Tag Archives: polishing vulcanite stems

What a beautiful Hans Original Hand Made UFO


Blog by Steve Laug

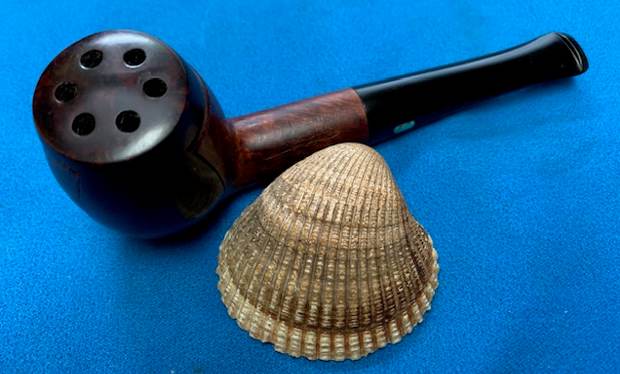
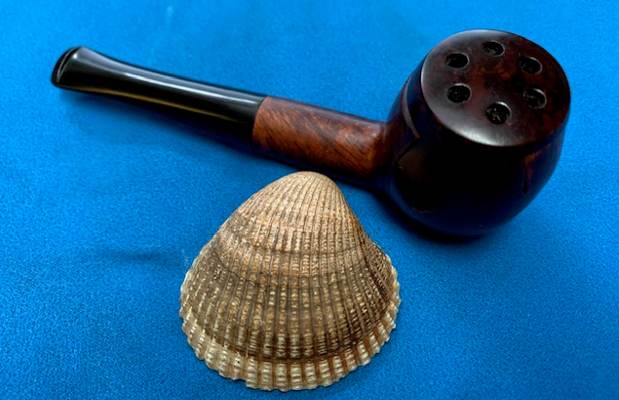
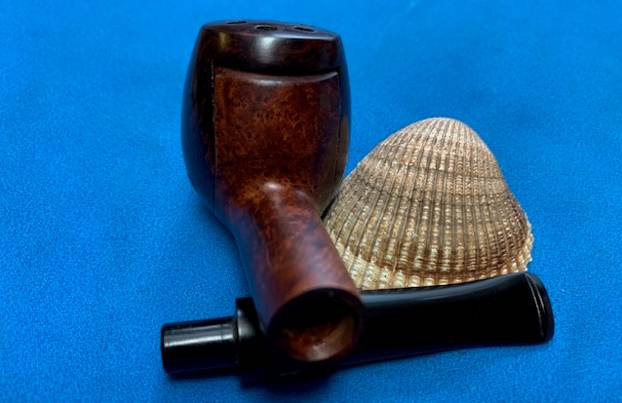
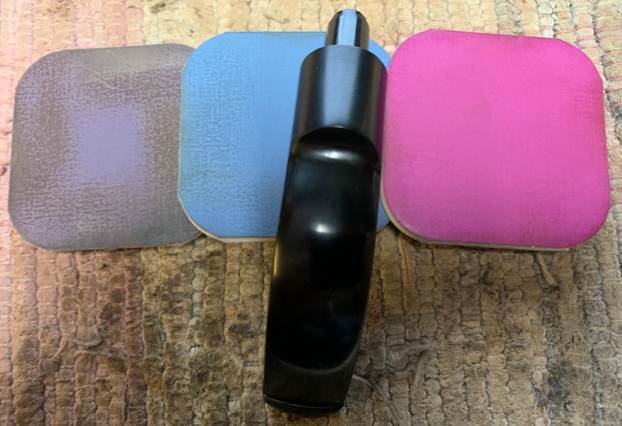
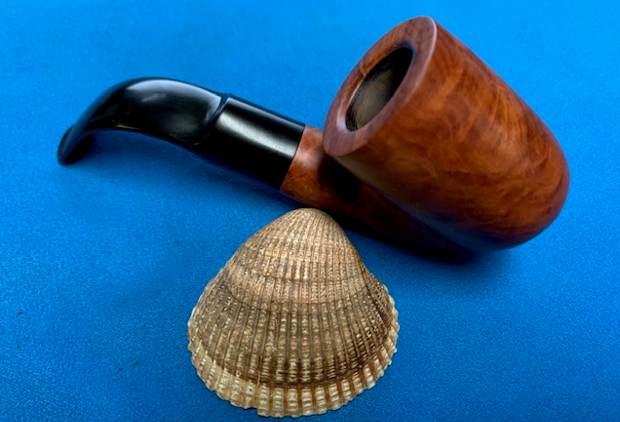
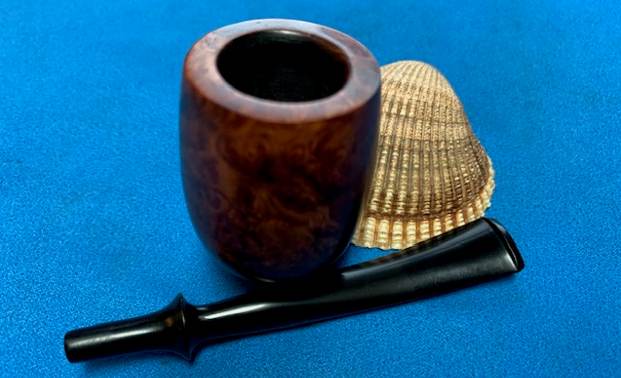
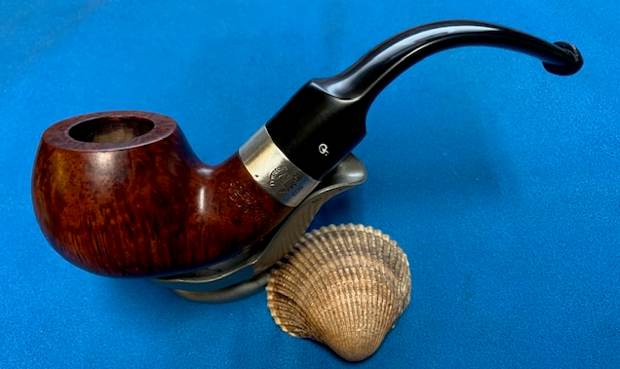
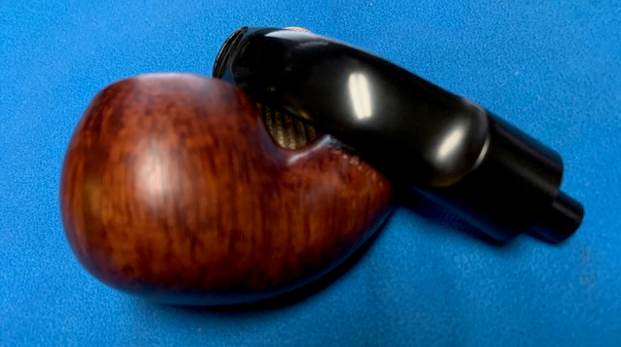
This interesting UFO/Flying Saucer/Disc shaped pipe was purchased from a sell in Chicago, Illinois, USA on 06/05/2021. It is a darkly stained briar with great grain around the bowl and shank. There is a thin 14K gold band on the shank and a vulcanite saddle stem. The smooth finished bowl has some great grain on it under the heavy grime on the surface. The bowl was thickly caked with a light lava coat on the rim top. It was hard to know the condition of the inner edge and rim top underneath the lava but cleaning that up will tell the story. The pipe is stamped on the underside of the shank and reads in script etching Hans Original [over] 6 [over] Hand Made. The “E” on Made is under the band. The gold band is stamped 14K on the topside. The vulcanite stem ha two brass dots side by side on the left side of the saddle. It had light tooth marks and chatter on both sides ahead of the button. It had a flattened heel on the bowl that allowed the pipe to sit on a desk top. Jeff took photos of it before he worked his magic in the cleanup process.The exterior of the pipe was very dirty – grime and grit ground in from years of use and sitting. The rim top was covered with a coat of thick lava that overflowed the bowl. There was also some darkening and lava on the rim top. The bowl itself had a thick cake with flecks of tobacco stuck in the cake on the sides. The vulcanite saddle stem surface was dirty and had some tooth marks and chatter on both sides. 
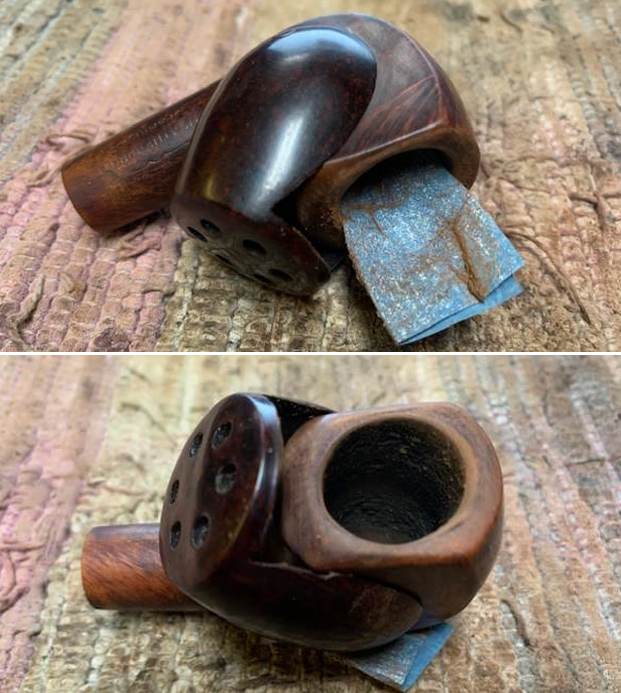
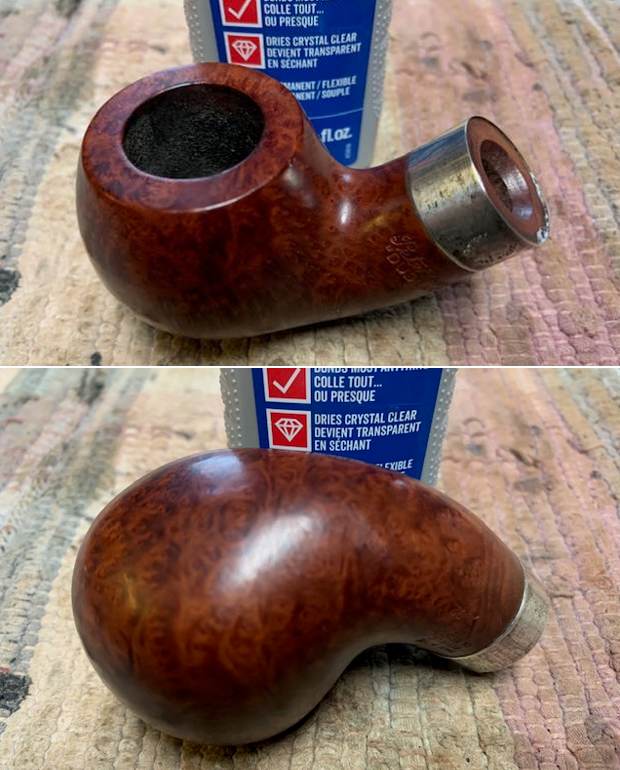
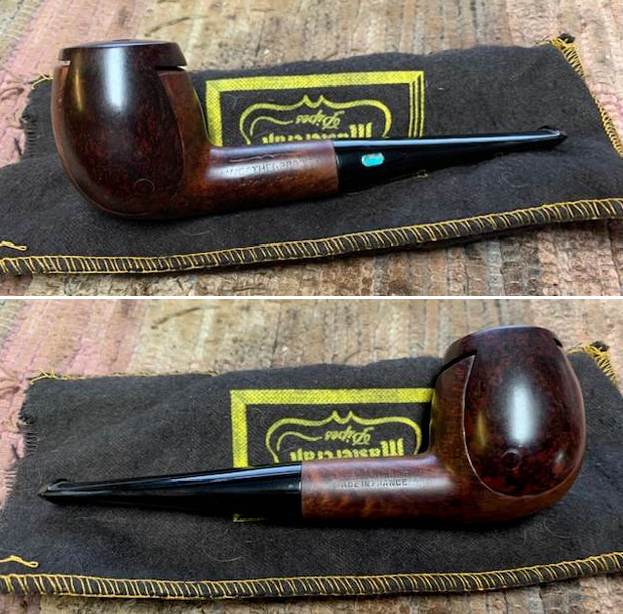
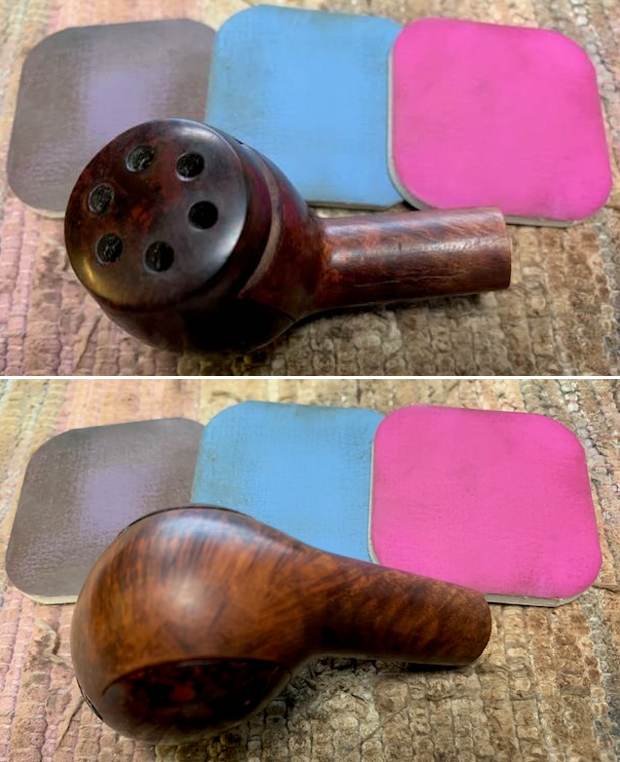
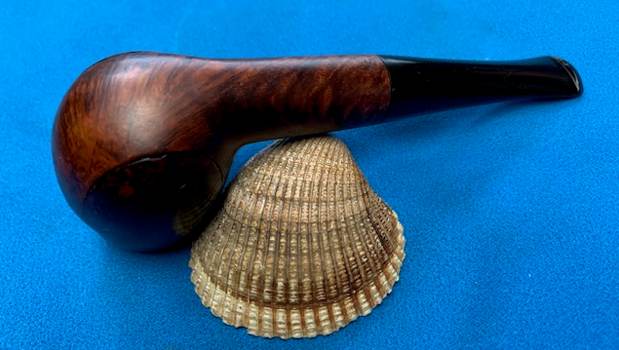
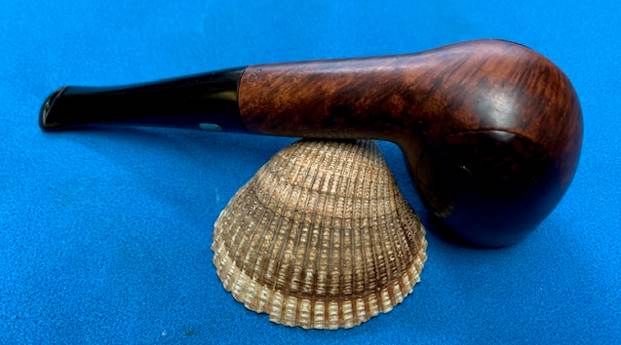
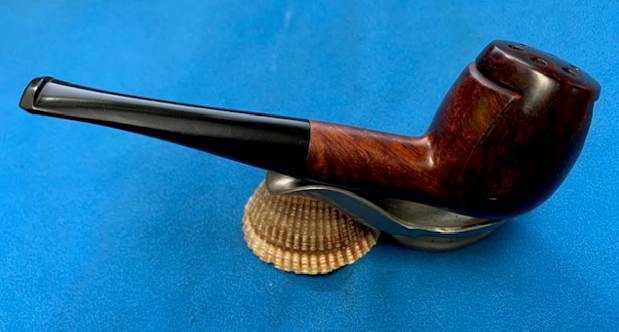
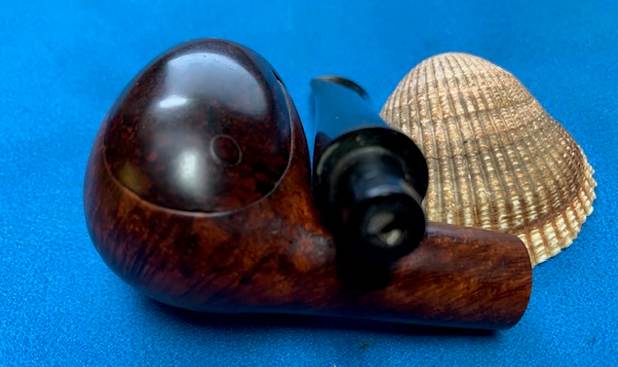
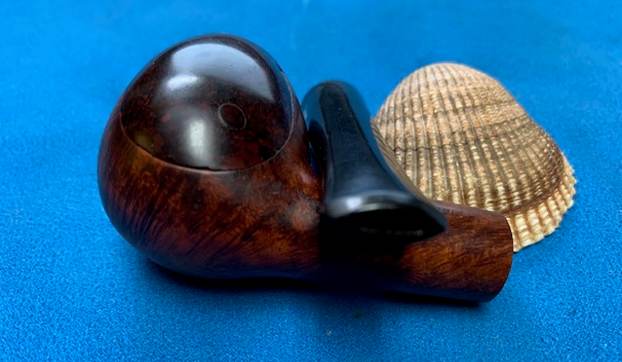
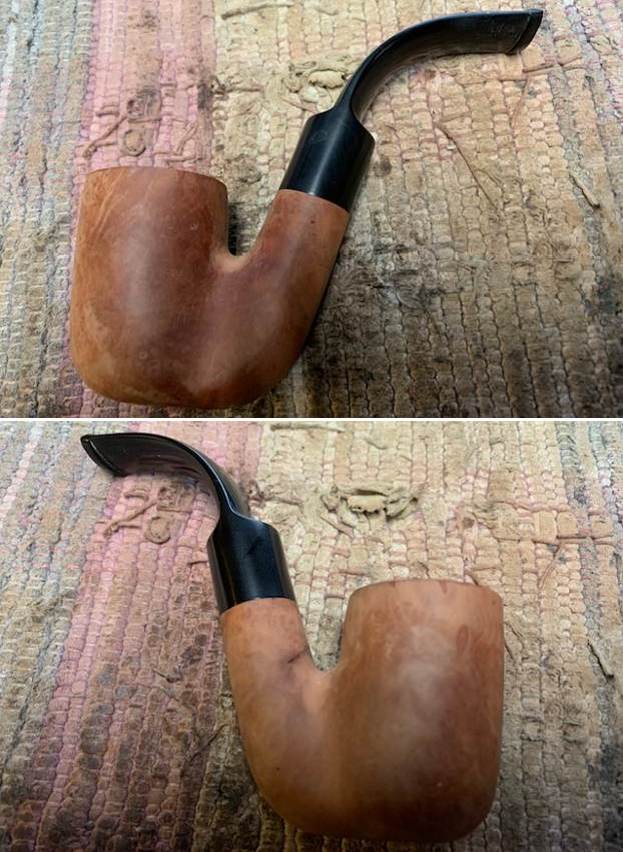
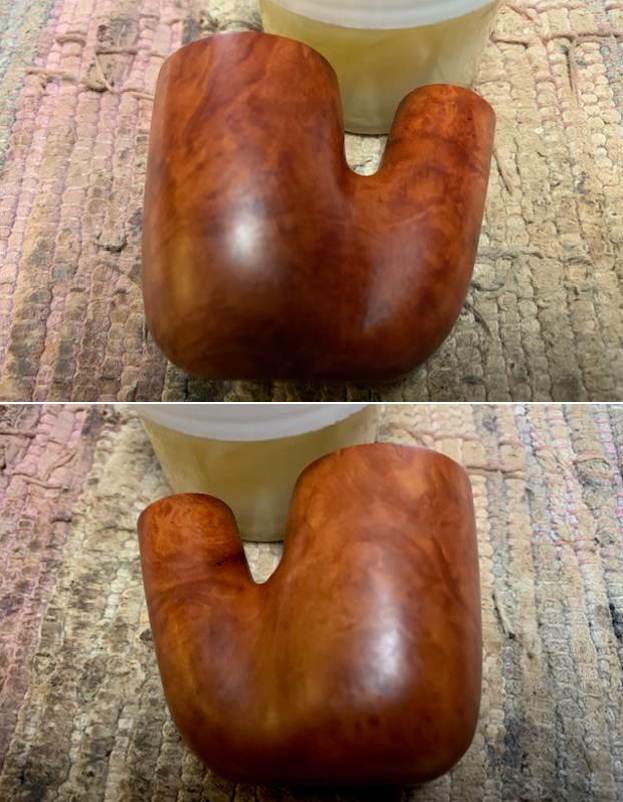
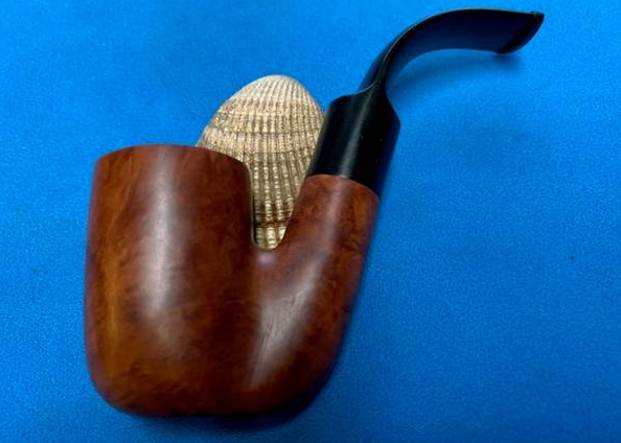
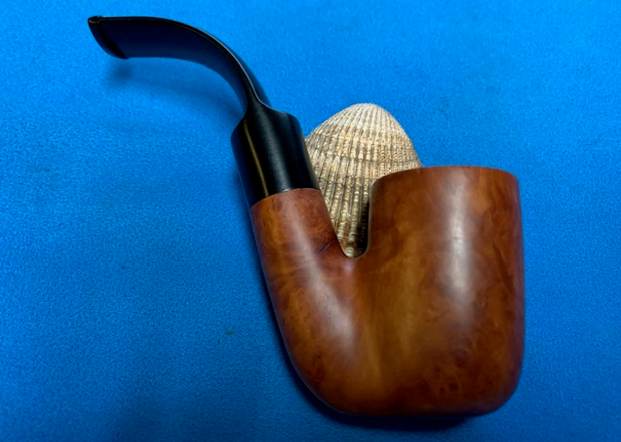
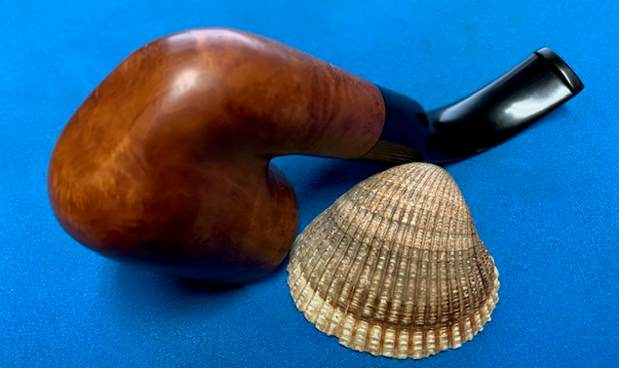
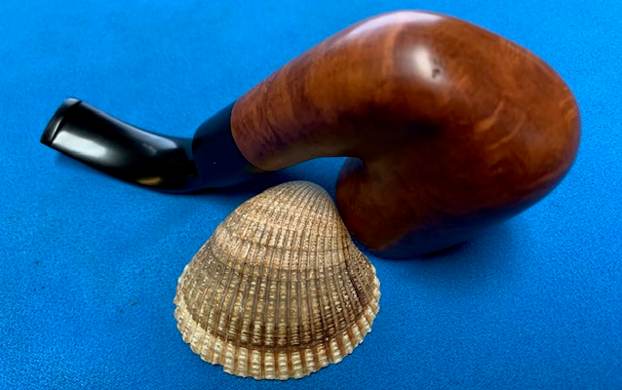
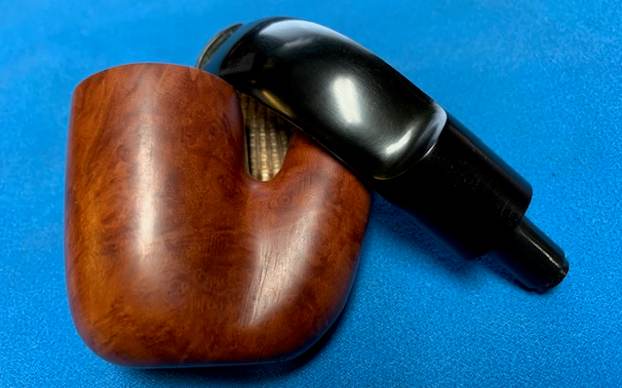
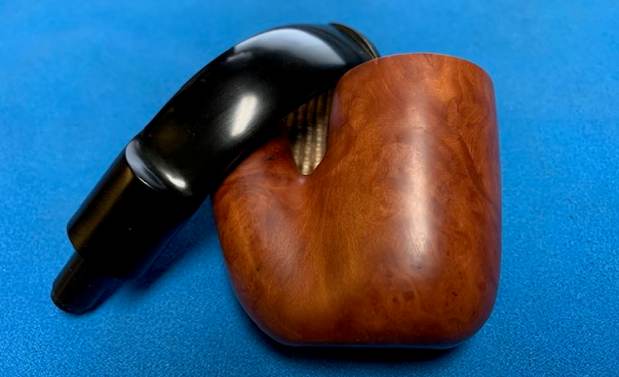
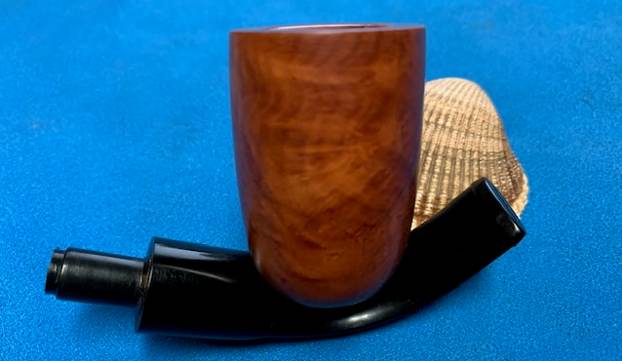
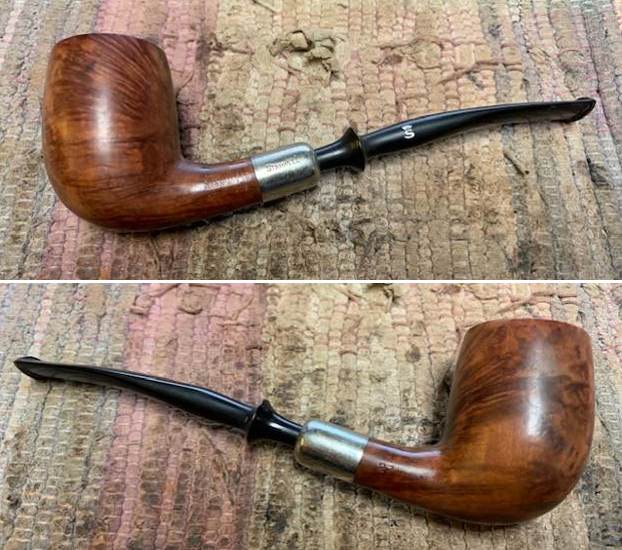
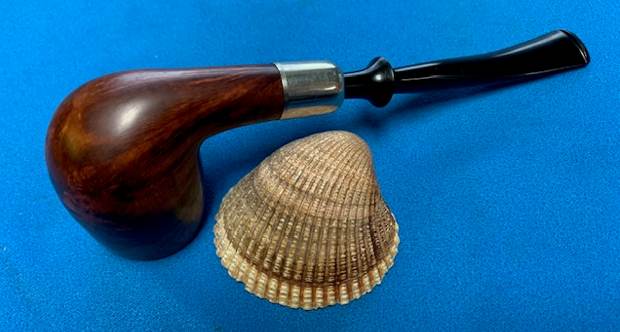
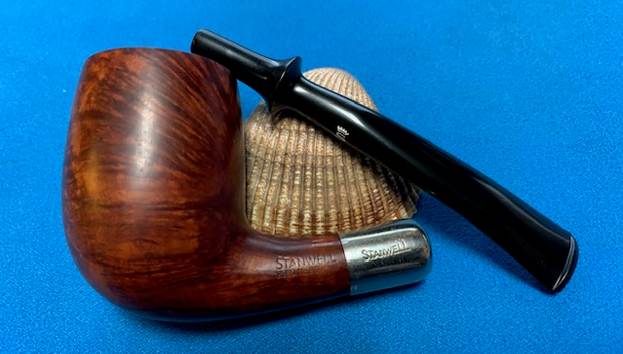
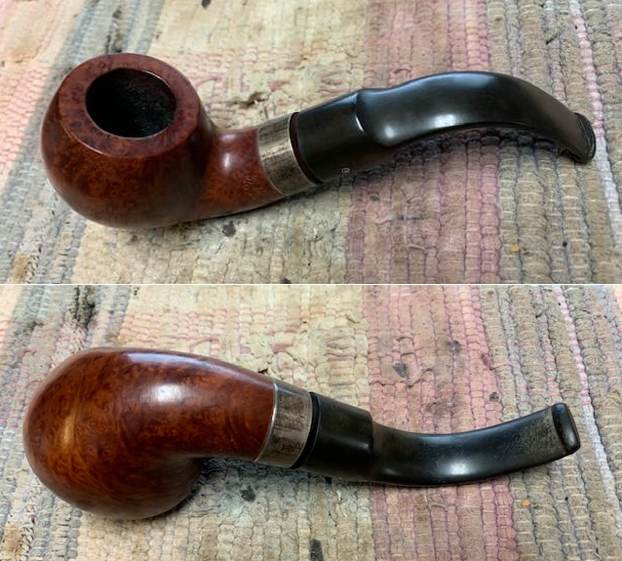
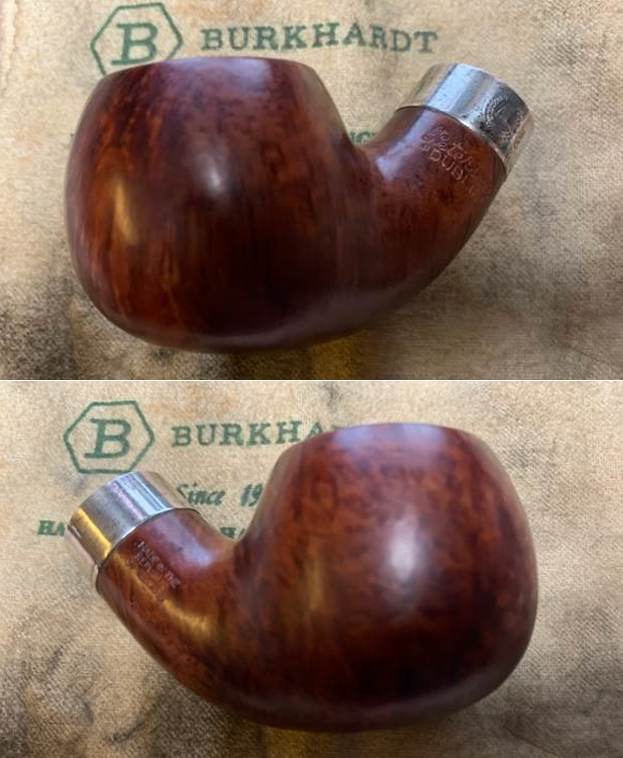
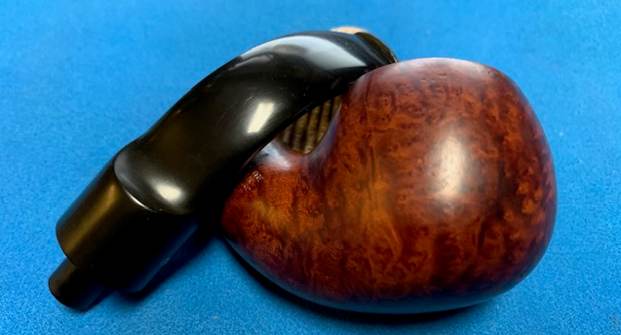
Jeff took photos of the sides of the bowl and shank to give a better feel for the condition of the bowl. You can see the interesting grain on the bowl side and front.
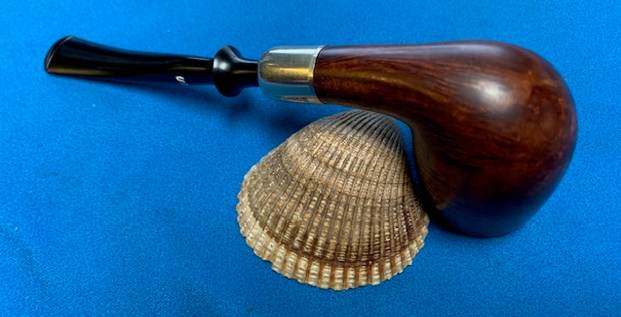
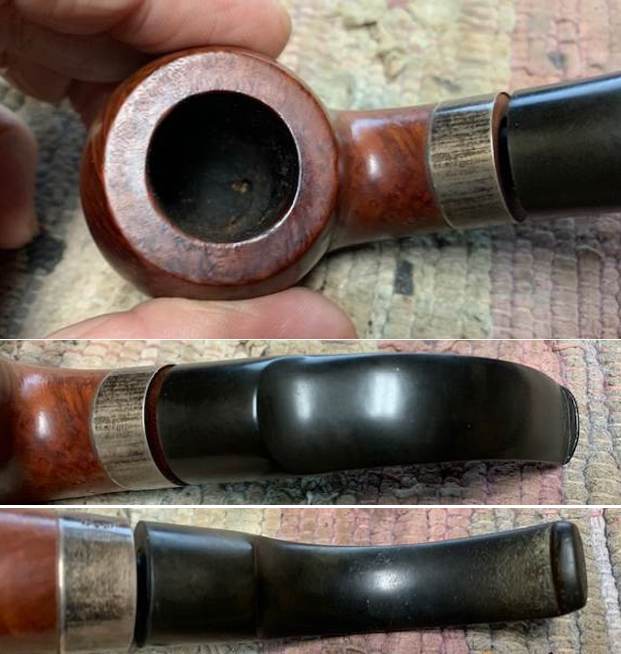
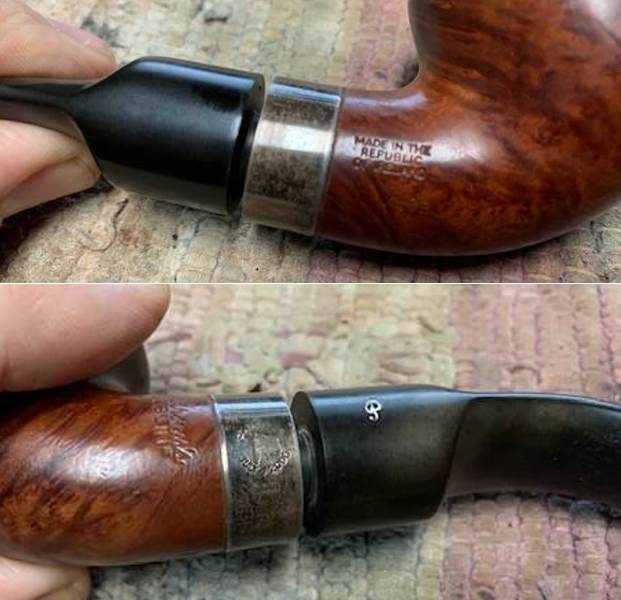
The next photos show the stamping on the underside of the shank, the gold band and the twin brass dots on the left side of the stem. It is clear and is very readable as noted above. 
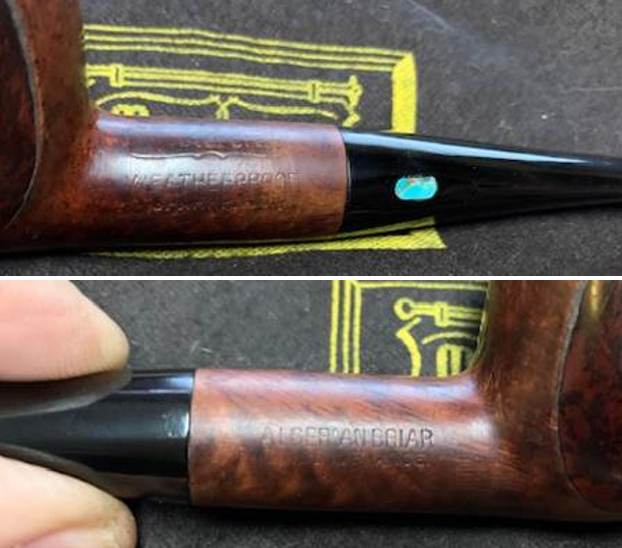
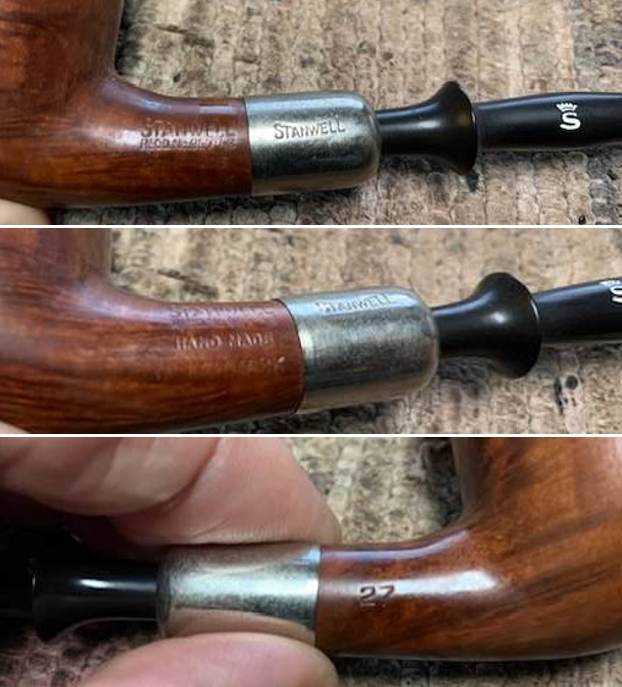
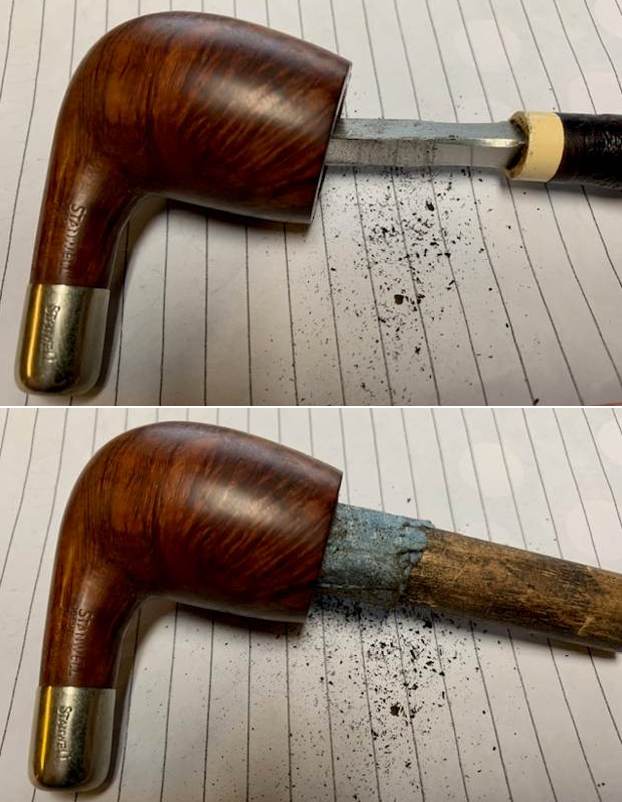
This pipe is a bit of a mystery in terms of the name of the maker. Han’s is not clear in terms of who it refers to. There is no identify COM stamp to point to a country of origin. It is a nice-looking Hand Made pipe that I know nothing about. If any of you who are reading this can help unravel the mystery please contact me. Thanks.

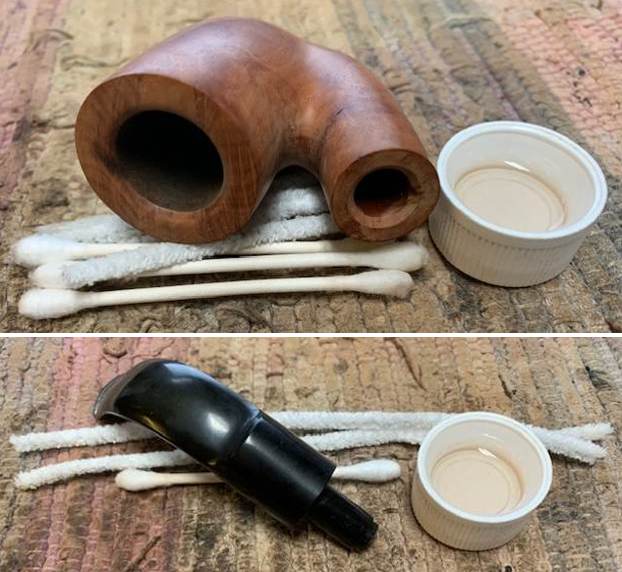
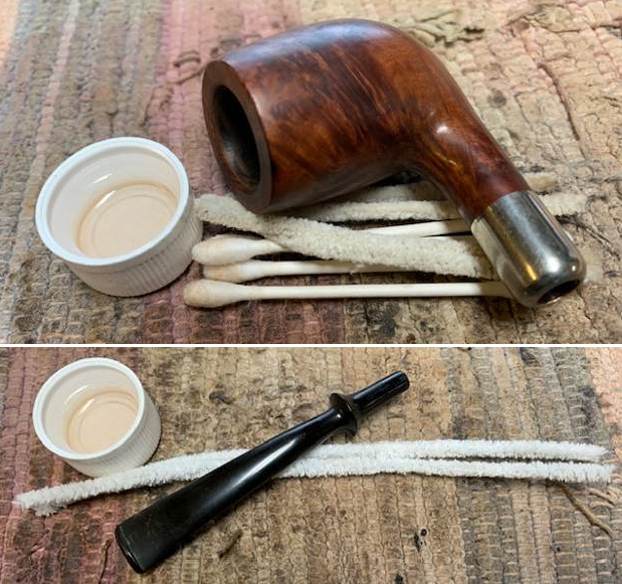
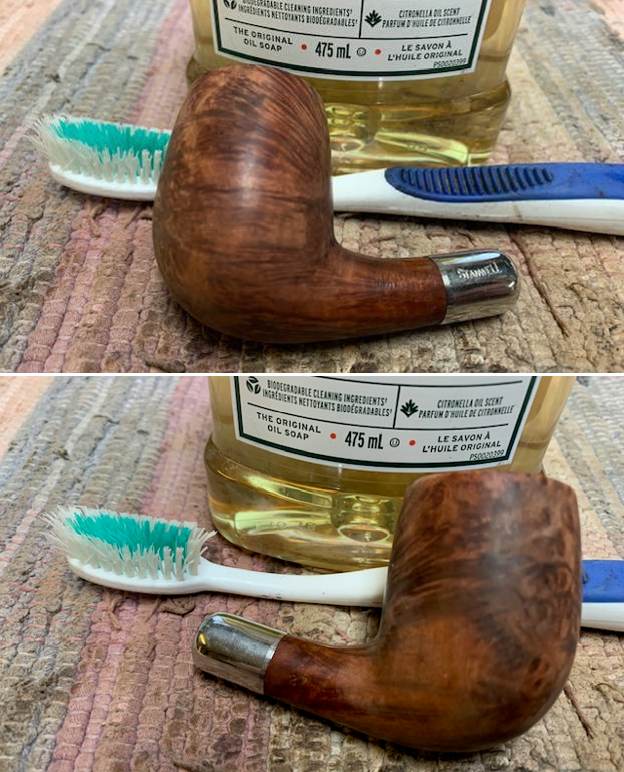
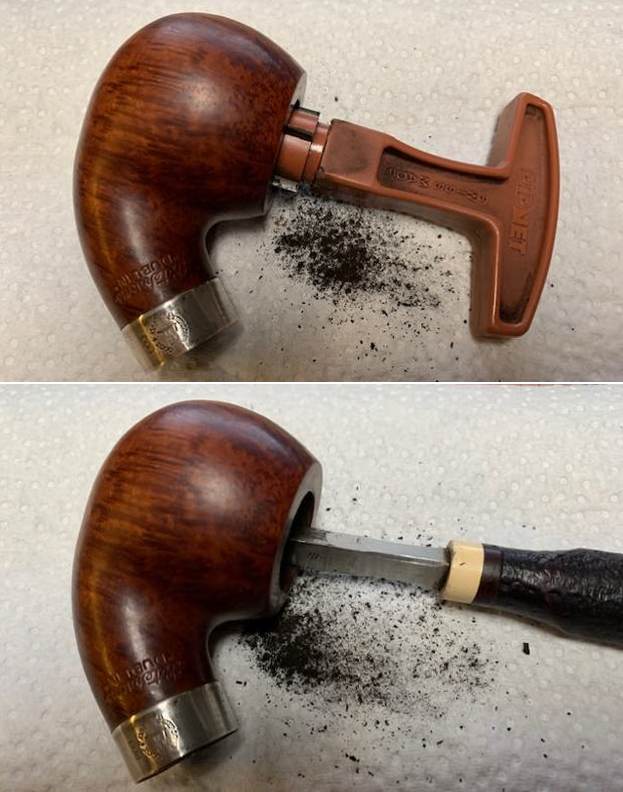
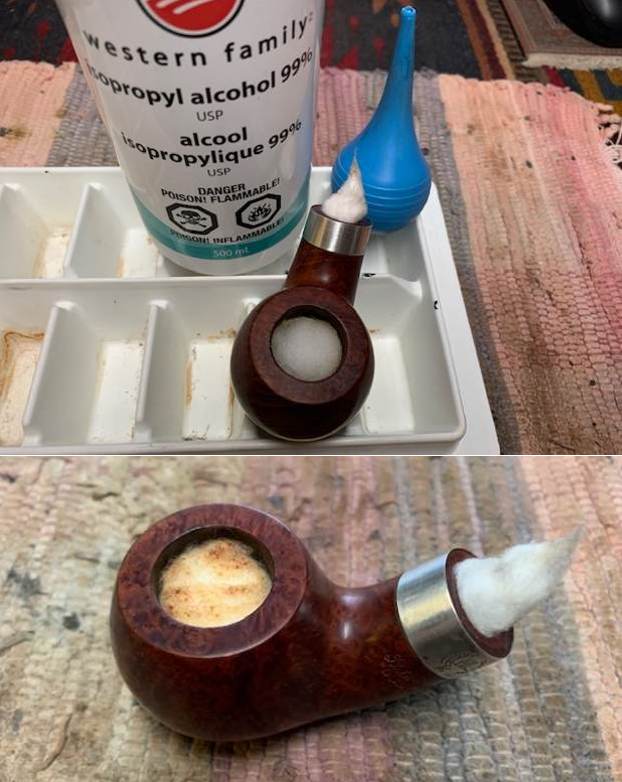
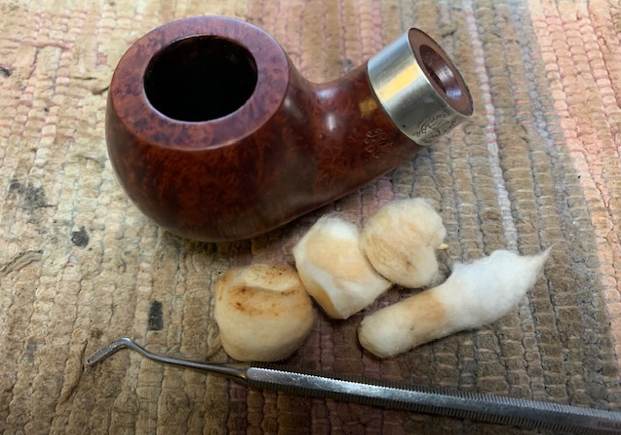
Jeff reamed it with a PipNet pipe reamer and cleaned up the remaining cake in the bowl with a Savinelli Fitsall Pipe Knife. He scrubbed out the internals with alcohol, pipe cleaners and cotton swabs until the pipe was clean. He scrubbed the exterior of the bowl with Murphy’s Oil Soap and a tooth brush to remove the grime and grit on the briar and the lava on the rim top. The finish looks very good with good looking grain around the bowl and shank. The rim top looked very good.  He scrubbed the stem with Soft Scrub and soaked it in Briarville’s Pipe Stem Deoxidizer to remove the grime on the acrylic. When the pipe arrived here in Vancouver for the second stop of its restoration tour it looked a lot better. I took photos before I started my part of the work. 
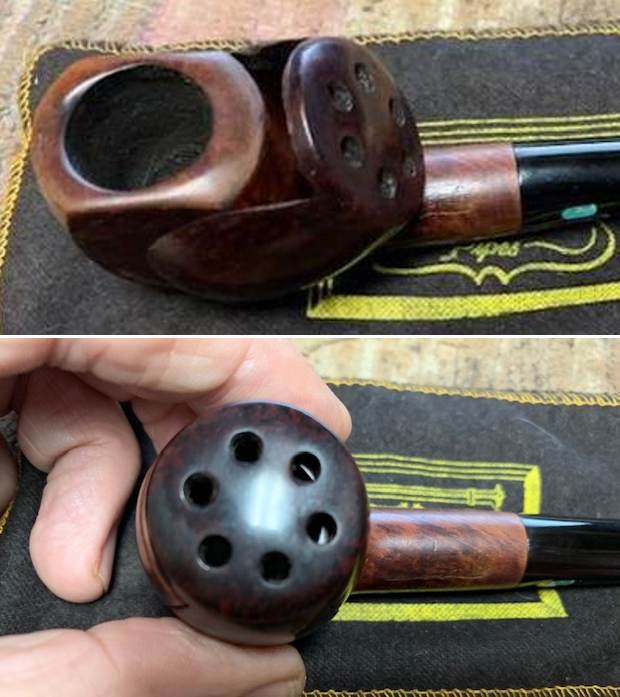
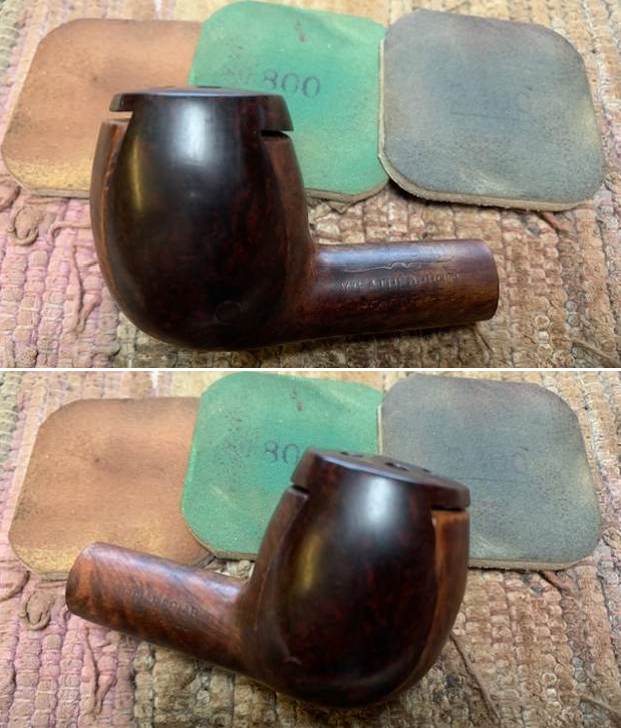
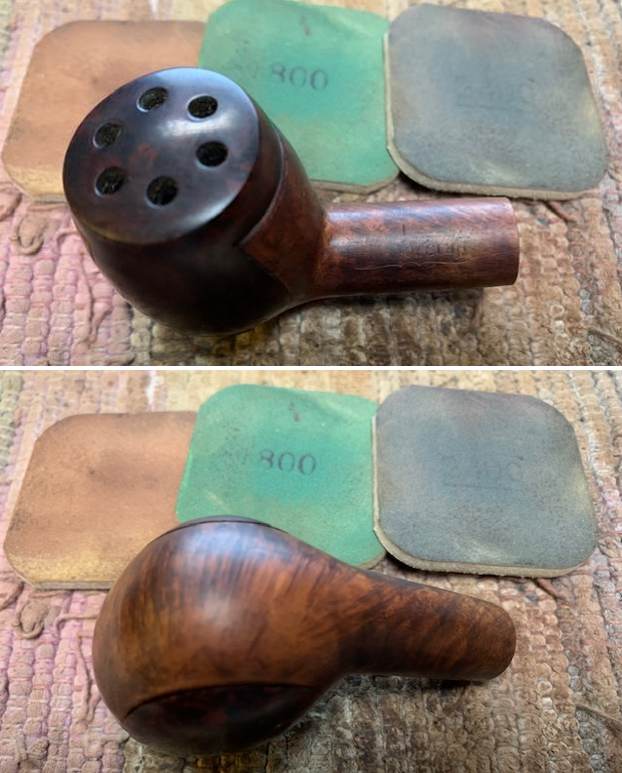
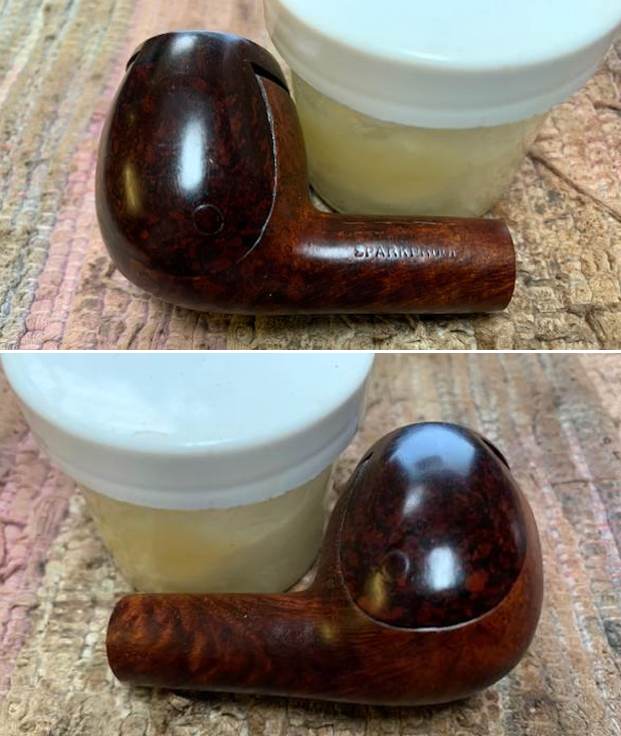
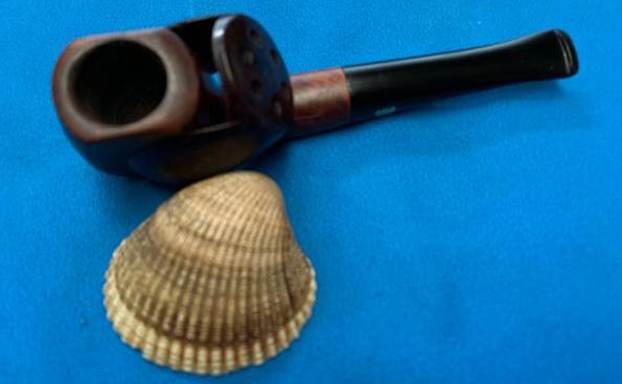
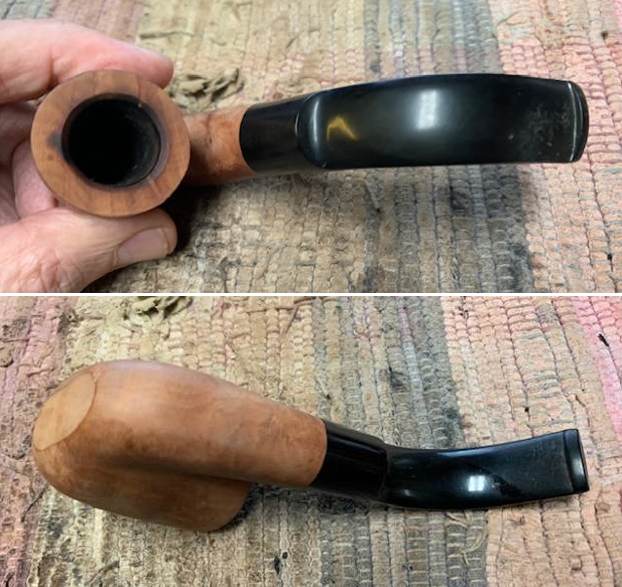
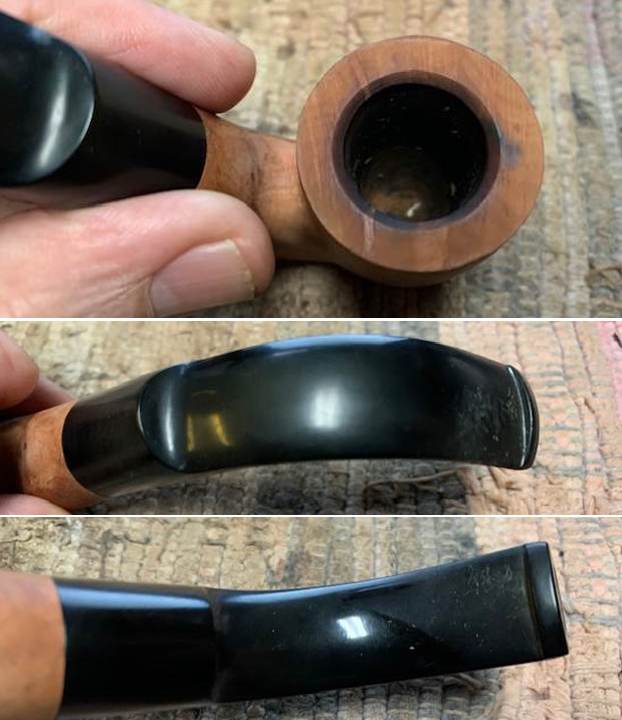
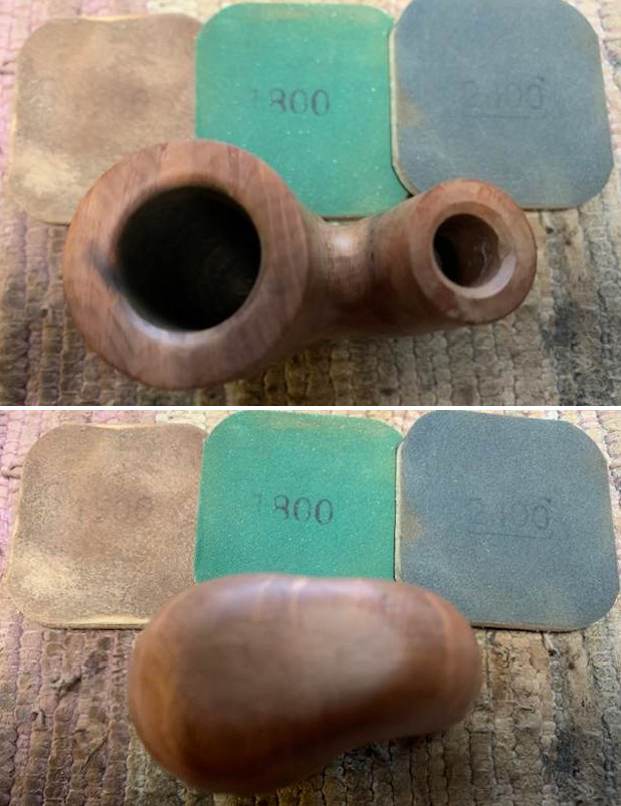
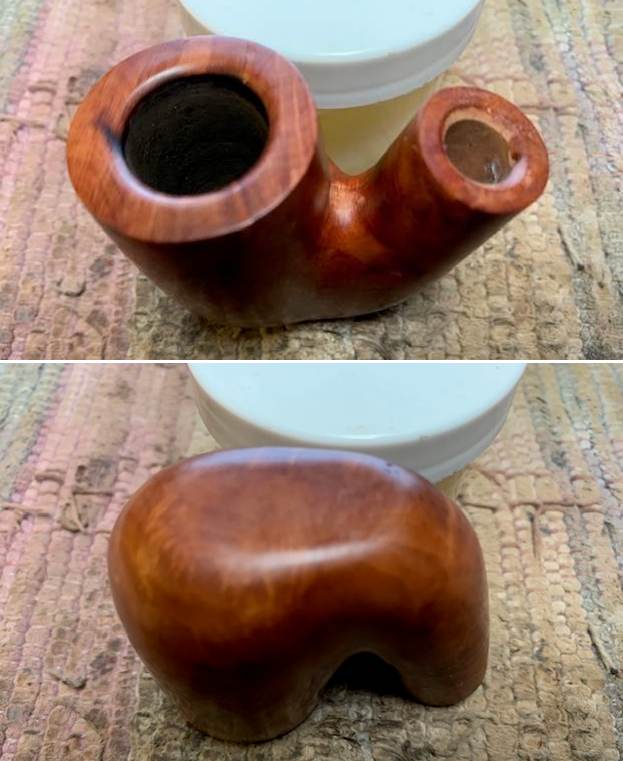
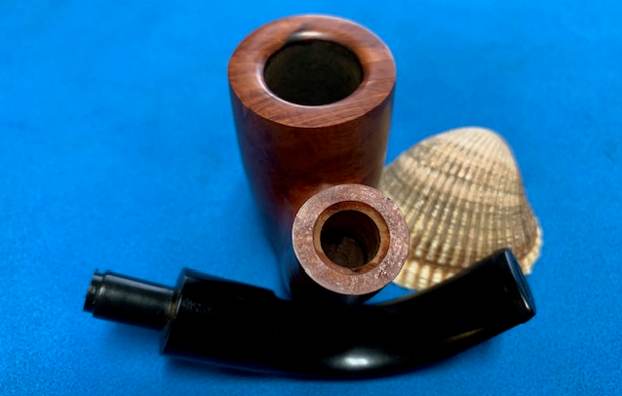
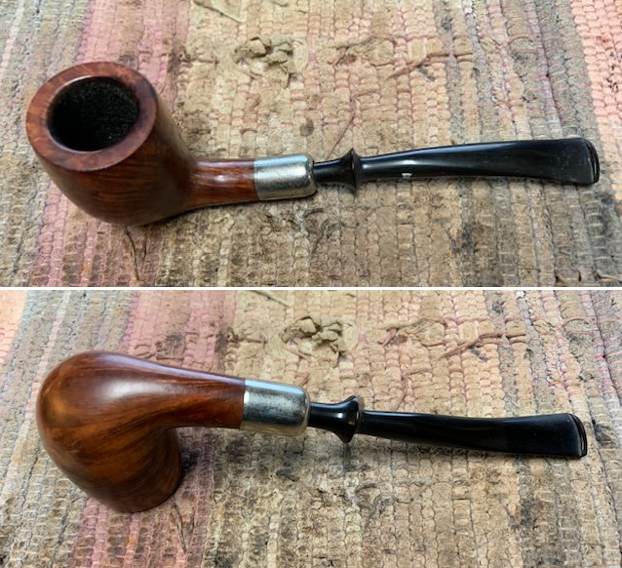
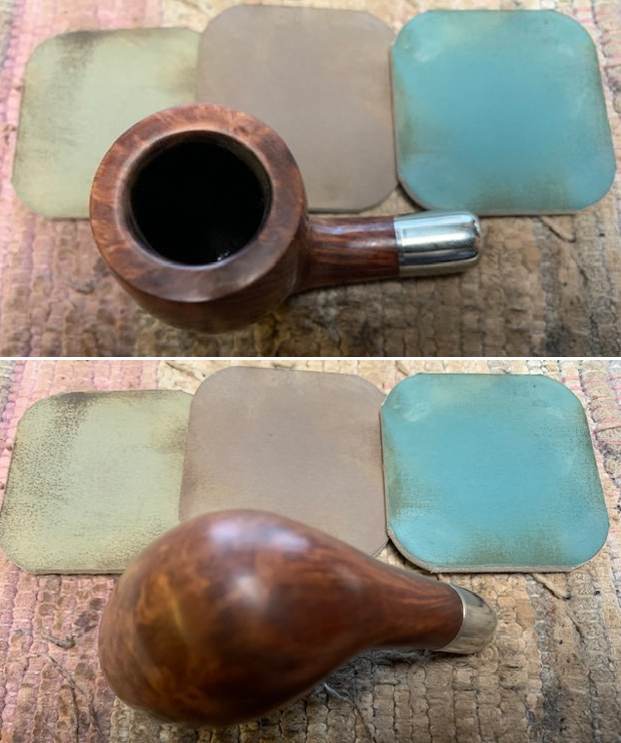
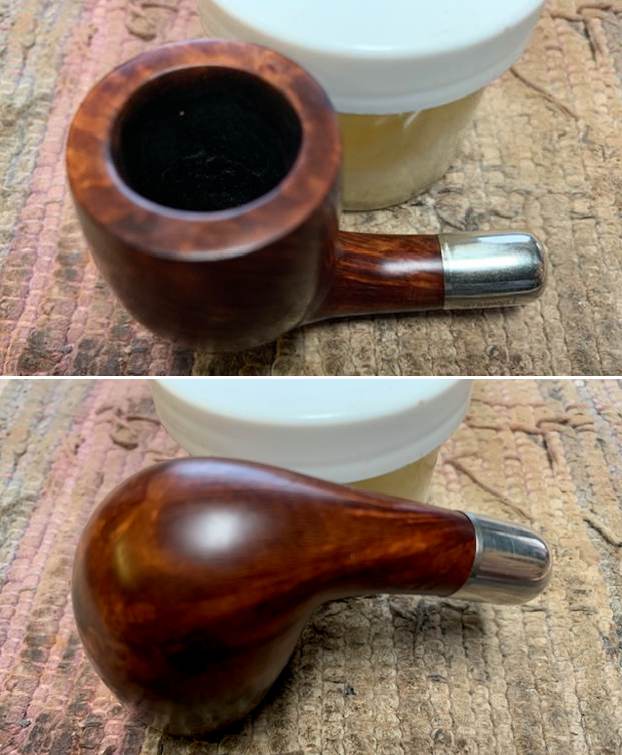
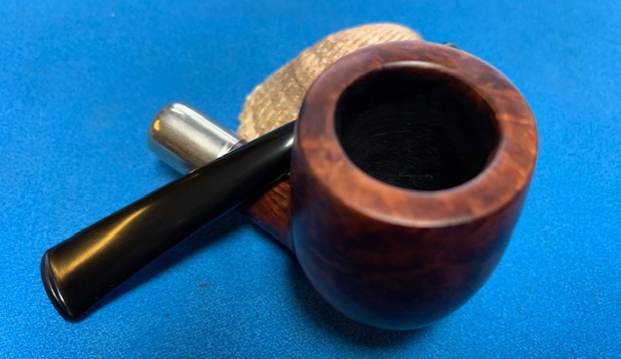
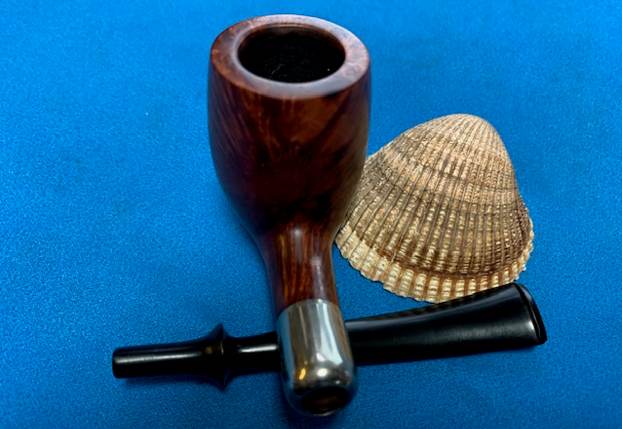
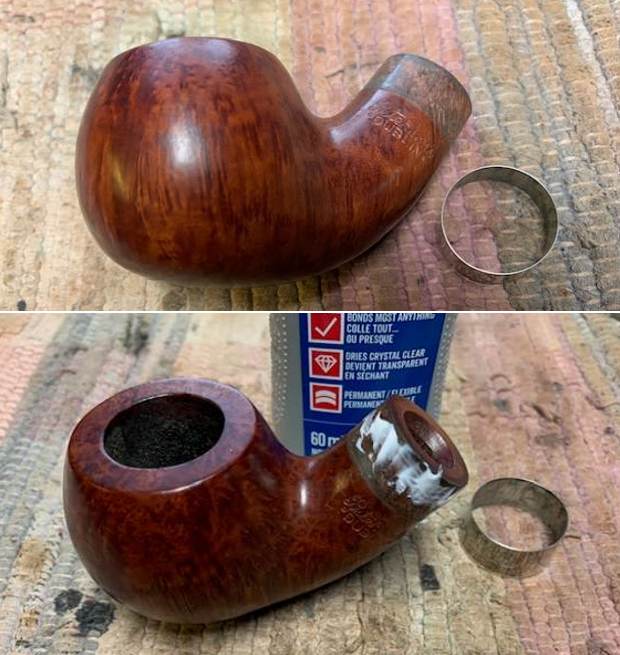
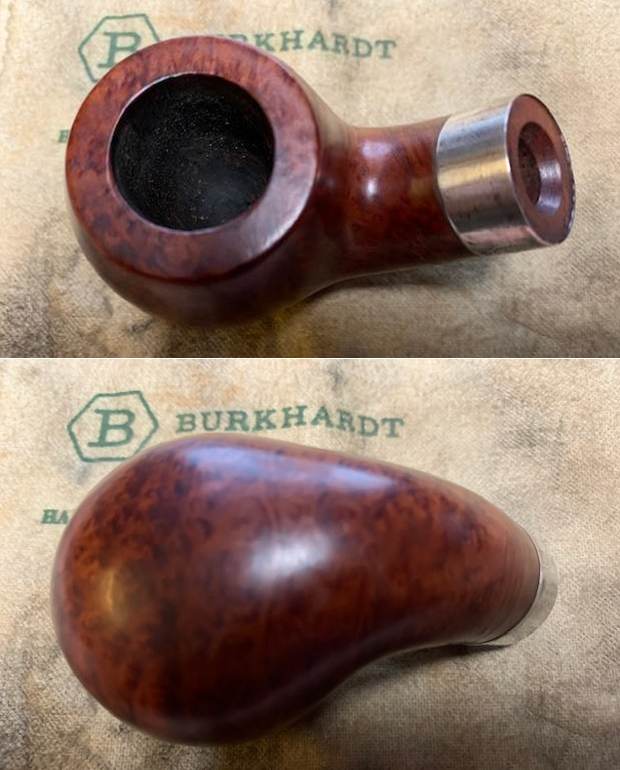
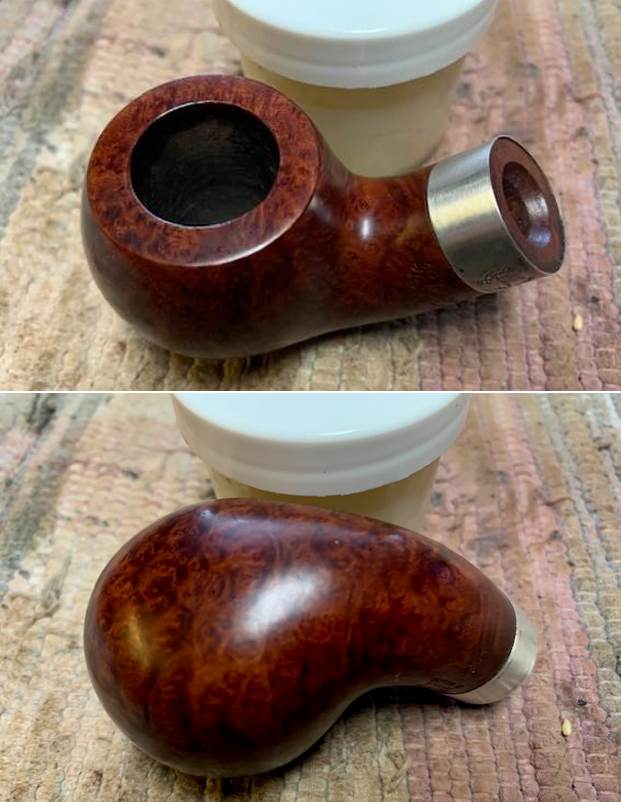
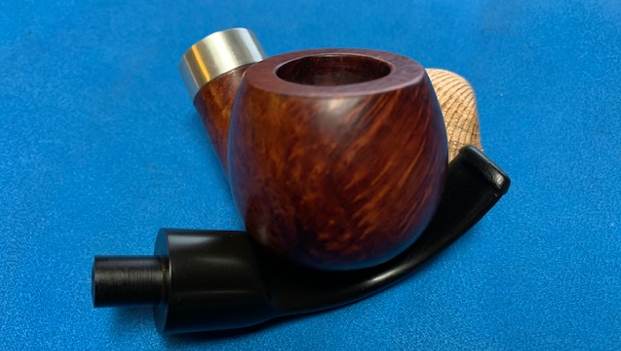
I took a photo of the bowl and rim top to show how well it had cleaned up. The top and the edges of the bowl are in very good condition. There does not seem to be any damage on either the inner or outer edges and the rim top. The stem had some tooth marks and chatter on both sides ahead of the button.
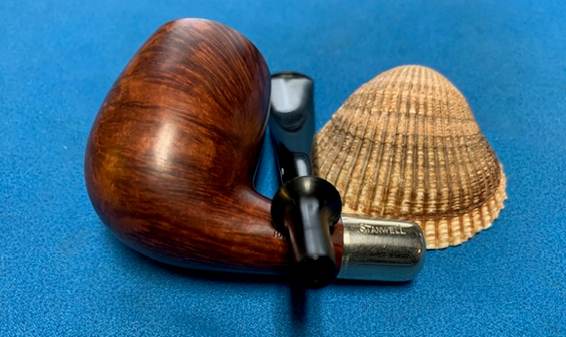
I took photos of the stamping on the left side and underside of the shank. It is clear and readable.
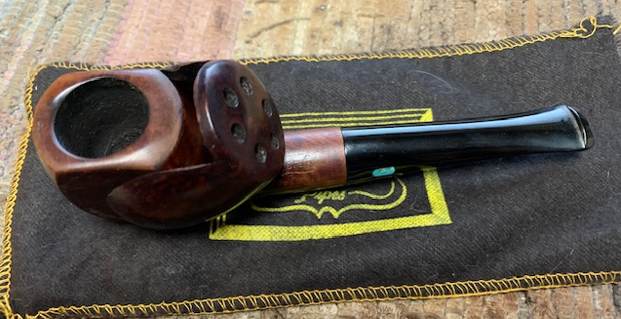
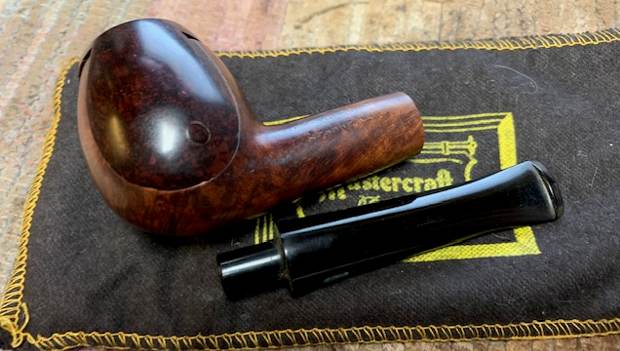
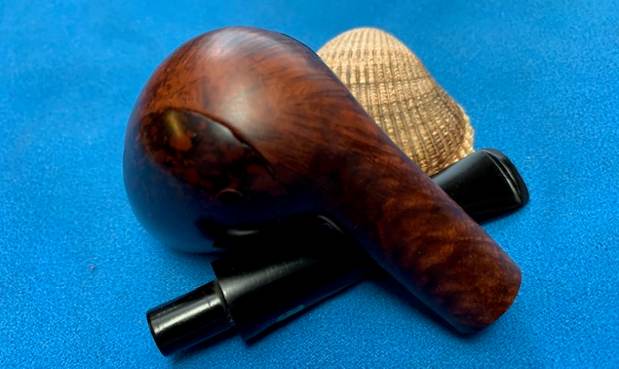
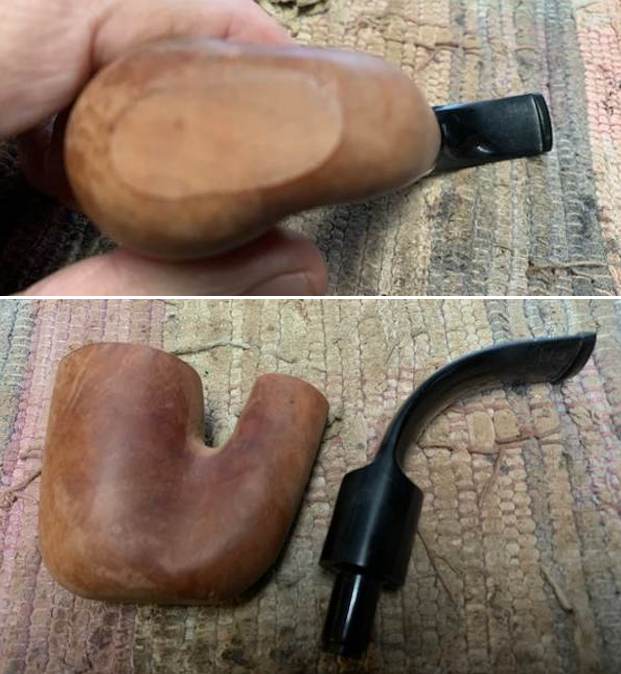
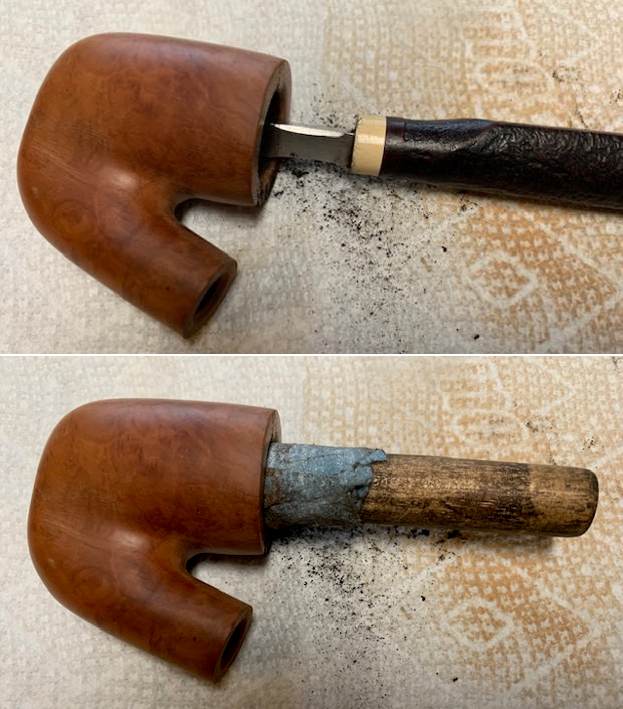
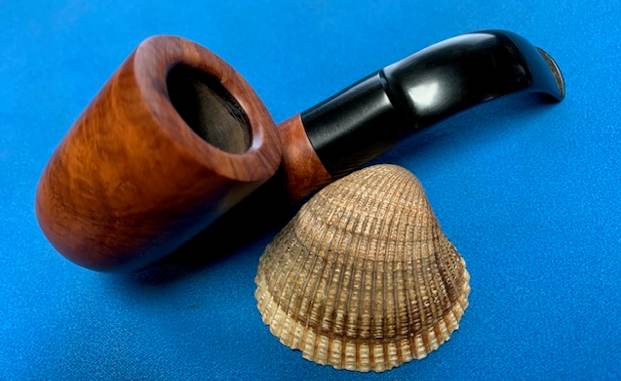
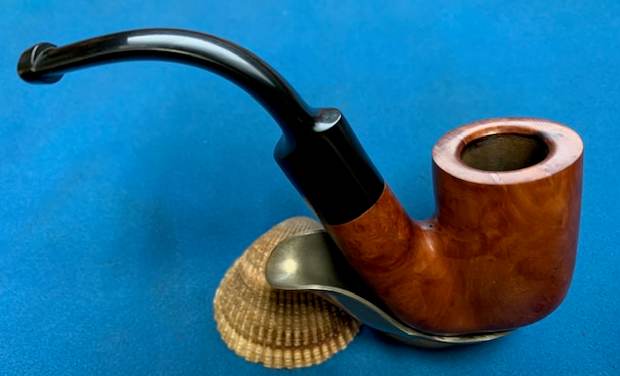
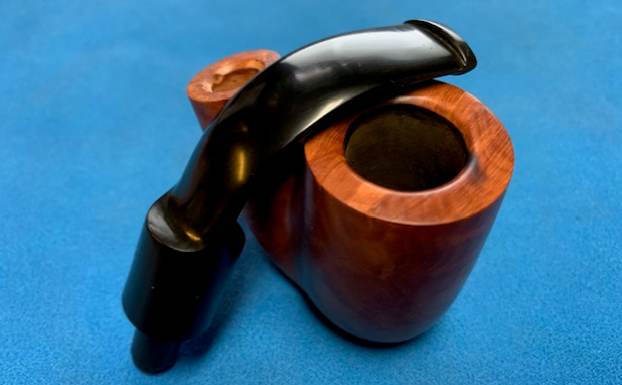
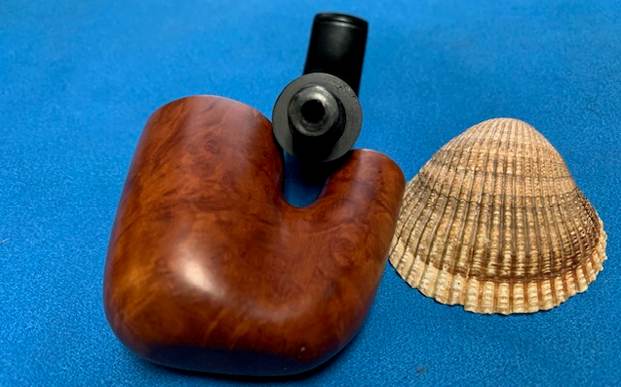
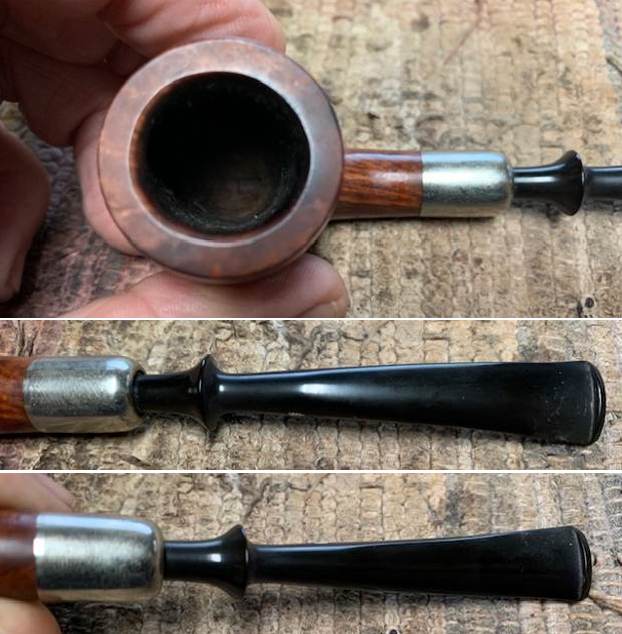
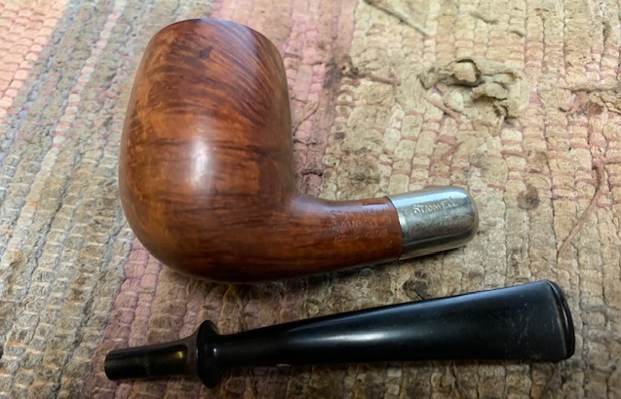
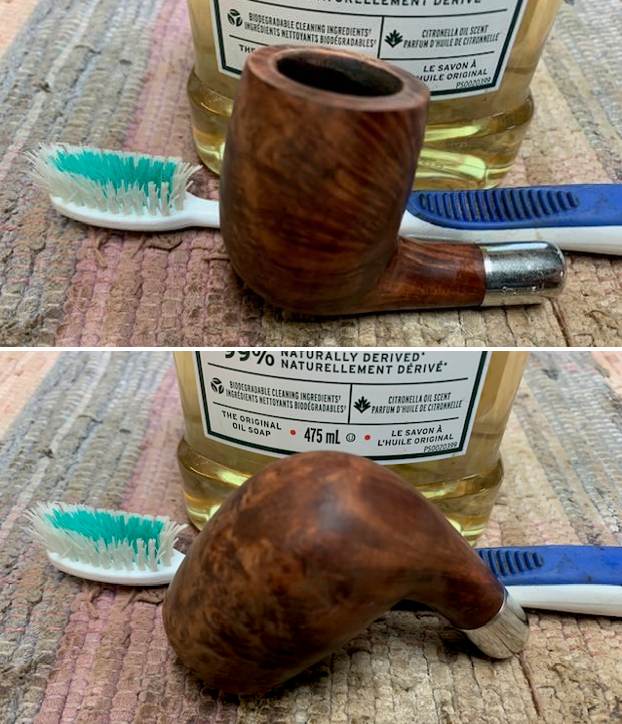
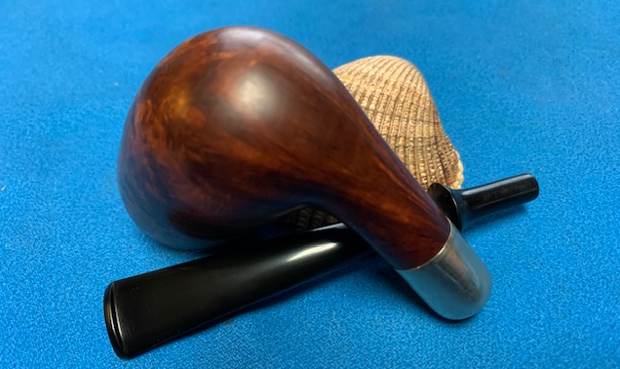
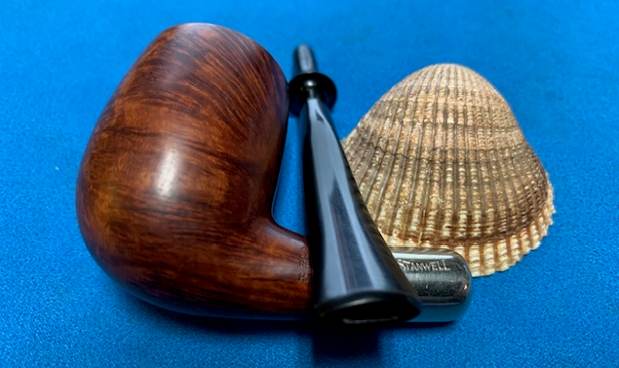
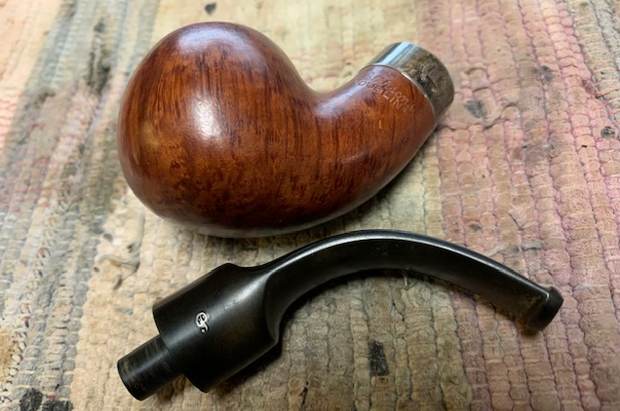
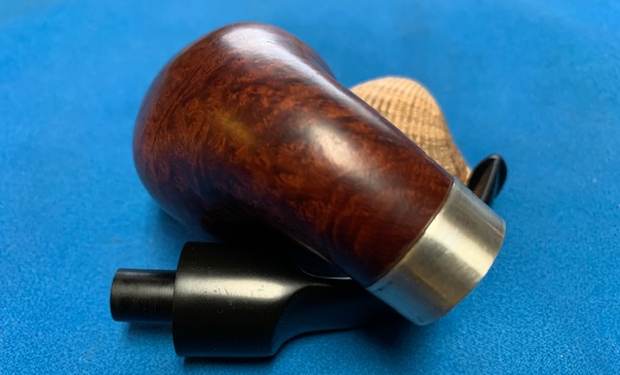
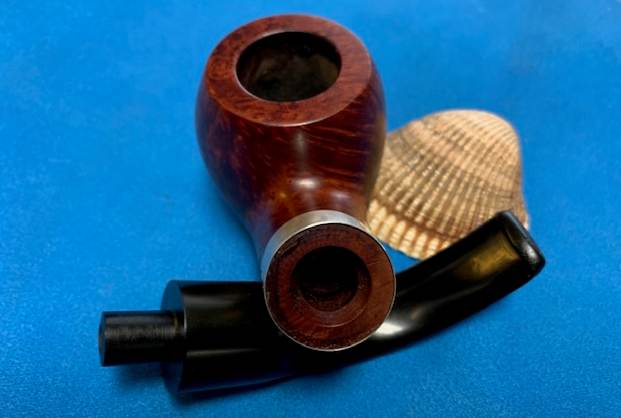
I removed the stem from the shank and took a photo. I wanted to give a sense of the proportion of the pipe and I think the photos gives a sense of that. 
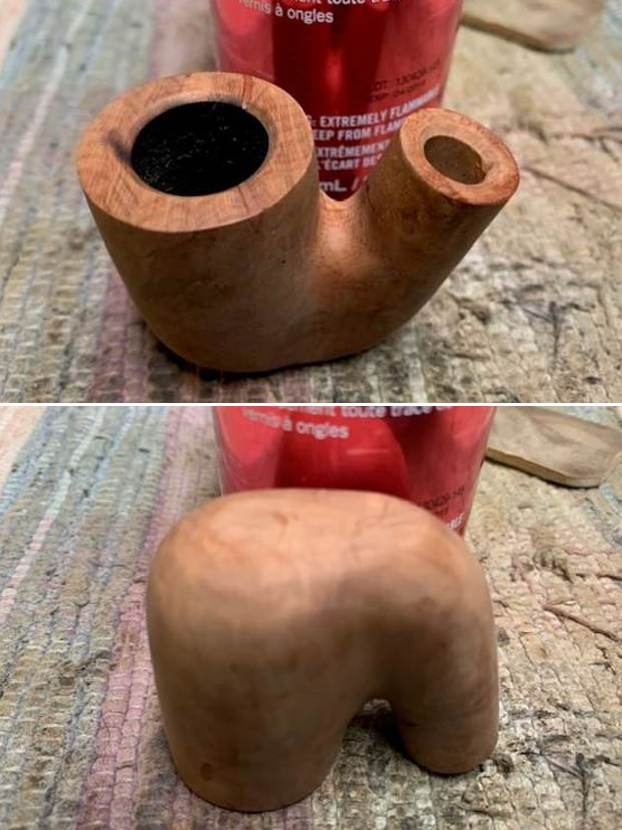
I wiped off the spotty shiny varnish coat on the briar with cotton pads and acetone. It took a bit of scrubbing but I was able to remove all of the shiny coat on the bowl and the grain really shone through once it was gone. 
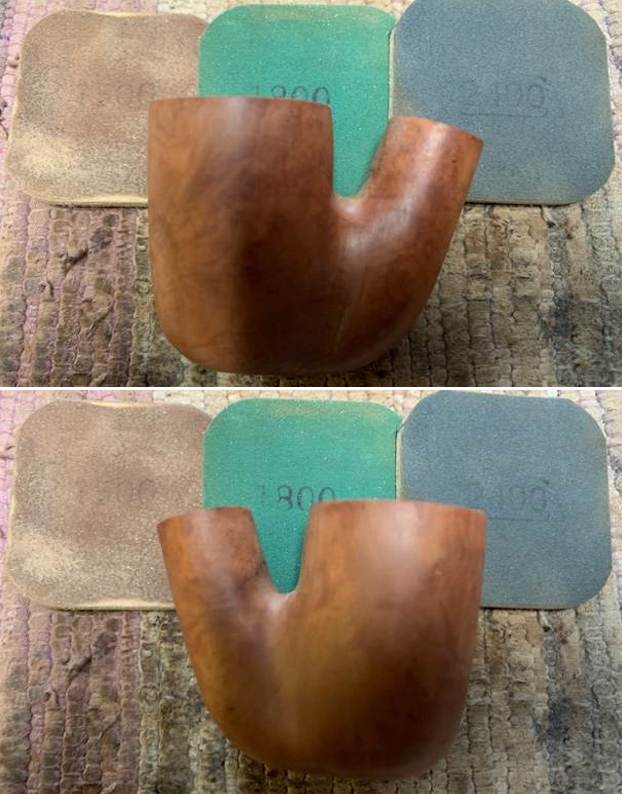
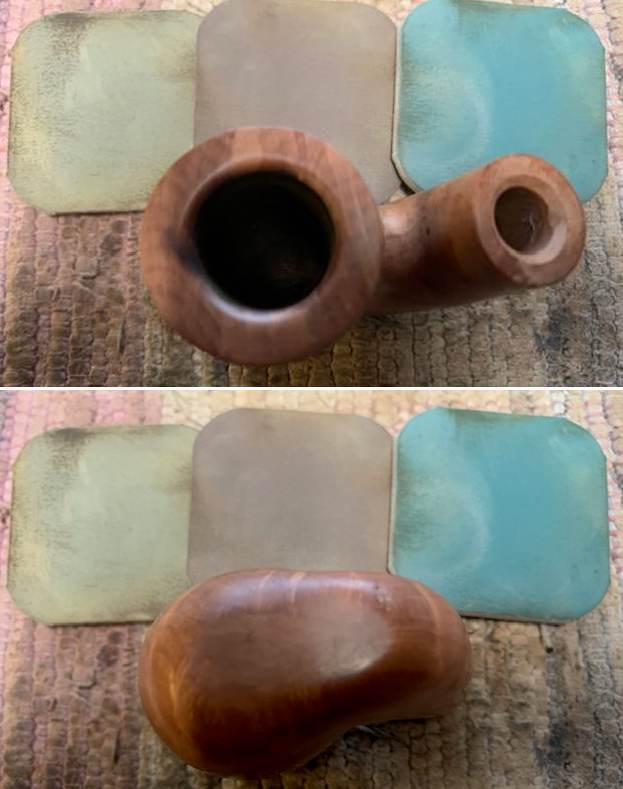
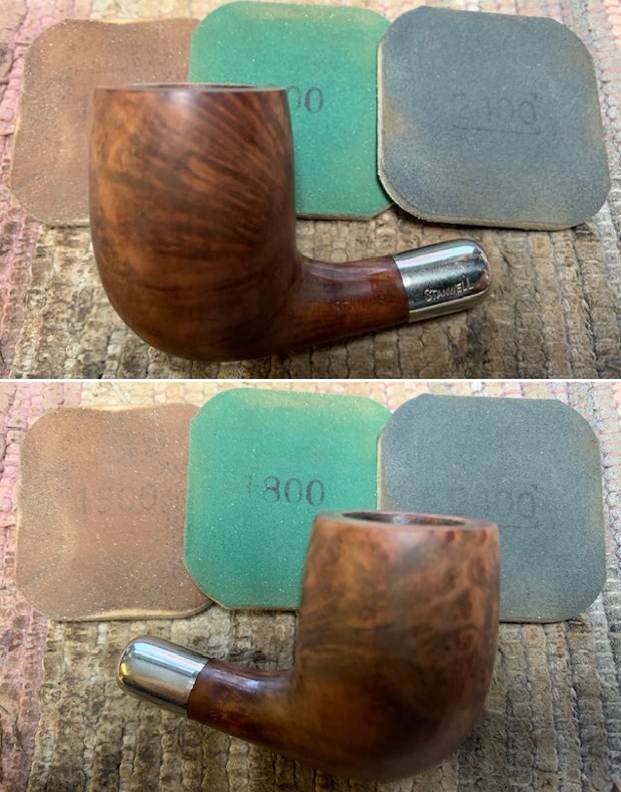
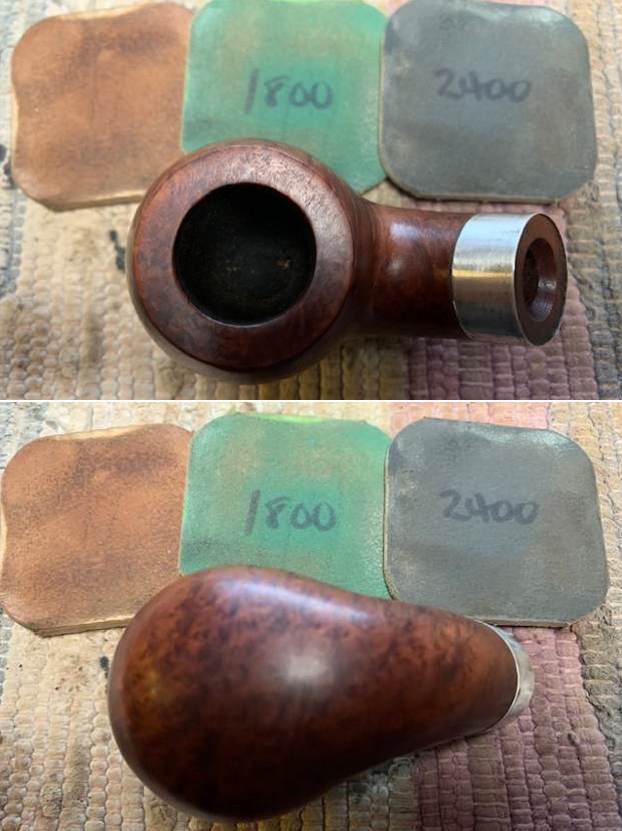
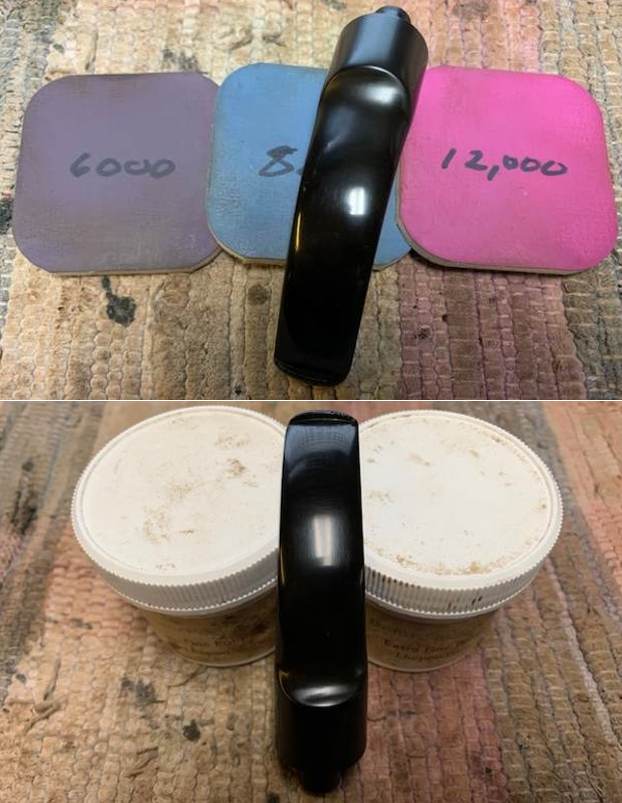
I started my work on the pipe by polishing the bowl and rim top with micromesh sanding pads – dry sanding with 1500-12000 grit pads. I wiped the bowl with a damp cotton pad after each sanding pad. The surface began to take on a nice shine. 
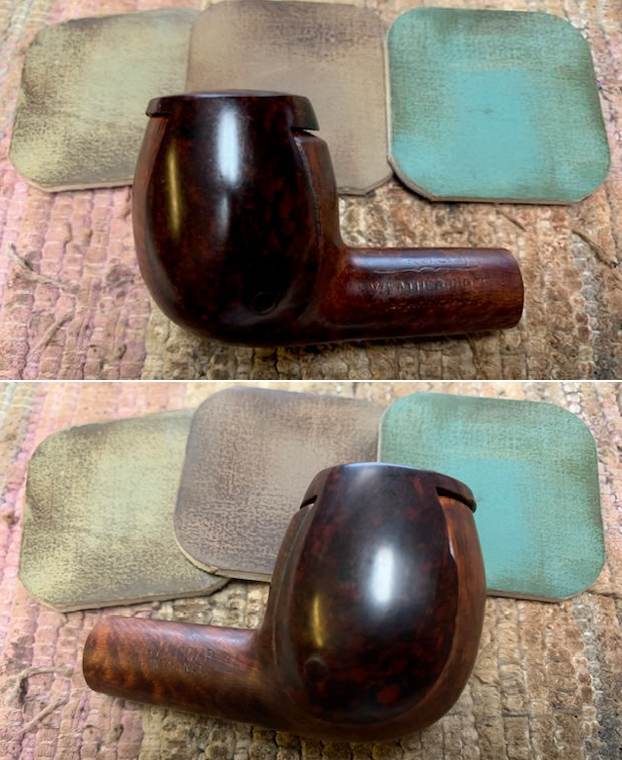
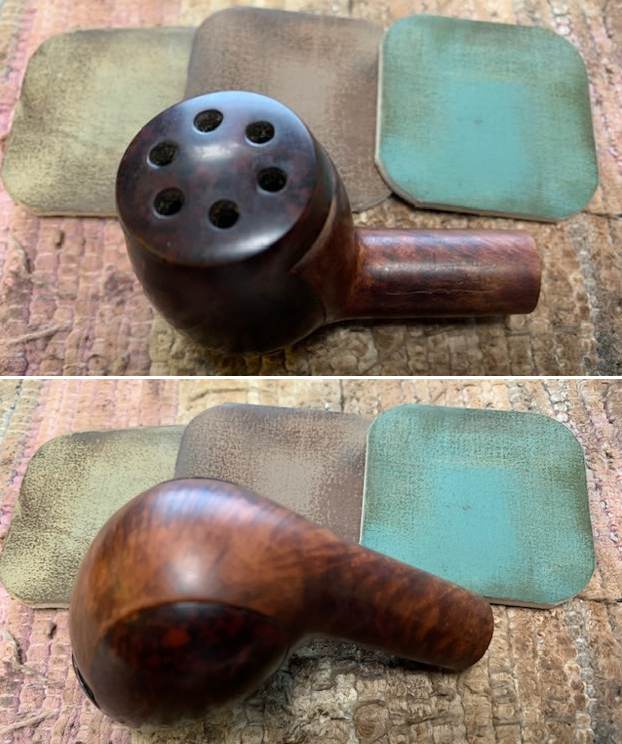
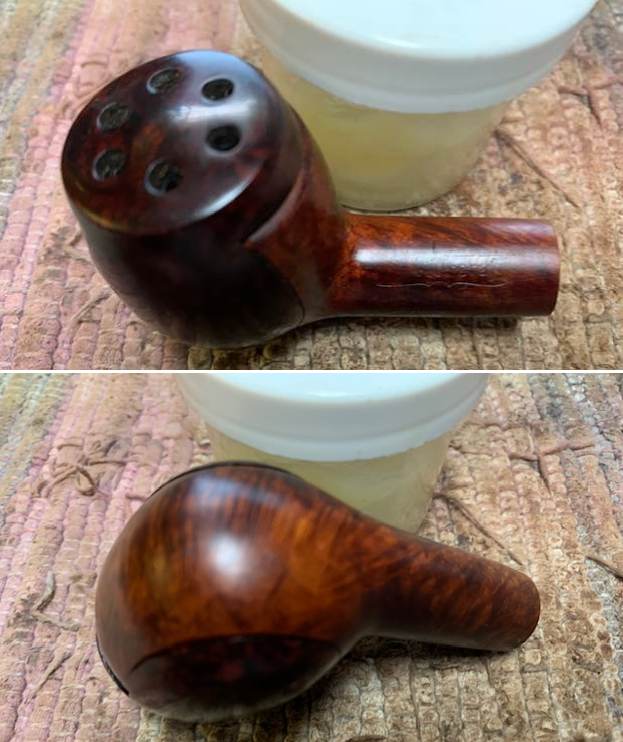
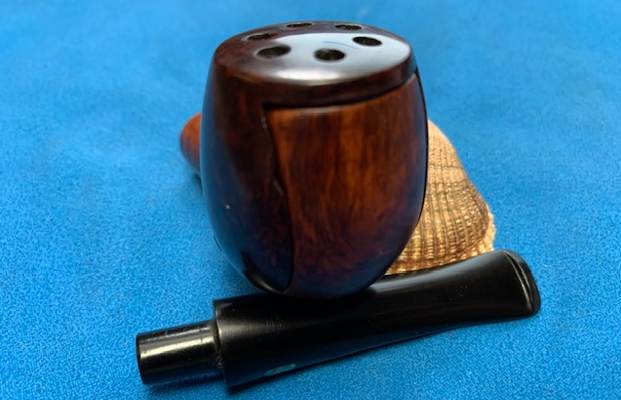
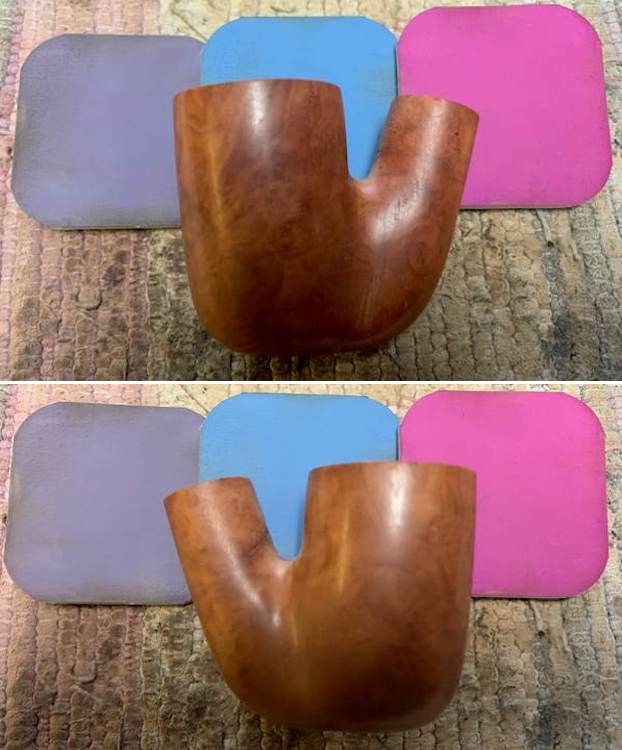
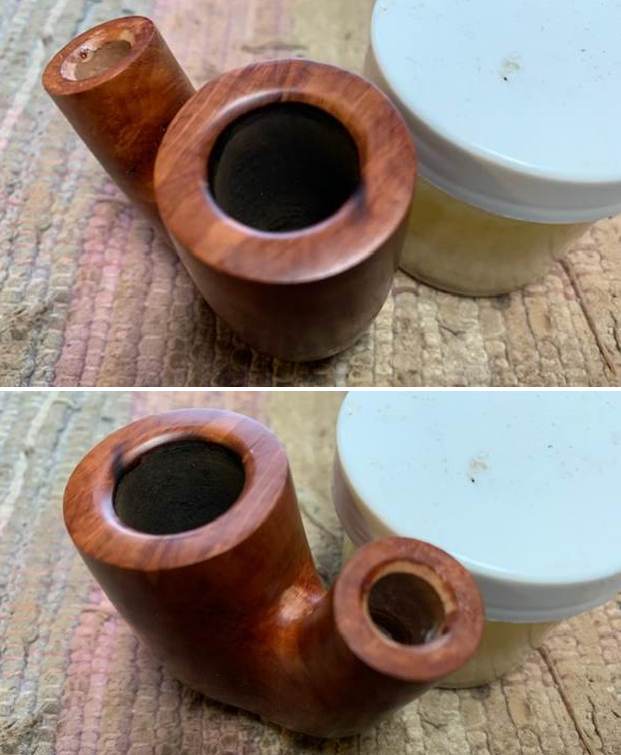
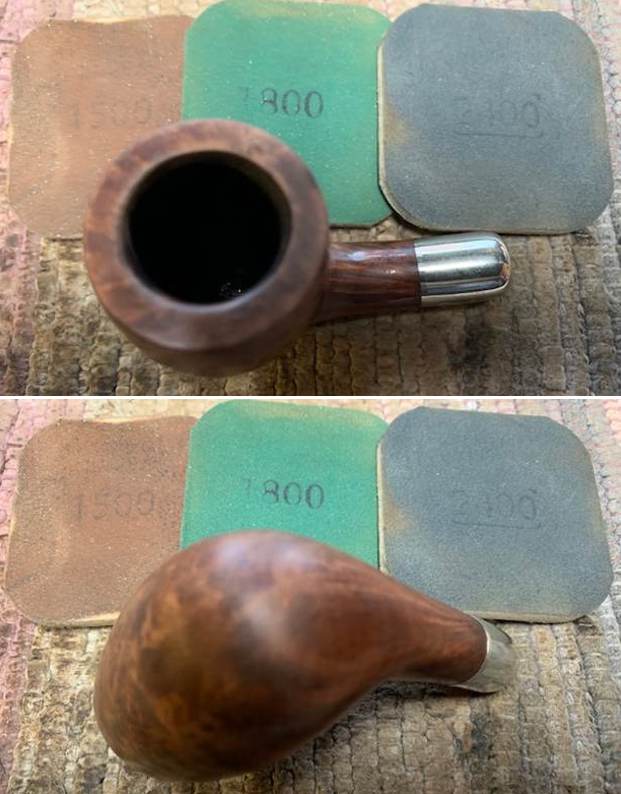
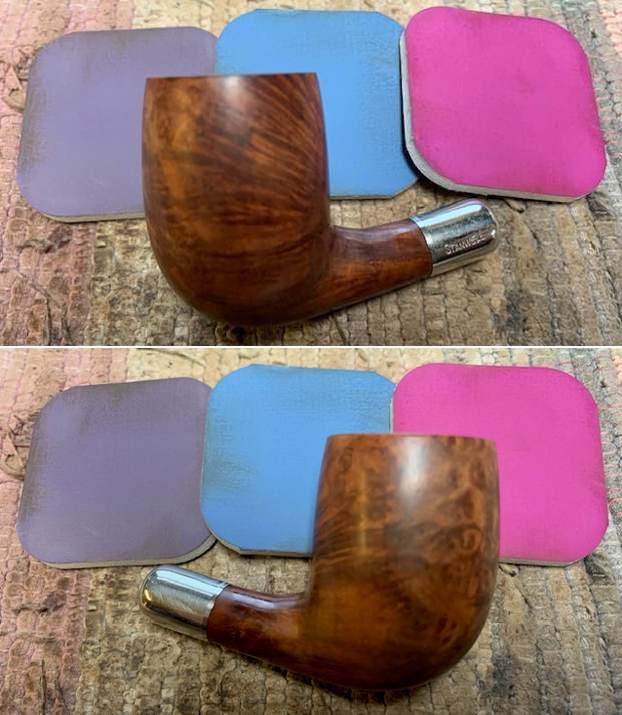
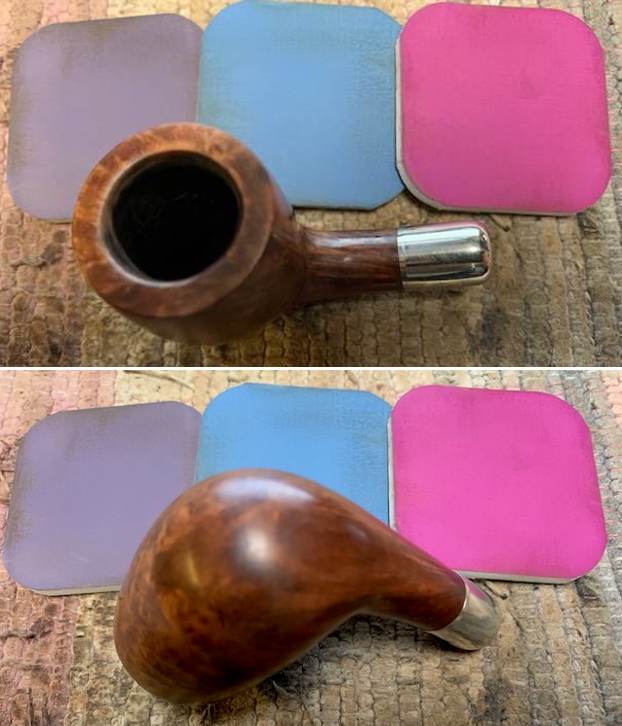
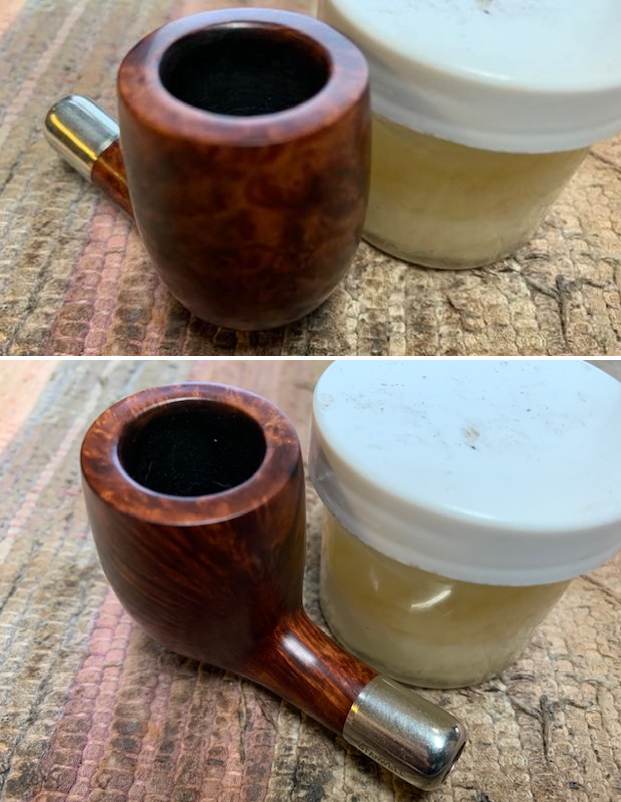
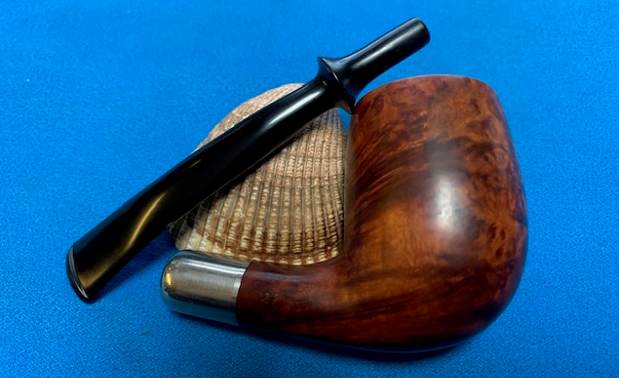
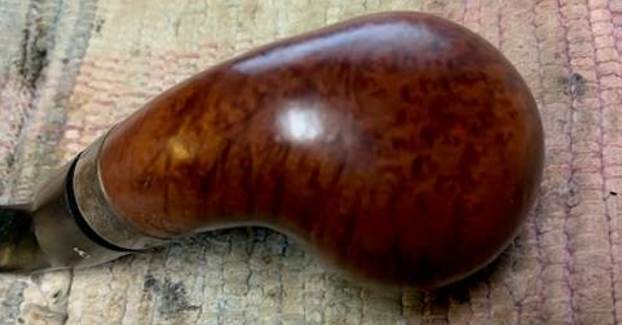
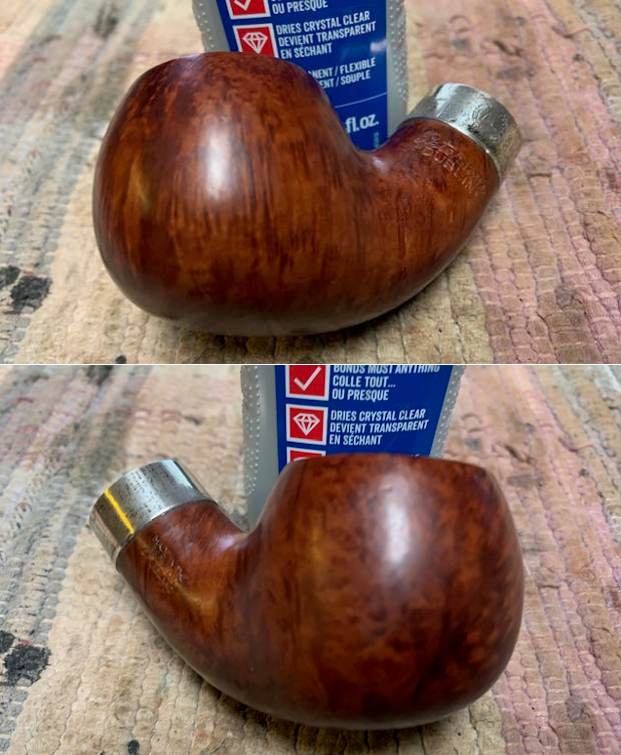
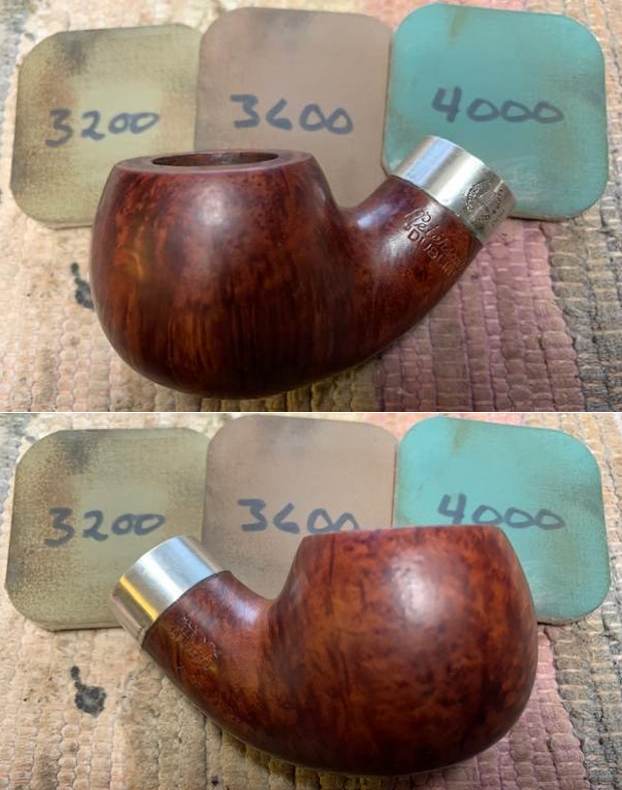
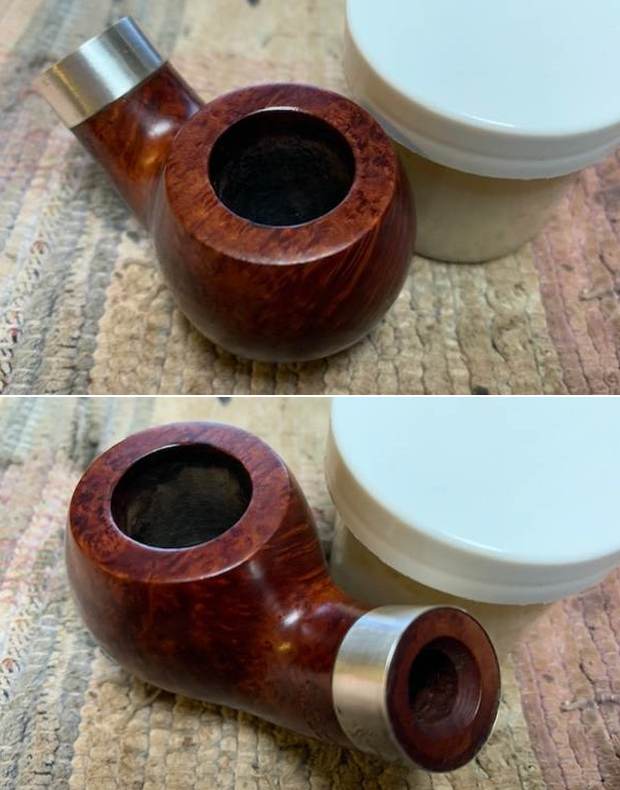
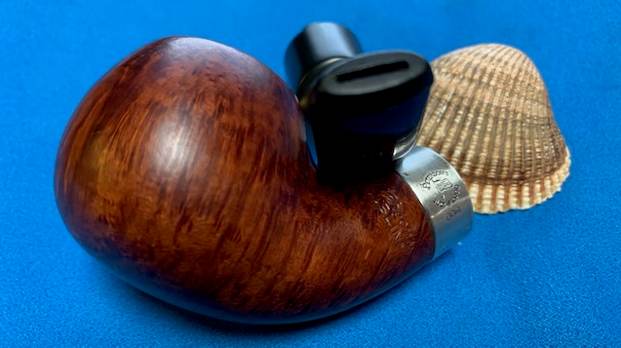
I worked Before & After Restoration Balm deep into the smooth finish to clean, enliven and protect the briar. I hand rubbed it with my fingers and worked it into the finish. I set it aside to dry for 10-15 minutes. I wiped it off with a soft cloth. I buffed the bowl with a cotton cloth to polish it. It really began to have a deep shine in the briar. I took some photos of the bowl at this point to mark the progress in the restoration. The grain on the bowl stands out with interesting lines moving across the sides of the bowl. 
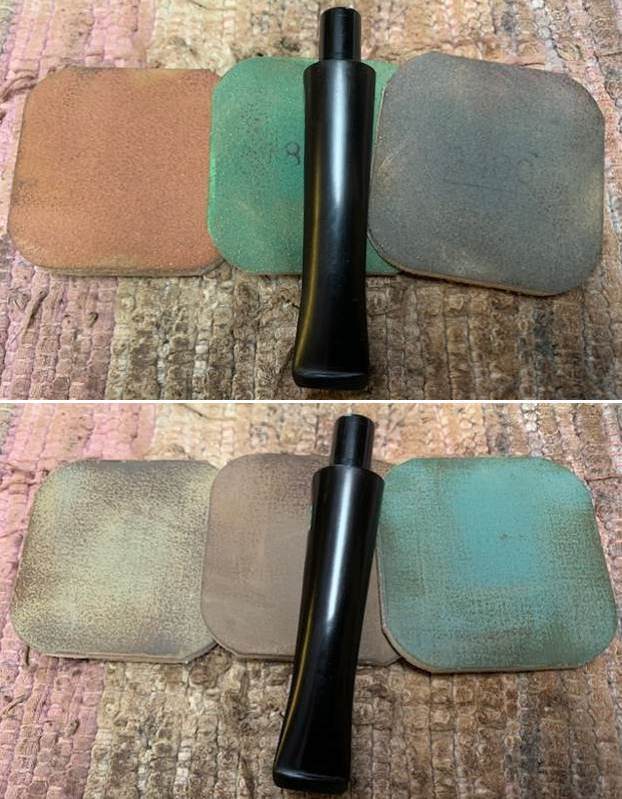
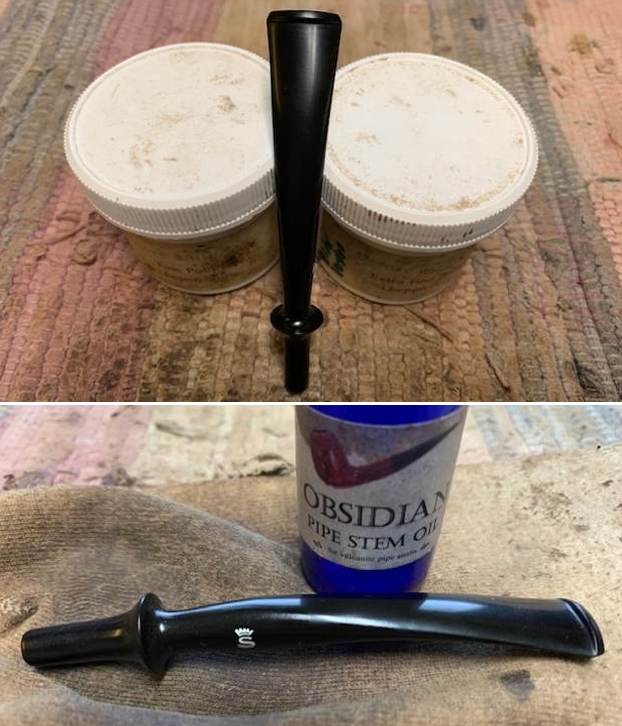
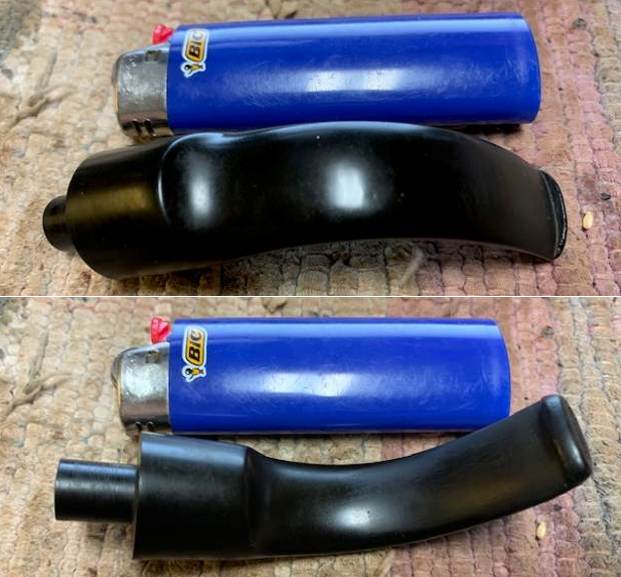
I set the bowl aside and turned my attention to the stem. I “painted” the surface of the stem with the flame of a Bic lighter. I was able to lift the majority of the tooth marks. I filled in what remained with black CA glue. Once the repairs cured I sanded them smooth with 220 grit sandpaper to blend them into the surface of the stem. 
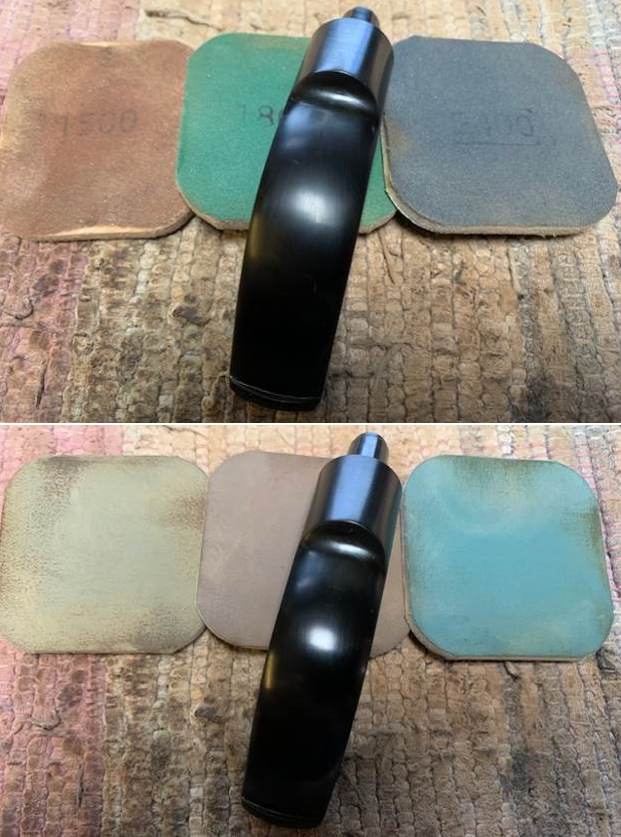
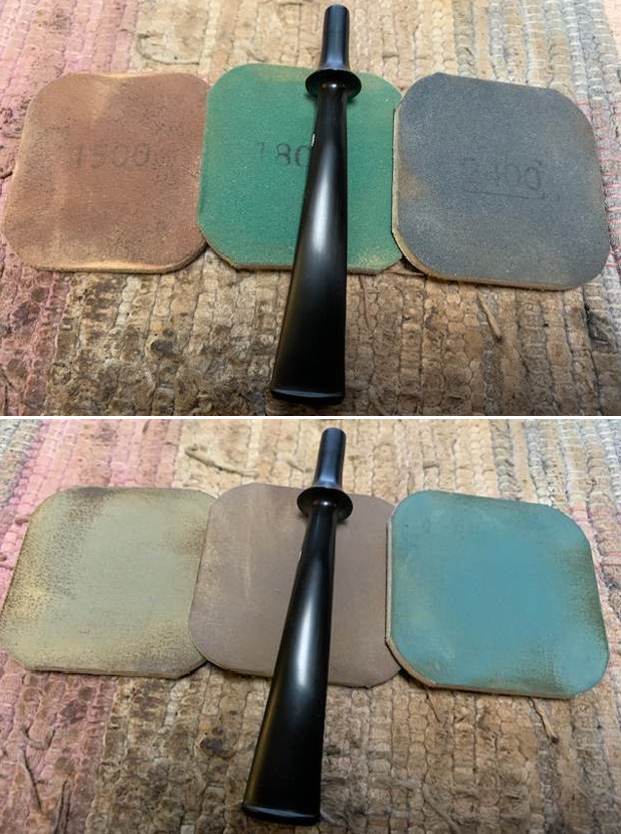
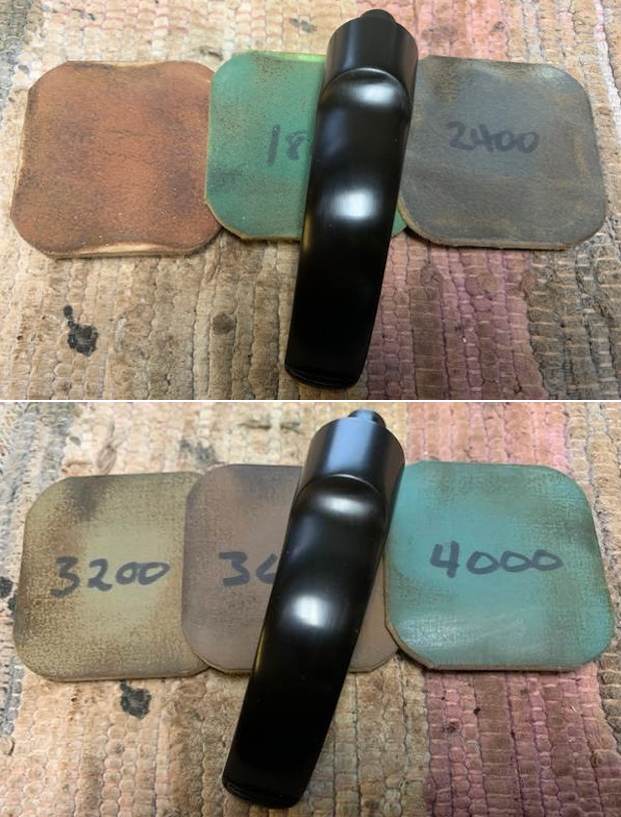
I sanded the repairs and the rest of the stem with the 2 inch square 320-3500 grit sanding pads. I wiped down the stem after each sanding pad. I was able to remove the tooth marks and chatter on both sides with the pads. The stem looked very good.
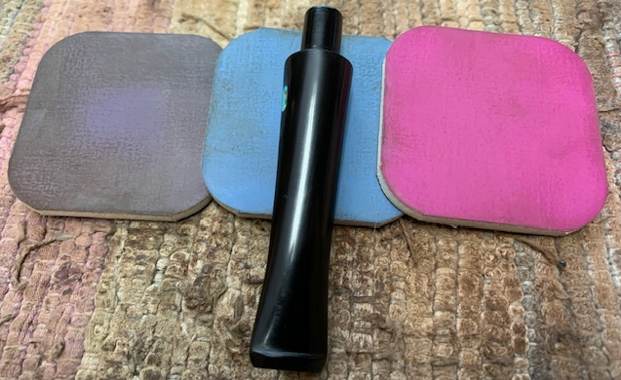
I polished the vulcanite stem with micromesh sanding pads – dry sanding it with 1500-12000 grit pads. I wiped the stem down after each sanding pad with Obsidian Oil and set it aside to dry. 
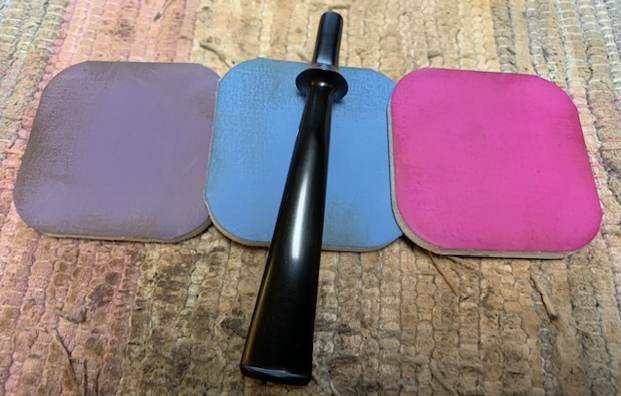
I polished it further with Before & After Pipe Polish – using both the Fine and Extra Fine Polishes. I gave it a rubdown with Obsidian Oil one last time and set it aside. 
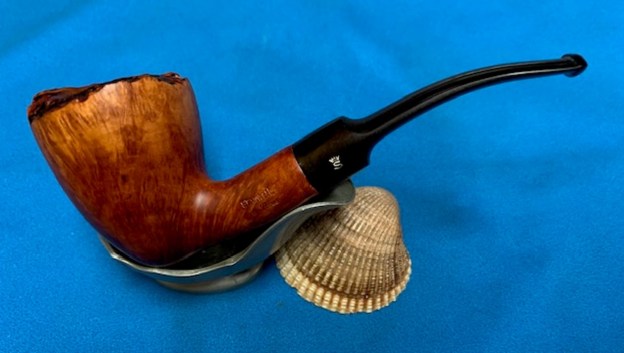
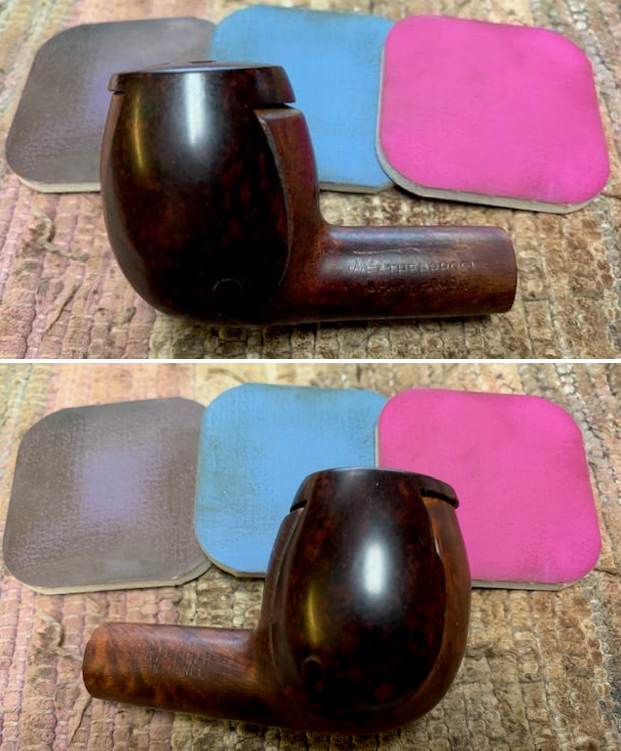
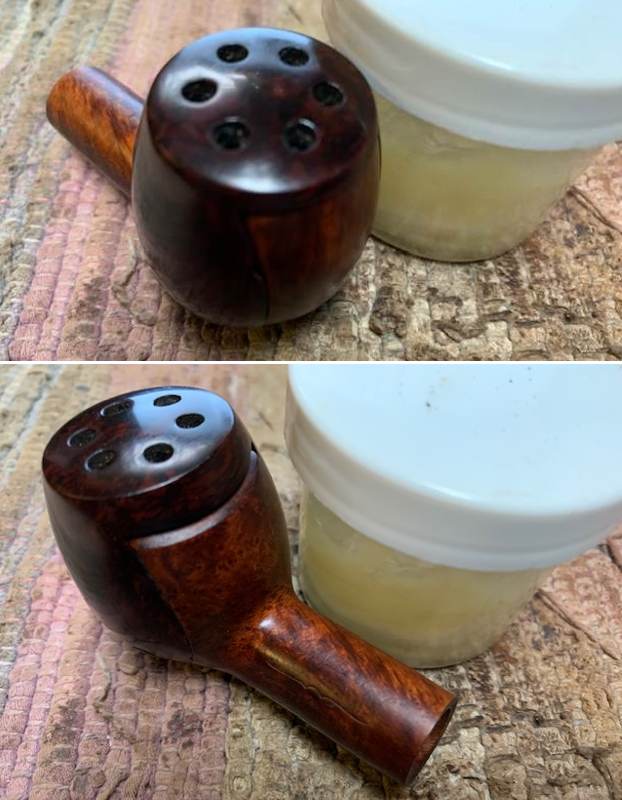
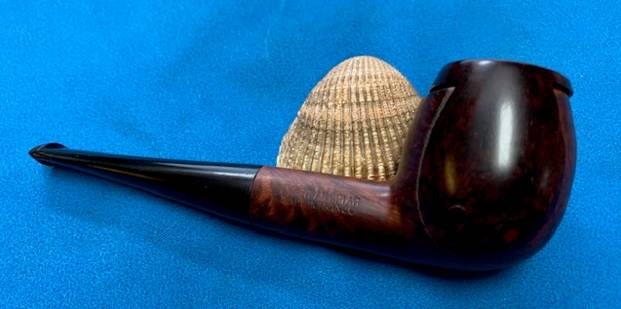
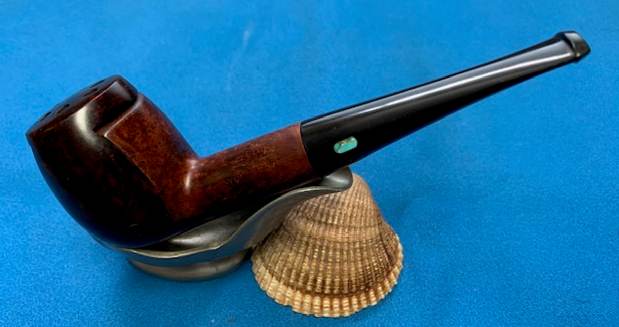
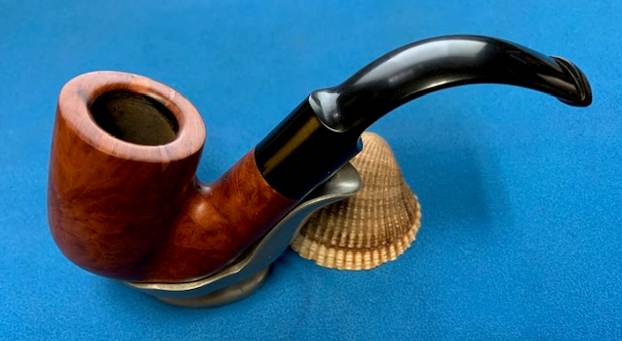
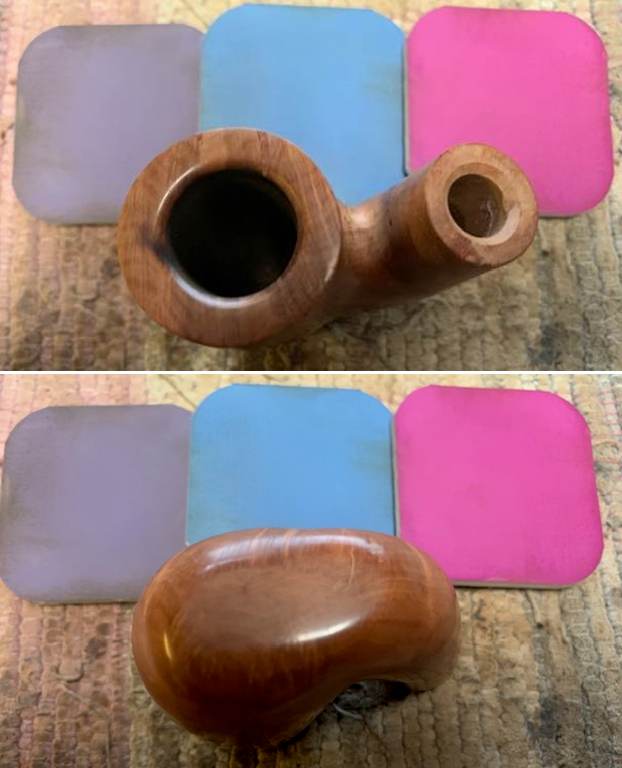
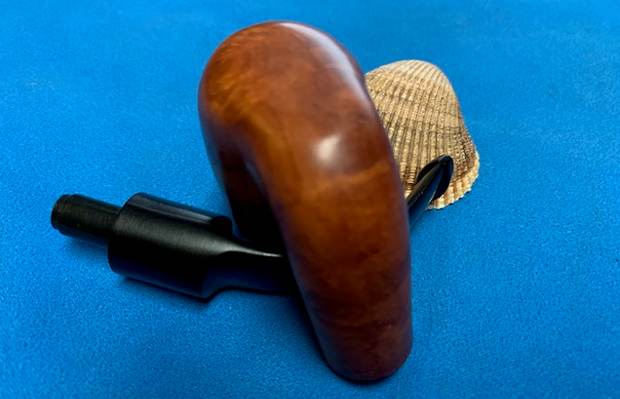
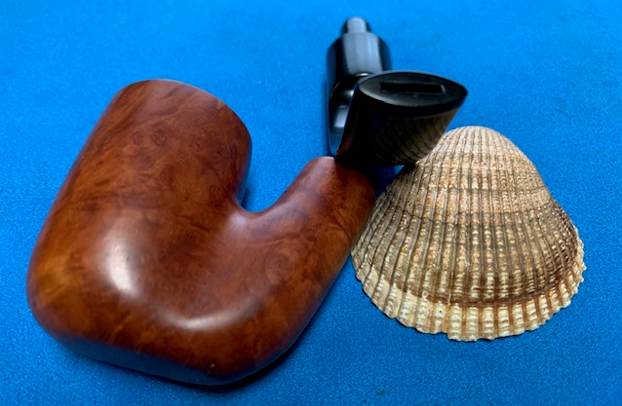
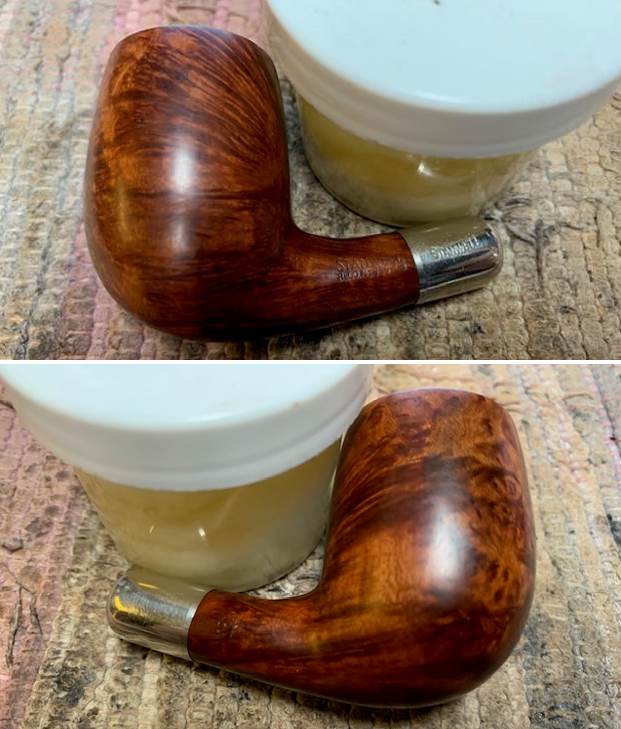
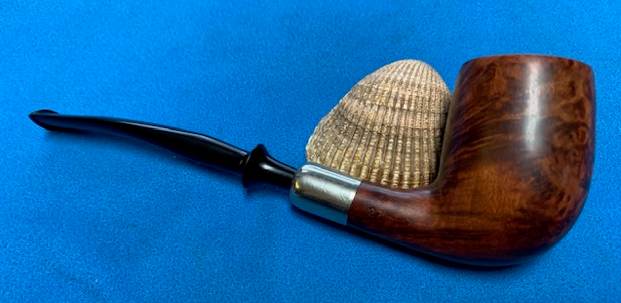
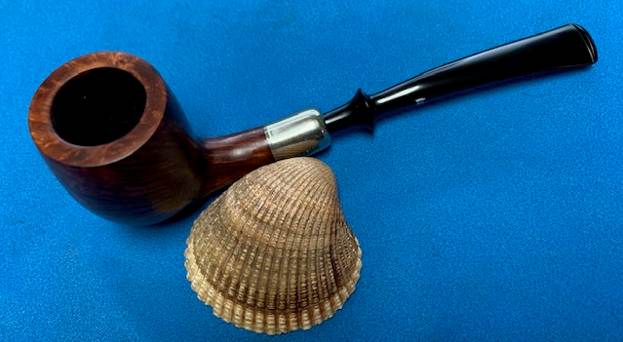
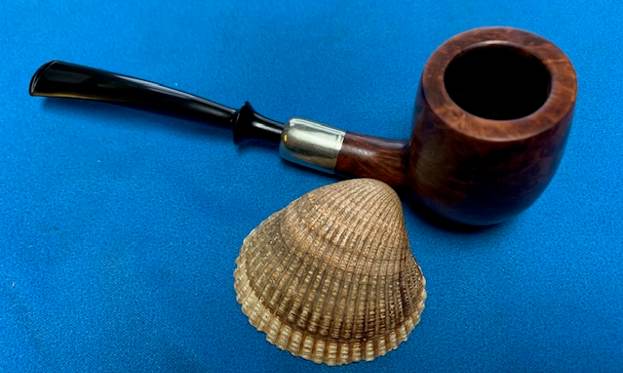
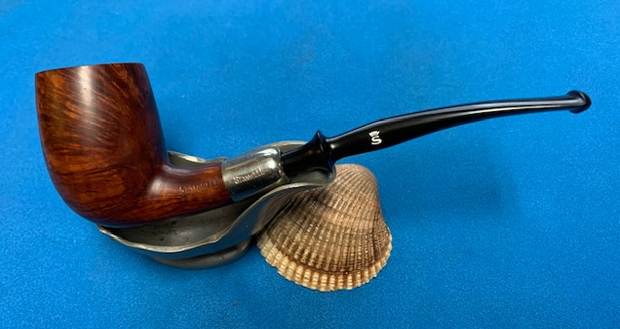
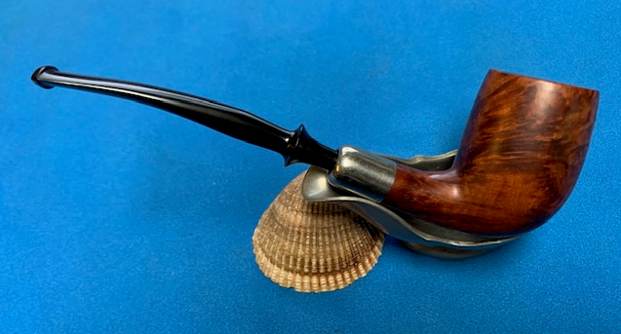
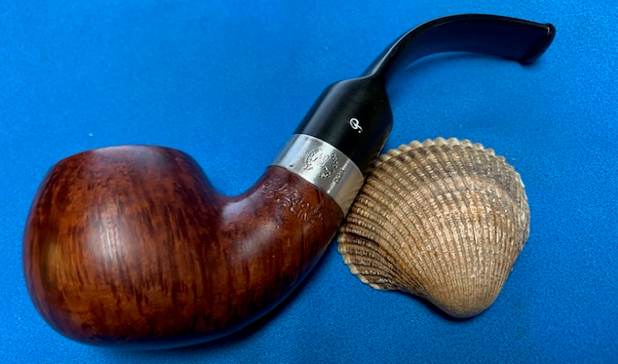
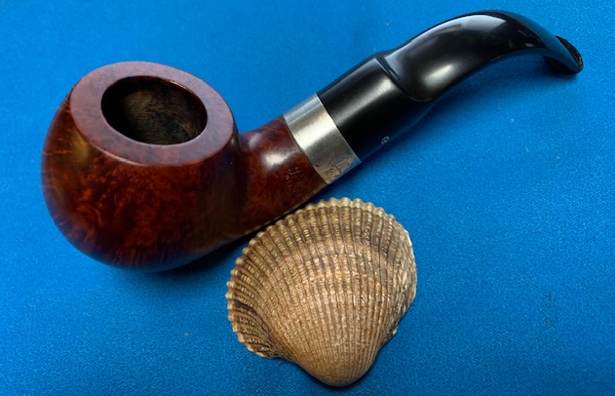
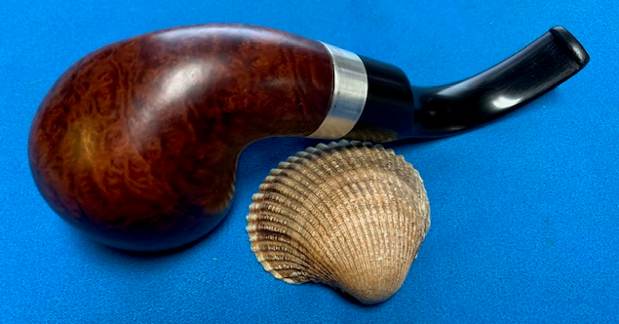
I put the Han’s Original Hand Made Saucer back together and worked the pipe over on the buffing wheel using Blue Diamond to lightly polish the bowl and the acrylic stem. I buffed the bowl and stem to raise the gloss on the briar and the acrylic. I gave the pipe multiple coats of carnauba wax. I buffed the entire pipe with a clean buffing pad to raise the shine. I hand buffed it with a microfiber cloth to deepen the shine. The finished the Han’s Original Hand Made Saucer is shown in the photos below. The medium brown stains on the smooth Saucer shaped bowl works well with the rich bronze Italian acrylic stem. The dimensions of the pipe are: Length: 5 ½ inches, Height: 1 ½ inches, Outside Diameter: 1 ¼ inches, Diameter of the chamber: ¾ of an inch. The weight of the pipe is 52 grams/1.83 ounces. This is an interesting piece of briar, cross grain and birdseye on the bowl and shank. I really like how the briar and the vulcanite work well together. This one will soon be on the rebornpipes store in the Pipes from Various Makers Section. If you are interested in adding this Han’s to your collection this may well be the one for you. Thanks for walking with me through the restoration process.

Cleaning up a Television Imported Briar Italian Made Churchwarden


Blog by Steve Laug

The next pipe on the table was purchased from a fellow in St. Leonard, Maryland, USA on 03/24/2018. It is a nice looking Smooth Rhodesian Churchwarden with twin rings around the cap on the bowl and a long straight stem. It is stamped on the left side of the shank and reads TELEVISION. On the right side it is stamped Imported Briar [over] Italy. The stamping is very clear and readable. The finish had a spotty coat of varnish around the rim, sides and shank and several small fills on the left side of the shank and underside. The bowl had a thin cake and dust and debris. The rim top had spots of lava on it and was dirty. The rest of the bowl and shank. The stem was acrylic and in decent condition with some ripples in the underside from when it had been heated to bend it. It had some tooth chatter and marks on both sides near the button was also dirty and covered with bubbly varnish and debris. Jeff took photos of the pipe when he unpacked it and before he started his clean up work. It is a great looking piece of briar.Jeff took photos of the bowl and rim top to show the cake in the light cake bowl and the debris in the finish. He also took photos of the stem to show the nicks and dents stem surface s well as the light tooth marks and chatter on the vulcanite stem. He took photos of the bowl and heel to show the condition of the finish. Though the photos show the spotty varnish coat the grain underneath actually looks very good underneath. Jeff took photos of the stamping on the sides of the shank. It read as noted above and was readable. You can also see the spots and crackle in the varnish coat on the shank. There is also a gold disc on the left side of the taper shank with an R stamped in the disc. I have worked on quite a few Television Pipes over the years – old timers, billiards and several Churchwarden pipes. I checked all the usual sites for information and I could find nothing about the brand. I decided to leave the hunt behind and just work on the pipe.

I took some photos of the pipe as I took it out of the box. Here is what I saw. I slid it out of the wrapper around it. I could see that Jeff had cleaned it well. The bowl had been reamed with a PipNet reamer and Savinelli Fitsall Pipe Knife. He had scrubbed the exterior with undiluted Murphy’s Oil Soap. He rinsed it with warm water. He cleaned out the internals with alcohol, cotton swabs and pipe cleaners. He cleaned out the airway in the stem with pipe cleaners and alcohol. The grain on the bowl is quite nice with just a few small fills that are solid and well blended in with the surrounding briar. I took photos of the pipe before I started my work on it. The rim top had cleaned up very well and the rim top and edges looked very good. There were still shiny spots on the rim and in the rings. The stem was in decent condition other than light tooth chatter on both sides at the button. The stem also has some nicks on the sides midstem. The stem was vulcanite and has some light oxidation remaining. I took a photo of the stamping on the smooth panel on the left side of the shank. It is clear and readable as noted above. I removed the stem and took a photo of the pipe to show the proportion of the stem to the bowl. It is a nice looking pipe.I took some photos of the fills in the underside and up the side of the shank next to the bowl junction. They both were damaged and shrunken.I repaired the two fills with clear CA glue and some briar dust. Once the repairs hardened I sanded them with 220 grit sandpaper to smooth them out and start blending them into the surface.I wiped down the bowl with acetone to remove the s potty varnish on the briar. I avoided wiping down the two repaired areas so the acetone would not dissolve the repairs. I sanded the bowl with a Medium and a Fine sanding sponge to remove the varnish coat that remained. I also worked over the repaired areas and they began to look very good against the rest of the briar. I polished the bowl with micromesh sanding pads – dry sanding with 1500-12000 grit sanding pads. I wiped the bowl down with a damp cloth after each sanding pad. It began to look much better. I worked some Before & After Restoration Balm into the surface of the briar and into the twin rings around the bowl cap. I rubbed it on with my fingertips and let it sit doing it is job for 10 minutes. The product works to clean, rejuvenate and preserve the briar. I buffed it off with a soft cloth after the ten minutes. It looked much better at this point. I set the bowl aside and turned my attention to the stem. I removed the stinger and then filled in the deep gouge marks on the stem surface with black CA glue. Once the repairs cured I sanded the stem with the new 320-3500 grit sanding pads to blend the repairs into the stem surface and also to remove the slight oxidation. I polished the stem with micromesh sanding pads – 1500-12000 grit pads. I wiped it down with Obsidian Oil after each sanding pad. I used Before & After Pipe Polish – both Fine and Extra Fine to further polish the stem. I gave it a final coat of Obsidian Oil and set it aside to dry. Once I finished working on the stem and put it back together you can see that this Television Imported Briar Italy Churchwarden is another beautiful pipe. The rusticated briar around the bowl is clean and really tactile. The rim top and edges are in great condition. The rich brown stains gave the grain a sense of depth with the polishing and waxing. The depth of the rustication really stood out. I put the acrylic stem back on the bowl and carefully buffed the pipe with a clean buffing pad to raise the shine. I hand buffed the pipe with a microfiber cloth to deepen the shine. The finished Television Italian Churchwarden is a beauty and feels great in the hand and looks very good. Give the finished pipe a look in the photos below. The dimensions of the pipe are Length: 11 inches, Height: 1 ½ inches, Outside diameter of the bowl: 1 ¼ inches, Chamber diameter: ¾ of an inch. The weight of pipe is 1.66 ounces /47 grams. It is another one that is much more beautiful in person than these photos can capture. I will be putting it on the rebornpipes store soon. Look for it in the Italian Pipe Makers section. If you would like to add it to your collection let me know. Thanks for walking through the restoration with me.

Replacing a broken tenon and restoring a Stanwell de Luxe


Blog by Steve Laug

Earlier in July I received an email from Peter, a fellow in California regarding a pipe repair he needed. He wrote as follows.

Hi, I’m just wondering if you can repair a Stanwell pipe for me? The stem broke off inside the pipe. Thanks for your time, Peter.

I wrote him back asking for photos so I could have a look at it. I figured he meant that the tenon snapped off inside the shank but I wanted to be certain. He replied

Thanks so much for your very fast response. Pictures are below. Best wishes, Peter We chatted back and forth a bit and Peter decided to send the pipe to me. I received it yesterday and here is what I saw once I unwrapped it. The photos tell the story but here is my review of it. The finish was dirty and worn. The bowl had a thick cake and there was lava buildup flowing along the inner edge and into the plateau on the rim top. The stem was snapped off leaving the tenon in the shank. Fortunately, there was no damage to the shank itself. It did not have any cracks in the sides. The shank end showed a lot of tar buildup. The tenon was still in the shank. The snap at the stem was fairly clean and would just need to be flattened. The stem itself showed a lot of oxidation, calcification and light tooth marks and chatter on both sides ahead of the button. The pipe was stamped on the left side and read Stanwell [over] de Luxe. I could not see any other stamping on the shank. There was a gold crown S on the left side of the saddle stem. This was going to be fun to bring back to life. I decided to begin working on the pipe by trying to pull the broken tenon with my usual methods. I put the bowl in the freezer for 30 minutes, then inserted a screw into the airway in the shank. I wiggled the screw and tried to break it free. It was no use. I used a qtip to dribble alcohol around the edges of the broken tenon in the shank. I repeated that several times and let it sit. I was still unable to remove the broken tenon in the shank. It was stuck and nothing seemed to loosen it. With the tenon being stuck in the shank I stepped up the process and drilled it out. I started with a drill bit slightly larger than the airway. I have had good success in drilling and in the process having the tenon come out on the drill bit. In this case I worked through four drill bits until I used one that was slightly small than the mortise. I then scraped out the remainder of the bits of vulcanite in the shank with a small pen knife until the walls were clear. I took a photo of the pipe at this point in the process – the tenon drilled out, a replacement tenon and the stem. Now it is ready for the next part of my work. I set the stem and tenon aside so that I could work on the bowl and shank. I reamed the bowl with a PipNet pipe reamer. I took the cake back to bare walls so I could check out the walls for damage or checking. It looked very good. I scraped out the remnants of the cake with a Savinelli Fitsall Pipe Knife and then sanded it with a piece of 220 grit sandpaper wrapped around a piece of dowel to smooth out the walls of the bowl. I worked on the buildup in the plateau surface of the rim top with a brass bristle wire brush. I was able to remove the heaviest part of the lava in the grooves of the plateau surface. It looked better but would need to be scrubbed. I scrubbed the exterior of the bowl with a tooth brush and undiluted Murphy’s Oil Soap. I scoured the surface of the briar and rinsed and repeated the process until the bowl was clean and the rim top looking very good. I cleaned up the darkening on the smooth bevelled portion of the inner rim edge next. I used a folded piece of 220 grit sandpaper to remove the damage and also smooth it out. I touched up the deep grooves in the plateau with a black Sharpie pen. The rim top and edge look very good.I polished the smooth rim top portions and the exterior of the pipe with micromesh sanding pads – dry sanding with 1500-12000 grit sanding pads. I wiped the bowl down after each sanding pad with a damp cloth to remove the sanding dust and debris. By the last pad it was looking very good with a shine in the briar that highlights the grain. I cleaned out the shank and mortise with alcohol, cotton swabs and pipe cleaners. I wanted to remove the oils and tars so that I would have a clean surface for the new tenon that I was fitting in the shank. It cleaned up and certainly smelled better once cleaned.I worked some Before & After Restoration Balm into the surface of the briar with my fingertips and a horsehair shoe brush to get into the plateau top. The product works to clean, preserve and protect the briar. I let it sit and work into the briar for 10 minutes then wiped it off with a cotton cloth. I buffed the briar with a clean cloth. The bowl is starting to look beautiful and there is a shine developing. At this point the bowl was finished until I finished with the new tenon insertion. I set the bowl aside and took a photo of the new tenon and the tools for reducing the diameter to fit in the shank. I used the Dremel and a sanding drum to reduce the diameter. I cleaned up the work with a file and then 220 grit sandpaper to get it to a point where the tenon fit in the shank.I put the stem in a bath of Briarville’s Pipe Stem Deoxidizer and set it aside while I worked on the tenon fit. I left it in the bath for three hours and then removed it and rubbed off the bath with a paper towel. The surface of the stem looked significantly better at this point. The oxidation was greatly reduced, the calcification was gone and the stem showed improvement. The tooth marks would still need to be worked on but there was progress.I cleaned out the airway in the stem with pipe cleaners and alcohol the drilled the airway to match the diameter of the new tenon insertion. I started with a drill bit the same size as the airway and gradually increased the bit size until it matched the outside diameter of the tenon. I took a photo of the newly drilled end of the stem. I cleaned up the airway once again in preparation for gluing the new tenon in place. I wiped the tenon end down with black CA glue and then aligned the tenon and the mortise. I pressed the tenon in place in the stem and set it aside to cure. Once it cured I took a photo of the stem and new tenon with the bowl before putting them back together. Once the glue cured I fit the stem in the shank. As seems to be very usual when I do this kind of thing the fit against the shank was not perfect. I would need to shape the stem and shank to make the fit and flow perfect. I took photos of the pipe at this point. The fit is not far off but just enough to be noticeable in the photos on the top and underside and slightly on the right and left sides. I sanded the shank and the stem to match and make the transition smooth all the way around the junction. I used 220 grit sandpaper and sanded it in place on the shank. I had to remove briar and vulcanite on the sides of the shank according to the transition. When finished it looked much better. I polished the sanded areas with micromesh sanding pads to make them smooth. I used an Oak stain pen to touch up the sanded areas and blend them into the rest of the bowl and shank. It blends in very well.I rubbed it down once again with Before & After Restoration Balm. I worked it into the surface of the briar and let it sit for 10 minutes then buffed it off with a soft cloth. I polished the bowl with a cotton cloth and set it aside. I set the bowl aside and turned my attention to finishing the work on the stem. I “painted” the stem surface with the flame of a lighter to lift the tooth marks. I was able to lift them significantly. I filled in what remained with black CA glue. Once the repair cured I used files to smooth out the surface of the repair. I sanded it with 220 grit sandpaper to blend them into the surface of the stem. I started the polishing of the stem with 600 grit wet dry sandpaper. I polished the stem with micromesh sanding pads – dry sanding with 1500-12000 grit pads. I wiped the stem down after each sanding pad with Obsidian Oil. I finished polishing the stem with Before & After Pipe Stem Polish – Fine and Extra Fine. I rubbed it into the surface of the stem and buffed it off with a cloth and buffed it to a shine. I am really happy with the way that this Stanwell Danish Made de Luxe Freehand turned out. It really is a beautiful looking pipe with a great shape and smooth finished bowl and plateau on the rim top. The original vulcanite saddle stem is cleaned up nicely. The polished black of the stem works well with the briar and the plateau portions. The briar really came alive with the buffing. The rich brown stains of the finish gave the pipe a sense of depth with the polishing and waxing. I put the stem back on the bowl and carefully buffed the pipe with Blue Diamond on the buffing wheel using a light touch on the briar. I gave the bowl and the stem multiple coats of carnauba wax on the buffing wheel. I buffed the pipe with a clean buffing pad to raise the shine. I hand buffed the pipe with a microfiber cloth to deepen the shine. The finished Stanwell de Luxe really is a beauty and feels great in the hand and looks very good. Give the finished pipe a look in the photos below. The dimensions of the pipe are Length: 6 inches, Height: 2 ¼ inches, Outside diameter of the bowl: 1 ¾ inches, Chamber diameter: ¾ of an inch. The weight of the pipe is 56 grams/1.98 oz. The pipe will be going back to Peter very soon. I look forward to hearing what he thinks about it. Thanks for reading this blog and my reflections on the pipe while I worked on it. It was a fun one to work on!

As always, I encourage your questions and comments as you read the blog. Thanks to each of you who are reading this blog. Remember we are not pipe owners; we are pipe men and women who hold our pipes in trust until they pass on into the trust of those who follow us.

Moving another one of my own – a Mastercraft Weatherproof Sparkproof 59 Apple


Blog by Steve Laug

This is another pipe that I have taken out of my personal collection as I just do not use enough to warrant keeping it. This pipe was one that I purchased long ago but have no memory where it came from. I have picked up several of these over the years and this is one that I don’t think I ever smoked to be honest. It is a pipe I should have smoked as it is attractive enough but did not. It is time to move it on to someone who will enjoy it. The airway in the shank and the mortise are very clean. The smooth finish and rim top were in good condition but it is dull and lifeless looking. It has a Bakelite windcap that is integral to the pipe and flips back toward the bowl for loading and lighting. The inner edge of the rim is in good condition. The stamping on the pipe on the left side of the shank reads Mastercraft in a shield [over] Weatherproof [over] Sparkproof. On the right side it is stamped Algerian Briar [over] Made in France. On the underside of the shank is the shape number 59 next to the stem shank union. The finish is a medium brown and goes well with the brown Bakelite flip cap and vulcanite stem. Once it is polished the grain will show clearly. There is an oval on the left side of the stem that appears to be inlaid with a piece of turquoise in the area where there is typically a MC brass logo. There is an odd metal half circle in the tenon that is one I have never seen. It could be part of a stinger but it hard to know for certain. The stem is in excellent condition with no tooth chatter or marks on it. It comes with its own pipe sock which has kept it from getting dirty sitting in my cupboard, so it looks good. I took photos of the pipe before I did my clean up work on it to prepare it for you.   I took a photo of the bowl and rim top to verify the description above. The rim top looks good. There is a little darkening around the inner edge but otherwise it is in good shape. The vulcanite stem looks quite good on both sides. I took photos of the stamping on the sides of the shank. It is clear and readable as noted above.I took the stem off the bowl and took a photo of the pipe to give a sense of proportion of the pipe. You can also see shape of the pipe and some interesting grain on the briar. I used a folded piece of 220 grit sandpaper to clean up the darkening on the inner edge of the bowl. Once finished it looked much better.The shank and mortise were very clean and a quick run through with a pipe cleaner proved all that was necessary. I polished the rim top and the briar with micromesh sanding pads – dry sanding with 1500-12000 grit pads. I wiped the bowl down with a damp cloth after each sanding pad to remove the dust and debris. I gave the bowl and shank a coating of Before & After Restoration Balm. I worked it into the surface of the briar with my fingertips to clean, enliven and protect the briar. I let the balm sit for 15 minutes and then buffed with a cotton cloth to raise the shine. The photos show the bowl at this point in the restoration process.   I set the bowl aside and turned my attention to the stem. I polished it with micromesh sanding pads – 1500-12000 grit sanding pads and water to wet sand the stem. I wiped it down after each sanding pad with Obsidian Oil on a cotton rag after each sanding pads. But I find it does two things – first it gives some protection to the stem from oxidation and second it give the sanding pads bite in the polishing process.       After finishing with the micromesh pads I rub the stem down with Before & After Fine and Extra Fine stem polish as it seems to really remove the fine scratches in the vulcanite. I rub the Fine Polish on the stem and wipe it off with a paper towel and then repeat the process with the Extra Fine polish. I finished polishing the stem with a final coat of Obsidian Oil and set the stem aside to let the oil absorb. This process gives the stem a shine and also a bit of protection.     This Mastercraft Weatherproof Sparkproof 59 Apple turned out to be a great looking pipe. With polishing, the grain shines through clearly. The polished Bakelite wind cap looks very good. The vulcanite taper stem is in excellent condition and works great with the polished Bakelite and briar. I put the stem back on the bowl and carefully buffed the pipe with Blue Diamond on the buffing wheel using a light touch on the briar. I gave the bowl and stem multiple coats of carnauba wax on the buffing wheel and followed that by buffing the entire pipe with a clean buffing pad. I hand buffed the pipe with a microfiber cloth to deepen the shine. The finished Mastercraft Weatherproof Spark Proof Apple fits nicely in the hand and feels great. Give the finished pipe a look in the photos below. The dimensions of the pipe are Length: 5 ½ inches, Height: 1 ¾ inches, Outside diameter of the bowl: 1 ¼ inches, Chamber diameter: ¾ of an inch. The weight of the pipe is 43 grams/1.52 ounces. It is a great looking pipe that I will soon be adding it to the rebornpipes store in the American Pipemakers Section. If you are interested in adding it to your collection let me know Thanks for reading this blog and my reflections on the pipe while I worked on it.

Restoring a No Name Natural Finished Oom Paul


Blog by Steve Laug

The next pipe I have chosen to work on is a Natural Finish smooth Oom Paul with a bent saddle stem that I picked up in a lot of 10 pipes from a fellow on Vancouver Island who was selling his collection. This is the final pipe of the 10 so it has been a fun journey to clean them up. There is no stamping on the shank on either side. It is unmarked and a no name. The saddle stem has a no stamping either. The pipe is a nice looking pipe with some mixed grain around the bowl and shank. There are some small fills in the briar but not to ugly. It has a natural finish. It is light weight and comfortable pipe to hold. I brought it to the work table and turned it over in my hands. This is what I saw when I over the pipe.

  1. The natural finish was okay with some hand oils on the sides of the bowl and grime ground into the finish around the bowl sides. The finish is rough and unfinished. It looks dull but the it really highlights the grain around the bowl sides and shank. There are some fills on the bowl – right side toward the top front, back of the rim top and one on the top of the full bent shank.
  2. The smooth rim top was okay and the inner and outer edges looked good. There was no lava build on the top and the beveled inner edge. There was some grime on the rim top and a burn mark on the top front of the rim and the bevel.
  3. There was a light cake in the bowl. It held the aroma of the tobaccos smoked in it – fortunately not aromatic. The walls looked to be undamaged but once I removed the light cake I could confirm that.
  4. The vulcanite saddle stem is in good condition with just some oxidation and light tooth marks and chatter on the top and underside ahead of the button.
  5. The heel of the bowl has a sanded spot that is flat and has not been sanded or smoothed out. It was made to be a sitter but it had not been finished out.

To summarize what I saw – this no name Oom Paul is a well made pipe. It is a dirty but otherwise in good condition. The stem is lightly tooth marked but otherwise undamaged. There does not appear to be any calcification, only some light oxidation on the stem surface. The look and feel of the pipe in the hand is great. It is going to clean up very well. Here are photos of the pipe before I started my clean up.   The bowl of the pipe looked good. The rim top is clean but there is some darkening on the beveled inner edge of the bowl on the back right side. There was a burn mark on the rim top at the front of the bowl. There does not seem to be any damage to the smooth finish. I see no warning signs in the rim top or the edges of the bowl. I took photos of the stem to show the condition of it. Though hard to see there are light tooth chatter on the surface of both sides ahead of the button but it should clean up easily with polishing. The next photo captures the flattened heel of the bowl. It is still roughly finished and will need some sanding. I removed the stem from the shank and took a photo of it to give a sense of proportion. Now it was time to work on the pipe itself. I started my work on the pipe by cleaning the internals. The cake was quite thin but it can hold residual oils from previous tobaccos and I wanted to check the bowl walls for burn damage or checking. I reamed it with a Savinelli Fitsall Pipe knife and took the cake back to bare briar. I sanded the walls with 220 grit sandpaper wrapped around a piece of dowel. I worked on them until they were smooth. There was no checking or burn damage to the bowl walls. It was quite clean. I cleaned out the internals of the shank and the airway in the stem with 99% isopropyl alcohol, cotton swabs and pipe cleaners. I worked them over until they were clean.  I scrubbed the bowl with acetone and a cotton pad to remove the oils on the sides of the bowl and spottiness from the bowl and shank. It looked much better once it dried off.  I polished the briar with micromesh sanding pads. I choose to dry sand the briar rather than wet sand it. Again it is a matter of personal preference. I prefer to use the pads dry and find they work very well on the briar. I sand with each pad (9 in total) and group them by threes for ease of reference. I wipe the bowl down after each pad with a damp cloth to remove the sanding debris and check the briar. I love seeing the developing shine on the briar as I move through the pads which is why I include so many photos of this step. I worked some Before & After Restoration Balm into the finish on the bowl and shank. I worked it into the surface of the briar with my fingertips to clean, enliven and protect the wood. Once the bowl was covered with the balm I let it sit for about 15 minutes and buffed it off with a soft cotton cloth and the shoe brush. I polished it with a microfiber cloth. I took photos of the pipe at this point in the process to show what the bowl looked like at this point. It is really a beauty. I set the bowl aside and worked on the stem. I dry sanded both sides of the stem with 1500-12000 grit pads to polish it further. I wiped it down with a cloth impregnated with Obsidian Oil after each sanding pad. Though I know that it does not do much with the acrylic I find that it still adds depth to the final shine on the stem which grew deeper with each sanding pad.  I finished polishing the stem with Before & After Pipe Polish – both Fine and Extra Fine polishes. I wiped the stem down with some Obsidian Oil afterwards and buffed it with a soft microfiber cloth. I took the No Name Oom Paul to the buffer to wax and polish. I buffed the bowl and stem with Blue Diamond polish on the wheel to polish out the scratches in the vulcanite. I gave the pipe multiple coats of carnauba wax on the wheel and then buffed the pipe with a clean buffing pad to raise the shine. I hand buffed it with a microfiber cloth to deepen the shine. The pipe polished up pretty nicely. The Natural finish used on the briar brings out the grain and the bowl looks excellent with the shine and the bent saddle stem. The rich finish around the bowl and shank is quite remarkable and gives the pipe a great look. The No Name Oom Paul is a beautiful pipe and one that will be a great smoking pipe. The finished pipe is shown in the photos below with each of the stems. The dimensions of the pipe are Length: 5 inches, Height: 2 inches, Outside diameter of the bowl: 1 ¼ inches, Chamber diameter: ¾ of an inch. The weight of the large pipe is a light and comfortable 55 grams/1.94 ounces. This is a great looking Natural Finish Oom Paul. I will be adding it to the rebornpipes store in the American Pipe Makers Section. If you want to add it to your rack let me know. Thanks for walking through the restoration with me. Cheers.

Restoring a Stanwell Regd. No. 969-48 Hand Made Military Mount Billiard


Blog by Steve Laug

The next pipe I have chosen to work on is a nice looking smooth brown bent Billiard with a silver ferrule and a vulcanite military mount stem that I picked up in a lot of 10 pipes from a fellow on Vancouver Island who was selling his collection. The stamping on the left side of the shank reads Stanwell [over] Regd. No. 969-48 [over] Hand Made [over] In Denmark. On the right side it was stamped with the shape number 27. The silver ferrule is stamped Stanwell on the left side. The saddle military saddle stem has a stamped with a white Crown S Stanwell logo on the left side. The pipe is a nice looking pipe with some nice cross grain on the sides of the bowl and shank. It has a medium brown finish. It is light weight and comfortable pipe to hold. I removed the pipe from the Stanwell pipe sock and turned it over in my hands. It was in good condition.This is what I saw when I over the pipe.

  1. The finish was very good with only some hand oils on the sides of the bowl and light dust and grime ground into the finish around the bowl sides. The brown stain is dull but the it really highlights the grain around the bowl sides and shank
  2. The smooth rim top looked very good and the inner and outer edges look very good. There was no lava build on the top and the edges. There was some grime on the rim top but the rest looked clean and undamaged.
  3. There was a light cake in the bowl. It held the aroma of the tobaccos smoked in it – fortunately not aromatic. The walls looked to be undamaged but once I removed the light cake I could confirm that.
  4. The silver Stanwell ferrule on the shank end is undamaged and clean. There is some tarnish on the silver and it is dull but still looks good overall.
  5. The thin, fancy saddle stem has a white Crown S logo stamped on the left side that identifies it as a Stanwell pipe. It is in excellent condition with just some light tooth marks and chatter on the top and underside ahead of the button.

To summarize what I saw – this Stanwell Hand Made Regd. No. military mount Billiard is a well made pipe. It is a dirty but otherwise in good condition. The stem is lightly tooth marked but otherwise undamaged. There does not appear to be any calcification or oxidation on the stem surface. The look and feel of the pipe in the hand is great. It is going to clean up very well. Here are photos of the pipe before I started my clean up.   The bowl of the pipe looked very good. The rim top is clean but there is some darkening on the top back of the rim. There does not seem to be any damage to the smooth finish. The edges of the bowl were undamaged and looked very good. I see no warning signs in the rim top or the edges of the bowl. I took photos of the stem to show the condition. Though hard to see there is light tooth chatter on the surface of both sides ahead of the button but it should clean up easily with polishing. The next photos capture the stamping on the shank and the saddle stem. It read as I have noted above. I removed the stem from the shank and took a photo of it to give a sense of proportion. As is my practice when working on pipes I researched the provenance of the pipe. I turned first to Pipephil (http://pipephil.eu/logos/en/logo-stanwell.html) to see what I could find. I found a side bar note on the stamping on the pipe. I found there that the company had begun in 1942 and that the “Regd. No.” stamping was discontinued in late 1960s to very early 1970s. So now I knew that the pipe was made after 1942 and before the late 1960s or early 1970s. I wanted to see if I could pin down the date a bit more.

I then turned to Pipedia to learn more about the pipe (https://pipedia.org/wiki/Stanwell). I read through the article by Smoking Pipes.com there and would recommend it as being a good read. In the material there I found no additional information. I scrolled through the photos and the included catalogue pages and there I found something helpful. There was a late 1950s catalogue shown there that had the description of the pipe I have and also the shape 27 shown in the pages. I have included a screen capture of the page below. I have circled the shape in the photo below. With that information I had learned that this pipe was available in the late 1950s in the shape that I had in hand. The Regd. No. stamping on Stanwell pipes ended in the late 1960s or early 1970s. My guess would place this pipe in the period between 1958-1965. It is a real beauty.

Now it was time to work on the pipe itself. I started my work on the pipe by cleaning the internals. The cake was quite thin but it can hold residual oils from previous tobaccos and I wanted to check the bowl walls for burn damage or checking. I reamed it with a Savinelli Fitsall Pipe knife and took the cake back to bare briar. I sanded the walls with 220 grit sandpaper wrapped around a piece of dowel. I worked on them until they were smooth. There was no checking or burn damage to the bowl walls. It was quite clean. I cleaned out the internals of the shank and the airway in the stem with 99% isopropyl alcohol, cotton swabs and pipe cleaners. I also cleaned the adapter that had come with the pipe. I worked them over until they were clean. I scrubbed the bowl with undiluted Murphy’s Oil Soap to remove the oils in the sides of the bowl. I used a tooth brush to work it into the briar. I rinsed it off with warm running water to remove the soap and the grime. It looked much better once I dried it off.  I polished the briar with micromesh sanding pads. I choose to dry sand the briar rather than wet sand it. Again it is a matter of personal preference. I prefer to use the pads dry and find they work very well on the briar. I sand with each pad (9 in total) and group them by threes for ease of reference. I wipe the bowl down after each pad with a damp cloth to remove the sanding debris and check the briar. I love seeing the developing shine on the briar as I move through the pads which is why I include so many photos of this step.     I worked some Before & After Restoration Balm into the finish on the bowl and shank. I worked it into the surface of the briar with my fingertips to clean, enliven and protect the wood. Once the bowl was covered with the balm I let it sit for about 15 minutes and buffed it off with a soft cotton cloth and the shoe brush. I polished it with a microfiber cloth. I took photos of the pipe at this point in the process to show what the bowl looked like at this point. The light sandblast finish looks very good and has a real touch of beauty.    I set the bowl aside and worked on the stem. I dry sanded both sides of the stem with 1500-12000 grit pads to polish it further. I wiped it down with a cloth impregnated with Obsidian Oil after each sanding pad. I find that it still adds depth to the final shine on the stem which grew deeper with each sanding pad.  I finished polishing the stem with Before & After Pipe Polish – both Fine and Extra Fine polishes. I wiped the stem down with some Obsidian Oil afterwards and buffed it with a soft microfiber cloth.    I took the Stanwell Hand Made Military Mount 27 Billiard to wax and polish. I buffed the bowl and stem with Blue Diamond polish on the wheel to polish out the scratches in the vulcanite. I gave the pipe multiple coats of carnauba wax on the wheel and then buffed the pipe with a clean buffing pad to raise the shine. I hand buffed it with a microfiber cloth to deepen the shine. The pipe polished up pretty nicely. The stains used on the briar bring out the grain and the bowl looks excellent with the shine of the polished silver ferrule and the vulcanite Military mount saddle stem. The rich finish around the bowl and shank is quite remarkable and gives the pipe an incredible look. The Stanwell Hand Made 27 Billiard is a beautiful pipe and one that will be a great smoking pipe. The finished pipe is shown in the photos below with each of the stems. The dimensions of the pipe are Length: 6 inches, Height: 2 inches, Outside diameter of the bowl: 1 ¼ inches, Chamber diameter: ¾ of an inch. The weight of the large pipe is a light and comfortable 34 grams/1.20 ounces. This is a great looking Hand Made Billiard. I will be adding it to the rebornpipes store in the Danish Pipe Makers Section. If you want to add it to your rack let me know. Thanks for walking through the restoration with me. Cheers.

Cleaning up a unique Peterson’s Dublin XL02 July 4, 2000 Commemorative Pipe


Blog by Steve Laug

The next pipe on the table is one that was sent to my by a friend who had just purchased it. The shape reminded me of a large version of a Peterson’s 02 shape. He sent me the following photos of the pipe before he mailed it to me and I was interested. I am including those photos for you to see what I saw when he sent it to me. It is dirty for sure but it has some amazing grain around the bowl and shank and a Sterling Silver Band on the shank. The stem is a P stamped fishtail and looks great on the bowl. The pipe arrived on Monday and I opened the box to find this pipe. It is stamped on the left side of the shank and reads Peterson’s [over] Dublin. On the right side it is stamped Made in the Republic of Ireland in 3 lines [over] the shape number XL02. The silver band is stamped with a US Flag in the center of a circle with Peterson’s arced over the top of the circle and July 4, 2000 arced below the circle. Below that there are hallmarks – Hibernia (Ireland), Harp (quality of silver) and the date stamp of an italic O which is the date stamp for the year 2000. The fishtail saddle stem is vulcanite and has the Peterson’s P stamp on the left side of the saddle. The stem was lightly oxidized with some tooth marks and chatter on both the top and underside ahead of the button. It was tight in the shank and would definitely fit better once cleaned. The bowl had a light cake in it and smelled strongly of Latakia/English blends. The finish was in good condition but there was some dust and grime ground into it. I took some photos of the pipe when I unpacked it. I have included them below. I took photos of the bowl and rim top to show what they looked like before my clean up. I also took some of the stem to show the condition of both sides.  The photos of the sides and heel of the bowl show the grain around the bowl and shank. The mixture of brown stains adds depth to finish on the pipe. Even under the grime it is a real beauty. The stamping on the sides of the shank are shown in the photos below. They are clear and readable as noted above. The “P” stamp on the left side of the saddle is also in good condition.  I removed the stem and took a photo of the parts to give a sense of the proportions of the pipe and its overall look. It is a real beauty.The band on the shank of the pipe was loose and the glue had dried out. It slid off the shank with little effort. I cleaned up the shank end with alcohol on a cotton pad. I spread some all purpose white glue around the area with a dental spatula and pressed the band in place. I wiped off the excess glue with a damp cotton pad and took photos of the newly glued band. Once the glue hardened I polished the silver band with a jewelers cloth. It removed most of the oxidation but a little more work on it would leave it shining bright. I reamed out the light cake in the bowl with a PipNet pipe reamer. I cleaned up the reaming with a Savinelli Pipe Knife and finished by sanding the bowl walls with a piece of dowel wrapped with 220 grit sandpaper. I cleaned out the shank and the airway into the bowl and the shank with pipe cleaners, cotton swabs and 99% isopropyl alcohol.  To deghost the pipe of the heavy Latakia smells I stuffed bowl with cotton bolls and used a twisted cotton boll in the shank. I filled the bowl with alcohol using an ear syringe to place the alcohol directly in the bowl. I set it aside to let it do its work drawing out the tars and oils from the walls of the bowl and the shank. I let it sit overnight and then removed the dirty and oily cotton and debris that had accumulated. I ran a pipe cleaner through the shank and removed any remnants of debris. The  pipe smelled significantly better. I polished the bowl with micromesh sanding pads – dry sanding with 1500-12000 grit pads. I wiped the bowl down with a damp cloth after each sanding pad. It really began to take on a shine. It is a beautiful piece of briar. I rubbed the bowl down with Before & After Restoration Balm. I worked it into the briar with my finger tips. I let it sit for 10 minutes and the Balm did its magic. It enlivens, cleans and preserves the briar. It certainly brought this bowl back to life. I buffed it off with a clean cloth and took the following photos. I set the bowl aside and turned my attention to the stem. I “painted” the stem with the flame of a Bic lighter to lift the tooth marks. The majority of them were lifted. I sanded out what remained with 220 grit sandpaper and then started the polishing with 600 grit wet dry sandpaper. I polished the vulcanite with micromesh sanding pads – 1500-12000 grit pads. I wiped it down with a damp cloth after each sanding pad. I used Before & After Pipe Polish – both Fine and Extra Fine to further polish the stem. This Peterson’s 4th of July 2000 XL02 Bent Apple with a vulcanite saddle stem is a great looking pipe now that it has been restored. The beautiful finish really highlights the grain and the polished finish is stunning. I polished the silver band with a jewelers cloth to protect and shine the silver. I put the stem back on the bowl and carefully buffed the pipe with Blue Diamond on the buffing wheel. I gave the bowl and the stem multiple coats of carnauba wax on the buffing wheel and followed that by buffing the entire pipe with a clean buffing pad. I hand buffed the pipe with a microfiber cloth to deepen the shine. The finished Peterson’s Dublin 4th of July 2000 XL02 fits nicely in the hand and feels great. Give the finished pipe a look in the photos below. The dimensions of the pipe are Length: 5 ½ inches, Height: 1 ½ inches, Outside diameter of the bowl: 1 ¼ inch, Chamber diameter: ¾ of an inch. The weight of the pipe is 69 grams / 2.43 ounces. I will be sending it back to the pipeman so that he can enjoy his “new” pipe. Thanks for reading this blog and my reflections on the pipe while I worked on it.