Tag Archives: polishing sterling silver

Restoring a 1979 Comoy’s Virgin Straight Grain 66 Large Liverpool with a silver band


by Steve Laug

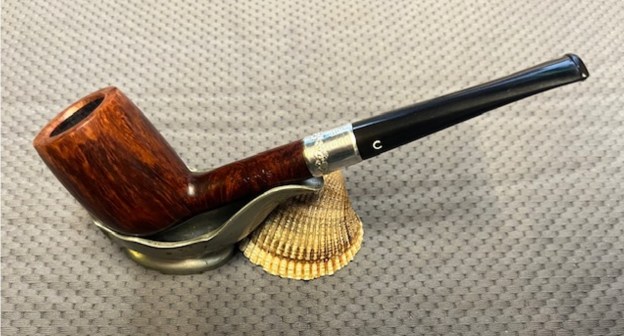
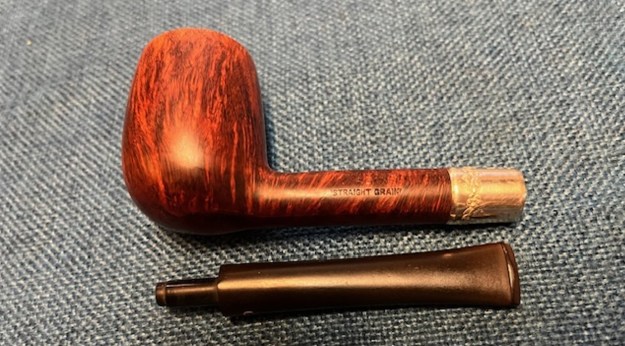
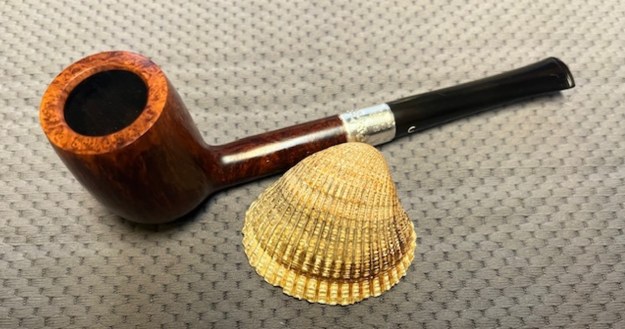
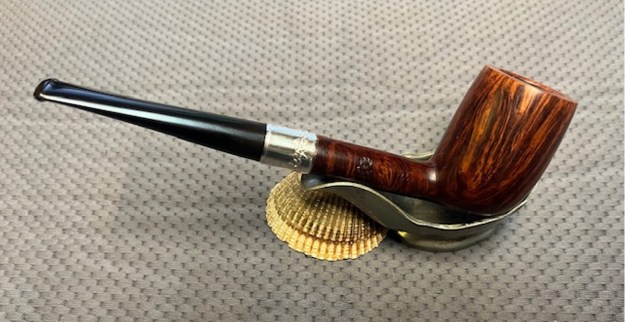
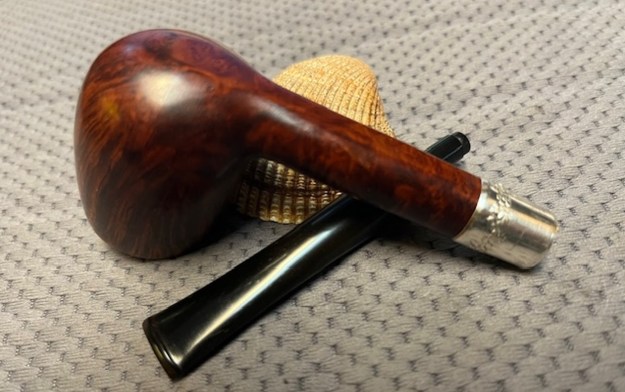
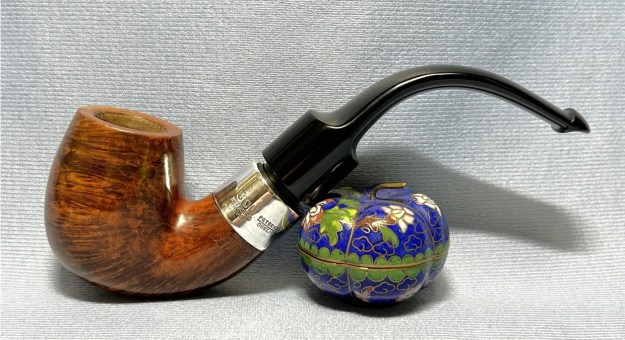
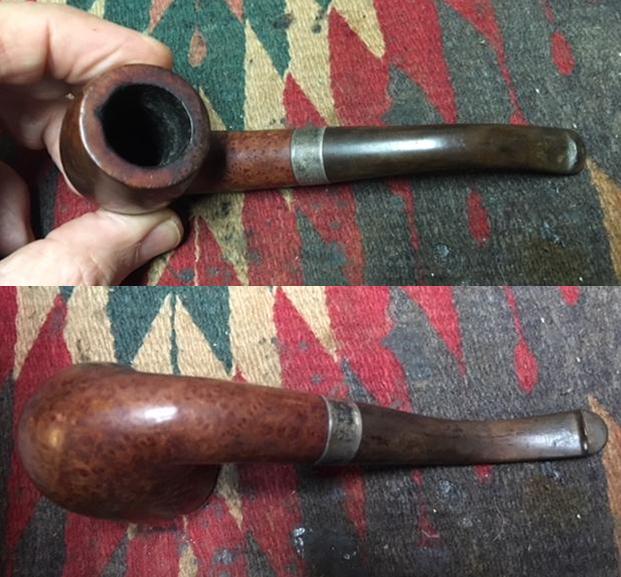
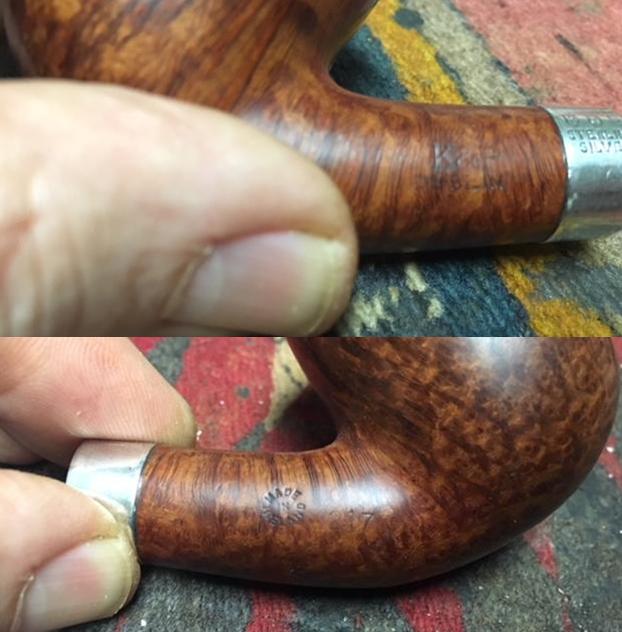
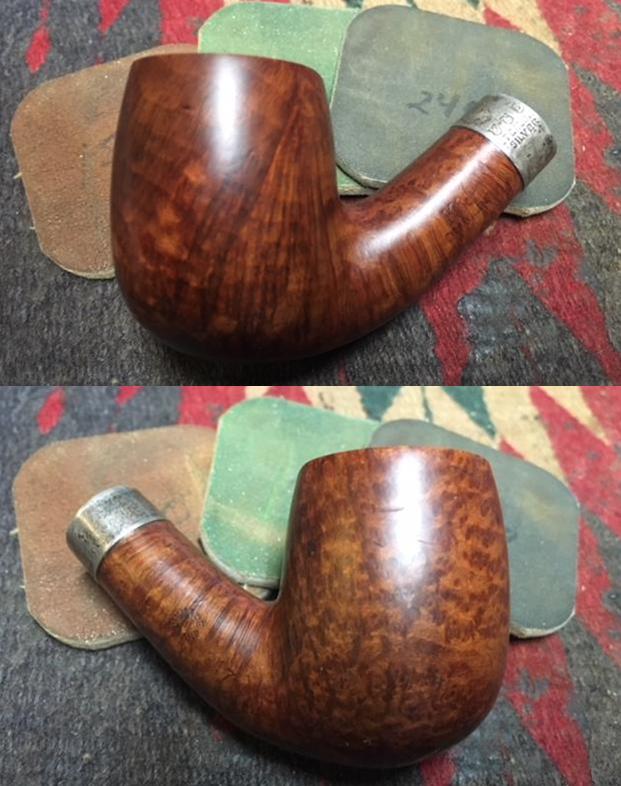
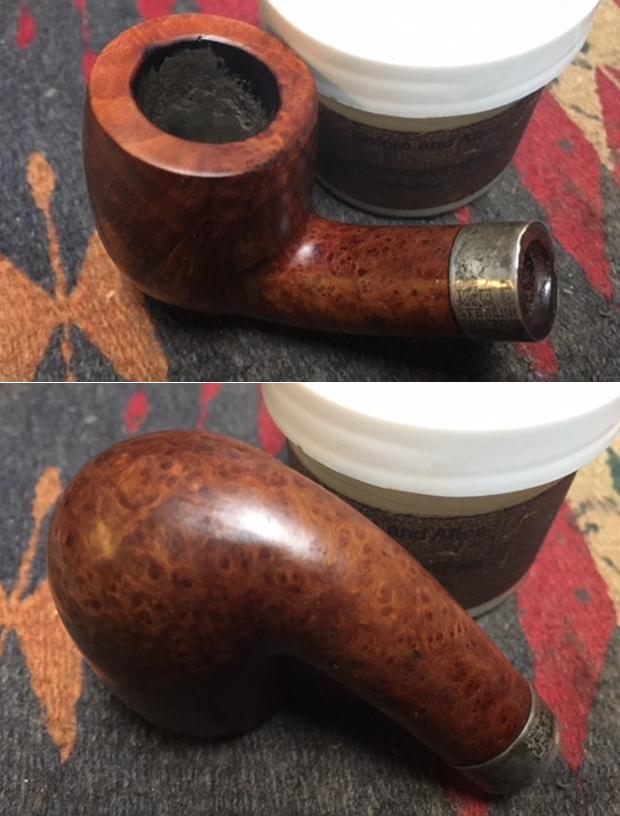
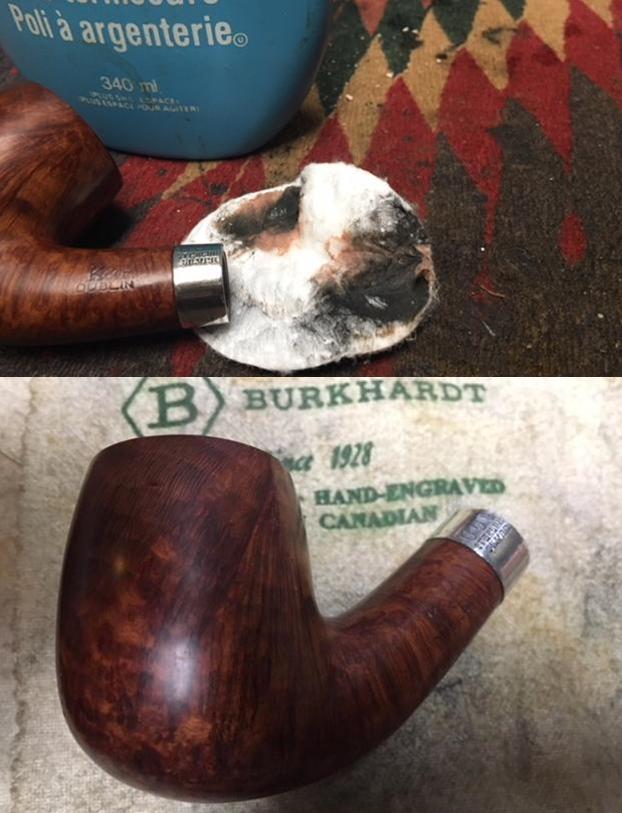
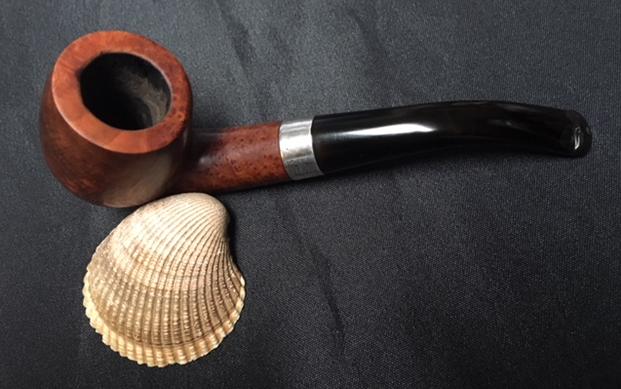
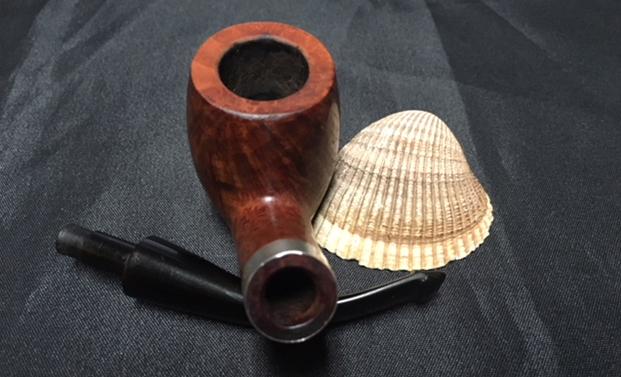
The next pipe on the table is one that we picked up in the lot from a good friend in Barrington, Rhode Island, USA on 08/22/2024. The smooth finish on this English made pipe and the Comoy’s stamping are what caught our eye. It is stamped on the left side of the shank and reads Comoy’s [over] Virgin [over] Straight Grain. On the right side it is Made in London in a circle [over] England. It is stamped with the shape number 66 near the bowl shank joint. There is an uppercase G on the underside of the shank ahead of the silver band. It has a classic Walnut Brown stain on the smooth finish that is a stark contrast to ornate silver band and vulcanite stem. The silver band gives the shank a length that added to the taper stem makes for a Liverpool shaped pipe. The bowl was lightly caked, though it also seems to have been recently reamed. The inner edge and the top look good though there is some darkening and some spots of lava on the top. The stem was lightly oxidized and had tooth chatter on both sides ahead of the button. The Comoy’s C logo looks to be one piece and was inset on the left side of the stem and looks to be in good condition. Jeff took some photos of the pipe to show the general condition of the pipe before he started his clean up. 
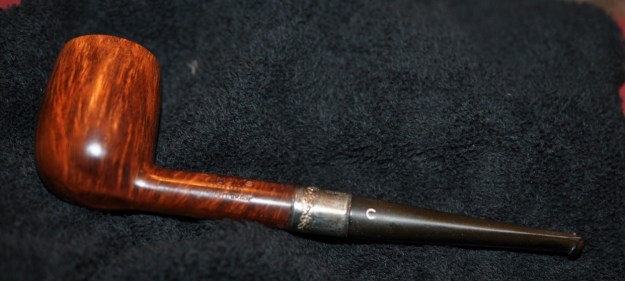
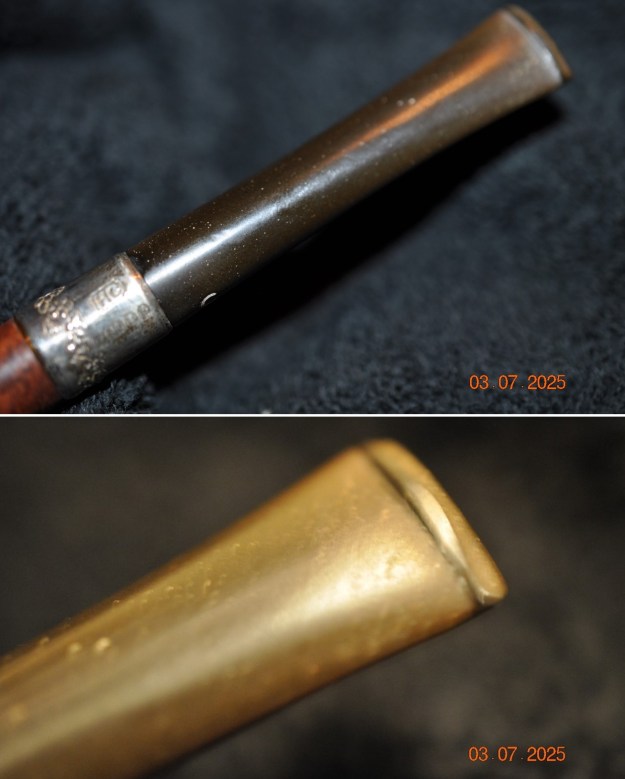
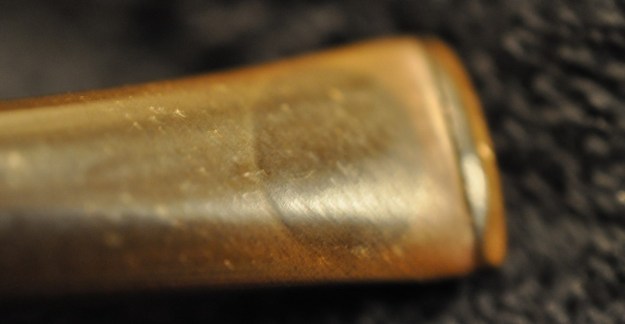
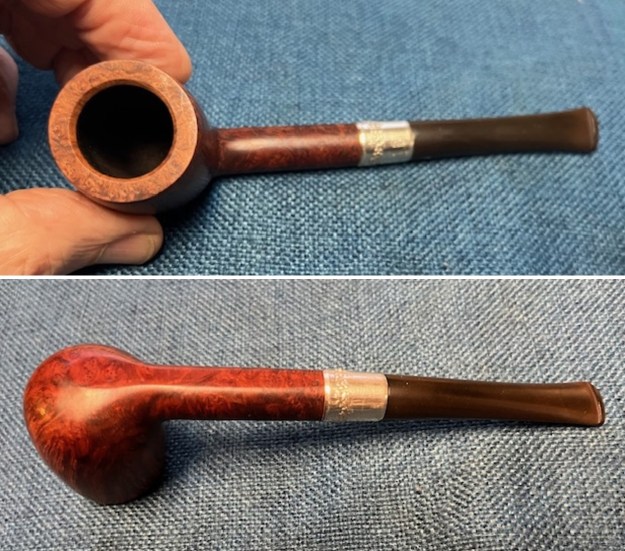
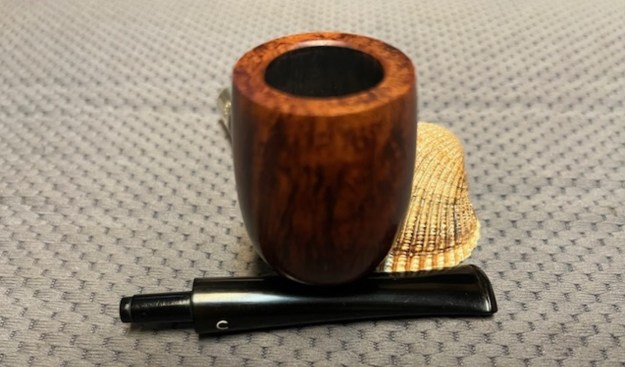
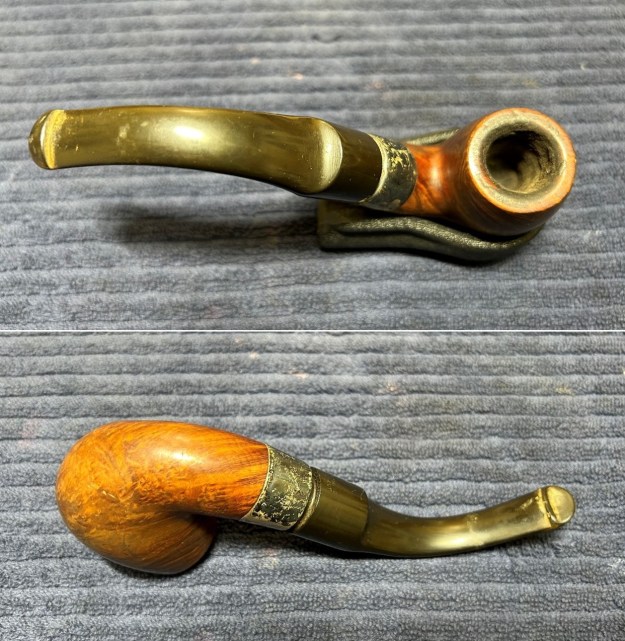
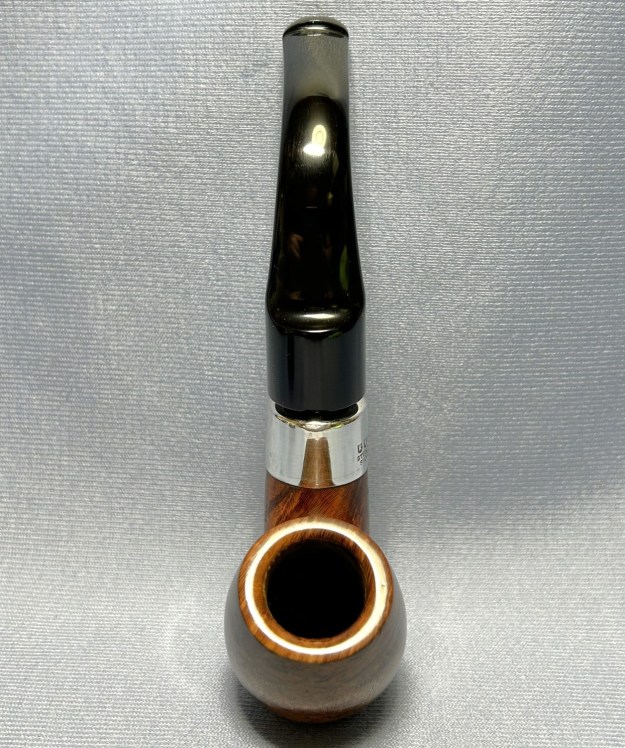
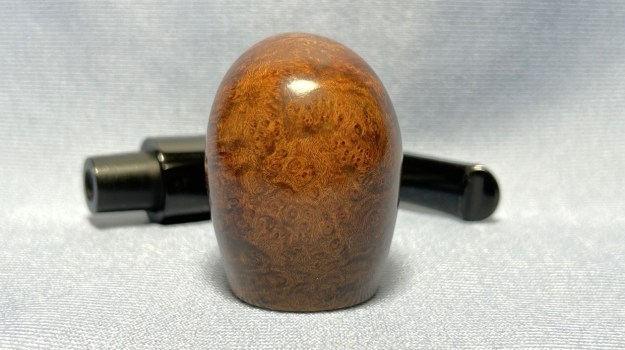
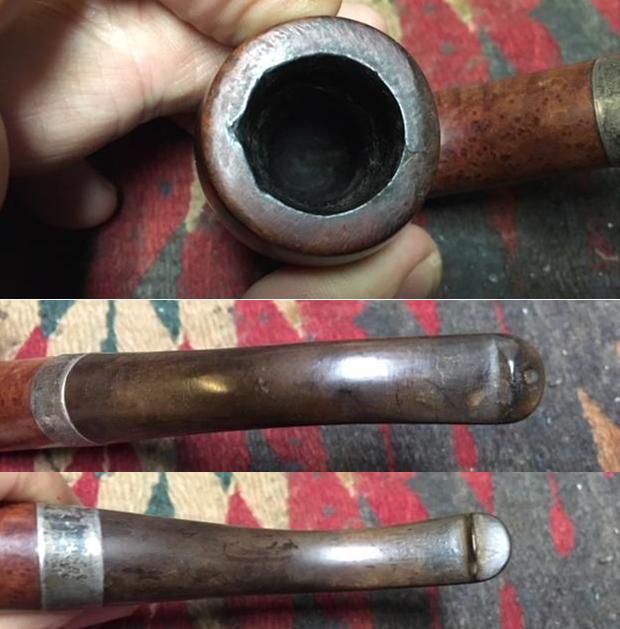
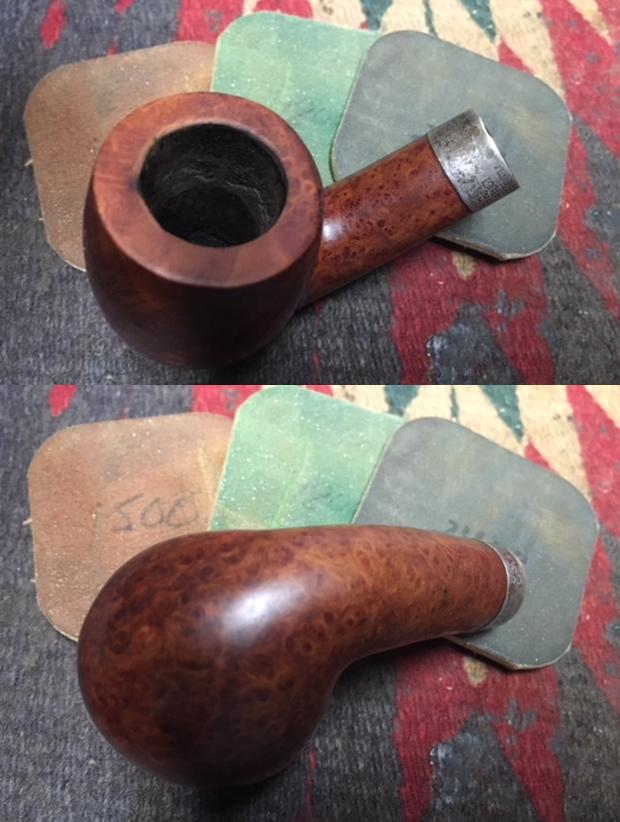
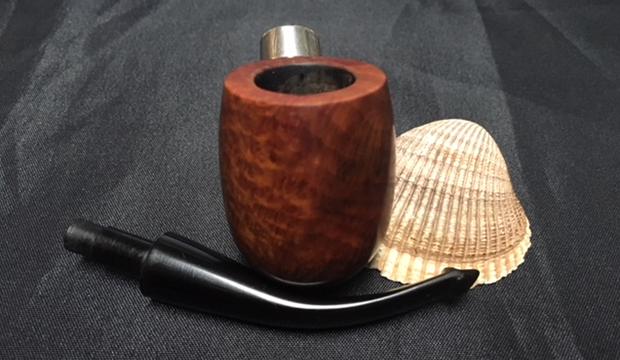
He took some photos of the rim top and bowl from various angles to give me a clear picture of the condition of the rim top and bowl. It is quite clean and the inside of the bowl is lightly caked. He included photos that show the top and underside of the stem. It is as described above. 
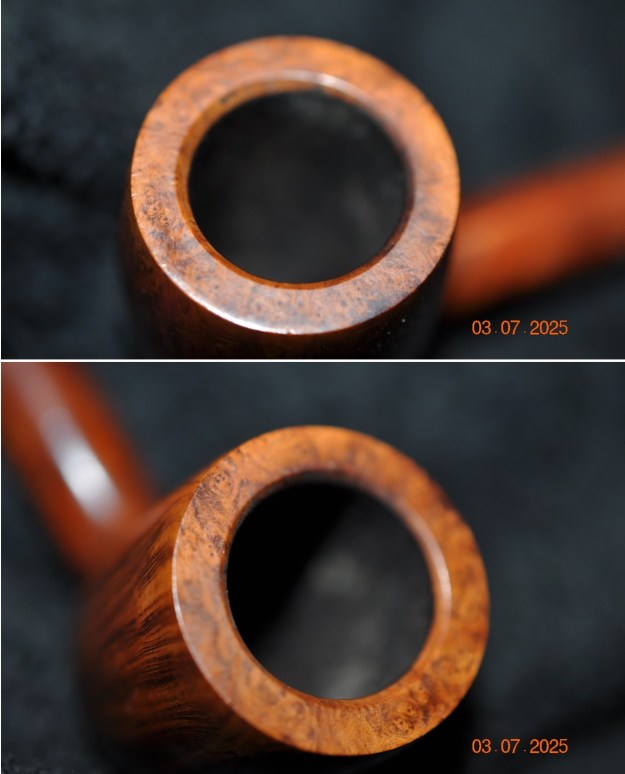
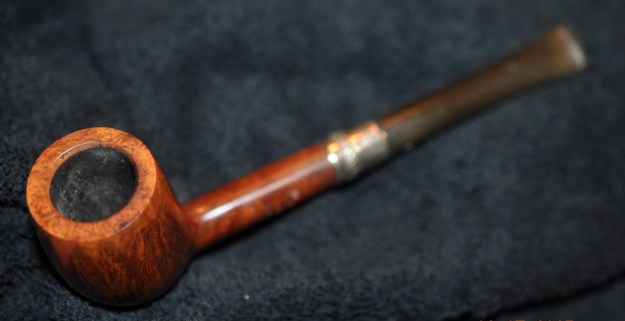
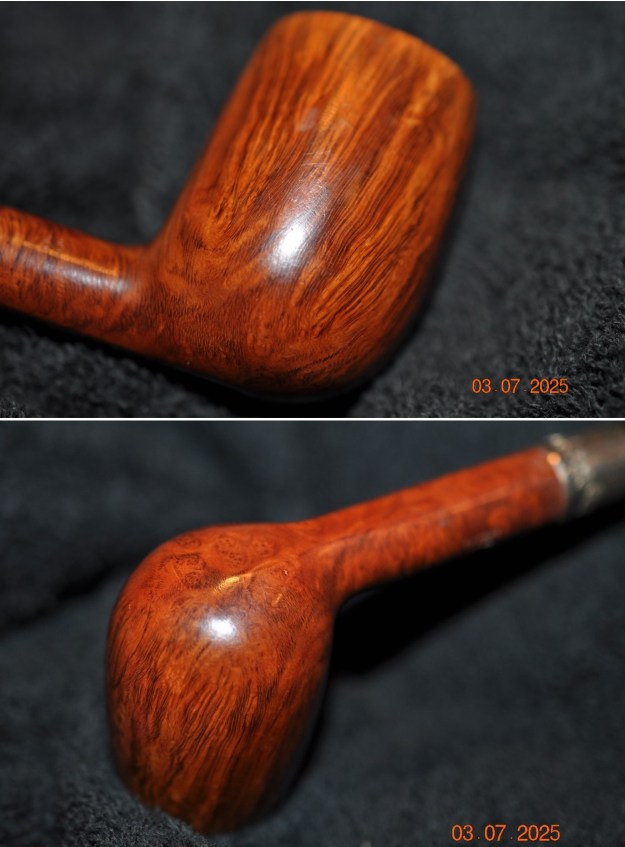
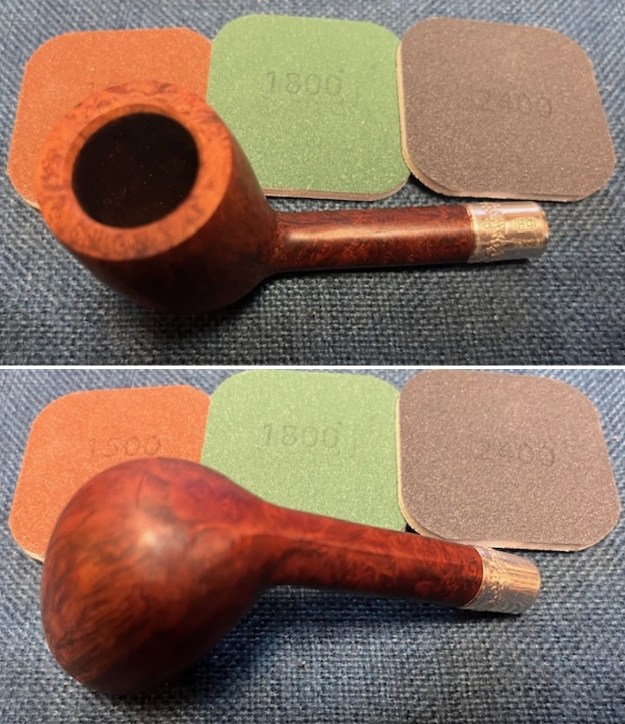
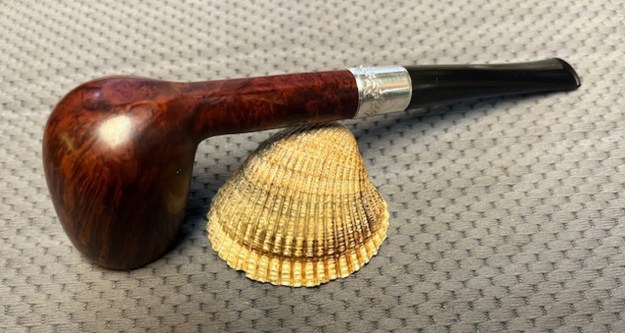
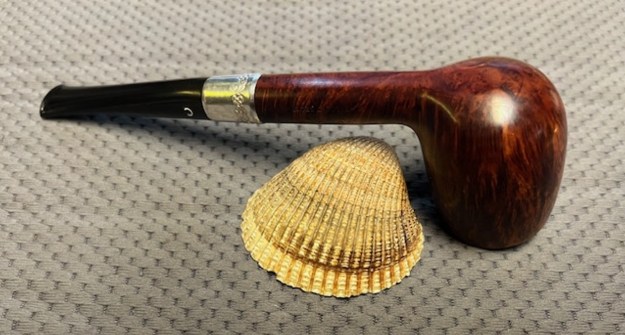
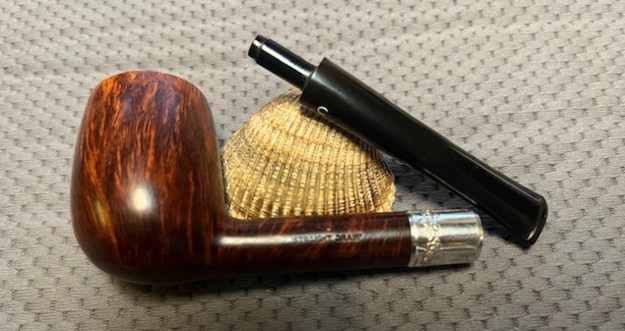
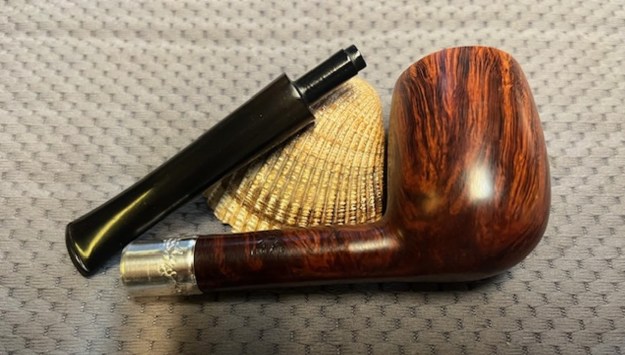
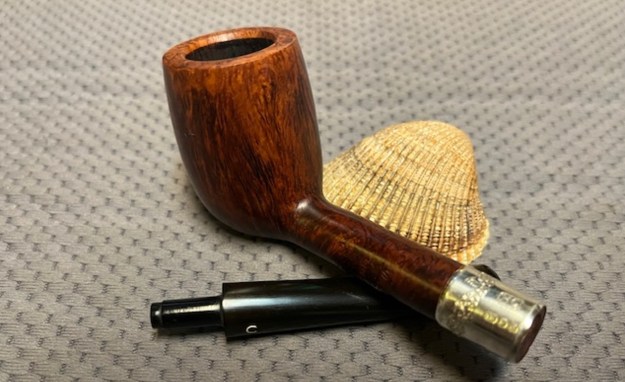
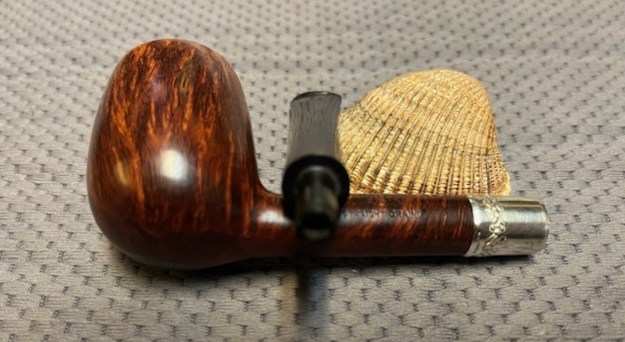
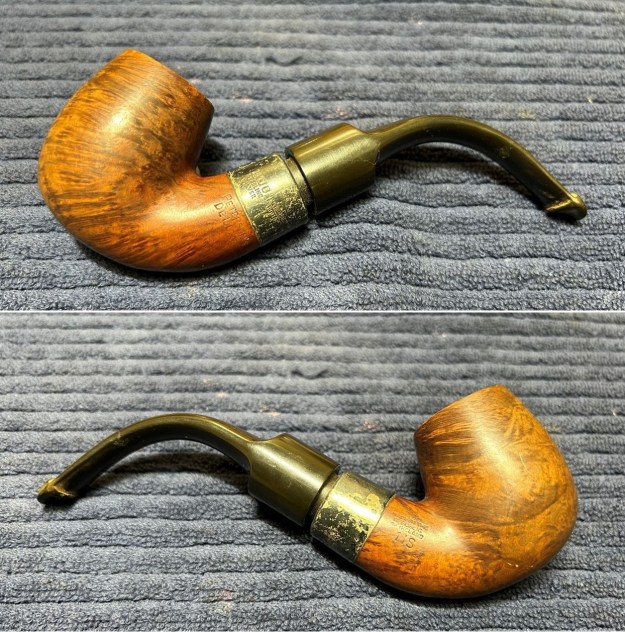
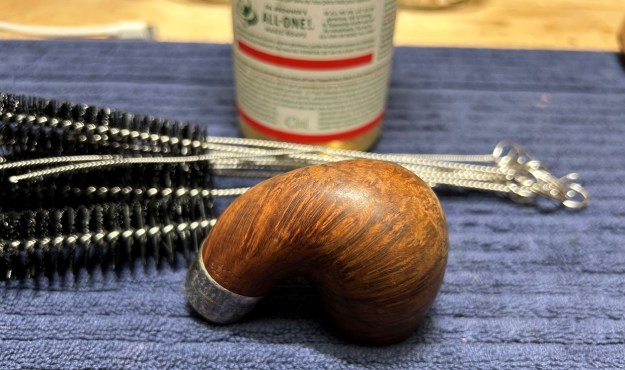
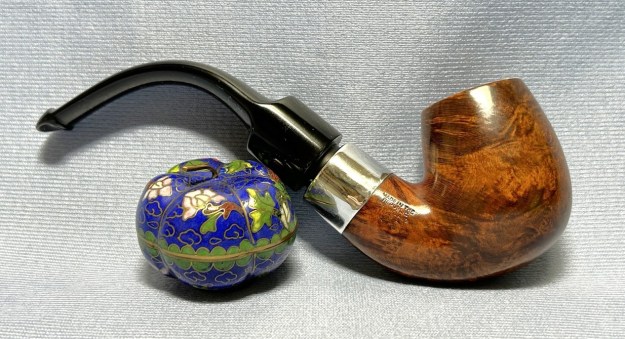
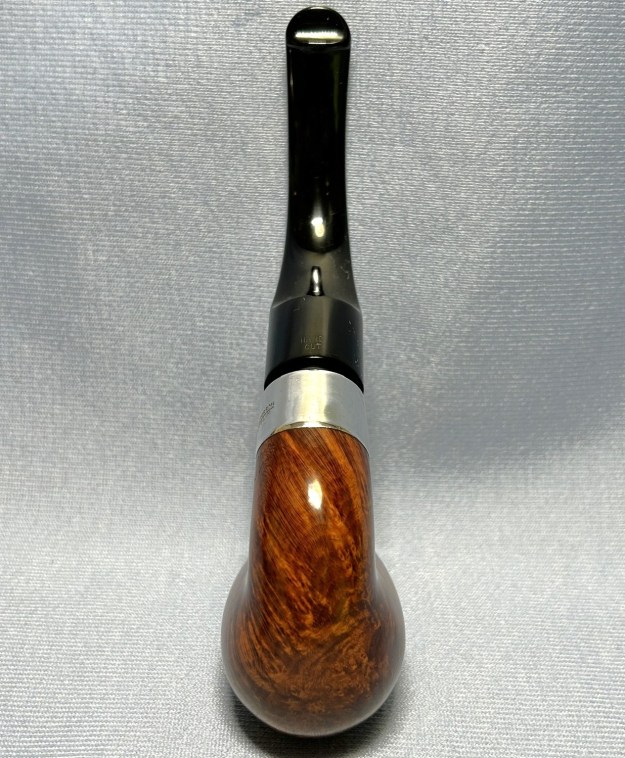
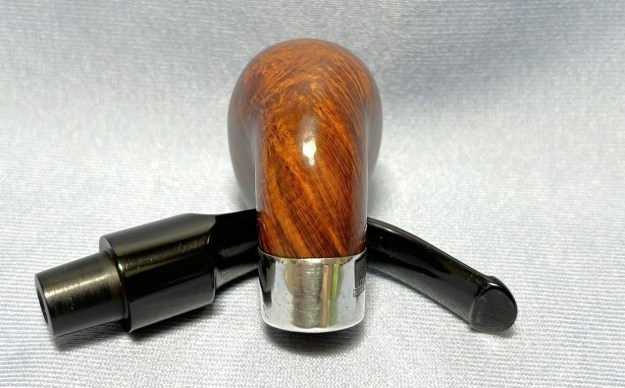
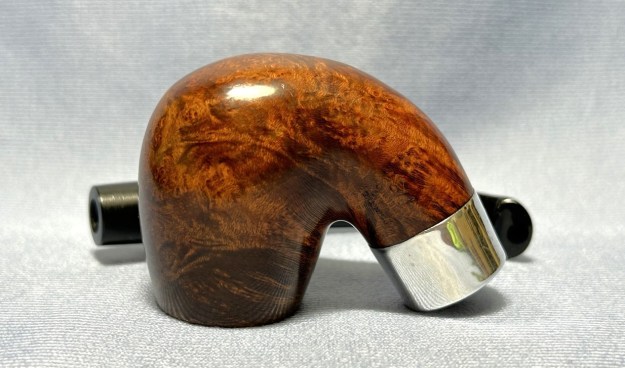
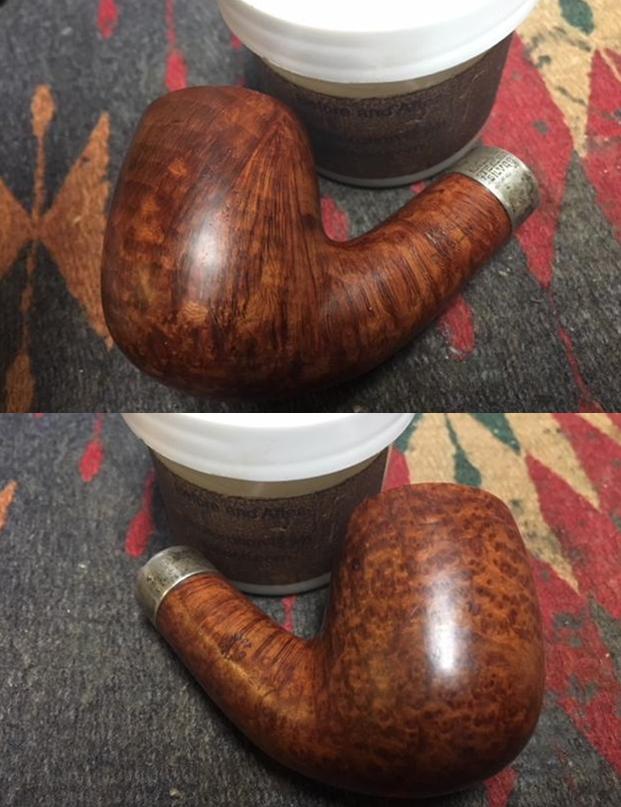
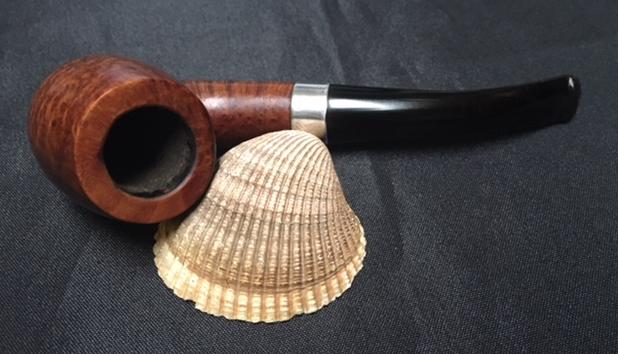
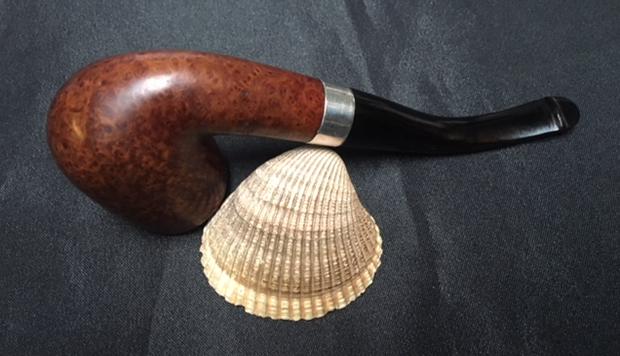
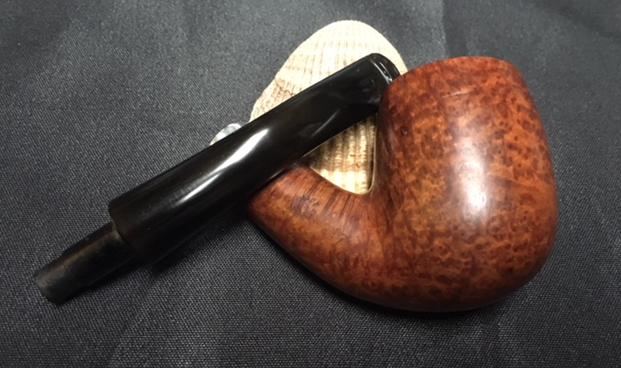
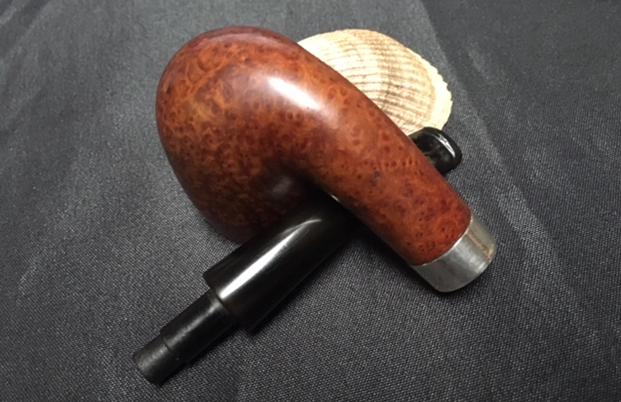
Jeff took some photos of the sides and heel of the bowl to show the condition of the finish on the pipe. The photos showed some great grain around the bowl and shank even with the grime in the finish. It is a great looking piece of briar. 
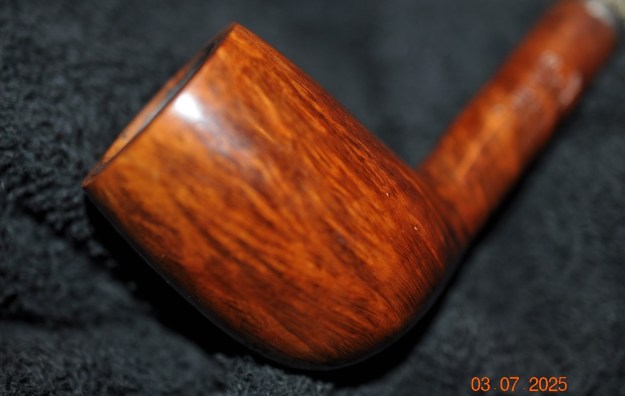
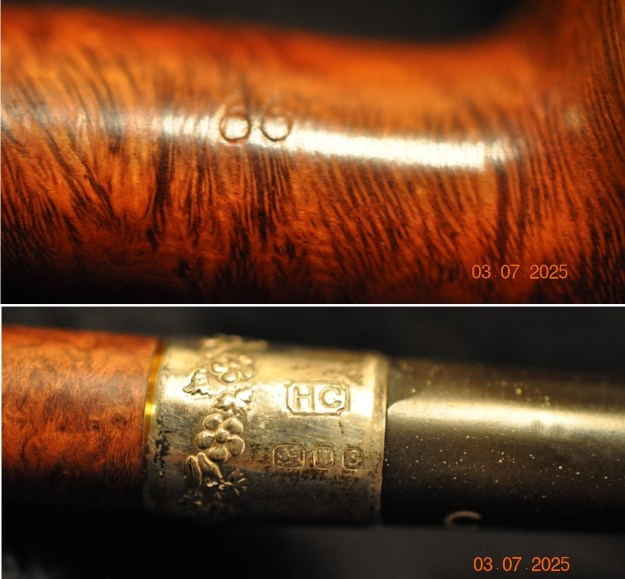
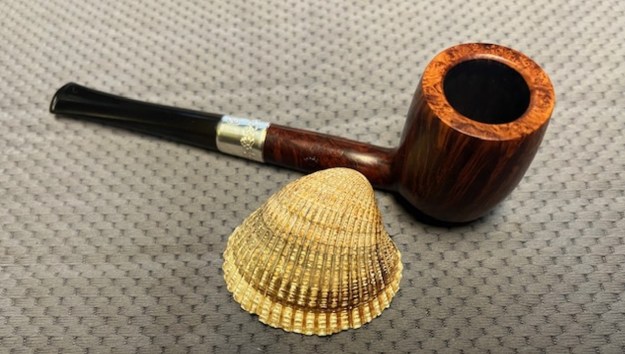
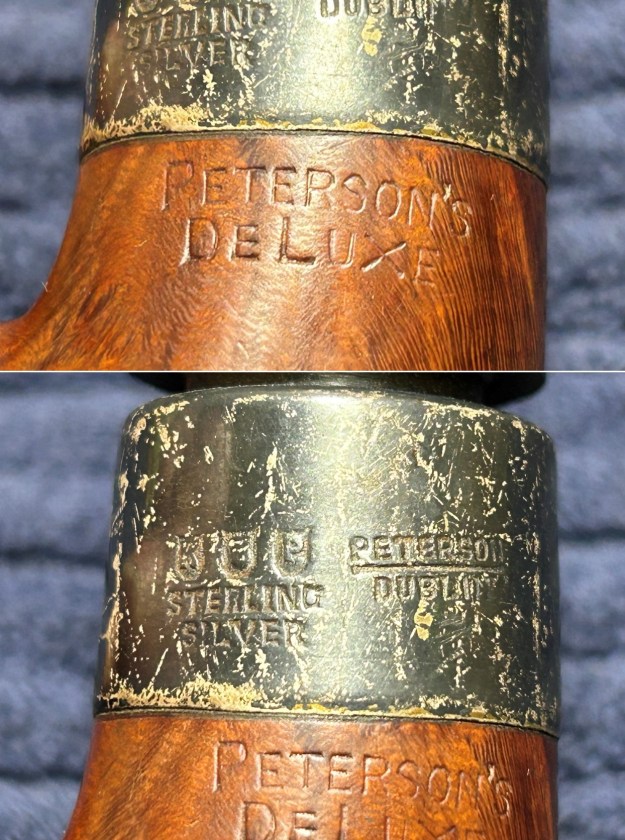
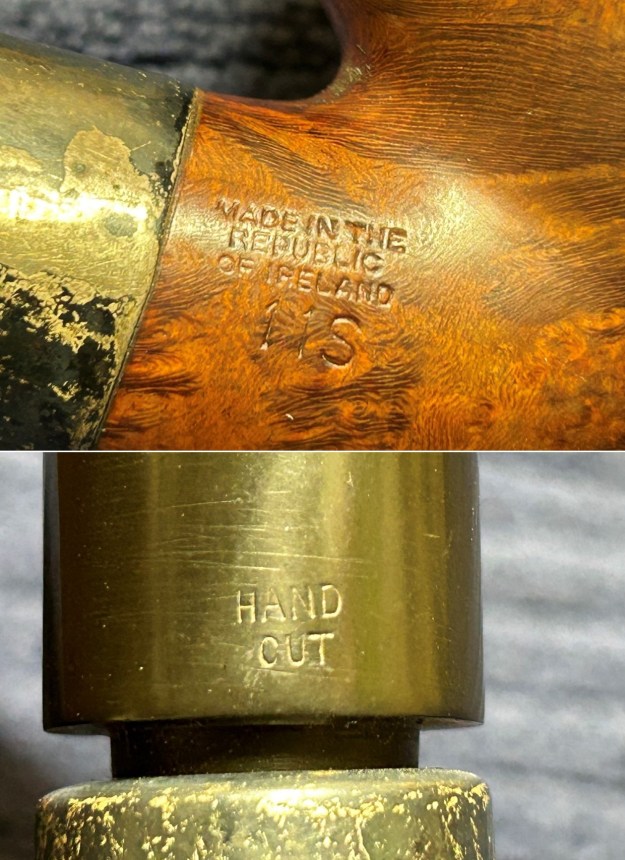
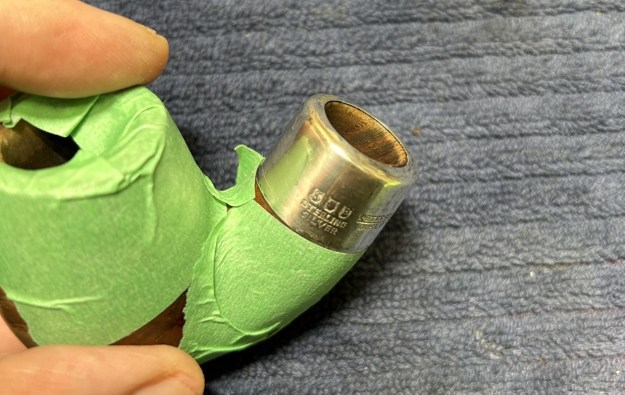
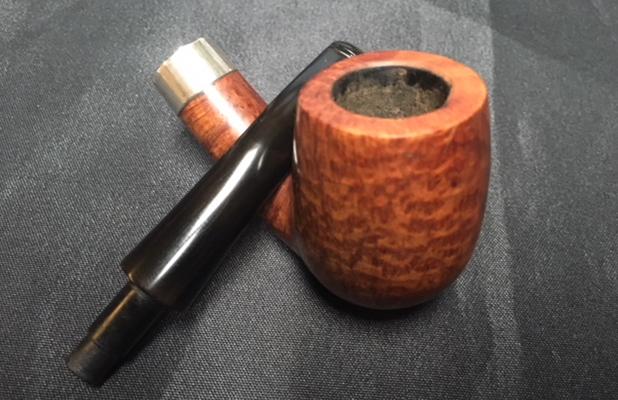
He took photos of the stamping on the sides of the shank. It was clear and readable as noted above. He did not capture a photo of the G stamp on the underside of the shank. He also captured the stamping on the silver band on the shank end. It is also clear. The silver is hallmarked which should help with dating this pipe. 
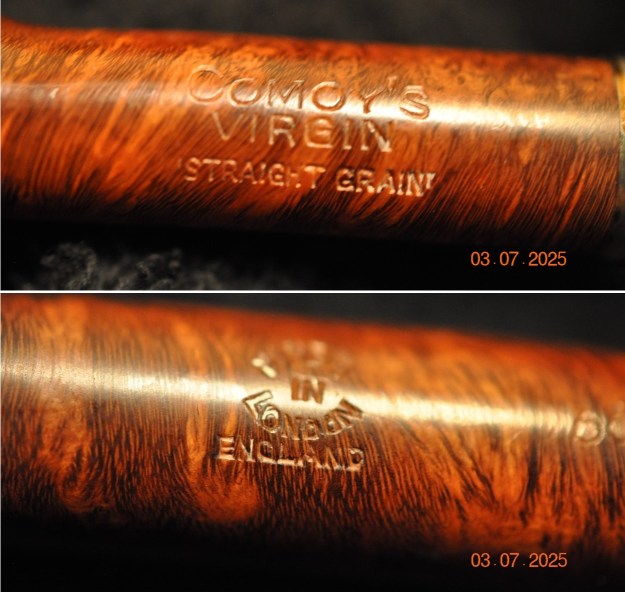
I looked on Pipephil’s site for information on the Comoy’s Virgin Straight Grain line and found the following information on pipes stamped Virgin Briar. I have included a screen capture below (http://www.pipephil.eu/logos/en/logo-comoy.html). It is interesting that the Virgin Briar originally came out in 1933 and by 1965 was no longer listed in the Comoy’s catalogues. It is different from the one I have as it is not stamped Virgin Briar and the Comoy’s is not arched but the C on the stem is similar in terms of thinness.
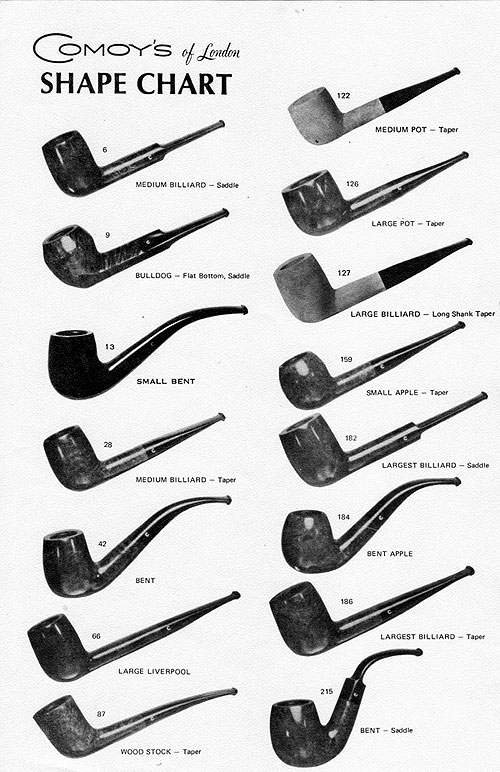
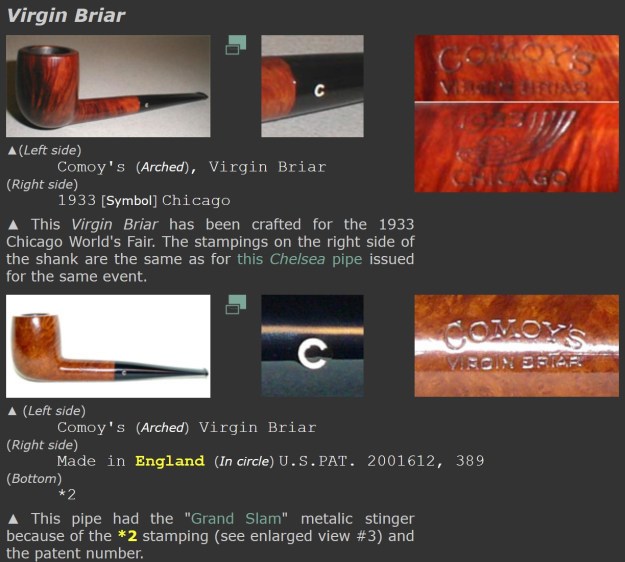
I also went to the the Comoy’s article on Pipedia and found nothing in the great historical article that was pertinent. I did find a shape chart that listed the 66 as a Large Liverpool. I have included a screen capture of the page that included that shape number. I have outlined it in red in the photo included below(https://pipedia.org/images/d/d7/Shape_Chart_1975_1.jpg).
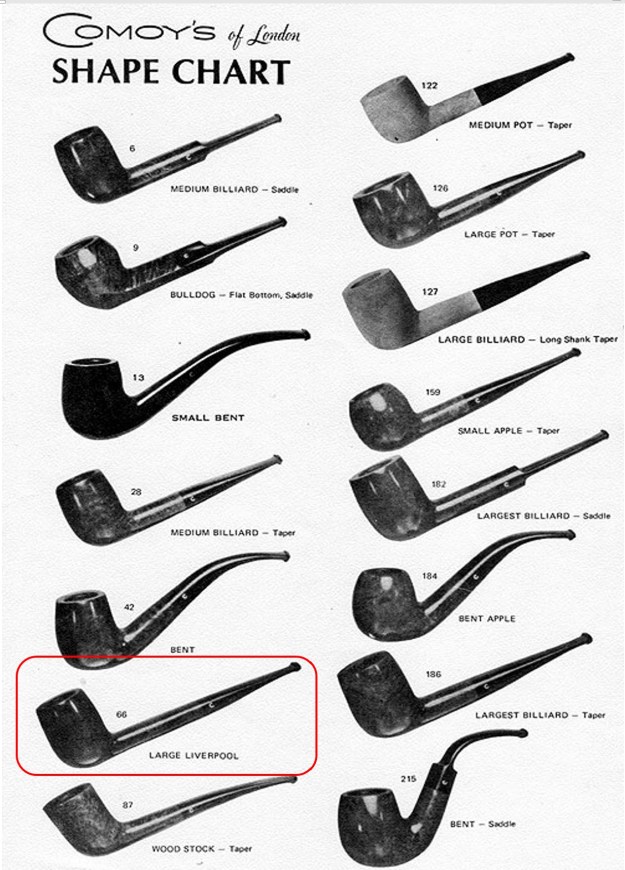
I turned to the article on Pipedia about dating Comoy’s pipes but the style of the stamping (https://pipedia.org/index.php?title=Comoy%27s_Dating_Guide#1917_to_the_end_of_the_1930.27s_.28at_least_1938.29). I have included the section in the screen capture below that date this pipe to the 1930s.

From the 1950s – Now the Comoy’s stamp can be found in three variants:

  1. A simple block-letter style without serifs but with the C larger than the other letters and the apostrophe before the “S”.
  2. A return to the slightly more fancy block letters with serifs and the apostrophe. (It seems that some grades carried different stamps, or at least that the stamping changed in different years for some grades.)
  3. A simple block-letter style without serifs and without the apostrophe and with the “C” the same size as the rest of the letters. This stamp was probably not used very long.
  4. A simple block-letter style without serifs but with the apostrophe before the “S” and with the “C” the same size as the rest of the letter

Made in London England

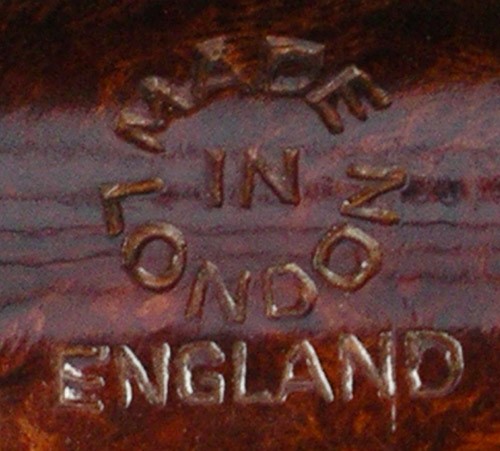
Appears in two versions. This is again stamped in a circle with “MADE” at the top, “IN” in the middle, and “LONDON” at the bottom, with “ENGLAND” in a straight line beneath. It can be assumed that this stamp was first used in the export drive in the early 1950s. On a Bulldog Sandblast from the early 50s the Comoy name no. 2 above was used together with “MADE IN LONDON” over “ENGLAND”. There are no known examples of pre-WW II Comoy’s stamped in this way. The second version is the same as above but in a “rugby ball ” shape. This shape is verified on Comoy´s “Extraordinaire” pipes.

 That article gave me some helpful information. I knew that the pipe the stamping on the shank of the pipe dated as post 1950. The 1950s stamping of the Comoy’s stamp was as noted above. The 66 shape number was tied to a Large Liverpool with a taper stem. I still needed to check on the Silver hallmarks but so far I had some progress.

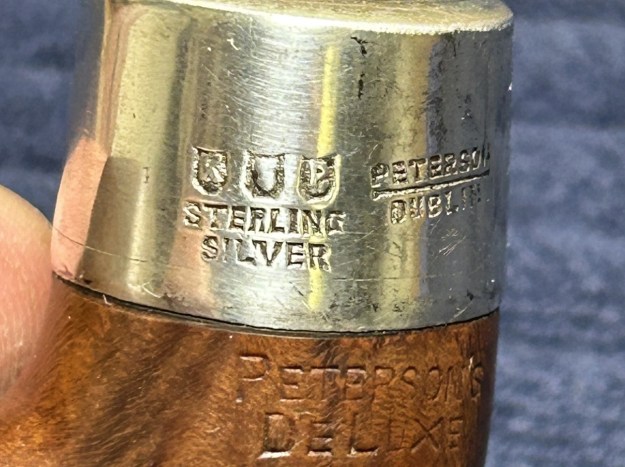
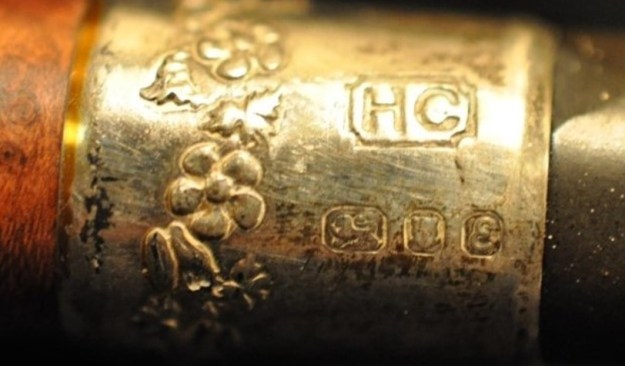
Now to look at the silver hallmarks. The hallmarking system in England comprises a series of symbols and numbers, including letters, numbers, and symbols that indicate the silver’s purity, the date of manufacture, and the location where the item was hallmarked. Each hallmark includes several symbols, such as the maker’s mark, standard mark, assay office mark, and date letter. The first on this silver band is the Rampant Lion which signifies the quality of the Sterling Silver in the band. The second is a leopard’s head which signifies the city of London, England as the location of the assay office. The third hallmark is the letter E in an italicized cursive style script that helps establish the date of the silver. The HC in the box above the hallmarks is the silversmith’s initials and in this case are those of Henri Comoy.

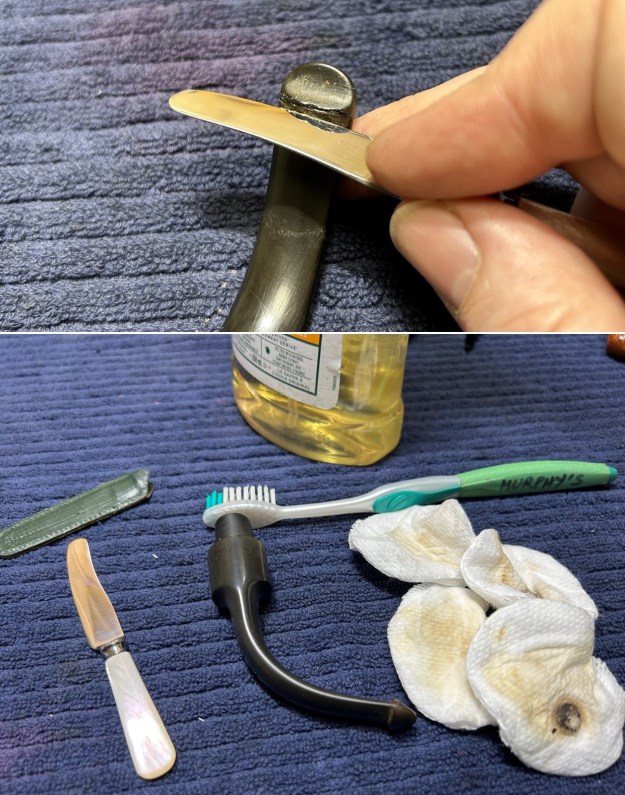
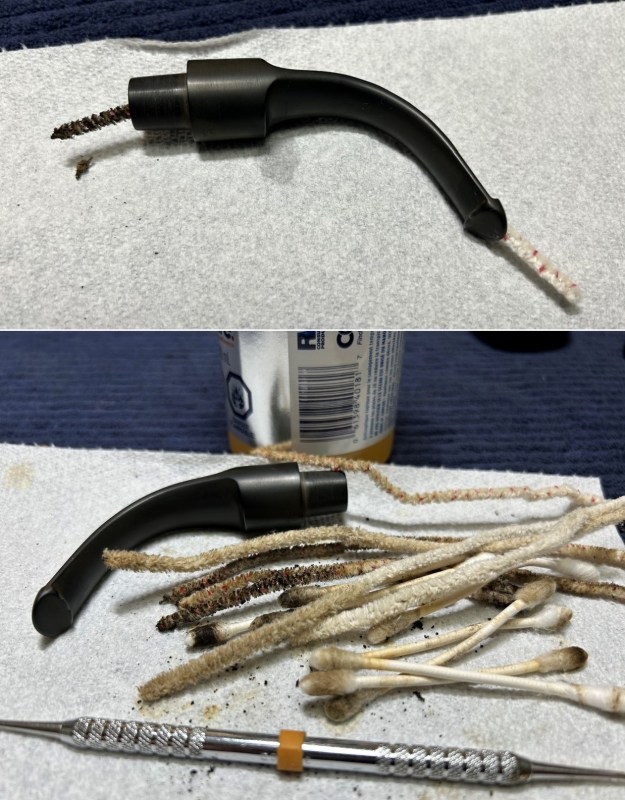
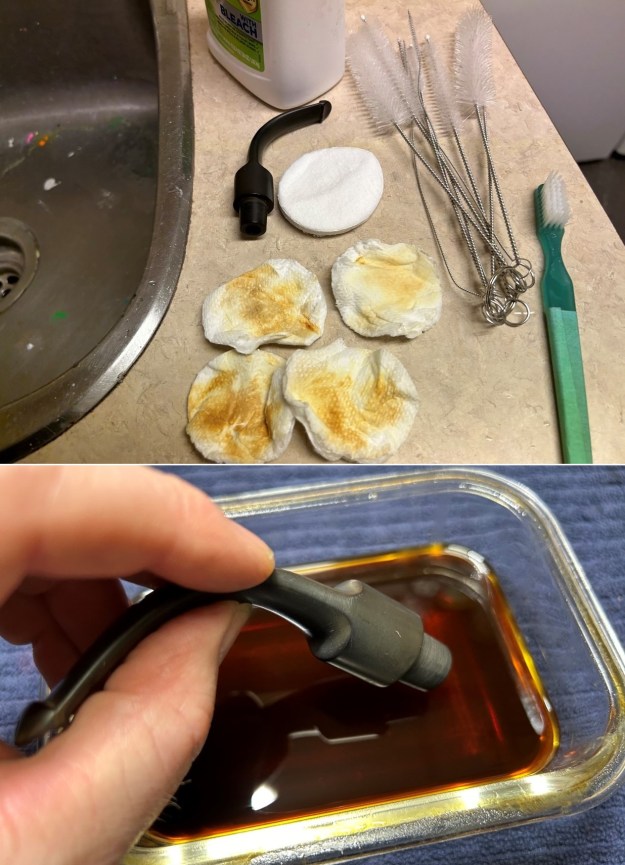
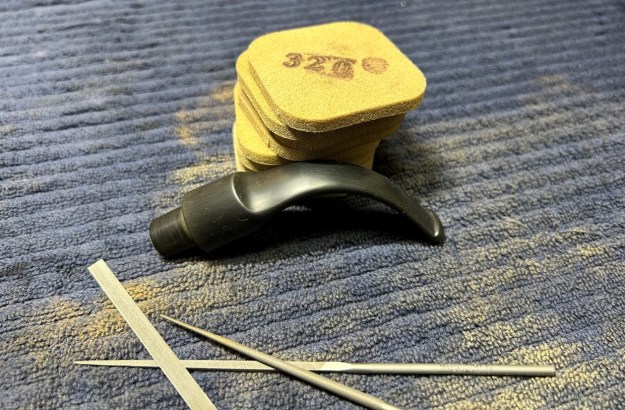
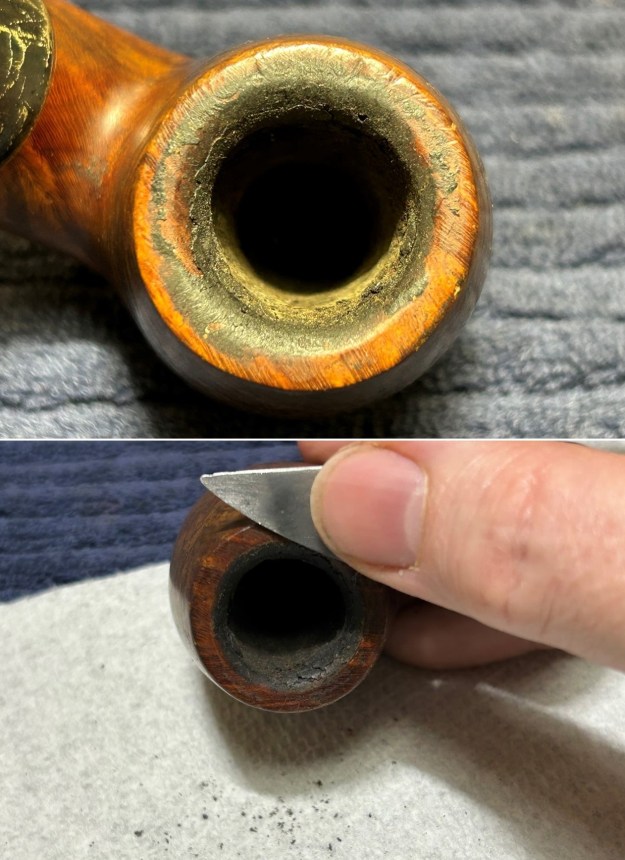
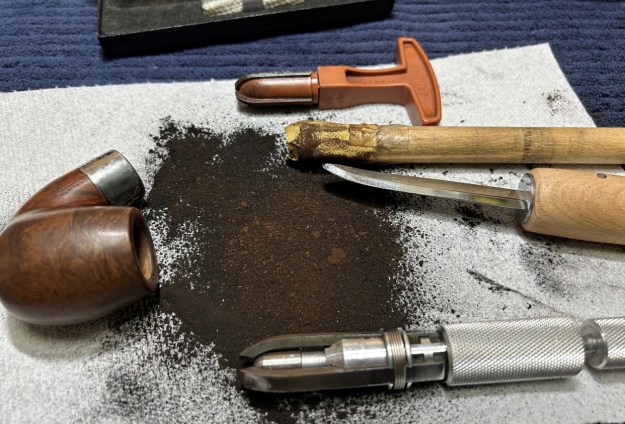
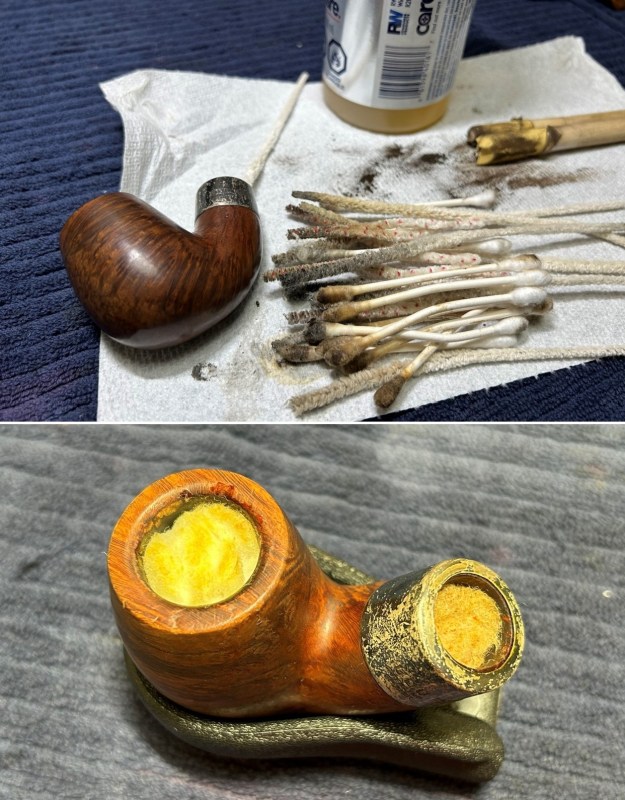
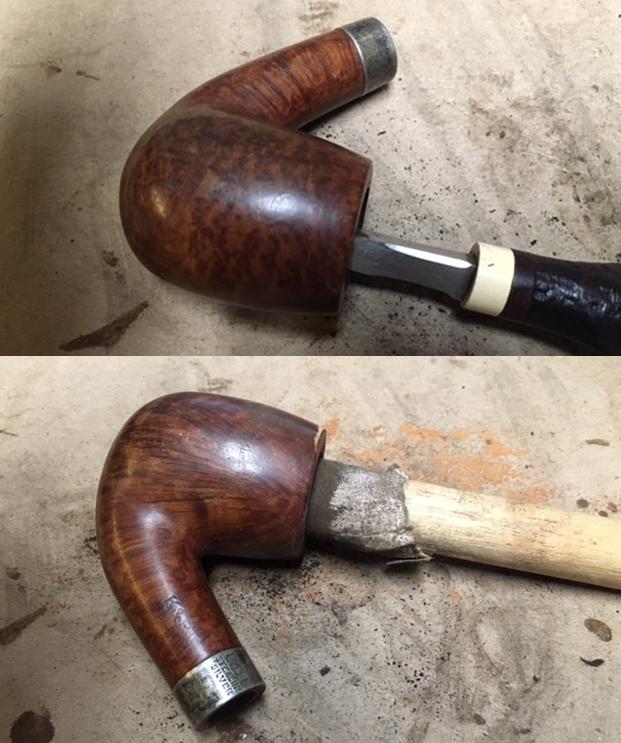
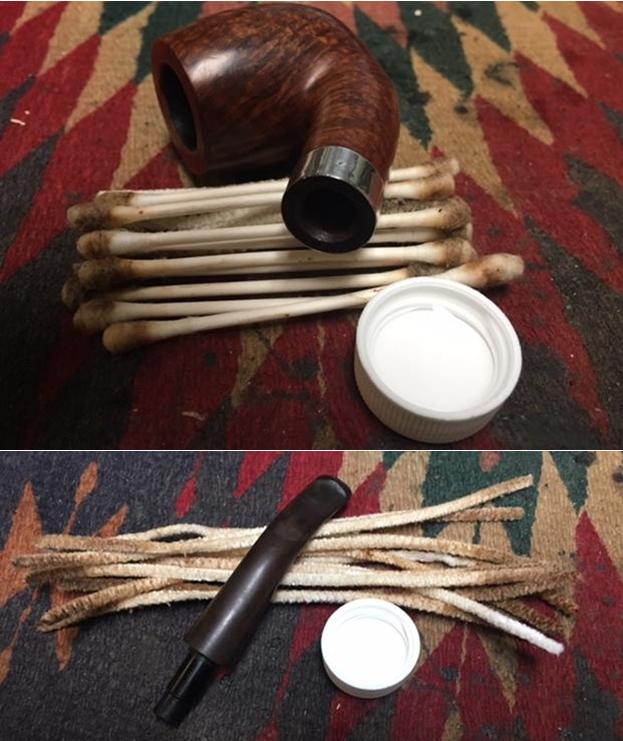
I turned to a blog on Historic Hallmarks – London 1678-2019 to determine the date of this pipe (https://huntvintage.co/blog/how-to-identify-silver-marks). I drew a red box around the date on this one – it is from 1979 as the hallmark matches the style of the E below.
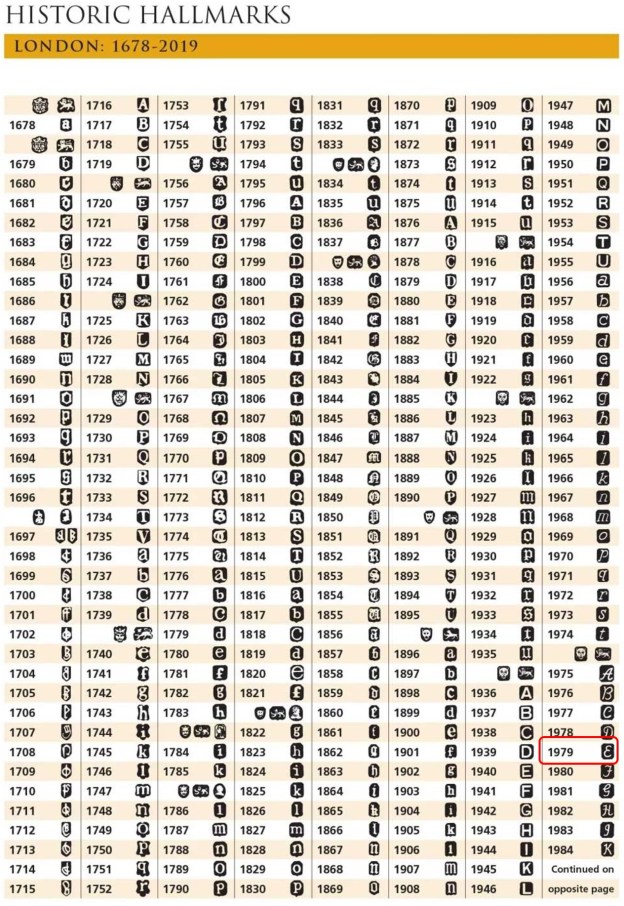
Since Jeff always follows the same pattern of work in his cleanup we do not include photos but rather just a simple summary. Jeff reamed the bowl with a PipNet pipe reamer and followed up with a Savinelli Fitsall pipe knife to remove the cake. He scrubbed out the mortise and the airway in the shank and the stem with alcohol, cotton swabs and pipe cleaners. He scrubbed the exterior of the bowl, rim, shank and stem with a tooth brush and Murphy’s Oil Soap to remove the oils and tars on the rim and the grime on the finish of the bowl. He rinsed it under running water. He dried it off with a soft cloth. He was able to remove the lava build up on the rim top and you could see the damages to the top and edges of the rim. I think this pipe may well been before we worked with Mark Hoover’s Before & After Deoxidizer so he cleaned the internals and externals. The stem was clean but lightly oxidized. I took photos of what the pipe looked like when I brought to my worktable. 
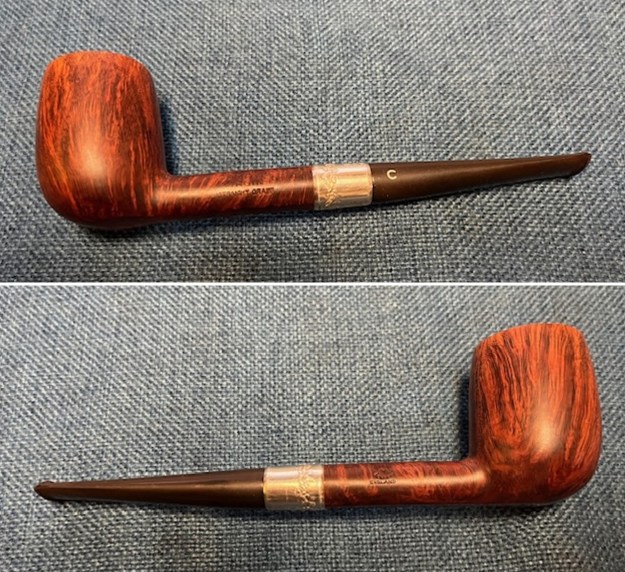
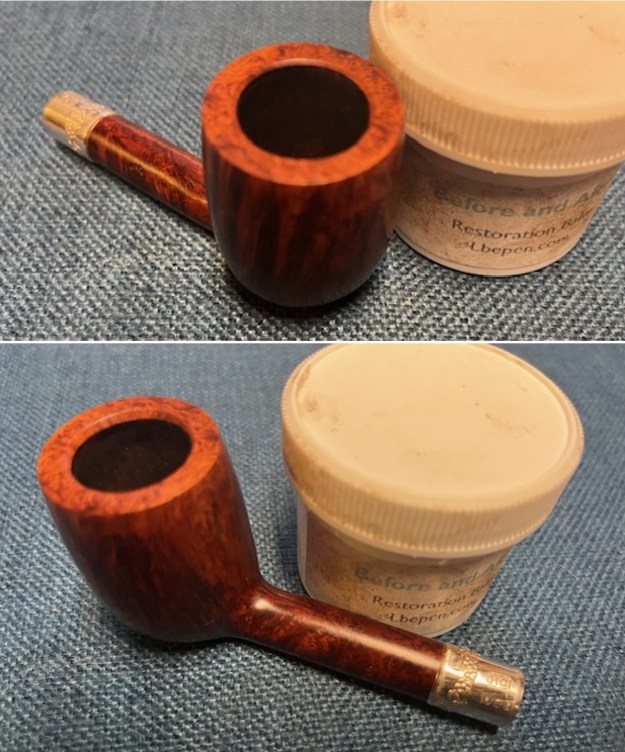
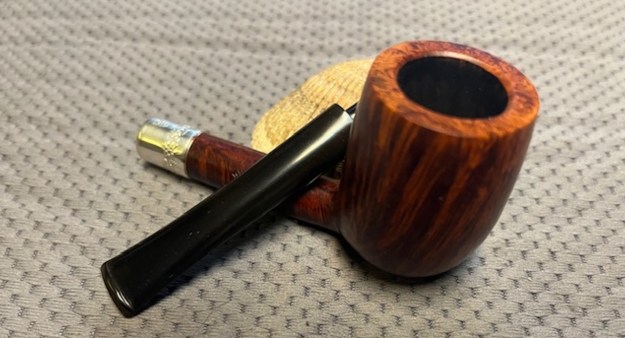
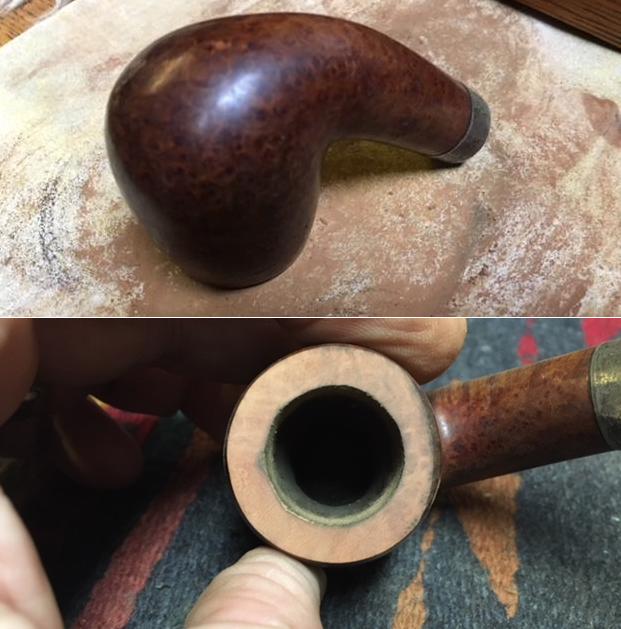
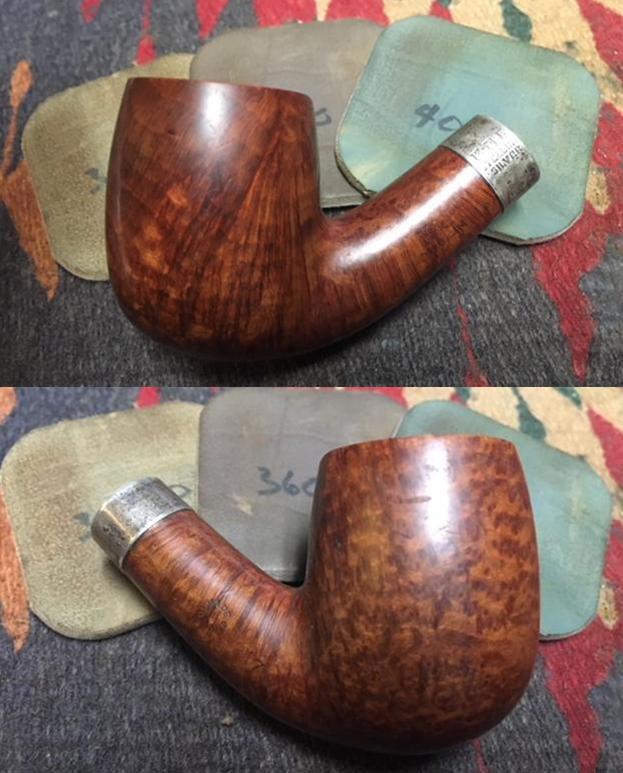
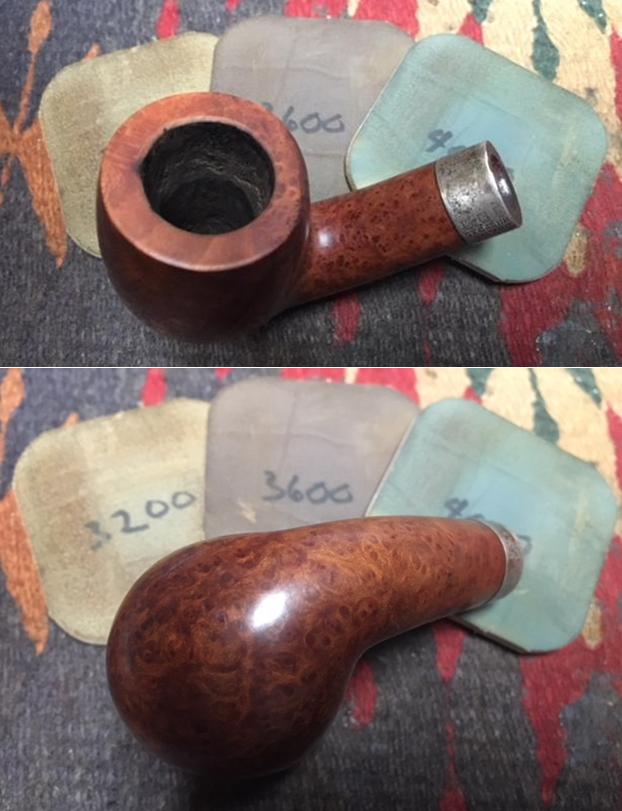
I took close up photos of the bowl, rim top and stem to show how clean the pipe was. The bowl was clean and the rim top and the inner edge look beautiful. The stem was clean and the tooth marks on the topside are visible. The chatter is light and hardly visible.
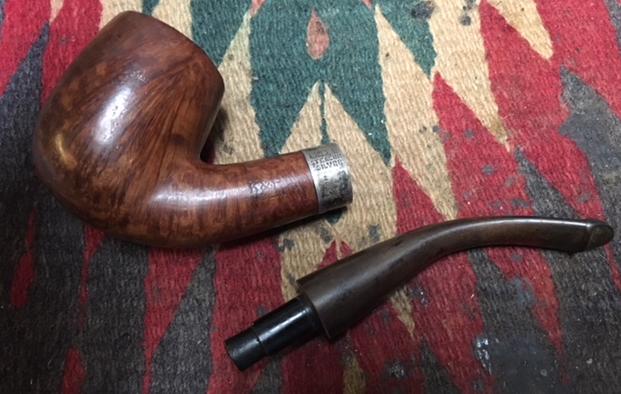
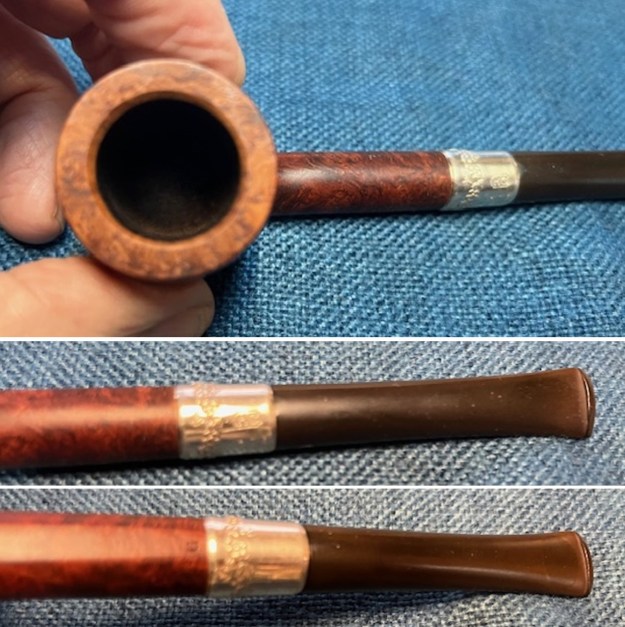
I took photos of the stamping on the sides of the shank. It is very clear and readable and read as noted above. I also removed the stem from the shank and took photos of the pipe to show the look of the parts.
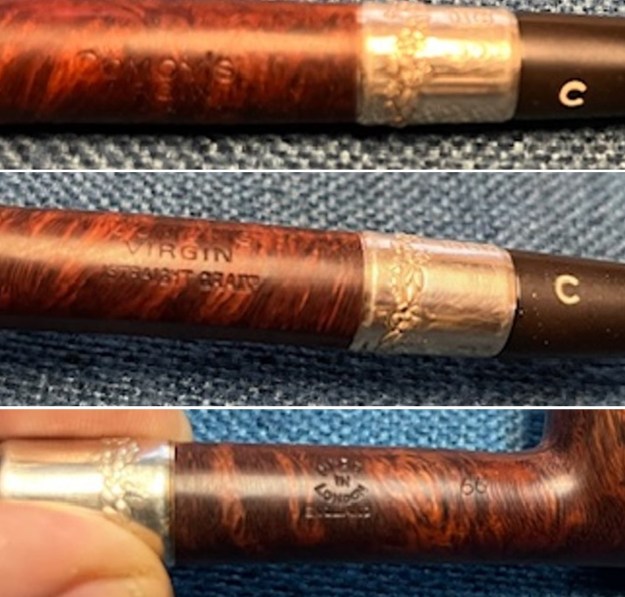
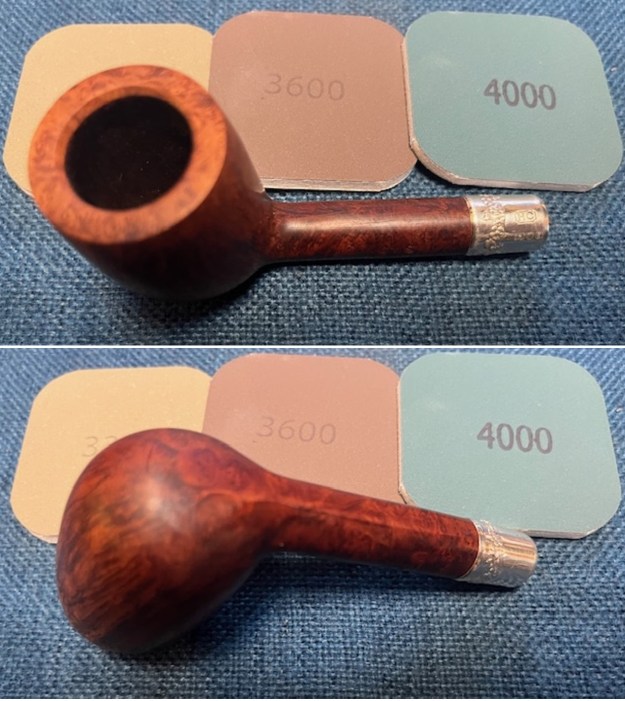
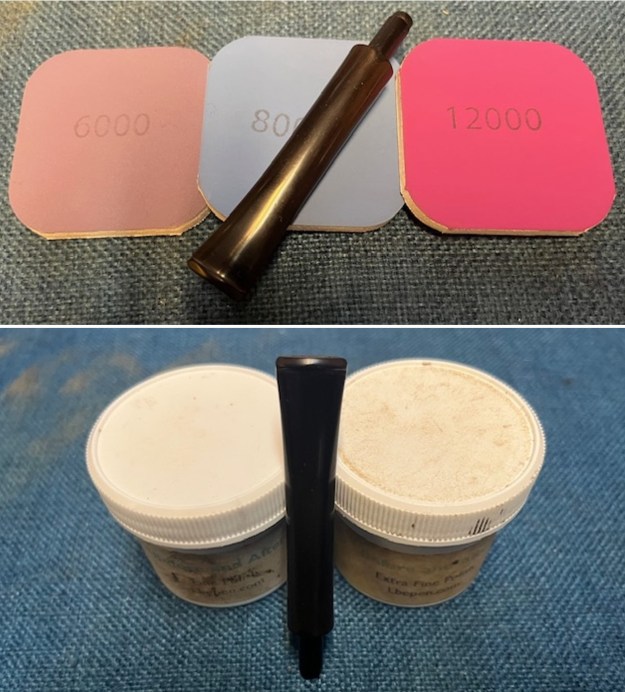
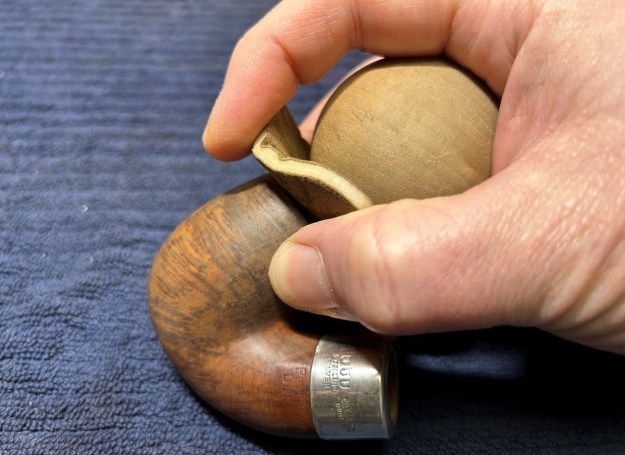
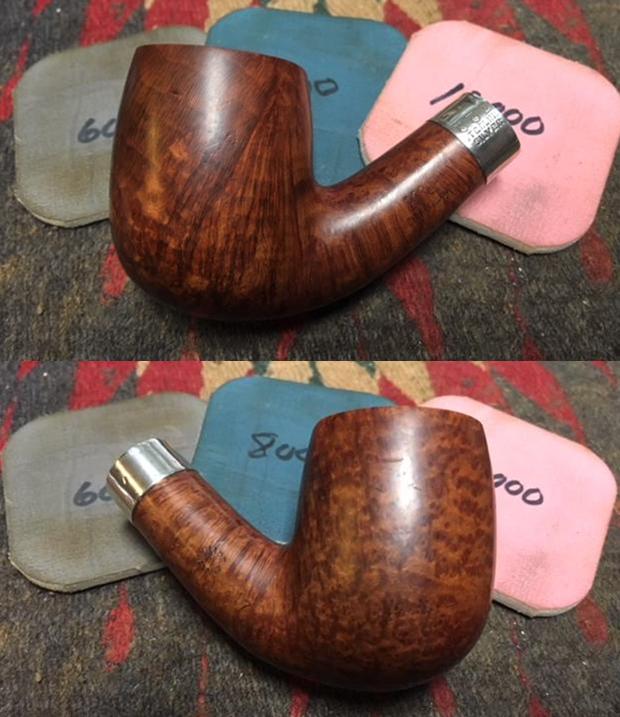
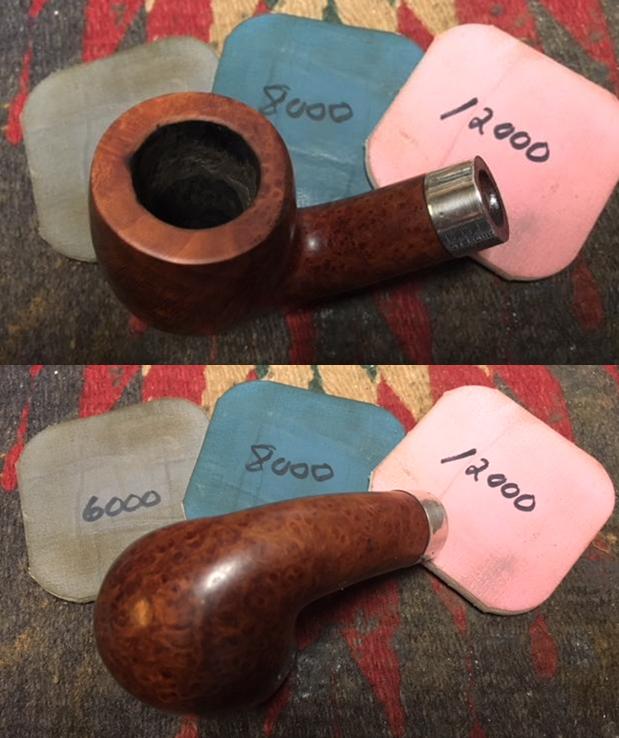
I polished the bowl and shank with 1500-12000 grit micromesh sanding pad – dry sanding it with the pads. I wiped the bowl down with a damp cloth after each pad. It began to take on a deep shine. 
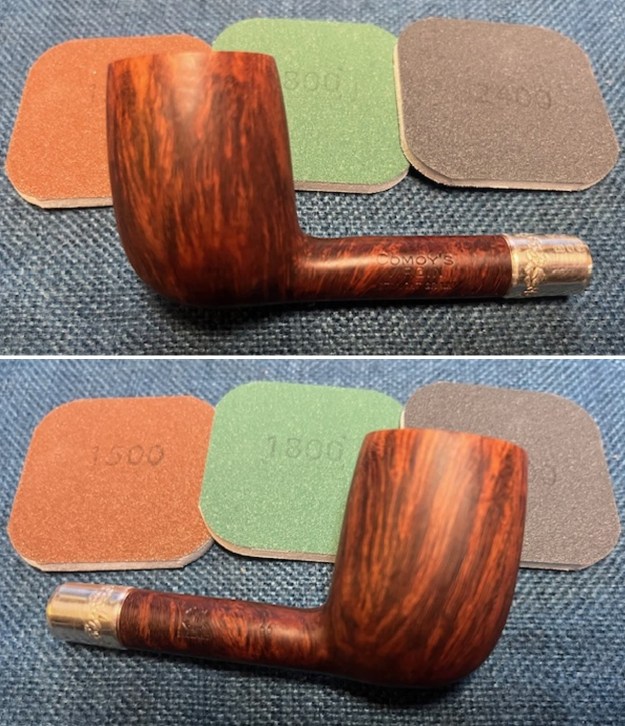
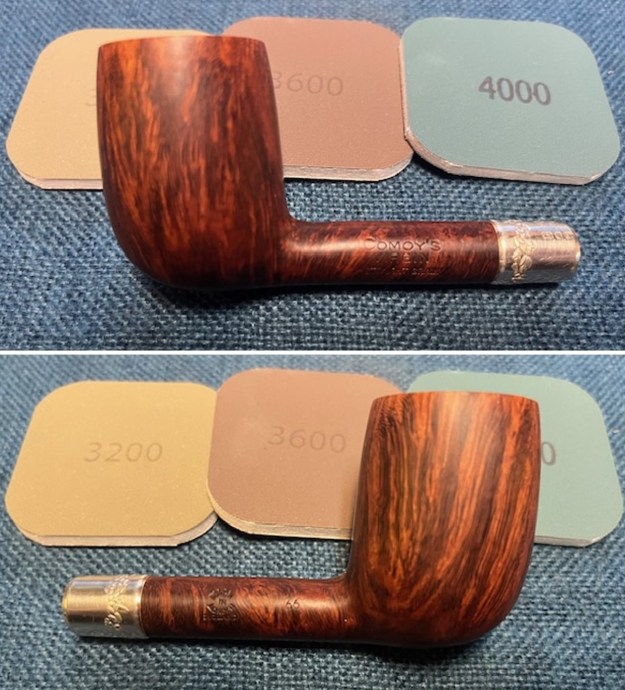
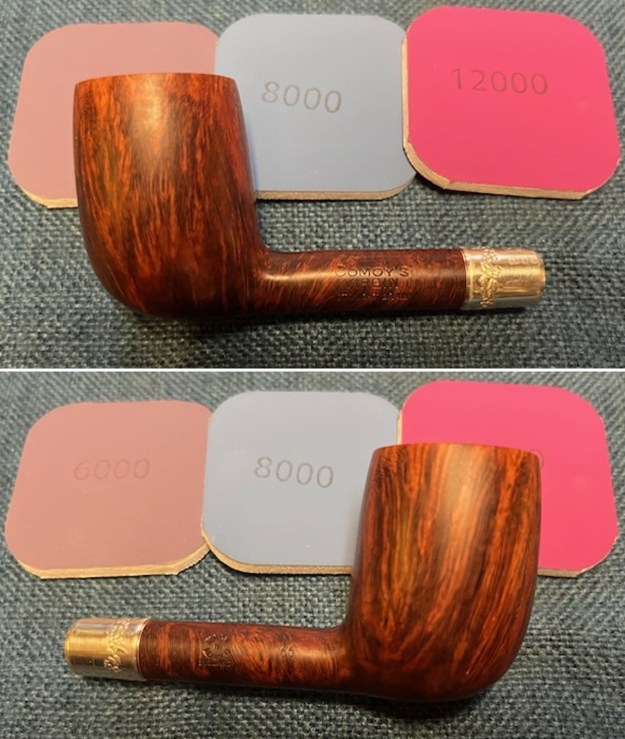
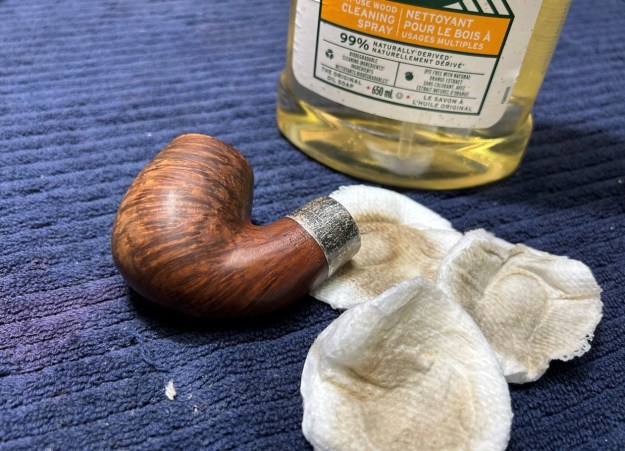
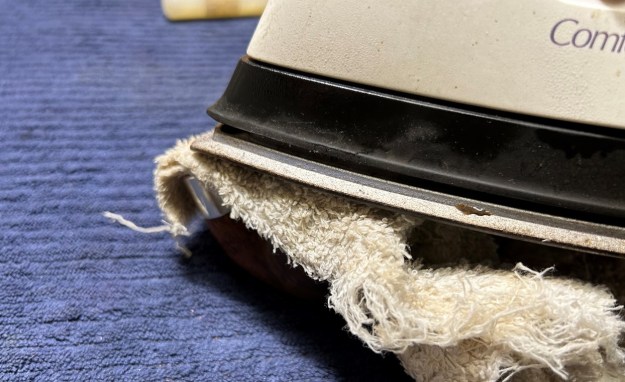
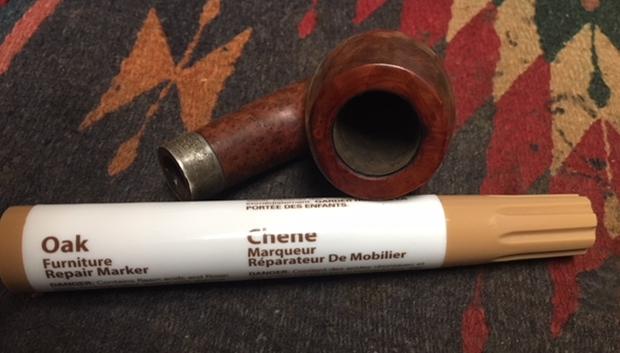
The exterior of the bowl look better after sanding. I worked some Before & After Restoration Balm into the briar with my finger tips. I let it sit on the bowl for 10 minutes and then buffed it off with a paper towel and soft cloth. The product is a great addition to the restoration work. It enlivens, enriches and protects the briar while giving it a deep glow. It is a product I use on every pipe I restore. 
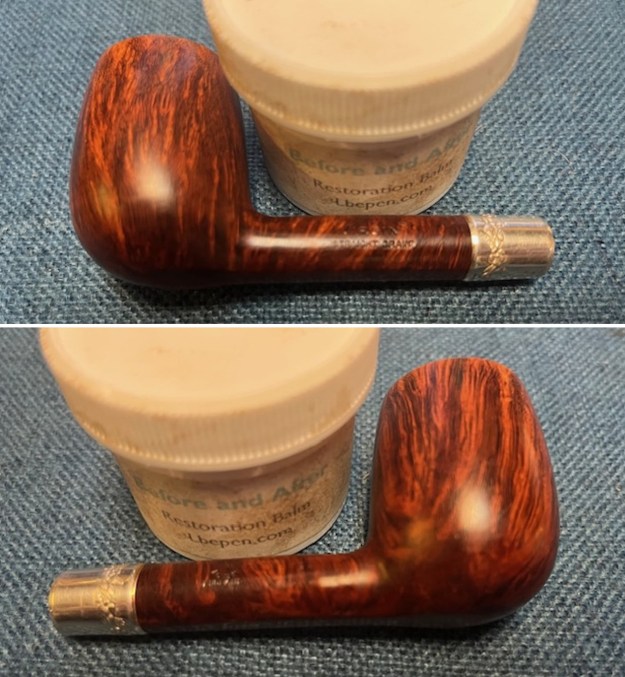
I polished the silver band with a jeweller’s cloth to remove the tarnish and protect the silver from further tarnishing. It really took on a rich shine. 
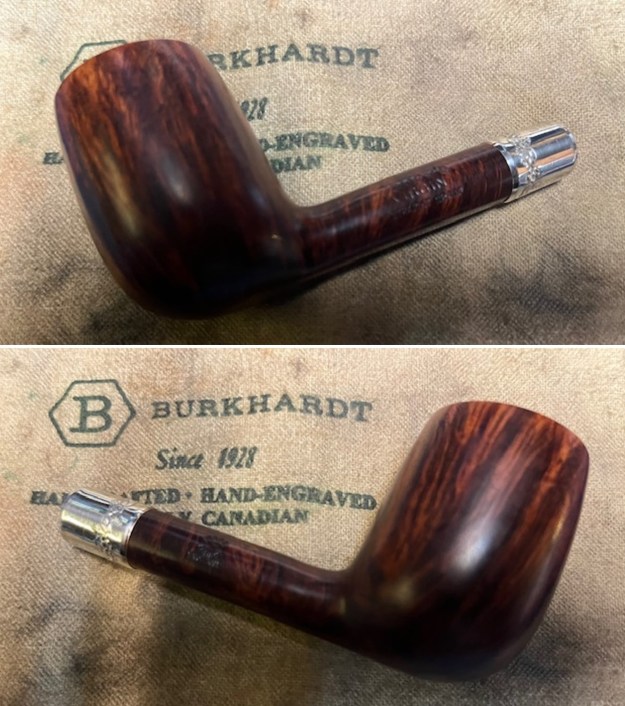
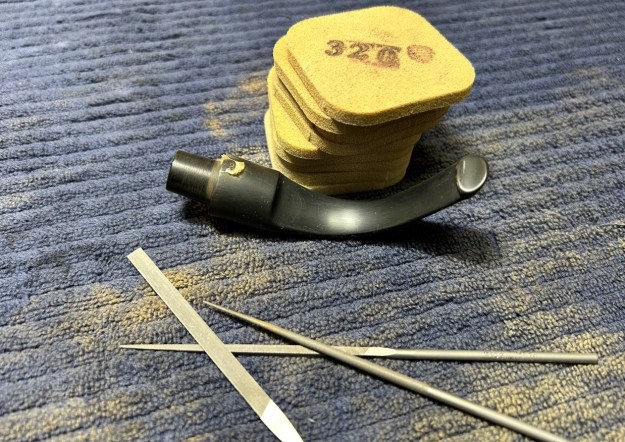
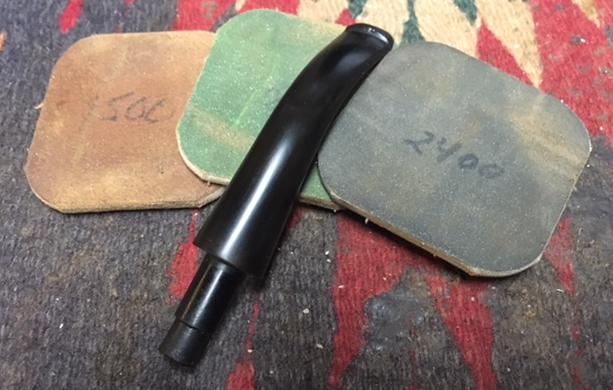
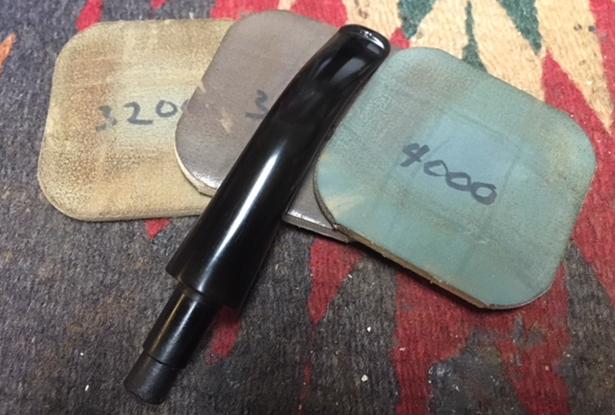
I set the bowl aside and turned to the stem. I sanded the it with 320-3500 grit sanding pads and wiped the stem down after each pad with some Obsidian Oil on a cloth. The shine is coming back beautifully.
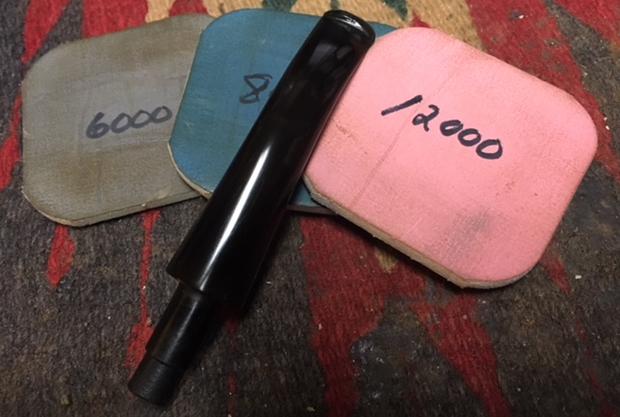
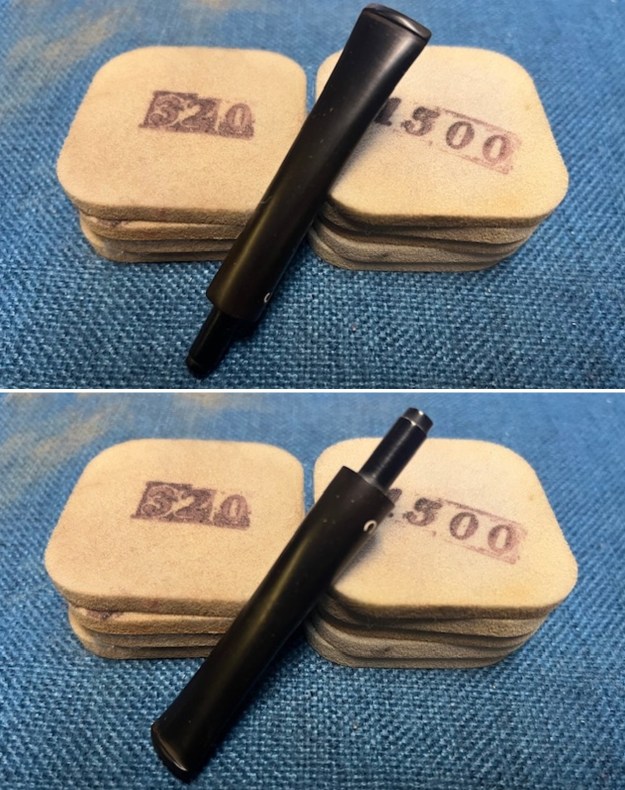
I polished it with micromesh sanding pads – dry sanding with 1500-12000 grit pads and wiping the surface down with Obsidian Oil after each sanding pad. It is really shining. I polished it further with Before & After Stem Polish – both Fine and Extra Fine. I gave it another coat of Obsidian Oil to finish this step. 
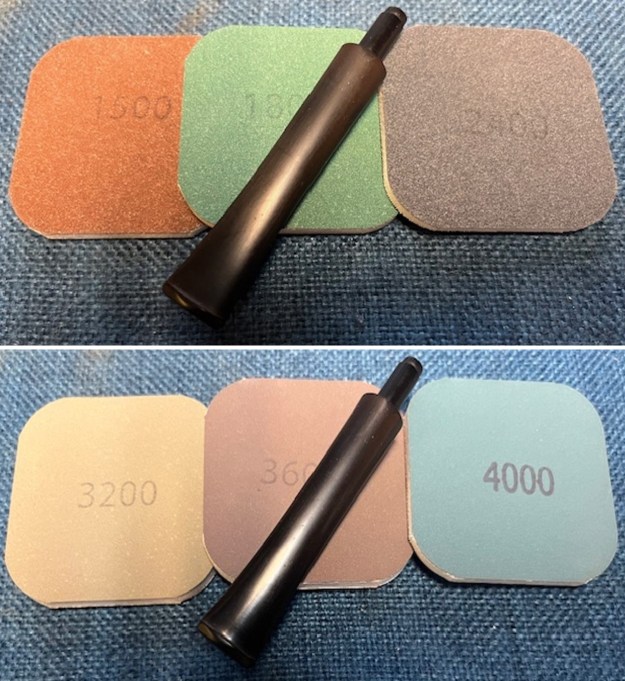
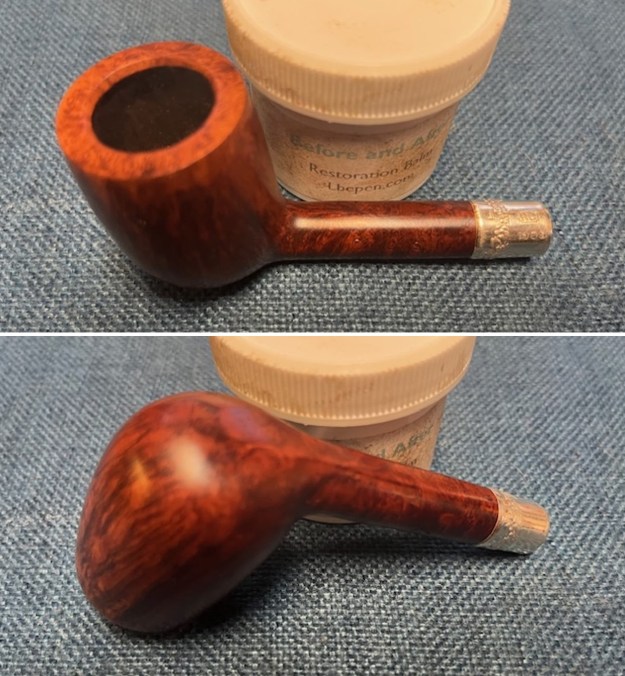
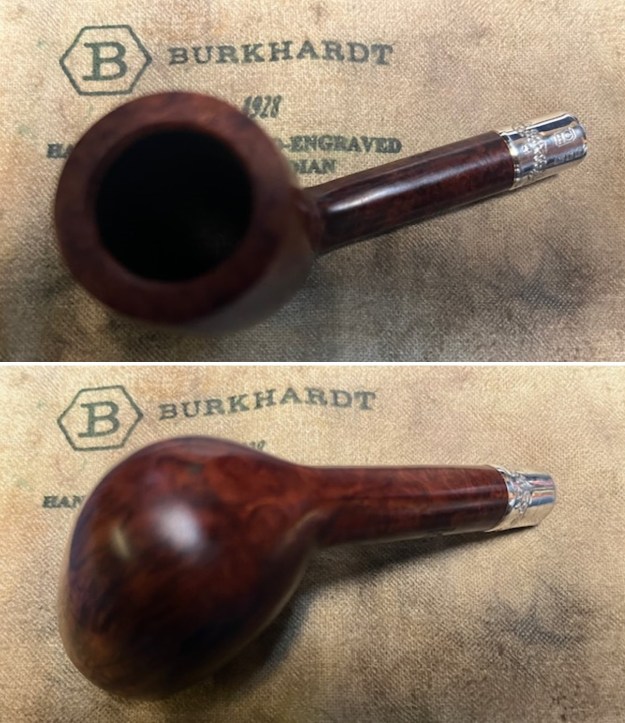
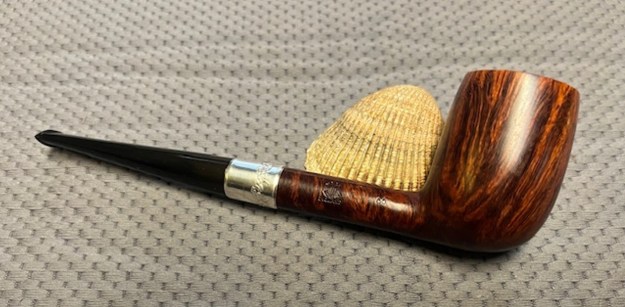
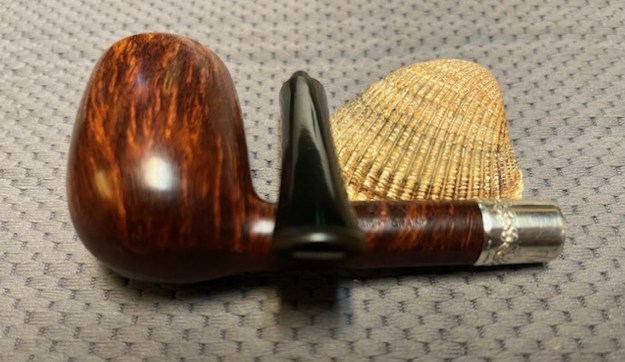
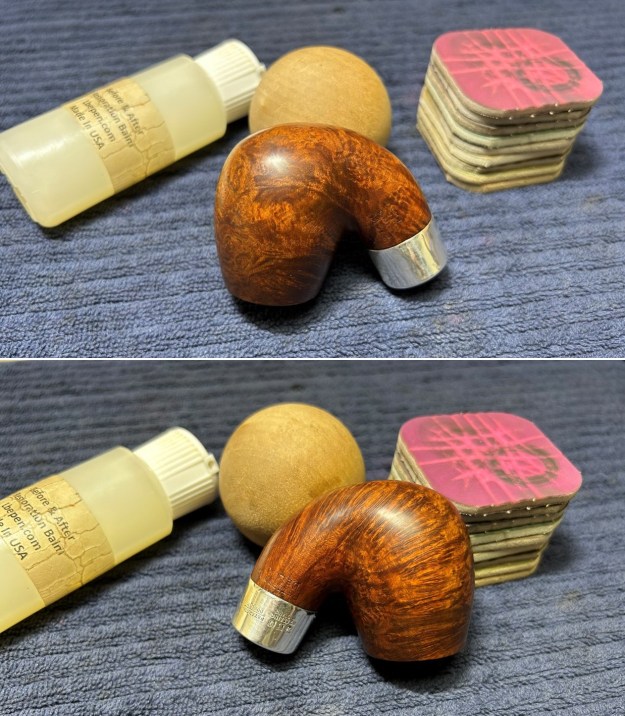
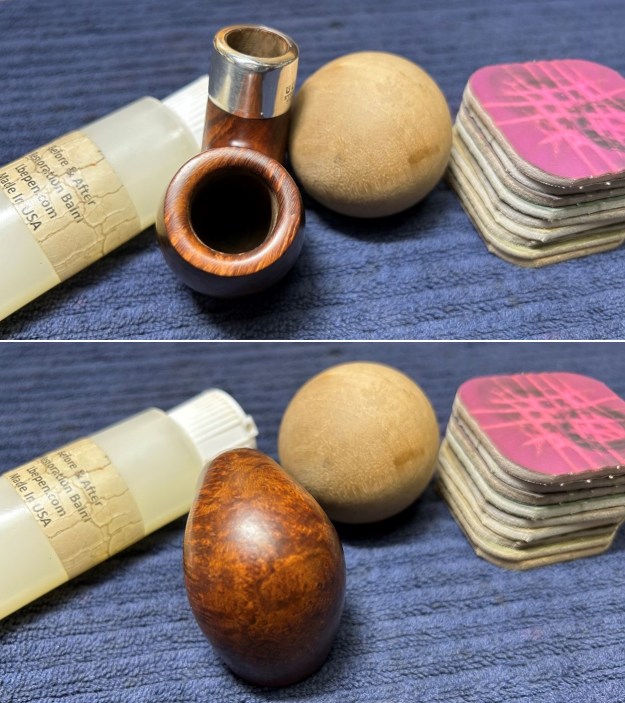
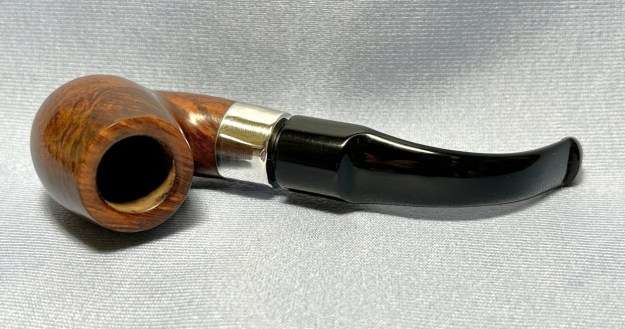
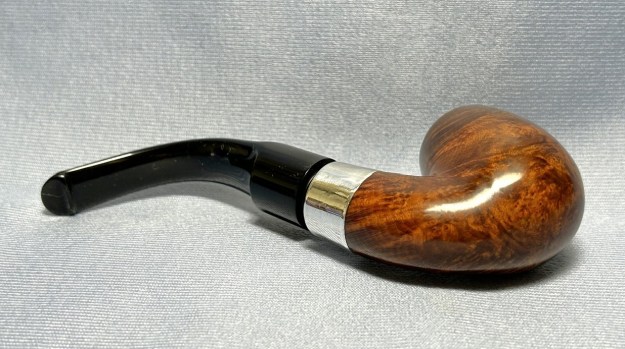
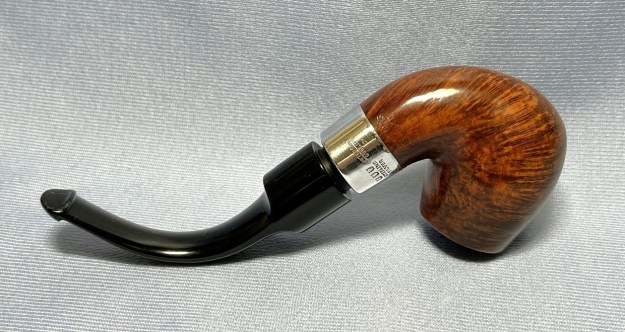
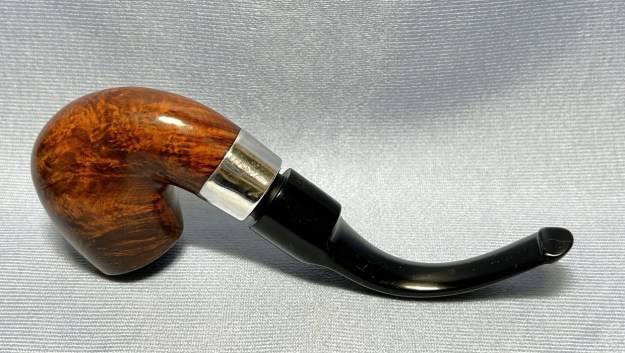
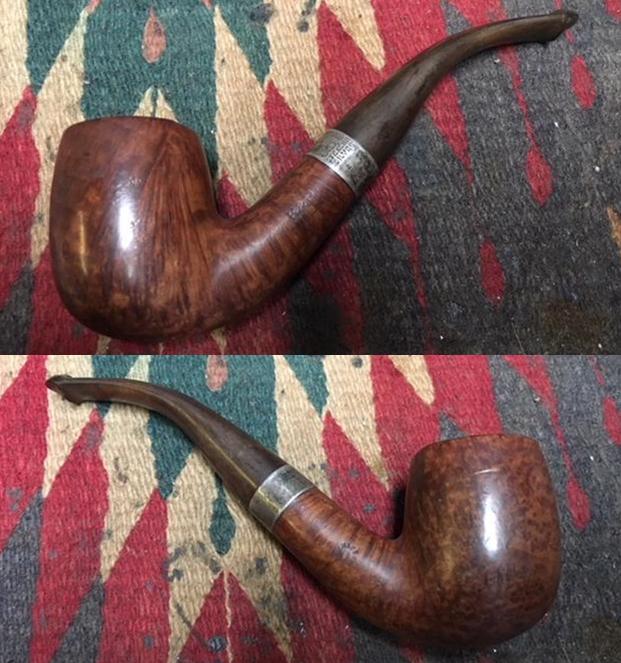
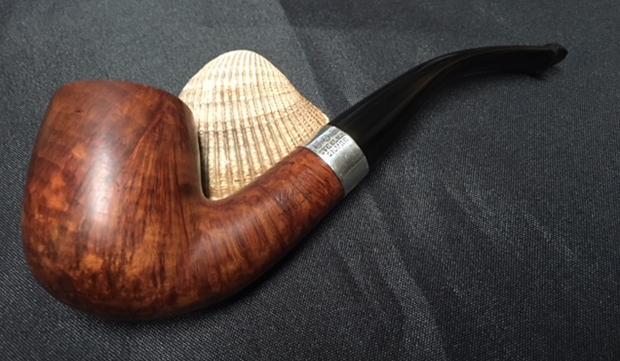
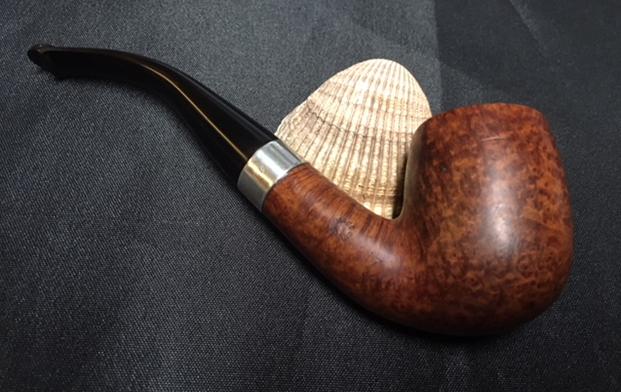
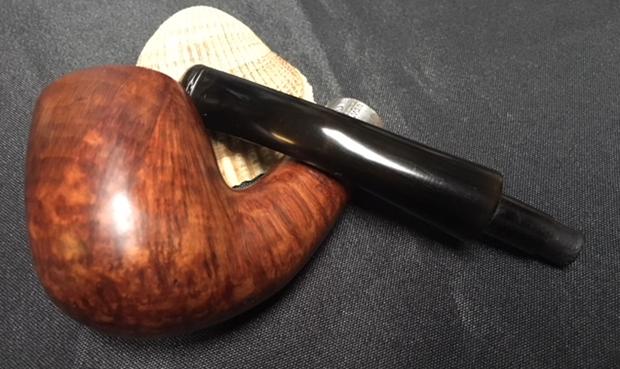
This Comoy’s Virgin Straight Grain 66 Liverpool with a vulcanite taper stem is a great looking pipe now that it has been restored. The beautifully grained finish really works well with the shape and the polished finish is stunning. I put the stem back on the bowl and carefully buffed the bowl and the stem with Blue Diamond on the buffing wheel. I gave the bowl and the stem multiple coats of carnauba wax on the buffing wheel and followed that by buffing the entire pipe with a clean buffing pad. I hand buffed the pipe with a microfiber cloth to deepen the shine. I wiped down the Sterling Silver band with a jeweller’s cloth to protect and polish it. The finished 1979 Comoy’s Virgin Straight Grain Liverpool fits nicely in the hand and feels great. Give the finished pipe a look in the photos below. The dimensions of the pipe are Length: 6 inches, Height: 1 ¾ inches, Outside diameter of the bowl: 1 ¼ inches, Chamber diameter: ¾ of an inch. The weight of the pipe is 36 grams /1.23 ounces. I will be putting it on the rebornpipes store in the British Pipe Makers Section shortly. Let me know via email or a message if you are interested in adding this pipe to your collection.

As always, I encourage your questions and comments as you read the blog. Thanks to each of you who are reading this blog. Remember we are not pipe owners; we are pipe men and women who hold our pipes in trust until they pass on into the trust of those who follow us.
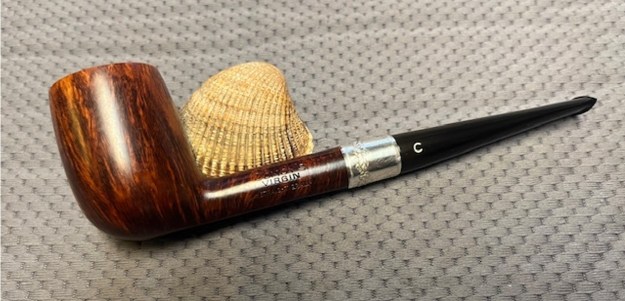
Restoring a Peterson Sterling Silver Deluxe System 11S Pipe


by Kenneth Lieblich

Ah, the Peterson Deluxe System – such a lovely pipe. Good fortune has provided two such pipes for me. First is the one you’re about to see restored and the second in a few days time. The two pipes didn’t come into my possession together, but they are being restored together. Despite both being Deluxe Systems, they have different finishes, come from different eras, and had different challenges in restoration. This 11S is really a fantastic pipe with wonderful grain. I am delighted with the way it cleaned up and I hope you are too! Our first Pete is this handsome fellow. It’s an 11S shape, has a smooth-finish, comes from the Republic era, and has the classic Peterson P-lip. Let’s have a look at the markings on this pipe. The left side of the stummel reads, Peterson’s [over] DeLuxe. The right side of the stummel reads, Made in the [over] Republic [over] of Ireland [over] 11S. The band has markings too. It has a set of faux hallmarks which read K&P. Over that are the words Sterling [over] Silver. To the right, are the words Peterson [over] Dublin. Finally, the stem reads Hand [over] Cut. In order to find out a bit more about the Deluxe System, I looked at Peterson’s own website and they furnished this information:

While the Deluxe stamp first appeared on our System pipes in 1940, the design itself dates to our 1896 and 1906 catalogues and, with the exception of the Supreme, has always marked our highest tier of System pipe. Like the System Standard and System Spigot lines, the Deluxe System pipe incorporates Charles Peterson’s patented System design, including a deep reservoir to collect excess moisture from the smoke; a graduated-bore mouthpiece that funnels the smoke and allows moisture to collect within the reservoir; a sturdy sterling silver military mount, which allows the pipe to be broken down and cleaned without damage or warping; and our patented P-Lip bit, which draws the smoke upward, thus reducing tongue bite. The Deluxe differs from those aforementioned lines, comprised of bowls with only the finest grain patterns and featuring a sterling silver mount and a push-gap stem, which was never designed to be flush-fitting, the space between the mount and stem base gradually decreasing with prolonged use. The Deluxe also elevates the System pipe by fixing each stem with a traditional chimney, an aluminum fitment that extends the tenon past the chamber’s airway for optimal System performance. Created for Peterson enthusiasts interested in acquiring the finest System pipe on the market, the Deluxe System will serve as the crown of any collection.

Then, over at Pipedia, there is the following commentary:

The handsome and very distinctive Deluxe system pipes, include the Darwin, Mark Twain and the Charles Peterson 140 year anniversary Pipe. These pipes are at the top of the ‘system’ series in terms of quality and finish. Each Peterson Deluxe is made from carefully selected, age mellowed root briar. In matt finish with hallmarked sterling silver mounts and a unique space fitting mouthpiece to allow for years of wear. They are available in a wide range of shapes numbered, as follows: 1s, 2s, 3s, 4s, 5s, 8s, 9s, 11s, 12.5s, 20s, XL5s, 20FB and 11FB. The pipes are well carved and construction, engineering and workmanship, is outstanding. The stems are well drilled and aligned. Silver work is excellent, finish very good, and the often maligned briar is of outstanding quality. The design is a very typically Peterson classic shape. Apart from the Darwin, the balance can be stem heavy, the bit is thick and chunky, especially in the larger versions. I also enjoy the sense of presence they give to the pipe, particularly if smoking in company with friends or strangers. They have a sophistication about them. The smoking qualities are excellent, dry and cool. The draw is good, and the flavour is particularly great in new pipes. The Mark Twains are outstanding in this department. As for the aesthetics and ergonomics, I find some shapes much more attractive than others. Favourites for me are the 1s, 2s, 3s, the Mark Twains and the Darwin deluxe. As a clencher most are very good to hang, except the beautiful Darwin which is more of a ‘hand holder.’ The one weakness I find is the modern orange/golden colour, (the so called natural) it is, in my opinion, less attractive than that found in the older Walnut finish of the eighties. As far as value and cost is concerned, for the excellent quality finish, these are competitively priced at around $135 to $250 depending on size and briar grade. For what it is worth, I reckon the Deluxes are probably the best value range of pipes that Peterson produce, both in terms of functionality and value. There is not a thing wrong with these pipes. Those who malign the brand because they’re made by the hundreds using machines, are very wrong, in my opinion. I like them a lot and the bang for the buck is the best I’ve ever seen for new pipes of this quality.The Deluxes are all excellent smokers. The Darwin, of course, is a truly outstanding pipe, its only “flaw” being that it’s not a clencher. One particular aspect of this pipe that appeals to me most is its physical beauty and presence. They are a pipe like no other. For me, they also offer a bowl capacity that I like and a balance in the hand that I appreciate. They are well named Deluxe s for giving that special experience.

These Petes with the faux-marks are a bit tricky to nail down in date. Mark Irwin, who runs the great Peterson Pipe Notes blog, has a whole page here on this topic. He writes:

Pipe smokers new to Peterson sometimes wonder what the “K&P” stamp is all about, not realizing the company was known as “Kapp & Peterson” until the 1970s and is still referred to as “Kapps” by the old hands who work in the shop. Most Peterson pipes with metal mounts (and all nickel-mount Systems) have a “K & P” Maker’s Mark, also called a Sponsor’s Hallmark, which is used by The Company of Goldsmiths of Dublin (est. 1637) to identify the silversmith or goldsmith responsible for making the article. The “K & P” maker’s mark was registered at the assay office shortly after Kapp & Peterson’s incorporation and appears either in capital letters (on early sterling and later nickel mounts) or capital letters in shields (on sterling). The maker’s mark was later placed in shields, which may be flat or pointed at the top. After 1938, the K&P maker’s mark became a stand-in for the Company of Goldsmiths (aka Dublin Assay Office) date letter and was usually accompanied nearby by the STERLING over SILVER stamp. The practice of stamping sterling with the date letter wasn’t resumed at Peterson until 1969, for rather humorous reasons explained in the Peterson book.

Sadly, I don’t have the Peterson book, so I cannot enlighten you on the humorous reasons. It would seem from Mark’s words that this pipe falls into the period between 1938 and 1968. However, we can refine that a bit, as the pipe’s markings clearly indicate that it’s a republic-era pipe. Ireland became a republic in 1949, so a date range of 1950-1968 seems suitable for this pipe.

Time to get on with it! The stem was pretty dirty. It had some calcification on it and I used a sharp edge to carefully scrape that off. Once done, I scrubbed the stem with oil soap on some cotton pads. I also took a BIC lighter and ‘painted’ the stem with its flame in order to lift the few bite marks and dents. Then I cleaned out the inside with pipe cleaners and lemon-infused isopropyl alcohol. You can see just how filthy it was inside. Also, it’s worth noting that the aluminum chimney that often goes with these pipes is missing – but a replacement could be sought from Peterson’s. I wiped down the stem with cleanser to remove surface oxidation. Then the stem went for an overnight soak in the Pipe Stem Oxidation Remover. The next day, I used the cleanser again with some cotton rounds. I built up the small tooth marks on the stem with black cyanoacrylate adhesive and let them fully cure. I put a tiny piece of hockey tape over the “Hand Cut” words, so I wouldn’t accidentally sand them. I then used my needle files, Micromesh pads and Obsidian Pipe Stem Oil to make it look great. Onto the stummel, and the first thing I did was to clean up the rim a bit. I took a piece of machine metal and meticulously scraped away the cake without affecting the finish of the wood.Then I reamed out the stummel and removed all the cake. I used a bit of everything to get it all out: PipNet, KleenReem, knife, sandpaper, etc. Fortunately, there was no damage to the interior walls. I used cotton rounds and some oil soap to scrub the outside of the stummel and a toothbrush with oil soap for the lava on the rim of the pipe. I then proceeded to clean out the insides of the shank with Q-tips, pipe cleaners, and lemon-infused isopropyl alcohol. I followed that up by de-ghosting the pipe and the bowl was nice and clean after this. I then cleaned the insides with some dish soap and tube brushes. I then worked on cleaning up the sterling silver band. I taped it off, as I didn’t want to damage the wood. This worked well and I was pleased. There were a couple of very small knocks in the wood and I opted to use a damp cotton cloth and an iron to help. By laying the wet cloth over the affected area of wood and applying the hot iron, steam is generated in a way that can often swell the wood back into place.Next, I sanded all of the wood down with my Micromesh pads and made it lovely and smooth. I followed that up with some Before & After Restoration Balm. I let it sit on the wood for 20 minutes or so, then buffed it off with a microfibre cloth. I took the pipe to the buffer. I gave it a good application of White Diamond and a few coats of carnauba wax. This made all the difference. It really sparkled after that. I also polished the silver with my jewellery cloth.

This Peterson Deluxe System 11S pipe looks amazing now. It’s really a beautiful pipe and it is ready to be enjoyed by the next owner! I am pleased to announce that this pipe is for sale! If you are interested in acquiring it for your collection, please have a look in the ‘Irish’ Pipemakers Section of the store here on Steve’s website. You can also email me directly at kenneth@knightsofthepipe.com. The approximate dimensions of the pipe are as follows: length 6 in. (152 mm); height 3⅔ in. (93 mm); bowl diameter 1½ in. (37 mm); chamber diameter ⅔ in. (17 mm). The weight of the pipe is 2¼ oz. (67 g). I hope you enjoyed reading the story of this pipe’s restoration as much as I did restoring it. If you are interested in more of my work, please follow me here on Steve’s website or send me an email. Thank you very much for reading and, as always, I welcome and encourage your comments.

Pipe Gods Smiled And I Got Not One But Three Les Wood Pipes….Restoring Second Of The Three Les Wood Pipes; A Bark Silver Spigot


Blog by Paresh Deshpande

I had purchased three Les Wood pipes from a gentleman and had restored the first of the three pipes and have added it to my personal collection. Given below is the link to the write up posted on rebornpipes and is a recommended read to know how I came to be in possession of this lot and brief research on husband wife duo of Leslie Wood and Dolly and the pipes they make.

https://rebornpipes.com/2022/08/05/pipe-gods-smiled-and-i-got-not-one-but-three-les-wood-pipes-restoring-a-les-wood-poker/

The second pipe that is now on my work table is a beautifully rusticated paneled Apple Half bent Silver Spigot. It is stamped on the bottom smooth surface of the shank as “FR LOUIS HESTON” over “FERNDOWN” in a slight arc over “BARK”. The sterling silver ferrule at the shank end bears the stamp “L & JS” in a rectangular cartouche over “.925”. The sterling silver mounting at the tenon end of the stem also bears similar stampings as seen on the ferrule. The vulcanite stem is stamped on the left side as “L J S”. Now this stamping varies significantly from the one that I had worked on earlier in that this pipe does not bear the stamping LES WOOD, HAND MADE IN ENGLAND and star (*) marking to denote the size. I referred back to pipedia.org to understand the variation in stamping. Here is what I found out and also the link to the write up is given below.

https://pipedia.org/wiki/Ferndown

Due to the vagaries of international trademark law, he sold his earlier pipes as ” L.&J.S Briars”, “Ellwood”, “Les Wood” or “L. Wood”. Until recently, an average of 1500 – 2000 pipes a year were sold as “Ferndown” — named for the mansion he lives in — in the UK and US, but as “L. Wood” pipes in Germany.

From the above, I assume that this pipe is from the recent past while the poker was from the earlier period. Truth be told, I am not 100% convinced on this and would really appreciate input, clarifications and detailed information on this variation in stampings observed from learned readers of rebornpipes.

There was not much that I could find about Fr. Louis Heston. An internet search of the name threw up data about Rev. Edward Louis Heston who left for heavenly abode in 1973. This period definitely does not coincide with the time period when Leslie Wood started making pipes under the FERNDOWN! Well, this too then is a grey area and would request readers to fill us all on this name and establish a relation between the name Fr. Louis Heston and this Les Wood pipe.

Initial Inspection
As observed with the Les Wood Poker that I last restored, this half bent Apple Silver Spigot too is in excellent condition. There is an even layer of cake of medium thickness in the chamber that is very hard and completely dry. The smooth rim top is sans any crusting of lava over flow but darkened towards the front. The eight panelled rusticated stummel appears in good condition with no signs of hot spots or cracked surfaces. The stummel has a lot of dirt, dust and grime grounded in to the crevices of the rusticated surface. The black and dark brown stain is faded at places giving the stummel is dull appearance. The fishtail vulcanite stem is deeply oxidized with some tooth chatter on either surface of the stem in the bite zone. The stampings on the shank, silver spigot and stem are all crisp and easily readable. The following pictures will provide a visual description to supplement the description given above. I like the feel and heft of this large stummel in my hand. The rusticated panelled surface with it prominent ridges feels tactile in the hand and very comfortable to hold. There is a lot of dirt, dust and grime trapped in to the crevices of rusticated surface giving it a dirty grayish appearance. The entire stummel looks dull, dirty and lifeless. Heavy accumulation of dried oils, tars and gunk is seen clogging the mortise. The dark stain has faded in couple of spots further adding to the sorry appearance of the stummel. The sterling silver ferrule is oxidized and dull looking. However, once the stummel surface is cleaned up and rejuvenated, this will be one beautiful looking pipe. I like the feel and heft of this large stummel in my hand. The rusticated paneled surface with it prominent ridges feels tactile in the hand and very comfortable to hold. There is a lot of dirt, dust and grime trapped in to the crevices of rusticated surface giving it a dirty grayish appearance. The entire stummel looks dull, dirty and lifeless. Heavy accumulation of dried oils, tars and gunk is seen clogging the mortise. The dark stain has faded in couple of spots further adding to the sorry appearance of the stummel. The sterling silver ferrule is oxidized and dull looking. However, once the stummel surface is cleaned up and rejuvenated, this will be one beautiful looking pipe. The beautiful sterling silver mounted vulcanite stem is hand cut and oozes very high quality of material use and also craftsmanship of highest quality. The stem is heavily oxidized to an extent that it appears dirty green. Dark coloration and calcification is seen on either surfaces of the stem in the bite zone from prolonged use of rubber bit. Very minor tooth chatter and bite marks can be seen in the bite zone on both the upper and lower surfaces of the stem. These tooth chatter and tooth indentation should be easily addressed by heating the affected areas to raise the vulcanite and thereafter sanding it down to match the rest of the stem surface. The tenon end and the horizontal slot end shows accumulation of dried gunk and grime. The sterling silver mount is oxidized but shows no signs of any damage whatsoever.The Process
I started the refurbishing of this Les Wood by working the stem first. Since there were other stems that were ready to be put into the stem deoxidizer solution, I decided to clean the internals of this stem first so that it could be put in the solution with other stems. I cleaned the stem airway with a thin shank brush and anti oil soap. It took considerable time and elbow grease to get the stem airway clean. I used a sharp dental tool to clean the horizontal slot and further cleaned the internals with regular and bristled pipe cleaners dipped in alcohol.The stem was immersed in the Deoxidizer solution, a product that has been developed by Mark Hoover. This solution raises the oxidation to the stem surface and helps in easy removal and imparting a nice shine to the stem after polishing. The pipe is indicated with a red arrow. The stem is allowed to soak into this solution overnight.Now it was time for me to work on the stummel. I did this by first reaming the chamber with size 2 followed by size 3 and 4 PipNet reamer heads. I further scraped the chamber walls with my fabricated knife to remove the remaining carbon deposits where the reamer head could not reach. Once the cake was reamed back to the bare briar, I used a 220 grit sand paper to remove all the traces of remaining cake and also to smooth out the inner walls of the chamber surface. Finally, to remove the residual carbon dust, I wiped the chamber with a cotton pad wetted with 99.9% pure isopropyl alcohol. The huge pile of carbon dust that was reamed out is an indication enough to the amount of carbon that had accumulated in the chamber. The chamber walls are solid without any heat lines or fissures. However, the hard cake was getting increasingly difficult to dislodge. I shall try and remove residual the hard cake after it has been moistened during the salt and alcohol soak. I further cleaned the mortise by scrapping out the dried gunk with a dental tool. I ran a few pipe cleaners dipped in alcohol to moisten the dried gunk and assist in its removal. I shall further continue the internal cleaning of the chamber and mortise with cotton and alcohol soak.I continued the cleaning of the chamber and shank internals with a salt and alcohol bath. I use cotton balls which is an at par substitute to Kosher salt as I have realized over the years. I draw out a wick from the cotton and along with a folded regular pipe cleaner; insert it in to the mortise and through the draught hole in to the chamber. Thereafter, I packed the chamber with cotton balls to about quarter of an inch below the inner rim edge and soaked the cotton balls with isopropyl alcohol up to the brim. About half an hour later, the level of alcohol had gone down, having being absorbed by the cotton. I topped it up once again and set it aside overnight. By next morning, the cotton and alcohol had drawn out all the remaining oils and tars from the chamber and mortise, fulfilling its intended task. I removed the cotton balls and ran pipe cleaners through the mortise to clean out all the loosened tars and gunk and further cleaned it with alcohol and q-tips.The cotton and alcohol soak had softened the hard and stubborn cake in the chamber and the mortise. Using my fabricated tool, I scrapped out all the hardened cake from the chamber and gunk from the mortise. The chamber now smells clean and fresh.Once the internals of the shank were cleaned, I cleaned the external surface of the stummel with Murphy’s Oil soap and cotton swabs followed by scrubbing the rusticated surface with a toothbrush and dish washing soap. This rid the nooks and crevices of all the accumulated dust, dirt and grime from the rusticated stummel. With a copper soft wired brush, I cleaned the rim top surface of all the crud that had accumulated over it. I wiped the stummel with a soft cotton cloth and set the stummel aside to dry out naturally. The charred inner rim edge (encircled in red) is now clearly visible and would need to be addressed. I simultaneously cleaned the shank internals with dish washing soap and shank brush.Next, I decided to address the issue of charred inner rim edge and getting the chamber back to round. I topped the rim top over a 220 grit sandpaper to reduce the charred surface. I checked the progress frequently to ensure that the topping is just adequate. I addressed the darkened inner edge by running a folded piece of 220 grit sandpaper pinched between my thumb and index finger along the inner edge and crated a smart bevel. This bevel also helped to get the chamber back to round.I polished the smooth rim top surface by dry sanding with 1500 to 12000 grit micromesh pads.The polished rim top looks much lighter than the rest of the stummel because of the topping process to remove the charred rim edge. To match the dark browns and black stains over rest of the stummel surface, I decided to re-stain the rim top surface using dark brown stain pen. I applied a coat of brown stain using a stain pen and set it aside for some time. I wiped the rim top using a soft cotton cloth to check the stain color and found it to be a bit lighter. I repeated the process till I had requisite color match and set it aside for the stain to set in.I rubbed a small quantity of “Before and After Restoration Balm” into the briar with my finger tips and let it rest for a few minutes. The balm almost immediately works it’s magic and the briar now had a nice vibrant appearance with the beautiful rustication patterns on full display. I have been using this balm ever since I embarked on this journey and it is this part of restoration that I always look forward to. I further buffed it with a horse hair shoe brush. This pipe really oozes of a very high quality, in fact similar to the Les Wood Poker that I had worked on earlier. The consistent quality is awesome, to say the least. The rim top appears lighter hued, but that’s due to the lighting when I took pictures. Now that the stummel refurbishing was nearly done and also the stem had now been soaking for more than 24 hours, I removed the stem from the solution. I first scrubbed the stem surface with a Scotch Brite pad, always being mindful of the stem logo on the left side. I followed this scrubbing with a nice cleaning of the surface using a 0000 grade steel wool. I rinsed the stem under running water to rid the stem of the thick deoxidizer solution. I ran a couple of pipe cleaners to remove the deoxidizer solution from the airway. The beauty of a high quality vulcanite hand cut stem in shining black can now be appreciated once the heavy oxidation has been eliminated. There are spots/ areas where oxidation is still visible, but that will be eliminated once the stem is subjected to sanding and polishing using sand papers and micromesh pads. The beauty of this stem will be enhanced once it has been all polished and waxed. A polish by wet sanding using all 9 micromesh pads (1500 to 12000 grit pads) brought out the deep black shine of the vulcanite. I rubbed a small quantity of EVO to hydrate the stem and deepen the shine.This was followed by removing oxidation from over the sterling silverware seen on the pipe using a locally made compound that Abha, my wife, uses to polish her silver and gold jewellery and silver cutlery. This compound is a very fine powder and is least abrasive with fantastic results. The silver ferrule at the shank end and the silver spigot are now nice shining pieces of silver and provides a nice contrast to the shining black stem and the dark brown and black stummel. I painted the stem logo L J S using a Gold paint glitter pen and wiped off the excess paint. The stem logo is now nice and prominently visible.I have reached that stage in this project which can be considered as the home run. I polished the rim top and the entire stem with blue diamond using a cotton wheel mounted on to my hand held rotary tool. The blue diamond compound helps to eliminate the minor scratches that remain after the use of micromesh pads. I completed this project by hand polishing the stummel with Halcyon II wax. I rubbed this polish deep into the rustications and after a couple of minutes, vigorously hand buffed the stummel with a microfiber cloth to a deep shine. I polished the stem with carnauba wax using my hand held rotary tool. This is a gorgeous looking spigot and I consider myself fortunate to have the opportunity to work on this beauty and, as my Guru Steve says, carry forward the trust in this pipe till it is time to pass it on to the next pipeman or pipewoman. Here are a few pictures of the completed pipe for you to appreciate while I take the opportunity to thank you each of you for sparing your valuable time in joining me on this journey.

Restoring a Beautiful K&P Dublin Bent Billiard


Blog by Steve Laug

This is another pipe from the fellow here in Vancouver that he dropped off for me to work on. There were 8 pipes in the lot – I have finished six and this is the seventh. It is a bent billiard shaped bowl that is stamped on the left side of the shank and reads K&P over DUBLIN. On the right side of the shank is the COM stamp Made in Ireland in a circle with the “in” in the centre of the circle. Next to that is the shape number 217. The silver band is marked K&P over Sterling Silver. The stem was the original and was in fair condition. It was another one of his pipe finds on a recent pipe hunt in Vancouver. There was some really nice grain showing through the dirt and debris of the tired pipe. The rim top was damaged with a burn mark on the front right and the back outer edge was rounded over. The finish was very dirty and there was a thick cake in the bowl. The stem was oxidized and had tooth marks on the top side near the P-lip and on the underside near the shelf. I took close up photos of the rim top and the stem to show the condition they were in when I received the pipe. The first photo shows the damage to the rim top – there is a nick out of the front inner edge of the bowl and a few other nicks and chips that make it appear to be out of round. The back outer edge on the shank end is worn down at an angle but it is not rough. The inside of the bowl has some uneven cake around the bowl and some tar and oil on the top of the rim. The sterling silver band – with K&P  and Sterling Silver stamped on it is oxidized and tarnished but otherwise in good condition. The photos of the stem show the tooth damage on the top and underside of near the P-lip button. There is a deep tooth mark on the top side ahead of the button and some wearing down of the button edge on the left and right. The underside of the stem also has tooth chatter and some wear on the sharp ledge. The airway on the top of the stem is still in good condition. I took a photo of the pipe with the stem removed to give an idea of the style of the tenon on the stem and the look of the pipe sans stem.I took a photo of the stamping on the both the right and left side of the shank. It is very clear and readable. The stamping left reads K&P over Dublin and the stamping on the right reads shape number 217 and the COM stamp as mentioned above – Made in Ireland in a circle.I started my clean up on the bowl with reaming and then cleaning out the airway to the bowl and the inside of the mortise as well as the airway in the stem. I reamed the bowl with a Savinelli Fitsall Pipe Knife to remove the cake on the walls. I used a dowel wrapped with sandpaper to sand down the walls on the bowl. I cleaned out the airway in both the bowl and stem with alcohol (99% isopropyl), pipe cleaners and cotton swabs until they were clean on the inside. To remove the damage from the rim top I lightly topped the bowl with 220 grit sandpaper on the topping board. I checked it repeatedly as I did the topping to make sure I had removed just enough to suffice to remove the damage. The second photo shows the topped bowl. You will note that I left a little of the damage on the rear outer edge so as not to top too much of the briar.I wiped the rim top down with alcohol on a cotton pad to remove the dust then stained it with an Oak coloured stain pen. I buffed it lightly with a soft cloth to even out the stain.I wiped down the bowl alcohol on a cotton pad to remove the dust and grime on the surface of the bowl. I polished the briar finish with micromesh sanding pads – wet sanding with 1500-2400 grit micromesh pads and dry sanding with 3200-12000 grit pads. I wiped it down after each pad with a damp cloth. The grain began to shine through with both flame and birdseye showing up on the sides of the bowl. I rubbed down the briar with Before & After Restoration Balm. I worked it into the finish with my fingertips and finished working it in with a shoe brush. The balm worked to clean, preserve and enliven the surface of the finish on the small bowl. The briar was coming alive so I took some photos of the pipe at this point. I polished the silver band with Hagerty’s Silver Polish to remove the tarnish. It is a soft scrub that is put on the band and buffed off with a cloth afterwards. I used a cotton pad to remove the tarnish. I polished it further with a jeweler’s cloth to protect and give it a shine. I set the bowl aside and began to work on the dents in the stem surface. I “painted” the vulcanite with a Bic lighter flame to try to raise the dents. I was able to get those on the underside completely removed. The deep one on the top surface of the stem and sides of the button needed to be addressed differently. I cleaned the areas around the button and filled in the dents with black super glue. When the repair cured I sanded the repairs and the oxidation with 220 grit sandpaper. I folded the paper and worked in the edges of the button. I polished the stem with micromesh sanding pads – wet sanding with 1500-2400 grit pads and dry sanding with 3200-12000 grit pads. I wiped the stem down with Obsidian Oil between each sanding pad. I put the stem back on the bowl and buffed the pipe with Blue Diamond polish on the buffing wheel. I carefully avoided the stamping on the both sides of the shank. I gave both the bowl and the stem multiple coats of carnauba wax and buffed the pipe with a clean buffing pad to raise the shine. I hand buffed it with a microfiber cloth to deepen the shine. The finished pipe is shown in the photos below. I have one more pipe to finish for him – it is the last of the pipes he found while pipe hunting. This has been a fun bunch of pipes to work on. I look forward to moving through the rest of them. Thanks for looking.