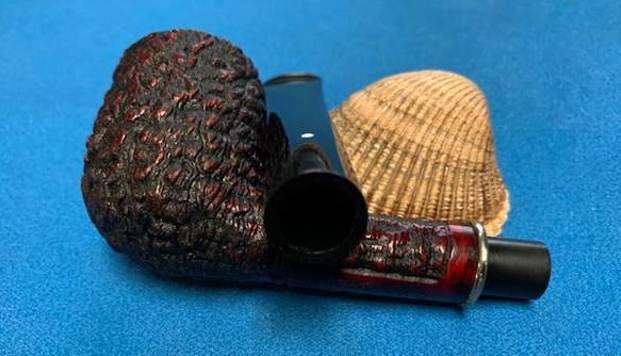
Blog by Paresh Deshpande
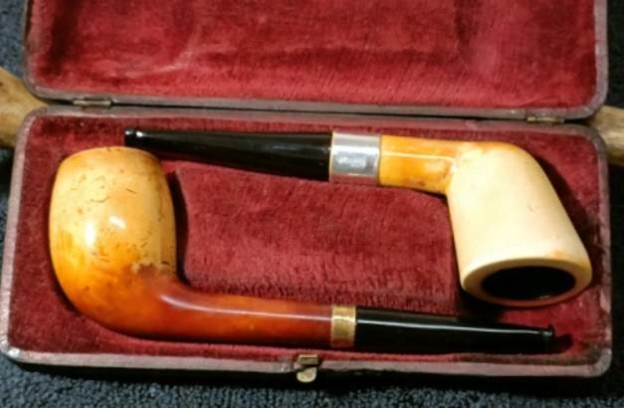
I had been working on a pair of meerschaum pipes that came in a beautiful well preserved case. I have completed refurbishing the first pipe, a straight Dublin. Though I had worked on both these pipes simultaneously, I have done the write up in two parts.
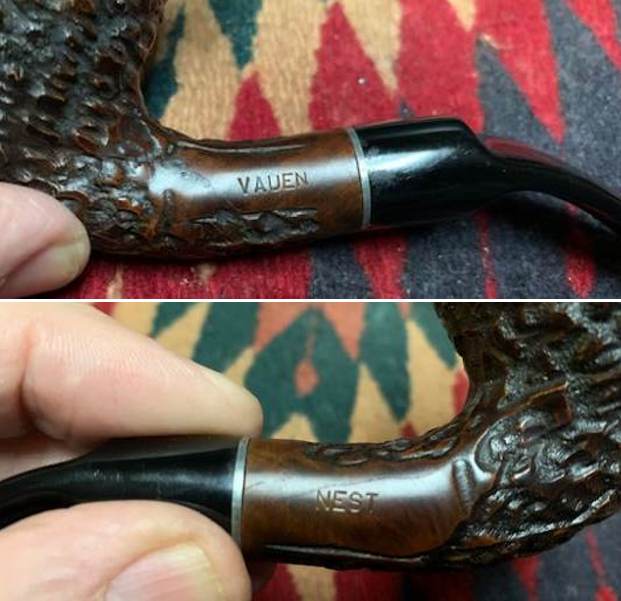
For detailed information on the brand and other general information about the pipe, please read PART- I of this series.
Part- ll: Straight Billiard
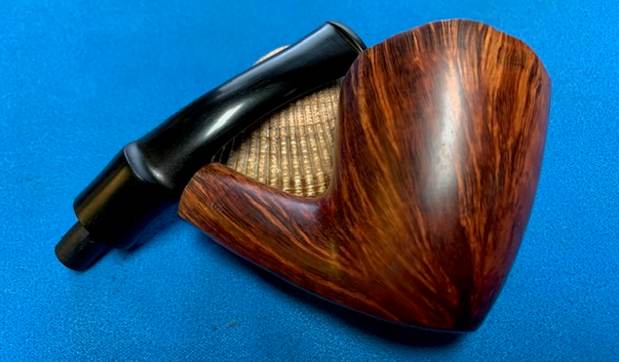
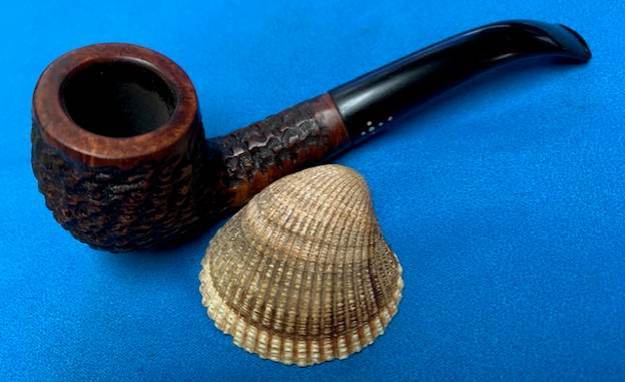
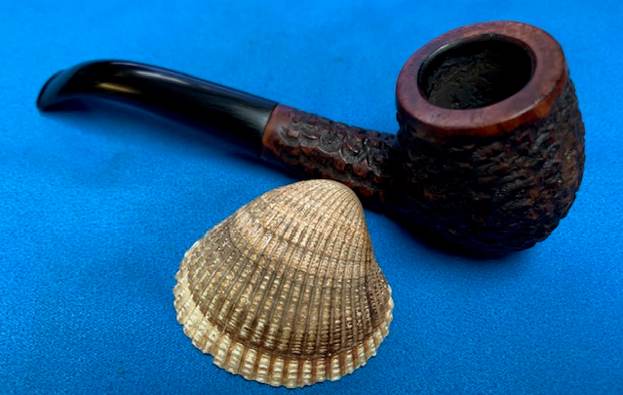
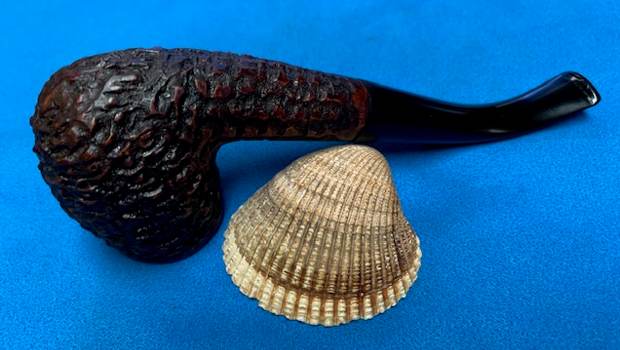
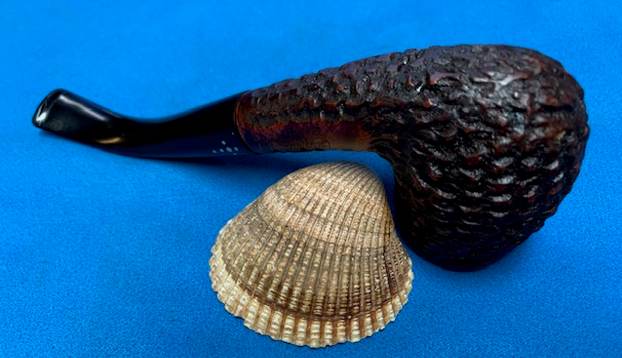
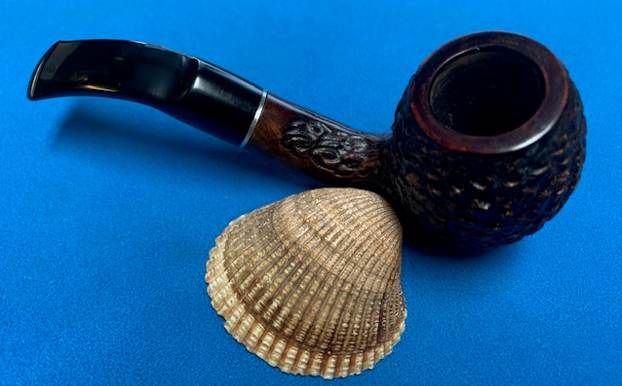
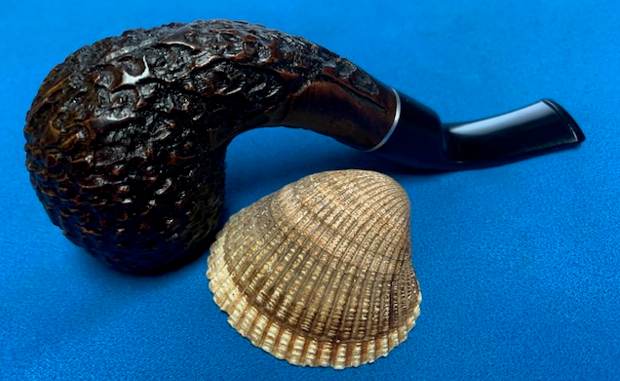
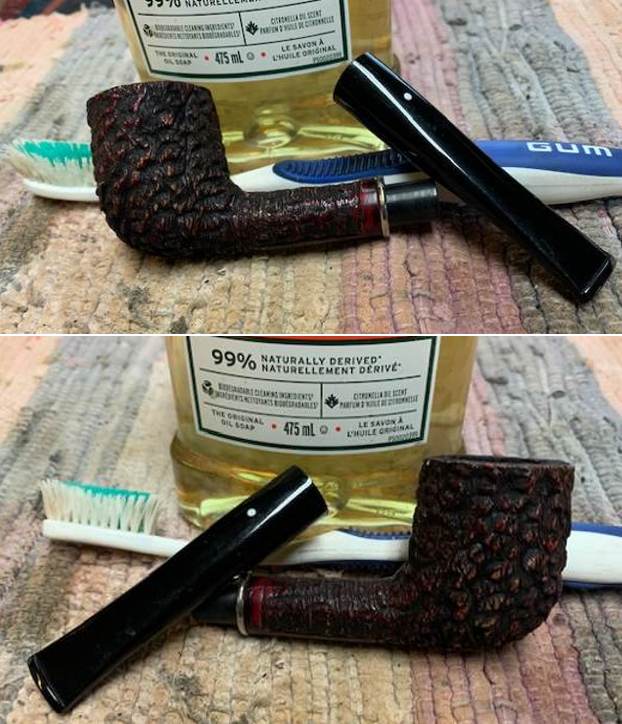
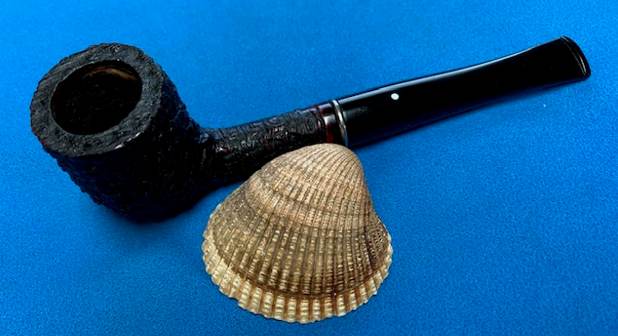
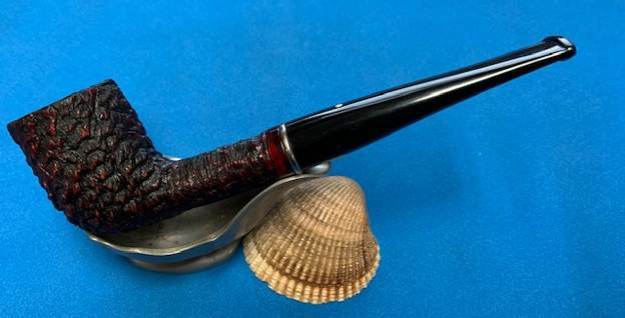
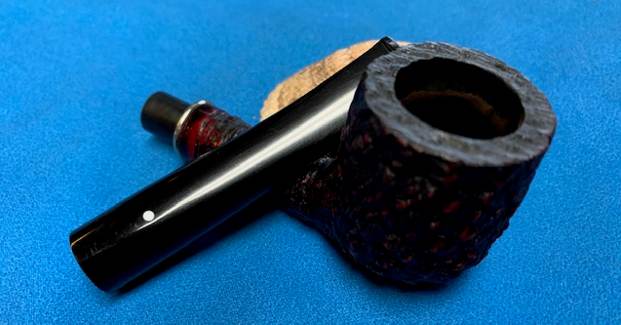
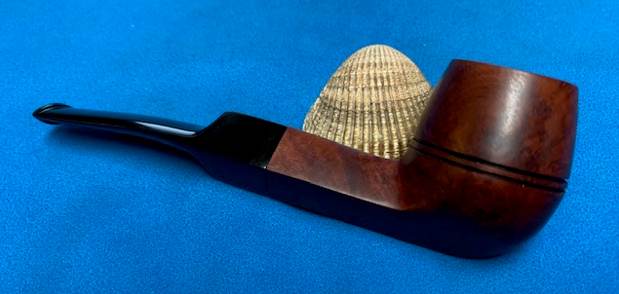
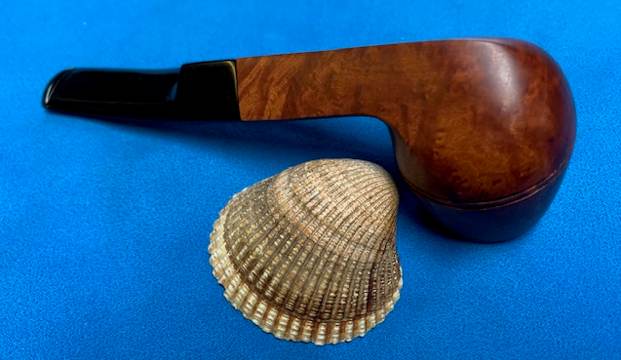
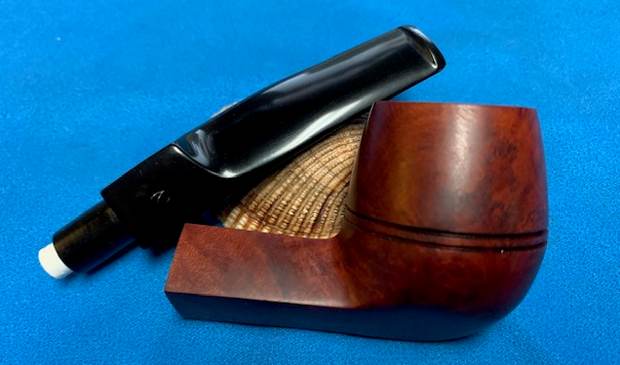
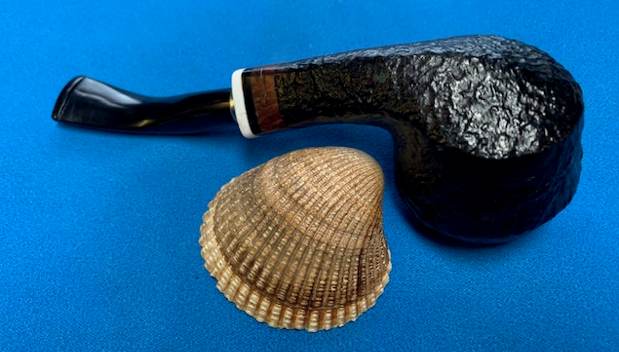
Initial visual inspection
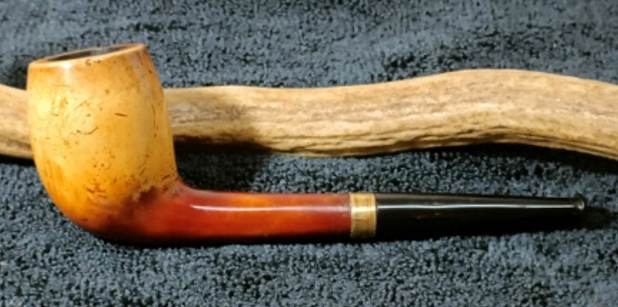
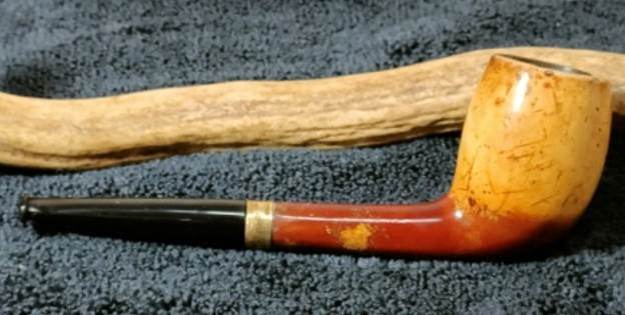
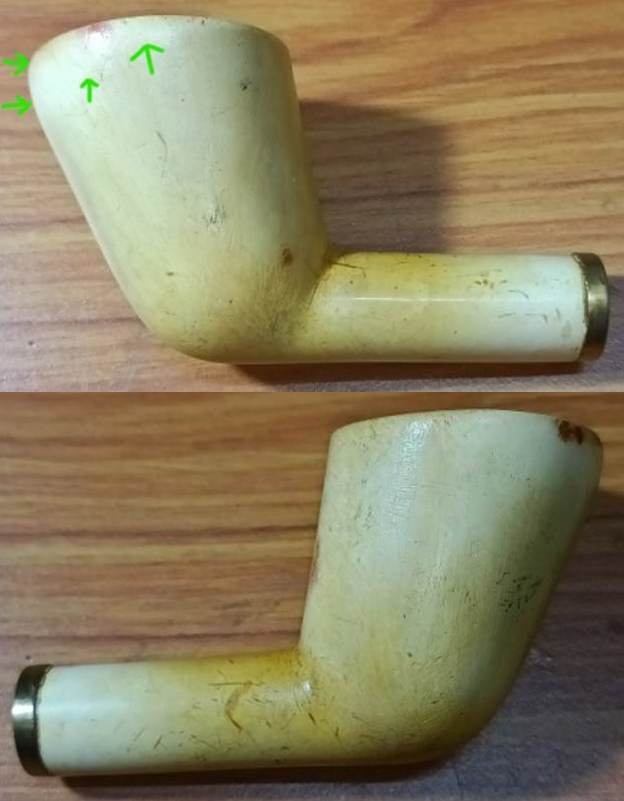
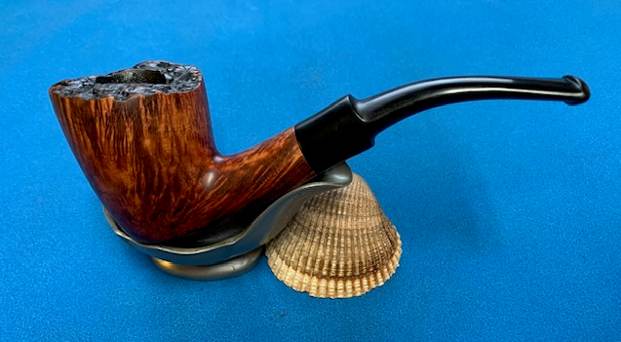
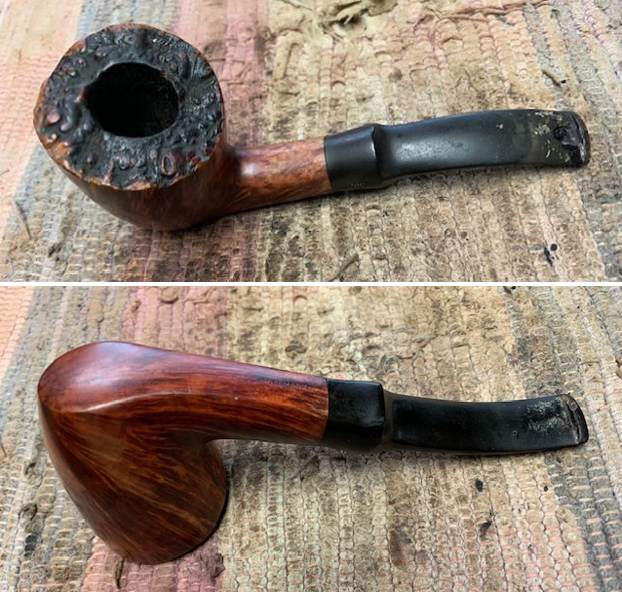
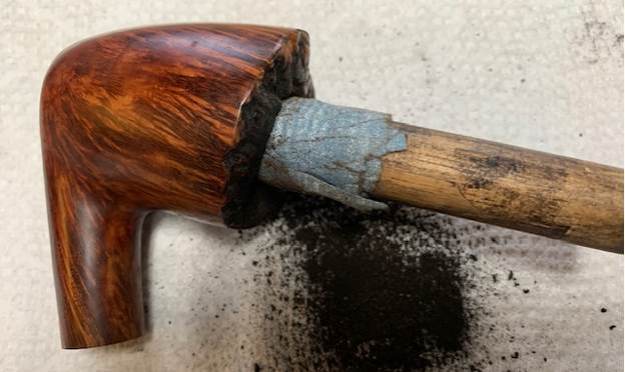
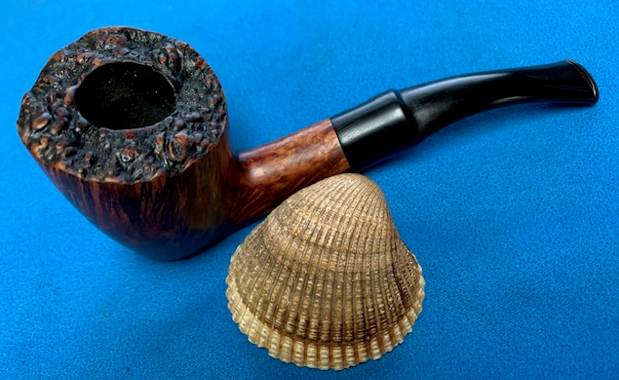
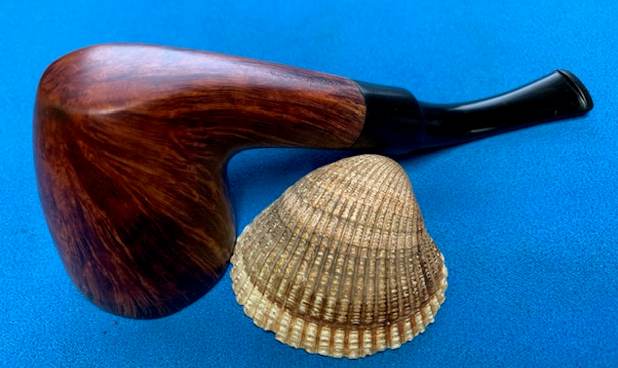
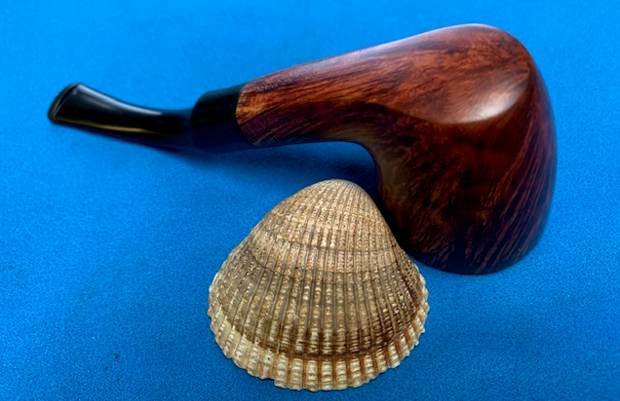
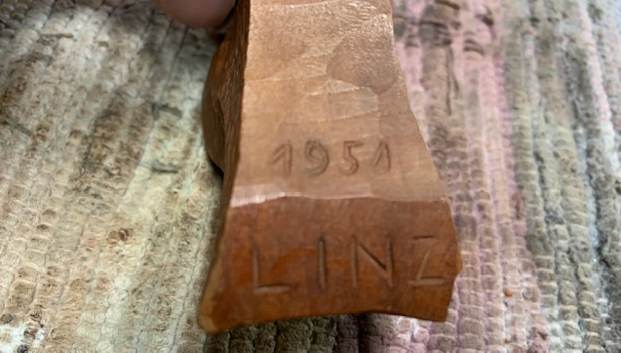
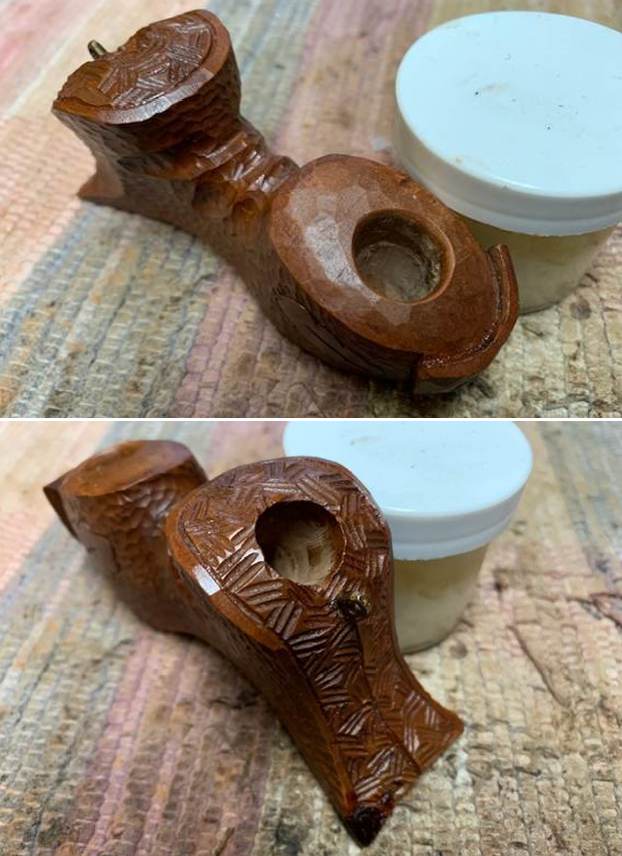
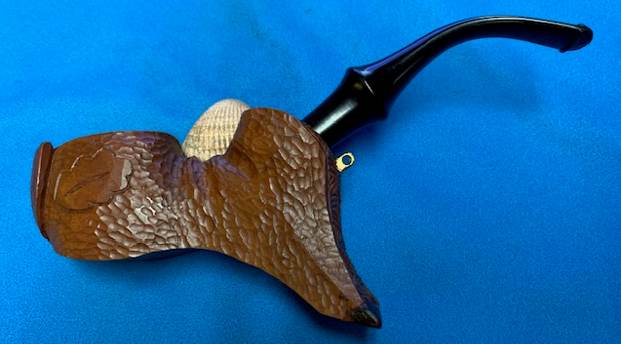
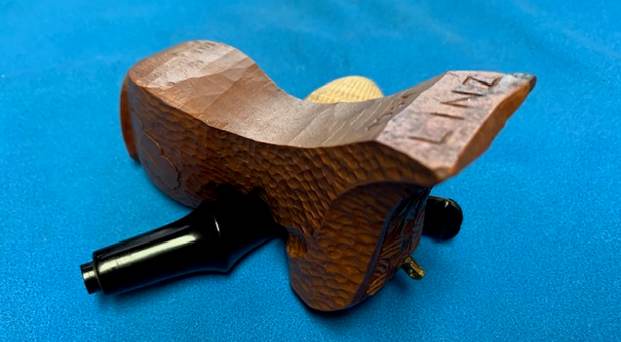
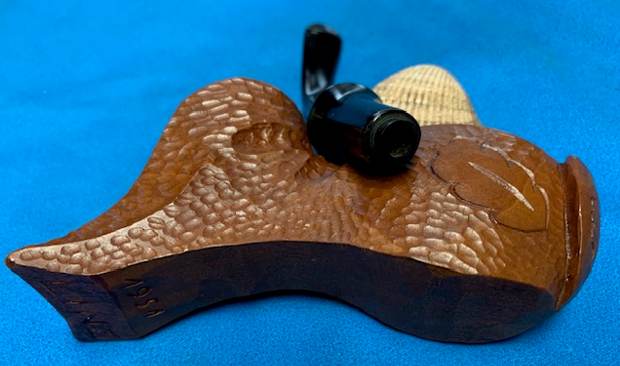
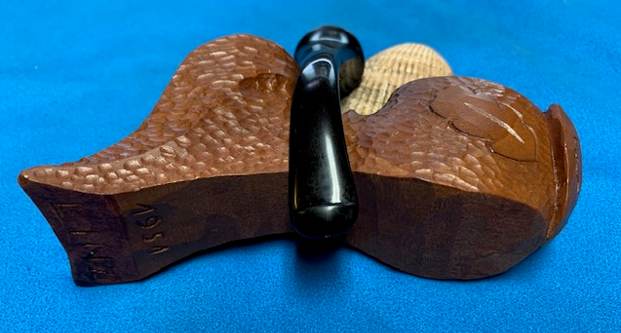
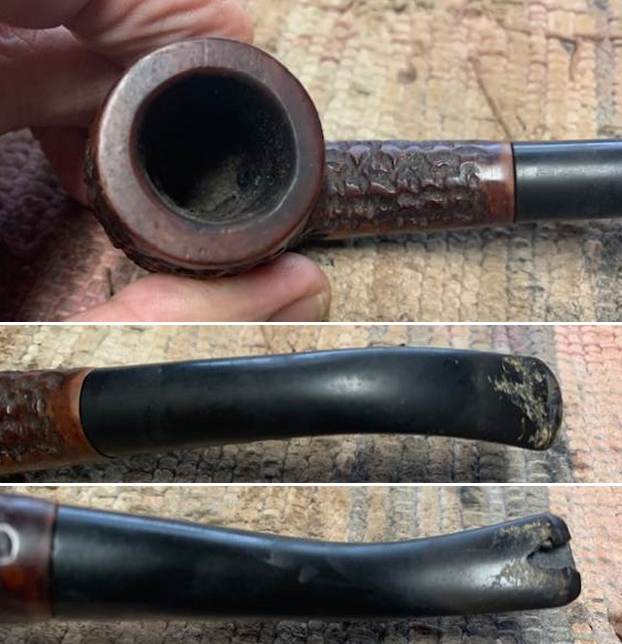
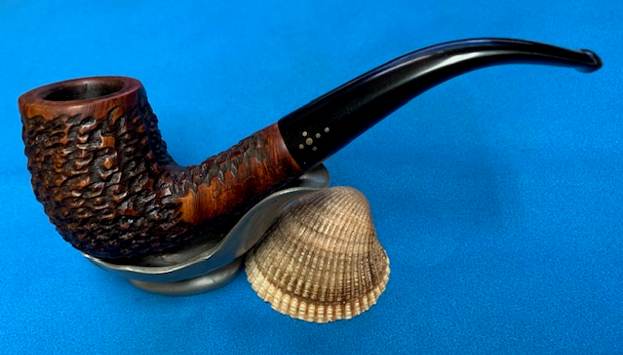
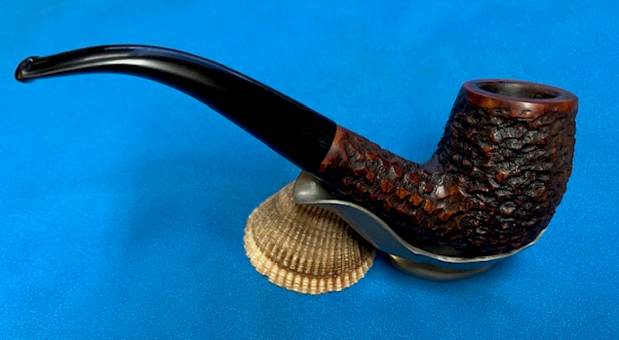
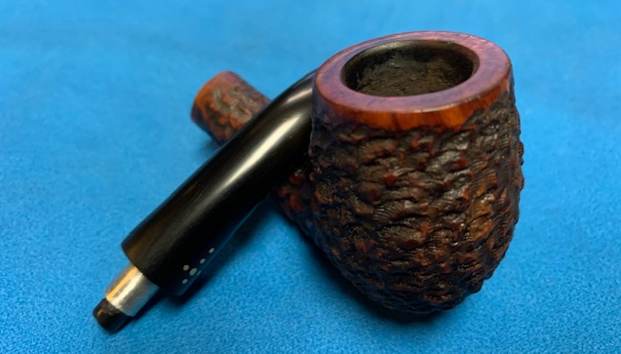
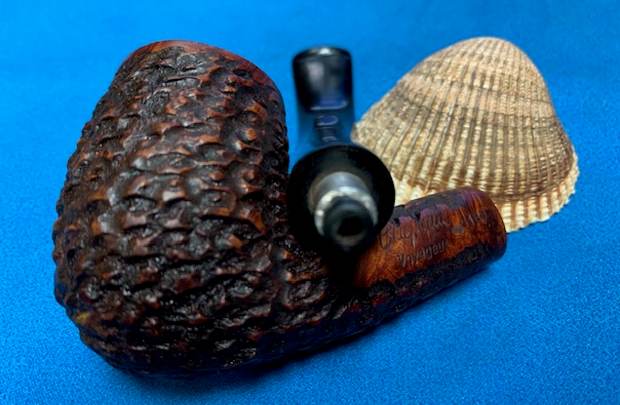
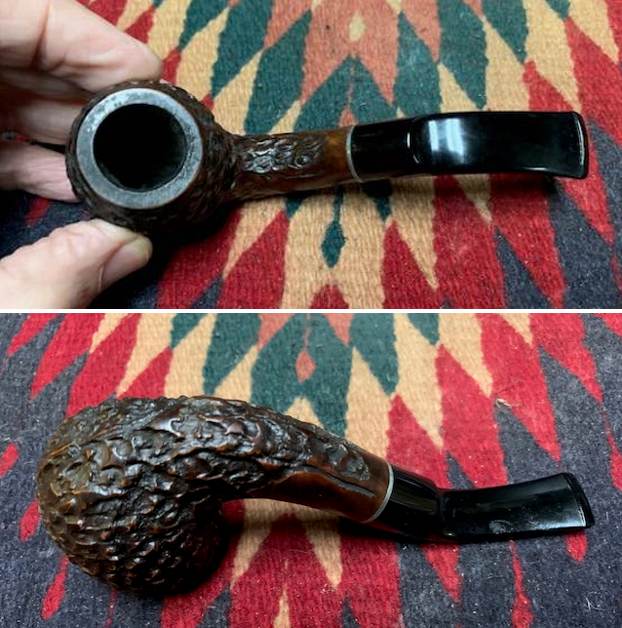
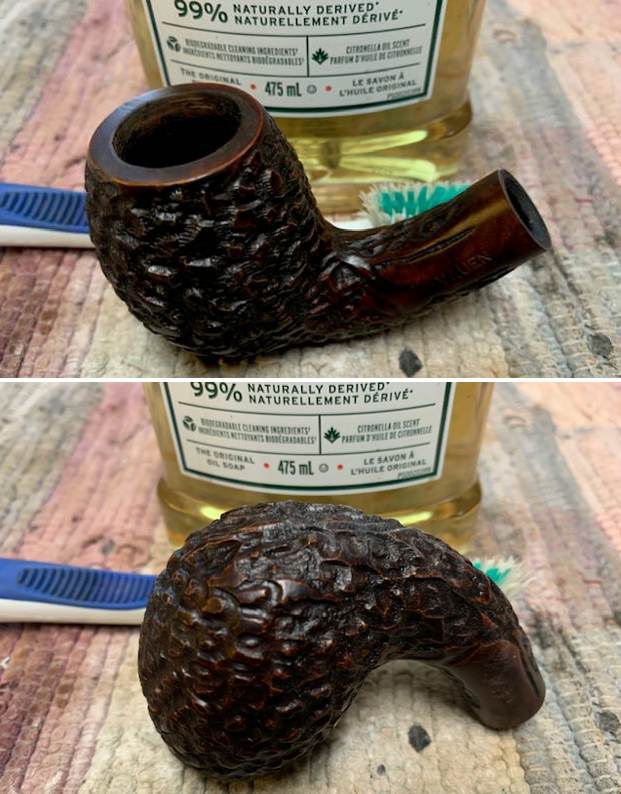
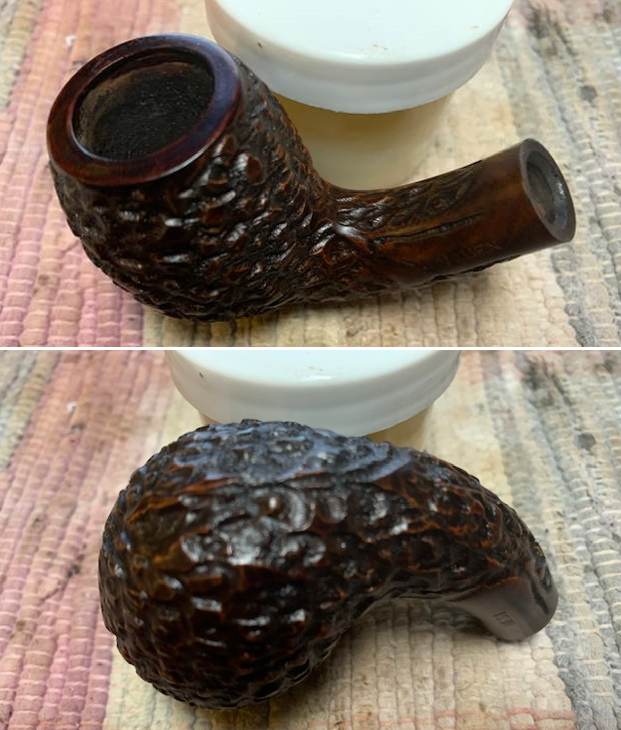
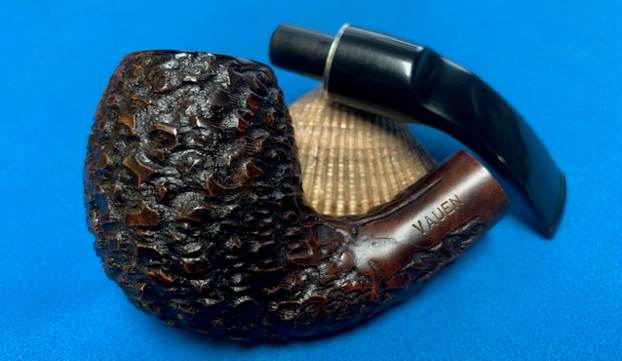
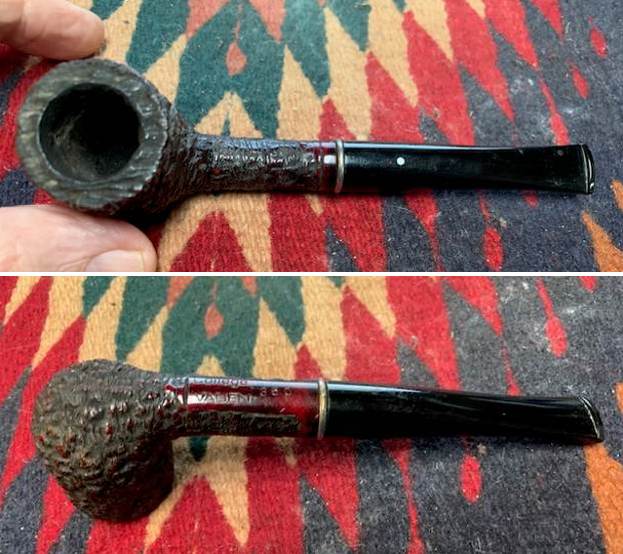
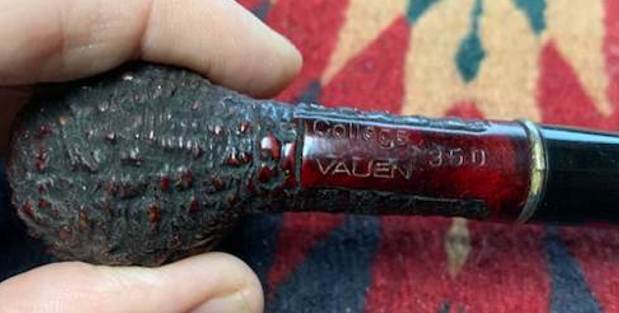
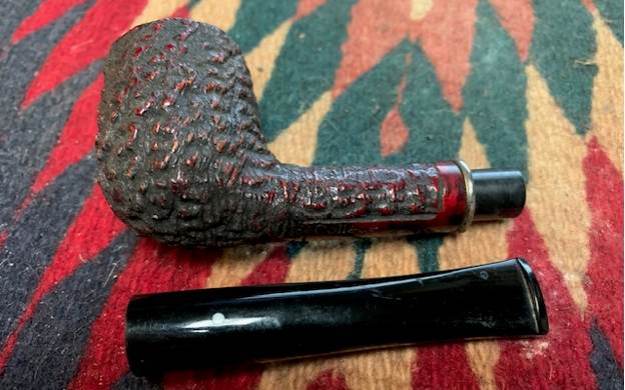
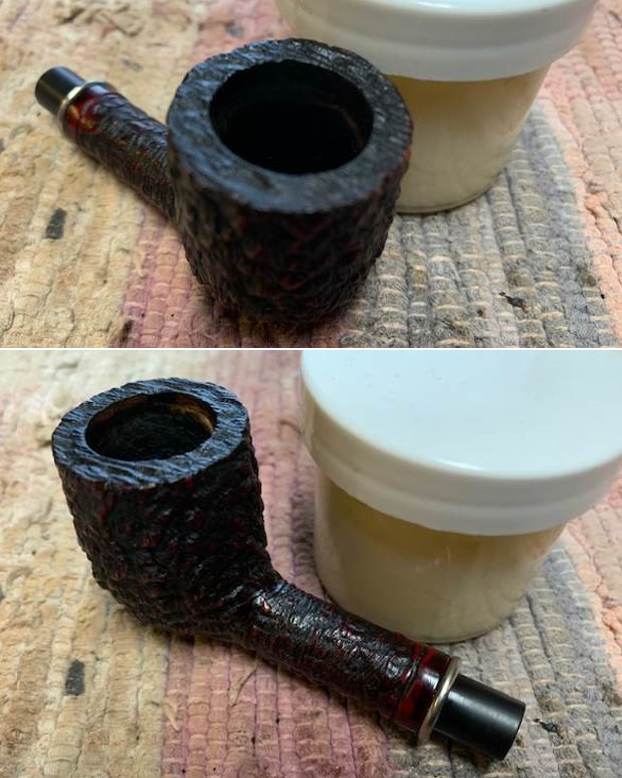
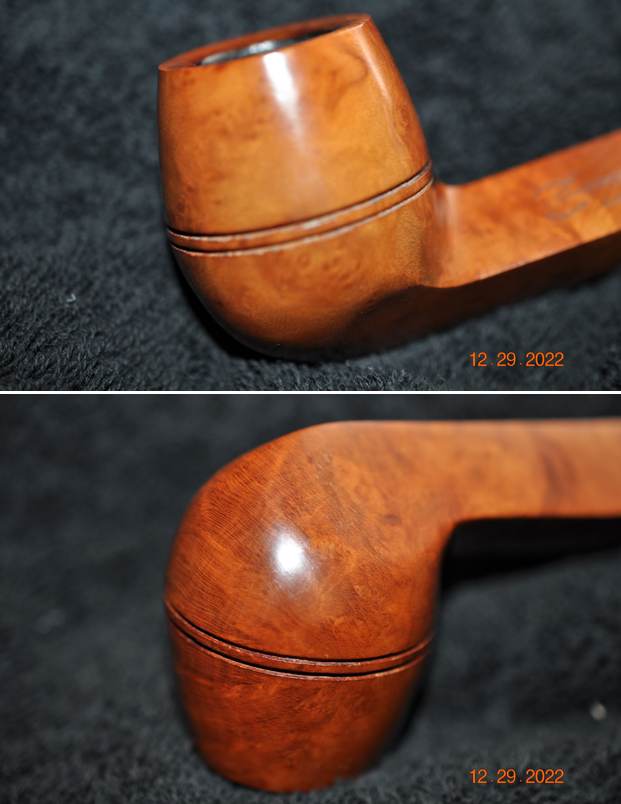
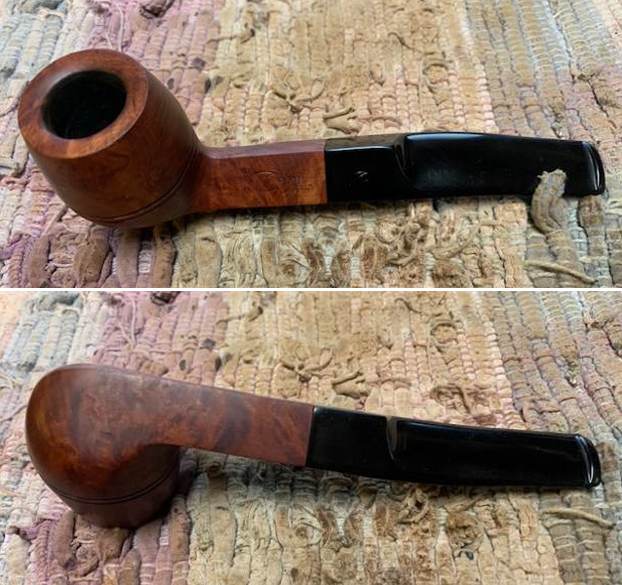
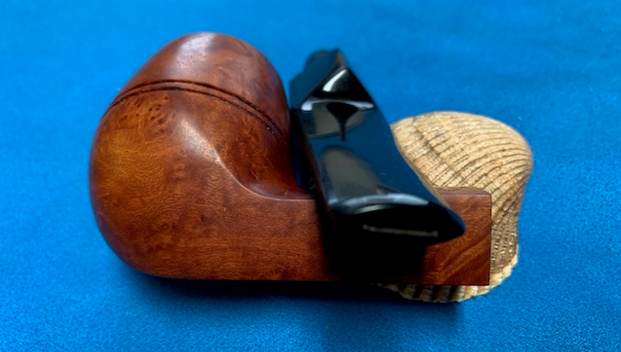
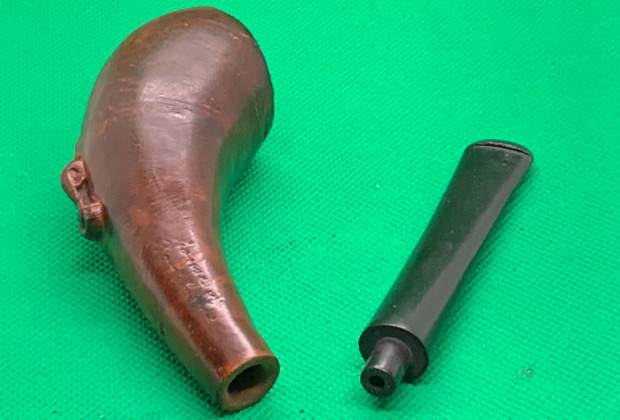
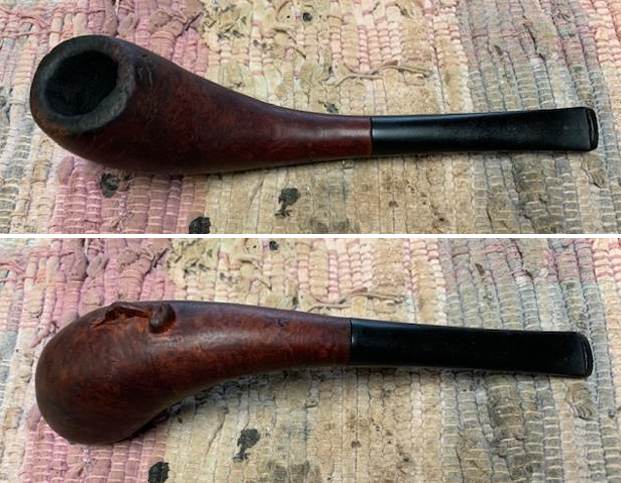
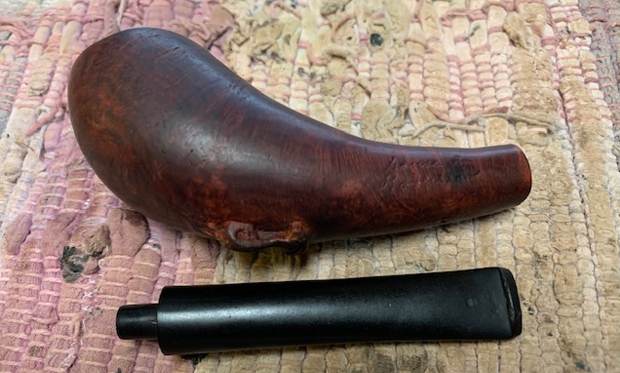
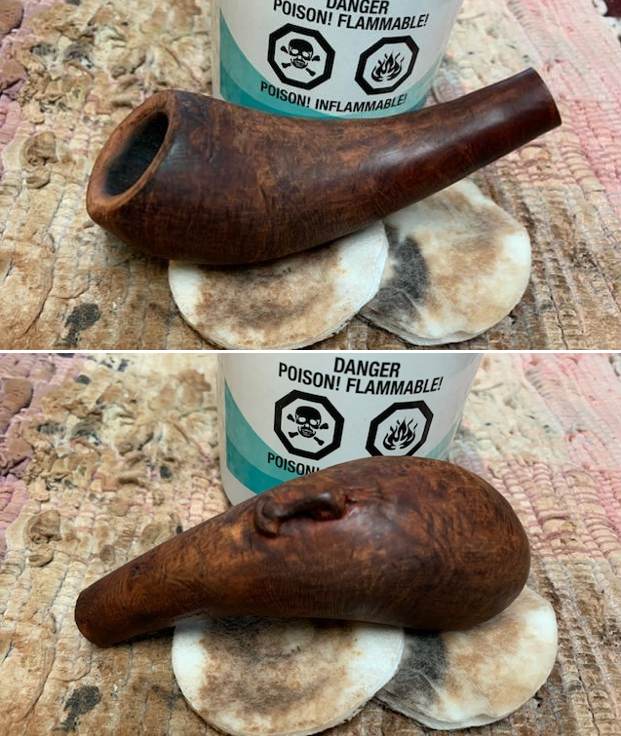
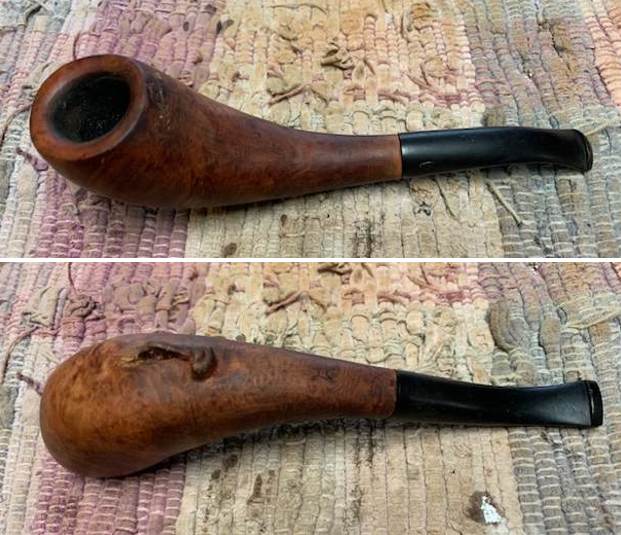
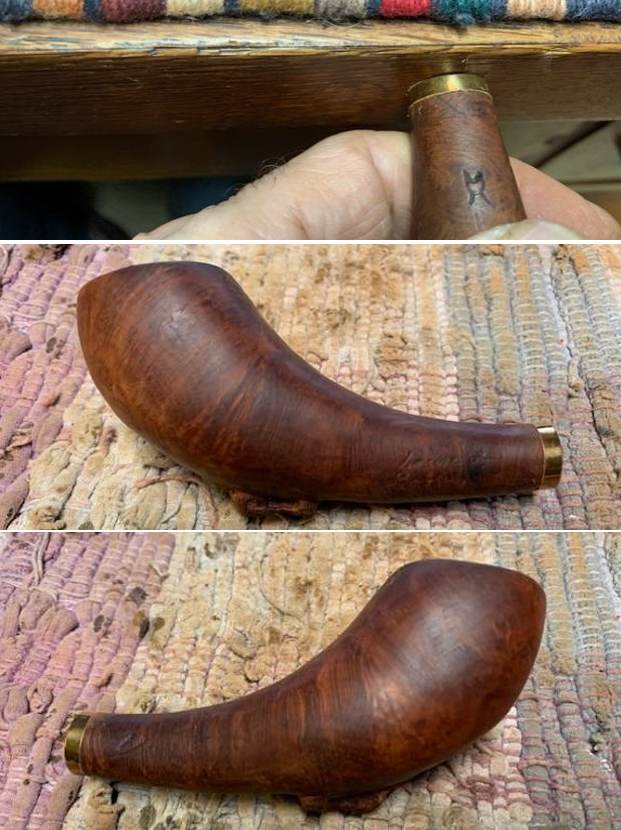
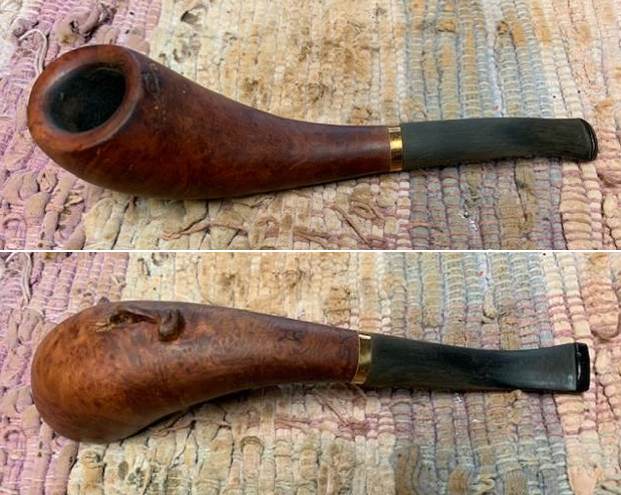
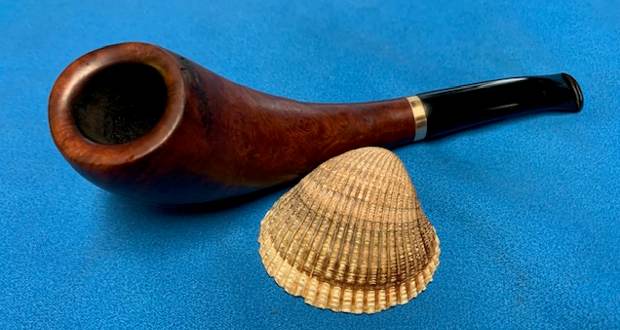
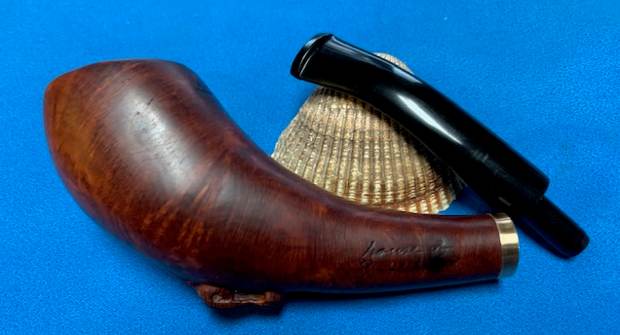
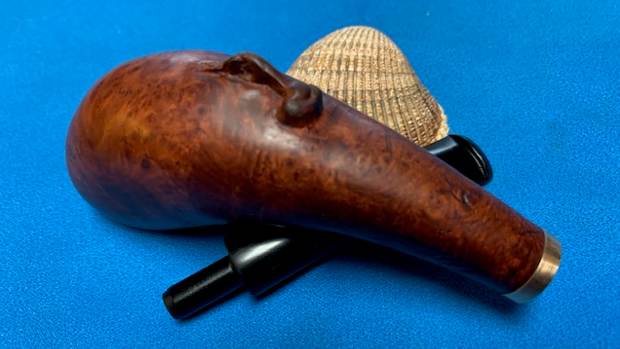
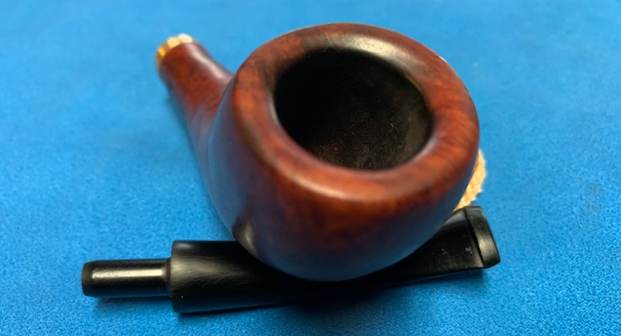
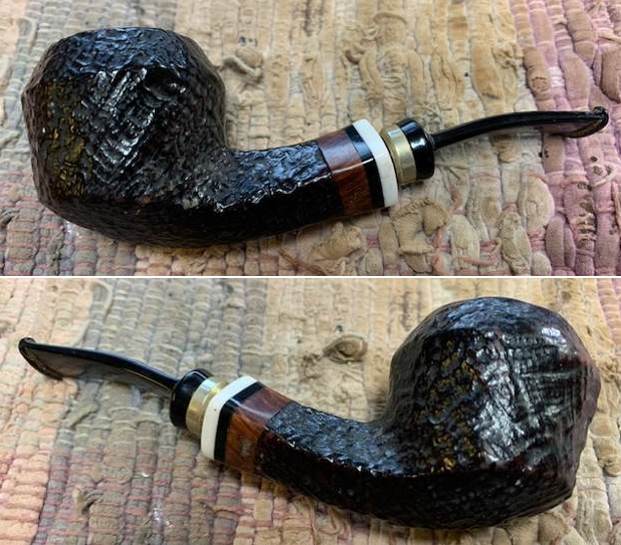
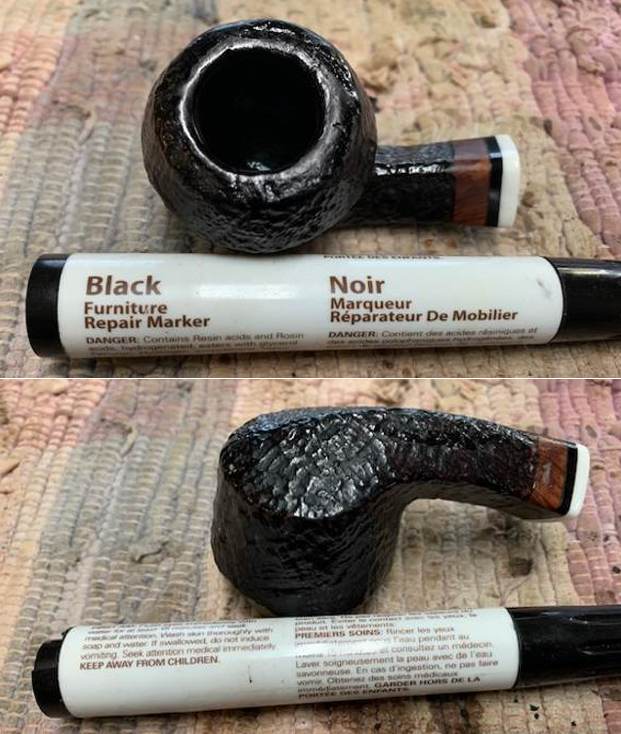
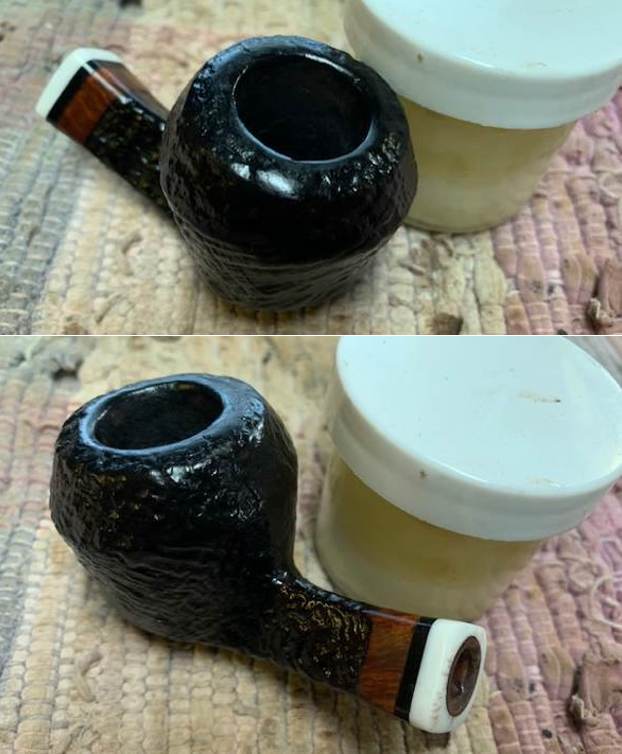
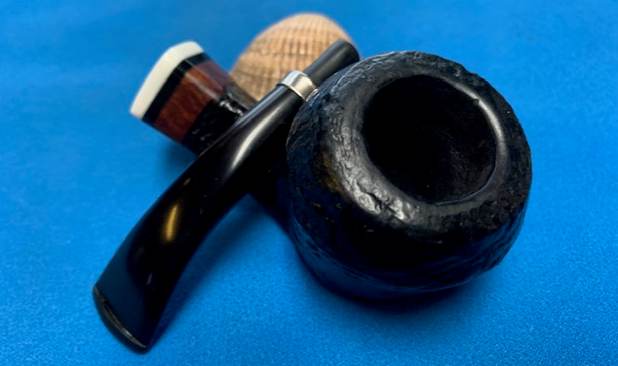
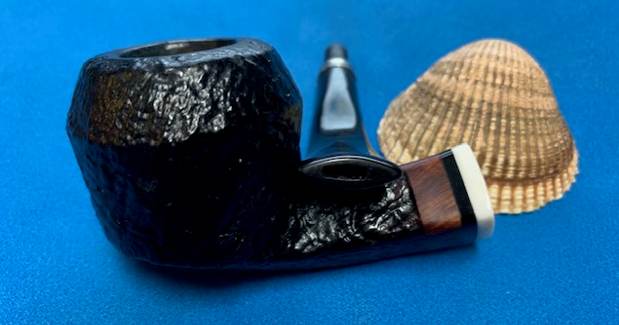
Of the two pipes in this set, this Straight Billiards appears to have seen the max abuse as well as use. The chamber has a thin layer of cake while the rim top surface has a couple of dents and dings. The inner rim edge has a couple of nicks and darkened in couple of areas. The stummel surface is marked by a number of scratch marks and is dirty with grime rubbed in to the surface. The Amber stem is badly damaged with cracks towards the tenon end and tooth indentations in the bite zone. The seating of the tenon in to the mortise is loose. The shank end has white silicon or some such tape sticking out and was likely used to tighten the fit of the stem in to the shank. Here is how the pipe looks as it sits on the worktable.

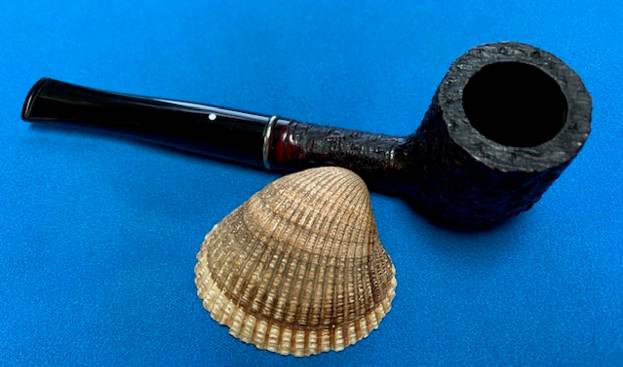
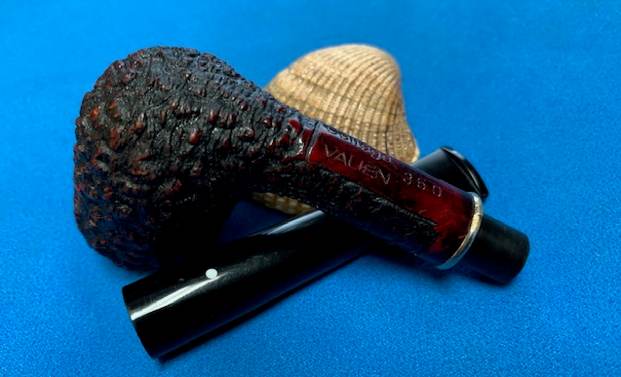
 Detailed Inspection
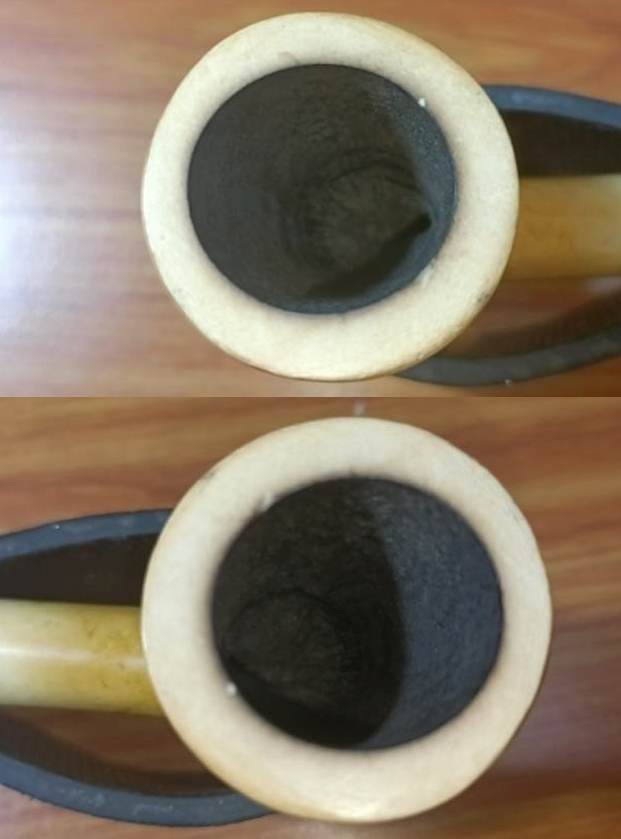
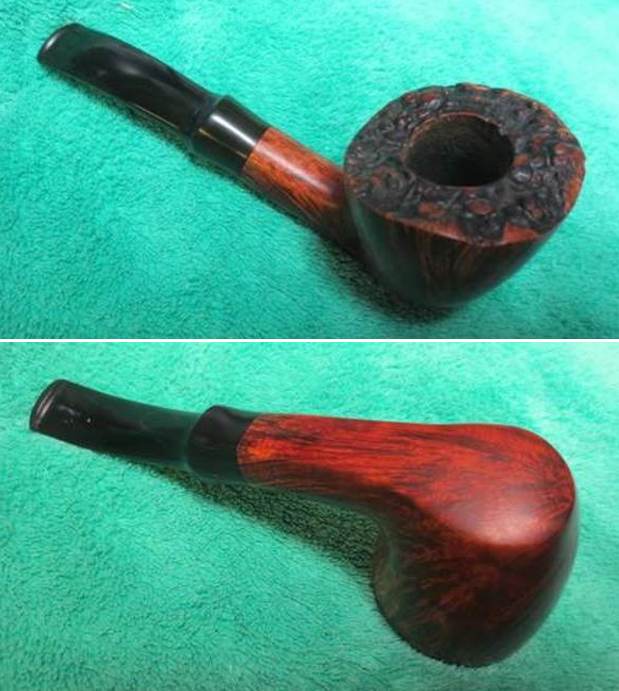
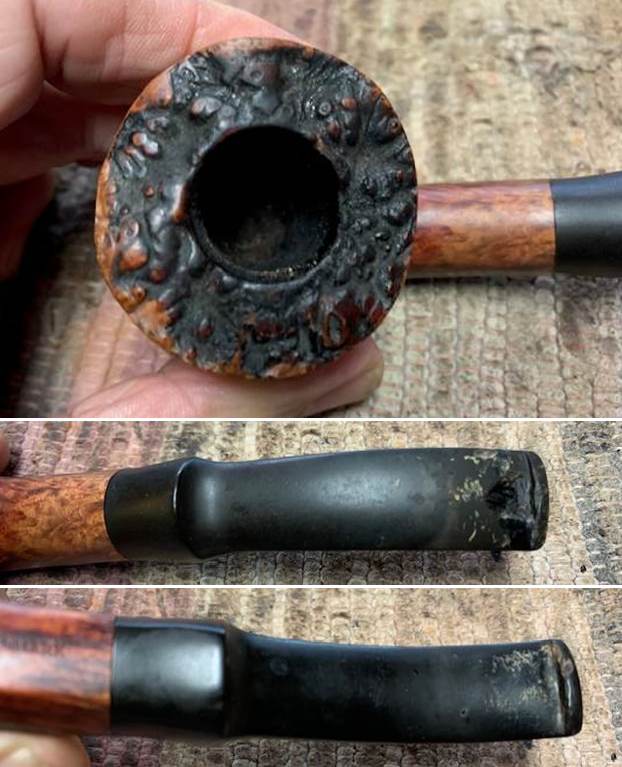
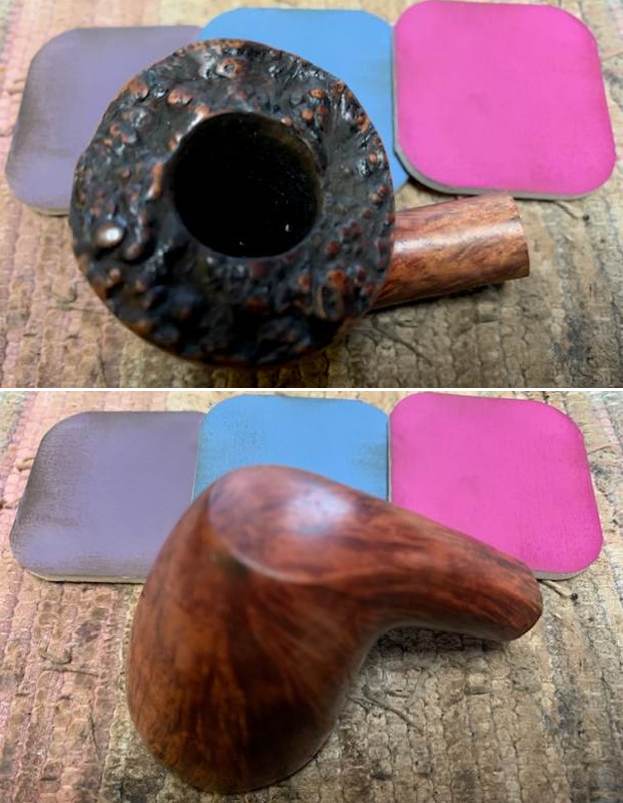
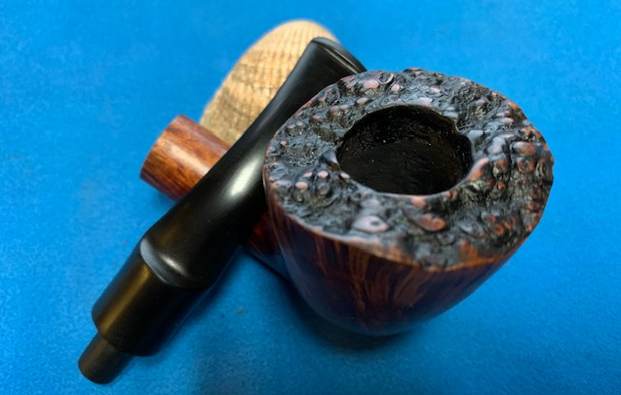
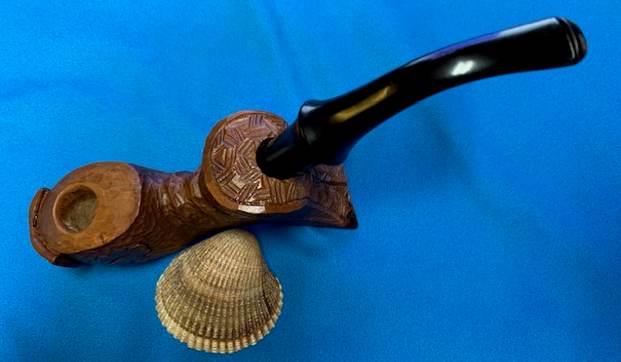
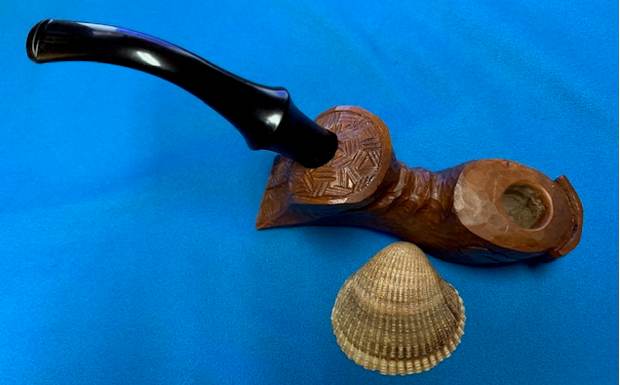
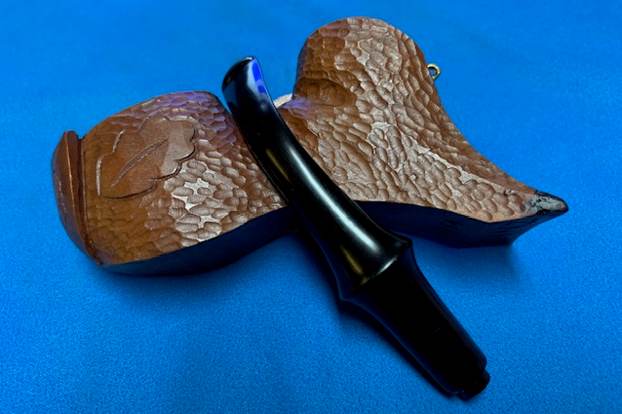
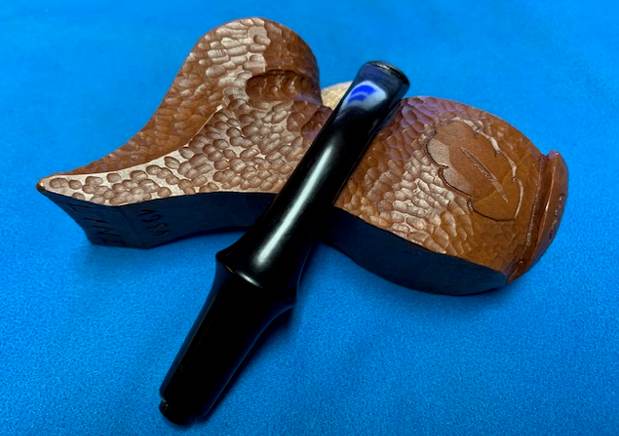
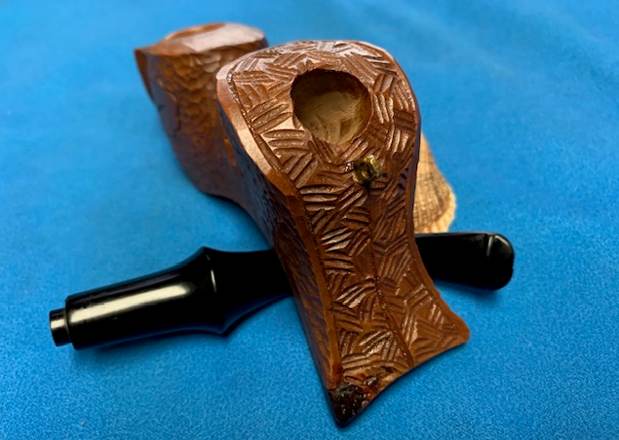
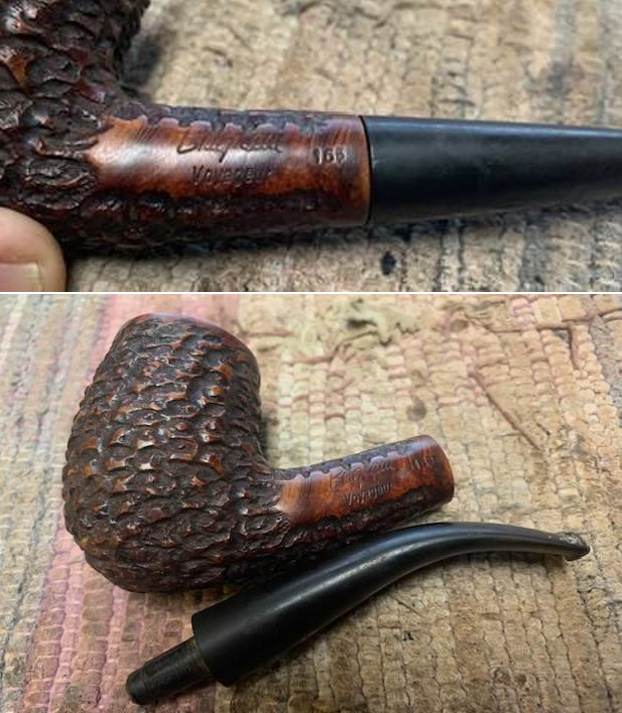
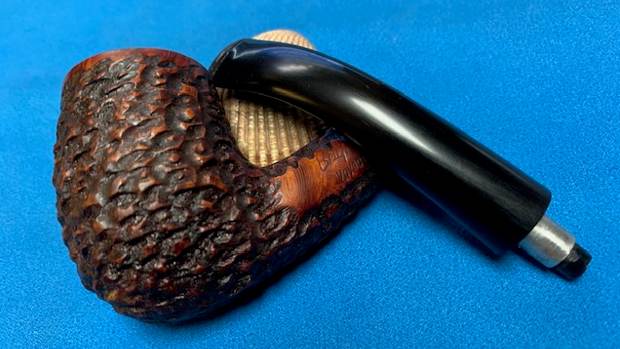
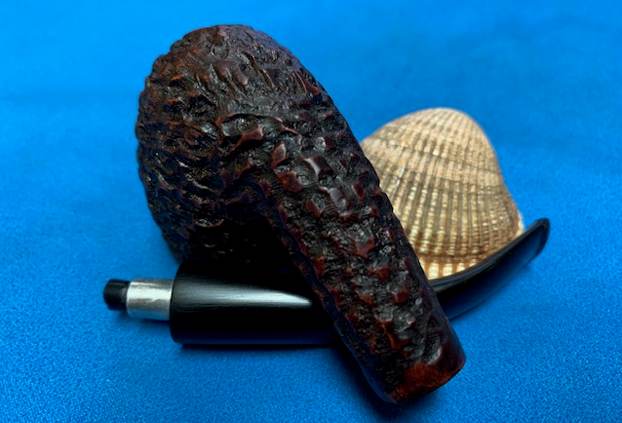
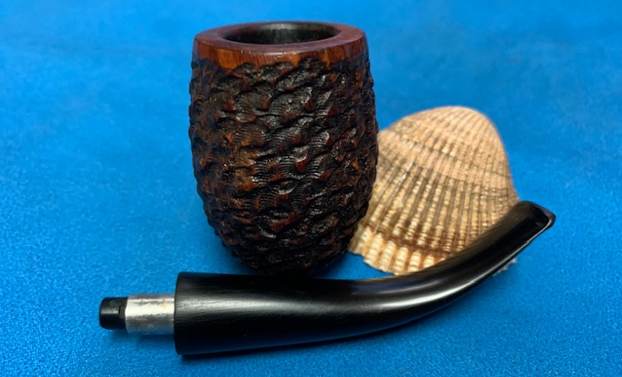
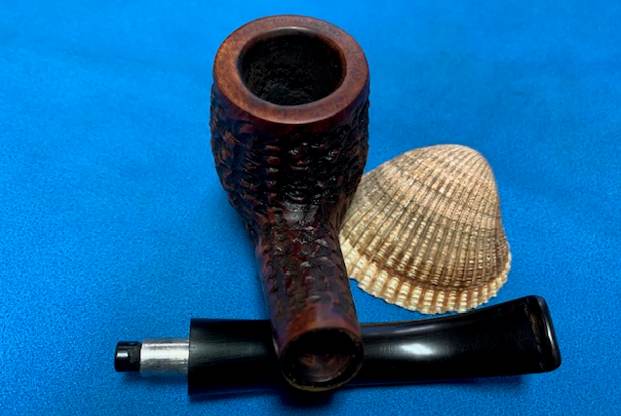
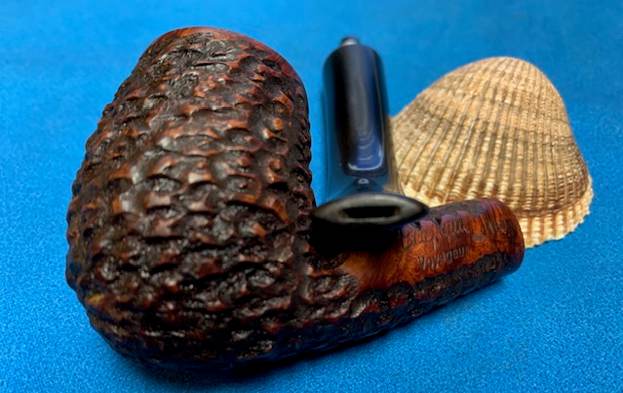
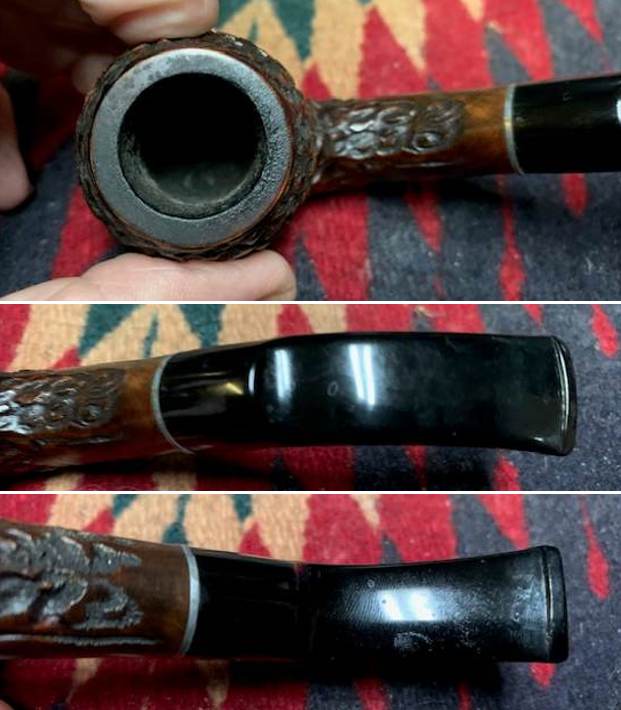
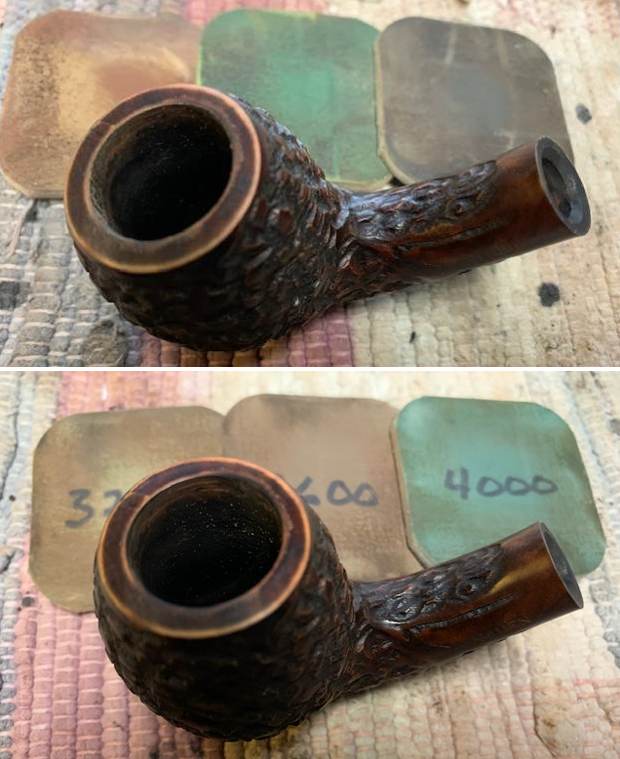
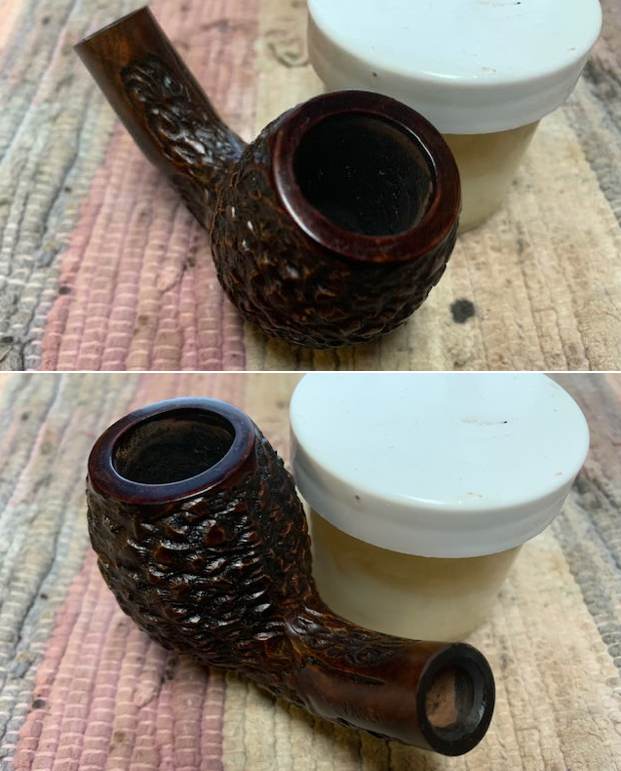
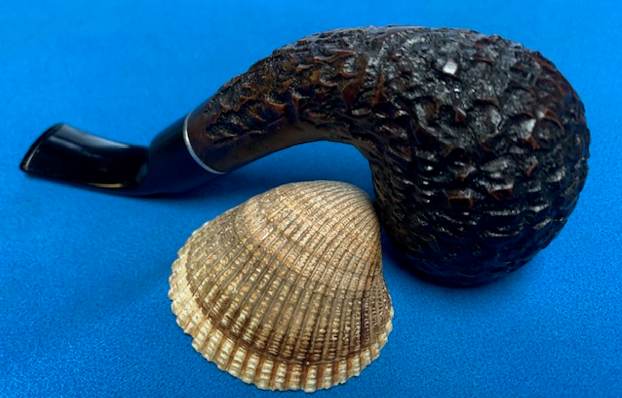
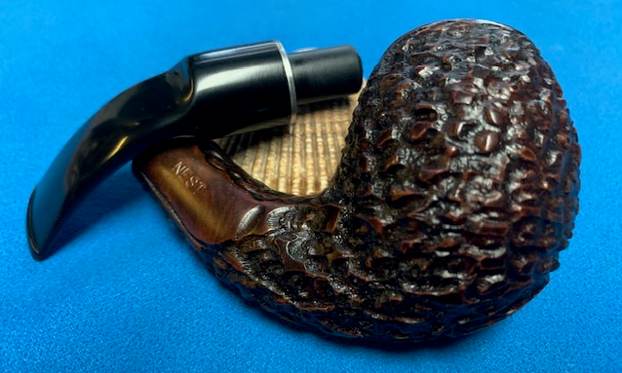
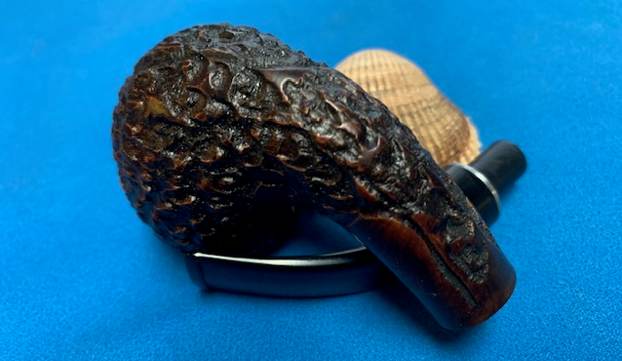
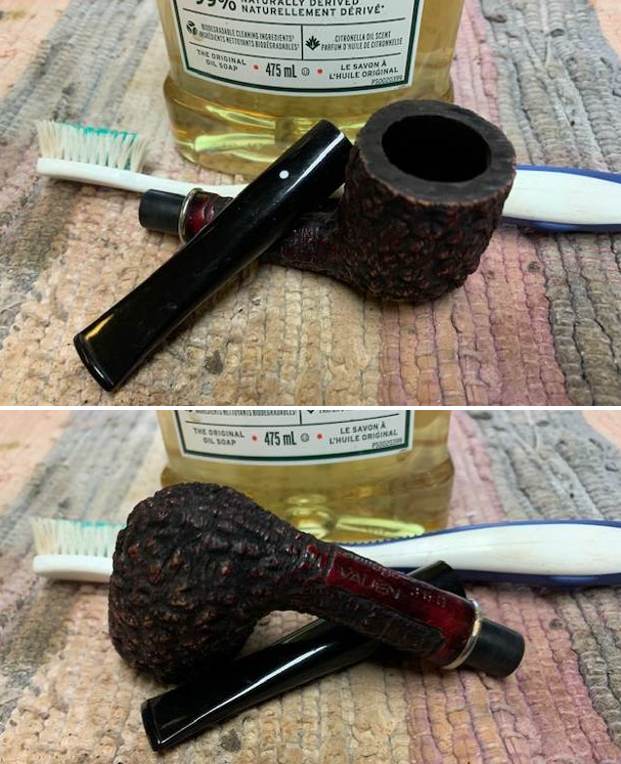
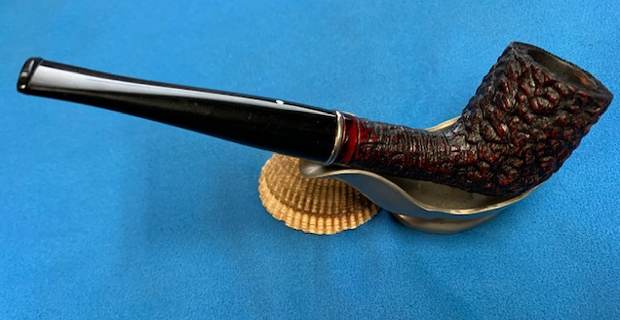
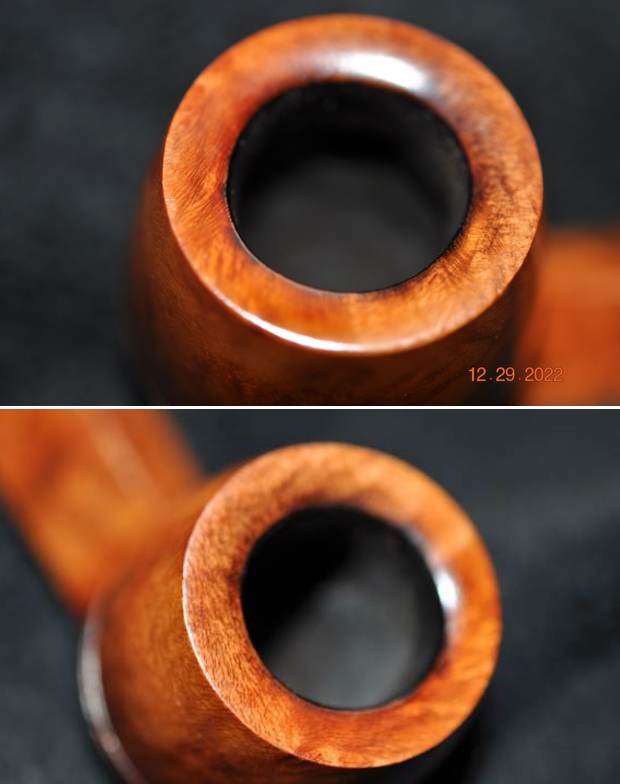
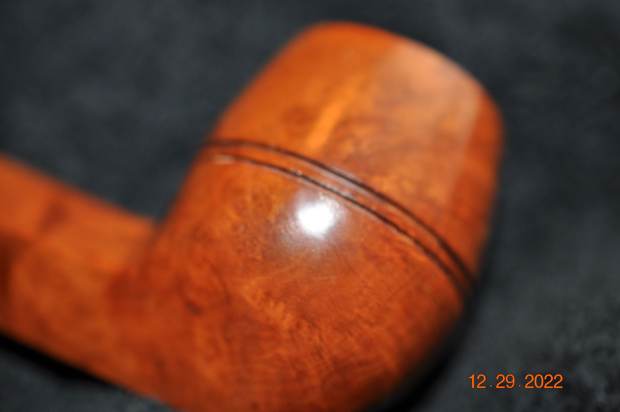
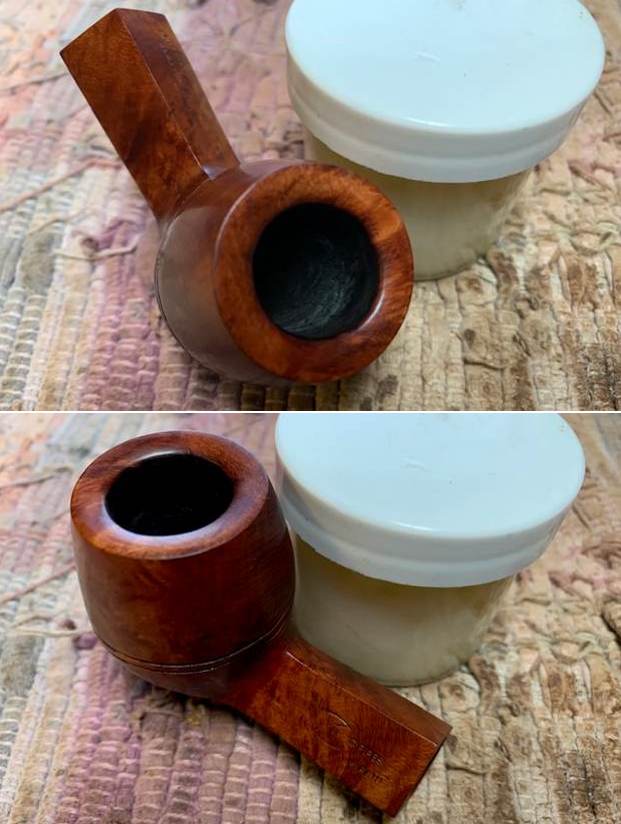
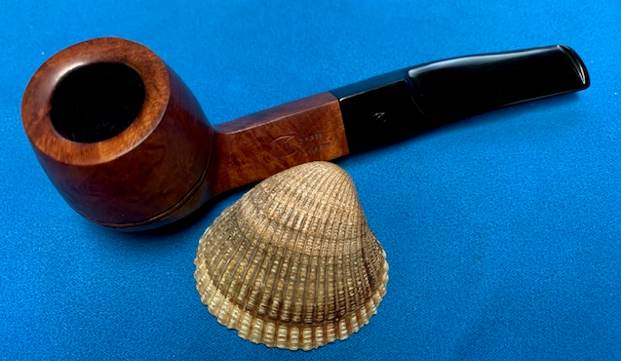
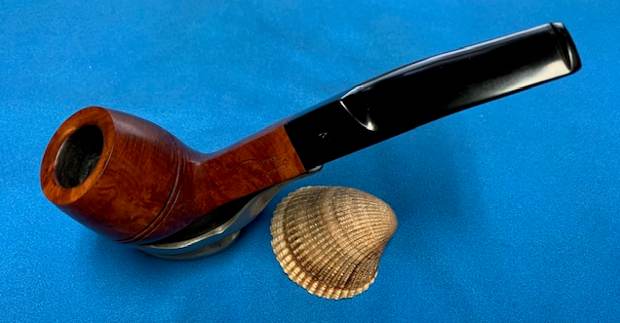
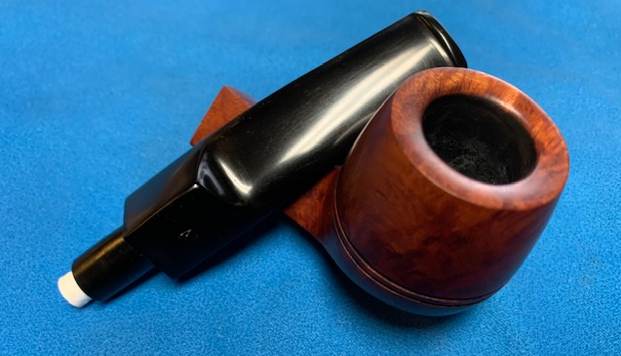
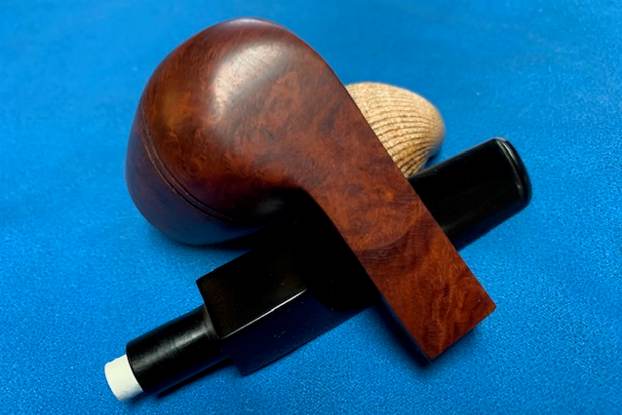
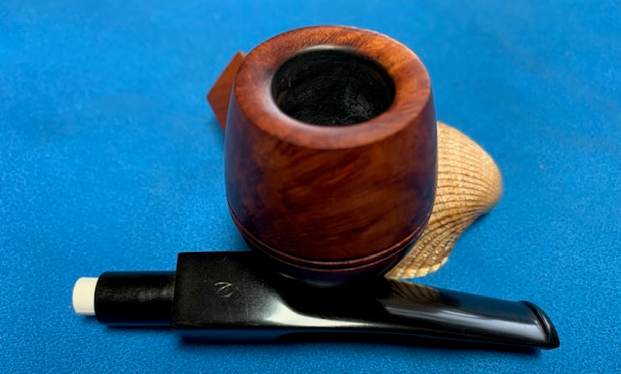
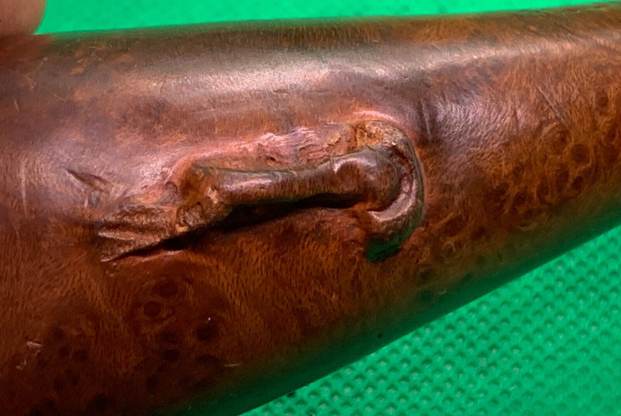
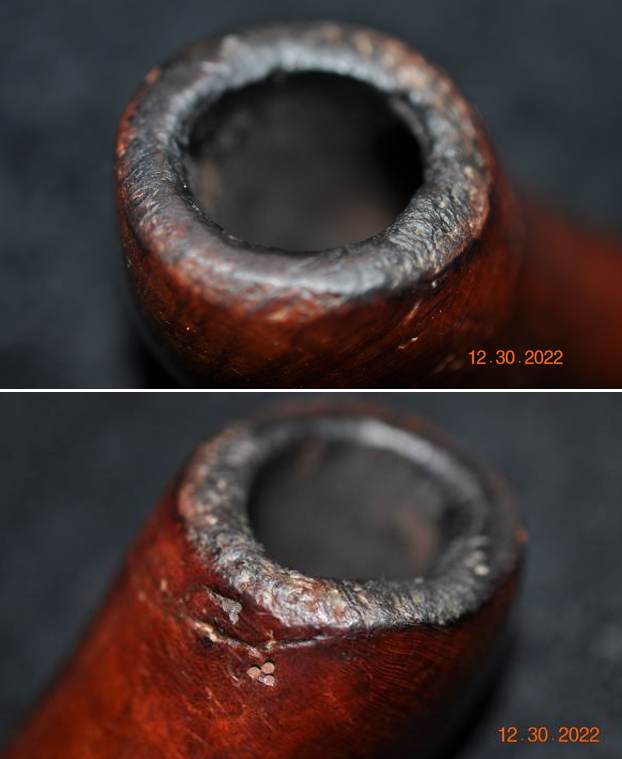
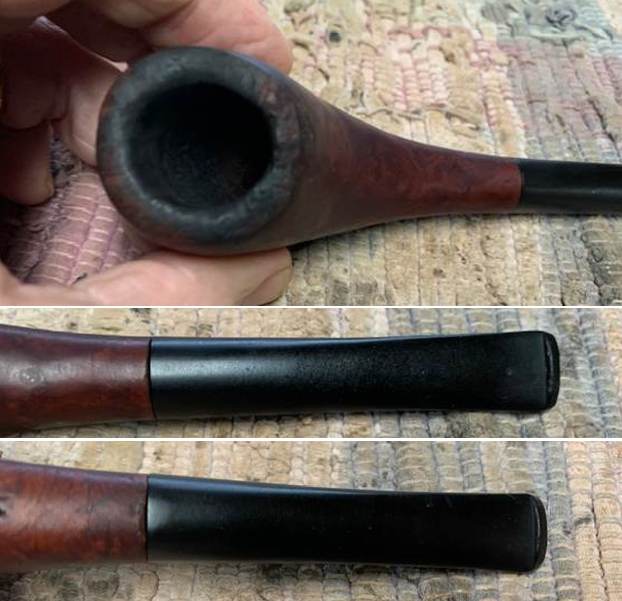
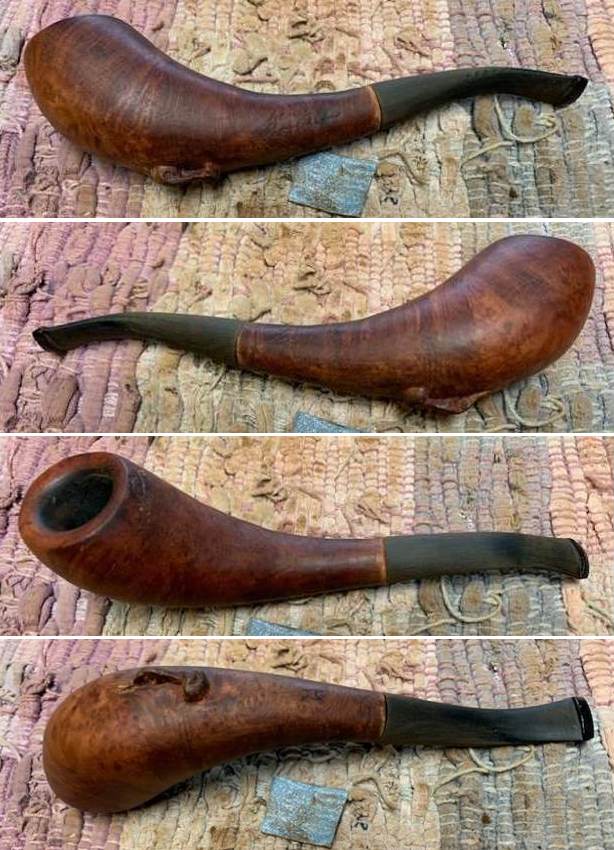
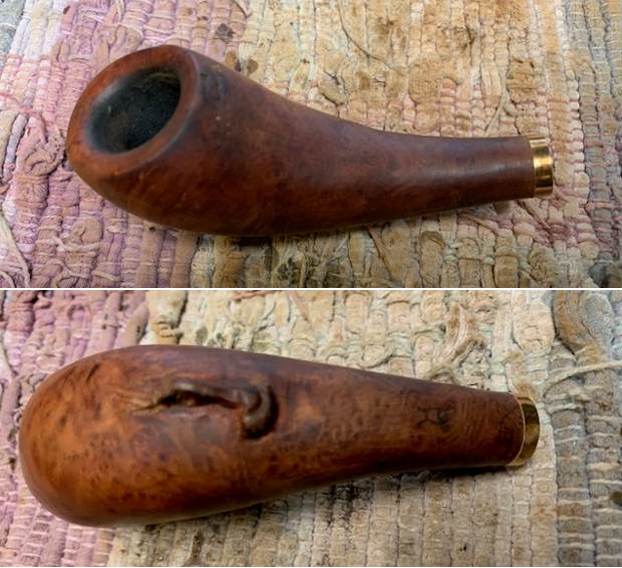
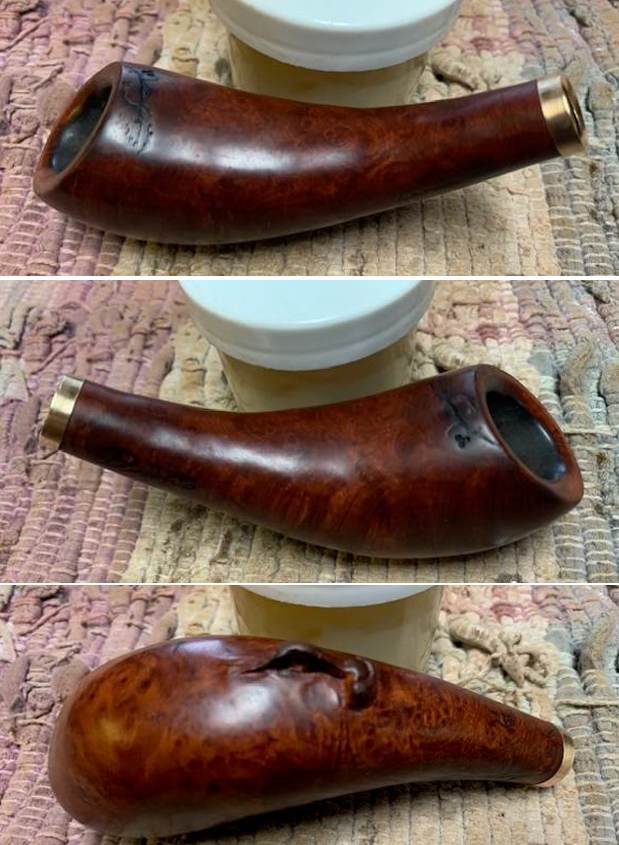
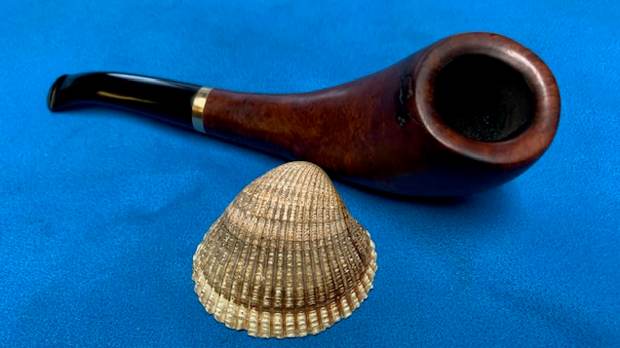
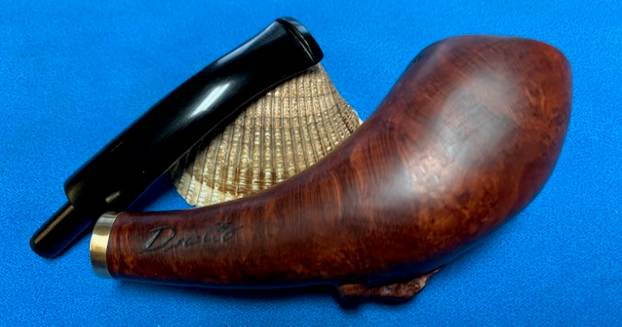
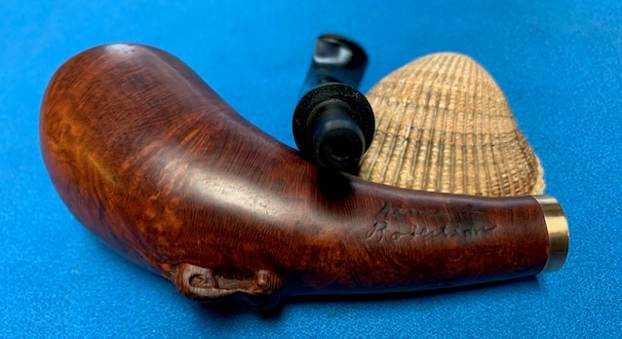
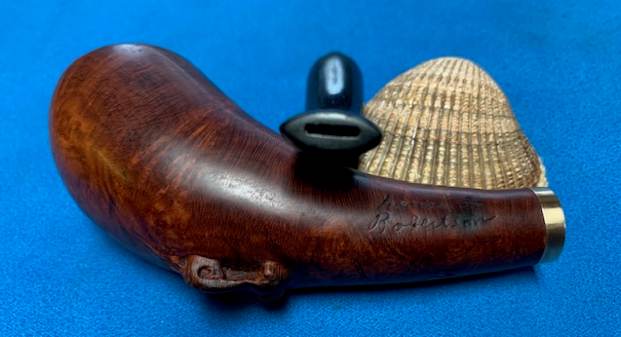
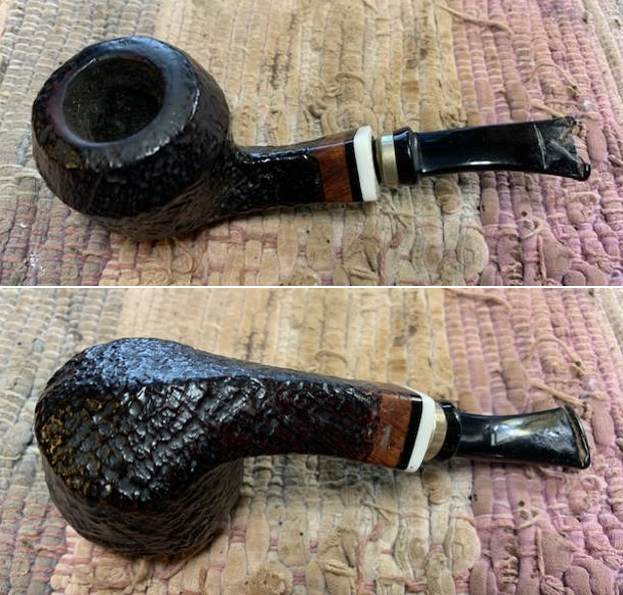
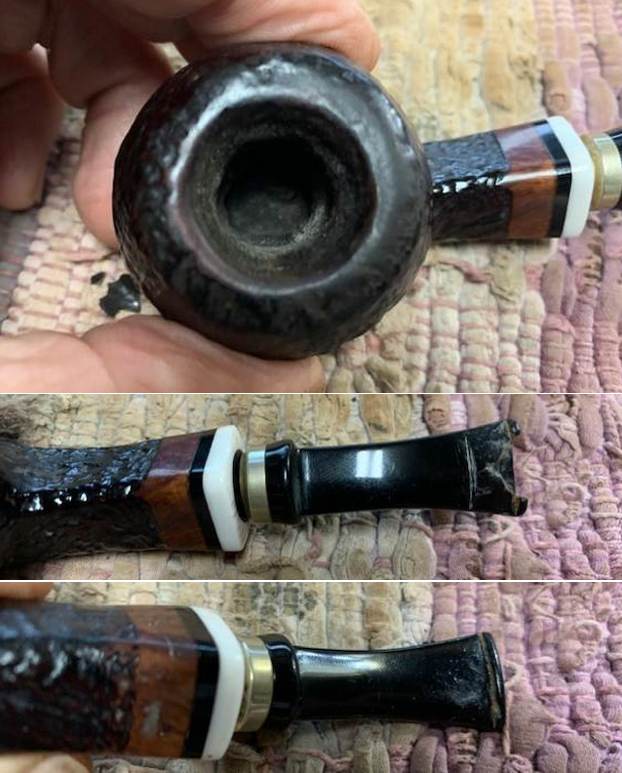
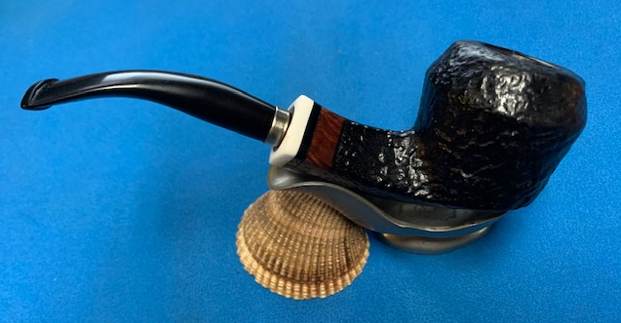
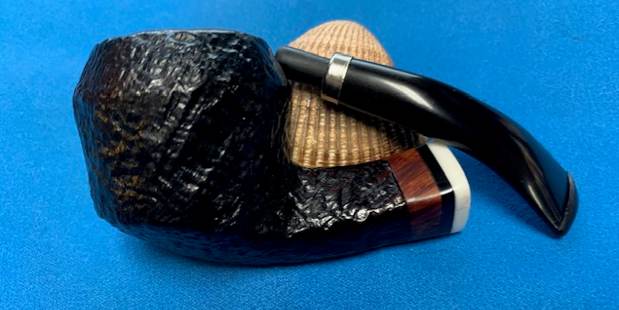
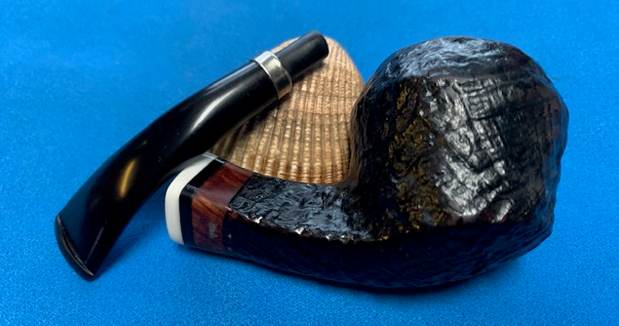
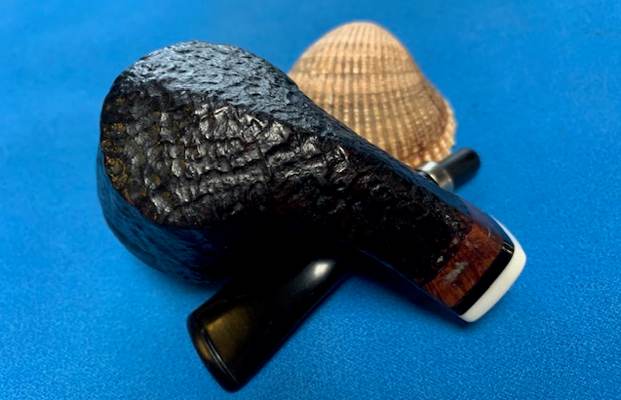
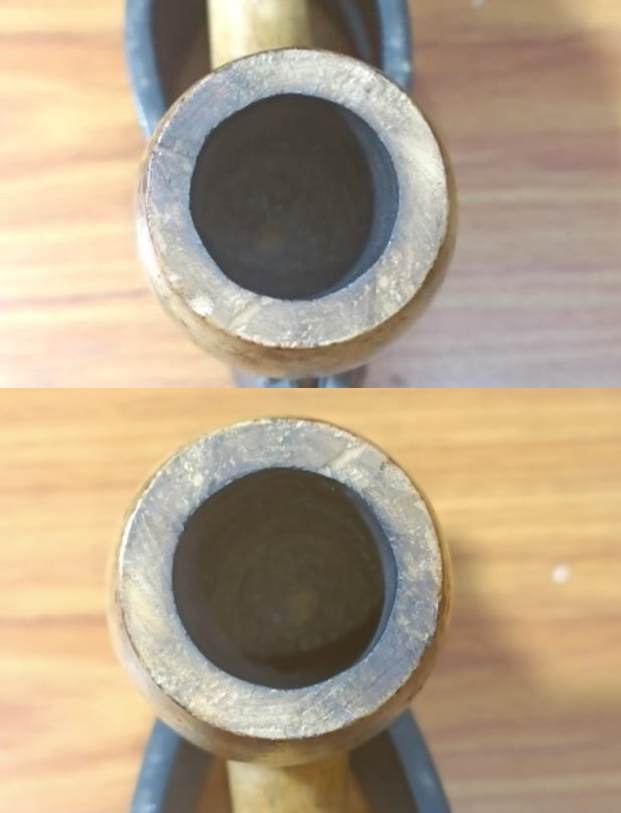
Both the pipes in the set appear to have been reamed prior to storage as is evident from the very thin layer of carbon in the chamber of both these pipes. The rim surface is clean of any lava overflow with slight darkening in 5 o’clock direction. However, there are a number of scratches and a couple of slight gouges (encircled in green) along the rim surface. The inner and outer rim edges have a few minor dings and would need to be addressed. The draught hole is right in the center and at the bottom of the chamber making these pipes a fantastic smoke.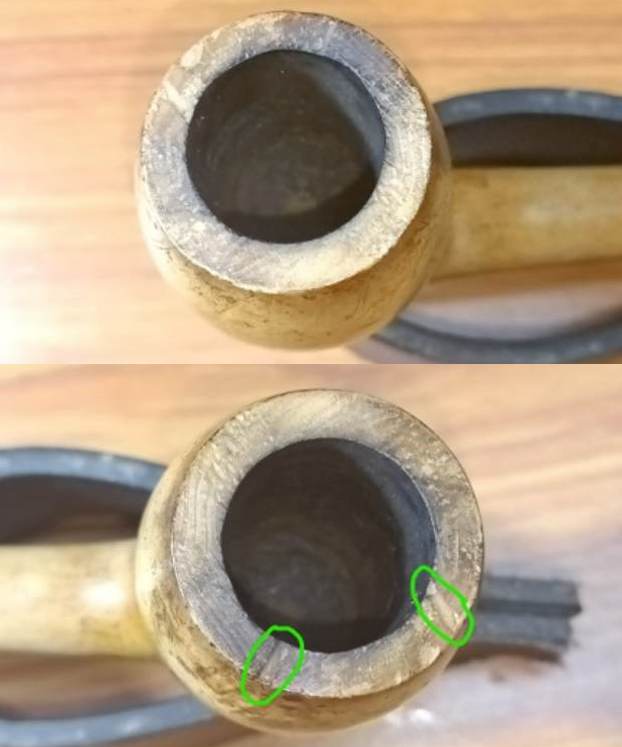
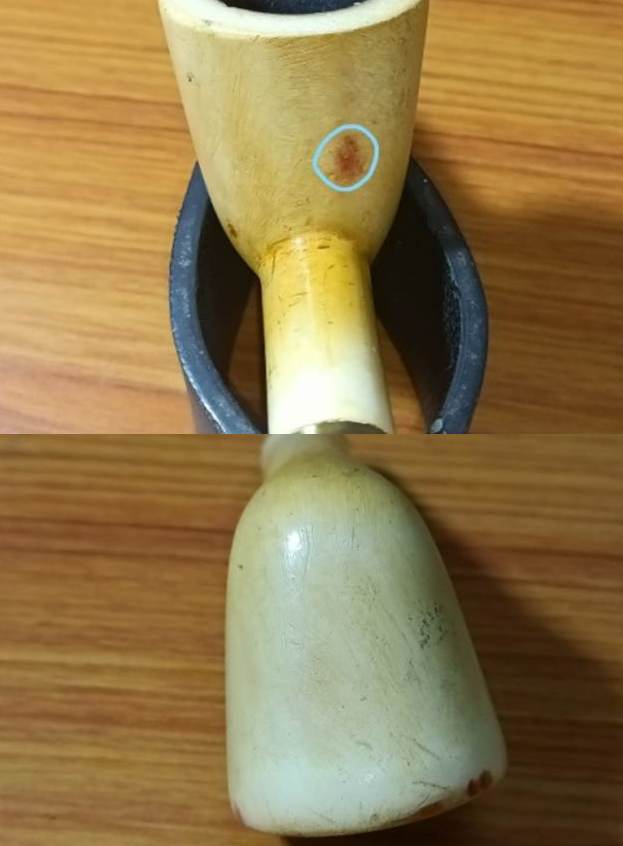
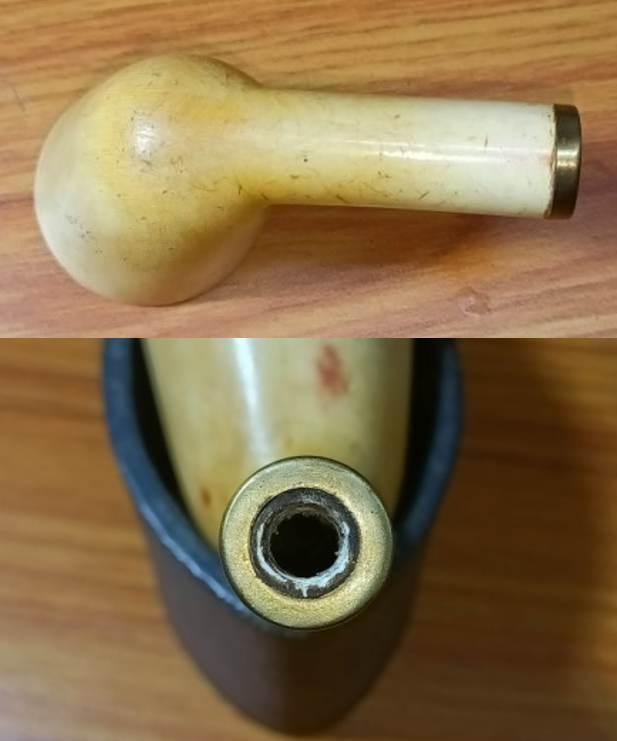
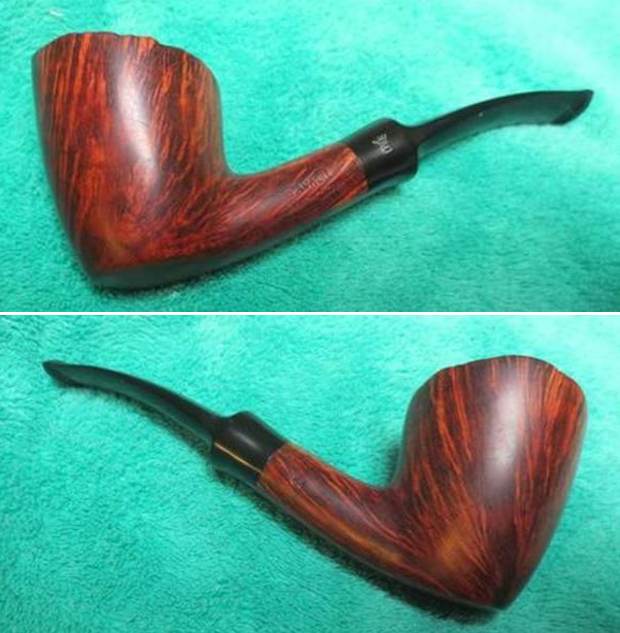
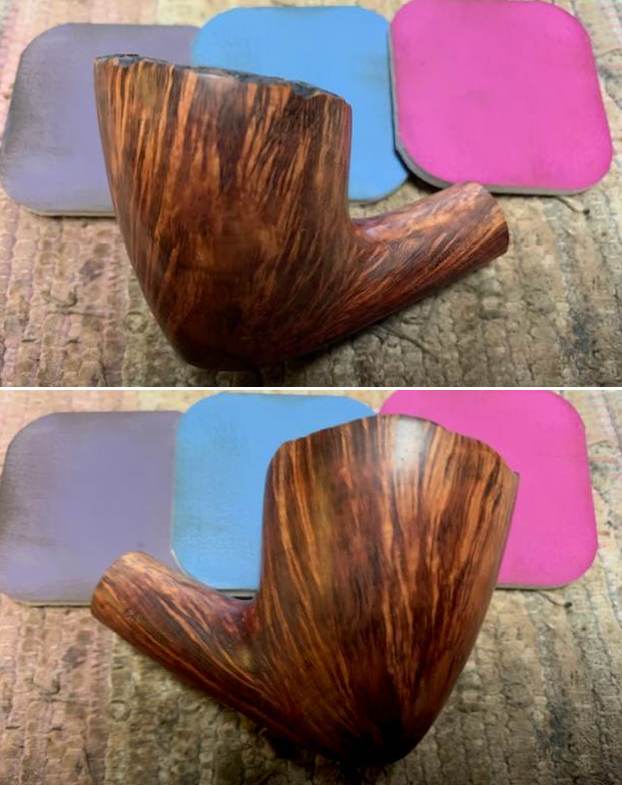
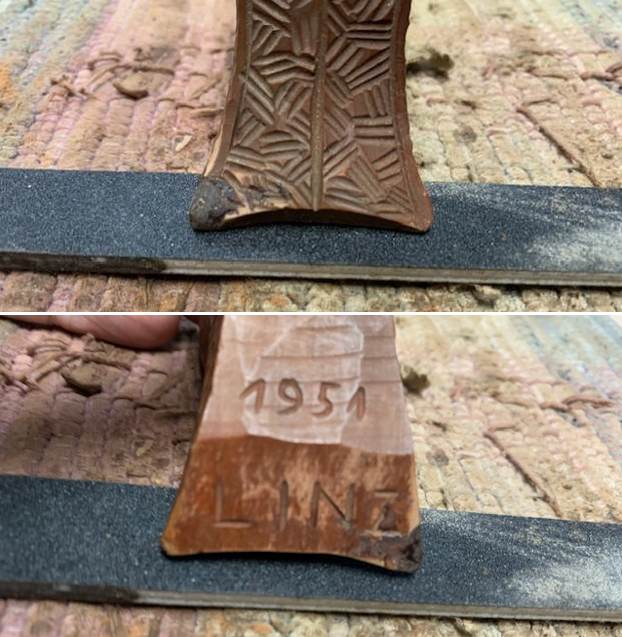
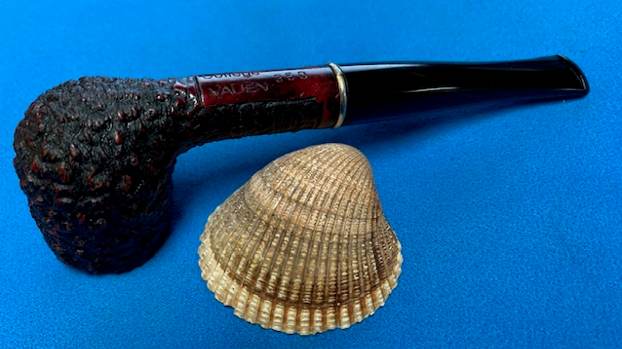
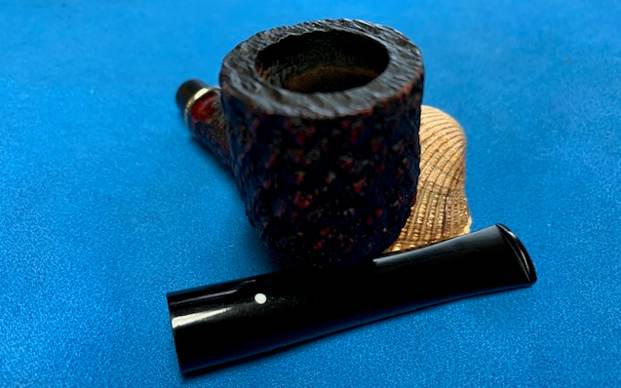
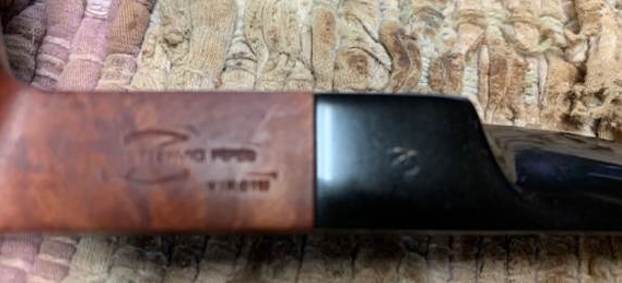
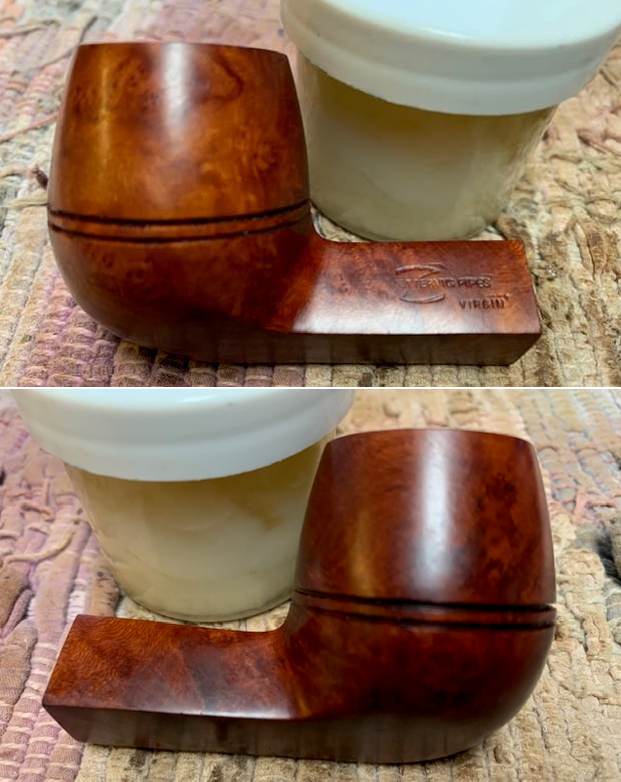
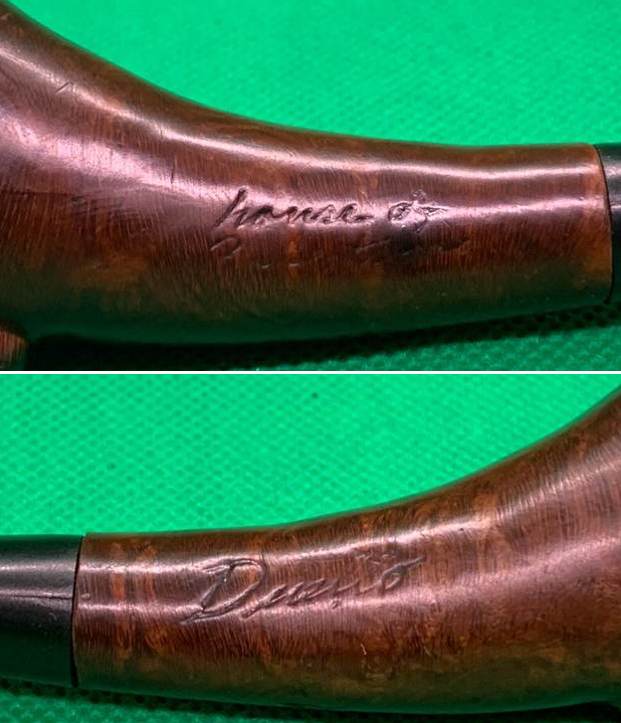
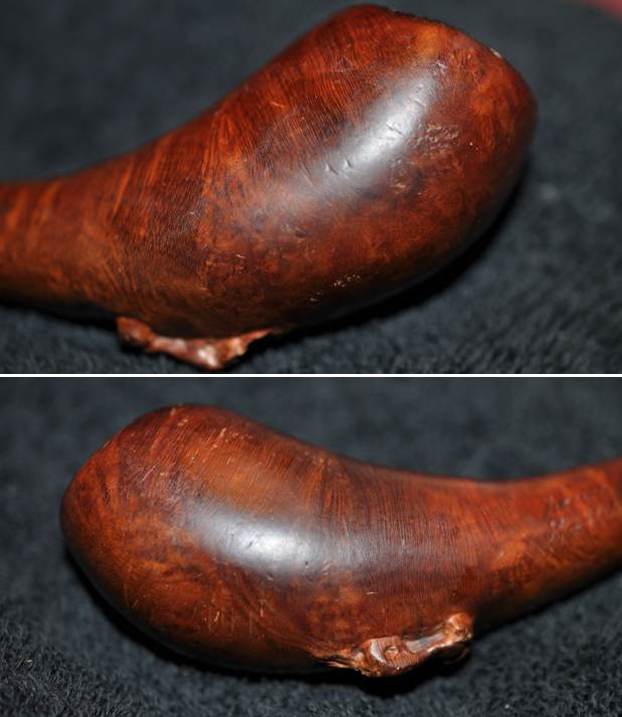
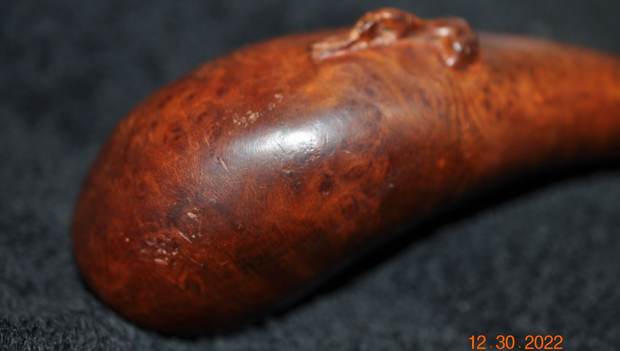
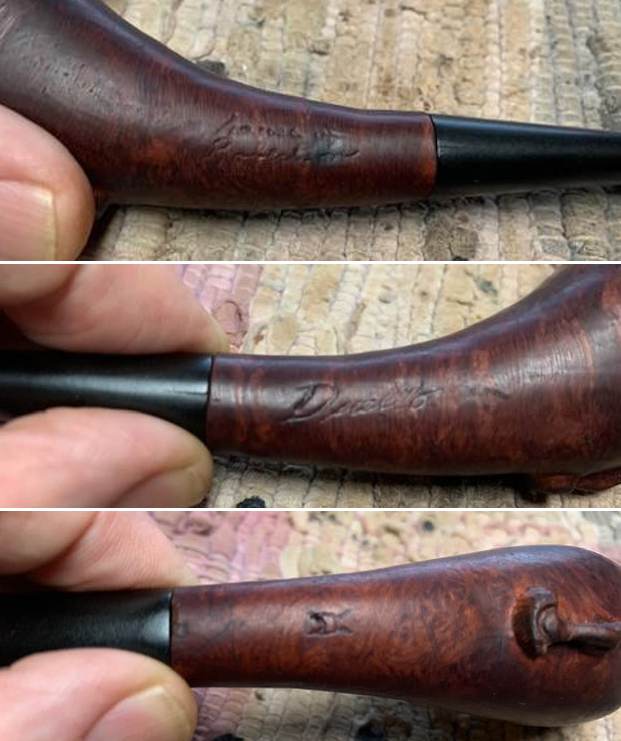
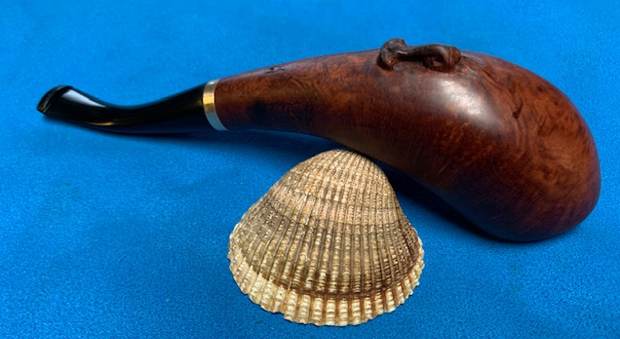
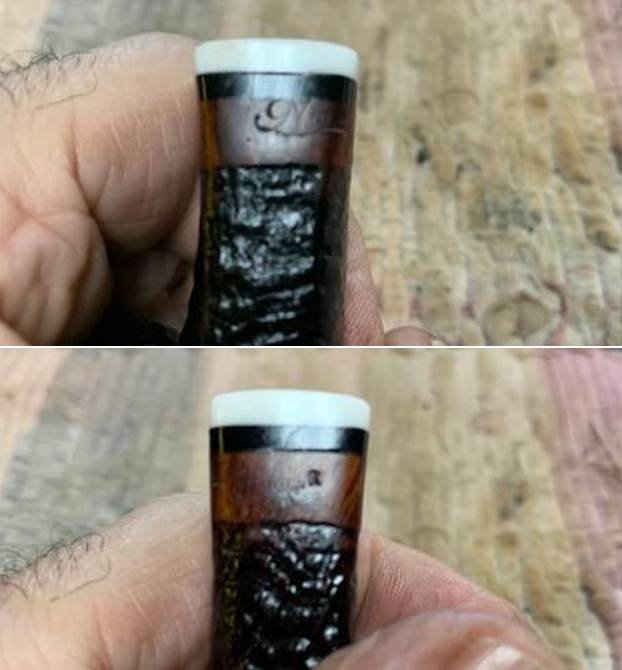
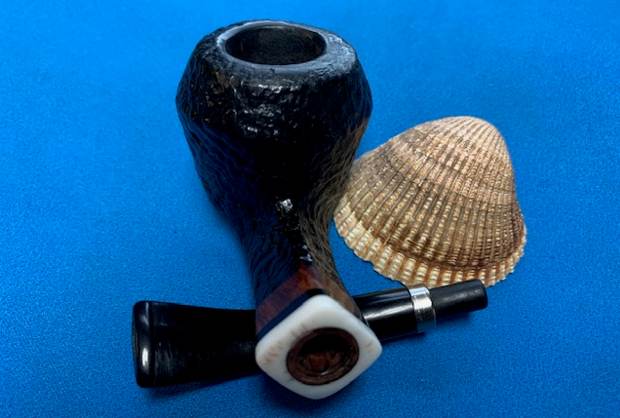
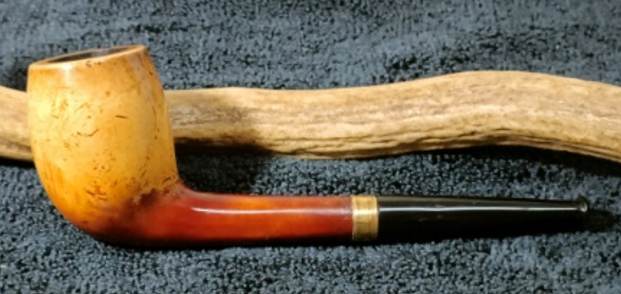
 The stummel is peppered with minor as well as some slightly deep scratch marks. These scratches are predominantly on the right side of the stummel surface. There is a ton of grime and dirt over the surface. The shank end has a brass band and close scrutiny confirmed that the band is not a repair band. The white silicon (?) duct tape that is seen along threads inside of the mortise is indicative of having been placed to tighten the seating of the tenon in to the mortise. The mortise is severely clogged with tobacco ash, oils and gunk making the draw labored. Notwithstanding the present appearance of this pipe, I think that this pipe has some really beautiful coloration hiding beneath all the dirt and grime.
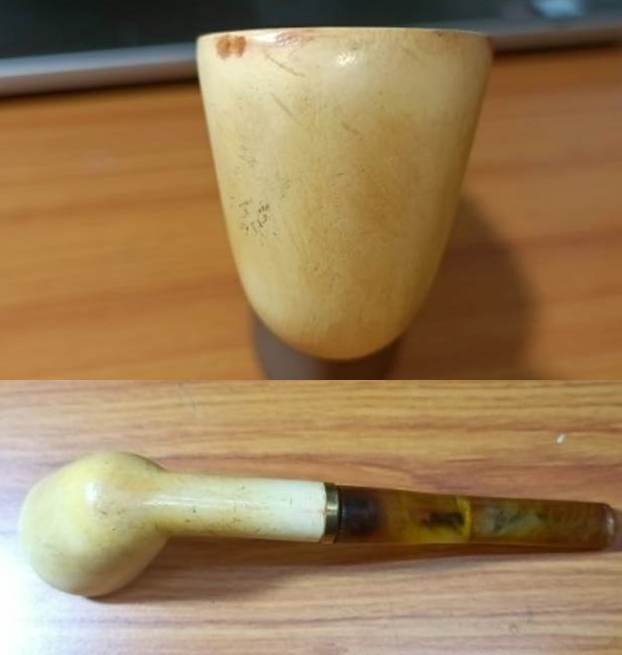
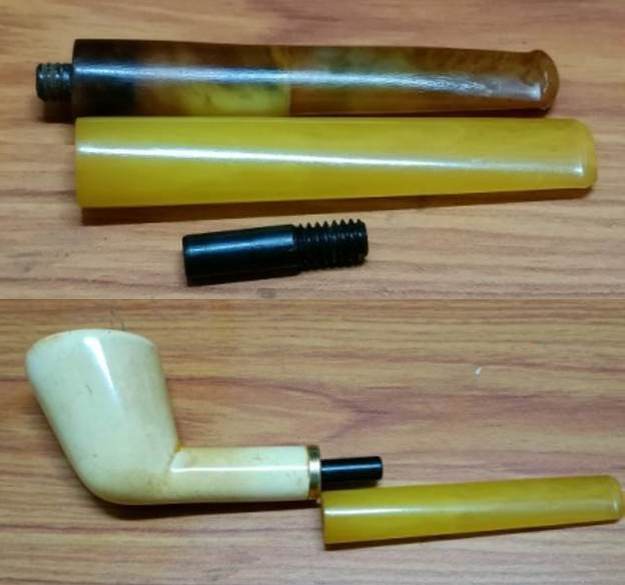
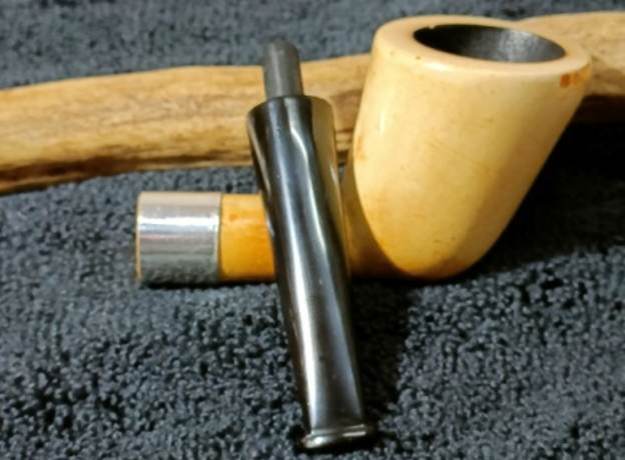
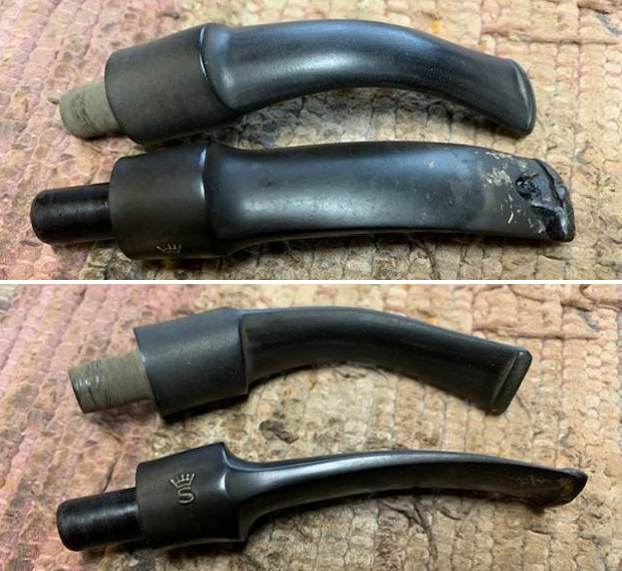
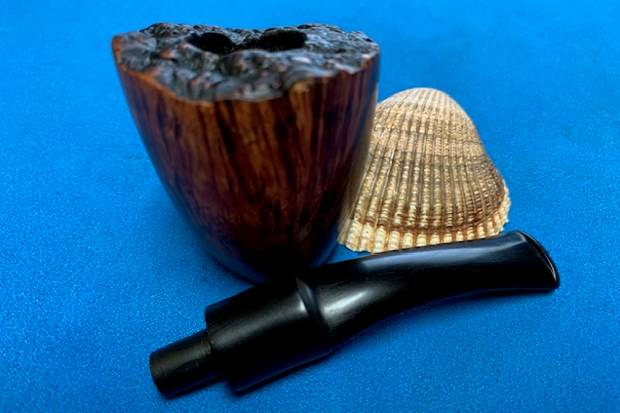
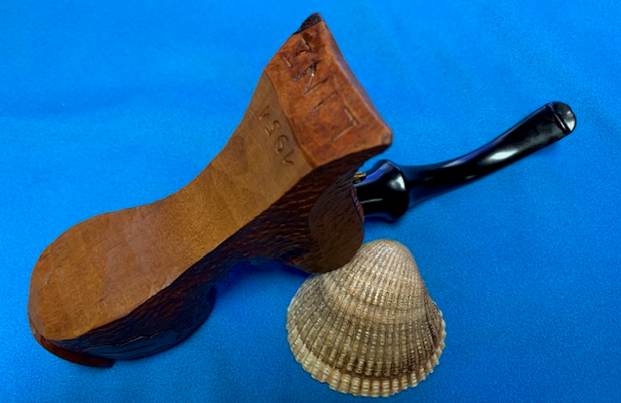
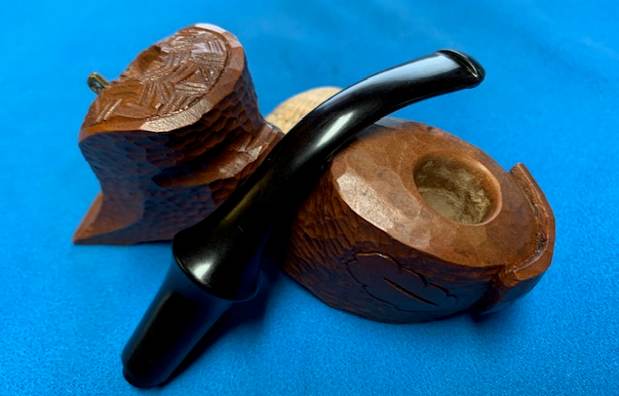
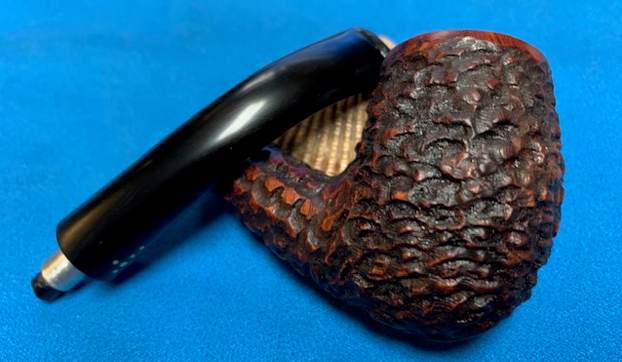
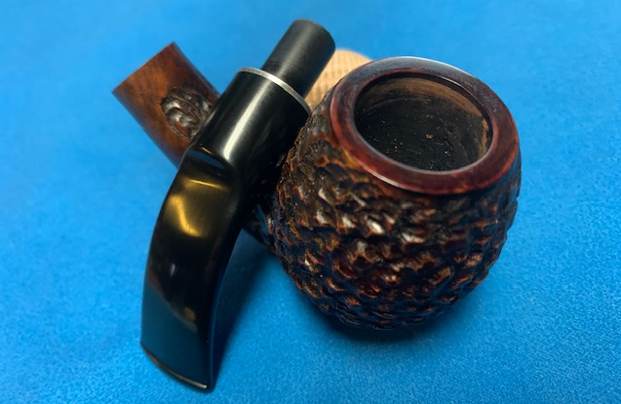
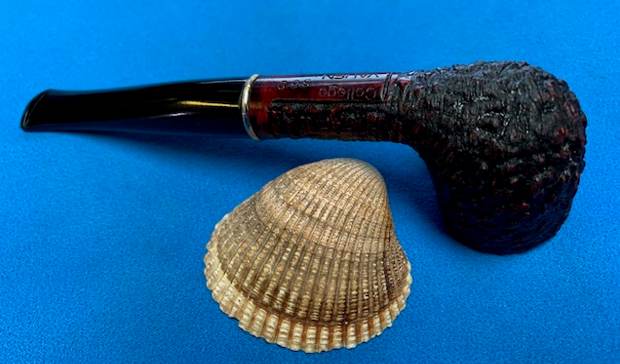
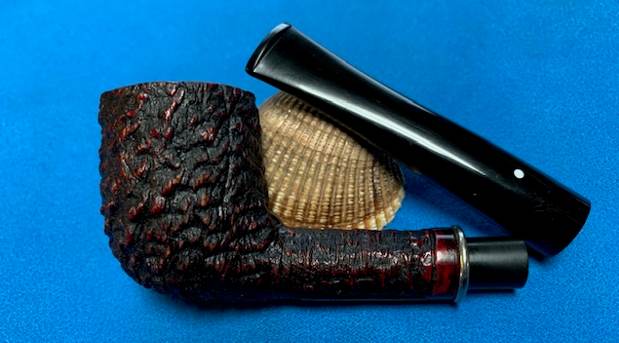
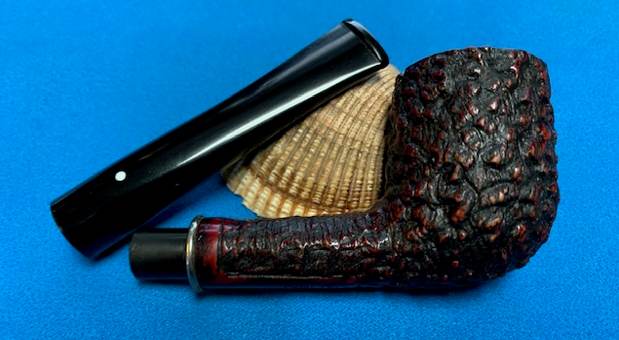
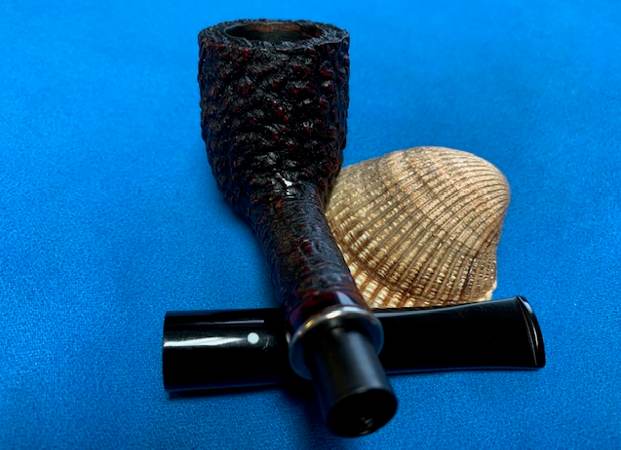
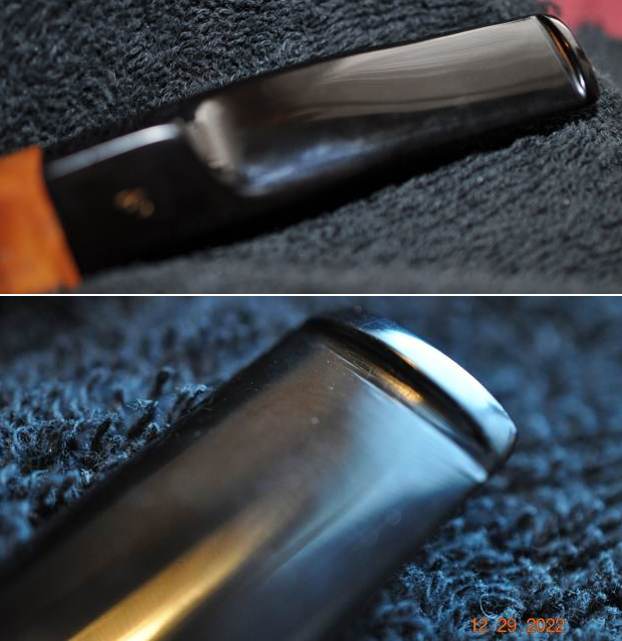
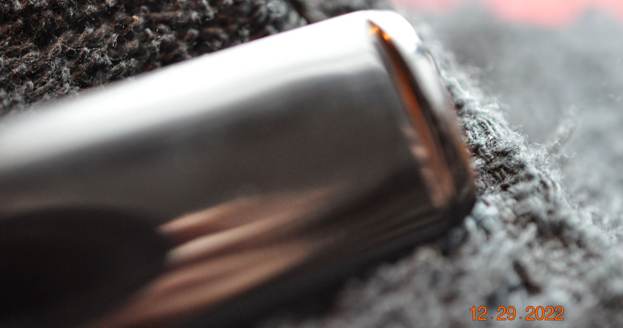
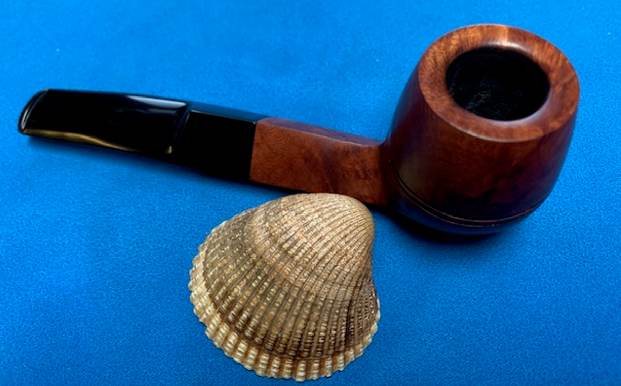
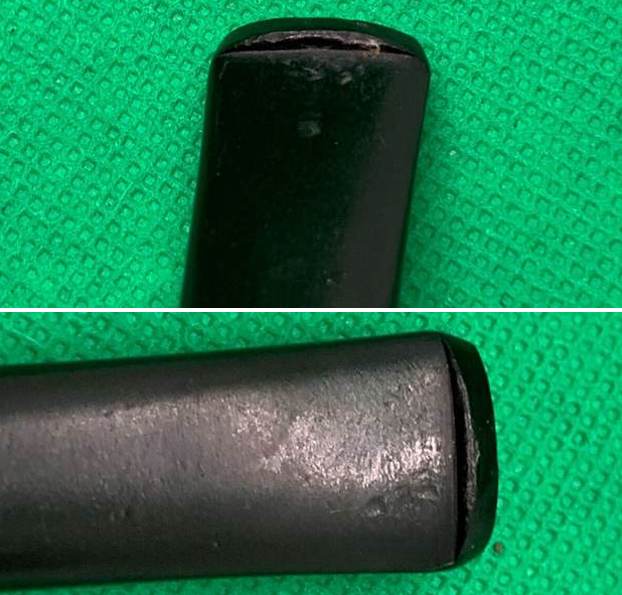
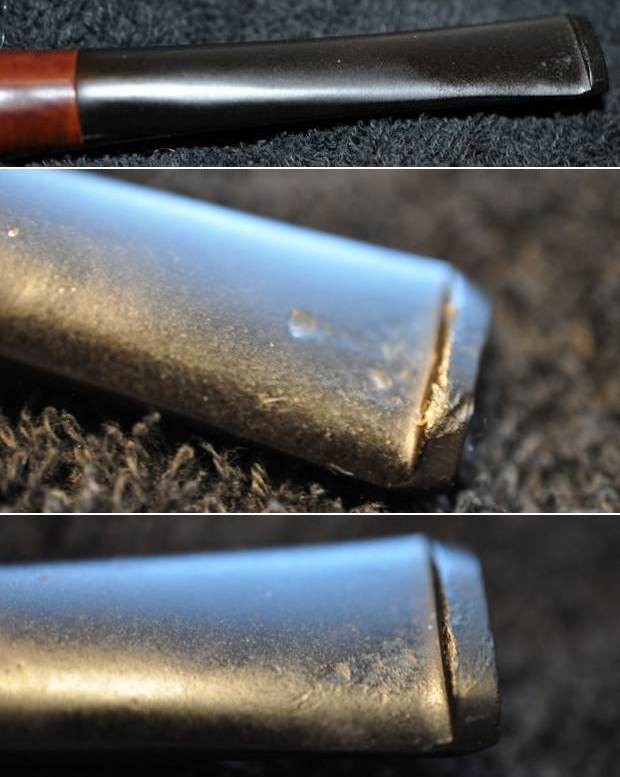
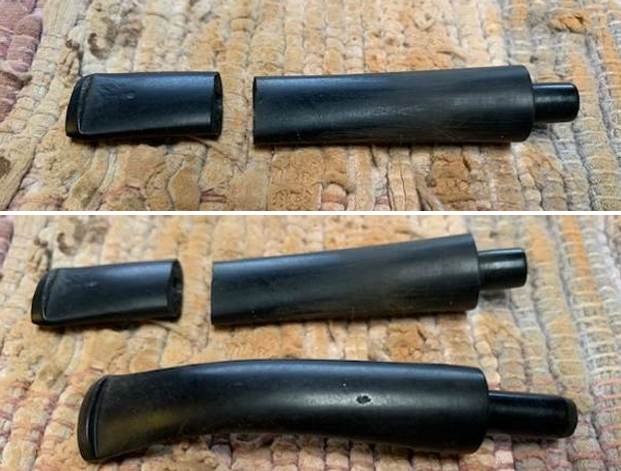
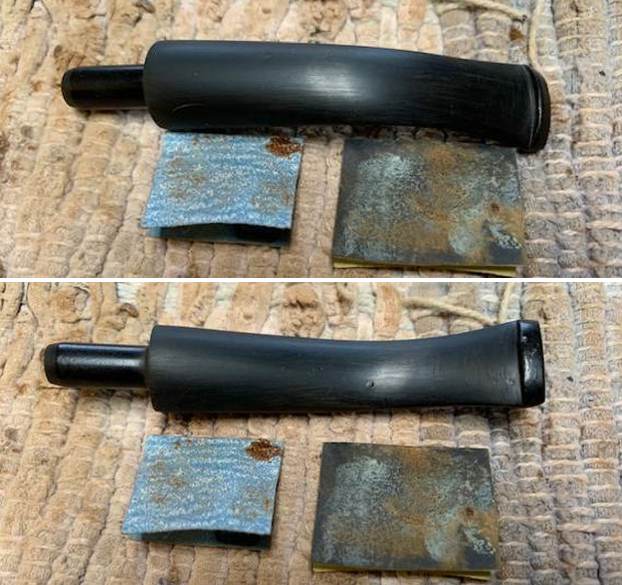
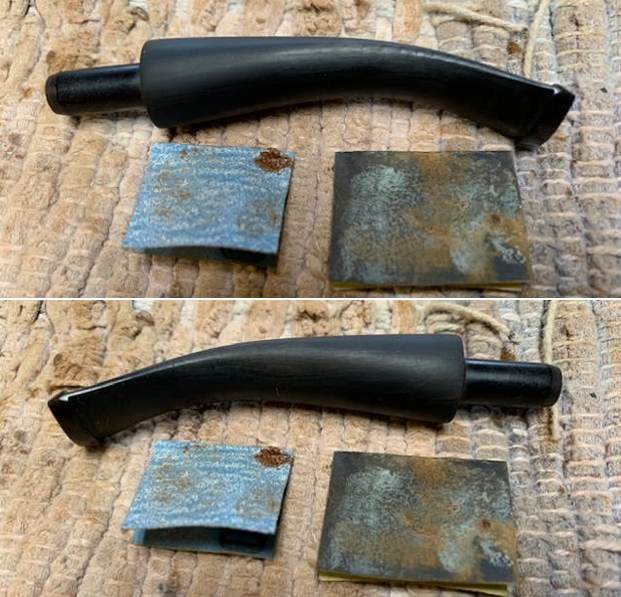
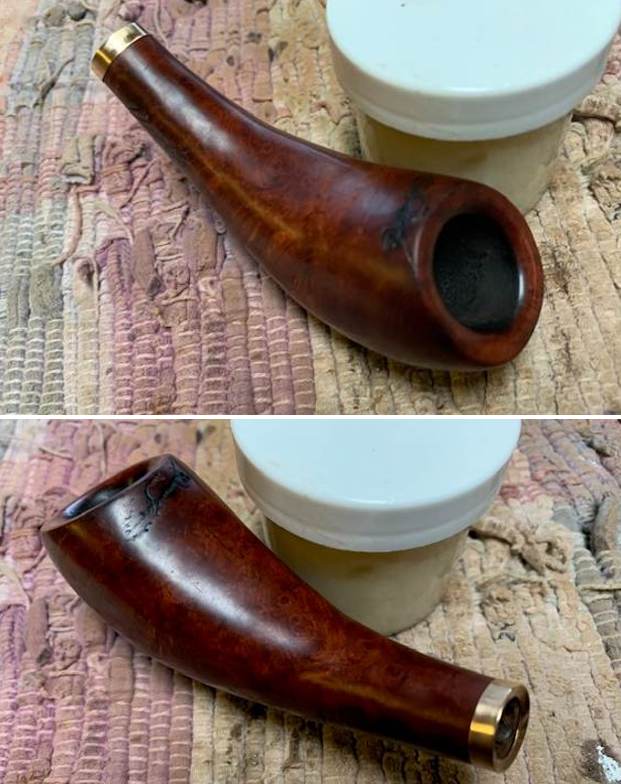
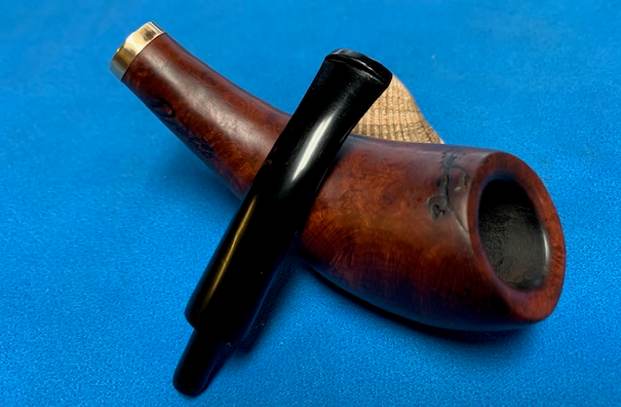
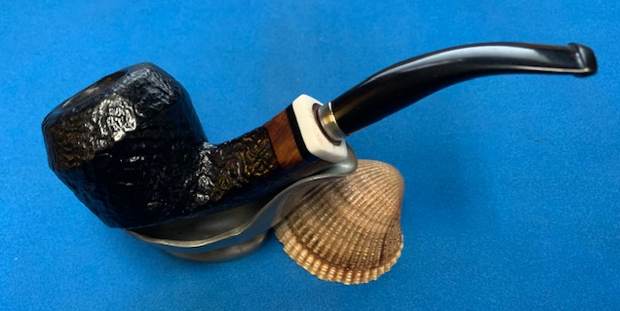
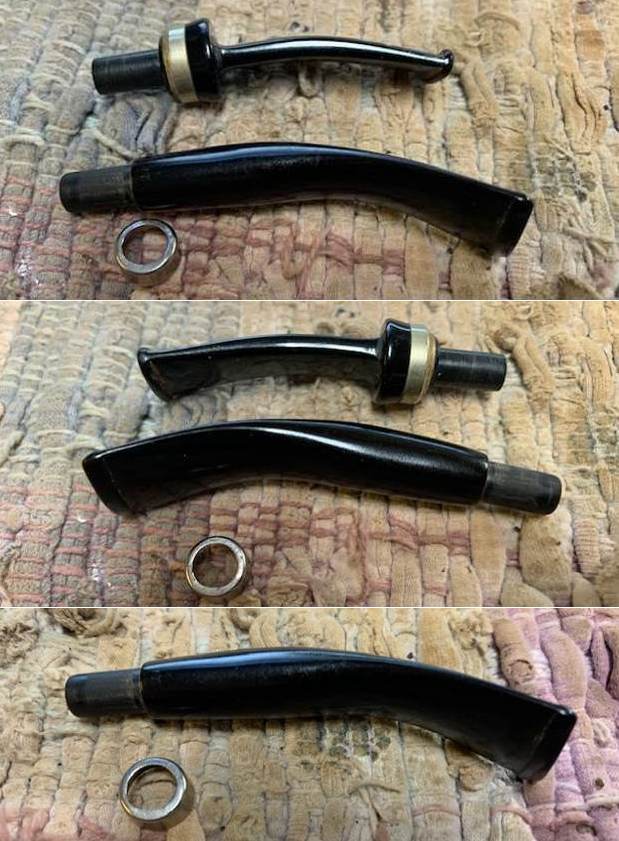
 The butterscotch yellow Amber stem with its threaded bone tenon sits very loose in to the mortise. I also noticed that the bone tenon is on the shorter side and does not extend all the way in to the mortise. Amber is a highly brittle material and with age and use is highly prone to develop cracks. This Amber stem is no exception. There is major fault line starting from the top surface of the stem at the tenon end, moving down for about an inch and branching off towards either sides of the stem. The crack line on the left side takes an upward turn on the lower surface and extends towards the stem face again. These cracks appear to have been repaired by gluing them together. All these cracks are indicated by red arrows. The bite zone on either stem surface has tooth indentations with chipped surfaces and these would need to be filled up. The round orifice has chipped areas around the edges.
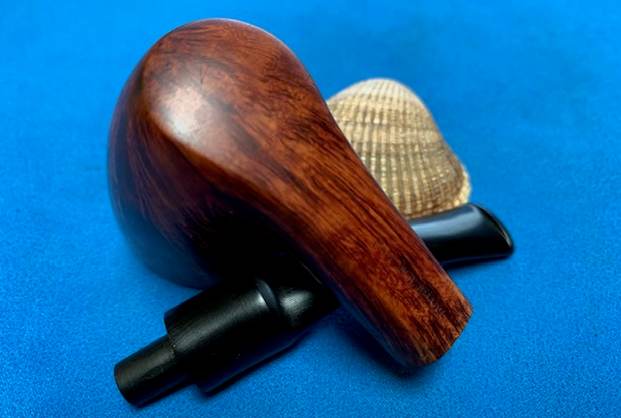
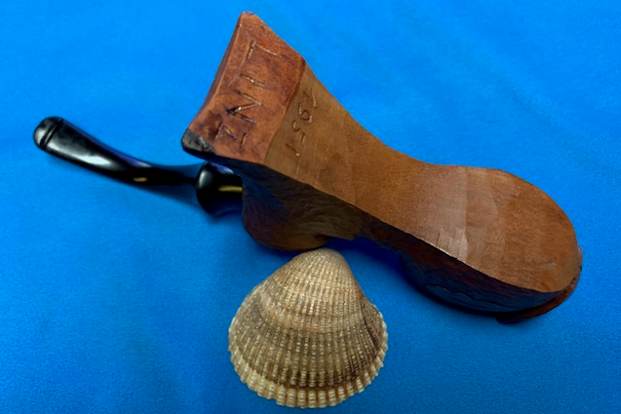
 The leather covered case is in very good condition. The inside of the case is lined with deep maroon velvet that shows signs of being worn down, but intact. The intact outer leather covering is dirty and looks dull and lifeless with the brass pins and latches/locks all in working condition. This leather case should clean up nicely and be ready to accept these freshly refurbished pipes soon.
 The Process
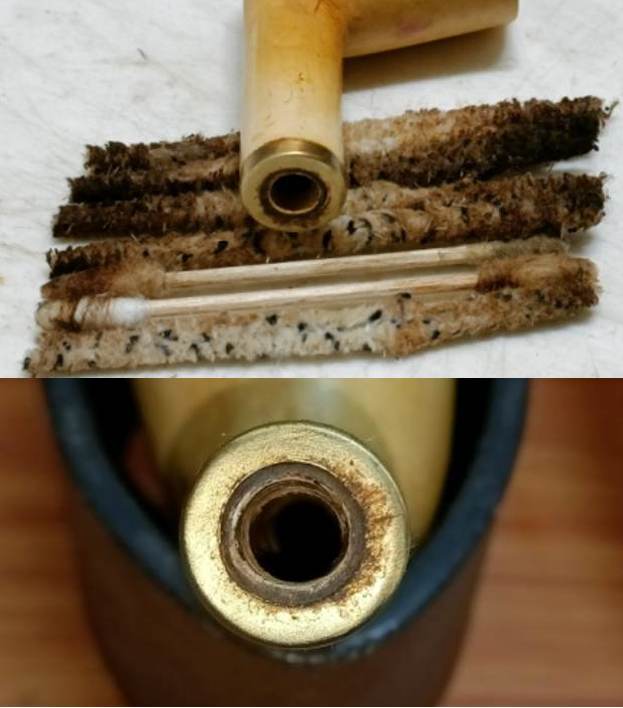
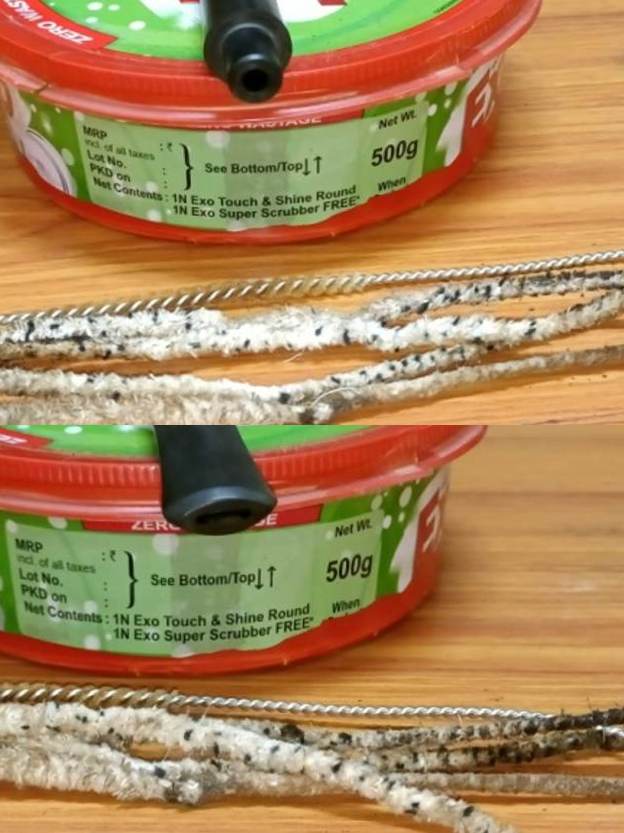
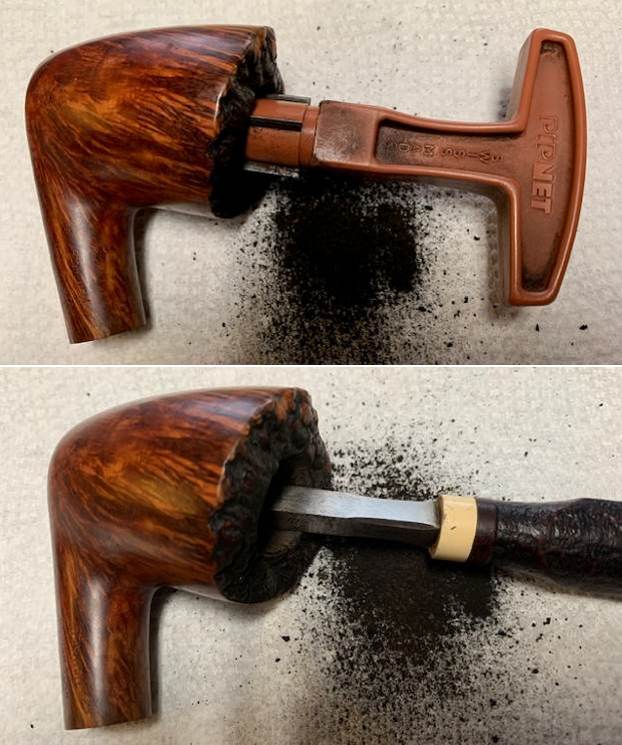
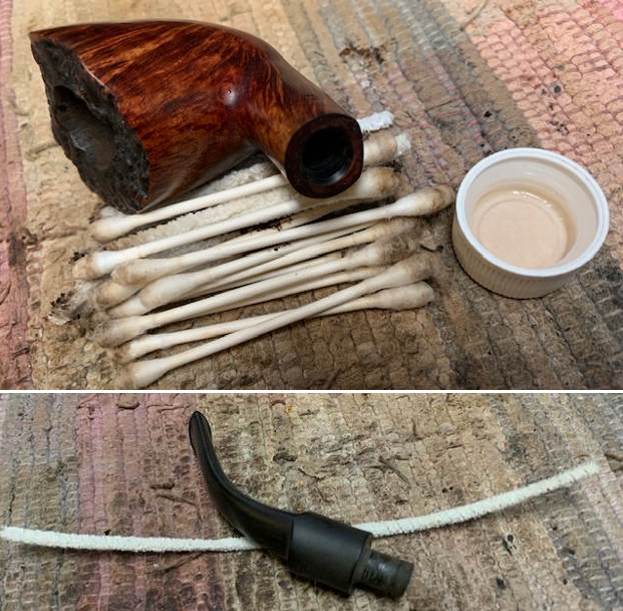
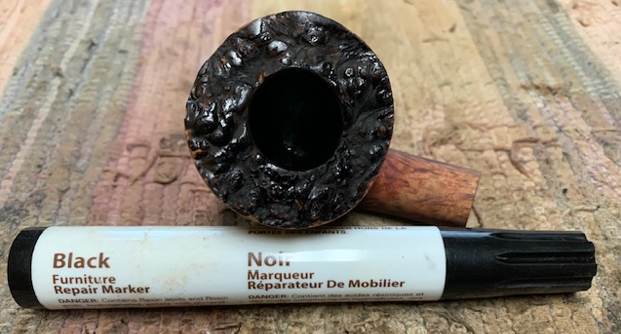
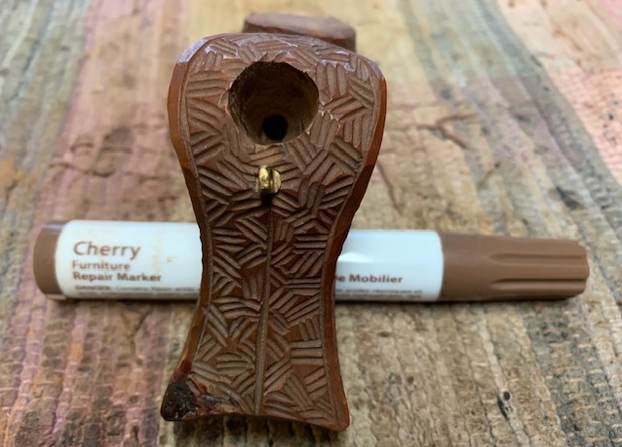
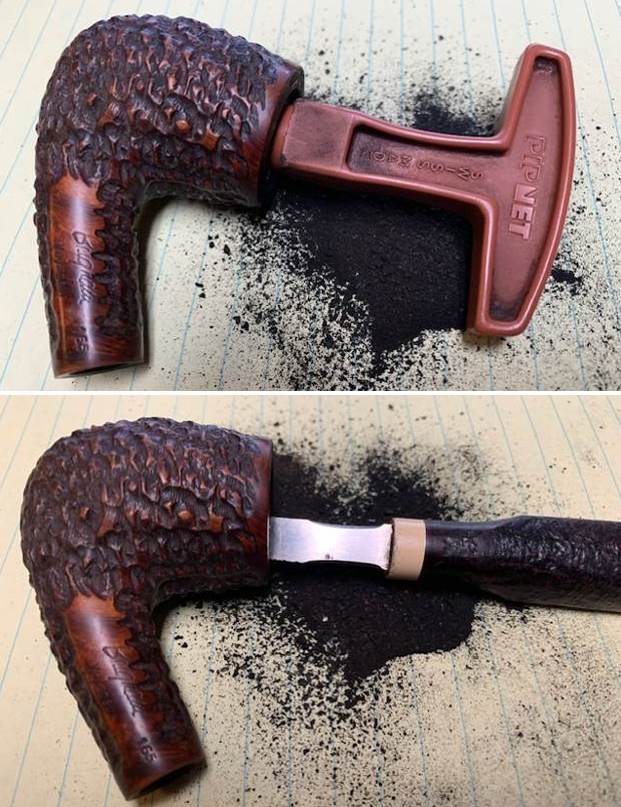
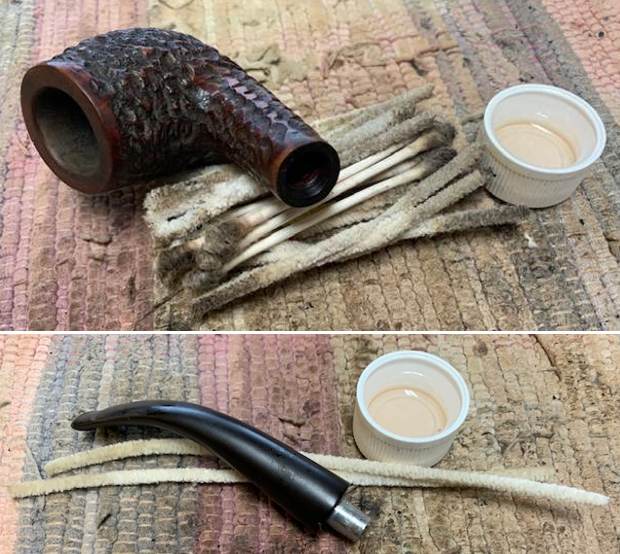
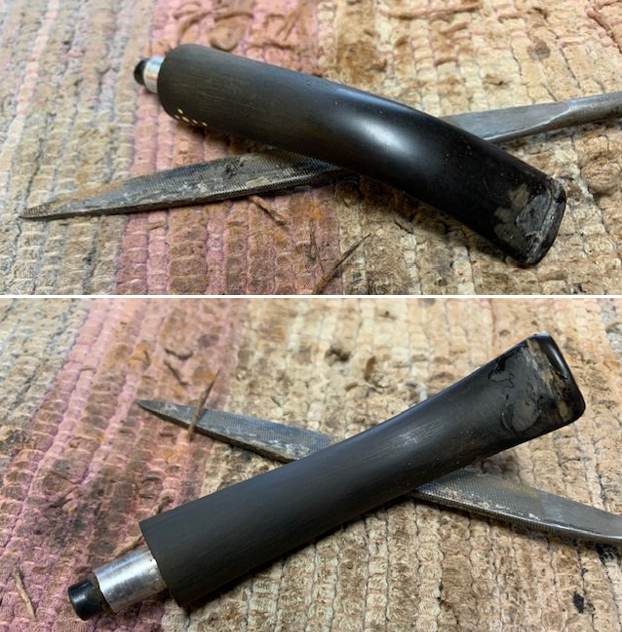
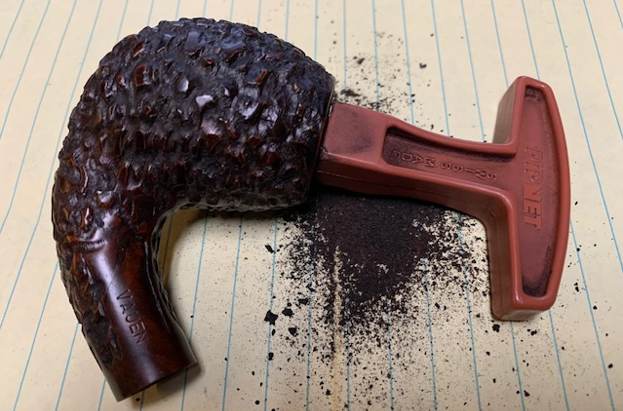
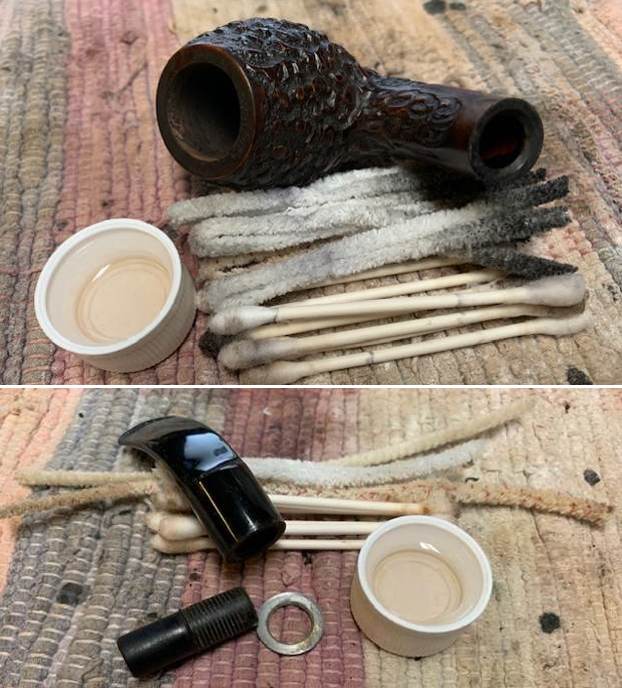
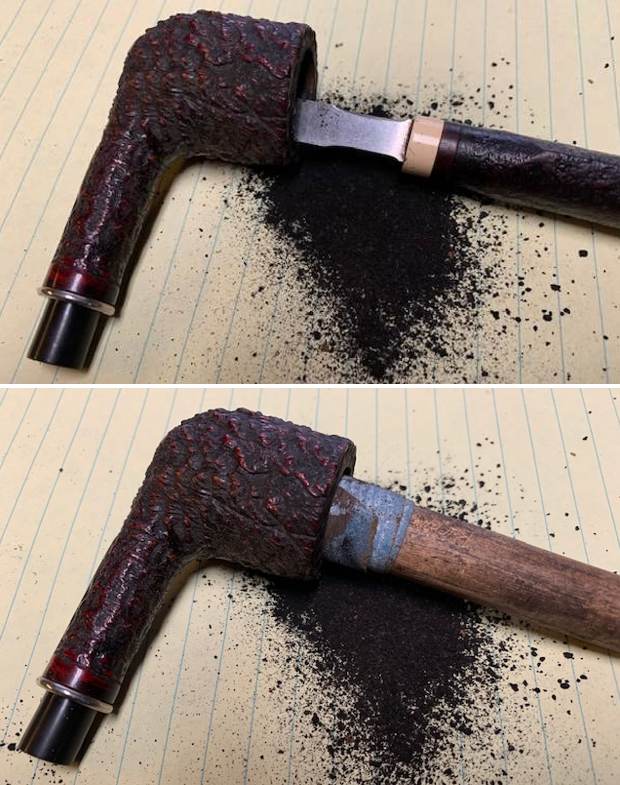
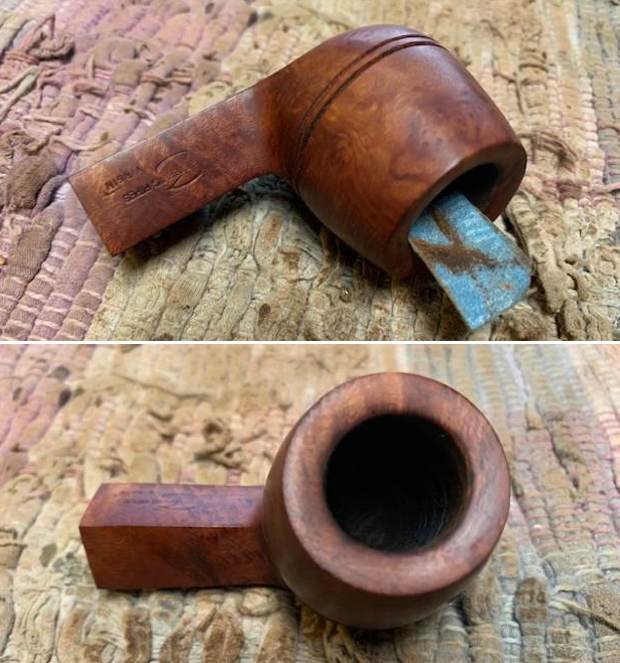
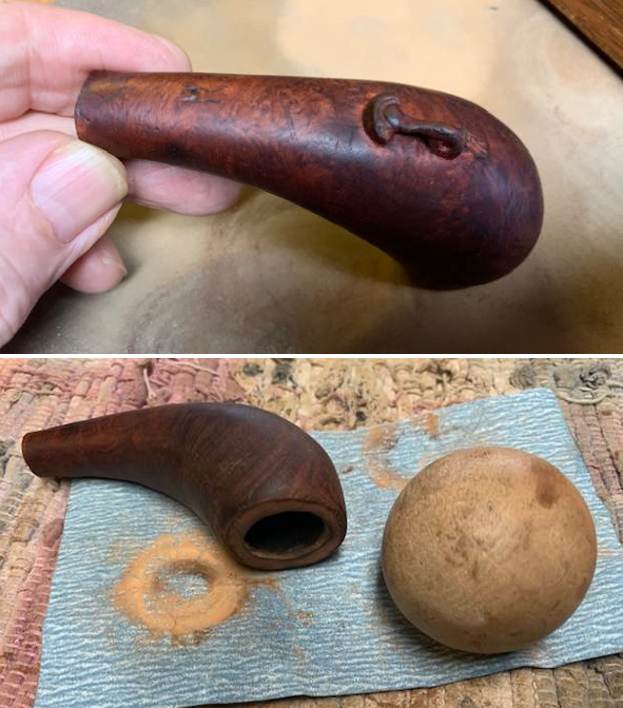
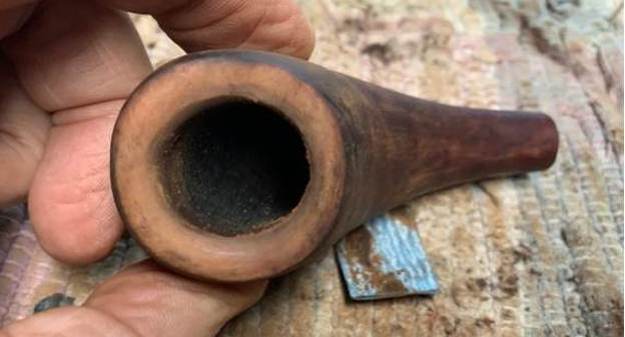
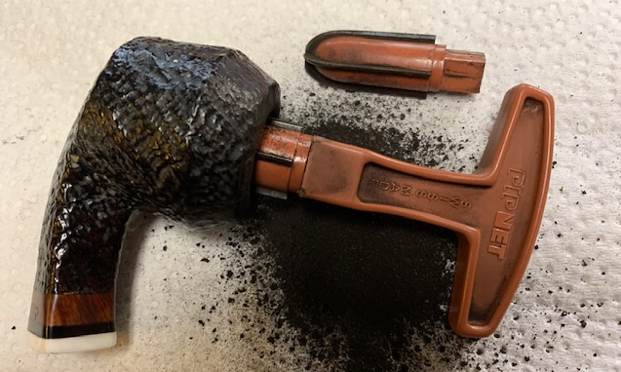
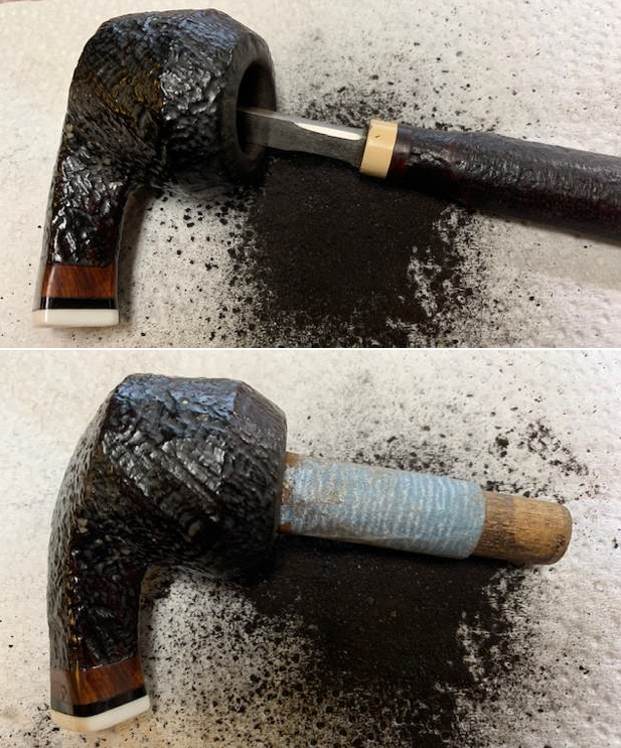
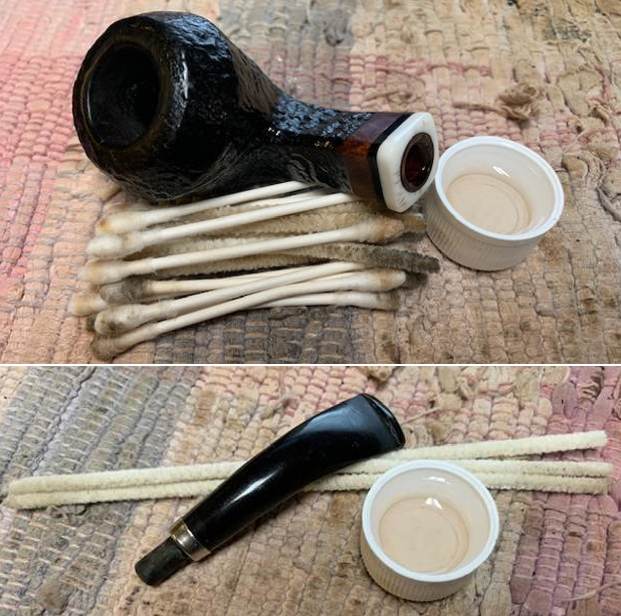
I started this project by first reaming the chamber to rid the walls of the little cake that was visible. I used my fabricated knife to gently scrap off the cake. I followed this up by sanding the walls of the chamber with a piece of 180 grit sandpaper. This sanding not only helps to completely remove the cake but also helps to even out the wall’s surfaces. A wipe using 99.9% pure isopropyl alcohol on a cotton swab ensured that the carbon dust that remained is completely lifted from the wall surface and the ghost smells are eliminated. I followed the cleaning of the chamber with cleaning the shank and mortise. If you recollect, I had mentioned that the draw through the mortise is heavy/ labored and assumed that it was due to accumulation of oils/ tars and gunk. However, during the cleaning, I was unable to get a pipe cleaner in through the airway and out through the draught hole. It was at this point that I handed over the stummel to Abha, my wife to see if she could clear the air way. By the late afternoon, when I came back from some work, Abha had removed the blockage from the shank air way and it was a solid piece of wood (clearly seen in the picture). She ran a few hard bristled and regular pipe cleaners dipped in 99.9% isopropyl alcohol through until the shank and mortise was spotless clean and disinfected. Close inspection of the piece of wood extracted from the mortise makes me believe this piece to be remnants of a 6mm Balsa filter. How and why would anyone even think of doing so, let alone do it, is beyond my comprehension.
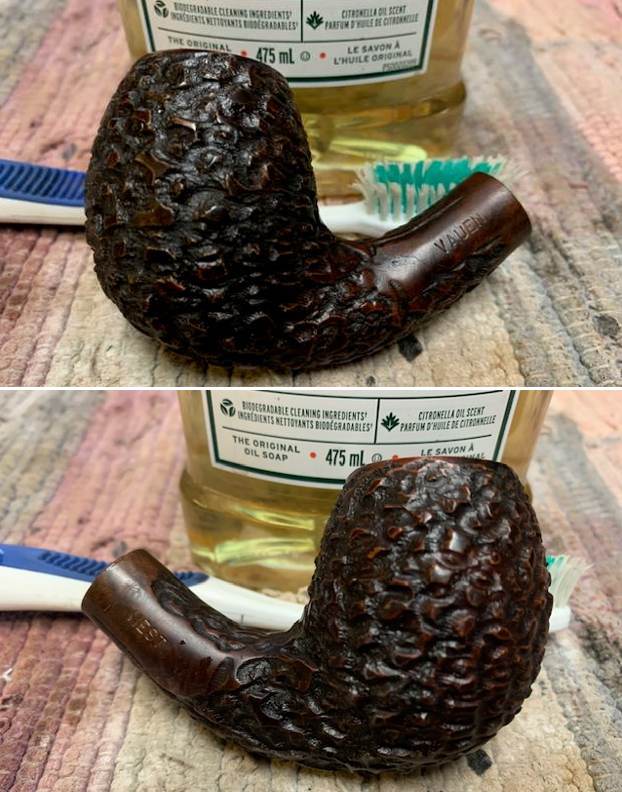
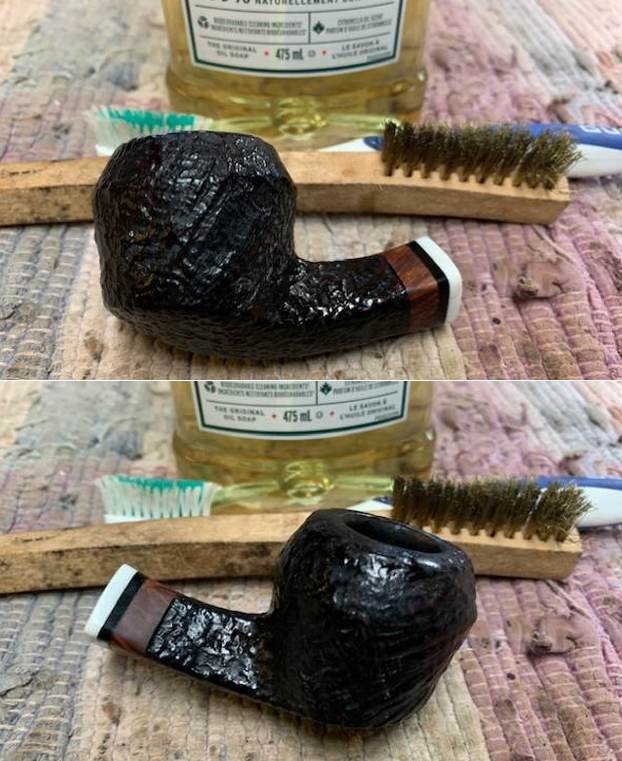
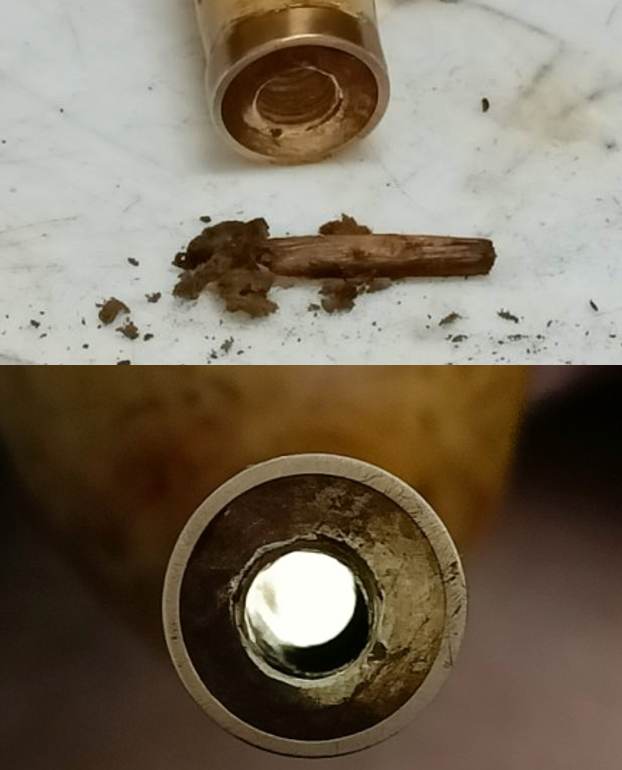 With the stummel internals all cleaned and spruced up, I cleaned the external surface of the stummel with cotton swab and oil soap. Once the grime was cleaned, I wiped the surface with a moistened cotton swab to completely remove the residual soap and grime from the surface. The scratches are now distinctly visible all across the surface. Also, the color at the foot of the stummel and over the shank surface is succinctly visible.
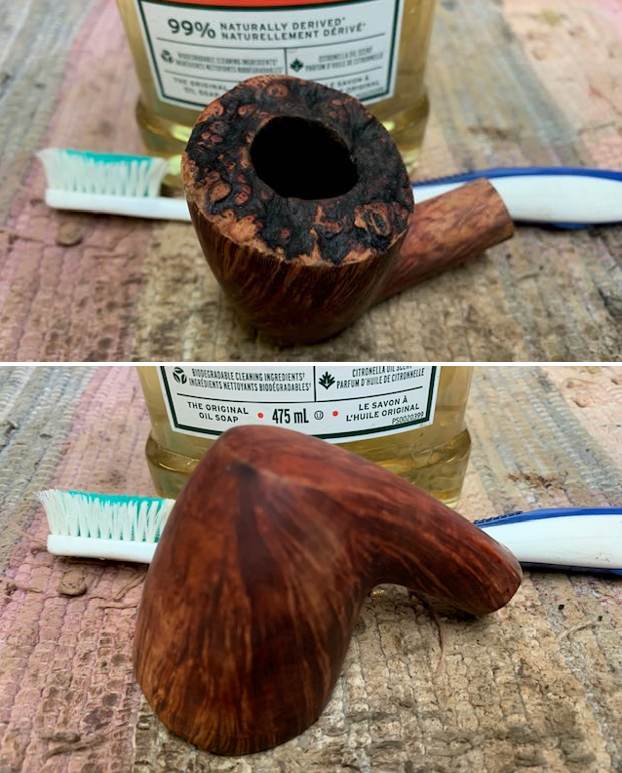
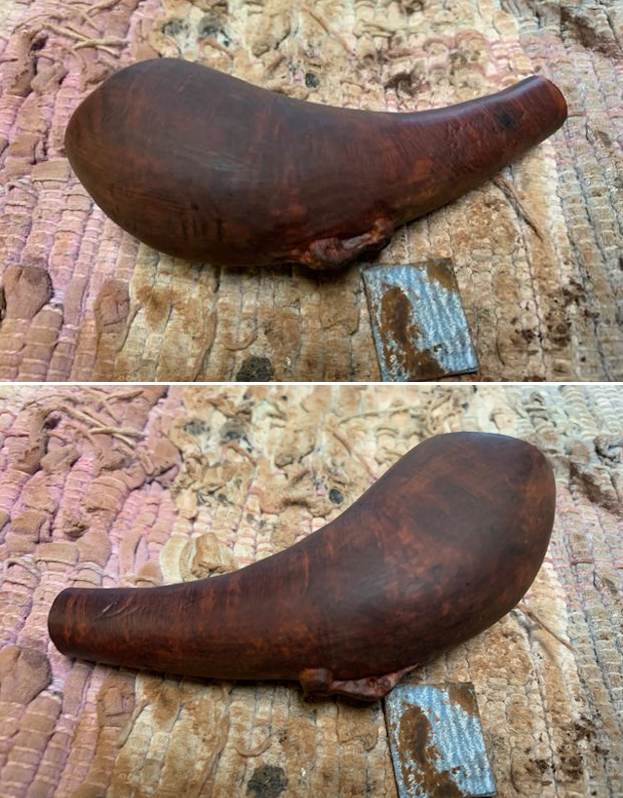

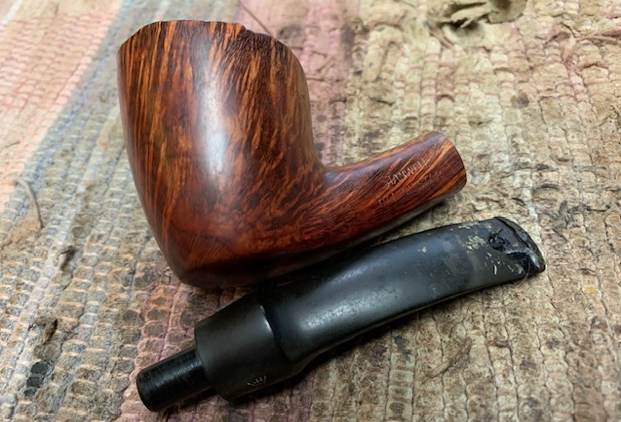
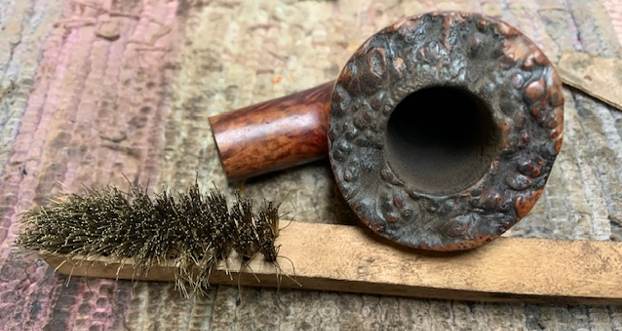
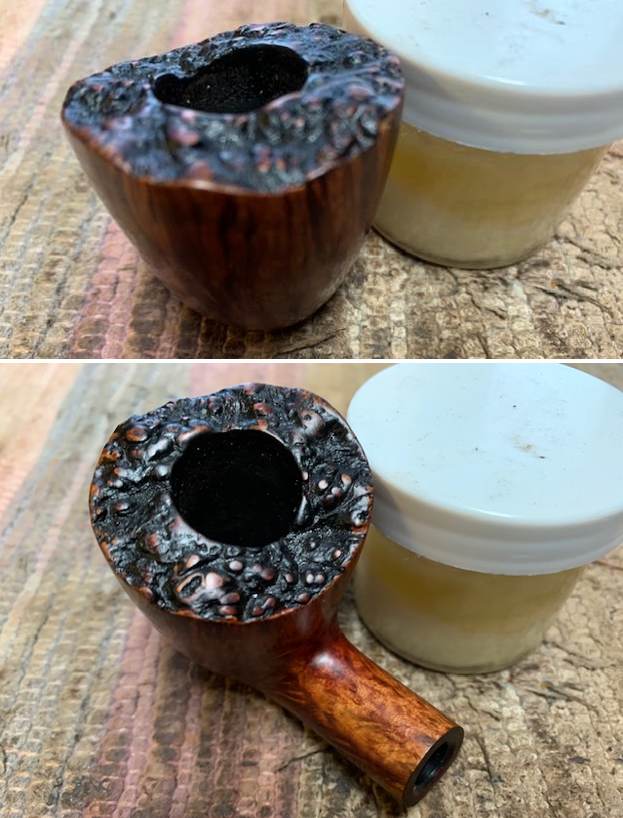
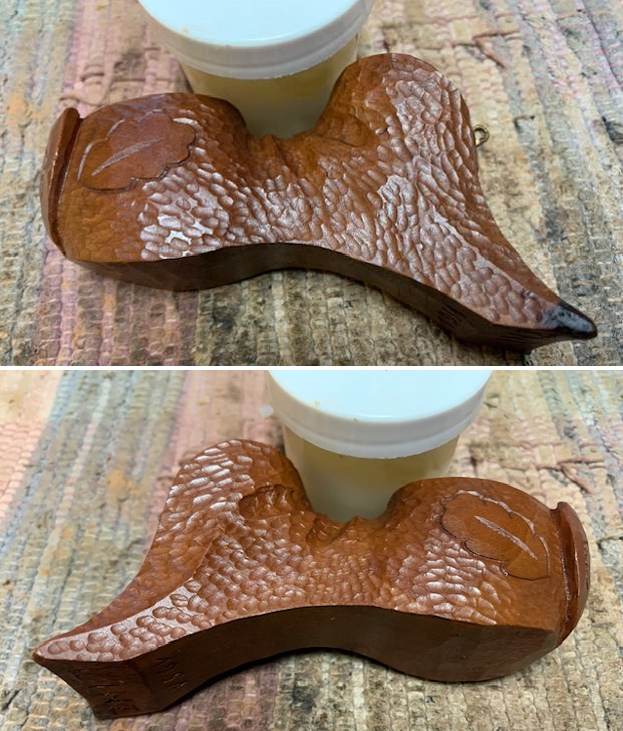
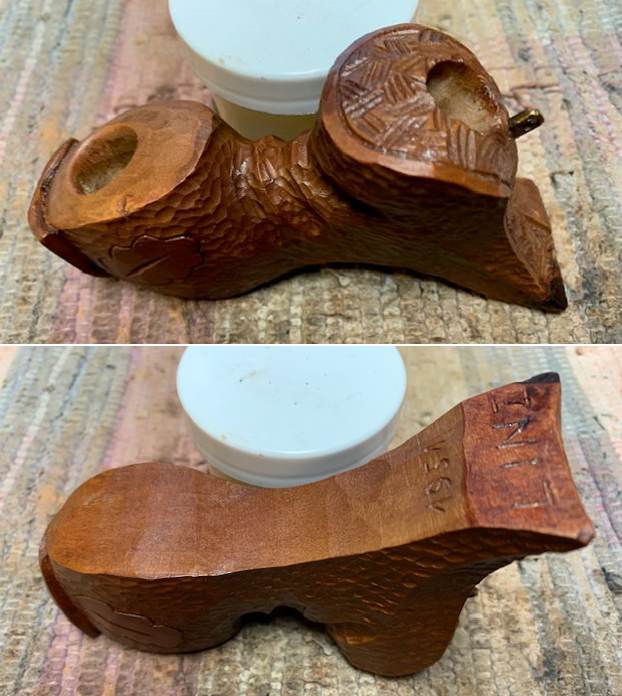
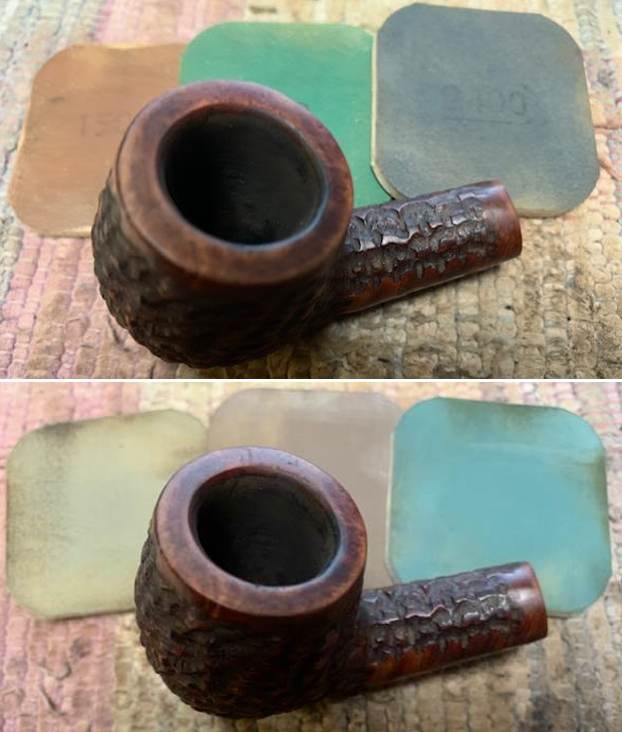
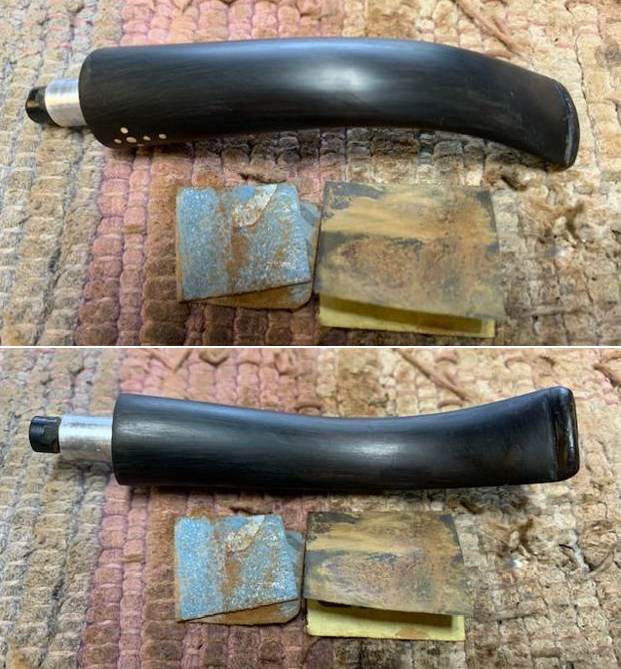
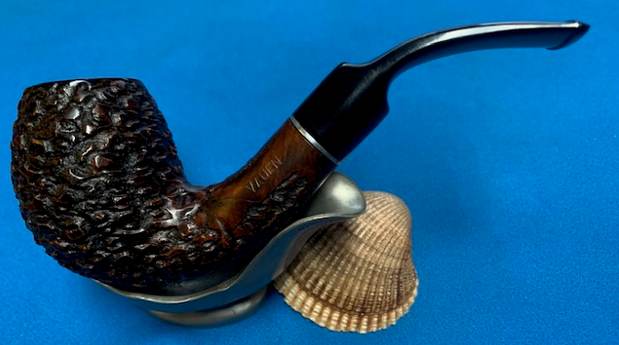
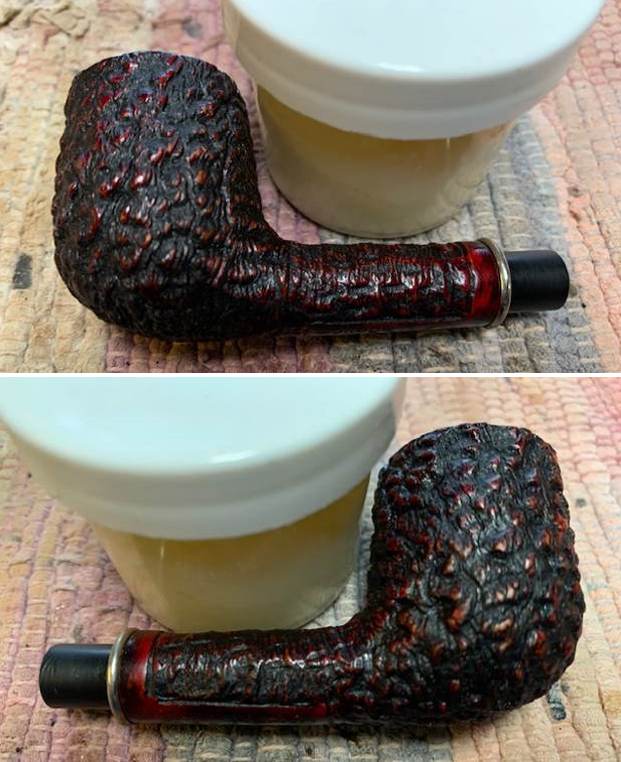
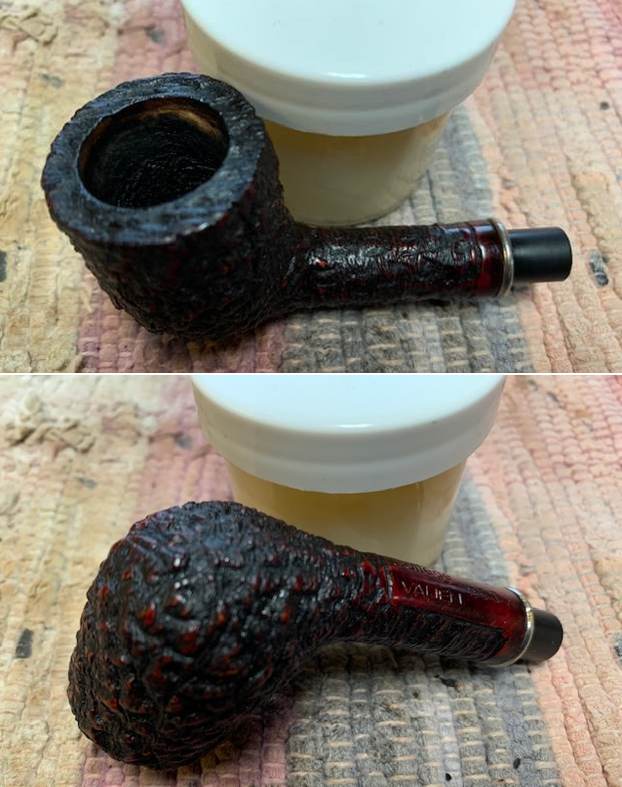
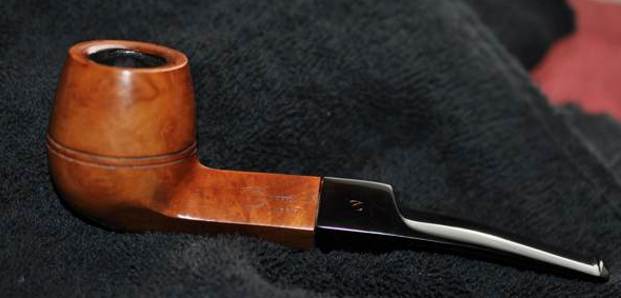
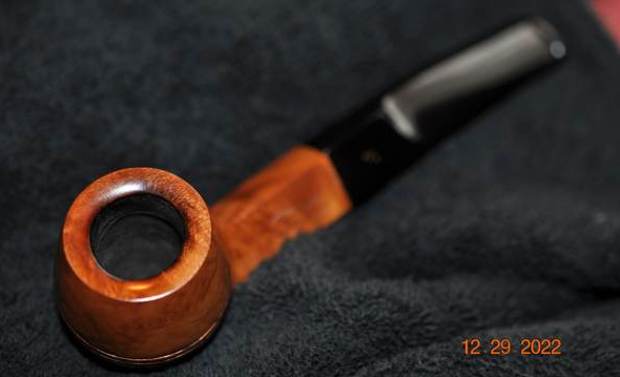
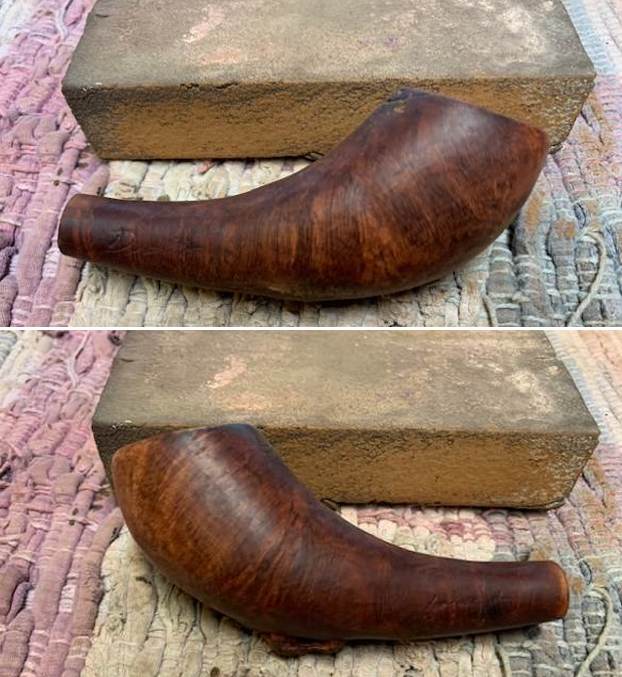
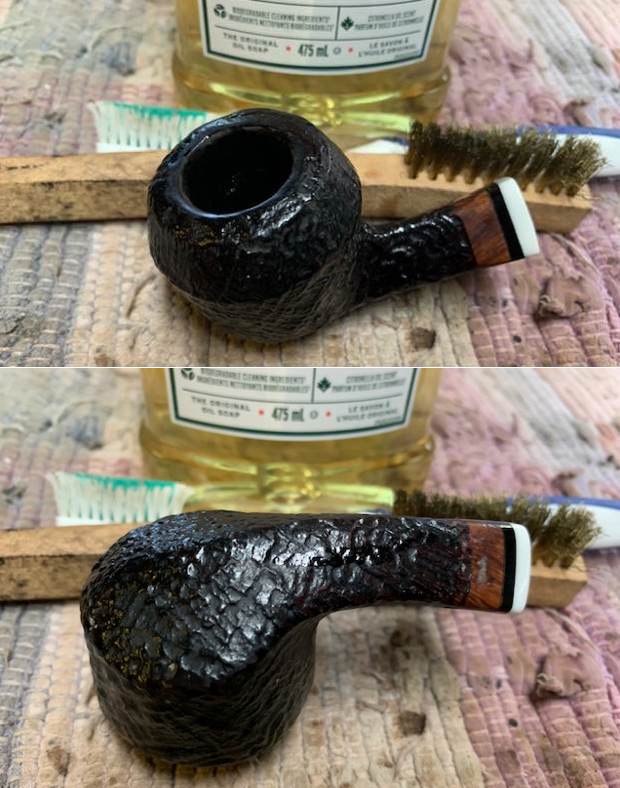
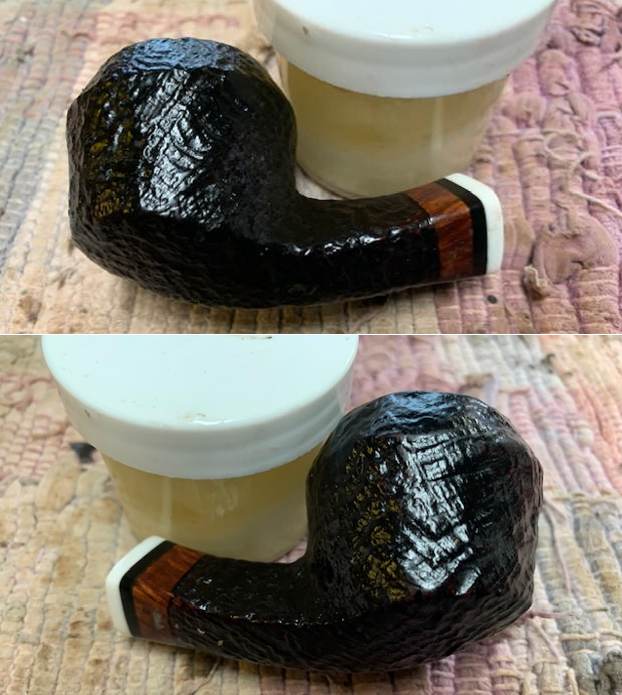
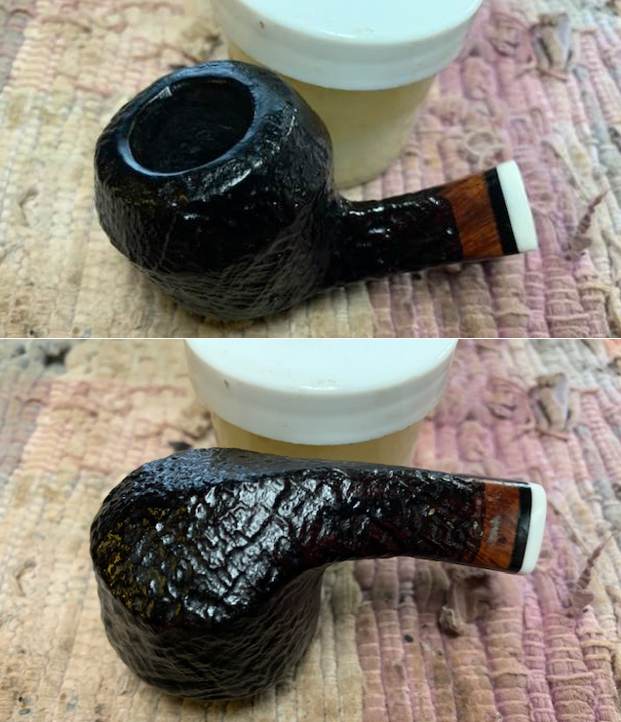
 With this external cleaning, the damage to the rim top is now clearly visible. I topped the rim surface on a piece of 220 grit sandpaper, frequently checking for the progress. Once I was satisfied that the damage is sufficiently reduced, I stopped the process of topping. Though the damage to the rim top is still visible, it is now in much better state than before. I think I shall let these signs of damage remain as a part of this pipe’s journey to date.
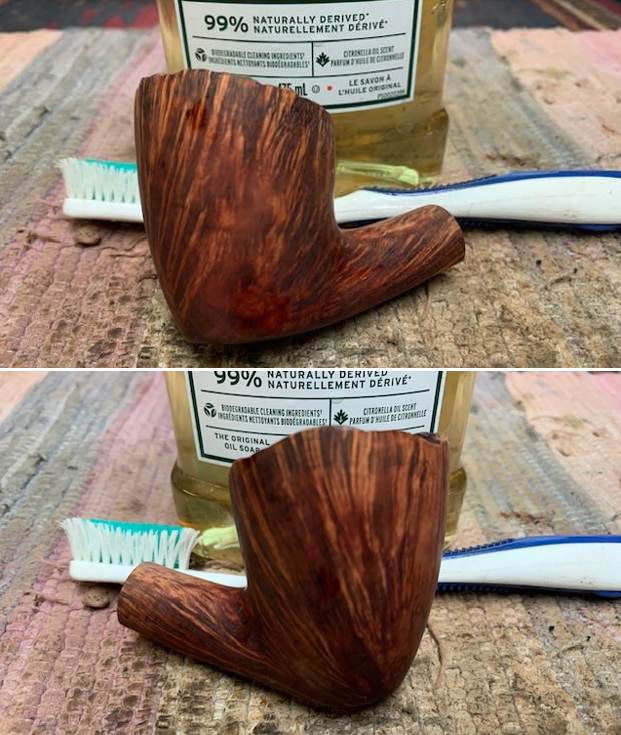
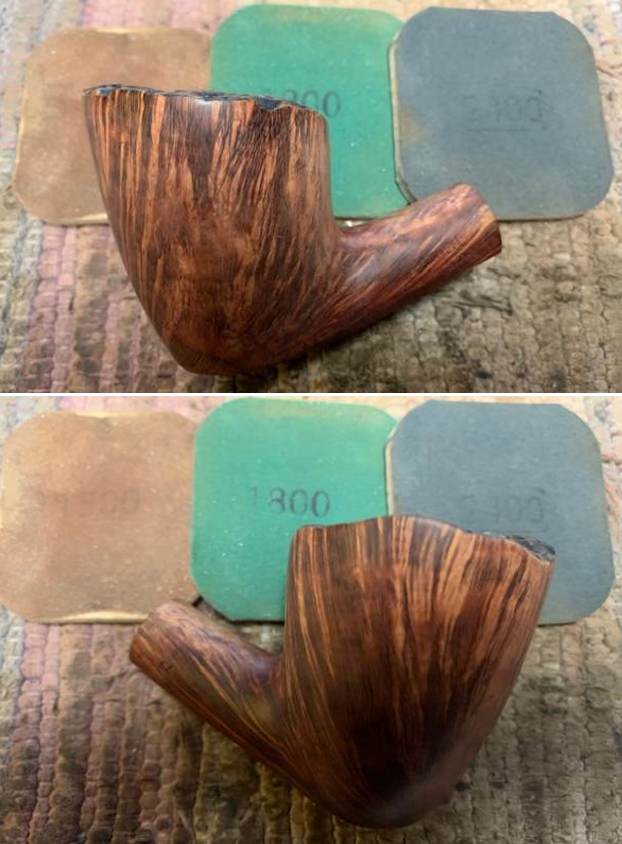
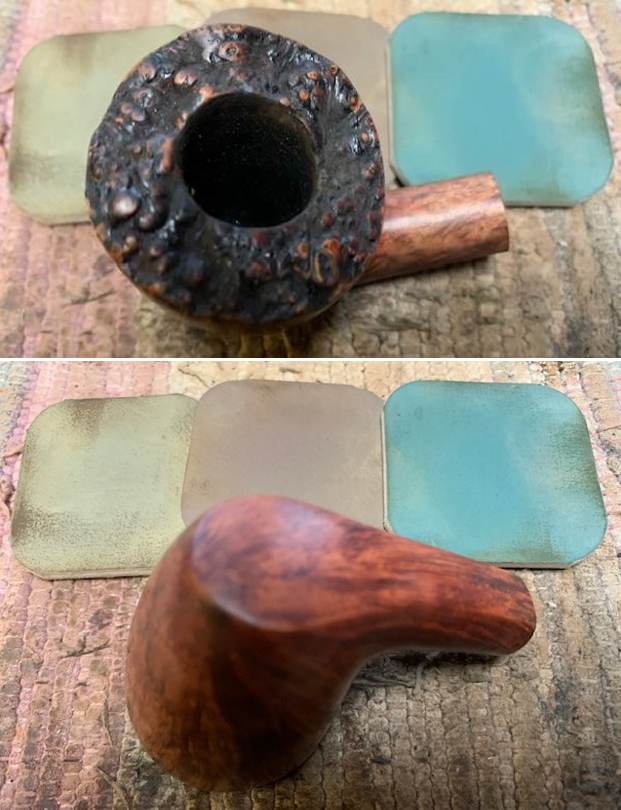
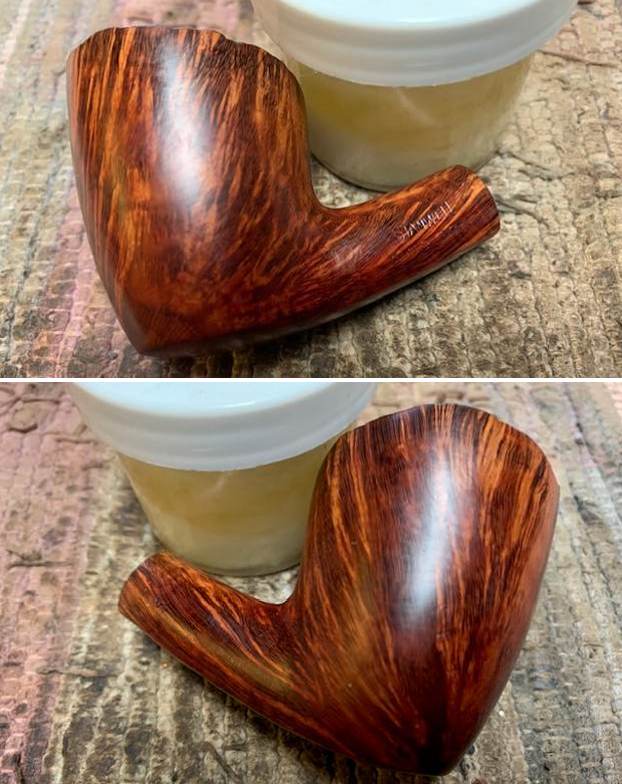
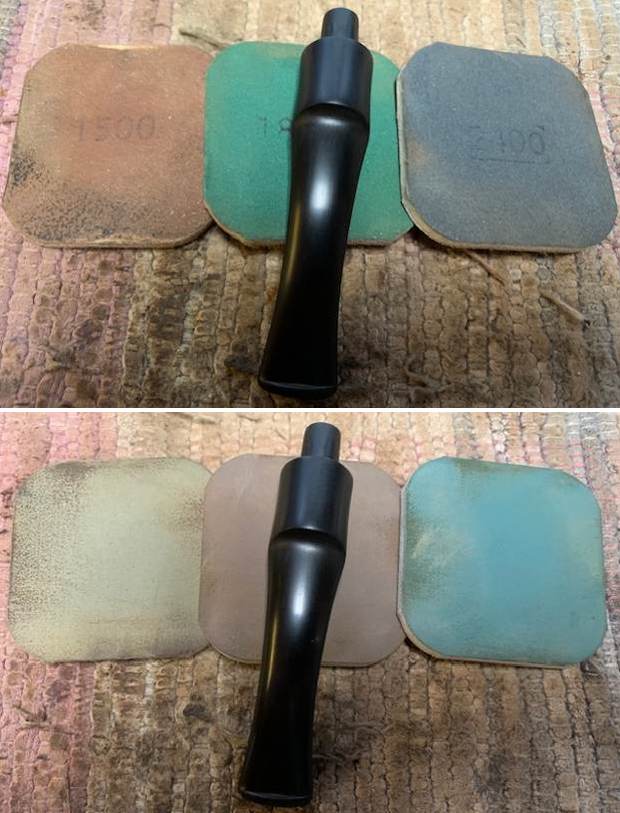
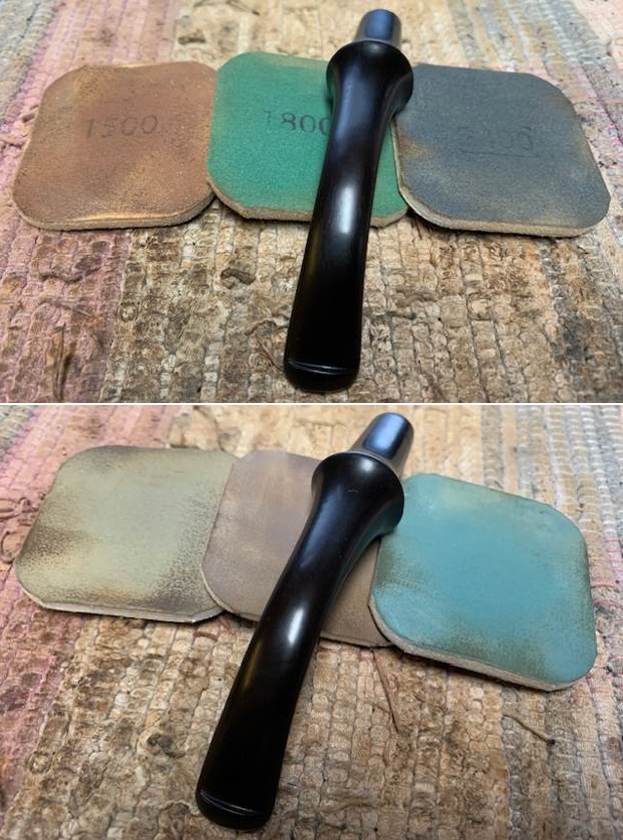
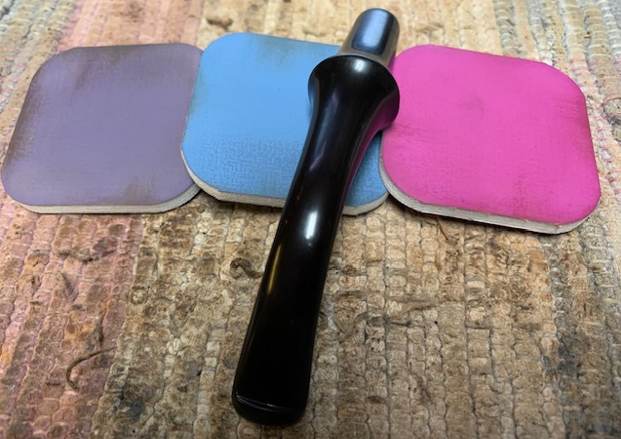
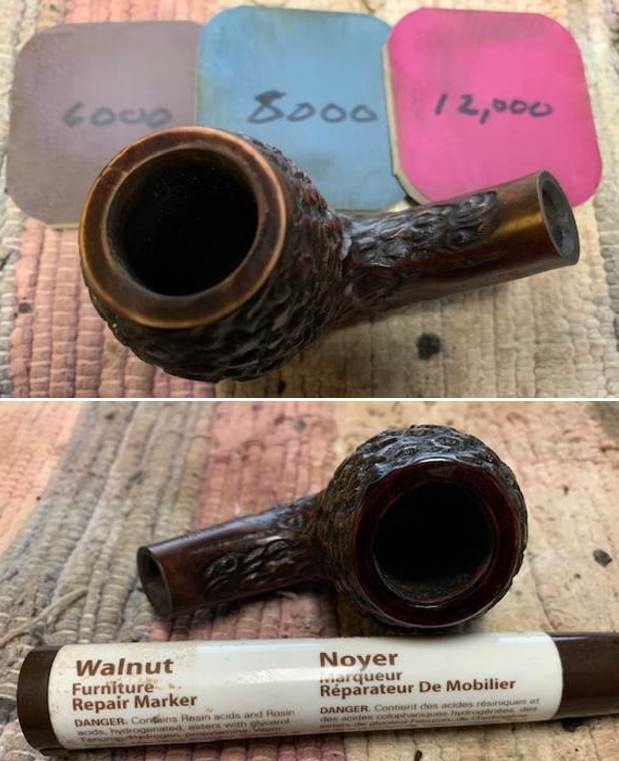
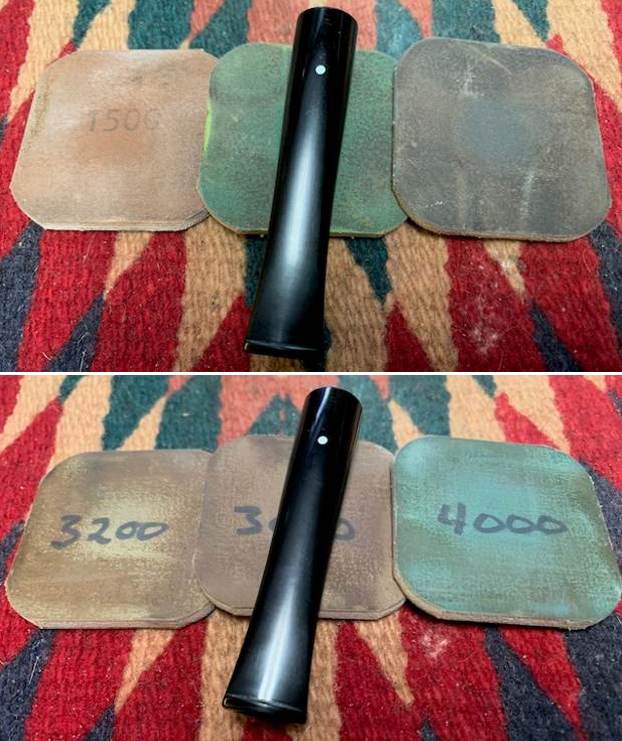
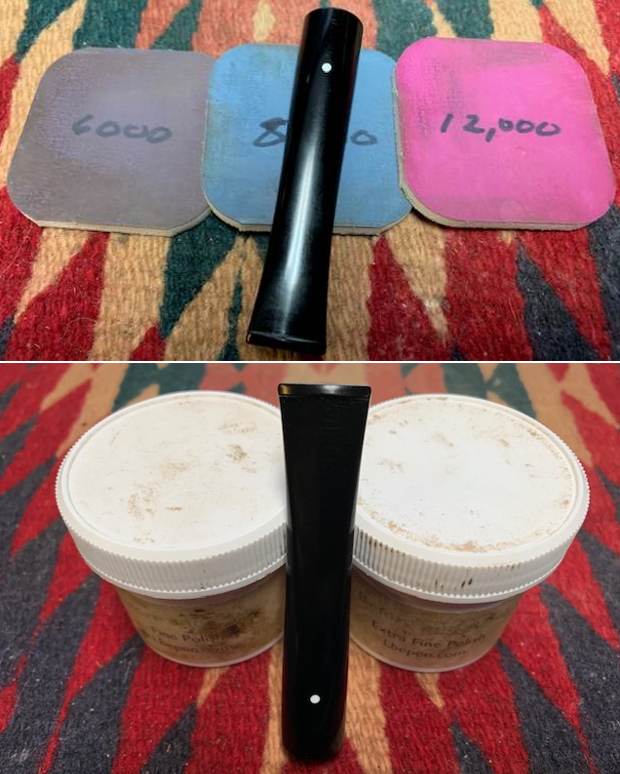
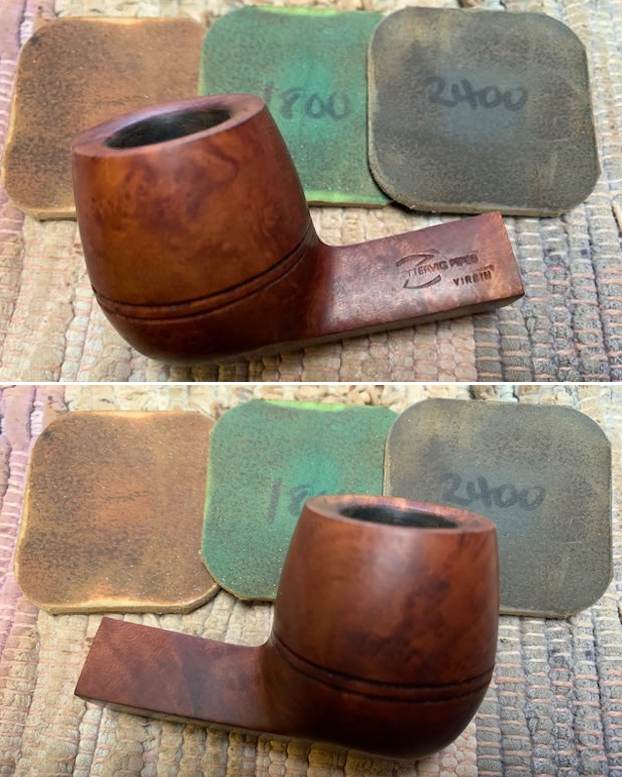
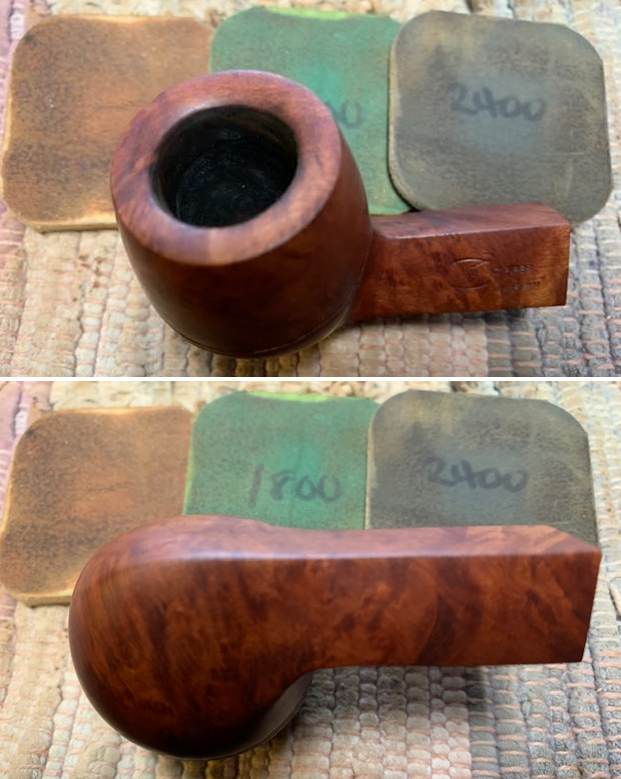
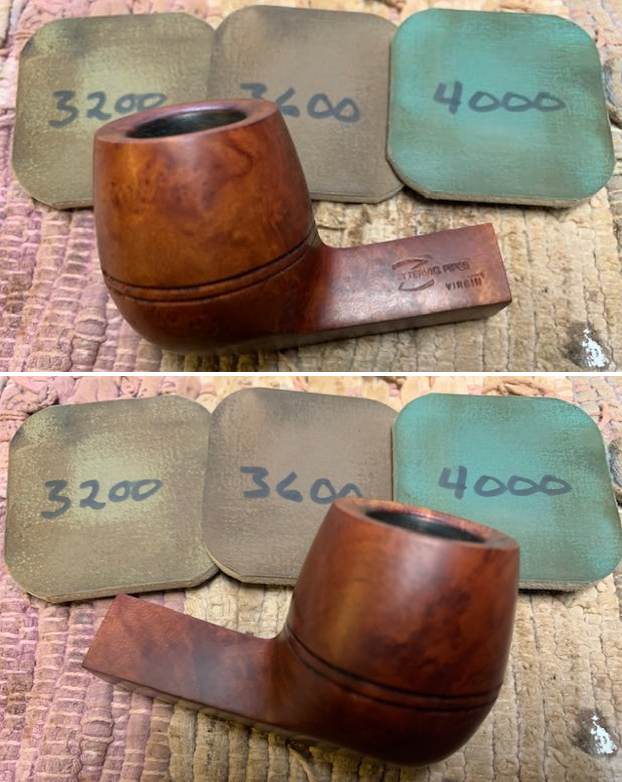
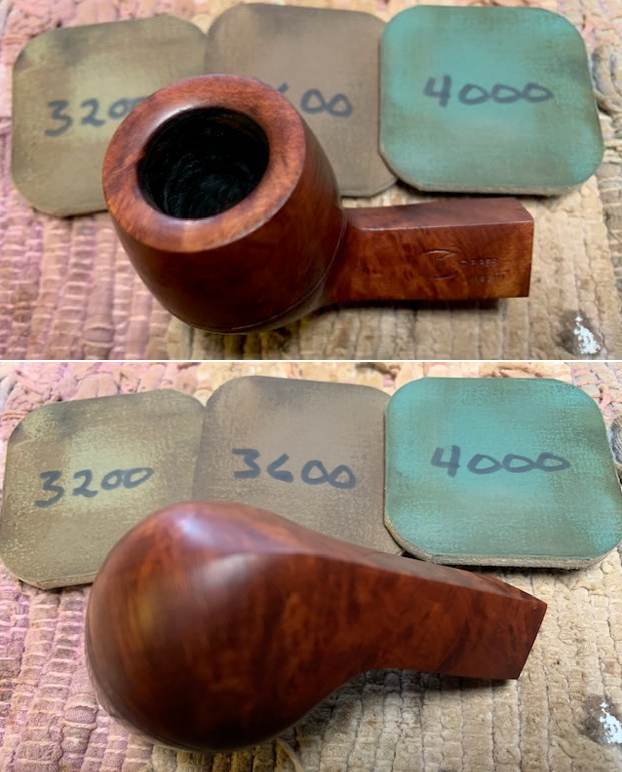
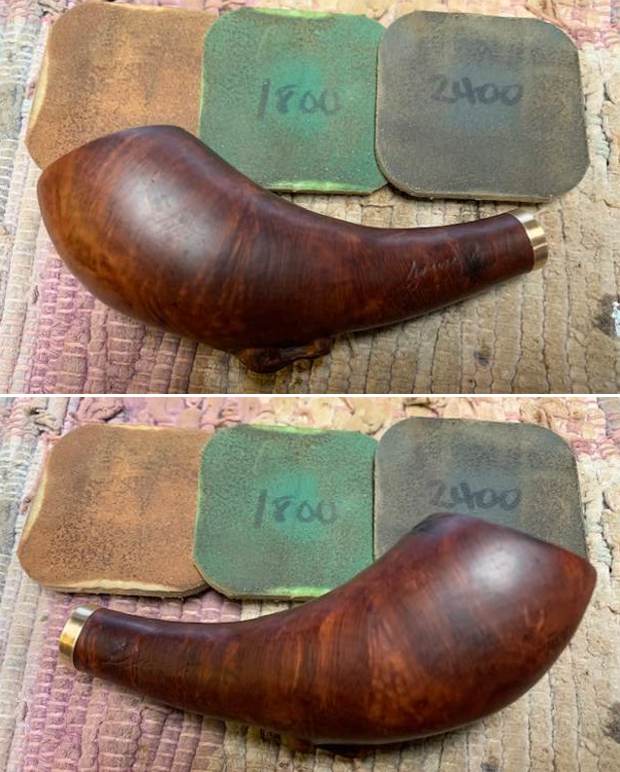
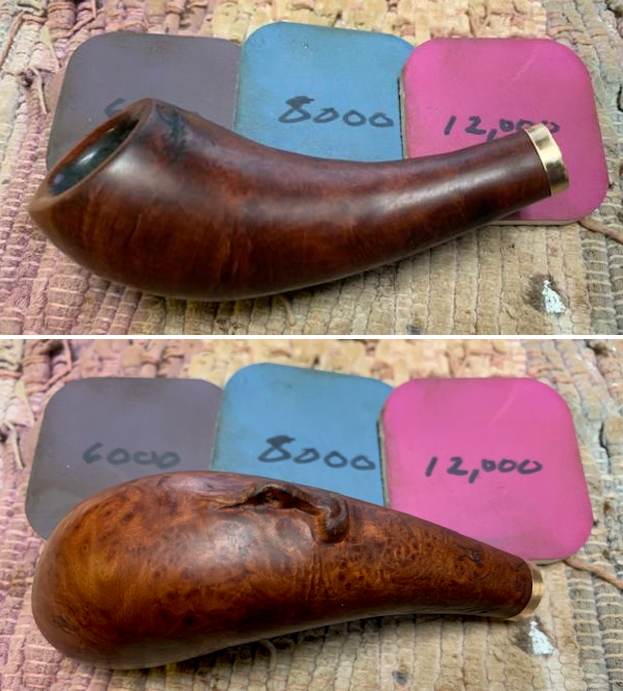
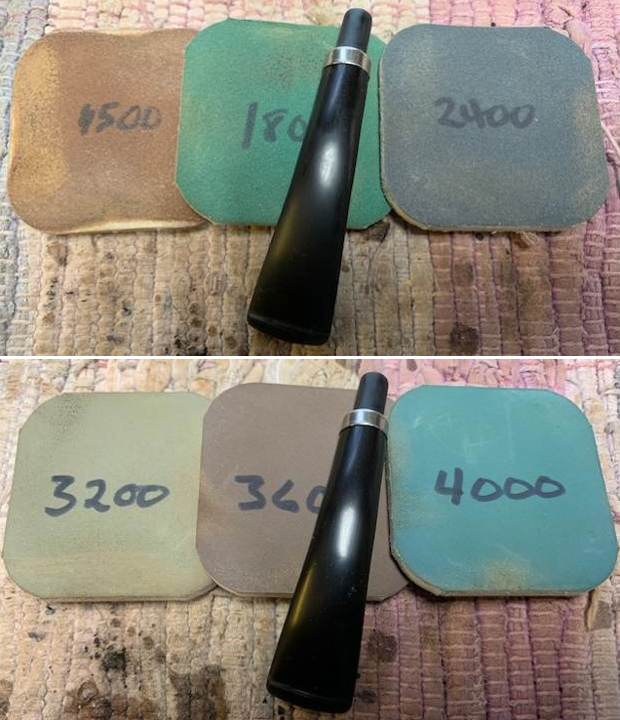
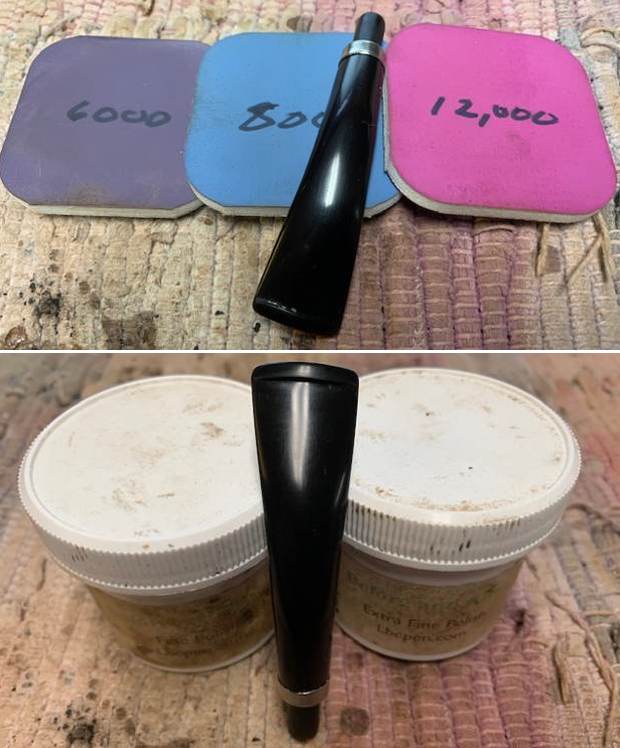
 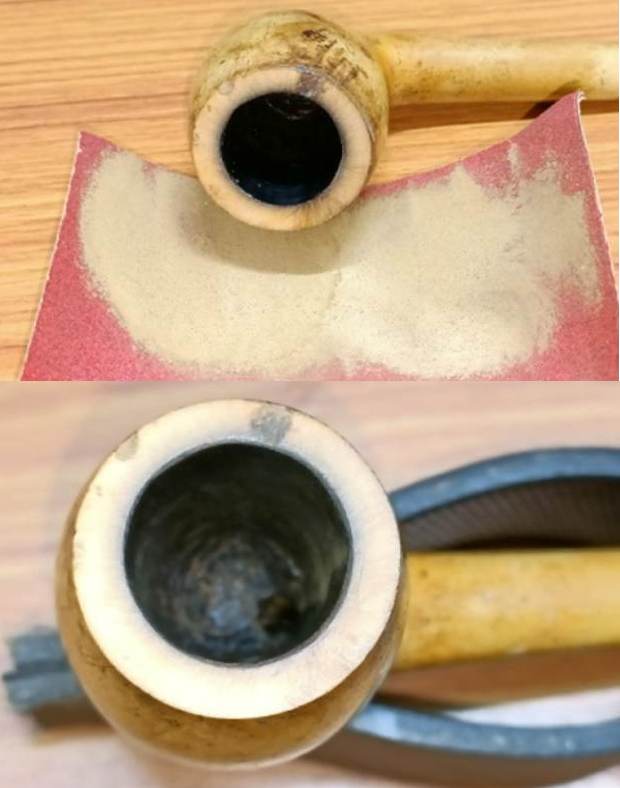 I polished the bowl with micromesh sanding pads. I dry sanded the entire stummel with 1500 to 12000 grit pads. I wiped the bowl down with a damp cloth to remove the dust that was left behind by the sanding. While I was working on the bowl top I also worked over the sides and bottom of the bowl to polish them as well. I wanted to minimize the scratching but not necessarily remove them all. These lacerations and dings must have had a history and I wanted to preserve it. I like the appearance of the stummel at this stage of restoration.

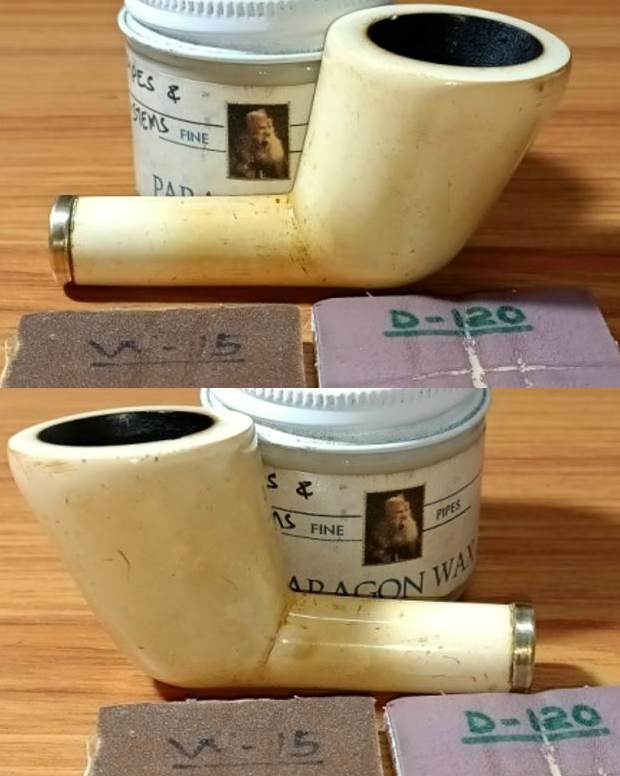
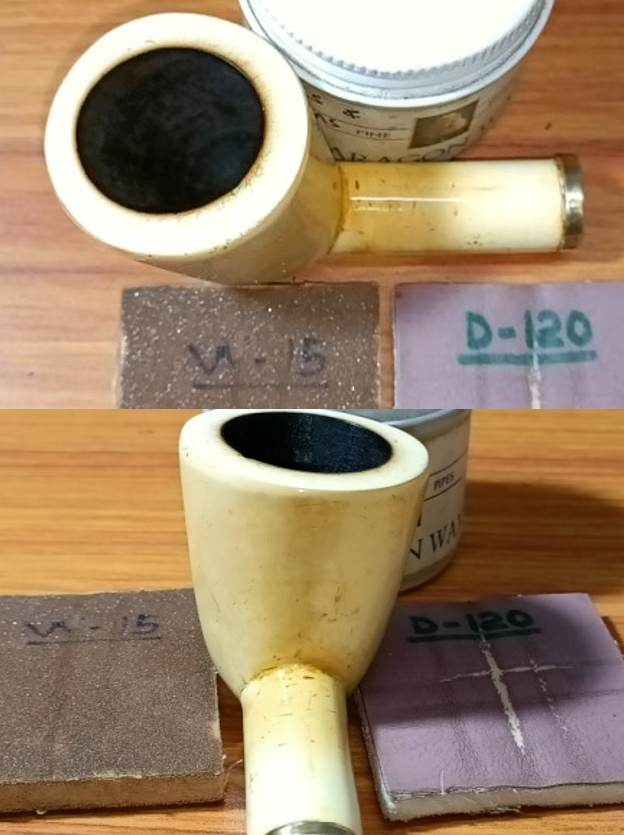
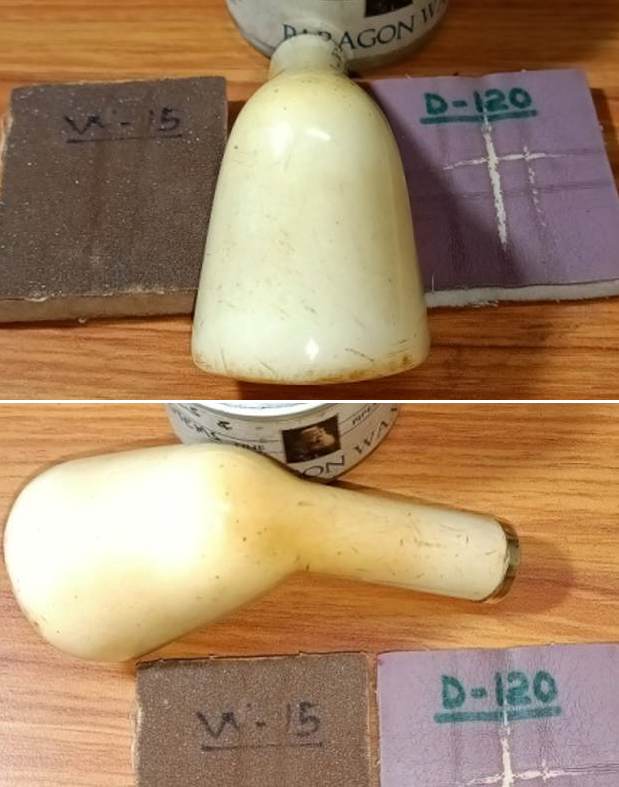
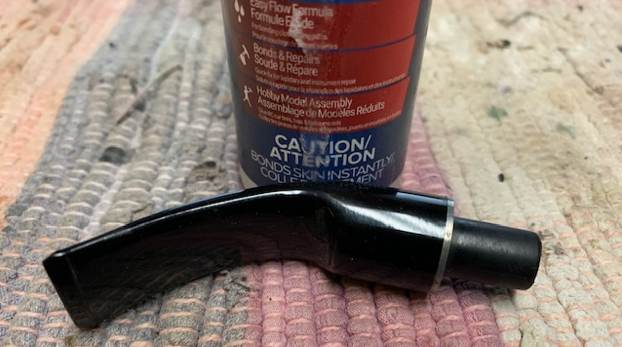
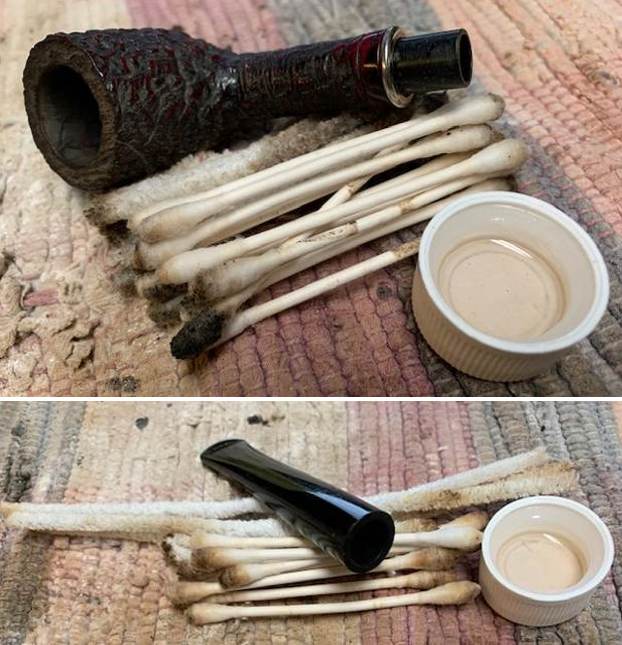
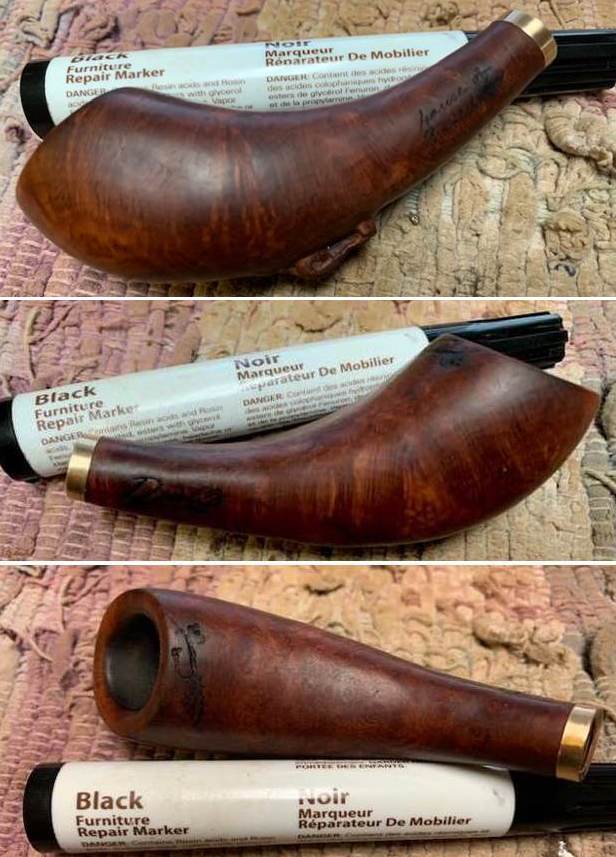
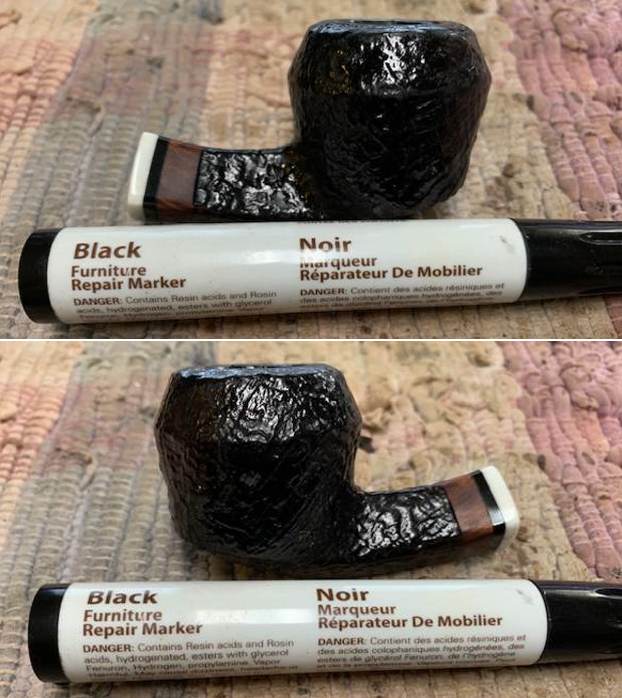
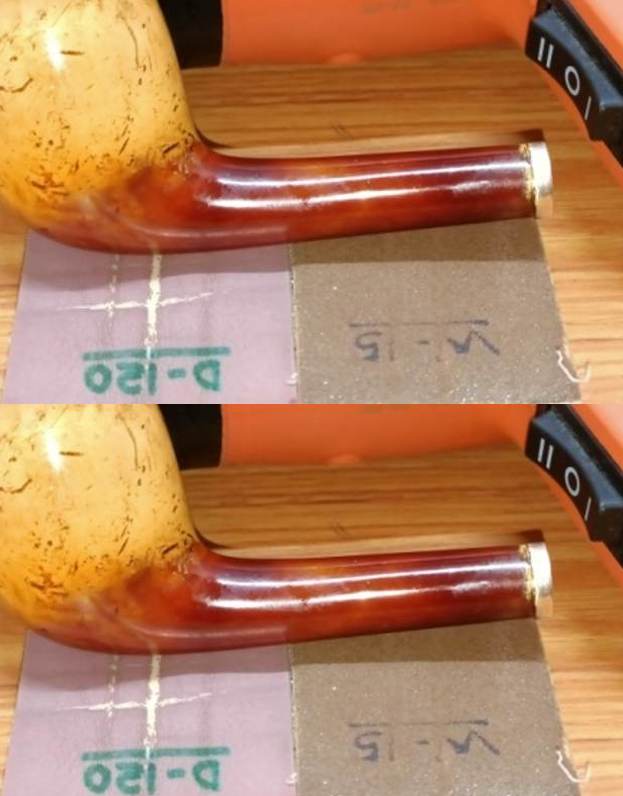
 I set the stummel aside and started with refurbishing of the stem. I cleaned the stem internals using anti oil detergent and thin shank brushes and rinsed it under warm water. I also cleaned the external surface of the stem using the soap and Scotch Brite pad. I further cleaned the stem airway with pipe cleaners and 99.9% pure isopropyl alcohol. I filled the tooth chatter with clear CA superglue and set the stem aside for the fill to cure.
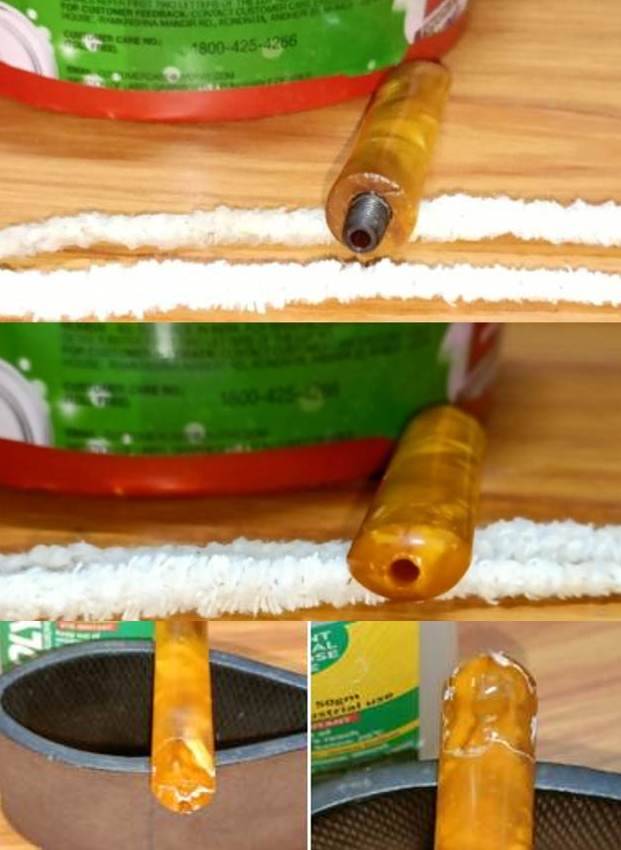 While the stem repairs were set aside to cure, I started with cleaning the leather covered case that housed the pipes. I used a hard bristled toothbrush and warm soap water to clean the maroon velvet lining the insides of the case and wiped it completely dry using paper towels. I cleaned the external surface of the case using cotton swabs and Murphy’s Oil soap and set it aside to dry out naturally.
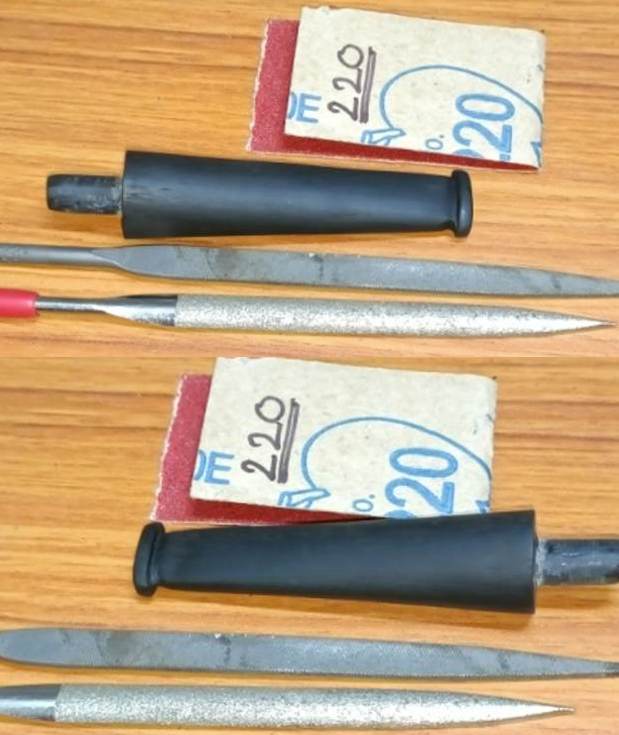
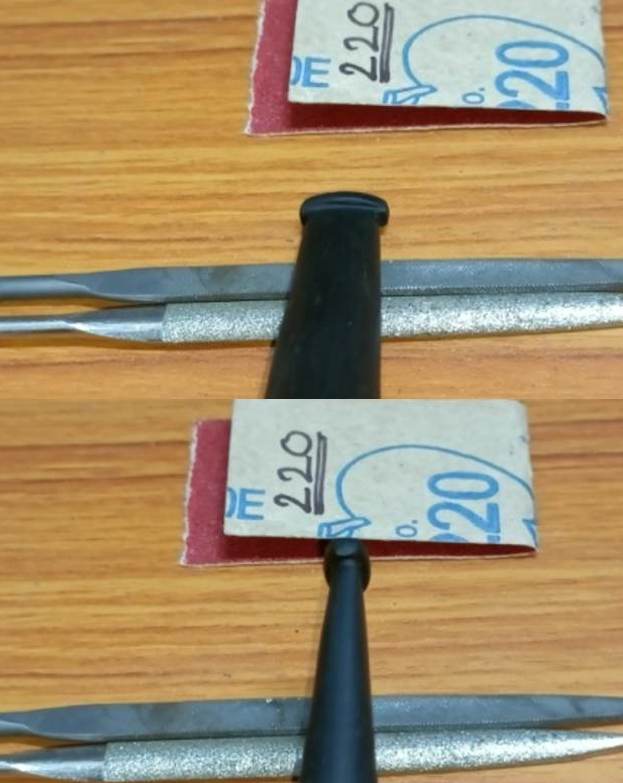
 I checked the repairs over the stem and found that the fills had cured completely. Using a needle file, I roughly blended the filled surface with the surrounding surface. With a folded piece of 220 grit sandpaper, I further fine tuned the blend by sanding the filled areas to match with the stem surface. The progress so far is good.
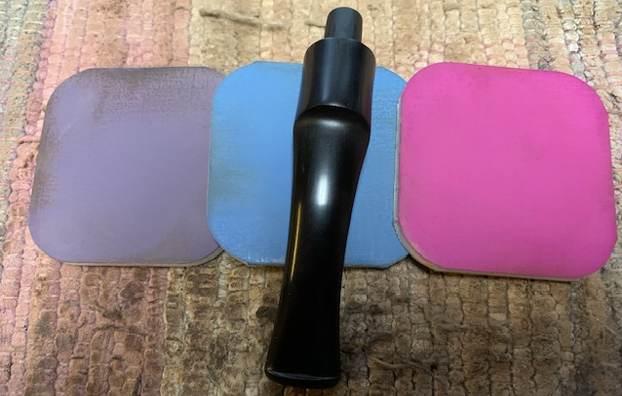
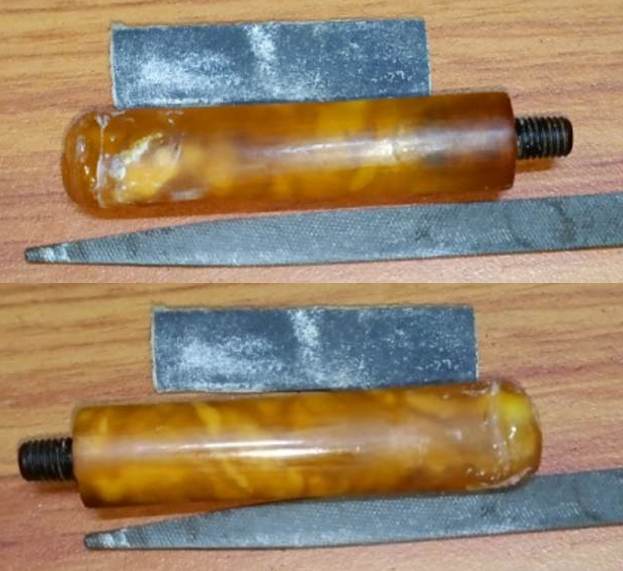 To bring a deep shine to the stem, I went through the complete set of micromesh pads, dry sanding with 1500 to 12000 grit pads. Though the repairs are visible, they are meant to be as it is after all a repair. I have made peace with this.
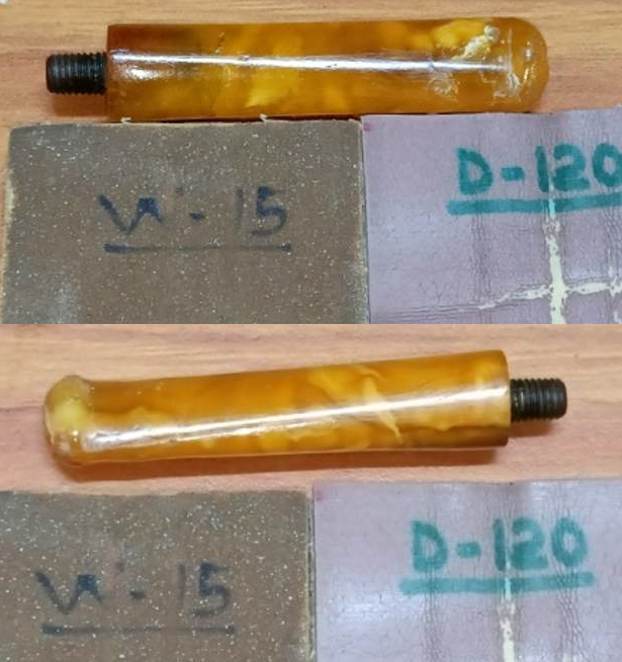 With the stem repairs and polish completed, I checked the leather case. It had dried completely. Next, I applied a liberal coat of Neutral color shoe polish over the leather and kept it in the sun for the leather to absorb the wax from the polish. I followed it up with a nice polish using a horse hair shoe brush. The leather is now nicely hydrated and taken on a nice shine.
 At this stage, the stummel has been polished with micromesh pads, the stem repairs and polishing is completed and the leather case has been cleaned and polished. I decided to address the loose seating of the tenon in to the mortise. I thought of using clear CA superglue to coat part of the tenon surface at the stem end and fit it in to the mortise. The rotation of the coated tenon within the mortise would create a thread pattern on both the tenon and mortise wall. I gave a few in and out rotations for the threads to set in to the coat. Once I was satisfied with the seating and alignment of the stem, I set it aside for the glue to set. I seem to have lost pictures of the process at this stage or may have not even taken them as after this complete project went in to a downward spiral….
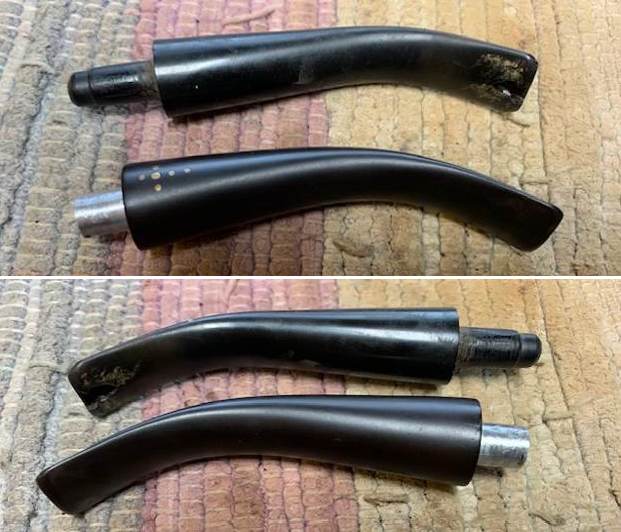
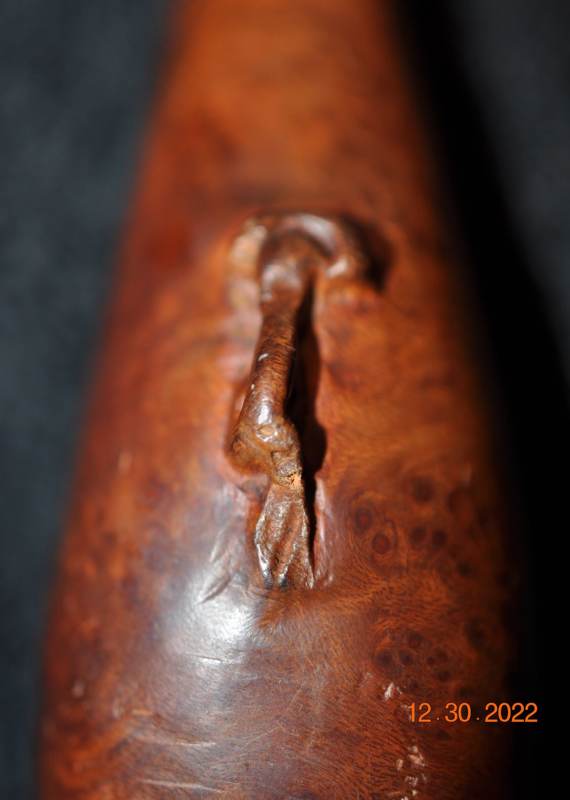
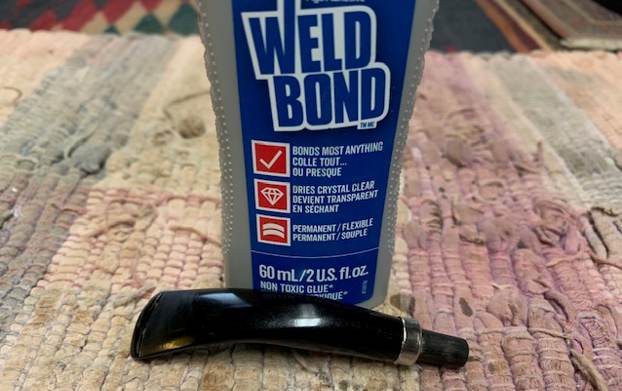
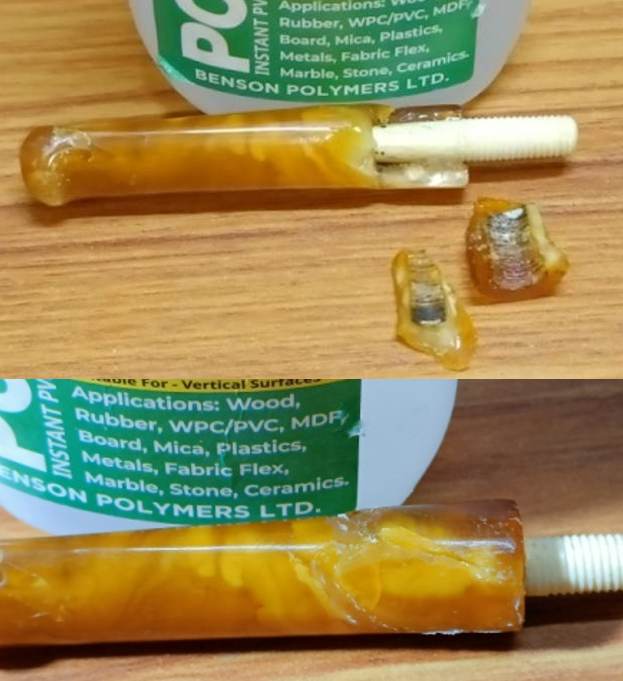
Once the tenon coating had completely cured, I checked the seating of the stem in to the mortise again and heard a small cracking sound (though utterly deafening to my ears) and I knew that I was in trouble, rather huge trouble. The Amber stem cracked exactly along the fault lines that I had indicated early on. The pain, frustration and the agony is indescribable!! I decided to set the carnage aside and took a break. A couple of days later, I had a fresh look at the broken stem and worked out a POA to address the damage. I decided to replace the old tenon with a fresh bone tenon from my cache of spare tenon and glue the broken stem pieces together. I would further stabilize and strengthen the cracked portion of the stem with a sterling silver band. This replacement of the tenon would also address the issue of shorter tenon that I had mentioned above.
I selected a bone tenon that would fit snugly in to the mortise as well as in to the broken stem. I fixed the tenon in to the remaining intact part of the Amber stem using superglue. Once the glue had cured, I fixed the broken parts of the stem around the tenon with superglue and set it aside for the glue to cure completely.
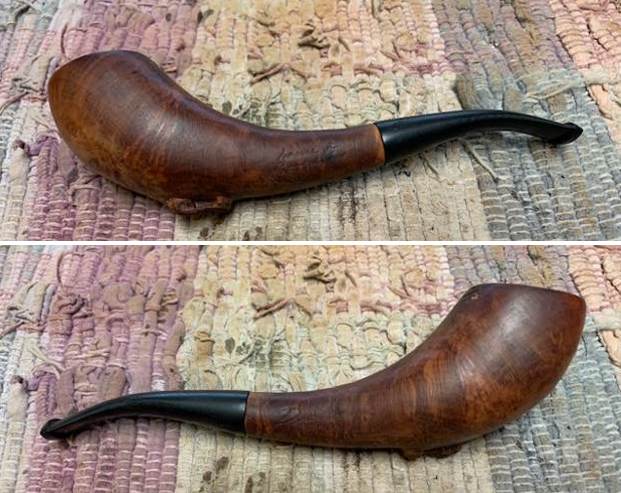
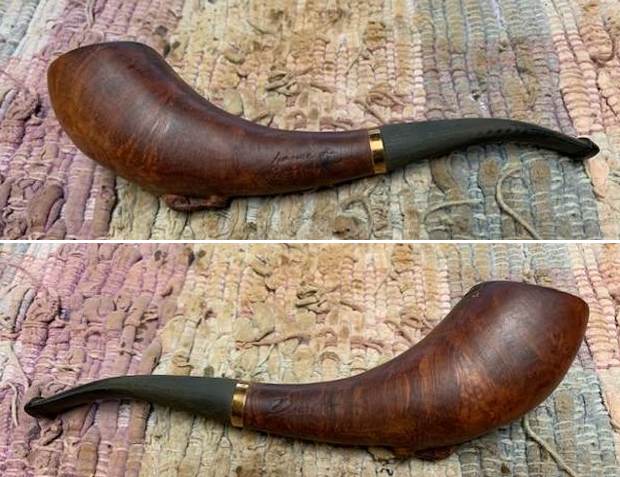
 Once the glue had cured, I sand the repaired surface with a piece of 320 grit sand paper to match with the rest of the stem surface. Thereafter I attached a sterling silver band, which I had got specifically made for this stem, using superglue. The repairs are solid and I am quite satisfied with the progress being made.
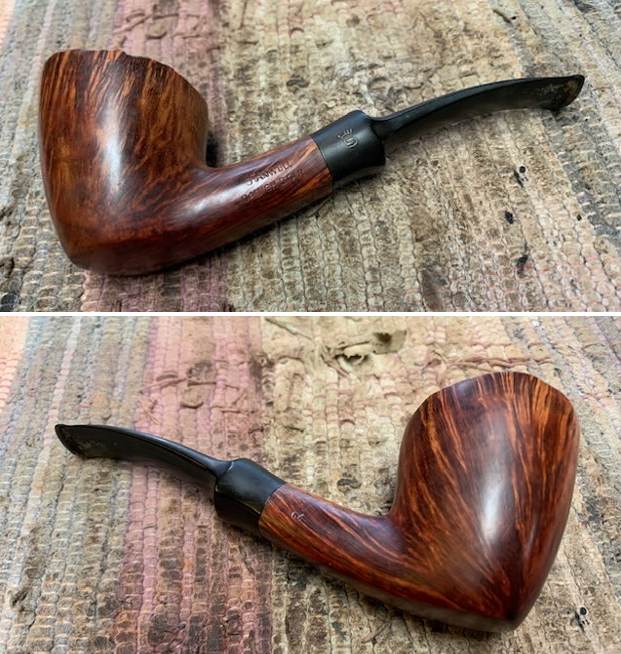
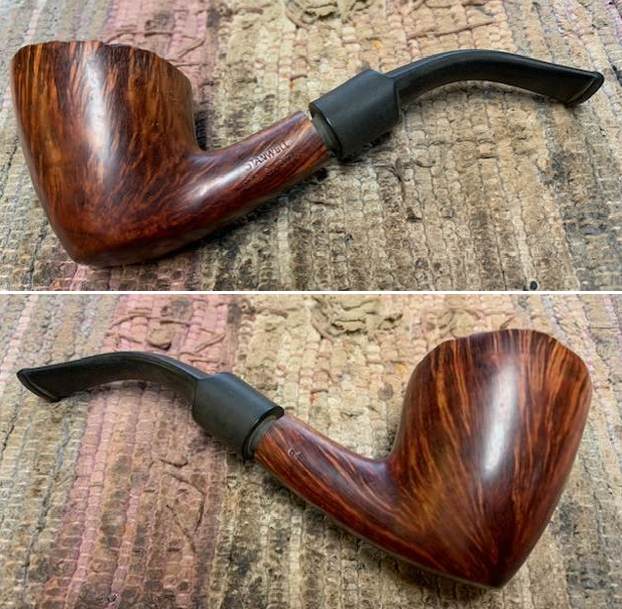
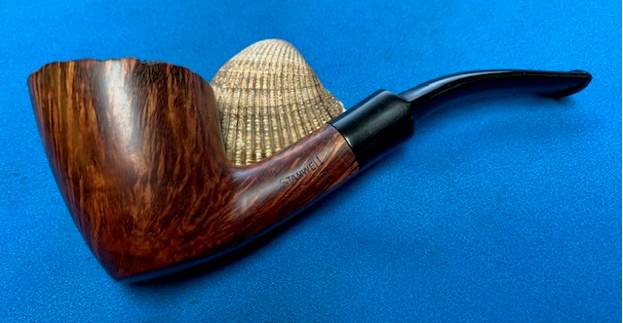
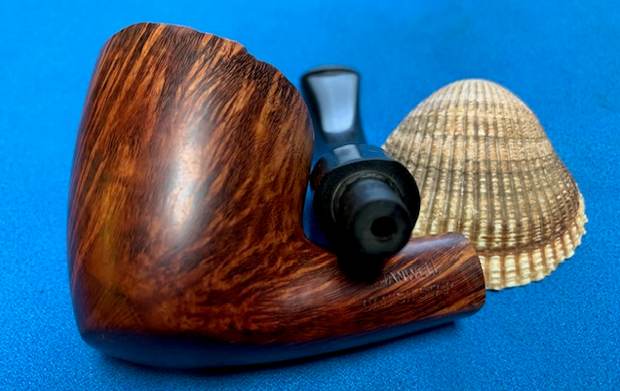
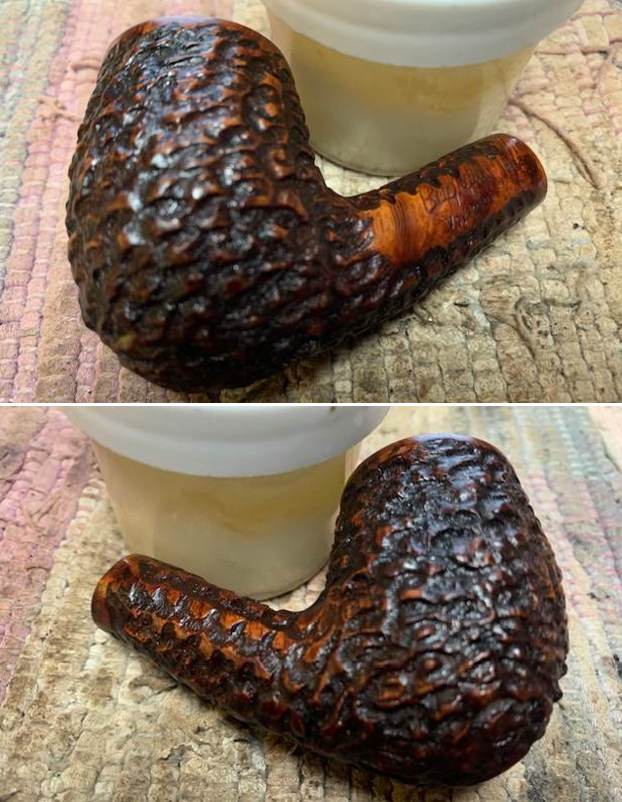
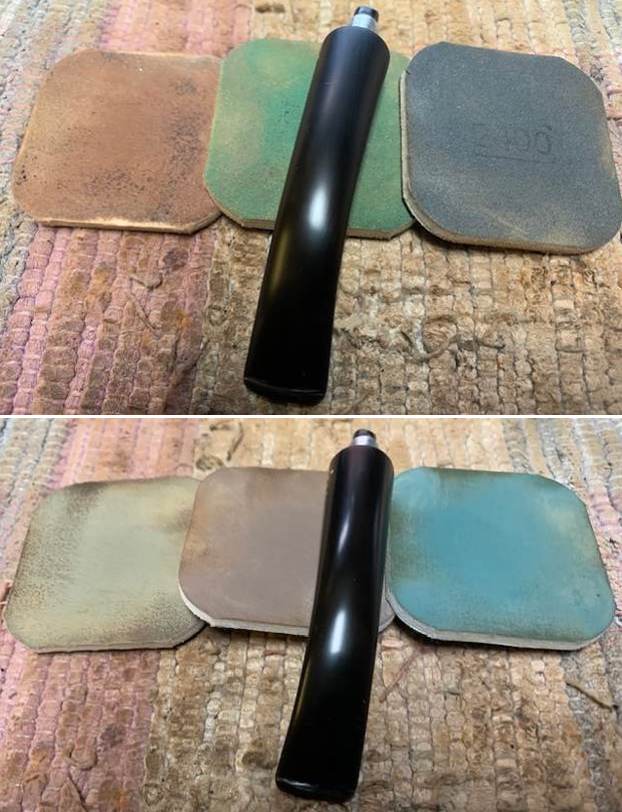
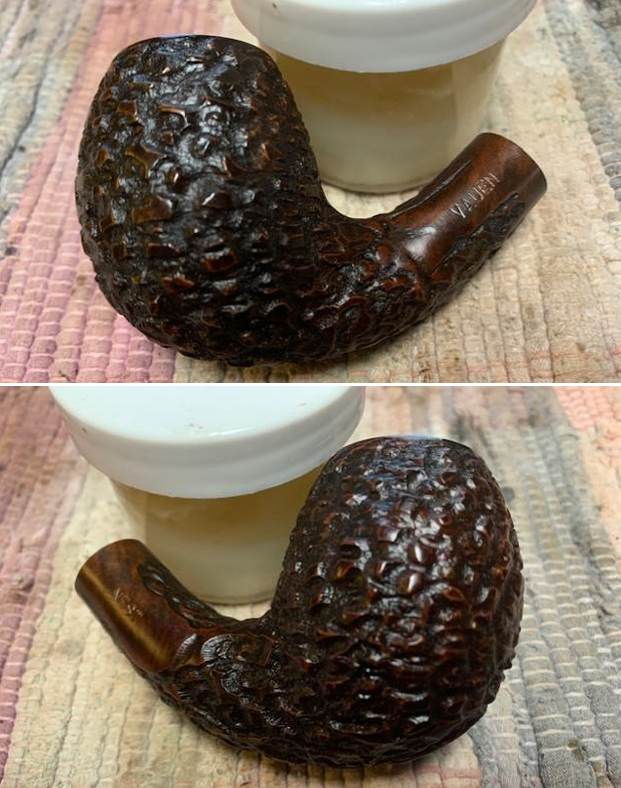
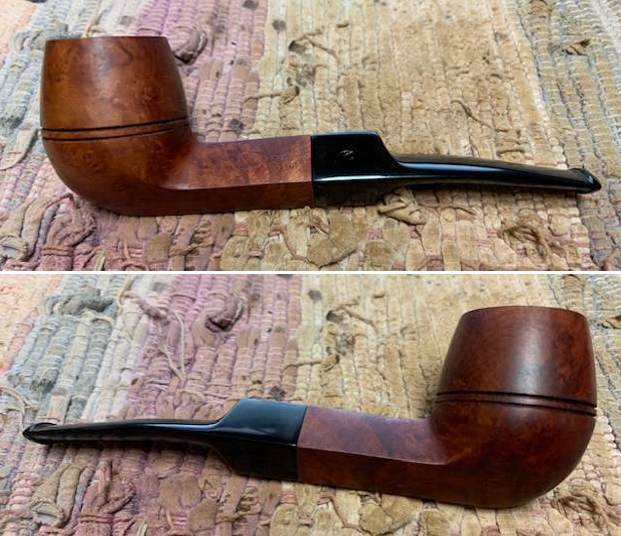
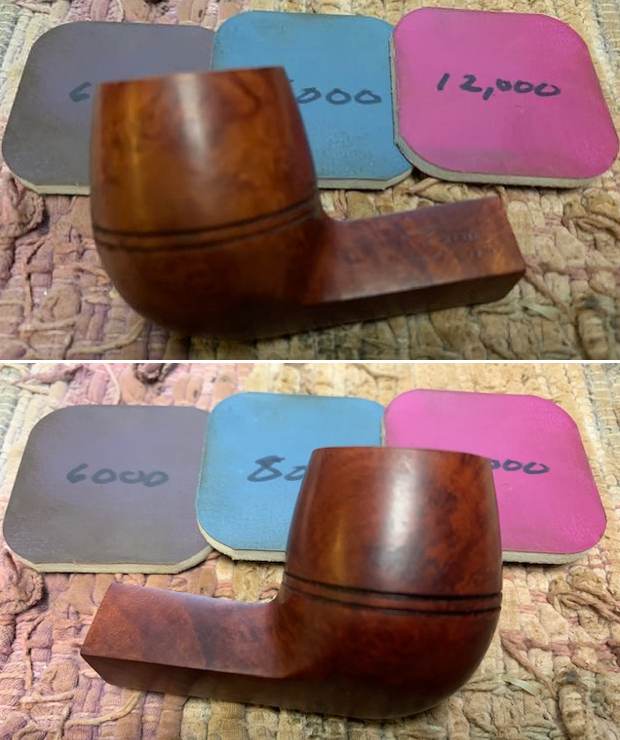
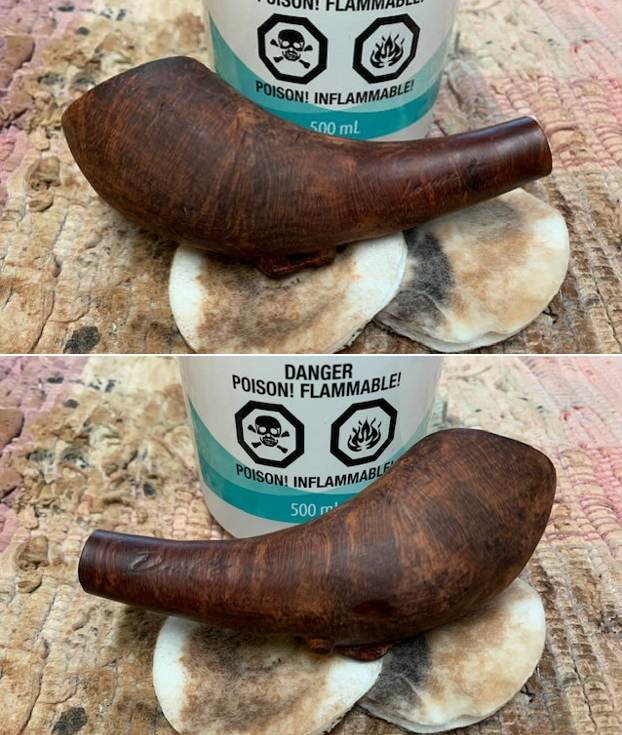
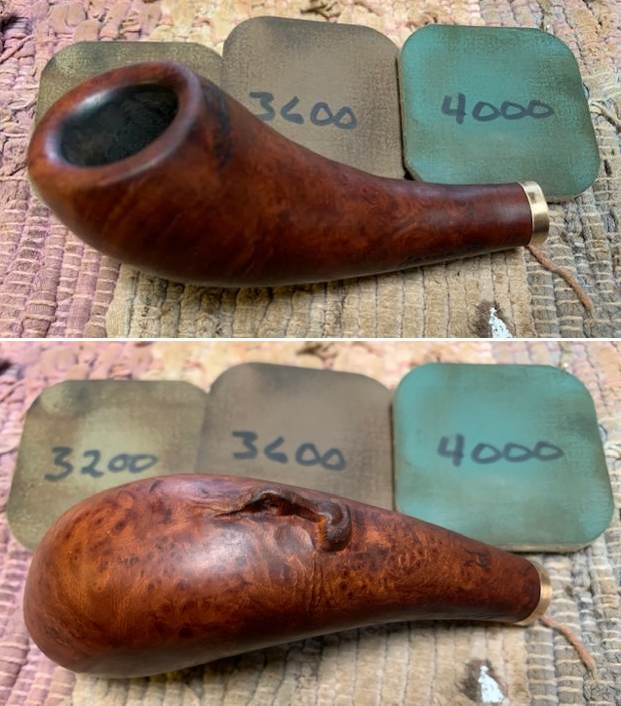
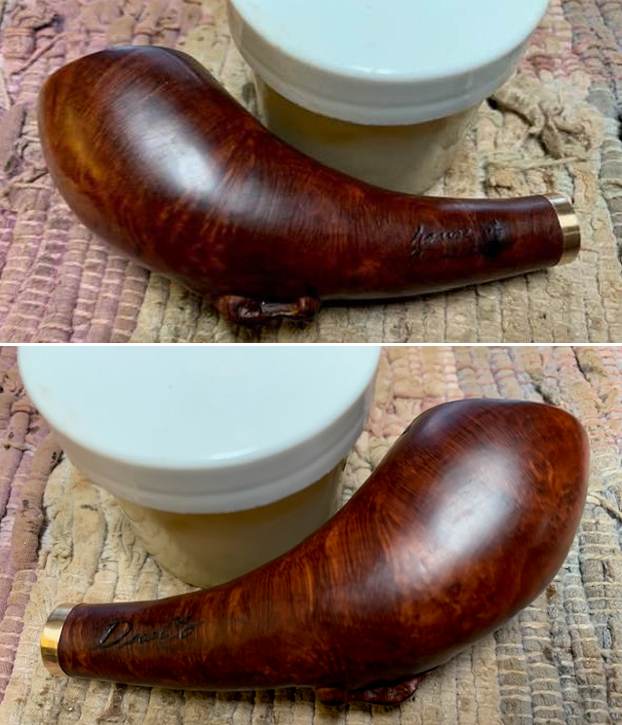
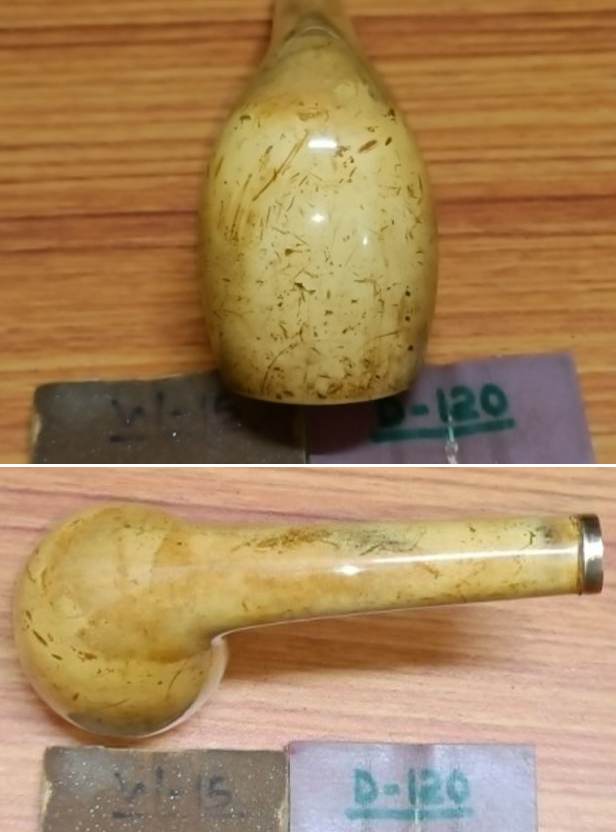
 The gentleman who had commissioned this set had made it amply clear that the scratches/dents and dings over the stummel surface should remain as it is a part of the pipe’s past journey. I too agreed with the new owner and decided to move ahead with polishing and waxing of the stummel with beeswax. I brought a deep shine to the surface by dry sanding with micromesh pads and followed with a microfiber cloth. I assembled the equipment and materials that would be needed during the waxing process viz heat gun, paper towels, q-tips and a steel container graciously lent by Abha from the kitchen and of course, beeswax. I stuffed the chamber with cork and the shank end with folded pipe cleaners to prevent inadvertent seepage of the melted beeswax into either. Next, I melted a sufficient quantity of beeswax using my heat gun and thereafter heated the stummel. Using the a folded pipe cleaner, I completely coated the stummel with the wax and continued the application till the surface was saturated and set the stummel aside to absorb the wax. I reheated the stummel with the heat gun about 20 minutes later and let the excess wax either be absorbed or drip off from the stummel surface. I rubbed off the excess wax with a soft cotton cloth and. The deep golden brown coloration that the meerschaum has taken is a visual treat.
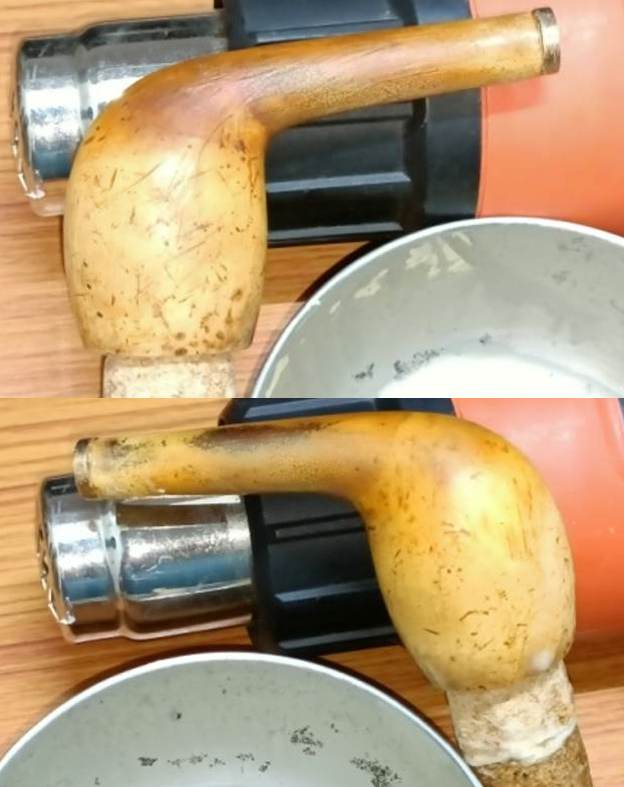
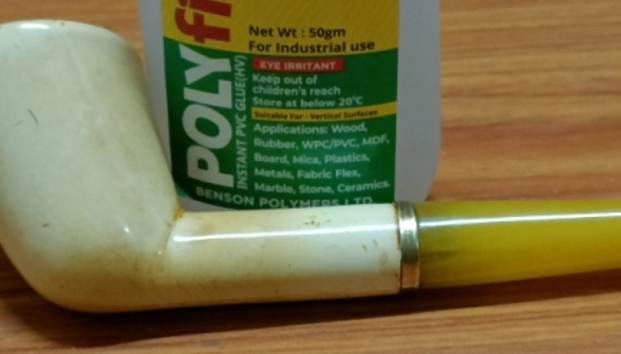
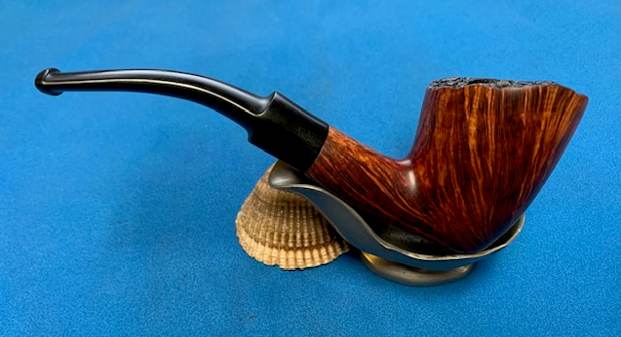
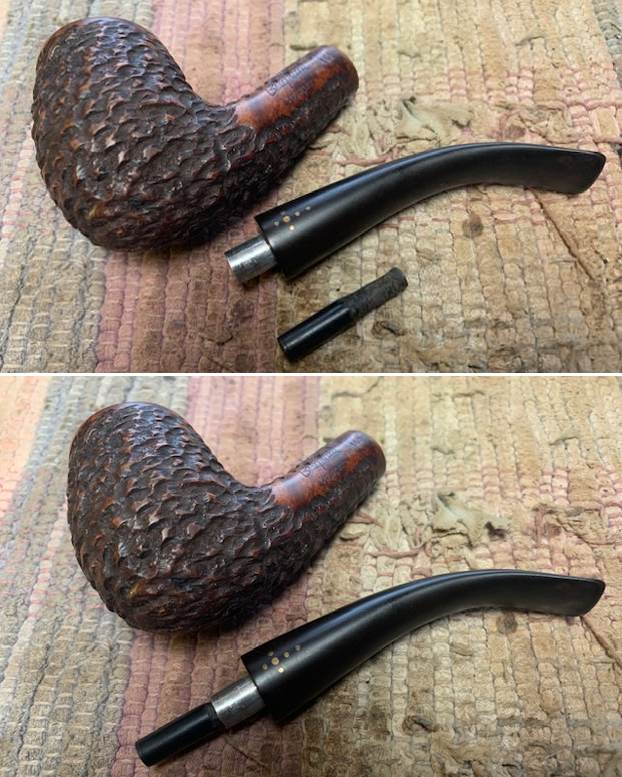
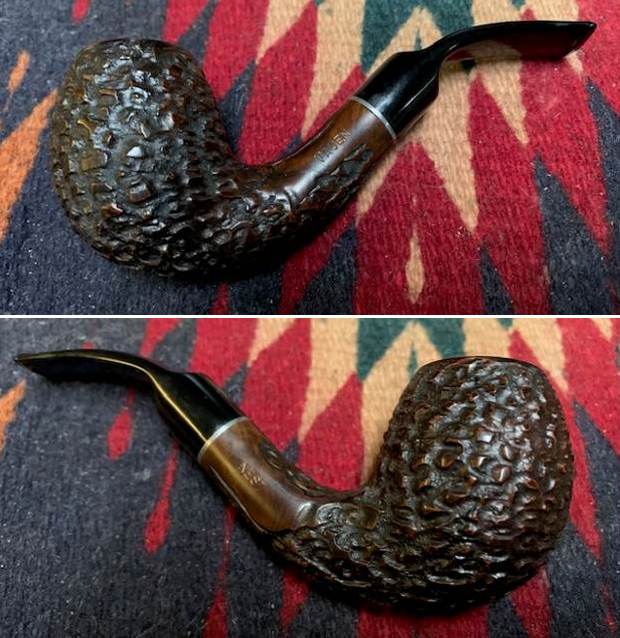
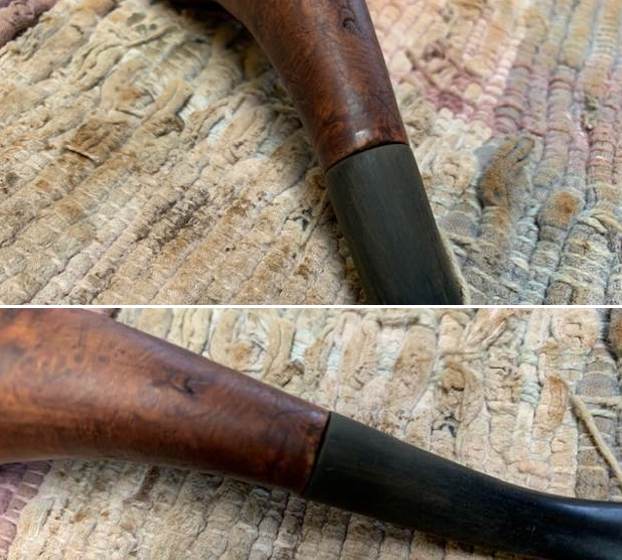
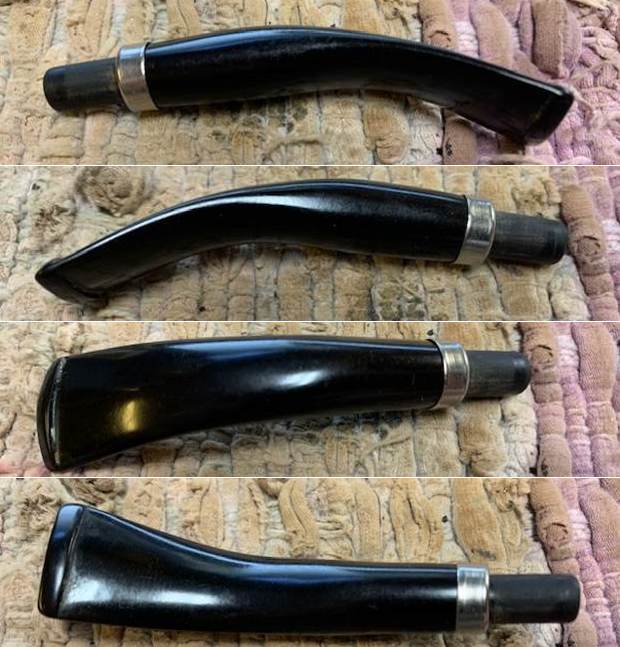
 With the stummel now completed, I was through with repairs and refurbishment of this cased pair. I reattached the Amber stem with the stummel for a final inspection and polish. Unfortunately, this was not the end of the journey with this pipe!!! As I reattached the Amber stem, the shank band broke free and fell on the table along with a small portion of the threads.
 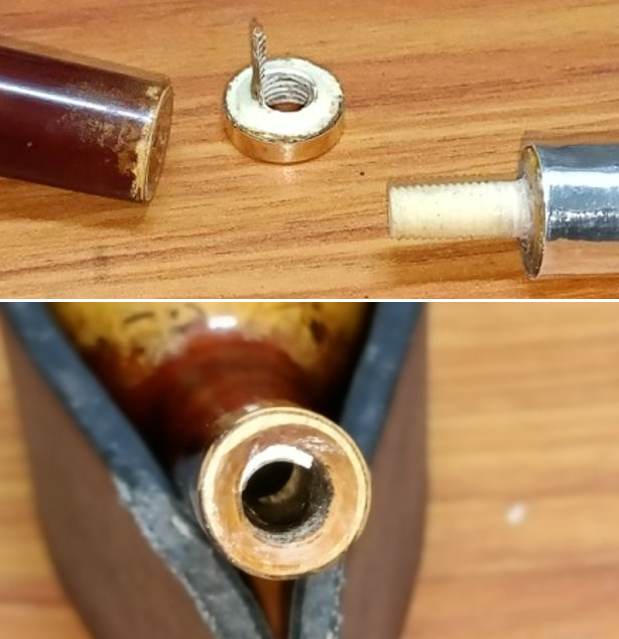 Luckily, the concave surface of the shank face and the convex surface of the band were intact and I decided to glue them up again as was done originally.
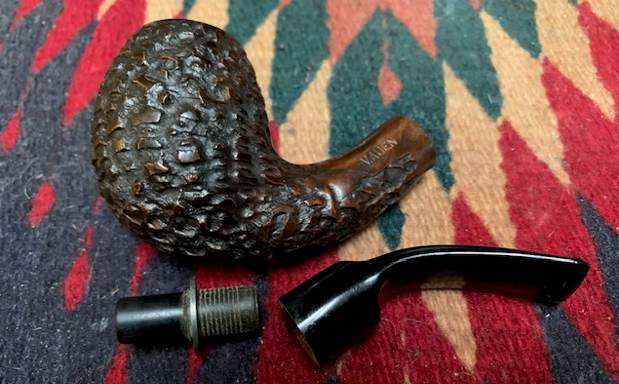
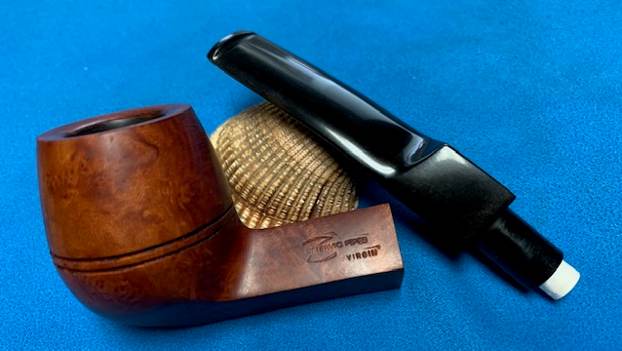
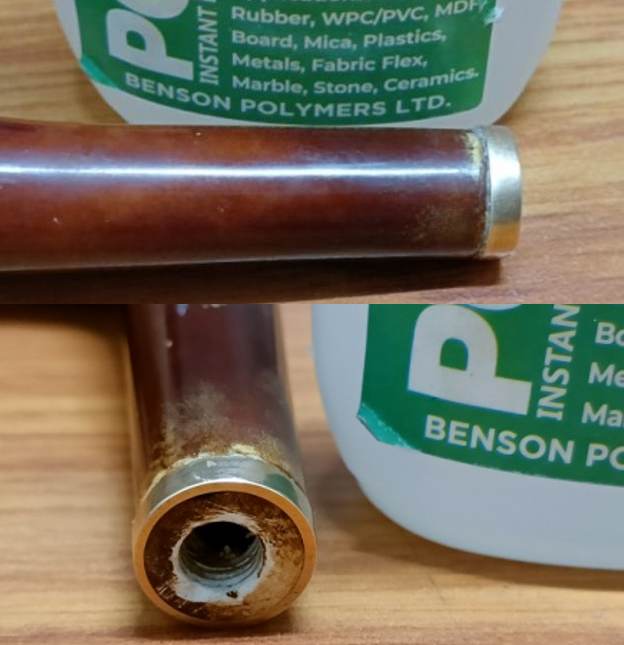 Since the threads were now damaged, I decided to do a complete stem replacement and shortlisted a near matching sized stem as a replacement to the Amber stem. The two aspects that I needed to match was the stem face diameter and the second was the matching of the taper and width with the Amber stem.
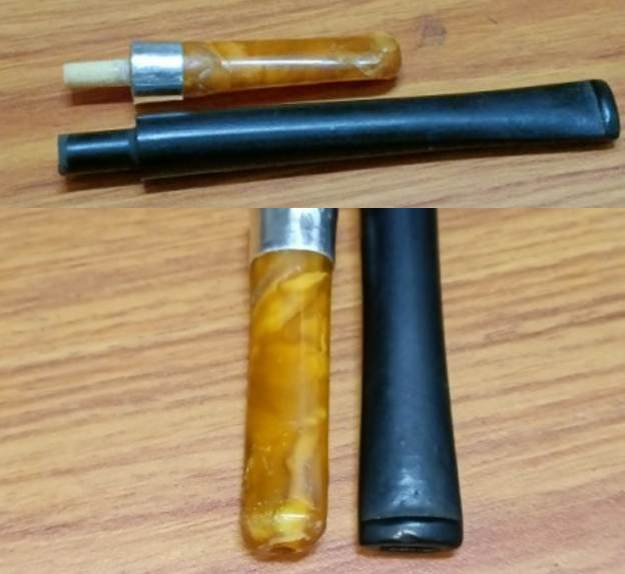 This decision to replace the stem on this pipe has now necessitated that I consider replacing the replacement stem on the Dublin from this set. All the efforts that had gone in to fabricating and shaping the acrylic stem on the Dublin are for naught!! I did the replacement of the acrylic stem on the Dublin and the end results are more than satisfying (you can read all about it in Part-I of this restoration).
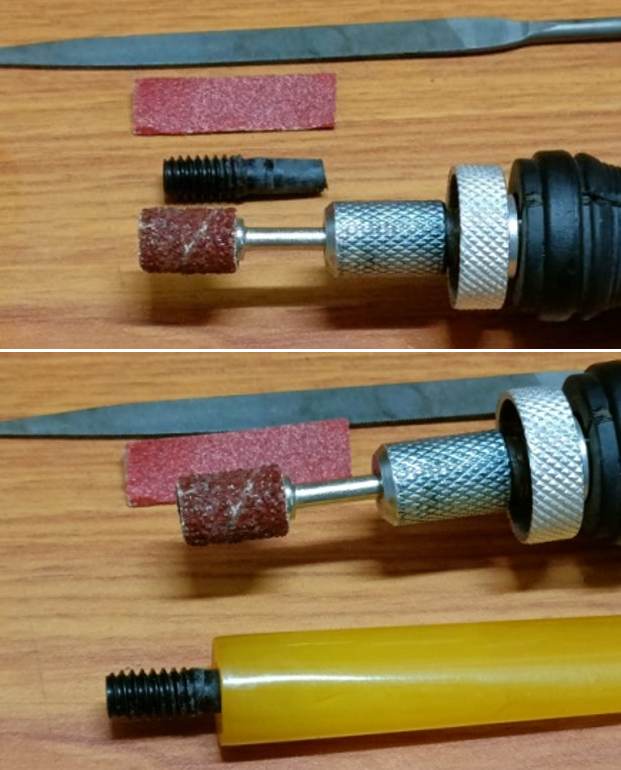
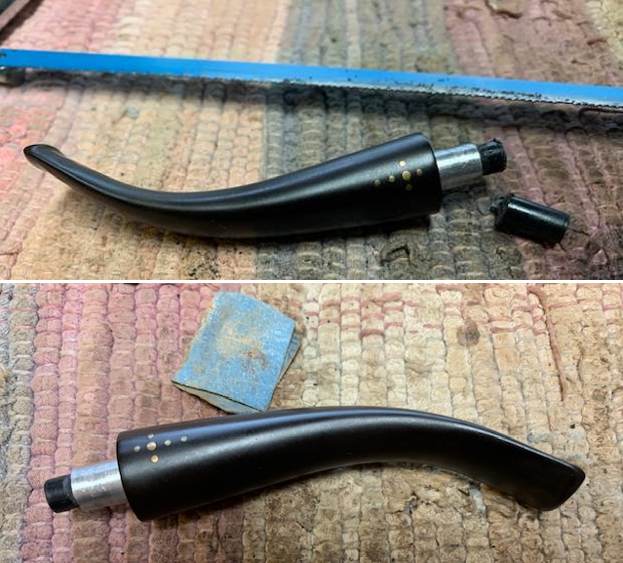
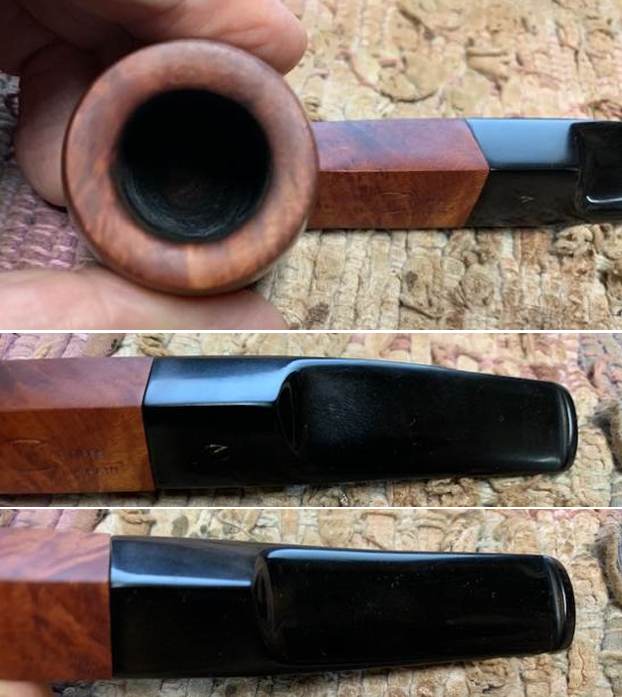
Using needle files and folded piece of sandpaper, I evened out the threads inside the mortise wall. This would make it easier for the mortise to accept a push pull tenon type.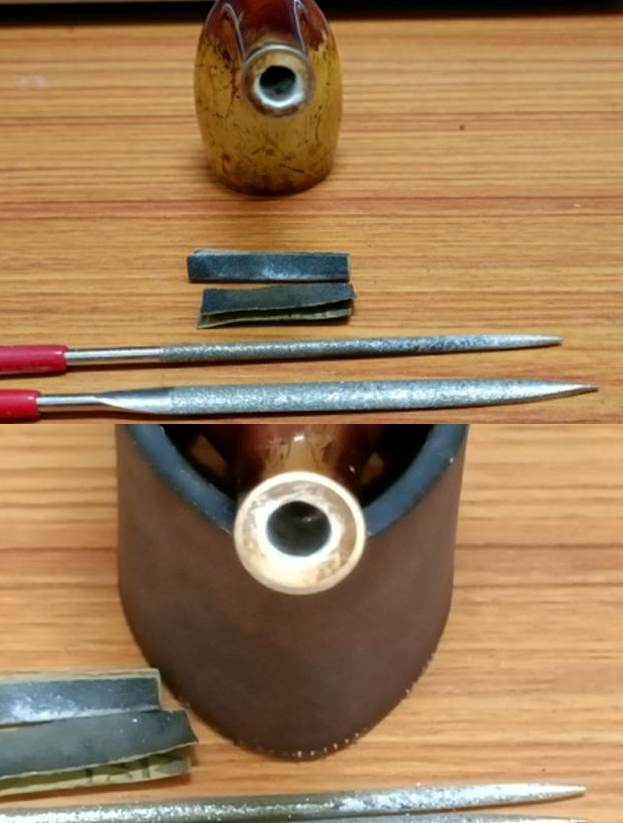 Next I tackled the sizing of the tenon. I first did the major hard work by sanding the tenon with a 150 grit sanding drum mounted on a hand held rotary tool. The challenge of achieving a perfect fit of the tenon in to the mortise was achieved by sanding the tenon using sandpaper. It did take a few man hours, tons of elbow grease and patience to achieve perfect fit.
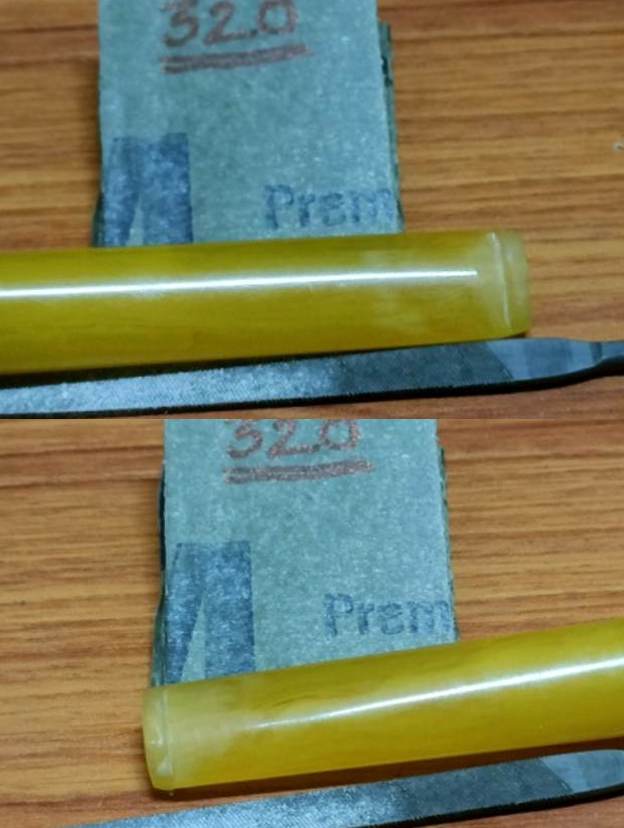
 With snug seating of the stem in to the mortise ensured, it was time to adjust the length and other parameters of the replacement stem. I wanted an old style stem with an orifice to match the correct time period of 1920s. I marked the length of the stem that would fit in to the case and cut off the excess with a blade. This cutting off of the stem provided me with a rounded slot and a taper that nearly matched the required shape.
 I cleaned out the stem internals using shank brushes and anti oil dish washing soap. I ran a couple of pipe cleaners through the airway to further clean and dry out the stem internals.
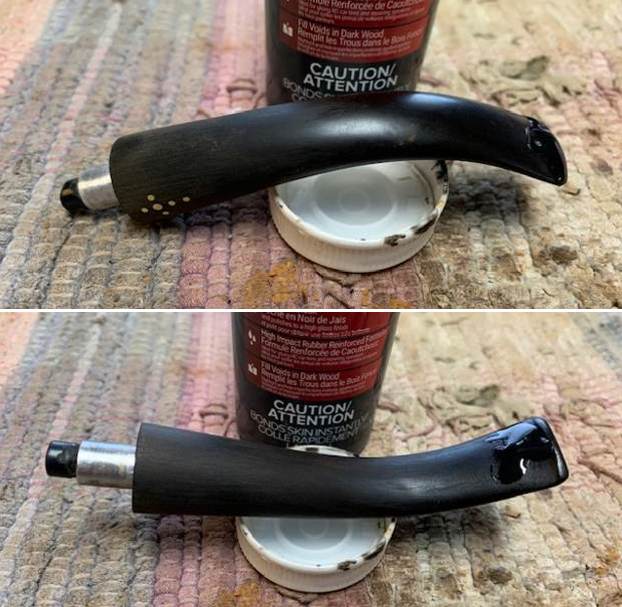
 I firstly evened out the slot end of the shortened stem by topping on a piece of 220 grit sandpaper. Thereafter began hours of hard and laborious task of shaping the stem to match the shape and rebuild buttons on either stem surface using needle files and sandpapers. It did take hours of work and eyeballing to get the shape I desired and most importantly, the slot end. I am pleased with the results achieved.
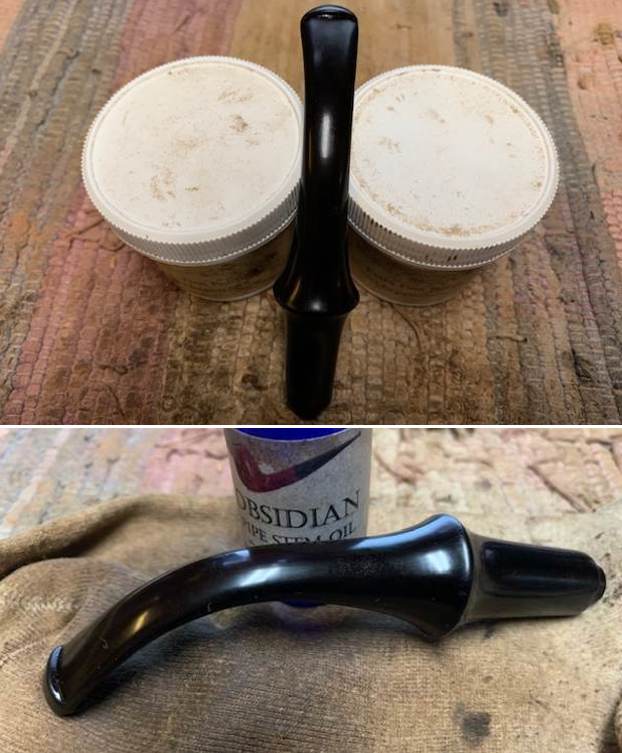
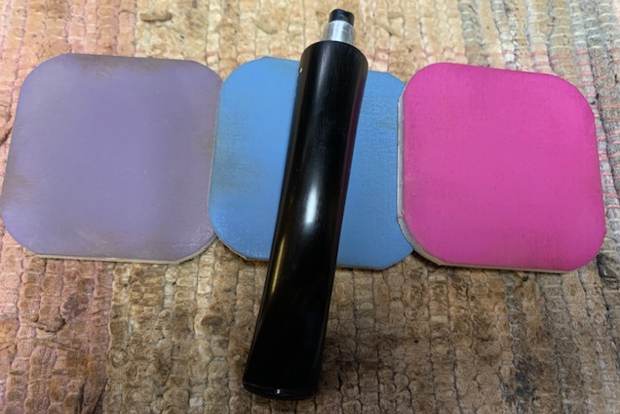
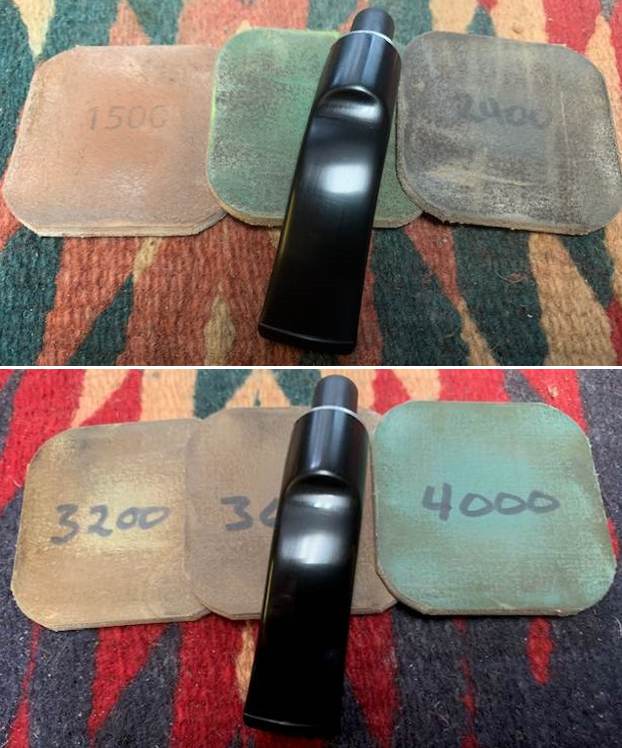
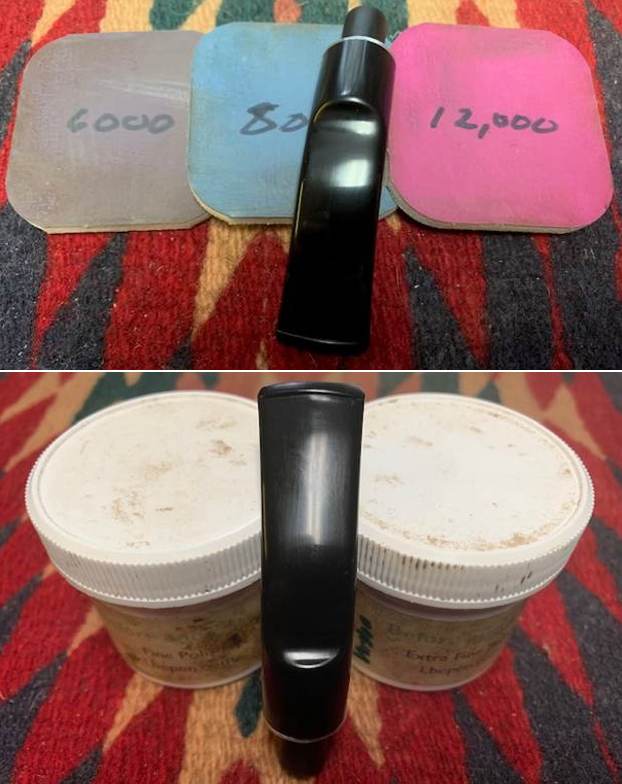
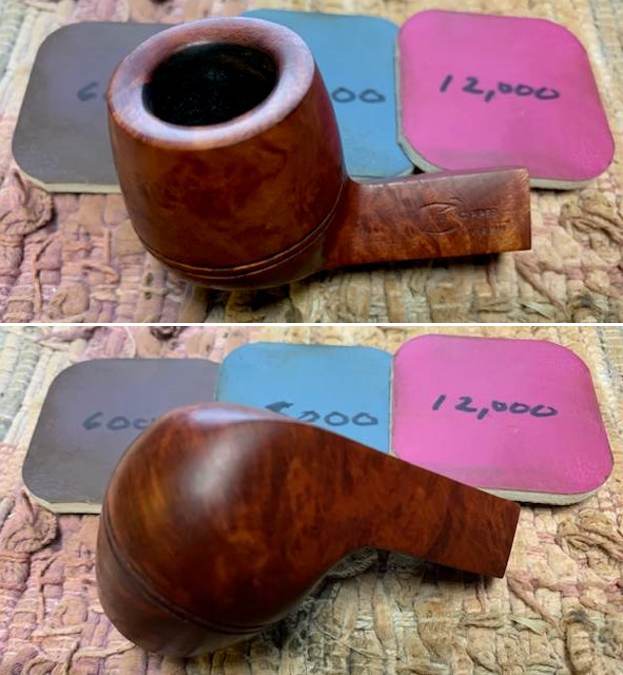
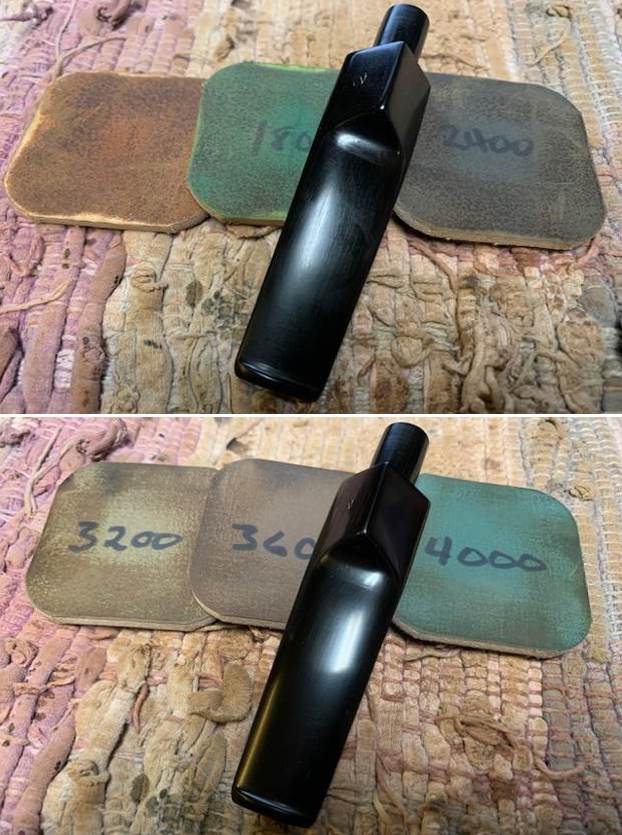
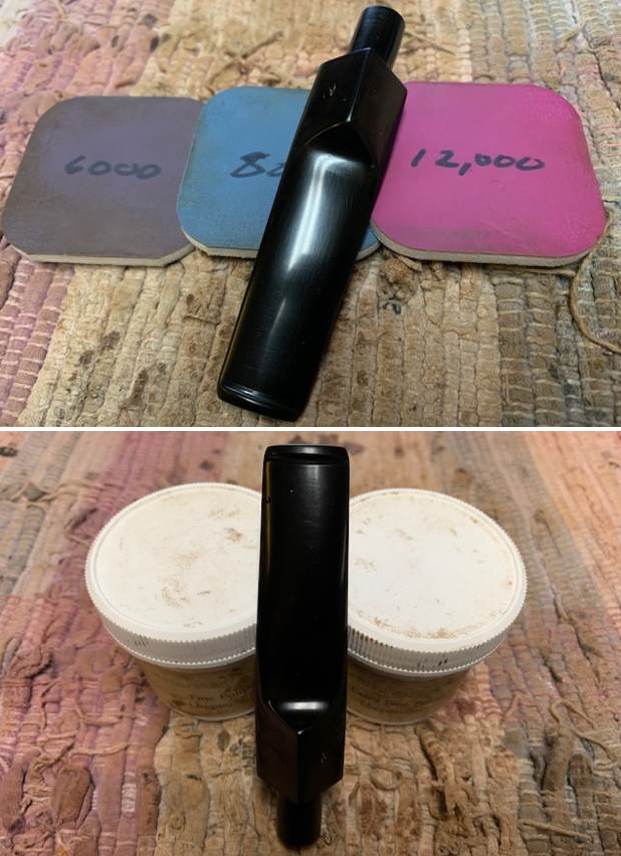
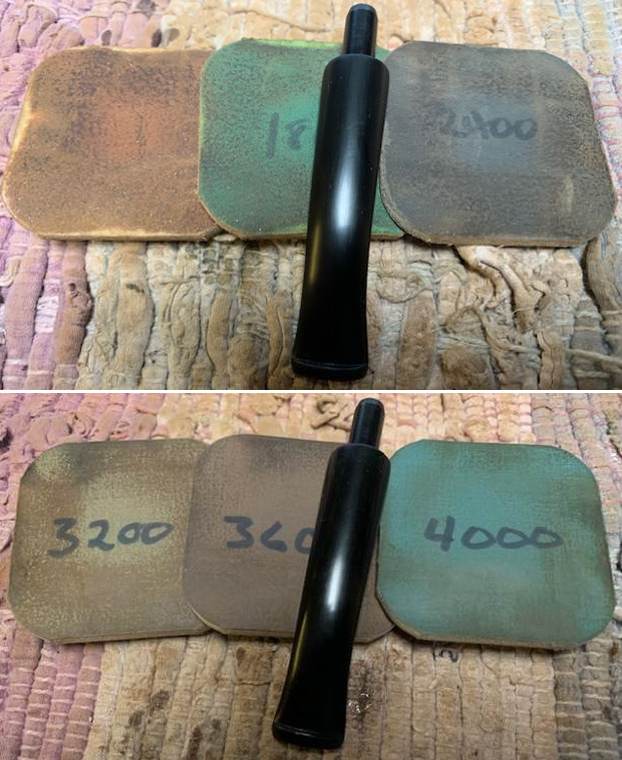
 Next, I wet sand the entire stem with 600, 800, 1000, 1500 and 2000 grit sand papers. This progressive use of higher grit sandpapers helps to, firstly, reduce the sanding marks left behind by the more abrasive ones, secondly, completely eliminate the oxidation while imparting a clean shine to the stem surface. Thirdly, this also helped to even out the sanding marks left behind by the flat needle files. I applied a little EVO and set the stem aside for a few minutes.
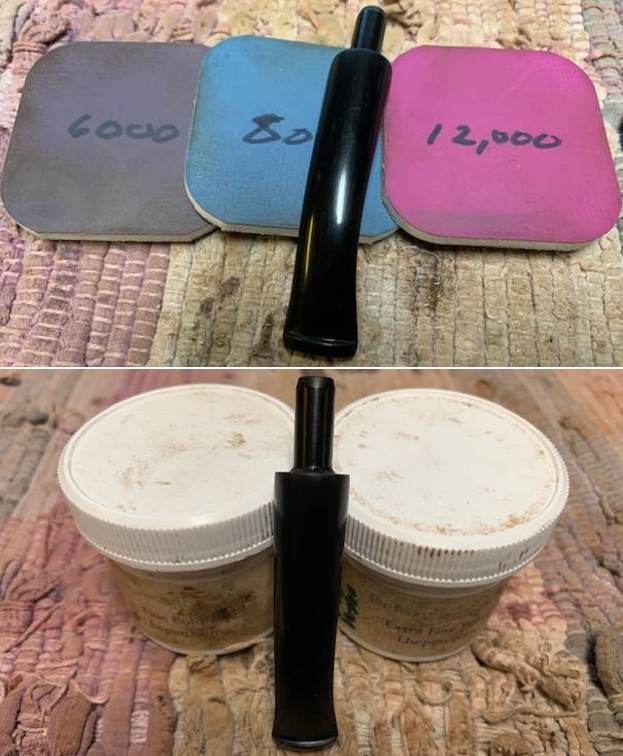
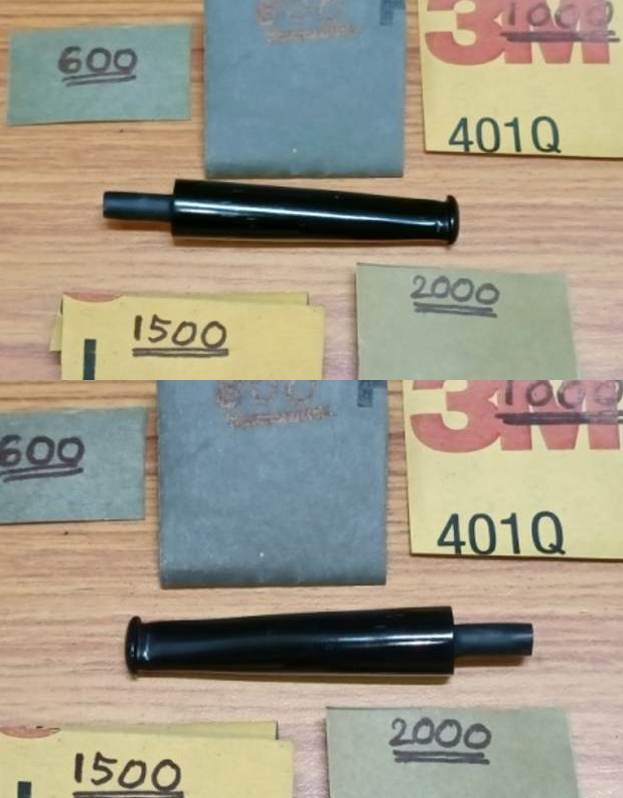 This was followed by wet sanding the stem with 3200 to 15000 to bring a deep shine and smooth finish to the stem. I applied a small amount of EVO and set it aside.
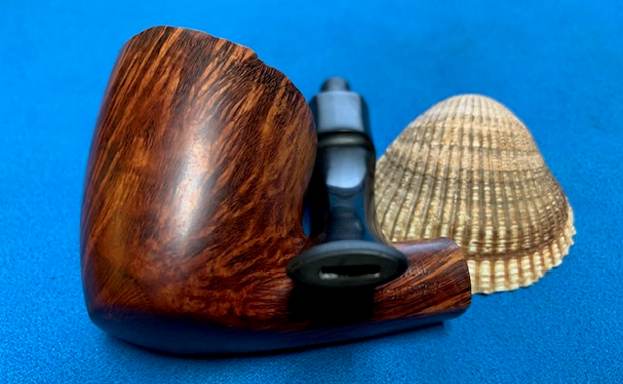
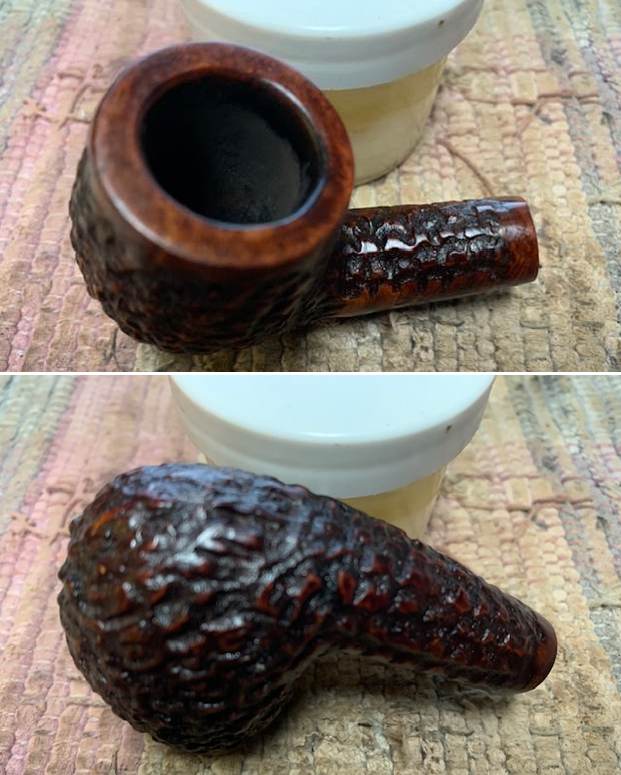
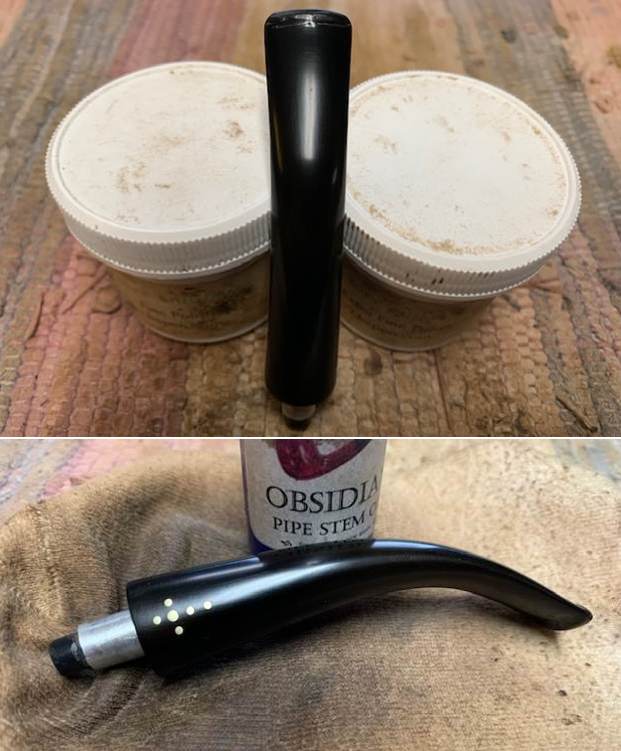
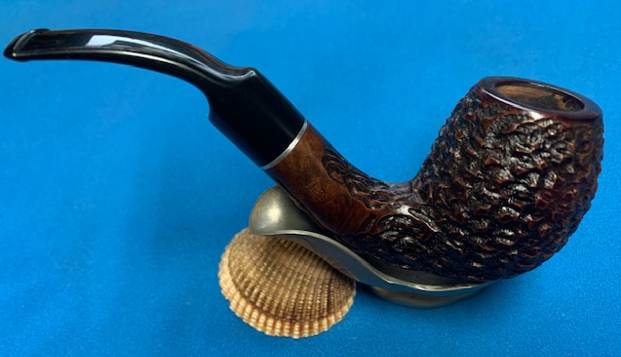
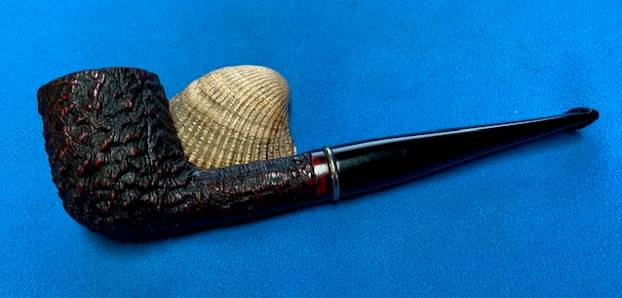
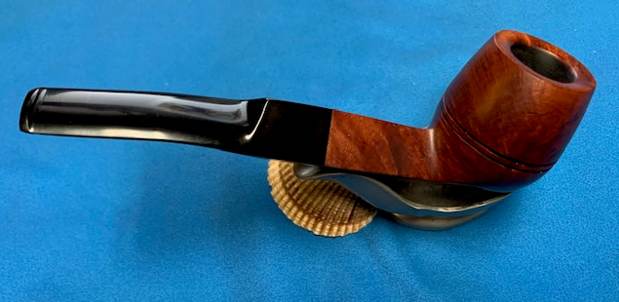
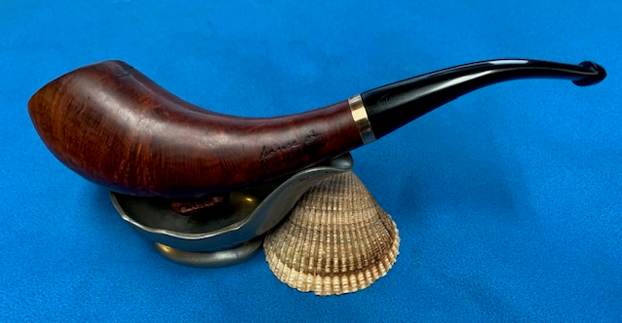
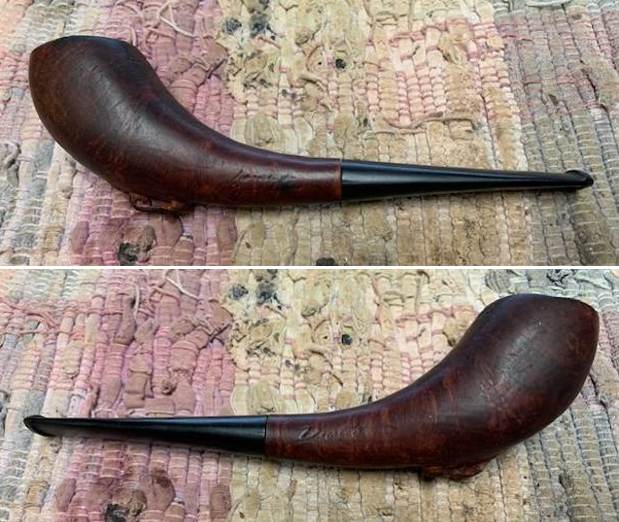
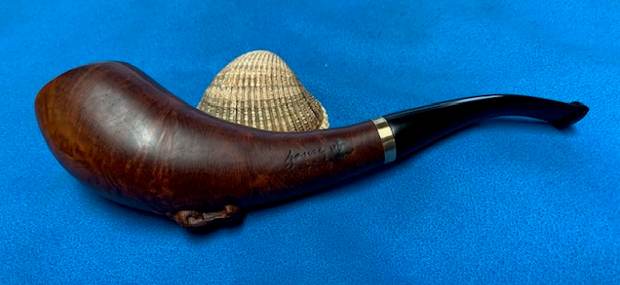
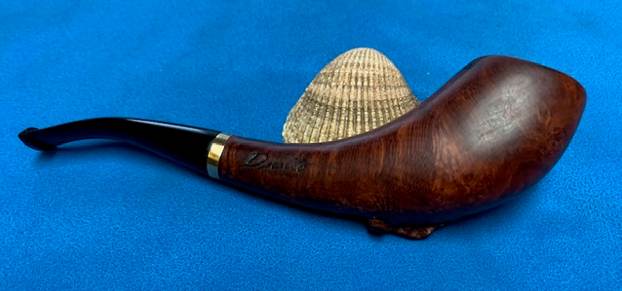
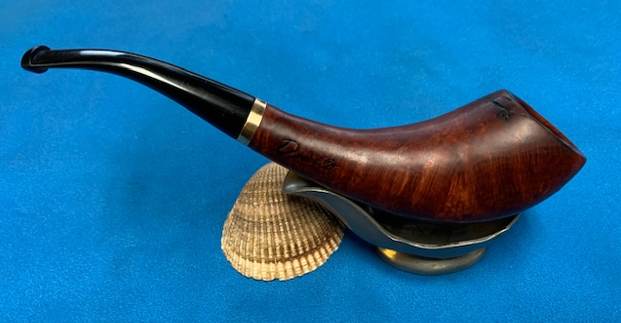
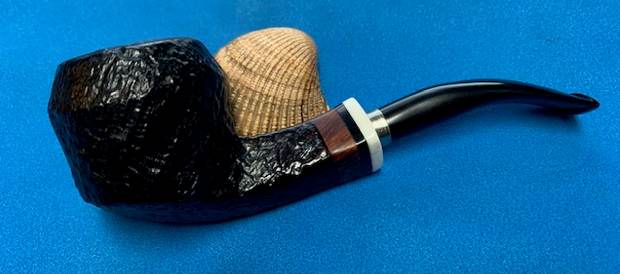
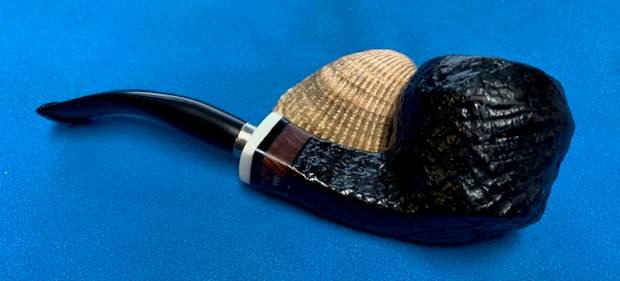
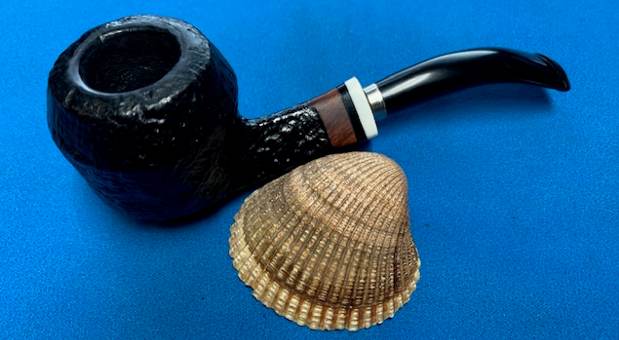
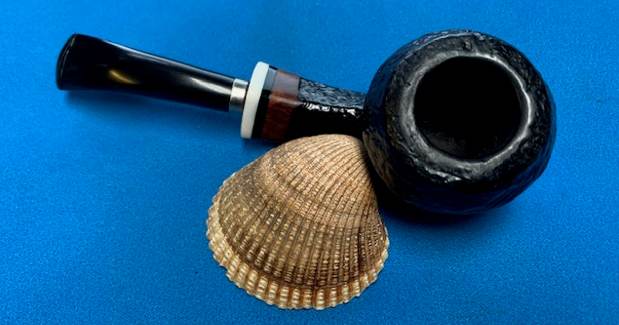
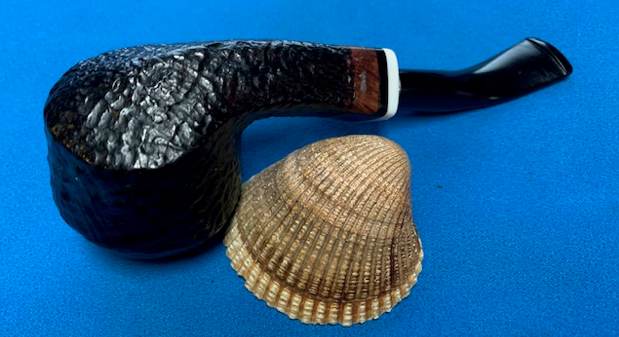
 To put finishing touches to this pipe, I polished the stem with Blue Diamond compound and subsequently with carnauba wax using my hand held rotary tool and vigorously buffed the stummel with microfiber cloth to bring a deep shine. This pipe looks absolutely stunning and I am sure that my friend will like it too.