Tag Archives: pipe restemming

A Surprise when working on the Citation 812 Canadian


Blog by Steve Laug

Class1
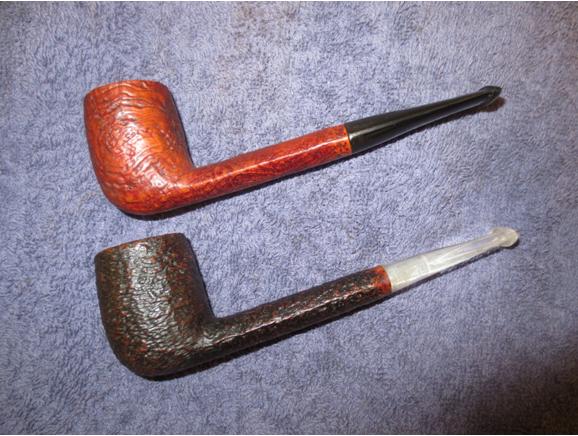
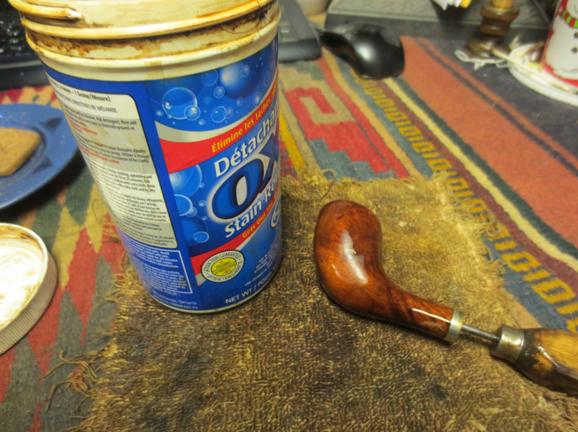
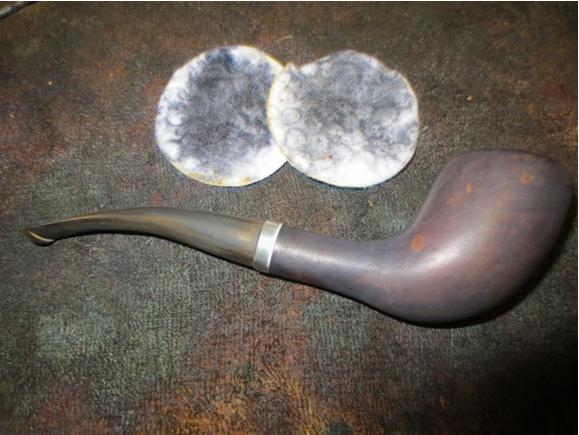
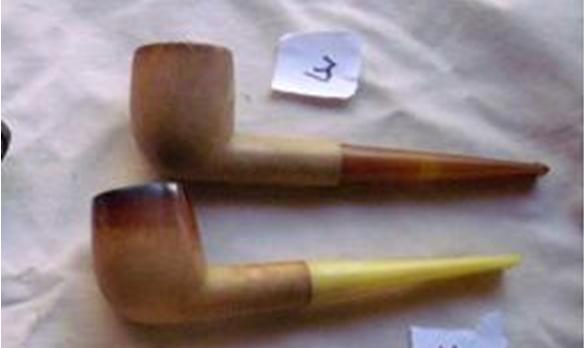
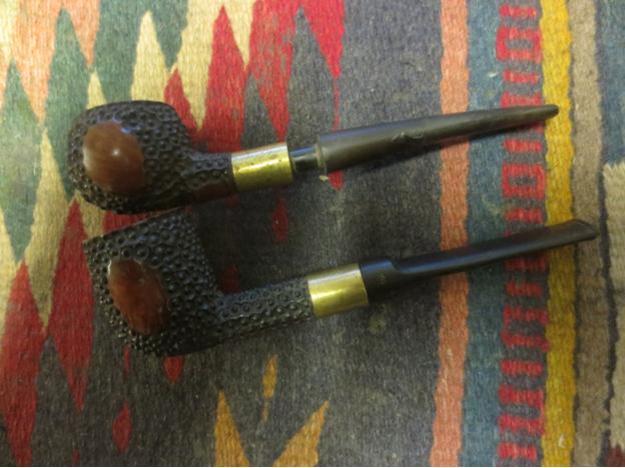
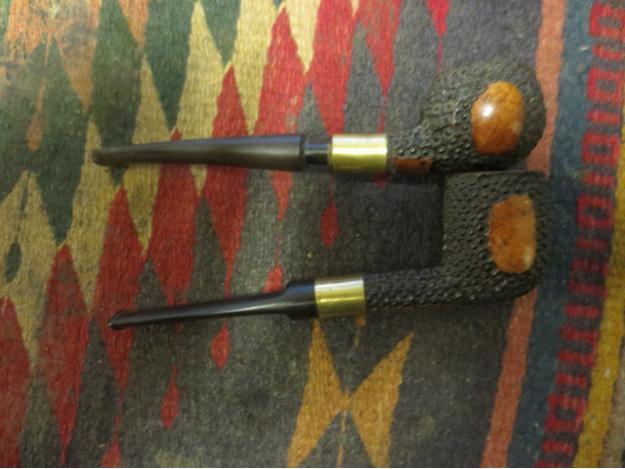
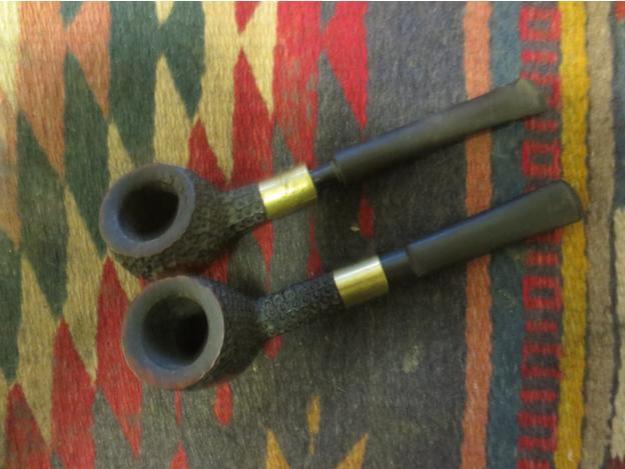
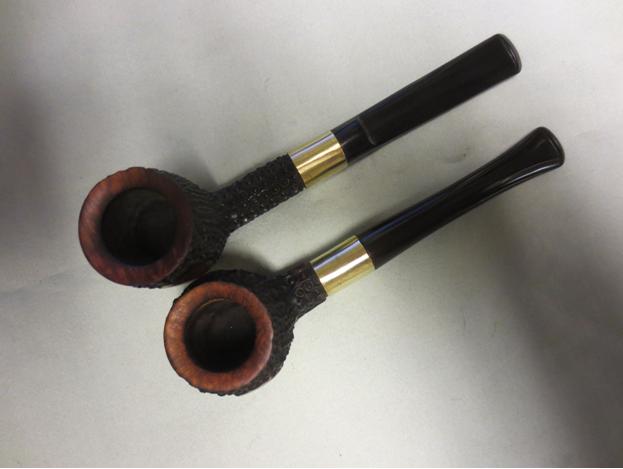
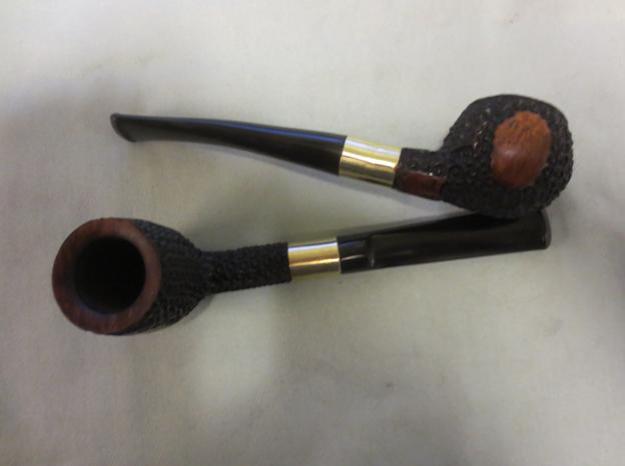
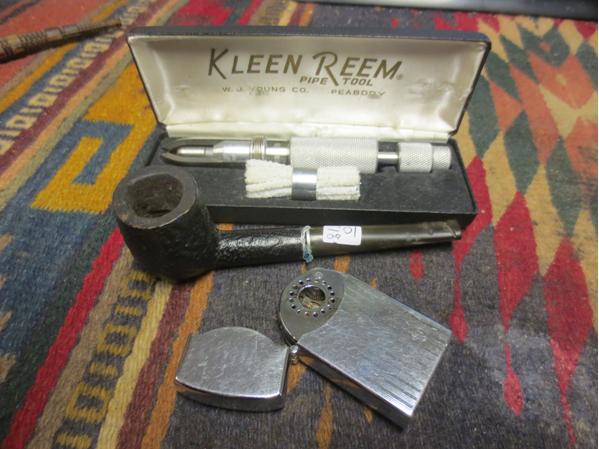
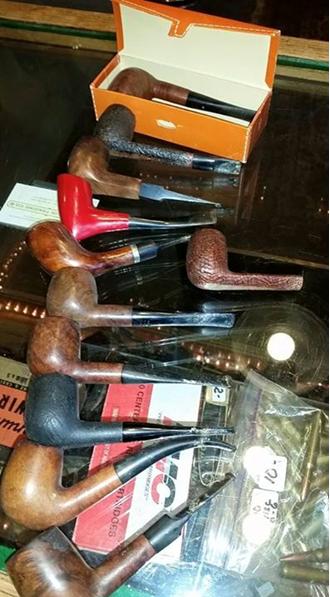
This Citation (second pipe down in the first column in the photo on the left) is a sister pipe to the Savinelli Classica 812 Canadian that I just restored. It is stamped Citation and 812 on the bottom of the shank. The sand blast is nowhere near as beautiful as the Classica but it has a charm all its own. It appears to be a combined blast and rustication – hard to explain but it is just too consistent to be a normal sand blast. It appears to have been rusticated and then blasted lightly. It has a dark brown stain as an undercoat and a light brown over the top. The high points on the finish are lighter brown and the smooth portions are also lighter brown.

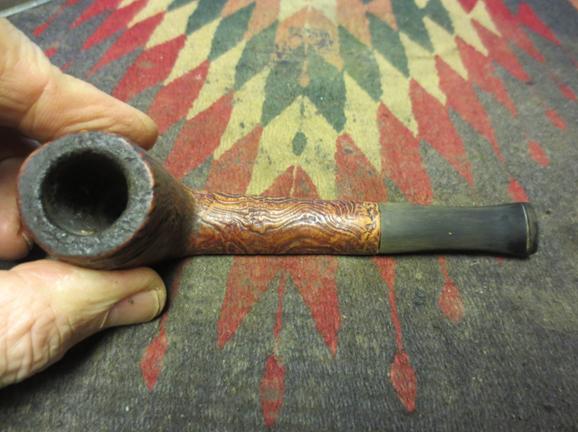
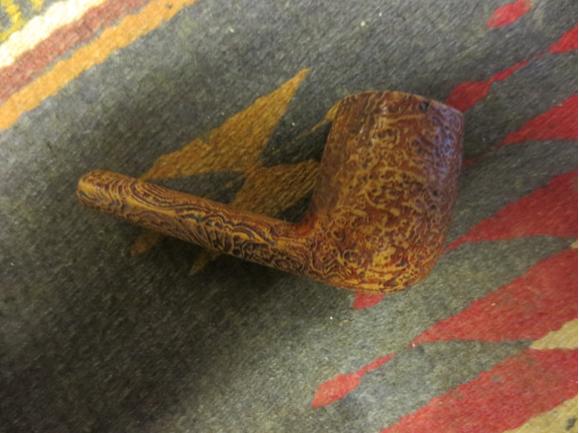
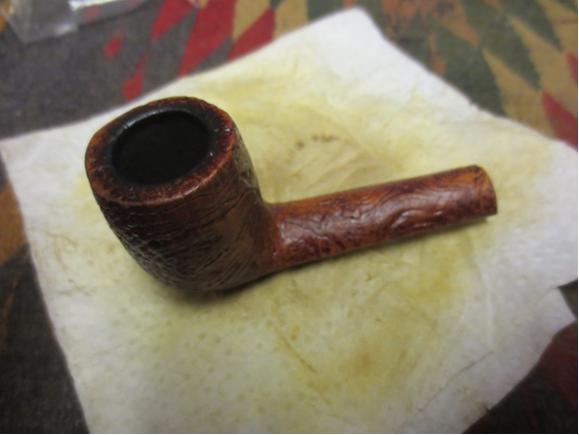
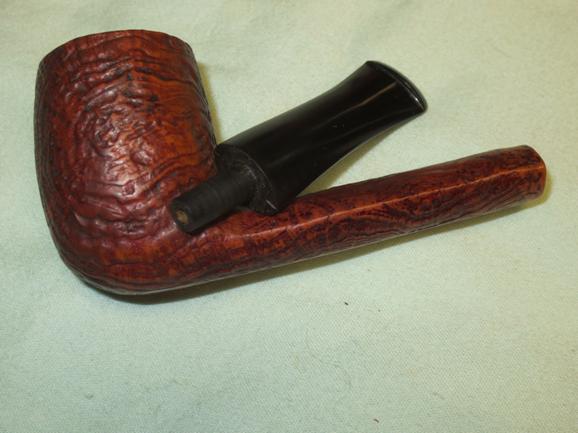
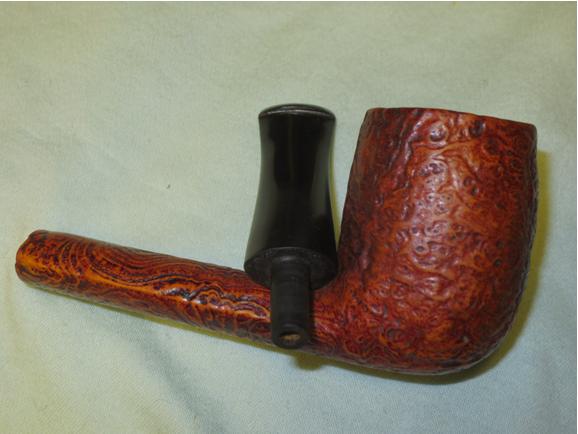
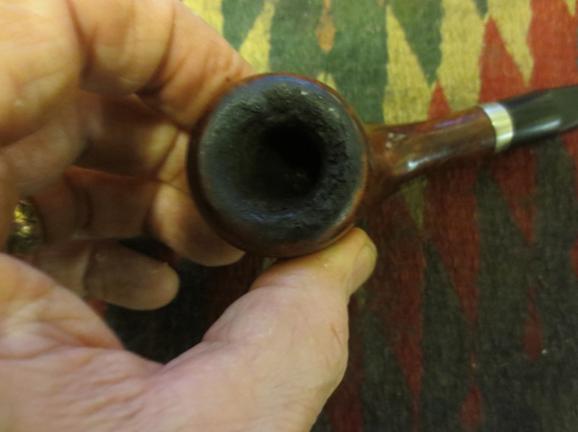
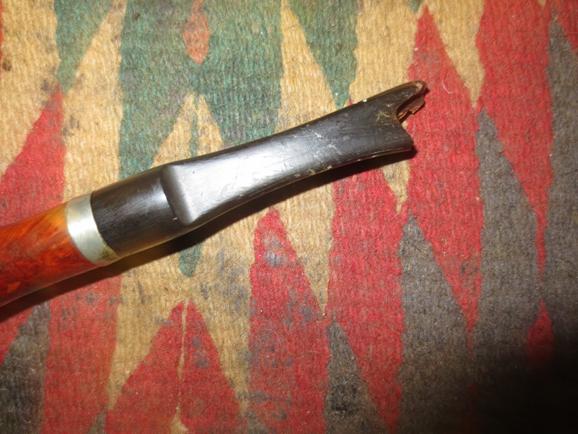
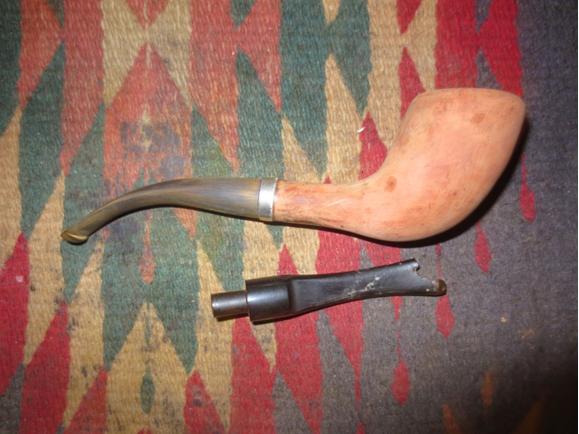
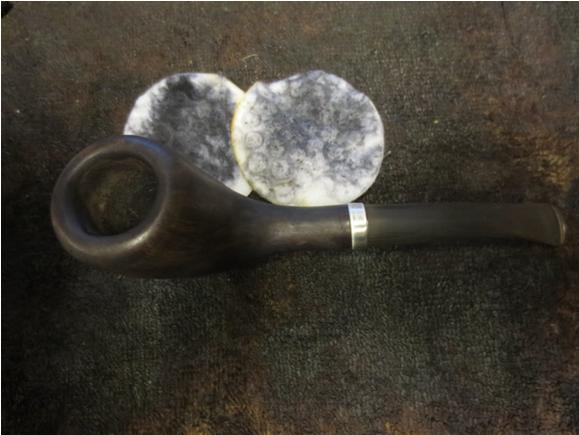
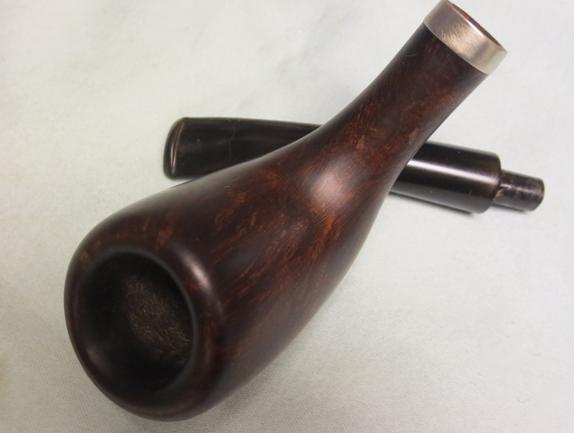
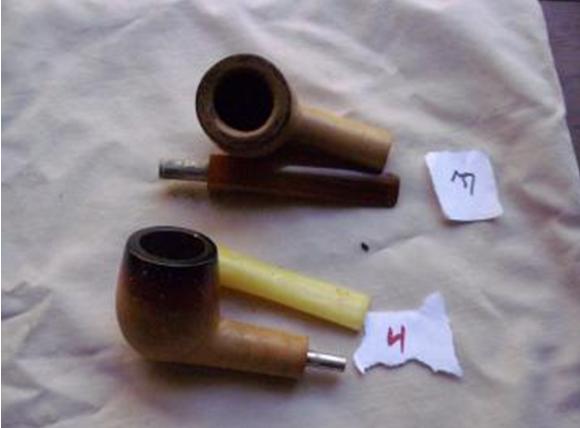
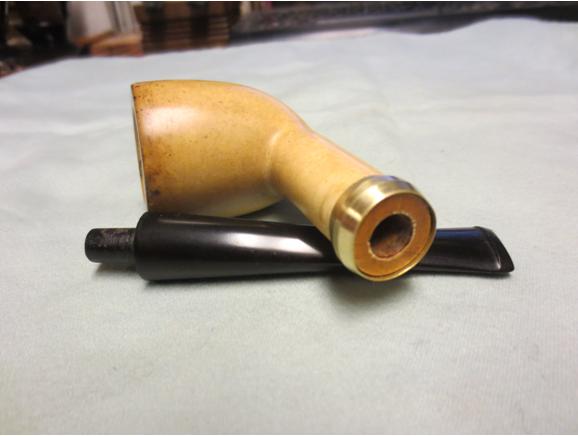
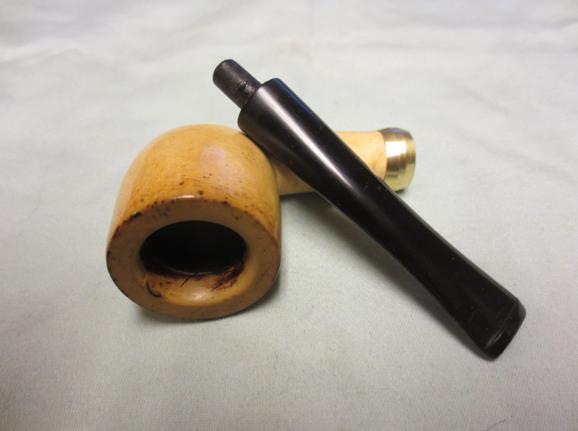
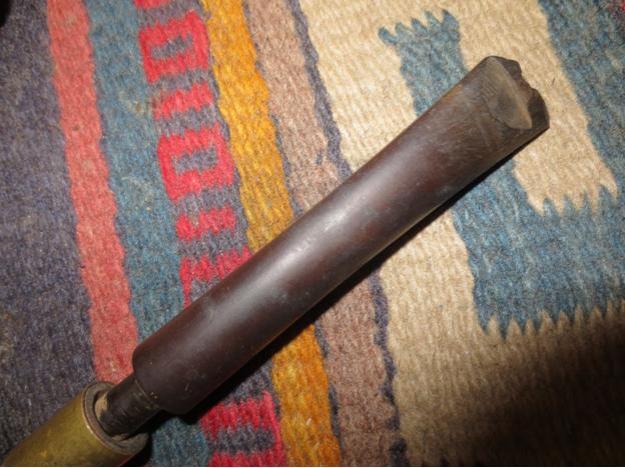
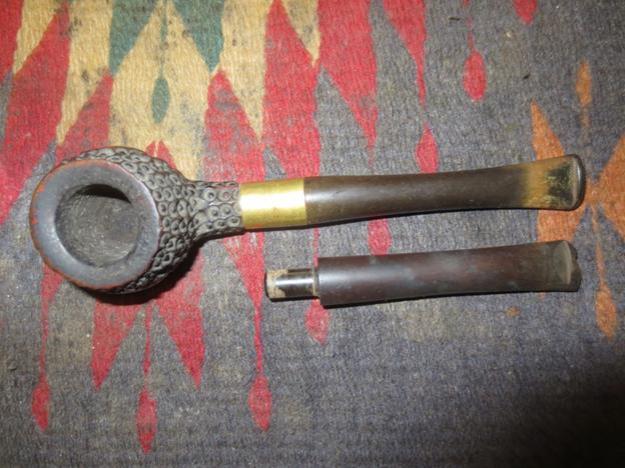
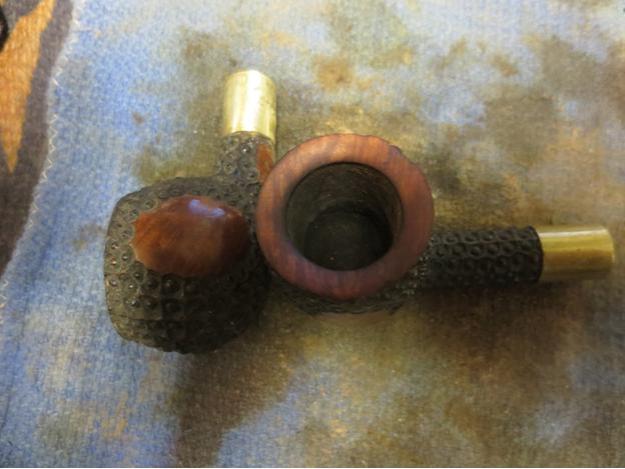
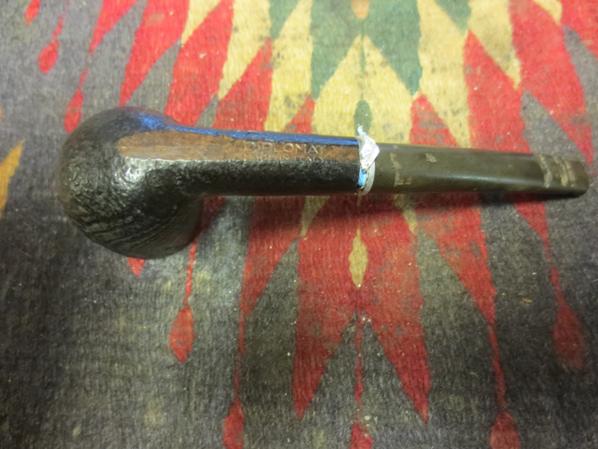
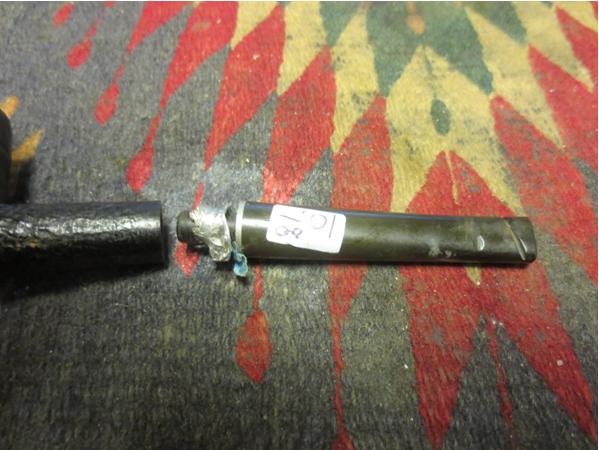
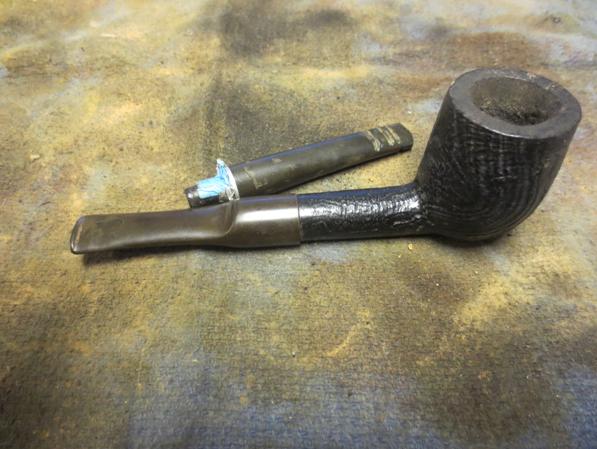
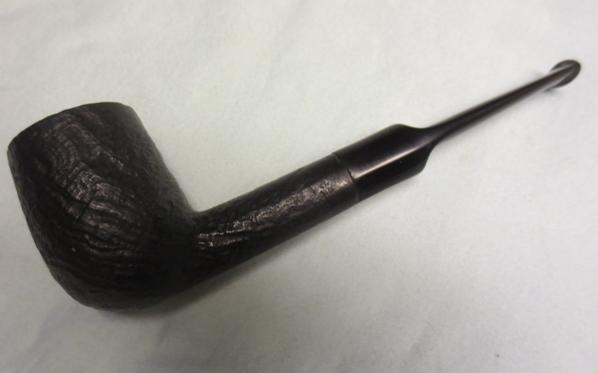
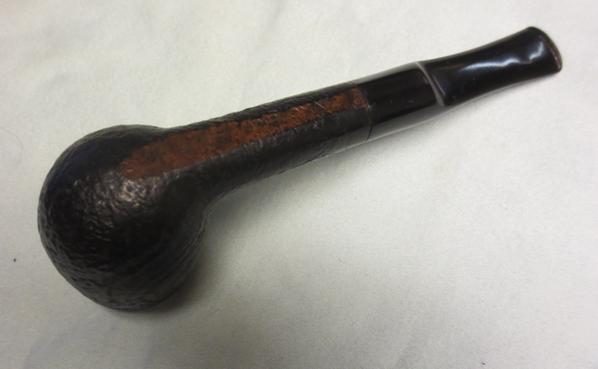
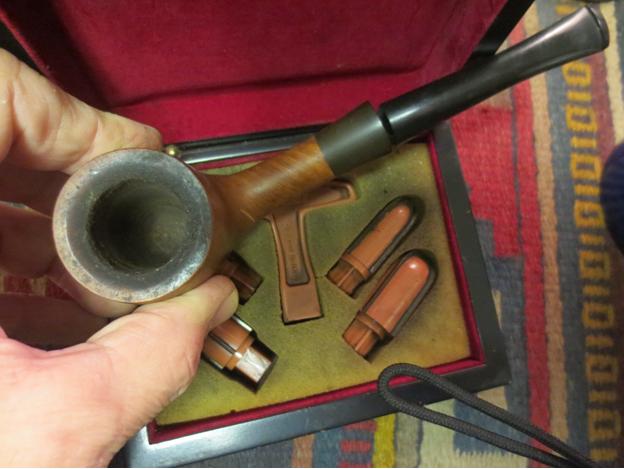
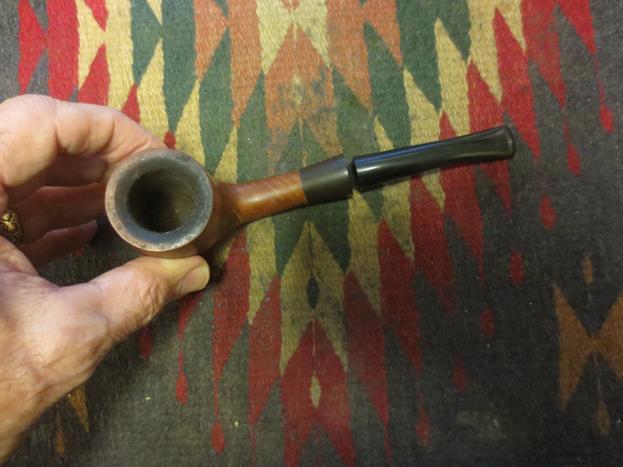
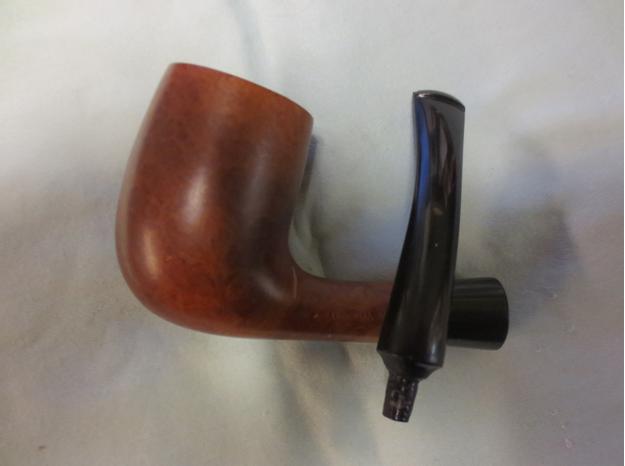
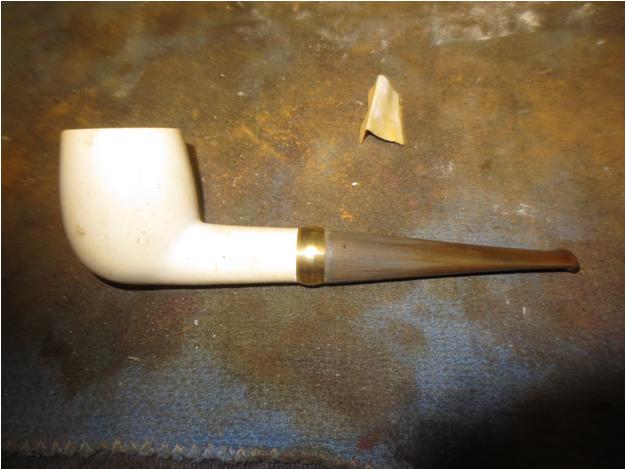
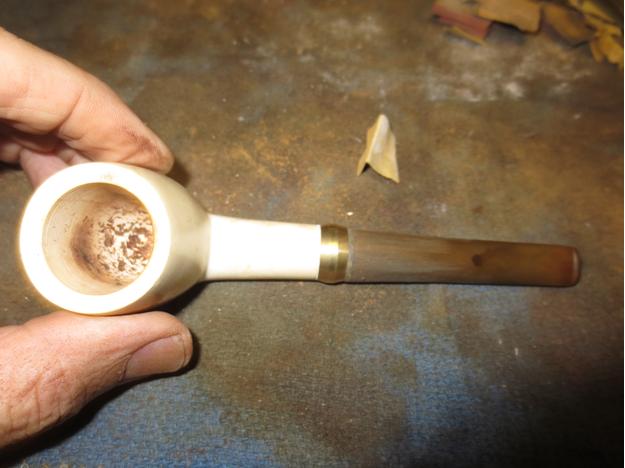
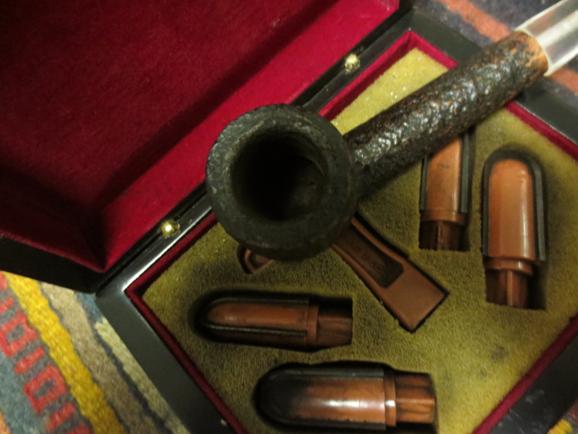
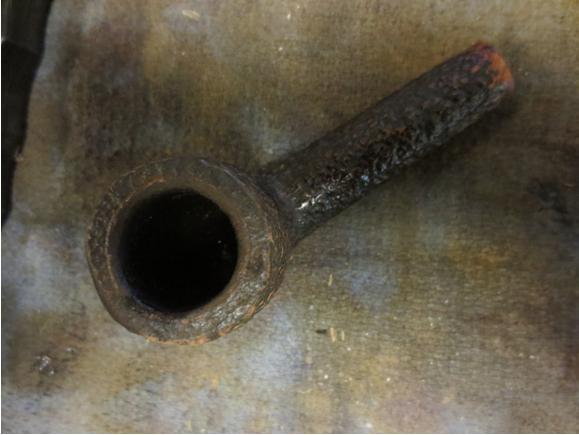
The bowl had a pretty heavy cake and the lava had overflowed onto the rim. The finish was dirty but otherwise in decent shape under the grime. The rim appeared to be in good shape under the grime and there were no nicks or dings in the outer or inner edge of the rim. The stem that came with the pipe was not the original and it had been poorly fit to the shank. It was narrower than the shank and pinched at the saddle portion. It still had all of the fill marks from the person who had fit it to the shank. The underside of the button and a large chunk of the underside of the stem were missing. I would not be sad to throw away this poorly cut broken stem.

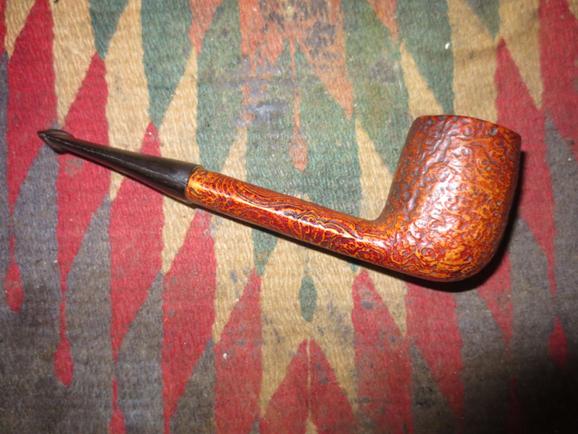
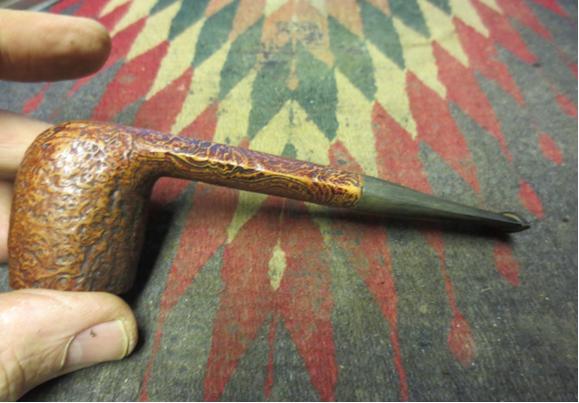
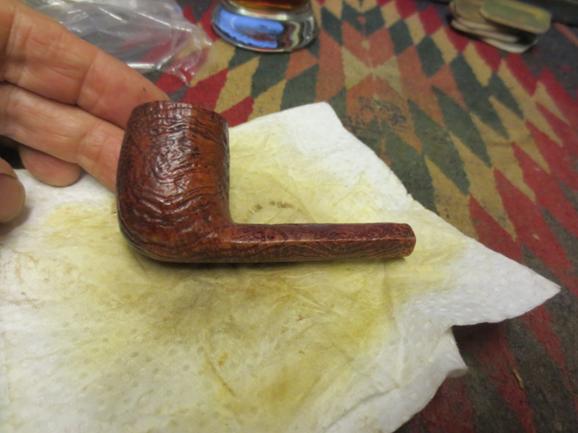
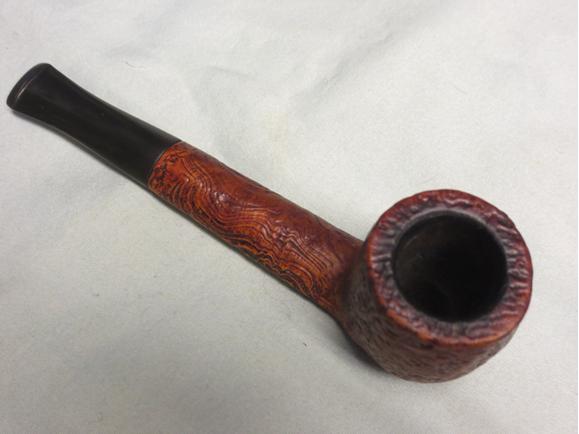
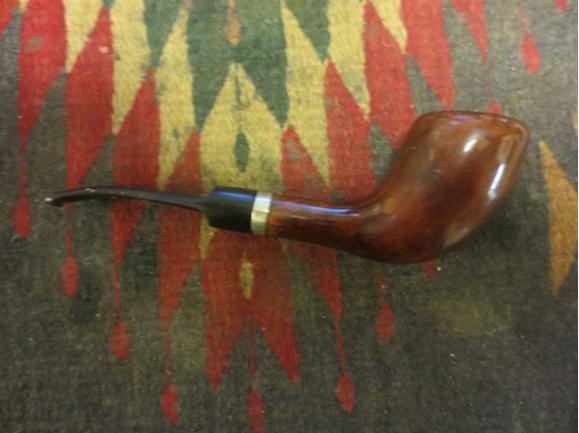
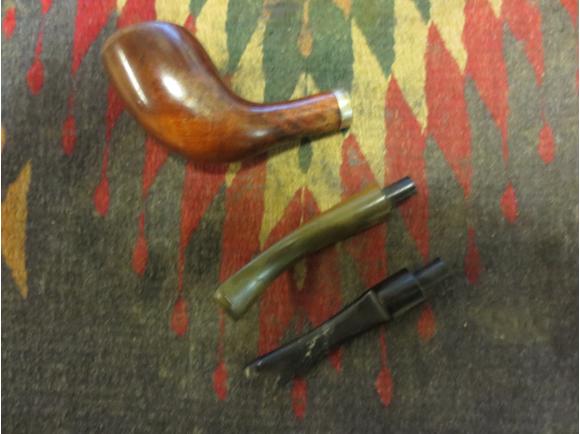
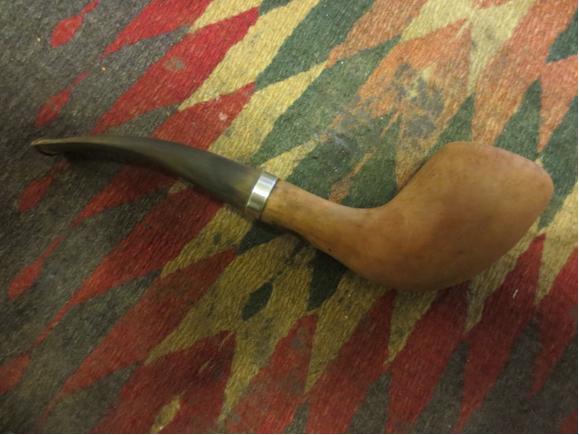
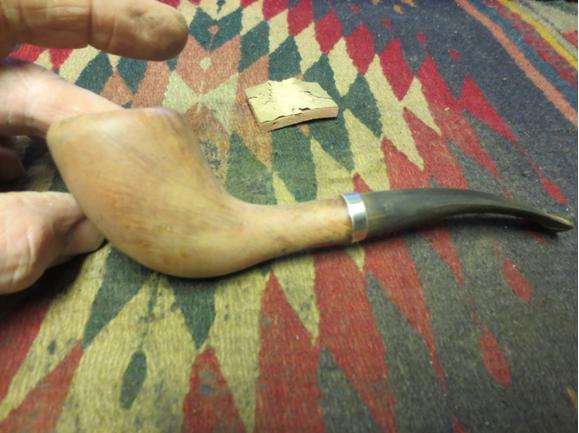
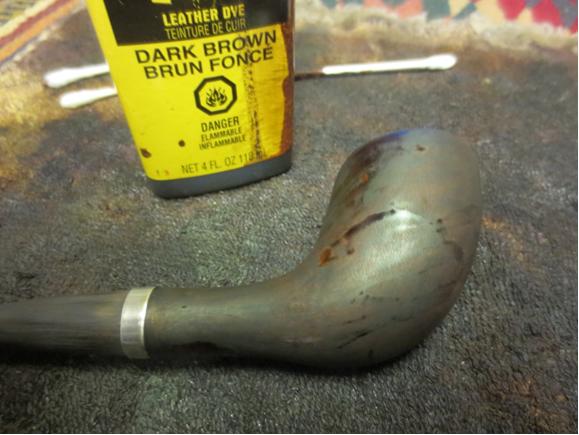
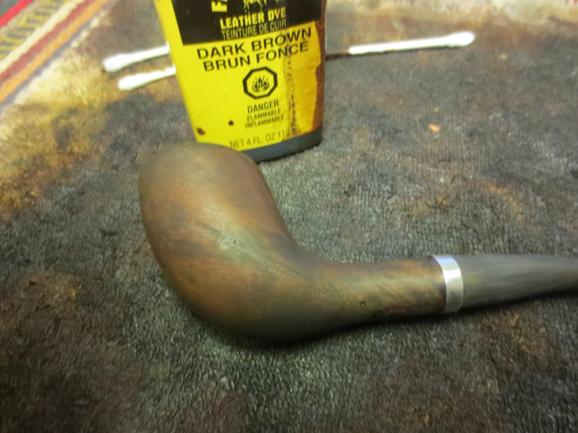
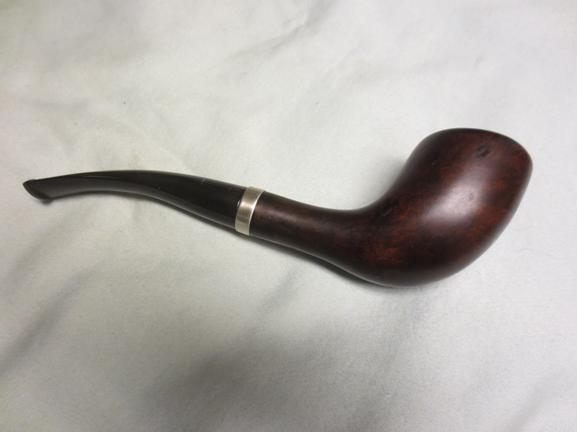
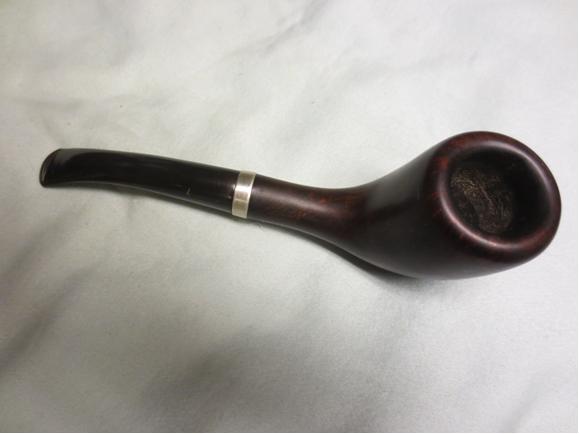
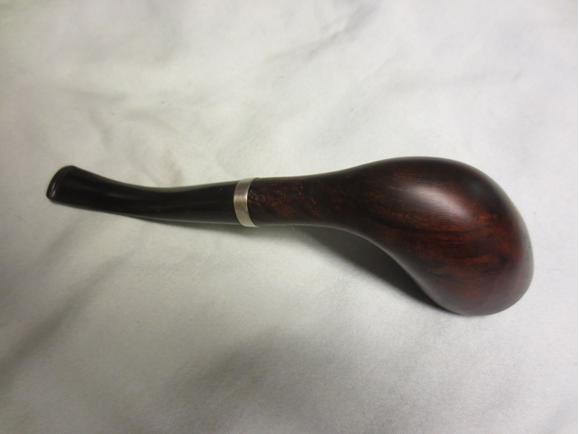
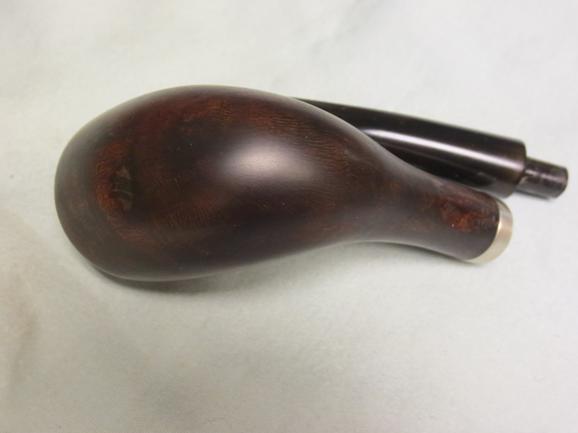
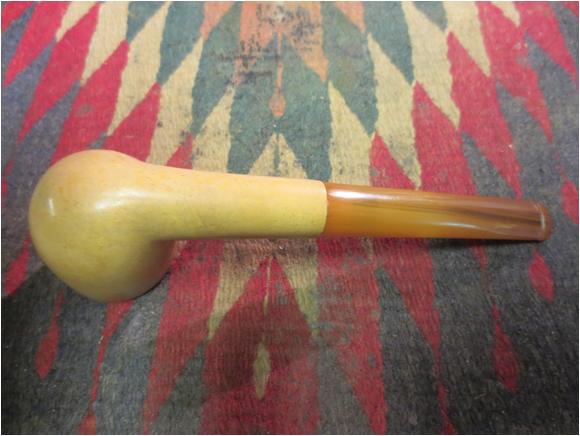
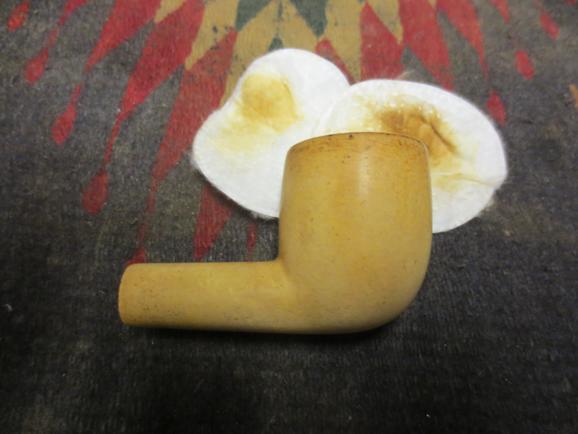
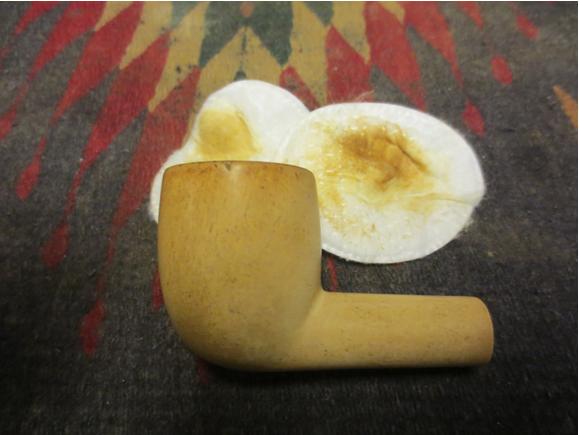
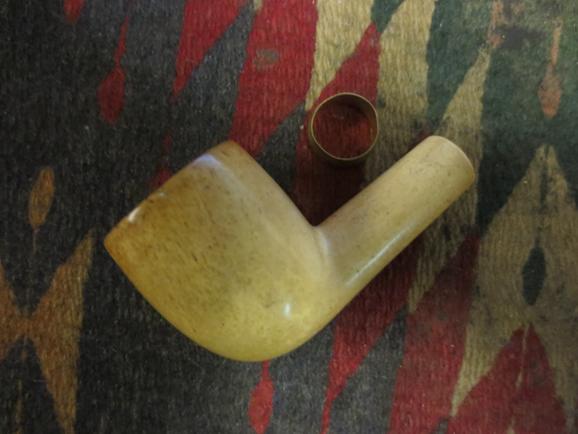
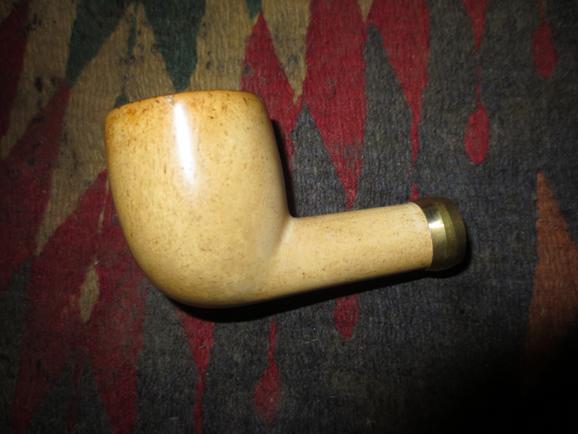
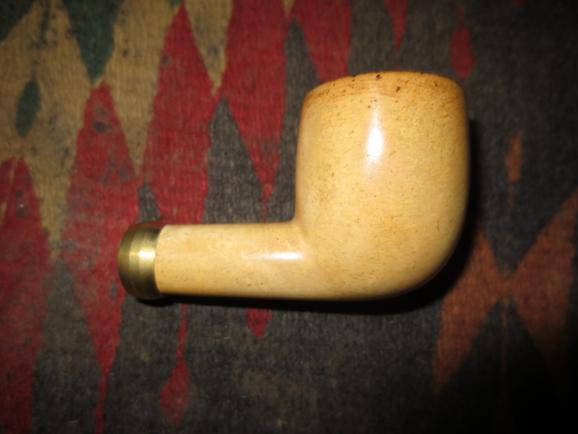
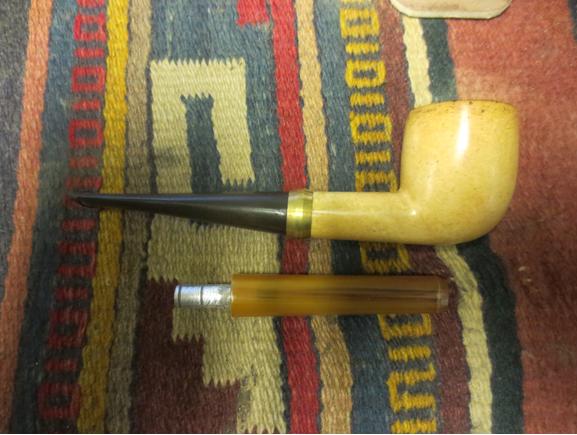
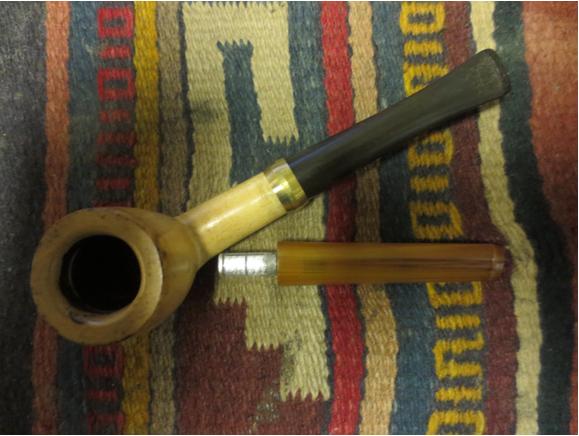
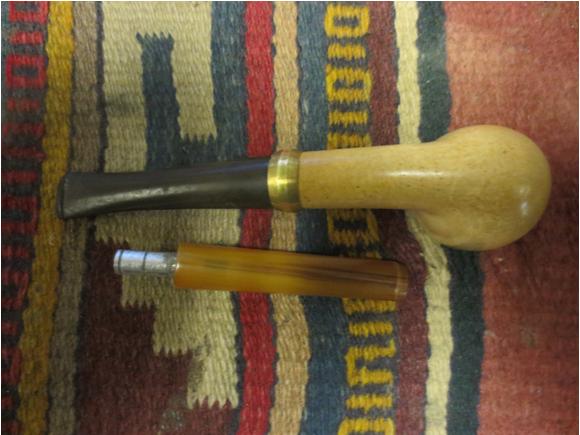
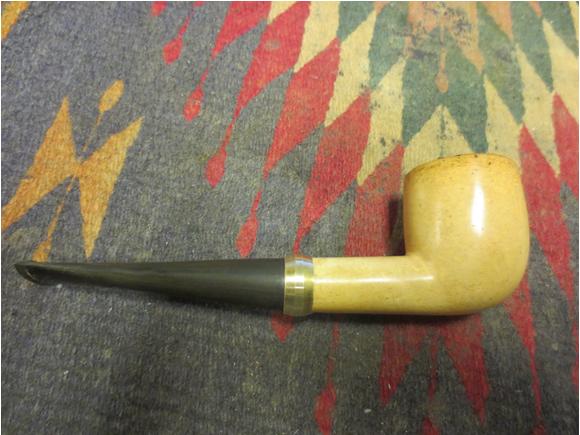
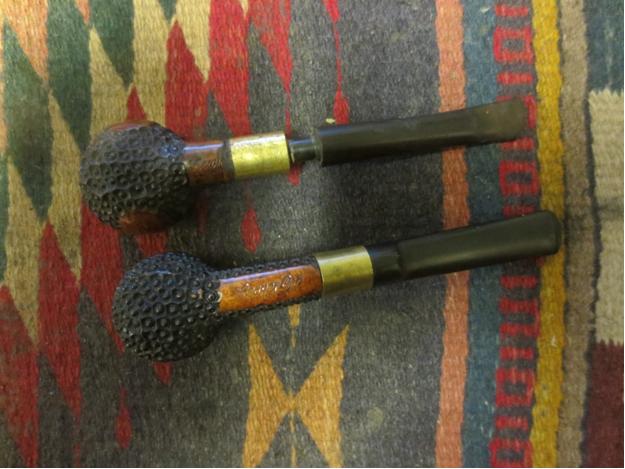
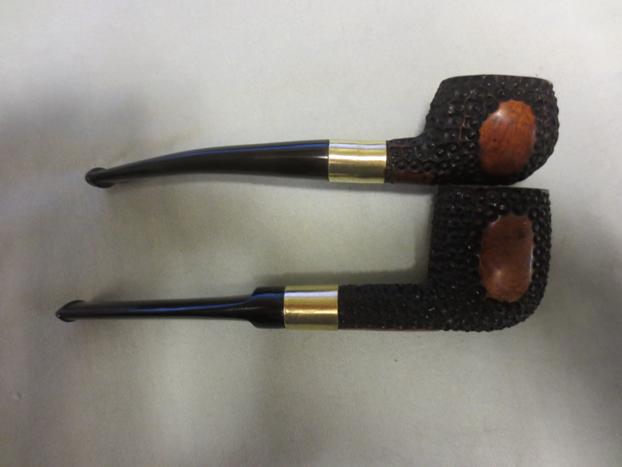
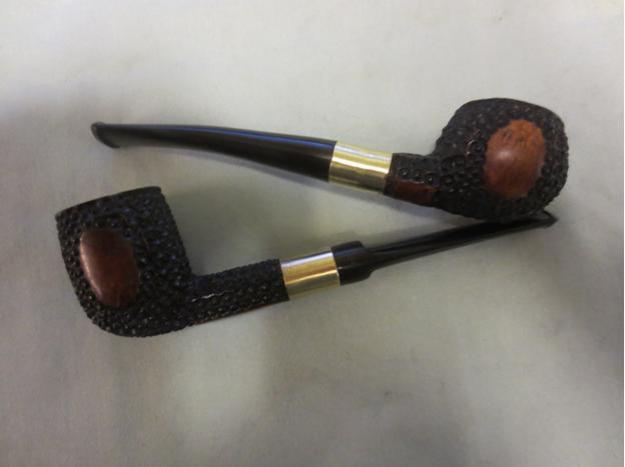
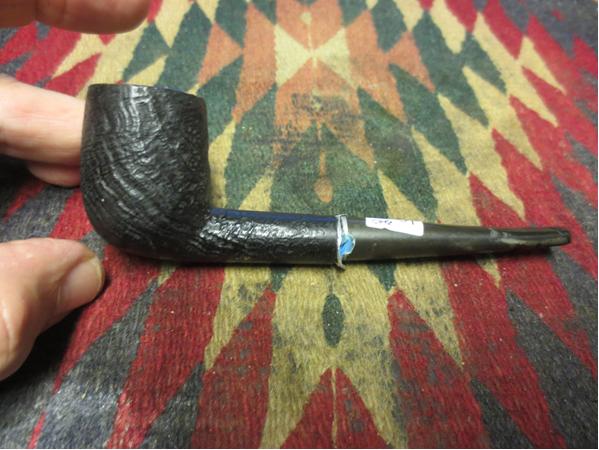
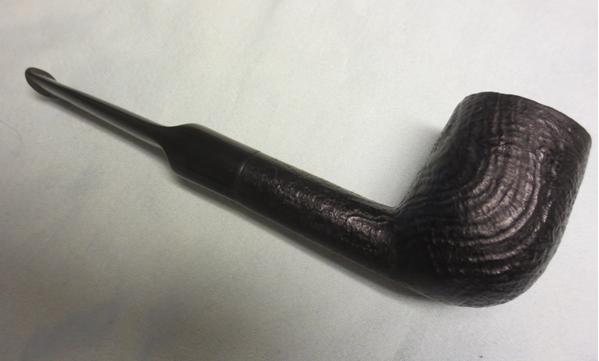
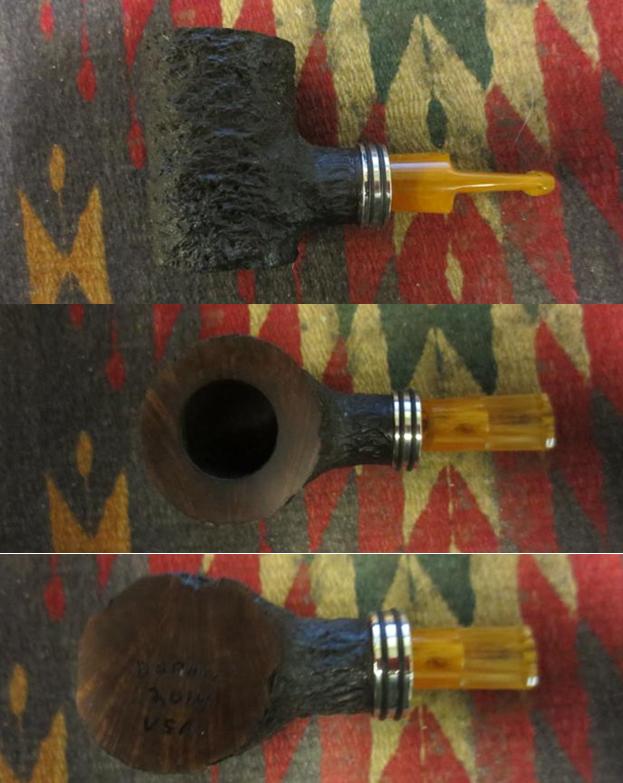
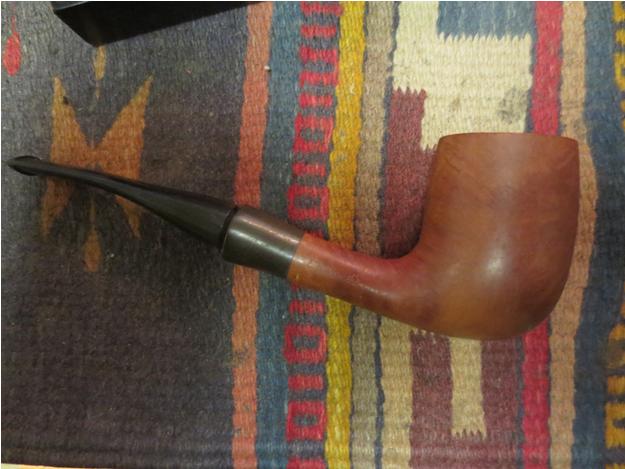
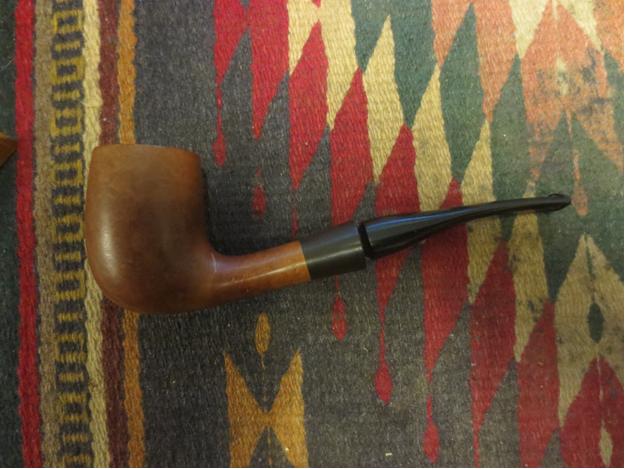
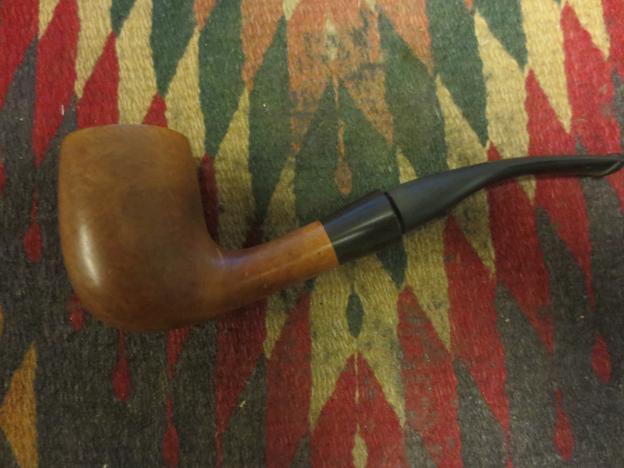
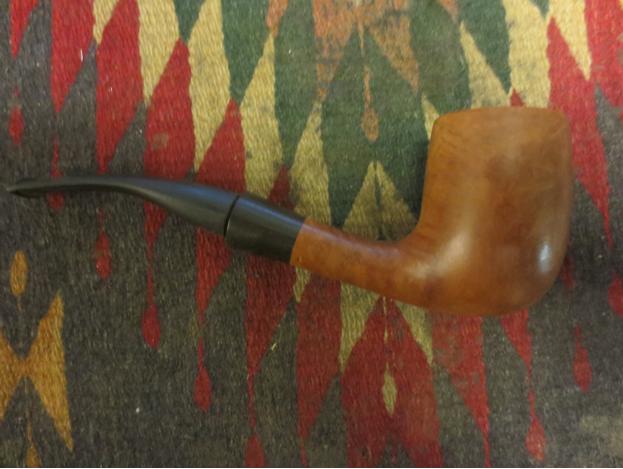
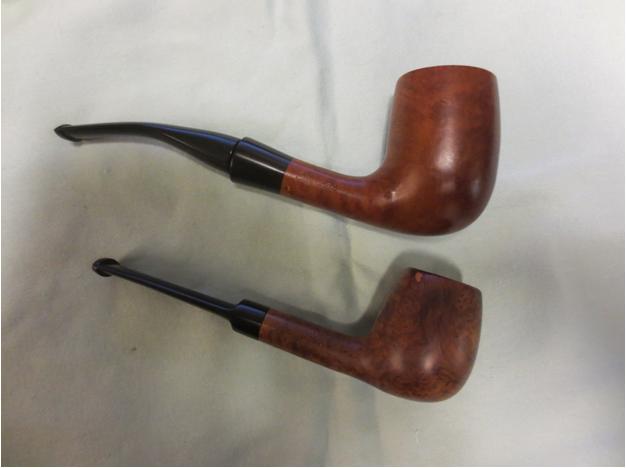
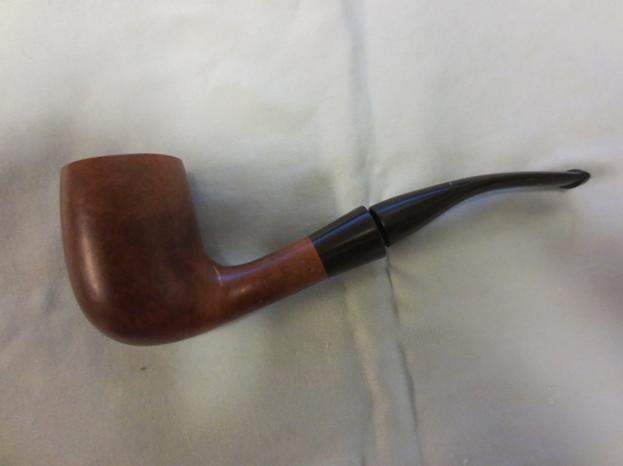
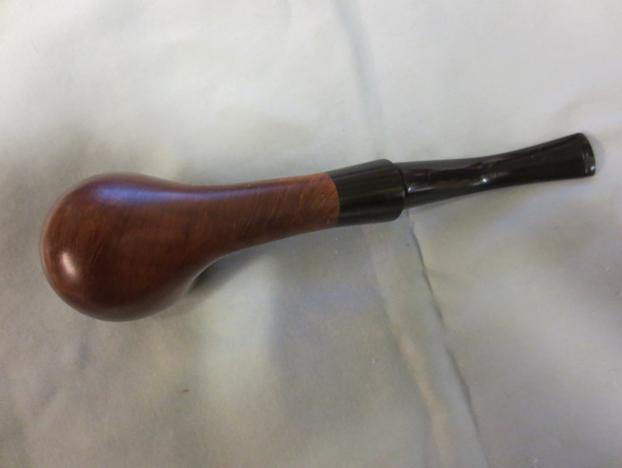
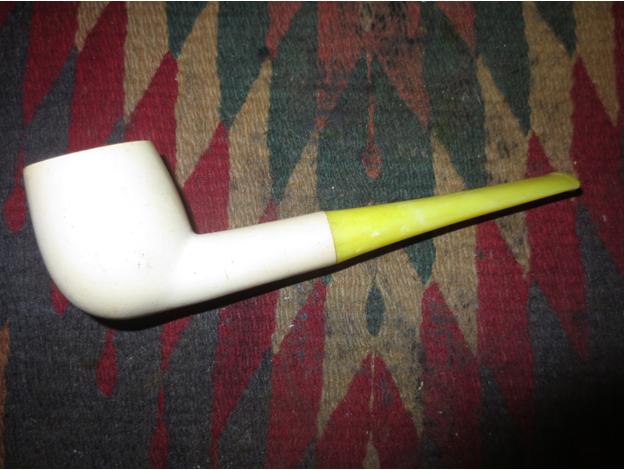
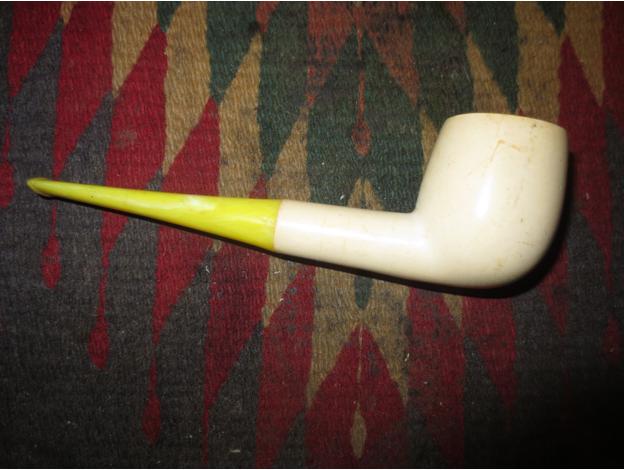
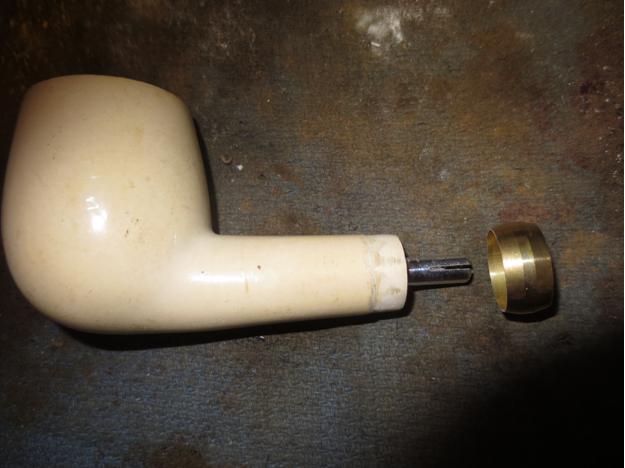
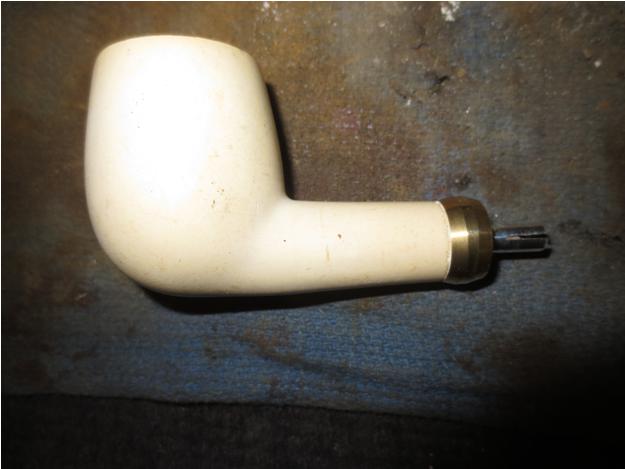
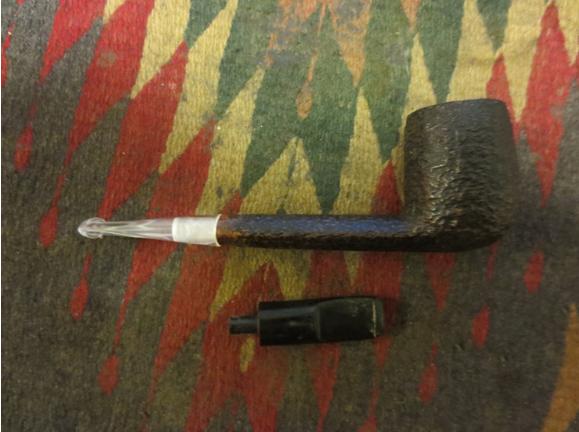
Inside the shank was pretty dirty and plugged. I could not blow air through the pipe and did not dare to try sucking on the shank. Who knows what might end up in my mouth! I would need to remedy that situation and I would need to make a stem for it. This would be a beautiful little pipe to go with the Savinelli Classica once it was finished – kind a light and a dark version of the same shape. At this point little did I know what kind of surprise lay ahead for me as I cleaned it up and restored this little pipe. The photo below shows the two pipes together.Class2 The next four photos give a clear picture of the state of the pipe – its finish, broken stem and tarred and cake rim and bowl. You can also see what I mean when I say that the finish is far to uniform for a sand blast but looks to have both a blast and a rustication. Someone help me out on this if you have any information.Citation3

Citation4

Citation5

Citation6
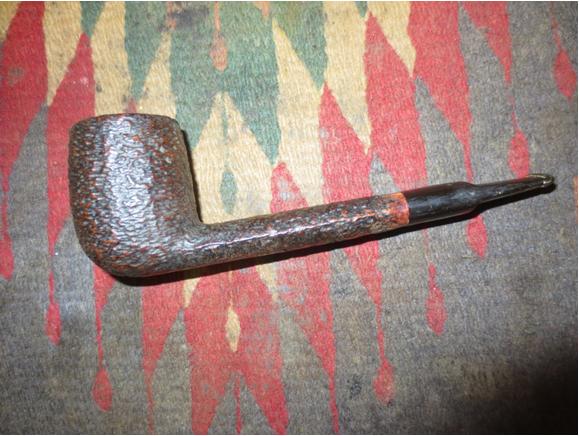
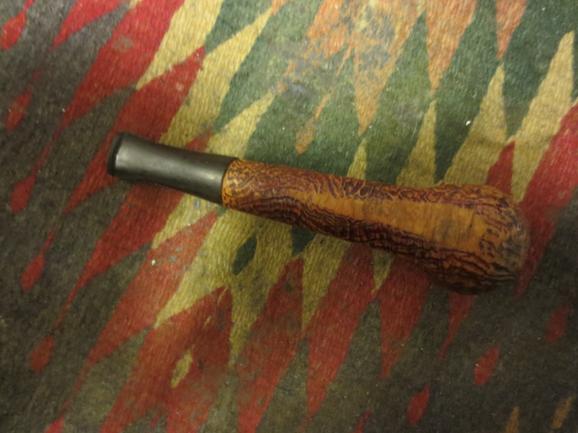
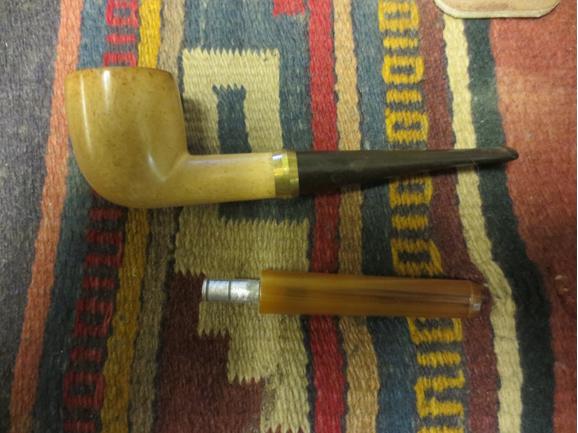
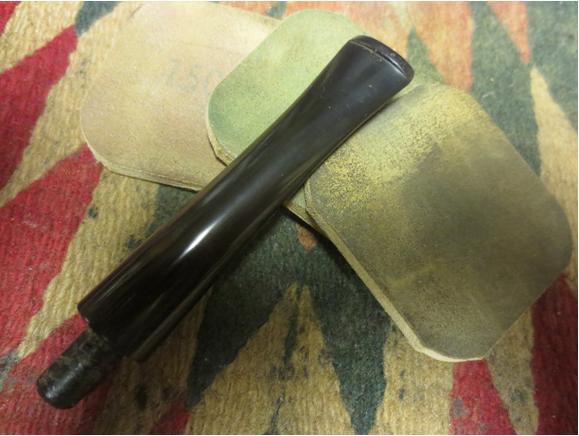
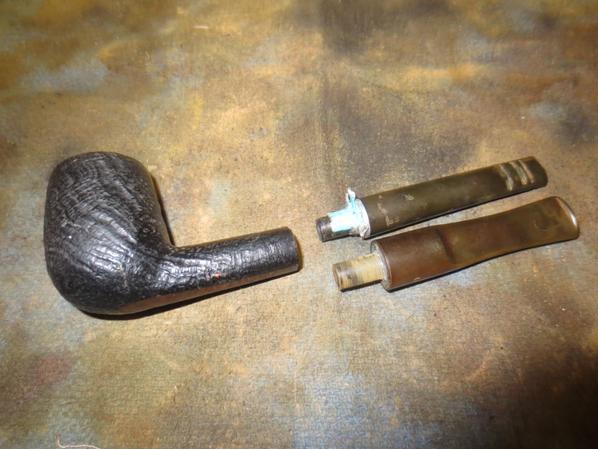
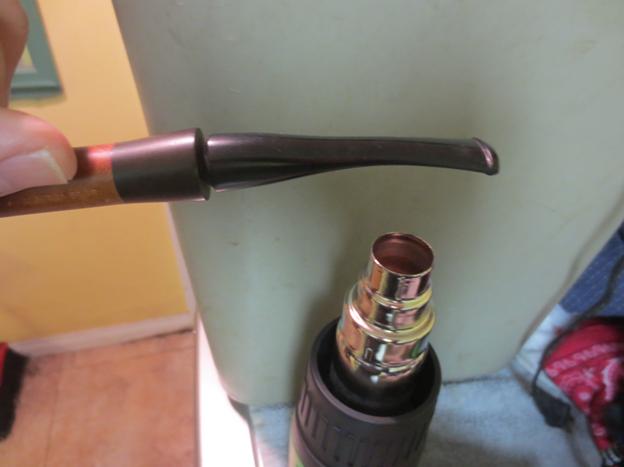
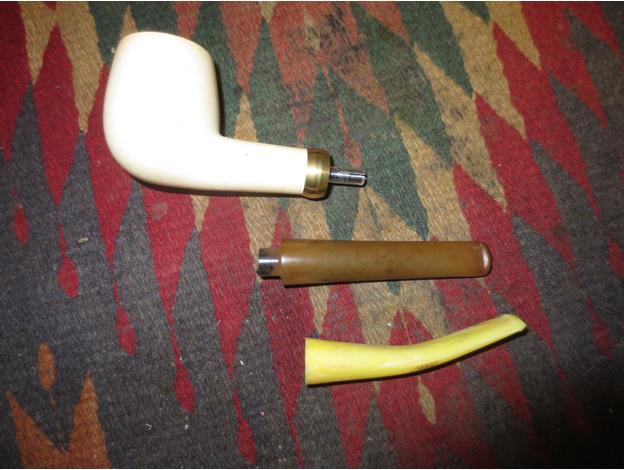
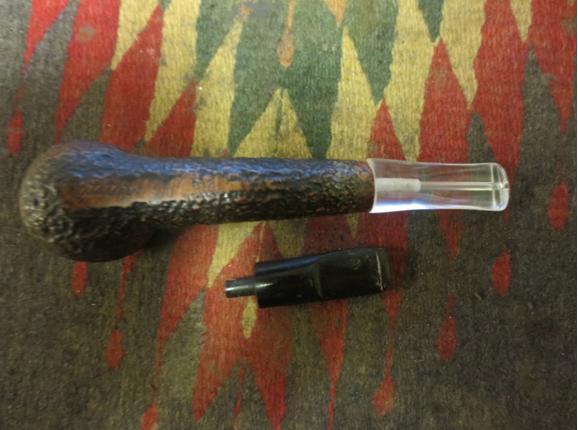
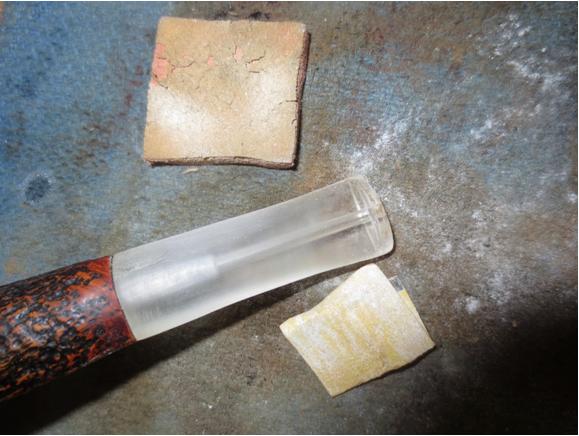
I went through my can of stems and found a clear acrylic taper stem that would work perfectly with this pipe and with a little shaping would go well with the dark look of the finish.Citation7 
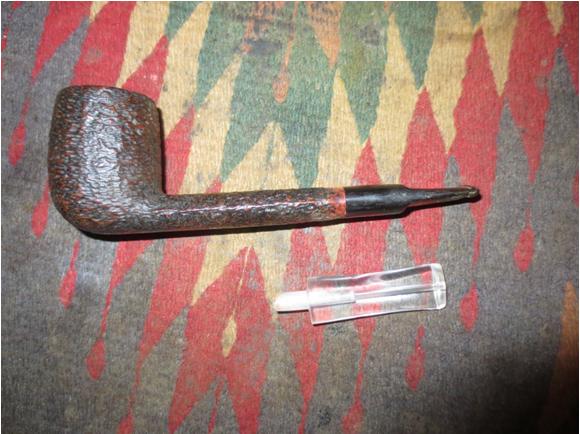
The tenon almost fit perfectly from the start. I only needed to lightly sand it to get a snug fit against the shank. The diameter of the stem was a little bigger than the shank of the pipe all the way around but would easily be shape to fit well.Citation8

Citation9

Citation10

Citation11 
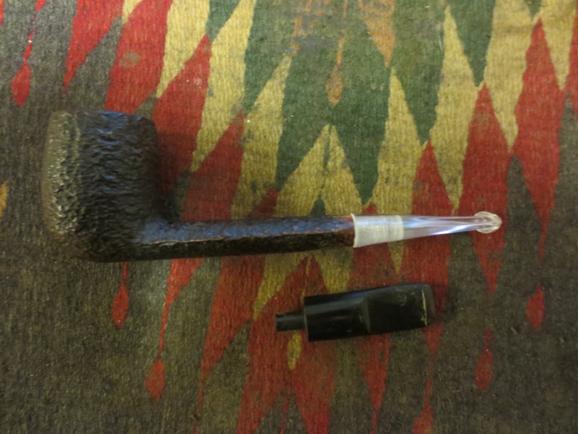
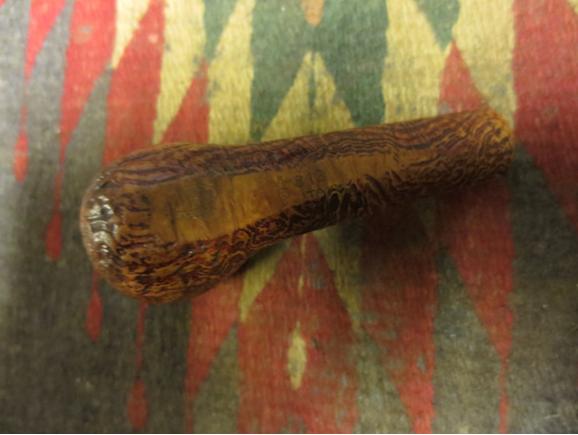
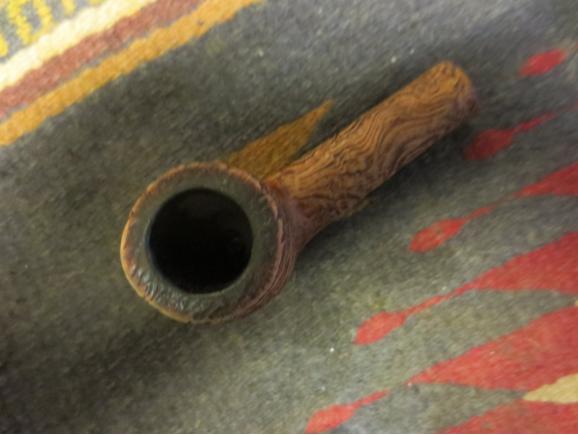
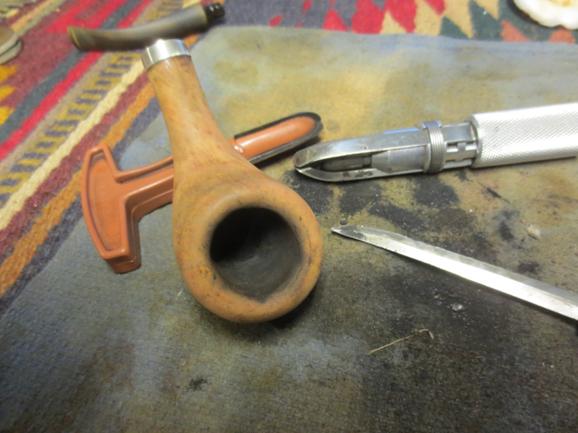
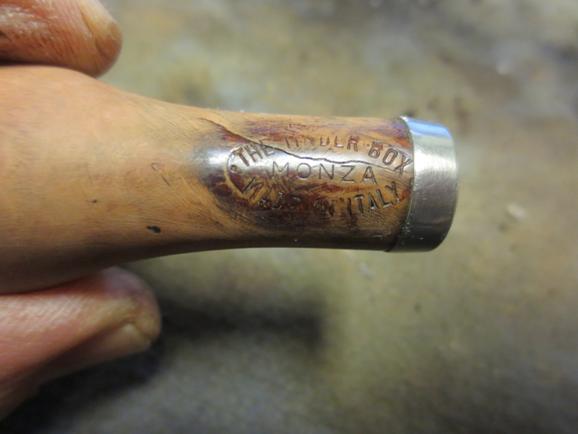
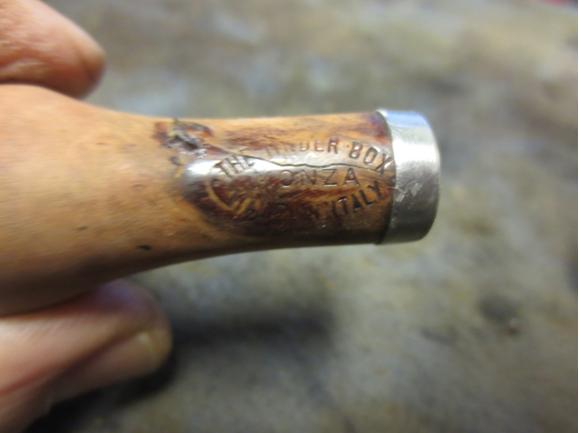
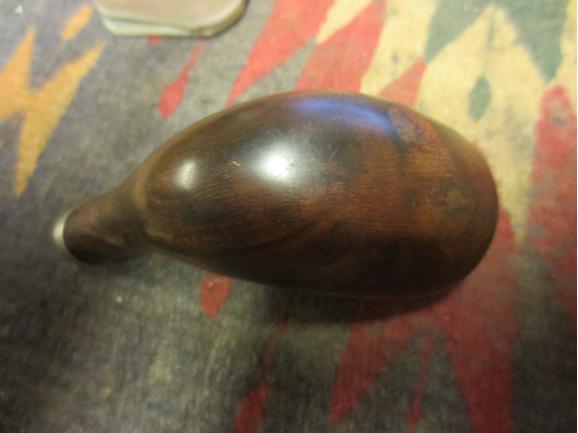
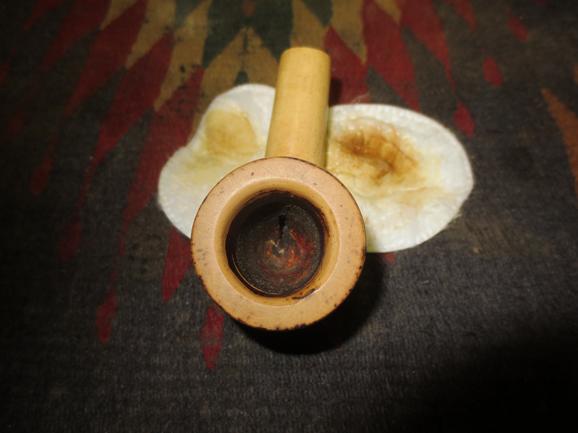
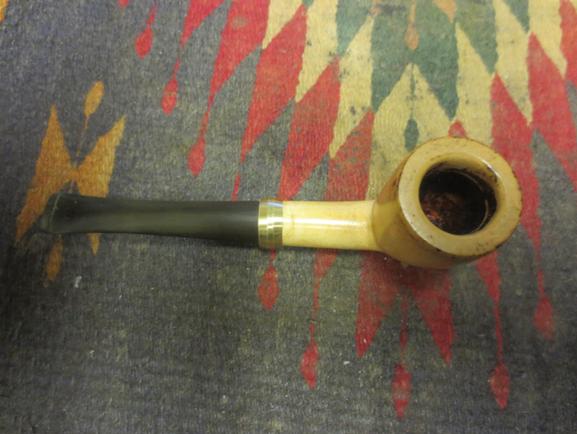
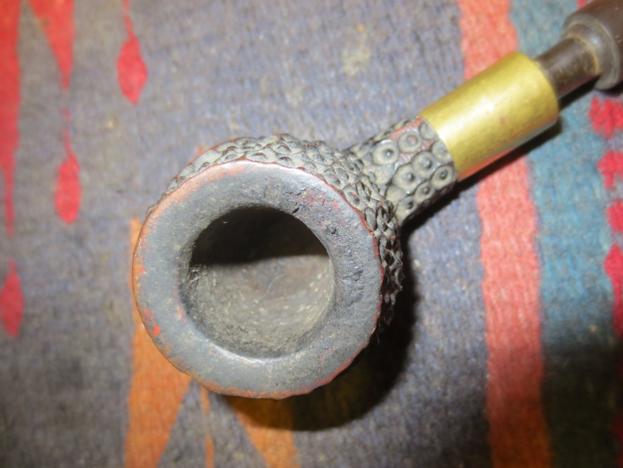
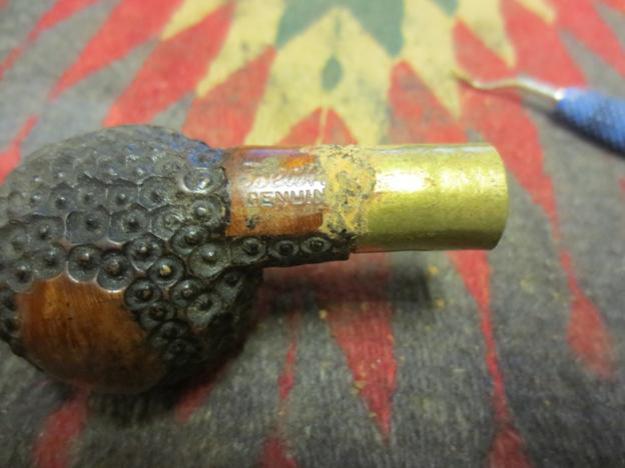
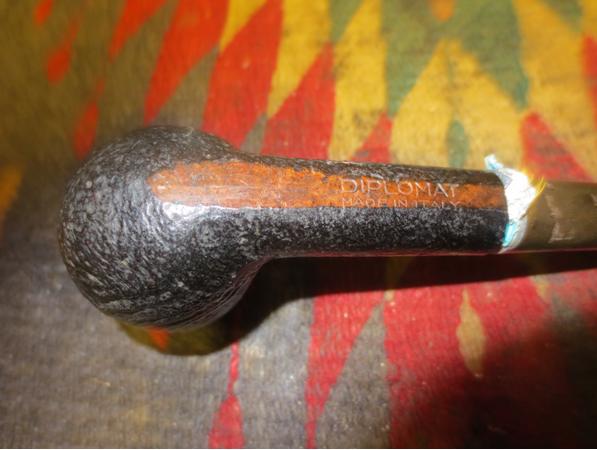
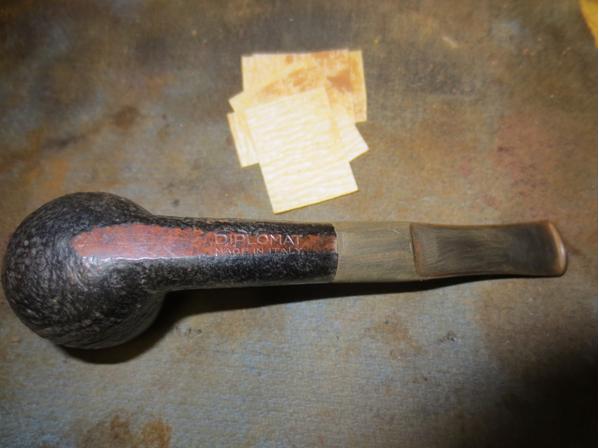
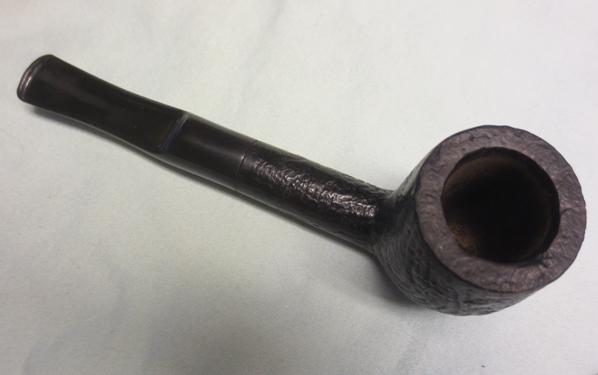
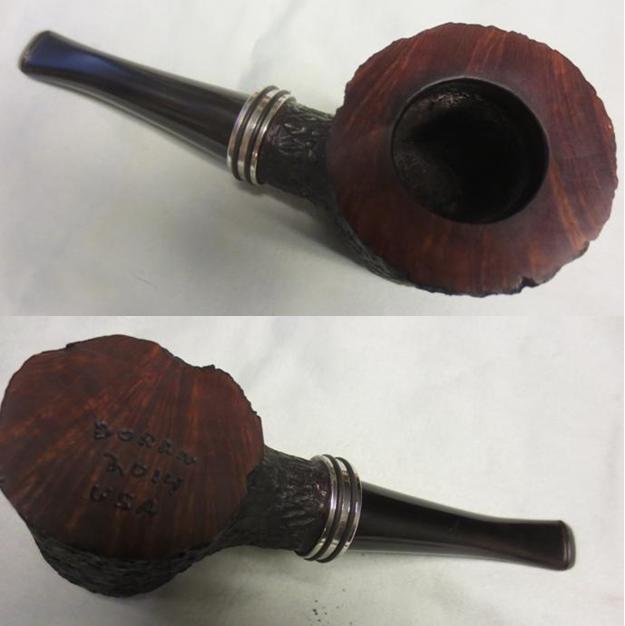
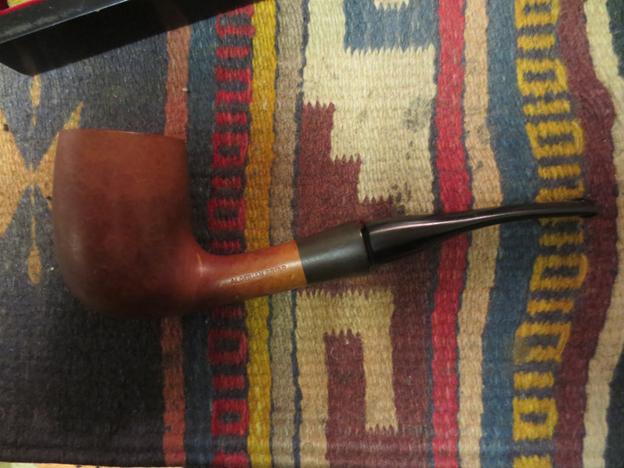
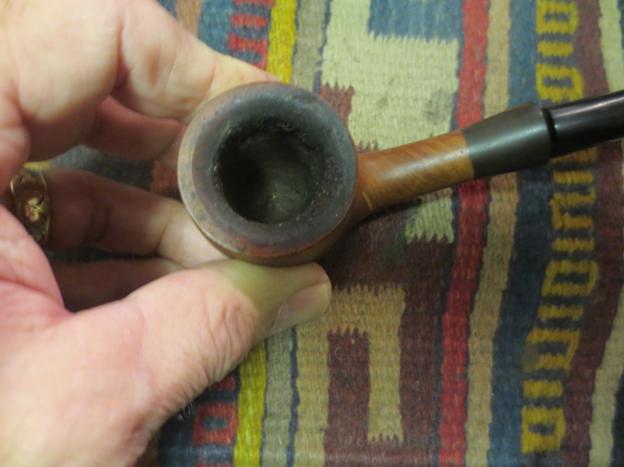
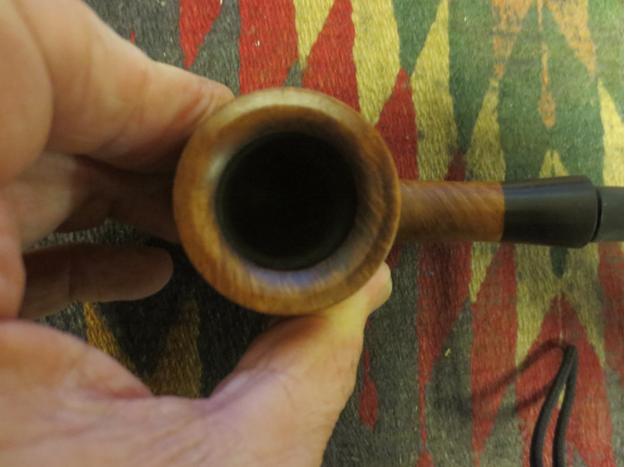
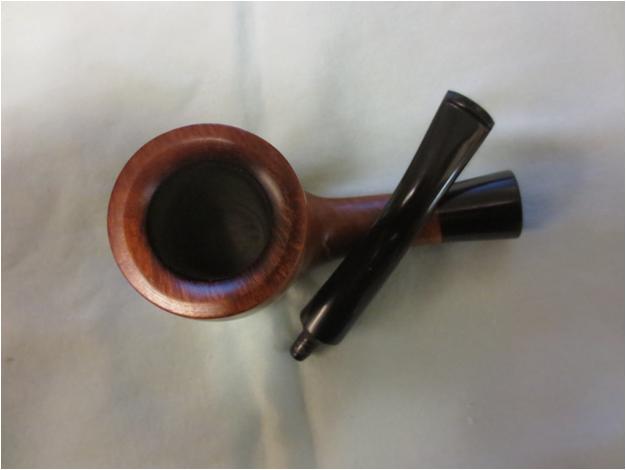
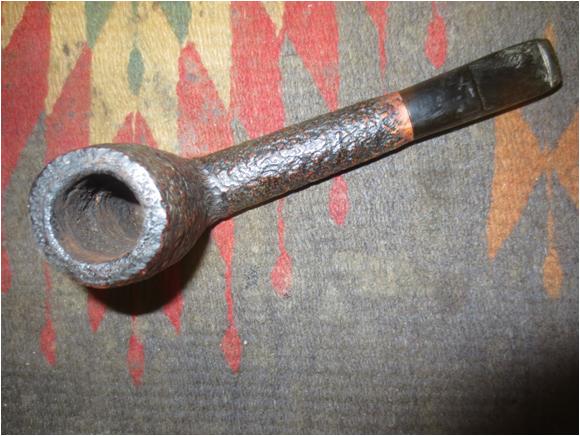
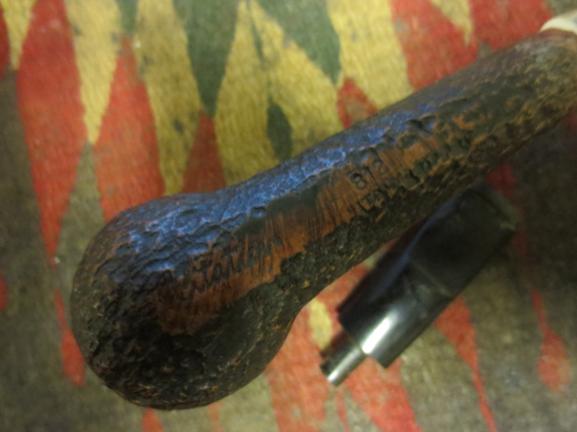
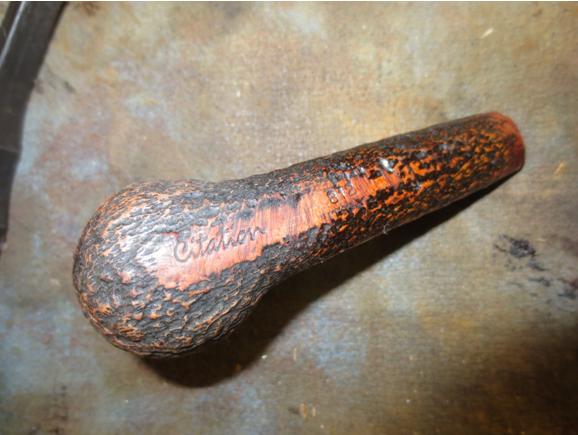
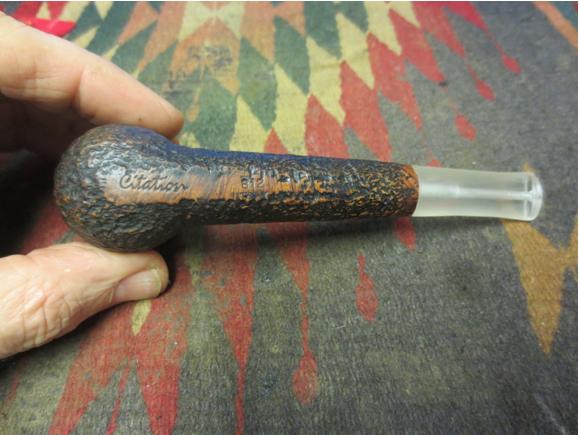
I took a close up photo of the rim to give an idea of what I was working with on this bowl. The second photo below shows the stamping on the pipe.Citation12

Citation13 
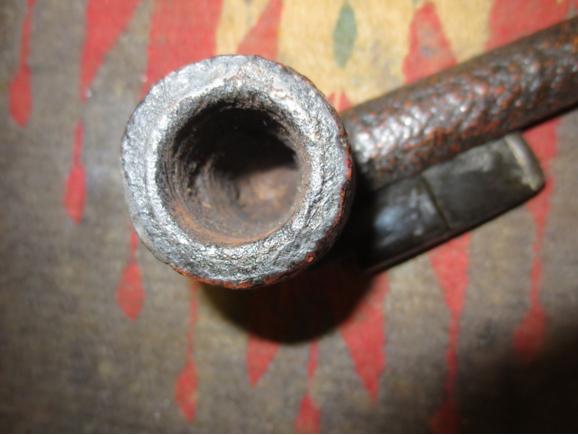
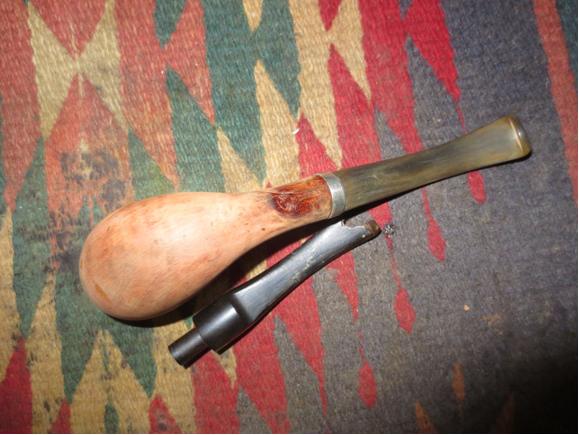
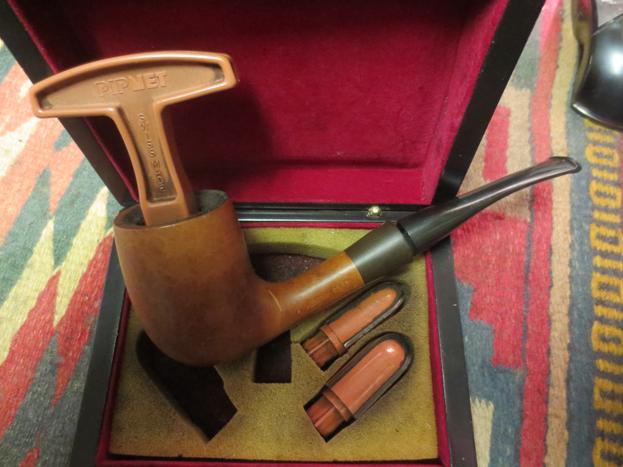
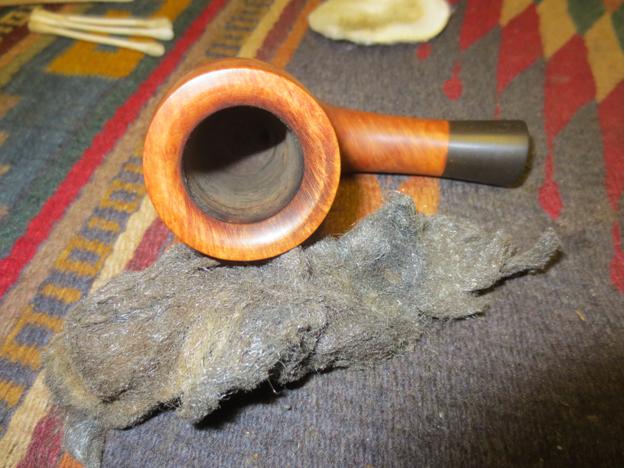
If I had known what I found out later in the refurbishing process I would never have taken the next steps in the clean up. But I was oblivious so I did them unwittingly. I used the smallest PipNet reamer cutting head to take back the cake to what I thought was bare briar. I used a small pen knife to even up the job of cutting back the cake to smooth.Citation14

Citation15 
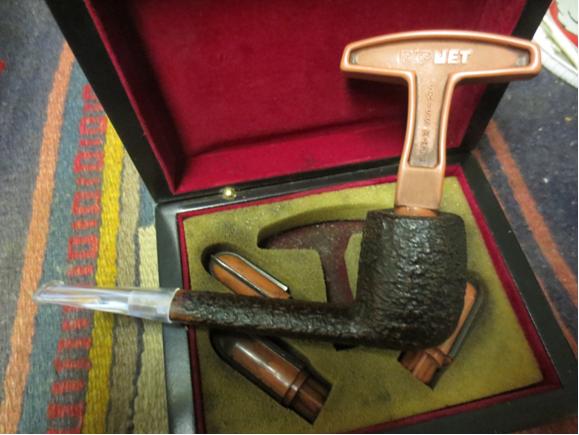
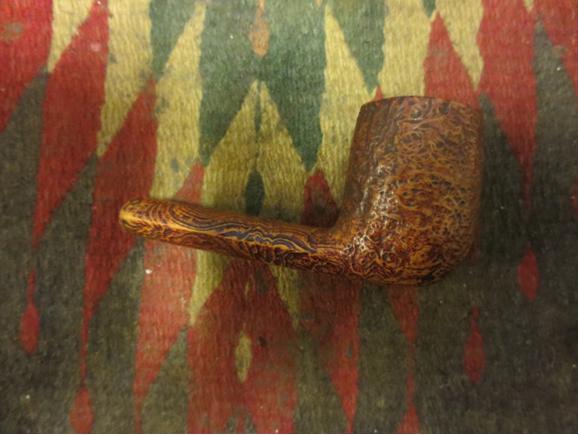
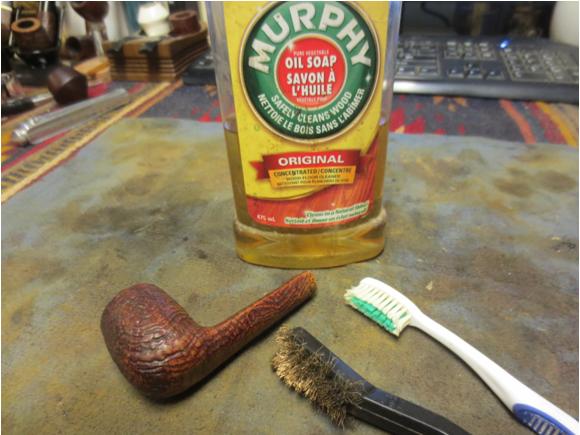
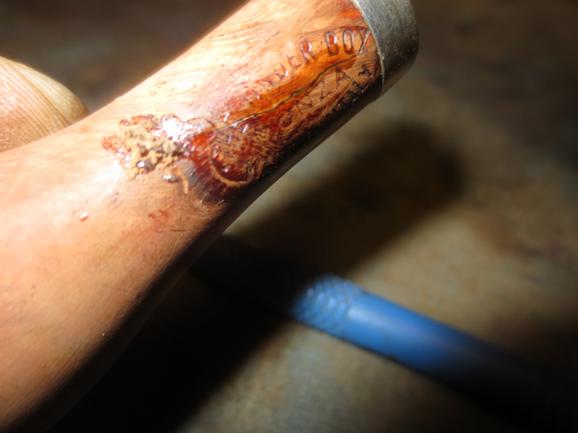
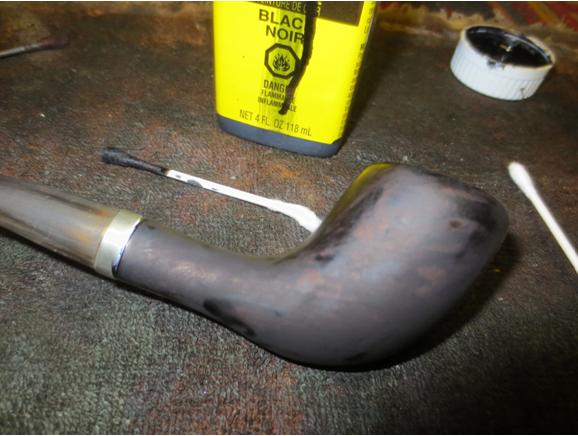
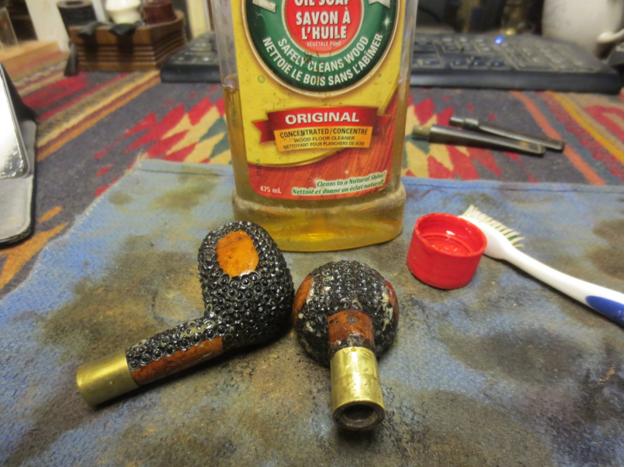
I scrubbed the outside of the bowl and the rim with Murphy’s Oil Soap and a tooth brush and fine bristle brass tire brush to clean off the tars and lava that had overflowed the top of the bowl. I rinsed the pipe under warm water to remove the soap and the grime and dried it off with a cotton towel.Citation16 
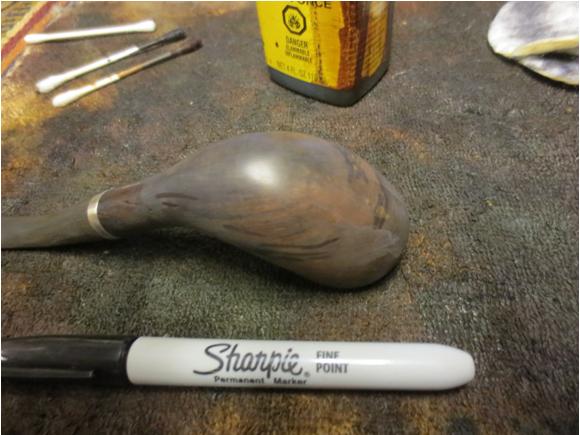
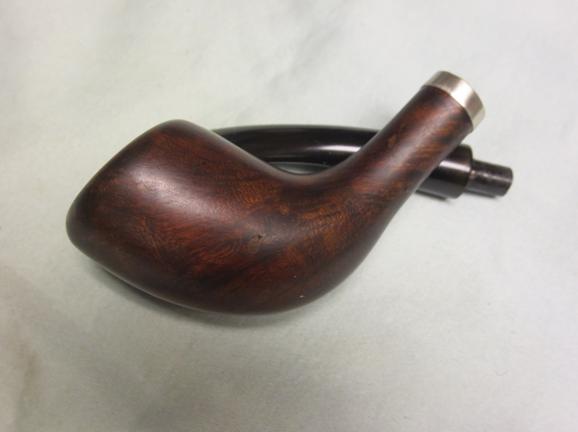
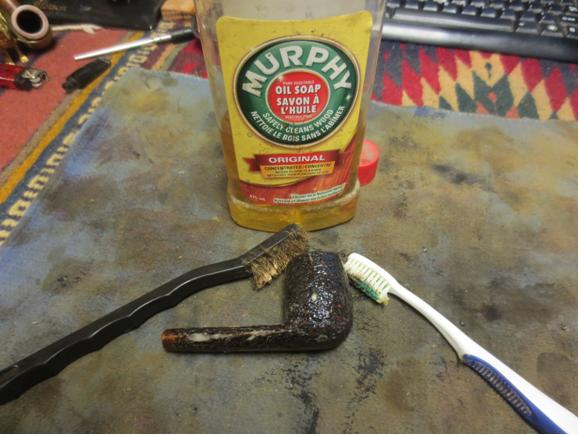
The cleaned finish even more clearly looks to be a manufactured look to approximate a sandblast finish. But it was a great tactile finish and once polished would look great.Citation17

Citation18

Citation19 
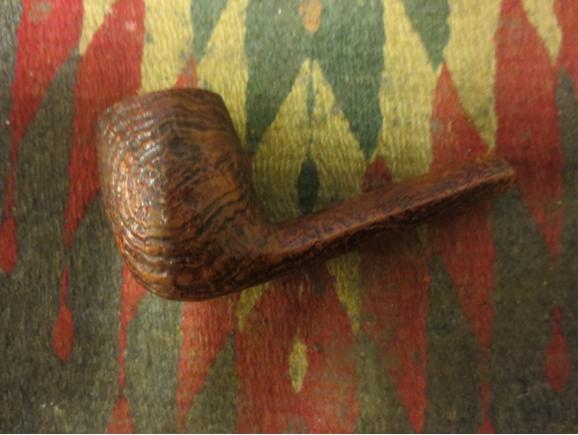
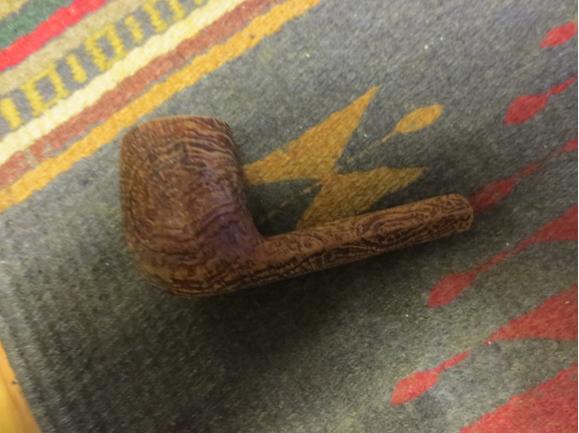
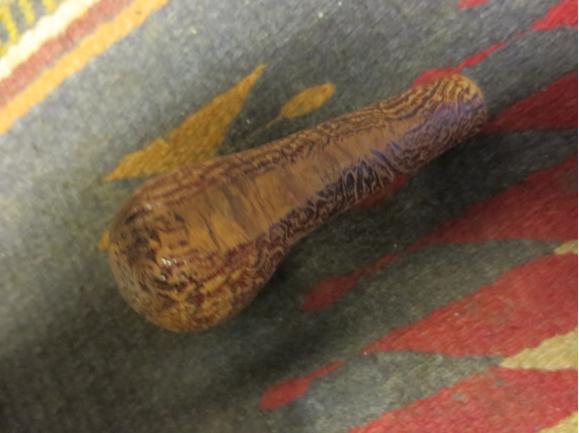
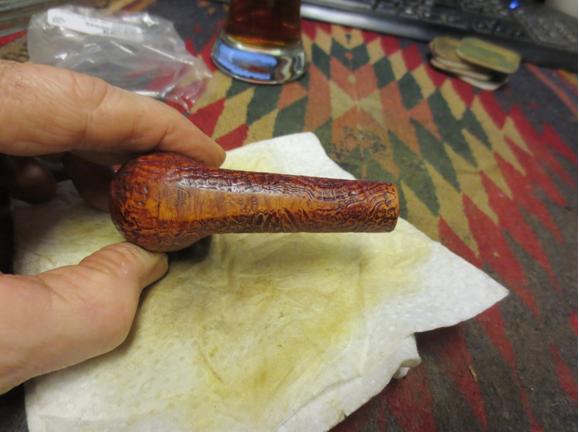
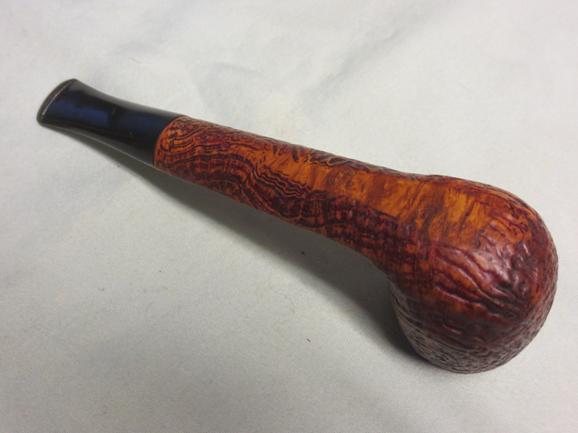
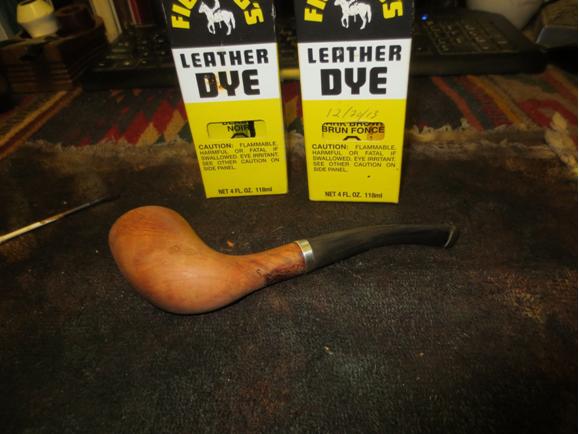
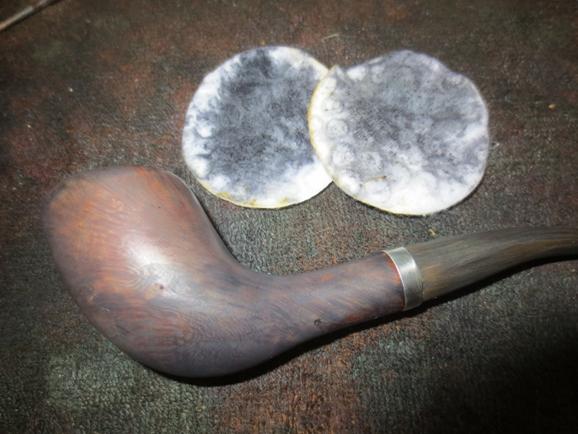
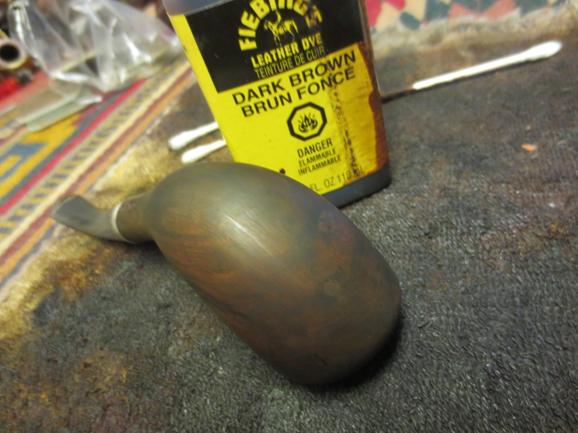
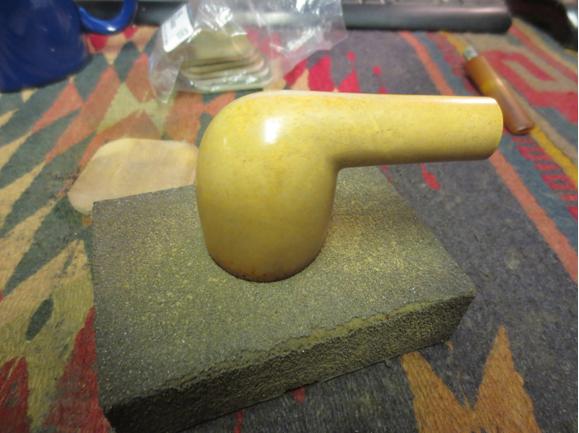
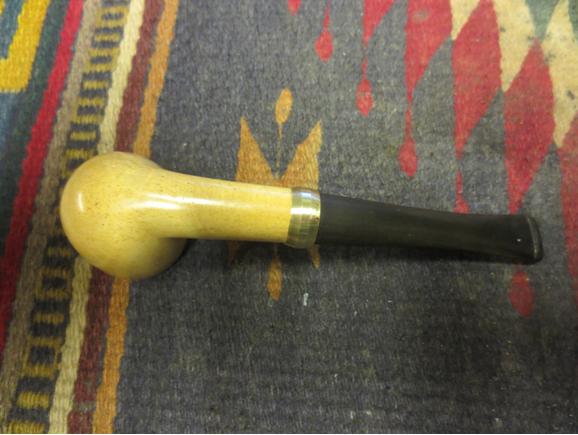
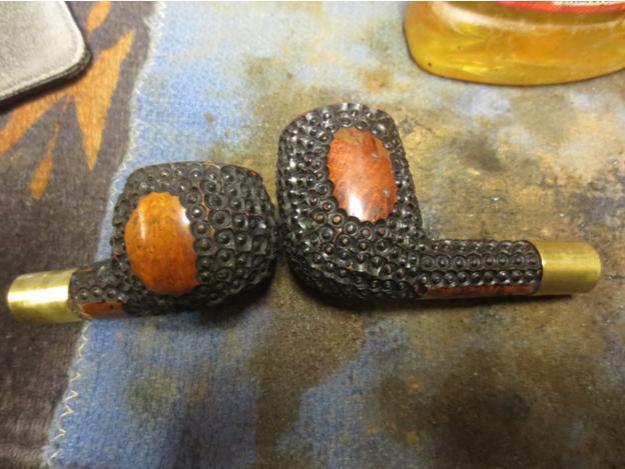
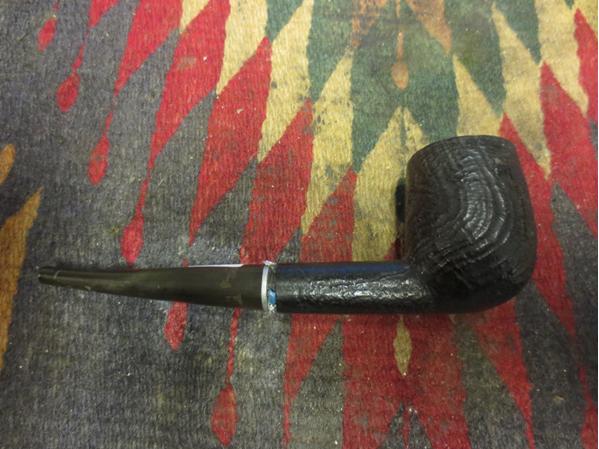
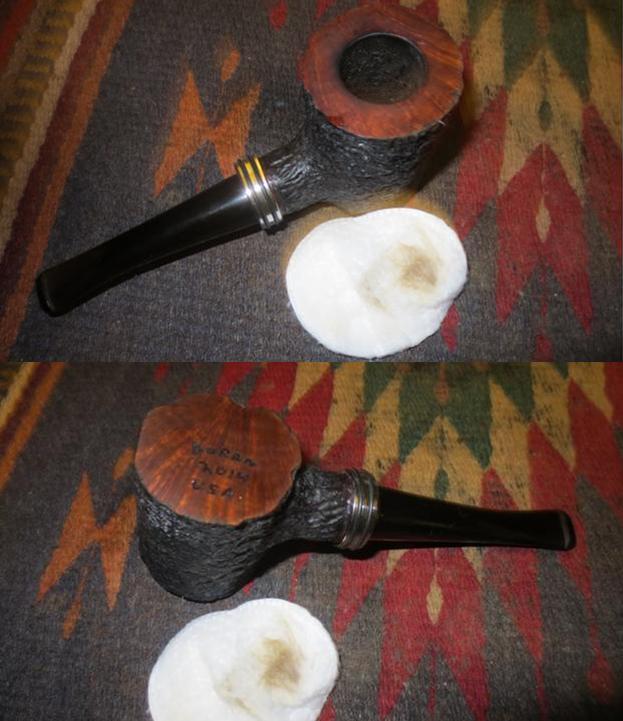
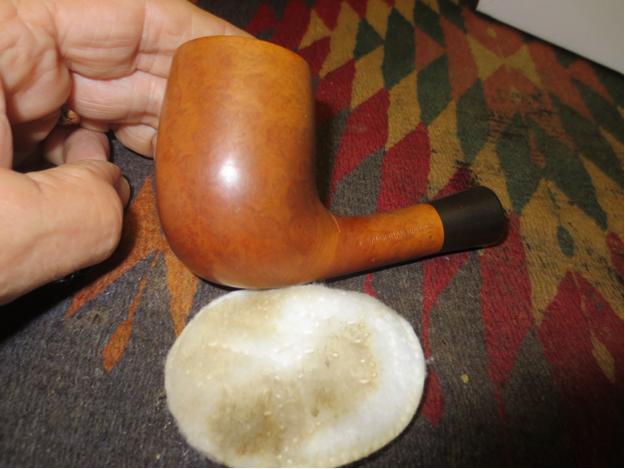
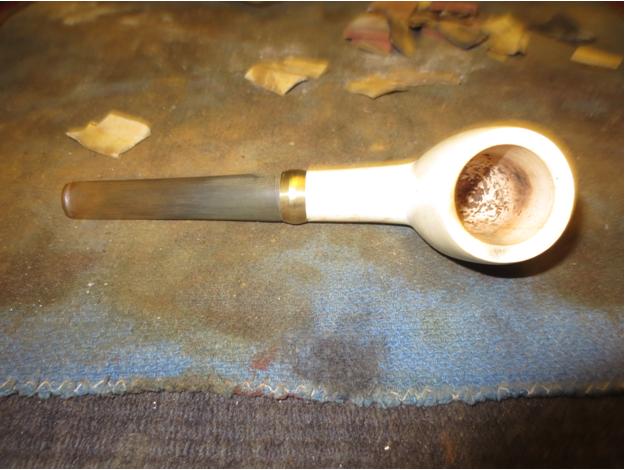
I gave the bowl a light rubdown of olive oil like I had on the Classica. It brought the colours in the briar to the front and it is going to be a beautiful pipe.Citation20

Citation21

Citation22 
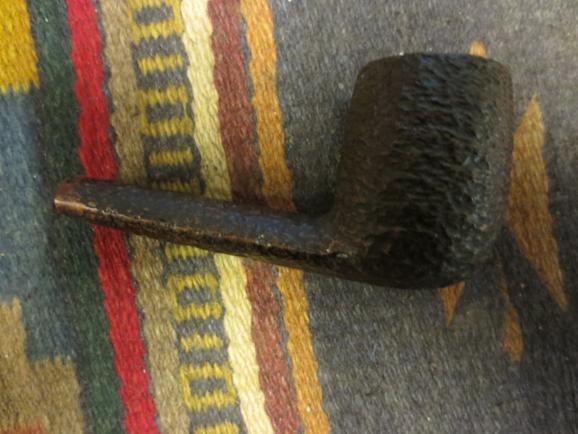
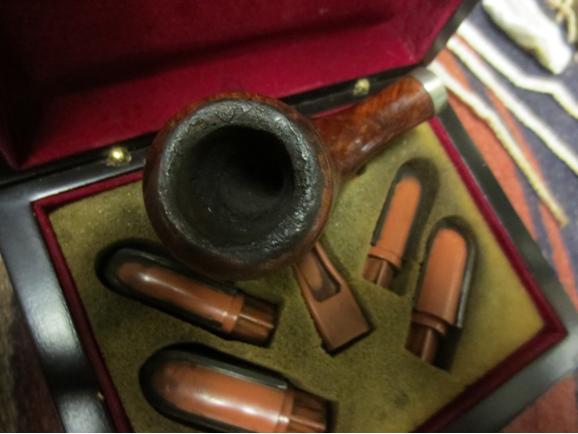
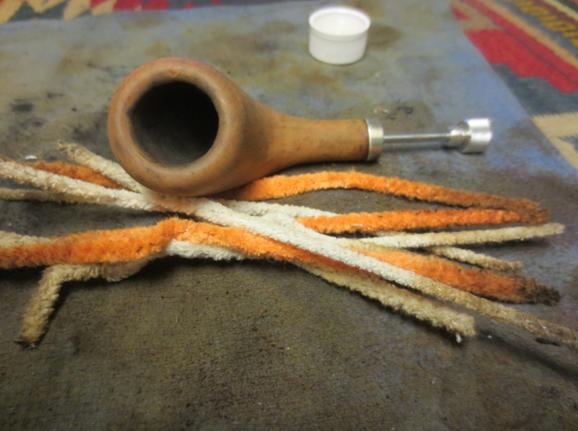
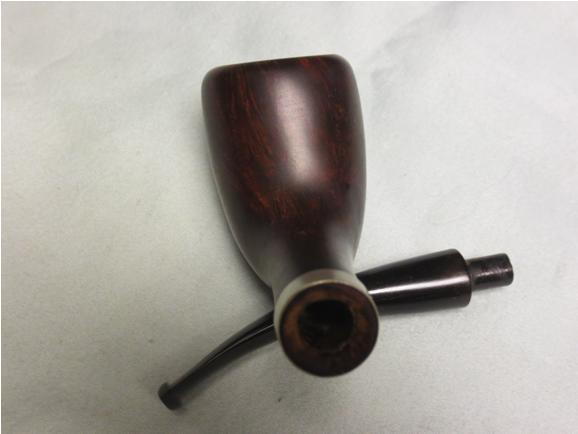
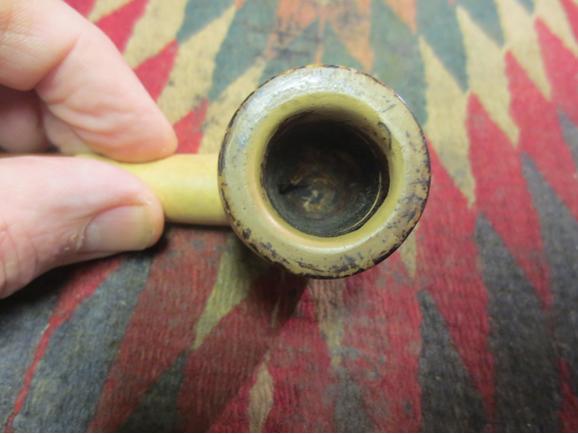
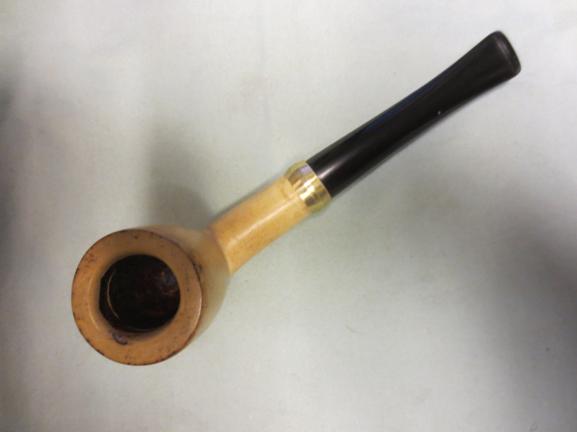
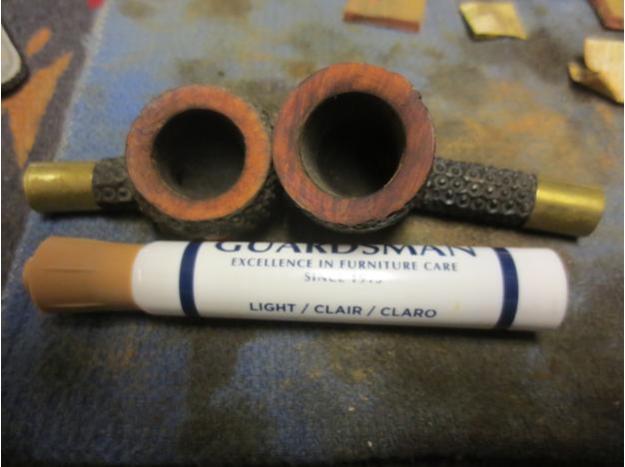
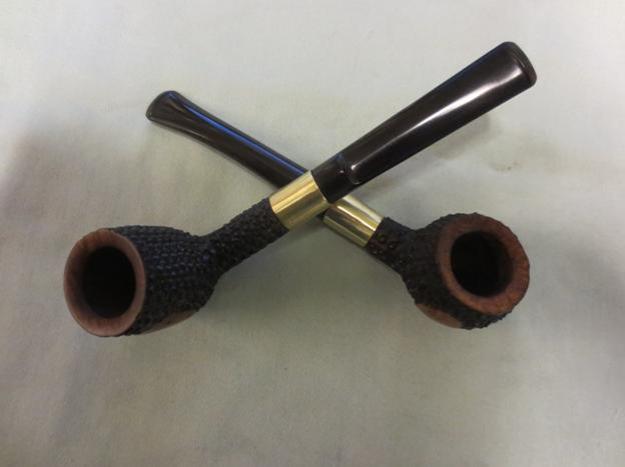
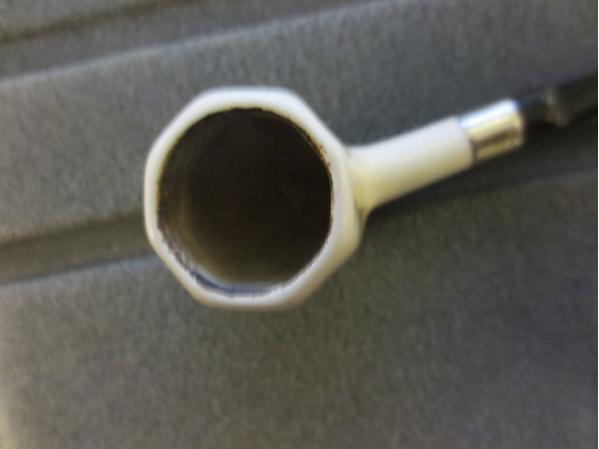
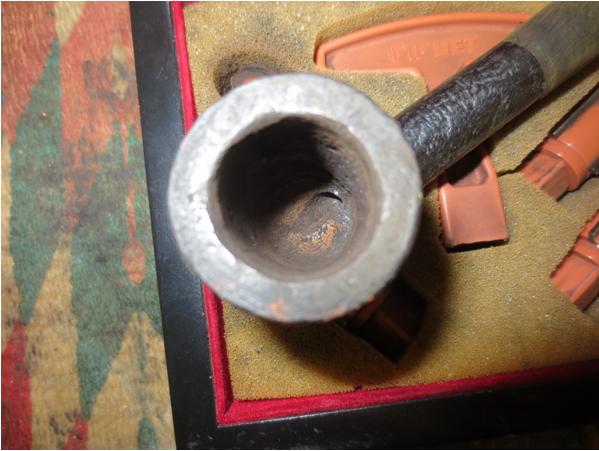
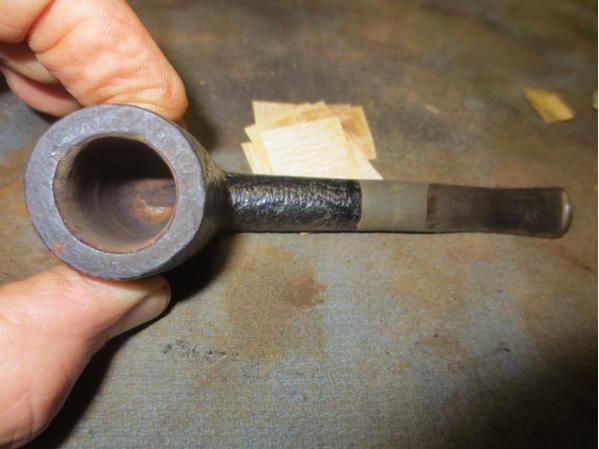
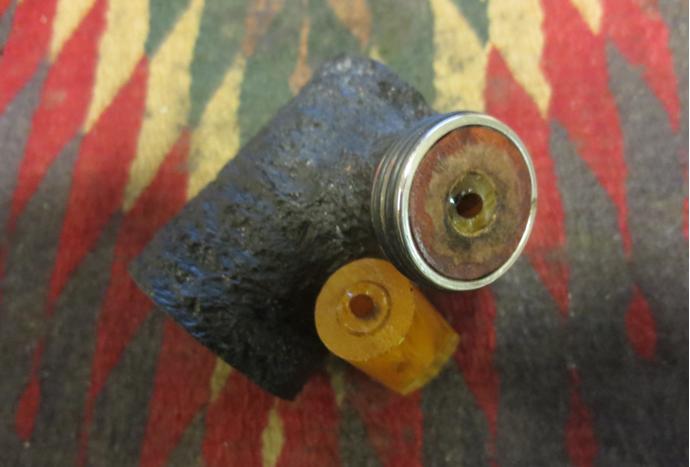
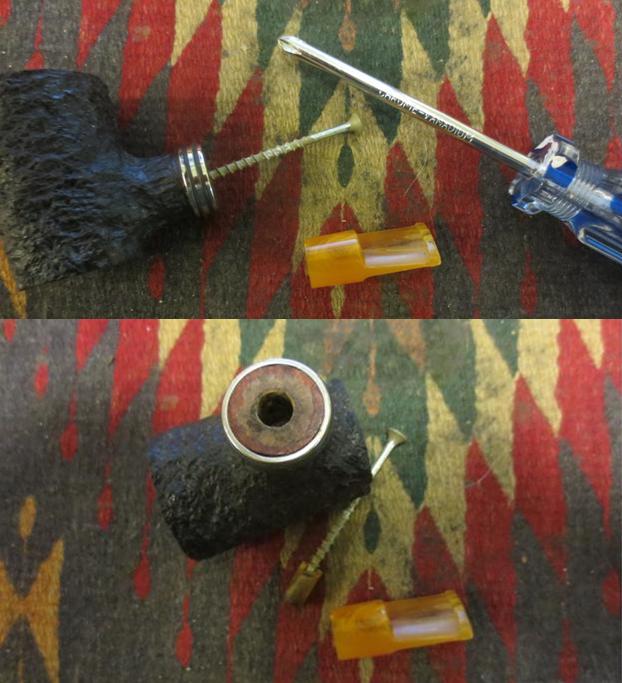
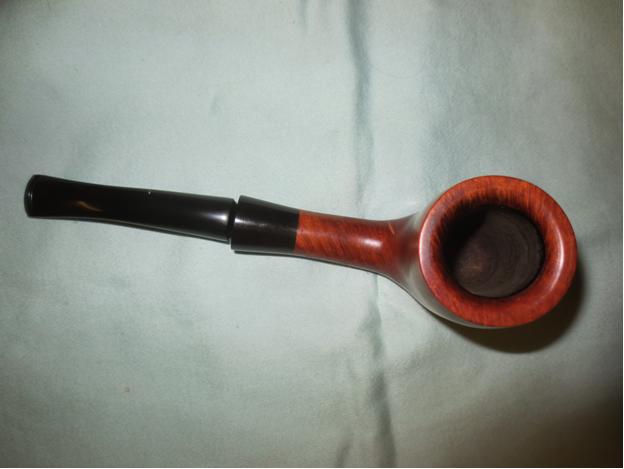
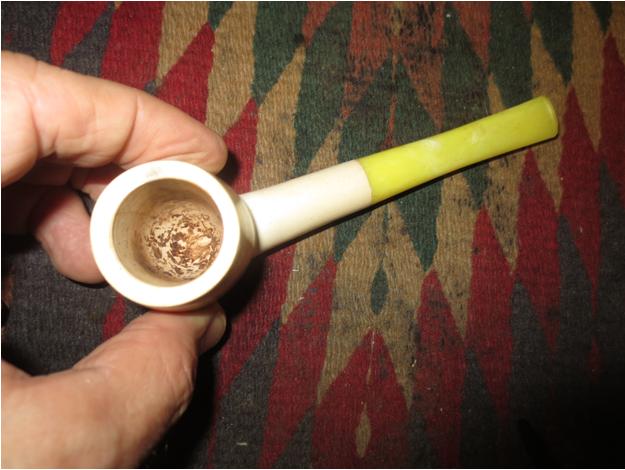
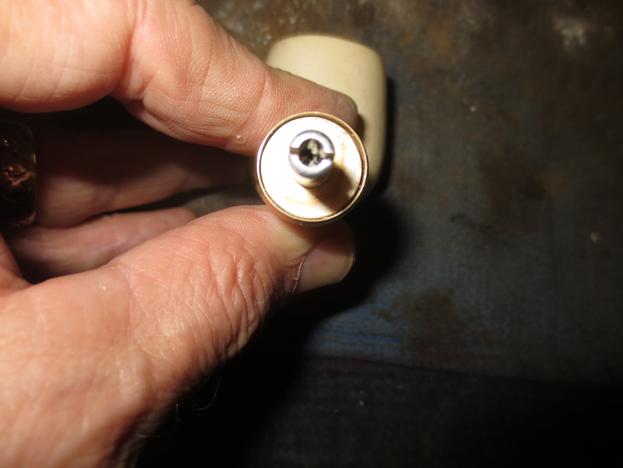
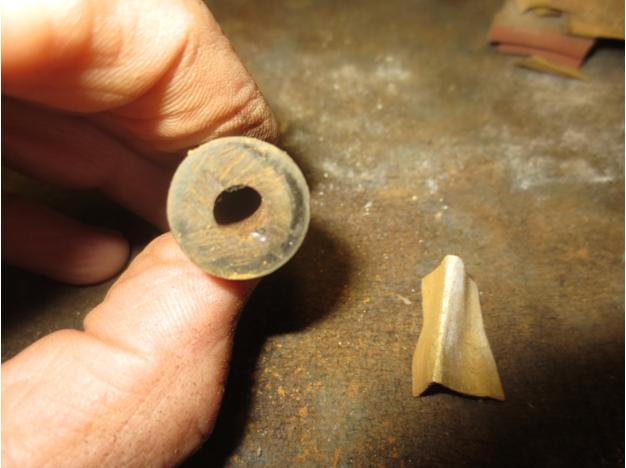
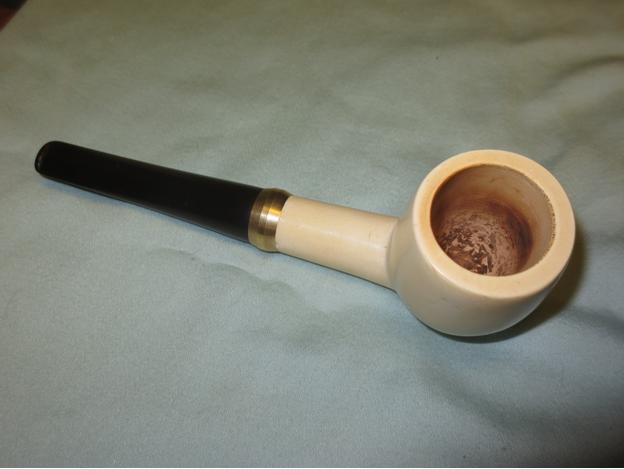
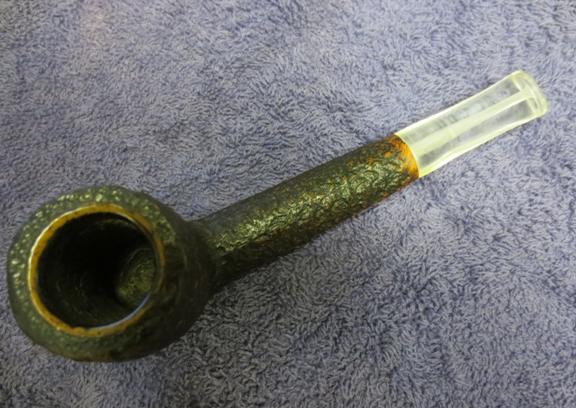
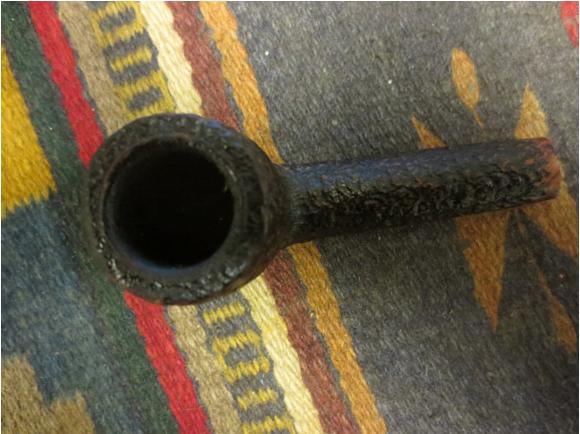
In the photo above you can see what looks like a smooth ring around the inside of the bowl. This was my first clue that things were not necessarily as they appeared. I went back to read a post on Facebook by Geoff Carmell about a Citation pipe he had found. Sure enough the finish was the same and the ring around the inside edge of the bowl was a meerschaum lining. With the way I had man handled it – reaming and scrubbing with the brass bristle brush it is a wonder that I had not damaged the bowl. I would do some work on cleaning that edge a little more gingerly later. Now I had to fit the new stem.

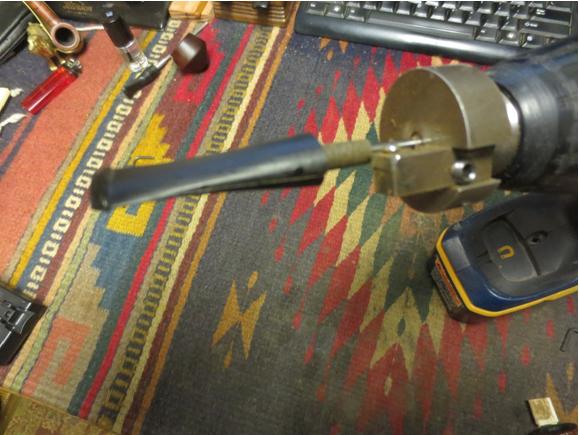
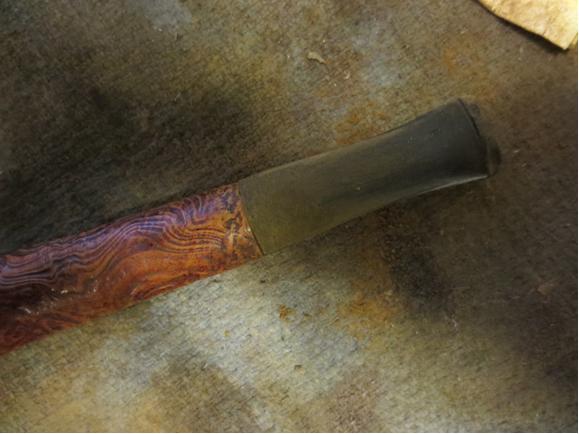
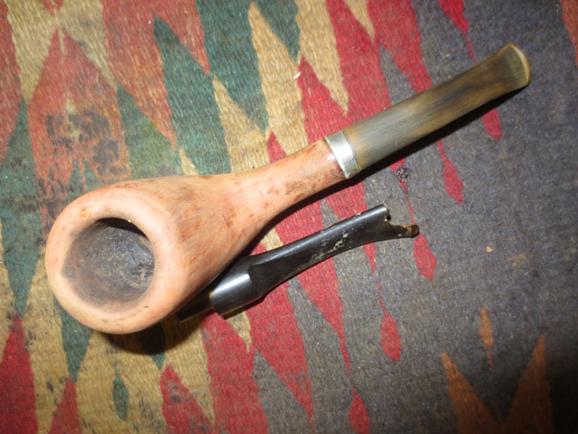
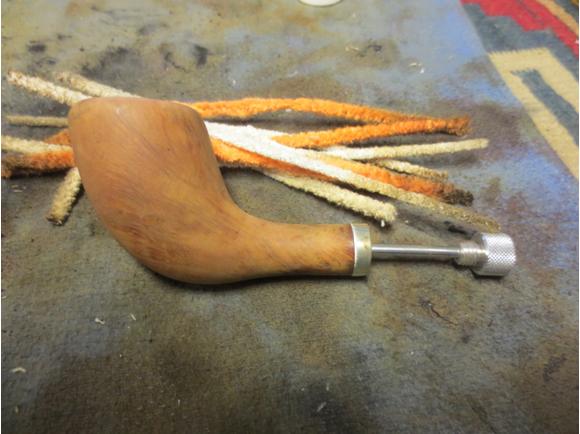
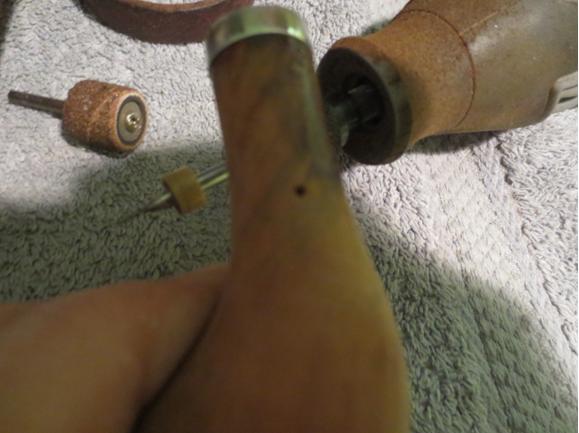
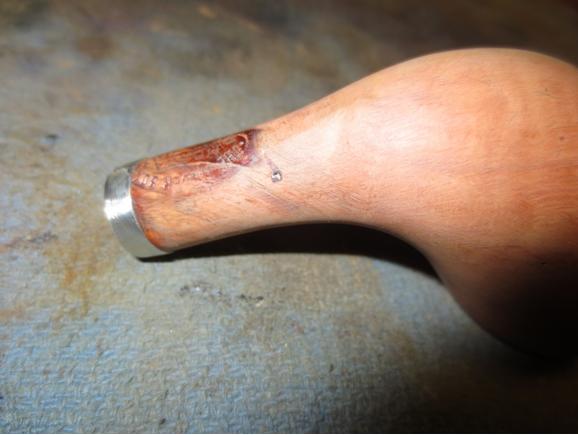
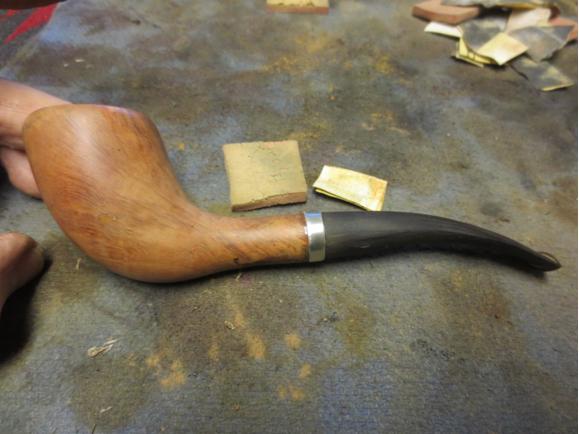
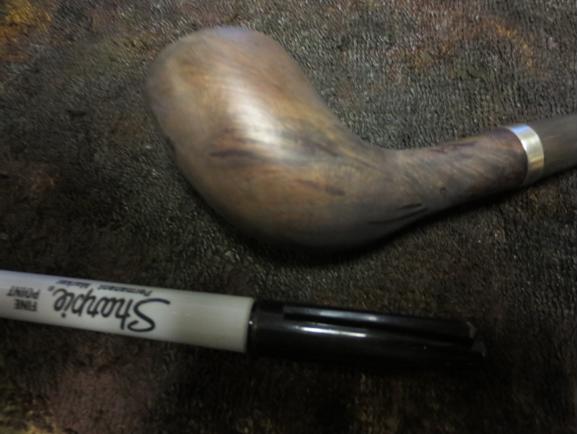
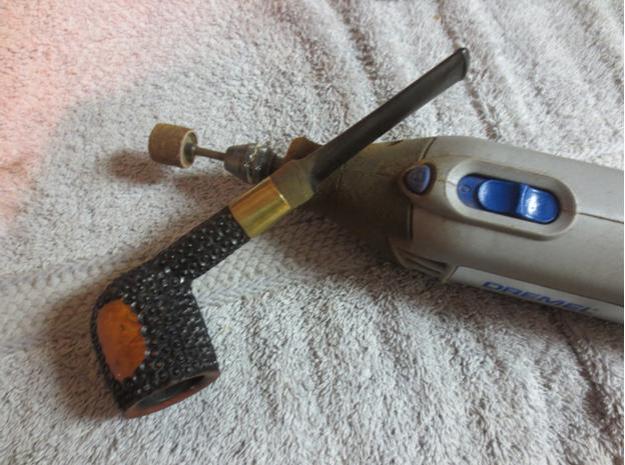
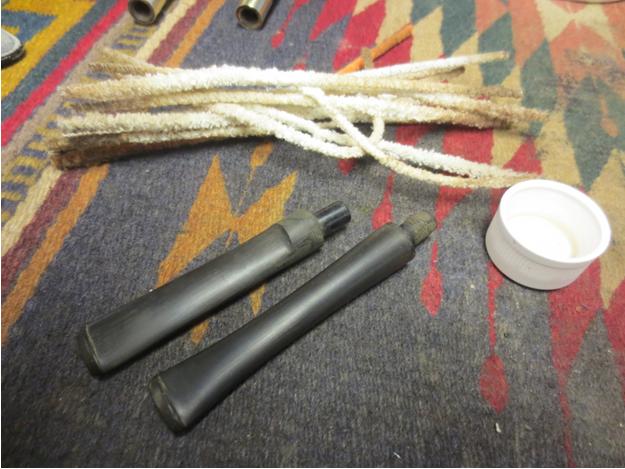
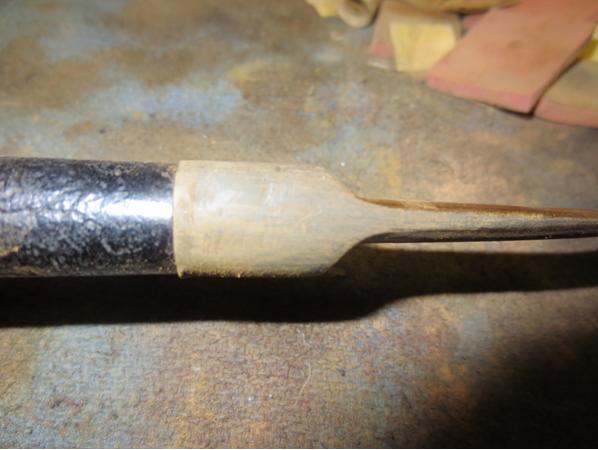
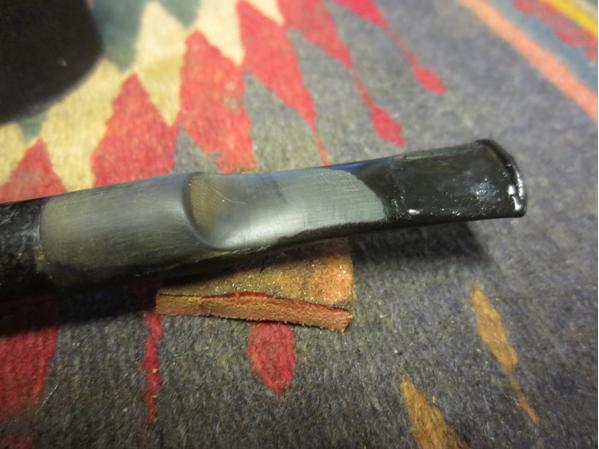
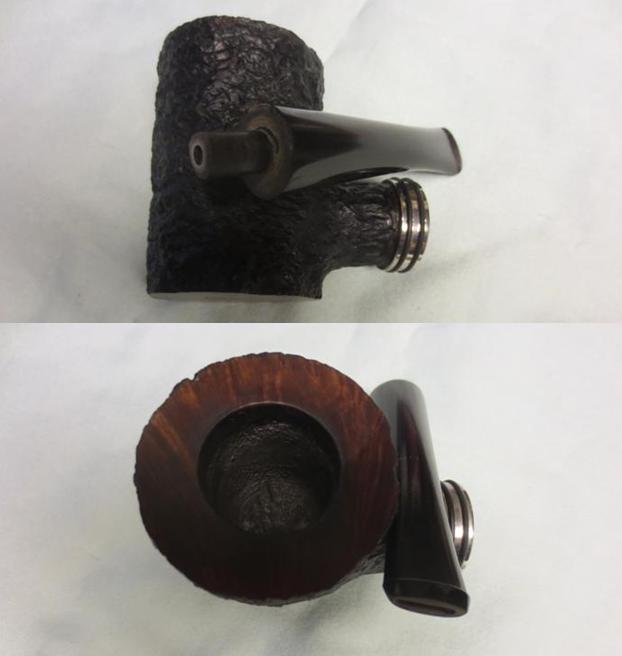
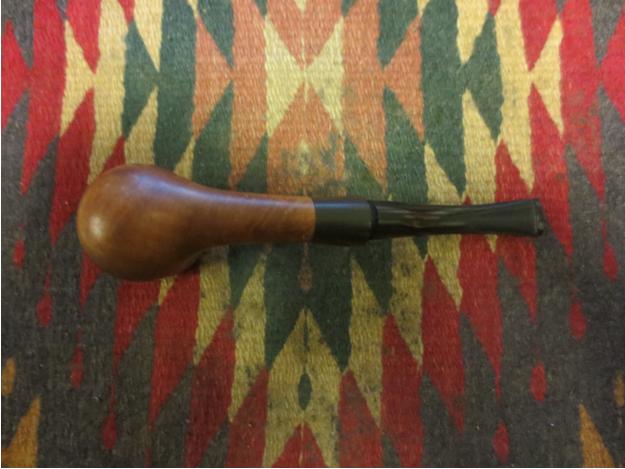
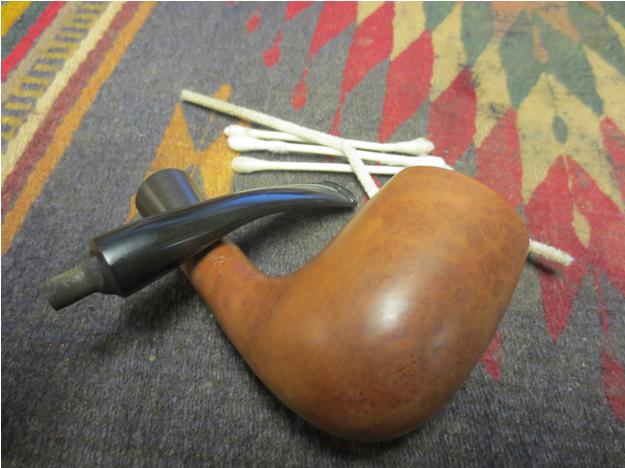
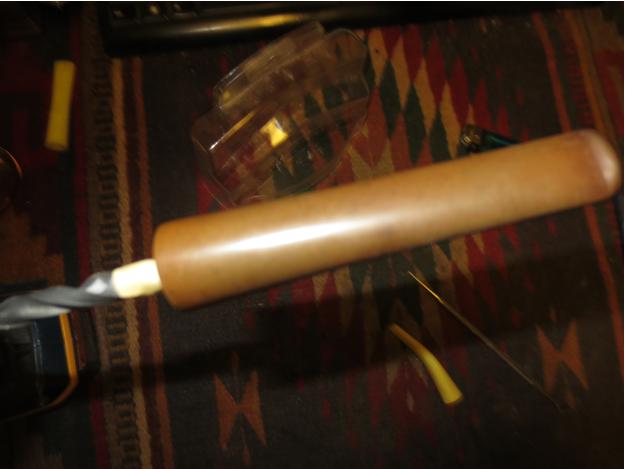
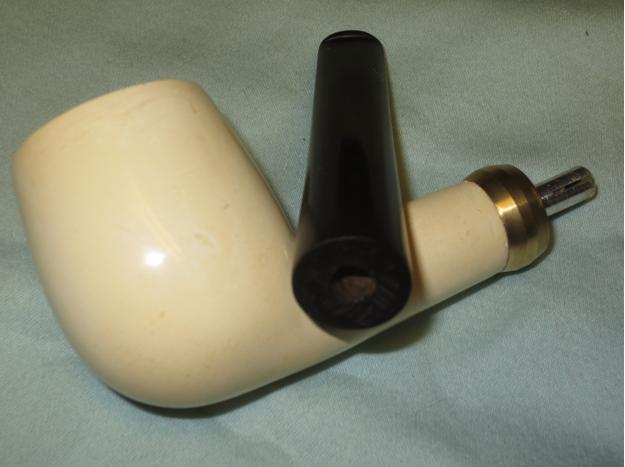
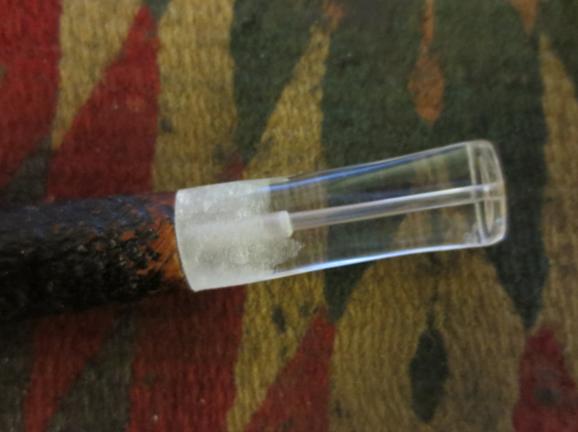
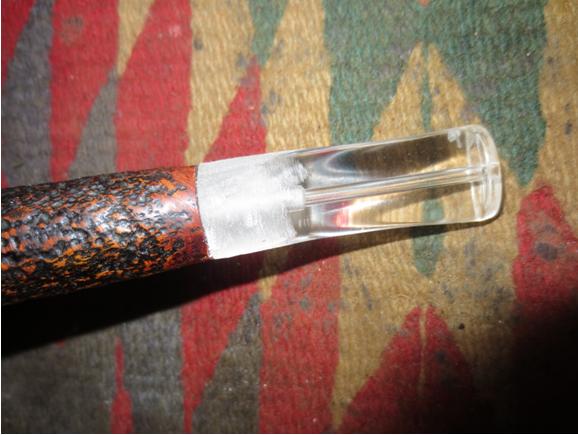
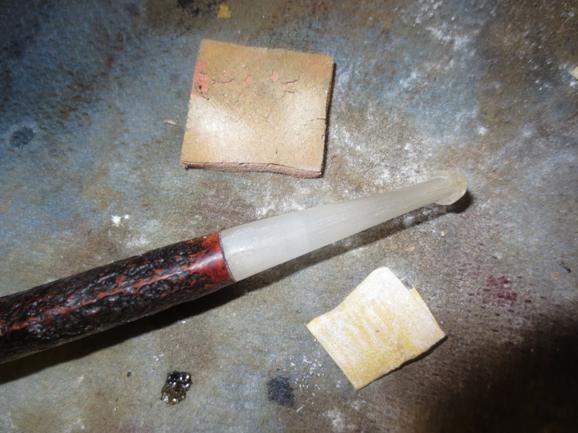
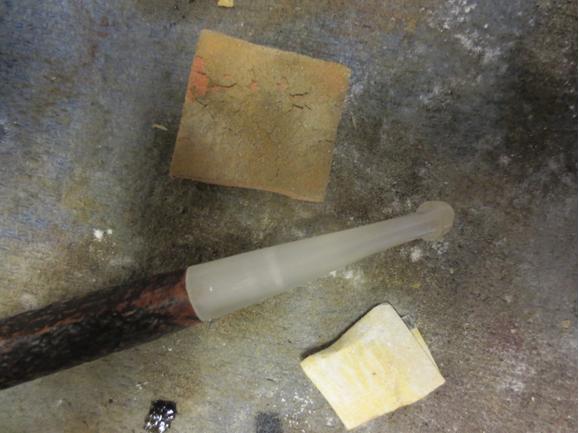
I sanded the stem with a Dremel and sanding drum carefully working it down to the same diameter as the shank and fitting the flow of the curves on the oval shank. This has to be done carefully and with a steady hand or you have to repair the damaged shank or cut another stem to fit. I proceed carefully and slowly. The photos below show the rough fit of the stem after the Dremel and sanding drum work.Citation23

Citation24

Citation25

Citation26 
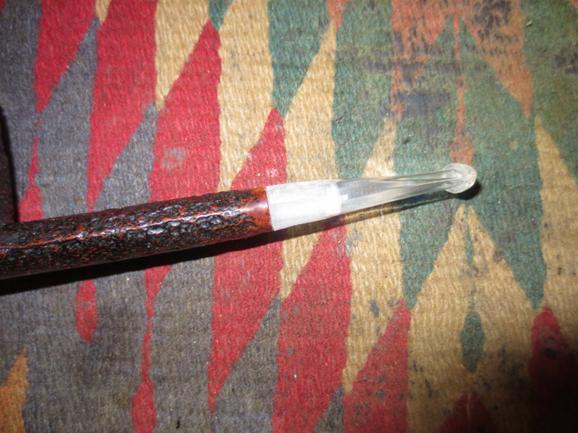
I sanded the rough fit stem with 220 grit sandpaper to smooth out the scratches and fine tune the fit to the shank. I also sanded it with a medium and a fine grit sanding sponge to further fine tune the fit.Citation27

Citation28

Citation29

Citation30 
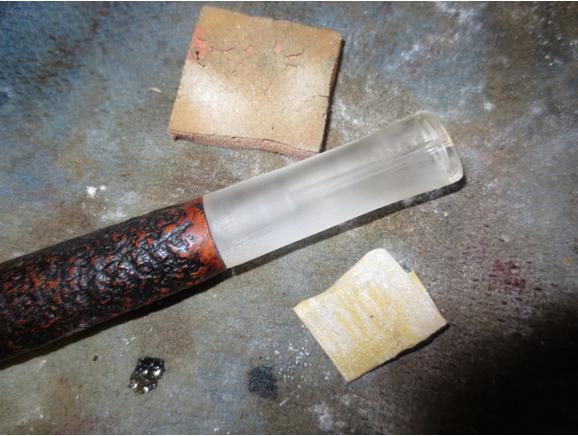
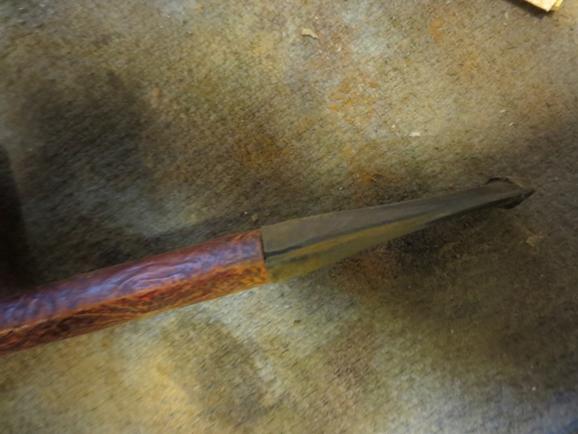
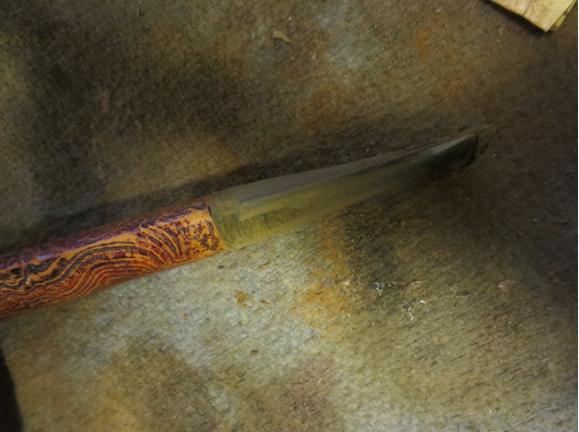
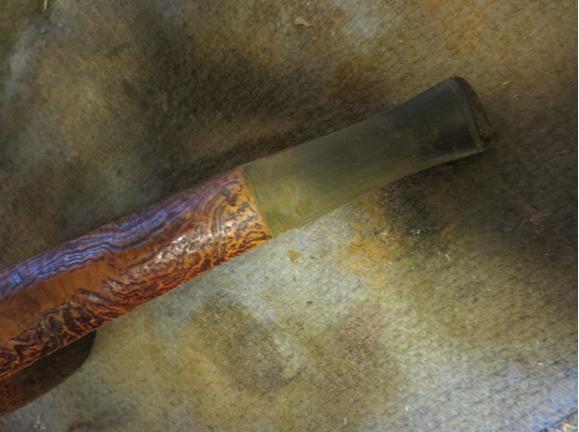
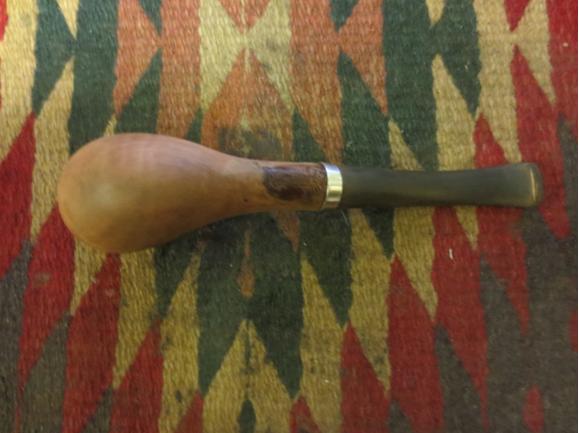
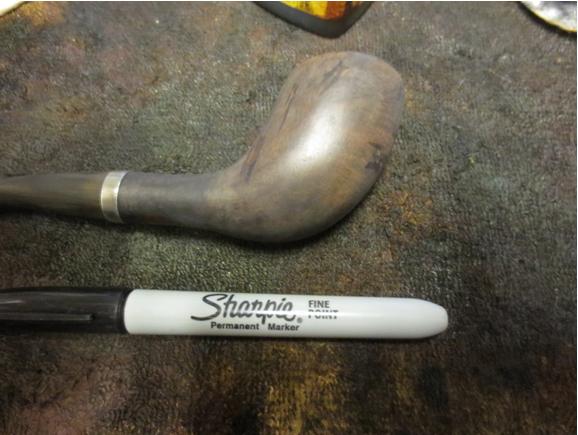
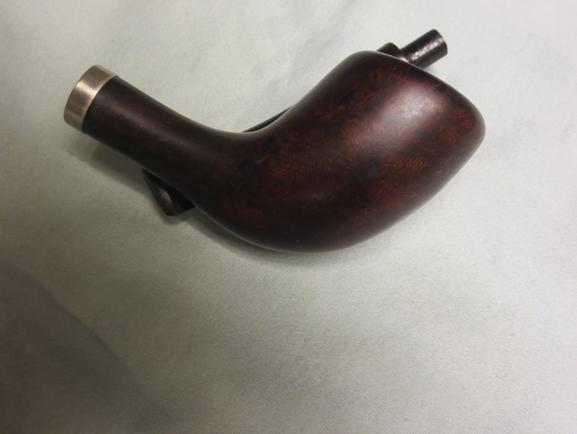
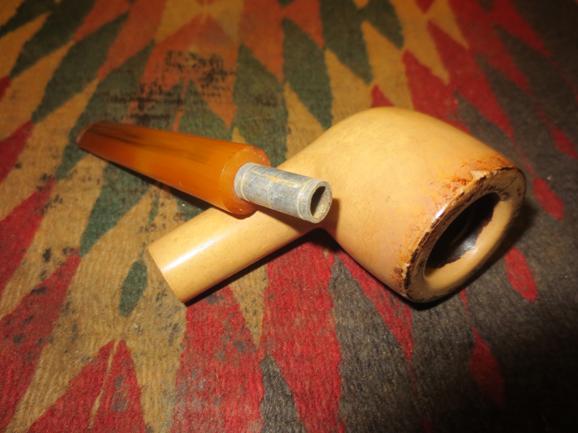
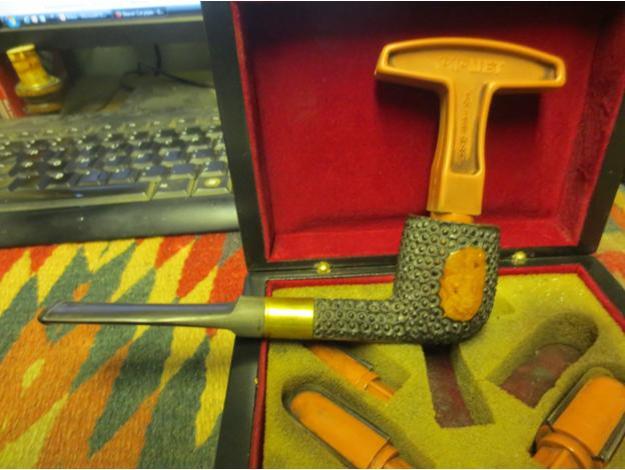
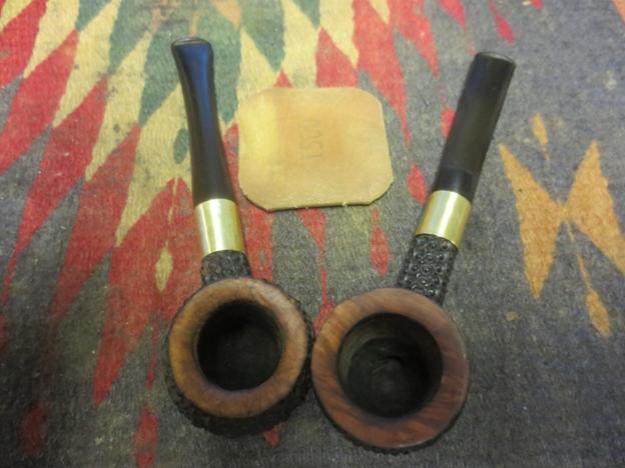
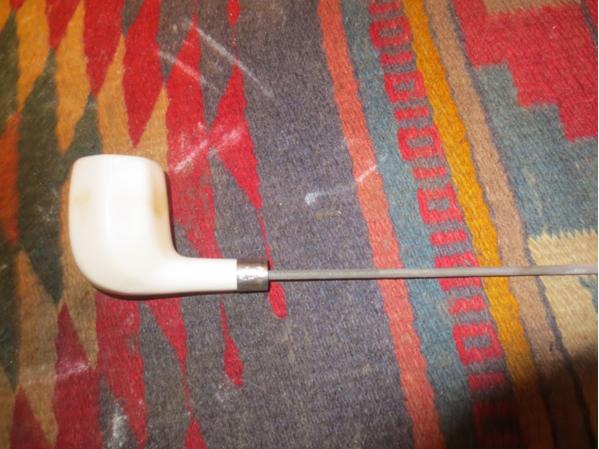
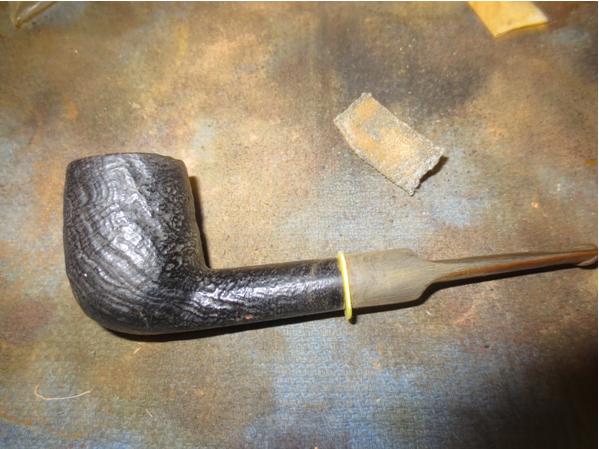
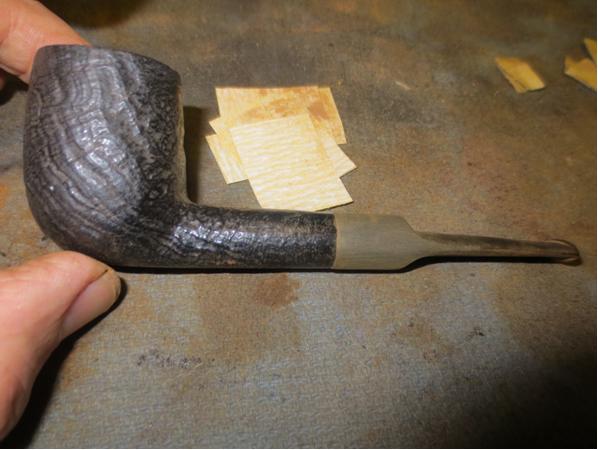
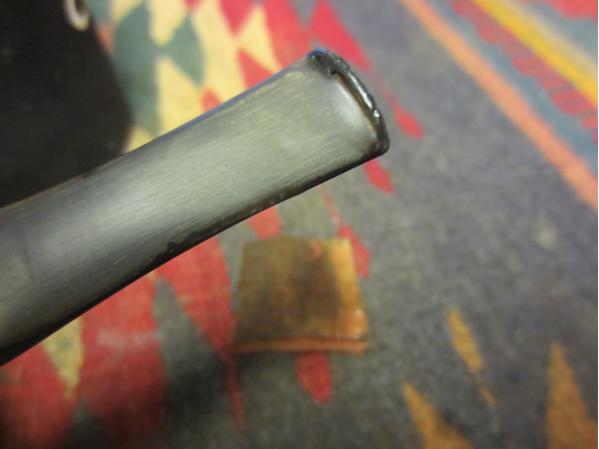
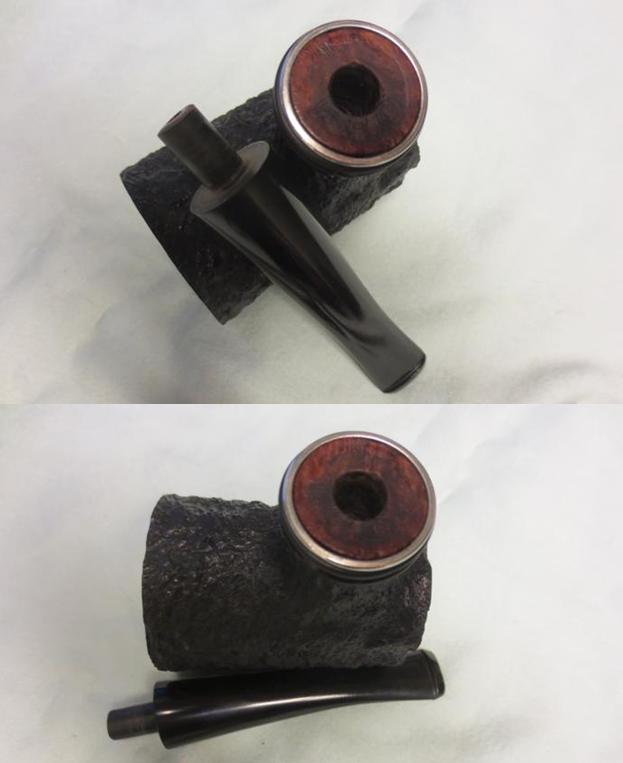
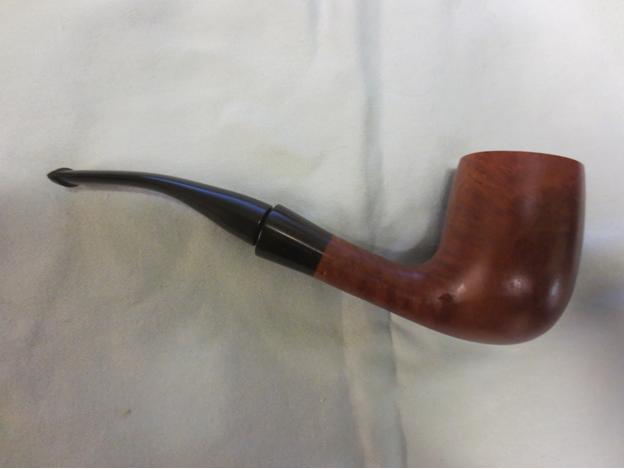
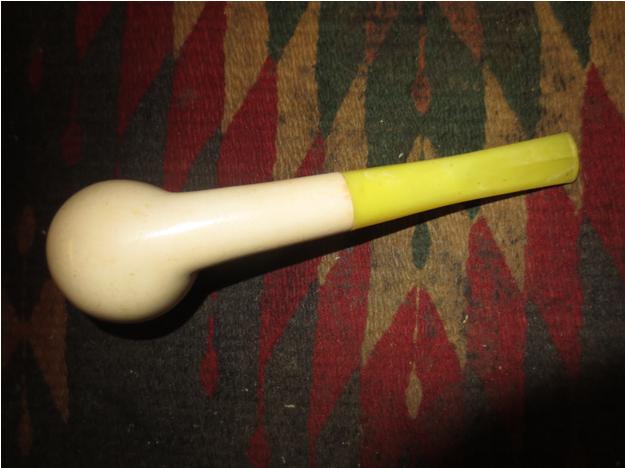
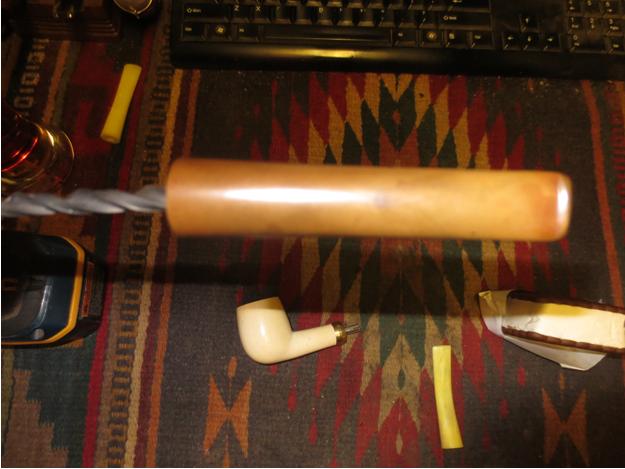
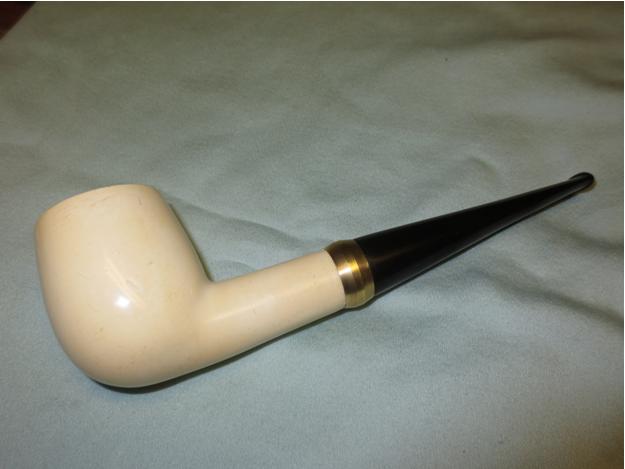
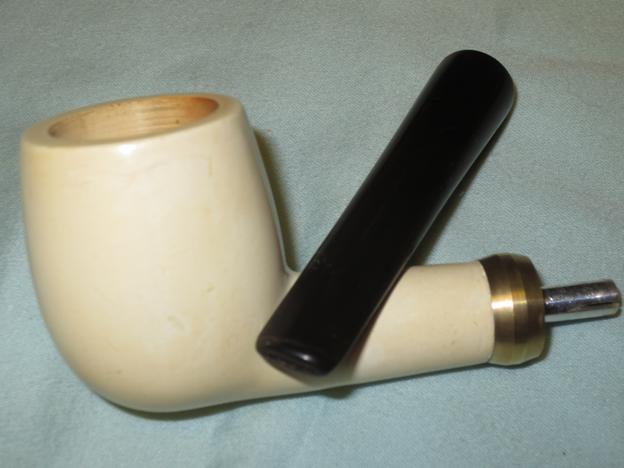
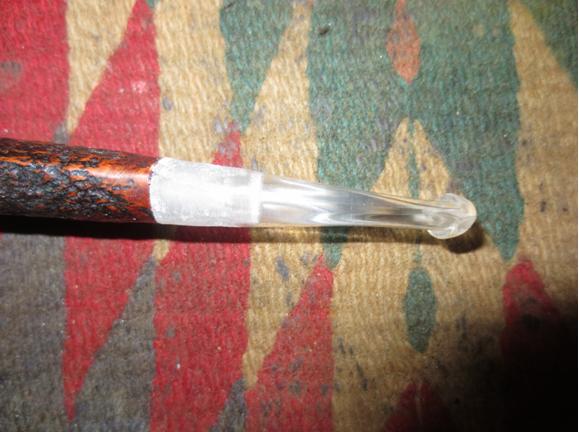
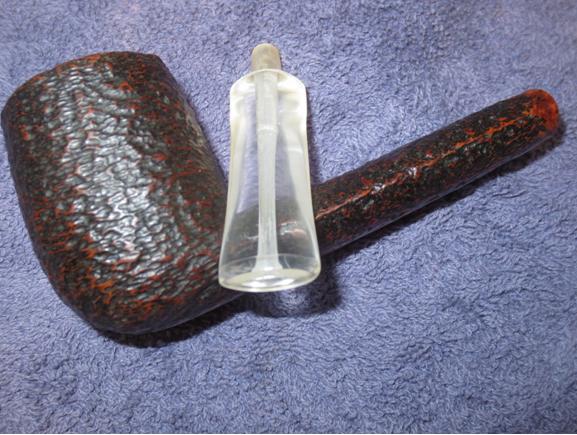
The next photos show the newly fitted stem and what the pipe will look like with the clear stem. It still needs a lot of sanding including file work on the airway and the button. It has a small airhole in the end of the button but I will need to cut and shape a slot.Citation31

Citation32

Citation33

Citation34 
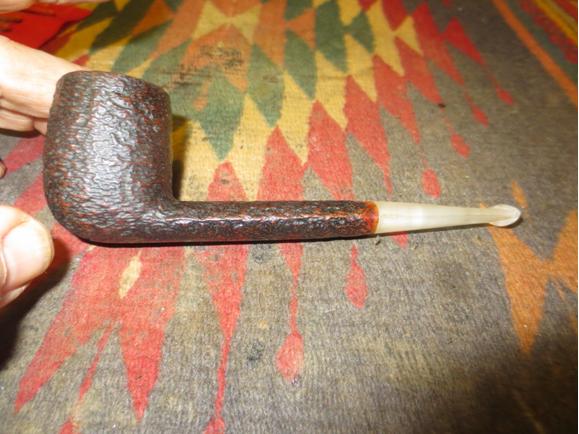
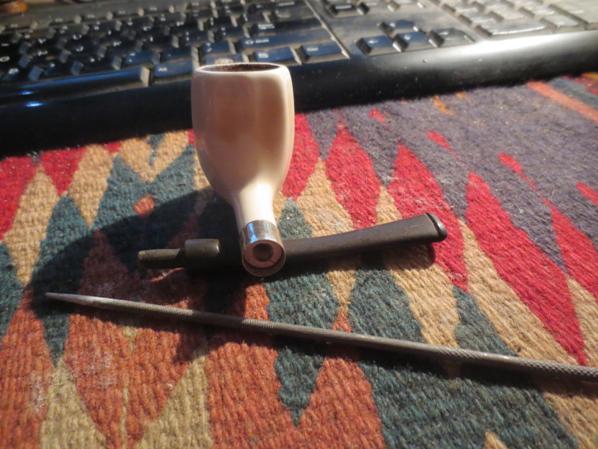
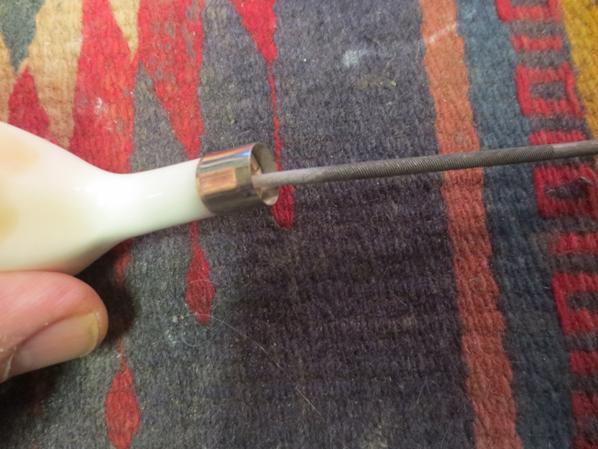
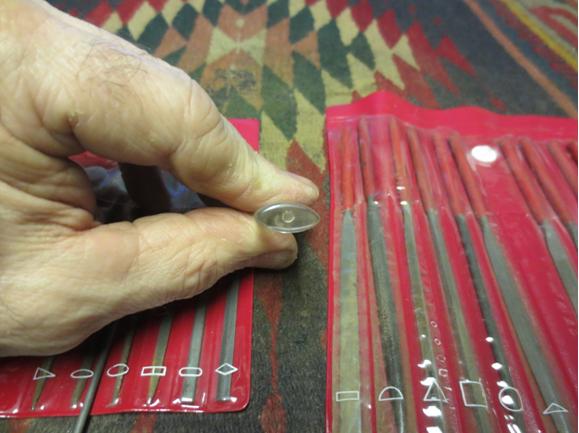
All of the internal work and the work on shaping a slot are done with my collection of needle files. It looks like a lot of files but I usually only use three different files – a round, an oval and a flat oval. I use both the larger and the smaller files in these three shapes.Citation35

Citation36 
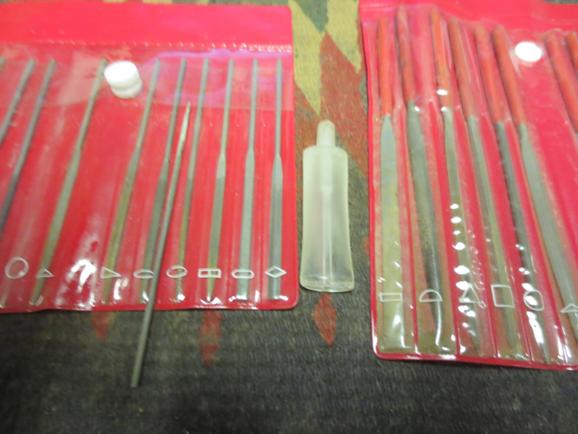
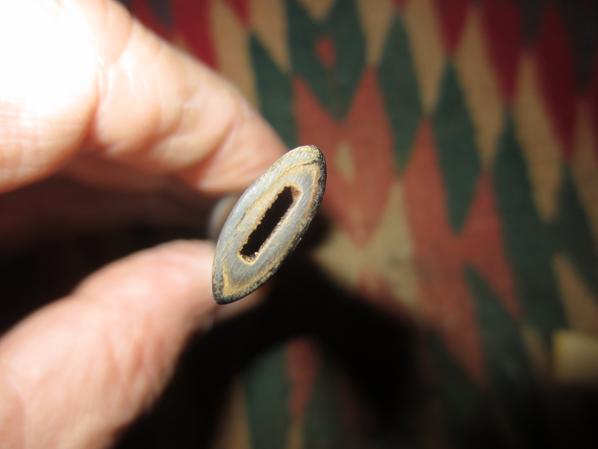
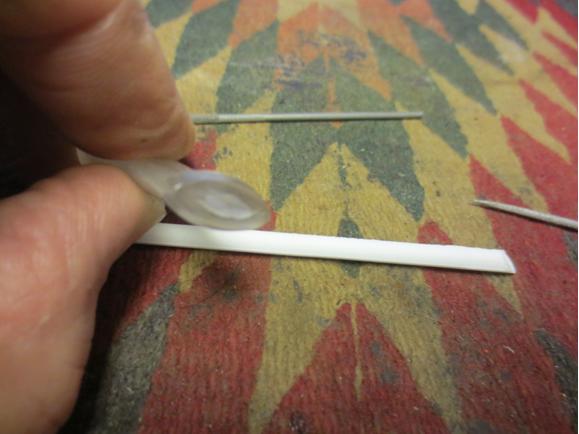
The slot is progressing from a round hole to more of an oval shape that matches the shape of the button. Still a lot of filing to do to get it finished.Citation37 
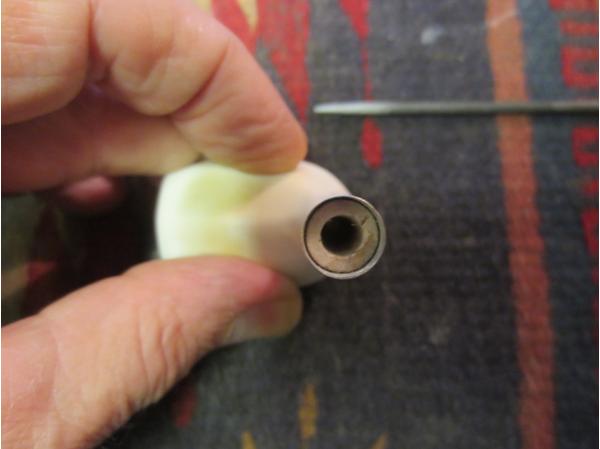
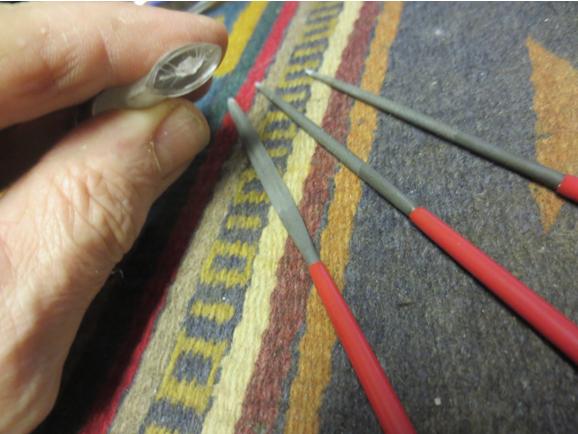
I worked on the button, slot, and airway to smooth things out and open them up with the smaller files as well. When I drilled the airway to turn the tenon the drill left a ridge on the inside of the airway in the stem that is a bear to sand out. I worked on it until it was as smooth as I could get it. There is still a small line in the airway but it is smoother than it was when I started. I am going to have to get some tapered drill bits. That would have made this task a minor hiccup in the process rather than a several hour ordeal. The airway is wide open and takes a fluffy pipe cleaner with ease.Citation38

Citation39

Citation40 
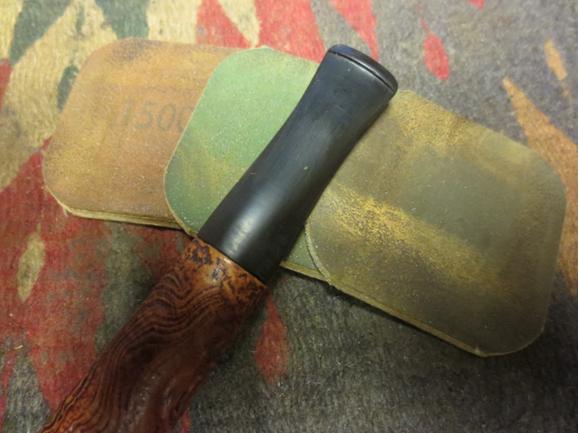
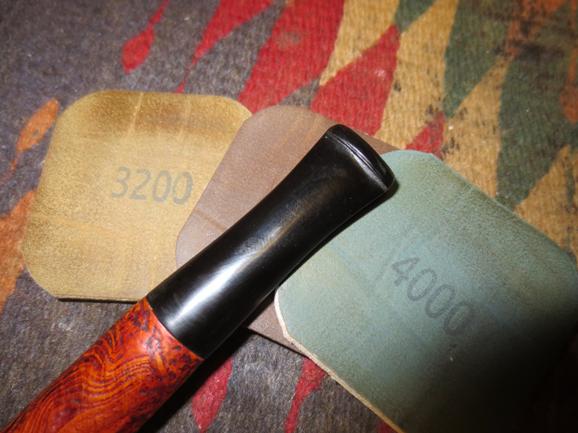
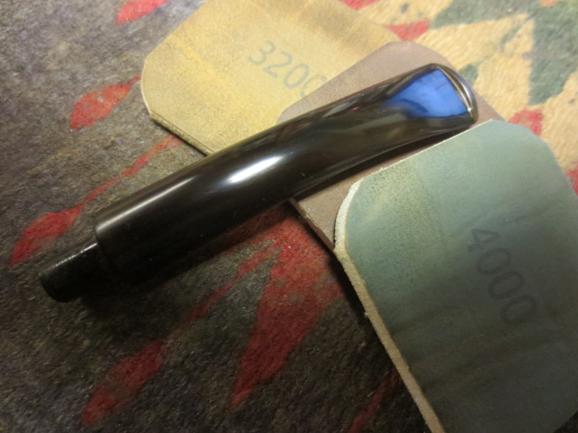
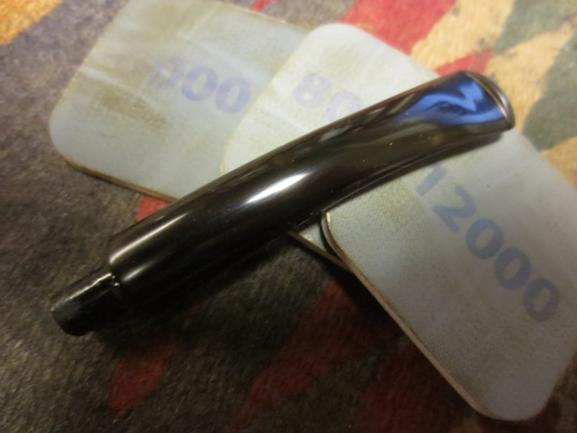
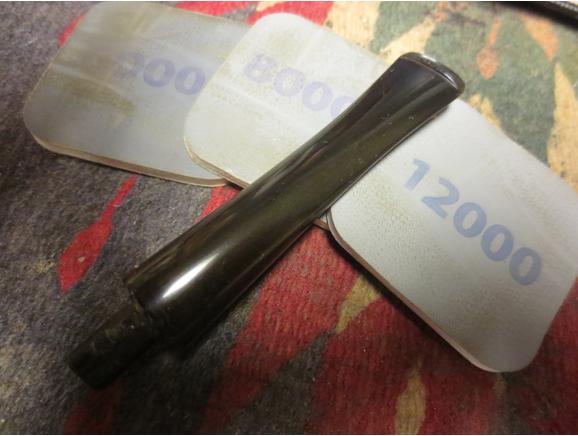
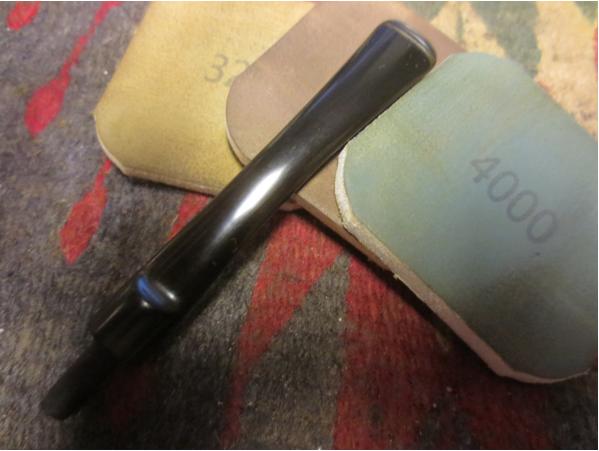
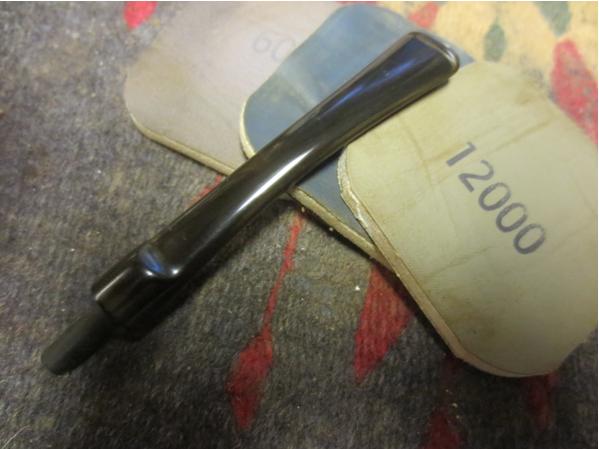
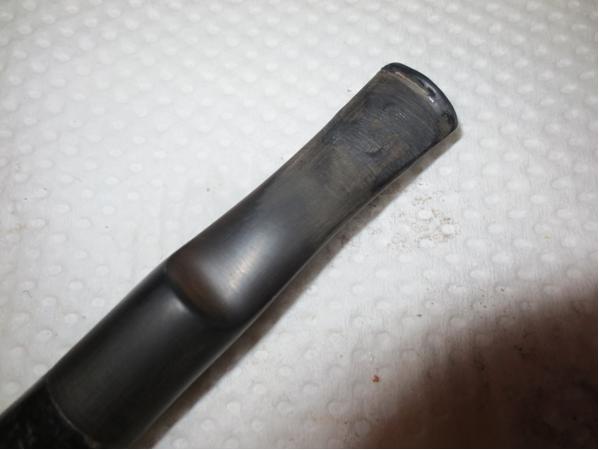
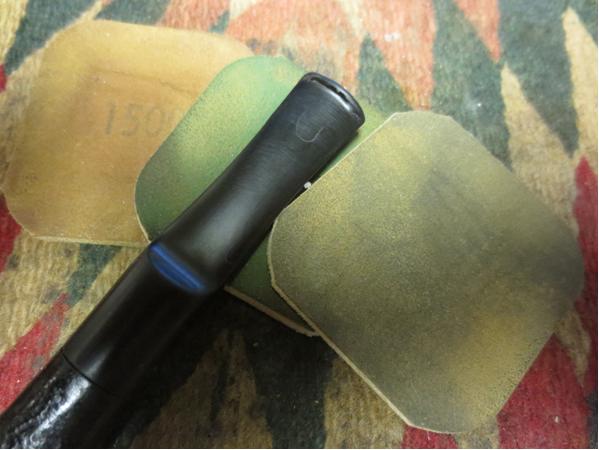
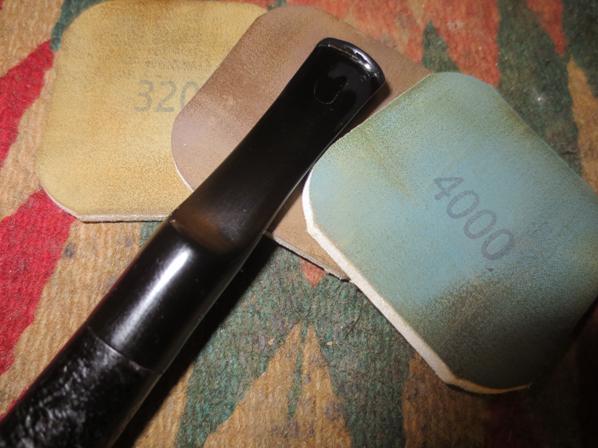
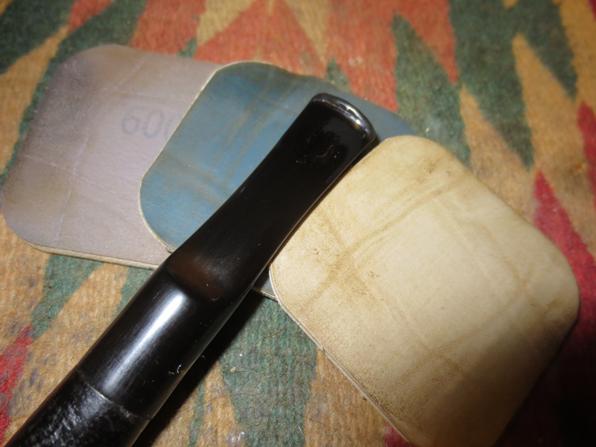
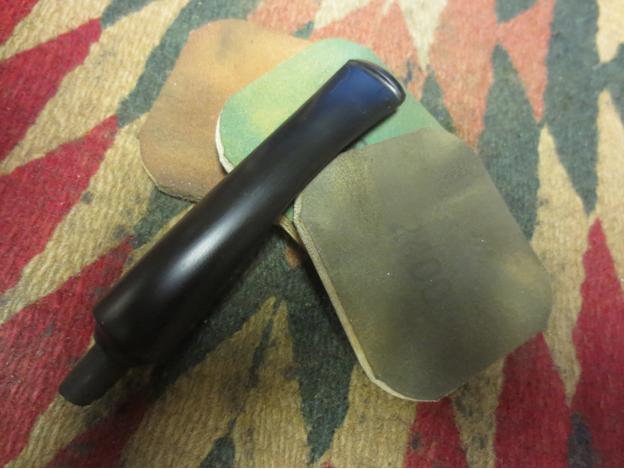
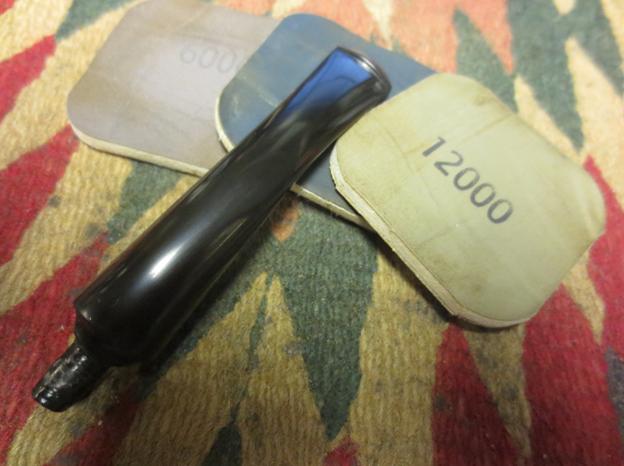
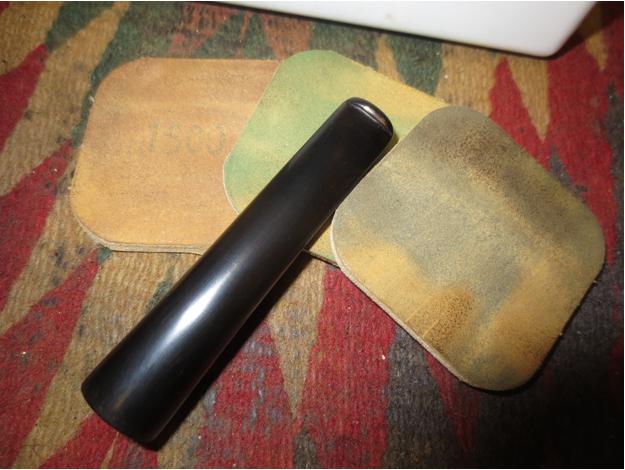
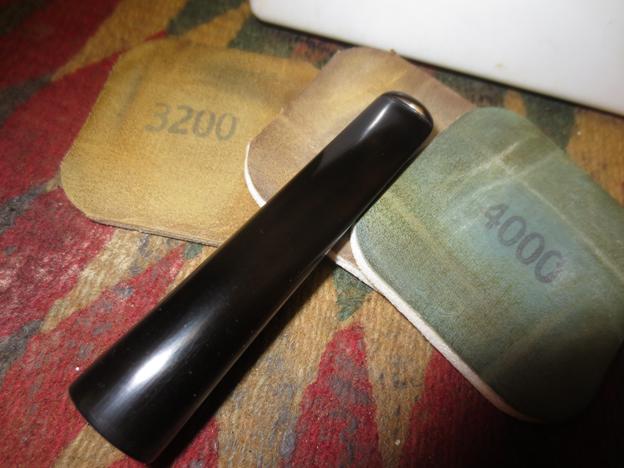
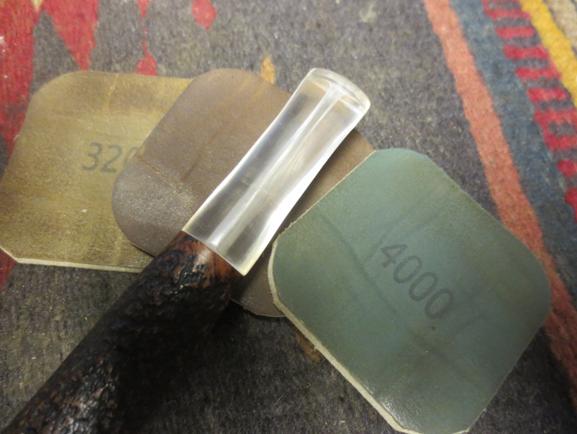
I sanded the end of the button and slot with 220 grit sandpaper to remove the scratches and then went through the micromesh pads to polish it. I worked the stem over with micromesh sanding pads, wet sanding with 1500-2400 grit pads and dry sanding with the remaining pads 3200-12000 grit.Citation41

Citation42

Citation43 
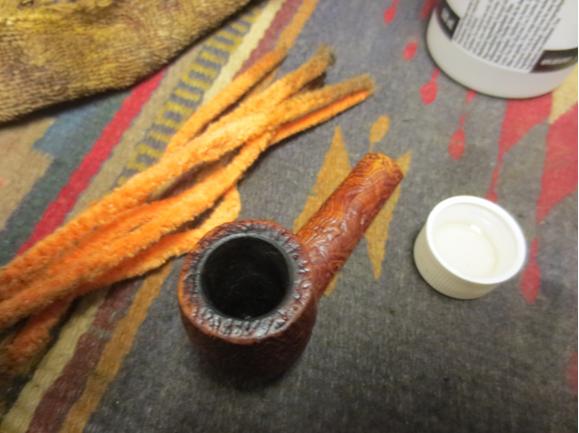
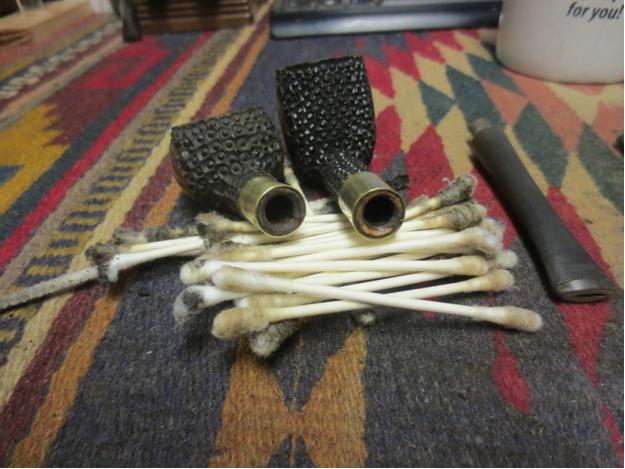
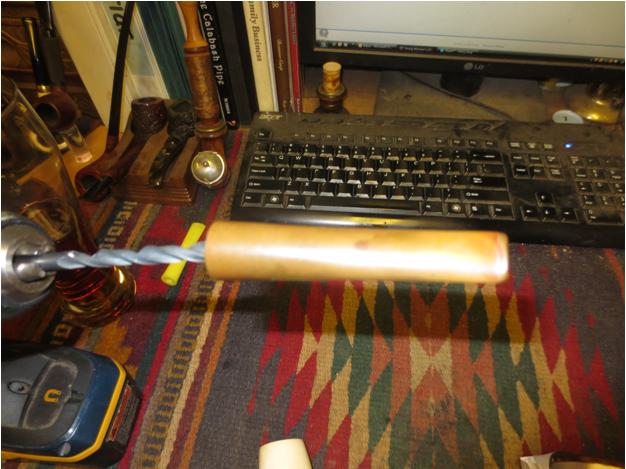
With the stem done I figured I could put it off no longer. I had to work on the airway. It was seriously clogged. I could not push a paper clip through or even an ice pick. I used the drill bit on the KLEENREEM and could not get it through. I had to soak it with an alcohol wetted pipe cleaner to soften the plug and then I used a paper clip to push through the plug finally. Then I had to work through the drill bit and the pipe cleaners to get all of the gunk out. Finally I have good airflow. I cleaned out the shank with alcohol and pipe cleaners until they were clean.Citation44 
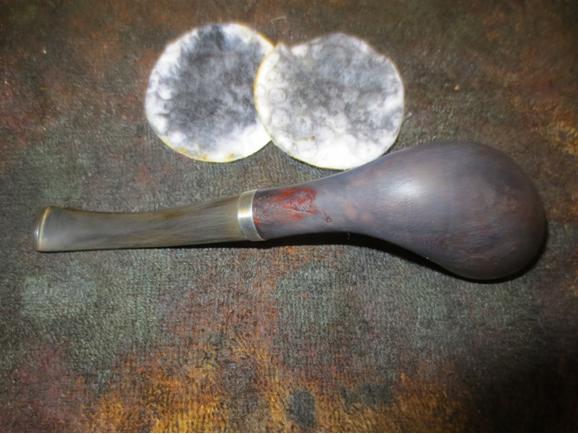
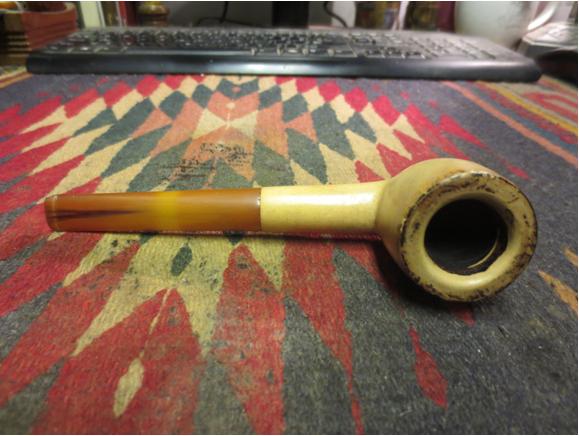
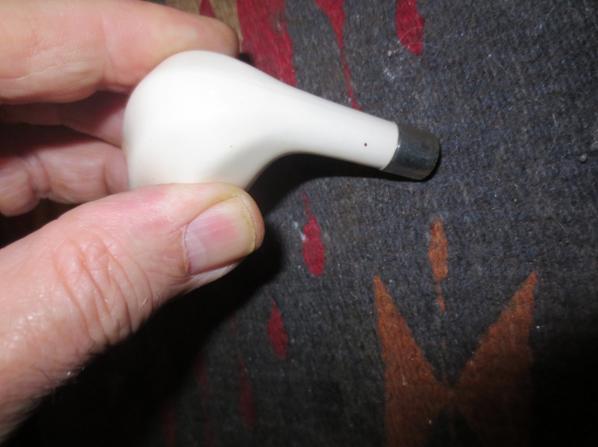
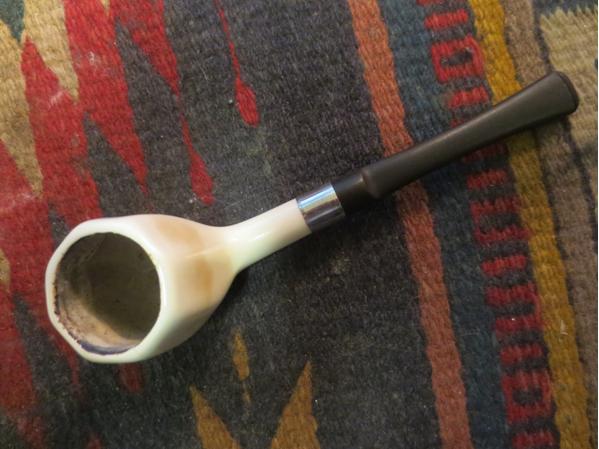
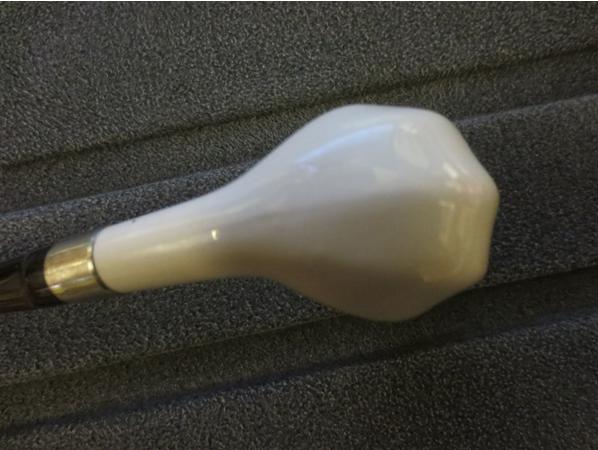
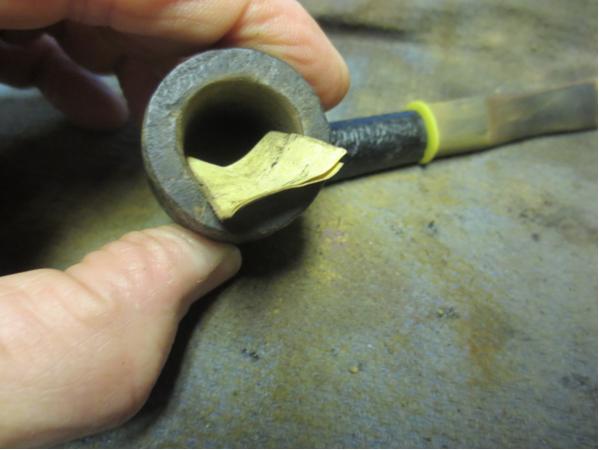
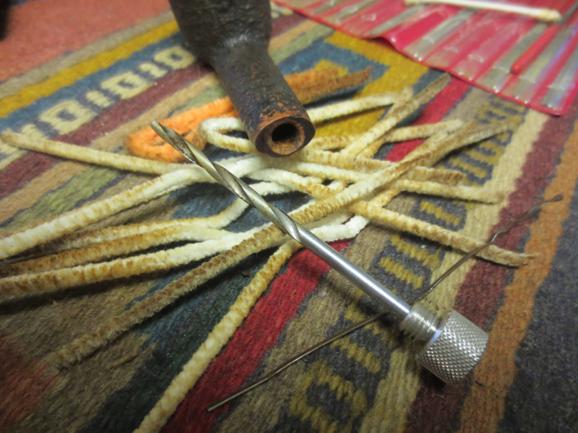
I cleaned the meerschaum lining on the rim with micromesh sanding pads and patiently just sanding the meer edge and the bowl. I was able to get much of the tars off the meer and now it shows golden. There are several spots where it is stained very dark.Citation45 
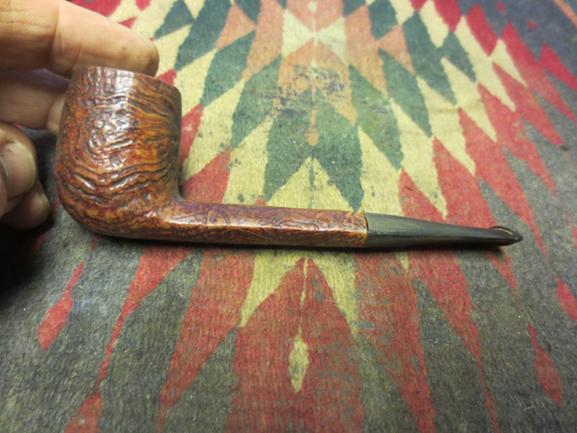
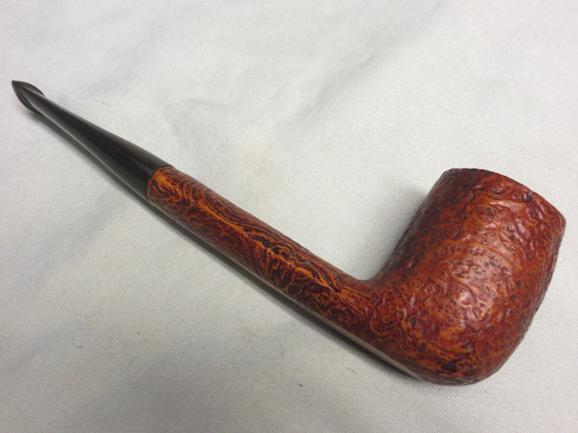
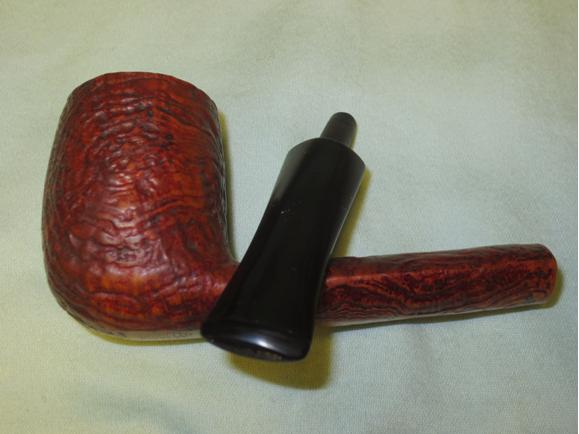
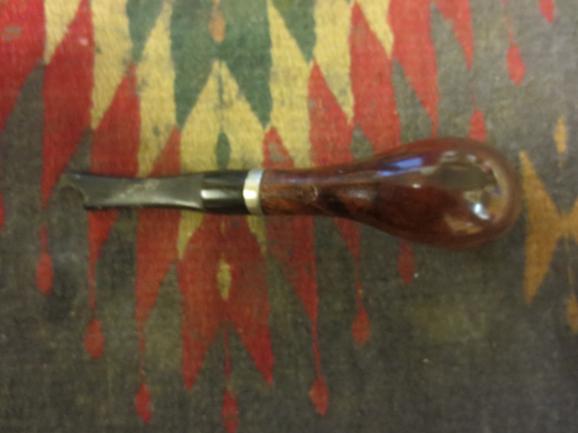
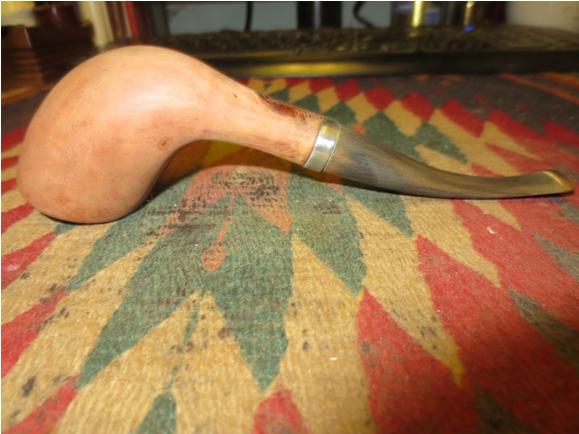
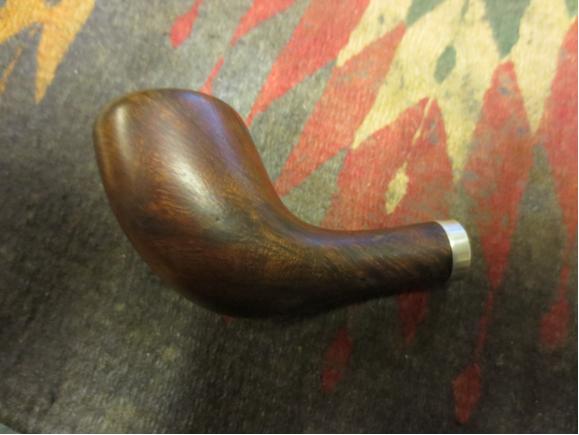
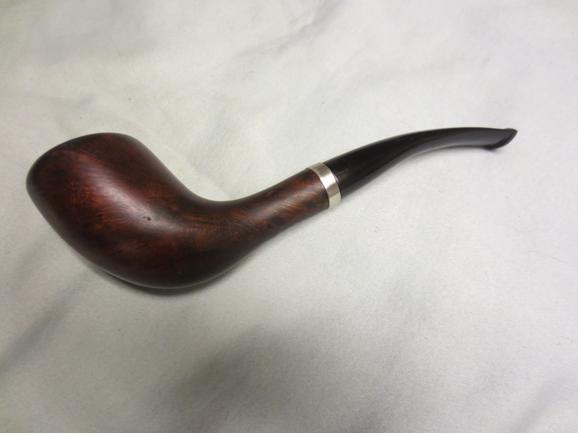
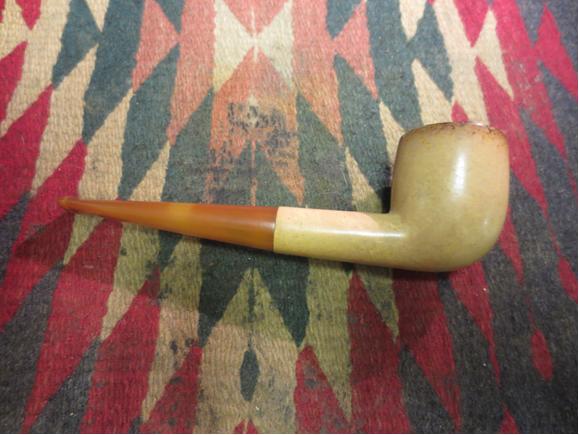
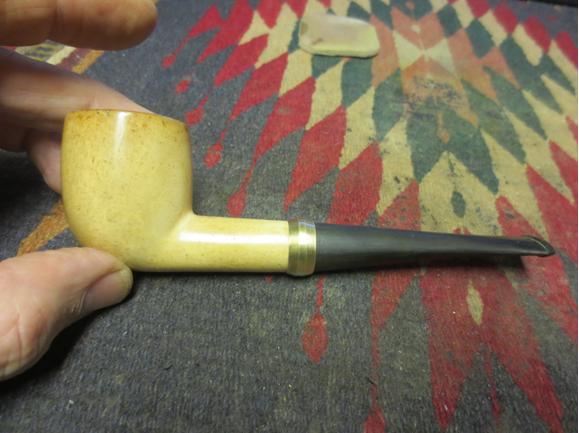
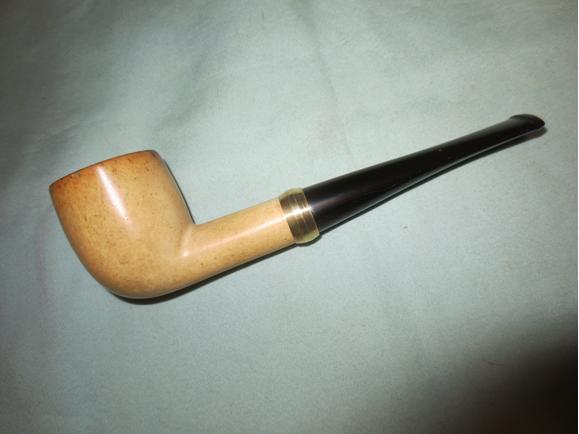
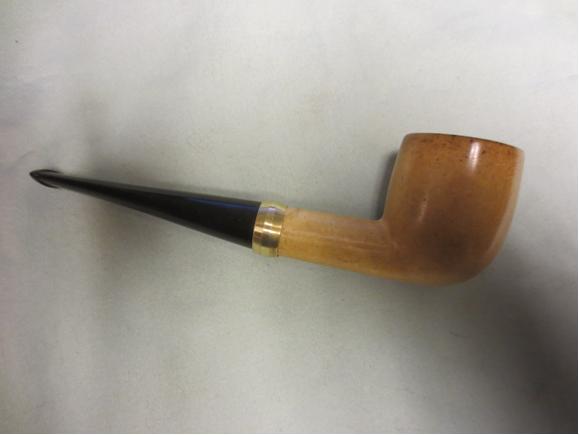
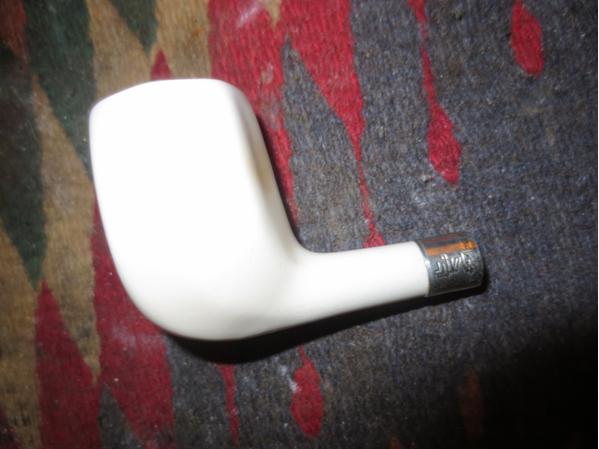
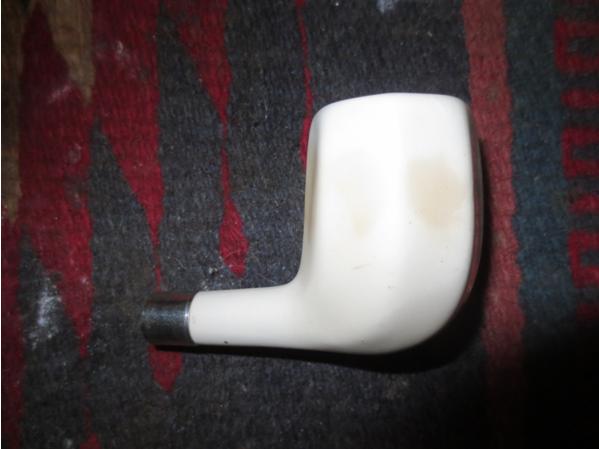
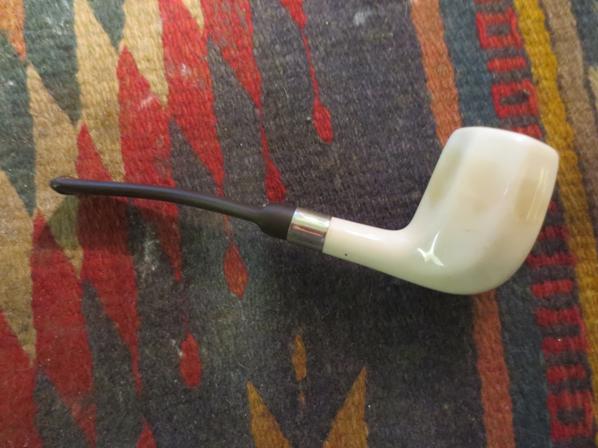
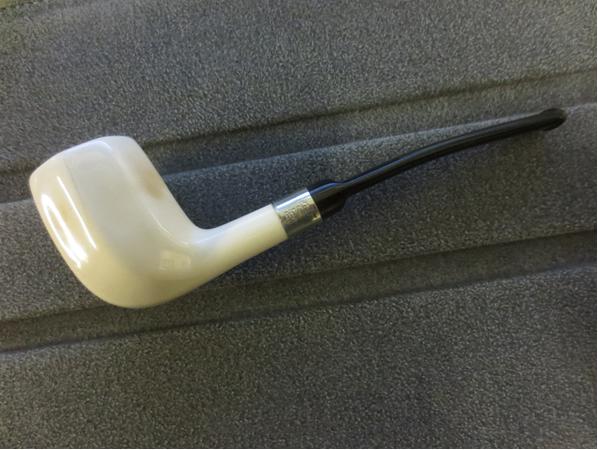
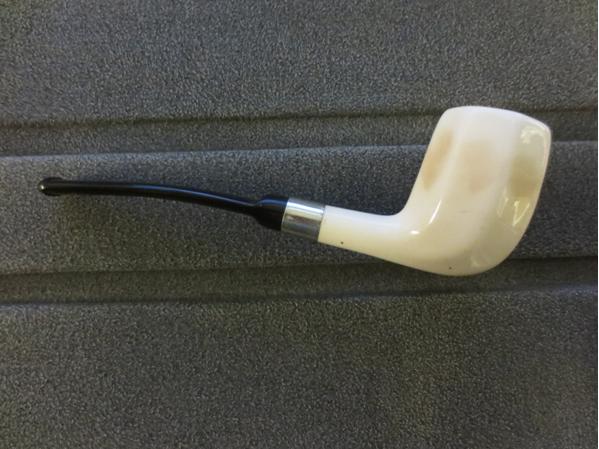
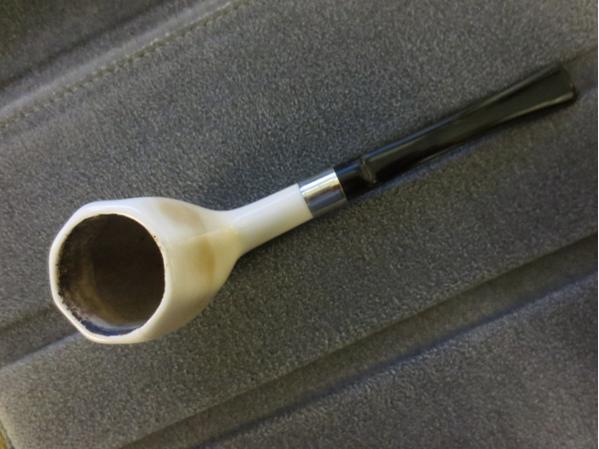
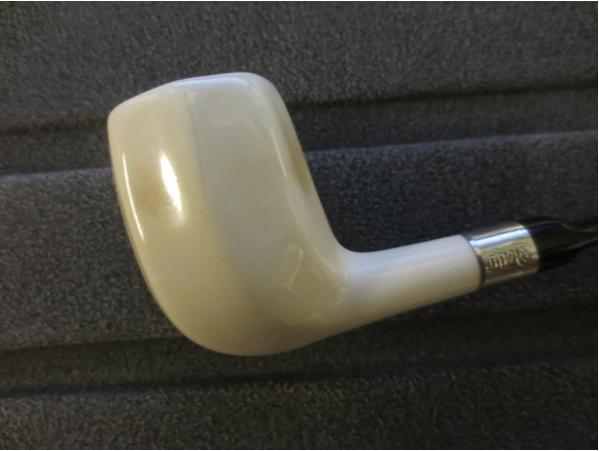
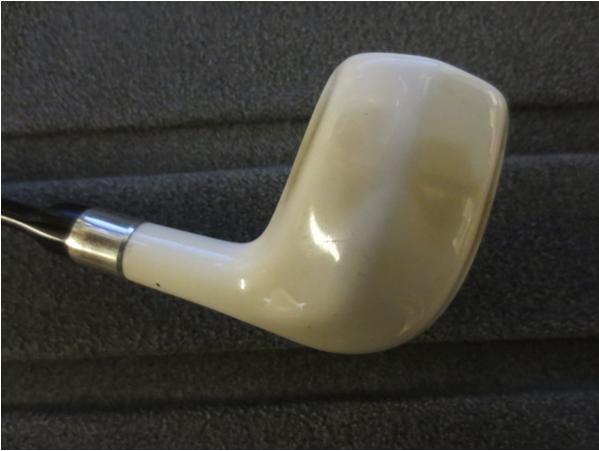
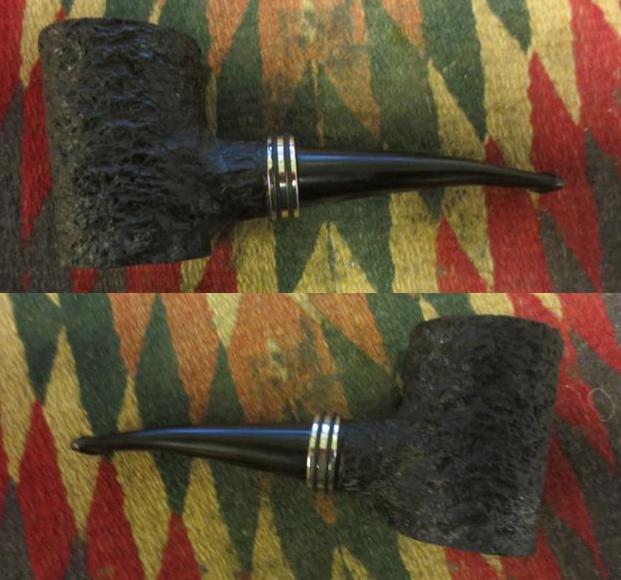
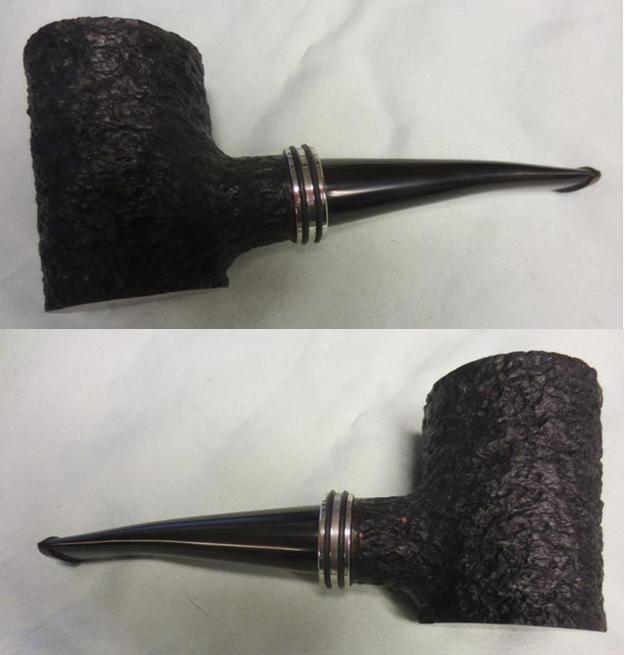
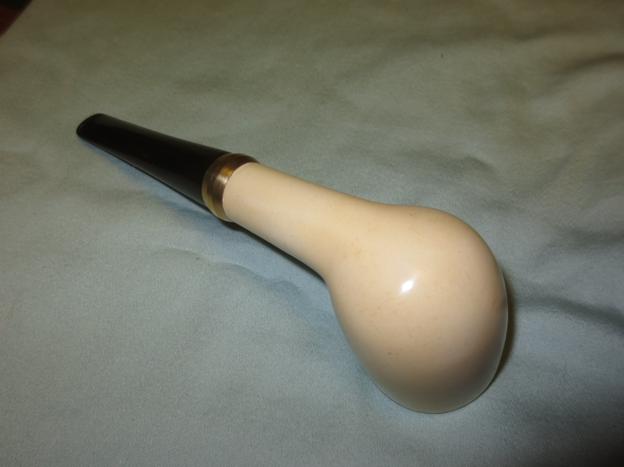
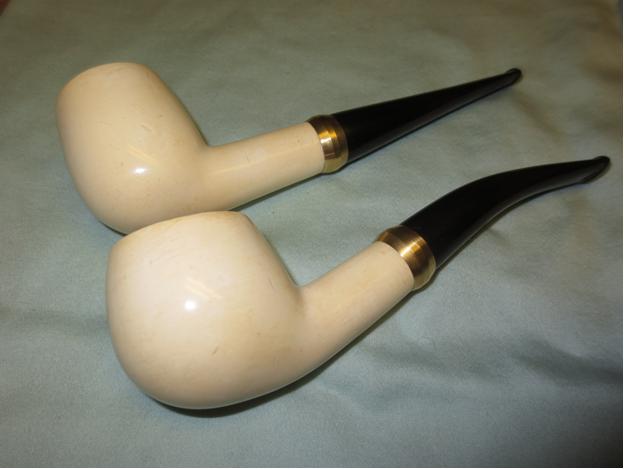
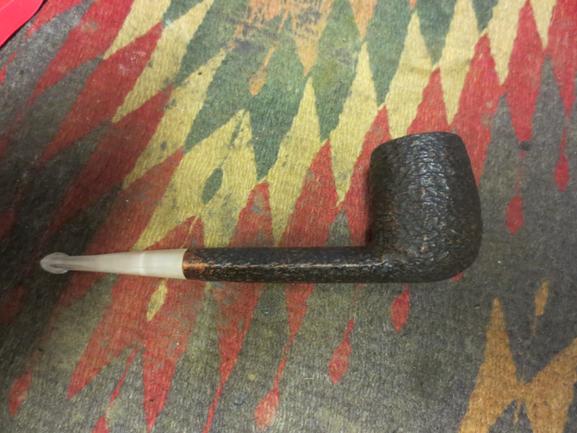
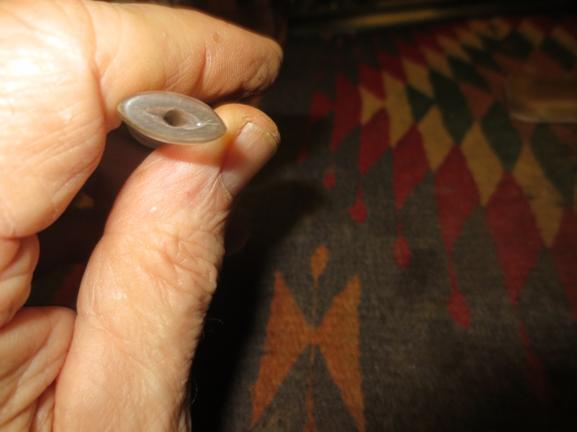
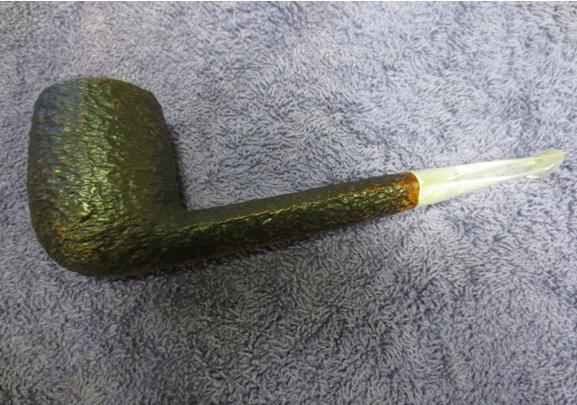
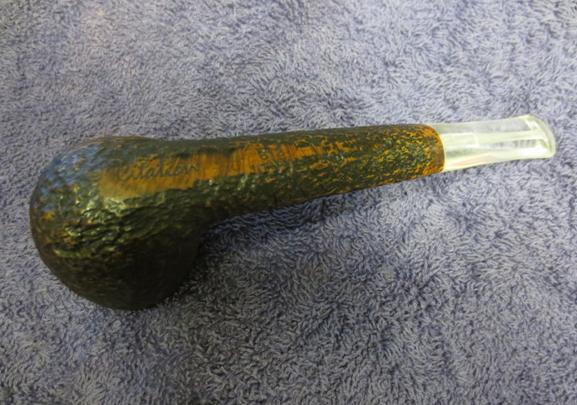
I buffed the bowl and rim with Blue Diamond and did the same to the stem. I gave the stem several coats of carnauba wax and the hand waxed the bowl with Conservators Wax. I buffed the pipe with a clean flannel buff and then with a microfibre cloth to raise the shine. The finished pipe is shown in the photos below. I like the way it came out. (In the photos of the full pipe the stem came out looking opaque but it is absolutely clear as can be seen in the close up photo.)
Citation46

Citation47

Citation48

Citation49

Citation50 
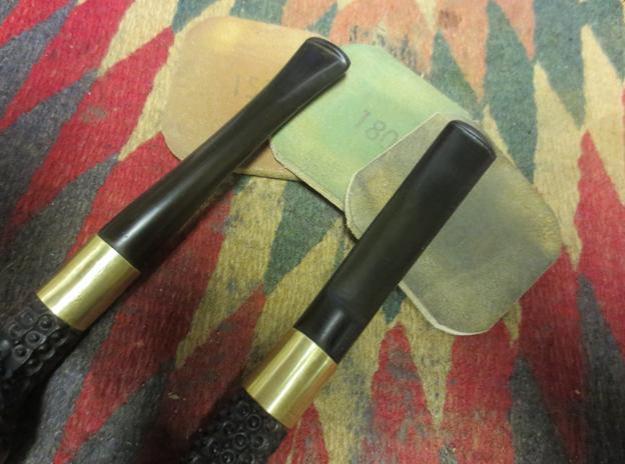
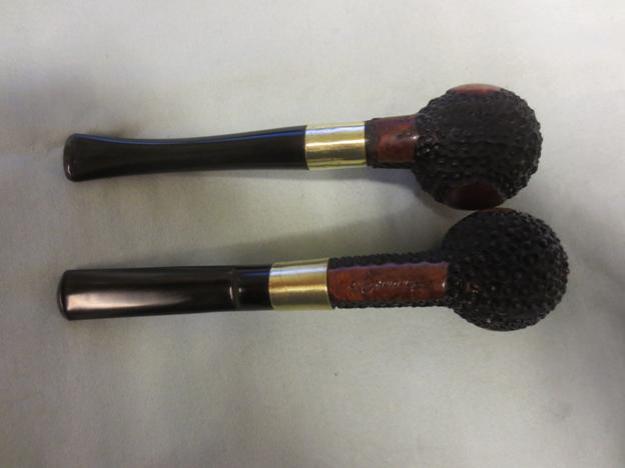
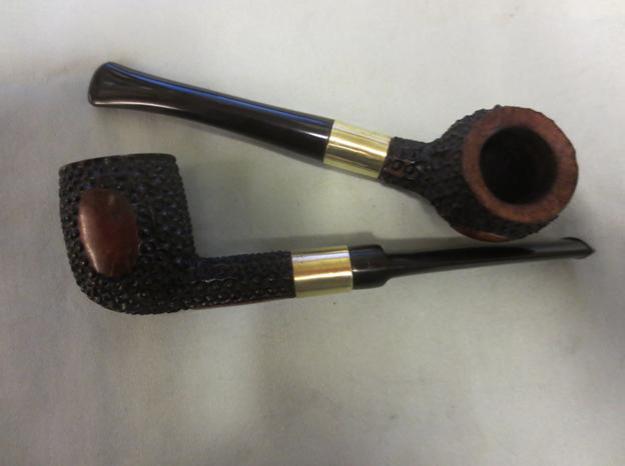
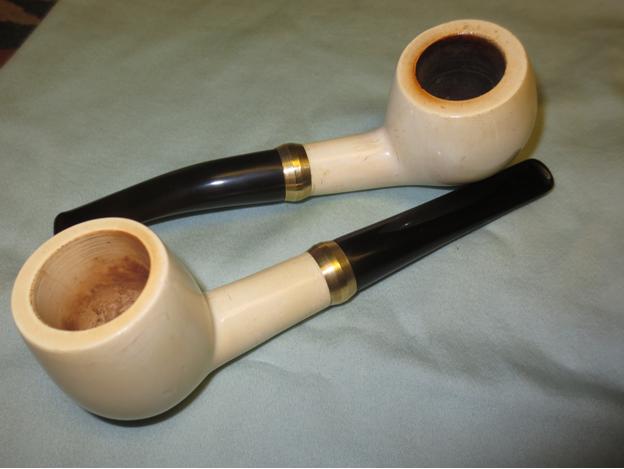
I took a photo of the two pipes together to show the finished product. Thanks for looking.Citation51

Restemming a Beautiful Savinelli Classica 812 Canadian


Blog by Steve Laug
Class1In the pipes that my brother Jeff sent me from his Montana find was a pair of Savinelli made 812 shape pipes. The first is the second pipe down from the top in the picture to the left. That pipe is stamped Citation 812 and made in Italy on the underside of the shank. The stem is a refit and is poorly done. Fortunately it is beat up and missing a large chunk on the underside near the button. The second one is shown in the picture in the second column and is a sandblast without a stem. It is stamped Savinelli Classica with the Savinelli shield and 812 Italy on the underside of the shank. The first is a two toned dark brown and the second is a lighter two toned medium brown.

The pipe I chose to work on first was the Savinelli Classica – the stemless one. It was in pretty decent shape. The finish was dirty but was not worn. It had a great sandblast. The left side of the bowl had a circular grain pattern and the right side was blasted birdseye. The shank had long swirls on the top and sides. The rim had some build up on it and the bowl had a thick cake that plugged the airway and closed off the lower portion of the bowl.

I took a photo of the two pipes together to show the similarities and the differences. The Classica is a bit shorter in terms of shank length and the finish is much more distinctive. The Citation had a nice blast on it but when compared with the Classica it had nothing to compare. Both pipes were the same height. The bowls were the same diameter and the mortise of both held the broken stem with no trouble.

I looked up the Savinelli 812 shape online and found that it originally had a taper stem and that the stem had a slight bend in it at the button. I am not sure if I like the look of it on the Canadian but will think about it as I restore the Classica.Class2 I took the next photos of the bowl to show the distinctive sandblast on the bowl. It truly is a beautiful piece of work. The way the bowl was stain highlighted and emphasized the blast rather than muted it. Once I cleaned it up I would need to maintain that look.Class3

Class4 The next two photos show the grain on the shank and the tar buildup on the rim. I am pretty sure that the blast is underneath the tars and will look good once it is scraped off. The third photo shows the underside of the shank and the smooth portion that bears the stamping.Class5

Class6

Class7 I went through my stem can and found the candidate for the tapered Canadian stem for this pipe. I used the PIMO tenon turning tool to take down the tenon to the point that it almost fit the shank. I hand sanded it with 220 grit sandpaper to bring it to the correct size. I did not want to crack the shank so I went slowly, checking for the fit often.Class8 Once the stem was in place I took some photos to show the excess in diameter on the top and sides and the shaping that would need to be done to get a good match to the shank.Class9

Class10 I rough shaped the stem fit with a sanding drum on a Dremel to get it close to the shape of the shank. I have found that if I move slowly and carefully with the Dremel it saves a ton of hand sanding on the stems. Once I had it rough shaped I did the rest of the shaping by hand.Class11

Class12

Class13

Class14 I fine tuned the shape with 220 grit sandpaper and brought it to a smooth transition between the shank and the stem all the way around. I worked on the button area and cleaned up the castings and marks on the slot and the button edges with the sandpaper.Class15

Class16

Class17

Class18 With the new stem fitting and only needing more fine tuning and polishing I decided to ream the bowl and work on the rim. I used a PipNet reamer and a KLEENREEM reamer and a pen knife to cut away the cake in the bowl. It was as hard as the cake in the other two bowls that my brother sent me.Class19

Class20 I scrubbed the sandblast with Murphy’s Oil Soap and a tooth brush and the caked rim with the soap and a brass bristle tire brush.Class21 Once the grime was scrubbed off I rinsed the bowl in warm running water and cleaned out the brushes. I dried off the bowl with a towel.Class22

Class23

Class24

Class25 I cleaned out the shank with pipe cleaners, alcohol and cotton swabs. It was plugged in the airway to the bowl so I used the drill bit on the KLEENREEM tool and was able to clear out the gunk in the airway and open it up all the way to the bowl.Class26 I wanted to keep the contrast stain on the pipe and not restain it so I gave it a light coat of olive oil to bring life back to the wood. I have found that dry briar absorbs the oil quite quickly and that the oil gives it some colour and life back without masking the original stain.Class27

Class28

Class29

Class30 I wiped the bowl down and rubbed it vigorously with a clean soft towel to remove any of the surface oil and to give it an initial buff. I went to work fine tuning the stem fit. I used micromesh sanding pads – wet sanding with 1500-2400 grit pads and rubbing the stem down with Obsidian Oil. I dry sanded with 3200-400 grit pads. I gave it another coat of oil and finished sanding with 6000-12000 grit pads. I gave it a final coat of Obsidian Oil and let it dry.Class31

Class32

Class33 I buffed the stem and lightly buffed the bowl with Blue Diamond and then gave the stem multiple coats of carnauba wax. I hand buffed the bowl with Conservators Wax and a small shoe brush to bring out a shine to sand blast finish. The finished pipe is shown in the photos below. The straight new stem works for me. The pipe is once again a work of beauty. Thanks for looking.Class34

Class35

Class36

Class37

Class38

Class39

Class40

Class41

Rescuing a Tinderbox Monza Horn – Restemming and Refinishing


Blog by Steve Laug

Monza1Another of the pipes that my brother Jeff sent me was a horn shaped pipe that was stamped Tinderbox Made in Italy in a circle with Monza in the centre of the circle. It is stamped on the underside of the shank. The shape is quite unique. The bowl had around 10-12 fills in it that went from tiny spots to huge plugs in the briar. The finish was a heavy urethane coat that made the pipe very shiny and really highlighted the fills around the bowl and the shank.

The shank had a split in the underside of the shank that went from under the band up the shank for one inch on the bottom side. It had just turned slightly upward and if left alone would have continued to the bowl. The rim was heavily damaged and there was a thick hard cake in the bowl that hurt my hand when I pushed the various reamers that I had trying to remove it. The bowl looked like it was conical in shape but was so thick that there was very little room in the bowl for tobacco. The stem was a replacement, like many of them in the pipes my brother sent me. It was a saddle stem and was missing a huge chunk on the left side of the button and up the stem about ½ inch. The person who had made the replacement had cut an angled end on the tenon which in my opinion was careless and not necessary. The airway into the bowl from the shank was plugged and when I blew into the end of the shank I could not get any air through it.

The next four photos show the pipe as it appeared when it arrived in the box from my brother.Monza2

Monza5

Monza4

Monza3 I took a close up photo of the bowl and rim to show the damage and the cake in the bowl. The second photo below shows the broken stem. The stem was pretty much a throw away as it is very narrow after the broken button.Monza6

Monza7 I started to ream the bowl with a PipNet reamer. I started with a small cutting head and soon gave up. I used the largest head that would fit the diameter of the bowl and still found the cake too hard to cut through with the reamer. I dropped it in an alcohol bath to soak to soften the cake and to soften the urethane coat on the bowl. After it had been soaking an hour I took it out of the bath.Monza8

Monza9 In my can of stems I had one with the same diameter as the shank and a tenon that would work with some adjustments. The tenon was too long so I would need to trim it back and also adjust the diameter to get a snug fit in the shank.Monza10 The alcohol bath did not even make a dent in the finish. As I expected the only way to remove a urethane finish is to sand it off. I did not mind as it was covering a lot of damage to the rounded rim and the sides of the bowl. I fit the new stem in the shank and took a few photos to get an idea of the look. The stem was a little too bent to my liking so that would need adjusting but the taper worked well with the horn shape. The last photo of the underside of the shank shows a dark area. That is where the stamping is present and also the crack in the shank.Monza11

Monza14

Monza13

Monza12 I put the stem aside and used a pen knife, a KleenReam and a PipNet reamer to work on the hard cake. It was still rock hard but I was able to chip away at it until I had removed it from the bowl.Monza15 I used the drill bit from the handle of the KleenReem to open up the airway into the bowl.Monza16

Monza17 I sanded the bowl some more with some medium and fine grit sanding sponges. I wanted to clean up the cracked area on the shank bottom so that I could repair it. I took the photo below to show the crack in the shank.Monza18 I used a micro drill bit on my Dremel to drill a small hole at the end of the crack to stop it from spreading further up the shank.MOnza19

Monza20 I packed some briar dust into the hole and then dripped super glue on top of that and then more briar dust and some more glue. I ran a dental pick along the crack to open it slightly and then put some glue along the crack to the band as to preserve that as well.Monza21

Monza22 I sanded the repair to smooth it out and blend it into the shank and avoided the area inside the stamping.Monza23 I heated the stem with a heat gun to take a bit of the bend out of it. Once it was pliable I bent it to match the flow of the curve of the horn. I wanted it to sit with the rim and the bend in the stem flat on the table when laid down. That angle would make it sit correctly in the mouth when it was smoked.Monza24

Monza25

Monza26

Monza27 I worked on the curve of the rim and top with sandpaper and sanding sponges to get the flow of the rolled rim even all the way around the bowl. I worked on the inner edge of the rim as well to make it flow into the bowl rather than be an abrupt edge.Monza28 I sanded the bowl with medium grit sanding sponges and fine grit sanding blocks to remove the scratches from the briar and to work on the oxidation on the stem. The grain was beginning to show through. I wiped it down with a tack cloth to remove the sanding dust in preparation for staining the bowl.Monza29 The bowl had a lot of fills so I decided to try a contrast stain to both hide the fills and to bring out the grain. I started with a black aniline stain and finished with a brown.Monza30 I stained the bowl with the black and flamed the stain to set it in the grain. I reapplied and reflamed it until the coverage was even.Monza31 I wiped the bowl down with alcohol and cotton pads to remove the excess black and leave it only in the grain of the briar. I wanted it to show the grain and highlight the beauty. I also wanted to mask the fills to some degree.MOnza32

Monza33

Monza34

Monza35 I used a black Sharpie permanent marker to draw grain lines through the huge fills on the bowl to further blend them into the briar.Monza36

Monza37

Monza38 With that preparation done I gave it a top coat of dark brown aniline stain. I applied it and flamed it and repeated until I was happy with the coverage.Monza39

Monza40

MOnza41 I hand buffed the bowl to check out the coverage of the brown and the contrast of the black and the black Sharpie marks. By and large I liked what I saw. There were some spots that needed some more work but it was looking good.Monza42

Monza43

Monza44 I worked the stem over with micromesh sanding pads – wet sanding with 1500-2400 grit pads and then giving it a coat of Obsidian Oil. I dry sanded with 3200-4000 grit pads and gave it another coat of oil. I finished sanding with 6000-12000 grit pads and then gave it a final coat of Obsidian Oil and let it dry.Monza45

Monza46

Monza47 I buffed the pipe with Blue Diamond and then gave it multiple coats of carnauba wax. I buffed it with a clean flannel buff to raise the shine and then with a microfibre cloth to add depth to the shine. The finished pipe is shown in the photos below. It exceeds my expectations when I began the reclamation work on it. The fills on the sides, shank and back of the bowl have all but disappeared in the blend of stains and Sharpie pen. The large ones on the bowl front look better but are still somewhat visible. Overall I am happy with the results. Thanks for looking.Monza48

Monza49

MOnza50

Monza51

Monza52

Monza53

Monza54

Monza55

Monza56

A Simple Mistake Forced a Restem on a Meerschaum Billiard


Blog by Steve Laug

I found these two no name meerschaum billiards on one of the web forums that I frequent. The seller gave me a decent price on the two. The top pipe was older than the bottom one and I chose to work on it first. The stem was Bakelite and had a metal tenon. It did not fit in the shank either in terms of the diameter of the tenon or the diameter of the stem. It fit very loosely and wobbled in the mortise. The stem itself was about 1/8 inch in some places and 1/16 inches in others smaller than the shank of the pipe. The pipe was dirty and in need of some effort to clean it up and restore it. The next three photos show the pipe from different vantage points.Meer1

Meer2

Meer3 Once the pipe arrived I was able to have a clear look at it. The rim on the bowl was tarred and the outer edge was chipped. The bowl surface itself was dirty and spotty looking. It had a light brown patina under the dirt. The tars on the rim ran down the outside of the bowl. The shank also was dirty on the outside. The inside of the bowl had been reamed and cleaned. There was some wax in the bottom of the bowl. The airway entering the bowl was damaged and had been worn upward about ½ an inch to form a trough along the back wall of the bowl. The inside of the shank was clean and still undarkened by smoke. There were no threads or marks on the inside of the shank so I was pretty sure that the original stem had been a push stem. It may even have been a Bakelite stem like the one that had been substituted on this pipe. But I was pretty certain that I was working with a replacement stem and poorly fitting one at that.Meer4

Meer5

Meer6

Meer7 The close up photo of the rim shows the rim damage and the damaged airway in the bottom of the bowl.Meer8 The next photo shows the oxidized aluminum tenon on the stem. I thought about adding a coating of superglue to the tenon to tighten the fit but that would not do anything for the diameter issue. I was pretty sure that I would have to restem this pipe to get a good fit on the stem and shank union. In the mean time I cleaned up the bowl. I should have paid attention to my initial thoughts here and just set the stem aside but I did not and would regret it soon enough.Meer9 In the mean time I cleaned up the bowl. I used a medium grit and a fine grit sanding block to remove the tars and deposits on the rim. I scrubbed the bowl with Murphy’s Oil Soap to remove the grime on the surface and leave as much of the patina intact as possible.Meer10

Meer11

Meer12

Meer13

Meer14 I decided to put a coat of superglue on the tenon and see if I could build it up for a snug fit. I should have left well enough alone. Needless to say my “quick fix” did not work. I got the fit correct or what I thought was correct and when I removed it from the shank I heard a popping sound and noticed that I a small chunk of meerschaum had cracked and come out of the shank. I was sick with having broken a chunk out of the shank because I had not gone with my first instinct of cutting a new stem. Now I had made work for myself. I glued the chunk back in place on the shank with some epoxy and then cleaned up the repair so I could band it. I had used some brass pressure fittings on some meerschaum pipes I had restemmed earlier and like the look of them so I found one that was the right diameter for this shank as well. I heated it with a heat gun and pressed it in place on the shank. I covered the majority of the repaired shank and protected it from breaking further.Meer18

Meer15

Meer16

Meer17 I found a stem that was the right diameter for the shank of the pipe in my can of stems. I sanded the tenon to get a snug fit in the shank and put it in place. The photos below show the stem before I had put the finishing touches on it and cleaned it up. They do give a good idea of how the new stem will look with the band.Meer19

Meer20

Meer21

Meer22 The stem style is wide at the button and more tapered than the one that had probably graced the pipe originally but I liked the new look of it. I sanded it with 220 grit sandpaper to remove the tooth chatter and tooth marks at the button. I also sanded to remove the oxidation. I sanded it with a medium and a fine grit sanding sponge. I sanded the bowl with micromesh sanding pads- 1500-12000 grit and polished it by hand.Meer23

Meer24

Meer25

Meer26 I sanded the stem with micromesh sanding pads – wet sanding with 1500-2400 grit sanding pads and dry sanding with 3200-12000 grit pads. I rubbed the stem down after each set of three pads with Obsidian Oil and then kept sanding. When I finished with the 12000 grit pad I gave it a final coat of oil and let it dry.Meer27

Meer28

Meer29 When it was dry I buffed the stem with Blue Diamond on the buffing wheel until it shone. Then I gave it multiple coats of carnauba wax and buffed it by hand with a microfibre cloth. I gave the bowl several coats of white beeswax paste that I have here and then buffed it as well. The finished pipe is shown in the photos below. I am actually happy how the finished pipe turned out. The issues that arose during the clean up worked out better than I had expected. For that I am thankful.

The meer polished up nicely and the spotty brown colouring was a nice contrast with the brass and the black vulcanite. I like the look of the band on the shank and only wish that I had not cracked the shank and made it necessary and not just cosmetic. Ah well it is nearly invisible and it will still give a good smoke. I need to figure out some way to repair the airway on the inside of the bowl. I am still puzzling over several options but will probably use a natural plaster of Paris to build up the groove on the back wall of the bowl. Time will tell. I will add that repair to the end of this blog once I decide how to do it. Thanks for looking.Meer30

Meer31

Meer32

Meer33

Meer34

Meer35

Cleaning up Two Sisters – A pair of Beaver Cut Genuine Briar Pipes


Blog by Steve Laug

I received this pair of pipes from Charles Lemon of Dad’s Pipes Blog. He picked them up as part of an estate from London, Ontario, Canada. They are both stamped on the bottom of the shank on a smooth surface with the words Beaver Cut in script over a block script Genuine Briar. He did some hunting on the web and could find nothing that gave any sense of history of the brand. When I got them I did the same and found absolutely nothing. The Genuine Briar stamping tells me it is post WW2 and is made in the USA. I found another Beaver Cut for sale on Worthpoint but it also did not have any information. From what I can find that is the extent of the information available.

The top pipe in the photo is Prince. The rustication was dirty and a lot of dirt and debris had collected in the grooves. It had a rustication pattern that I had not seen before. It is like rows and rows of birdseye cuts in the surface of the briar. There is a smooth patch on both sides and on the bottom of the shank. The bowl had a thick cake and the shank had a lot of debris and oils in it. The rim had an overflow of lava and oils on the top of the bevel. The inner and outer edge of the rim was in great shape and the bowl was still in round. The brass band on the shank appeared to be factory as it was on both pipes and was identical. It was scarred and had tarnished. When it was installed the installer had made a mess of the shank. He had cut the shank back farther than the length of the band so that when it was installed it left a groove between the edge of the band and the rustication on the shank. It looked almost as if the band was an afterthought. I am pretty certain that it was sent out from the factory with that look. The stamping had been cut in two by the chopping of the briar to fit the band. The stem did not fit the shank due to the buildup internally. The stem was also missing a large chunk on the right side near the button and someone had cut a groove in the top of the stem to begin cutting a new button but had not finished the work.

The lower pipe is a Billiard with the exact same grain pattern. It was in a bit better shape than the Prince. The grooves in the unique rustication were actually clean. There was a varnish coat on the smooth parts of the bowl even though there were several sandpits in each smooth spot. The bowl had a thick cake and the rim had an overflow of tars and lava which obscured the bevel. The fit of the band to the shank on this one was better though looking at it from the end of the mortise it was clear that the shank was out of round. The brass was also scratched and marred on this pipe. The stamping on this one was clean and deep. The stem diameter extended further on the right side than on the left though the stem was of equal diameter all the way around. There were some light tooth marks on the top and the bottom of the stem near the button and there was tooth chatter. The stem was oxidized but was faintly stamped with a B in a circle.Beaver1

Beaver2

Beaver3

Beaver4 I took a close up photo of the rim on each of the pipes. The first photo below shows the rim on the Prince and the second shows the rim on the Billiard. The buildup and the uneven cake are visible in both pipes. It is hard to see the bevel on the rim in the Prince but it matches the one on the rim of the Billiard.Beaver5

Beaver6 I also took some close up photos of the stems on both pipes to show the state of the stem. The first two photos show the stem on the Prince. You can see the damage of the broken area on the side of the button and the cut off button. You can also see the groove or divot that had been cut in the stem to make the pipe useable. The third and fourth photos show the stem on the Billiard and you can see the tooth marks and chatter on the stem surface. It is also clear that it does not fit well against the side of the band.Beaver7

Beaver8

Beaver9

Beaver10 I decided to restem the Prince so I found a stem in my can of stems that was the same diameter as the shank and slightly longer than the broken stem to account for the missing button. I turned the tenon with a sanding drum on a Dremel to get a close fit and then hand sanded until it push snuggly into the mortise.Beaver11 To deal with the badly fit shank band I cleaned the area with a dental pick and then pressed briar dust into the groove just ahead of the band. I dripped clear super glue into the briar dust and then as it settled add more glue and more briar dust. I wanted the transition between the shank and the band to be smooth. I sanded the repair with a folded piece of 220 grit sandpaper and then with a medium and a fine grit sanding sponge to smooth out the scratches in the surface.Beaver12 I reamed both bowls back to bare wood with a PipNet reamer. I sanded the beveled rim on the Prince to clean off the oils and lava and to show the bevel. More work would need to be done on both rims.Beaver13

Beaver14

Beaver15 I worked on the bevel of the rims with 220 grit sandpaper to remove the buildup and also to smooth out the bevel. It took quite a bit of sanding on both rims to get the angle consistent all the way around the bowl and also to remove the burn damage on the inner edge of both. I sanded both with a medium and fine grit sanding sponge to finish the cleanup.Beaver16 I stained the newly cleaned surfaces of the rim with a light brown stain pen to approximate the colour on the smooth portions on the bowl sides and bottom of the shank.Beaver17 I sanded them both with 400 grit wet dry sandpaper to smooth out the remaining scratches that showed up with the stain. It also lightened the stain enough that the match was perfect.Beaver18

Beaver19

Beaver20

Beaver21 With the rims finished it was time to scrub the rustication. I used Murphy’s Oil Soap and a tooth brush to scour the rustication pattern on both bowls. I scrubbed them and then rinsed them under warm running water.Beaver22

Beaver23

Beaver24 To address the difference in diameter of the stem and the band on the shank on the Billiard I used a Dremel and sanding drum to take down the top, bottom and right side of the saddle stem. I repeatedly checked the fit until I had it very close then I finished adjusting the fit by hand with 220 grit sandpaper. I sanded the stem on the Prince with 220 grit sandpaper to remove the oxidation and the calcification on the end of the stem.Beaver25

Beaver26

Beaver27 With the fit finished on the stems it was time to clean out the internals of the stems and shanks. I used alcohol, cotton swabs and pipe cleaners to scrub the insides until they were clean.Beaver28

Beaver29 I wet sanded the stem and the brass with a 1500 grit micromesh sanding pad for the first round of sanding on both. It worked to remove many of the scratches and marks in the brass and the vulcanite.Beaver30 I worked on the stem with the micromesh sanding pads – wet sanding with 1500-2400 grit pads and dry sanding with 3200-12000 grit pads. I rubbed the stem down with Obsidian Oil between each set of three pads. When I finished sanding with the 12000 grit pad I let the oil dry on the stem.Beaver31

Beaver32 In the final sanding I sanded the brass and it carried over onto the top portion of each stem giving it a bit of a brown look in the next photo. This all came off when I buffed the stem with red Tripoli and White Diamond.Beaver33 I heated the stem on the Prince and gave it a slight bend to give it a more finished looked. I buffed the stems and rims with White Diamond and Blue Diamond and then gave them multiple coats of carnauba wax. I also waxed the smooth portions on the bowl sides, shank bottoms and the rims. I buffed these with Blue Diamond as well. I wiped the rustication down with a light coat of olive oil to bring some life back to the briar. The finished sisters are shown below.Beaver34

Beaver35

Beaver36

Beaver37

Beaver38

Beaver39

Beaver40

Beaver41 Thanks for looking. Does anyone have any information about this brand? It would be great to be able to get a little information. Please post anything you know in the comments below. Thanks.

Fitting a Stem to an Old Ceramic/Porcelain Pipe Bowl


Blog by Steve Laug

In a box of pipe parts I was given was a hexagonal shaped ceramic/porcelain pipe bowl with a thin pencil shank. It was cut off mid-shank at a slight angle. Looking at it I decided that it would be an interesting looking pipe to restem. The finished pipe would be unique and well worth the work to restem. I am guessing that the pipe originally had been longer and possibly had a bit on the end. There was a tiny chip cracked in the end of the shank. I reglued that and held it in place until it dried. Since the shank had been cut at an angle, I used a topping board to flatten the edge and square the end of the shank as much as possible. I then used a nickel band that I had in my box of bands and heated it and pressed it in place on the shank. I left a small portion of the band extending beyond the end of the shank to help square the fit of the stem to the shank. I went through my can of stems and found one that was the perfect diameter for a match to the shank. The tenon would need to be made smaller to fit in the shank and the mortise would need to be opened further with needle files for the stem to fit well.ceramic1 I scrubbed the bowl with Murphy’s Oil Soap and polished it with a microfibre cloth. There was a small hairline crack on the left side of the bowl coming from the rim downward about one half-inch. It was sealed so it was not currently a problem that I would need to deal with. I took some photos of the newly banded stem and the polished bowl to show the new look of the pipe. The bowl is quite thin so it will be a hot one to hold. It will need to be smoked slowly to keep it cool.ceramic2

ceramic3

ceramic4

ceramic5

ceramic6 I used a coarse needle file to open up the mortise in the shank to accommodate the tenon. I used a Dremel with a sanding drum to reduce the tenon as much as possible. I worked on the mortise to file down the inside of the shank. It took some careful file work to keep the mortise round so that once the opening was sufficient the tenon would not be loose inside.ceramic7

ceramic8 The next photo shows the finished mortise. The files worked well and the newly shaped tenon fit the shank perfectly.ceramic9 I put the stem in place on the bowl and took some photos to get a better look at the new pipe. The newly stemmed pipe actually looked very good. I loved the delicate look of it. The slight bend in the stem worked well with the bowl and allows the pipe to sit upright on a flat surface.ceramic10

ceramic11

ceramic12

ceramic13 The stem was rough and lightly oxidized. I sanded it with 220 grit sandpaper to loosen the oxidation and then used a medium and a fine grit sanding sponge to smooth out the scratches on the stem. I then wet sanded the stem with 1500-2400 grit micromesh sanding pads and rubbed the stem with Obsidian Oil. I dry sanded it with 3200-4000 grit pads, gave it another coat of oil and then finished sanding with 6000-12000 grit pads. I gave the stem a final coat of Obsidian Oil and let it dry.ceramic14

ceramic15

ceramic16 I buffed the stem and bowl lightly with Blue Diamond polish on the wheels and then gave the stem and bowl multiple coats of carnauba wax. I polished it with a clean flannel buff on the wheel making sure to hold the bowl tightly. To have the buffer grab this one and throw it would be a disaster that the pipe would not survive. Once I finished the buffing on the wheel I hand buffed it with a microfibre cloth to raise the final shine. The finished pipe is shown in the photos below. There is some slight coloring forming on the sides of the bowl midway down from the top. I am wondering if the rest of the bowl will also colour with use. The pipe looks really good with the new stem and band. It will fit well in my collection of unique older pieces.

Thanks for looking.ceramic17

ceramic18

ceramic19

ceramic20

ceramic21

ceramic22

ceramic23

ceramic24

A Simple Elegance: Cleaning, Restemming and Restoring a Diplomat Billiard


Blog by Steve Laug

On my recent Lethbridge trip I found the Diplomat pipe at an Antique Fair. It is a nice sandblast billiard with a dark undercoat and a brown over stain. The bowl was in decent shape. The sandblast was deep and quite beautiful to look at. The nooks and crannies caused in the process made for an interesting feel in the hand as well. The stain had worn off in spots on the sides of the bowl and along the outer edges of the rim. The finish was also generally dull and lifeless. The surface of the rim was dirty with tars and oils. The inner edge was slightly damaged and would need to be worked on. There was a thick cake around the middle of the bowl and light at bottom and on top. The stem was one that somebody had Gerry-rigged to fit. It was smaller in diameter and the tenon was too small. The previous owner had wrapped the tenon with thread and then with aluminum foil and pressed it into the shank. The stem had also been hacked up to repair a damaged button and grooves had been carved on the top and bottom sides of the stem to make it a dental bit.Dip1

Dip2

Dip3

Dip4

Dip5 I took close-up photos of the top of the bowl and the underside of the shank to give a clear picture of the state of the inner edge of the rim and the stamping on the pipe.Dip6

Dip7 The next two photos show the stem that came with the pipe and the “fancy” work that had been down to make it fit the shank and create grooves on the top and underside that would allow the pipe to be held in the mouth behind dentures.Dip8

Dip9 My first task was to go through my stem can and see if I could find a better stem for this pipe. I did not have a tapered stem that would readily fit but I did have a saddle stem that would look good after shaping and fitting it to the shank.Dip10 I lightly sanded the tenon to get a snug fit in the shank and pushed the new stem home to have a look at the fit. The stem would need to be sanded to bring the diameter at the stem/shank union down to match the shank. I took a few photos to see what the pipe looked like with this new stem.Dip10

Dip11

Dip12

Dip13 I used a Dremel with a sanding drum to carefully reduce the diameter of the saddle portion of the stem. I have found that I can roughly shape the stem to fit better and then finish by hand sanding it (photo 1). Once I had the rough shape I sanded it with a coarse emery paper to remove the gouges and scratches left behind by the sanding drum (photo 2). I slipped a plastic washer on the tenon and put the stem back in place. I sanded it with 180 and 220 grit sandpaper to further shape it and remove the scratches (photo 3).Dip15

Dip16

Dip17 With the basic fit correct and only needing to fine tune it and polish the stem I decided to ream the bowl. I used a PipNet reamer and took the cake back to bare wood.Dip18

Dip19 I cleaned out the inside of the shank and stem with pipe cleaners, cotton swabs and alcohol. Once it was clean I worked on the inner edge of the rim. I sanded it and reshaped it to make it smooth and round once again using a folded piece of 220 grit sandpaper.Dip20

Dip21

Dip22 I sanded the stem some more with 220 grit sandpaper and flattened the bottom side to match the flat bottom of the shank. The next set of three photos show the fit and shape of the stem at this point.Dip23

Dip24

Dip25 The button was quite thin and I decided to build it up with black superglue. I also could see a repair that had been done on the stem before I used it so I worked on that to further blend it into the stem surface.Dip26 When the glue dried I sanded it with 220 grit sandpaper to feather it into the surface of the rest of the stem and also worked on shaping the button. In the second photo below you can see the end view of the built-up and reshaped button.Dip27

Dip28 I sanded the stem and button with a medium and a fine grit sanding sponge to remove the scratches and blend in the patches. I then wet sanded the stem with 1500-2400 grit micromesh sanding pads and then rubbed the stem down with Obsidian Oil. I dry sanded with 3200-4000 grit pads and rubbed it down again with oil. I finished by sanding it with 6000-12000 grit pads and gave the stem a final coat of Obsidian Oil. I set it aside until the oil was dry.Dip29

Dip30

Dip31

Dip32 I touched up the worn spots on the finish of the bowl with a dark brown stain pen and a black permanent marker and then buffed the bowl and stem with White Diamond on the wheel. I buffed it again with Blue Diamond and then gave the pipe multiple coats of carnauba wax. I polished it with a clean flannel buff and then hand buff with a microfibre cloth. The finished pipe is shown in the photos below. I like the looks of the saddle stem and the deep sandblast finish. The pipe has an understated elegance about it that I like.

Thanks for looking.Dip33

Dip34

Dip35

Dip36

Dip37

Restemming a Brian Doran Nosewarmer Poker


Blog by Steve Laug

In the gift bag that I received while traveling was a poker made by Brian Doran. I did some reading on Brian’s Facebook page and cannot find out when the pipe was made. I know that this one was originally a nosewarmer poker. I had the pieces of the pipe as it had been dropped by my friend. The tenon broke off in the shank. The tenon would need to be pulled and a new tenon put in the stem or the pipe would need to be restemmed. The bowl was large and the rustication was very nice with a contrasting stain between the rim and bowl. The bowl was a dark brown/black with the smooth rim and bottom stained with a medium brown. The bowl was attractive and the drilling was spot on. There was a large silver band with two black rings around it on the end of the shank that added to the weight of the piece.Doran1 I put the stem up against the bowl to get an idea of how it originally looked before the break. The piece of briar was quite large and heavy and the small mouth piece that had been on it made gripping it a challenge. I could see why my friend had dropped it. The mouth piece itself was smaller in diameter than the shank of the pipe and did not look quite right to me. The button was rough – not sure if it happened during the drop or if it came that way. It had chips out of the edges, top and the face of the button and the inside of the slot was also roughly shaped. The shortness of the blade on the stem did not give much to work with.Doran2 I used a screw to pull the broken tenon out of the shank. I twist it in with a screwdriver until it catches and then wiggle the screw while pulling on it. It generally comes out very easily. I was thankful that this time it came out without a problem. I cleaned up the shank with pipe cleaners, cotton swabs and alcohol.Doran3 With the tenon pulled I needed to make a decision regarding the pipe. After spending some time with the mouth piece I decided that the damage to the button would take more work than I was willing to put into it. I personally did not like the short stem and found that it was uncomfortable in the mouth and the pipe was too heavy to make it practical. That meant that I needed to restem it. I looked at short stems of the same diameter – both saddle and tapered and just did not like the look. I went through my stems and found a saddle stem that was the same diameter as the shank but was not happy with the overall look. Then I found this smaller tapered stem. It was one I had scavenged from somewhere and the tenon was a perfect fit. It sat in the shank just like the little saddle stem had and showed the stained briar ring inside of the silver band. The appearance at the shank was almost the same. It was slightly bent and I would need to straighten it but I kind of liked the look. It would be worth working on. If I should decide otherwise later I can always restem it again. I set up the heat gun and straightened the stem leaving a very slight bend.Doran4 I took the next series of photos to show what the pipe looked like at this point in the process with the longer stem.Doran5

Doran6 I reamed the bowl to take back the uneven cake. I scrubbed the rusticated bowl and the tars on the rim with a tooth brush and Murphy’s Oil Soap. I rinsed the bowl with water and then dried it off with a soft cloth. I further worked on the darkening of the rim with a cotton pad and saliva until I had the majority of it removed. I also scrubbed the bottom of the bowl with the cotton pad and saliva as well.Doran7 I buffed the rustication with a shoe brush to give it a slight shine.Doran8 I gave the bowl a light wipe down with olive oil and hand buffed it with the shoe brush to raise the shine. The stem was in very good shape with no tooth chatter or oxidation so it needed only to be cleaned and polished. I buffed the rim and the base along with the stem with Red Tripoli, White Diamond and Blue Diamond. I then gave the rim, base and stem several coats of carnauba wax and buffed them with a soft flannel buff. I finished by hand buffing with a microfibre cloth. The finished pipe is shown below. I like the new look with the longer stem. The pipe now works as a sitter and balances on the desk with no issues. What do you think?Doran9

Doran10

Doran11

Doran12

Restoring and Restemming a Large Edward’s Bent Billiard with a Vulcanite Ferrule


Blog by Steve Laug

Label Logo_medium The last of the foursome of Edward’s pipes that I cleaned up for the fund raiser on Smoker’s Forums is a large Billiard with a vulcanite ferrule. It came to me without a stem so I would need to go through my stem can and see if I had any stem that would work with this bowl. The pipe is stamped Edward’s in script on the right side of the shank. On the left side it is stamped Algerian Briar in block letters. On the underside of the stem there is a large + sign and the shape number 42 near the ferrule. The bowl was in rough shape. The finish was dirty and there are some large and small fills along the shank from the bowl shank union to the ferrule. The ferrule was oxidized. The internals of the bowl and shank were dirty. The bowl was caked with the same heavy soft cake as the other Edward’s pipes. The tars had flowed over the beveled inner rim of the pipe and hardened into a dark hard cake. The briar itself was quite beautiful under the grime so a good cleaning would reveal some excellent grain as it had in the other three pipes.

I found a stem in my stem can that fit the shank well and looked pretty decent. It would need to be bent slightly and the roughness of the stem would need to be sanded down to make the fit right but I took photos of the pipe with this stem to get an idea of how it would look. At this point the pipe has not been cleaned up or reamed.Free1

Free2

Free3

Free4 I took one close-up photo of the bowl to show the state of the rim and the cake in the bowl. It would take some work to clean off the lava and bring the finish back to pristine.Free5 I reamed the bowl with the PipNet reamer and took it back to bare wood to remove the crumbling, soft cake in the bowl.Free6

Free7 Once I had the bowl reamed I took a photo of the stem and then took it to the heat gun to soften and rebend it to fit the bend of the pipe. There was a slight wave in the top of the stem that needed to be straightened as a part of the new bend.Free8

Free9 I heated it until the vulcanite was pliable and then straightened it before rebending it to match the curve of the bowl and when held in the mouth was horizontal with the top of the bowl.Free10

Free11

Free12

Free13 I liked the look of the stem with the new bend so I set it aside and went to work on the bowl. I used 0000 steel wool on the rim to remove the lava overflow and repolish the rim. I am finding that this works really well as Troy shared in various blog posts he has done here and on his own site. There is always something new to learn and add to the refurbishing skill set.Free14 With the rim cleaned up I wiped down the bowl with acetone on a cotton pad to remove the grime in the finish and refresh the briar.Free15

Free16

Free17

Free18 I cleaned out the bowl, shank and the airway in the stem with pipe cleaners, cotton swabs and alcohol. It was pretty clean which is amazing when you consider the condition of the rim and the cake.Free19

Free20 I sanded the stem with 220 grit sandpaper to clean up the shape and smooth out the angles and make the sides proportionally the same when the stem was in the mortise. I finished by sanding it with a medium and fine grit sanding sponge to smooth out the scratch marks left behind by the sandpaper.Free21

Free22 I lightly sanded the bowl and the rim with micromesh sanding pads – wet sanding with 1500-2400 and dry sanding with 3200-4000. I also sanded the vulcanite ferrule at the same time to remove the oxidation.Free23 I sanded the stem with the micromesh sanding pads as well – wet sanding with 1500-2400 grit pads and then rubbing it down with Obsidian Oil. I also used the oil on the ferrule. I dry sanded with 3200-4000 grit pads and rubbed it down again with the oil.Free24

Free25 I buffed the stem with Tripoli and White Diamond before sanding it with the final grits of micromesh pads. I finished with 6000-12000 grit pads and then gave the stem and ferrule a final rub down with the Obsidian Oil. I let it soak in and dry before taking it to the buffer.Free26 I gave the bowl a light coat of olive oil to bring life back into the briar and then gave it a buff with Blue Diamond on the buffing wheel. I gave the bowl and stem multiple coats of carnauba wax and then buffed it with a clean flannel buff. I finished by hand buffing it with a microfibre cloth to bring depth to the shine. The finished pipe is shown below. The first photo is of the pipe with the Edward’s large apple to give a sense of the size of the pipe. It is a large piece of briar.Free27

Free28

Free29

Free30

Free31

Free32

Free33

Another dressed for the Prom… maybe the Prom King – Cheap Meer Given a New Look


Blog by Steve Laug

In the box of pipes to experiment with and refurbish as I can I had the mate to the little meerschaum apple that I restored a few days ago. https://rebornpipes.com/2015/08/28/prom-night-dressing-up-a-cheap-meerschaum-apple/ This one is a Meerschaum billiard. It had the same plastic (nylon) stem (it is not acrylic – way too soft). It had been smoked about the same amount as the other one – in fact the detritus in the bowl was identical. The stem had a crack on the underside from the button forward about 1 ½ inches. The finish had some dings and scratches in the surface but was very redeemable. I thought since I had to restem it anyway I might as well make it a match to the apple.Bill1

Bill2

Bill3

Bill4 I took the next close-up photo to show the fit of the stem to the shank and also the crack in the underside.Bill5 The next series of photos show the brass band that I chose to put on this one to match the other. It is a pressure ferrule and I have used them a lot in the past as they make a great looking band. Sometimes I grind out the rings and other times I leave them as I did in this case. Note the different tenon set up on this stem. The other stem had been drill out and the shank had a Delrin insert to accommodate a push stem. This one has a stainless steel tube glued solidly in the shank of the pipe. I heated it and pulled it but I am not able to remove it so I decided to leave it alone.

To make the shank ready for the band I needed to sand it back the width of the band. I used 220 grit sandpaper and carefully worked it back evenly to make fitting the band simpler. My normal pressure fit method of pressing a band would need to be modified on this one because of the metal tenon locked in the shank. It would still work but just need modification. I heated the band with a lighter and then pressed in place a little bit at a time working my way around the tenon.Bill6

Bill7

Bill8 With the newly banded shank finished it was time to work on a new stem. I toyed with the idea of using the nylon one from the other pipe. It did not take me long to put that idea aside. I had a stem in my can of stems that would do the job – an old taper vulcanite with a very straight profile would look great on this meer billiard. I used the Dremel and sanding drum to take back the existing tenon and flatten it against the face. I forgot to take a photo of the stem to begin with so I stopped mid stream after I had removed about half of it to take the photo below.Bill9 Once I had removed the tenon I needed to drill out the airway to accommodate the metal tenon. I would in essence make a reverse tenon set up on the stem. I started with a drill bit slightly larger than the airway and hand twisted the stem onto the bit. I have found this is far safer that using a power drill to do this finicky work. I worked my way up to a bit the same diameter as the tenon and hand turned the stem onto the bit. I put a piece of tape on the bit so I would know when to stop turning the stem. That marked the depth of the tenon. Once I got to that place the stem would push onto the tenon flush against the shank end in the band.Bill10

Bill11

Bill12 The next photo is an end view of the newly drilled airway. It is a little rough and will need to be sanded smooth to remove all of the scratches.Bill13 I pushed the stem in place on the pipe to get an idea of the final look of the newly dressed prom king. The photos below show the stem before I did the final adjustments to the diameter and flow.Bill14

Bill15

Bill16

Bill17 I liked the new look a lot. It had the same touch of class as the meerschaum apple does. It would come out looking pretty slick once it was finished. I sanded the diameter of the stem with the Dremel and sanding drum to take off a fraction so that it would sit flush in the band with no gap around the edges. I then hand sanded it with 220 grit sandpaper to further fine tune the fit.Bill18

Bill19

Bill20 I sanded the newly fit stem with a medium and a fine grit sanding sponge to clean up the vulcanite and remove all of the scratches from the sanding drum and 220 grit sandpaper. I sanded it with micromesh sanding pads – wet sanding with 1500-2400 grit pads and dry sanding with 4000-12000 grit pads. I rubbed it down with Obsidian Oil between each set of three pads and then after the 12000 grit pad I let it dry before going to the buffer. I also sanded the bowl with the micromesh pads to polish the meerschaum.Bill21

Bill22

Bill23 I buffed bowl and stem with Blue Diamond and then gave the stem multiple coats of carnauba wax. I buffed it with a clean flannel buff to raise a shine and then hand buffed it with a microfibre cloth to put on the final touches. The finished pipe is shown below.Bill24

Bill25

Bill26

Bill27 The next two close up photos show the detail of the stem. They also show the way the air hole has been opened to accommodate the metal tenon.Bill28

Bill29 The final two photos show the two meers, dressed and ready to head out to the Prom. They look like royalty – maybe Prom King and Queen. Ah well so much for an old guys memory of things long past in the recesses of the high school years file.Bill30

Bill31