Blog by Paresh Deshpande
After I had completed the Butz- Choquin A Metz No. 2 pipe (Restoring An Early Butz Choquin “A Metz” No. 2 | rebornpipes), I rummaged through the fast dwindling pile of 40 odd pipes that Abha, my wife, had cleaned up for me to complete my part of further repairs and restoration work.
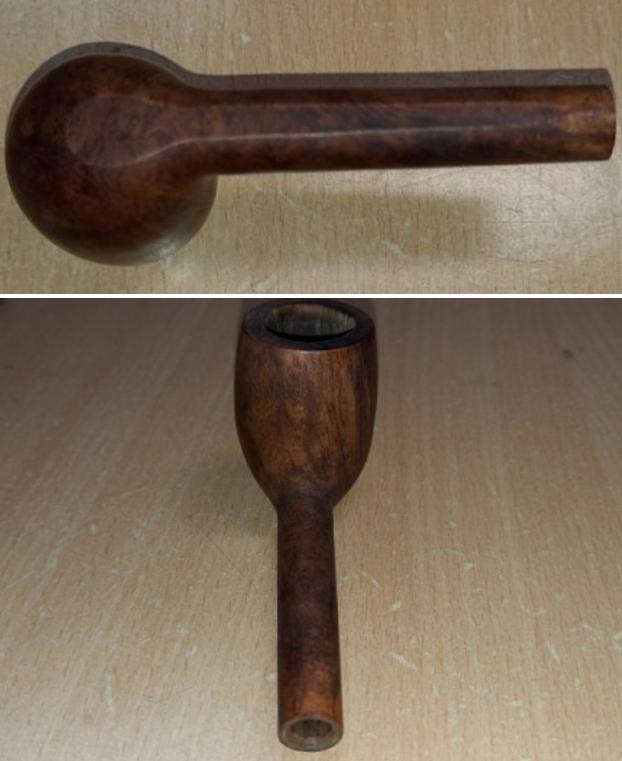
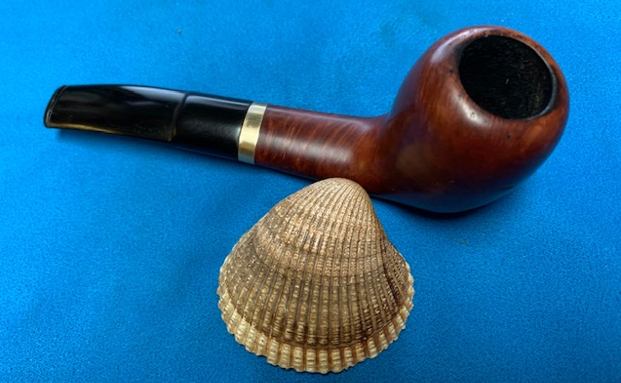
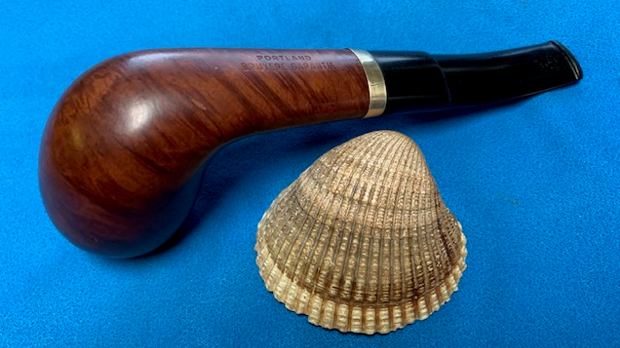
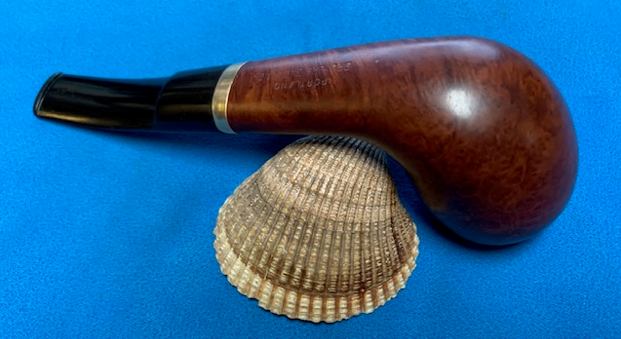
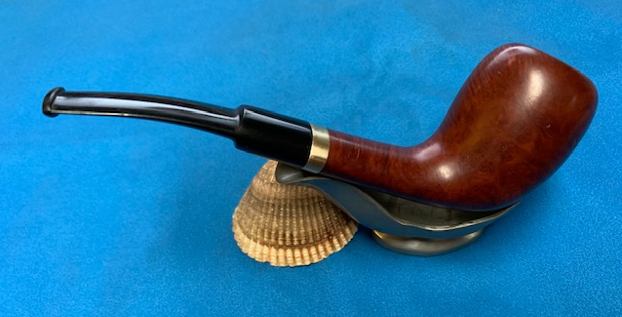
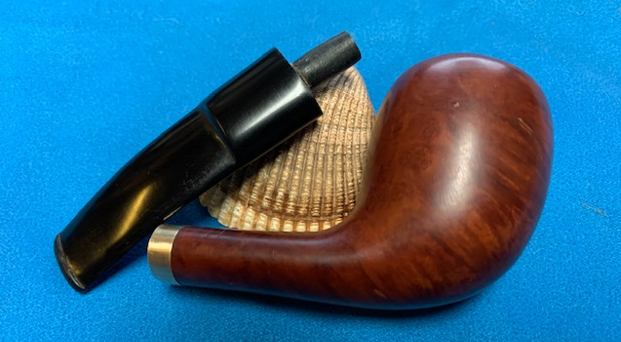
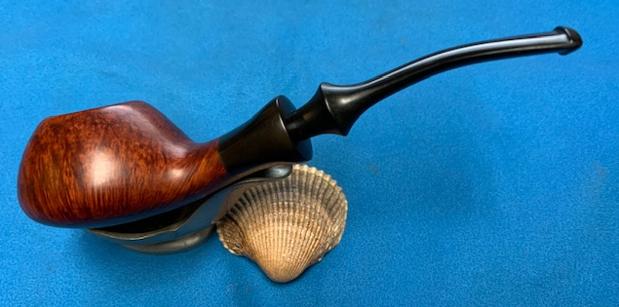
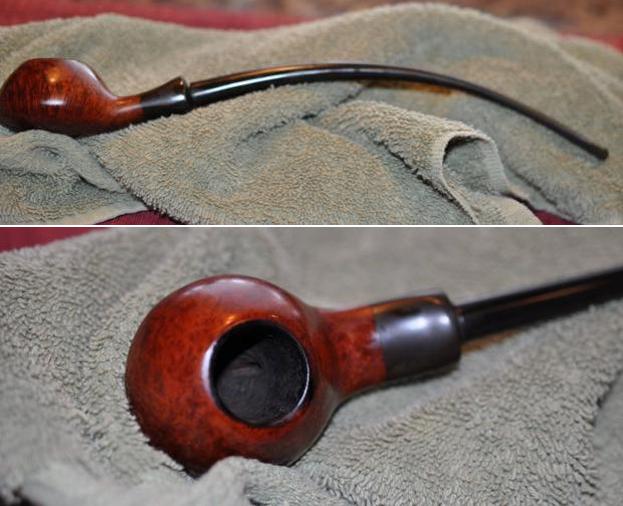
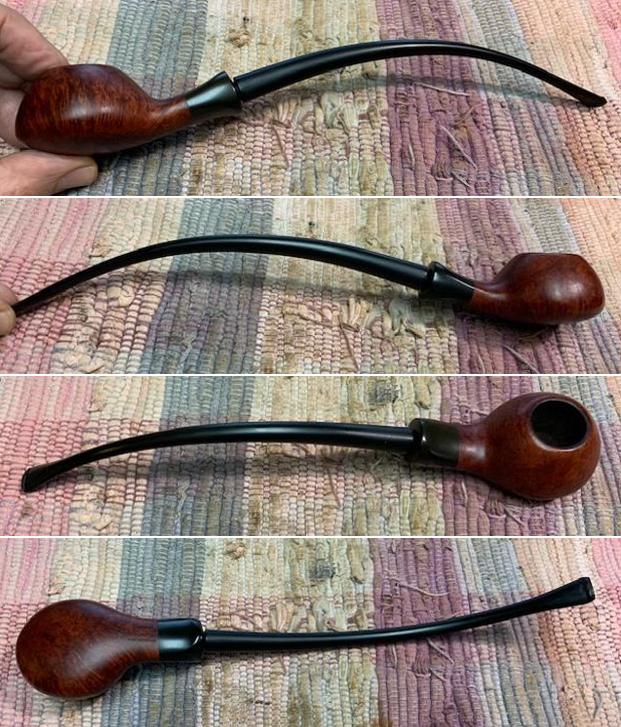
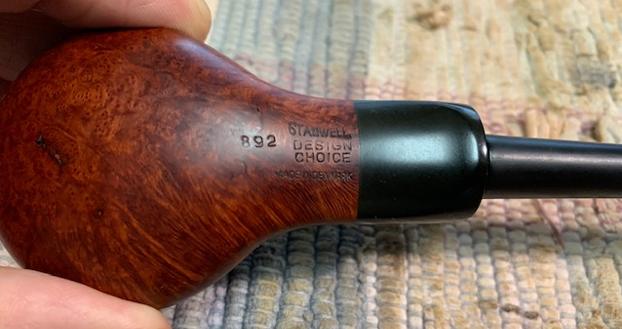
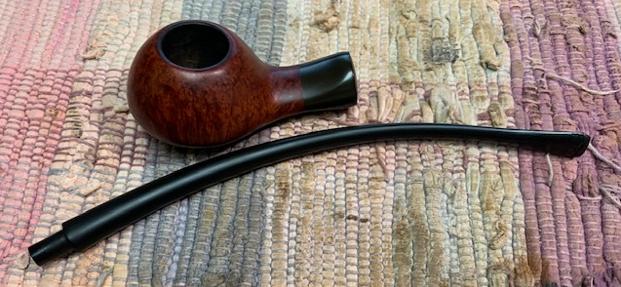
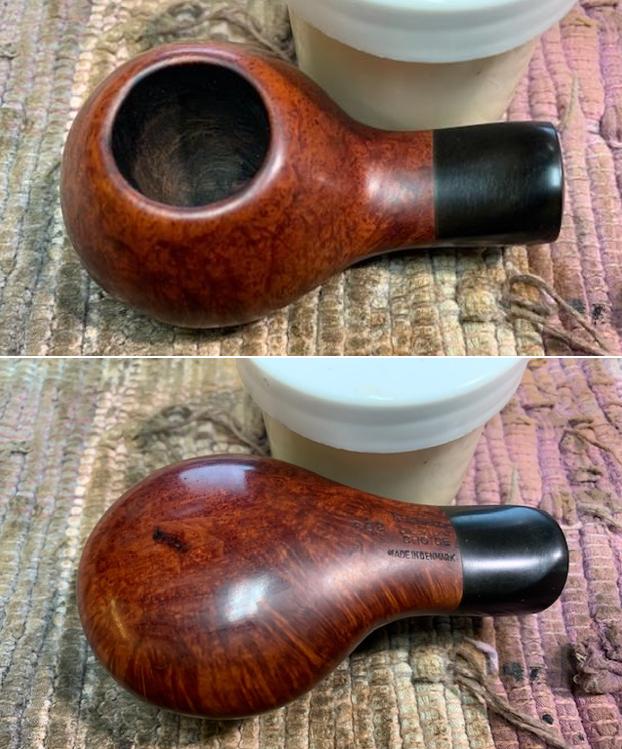
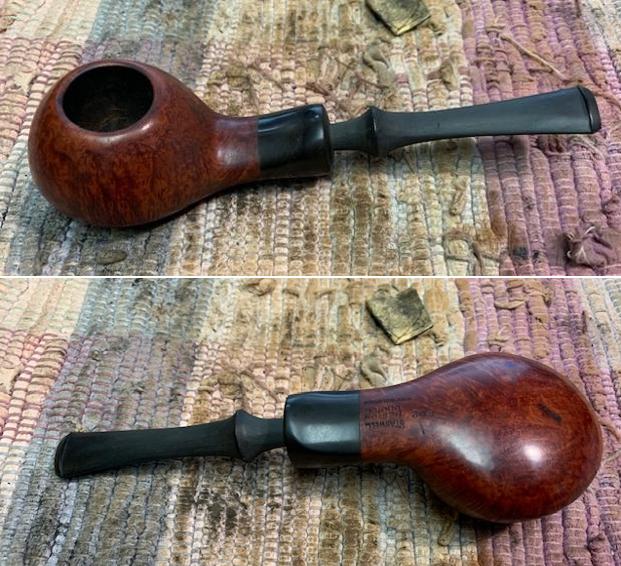
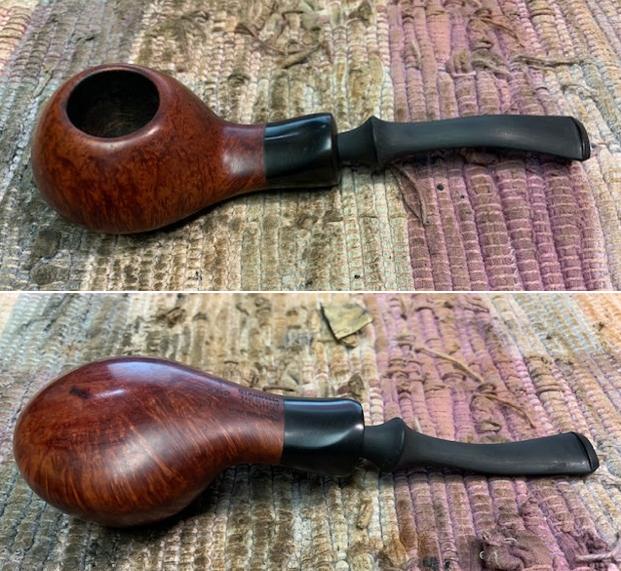
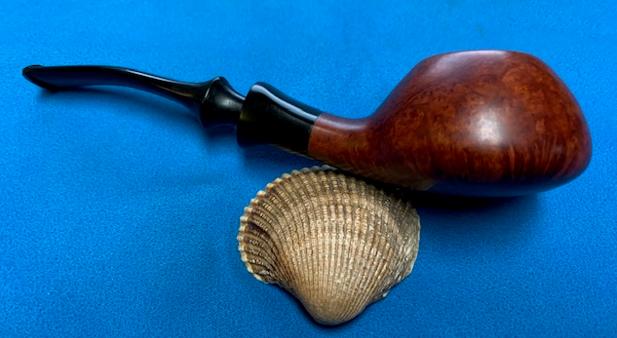
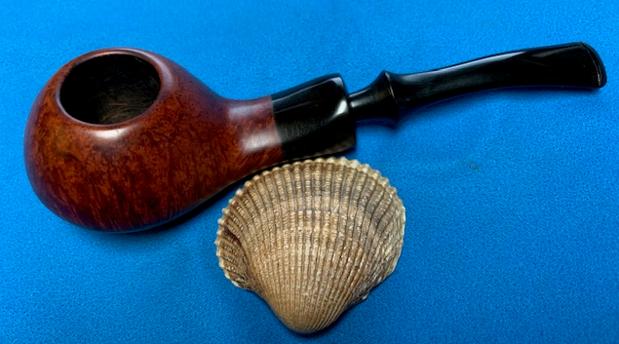
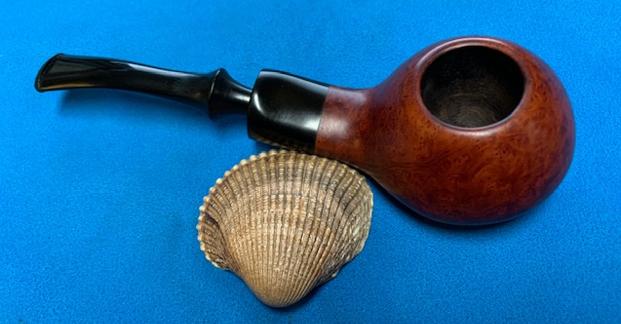
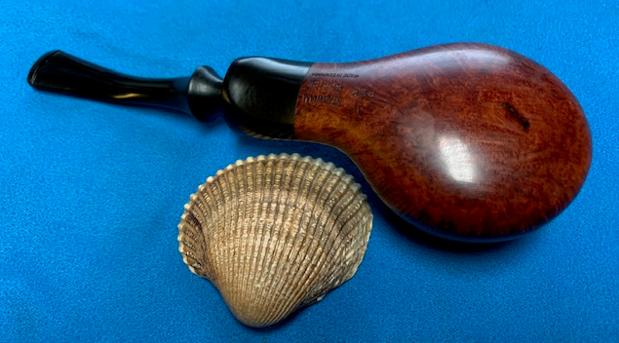
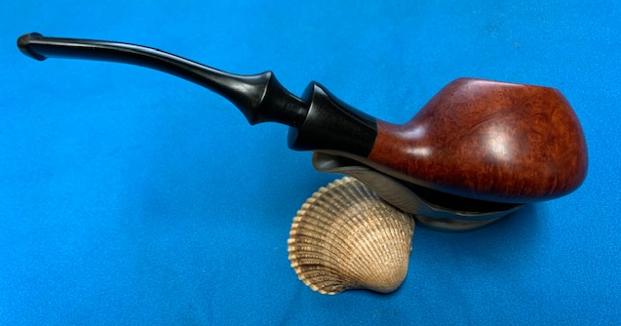
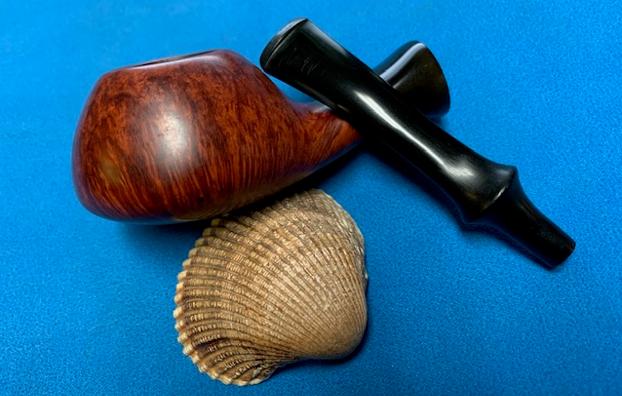
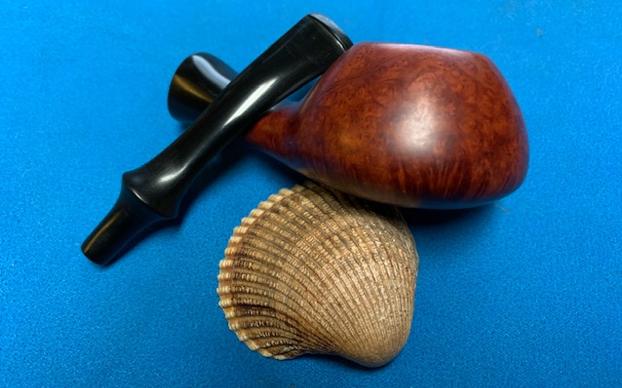
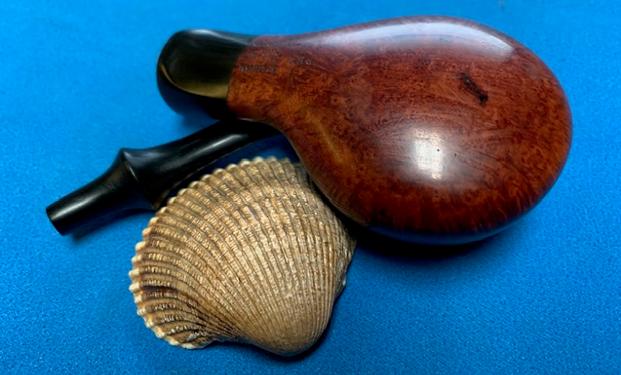
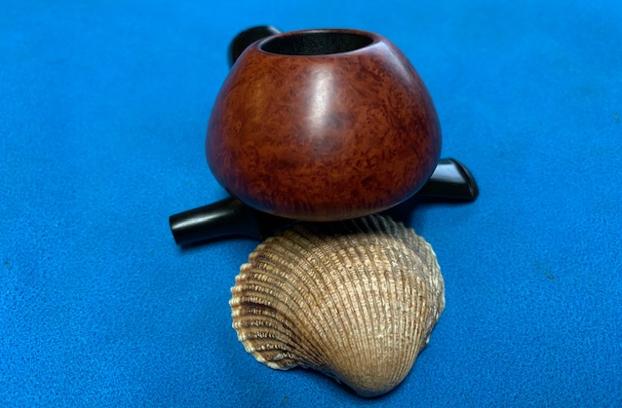
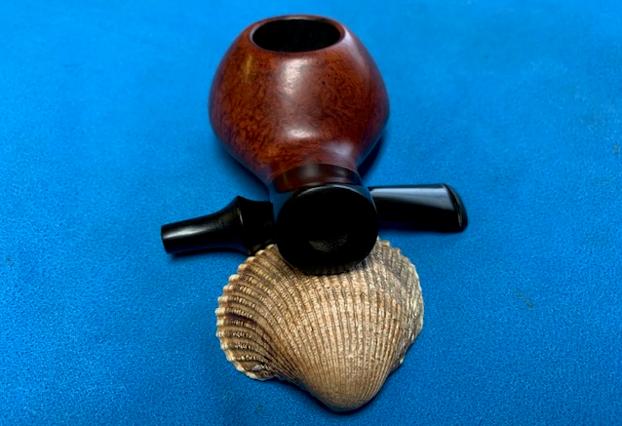
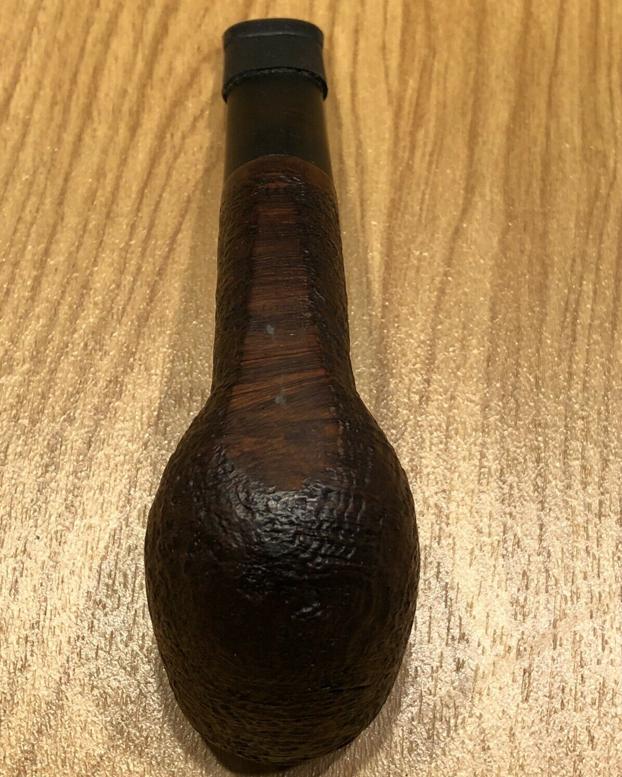
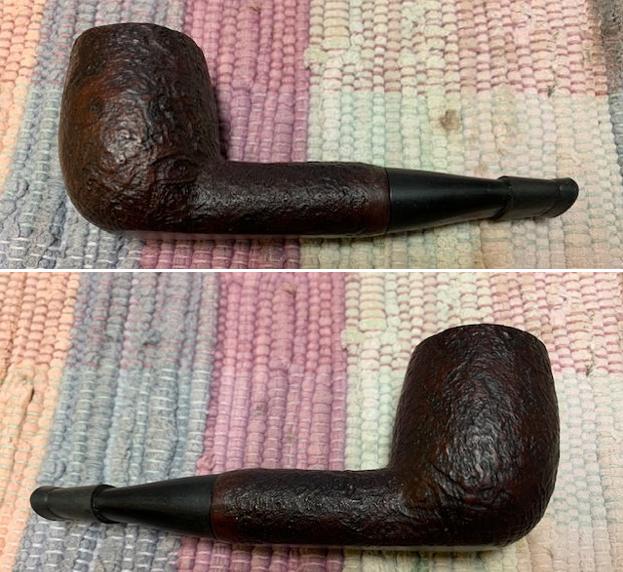
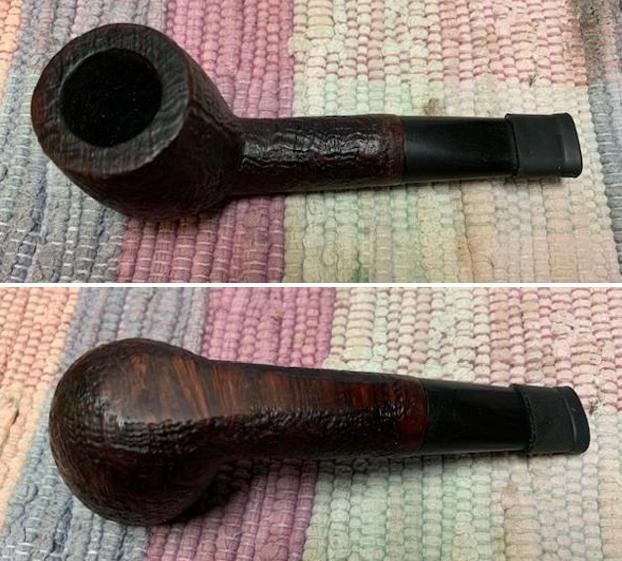
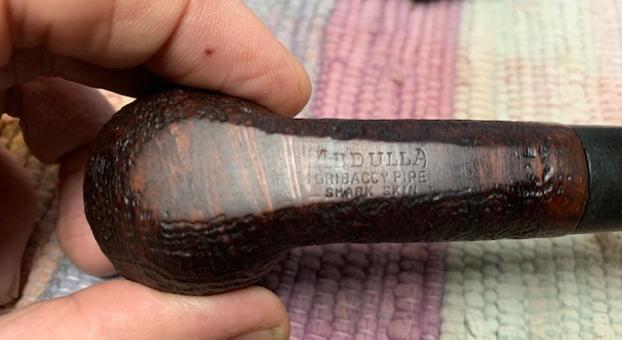
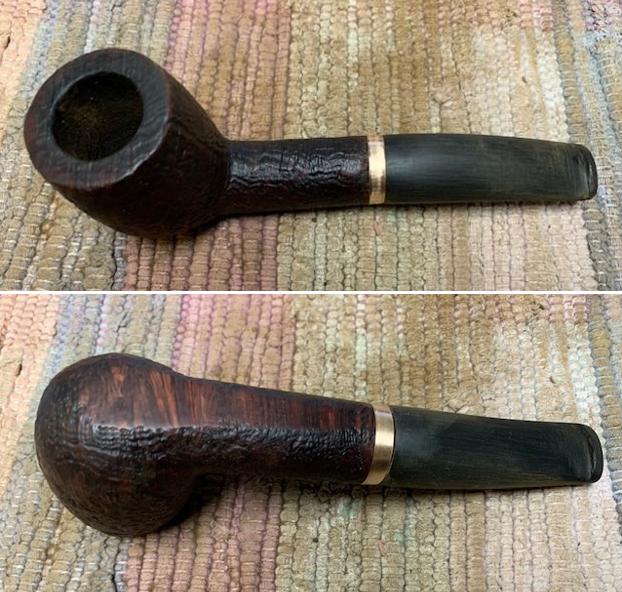
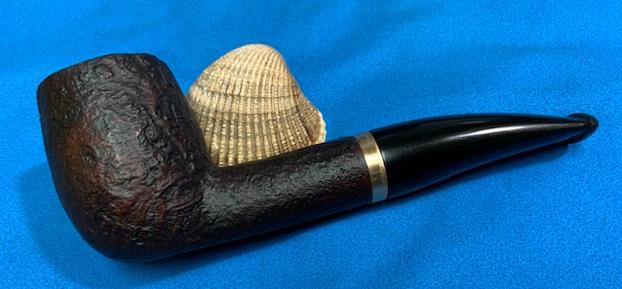
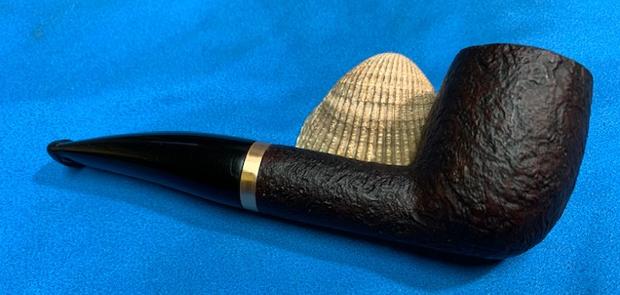
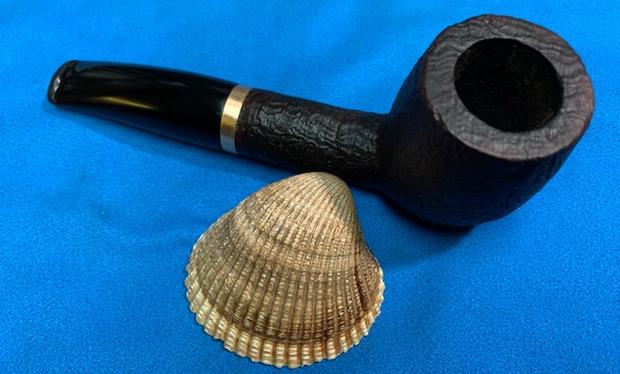
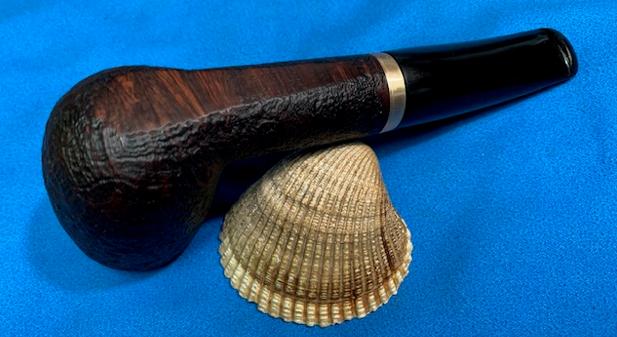
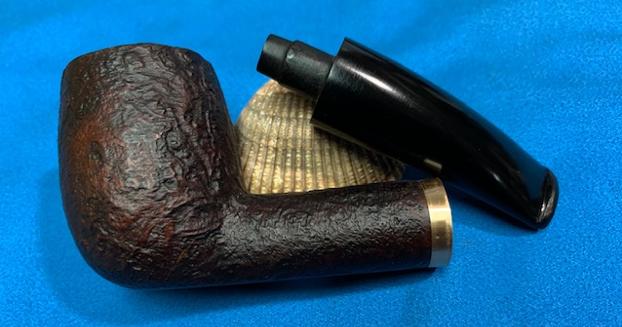
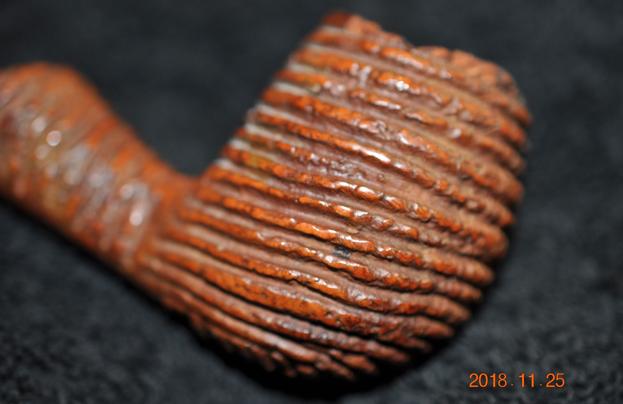
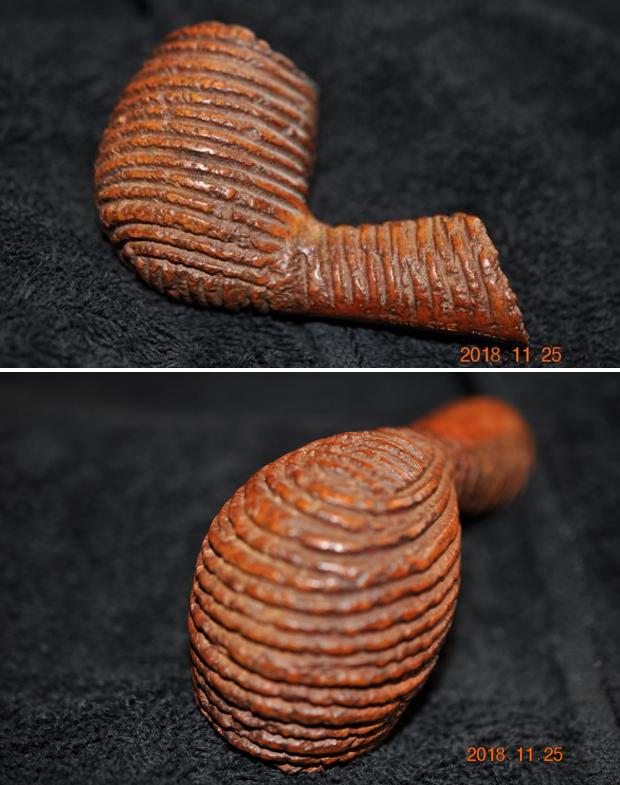
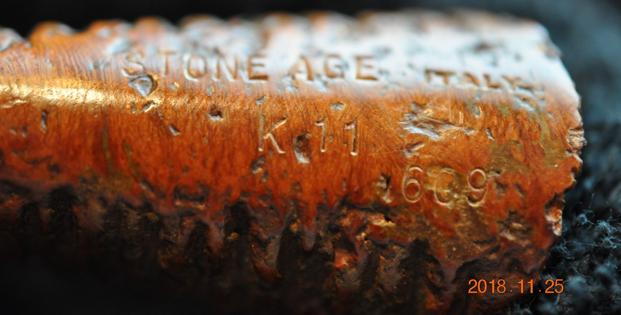
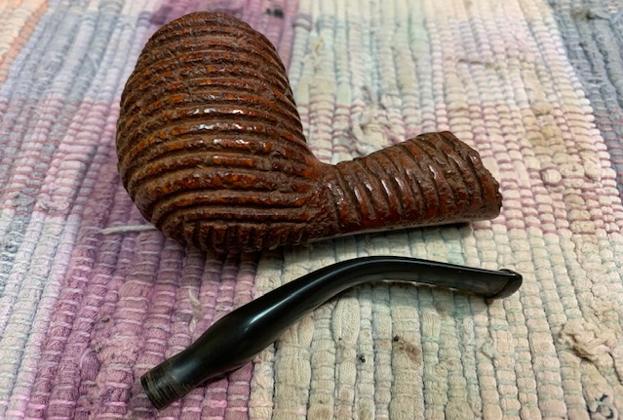
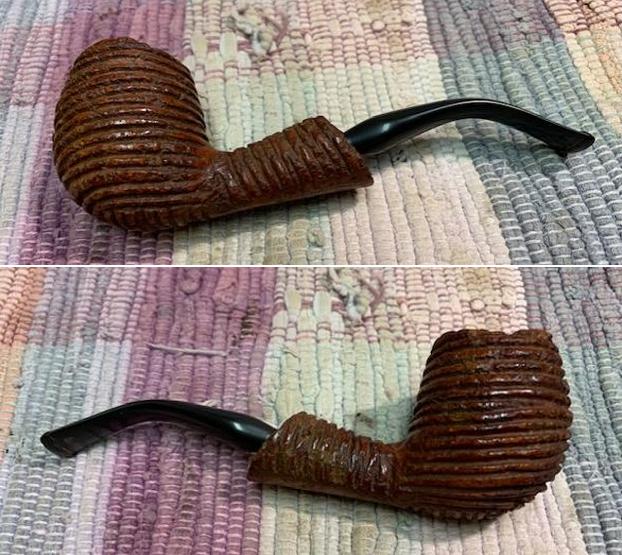
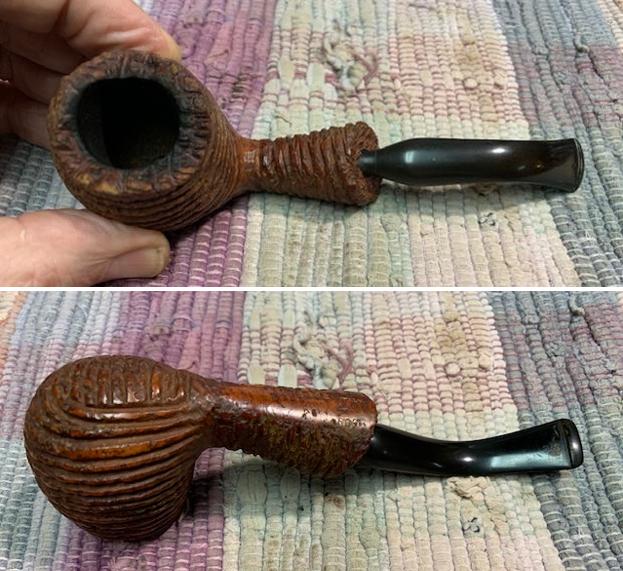
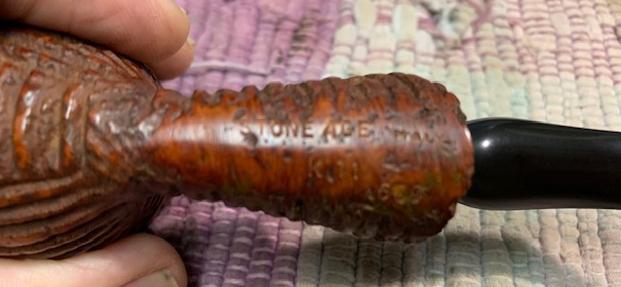
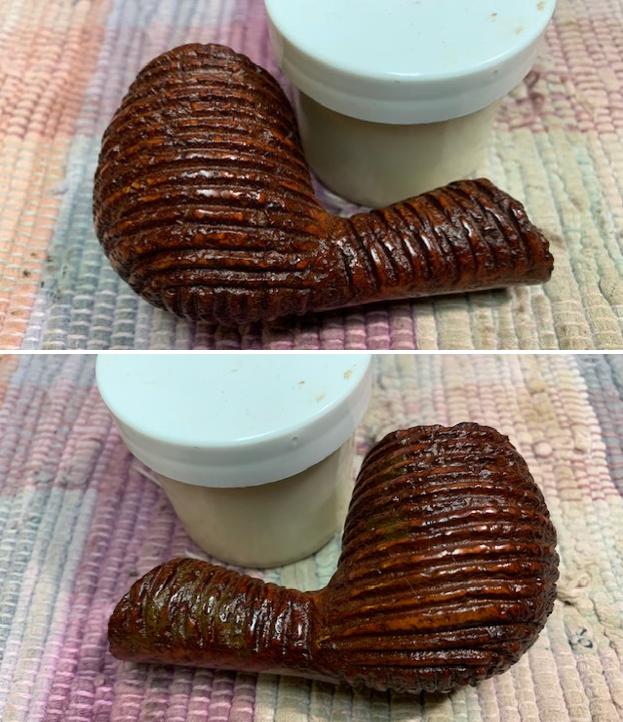
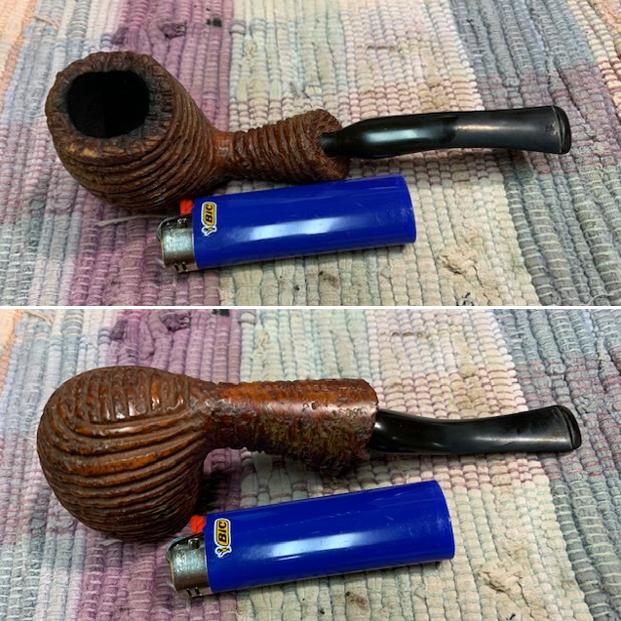
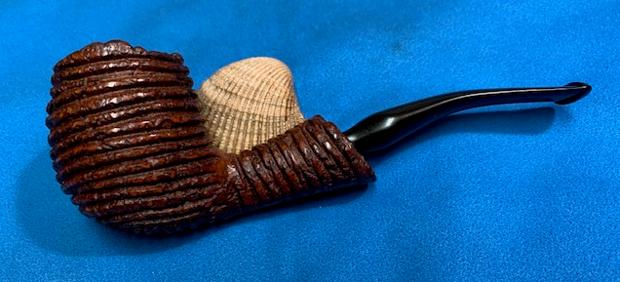
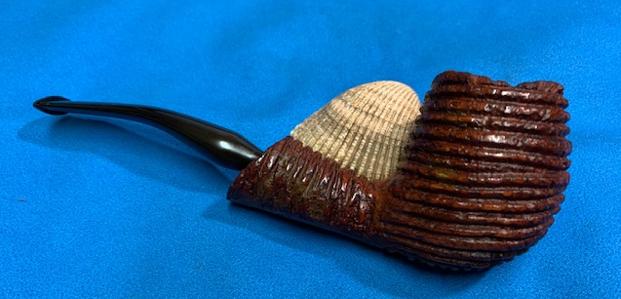
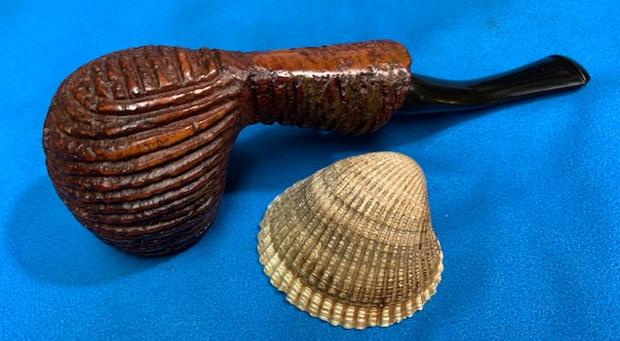
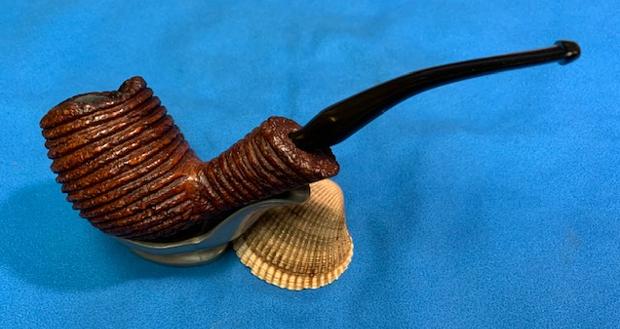
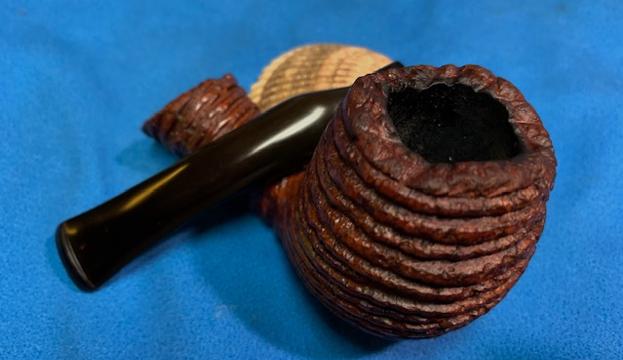
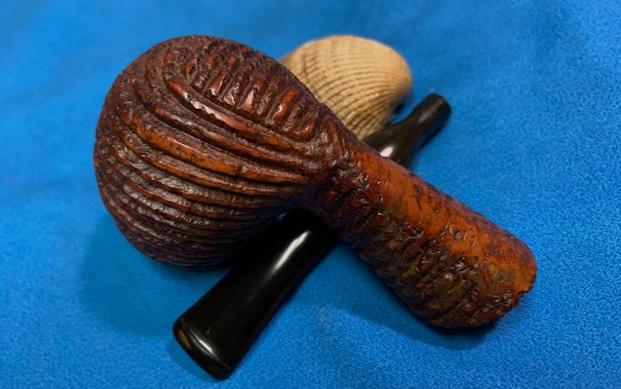
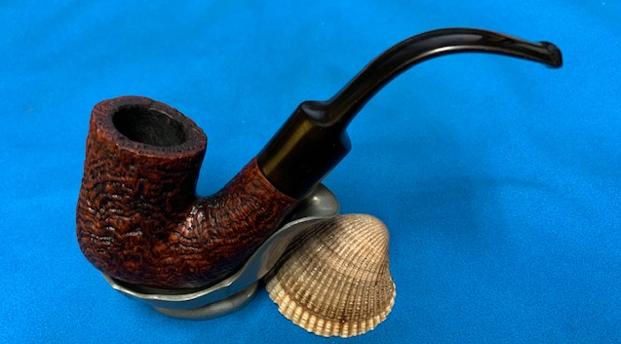
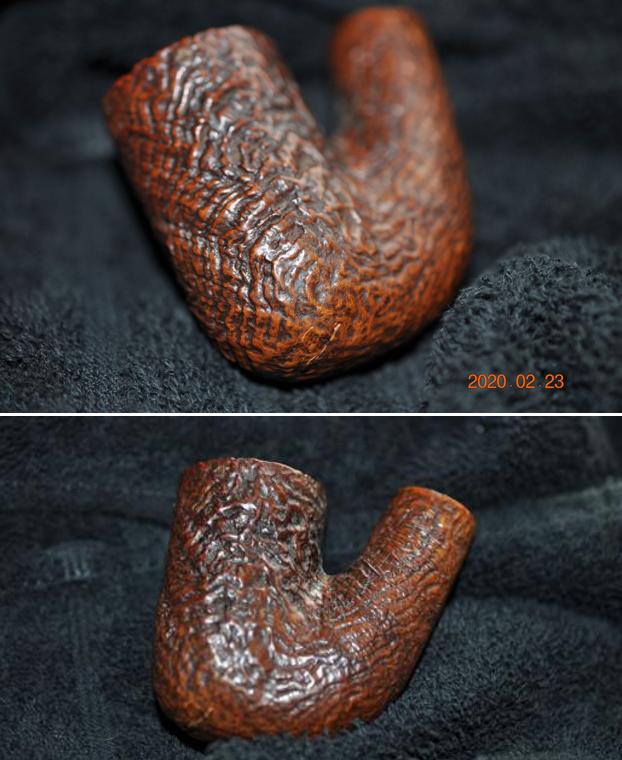
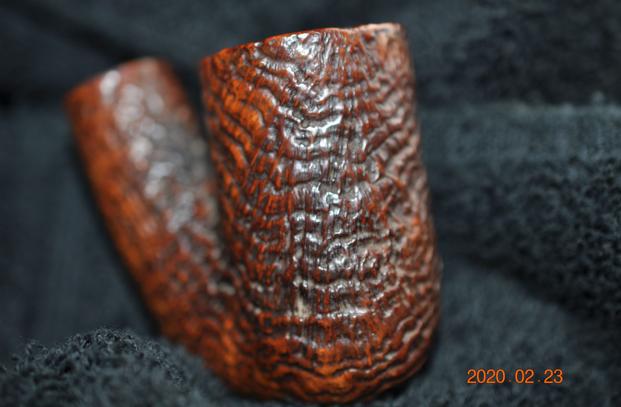
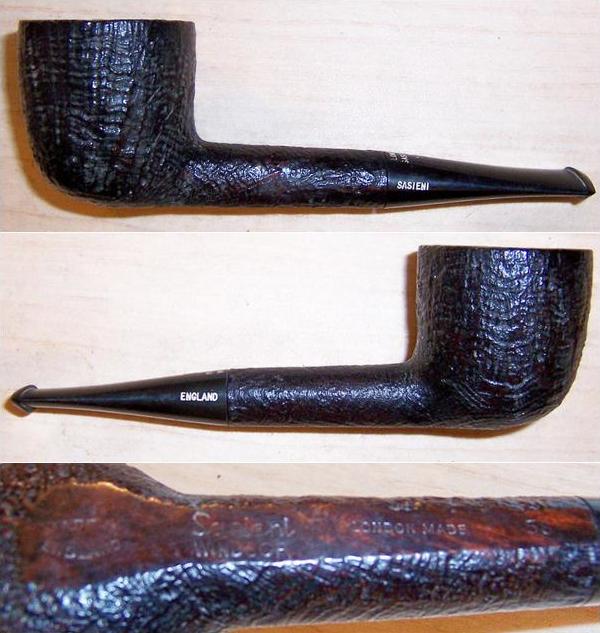
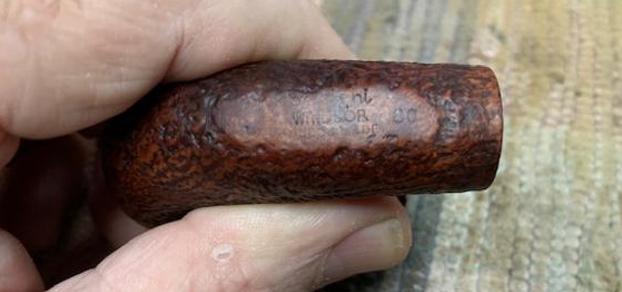
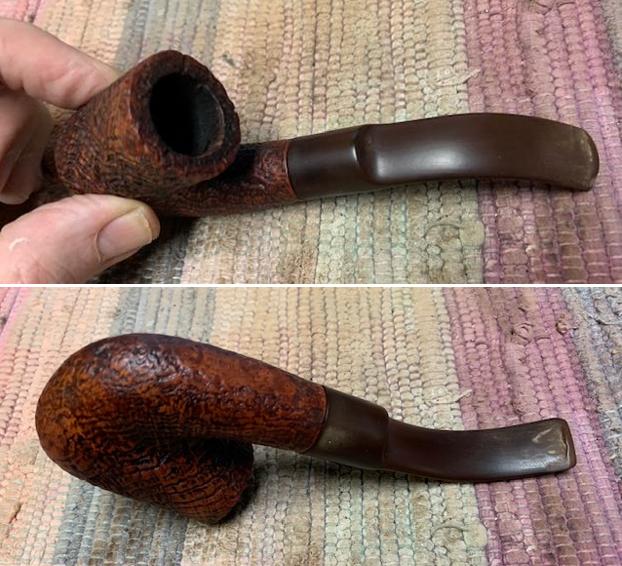
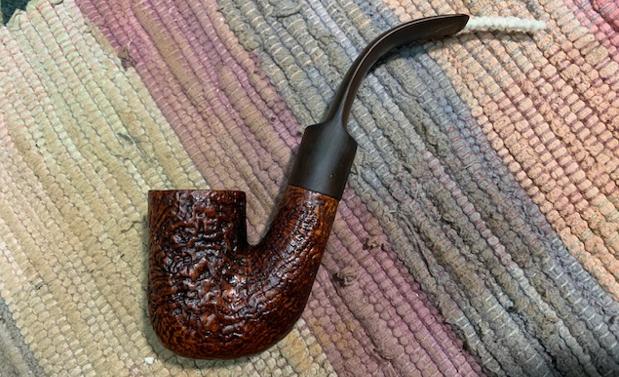
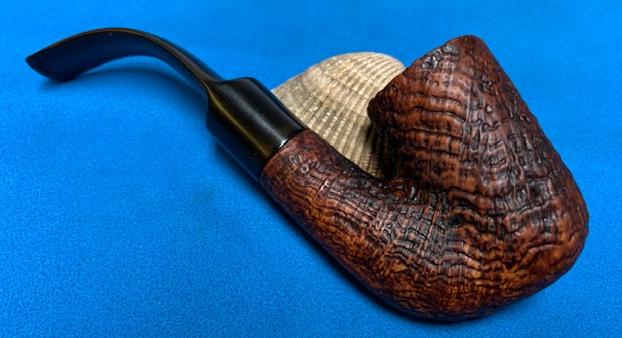
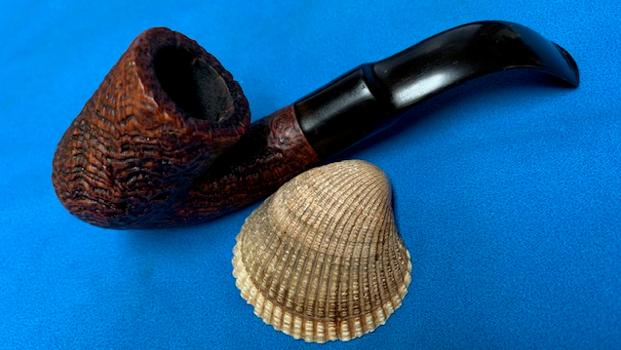
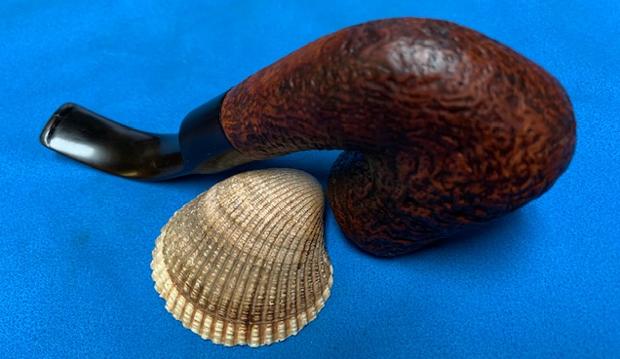
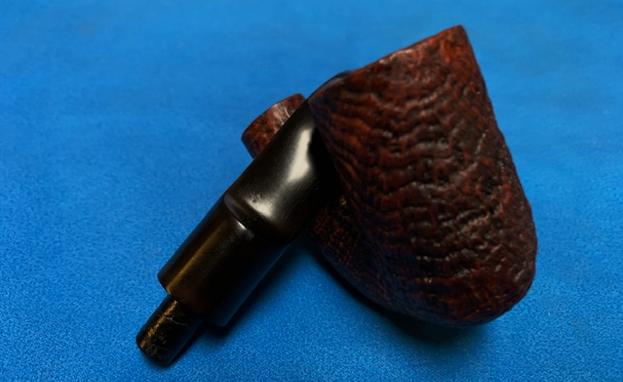
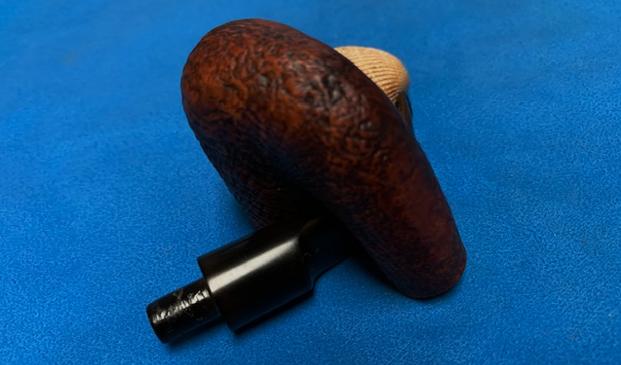
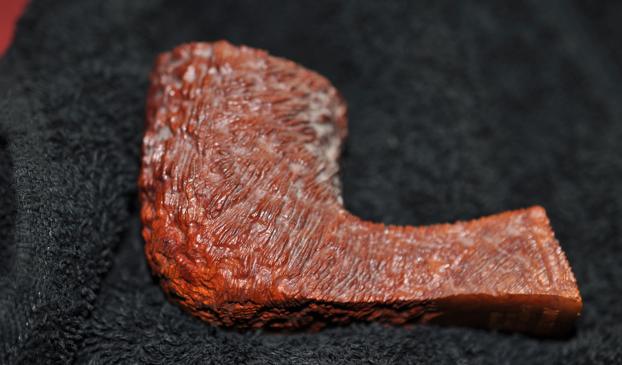
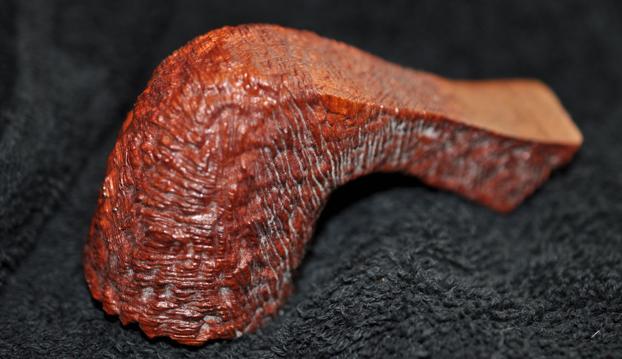
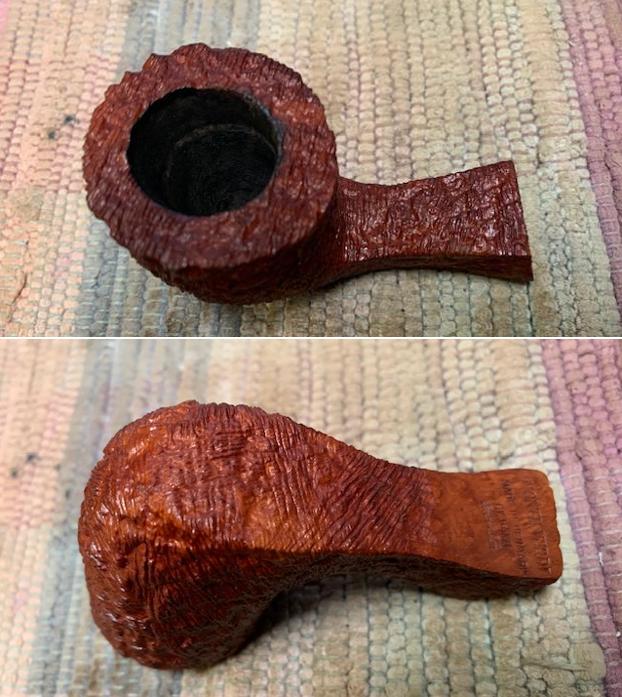
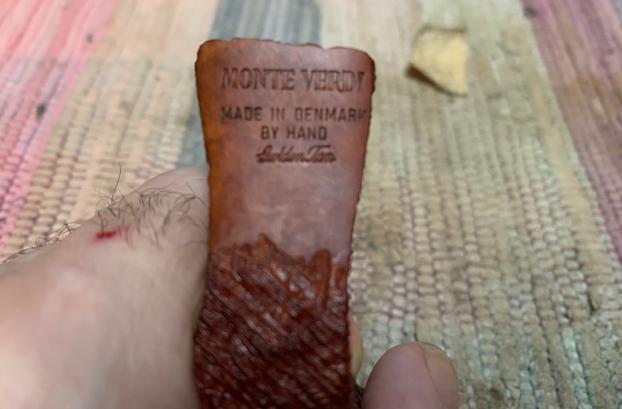
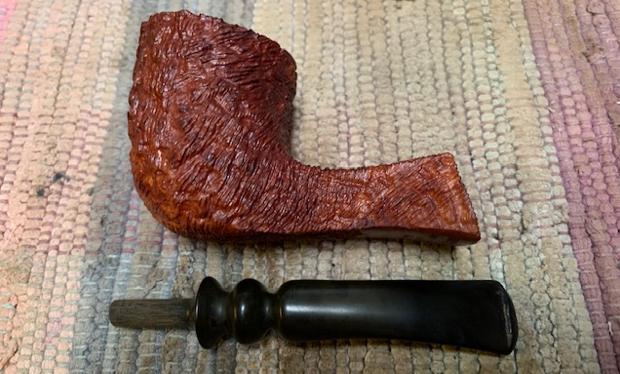
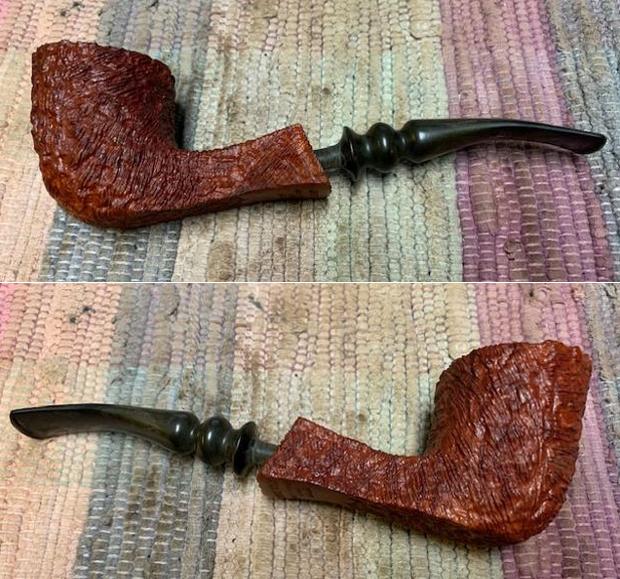
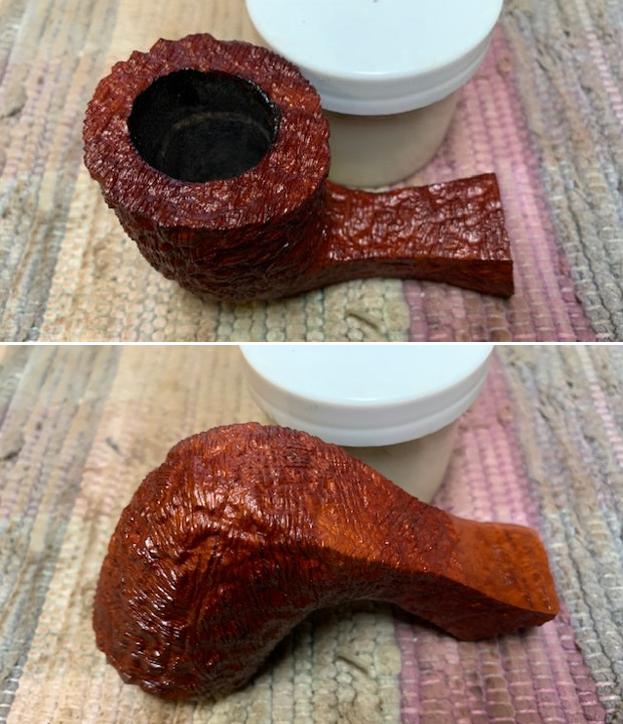
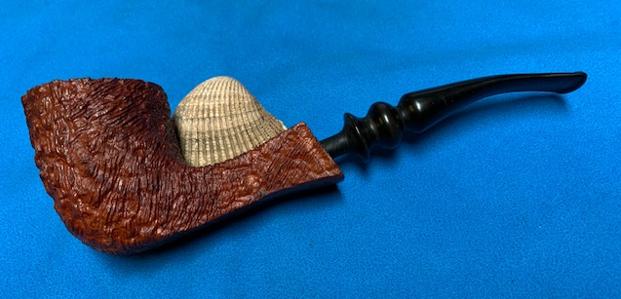
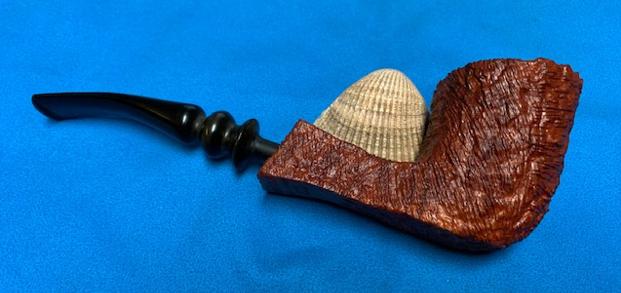
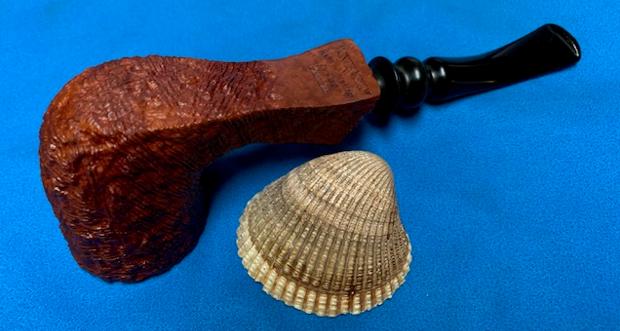
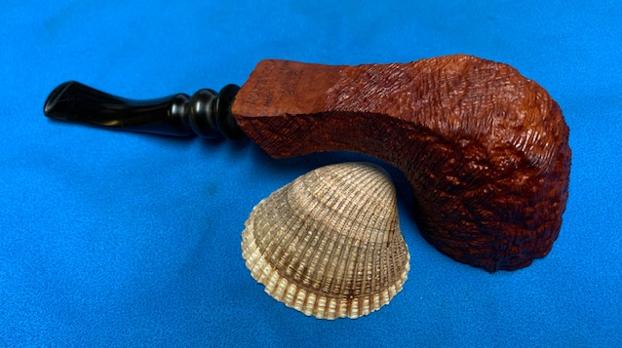
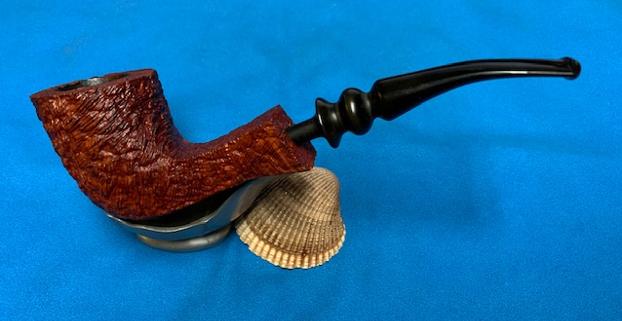
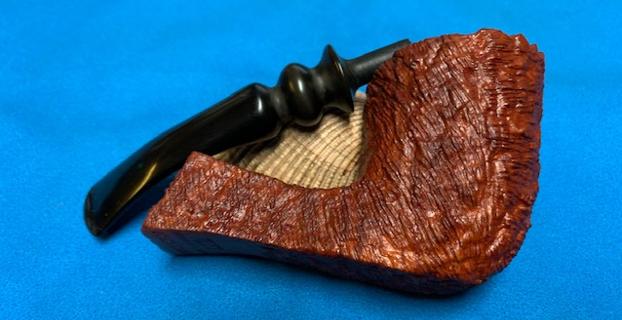
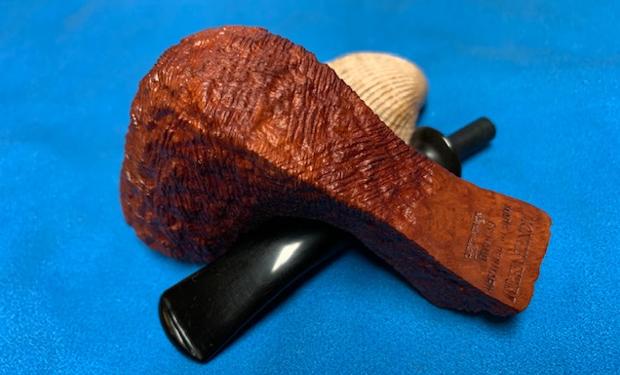
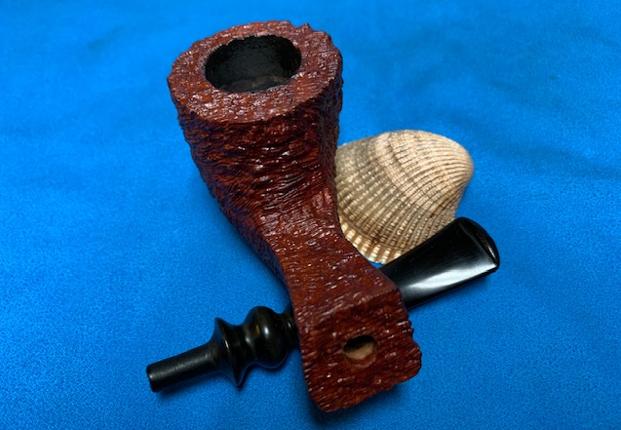
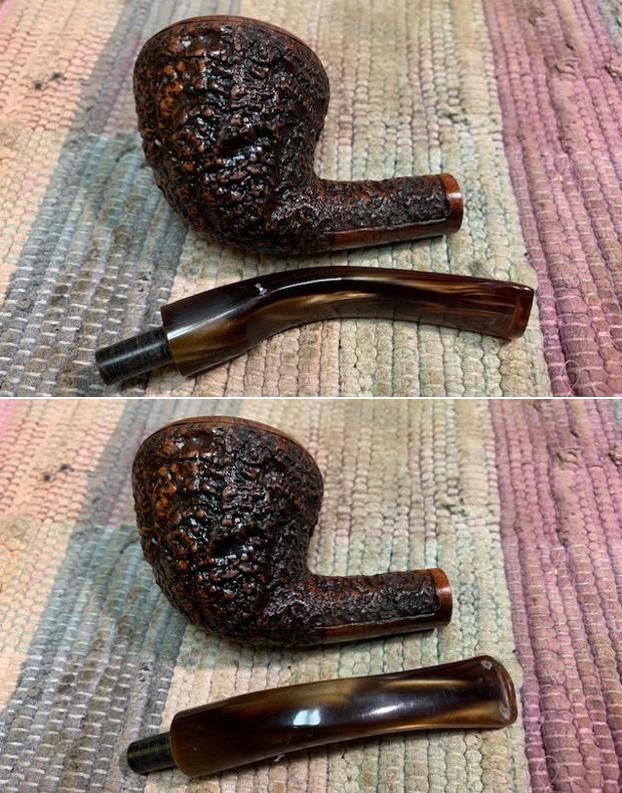
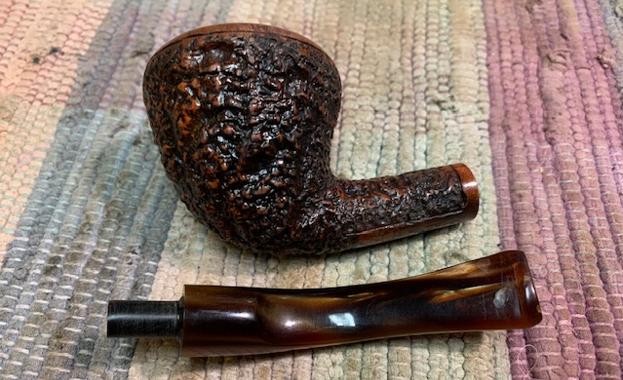
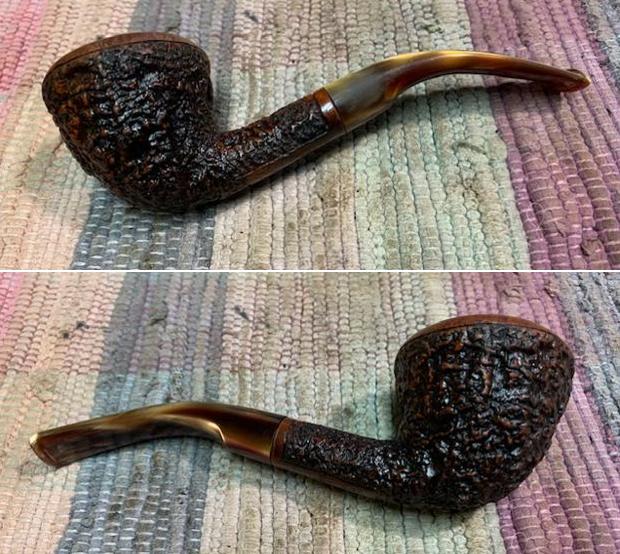
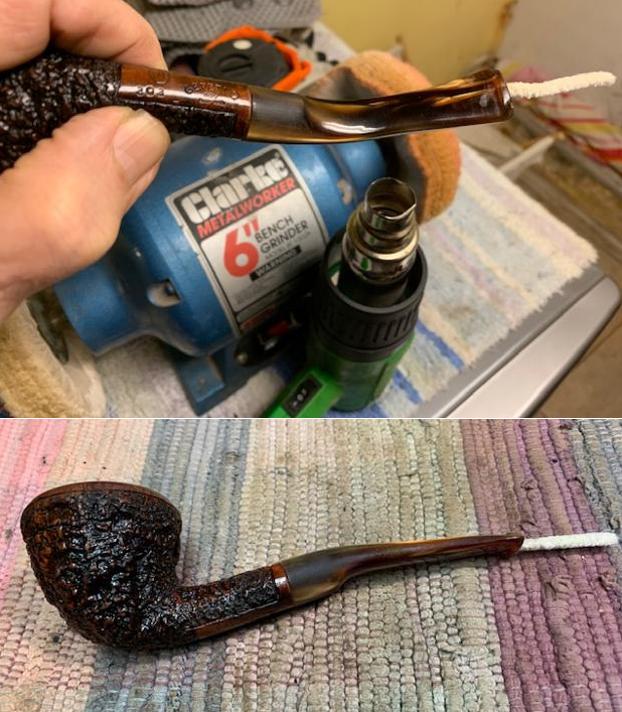
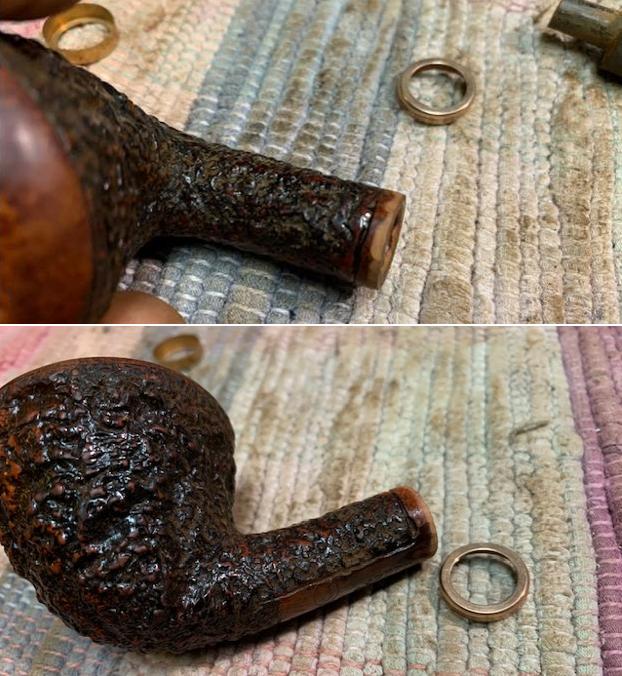
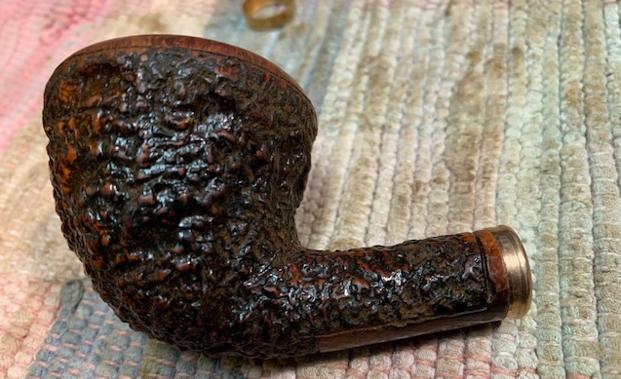
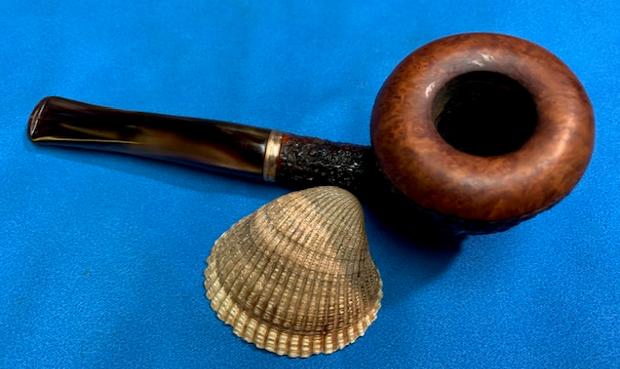
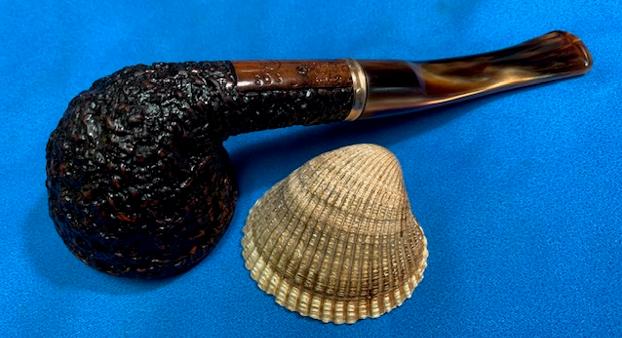
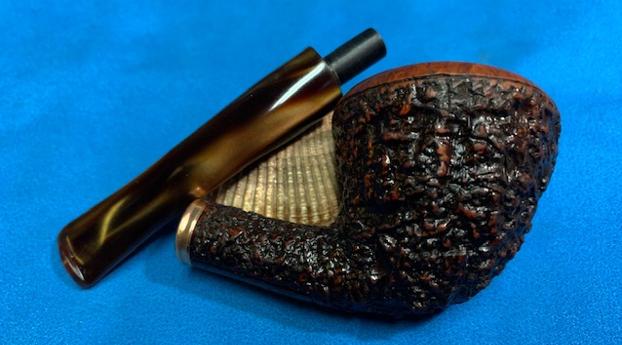
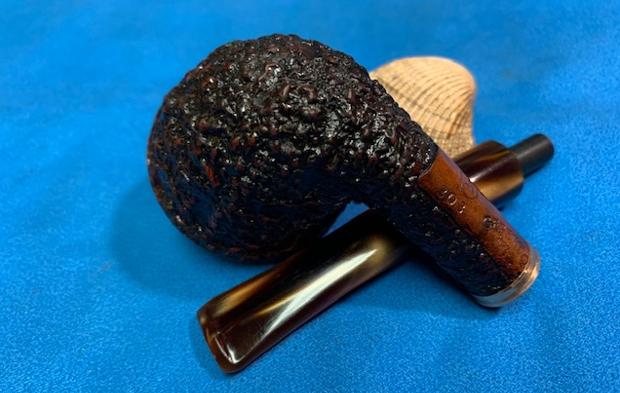
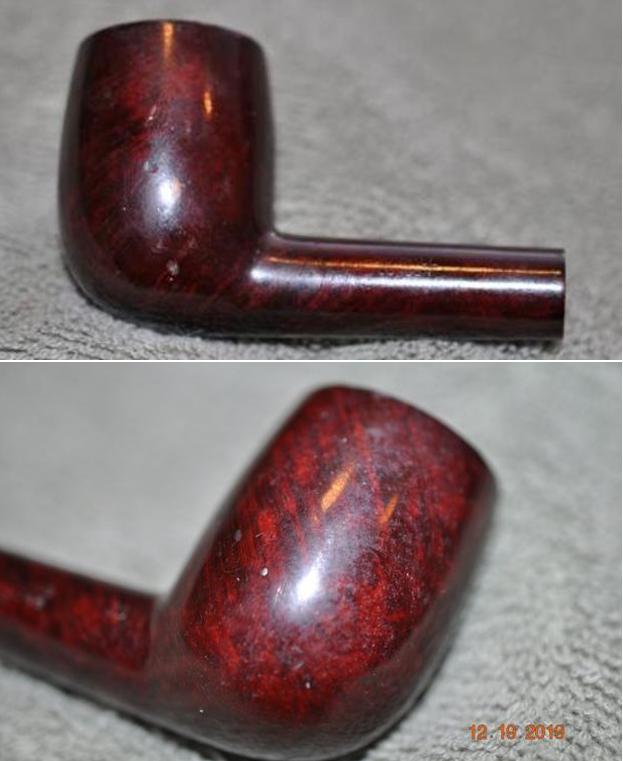
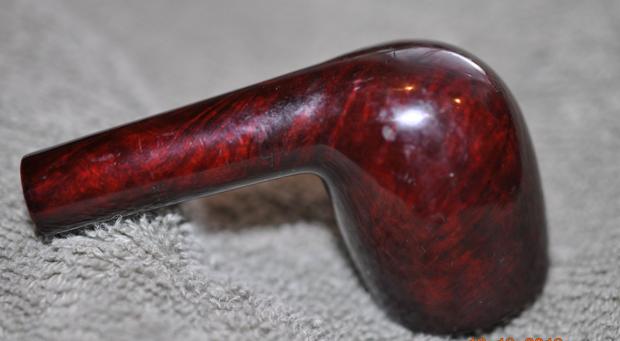
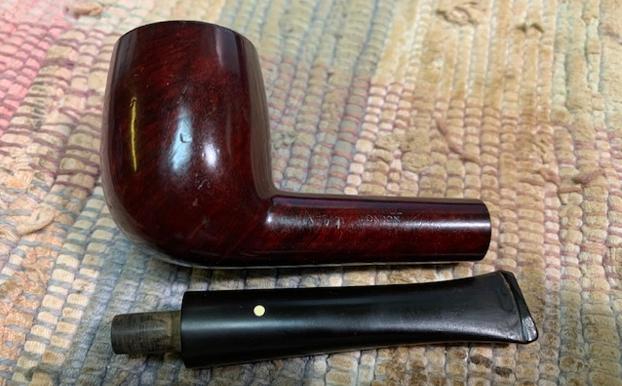
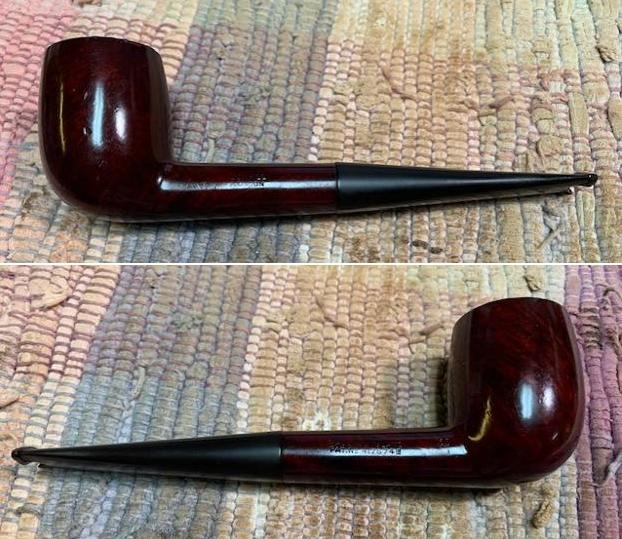
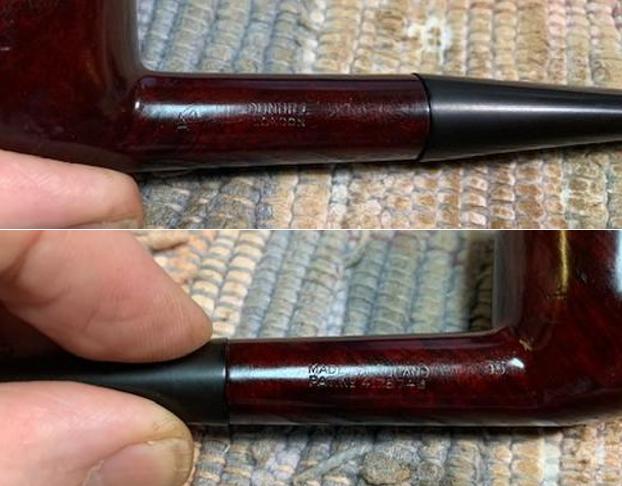
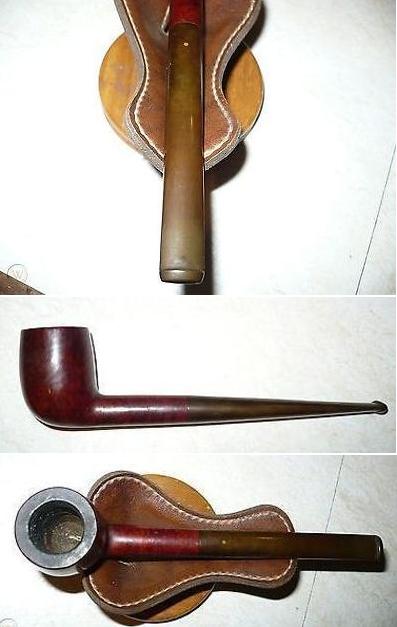
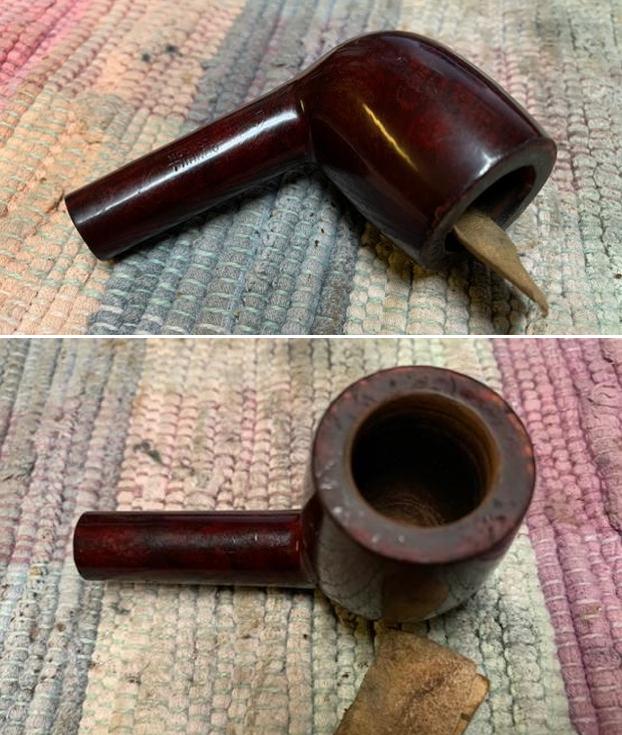
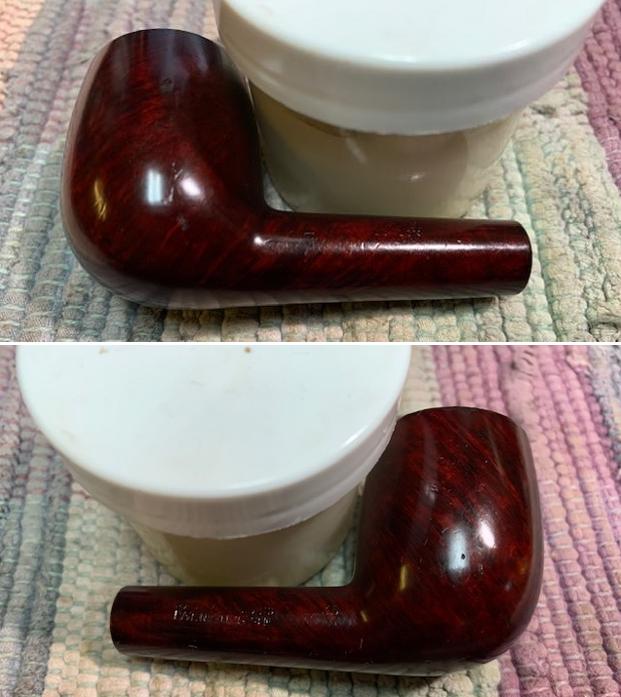
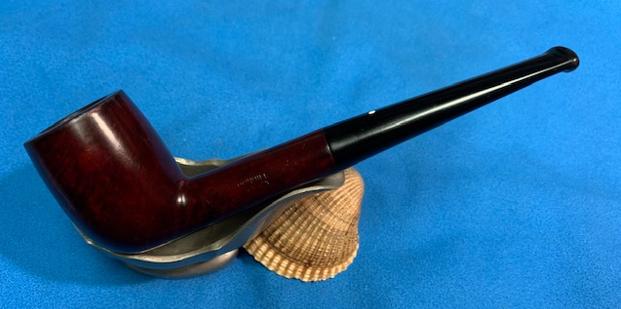
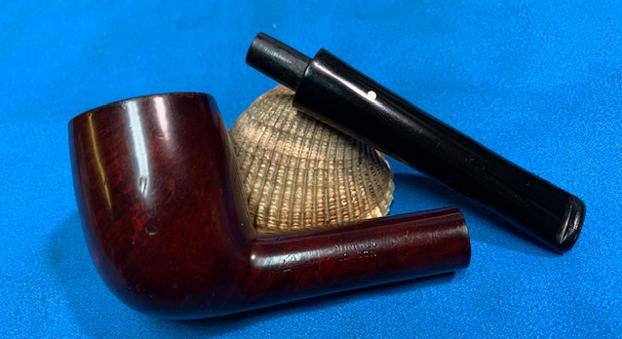
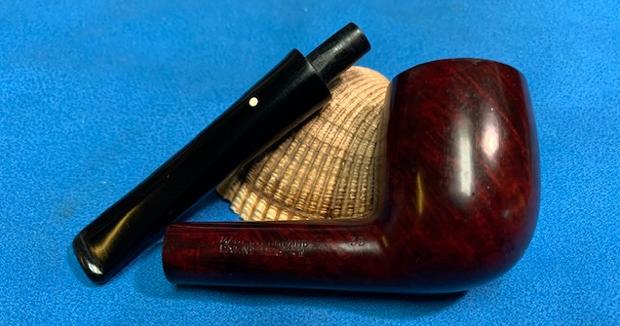
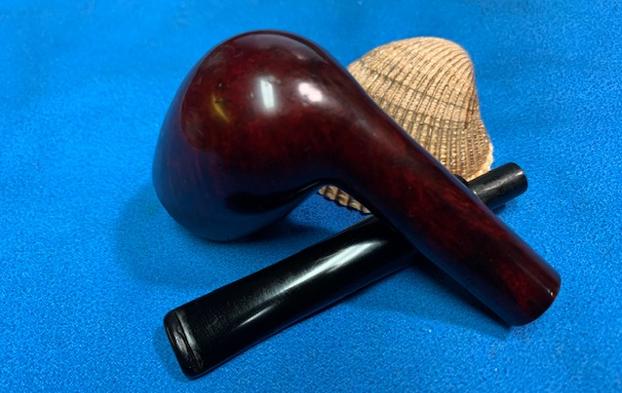
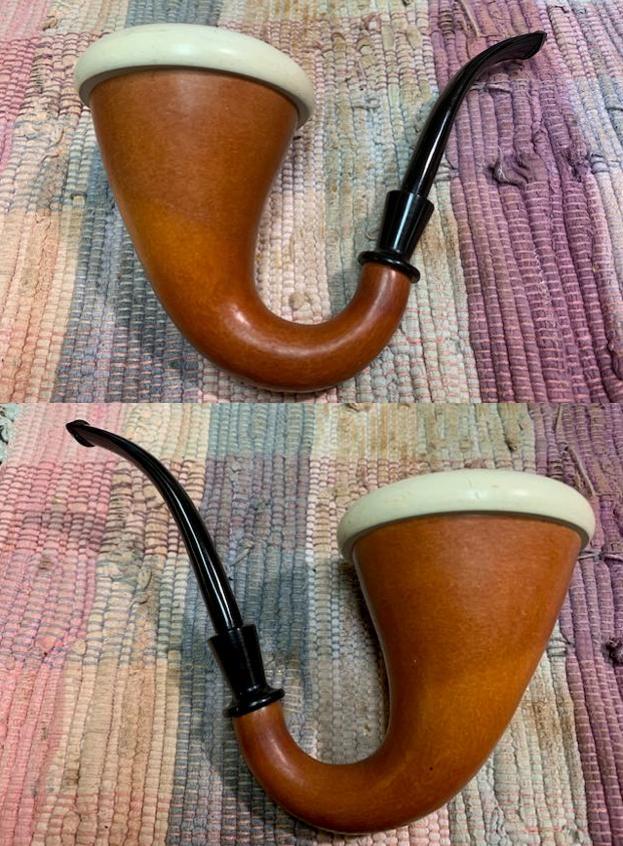
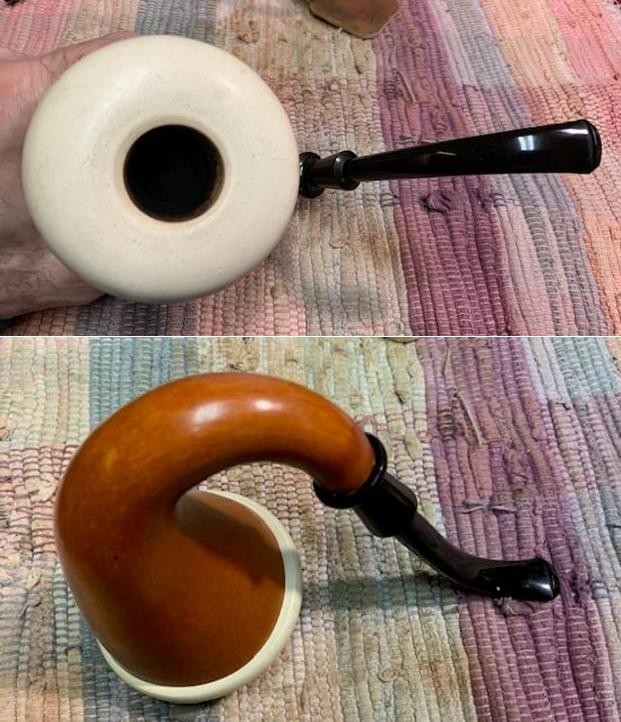
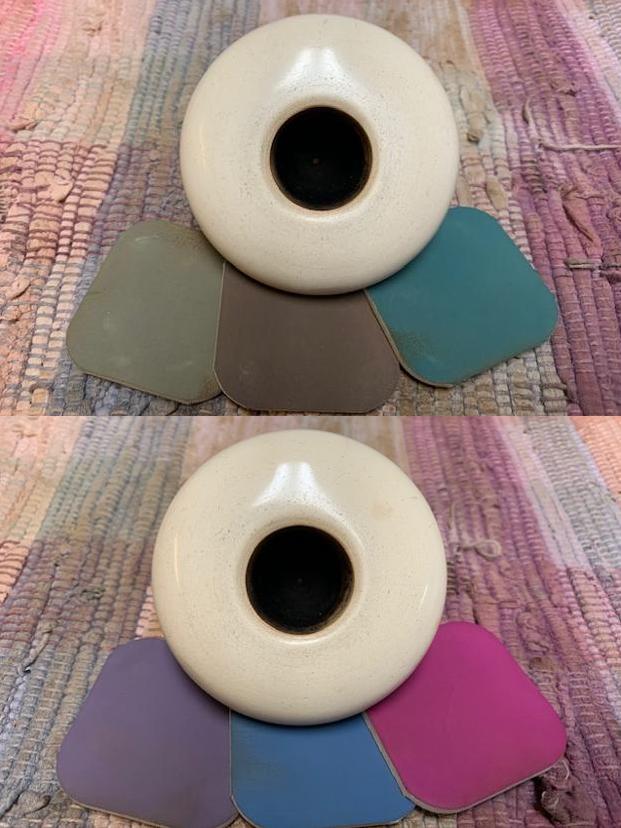
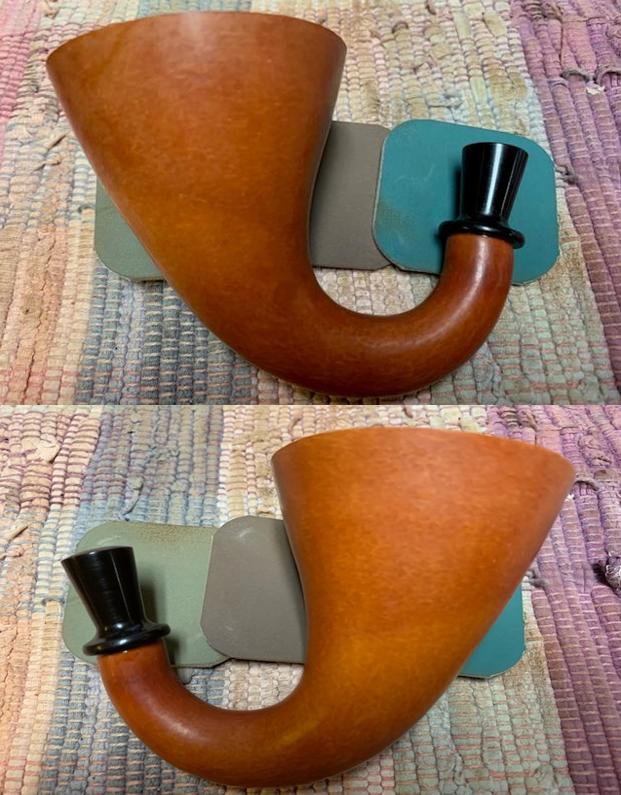
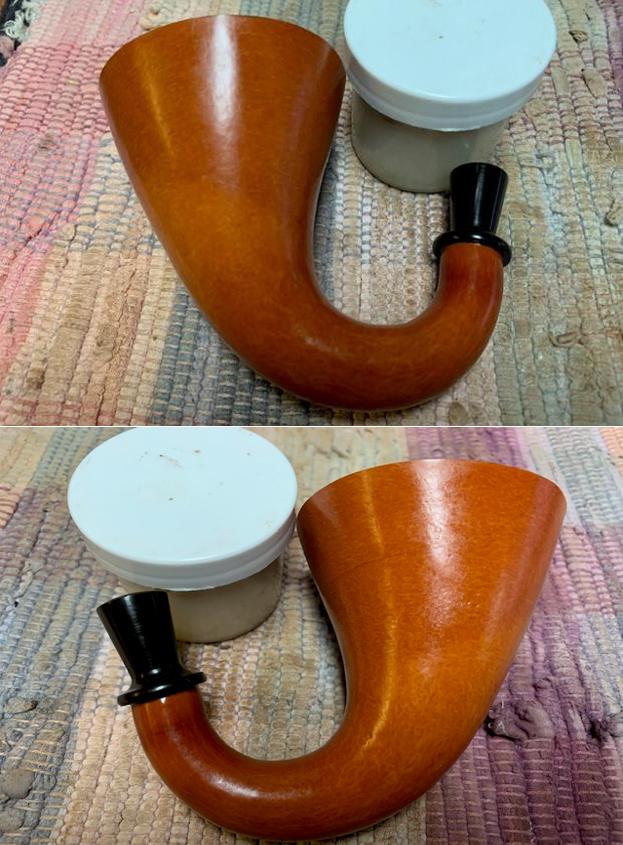
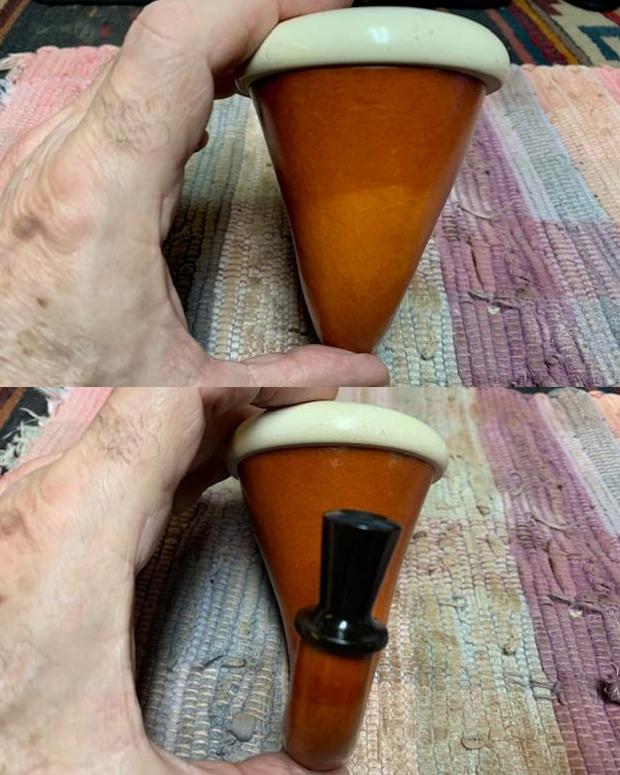
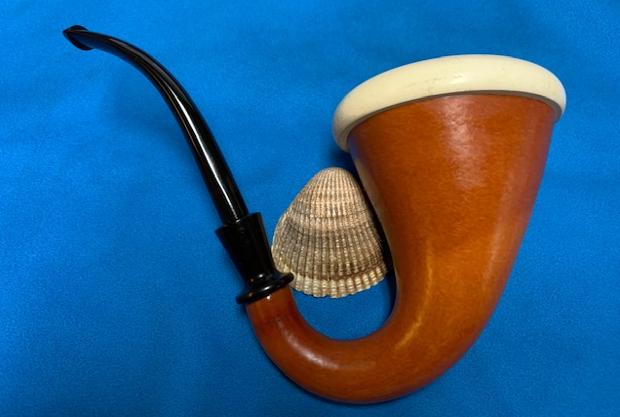
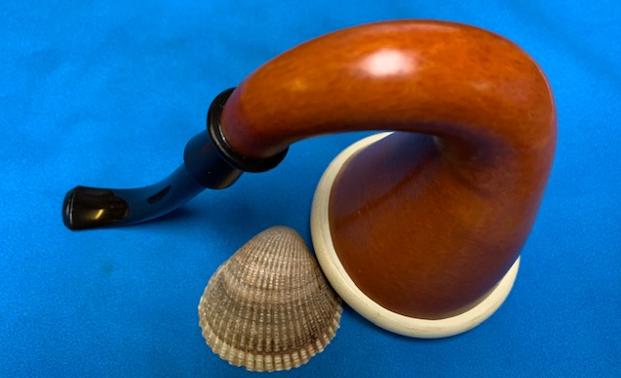
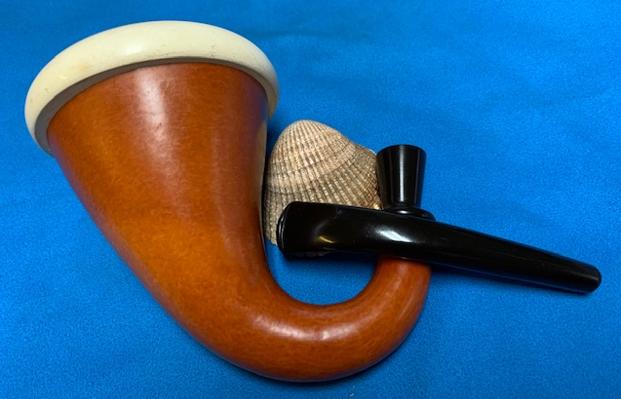
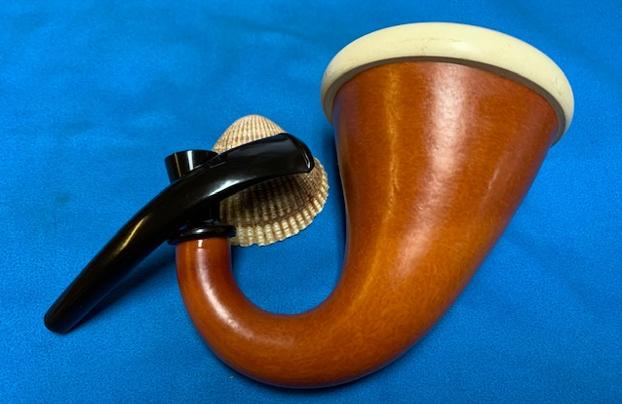
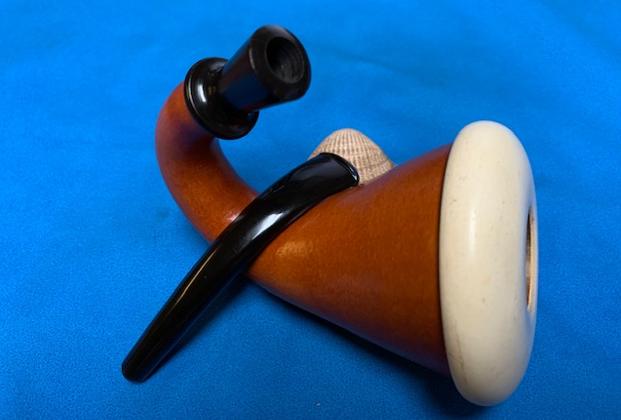
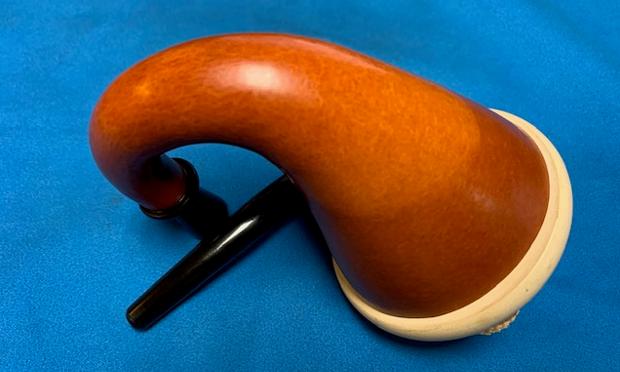
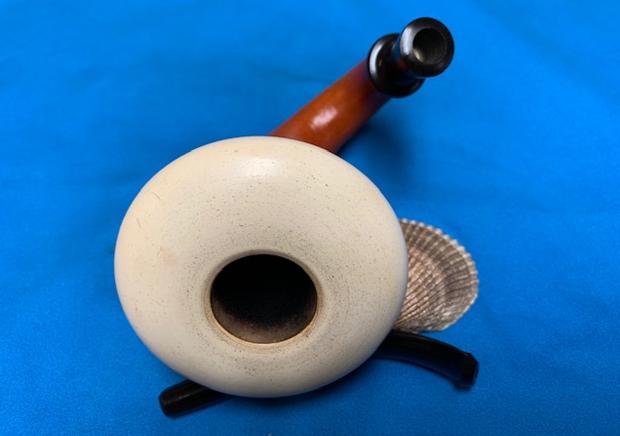
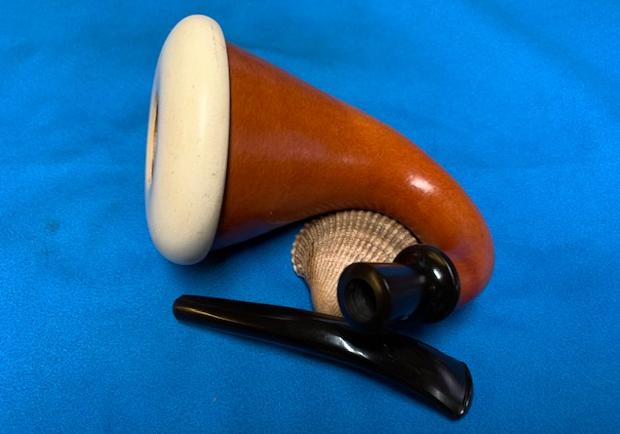
The pipe that I have selected is one from the huge lot of my grandfather’s pipes that I had inherited. This pipe had always caught my fancy on account of the wonderfully thin, tightly packed straight grains that are seen all around the stummel and shank and also due to its peculiar shape, a rather tall bowl (but not a stack!) with a longish shank and an equally long saddle stem. Overall, it definitely looked quirky to say the least, it’s a LOVAT shape on account of the round shank and a saddle bit but not a classic LOVAT since the stem is as long as the shank!! It’s the carver’s take on a classic shape, I guess. However, there was something about the stem that seemed wrong at the first glance. It was for this reason that the pipe always fell out of favor in the lineup of pipes for restoration. Here are a couple of pictures of the pipe that shows the pipe before Abha, my wife, had done the initial cleaning. From the pictures below, it is amply evident that the stem is not aligned straight in reference to the shank, but is skewed more towards the left (evidenced in the second picture). This pipe has some beautiful densely packed thin straight, also referred to as “Angel hair” grains all around the tall bowl and over the long shank surface. The only stampings seen on this pipe are over the left shank surface and is stamped as “HIALEAH” over “ALGERIAN BRIAR”. These stampings are crisp and clear. The long saddle vulcanite stem is devoid of any stampings.
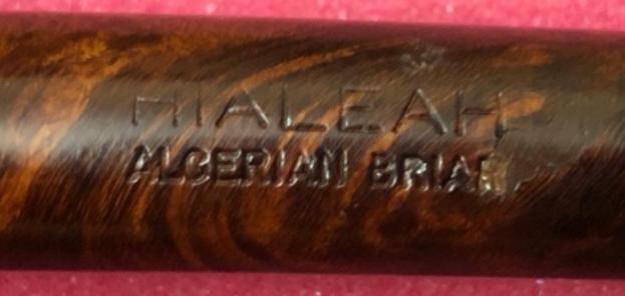 I looked for information on this brand on rebornpipes.com. Unfortunately the search yielded no results (a surprise for sure!!). Next I turned to pipedia.org to understand and establish the provenance of the pipe brand. There is not much information that was noted in the article, but was sufficient to give me an idea of the brand and period of operations. Here is the link to the webpage:-
Hialeah – Pipedia I quote from the article; “From what I’ve found on the web HIALEAH pipes were sold by Whitehall Products Co. (a division of Helme Products) prior to 1975. Whitehall was in Wheeling, West Virginia, and Helme somewhere in New Jersey. All I’ve seen have been made of Algerian Briar and are reported to be great smokers”.
Thus, this pipe definitely dates to pre-1975
Initial Visual Inspection
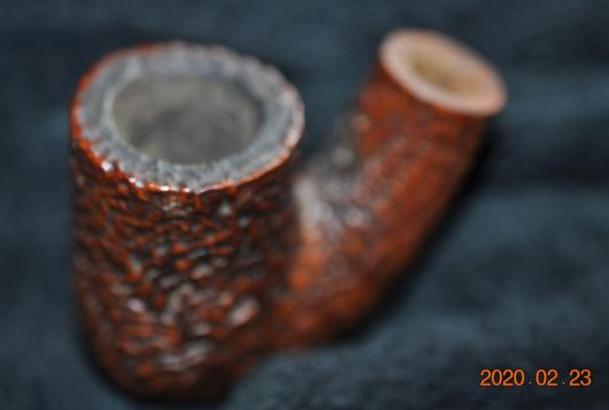
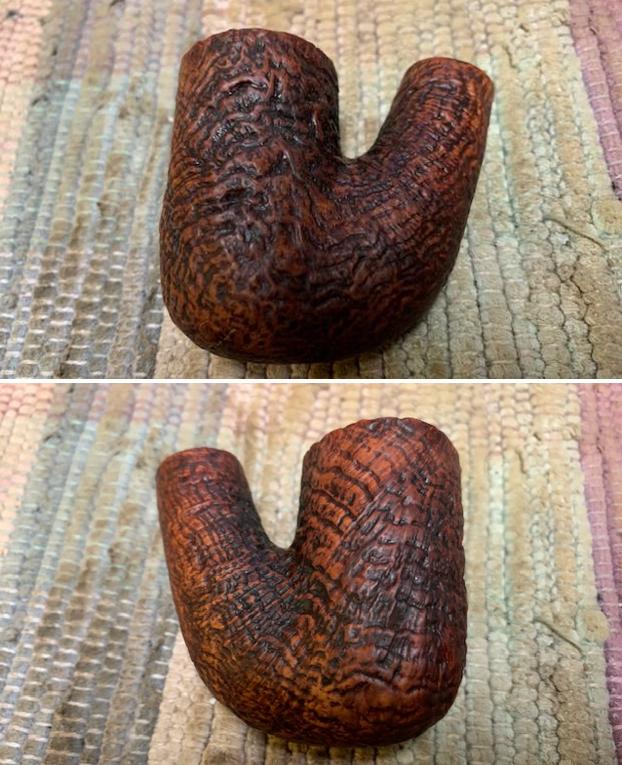
Abha, in a deviation from her thumb rule of not taking any “BEFORE” pictures, had taken a few pictures of the pipe to highlight the condition of the pipe before she commenced her initial clean up for me.
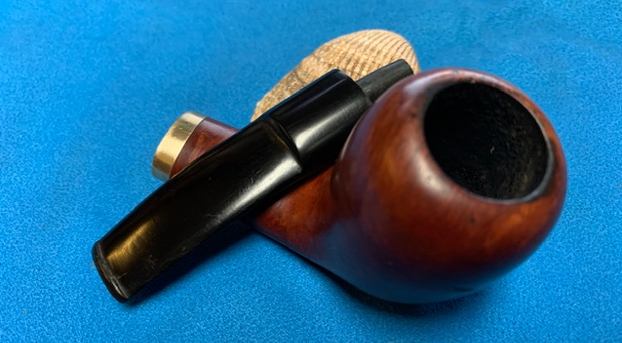
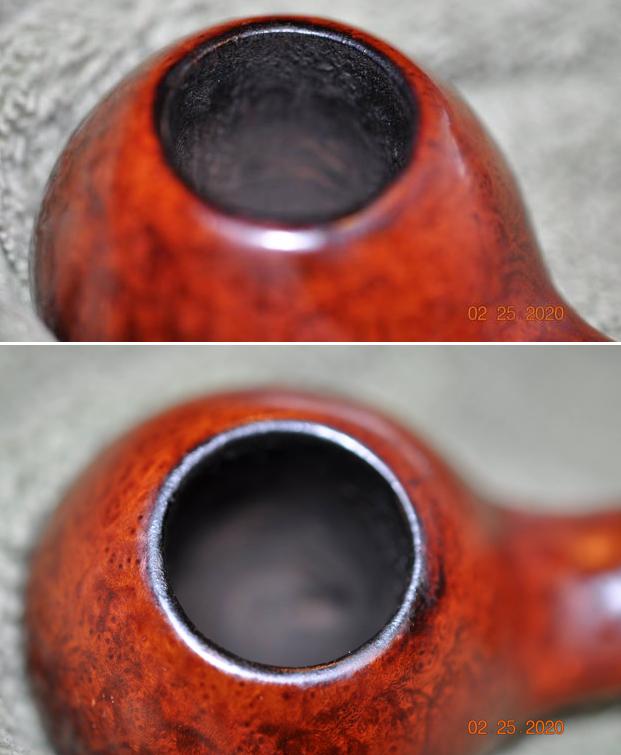
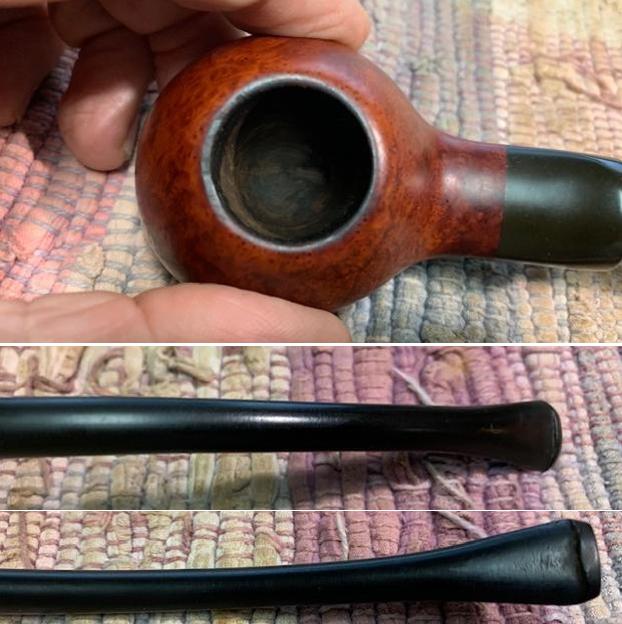
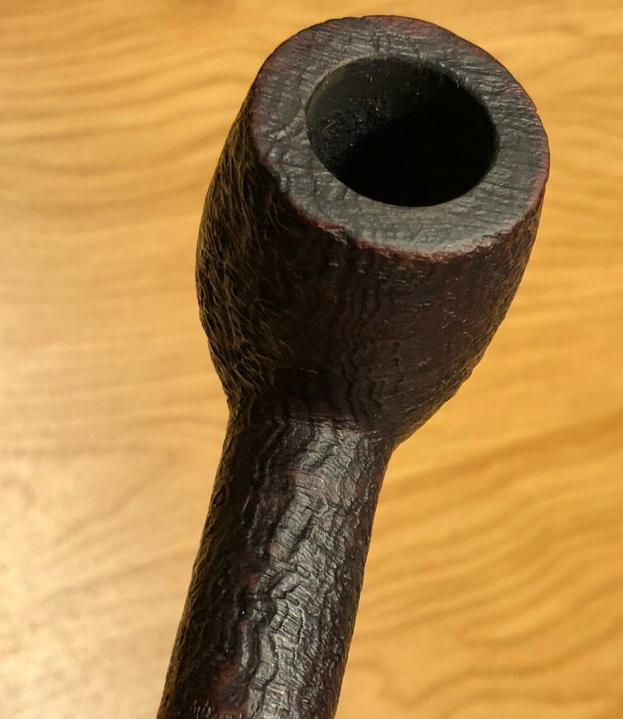
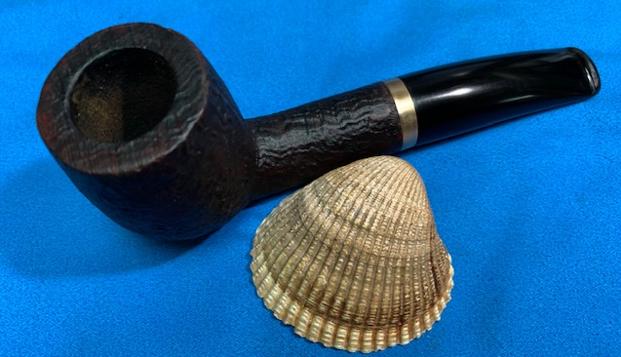
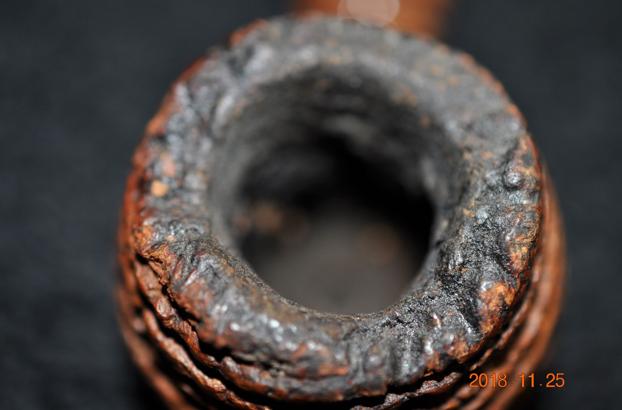
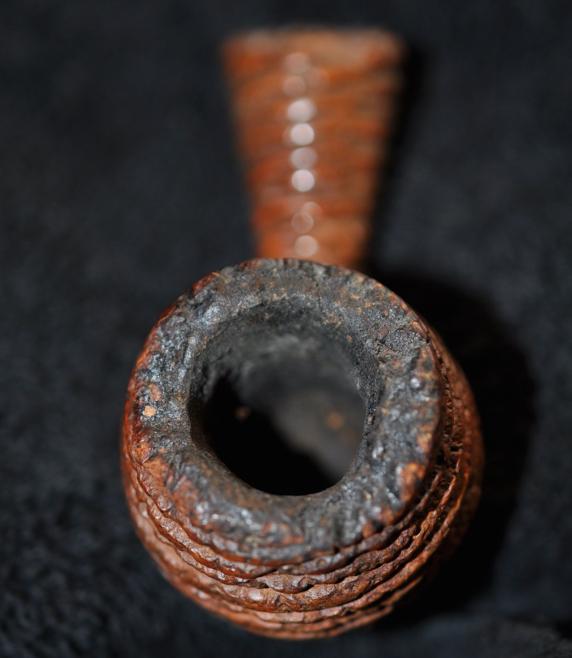
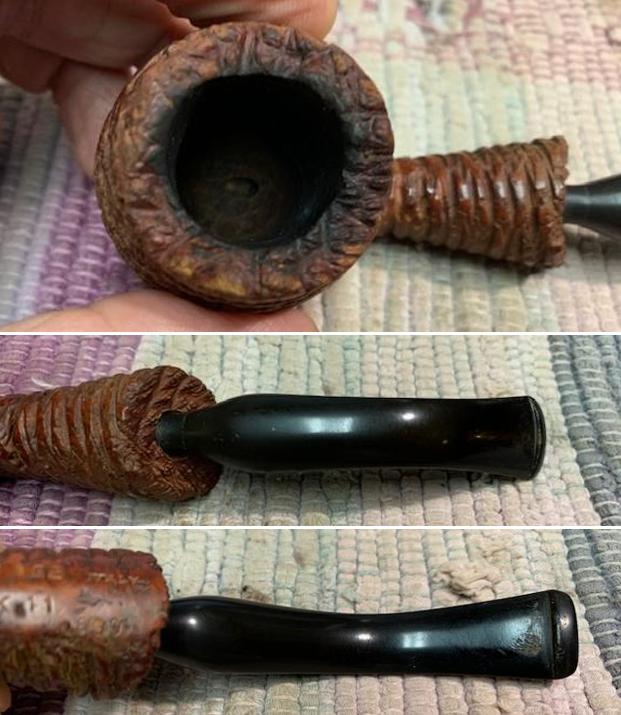
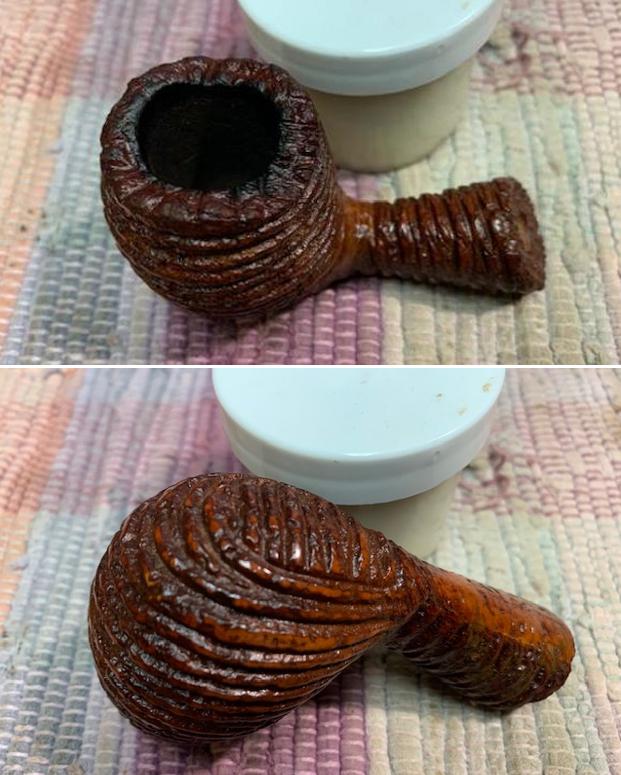
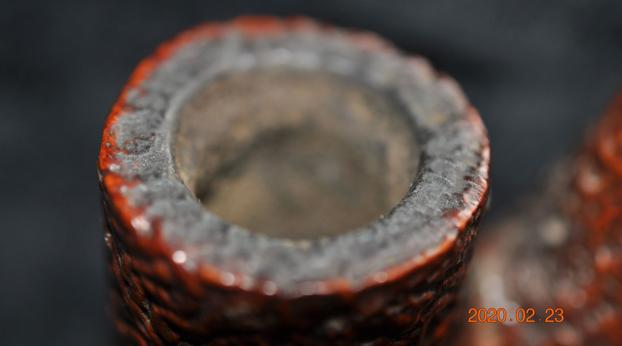
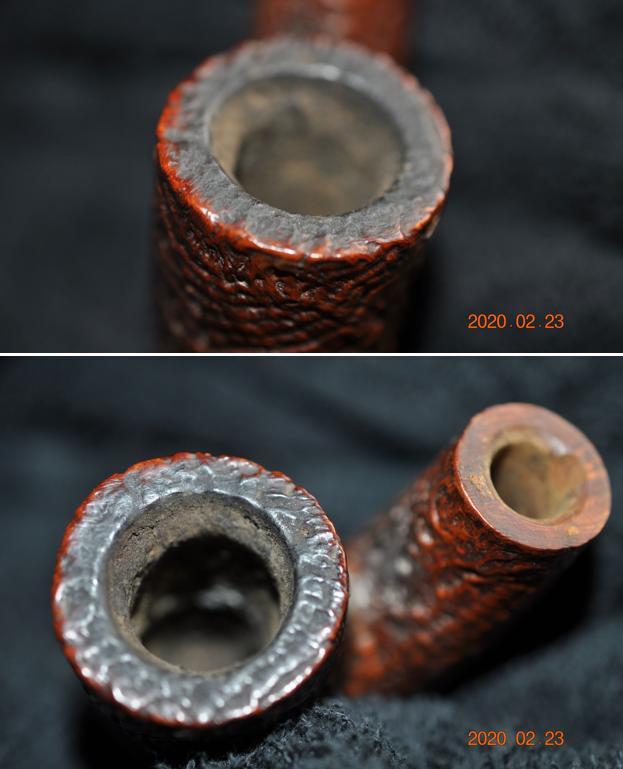
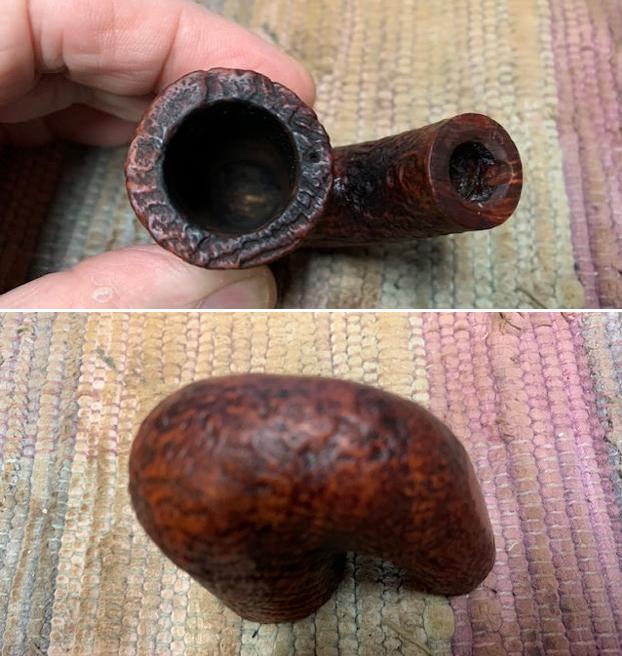
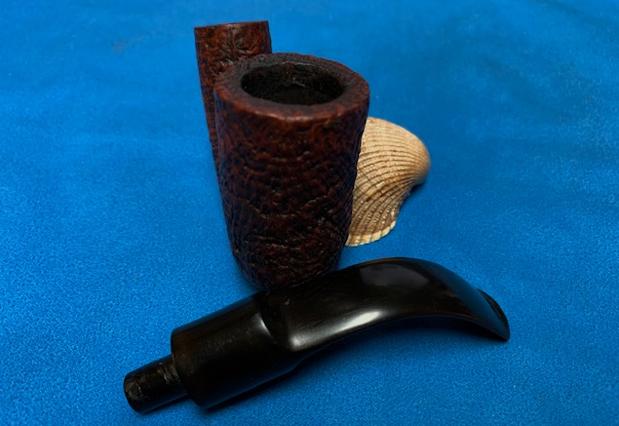
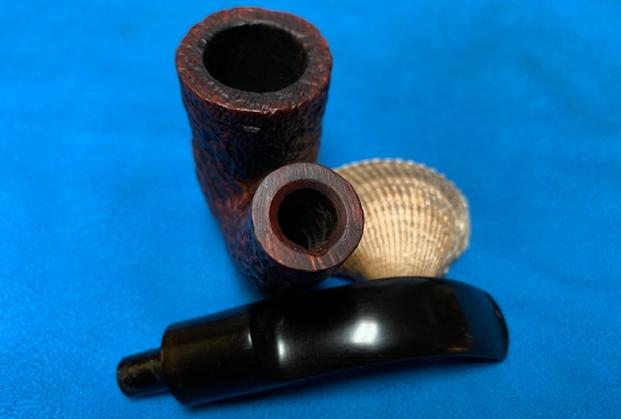
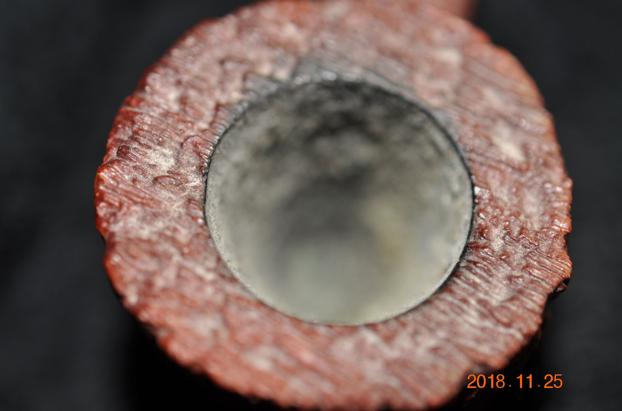
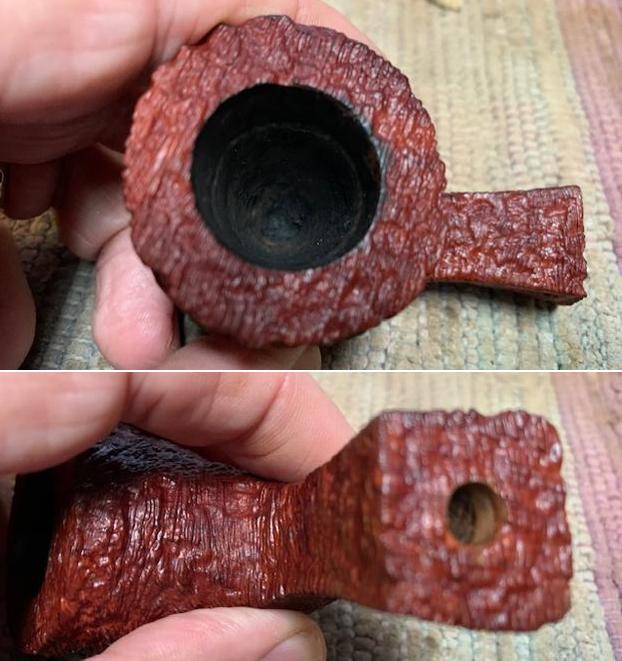
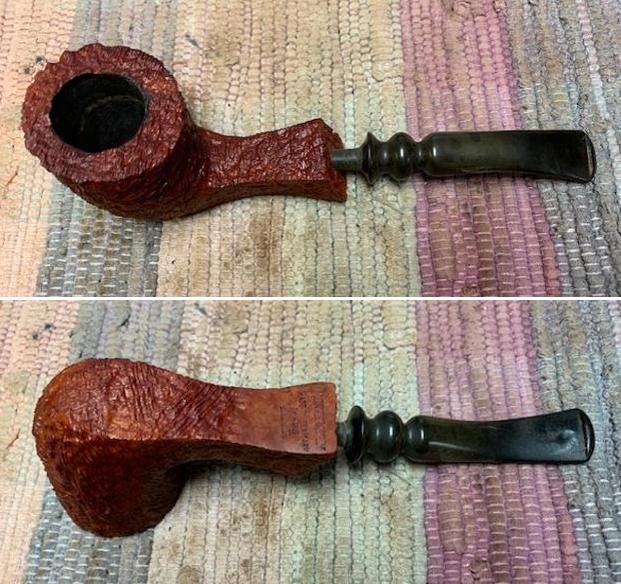
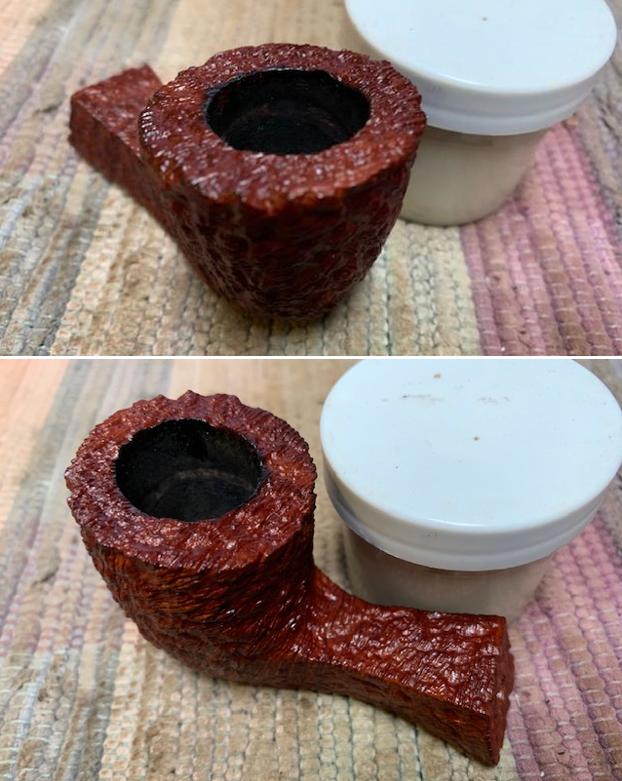
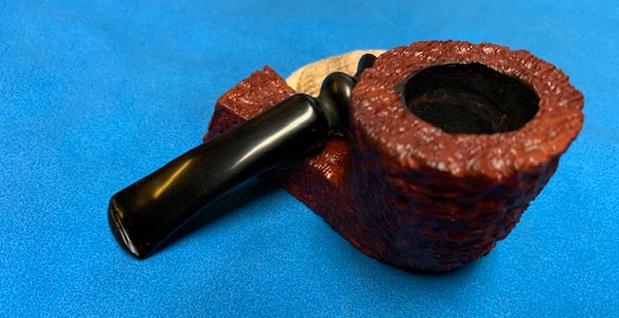
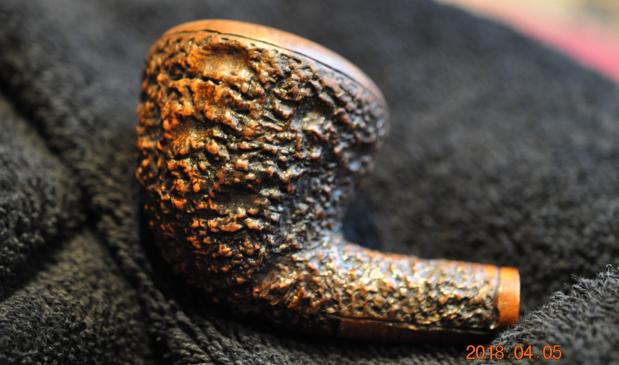
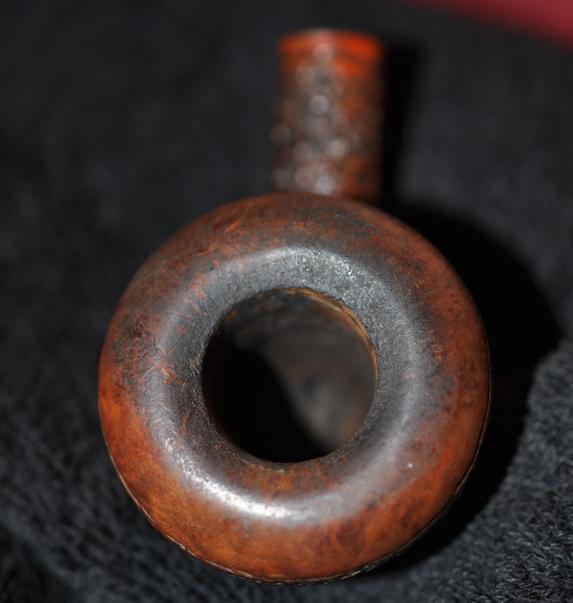
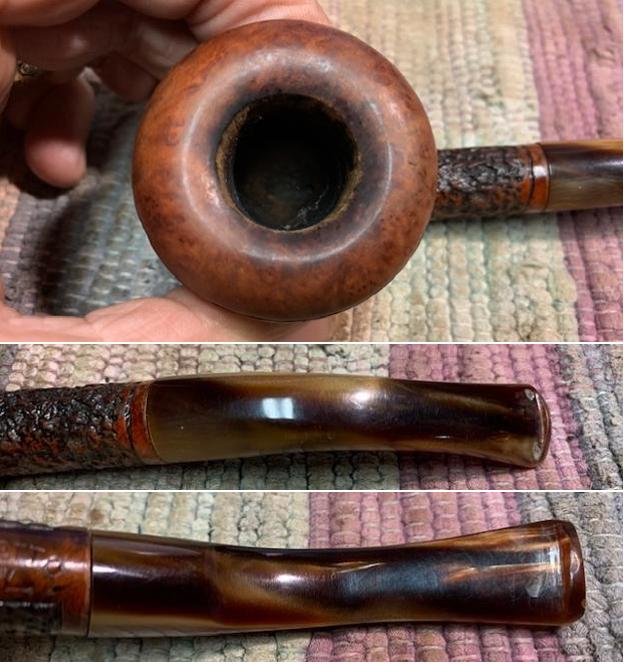
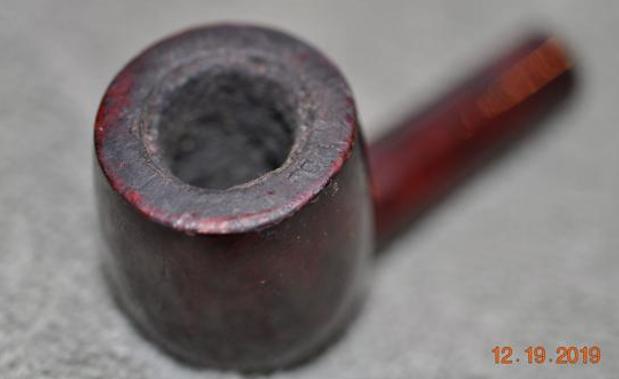
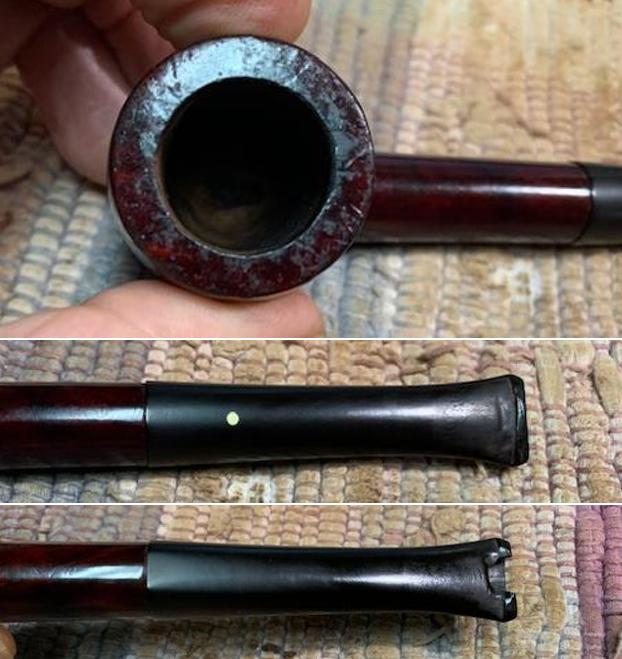
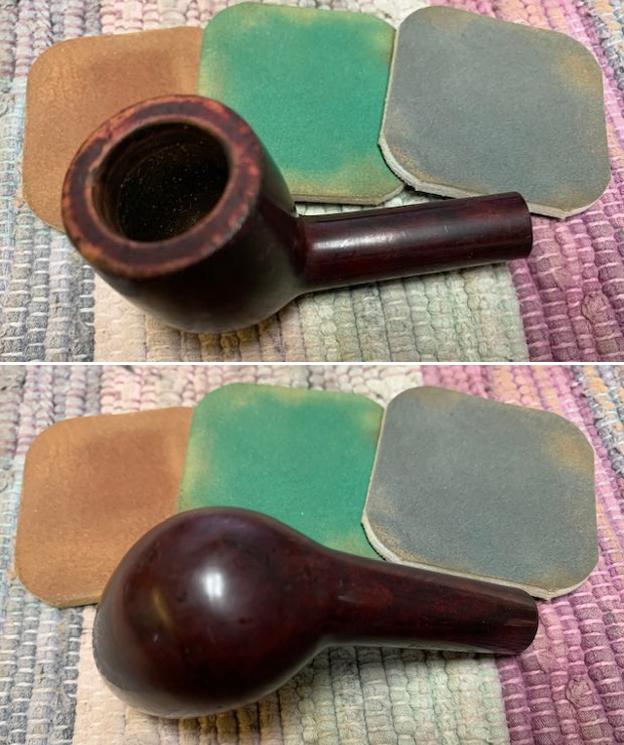
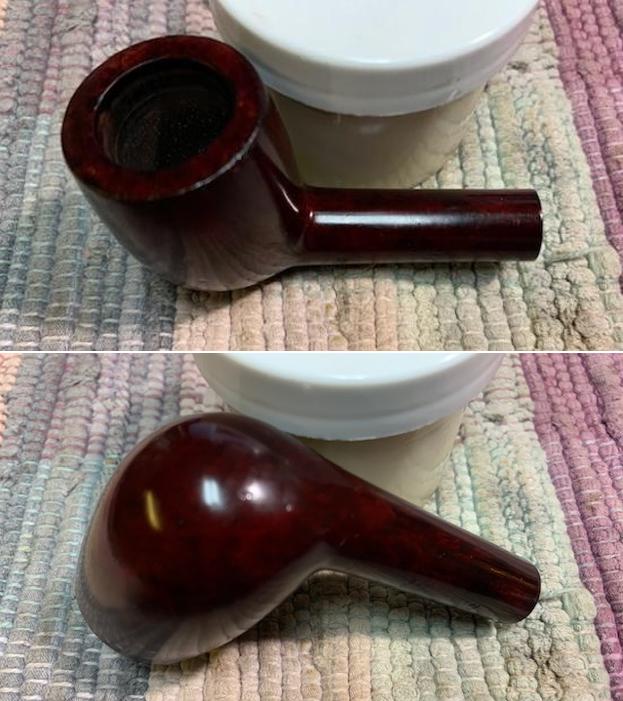
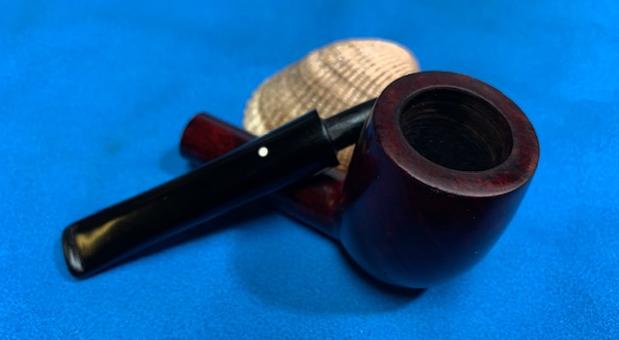
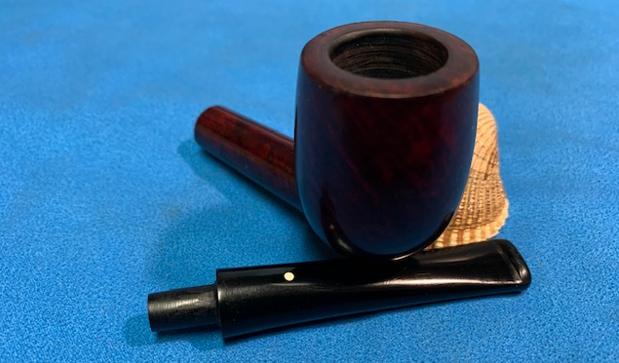
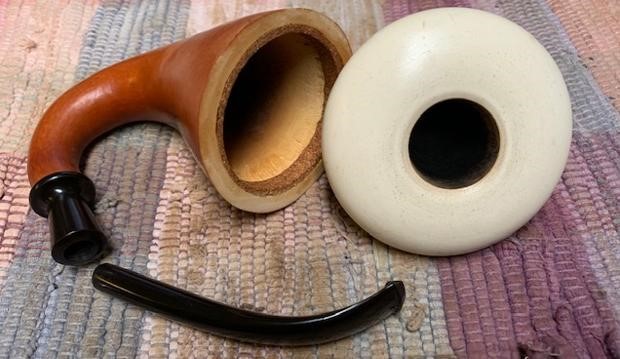
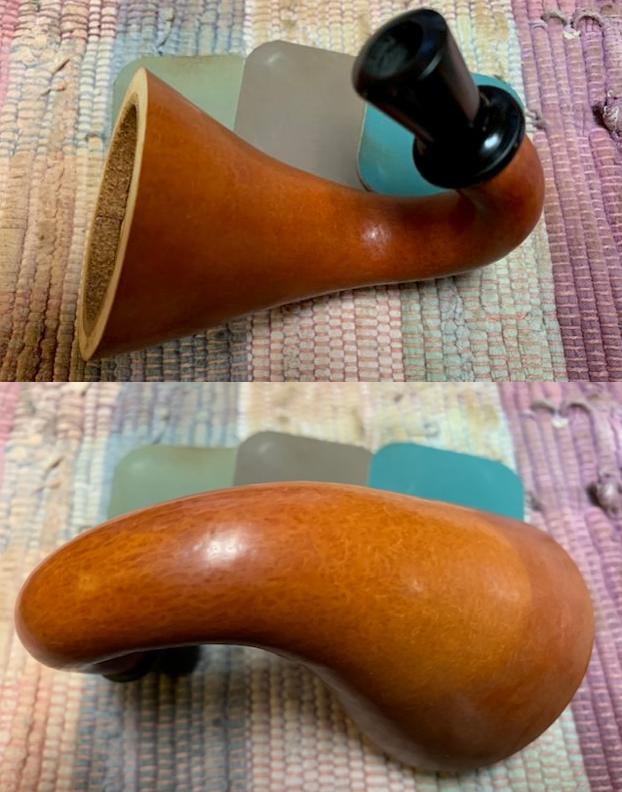
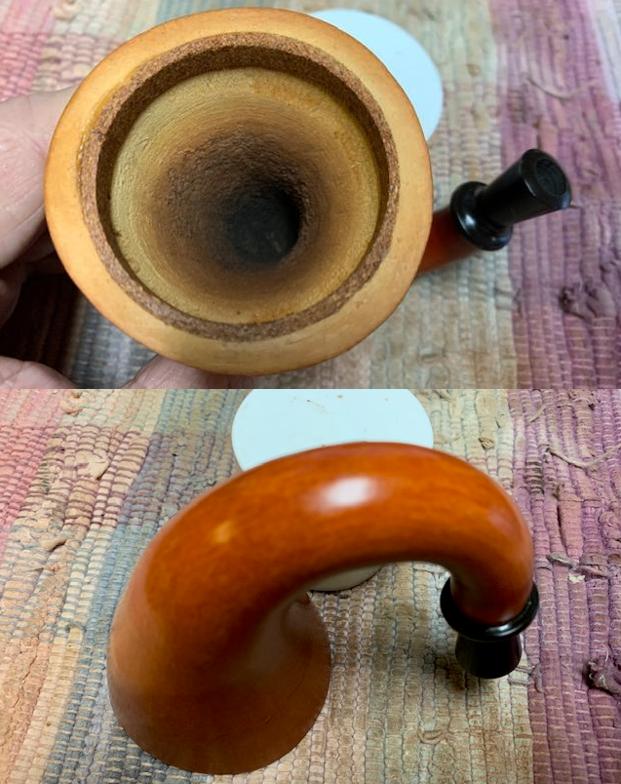
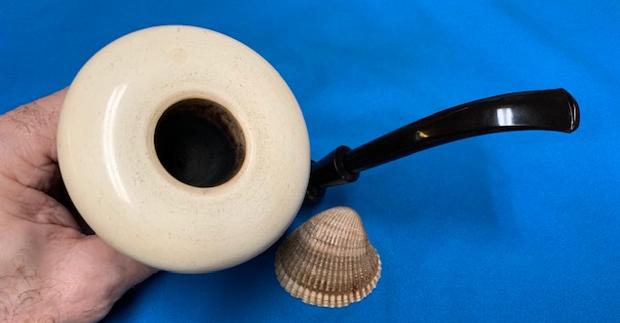
The chamber had a thick layer of cake with heavy overflow of lava over the rim top surface. The inner rim edge appears to be uneven while the outer rim edge appears sans any damage. The exact condition of the edges will be ascertained once the lava overflow from the rim top surface is removed and the surface is cleaned up. The draught hole is in the dead center and at the bottom of the chamber and this construction should make it a great smoke. The stummel surface was covered in dust and grime of years of usage and subsequent storage. The stummel has developed dark hues of browns and has scratches and dings over the surface, most notably to the heel and front of the stummel. However under all the dust and grime, beautiful tight Angel hair grains are awaiting to be brought to the fore. There are a couple of fills, one to the front of the stummel and another to the shank very close to the stampings. The mortise has traces of old oils and tars, restricting the air flow through the mortise. Whether to refresh the fills or let them be will be decided once the stummel is cleaned and the fills are checked for softness thereafter.
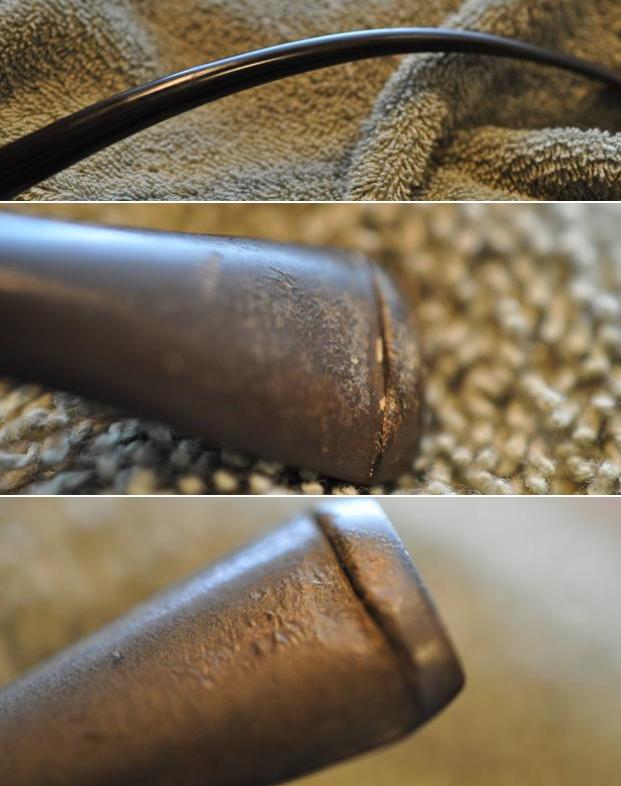
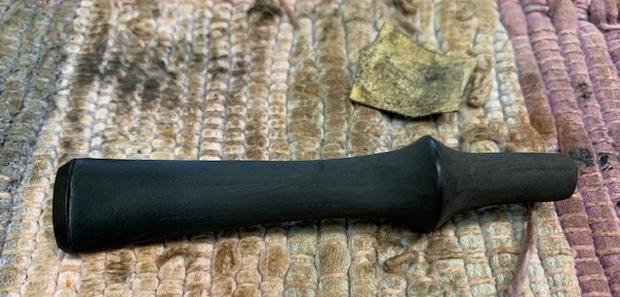
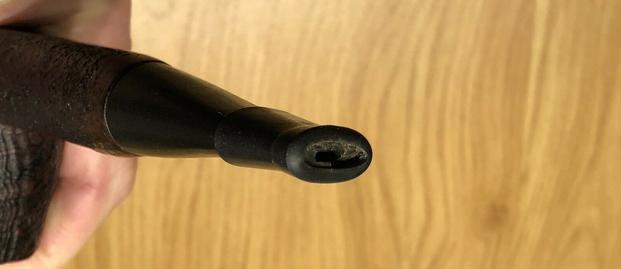
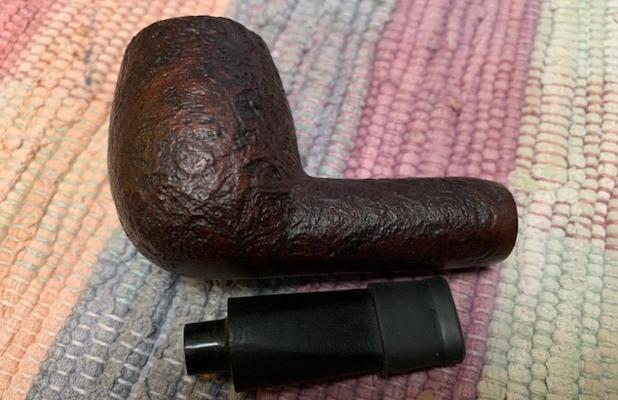
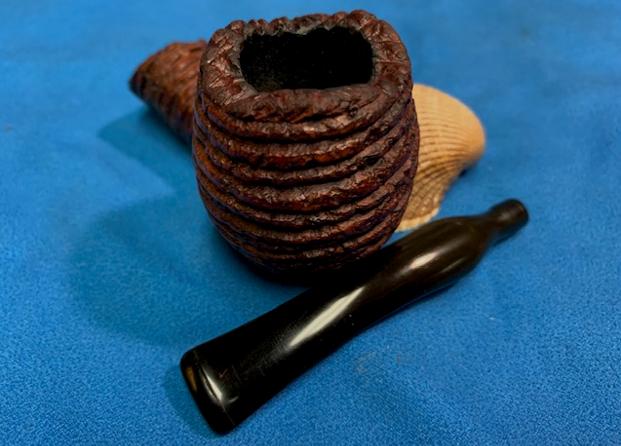
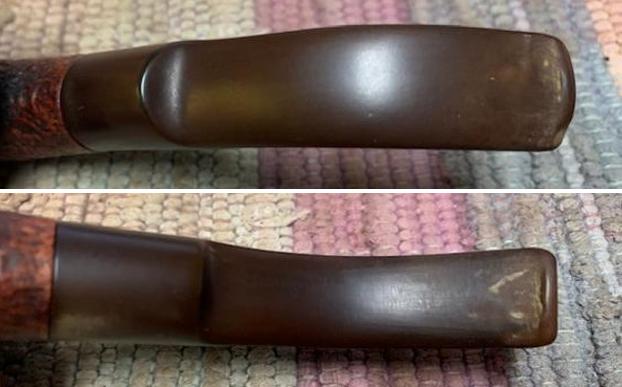
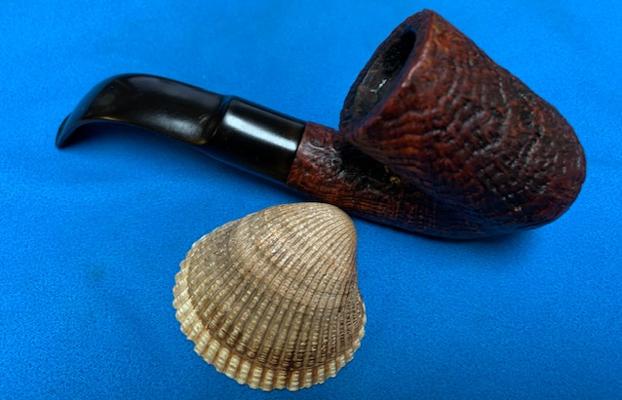
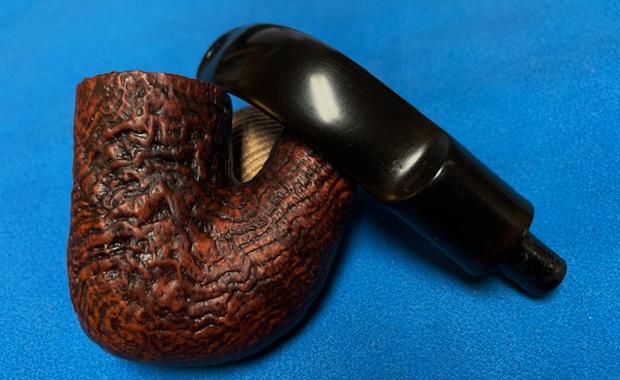
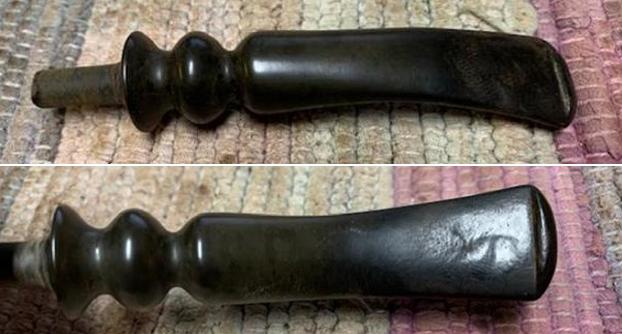
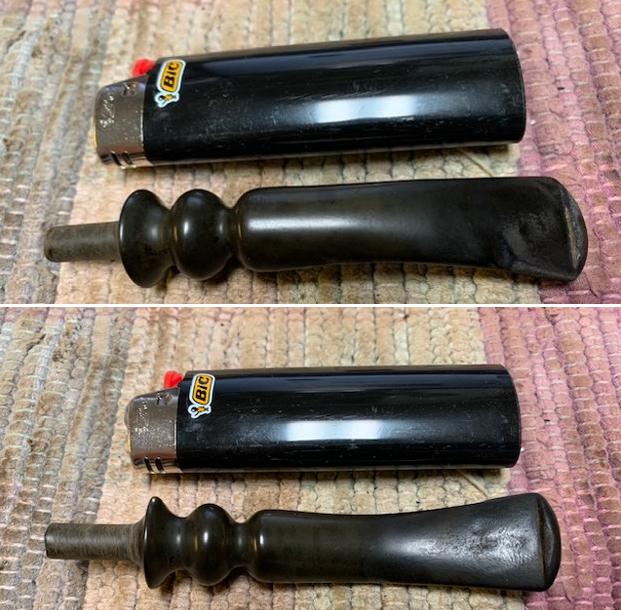
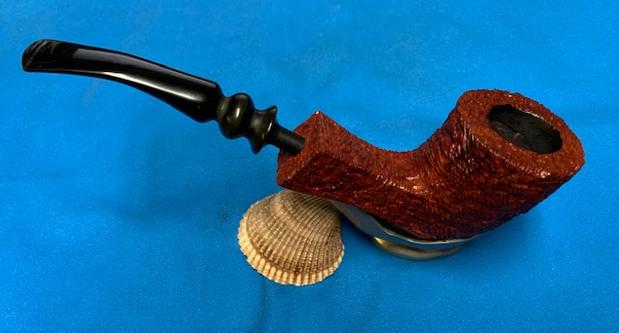
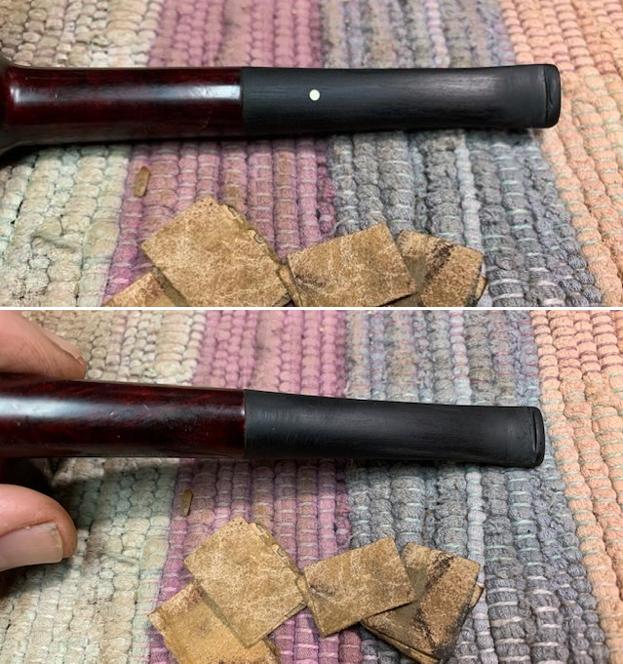
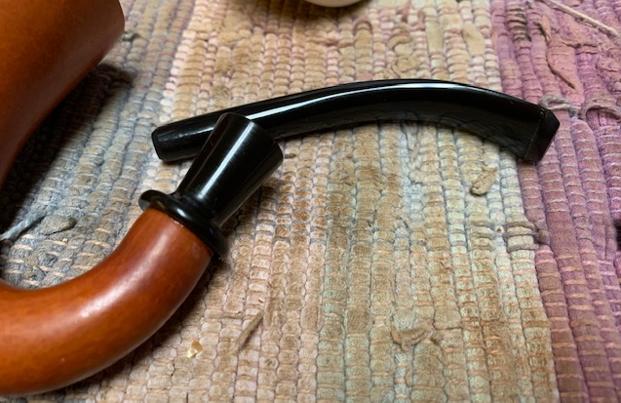
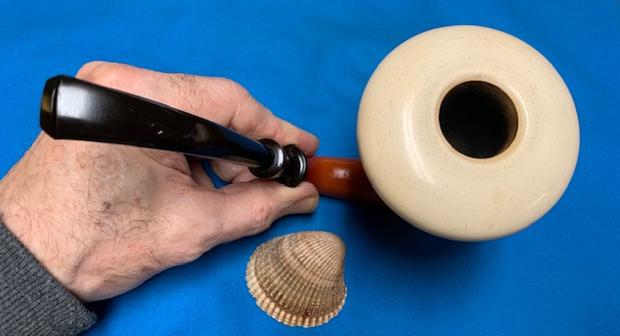
 The long vulcanite saddle stem is heavily oxidized with minor tooth chatter in the bite zone. The stem is skewed to the left immediately after the saddle portion of the stem. This flaw makes me believe it to be a shaping issue more than anything and further points to the likelihood of the stem to be handmade. Steve also concurred with my assumptions when we discussed the restoration during one of our video calls. He also pointed out that there was no way to right this wrong other than replacing the stem.
 Initial Cleaning By Abha…
The initial cleaning on this pipe was done by Abha, my wife (she has cleaned up around 40-50 pipes and these have now reached me for further restoration). She reamed out the complete cake and further smoothed out the chamber walls with a folded piece of 220 grit sand paper. She further cleaned out the internals of the shank with pipe cleaners and alcohol and cotton buds. She followed the internal cleaning of the shank with external cleaning of the stummel using Murphy’s Oil soap and hard bristled tooth brush and dried it with paper napkins and cotton cloth.
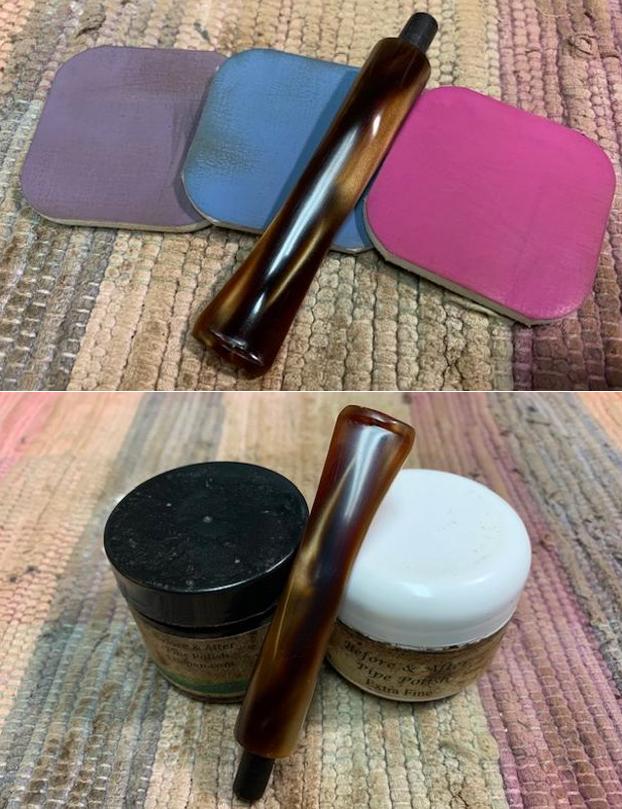
Next she cleaned out the internals of the stem air way and immersed it in “Before and After Deoxidizer” solution along with the stem of other pipes in line for restoration. Once the stem had soaked overnight, she cleaned the stem under running warm water and scrubbed the raised oxidation from the stem surface using Scotch Brite pad. She further removed the oxidation by scrubbing the stem with 0000 grade steel wool and applied a little olive oil to rehydrate the stem.
Once The Pipe Is On My Work Table…
The cleaned up pipes presents a very clear picture of what needs to be done to restore this pipe to a decent and smokable condition. I really cannot thank Abha enough for all the help and support that she extends me in my pursuance of this hobby. I proceed to carry out my appreciation of the work that needs to be done on this pipe to restore it.
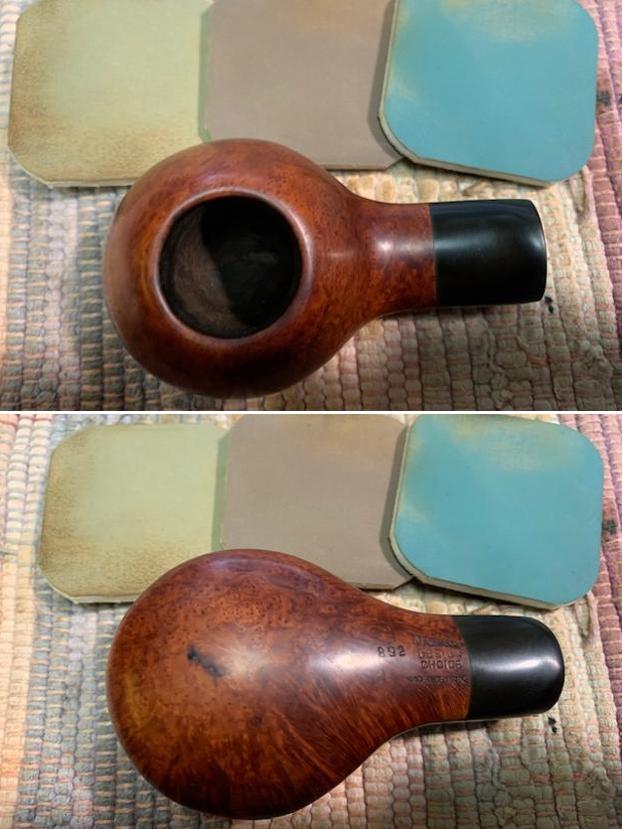
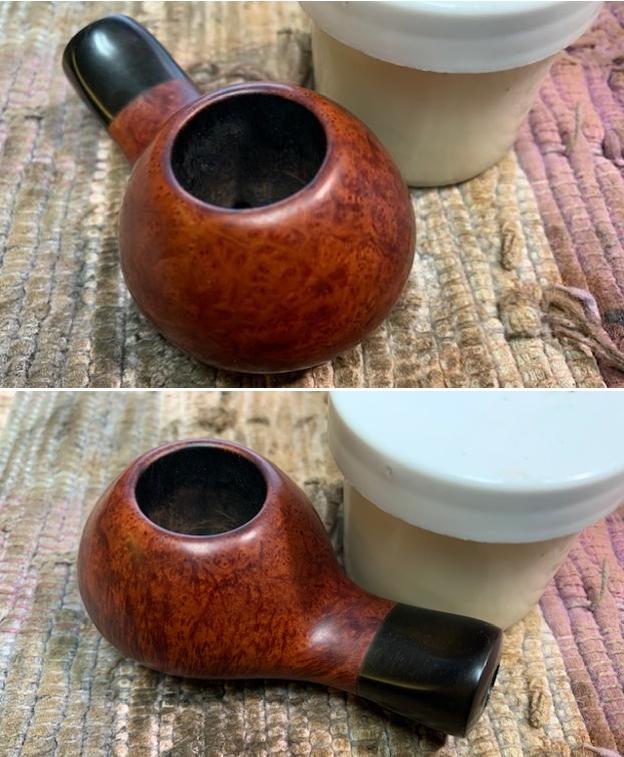
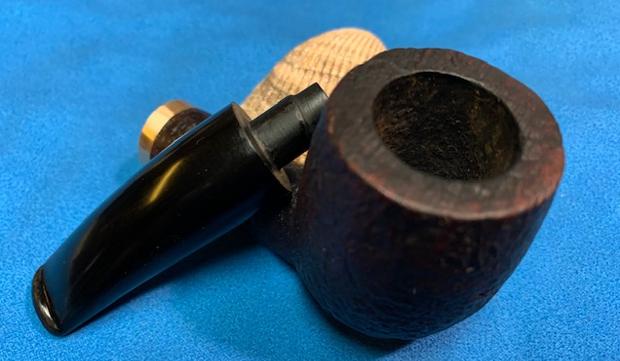
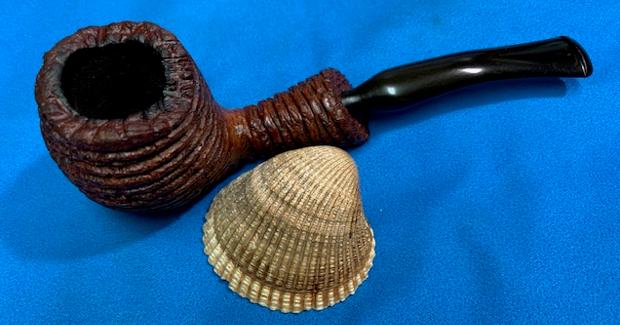
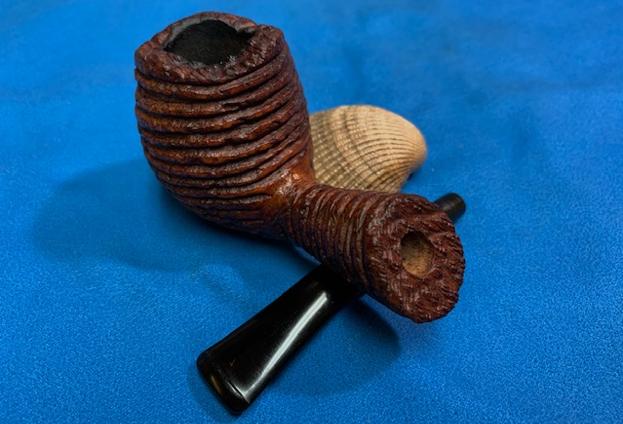
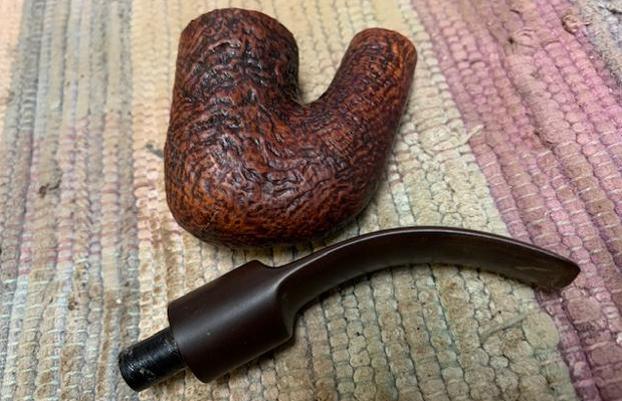
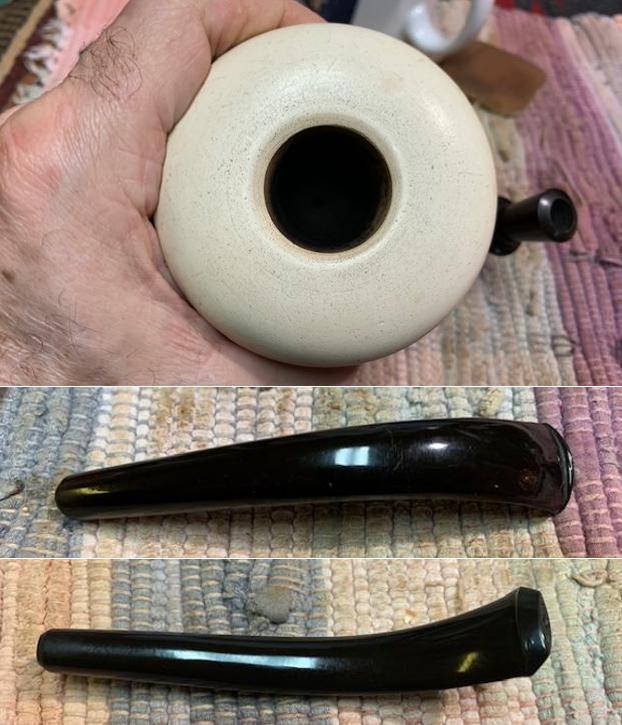
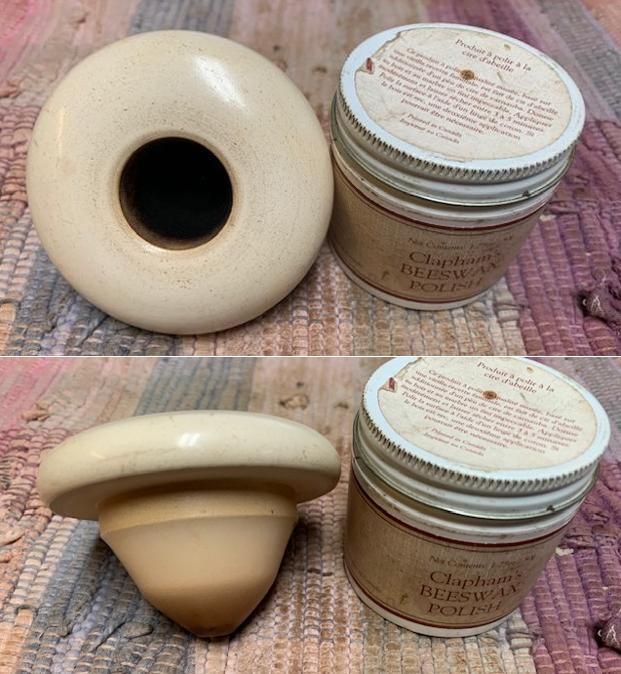
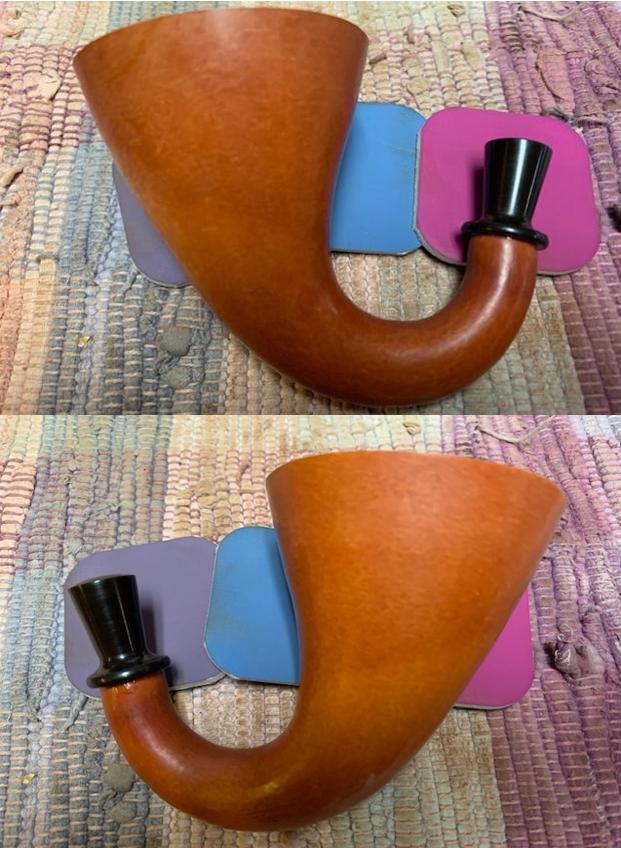
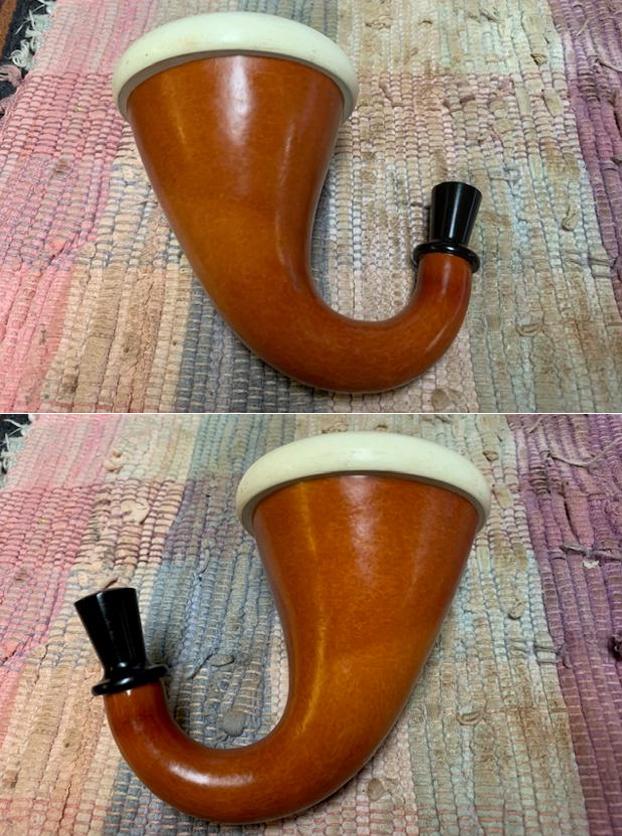
As with all the cleaned pipes that Abha packs, there was a note in the zip lock pouch with issues that she had observed in the pipe. The first point was that the chamber has developed heat fissures. The second point was that she was not happy with the shape of the stem and it appeared odd. Also the seating of the stem in to the mortise was very loose. Here are the pictures of the pipe as I had received.

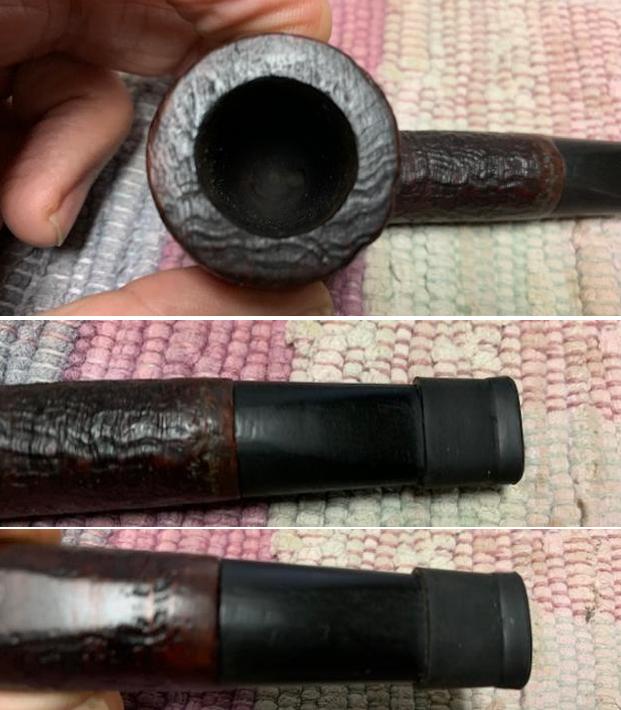
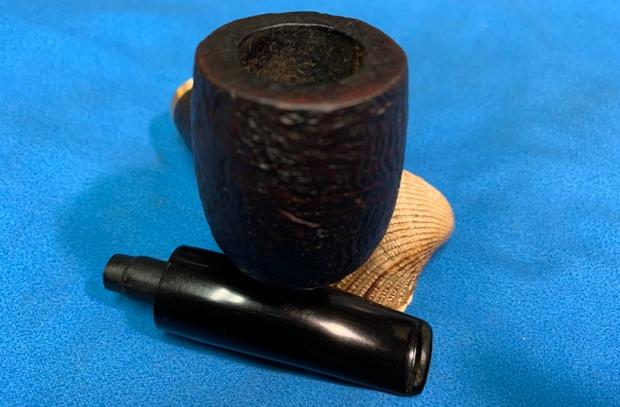
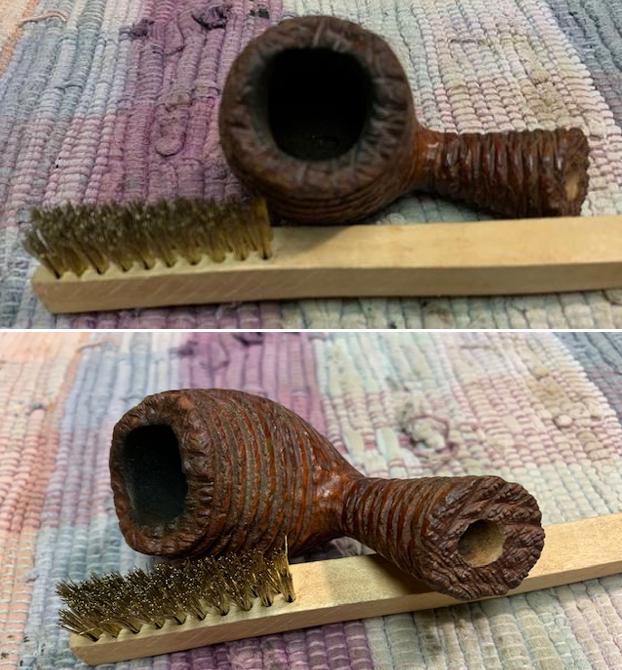
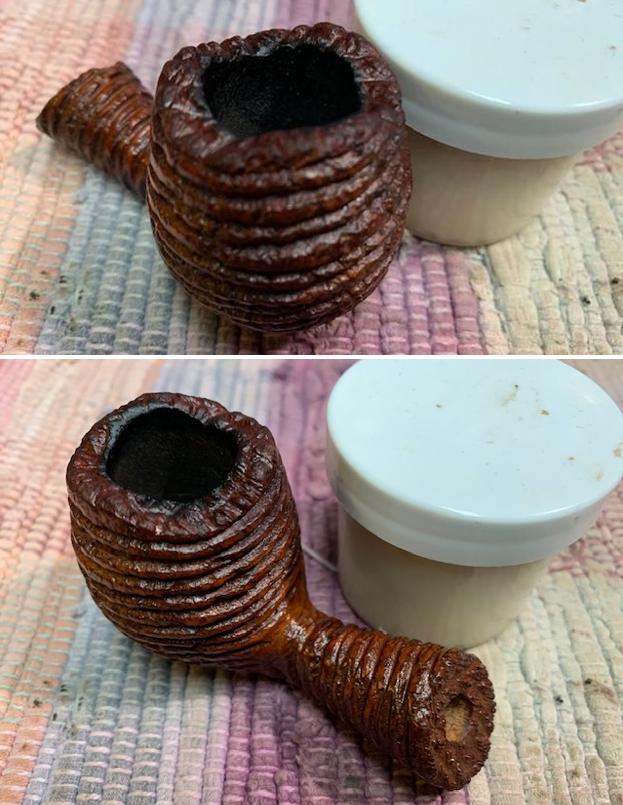
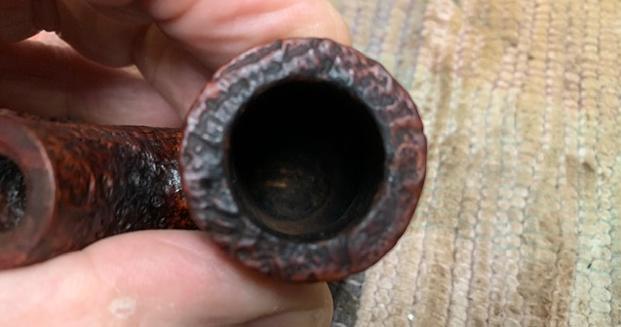
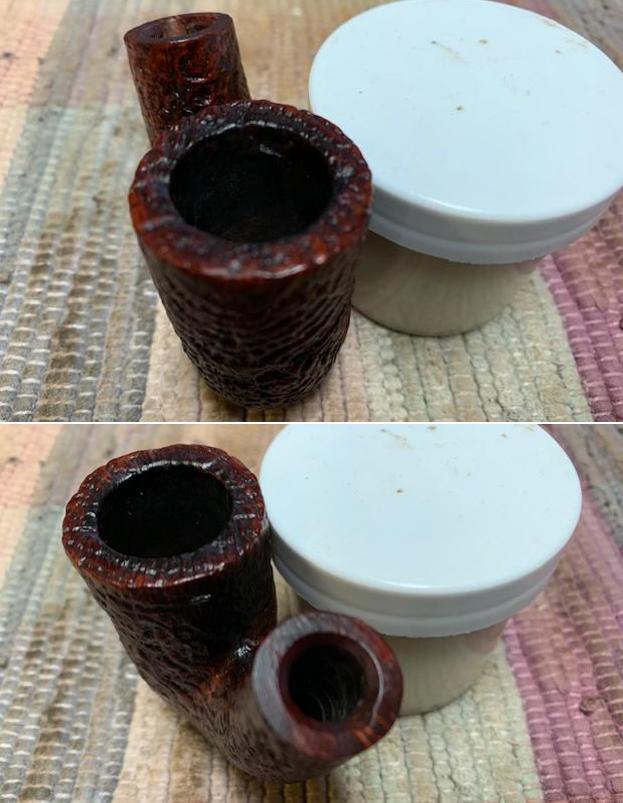
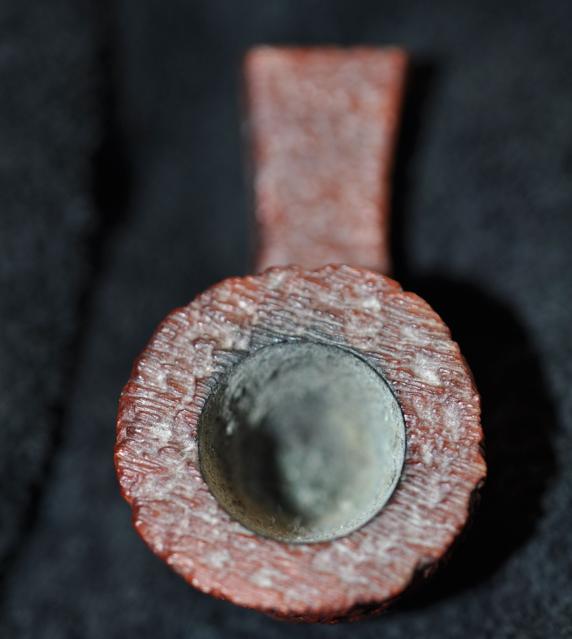
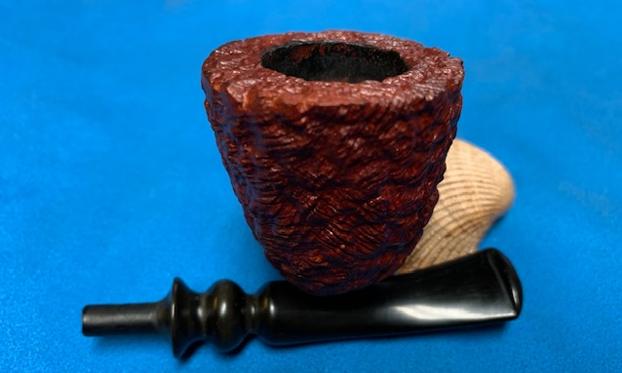
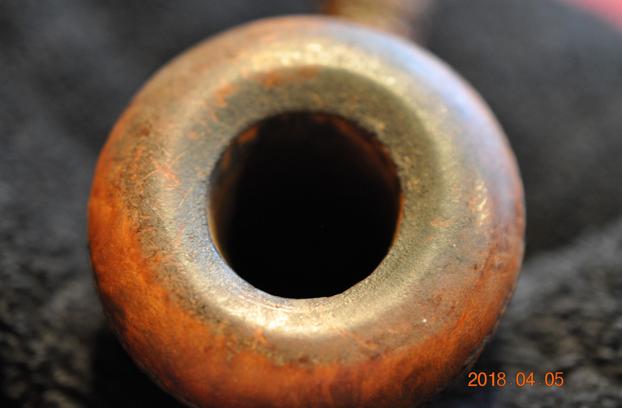
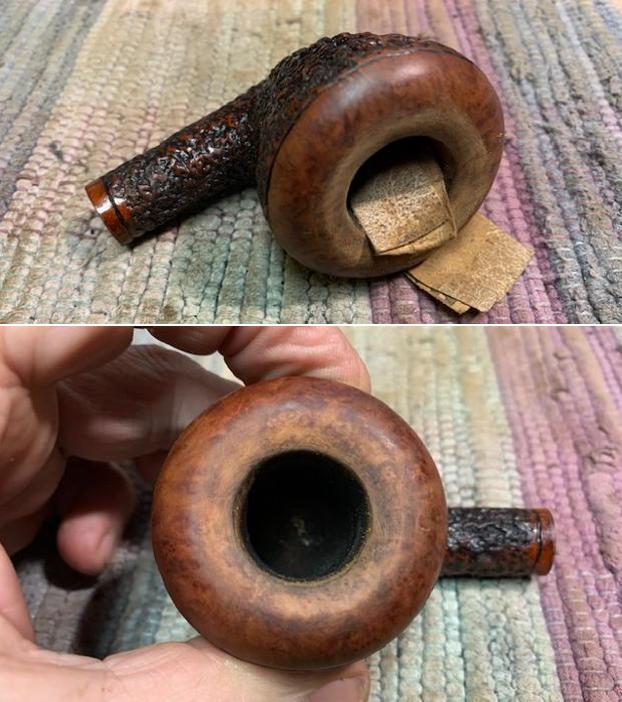
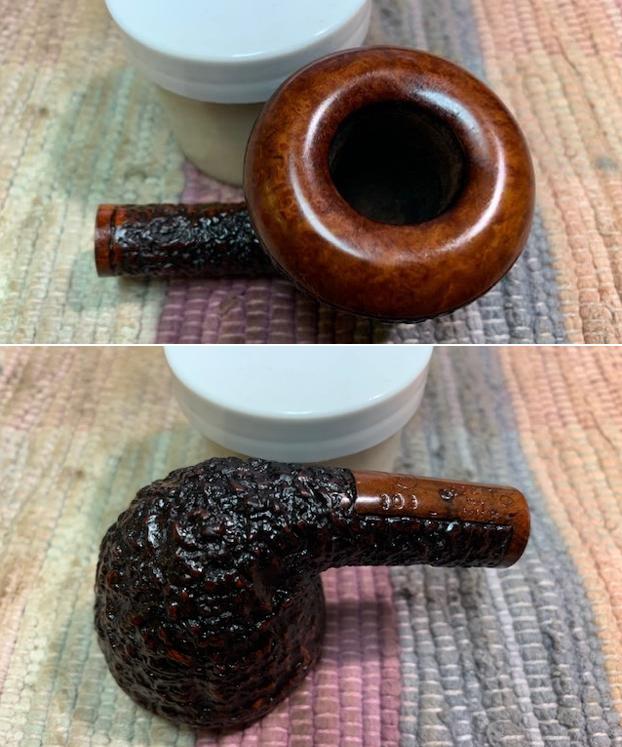
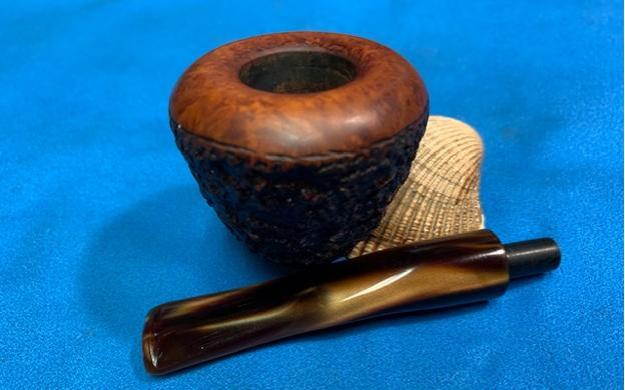
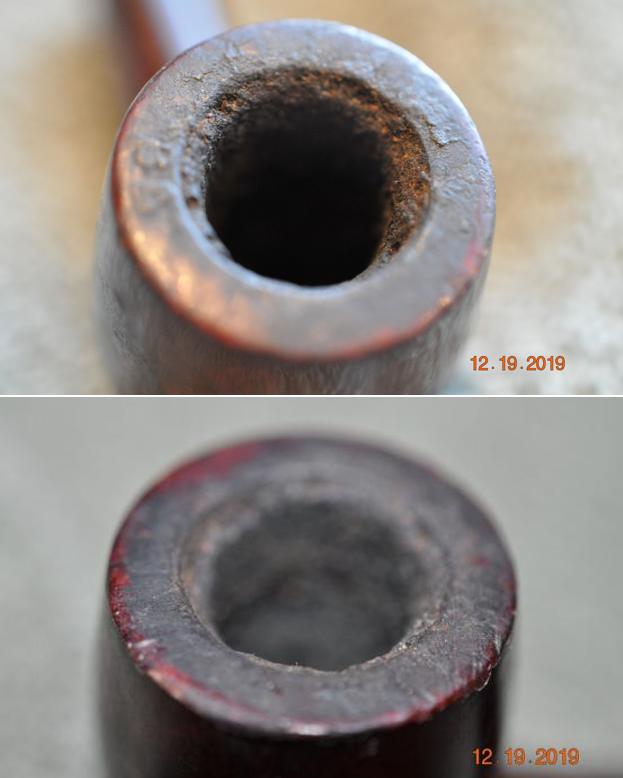
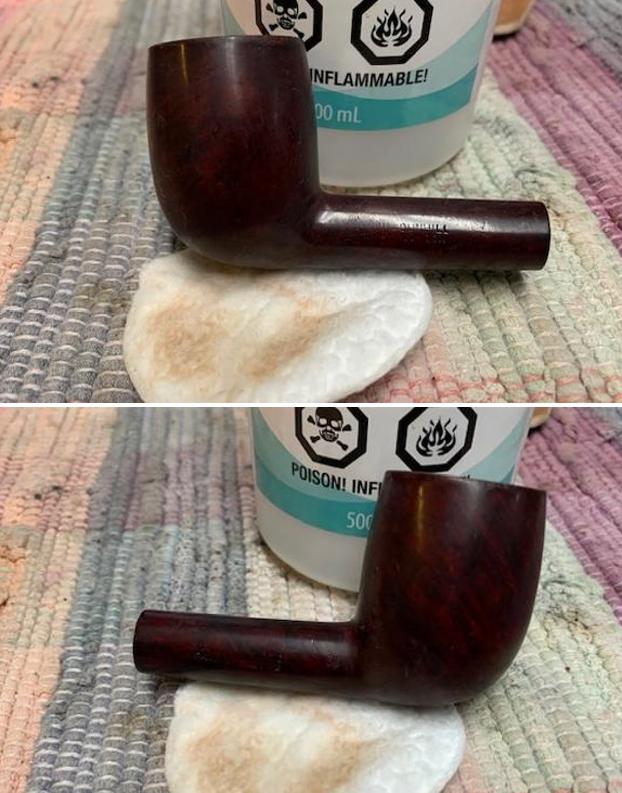
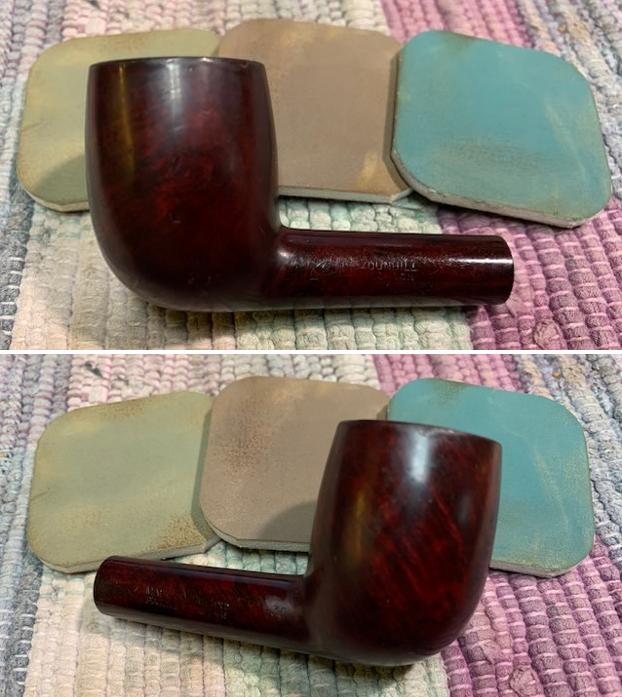
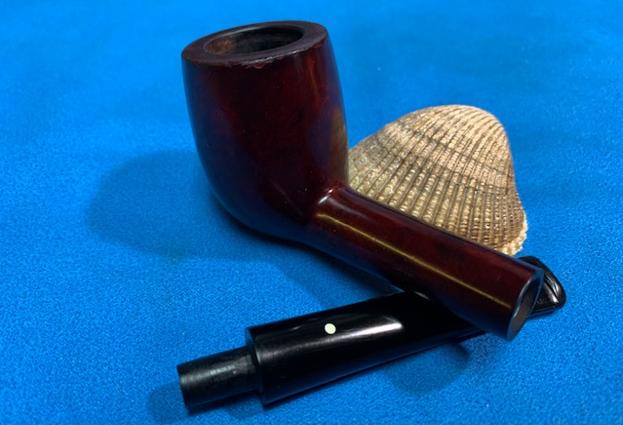
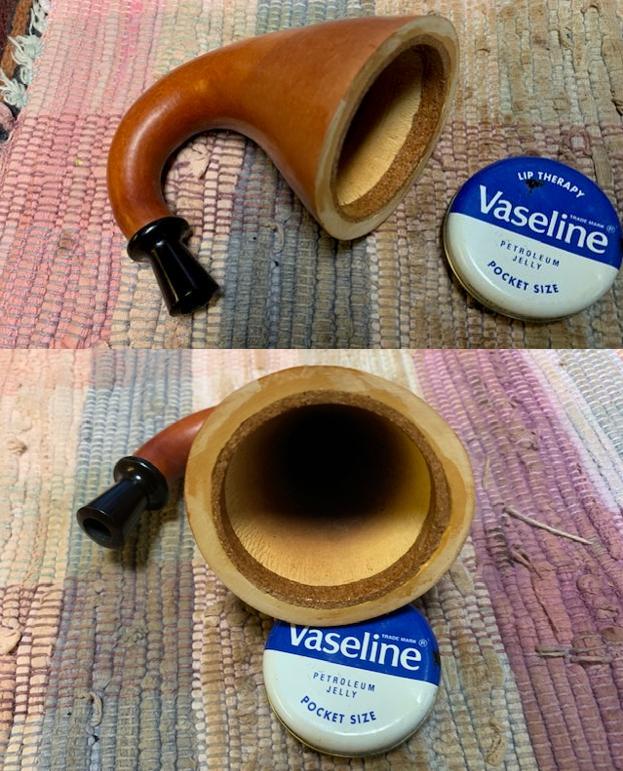
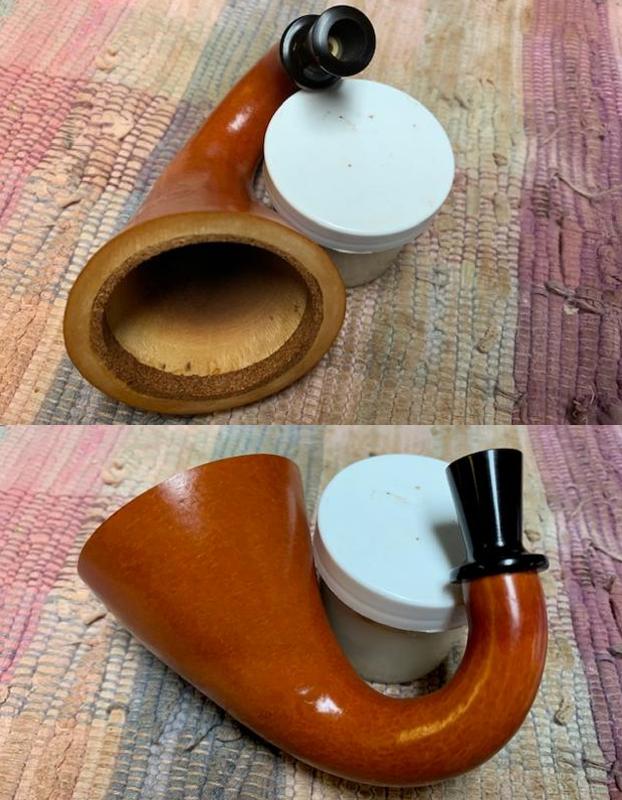
 The chamber does appear to have developed heat fissures (indicated with red arrows). The rim top surface is darkened all around, more so at the back of the rim surface. The inner rim edge is uneven while the outer edge is slightly charred in 1 o’clock direction and is encircled in yellow. Close scrutiny of the chamber walls made me realize that there is still a very thin layer of cake in the chamber and it is my experience that this gives an appearance of heat fissures! Only after the cake has been completely removed will I be able to confirm presence of heat fissures or otherwise.
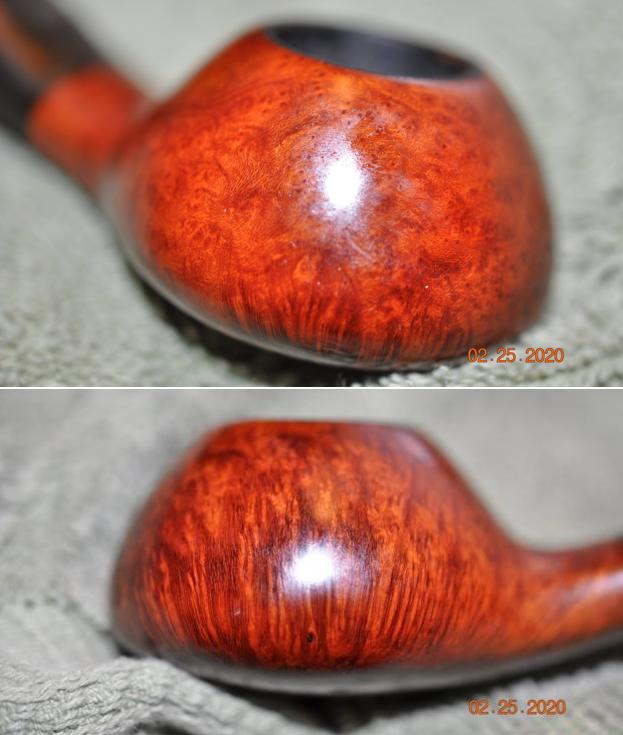
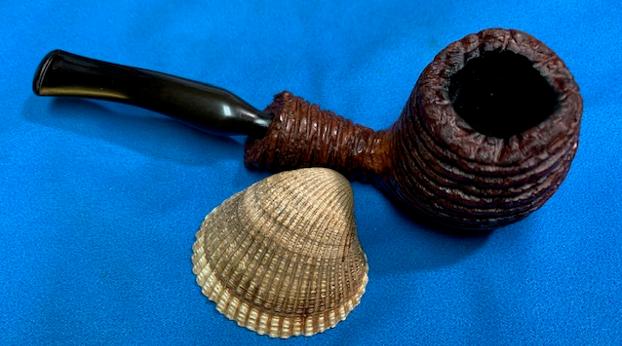
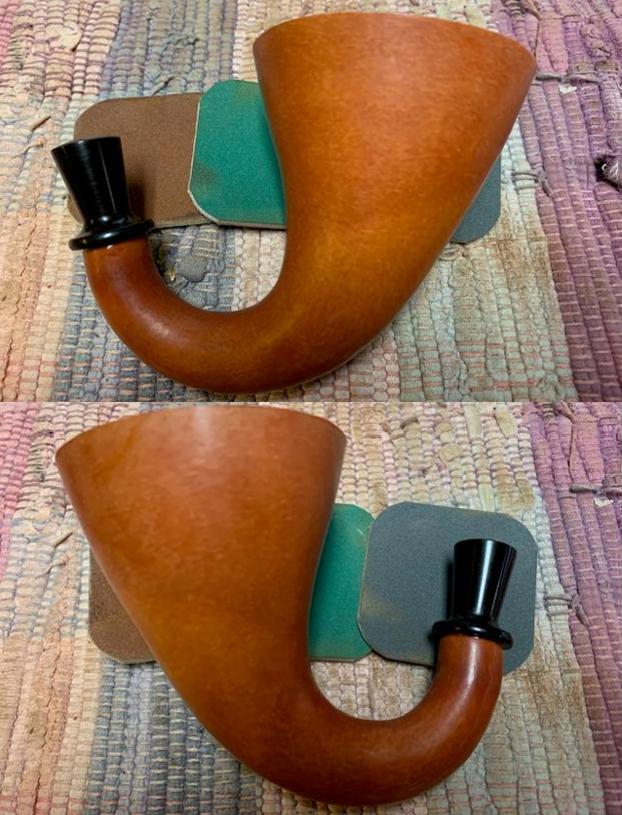
 The stummel is nice and clean but would benefit from polishing to rejuvenate and bring a nice shine over the briar surface. There is a large fill over the left shank surface and very close to the stampings (encircled in yellow). The fill is solid and I wouldn’t take the risk of refreshing it due to its proximity to the stampings. There are a few dings to the front of the bowl (encircled in red) that would need to be addressed.
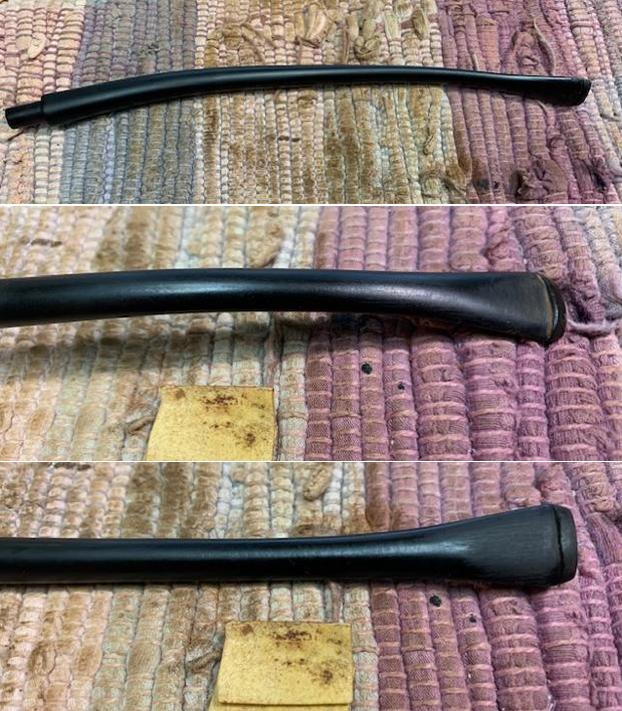
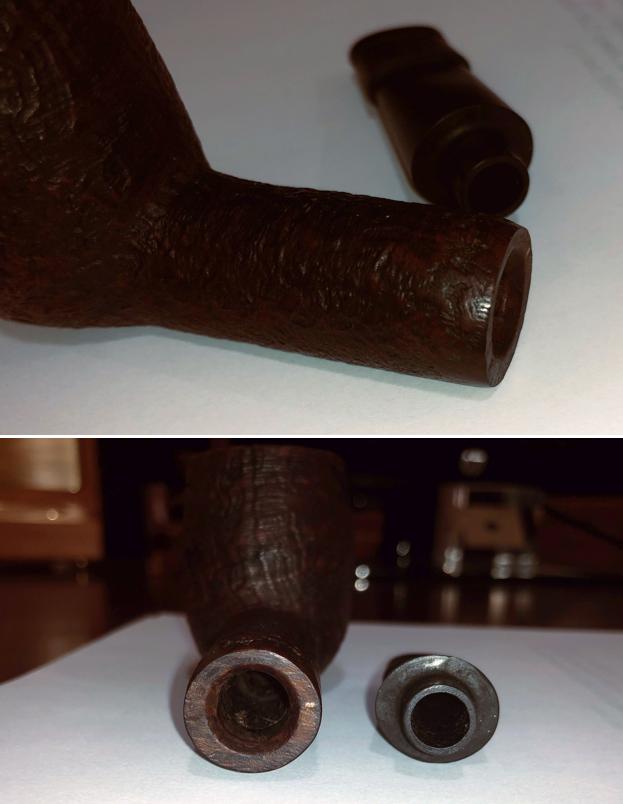
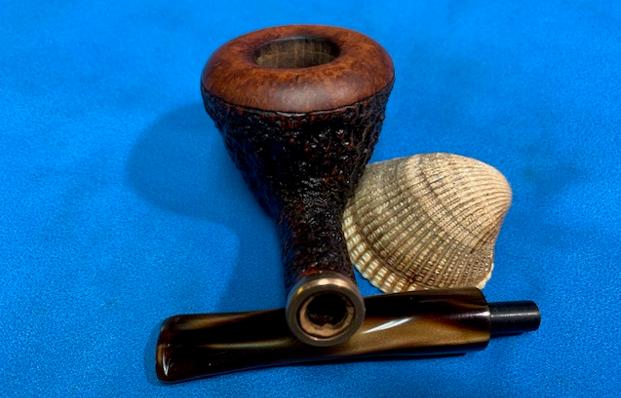
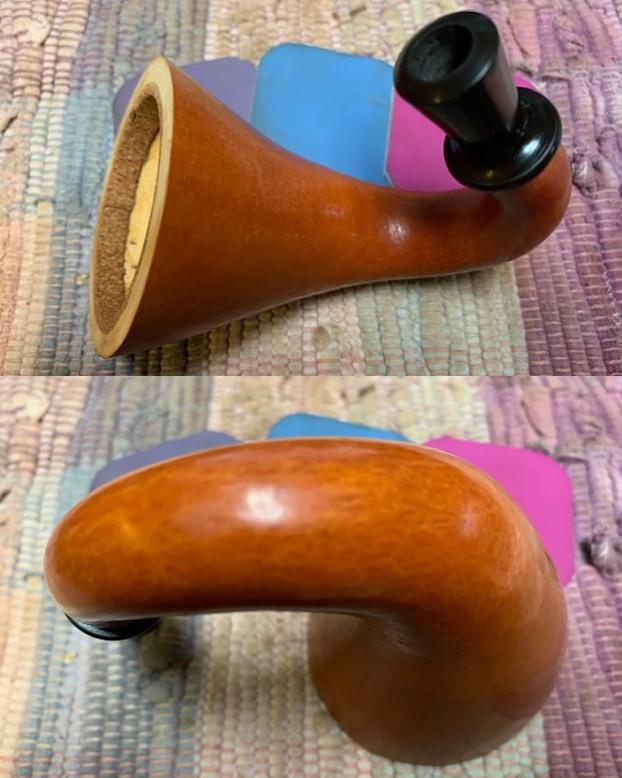
 The mortise has no chips or cracks to the shank face/ shank. There are a few minor pockets of old oils and tars that are seen on the walls of the mortise and would require some invasive measures to eliminate completely.
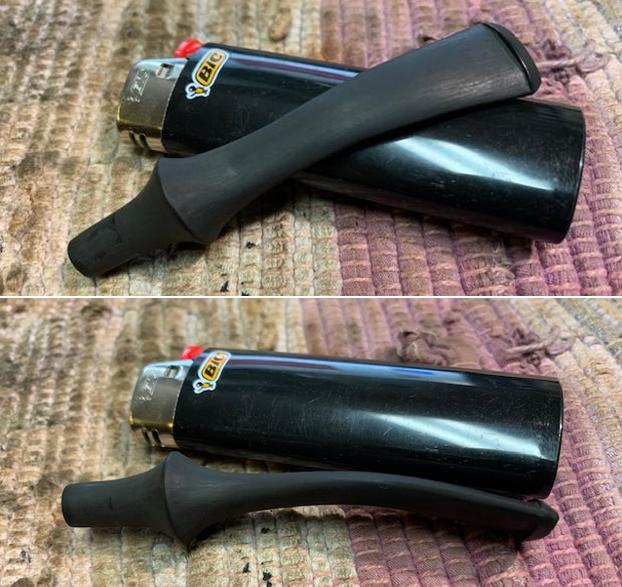
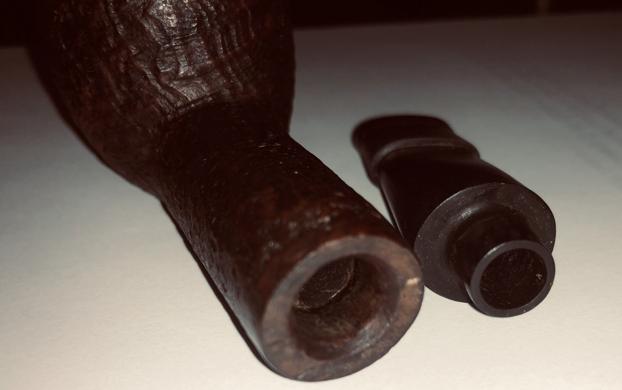
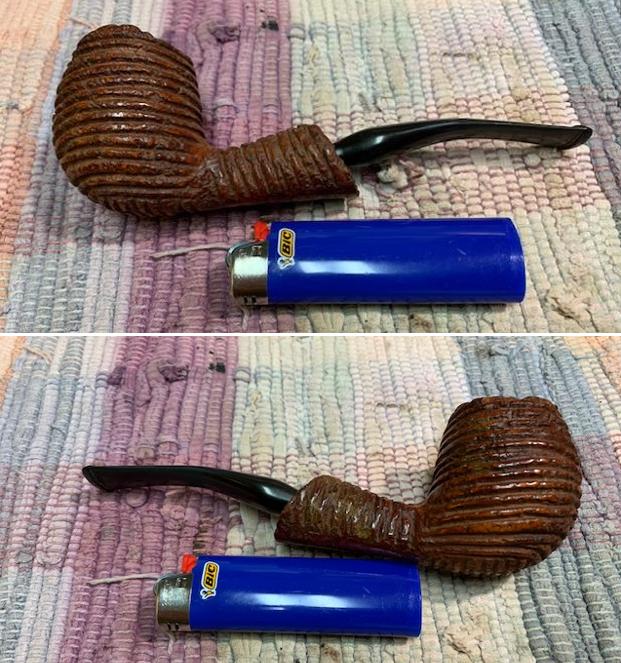
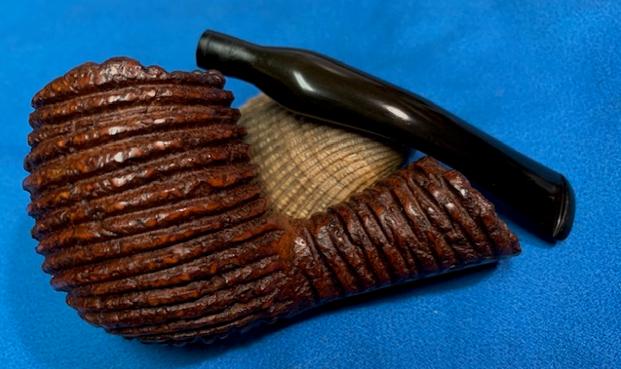
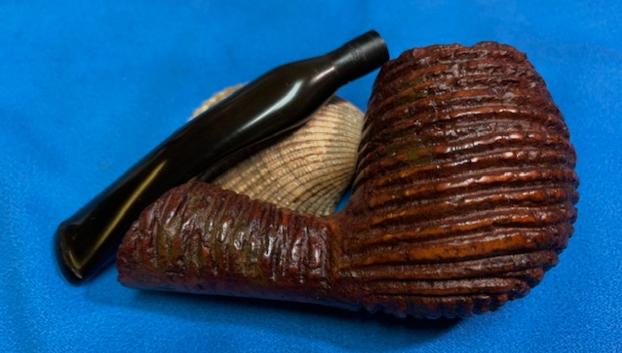
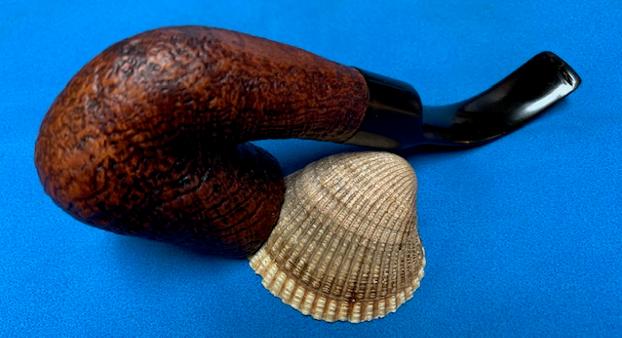
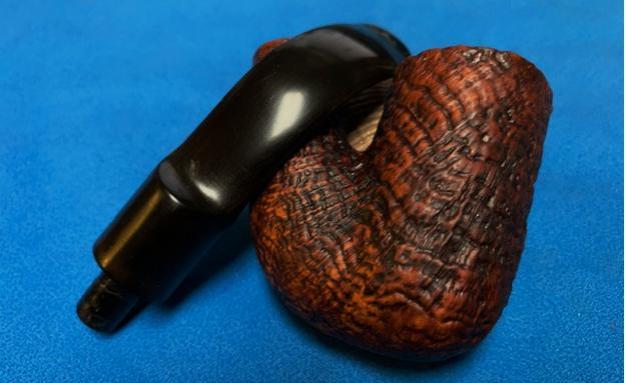
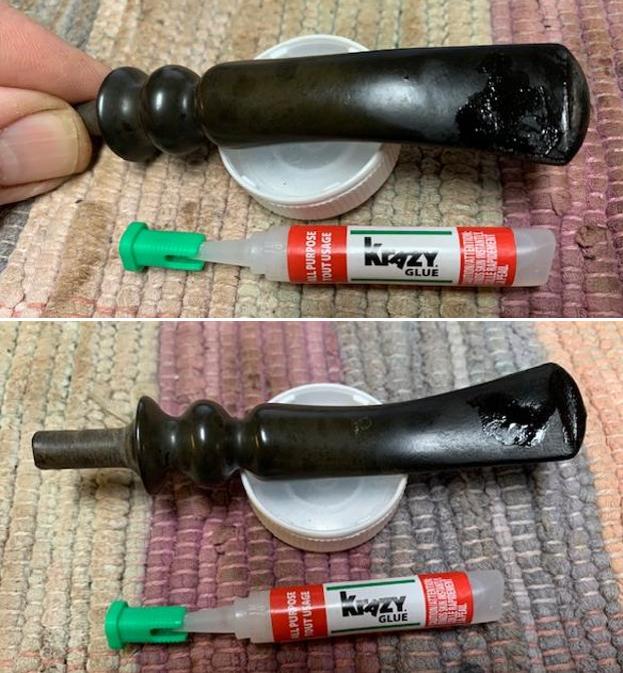
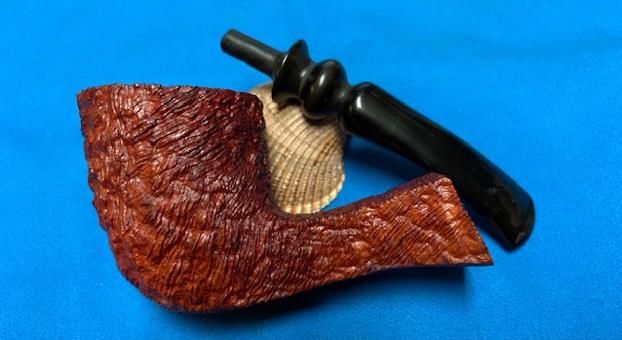
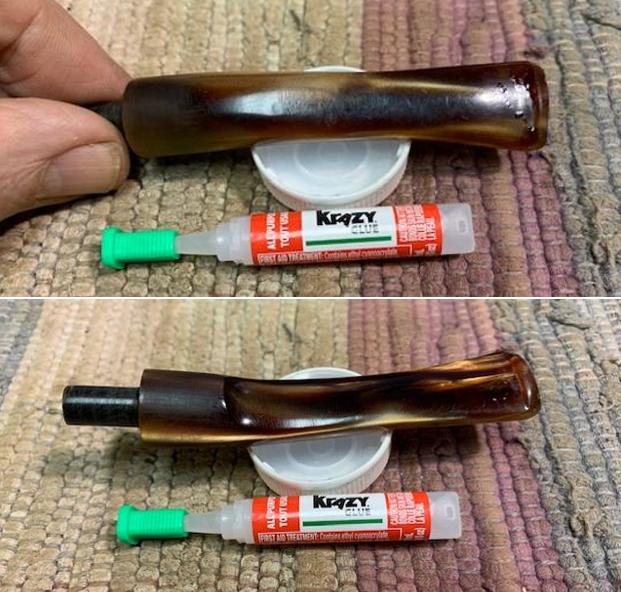
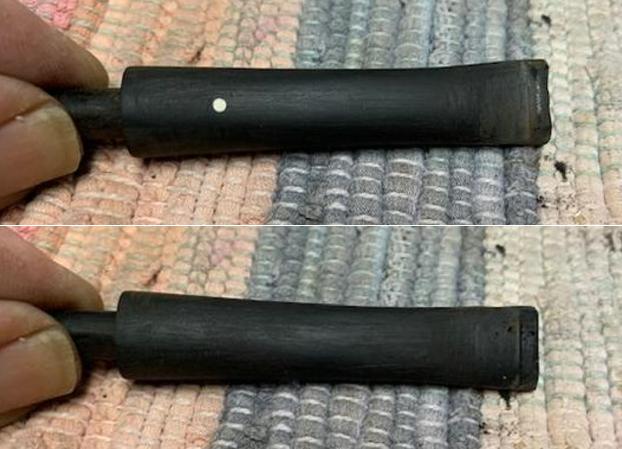
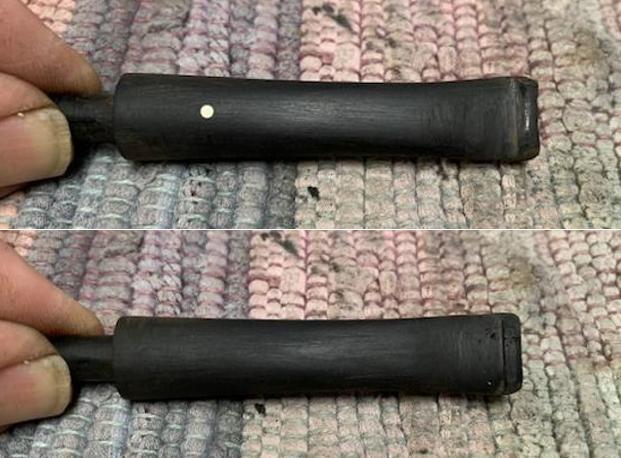
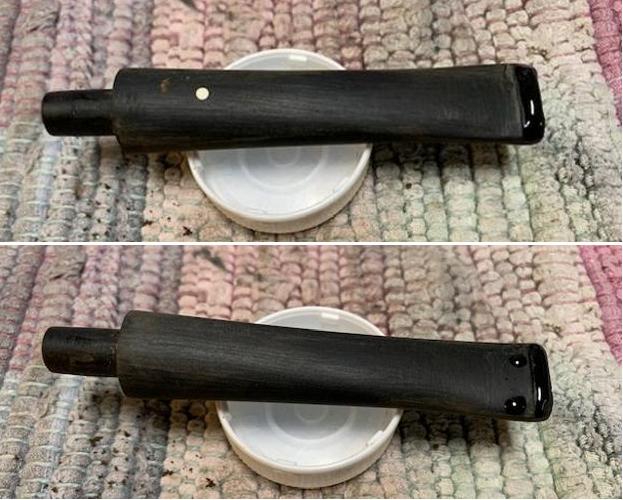
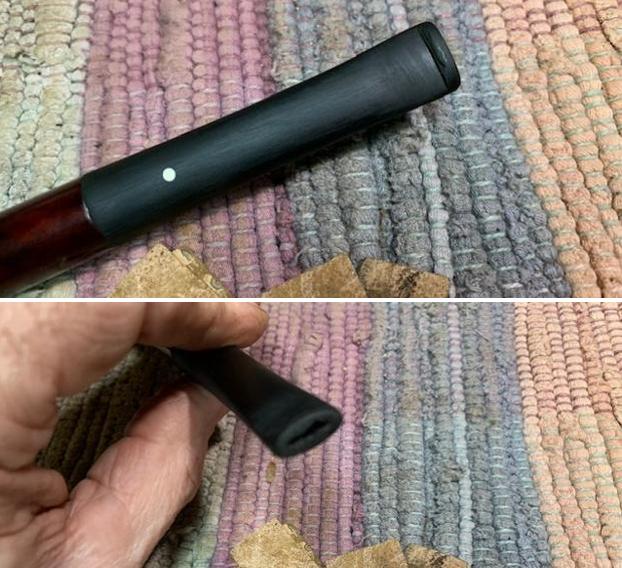
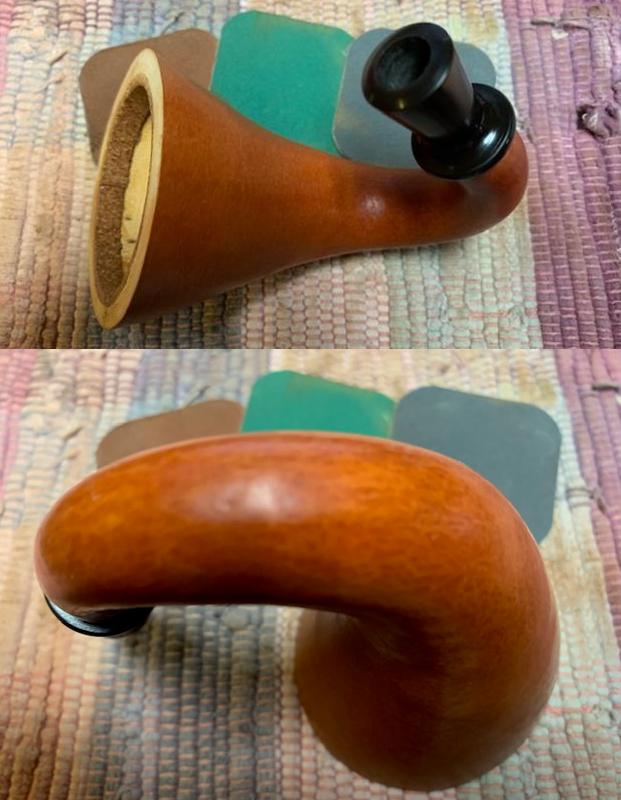
 Since the stem would be replaced, I shall not dwell in detail about the stem condition, but am including a few pictures of the stem to show its condition as well as give the readers a perspective about the incorrect shape imparted to the stem at the time it was crafted.
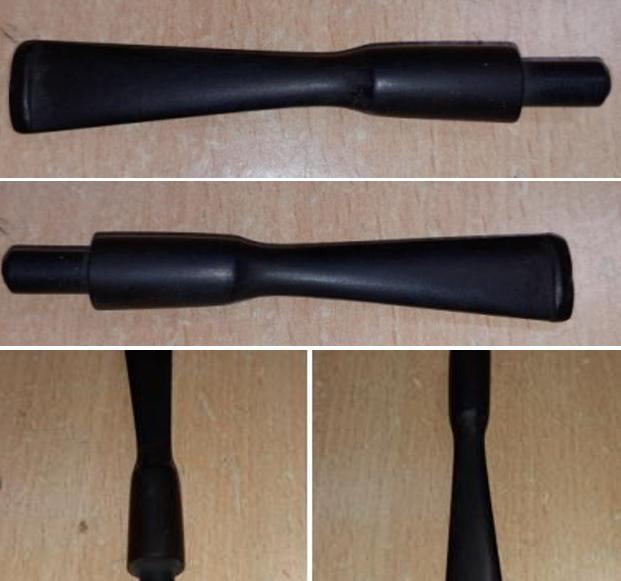 The Process
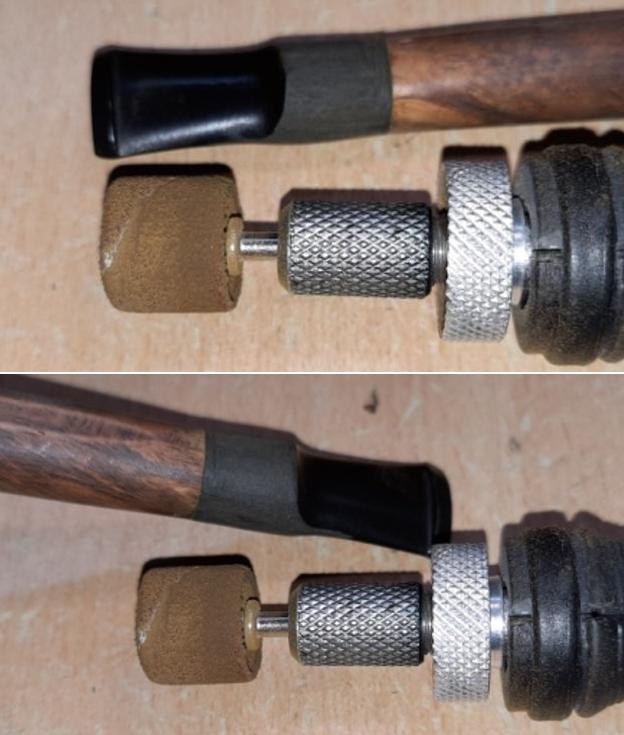
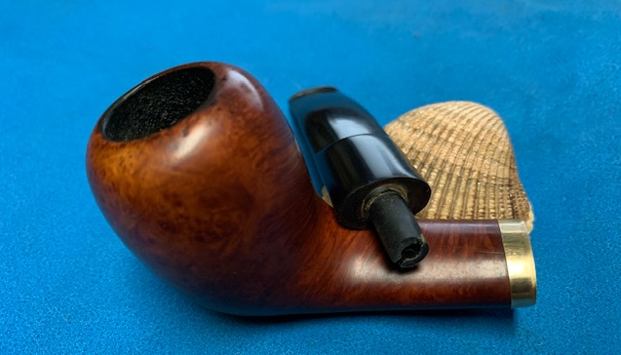
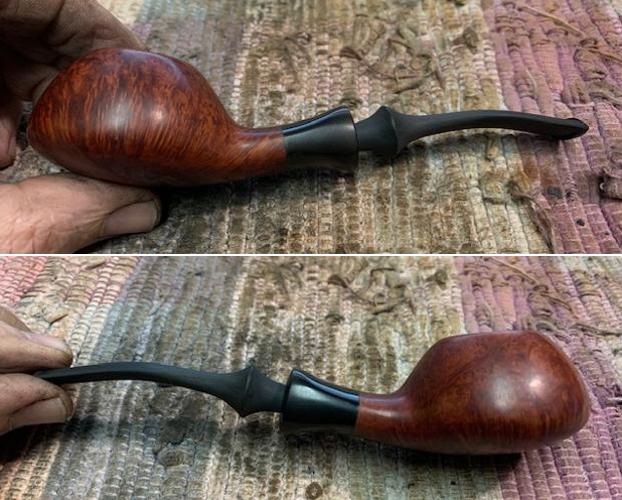
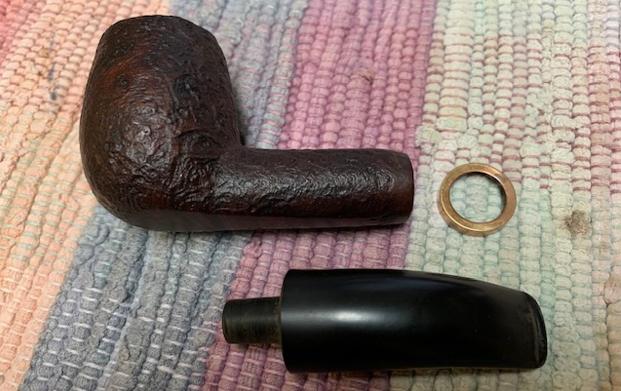
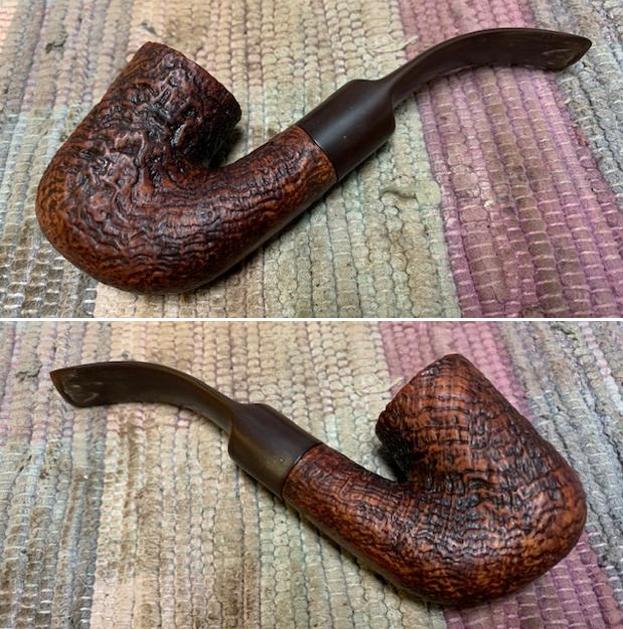
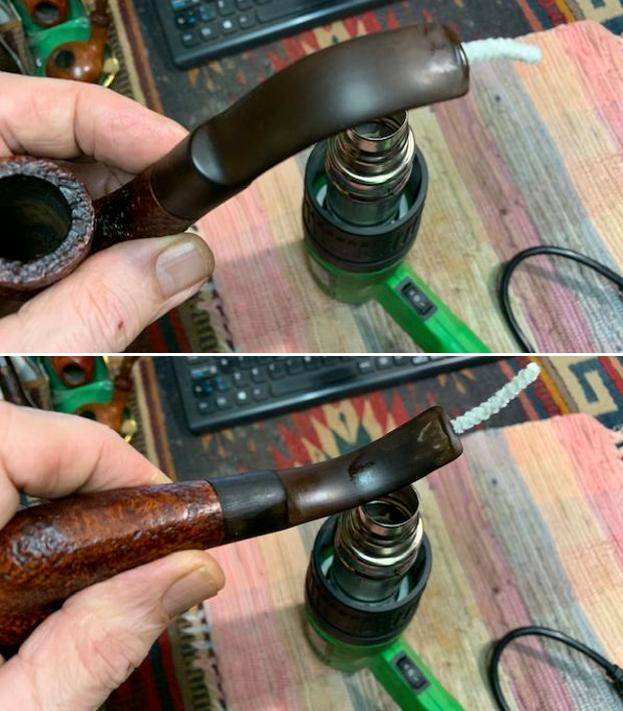
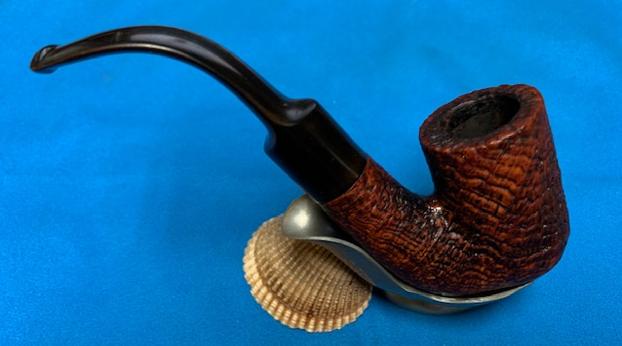
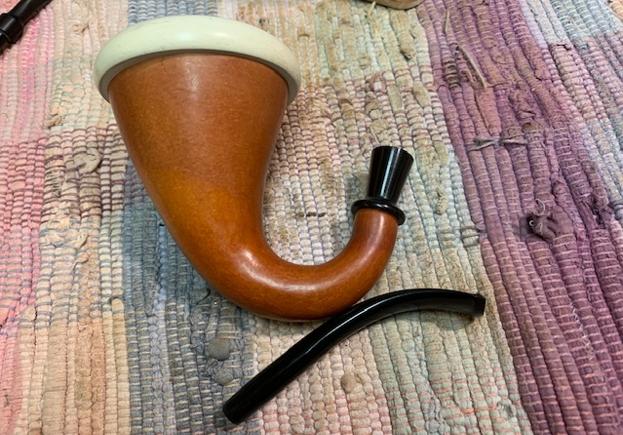
The first issue to be addressed in this project was to replace the original poorly crafted stem. Steve and I went through my small stash of spare stems and selected a small bent saddle stem that was stamped on the left as “ROPP” on a steel roundel. This stem would impart a classic Lovat shape to the pipe and vastly improve the aesthetics of the pipe, or so we thought. Here is how the pipe looks with this bent saddle stem. The tenon would need to be sanded down for it to seat in to the mortise and this would be the trickiest part of this stem replacement. I would have to be very careful to sand the tenon evenly and equally from all around, frequently checking for a snug fit in to the mortise.  The replacement vulcanite saddle stem is in perfect condition with no damage to the button or in the bite zone, save for some minor oxidation and very light tooth chatter. I would need to first straighten out the stem followed by sanding the tenon for a snug fit in to the mortise. Only once these issues are addressed would I be progressing to removing the “ROPP” stamped steel plate and filling the area left behind by the removal of the steel plate.
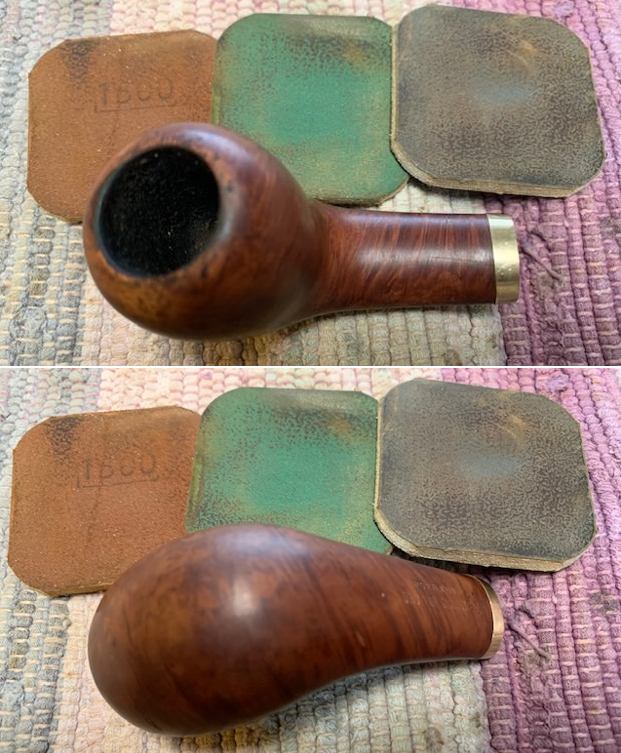
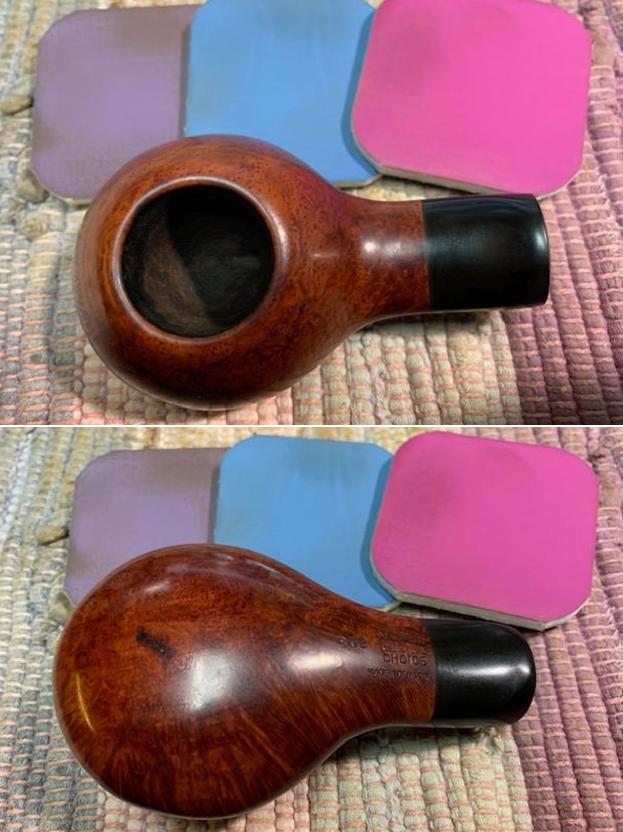
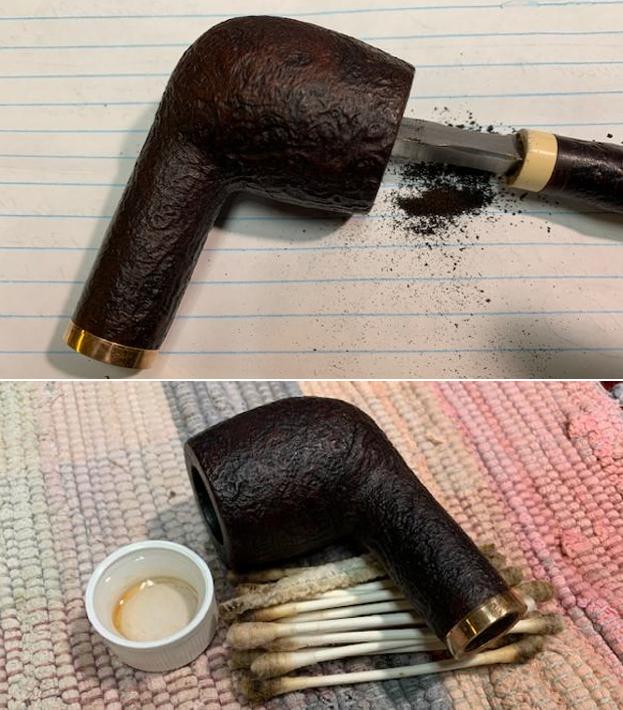
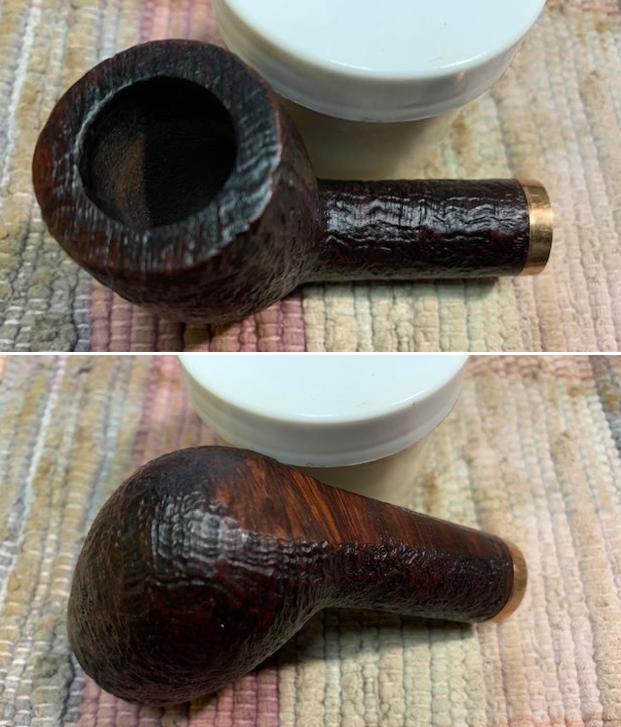
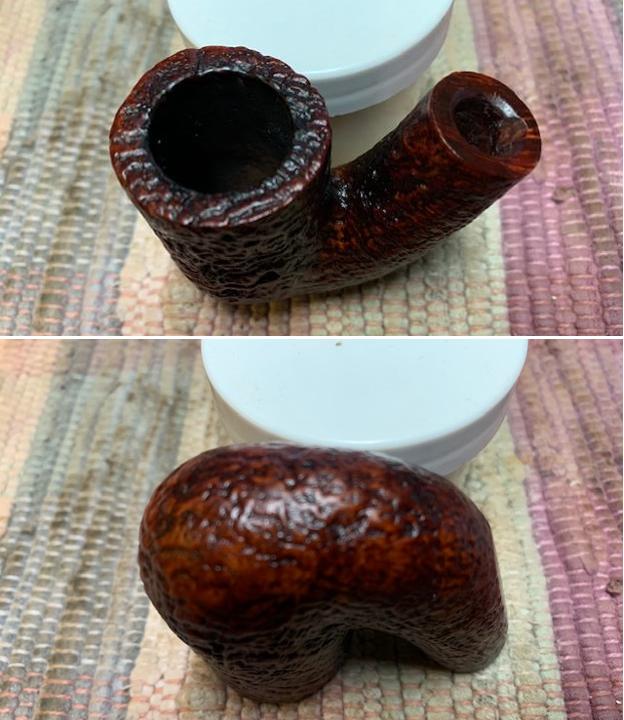
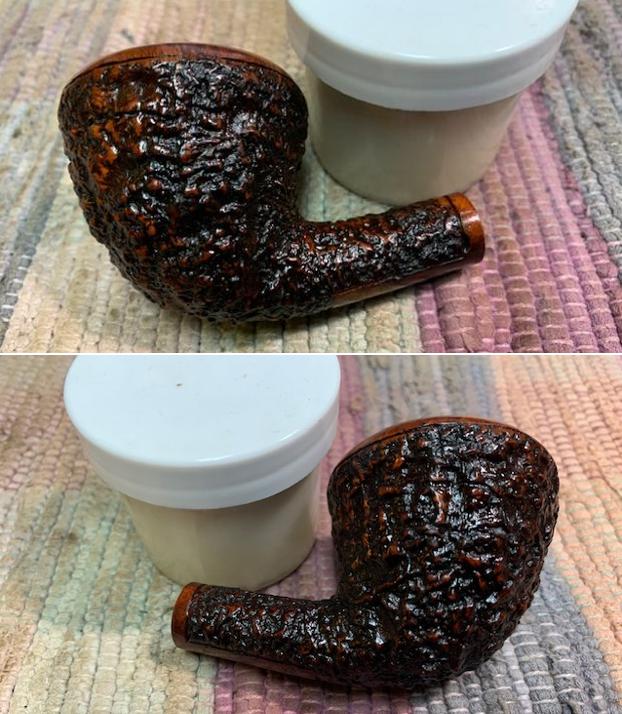
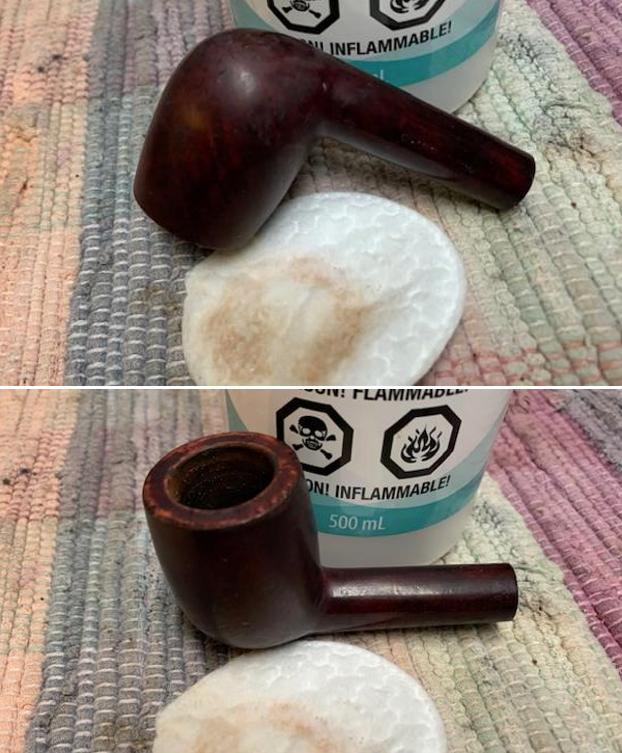
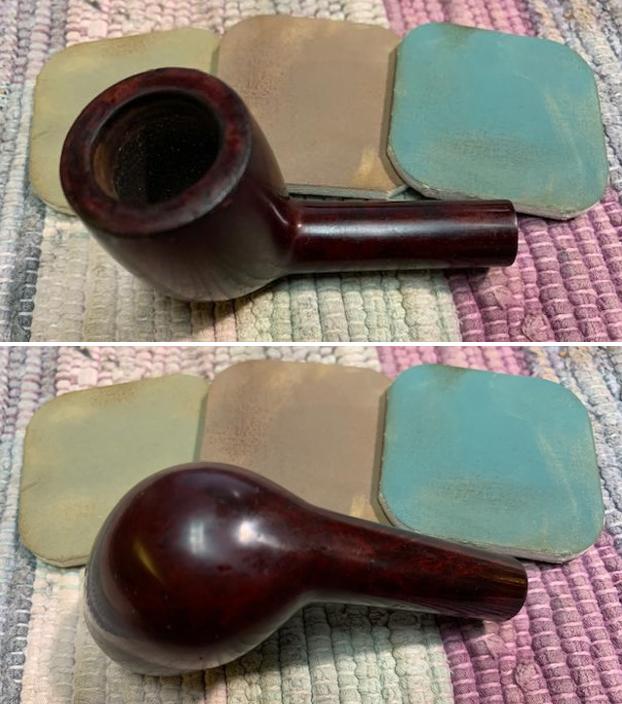
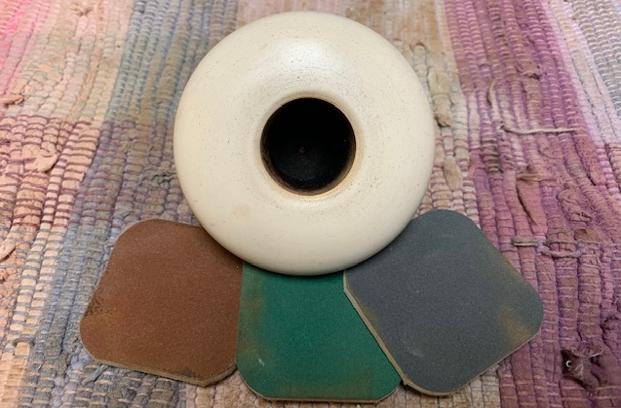
I began the restoration of this pipe by first addressing the suspected heat fissures in the chamber walls. I worked on the stummel by reaming the chamber with a PipNet pipe reamer using the size 3 head. With my fabricated knife, I removed the remaining carbon deposit. Once the cake was reamed back to the bare briar, I used a 150 grit sand paper followed by 220 grit sand paper to remove all the traces of remaining cake and also to smooth out the inner walls of the chamber surface. Finally, to remove the residual carbon dust, I wiped the chamber with a cotton pad wetted with 99.9% pure isopropyl alcohol. I was very pleased to note that the chamber walls are sans any damage. With the bowl internals clean, I move to clean the exterior of the stummel, specially the rim top surface. I used a hard bristled tooth brush and Murphy’s Oil soap to scrub the stummel and rim top. After the scrub with oil soap, I washed the stummel under running warm water with anti oil dish washing detergent till the stummel surface was clean and dried it using paper towels and soft cotton cloth. I simultaneously cleaned the shank internals with the detergent and hard bristled shank brush and set the stummel aside to dry out naturally. The smooth stummel surface has cleaned up nicely with the beautiful Angel hair grain patterns on full display. There are two major fills that are now plainly visible (encircled in green), but they are solid and I shall avoid refreshing them. The darkening and unevenness of the inner rim edge is evident and over reamed in the 1 o’clock direction (encircled in yellow). The ghost smells are completely eliminated and the pipe now smells fresh, odorless and clean. The shank air way is nice and open. I am sure that the pipe will turn out to be a fantastic smoker with a full wide and open draw.

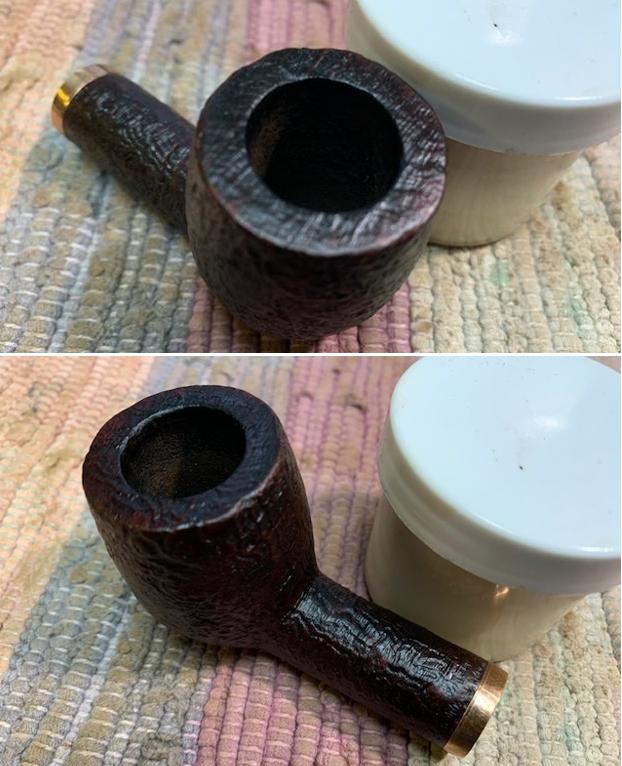
 Now that I had a fair idea of the extent of topping required to the rim surface, I top the rim on a piece of 220 grit sand paper to address the rim surface darkening, dents and dings. I addressed the uneven inner edge by creating a light bevel to inner edge with a folded piece of 220 grit sand paper pinched between my thumb and index finger. To further smooth out the scratches left behind by the abrasive 220 girt sand paper, I top the rim surface on a piece of 400 grit sand paper. I am very happy at the way the chamber and rim top surface appears at this point in restoration.
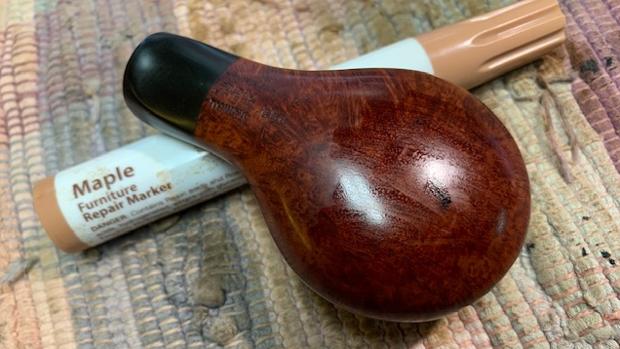
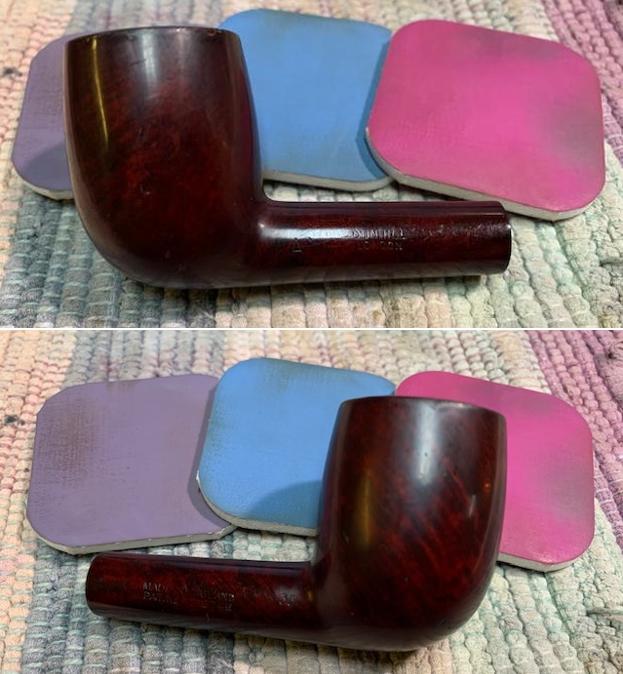
 Next, I decided to address the dents and dings on the stummel surface, notably to the front of the bowl (encircled in pastel blue). Using a whitener pen, I marked all the major areas with dents and dings as I had decided to leave the minor ones as they were. I heated my fabricated knife over the flame of a candle, placed a wet Turkish hand towel over the marked areas and steamed out the dents by placing the heated knife over the towel. The steam generated by placing a hot knife on the wet towel helps the briar to expand within these dents and dings, making for a smooth and even surface. To further even out the remaining dings, I lightly sand the entire stummel with a folded piece of worn out 180 grit sand paper. The stummel appears much better and smooth at this juncture.
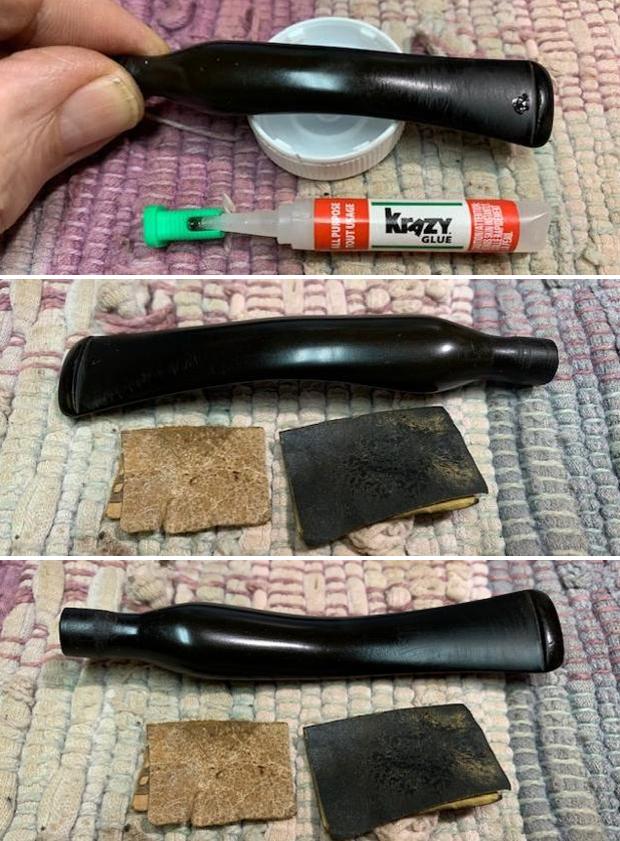
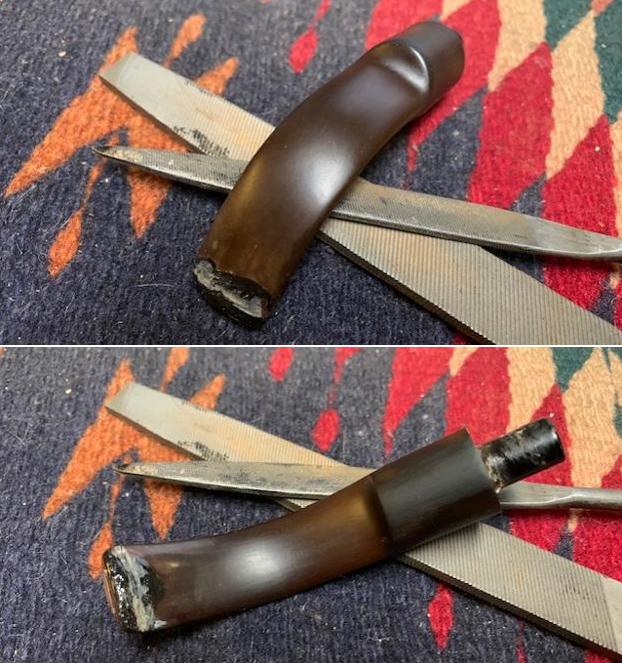
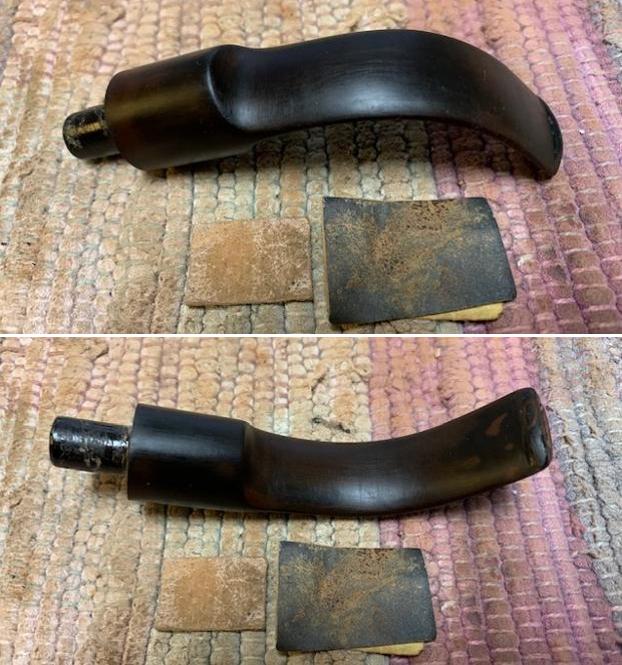
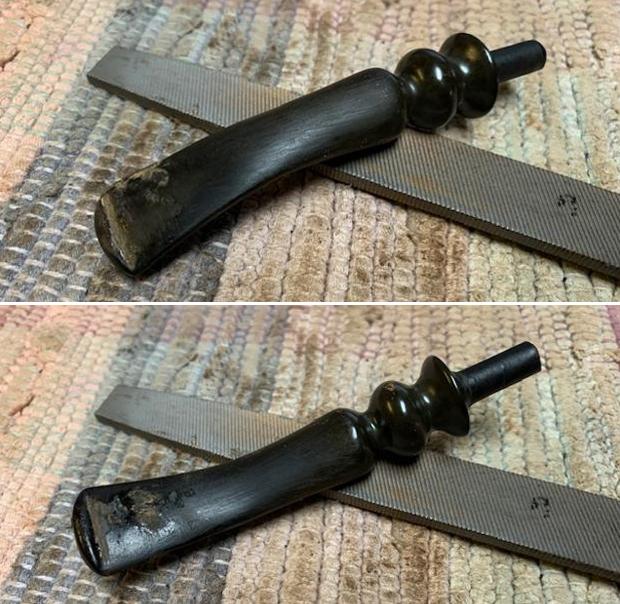
 With the stummel repairs completed, I turned my attention to the replacement stem. The first thing that needed to be done was to straighten the stem. I cleaned the stem internals first and inserted a regular pipe cleaner through the stem airway. This prevents the airway from collapsing when the stem is heated to straighten it. With a heat gun, I heated the stem at the point where the stem was bent, rotating the stem frequently to ensure even heating. Once the stem was pliable, I straightened the stem with my hands by placing it on the flat table. After the stem had cooled down sufficiently, I held it under cold running water to set the straightened shape.
  Now that the stem was straightened, the next step was to ensure a snug fit of the tenon in to the mortise. Since the tenon was not too large as compared to the mortise, I got down to the arduous and time consuming task of manually sanding down the tenon with a folded piece of 180 grit sandpaper till I had achieved a perfect seating of the tenon in to the mortise. My previous experience had taught me an invaluable lesson; “SAND ONCE AND CHECK TWICE”!! Here I was extra careful and vigilant while sanding the sides of the tenon and frequently checked the alignment of the stem airway, the shank airway and finally, the draught hole. Excess sanding of any one side of the tenon disturbs this alignment even though the seating may appear to be snug and seamless. I gave a final check to the progress being made and the seating was perfectly snug with all the airways perfectly aligned. I am very happy with the progress up to this point!!
 Close scrutiny of the seating of the tenon in to the mortise under camera magnification revealed a slight gap at the stem and shank face junction. With a folded piece of 180 grit sandpaper, I sand the base of the tenon until I had achieved a seamless and flushed seating of the stem. Discerning Readers must have noticed a dark line starting from the shank end and extending for about an inch and a half towards the bowl (indicated with green arrows). I too thought (with a cringe) that the shank had cracked in the process, but let me assure you that the shank is not cracked and is in fact a dark strand of straight grain…that was really a big relief!!
 Once I had achieved a snug fit of the tenon in to the mortise, I checked for the flush seating of the stem face with that of the shank and realized that the stem diameter is larger than that of the shank and the extent of sanding that would be required. This would need to be addressed.
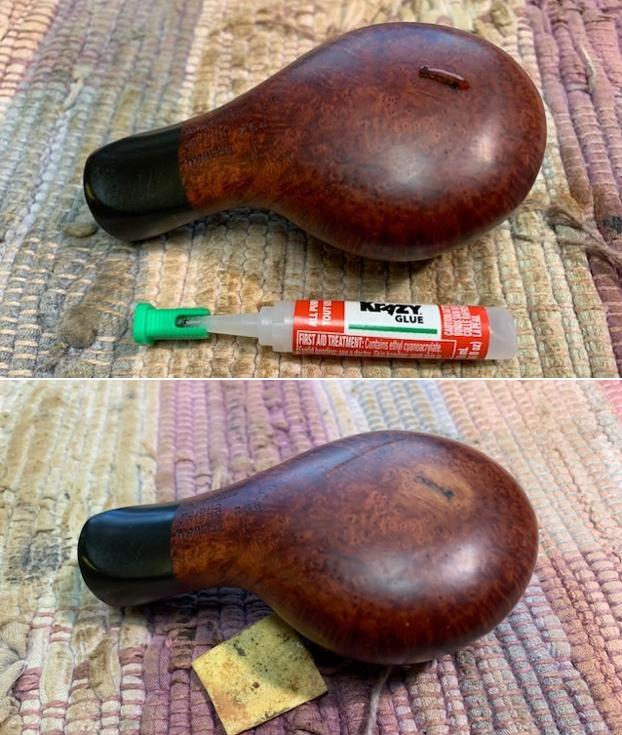
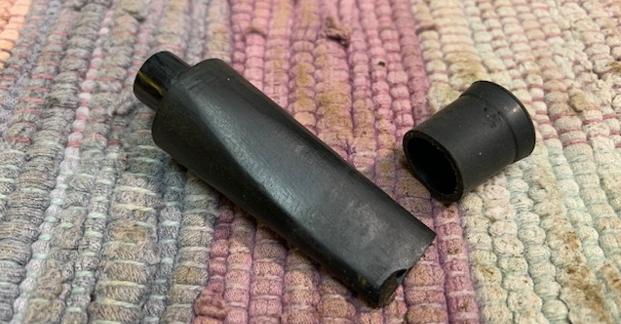
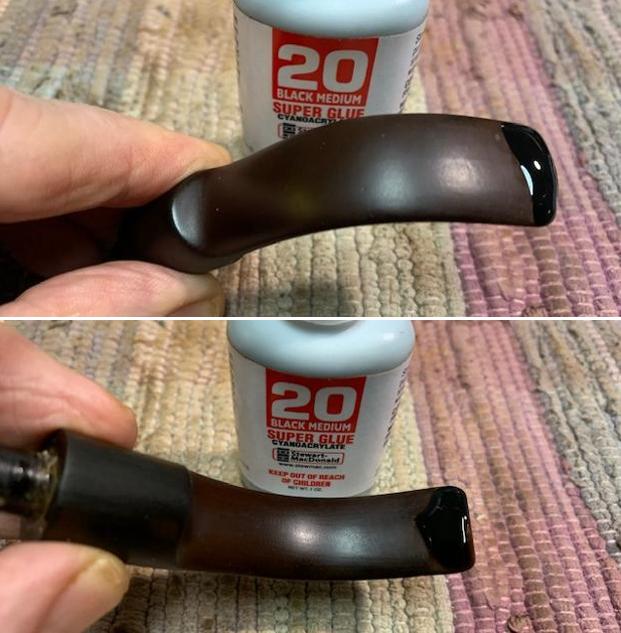
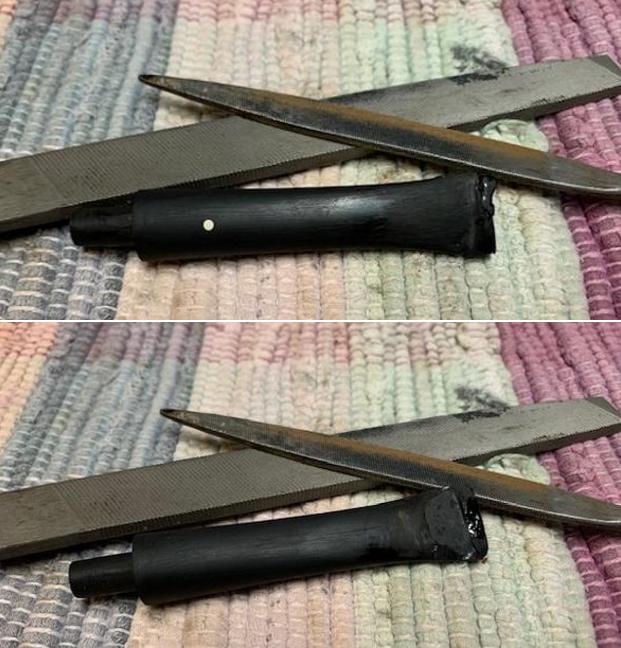
  But before I could address this issue, it was necessary that the metal plate bearing the ROPP stamping be removed and the cavity created, be filled out. Once this was done, matching the entire saddle portion with the shank face would be accurate and time saving. Using dental pick and a sharp, thin paper cutter, I removed the steel plate and cleaned the gouged out surface with a cotton pad and isopropyl alcohol. I evened out the surrounding area with a worn out piece of 180 grit sand paper and filled the cavity with a mix of CA superglue and black charcoal powder. I set the fill to cure overnight.
 The next day, I sand the filled cavity with a piece of 180 grit sand paper till I had achieved a rough match with the surrounding saddle surface of the stem. The filled area would be perfectly matched when I sand the entire saddle portion to match the shank face.
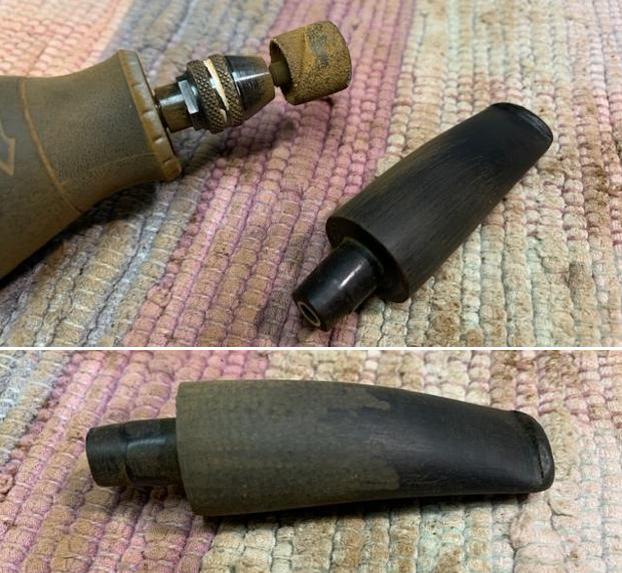
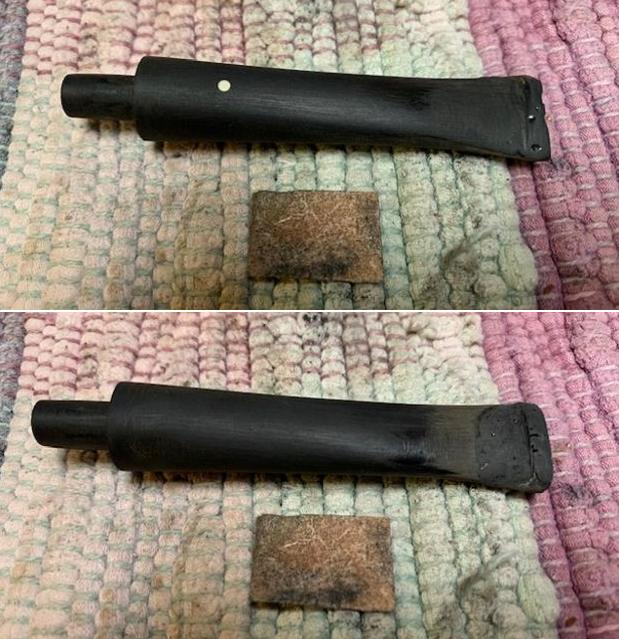
 Now, to match the stem face with the shank face, I unite the stem and the shank. With a sanding drum mounted on to my hand held rotary tool, I sand the saddle portion of the stem till I had achieved a near perfect matching of the stem face with that of the shank face. I further fine tune the match perfectly by sanding it with a 220 followed by 400 grit sand paper. The match is perfect and the pipe as a whole is now looking very nice with the new stem. It still looks very plain and would need a dash of a little bling to complete the transformation!! Also, there is a need to refill the cavity left behind by the steel plate as I noticed a few ugly air pockets. I refilled it with CA superglue and charcoal powder and set it aside for the fill to cure.
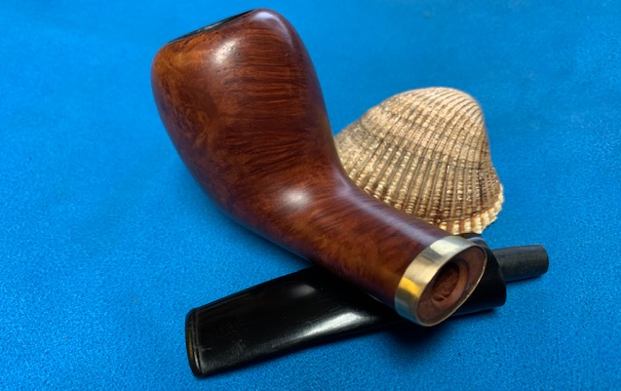
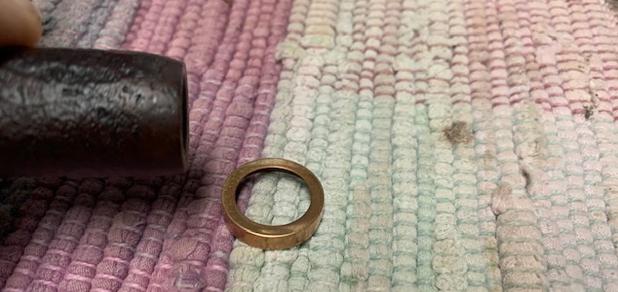
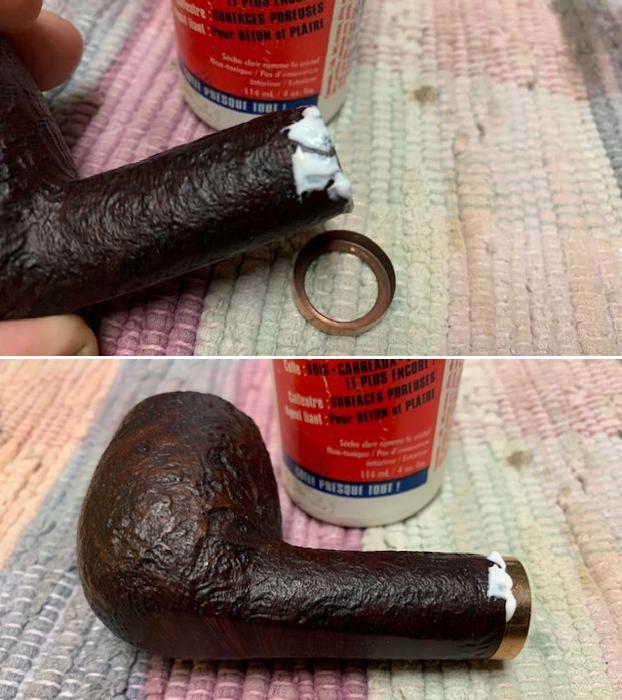
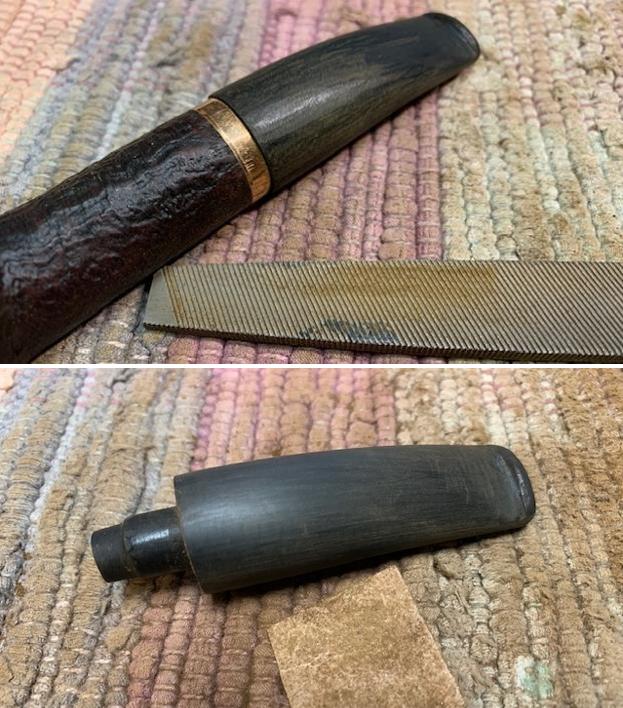
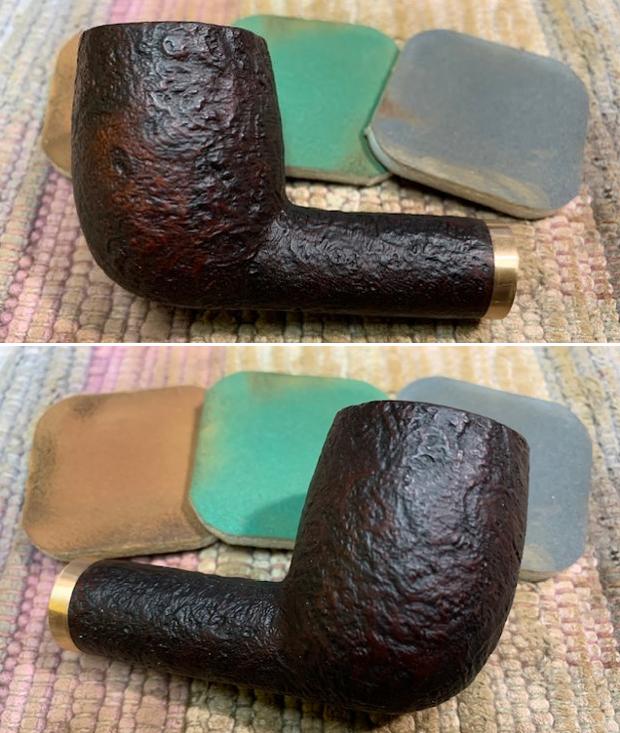
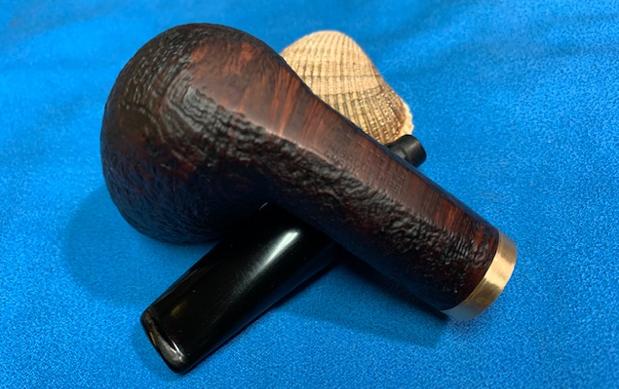
 To add a little bling to the appearance of the pipe, I decided to attach a brass band at the shank end. I selected a band that was a perfect fit and glued it over the shank end with CA superglue and set it aside to cure.
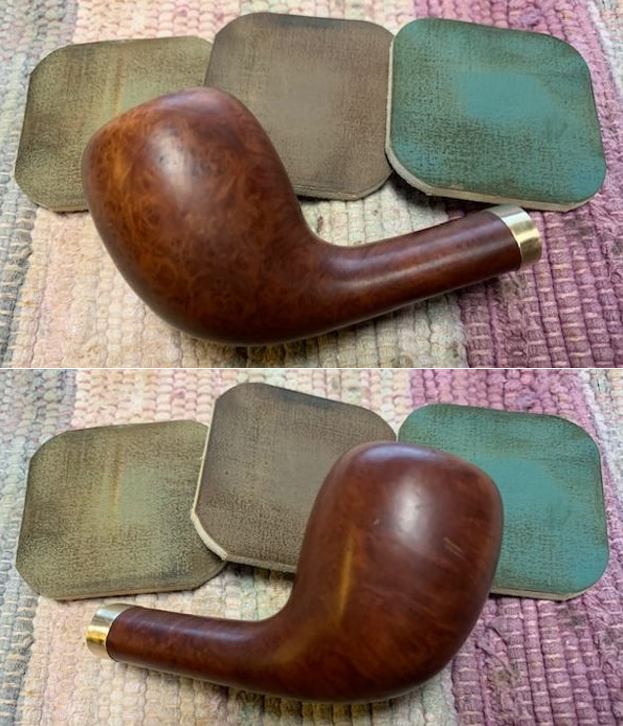
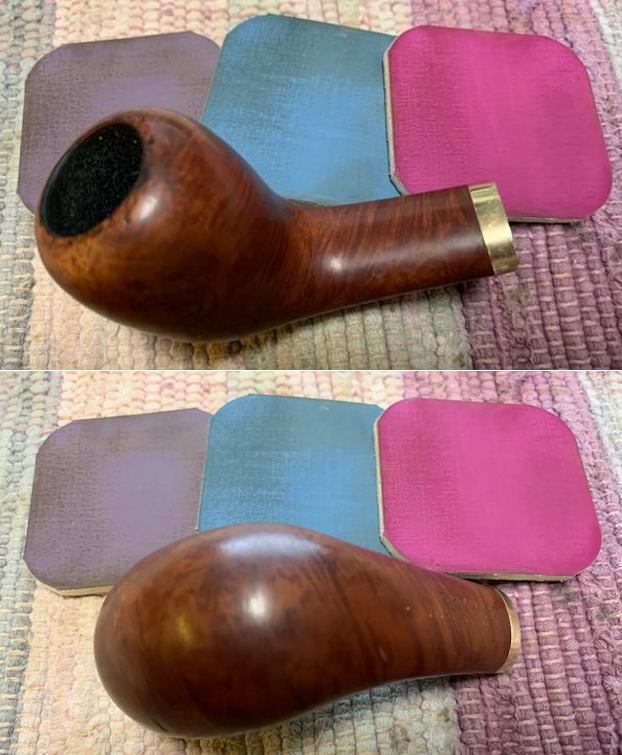
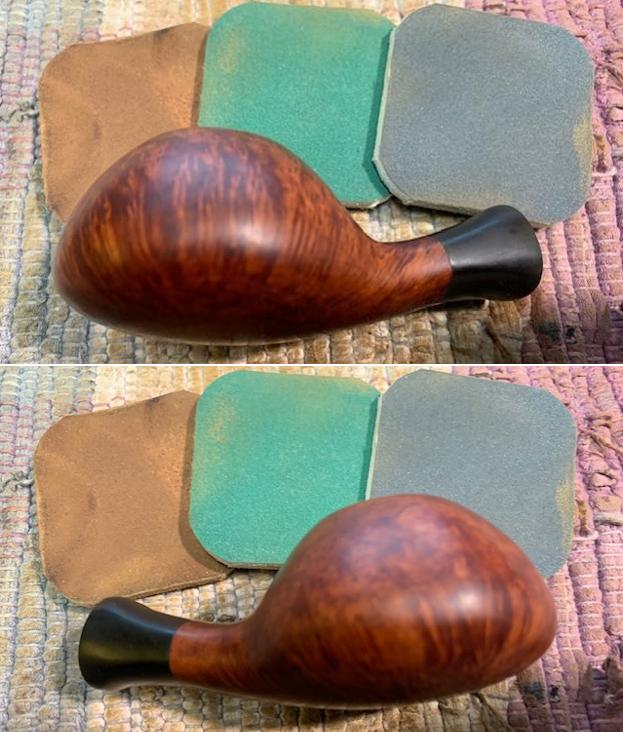
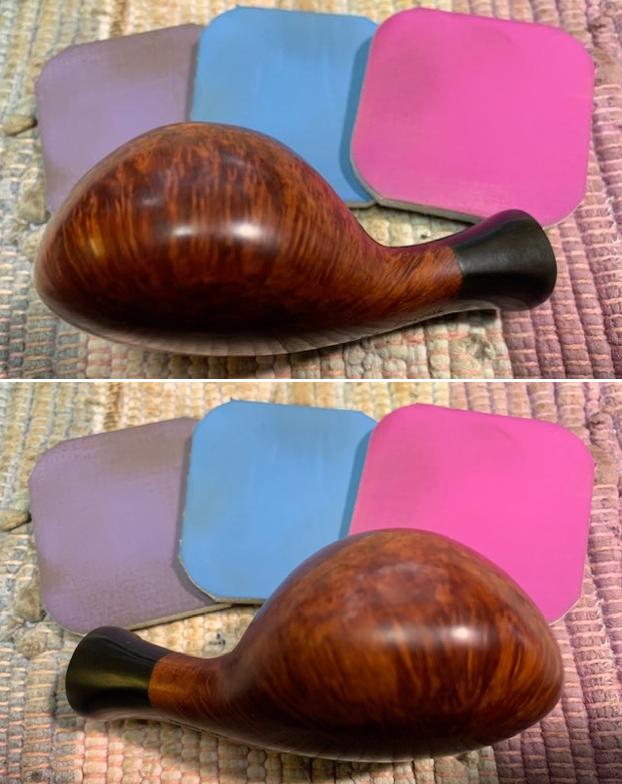
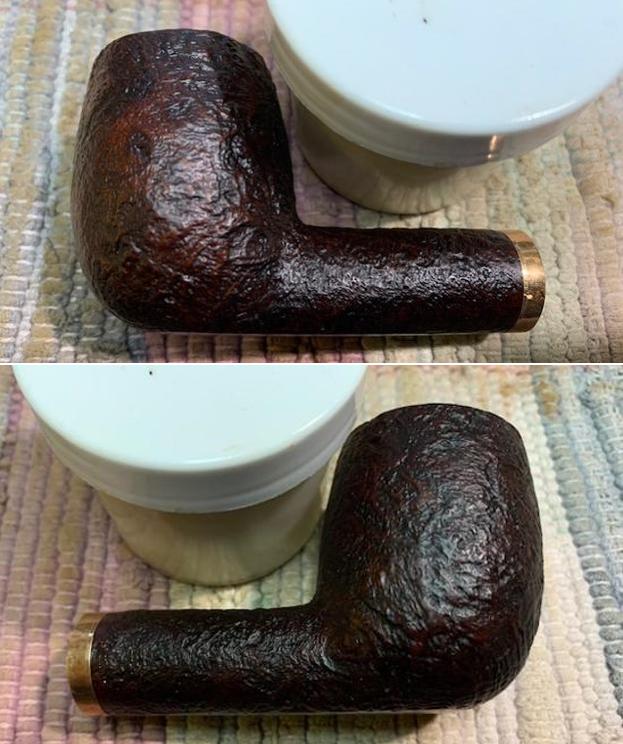
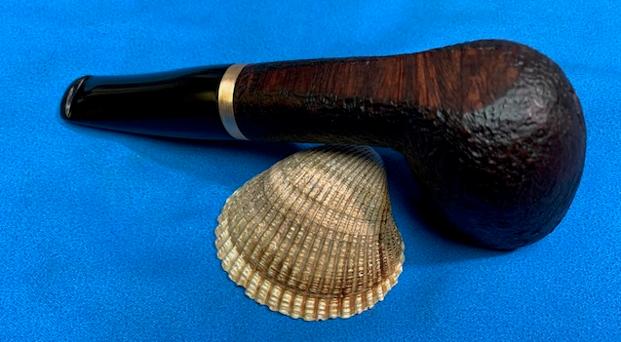
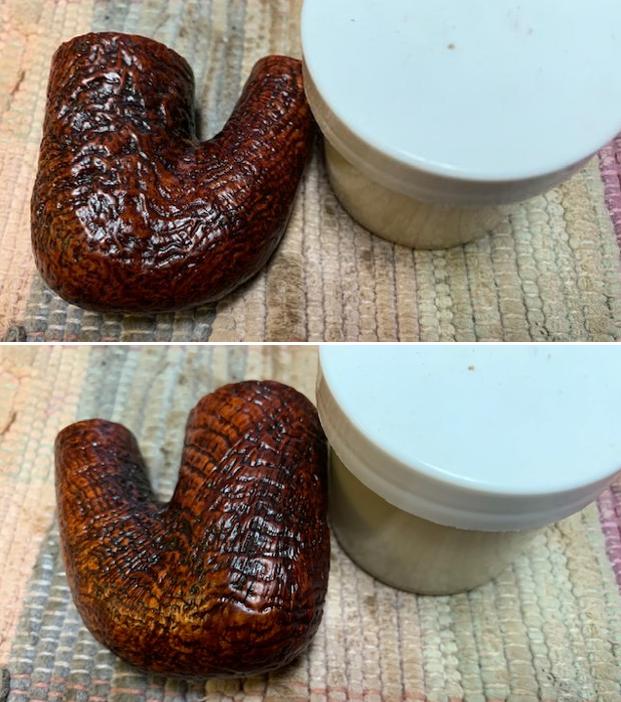
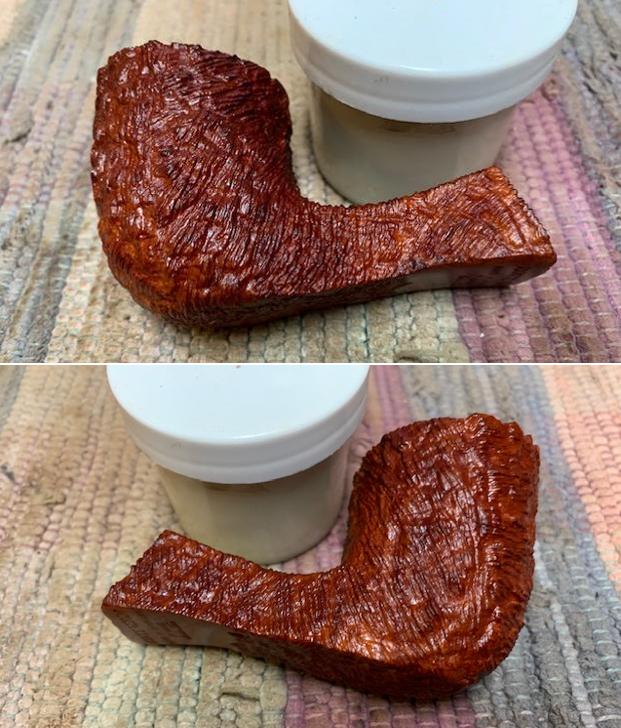
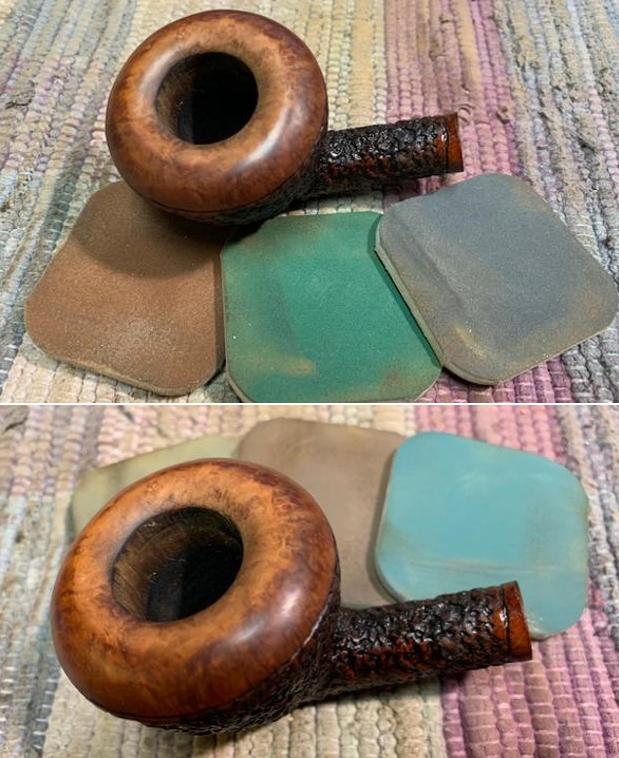
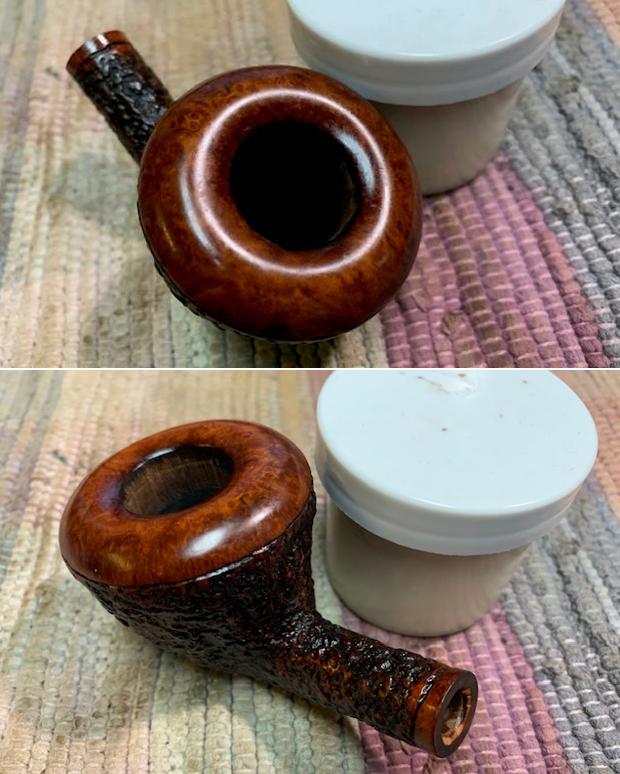
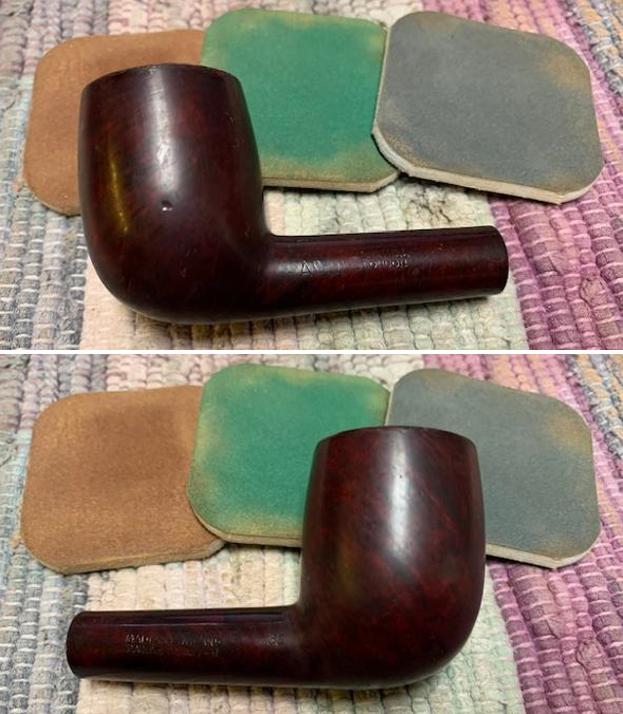
 I subjected the stummel to a complete cycle of micromesh polish, dry sanding with 1500 to 12000 grit pads. I paid greater attention to polish the rim top surface and the bevel created on the inner rim edge. I wiped the stummel with a moist cloth after every grit pad to remove the sanding dust left behind by the pads. I am happy with the progress being made till now. Just look at the beautiful grain on this piece of briar!! The briar has taken on a nice deep shine with brown of the stummel and the darker brown stains to the grain contrasting beautifully. I really like the patina that is seen over the stummel surface. However, the rim top surface appears lighter than the rest of the stummel due to the topping.
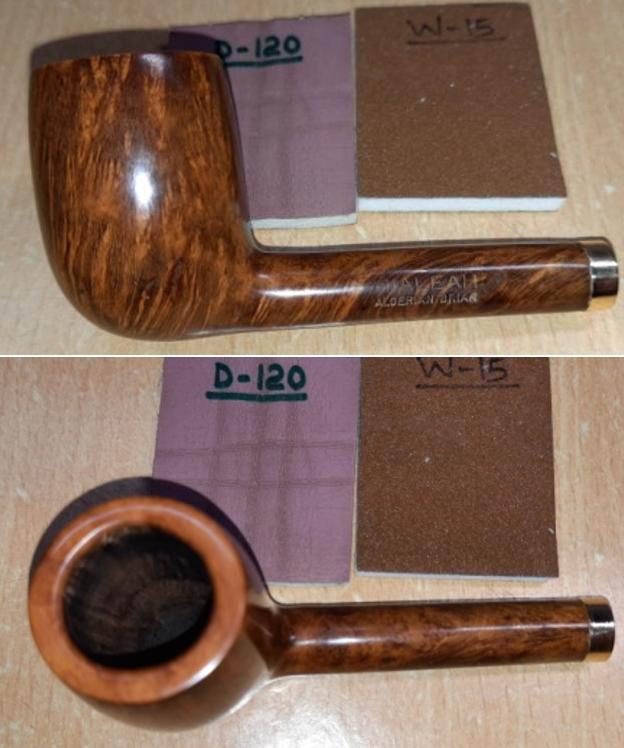

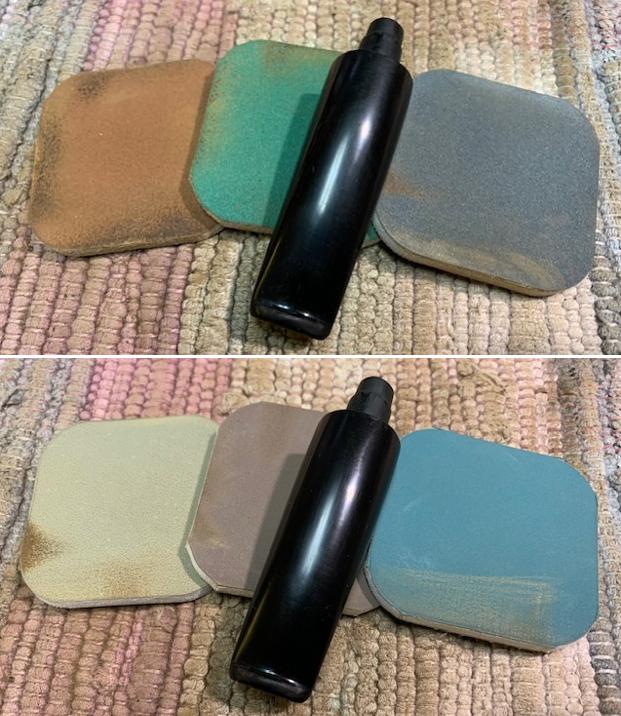
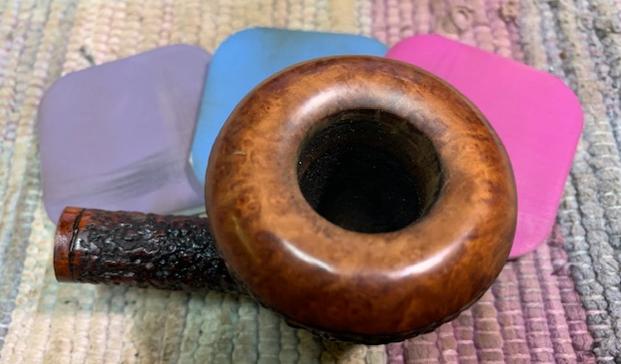
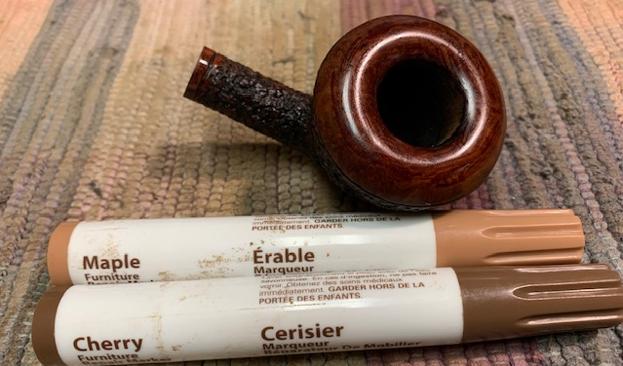
 I stained the lighter hued rim top surface with a combination of Dark Brown over Chestnut stain pens. I set the stummel aside for the stain to set. The stain combination has helped in perfect blending of the rim top with the rest of the stummel.
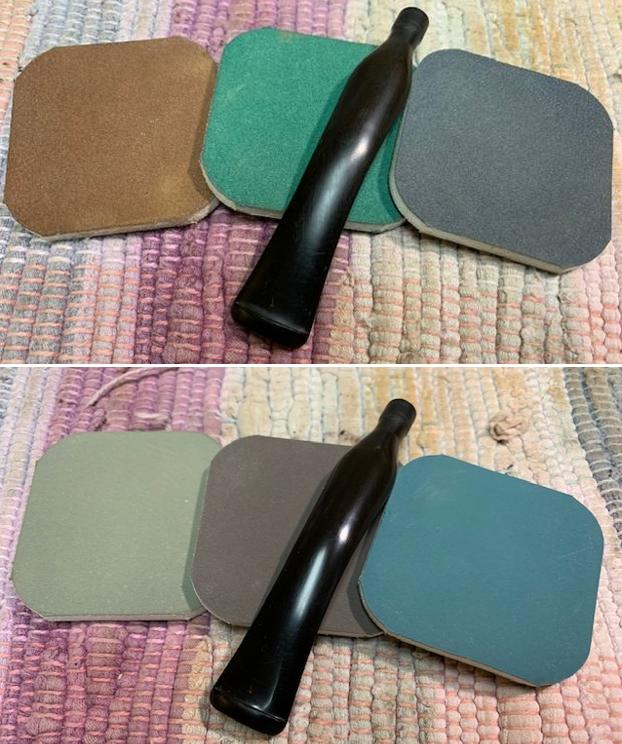
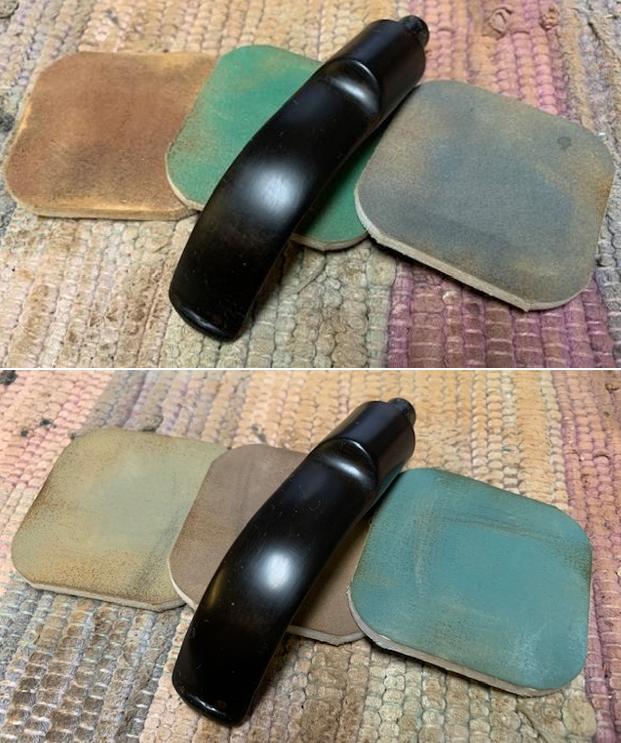
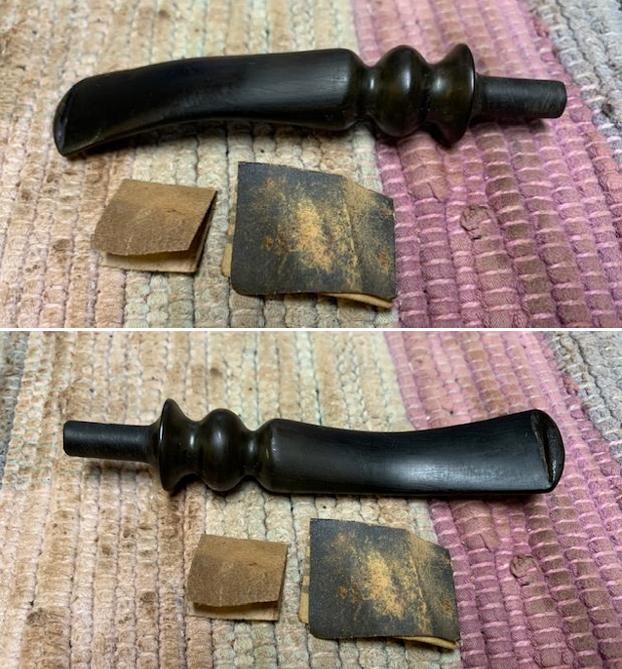
 Next, I turned my attention back to the stem. I began the process of final fine tuning of matching the stem face with the shank face, shaping the saddle for a sharper match with the shank flow, sanding the refill in the saddle and bringing a nice shine to the stem surface by sanding with 320, 400, 600, 800 and 1000 grit sandpapers. I had attached the stem to the shank during the entire sanding job so that I do not end up shouldering the stem face. The closer I came to the perfect match, the higher grit sand paper I used. A lot of patient and diligent work, I reached the point where I felt “no more sanding… this is the perfect seating and perfect Lovat profile!!”. My mantra “LESS IS MORE” was also playing at the back of my mind. I was very pleased with my efforts of transforming the stem as I had achieved a perfect snug seating of the stem in to the mortise and a perfectly matching shank and stem face!!
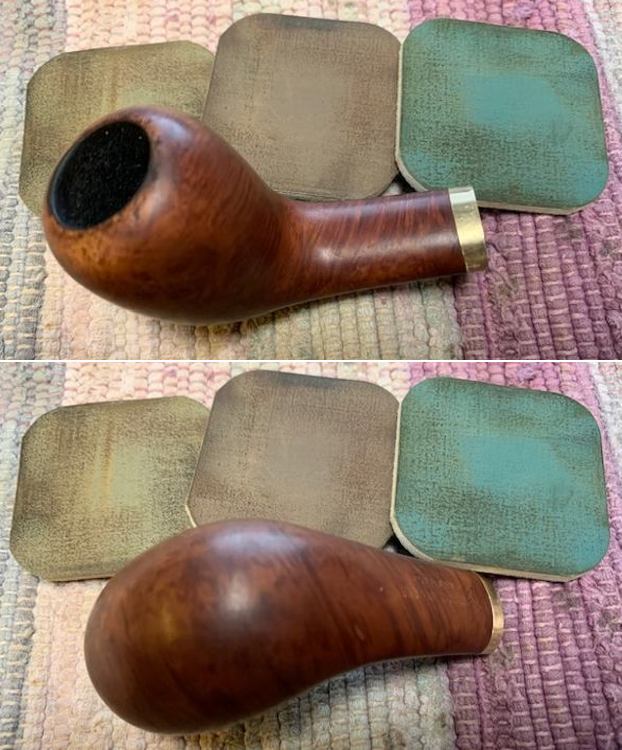
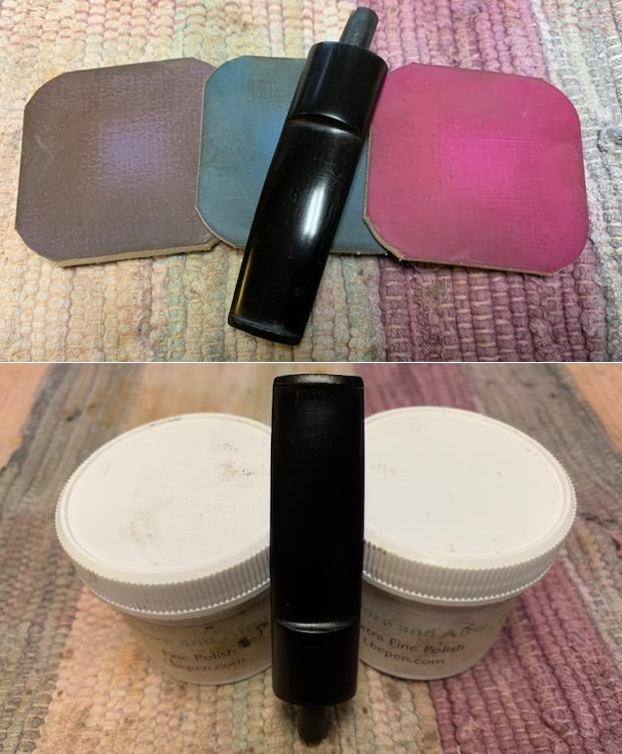
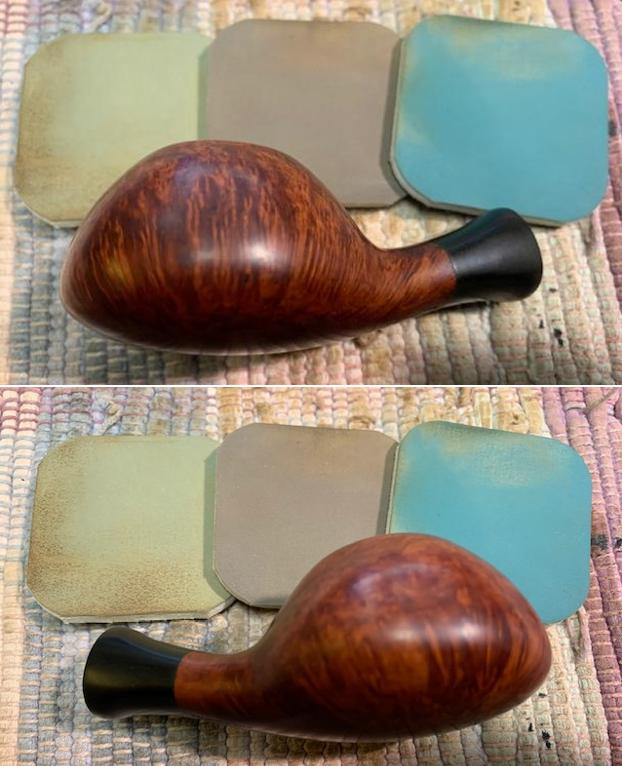
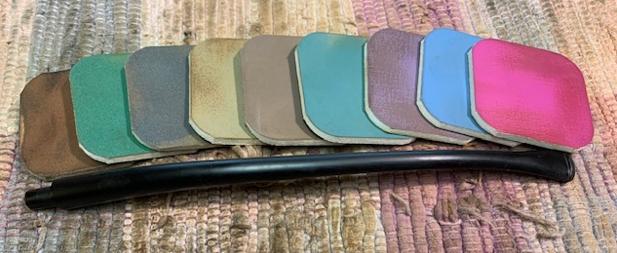
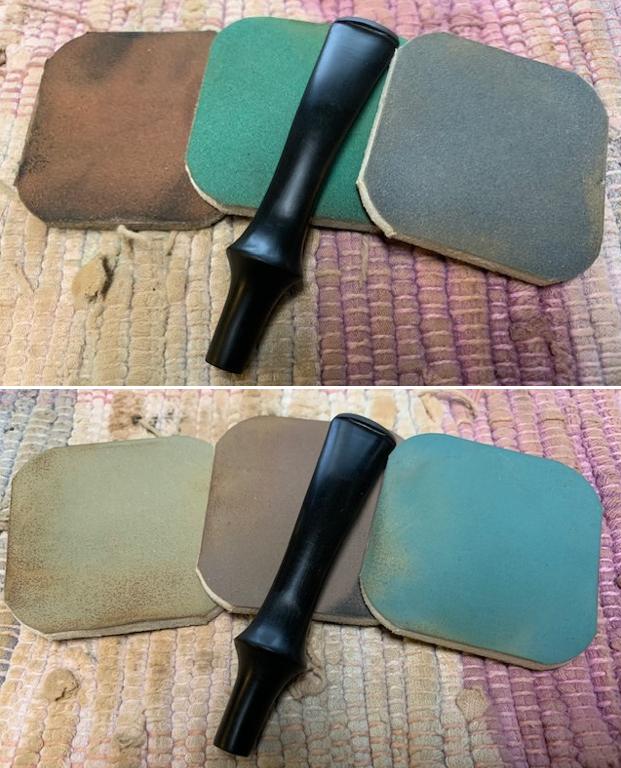
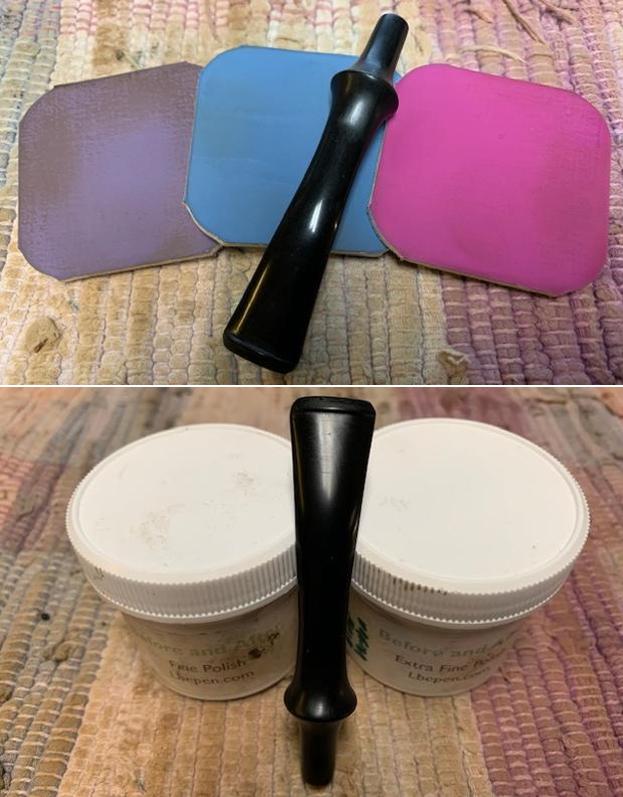
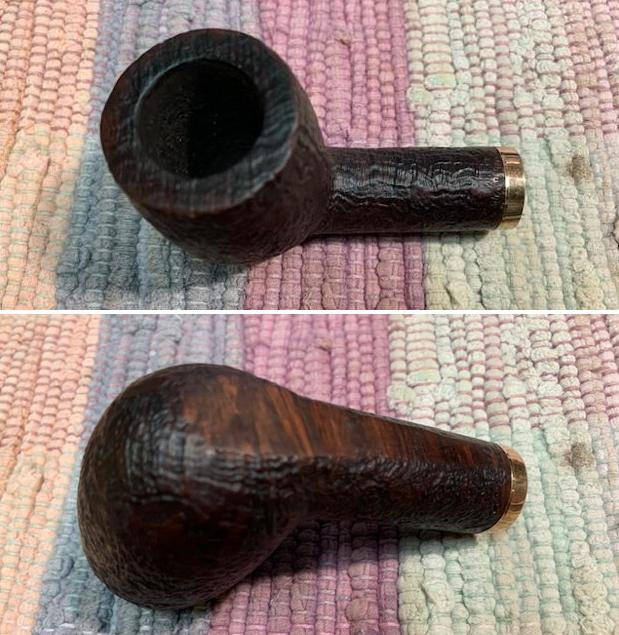
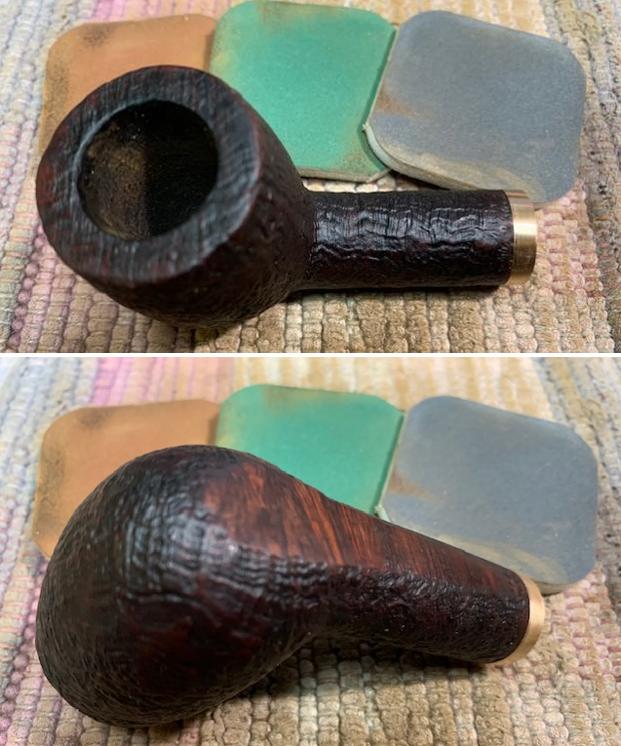
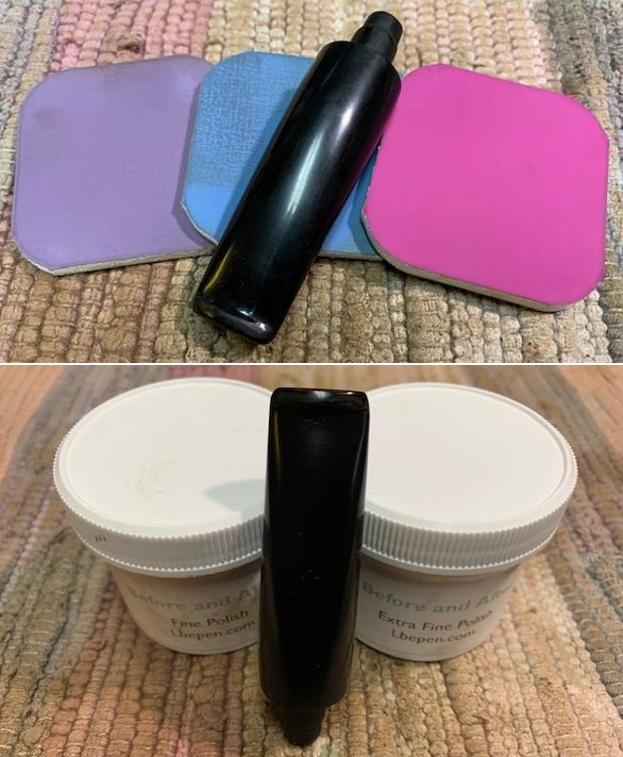
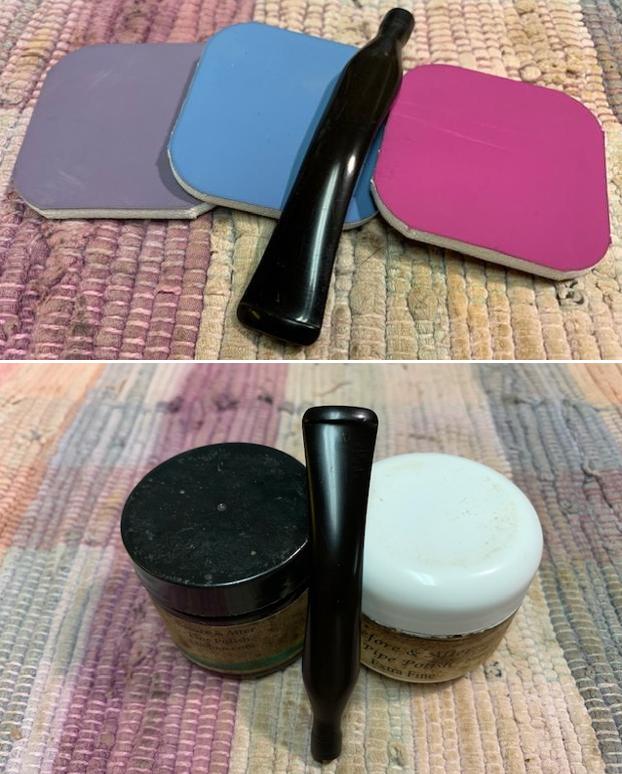
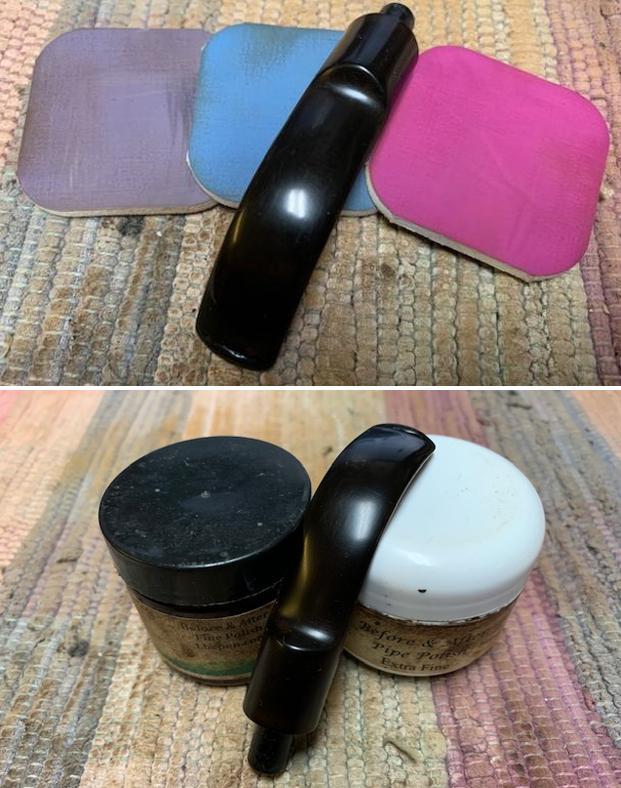
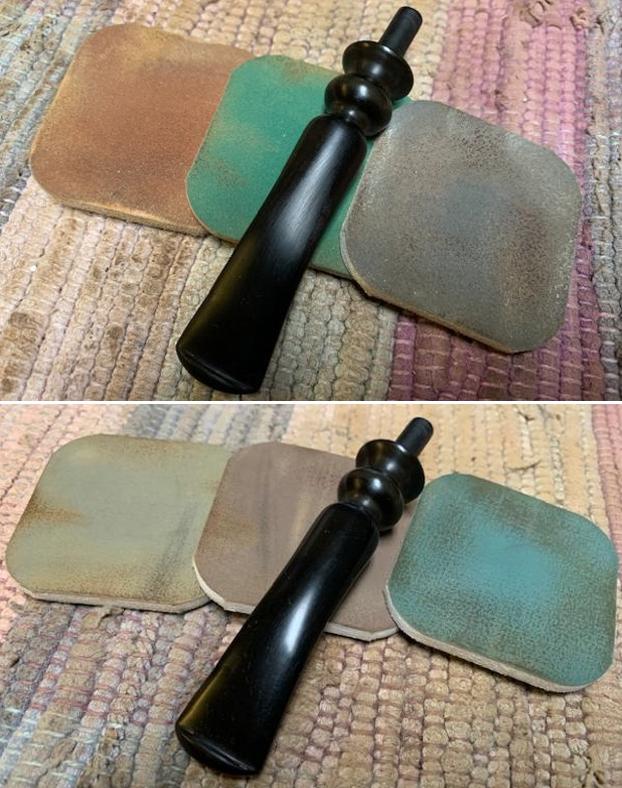
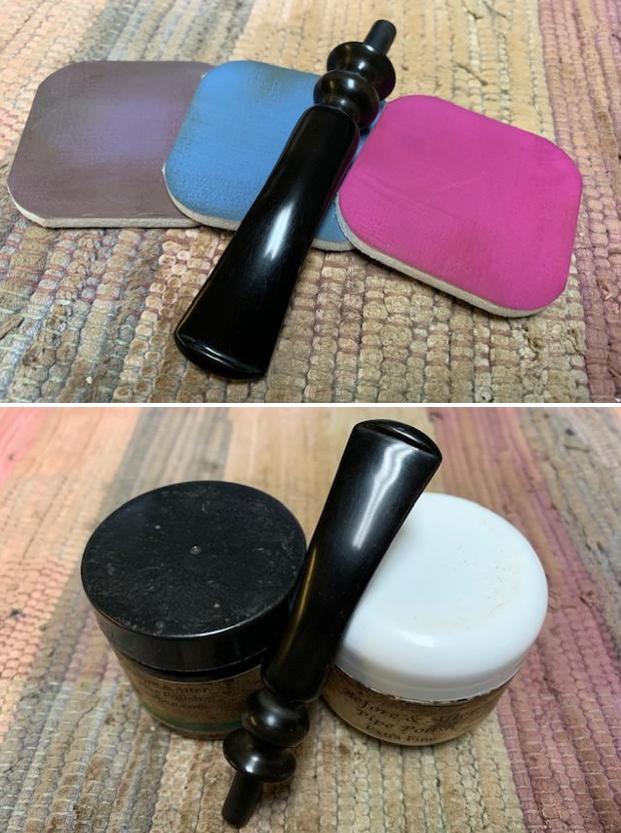
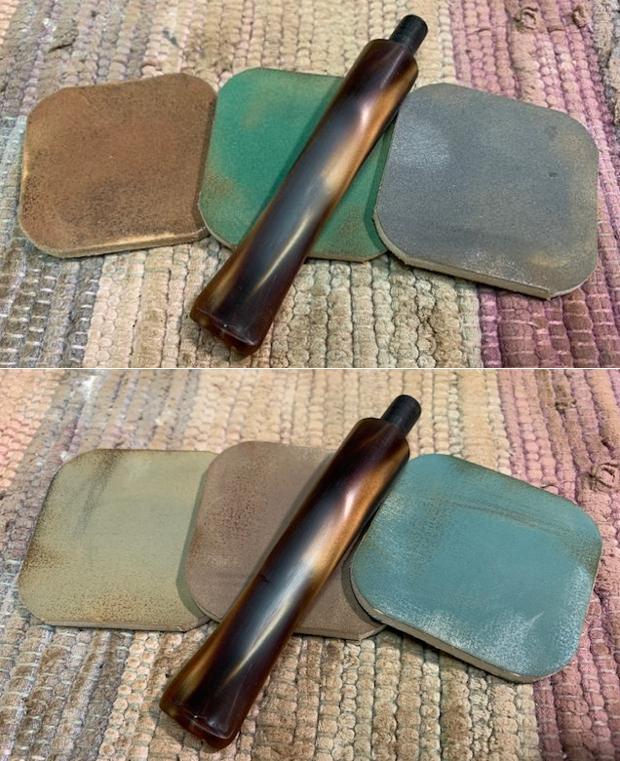
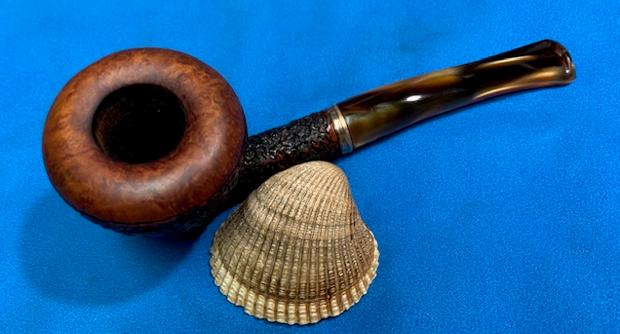
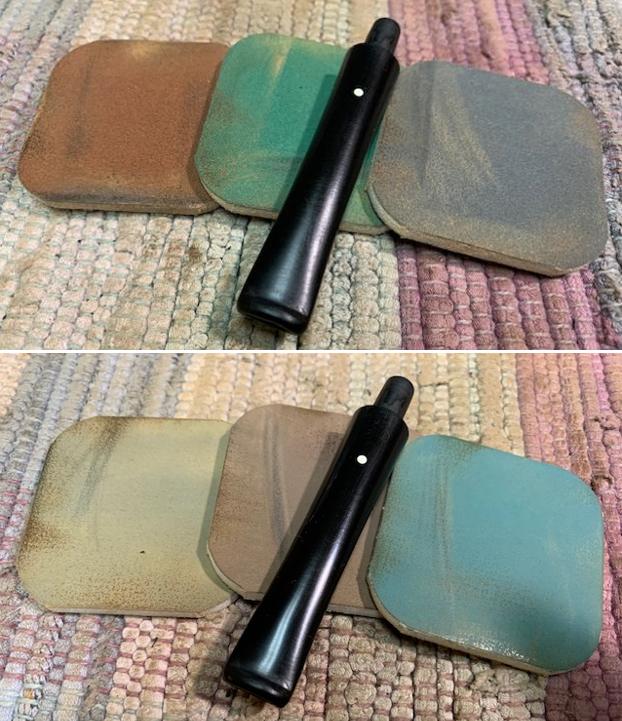
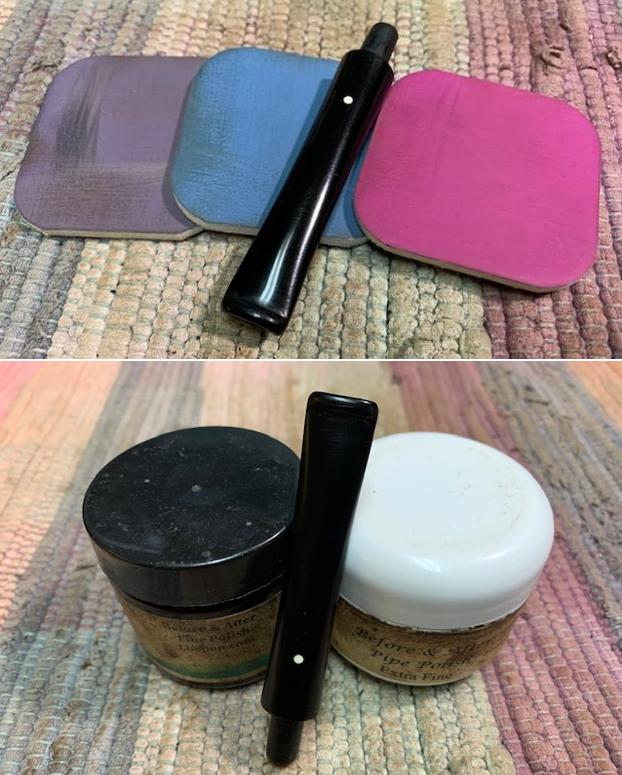
To bring a deep shine to the vulcanite stem, I went through the complete set of sand papers and micromesh pads, wet sanding with 1500 to 12000 grit micromesh pads. I wiped the stem with moist cloth after each pad. At the end of micromesh cycle, I polished the stem with “Before and After Fine & Extra Fine” paste. The finished stem is shown below. Turning back to the stummel, I rubbed a small quantity of “Before and After Restoration Balm” deep in to the briar with my finger tips and let it rest for a few minutes. The balm almost immediately works its magic and the briar now has a nice vibrant appearance with the Angel hair grain patterns displayed in their complete splendor. I further buffed it with a horse hair brush. The contrast of the natural lighter brown patina of the stummel with the dark browns of the grain adds an interesting dimension to the appearance of the stummel.

 To check and verify the correctness of the alignment of the stem airway, the tenon opening, shank/mortise airway and finally through the draught hole, I did the PIPE CLEANER TEST. The pipe cleaner passed through cleanly and without any obstruction from the slot end right through the draught hole. I checked the draw and though it was smooth, it felt a tad bit constricted. I further opened the draw by funneling the tenon end with a thin sanding drum mounted on the hand held rotary tool. The draw is now silky smooth and effortless!! Unfortunately, I missed out on taking pictures of the process, but I am sure the readers have a general idea of what had been done.
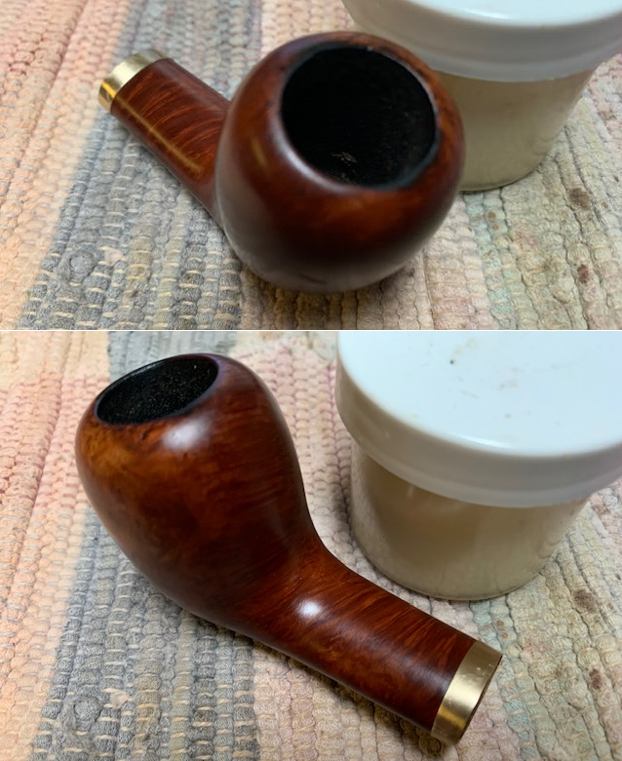
 I have now reached the homestretch in this restoration project. To complete the restoration, I mount a cotton cloth buffing wheel on to my hand held rotary tool and polished the stummel and stem with Blue Diamond compound. This compound helps to remove the minor scratch marks from the stem surface that remain from the sanding.
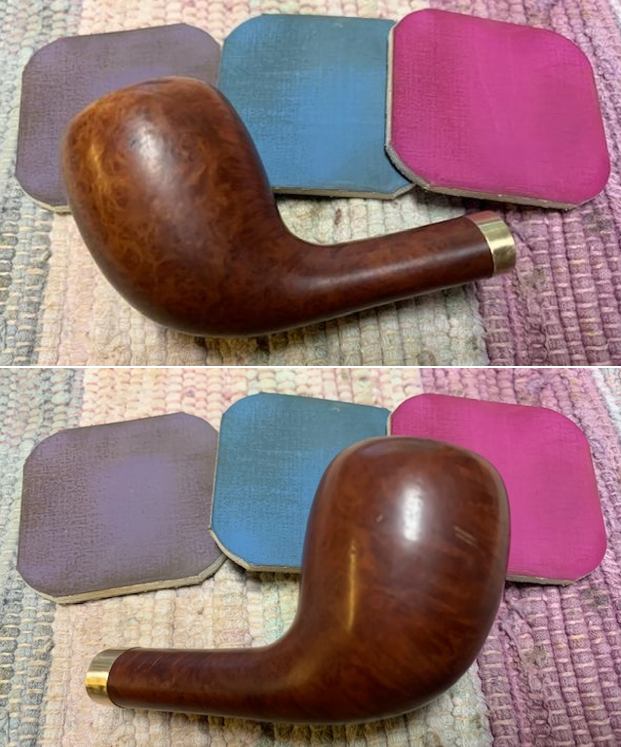
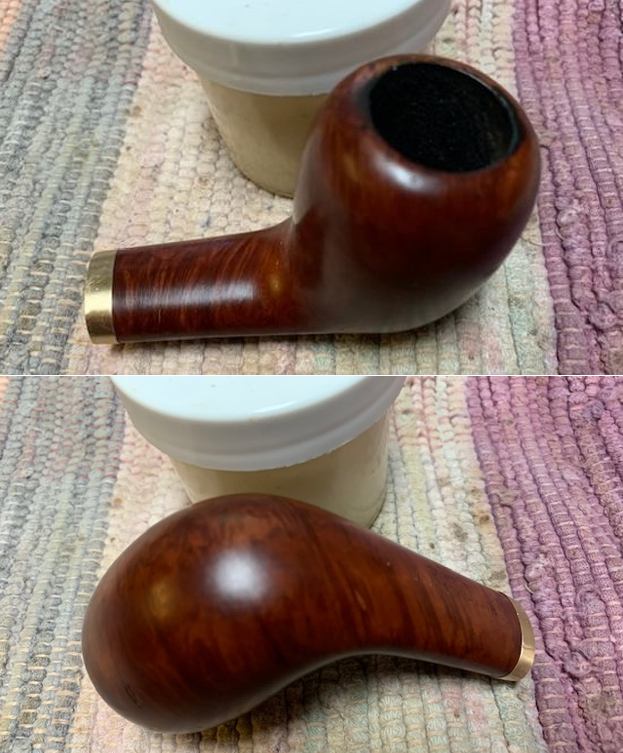
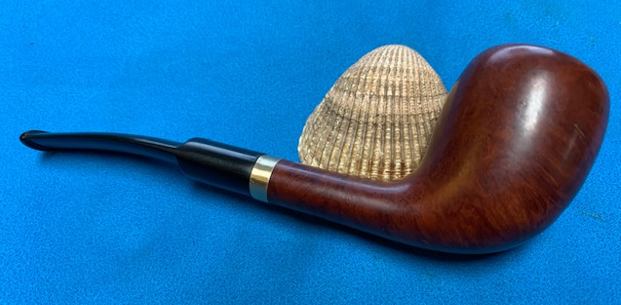
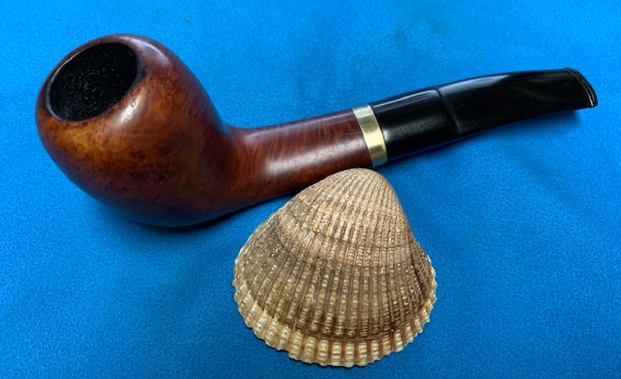
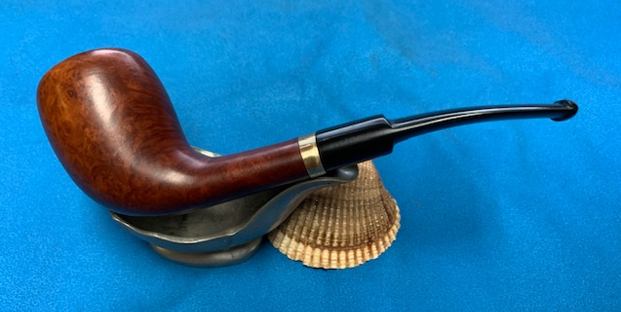
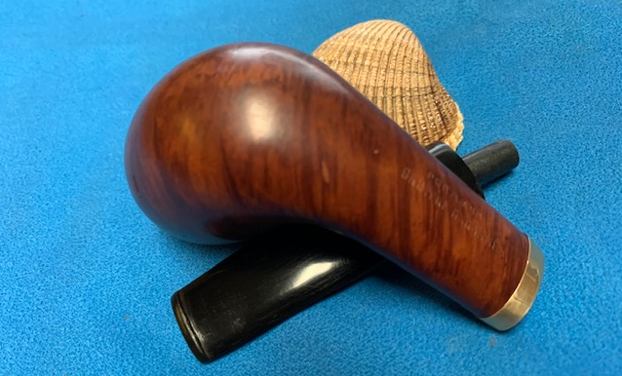
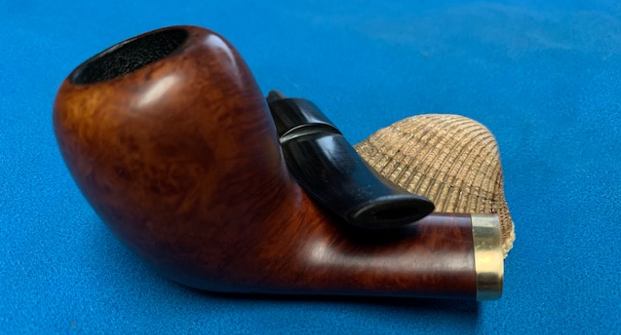
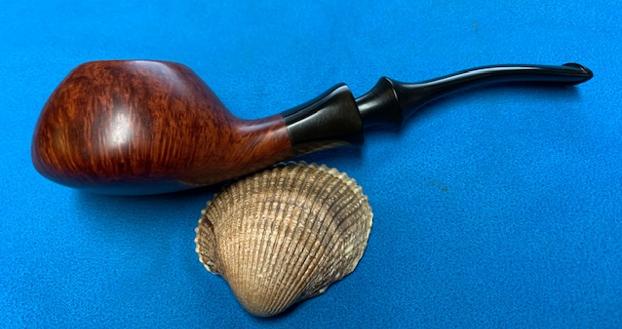
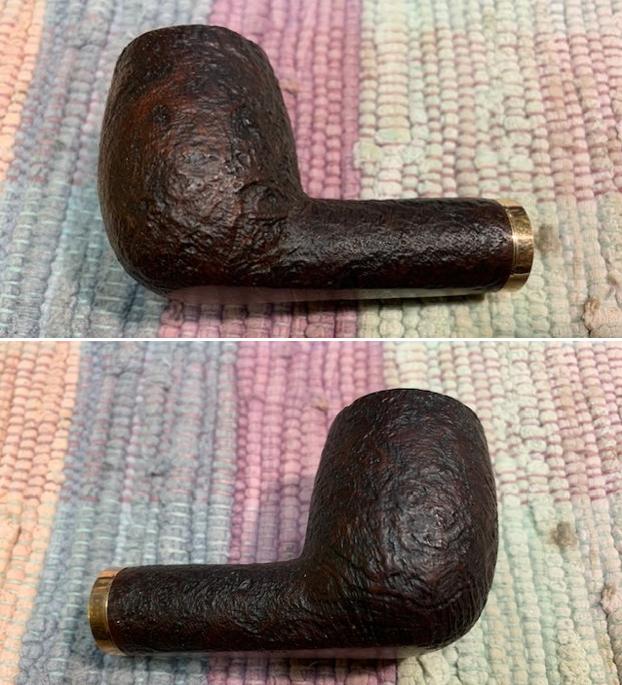
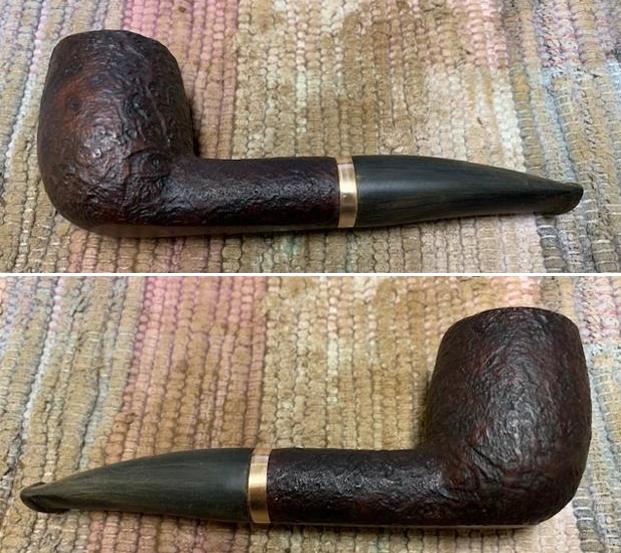
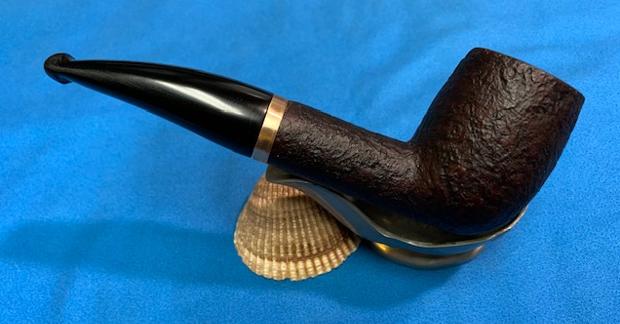
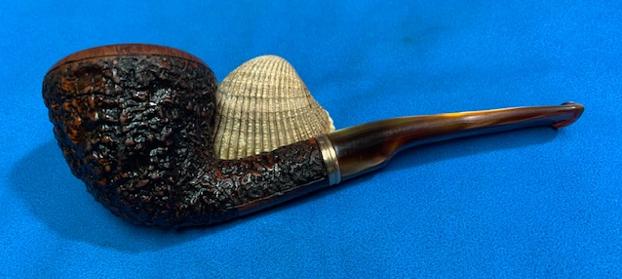
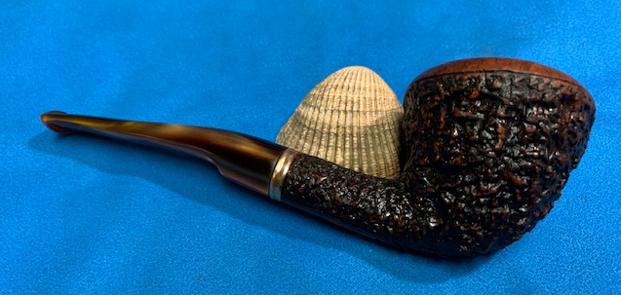
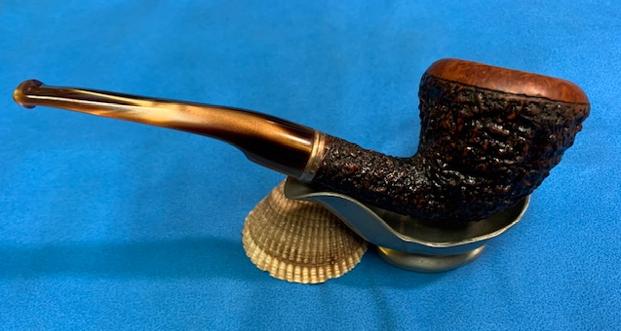
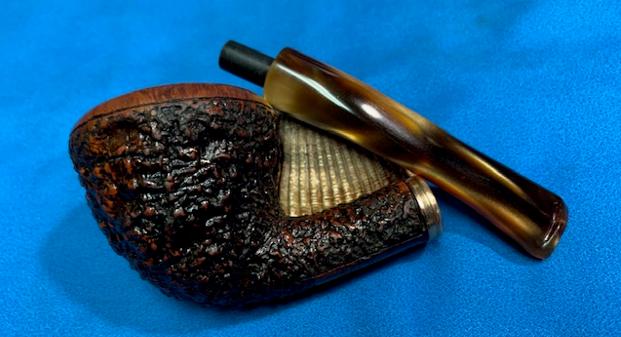
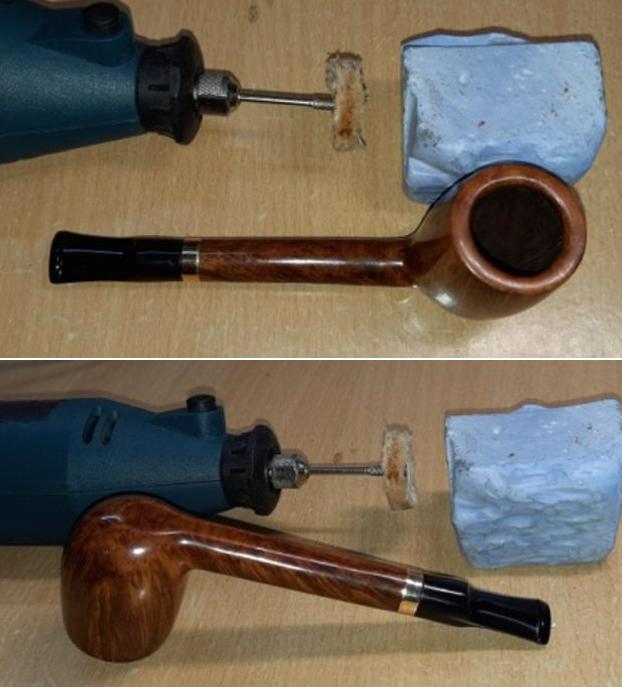 I mounted another cotton buffing wheel that I have earmarked for carnauba wax and applied several coats of the wax. I finished the restoration by giving the entire pipe a rigorous hand buffing using a microfiber cloth to raise the shine further. The finished pipe with a new brass band looks amazingly beautiful and is ready for its new innings with me and be enjoyed for a long time.


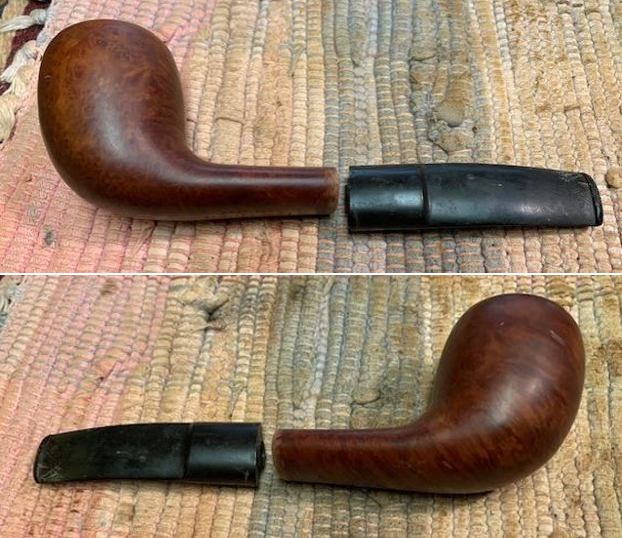
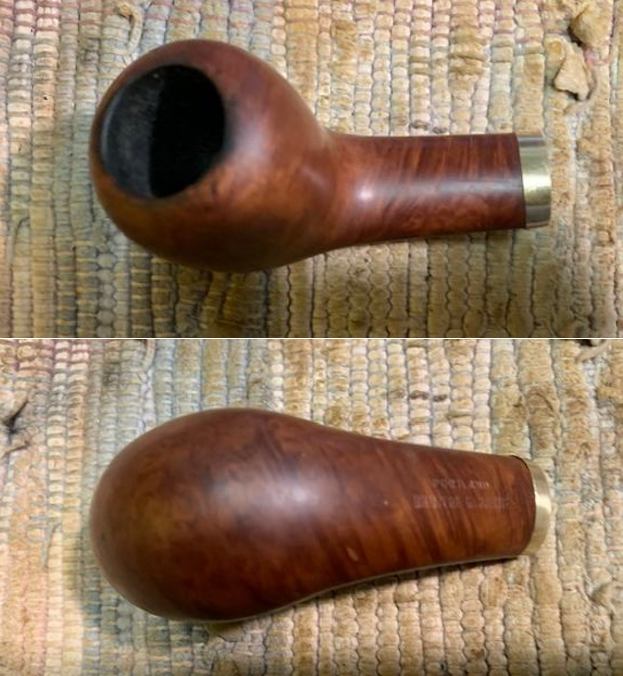
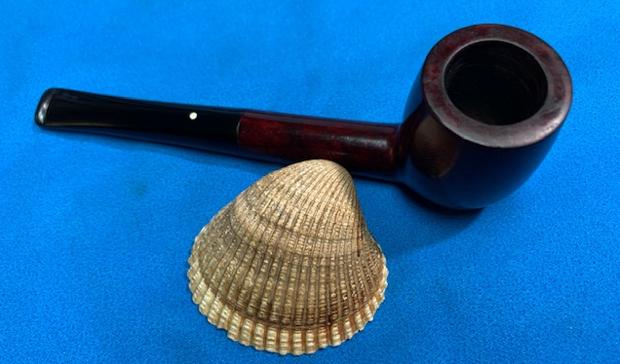
 I took photos of the rim top and the stem surfaces to chronicle the condition. The rim had some darkening from his lighter toward the right front of the bowl and on the back side. There was not any cake in the bowl as it was still quite new. The stem was just dirty with light tooth marks on both sides near the button. The tenon had snapped off very close to the stem so it would be a simple process to add a new tenon.
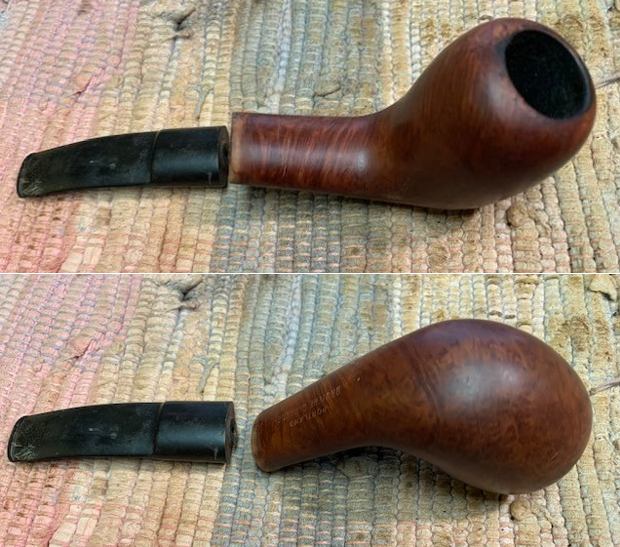
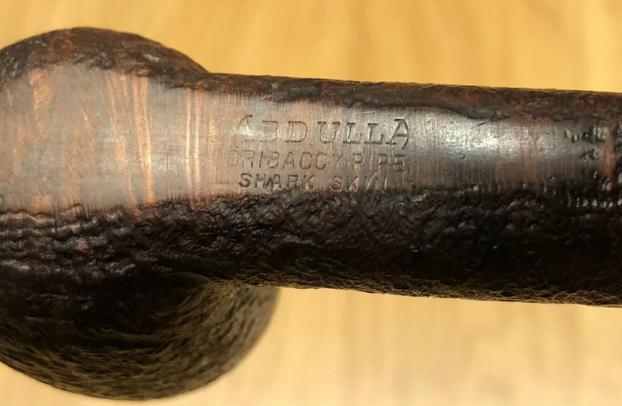
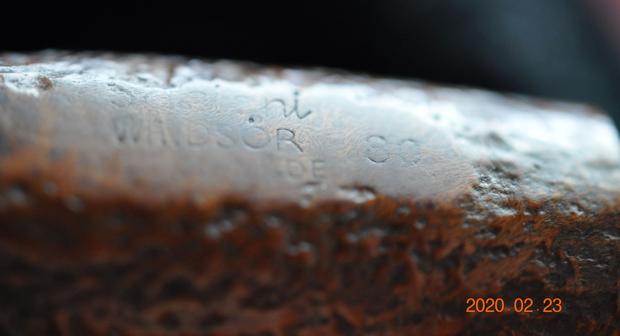
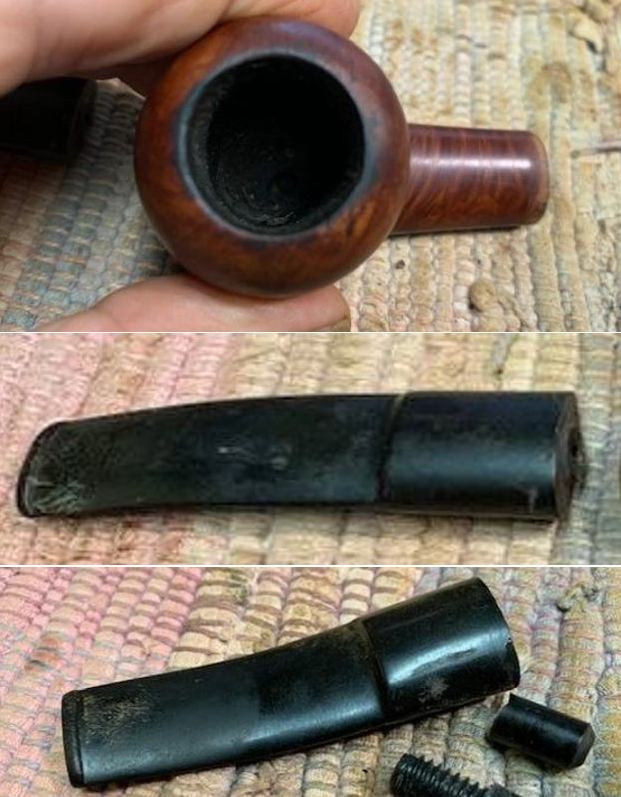 I took a photo of the stamping on the shank underside. It is clear and readable.
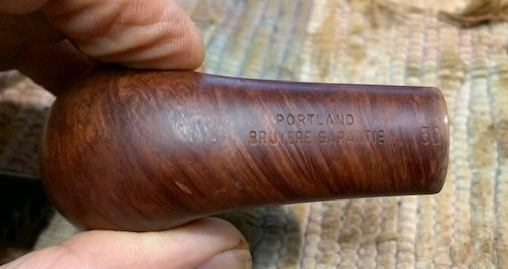 I took a photo of the parallel cracks on the top of the shank. These were hairline but they were present and though you cannot see it they go to the end of the shank.
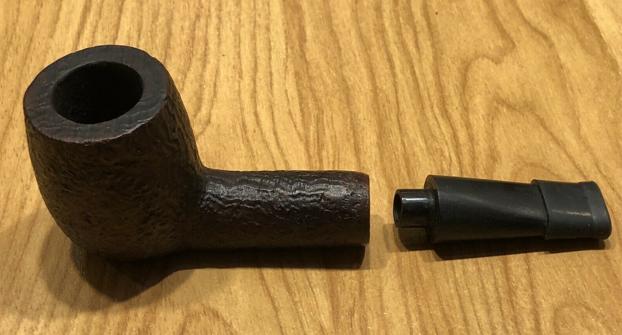
 I began my work on this pipe by pulling the broken tenon. I always use a coarse threaded screw and gently turn it into the airway in the broken tenon. I carefully wiggle it free. If it is tight a short 10 minutes in the freezer takes care of that.
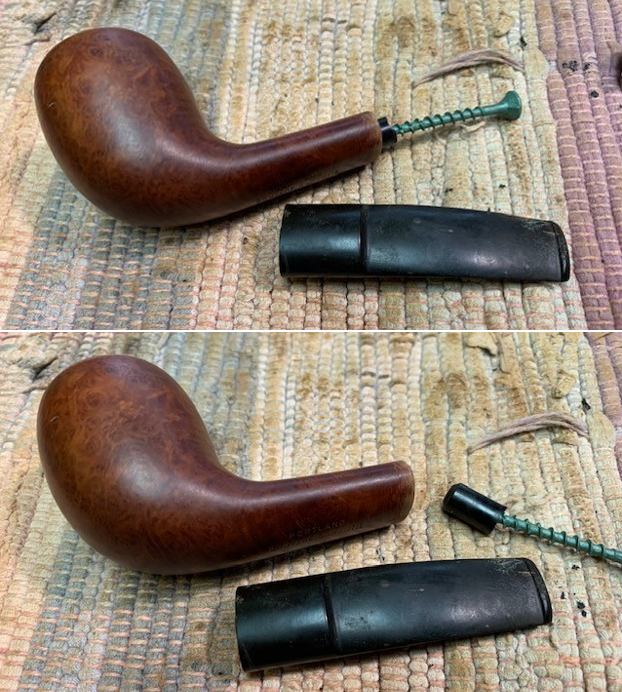
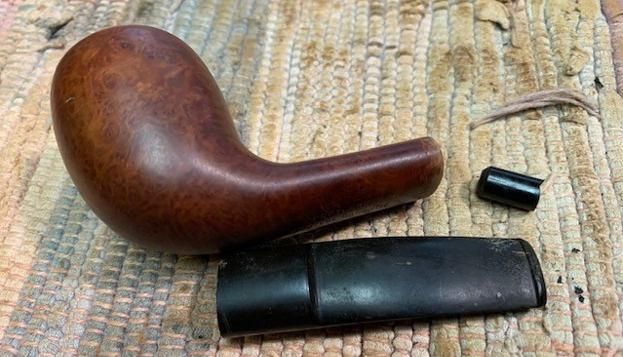 I went through my box of tenons and found a threaded one that was close to the diameter of the older broken tenon. It would need to be shaped but it would work.
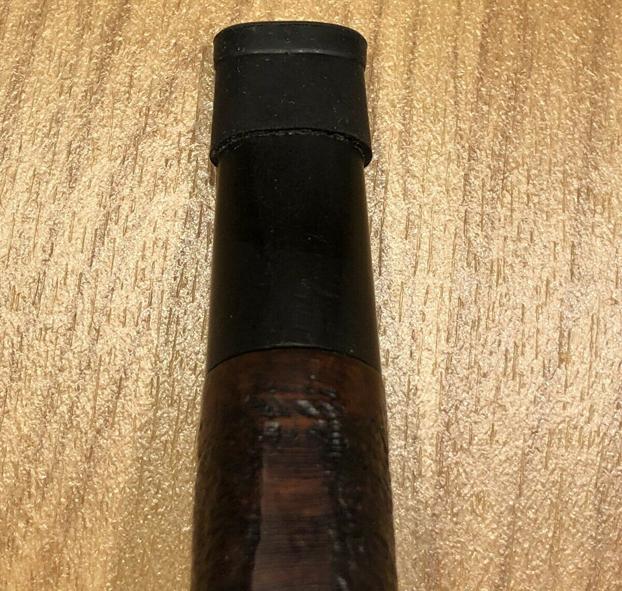
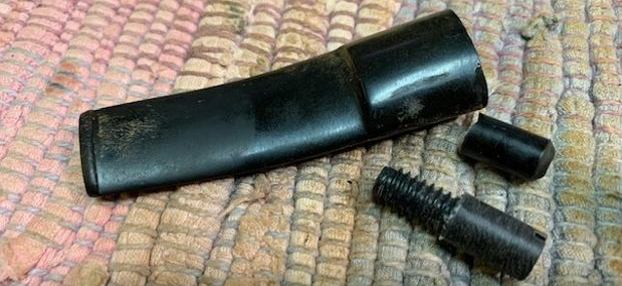 Before working on the stem I decided to put the band on the shank and repair the crack and protect it from going further. They are very fine cracks and I decided not to drill it as the hole would be bigger than the cracks. A tight fitting band would pull it together. I reduced the depth of the band with a topping board to make it thin and give a daintier look than the big clunky band. It is a thin brass band and it is pressure fit in place on the shank. I heated the band with a lighter and pressed it onto the shank. I like the look of the banded shank in the photos below.
 With the band fitted it was time to work on the tenon and the stem. I used my Dremel and sanding drum to make the tenon smaller in diameter to match the shank. I worked on it until the fit in the shank was snug but not tight.
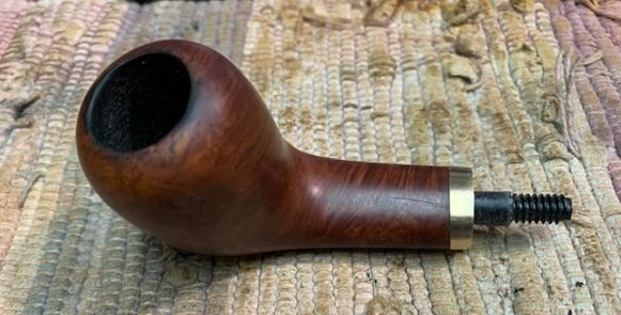 With that finished it was time to drill out the stem. I used the Dremel and sanding drum to flatten out the broken tenon end on the face of the stem. I started drilling with a bit slightly larger than the airway and finished with a bit that would allow the threaded tenon to fit the stem.
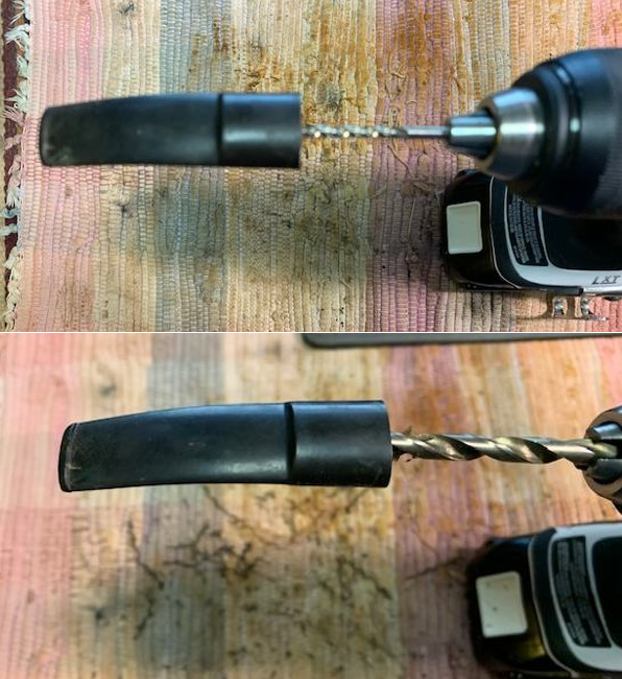 I do not tap the drilled hole in the stem. Rather I flatten out the threads slightly as they provided the grip for the glue when I insert the tenon in the stem. I coated the threaded tenon end with black superglue which dries more slowly than the regular glue and allows me to make adjustments in the fit. I checked the fit in the shank and was pleased with it. I set the stem aside so the glue could cure.
 I turned my attention to polishing the bowl. I polished it with micromesh sanding pads – dry sanding it with 1500-12000 grit pads. I wiped the briar down with a damp cloth after each sanding pad. The pipe really began to take on a shine as I worked through the pads.
 I rubbed the briar down with some Before & After Restoration Balm. It works to protect, clean and enliven the briar. I rub it in with my finger tips and let it sit for 10 minutes. I buff it off with a cotton cloth to remove the excess and give the bowl a shine.
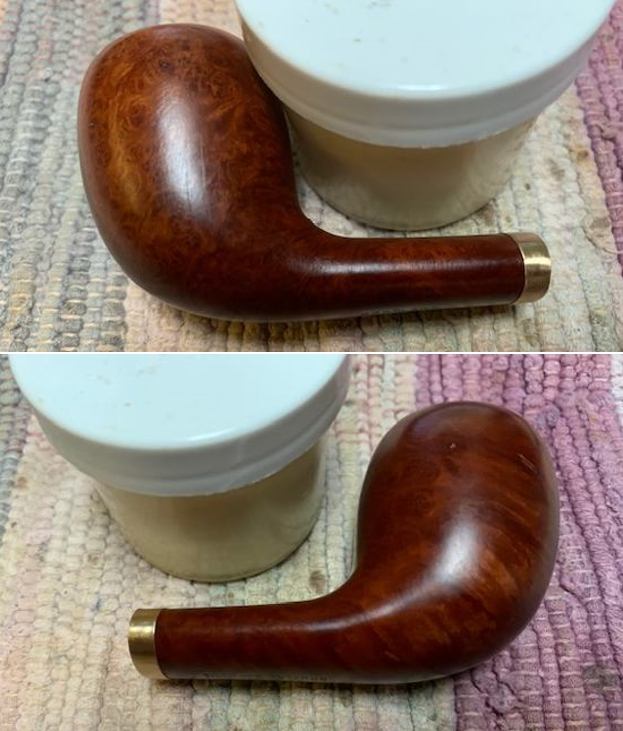
 I polished the stem and new tenon with micromesh sanding pads – 1500-12000 grit pads. I dry sanded with the pads and wiped the stem down with Obsidian Oil after each sanding pad. I finished the polishing with Before & After Pipe Stem Polish – both Fine and Extra Fine. I gave it a final rubdown with Obsidian Oil.
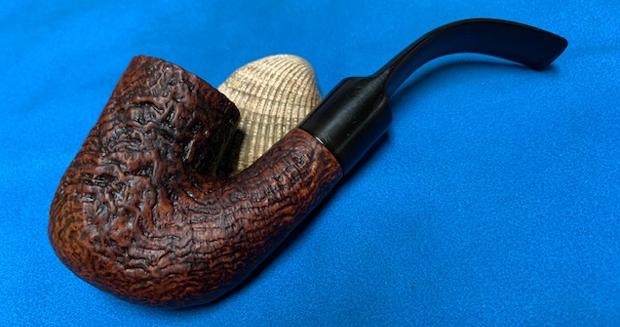
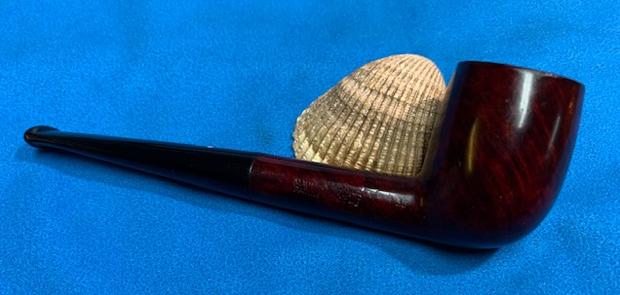
 I put the stem back on the bowl and polished the pipe with Blue Diamond on the buffing wheel to give it a shine. I gave it multiple coats of carnauba wax and buffed it with a clean buffing pad. I hand buffed it with a microfiber cloth to deepen the shine. I took some photos of the pipe before calling the pipeman to pick up his pipe. I am pleased with the look of the Portland Bruyere Garantie 60 Egg and the fit of the repair band and the stem to the shank. I think it will meet his expectations when he picks it up later today. Thanks for walking through the repair with me in this blog. Cheers.
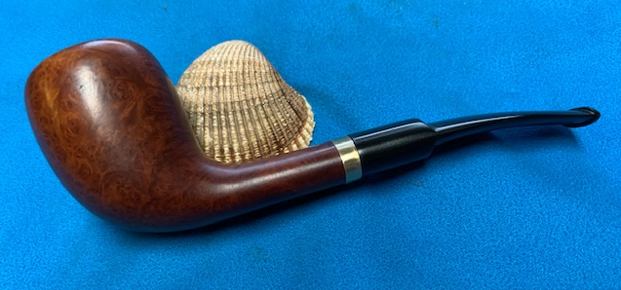


