Tag Archives: pipe refurbishing

Giving a no name Poker a new stem and a new look


Blog by Steve Laug

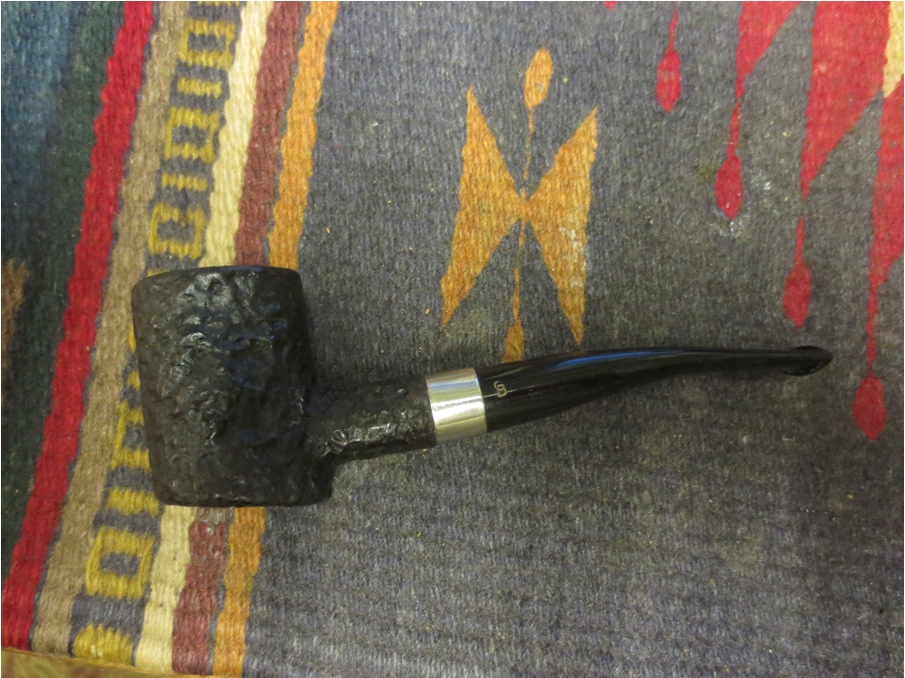
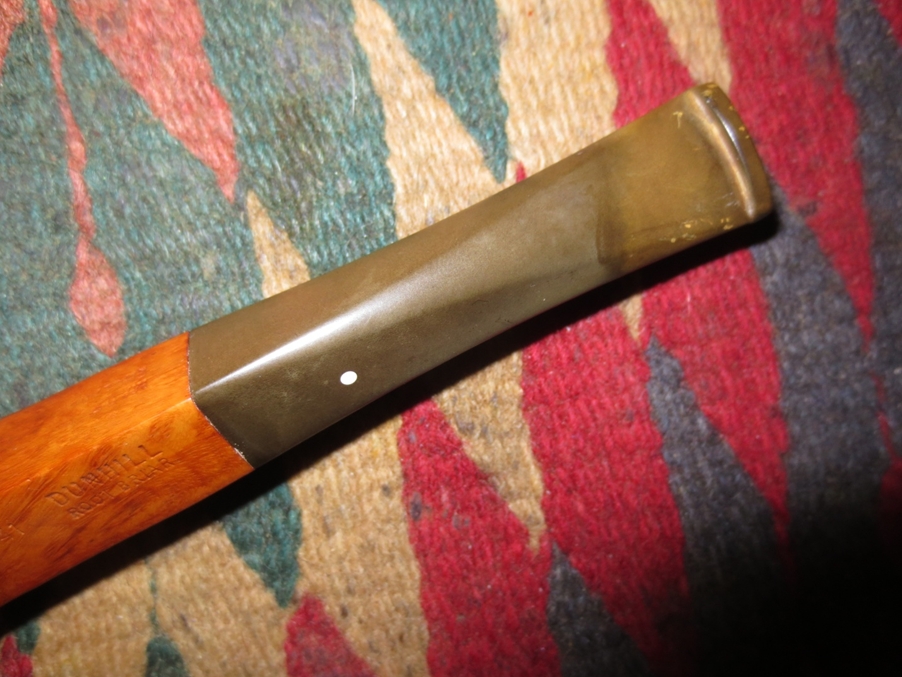
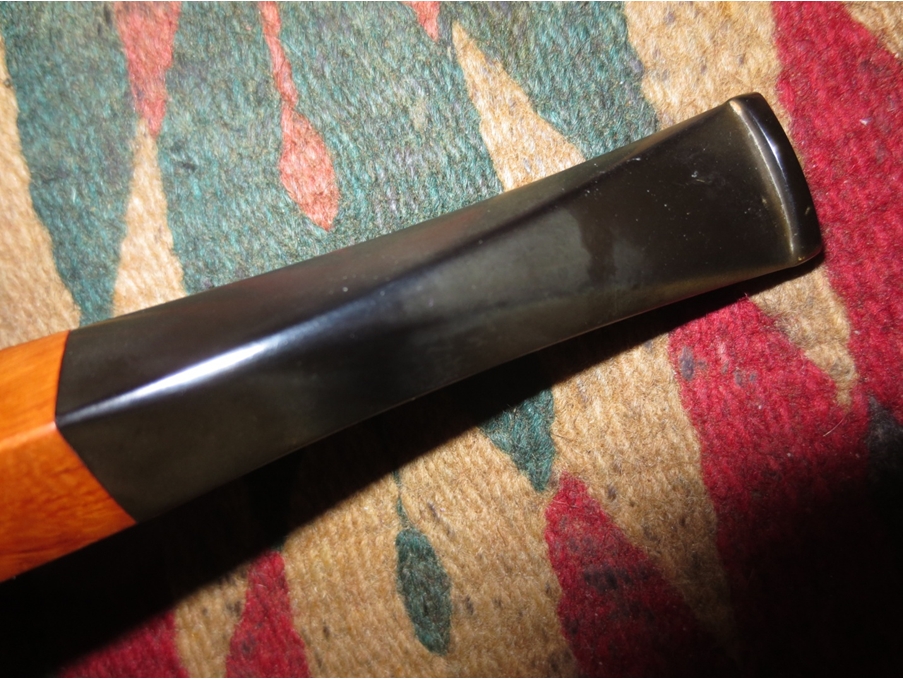
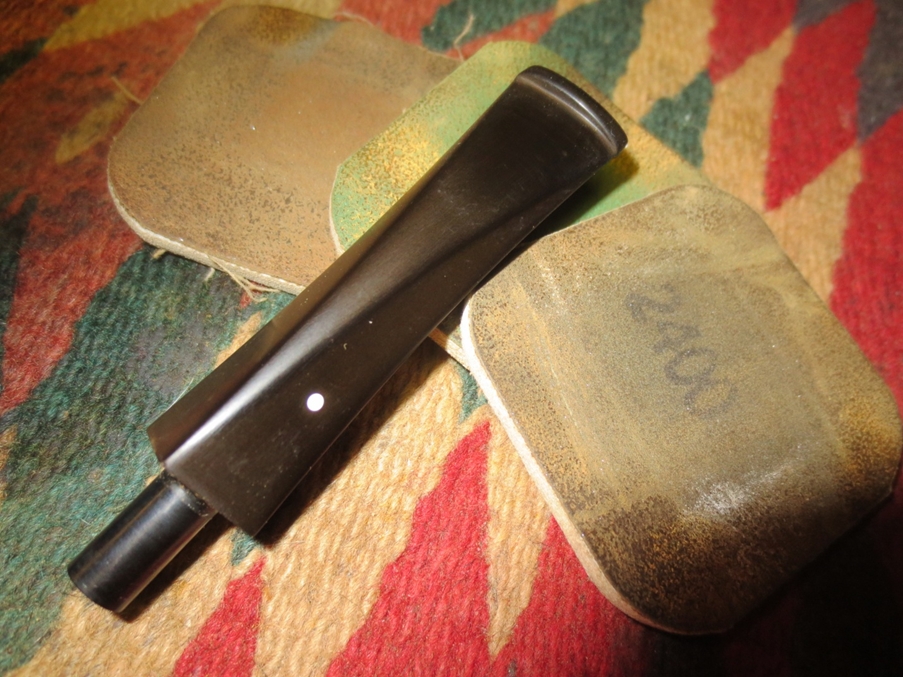
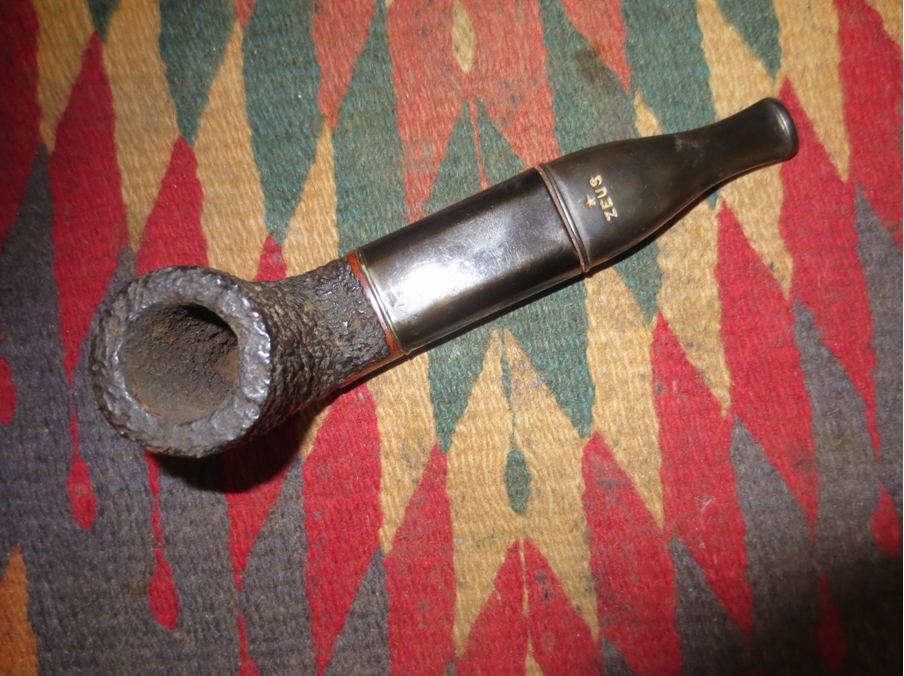
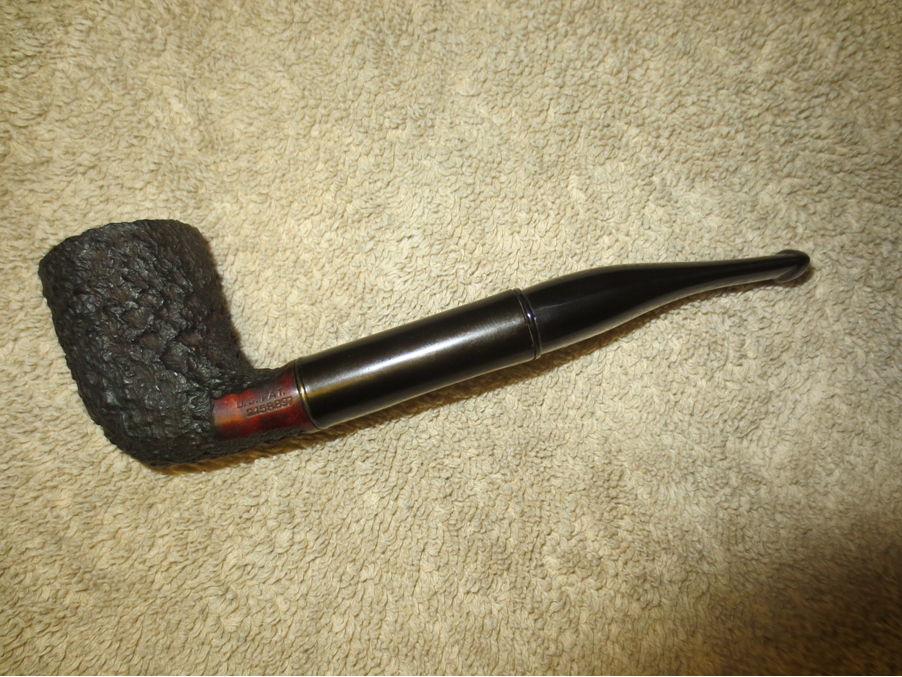
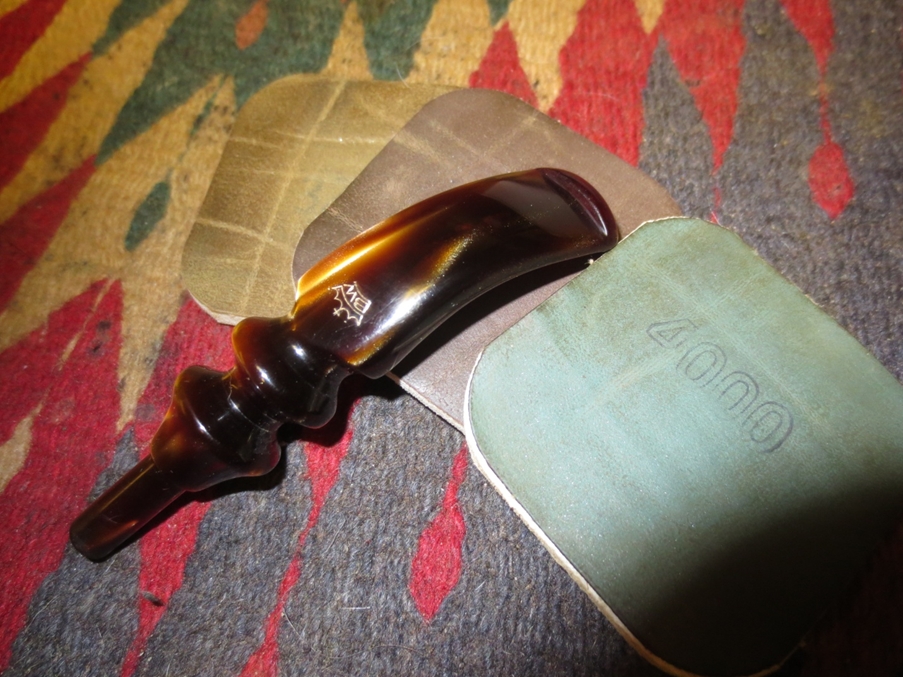
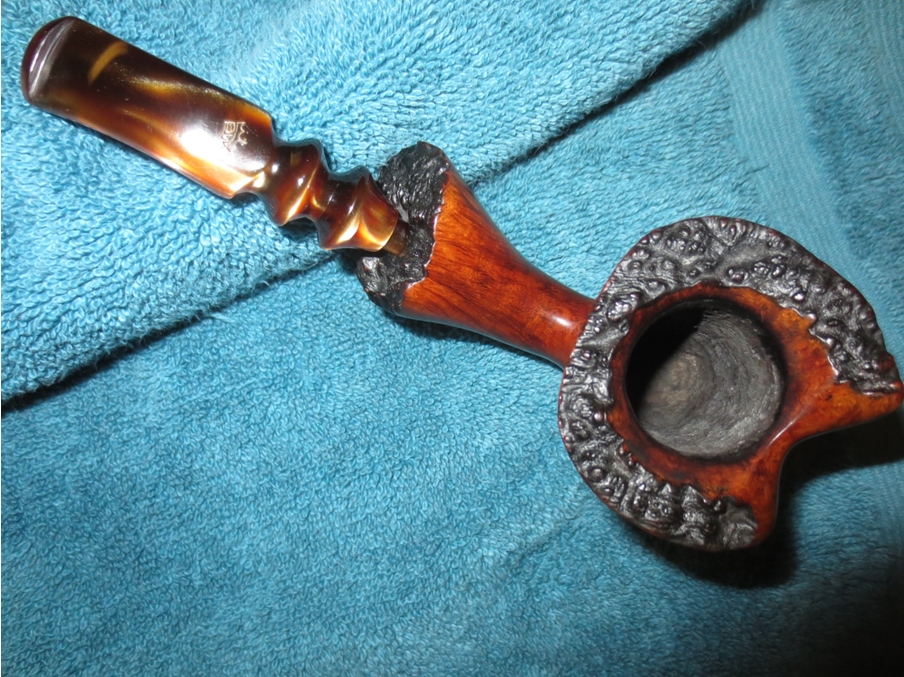
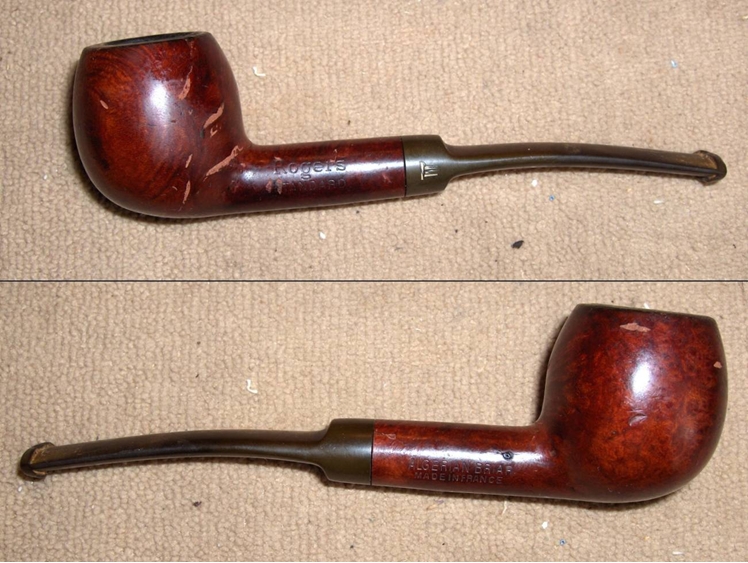
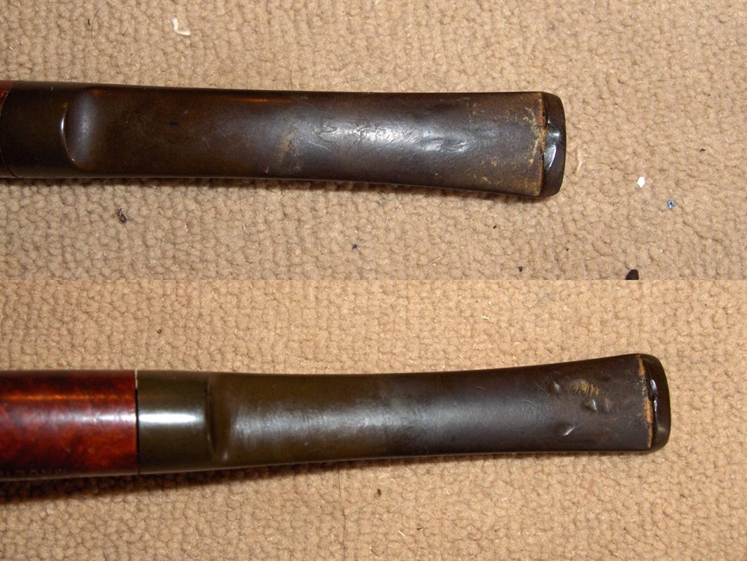
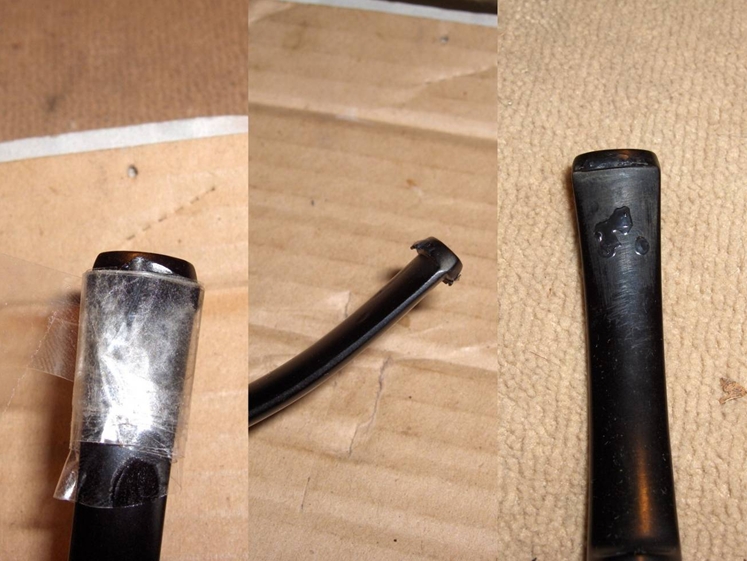
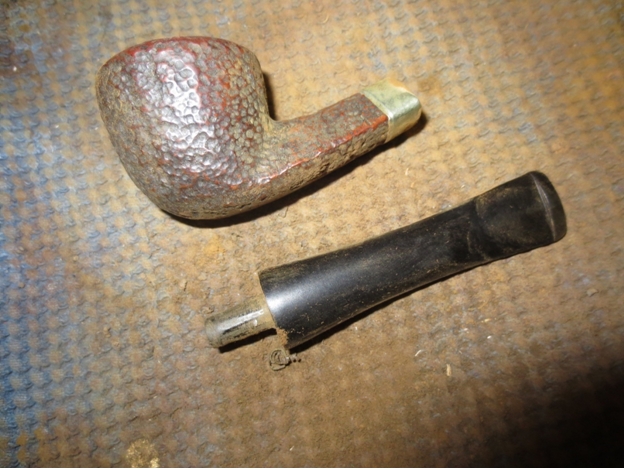
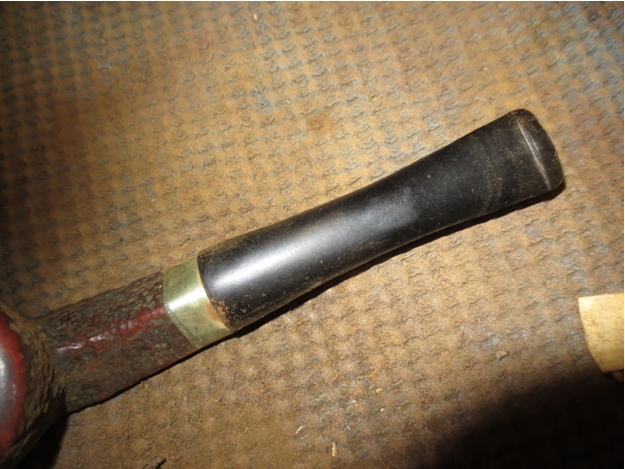
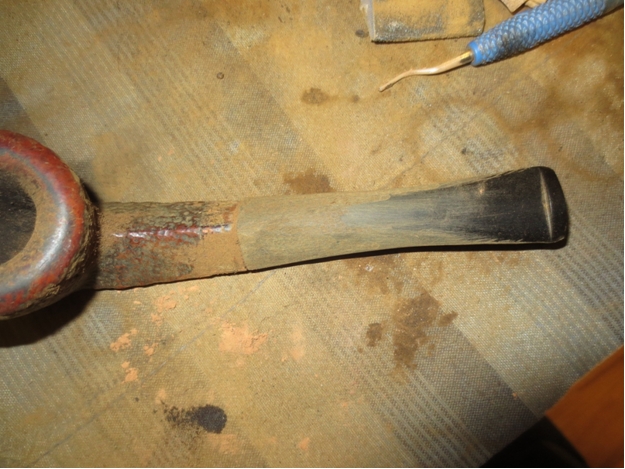
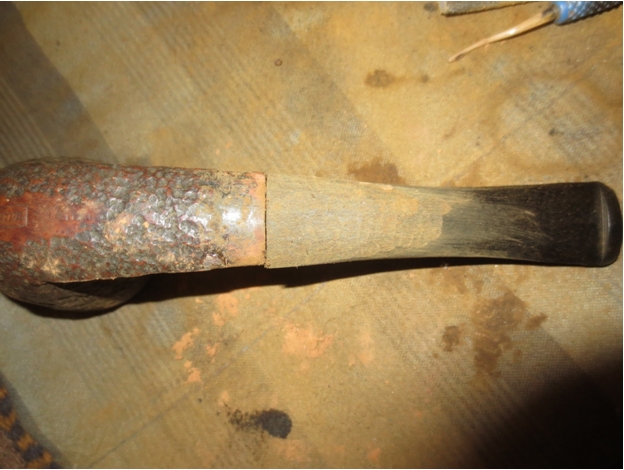
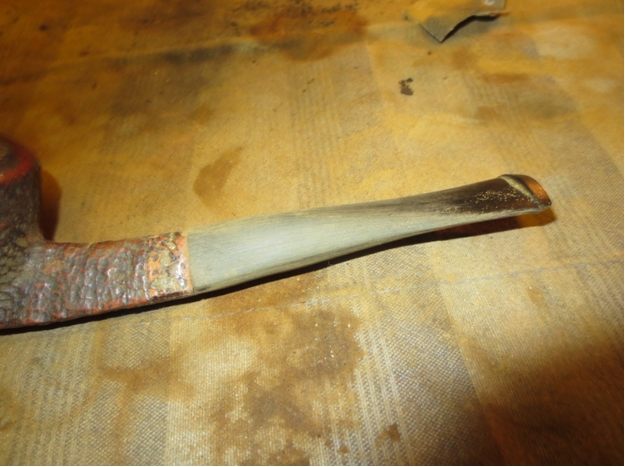
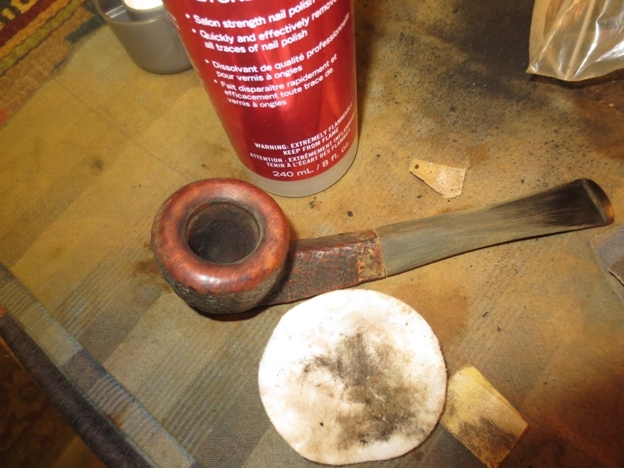
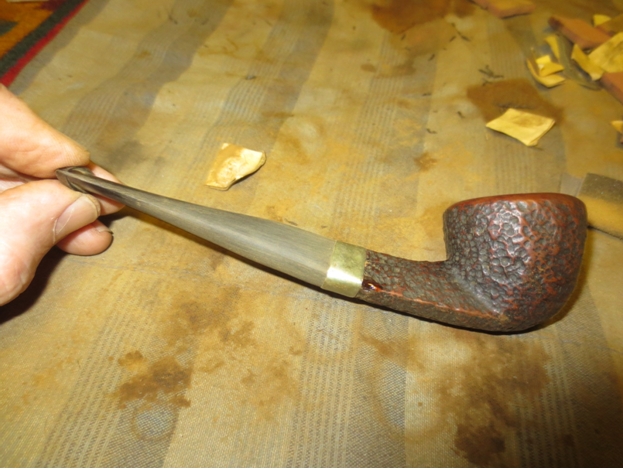
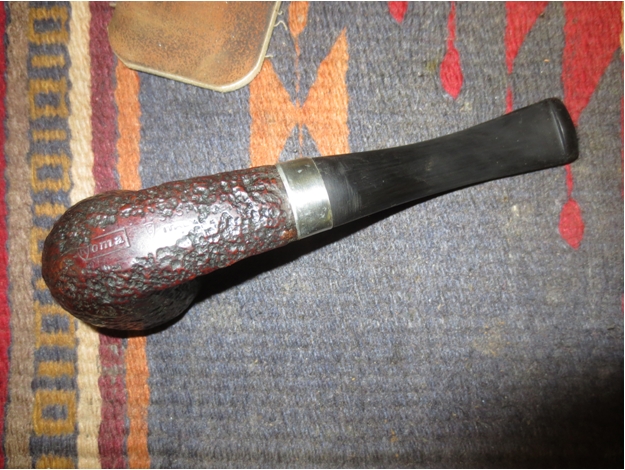
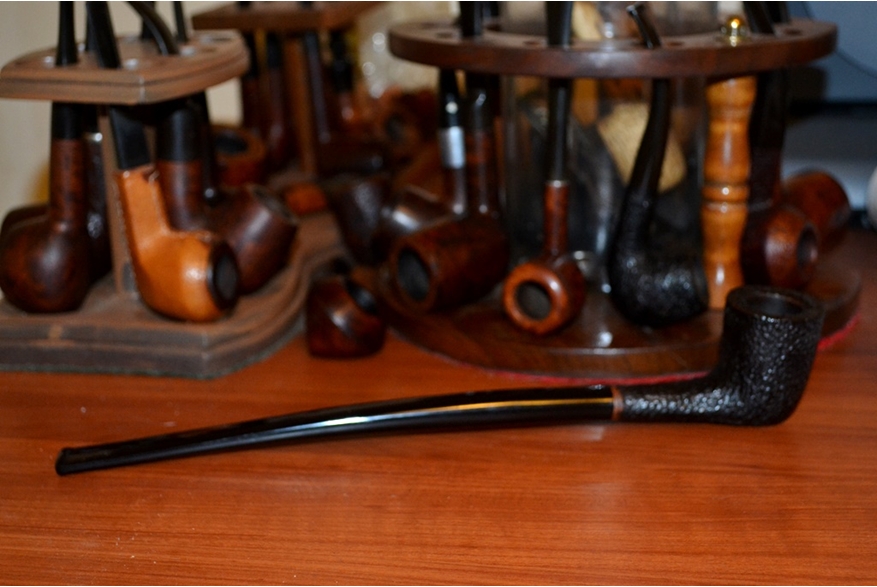
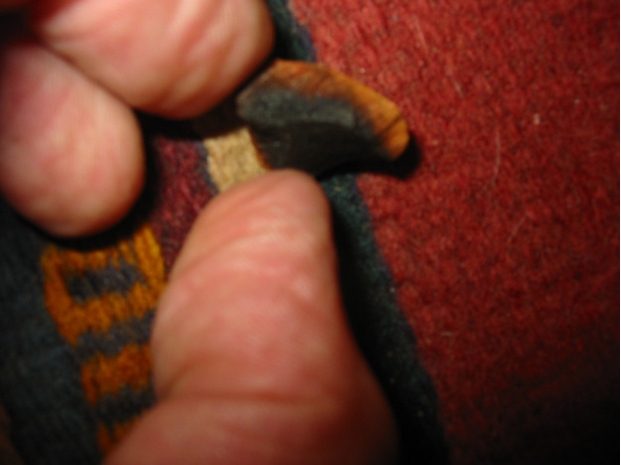
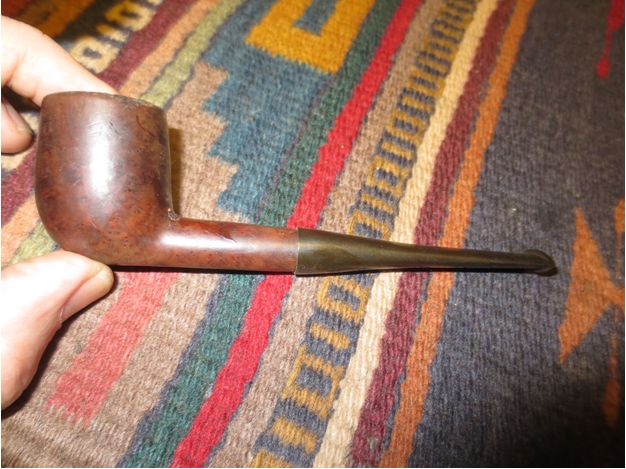
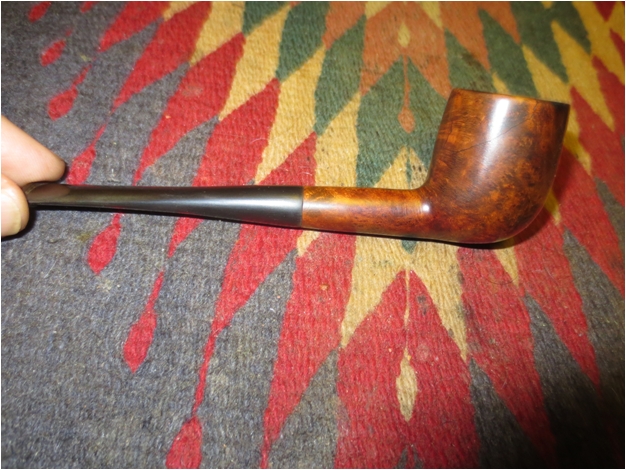
Over the past six or seven months I have picked this pipe up and looked it over at the small antique shop I visit regularly. Every time I put it back down and leave it there. There was really nothing redeeming about the shape with its one thin side and the odd shank that was not quite round. The stem was just plain ugly and unfinished. It was as if the maker or owner just turned a blank to fit the mortise and flared it backwards to avoid having to deal with a smooth fit to the shank as it was everything but flat and round. The sides of the stem still showed file marks and the diameter was markedly different than that of the shank. All in all it was one that I could do without that is for sure.

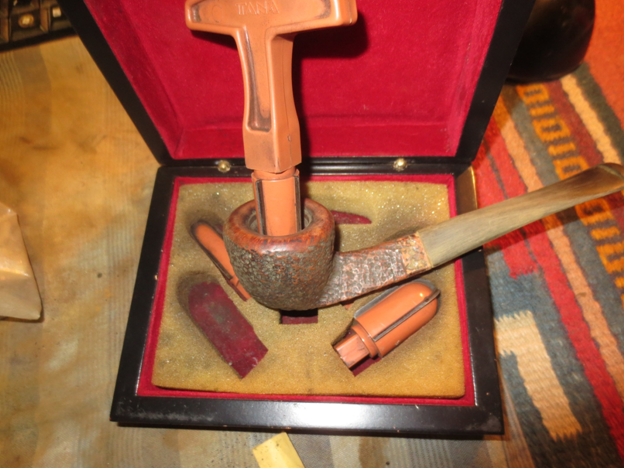
Then this past weekend I was in the shop again. I picked it up and looked at it once more. I don’t know if my mood was different or I was on the adrenaline high of finding the old Zeus at the shop before or what but this time I saw some possibilities in the pipe. I paid the $8 cash and the pipe was mine. Now what would I do with it?

When I got home I took some photos and weighed my options over Saturday evening and Sunday. I thought about making a freehand style stem for the pipe and ditching the old one. I thought about cleaning up and reshaping the old stem. I thought about facing off the shank end and giving it a more classic look. I took the stem off and looked at the shape of the shank, the shape of the shank end and tried to visualize it with a classic look. As you can guess by this point if you know my likes I went for the classic look.Poker1

Poker2

Poker3

Poker4 
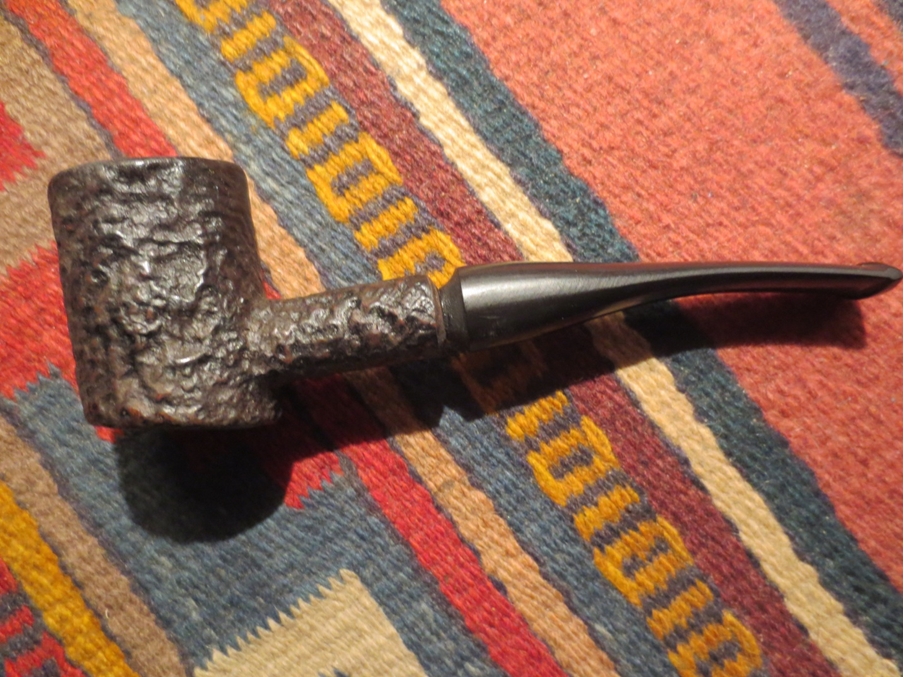
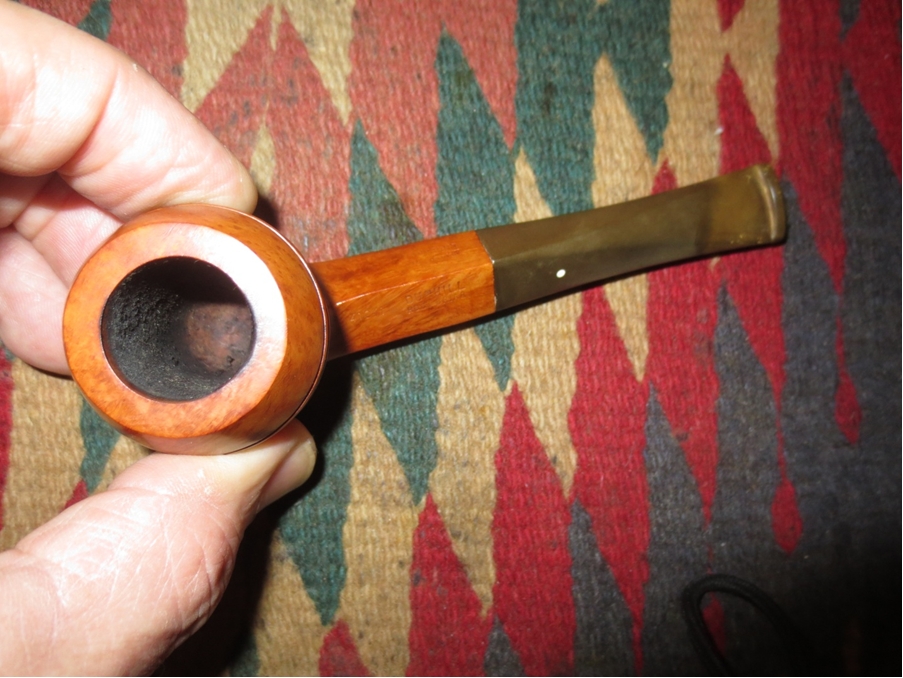
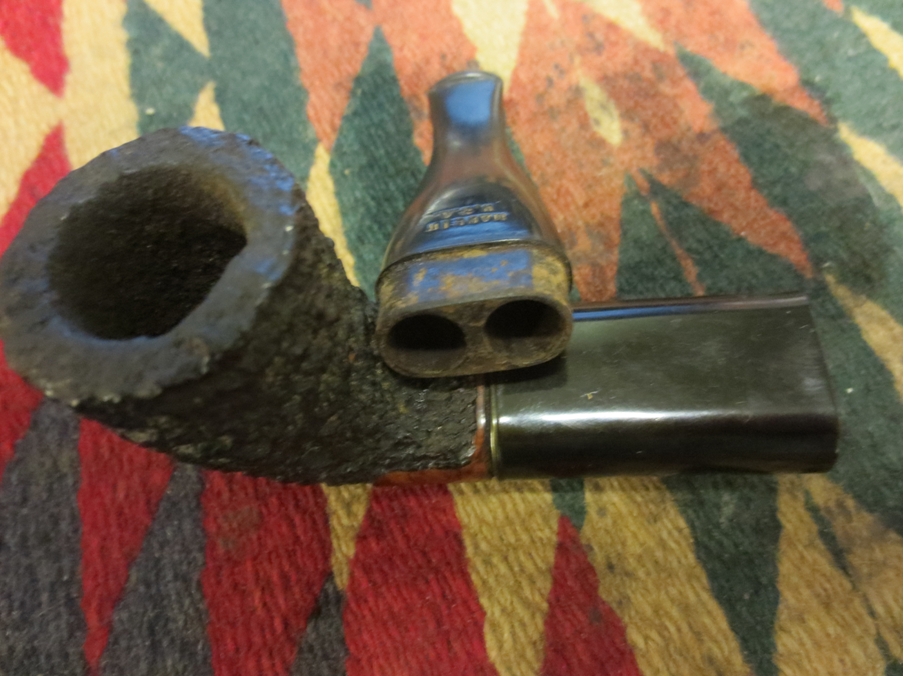
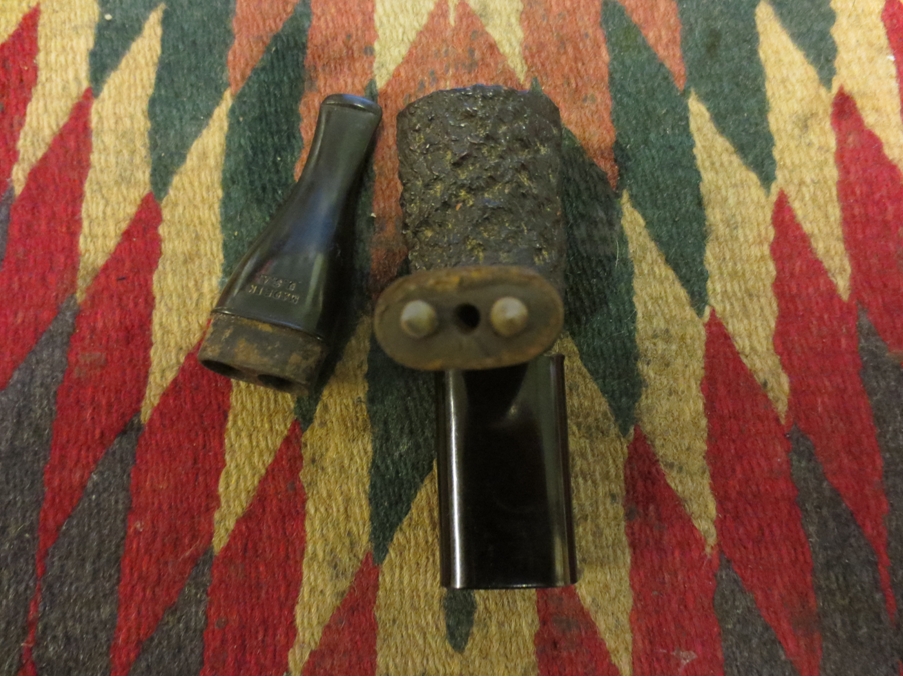
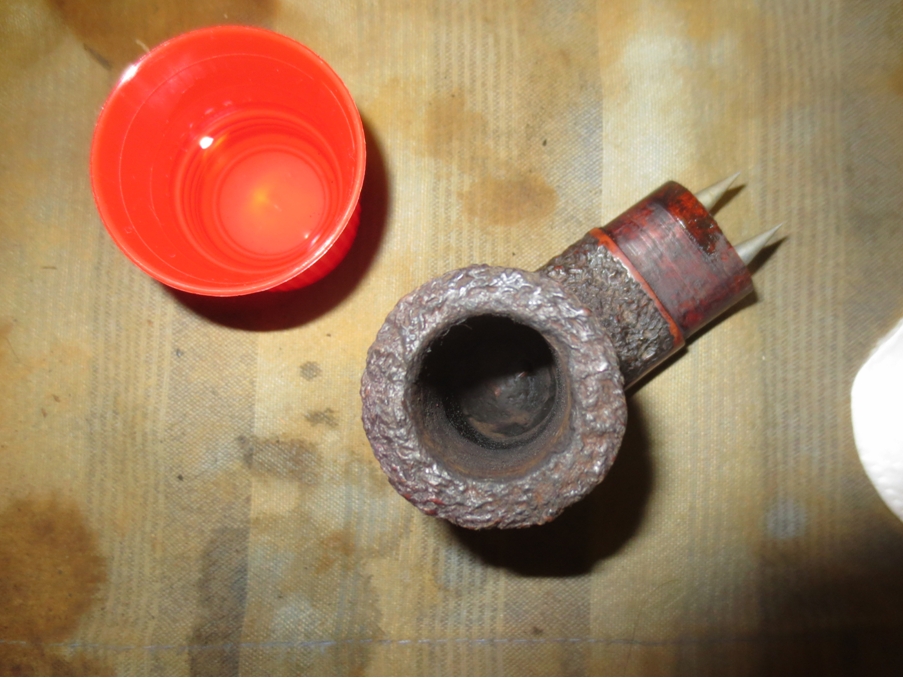
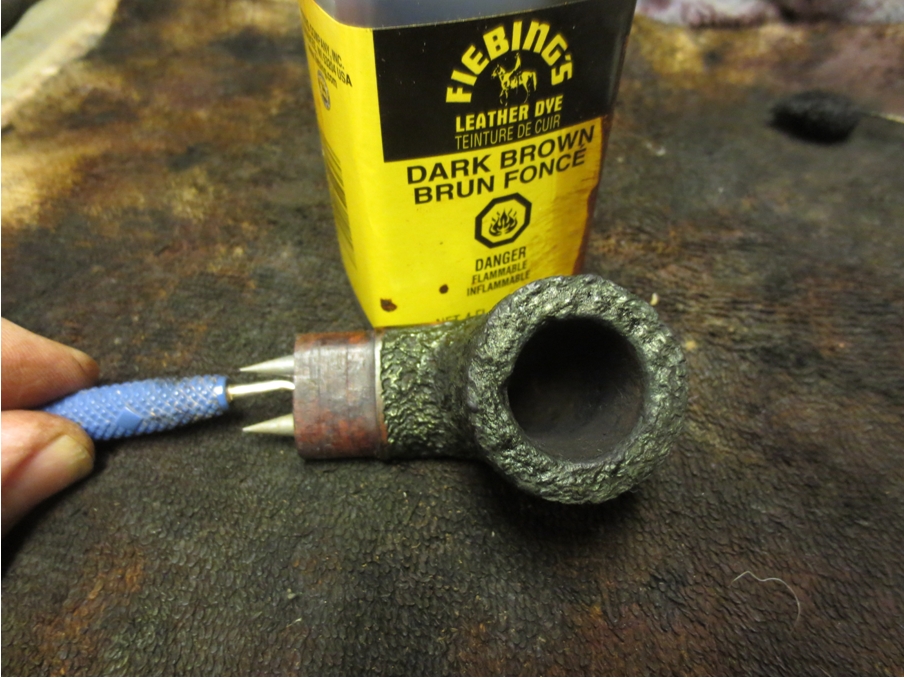
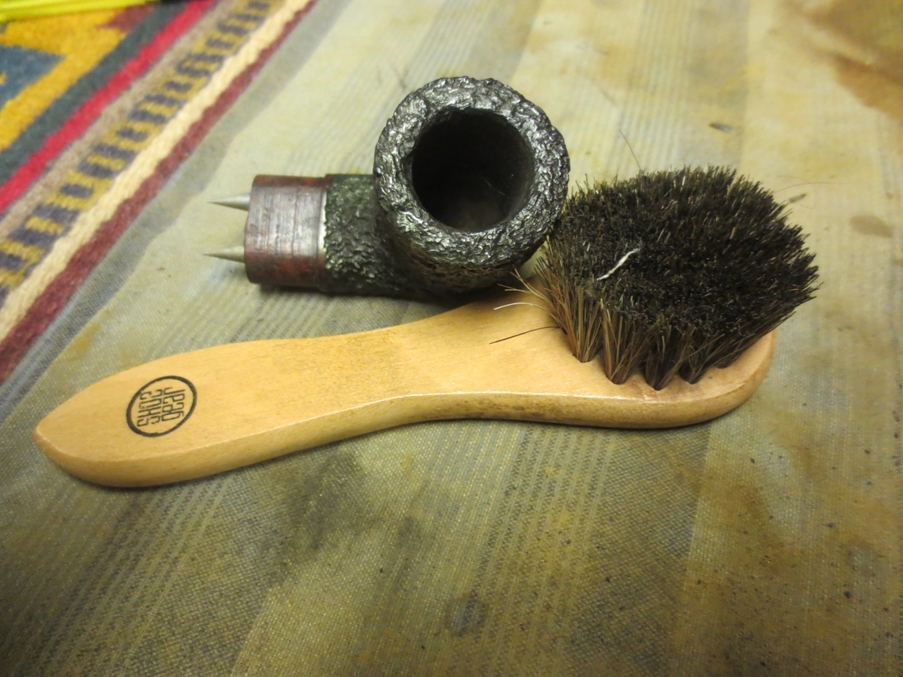
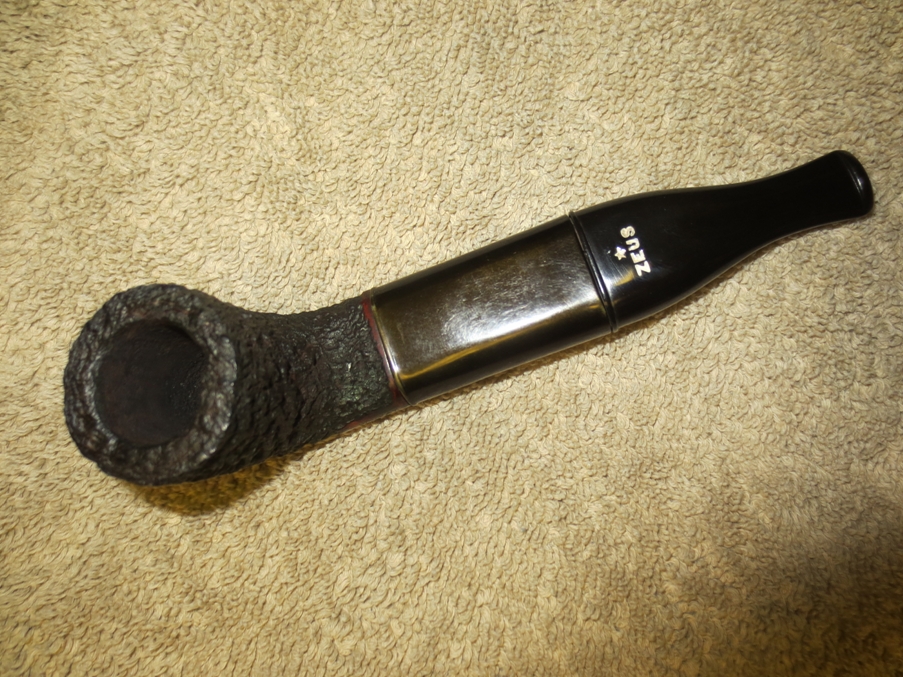
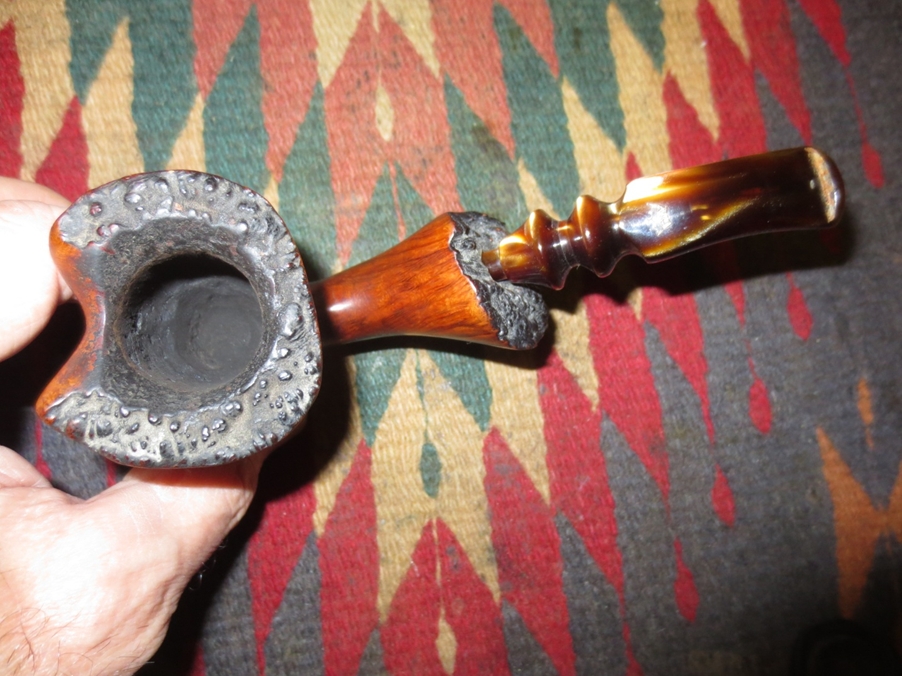
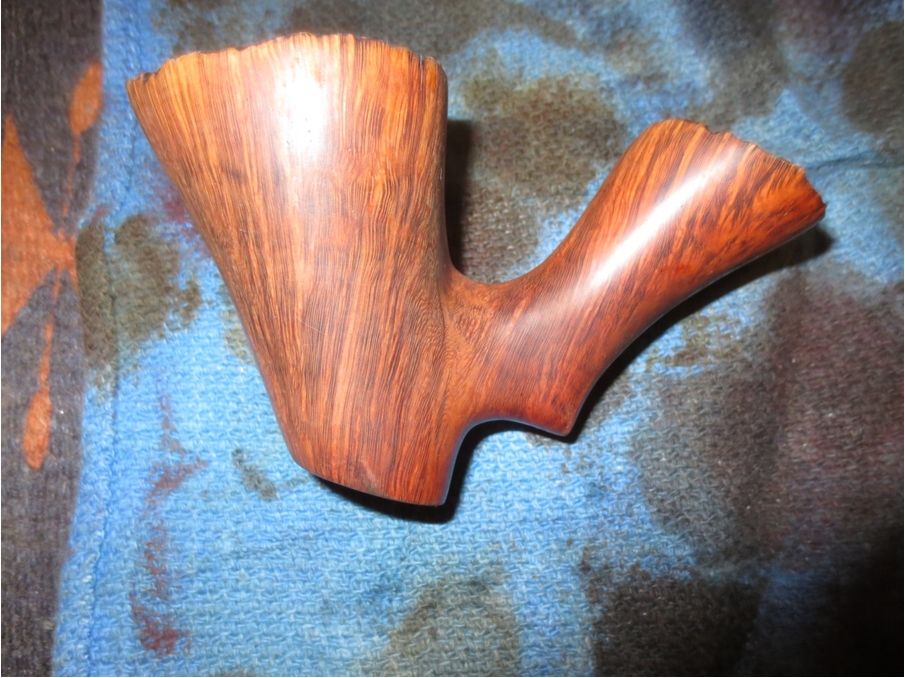
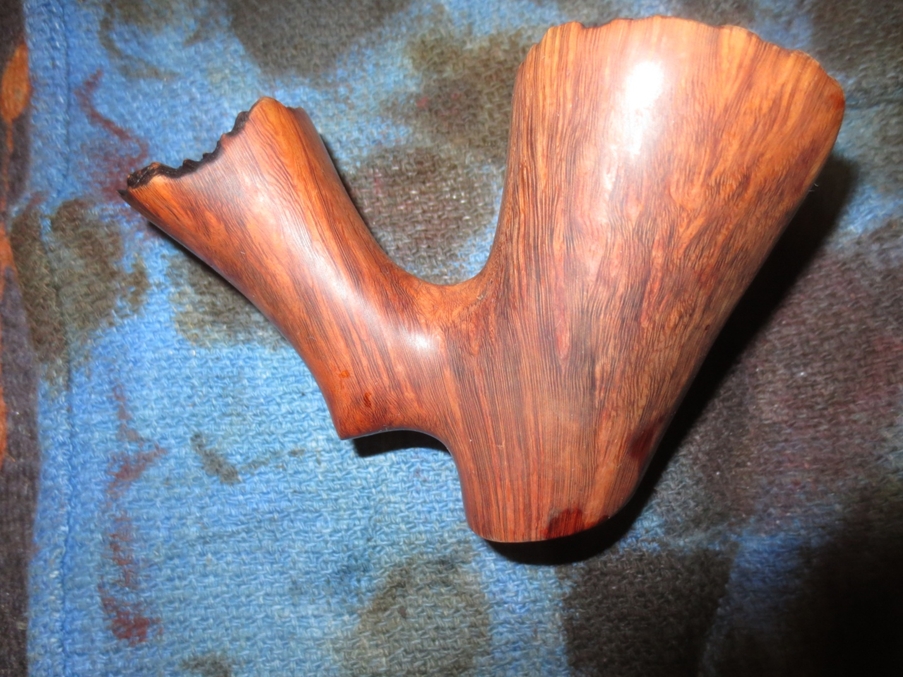
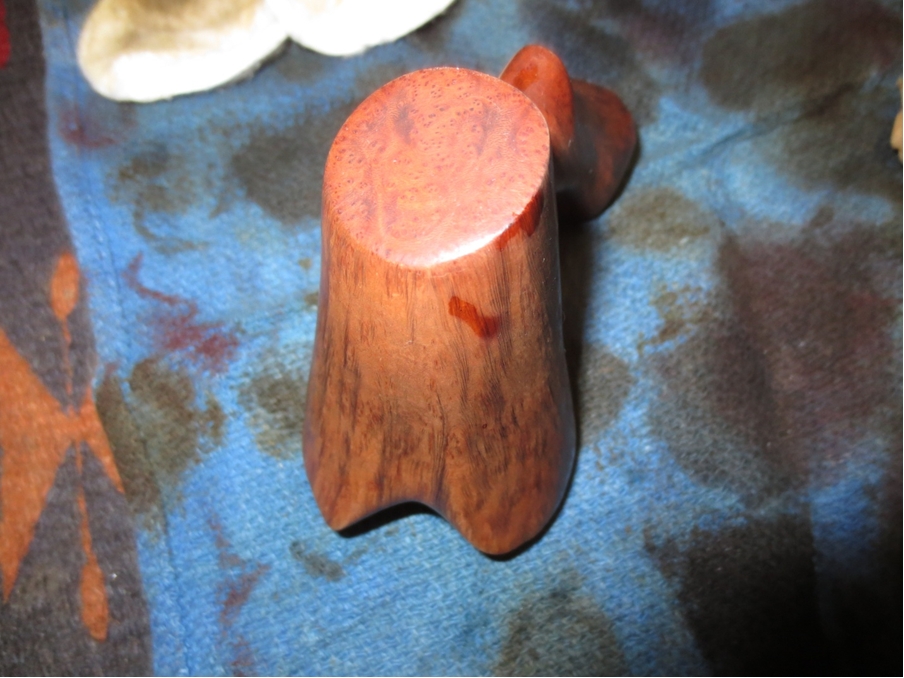
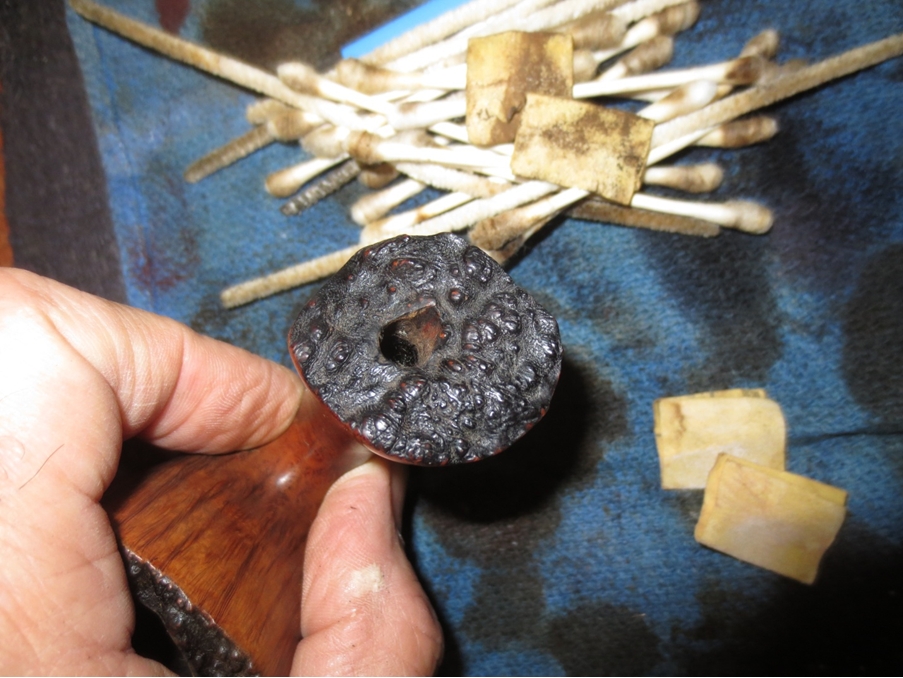
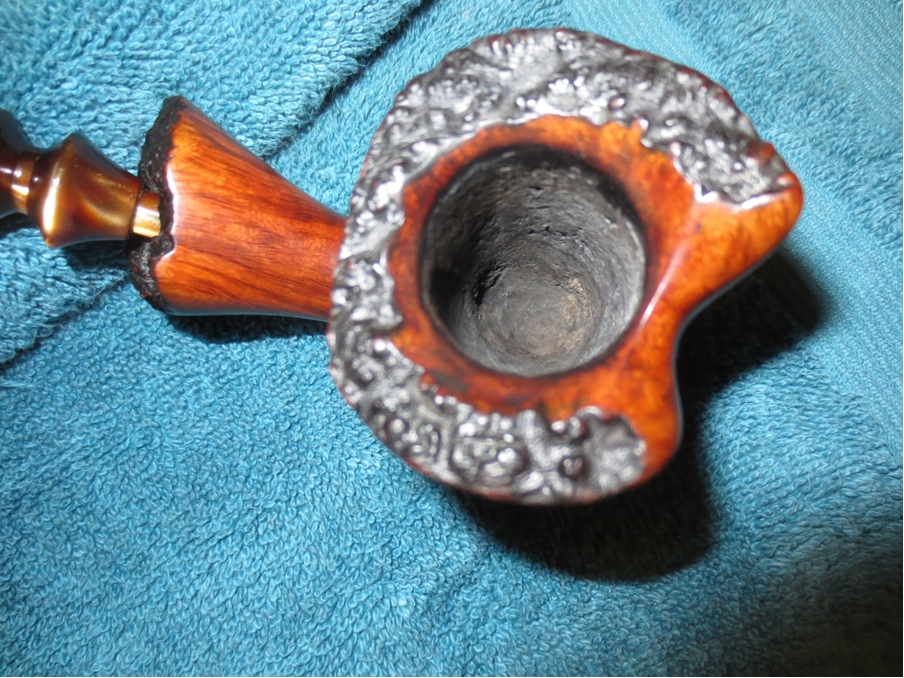
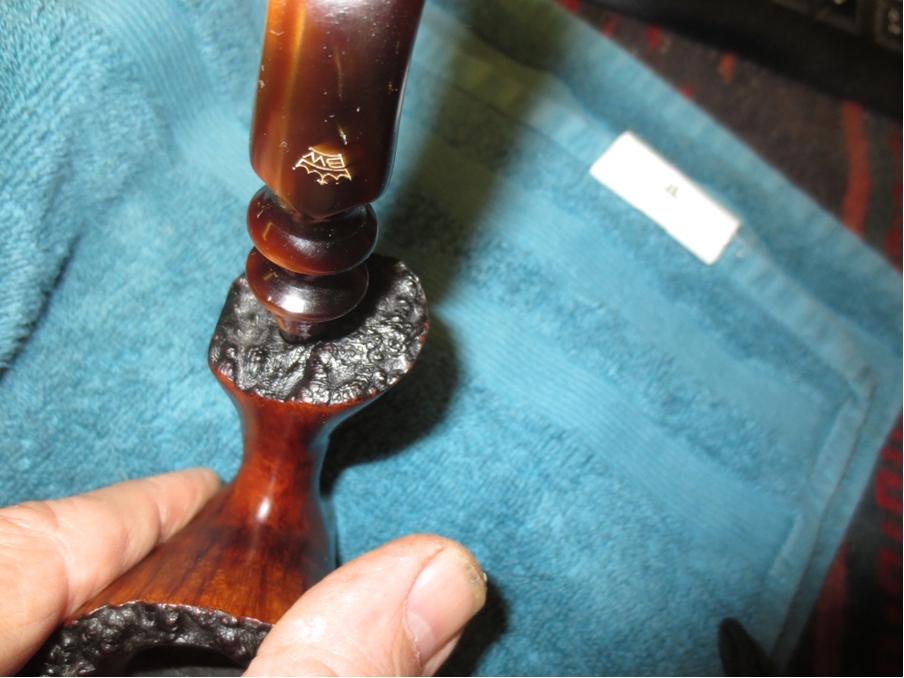
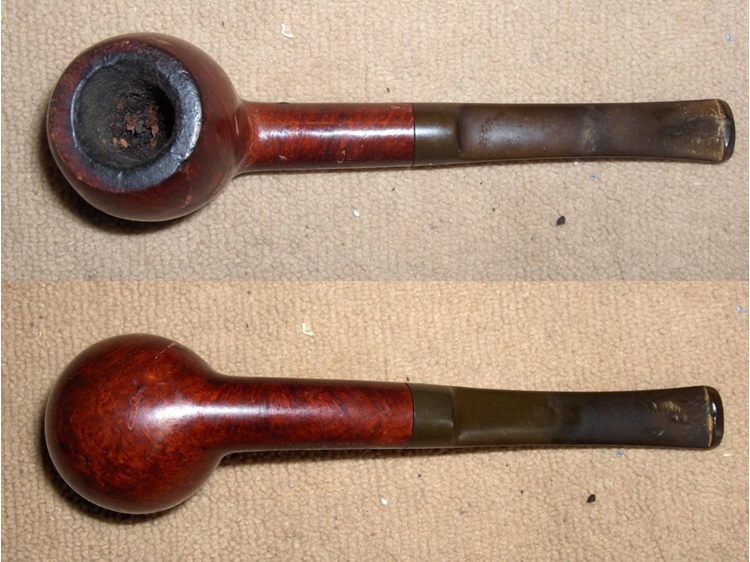
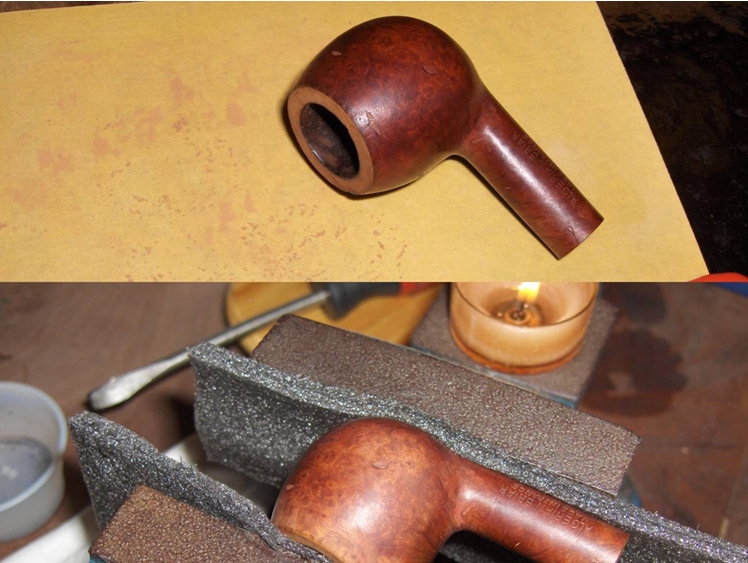
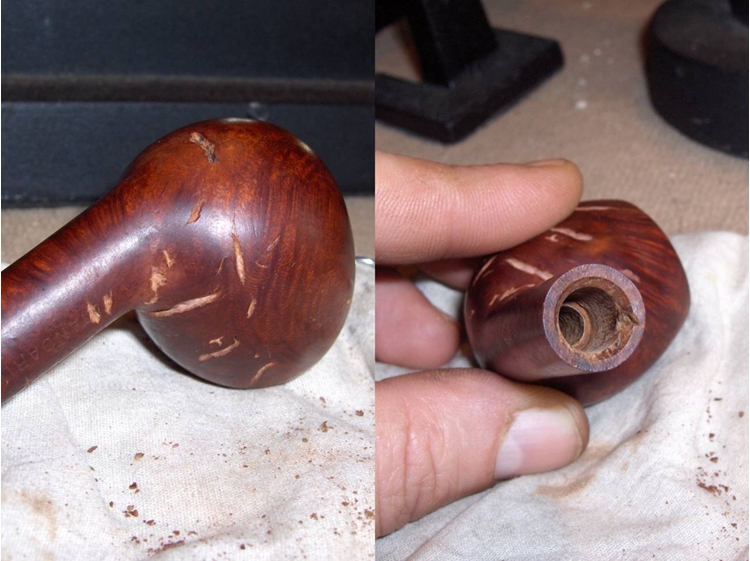
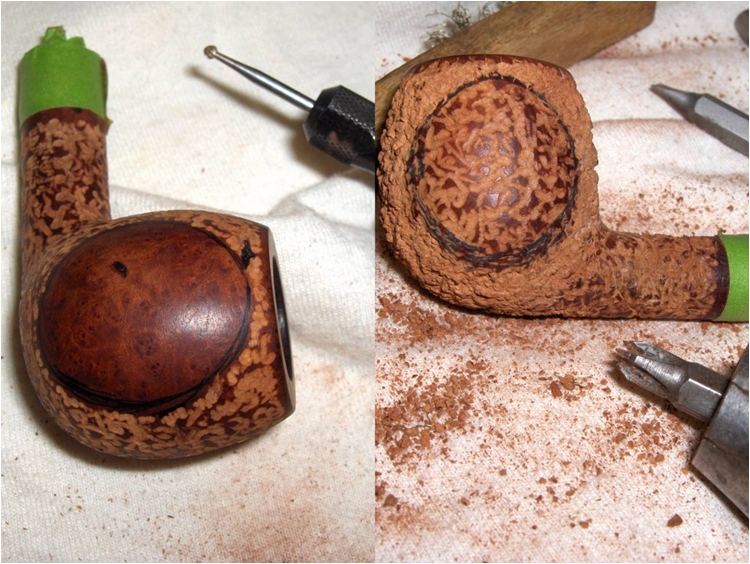
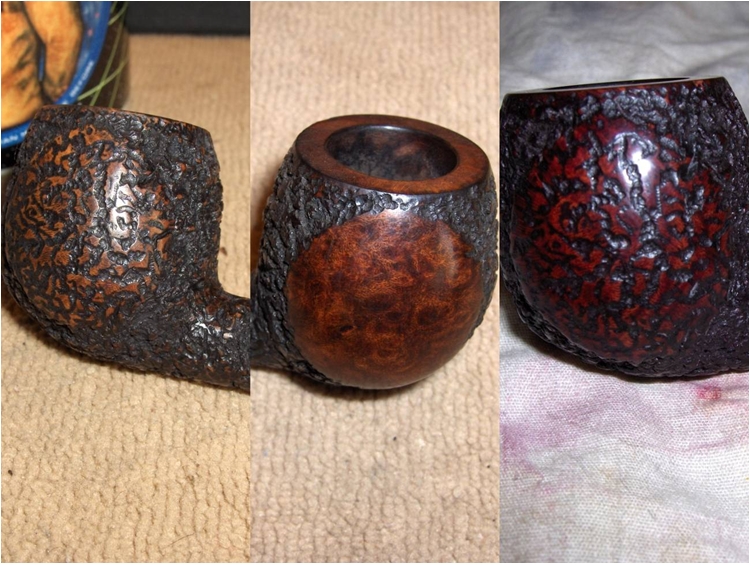
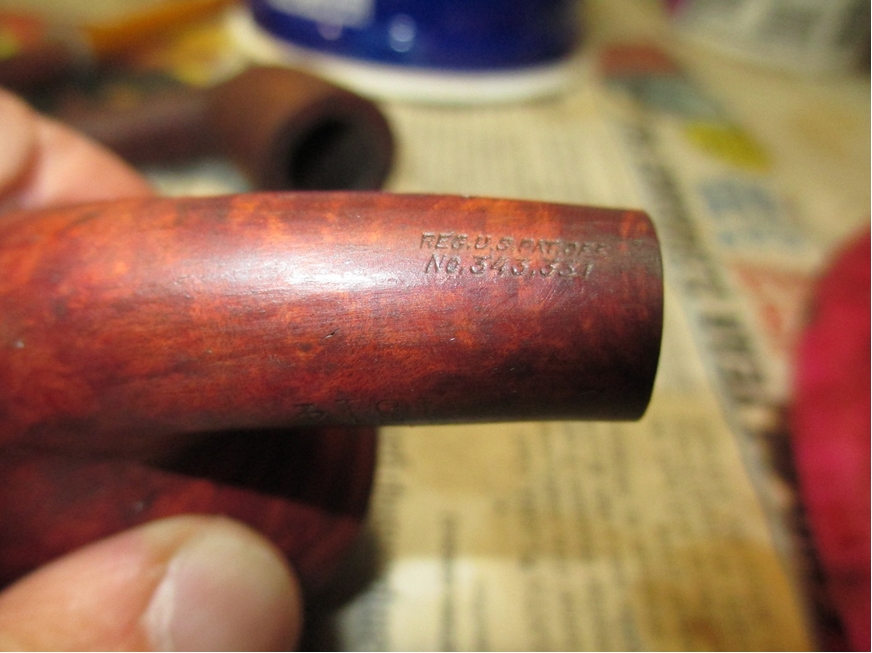
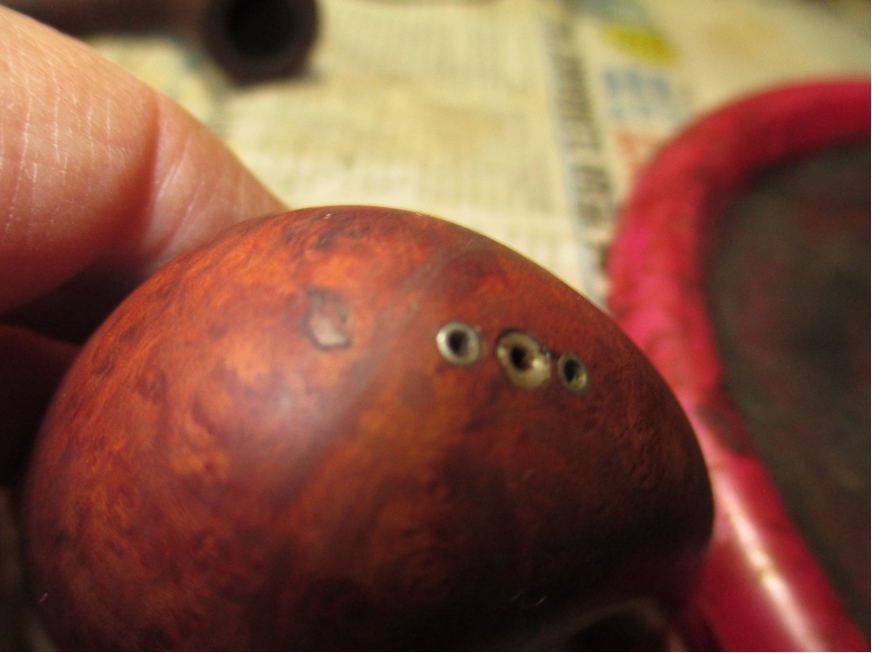
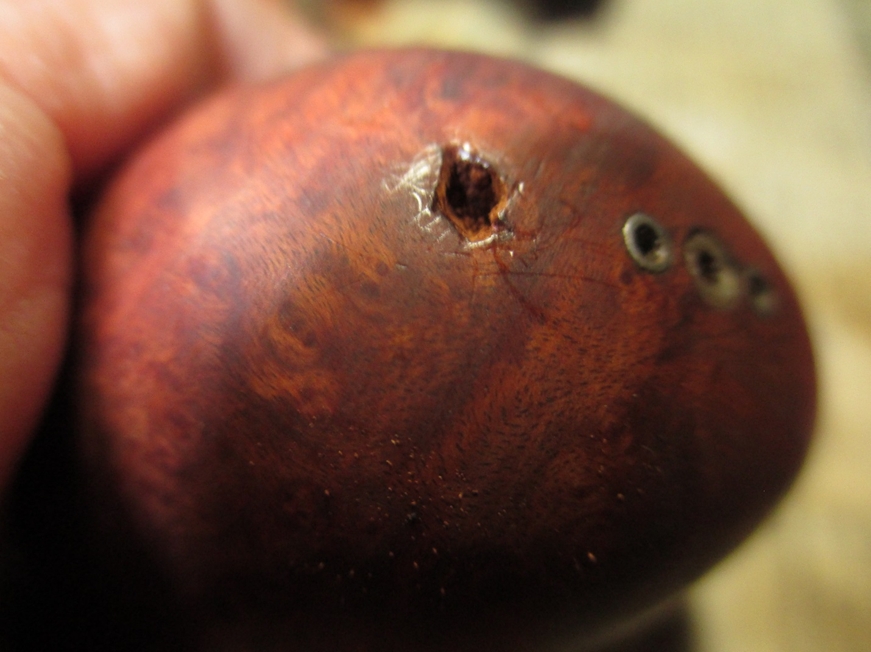
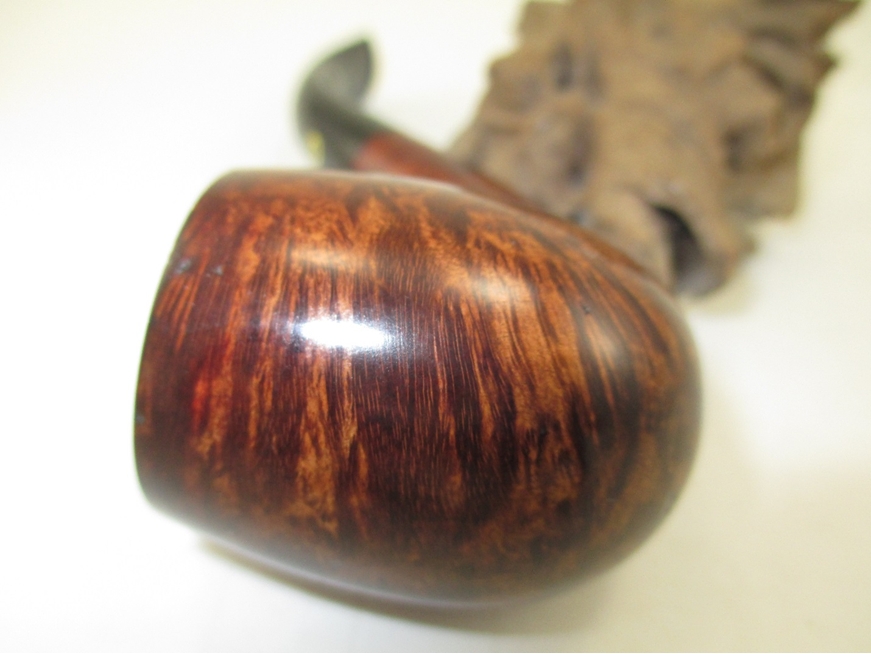
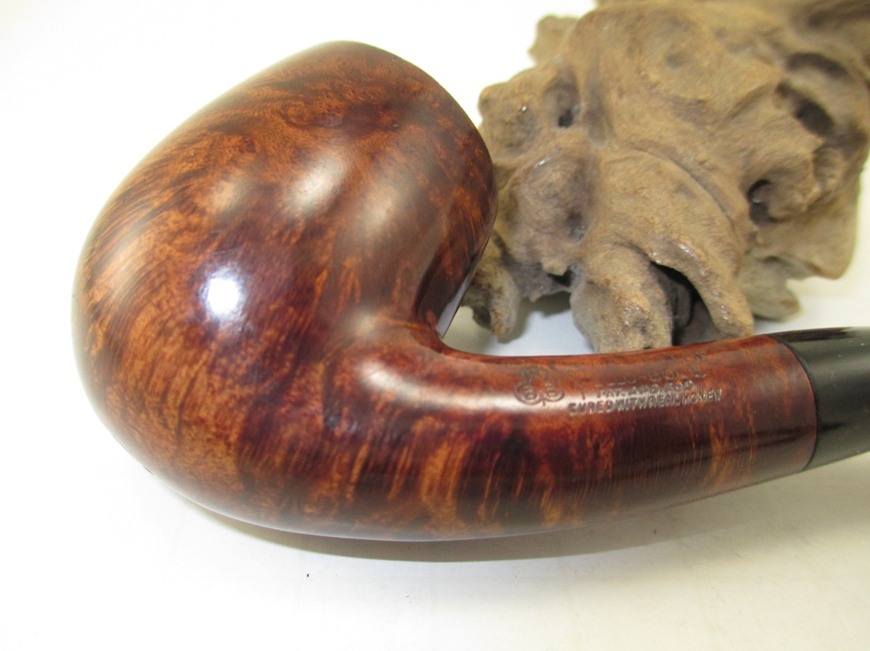
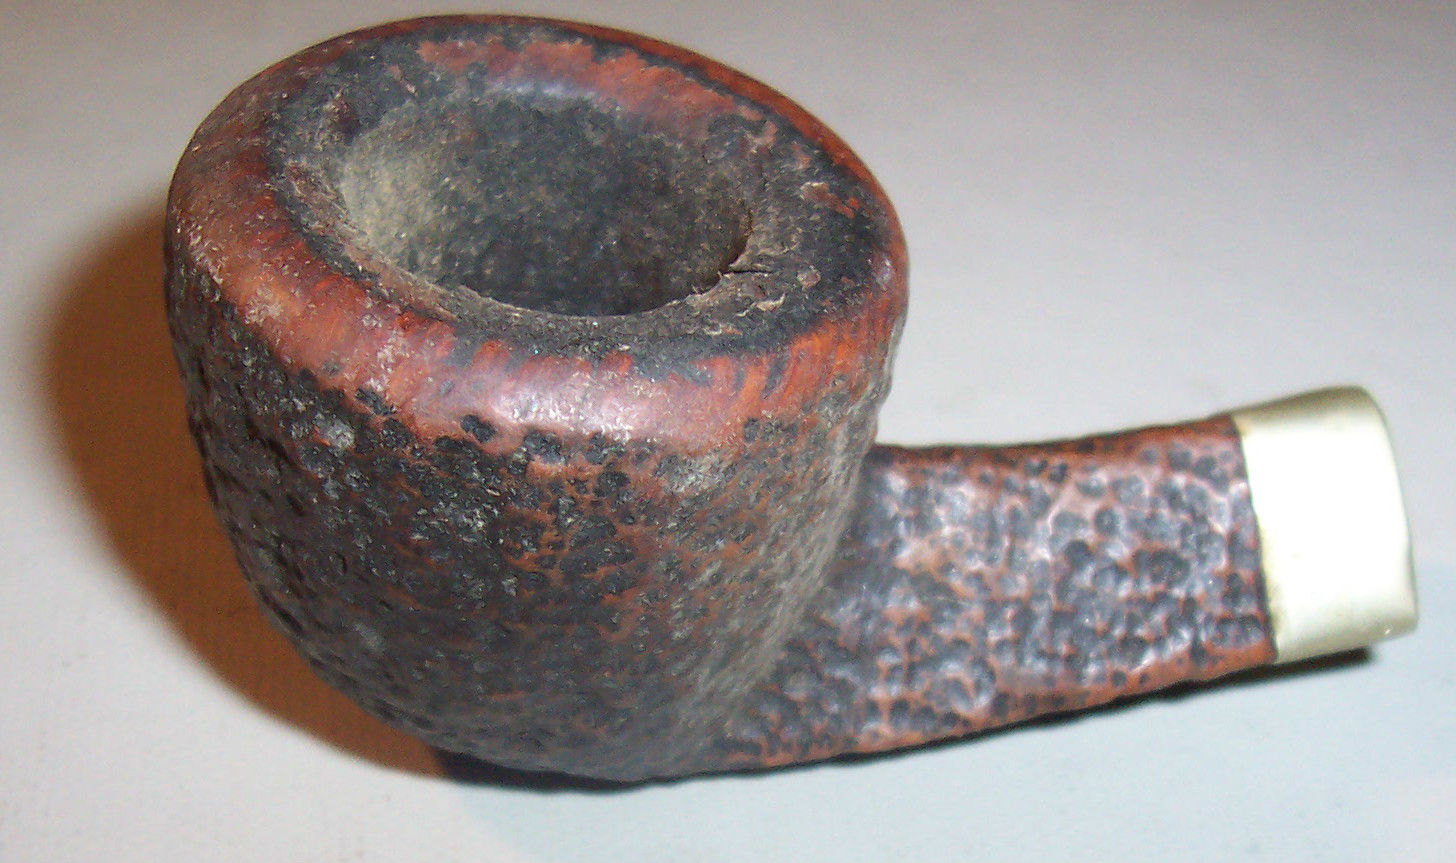
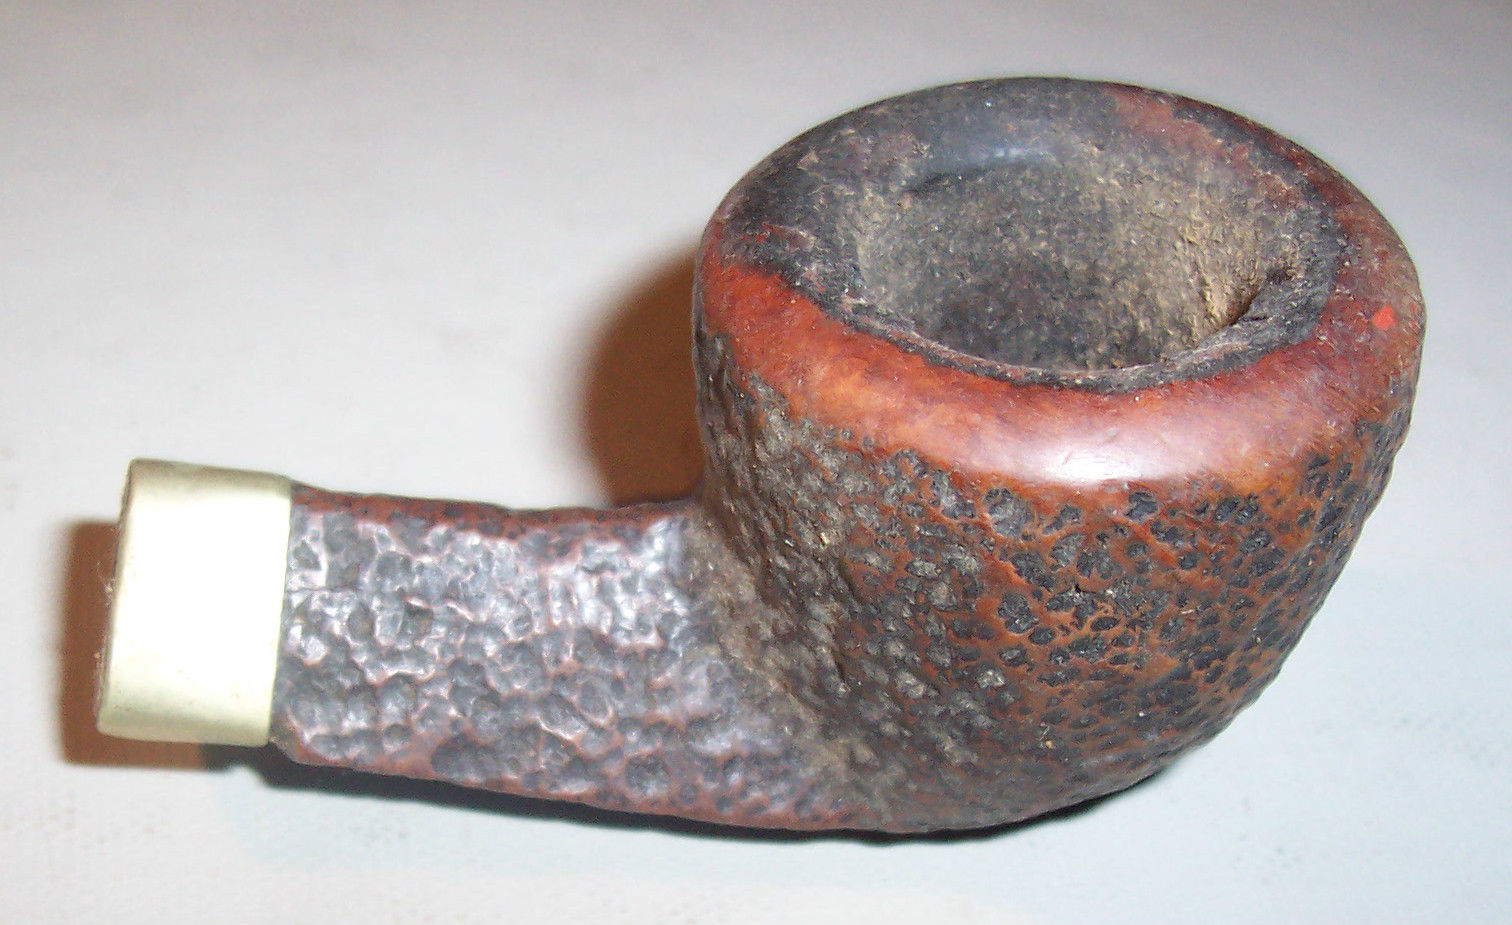
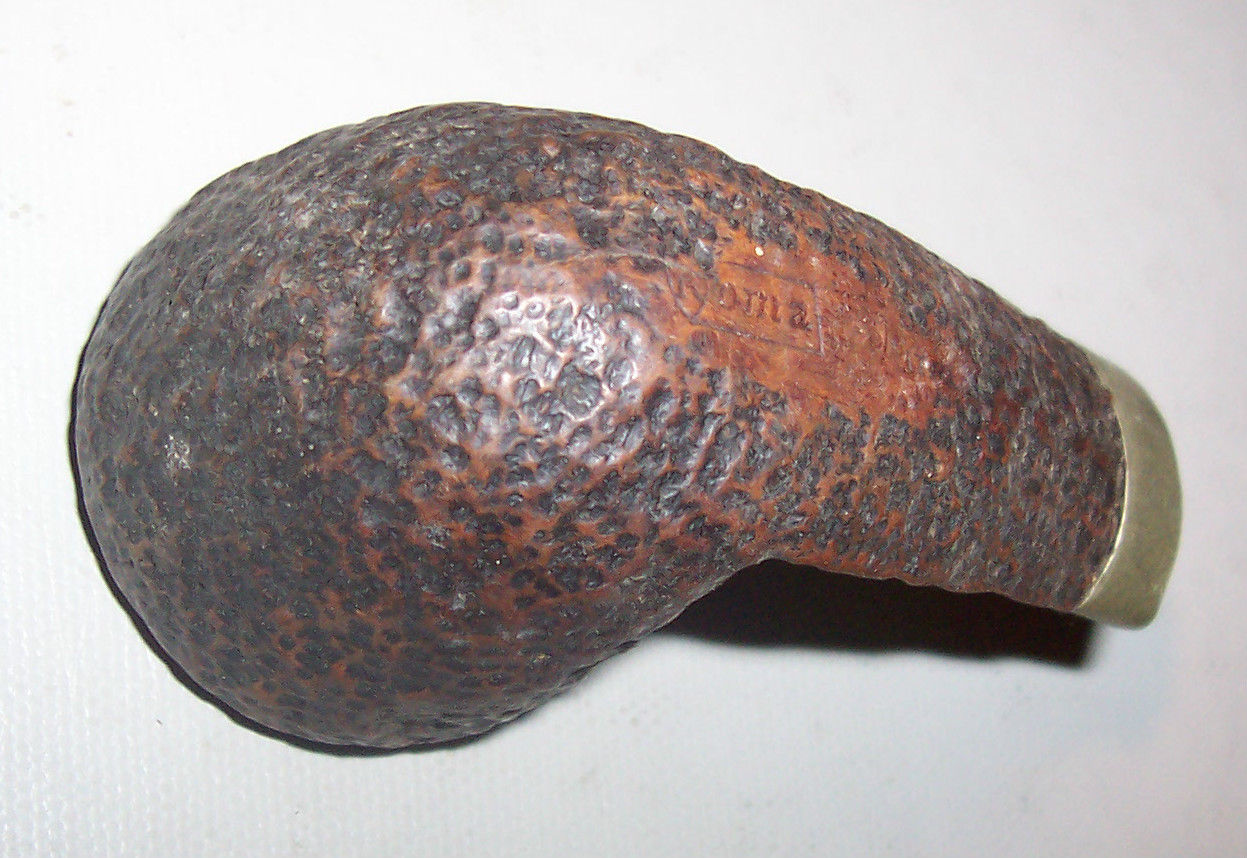
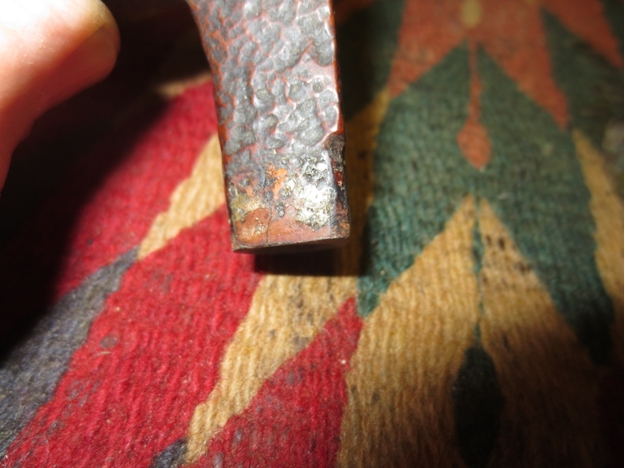
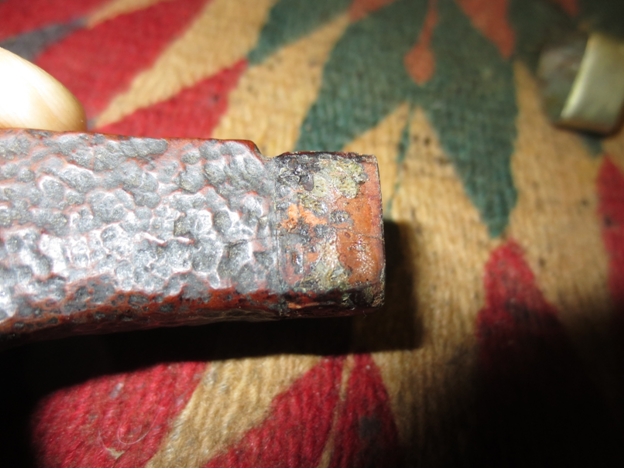
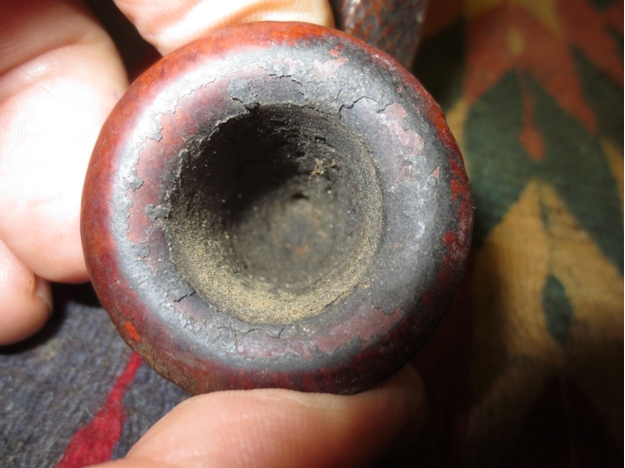
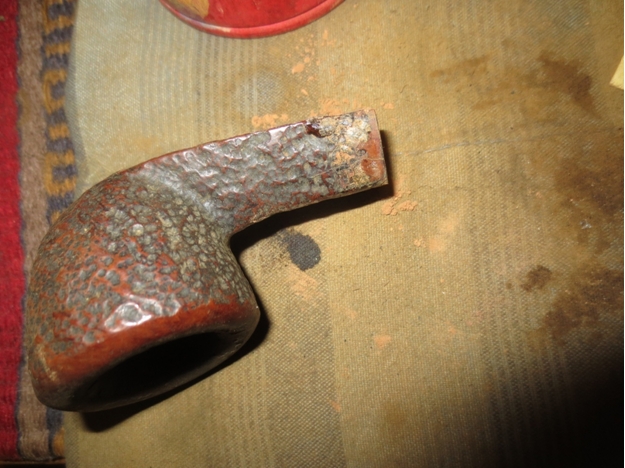
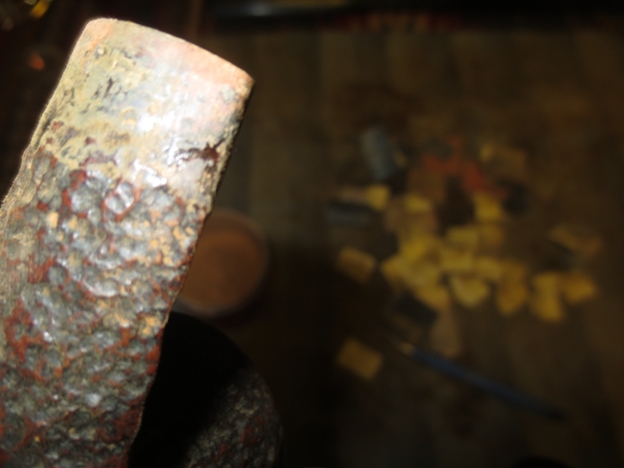
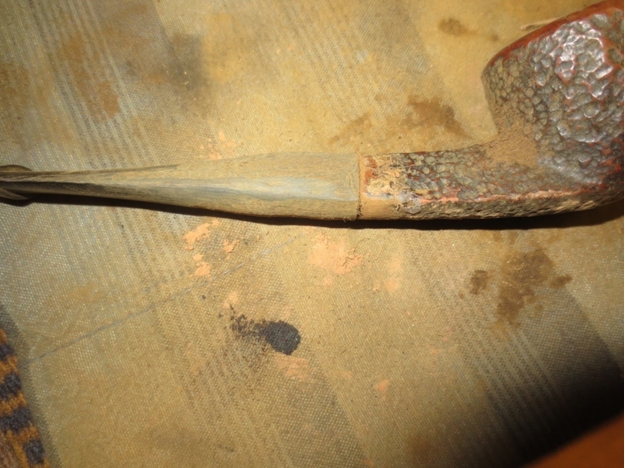
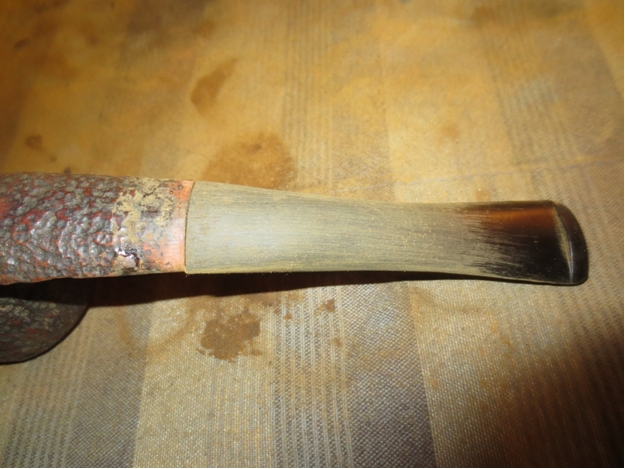
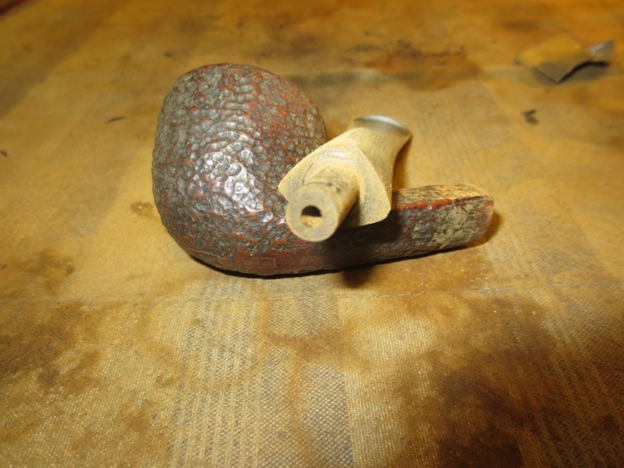
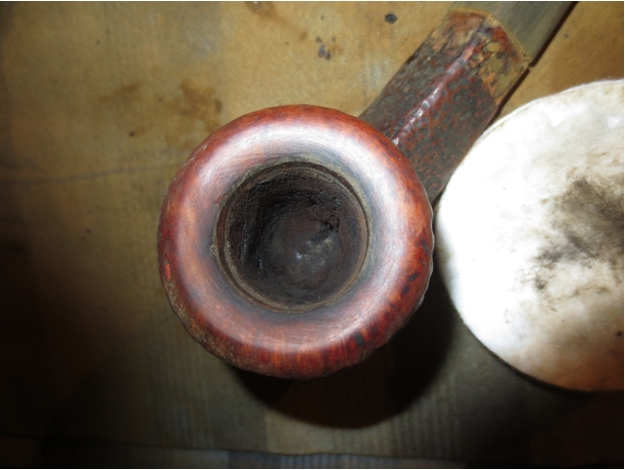
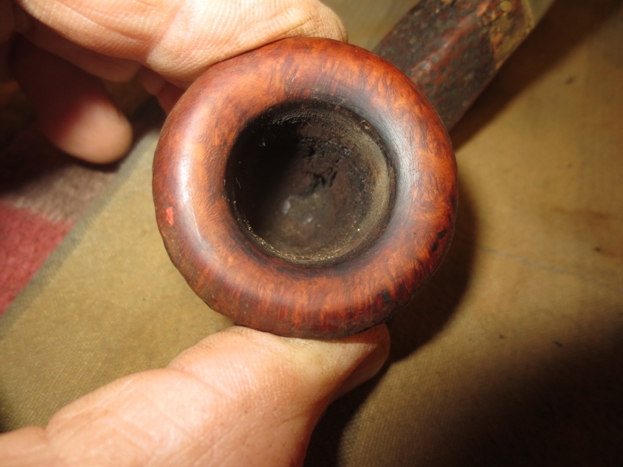
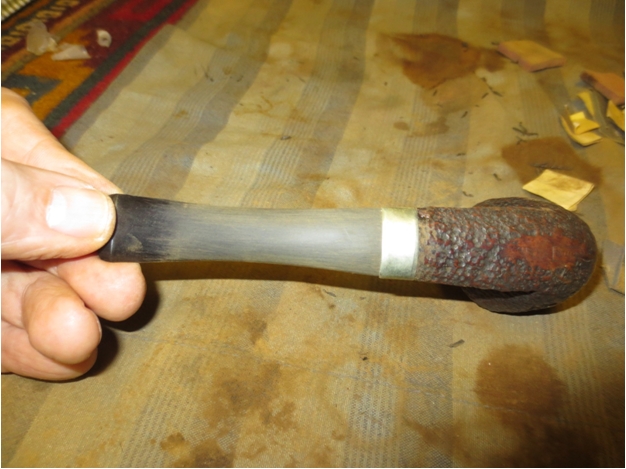
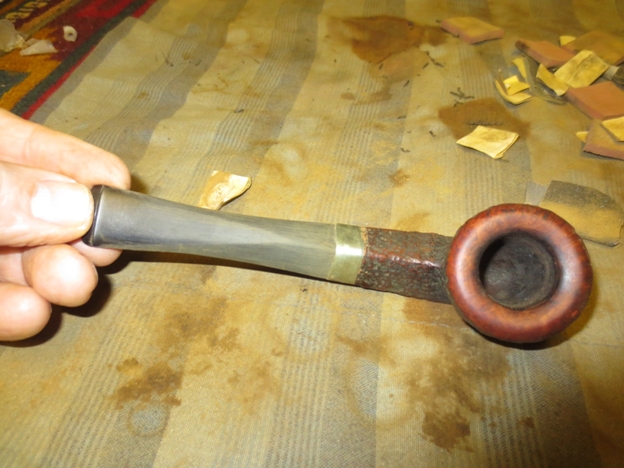
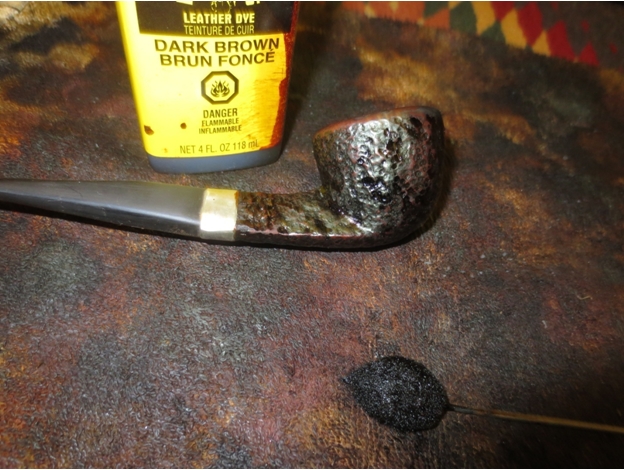
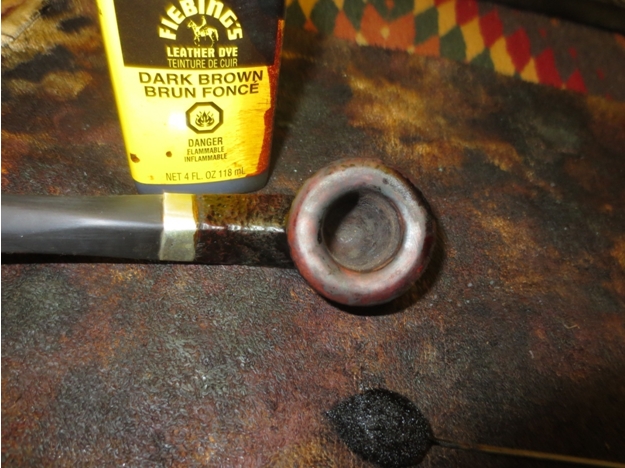
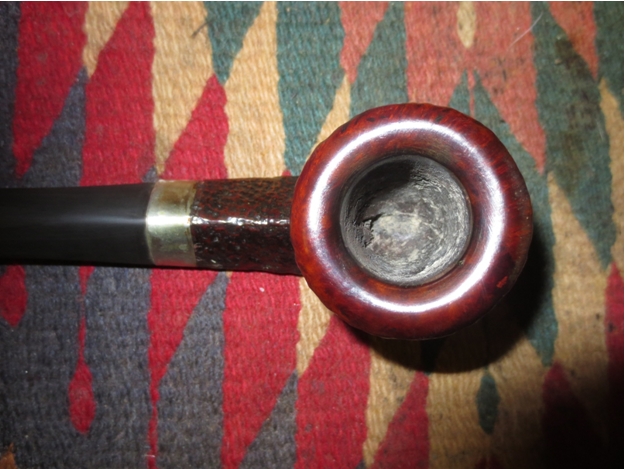
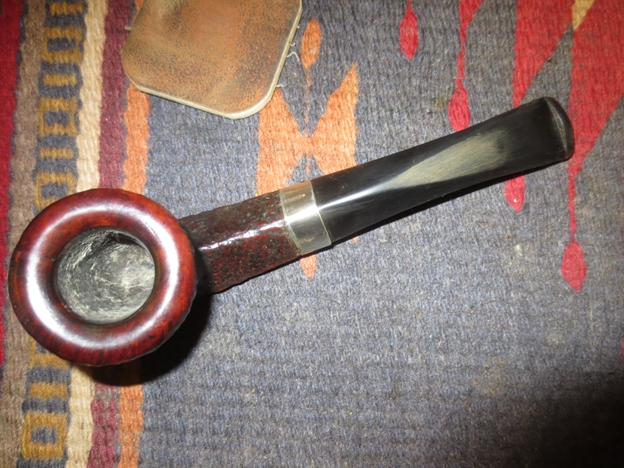
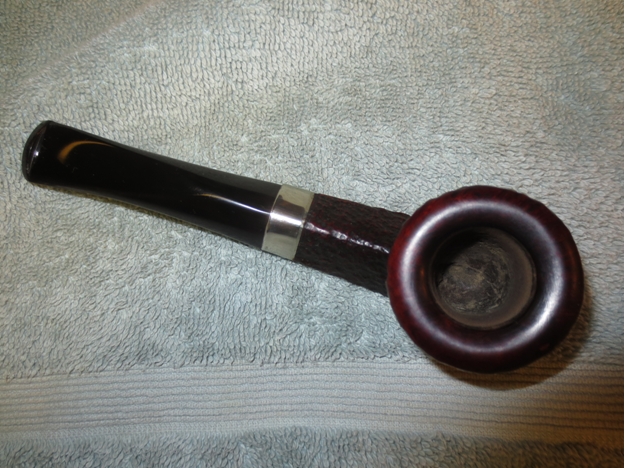
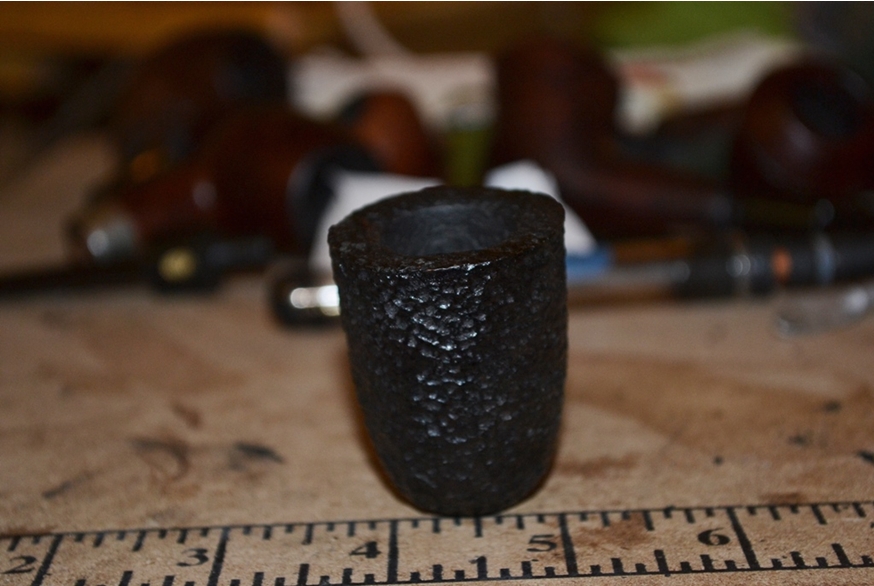
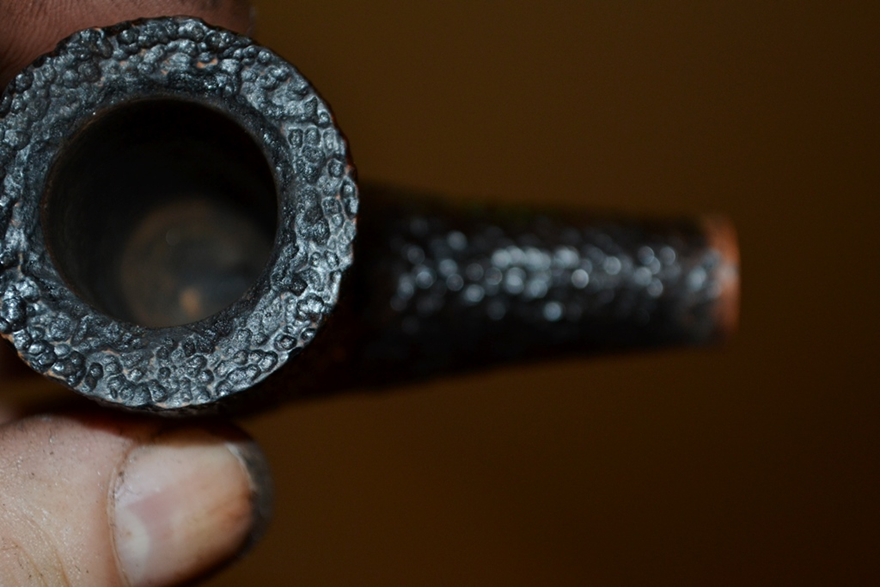
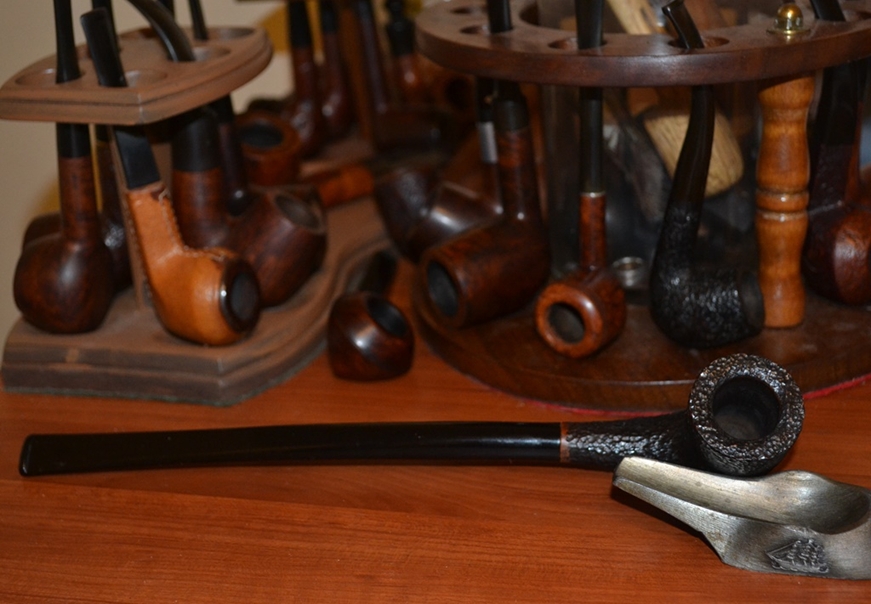
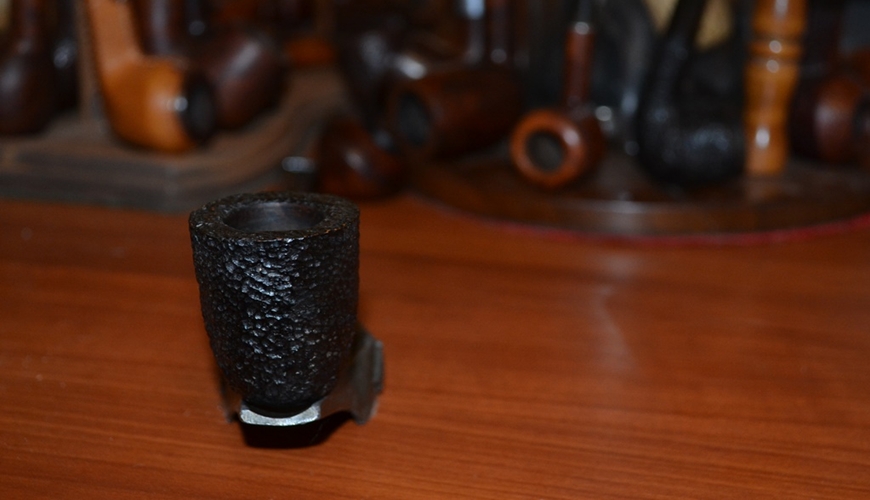
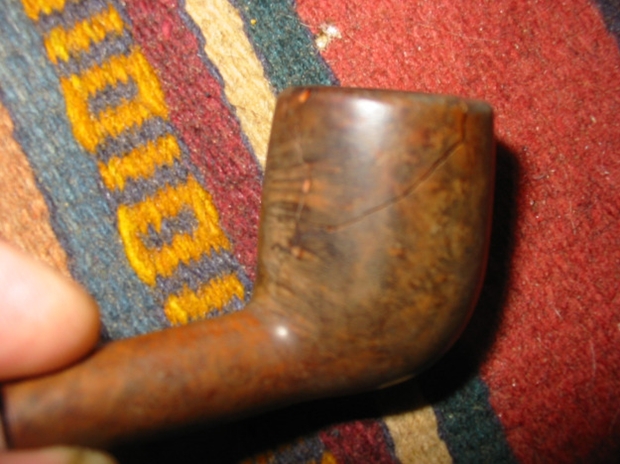
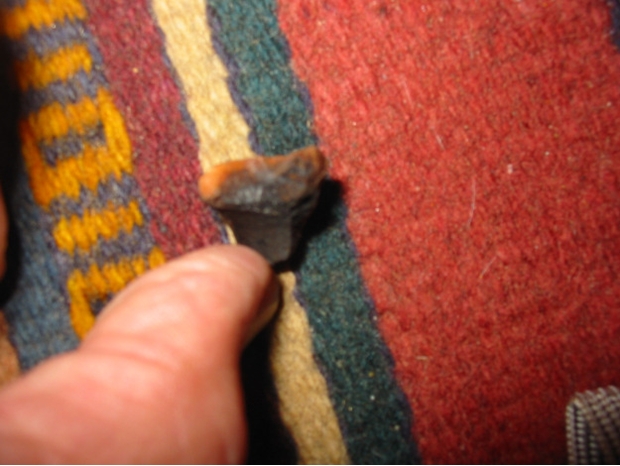
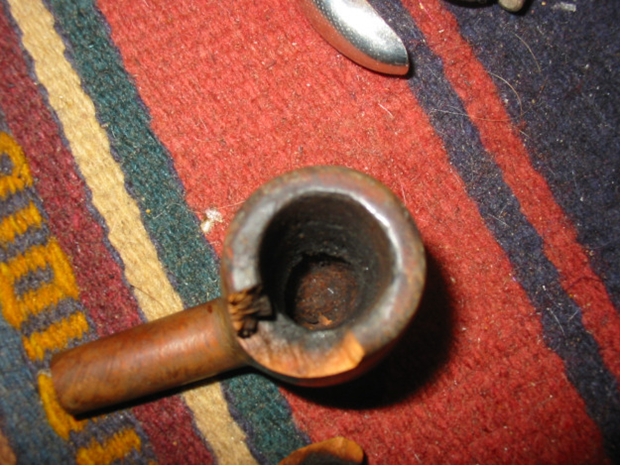
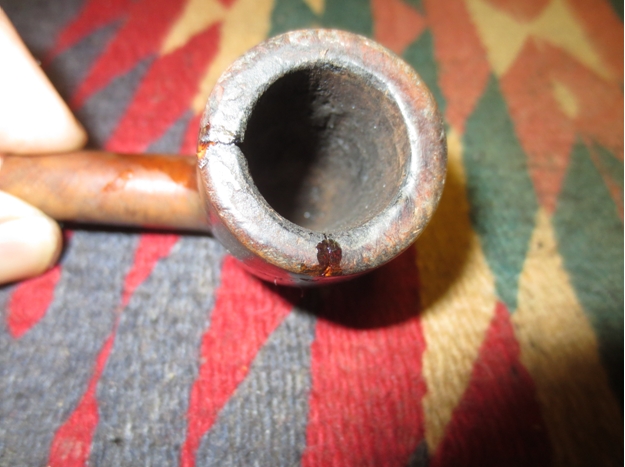
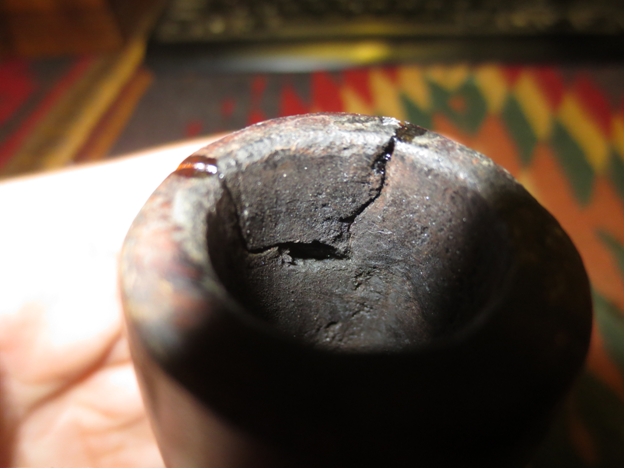
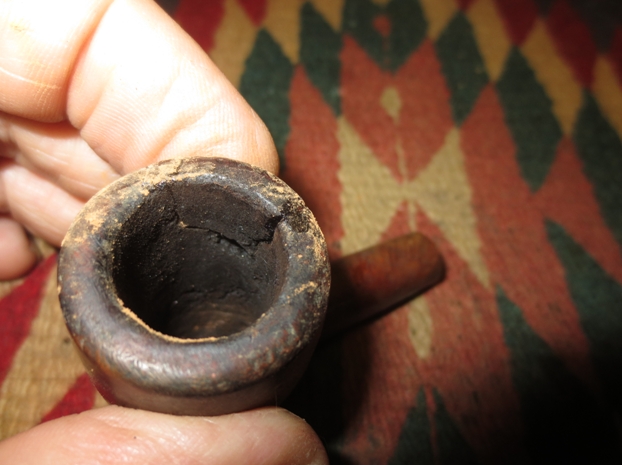
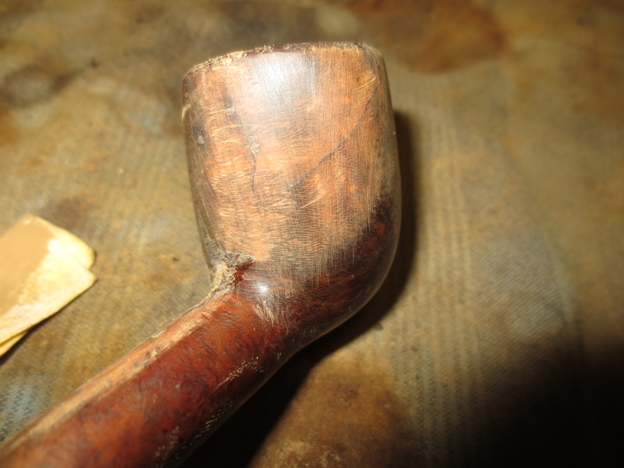
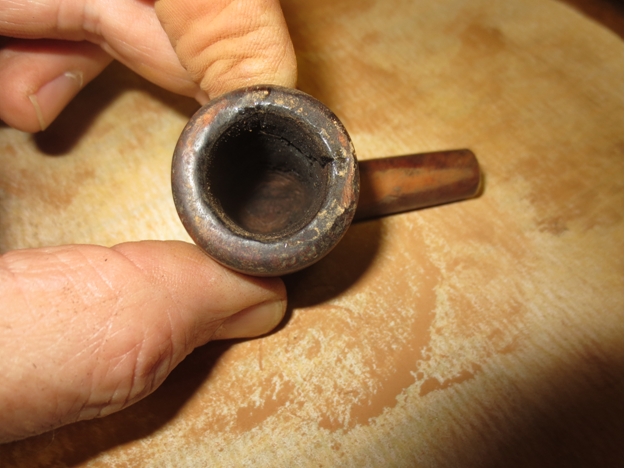
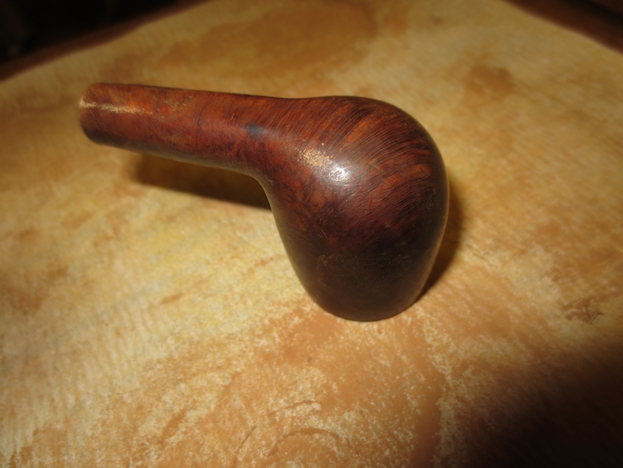
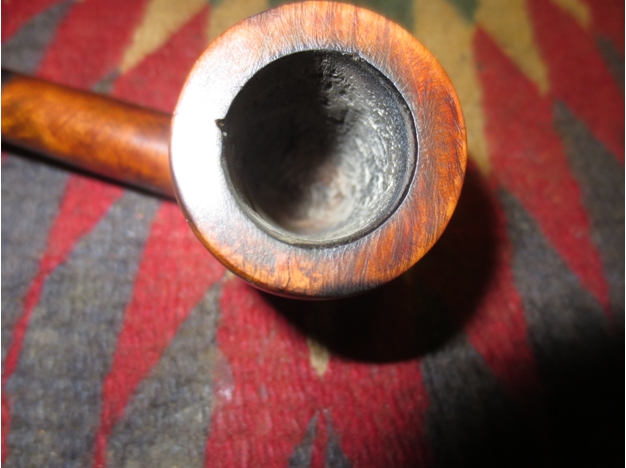
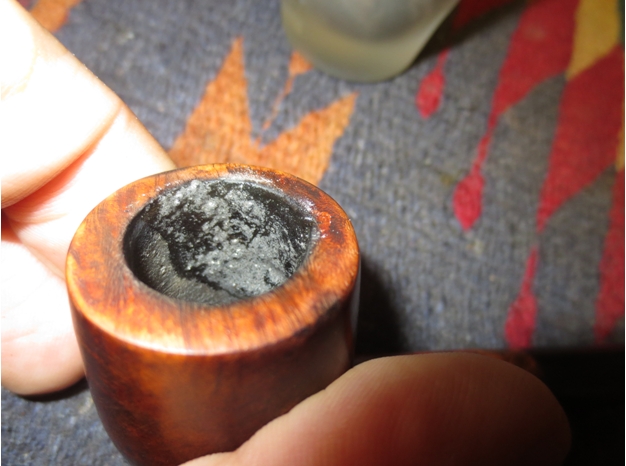
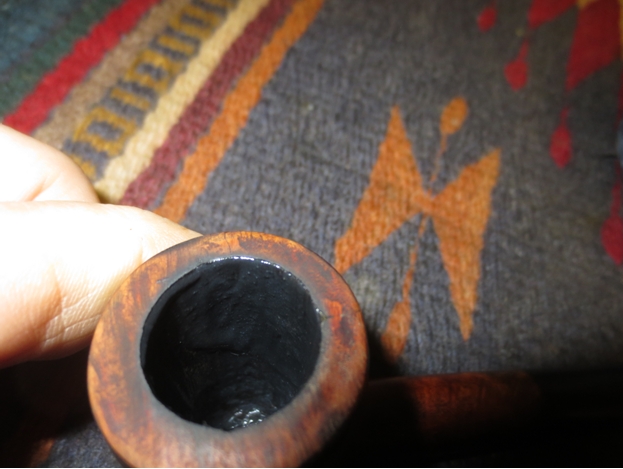
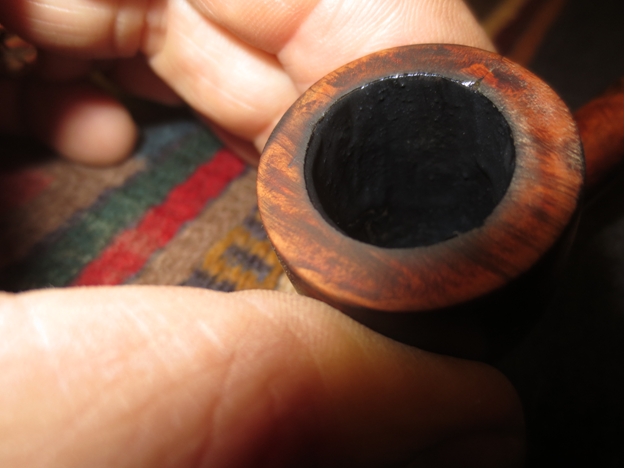
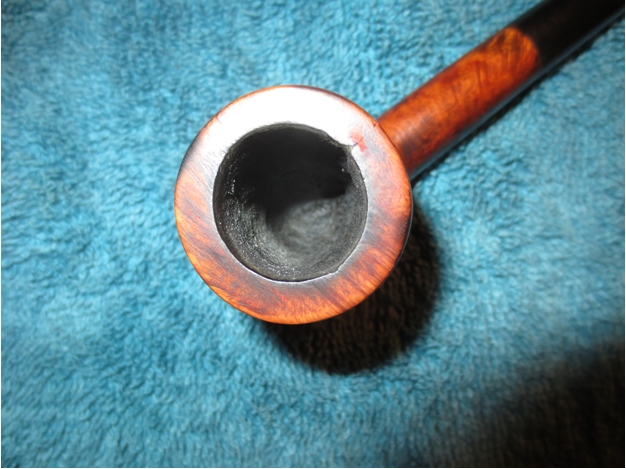
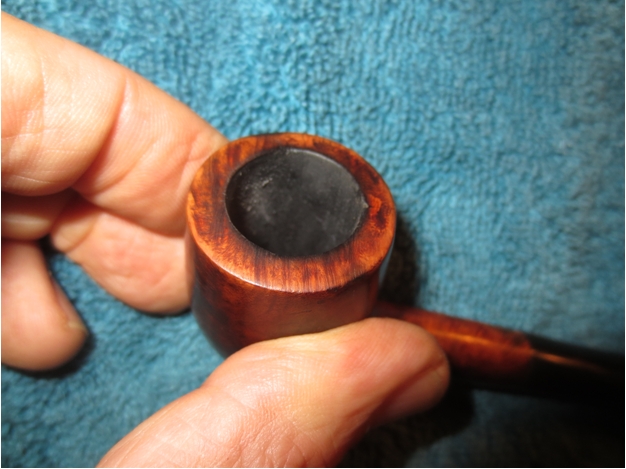
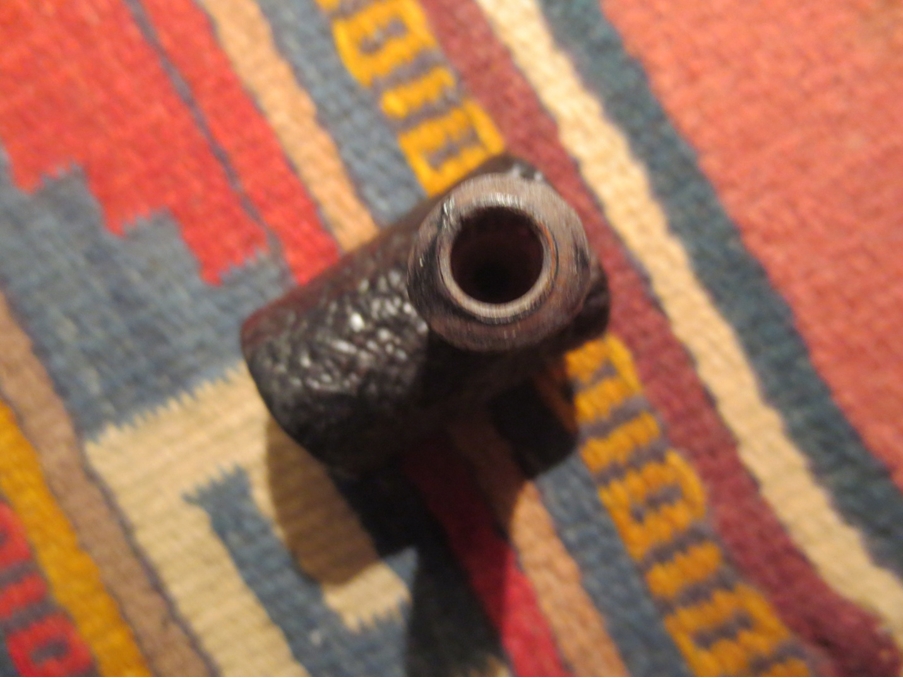
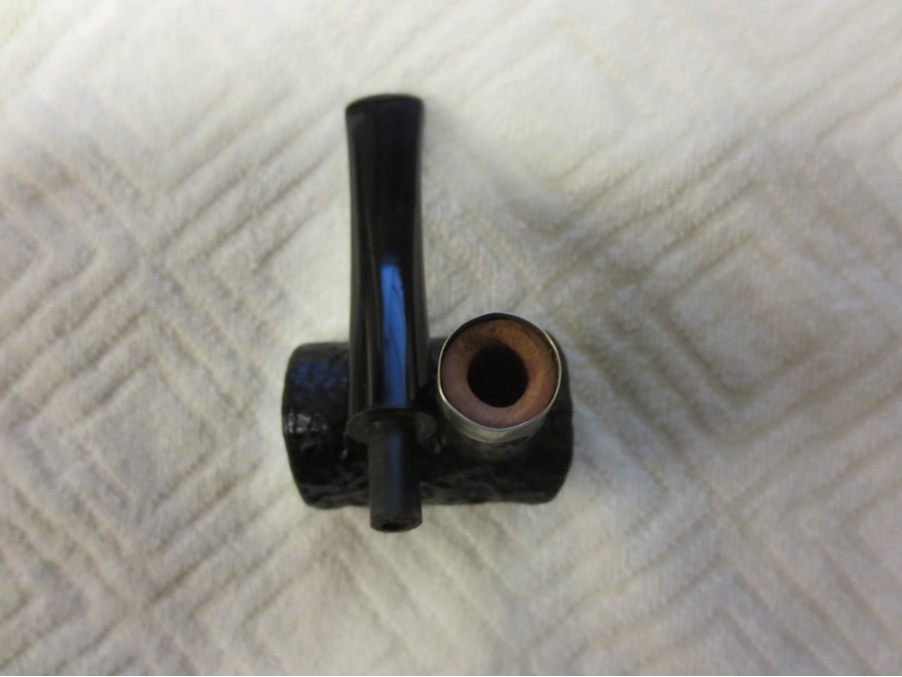
I took a couple of close-up photos of the rim and the shank end to give an idea of how the bowl and shank were not round or close to it. The first photo of the dirty rim of the bowl shows the odd shape it was in. The right side of the bowl wrapping about half way around both the back and the front had a nice thick, even width while the left side tapered in from the thickness and roundness of the right, back and front to a thinner width. Besides that it also seemed to be a bit oval on the back and front but after measuring it I could see that it was an illusion. The second photo shows the shank end. It is a bit hard to see but the shank end was crowned and rounded over but inconsistently. The shank itself had the same problem as the bowl – it too was not round but was thicker on the left side than on the right; just the opposite of the bowl. This little pipe was going to be a challenge to make look correct.Poker5

Poker6 
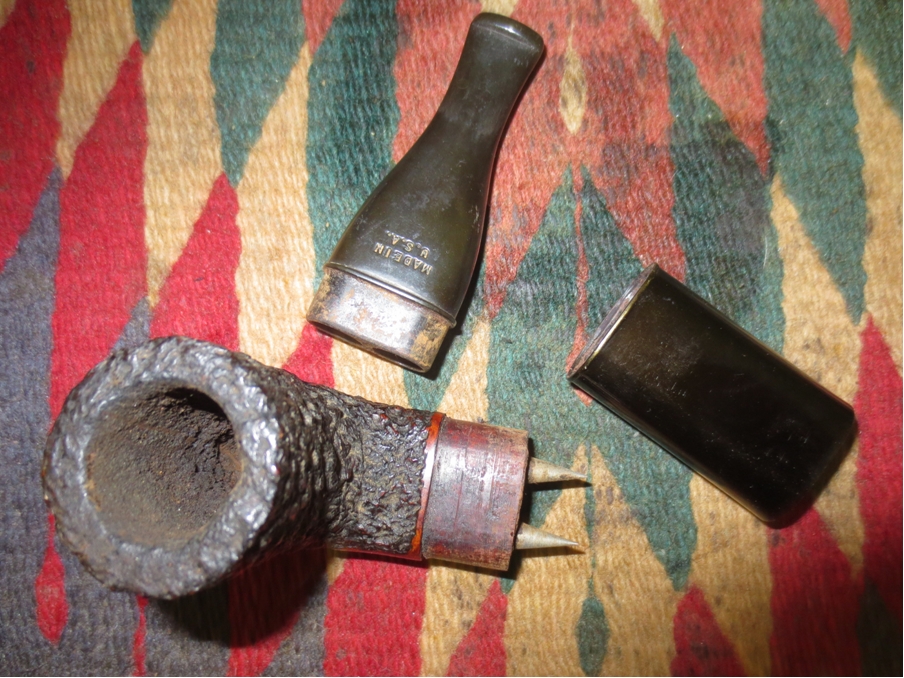
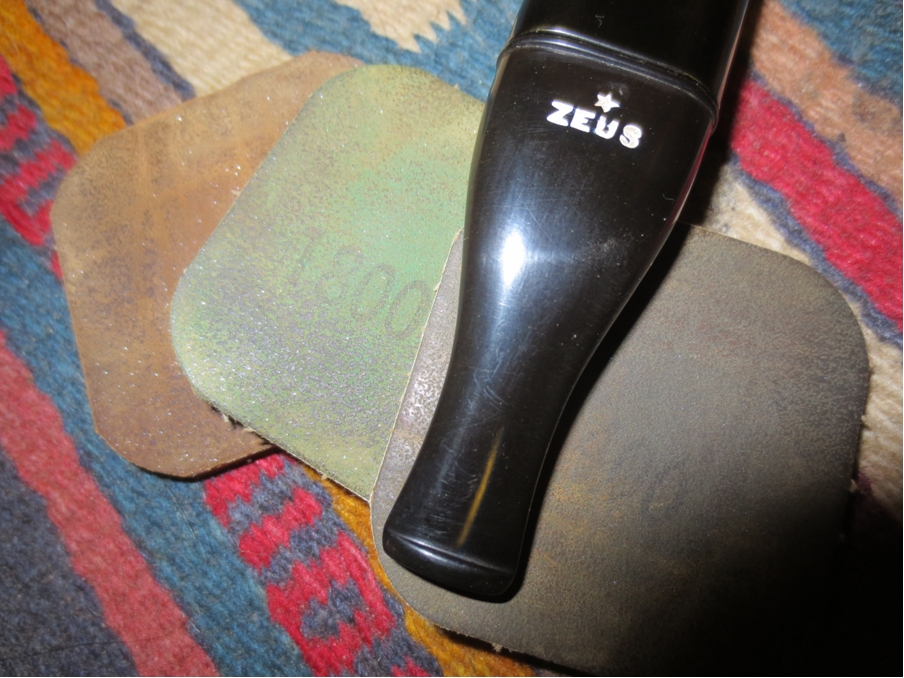
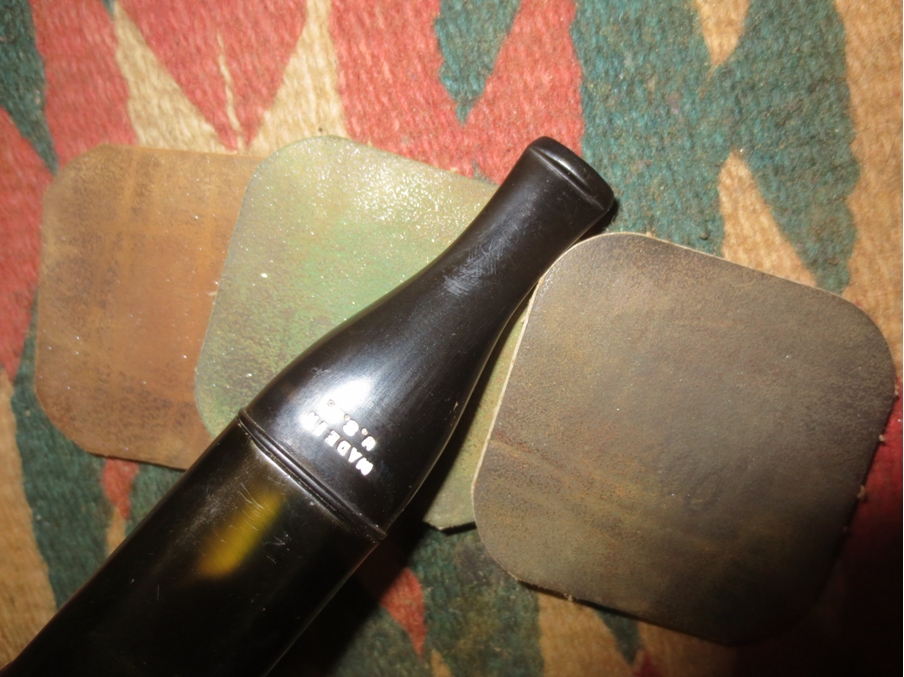
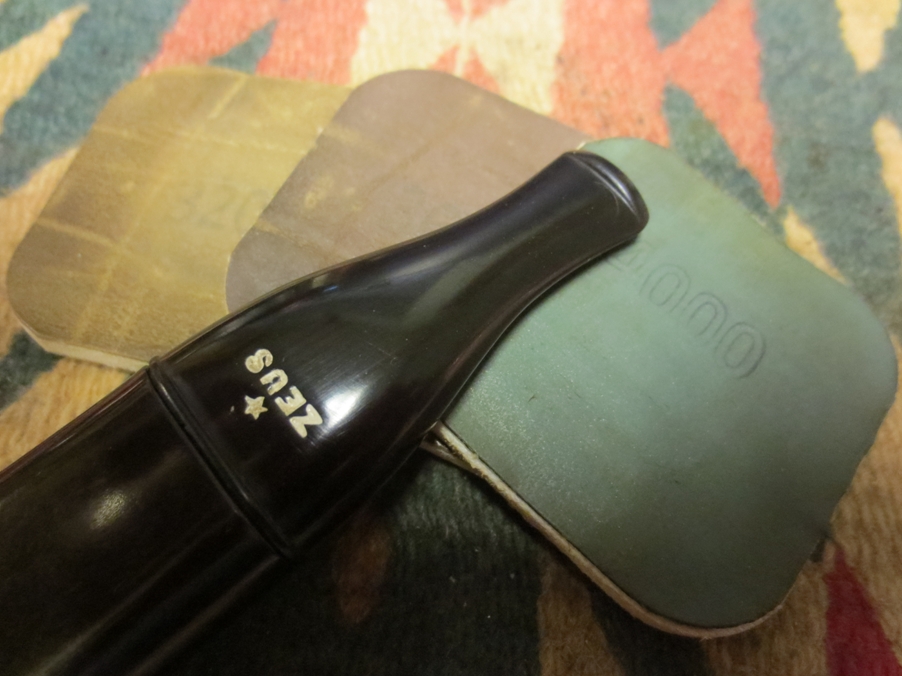
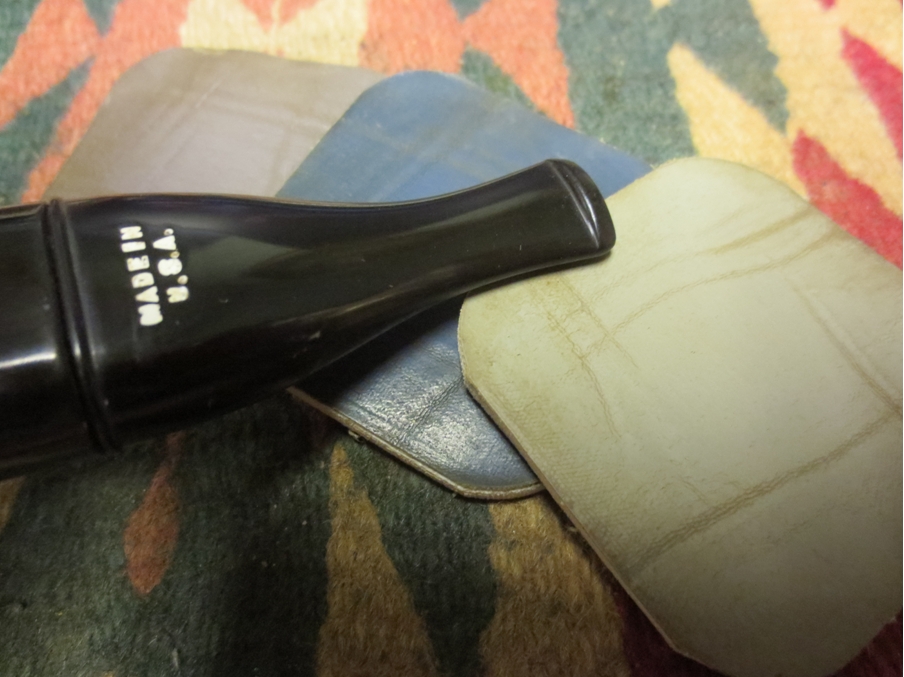
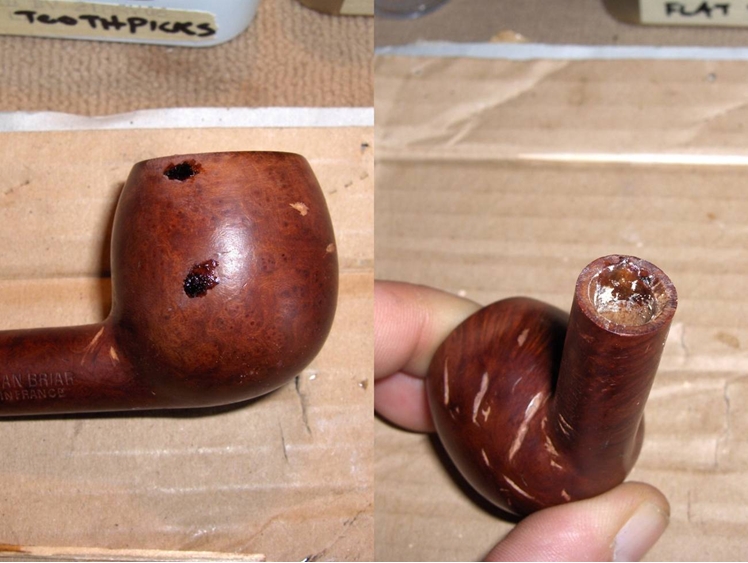
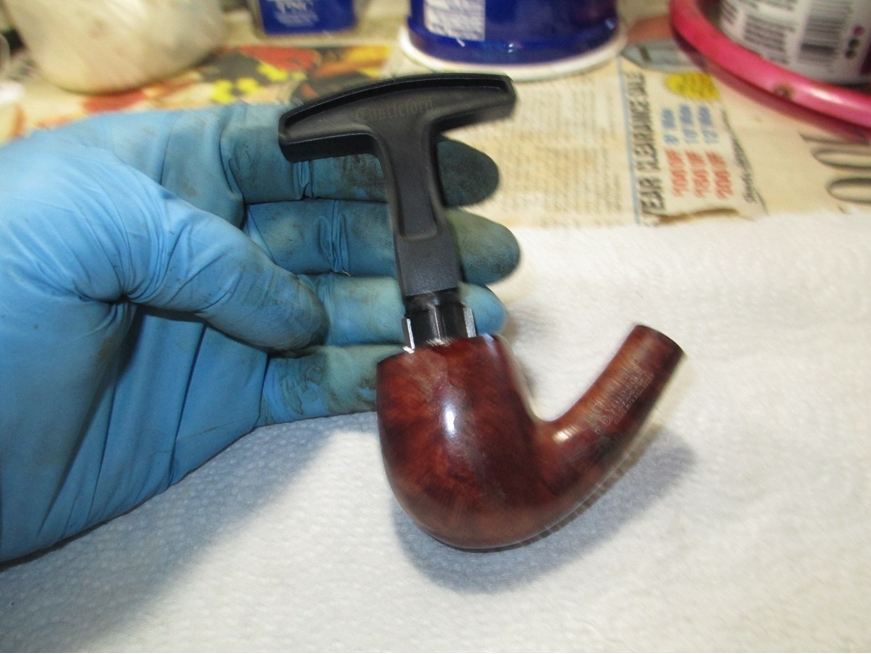
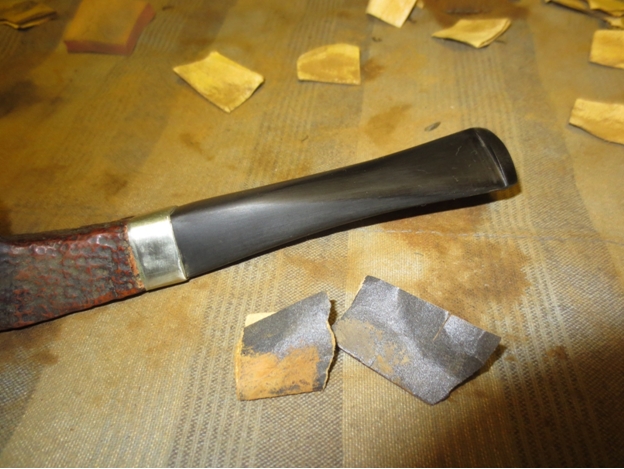
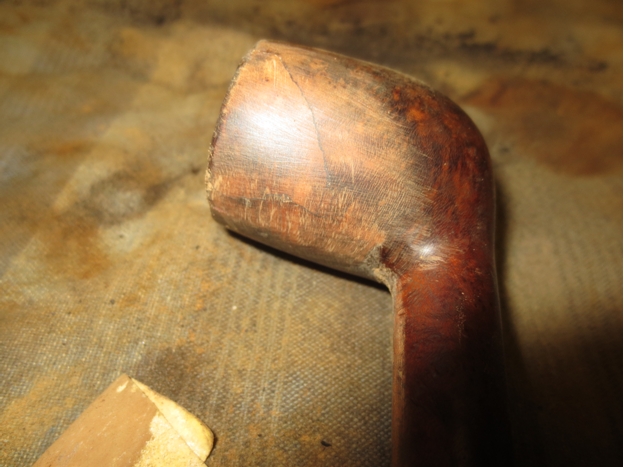
I decided to face the end of the shank and remove the uneven crown and to flatten it to fit a flush stem. I used the topping board and carefully pressed the end of the shank into the sandpaper. I had to make sure that I held it straight vertically while sanding so that I did not slant the end of the shank and make things worse.Poker7 I worked it against the 220 grit sandpaper until it was smooth and the crown was gone. I then used a medium grit sanding block to make sure the shank end was flat and even.Poker8 
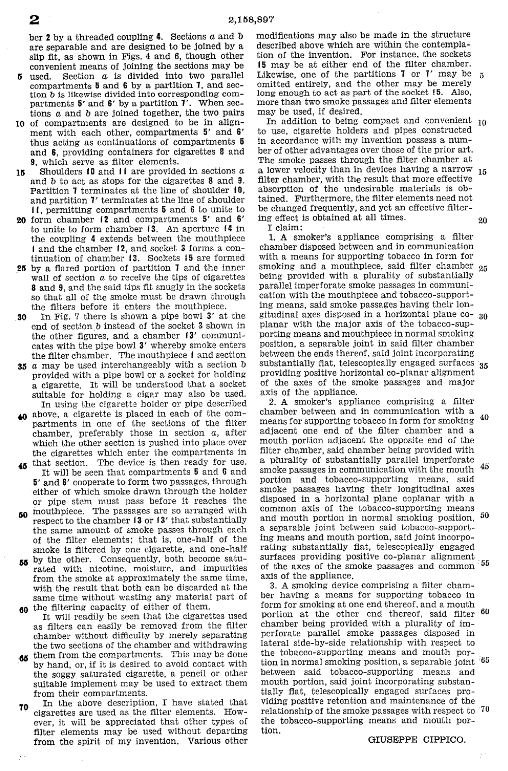
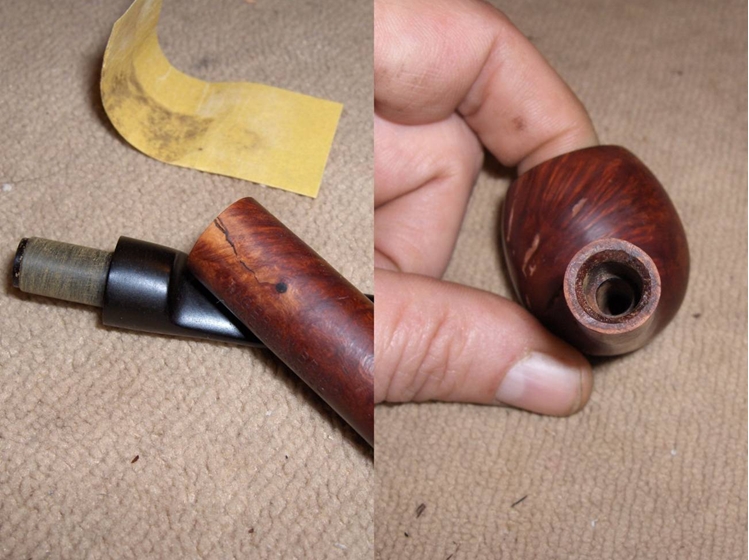
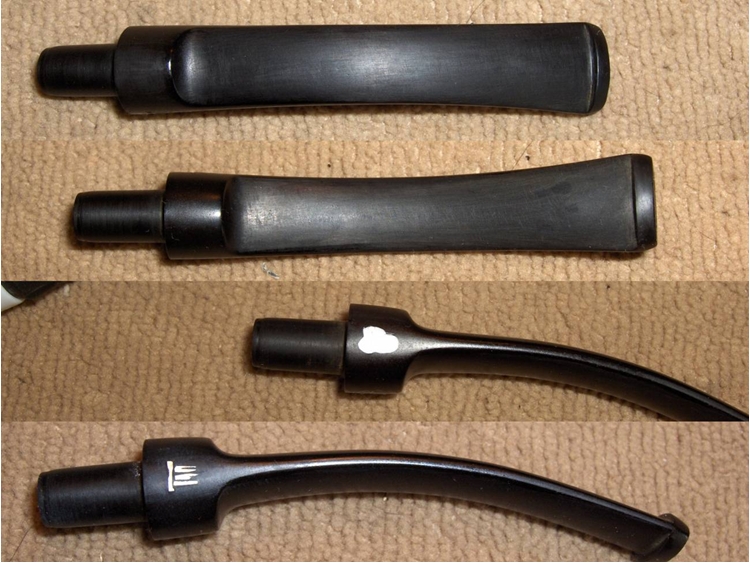
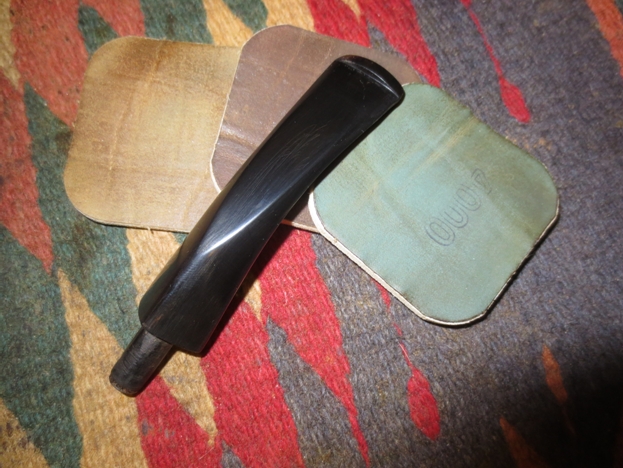
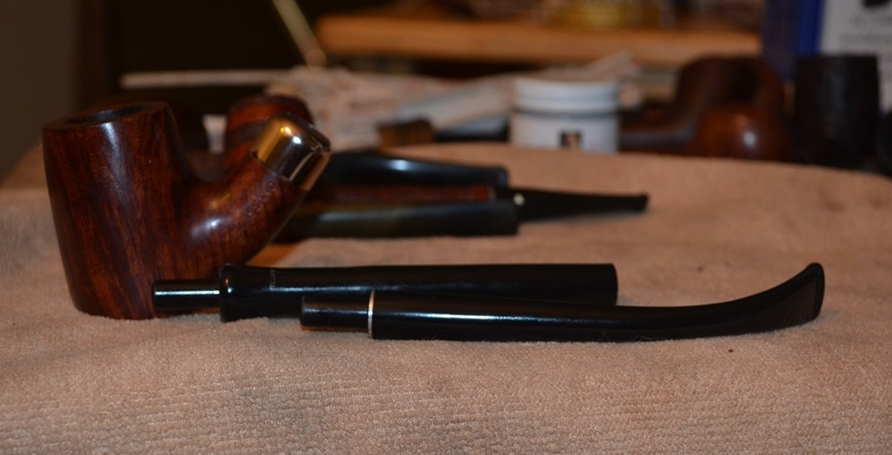
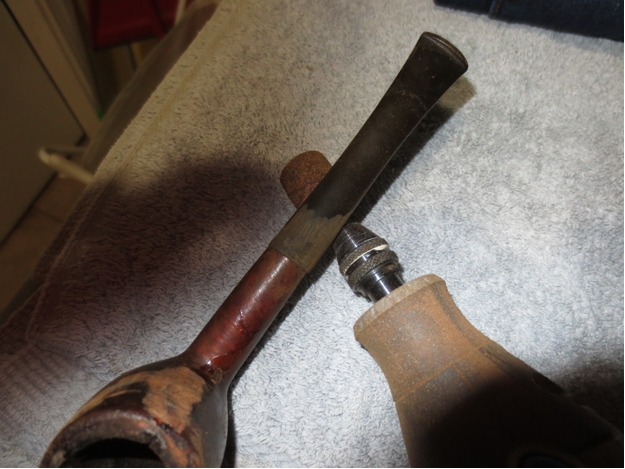
I had an old Georg Jensen stem that fit on the right side of the shank perfectly. The left side and the bottom and top on that same side were off. I tried a saddle stem I had as well. No matter which stem I use the shape of the shank made a perfect fit impossible. The good news was that the flush stem fit snugly in the mortise and flat against the end of the shank. Now I would need to make adjustments to the shank diameter without losing the nice sandblast finish.Poker9 
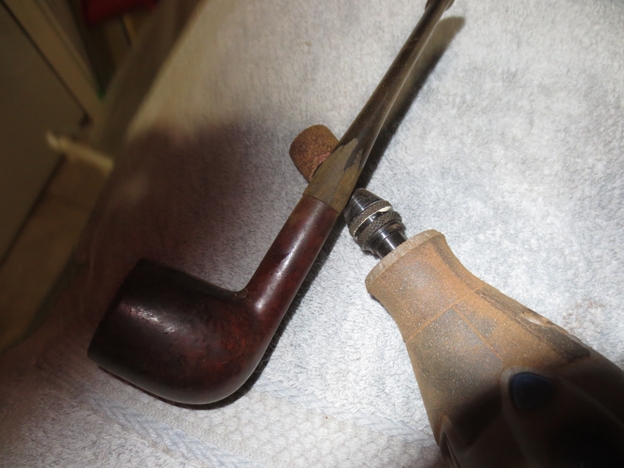
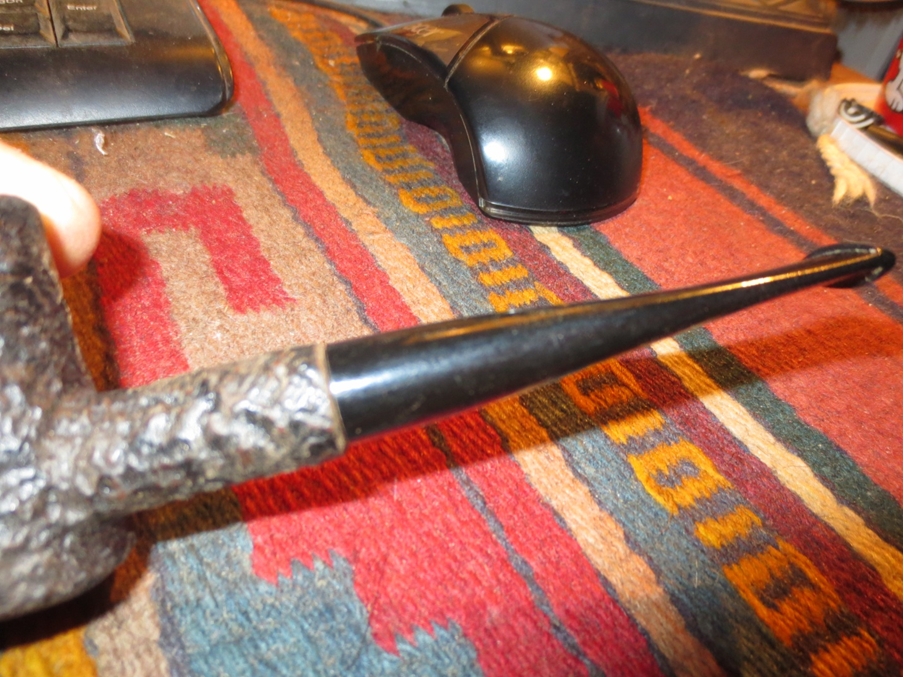
I went through my bands and found one that would fit both the shank and the stem once it was in place. I used my Dremel and sanding drum to take down and round out the shank end so that the band would sit properly. I wanted to make the adjustments to the shank before the band so that once it was in place the stem would fit without adjusting the roundness of the stem to match the out of round shank. It took some work to round out the shank but the Dremel made short work of the process.Poker10 
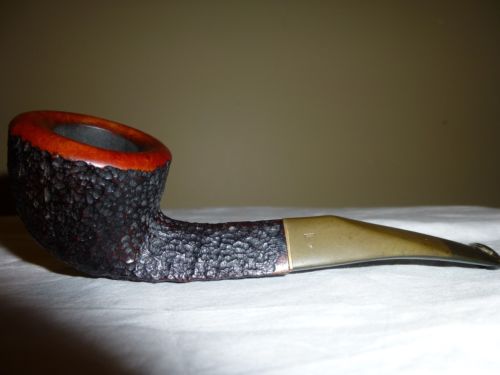
I was able to put the band loosely on the shank to get an idea of the overall look of the pipe with the band. It appeared to me that it would work well.Poker11

Poker12 
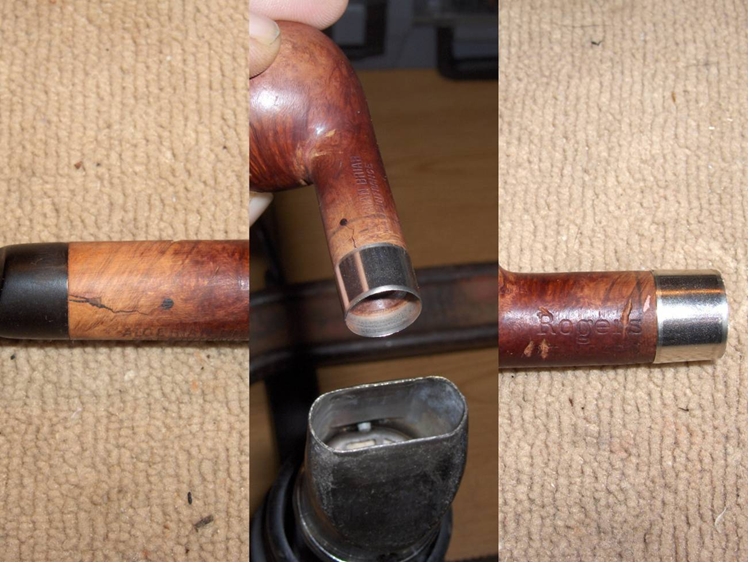
I decided to heat the band with a lighter rather than set my heat gun to do the simple heat up of the band. Once I heated it I pressed it into place on the shank. The metal expanded slightly with the heat and by pressing the shank end against a flat surface I was able to push the band into place.Poker13

Poker14

Poker15

Poker16
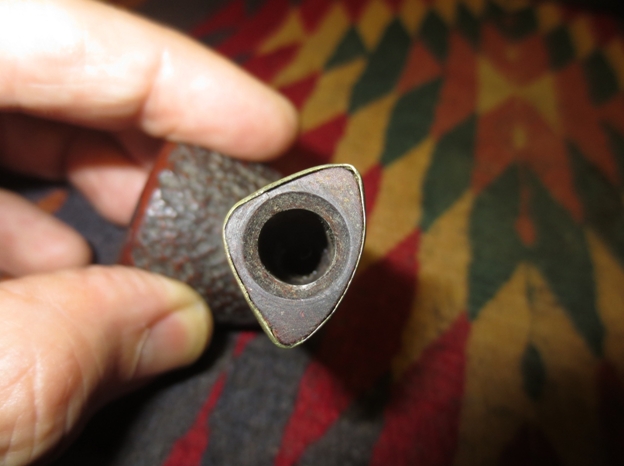
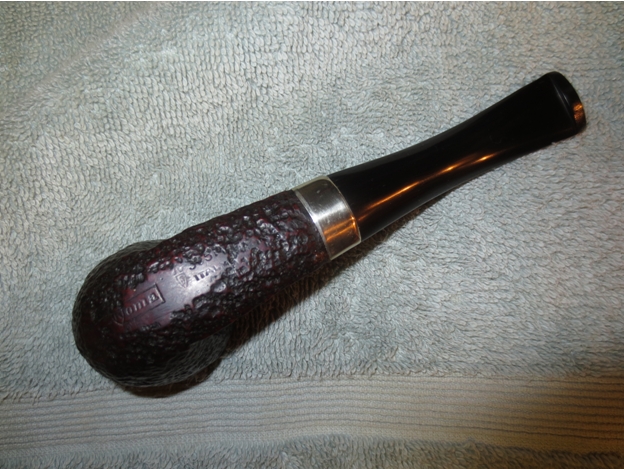
One problem was solved. The shank was now round at the end and the stem would fit tightly against the shank and the band made the match perfect.Poker17

Poker18

Poker19

Poker20 
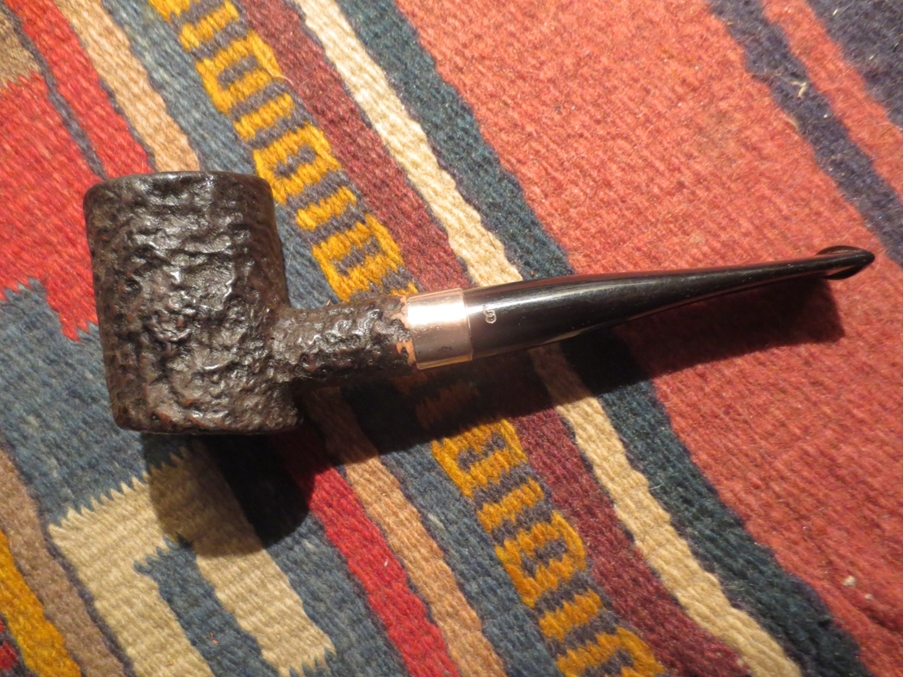
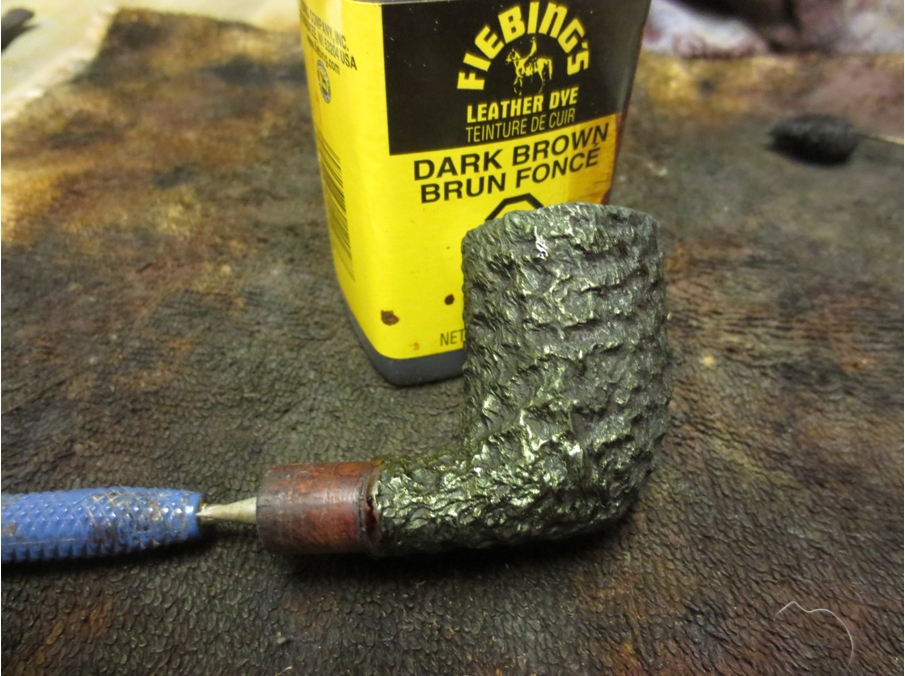
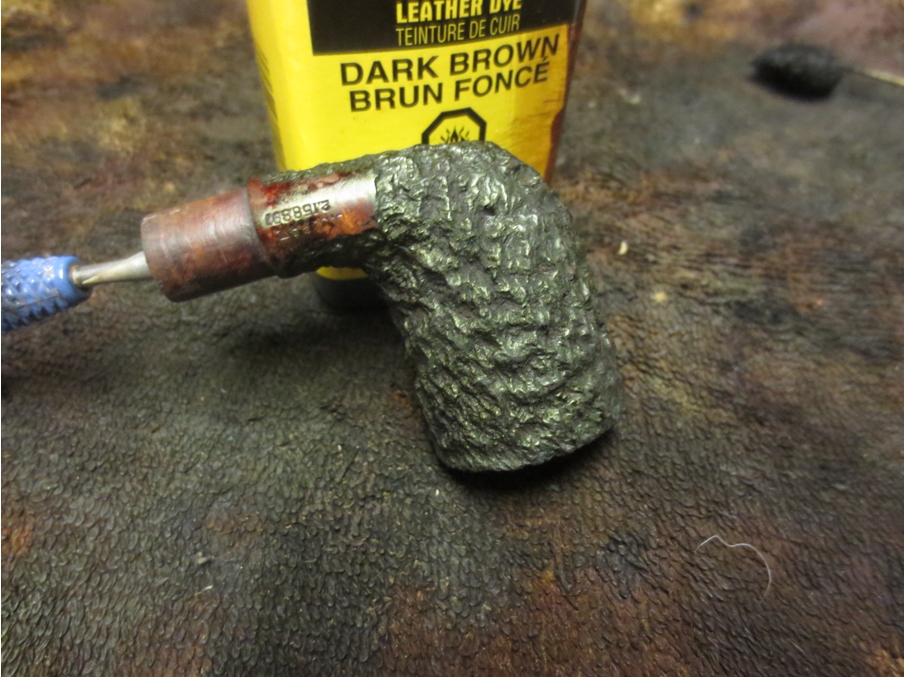
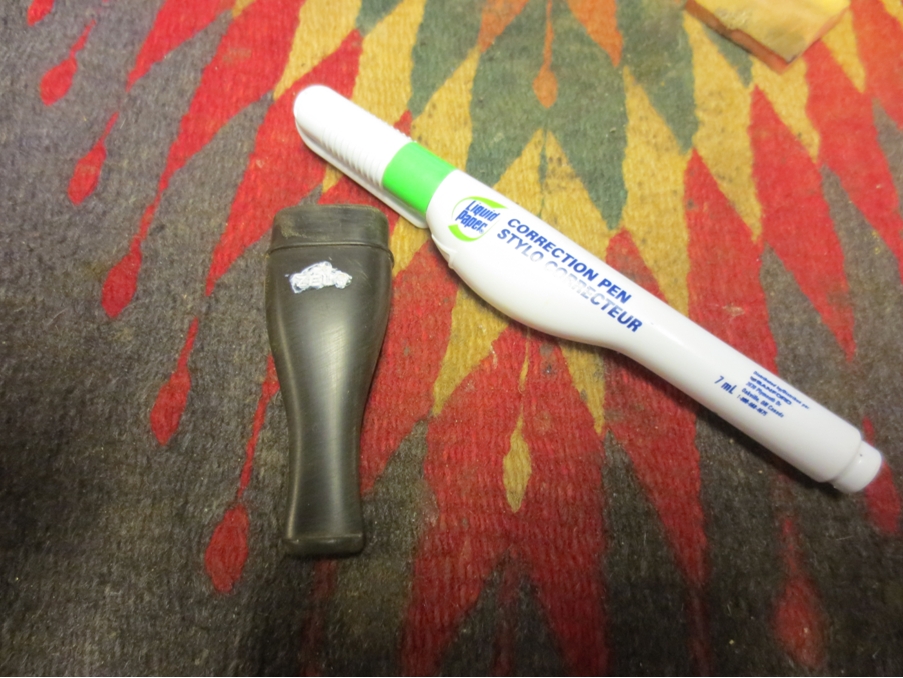
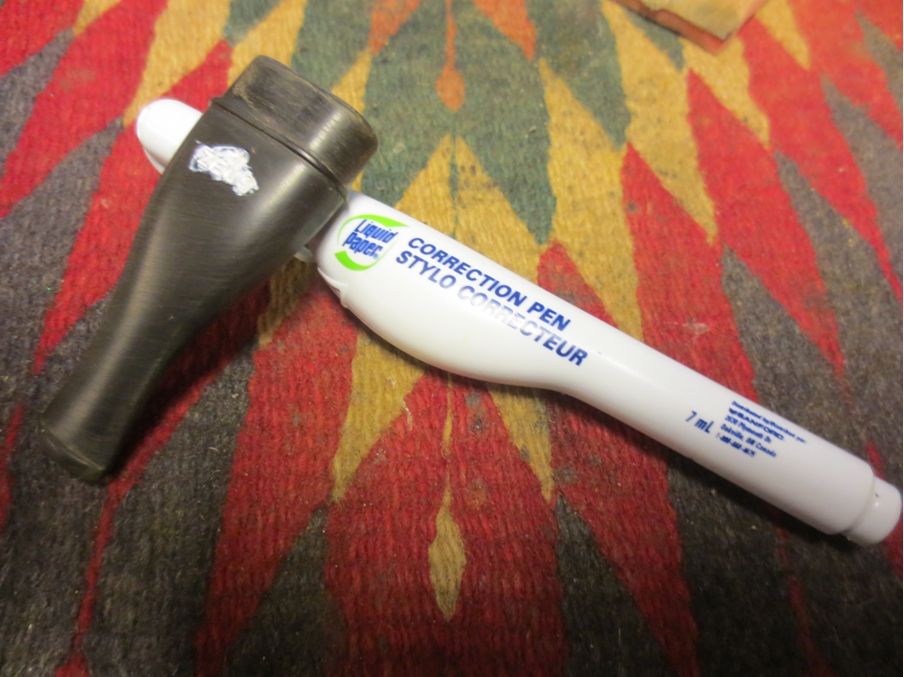
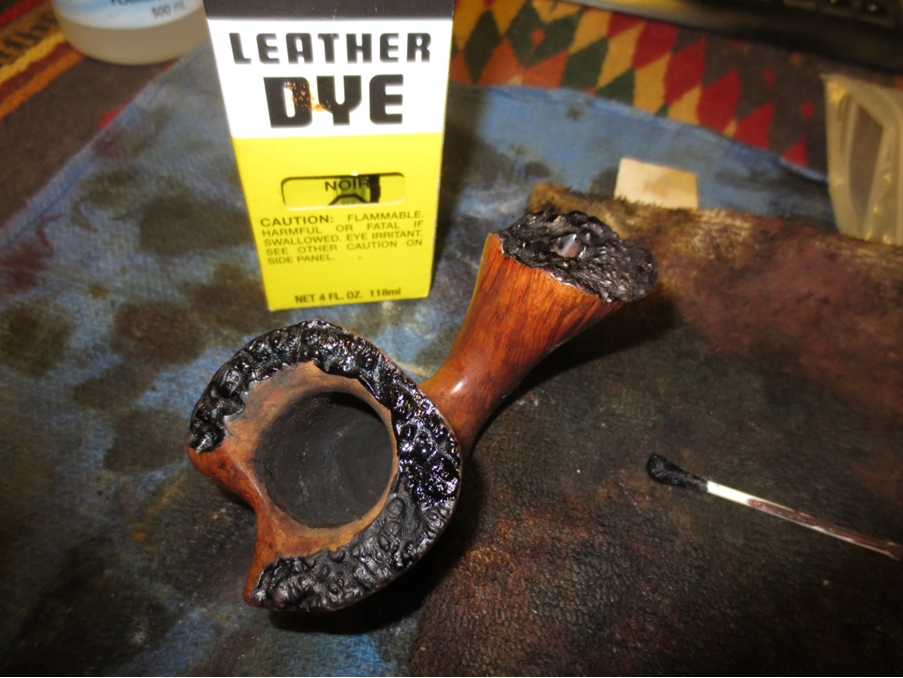
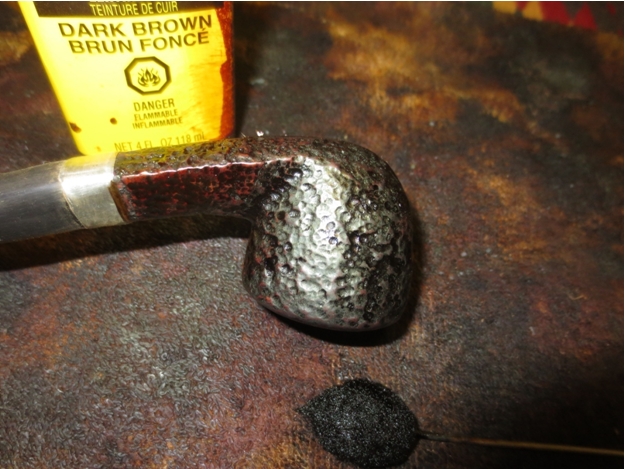
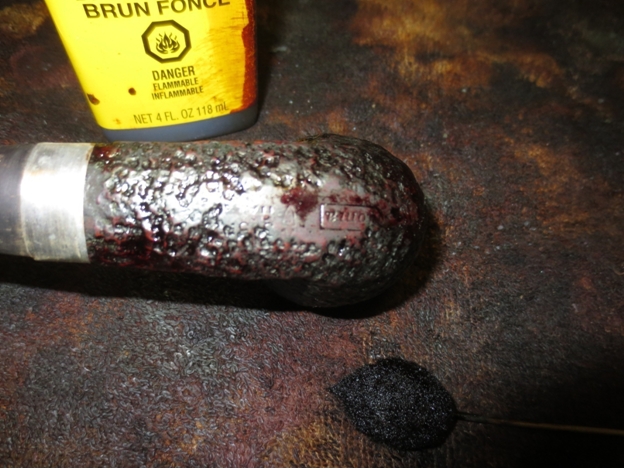
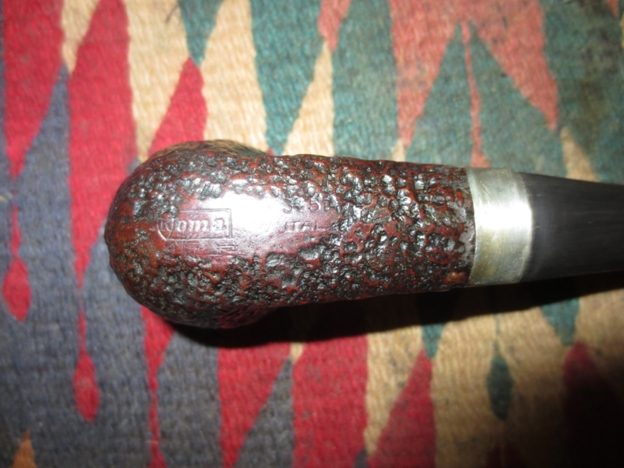
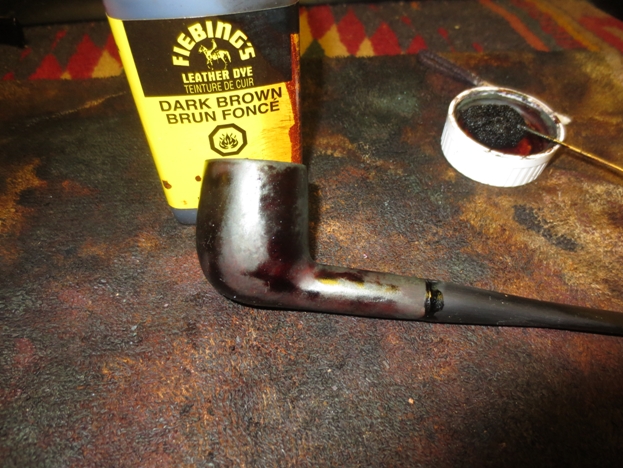
I used a dark brown stain pen and a black permanent marker to touch up the raw briar in front of the band and blend it into the colour of the bowl and shank.Poker21

Poker22

Poker23

Poker24 
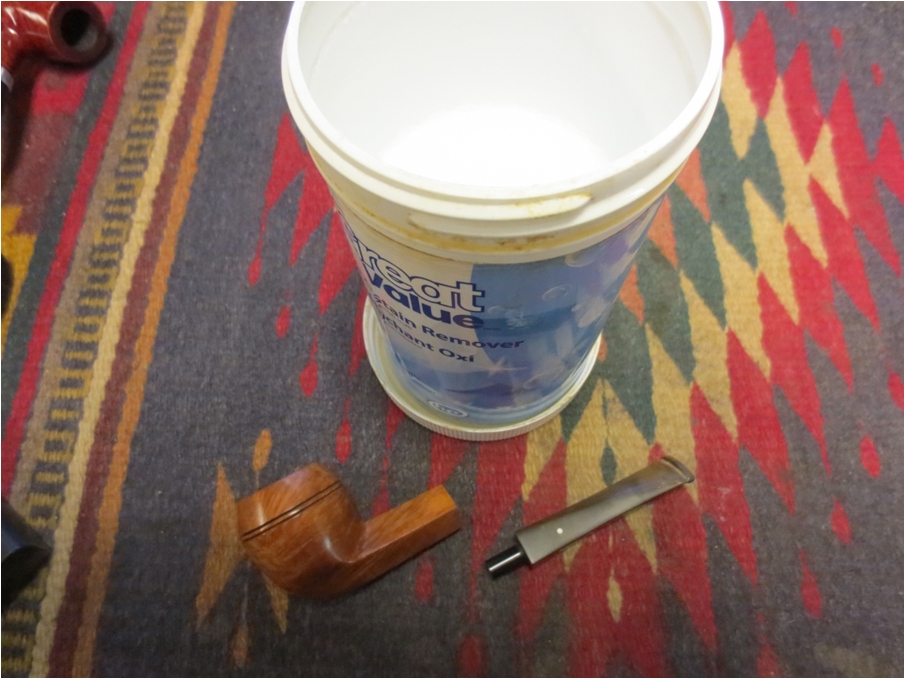
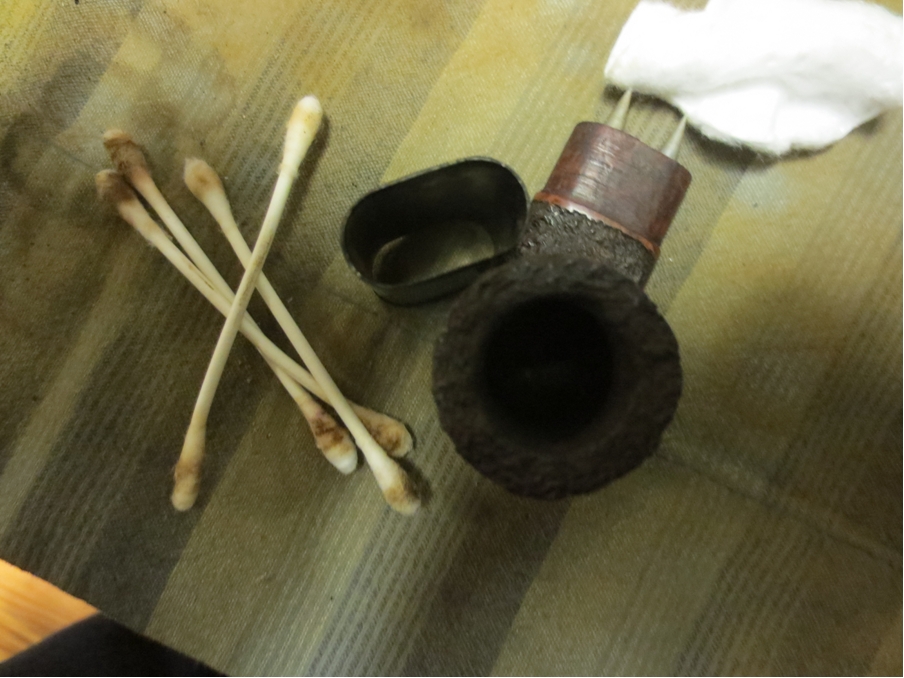
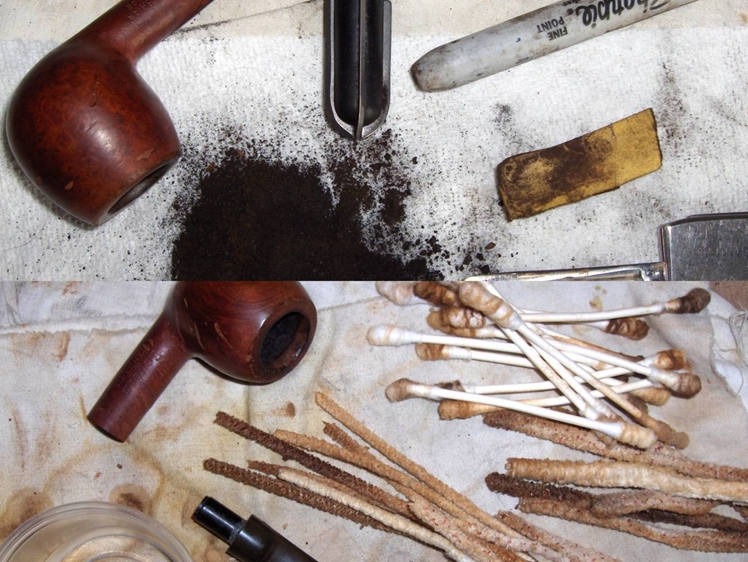
Once I had the stained matched, it was time to clean the sandblast finish. I used Murphy’s Oil Soap and a tooth brush to scrub the bowl and shank. I did it after the stain touch up as I figured that the scrub would help blend the stains together.Poker25 
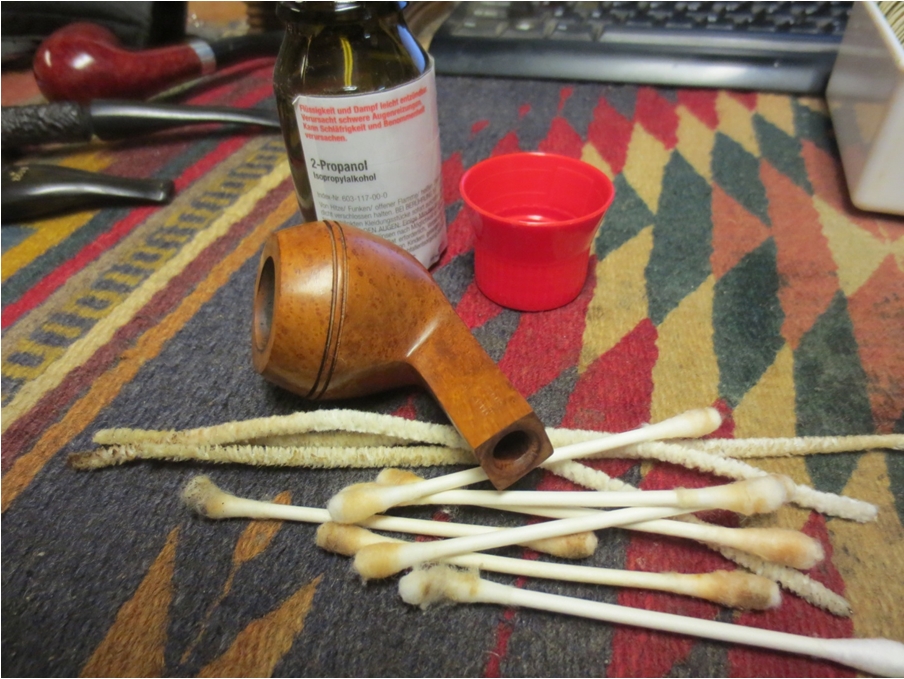
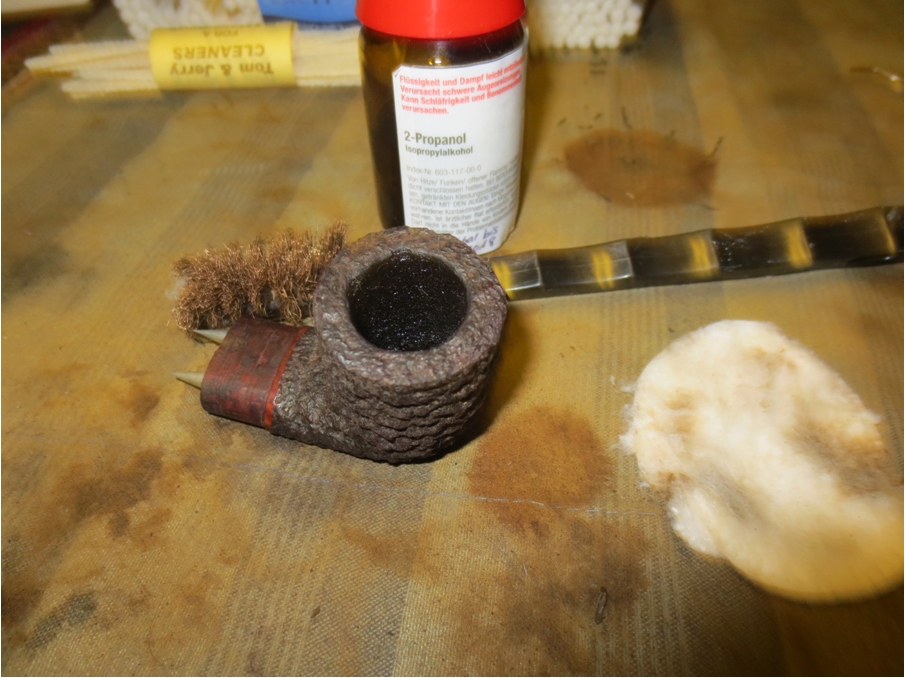
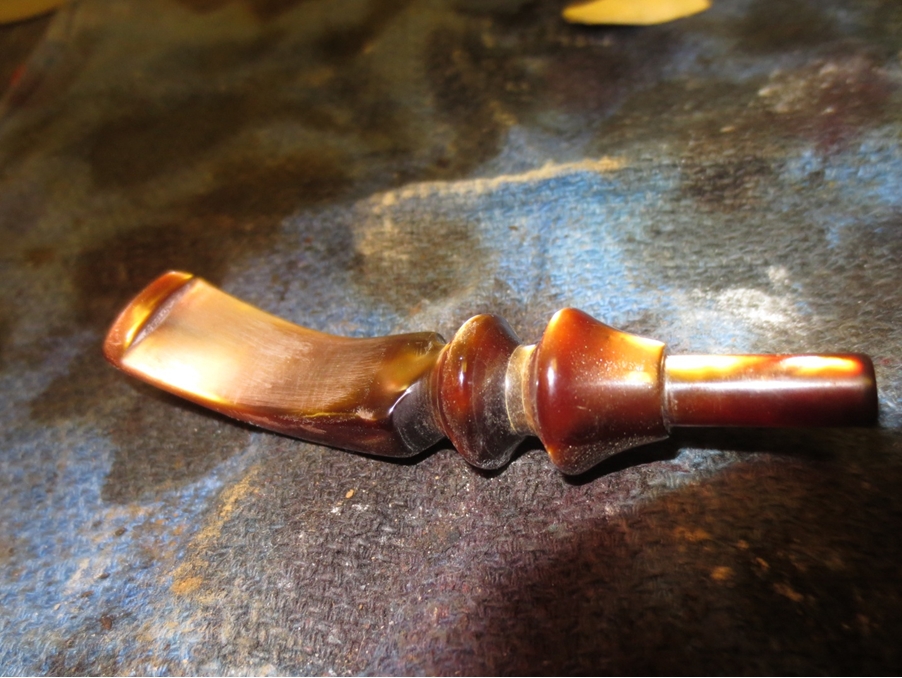
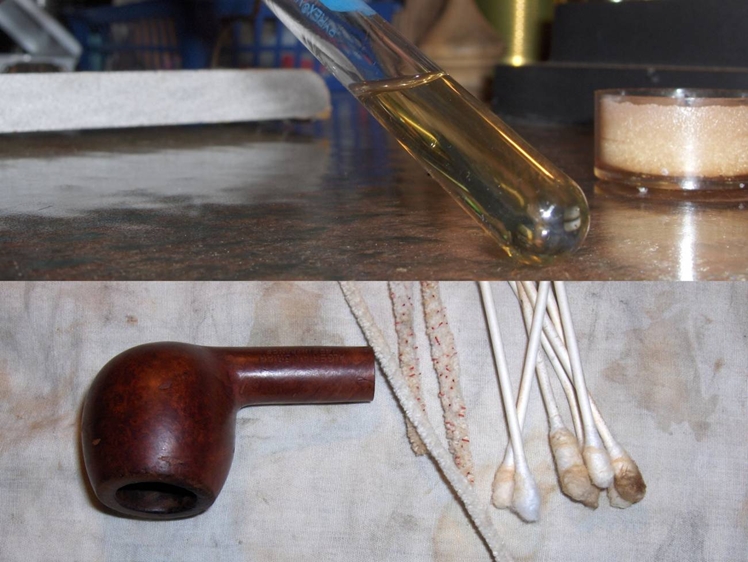
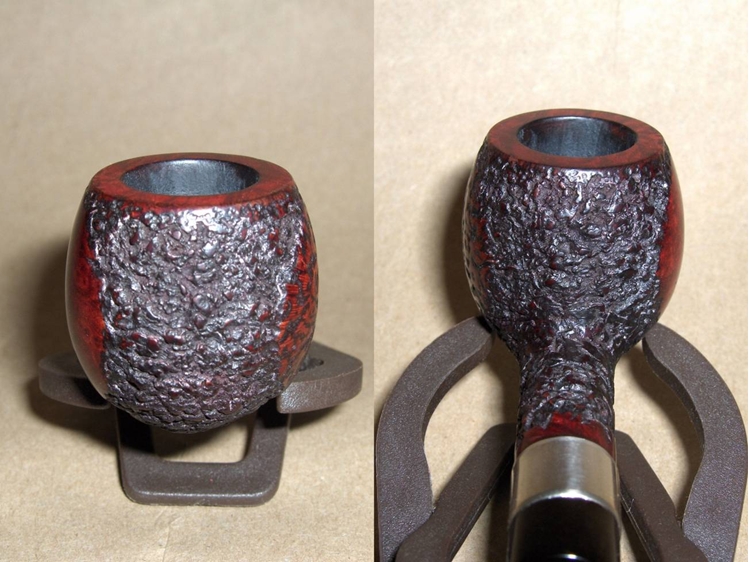
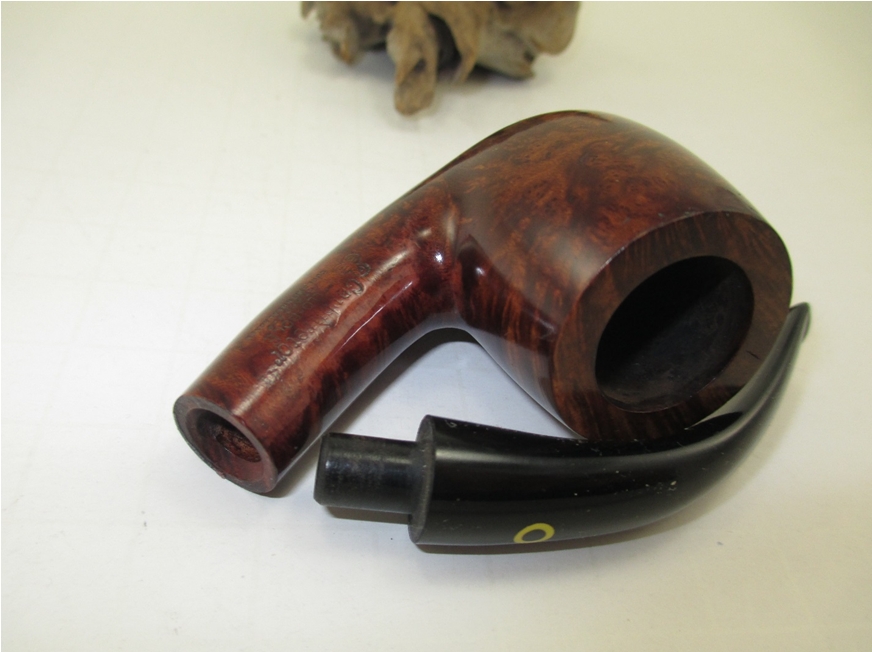
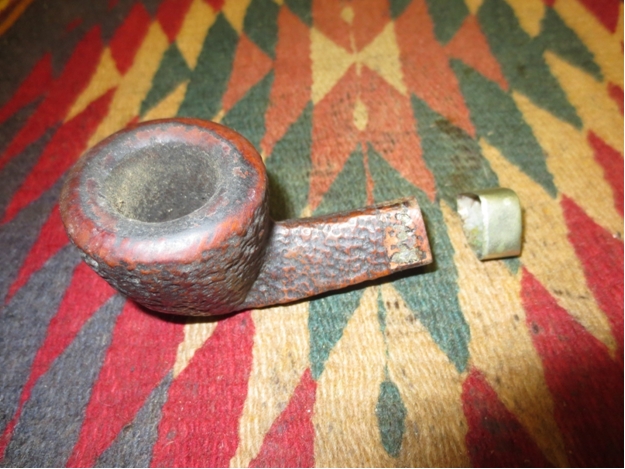
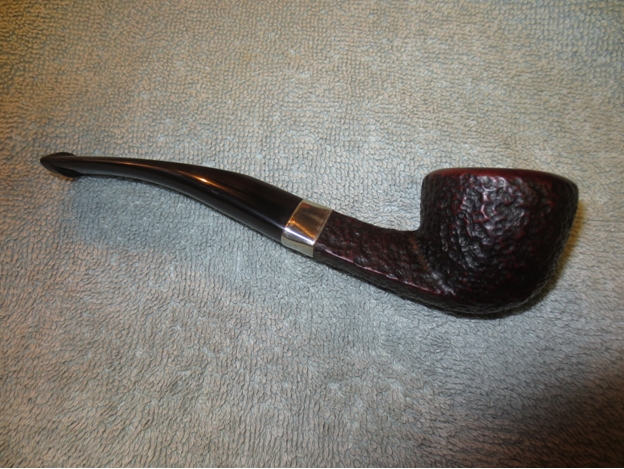
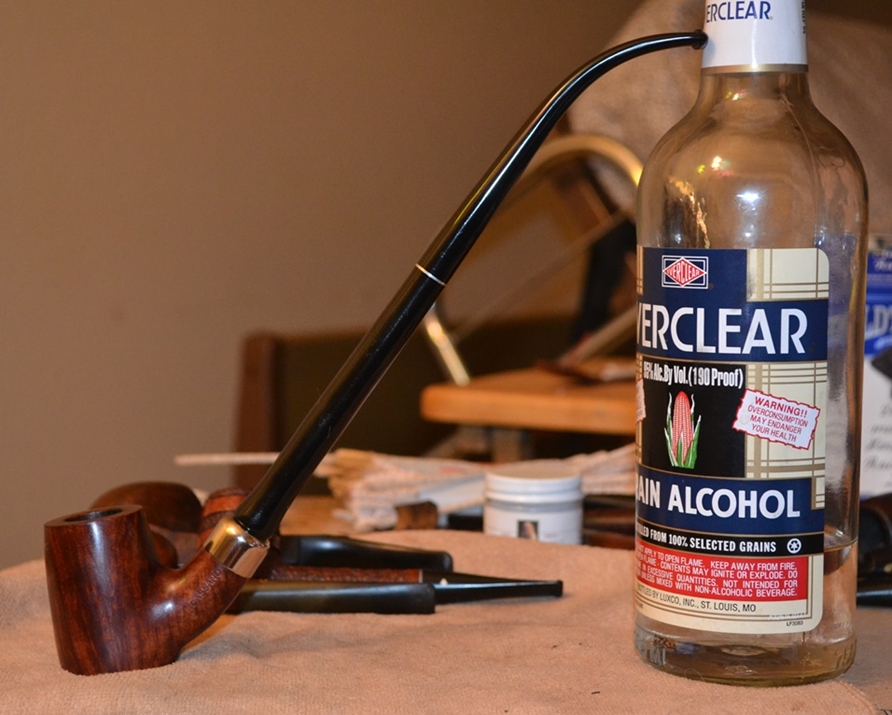
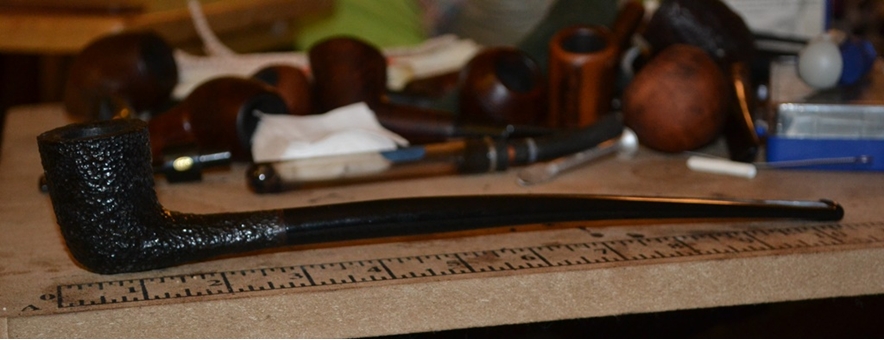
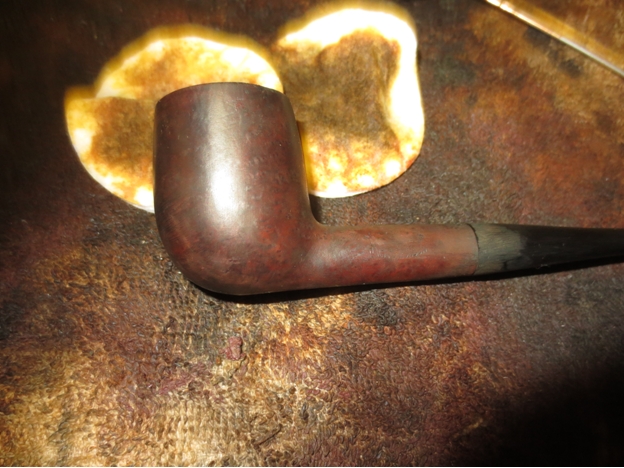
I rinsed the bowl with fresh water avoiding getting it into the shank and the bowl. I dried it off and brought it back to the work table. I cleaned out the shank and the used stem with a few pipe cleaners and alcohol. The pictures below show the pipe at this point in the process.Poker26 
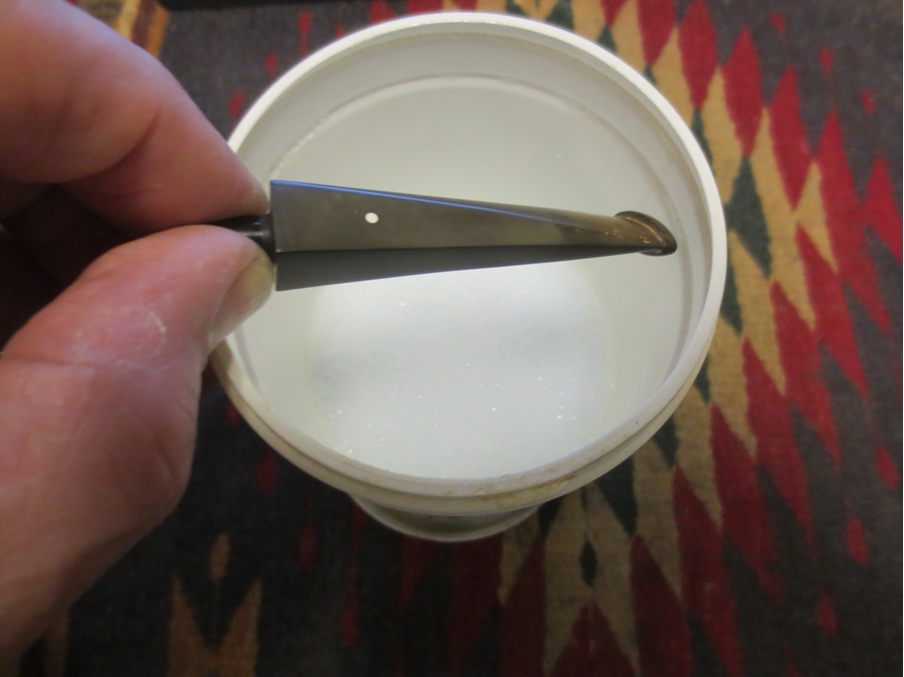
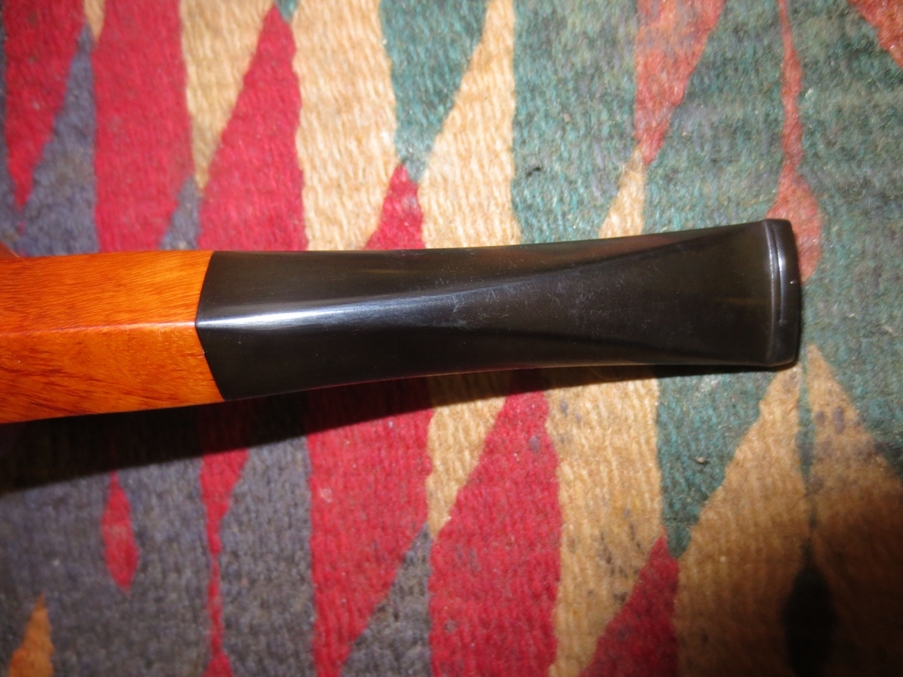
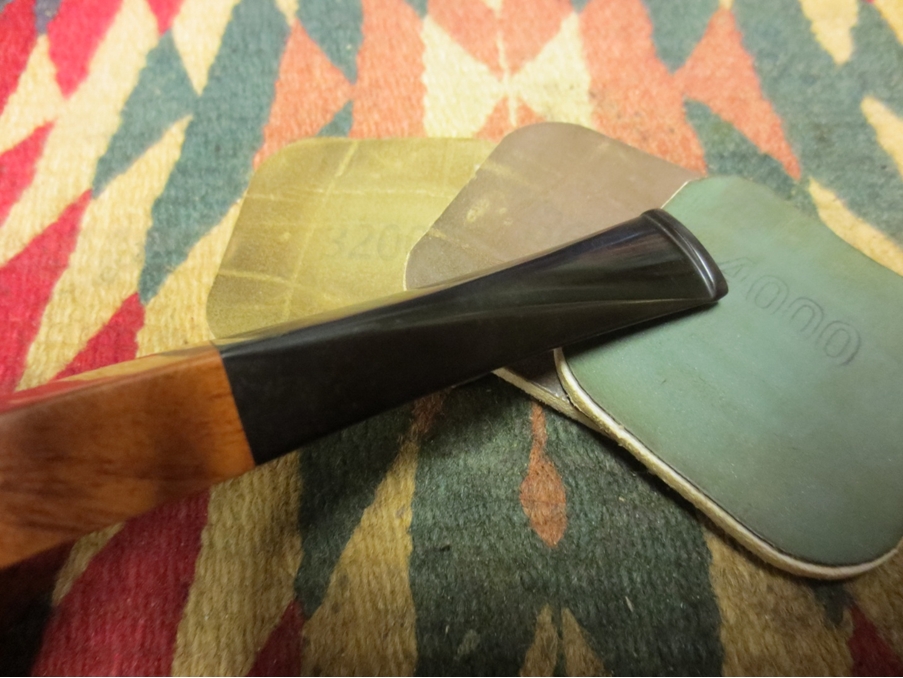
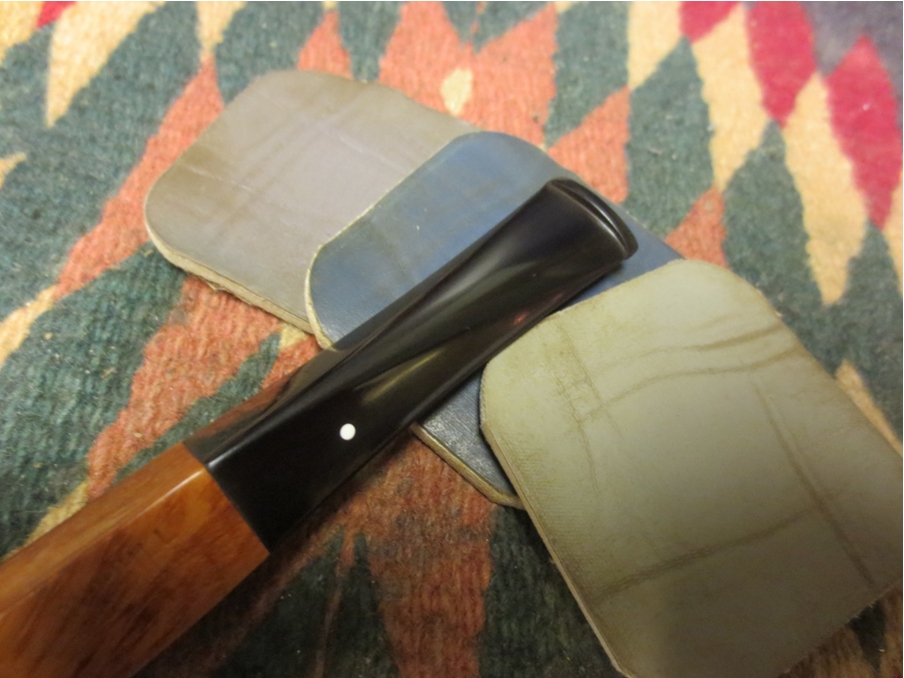
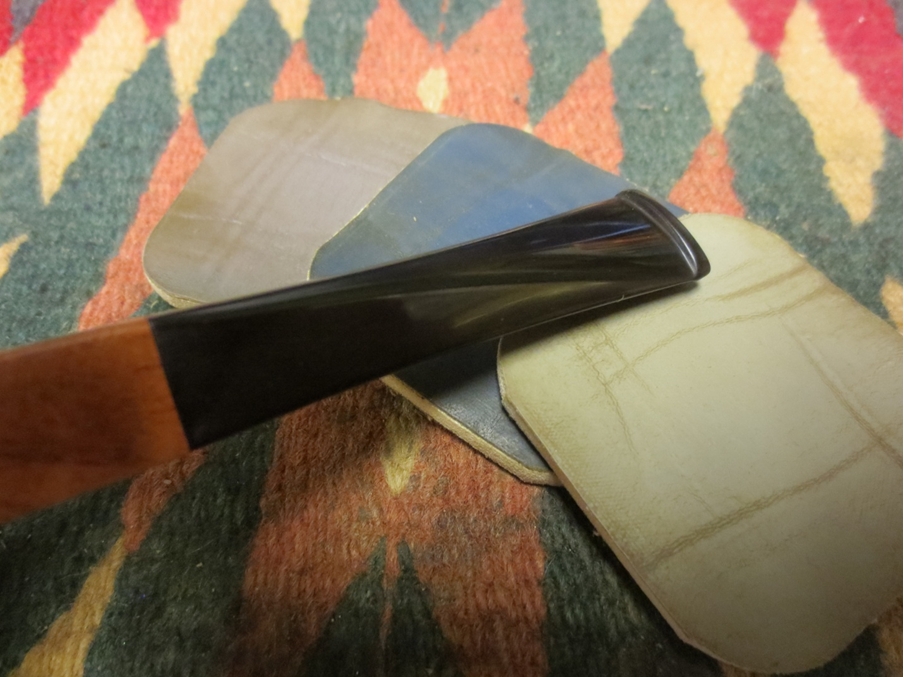
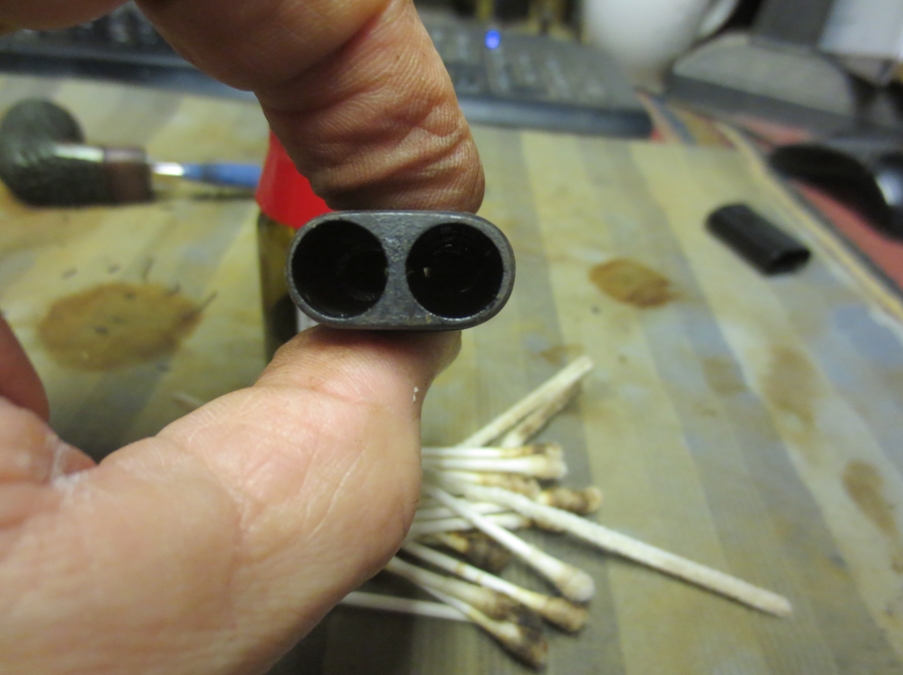
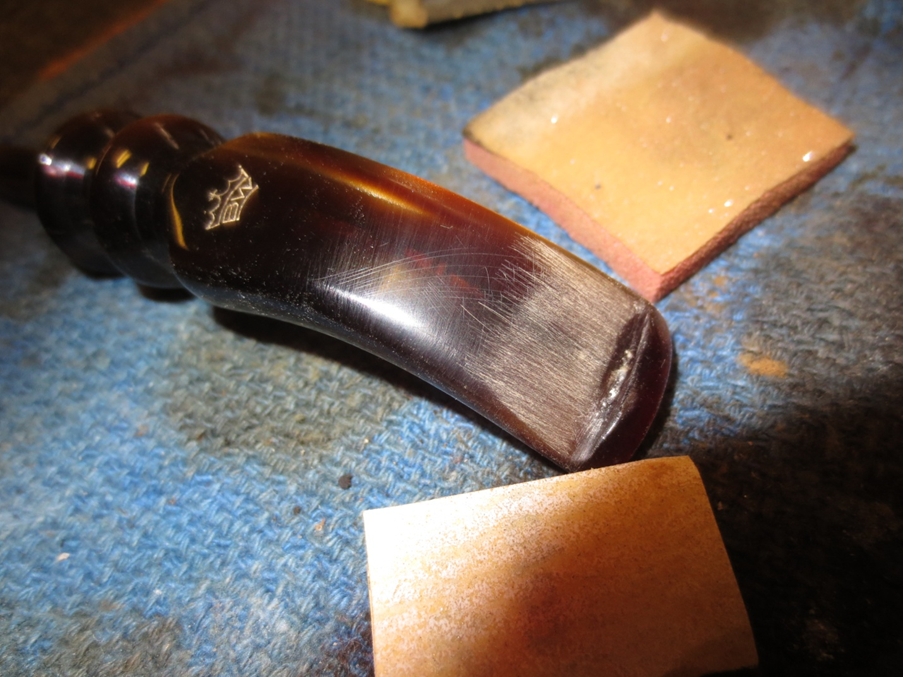
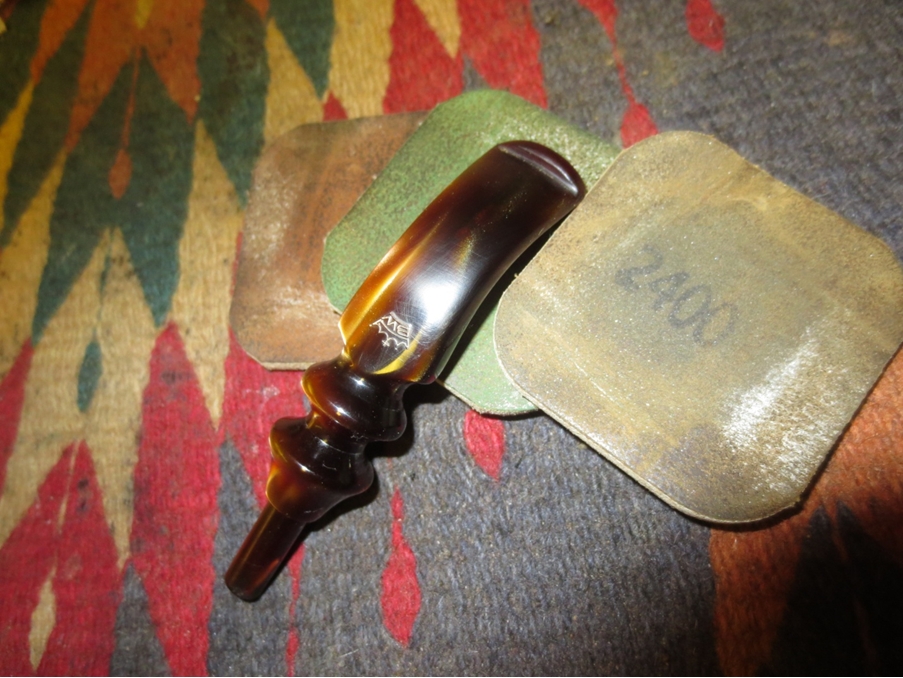
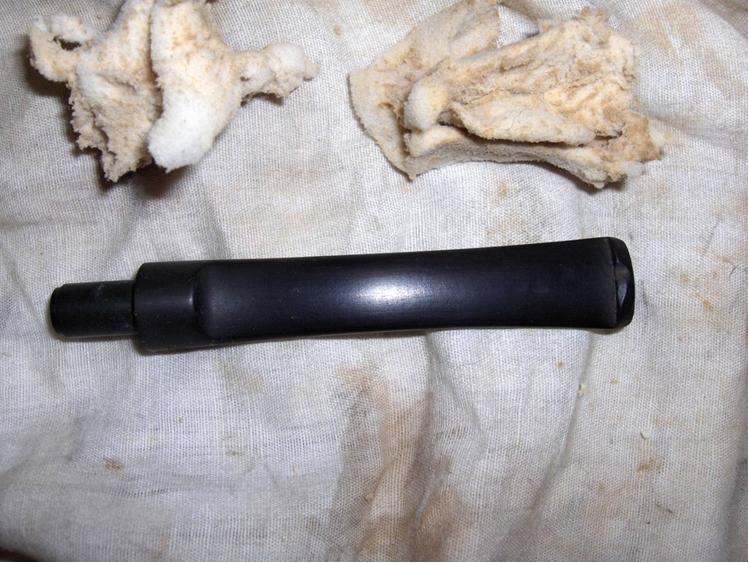
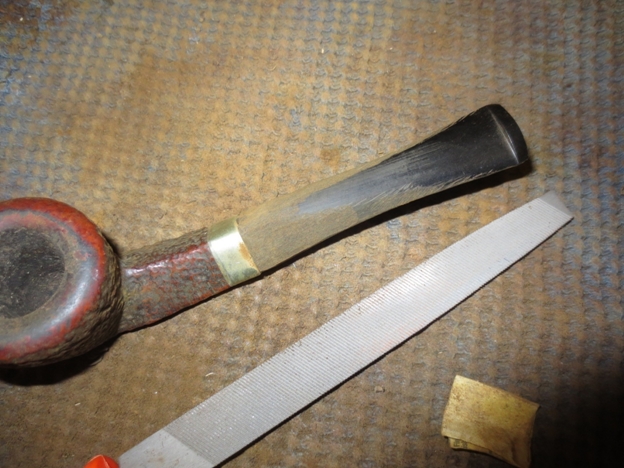
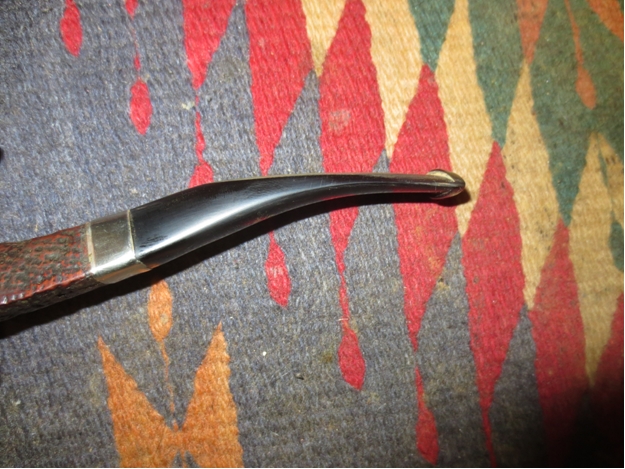
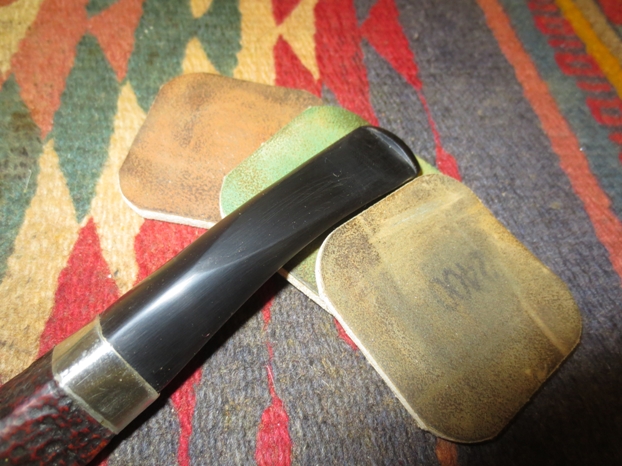
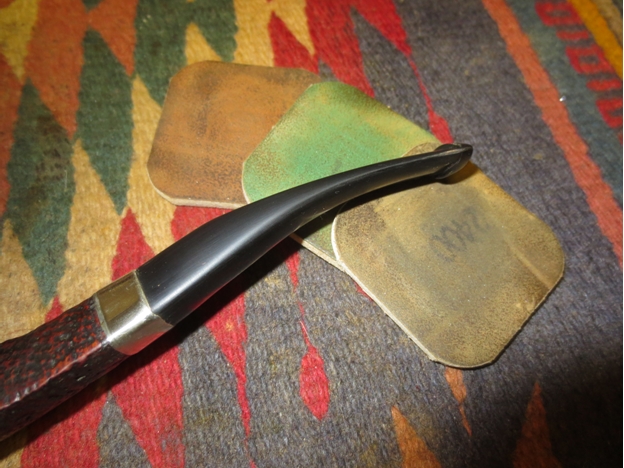
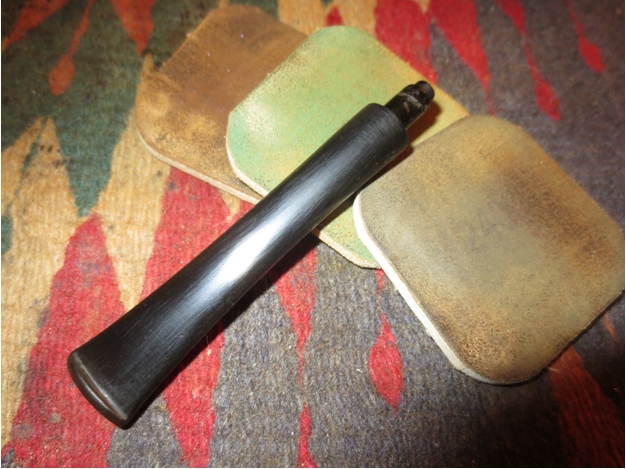
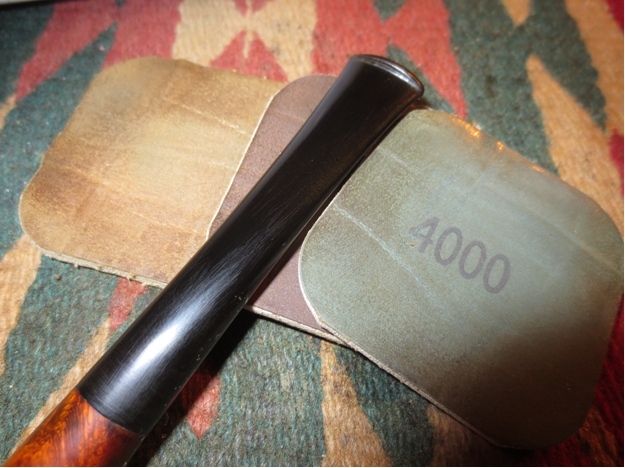
The stem needed some work to clean up the scratches and wear around the button. I wet sanded it with 1500-2400 grit micromesh sanding pads and dry sanded it with 3200-12,000 grit pads. I rubbed it down with Obsidian Oil and then buffed it with Blue Diamond Plastic Polish on the buffing wheel. I gave it a quick coat of carnauba and took it back to the work table.Poker27

Poker28

Poker29 
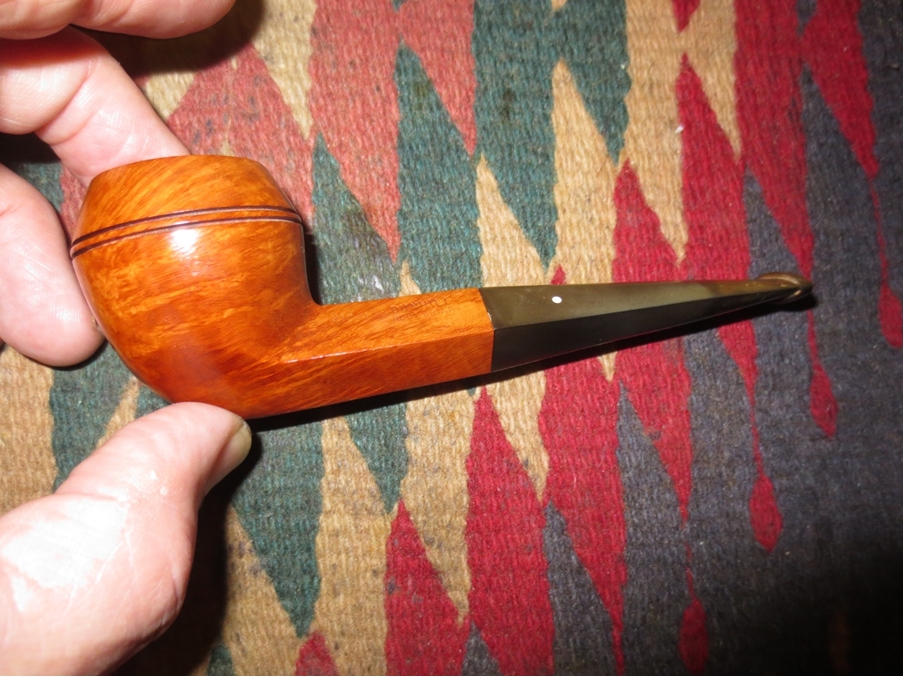
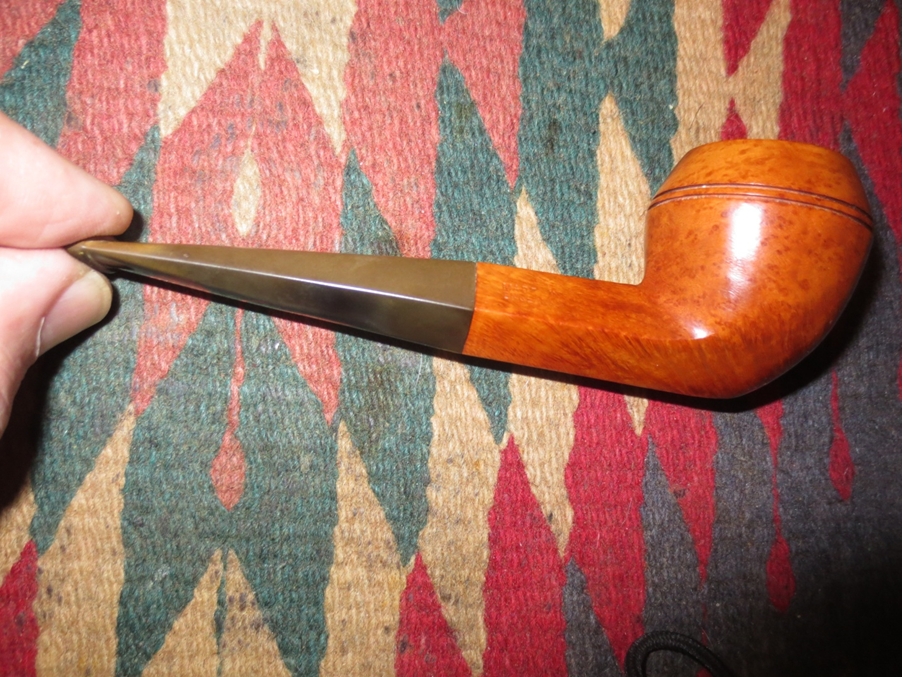
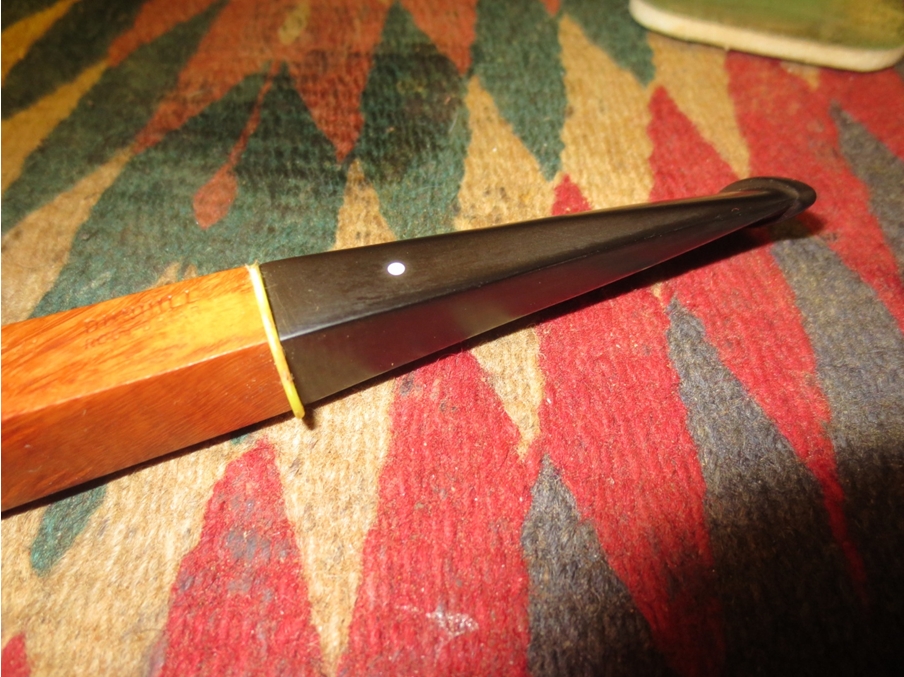
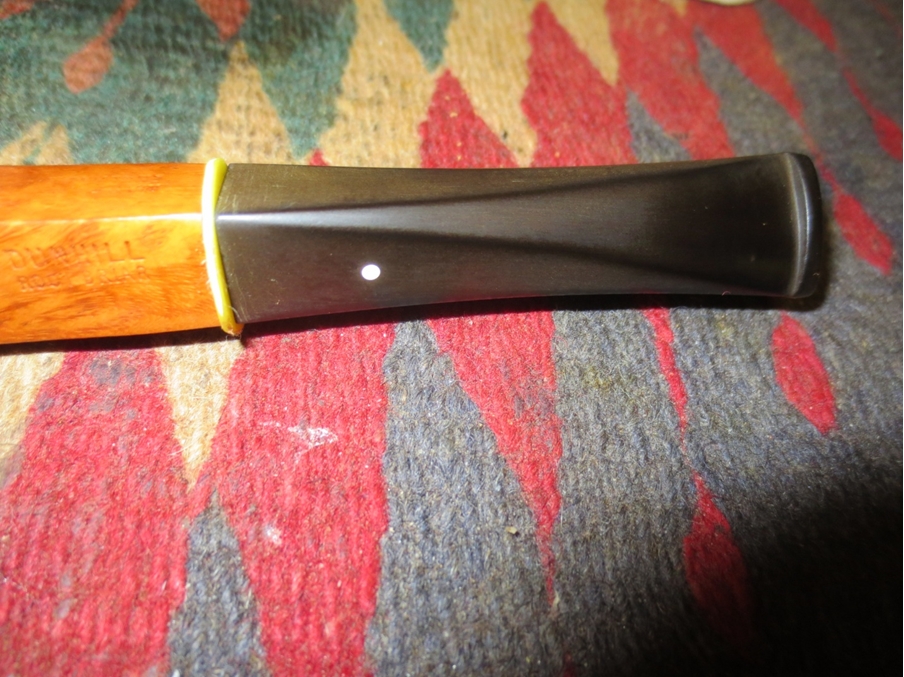
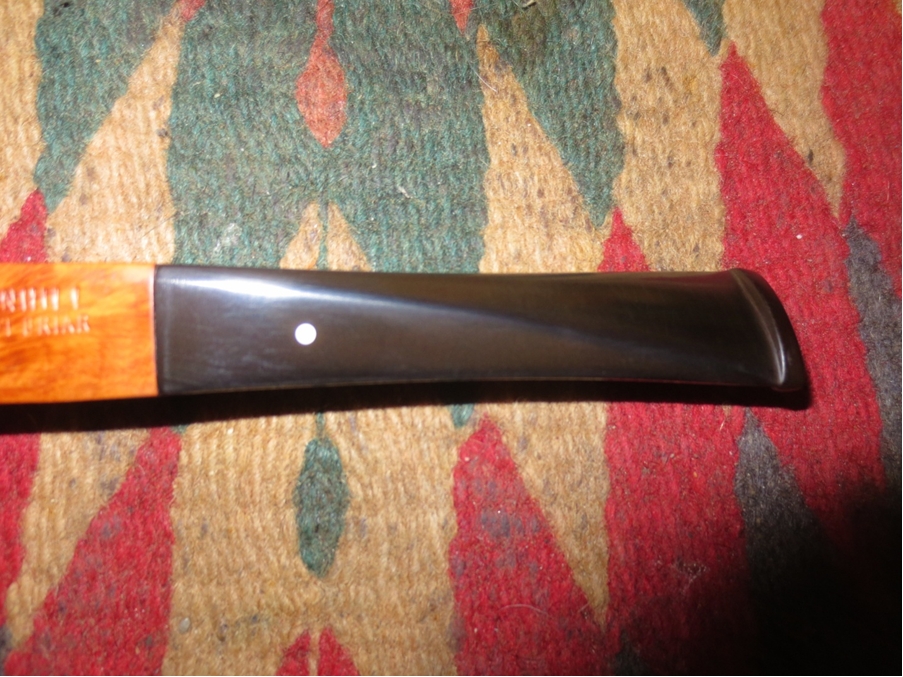
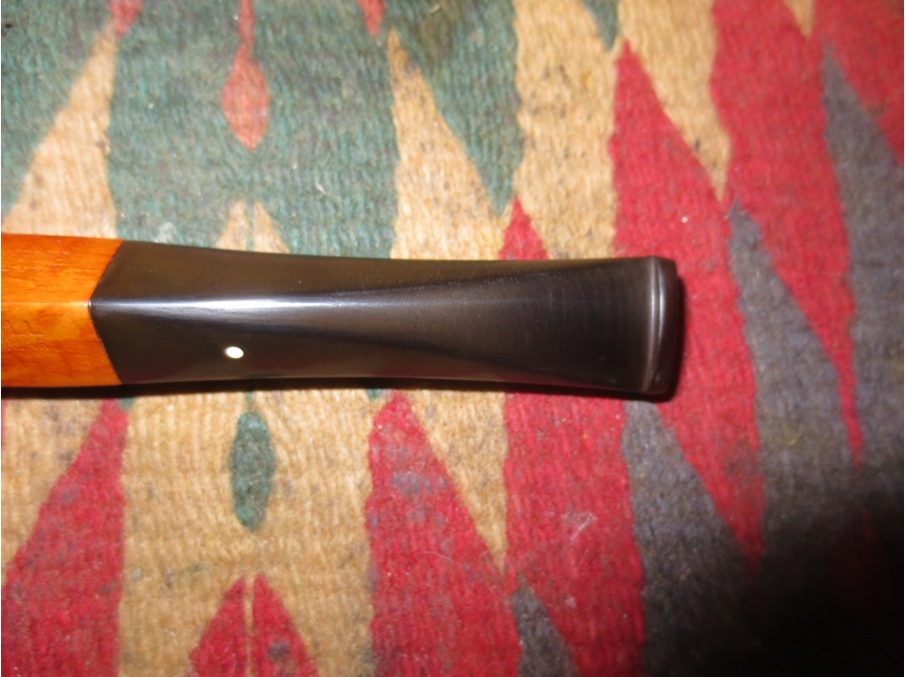
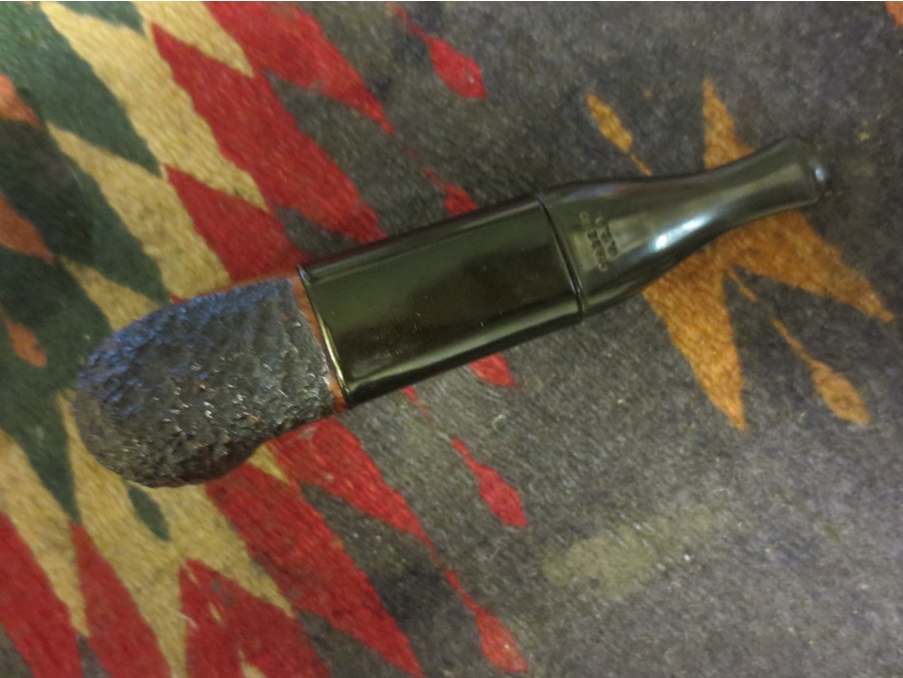
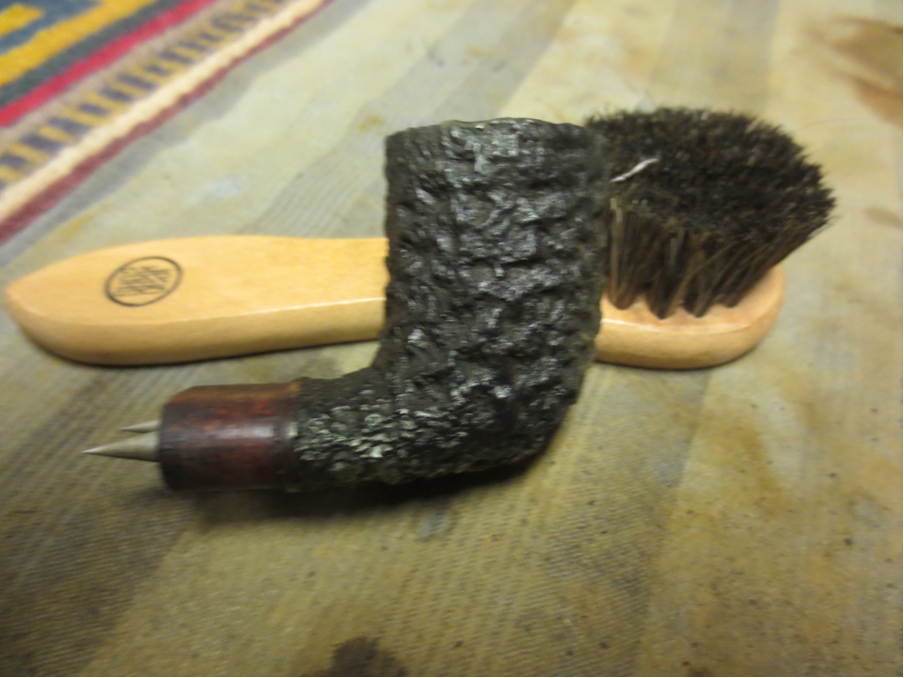
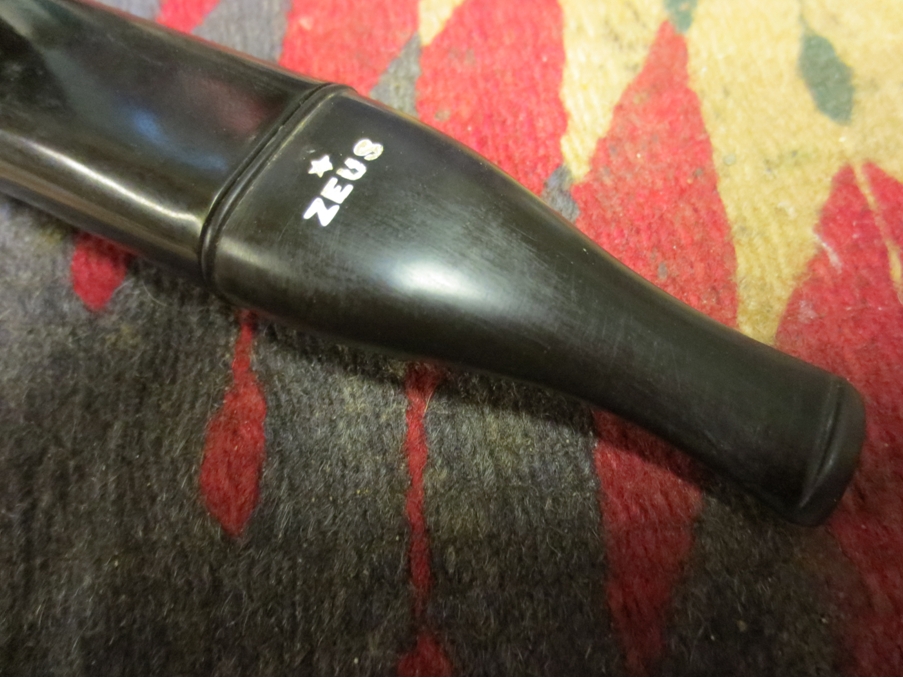
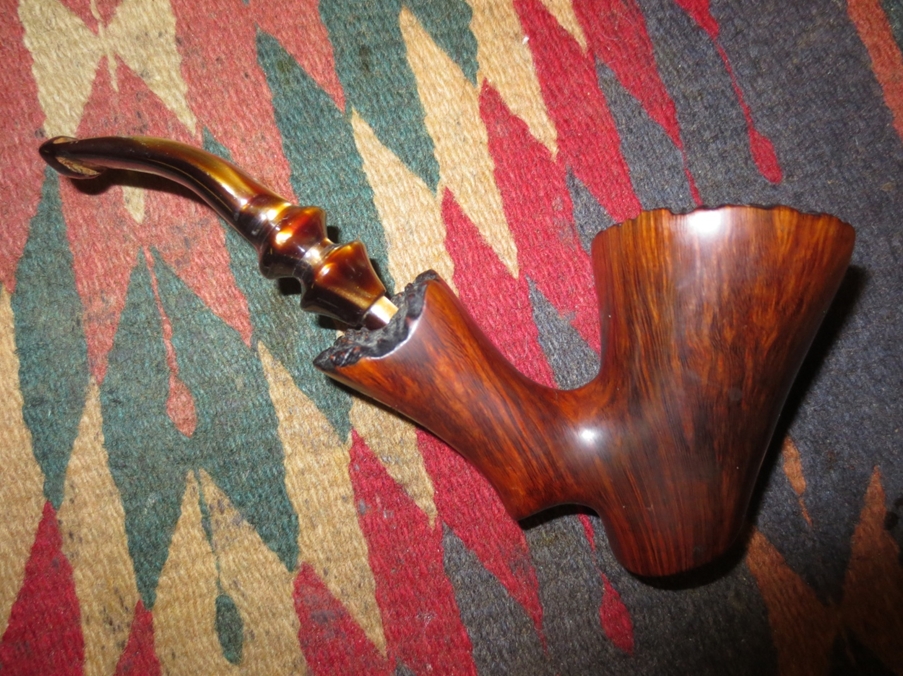
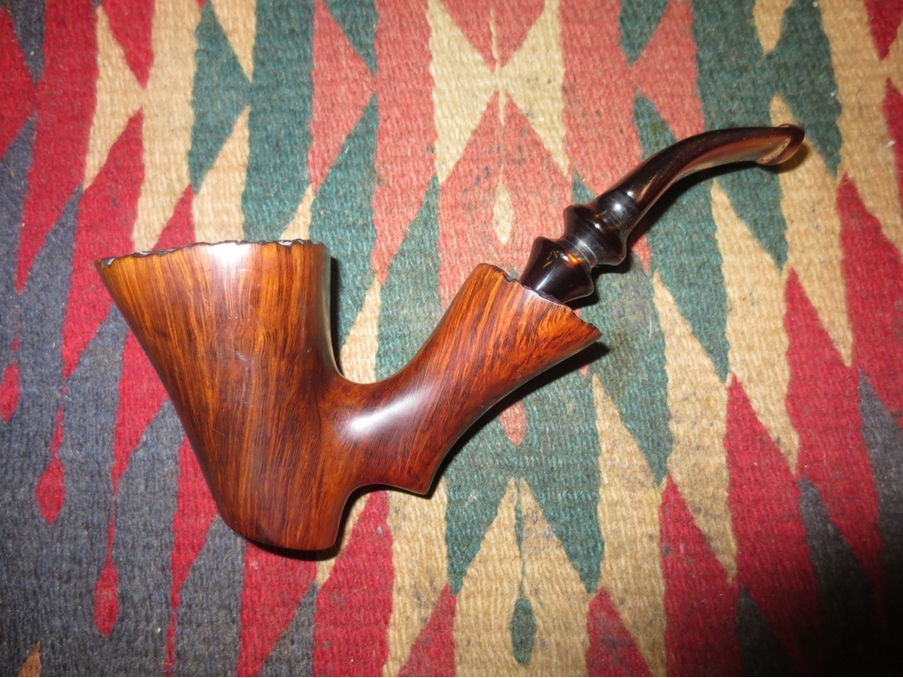
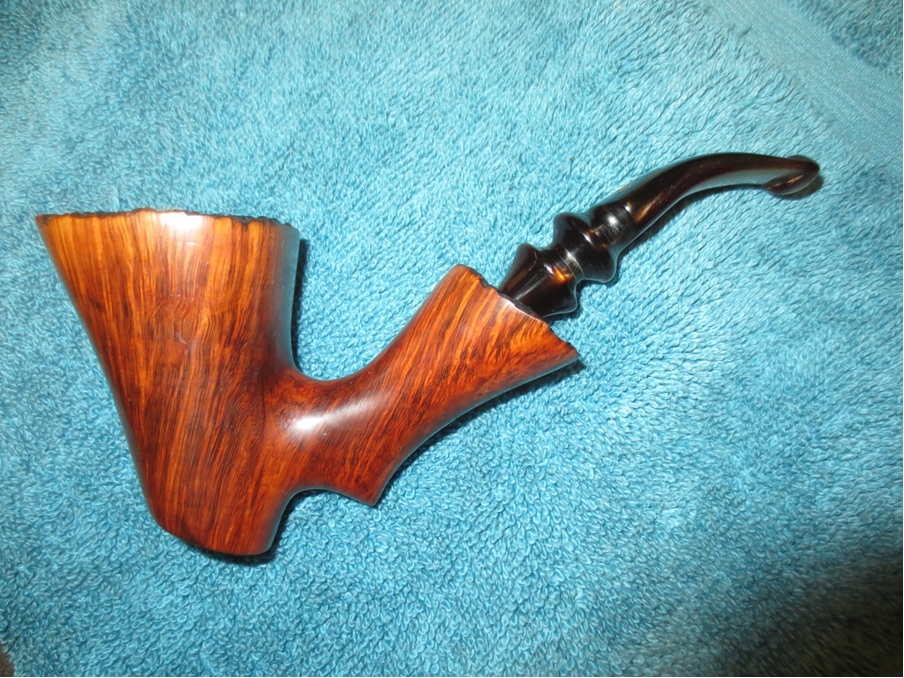
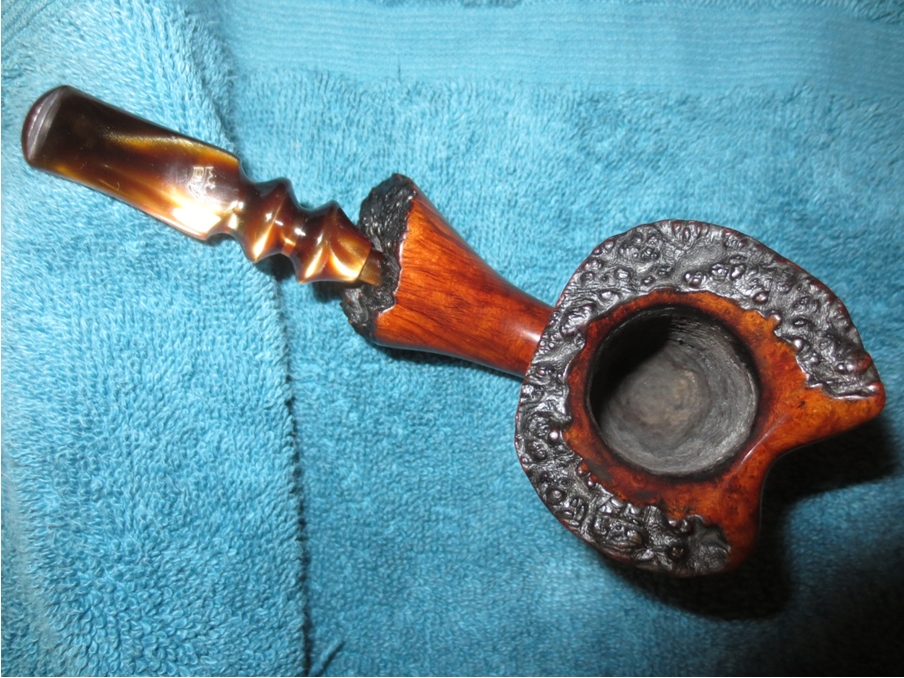
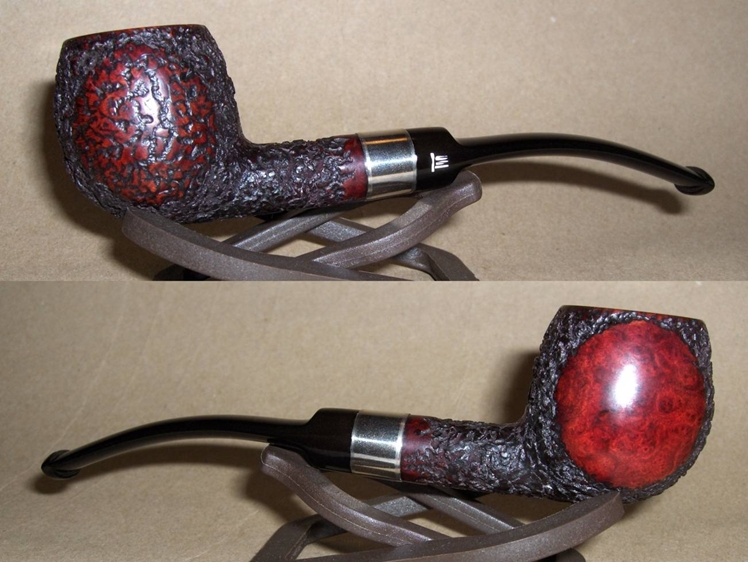
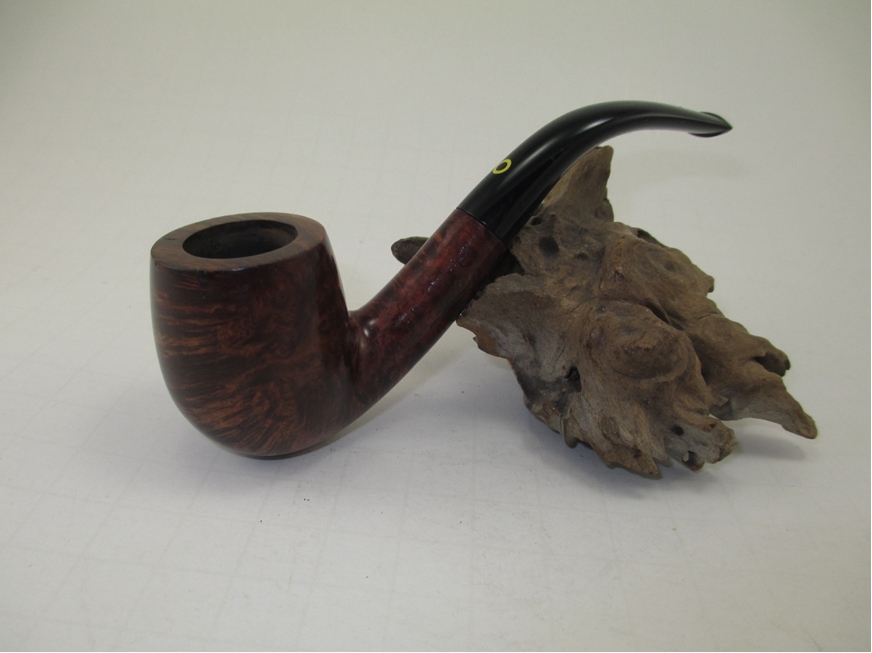
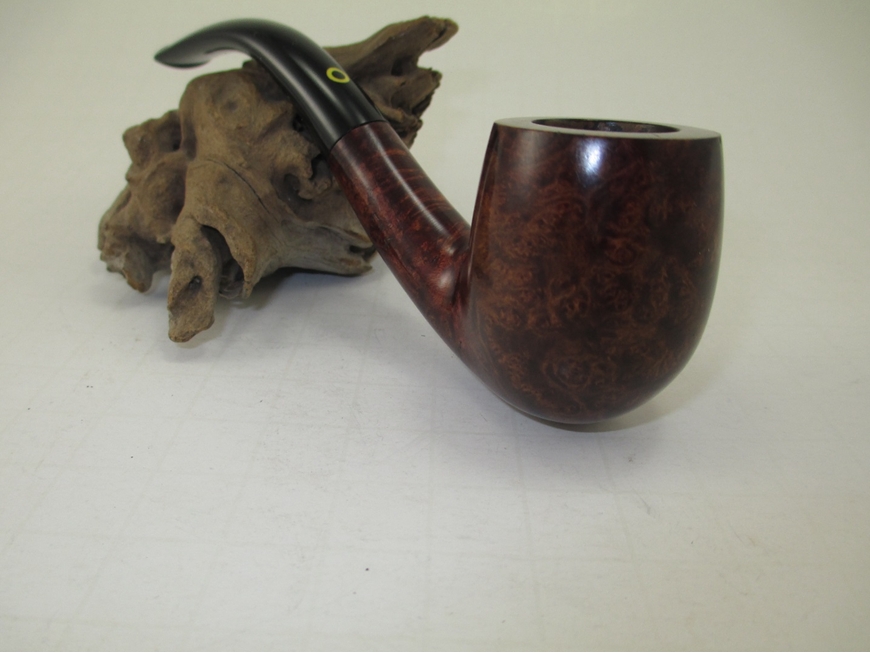
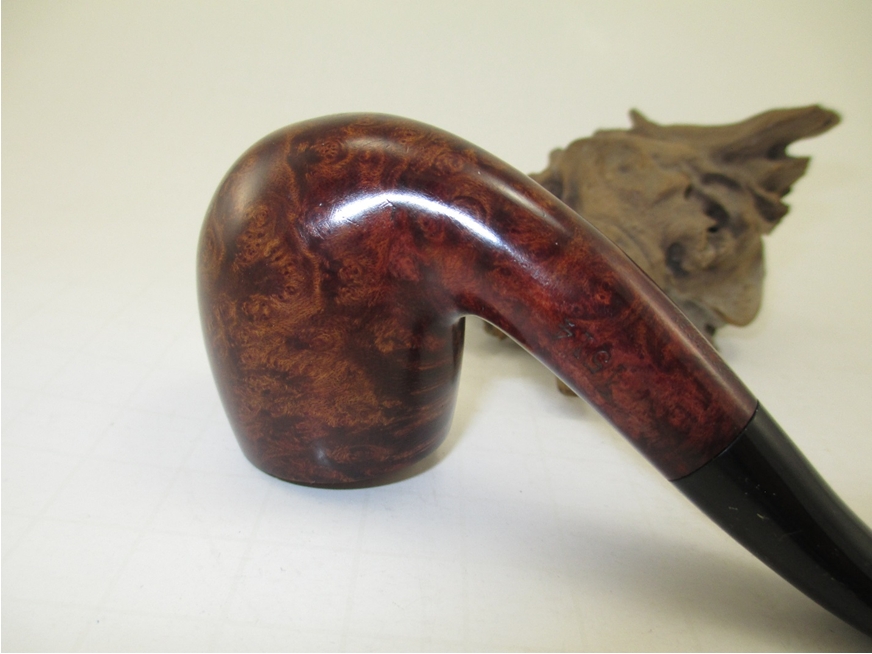
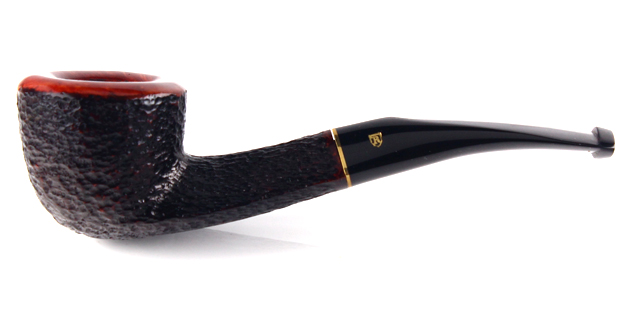
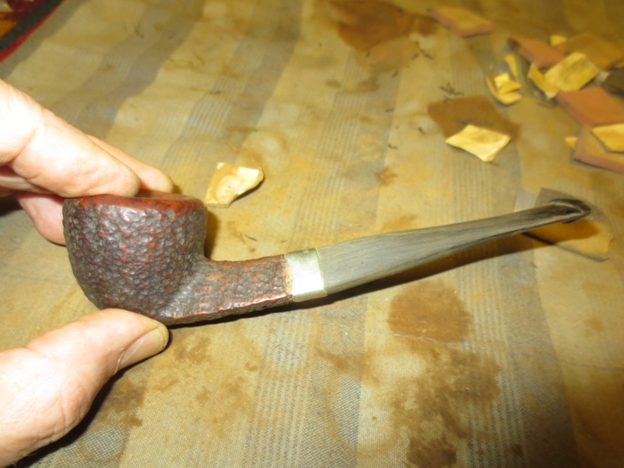
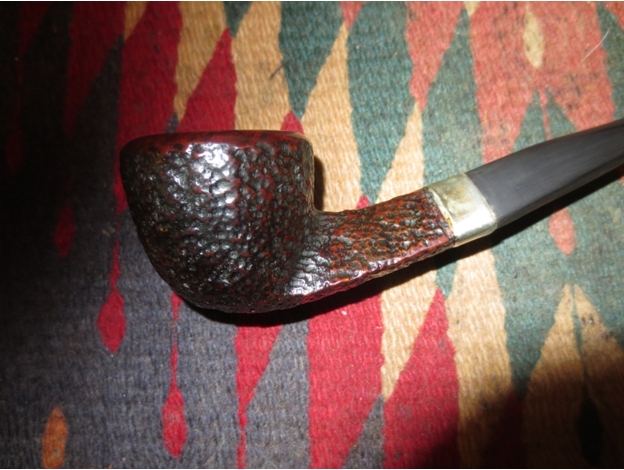
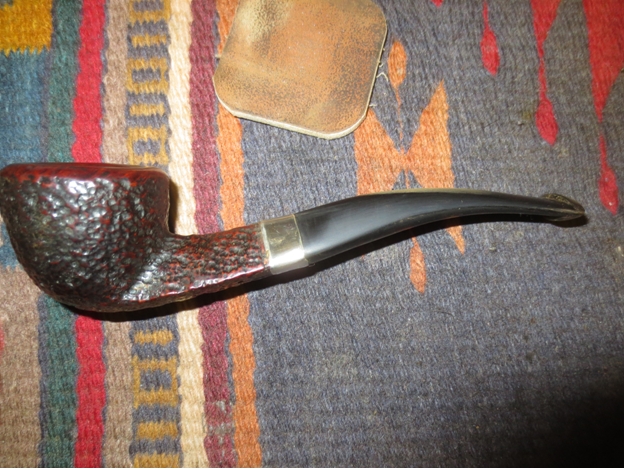
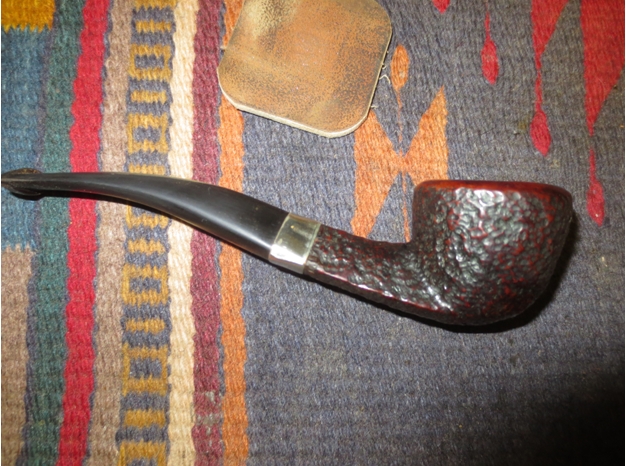
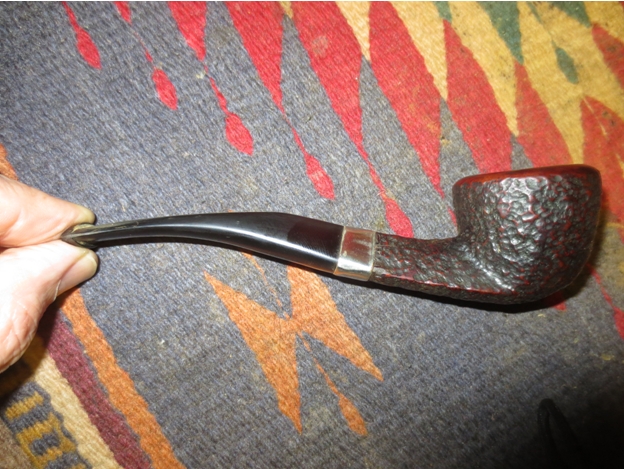
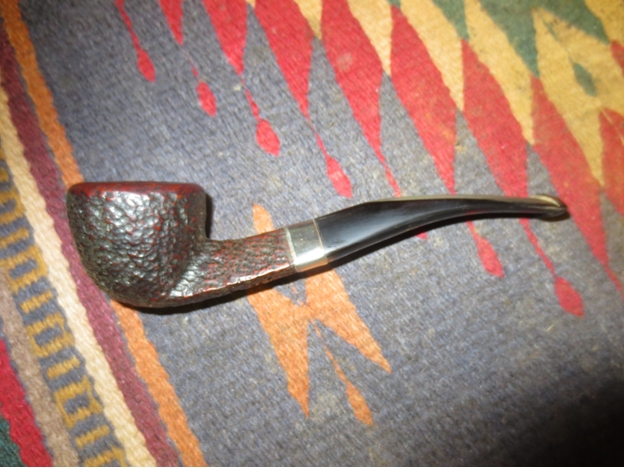
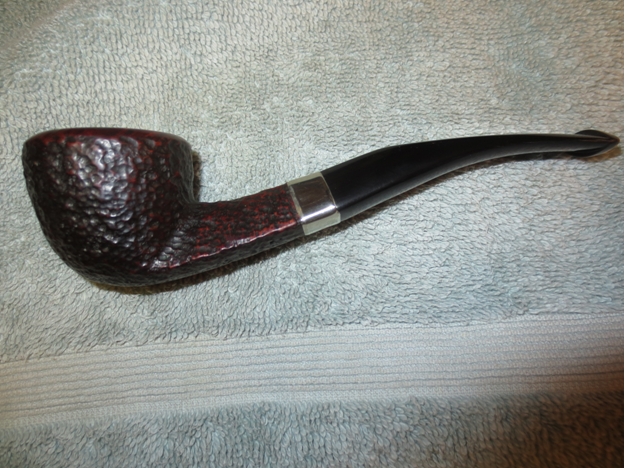
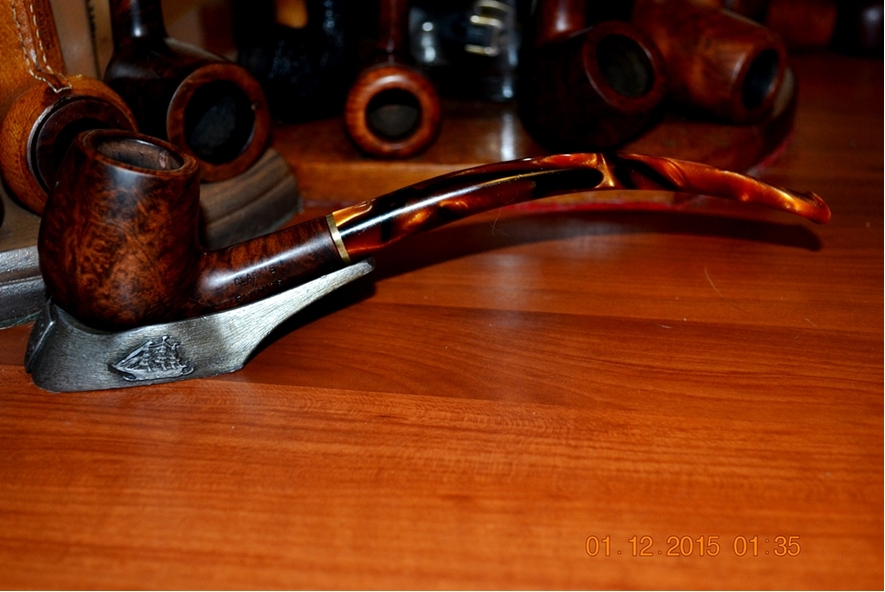
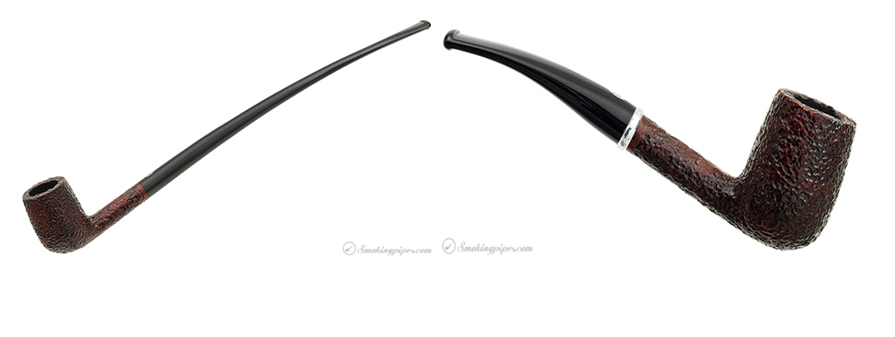
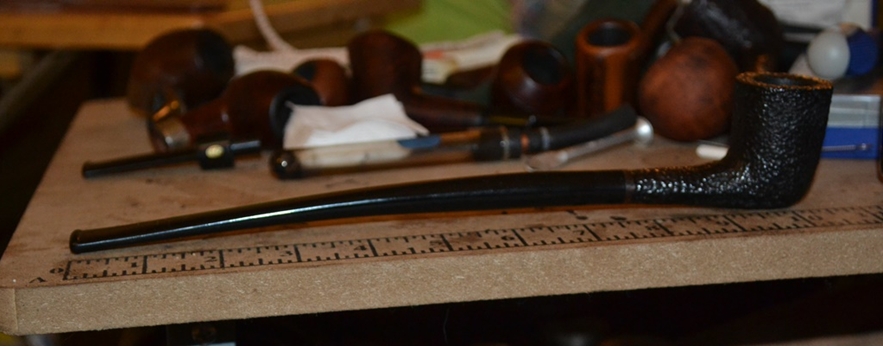
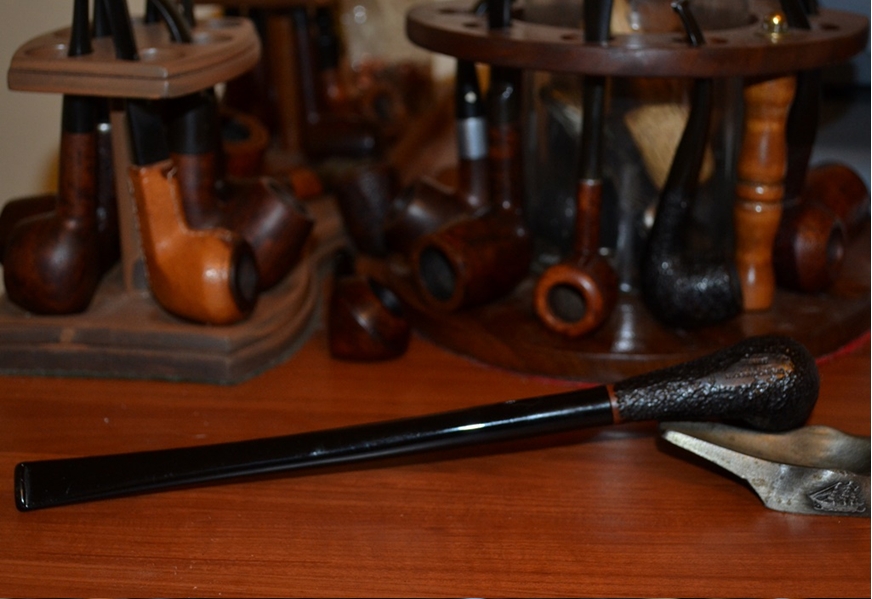
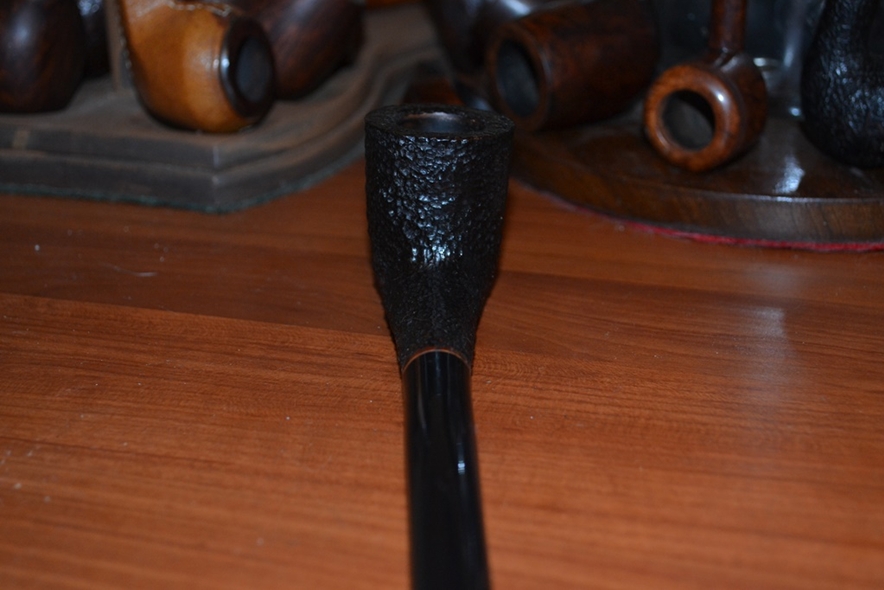
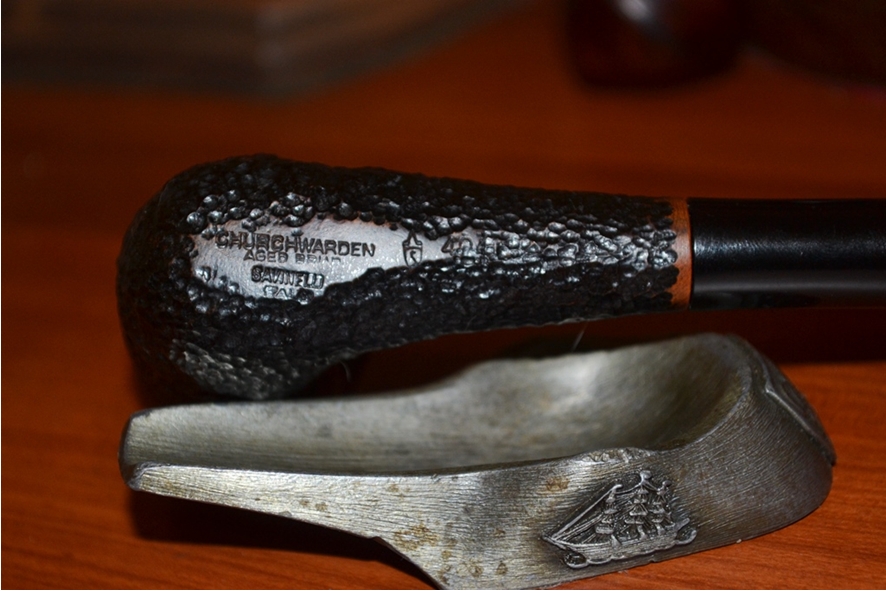
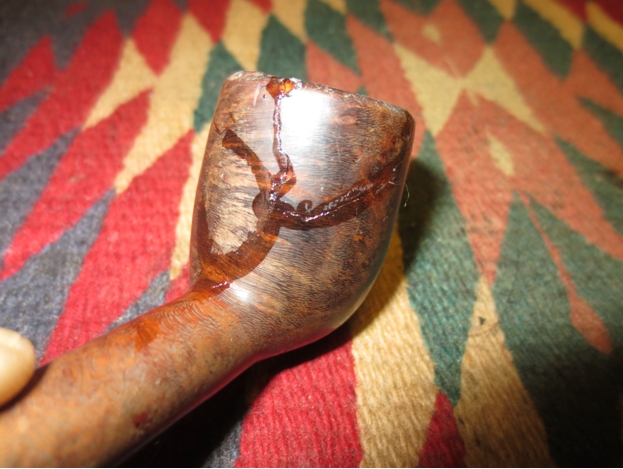
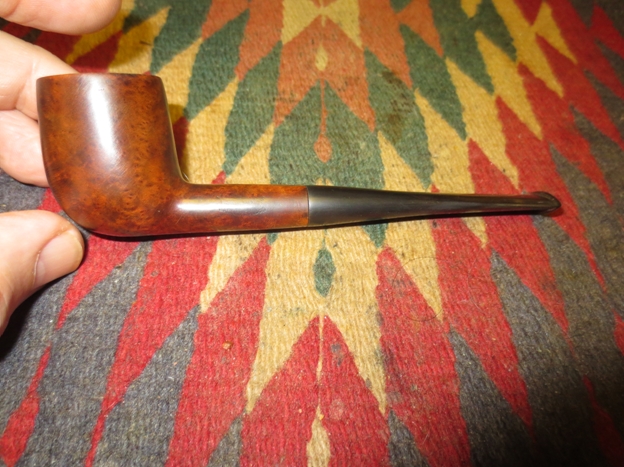
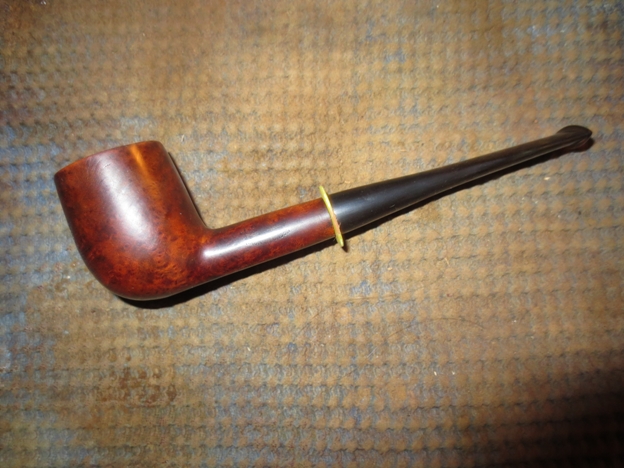
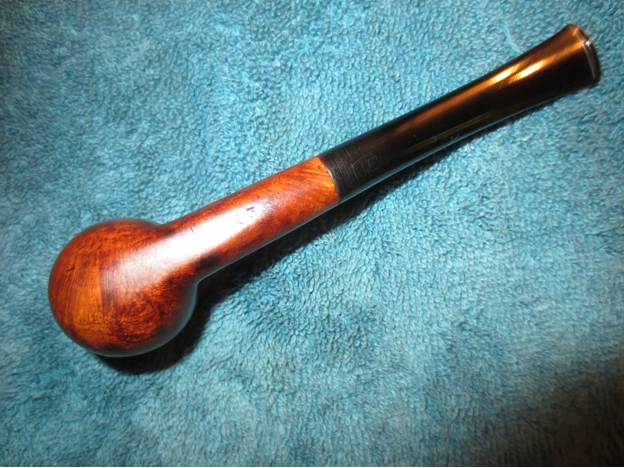
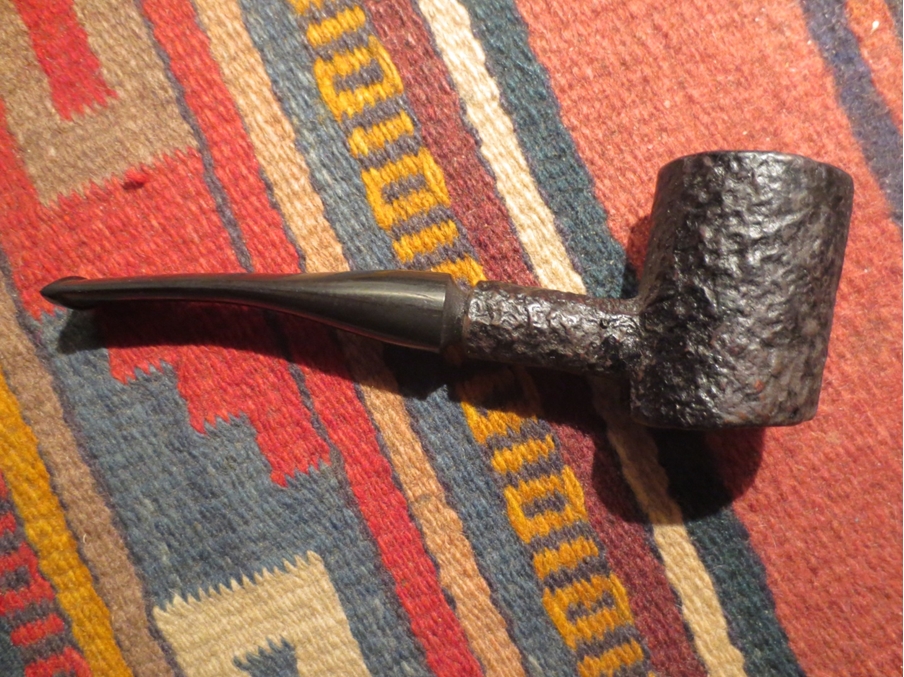
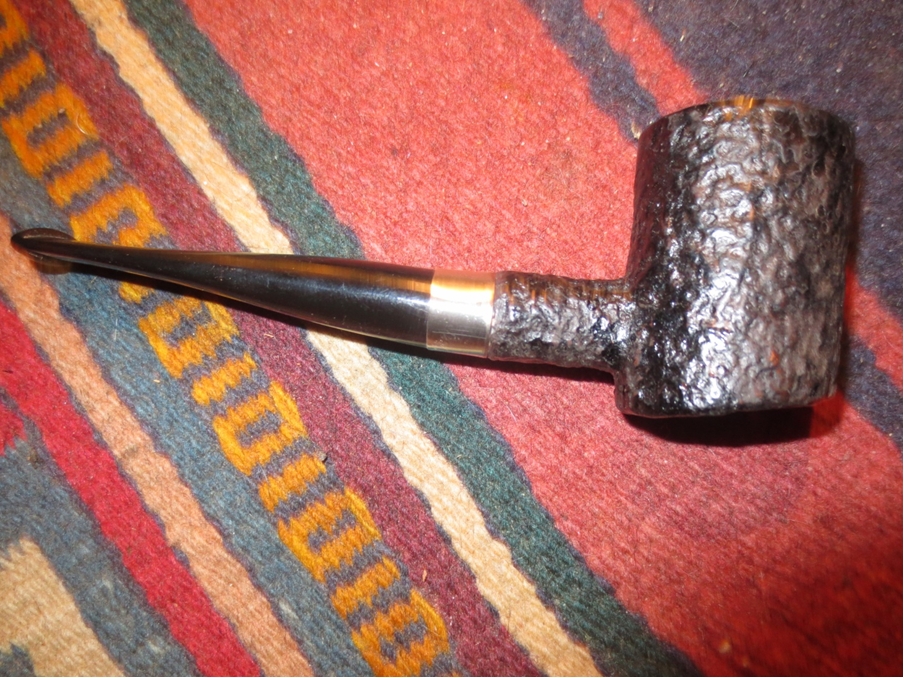
I gave the bowl and stem a light buff and rubbed the bowl down with a light coat of olive oil. When it dried, I hand buffed the bowl with a shoe brush to raise the shine. The finished pipe is shown in the pictures below. I think I achieved what I set out to do when I started this project. I took a pretty ugly poker with a misfit stem and with work transformed it into a more classic poker look. What do you think? Thanks for looking and giving your opinion on the new look.Poker30

Poker31

Poker32

Poker33

Poker34

Poker35

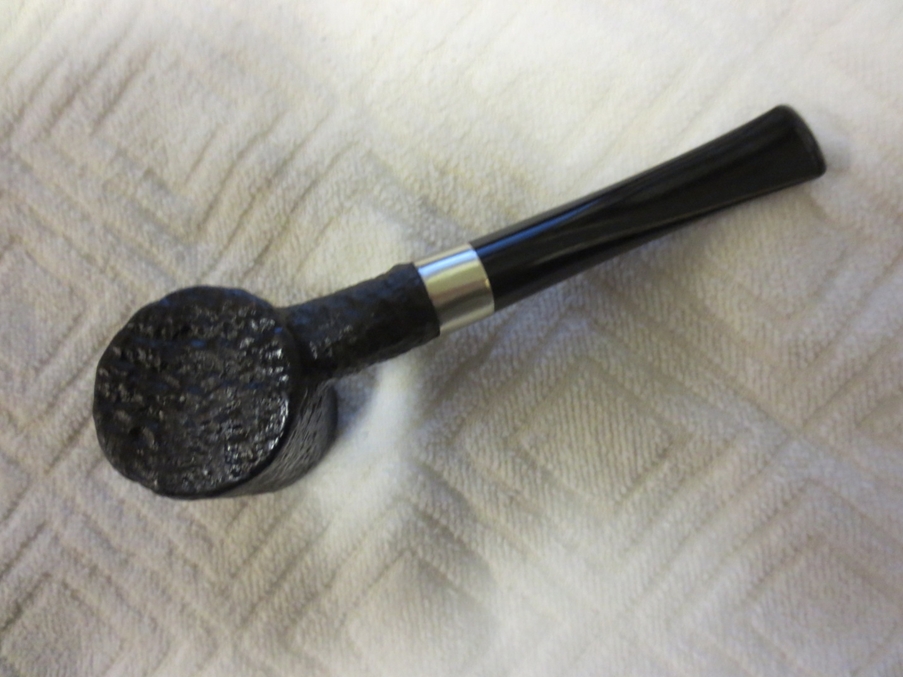
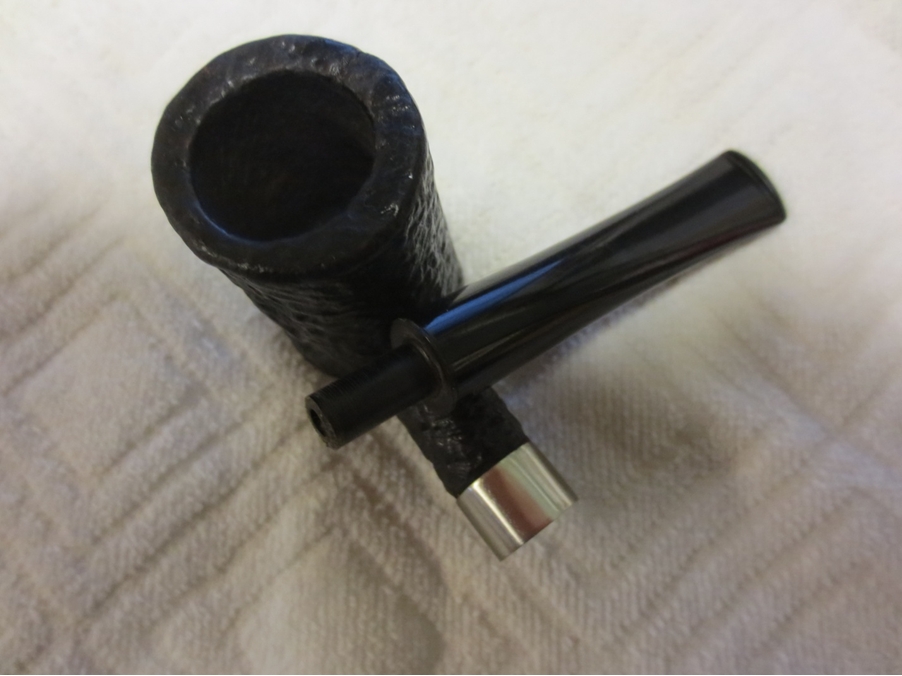
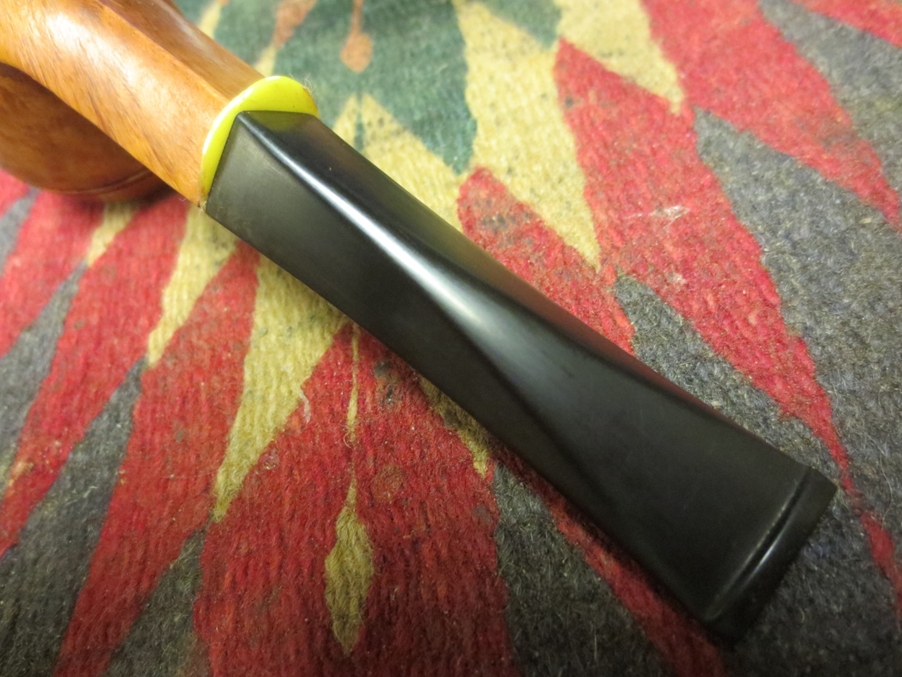
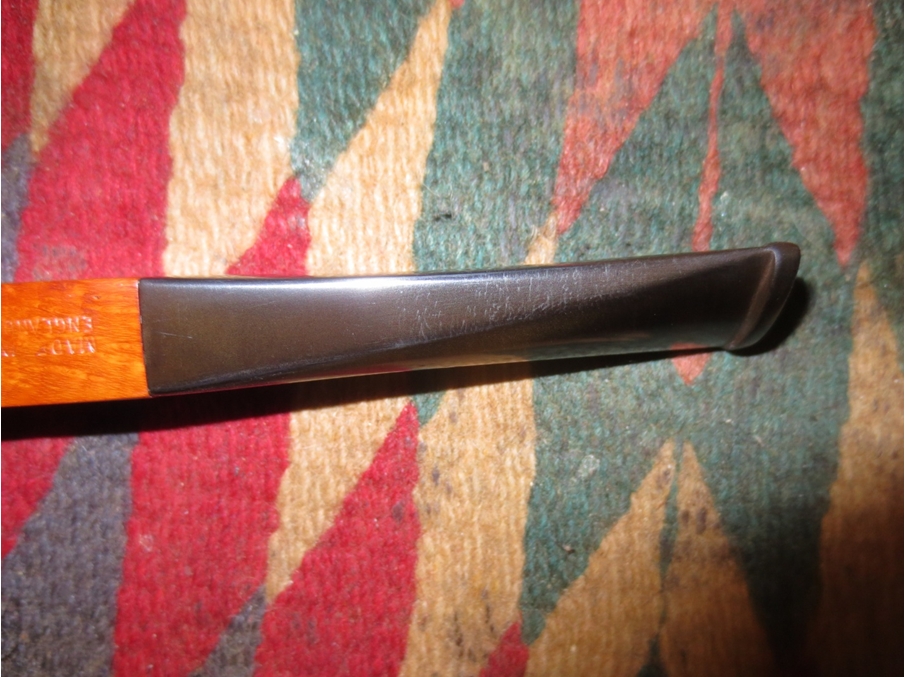
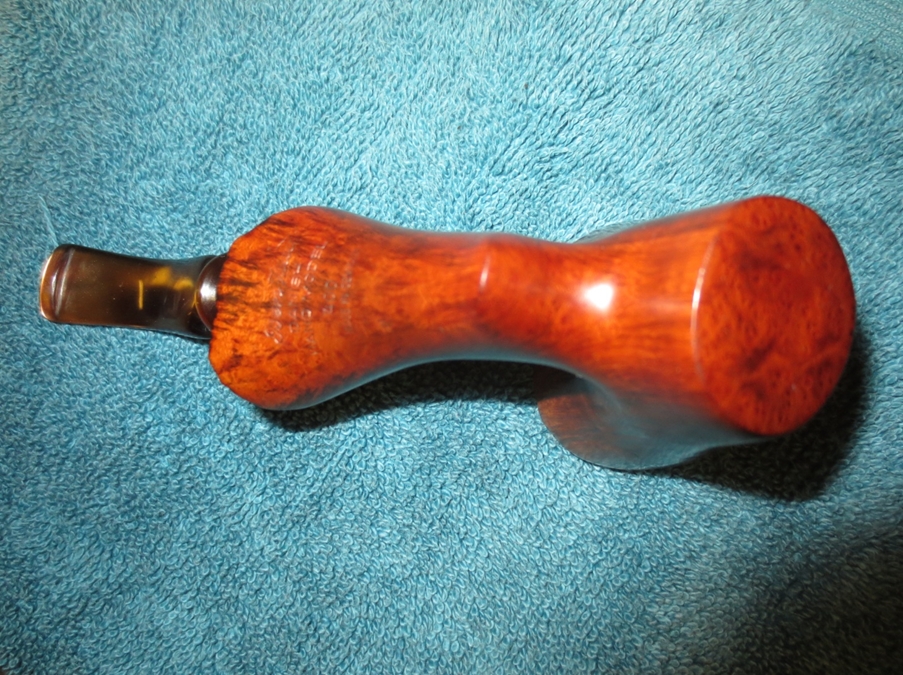
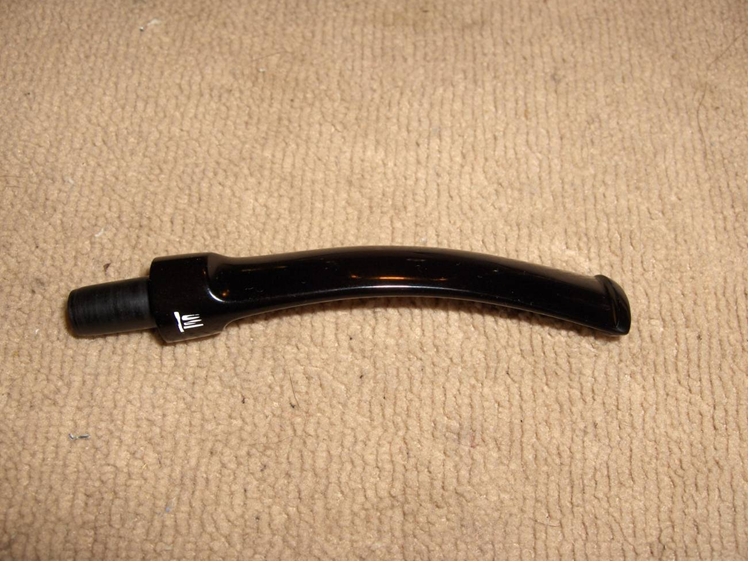
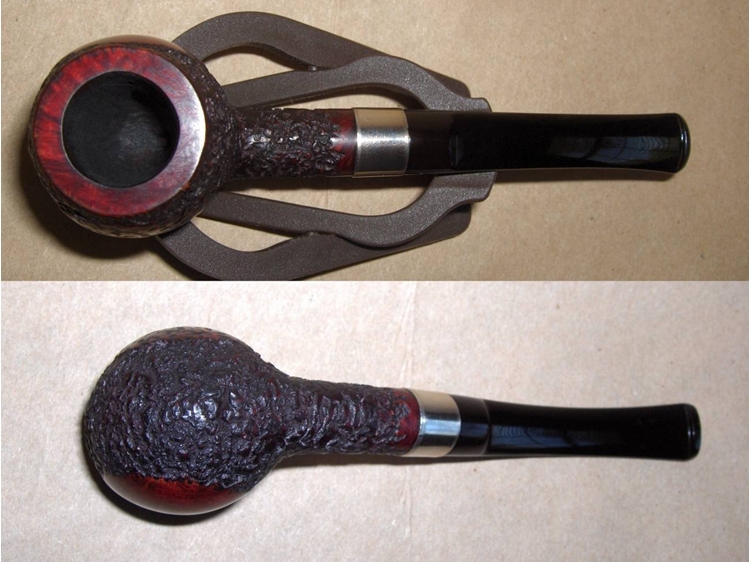
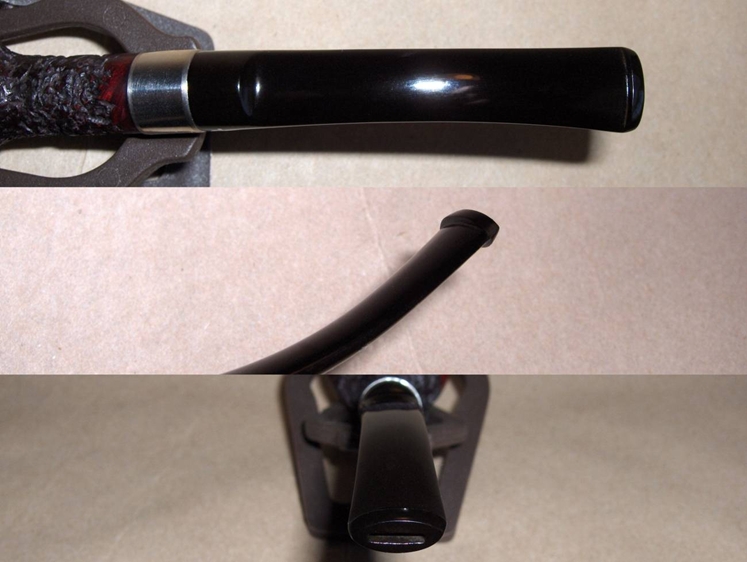
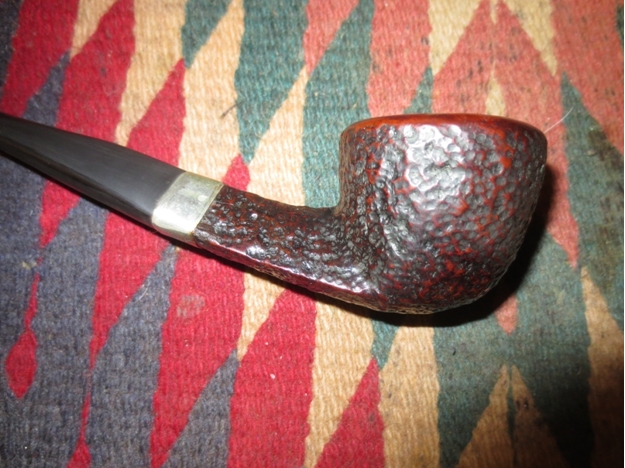
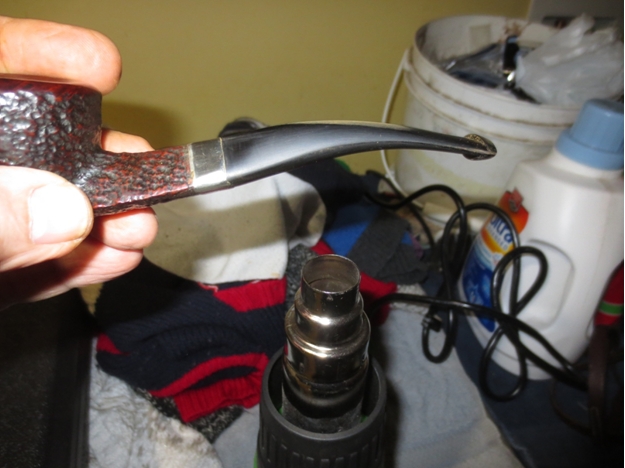
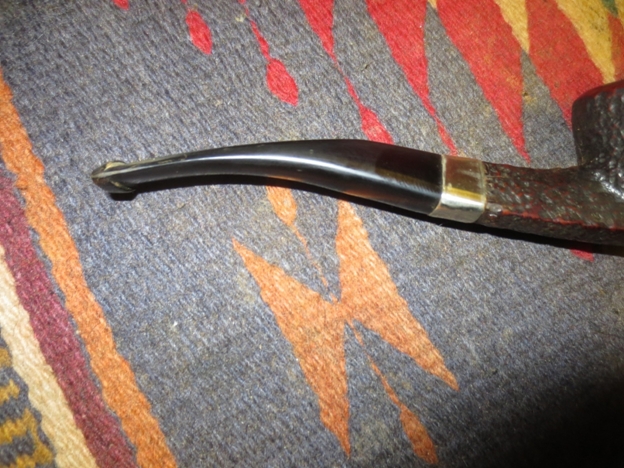
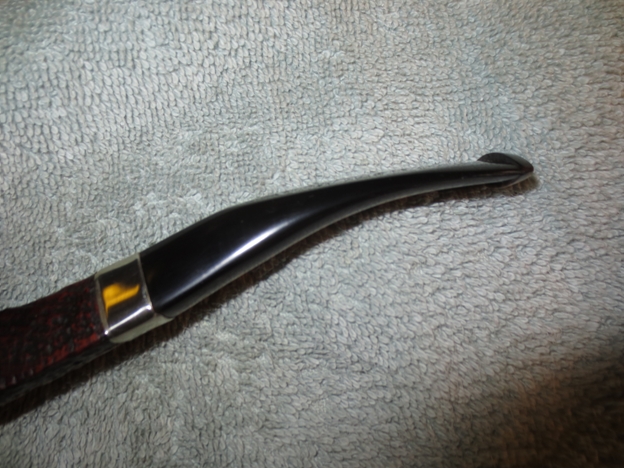
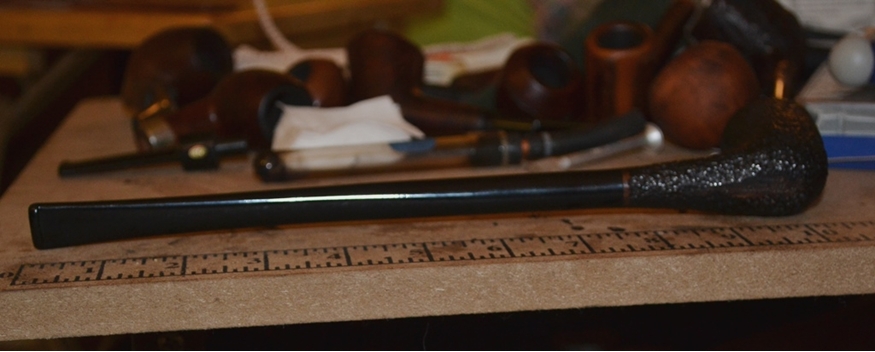
Taking the idea that several readers gave regarding the straight stem I bent it this morning. I heated it with the heat gun and then gave it a gentle 1/8 bend. Here are the photos.Bent1

Bent2

Bent3

Bent4

Refurbishing a 1978 Dunhill Root Briar 41041 Bulldog


Blog by Steve Laug

This is another pipe that came to my work table. It is a beautifully shaped Dunhill Bulldog. It is stamped 41041 and Dunhill over Root Briar on the left side of the shank. The right side bears the made in England stamping with the date number that puts it at 1978. The bowl was in excellent shape and had been recently reamed and cleaned. The finished was dull but very clean. There were no issues with the briar. The stem was also in great shape other than being heavily oxidized on the top sides. There was a small tooth mark on the top side of the stem next to the button as well. What made this one interesting to me was the issue that I often see with diamond shank pipes. The sides all looked the same but were not when measured. The top left was slightly bigger than the top right and so forth. It was not an issue as I did not need to replace the stem but it was just an interesting tidbit and one thing I always look for when working on diamond shank pipes. The next series of four photos show how the pipe looked when I brought it to my work table.Dunhill1

Dunhill2

Dunhill3

Dunhill4 I took two close-up photos of the stem to show the oxidation and the slight tooth mark on the topside near the button. The underside of the stem was not as badly oxidized but had slight oxidation.Dunhill5

Dunhill6 I mixed up a batch of Oxyclean and put the stem in it to soak overnight.Dunhill7

Dunhill8 While the stem soaked I decided to clean out the shank and airway. I used isopropyl alcohol, cotton swabs and pipe cleaners to remove the tars and oils in the shank. I have found that even when I buy a “refurbished” pipe on eBay I do this and am always surprised at the grime and oils that come out of the “clean” shank. I did not want to use the retort on this one as it was not terribly dirty and had been subjected to a pretty good cleaning before it came to me.Dunhill9 In the morning when I took it out of the bath and dried it off much of the surface oxidation was gone and the mix had raised some more oxidation.Dunhill10

Dunhill11 I put a plastic washer on the tenon and put the tenon in the shank so that I could clean up the edges/shoulders of the stem without rounding them. I sanded it with a medium and a fine grit sanding sponge to start with and worked on the oxidation.Dunhill12

Dunhill13

Dunhill14 I wet sanded the stem with 1400-2400 grit micromesh sanding pads. I worked on the scratches as well as the oxidation on the stem.Dunhill15 I “painted” over the surface of the stem with flame from a BIC lighter to burn off some of the surface oxidation and then wiped it down with Obsidian Oil. The photos below show the stem after that process.Dunhill16

Dunhill17

Dunhill18

Dunhill19 I went back over the stem with the 1500-2400 grit micromesh sanding pads until the surface was freer of oxidation. I then wet sanded it with 3200-4000 grit pads and the shine began to show up.Dunhill20

Dunhill21 I buffed the stem with red Tripoli and White Diamond before finishing with 6000-12,000 grit micromesh sanding pads. When I finished with the pads I rubbed down the stem with Obsidian Oil and let it soak in.Dunhill22

Dunhill23 Once the oil had soaked into the stem I buffed the bowl and stem with Blue Diamond plastic polish being careful around the stamping on the shank. I gave the bowl and the stem multiple coats of carnauba wax and then buffed it with a clean, soft flannel buffing pad to raise the shine and give it that like new look. The finished pipe can be seen in the photos below. It is ready for the next pipeman to load up his favourite bowl and have a smoke.Dunhill24

Dunhill25

Dunhill26

Dunhill27 Thanks for looking.

A Unique Piece of Pipe History – A Zeus System Filter Pipe


Blog by Steve Laug

The morning of May 9th started as any other one does for me – a coffee and a plan. I got up early and roused the troops. We loaded the car and headed to the US to get to the border crossing before the long lines began. We were at our destination in Bellingham, Washington by a little after 8:00 AM. We had breakfast with the ladies in my family, dropped them off for a few hours of shopping and then did a few errands before heading to the “Junque” shops when they opened at 10:00 AM. I walked through the first shop and found a small no name pipe that was in very rough shape and decided to leave it behind. I went to the second shop and went through all of the cabinets and finally came to the one belonging to a seller that usually had something interesting in her cabinet. That is where I saw the oddly shaped rusticated briar pipe that was stamped ZEUS on the stem. The seller unlocked the cabinet and I took the pipe in hand and examined it. The stem came out easily and I could see the odd spikes at the end of the metal shank. It was an oddity that I had not seen before so I had to have it. I know it sound lame, but this find made my morning. I had found an unknown to me, odd-shaped system pipe and the pipe hunt had been successful.

The pipe is not large. The bowl is about a group 3 size and has a very wide shank. It extends for about an inch before it is joined by a metal oval tube. The tube was in great shape with no scratches and only minimal dents. An oddly shaped stem fit in the end of the metal tube. The stem bore a star with the words ZEUS stamped under it on top of the stem. On the underside it was stamped Made in U.S.A. There is a patent stamp on the short briar shank in a smooth patch on the left side. It reads U.S. Patent over 2,158,897. When I returned home I took it to the work table and took these photos.

The pipe appears to be in great shape. There is minor oxidation on the stem but no tooth marks. The metal tube had sticky glue areas that seemed to come from a label that had been stuck to the metal. I sure wish that they would not use these labels to mark pipes. The briar bowl exterior is very dirty with dust and grime pressed deeply into the rustication. There was a thick build up of tars and oils in the rustication of the rim. There was a crumbling thick cake in the bowl with the cake on the bottom portion of the bowl being much thicker. The airway was dirty as well and I had trouble getting a pipe cleaner through from the stem. It would be interesting to take this old timer apart.Zeus6

Zeus7

Zeus8 I removed the stem from the shank and took the following photo. It was a twin bore stem that moved toward a single airway in the thinner portion. It formed a Y. The twin bores were quite large as can be seen in the photo. It made me wonder what I was dealing with.Zeus10 The metal tube portion of the shank was also removable and only took a little finagling to get it to come free. It was pressed into place and formed a fairly tight seal. Once it was free the end of the briar shank was visible. It had two imposing metal spikes and an airway entering from the bowl in the middle between them.Zeus11

Zeus12

Zeus13 I took another photo of the three parts standing on end. You can see that the metal tube forms a chamber for the smoke and serves as the mortise area for the twin bore stem. The mystery to me at this point was the purpose of the spikes. It seemed likely to me that some sort of filter system was spiked on the points and extended from them into the twin holes in the stem. They would lie parallel to each other in the metal shank and the smoke would swirl around them in the chamber. I began to wonder if I was missing some key parts of this pipe. Were those parts lost somewhere along the way and what must they have looked like? Those were some of the questions that went through my mind at this point.Zeus15 I knew that the patent number on the shank would give me some help with this. I could search the US Patent site and possibly find the drawings and original proposal for the pipe that the inventor submitted for patent. But before I did that I did a quick search on Google for the ZEUS pipe. Of course the PipePhil site came up and there I found the following information. There were two photos of the pipe – one disassembled and one assembled. The stamping was identical to the one I had as was the patent number on both shanks.Zeus4 There was also a short line to the right of the photo that gave me the quick answer to what I had assumed about the pipe. The spikes and the chamber as well as the twin bore had a clear purpose and I was not missing any parts. The ZEUS pipe was designed to hold 2 halves of a cigarette to act as filters. The spike held them in place and the twin cigarettes extended into the mouth piece. The smoke would swirl around them and the tars and moisture would be absorbed in the cigarettes.

There was also a link to MODERN MECHANIX Magazine dated November, 1939 that was an advertisement for the pipe and gave a simple diagram of the interior of the pipe with the cigarettes in place. The advertisement text is interesting in spelling out the pipe designer’s intention for the design of the pipe. It claims that 80% of the nicotine is removed by this new pipe design. The ad says that smoke drawn from the pipe passes through the two cigarettes which act as filters to absorb the nicotine.
I love finding these old inventive pipes that were designed to deliver what at the time was a smoother, cooler, healthier smoke. This was one of the most unique designs that I have seen.Zeus5 From there I turned to the patent number on the side of the shank. I went to the US Patent website and did a numerical search for the patent number. Here is the link to the number search portion of the patent website: http://patft.uspto.gov/netahtml/PTO/srchnum.htm Zeus9 I entered the patent number 2,158,897 and was immediately given a three page scan of the documents on the site for that number. I have included all three pages below. The first page is a series of conceptual drawings of the device. The second and third pages are the details linked to the Figure numbers in the drawings. It was filed May 21, 1937 by a G. Cippico in the category of Smoking Device. G. Cippico is later shown to be Giuseppe Cippico, Inventor from Rome, Italy. The patent was granted on May 16, 1939 almost two years later. These old Patent details are always an interesting read to me. The theory of how the pipe would work is spelled out and the rationale for it being a new and better pipe is detailed.Zeus1

Zeus2

Zeus3 I put this information on two of the pipe forums that I frequent to see if I could garner any further information. I was particularly looking for the US manufacturer of the pipe. On Smokers Forum I received a response from Chris Chopin (flatticus). He included another advertisement from Life Magazine that he found.Zeus16 The advertisement is for a ZEUS Cigarrete holder that claims to absorb over 70% of the nicotine and tars. It also says in small print at the bottom of the ad under the $1 Ladies Zeus with choice of amberlike colored bits that there are also ZEUS pipes. The ad says that ZEUS is made by L. & H. Stern, Inc., 57 Pearl Street, Brooklyn, N.Y. With that it appears that the pipes were made in the US by LH Stern Inc.

Chris also writes; “There are ads from Stern for the Zeus filter in 1938 in Life Magazine (several times that year), Collier’s Illustrated Weekly, and Time. They start in March and April of 1938 with the filter noted as “A New Way to Smoke”. Then nothing for 8 full years. Not a single ad or mention of any kind I can find past December of 1938 except for a mention in the Rocky Mountain Medical Journal that may not be an ad.”

“Then, in 1946, ads show up in Popular Science, Popular Mechanics, The Rotarian, Newsweek, all over the place, advertising that the Zeus Filter Holder is back, now in aluminum. All but one of the 1938 ads say “Also Zeus Pipes” and not a single one of the 1946 ads does.”

“It’s an assumption, of course, but this makes me think that for some reason the Zeus pipes had a very short life, and you may have one of very few they made.”

Thanks for the advertisement and information Chris. Your post gave me some needed information on the brand and confirmed what I had already found from my own digging. It appears I found a bit of a rarity in this old pipe.

Armed with these details and a bit of historical background it was time to clean up the pipe and bring it back to pristine condition.

I took the pipe apart and put the bowl into an alcohol bath to soak and soften the cake before I ream and clean it. I put the stem and barrel in an Oxyclean bath to soak and raise the oxidation and start the sanitizing process.Zeus17

Zeus18 When I took the stummel out of the alcohol bath after it has soaked for three hours I scrubbed it with a soft bristle brass tire brush to clean out the debris from the rustication. I scrubbed the top of the rim to remove the tarry buildup from that surface. I wiped the surface down with isopropyl alcohol on a cotton pad to remove the dust on the finish.Zeus19

Zeus20 I reamed the bowl with a PipNet Reamer using the smallest cutting head. It was still slightly too big to get to the bottom of the bowl. I used a small sharp pen knife to work on the cake on the bowl bottom and sides.Zeus21 I wiped out the bowl with isopropyl alcohol on cotton swabs to remove the carbon that the knife and reamer let behind. The reamed bowl is shown in the photo below.Zeus22 I used the cotton swabs and alcohol to clean out the airway in the shank and to clean up the two points of metal on each side. I scrubbed down the briar surface that the metal tube slid over. I also scrubbed the metal tube out on the inside with alcohol. I used the sharp pen knife to scrape the inside of the tube and then rinsed it with alcohol.Zeus23 I inserted the dental pick in the airway to use as a handle and restained the stummel with a dark brown aniline stain. I flamed it and repeated the process until the coverage was even.Zeus24

Zeus25

Zeus26 I set the bowl aside to dry and worked on the stem. I had dried it off when I removed it and the tube from the Oxyclean bath but still needed to do some work to clean out the airways. I used pipe cleaners, cotton swabs and isopropyl alcohol to clean out the stem airways.Zeus27

Zeus28 I hand buffed the bowl with a shoe brush to smooth out the stain and to raise a shine on the briar.Zeus29

Zeus30

Zeus31

Zeus32 The Oxyclean had removed some of the white in the stamping on both sides of the stem so I cleaned off the surface of the stem and then used a correction pen to reapply the white to the stamping on both sides of the stem.Zeus33

Zeus34 When it was dry I sanded it with a fine grit sanding sponge to remove the excess white material and to polish the stem.Zeus35

Zeus36 With the stamping repaired I worked on the stem with micromesh sanding pads. I wet sanded with 1500-2400 grit pads and dry sanded with 3200-12,000 grit pads. I buffed the stem after the wet sanding with red Tripoli and then rubbed it down with Obsidian Oil before going on to the higher grit pads.Zeus37

Zeus38

Zeus39

Zeus40

Zeus41

Zeus42 When I had finished with the micromesh pads I buffed the stem with Blue Diamond Plastic polish on the buffing wheel and then gave the stem several coats of carnauba wax. I buffed the stem and bowl with a clean flannel buff to give a clean shine and finish the pipe. The completed pipe is shown in the photos below. It turned out really well and it will go in my display cupboard. I think one day I will have to light it up and see how it smokes but to do that I will need to find a couple of cigarettes to use as filters.Zeus43

Zeus44

Zeus45

Zeus46 Thanks for looking at this unusual piece of tobacciana. It will join other odd pipes that I have found over the years that bear witness to the ongoing and ever-present search for the perfect smoke.

Restoring a Ben Wade Danish Hand Model Free Hand 400


Blog by Steve Laug

The latest pipe that I have on the work table was a beautifully grained Ben Wade Danish Hand Model 400 free hand. It has some amazing flame and straight grain all the way around the bowl. The flat bottom of the bowl has some great birdseye grain. There is plateau on the top of the bowl and on the end of the shank. There appeared to be a smooth inner rim that had been covered with tars and oils. The plateau on the rim was oily and tarry. The valleys were basically filled in and the rough beauty of plateau was hidden under the grime. The smooth bowl sides were dirty with dark spots where hand oil and grime had been rubbed into the finish. Fortunately there were not any dents or scratches on the briar.Ben1

Ben2 The stem was Lucite and quite thick. There were tooth marks on the top and underside of the stem near the button and there was some calcification on the stem top next to the button. The airway in the stem was partially closed off and there was not much airflow being drawn through the stem. The shank airway was also closed partially with oils and tars. The bowl had been reamed before it came to me and was quite clean.Ben3

Ben4 The next two photos are close up pictures of the stem and the bite marks. The first shows the calcification next to the button and the slight damage to the inside button edge. The tooth mark is visible just ahead of the white line on the stem. The stem was also lack luster and the shine was gone. The second photo shows the underside of the stem. It was slightly wavy like it had been pushed to heavily into the buffing wheel. There was a small tooth mark in the same spot as on the upper side of the stem.Ben5

Ben6 I decided to address the issues with the stem first. I used a straightened paper clip bent to the angle of the stem to push through the airway. Pushing from the slot I was unable to get the wire through the airway. I pushed it through from the tenon and a large chunk of tars and pipe cleaner detritus came out of the button. I worked the wire around in the airway to clean the sides and remove any other build up. It appeared to be at the bend in the stem. I then used pipe cleaners and cotton swabs and isopropyl alcohol to clean out the airway and remove the remaining tars and oils in the stem and tenon.

I sanded the tooth marks on the topside and underside of the stem with 220 grit sandpaper until I had removed the damaged area. I also wanted to thin the thick Lucite slightly as there was plenty of material to work with. I sanded with a medium and a fine grit sanding sponge to remove the scratches and see if I had removed the mark. It took repeated sanding with the three grits of sanding material to remove the remnants of the tooth marks.Ben7

Ben8

Ben9 I continued to sand with the fine grit sanding sponge to minimize the scratches and then sanded the stem with 600 grit wet dry sandpaper. Once I had finished with the sandpaper I used micromesh sanding pads. I wet sanded with 1500-2400 grit sanding pads and dry sanded with 3200-12,000 grit pads. I rubbed the stem down with Obsidian Oil between the grits in order to provide the medium for the micromesh to cut better. When I finished I buffed the stem with Blue Diamond plastic polish on the buffing wheel and then gave it several coats of carnauba wax.Ben10

Ben11

Ben12 I set aside the stem so that I could work on the bowl. When the bowl was finished I would buff the two parts together and also give them another coat of wax. I used a soft bristle brass white wall brush to work on the buildup on the rim and plateau. It was quite thick on the inner edge of the rim. I have learned over time that the tar coat really protects the briar underneath. Once I had removed the tars I would see that.Ben13 I scrubbed the exterior of the bowl with Murphy’s Oil Soap to remove the grime and oils that were all over the surface. I used cotton pads to scrub the bowl.Ben14 Once I had removed the grime I washed the exterior of the bowl with running water to remove the soap. The photos below show the clean bowl of the pipe.Ben15

Ben16

Ben17

Ben18 I cleaned out the shank with pipe cleaners, cotton swabs and alcohol. I wiped down the plateau with alcohol on a cotton pad to remove any remaining dust in preparation for staining.Ben21 I stained all of the plateau areas with a black aniline stain and flamed it. I repeated the process until the coverage was thorough. When it had dried I hand buffed the plateau with a shoe brush until the high points shone and the valleys were slightly darker.Ben22 I buffed the pipe and stem with Blue Diamond and then gave the bowl multiple coats of carnauba wax. I finished by buffing it with a clean flannel buff to raise the shine on the bowl and stem. The finished pipe is shown in the photos below. Thanks for looking.Ben23

Ben24

Ben25

Ben26

Ben27

Ben28

Ben29

Ben30

Ben31

A Dodgy Rogers: Restoring and Modifying a Rogers Standard


Blog by Anthony Cook

I was recently engaged in a conversation with another member of an online pipe tobacco forum and I learned that he had been smoking a pipe for six months and had only one pipe. I’ve been there, man. From what I’ve seen, six months seems to be the sweet spot for new pipe smokers. They’re likely to stick with it if they’ve made it that far, but everything is still new enough that even simple things can be a challenge. I’m sure that most of you will agree that smoking a pipe isn’t rocket science, but the initial learning curve can be fairly steep all the same. So, I offered to send him a pipe to give his faithful companion a break, reward his perseverance, and encourage him to hang in there.

I sent him a photo of a few pipes that I had on hand. I told him to pick one and I’d send it along. I half expected him to balk after seeing the photos. None of the pipes had been restored at all. If you’re not used to dealing with estate pipes, it can be difficult to see one as anything other than what it is; grime, tar, fills, and all. So, to ease any concerns that he may have I sent him a few before/after photos of some of my work and promised that I would make sure that his pipe was clean and pretty. He responded quickly with his choice, and to my surprise, it was probably the grungiest in appearance of the lot. Here it is…An1 The pipe is a Rogers Standard. I think the unique shaping is what attracted him and I can understand why. The slightly longer shank paired with the short saddle on the stem give it a quirky look that’s still classy. Here are a few more photos to give you an idea of what I was working with.An2

An3

An4 The stem was stuck tight on this one, but a couple of hours in the freezer took care of that. Once the stem was removed, I found a grimy, spiral stinger in the tenon. It too was stuck. So, I dripped alcohol into and around the tenon to soften the tar that was gluing it in. After a few minutes, I wrapped it in several layers of soft cloth to protect it and pulled it out with a pair of pliers. I dropped it into a container of alcohol for about an hour, and then scrubbed it with a pipe cleaner until it was as good as new.An5 I gave the stummel an alcohol bath to remove the old, lacquer finish. Several hours later, I removed it and wiped it down. Only about the top two-thirds of the bowl was caked to any degree, but what was there was thick, uneven, and harder than chicken lips. In the end, it took a group effort to ream the bowl back to bare wood the way I like it, but a T-handle reamer, a pipe knife, 400-grit paper wrapped around a Sharpie pen, and a little elbow grease got the job done.

I’ve added a retort to my tool chest since I last posted here, but I still like to scrub out the solid debris and lumpy build-ups by hand before using it. The Rogers took a whole handful of pipe cleaners, cotton swabs, and a couple of shank brushes before I was satisfied enough to move on.An6 I set up the retort and flushed the stem and shank several times before setting it aside to cool for about 15 minutes. Then, I refilled with clean alcohol and flushed several more times. After the second retort, the alcohol was nearly clear. So, I considered the retort to have done its job and gave the stummel and stem one last quick scrub to remove any remaining tar.An7 While I had been retorting the stummel, the stem had been soaking in an Oxyclean bath. I removed it and scrubbed it down with a couple of 1” cubes cut from a Magic Eraser pad to remove the oxidation. There is one thing to note though. I noticed that the paint had come out of the stem stamping during the bath despite my attempt to protect it with a dab of petroleum jelly. I’ve never really trusted this method of protection and I think I’m going to explore some others ideas in the future.An8You may have noticed from the photos that this pipe had a few fills. Okay… It had a lot of fills and the ones that concerned me the most were a few that were right inside the stamping on the shank. I was considering what to do about them when the thought occurred to me that it might be best to leave it up to the guy that was going to smoke the pipe. I contacted the future owner and presented him with a few option: (1) I could patch the fills with briar dust and CA that would blend well into the final finish, but some of the stamping would be sacrificed, (2) I could leave the stamping intact, but there would be some obvious fills on the shank of the finished pipe, or (3) I could rusticate the pipe, which would completely obliterate the stamping but the pipe would be unique. He chose to go with rustication.

So, once I knew the direction in which I was heading, I set up my topping surface to remove the scratches and charring on the rim. I sanded with a progression of 220-grit, then 320-grit, then 400-grit paper until I was satisfied that all of the scratches were gone. I also softened the inside and outside edge of the rim by light sanding with 400 grit paper (not pictured).

My rustication plan called for a round, smooth button on the right side of the bowl where there were few fills and some fairly decent bird’s eye. There were also a few dents in the area. So, I clamped the stummel in a vice and tried to steam them out by pressing a heated screwdriver into a wet cloth placed over the dents. Most of them were removed successfully, but one large dent with sharp edges still remained. You win some. You lose some.An9 Nobody wants a pipe that looks like it has the measles and those pink putty fills will show through and ruin even a rusticated finish. So, I picked them all out. I also discovered that the wood inside the mortise directly beneath the shank crack was weak and spongy. I scraped it out easily with a pick, but left behind a disconcertingly large gouge in the mortise.An10 I had been experimenting with pre-staining briar dust for patches and fills, but I hadn’t had the opportunity to put it into practice until this pipe. I dripped a couple of drops each of Fiebing’s black and oxblood into a bit of briar dust, and then added a few drops of isopropyl alcohol to spread it evenly. After mixing it up and sitting it under a warm lamp for about 30 minutes, I had a batch of stained briar dust.An11 The stained dust and a bit of CA glue were used to patch the dent and a large fill on the right side of the bowl. I also used unstained dust and CA to fill in the area of missing wood in the mortise.An12 The bowl patches were sanded out with 220-grit, then 320-grit, sandpaper. In the mortise, I used 240 and 320-grit sanding needles. When I inserted the stem to test the fit, I heard a sharp “snap”. Uh-oh.
When I flipped the pipe over I saw that the shank had cracked again. This one began about 1mm below the patched crack and was also longer than that one. I used a 1/32” drill bit to make a small hole at the end of the crack to stop the run. I didn’t drill all the way through, only a hair’s width below the crack. Then, I inserted the stem (after smearing petroleum jelly on the tenon) to widen the crack and filled the crack and drill hole with stained dust and CA. Once the patch had set up, I removed the stem, wiped the petroleum jelly from the mortise, and added more briar dust and CA there to add the strength that it obviously needed.An13 The new patches were sanded out once dry and I used a strip of 400-grit paper to reduce the diameter of the tenon before trying to insert is again. The fit was snug but not overly tight, and best of all, there were no new cracks.An14 Since the shank crack had been opened up and then filled, the overall diameter of the shank had increased slightly. So, I used 220-grit, then 320-grit, sandpaper to bring it back into register with the stem.

Then it was time to strike up the band. I selected a band from my box that was large enough to fit over the end of the shank, but not so large that I could slide it all of the way up by hand. With the band partially in place over the shank, I heated it with a heat gun to expand the metal, and then pressed it into place on a hard, cushioned surface.An15 The mortise had been constricted by the placement of the band. So, again, I had to do a bit of sanding with 220-grit, 320-grit, and 400-grit paper to turn the tenon down enough to make a good, snug fit.

The heat gun was already set up. So, I used it to heat the stem to see if I could raise some of the tooth dents. It did a fair job, but a few still remained after the heat treatment. I also took the opportunity to add a few more degrees of bend in the stem to give it a more elegant flow (at least to my eyes).An16 The stem button had a couple of chunks bitten out of it that needed to be repaired. I borrowed Andrew Selking’s idea of wrapping the area below the button with tape to keep a crisp edge before applying black CA glue to the gouges. The middle picture in the image below shows the button just after removing the tape. There was a bit of overhang at the lip that would have to be taken off, but the area where the button meets the stem is crisp and clean. That would save a lot of work. Thanks, Andrew!

I sanded out the lighter dents on the stem with 220-grit paper. For the deeper dents, I patched them with a bit of black CA glue applied with a toothpick.An17 When the stem patches where dry I sanded them down with 220-grit paper, and used 320-grit and 400-grit to blend them into the rest of the surface and to shape the button. Then, I lightly sanded the entire stem with 600-grit paper to remove any scratches and pits in the vulcanite. I also used a grout pen to paint in the stamped logo. Some of the logo area had been worn smooth over time. So, the resulting logo didn’t look as good as the example over at PipePhil.eu, but I think it looks better than it did originally.An18 For comparison, here’s the logo example from PipePhil.eu (first image), the original logo (second image), and the repainted logo (third image):An19 The stem was polished with micro-mesh pads 1500-grit to 12000-grit. I applied a drop of Obsidian Oil to the stem, let it sit for a couple of minutes, and then wiped off the excess to finish up the work on the stem.An20 I decided to go for three levels of texture in the partial rustication and hoped that would give the pipe a unique appearance. I used a felt pen to mark an oval-shaped guideline on each side of the bowl. I started carving with a Dremel and a 3/32” engraving burr. Basically, I just scribbled around the stummel avoided the areas that I wanted to leave smooth to create the base for the medium texture. Then, I used a variety of hand-cut bits and tools to really get in there and remove some wood to create the craggy texture around the ovals that I had marked. To finish up the rustication, I used a 1/32” engraving burr to touch up a few of the places where the rustication met the smooth areas.An21 It turned out to be a rather lengthy process to get the final color and finish the way that I wanted it. So, I won’t go into a lot of detail, but here’s the gist of it:
1) Applied black stain, sanded smooth areas and rustication high spots with 400-grit, and buffed with Tripoli
2) Applied mahogany stain, lightly sanded smooth areas and brushed the rustication high spots with 600-grit, and buffed with a clean wheel.
3) Applied ox blood stain to the rusticated areas only, hand buffed, sanded smooth areas with 1200-grit (Not pictured below. Oops).
4) Polished with micro-mesh 1500-grit to 2400-grit, applied red stain to smooth areas only, buffed with a clean wheel, continued polishing smooth areas with micro-mesh 3200-12000.An22 After the final micro-mesh polish, I reattached the stem and buffed the entire pipe with White Diamond. I then applied Halcyon II wax to the stummel and carnauba wax to the stem and buffed the pipe with a clean wheel. Lastly, I painted the walls of the chamber with a sour cream and activated charcoal bowl coating to add some temporary insulation until a good cake could form.

The finished pipe is very different from what it was when I started. It has lost its pedigree, but it has gained a unique, one-of-a-kind appearance. I’m quite pleased with the way that it turned out and I’m hoping that the new owner will be too. It’s in the mail, Dustin. Smoke it well, brother!An23

An24

An25

An26

Conjuring a Makeover for a Carey Magic Inch


Guest Blog by Robert M. Boughton
Member, North American Society of Pipe Collectors
http://www.naspc.org
http://www.roadrunnerpipes.com
http://about.me/boughtonrobert
Photos © the Author

“Blessed are they who see beautiful things in humble places where other people see nothing.”
― Camille Pissarro (1830-1903), French Impressionist painter

INTRODUCTION
I suspect there is some aspect of my basic personality that is incapable, to a degree, of not admiring the tenacity alone required to survive 67-years – and still going – in the admirable pursuit of providing affordable smoking pipes. Remember, this is an industry that has seen all manner of fly-by-night systems for dissipating the high heat of the all-important tobacco that has an inherent tendency to become moist and therefore brackish in the process of flowing through the basic designs of all pipes.

Notwithstanding the relative quality of pipes that evolve based on the periodic new patents from the ever-pioneering designers at E.A. Carey, which also owns the Duncan Hill Aerosphere brand, the system’s section that comprises the so-called “Magic Inch” has changed little since 1948, when the first billiard version was created and marketed. The system involves five elements: 1-2) the first two in the double-pronged tenon, the thin, hollow end of which attaches to the plastic bit and the typical part that slides into the shank; 3) the thin bit insert with six small drilled holes, two each on the top and bottom (when properly inserted) and one each on either side; 4) the newer Papyrate II sleeve (two-ply) – made of very thin, wet slices, from the roots of an aquatic plant, that are pressed together and dried – that fits snugly over the holes of the bit insert, and 5) six horizontal slits in the shank end of the bit, three on the top and three on the bottom. The photos of the bit show the used, brownish papyrate sleeve that came with the original pipe.Carey1

Carey2

Carey3

Carey4

Carey5 Back some months when I was snatching up pipe lots online, I bought one with 10 sundry examples of the craft, including a few nice finds such as a Kaywoodie Filter Plus metal pipe from the late 1950s, a Jobey Extra, a nice glazed clay pipe and others, with this Magic Inch among them.Carey6 I put all of these in a small box “for later,” except for the beautiful unknown clay billiard that I cleaned up and added new cork in the shank with a hole drilled to fit the screw-in tenon attached to the acrylic stem, for my own collection.

By the way, not everyone knows that Carey does not only make Magic Inch pipes. Here are a few of the company’s representative standard briar pipes.Carey7 But this blog concerns the vintage Magic Inch billiard, U.S. Patent №. 3,267,941 granted in 1966, shown in the lot above three rows down on the right. A few years ago, I owned, and for a while enjoyed, another Magic Inch, and it wasn’t – well, bad. But first, I have a few comments regarding Carey’s rather imaginative advertising.

Numerical data and the manifold methods of collection, arrangement and interpretation of them for publication as fact by the complex use of statistics in almost every facet of society – including but by no means limited to governmental and other political concerns, businesses and the news media – can be misleading at best and downright manipulative at worst.

Take, for example, the E.A. Carey Smokeshop claim [http://www.eacarey.com/ pipes.html] that it has sold more than one million of its Magic Inch pipes since 1948. That sounds impressive, and suggests that Carey’s pipes are superior to others. But that total averages to 15,152 pipes (rounded up, through 2014) per year. Then again, Carey changes the number of Magic Inch pipes sold in the same period to a vague “hundreds of thousands” [http://www.eacarey .com/magicinchinfo.html]. Allowing for hundreds of thousands to be a maximum of 200,000 pipes, which quite likely is stretching it, the average drops to 3,030. Somehow, I doubt that either annual sales figure engenders any impulse among the world’s other pipe makers to compete with the folks at the venerable Carey Smokeshop online, both in the U.K. [http://www.eacarey. co.uk/] and U.S.

Now, to return to the real subject matter, the purpose of this particular blog is to show how a pipe with a singular lack of attractive qualities can be transformed into something nicer.Carey8

Carey9

Carey10 RESTORATION
After removing and separating the bit and two-sided tenon, throwing away the old brown papyrate sleeve, on an impulse, I decided to give the old rusticated briar girl an Everclear soak. For some reason, this process took quite a while – say six hours. At any rate, when the old finish was stripped and the wood dried, I began a hand-buff with super fine steel wool followed by a progression of micromesh pads from 1500-3600.

I turned a reamer a few times in the chamber, followed by sanding with 200-grit and 320, and the chamber was almost good to go. Then I attached a suitable stem and retorted the shank and chamber.Carey11

Carey12

Carey13

Carey14

Carey15

Carey16 Thinking the pipe, which was dreary in the beginning, deserved something more distinctive and in keeping with its natural reddish color, I chose maroon boot stain. After the quick application and flaming, I rubbed the wood gently with 3200 micromesh.Carey17

Carey18

Carey19

Carey20

Carey21

Carey22 To clean the hollow plastic bit and tenon, I diluted – and I mean heavily – a little Everclear with a lot of water. I like to think of this as the Reverse Julia Childs Approach. The popular cook once said, “I like to cook with wine. Sometimes I even put it in the food.” From what I recall of watching Julia in the studio kitchen on TV, I am not surprised that she seemed to have forgotten the apparent equal measures of wine expended in the food and down the hatch. Anyway, I bent a soft pipe cleaner in half and dipped it in the comparatively wimpy solution, which is like comparing wine to Moonshine, and inserted the folded end in the stem, turning it several times and finding it needed replacing. And so I repeated the action, but giving the inner bit the old in-and-out, scrubbing its sides. Only the slightest amount of grime came out on the second run, and I used the same cleaner to work through the slits on the top and bottom. I used a third, dry cleaner to finish.

The outer bit required very little work with one micromesh pad, although I forget the grade, to make it shine. Using a white china marker, I filled in the small, long-empty square with a three-sided C in the middle, forming all but one line of a second square. Thanks to a generous gift of a handful of papyrate sleeves from my good friend and mentor, Chuck Richards, I was able to complete the tenon for ultimate placement into the shank.

All that was left to do was buff the wood on the electric wheels, using white Tripoli and White Diamond, with quick runs on the clean wheel after each. At last, with a finger, I applied a thin, even coat of Halcyon II, and after letting the briar sit for 10-15 minutes, buffed it with the clean wheel.Carey23

Carey24

Carey25

Carey26

Carey27

Carey28

Carey29 CONCLUSION
Love ’em, hate ’em or really don’t give a hoot either way, the Carey Magic Inch has secured its place in tobacco pipe history, as well as giving many a smoker a start in the pleasures derived from fine tobaccos. And as far as I’m concerned, the Carey system works better than most far more complicated attempts.

Imagine, if you will, a special place in the Twilight Zone – an area so horrific only the most heinous attempts at pipe cooling ever make it there. Take, for example, the following specimen, a Jenkins, which, with its screw designed to hang while smoking like a broken appendage from the underbelly of the shank at a point just before the bowl, may never find its way back.Carey30

1934-35 Yello Bole Carburetor


Blog by Andrew Selking

The more I work on old Yello Bole pipes, the more I appreciate them. First of all, they used the same briar that went into the higher end Kaywoodies. From my experience you might find a Yello Bole with one fill, but otherwise spectacular grain. This pipe is no exception, stunning swirling birds-eye and spectacular cross grain, with one fill on the bottom of the bowl.

I can say with a fair degree of certainty that this pipe is from 1934 or 35. The carburetor patent was granted in 1935, this pipe is stamped “Pat Applied For.” Interestingly enough, it also has a patent number on the bottom of the shank. Additionally, the four digit number was used by Kaywoodie until 1936. The first two numbers indicate the finish and the second two numbers indicate the shape.

When I got the pipe it had the usual heavy finish that Kaufman Brothers and Bondy (KB&B) put on the Yello Bole line to cover imperfections.Andrew1

Andrew2 As you can see from the picture, I was working on more than one Yello Bole stem.Andrew3 While the stem soaked in Oxyclean, I dropped the bowl into the alcohol bath to begin loosening the gunk inside.Andrew4 After soaking overnight, I used my Castleford reamer to ream the bowl. The cake seems to come off easier if I ream the bowl right after the alcohol bath.Andrew5 I normally document cleaning the inside of the pipe, but for some reason didn’t this time. I did the usual retort on the stem and bowl, followed by scrubbing the inside of the shank with a brush, followed by q-tips dipped in alcohol. I used pipe cleaners dipped in alcohol to remove the last of the tar build up in the stem.

Once the internals were sorted, I decided to see what was under the varnish. I used 0000 steel wool and acetone to remove the worst of the finish.Andrew6 Here are some details of the markings on the bowl.Andrew7

Andrew8

Andrew9 With the varnish off I could see the single fill on the bottom of the bowl.Andrew10 I used my dental pick to remove the fill…Andrew11 And repacked it with briar dust and CA glue.Andrew12 I use accelerator with the CA glue. This gives me the ability to start rough shaping the fill within a minute or two of application. I used 150 grit to knock of the high spots, followed by 400 grit to blend it in. I used a progression of micro mesh pads, from 1500-12,000 to remove most of the dings in the bowl and to prepare the wood for stain and final polish. I used 400 grit wet/dry with water on the stem, followed by micro mesh pads (1500, 1800, and 2400) with water. Next I used micro mesh pads without water (3200-12,000) to polish the stem. Finally I buffed the bowl with white diamond and carnauba wax on the buffer. I used my rotary tool (the generic term for a Dremel that isn’t made by Dremel) with white diamond and carnauba wax to polish the stem. Here is the final result.Andrew13

Andrew14 Some better detail of the grain.Andrew15

Andrew16

Andrew17

Andrew18 I forgot to mention that I tried something new to highlight the grain. I normally use a coat of black aniline dye followed by a brown or mahogany. This time I used dark walnut as the base coat. I like how it turned out.

Here is a better view of the stem and bowl.Andrew19 Thanks for looking.

Restoring and Shaping a New Stem for a Savinelli Roma 305


Blog by Steve Laug

When I saw this old Savinelli Roma on eBay I decided to bid on it and see what I could do with it. It had a triangular shank without a stem. The bowl had a cake build-up and the rim was covered with tars that were flaking off. The finish was dirty and worn as these pipes usually have a contrast dark stain on the bowl and a lighter stain on the rim. The rim is chamfered or bevelled inward toward the bowl. The edges of the rim – both inner and outer – were in great shape. The bowl was still in round.Roma1 The band was an aftermarket addition and from the looks of it covered a cracked shank. In the photo below you can see the band has been pressed into place and damaged the shape of the shank on the bottom right side. Notice the step down from the band to the bottom edge of the shank and you will see what I mean.Roma2

Roma3 I have included the next photo of the Savinelli Roma 305 to show what the pipe originally looked like. The triangular shank and matching stem are attractive. This should be interesting to duplicate on a replacement stem! The round rim and the contrast colour of the bowl and rim look very good. The thin metal spacer between the stem and shank would have been connected to the stem and with the cracked shank on the one I picked up will not be possible to duplicate.Roma5 I have also included a picture I found on the web of a badly oxidized stem. I saved this because it gives a good close up of the angles on the stem that I will need to duplicate.Roma4 When the pipe arrived I took it out of the package and gave it a thorough inspection. As I suspected the band was an added feature. It was pressed loosely in place to deal with a crack in the right side of the shank and also on the bottom edge. It was poorly fit and would need shaping before I put it permanently in place. I would also need to address the cracks in the shank and the missing notch on the right side of the shank.Roma6 The next group of three photos shows the damaged areas on the bowl and shank. The crack is visible in the first photo and the missing notch is visible in the second photo. The third photo gives a close up of the bowl and rim.Roma7

Roma8

Roma9 I slipped the band in place and took a photo of the end of the shank to give an idea of what the shape of the stem will need to be when I worked on it. You can see the poor fit of the band at this point as well.Roma10 I went through my can of stems to find one that fit. I tried diamond shaped stems and none had a wide enough diameter to match the width of the shank without being too long to look right. I finally settled on a round stem blank that had the correct diameter. I turned the tenon down with a PIMO Tenon turning tool until it fit the shank. In the photo below you can see the stem and the stem before I corrected the tenon.Roma11 With the tenon turned to fit I pushed it into the shank of the pipe.Roma12

Roma13 Using a rasp and files I roughed in the shape of the new stem. I used a Dremel and sanding drum to take it down as close as possible to the finished shape and then brought it back to the work table to use the files again. The photo below shows the roughly shaped stem. Much more sanding will be necessary before this stem is finished.Roma14 I slipped off the band from the shank and worked on the area on the right side of the shank where there was a large divot in the shank. I also cleaned the cracks on that side of the shank and the underside of the shank with alcohol. I picked out the loose briar with a dental pick and then filled in the divot with briar dust and superglue. I built it up to match the current level of the shank and carved it with the dental pick and needle files to match the finish around the repair. I put super glue in the cracked areas on the shank as well and pressed them until the glue set.Roma15

Roma16 The next photo shows the repaired edge of the shank. The shiny area on the right side of the photo is the glue and briar dust repair.Roma17 With the band off and the repairs made I inserted the stem and used the files to further shape the angles on the stem. I sanded it with 100 grit emery cloth to smooth out the file marks and further shape it.Roma18

Roma19

Roma20

Roma21 After more sanding with 180 grit sandpaper the stem is finally beginning to take shape. You can see the shape in the photos below.Roma22

Roma23

Roma24

Roma25 I decided to clean up the bowl before continuing further on the stem. I reamed it with a PipNet reamer and took it back to a thin cake. I would sand it smooth later in the process.Roma26 With hard sanding work done on the stem I worked on the bowl. I scrubbed down the bowl and shank with acetone to remove the remaining finish and scrubbed and scraped the buildup of tars on the rim. I used a small piece of folded 220 grit sandpaper to clean up the rim further.Roma27

Roma28 I scrubbed the rim with acetone and elbow grease and was able to remove all of the tars on the rim.Roma29 I put some wood glue on the shank and pressed the band into place. I wiped off the excess glue with a little alcohol on a cotton pad. I sanded the stem with 220 grit sandpaper to continue shaping and fitting it against the shank. I would need to clean up the straight edges on the sides of the stem and the flattened top portion before I was finished but I wanted to get the shank fit done first.Roma30

Roma31

Roma32

Roma33 I sanded the stem (particularly working on the shank stem junction) with 600 grit wet dry sandpaper. I also sanded the bottom and the sides of the stems at the same time.Roma34 I stained the bowl with a dark brown aniline stain, flamed it and repeated the process.Roma35

Roma36

Roma37

Roma38 I buffed the pipe with White Diamond to even out the stain and bring some shine to it.Roma39

Roma40

Roma41

Roma42 Then it was time to bend the stem to match the original in the photo that I had. I heated it with a heat gun until it was flexible and then bent it over a rolling pin that I use to get an even and straight bend.Roma43 I took the pipe back to the worktable and took the following photos so I could compare the stem with the original photo. The bend looked correct.Roma44

Roma45 However, the top of the stem needed to be flattened more and lose the arched look. I used a flat file that I have and worked on the top of the stem to flatten it.Roma46

Roma47

Roma48

Roma49 The next three photos show the stem after I had filed and flattened the top of the stem to get the angles correct.Roma50

Roma51

Roma52 I sanded the stem with 220 grit sandpaper, medium and fine grit sanding sponges and with 600 grit wet dry sandpaper. I moved on to polishing it with the micromesh sanding pads – wet sanding with 1500-2400 grit pads and dry sanding with 3600-12,000 grit pads.Roma53

Roma54

Roma55

Roma56 I buffed the stem with White Diamond and Blue Diamond plastic polish to further shine the stem.Roma57

Roma58 I polished the band with micromesh sanding pads and then buffed the pipe with Blue Diamond to bring out a shine. I then gave it multiple coats of carnauba wax and buffed it with a soft flannel buff to lift the shine even higher. The finished pipe is shown in the photos below.Roma59

Roma60

Roma61

Roma62

Concerning the Rising Popularity of Churchwardens in General, a Little about Their History and the Cleanup of a Barely Smoked Savinelli Rustic Aged Briar


Guest Blog by Robert M. Boughton

Member, North American Society of Pipe Collectors
http://www.naspc.org
http://www.roadrunnerpipes.com
http://about.me/boughtonrobert
Photos © the Author, except as noted

“The supreme accomplishment is to blur the line between work and play.”
― Arnold J. Toynbee (1889-1975), British historian

INTRODUCTION
If ever a pipe found its way into my possession and was sheer play and no work to clean up, this black Savinelli Rustic Aged Briar Dublin Churchwarden is it. I bought the long, sleek, exquisite example of the fine Italian pipe crafter’s genuine labor as a perfect addition, not to my own collection but to the growing and diversifying line of brands and styles I sell. Based on the requests I have received for churchwardens in general, as well as my eavesdropping at the local tobacconist I favor, this classic old style appears to be experiencing a comeback in popularity.

Perhaps the shift in supply and demand – as well as the corresponding rise in average churchwarden prices, at my preferred tobacconist and online, compared to the not so distant past – are due in part to the timeless popularity of the classic fantasy novels of J.R.R. Tolkien, starting with “The Hobbit” [1937] and “The Lord of the Rings” trilogy [1954-1955]. This year, in fact, marks the sixtieth anniversary of “LOTR,” and the recent releases of movie versions of both of these can only have spurred interest in the centuries-old pipe shape thanks to the churchwarden-puffing Hobbits, wizards, elves, dwarves and – yes – men. Or maybe the increase in sales and prices is just a sign of greater discernment among pipe enjoyers, and those new to the pleasure in particular, who seek the smoother, cooler satisfaction of a good tobacco’s flavor that the longer shank and bit can provide.

Whatever the cause of this apparent resurgence, I am doing my best to follow the tide by locating and restoring more of this venerable style’s many examples at affordable prices. I already went so far as to clean up a beloved but no longer often enjoyed Clark’s Favorite from my own collection. I bought the lovely pipe several years ago, restored, for about $40 (at which time a quick check online showed the same but new pipe on sale at $69) and sold it to a prospective customer who was bent on a medium-length church or nothing.Rob1 I still miss the Clark’s Favorite, which I supposed I could always replace for the new price noted above. Today, the same smooth version, with its orange-black acrylic bit, is on sale for $112 compared to the MSRP of $140.

Savinelli for one, seeming to recognize the inconvenience of carrying a long, fixed-bit church about town to enjoy on the go, now offers a nice selection of “Tandem” versions that can be enjoyed at home in their full glory and, when traveling anywhere, with a second short bit. The model shown below, the Tandem Rusticated #112, comes with two completely separate bits – the longer Vulcanite and the shorter acrylic.Rob2 This particular Tandem, by the way, is now on sale for $108 as opposed to its regular price of $130.

There are, however, still other “churchwardens” with the two bits combined as one, where the entire bit can be twisted off at the shank and the shorter part at the top, with the button, replaced in the shank. Of course, these models carry a higher price tag. Take, for example, this adjustable Cassano smooth billiard, which I bought last night at my tobacconist’s shop for $175. The full churchwarden large poker is 13” in length, and the smaller option is 8½”.Rob3

Rob4

Rob5 A BIT OF HISTORY
The churchwarden is one of the oldest of pipe shapes. The earliest use was in the Orient, where the bowls were likely made (for the most part to smoke opium) not only of known materials – including amber, ivory, various metals such as brass, different kinds of wood, bone and clay – but also jade and other exotic minerals. The bits (without buttons) often matched the bowls, although combinations of brass, wood, bone and/or ivory were not uncommon.

However, the clay bowl and long wooden shank without a bit was the design adopted and quickly adapted in late 18th or early 19th century Europe. So popular were the original Western World churchwardens that many Eastern European taverns kept supplies on hand for their customers’ use, and the habit of biting off the end of the wood shank for a fresh smoke developed. Until the mid- to late-1800s, clay bowls with wood shanks, open where the bit would now be found, remained the prevailing materials of construction.

As for the origin of the name churchwarden, there are three main theories, given here in reverse order of likelihood: the first, that smoking was permitted almost everywhere, including churches, in those dear lost days, and the long length and design of the pipe allowed it to rest on the pews; the second, that certain individuals, erroneously called churchwardens and trusted with guarding England’s churches in the 1800s, very much enjoyed their pipes and fancied the popular style, and the third, that real churchwardens (who by every official definition were not guards but honorary officers of local parishes or district churches entrusted with administrative and other minor duties) became known for their love of the pipe later named for them.

And contrary to popular myth created by various actors who have performed the role of Sir Arthur Conan Doyle’s brilliant mystery solving character, Sherlock Holmes, using fancy Gourd Calabashes or sundry churchwardens as props – which falsehood was adored and perpetuated by generations of Sherlockian fans – these are the facts: the shape or material of pipe most often cited by Holmes’ fictional chronicler, Dr. John H. Watson, was cherry wood (six references), followed by several mentions of standard-sized clay pipes and some appearances of briars. You can read the entire “Adventures of Sherlock Holmes” at https://www.gutenberg.org/files/1661/1661-h/1661-h.htm and locate all of them yourselves.

THE CLEANING
Rob6

Rob7

Rob8

Rob9

Rob10

Rob11

Rob12 To start on an honest note, I only show the few following steps needed to clean this almost-new Savinelli Rustic Dublin Churchwarden beauty for the sake of showing the pipe itself and the ease with which it was spruced up. The bit had no signs whatsoever of having been touched by any hands, much less placed in a mouth and smoked. In other words, its outside was buffed to the highest sheen, as if it came fresh from the factory in Barasso, Italy, in the Varese province. And so I began by running a long, soft cleaner dipped in alcohol once through the 7½” bit, which was all but 3” of the total length, removing the smallest amount of tobacco residue, and again for good measure.

The rim had minor blackening, not part of the stain. I removed that with a quick brush using 1800 micromesh and proceeded to the chamber. Two easy turns of a reamer followed by about 30 seconds of sanding with 200-grit paper and then 320 made the chamber as smooth as it ever was.

For the sake of thoroughness, I attached an otherwise useless small bit with a tenon that fit the shank and retorted the inner shank and chamber. To my amazement, one Pyrex test tube of boiled Everclear came back from the first passage with the lightest shade of brown, and despite about six more tries to make the alcohol darker, the barely tested briar was clean.

Then I noticed a spot on the outer edge of the shank opening that appeared to be smooth and dark red. With a small scrap of super fine steel wool, I probed the narrow strip of briar around the opening and watched it come clean. Below are before and after photos.Rob13

Rob14 I could have left the briar in the excellent shape it already was, but as chance happened, I had just received my order of a new jar of Halcyon II wax, and had to try it out. Therefore, I gave the wood a spin on the clean buffer and with one finger applied a dab of the Halcyon as far as it would spread before adding a smidge more to finish coating the bowl, shank and rim. Setting the wood on a cotton rag, I waited about 10 minutes and again took the duller-looking briar for a fast spin on the clean wheel. Whether or not these steps were necessary, here are the final results.Rob15

Rob16

Rob17

Rob18

Rob19

Rob20

Rob21 CONCLUSION
That is all.

SOURCES
(in haphazard order)

http://www.onlineoriental.com/Merchant2/merchant.mv?Screen=CTGY&Store_Code=1&Category_Code=14
http://www.quora.com/What-kinds-of-pipes-did-Sherlock-Holmes-smoke-according-to-Sir-Arthur-Conan-Doyles-writings
http://www.sherlockian-sherlock.com/jeremy-brett-churchwarden-pipe.php
http://www.pipedia.org/wiki/Churchwarden_Pipes

Guide to Tobacco Pipes & Pipe Smoking


http://www.smokingpipes.com/pipes/new/savinelli/index.cfm?tag=Clark’s%20Favorite
http://www.smokingpipes.com/pipes/new/savinelli/moreinfo.cfm?product_id=160492

A Bit of an Experiment – Restoring a Broken Bowl on a Hardcastles Jack o’ London Billiard


Blog by Steve Laug

Having had a long week at work with nary a break in the busyness I needed a bit of a diversion on the weekend. I had an old Hardcastle’s Jack o’ London billiard in the cupboard that I probably should have thrown away but did not. I picked up the nice little billiard on one of my pipe hunts months ago. When I reamed it after I brought it home the bowl cracked and a large piece fell out of the right back side of the bowl. Up on examination it was on its way to being a burn out as the interior wall on the crack was charred and damaged. I took pictures of the bowl to show the damage at that time. For some reason I did not throw it away but rather put it in the cupboard and figured I could use the briar for other repairs.

But this weekend I took it out and decided to experiment with it and see what I could do with the damaged bowl. I debated whether to cannibalize it and save the parts or to rework it. I had already scavenged the stem and reused it on another Hardcastle’s pipe bowl that I restored so I only had the bowl. If the repair worked I would have to fit a new stem on the pipe before I could smoke it.

Here are some photos I took when the bowl cracked during the initial reaming. I took quite a few because I had not had that happen before in my experience. Looking at the photos you can clearly see the damage to both the remaining bowl and the chunk of briar that fell out. It was seriously damaged and one that I seriously considered throwing away that day. The rim was a mess as well besides being cracked and broken and the inner edge was out of round and the top beaten around the outer edge. The bowl was heavily caked and it looked to have been a good smoking pipe for the previous pipeman. There were even some fragments of unsmoked tobacco in the bottom of the bowl.Jack1

Jack2

Jack3

Jack4

Jack5

Jack6 Out of boredom and the need for something to keep my hands busy while my dog was being groomed I decided to experiment with repairs on the bowl. I cleaned up the broken pieces of the briar both the edges on the bowl and broken pieces with alcohol and cotton swabs and picked out any remaining loose pieces of briar or charred pieces of briar. I knew that I could easily patch the external side of the bowl and make it look acceptable but I was not sure what I would do with the internal side. I used a pen knife to scrape out the remaining cake in the bowl and to make sure there was no loose carbon that would get in the way of the repair before gluing in the piece. I applied clear super glue to both the bowl and the chunk of briar being careful to keep it out of the interior of the bowl and pressed the piece in place. In the photos below you can see how the glue ran down the exterior of the back side of the bowl but not on the inside.Jack7

Jack8 I applied some more glue to the cracks on the outside of the bowl so that I could push briar dust into any spaces or chips in the briar between the pieces.Jack9

Jack10 With the chunk of briar glued in place and the external cracks patched it was time to look at the damage on the inside of the bowl and determine what to do. I know that in the past I have used J.B. Weld and Greg and others have used fireplace cement to repair the inside surfaces of the bowl but I had in mind a different experiment. Both the J.B. Weld and the fireplace cement dry and are neutral after curing. They are both impervious to heat or moisture but I wanted to see if I could use all natural substances and work a repair that would hold up. I knew that only time would tell if it actually worked but I figured that I had nothing to lose with this old pipe. If it did not work it would go back to the scrap yard and come back to life in repairs on other pipes. But if it did work I would have a useable yard pipe that I could smoke while working with little concern of damaging or ruining it in the process. Too me it was worth a try.

The next series of two photos show the inside of the bowl. The cracks and damage to the inside of the bowl was quite extensive. But it was still worth trying a repair.Jack11

Jack12 I fit a stem on the shank from my can of stems with minimal sanding of the tenon for a good fit in the shank. The diameter of the stem would need to be adjusted but that would not be too much of a problem.Jack13

Jack14

Jack15 The next two photos show the variation in diameter of the shank and the stem.Jack16

Jack17 I use a Dremel and sanding drum to take down the excess material as close to the shank as possible without damaging the shank. I also decided to use the Dremel and sanding drum on the overflow of super glue and briar dust on the outside of the bowl as I planned on sanding the bowl anyway.Jack18

Jack19

Jack20

Jack21 Once I had the fit of the stem close and the majority of the glue and briar dust patch smoothed out I took it back to the work table and sanded both the bowl and the stem with 220 grit sandpaper to smooth out the scratches in the briar and the vulcanite.Jack22

Jack23 The rim needed to be topped to smooth out the damage to the top and the outer edges. I set up the topping board with 220 grit sandpaper and pressed the bowl flat against the sandpaper. I sanded it in a circular motion until I had removed the damaged rim surface and the damaged out edge.Jack24

Jack25

Jack26 I forgot to take a photo of the rim at this point but you can see in the photos of the staining that it is sharp and clean on the outer edge. I sanded the briar with a medium and a fine grit sanding sponge to minimize the scratches even more and then heated the bowl before I applied a dark brown aniline stain. I applied the stain, flamed it and repeated the process until I had good even coverage on the bowl.Jack27

Jack28 The dark brown stain was quite opaque so I wiped down the bowl with isopropyl alcohol on cotton pads to remove and thin down the stain coat.Jack29

Jack30 The top of the rim can be seen in the next photo. The damage to the rim top has been minimized and the surface is smooth. There is still some damage on the inner edge but that will be addressed when I do the internal repairs to the bowl walls.Jack31 I buffed the bowl with Red Tripoli and then wiped it down again with alcohol. The colour was just what I was looking for at this point in the process. It was a rich brown stain that allowed the grain – birdseye and mixed to show through the finish. It also did a decent job covering the repair to the other side of the bowl.Jack32

Jack33

Jack34

Jack35 I buffed it again with White Diamond to raise the shine. The stem still needed some fine tuning for a better fit against the shank and some sanding to remove the oxidation and scratches but the pipe was beginning to look good.Jack36

Jack37

Jack38

Jack39 I took the next close up photos to show the work that still needed to be done on the rim and the look of the repairs on the right side of the bowl. The bowl surface and rim surface was very smooth but still needed to be sanded with micromesh pads to take out the scratches and polish the briar to a deep shine.Jack40

Jack41 With exterior at a good place to take a break it was time to address the inside of the bowl. I mixed a batch of pipe mud using cigar ash and water. I mixed it to a thicker than usual consistency so that I could press it into the damaged area of the bowl wall. I did not want it runny or soupy but I still wanted it wet enough that the mud was well mixed and would stick. I painted it on the wall in the damaged area with a folded pipe cleaner and pressed it into the cracks with the spoon end of a pipe nail. I also pressed it in with the end of my finger. I repeated the application of the mud until the surface of the wall was smooth and showed no pits or divots. I set the bowl aside to dry over night as I wanted the mud to harden and also wanted to see if it was solidly stuck in the damaged areas.Jack42

Jack43 In the morning, after curing over night I inspected the patch on the inside of the bowl. I used my dental pick to make sure that the patch was well set in the divots in the wall of the bowl and then smooth out the surface with a pen knife.Jack44

Jack45 I let it dry for about four more hours while I did other things and then decided to mix a batch of bowl coating to paint the bowl interior. I mix a batch of bowl coating using sour cream and activated charcoal powder. I use a finely ground powder that comes in capsules.Jack46

Jack47 I take apart the capsules and dump the charcoal powder into the sour cream.Jack48 I use a dental spatula to mix the charcoal and sour cream into a black paste. I work the paste until all the sour cream and charcoal are combined.Jack49

Jack50 I used the spatula to apply the paste to the walls of the pipe and then smoothed it out using a folded pipe cleaner.Jack51 The entire bowl is coated with the paste and after smoothing it out with the pipe cleaner looks like a dark grey almost black coating around the sides and bottom of the bowl. I put a pipe cleaner in the airway so that I would not get the paste in the airway when smoothing it out.Jack52

Jack53

Jack54 I wiped down the top of the rim with a bit of saliva on a cotton pad and then set the bowl aside to let the coating cure. Once the coating cured it would provide a protective layer over the bowl interior and facilitate the buildup of a new cake.

While the bowl coating was drying I worked on the stem. I sanded it with 220 grit sandpaper with a plastic washer between the shank and stem to smooth out the transition between the two. When I had finished sanding the stem with the 220 grit sandpaper I sanded it with a medium and a fine grit sanding sponge.
Jack55

Jack56

Jack57

Jack58 I wet sanded the stem with 1500-2400 grit micromesh sanding pads to minimize the scratches.Jack59 I dry sanded the stem with 3200-4000 grit micromesh sanding pads and then buffed the stem with Red Tripoli to further polish the stem.Jack60 I brought it back to the work table and dry sanded it with 6000-12,000 grit sanding pads. I buffed the stem with Blue Diamond on the wheel and then rubbed it down with Obsidian Oil and let it soak in.Jack61 I sanded the bowl and shank with micromesh sanding pads – wet sanding 1500-2400 grit pads and dry sanding with 3200-12,000 grit pads. I buffed the bowl with Blue Diamond to polish the briar. There are some fine scratches that seem to be around the junction of the shank and stem. I buffed it with Red Tripoli again and with White Diamond and then with Blue Diamond. I polished the stem and bowl with carnauba wax and buffed it to a shine with a clean buffing pad to raise the shine. The finished pipe is shown in the photos below.Jack62

Jack63

Jack64

Jack65 The next photos are close up pictures of the repair. They also that the carbon/sour cream bowl coating has dried and is a dark grey colour. The cracks on the exterior are smooth to touch and do not feel like cracks. The repairs to the top of the rim still show as a red coloured spot at the back of the rim. The stain took to the patch a little lighter than the rest of the bowl. It is smooth to the touch but still shows. The internal bowl coating has dried to the touch and gives a nice coat that is cover the repairs on the bowl wall. The carbon bowl coating has small particles of carbon in the finish. These will provide something for the new cake to bind to when it is smoked. All that remains is to let the coating cure for a few days and then load a bowl and smoke it.Jack66

Jack67

Jack68

Jack69