Blog by Paresh Deshpande
Even though the work on my last project which I had mentioned in all my previous couple of blogs as one that I was keen to work on, has been more or less completed, the write up is pending for one simple reason, there was an issue which was pointed out by Steve when I shared pictures of the finished pipe with him. To address the issue, I need to travel back to my home town where services of a very special artisan are needed to be sought. Well, unraveling of this mysterious pipe will happen only in October 2019 and in the meanwhile I move ahead with my other restorations!!
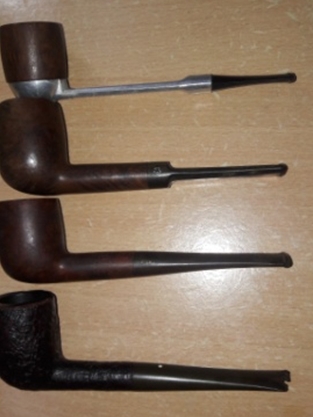
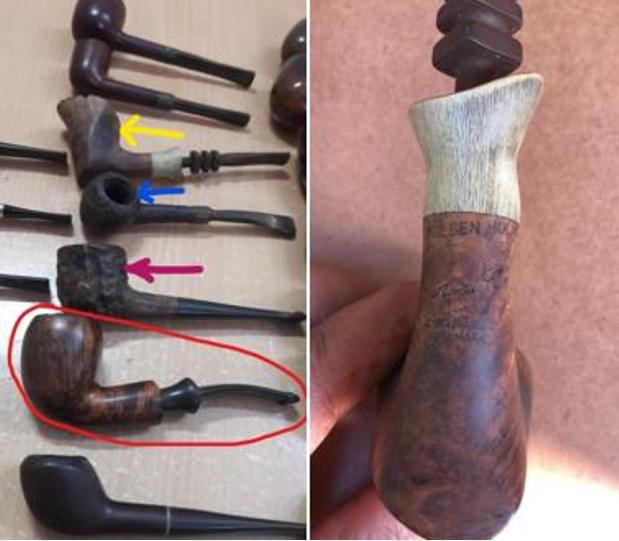
The next pipe on my work table is a French pipe, makers of which trace back their history to 1870s!! Most of the learned readers would have guessed it right, it’s indeed a ROPP!
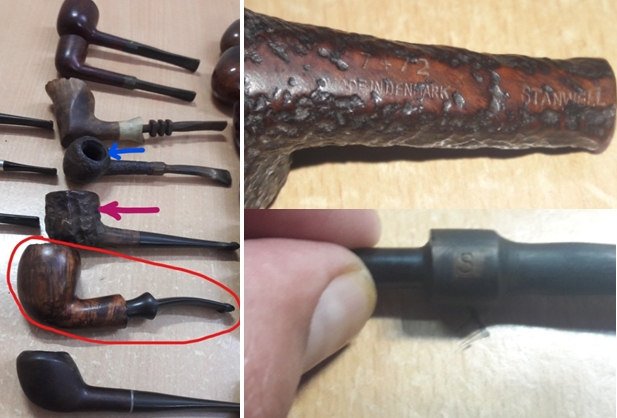
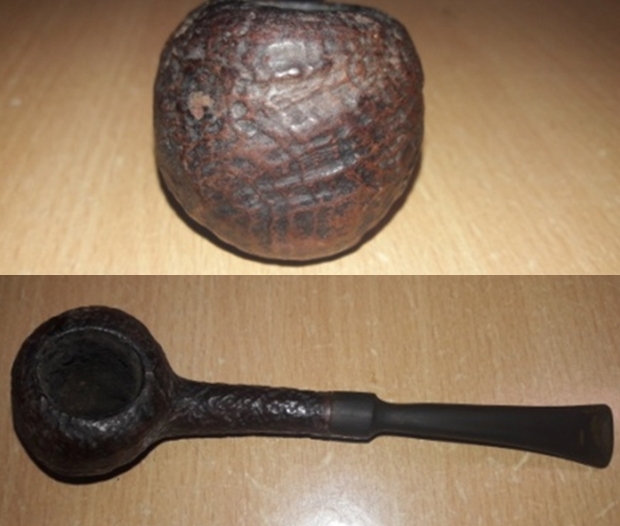
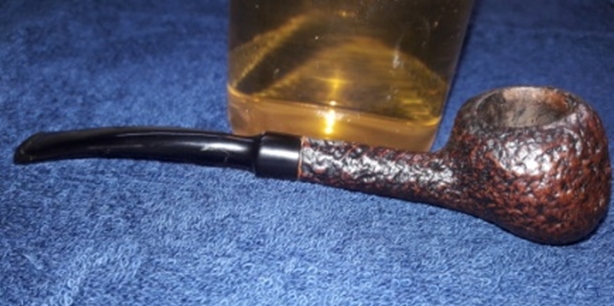
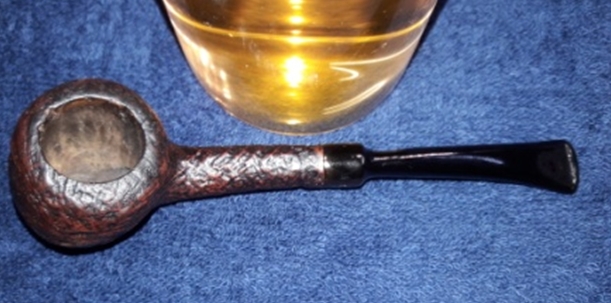
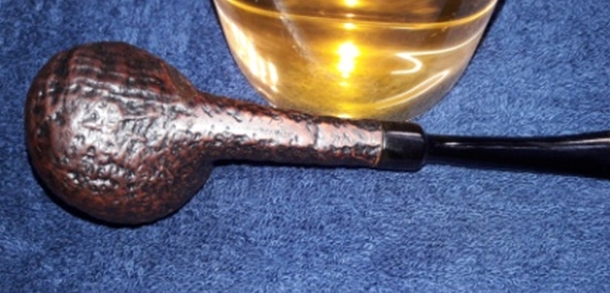
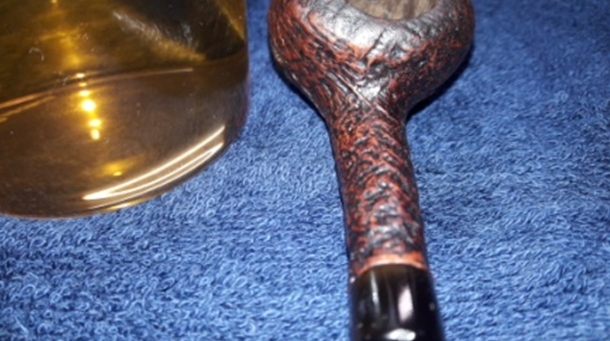
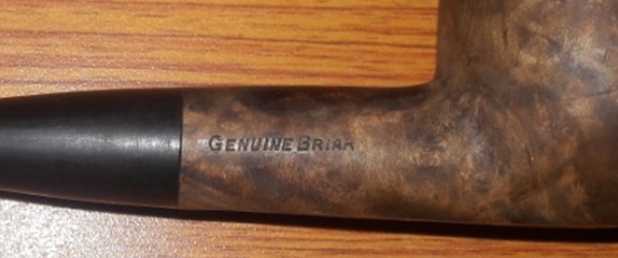
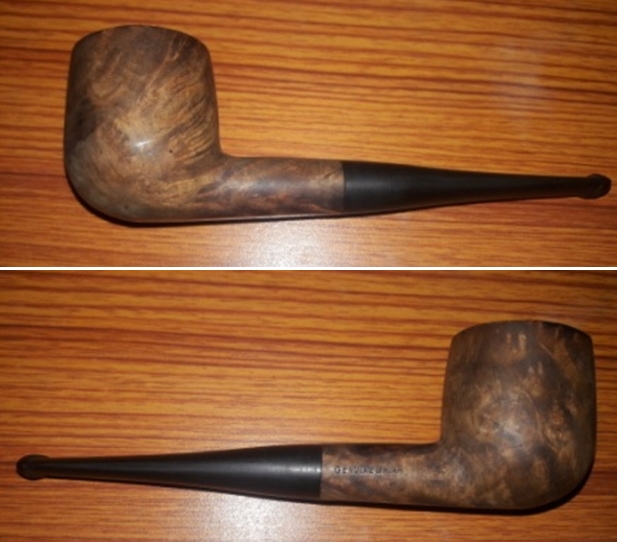
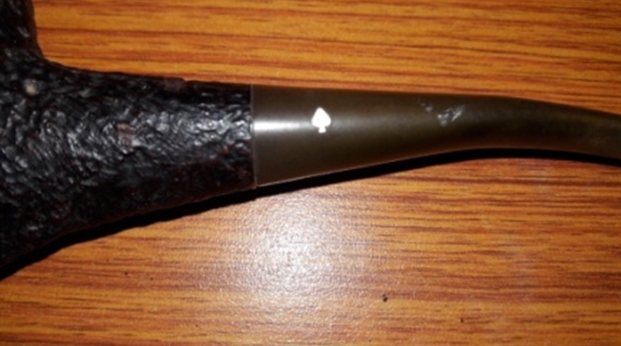
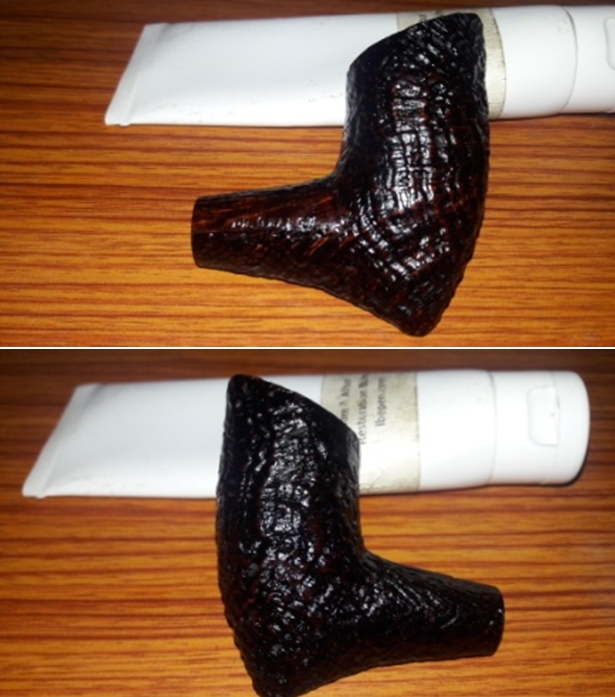
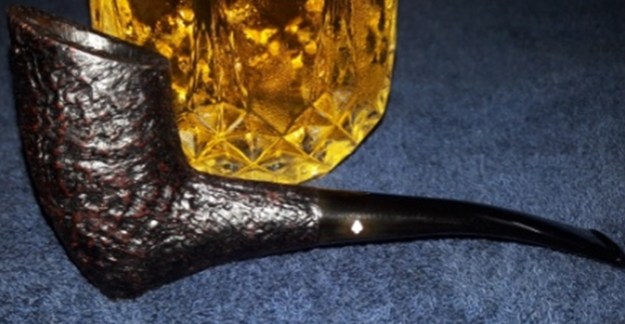
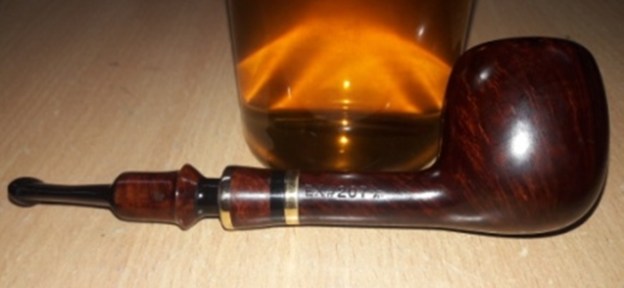
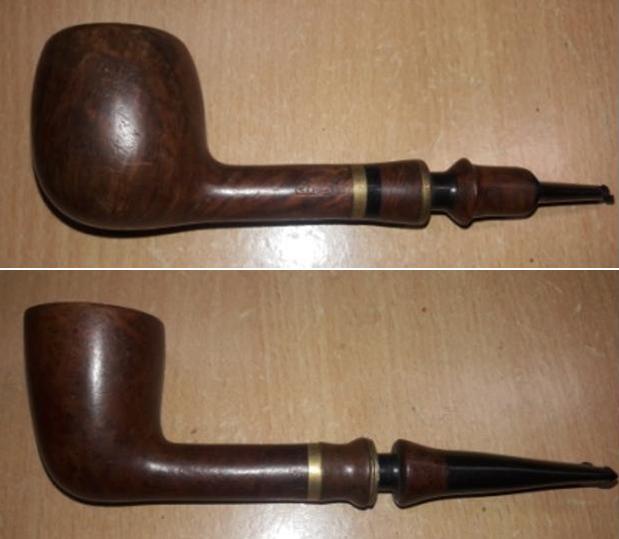
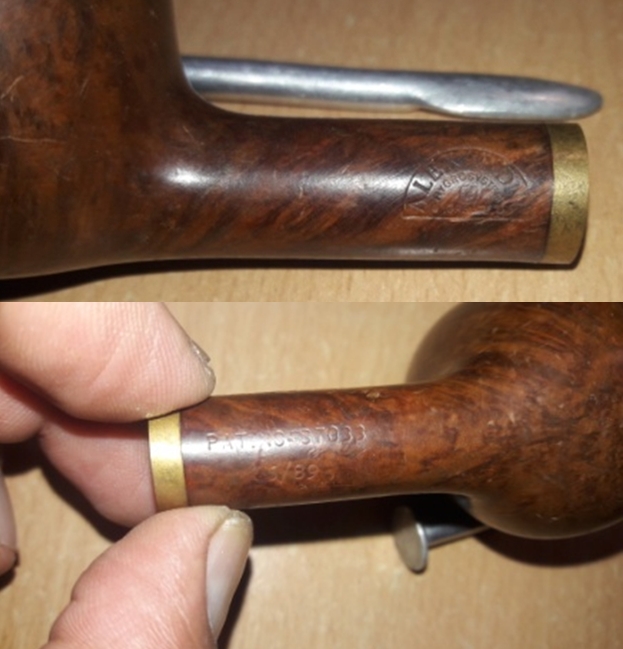
The pipe is a large bowl straight billiards with shiny golden colored shank end band with a bright burnt orange cherry wood (?) shank extension. The stem end of this extension too has the golden colored thin metal ring. The vulcanite stem has a corn cob shaped aluminum stinger. The pipe is stamped on the left side of the shank as “ROPP” in an oval over “REPORTER”, all in block capital letters. The right side of the shank bears the stamp “L 83” probably denotes the size (L- large) with shape code # 83. The vulcanite saddle stem has the logo “ROPP” in white letters, embedded deep in to the saddle and covered in a transparent high quality plastic cover. I searched pipedia.org to know about the brand as it is a first for me. The site has very scant information about the brand, but what is available makes it an interesting read (https://pipedia.org/wiki/Ropp)
Eugène-Léon Ropp (1830 – 1907) had acquired a patent for a cherrywood pipe (wild cherry, lat.: Prunus avium) in 1869. In 1870 he established a workshop to manufacture such pipes in Büssingen (Bussang, Vosges mountains). Around 1893 the business moved into the former mill of Sicard (part of the community of Baume-les-Dames – Département Doubs, Upper Burgundy – from 1895 on).
The pipes were a big success in the export as well. Shortly before 1914 Ropp designated A. Frankau & Co. (BBB) in to be the exclusive distributor in the UK and it’s colonies.
Probably in 1917 a workshop in Saint-Claude in the Rue du Plan du Moulin 8 was acquired to start the fabrication of briar pipes. In 1923 a small building in the environment of Saint-Claude, serving as a workshop for polishing, was added.
Even though cherrywood pipes were the mainstay of Ropp until the company finally closed down in September 1991. The company was taken over by Cuty-Fort Entreprises (Chacom, Jeantet, Vuillard, Jean Lacroix…) in 1994.
There are some nice old flyers advertising these pipes which are always interesting to go through, but unfortunately my understanding of French is as good as that of the readers who can read, write and understand Devnagiri script (origins of which is Sanskrit), my mother tongue!! Admiring the pictures (but not understanding the text…LoL!!), the only conclusion I could draw was that this pipe is certainly post 1994 as it is more contemporary looking. The complete appearance of the pipe is that of desiring/ seeking attention! It really has that kind of appearance and bling.
INITIAL VISUAL INSPECTION
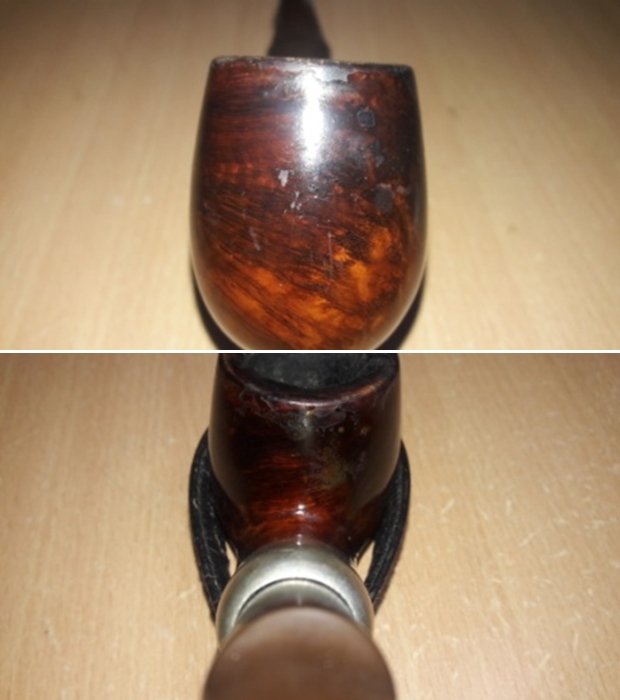
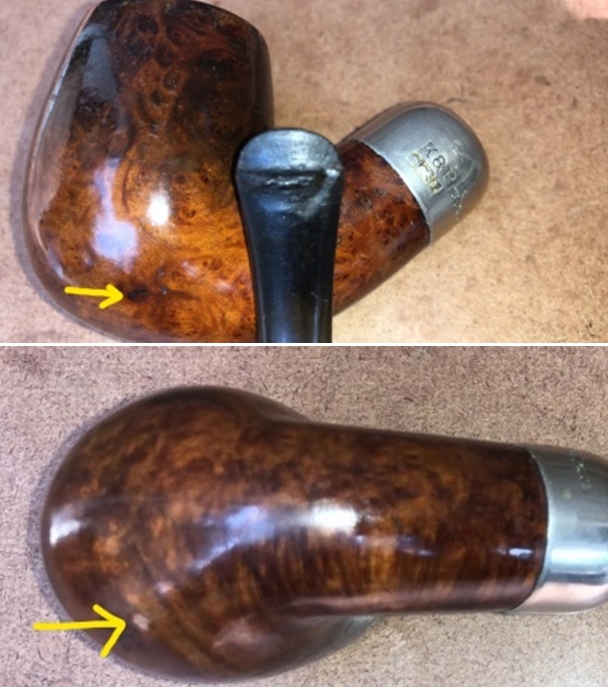
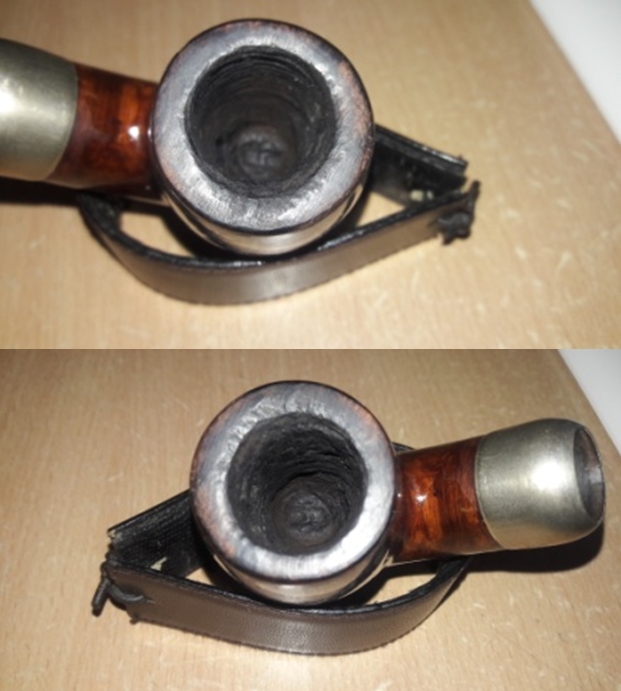
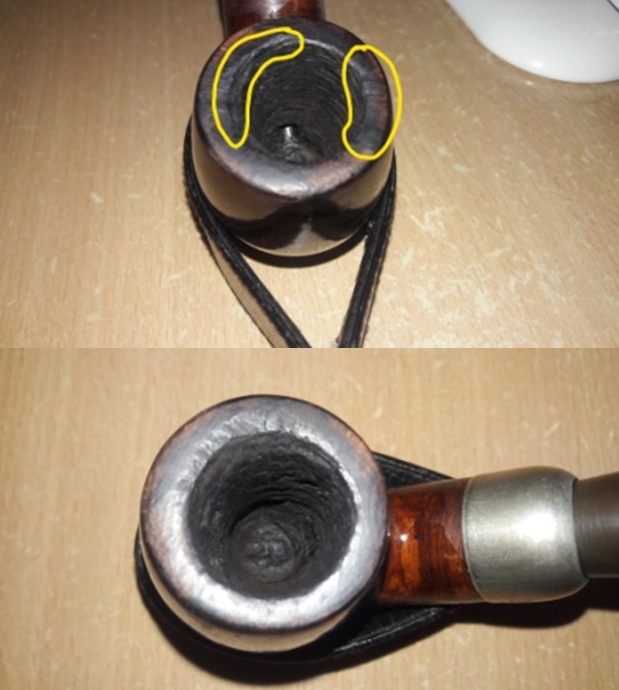
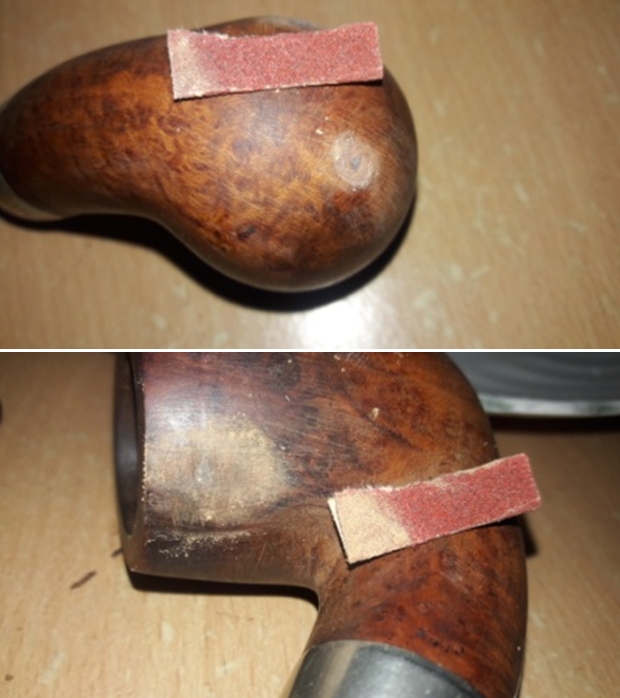
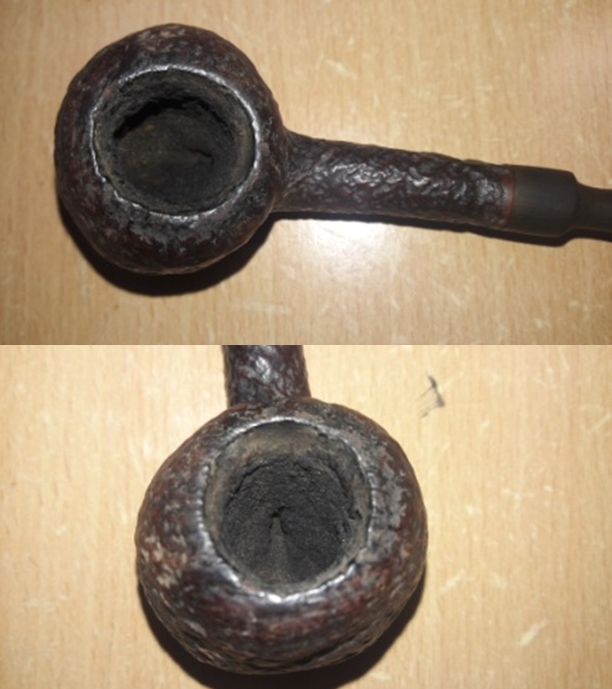
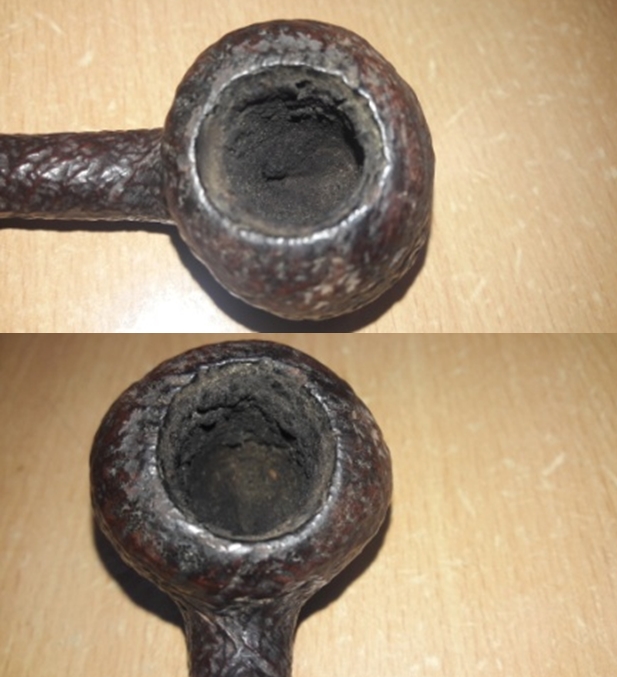
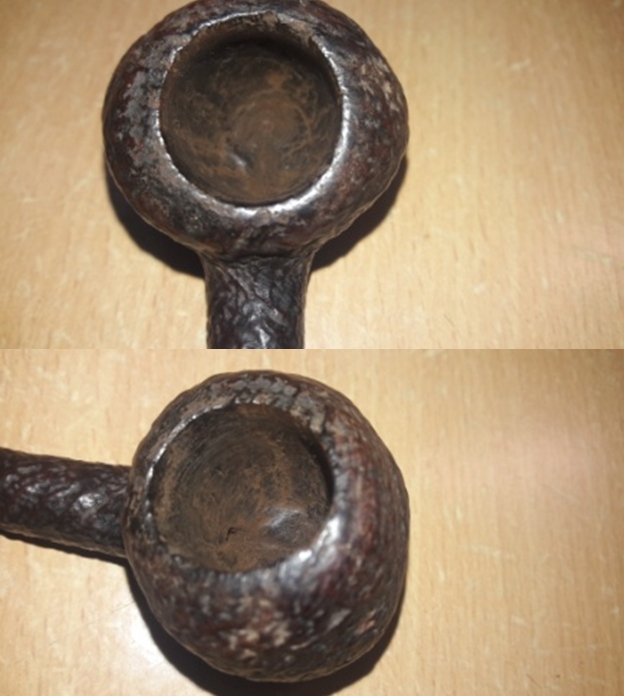
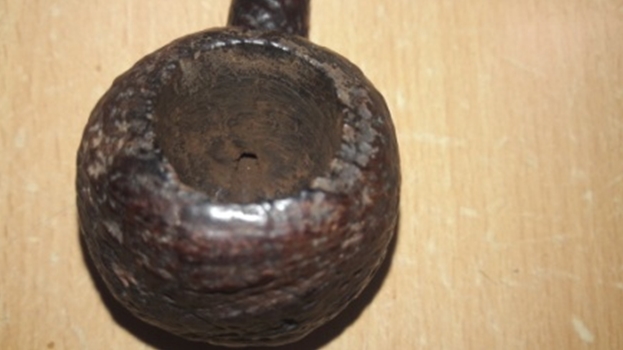
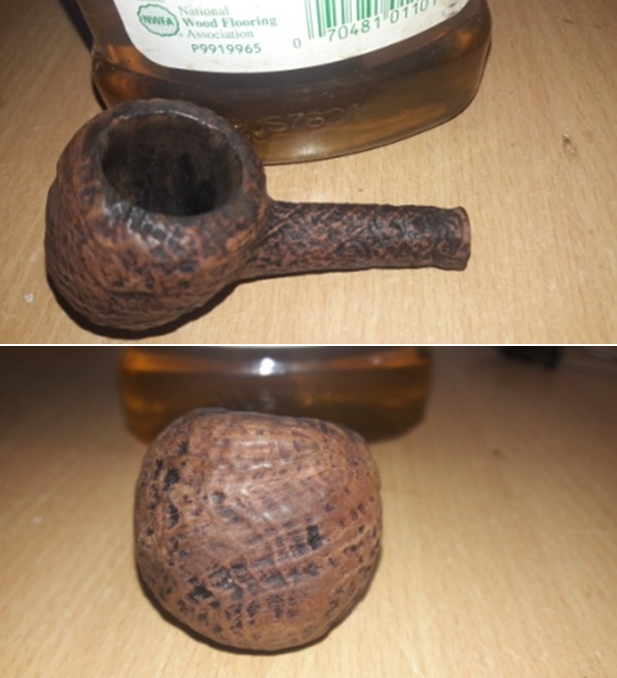
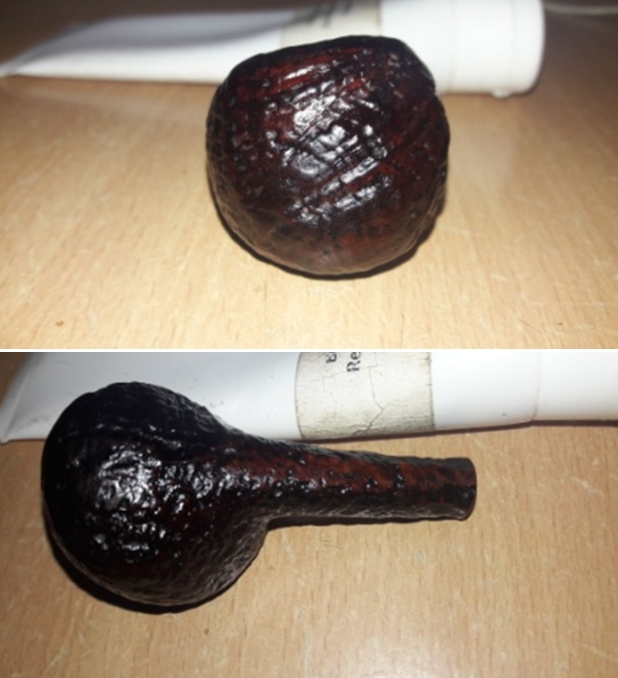
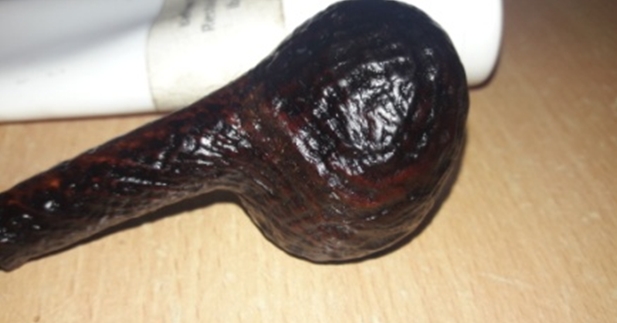
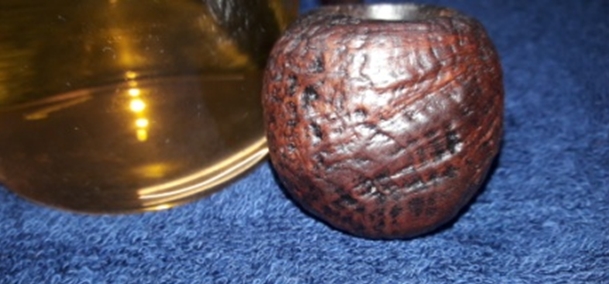
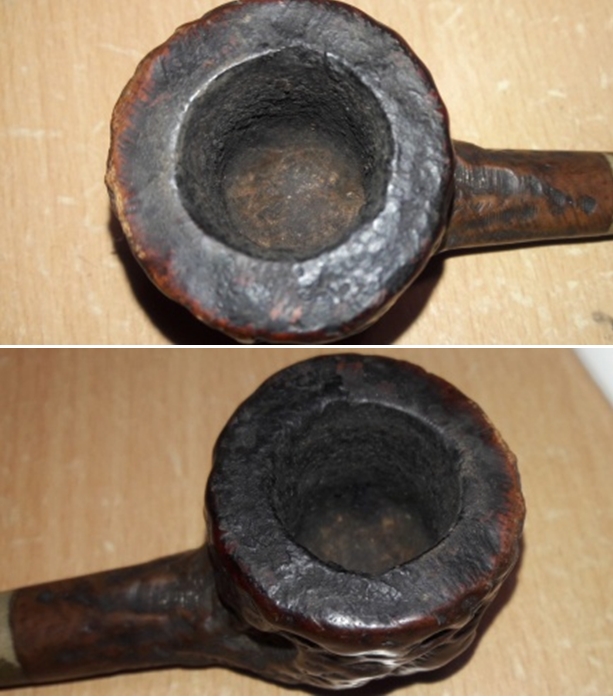
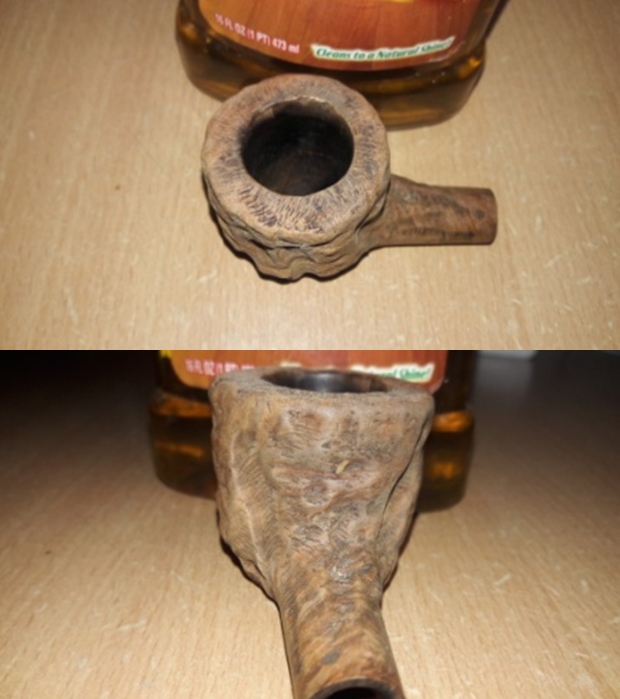
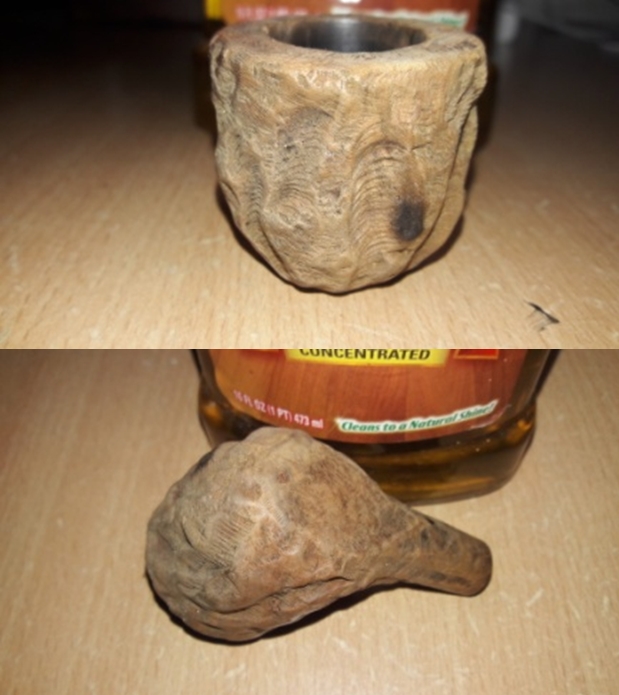
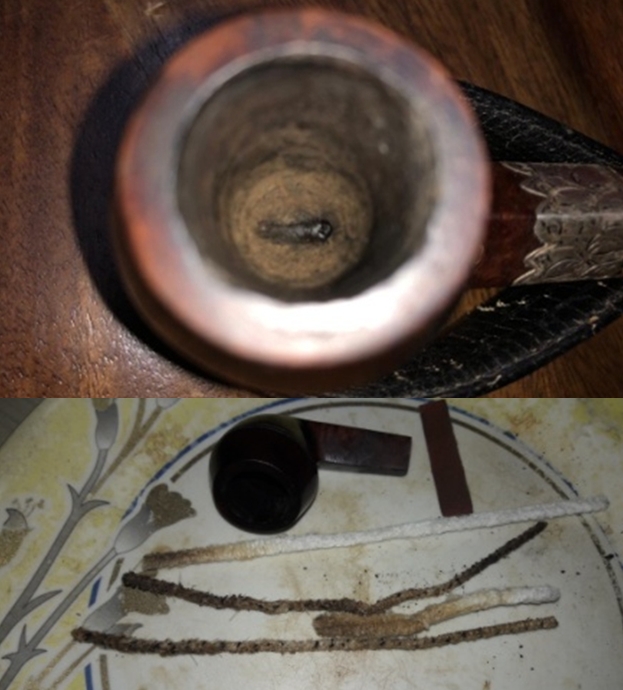
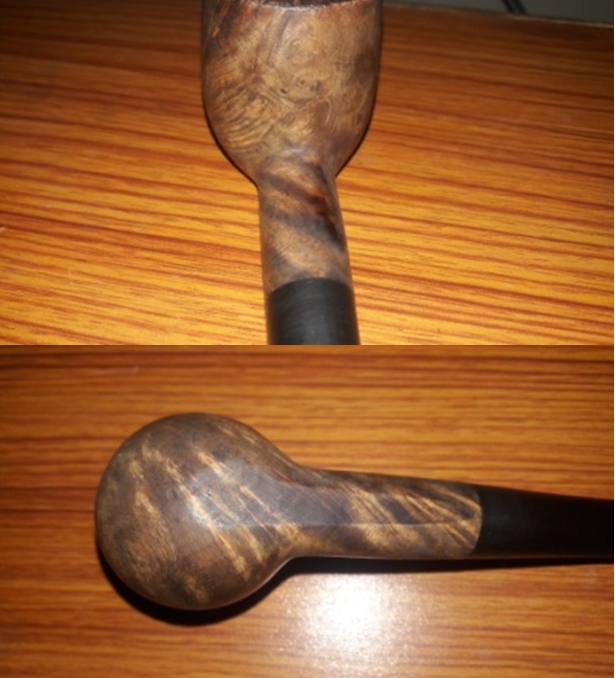
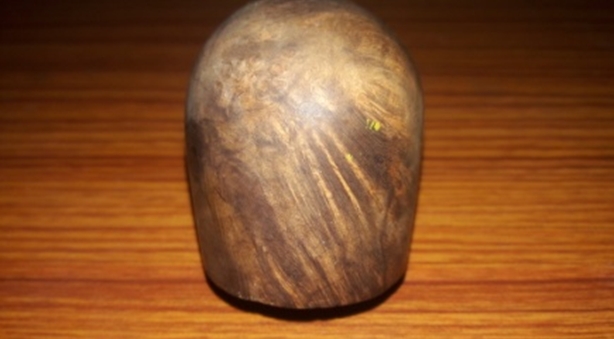
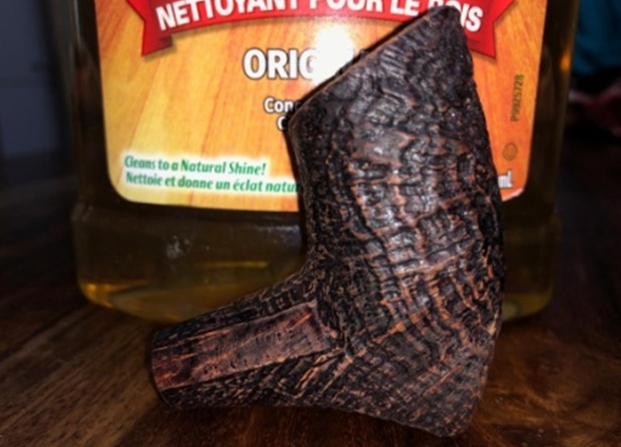
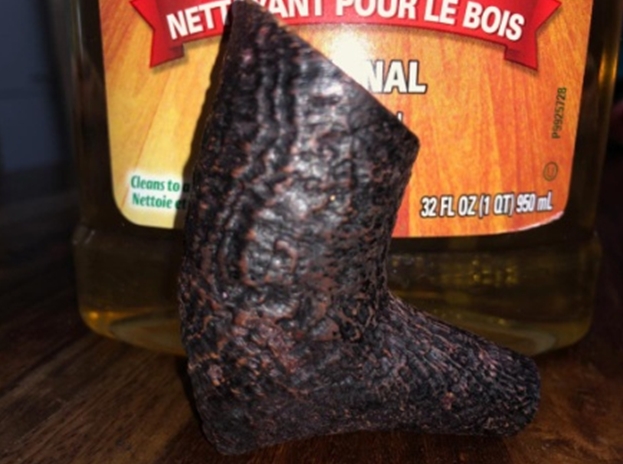
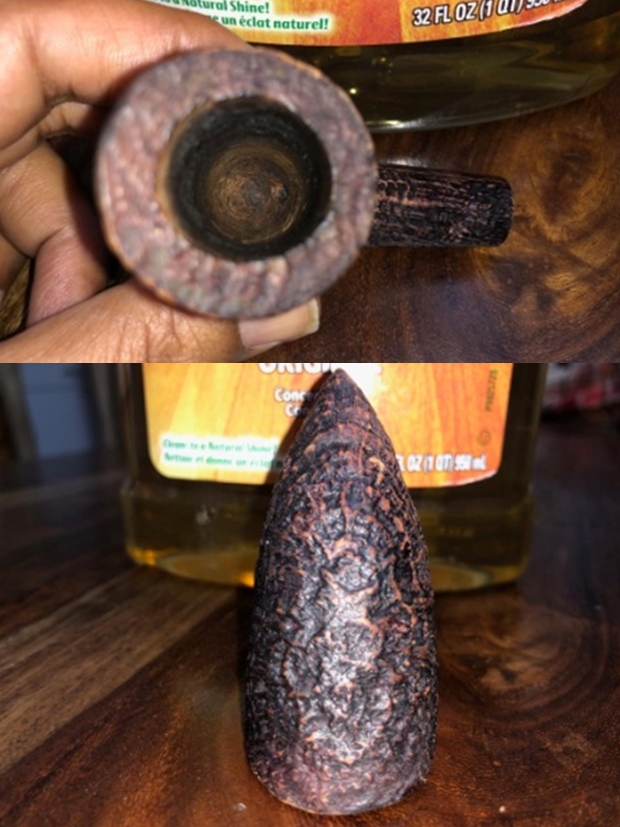
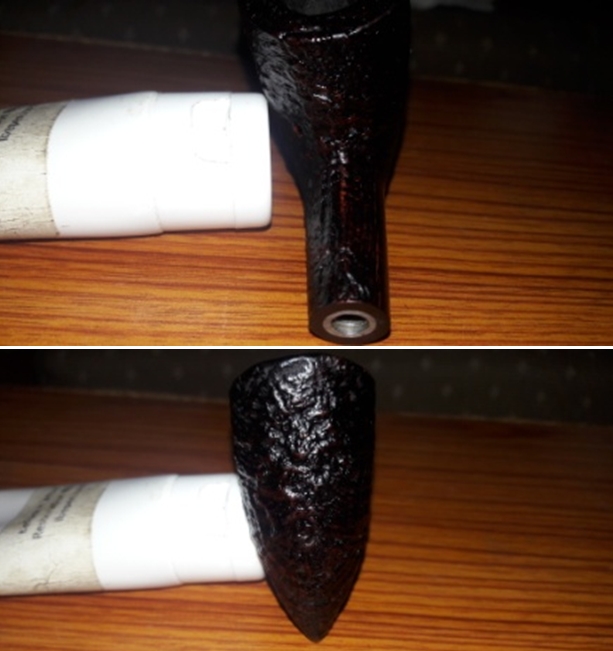
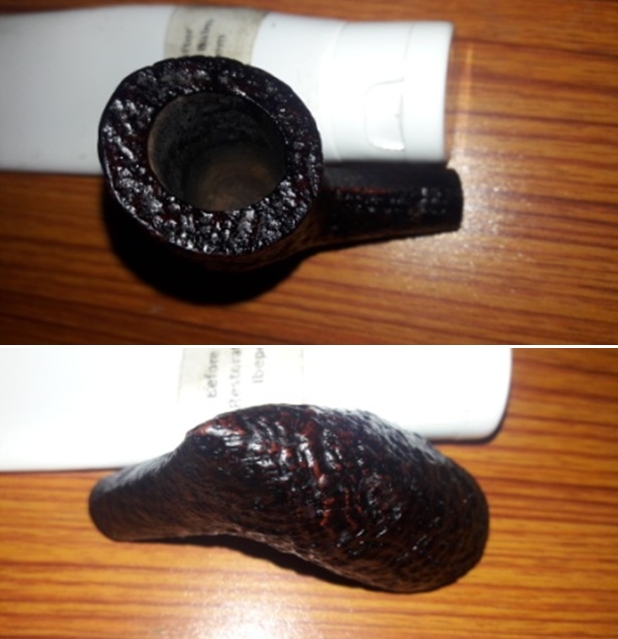
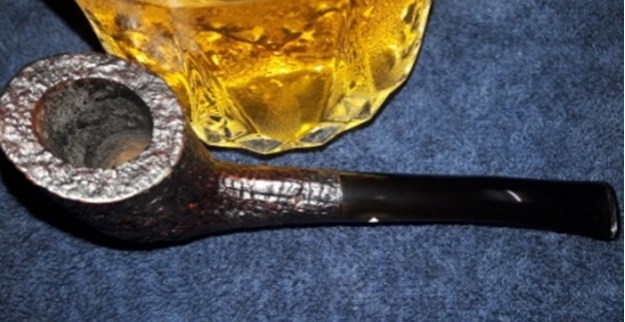
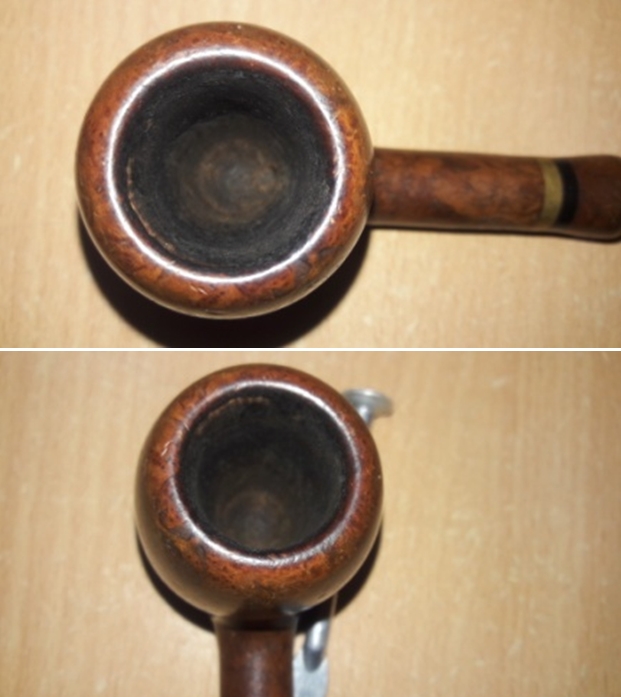
This pipe was received by Abha, my wife, and she liked the funky and bright looks of it. The first thing she noticed was the fit of both the stem tenon in to the shank extension and that of the shank extension in to the mortise was extremely loose. The stummel shows some nice mixed straight, cross and bird’s eye grains all across. The stummel had dirt and grime accumulated over the surface and appeared dull and lifeless. A couple of dents/ dings are visible on the foot of the stummel. I shall address this by steaming out these dents followed by sanding and micromesh polishing.  The chamber had a thin even layer of cake in the lower half of the chamber and appeared to have been well looked after. The rim top surface is without any serious damage, save for some minor (and could have been ignored!!!) dents. The inner rim edge has a nice delicate bevel which has been made uneven with reaming with a knife. However, the outer edge has a few very minor dents and dings.
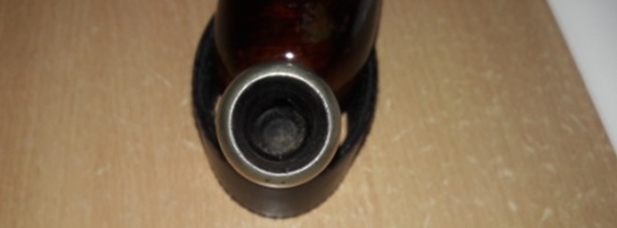
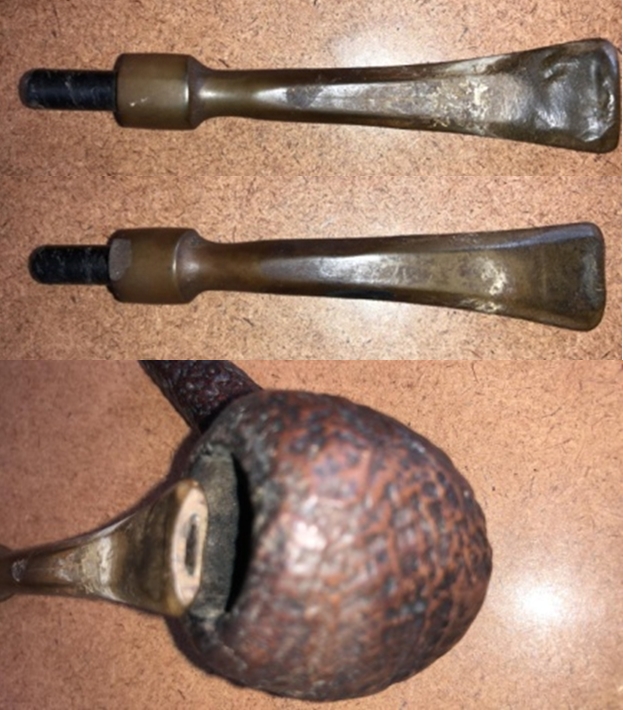
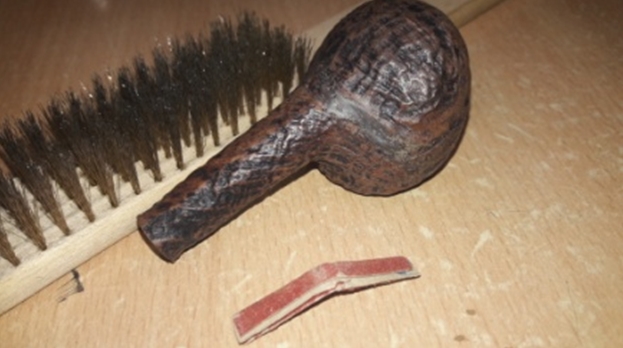
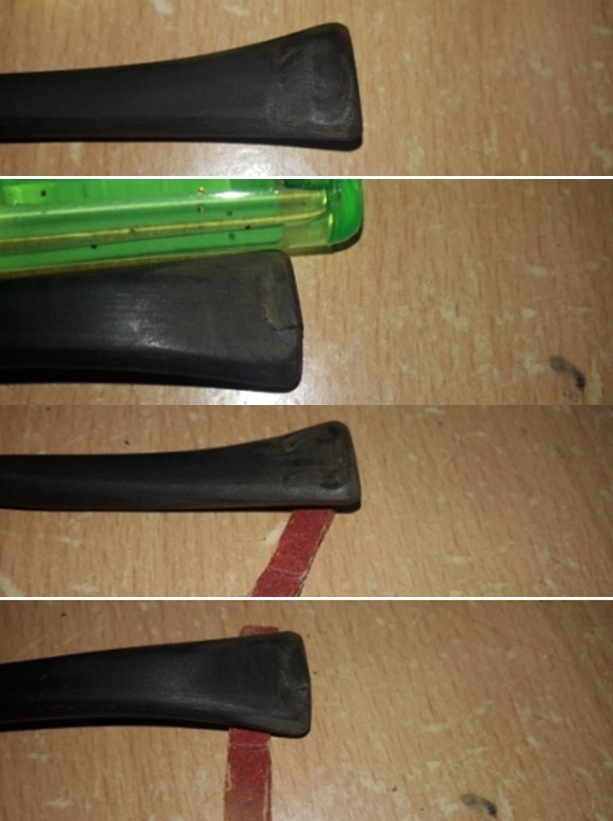
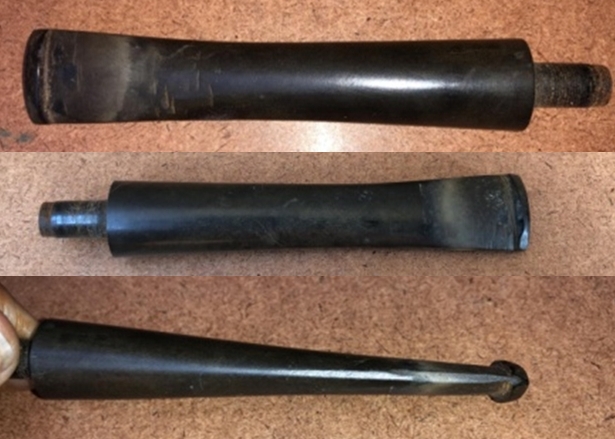
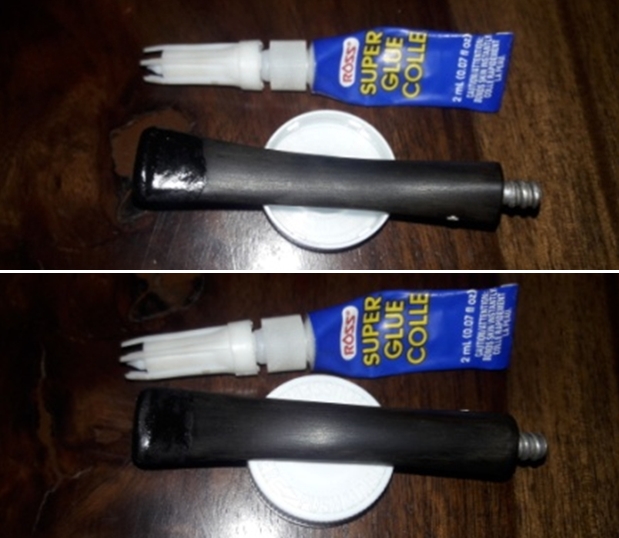
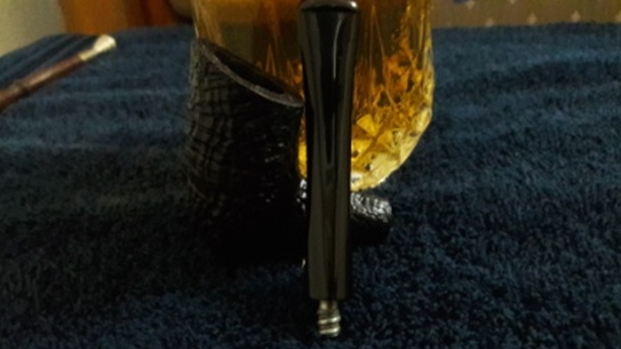
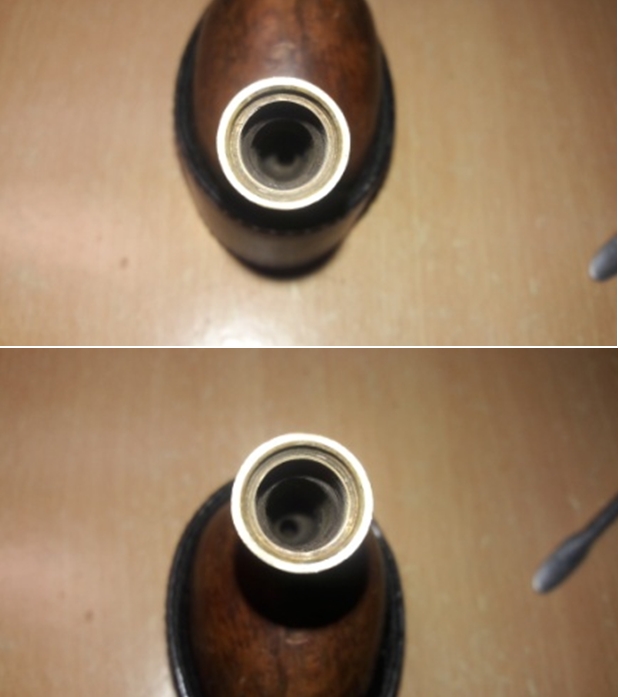
 The broad vulcanite saddle stem is oxidized and had a couple of minor tooth indentations and chatter on both the surfaces in the bite zone. The corn cob shaped aluminum stinger is covered in dried oils and tars. The button edges showed very slight deformation from tooth marks. The tenon was covered in a hard plastic cap to tighten the fit of the stem in to the shank extension. The burnt orange cherry wood (?) extension is in very good condition except that the ring has discolored in patches but not corroded. The fit of all these pieces of pipes in to each other was extremely loose and would be the biggest challenge to address on this pipe.

 INITIAL CLEANING BY ABHA…
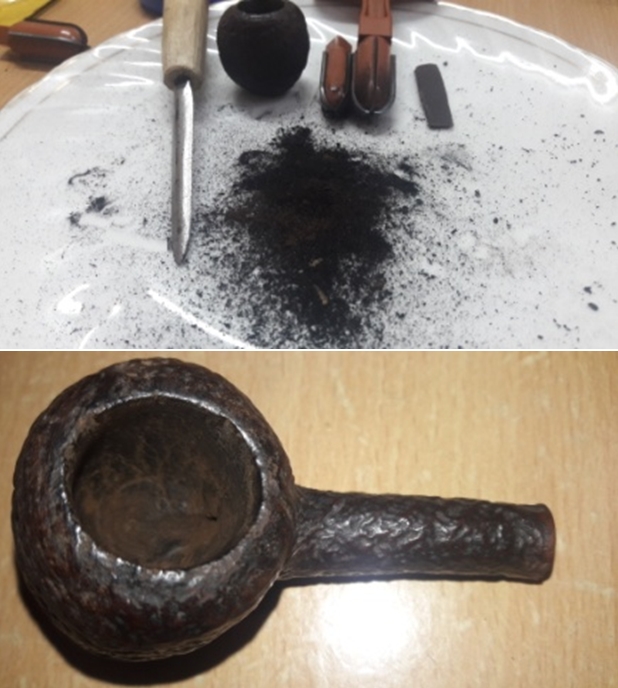
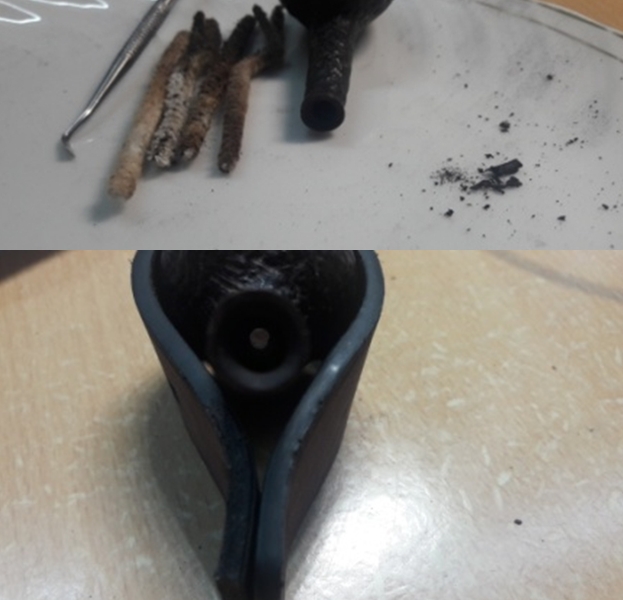
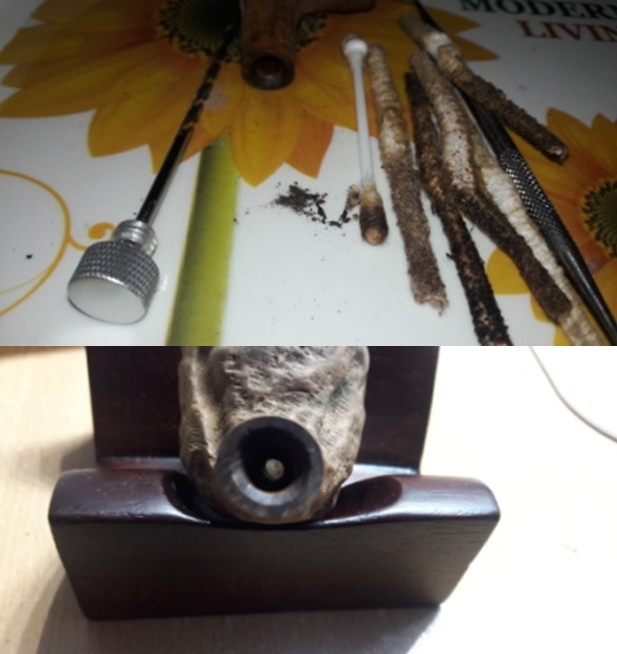
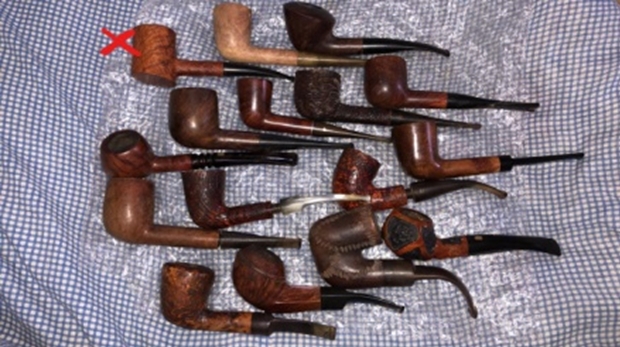
The initial cleaning on this pipe was done by Abha, my wife (she has cleaned up around 40-50 pipes and these have now reached me for further restoration). She reamed out the complete cake and further smoothed out the chamber walls with a folded piece of 220 grit sand paper. She further cleaned out the internals of the shank with pipe cleaners and alcohol and cotton buds. She followed the internal cleaning of the shank with external cleaning of the stummel using Murphy’s Oil soap and hard bristled tooth brush and dried it with paper napkins and cotton cloth.
Next she cleaned out the internals of the stem air way and immersed it in “Before and After Deoxidizer” solution along with the stem of other pipes in line for restoration. Once the stem had soaked overnight, she cleaned the stem under running warm water and scrubbed the raised oxidation from the stem surface using Scotch Brite pad. She further removed the oxidation by scrubbing the stem with 0000 grade steel wool and applied a little olive oil to rehydrate the stem. She had removed the stinger from the tenon and cleaned it with cotton swabs, pipe cleaners and alcohol.
ONCE THE PIPE IS ON MY WORK TABLE…
Now that the cleaned pipe is on my work table, I proceed to carry out my appreciation of the work that needs to be done on this pipe to restore it.
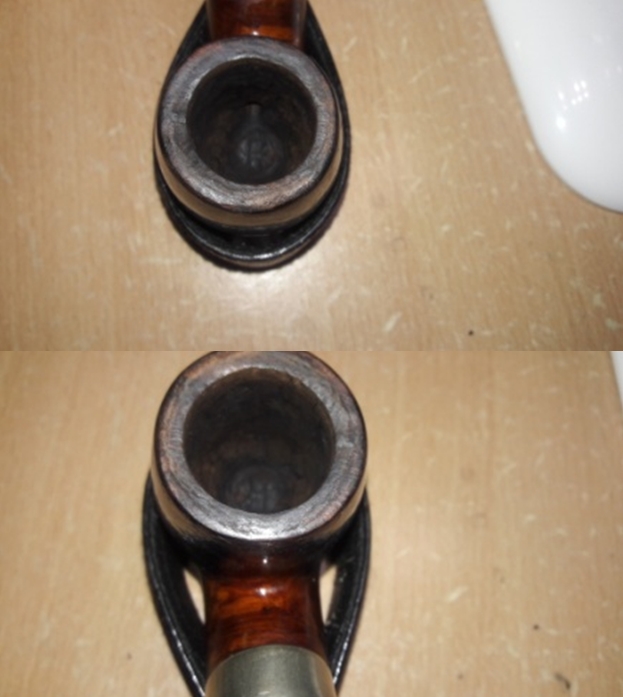
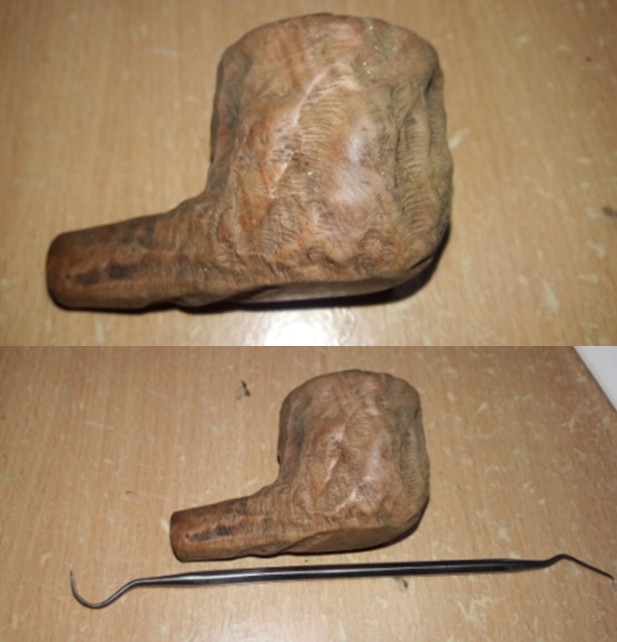
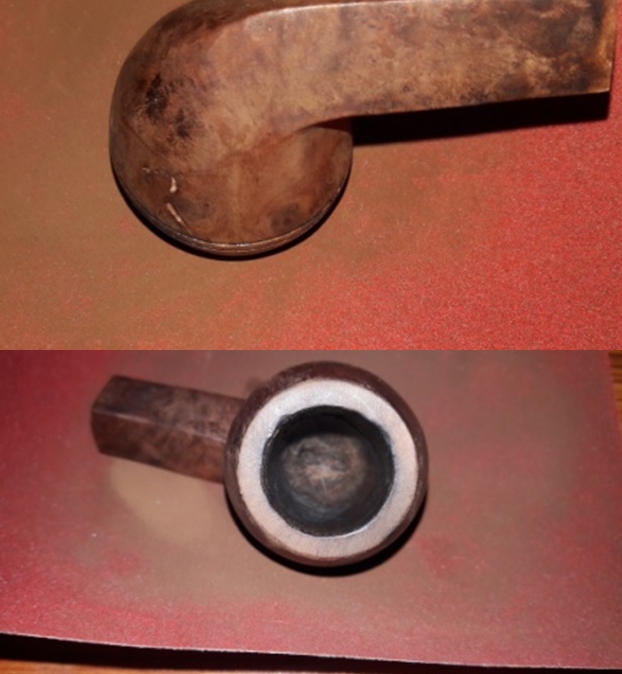
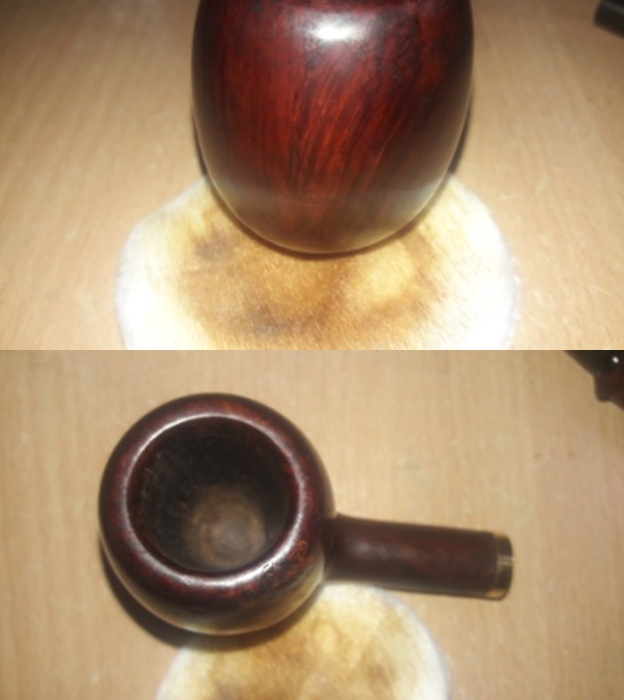
The chamber show very minor and superficial heat lines all along the walls, however, the stummel appears to be solid to the feel. The rim top surface is in decent condition with the inner rim edge bevel in slightly worn out condition. The outer rim edge does show very minor dents and dings. I could either top the rim top to address this issue or let them be since these dents and dings are very minor and hardly noticeable.
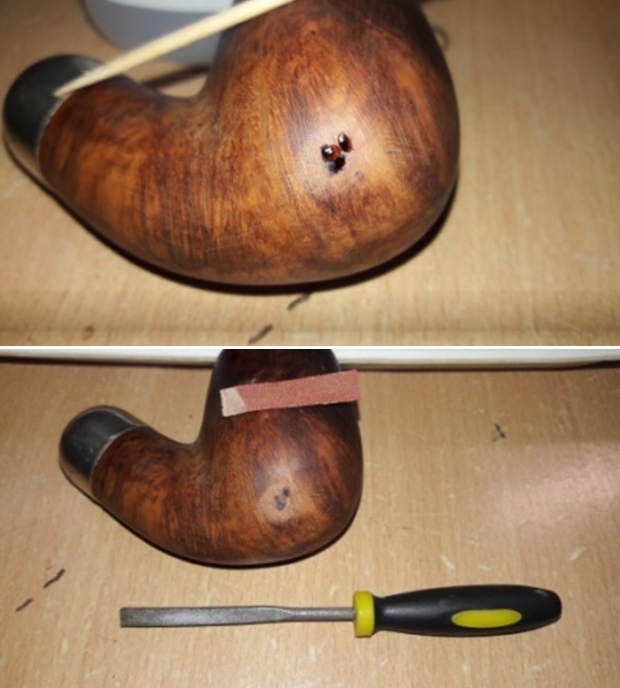
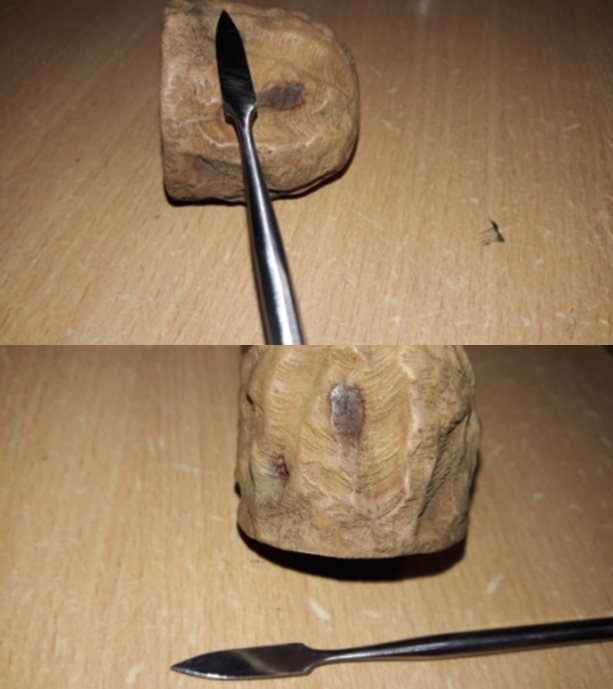
 The stummel was clean and free of any accumulated grime. One fill that Abha had noticed, was picked clean with a thin sharp edged knife and would need to be filled. After I have polished the stummel with micromesh pads, would I be able to decide if I would stain it or let it be in its natural finish.
 The stem has only one deeper bite mark which would need to be repaired with a fill of activated charcoal and superglue mix. Whatever, little oxidation remains, will need to be removed by sanding with a folded piece of 220 grit sand paper and follow it up with polishing with micromesh pads. The aluminum stinger is clean.
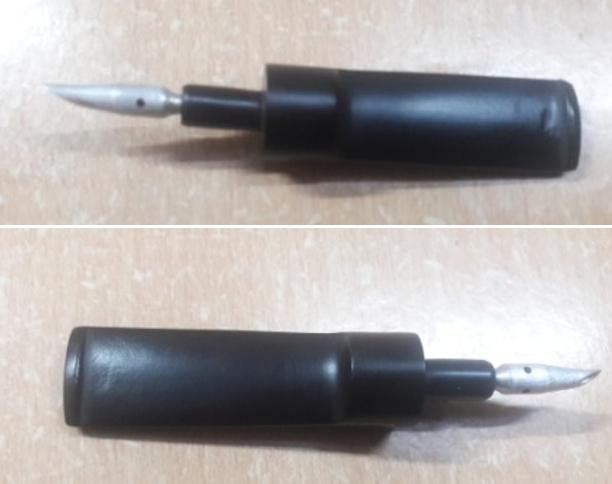 The one major issue I need to sort out at the outset is to make the 3 pieces of this pipe stick together to be called a pipe!! The stummel, shank extension and the stem tenon are so loose that it does not fit in to each other and cleaning of all these parts has not helped the matters either.
 THE PROCESS
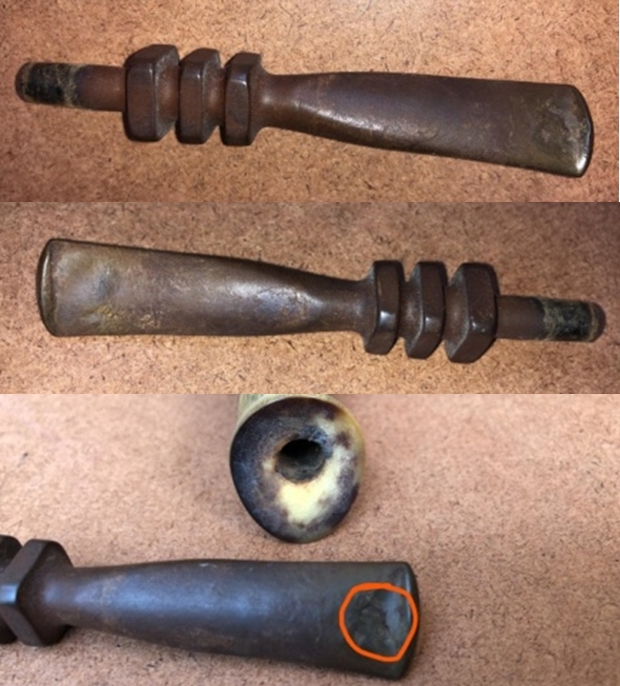
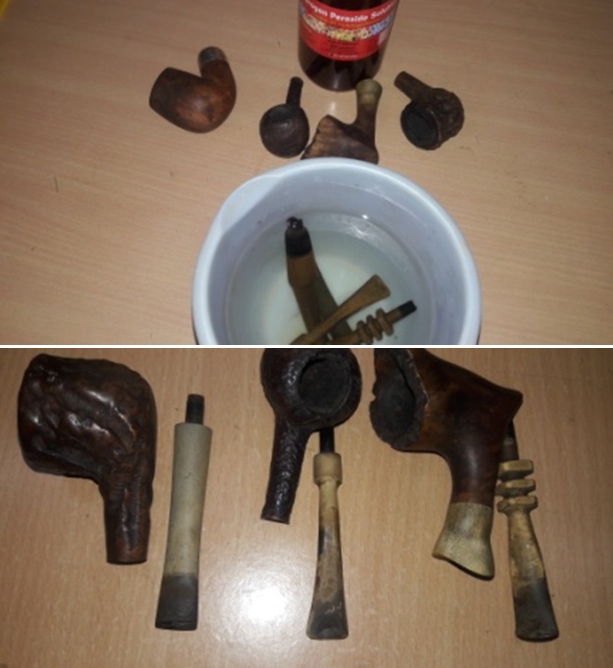
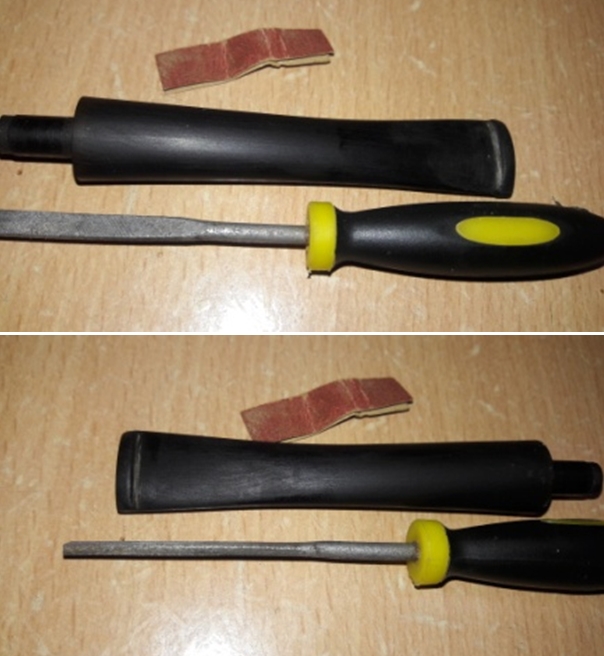
The first issue on the agenda that I decided to tackle was to get the pipe together by making the three parts of this pipe to affix firmly in their designated places. For the stem tenon fit, I had an option to either increase the tenon size by heating and thereafter enlarging it with a larger diameter drill bit and coating it with a clear nail polish. I decided against this process since firstly, this would make the seating of the stinger in to the tenon too loose and secondly, the gap between the tenon and shank extension seat was so large that it would not be possible to expand the tenon to this extent. Similarly, there was no way that I could ensure a snug fit of the shank extension in to the mortise other than by making a packing insert. This brought me to the only option of creating a packing insert using a cork and this is exactly what I proceed to do. Theoretically, I would measure the length that needed to be cut off from the cork to fit the stem tenon and the tenon of the shank extension and sand it down to achieve a snug fit, simple. Well, theoretically it sounds easy, practically not so much. I decided that I would address the shank extension first. I pried out a couple of corks from wine bottle caps (Oh my, I have plenty of them!!!) and measured the length that needed to be cut off from the cork to fit the tenon of the shank extension. With my hand held drilling tool and a smaller drill bit, I drilled a through hole. I progressively increased the diameter using progressively bigger drill bits till I had achieved a snug fit of the cork piece on the tenon. Once I was satisfied with the fit, I fixed the cork packing with superglue on to the tenon. I replaced the drill bit on my tool and mounted a sanding drum. Next, I sand the drilled cork with the sanding drum till I had achieved a rough fit of the shank extension tenon in to the mortise. I fine tuned the fit by hand sanding it with a piece of 220 grit sand paper. I decided on fixing this packing on to the tenon so that it will be easier to clean the mortise and shank extension in future after each use. It required a great deal of patience and diligent work to achieve a perfectly snug fit of the shank extension tenon in to the mortise.
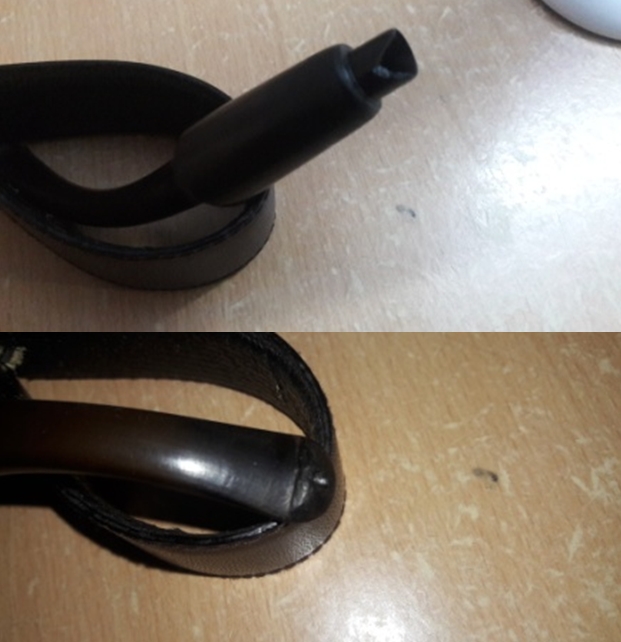
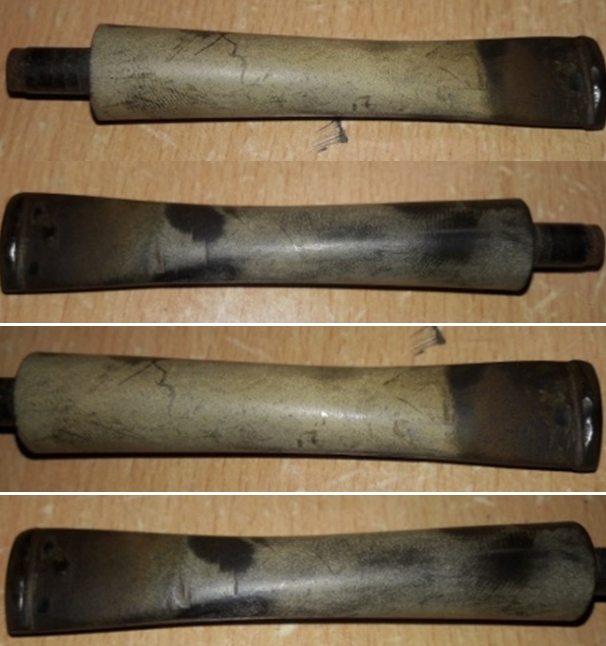
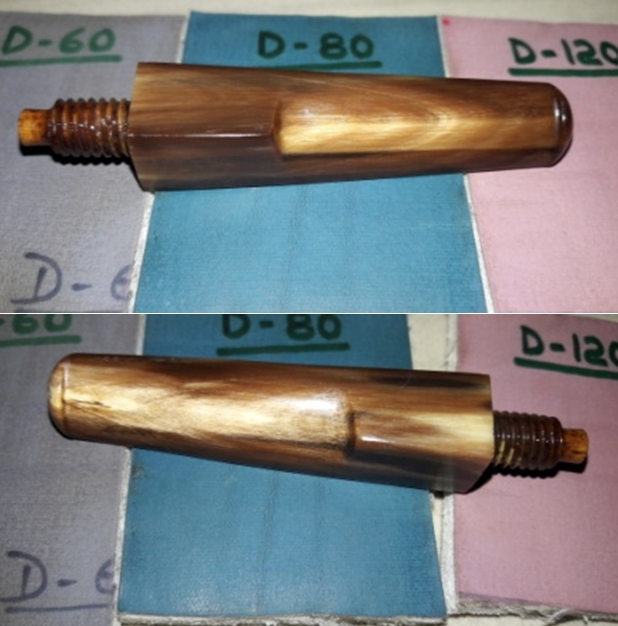
However, the moment I started to fit the drilled out cork for the stem tenon, I noticed that the cork had started to split along the fault lines. I tried to stick them together with CA superglue, but to no avail. The more I tried to push, the more the cork disintegrated!! Finally I had to shelve this idea of a cork packing for the stem tenon. The following pictures will give a clearer picture of the steps, results and the failures of this process.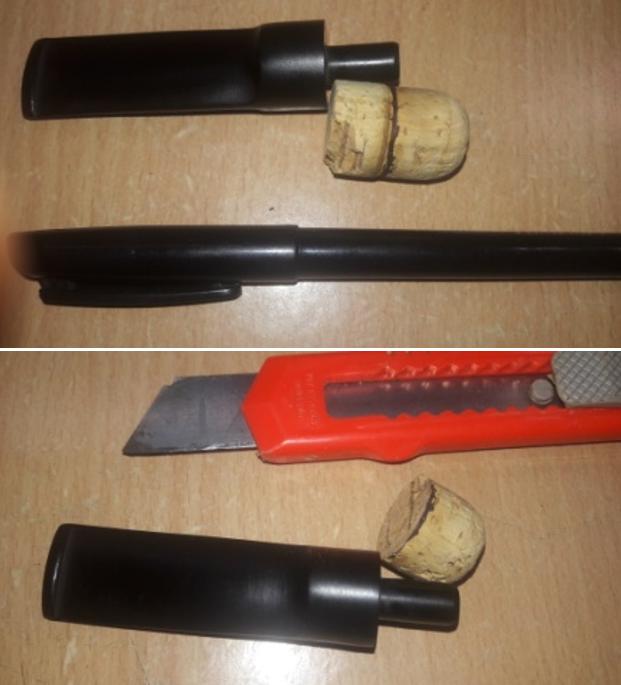


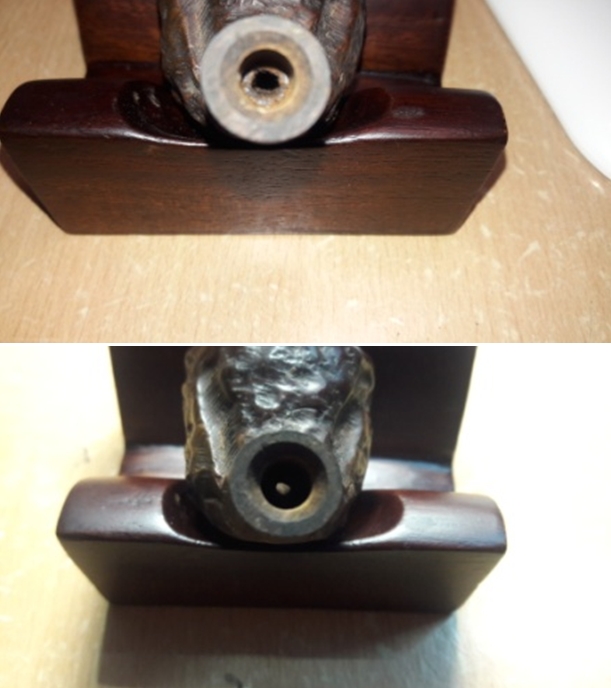
 While working on the shank extension, the metal band came loose and revealed all the corrosion on the insides of the band and patches of old glue on the shank extension itself. With a folded piece of 220 grit sand paper, I removed all the corrosion from the metal band and evened out the shank extension surface which seated the metal band. I stuck this band flushed with the shank extension stem end surface with CA superglue and set it aside.
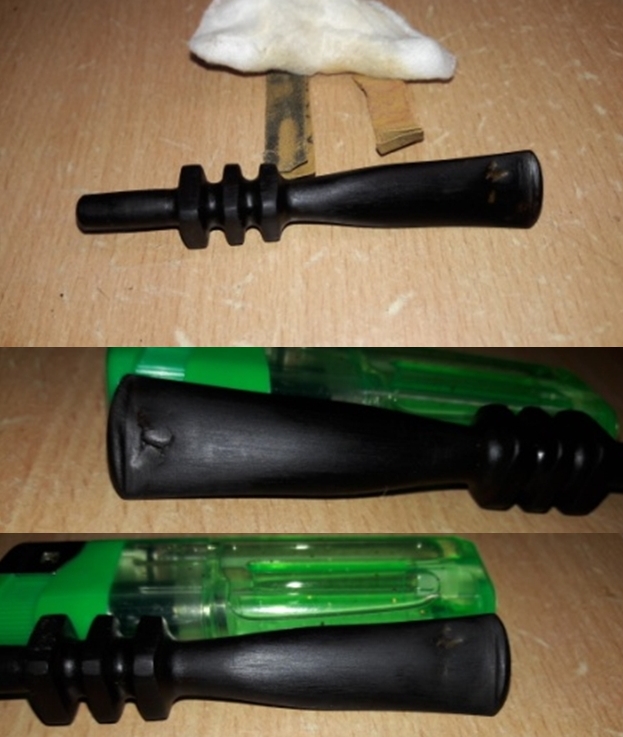
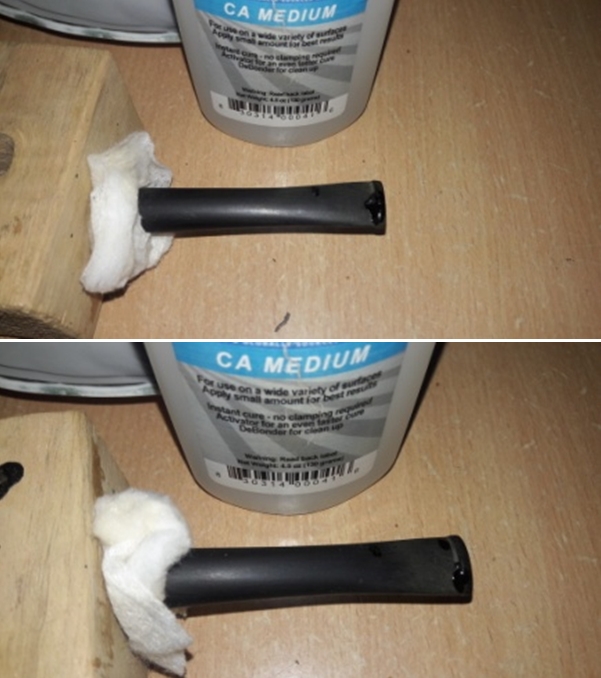
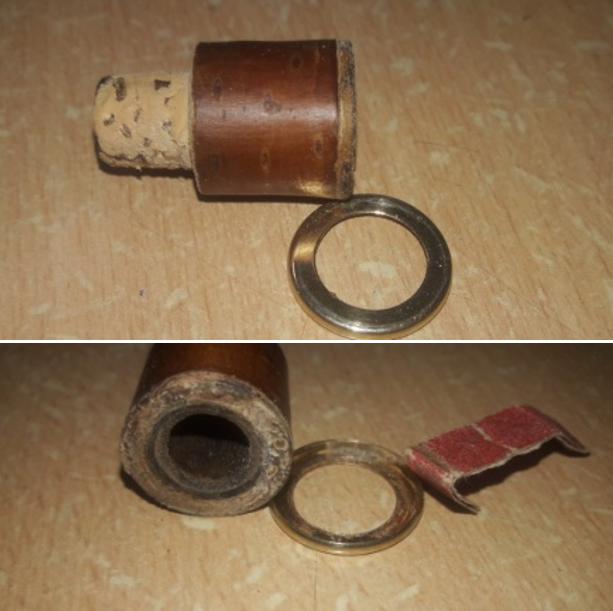 To address the fit of the stem tenon in to the shank extension, I decided to go the tried and tested path of increasing the girth of the tenon by using a mix of activated charcoal and superglue. I applied the same in layers, till I had achieved a snug fit. I had to set the stem aside after each layer for the mix to cure.
 In between all the layering and curing process on the stem tenon, I simultaneously worked on the stummel surface. The one fill which was seen and readied for a fresh fill was patched up with a mix of briar dust and superglue and set aside to cure.
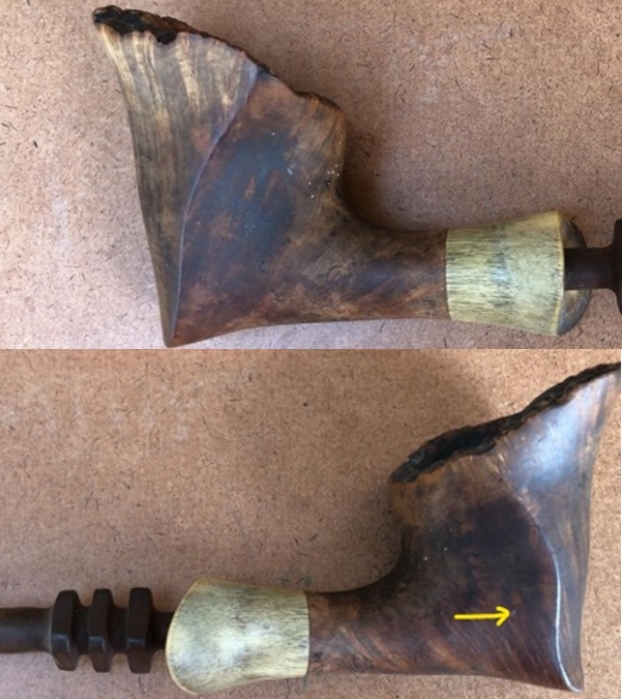
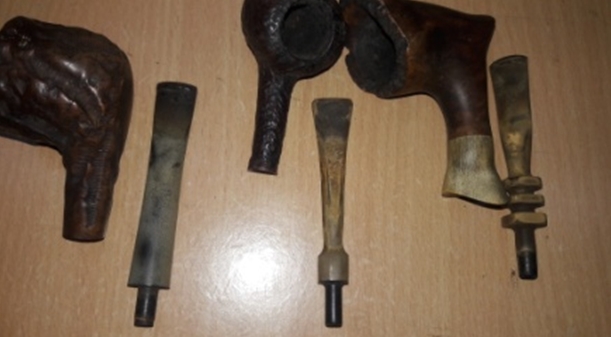
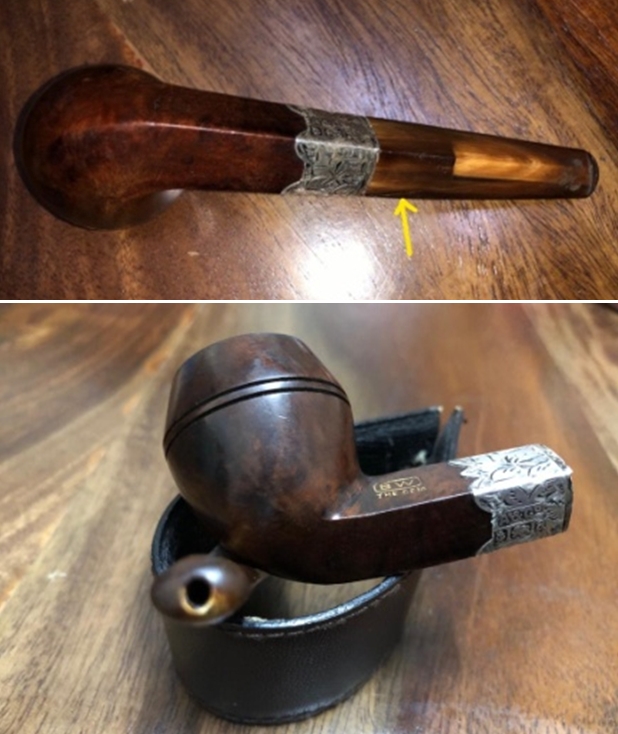
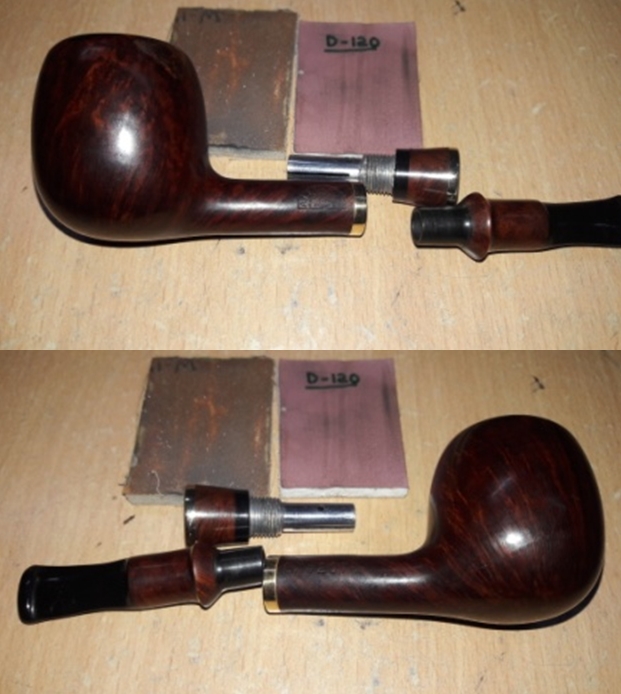
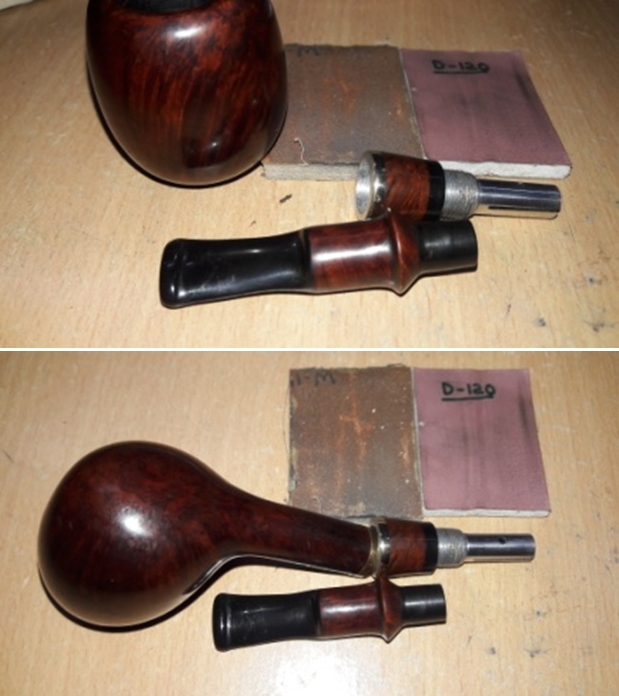
 While, the stummel fill was set aside to cure, I started work on the stem tenon. Using a flat heat needle file, I lightly sand the rebuild tenon surface. As I started to sand with a piece of 220 grit sand paper, I frequently checked the seating of the tenon in to the shank extension. It was at this point in time that I observed that the seating was skewed. There was a prominent gap (indicated by a red arrow) towards the right side between the edges of the stem and the shank extension. On careful observation, I noticed that the fit of the tenon itself in the stem is not aligned straight!! It was this misaligned tenon that caused the stem to seat incorrectly in to the shank extension. To straighten the stem tenon, I inserted a pipe cleaner through the stem and heated the tenon with my heat gun till pliable. Pulling the tenon end of the pipe cleaner, I achieved a straight alignment of the tenon with the stem and cooled the tenon by holding it under cold running tap water. I checked the seating of the stem in to the shank extension and it was perfect.
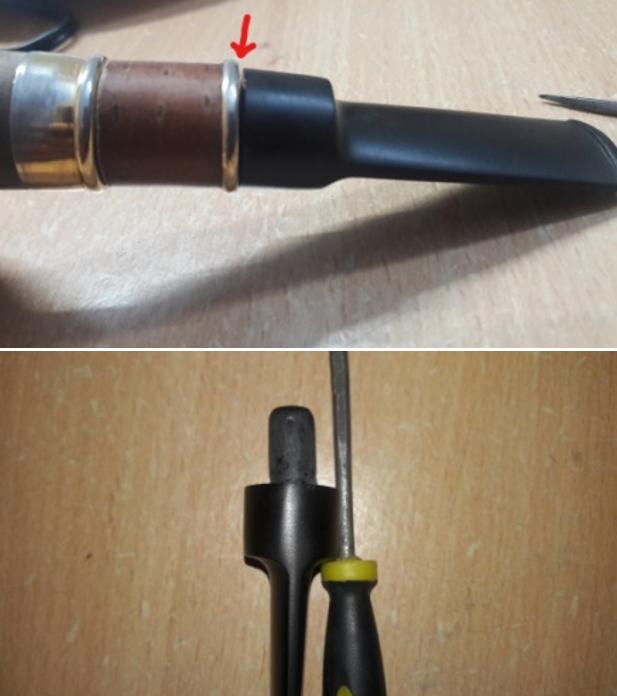
 Turning my attention back to the stummel, I matched the fill with the rest of the stummel surface by sanding the fill with a flat head needle file followed by sanding the fill with a folded piece of 220 grit sand paper. For a perfectly smooth rim top surface, I top it on a piece of 220 grit sand paper. This also addressed the minor dings on the outer rim edge. I sharpened the inner bevel with a folded piece of 220 grit sand paper, pinched between my fingers.
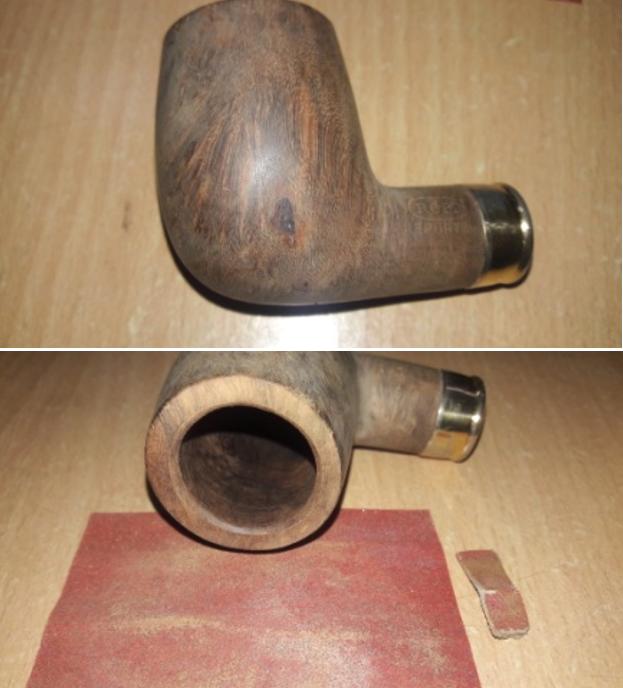
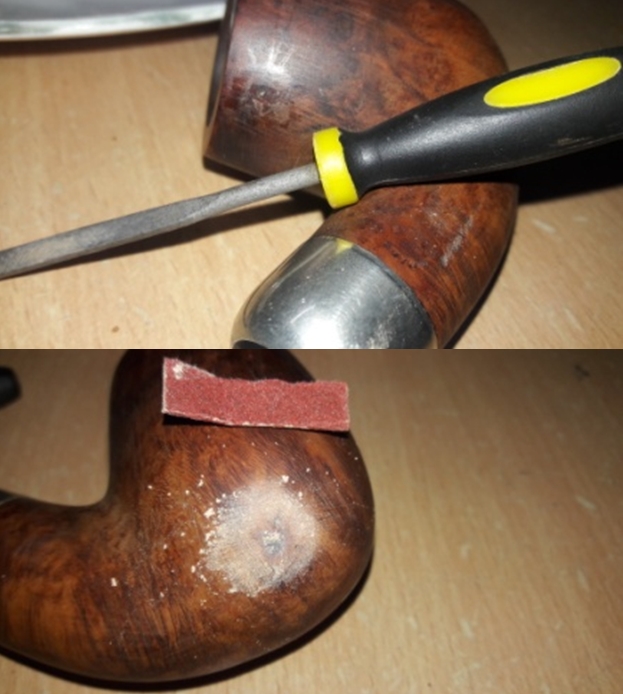
 It was at this stage that a colleague of mine saw the pipe and wanted it for himself. He liked the grains and the overall aesthetics of this pipe. I explained to him the amount of work remaining that was required to restore this pipe, including the steaming out of the dents and dings at the foot of the stummel. He did not like the idea of steaming out the dents from the foot and vehemently opposed this process. No amount of persuasion on my part that this process will not cause any damage but on the contrary repair it, could convince him. Since he is the new owner of this pipe, with great reluctance, I gave in to his request.
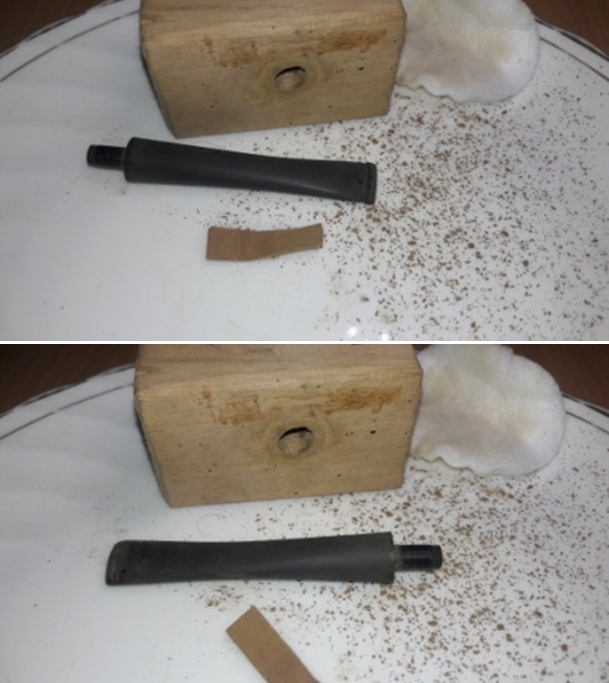
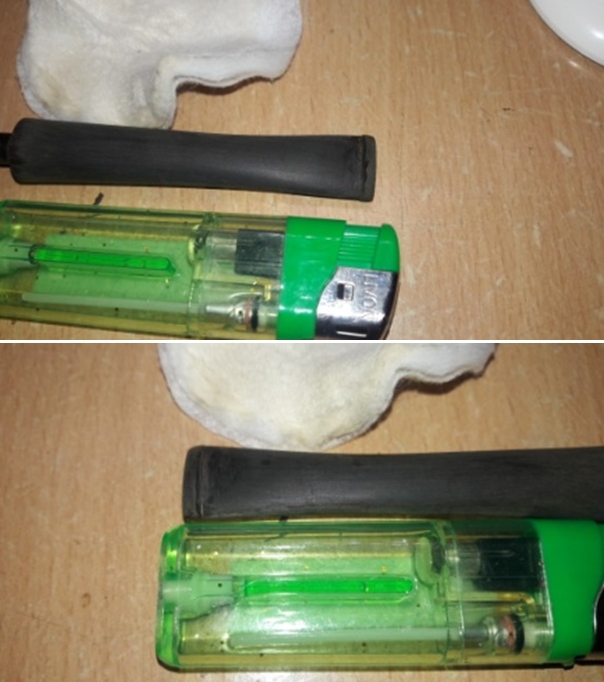
The stem tenon had completely cooled off by now and was perfectly straight. I flamed both the stem surfaces with a lighter to raise the deep bite mark and followed it up with sanding the surface with a 220 grit sand paper followed by 0000 grade steel wool. This helps to remove what little oxidation remained on the stem surface and at the same time addresses minor tooth chatter in the bite zone. I fill the deeper bite area and the button edges with a mix of superglue and activated charcoal powder and set it aside to cure.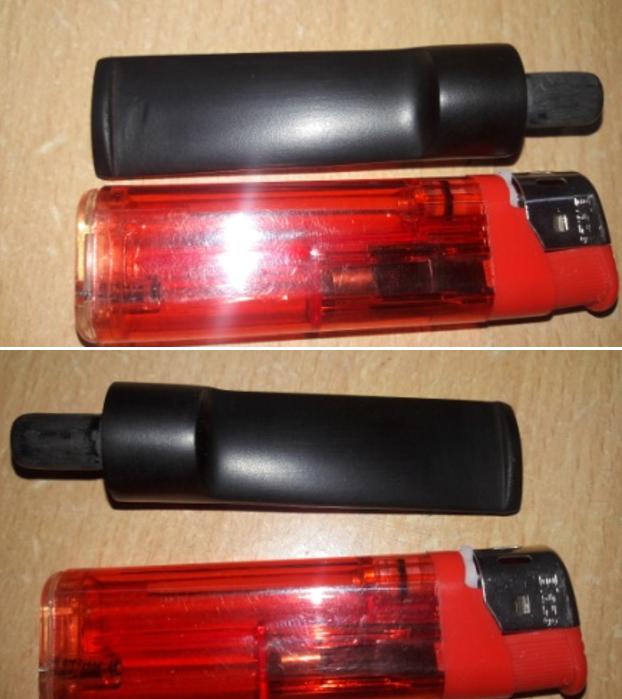

 While the stem fill was curing, I moved ahead with micromesh polishing of the stummel surface. Now, here is a slight departure from the usual polishing process that I have followed on all previous restorations. I had read that White diamond polish falls between 3400 to 4000 grit micromesh pads and so to experiment, I polished the stummel with white diamond after wet sanding with 1500 to 3400 micromesh pads. I finished the polishing cycle by wet sanding with remaining grit micromesh pads. In all honesty, I found the finish not much different from the routine polishing of wet sanding with 1500 to 12000 micromesh pads. I shall continue with this experiment on a few more pipes and then decide to continue with this process or revert back to only micromesh pads.
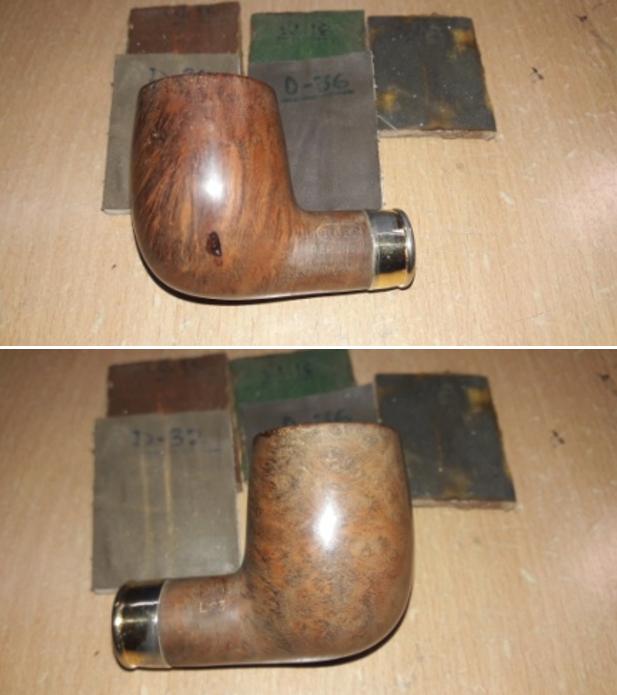


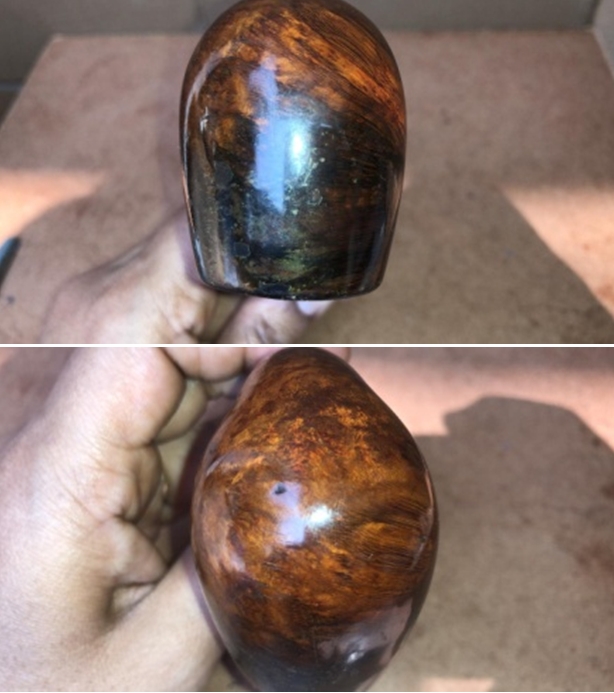
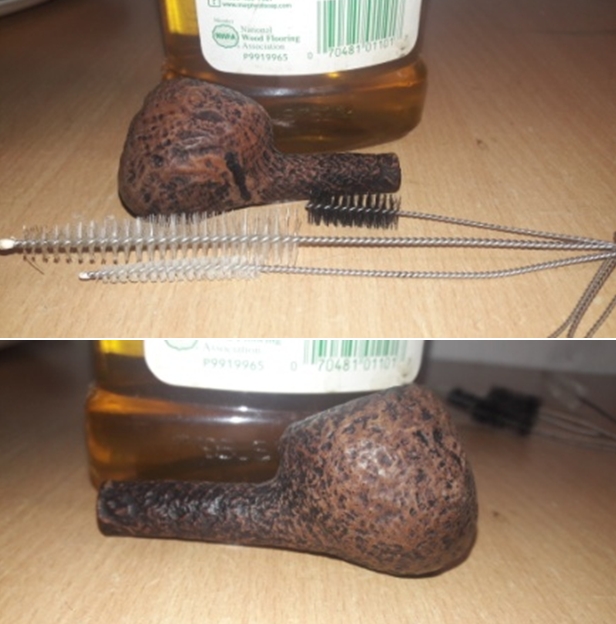
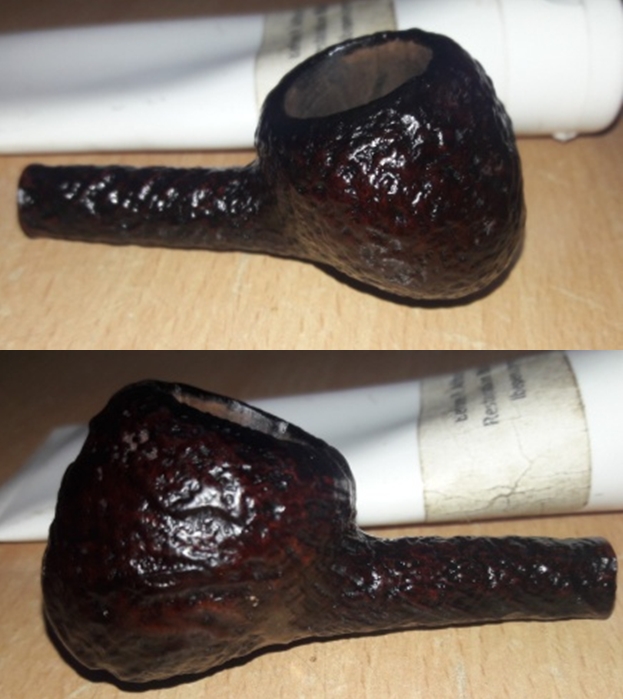
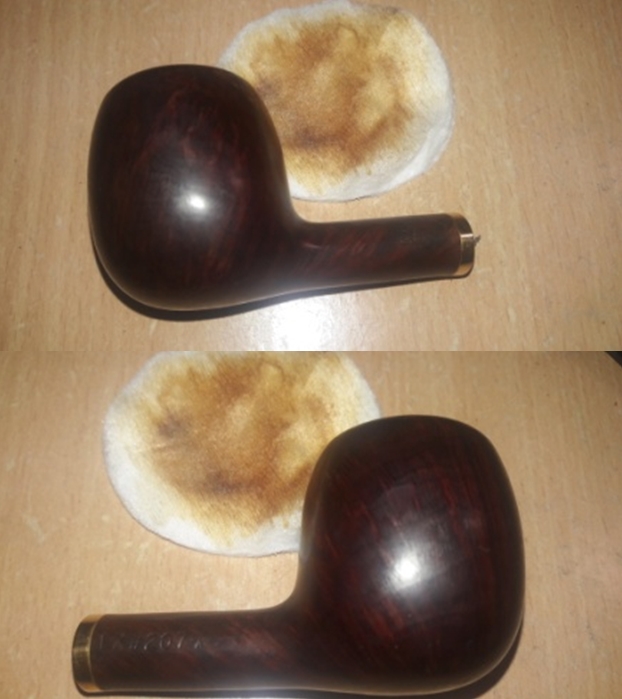
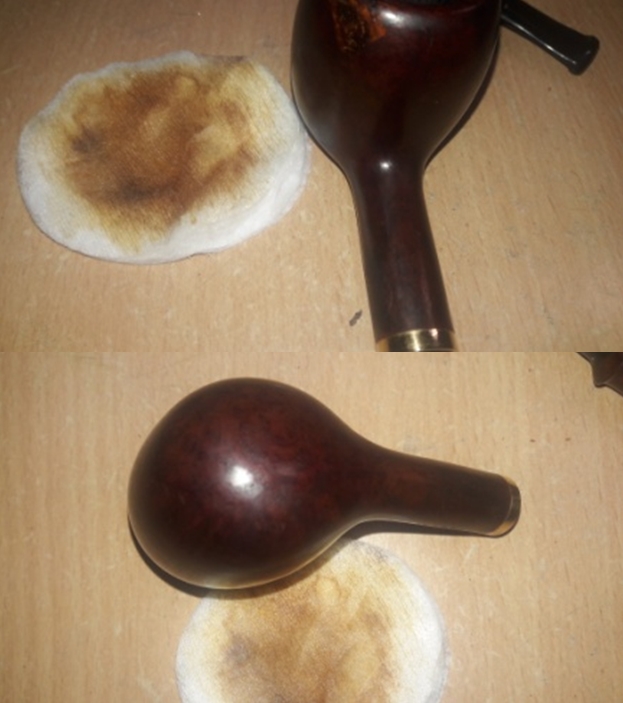
 I followed up the polishing by applying “Before and After Restoration” balm. This balm protects and enriches the briar surface and is highly recommended for use in any restoration of briar pipe. I rubbed it deep in to the stummel surface and also in to the shank extension and set it aside to be absorbed for 20 minutes. I also applied petroleum jelly to the cork on the tenon of the shank extension to hydrate and moisten it. I am pleased by the appearance of the stummel (less the dents and dings on the foot of the stummel) and the deep burnt orange hue of the shank extension.

 At this point in restoration the only other issue, other than the dents and dings on the foot of the stummel, that I need to address is that the burnt orange color of the shank extension merges with the coloration of the stummel. I would love to impart a bit of a contrast between the stummel, shank extension and the shining black of the vulcanite. Well, I shall see to it when I get there!! The following pictures will bring better clarity to what I am commenting on.
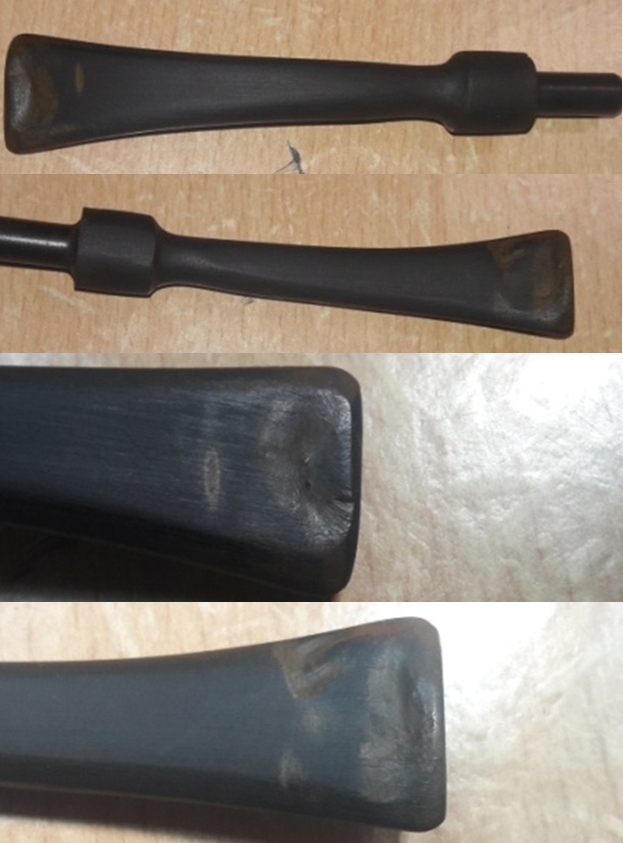
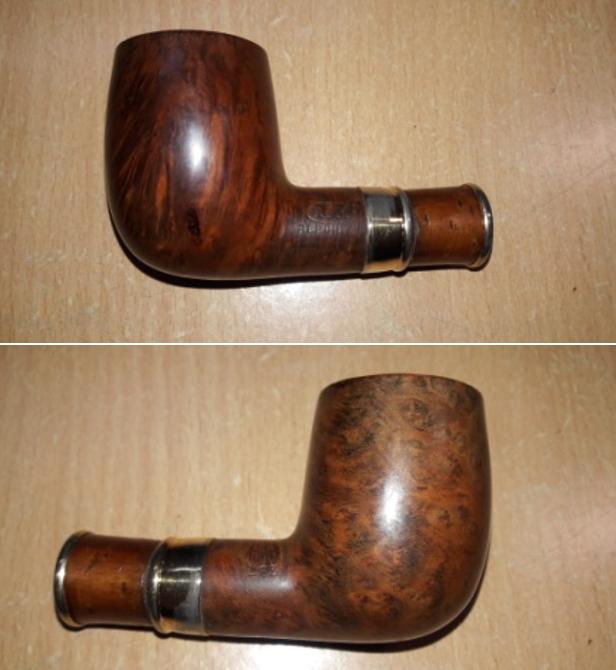 With the stummel nice and clean and attractive, I worked the stem of the pipe. The fill on the stem had cured nicely and I sand it down with a flat head needle file. I sharpened the lip edges using a needle file and sand the entire stem with 220 followed by 400, 800 and 1000 grit sand paper. This helps to reduce the sanding marks left behind by the more abrasive 220 grit paper. To bring a deep shine to the vulcanite stem and the tenon, I went through the complete set of micromesh pads, wet sanding with 1500 to 12000 grit pads. I wiped the stem with a moist cloth after each pad and rubbed it down with Extra Virgin Olive oil. The pictures of the final results are shown below.
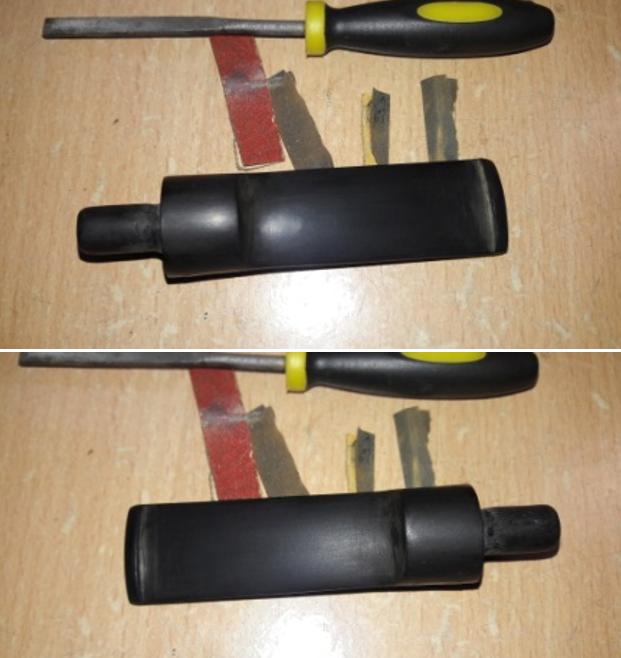
 I applied a small quantity of “Before and After Extra Fine” stem polish and rubbed it deep in to the vulcanite stem. This polish, purportedly, is supposed to remove the fine sanding marks left behind by the abrasive grit papers.
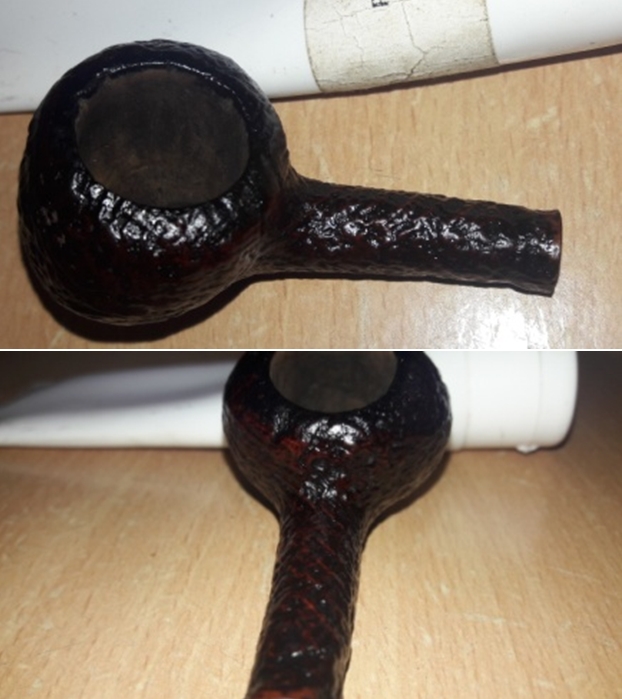
 This is how the pipe appears at this stage. The shank extension completely merges with the stummel and looks out of sync with the overall appearance of the pipe. The shank extension was most likely meant to provide a contrast between the stummel and in the process, add some bling to it.
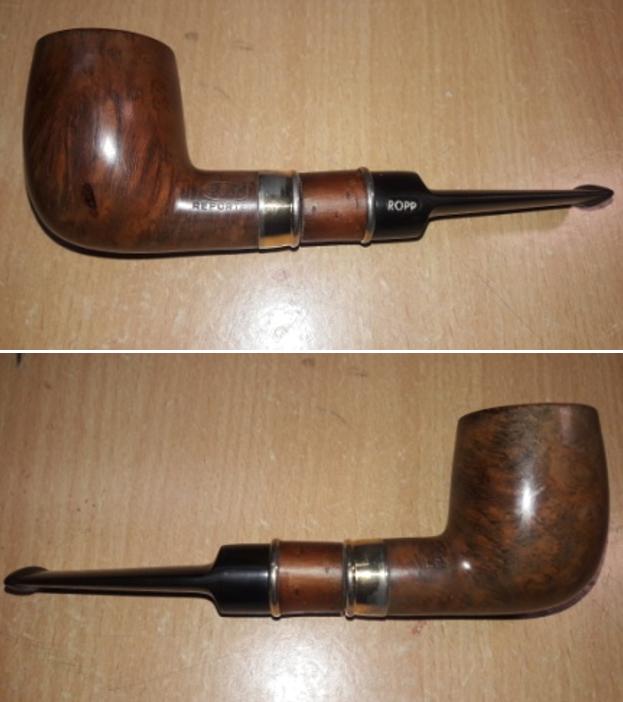
 At this stage my colleague again interfered and wanted the natural finish. He is one person who loves natural finish of the briar with the grains being seen. However, I was not ready to compromise this time around. We struck an understanding between us that if the finished pipe is not liked by him, I would get it back to the natural finish. Now with this stalemate sorted out, I contemplated my next step.
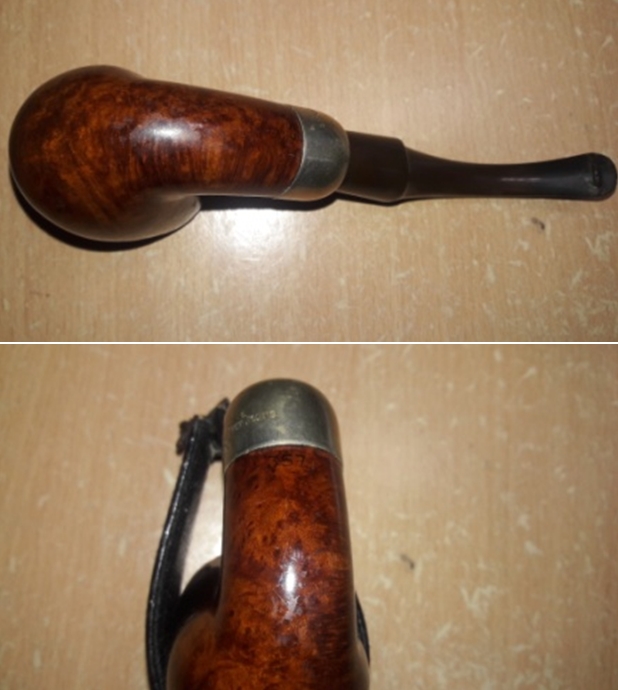
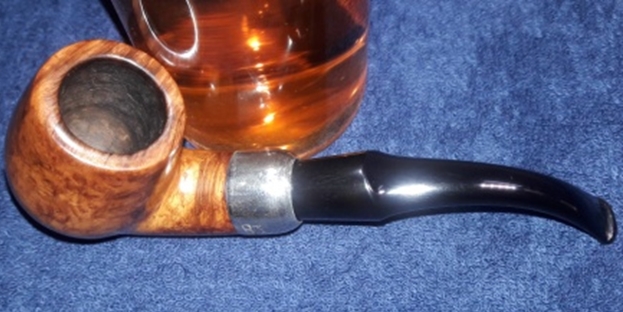
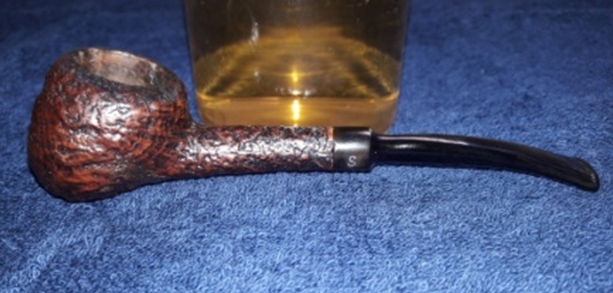
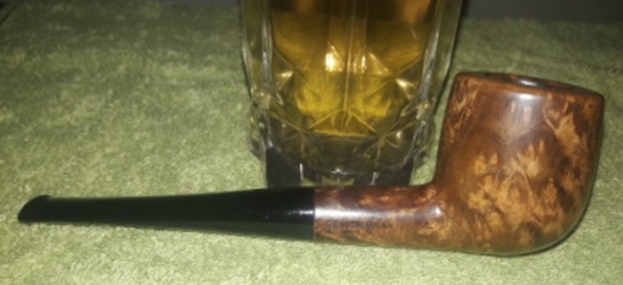
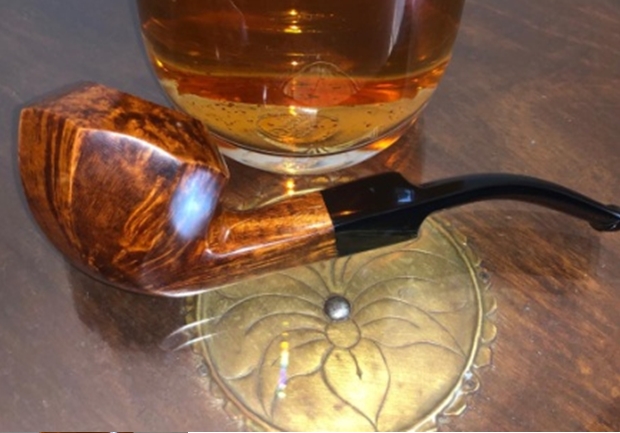
I felt that the burnt orange of the shank extension would provide a nice contrast between the shining black vulcanite and a light black stained stummel. I shared this thought with Steve, my mentor, and he concurred with my view. He suggested that I should give the stummel a light black stain wash and thereafter bring it up to a nice high gloss finish. I mixed a small quantity of black stain powder with isopropyl alcohol to a very watery consistency and applied it to the stummel with a cotton swab. I let this stain wash set for a minute and vigorously wiped it down with a clean cotton swab. I repeated this process a couple of times till I was satisfied with coloration of the stummel. Here are the pictures and the end result of this stain wash. I liked it immensely. 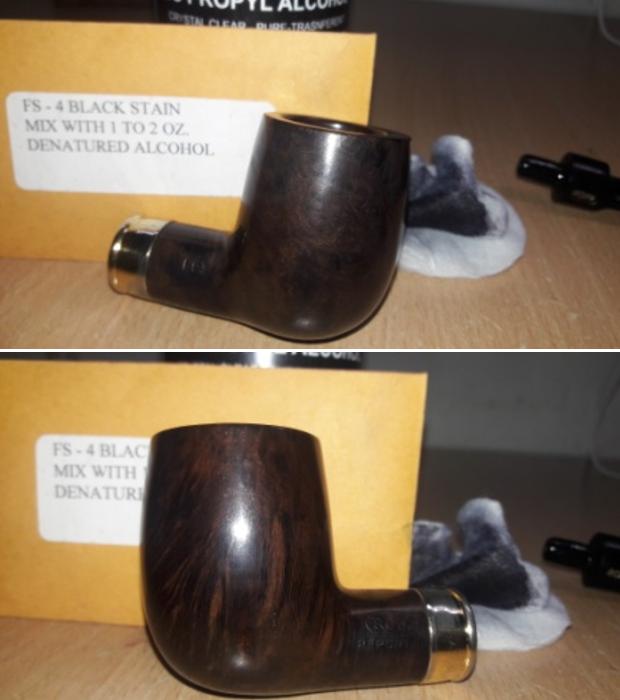 To complete the restoration, I mount a cotton cloth buffing wheel on to my hand held rotary tool and apply a coat of Blue Diamond to the stummel, shank extension and the stem to polish out the minor scratches. With a cotton buffing wheel that I use for carnauba wax, I apply a coat of carnauba wax and continue to work on it till the complete coat of wax had been polished out. I finished the restoration by giving the entire pipe a rigorous hand buffing using a microfiber cloth to raise the shine further. I buffed the gold colored band/ ring at the shank end and at the stem end of the shank extension with a jeweler’s cloth and bring it to a nice shine. I mount a clean cotton cloth buffing wheel and give the entire pipe a once over buff. Boy, am I happy with the look of this pipe. The burnt orange provides a striking contrast with the darker hues of the stummel and shining black of the highly polished vulcanite stem. The finished pipe is shown below. Cheers!!
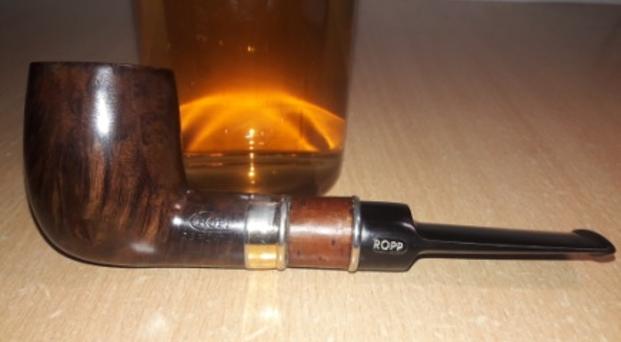


 P.S. The completed pipe actually looks more stunning in person than in pictures. Even my colleague loved the finished pipe and he is all set to enjoy this beauty with his favorite tobacco, Autumn Evening, from 4noggins!! Thank you all for walking with me through this restoration which was a combination of some new processes and experiments.