Tag Archives: Oxidation

Restoring 2 Kaywoodies – a Flame Grain 99B and a Meerschaum Lined 86B


Blog by Dave Gossett
KW1 
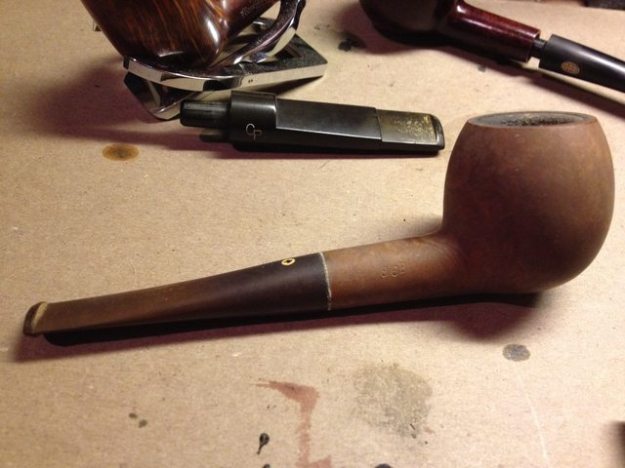
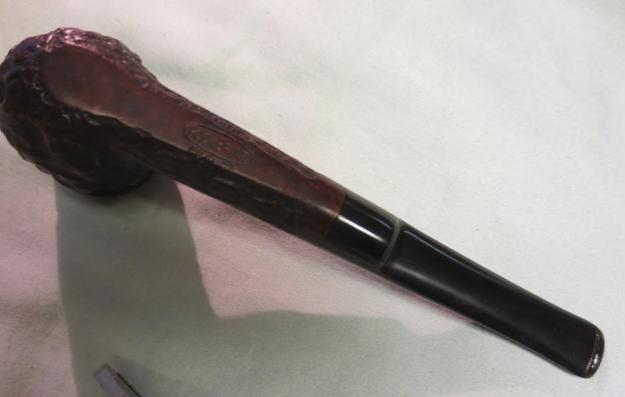
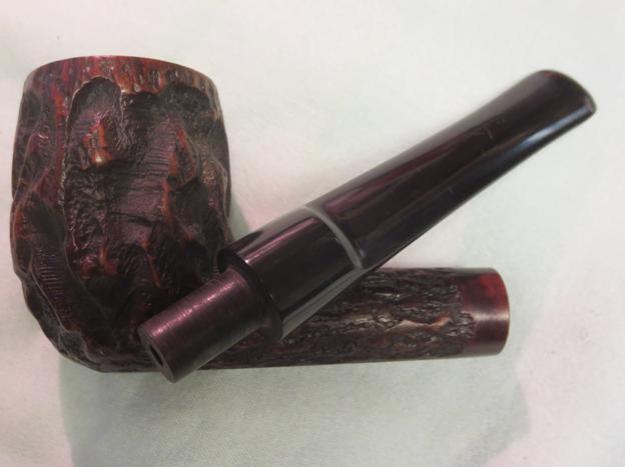
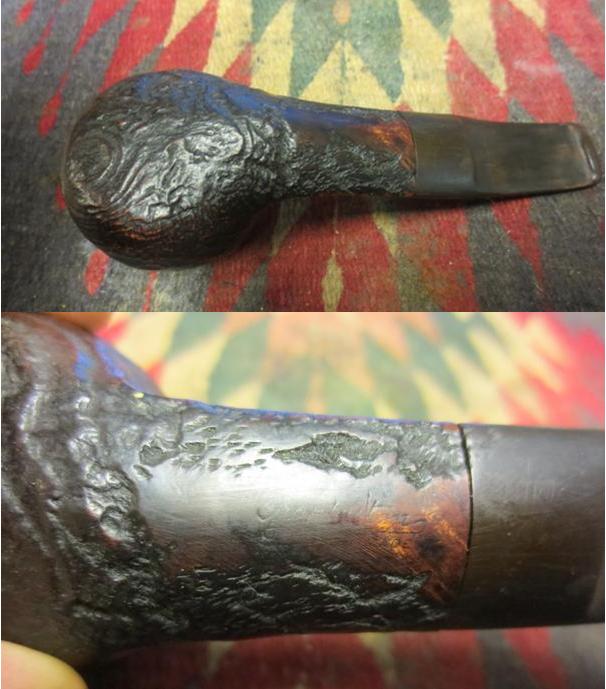
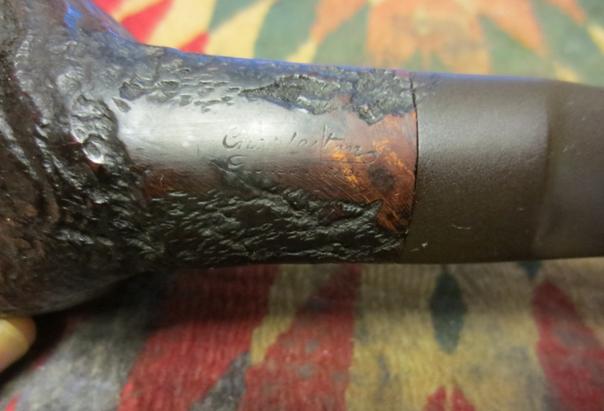
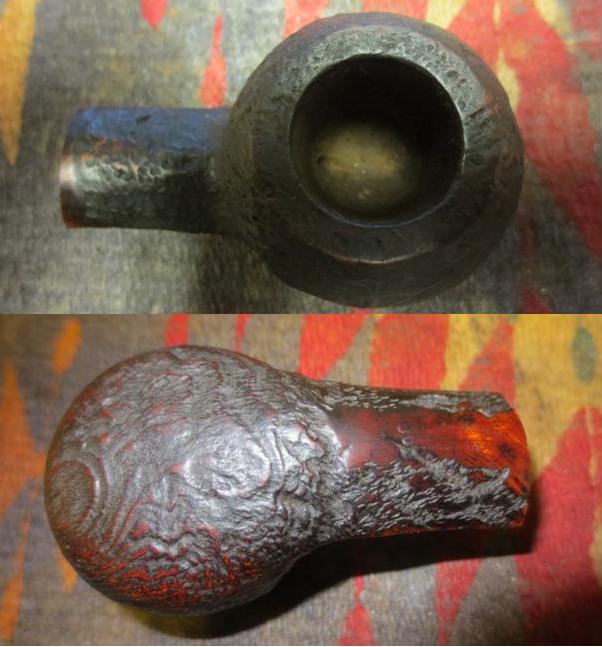
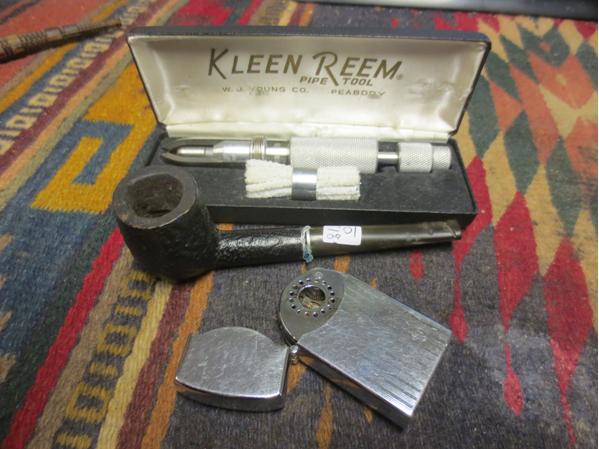
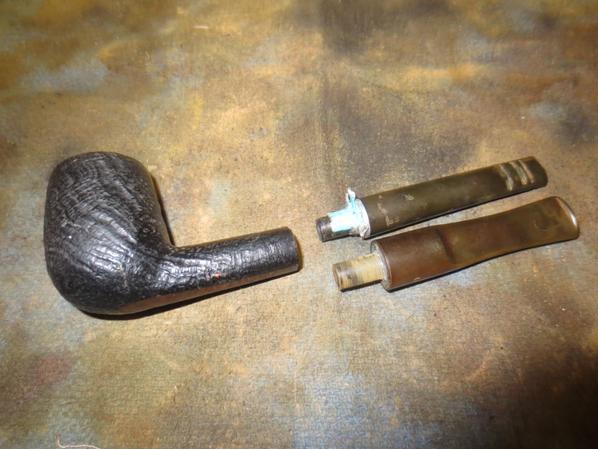
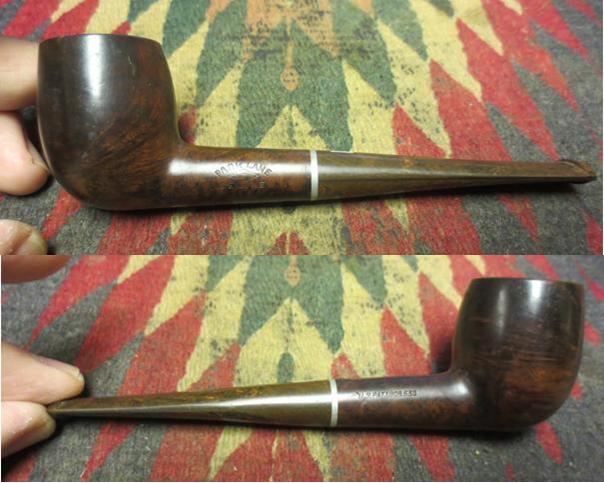
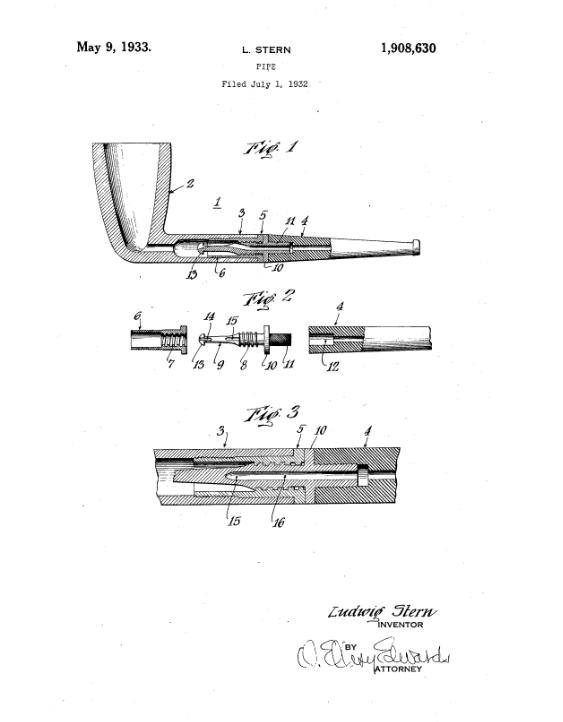
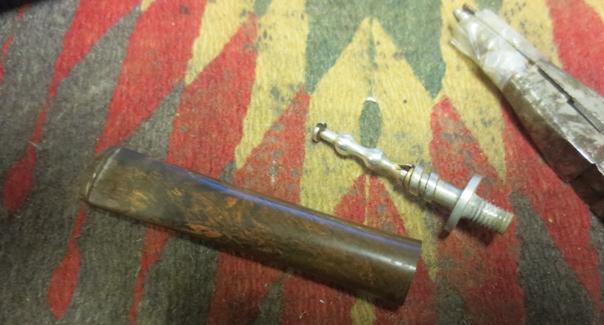
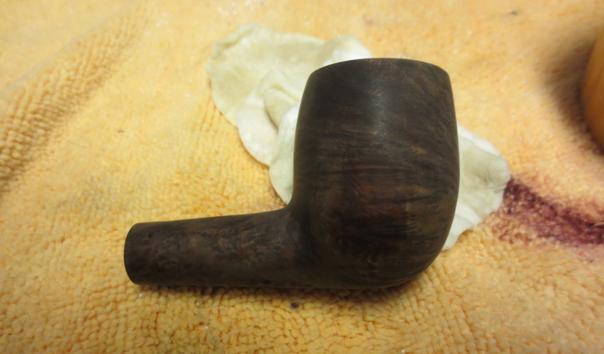
These two Kaywoodie’s were found at an estate sale. They are great survivor examples from the heyday of Kaywoodie. I could tell the previous owner cared for and loved these pipes. They were well used and dirty, but in near perfect condition. Free of fills, tooth chatter, scratches, nicks, or dents. The stampings are crisp and clear. The lines are sharp and straight. Both are 4 hole Drinkless stinger era KW’s.

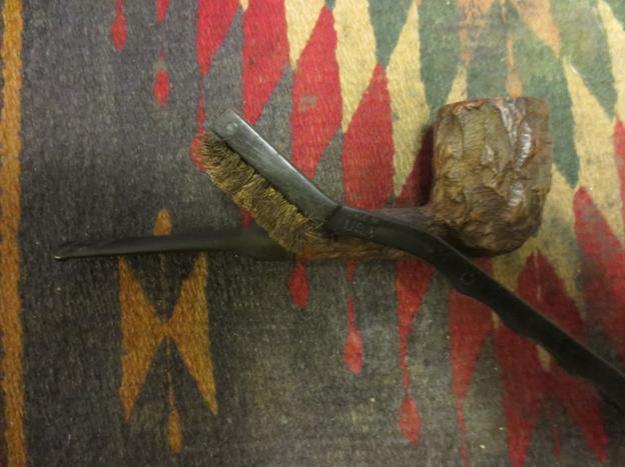
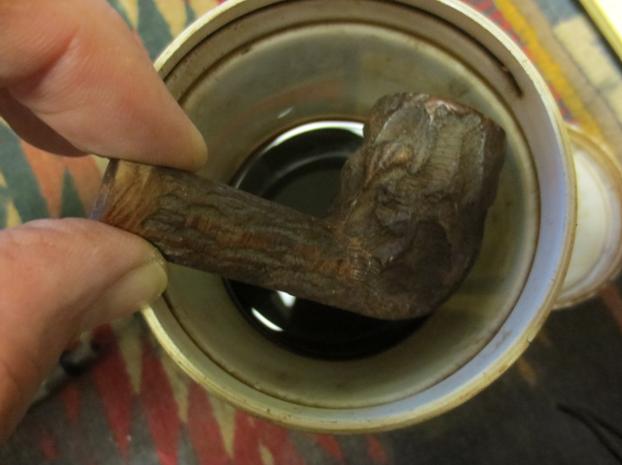
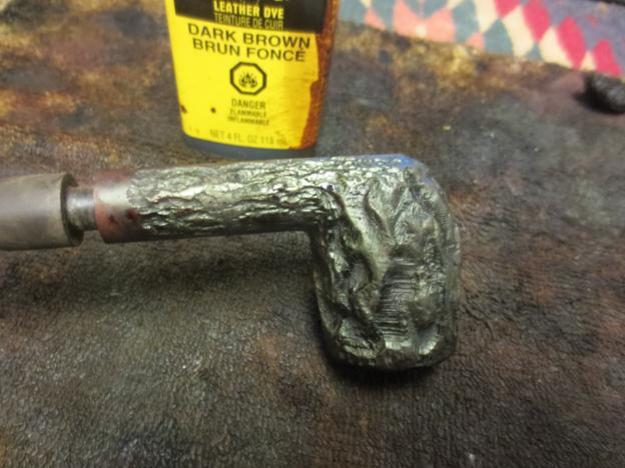
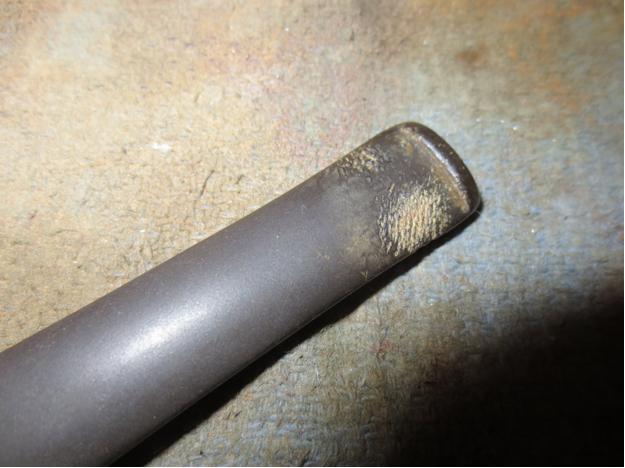
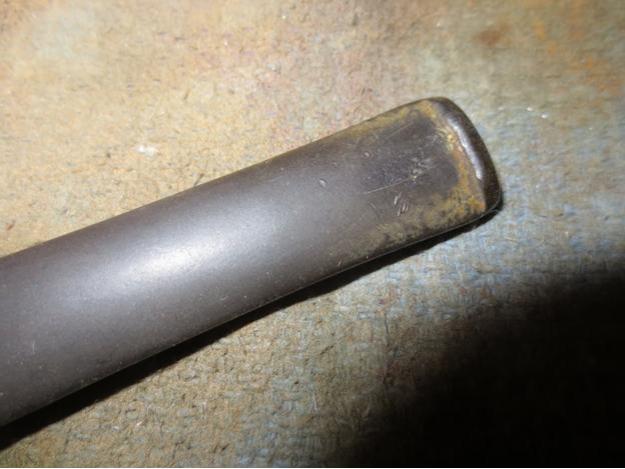
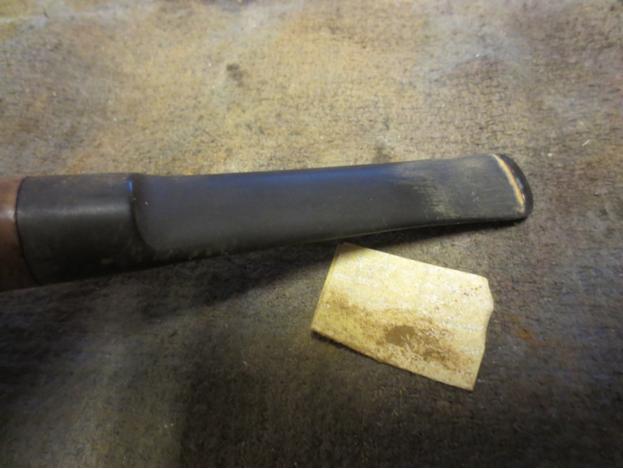
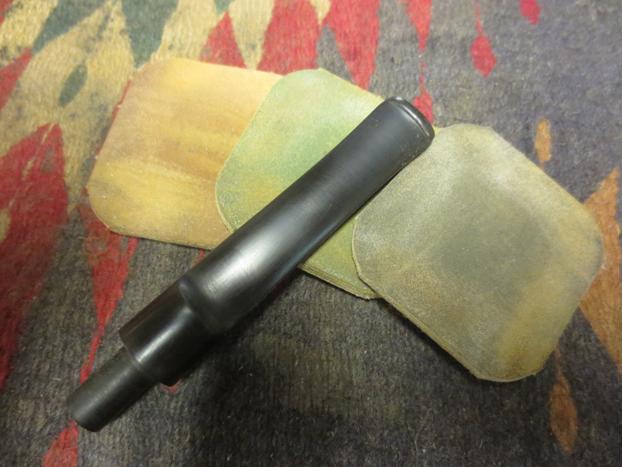
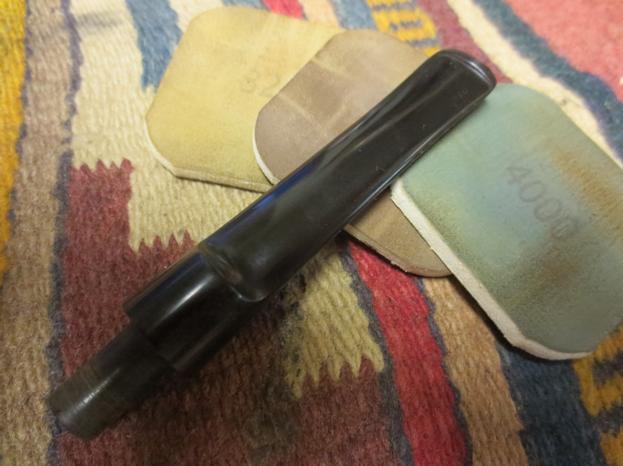
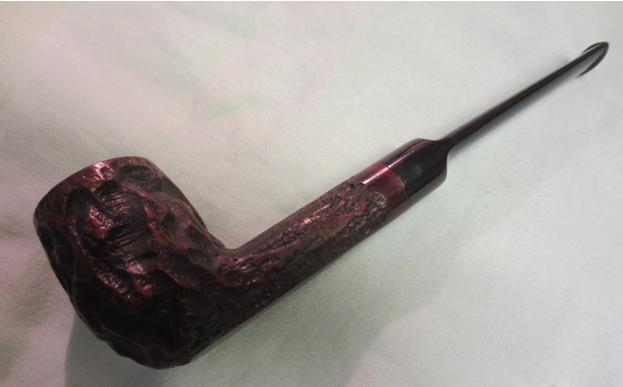
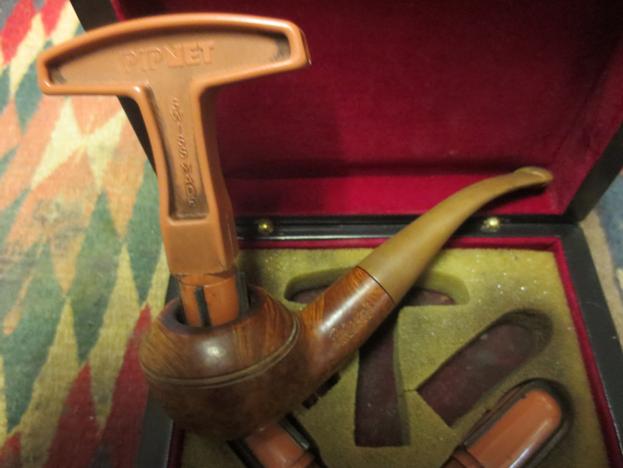
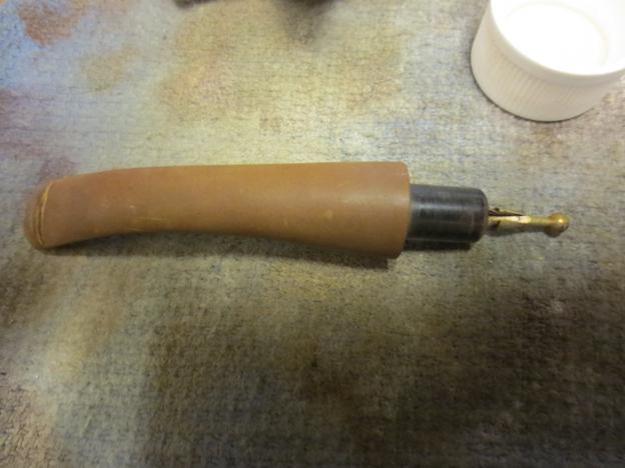
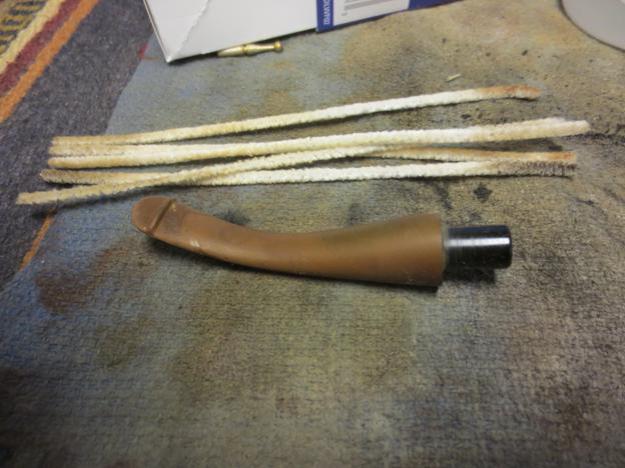
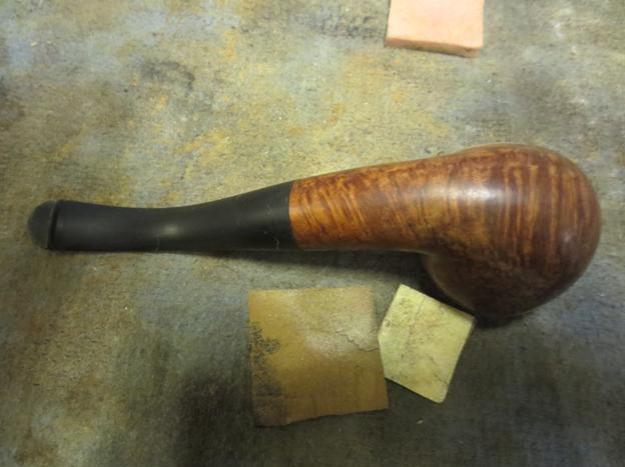
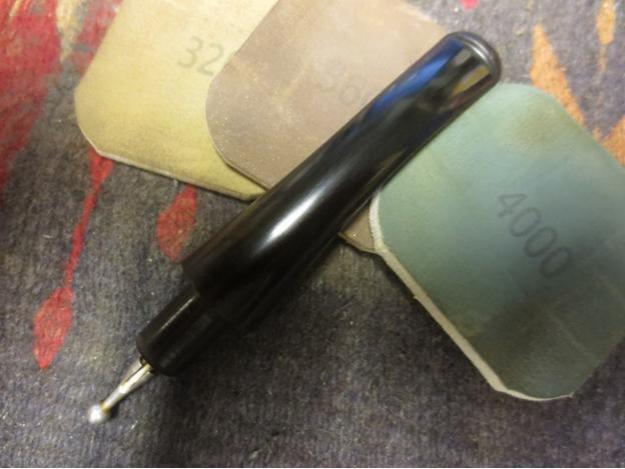
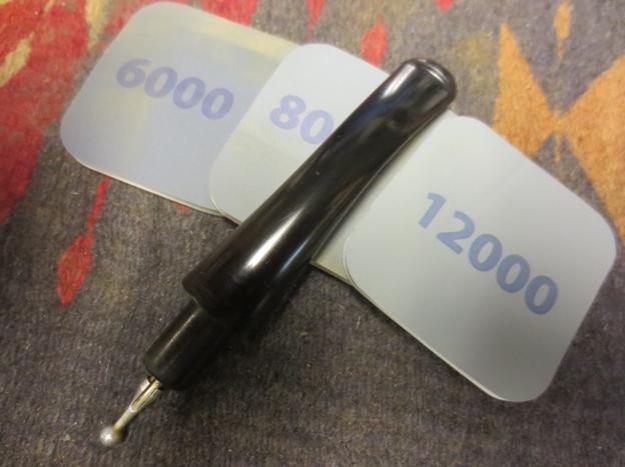
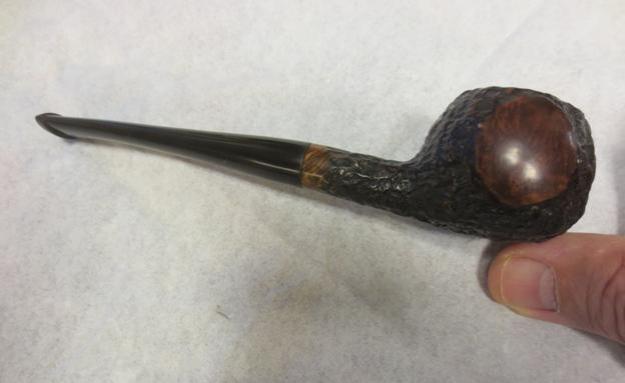
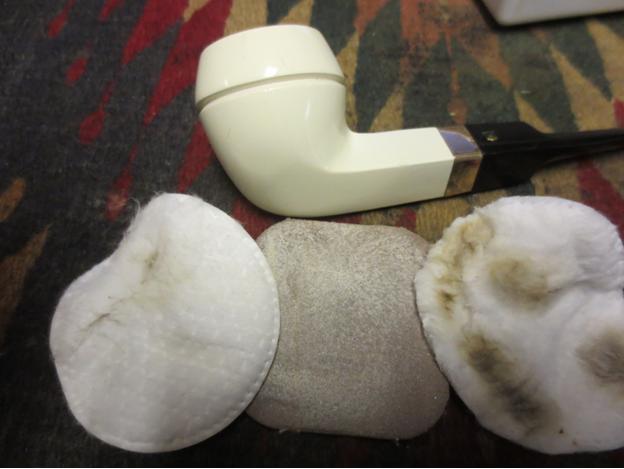
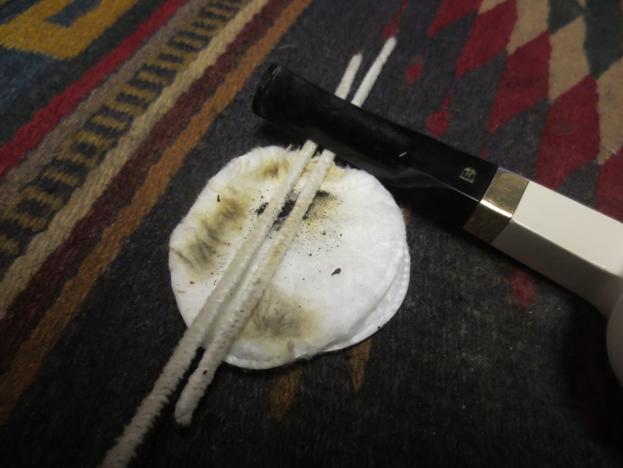
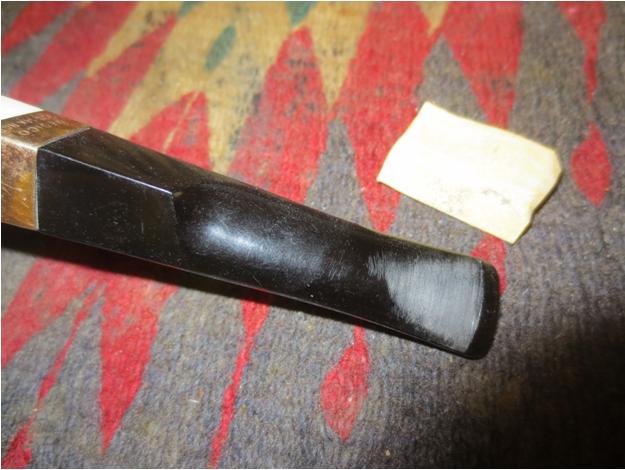
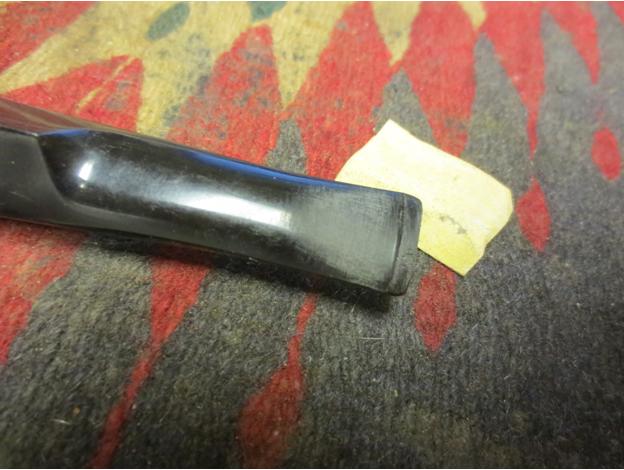
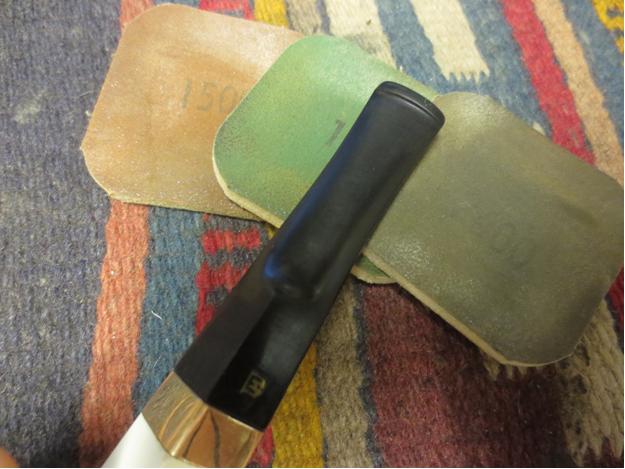
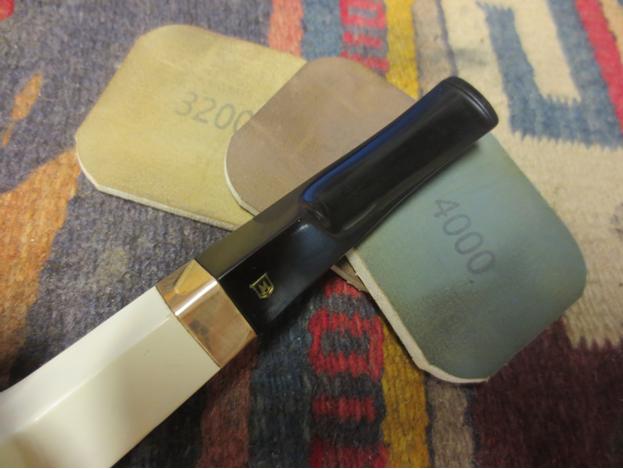
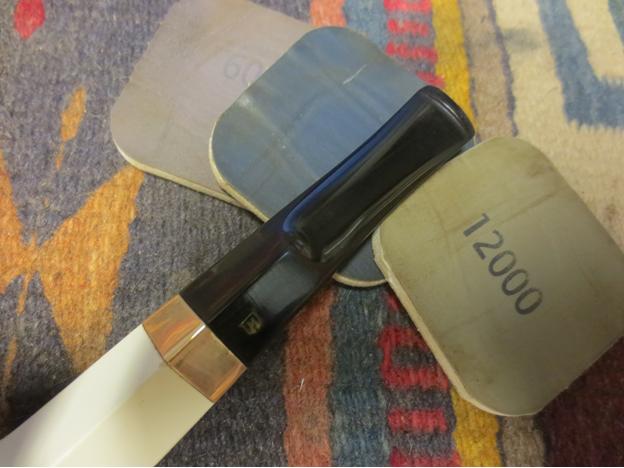
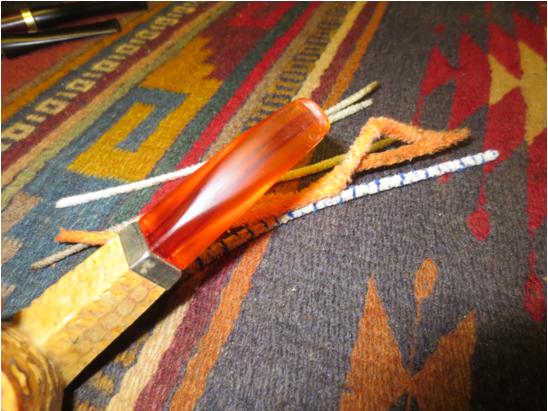
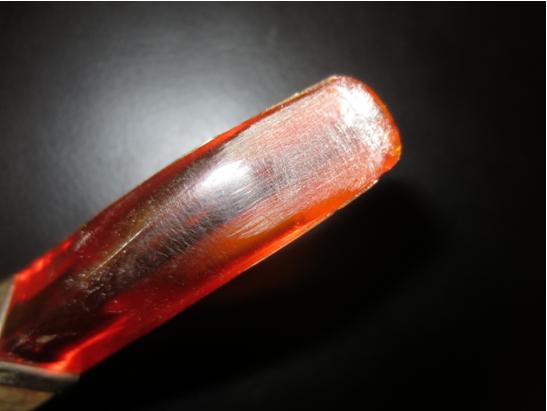
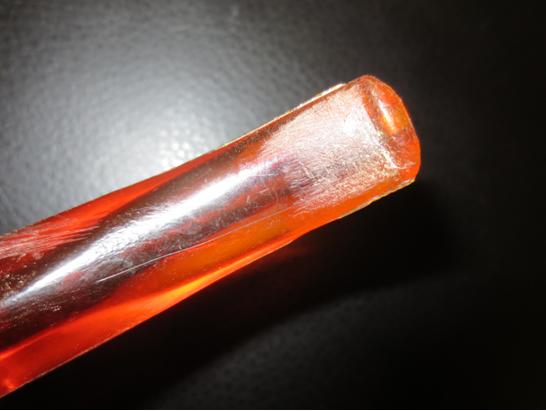
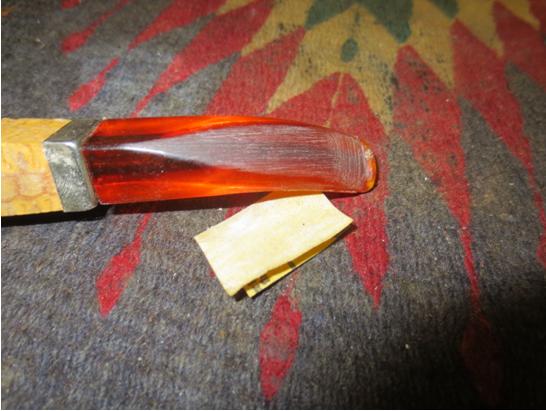
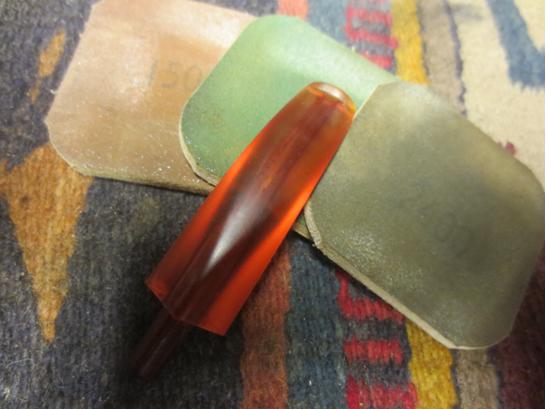
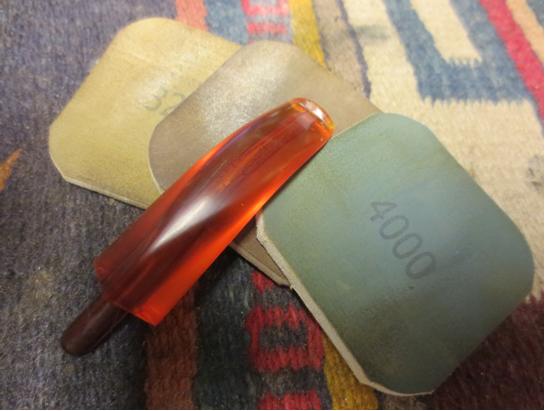
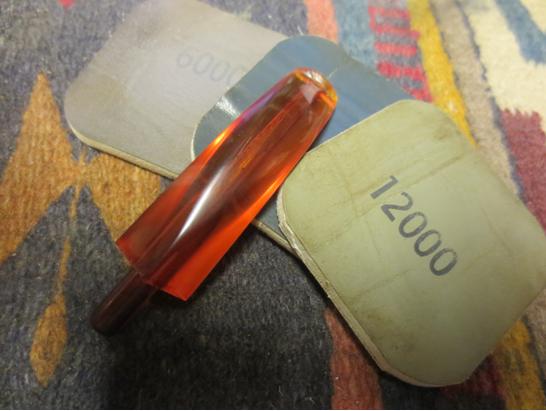
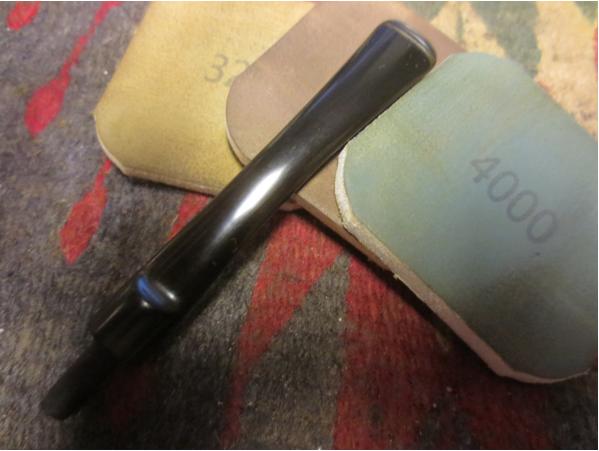
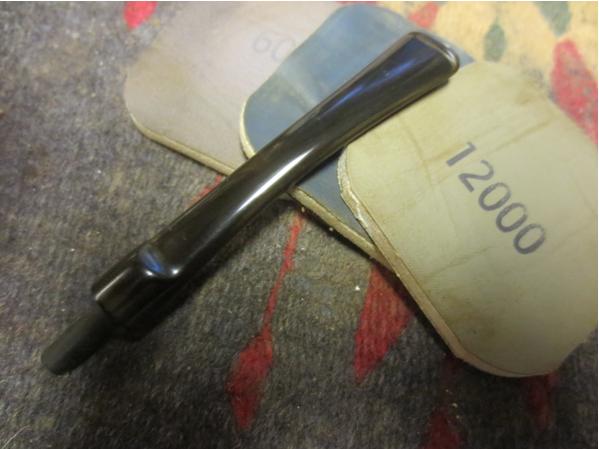
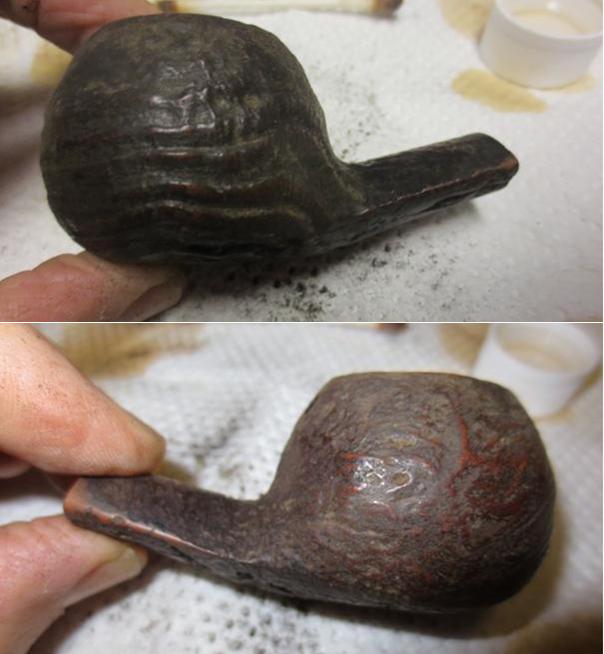
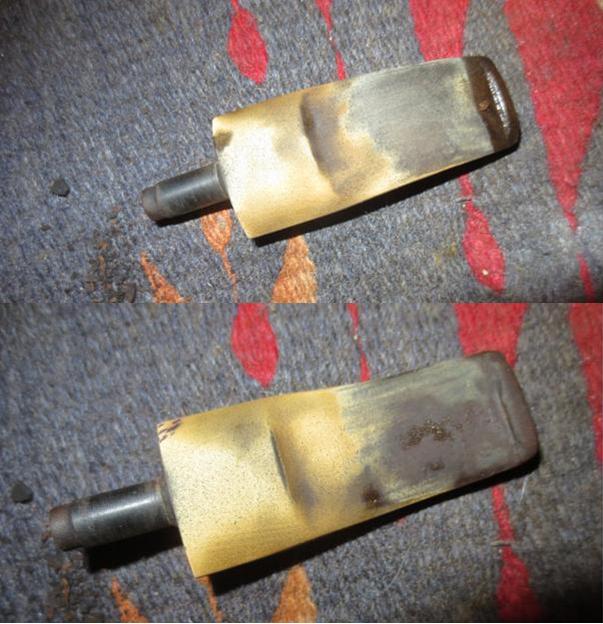
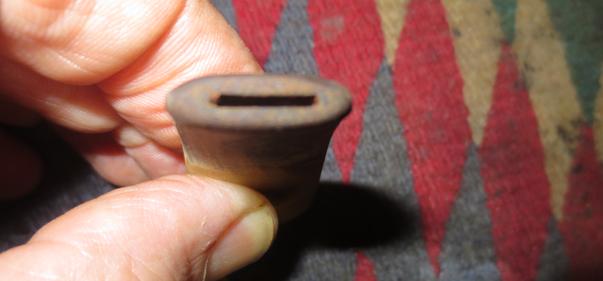
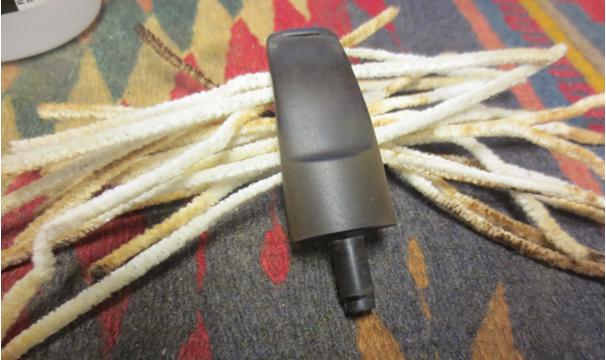
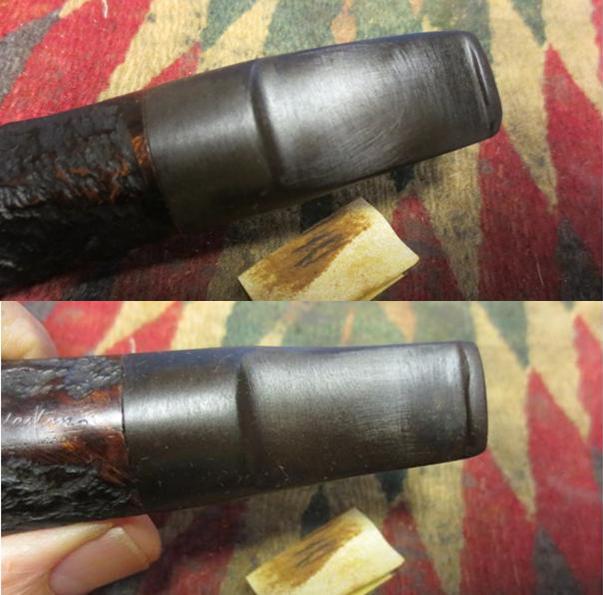
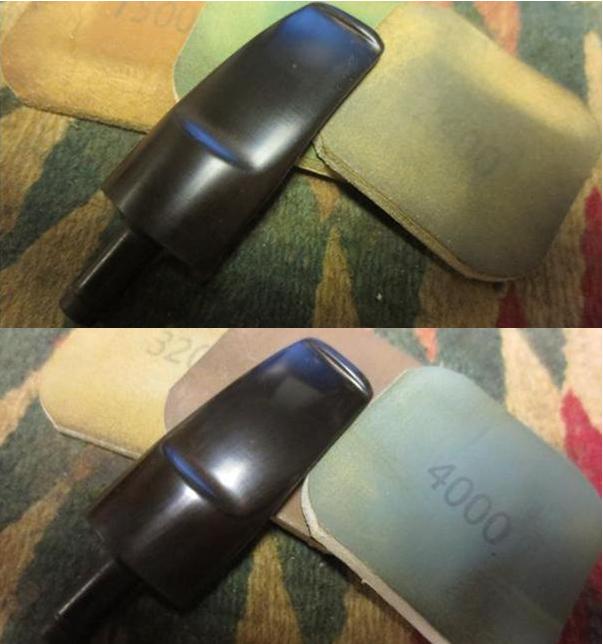
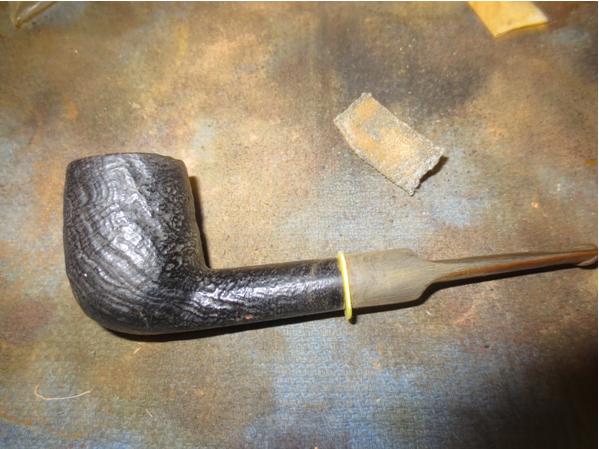
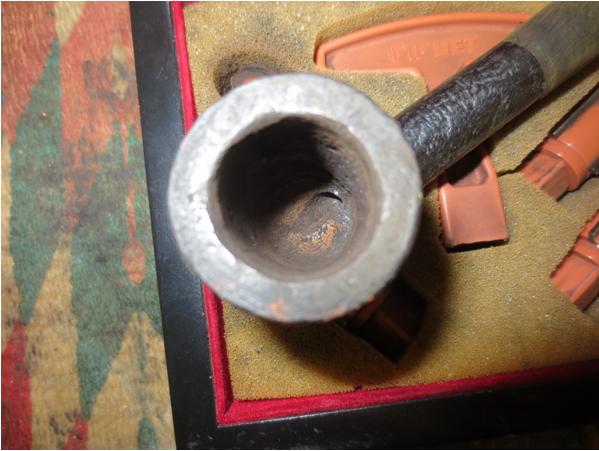
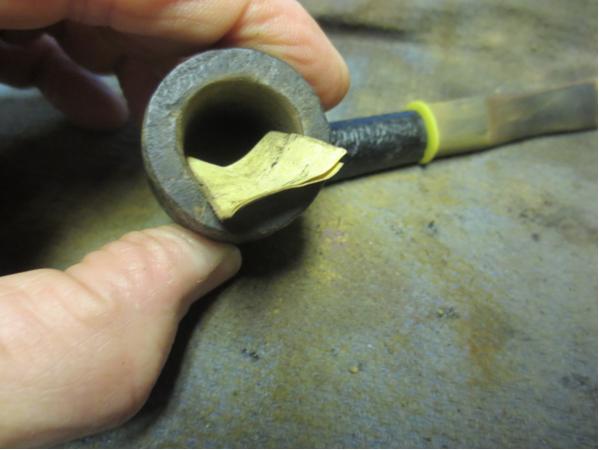
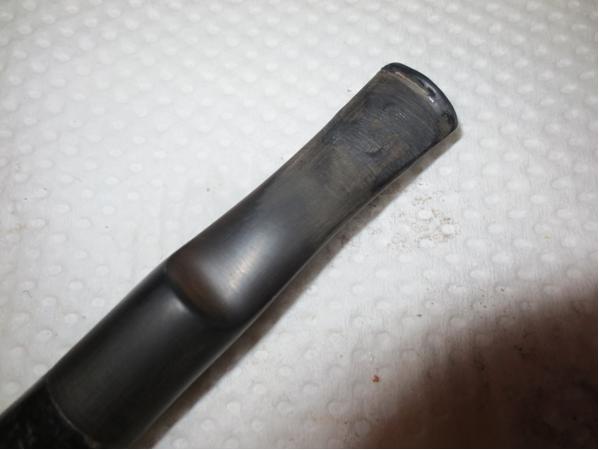
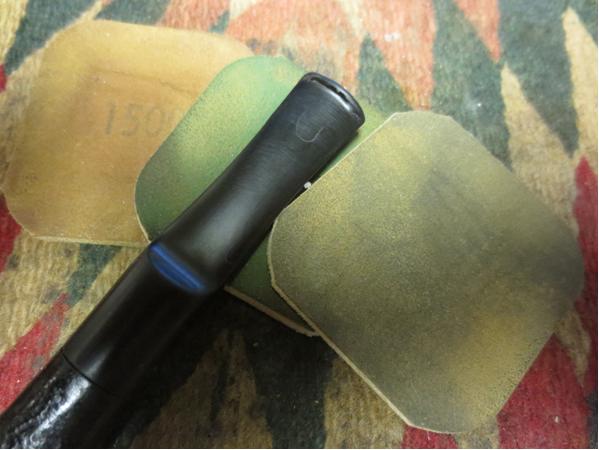
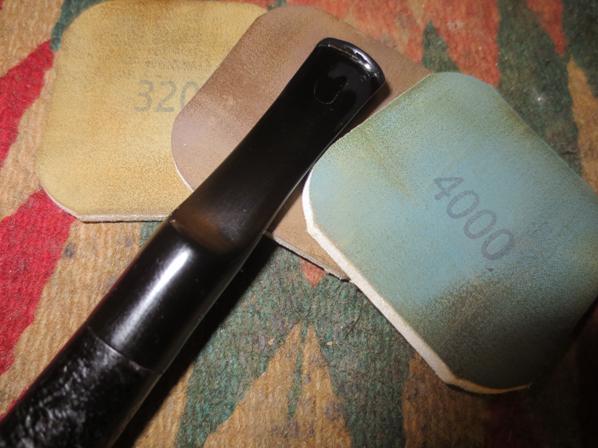
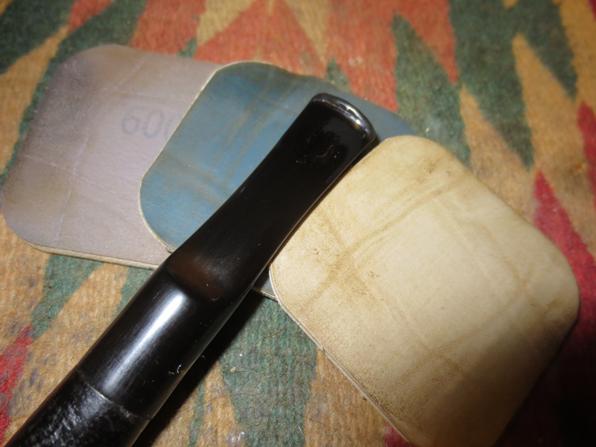
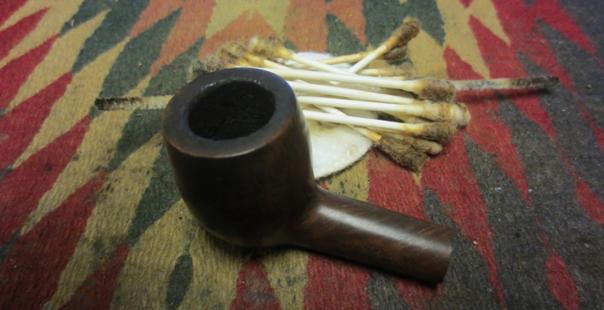
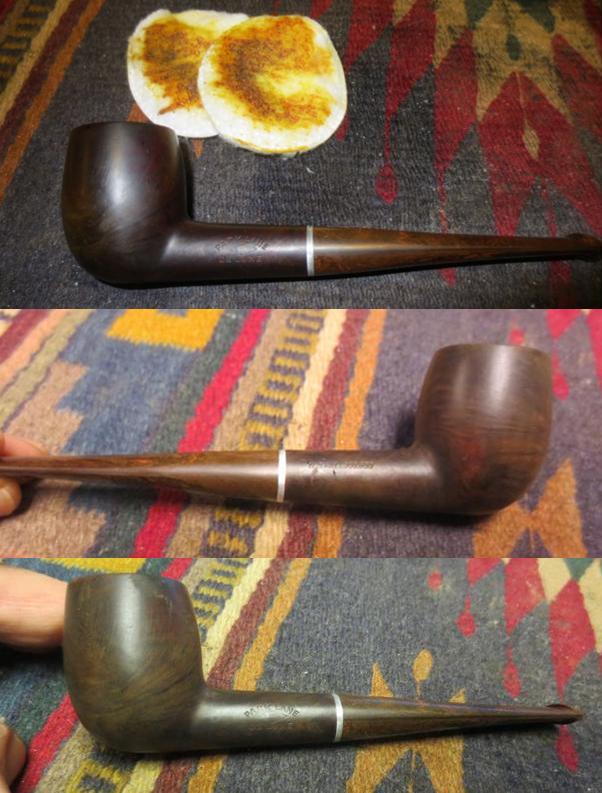
Bringing these pipes back to their former glory was pretty simple. I have about an hour of work in each pipe. I gave them a wood soap wash, a light ream, deoxidized the stems, and put on fresh coat of carnauba.

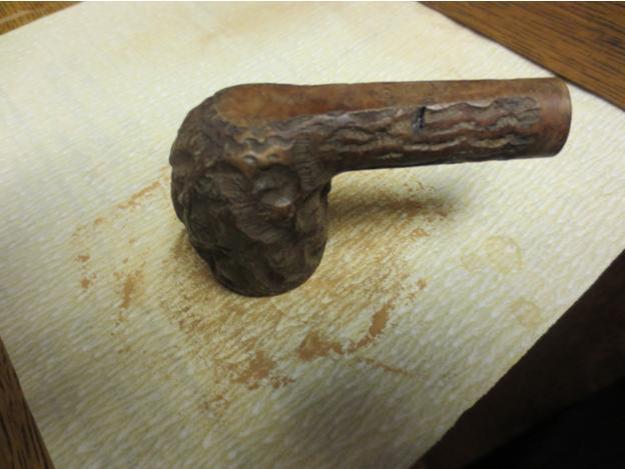
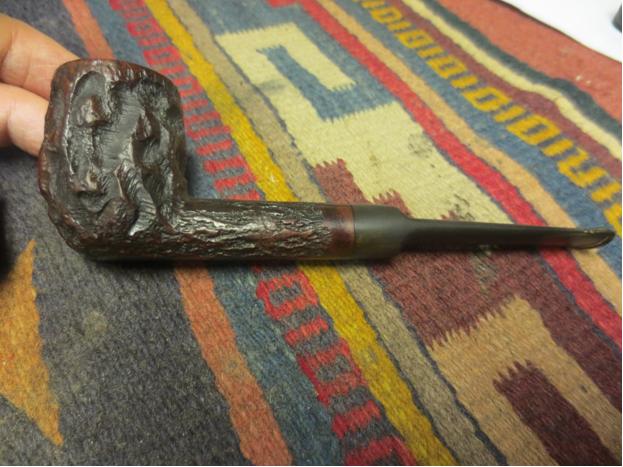
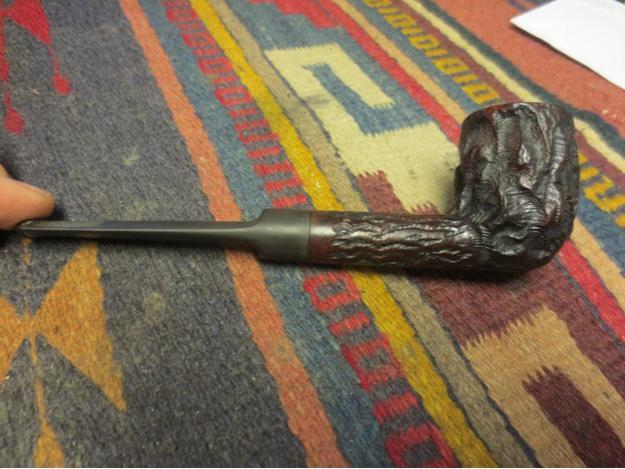
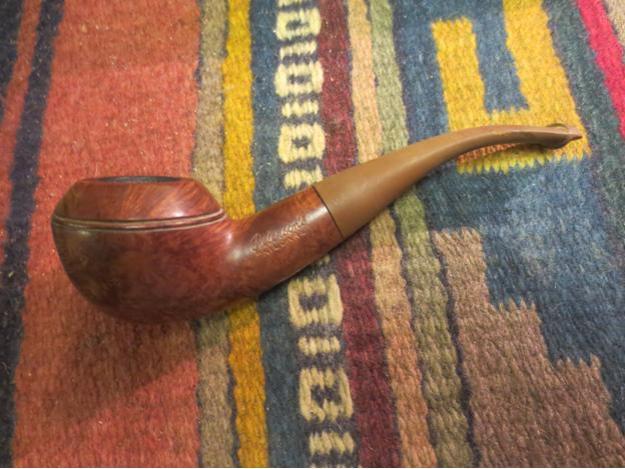
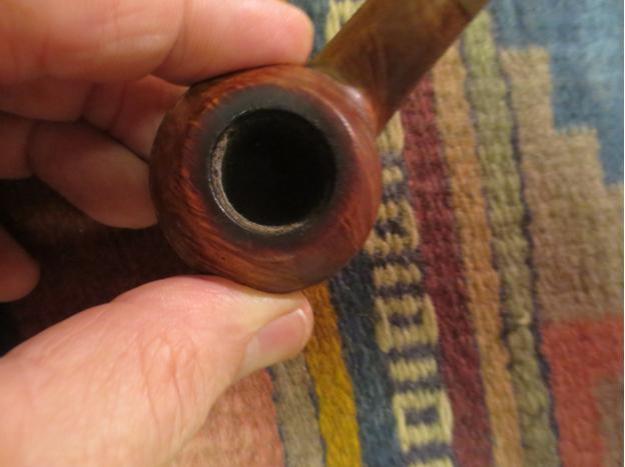
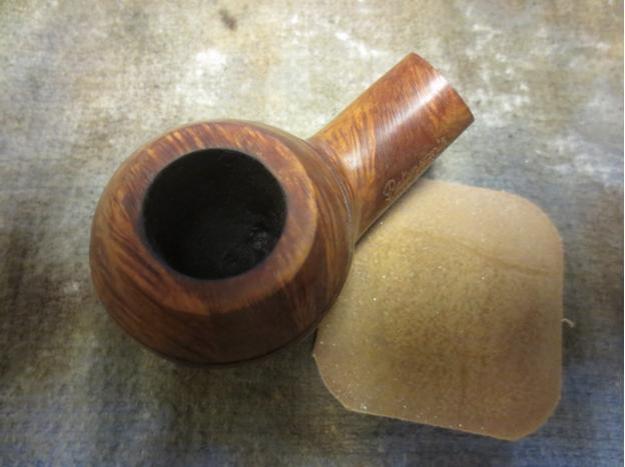
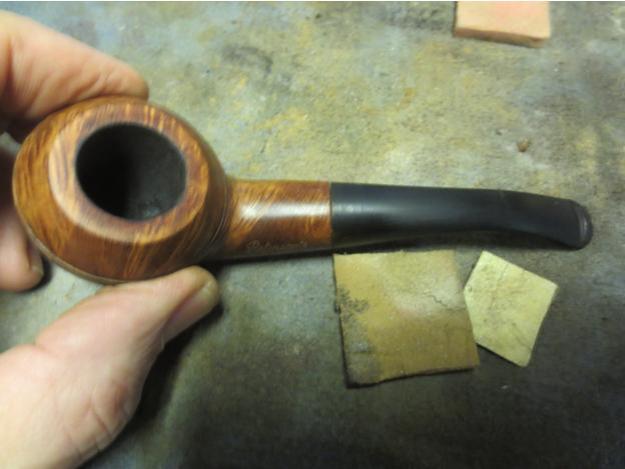
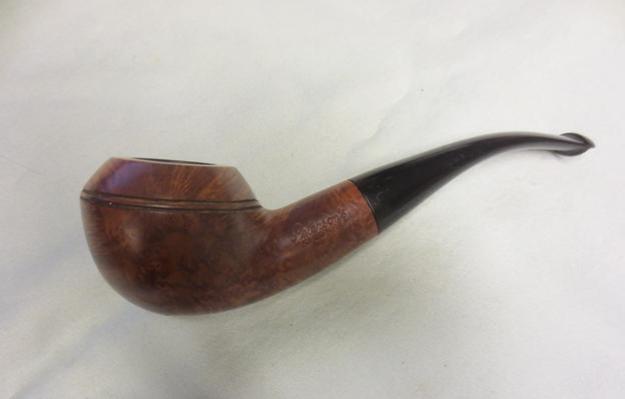
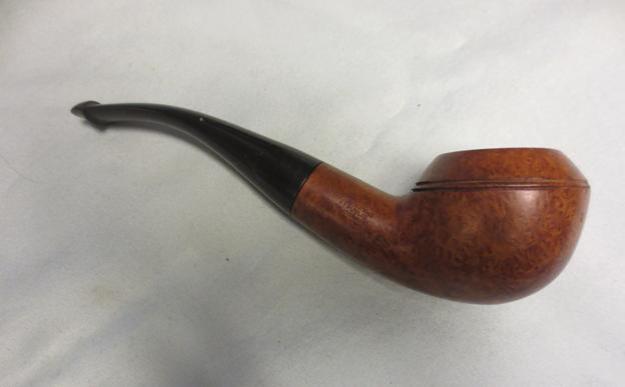
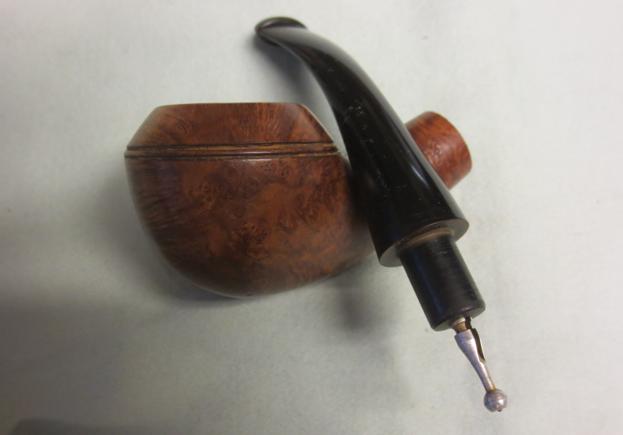
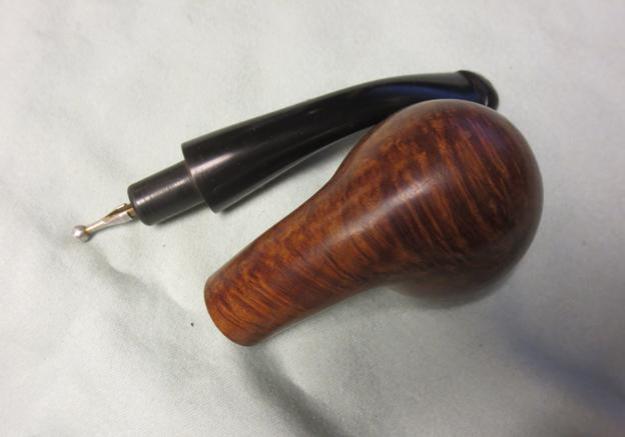
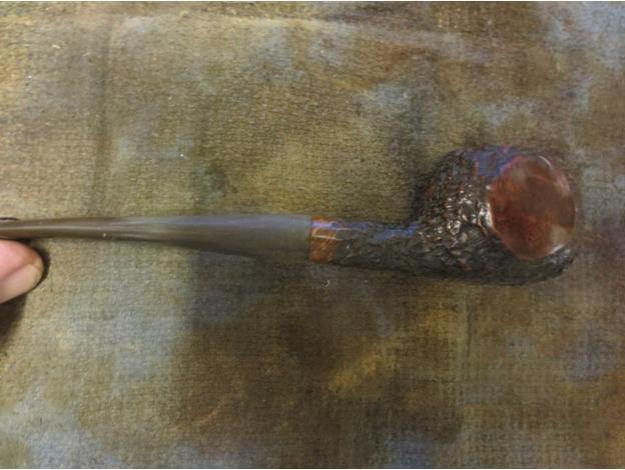
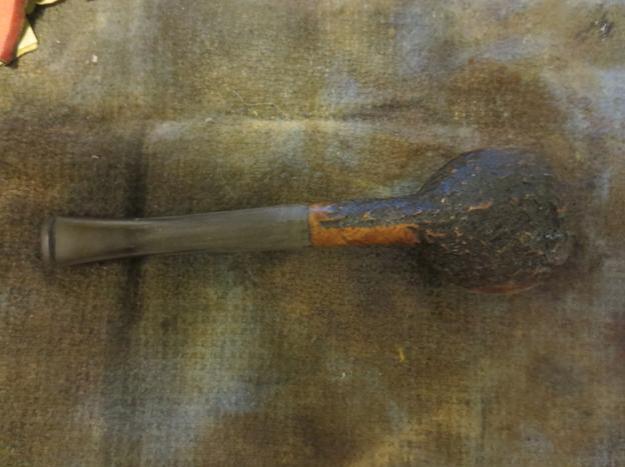
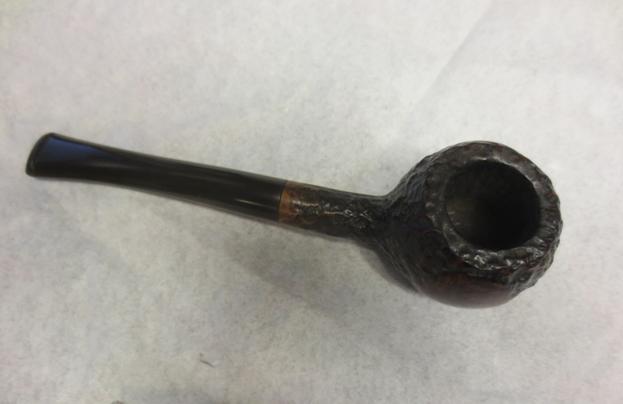
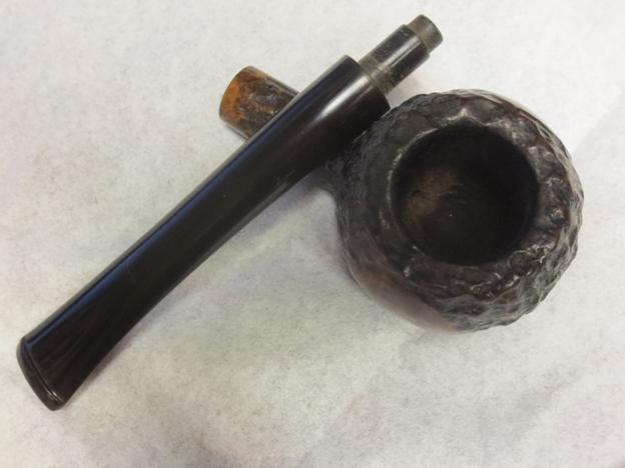
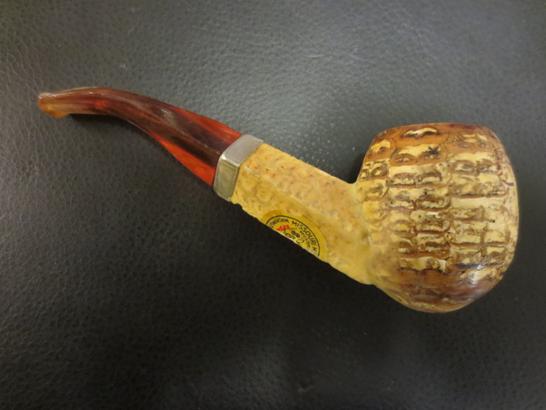
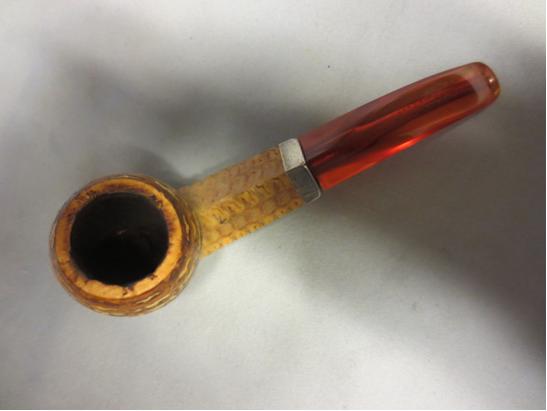
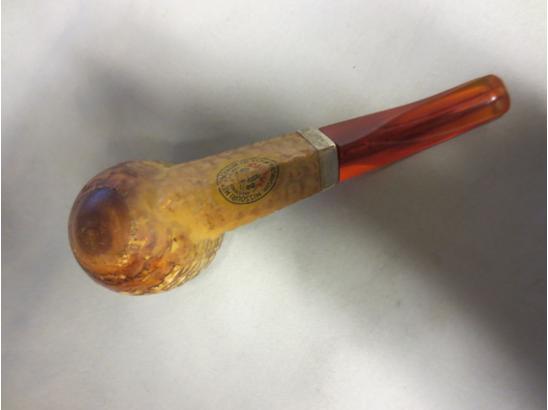
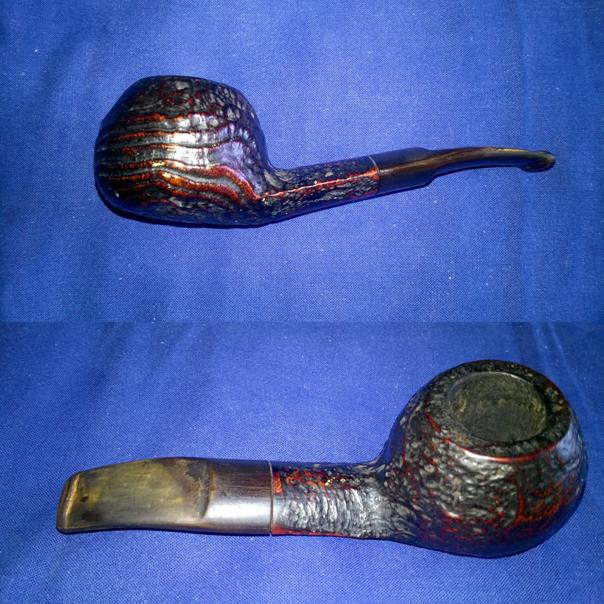
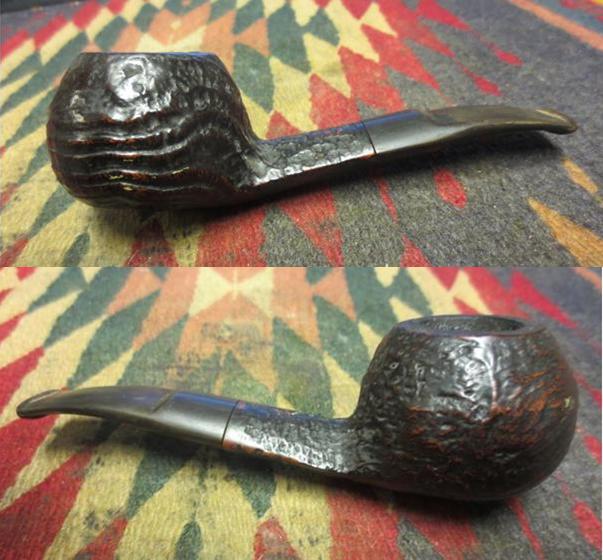
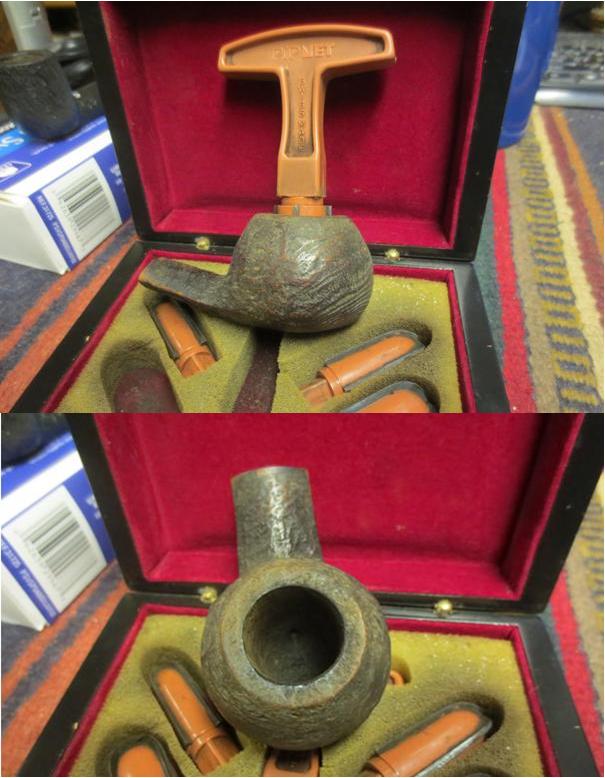
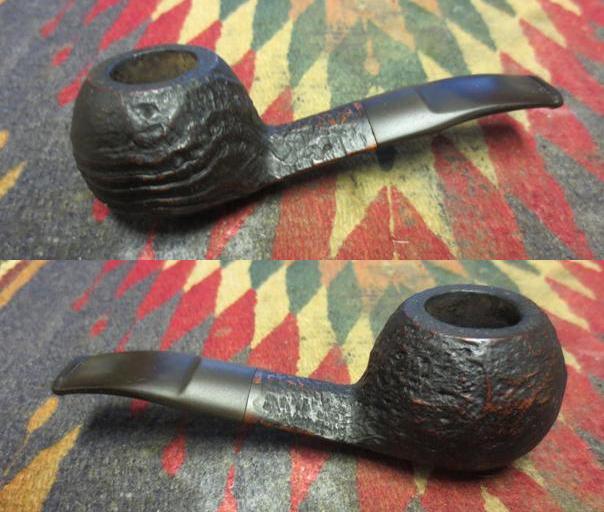
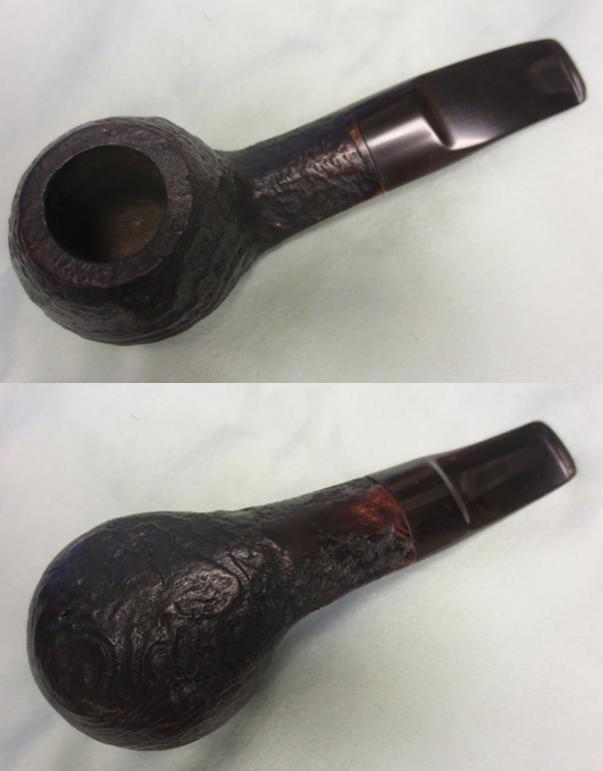
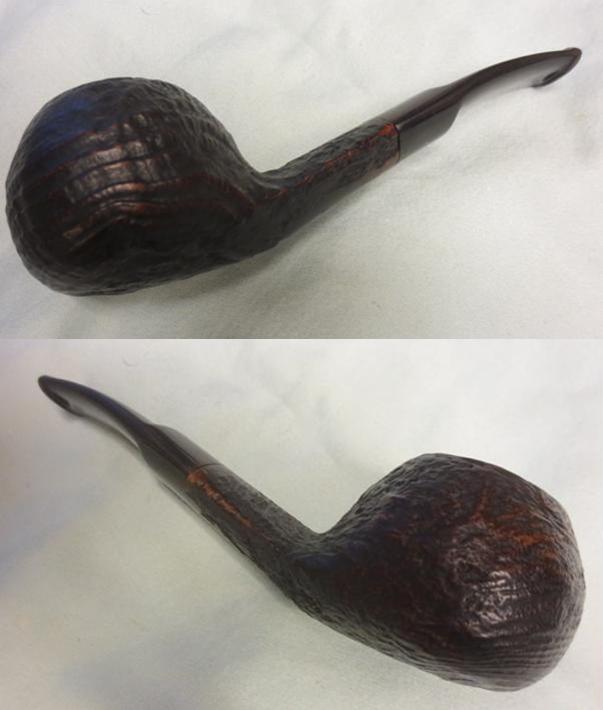
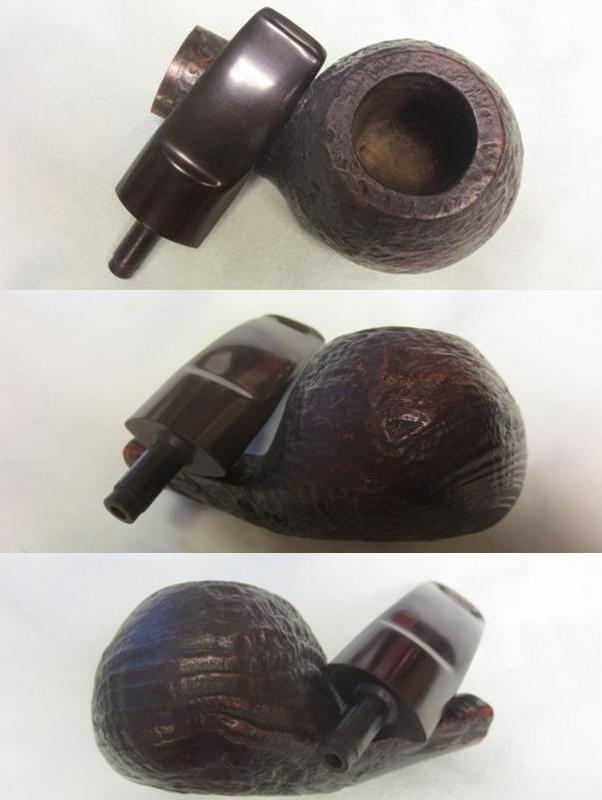
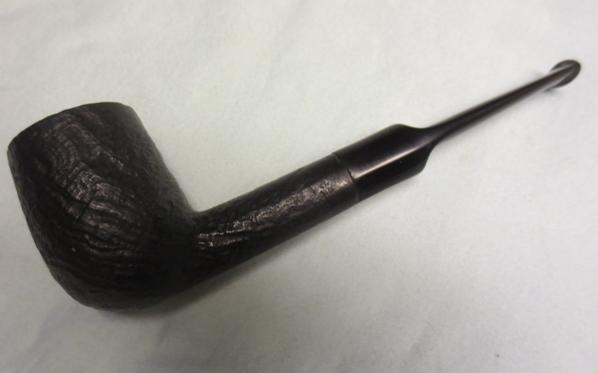
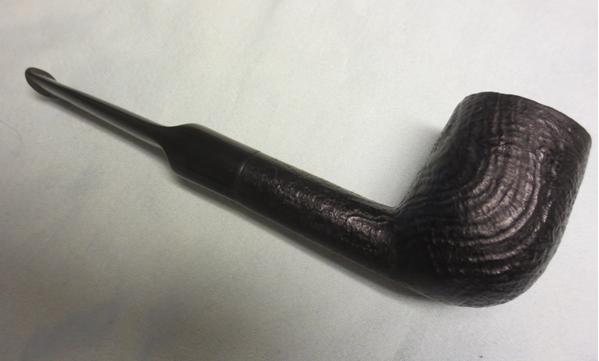
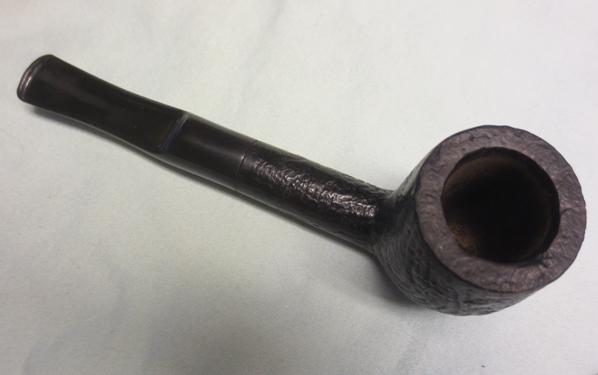
The first is a Kaywoodie Flame Grain 99B KW2

KW3

KW1

KW5 
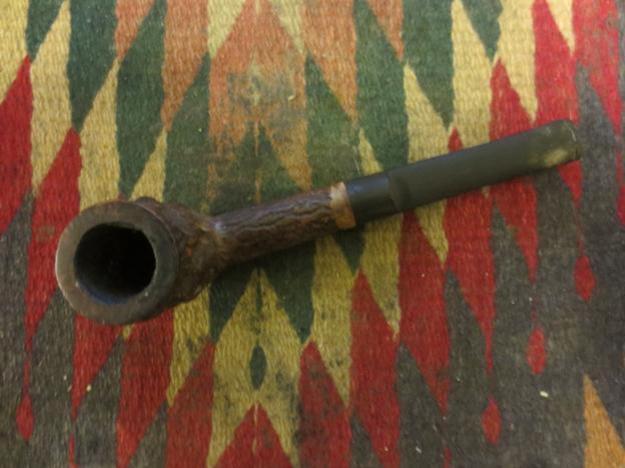
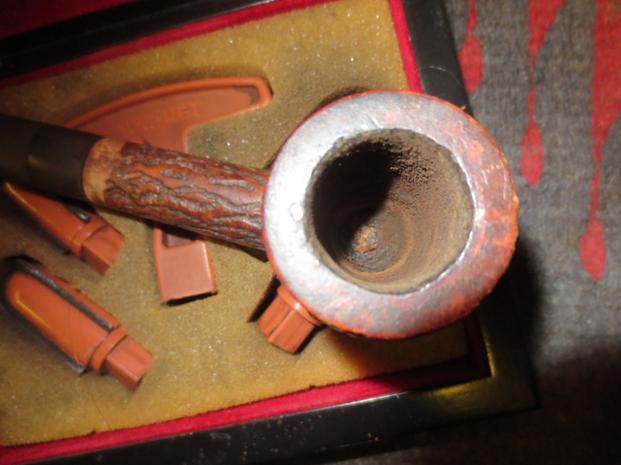
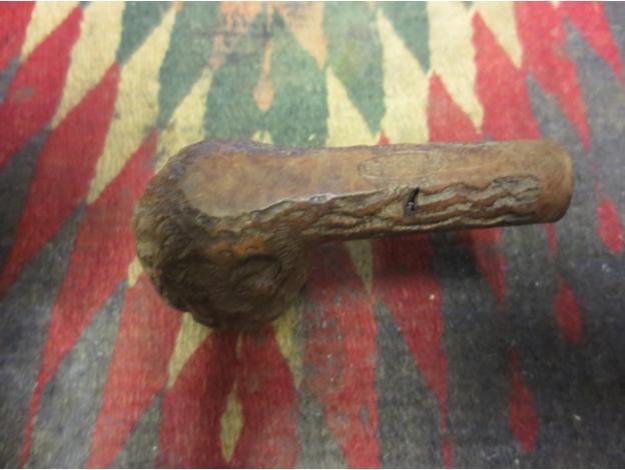
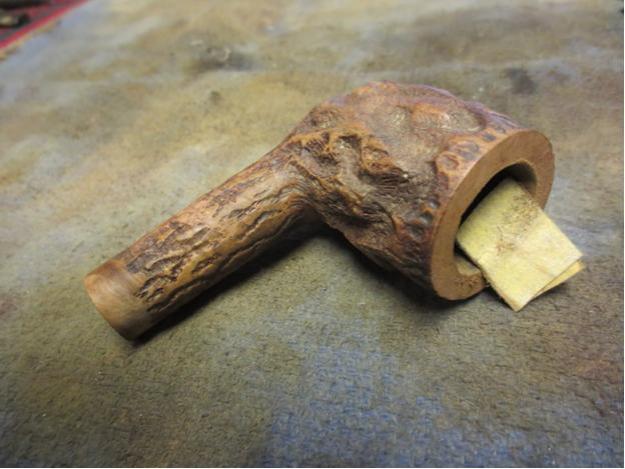
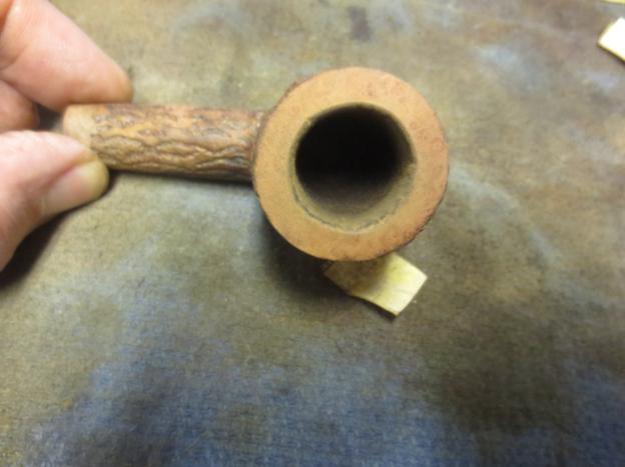
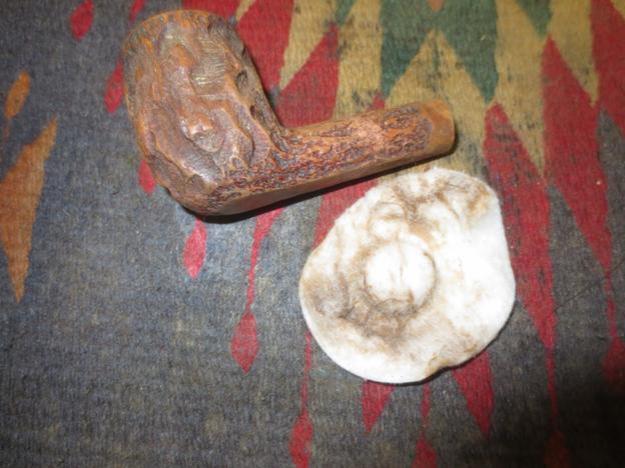
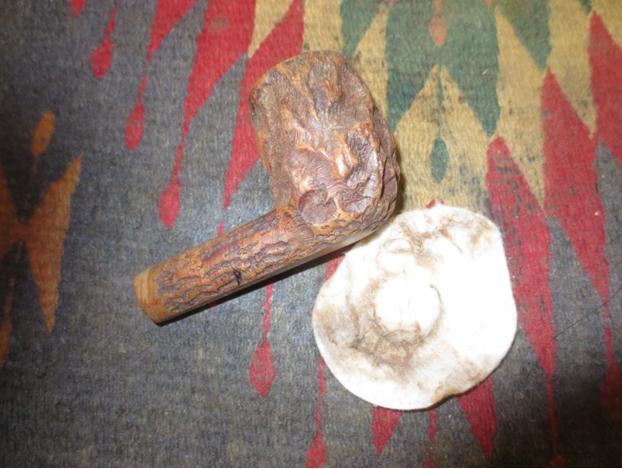
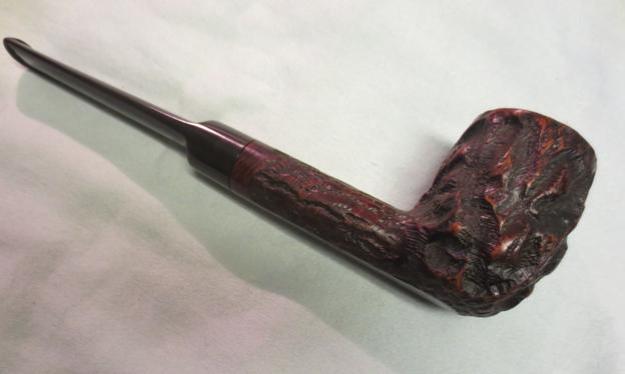
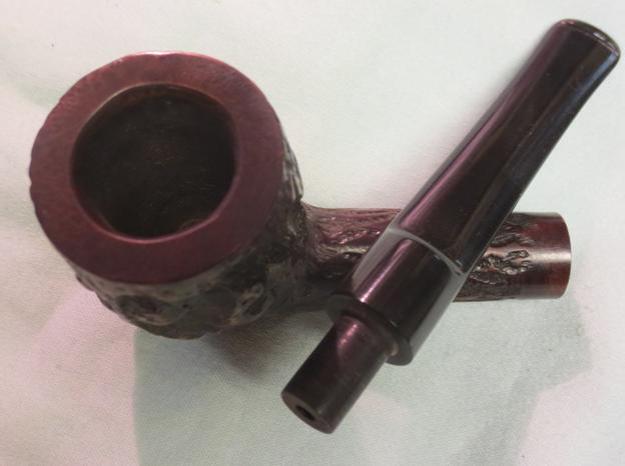
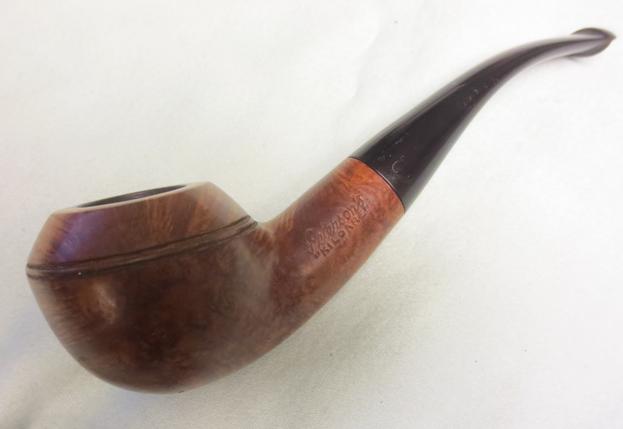
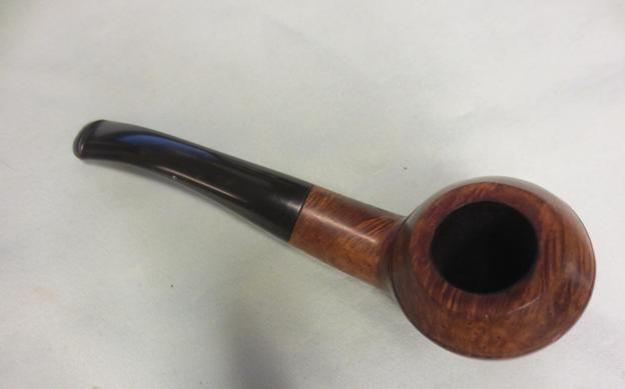
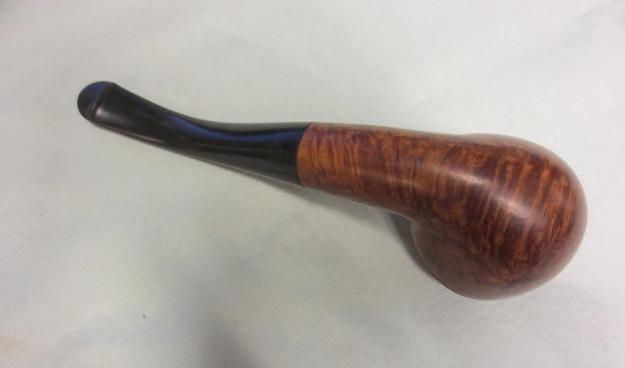
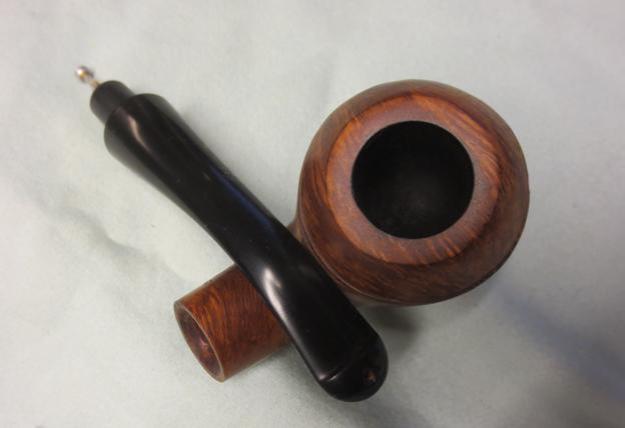
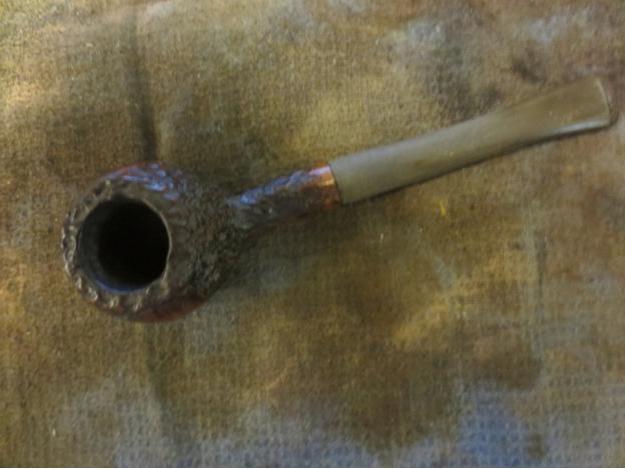
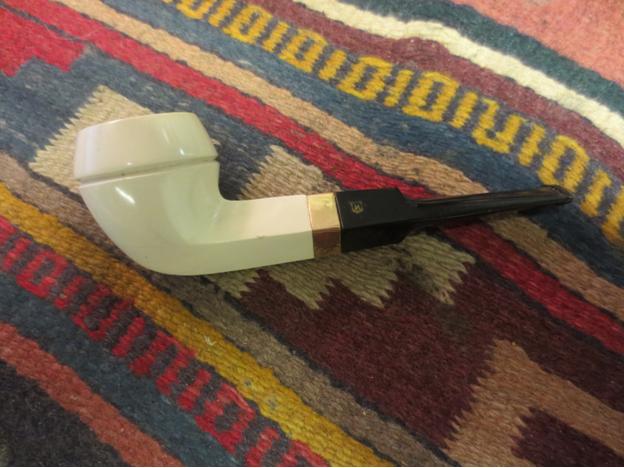
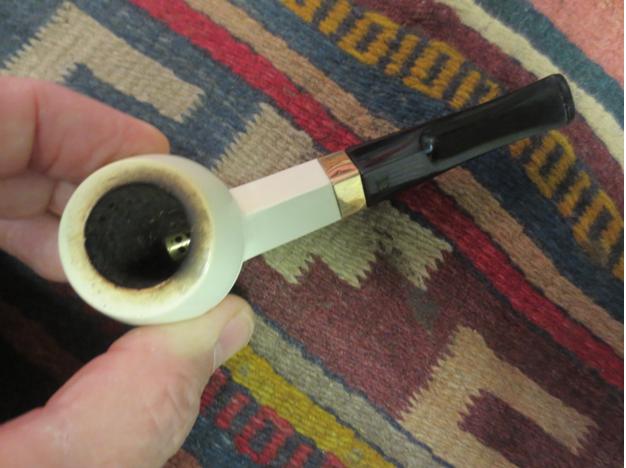
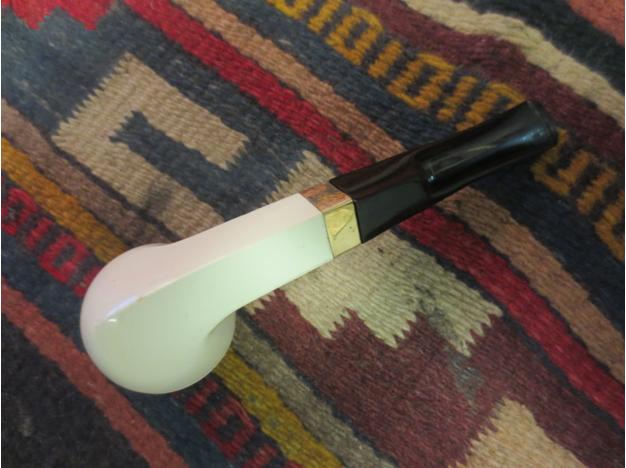
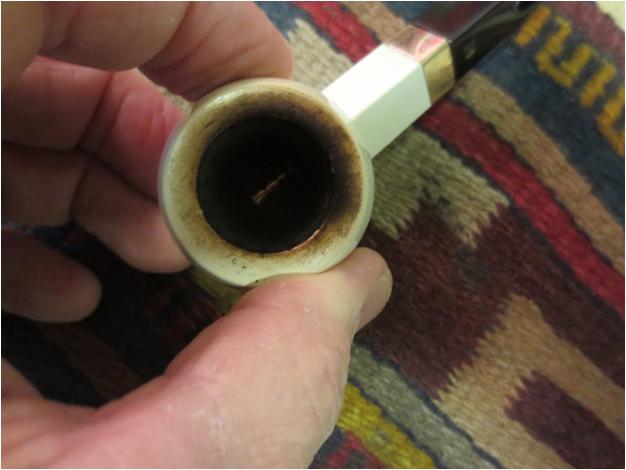
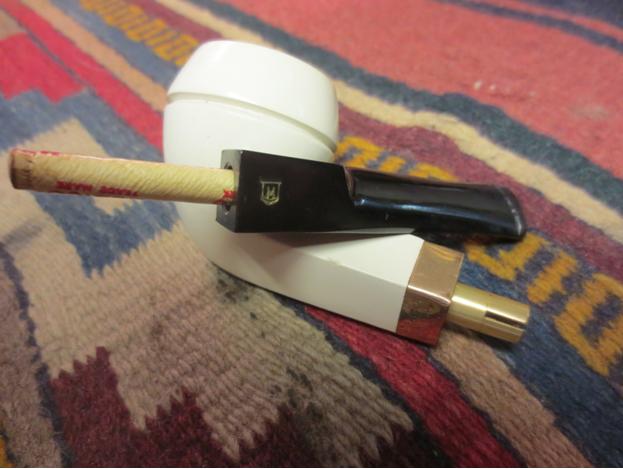
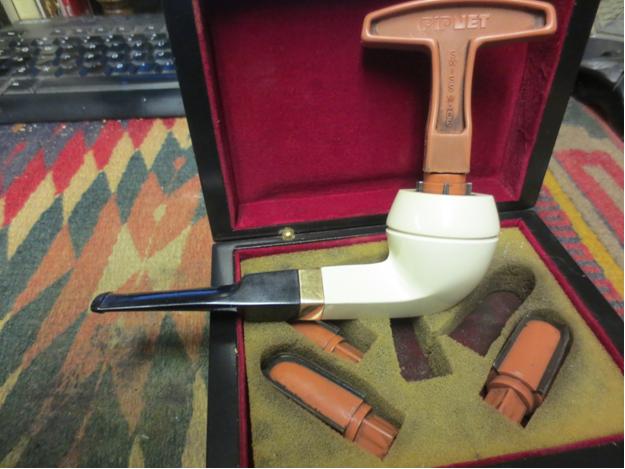
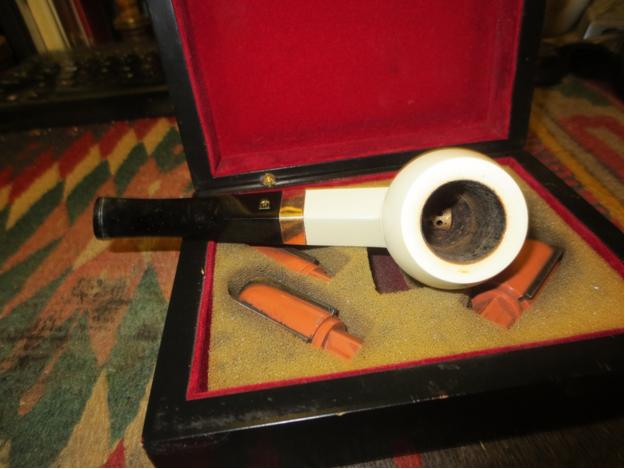
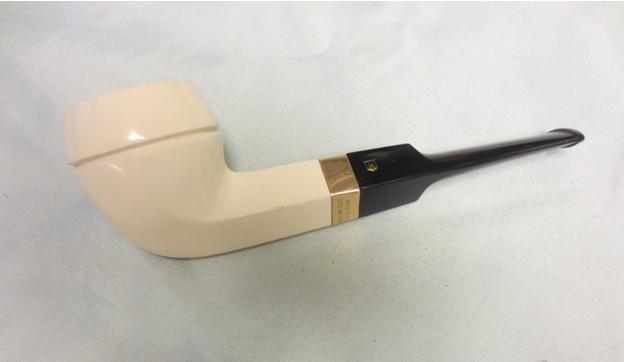
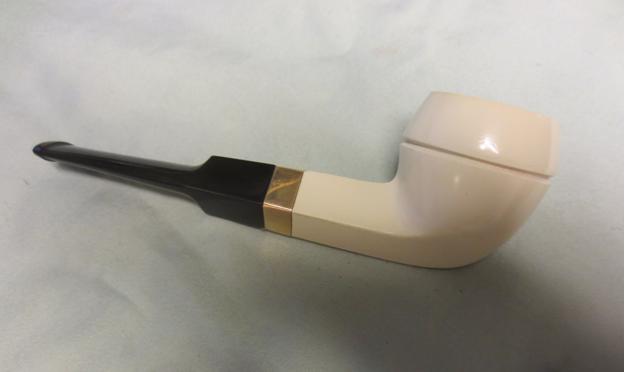
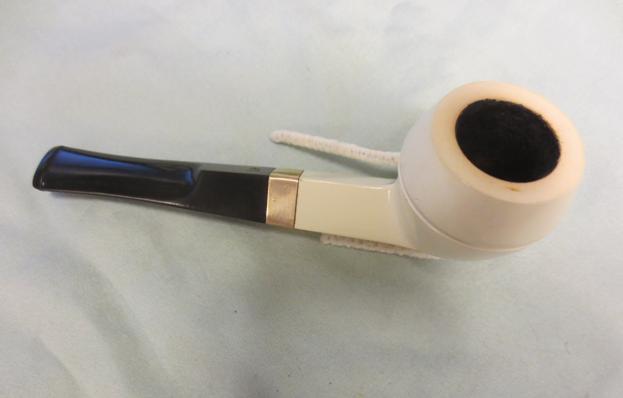
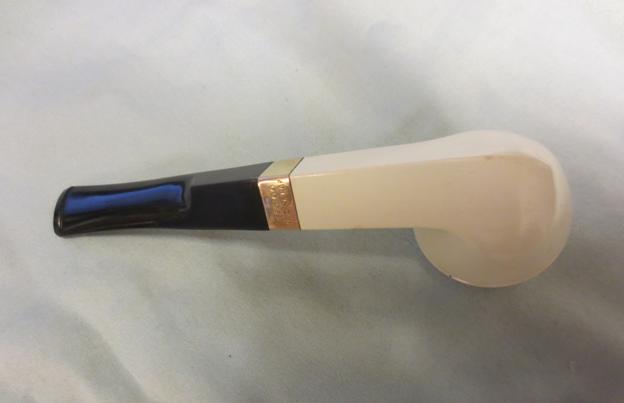
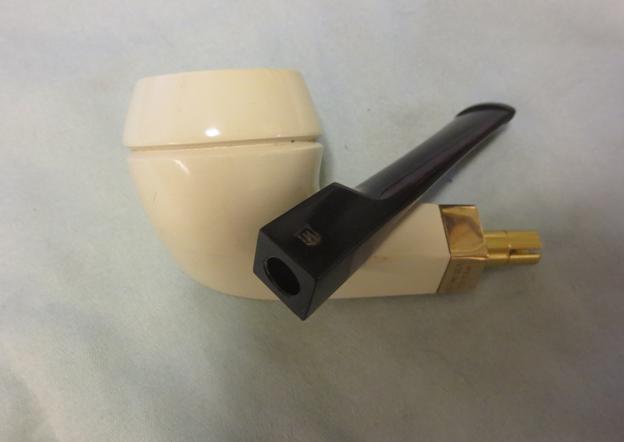
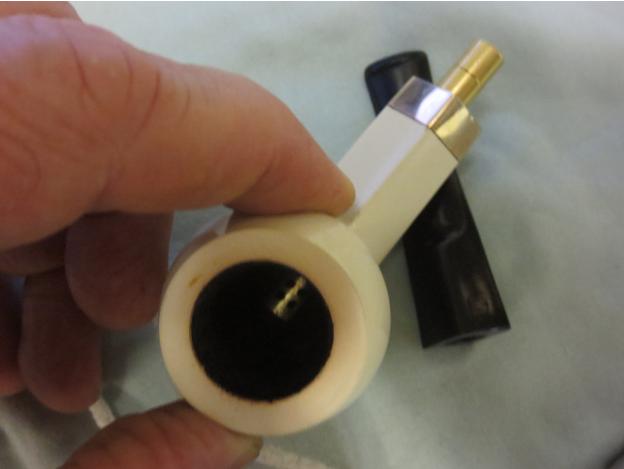
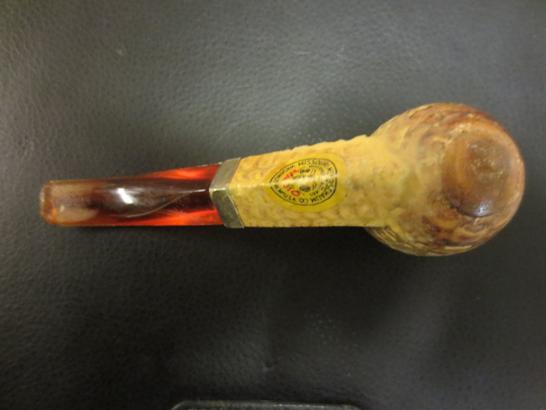
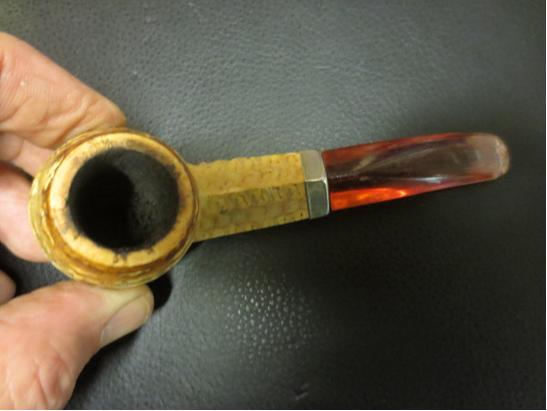
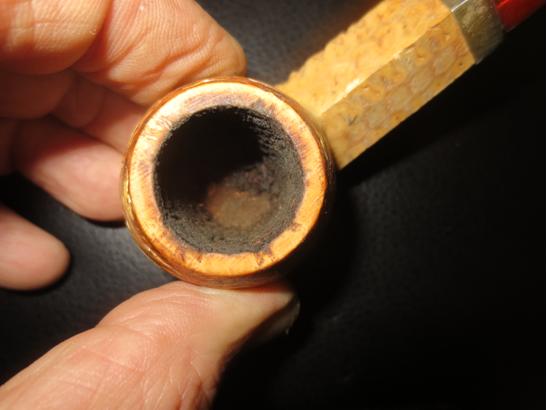
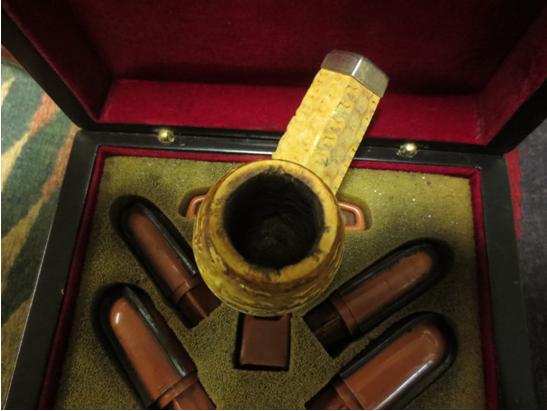
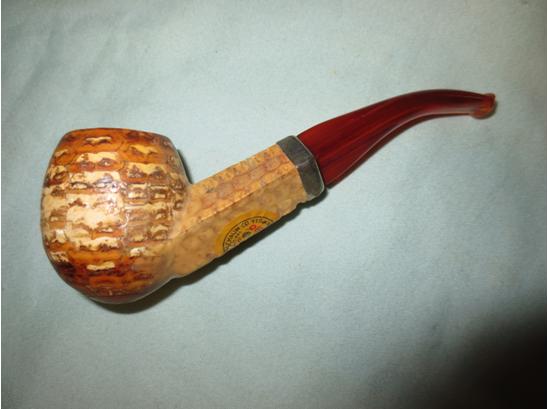
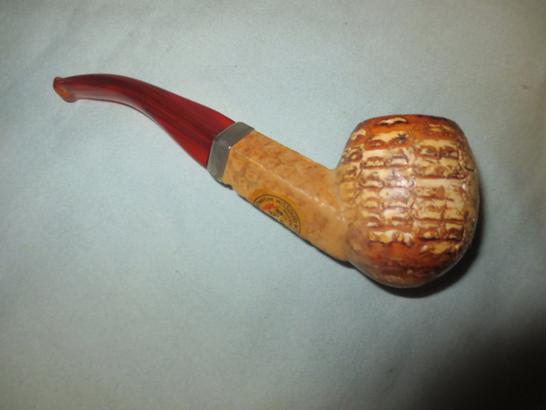
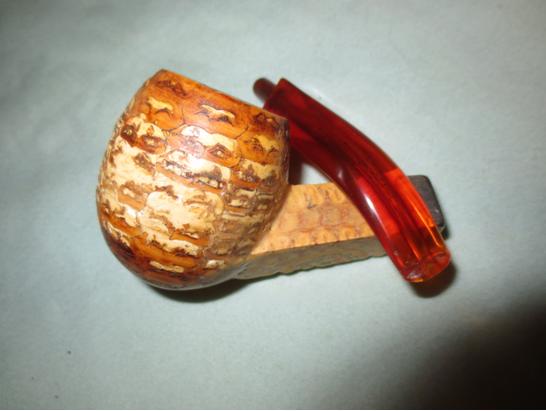
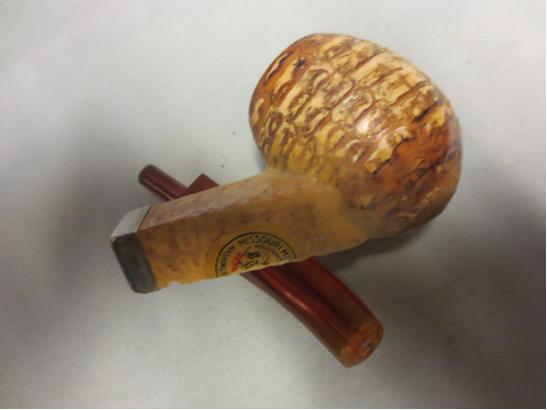
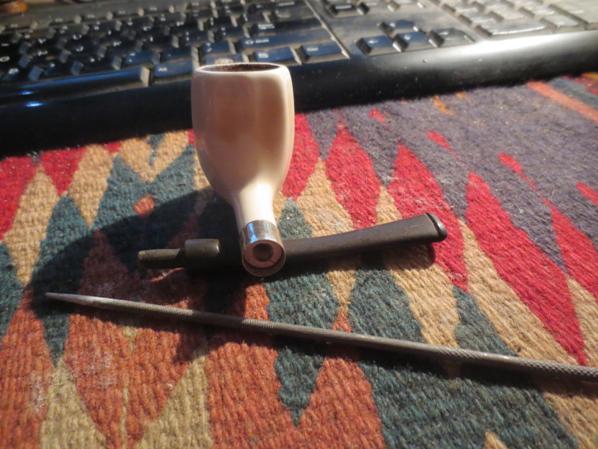
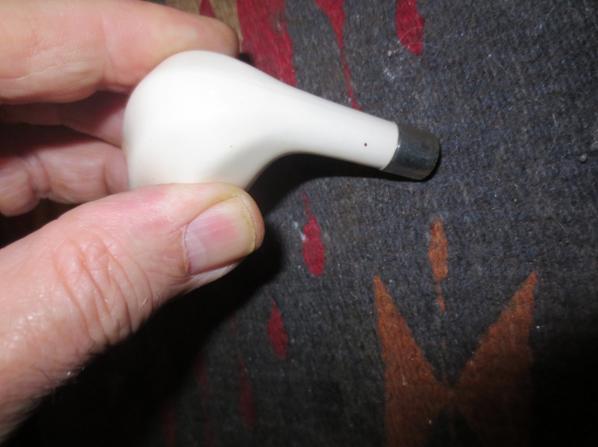
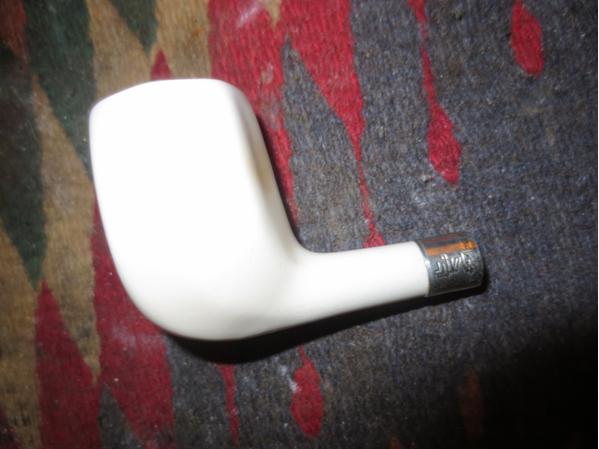
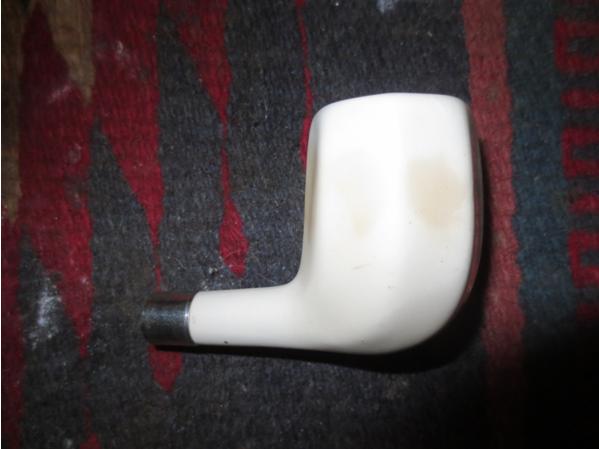
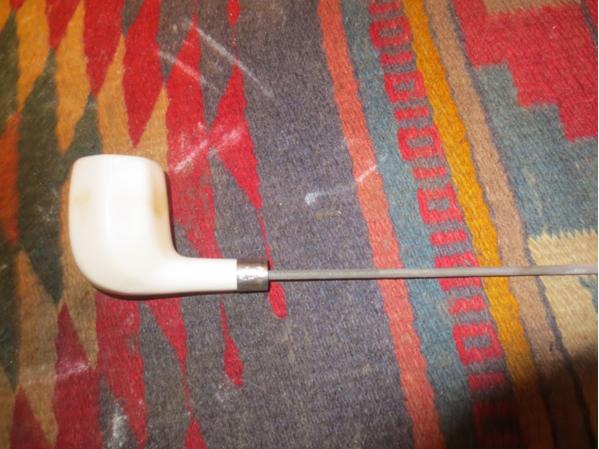
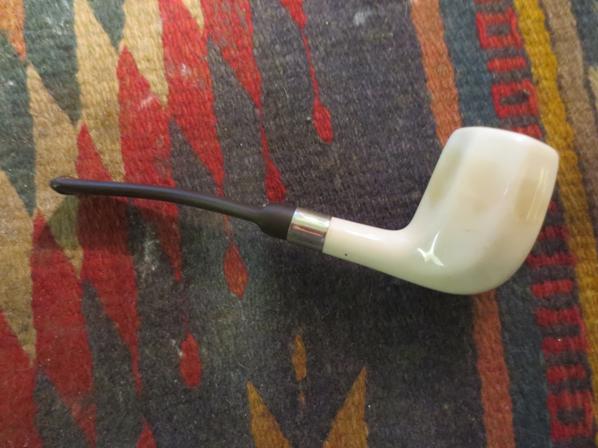
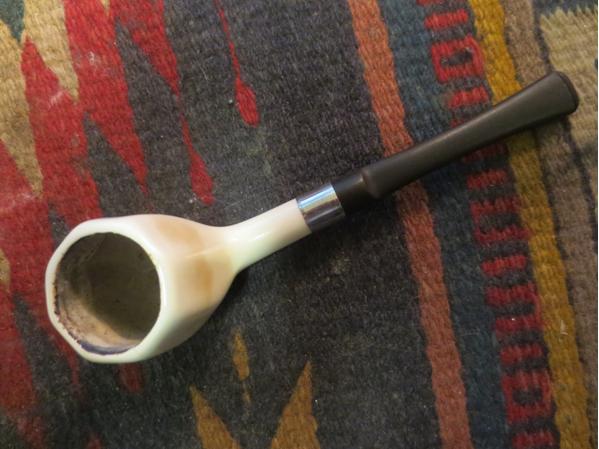
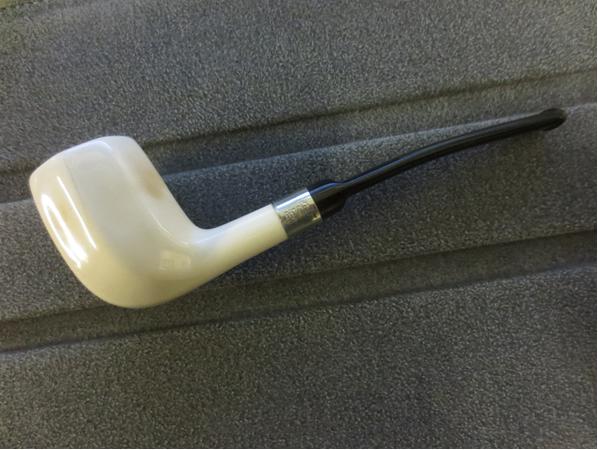
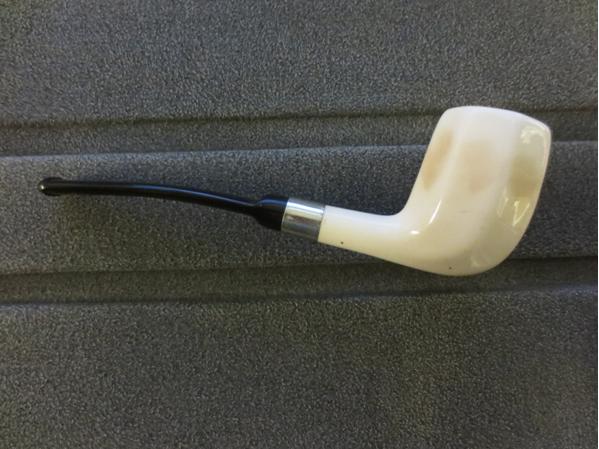
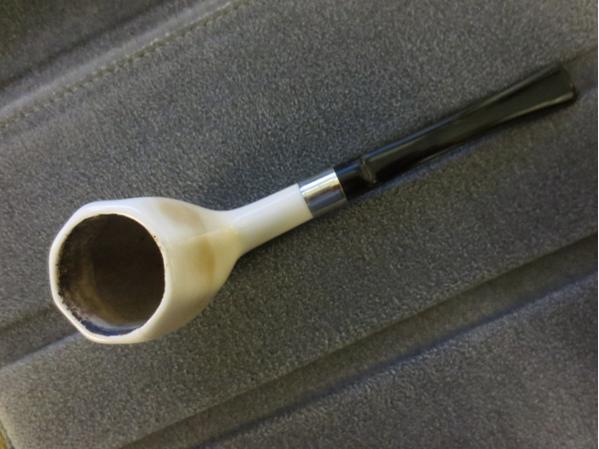
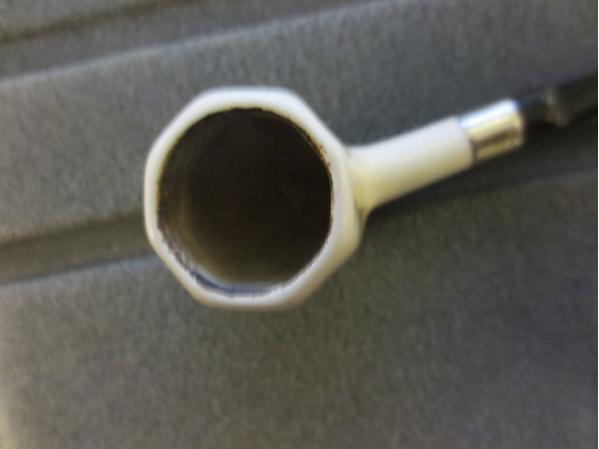
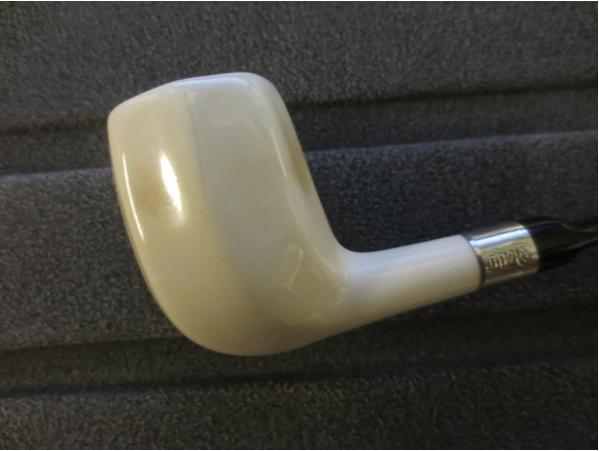
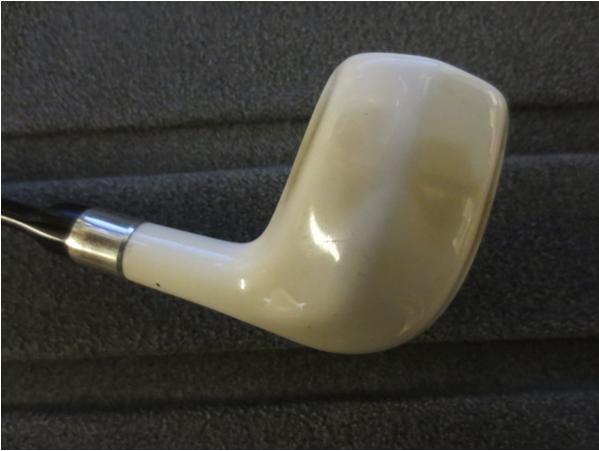
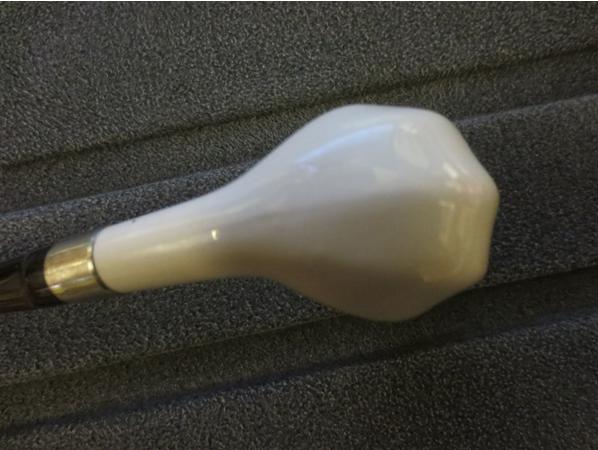
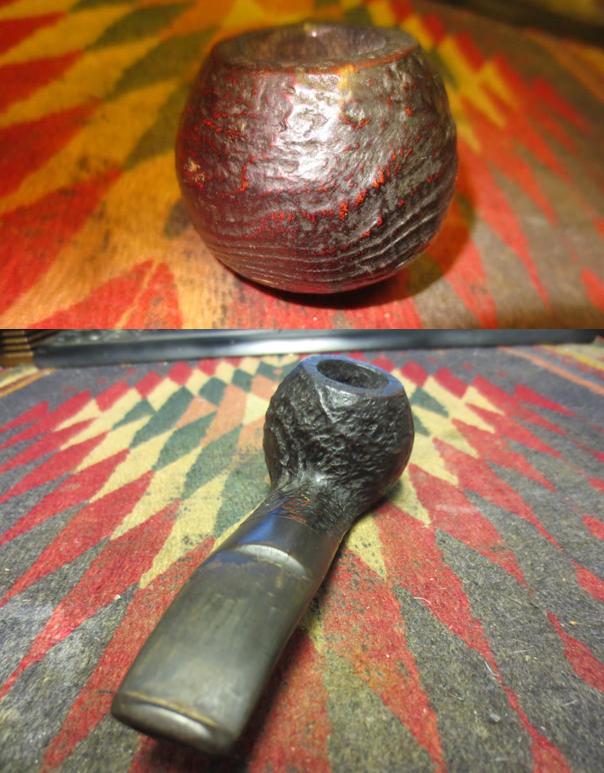
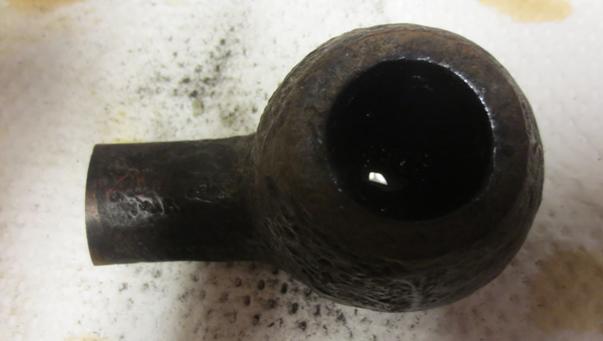
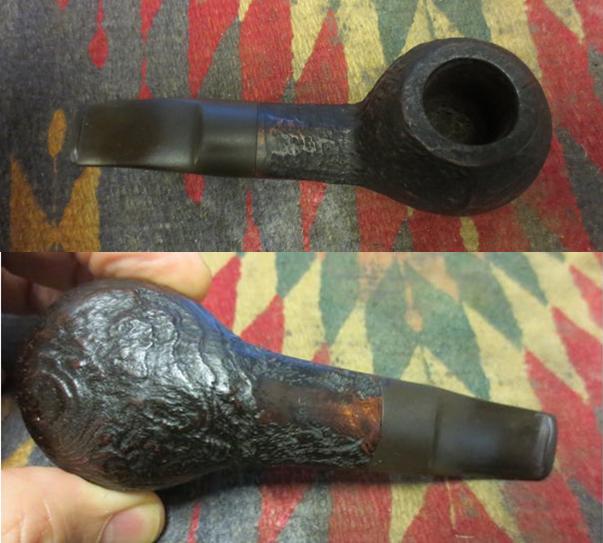
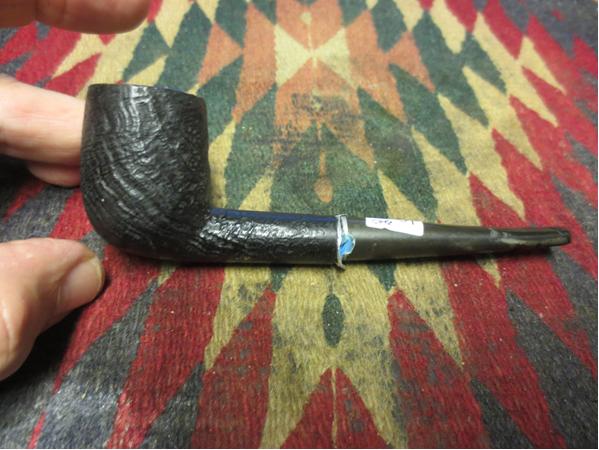
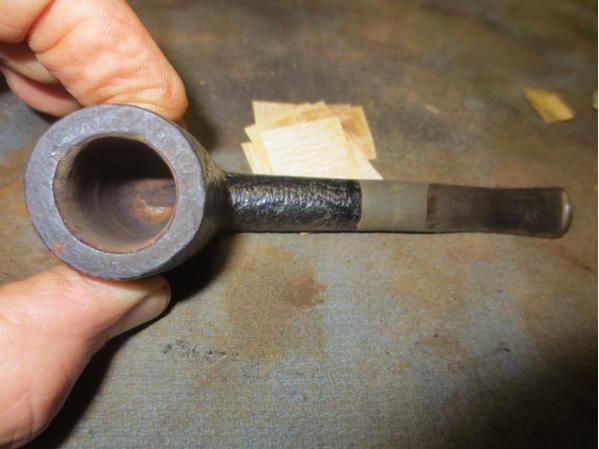
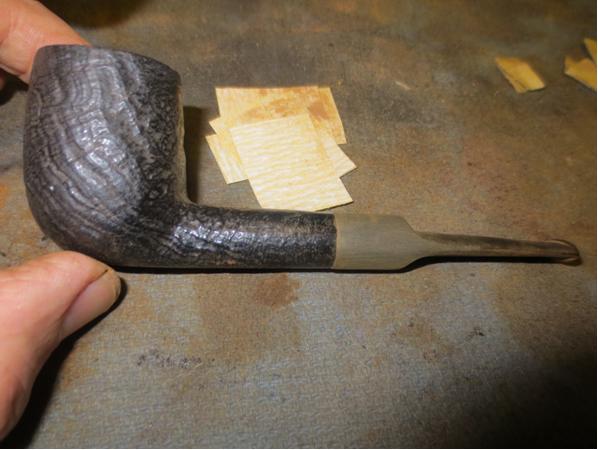
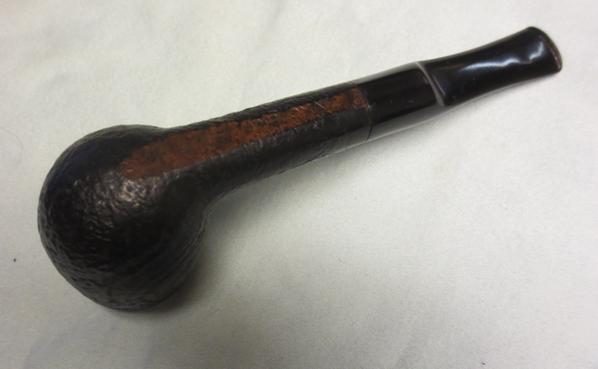
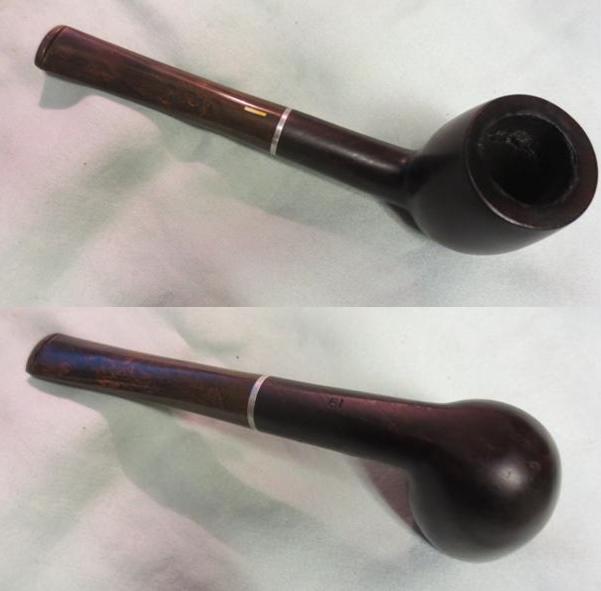
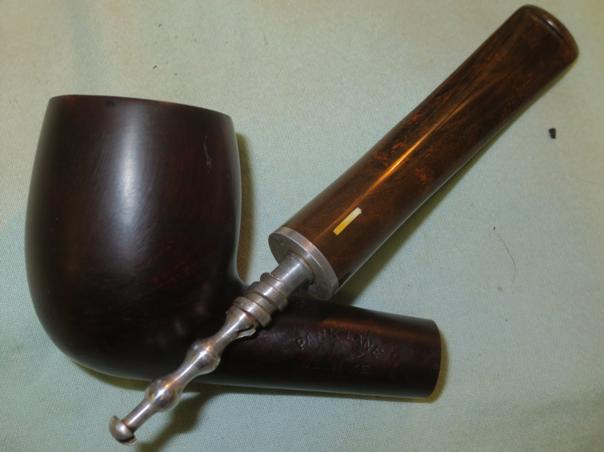
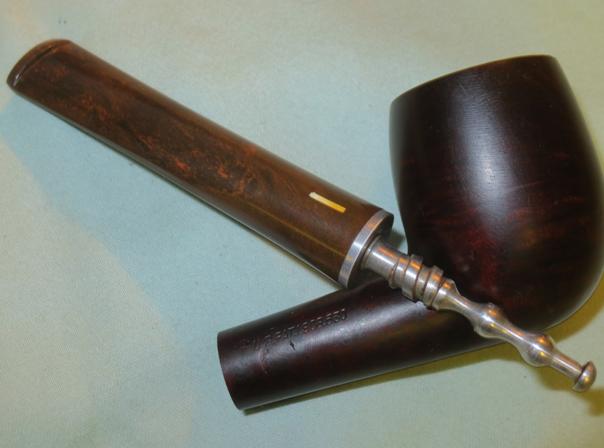
The second is a Kaywoodie Meerschaum Lined 86BKW6

KW7

KW8

KW9

KW10

Bringing a Mastercraft Rock Briar Billiard back to life


Blog by Steve Laug

I found this old billiard for sale in an antique mall in Idaho Falls, Idaho. It was there when I visited in July and I bypassed it. It was still there this time so I made a deal with the seller and it came home with me. The bowl was dirty and had a cake and a bunch of tobacco debris and dust in the bottom. The rim had a buildup of tars and lava on the surface. The inner edge had some light damage and was slightly out of round. The finish was a rough rocklike rustication that was worn and dirty. There were white flecks and flecks of what looked like putty fills on the side of the bowl. There were several small sandpits in the bowl sides and on the bottom right side of the shank.RB1

RB2

RB3

RB4 The stamping on the bowl was on a smooth flattened panel on the bottom of the bowl and shank. It bore the stamping Rock Briar in an oval and underneath France. I found out from Who Made That Pipe that the pipe was made for Mastercraft in France. From my research it doesn’t appear that Mastercraft ever manufactured pipes but rather bought them from multiple factories — mostly French and English. It survived briefly the post war recovery and then was acquired by Grabow.RB5 The next photo is a close-up picture of the rim and the debris in the bowl. The rim and bowl would take some work to clean out.RB6 I reamed the bowl with a PipNet pipe reamer and starting with the smallest cutting head worked my way up to one the same diameter as the bowl. I removed the cake and the clutter in the bottom of the bowl. I also used a pen knife to scrape out the small remnant of cake that the reamer did not take out.RB7

RB8 I scrubbed the bowl with a brass bristle whitewall tire brush to remove the buildup of grime and dust in the grooves of the rustication. Once the grime was loosened I put the bowl in an alcohol bath to soak while I went to work for the day.RB9

RB10 When I got home from work I took the bowl out of the bath and used the brass bristle brush on it once again. When I had finished brushing it I dried it off with a cotton cloth. The following photos show the bowl after the half day soak.RB11

RB12

RB13 I decided to lightly top the bowl to clean up the rim surface. I used a 220 grit topping board followed by a medium and a fine grit sanding sponge.RB14

RB15 I used a folded piece of 220 grit sandpaper to sand and bevel the inner rim. I wanted to minimize the inner edge damage.RB16

RB17 I scrubbed the bowl down with acetone on a cotton pad to remove the dust and remnants of the finish on the bowl and shank. I scrubbed out the shank, mortise and the bowl with alcohol, cotton swabs and pipe cleaners to remove the debris and dust.RB18

RB19

RB20 I decided to do a bit of contrast on the stain. I used a black Sharpie pen to colour in the grooves and rusticated patterns on the bowl and shank. Once I finished that they would add some depth to the colour that I stained the pipe.RB21

RB22 I stained the bowl with a dark brown aniline stain that I had thinned by half to give a bit of translucence to the colour on the bowl. I applied the stain and flamed the bowl to set the stain in the grain.RB23

RB24

RB25

RB26 I wiped the bowl down with isopropyl alcohol on a cotton pad to remove the stain from the high spots on the briar. I wanted a distinct contrast in colour between those and the grooves which I had coloured black.RB27

RB28 I buffed the bowl with red Tripoli and with White Diamond to remove some more of the colour from the high spots and polish them while leaving the grooves dark and unpolished.RB29

RB30

RB31

RB32 The stem was in decent shape with some tooth chatter and minor oxidation. I like the overall look and the rustication on the bowl. The stem and shank are long and straight and work well with this pipe.RB33

RB34 I sanded the stem with 220 grit sandpaper on both sides next to the button to remove the tooth chatter. I followed that by sanding it with a medium and fine grit sanding sponge.RB35

RB36 I worked on the stem with the micromesh sanding pads. I wet sanded with 1500-2400 grit pads and then rubbed the stem down with Obsidian Oil. I dry sanded with 3200-4000 grit pads, gave it another coat of oil and finished with the 6000-12000 grit pads. I gave it a final coat of Obsidian Oil and let it dry.RB37

RB38

RB39 I buffed the pipe with White Diamond and Blue Diamond and then gave it multiple coats of carnauba wax. I buffed it with a clean flannel buff and then hand buffed it with a microfibre cloth. The finished pipe is shown below. The unique finish intrigues me and the rustication feels great in the hand. Thanks for looking.RB40

RB41

RB42

RB43

RB44

RB45

Breathing new life into a Republic Era Peterson’s Kildare 999


Blog by Steve Laug

My brother picked this pipe up for me when he was in Austin, Texas. It is actually one of my favourite Peterson shapes – the 999. This one is stamped Peterson’s over “Kildare” on the left side of the shank and Made in the Republic of Ireland 999 on the right side of the shank. It actually is in really decent shape. The bowl had grime on the finish but no real dings or gouges. The rim was tarred and dirty but otherwise in good condition. The outer and the inner edge of the rim were smooth and the bowl was round. The double ring under the cap of the bowl was also in great shape with no chips or missing parts. There were a few small fills on the underside of the bowl among the cross grain that covered that and the top and bottom of the shank. The birdseye grain on the bowl and shank sides is quite stunning. The stem had straightened out during the time the pipe had been sitting and would need to be rebent somewhere along the line. The stem was oxidized, but otherwise clean with no tooth dents or bite marks. The fit against the shank was not tight but that would probably change once the pipe had been cleaned. There was a stinger in the end of the tenon once I removed the stem from the shank. The next three photos are ones that my brother sent me when he found the pipe. The first is a side view of the pipe and the second and third show the stamping on the shank.Pete1

Pete2

Pete3 When I was visiting with my brother in Idaho Falls I decided to rebend the stem on this one. I used a cup of water that I boiled in the microwave and then put the stem in to heat and soften the rubber. Once it had softened I bent it to match the curve of the bowl. When I heated the stem in the water the oxidation rose to the surface of the stem and turned it an unsightly brown. That is what I expected and why at home I use a heat gun rather than water. But as the stem was oxidized already the water would bring the rest of it to the surface for an easier clean up.Pete4

Pete5

Pete6

Pete7 I took the next three photos – close-up pictures of the rim and the stem – to show the state of those areas. Both the rim and the stem were in very good shape under the tars and the oxidation.Pete8

Pete9

Pete10 I reamed the bowl with a PipNet reamer to take the cake back to bare briar. I used the first two cutting heads to clean out the cake.Pete11

Pete12 I scrubbed out the bowl and shank with cotton swabs, pipe cleaners and alcohol to remove the build up and oils. It did not take too long for the shank to be clean.Pete13 The next photo shows the small stinger that was in the tenon when I removed the stem. It has a slot on the top of apparatus behind the ball and collects the moisture from the smoke. The shank is drilled deeper than my other 999 pipes to accommodate the stinger. I removed the stinger and cleaned out the stem with pipe cleaners and alcohol. I cleaned the stinger with the same and then polished it with 0000 steel wool.Pete14

Pete15 I scrubbed the top of the rim with alcohol and a cotton pad and then used a 1500 grit micromesh sanding pad to sand the surface of the rim. I used the pad like a topping board and worked the rim around the pad in a clockwise motion. Why clockwise? I honestly don’t know other than I am right handed.Pete16

Pete17 I wiped down the bowl with alcohol and a cotton pad to remove the wax and grime from the surface of the briar. The pipe was unstained or stained with a light stain so the alcohol did not remove any of the colour.Pete18 I sanded the stem with 220 grit sandpaper to remove the oxidation that sat on the surface of the stem. I worked hard on the angles of the button to remove the oxidation there. I then sanded the stem with a medium and a fine grit sanding sponge to remove the scratches left behind by the sandpaper.Pete19

Pete20

Pete21

Pete22

Pete23 I wet sanded the stem with 1500-2400 grit micromesh sanding pads and rubbed the stem down with Obsidian Oil. I dry sanded it with 3200-4000 grit pads and rubbed it down with Oil once again. I finished by dry sanding with 6000-12000 grit pads and giving it a final coat of Obsidian Oil. I let the oil absorb into the rubber of the stem.Pete24

Pete25

Pete26 I buffed the stem and bowl with White Diamond and then Blue Diamond on the buffing wheel. I gave it multiple coats of carnauba wax and then buffed it with a clean flannel buff on the wheel. I finished by hand buffing the pipe and stem with a microfibre cloth to give it a deep shine. The finished pipe is shown in the photos below. Thanks for looking.Pete27

Pete28

Pete29

Pete30

Pete31

Pete32

Pete33

Pete34

Refitting an existing stem on a Royal Windsor Prince


Blog by Steve Laug

When I was in Idaho my brother showed me the pipes he had picked up in auctions and from antique shops. He had found three meerschaum pipes and two briars. One of the briar pipes that he picked up in an auction was a Royal Windsor Imported Briar Prince. It was included as part of a sculpture that he bought that he really liked. It was an old man with a cap, glasses and a pipe. The old boy in the sculpture looks lost without his pipe in the photo below. It is finished now and it will go out in the mail tomorrow so he should have it back very soon.Statue1
My daughter took the following photo of the sculpture with the pipe. In her photo the table top looks like a sweater.
12204991_10156170659610654_1169179242_nThe pipe itself is a clean and quite beautiful little pipe with a rusticated finish and some smooth parts similar to the Stanwell Vario line. In looking at it when I was visiting it was obvious the pipe had been restemmed at some point along the way and the stem shank union was poorly executed. There was a bulge to the stem at that point and it also was not round. The right side and bottom of the stem diameter were wider than the shank of the pipe. The taper of the stem on the underside did not work with the flow of the shank. He wanted to keep it for the sculpture but the fit of the stem bugged me enough that I offered to bring it home and reshape the stem for a better fit. It was also badly oxidized so that would also need to be cleaned up. The bowl itself was quite clean and virtually unsmoked. The first photos below were taken after I had started cleaning up the stem. I began reworking the stem without taking photos and caught myself before I had gone too far.cap1

cap2

cap3

cap4 I put a plastic washer on the tenon to protect the shoulders of the stem from rounding while I worked on the shape of the stem. I sanded it with 220 grit sandpaper to shape and fit the stem to the shank. To me the taper on the underside of the stem did not flow into the shank correctly. I sanded it and removed a lot of material and changed the taper to flow better. I checked the fit often by removing the washer and looking at the stem in place.cap5

cap6 I refined the shape some more and then sanded the entire stem to remove the surface oxidation. I finished this part of the process by sanding the stem with a medium and a fine grit sanding sponge to remove the scratches left behind by the 220 grit paper.cap7 With the shape and fit greatly improved (at least to my eye ;)) I wet sanded the stem with 1500-2400 grit micromesh sanding pads. I rubbed the stem down with Obsidian Oil and then dry sanded with 3200-4000 grit pads. Another coat of Oil was rubbed into the stem and then I sanded it with the final 6000-12000 grit pads. I gave it a final coat of Obsidian Oil and let it dry.cap8

cap9

cap10 I buffed the pipe with White Diamond and then Blue Diamond on the wheel. I gave the bowl and stem multiple coats of carnauba wax to protect and shine. I buffed it with a clean flannel buff and then with a microfibre cloth by hand. The finished pipe is shown in the photos below.cap11

cap12

cap13

cap14

cap15

cap16

A Surprising Antique Mall Find – A Medico 14K Gold Band Meerschaum Bulldog


Blog by Steve Laug

On my recent Idaho trip my brother and I went on a pipe hunt through quite a few antique malls. One of them in particular yielded some great finds. The first of these I worked on was the bent diamond shank cob pipe that I wrote about earlier. The next one I worked on was a small Medico Meerschaum Straight Bulldog. I honestly had no idea that Medico made meerschaum pipes so it was a surprise to me. It was in pretty decent shape with a little buildup on the rim and a light cake in the bowl. The meer was clean except for a few small nicks in the sharp edges of the diamond shaped shank and some small scratches on the top surface of the rim. The single ring around the bowl below the cap is in perfect shape with no nicks or dings. It had dust and some grit in the bottom of the ring but otherwise the edges were sharp. The stem has a reverse tenon set up with the tenon permanently inserted in the shank and a permanently inset stinger/filter apparatus that sits in the bottom of the bowl like a grate in a fireplace. The 14K gold band had light scratches and is stamped MEDICO over 1/30 14K RGP. There are no other marking on the pipe or shank. The stem is in decent shape with light tooth chatter on the top and underside near the button and is stamped with an M in a shield. From my research the Medico Meerschaum pipes were carved in Austria by Strambach. This one is stellar.Bulldog1

Bulldog2

Bulldog3

Bulldog4 The next three photos show close up views of the rim and the top and bottom sides of the stem. The top of the rim was dirty and had a slight buildup of tars on the back side and some scratches on the rim top. The stinger apparatus in the bottom of the bowl was darkened and caked as well. The bowl had a light cake buildup that would need to be reamed. The stem had tooth chatter on the top and underside.Bulldog5

Bulldog6

Bulldog7 The next photo shows the stem removed from the shank and the Medico paper filter that was in the shank. It also shows the reverse tenon that is inserted in the shank.Bulldog8 I scrubbed the rim with a cotton pad and saliva to clean off the tars on the surface. I also sanded it with a micromesh sanding pad. I also sanded the sharp edges of the diamond shank to smooth out the nicks and scratches.Bulldog9

Bulldog10 I reamed the bowl with a PipNet pipe reamer to remove the cake from the bowl. I used a cotton swab to clean off the stinger extension in the bottom of the bowl.Bulldog11

Bulldog12 I cleaned out the airway in the stem with pipe cleaners, cotton swabs and alcohol.Bulldog13 I worked on the stem to remove the tooth chatter on the surface of the top and bottom near the button. I sanded it with 220 grit sandpaper to remove the chatter and then sanded it with a medium and a fine grit sanding sponge. I moved on to use micromesh sanding pads – wet sanding it with 1500-2400 grit pads and then rubbing it down with Obsidian Oil. I dry sanded with 3200-4000 grit pads and rubbed it down again. I finished sanding it with 6000-12000 grit pads and gave it a final coat of Obsidian Oil. I let it dry before taking it to the buffer.Bulldog14

Bulldog15

Bulldog16

Bulldog17

Bulldog18 I buffed the stem and bowl lightly with Blue Diamond Plastic polish on the wheel. A light touch is essential when buffing these nylon stems. It is very easy to melt them and make a mess. The finished pipe is shown in the photos below. It is a beautiful pipe.Bulldog19

Bulldog20

Bulldog21

Bulldog22

Bulldog23

Bulldog24

Bringing new life to an old corn cob


Blog by Steve Laug

When I was in Idaho for the funeral of my mother in law my brother and I took the day after the funeral and went on a pipe hunt. He has been attending auctions and going to antique shops on his travels and he picked up some nice pipes that he passed on to me. I will be working on them for a few months. He also had visited several of the antique malls in Idaho Falls where we were. On that day we visited three of them. In one of them there were a few pipes that caught my fancy one of them was an old corn cob bent with a diamond shank. It was in rough shape in that the glue that usually seals the shank into the bowl was gone and it was pretty loose. The bowl was well smoked and had a cake that I would need to clean up. The rim was also blackened. The bowl has a hardwood plug in the bottom which adds to the durability of the pipe. One unique feature of this pipe was that the shank was made of cob. It had some dings and nicks on it. The bottom of the diamond shank bore the Missouri Meerschaum label. There was a brass band that protected the end of the shank. The stem was Redmanol or Bakelite – a nice rich red coloured plastic that had some tooth chatter but no deep tooth marks or cracks. The orifice button on the stem and the material it was made of made me pretty certain that this was an old timer – possibly from the 30s.

Typical of what happens when I find old pipes like this I can’t wait until I get home to start working on them. In this case I figured I wanted to stabilize the shank in the bowl so that it would not get damaged when I carried it home in my luggage. I bought some Elmer’s Wood Glue and used it to fill in the gap around the entrance of the shank to the bowl. I used it to also repair some of the nicks on the sides of the bowl and the shank. I gave it multiple coats to build it up so that shank bowl union was smooth and the dings and marks were also smooth. Of course being in a rush to work on it I forgot to take pictures of the pipe before or during the early stages of the repair. When I left for Vancouver the bowl and the shank transition were smooth and the nicks and dings were also smooth on the surface of the bowl. I need to sand them and feather them into the surface and take off some of the glue shine.Cob1

Cob2

Cob3 I lightly sanded the rim to remove the blackening and clean up that surface. I reamed the pipe with a PipNet reamer and took the cake back to a very thin coat. The bowl is still round so that will not take further work to fix it.Cob4

Cob5

Cob6

Cob7 I cleaned out the bowl and shank with cotton swabs, pipe cleaners and alcohol until they were clean. Due to the shank being cob I was careful how much alcohol I ran through it as I did not want to soften the shank any further by making it wet. I cleaned out the inside of the stem with pipe cleaners and alcohol again being careful to not damage the Redmanol material.Cob8 I sanded the stem with 220 grit sandpaper and then with a medium grit sanding sponge to remove the too chatter on the top and bottom sides of the stem.Cob9

Cob10

Cob11

Cob12 I wet sanded the stem with 1500-2400 grit micromesh and rubbed it down with Obsidian Oil. I dry sanded it immediately with 3200-4000 grit pads so that the micromesh had some bite to it. The oil provided a surface that allowed the micromesh pads to polish the stem. I dry sanded further with 6000-12000 grit pads and then buffed it with Blue Diamond on the buffing wheel. I gave the stem several coats of carnauba wax and then buffed it with a clean flannel buff to give it a shine. I hand buffed it with a microfiber cloth to finish the polishing.Cob13

Cob14

Cob15 The finished pipe is shown in the photos below.Cob16

Cob17

Cob18

Cob19

Cob20

Cob21

Cob22

Fitting a Stem to an Old Ceramic/Porcelain Pipe Bowl


Blog by Steve Laug

In a box of pipe parts I was given was a hexagonal shaped ceramic/porcelain pipe bowl with a thin pencil shank. It was cut off mid-shank at a slight angle. Looking at it I decided that it would be an interesting looking pipe to restem. The finished pipe would be unique and well worth the work to restem. I am guessing that the pipe originally had been longer and possibly had a bit on the end. There was a tiny chip cracked in the end of the shank. I reglued that and held it in place until it dried. Since the shank had been cut at an angle, I used a topping board to flatten the edge and square the end of the shank as much as possible. I then used a nickel band that I had in my box of bands and heated it and pressed it in place on the shank. I left a small portion of the band extending beyond the end of the shank to help square the fit of the stem to the shank. I went through my can of stems and found one that was the perfect diameter for a match to the shank. The tenon would need to be made smaller to fit in the shank and the mortise would need to be opened further with needle files for the stem to fit well.ceramic1 I scrubbed the bowl with Murphy’s Oil Soap and polished it with a microfibre cloth. There was a small hairline crack on the left side of the bowl coming from the rim downward about one half-inch. It was sealed so it was not currently a problem that I would need to deal with. I took some photos of the newly banded stem and the polished bowl to show the new look of the pipe. The bowl is quite thin so it will be a hot one to hold. It will need to be smoked slowly to keep it cool.ceramic2

ceramic3

ceramic4

ceramic5

ceramic6 I used a coarse needle file to open up the mortise in the shank to accommodate the tenon. I used a Dremel with a sanding drum to reduce the tenon as much as possible. I worked on the mortise to file down the inside of the shank. It took some careful file work to keep the mortise round so that once the opening was sufficient the tenon would not be loose inside.ceramic7

ceramic8 The next photo shows the finished mortise. The files worked well and the newly shaped tenon fit the shank perfectly.ceramic9 I put the stem in place on the bowl and took some photos to get a better look at the new pipe. The newly stemmed pipe actually looked very good. I loved the delicate look of it. The slight bend in the stem worked well with the bowl and allows the pipe to sit upright on a flat surface.ceramic10

ceramic11

ceramic12

ceramic13 The stem was rough and lightly oxidized. I sanded it with 220 grit sandpaper to loosen the oxidation and then used a medium and a fine grit sanding sponge to smooth out the scratches on the stem. I then wet sanded the stem with 1500-2400 grit micromesh sanding pads and rubbed the stem with Obsidian Oil. I dry sanded it with 3200-4000 grit pads, gave it another coat of oil and then finished sanding with 6000-12000 grit pads. I gave the stem a final coat of Obsidian Oil and let it dry.ceramic14

ceramic15

ceramic16 I buffed the stem and bowl lightly with Blue Diamond polish on the wheels and then gave the stem and bowl multiple coats of carnauba wax. I polished it with a clean flannel buff on the wheel making sure to hold the bowl tightly. To have the buffer grab this one and throw it would be a disaster that the pipe would not survive. Once I finished the buffing on the wheel I hand buffed it with a microfibre cloth to raise the final shine. The finished pipe is shown in the photos below. There is some slight coloring forming on the sides of the bowl midway down from the top. I am wondering if the rest of the bowl will also colour with use. The pipe looks really good with the new stem and band. It will fit well in my collection of unique older pieces.

Thanks for looking.ceramic17

ceramic18

ceramic19

ceramic20

ceramic21

ceramic22

ceramic23

ceramic24

Cleaning up a London Made Charleston Banker


Blog by Steve Laug

When I saw this pipe on Ebay I decided to bid on it. I had bought from this English sell a few times in the past and he generally has some great older pipes. He had listed this one as a Criterion London Made pipe. I had looked and found that Criterion was made by Comoy’s. He described it as a 1/8th bent sandblasted prince. To me it is almost a Banker shape. The bowl is quite large and the oval shank ends with a saddle bit. It is 5 inches (12.75cms) long and the bowl height is 1.5 inches (3.75cms). He described it as lightly smoked, and in very good condition and as usual his description was perfect. He said that the markings on the bottom of shank were very faint and read Criterion over London Made. When the pipe arrived I looked at the faint stamping with a lens and a bright light and it actually reads: Charleston in script over block script LONDON MADE. I had not heard of Charleston pipes before so I did a bit of research and found the brand listed in Who Made That Pipe. It was listed as being made by Sydney Charleston Ltd. London, England. The first two photos are the ones provided by the seller on Ebay.Charleston1 When the pipe arrived I took it to the work table and took a few photos of the state of the pipe before I began to work on it. It was in pretty decent shape. The finish was dirty and the rim had dirt on it. The bowl had a cake build up. The stem was oxidized with a few small tooth marks on the top and bottom of the stem near the button. The slot was virtually plugged so I could not get a pipe cleaner through it to clean the inside.Charleston2

Charleston3

Charleston4

Charleston5 I took the pipe apart and put the bowl in an alcohol bath to soften the hard cake and the stem into an Oxyclean bath to soften the oxidation on the stem. I left them to soak overnight.Charleston6 When I took the bowl out in the morning I scrubbed it with a brass bristle whitewall tire brush to clean out the grooves in the blast on the bowl and the rim. I was able to remove all of the build up and grime from the ridges and grooves.Charleston7

Charleston8 I wiped out the bowl with a cotton swab and then reamed it with a PipNet reamer to remove the cake. The bath had softened the cake so it came out very easily.Charleston9 I took the stem out of the Oxyclean bath and the oxidation had all come to the surface. It was soft and would be easier to remove.Charleston10 I used a dental pick to clean out the slot and then a pipe cleaner to make sure the edges of the Y were wide open to further clean it.Charleston11 I scrubbed down the bowl and stem with a Mr. Clean Magic Eraser and gave the bowl a light rub down with olive oil. I took the following photos. There was progress to be seen.Charleston12

Charleston13 The cleaning and oil seemed to make the stamping more legible. In the photo below you can see the Charleston with a curled line under it and the London Made stamping underneath the line.Charleston14 I cleaned out the bowl, shank and stem with pipe cleaners, cotton swabs and alcohol. It was incredibly dirty. I would need to use the retort to really clean it.Charleston15

Charleston16 I sanded the stem with 220 grit sandpaper and worked out the tooth marks on the top and underside near the button.Charleston17 I set up the retort and held the tube over the flame to boil the alcohol through the stem and bowl. I ran three test tubes of alcohol through the pipe before it came out clean. The fourth bowl came through with clear.Charleston18

Charleston19 I took the cotton ball out of the bowl, wiped out the bowl with a cotton swab and ran pipe cleaners through the stem and shank to remove any moisture and final debris. The pipe smelled fresh and clean and the interior was clear.Charleston20

Charleston21 I worked on the stem with a medium and a fine grit sanding sponge and then wet sanded with 1500-2400 grit micromesh sanding pads. I rubbed the stem down with Obsidian Oil before dry sanding with 3200-4000 grit pads. I gave it another rub down with oil and then finished sanding with 6000-12000 grit pads. I gave it a final rub down of Obsidian Oil and let it dry.Charleston22

Charleston23 I buffed the pipe with White Diamond and Blue Diamond on the buffing wheel and then gave it multiple coats of carnauba wax. I then buffed it with a clean flannel buff and a final hand buff with a microfibre cloth. The finished pipe is shown in the photos below. It is fresh and ready to smoke. I intend to fire up a bowl today!

Thanks for looking.Charleston24

Charleston25

Charleston26

A Simple Elegance: Cleaning, Restemming and Restoring a Diplomat Billiard


Blog by Steve Laug

On my recent Lethbridge trip I found the Diplomat pipe at an Antique Fair. It is a nice sandblast billiard with a dark undercoat and a brown over stain. The bowl was in decent shape. The sandblast was deep and quite beautiful to look at. The nooks and crannies caused in the process made for an interesting feel in the hand as well. The stain had worn off in spots on the sides of the bowl and along the outer edges of the rim. The finish was also generally dull and lifeless. The surface of the rim was dirty with tars and oils. The inner edge was slightly damaged and would need to be worked on. There was a thick cake around the middle of the bowl and light at bottom and on top. The stem was one that somebody had Gerry-rigged to fit. It was smaller in diameter and the tenon was too small. The previous owner had wrapped the tenon with thread and then with aluminum foil and pressed it into the shank. The stem had also been hacked up to repair a damaged button and grooves had been carved on the top and bottom sides of the stem to make it a dental bit.Dip1

Dip2

Dip3

Dip4

Dip5 I took close-up photos of the top of the bowl and the underside of the shank to give a clear picture of the state of the inner edge of the rim and the stamping on the pipe.Dip6

Dip7 The next two photos show the stem that came with the pipe and the “fancy” work that had been down to make it fit the shank and create grooves on the top and underside that would allow the pipe to be held in the mouth behind dentures.Dip8

Dip9 My first task was to go through my stem can and see if I could find a better stem for this pipe. I did not have a tapered stem that would readily fit but I did have a saddle stem that would look good after shaping and fitting it to the shank.Dip10 I lightly sanded the tenon to get a snug fit in the shank and pushed the new stem home to have a look at the fit. The stem would need to be sanded to bring the diameter at the stem/shank union down to match the shank. I took a few photos to see what the pipe looked like with this new stem.Dip10

Dip11

Dip12

Dip13 I used a Dremel with a sanding drum to carefully reduce the diameter of the saddle portion of the stem. I have found that I can roughly shape the stem to fit better and then finish by hand sanding it (photo 1). Once I had the rough shape I sanded it with a coarse emery paper to remove the gouges and scratches left behind by the sanding drum (photo 2). I slipped a plastic washer on the tenon and put the stem back in place. I sanded it with 180 and 220 grit sandpaper to further shape it and remove the scratches (photo 3).Dip15

Dip16

Dip17 With the basic fit correct and only needing to fine tune it and polish the stem I decided to ream the bowl. I used a PipNet reamer and took the cake back to bare wood.Dip18

Dip19 I cleaned out the inside of the shank and stem with pipe cleaners, cotton swabs and alcohol. Once it was clean I worked on the inner edge of the rim. I sanded it and reshaped it to make it smooth and round once again using a folded piece of 220 grit sandpaper.Dip20

Dip21

Dip22 I sanded the stem some more with 220 grit sandpaper and flattened the bottom side to match the flat bottom of the shank. The next set of three photos show the fit and shape of the stem at this point.Dip23

Dip24

Dip25 The button was quite thin and I decided to build it up with black superglue. I also could see a repair that had been done on the stem before I used it so I worked on that to further blend it into the stem surface.Dip26 When the glue dried I sanded it with 220 grit sandpaper to feather it into the surface of the rest of the stem and also worked on shaping the button. In the second photo below you can see the end view of the built-up and reshaped button.Dip27

Dip28 I sanded the stem and button with a medium and a fine grit sanding sponge to remove the scratches and blend in the patches. I then wet sanded the stem with 1500-2400 grit micromesh sanding pads and then rubbed the stem down with Obsidian Oil. I dry sanded with 3200-4000 grit pads and rubbed it down again with oil. I finished by sanding it with 6000-12000 grit pads and gave the stem a final coat of Obsidian Oil. I set it aside until the oil was dry.Dip29

Dip30

Dip31

Dip32 I touched up the worn spots on the finish of the bowl with a dark brown stain pen and a black permanent marker and then buffed the bowl and stem with White Diamond on the wheel. I buffed it again with Blue Diamond and then gave the pipe multiple coats of carnauba wax. I polished it with a clean flannel buff and then hand buff with a microfibre cloth. The finished pipe is shown in the photos below. I like the looks of the saddle stem and the deep sandblast finish. The pipe has an understated elegance about it that I like.

Thanks for looking.Dip33

Dip34

Dip35

Dip36

Dip37

Breathing new life into an LHS Park Lane De Luxe Billiard


Blog by Steve Laug

When I repaired Troy’s LHS Park Lane Lovat he gifted me this little beauty as a thank you. It is a small billiard and is stamped on the left side of the shank, Park Lane in an arch over the LHS Diamond and underneath the diamond it is stamped De Luxe. On the right side it is stamped with US Pat. 1,908,630. The shape number 19 is stamped on the underside of the shank. The finish was dirty and chipped all around the bowl. The rim had a buildup of tars and lava and the cake in the bowl left the bottom virtually conical. The stem was under clocked slightly. The stem (Bakelite?) was oxidized and had some small tooth marks near the button on the top and bottom sides. I love the swirl patterns of the stem material. They really give the pipe a look of class. When I removed the stem the stinger itself was black with tars and the inside of the shank was also dirty.Bake1

Bake2 I looked up the patent number on the US Patent information website and found out that the patent was filed for the stinger and tenon apparatus in 1933. The one in the diagram is shorter and slightly different from the one in this pipe so I am thinking that it is a later modification that was introduced. That combined with the dates for Bakelite I would put the dates on this pipe in the late 1930s or early 1940s. It is in pretty decent shape for a 75-80 year old pipe.LHS1908630 Patent drawings

LHS1908630 Patent doc I took the next three photos to give an idea of the state of the rim. I was uncertain of the condition of the inside edge of the rim because of the thickness of the build-up. The stamping was weak in the middle and the LHS diamond also quite weak.Bake3 I reamed the bowl with a PipNet reamer. I find that I use that reamer for almost all of the refurbs that I do. The four different sized cutting heads, the T-handle and the carbon steel blade make short order of the most difficult cake. In this case I reamed it back to bare wood. I really wanted to see what the interior looked like as there was significant darkening around the top half of the bowl. The rim itself was just slightly out of round so it would be no issue to clean up.Bake4 I used a brass bristle tire brush on the long aluminum stinger to clean off the tars. I wanted it clean before I heated it to reclock the stem.Bake5 With it clean I heated the stinger with the lighter to loosen the glue in the stem. Once it was loose I was able to align the stem correctly. I let it cool in place.Bake6 With everything aligned I decided to try to pull the end of the stinger to get it to line up with the top of the stem. I wanted the slot in stinger to match the white bar in the stem material. I wrapped the jaws of a pair of needle nose pliers with cellophane tape to protect the aluminum from damage when I clamped them on it. I gently twisted on the end of the stinger and to my surprise the entire tenon unscrewed from the stem. That was a good thing by the way as it made cleaning the stem far simpler.Bake7 I cleaned the inside of the stem and the stinger with pipe cleaners, cotton swabs and isopropyl alcohol. I had already tested the stem material and I knew that it would not dissolve with the alcohol.Bake8 With the inside of the stem clean I put the tenon back in place on the pipe and worked on the exterior. I sanded the surface and particularly the tooth marks with 220 grit sandpaper until they were smooth and blended into the stem surface.Bake9 I decided to work on this pipe from the opposite direction of my normal practice and finished working on the stem first. I wet sanded it with 1500-2400 grit micromesh pads and then rubbed it down with Obsidian Oil. I dry sanded with 3200-4000 grit pads and then gave it another coat of oil. I finished with 6000-12000 grit pads and a final coat of Obsidian Oil. I set the stem aside and let the oil dry.Bake10

Bake11

Bake12 I cleaned out the bowl and shank with pipe cleaners, cotton swabs and alcohol until it was clean and smelled fresh. I thought about using the retort on it but I am just not certain what the hot alcohol will do with this stem material.Bake13 Once the rim was cleaned I could see the chips and damage to the surface so I decided to lightly top the bowl.Bake14 I decided to do some experimenting with Dave Gossett’s method of stripping a bowl finish. I read about it on the Dr. Grabow Collectors Forum. He uses Oxyclean and alcohol he said. I had no idea how he went about it and fired him an email. Due to my impatience I did not wait and just jumped in. I tried to mix the Oxy with the alcohol. It did not work! It made a grit paste but I decided to give that a try anyway. I scrubbed and scrubbed and succeeded in removing a lot of the finish. The mixture left a white/grey ghost on the briar.Bake15

Bake16 I happened to check my email and saw that Dave wrote back. He said that he dissolved the Oxy in hot water and then added the alcohol. He said to be careful of the stamping as the mixture had a tendency to raise the stamping in the weak areas. Boy I wish I had not been impatient. I lost some clarity on the week areas of the stamping. I did the mixture as Dave suggested and wiped down the bowl with it and was able to get some more of the finish removed.Bake17 There were some deep cuts in the surface of the bowl. I steamed out the dents but these did not raise. I repaired them with superglue and briar dust.Bake18 I sanded the repaired areas smooth to match the surface of the bowl. I wiped the bowl down with alcohol to remove the dust. I heated the briar with a blow dryer and then stained it with a Dark Brown aniline stain thinned with 3 part alcohol to 1 part stain. I flamed the stain and set it in the briar.Bake19 I buffed it with White Diamond and found that even with the thinning it was too dark to my liking. I wiped the bowl down with alcohol on cotton pads to remove some of the stain and make it more transparent.Bake20 The grain showed through nicely and the colour once it was waxed would look good with the stem material. I buffed with Blue Diamond and then gave it multiple coats of carnauba wax. I buffed it with a clean flannel buff and then with a microfibre cloth by hand. The finished pipe is shown in the photos below. Thanks for looking.Bake21

Bake22

Bake23

Bake24