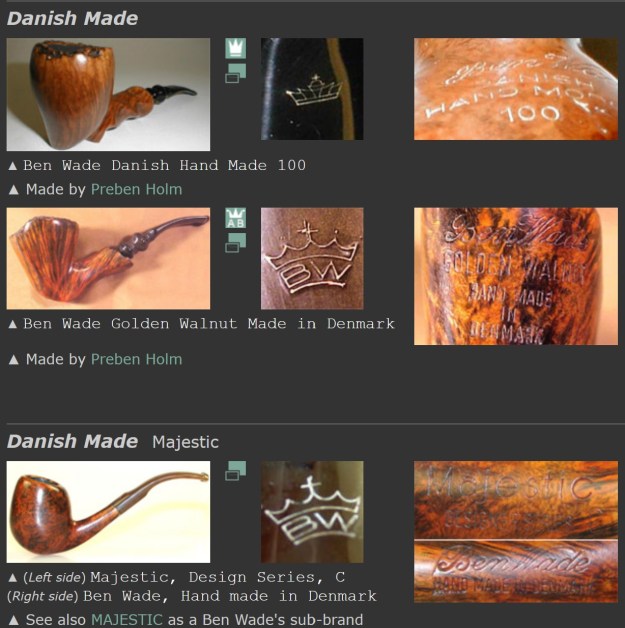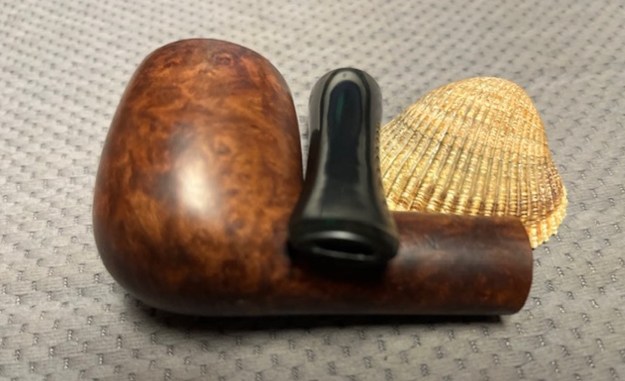
by Kenneth Lieblich
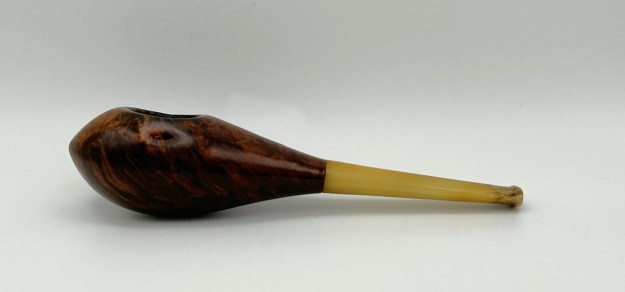
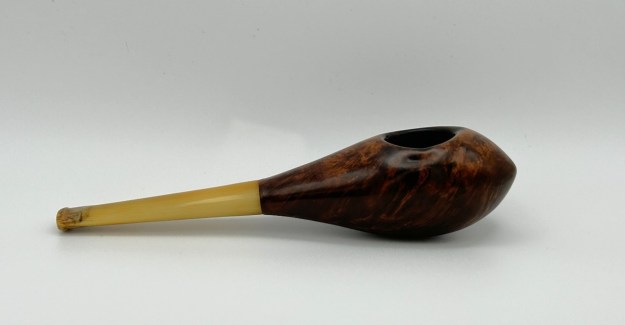
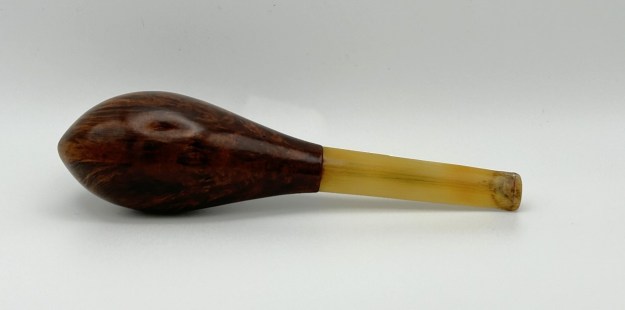
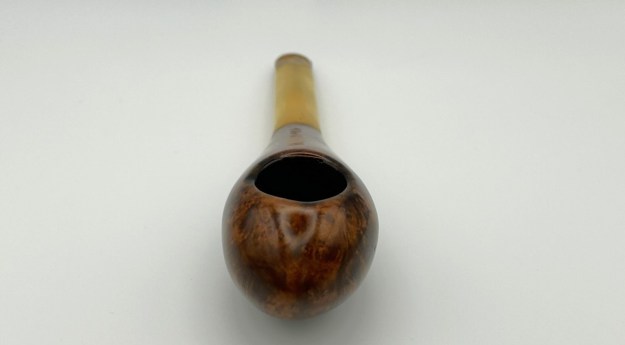
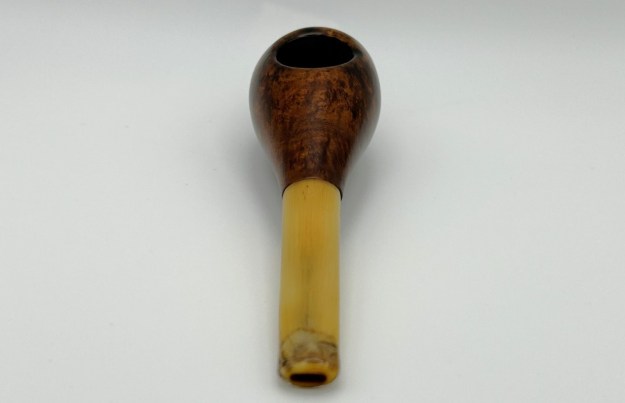
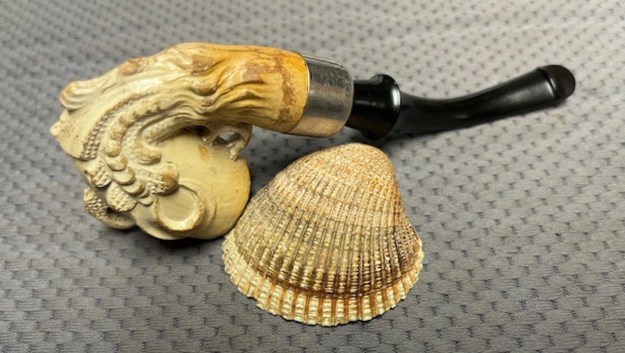
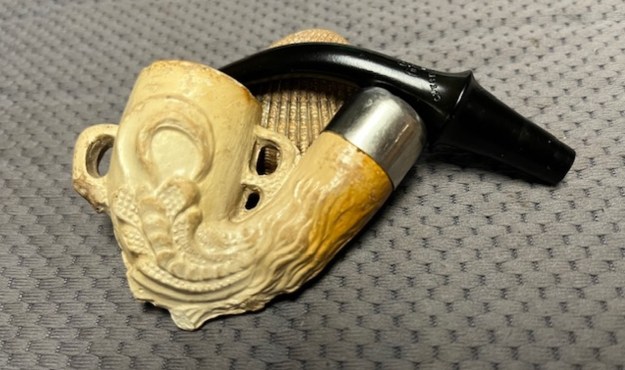
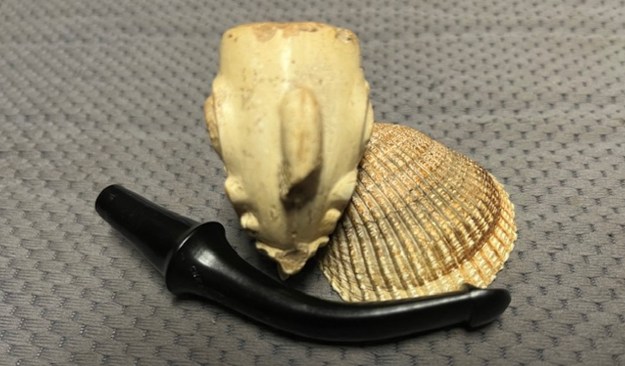
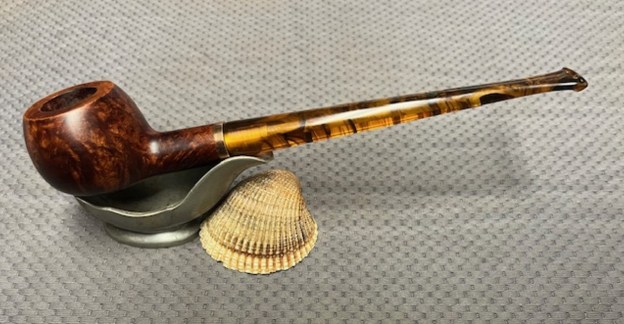
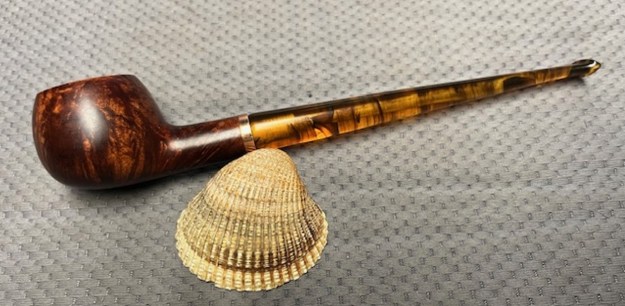
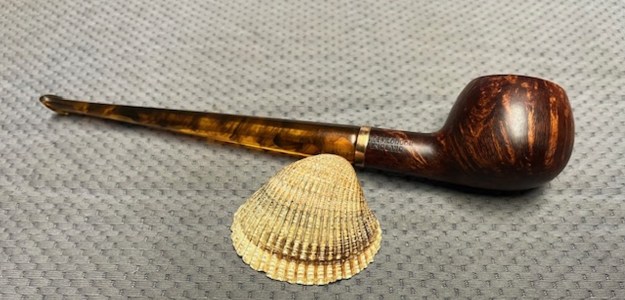
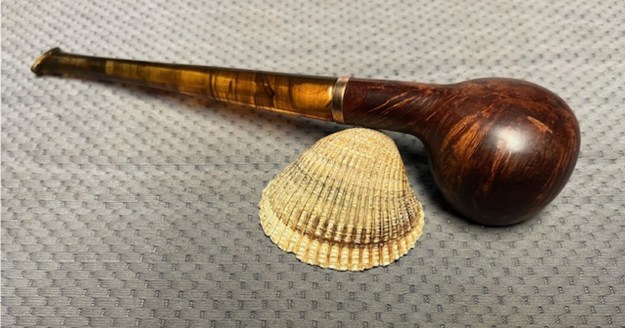
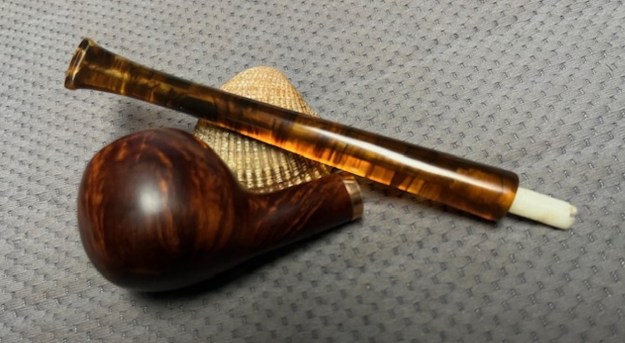
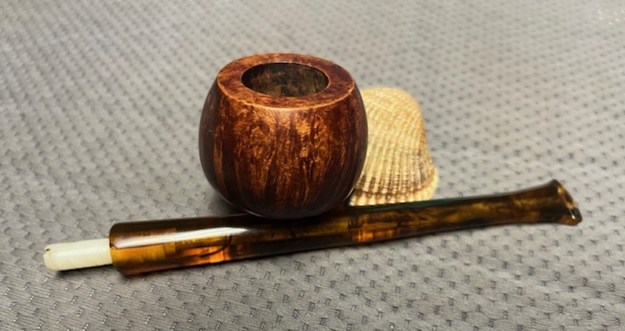
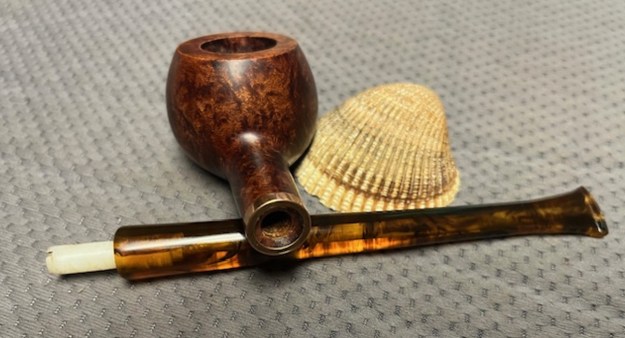
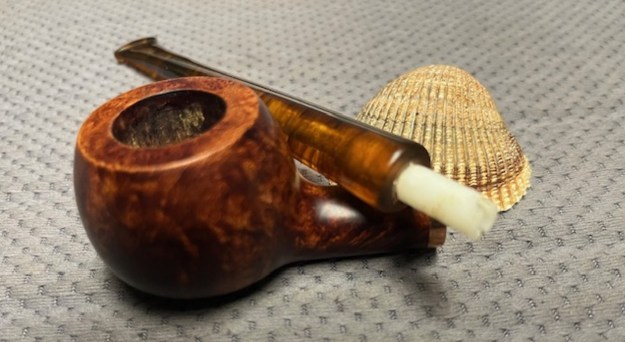
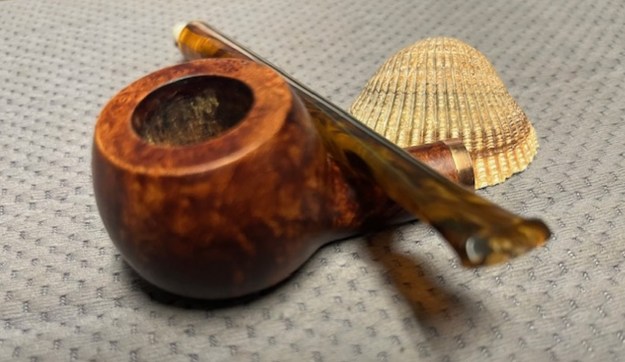
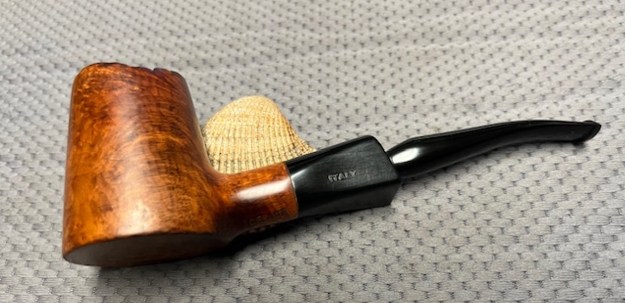
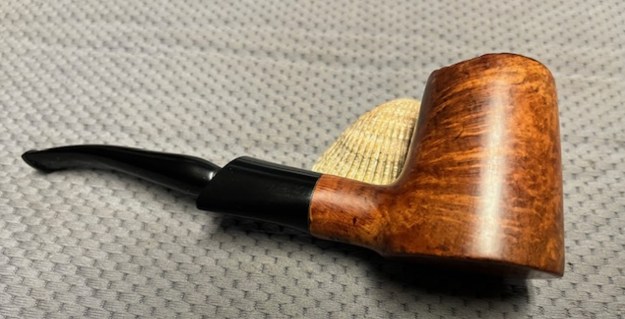
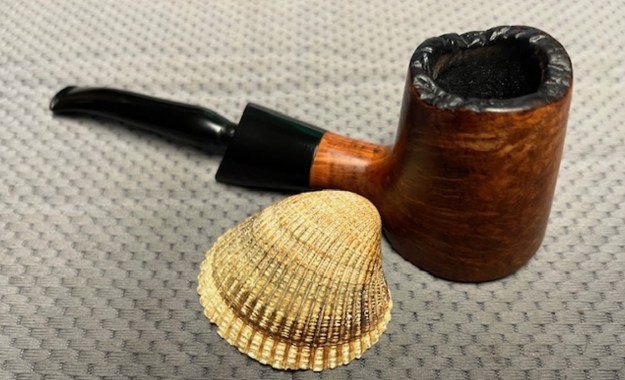
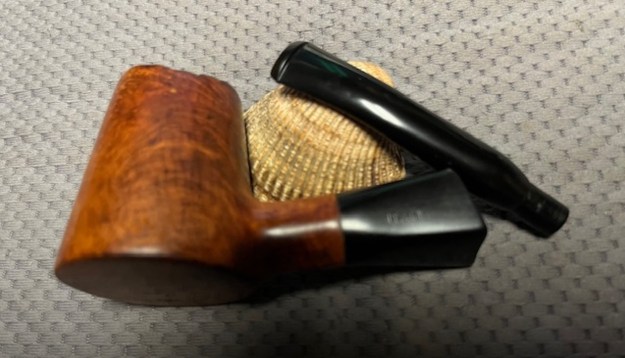
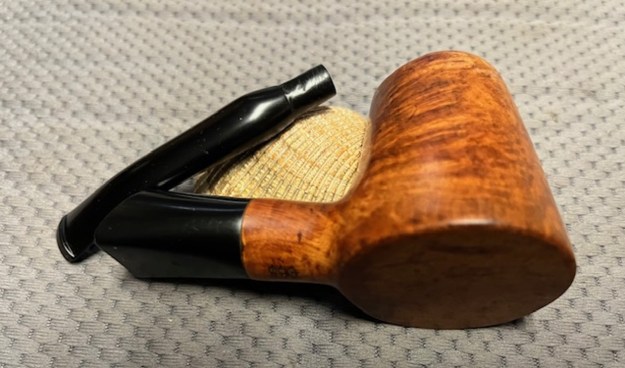
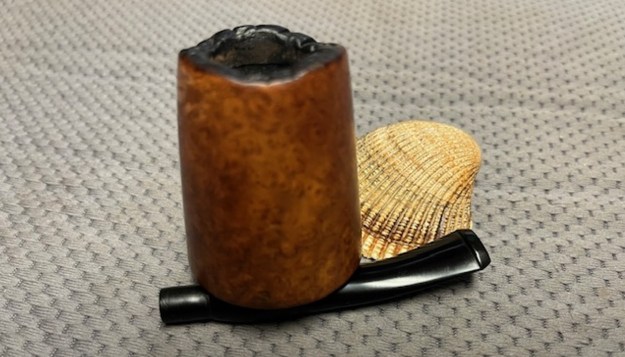
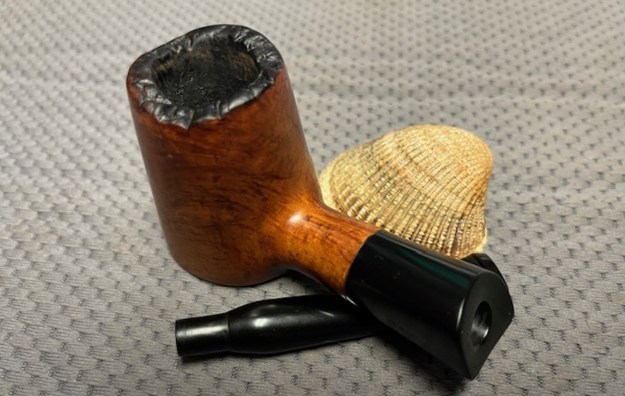
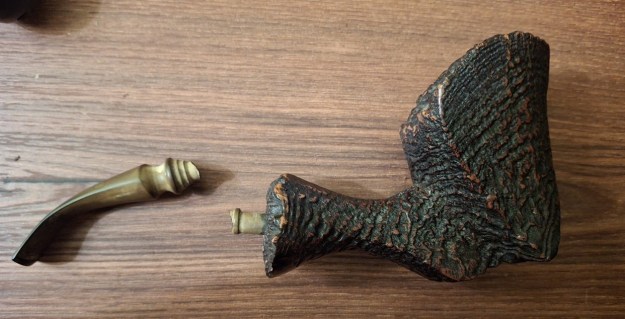
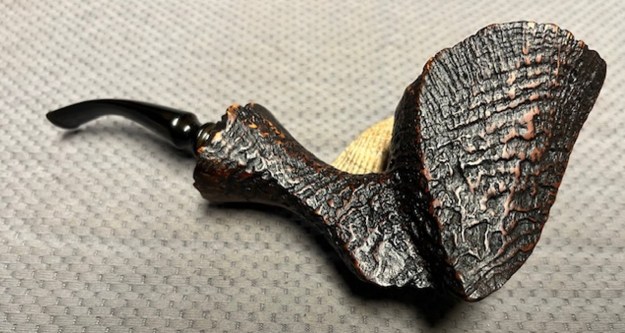
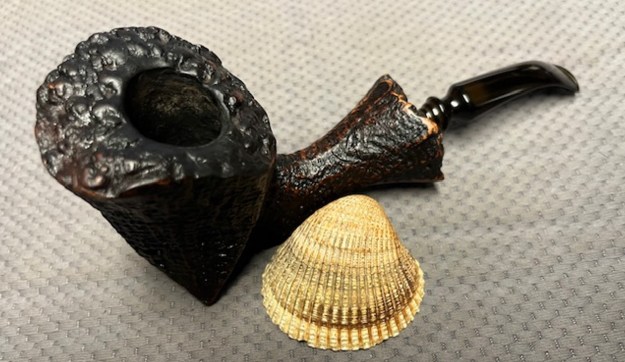
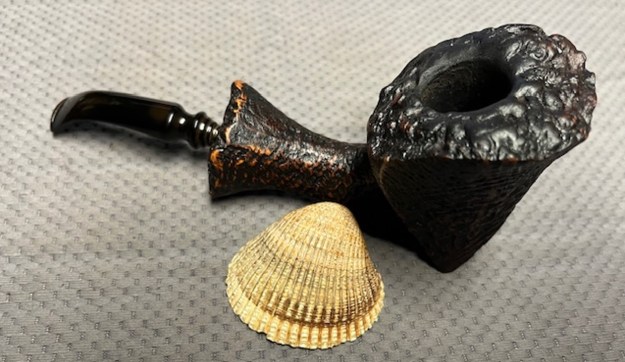
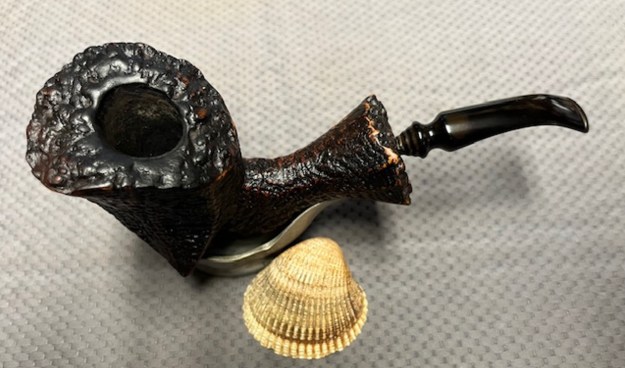
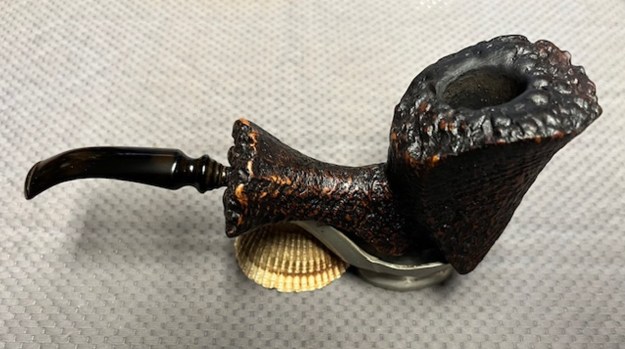
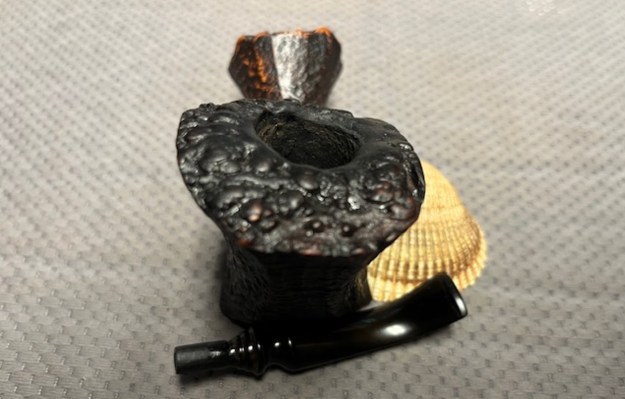
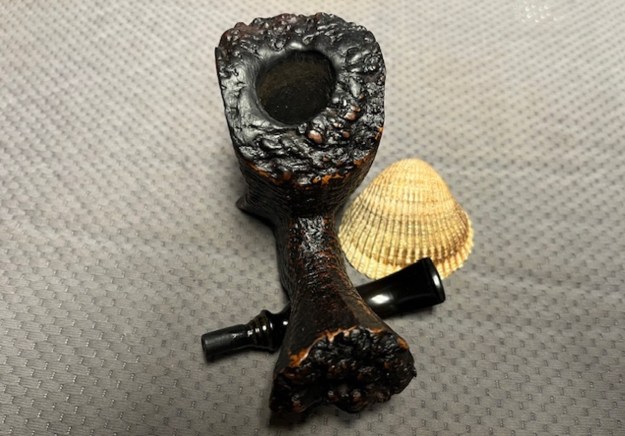
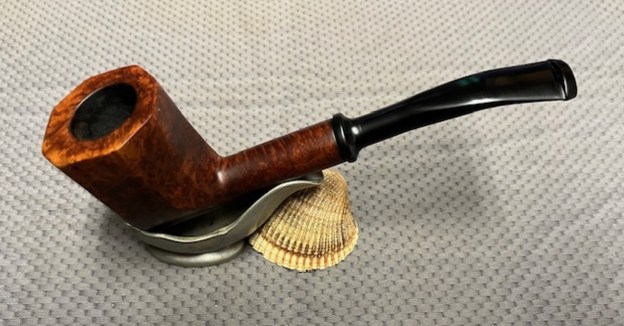
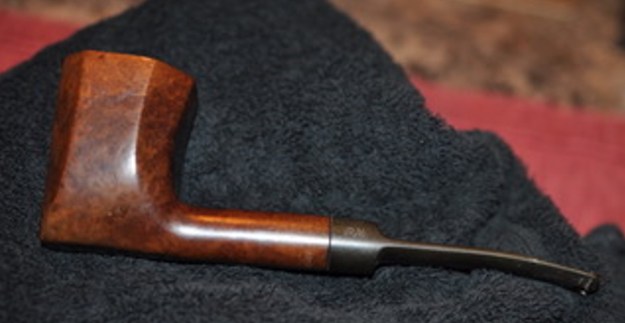
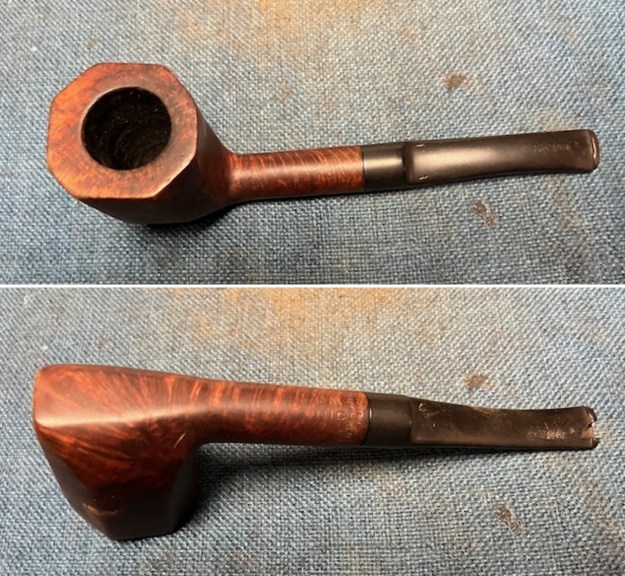
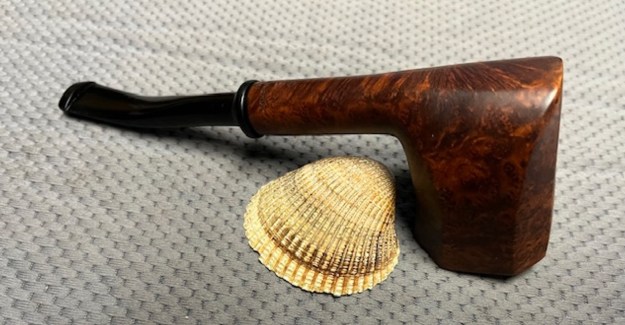
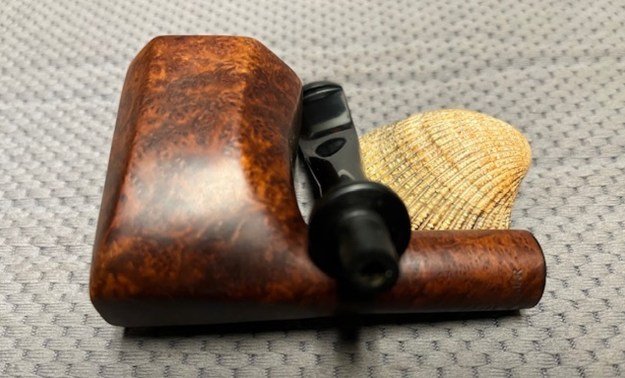
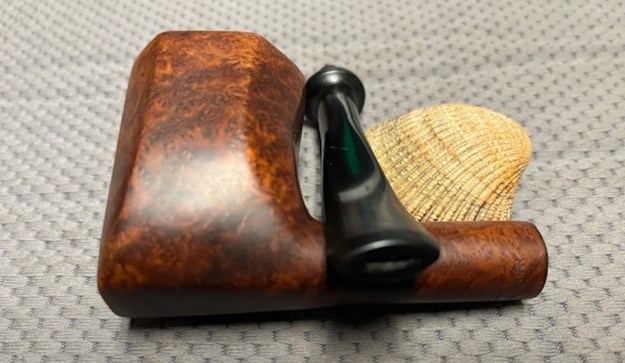
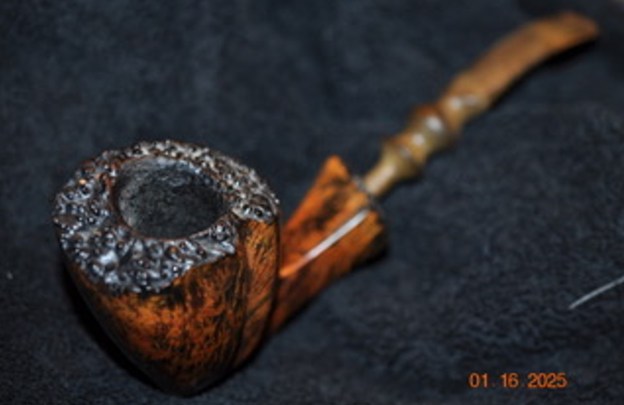
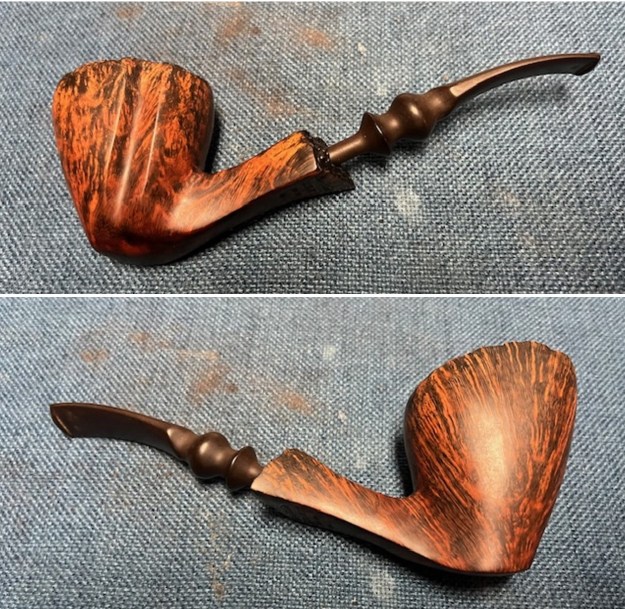
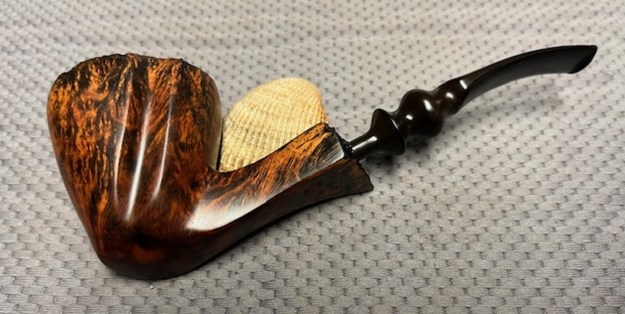
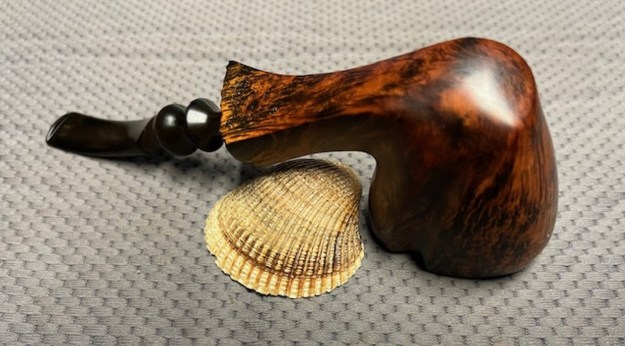
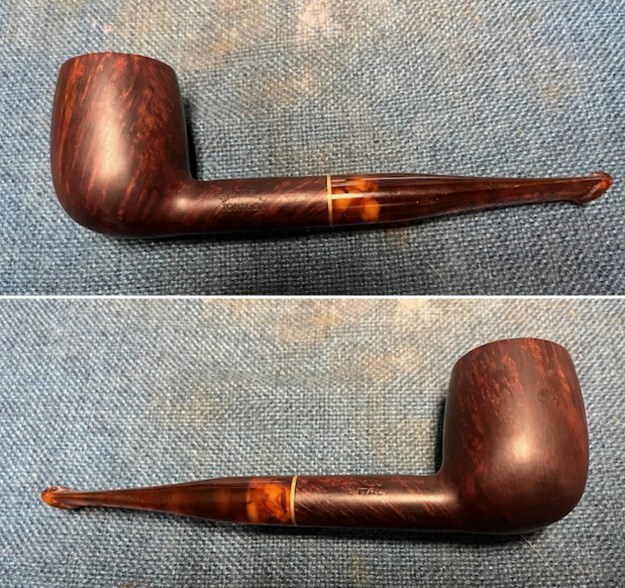
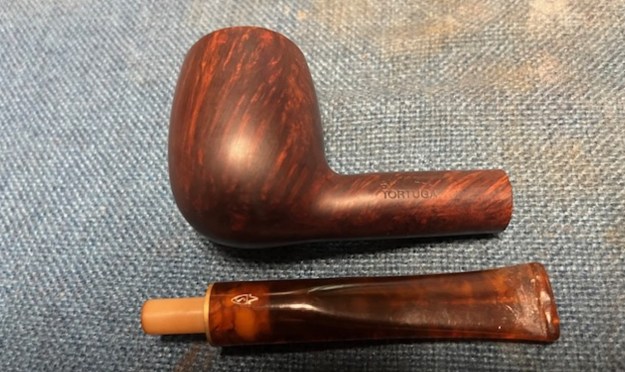
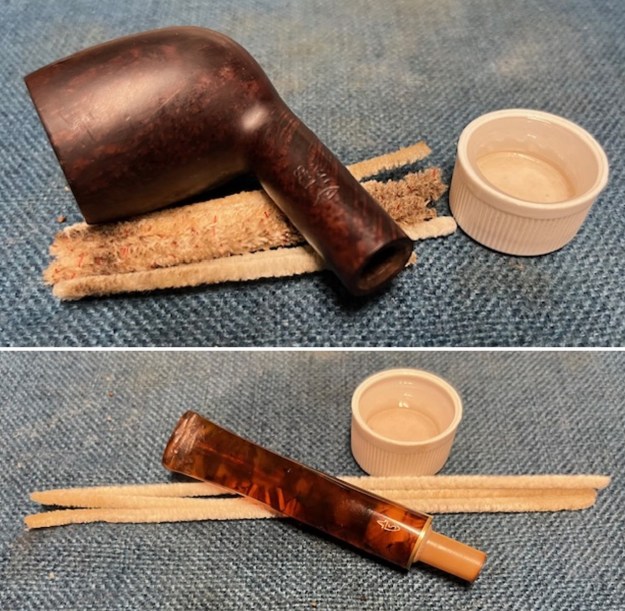
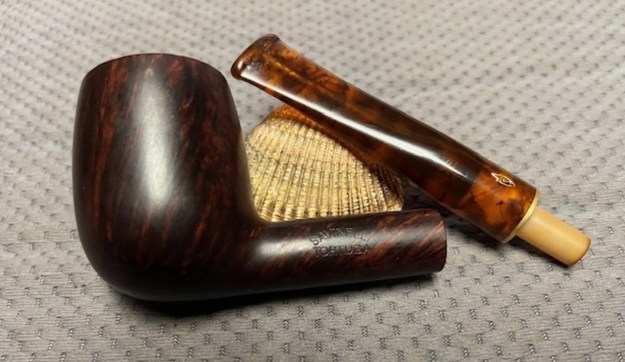
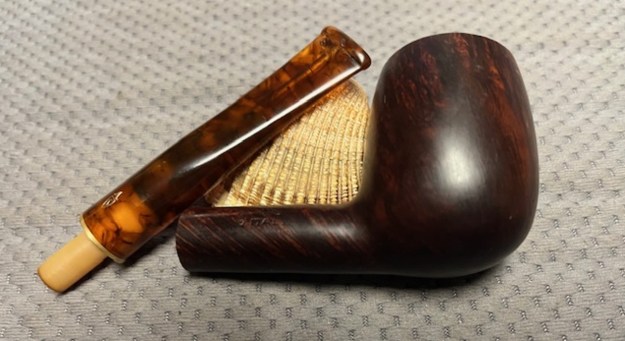
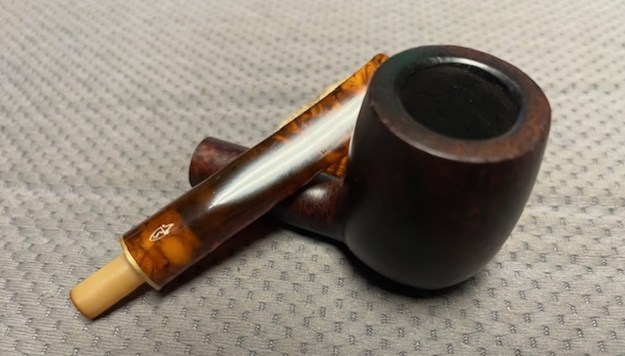
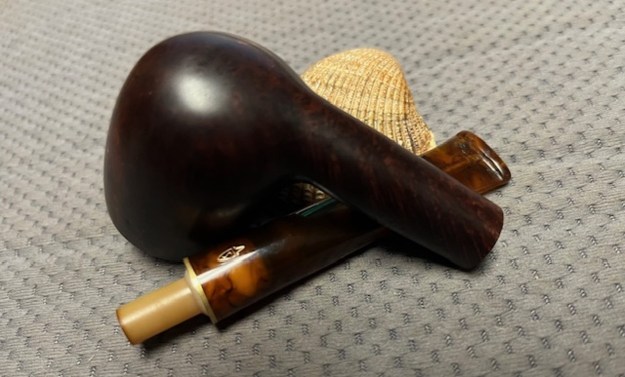
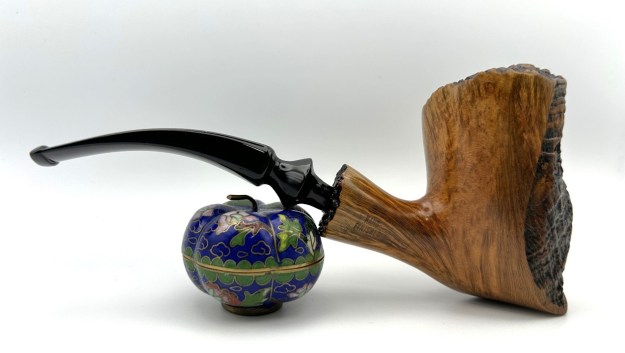
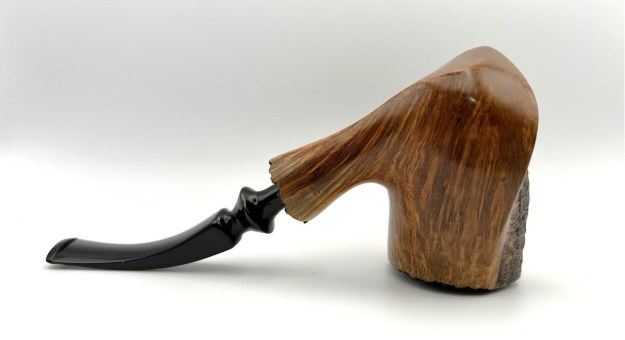
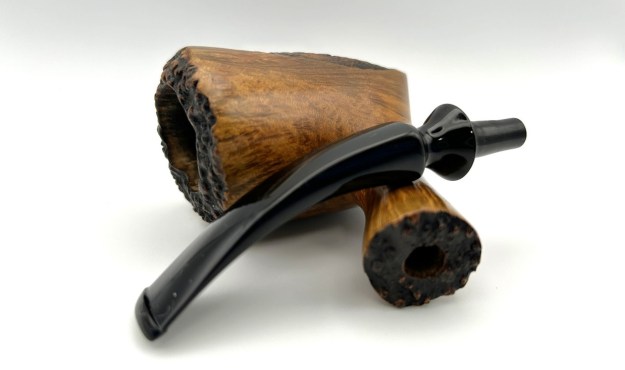
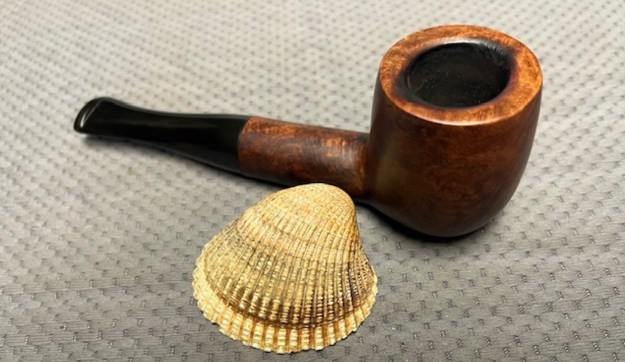
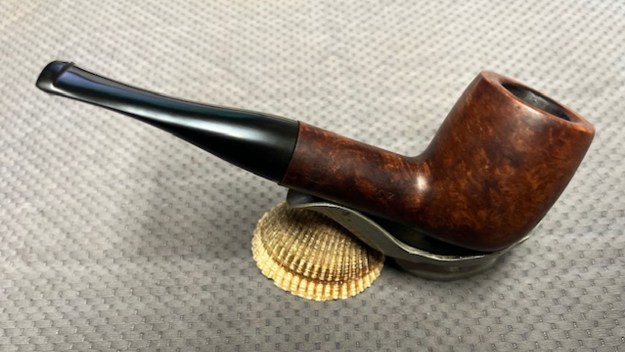
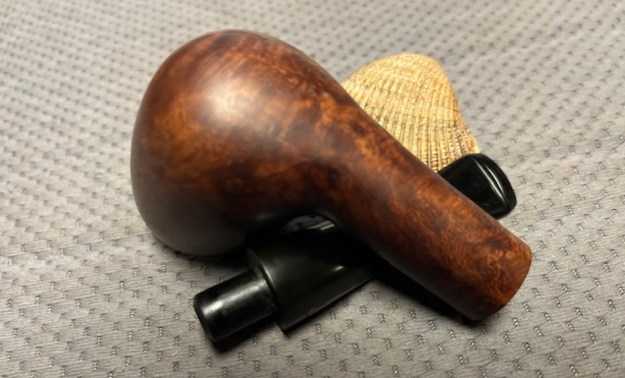
If you’re interested in an old and highly unusual pipe with incredible grain, have I got a pipe for you! This pipe is in the shape of a torpedo – but not like the screw-in zeppelin pipes you may have seen. This one is much older and more fascinating. It has a substantial chunk of briar and a lovely horn stem, with a bone tenon. I received it in a large lot of French pipes and it has been sitting in my box for a long time. Now, the time has come for it to be brought back to life. I’ve mentioned several times that I have an interest in French pipes and pipemaking. I think we’re going to have fun with this one.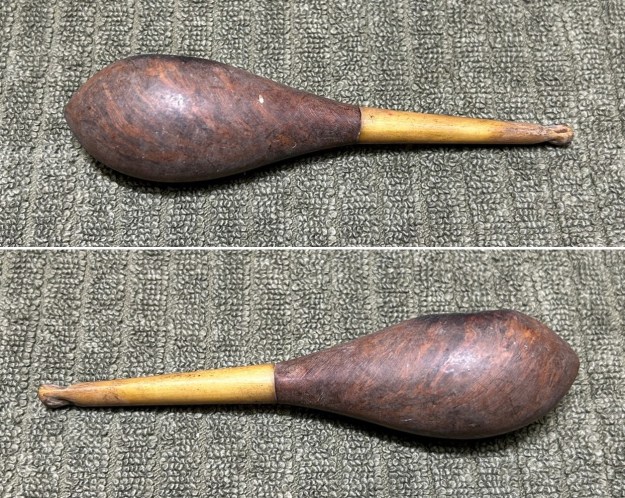
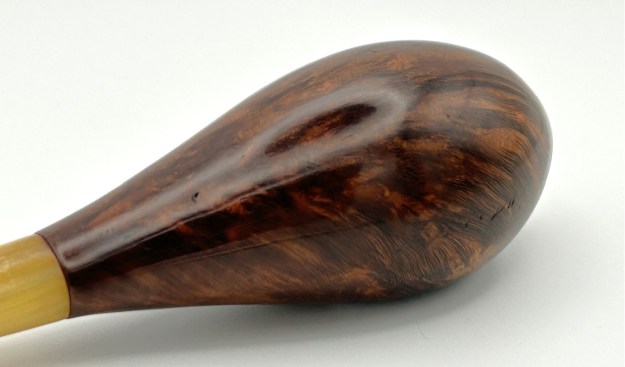
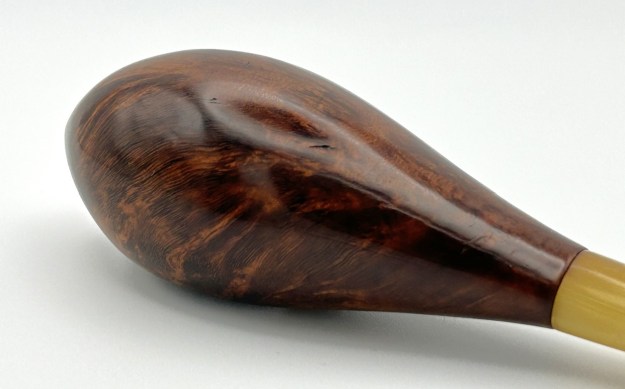
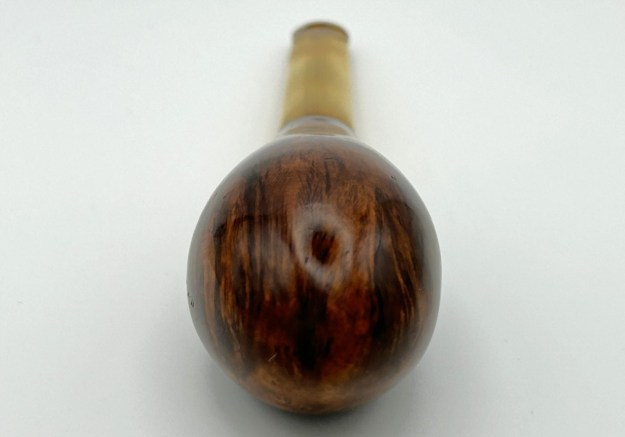
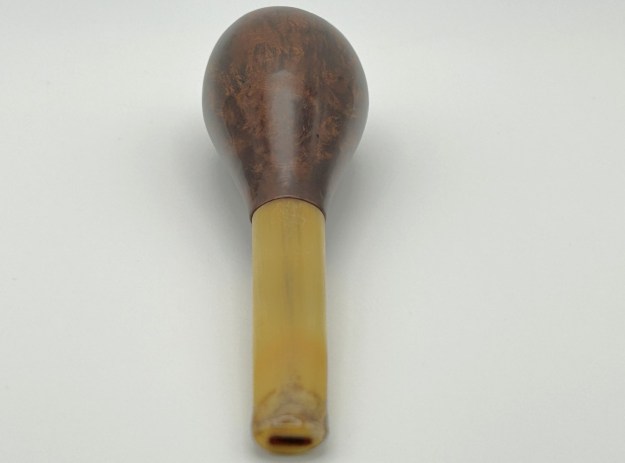
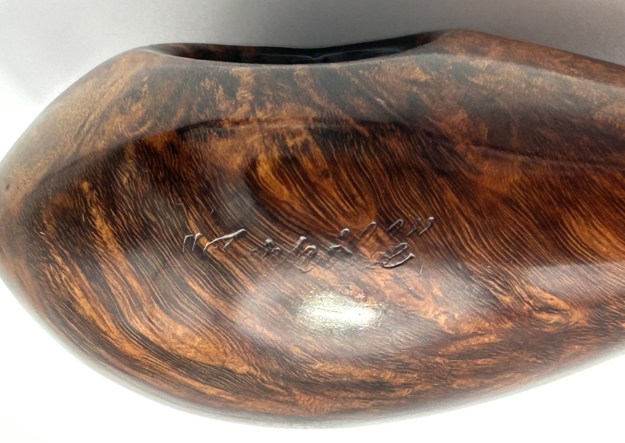
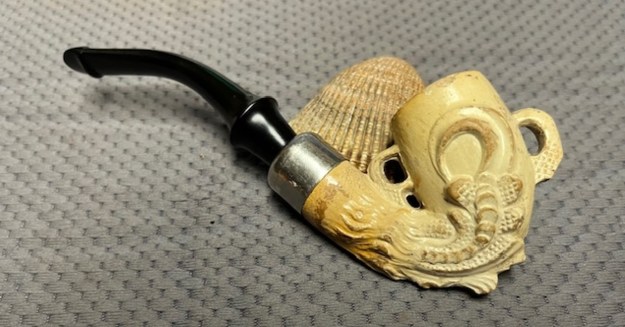
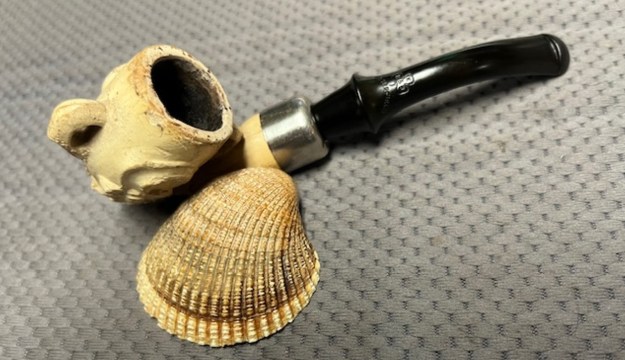
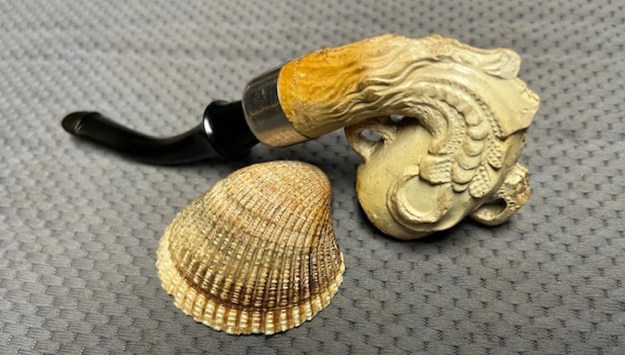
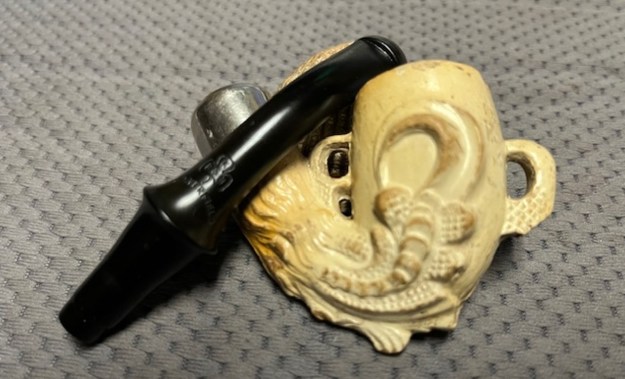
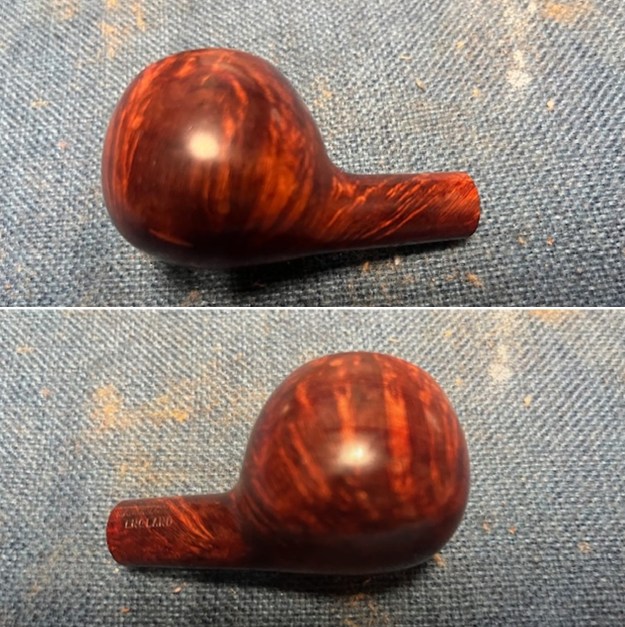
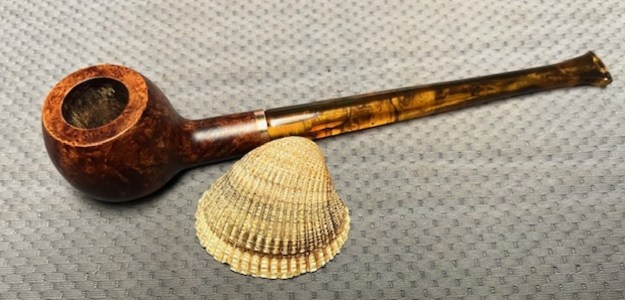
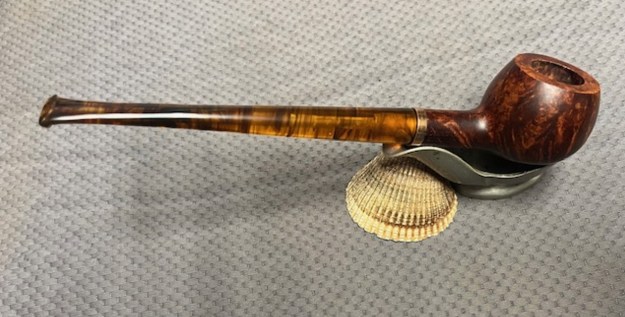
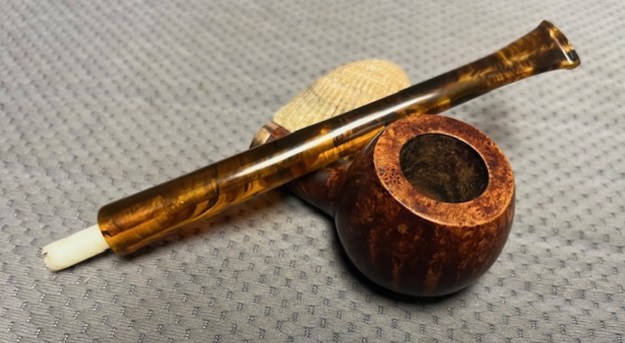
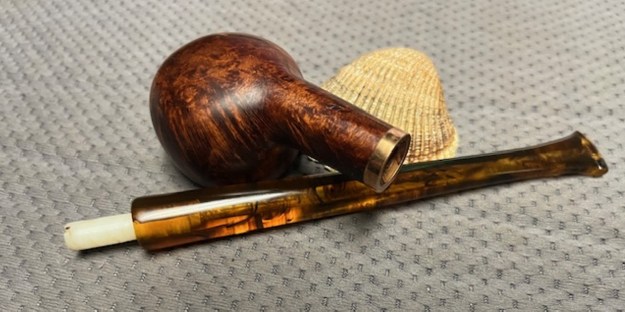
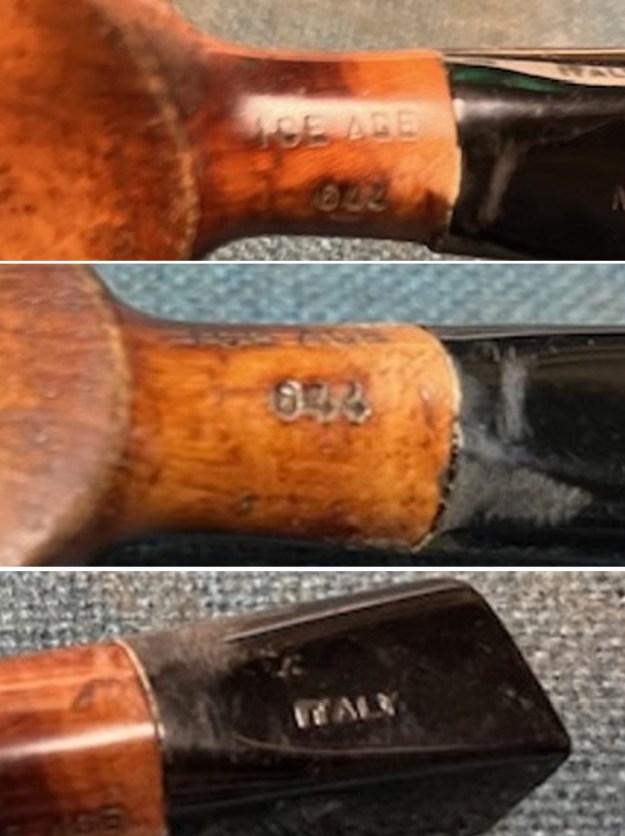
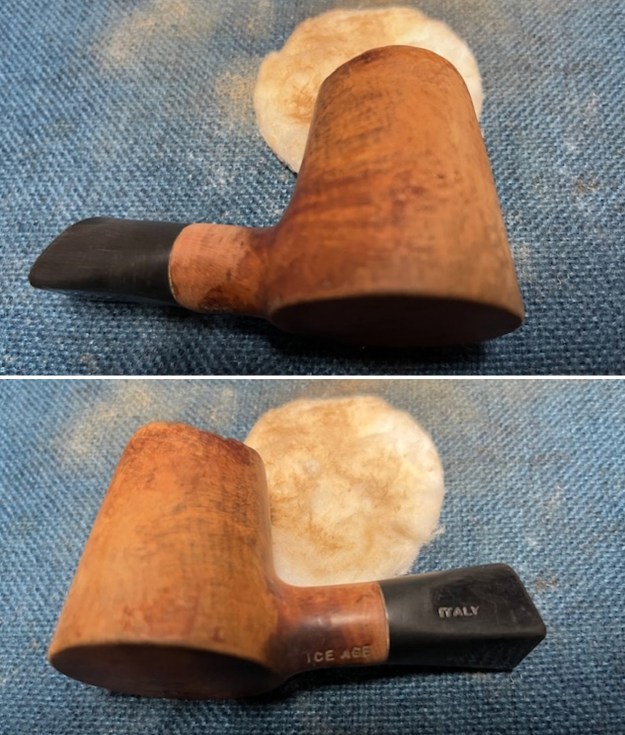
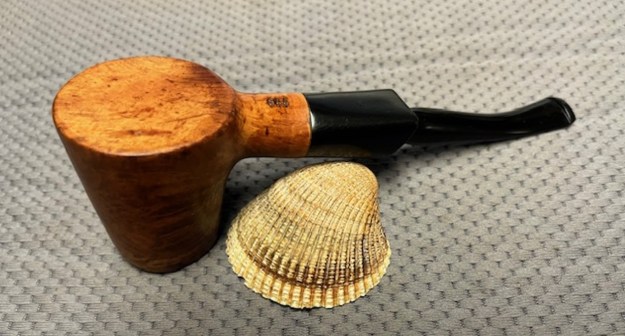
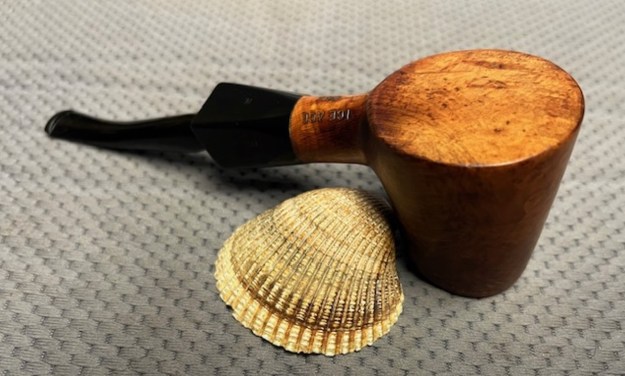
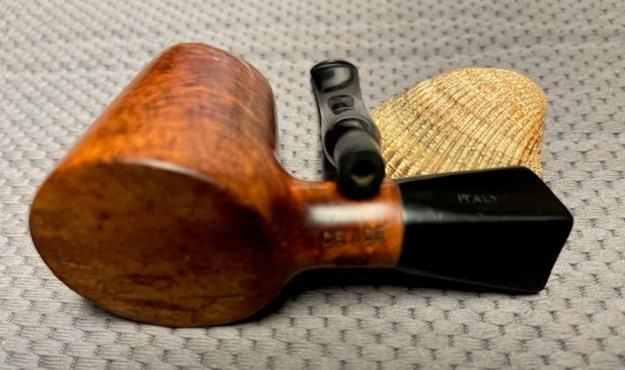
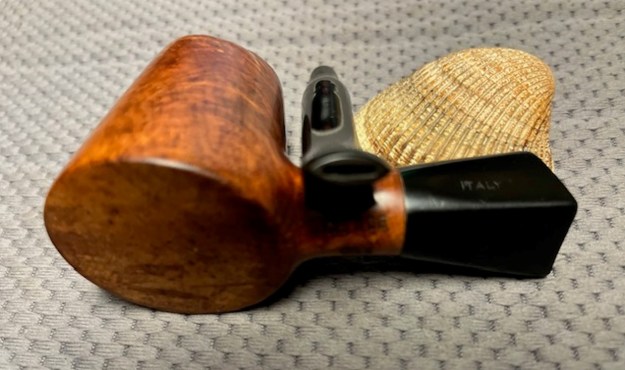
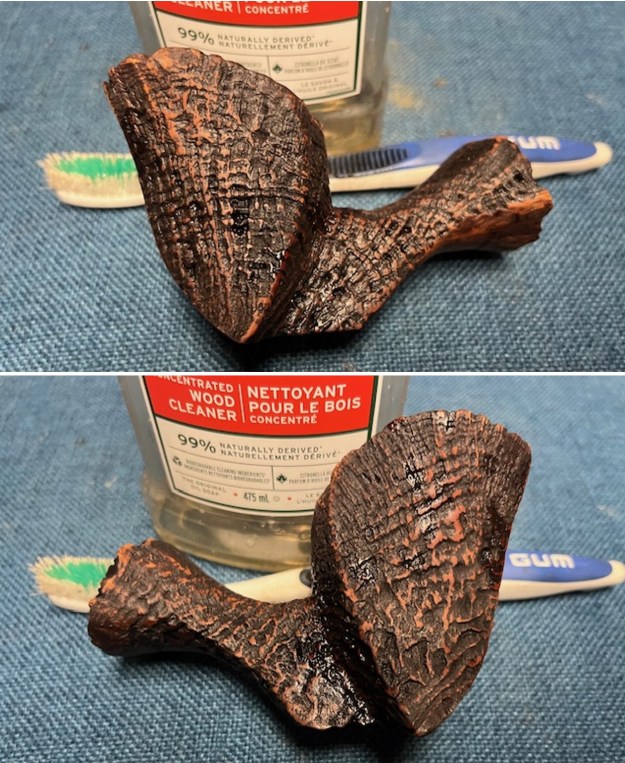
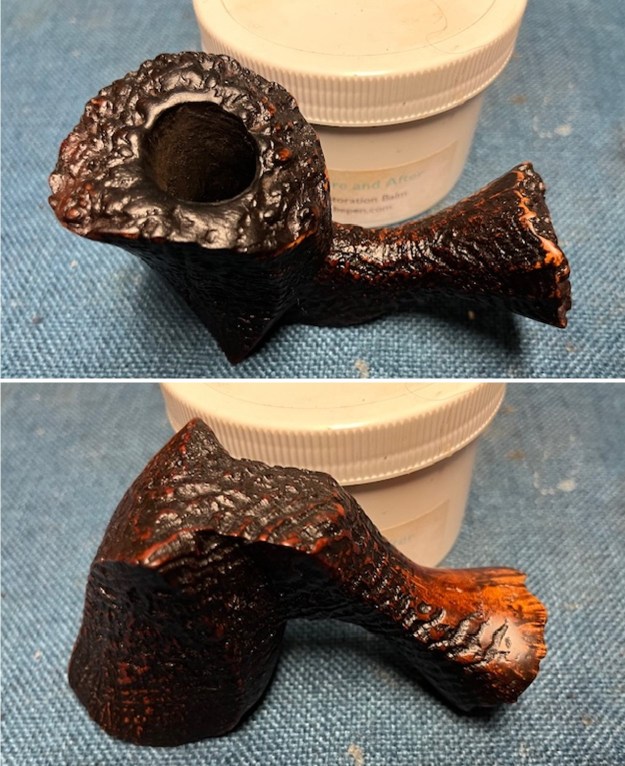
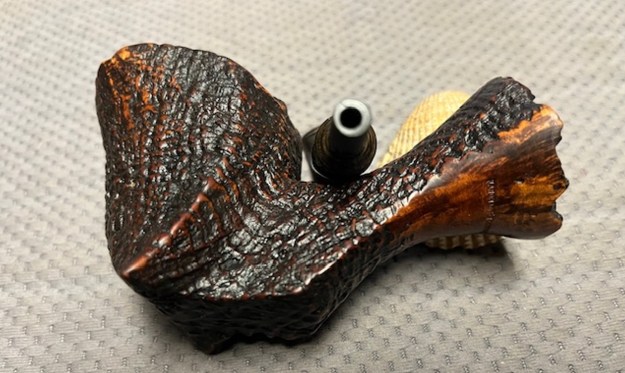
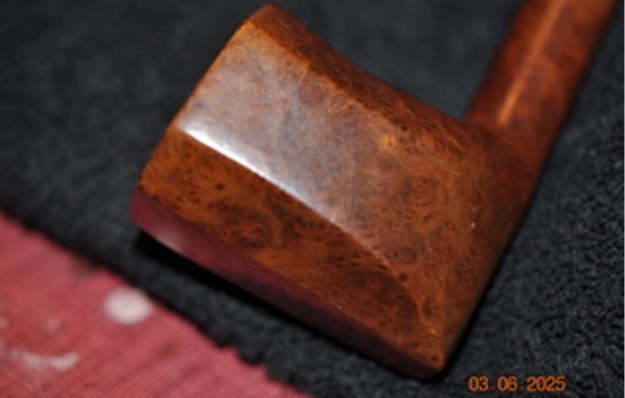
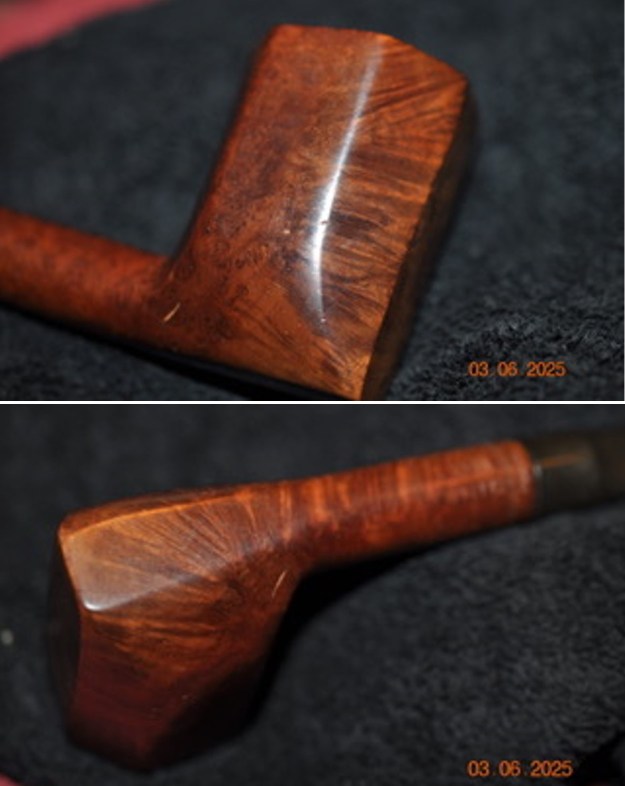
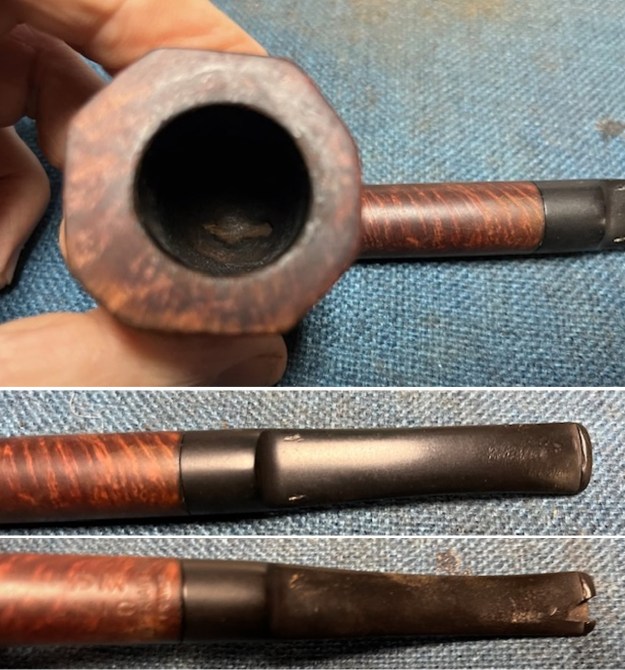
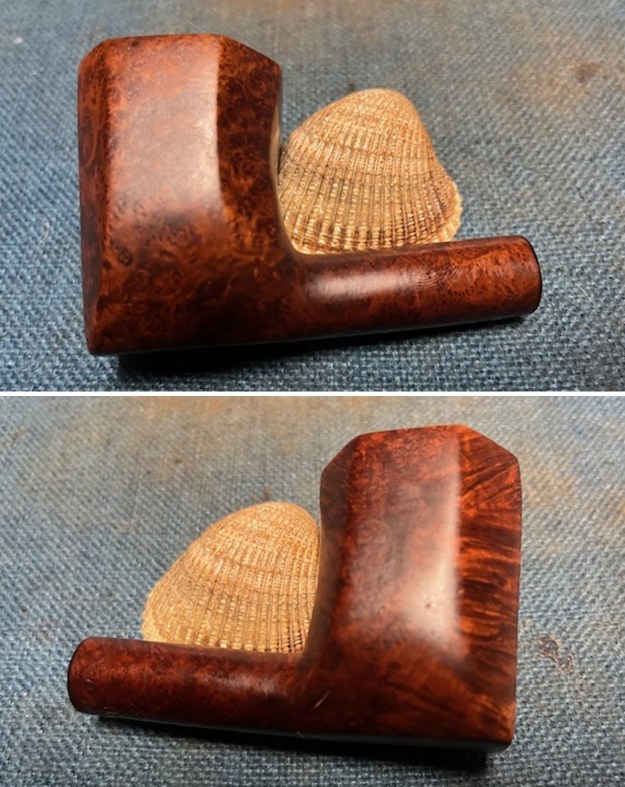
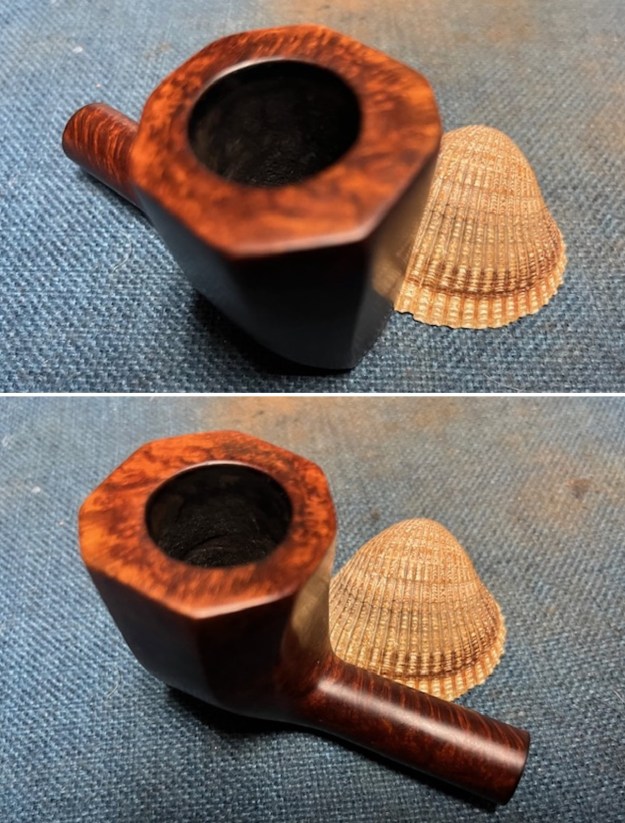
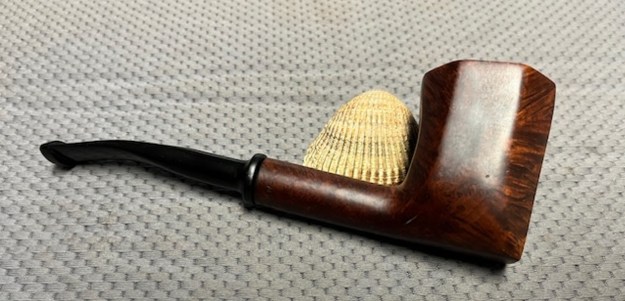
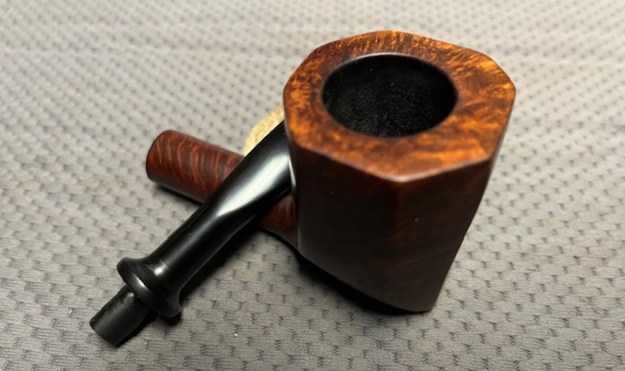
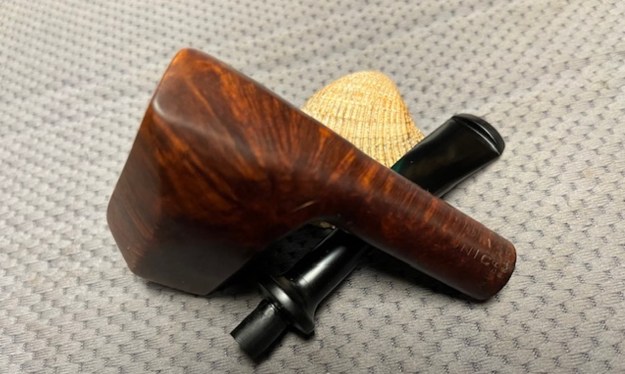
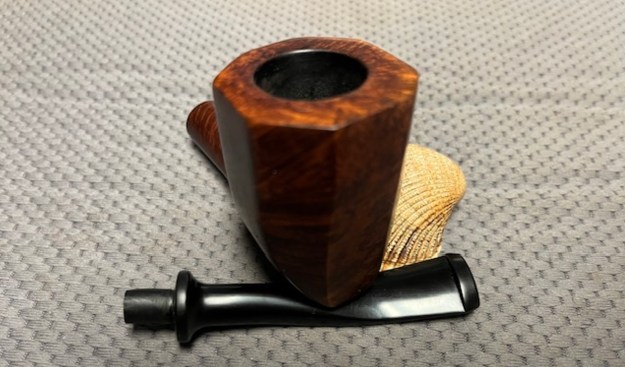
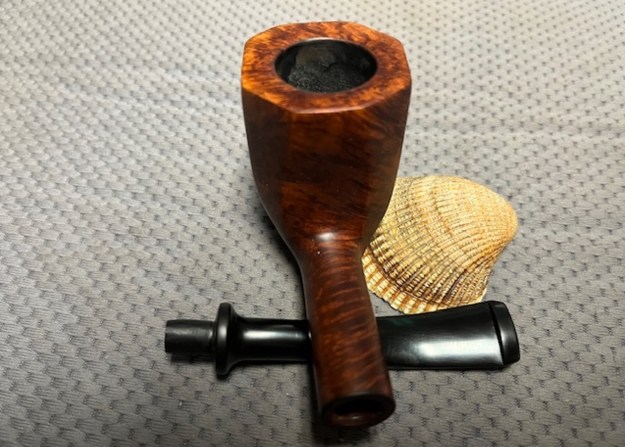
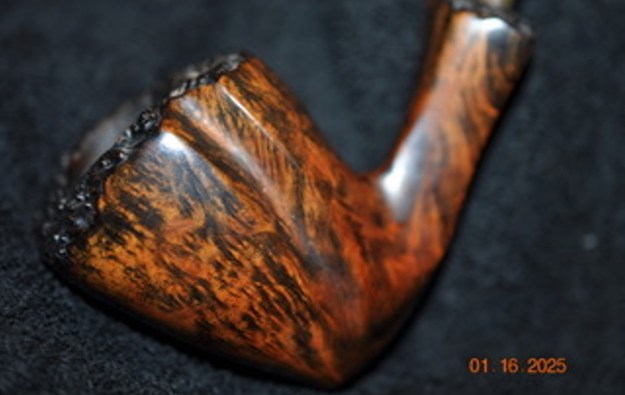
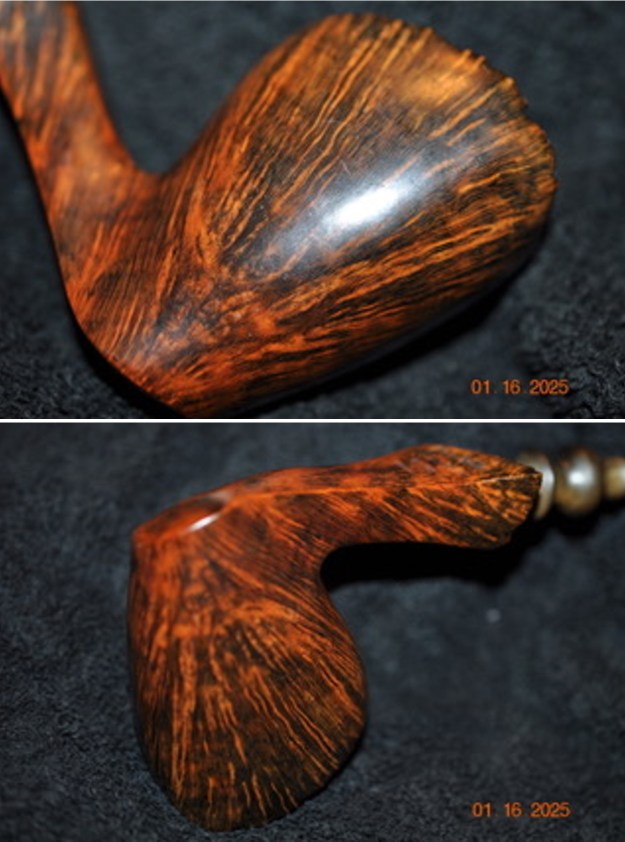
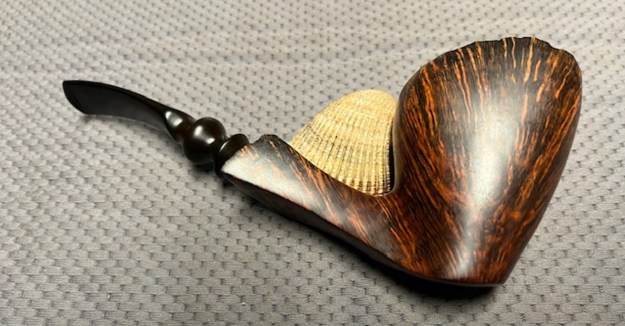
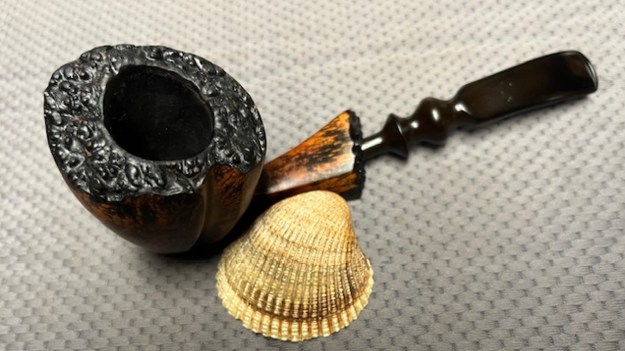
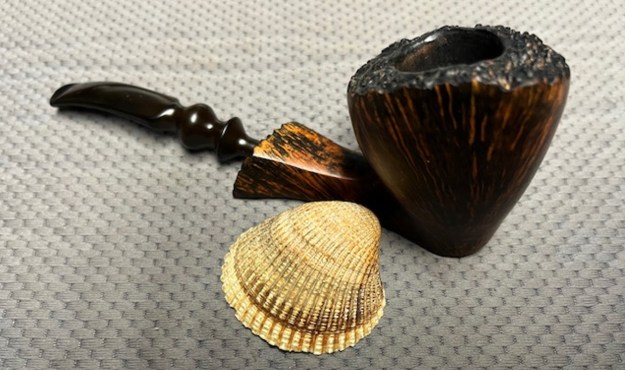
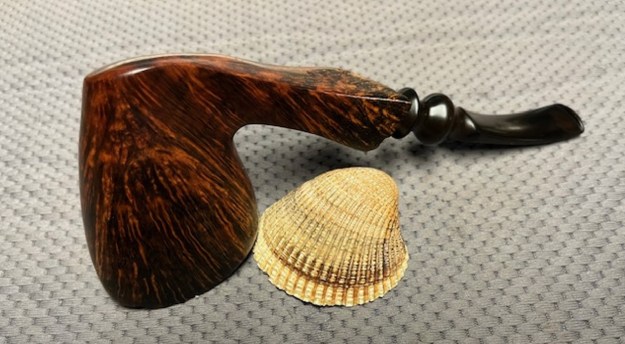
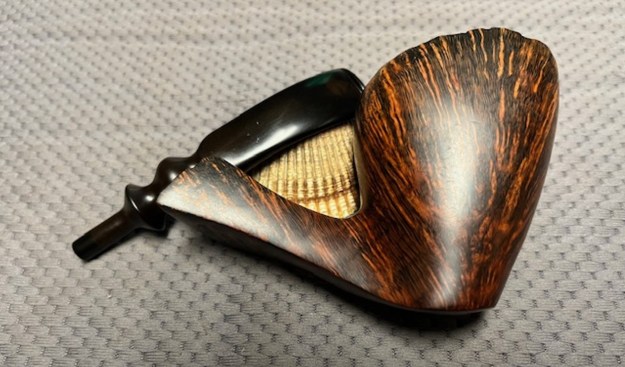
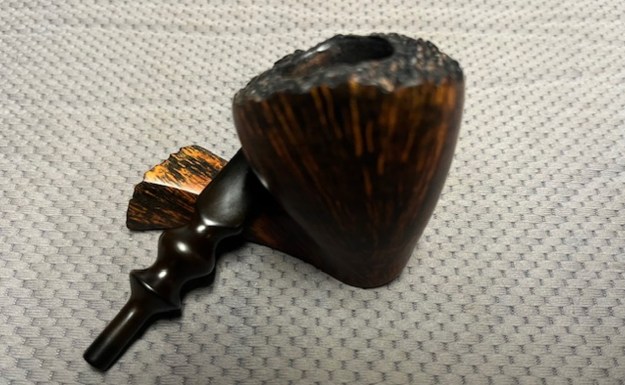
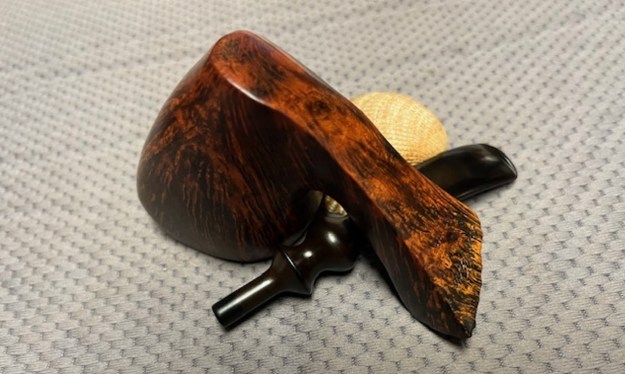
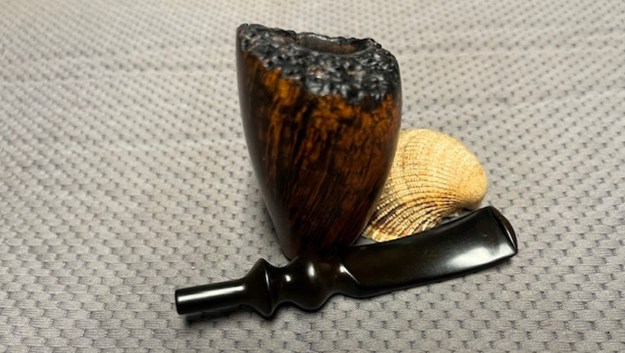
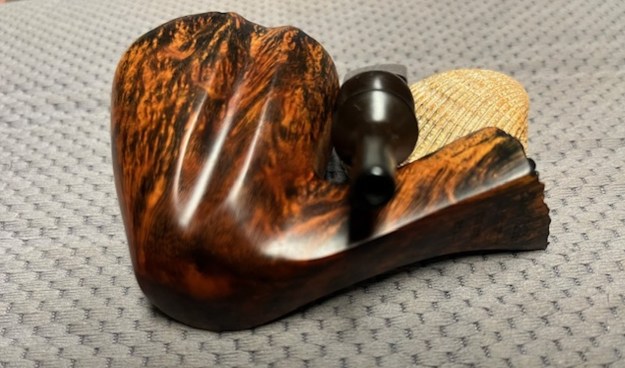
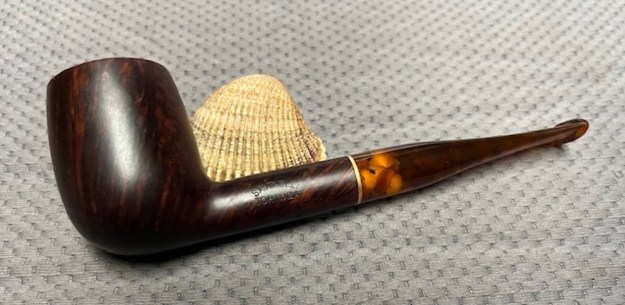
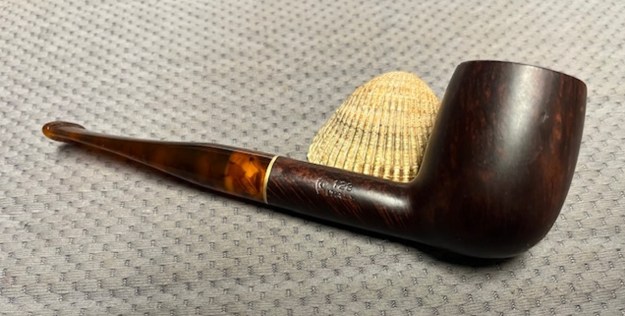
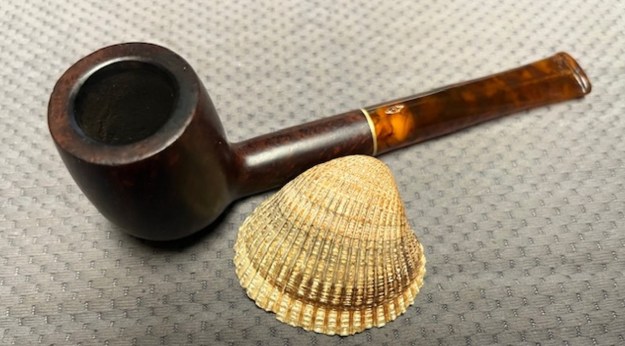
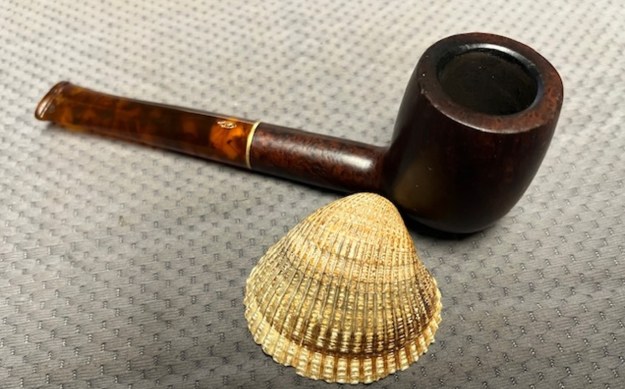
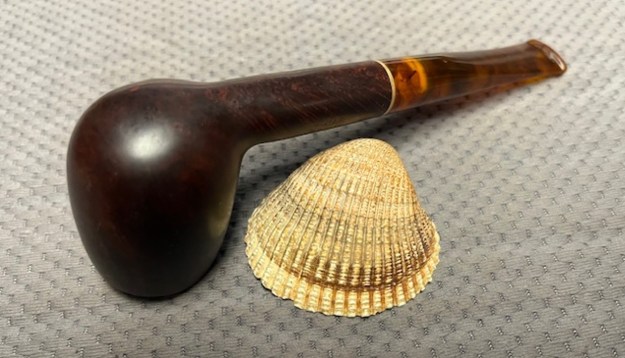
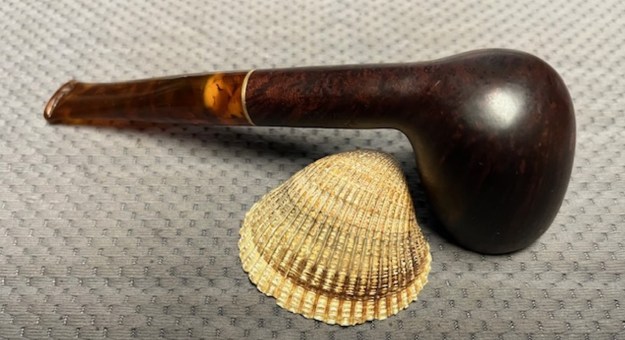
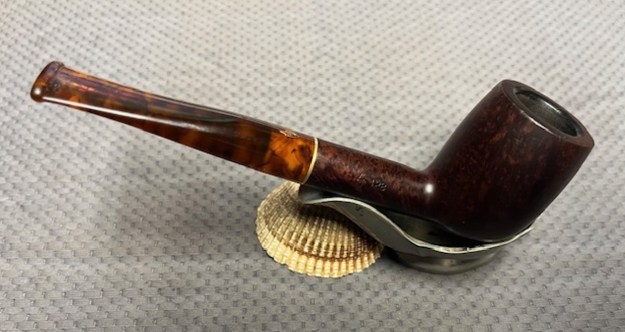
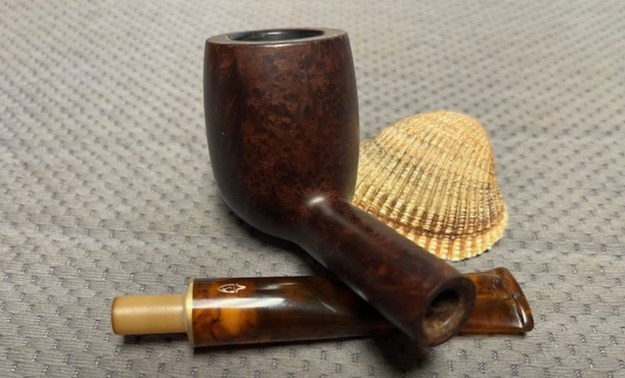
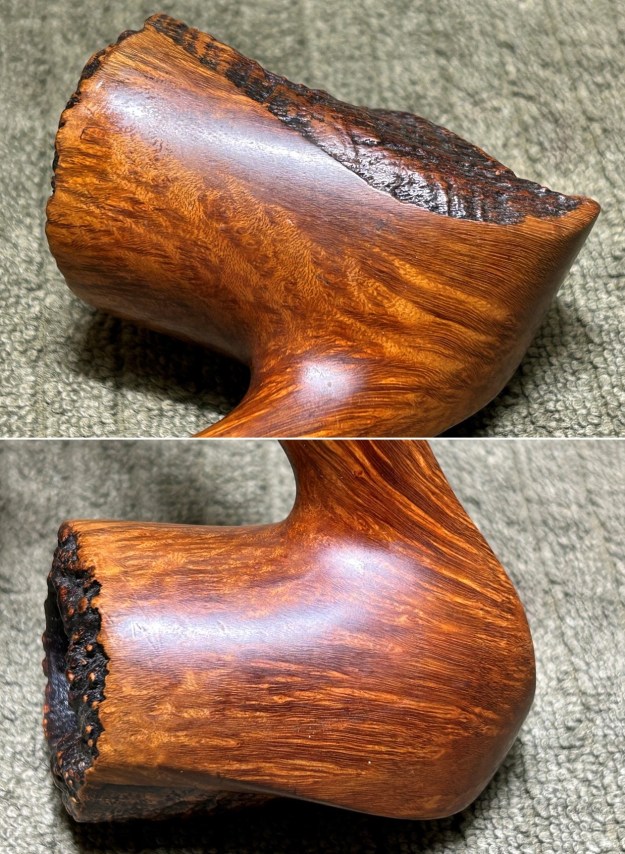
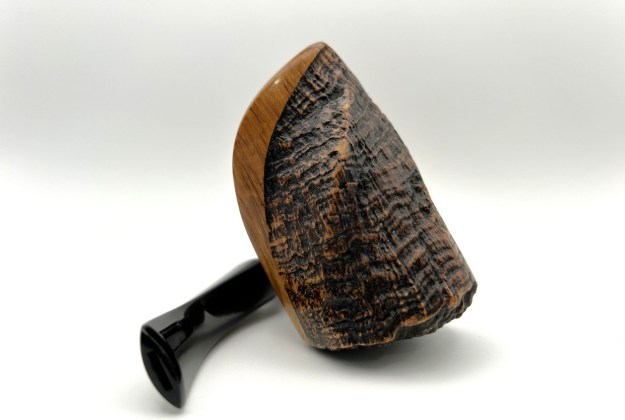
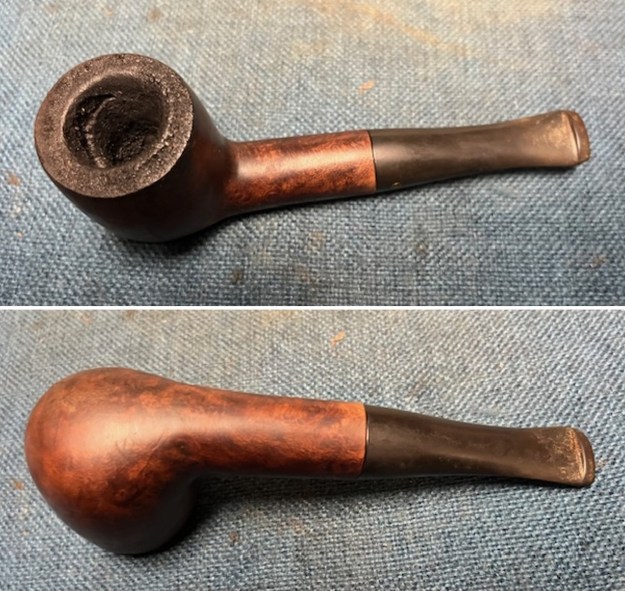
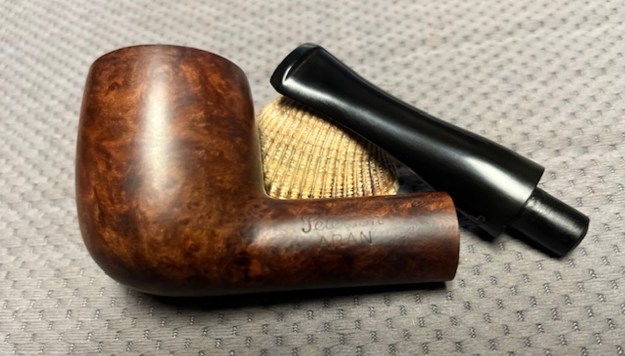
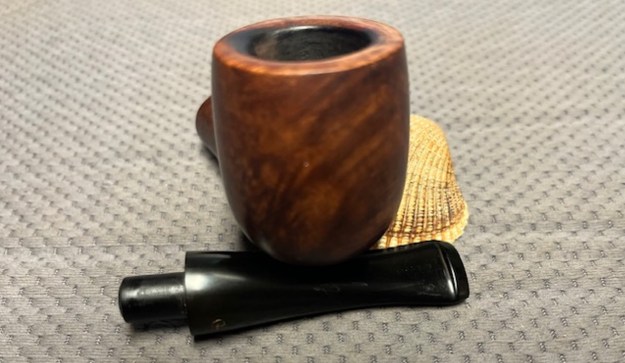
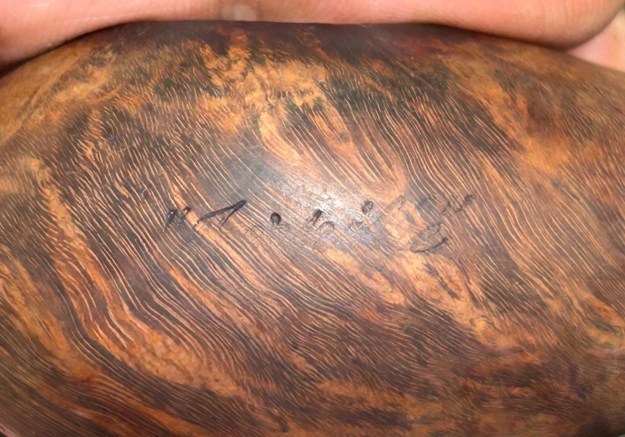
 You may wonder why I called this pipe a torpedo, and that’s a fair question. The markings on the pipe are what gave it away. If you look at the photos below, you’ll see a difficult-to-read word on the side of the stummel. It took me a long time to figure out what it said (and I also used chalk like a gravestone rubbing), but my knowledge of the French language helped. The word is torpille, which is the French word for torpedo. Aha! The word fit the letters and the shape of the pipe. These photos also show the wonderful grain.
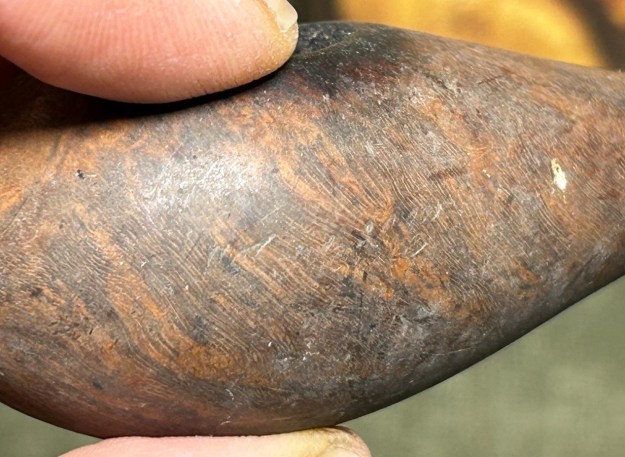
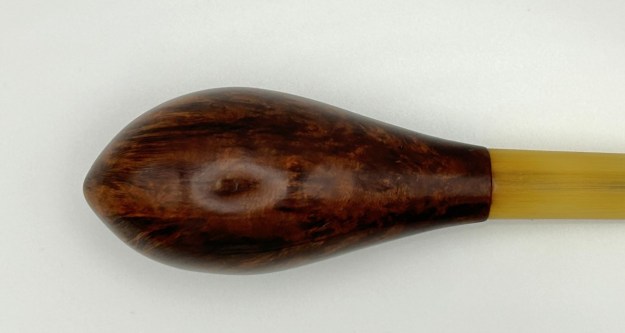
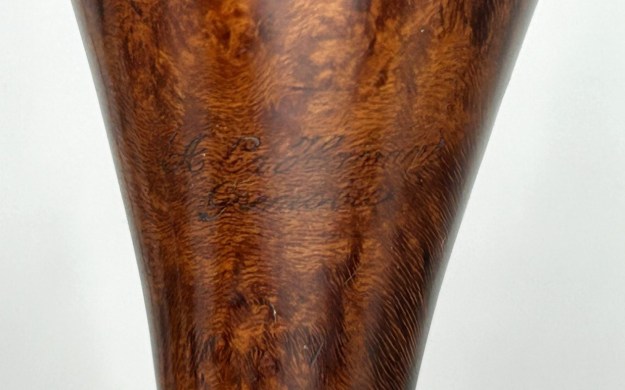
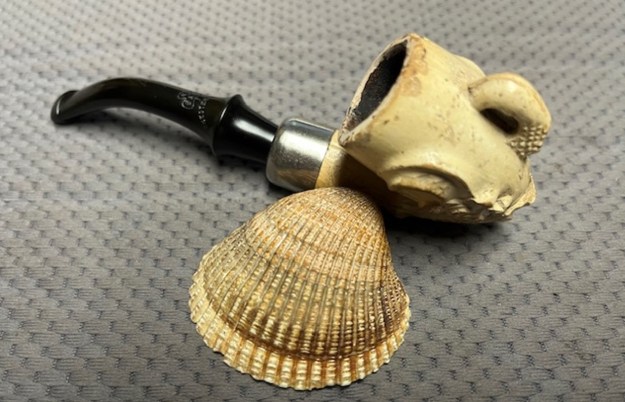
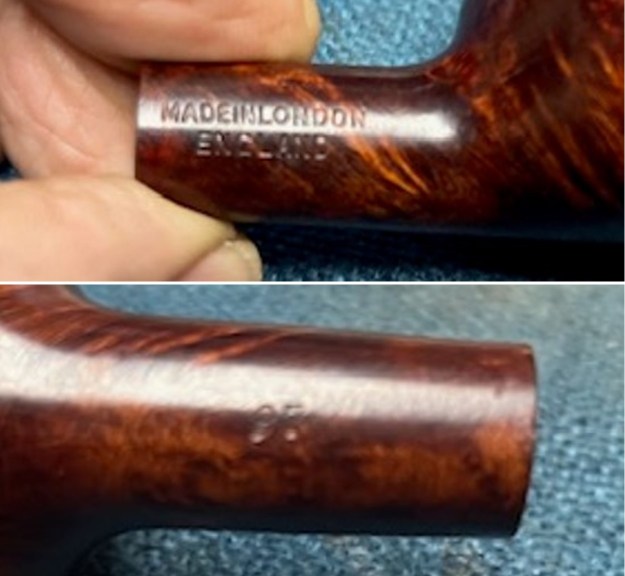
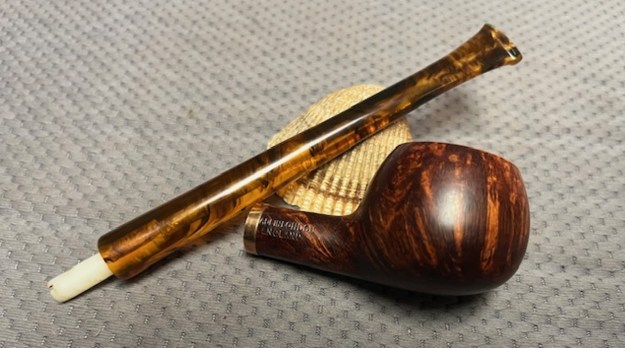
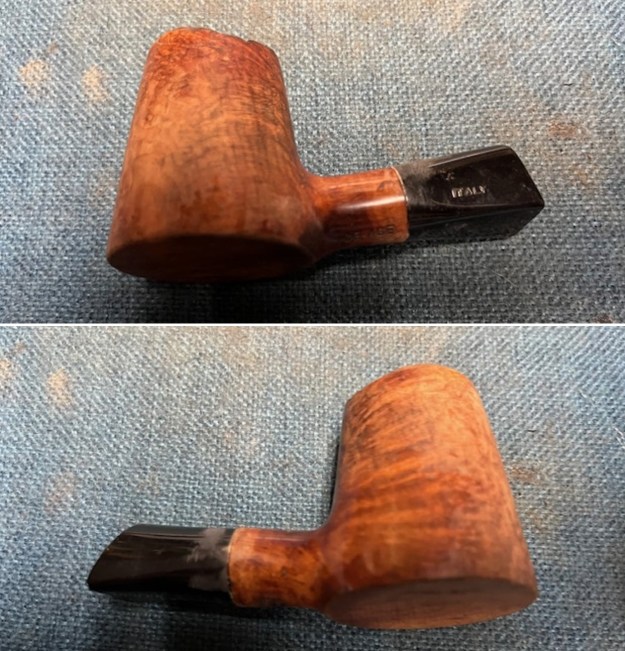
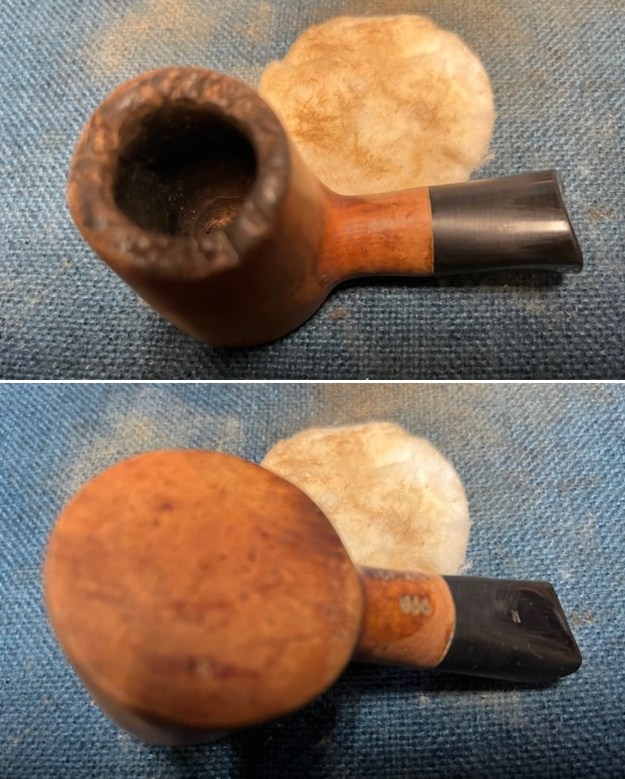
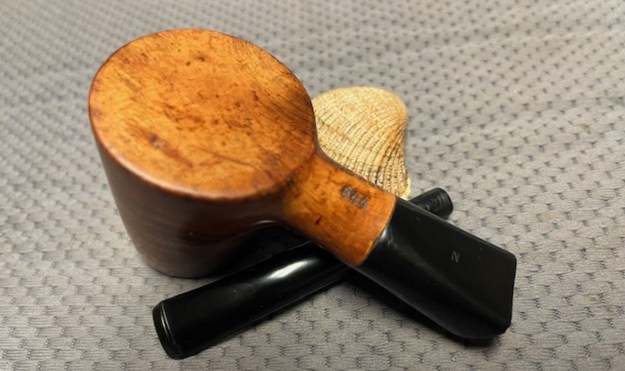
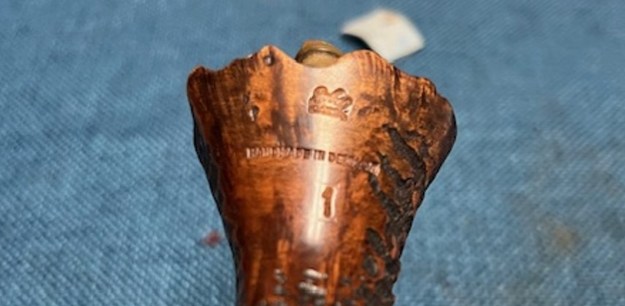
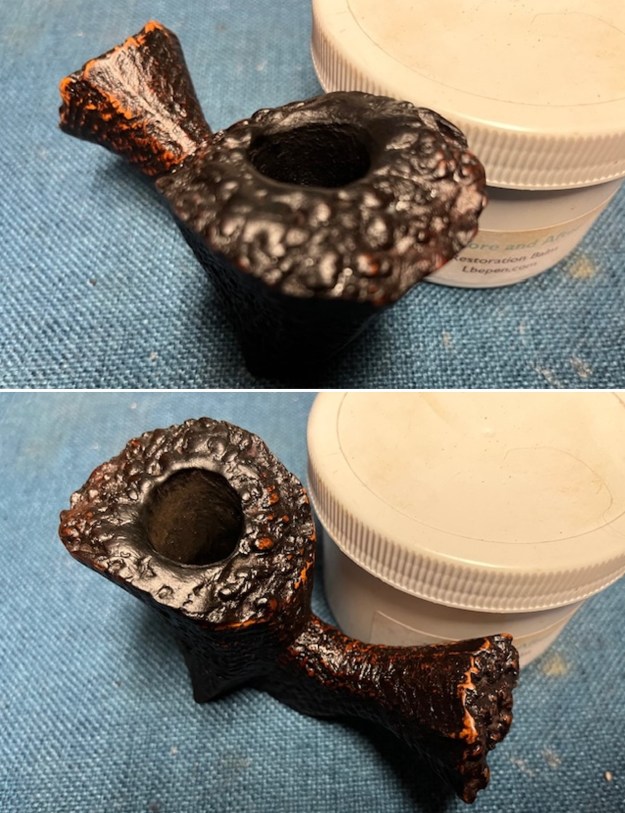
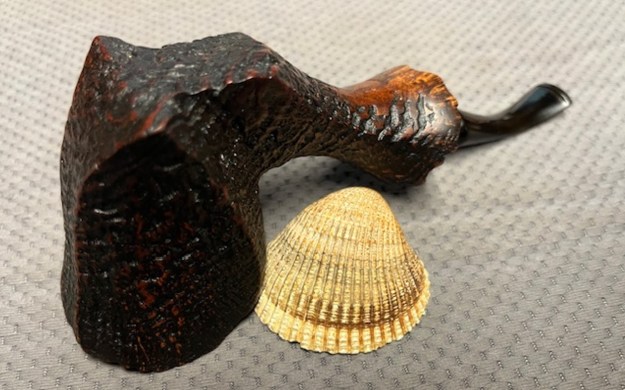
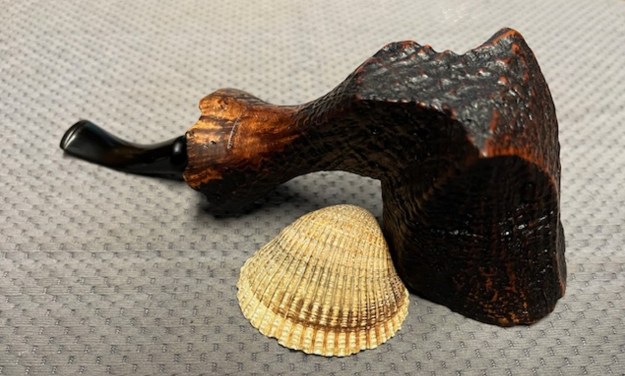
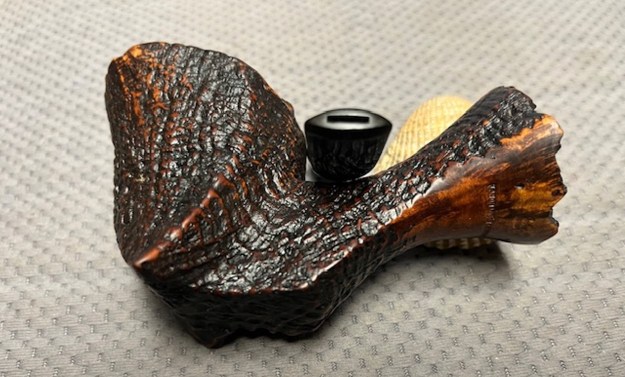
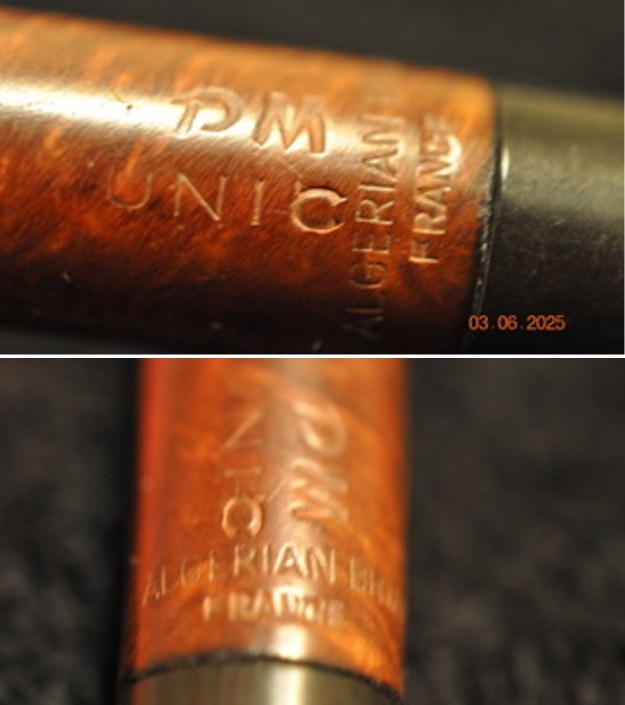
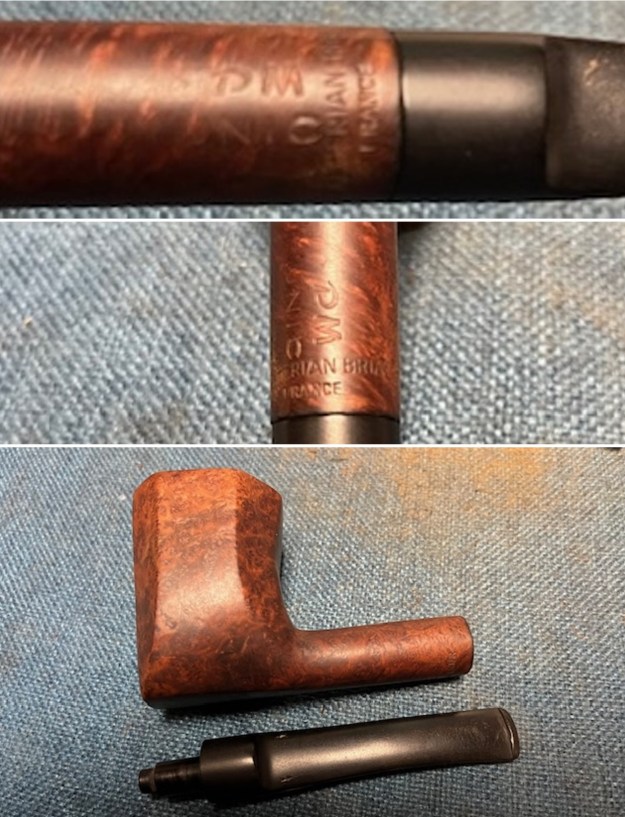
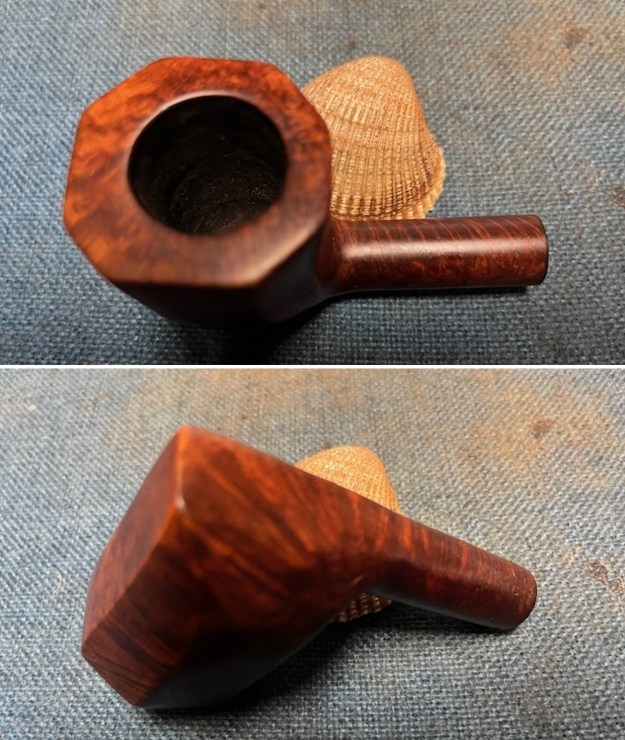
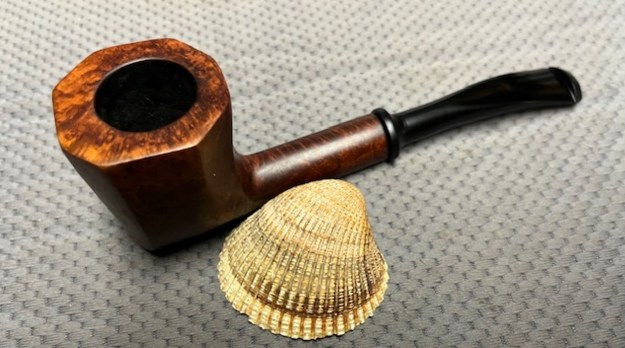
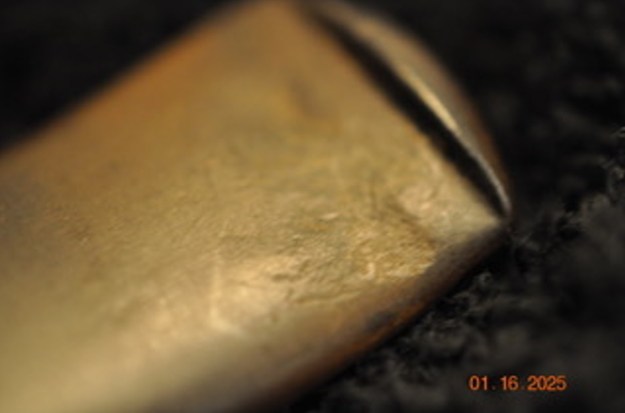
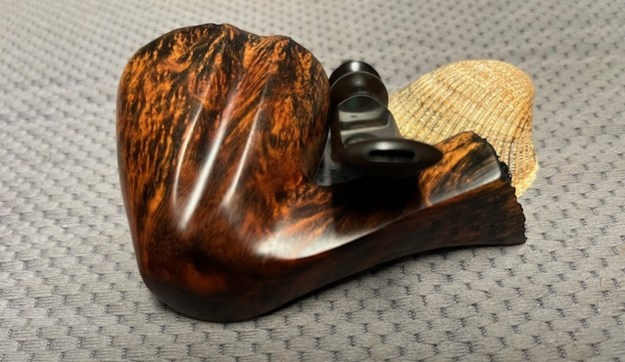
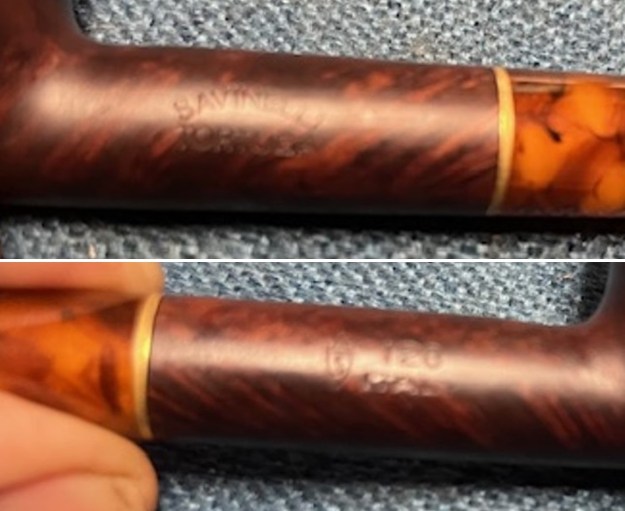
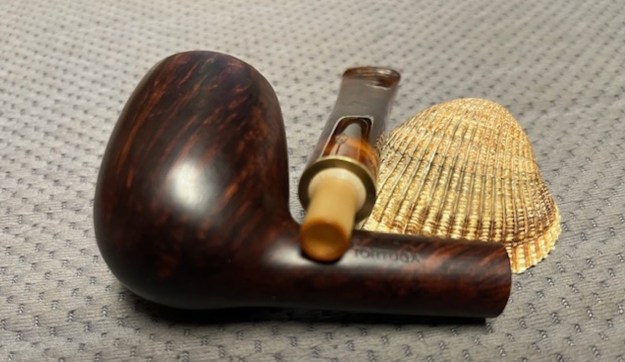
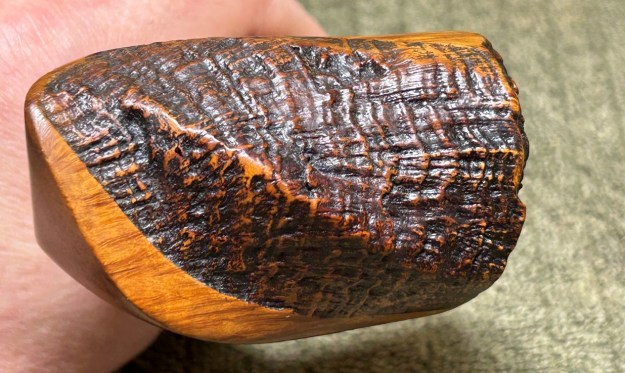
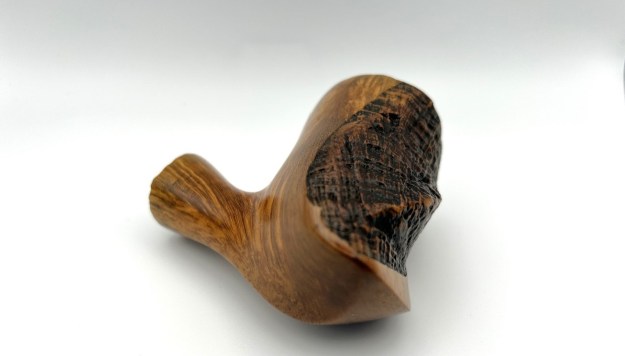
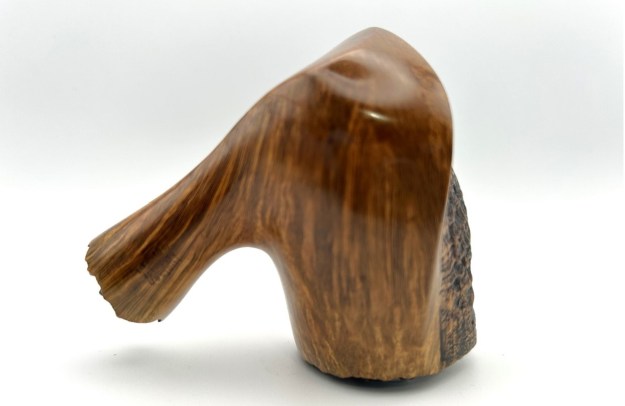
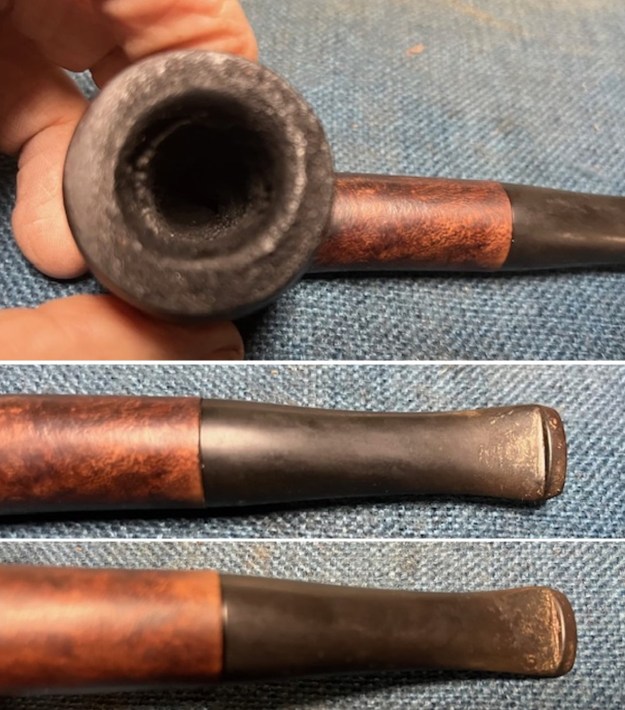
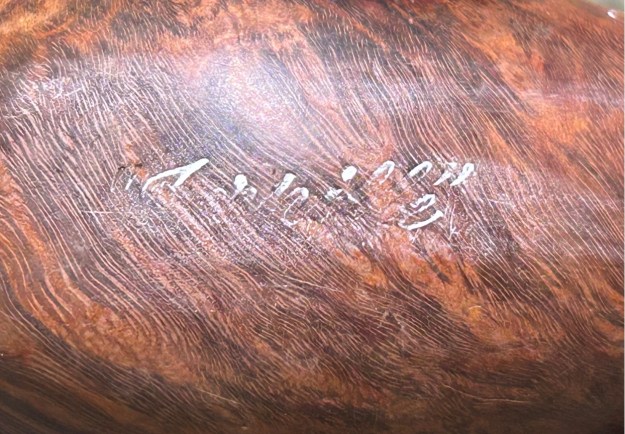 At this point, since we’re talking about markings, I’m momentarily going to jump ahead in the story. It wasn’t until after I had cleaned the stummel (much later) that I uncovered more marks! These were very faint (as the photos below attest). Again, after quite a bit of staring with magnification, I figured out what the words were. They are A La Havane [over] Grenoble.
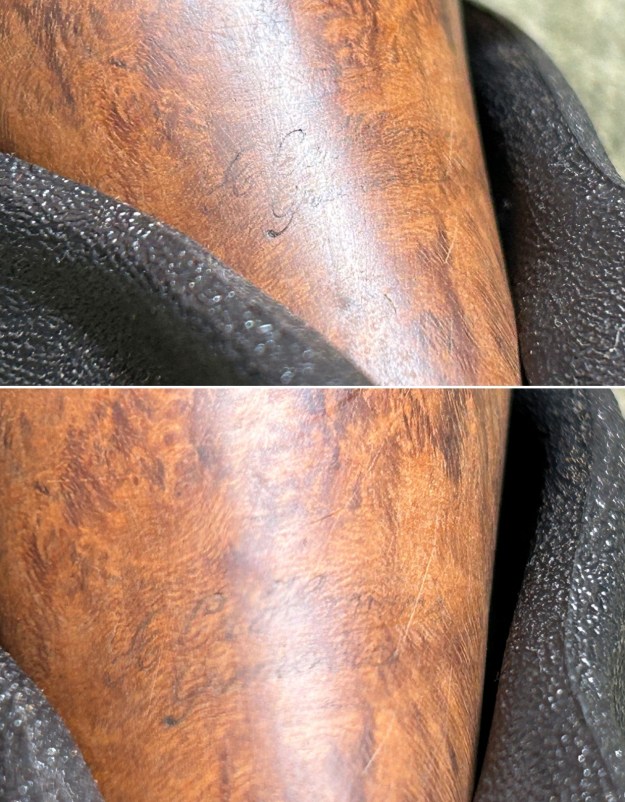
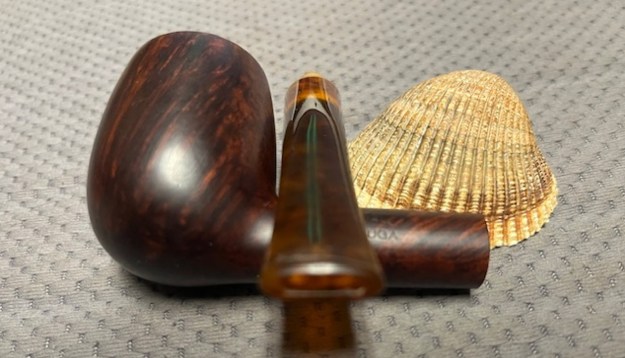
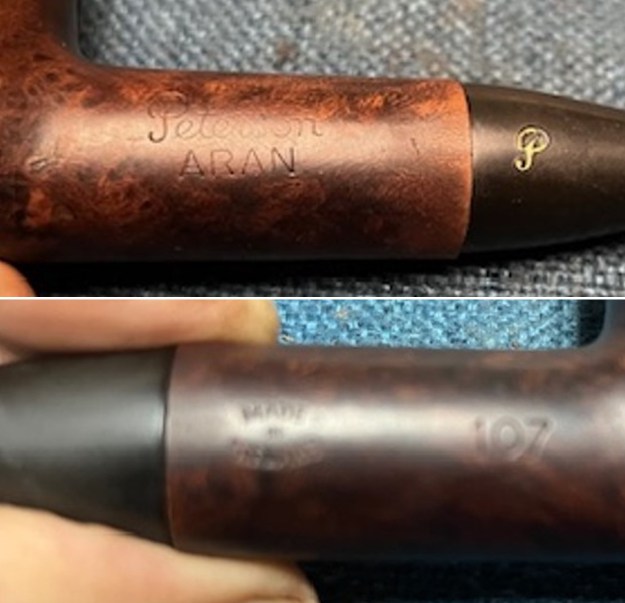
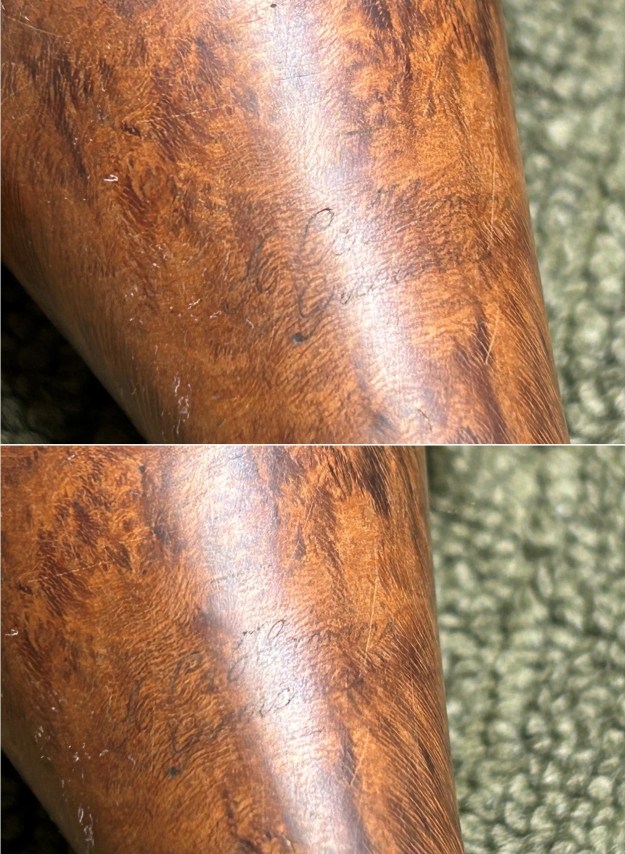 Naturally, I was curious about this and discovered that this was the name of an old tobacco shop in the French city of Grenoble (obviously). Incidentally, A La Havane means ‘In Havana,’ which seems like a suitable name for a tobacconist. In fact, there is a tobacco shop in Grenoble to this day which is called Le Havane. I wonder if this is just the modern incarnation of that old shop. It seems likely. Here’s a Google Street View image of it:
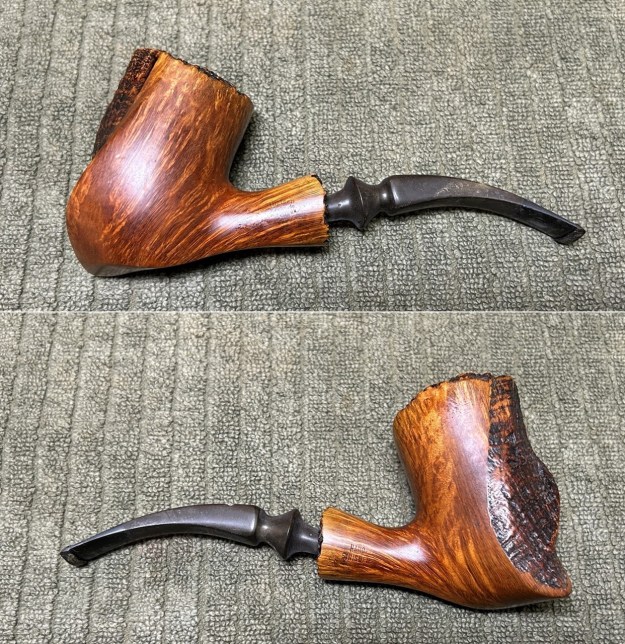
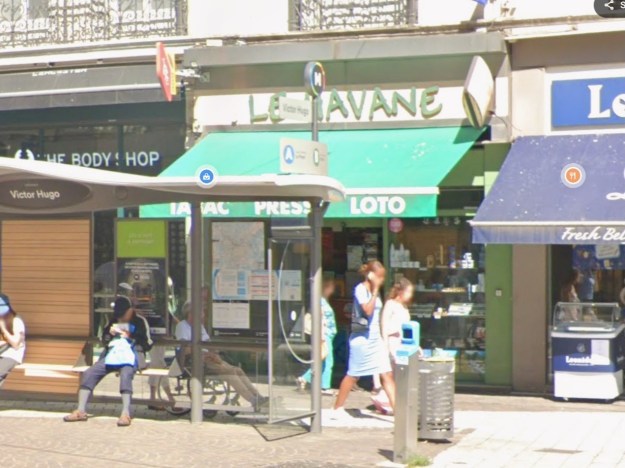 Steve has restored a couple of pipes similar to this one, but not quite the same. He referred to the pipe he had as a ‘slug’, which is both humorous and accurate. You can read about one of the restorations here. Mine is a bit different, as it has a very different stem and is missing the slug’s ‘foot’. Have a look at Steve’s here:
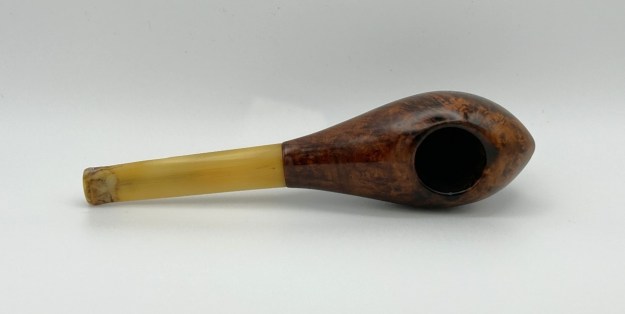
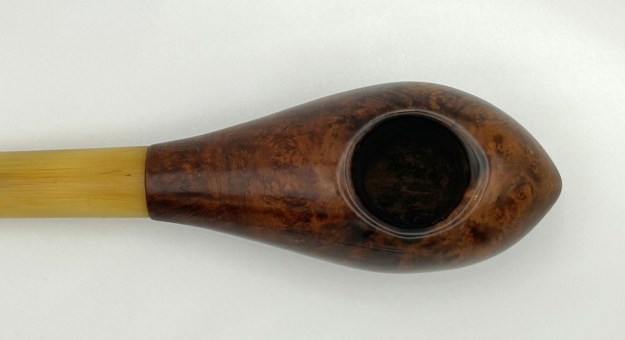
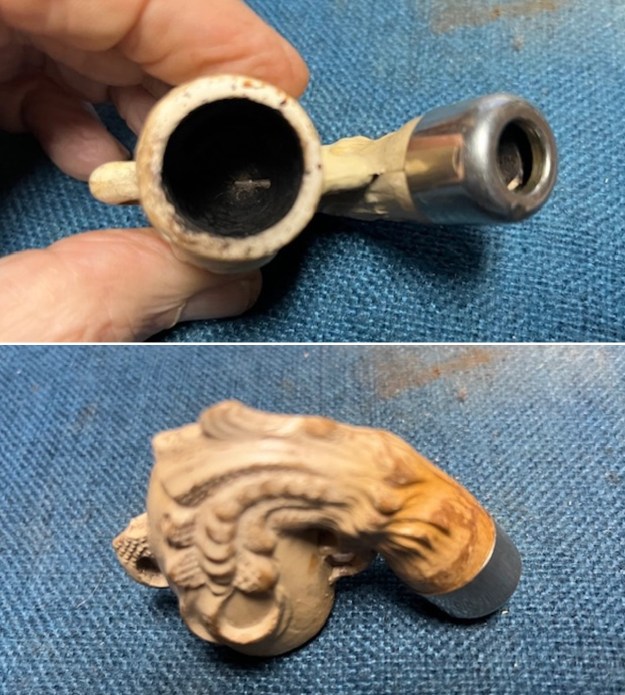
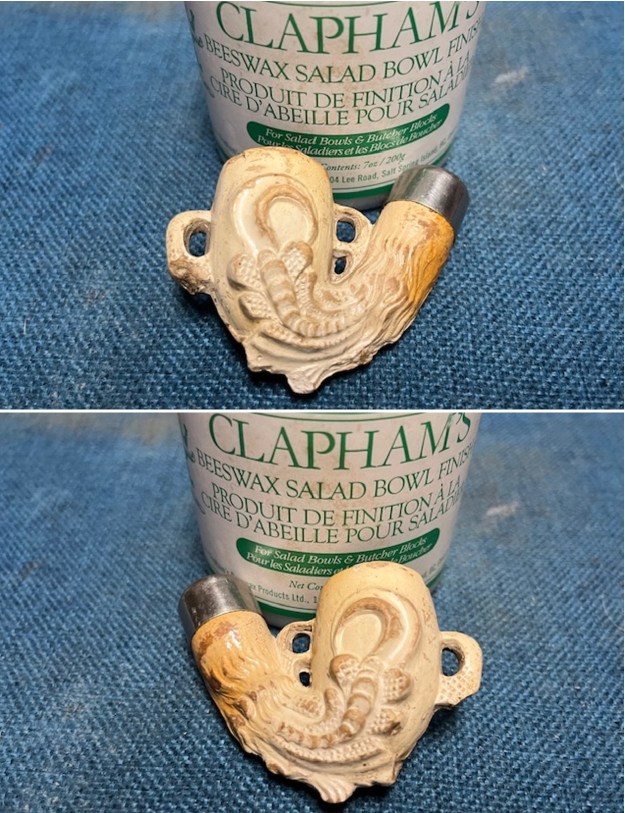
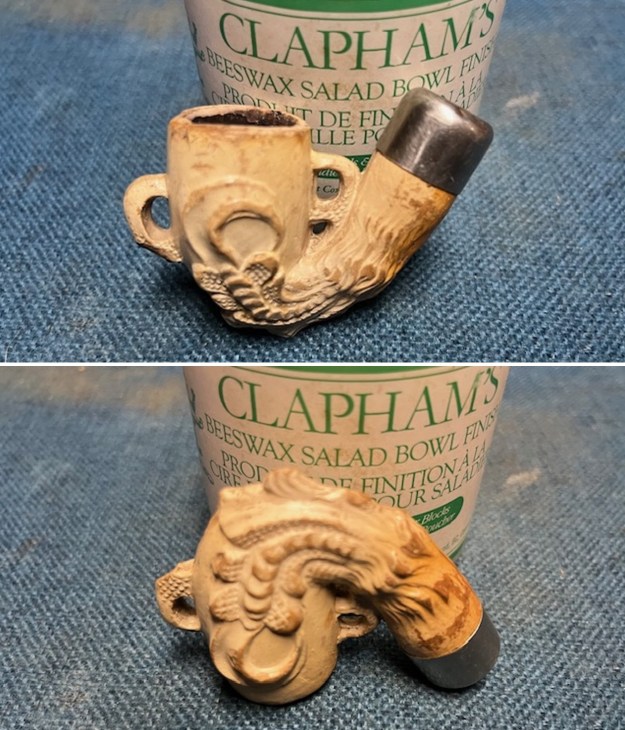
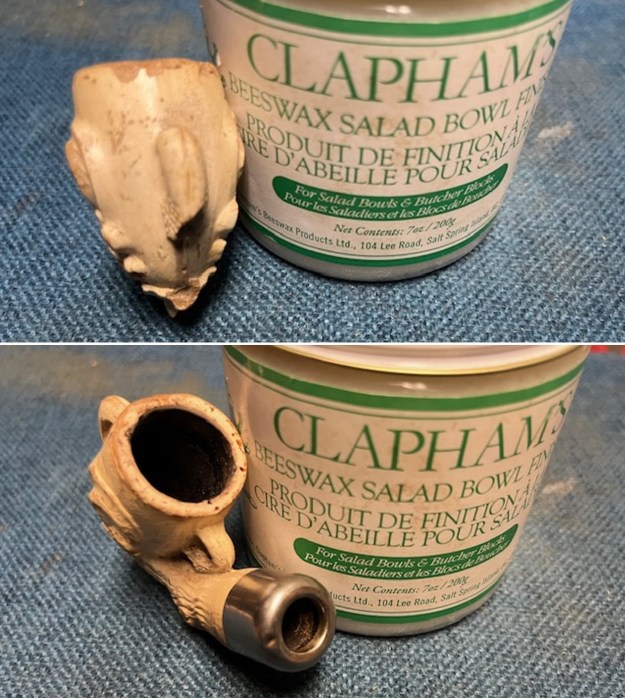
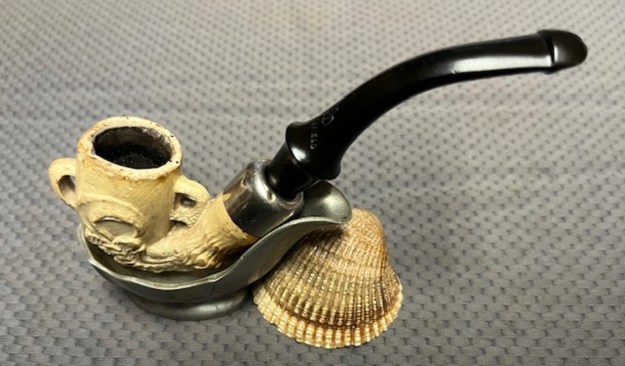
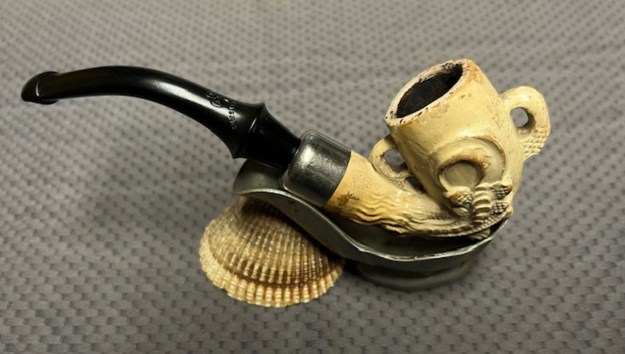
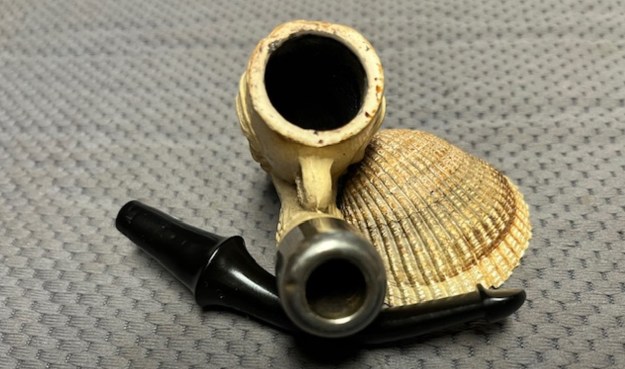
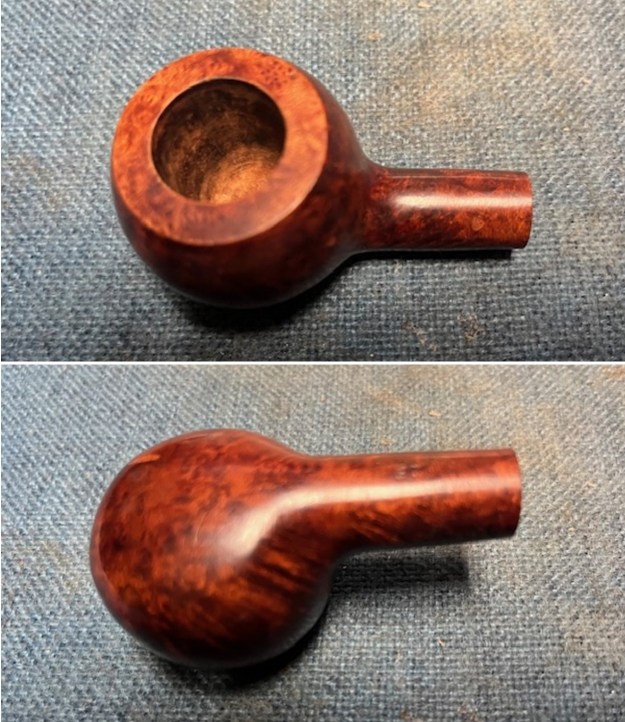
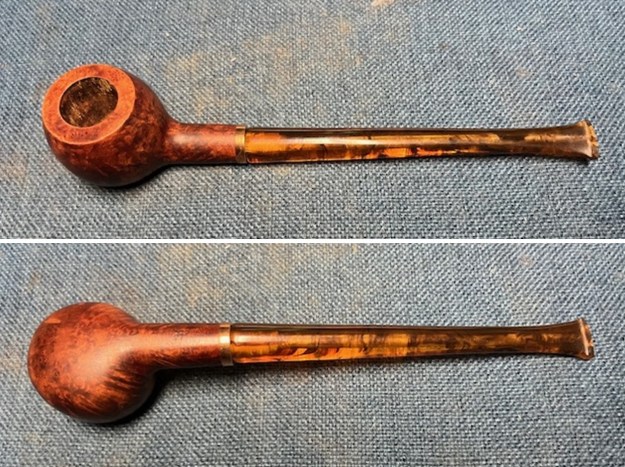
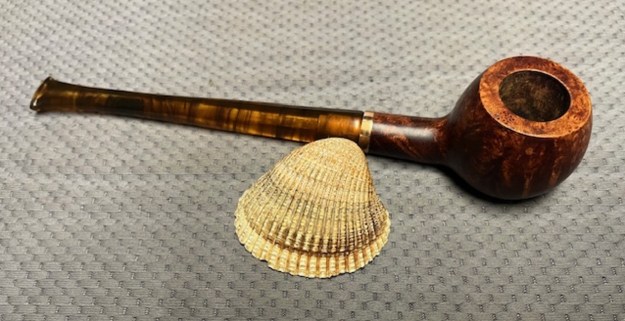
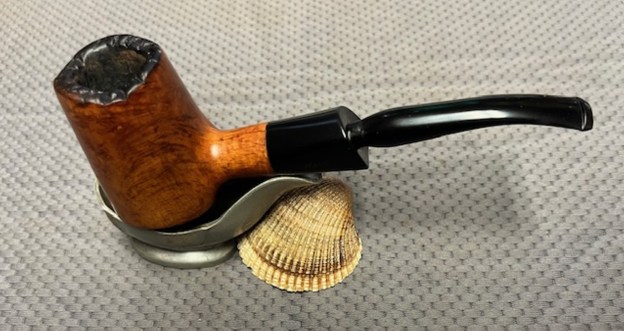
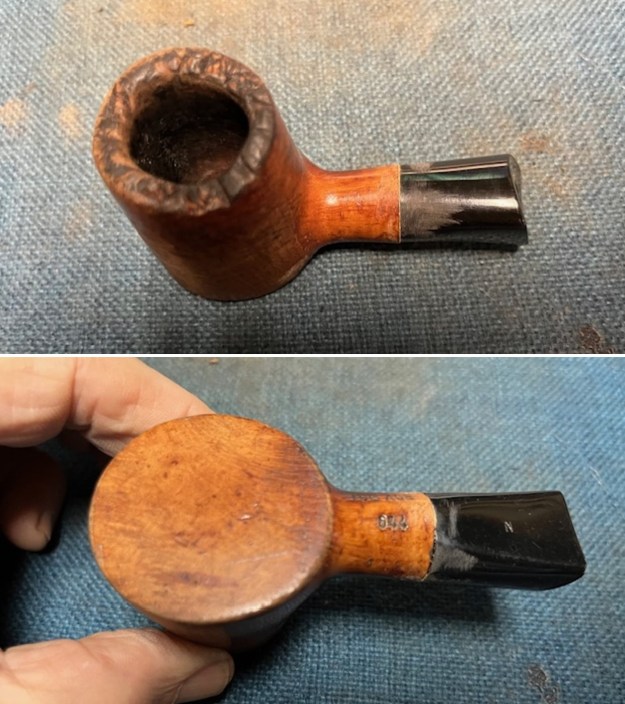
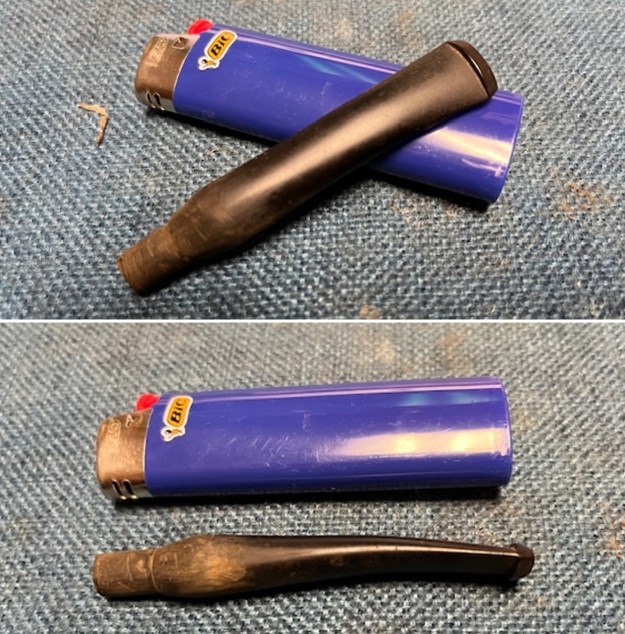
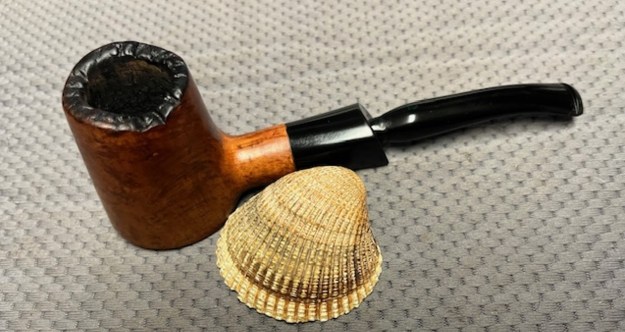
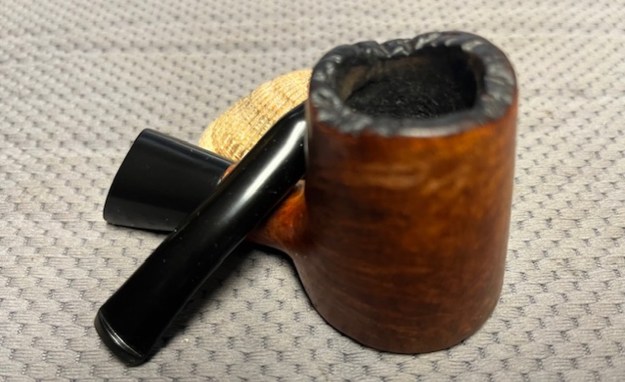
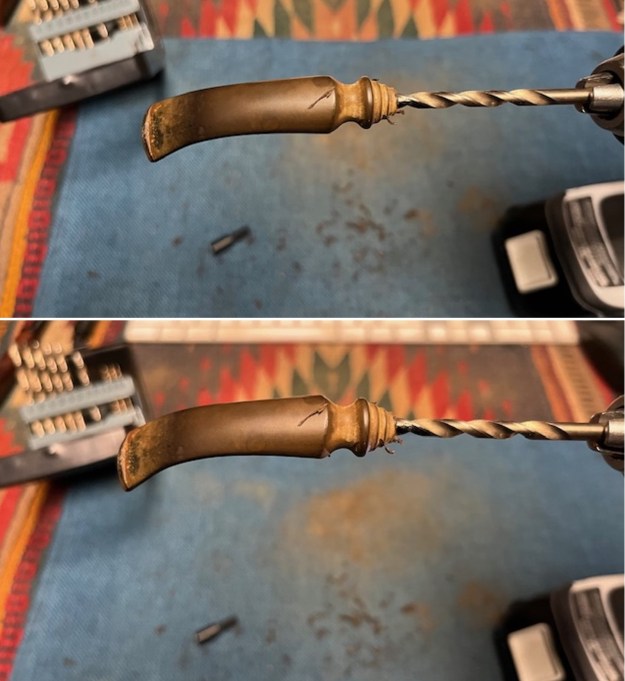
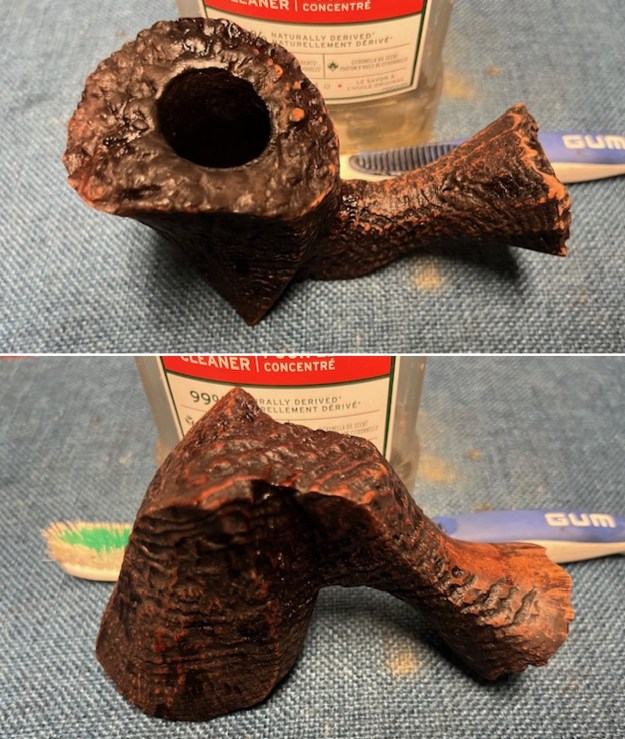
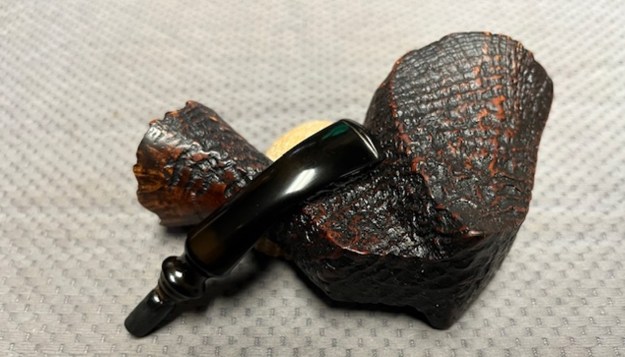
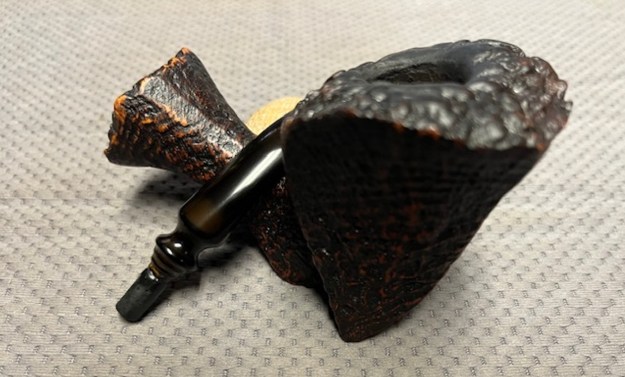
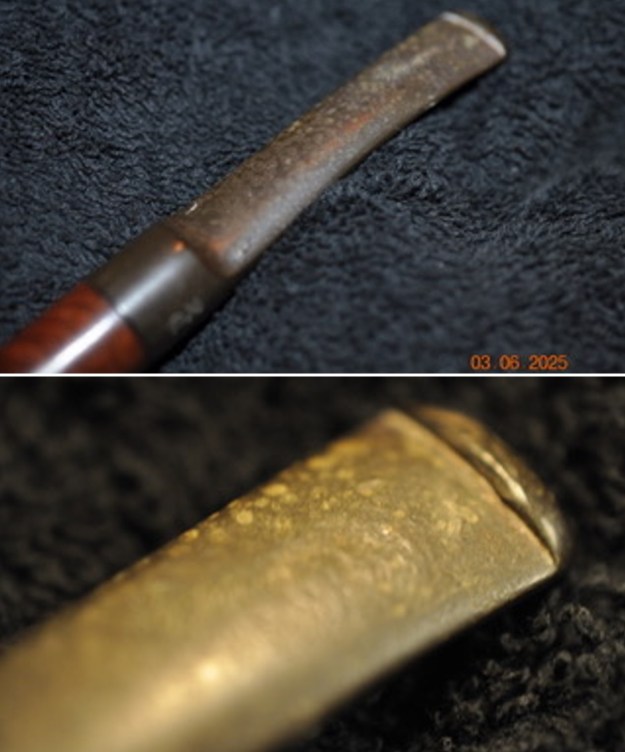
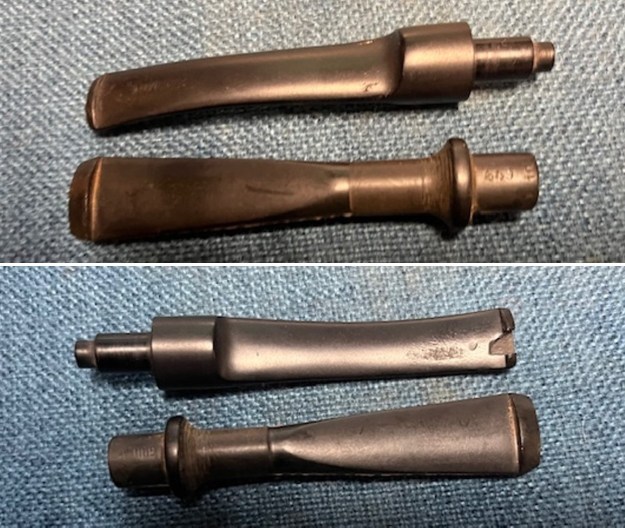
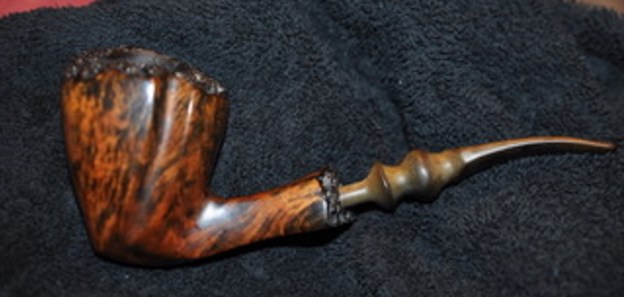
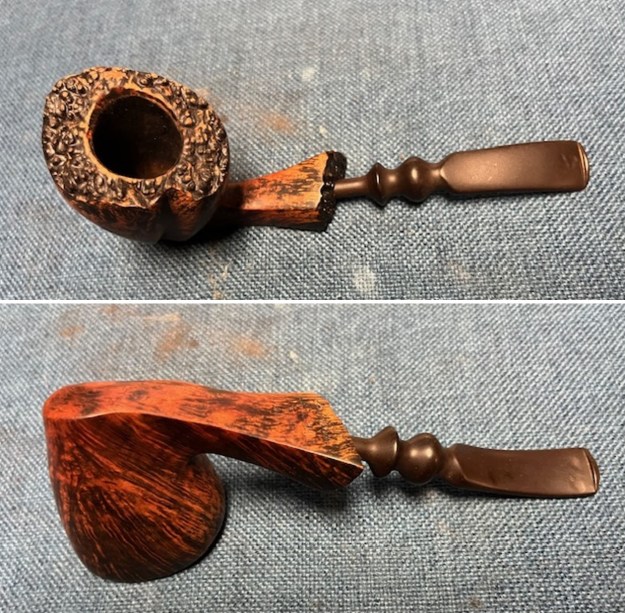
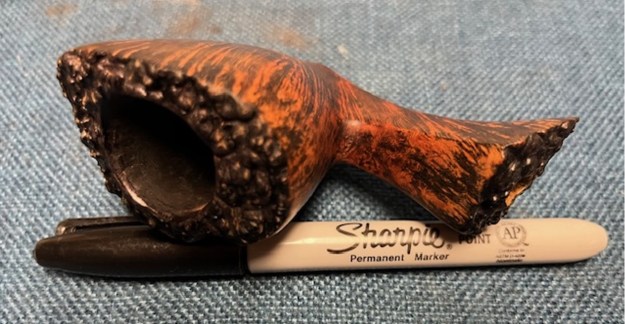
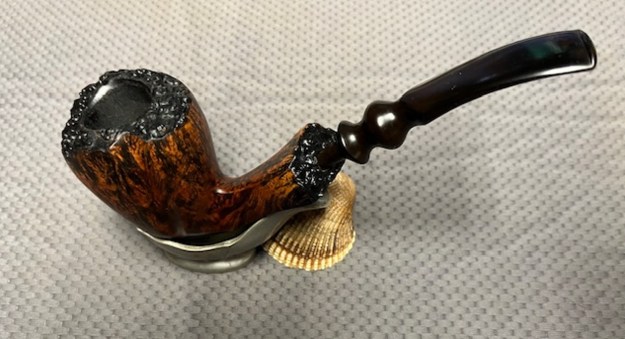
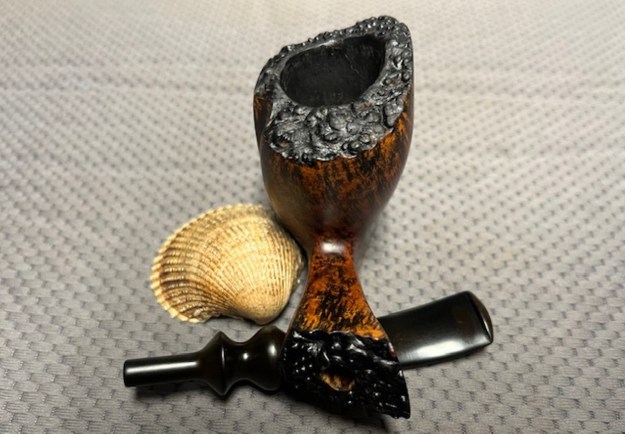
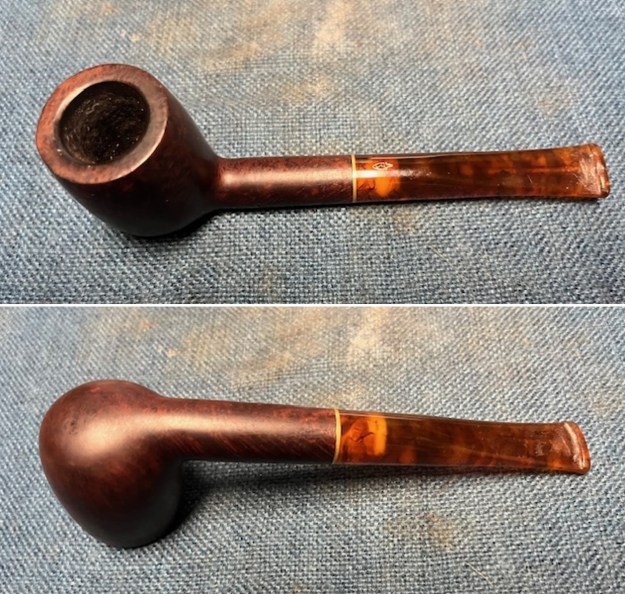
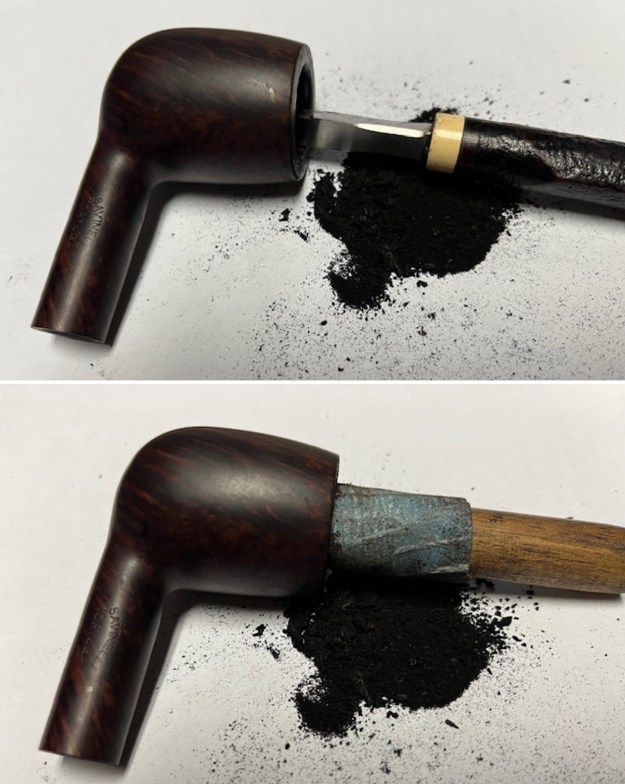
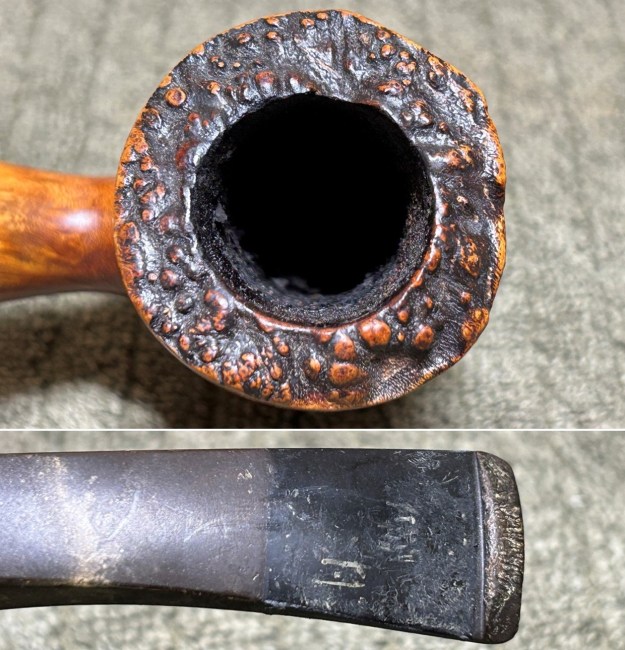
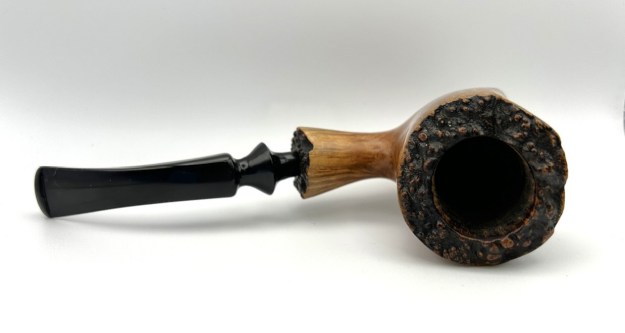
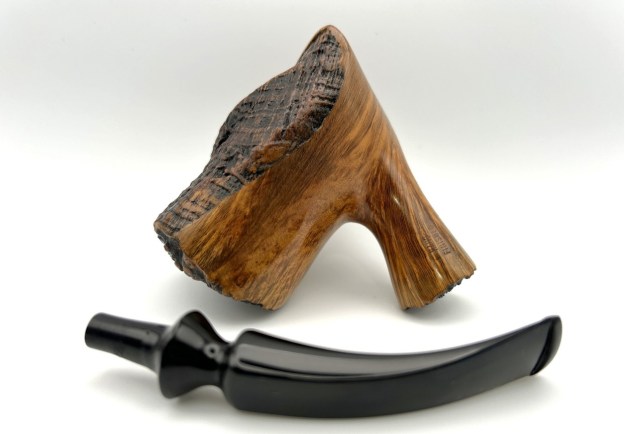
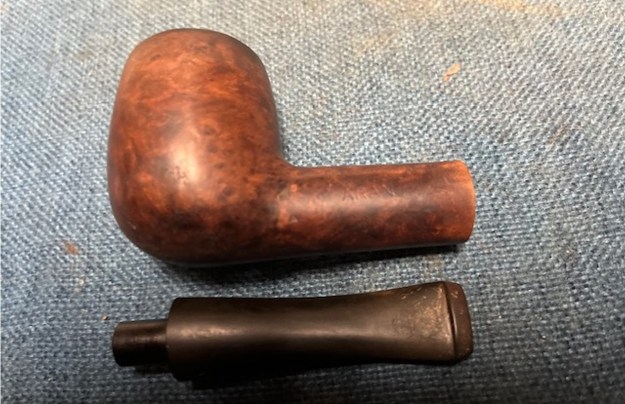
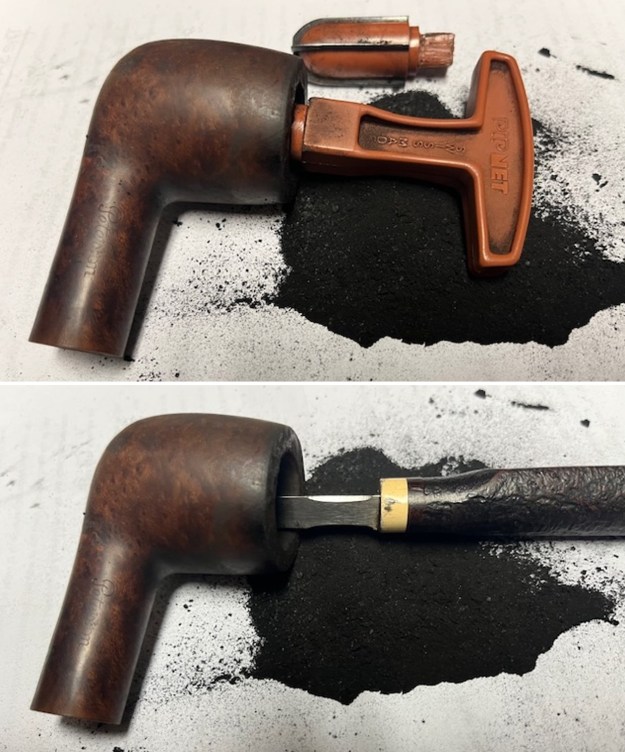
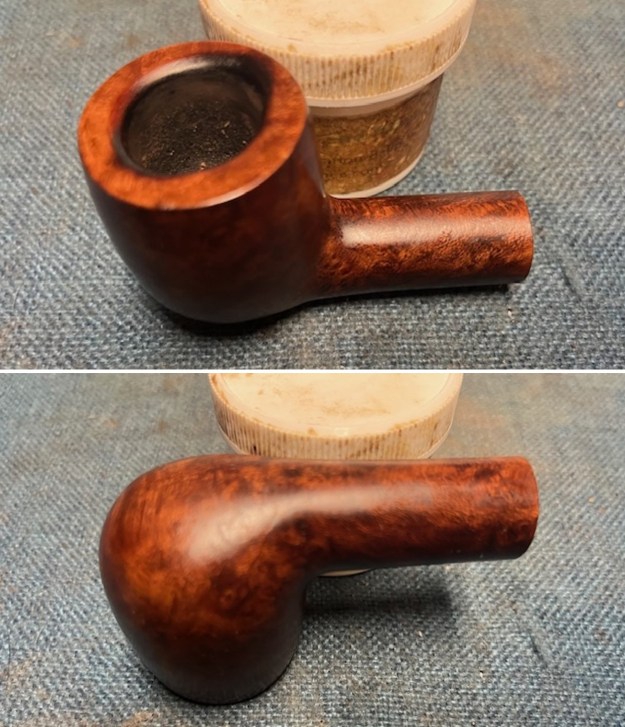
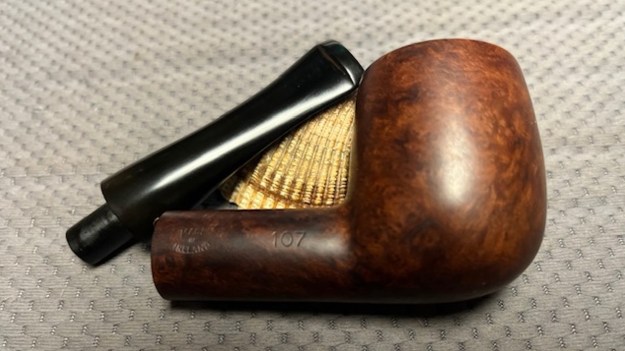
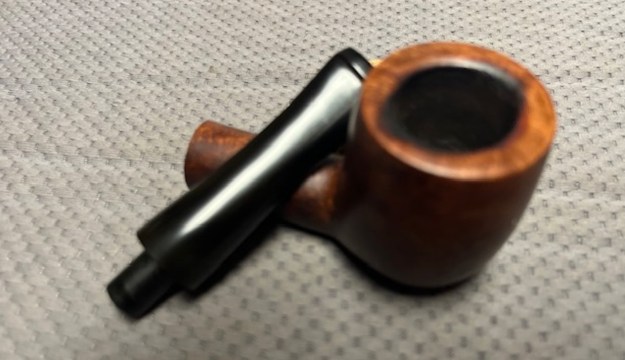
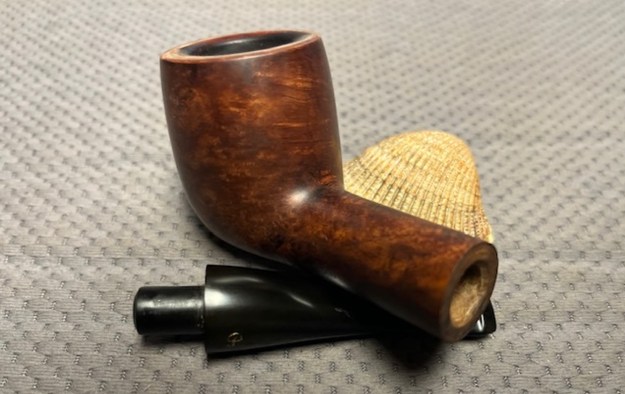
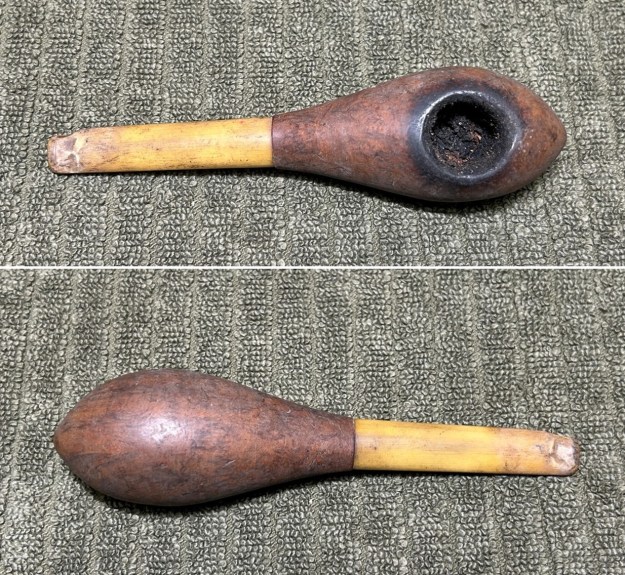
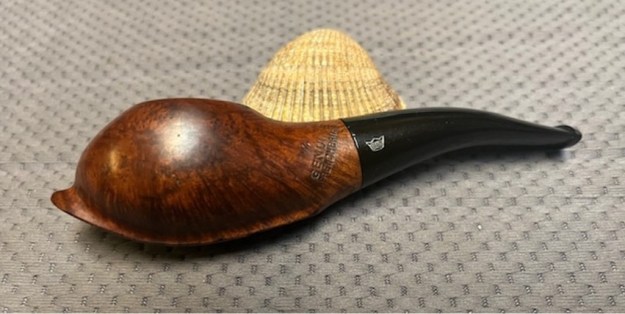 Moving on to the state of this pipe and, well, it had seen better days. This pipe was worn, dirty, and rough. The stem was made of horn and was heavily chewed and beaten. Its tenon was made of bone and, in theory, should be able to be unscrewed – but some of these century-old pipes are awfully difficult. Meanwhile, the stummel was very dirty, with dust and grime ground into the wood. The rim was heavily burned and the insides were clogged with filth.
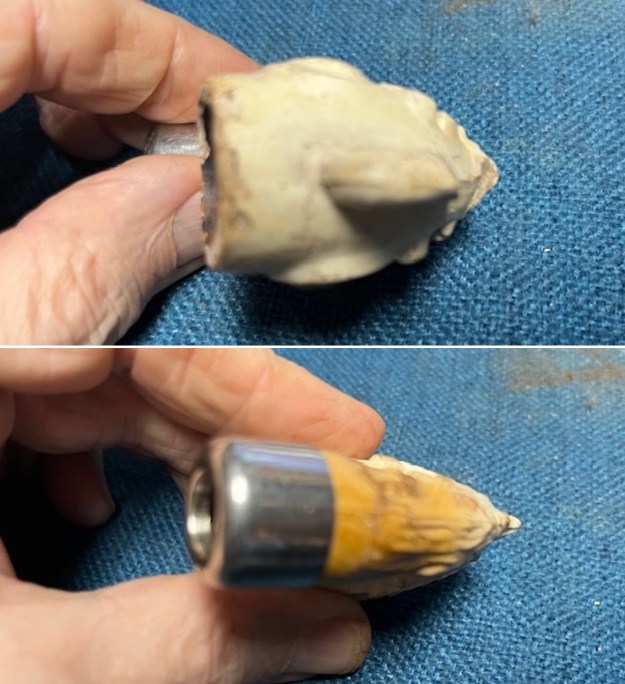
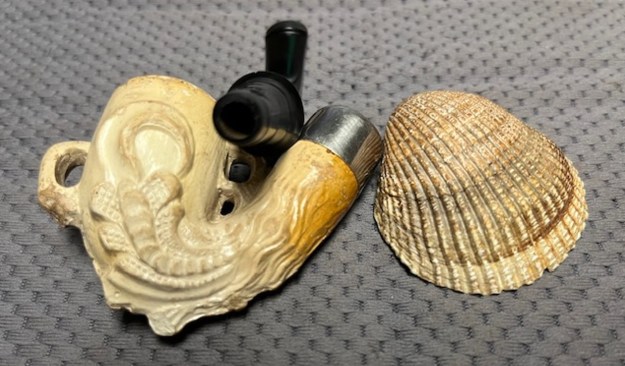
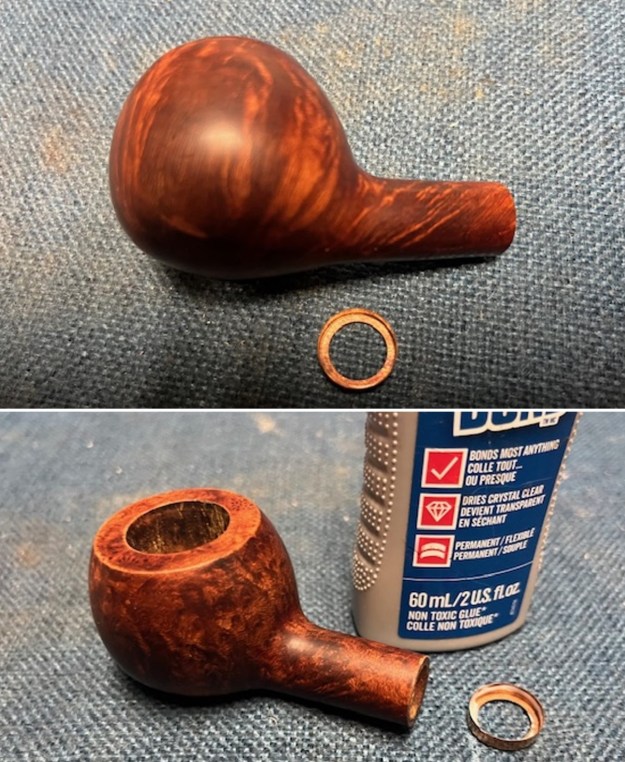
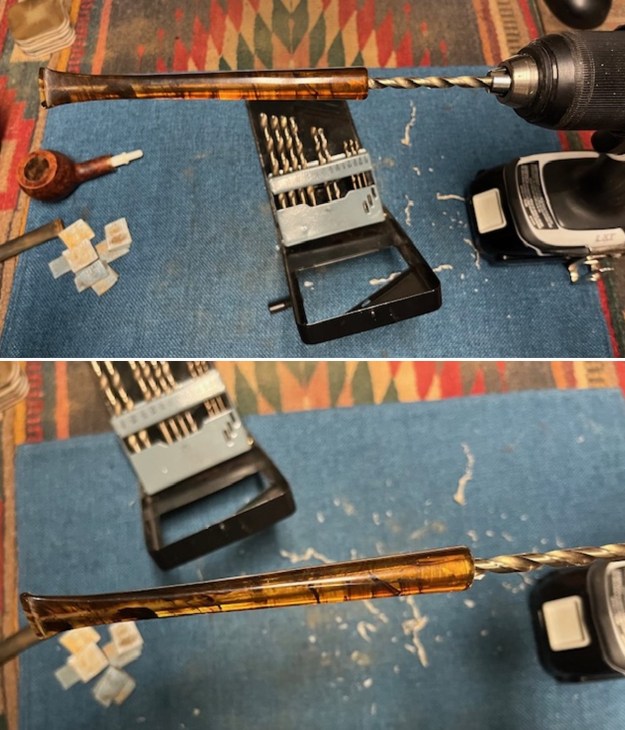
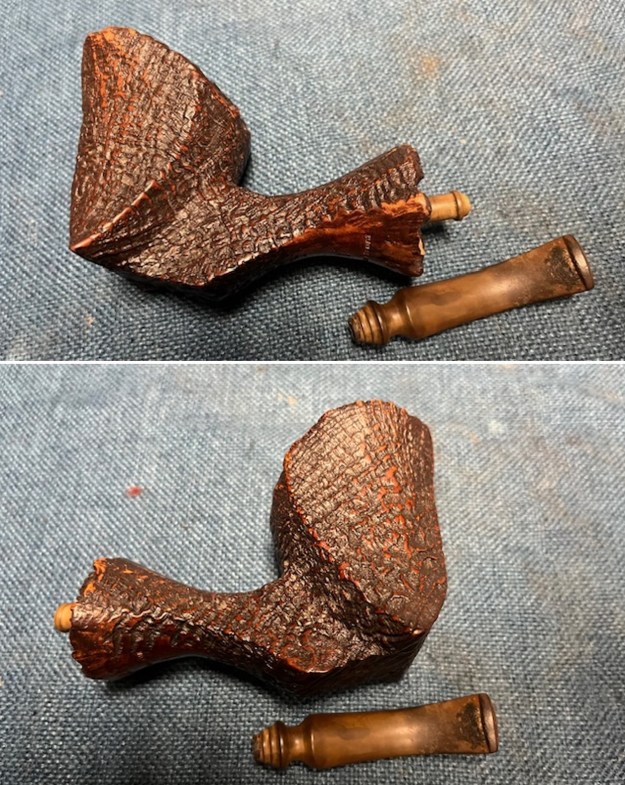
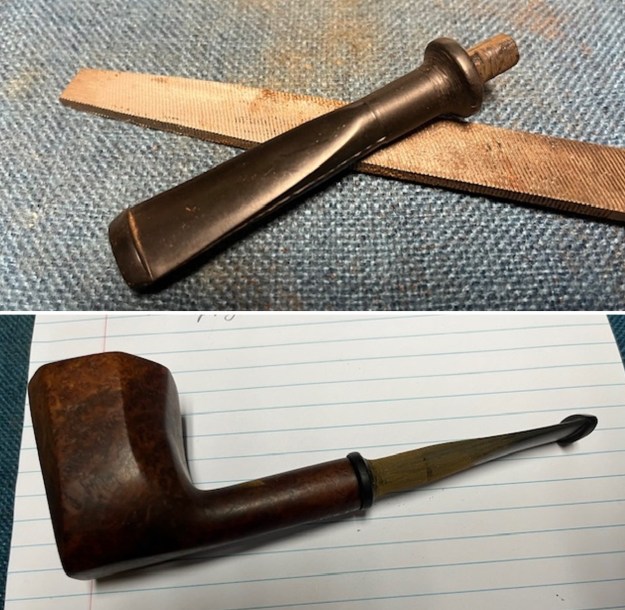
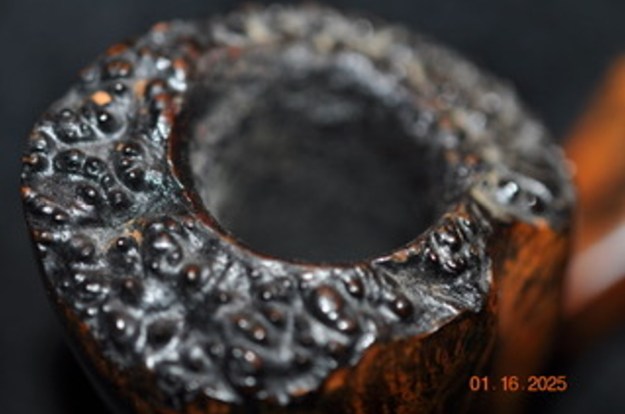
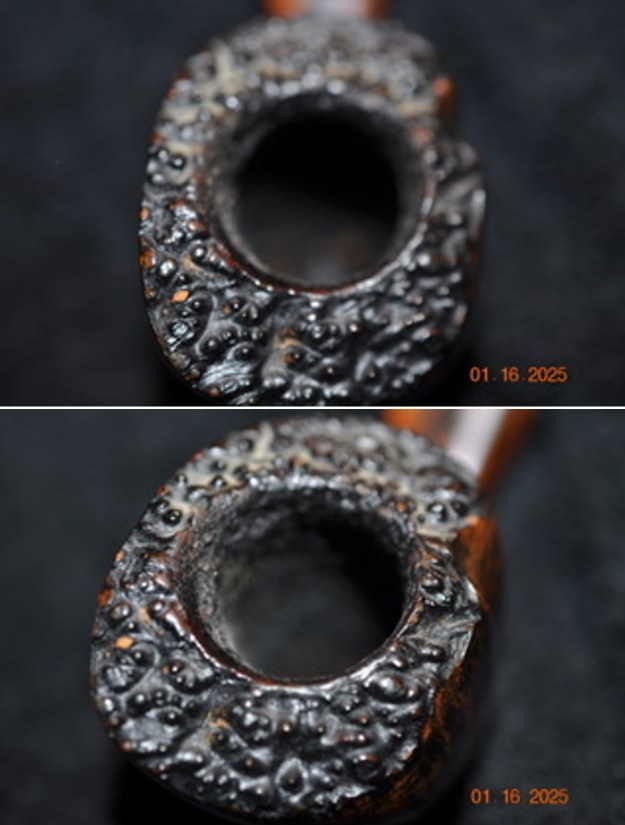
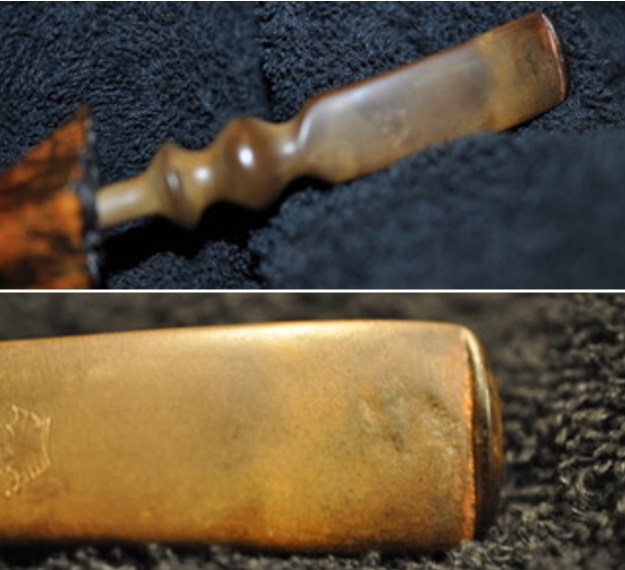
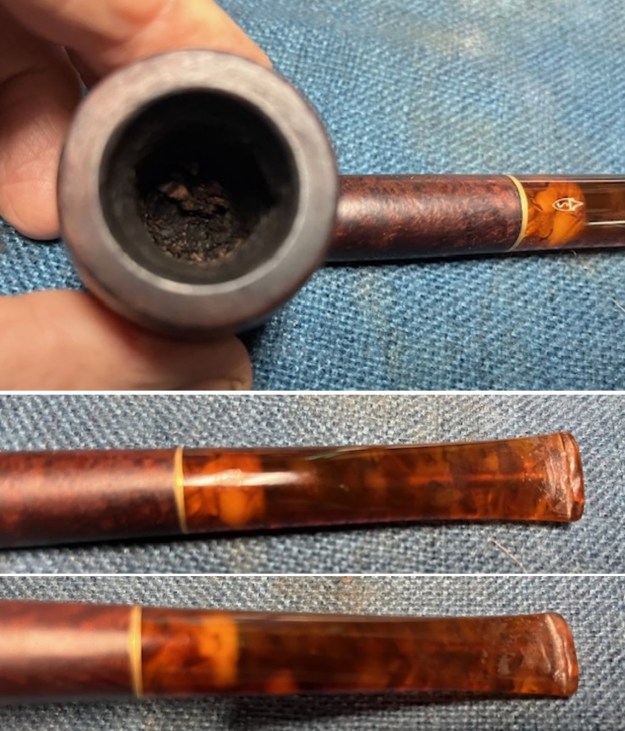
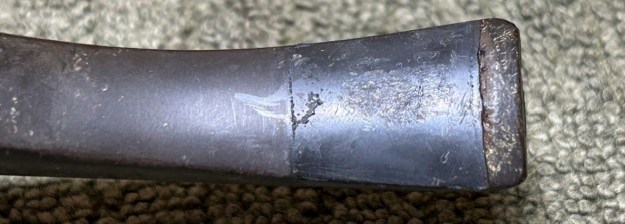
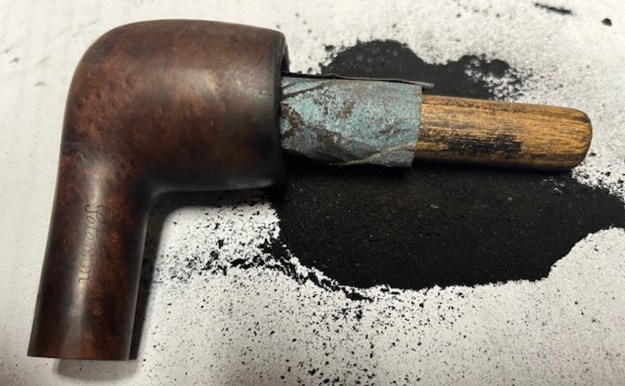
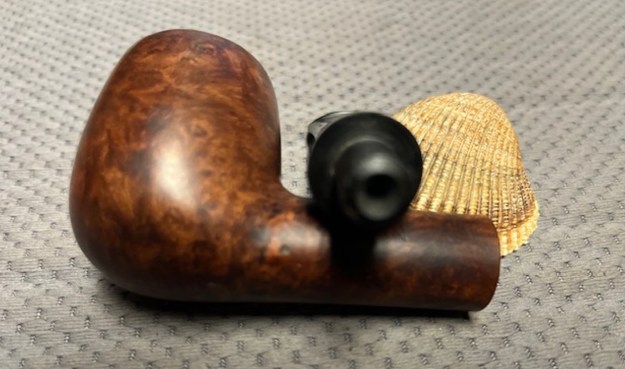
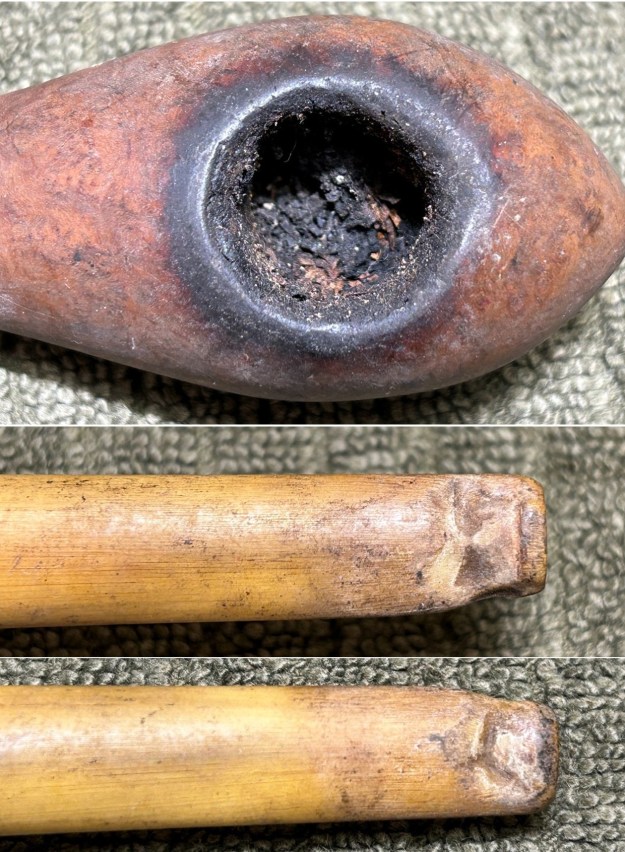 To begin, I used isopropyl alcohol on a few cotton rounds and wiped down the stem to provide an initial cleaning of filth before moving on to the next steps. I wanted to clean out the insides next, but I felt it important to try and remove the tenon. First, I soaked the stem in isopropyl alcohol for about an hour – and that did precisely nothing. Second, I stuck the stem in the freezer for about 30 minutes – sometimes that can help the unscrewing process, but it didn’t. Third, I warmed the stem with my heat gun, hoping that that might loosen the gluey goo inside. After heating for quite a while, I could feel just a little give. I used my fingers to undo the screw. It was so challenging that I actually developed (and burst) a blister on my left index finger. But the good news is that I actually got it unscrewed. What I won’t do for pipes!
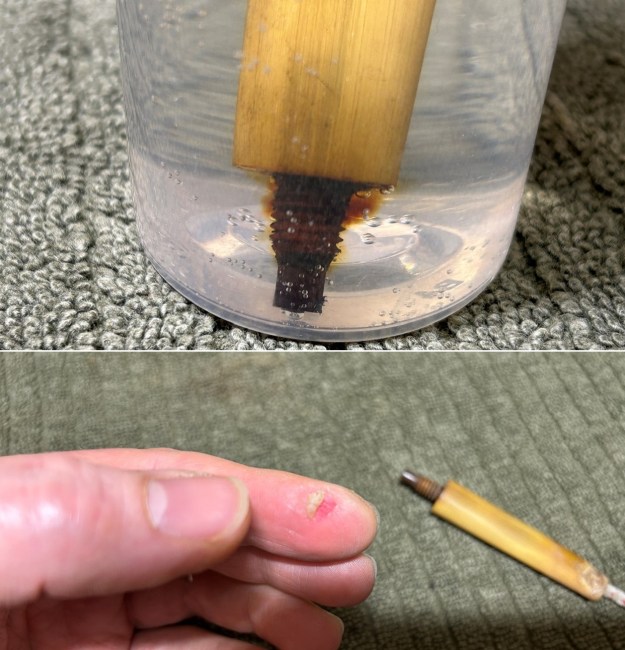
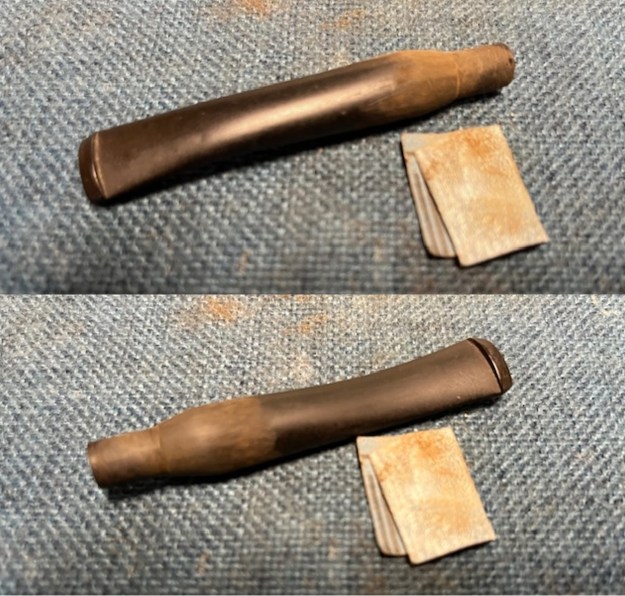
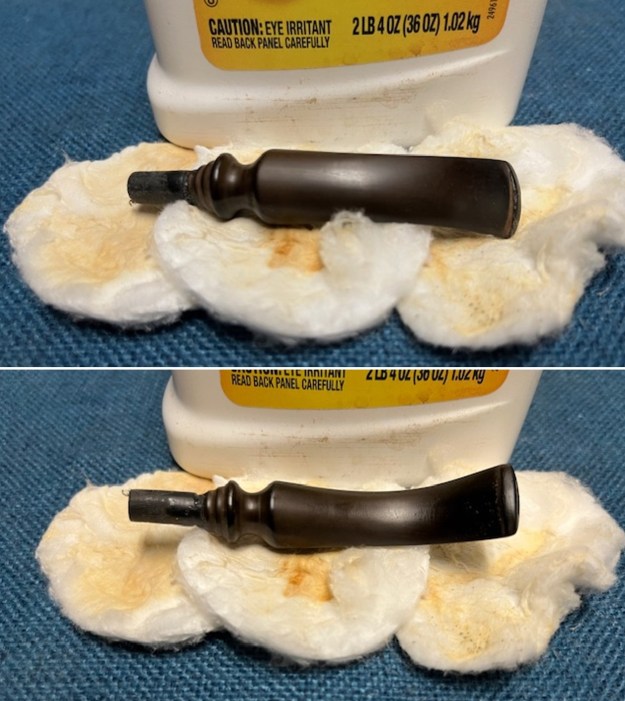
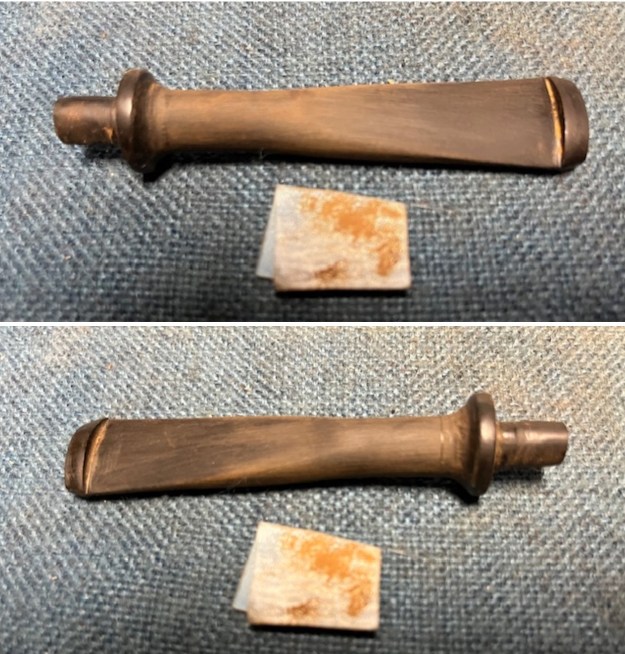
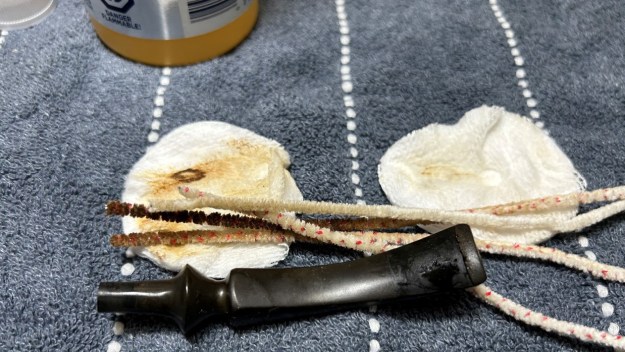
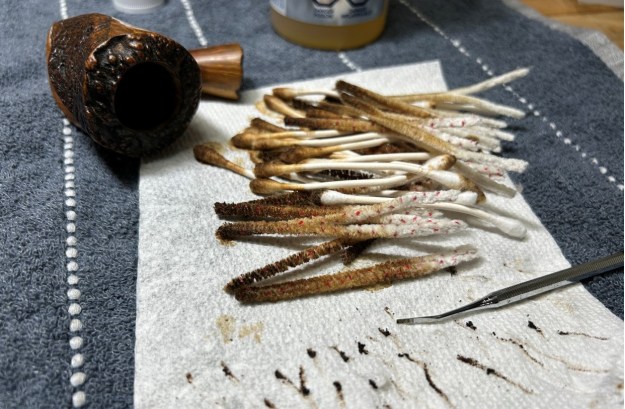
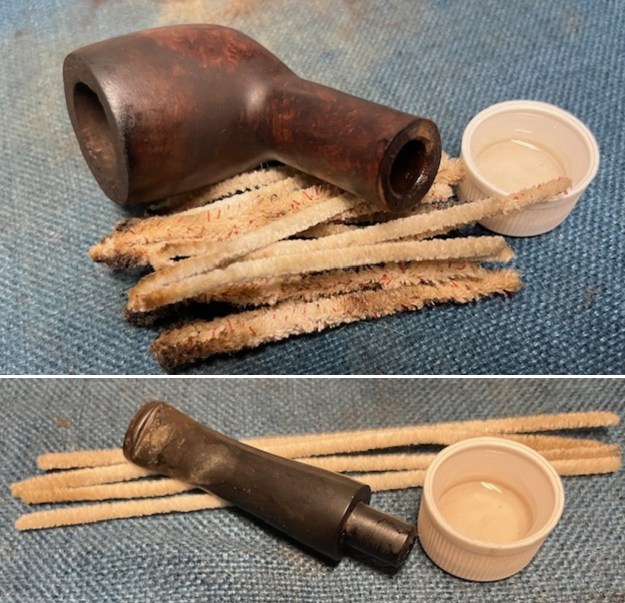
 The primary cleaning came next. I disinfected the inside of the stem with both pipe cleaners and cotton swabs dipped in lemon-infused 99% isopropyl alcohol. I scrubbed thoroughly to make sure the interior was very clean. I used quite a few pipe cleaners and cotton swabs. I also cleaned the tenon very well too.
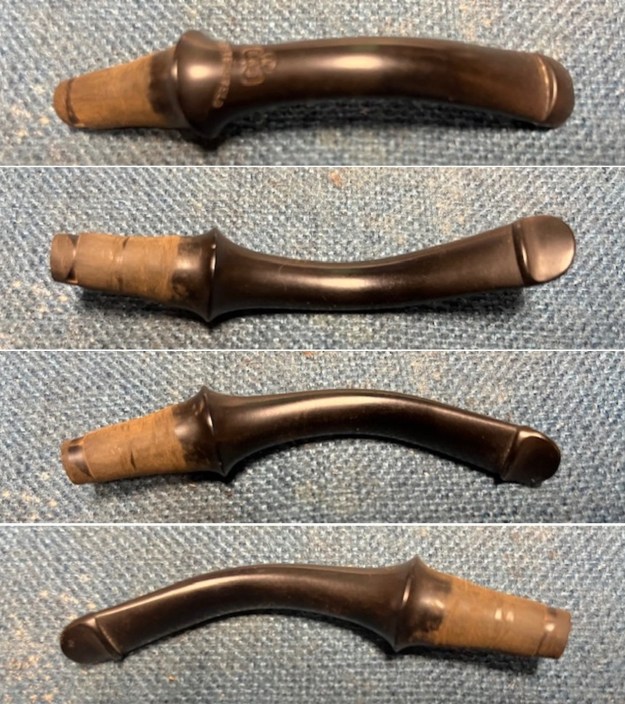
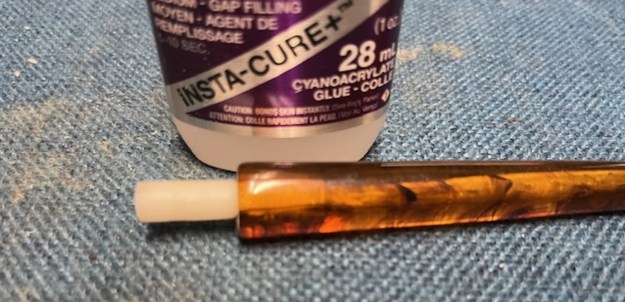
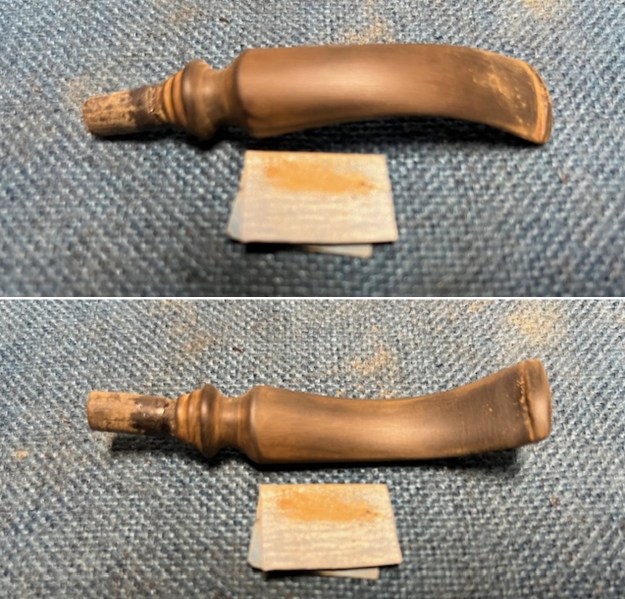
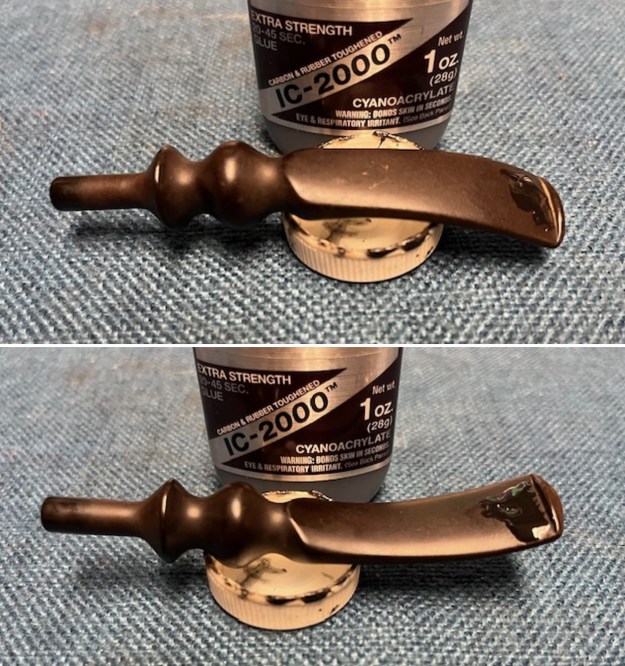
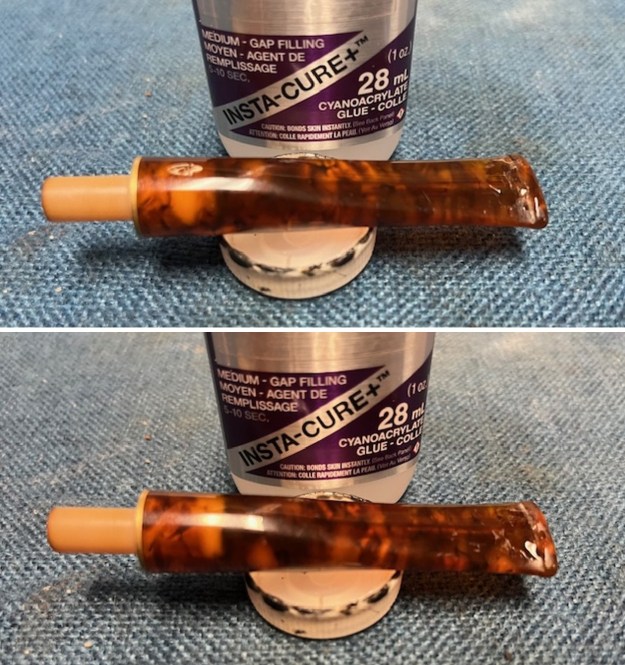
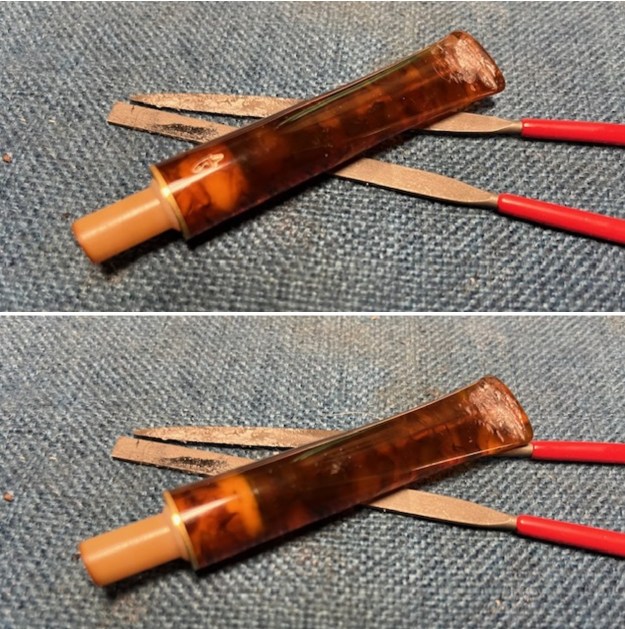
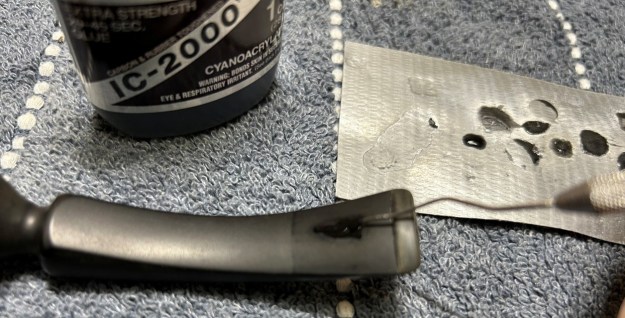
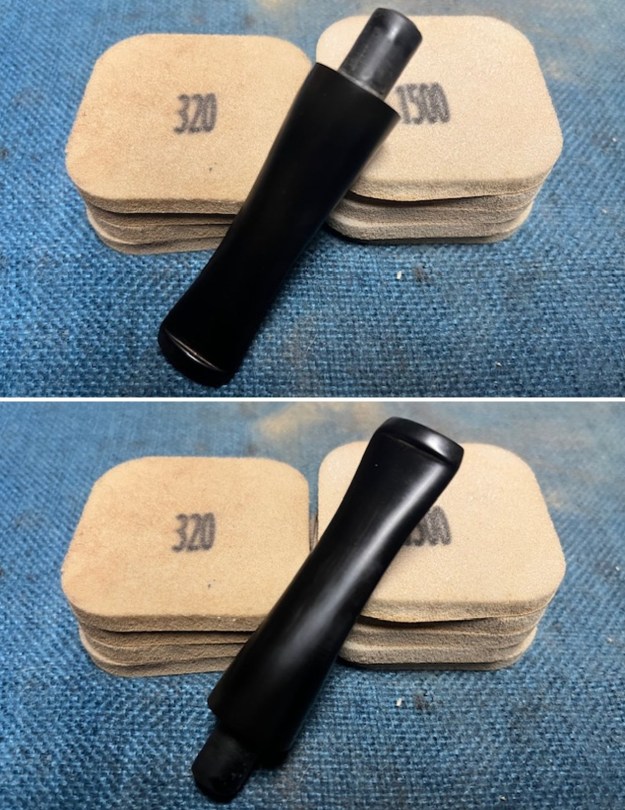
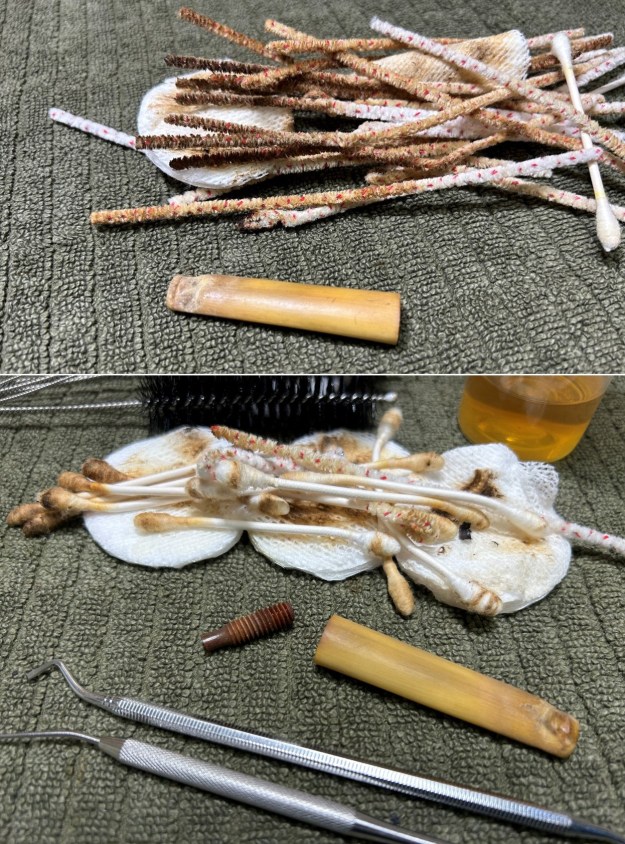 As the stem was now clean and dry, I set about fixing the marks and dents in the horn. This was done by filling those divots with clear cyanoacrylate adhesive. There was quite a bit of horn missing and the repair took quite a while. I left this to cure and moved on. I neglected to take photos of this stem, so you’ll just have to take my word for it.
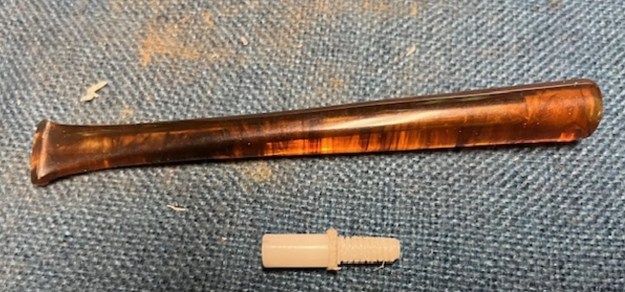
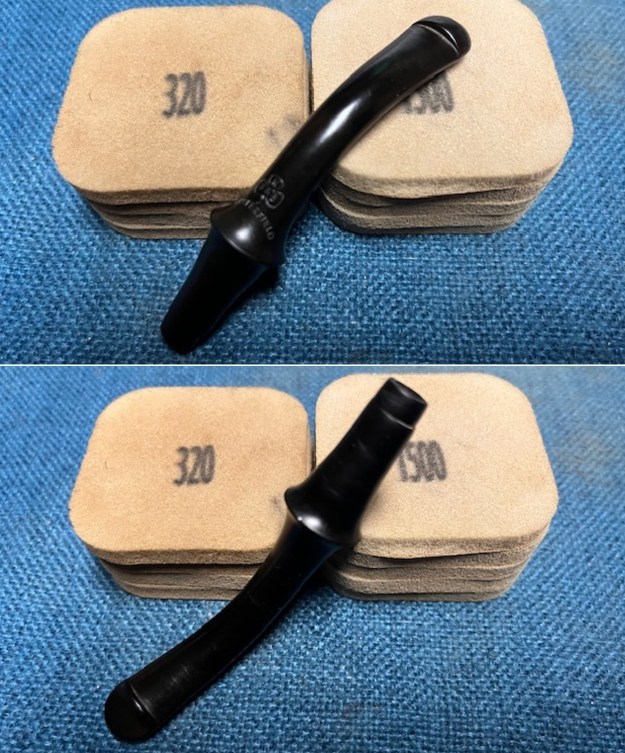
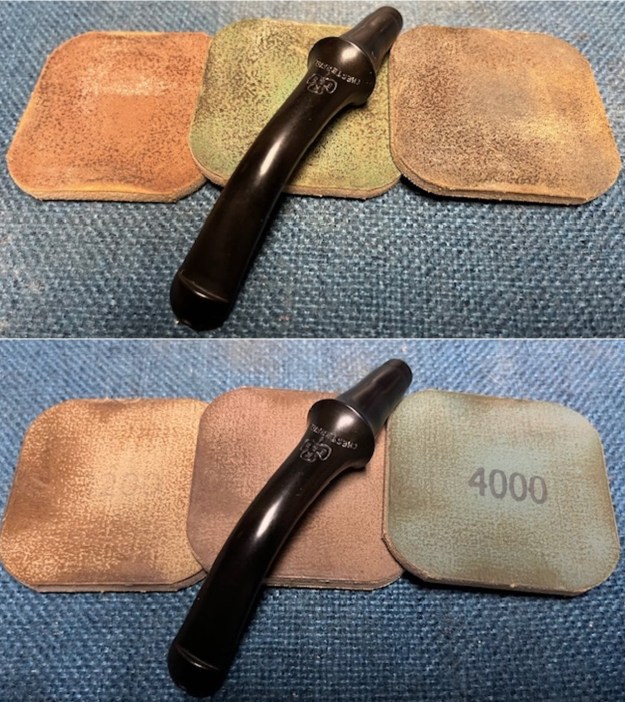
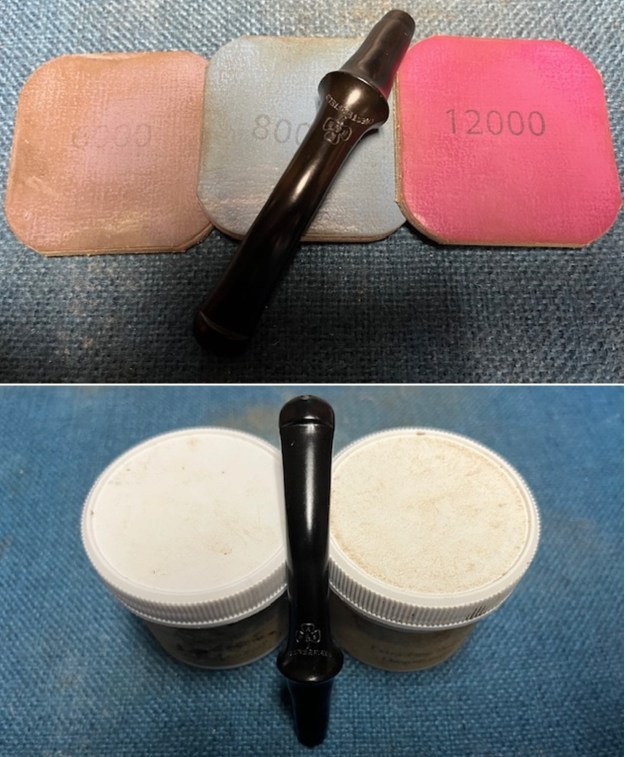
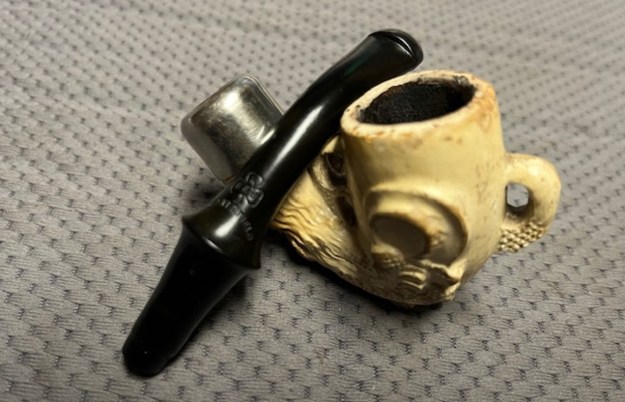
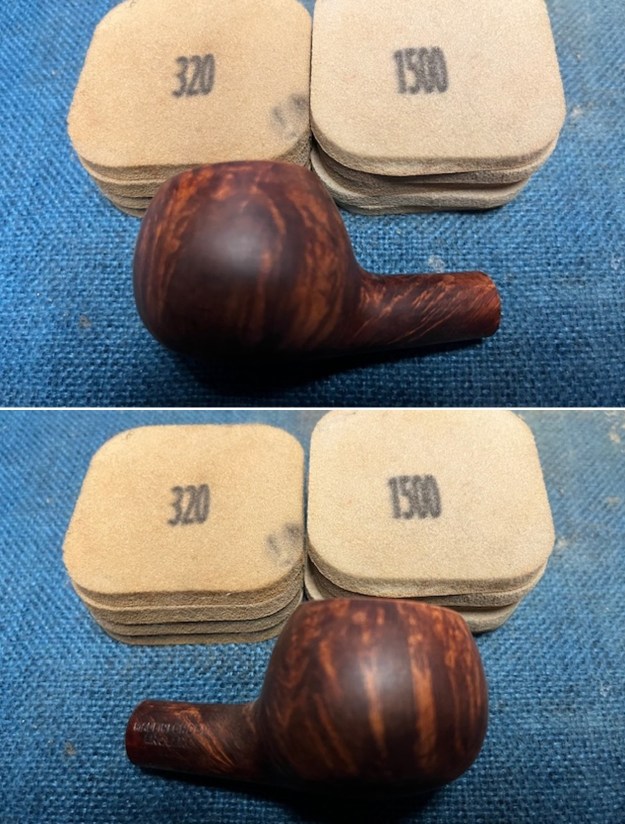
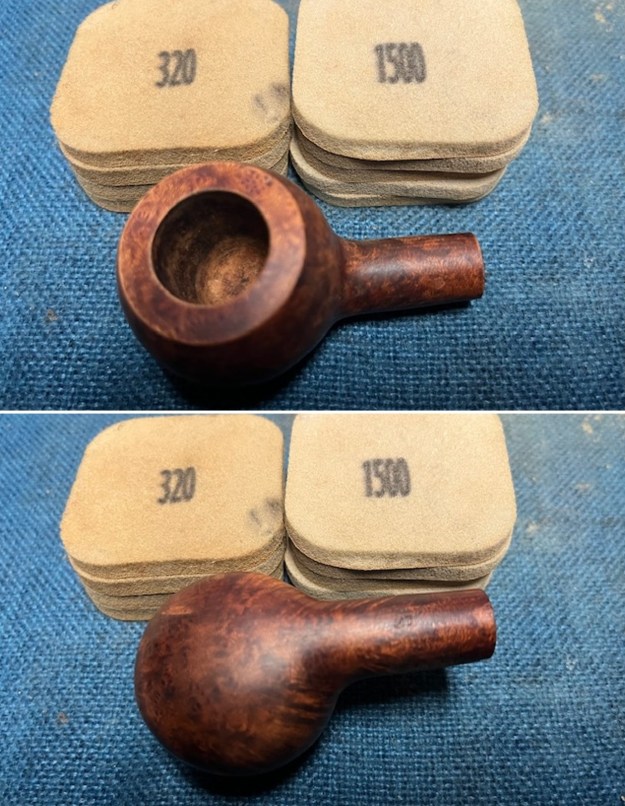
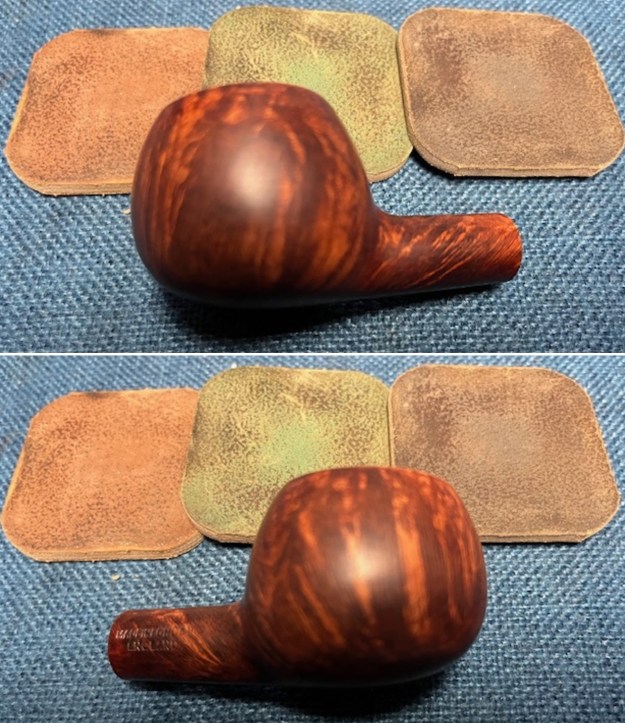
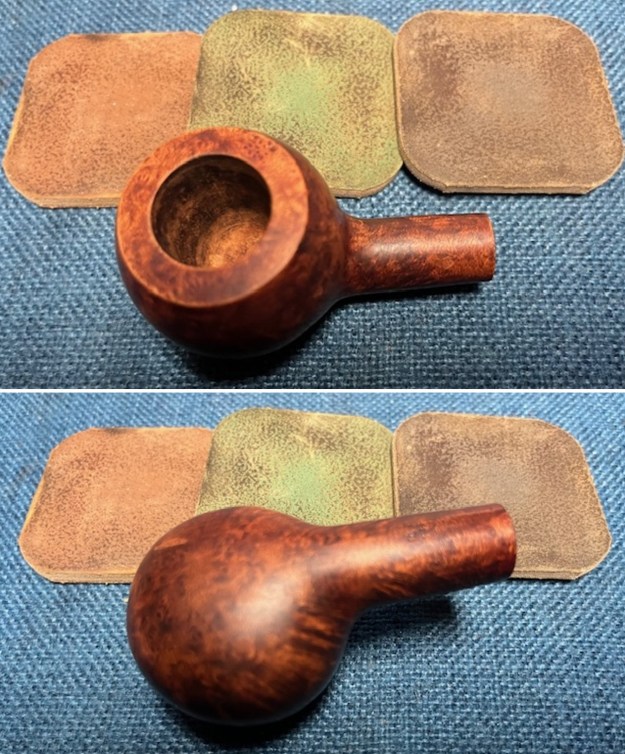
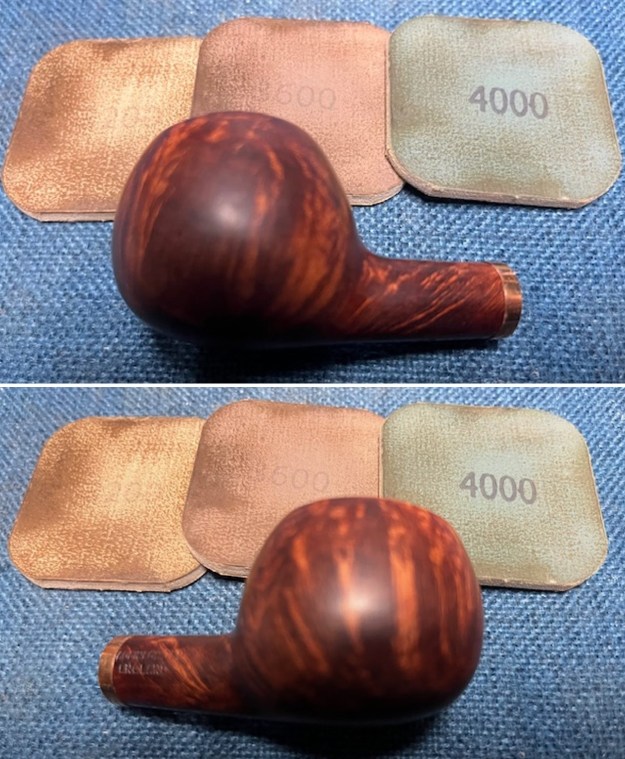
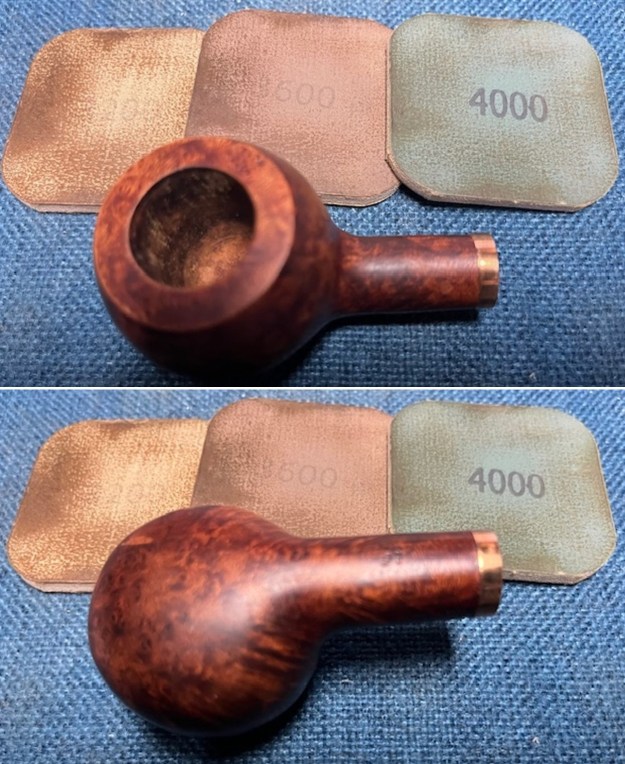
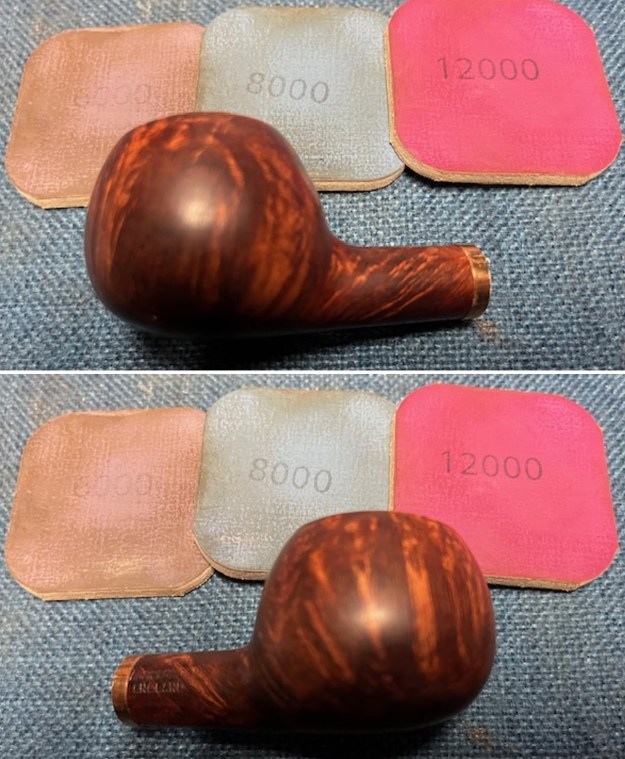
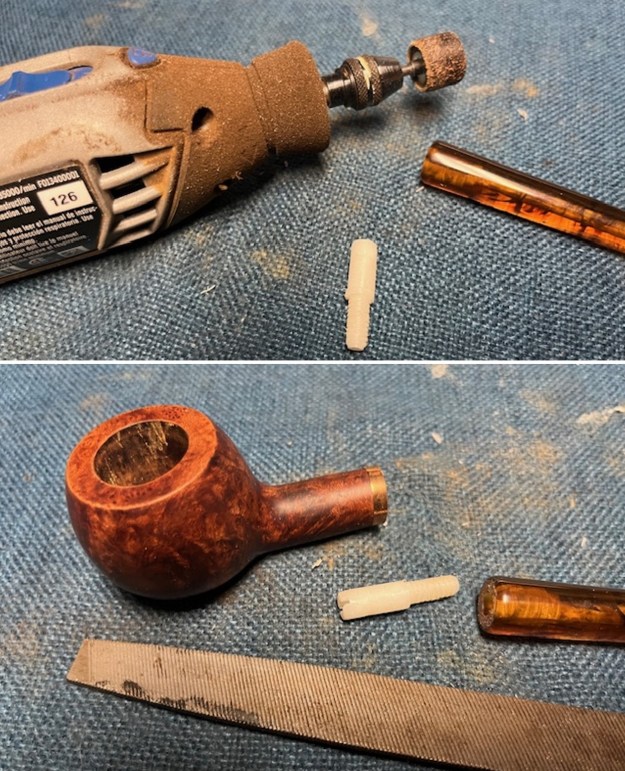
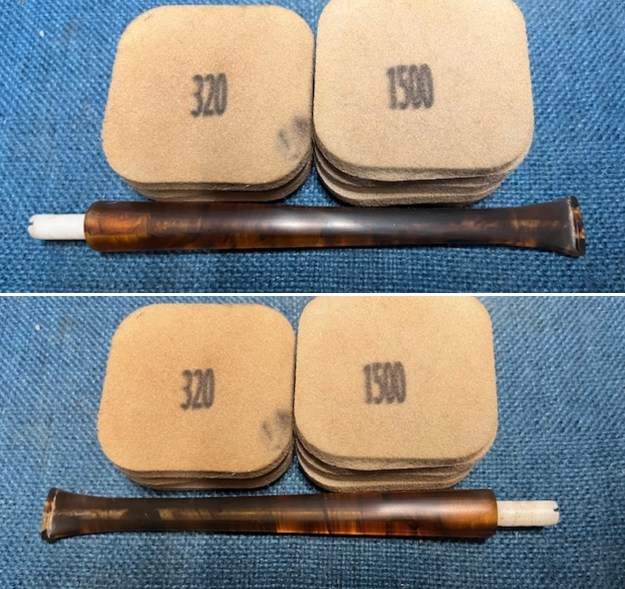
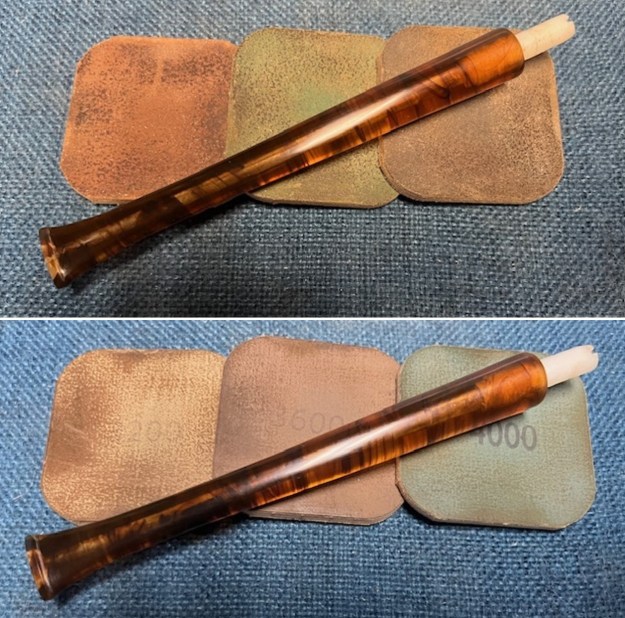
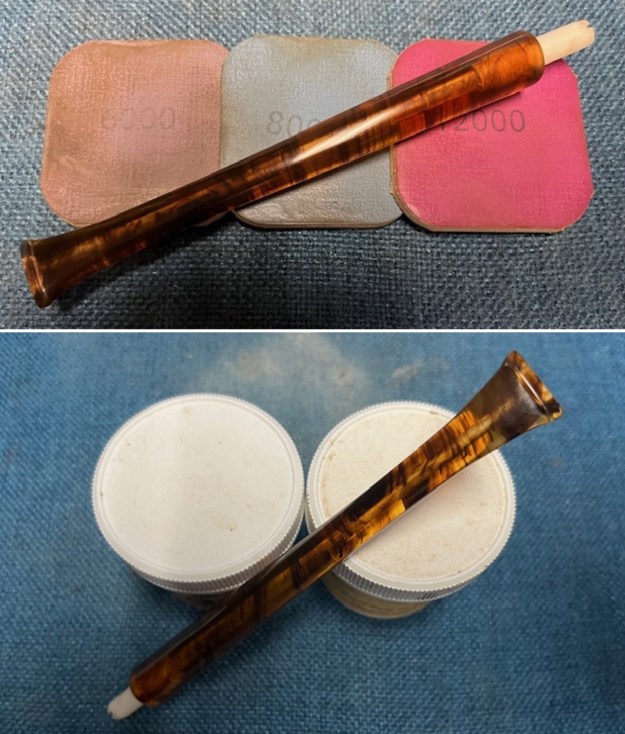
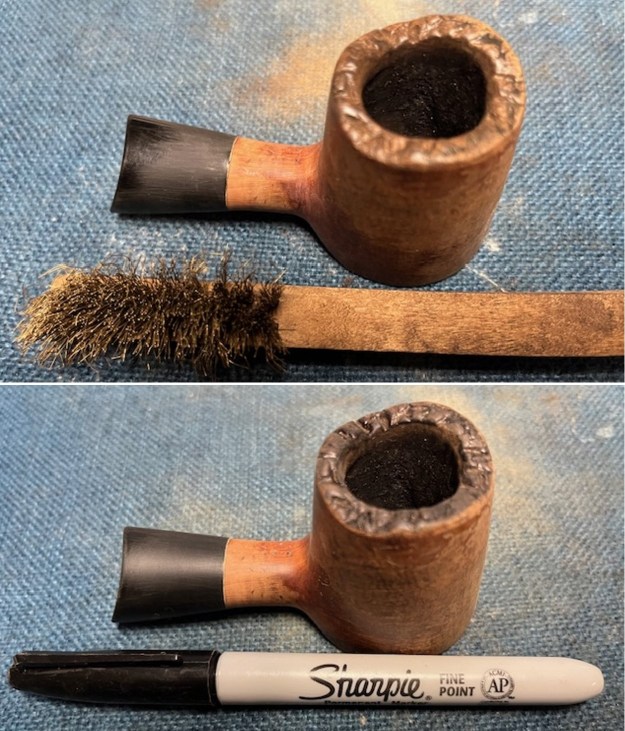
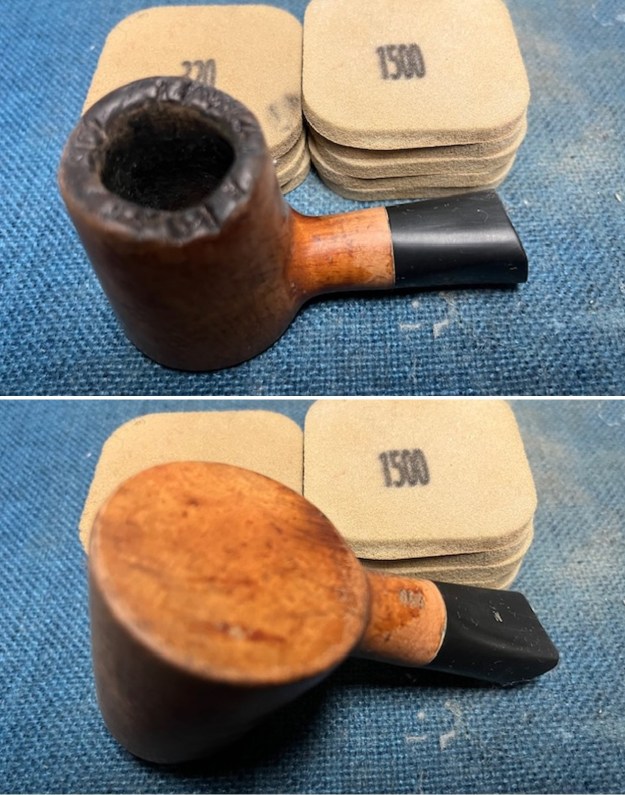
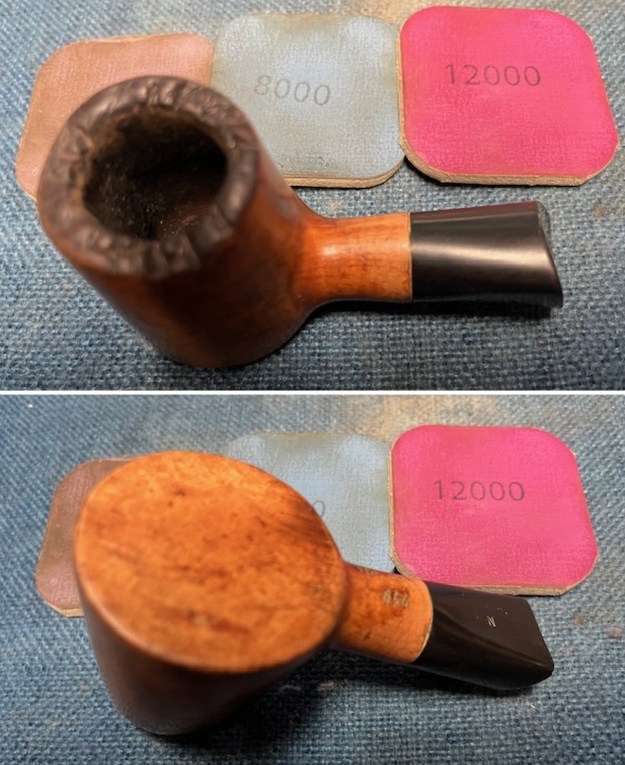
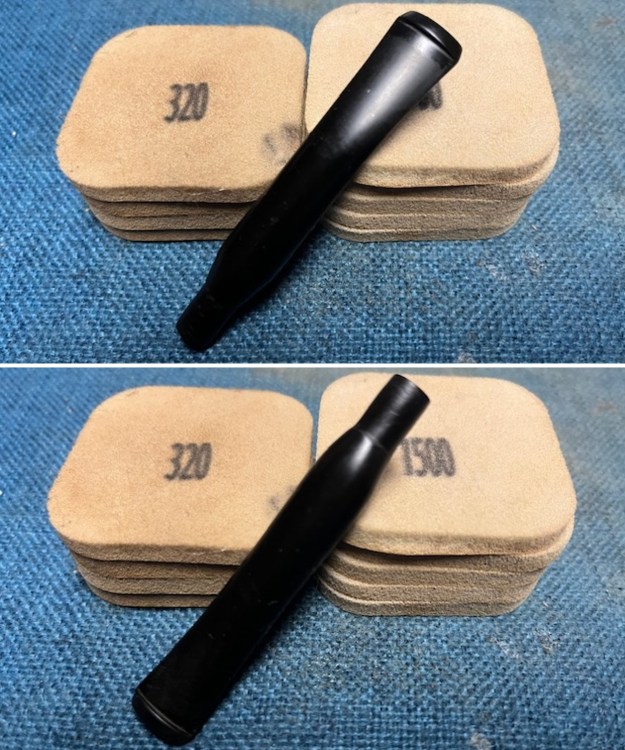
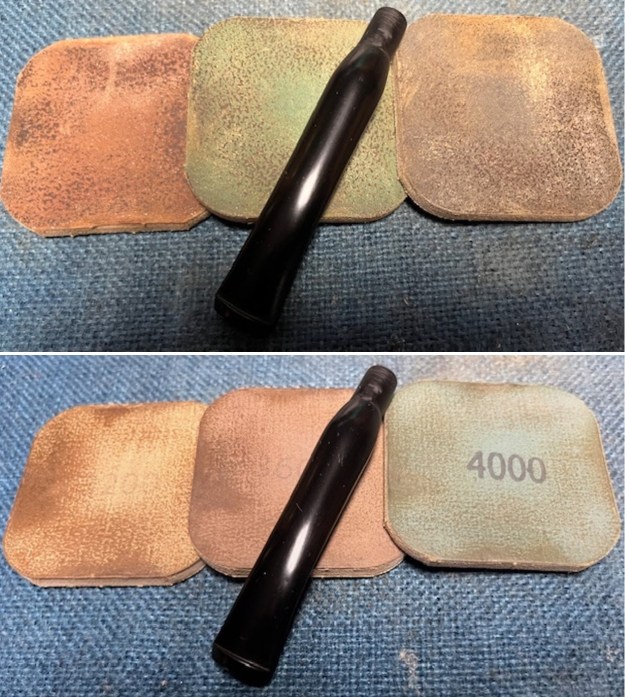
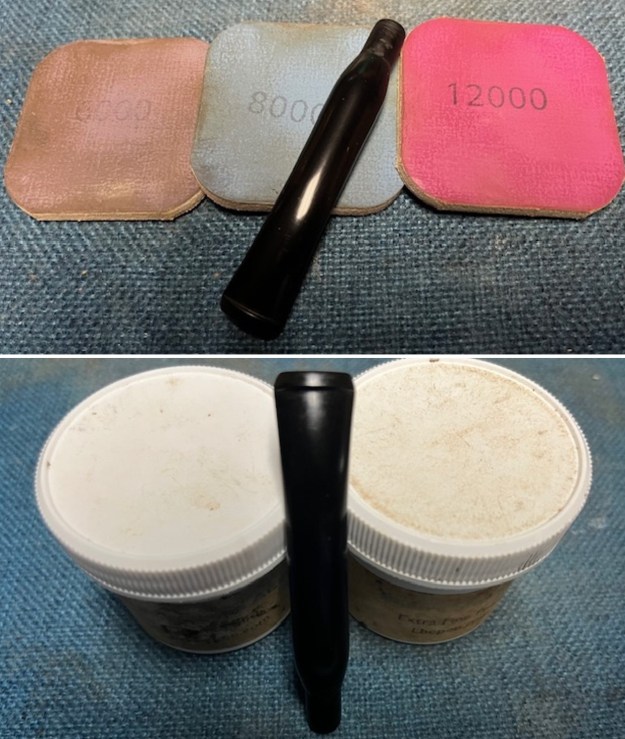
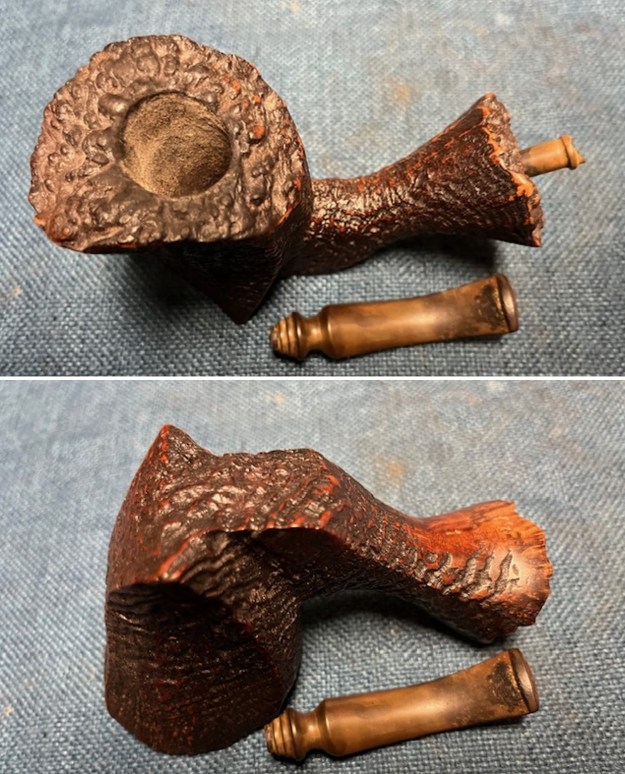
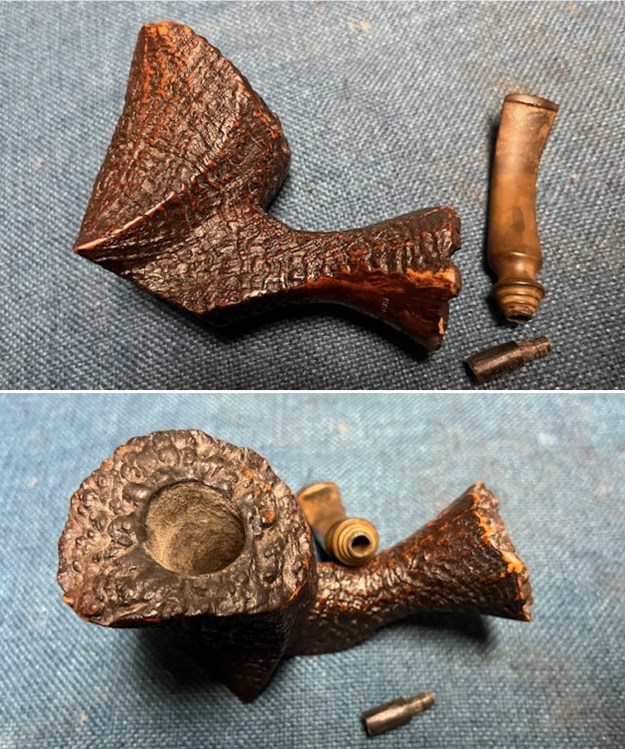
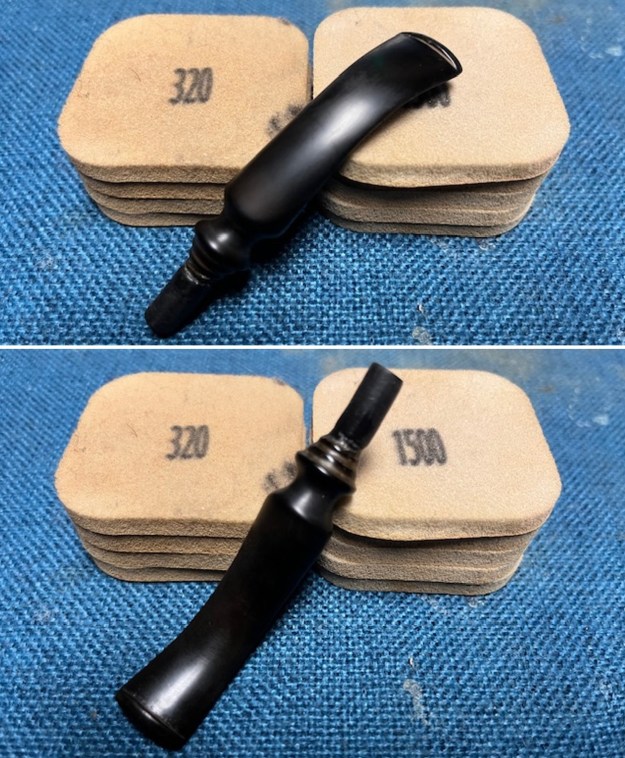
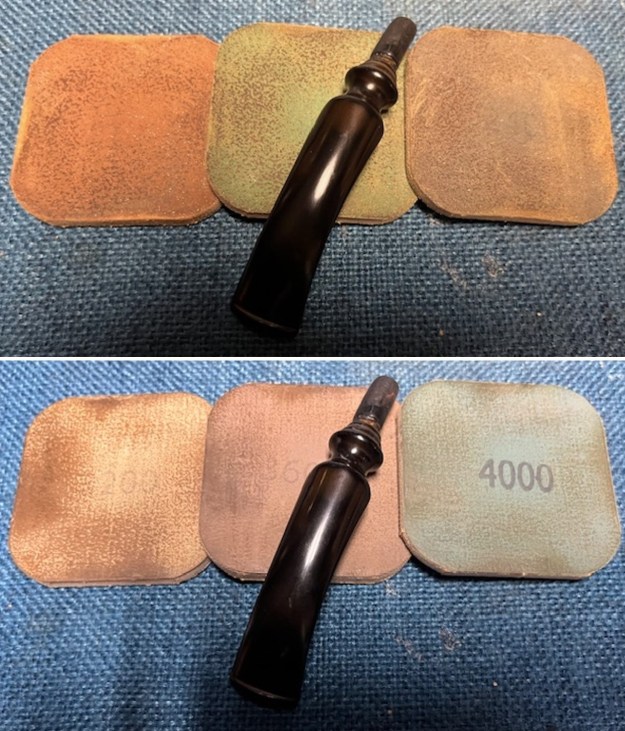
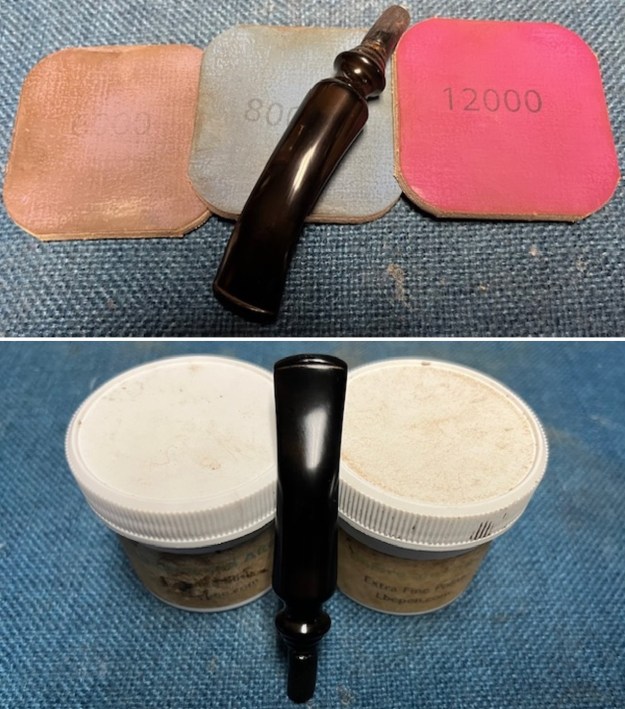
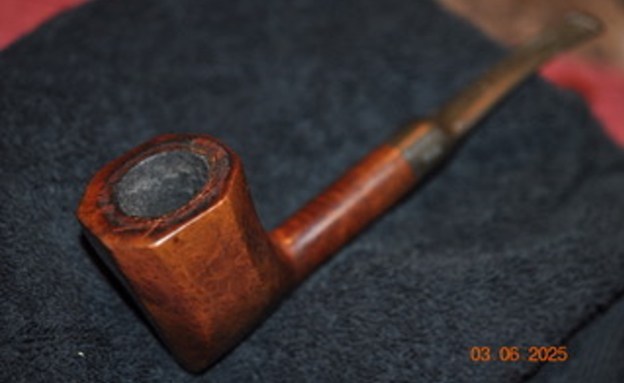
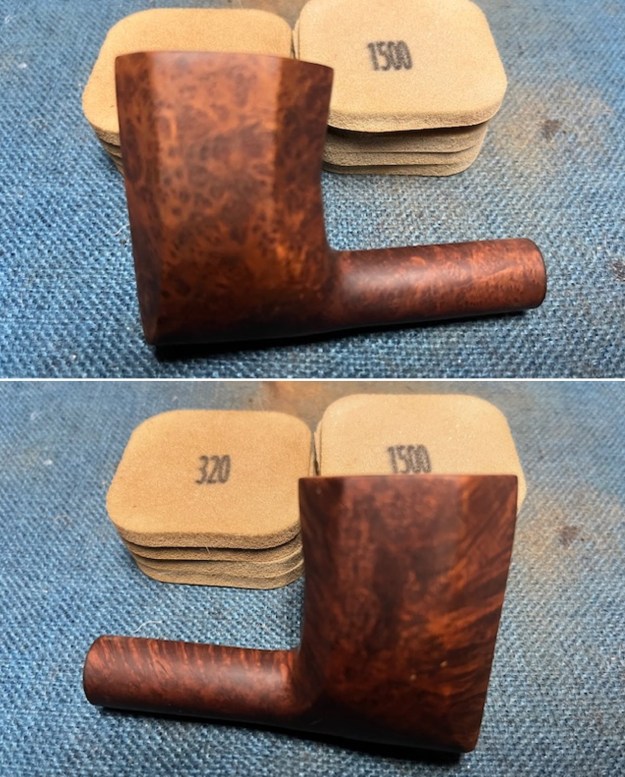
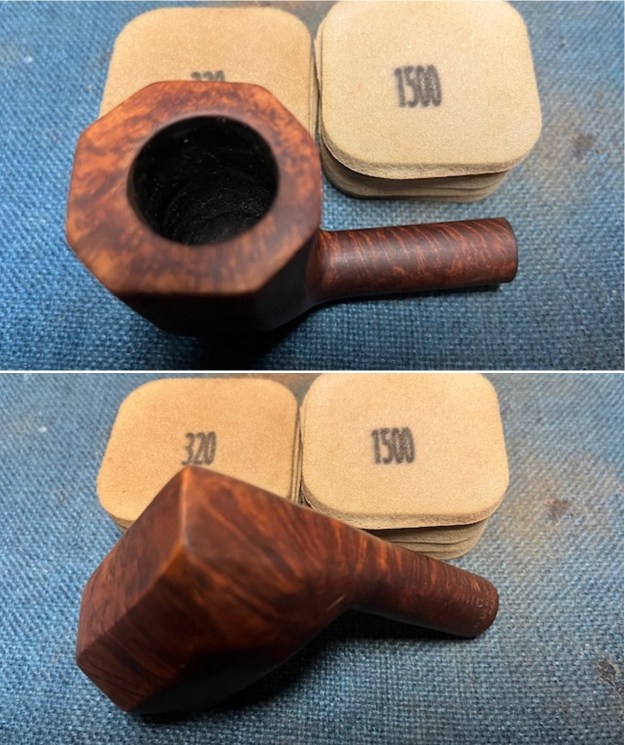
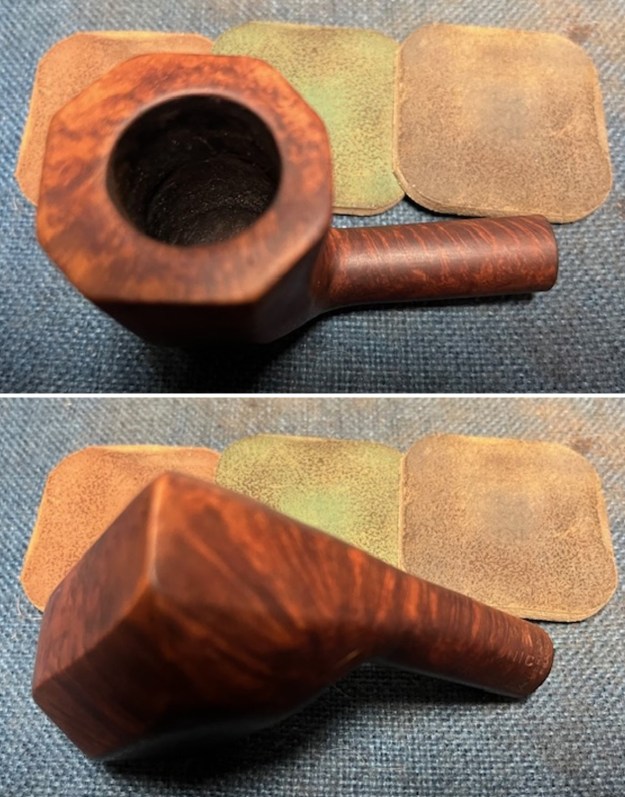
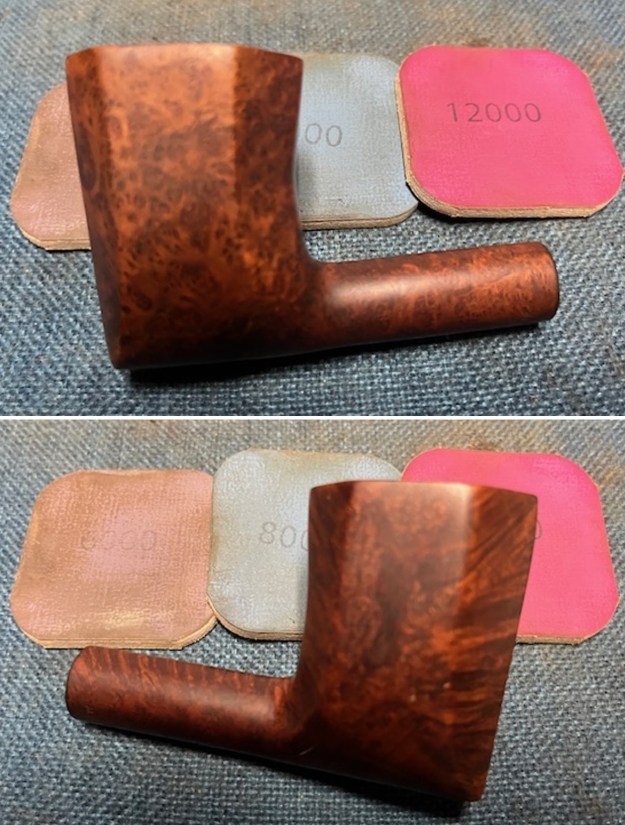
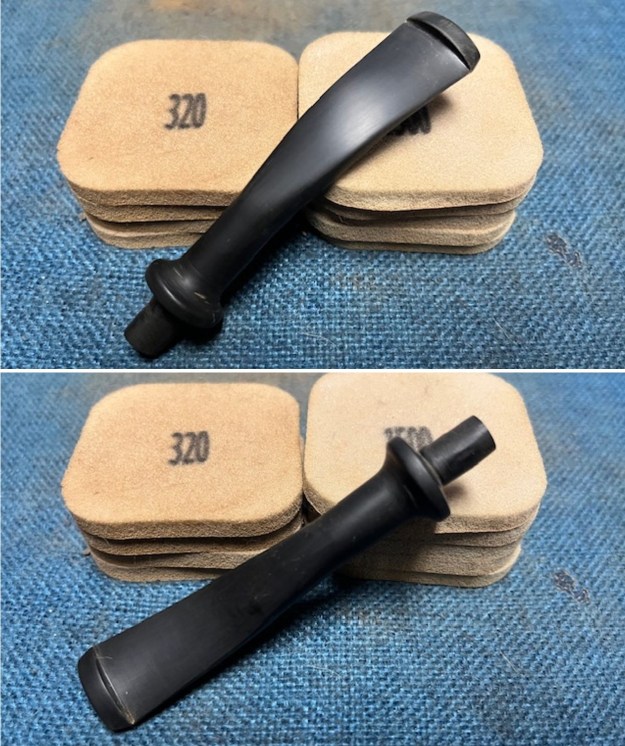
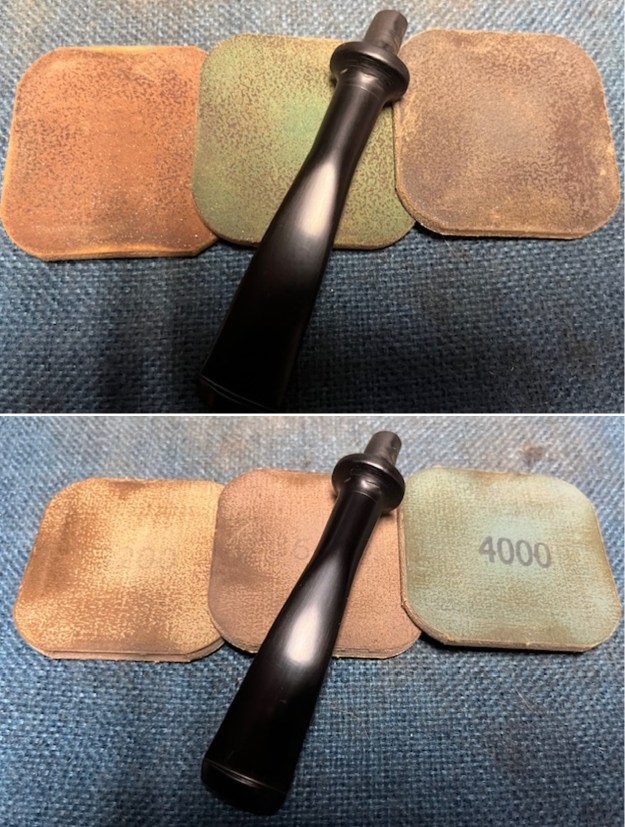
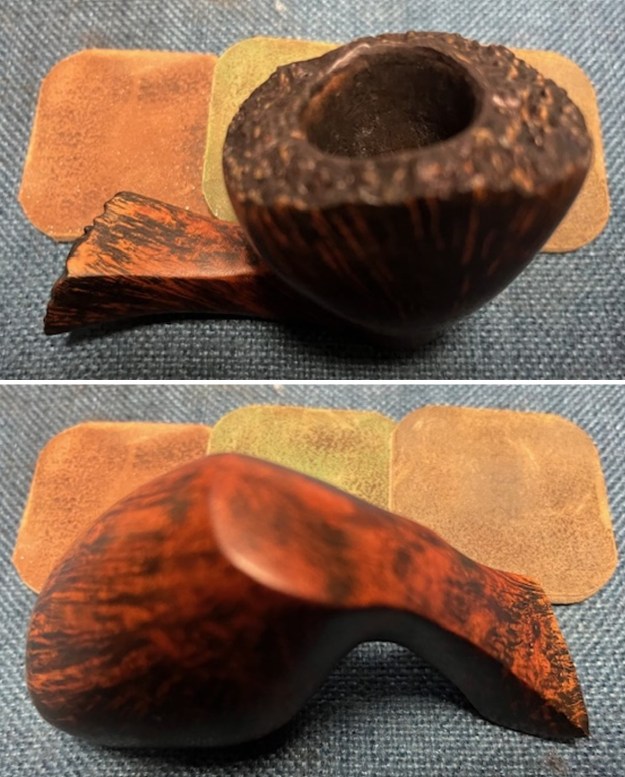
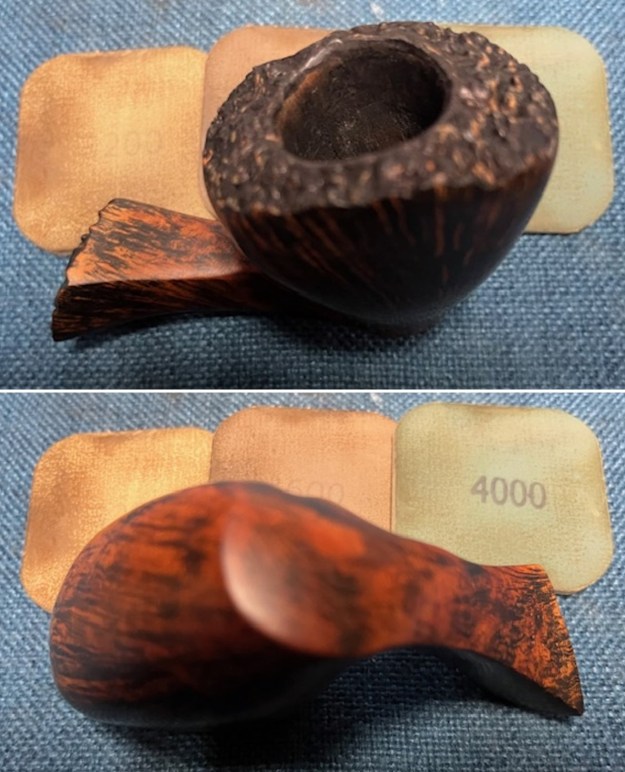
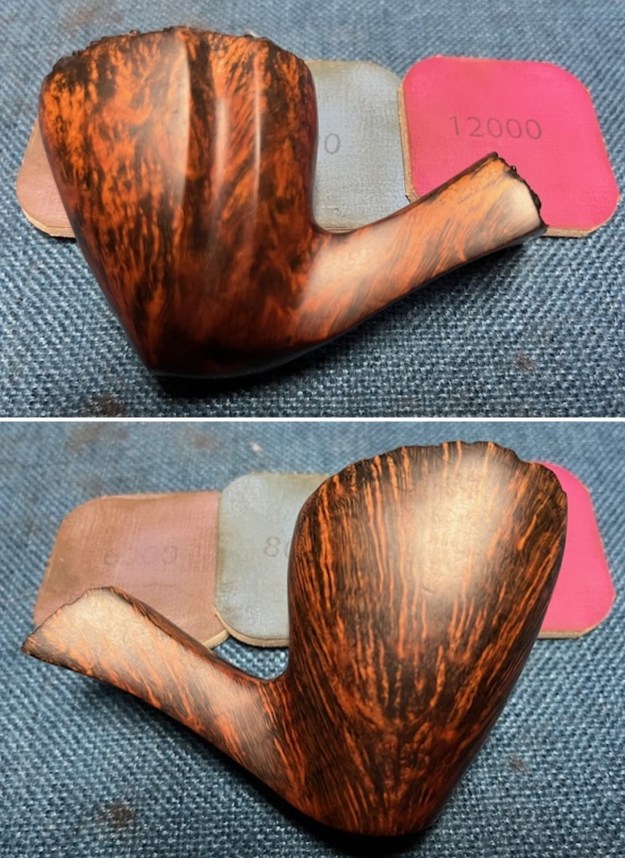
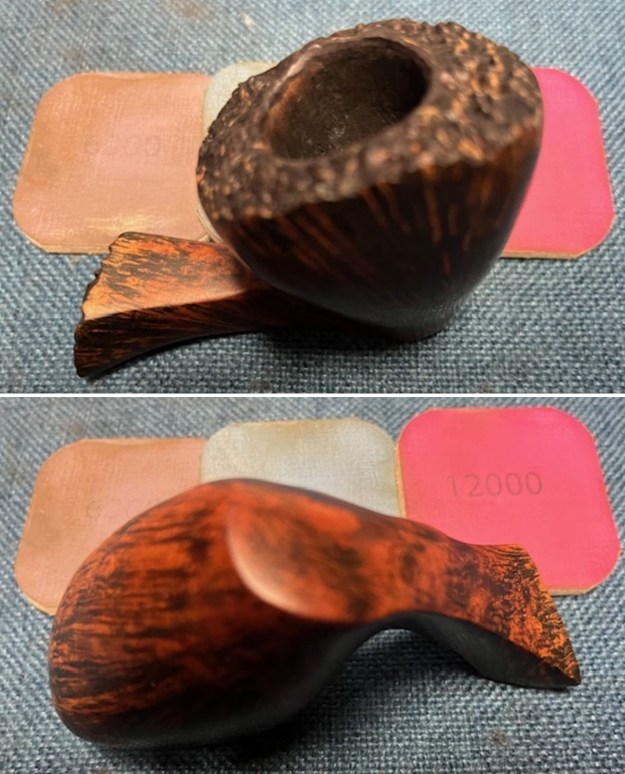
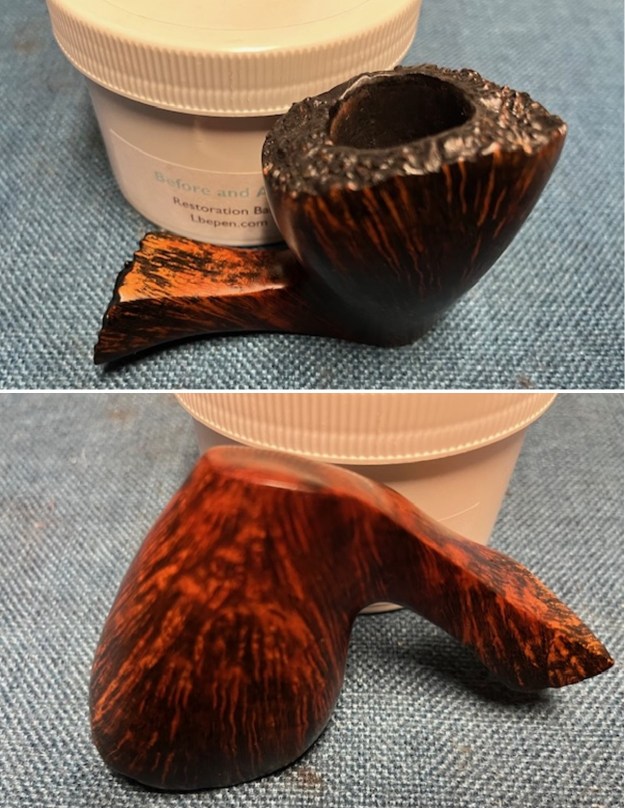
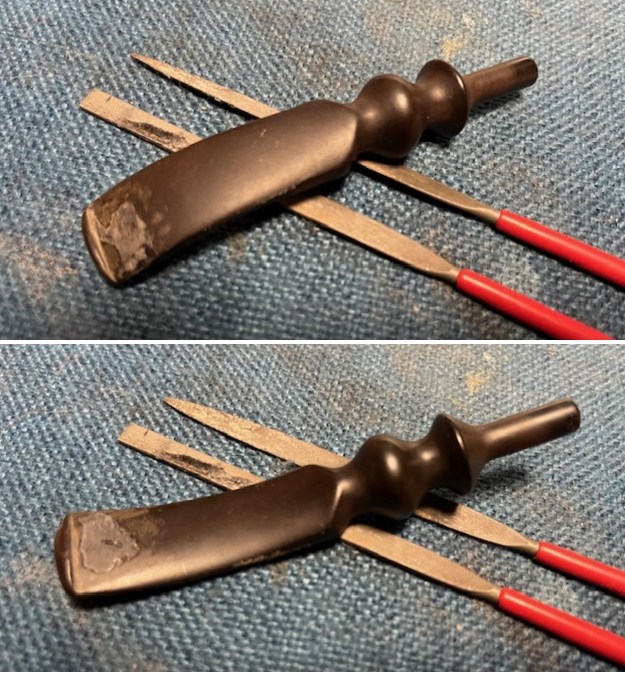
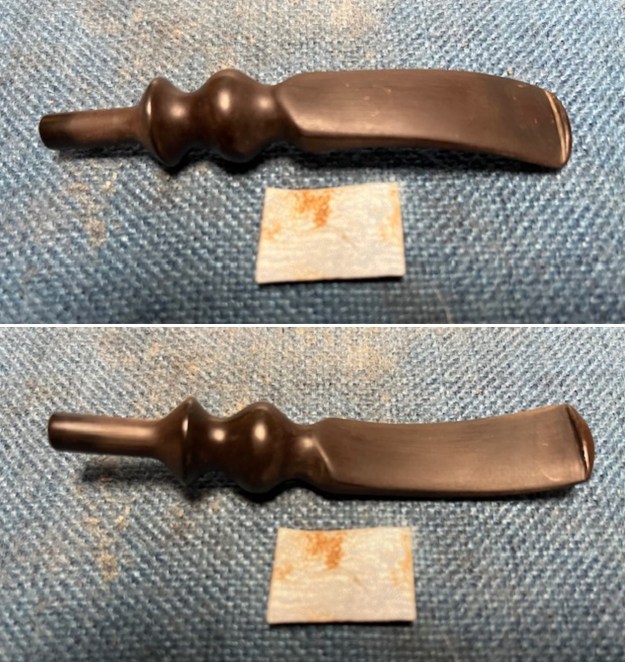
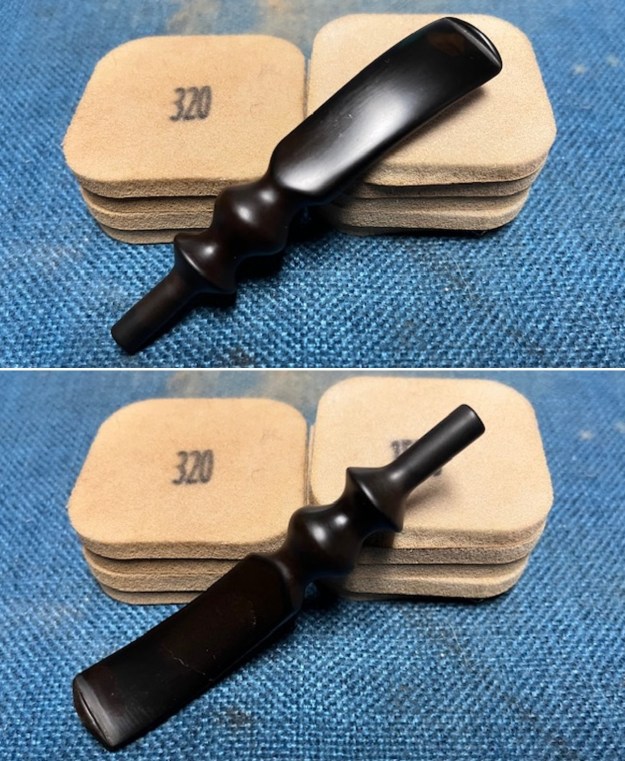
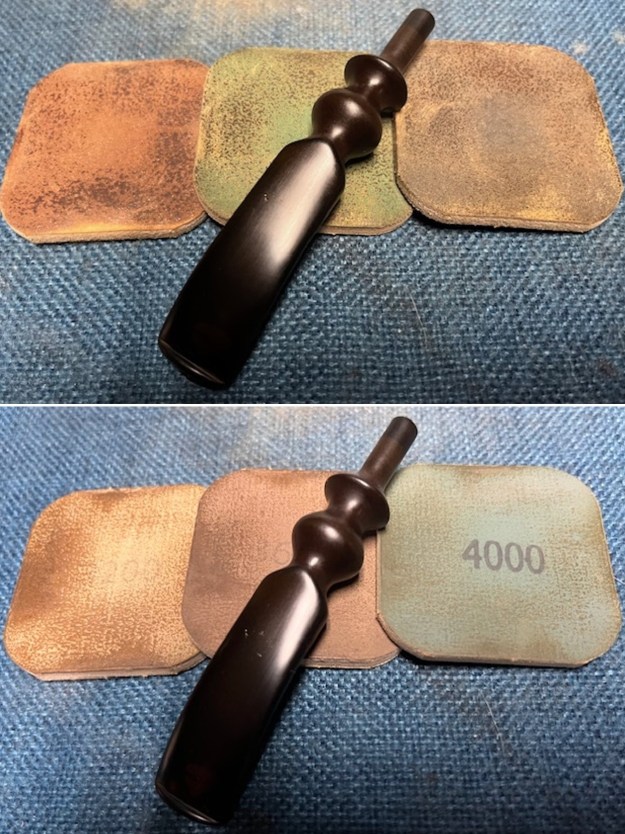
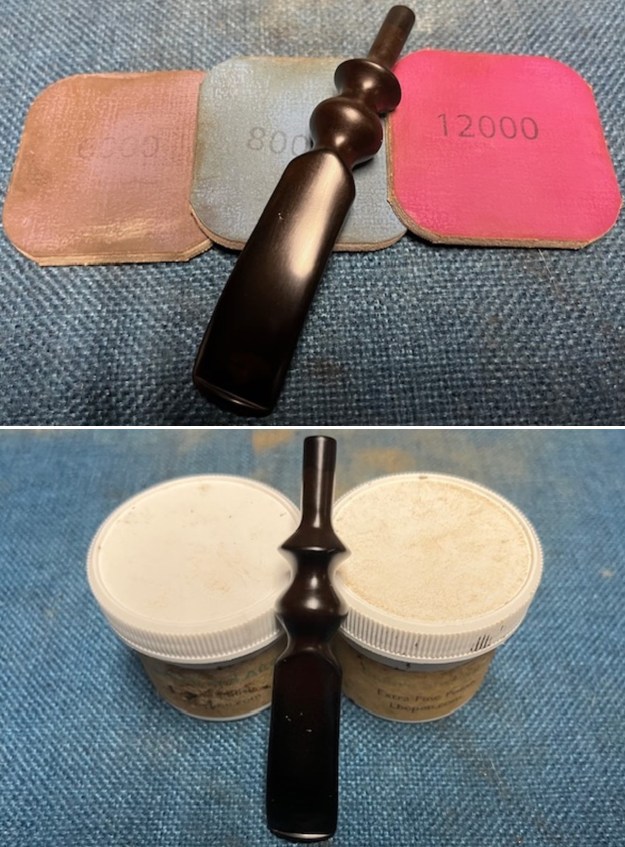
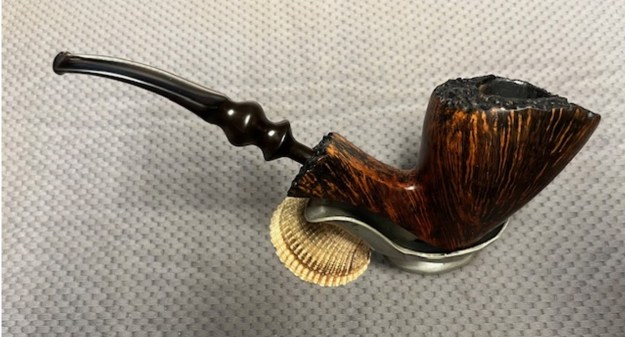
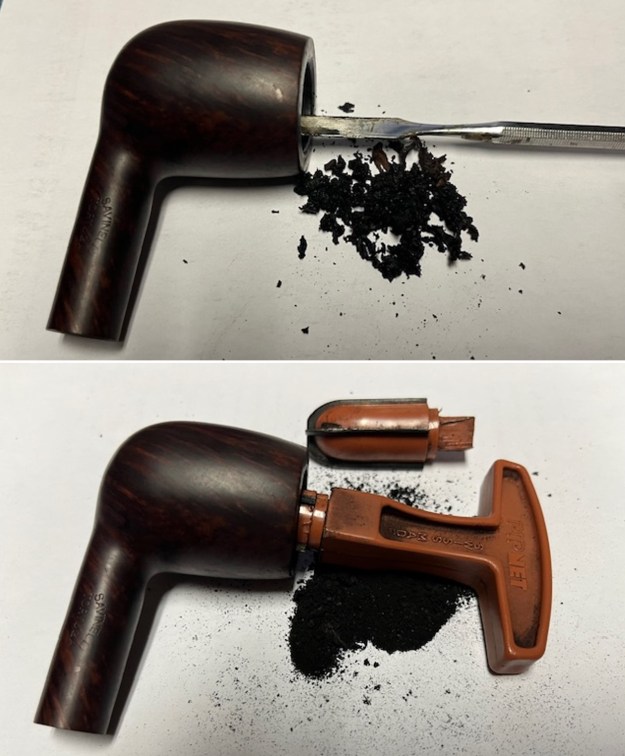
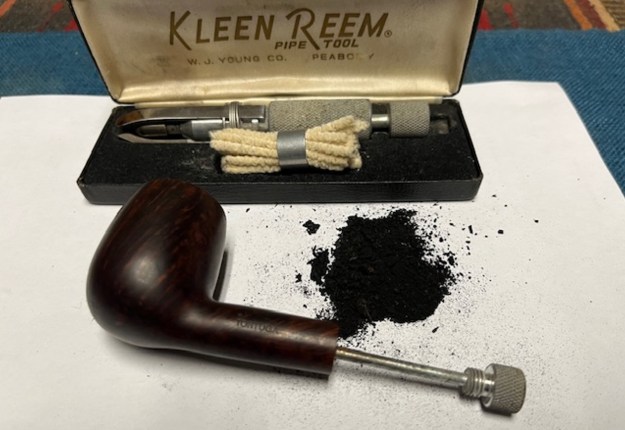
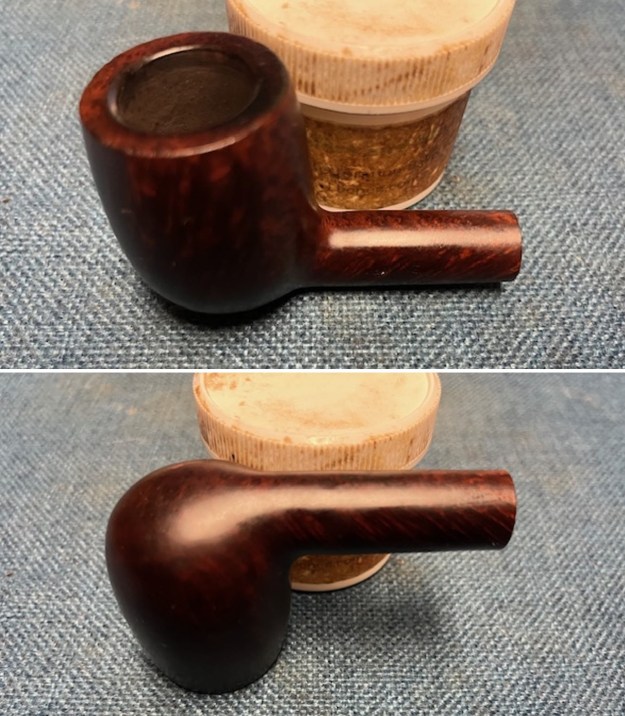
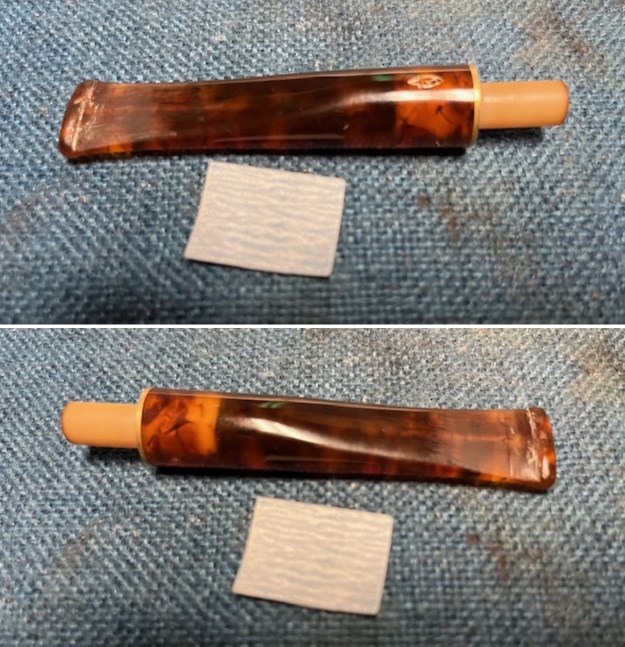
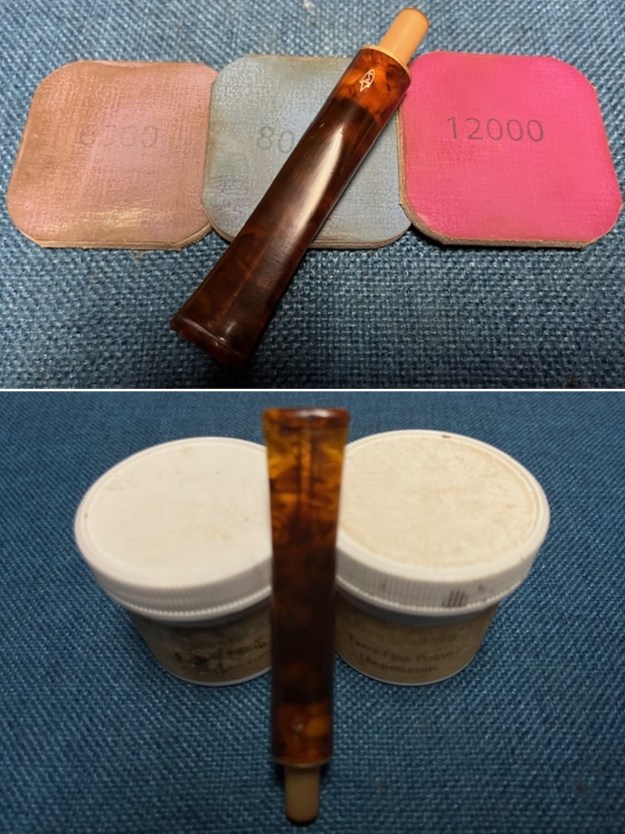
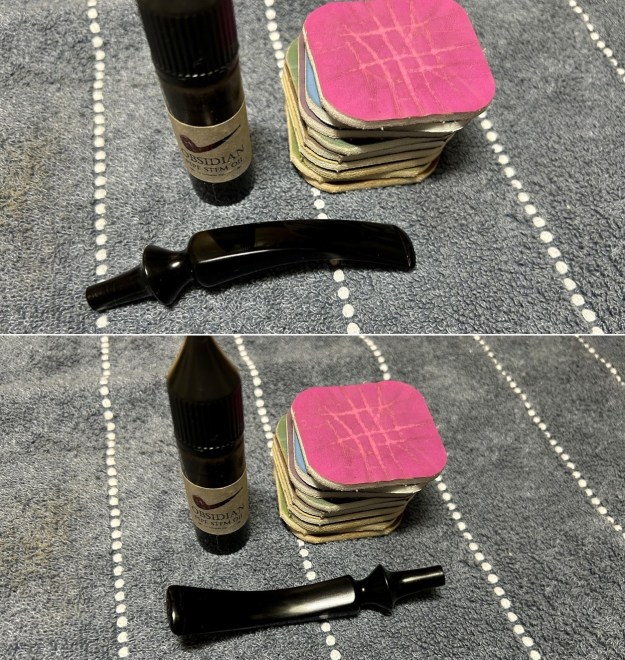
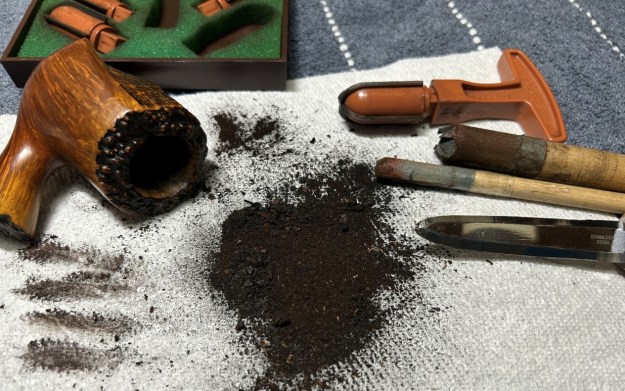
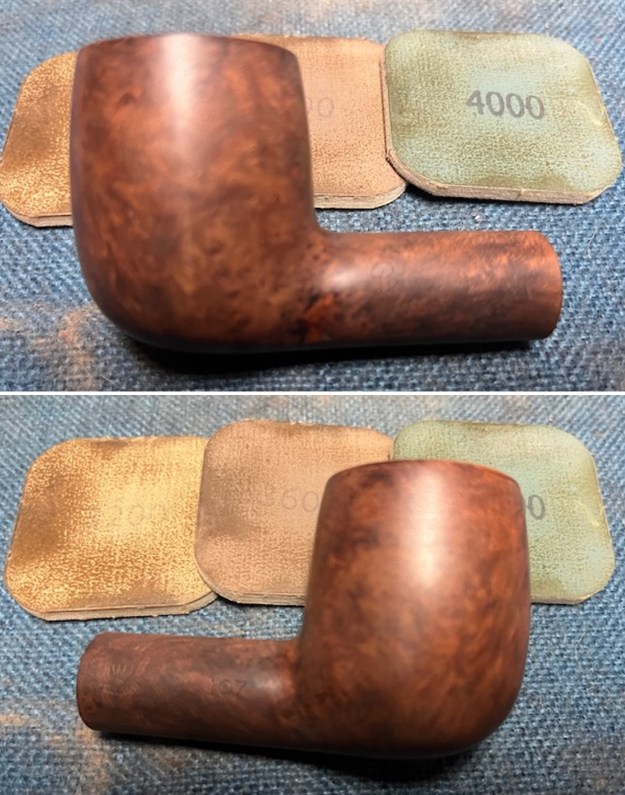
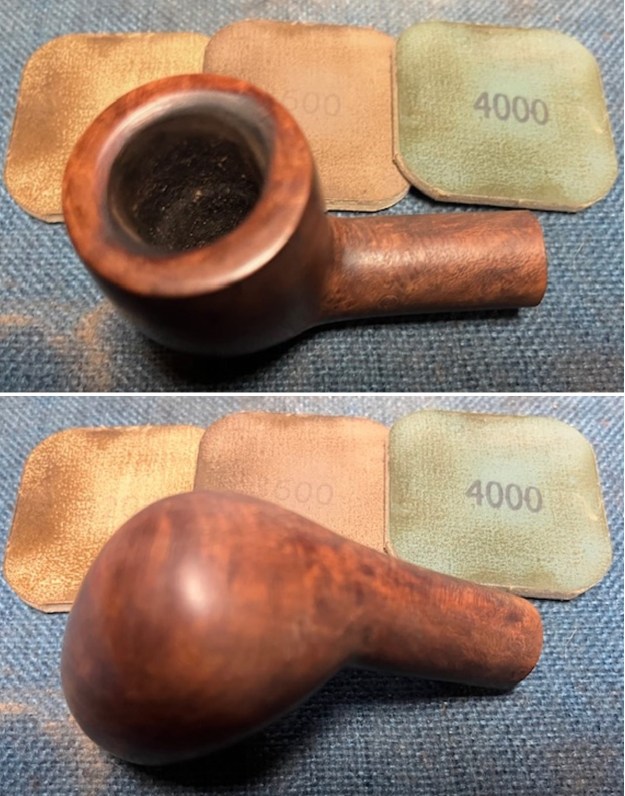
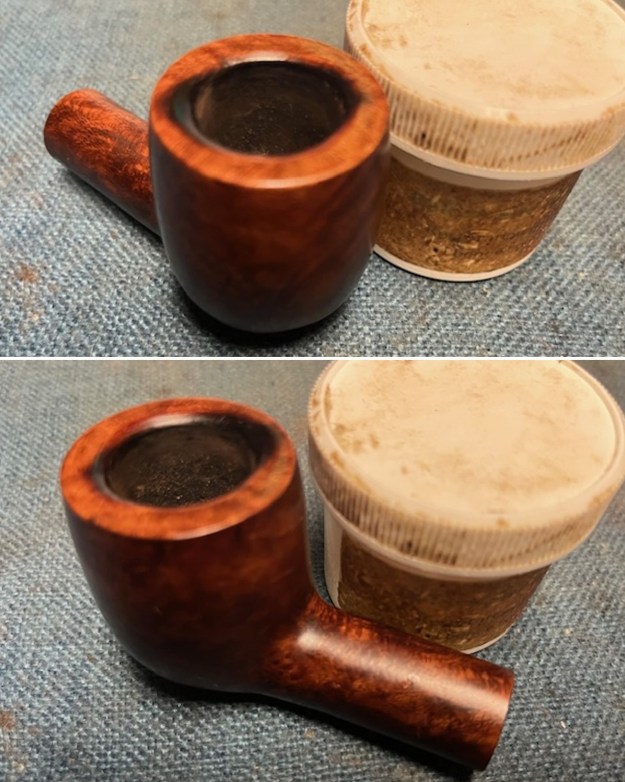
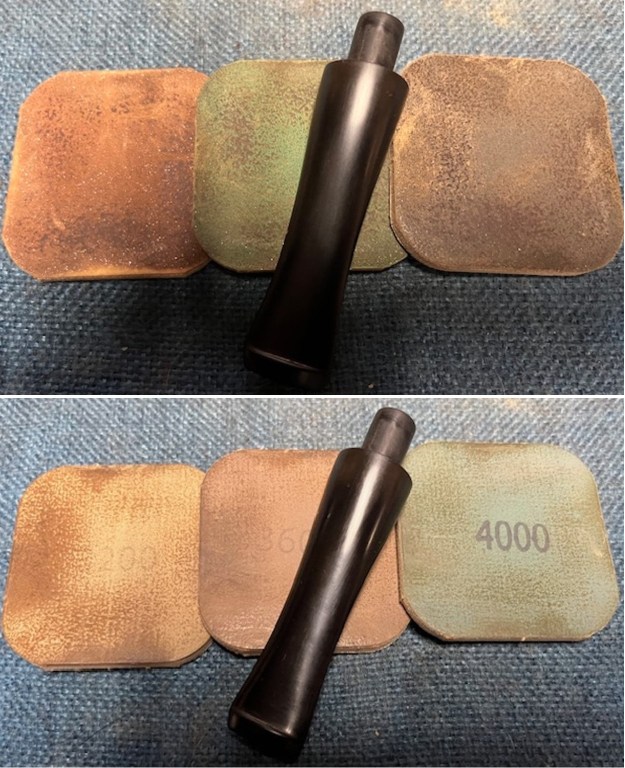
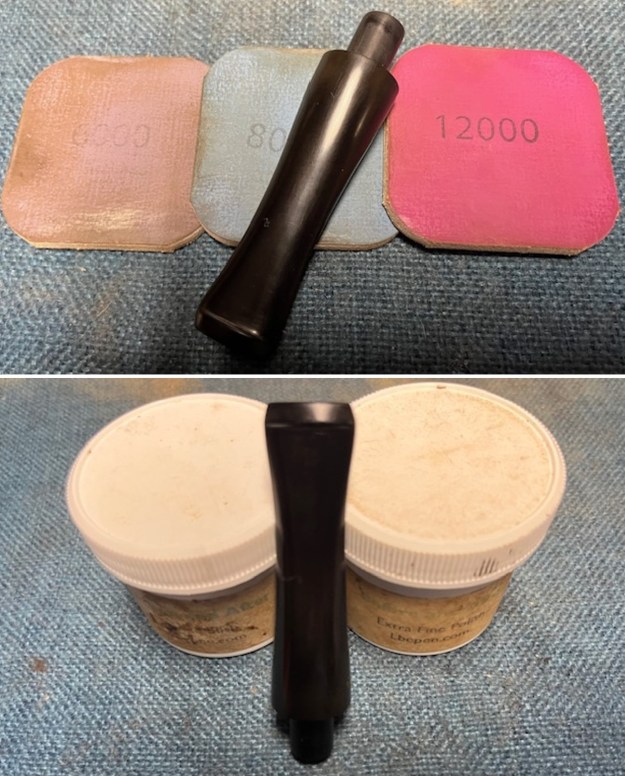
The penultimate step for the stem is sanding. First, with my set of needle files, I reduced the bulk of the cyanoacrylate repairs. I removed the excess adhesive as near to the surface as possible, without cutting into the horn. Following that, I used all nine of the micromesh sanding pads (1,500 through 12,000 grit) to sand out flaws, even out the horn, and provide gentle polishing of the finished surface. I also applied pipe-stem oil while using the last five micromesh pads. There was a wonderful shine to the stem when I was done.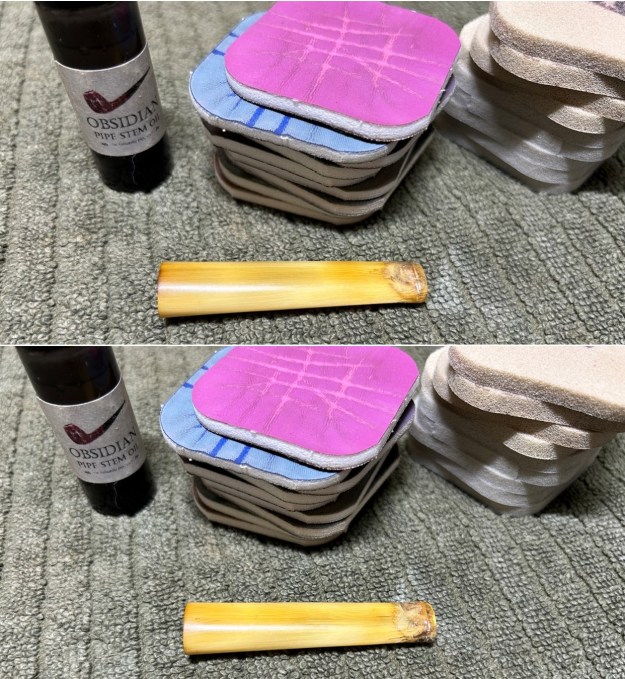 As the stem was (nearly) complete, I moved on to the stummel. The first step was to ream out the bowl – that is to say, remove all the cake inside the bowl. This accomplished a couple of things. First (and most obviously), it cleaned the bowl and provided a refurbished chamber for future smoking. Second, when the old cake was removed, I could inspect the interior walls of the bowl and determine if there was damage or not. I used a reamer, a pipe knife, and a piece of sandpaper taped to a wooden dowel. Collectively, these ensured that all the debris was removed. I noticed that the bottom of the bowl had been somewhat scraped out over the years, and the heel was lower than one would wish. However, I left it as it was – this is part of its history.
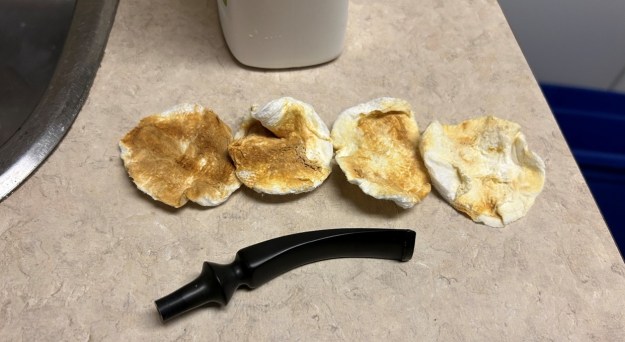
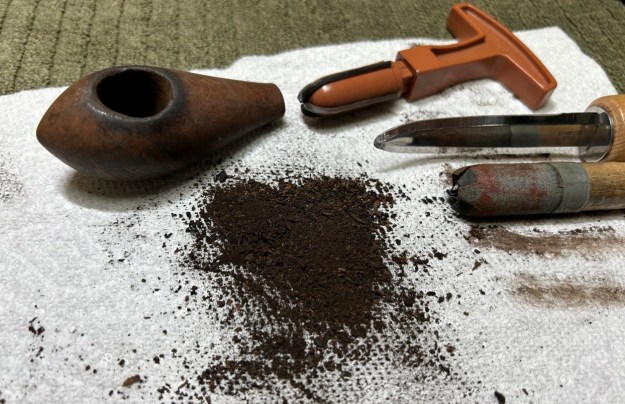 Similar to the stem, I then cleaned the stummel with both pipe cleaners and cotton swabs dipped in lemon-infused 99% isopropyl alcohol. With a pipe this dirty, it took quite a while and much cotton to clean. Holy moly, was this pipe ever dirty!
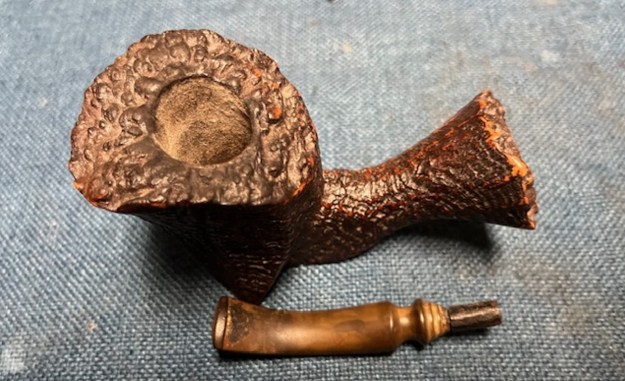
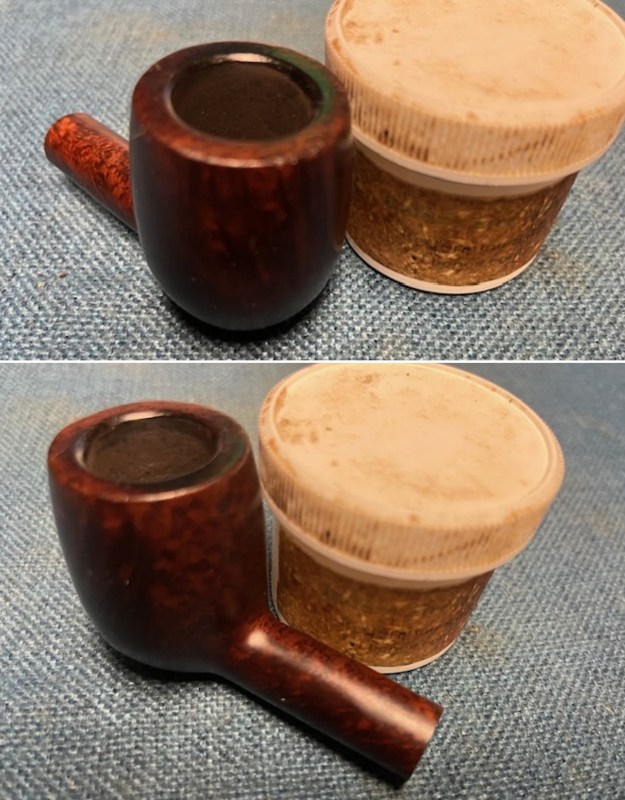
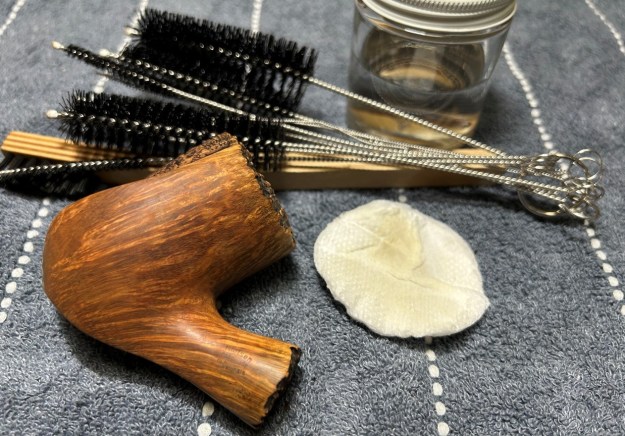
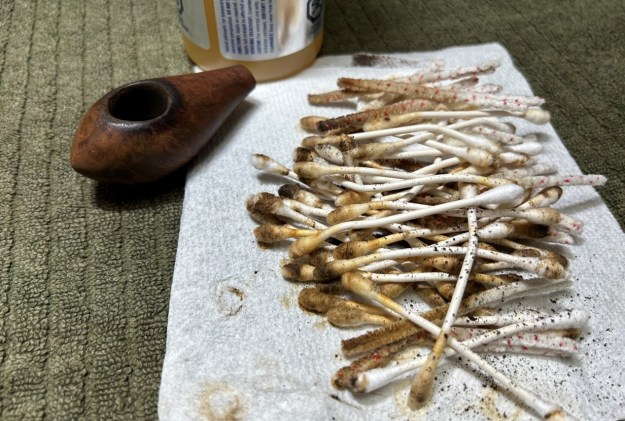 I then decided to ‘de-ghost’ the pipe – that is to say, exorcize the remaining filth from the briar. I filled the bowl and the shank with cotton balls, then saturated them with 99% isopropyl alcohol. I let the stummel sit overnight. This caused the remaining oils, tars and smells to leach out into the cotton.
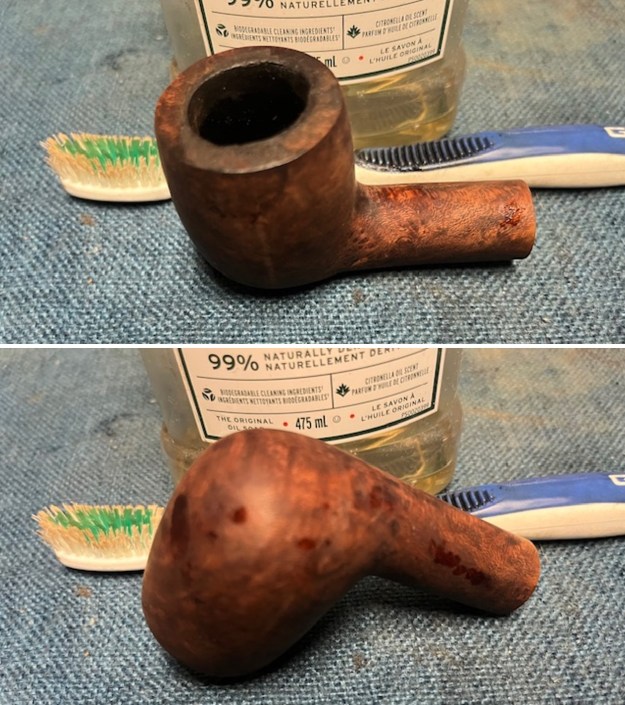
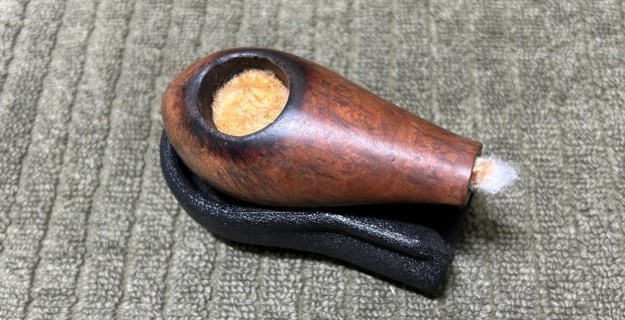 To tidy up the briar, I wiped down the outside, using a solution of a pH-neutral detergent and some distilled water, with cotton rounds. I also used a toothbrush in the crevices. This did a good job of cleaning any latent dirt on the surface of the briar. It was at this point in the cleaning process that I noticed the faint markings that I mentioned earlier.
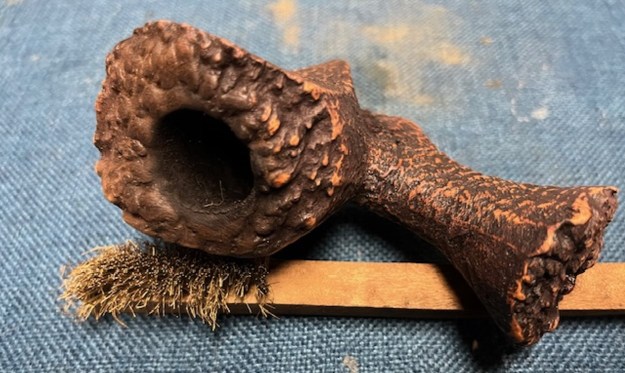
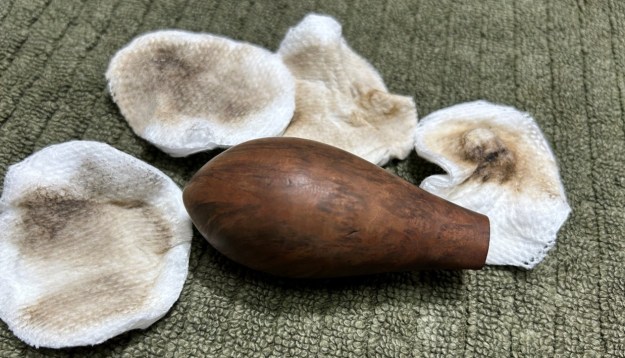 The last step of the cleaning process was to scour the inside of the stummel with the same mild detergent and tube brushes. This was the culmination of a lot of hard work in getting the pipe clean.
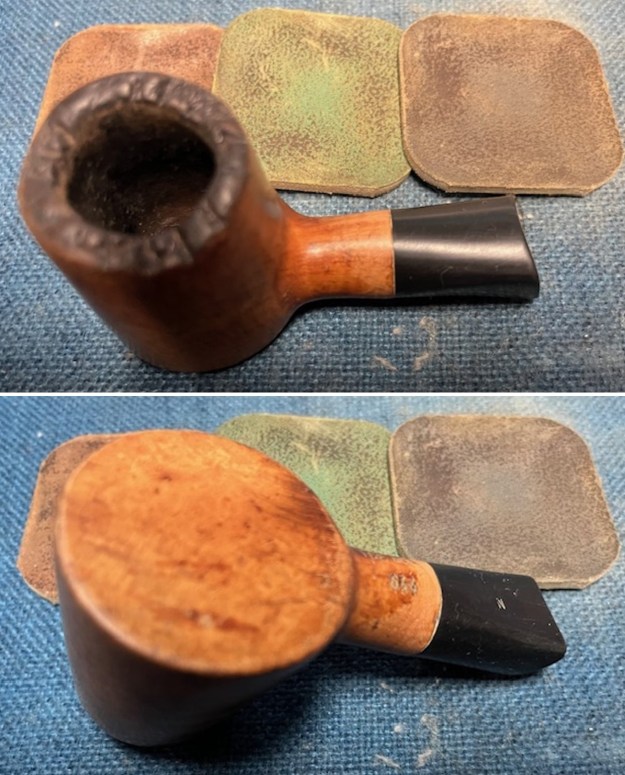
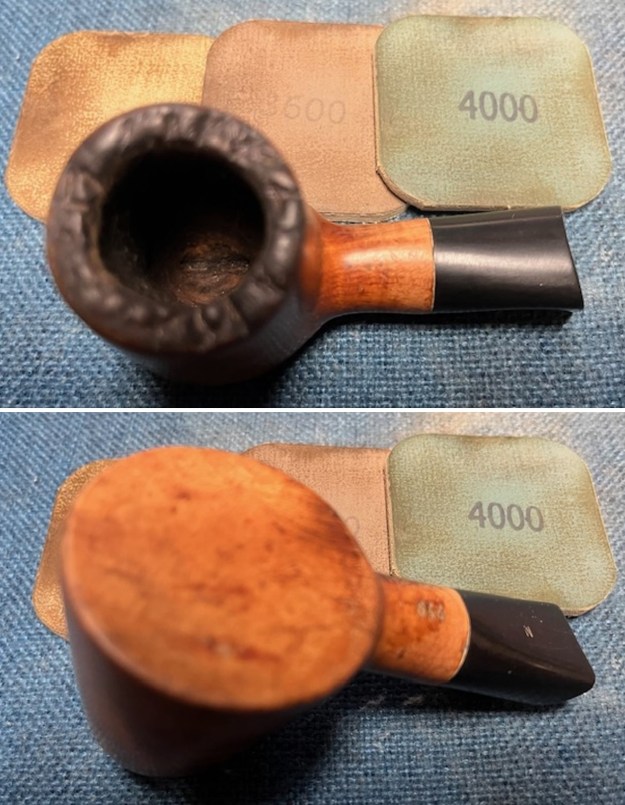
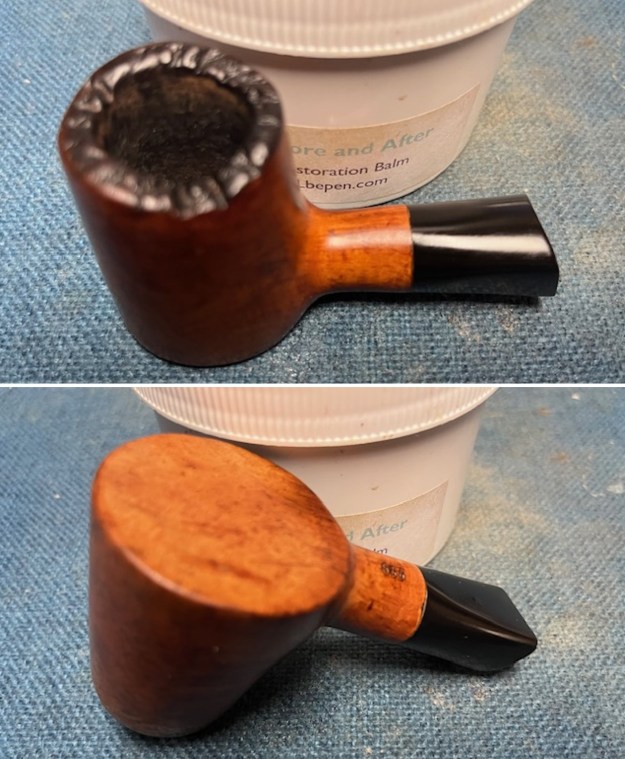
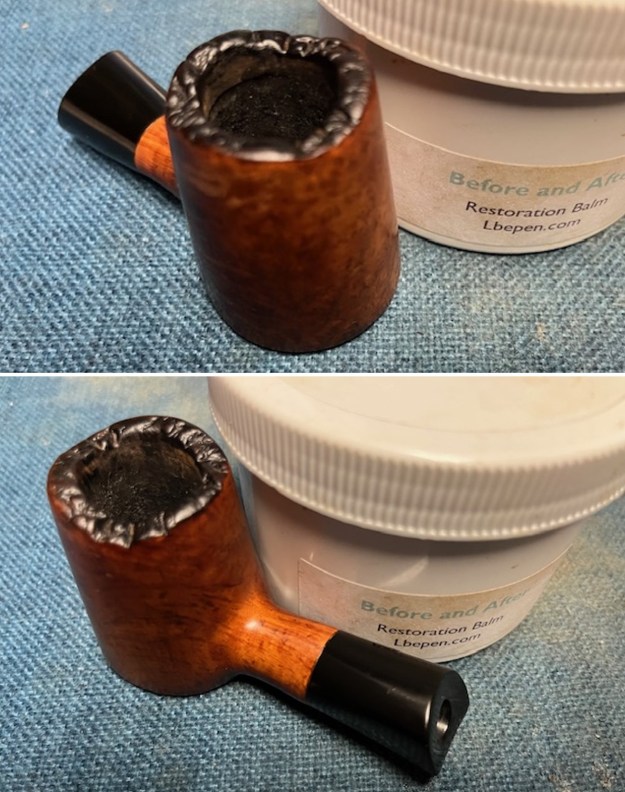
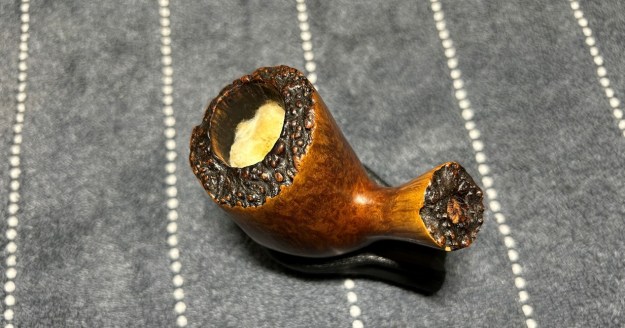
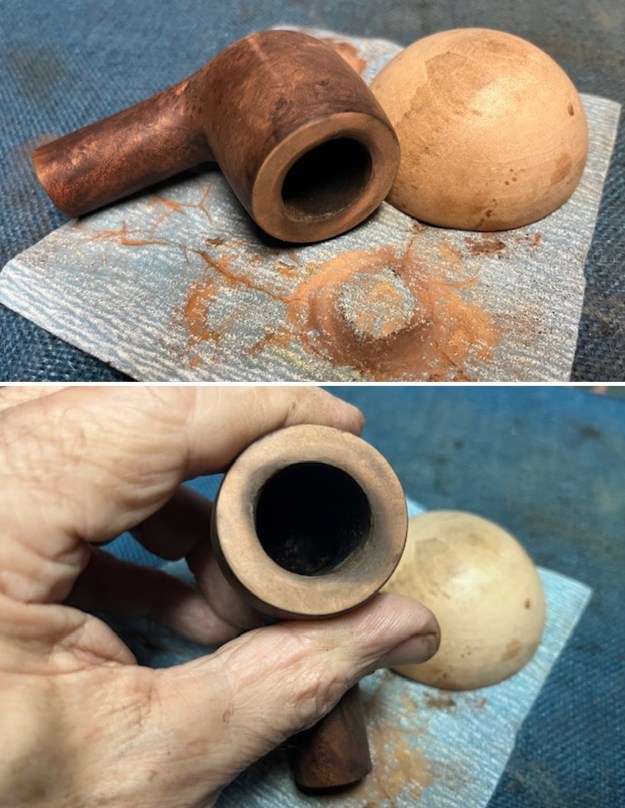
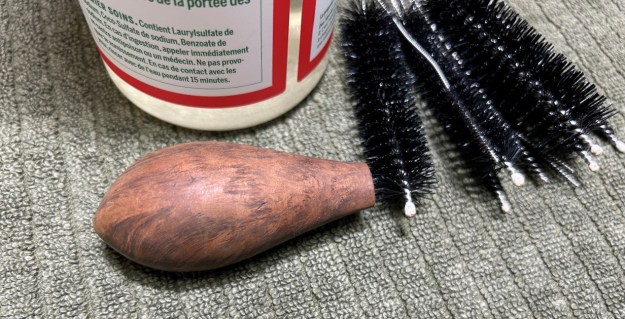 I took a solid wooden sphere, wrapped a piece of 400-grit sandpaper around it, and lightly sanded the inner edge of the rim. This achieved two things: first, it removed some of the burn marks; and second (and more importantly), the circular shape and motion of the sphere gradually returned the edge to a circle. Some of the burning will always remain, but that’s fine – it is part of this pipe’s history.
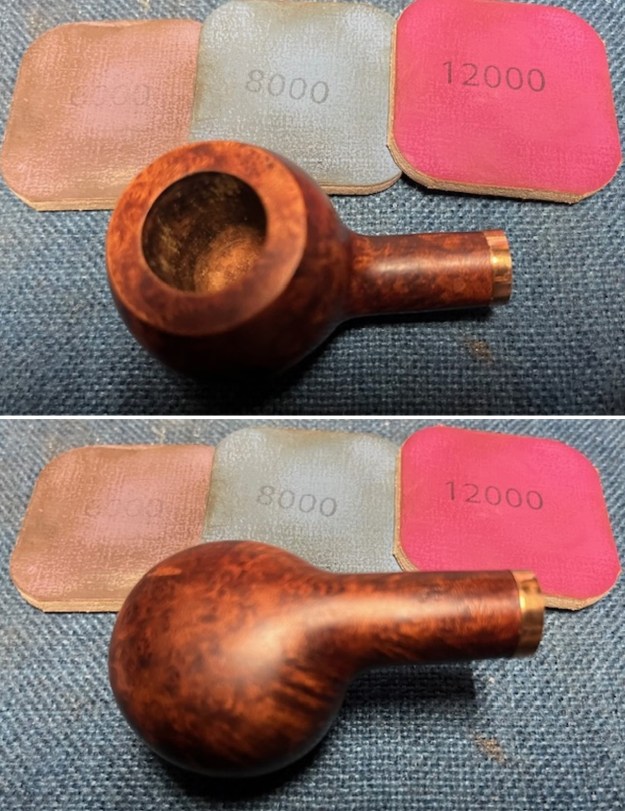
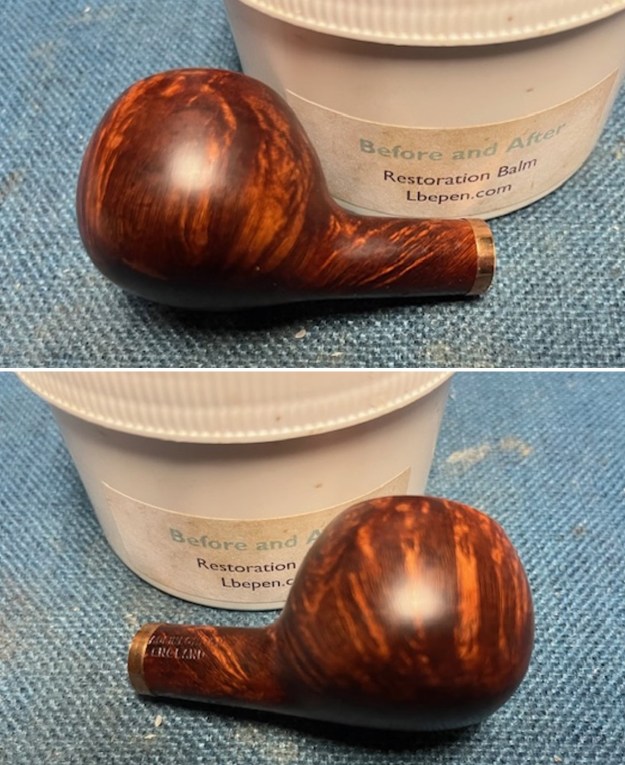
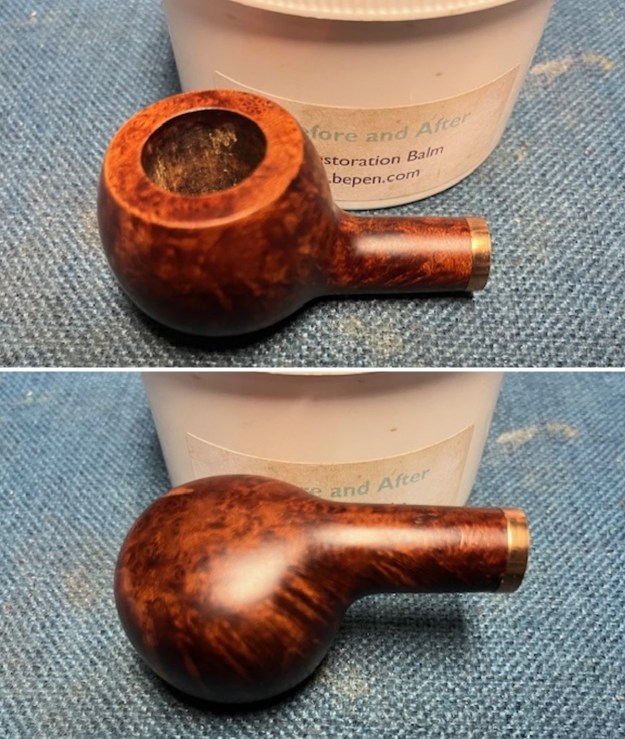
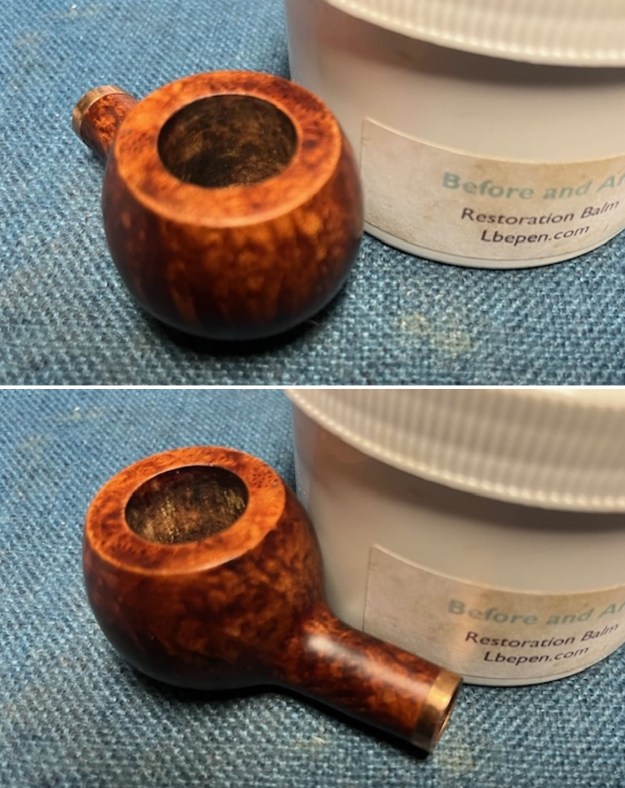
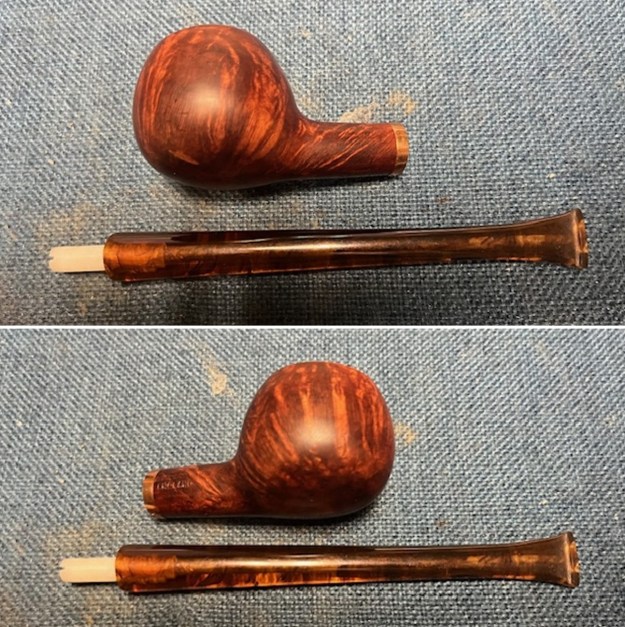
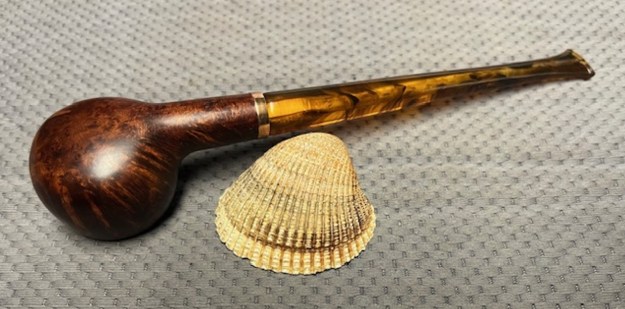
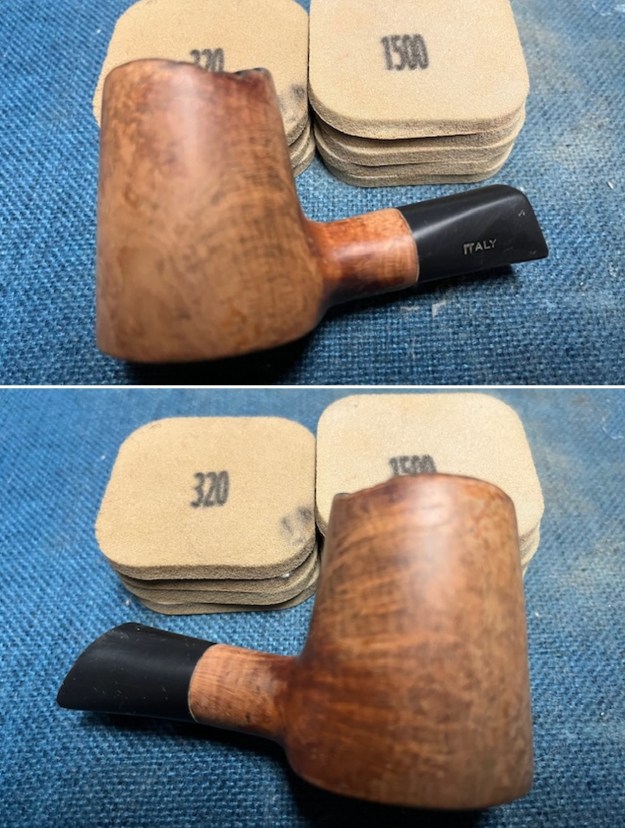
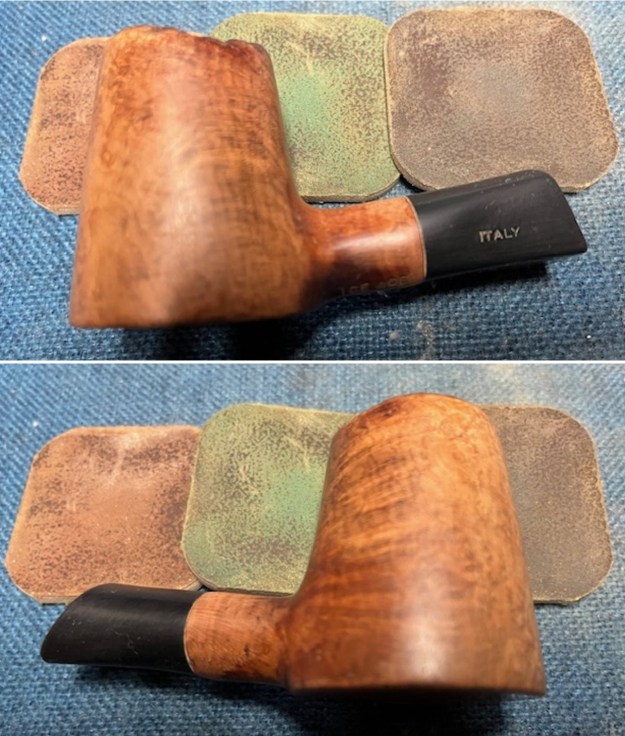
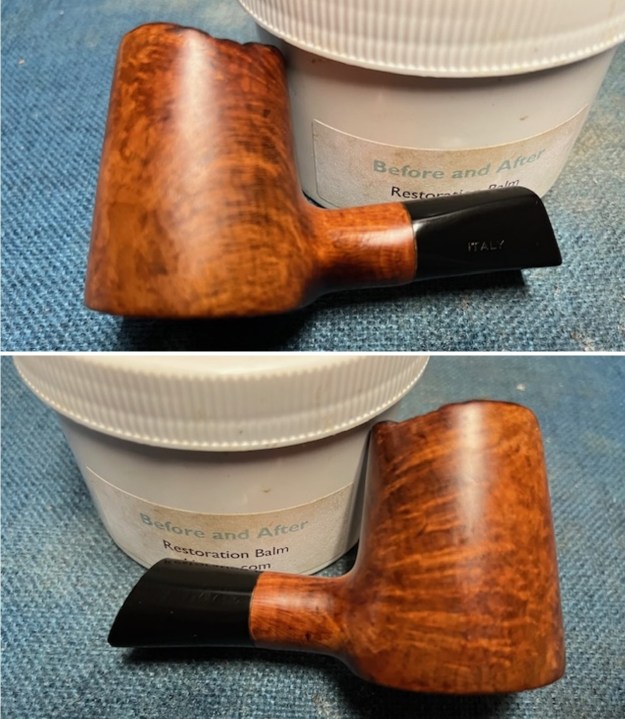
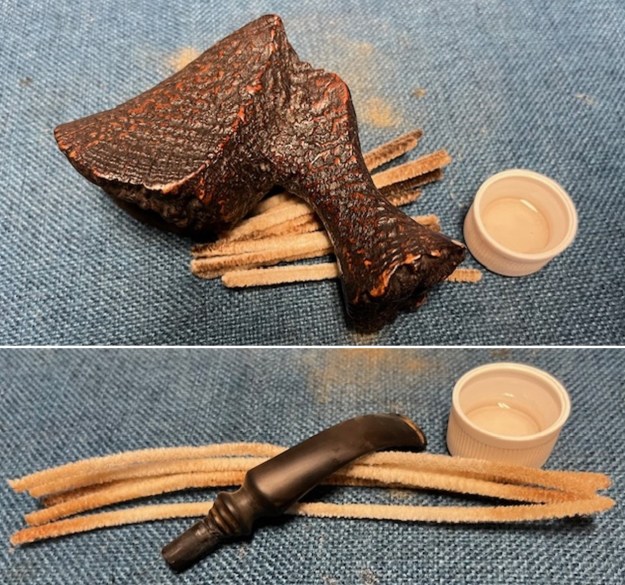
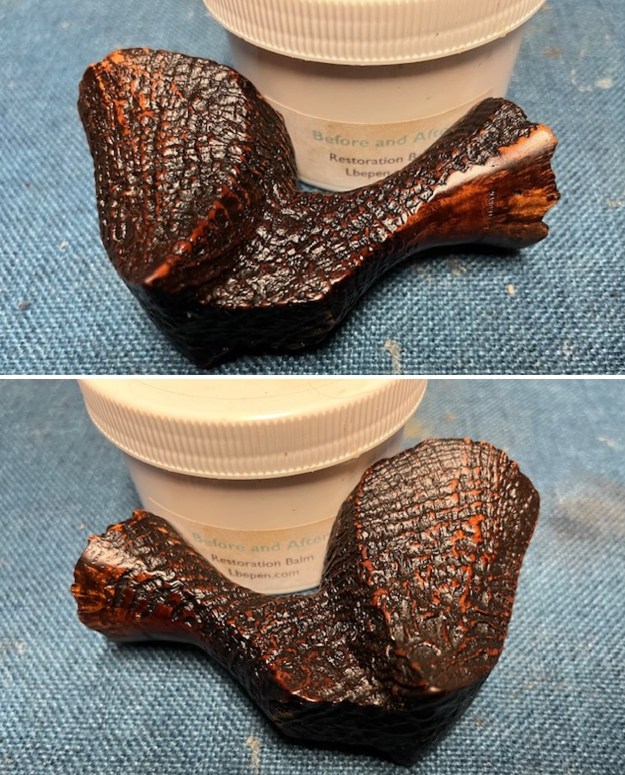
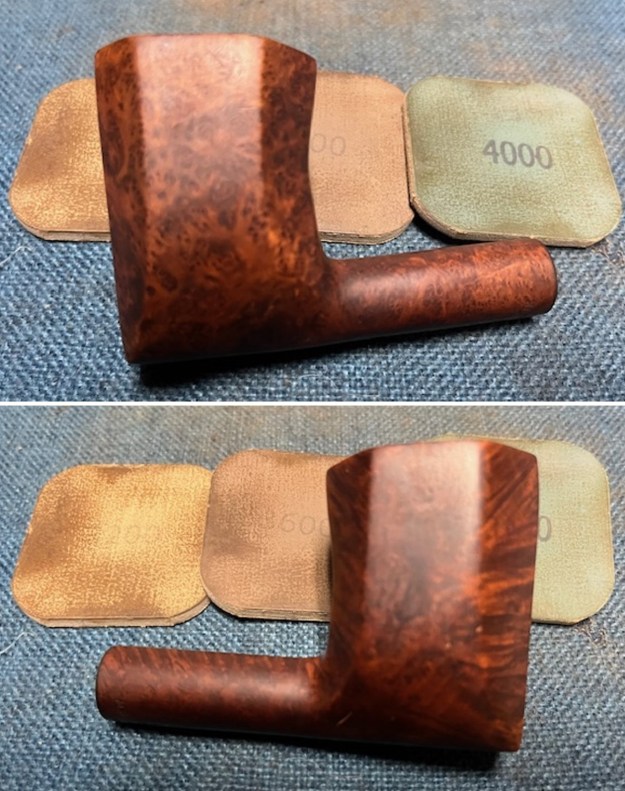
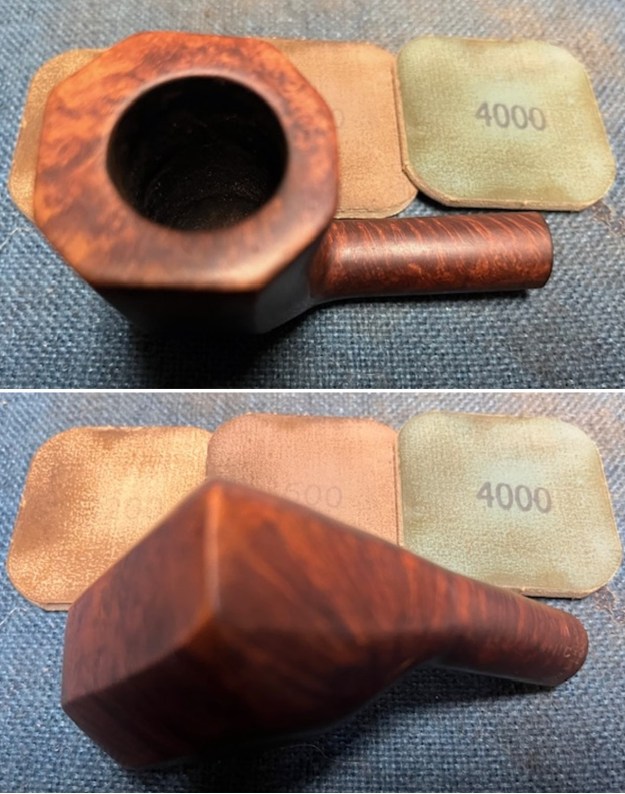
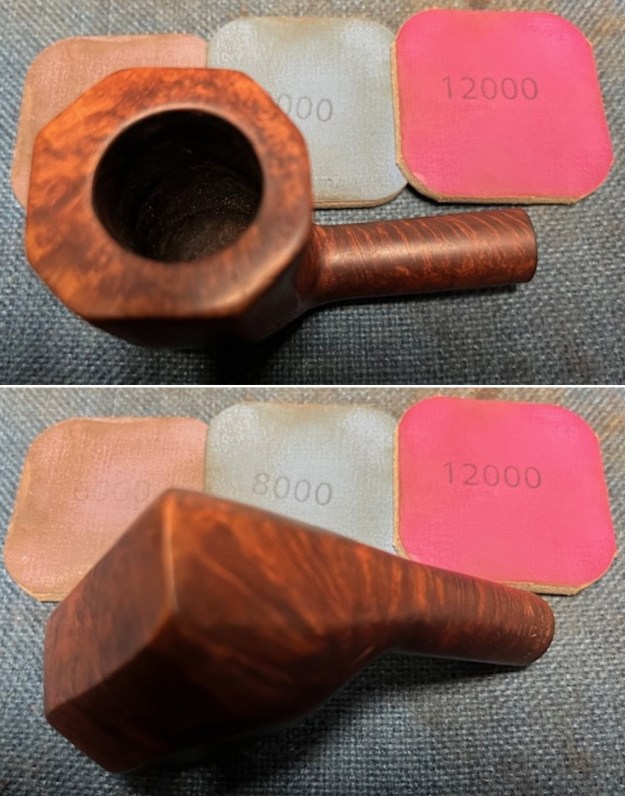
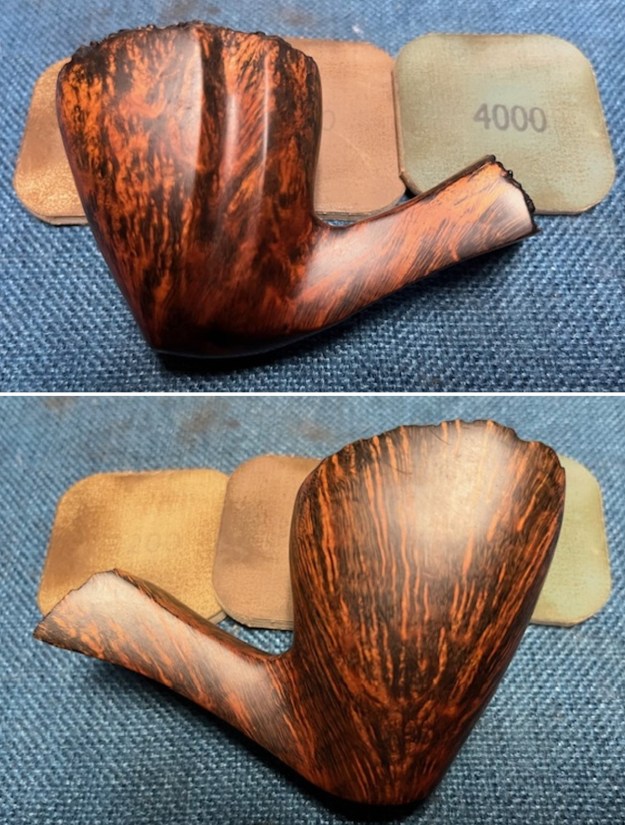
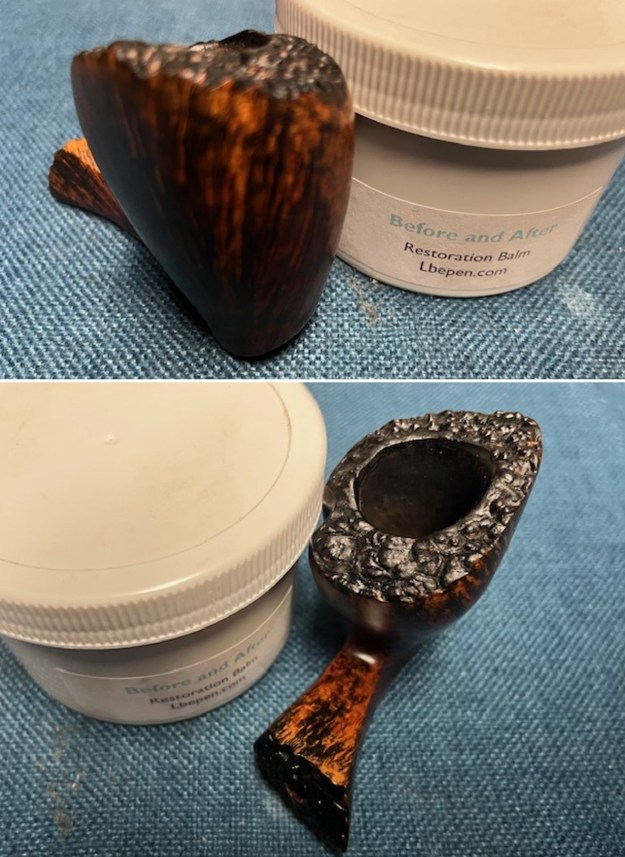
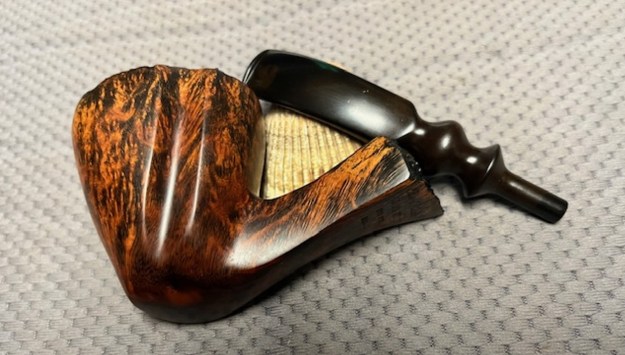
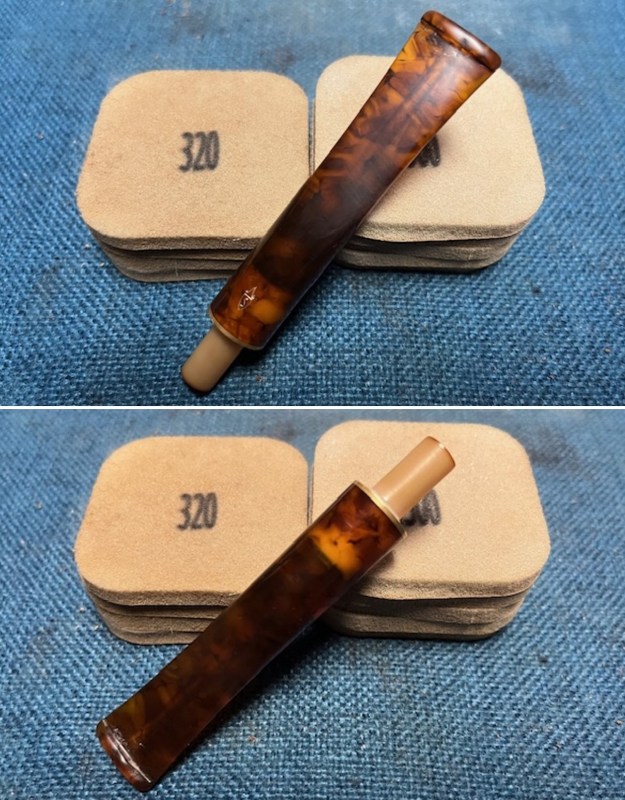
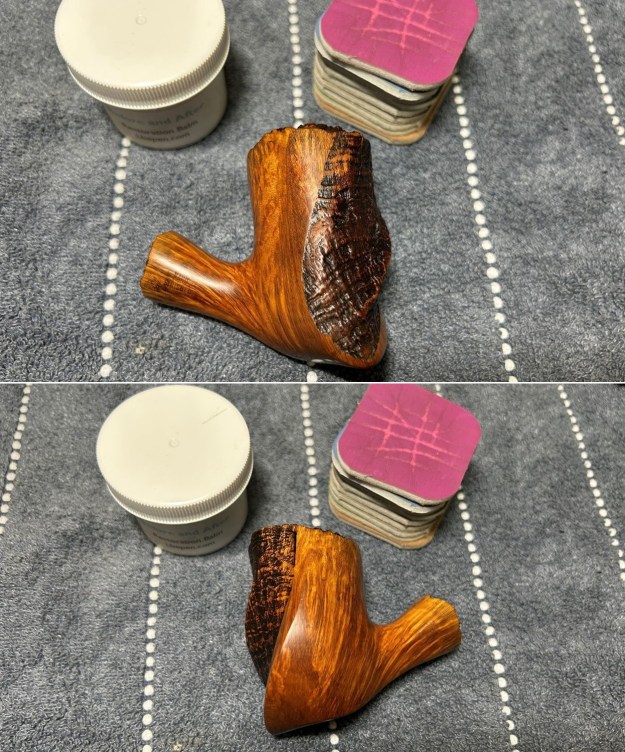
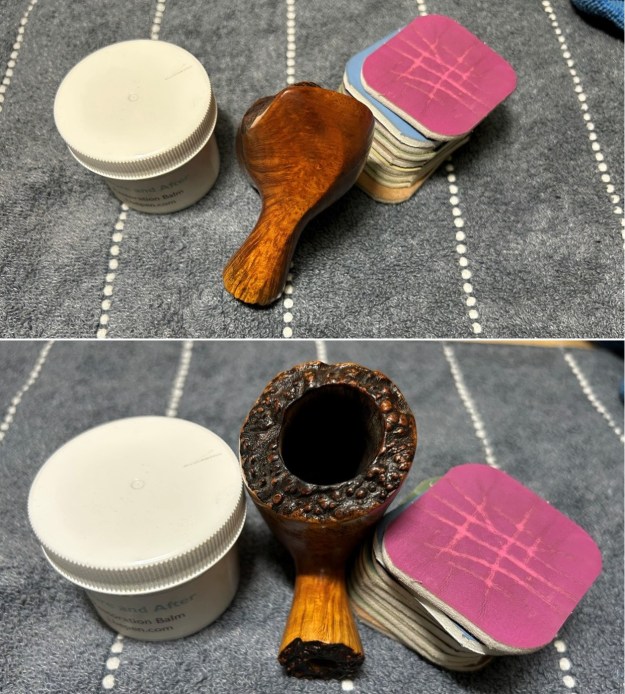
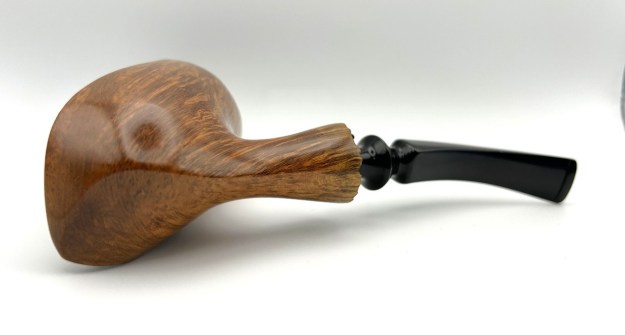
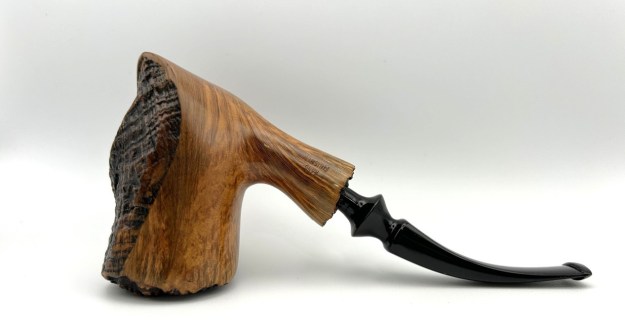
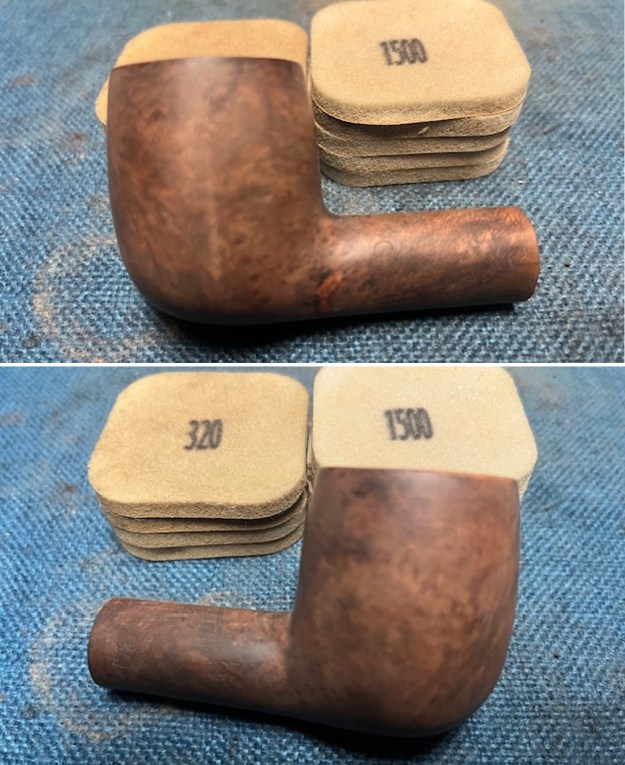
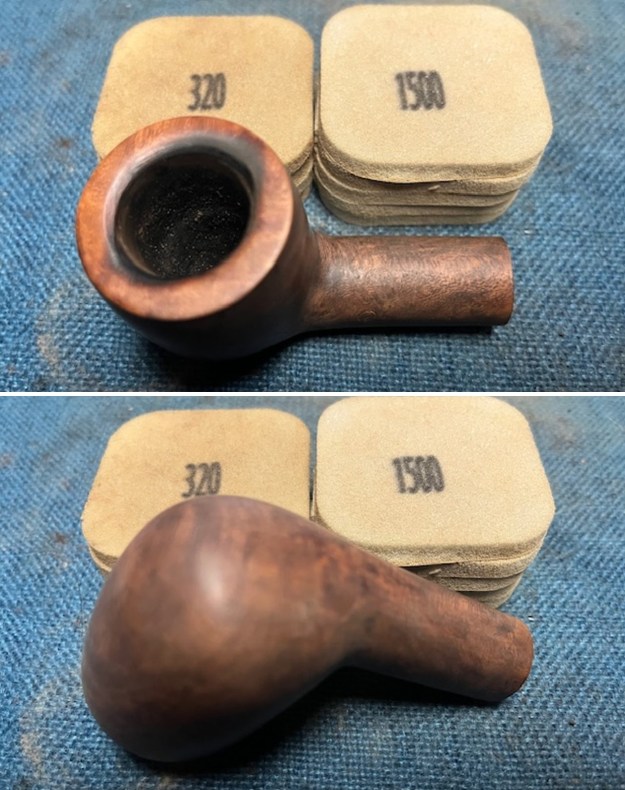
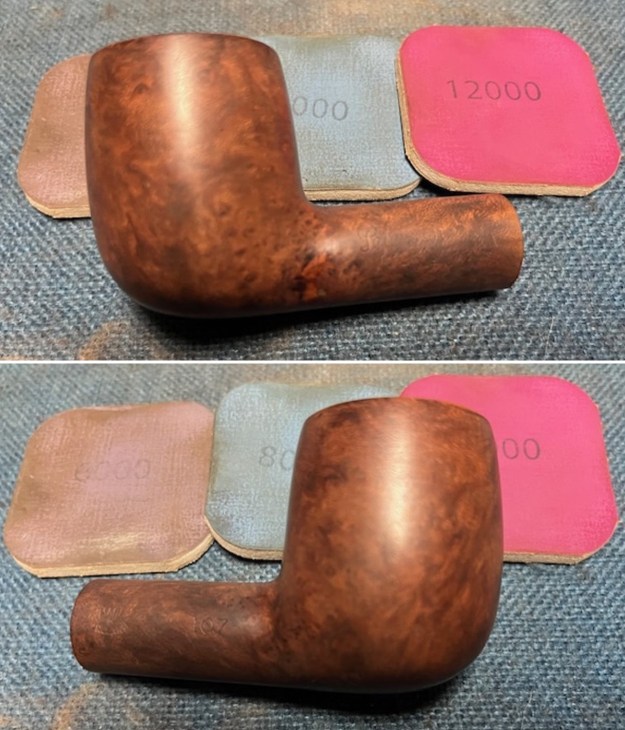
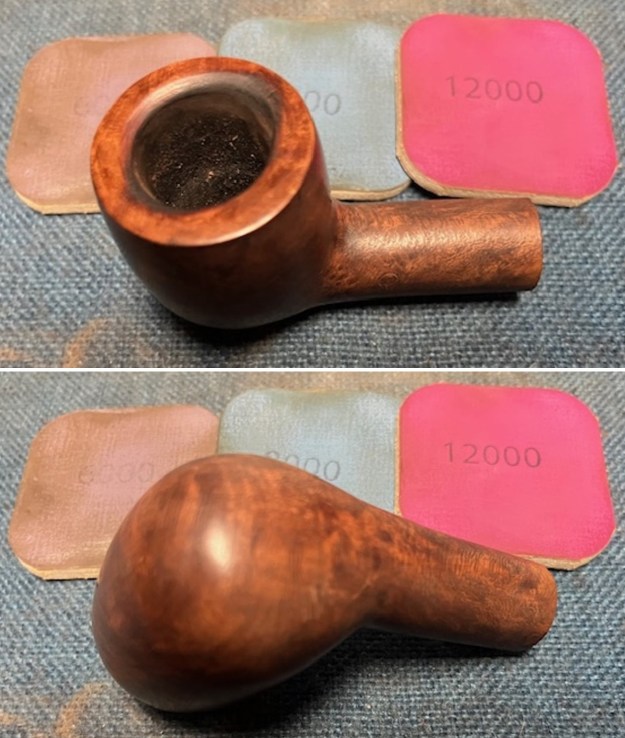
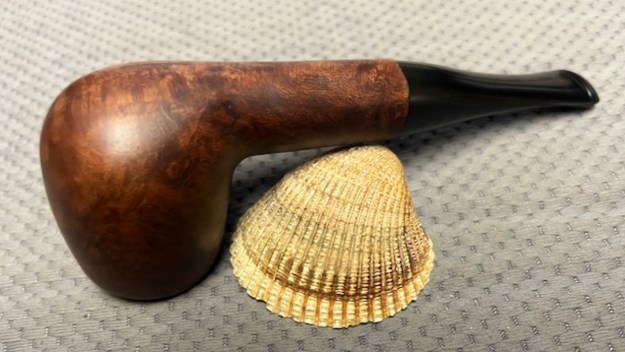
I used all nine micromesh pads (1,500 through 12,000 grit) to sand the outside of the stummel and finish it off. This sanding minimizes flaws in the briar and provides a beautiful smoothness to the wood. I rubbed some LBE Before & After Restoration Balm into the briar and let it sit for 30 minutes or so. The balm moisturizes the wood and gives a beautiful depth to the briar. I then buffed the stummel with a microfibre cloth.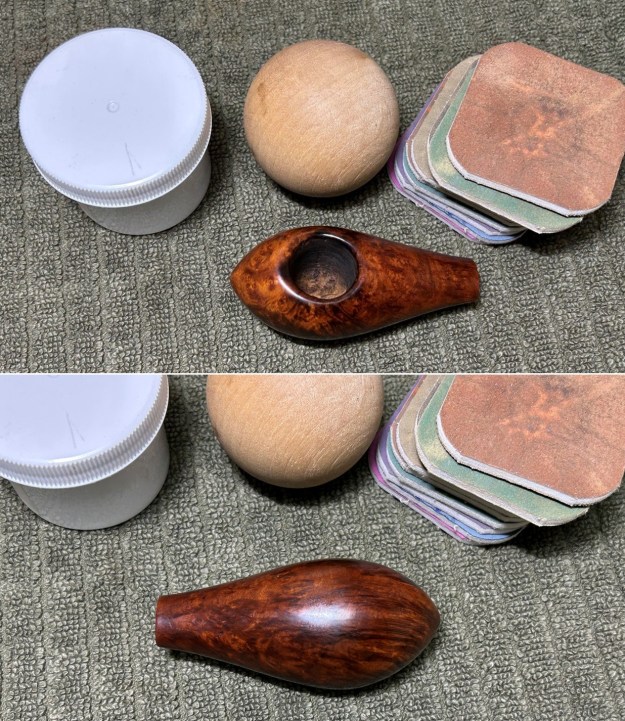
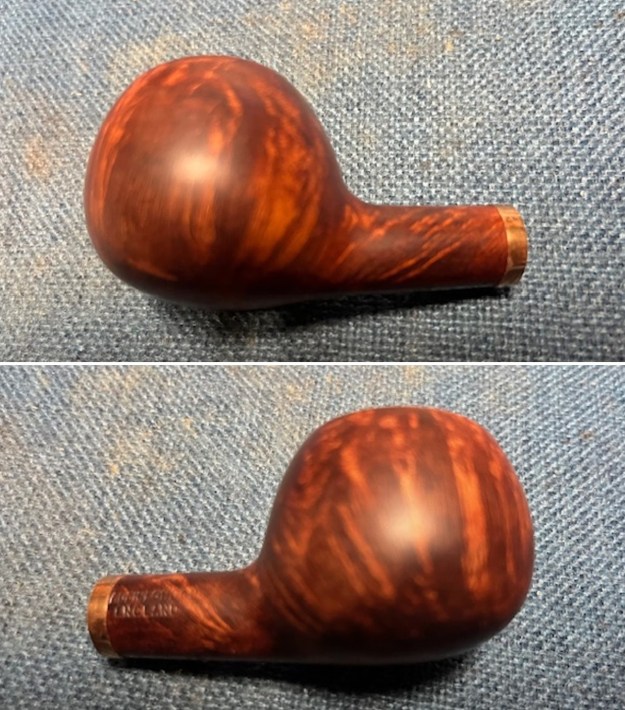
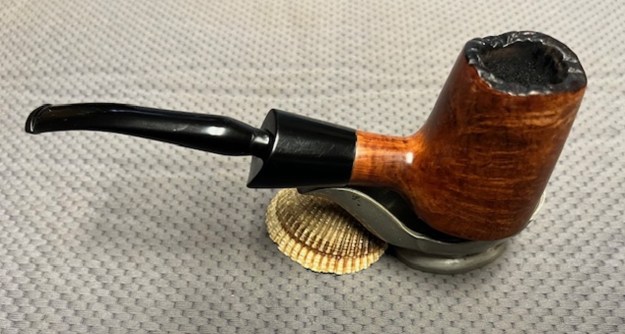
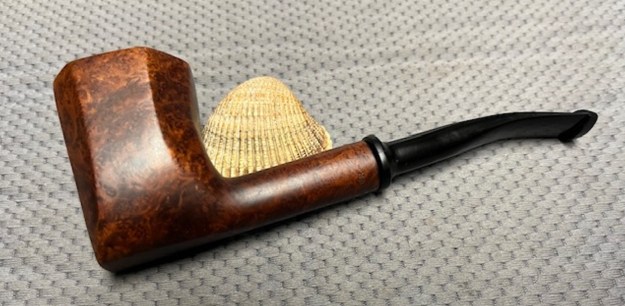
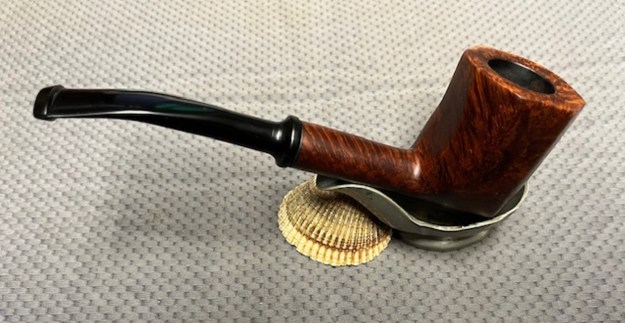
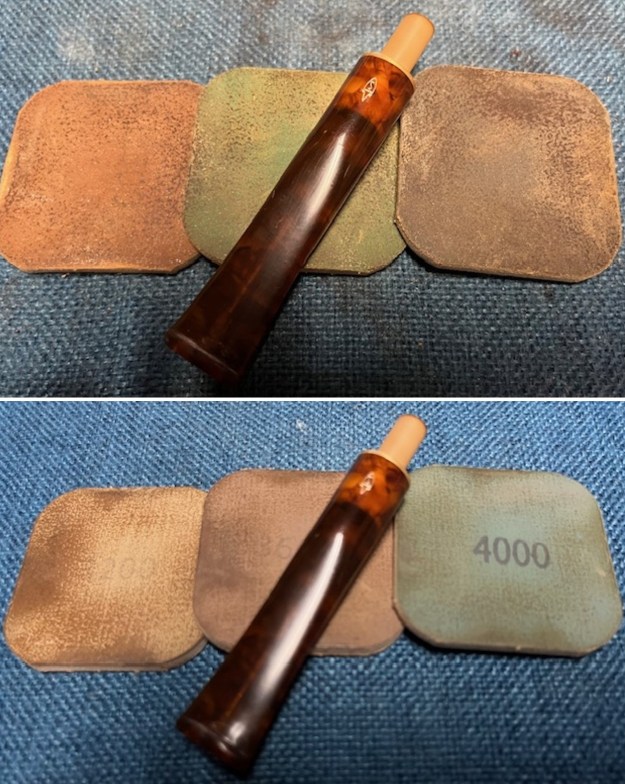
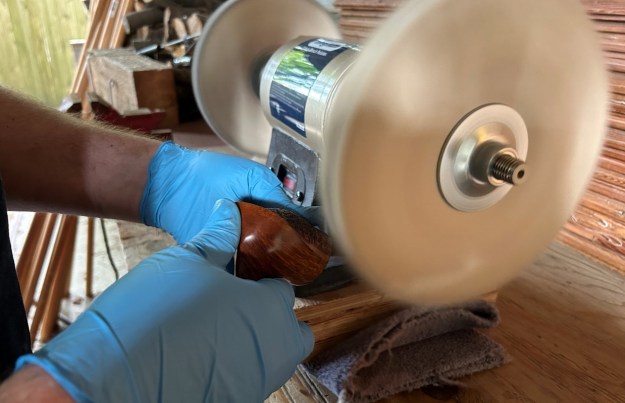
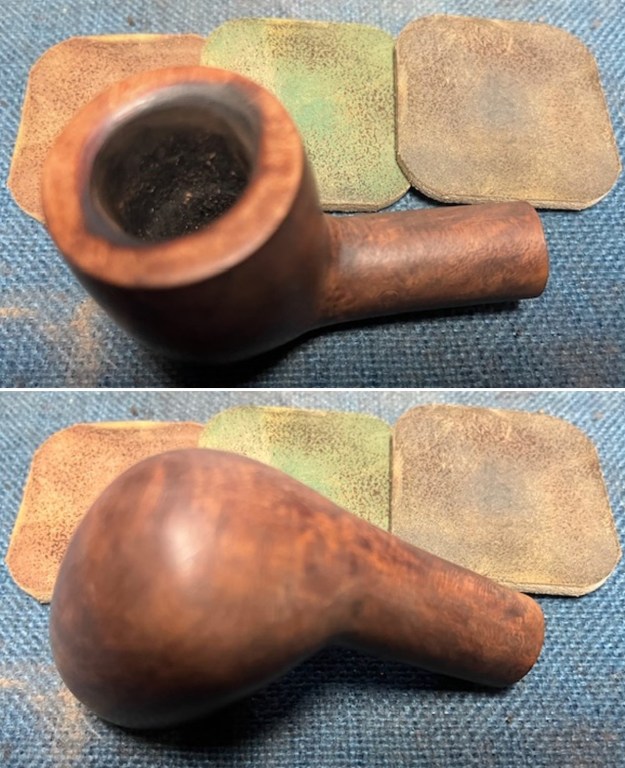
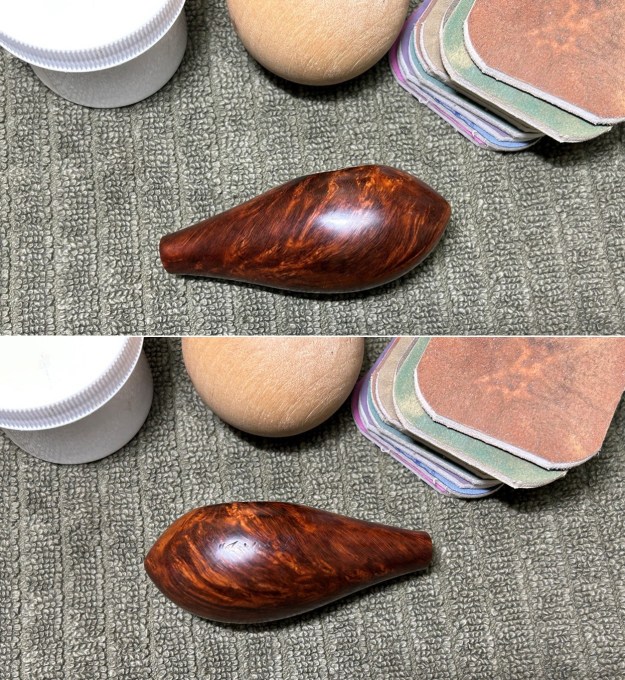 For the final step, I took the pipe to my bench polisher and carefully buffed it – first with a blue diamond compound, then with three coats of carnauba wax. This procedure makes the pipe look its best – the stummel sings and the stem glows.
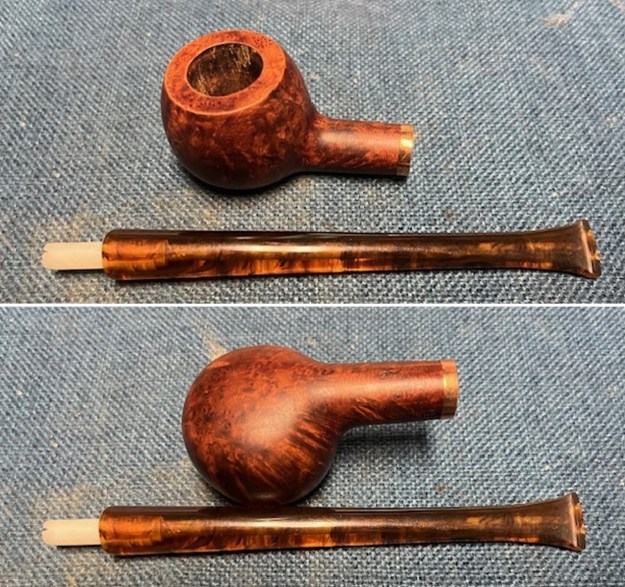
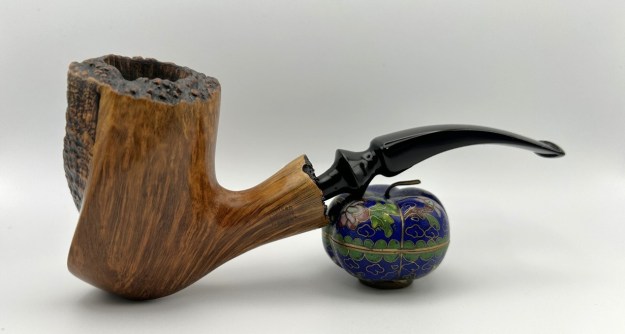
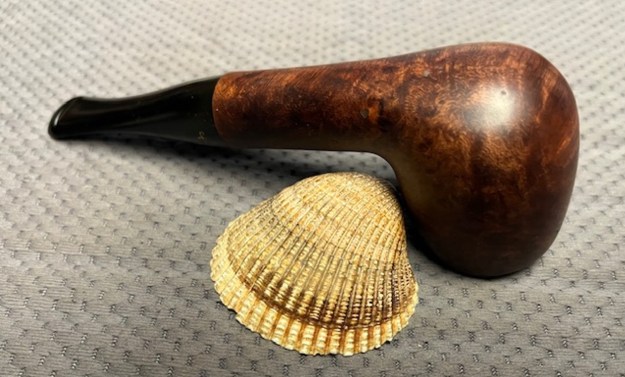
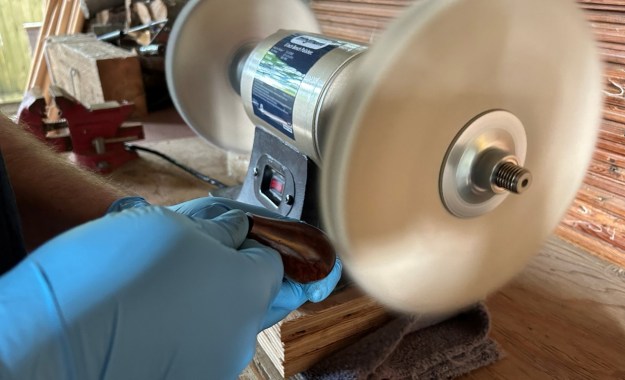 This French ‘Torpille’ Torpedo pipe looks fantastic again and is ready to be enjoyed by its next owner. I am pleased to announce that this pipe is for sale! If you are interested in acquiring it for your collection, please have a look in the ‘French’ pipe section of the store here on Steve’s website. You can also email me directly at kenneth@knightsofthepipe.com. The approximate dimensions of the pipe are as follows: length 5½ in. (140 mm); height 1¼ in. (30 mm); bowl diameter 1½ in. (36 mm); chamber diameter ¾ in. (19 mm). The weight of the pipe is 1¼ oz. (37 g). I hope you enjoyed reading the story of this pipe’s restoration as much as I did restoring it. If you are interested in more of my work, please follow me here on Steve’s website or send me an email. Thank you very much for reading and, as always, I welcome and encourage your comments.