Blog by Steve Laug
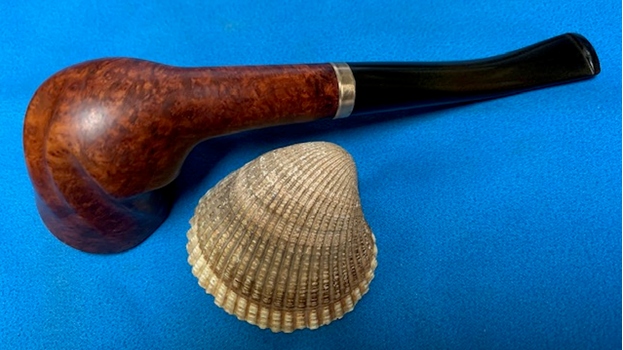
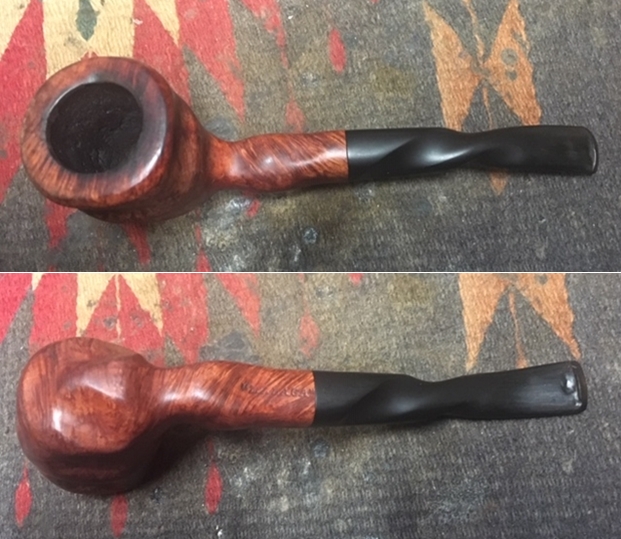
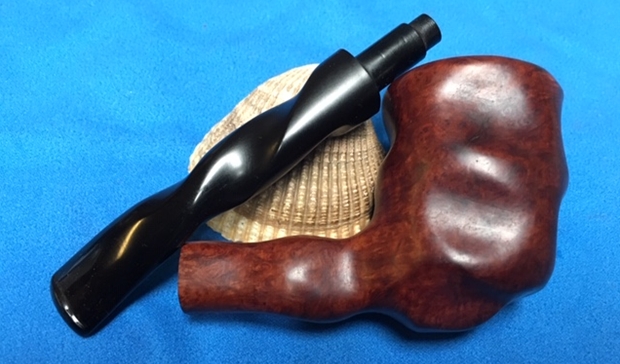
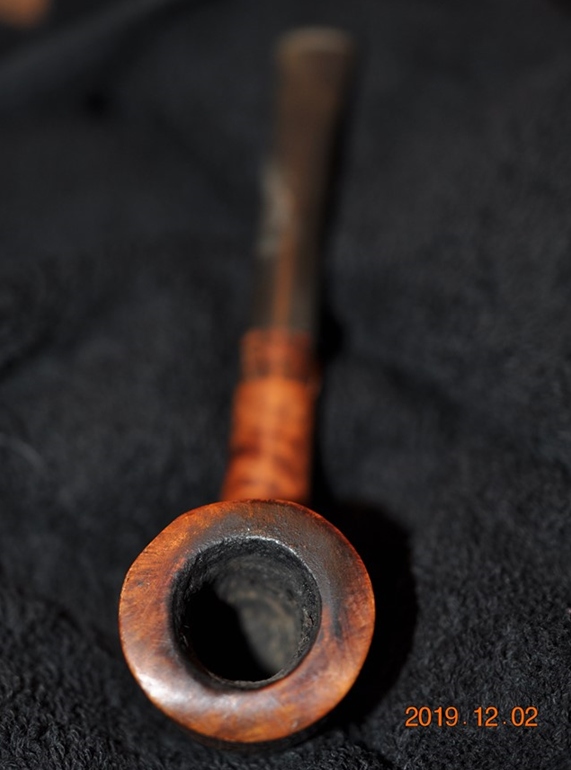
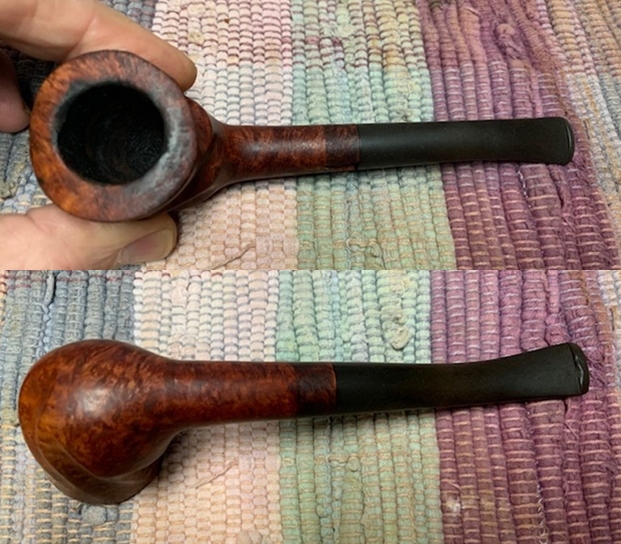
The next pipe on the table is a “Malaga” pipe that is made in a shape that I would define as a twisted billiard. It has some great cross and birdseye grain and a tapered vulcanite stem with a quarter bent. The grain around the bowl and shank combined with the stem make it a stunning pipe. The issue is that it has a huge chunk. The carver did a great job of uniquely shaping the pipe to follow the grain on the briar. The twists and turns in the bowl are well done. The bowl had a thick cake that overflowed with lava onto the rim and there was significant burn damage on the top front inner of the bowl. The sides of the bowl and shank are very dirty with grime and oils from prolonged use. The stamping on the left side of the shank read “MALAGA” with the ending quotation just ahead of the missing chunk of briar. Someone had obviously banded the pipe somewhere along the way to hide the damaged shank. By the time it came to us the band was missing and it left behind a darkened shank end on the briar. The vulcanite stem had light tooth dents and chatter on the top and the underside of the stem. The button was worn on both sides. Jeff took these photos before he started the cleanup work on the pipe.
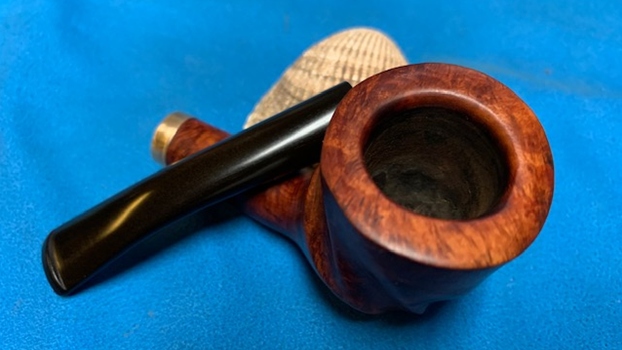
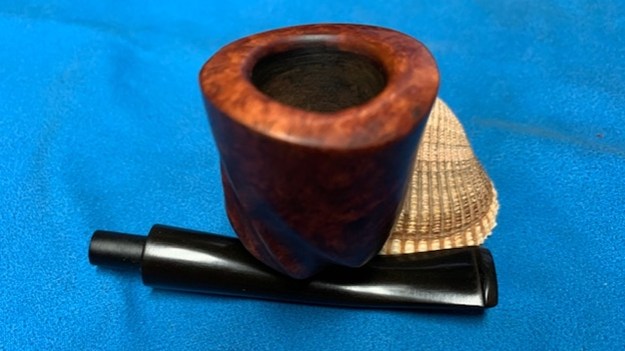
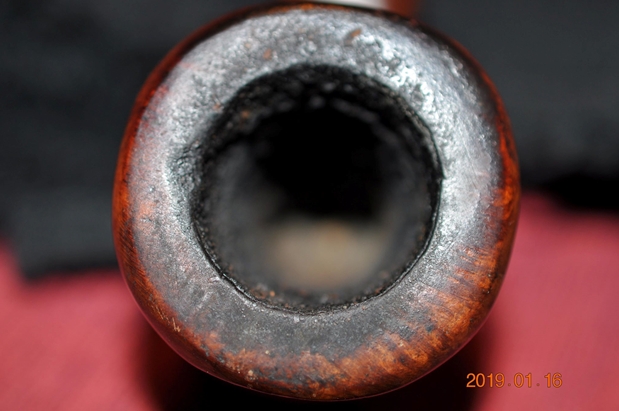
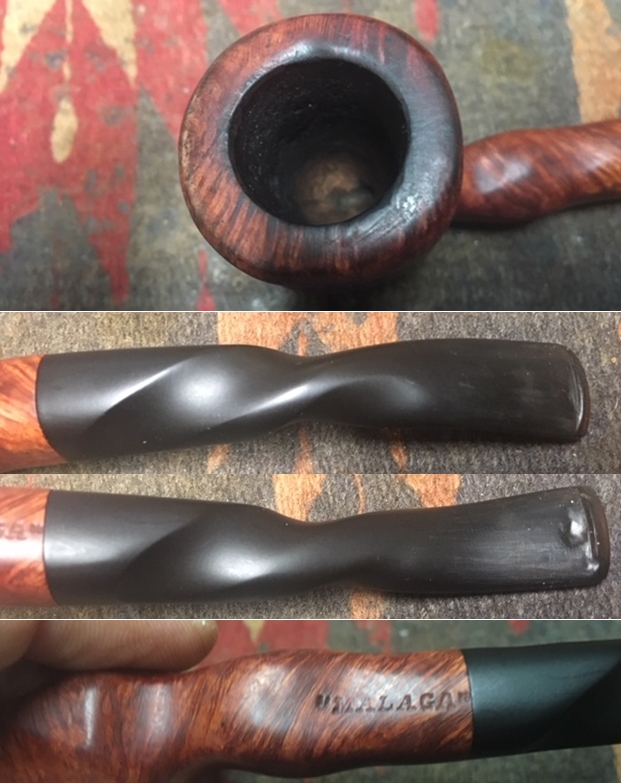
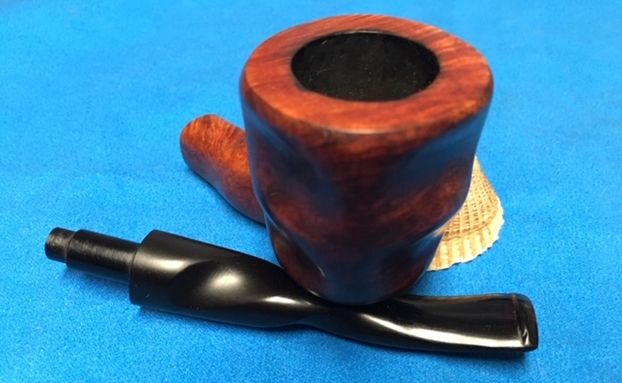
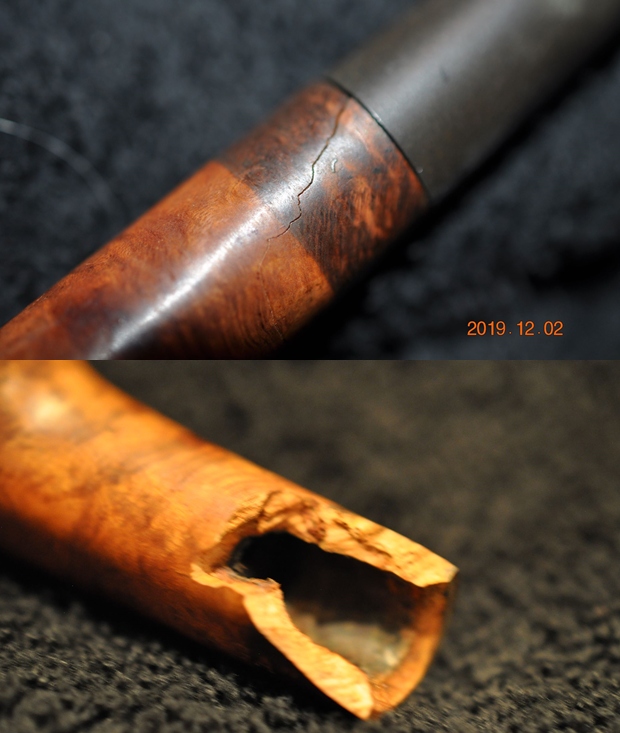
 Jeff took a close up photo of the bowl and rim to capture the condition of the pipe before he started his cleanup work. The rim top had some lava overflow and darkening on the back of the bowl and some serious burn damage to the inner edge on the bowl front. The burn marks appeared to be quite deep on the inner edge on the right front side of the grimy pipe. The stem is oxidized and dirty and there is tooth damage on the button edges and surfaces.
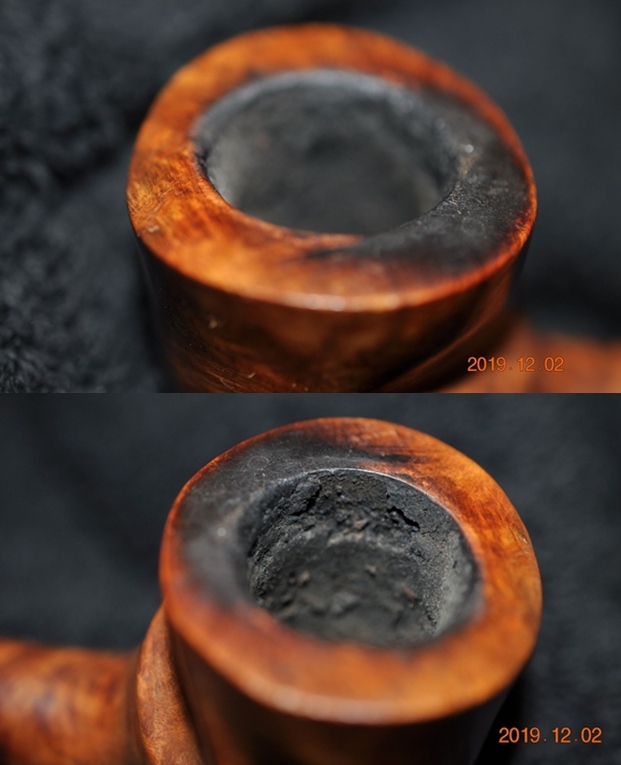
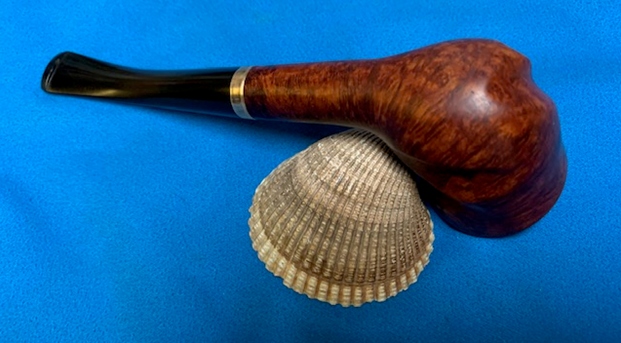
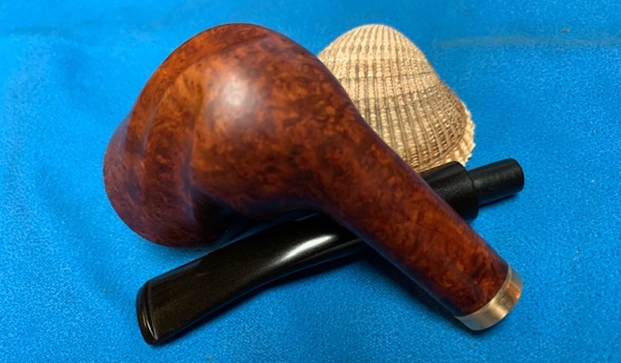
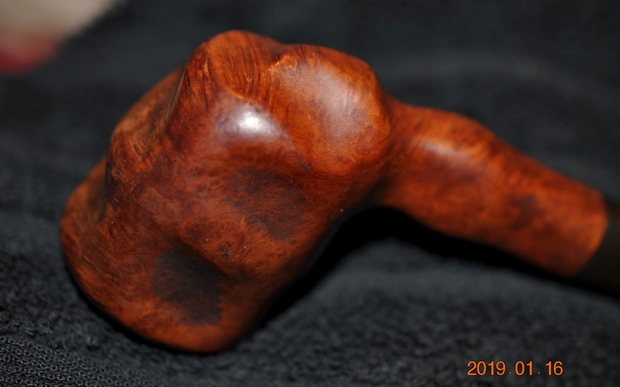
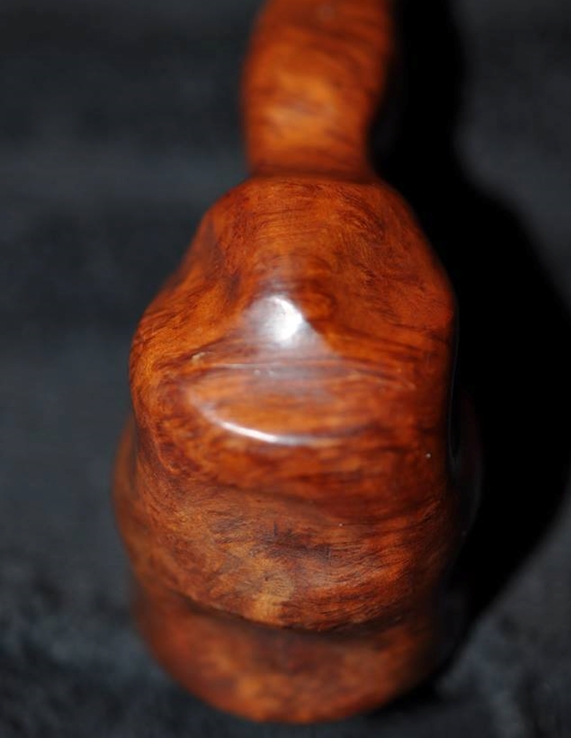
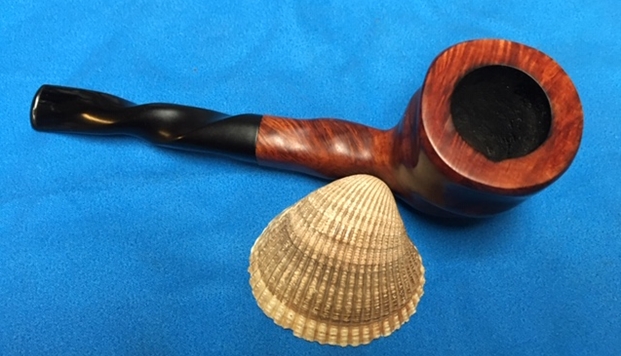
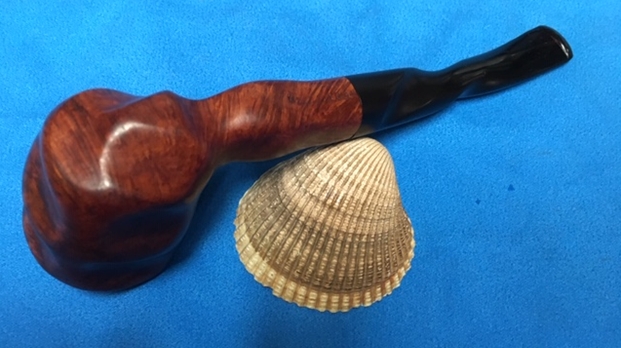
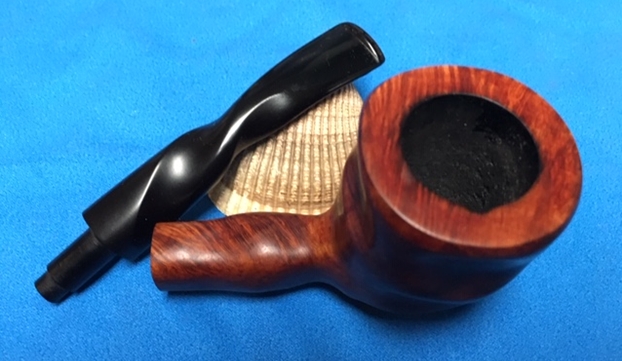
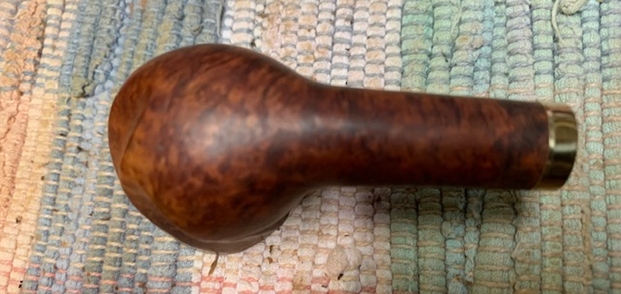
 He also took photos of the sides and bottom of the bowl and shank to show the beautiful grain around the bowl. The photos show the general condition of the bowl and wear on the finish. It is very dirty but this is another beautiful pipe.
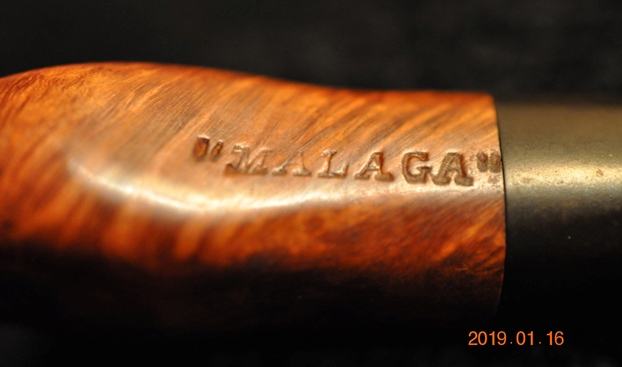
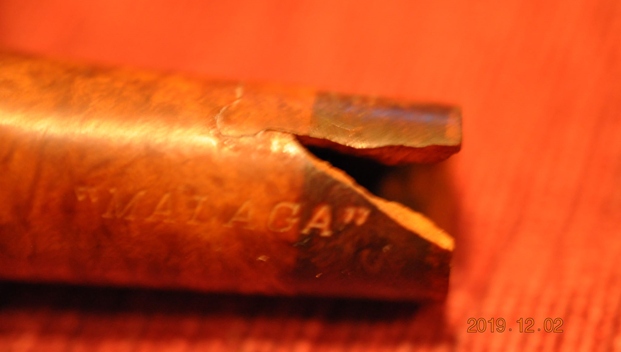
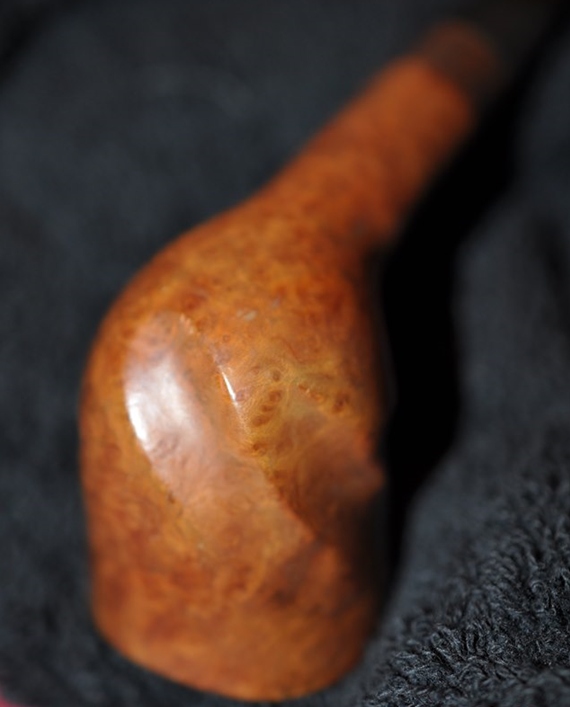 Jeff took a photo to capture the stamping on the shank. The photos show the stamping “MALAGA” on the left side of the shank. The stamping is very readable. The break in the shank fortunately happens after the quotation marks on the stamping. He also took photos of the cracked and damaged shank so you can see the extent of the damages.
 I am also including the link to a blog that I wrote that gives some of the history of the Malaga brand and the Malaga Pipe Shop in Royal Oak, Michigan in the USA. I have written an earlier blog to give a little history of the Malaga Brand and the pipemaker, George Khoubesser. Here is the link – https://rebornpipes.com/tag/malaga-pipes/.That blog also includes links to a catalogue and the history of the pipemaker George Khoubesser. Follow the link to get a feel for the brand and the pipemaker.
Jeff reamed the bowl with a PipNet pipe reamer and followed up with a Savinelli Fitsall pipe knife to remove the cake. He scrubbed out the mortise and the airway in the shank and the stem with alcohol, cotton swabs and pipe cleaners. He scrubbed the exterior of the bowl, rim, shank and stem with a tooth brush and Murphy’s Oil Soap to remove the oils and tars on the rim and the grime on the finish of the bowl. He rinsed it under running water. He dried it off with a soft cloth. He was able to remove the lava build up on the rim top and the flat surface of the rim looked very good. The inner edge of the rim has some serious burn damage on the front inner edge. The outer edge looked very good. He soaked the stem in Before & After Deoxidizer and rinsed it with hot water. I took photos of the pipe to show its condition before I started my work on it.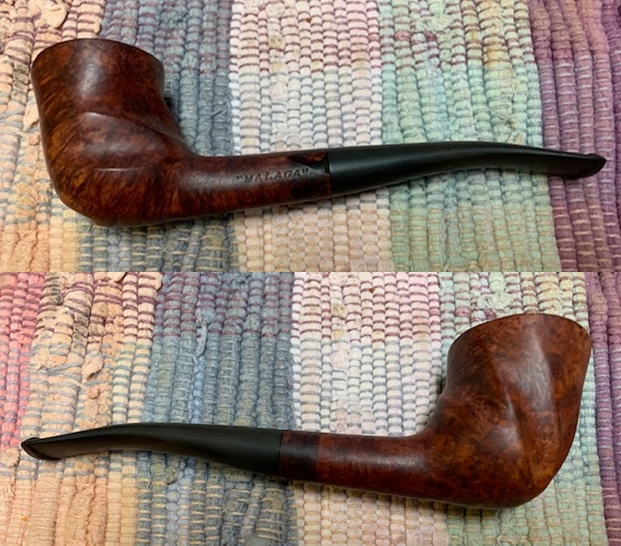
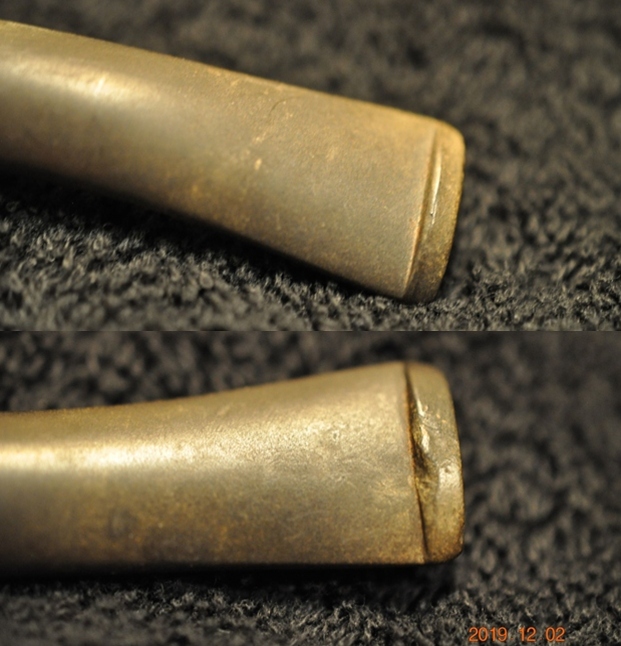
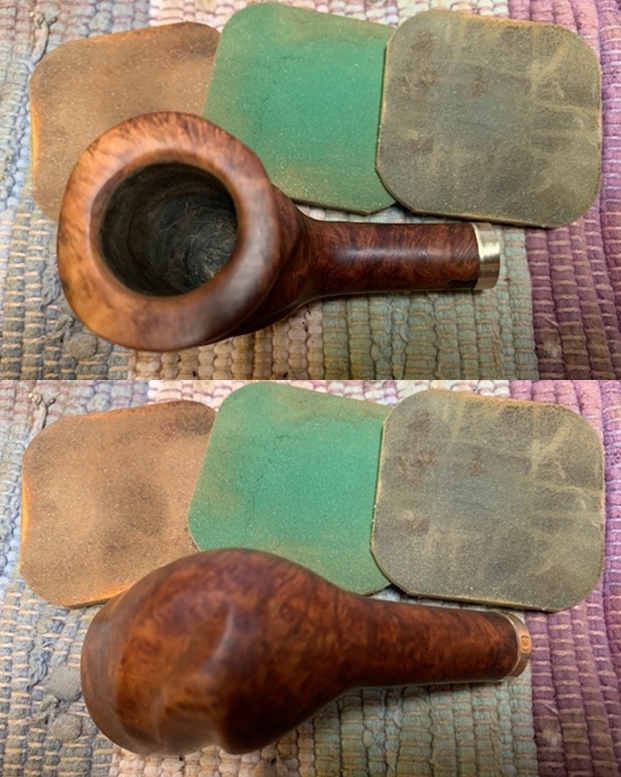
 I took close up photos of the bowl and rim top as well as the stem. You can see the condition of the rim top and bowl in the first photo. Jeff was able to remove all of the tar and oils but you can now see the damage on the inside rim edge. The edge is out of round. There is a burn mark that extends across the front and the back edge of the rim top at that point leaving the bowl edges out of round. The vulcanite stem had tooth chatter on both sides near and on the button surface.
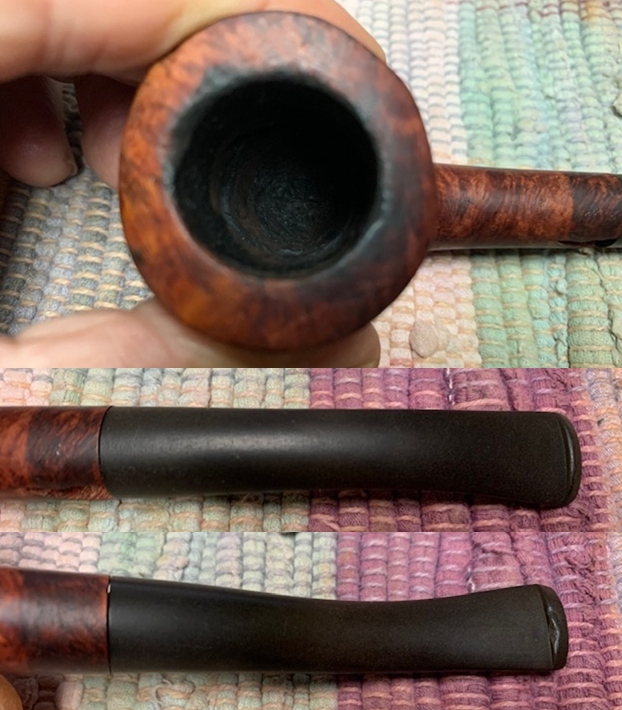 I took a photo of the stamping on the shank to show how good the condition is. It shows the “MALAGA” stamp on the left side. The stamping is very legible. You can see the large chip of briar out of the left side of the shank.
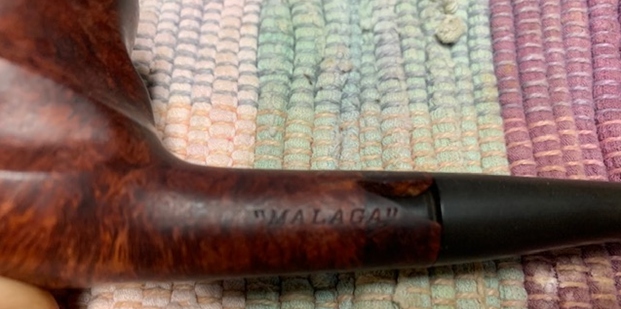 I took a photo of the pipe with the stem removed to give a clear picture of the character of the pipe.
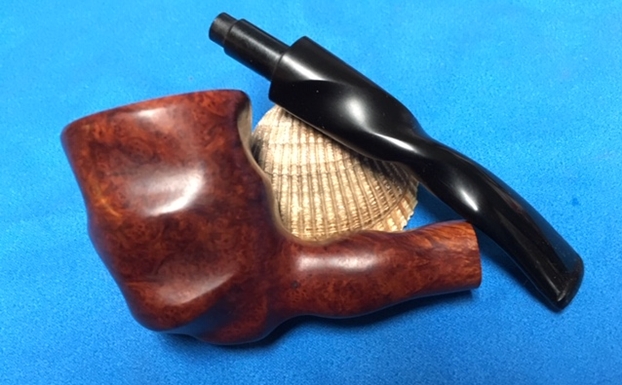
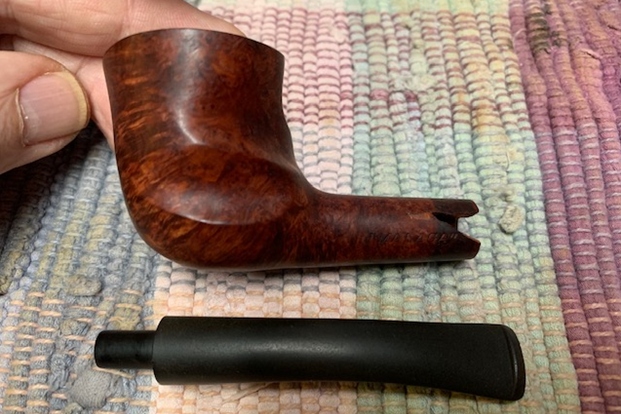 I decided to start the restoration bu dealing with the cracked shank. I have repaired these several ways in the past. I have cut out a chunk of briar and carved it to fit the damaged area. I have also built up the area with briar dust and super glue I the past. I chose to use the briar dust and super glue method this time. I coated the edges of the cut with super glue and used a dental spatula to layer on the briar dust. I gave it a layer of glue and another lay of briar dust until I had filled in the damaged area.
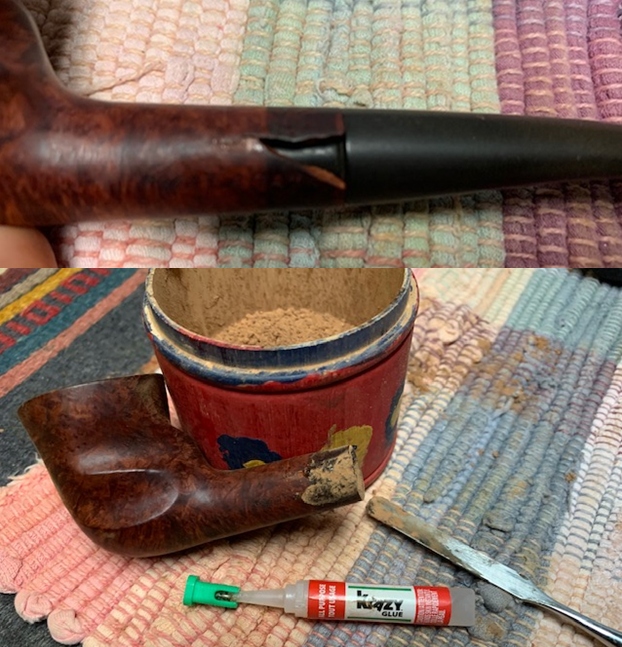 The repair was solid. It was thicker than necessary but it was exactly what I wanted. I would need to reshape it and bring it back into round with files and sandpaper. I shaped the inside of the shank with a needle file to bring it to round and allow the tenon to fit in the shank.
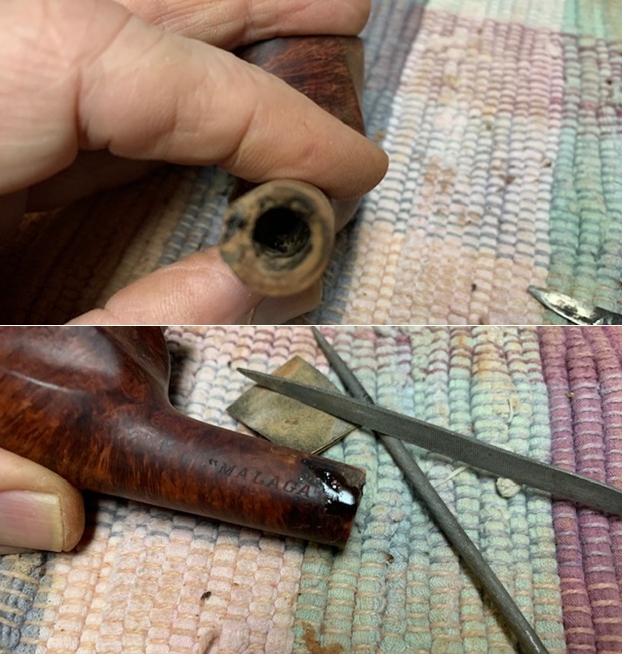
 Once I had the finish roughed in I smoothed it out with 220 grit sandpaper to smooth out the exterior of the finish and blend it into the surrounding briar. I went through my bands to find a brass band that would fit the shank. I wanted to band it after it was repair to protect the repaired shank and cracks from further damage with the insertion of the stem.
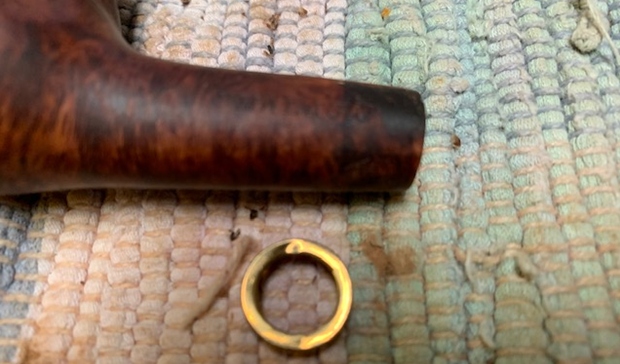 I painted glue on the shank end pressed the band in place. The band is thin enough to protect the stamping on the shank and thick enough to protect the repair. I took photos of the bowl from various angles to show the look of the repaired and banded shank.
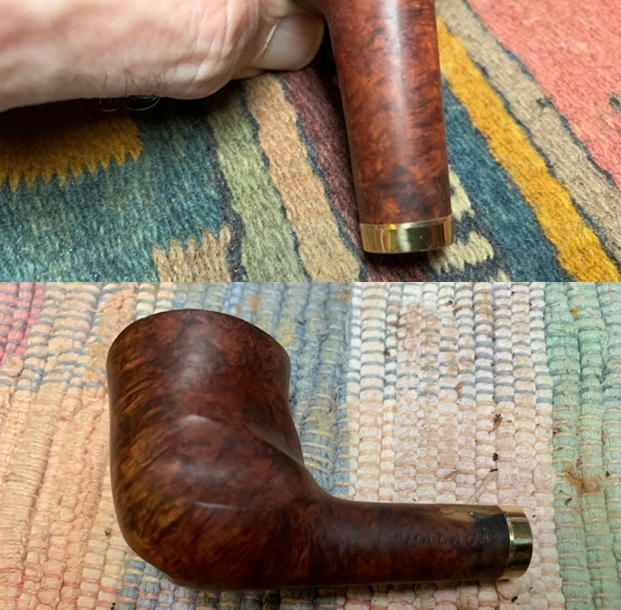
 I slipped the stem in the shank and took photos of the repaired and banded shank with the stem in place.
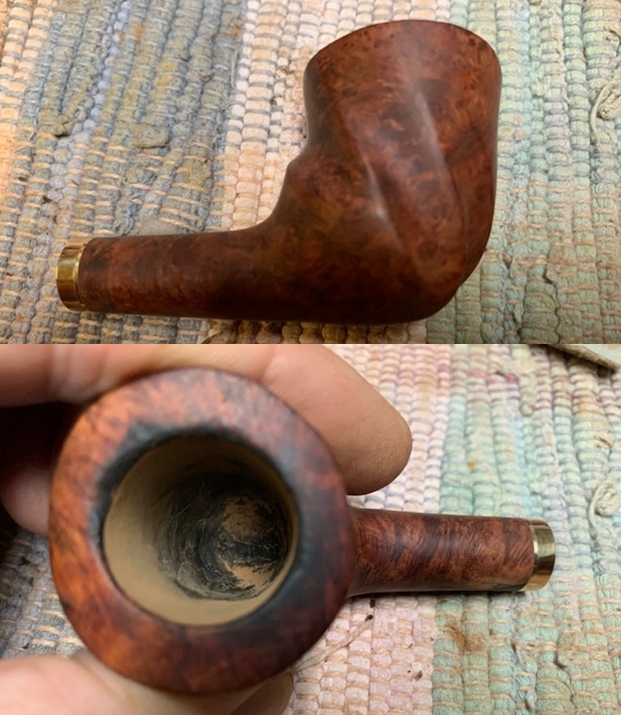
 The bowl had a wave in it so it was not possible to top it on a topping board. I used a folded piece of 220 grit sandpaper to clean up the damage on the top and on the front inner edge of the bowl. I gave the inner edge a slight bevel to repair the damage. I polished the edge with 400 grit wet dry sandpaper. The rim top and edges really looked better. There was still more work to do but it was looking better.
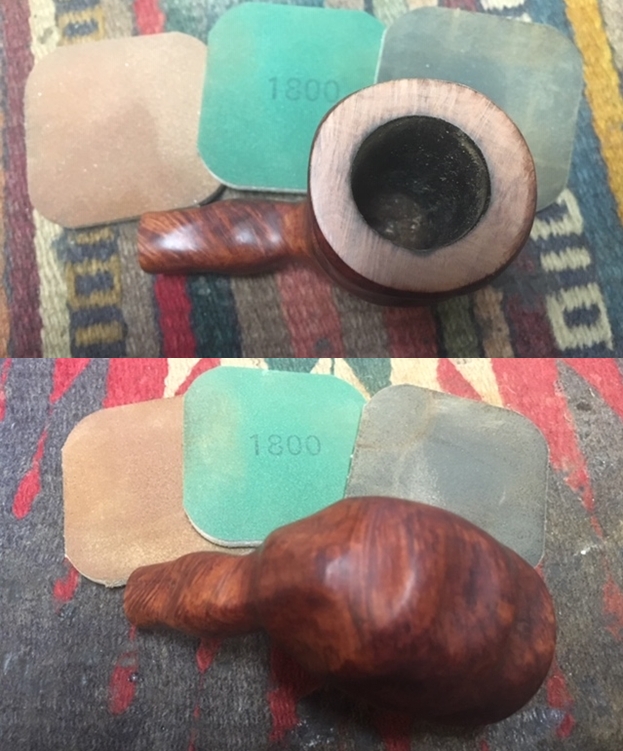
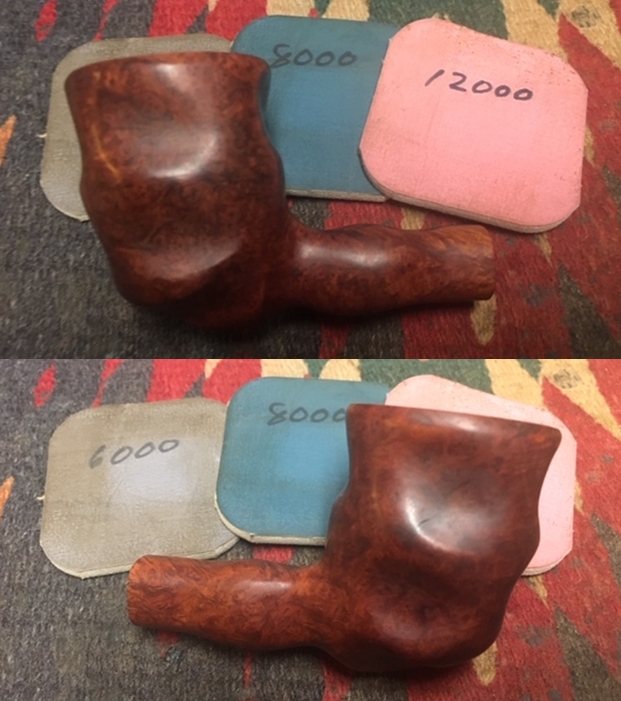
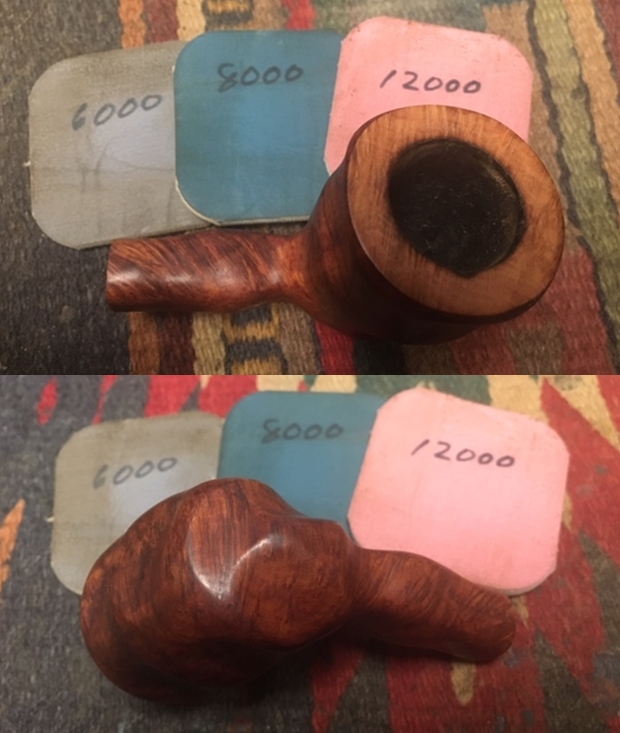
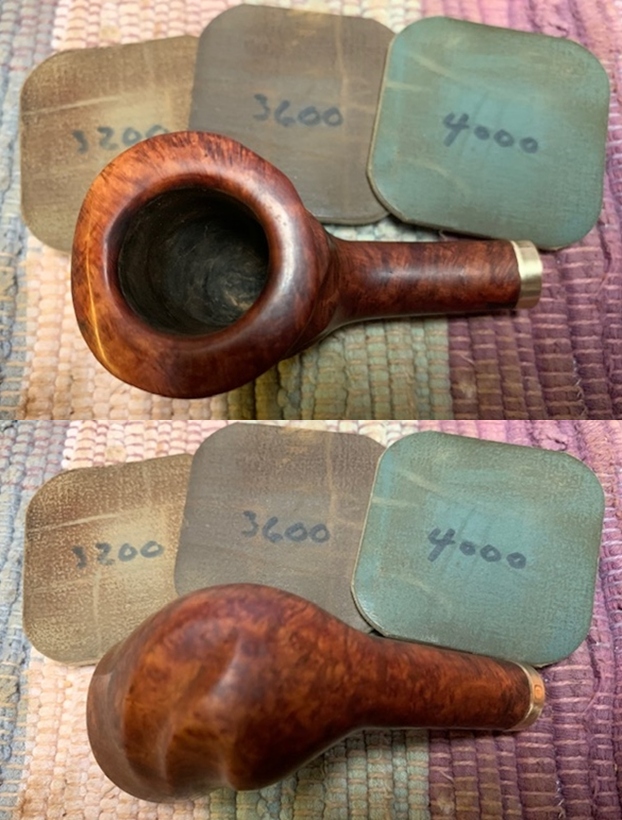
 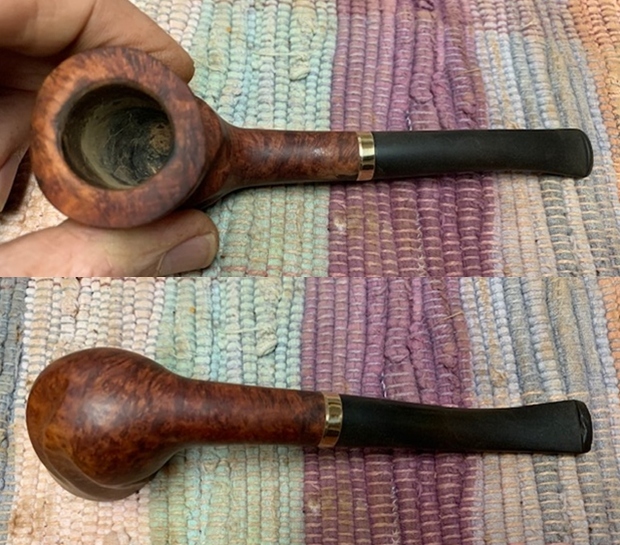 I polished the rim top and the briar with micromesh sanding pads. I wet sanded the bowl with 1500-2400 grit sanding pads to prepare the rim top for staining. I wiped the bowl down after each pad with a damp cloth to remove the sanding dust.
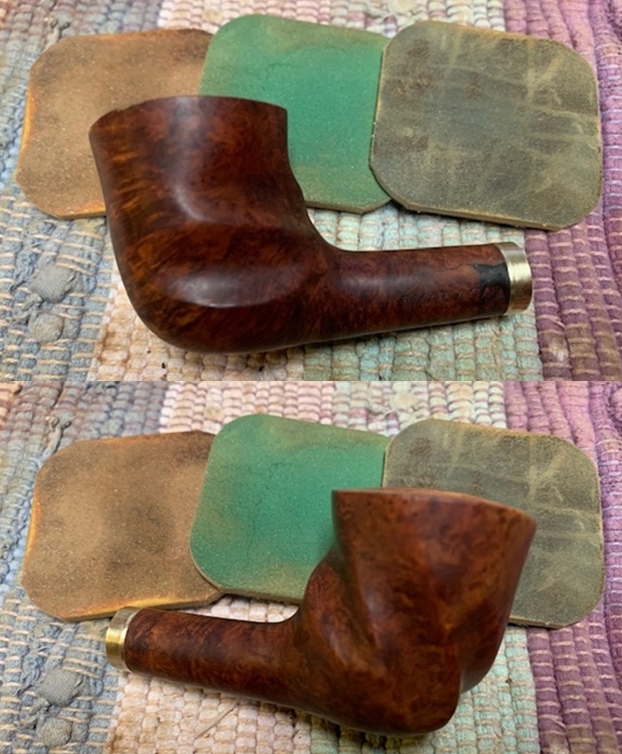
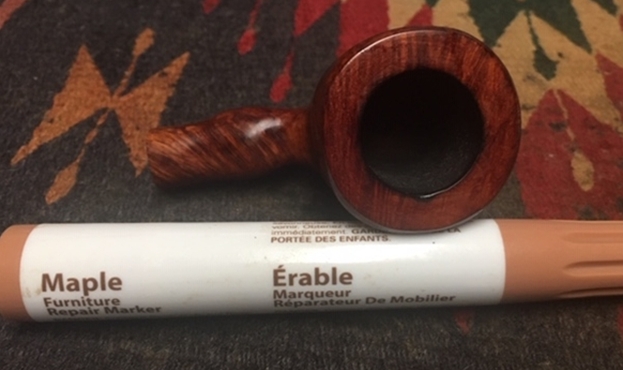
 I restained the rim top and edges with a Maple Stain Pen. I was able to blend it into the rest of the bowl. Polishing it with the rest of the micromesh pads would make the blend perfect.
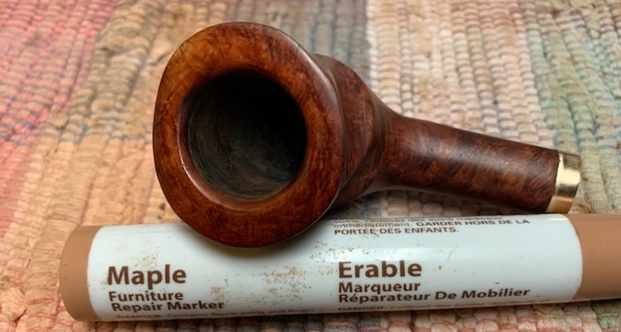

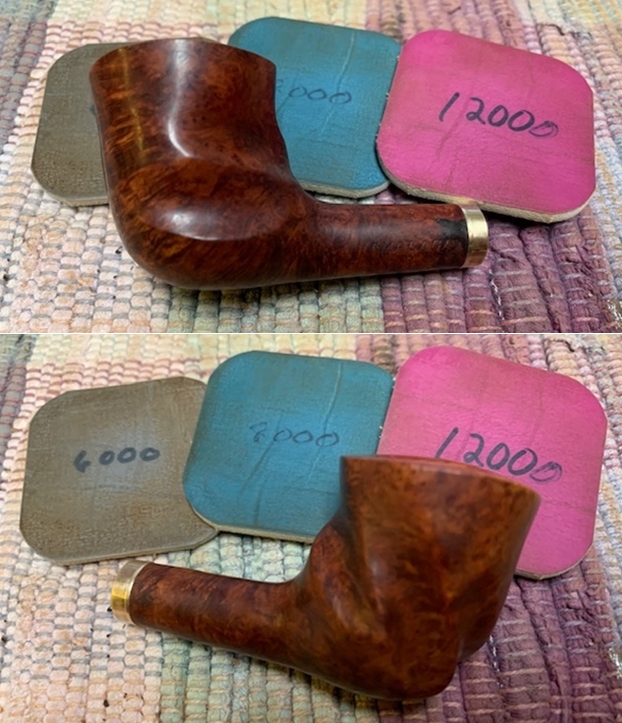
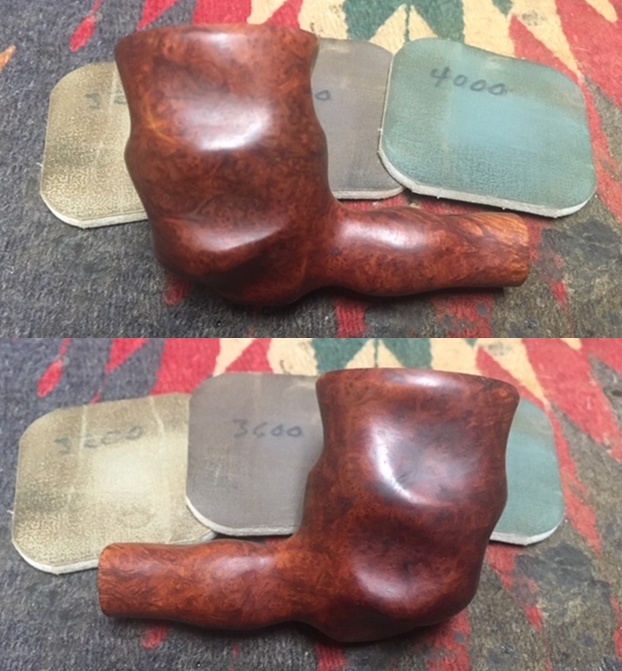
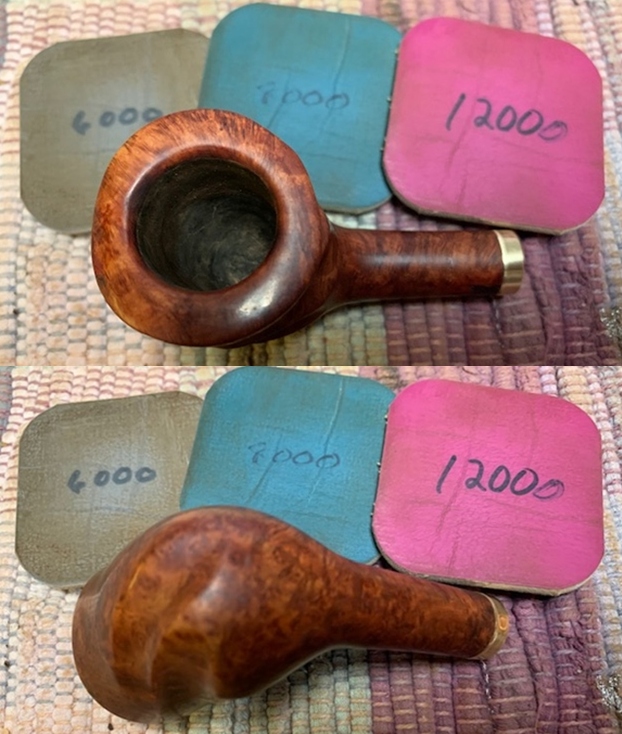 I worked some Before & After Restoration Balm into the surface of the briar with my fingertips to clean, enliven and protect it. I let the balm sit for a little while and then buffed with a cotton cloth to raise the shine. The following photos show the bowl at this point in the restoration process. I am very happy with the results.
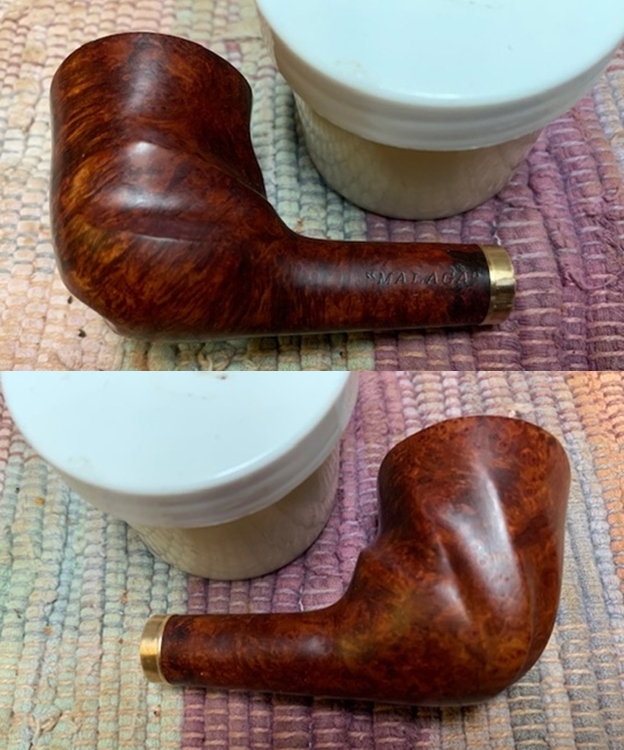

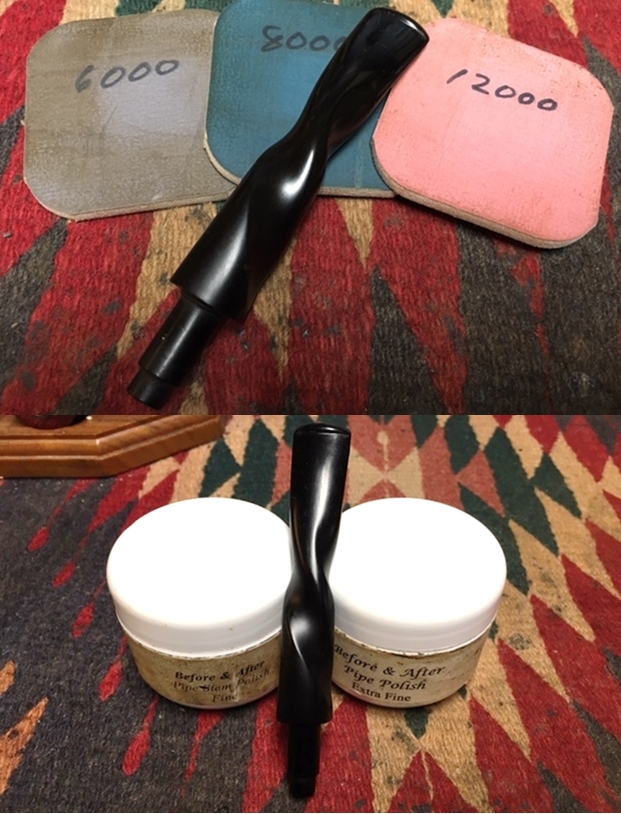
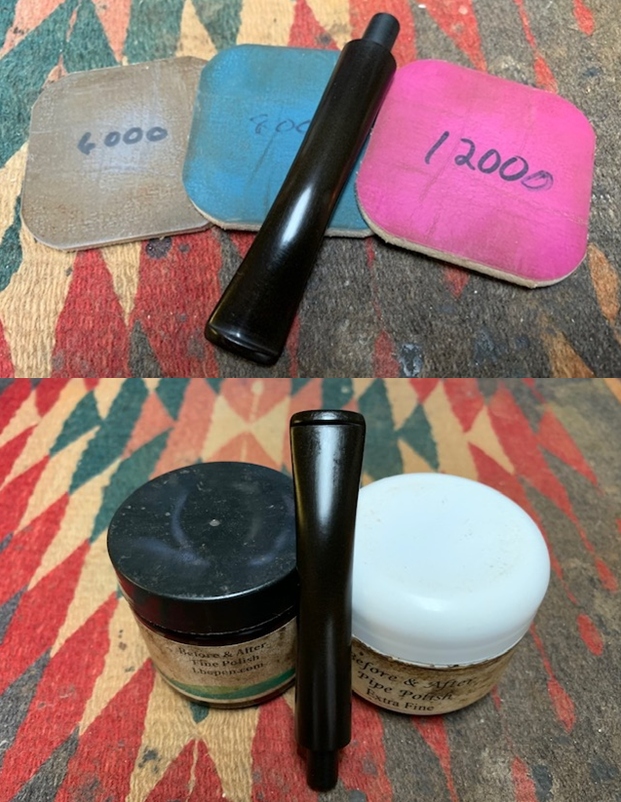
 I turned to the stem to address the issues on the surface of both sides at the button. I reshaped the button edges with 220 grit sandpaper and a needle file. Once it was shaped I polished the stem with micromesh sanding pads – wet sanding with 1500-12000 grit sanding pads. I wiped it down after each sanding pad Obsidian Oil. I finished by polishing it with Before & After Pipe Stem Polish both fine and extra Fine and then wiped it down with a final coat of Obsidian Oil.
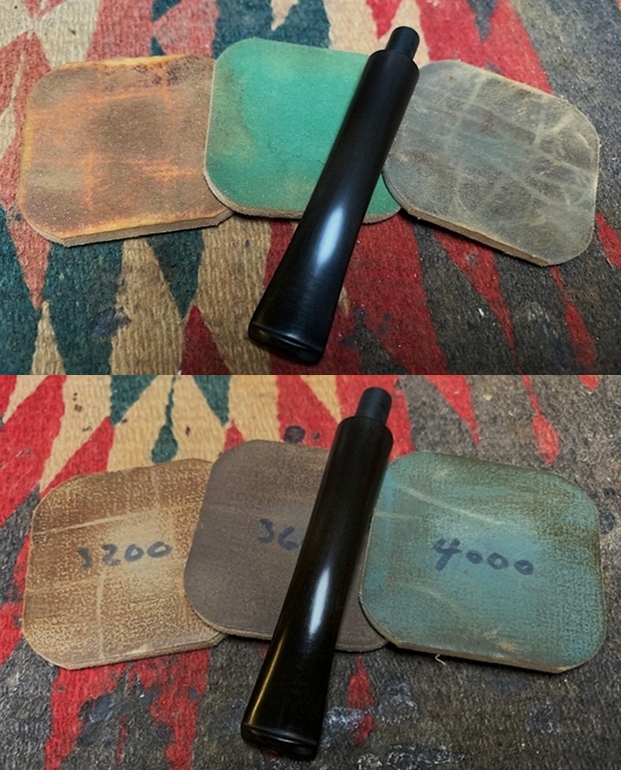
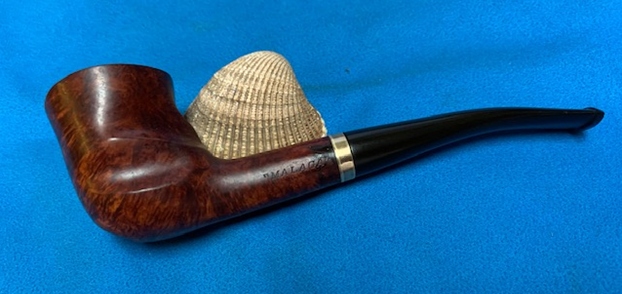
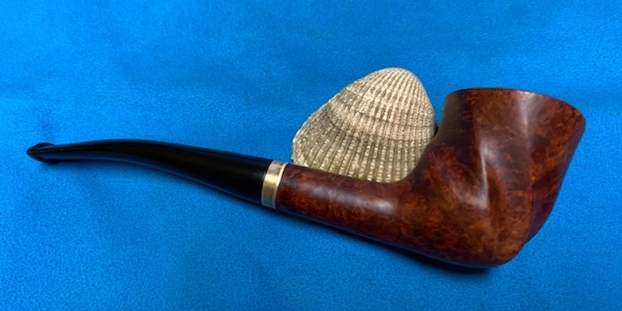
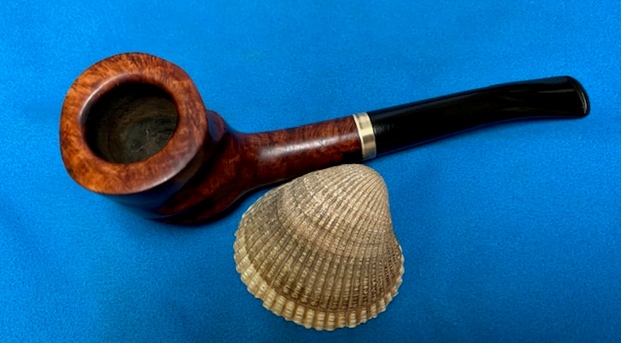
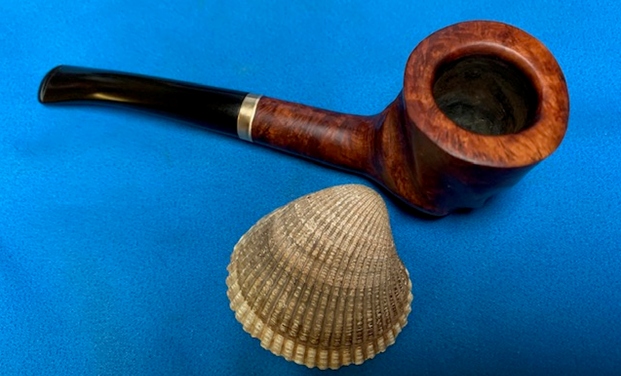
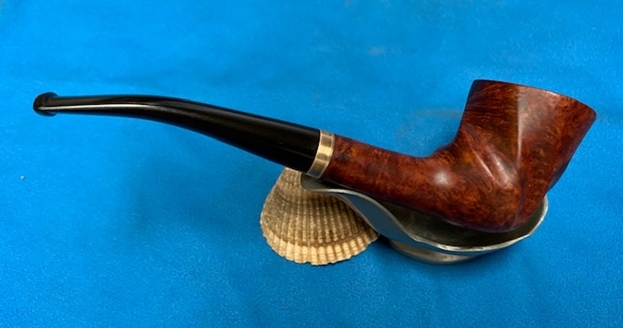
 This Malaga Twisted Billiard with a vulcanite tapered stem turned out to be a real beauty. It has a great grain around the bowl and the carver really maximized that with the shape of the pipe. The repaired shank looks quite good and the brass band is a nice addition to the look of the pipe. Everything about the pipe – the shape of the bowl, the beveled rim top and the cut of the briar work well to highlight the grain around the bowl sides. I polished stem and the bowl with Blue Diamond polish on the buffing wheel and the grain just popped and came alive. I gave the bowl and the stem multiple coats of carnauba wax. I buffed the pipe with a clean buffing pad to raise the shine. I hand buffed it with a microfiber cloth to deepen the shine. The pipe polished up pretty nicely. The grain took on life with the buffing. The rich oil cured colour works well with the polished vulcanite stem. The finished pipe has a rich look that is quite catching. Have a look at it with the photos below. The shape, finish and flow of the pipe and stem are very well done. The dimensions are Length: 6 inches, Height: 1 ¾ inches, Outside diameter of the bowl: 1 ½ inches, Chamber diameter: 7/8 of an inch. I will be adding the pipe to the rebornpipes store shortly. If you are interested in adding this pipe to your rack send me an email or message on Facebook. Thanks for walking through the restoration with me as I worked over another estate pipe.