Blog by Dal Stanton
It is a pleasure to introduce Dal Stanton to you all. He has become a good friend through the work that I do. I just returned from spending time with him in Sofia, Bulgaria where we went pipe hunting and enjoyed some great smokes over dinner together. Here is his first blog for rebornpipes. I hope that he will do many more. Thanks Dal. Welcome to rebornpipes as a contributor. — Steve
Well, after much encouragement and a bit of prodding from Steve, I’m submitting this, my first full restore, to rebornpipes exclusively (and hesitantly) from a newbie’s perspective. After discovering the hobby of restoration only last year, I’ve been intrigued by the restoration process and amazed at the skills and blogging of Steve Laug (rebornpipes.com), and Charles Lemon (Dad’sPipes.com) and several other contributors. I thoroughly enjoyed the ‘Mission Impossible’ episodes that Steve and Charles collaborated on. All the posts have been workshops for me as I’ve pieced together the different steps and techniques of pipe restoration. Since I live in Sofia, Bulgaria, and on the 10th floor of a formerly Communist ‘Block’ apartment complex, I do not have a basement or a garage to set up a workspace. My wife has lovingly allowed me to set up shop in our bedroom (yes, I know that limits the night-time hours for restoration and reflection!) but it has forced me to develop ‘compact’ ways of approaching the hobby. Instead of polishing wheels I utilize a Dremel with many wheels purchased from China on eBay! It works well for me and most importantly, I’m enjoying something that has surprised me with the satisfaction involved in finding a tired candidate that can be redeemed and brought back to life.
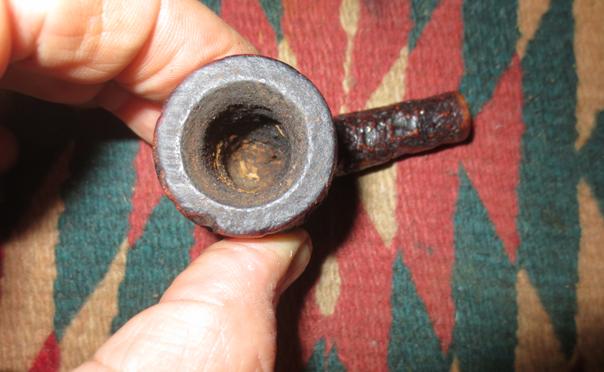
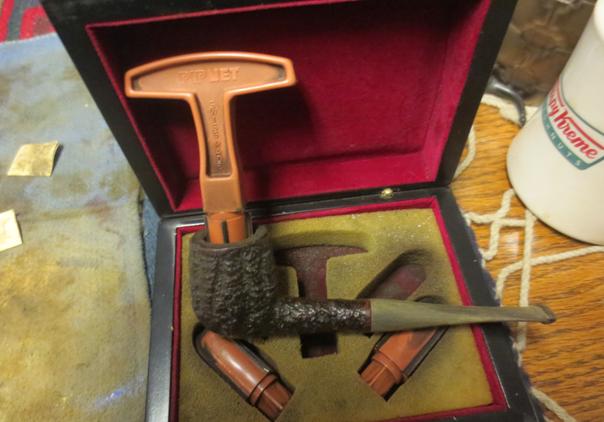
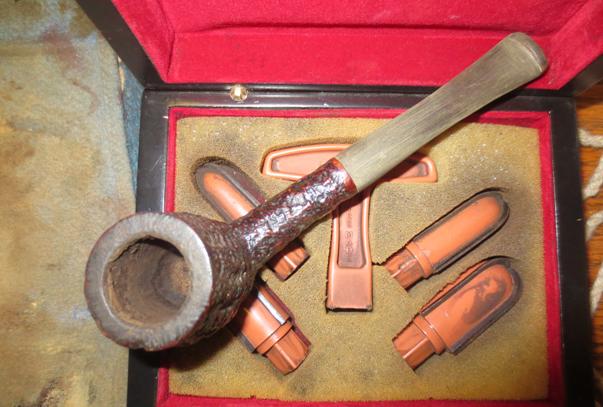
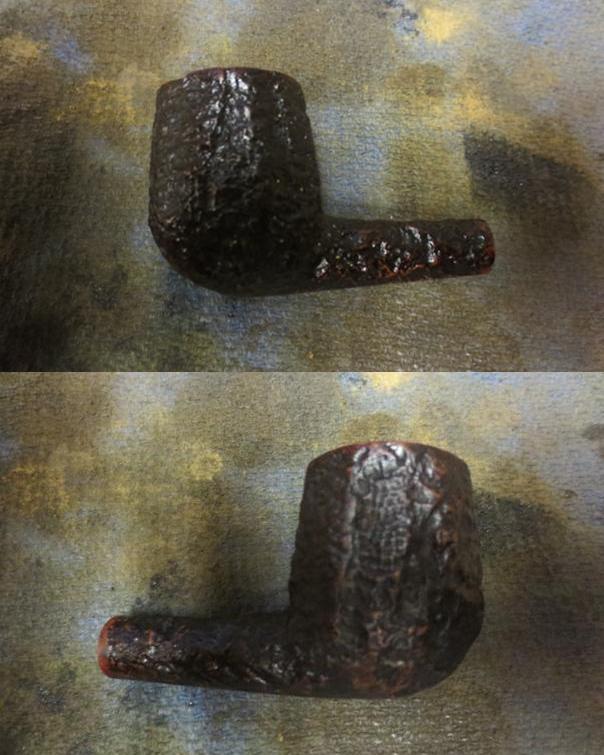
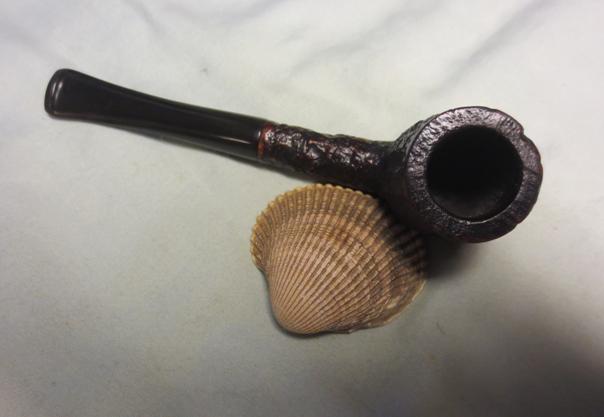
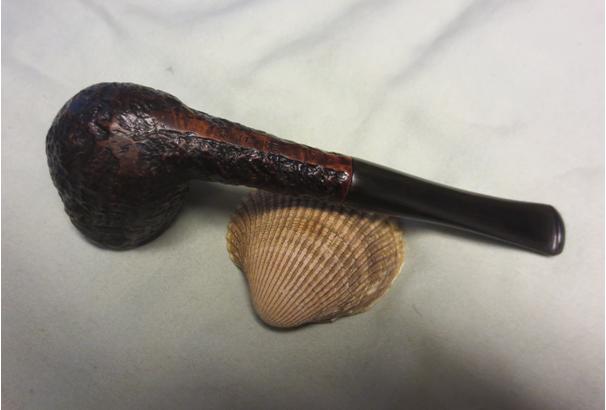
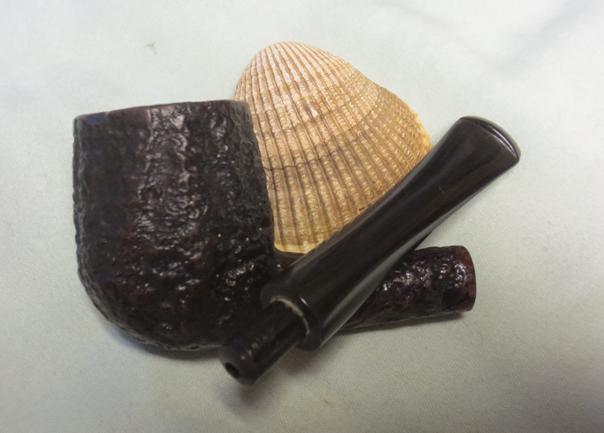
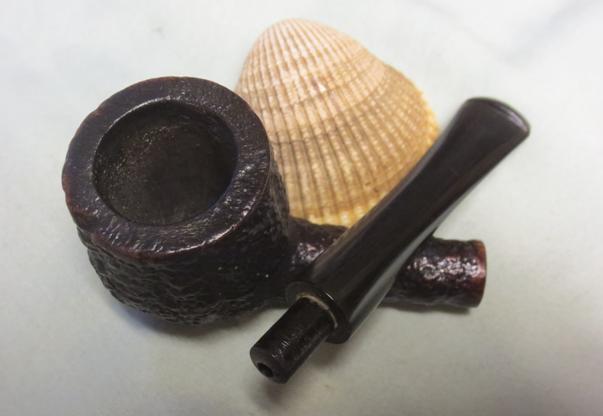
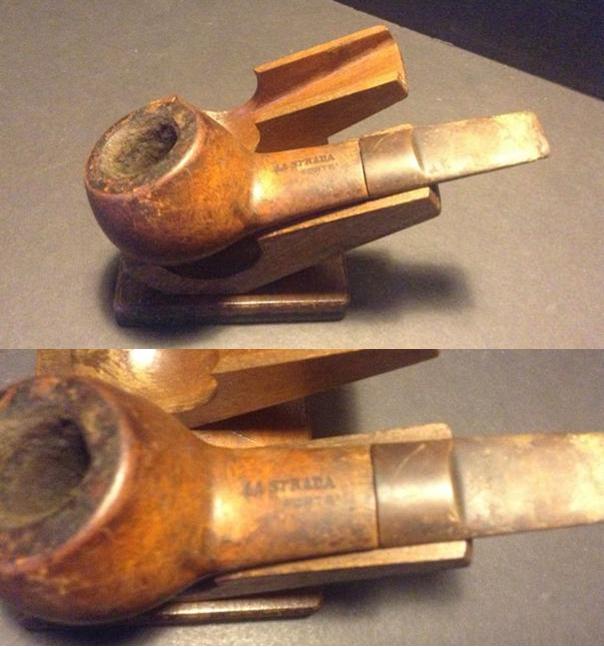
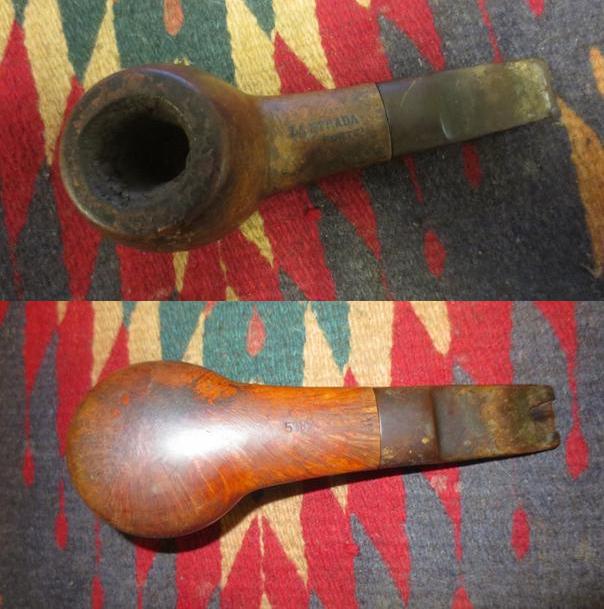
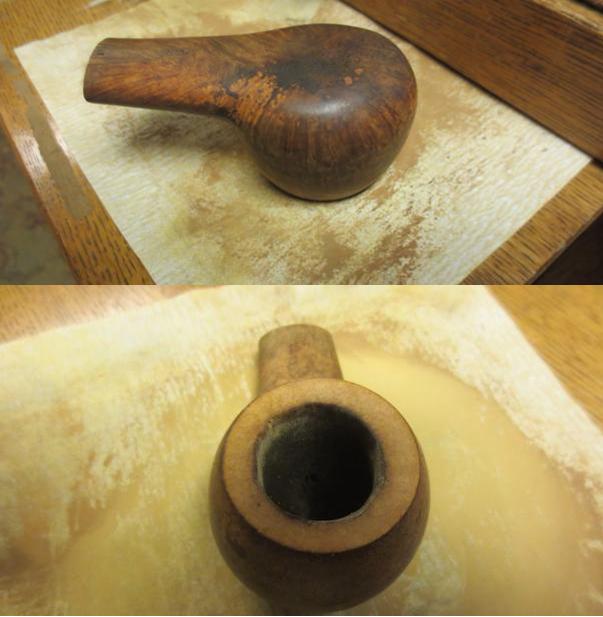
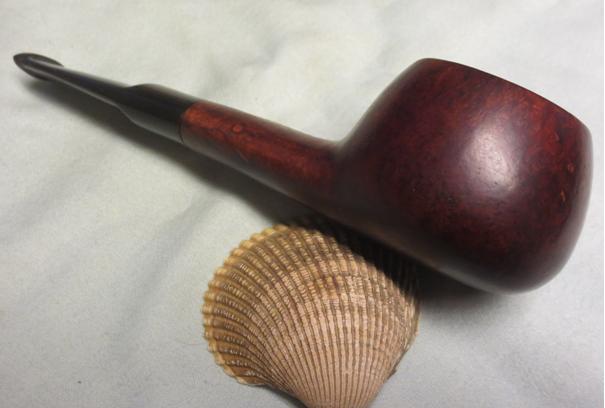
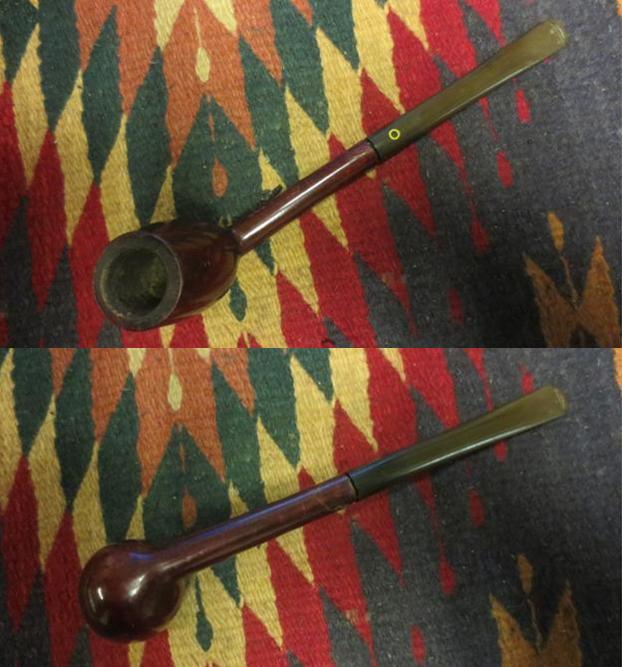
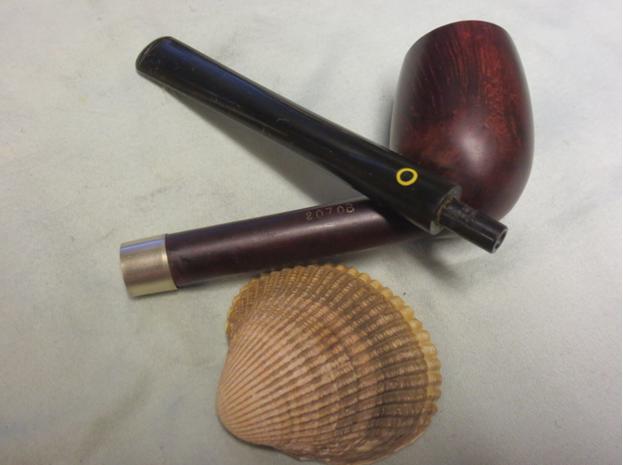
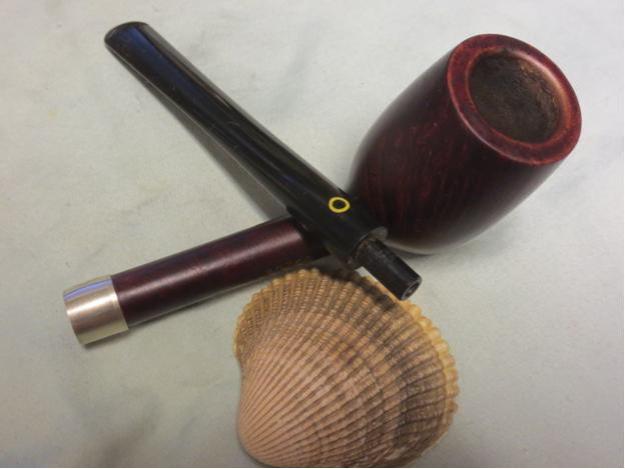
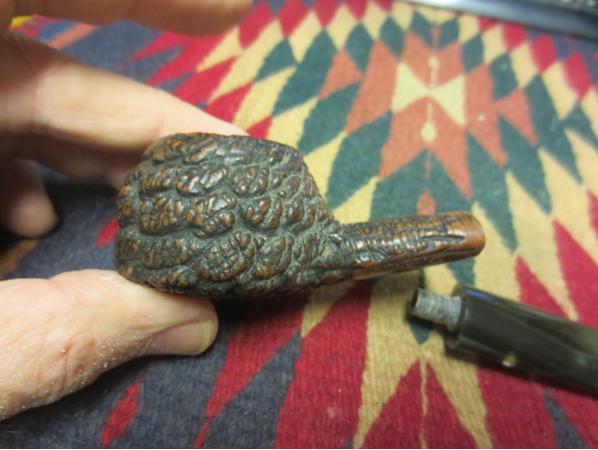
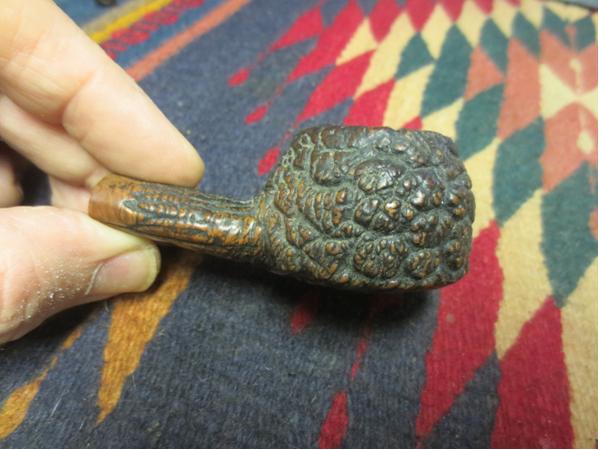
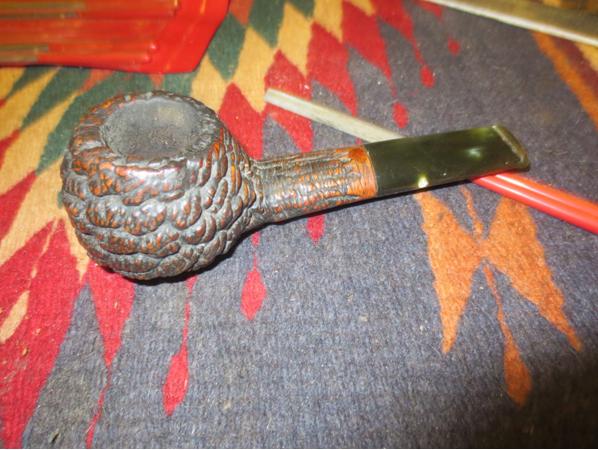
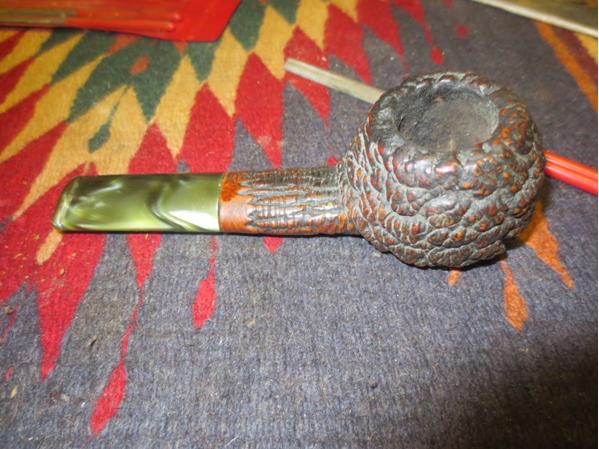
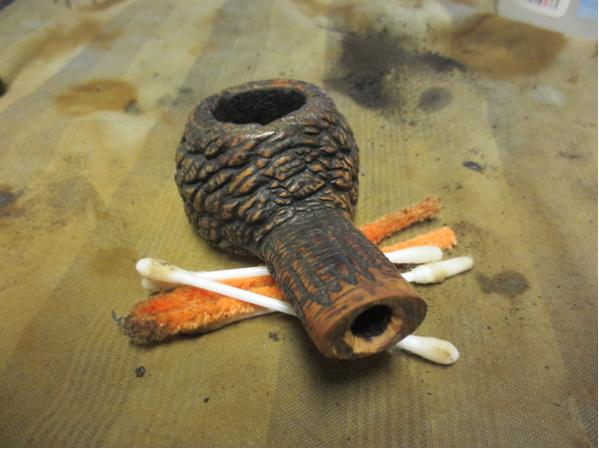
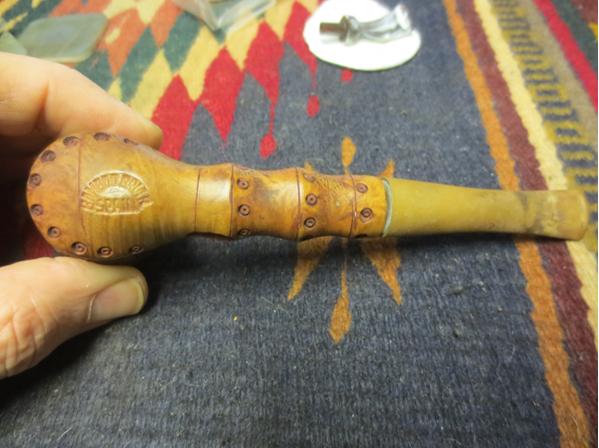
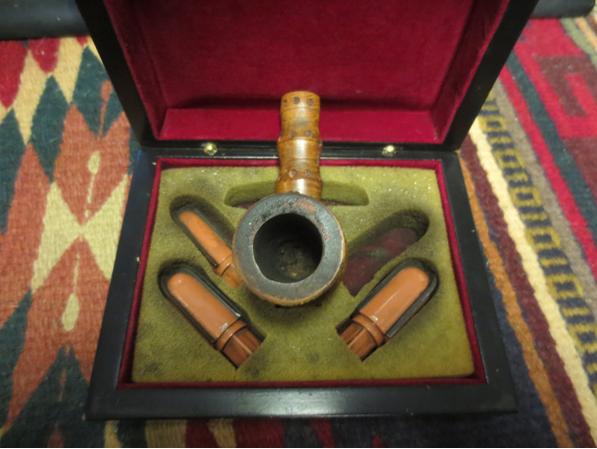
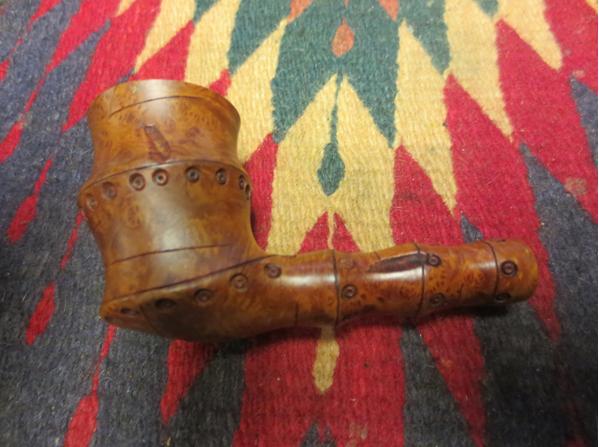
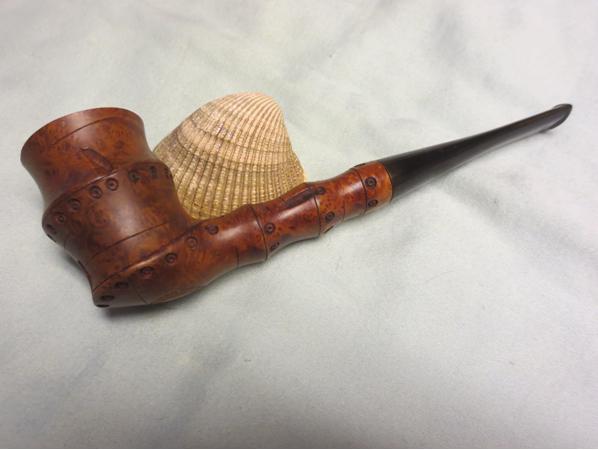
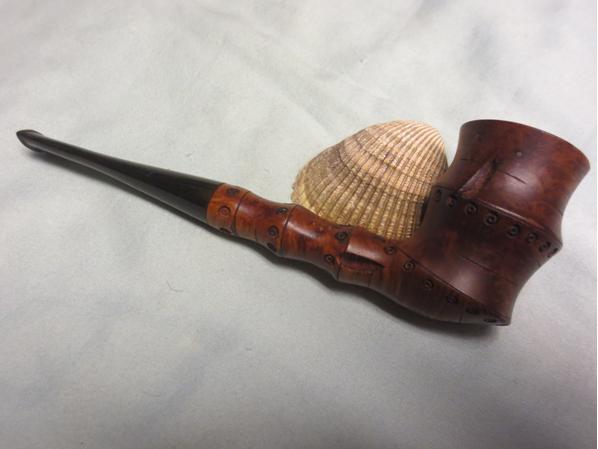
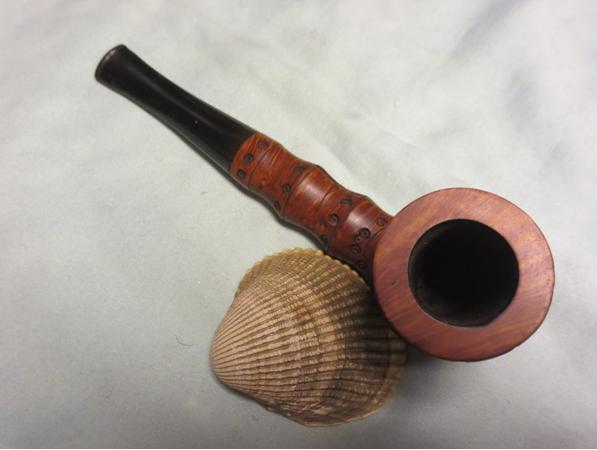
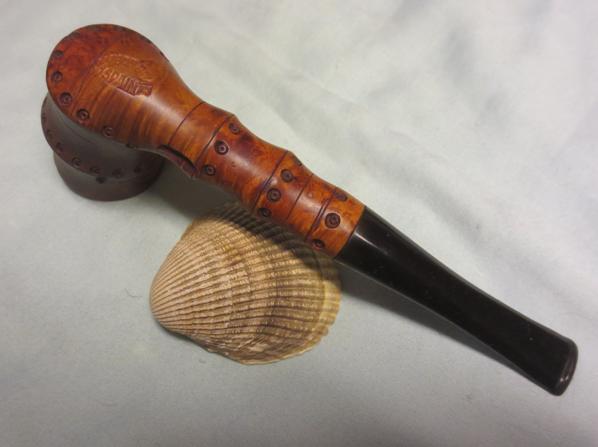
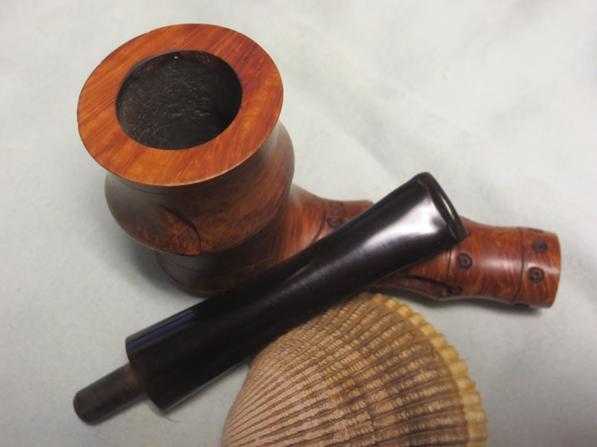
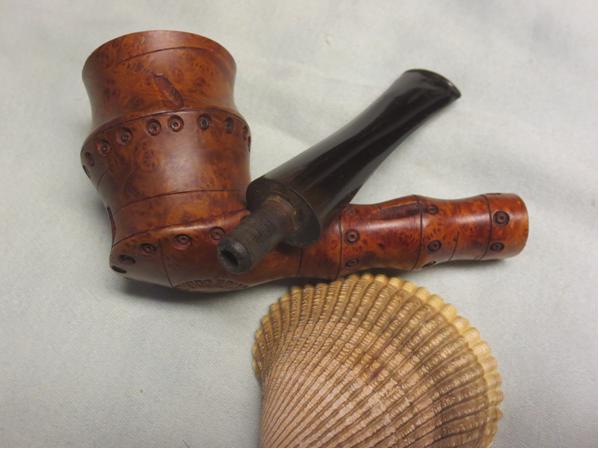
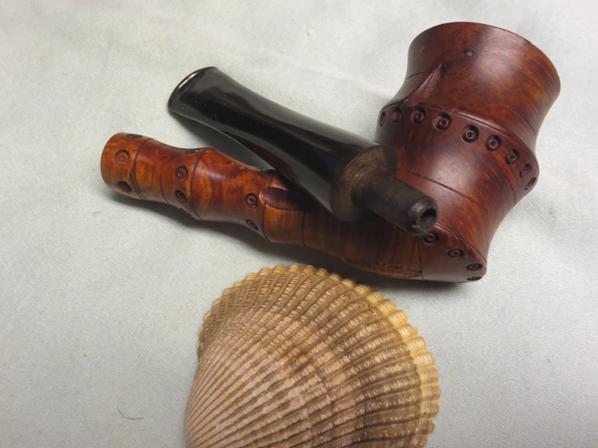
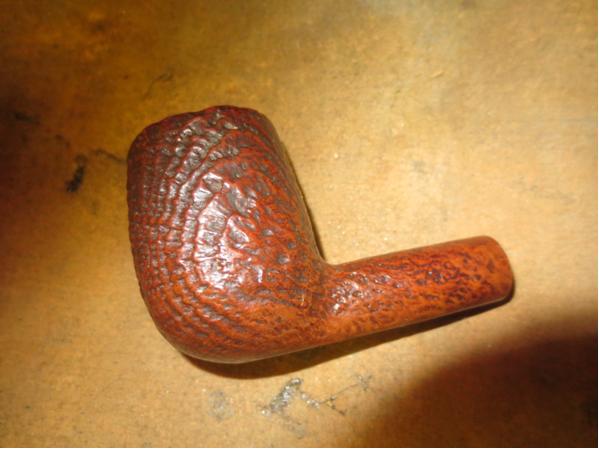
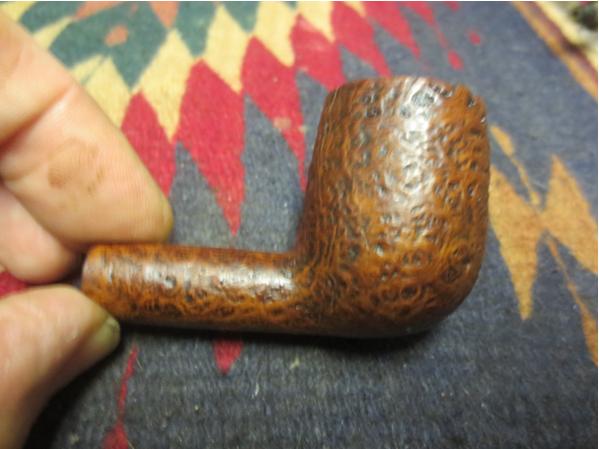
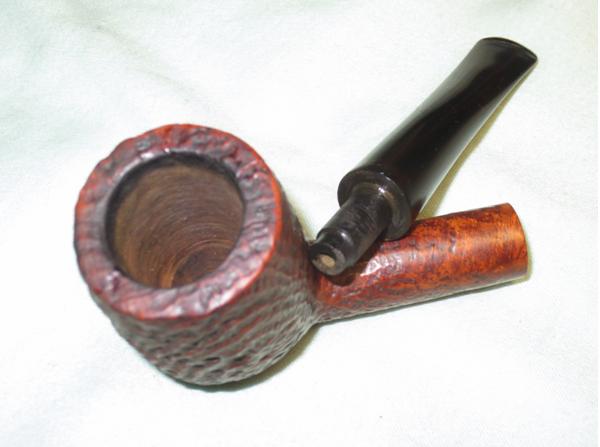
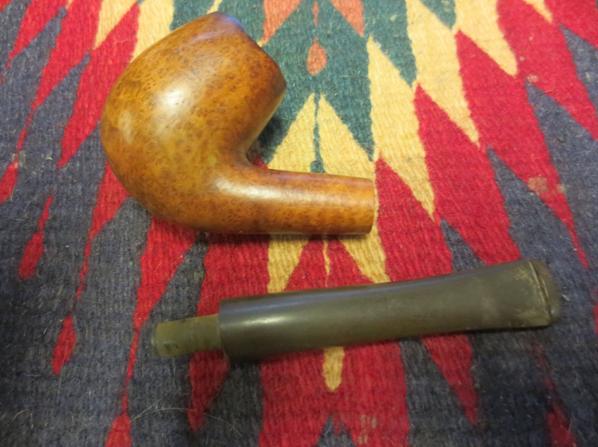
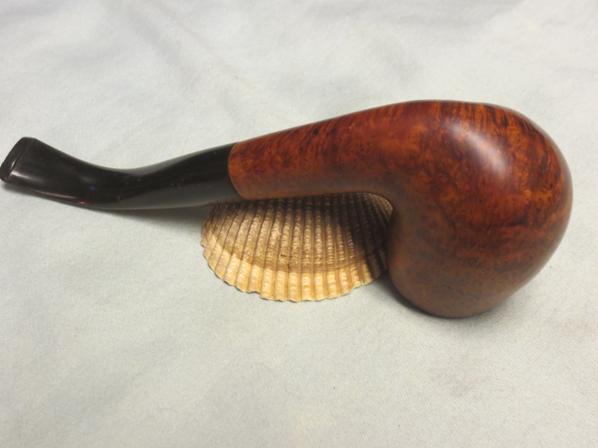
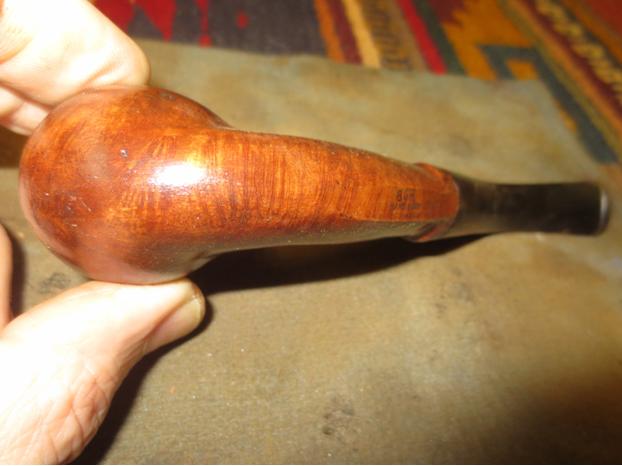
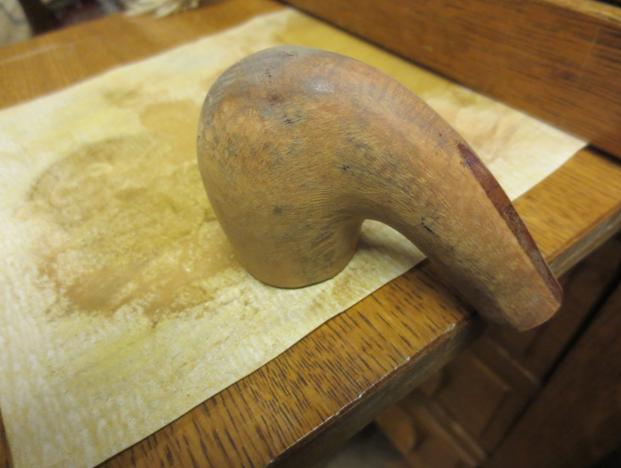
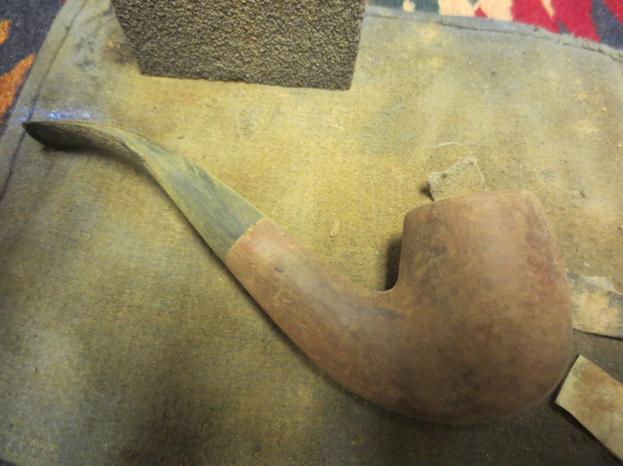
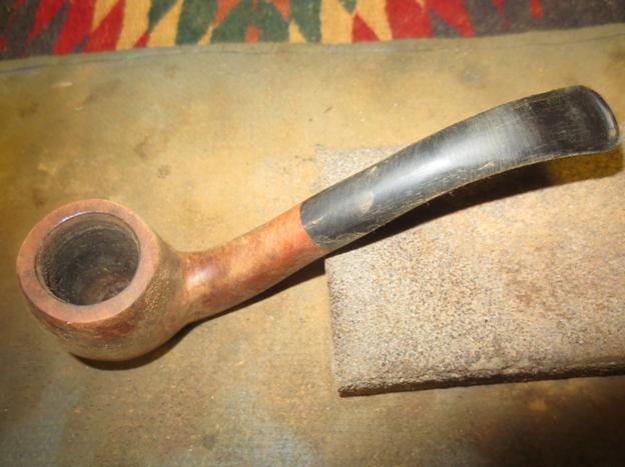
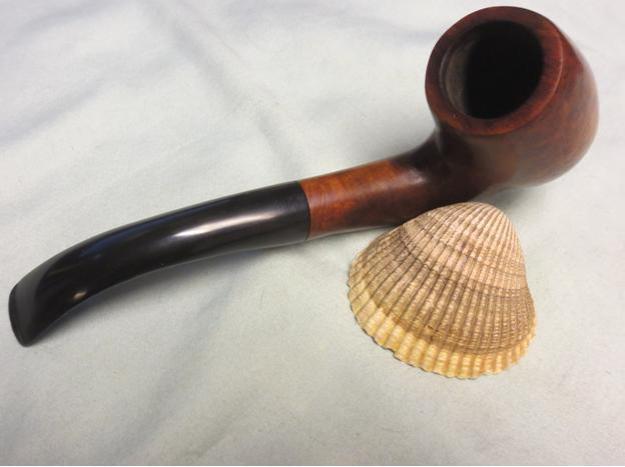
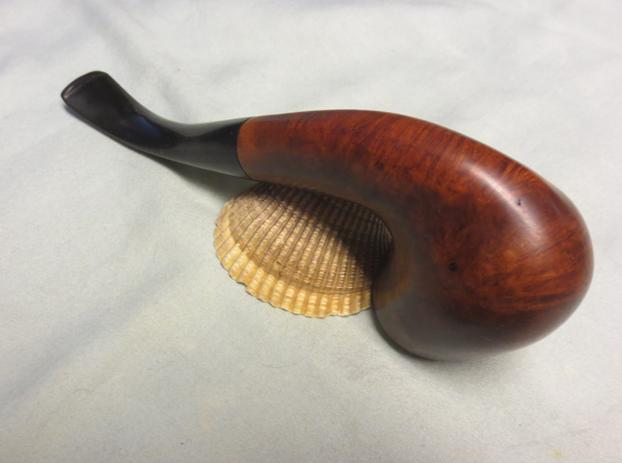
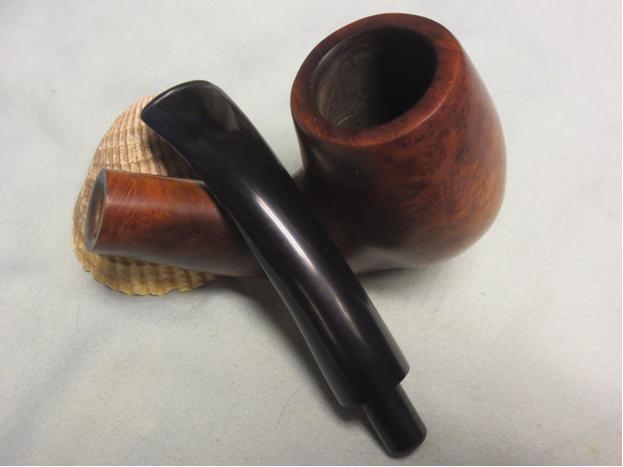
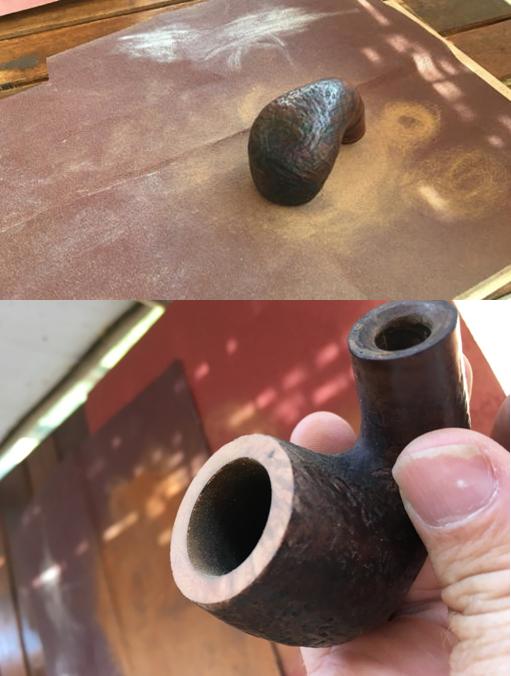
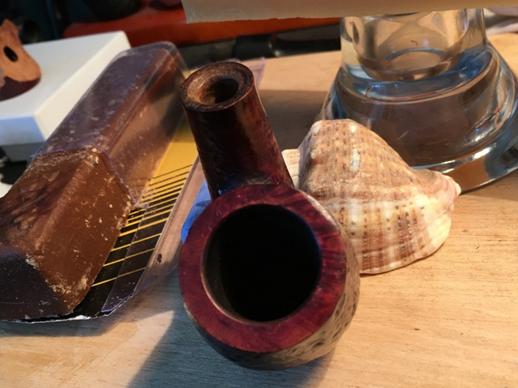
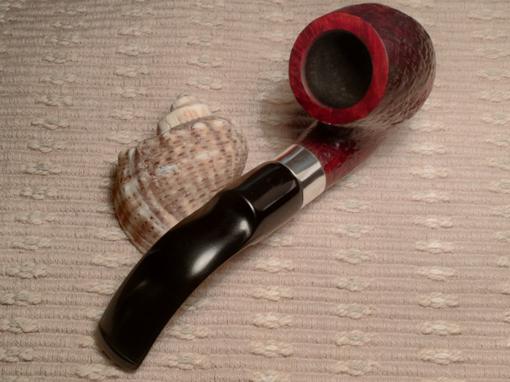
So, in April I found the Oom Paul bowl from a vendor in an outside antique market in the shadow of Sofia’s largest church building – Nevski Cathedral. I enjoy my developing relationship with the young Bulgarian man who enjoys the bartering event as much as I and has begun to recognize me in the crowd as I have become a regular buying customer. After looking through his holdings and striking deals for a few tired candidates for future attention, he produced a bag full of orphaned bowls and stems. At this point in my early pipe collecting strategy, my eye is drawn to the styles I’ve yet to add. The Oom Paul jumped out even though I wasn’t sure I wanted to touch it! The first question that came to my mind as I got a feel for the bowl in my palm was, “How could anyone smoke a pipe to a state that I was looking at!” I took the pictures below when I got home from the antique market. 

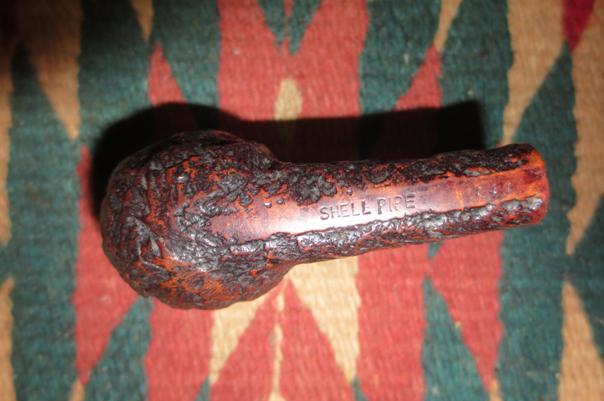
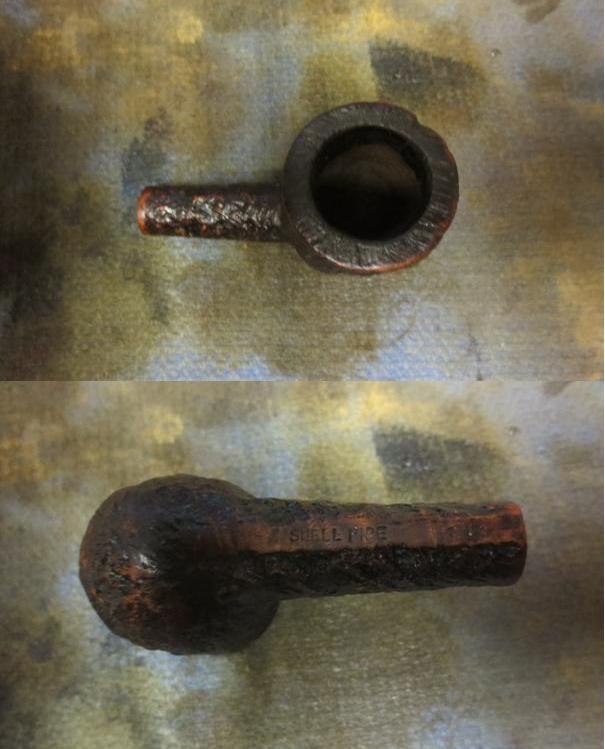
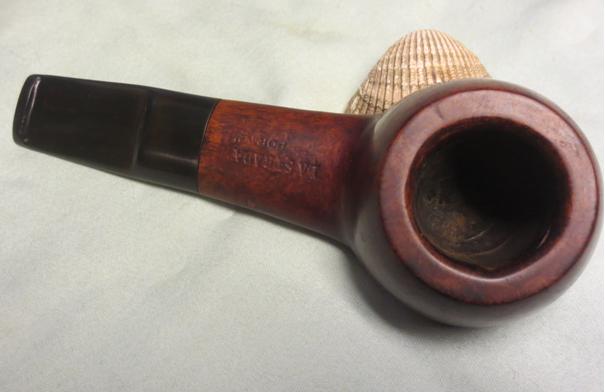
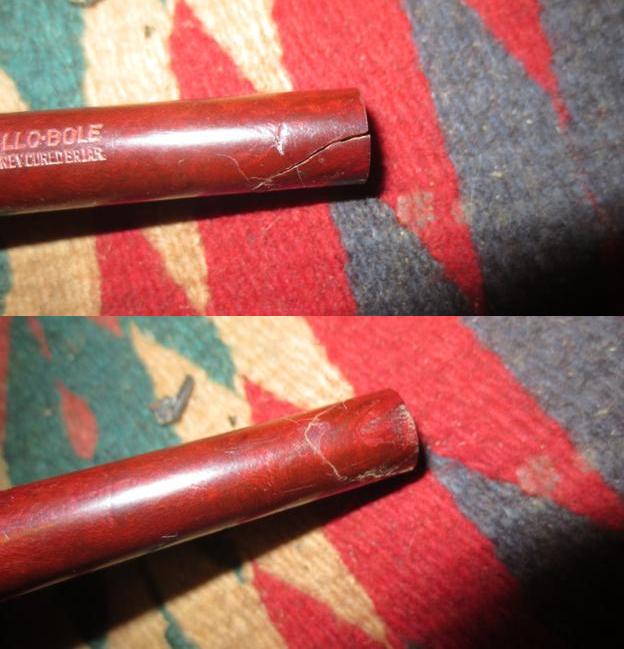
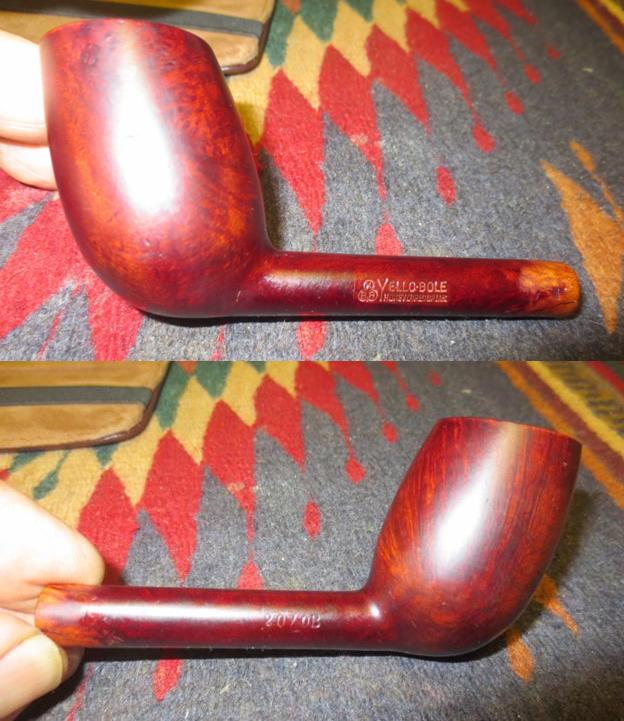
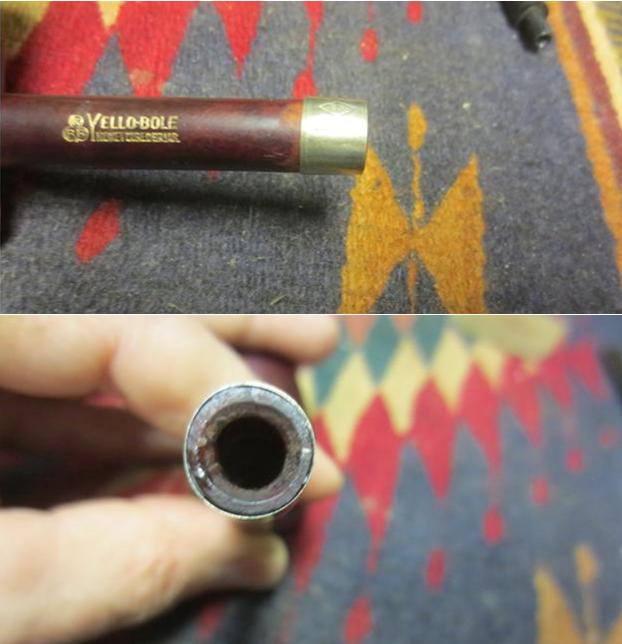
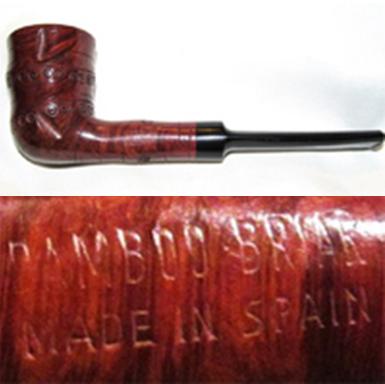
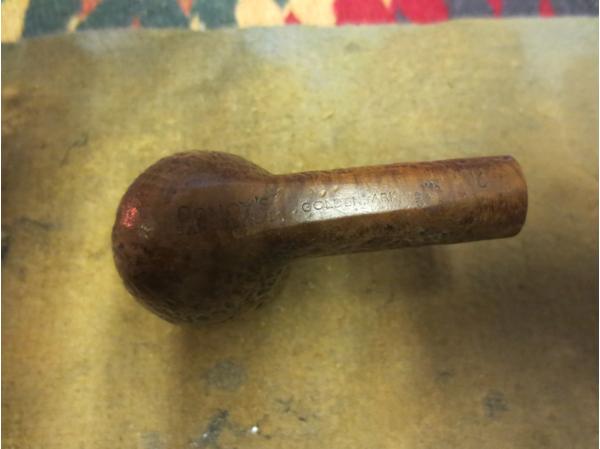
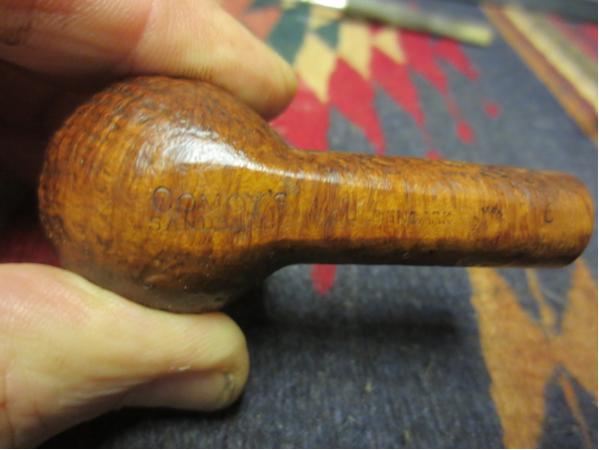
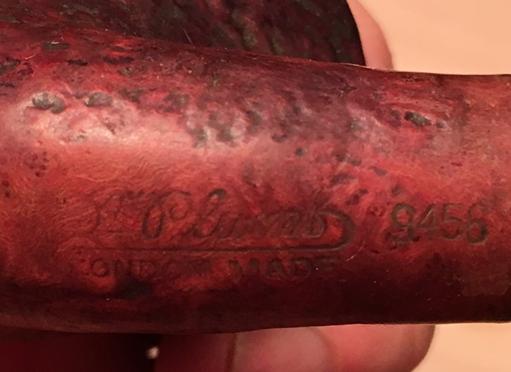 My initial look at the markings found Dr. Plumb over London Made with what I assume is the shape number 9456. I checked it out in Pipedia and found this: The Dr. Plumb brand name is owned by A. Oppenheimer & Co., Limited, owners of Cadogan Investments, Ltd. J.B. Rubinovich, GBD’s Parisian sales manager, created this brand in 1925. The pipe was produced by the Ruchon & Verguet and also Ropp factories (Saint-Claude, France). In 1962 a Dr. Plumb pipe sold for between C$3.95 and C$4.95, or $31.72 in 2015 U.S. dollars and pipes can still be purchased from this brand for a similar price today. These pipes have long been advertised as Dr. Plumb’s Perfect Pipe, that name coming from an aluminum tube system designed to keep the smoke cool and dry while at the same time permitting the “cooling chamber” to be cleaned by simply twisting the stem. While Dr. Plumb pipes were long made in France and stamped accordingly, they are now British made.
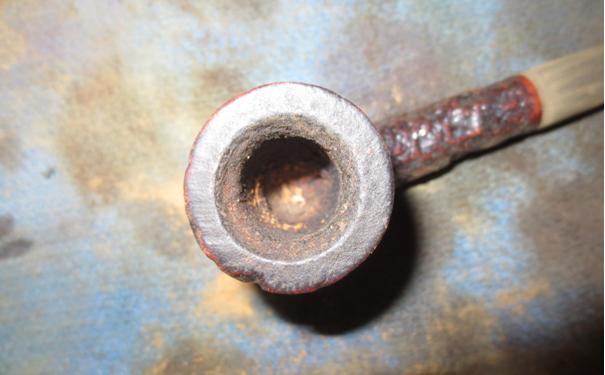
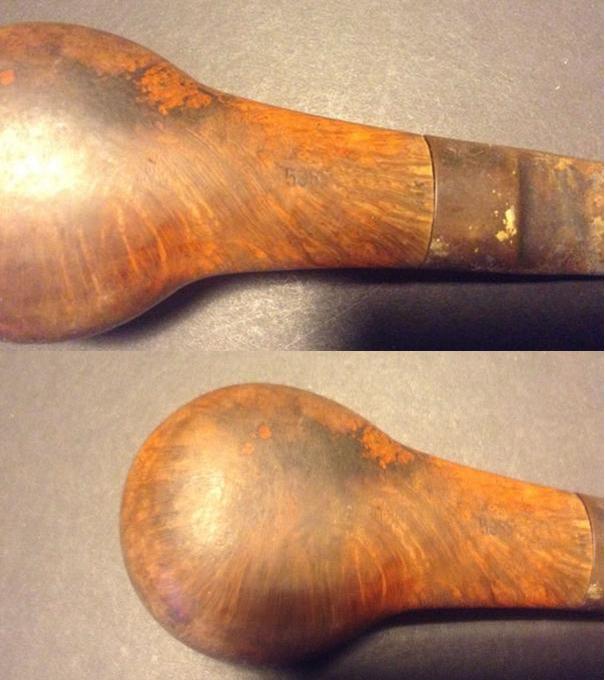
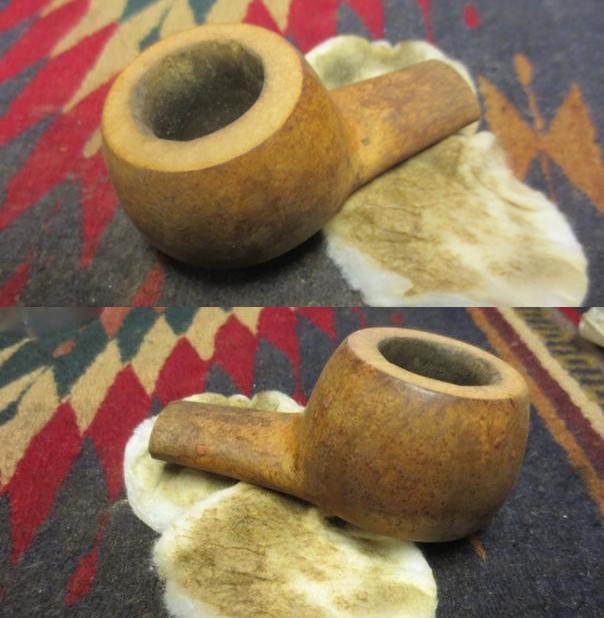
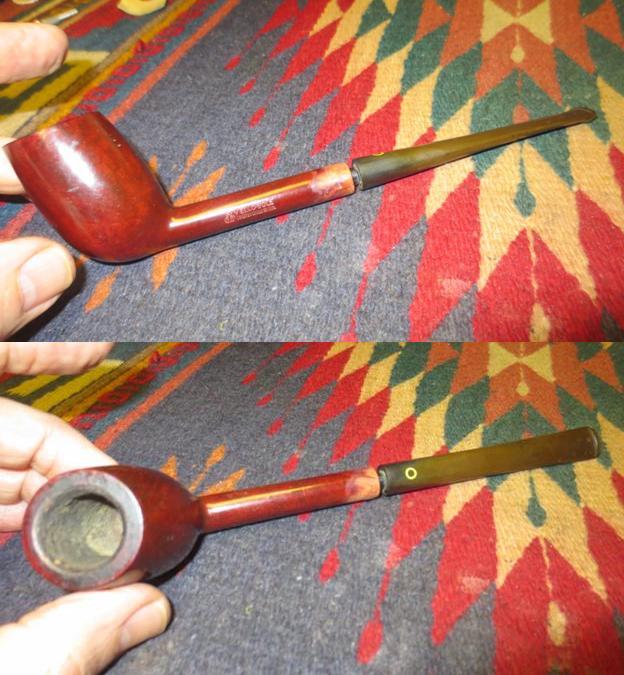
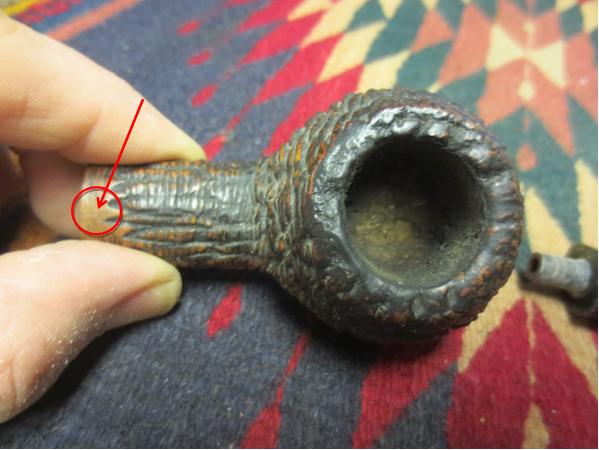
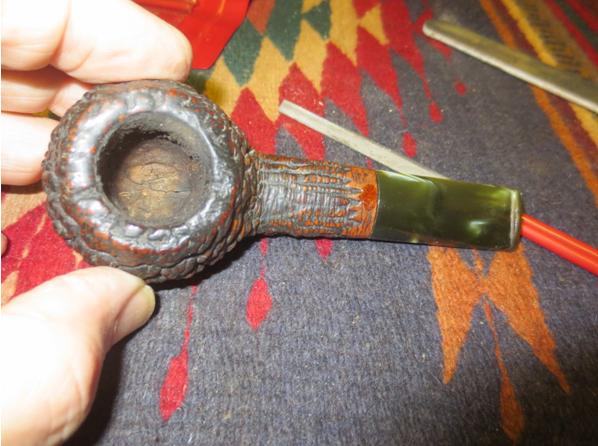
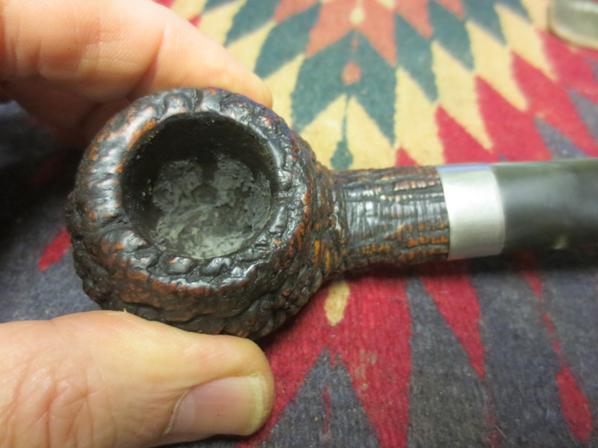
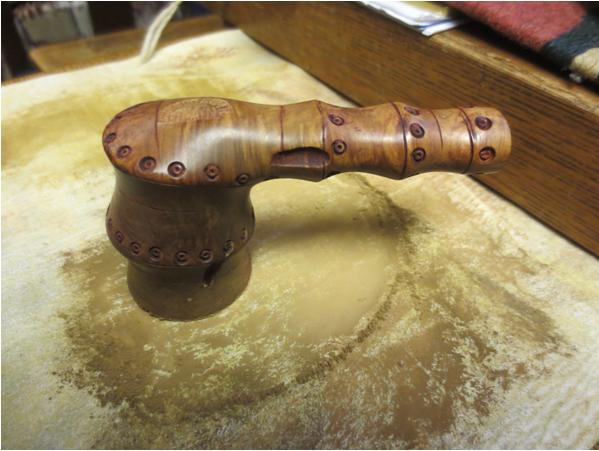
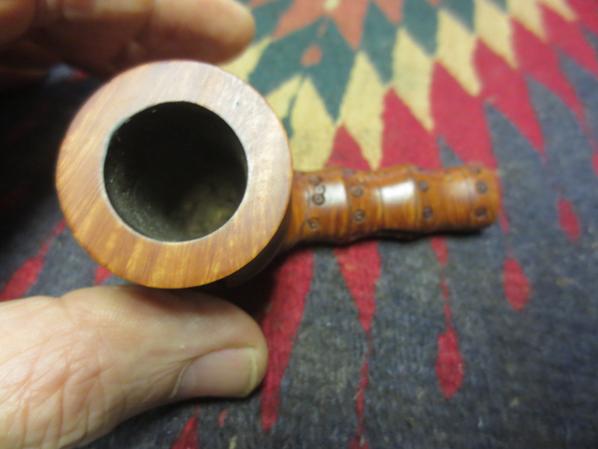
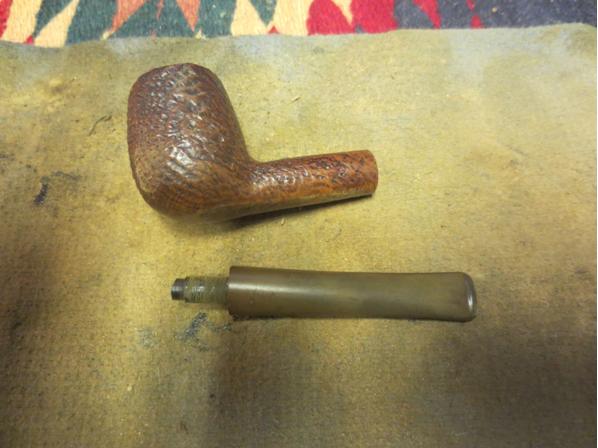
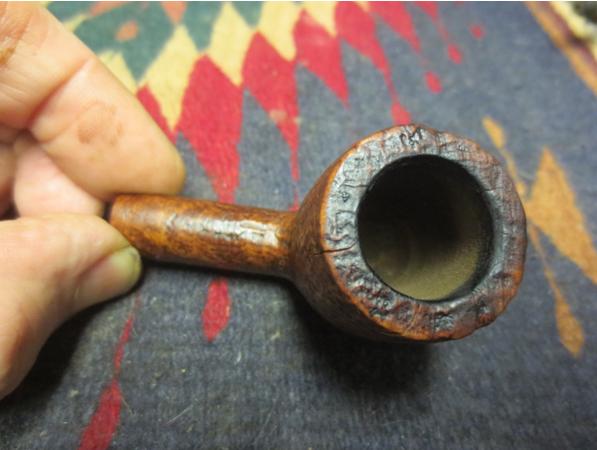
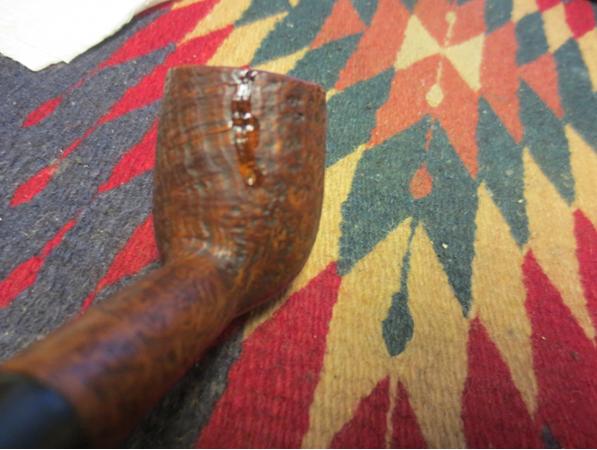
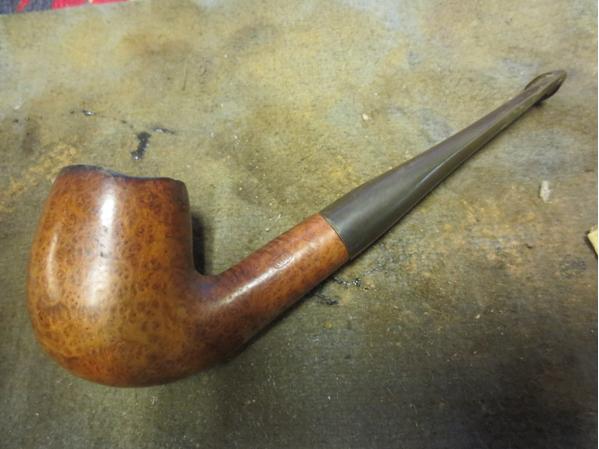
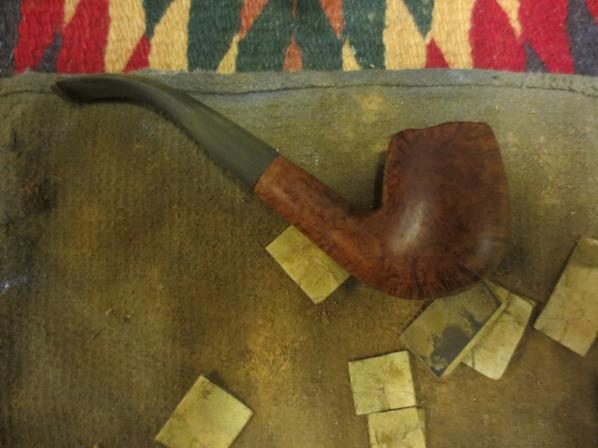
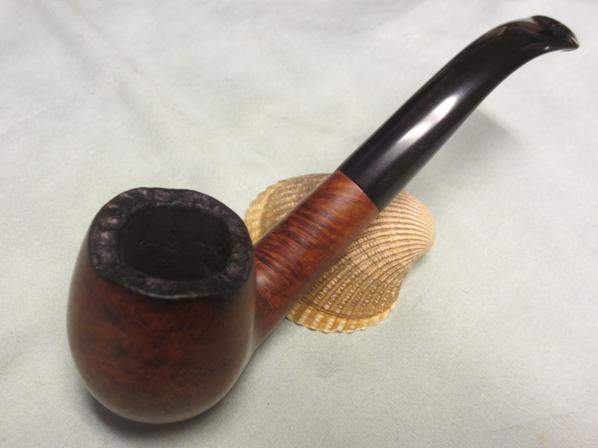
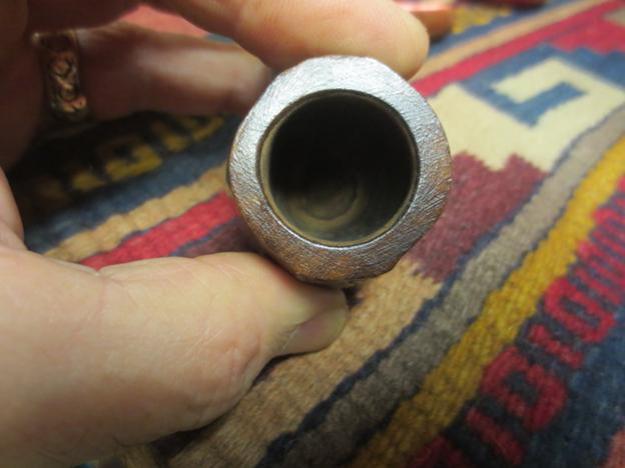
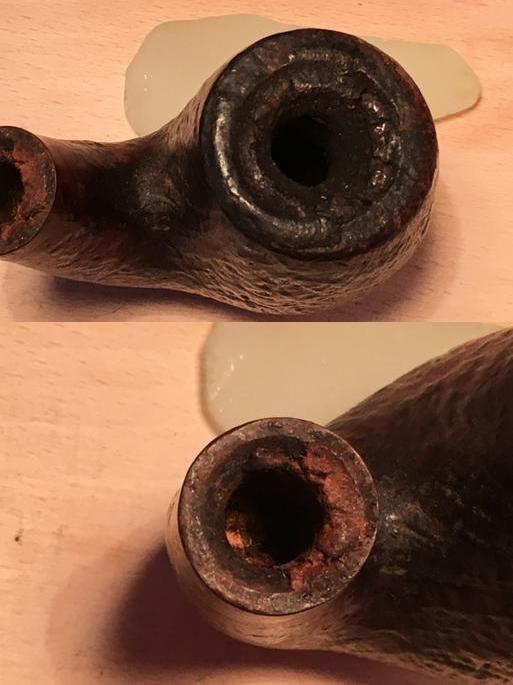
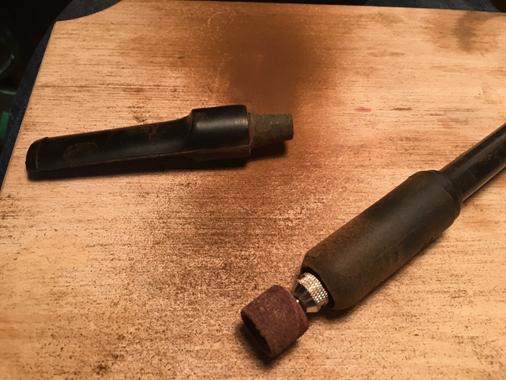
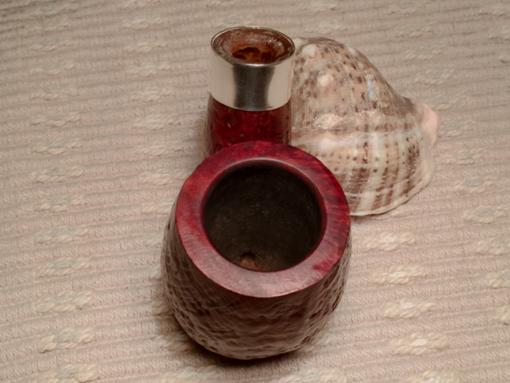
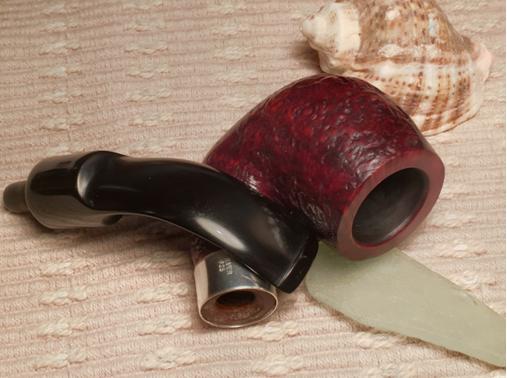
The bowl was almost closed with the buildup of lava and the rim was in pretty tough shape revealing at least one unfortunate drop on the front – that part that I could see. A look down the shank revealed something lodged. I couldn’t detect any cracks or burns. I enjoyed the feel of the bowl in my hand and the briar had great potential – I liked the dark reddish hue of the briar and the gentle rustification seemed to enhance the mostly hidden grain but showing promise. I would have to ream the bowl and clean the rim before I could know what might lie underneath. I would also have to find an appropriate stem too to fit the Dr. Plumb, no small task in Bulgaria. Since I was soon to make a trip to the US for my daughter’s graduation from college (Yes!), I decided to order the needed stem and bring it back to Bulgaria in order to complete the restoration. Steve recommended J. H. Lowes (http://www.jhlowe.com/). I discovered that finding the correct stem wasn’t too difficult but I was a bit nervous about the measurements. The directions on the website were pretty clear that the shank diameter would do the trick. I wasn’t sure whether the tenon measurements factored in at all. I purchased the Giudici bit – Round Saddle 17mm X 75mm. While I was buying a stem for my Oom Paul project, I bought a selection of nickel silver bands to have on hand in Bulgaria. While I was looking at the bands, I had the idea of dressing the Oom Paul with a band – and since it was my first honest to goodness restore – I splurged and bought a sterling silver band – oh, to get the correct size! Again, the size was measured by the diameter of the shank as the stem which looked to be at 17.5mm. I might also mention that Tim West at JH Lowe answered my emailed newbie questions and was a great help. Having put in motion the strategic plan with the stem and band, I moved to the cleanup of the bowl. In order to soften the muck buildup in the bowl I put the bowl in a bath of isopropyl 95% overnight. The pictures reveal the post-bath bowl working in my ‘satellite workspace’ on the 10th floor balcony!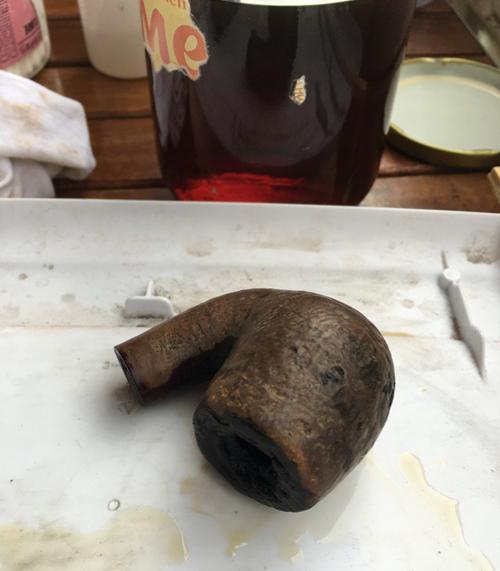

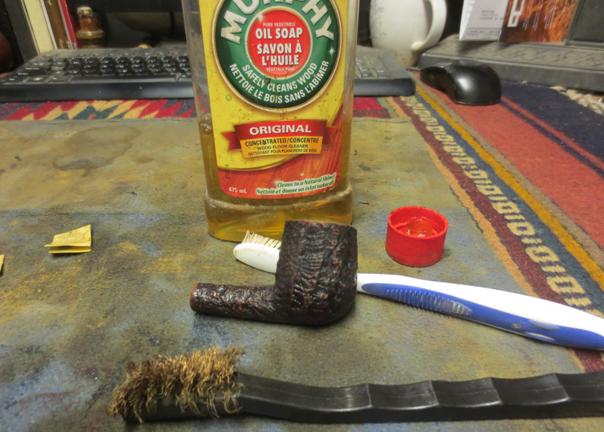
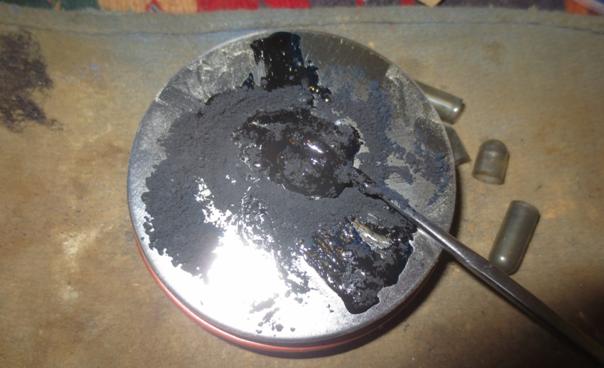
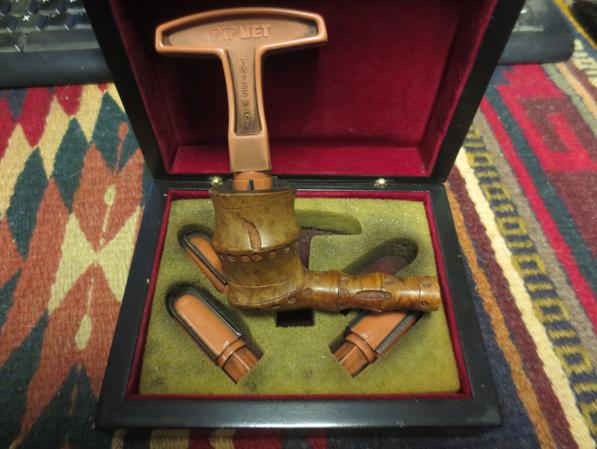
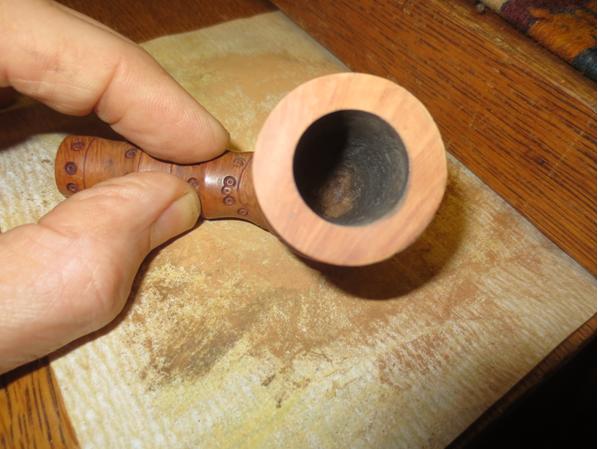
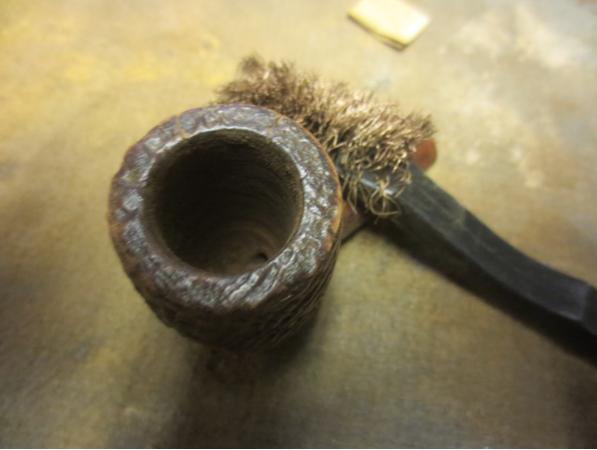
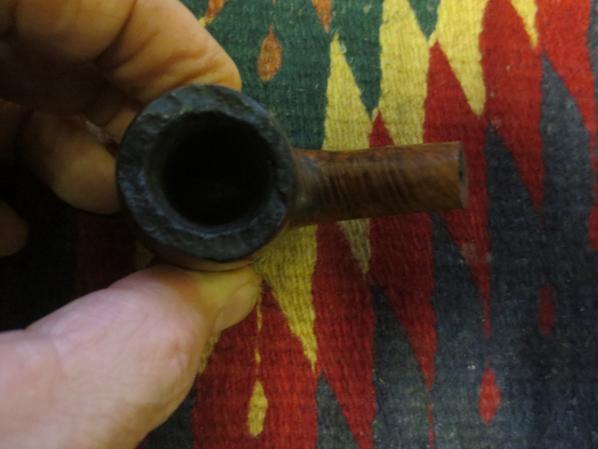
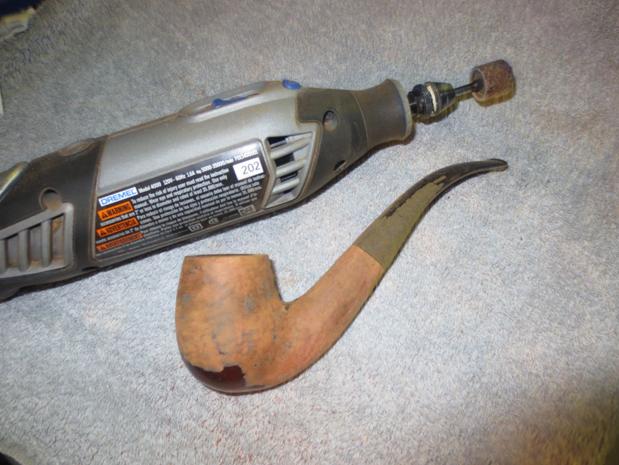
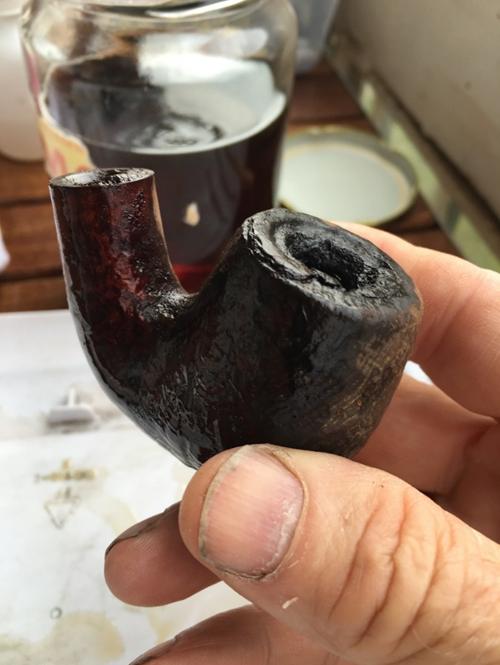 I tried unsuccessfully to remove the obstacle in the shank using a wooden chopstick as a tool. It works great on Chinese food, but not so well here. I decided to leave the shank for the time and I moved to reaming the bowl with the Pipnet reaming kit that recently arrived from Germany – eBay of course. I started with the smallest blade working toward the larger bringing the tobacco chamber back to the wood. Not having used the reaming kit too much, I’ve learned that it works best if I allow each blade to do the work – not applying too much vertical pressure on the tool. Simply rotating the tool (clockwise) with consistent pressure proved to do the job. I had a pretty big pile of ‘charcoal dust’ resulting from the ream – Question: Can this be used for stem repairs mixing with superglue? After completing the ream I turned my attention to the rim. I used a brass brush and isopropyl to clear away the remaining lava flow allowing me to see more clearly the condition. The rim would need to be topped but the prospect of ’re-rustifying’ the rim was a daunting thought at this point. The rim appeared to have a ‘lined’ rustification before, but I decided to put that question off till later. These pictures show the progress.
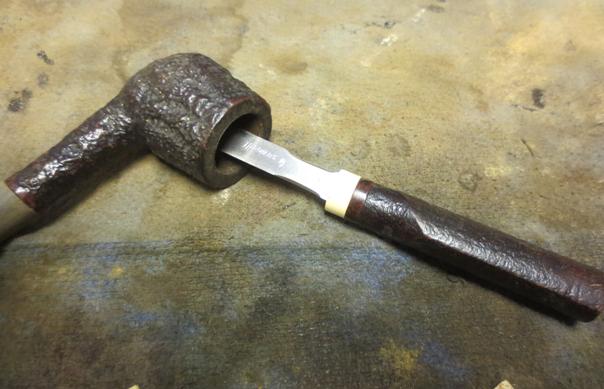
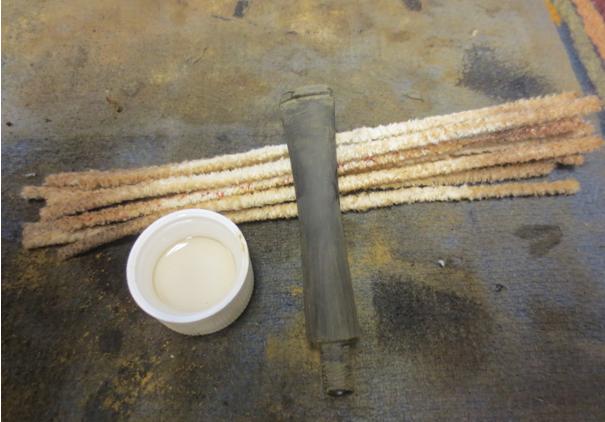
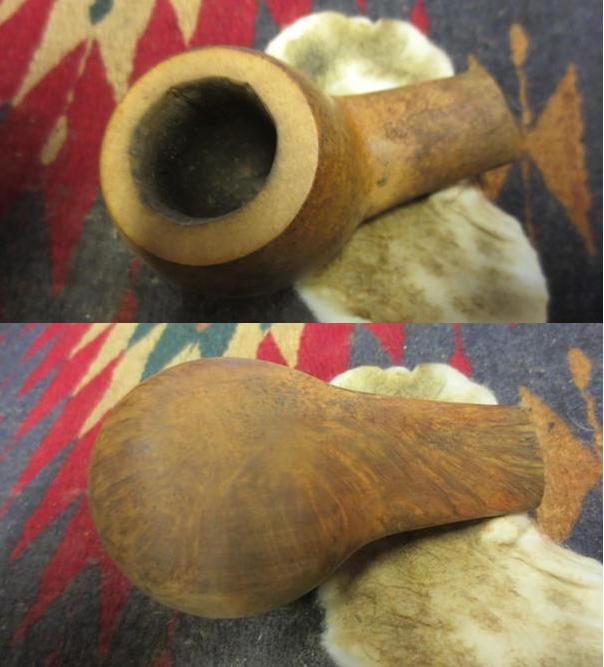
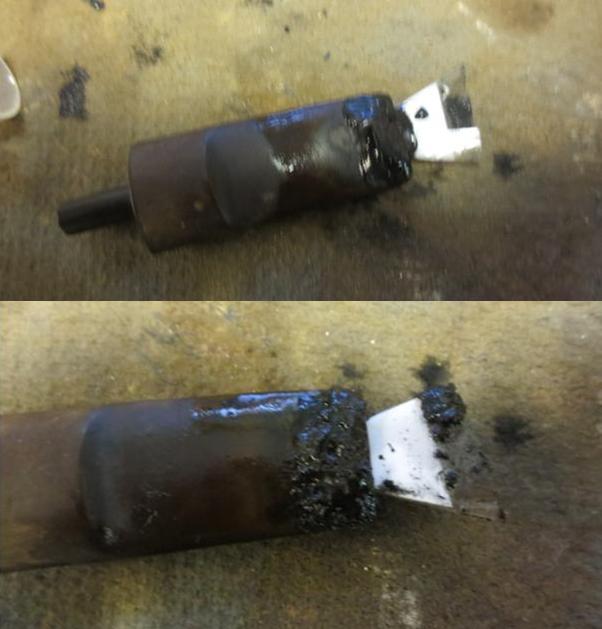
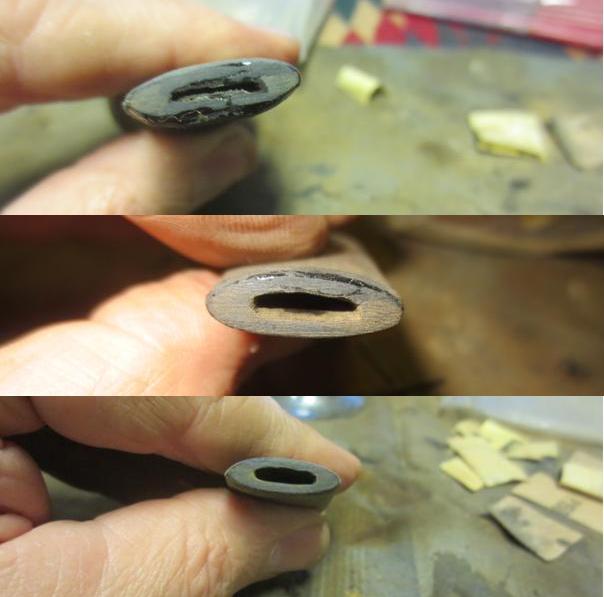
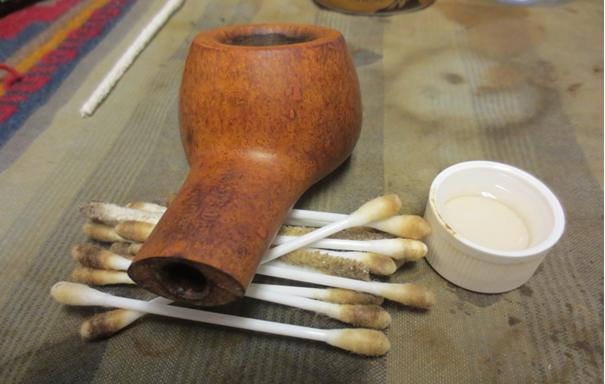
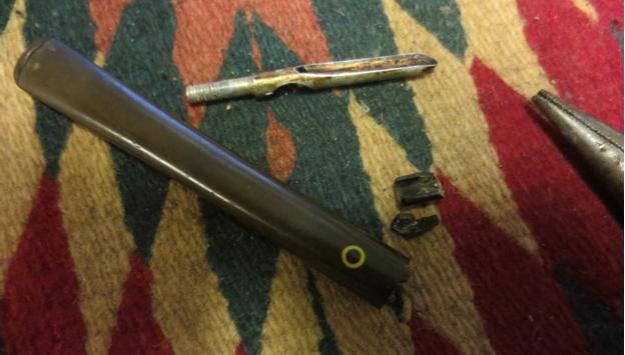
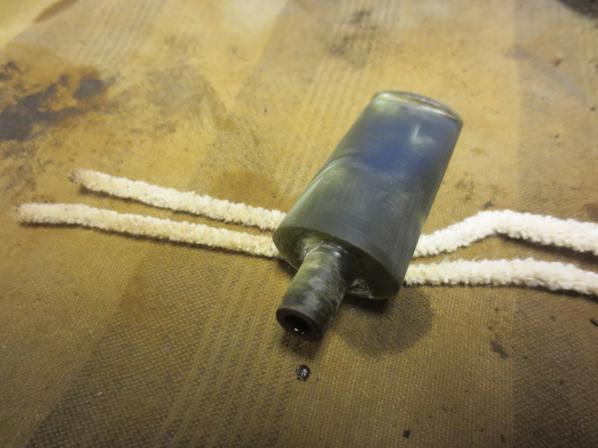
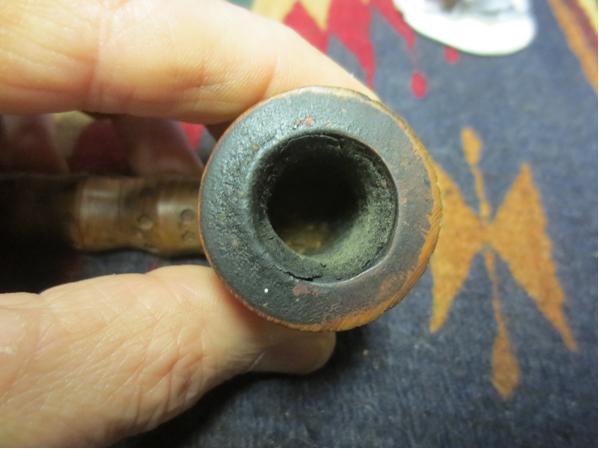
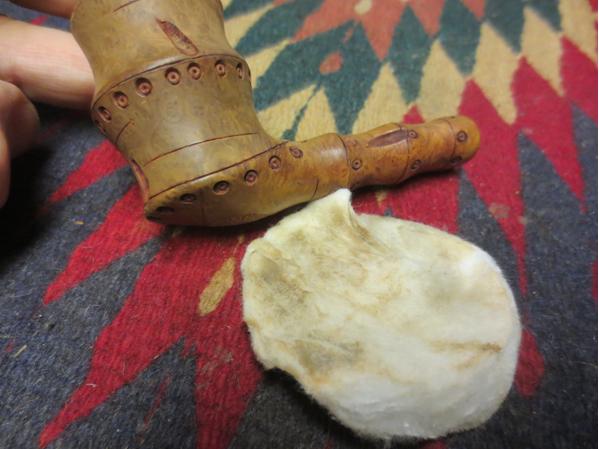
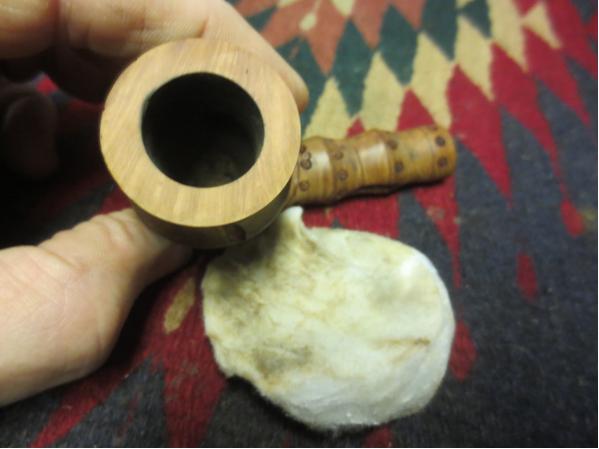
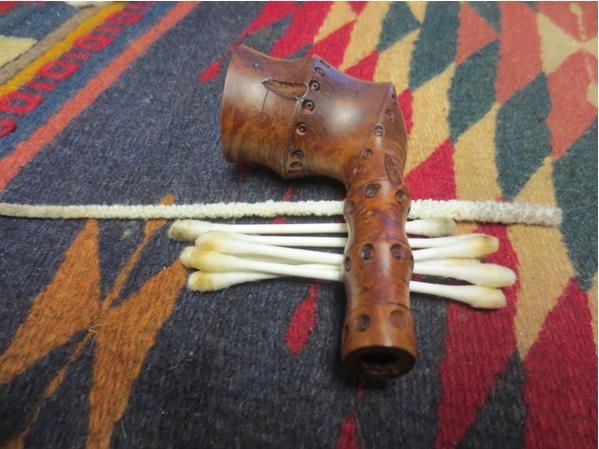
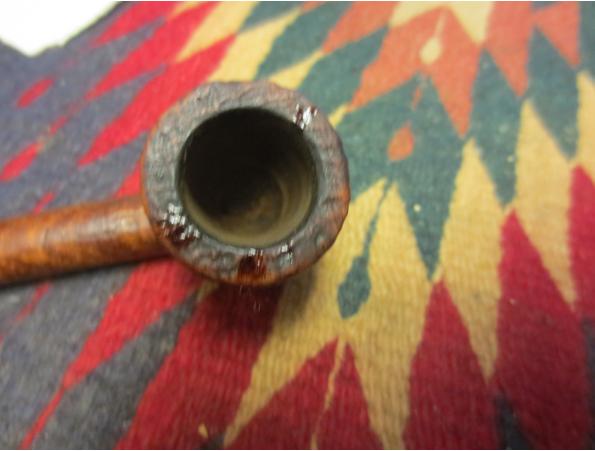
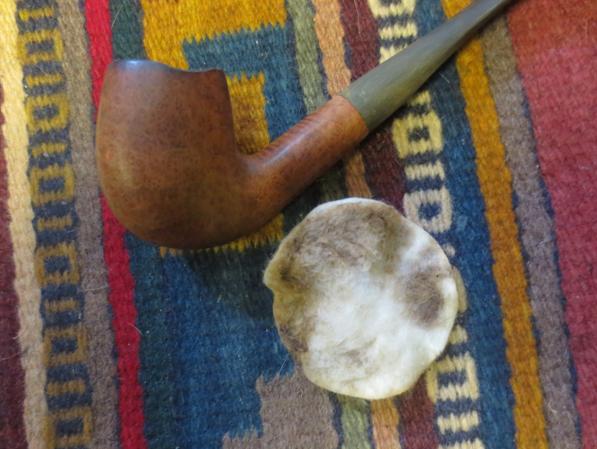
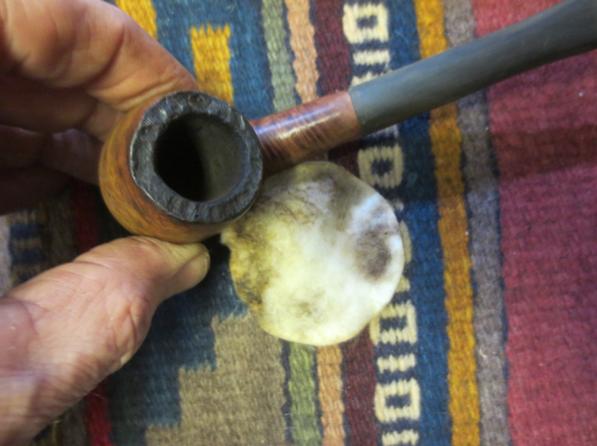
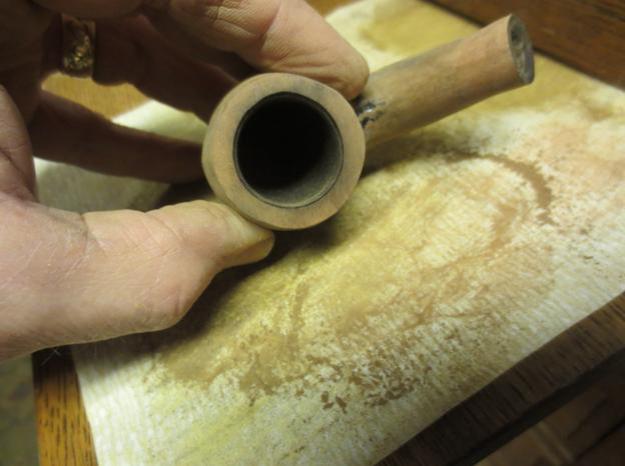
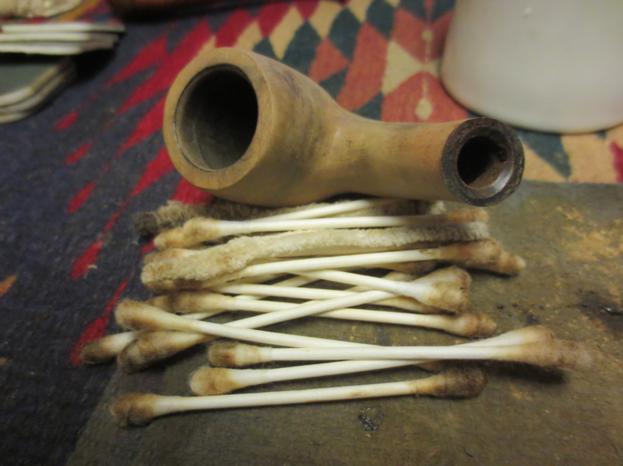
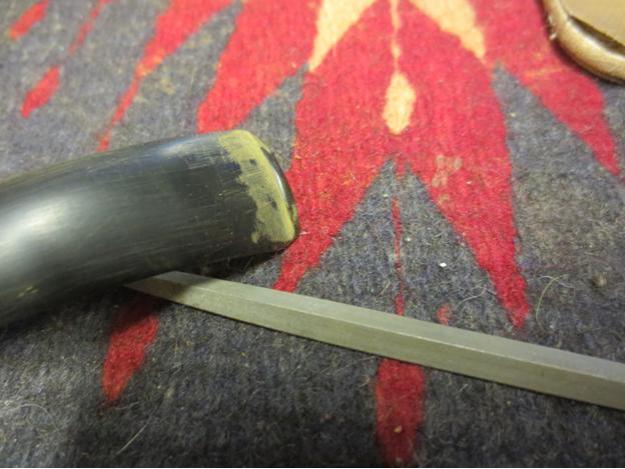
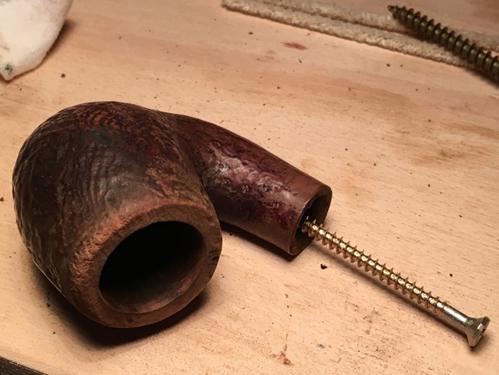
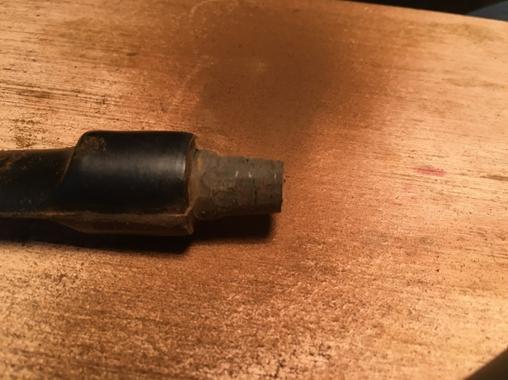
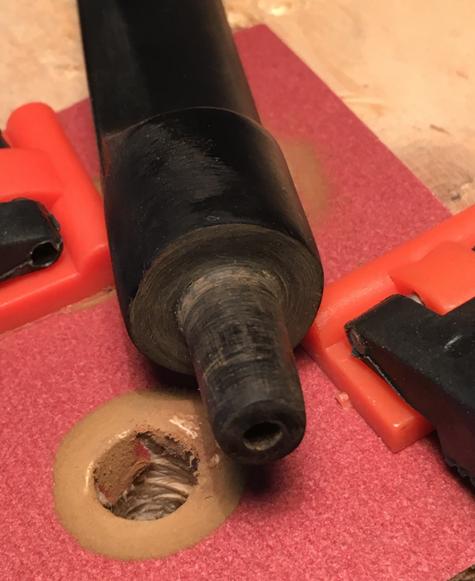
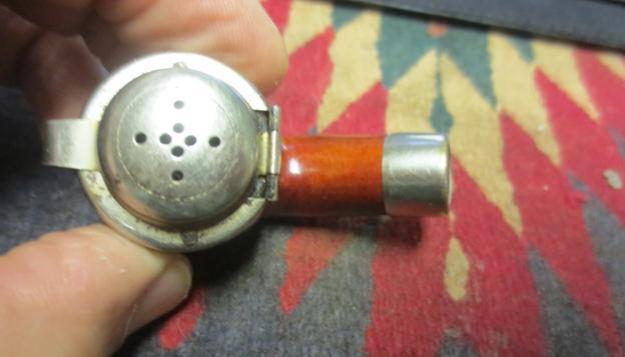
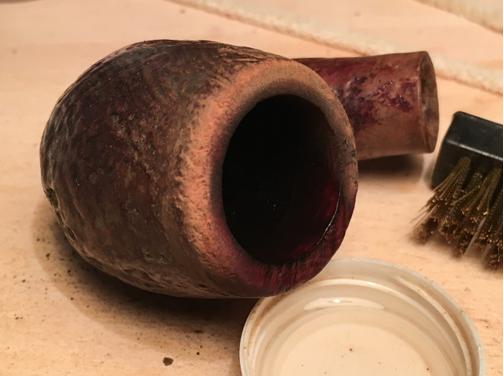 Moving to the shank, I knew that I would need to do extraction work. After working with several Qtips and a dental probe I was not able to extract the muck. Drawing on previous rebornpipes posts, I decided to use a wood screw to remove an obstruction. While I don’t have an extraction tool like Steve’s, in Bulgaria we do have wood screws. Carefully I inserted a smaller diameter wood screw into the mortise slowly rotating the screw to grip the obstruction without damaging the briar. Thankfully, the battle was not long and the pictures reveal the unearthed obstacle to now allow pipe cleaners to do their part.
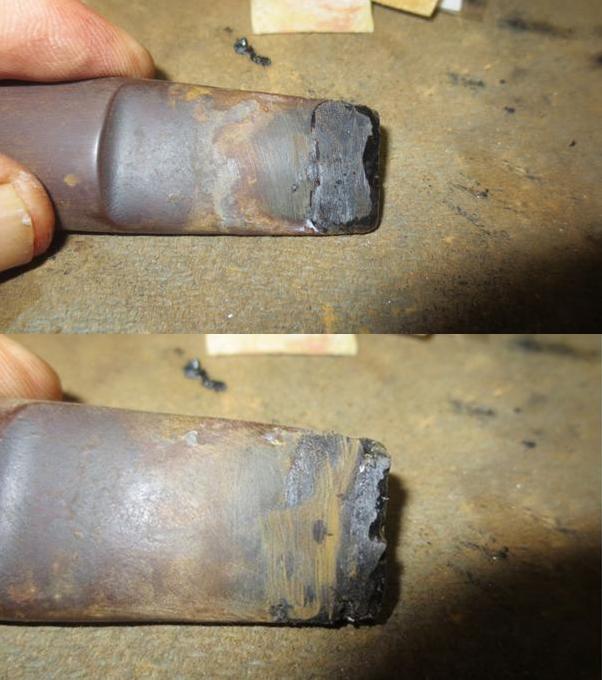
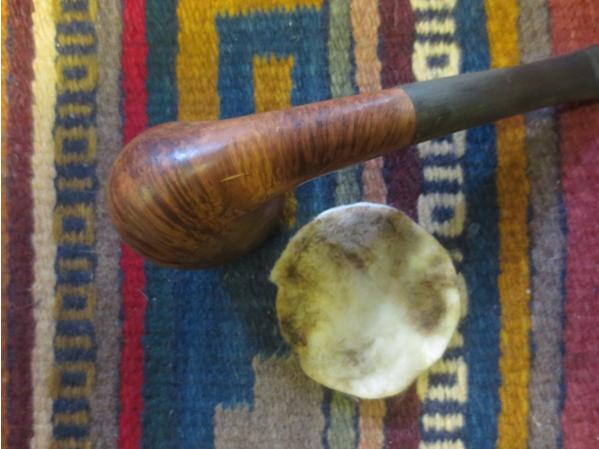
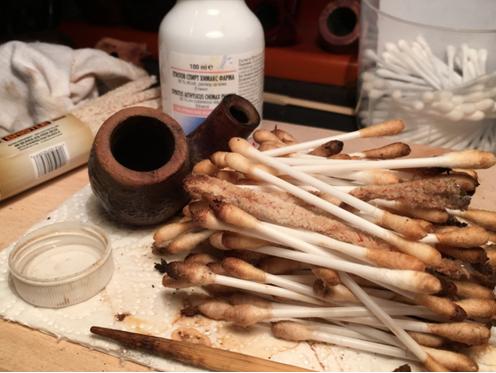
 When the remains of what appeared to be an old filter were removed, I went to work on the airway with pipe cleaners and Qtips dipped in isopropyl 95%. Cleaning the Oom Paul seemed to go on forever. Part of the problem was that I could not quite figure out through ‘Qtip feel’ what the design was in the internals of the bowl. No matter how many Qtips I put in, they didn’t seem to make a dent on the muck. So I went to the internet and discovered on puff.com questions from what appeared to be another newbie trying to figure out Oom Paul gunk problems. I discovered that Dr. Plumb’s internal design had a trap that would collect the moisture while the airway flowed over it – theoretically giving the proverbial ‘dryer and cooler’ smoking experience. I’ve included the cut-away picture that helped me understand what I was dealing with in my seemingly unending cleaning project. If I had a retort at this point, I would have put it to work (I just ordered one on eBay that I would also pick up in the US and bring back to Bulgaria!). I settled for loading the bowl and shank with isopropyl and letting it sit overnight again hopefully to loosen things up more. The next day I used a bunch of Qtips and pipe cleaners to clean the bowl sufficiently for me. At this point I put the project aside in anticipation of my trip to the US. I needed to have stem and band in hand before I proceeded with the bowl preparation and finishing. I would also return from the US with purchased cleaning and finishing supplies that I cannot find in Bulgaria. Thankfully, Qtips are in great supply in Bulgaria!
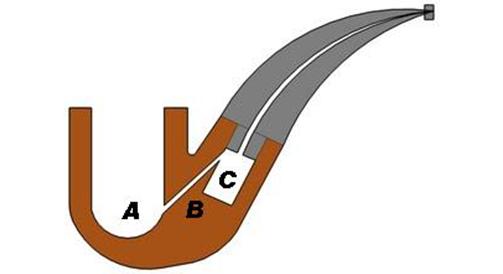 http://www.puff.com/forums/vb/general-pipe-forum/175391-oom-paul-gunk-problem-2.html
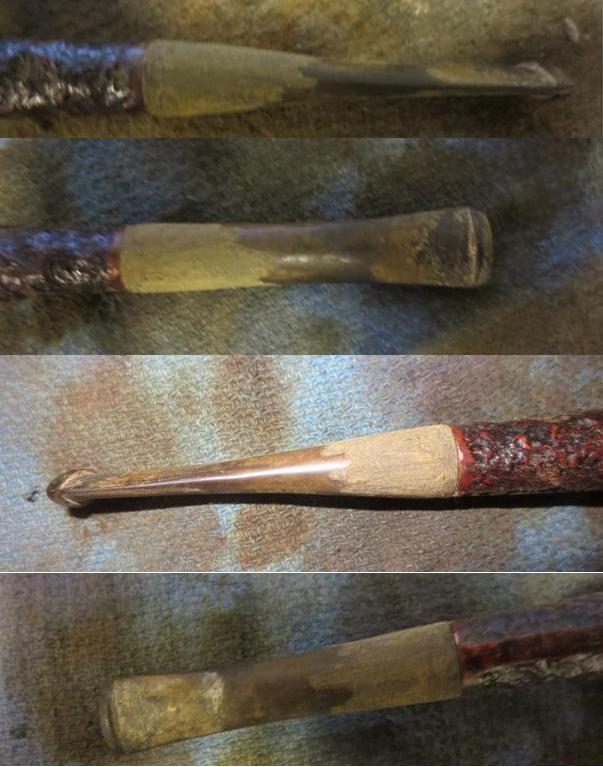
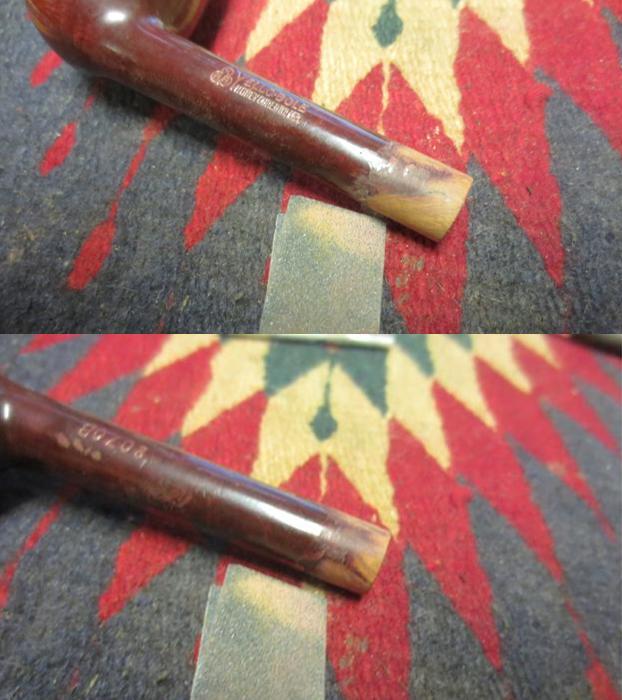
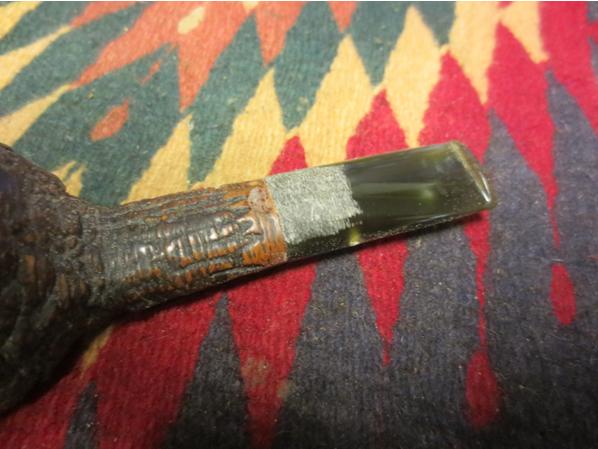
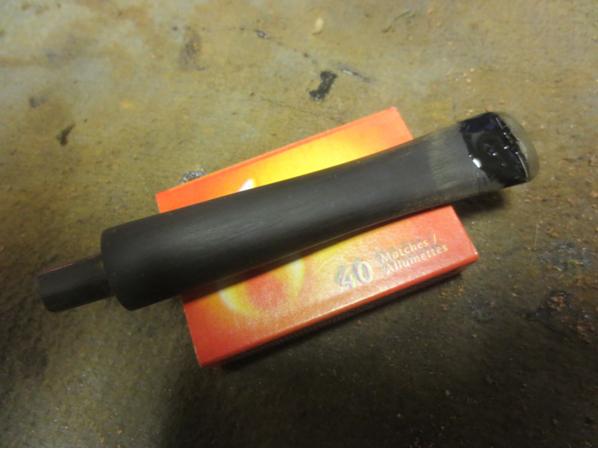
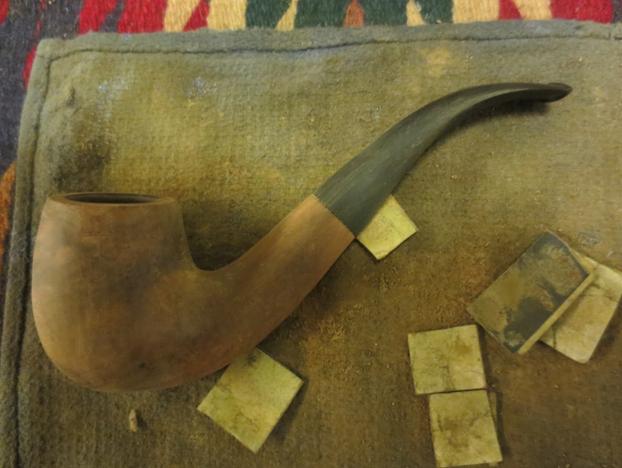
 My time in the US for my youngest daughter’s graduation from college was a blessing as my wife and I were reunited with our 5 children and now, 2 grandchildren. We were happy to meet our newest grandson who was born only recently! I returned with a suitcase full of eBay estate pipe purchases to compliment my local finds – as well as cleaning and finishing supplies that I could not find in Bulgaria. My new retort arrived too and I’m looking forward to giving it a go – though I am a bit nervous about boiling alcohol! Also in hand were the new stem and band that JH Lowe had delivered to my US mailbox. I was anxious to see if my measurements were accurate and to continue my Oom Paul project. The first thing I discovered was that the tenon of the new stem was too large and would need to be resized. I was relieved to see that the actual diameter measurement of the shank was correct. From this I learned that there seems to be no standard tenon sizing with new stems – the most important measurement is the exterior dimensions, so that the stem and the shank have a proper mating. Given that I had not shaped a tenon before, I discovered that I had all the tools needed after a quick email question to Steve – what I didn’t know I would have was the patience to go slowly! My biggest concern was that the ’rounding’ of the tenon would not be true as I downsized it with the use of Dremel, files and sandpaper. I knew also that I didn’t want to have to repair a previously uncracked shank by forcing a too large tenon into the mortise. I ALSO knew that I didn’t want to take too much off the tenon and it be too loose and then have to build it back up with clear nail polish (epoxy) which I’ve had to do before. With questions and concerns loaded in my conscious mind, I went to work on the brand new stem. The pictures show the progress.
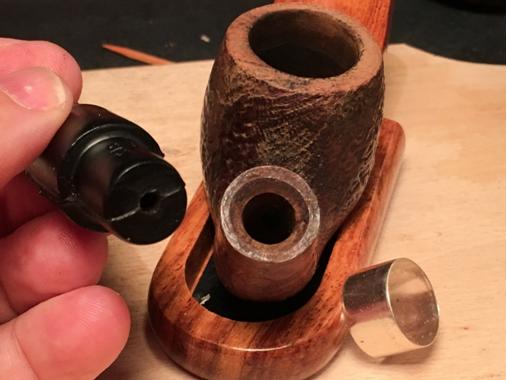
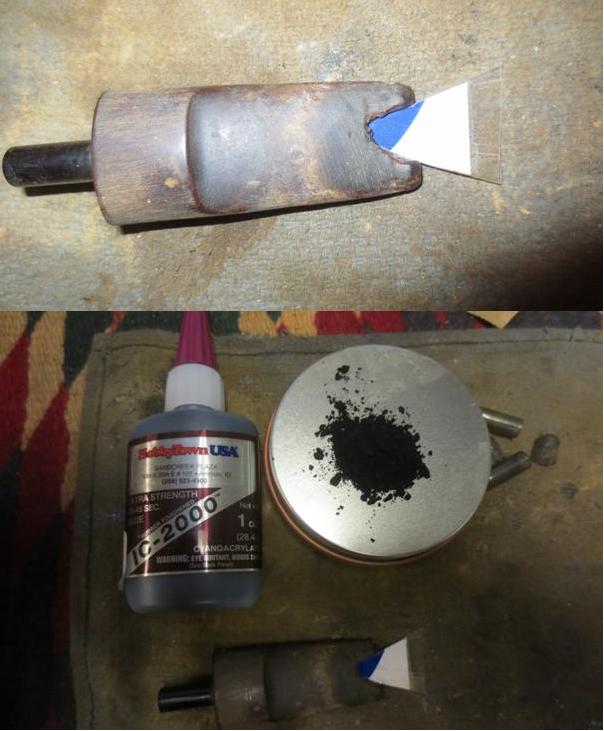
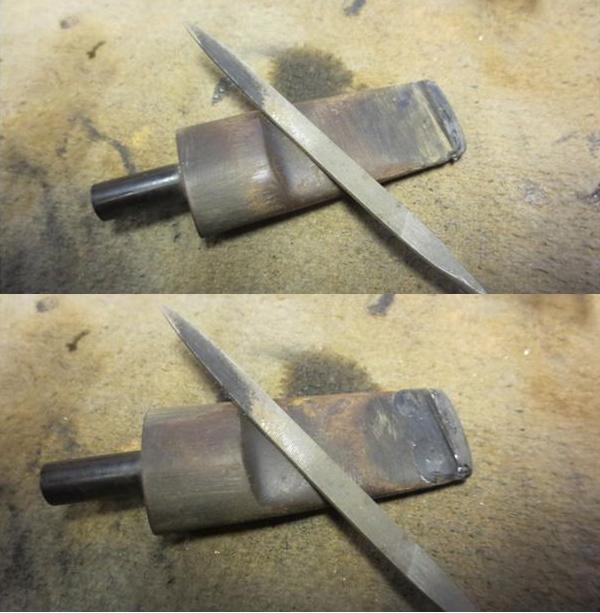
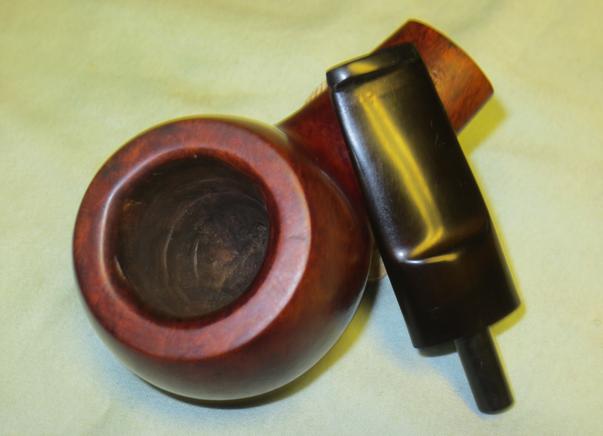
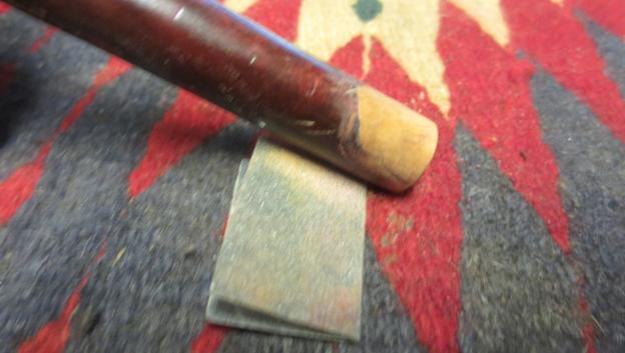
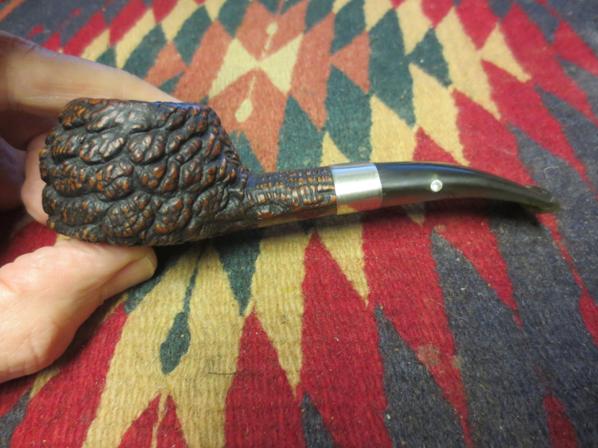
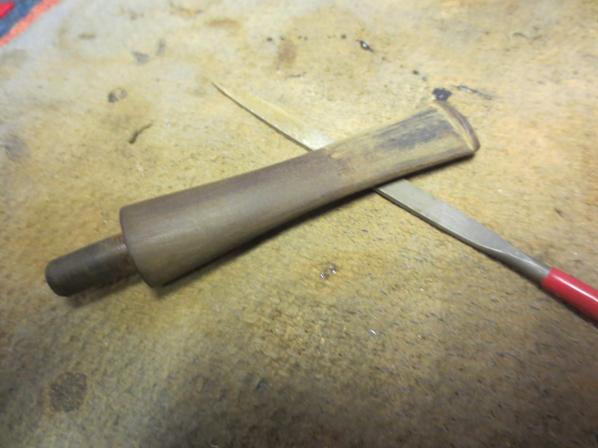
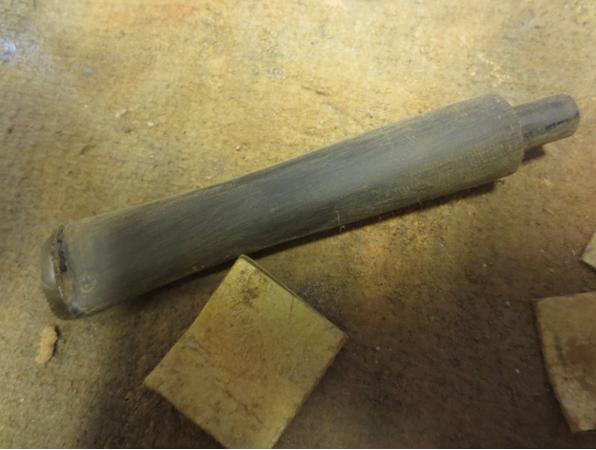
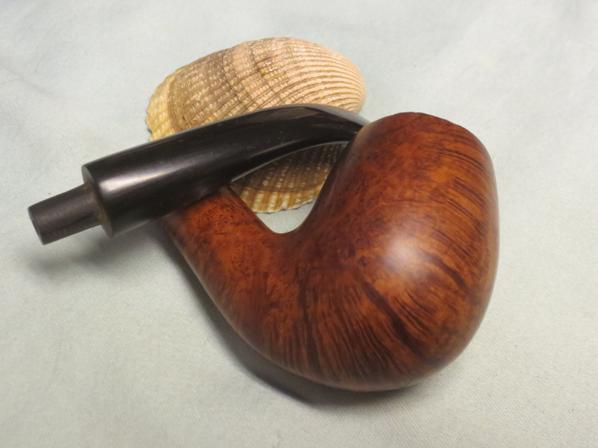
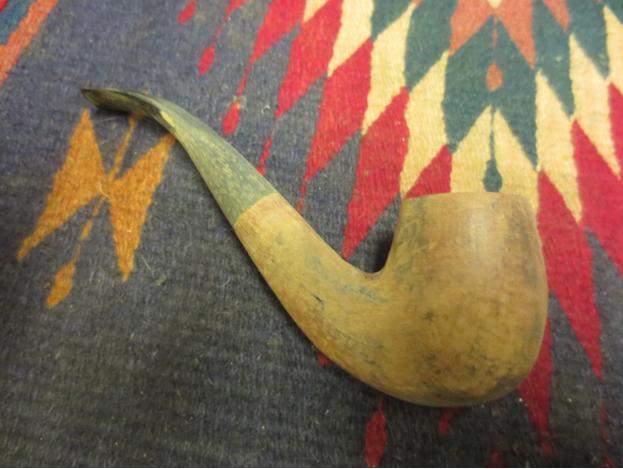
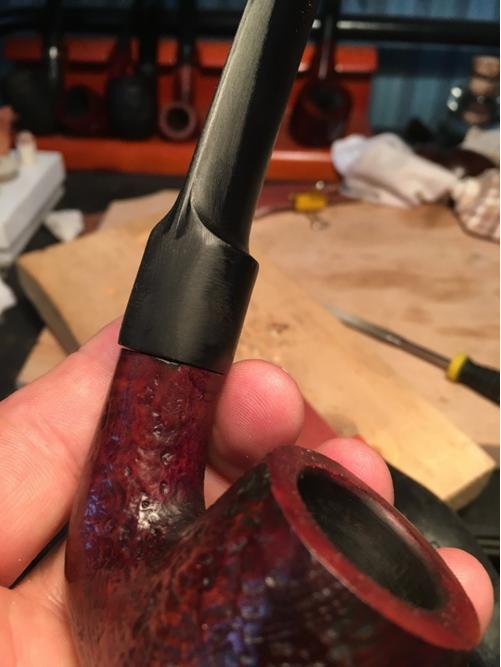
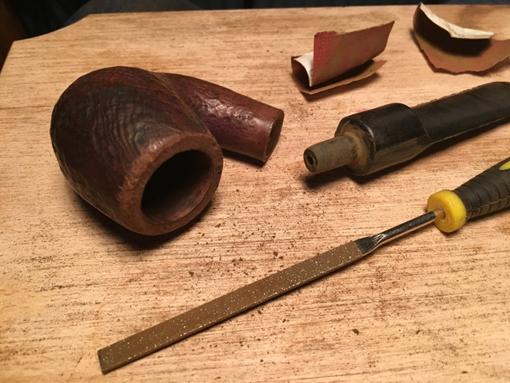 After bringing the tenon down to close proximity to the mortise size, I gently tried the fit the tenon without pushing. I did this several times while slowly taking more vulcanite off the tenon. I discovered that when I partially inserted the tenon into the mortise to test it, the places on the tenon that were more firmly in contact with the mortise wall would be shinier – thus cluing me in to where I needed to apply the file more directly. I also discovered that the positioning of the stem in the shank – as it progressed more deeply into the mortise – began to reveal a more favorable positioning of the stem for the eventual bend direction that would be made. The technique I used (discovered!) that seemed to make sense as I started the process was to shape the tenon as a cone that gradually brought the tenon tip to the correct diameter of the mortise. I then moved gradually working that diameter toward the base of the tenon. By doing this I was more effectively able to remove the vulcanite evenly and not have a crooked or untrue tenon. The pictures below show the seated tenon from different angles. I realized that the base of the tenon where it ties into the stem was pretty roughed up from my use of the Dremel. It unevenly pushed out at the shank and needed more attention. I decided to put the stem aside for a while and turn to the bowl – I needed some new scenery at this point!
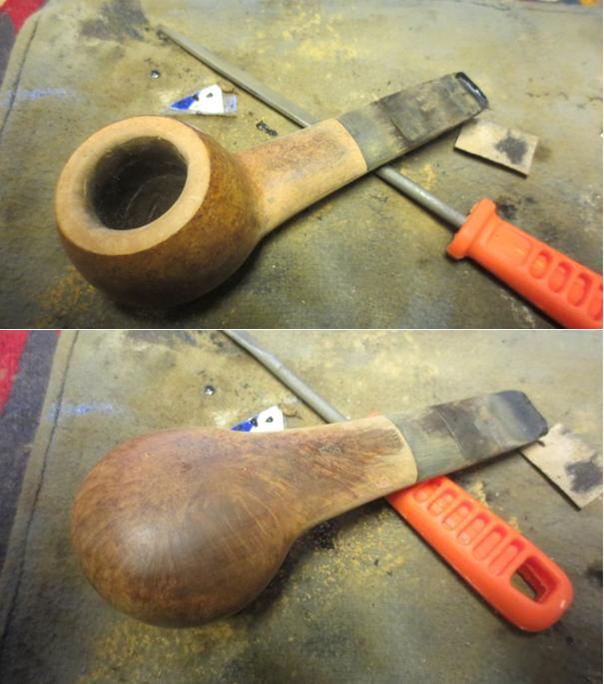
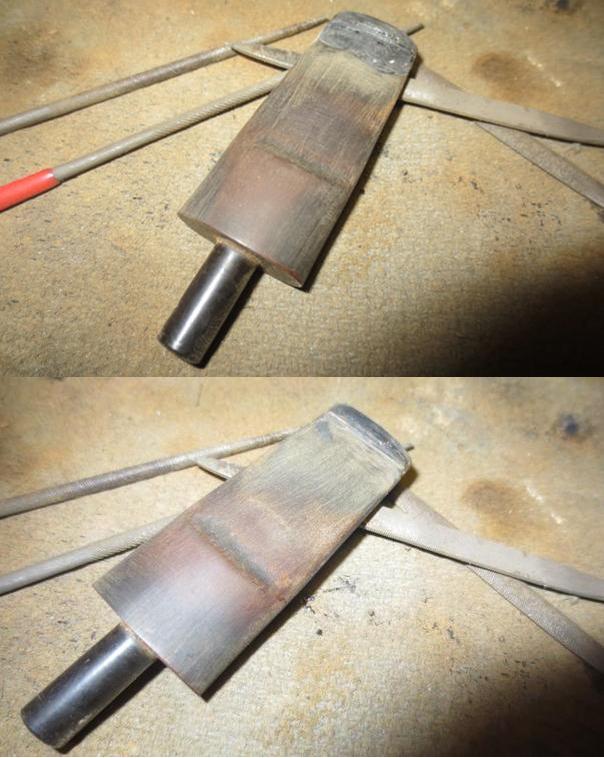
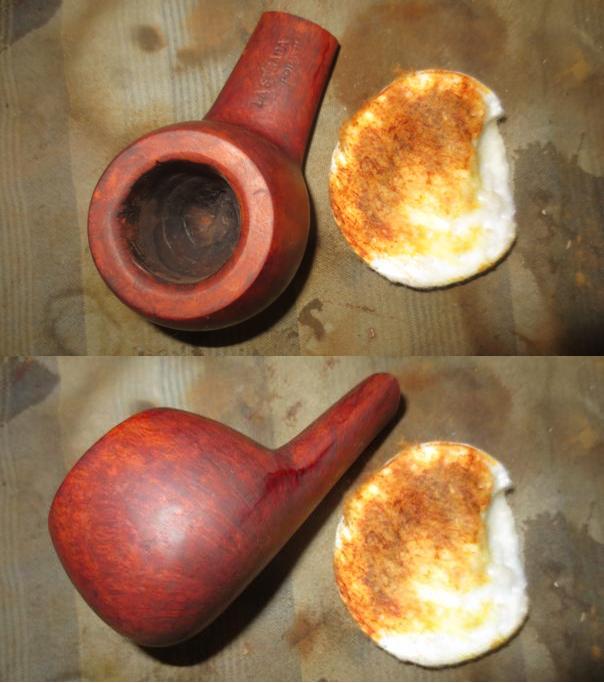
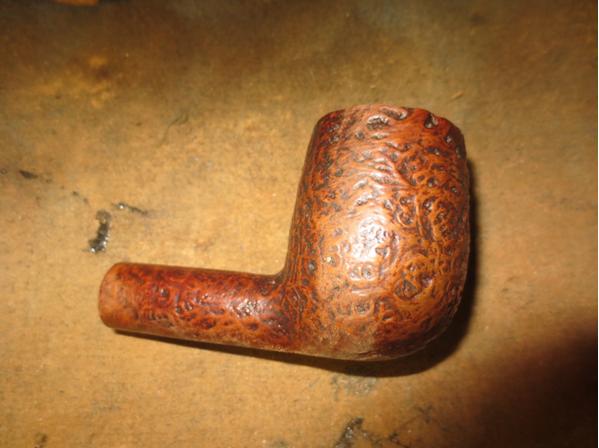
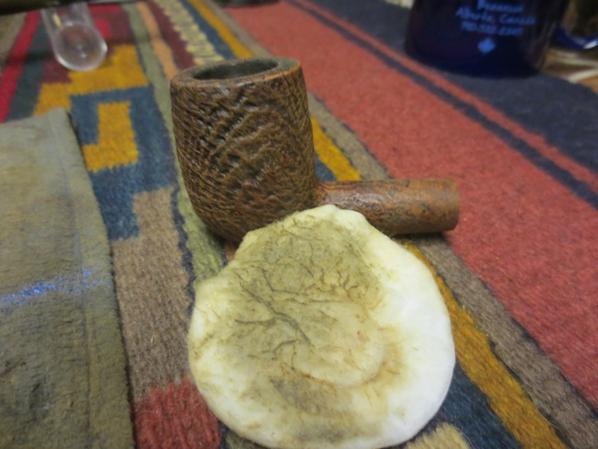
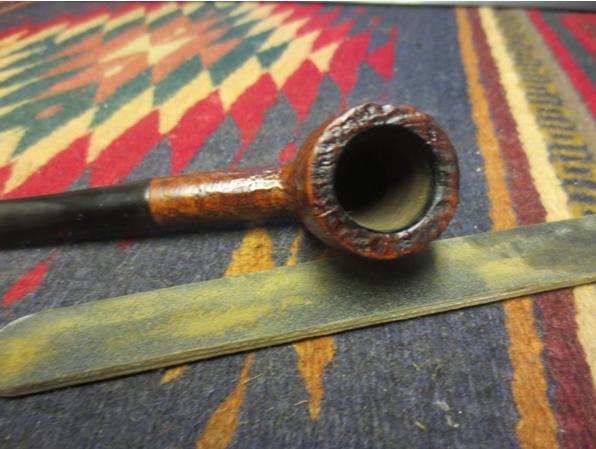
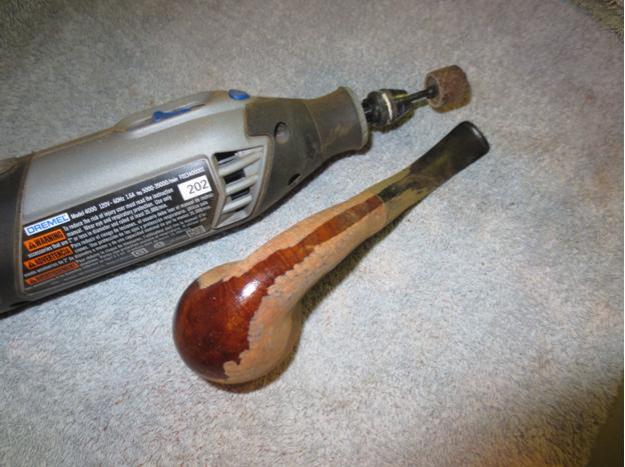
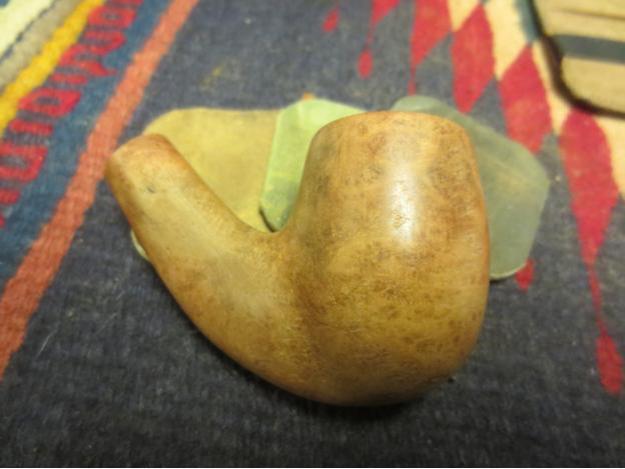
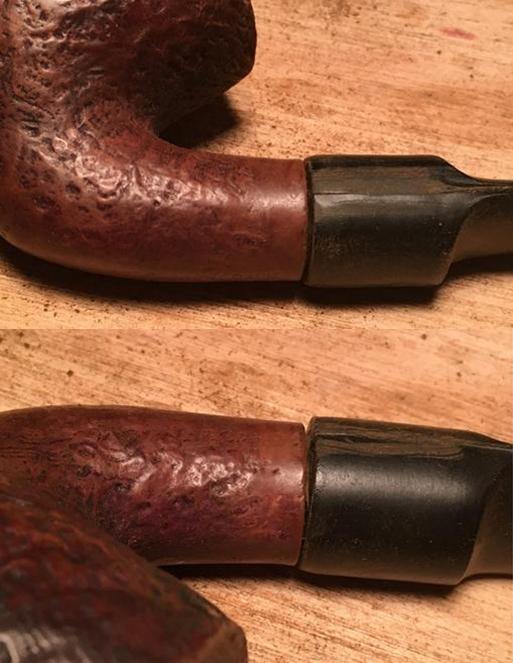 Looking to the rim, I took some closer pictures as a reminder of the rustification design. The damage on the front of the bowl was significant and the bowl needed to be topped. I moved out onto the balcony so as to minimize the sawdust in our bedroom (helping my wife to be happier 🙂 and I spread out 230 sandpaper on a flat surface (cutting board). I wanted to take off enough of the top to remove the rim damage but not too much to maintain the bowl proportions.
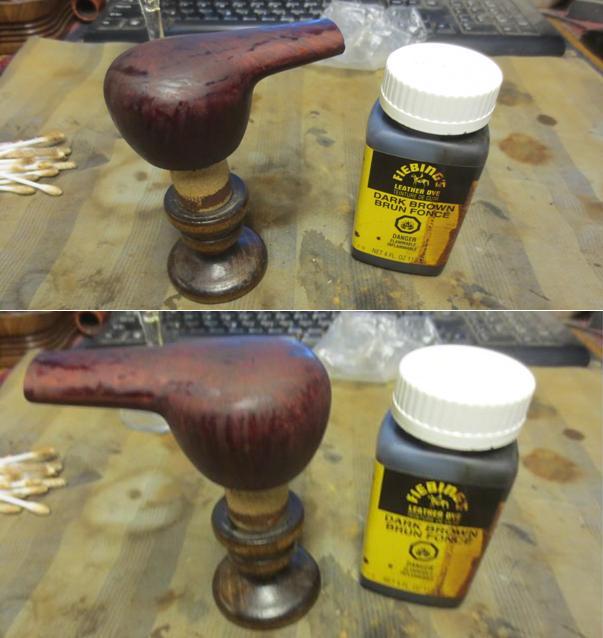
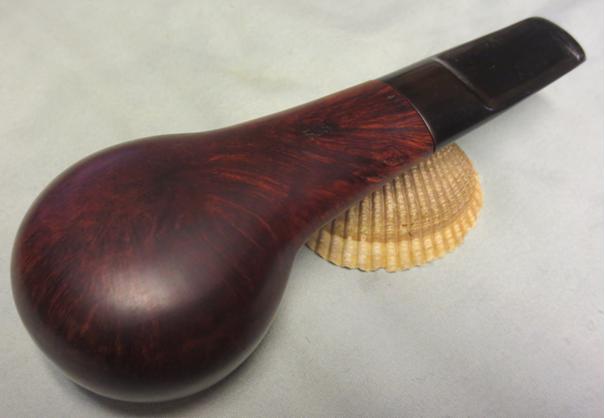
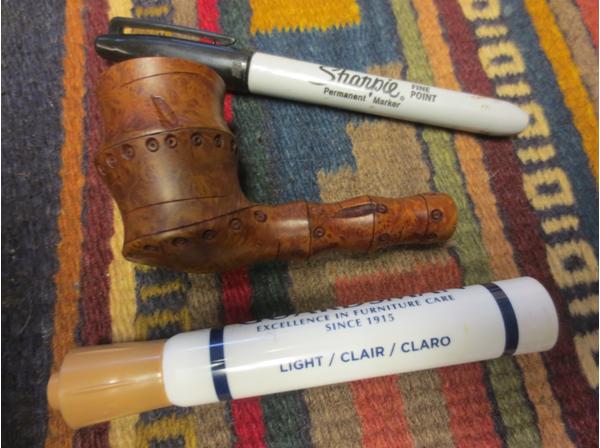
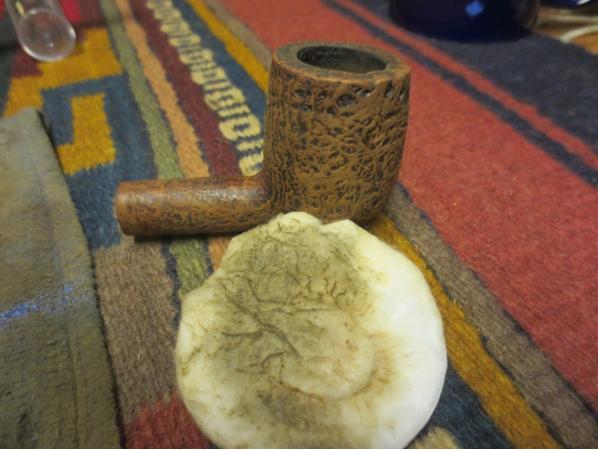
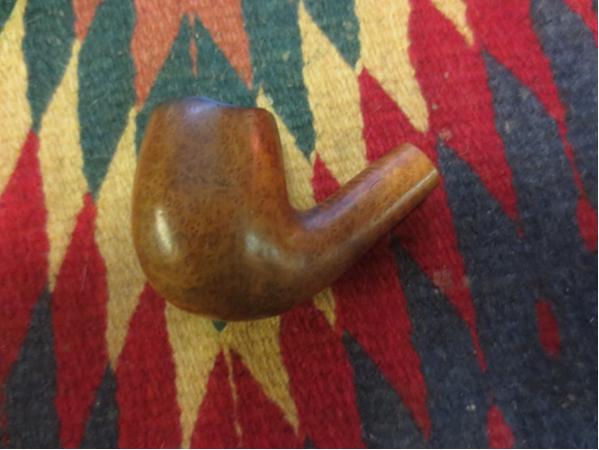
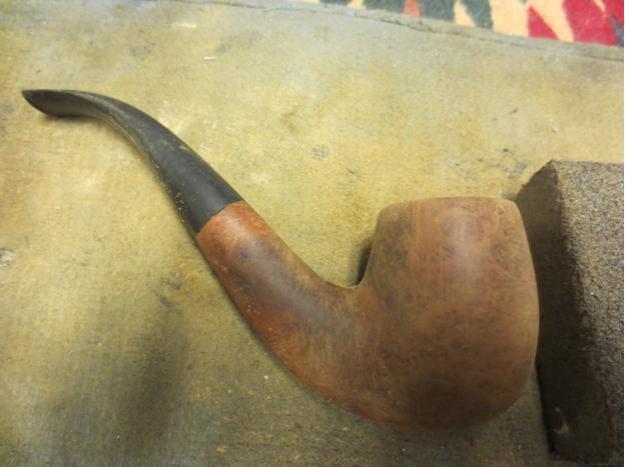
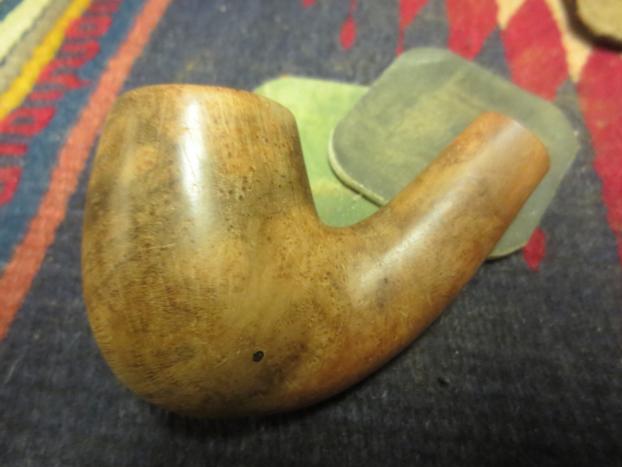
 I was satisfied with the topping at this point. However, what the topping revealed was the beautiful briar underneath. Part of what has attracted me to this hobby is the ‘surprise’ I get from each peek of revealed briar grain – never the same, always creatively new with potential beauty to be more fully revealed. Getting ready for staining the bowl, I used a dark mahogany stain stick (from Italy) to darken the rim and bring out the dark rich reds I’m seeing in the briar.
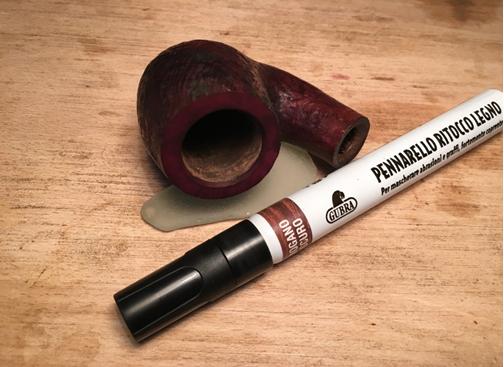
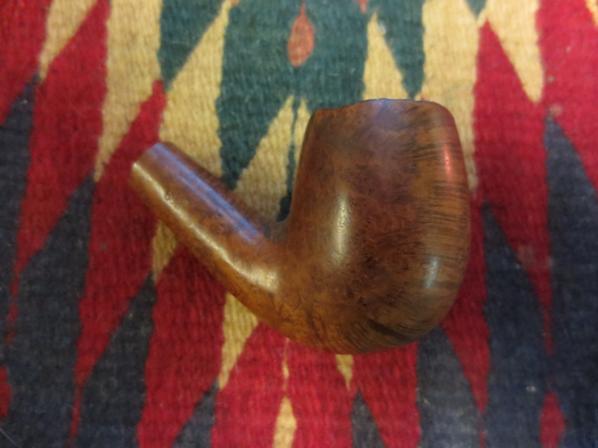
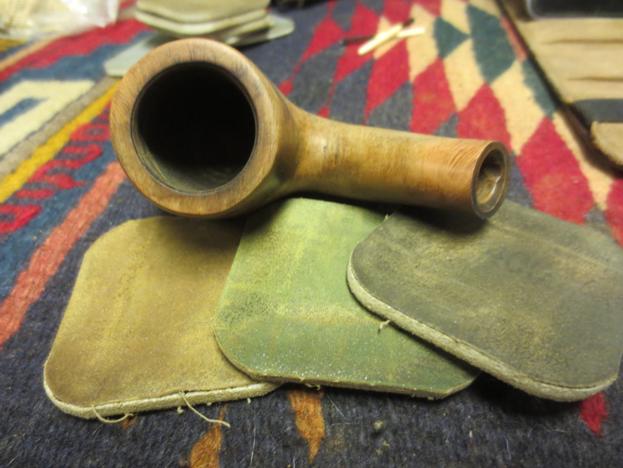
 I have yet to find an alcohol based stain in Bulgaria that Steve uses in his restorations. The stains are pigment based with water. So, the ‘flaming’ technique that I’ve studied on rebornpipes doesn’t come without some help. I used a Cherrywood stain and diluted it with 50% alcohol as the base stain. Again, reaching for the red-tones that I see in the briar. When I applied the stain mix I used a cotton ball and let it flow over the bowl surface. I was careful to have full coverage by picking up the candle stick and cork set-up and manipulating the stain so it reached the inverted rim. When I applied the lighter, it still didn’t flame but I was able to essentially ‘dry’ the stain to the wood by moving the lighter lightly over the surface. I think it pretty closely achieved the same thing – sealing the dye in the grain. I repeated the process a second time – the pictures show the progress. Oh, and shot glasses make for good stain mixers in cramped quarters! (Also, thanks to my wife for providing the candle holder :-). I put the stained bowl aside for several hours to allow the stain to set – I suppose it needed it, but I had other things to do!
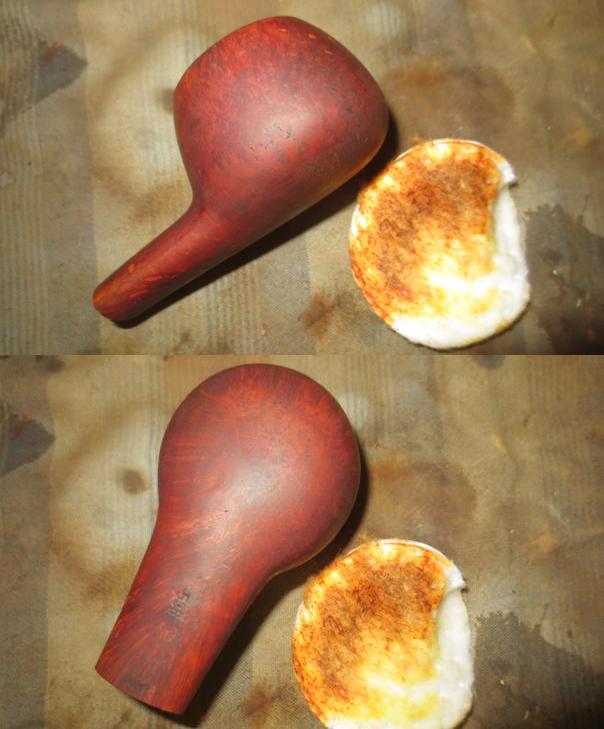
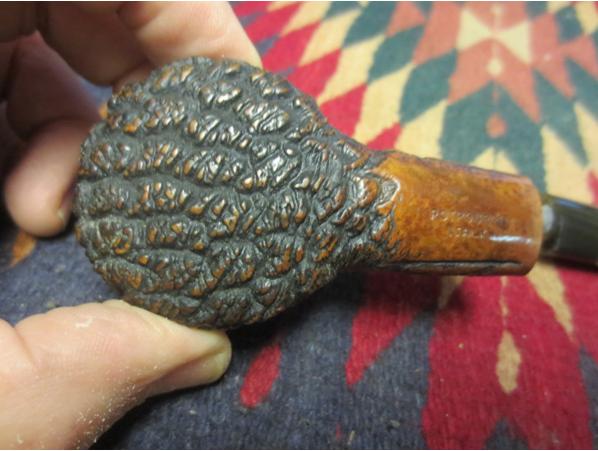
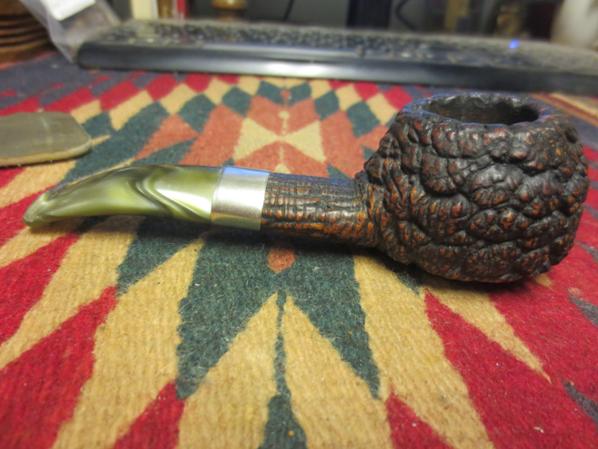
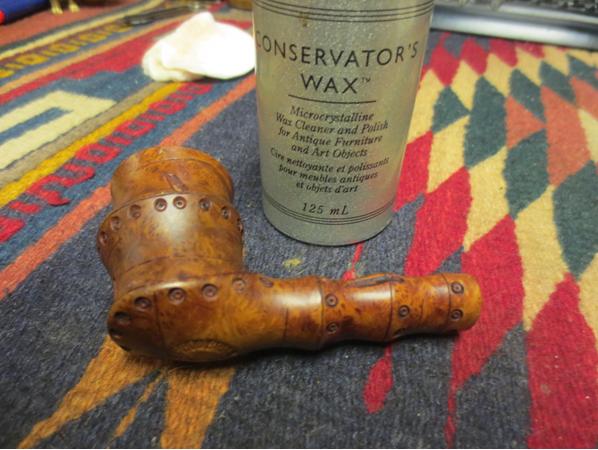
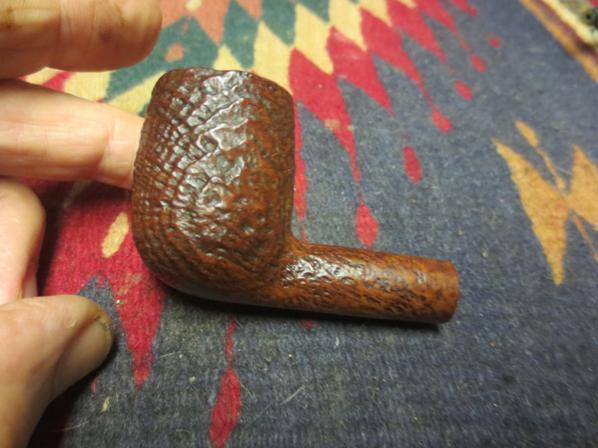
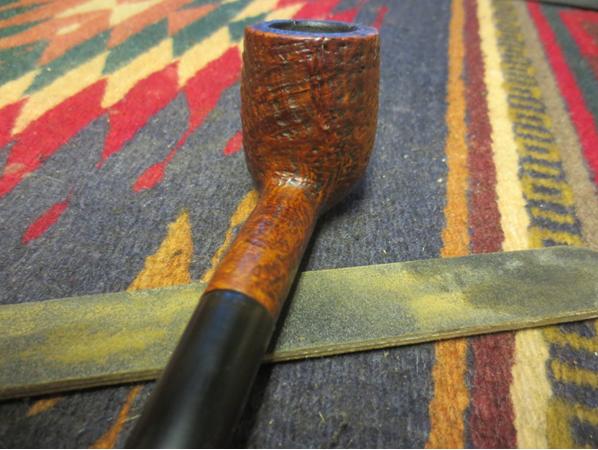
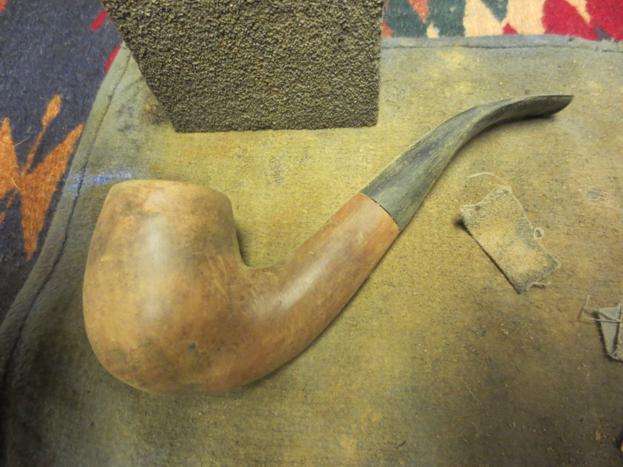
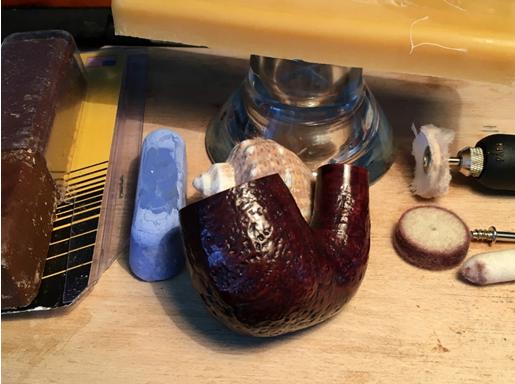
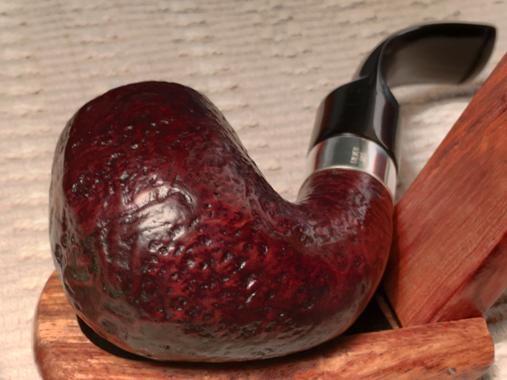
 I was anxious to get back to the project because I would be able to employ new supplies that I just brought back from the US – Tripoli, Blue Diamond and carnauba wax! I also had purchased different Dremel wheels for each different application. Based upon my readings, I used felt wheels for the Tripoli and blue diamond applications – in that order. Then, to bring out the grain further, I used a cotton wheel attachment for the carnauba wax application. Since Dremels have a very high RPM potential, I buffed at the slowest setting and kept the wheels moving so as to not overly heat up a particular area. Applying the carnauba wax needed some heat to spread the wax evenly over the bowl surface, but I soon was able to see the way the wax liquefied and I used that to work over a particular area and then move on. Its difficult describing the ‘rush’ of seeing the beauty of the briar grain emerge with each application. It was at this point I decided not to rusticate the rim, but to leave it smooth, revealing the grain and to me, a very classic appearance when adding the band. The pictures show the bowl but I know that I will need to polish up more after applying the band later on.
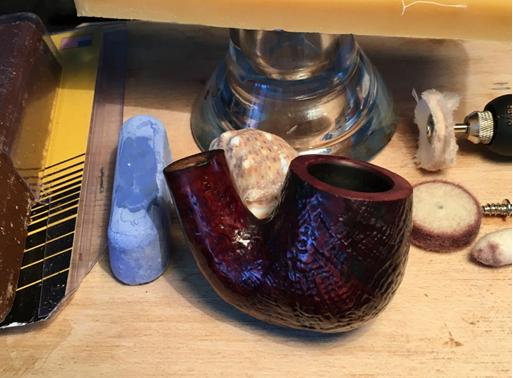

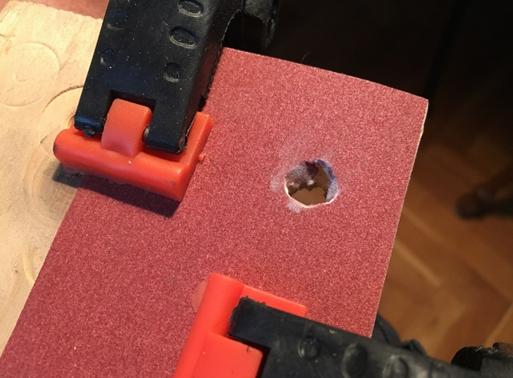
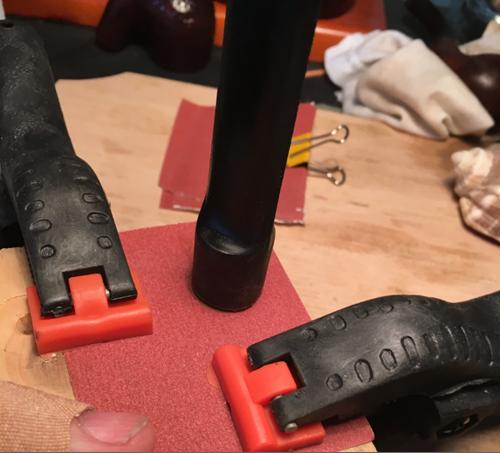
 With the bowl restoration nearly complete, I was re-energized to look at the stem. The tenon needed to be more finely-tuned to fit the mortise, but first, I had to deal with scars from the over-anxious Dremel sanding wheel that ate a little too much into the base of the tenon. The result was that small ridges kept the stem from seating snugly up to the shank. I remembered a technique I read on, I believe, Dadspipes.com (I’ve read so much I can’t remember for sure!) that was able to help me uniformly smooth out the base of the tenon, which is almost impossible using files freehand. I drilled a hole in a piece of wood providing enough space for the tenon to rotate freely and covered the hole with 230 sanding paper and clamped it. I punctured the paper and then forced the tenon into the hole. I rotated the stem on the flat board back and forth to evenly sand down the tenon base. I stopped the rotation periodically and let the stem ‘free-stand’ in order to eye-ball it and to make sure I was not sanding unevenly and unintentionally creating a tilt. The pictures show the process and the successful results of a more snuggly fitting stem!
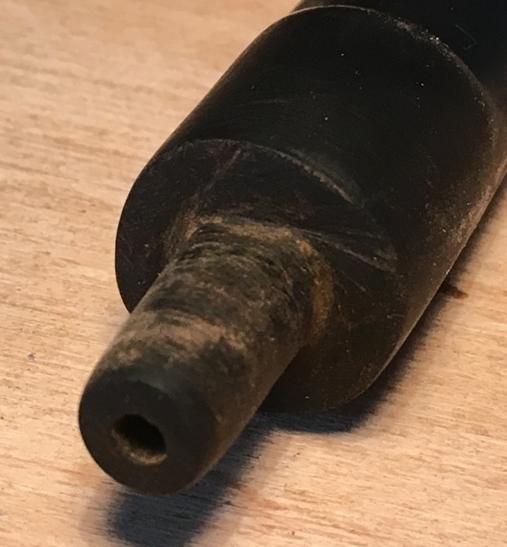

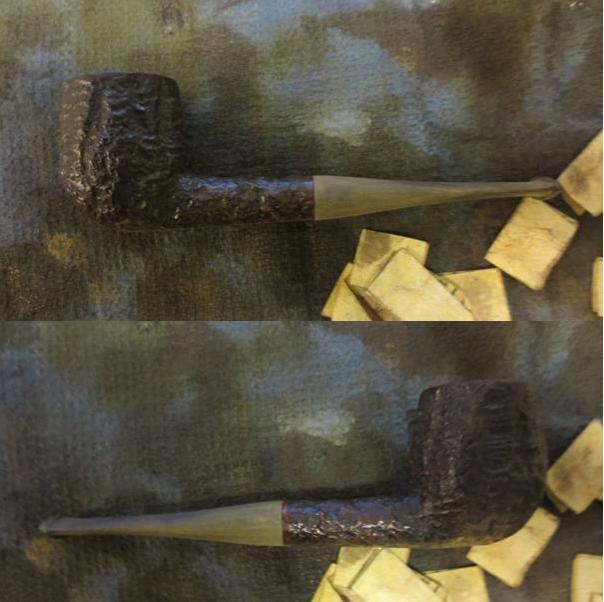
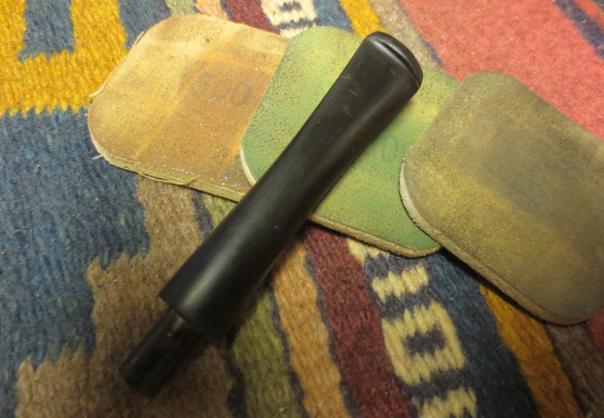
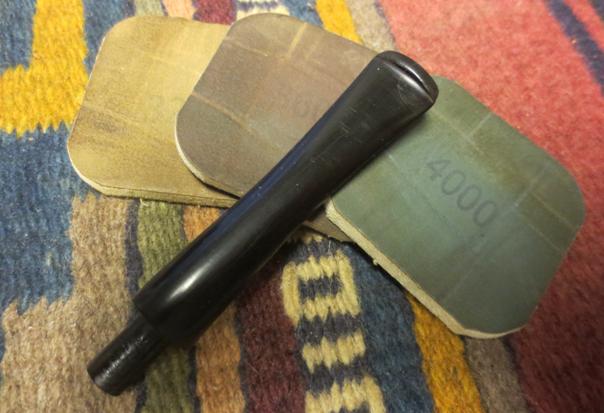
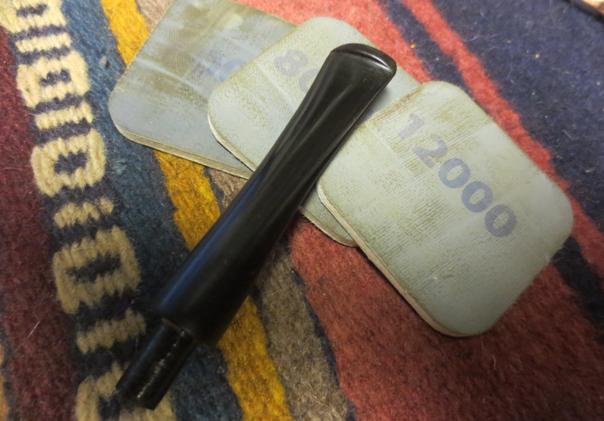
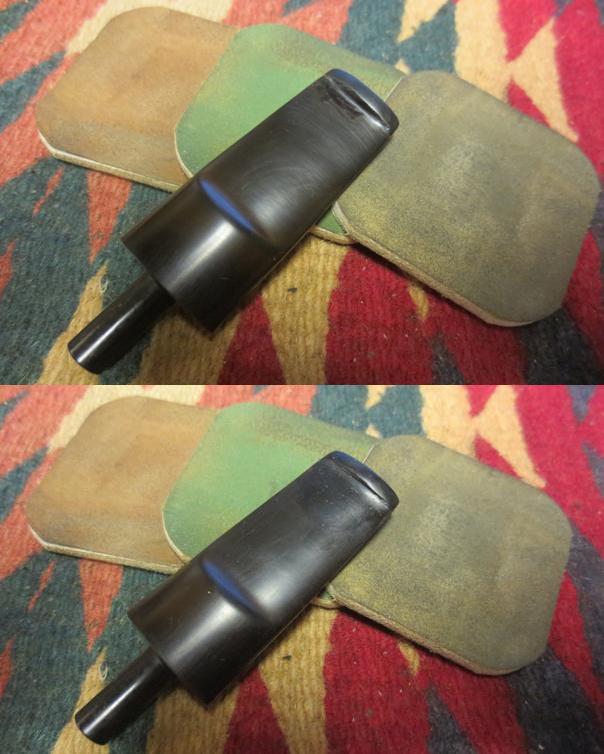
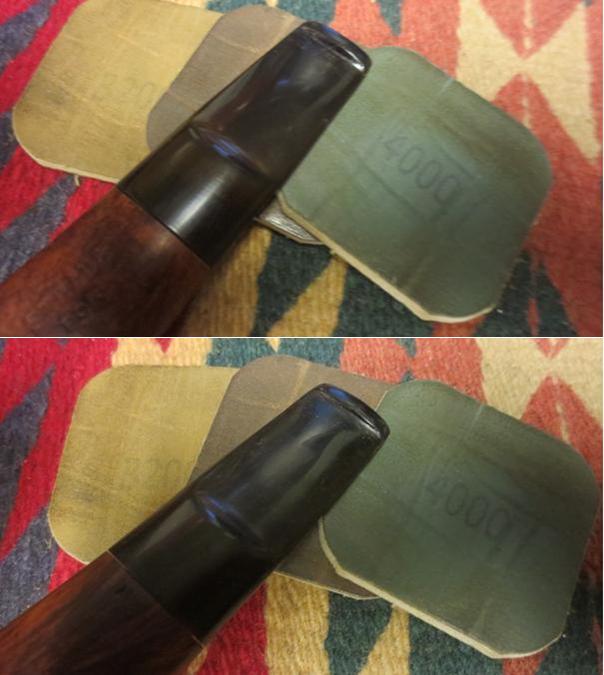
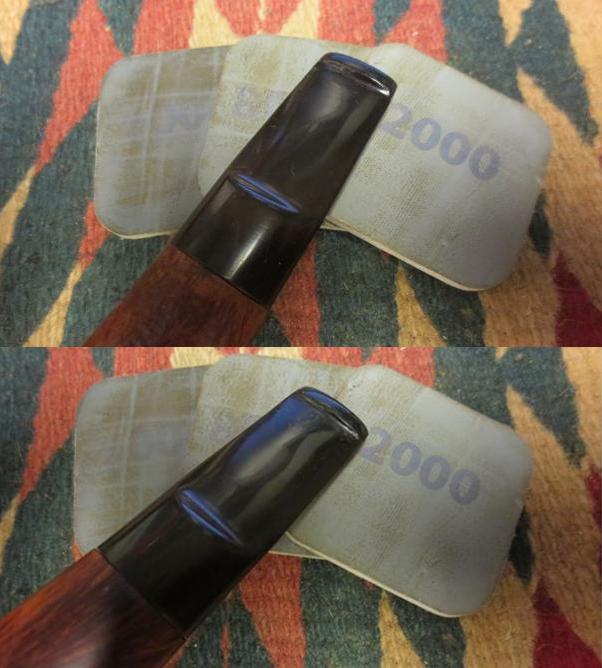
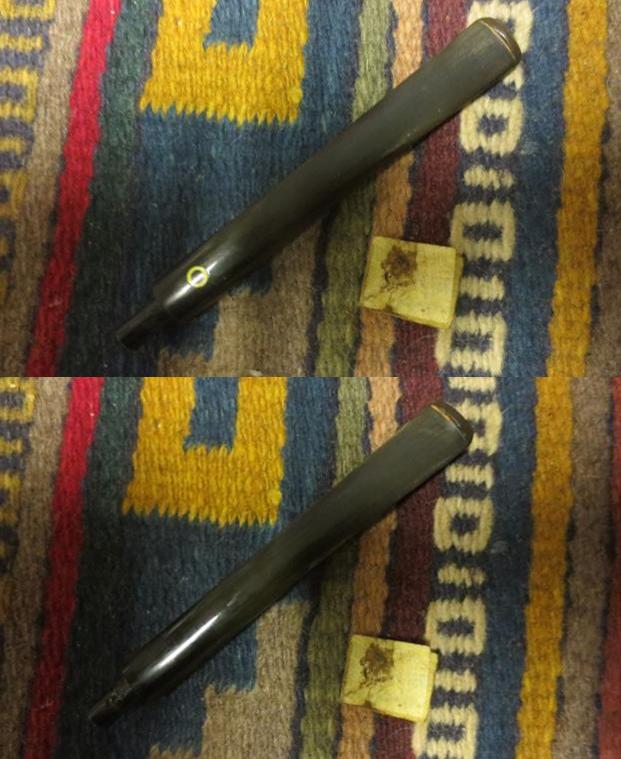
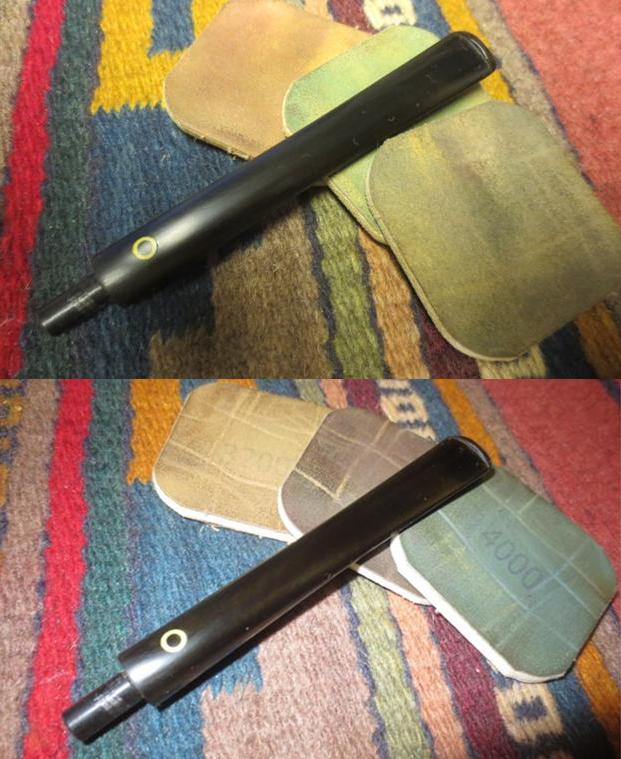
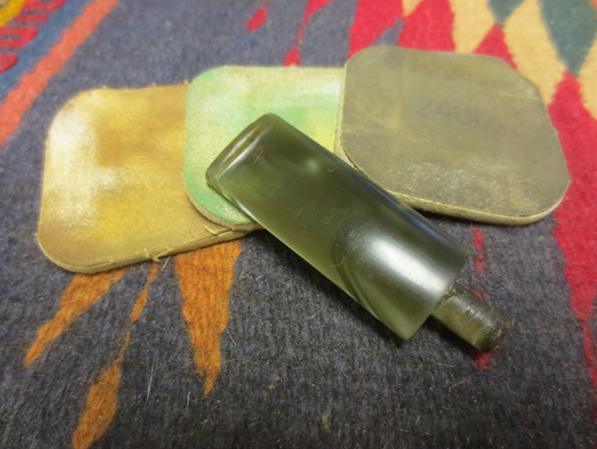
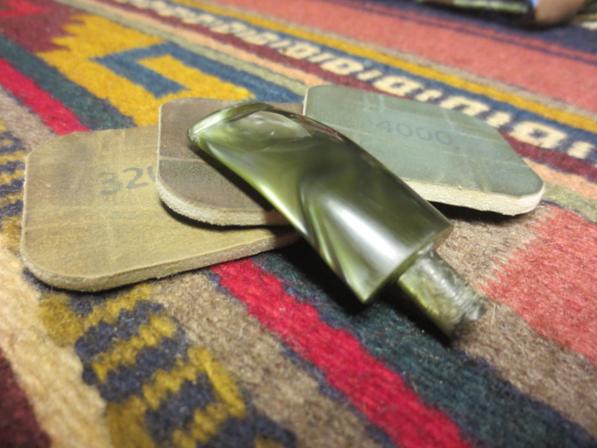
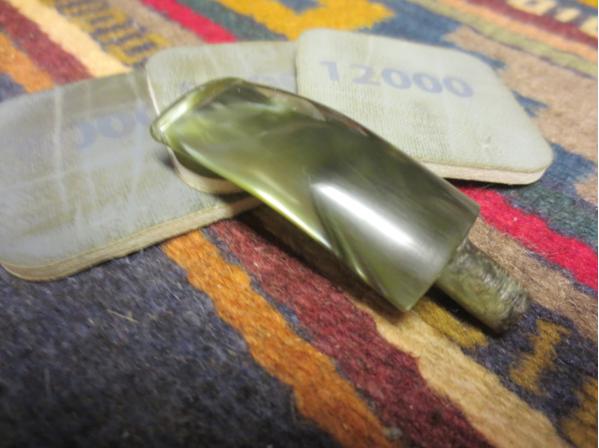
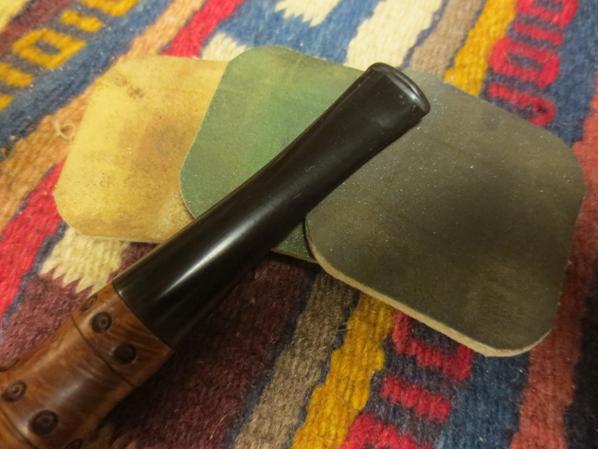
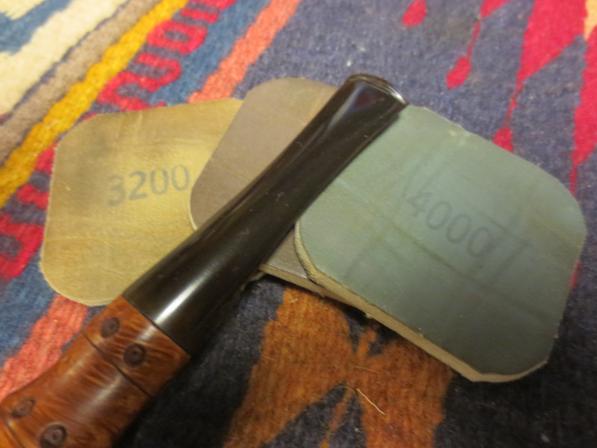
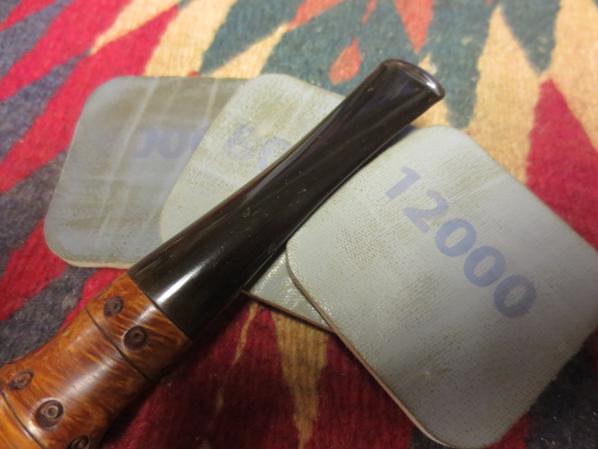
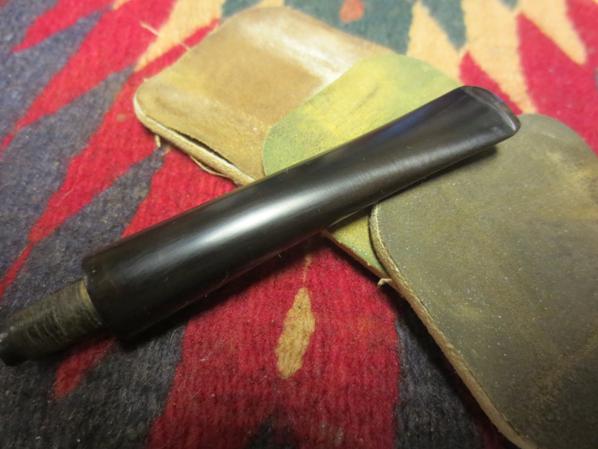
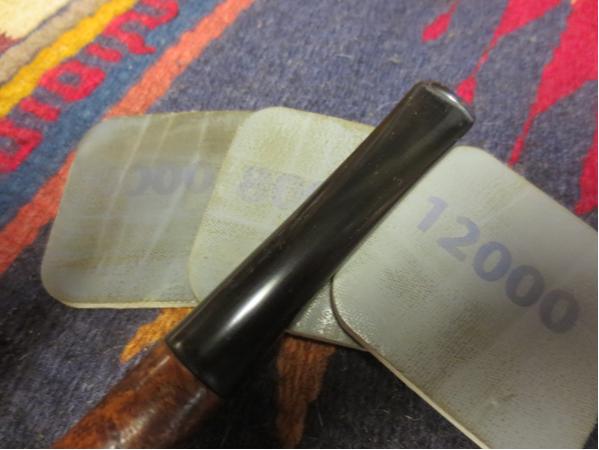
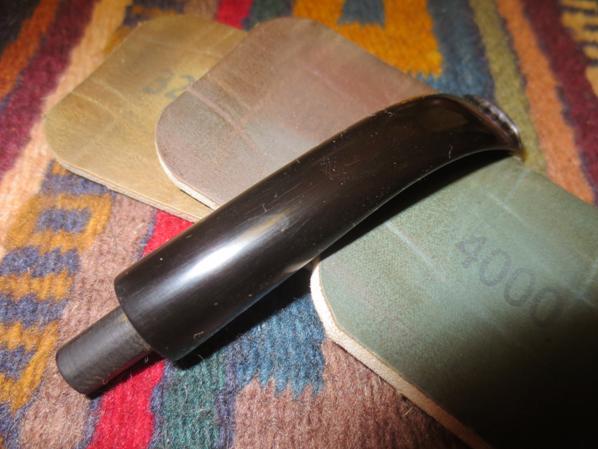
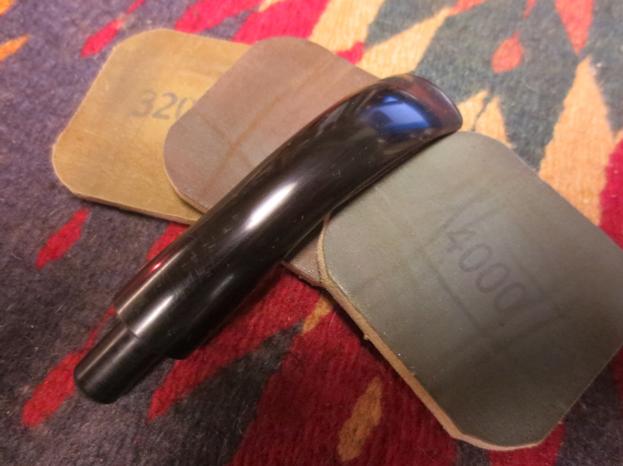
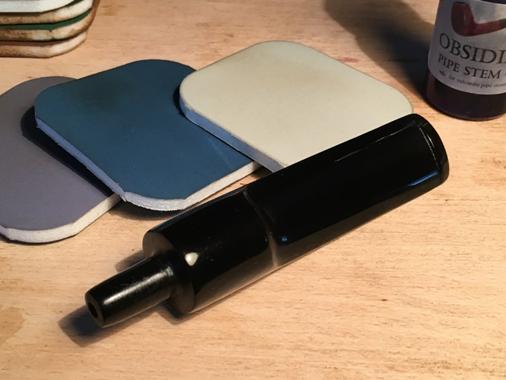
 Again I was anxious to move to finishing the stem proper and to utilize the micro-mesh pads that were newly acquired in the US! Up to this point I had been utilizing sanding paper I found here in Bulgaria and I was anxious to see the results of using micro-mesh pads. I employed Steve’s stem finishing pattern that he utilizes with almost each stem finish: Picture 1 reveals the results of wet-sanding with micro-mesh 1500, 1800, and 2400 then an application of obsidian oil. Following is dry sanding with 3200, 3600, 4000 again followed by an application of obsidian oil. I have to confess, I was so excited to see the luster popping out I forgot to document the two sets with a picture! Finally, picture 2 shows the results from dry-sanding (with obsidian oil) with 6000, 8000, and 12000. After this, I gave the stem another coat of obsidian oil and put it aside to dry.
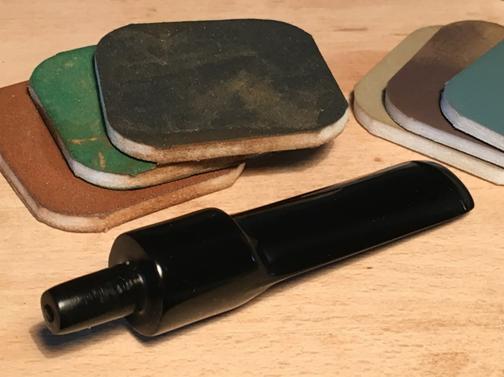
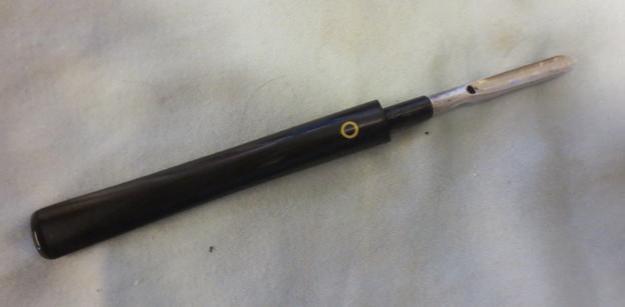
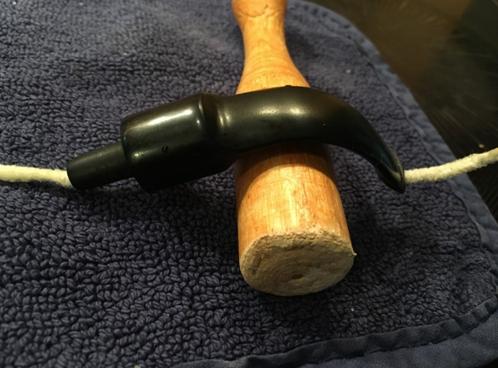
 Now I’m stoked! While the obsidian oil was drying I was re-reading the blogs on bending stems (https://rebornpipes.com/2012/07/15/bending-vulcanite-stems/) and turning on the oven to warm it up. My experience was limited – I bent one stem for a pipe I acquired off eBay from Budapest, Hungary. I named that pipe, Budapest (I may have developed a bad habit of naming my pipes like pets…). I warmed the oven to about 200 to 220 Fahrenheit, (for those living in Europe that is about 93 to 100 C). I found a ‘bender’ using a small jar measuring about 1.5 inches in diameter and stuck the pipe cleaner in the airway to keep it open during the bend. I had researched pictures of Oom Pauls and I found another Dr. Plumbs 9456 online (http://www.bidorbuy.co.za/item/222662283/VINTAGE_DR_PLUMB_LONDON_MADE_SMOKING_PIPE_NO_9456.html). I wanted the bend to reflect the original as closely as possible. I wanted the bend to be tighter toward the stem expansion at the base – the effect was that the button end of the stem reached out more, or it seemed to me. It didn’t take long for the vulcanite to become pliable – about 5 minutes or so in the oven on a cookie sheet (thanks again to my wife!). When I brought it out the first time and bent it over the jar, I was not pleased with the bend – it was too much of an arch for my liking. So I found a pestle from my wife’s mortar and pestle set that she uses to grind up spices. Its diameter was smaller. I put the stem back into the oven and it slowly flattened back out as it heated up. After about 7 minutes I took it out and bent it around the pestle – that got it. I held the bend (careful, it’s hot!) and ran the stem under tap water to galvanize the bend. I wanted the angle to be right – anxious to see the stem with the bowl, I took a few pictures to show what I feel are better results.
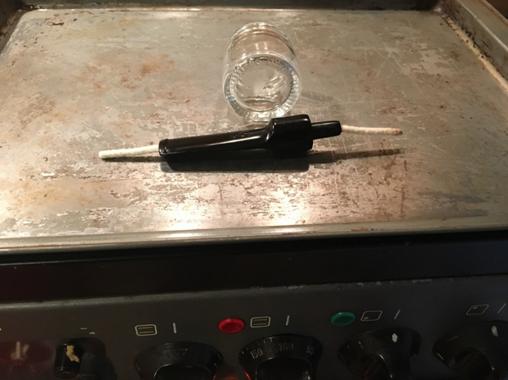
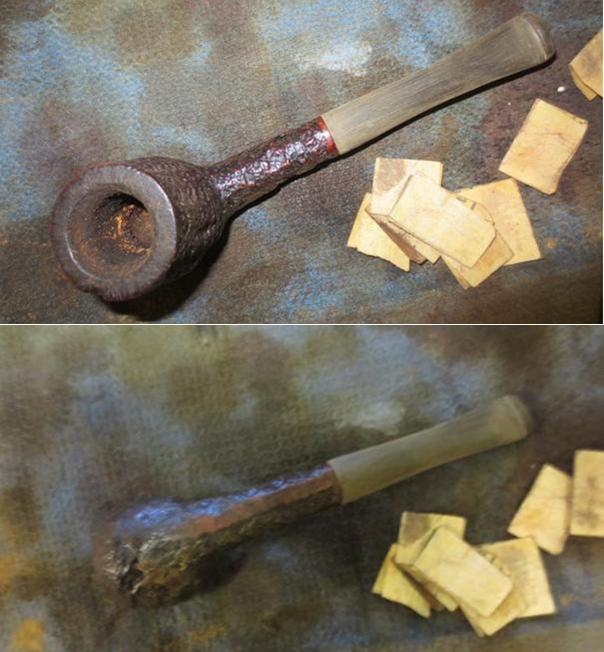
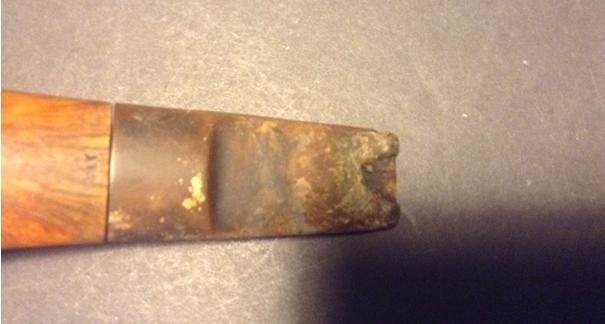
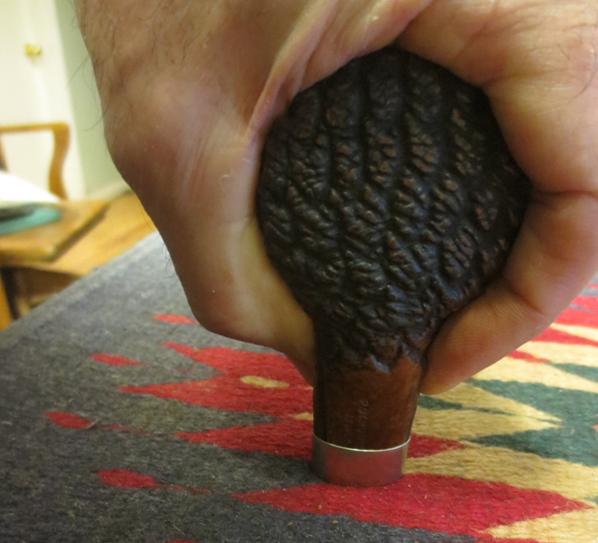
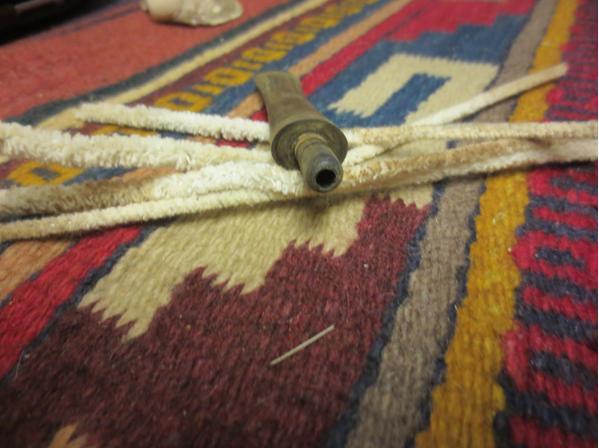
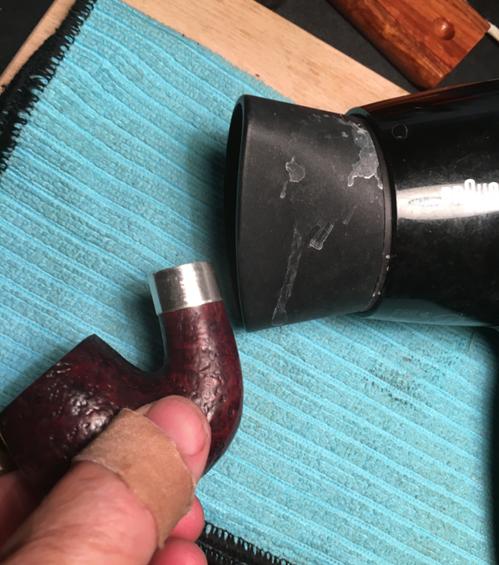
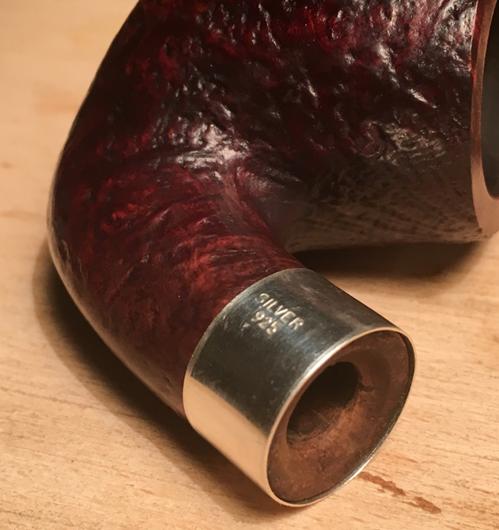
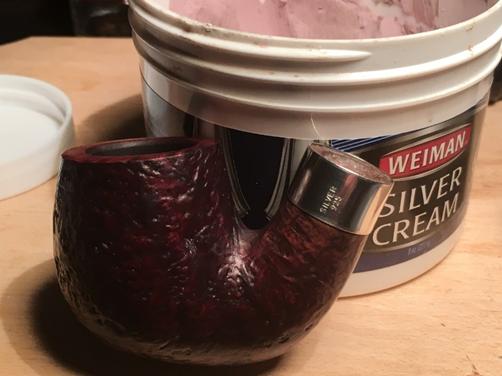
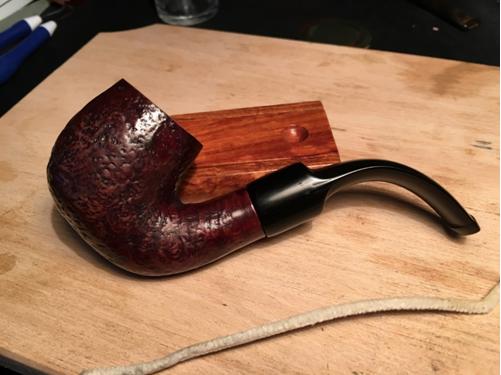 Almost home. The sterling silver band was awaiting my attention but I wasn’t in a mood to be rushed! I re-read again Steve’s blogs on banding (https://rebornpipes.com/2012/10/31/banding-a-cracked-shank-pressure-fitting-a-metal-band-on-a-pipe-shank/). Armed with renewed knowledge and the resounding warning not to work too quickly (or else you will tear the band!) I started the work on the band. I had one large obstacle – I did not have a heat gun to apply heat to the band to enable its expansion to fit successfully over the shank (and not tear!). I did not have a heat gun, but my wife owns one of the wonders of German technology, a Braun hairdryer. It gets pretty hot and I gave it a try. The first picture shows the band placement (about 50% shy) before I started the hairdryer heating process. I heated up the band on the shank as shown in picture 2 and after about 1 minute or so I took the shank and pressed it down against the cloth on a flat cutting board and applied gentle vertical pressure against the band to slide it further onto the stem. Patience – I kept hearing “Don’t tear it!” After I felt a wee bit of movement from the band I stopped the downward pressure and started the reheating process again and then again, a wee bit of band movement as I pressed it vertically against the cloth. I repeated this process about 7 or so times and was able to move the band to where I wanted it – without tearing it! (picture 3). I finished up by applying some Weiman Silver Cream to shine the band up nicely.
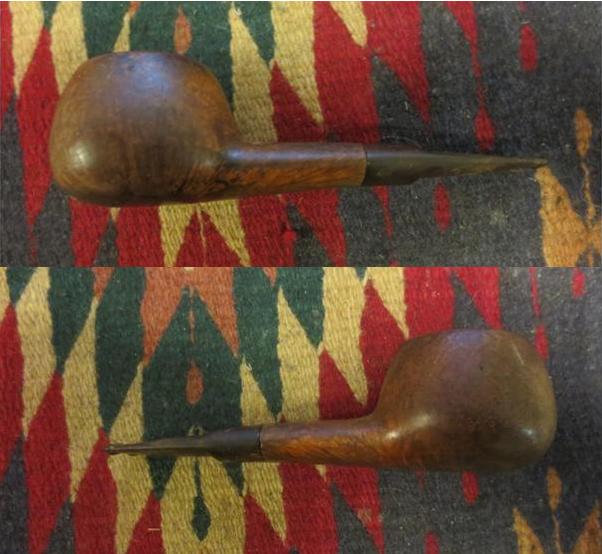
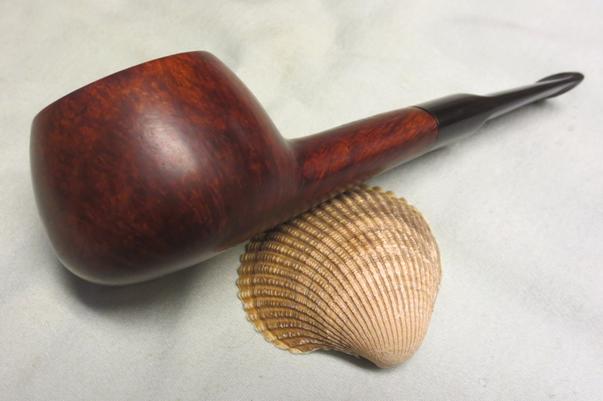
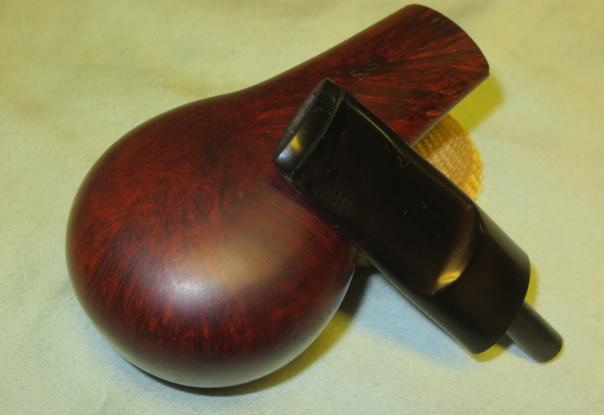
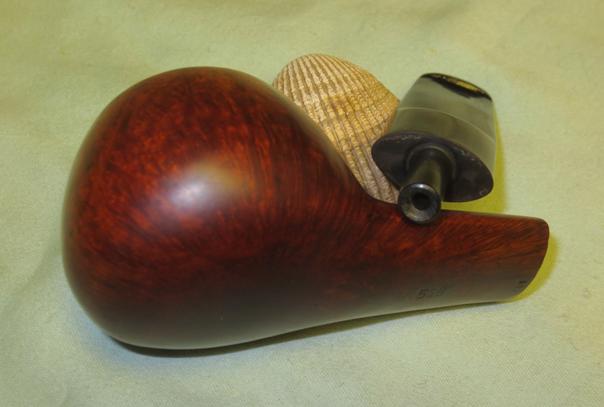
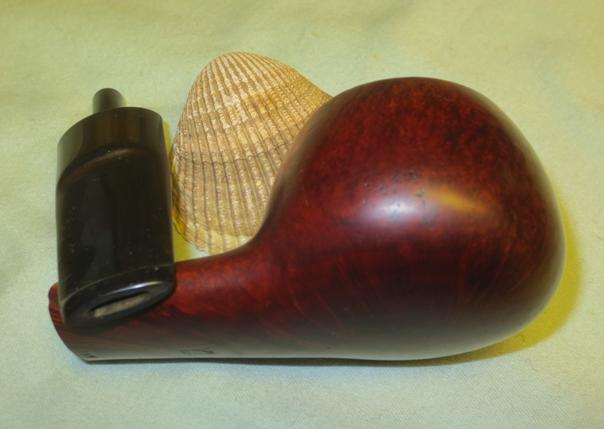
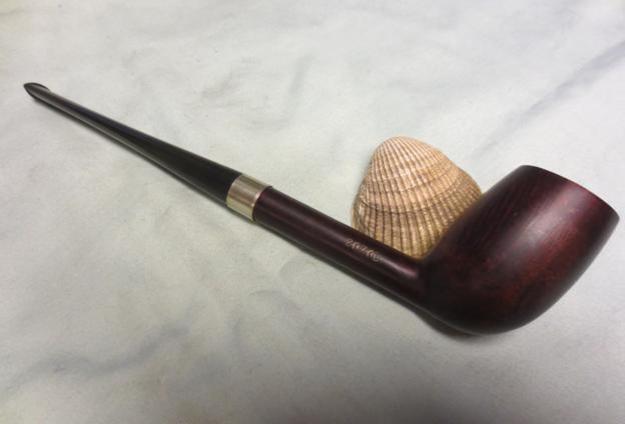
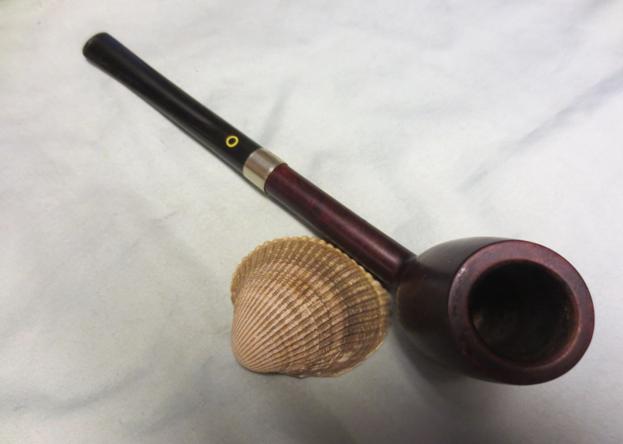
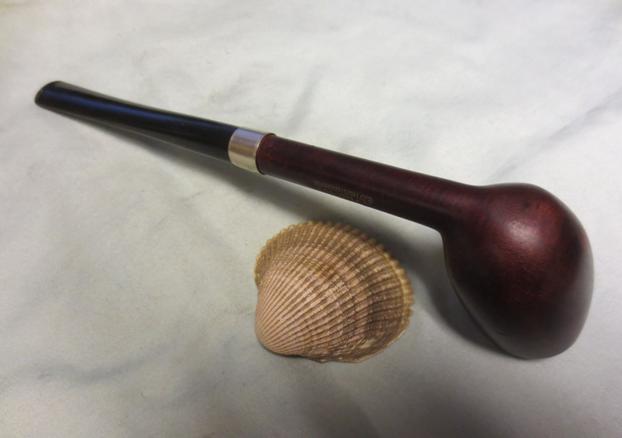
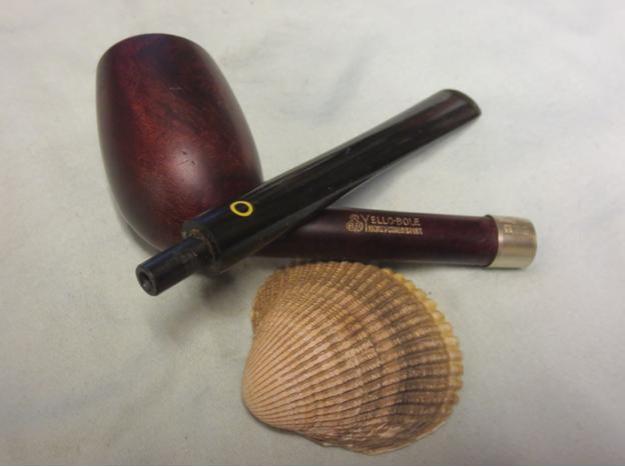
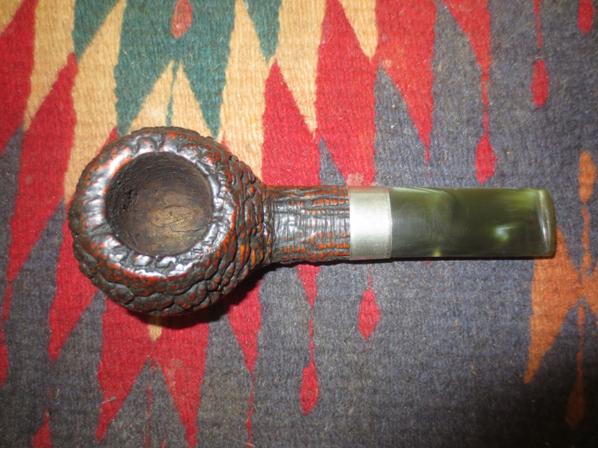
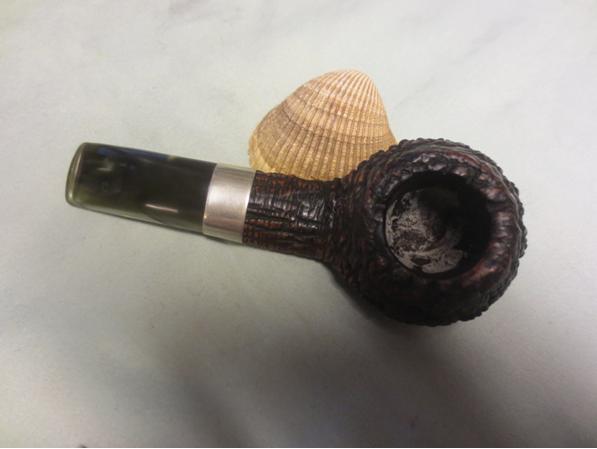
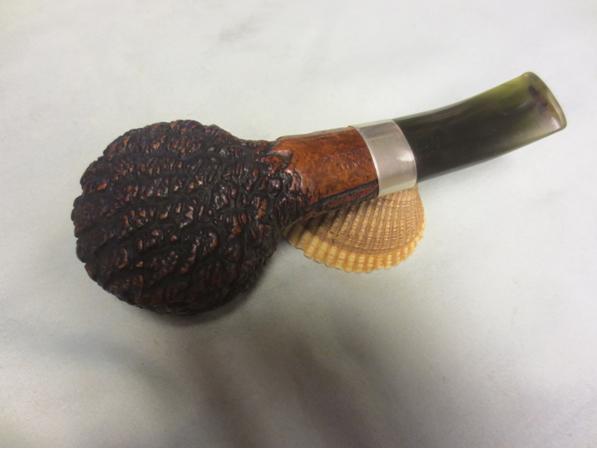
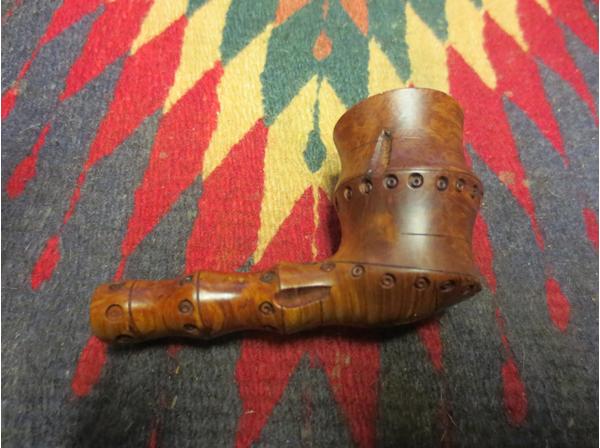
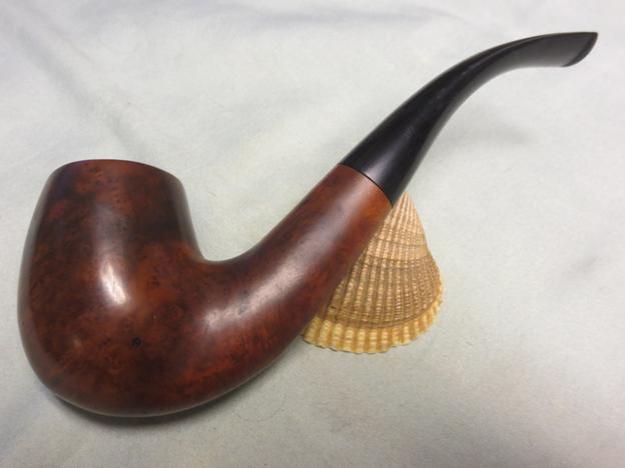
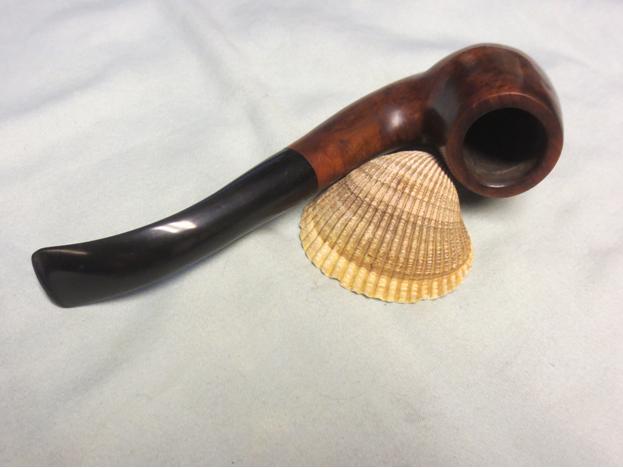
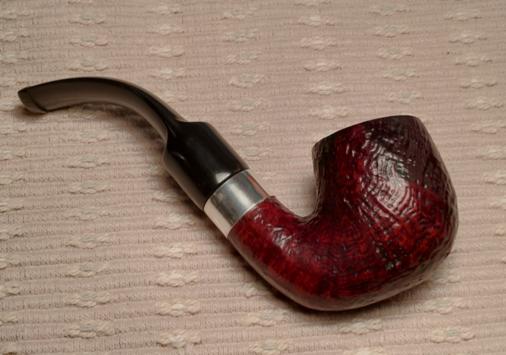
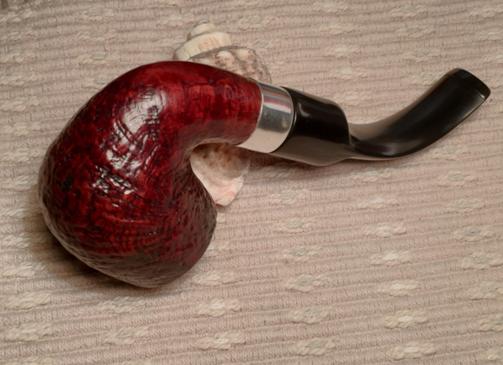
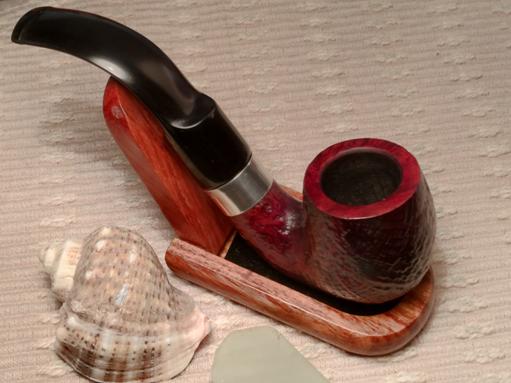
 I’m very pleased with the results of restoring this Oom Paul and putting him back into service. I’ve already identified areas that I want to improve next time around. I didn’t describe how I had to re-top the bowl after I put the stem in and discovered that the rim was not perpendicular to the shank. Result? The stem was tilted out and not aligned. I re-topped the rim to straighten it. I also detected areas on the stem I had missed during the sanding process. Yet, overall I’m very pleased and appreciate the rich color and grain of this piece of briar. I think the band sets if off in a classic way. Since this Oom Paul will remain in my collection, I’ve named it – a bad habit probably, but I enjoy the life rekindled in restored pipes and names seem appropriate. Steve told me about the history of Oom Pauls in his recent visit to Bulgaria. This is when I learned that Oom Paul was Afrikaans Dutch meaning ‘Uncle Paul’. So, in Bulgarian, meet ‘Chicho Pavel’! Thanks for reading!
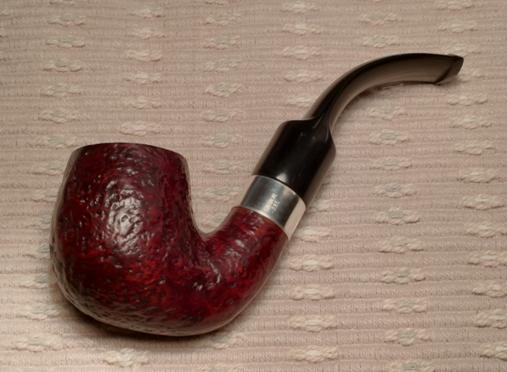


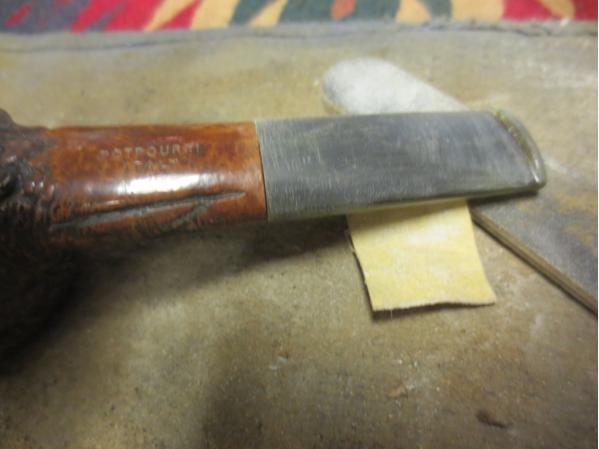
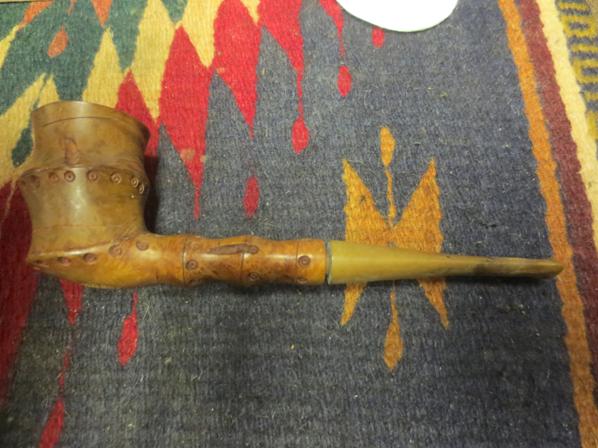
 I reamed the bowl with a Savinelli Pipe Knife so that I could carefully cut back the cake to check on the material the bowl was made of. I did not want to damage it so I went slowly and carefully.
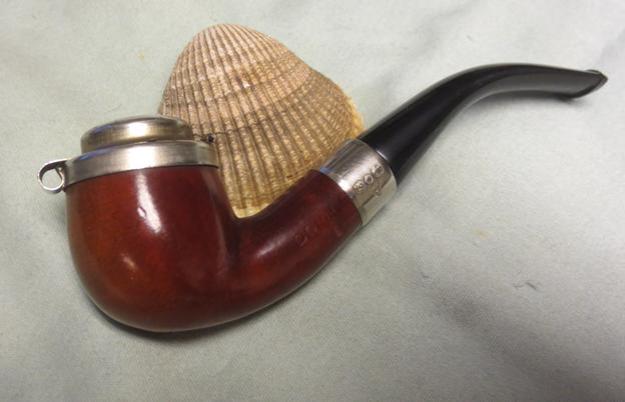
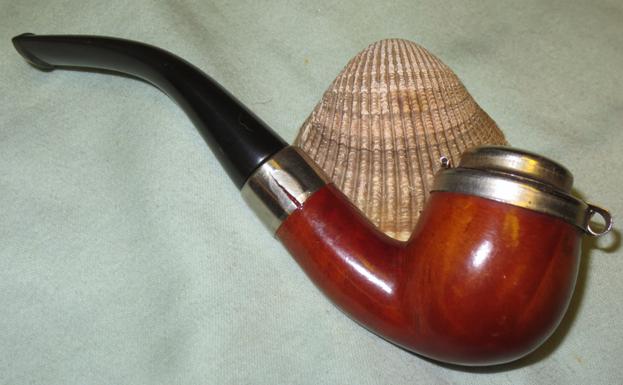
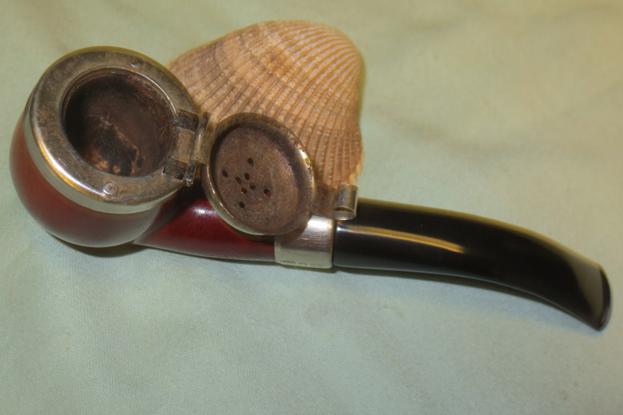
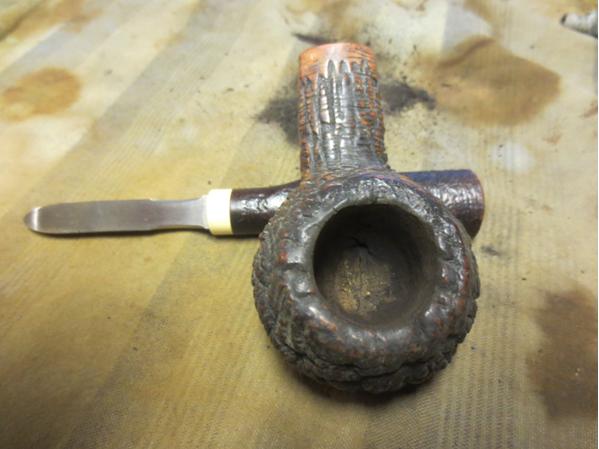
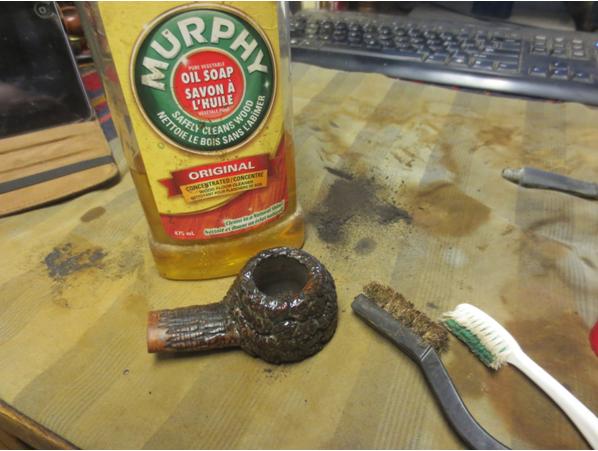
 I wiped down the exterior of the bowl with a damp cloth and removed the stickiness and dirt on the surface. I also pressed a WDC band on the shank. It had a small split that I repaired with super glue but it was the only one I had that fit the shank and did not cover up the stamping. It will have to do. I used some silver polish to scrub the rim and the windcap.
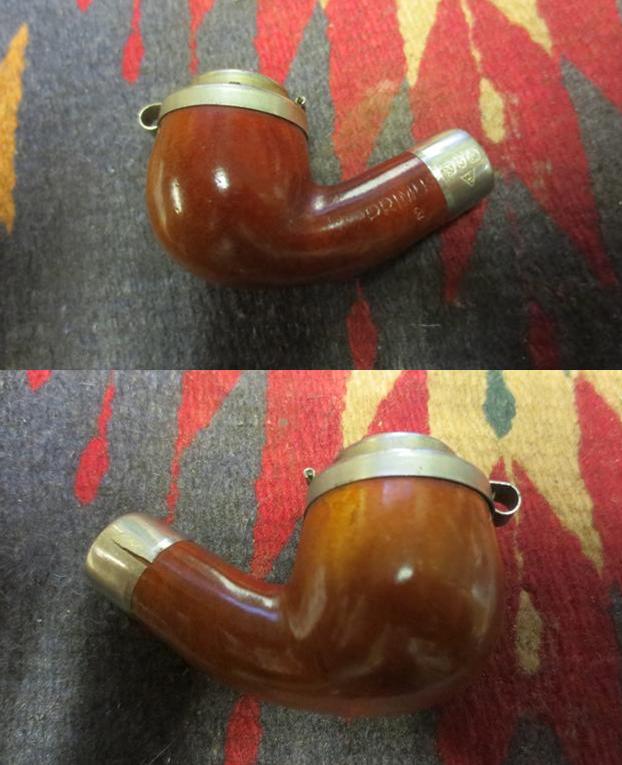
 I cleaned out the mortise and airway on the shank and stem with pipe cleaners, cotton swabs and alcohol until they were clean.
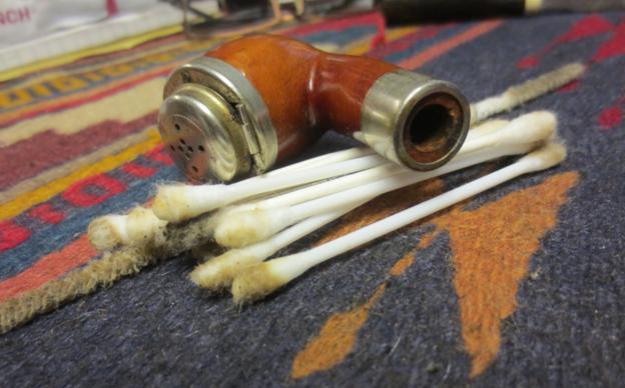
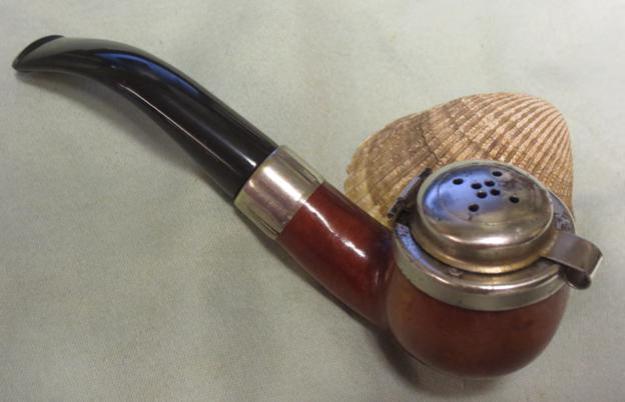
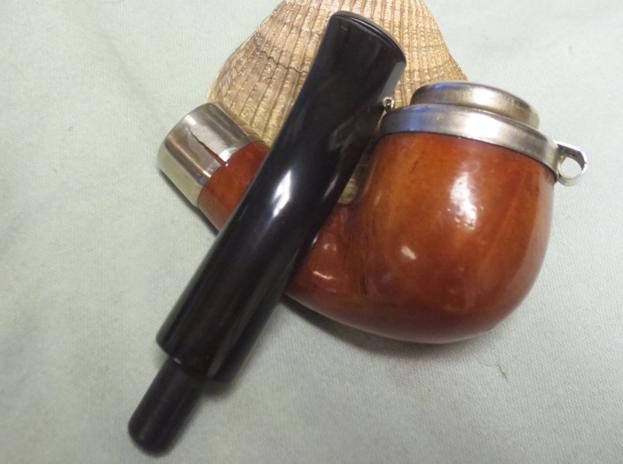
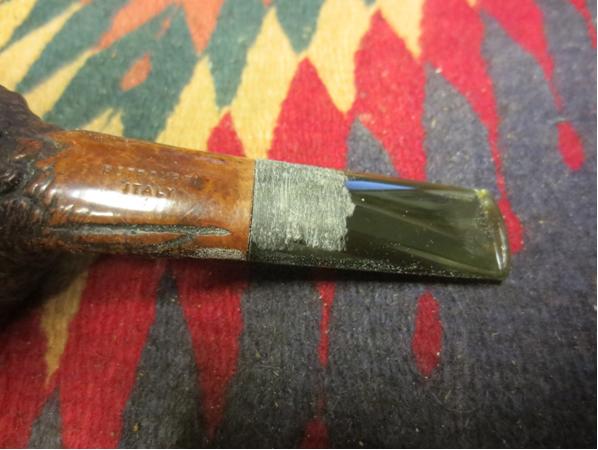
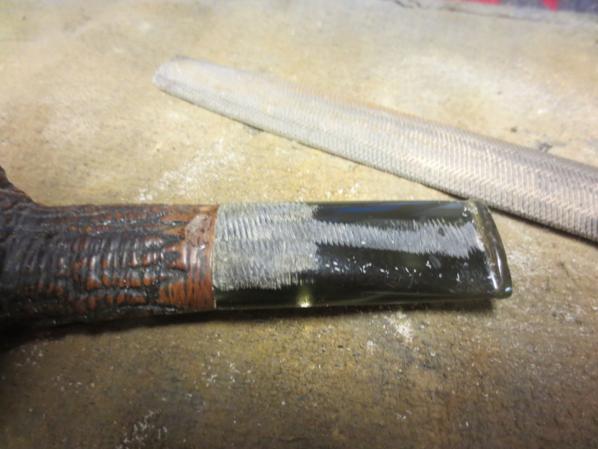
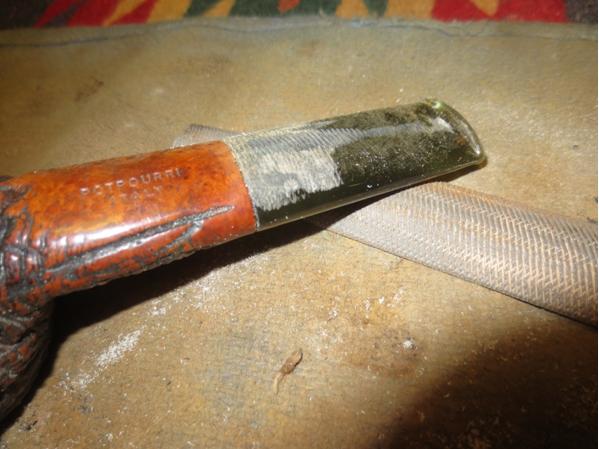
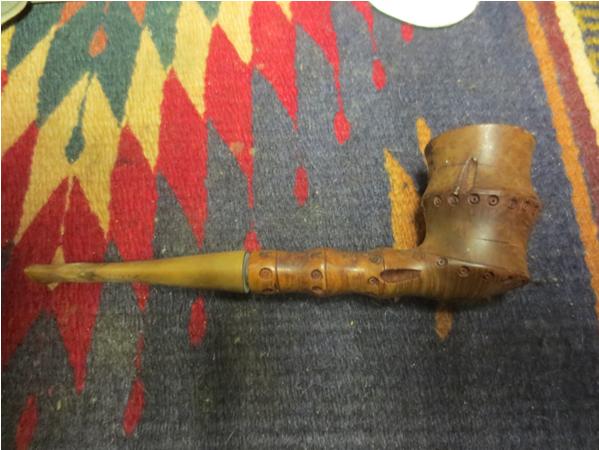
 To adjust the diameter of the stem to match the rolled over end cap I sanded it with 220 grit sandpaper. I wanted the diameter of the stem to show equally from the end view so that the same amount of silver showed on each side.
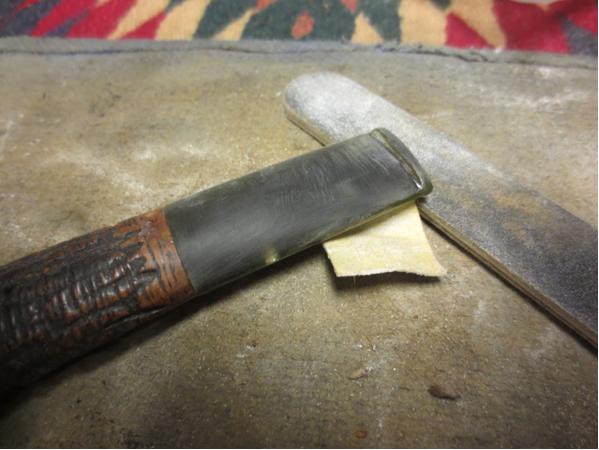
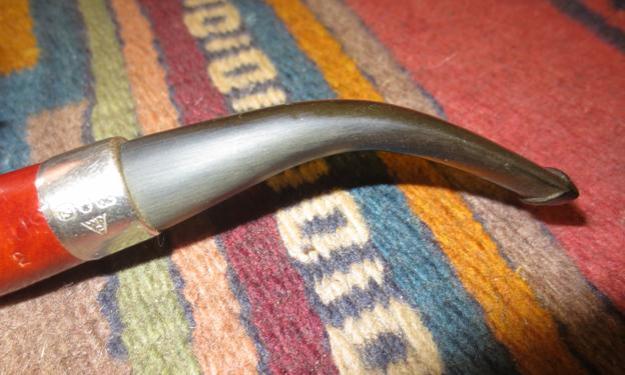 I wet sanded the stem with 1500-2400 grit micromesh pads and gave the stem a coat of Obsidian Oil. I dry sanded it with 3200-4000 grit pads and gave it another coat of oil. I sanded it with the final three grits of micromesh pads – 6000-12000 and gave it a final coat of Obsidian Oil. I set it aside to dry.
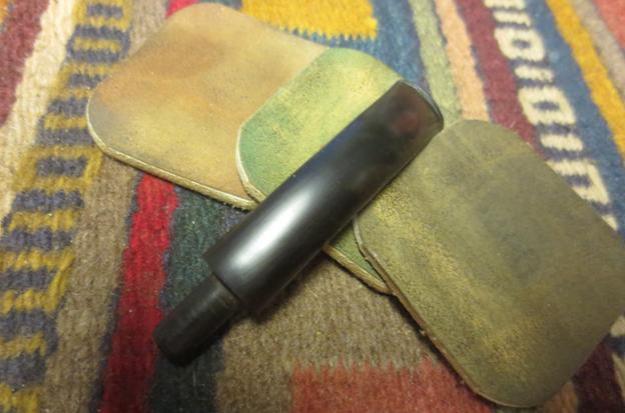

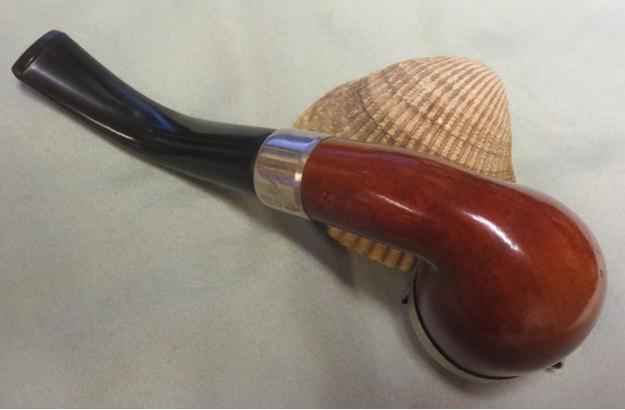
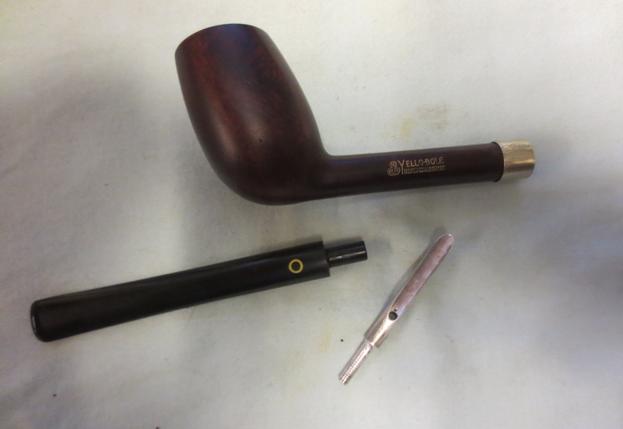
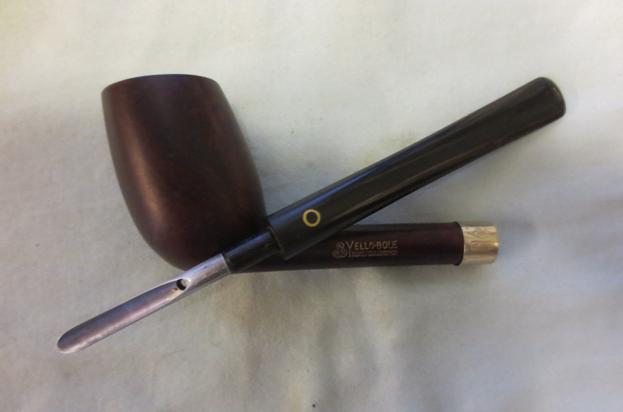
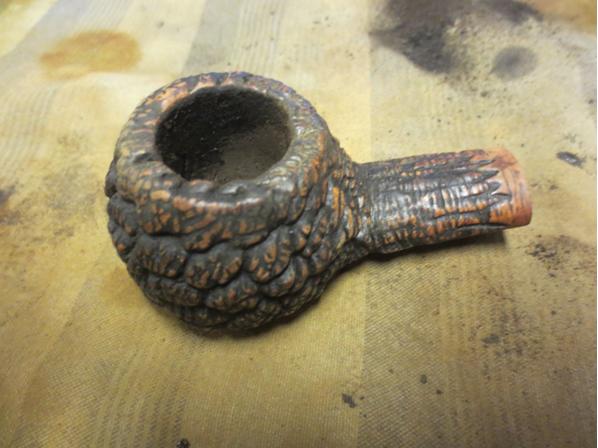
 I buffed the bowl and stem with Blue Diamond and gave them both several coats of carnauba wax. I buffed it with a clean buffing pad to give it a shine and then hand buffed it with a microfiber cloth to deepen the shine. The finished pipe is shown in the photos below. If I come across another band someday I will swap them out but this works for now. Thanks for looking.