Blog by Steve Laug
I am continuing to work on the pipes in Bob Kerr’s estate for a while. I am getting closer to finishing restoring this large estate with only about 29 more pipes to do. This is one of his two Charatan’s pipes that I am working on. I am cleaning them for the family and moving them out into the hands of pipemen and women who will carry on the trust that began with Bob and in some pipes was carried on by Bob. In the collection there were 19 Peterson’s pipes along with a bevy of Dunhills, some Comoy’s and Barlings as well as a lot of other pipes – a total of 125 pipes along with a box of parts. This is the largest estate that I have had the opportunity to work on. I put together a spread sheet of the pipes and stampings to create an invoice. I was taking on what would take me a fair amount of time to clean up. I could not pass up the opportunity to work on these pipes though. They were just too tempting. This beautiful Charatan’s Make Lovat is a great pipe to work on. It is a classic shaped pipe with a Charatan spin on the Lovat shape. It will go on the rebornpipes store.
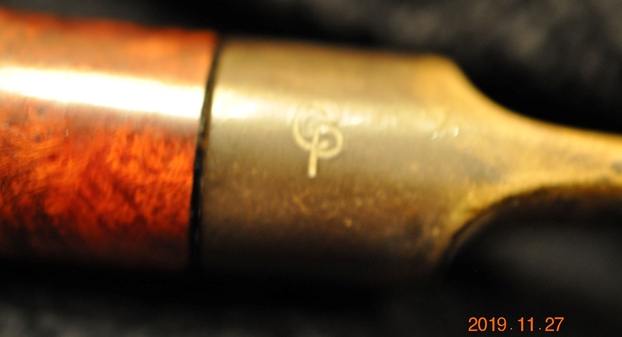
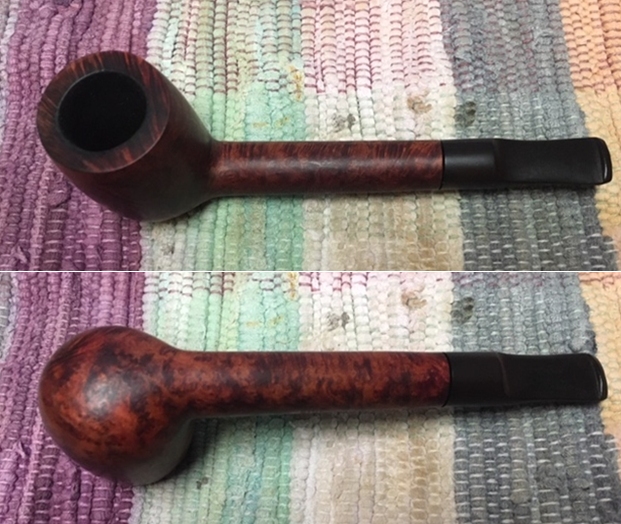
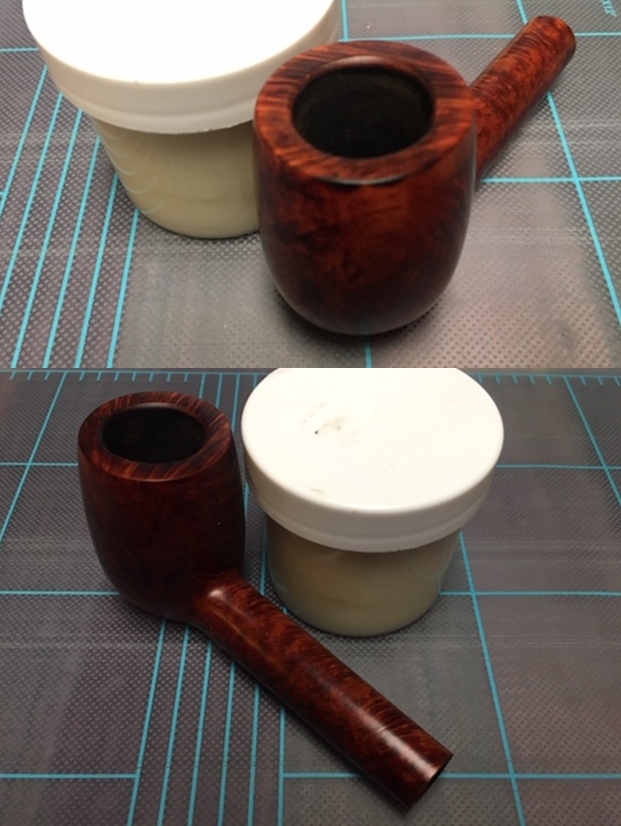
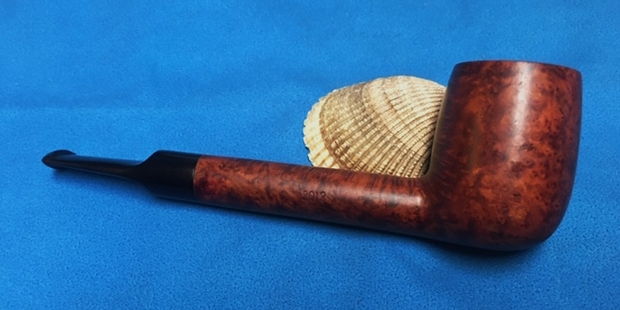
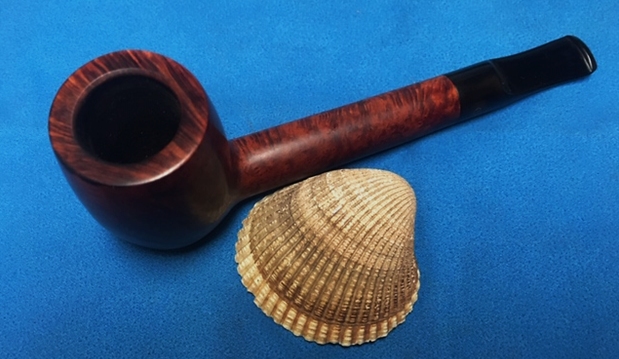
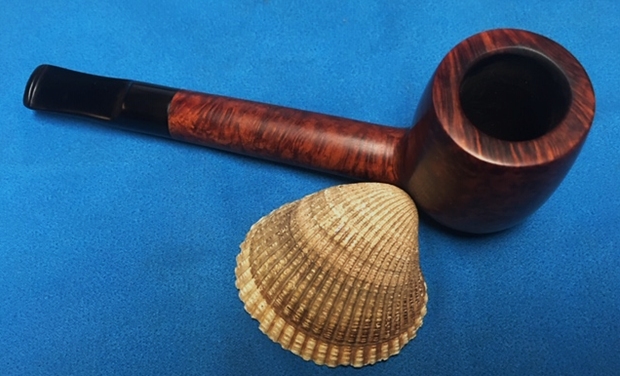
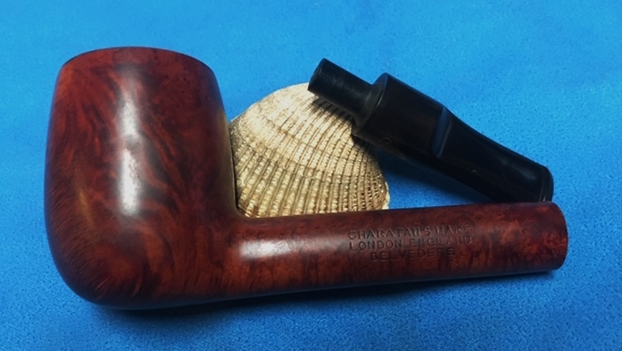
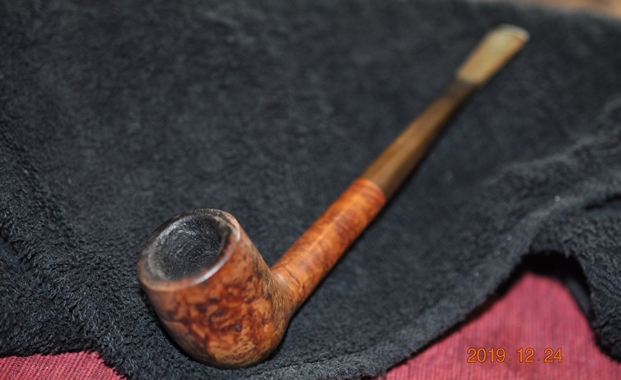
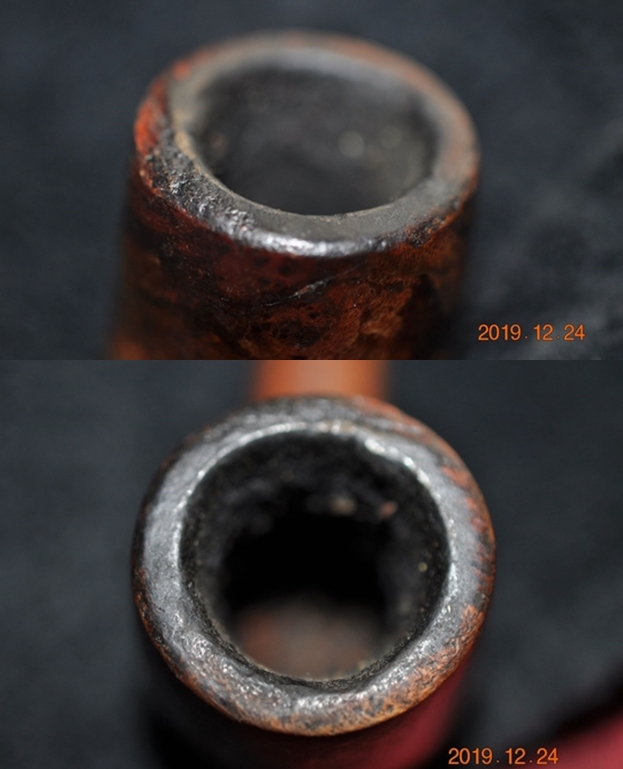
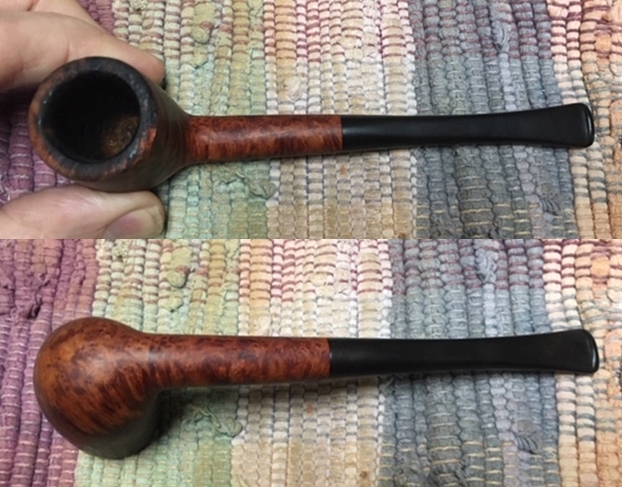
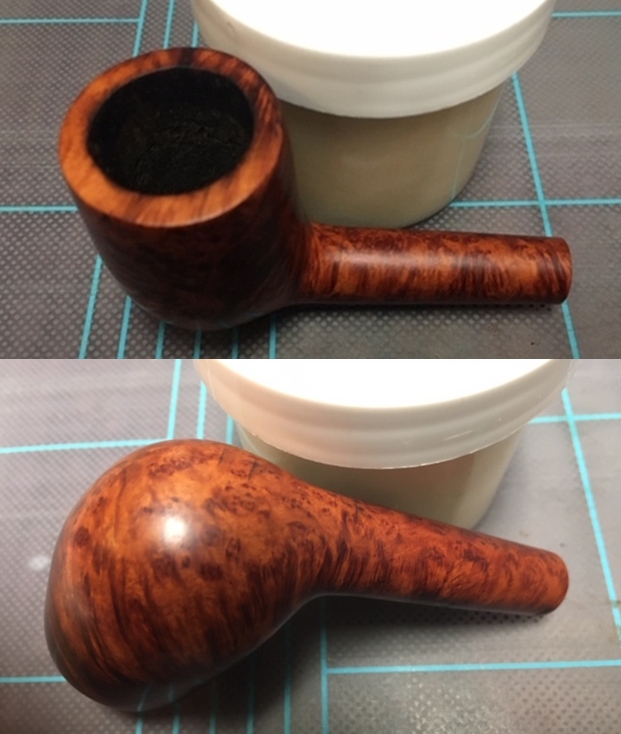
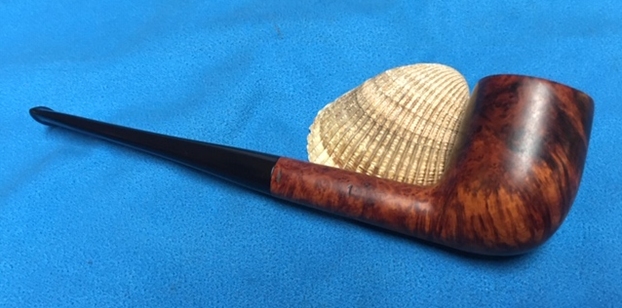
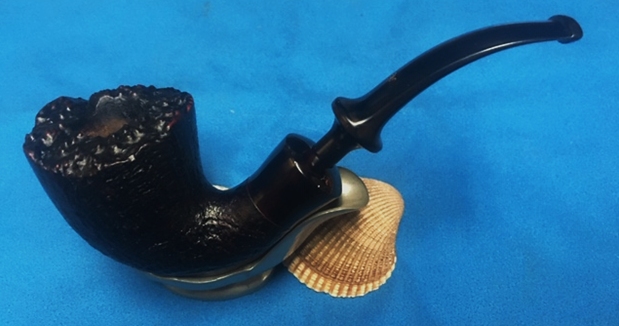
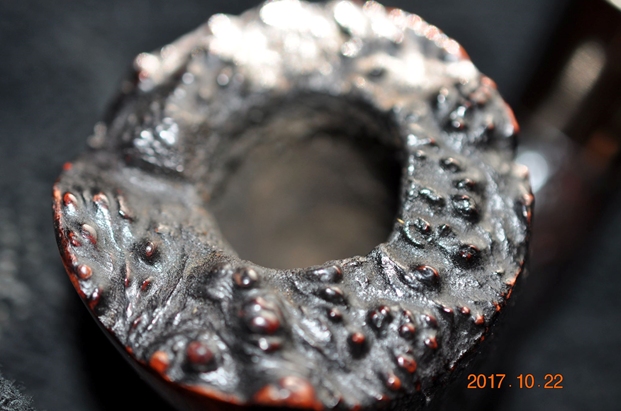
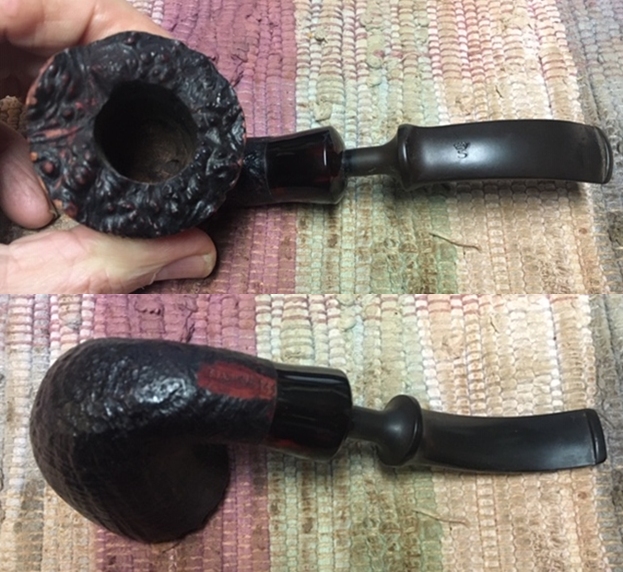
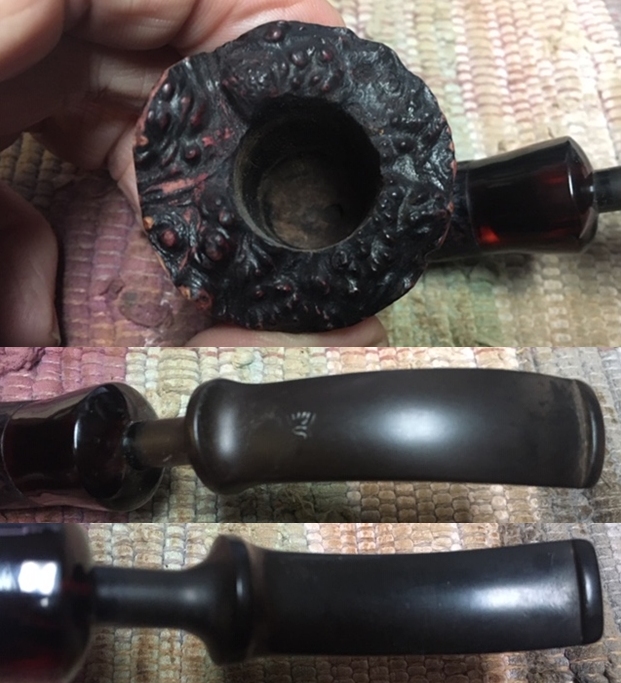
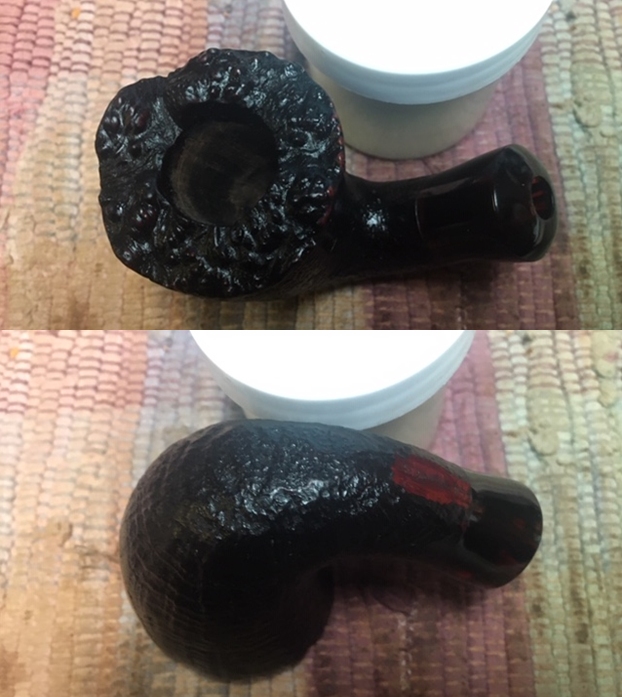
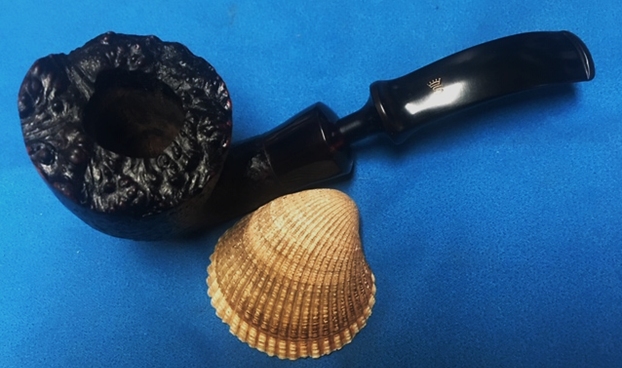
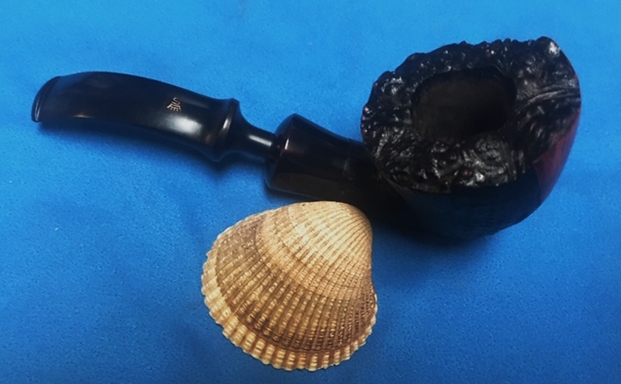
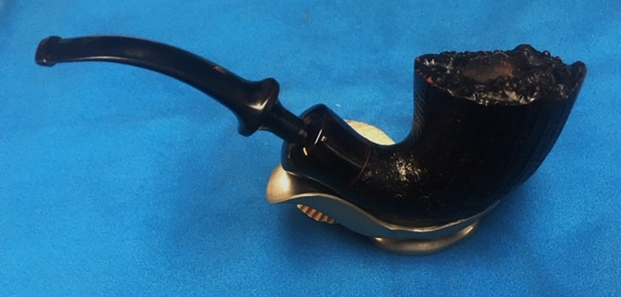
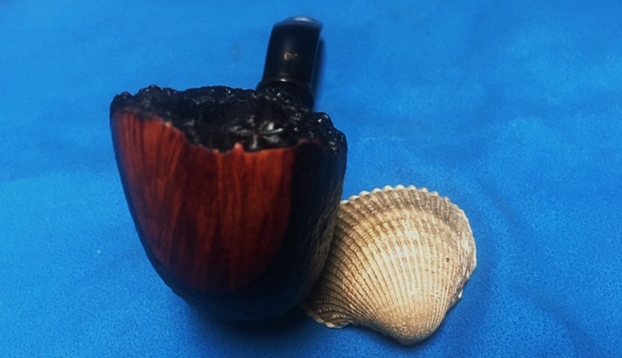
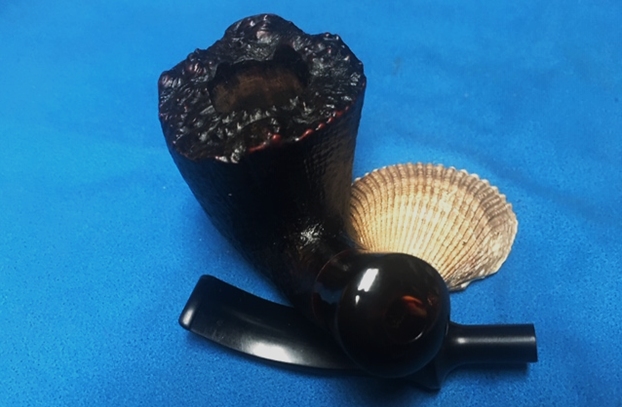
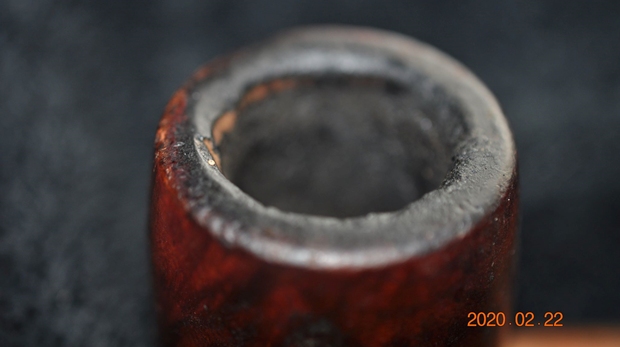
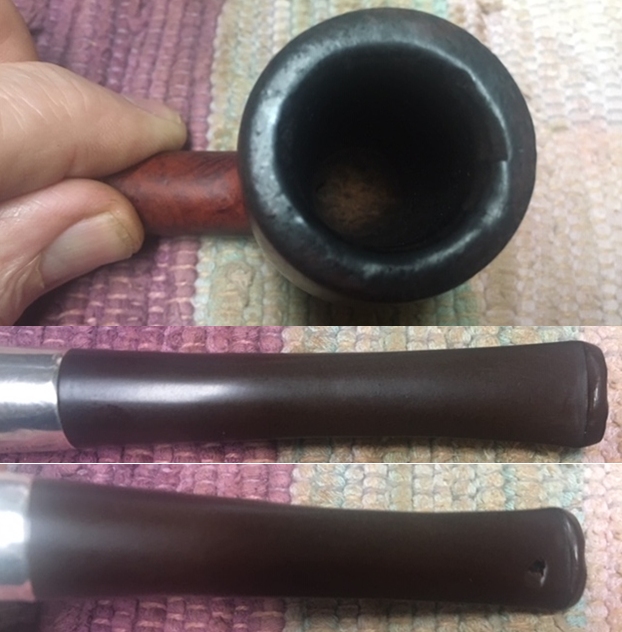
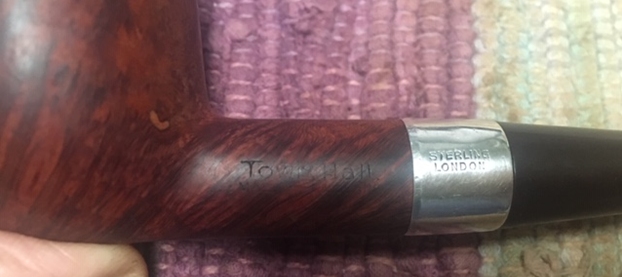
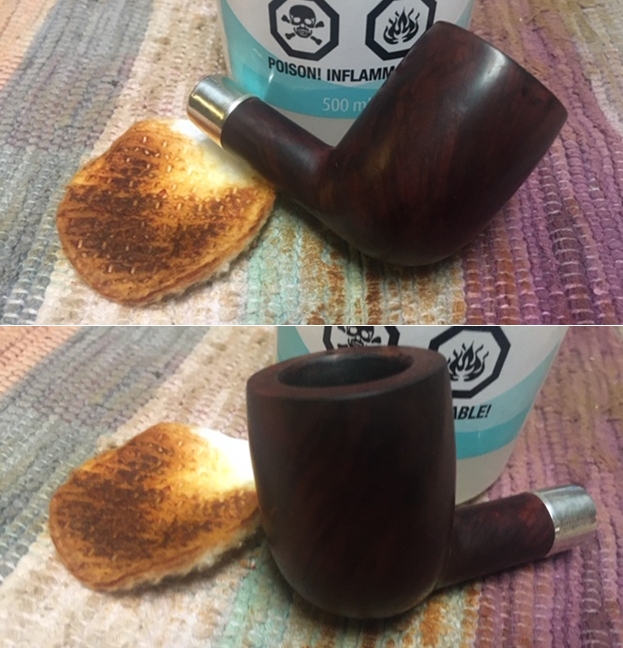
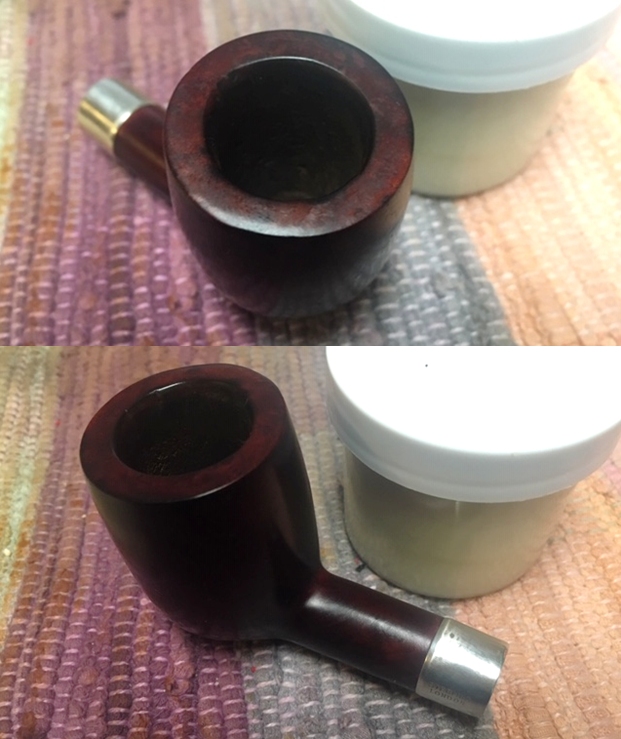
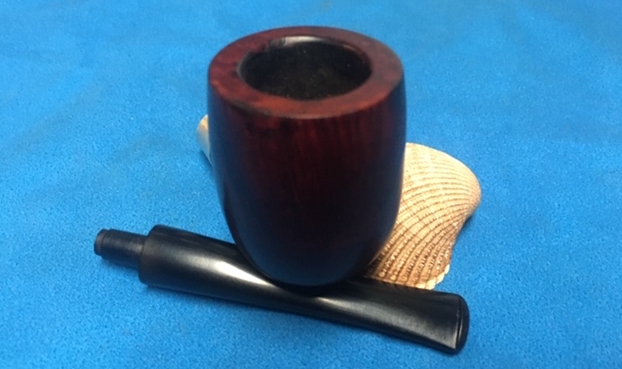
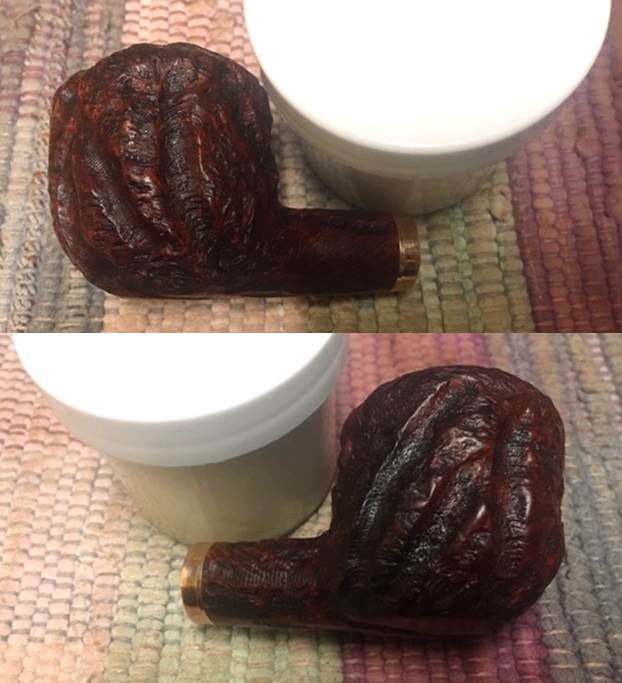
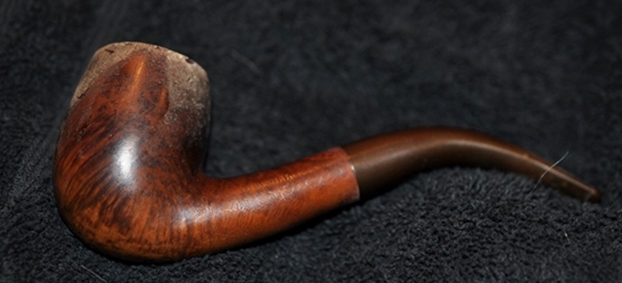
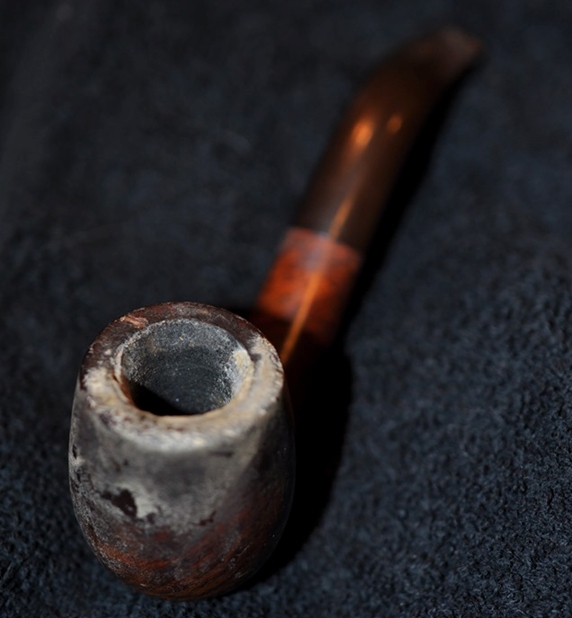
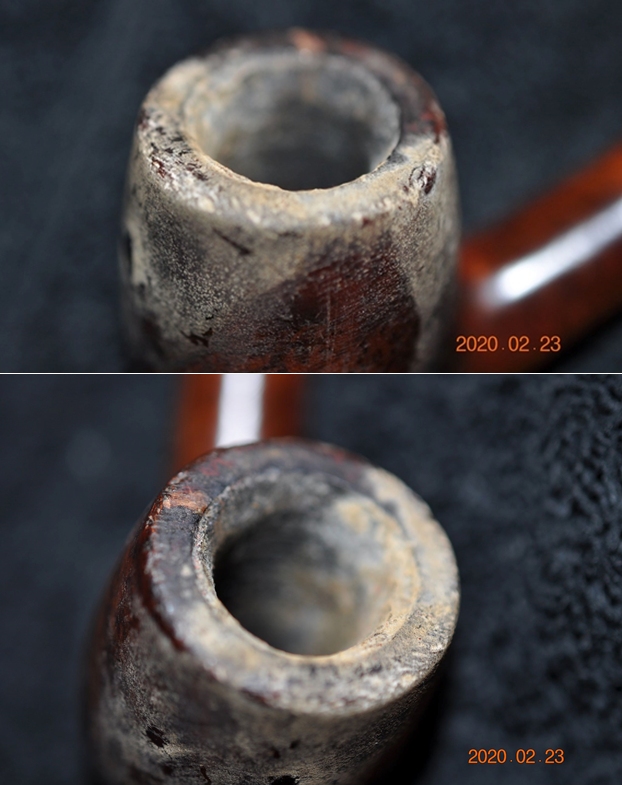
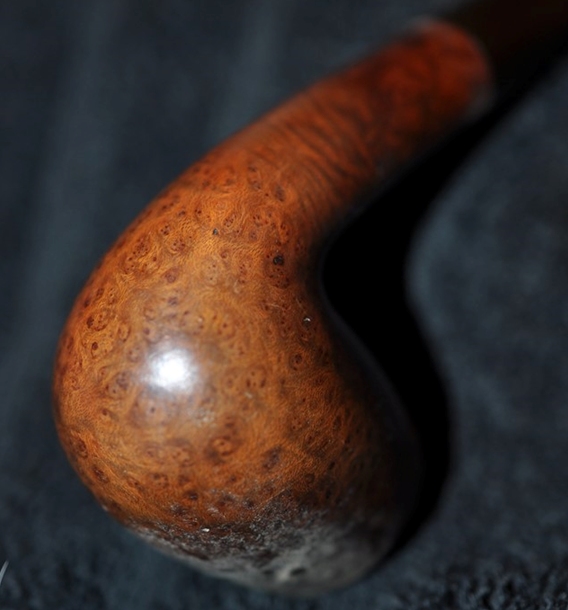
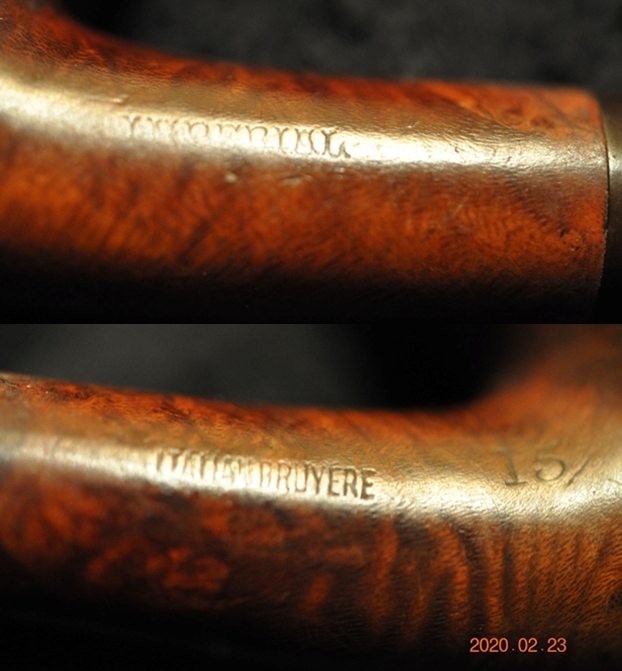
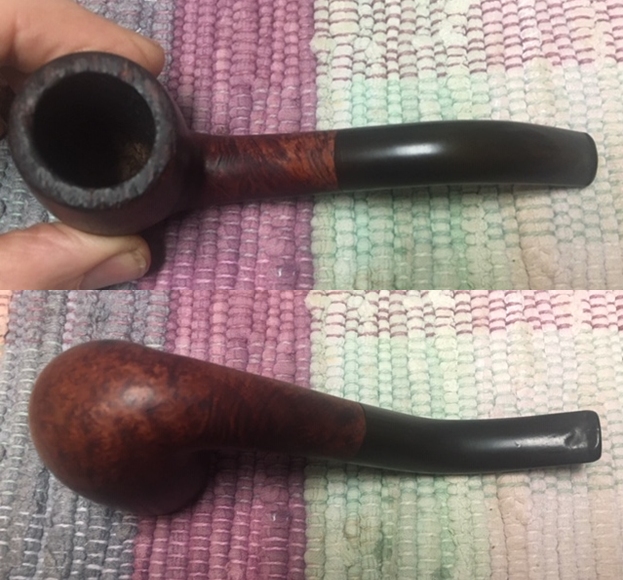
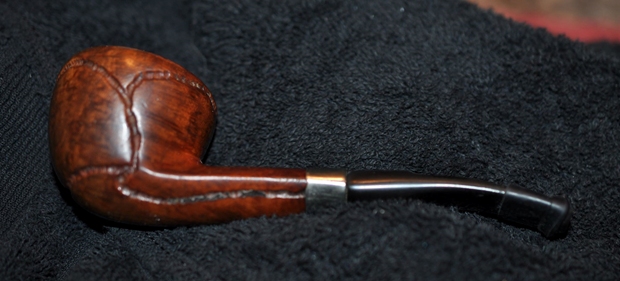
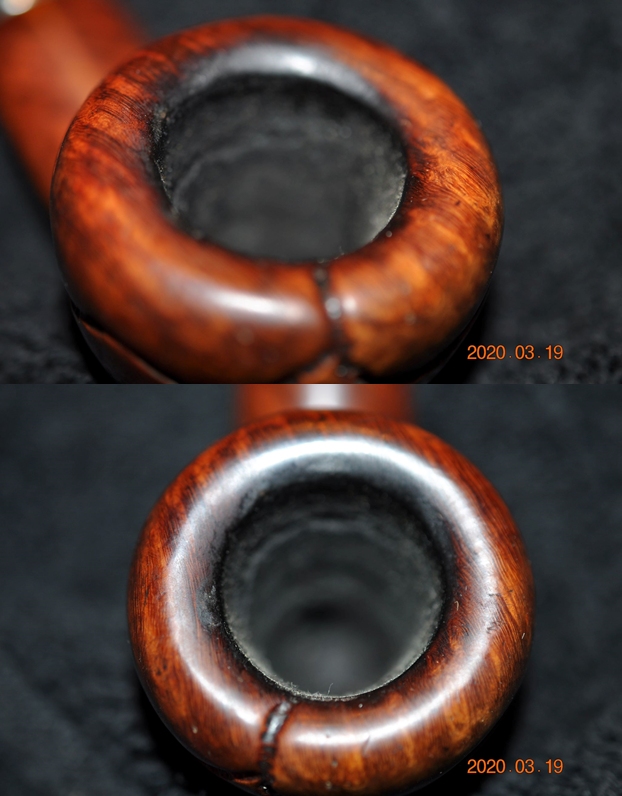
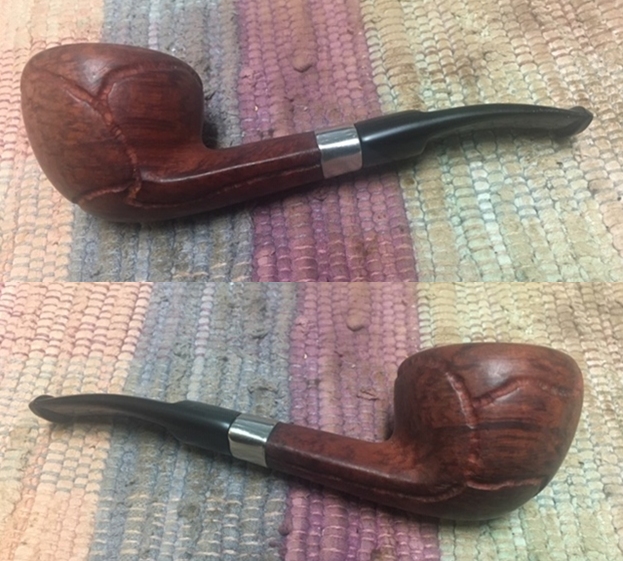
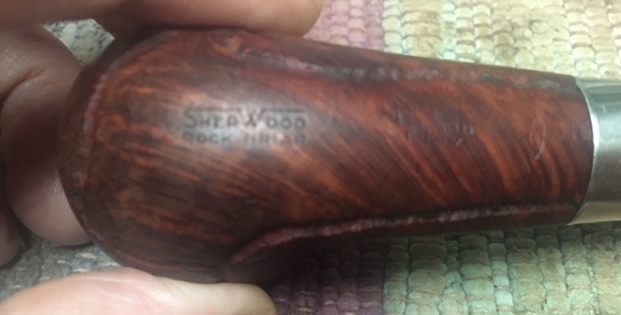
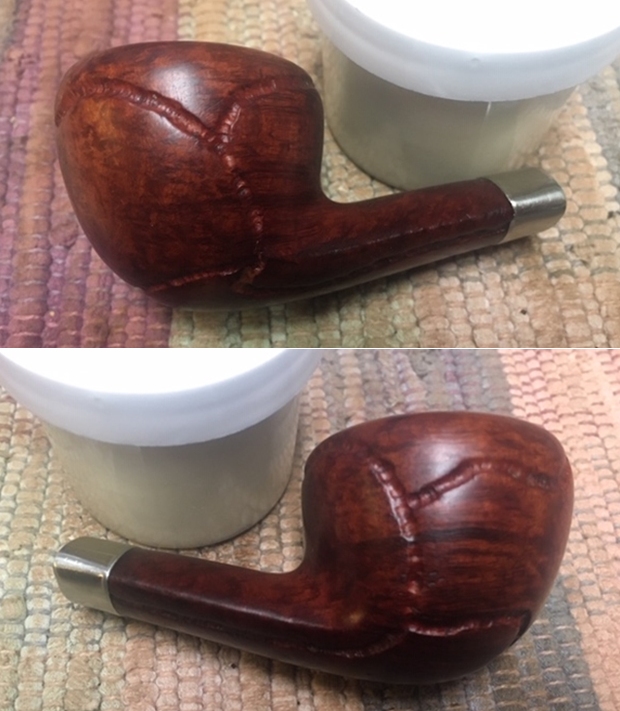
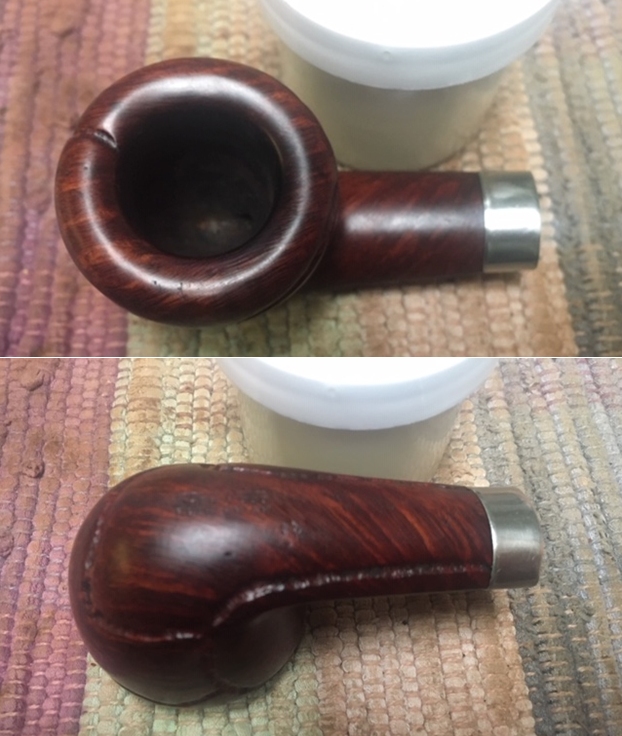
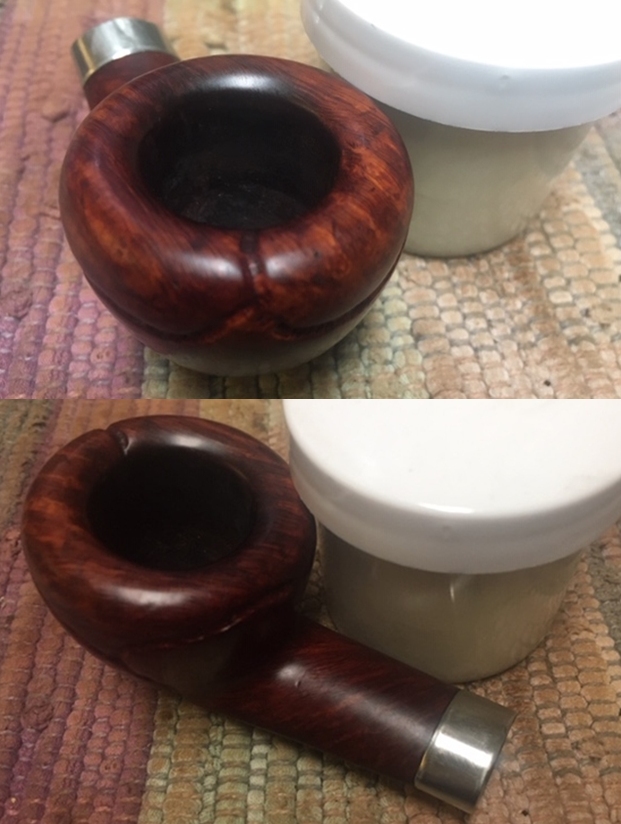
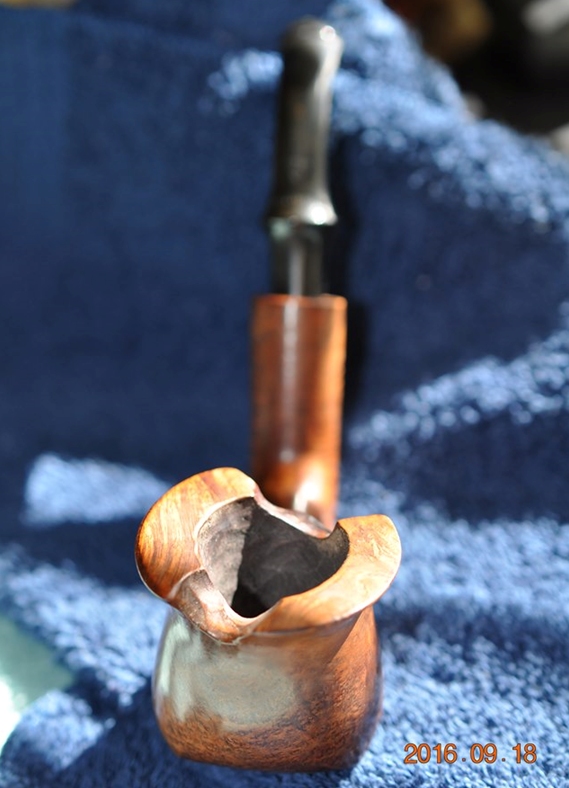
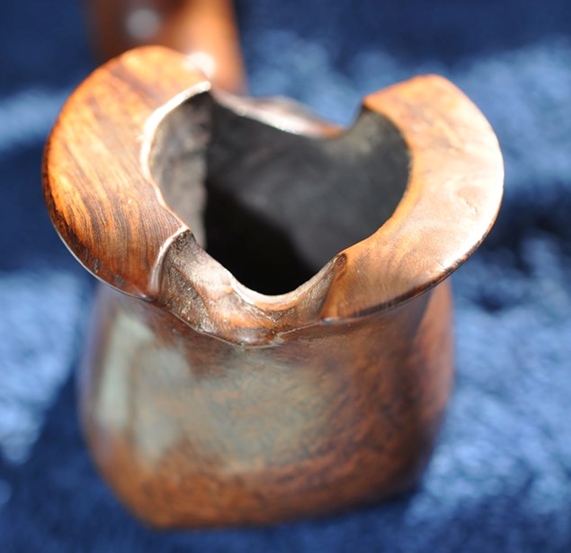
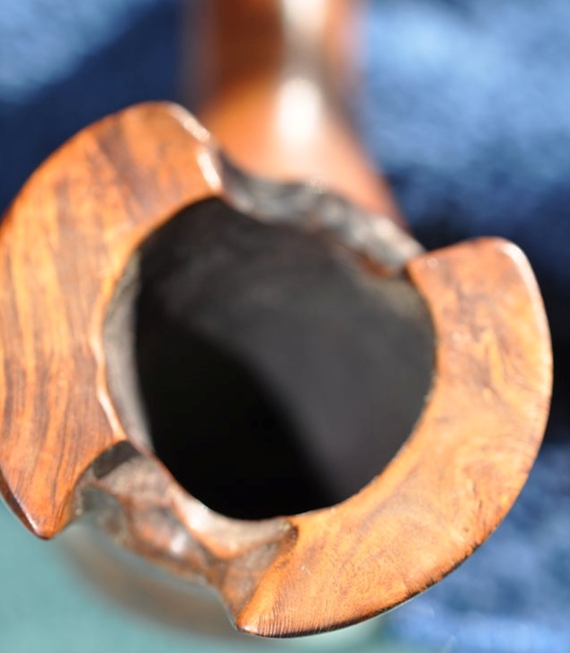
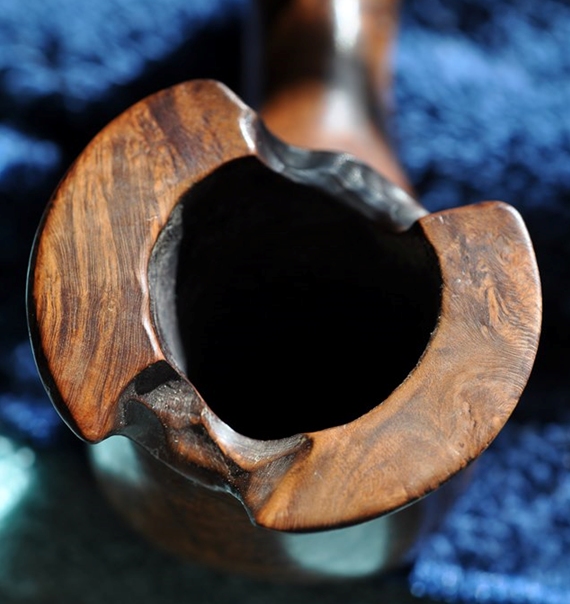
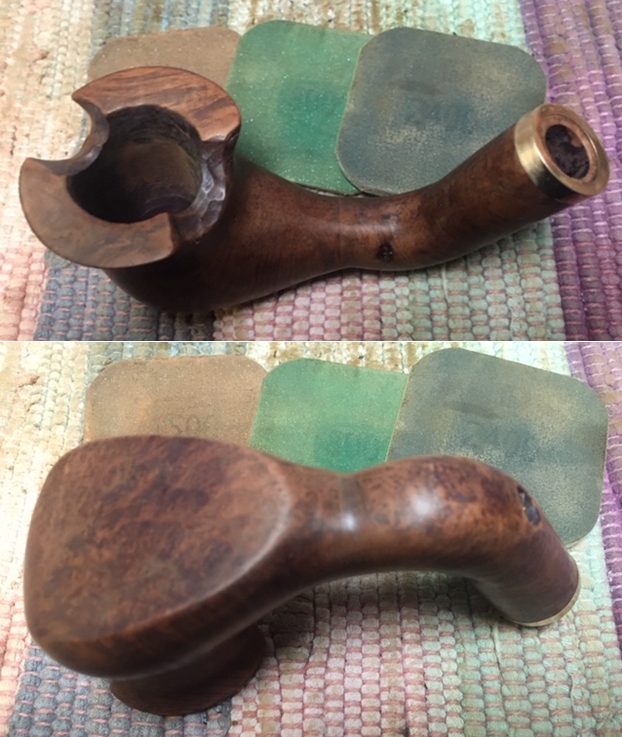
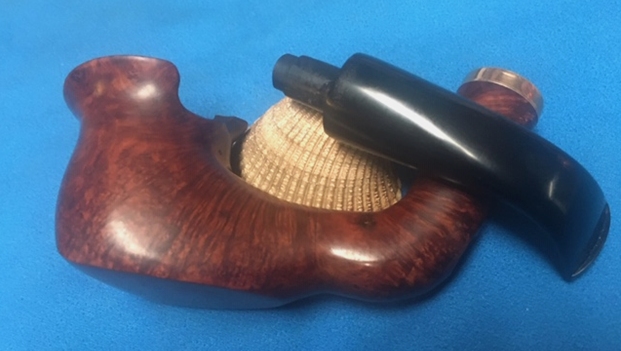
This Charatan’s Make London England Belvedere smooth finish with lots variation in the grain around the briar is a beauty! The pipe is stamped on the left of the shank and reads Charatan’s Make over London England over Belvedere. On the right side it has the shape number 2012. The grain grime and dirt ground into the mixture of grain around the bowl. It had rich dark and medium contrasting brown stains that do not look too bad. There was a thick cake in the bowl with remnants of tobacco stuck on the walls. There was a thick lava overflow sitting on the total rim top. The inner edge of the rim is dirty and may have some damage under the grime. It was a beautiful pipe that was dirty and tired looking. The stem was oxidized and calcified toward the end. It bears the CP stamp on the left side of the saddle stem. It had the characteristic tooth marks that I have come to expect from Bob’s pipes. Jeff took photos of the pipe before he started his cleanup work on it. 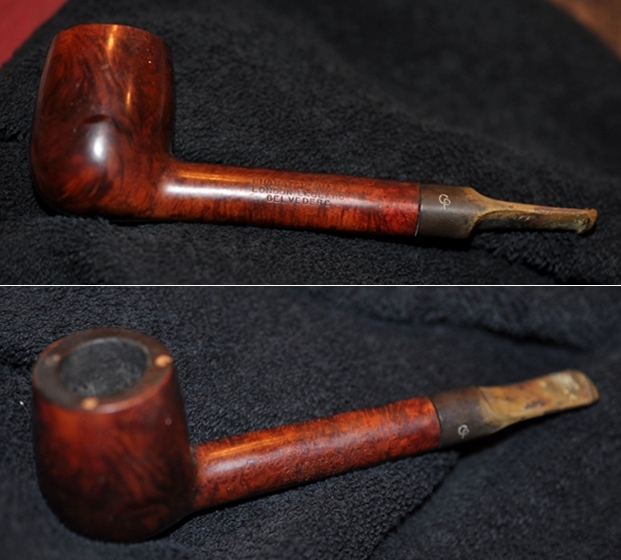 He took photos of the bowl and rim top to show the cake in the bowl and the lava build up on the edges of the bowl. It was thick and hard but hopefully it had protected the rim top and edges from damage. It was hard to know for sure from the photos.
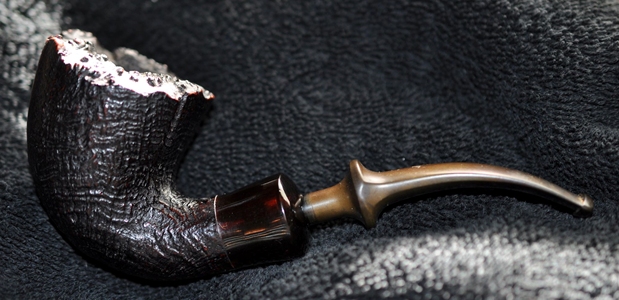
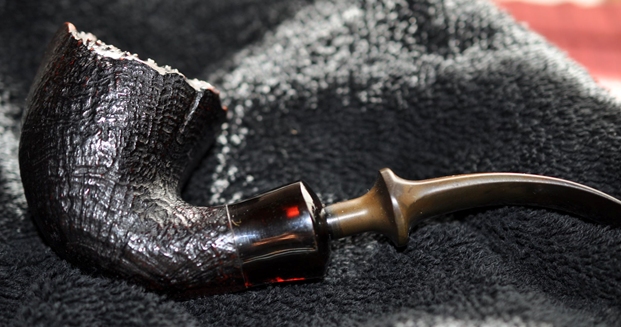
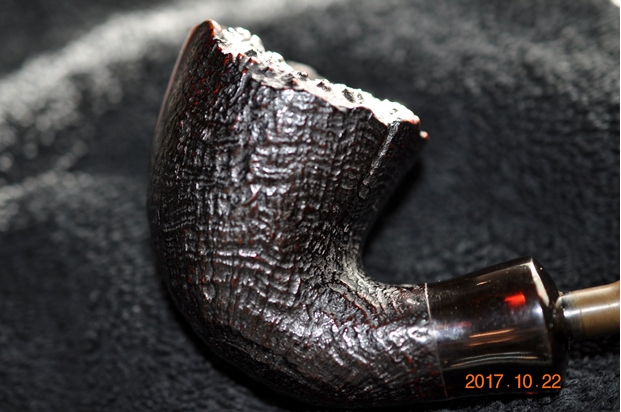
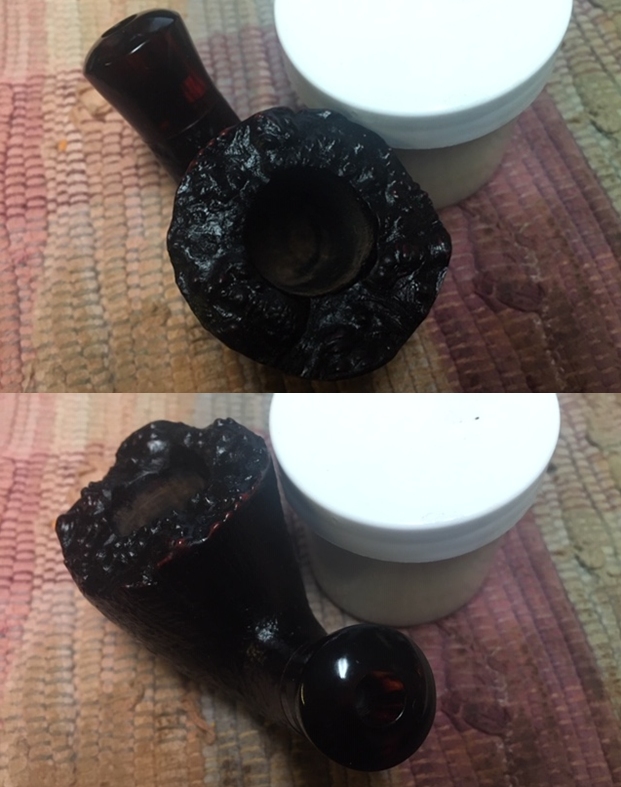
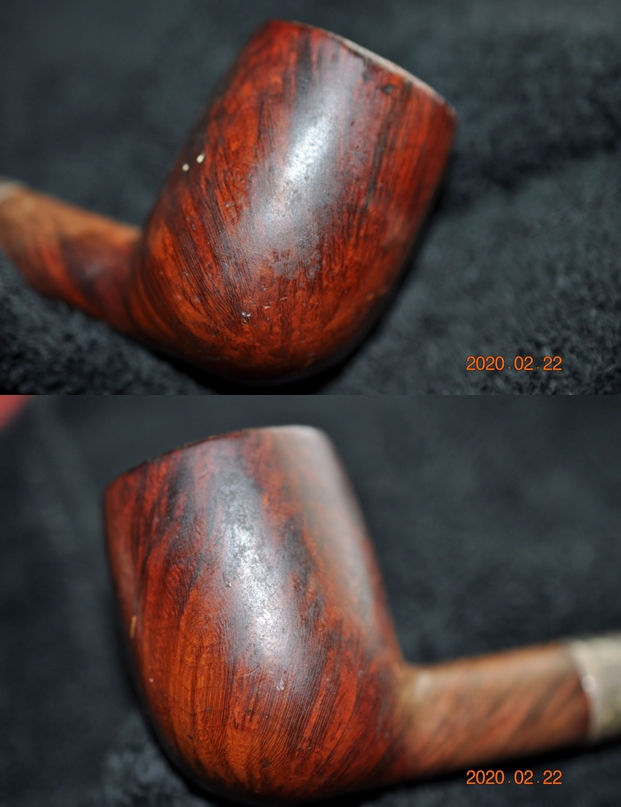
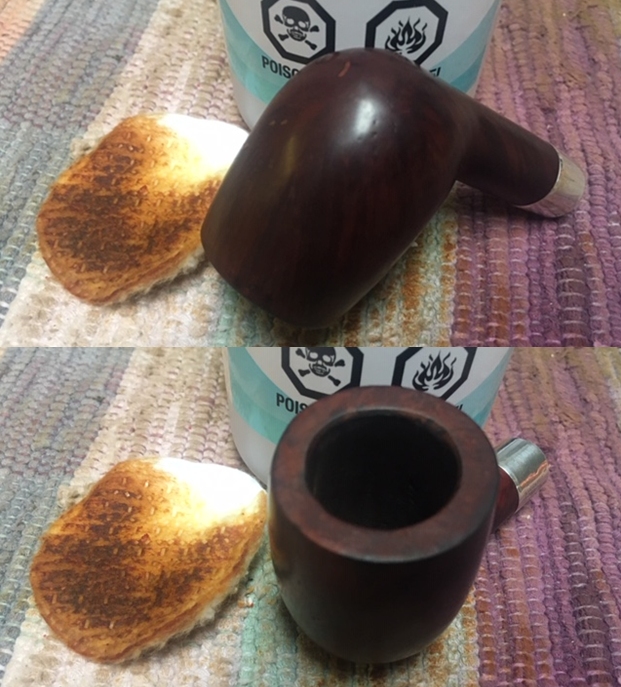
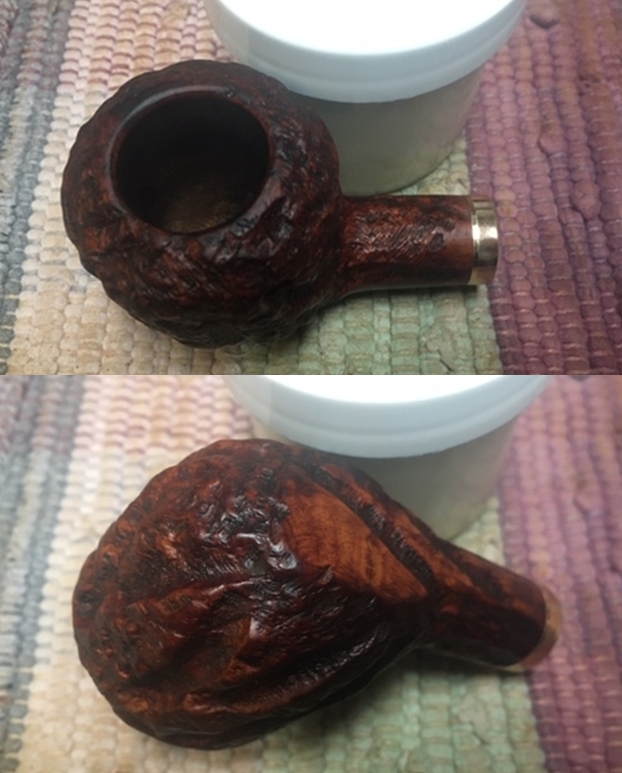
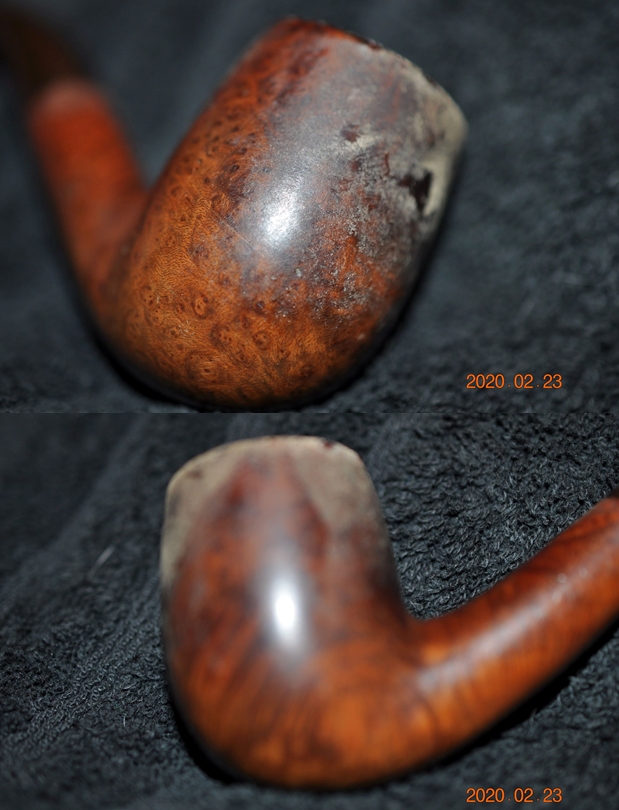
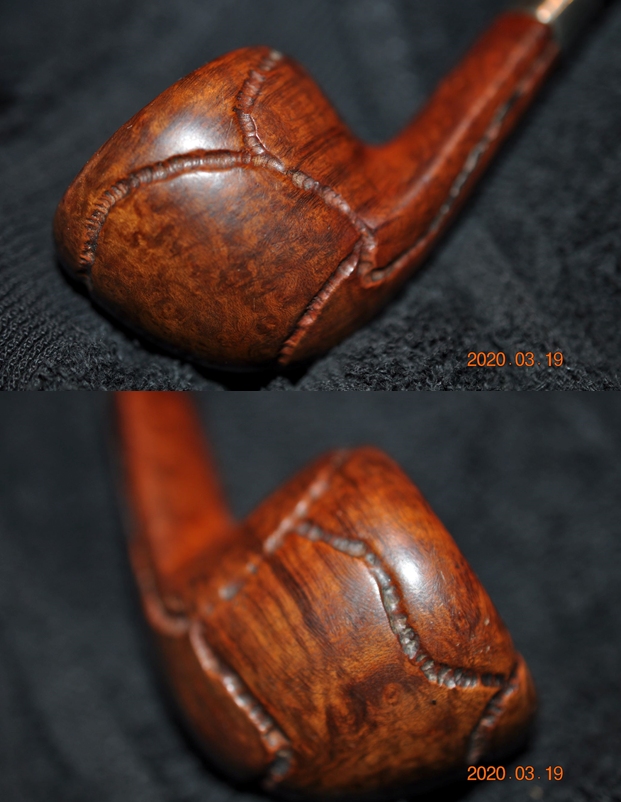
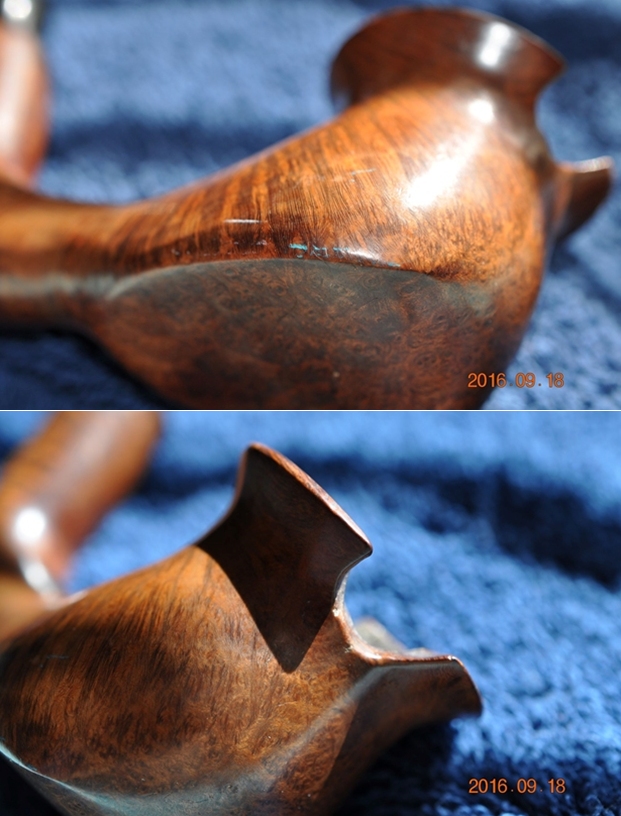
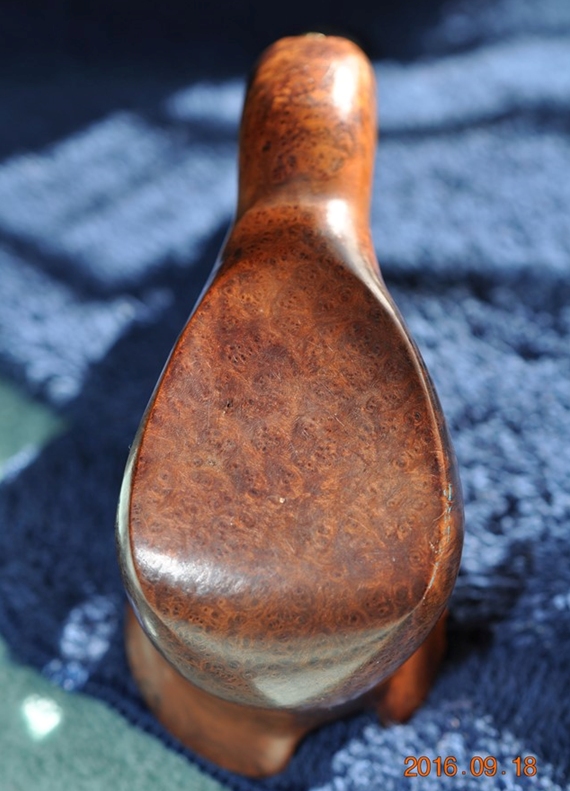
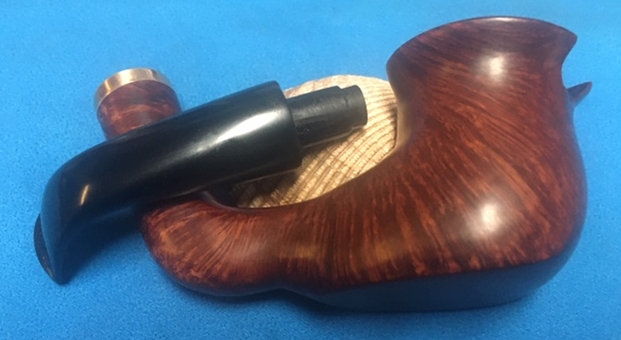
 Jeff took photos of the sides and heel of the bowl to show the condition of the finish. You can see the beautiful grain under the grime and grit ground into the finish.
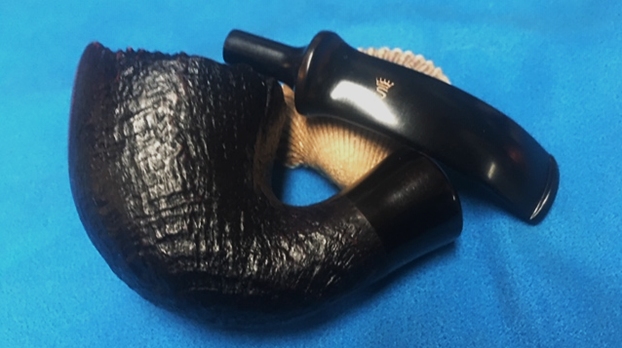
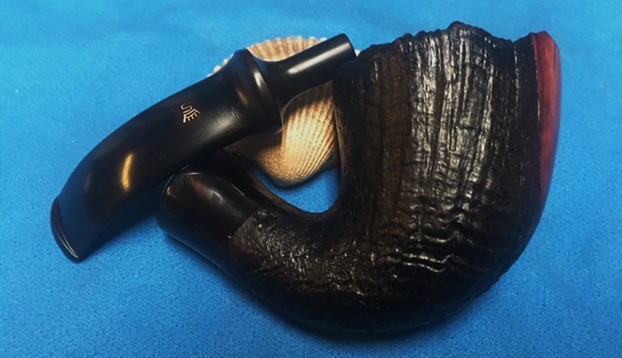
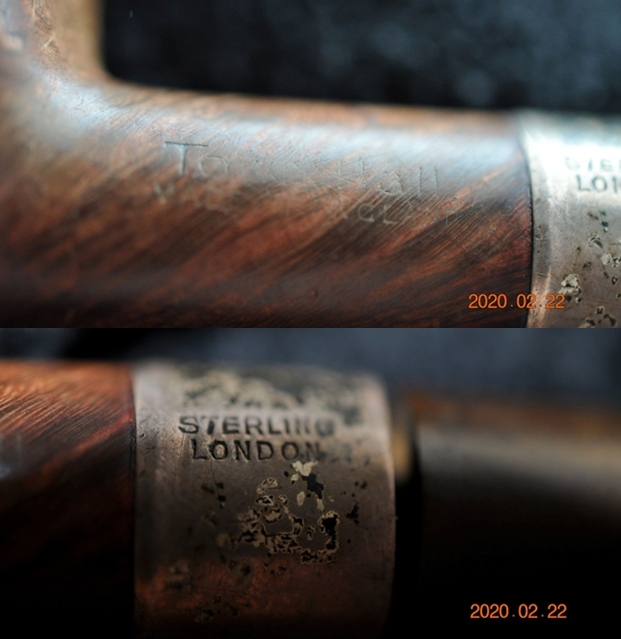
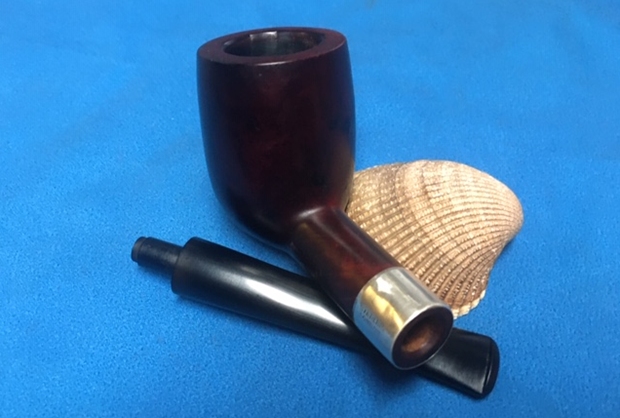
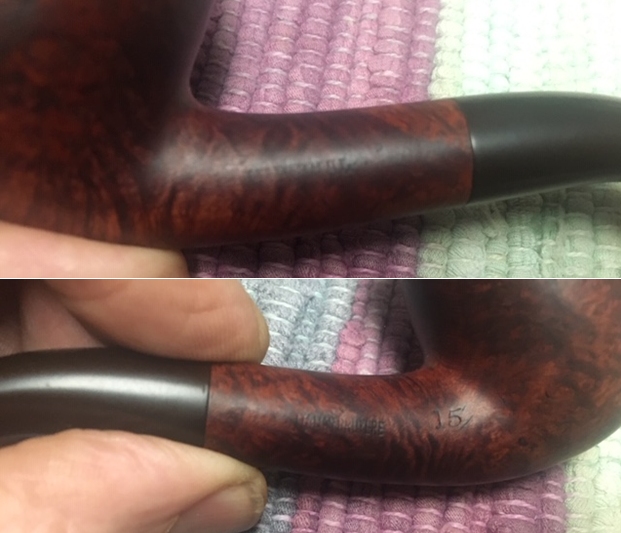
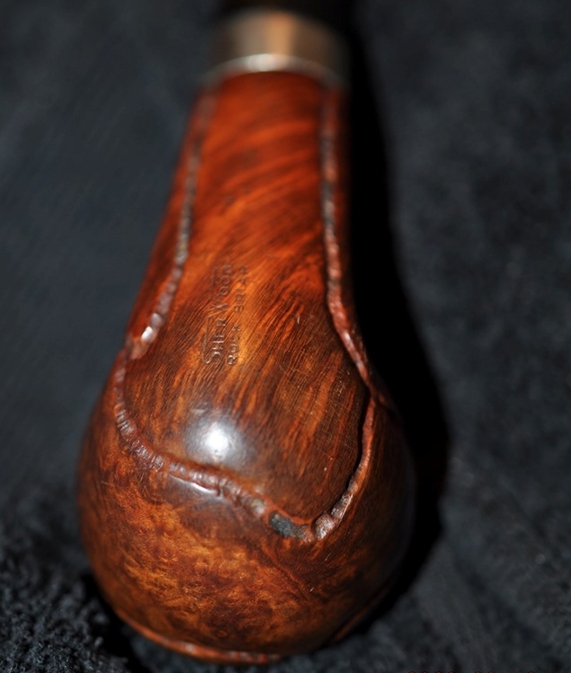
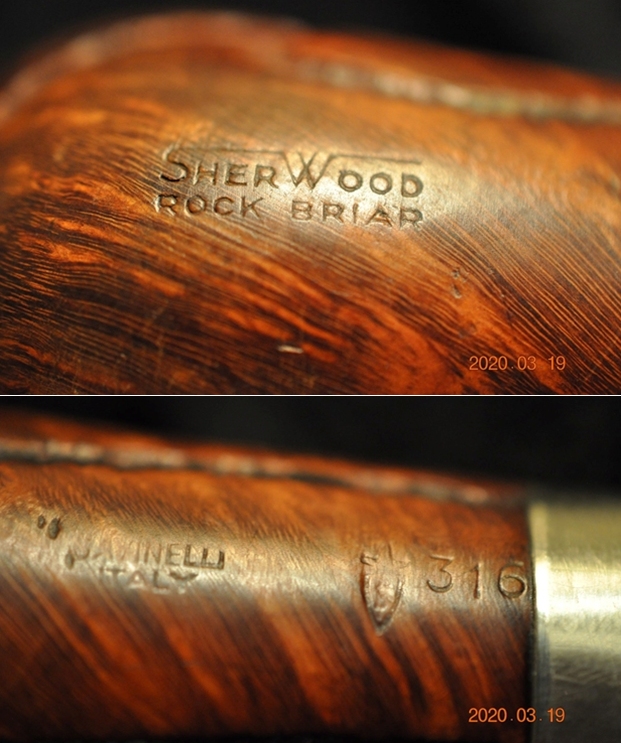
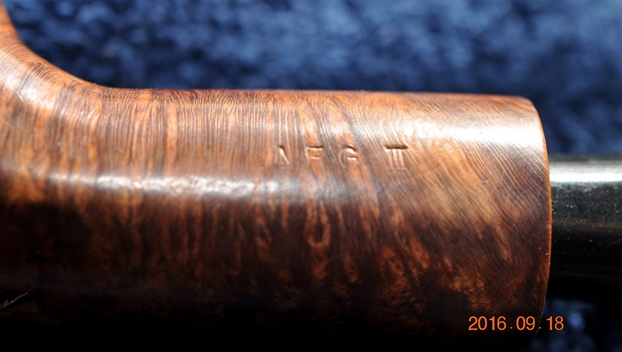
  He took photos of the stamping on both side of the shank. The stamping was readable as you can see from the photos and read as noted above. You can also see the CP stamp on the left side of the saddle stem.
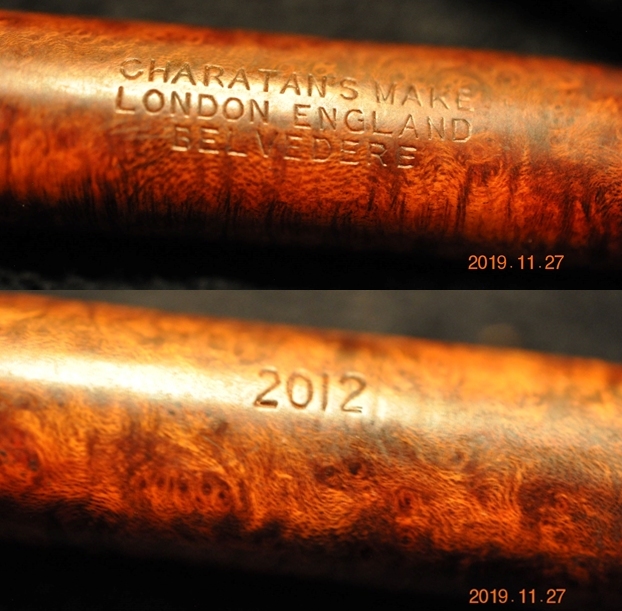
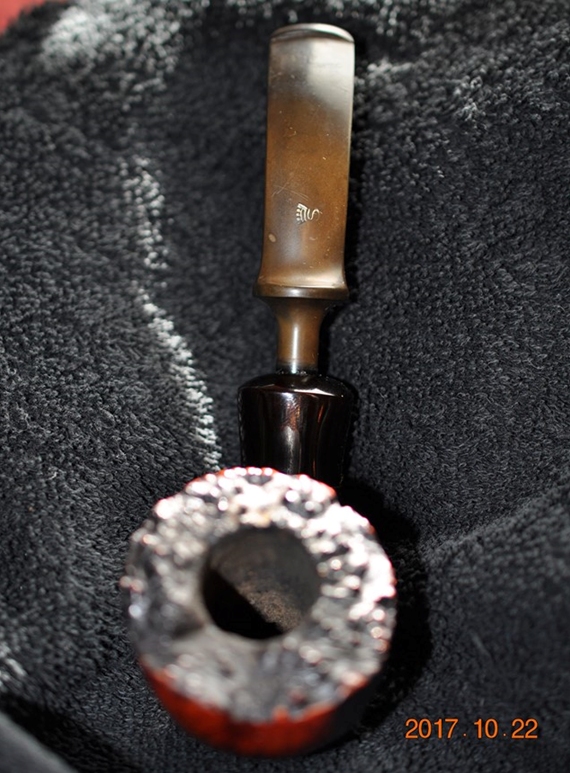
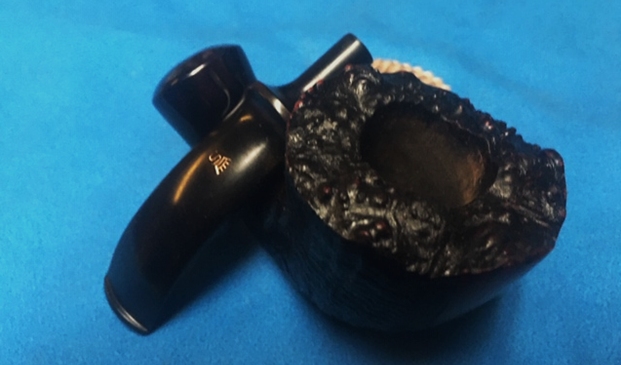
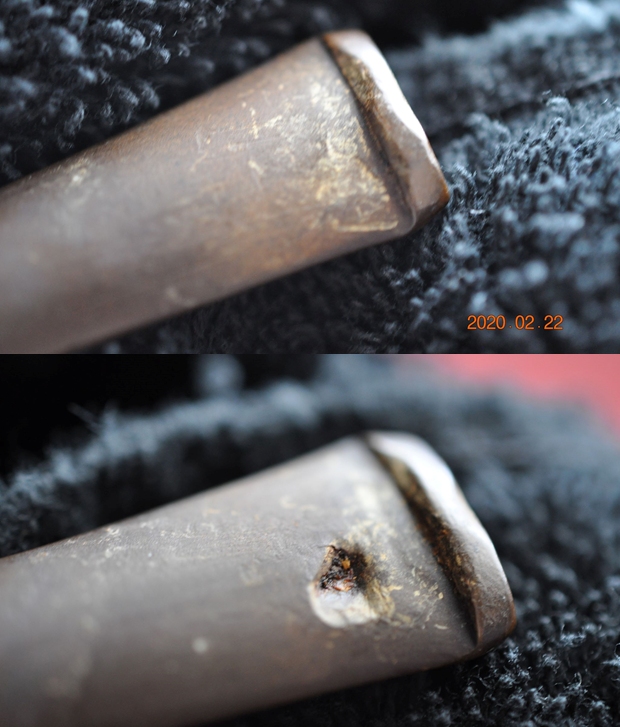
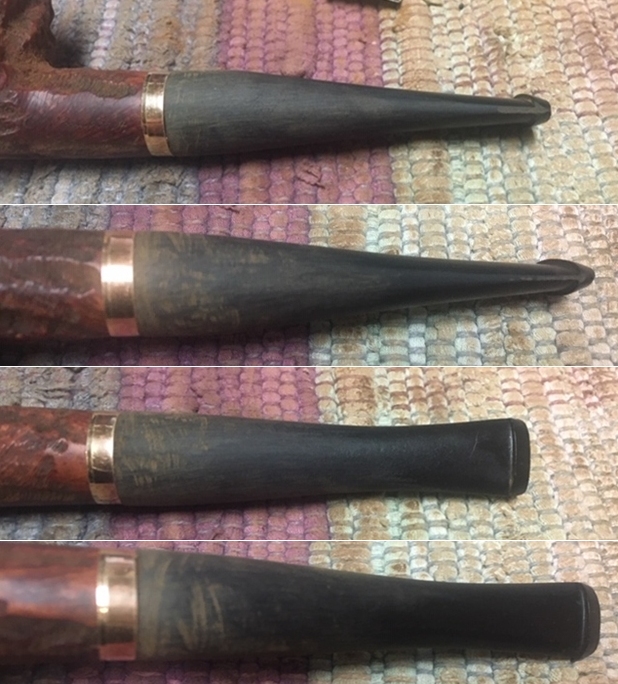
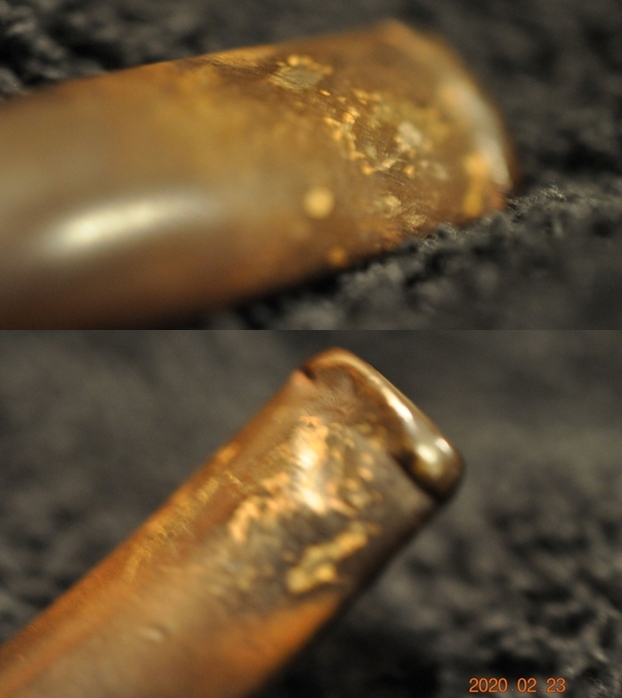
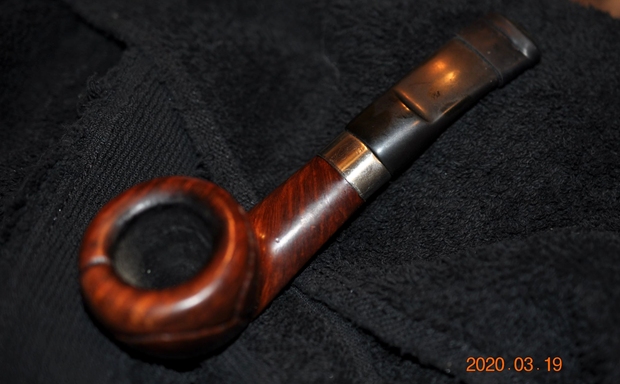
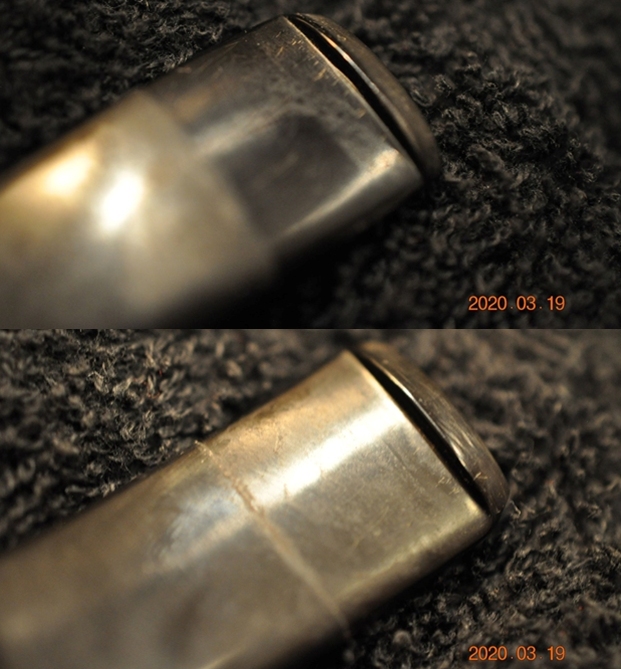
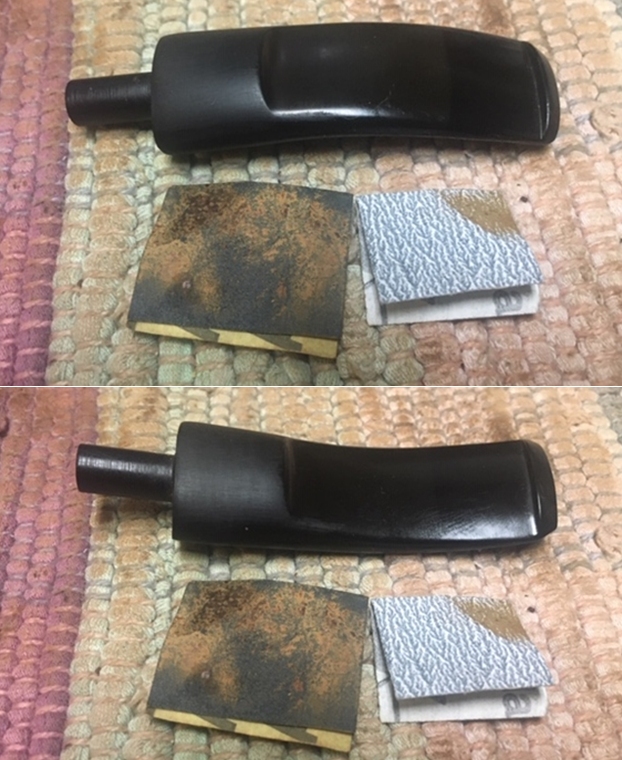
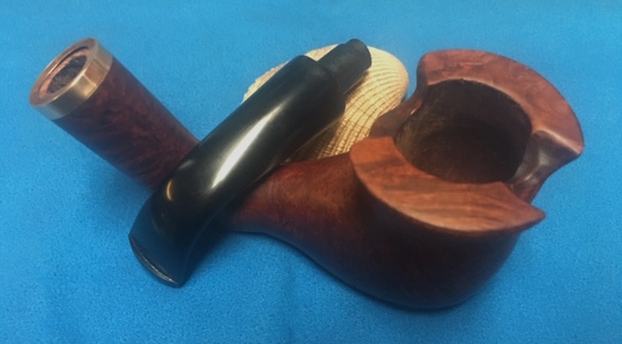
 Jeff took photos of the top and underside of the stem showing the tooth chatter, scratching and oxidation on the stem surface and wear on the edges of the button.
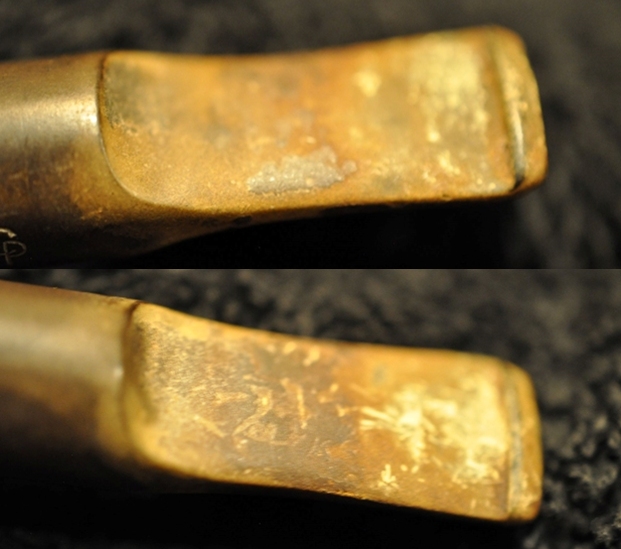 To try to figure out the era of the Charatan’s pipe I was working on I turned to the Pipephil website, Logos and Stampings. There is some really helpful information on each of the lines of Charatan’s Make pipes that entered the market. Here is the link to the section of the site that I turned to (http://www.pipephil.eu/logos/en/logo-charatan.html). There is an alphabetical listing of the lines but the Belvedere they showed had a stem made for a 9mm filter while the one I have is a nonfiltered pipe. The site did give a short history of the brand. I quote the portion that is most pertinent.
The brand was founded in 1863 by Frederik Charatan. When his father retired in 1910, Reuben Charatan took over the family business. All the pipes were handmade until 1973. The brand name has been overtaken by Dunhill in 1978 and sold in 1988 to James B. Russell Inc.(NJ, USA). During the period 1988-2002 Charatans were crafted by Butz Choquin in St Claude (France). Dunhill re-purchased Charatan brand name in 2002 and Colin Fromm (Invicta Briars, Castleford) followed up on freehand production.
I turned to Pipedia to see if I could find more information on the brand and possibly a link to the Belvedere line (https://pipedia.org/wiki/Charatan) but once again in the general article it was not listed. It did give a little more historical information. I quote the pertinent parts and have highlighted in red the sections that give information on this particular pipe.
In 1863 Frederick Charatan, a Russian/Jewish immigrant, opened a shop in Mansell Street, located in the borough of Tower Hamlets, London E1, where he began to carve Meerschaum pipes. These pipes got very popular soon, and thus Charatan moved to a bigger workshop in Prescot Street, just around the corner. Here he began to make briar pipes which should make the name famous the world over. Charatan was the first brand to make entirely hand-made briars from the rough block to the finished pipe including the stems. The nomenclature “Charatan’s Make” refers to this method of production and was meant to differ Charatan from other brands who “assembled” pipes from pre-drilled bowls and delivered mouthpieces.
Being the undisputed No. 1 in English pipemaking, Charatan was approached by Alfred Dunhill who was unsatisfied with the quality of the pipes he imported from France. During 1908 – 1910 Dunhill bought pipes from Charatan paying exorbitant prices to ensure he had some of the very best pipes for sale in England. In 1910 he lured away Joel Sasieni, one of Charatan’s best carvers, and opened his own small pipe workshop on 28 Duke Street. On the retirement of his father in 1910 Reuben Charatan took over the family business…
…The pre-Lane period (prior to 1955) and the Lane era pipes (1955 to until sometime between 1979 – 1984) are of primary interest the collector. The Lane era is often quoted as beginning about 1950… Charatan records are almost non-existent before Lane due to a factory fire, making it difficult to date pre-Lane pipes. Charatan used 4 basic grades prior to 1950: Supreme, Selected, Executive, and Belvedere. After 1950 Herman Lane’s influence began, and the grades started to expand. In 1955 Lane took over sole distributorship of Charatan in the US. In 1957 he introduced the Supreme S. Most of his other introductions were from the 60’s and early 70’s…
The section called Miscellaneous Notes had some interesting information. The pipe I was working did not have the Double Comfort (DC) bit which helps give more credence to an early pre-Lane date for this one. It also does not have the Serif L on the shank which adds to my belief of its early date.
Charatan records indicate the DC (Double Comfort) bit was introduced in the 50’s, but some report seeing them in earlier production. Still others indicate they were introduced by Lane in 1960. Regardless, the DC bit is not an accurate way to date a pipe because many Charatan’s were made with regular and saddle type bits throughout the “Lane Era”…
…The Lane Trademark serif and circled L indicates the pipe is from the “Lane Era” (approx. 1955 to 1979 -1984?), however it appears that both the English factory or Lane themselves sometimes, or perhaps even often forget to stamp the L on a pipe. The Charatan factory was known for inconsistencies, especially in stampings. Therefore, although an L on the pipe definitely defines it as a Lane Era pipe, the lack of it could simply mean the pipe missed receiving the stamp from the factory. The lack of the trademark could also mean the pipe was destined for the European market.
I continue digging further into the dating of the pipe, but what I had found was a good start for me. If some of you would like to try your hand at dating it more accurately as to the time period it came out you might want to check out the article on Pipedia on Dating Charatans (https://pipedia.org/wiki/Dating_of_Charatans).
I also reread the article on Pipedia by the Italian fellow who contributed some really helpful information on the brand (https://pipedia.org/wiki/Charatan_-_Milan_2014). I quote the section on the Second period: Reuben Charatan 1910 – c. 1962
– In 1962 Herman Lane took over the business from the Charatan family, although he had already influenced production from the 1950s.
– The pipes were mostly larger than the previous ones and corresponded in size to Dunhill group 5. These are slightly less rare, but still difficult to find.
– Stem: Usually in ebonite, saddle shaped or tapered, bearing a fine “CP” stamp, underbore system (see below) used when necessary.
– Shank: The shape code is stamped on it together with the nomenclature “CHARATAN’S MAKE LONDON ENGLAND” arranged in two lines. From 1955 onwards on the models marketed for the USA there is also a serif and circled capital “L” (but not all models bear this) which resembles the pound sterling symbol. The “L” is for Lane, the importer.
From 1958, Lane changed the nomenclature for models marketed for the US to clarify the message: “MADE BY HAND”. In this period the underbore was introduced. Its manufacturing period ranged between 1920 and c.1930. This model was equipped with a duralumin plunger trap fitted in the stem, which served to clean the residue more easily. This particular model bore a special stamp on the stem, and also had its own catalogue…
QUALITY GRADES…The stem did not only display the stamps mentioned above. Another stamp that can help dating is the one referring to the quality of the pipe. Until Herman Lane arrived on the scene there were four quality grades. Starting with the lowest: Belvedere, Executive, Selected, and Supreme. Lane went on to add higher grades from time to time: Supreme S, Supreme S100, S150, S200, S250, S300, Coronation, Royal Achievement, Crown Achievement, and Summa Cum Laude; these last three are extremely rare and almost impossible to find. He also invented other, different grades, even changing the previous pipe classification standards. We will not go into detail here, but it means that if we find an S100 or Coronation the pipe was manufactured following Herman Lane’s acquisition. In particular, the FH mark, or Freehand pipe was commissioned to the famous Danish craftsman, Preben Holm.
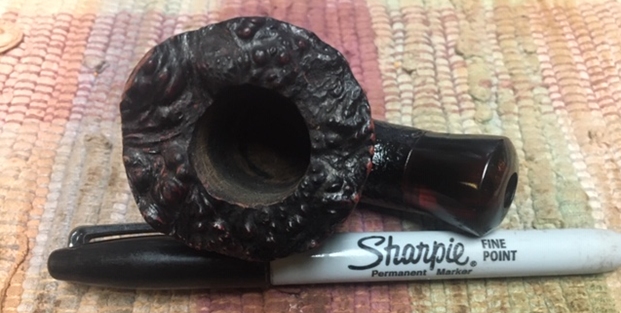
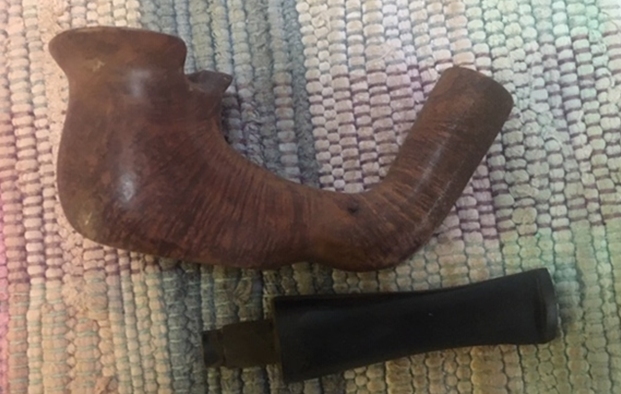
I am also including a shape chart from that site. I have drawn a red box around the 2012 Lovat shape.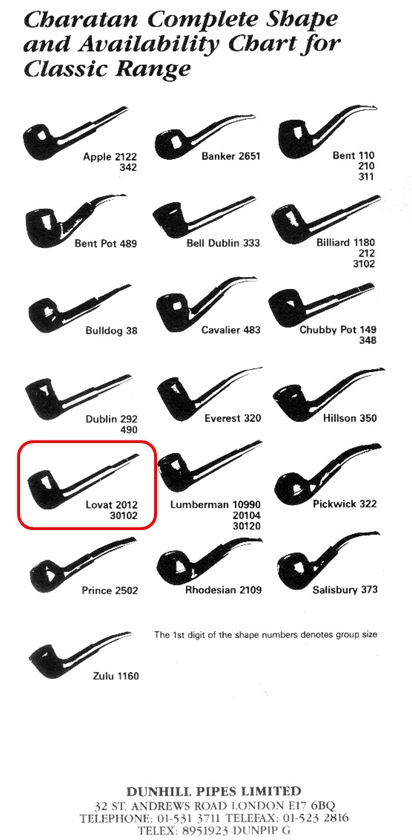 With over 125 pipes to clean from Bob’s estate I took a batch of them to the states with me when I visited and left them with Jeff so he could help me out. Jeff cleaned the pipes with his usual penchant for thoroughness that I really appreciate. Once he finished he shipped them back to me. This one was a real mess and I did not know what to expect when I unwrapped it from his box. He reamed it with a PipNet pipe reamer and cleaned up the reaming with a Savinelli Fitsall Pipe Knife. He scrubbed out the internals with alcohol, pipe cleaners and cotton swabs until the pipe was clean. He scrubbed the exterior of the bowl with Murphy’s Oil Soap and a tooth brush to remove the grime and grit on the briar and the lava on the rim top. The finish looks very good with good looking grain around the bowl and shank. Jeff scrubbed it with Soft Scrub and soaked it in Before & After Deoxidizer to remove the oxidation on the rubber. When the pipe arrived here in Vancouver for the second stop of its restoration tour it looked a lot better. The stem still had a lot of deep oxidation. I took photos before I started my part of the work.
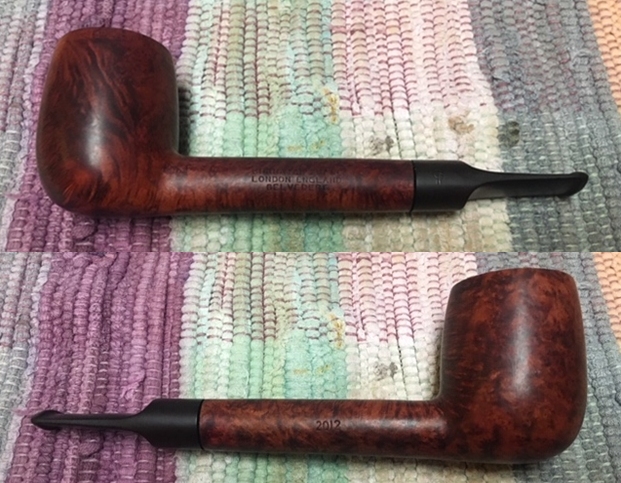
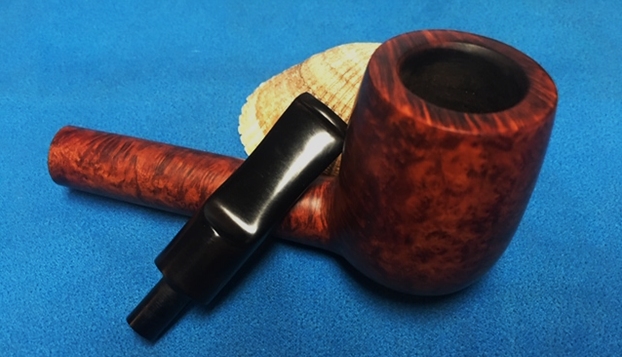
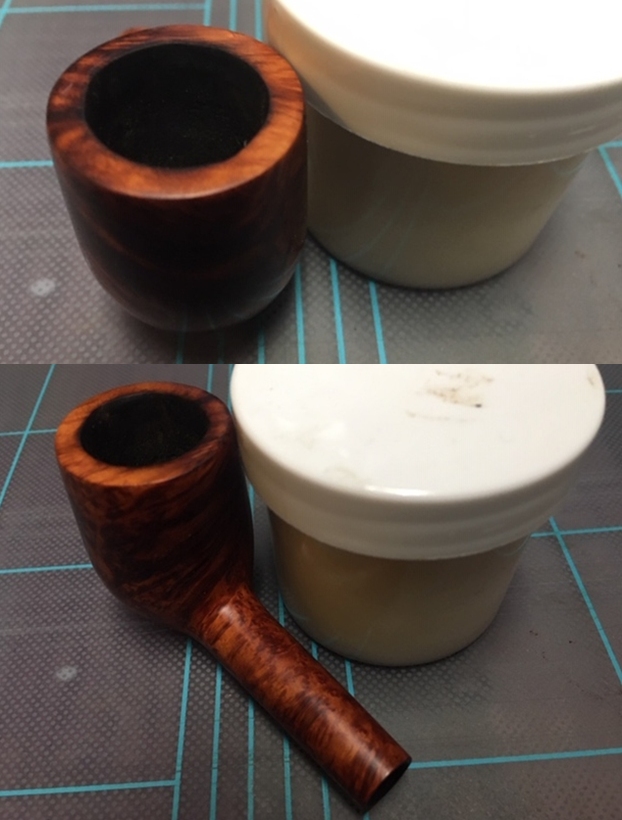
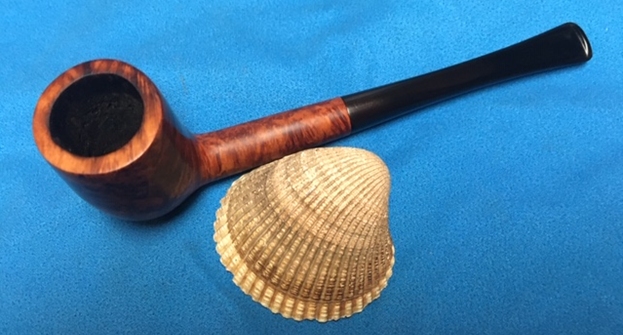
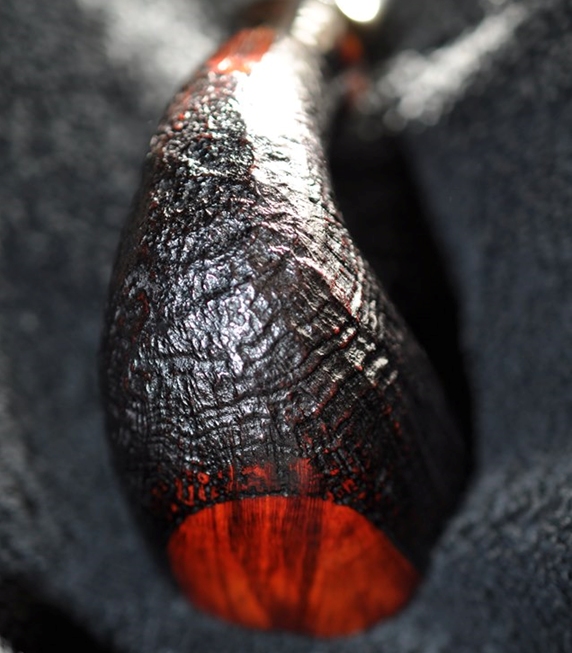
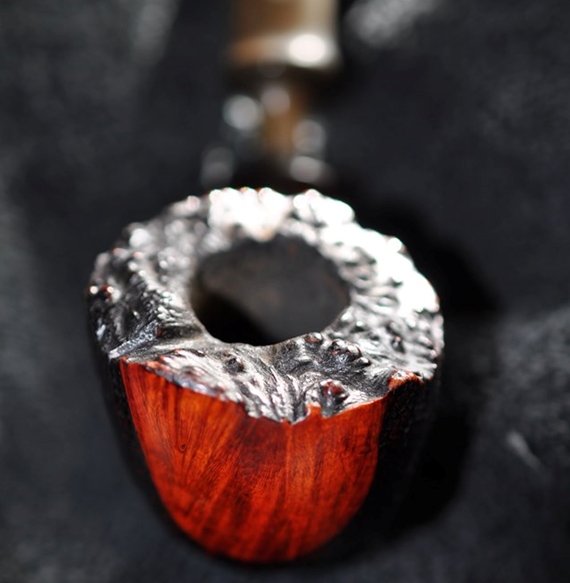
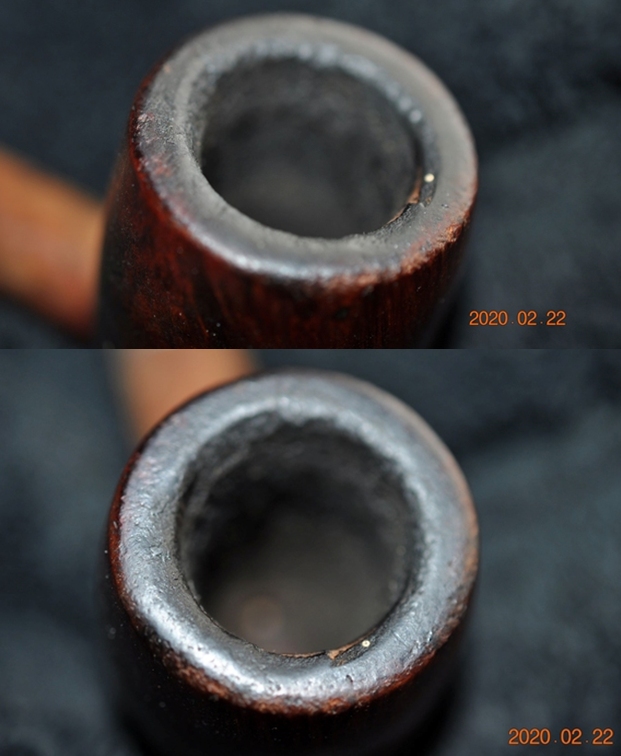
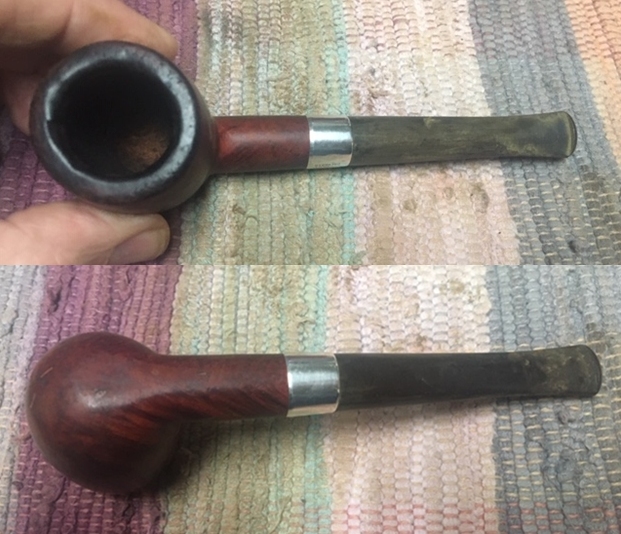
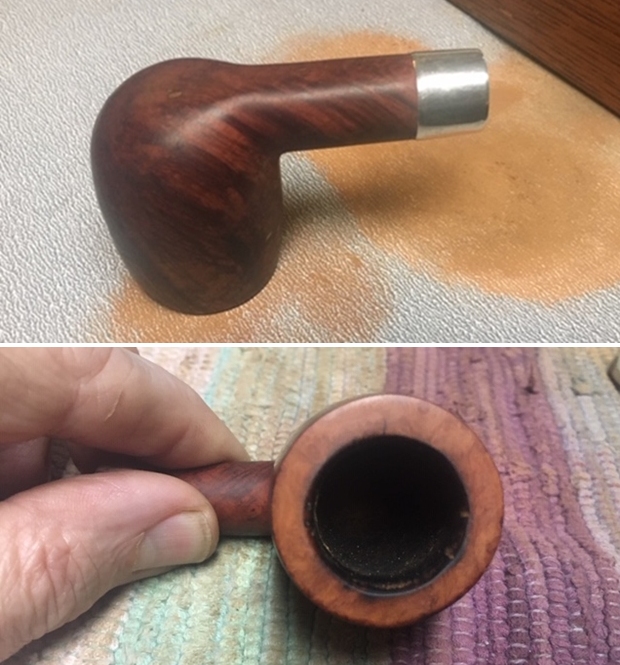
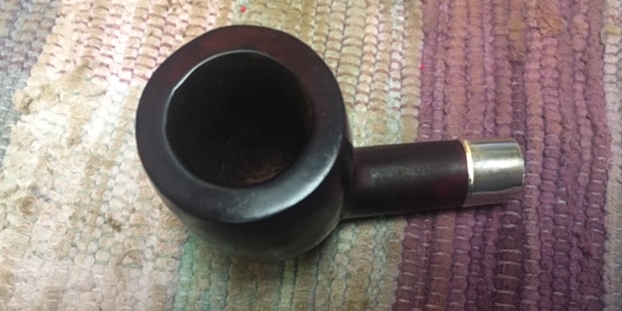
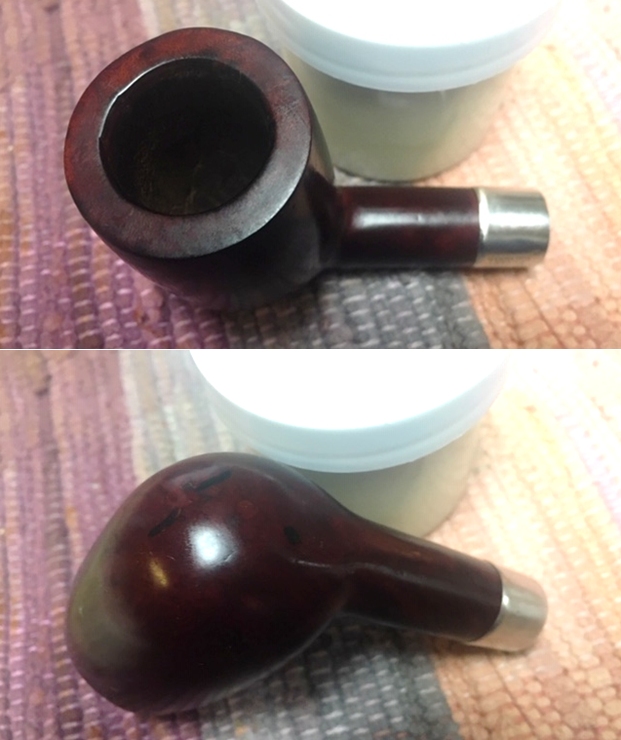
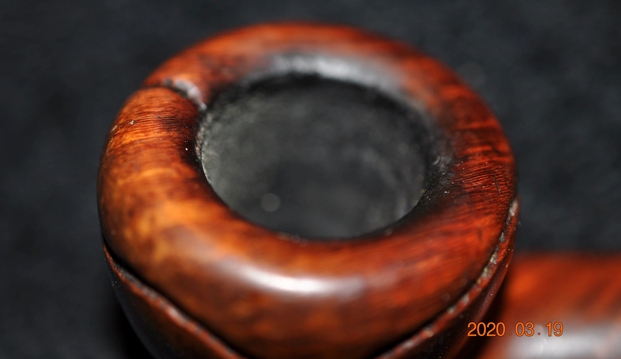
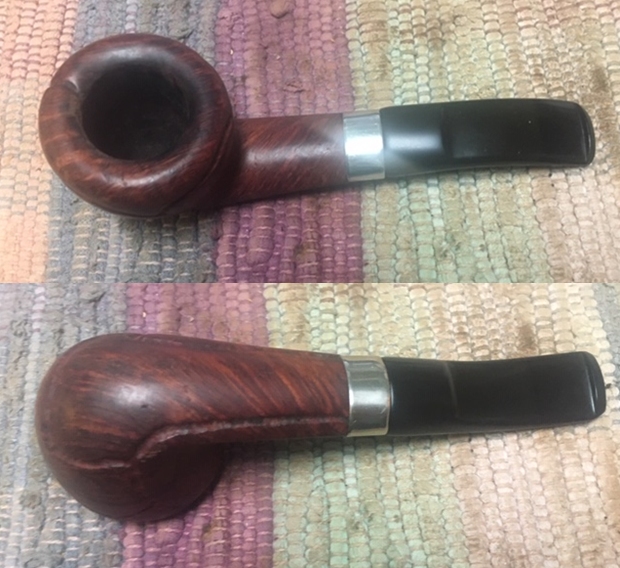
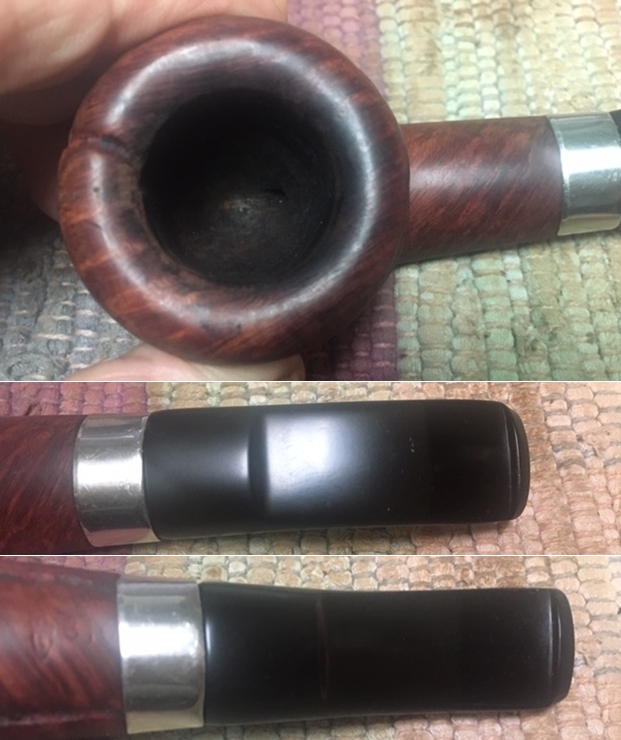
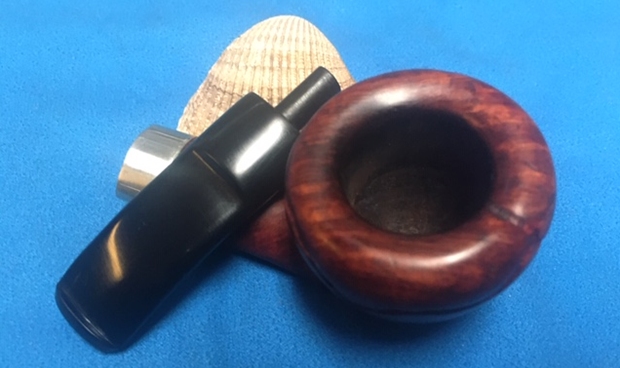
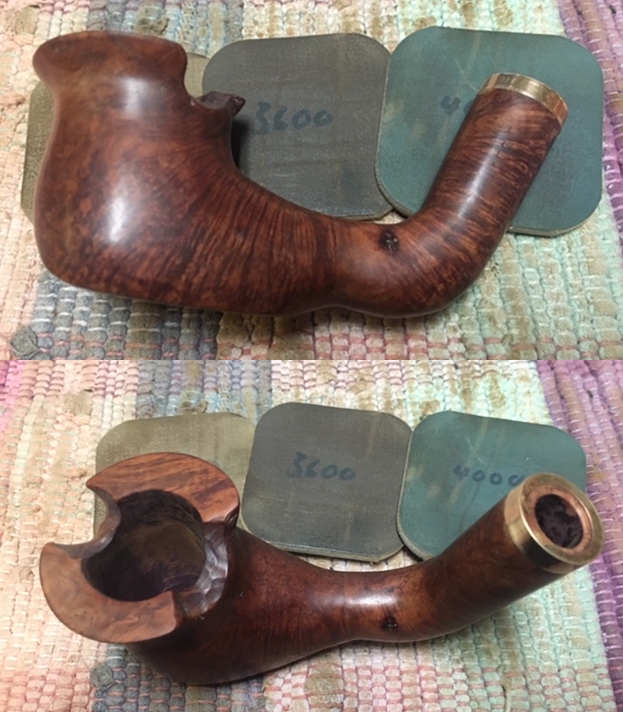
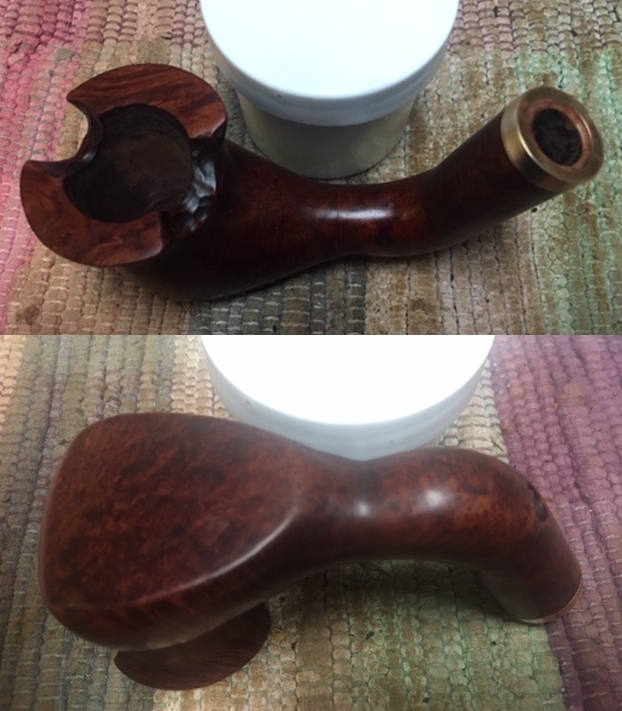
 I took some close up photos of the rim top and also of the stem surface. I wanted to show what cleaned bowl and rim top looked like. The rim top good but there was some damage on the inner edge with some charring on the front inner edge. I also took close up photos of the stem to show the light tooth marks and the remaining oxidation on the stem surface.
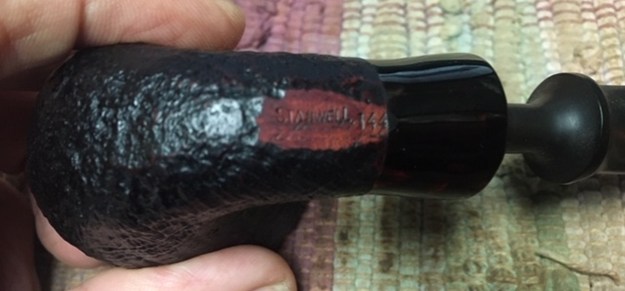
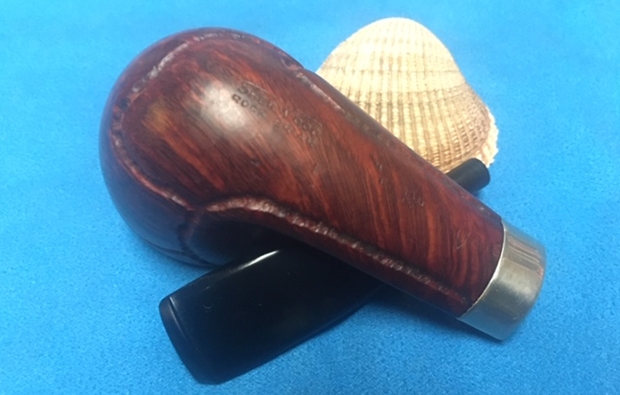
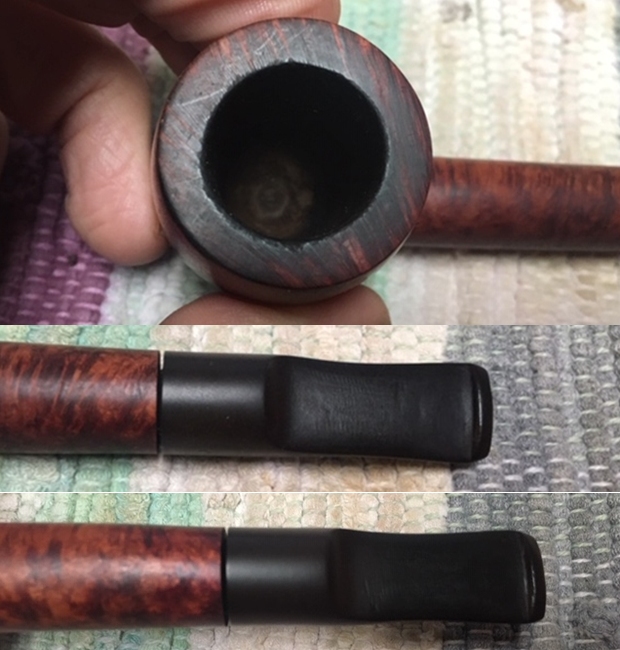 I took photos of the stamping on the sides of the shank and it is clear and readable. It is stamped as noted above.
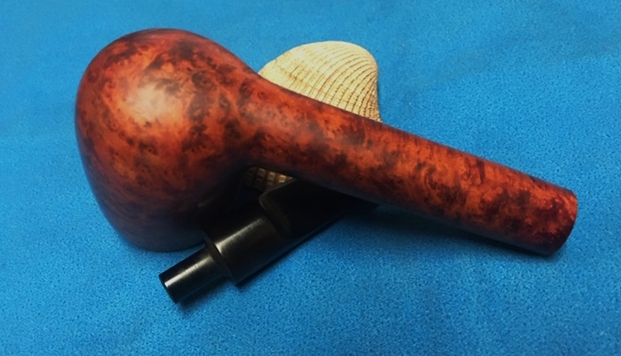
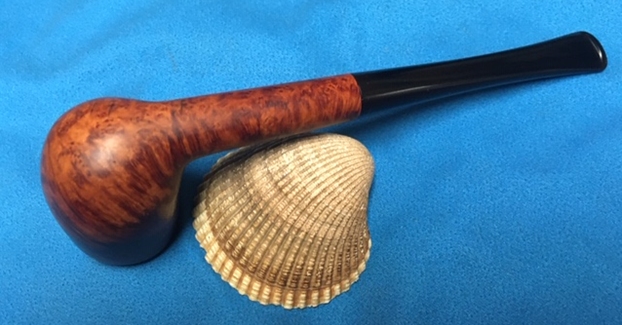
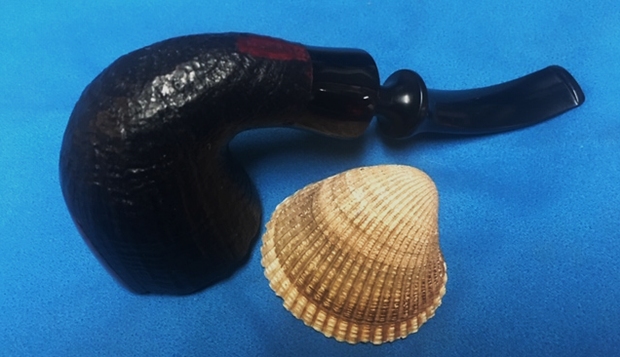
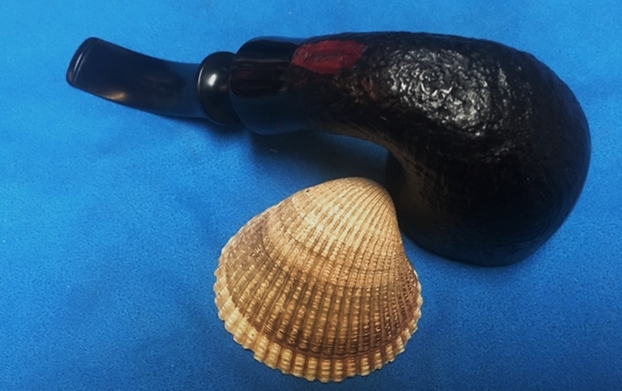
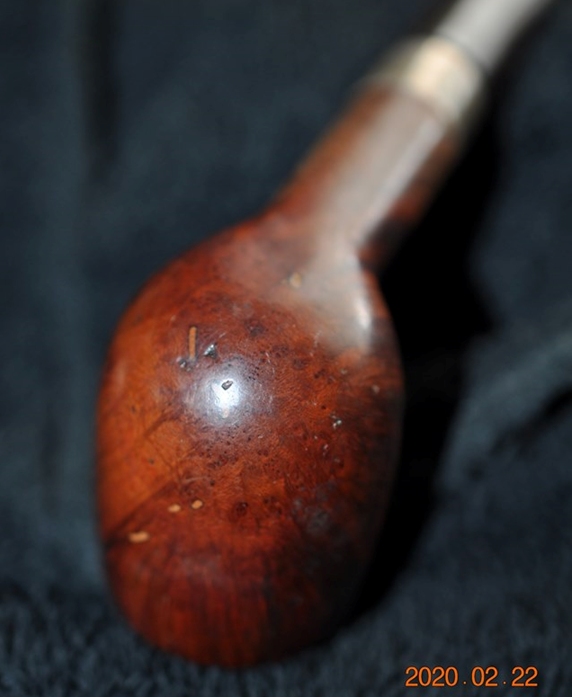
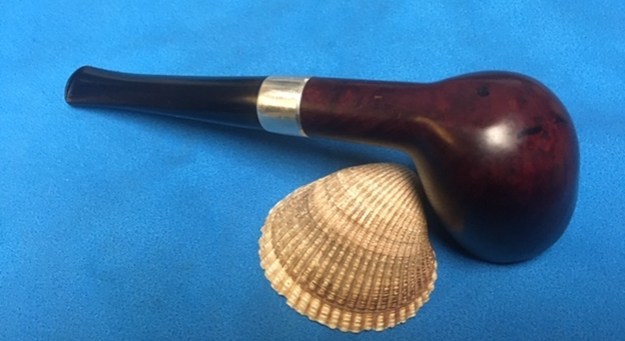
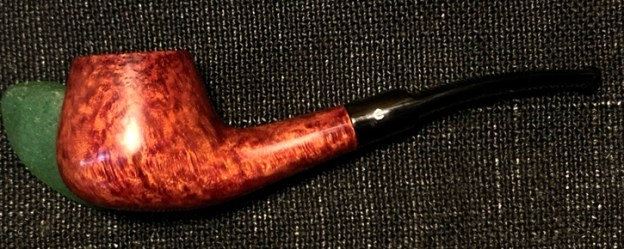
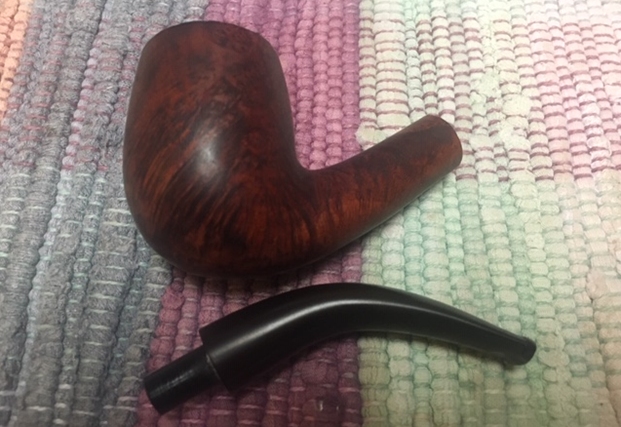
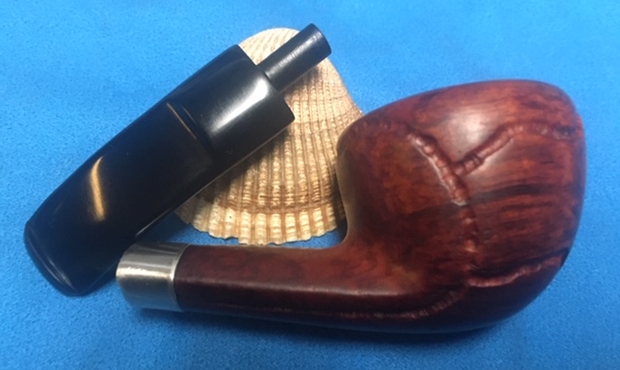
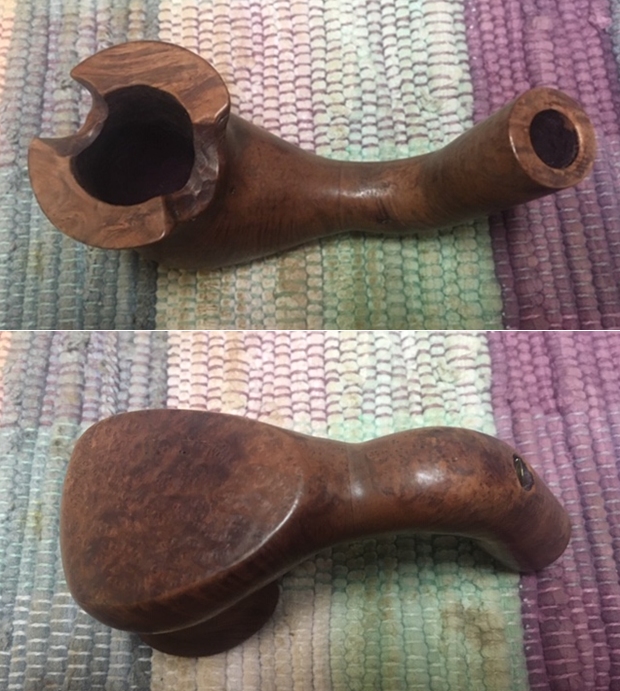
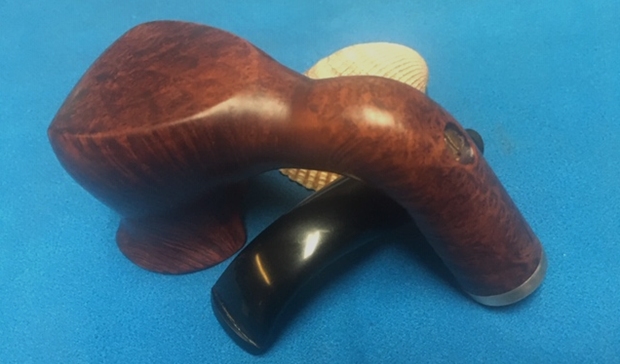
 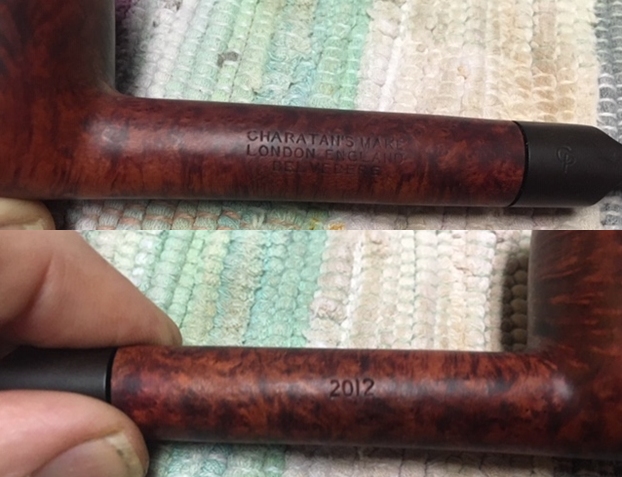 I took the stem off the shank and took some photos to give a clear picture of the pipe from the left side profile. It is a really pretty pipe.
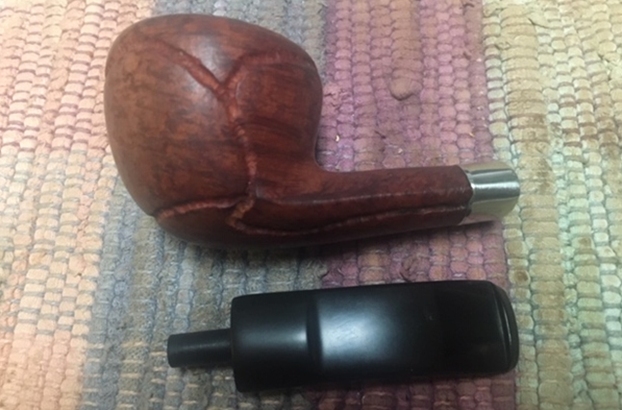
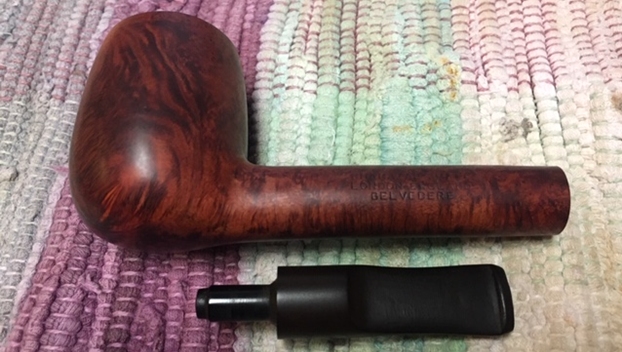
 Since this is another pipe Bob’s estate I am sure that some of you have read at least some of the other restoration work that has been done on the previous pipes. You have also read what I have included about Bob Kerr, the pipeman who held these pipes in trust before I came to work on them (see photo to the left). Also, if you have followed the blog for long you will already know that I like to include background information on the pipeman whose pipes I am restoring. For me, when I am working on an estate I really like to have a sense of the person who held the pipes in trust before I worked on them. It gives me another dimension of the restoration work. I asked Brian if he or his wife would like to write a brief biographical tribute to her father, Bob. His daughter worked on it and I received the following short write up on him and some pictures to go along with the words including one of Bob’s carvings. Once again I thank you Brian and tell your wife thank you as well.
I am delighted to pass on these beloved pipes of my  father’s. I hope each user gets many hours of contemplative pleasure as he did. I remember the aroma of tobacco in the rec room, as he put up his feet on his lazy boy. He’d be first at the paper then, no one could touch it before him. Maybe there would be a movie on with an actor smoking a pipe. He would have very definite opinions on whether the performer was a ‘real’ smoker or not, a distinction which I could never see but it would be very clear to him. He worked by day as a sales manager of a paper products company, a job he hated. What he longed for was the life of an artist, so on the weekends and sometimes mid-week evenings he would journey to his workshop and come out with wood sculptures, all of which he declared as crap but every one of them treasured by my sister and myself. Enjoy the pipes, and maybe a little of his creative spirit will enter you!
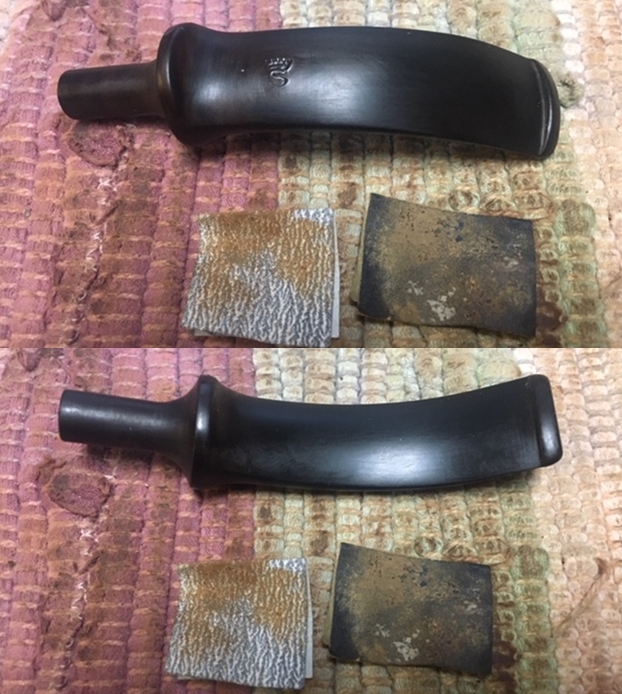
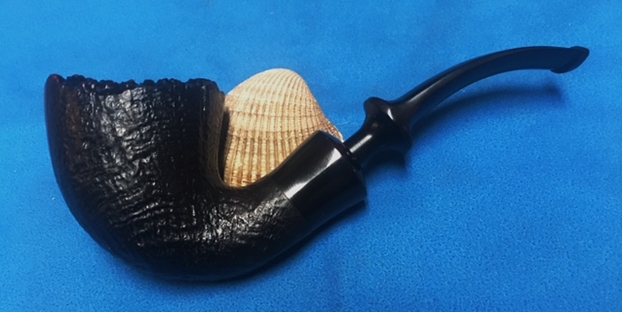
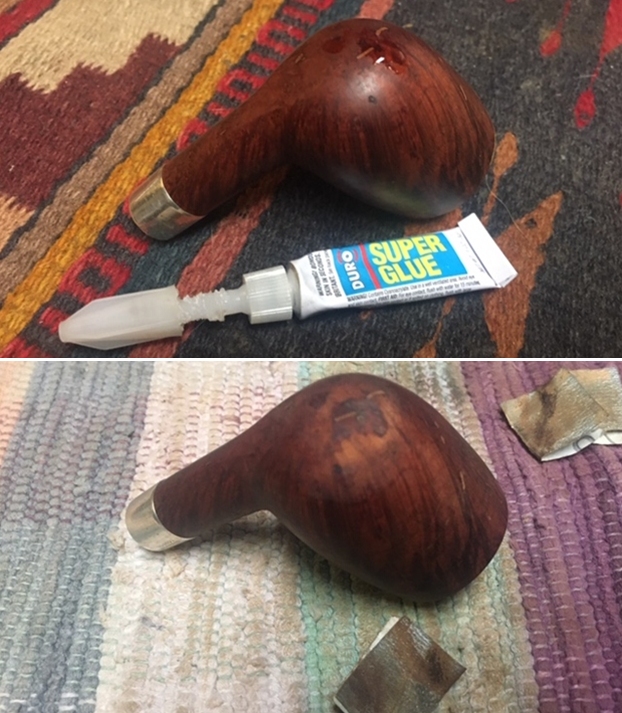
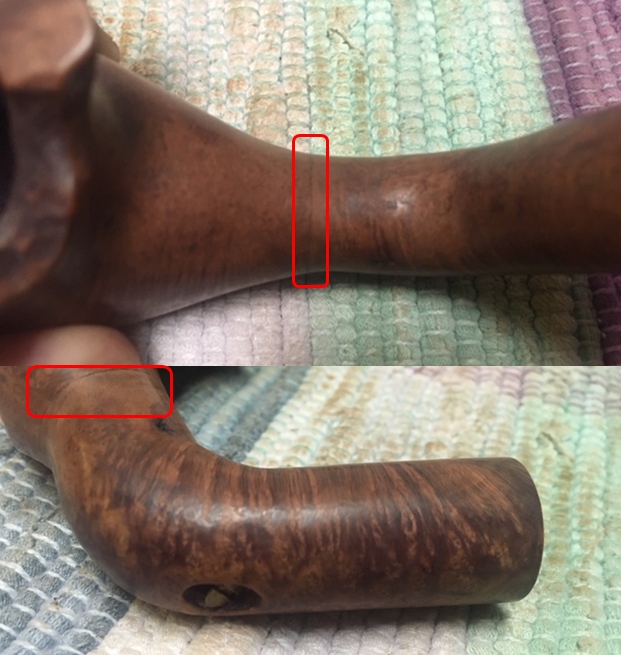
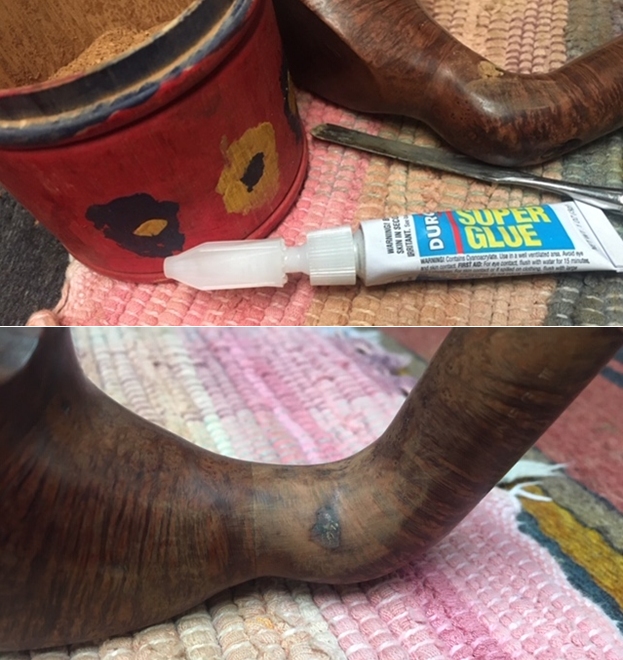
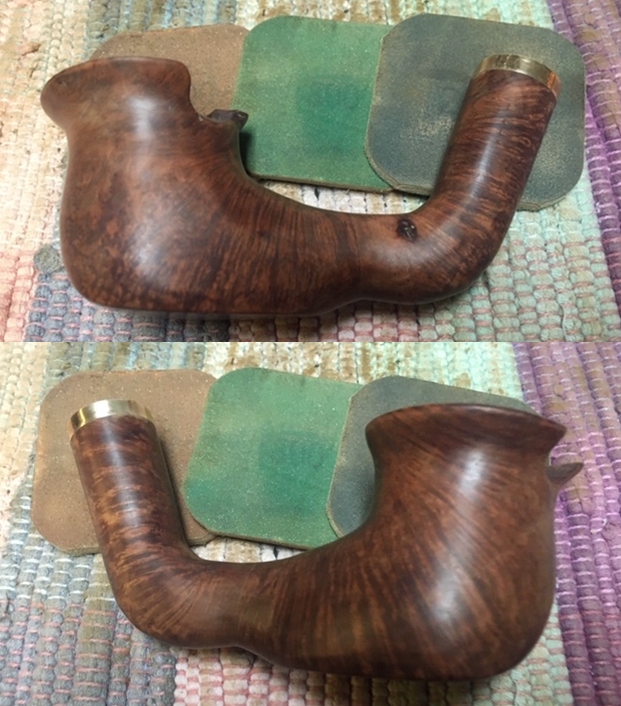
Now on to my part of the restoration of this Charatan’s Make 2012 Lovat. I decided to start by dealing with the damage to the inner edge of the rim. I used a folded piece of 220 grit sandpaper to smooth out the edge and give it a slight bevel to remove the damaged area and bring the bowl back into round.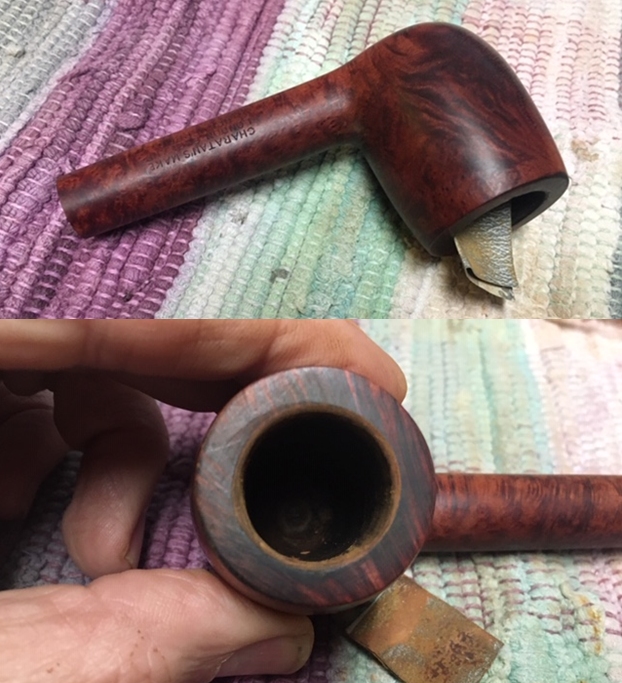 Sometimes the pipe does not come with enough work on it! Today I took the pipe to my old office to work on it while I waited for movers to come for our Canon Copier and some of the desks, computers and equipment. I was carrying it from my car to the office and it fell out of my hand and bounced off the asphalt parking lot. It left some nice road rash on the right side of the bowl. I tell you when that happens I want to cry!! This evening when I got home I filled in the divots of the rash with some clear super glue. Once it cured I sanded them smooth with micromesh and blended them into the surrounding briar.
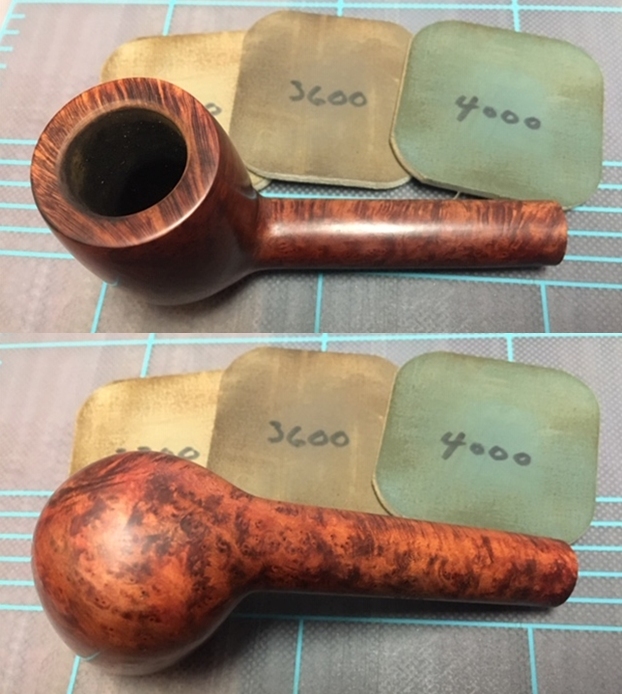
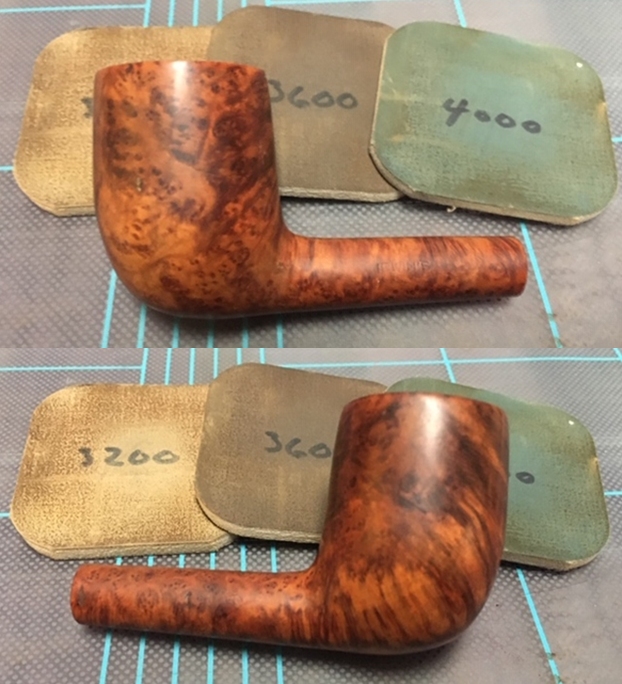
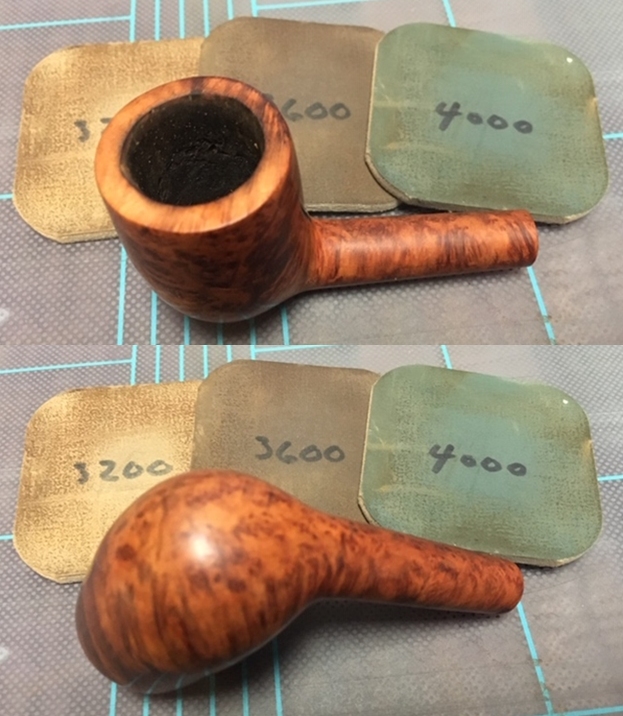
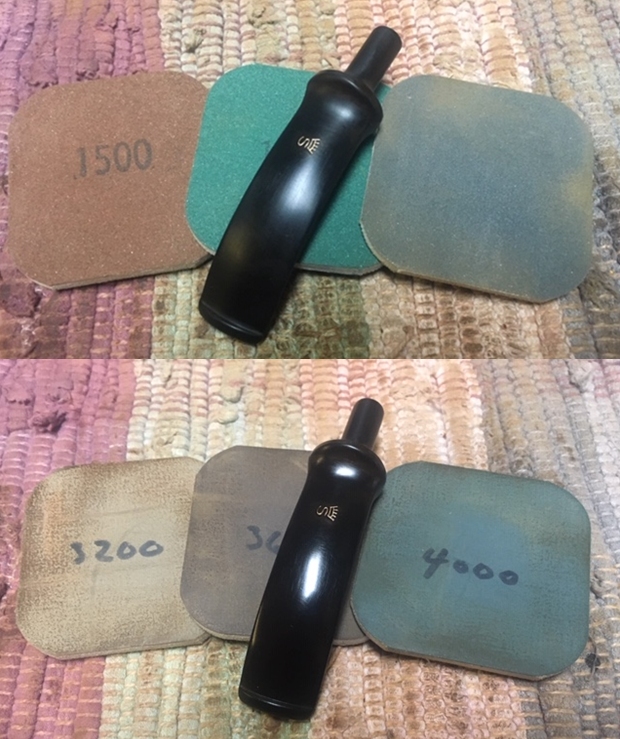
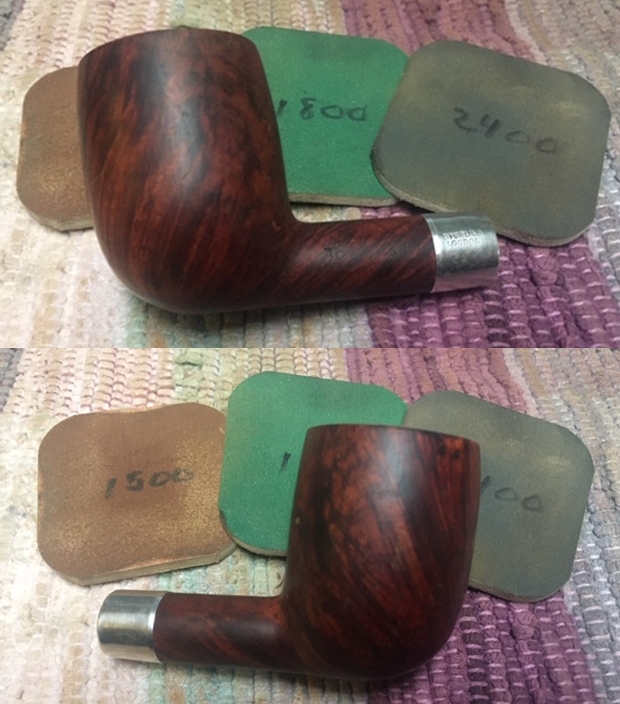
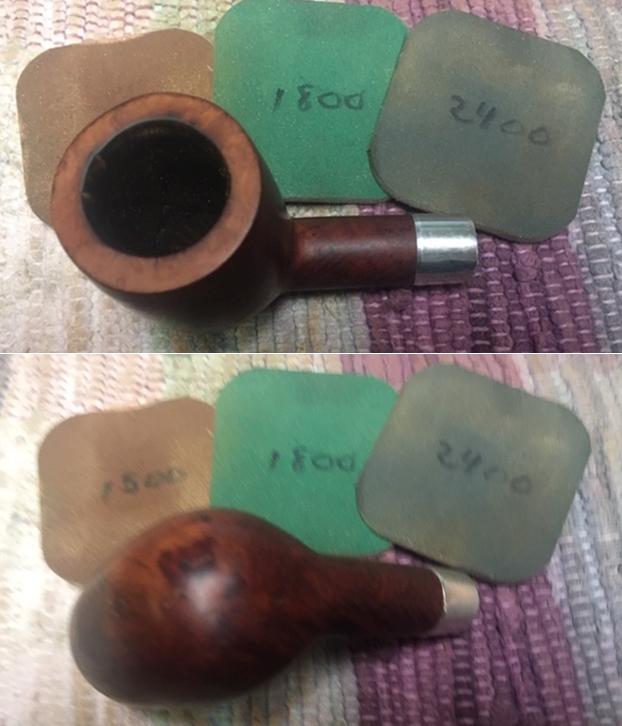
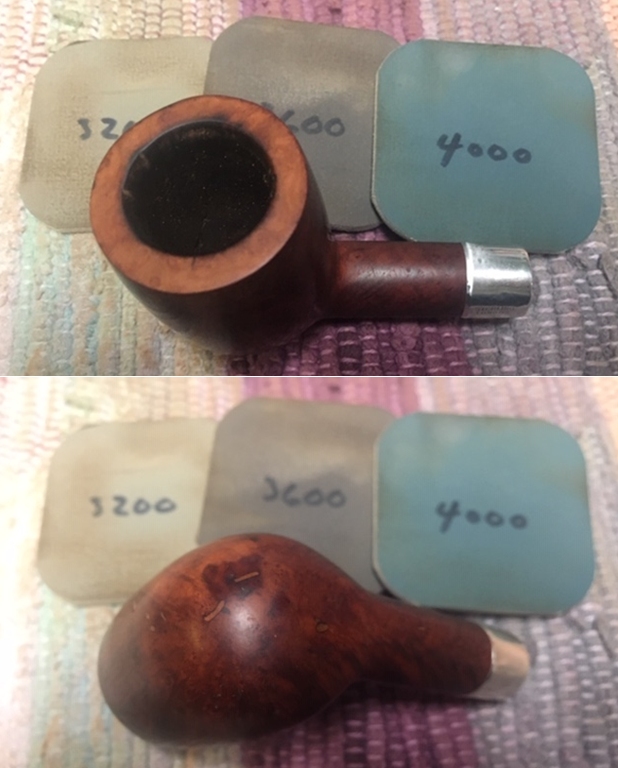
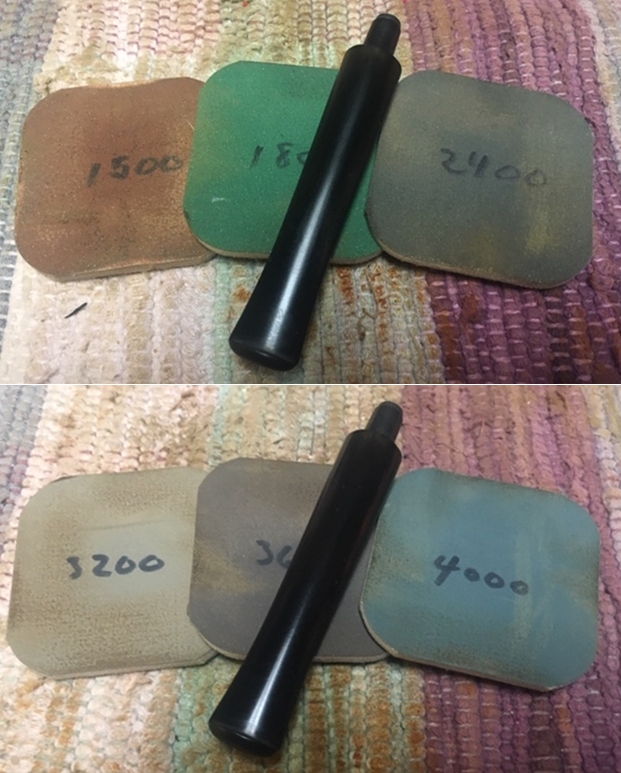
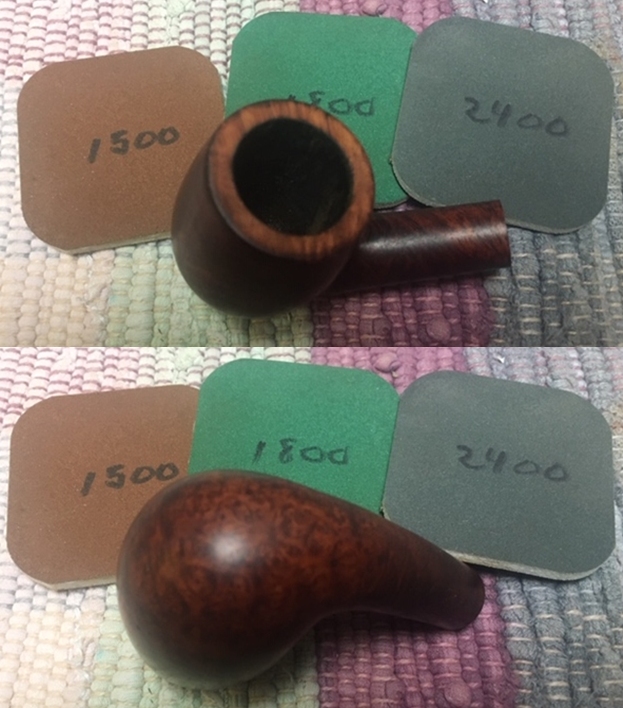
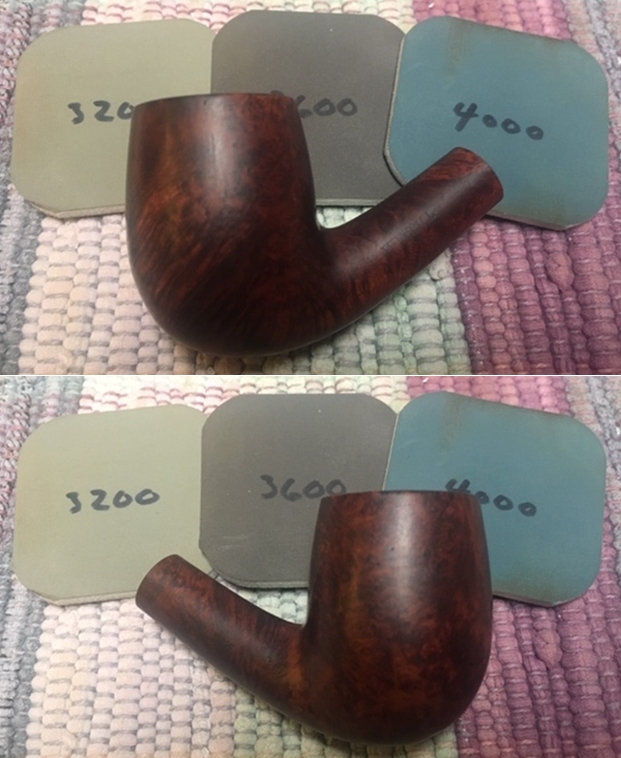
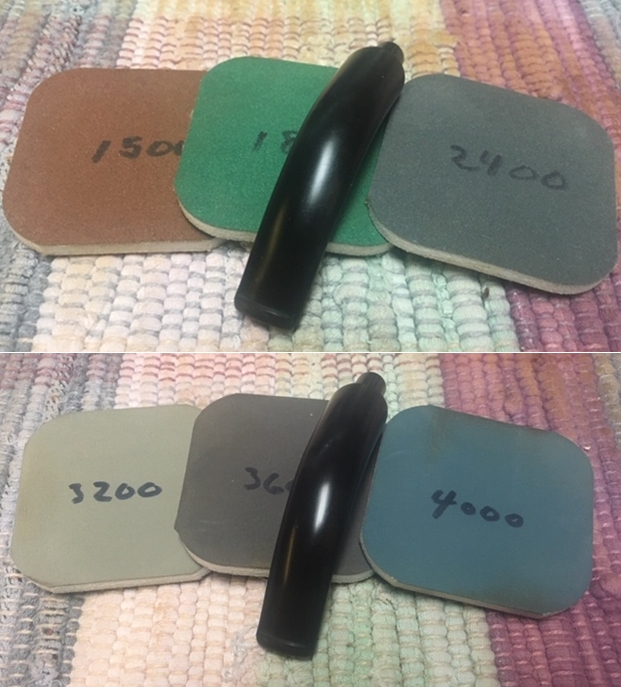
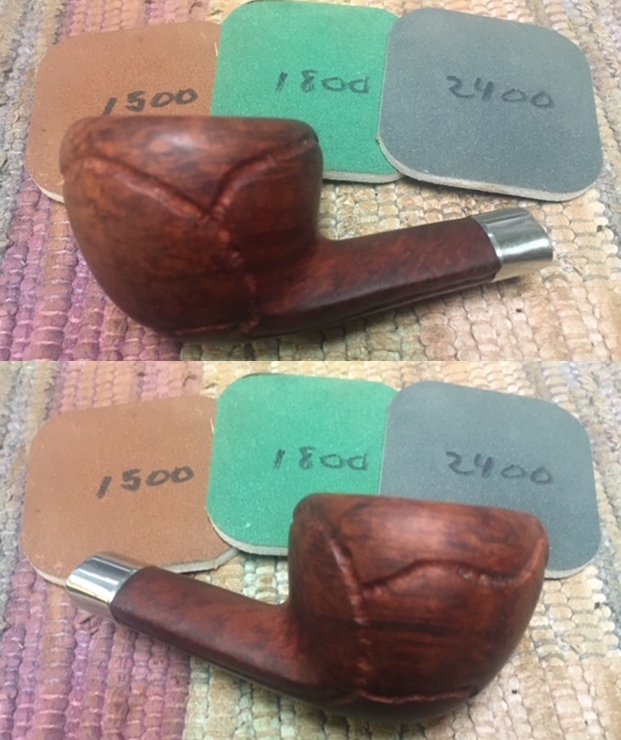
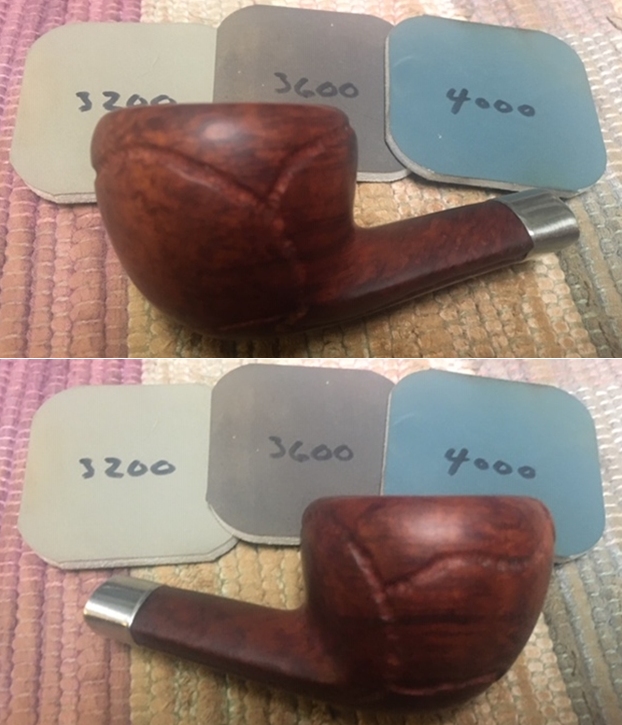
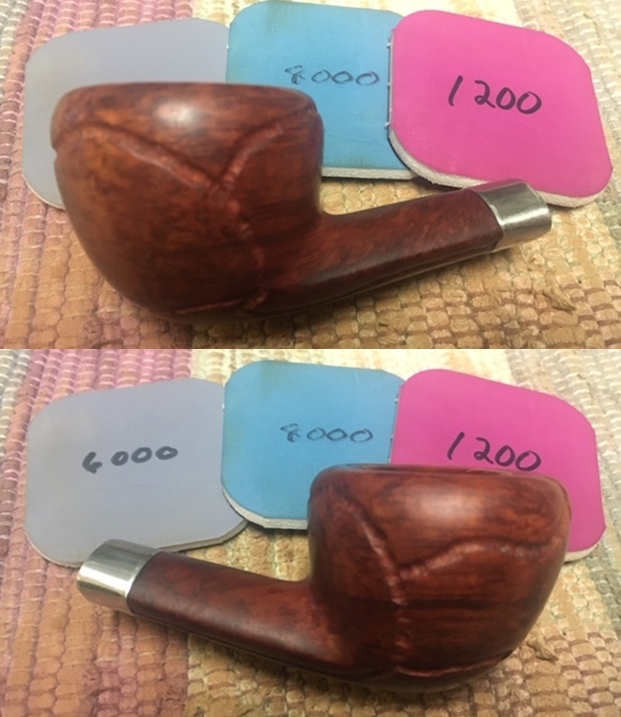
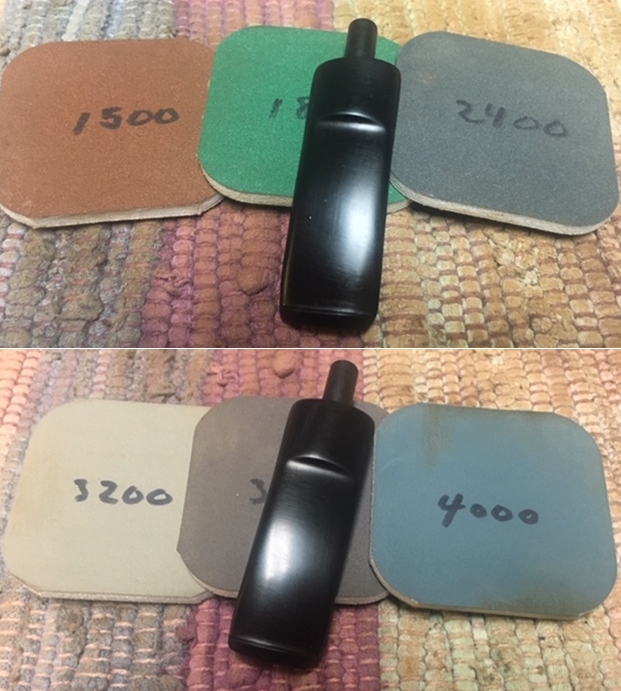
 I polished the briar with micromesh sanding pads – wet sanding with 1500-12000 grit pads and wiping the briar down with a damp cloth after each sanding pad.
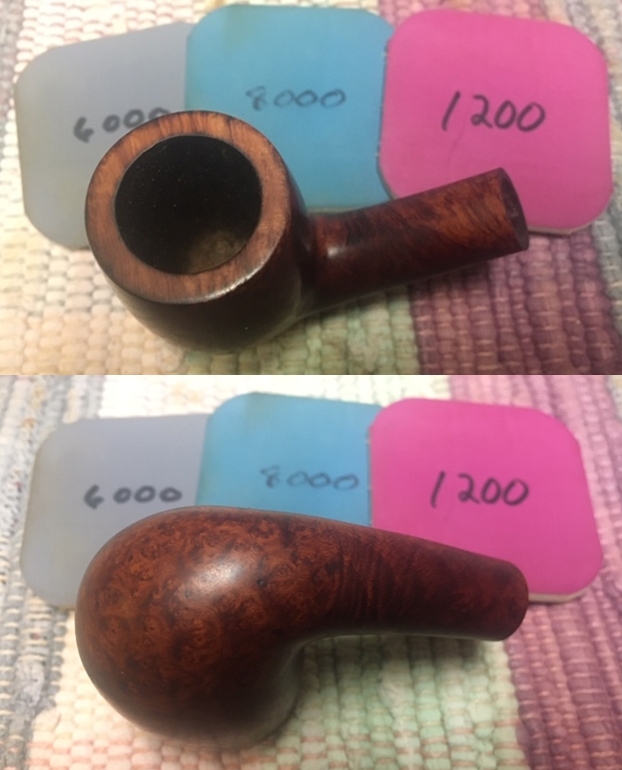
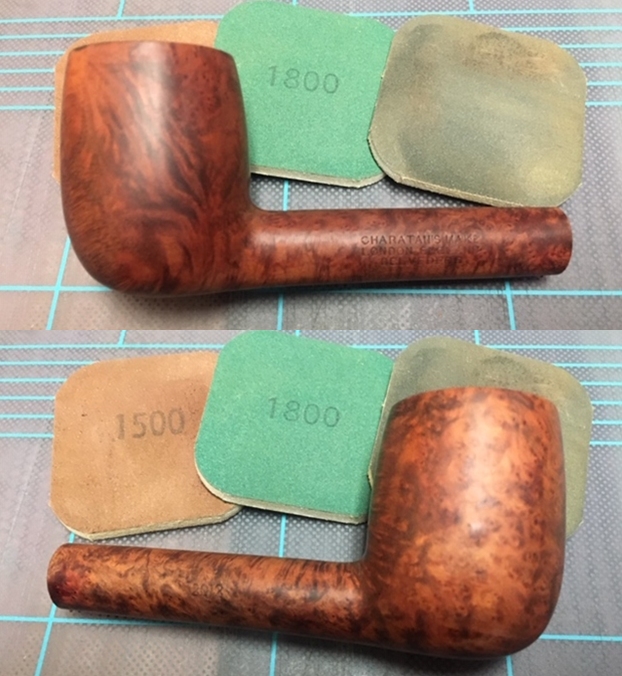


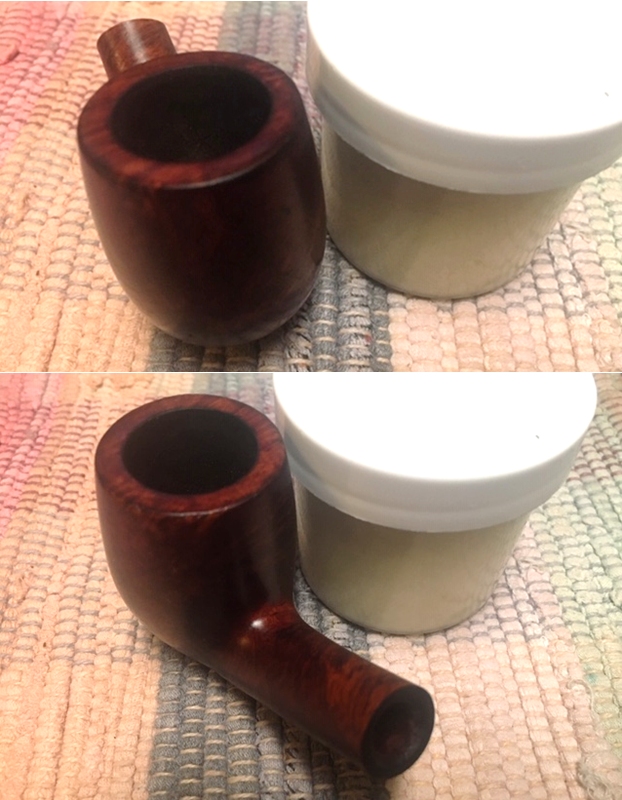
 I rubbed the bowl down with Before & After Restoration Balm. I worked it into the surface of the briar with my fingertips to clean, enliven and protect it. I let the balm sit for a little while and then buffed with a cotton cloth and shoe brush to raise the shine. Mark Hoover’s Balm is a product that I have come to appreciate and one I use on every pipe I have been working on.
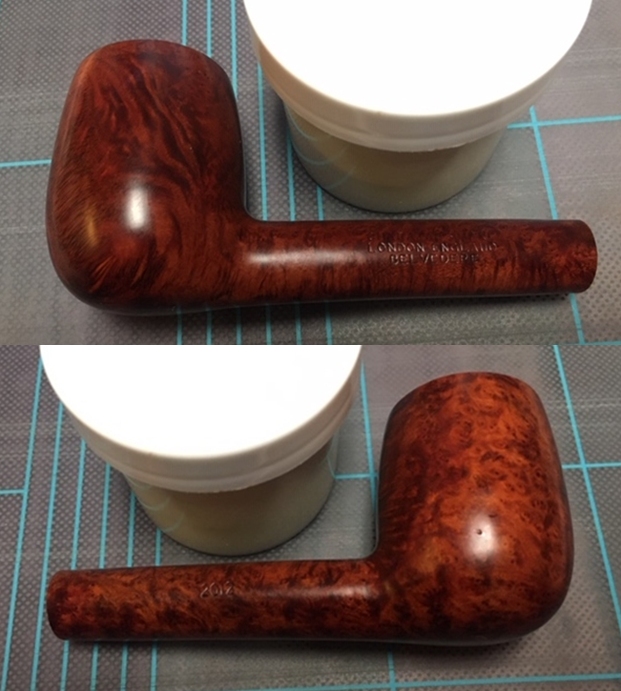
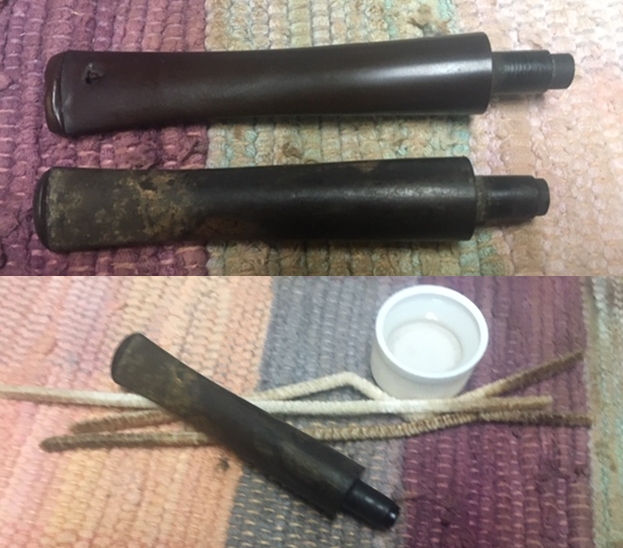
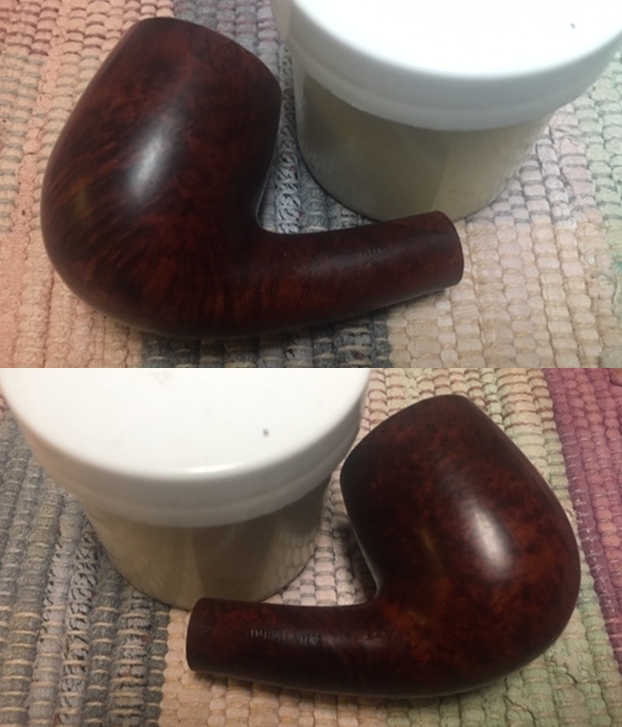
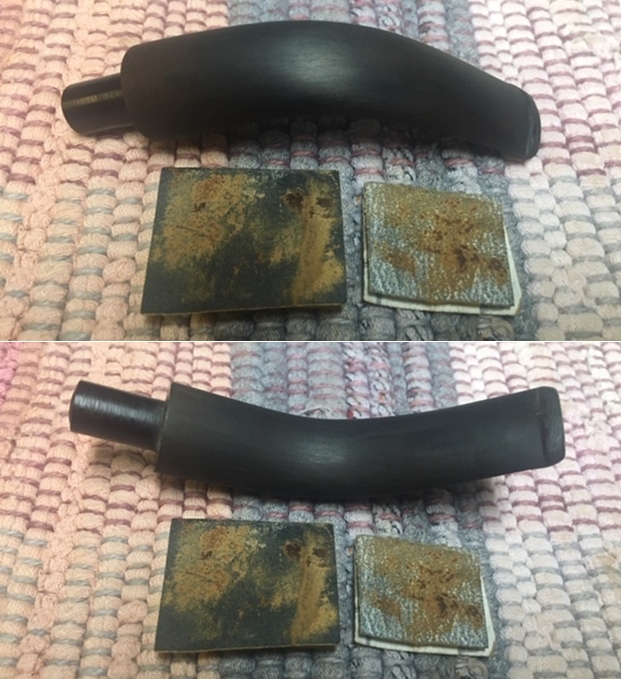
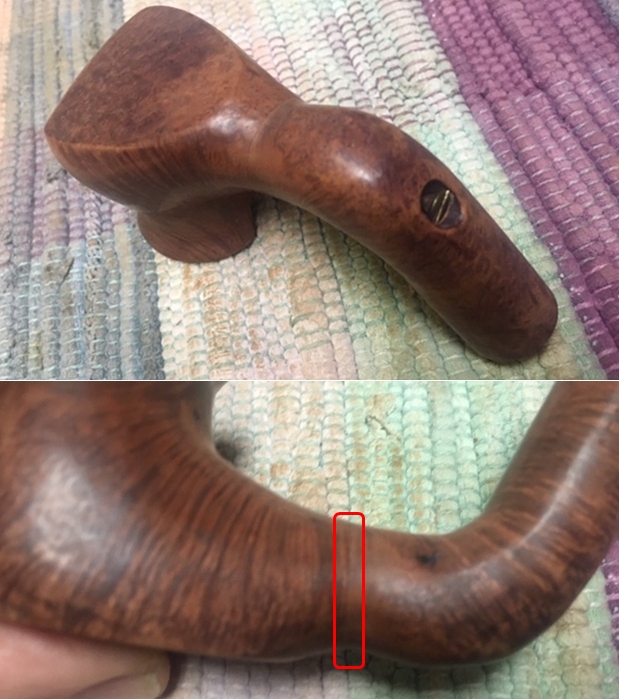
 I set the bowl aside and turned my attention to the stem. It did not seat against the shank end when it arrived as could be seen from the photos at the beginning. Someone had trimmed the step down tenon slightly and done it crooked. To smooth that out and facilitate a snug fit against the shank end I cleaned up the tenon. I topped the tenon on the topping board with 220 grit sandpaper and straightened out the tenon end. It did not take too much work to get the fit right.
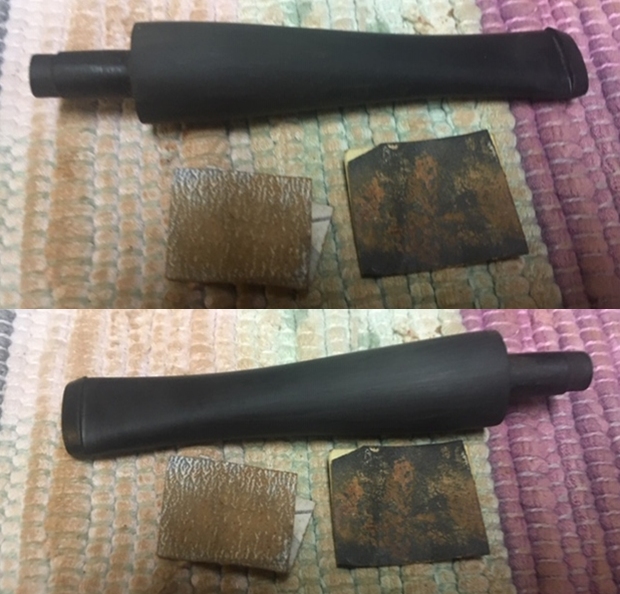
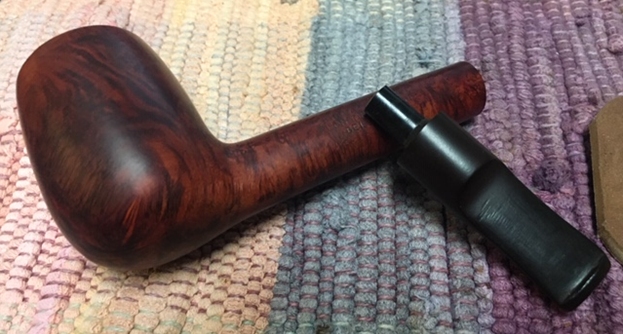 I worked over the rest of the remaining oxidation and the tooth marks with 220 grit sandpaper. I started polishing the stem with 400 grit wet dry sandpaper. At this point it is starting to look much better.
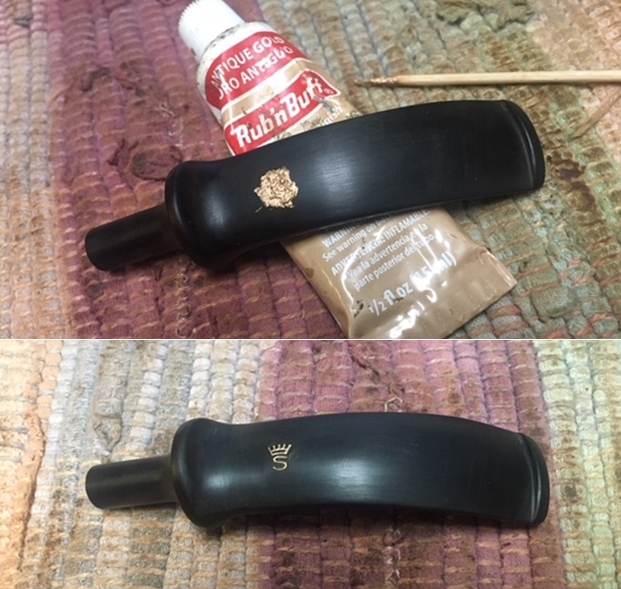
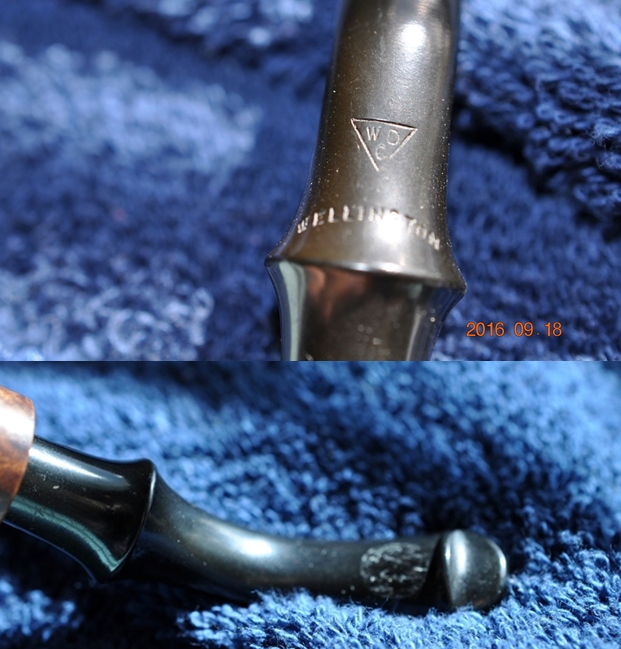
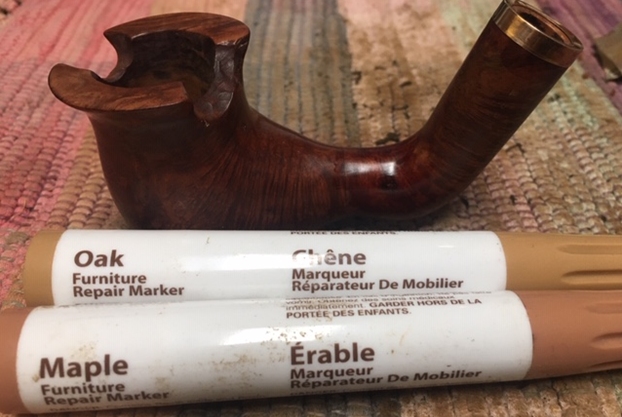
 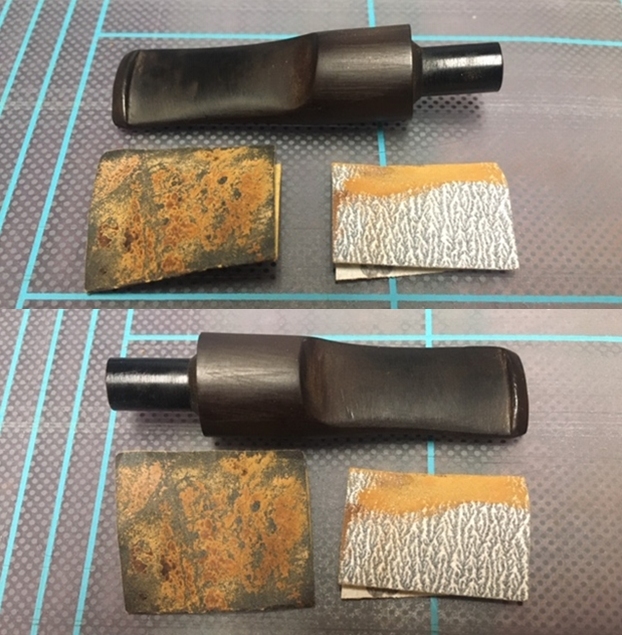 I touched up the CP stamp on the left side of the saddle stem with some Rub’N Buff Antique gold. I tried some Liquid Paper but it did not stick. The Rub’N Buff worked well and highlights the fine stamping of the entwined CP on the left side of the saddle.
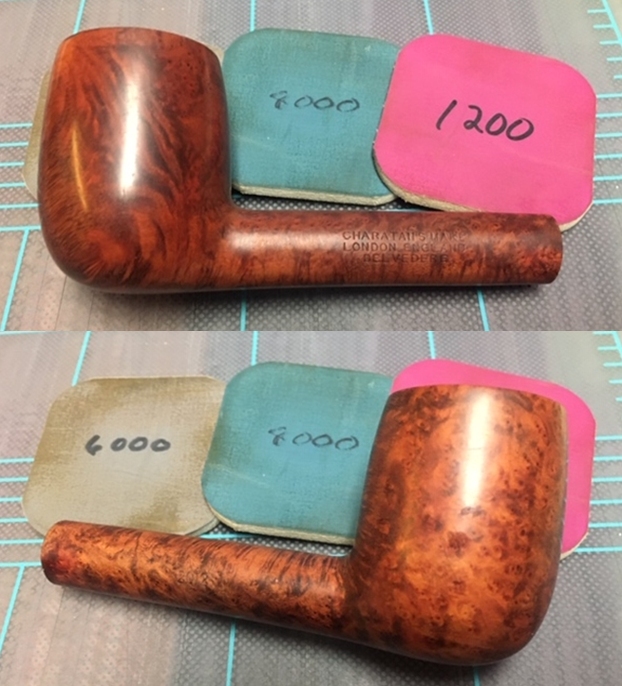
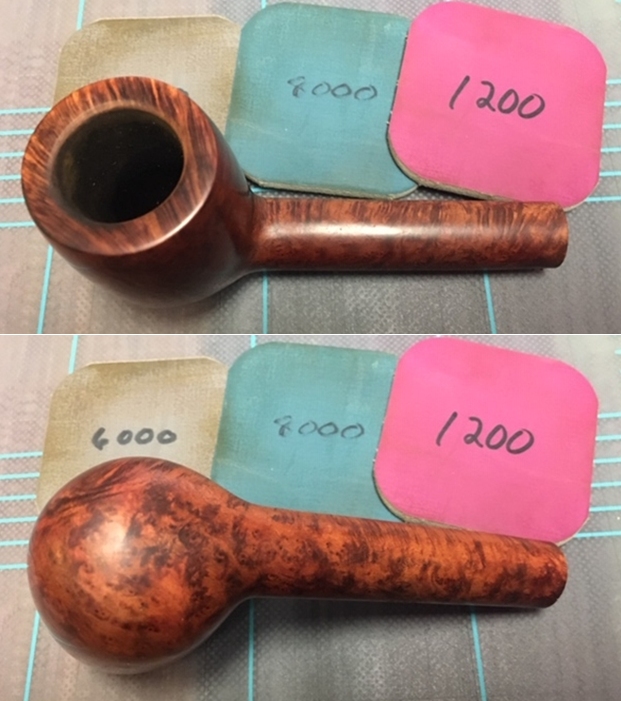
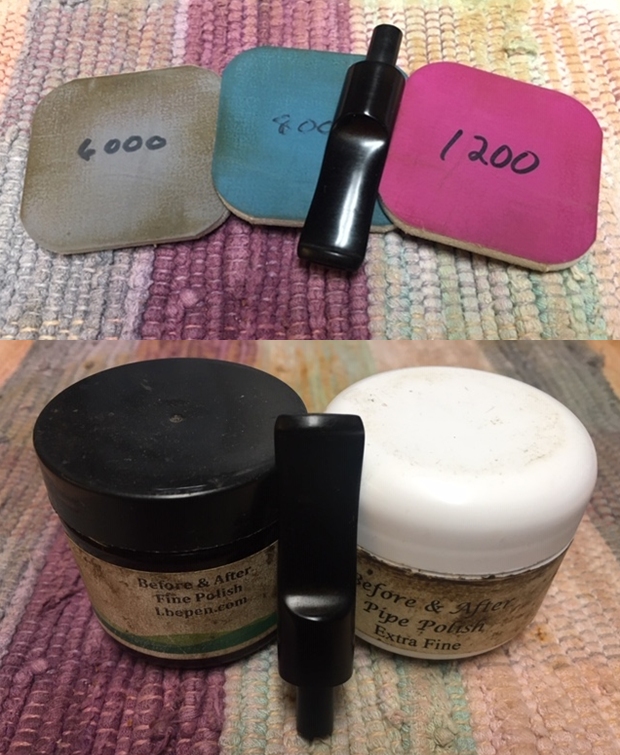
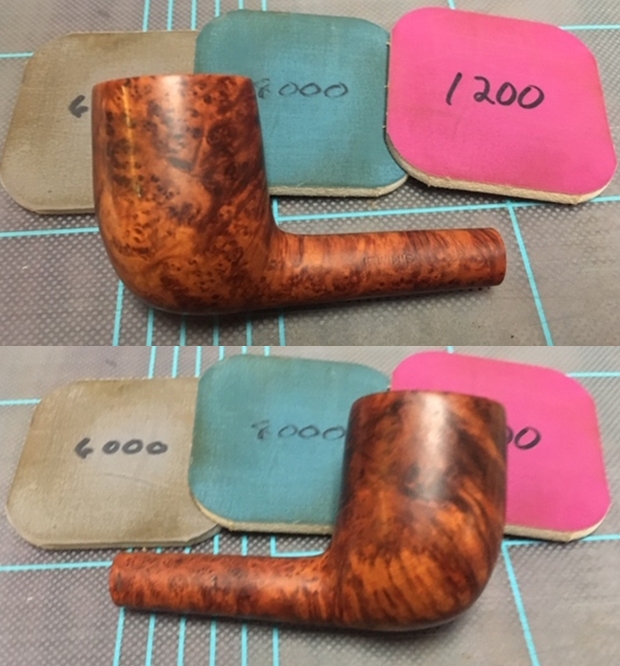
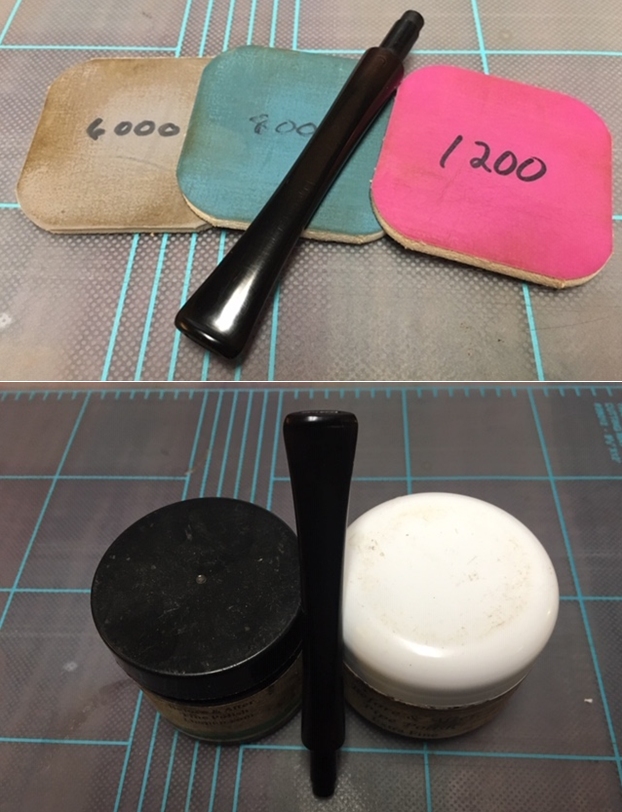
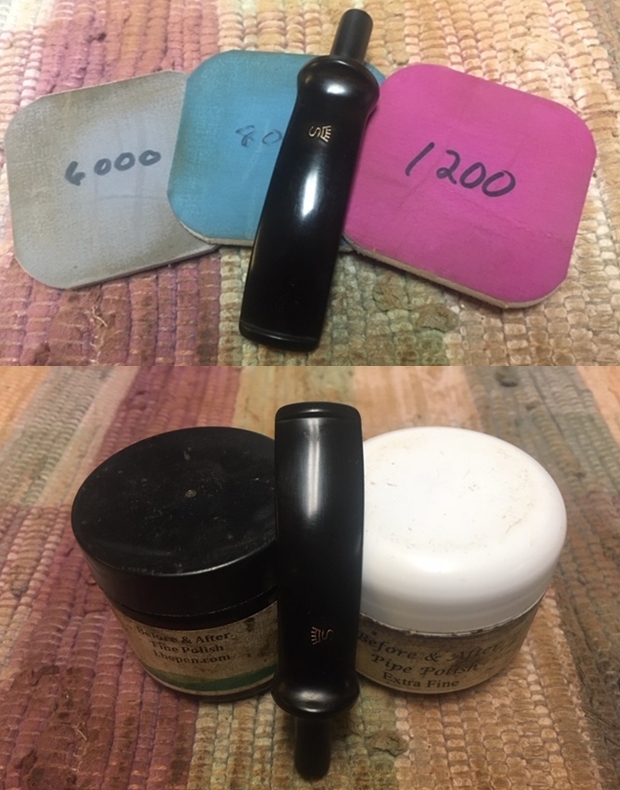
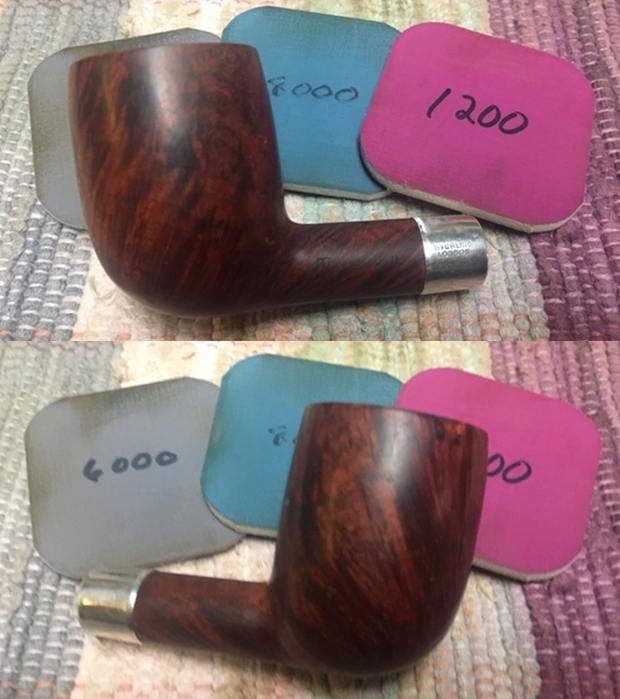
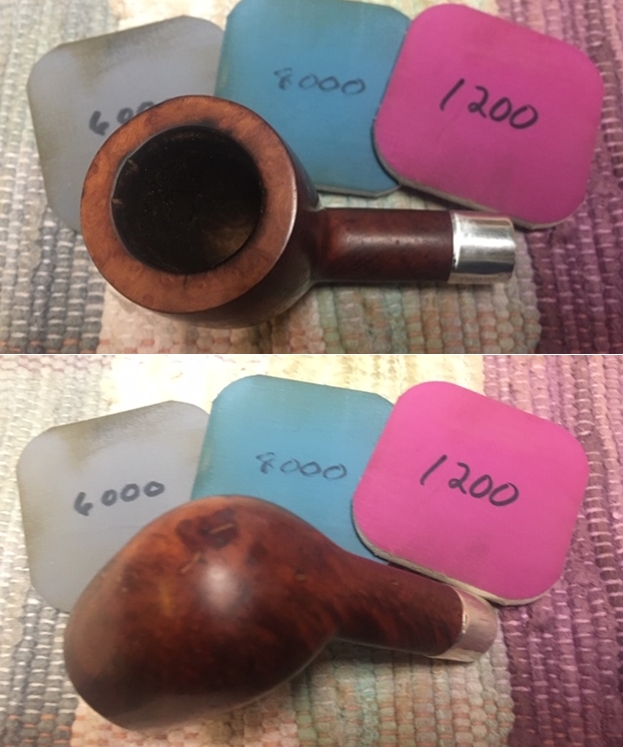
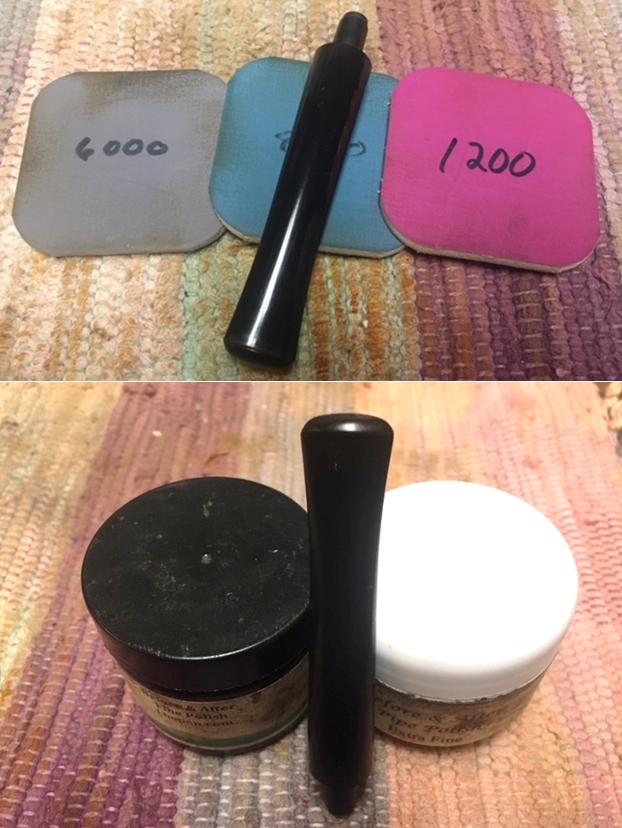
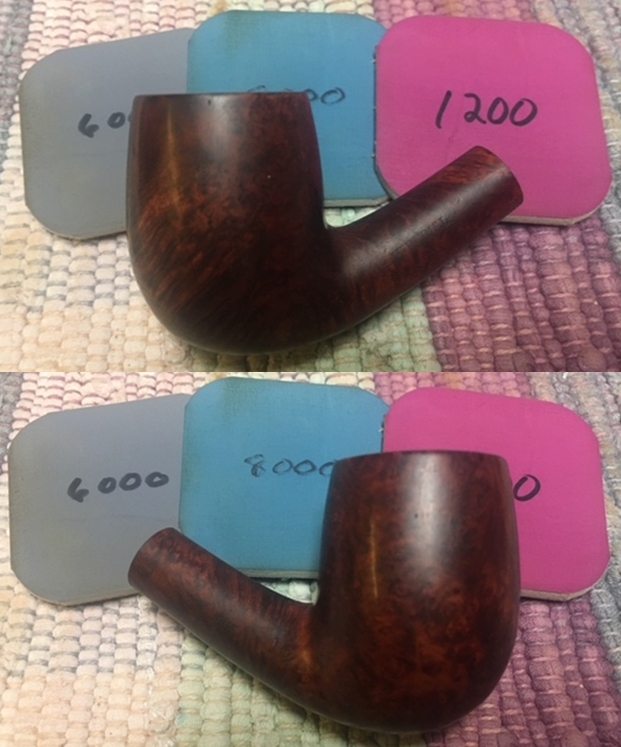
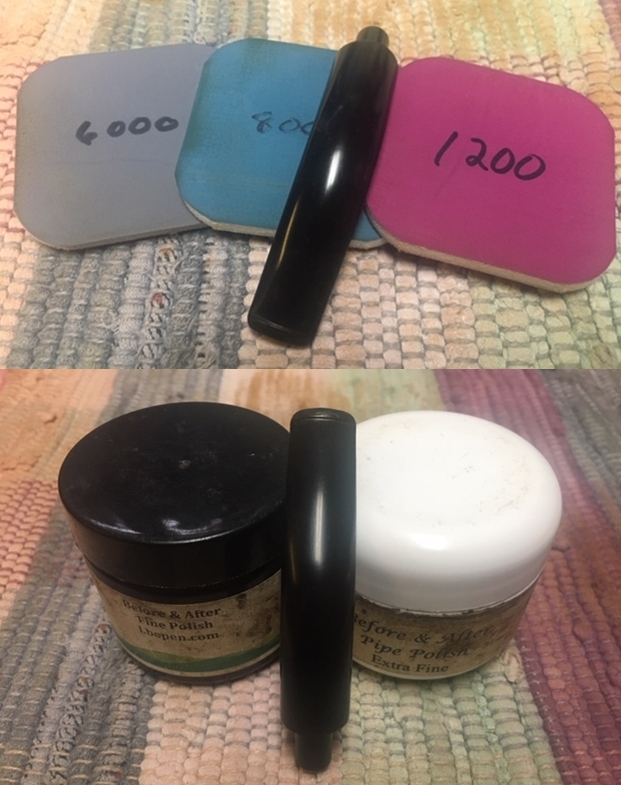
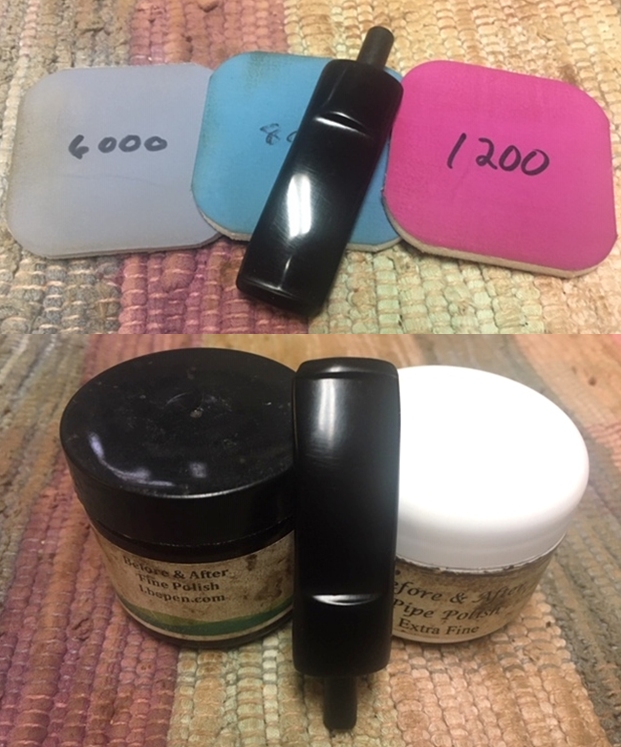
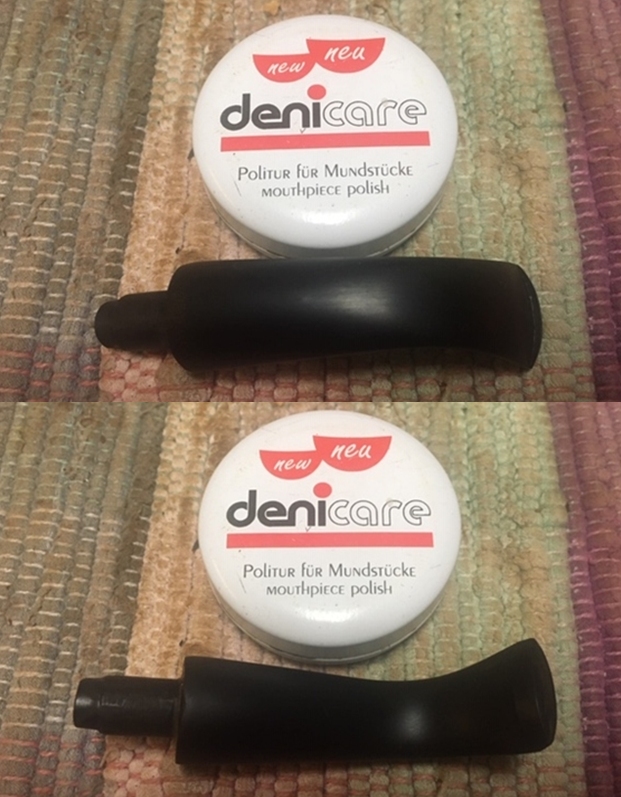
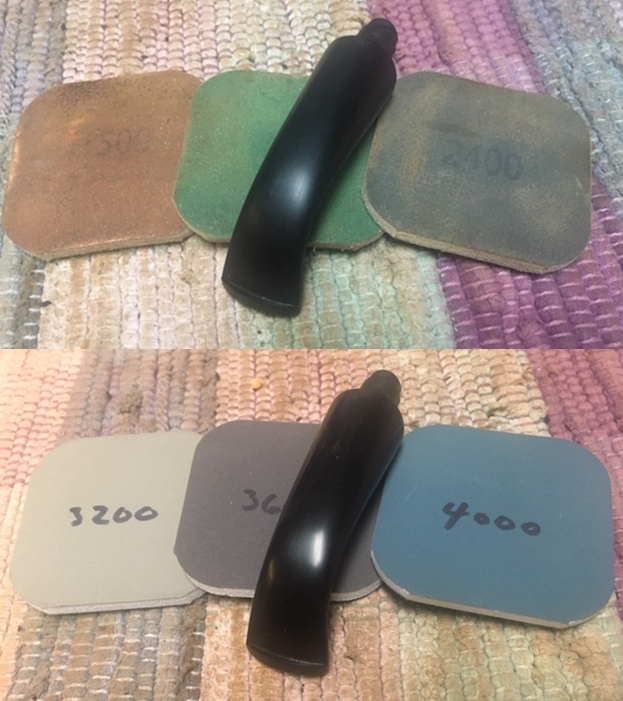
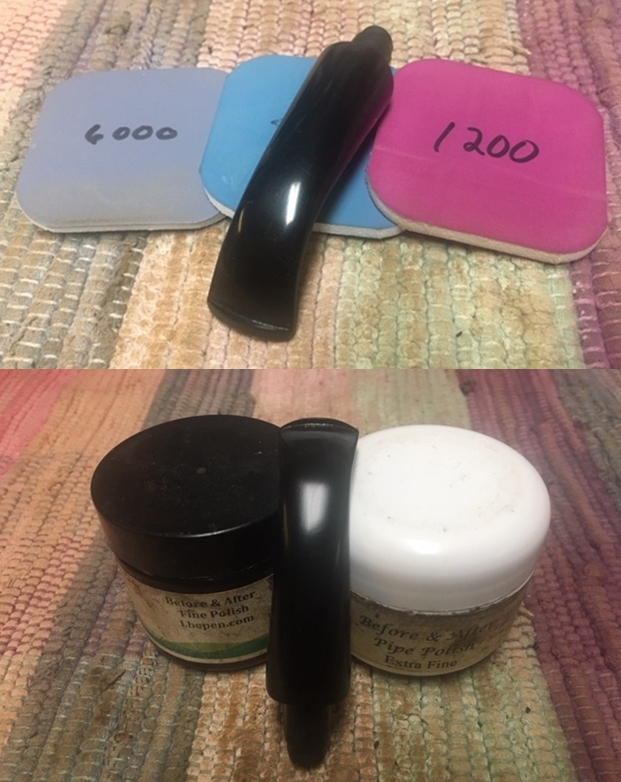
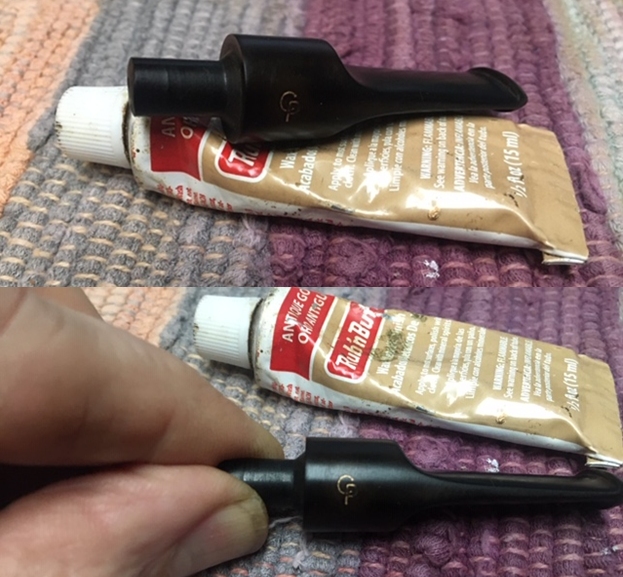 I polished the vulcanite with micromesh sanding pads – 1500-12000 grit pads. I wiped it down with a damp cloth after each sanding pad. I used Before & After Pipe Polish – both Fine and Extra Fine to further polish the stem.
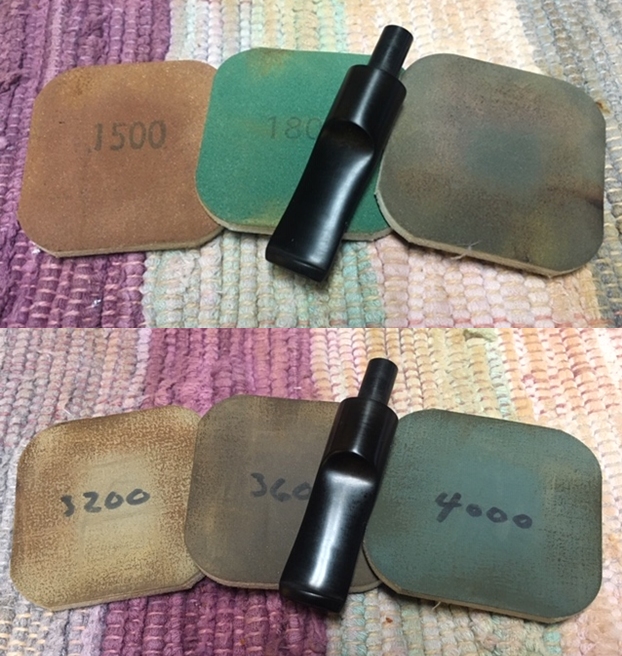
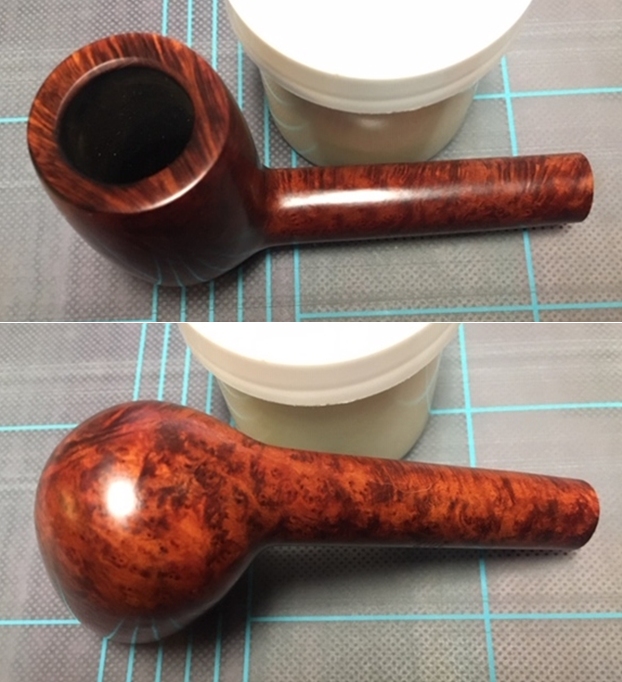
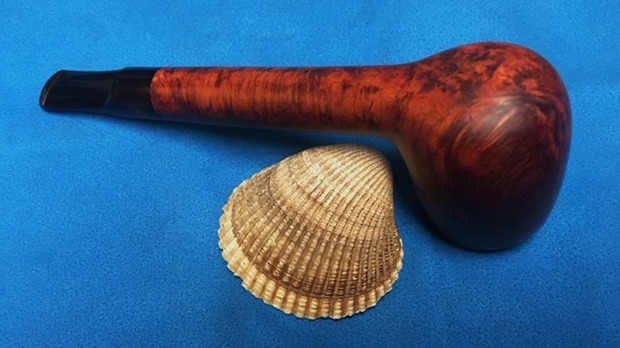
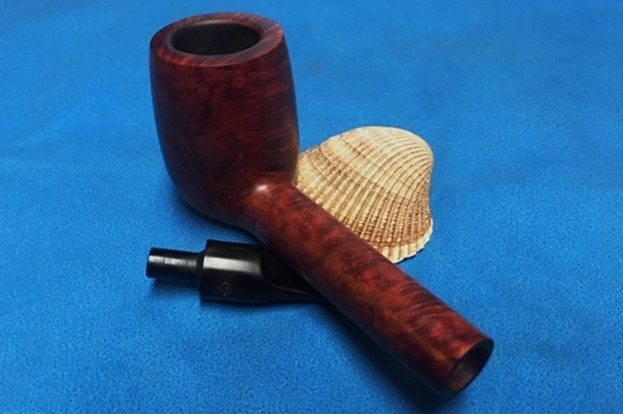
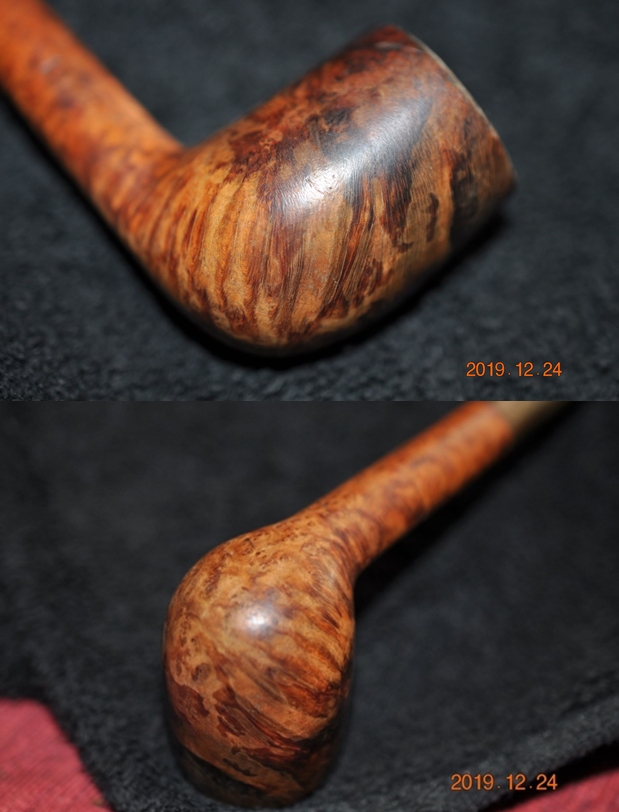
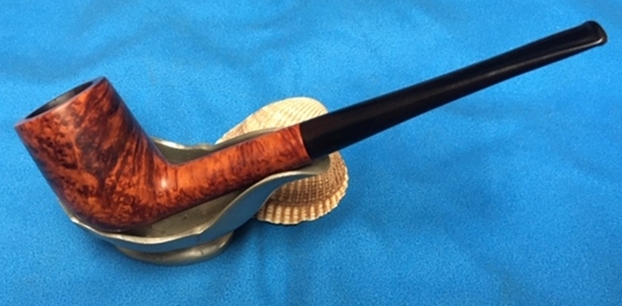
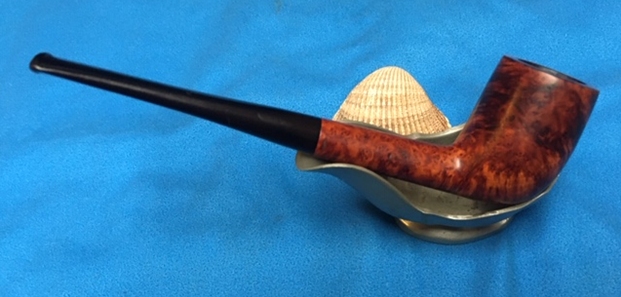
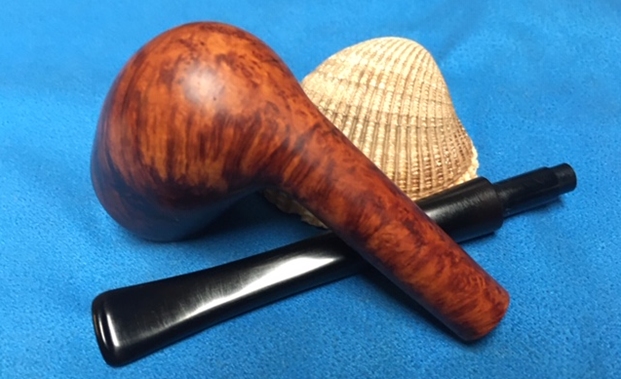
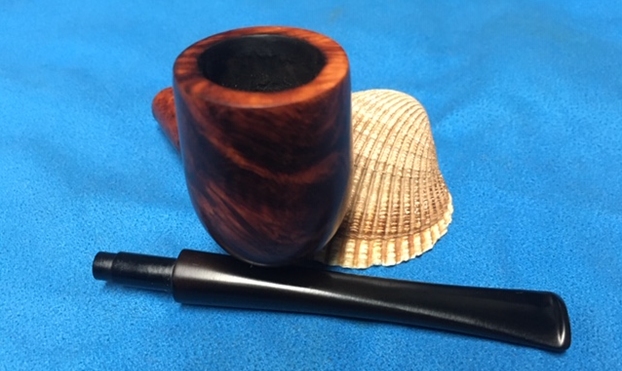
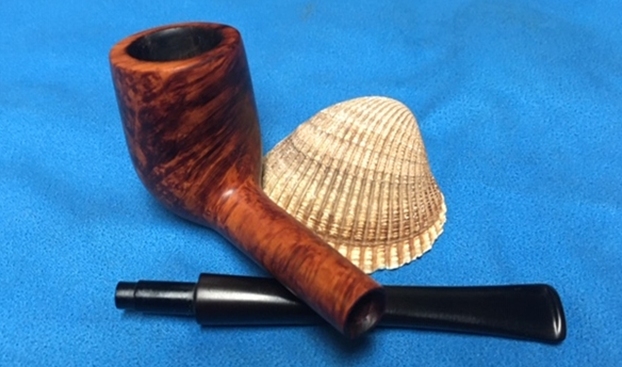
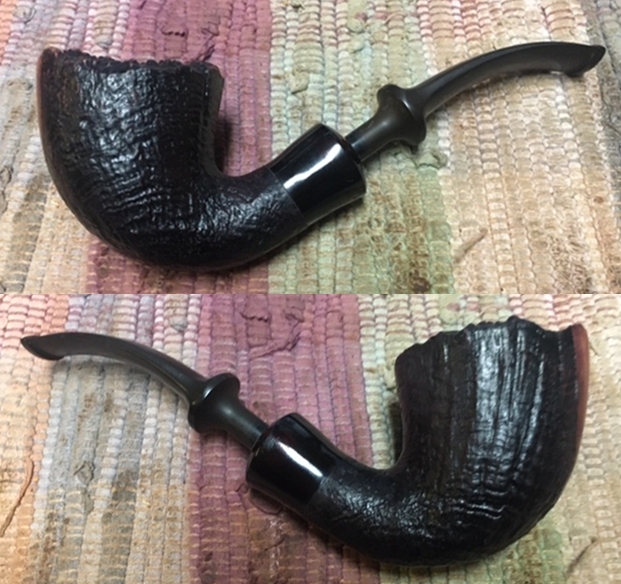
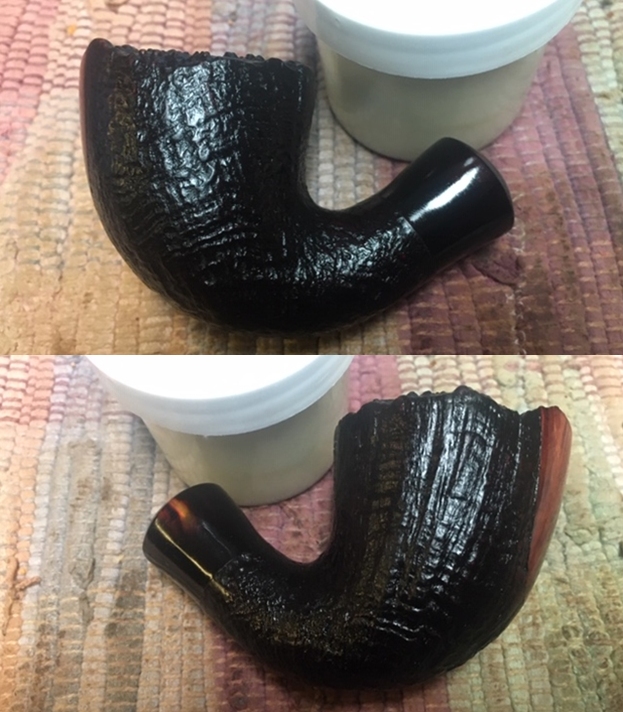
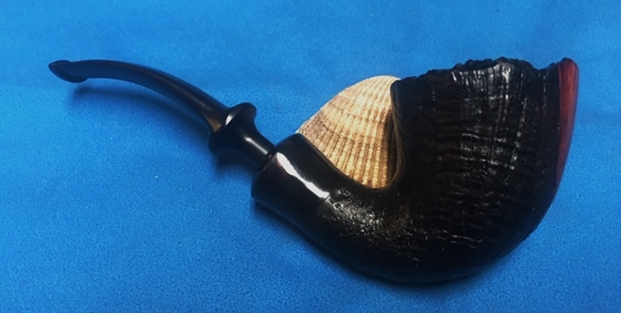
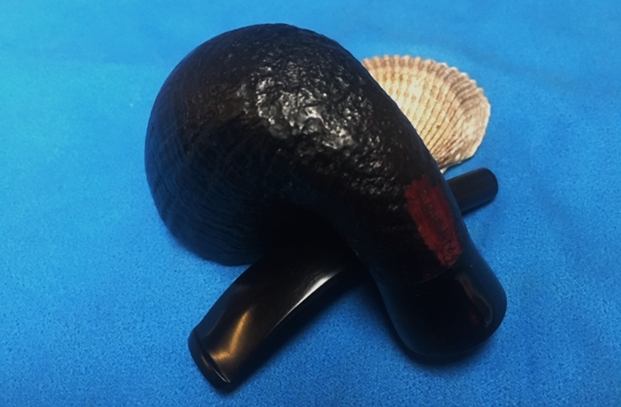
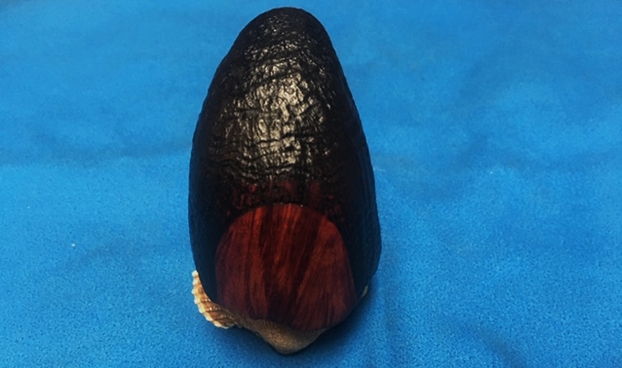
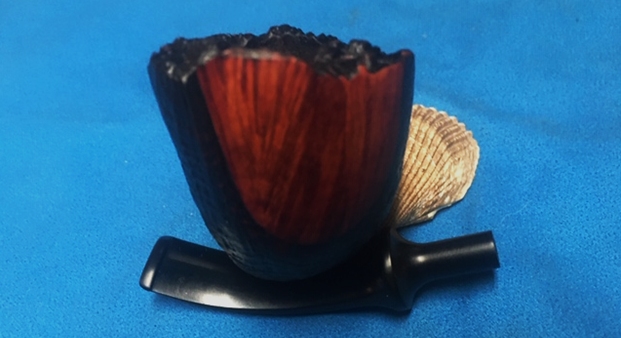
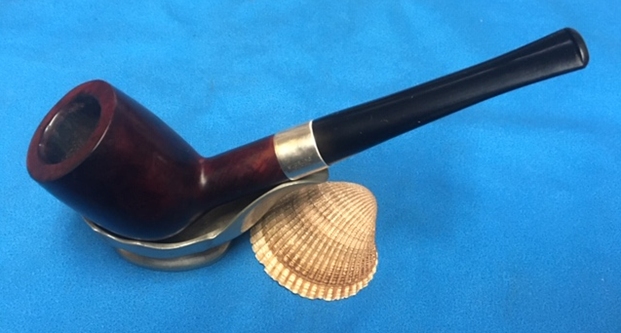
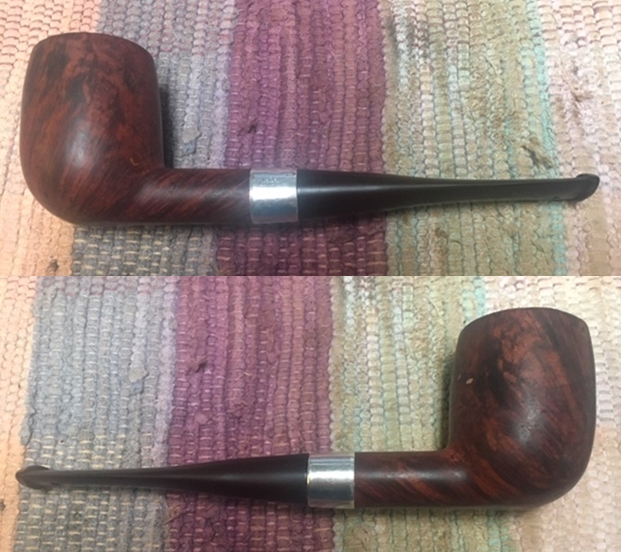
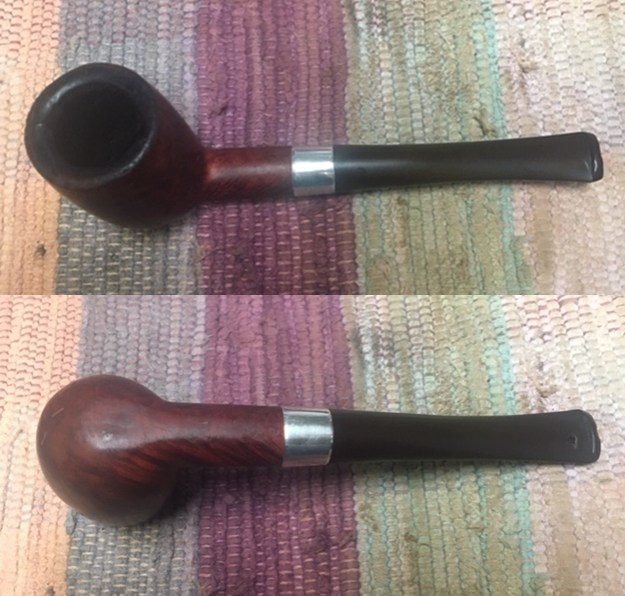
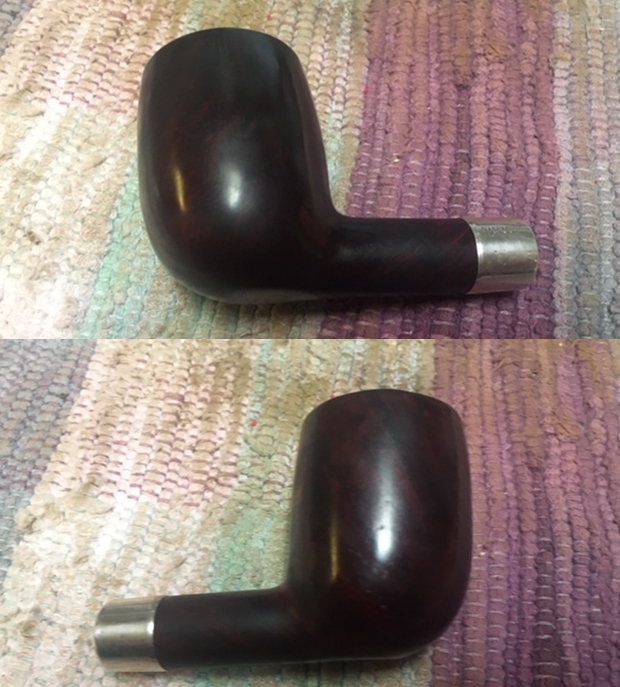
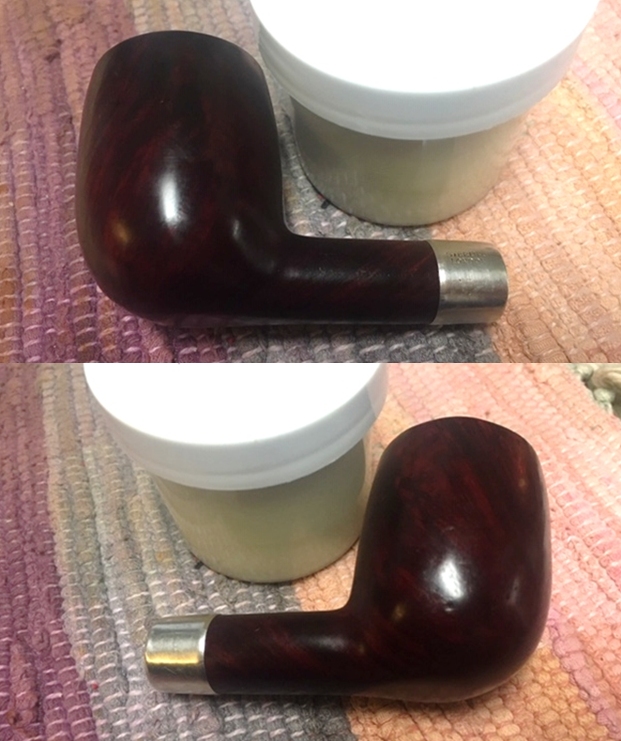
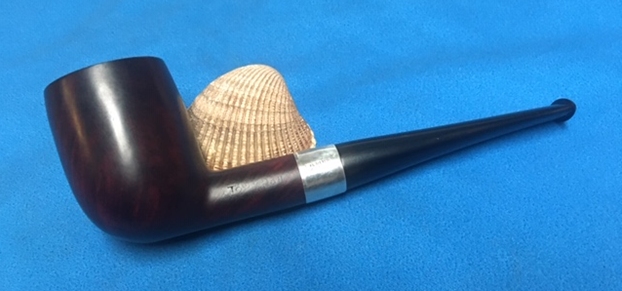
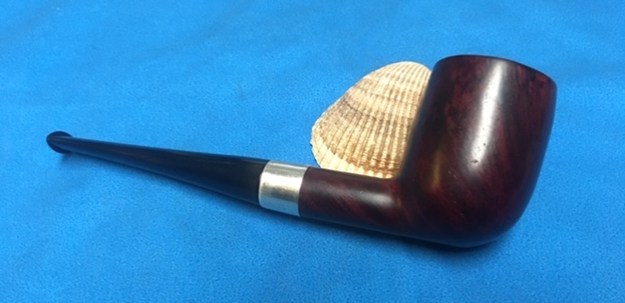
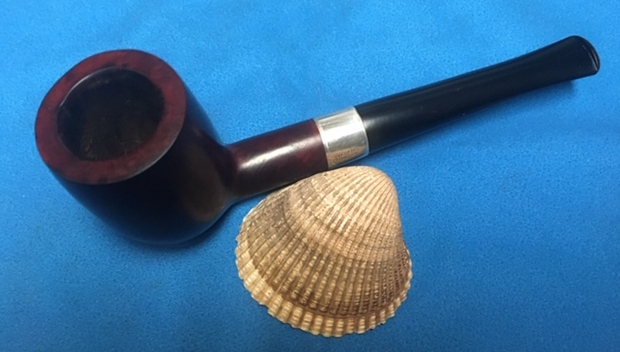
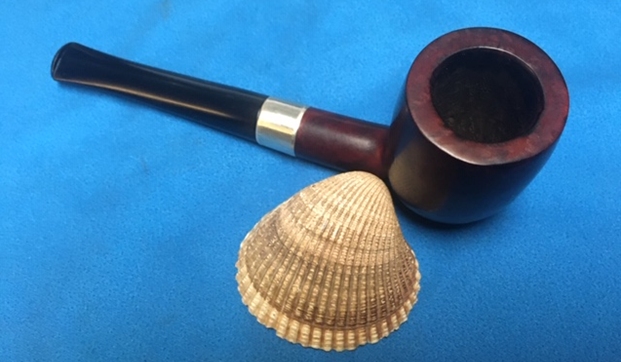
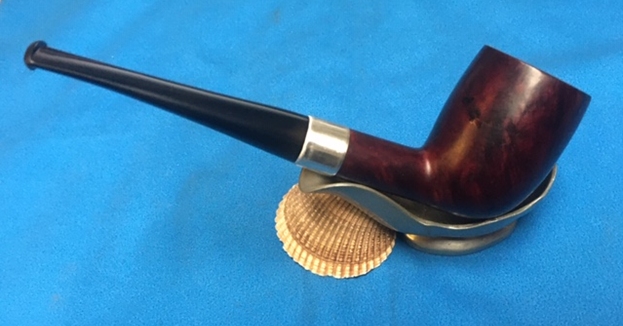
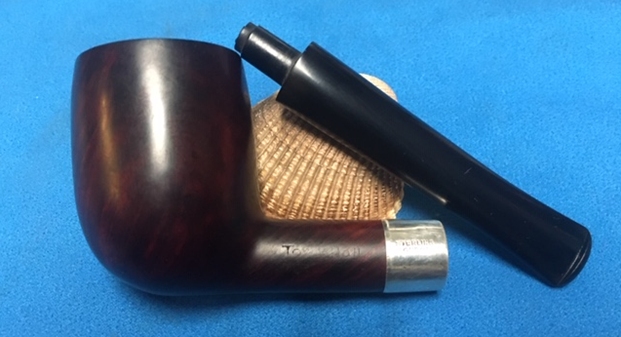
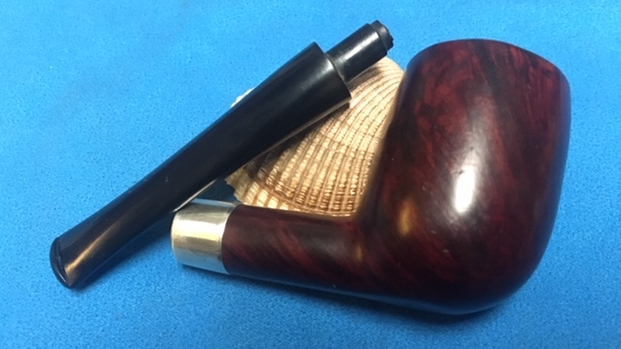
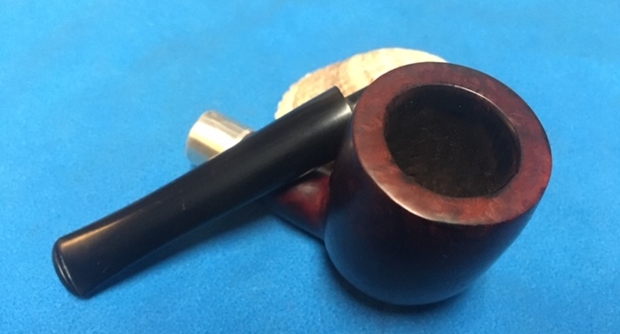
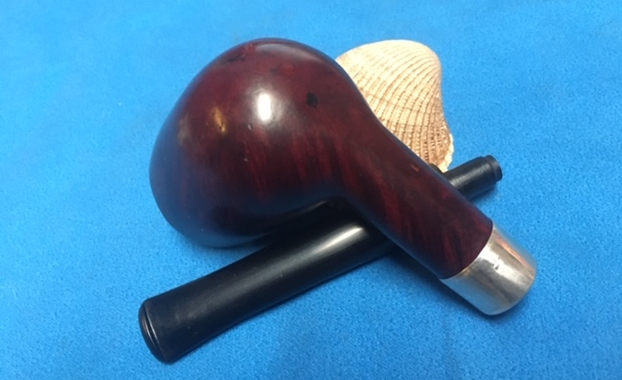
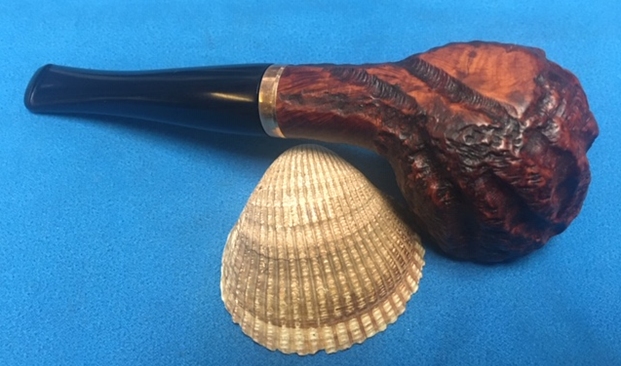
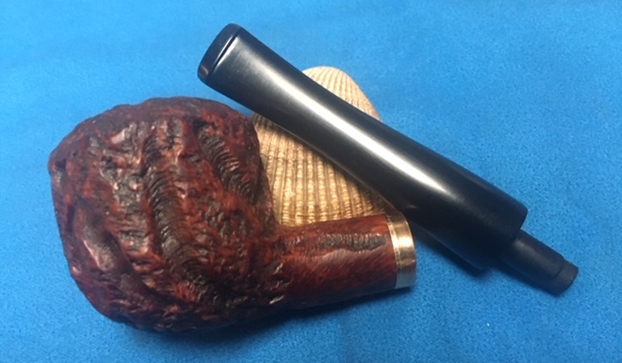
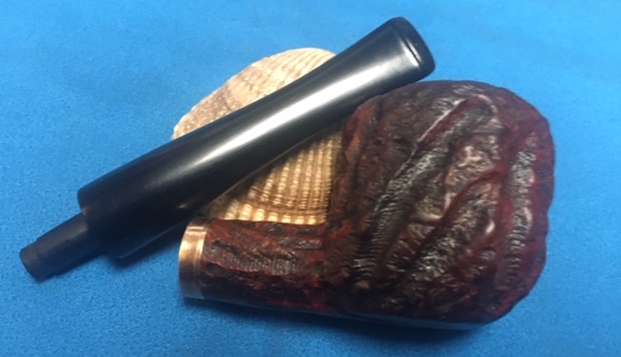
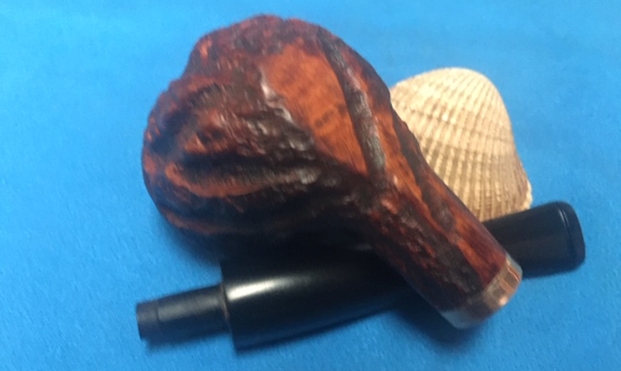
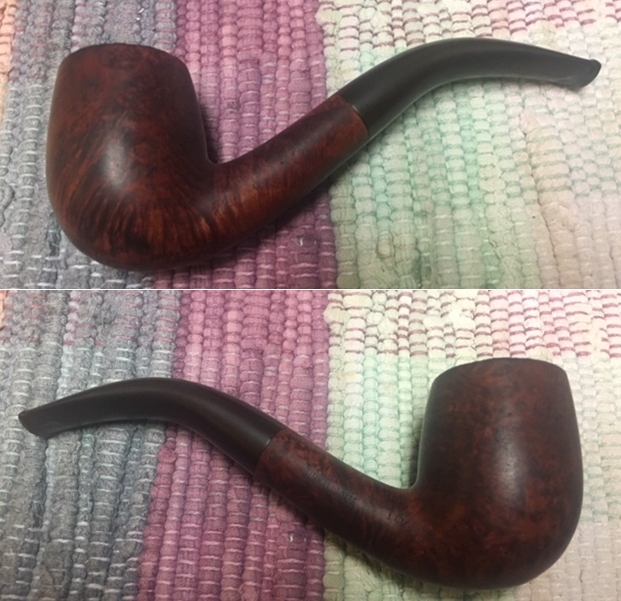
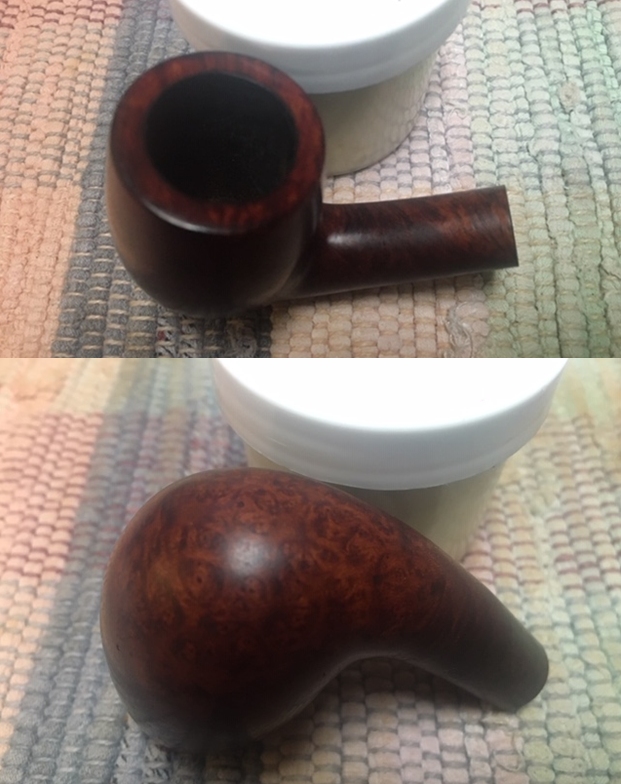
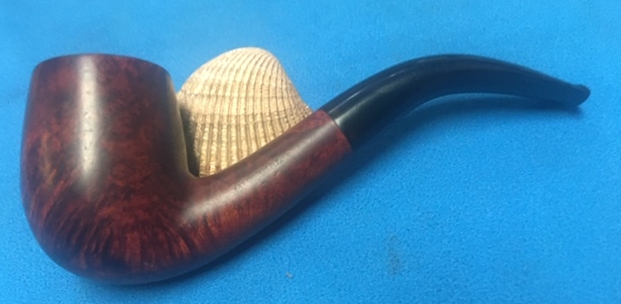
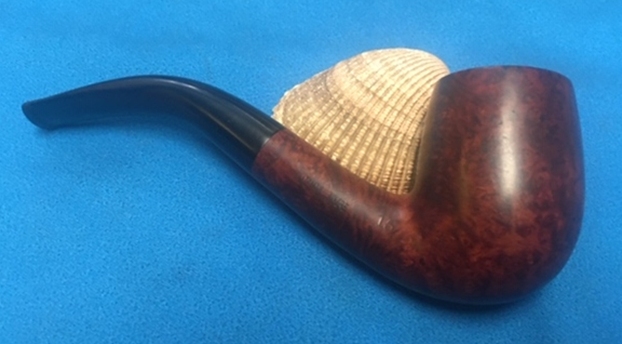
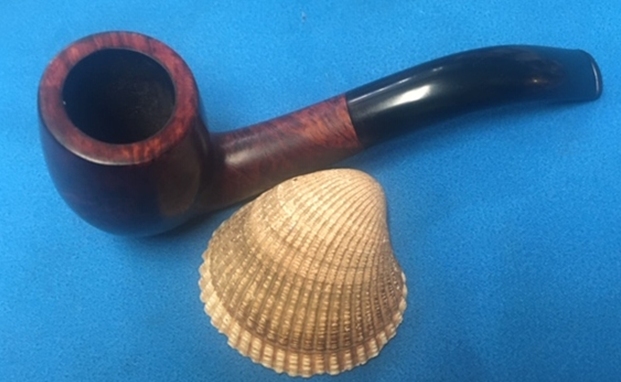
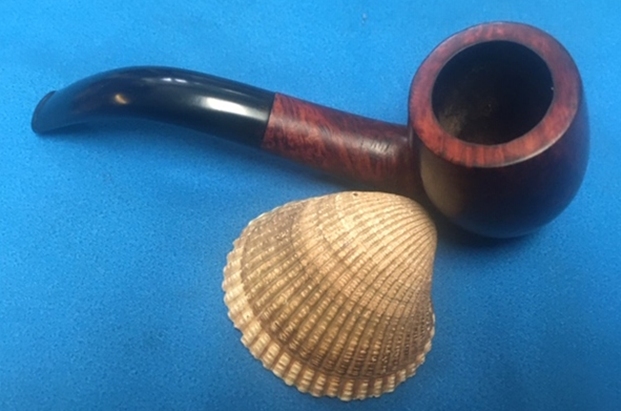
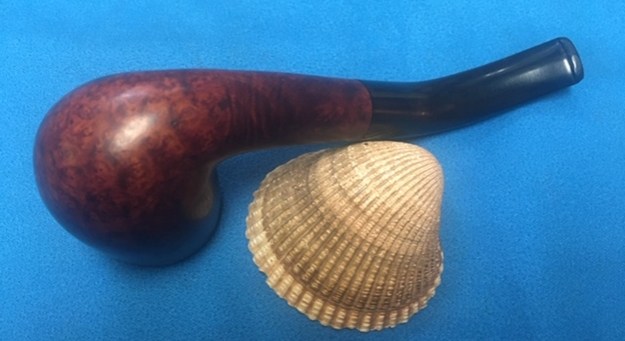
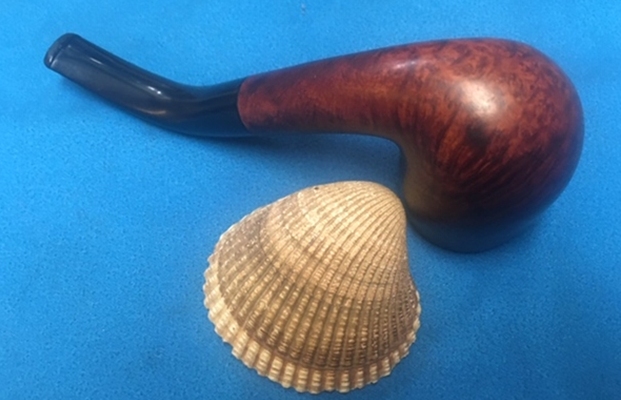
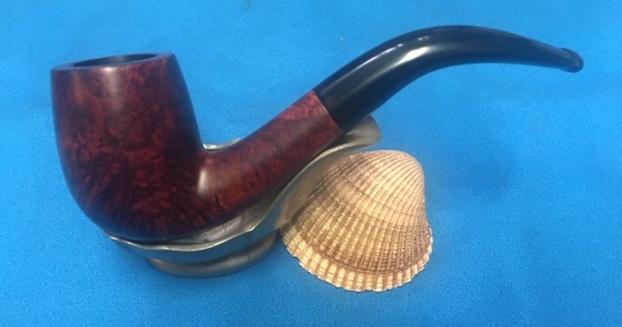
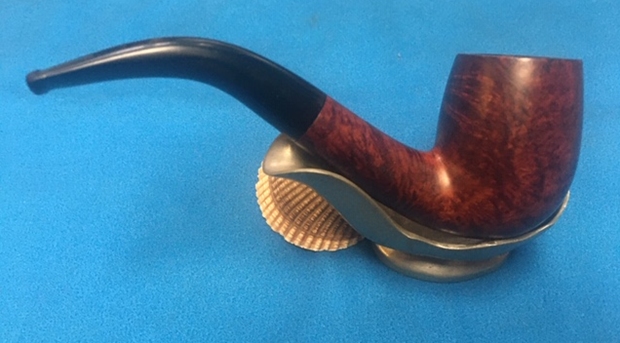
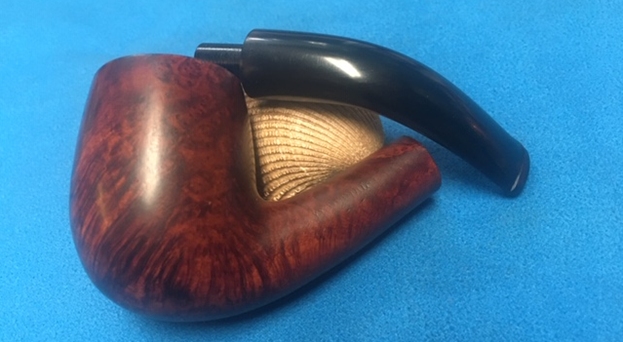
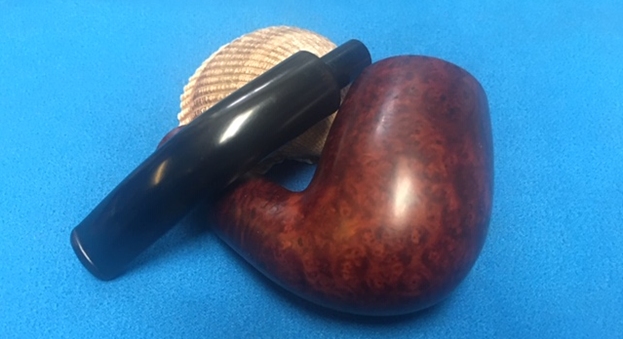
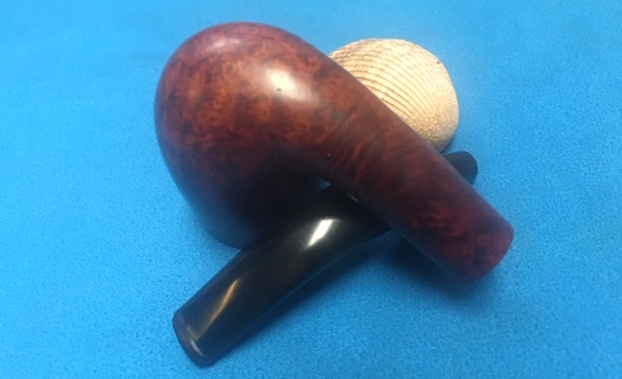
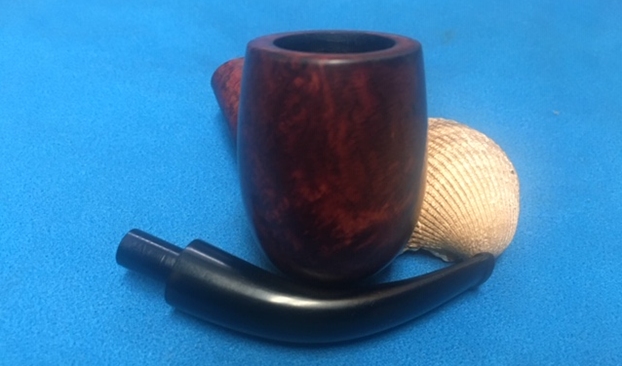
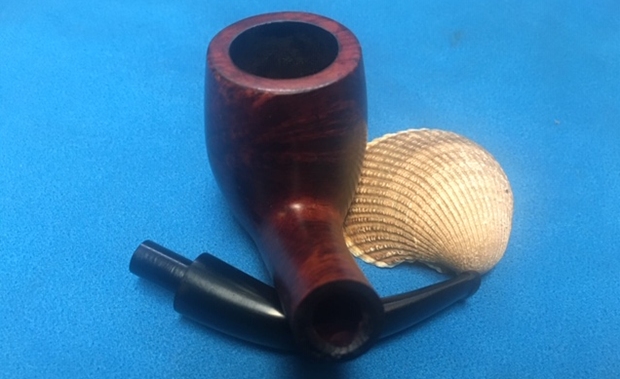
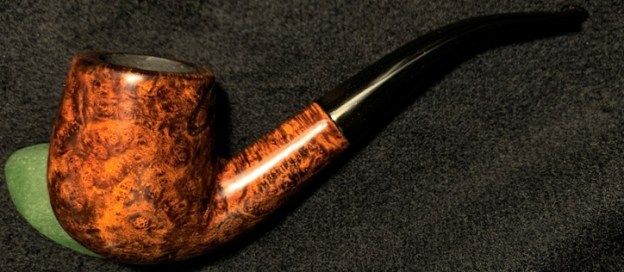
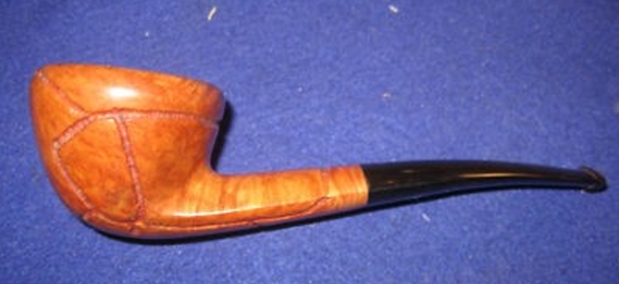
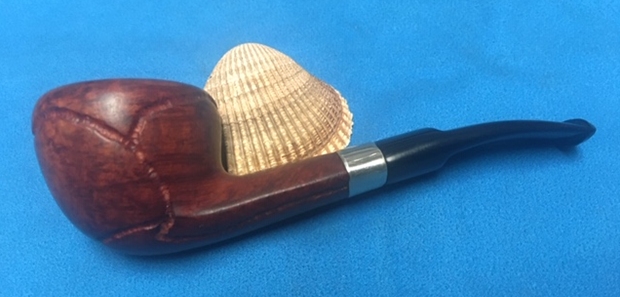
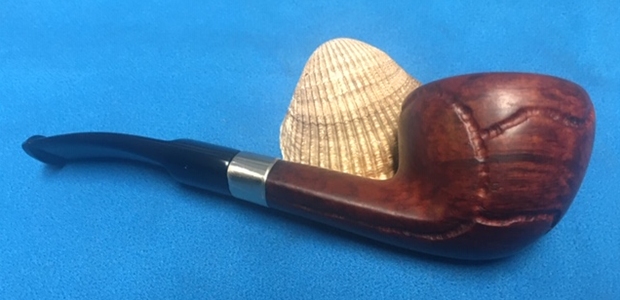
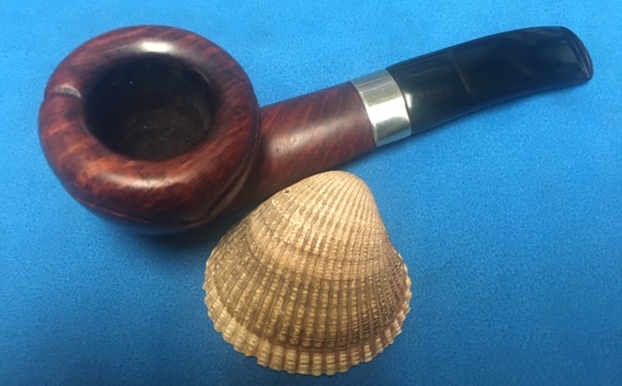
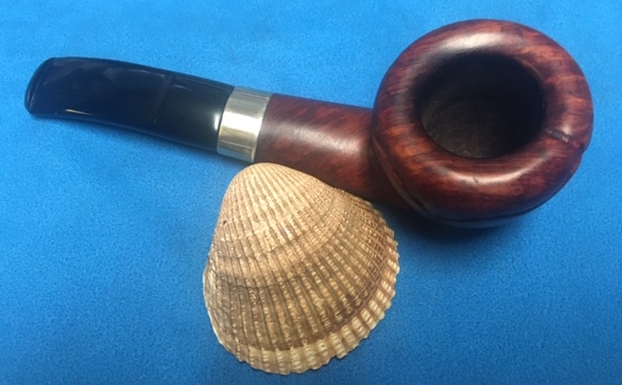
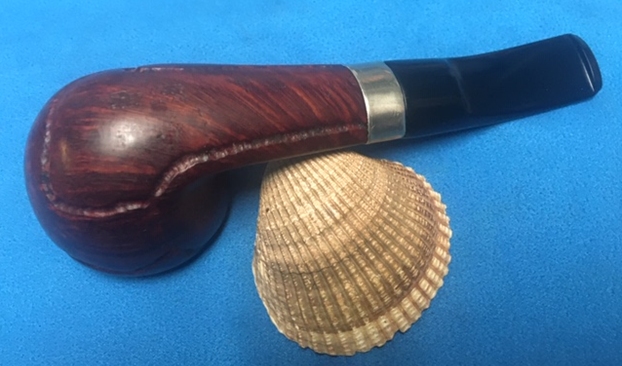
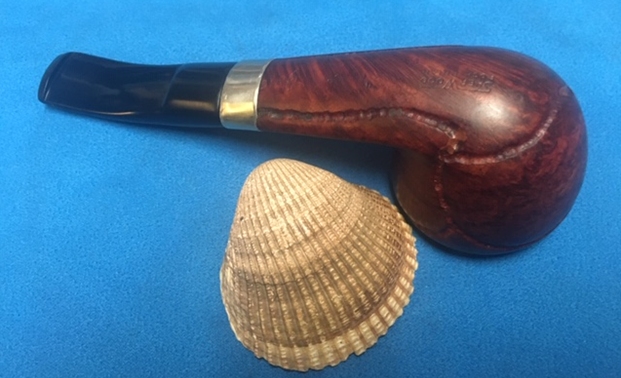
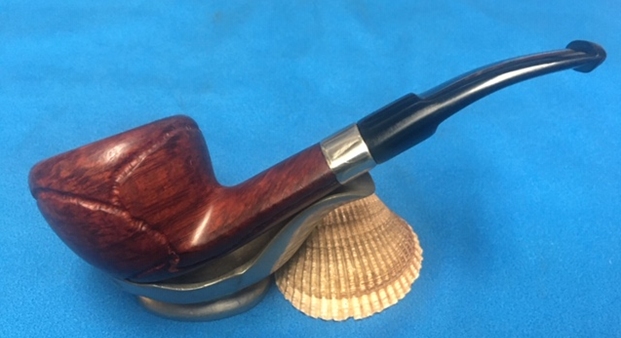
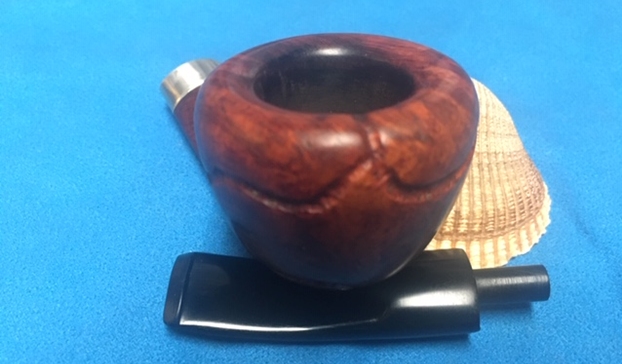
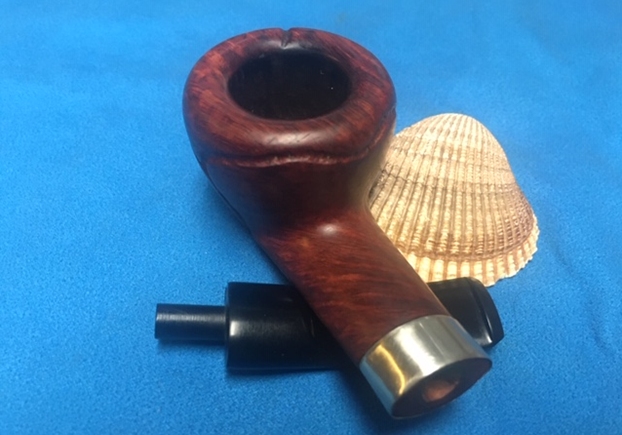
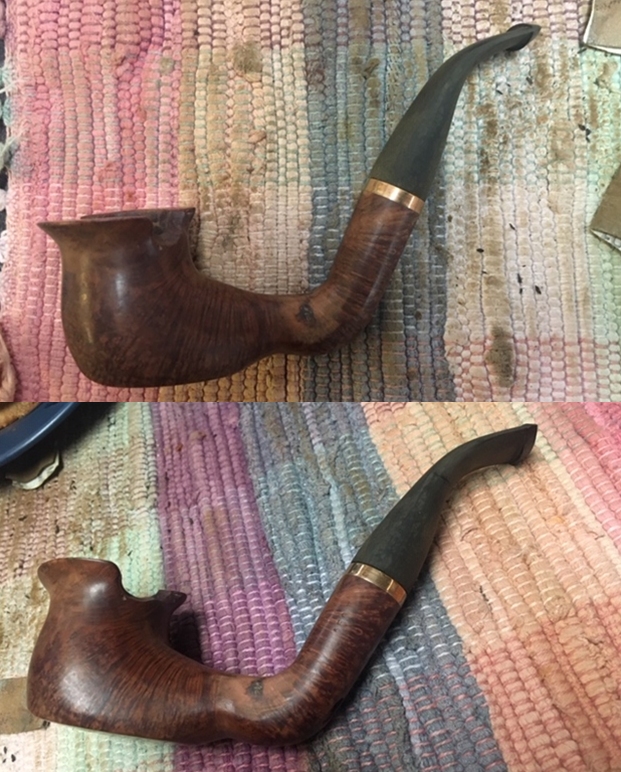
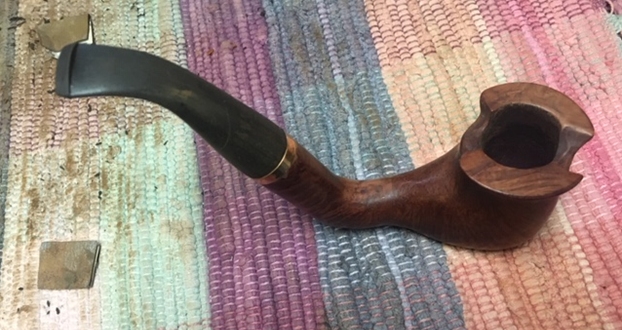
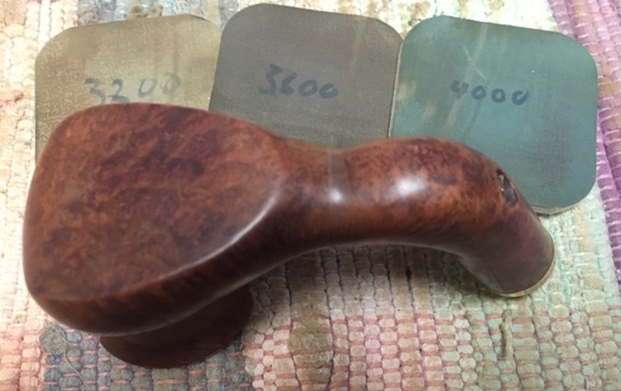
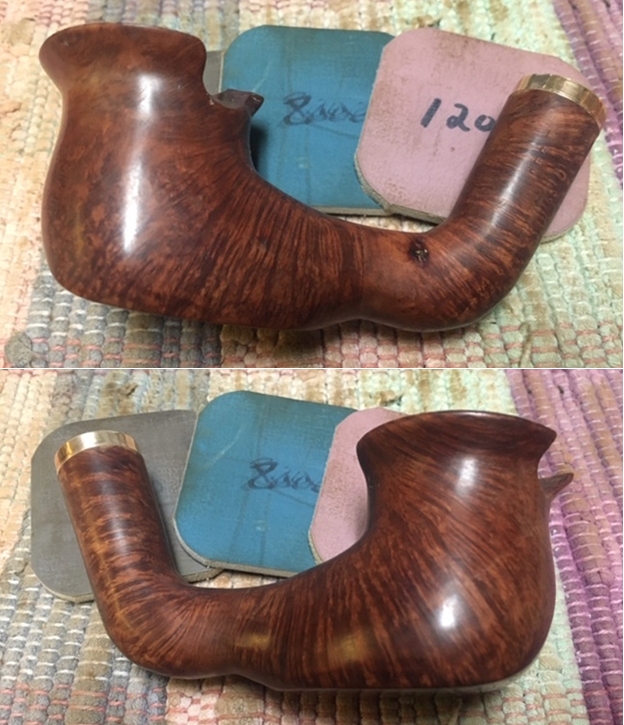
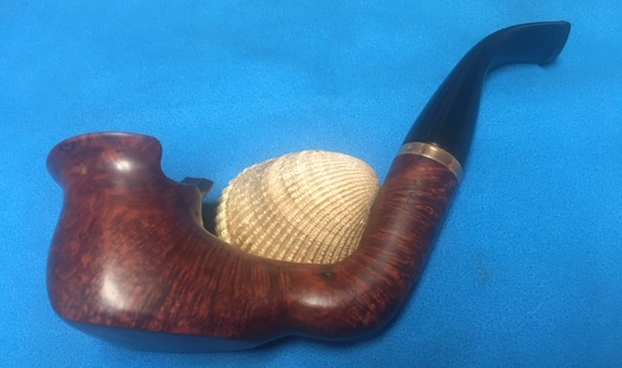
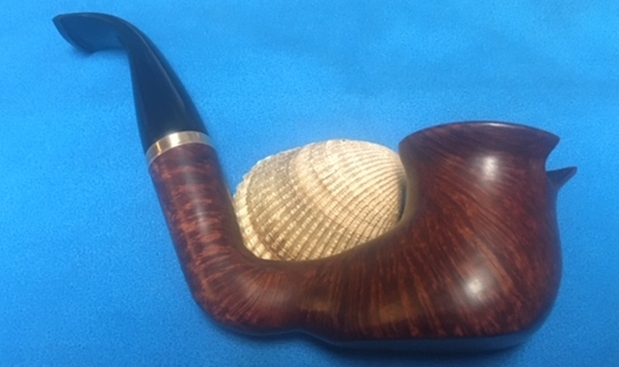
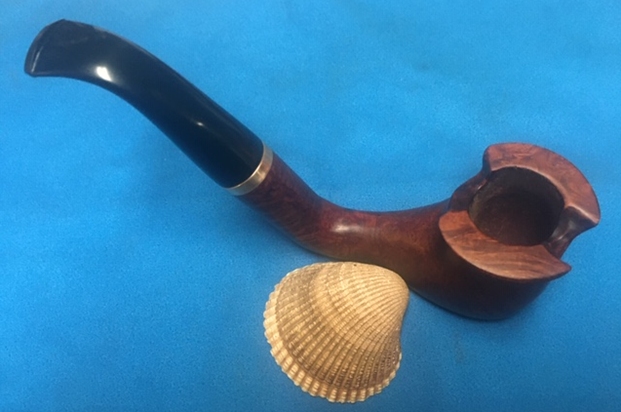
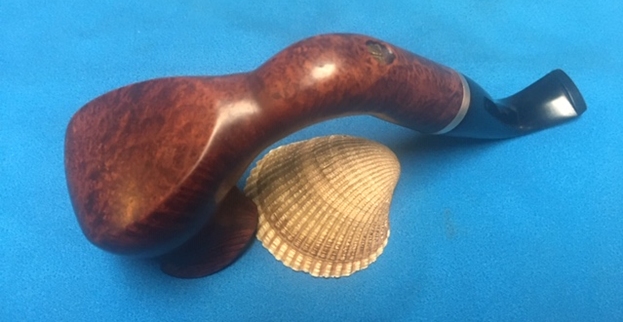
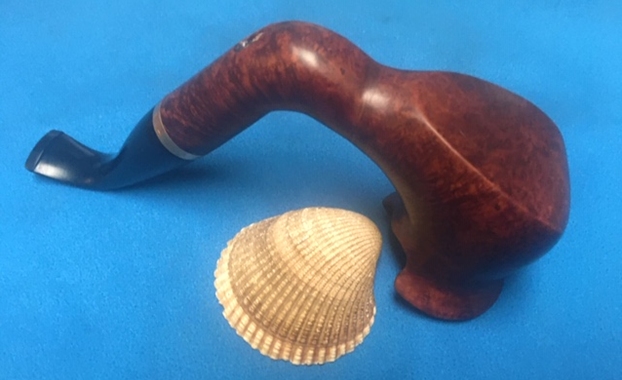
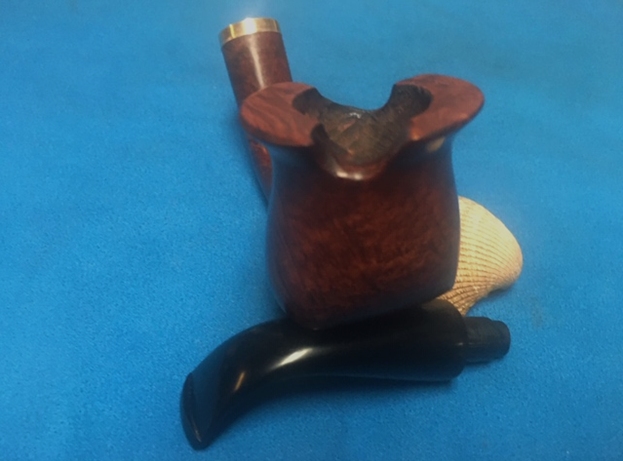
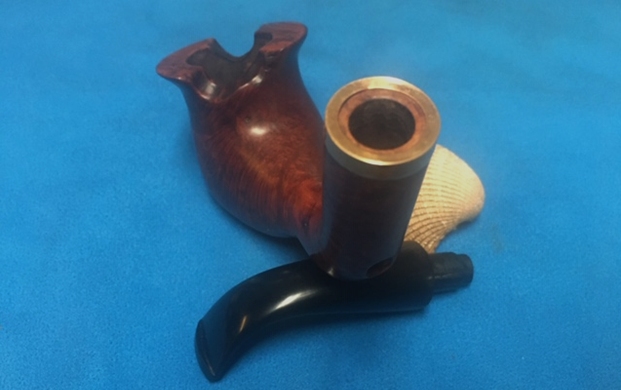
 This Charatan’s Make Belvedere Lovat from Bob Kerr’s estate turned out to be a great looking pipe. The mix of brown stains highlights the grain around the bowl sides, top and bottom. The finish on the pipe is in excellent condition and the contrasting stains work well with the polished vulcanite saddle stem. I put the stem back on the bowl and carefully buffed the pipe with Blue Diamond on the buffing wheel using a light touch on the briar. I gave the bowl and stem multiple coats of carnauba wax on the buffing wheel and followed that by buffing the entire pipe with a clean buffing pad. I hand buffed the pipe with a microfiber cloth to deepen the shine. The finished Charatan’s Make Belvedere Lovat fits nicely in the hand and feels great. Give the finished pipe a look in the photos below. The dimensions of the pipe are Length: 5 ¾ inches, Height: 2 inches, Outside diameter of the bowl: 1 ¼ inches, Chamber diameter: ¾ of an inch. If you are interested in carrying on Bob’s legacy with this pipe send me a message or an email. I have more to work on of various brands. Perhaps one of those will catch your attention. Thanks for reading this blog and my reflections on the pipe while I worked on it. This is an interesting estate to bring back to life.
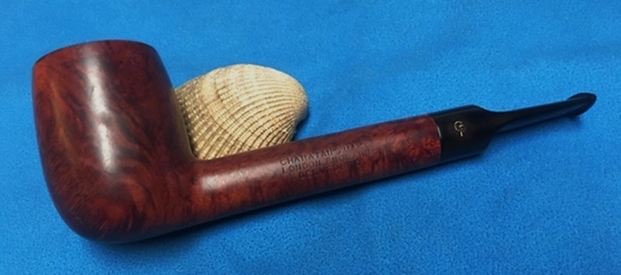


 He took photos of the bowl and rim top to show the cake in the bowl and the lava build up on the edges of the bowl. It was thick and hard but hopefully it had protected the rim top and edges from damage. It was hard to know for sure from the photos.
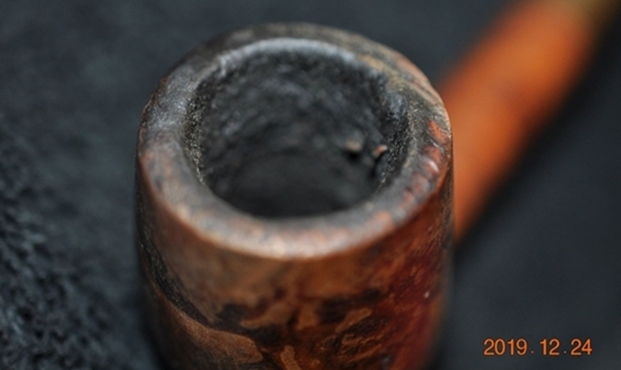
 Jeff took photos of the sides and heel of the bowl to show the condition of the finish. You can see some beautiful grain under the grime and grit ground into the finish. You can also see the damaged areas on the briar in the photos.
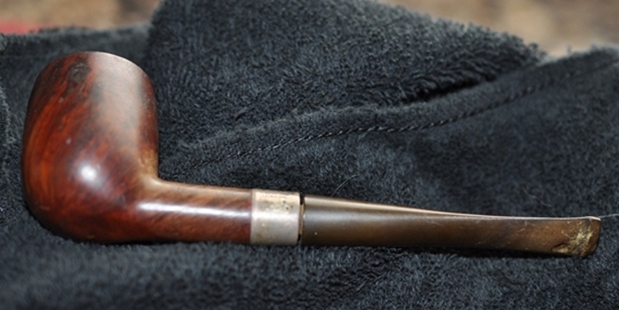
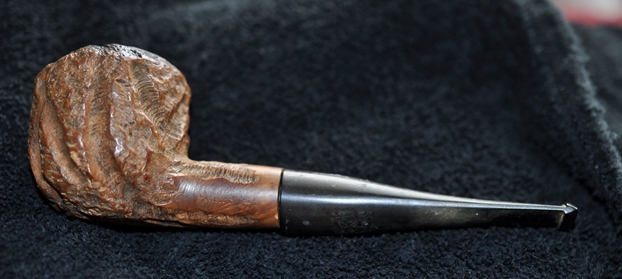
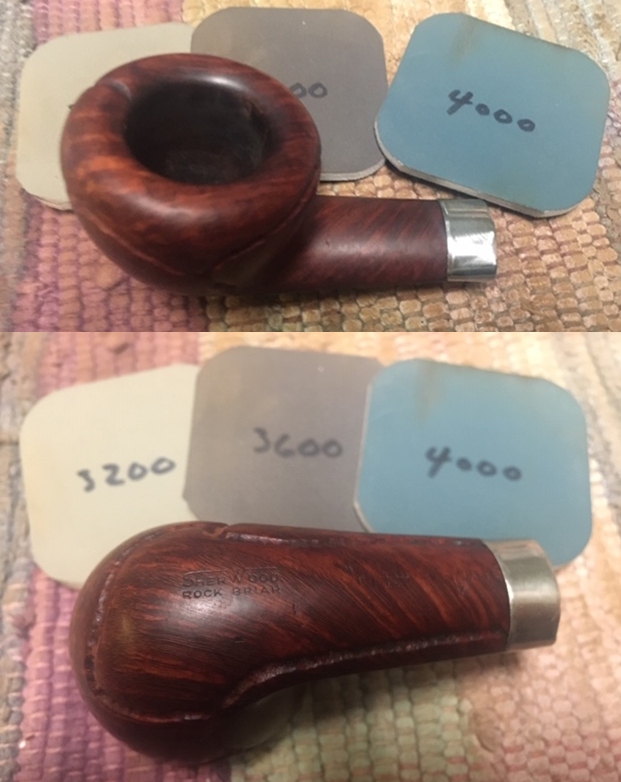
 He took a photo of the left side to show the deep scratches in the briar. Next these there were also vertical scratches and a fill that had fallen out. It was going to take a bit of work but it must have been a fine smoking pipe if the condition is any indication.
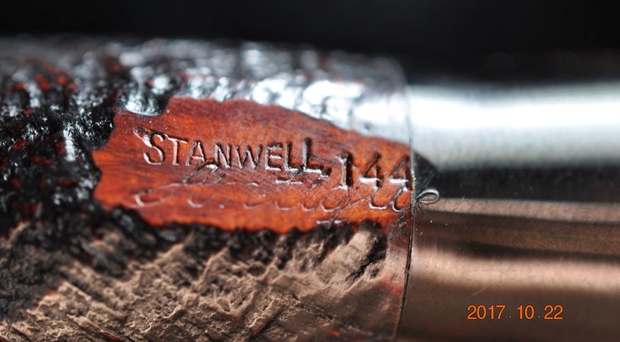
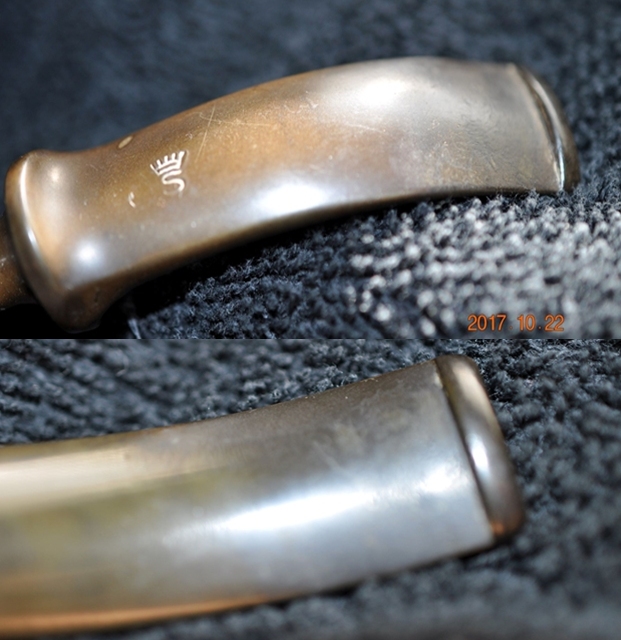
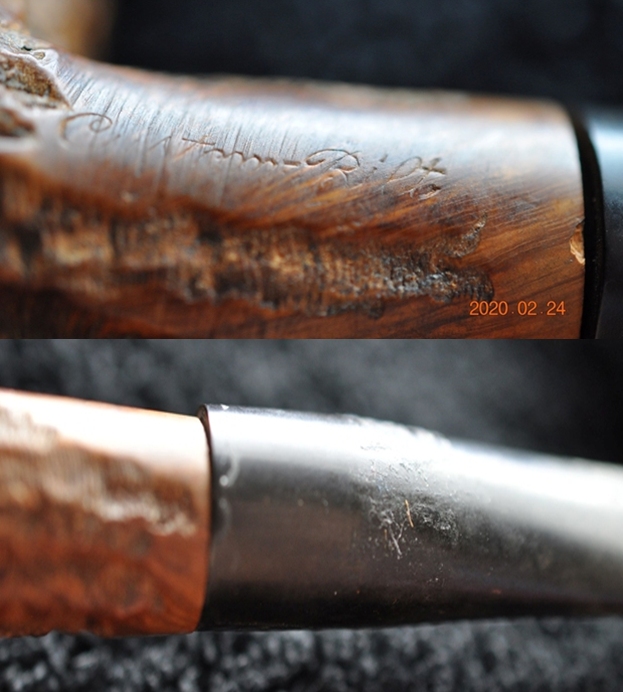
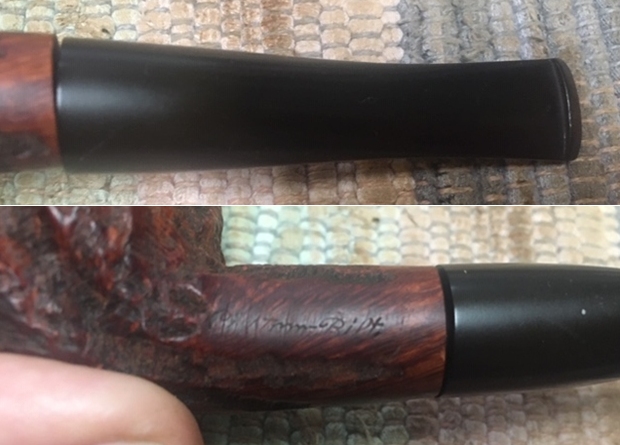
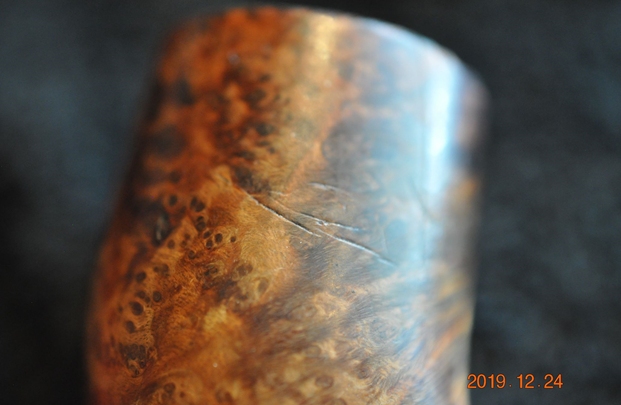 He took photos of the stamping on both sides of the shank. The stamping was readable as you can see from the photos and read as noted above. You can also see the Circle IR stamp on the topside of the taper stem.
 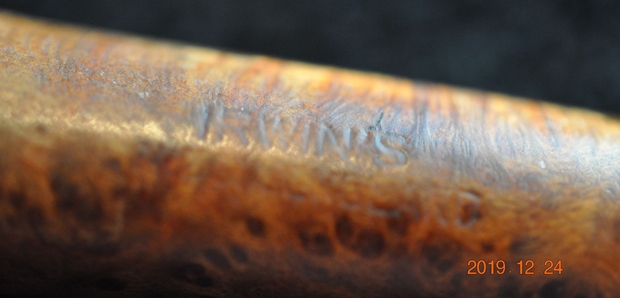 Jeff took photos of the top and underside of the stem showing the tooth chatter, scratching and oxidation on the stem surface and wear on the edges of the button.
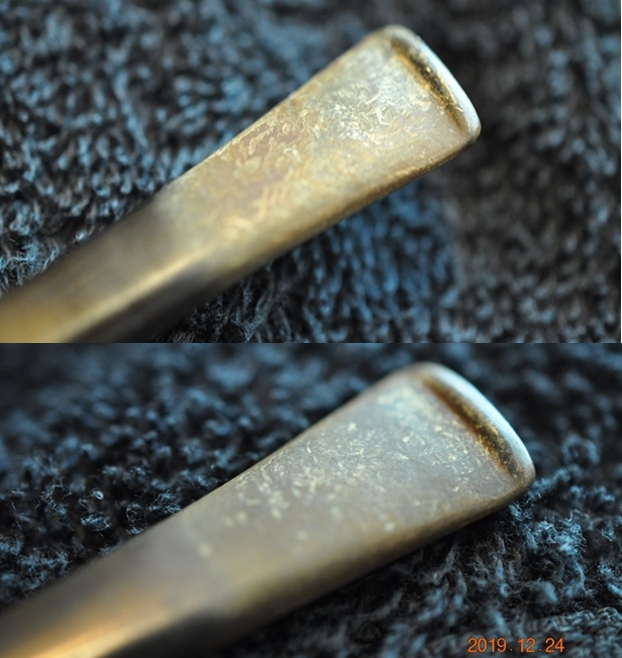 The shape number 1 on the right side of the shank mystifies me a bit but I knew that Irwin’s was a second line for GBD. I am including what I found when I worked on the previous Irwin’s billiard in this collection.
 I turned to Pipedia to see if I could find more information on Irwins and there was nothing listed in the article on GBD pipes. I did find a note on the Brands and Makers page connection the brand to GBD (https://pipedia.org/wiki/Pipe_Brands_/_Makers). On that page under Irwin’s I found the following information.
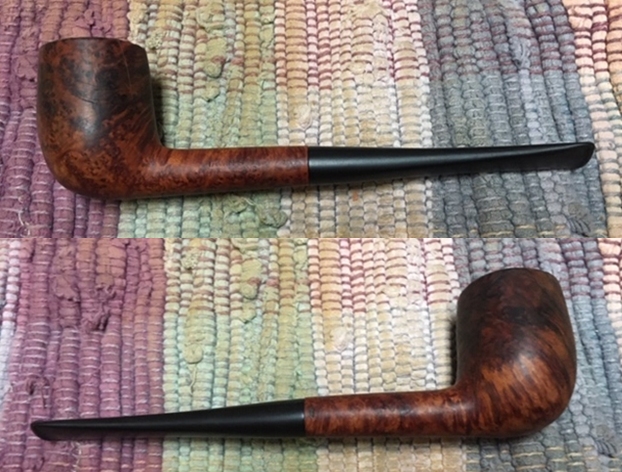
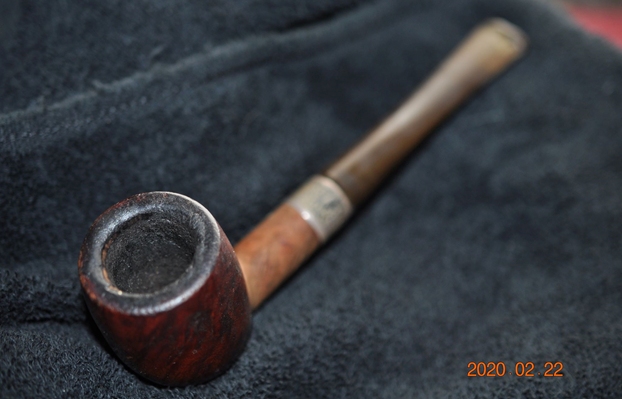
 I took some close up photos of the rim top and also of the stem surface. I wanted to show what cleaned bowl and rim top looked like. The rim top good but there was some darkening on the beveled inner edge of the rim. I also took close up photos of the stem to show the light tooth marks and the remaining oxidation on the stem surface.
 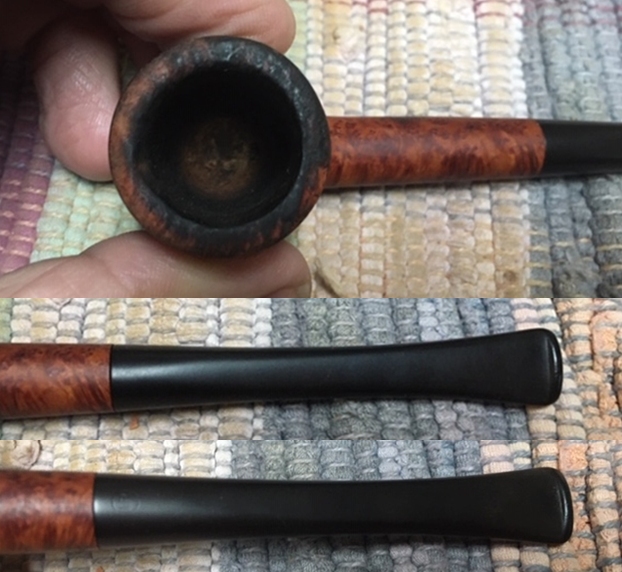 Now on to my part of the restoration of this Irwin’s London England 1 GBD made Billiard. I decided to start by dealing with the damage to the rim top and the inner edge of the rim. I started by topping the bowl on a topping board with 220 grit sandpaper to start removing the damage to the rim top.
 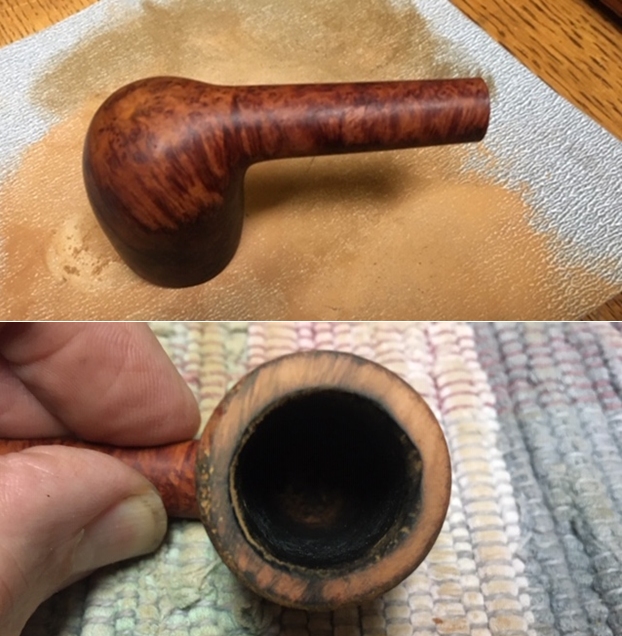 I used a folded piece of 220 grit sandpaper to smooth out the edge and clean up the edge to minimize the darkening.
 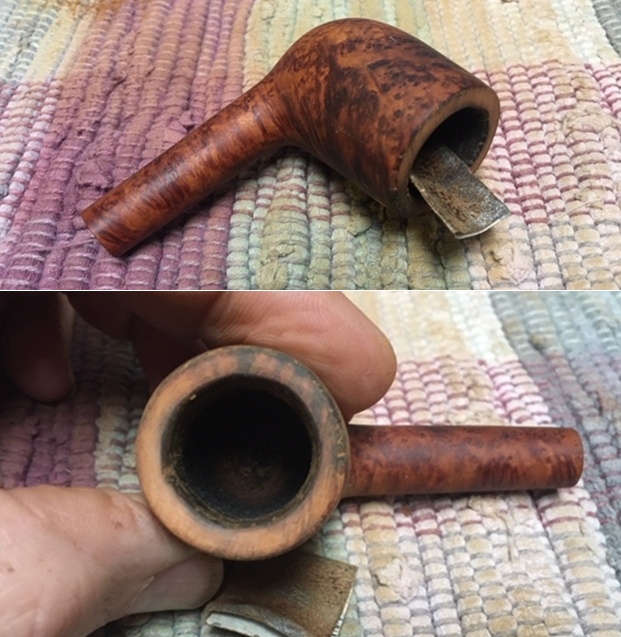 I retopped the bowl on the topping board to further work on the outer and inner edge. Once I finished the topping I was happy with the look of the rim top and edges.
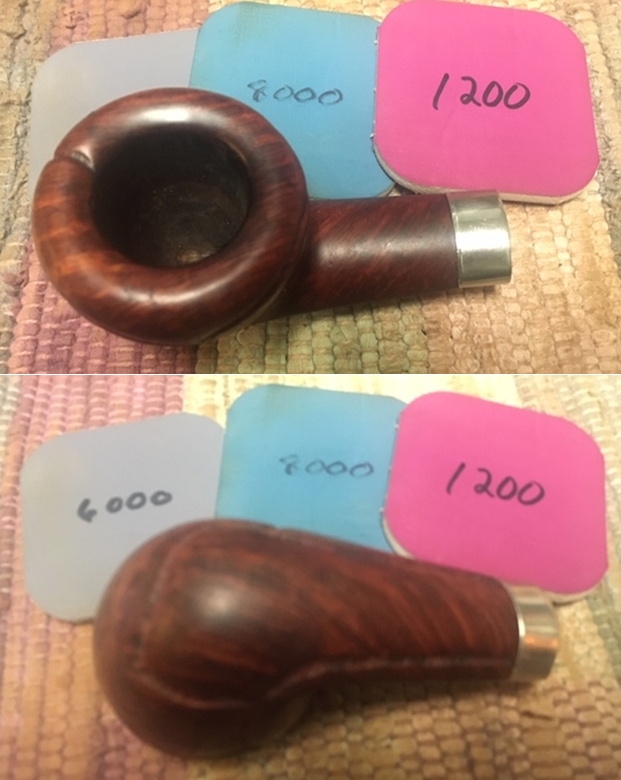
 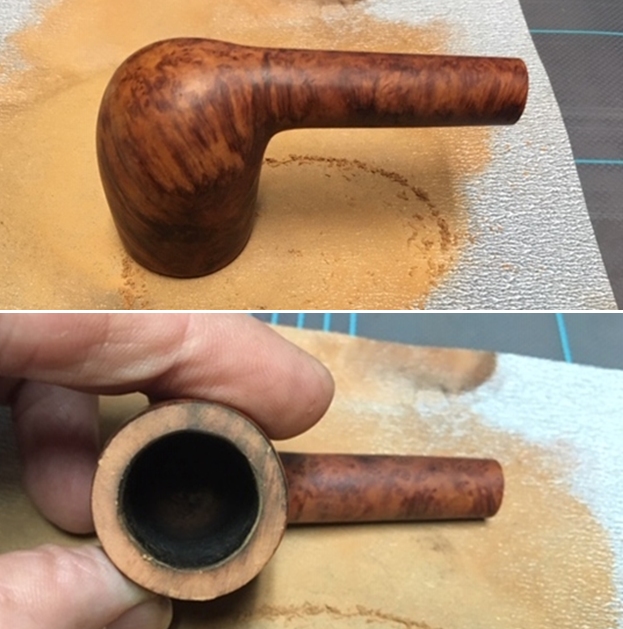 I sanded out the scratches in the left side of the bowl as shown above. I was able to remove them with the 220 grit sandpaper.
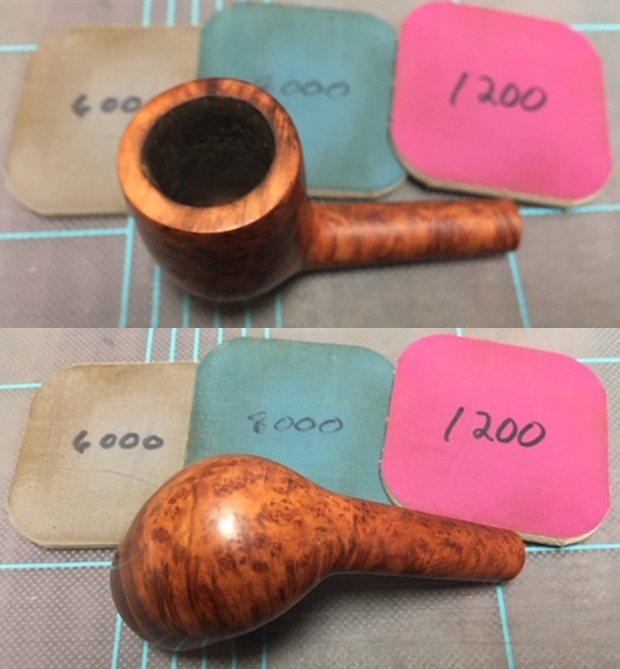
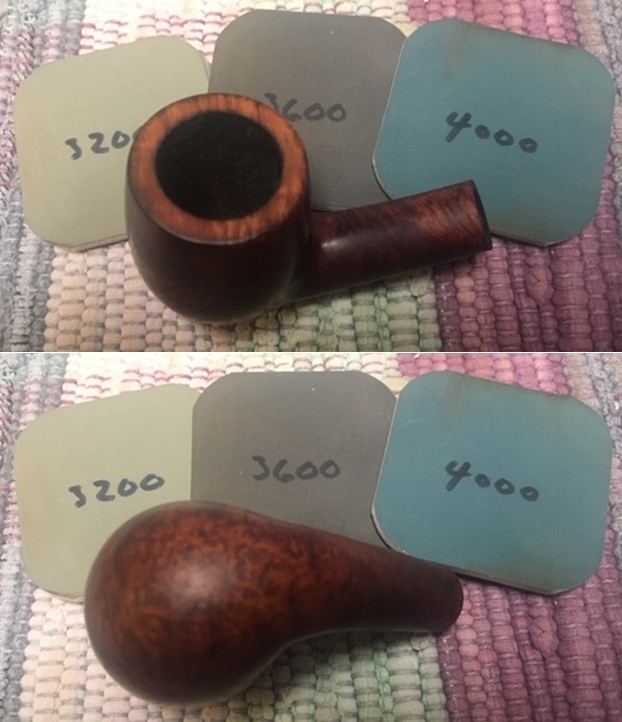
 I polished the briar with micromesh sanding pads – wet sanding with 1500-12000 grit pads and wiping the briar down with a damp cloth after each sanding pad.
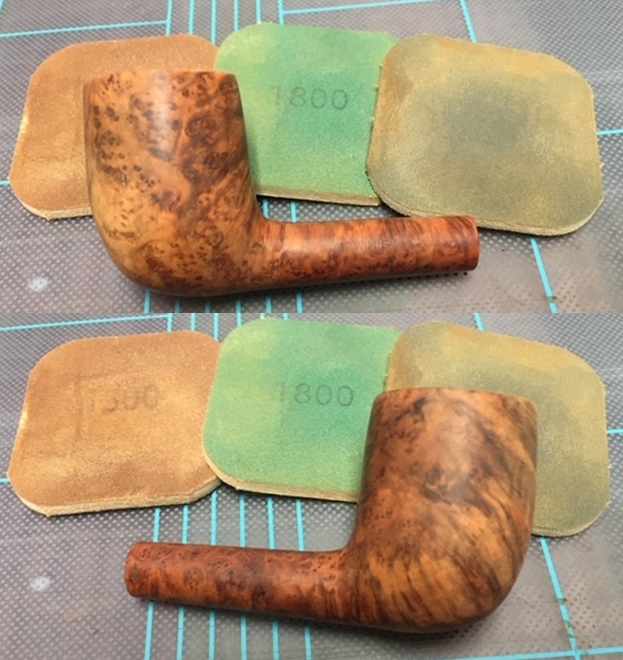

 I rubbed the bowl down with Before & After Restoration Balm. I worked it into the surface of the briar with my fingertips to clean, enliven and protect it. I let the balm sit for a little while and then buffed with a cotton cloth to raise the shine. The pipe looks very good.
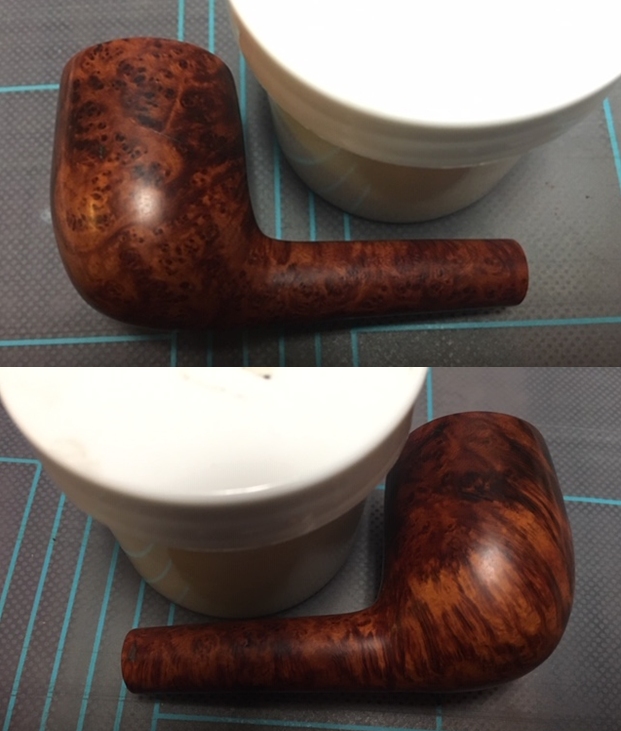
 I set the bowl aside and turned my attention to the stem. The stem was in great condition with light tooth marks and oxidation. The circle IR stamp on the top of the stem is very faint. There was not enough depth to the stamp to put white paint into and restore. I polished the vulcanite with micromesh sanding pads – 1500-12000 grit pads. I wiped it down with a damp cloth after each sanding pad. I used Before & After Pipe Polish – both Fine and Extra Fine to further polish the stem. I left a little oxidation around the Circle IR stamp on the top of the stem to preserve what remained.
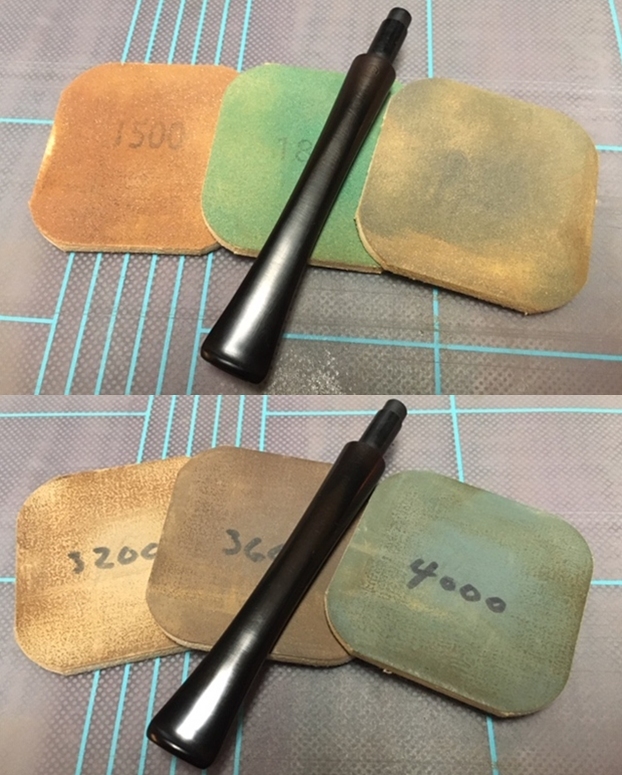
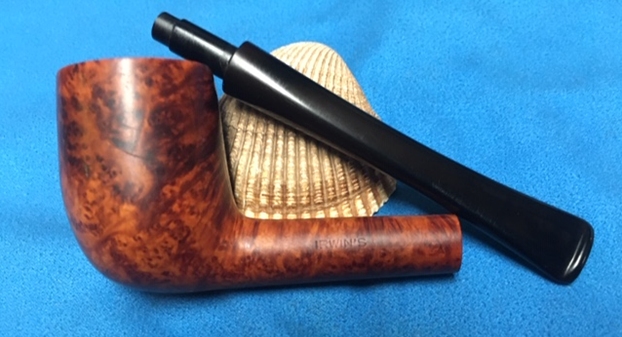
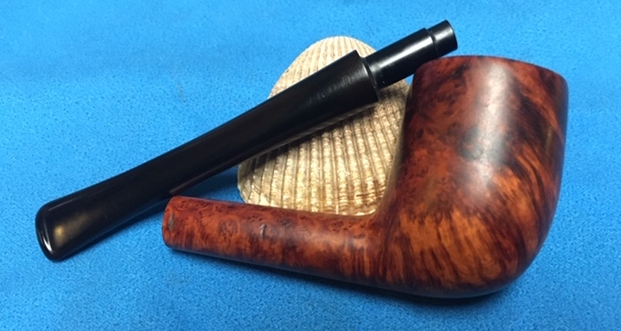
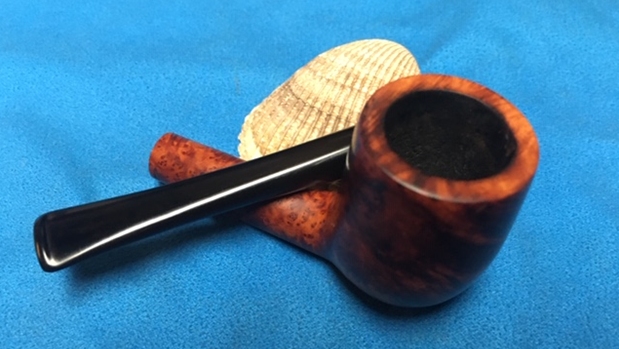
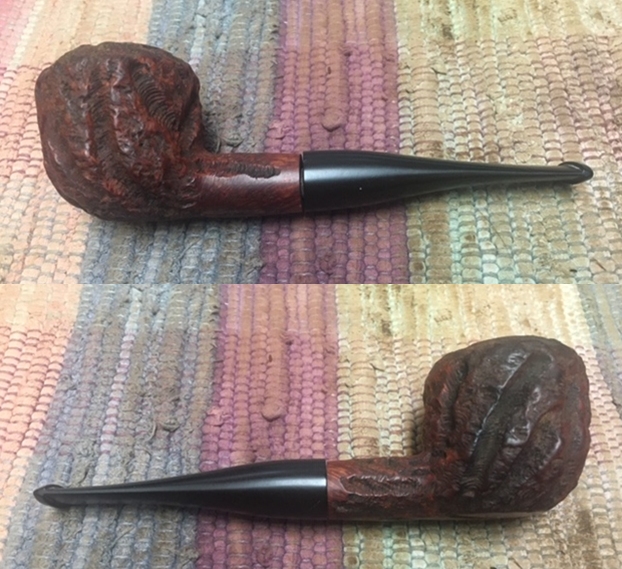
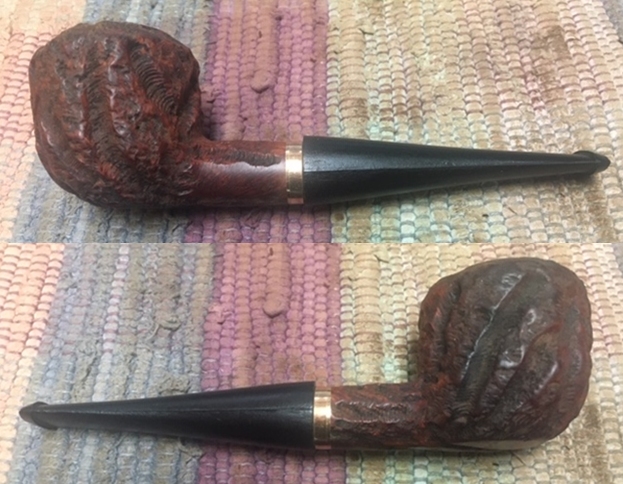
 This Irwin’s London England 1 Billiard made by GBD from Bob Kerr’s estate turned out to be a great looking pipe. The mix of brown stains highlights the grain around the bowl sides, top and bottom. The finish on the pipe is in excellent condition and the contrasting stains work well with the polished vulcanite saddle stem. I put the stem back on the bowl and carefully buffed the pipe with Blue Diamond on the buffing wheel using a light touch on the briar. I gave the bowl and stem multiple coats of carnauba wax on the buffing wheel and followed that by buffing the entire pipe with a clean buffing pad. I hand buffed the pipe with a microfiber cloth to deepen the shine. The finished Irwin’s Billiard fits nicely in the hand and feels great. Give the finished pipe a look in the photos below. The dimensions of the pipe are Length: 5 ¾ inches, Height: 1 ½ inches, Outside diameter of the bowl: 1 1/8 inches, Chamber diameter: ¾ of an inch. If you are interested in carrying on Bob’s legacy with this pipe send me a message or an email. I have more to work on of various brands. Perhaps one of those will catch your attention. Thanks for reading this blog and my reflections on the pipe while I worked on it. This is an interesting estate to bring back to life.


