Blog by Paresh Deshpande
I had restored a Castello Sea Rock from my inherited pipe lot, my first Castello pipe, last year while Steve, Jeff and Dal Stanton had visited me in Pune, India (https://rebornpipes.com/2019/06/07/a-simple-restoration-of-a-castello-sea-rock-briar-56-f-pipe-with-steve-and-jeff-laug/)
Since then after I had smoked this pipe, I always wanted to lay my hands on another Castello. They are fantastic smokers, I say. However, the prices of Castello pipes had gone through the roof and to some extent, beyond reach. During one of my search on eBay for estate pipes, I came across this Castello Sea Rock pipe that was being sold for a considerably lesser price and it had the option for Best Offer. The long and short of it is that my best offer was accepted by the seller and the pipe made its way to Abha, my wife. That this pipe was being sold for such a low price was a pointer that there were issues with this pipe, but what exact issues and the extent of these issues was neither described by the seller nor were they visible in the pictures provided by the seller.
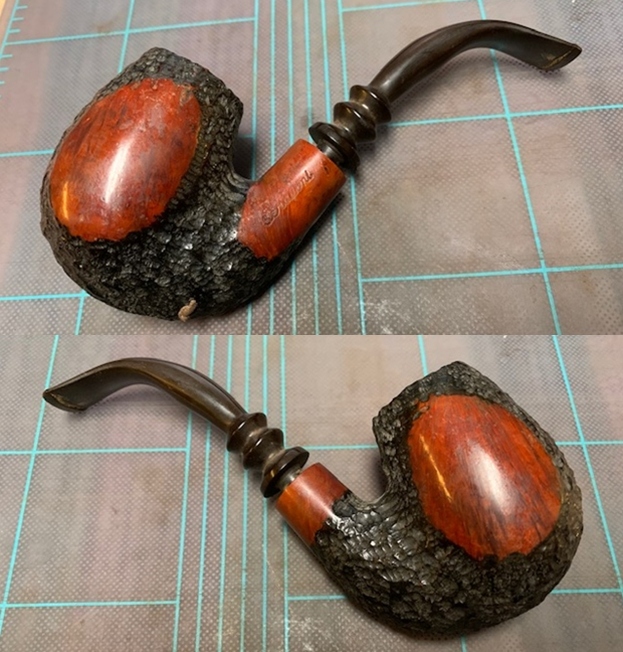
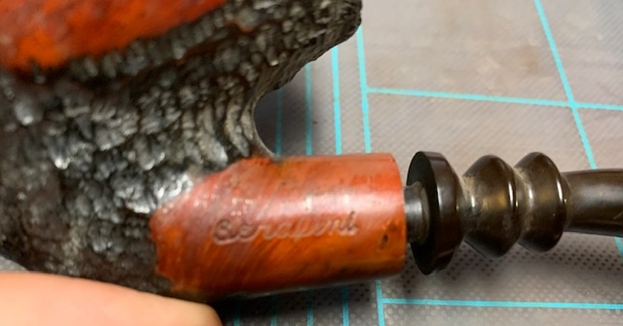
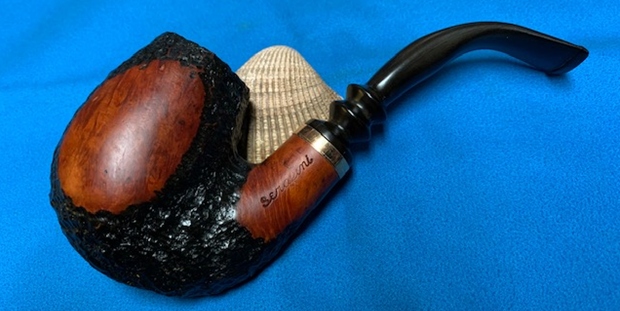
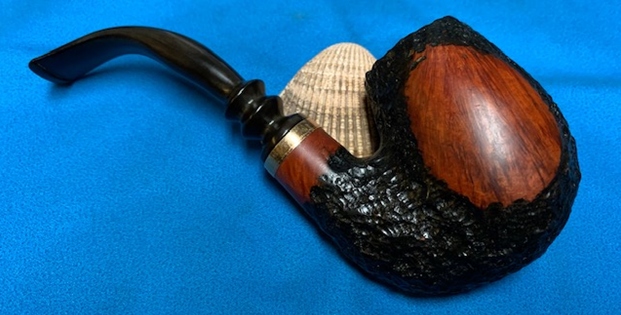
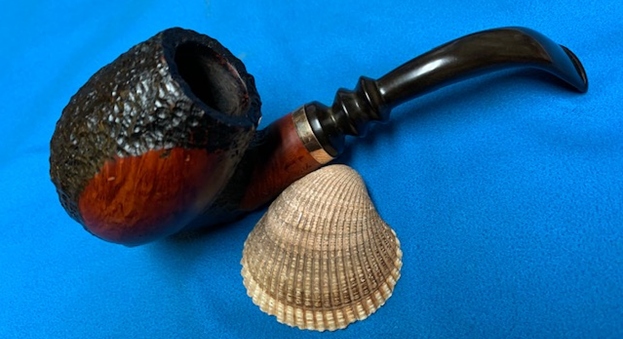
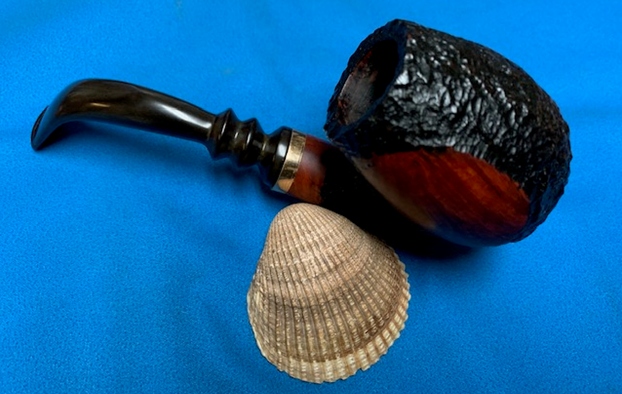
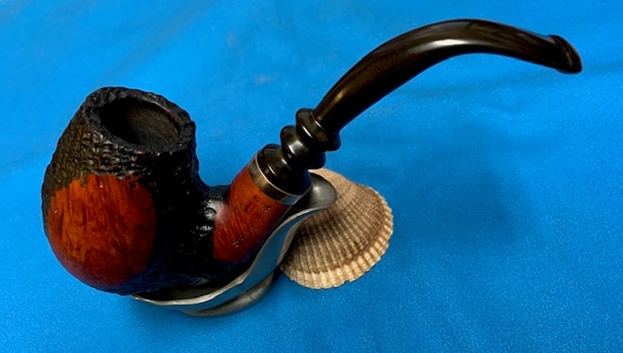
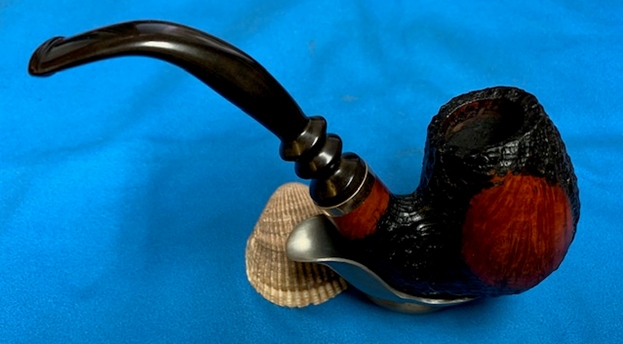
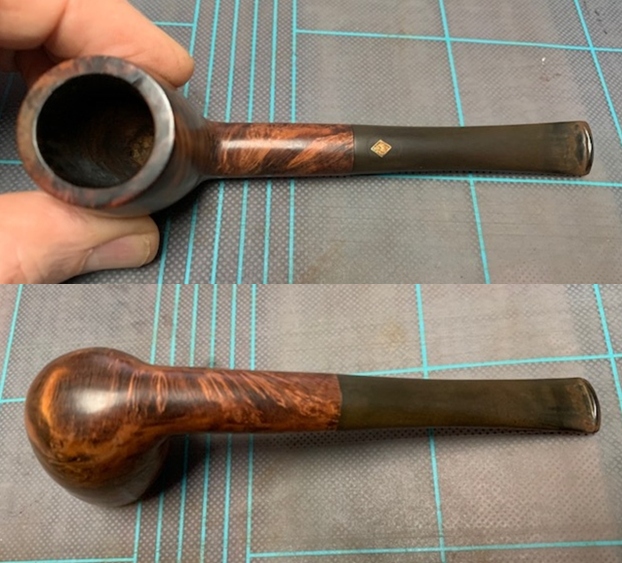
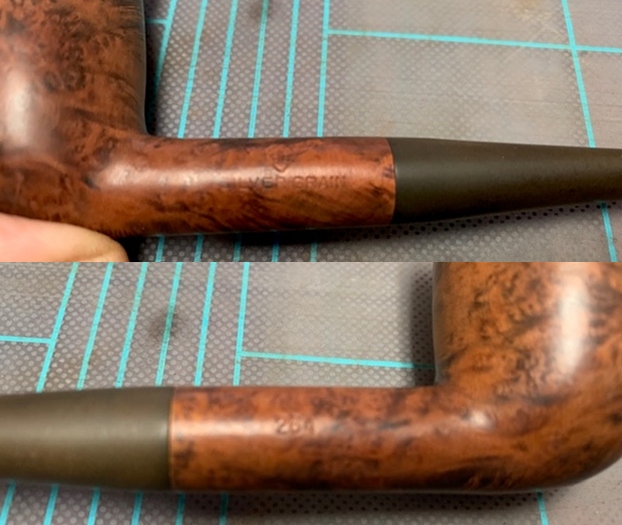
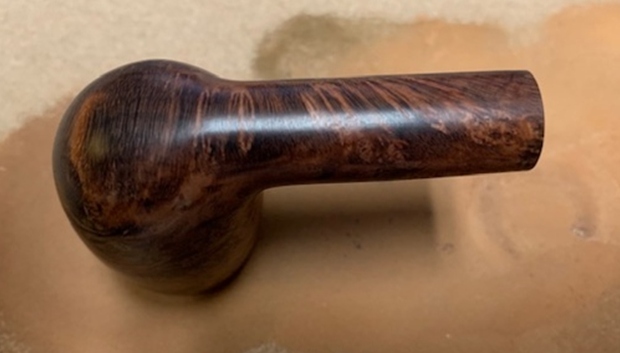
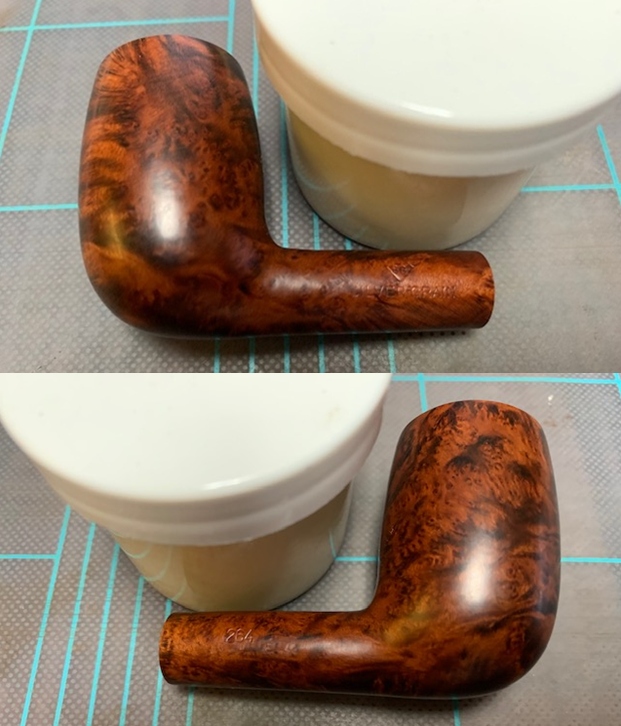
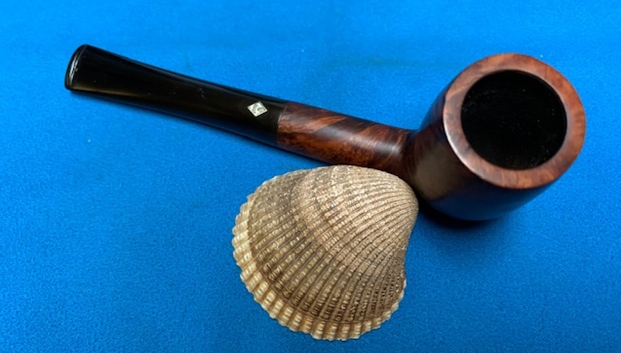
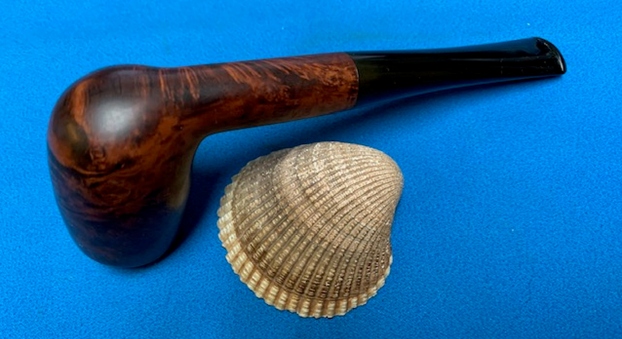
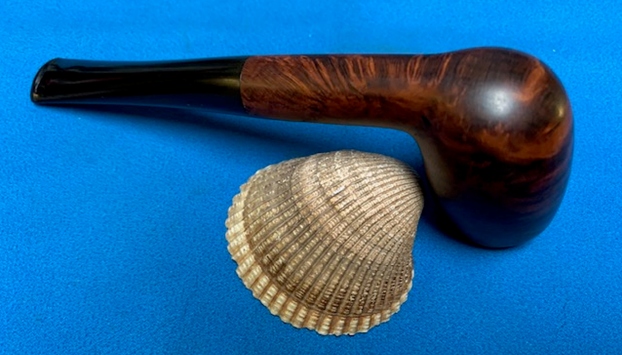
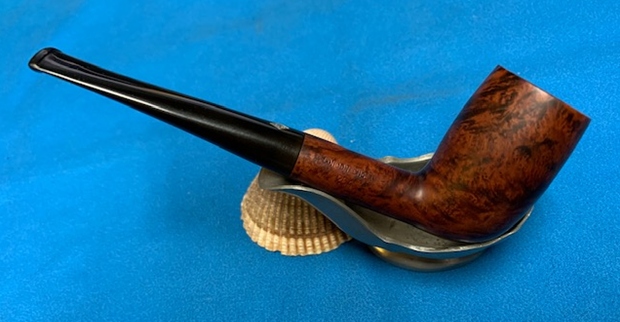
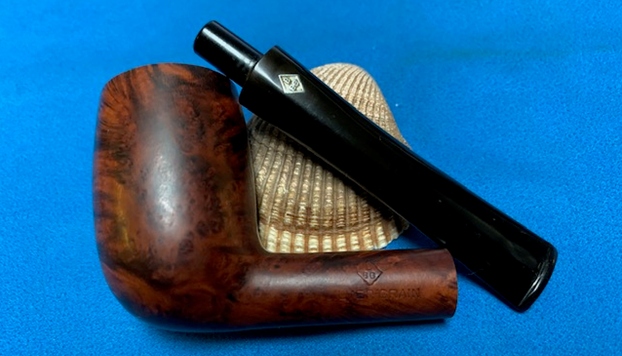
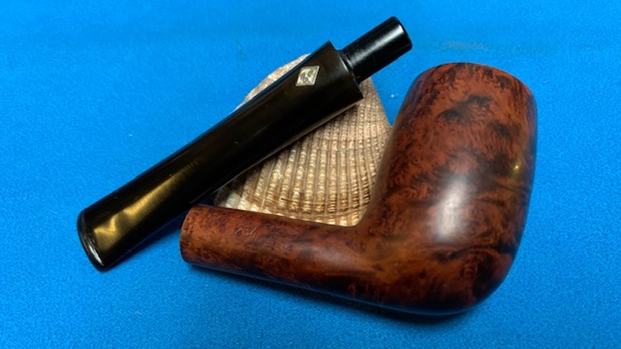
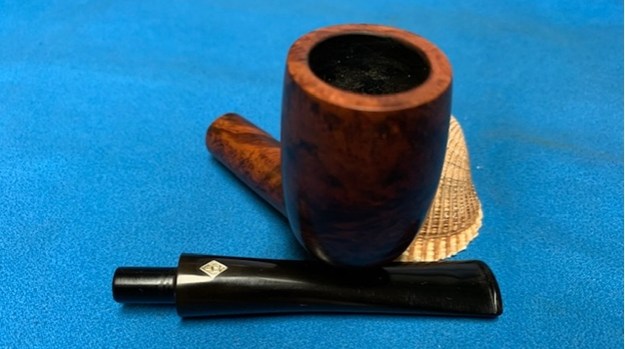
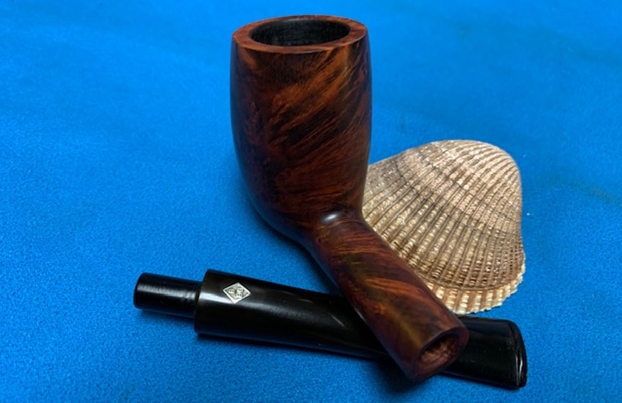
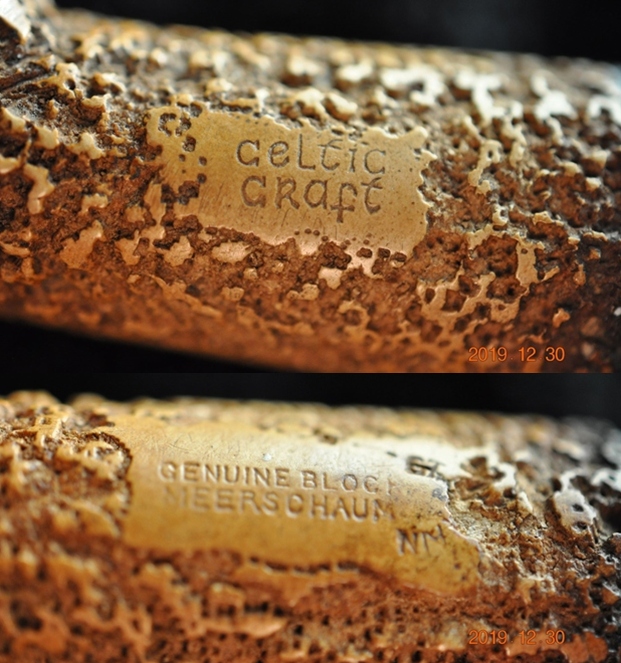
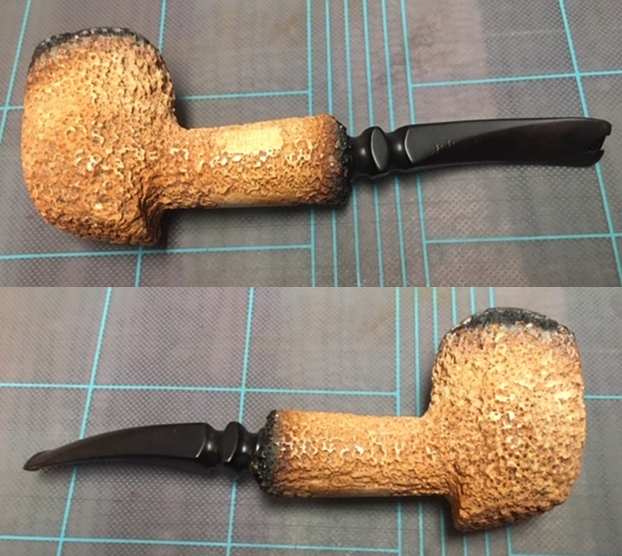
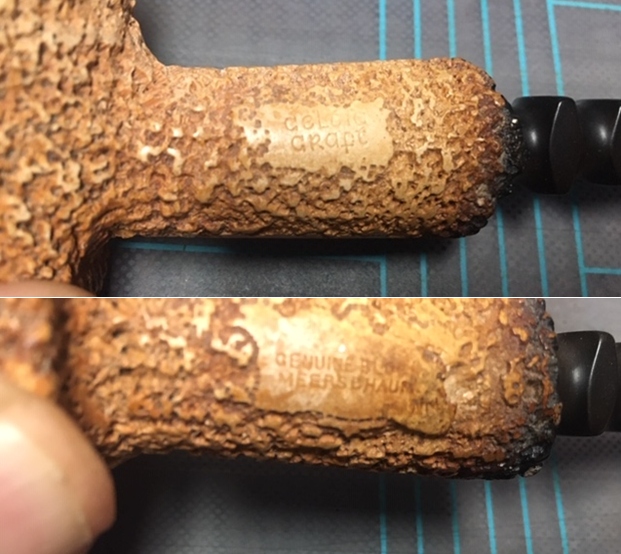
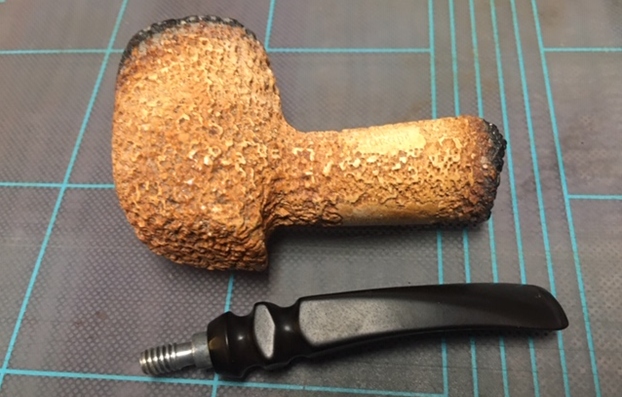
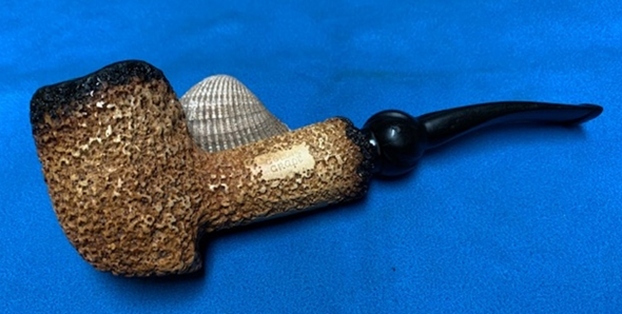
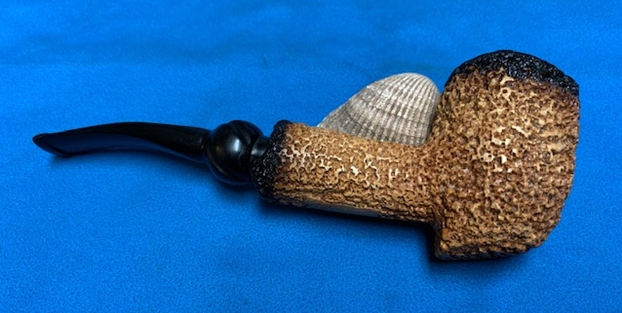
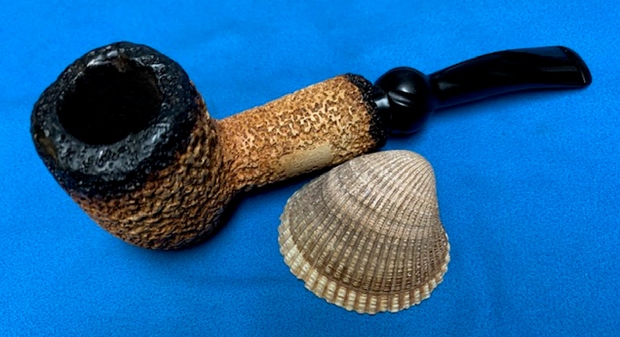
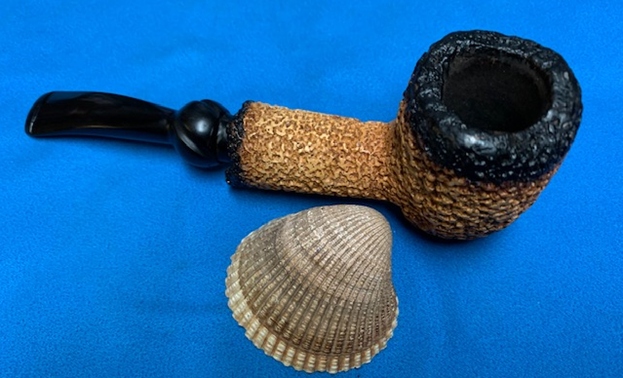
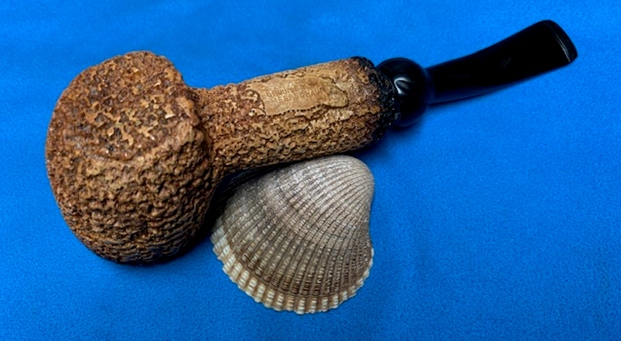
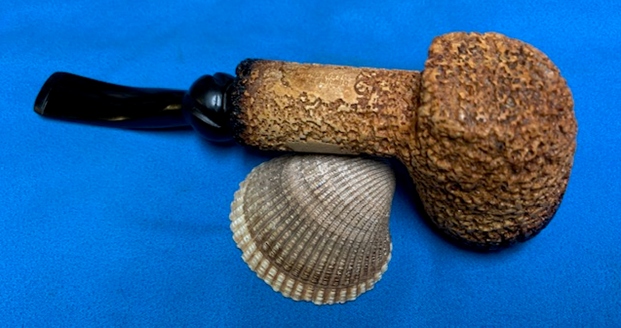
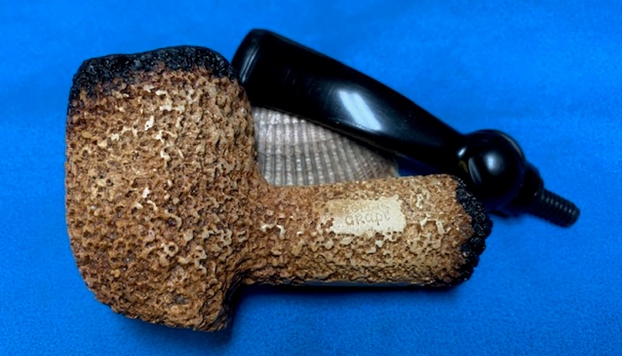
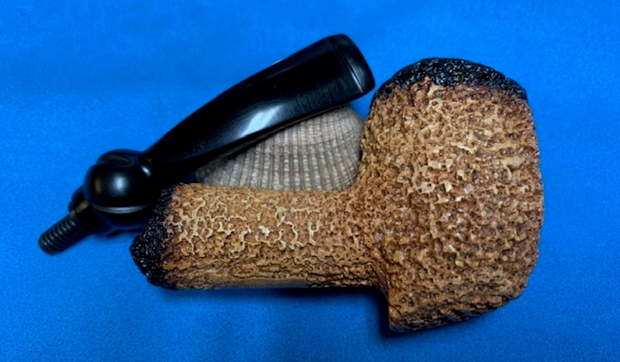
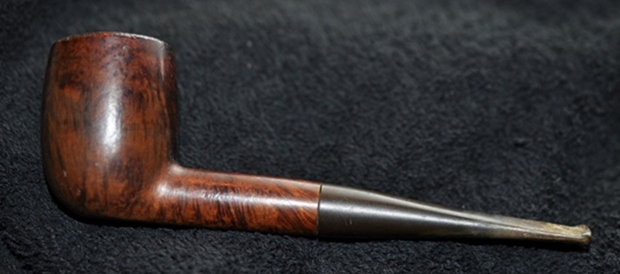
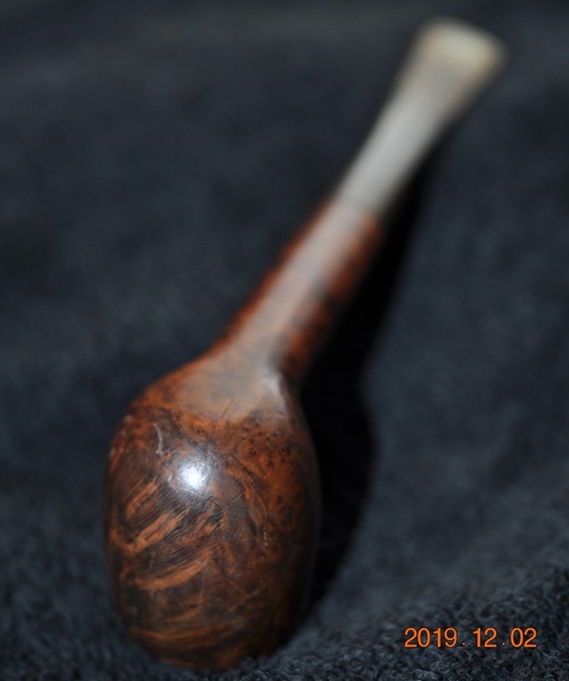
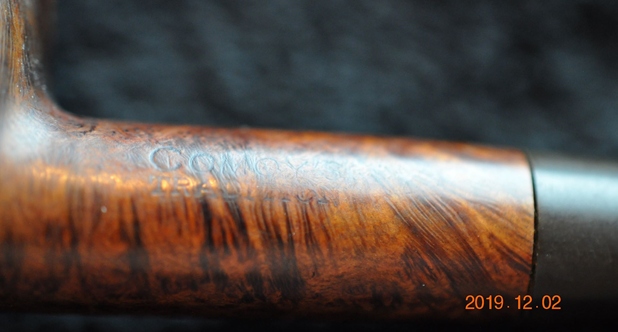
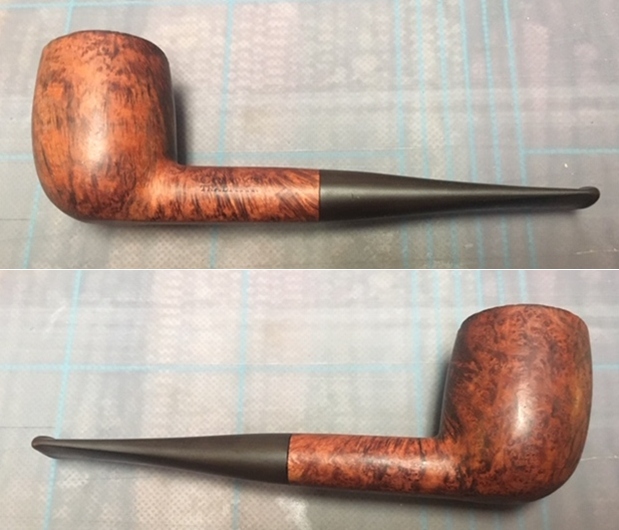
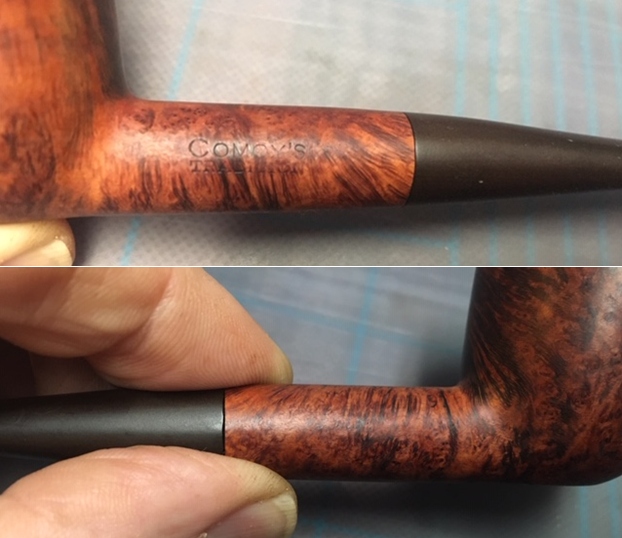
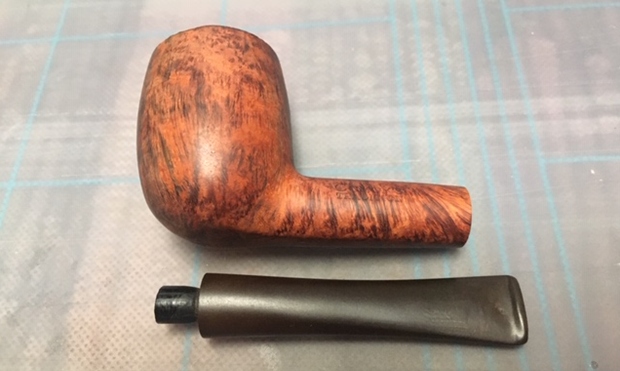
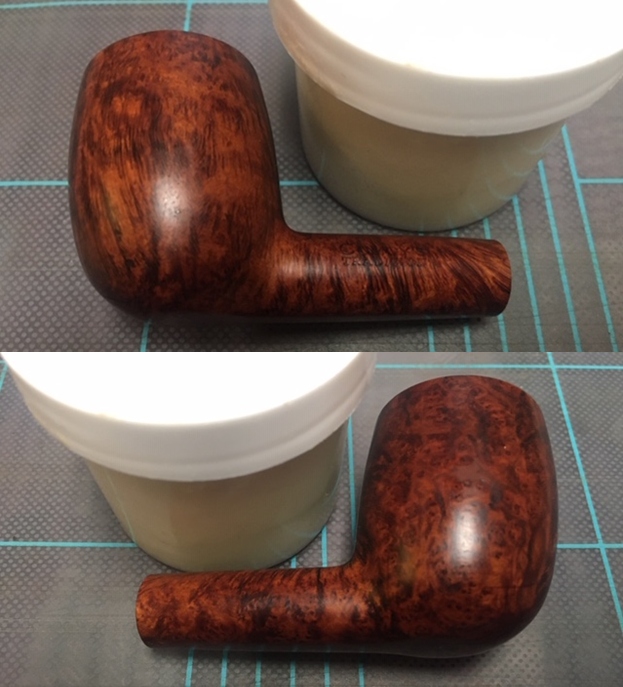
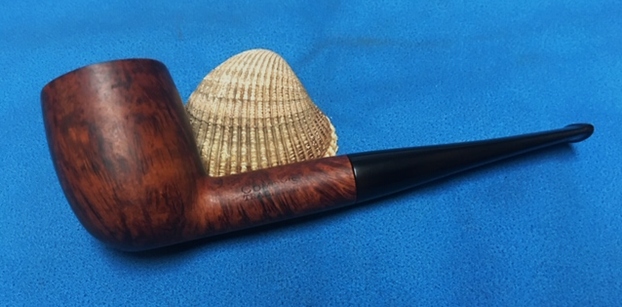
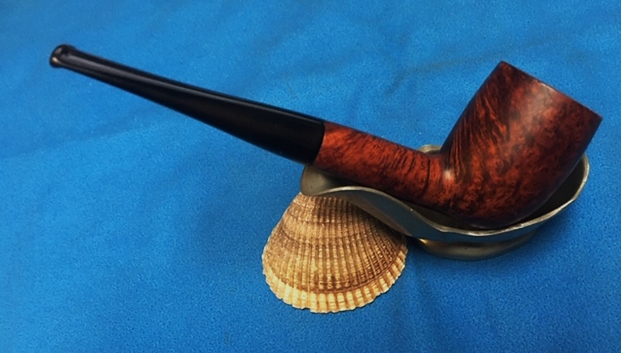
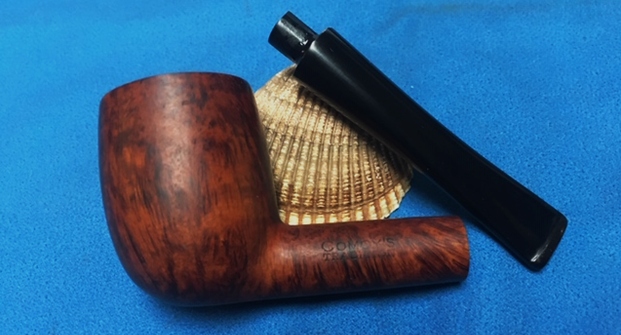
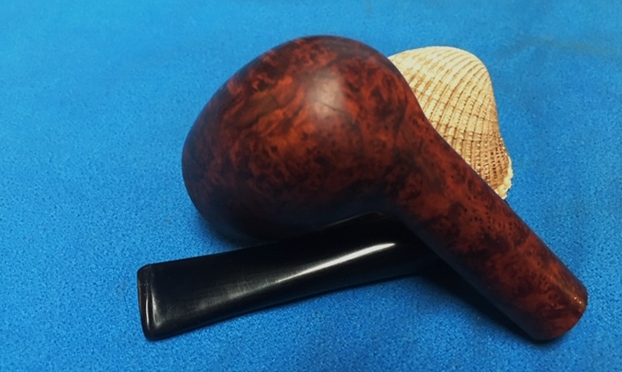
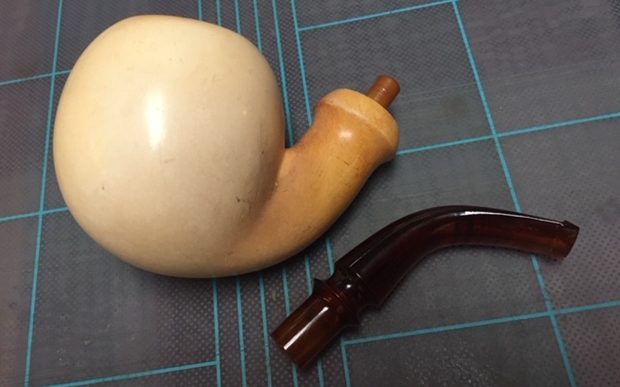
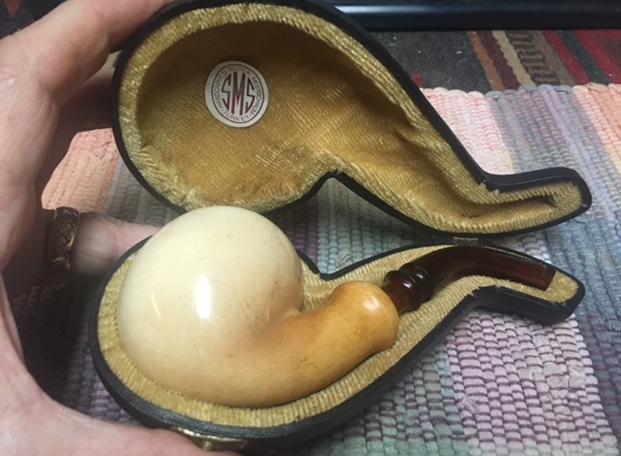
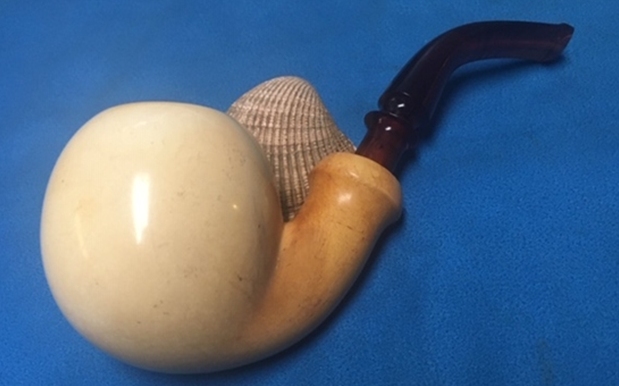
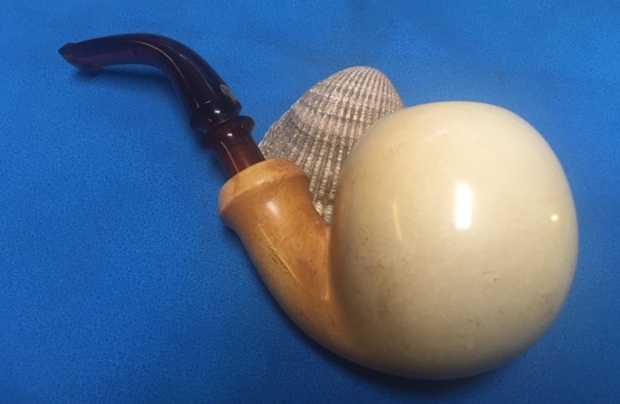
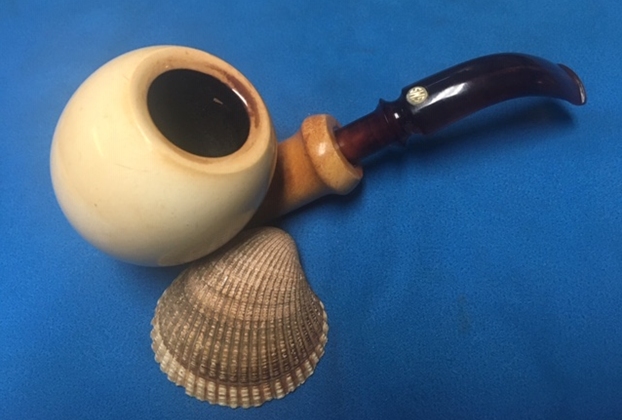
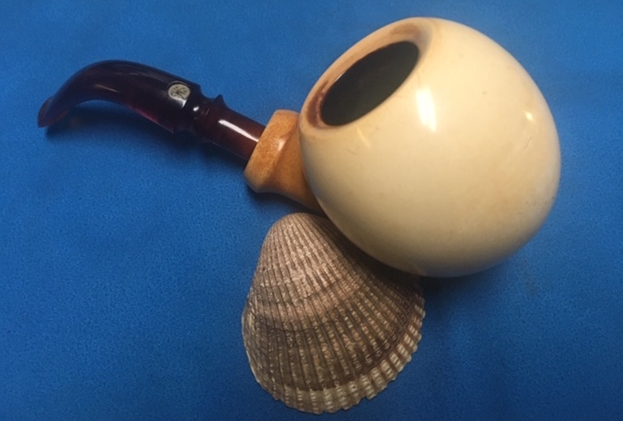
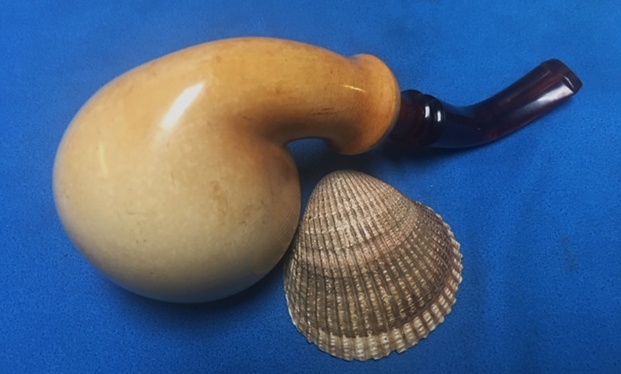
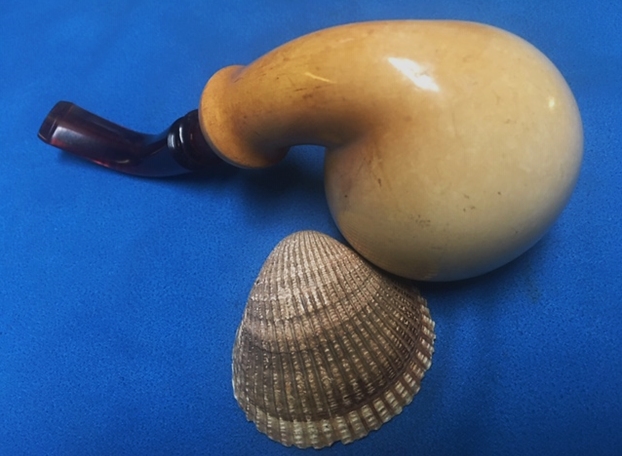
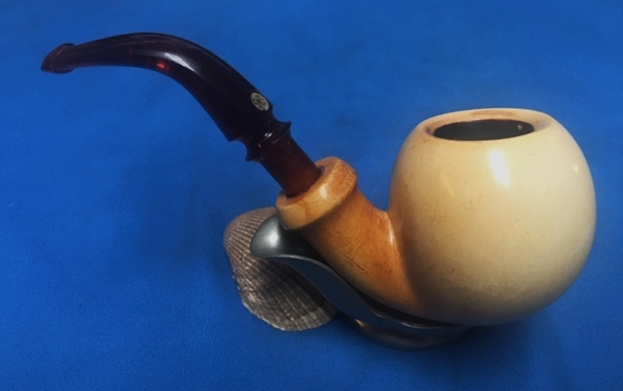
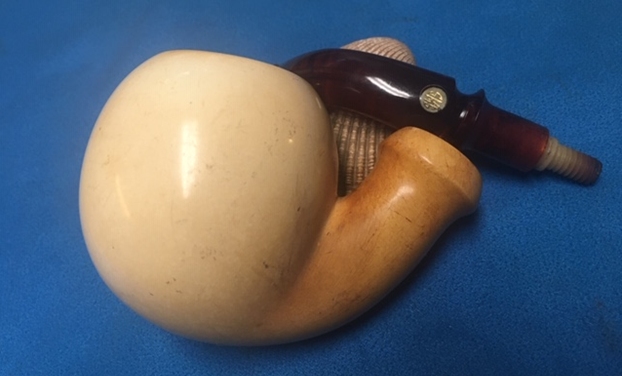
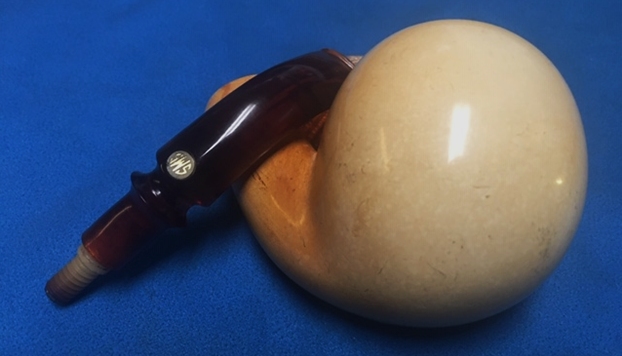
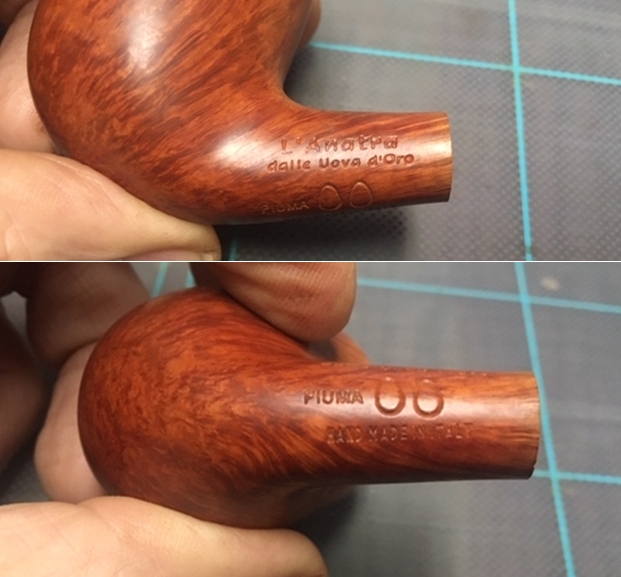
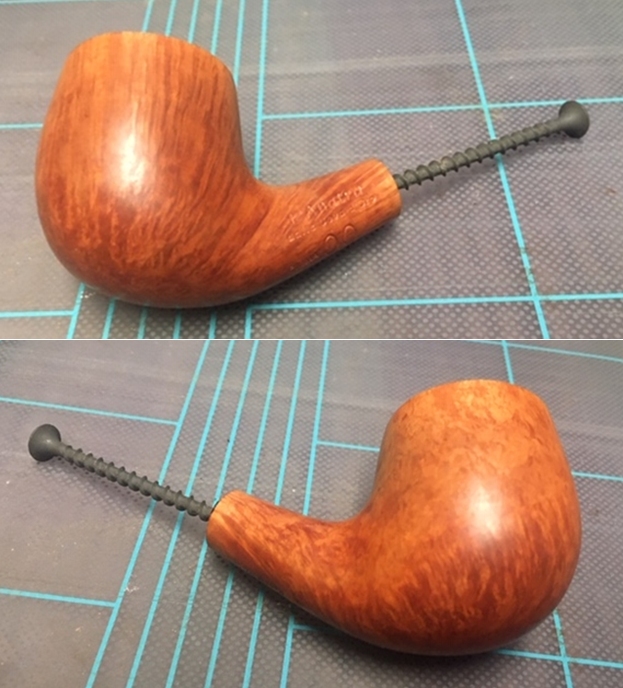
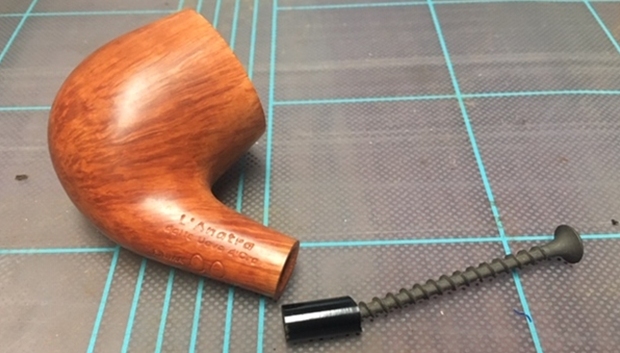
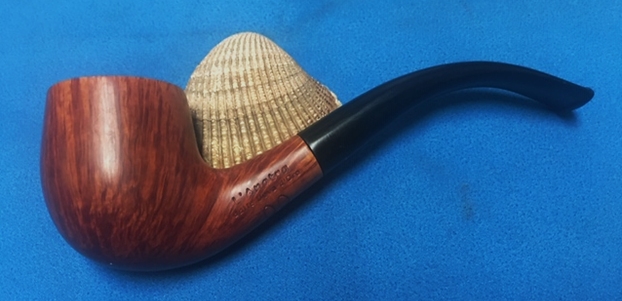
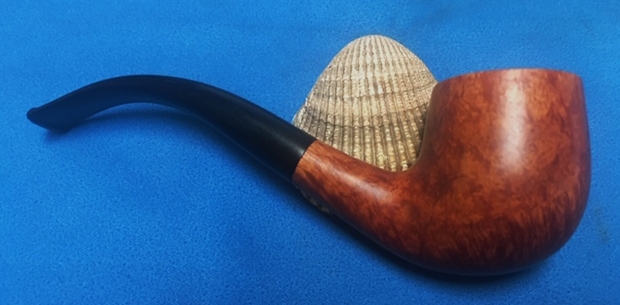
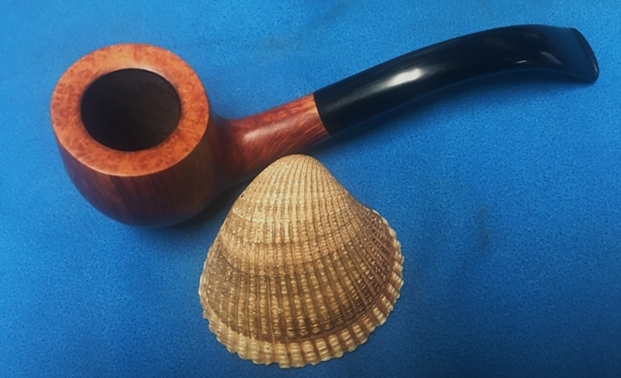
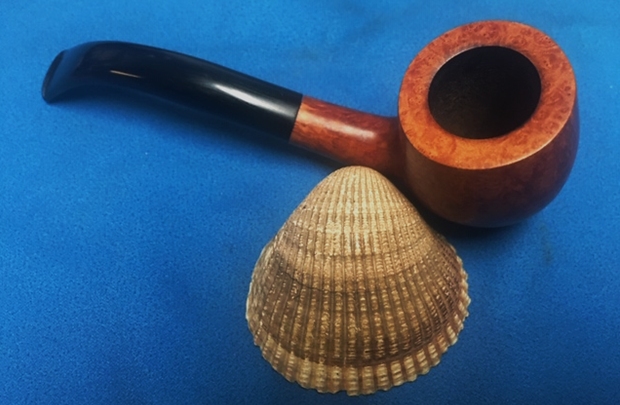
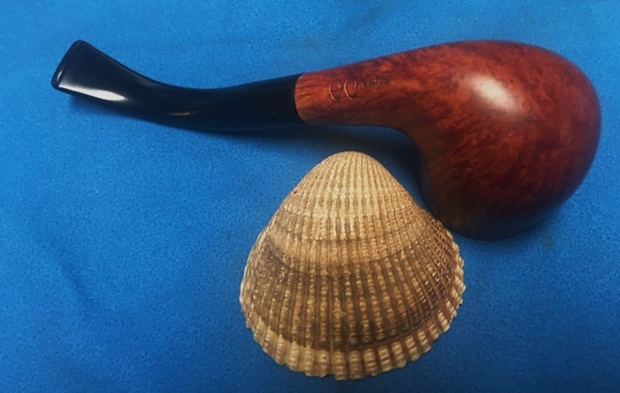
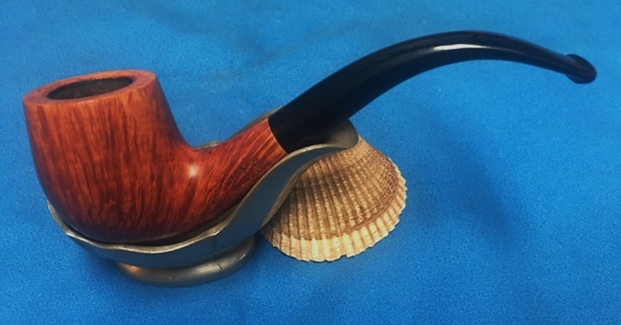
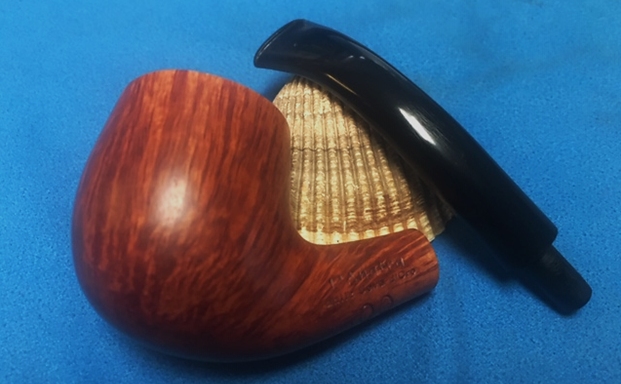
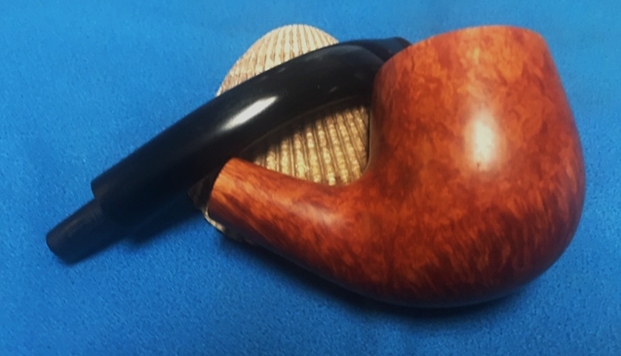
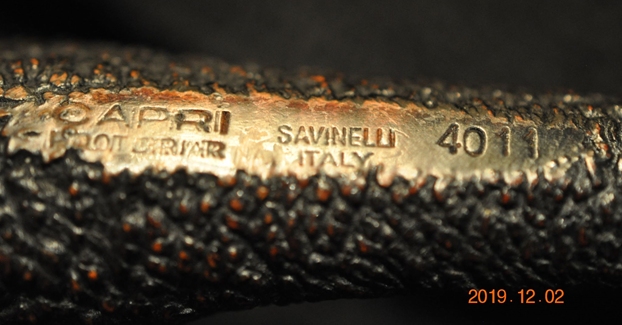
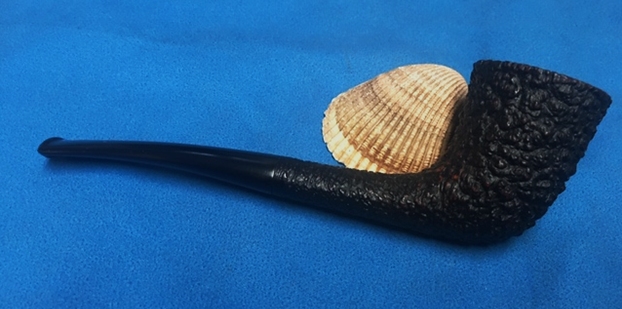
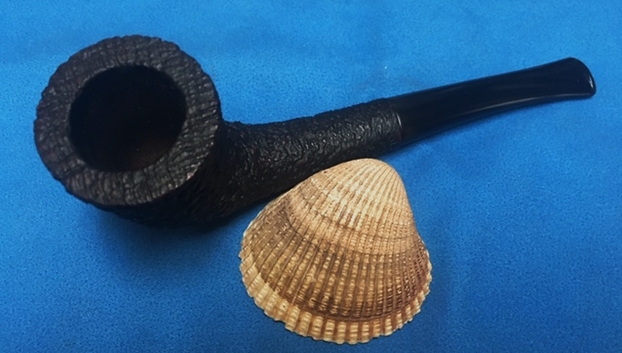
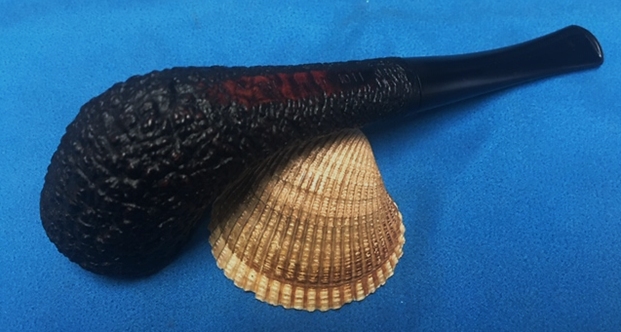
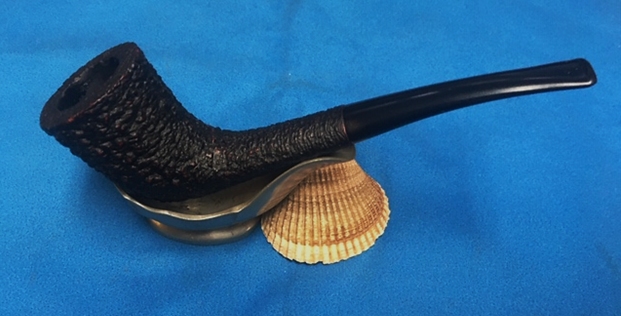
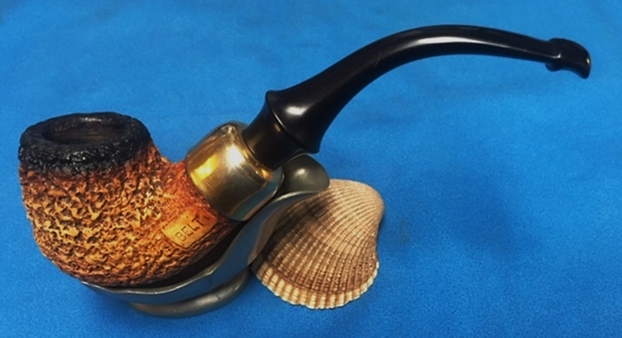
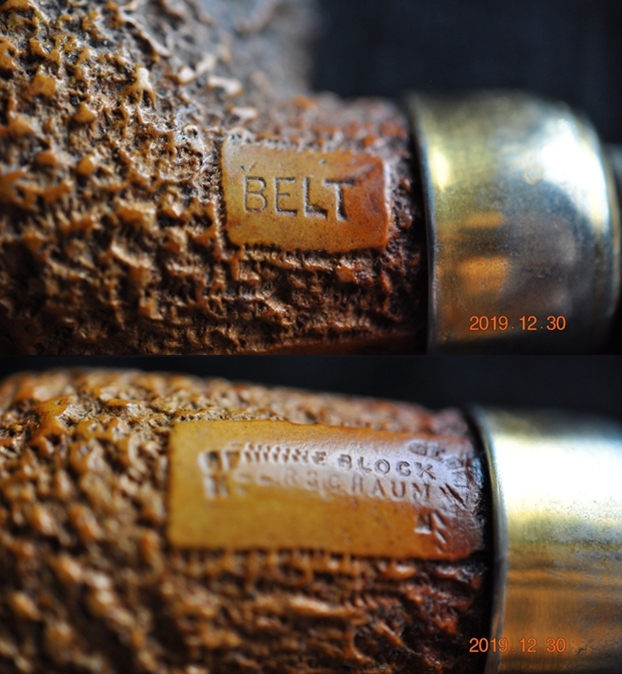
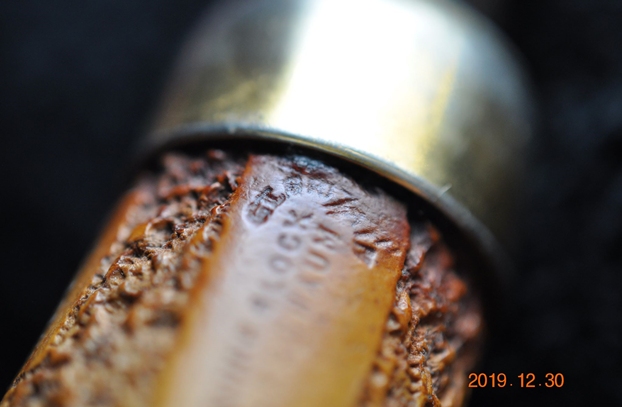
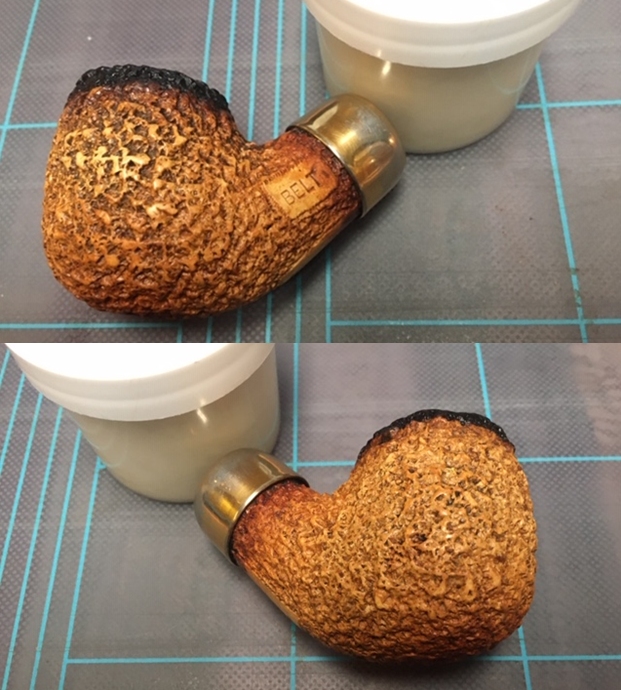
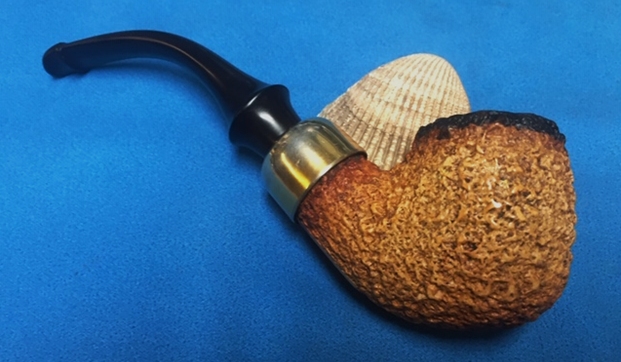
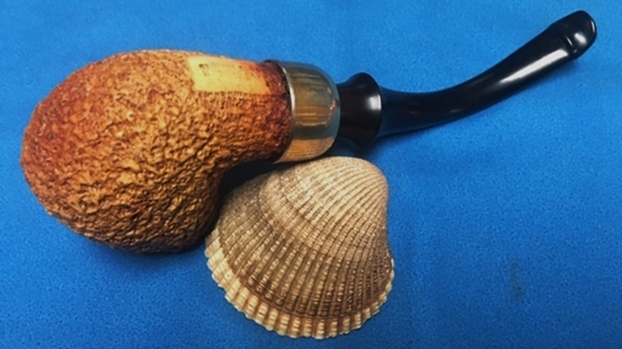
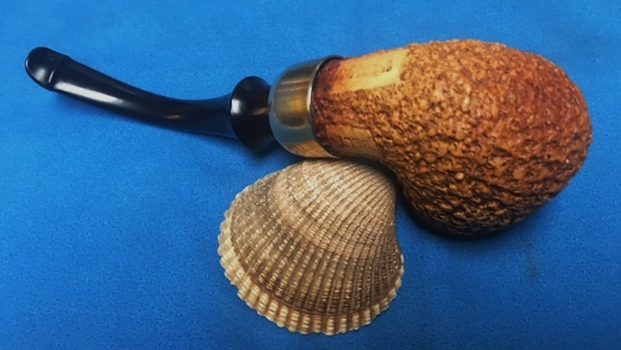
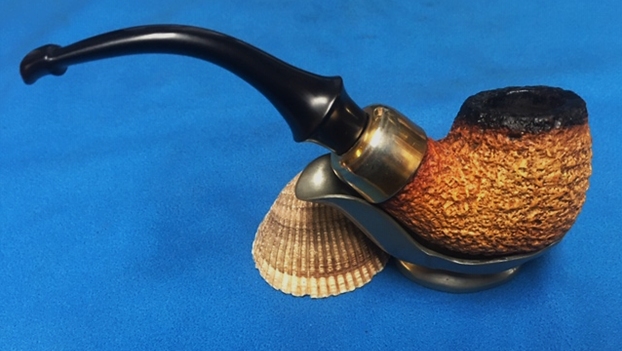
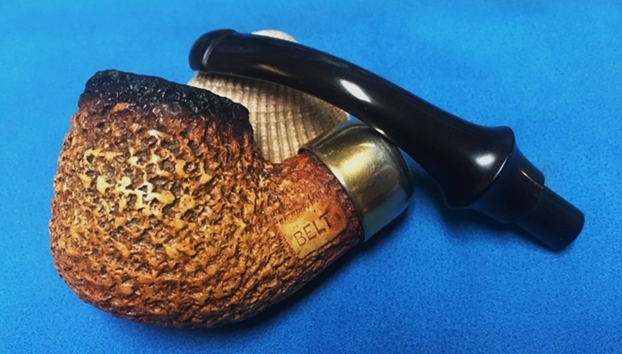
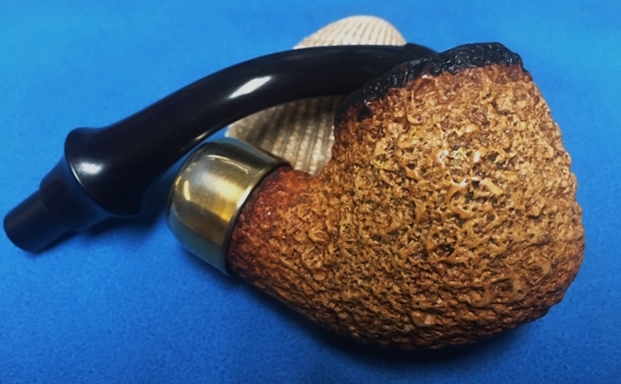
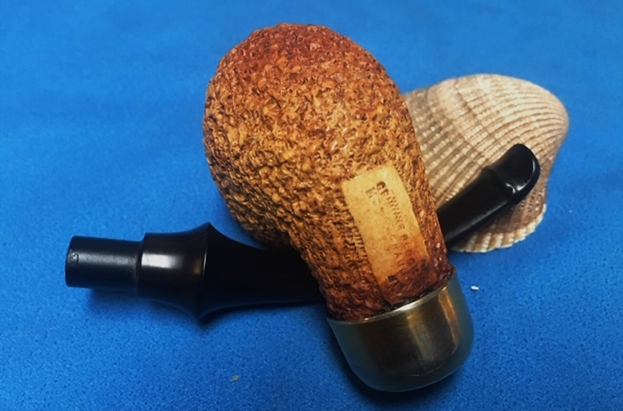
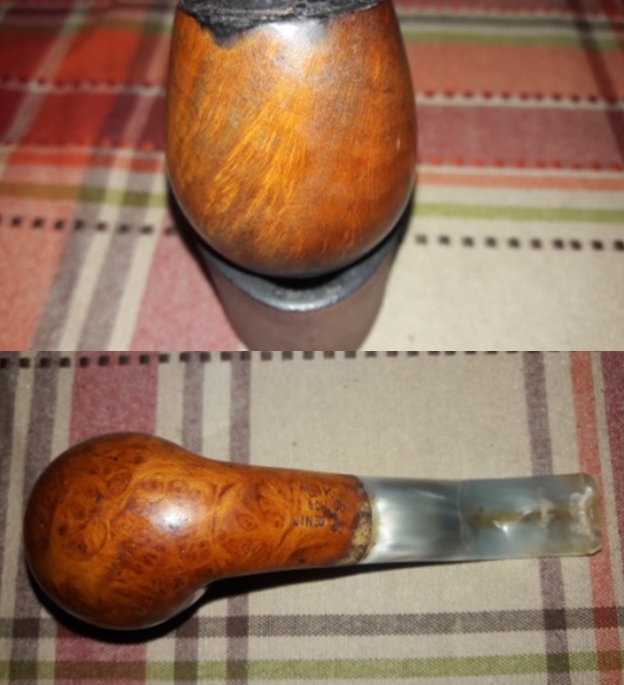
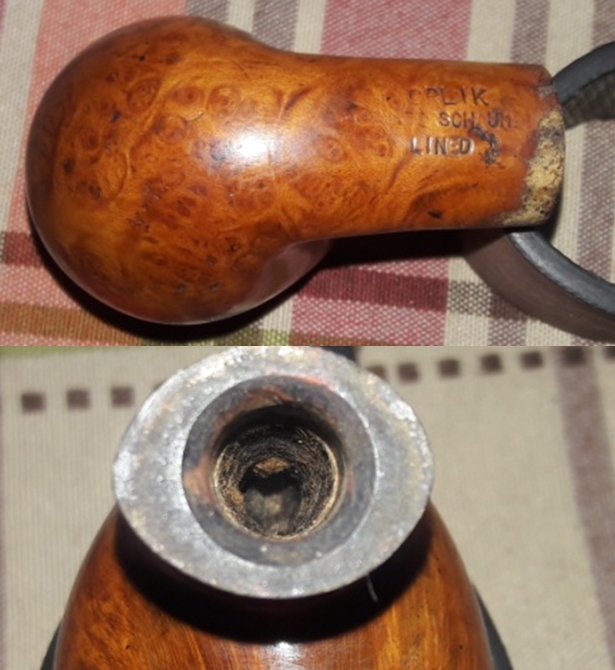
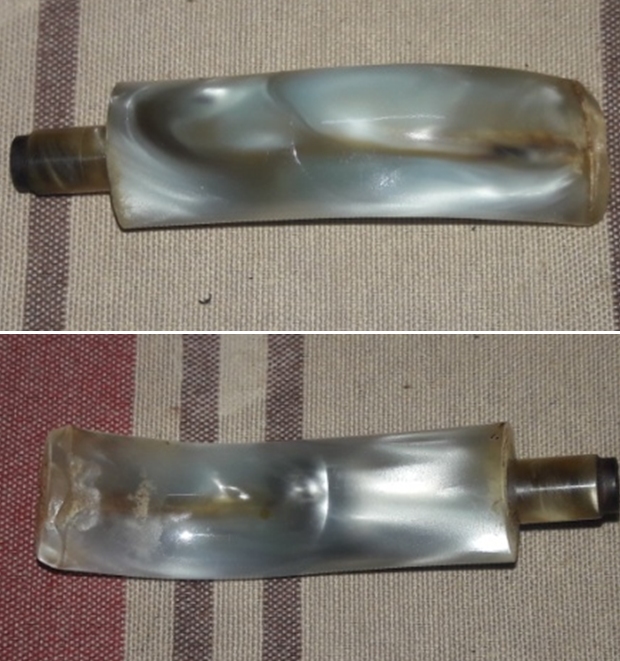
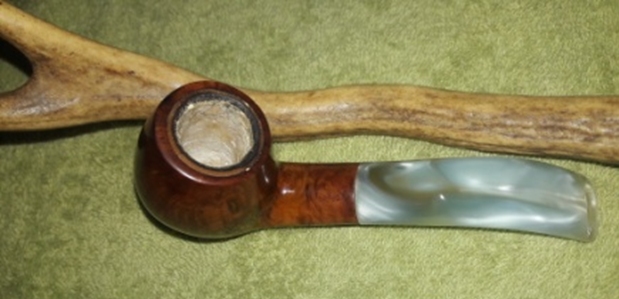
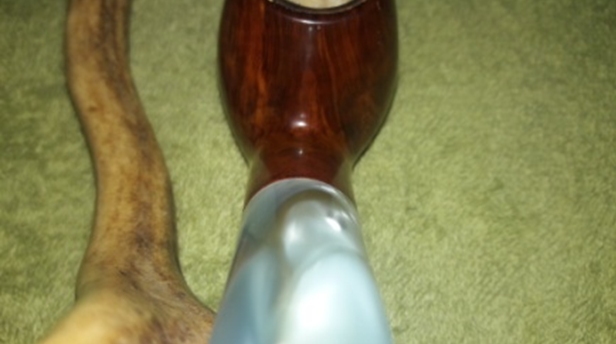
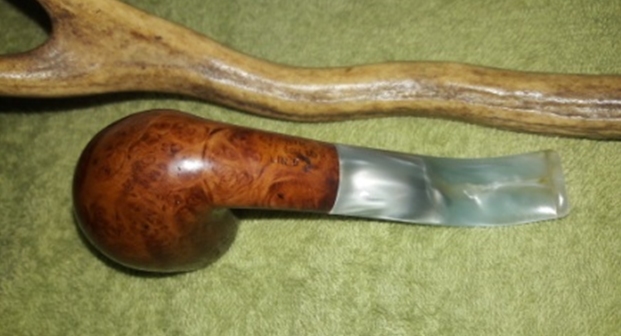
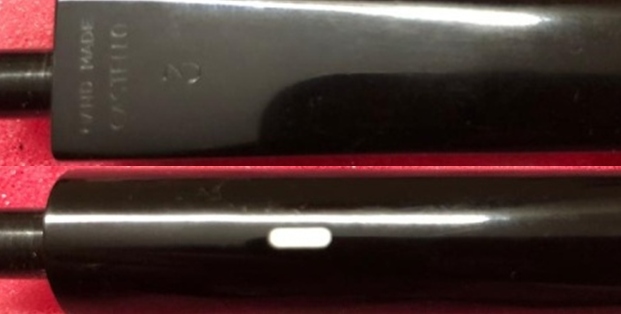
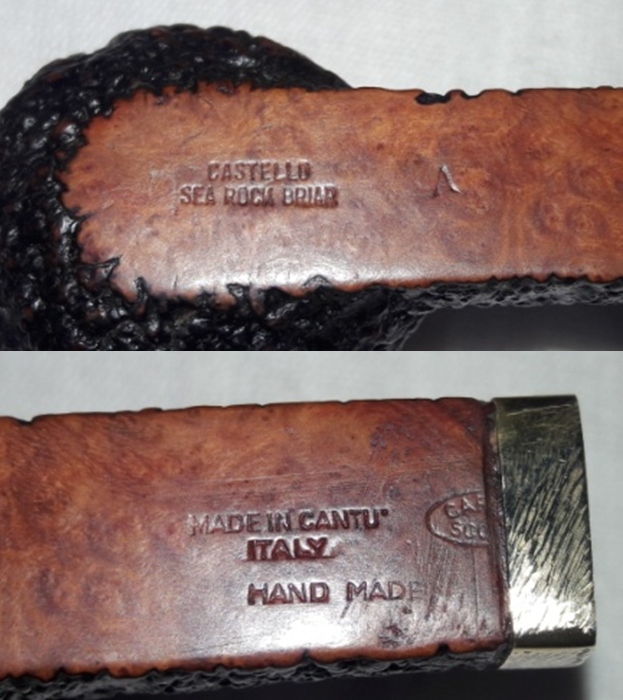
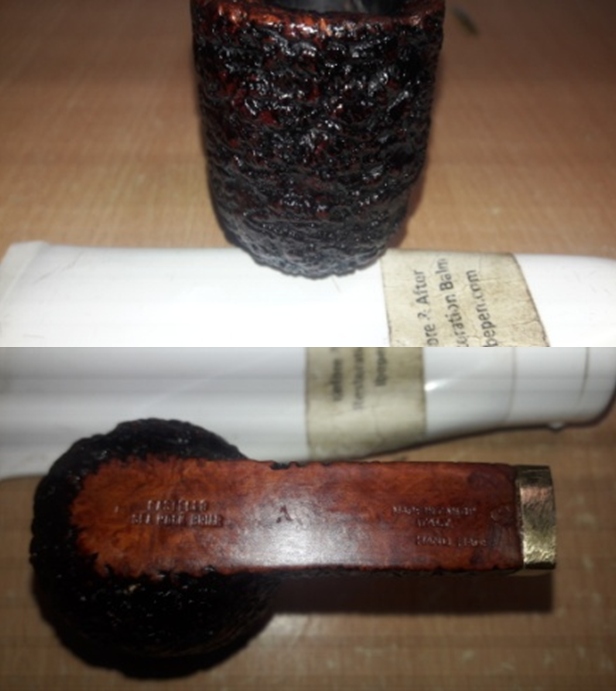
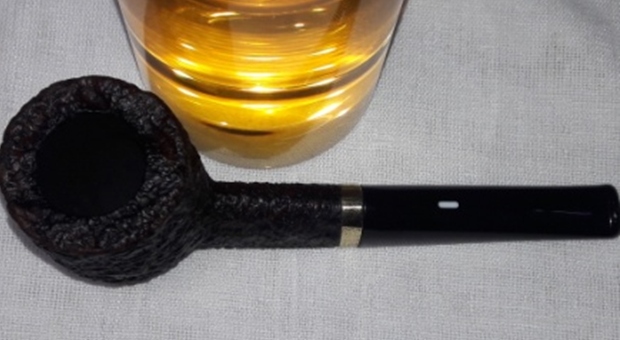
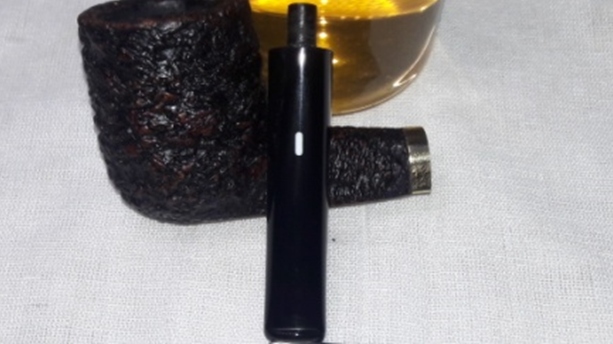
The pipe with its large Billiard bowl and a triangular shank looks beautiful. The stummel has deep and craggy rustications that feel tactile in the hand. The shank end is adorned with a gold/ brass band that add a touch of classy bling to the appearance of the pipe. The flat lower surface of the stummel is smooth and bears the stampings on this pipe. It is stamped as “CASTELLO” over “SEA ROCK BRIAR” followed by the letter “A”. Towards the shank end, it is stamped as “MADE IN CANTU” over “ITALY” over “HAND MADE”. Stamped at the very end of the shank and partially covered by the gold/ brass band is “CARLO SCOTTI” in an oval. The triangular Lucite stem is stamped on the lower flat surface as “HAND MADE” over “CASTELLO” over code “# 3”. The trademark WHITE BAR adorns the upper surface of the stem. 
 I had researched this brand extensively when I had worked on my first Castello, link for which I have provided at the very beginning of this write up. In order to establish the provenance of this pipe, I revisited the Briar Blues site where a detailed history and dating guide is available for the discerning reader. I have reproduced the entire article here for posterity as the external link provided on pipedia.org did not work.
https://briarblues.com/castello/

CASTELLO – DATING & INFORMATION GUIDE
 NEW INFORMATION JUST IN – The very first pipes made by Carlo Scotti were in 1936 in Switzerland!!!
1947 – Carlo Scotti begins the company. In the beginning (1947 – 1949, maybe 1950 ) the pipes were stamped Mi Reserva ( my reserve ). Later the Reg No was added. This Reg No has nothing to do with shape numbers, but is merely the Castello company trademark.
Vulcanite stems used until? This is an interesting question. From early Castello pipe advertising from the Wally Frank and later Hollco Rohr companies it says the pipe comes with Vulcanite stems. However the photos appear to have pipes with Lucite stems. To our knowledge no one has yet seen a Vulcanite stemmed Castello with the faux diamond logo inset.
The Old Sea Rock and the Sea Rock co-existed. As far as I know, the OSR was US only, imported by Hollco Rohr, and sported the rhinestone. The Sea Rock goes back to the early days.
There was an Antiquari (not Old Antiquari) that was also a Hollco import, and was fume top and rusticated. I think it was only around for a couple of years.
Stem logo’s. White bar, black dot, and faux diamond. The first stem logo was the white bar. However once Castello began it’s working relationship with The Wally Frank Co a different stem logo was required, as The Wally Frank Co had a line of pipes named White Bar.
The faux diamond logo was created and used primarily for the US market for many years.
Castello still occasionally put rhinestones in the mouthpieces, just to maintain it’s value as a trademark. It’s not on many pieces. The black dot logo is used on Castello pipes with white Lucite stems.
Shape numbers. Shape numbers are all 2 digits. A 2 in front indicates a “fancy” interpretation, a 3 in front means that the carving is somehow unique. I don’t know when the change was made, but currently, a π symbol is used instead of the 3xx. It may be seen on a variety of finishes, that may have a unique carved section or some other interesting feature.
Hollco Rohr begins distribution in the mid to late 1960’s when they take over the Wally Frank Company.
Big Line – stamp used from 1968 – 1972. Replaced by Great Line, although still used on huge pipes.
Colored Lucite stems – used in the 1970’s and on occasion today although the material is difficult to find.
Pre K grading. Late 1950’s to mid 1960’s the pipe carried stamps which indicted sizes. These were as follows; SA, SB, SC, and SS. SA being the smallest and SS the largest.
K grading begins. In 1969 Franco ( Kino ) Coppo joins the firm. In the late 1960’s and early 1970’s the company began the use of the K grading. The upper case large K, was used for non smooth pipes to designate size. For smooth pipes to indicate a combination of grain quality and size. These are also the years that Castello switched from machine made pipes that were hand finished to completely hand made pipes.
Switch from large K to small k in an oval. In 1982 the company changed from the use of the large upper case K grading to a small lower case k within an oval ( 2 k or greater ) or circle for single k grades.
1984 – 1985 Franco ( Kino ) Coppo takes over the running of the firm. The Kino “knickname” given to Franco by Carlo Scotti, and is a shortened version of his full birth name, Franchino.
The Natural Vergin were issued in 1967 first but only in 1985 they started to be produced in series only on the natural carved pipes.
1987 – the 40th anniversary Castello begins the number within a castle stamp. The number added to 1947 gives the year of pipe creation. ie 50 within a castle = 1947 + 50 = 1997.
1992 – Carlo Scotti passes away.
US stamp begin in 1997
KINO stamp begin in 2007 – 60th anniversary. Kino is Franco Coppo’s nick name.
X – stamped on pipe. This stamp is added to pipes that are picked up directly at the factory by customers. Indicates a “friendship” pipe.
Ever wonder where your pipe came from? Which shop had it first? If so, read below;
N1 = Novelli ( Italy )
N = Noli ( Italy )
F = Fincato ( Italy )
LO = Lorenzi ( Italy ) ( this shop has closed and they used to add a * on every pipe )
B = Bonfiglioli ( Italy )
BO = Bollito ( Italy )
B15 = Bollito ( Italy )
V = Agide ( Italy )
SO = Tabaccheria Scarafioffi ( Italy )
JO = Osstermann ( Austria )
R3 = Ruocco Raffaella of Savona ( Italy )
L – Lanzola ( Italy )
US = sold into the US via the US Castello agent
A = “Amicizia” or friendship. That is the stamping for the pipes given for free to friends. It is quite rare.
LOB = is part of a large collection that the factory just re-purchased and they stamped with LOB (Legendary old briar)
The information gathered on this page comes from a variety of sources on the internet and through emails and conversations. I’d like to Thank these gentlemen for their help; Marco Parascenzo, Franco Coppo ( via Marco ), Greg Pease, Mike Penix, Bob Hamlin, Chris Jones, Mike McCain, and Mike Davis
Current finishes, grades, & SRP in US dollars;
Castello US prices have not increased since 2012!!
Sea Rock Briar – carved finish – various stains
k 380.00, kk 395.00, kkk 405.00, kkkk 425.00, G 450.00, GG 550.00, GL 615.00 & GGG 615.00
Old Antiquari – sand blast – various stains
k 415.00, kk 415.00, kkk 450.00, kkkk 450.00, G 530.00, GG 675.00, & GL 675.00
Trademark – smooth – various stains
k 430.00, kk 430.00, kkk 480.00, kkkk 480.00, G 500.00, GG 660.00, & GL 660.00
“Castello” – smooth – various stains
kk 550.00, kkkk 590.00, G 600.00, GG 690.00, & GL 690.00
Perla Nera – smooth polished black
k 560.00 & kk 590.00
Collection – smooth – various stains
k 595.00, kk 655.00, kkk 750.00, kkkk 825.00
Occho di Pernice – smooth – graded birds eye
k 685.00, kk 750.00, kkk 800.00, kkkk 855.00
Aristocratica – smooth – fumed rim
Trade Mark – 595.00, “Castello” – 690.00, Collection – 865.00, Collection Great Line – 910.00
Castello Collection Fiammata – 1090.00, Collect Great Line Fiammata – 1545.00
Dune – carved
k – ???.00, kk – ???.00
Big Line – various grades
Sea Rock – ???.00 Old Antiquari – 900.00, “Castello” – ???.00, Collection, ???.00
Collection Great Line – smooth – free style
k 780.00, kk 850.00, kkk 1000.00, kkkk 1270.00
Collection Fiammata – smooth – graded straight grains
k 970.00, kk 1150.00, kkkk 1270.00, kkkk 1600.00
Collection Great Line Fiammata – smooth straight grain free style
k 1660.00, kk 2300.00, kkk 3100.00, kkkk 3780.00
Special Series – Cavallo, Riso, etc
Sea Rock 765.00, Old Antiquari 810.00, Trademark 950.00, Castello 1050.00,
Collection 13000.00, Occhio di pernice 1300.00, Fiammata 1455.00
Preziosa ( semi precious stone floc )
Perla Nera 950.00, Castello 980.00, Collection 1180.00, Collection GL 1390.00,
Madreperla 1545.00, Fiammata 1700.00
Options
briar shank or stem application + 75.00
silver floc or band + 90.00
18 k gold band + 500.00 – now a very rare addition, due to gold cost
18k gold band with lacquer inlay + 500.00
silver pin / nail + 160.00
common stone inlay + 105.00
special pi trim + 55.00
From the above, it is evident that the pipe currently on my work table is from an early time period of Castello pipe making as evidenced by the stamp of SEA ROCK and WHITE BAR. That this pipe is stamped with the letter “A” is indicative that it was given for free to friends and IT IS VERY RARE. Lady luck smiled upon me during this purchase for sure!!
Initial Visual Inspection
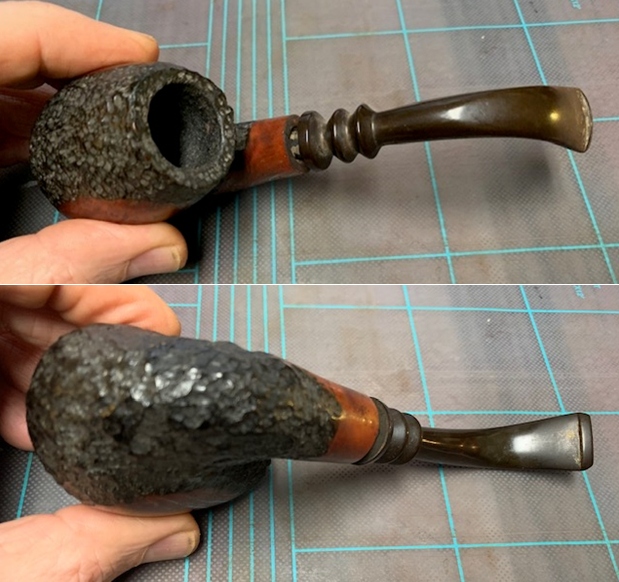
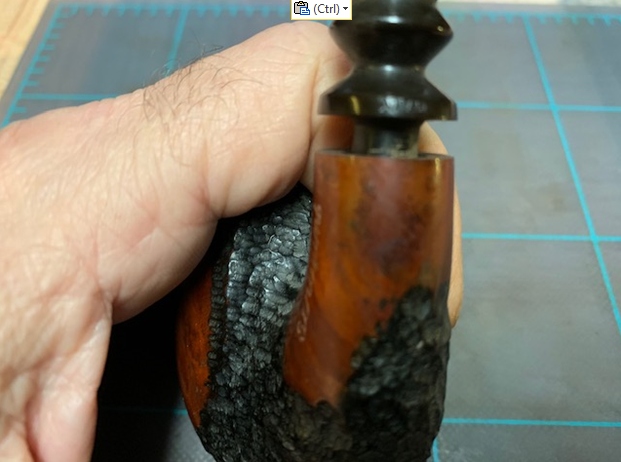
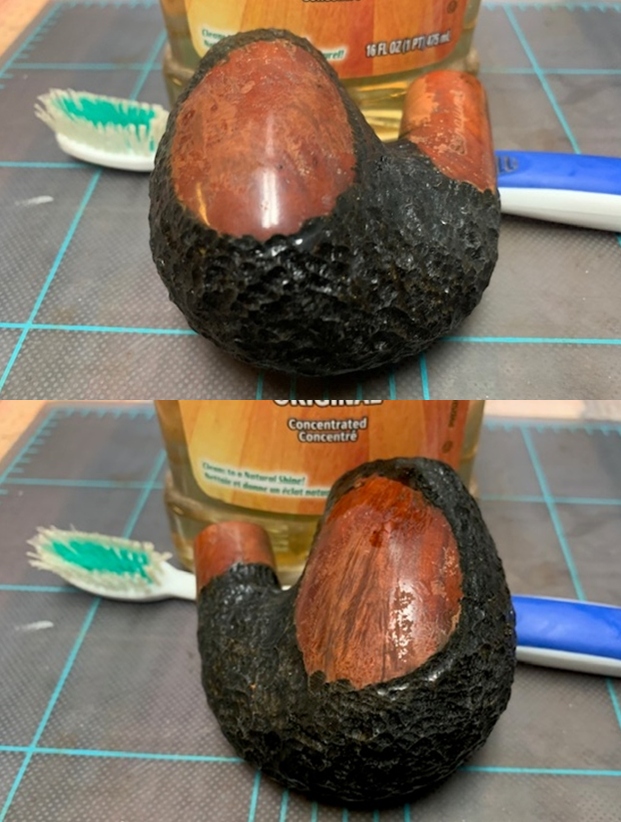
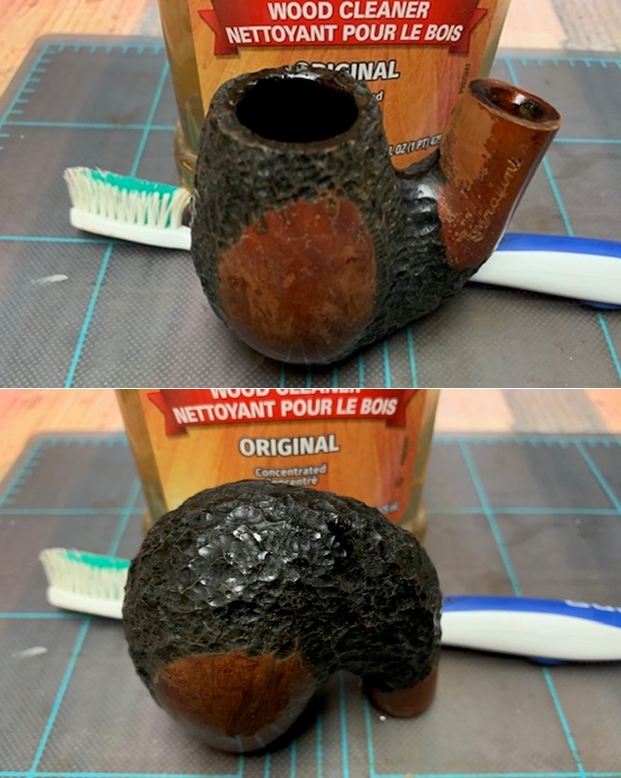
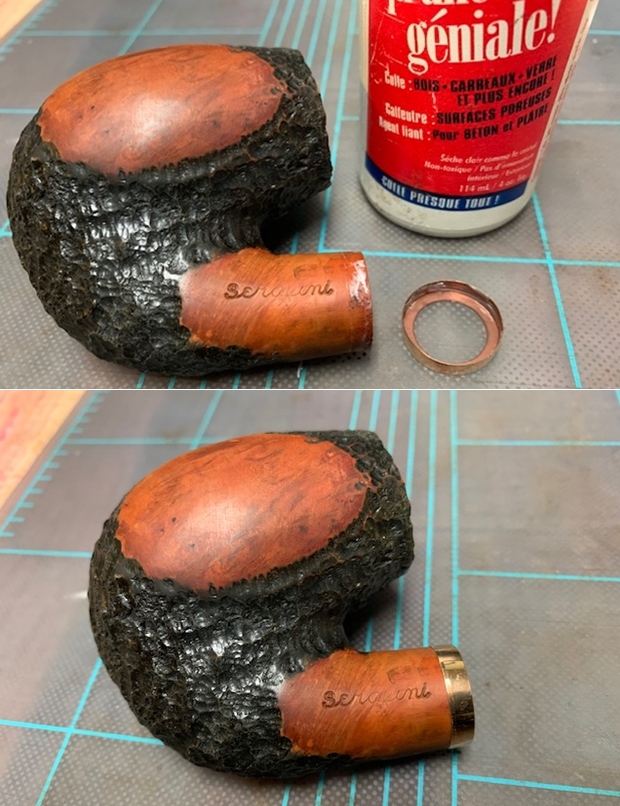
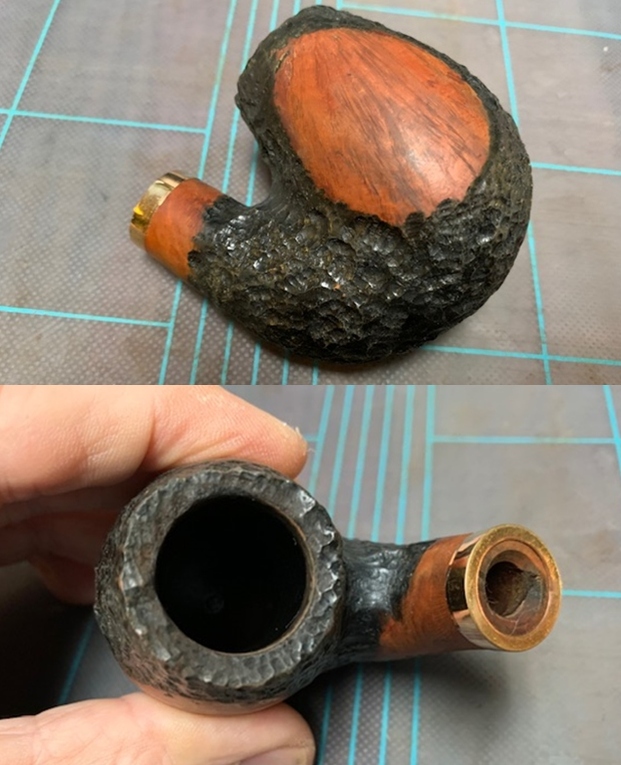
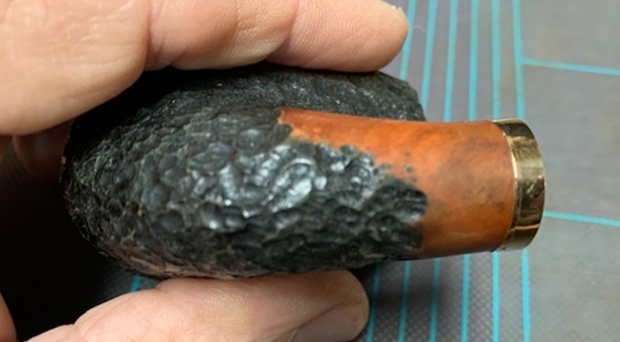
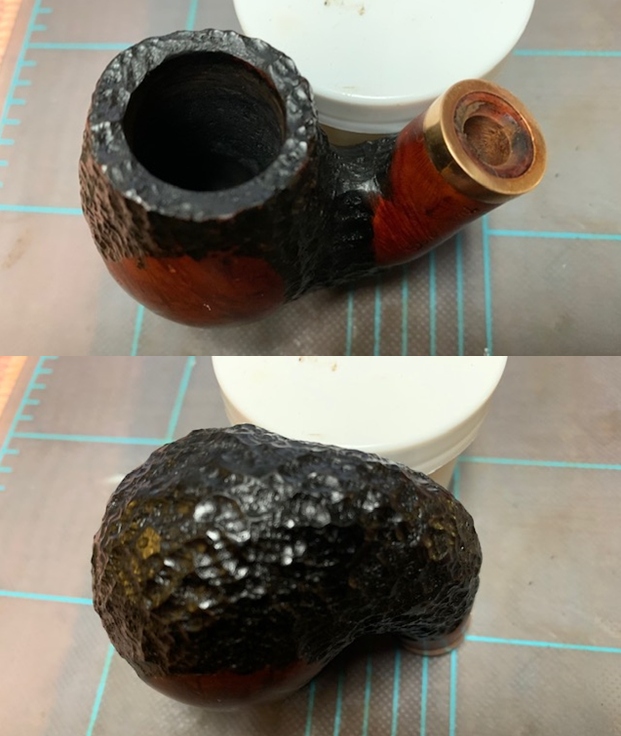
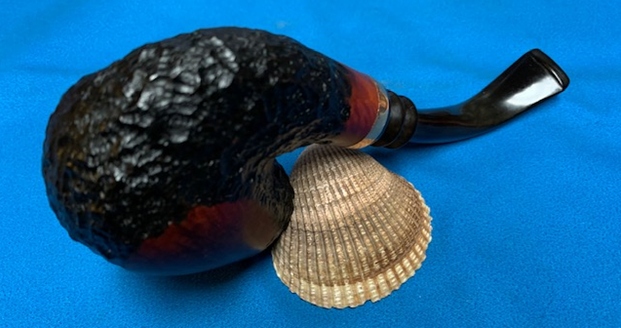
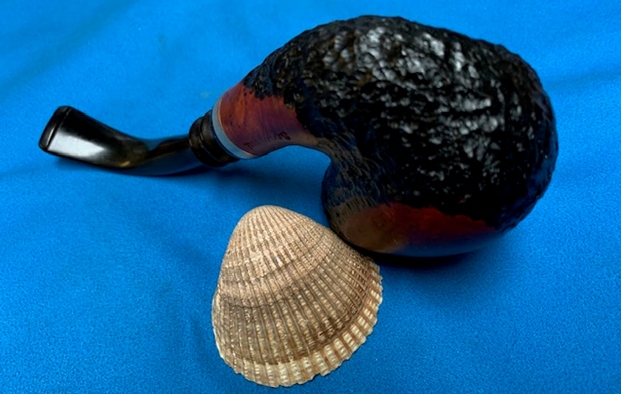
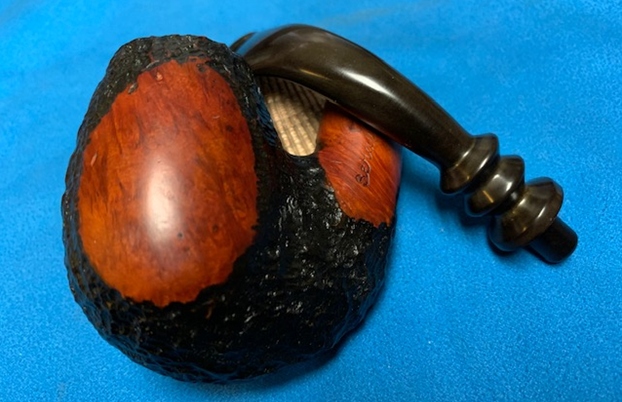
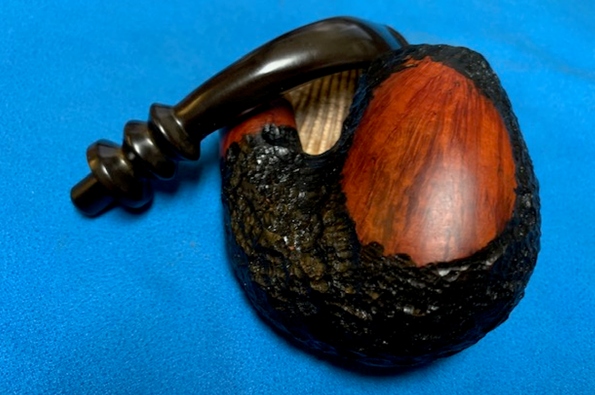
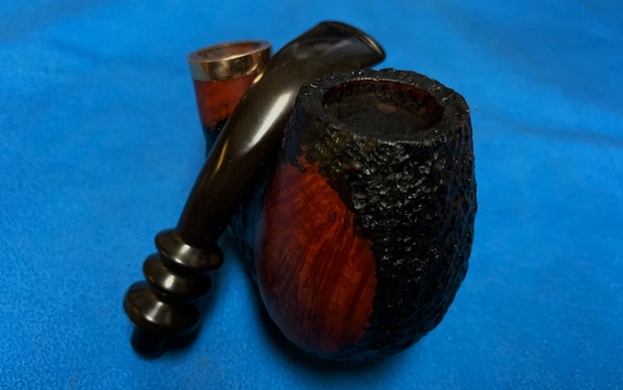
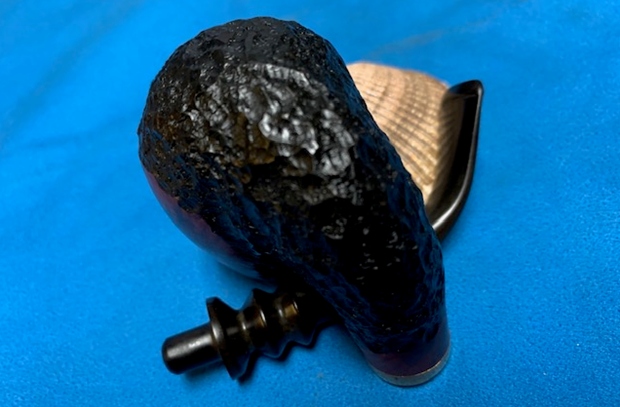
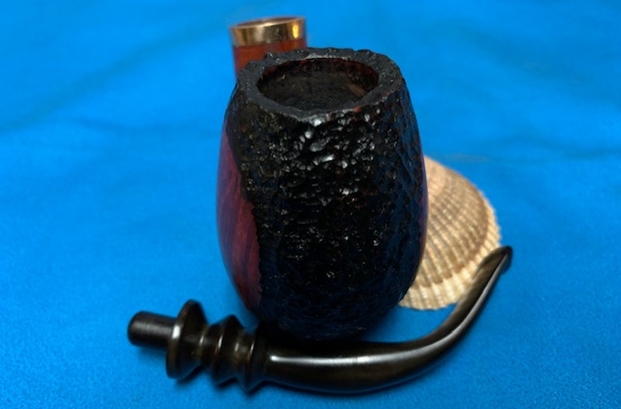
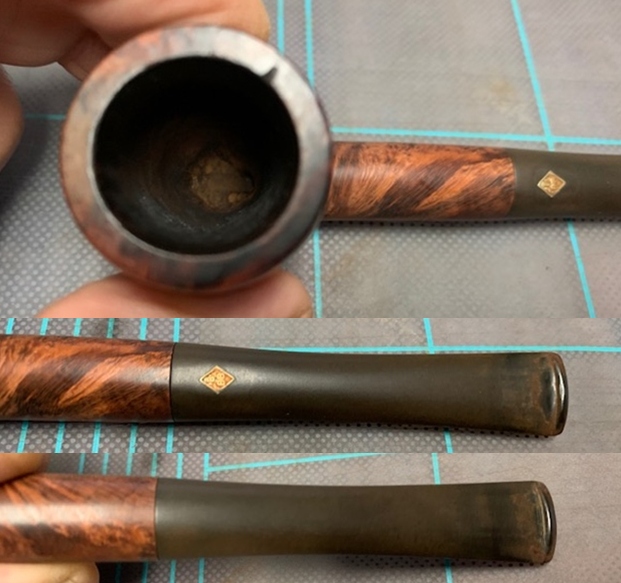
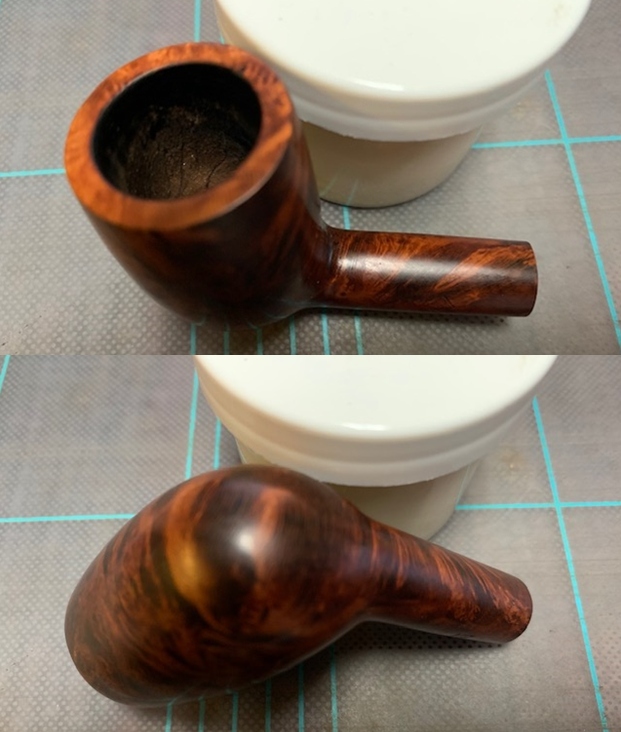
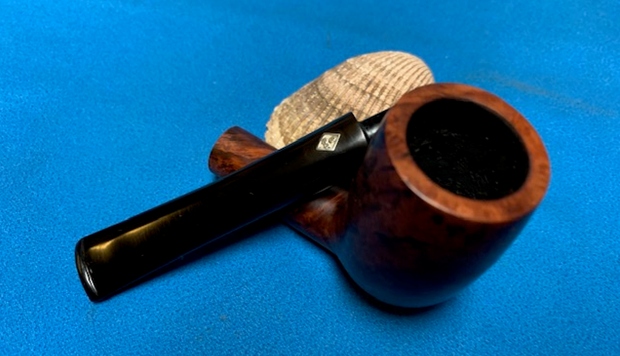
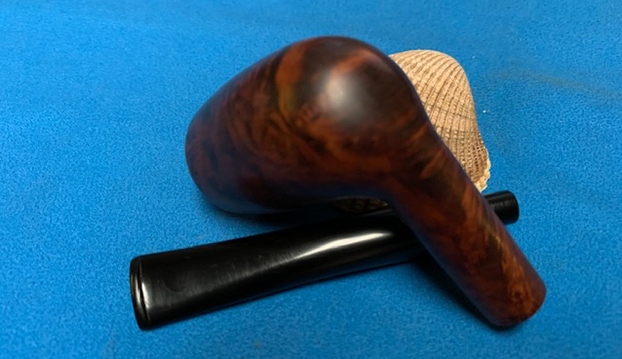
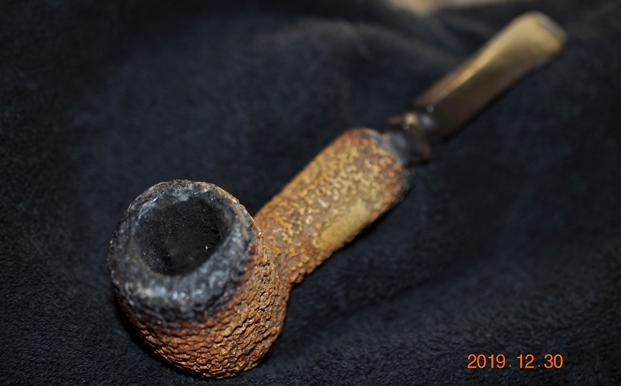
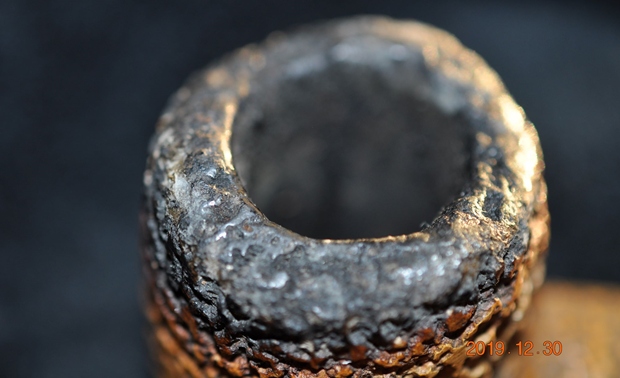
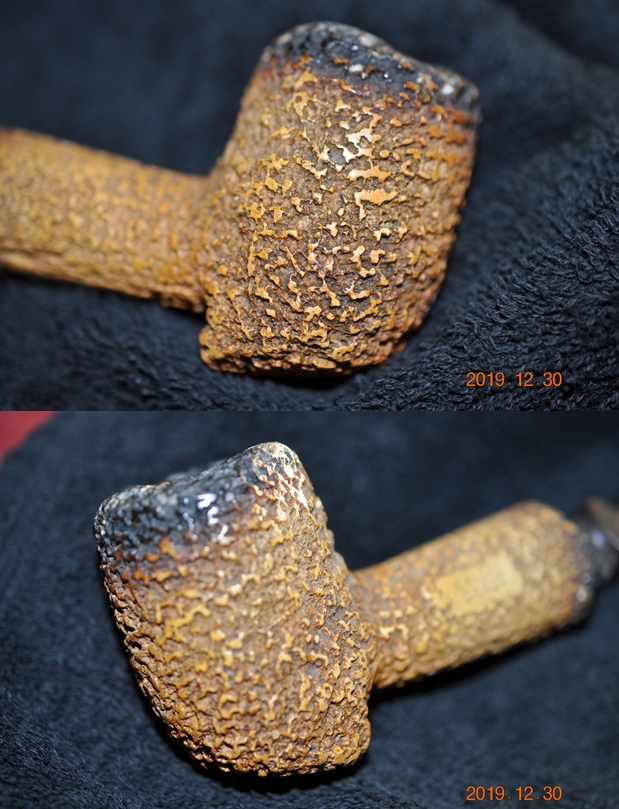
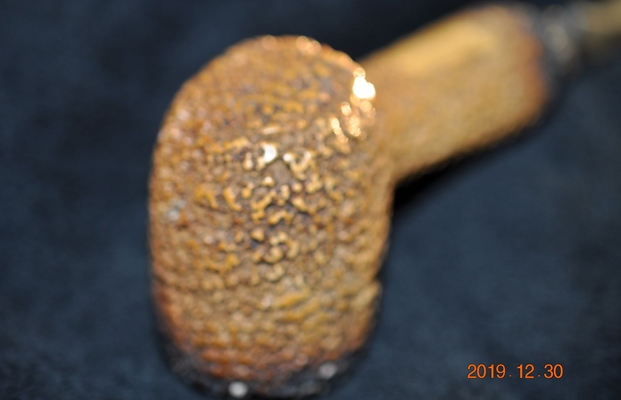
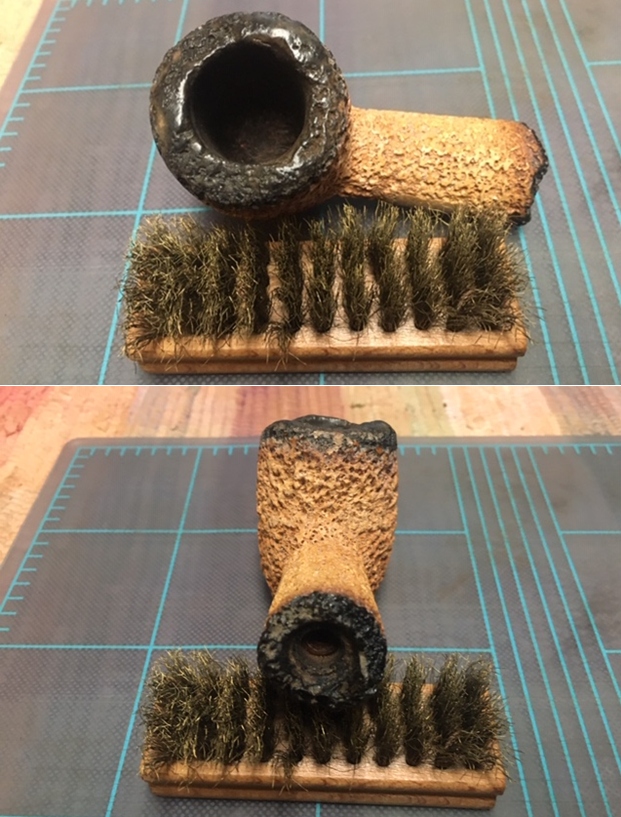
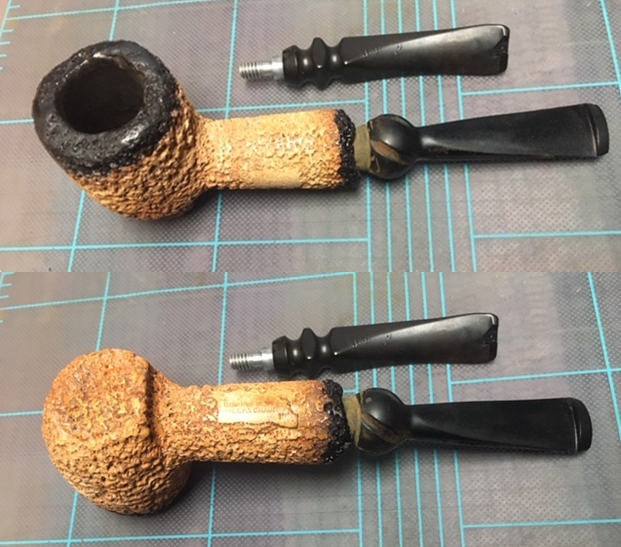
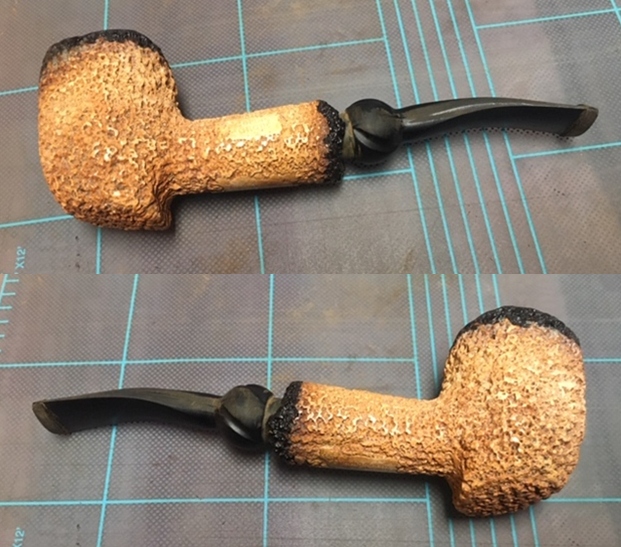
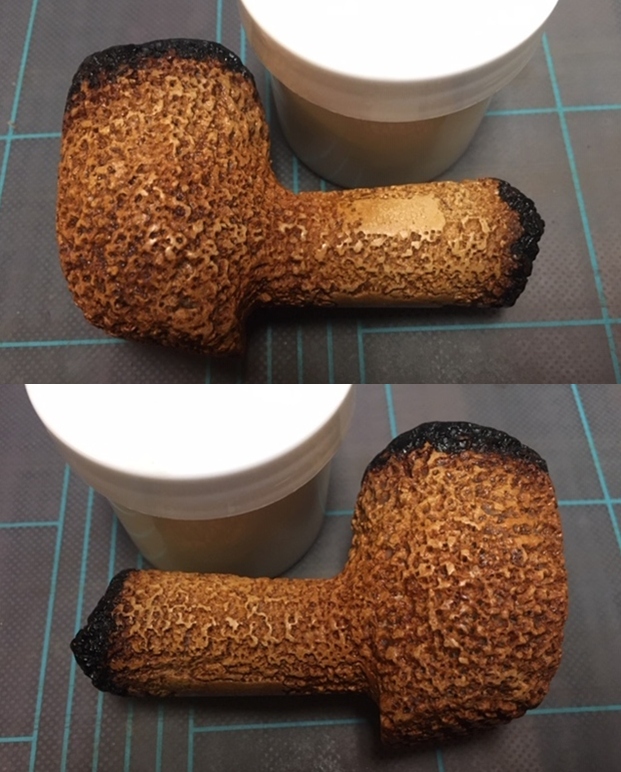
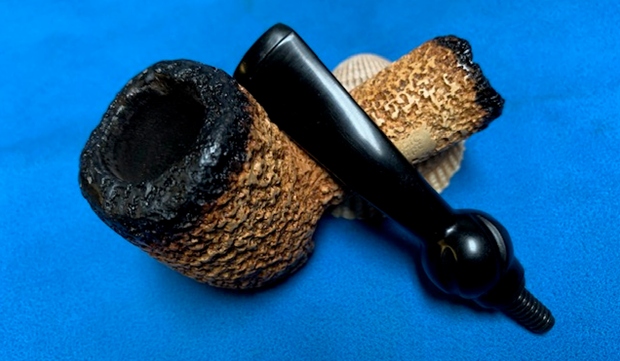
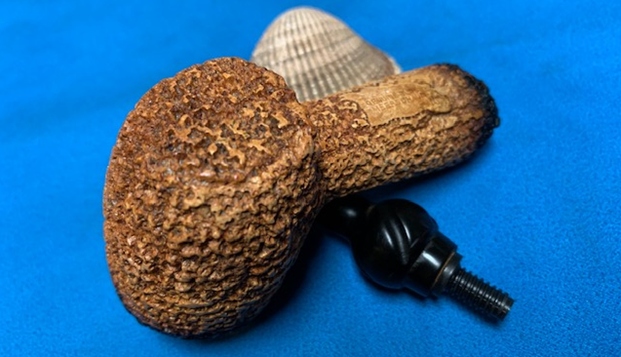
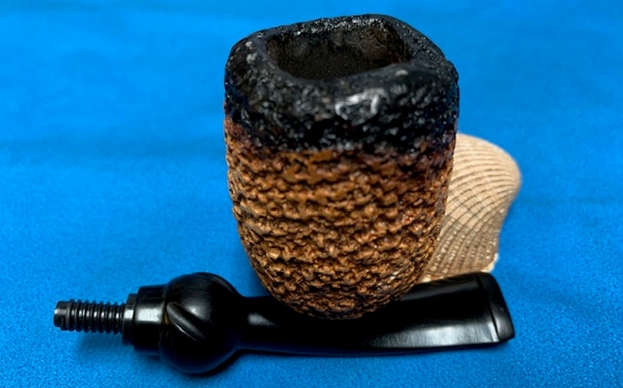
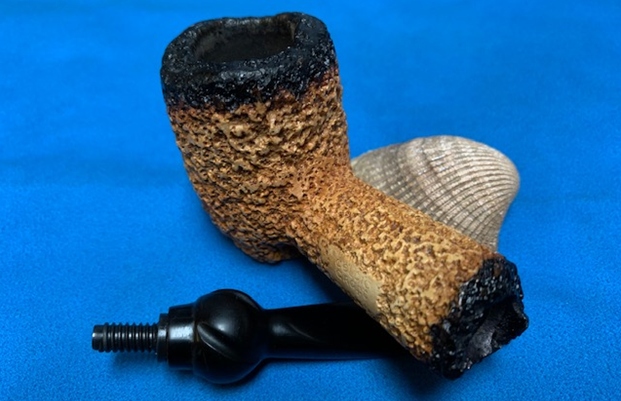
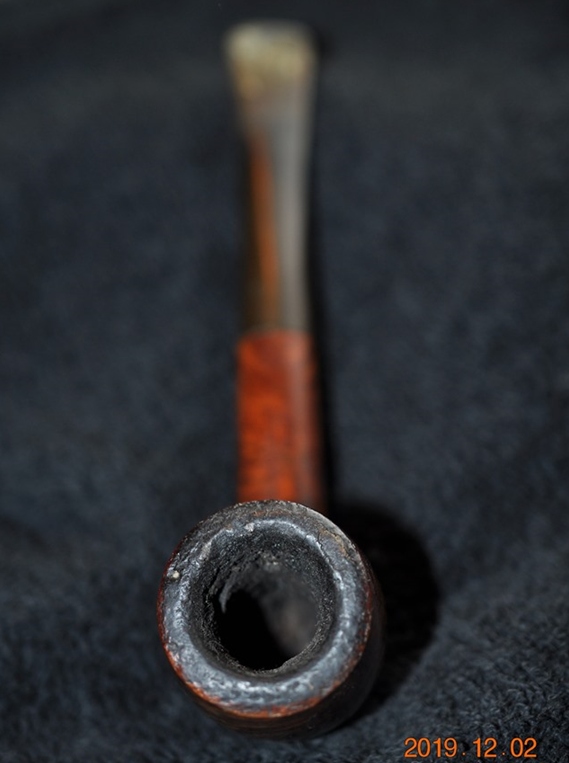
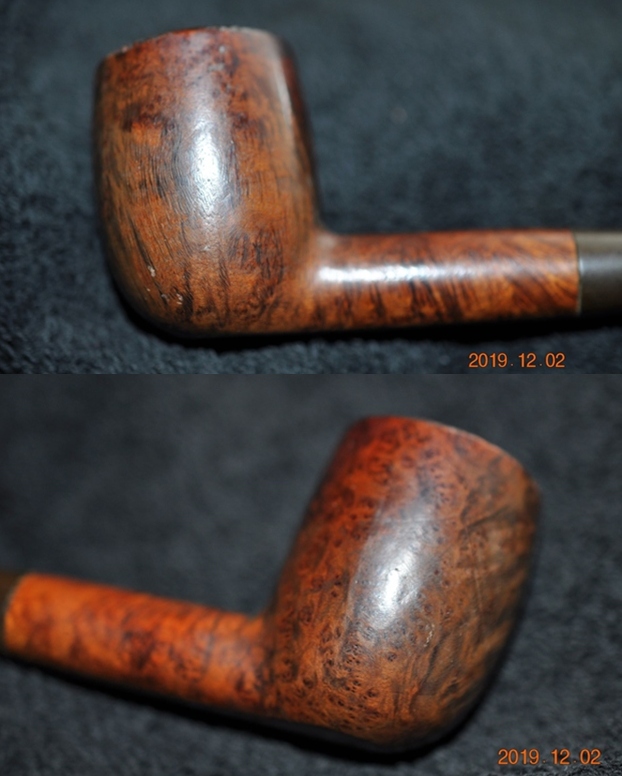
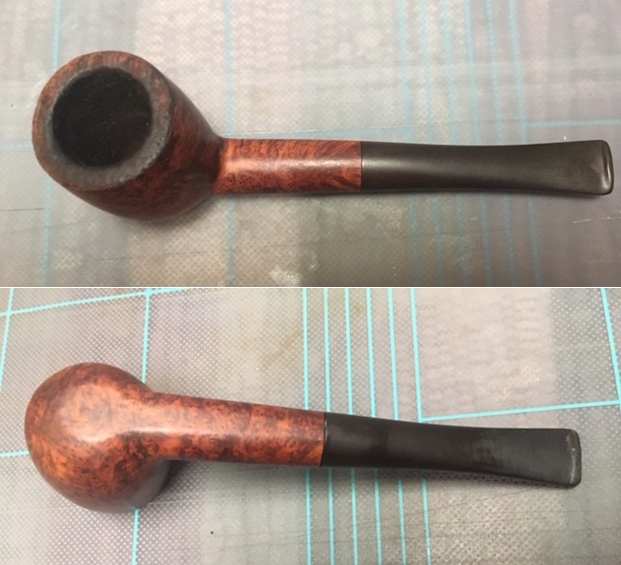
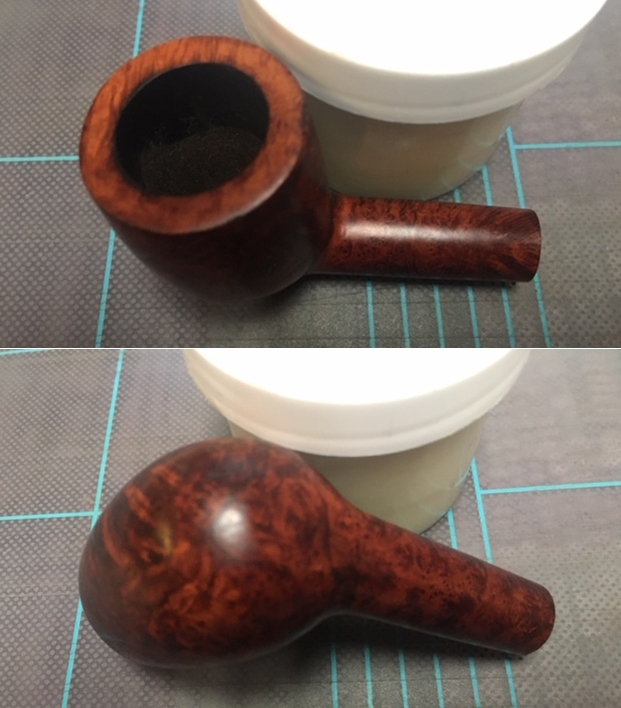
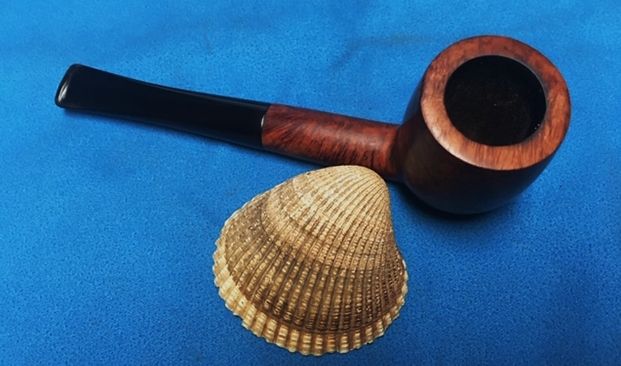
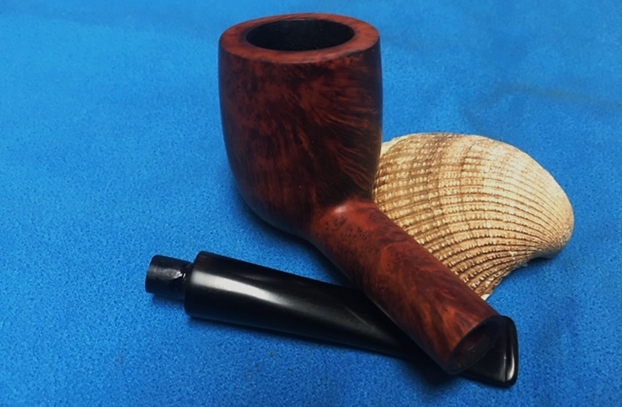
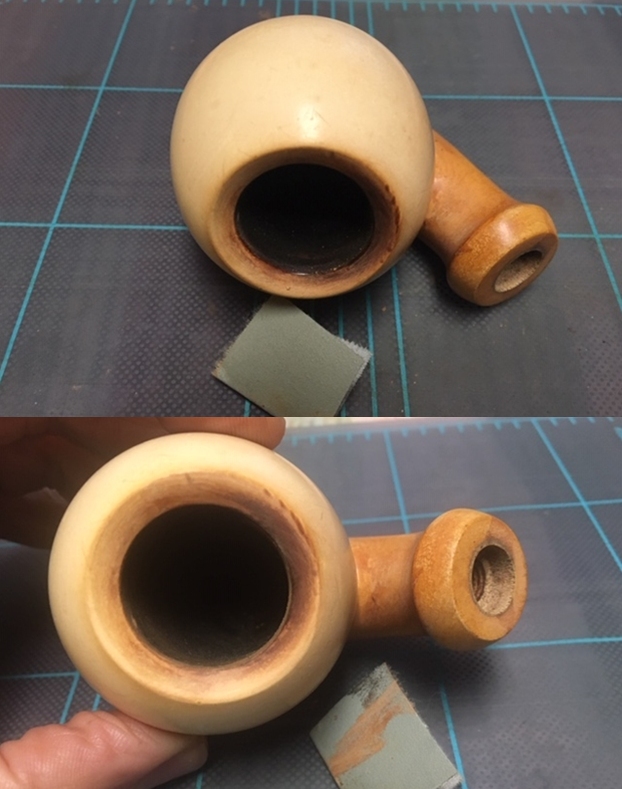
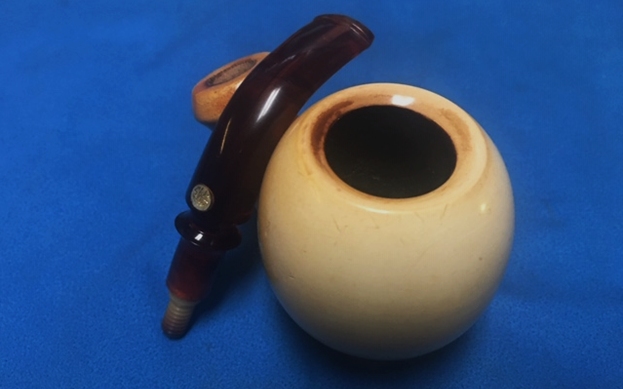
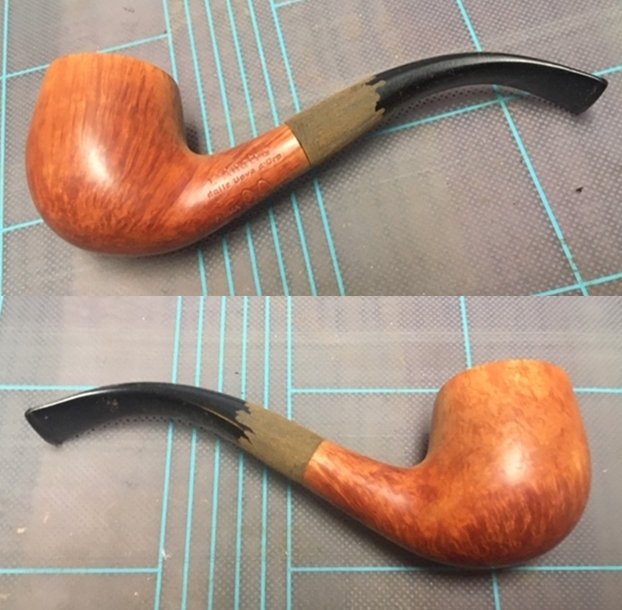
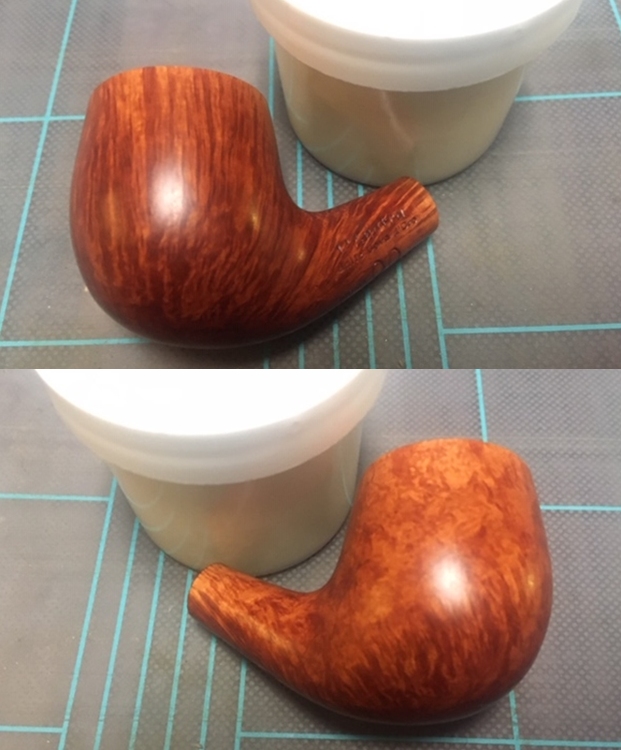
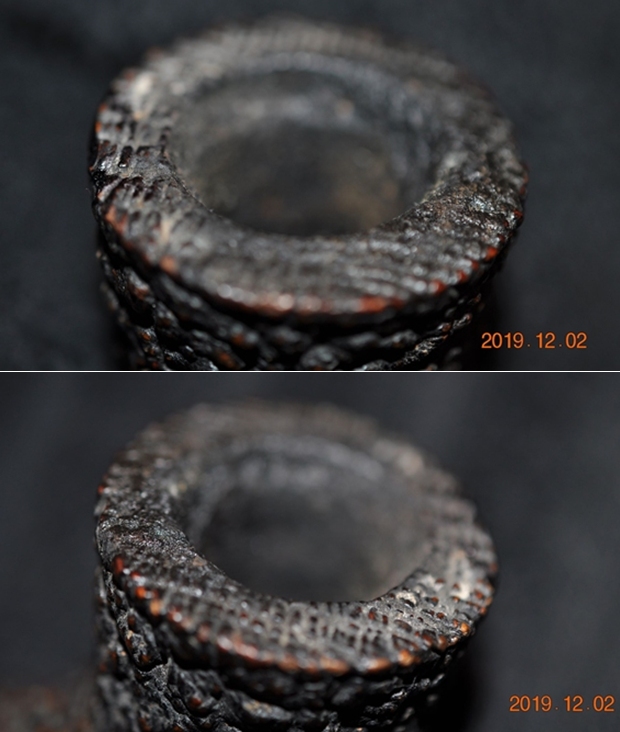
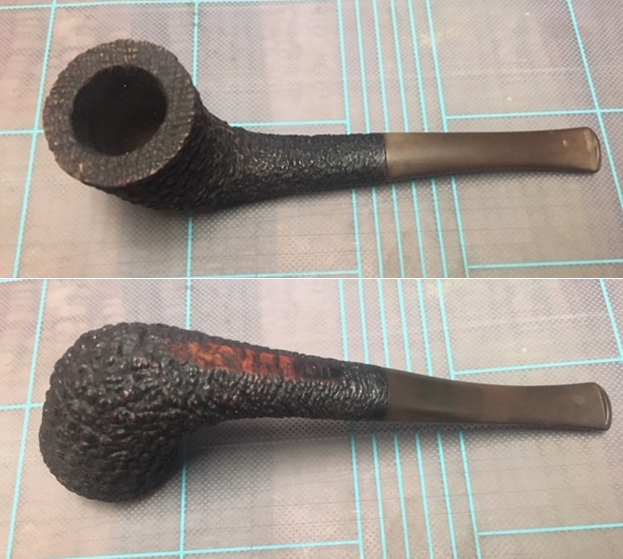
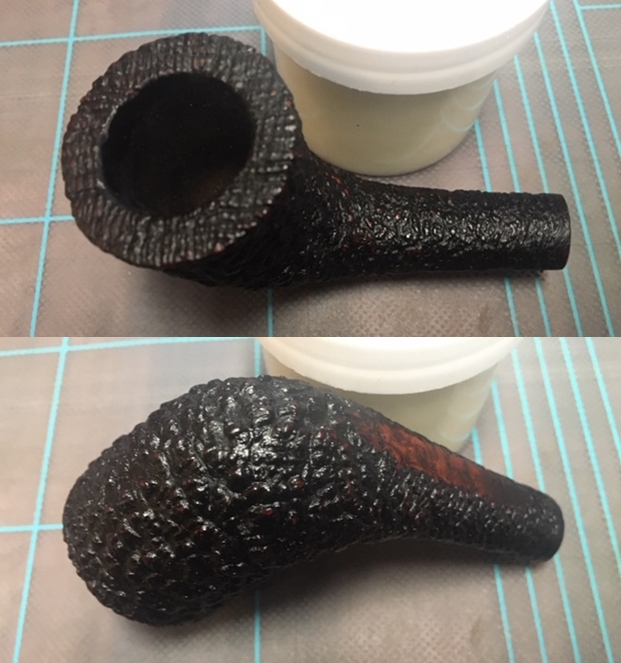
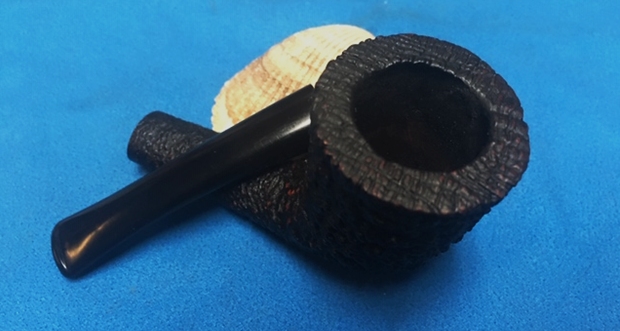
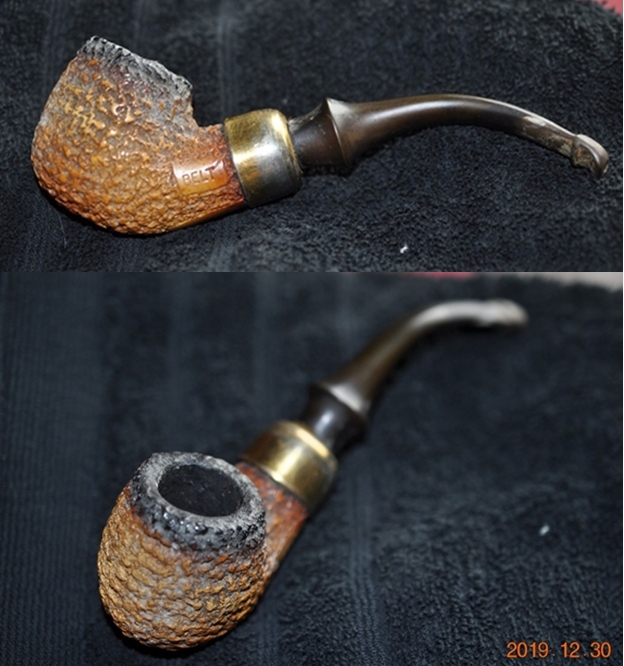
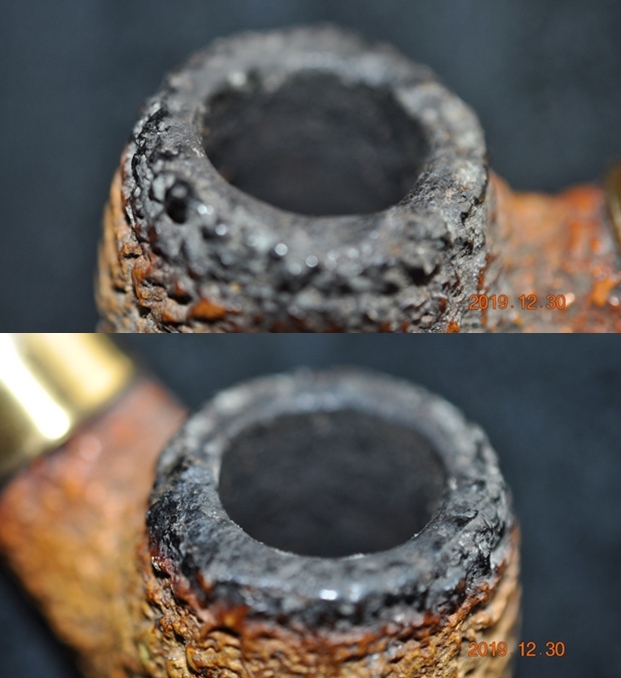
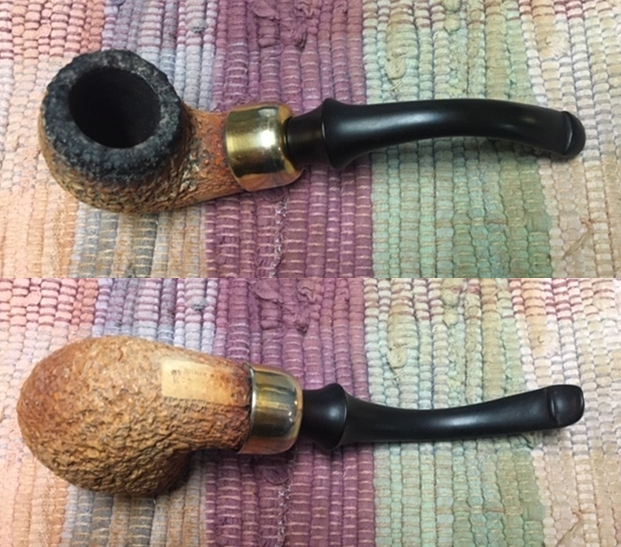
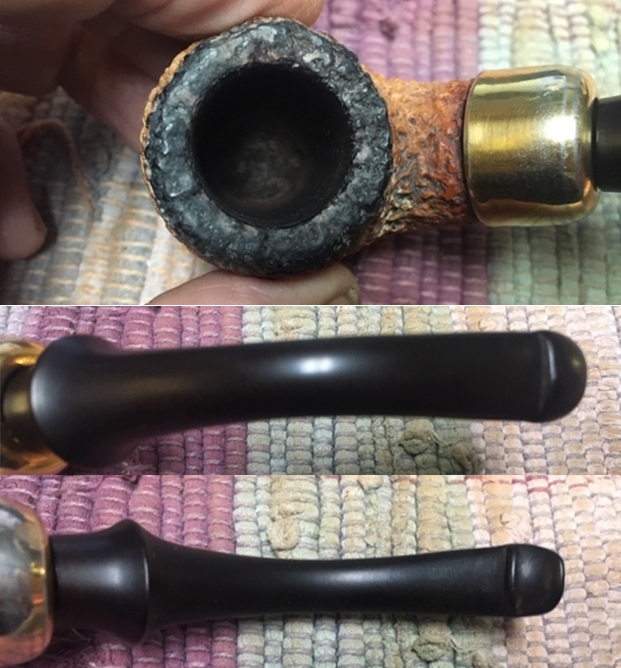
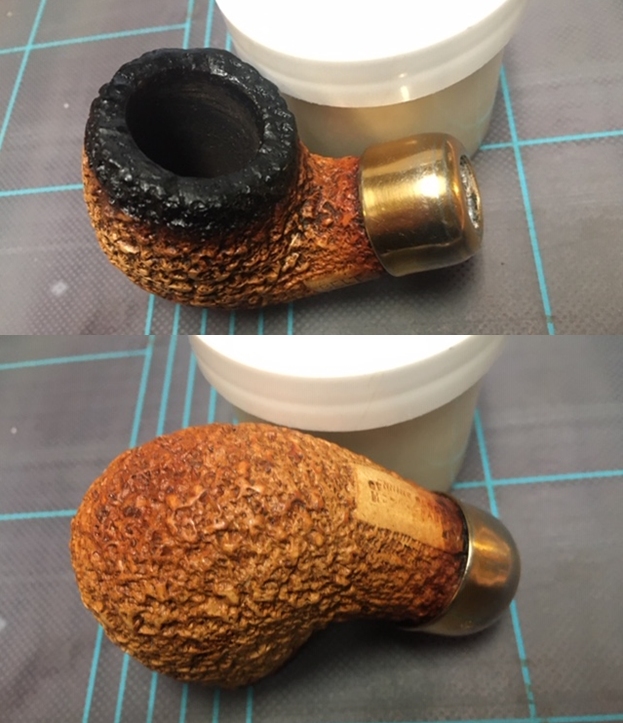
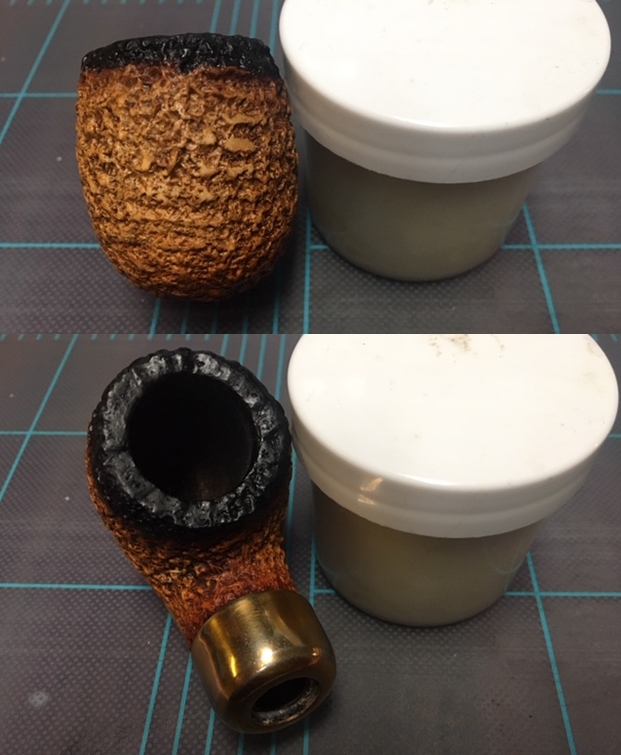
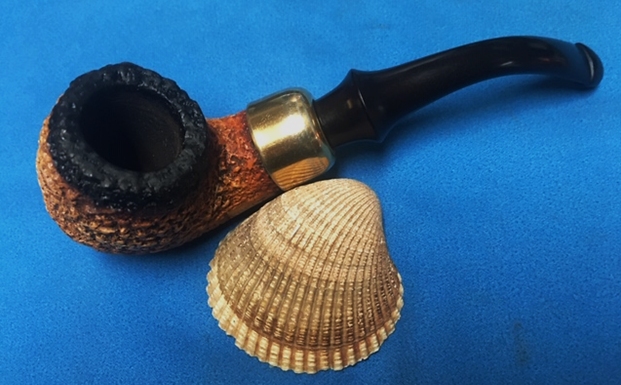
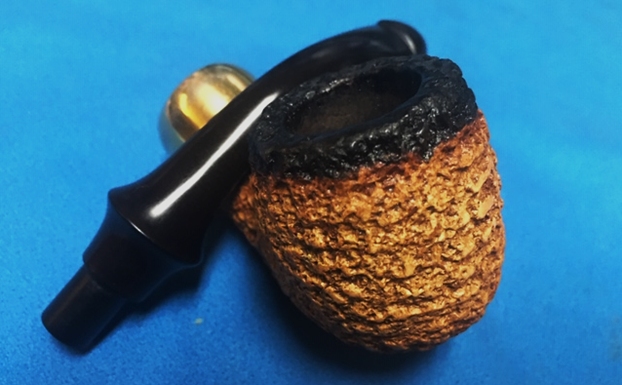
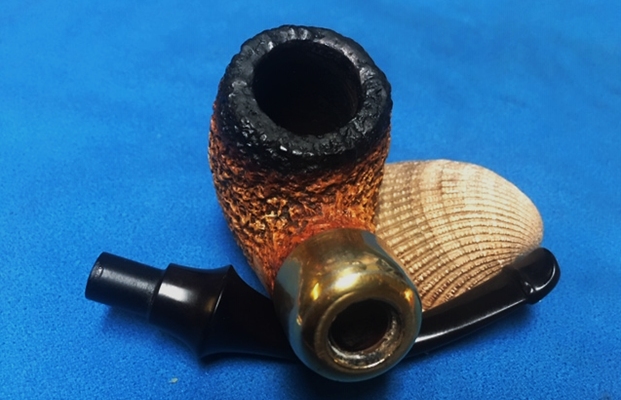
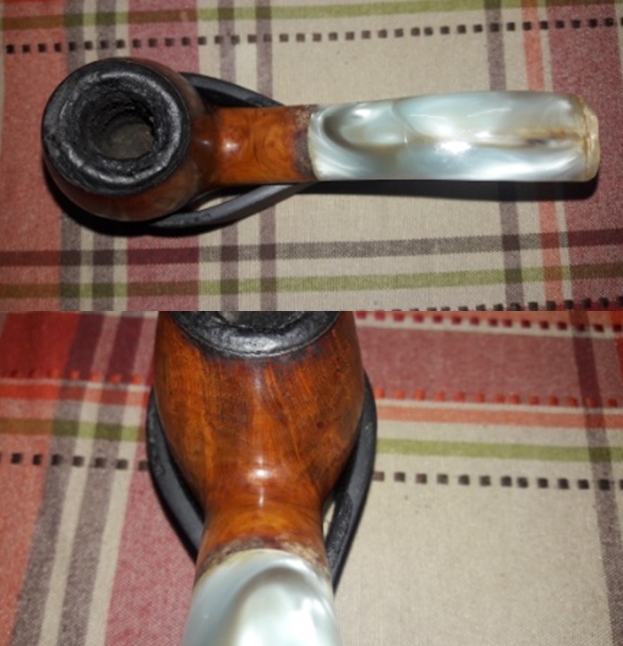
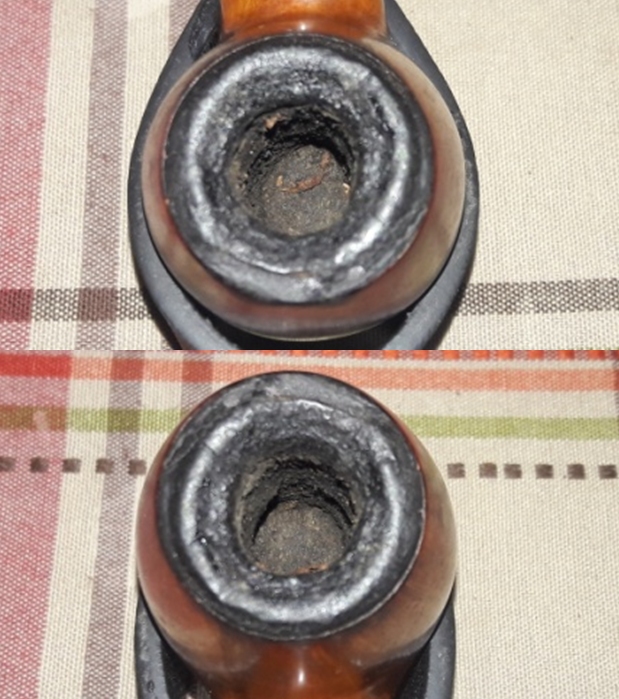
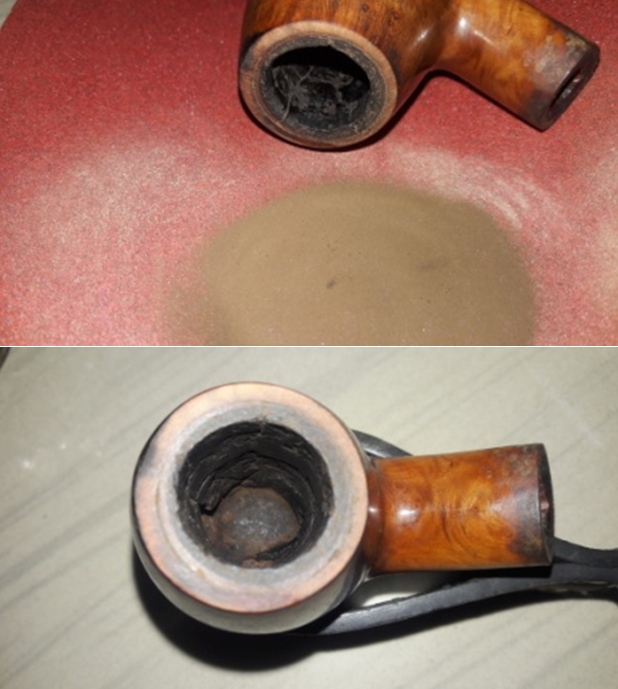
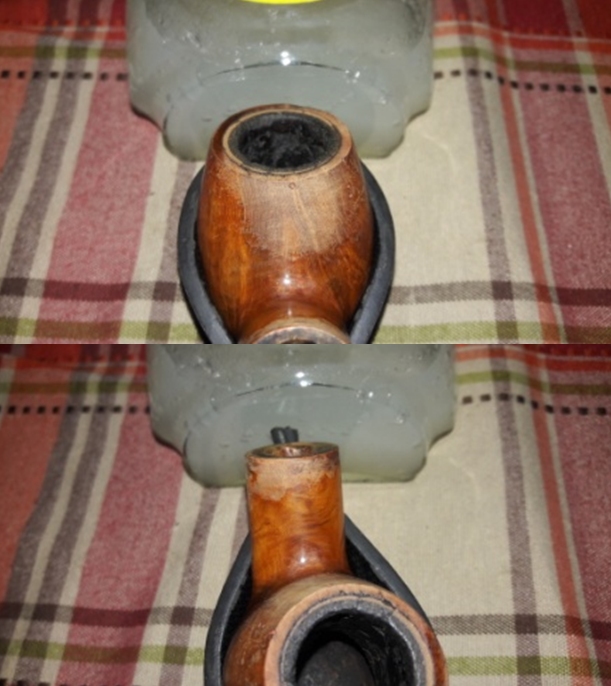
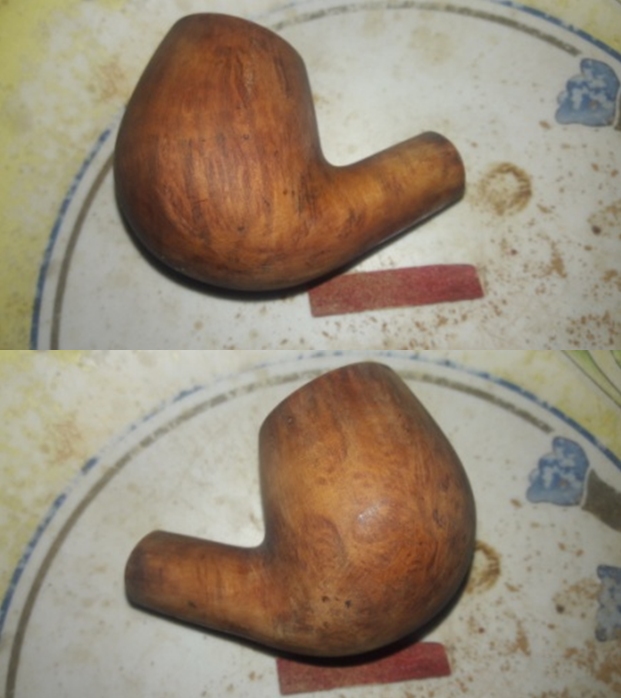
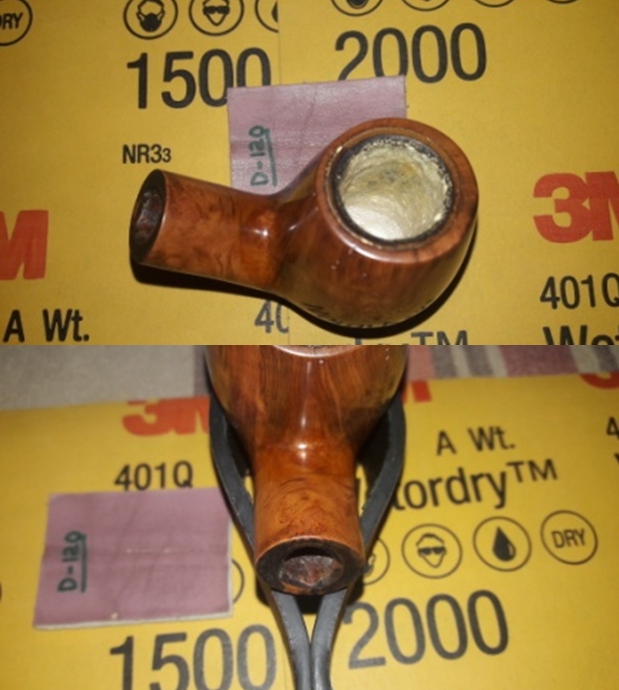
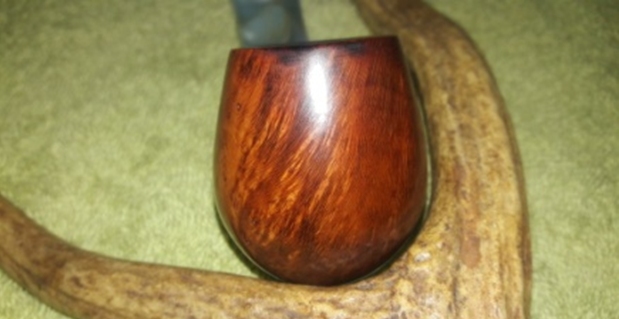
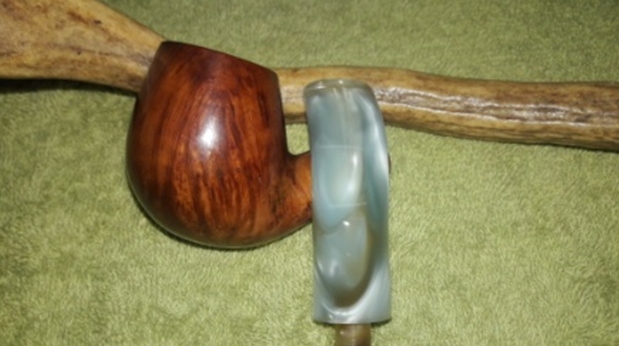
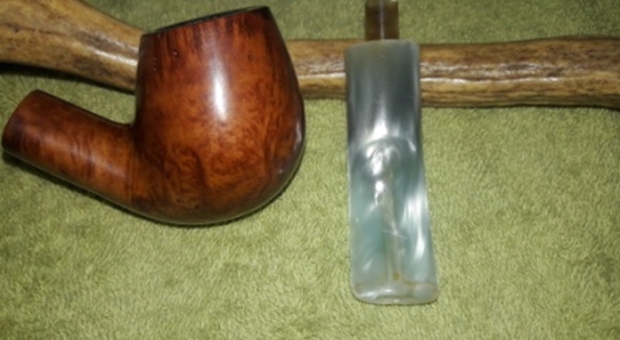
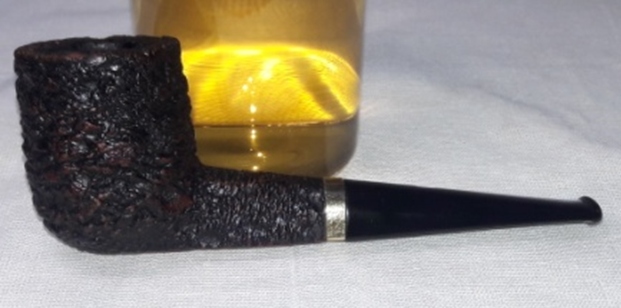
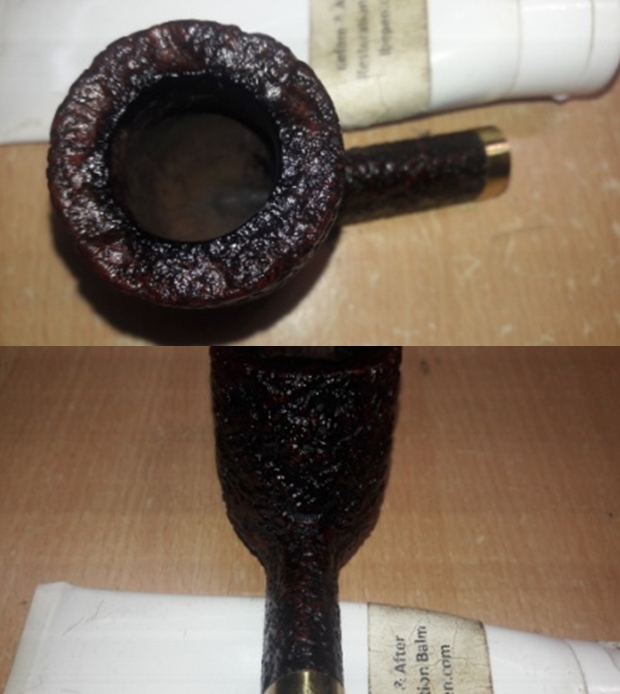
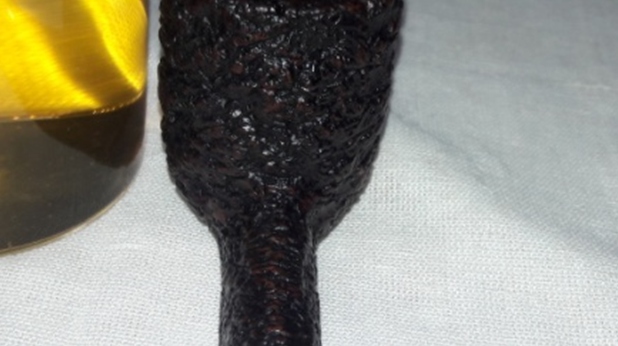
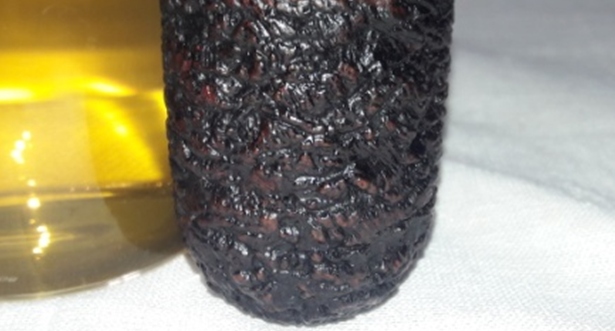
This pipe has a large bowl with a depth of 2 ¾ inch. The chamber has an even layer of thick hard cake. There is a heavy overflow of lava over the rim top surface. The rim top has darkened considerably. The condition of the inner walls of the chamber and the inner edge can be commented upon after the cake has been taken down to the bare briar. The ghost smells in the chamber are not very strong. The deeply rusticated stummel surface has a very beautiful texture and is covered in dust and grime. The fact that the rustications are dusty and filled with dirt is accentuated more due to the contrast of dark and medium brown stains on the stummel and the shank. The briar is looking lifeless and bone dry and has taken on black dull hues. The smooth bottomed shank that bears all the stummel stampings, has deep scratches akin to road rash marks.
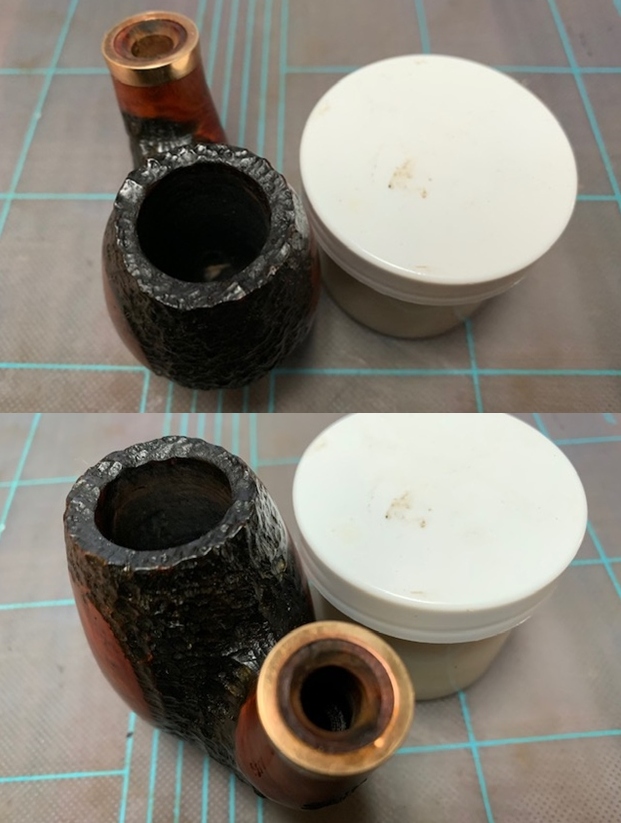
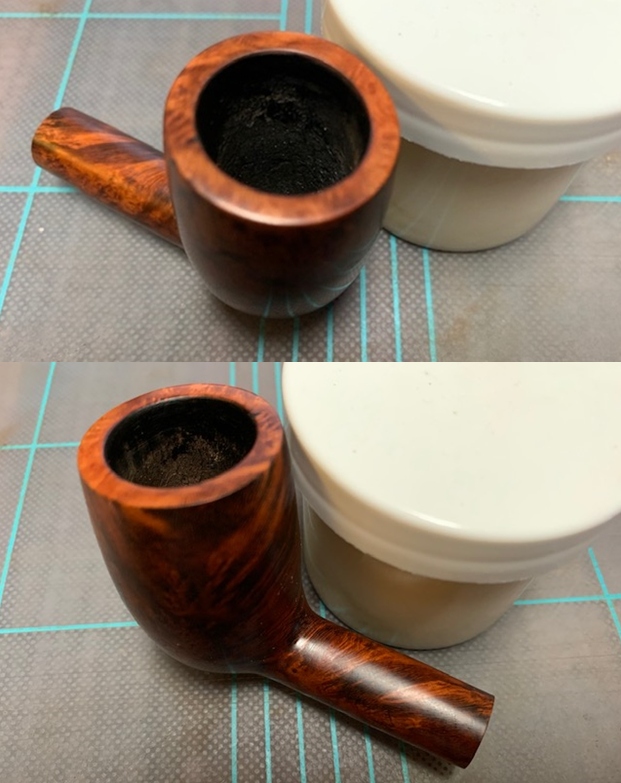
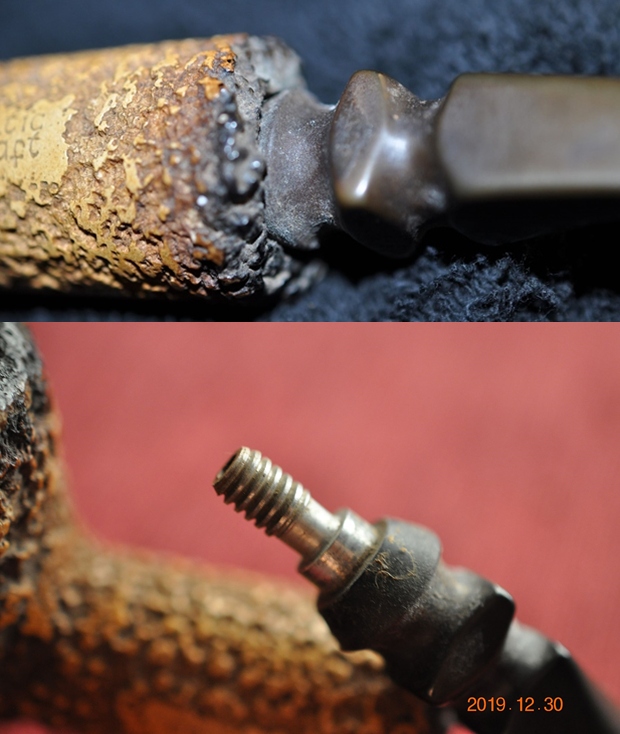
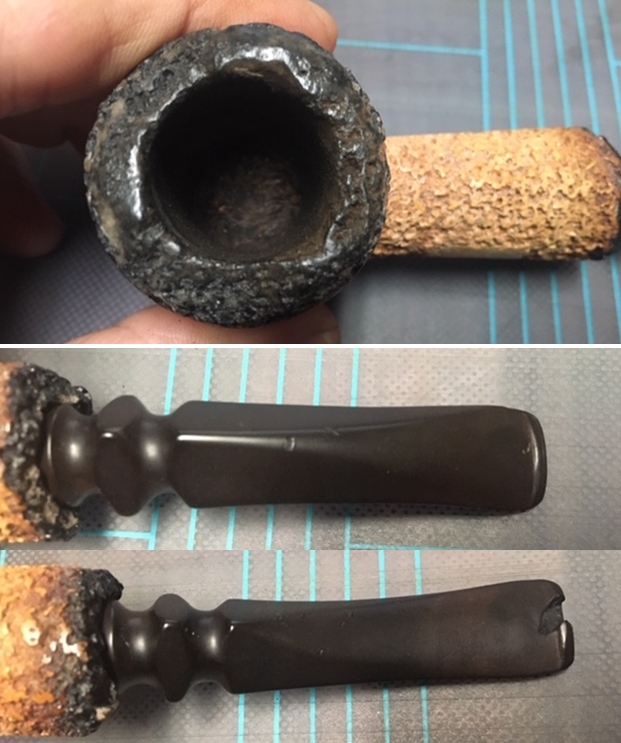
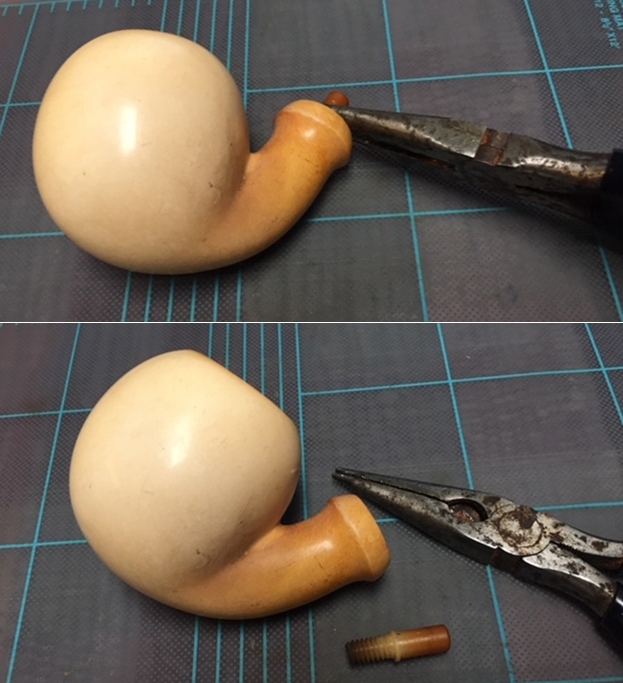
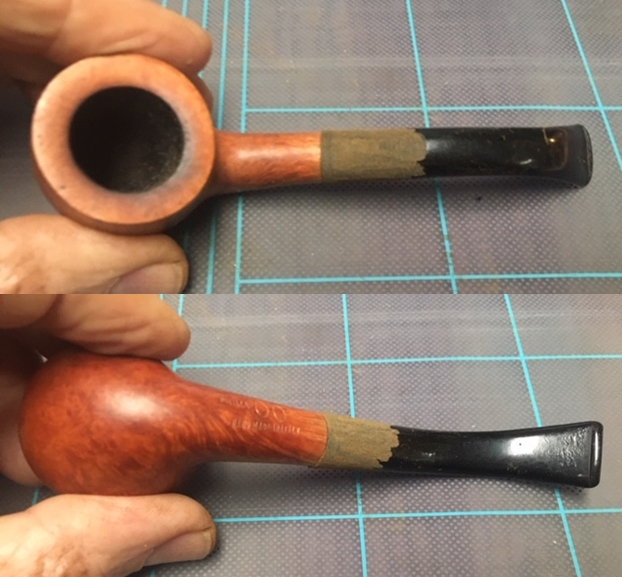
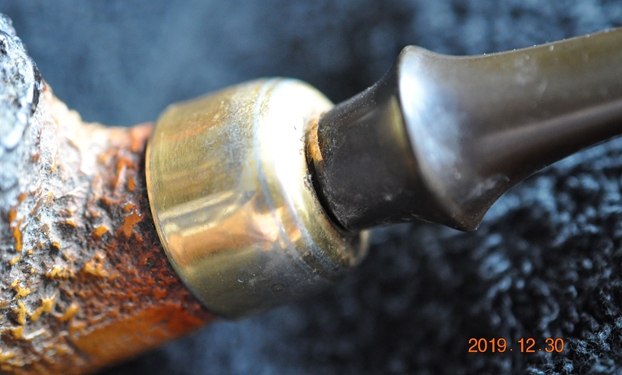
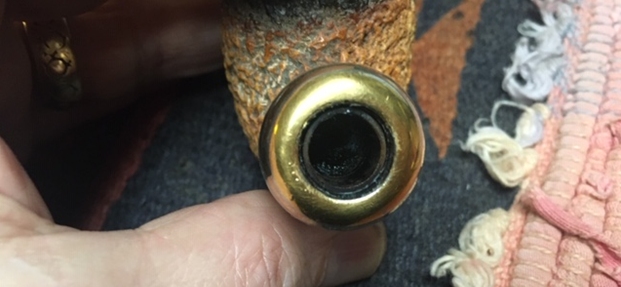
 The mortise was full of oils, tars and gunk and air flow was restricted. The shank end gold band made me wonder if it was a shank repair band or otherwise. However, the shank has no cracks and hence it is definitely an original adornment. The seating of the stem in to the mortise is not flush. This could be either a result of the accumulated gunk and grime in the mortise or incorrect drilling of the mortise (unlikely on a Castello though!) or a bent stem tenon.
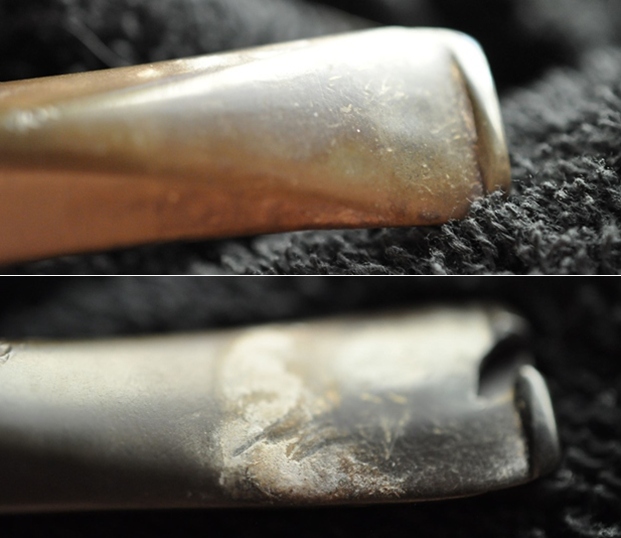
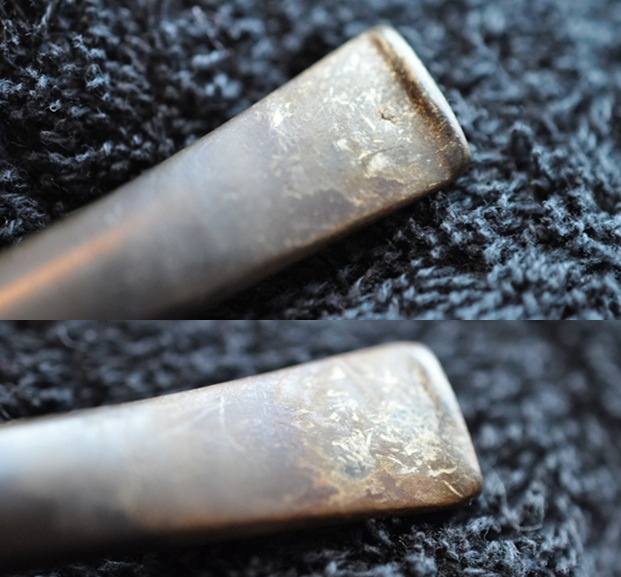
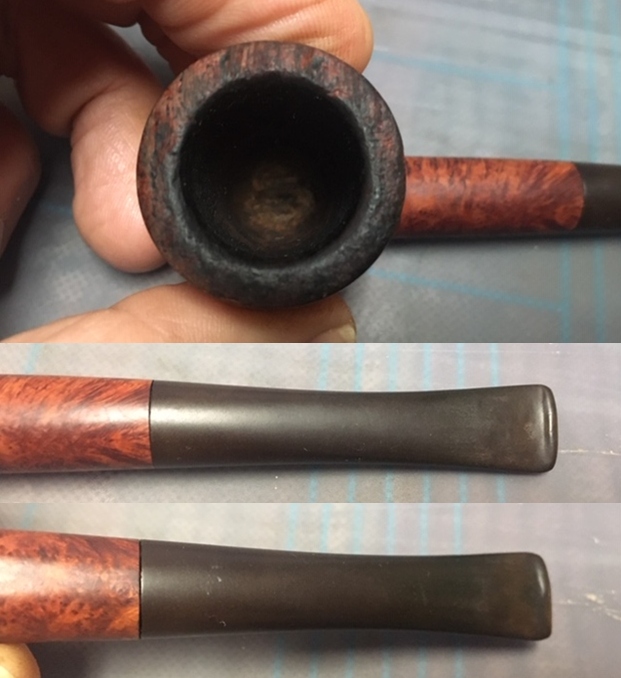
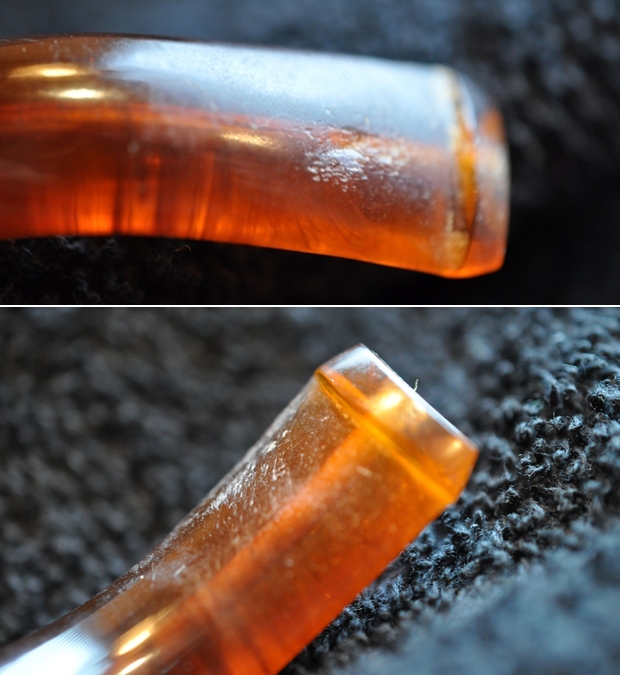
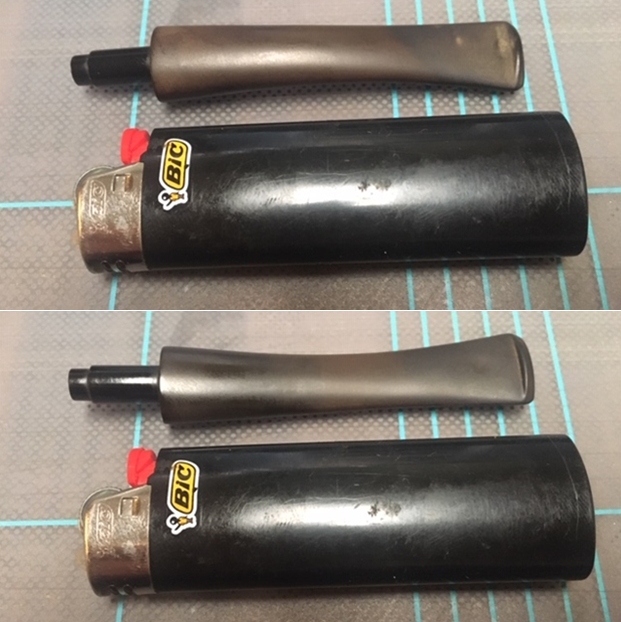
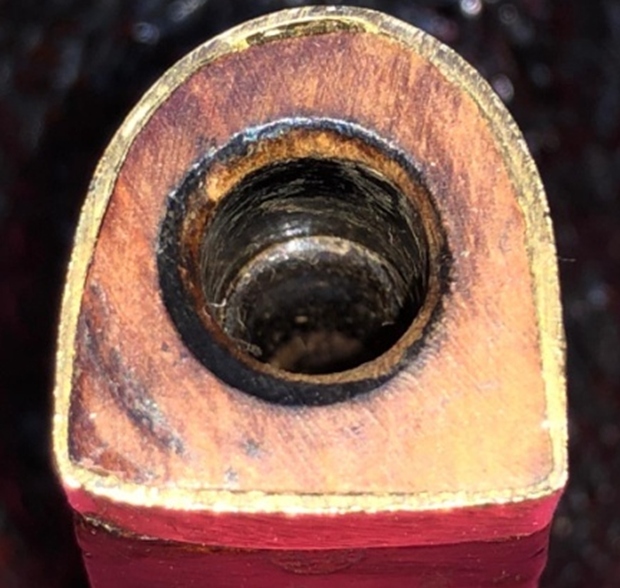 The high quality Lucite stem is nice and shiny. Some minor tooth chatter and a couple of deeper bite marks are seen on both the upper and lower stem surfaces in the bite zone. The tenon end had accumulated oils/ tars that had dried out on the inside as well as on the outside. The horizontal slot is filled with grime that will have to be addressed.
 Initial Cleaning By Abha…
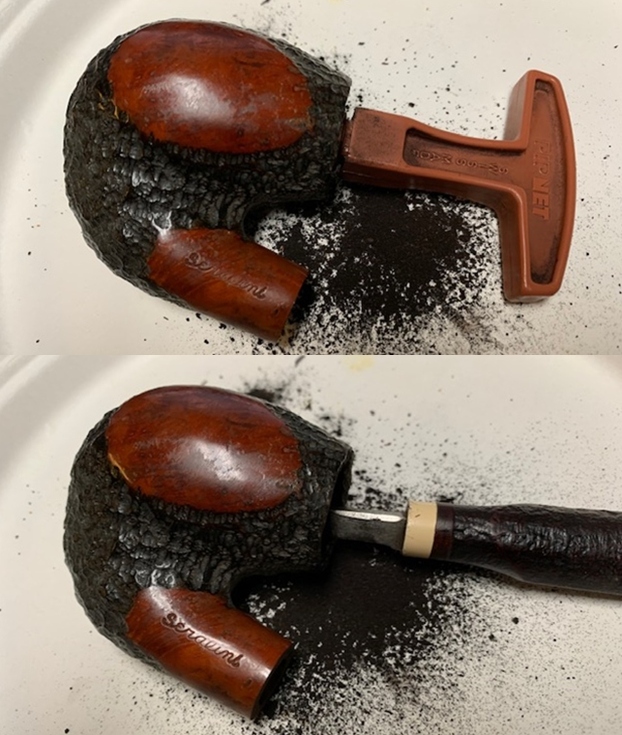
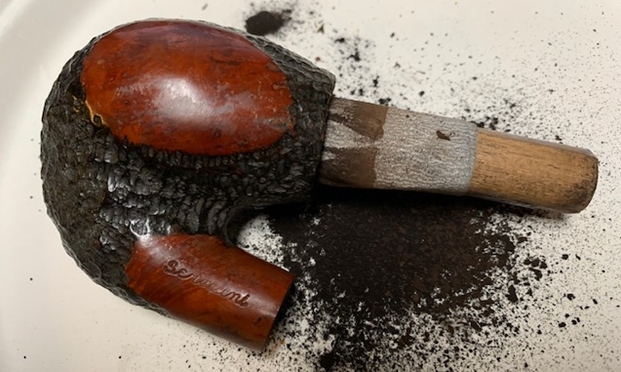
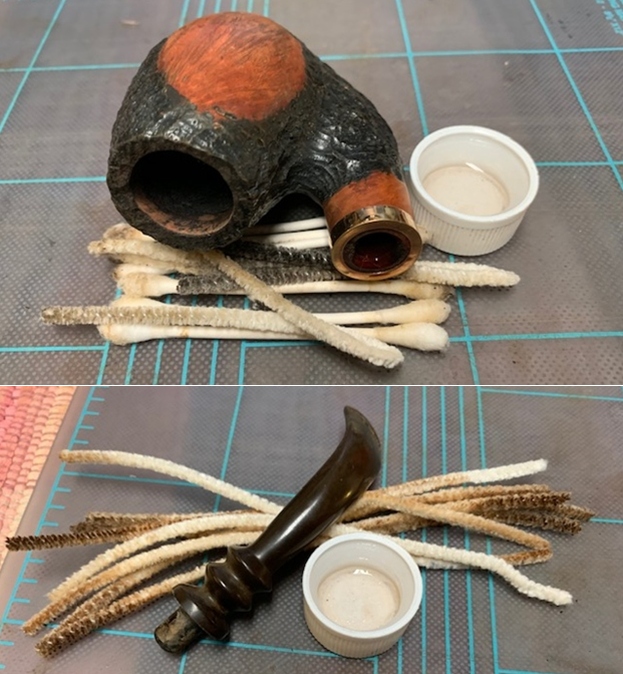
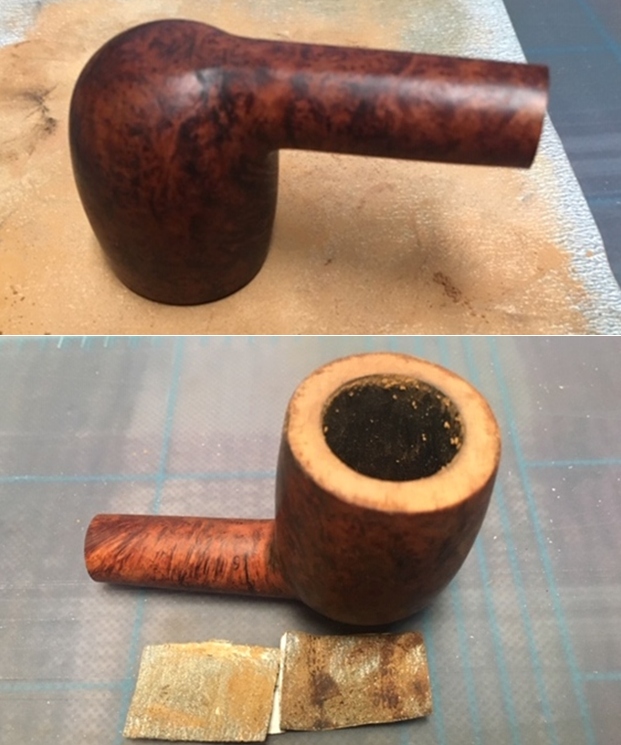
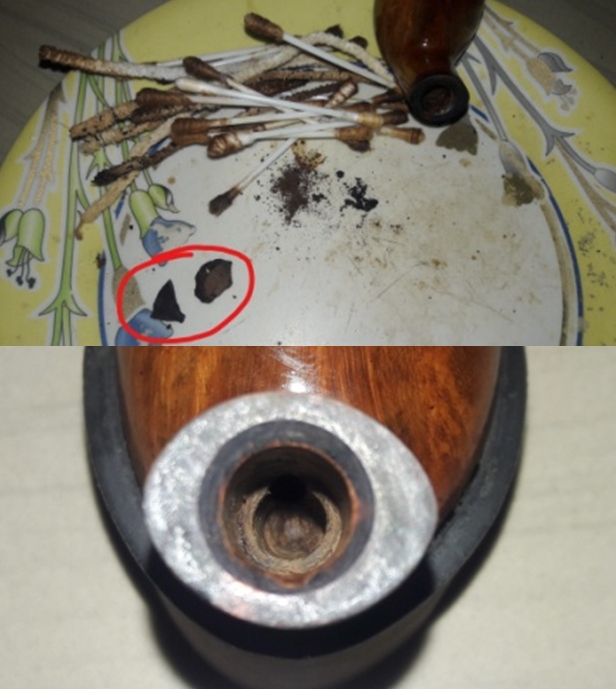
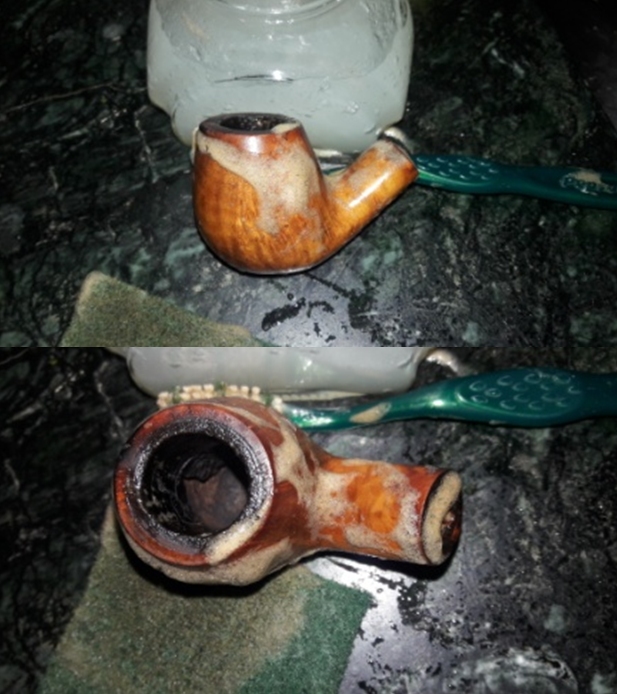
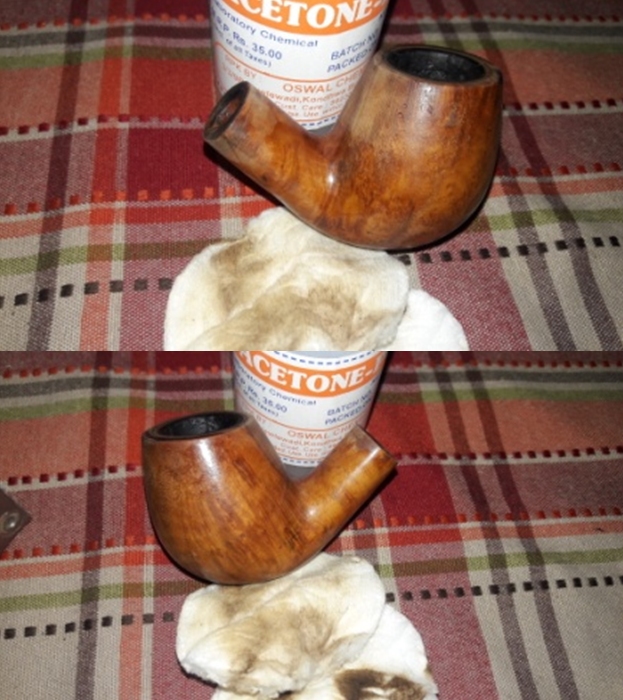
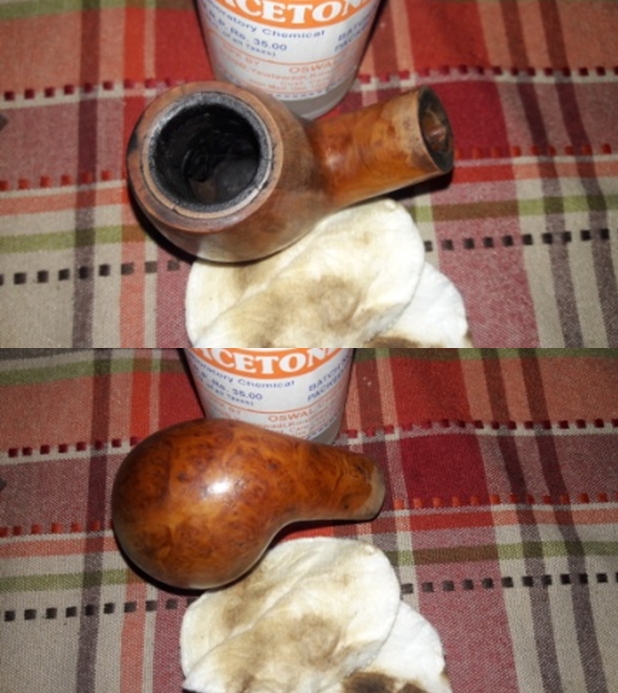
The initial cleaning on this pipe was done by Abha, my wife (she has cleaned up around 40-50 pipes and these have now reached me for further restoration). She reamed out the complete cake and further smoothed out the chamber walls with a folded piece of 220 grit sand paper. She further cleaned out the internals of the shank with pipe cleaners and alcohol and cotton buds. She followed the internal cleaning of the shank with external cleaning of the stummel using Murphy’s Oil soap and hard bristled tooth brush and dried it with paper napkins and cotton cloth.
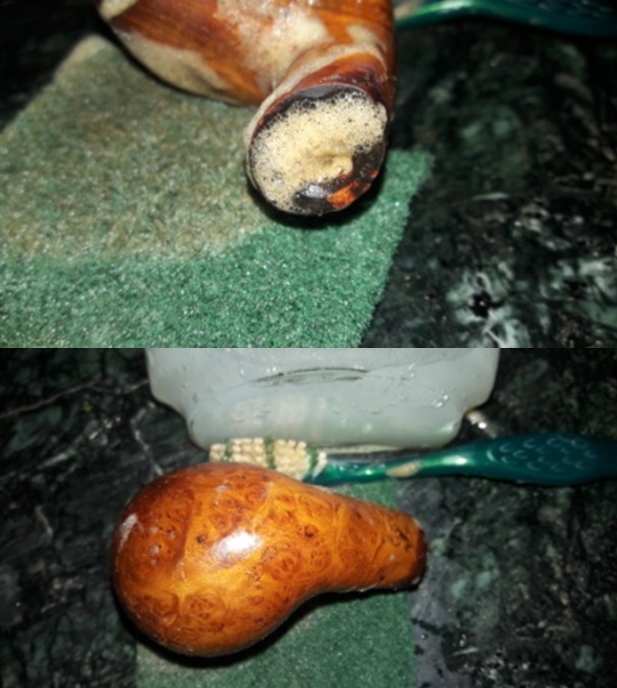
Next she cleaned out the internals of the stem air way and immersed it in “Before and After Deoxidizer” solution along with the stem of other pipes in line for restoration. Once the stem had soaked overnight, she cleaned the stem under running warm water and scrubbed the raised oxidation from the stem surface using Scotch Brite pad. She further removed the oxidation by scrubbing the stem with 0000 grade steel wool and applied a little olive oil to rehydrate the stem.
The Process
Finally back at my work place… After enjoying a compulsory extended leave of three months with family and having honed my culinary and domestic chores skill set, I was happy to rejoin my duty and get back to completing the pending pipe restorations.
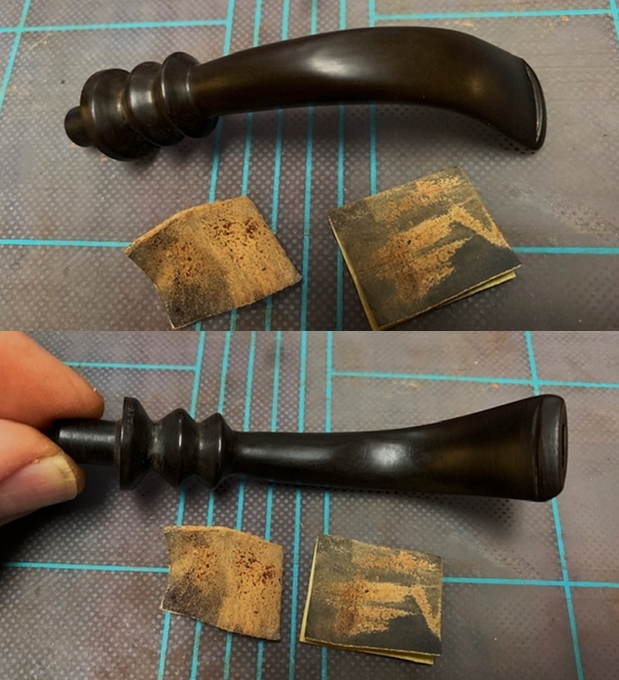
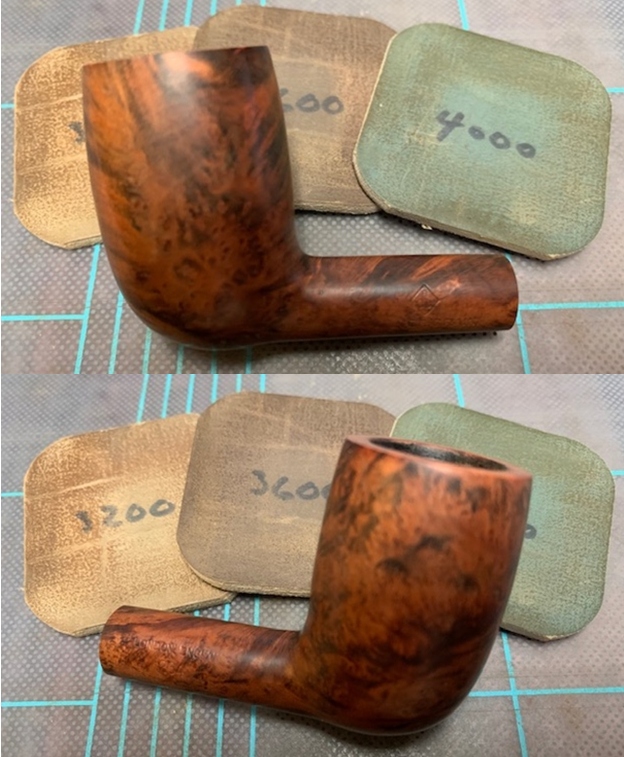
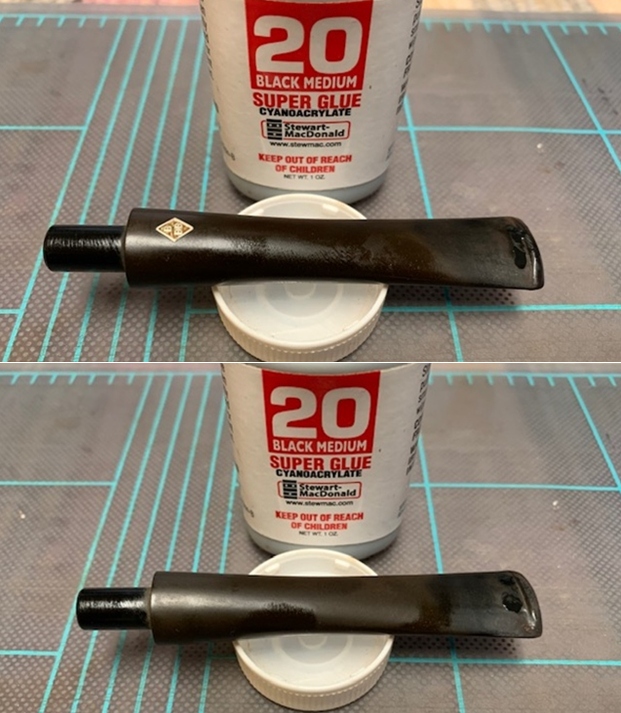
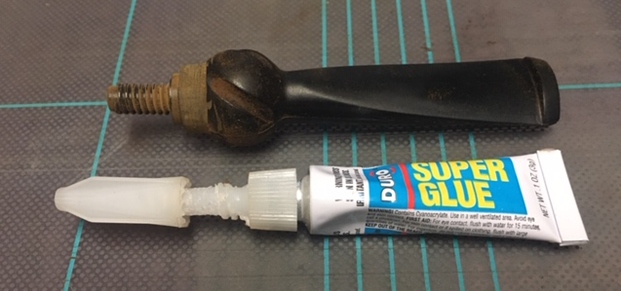
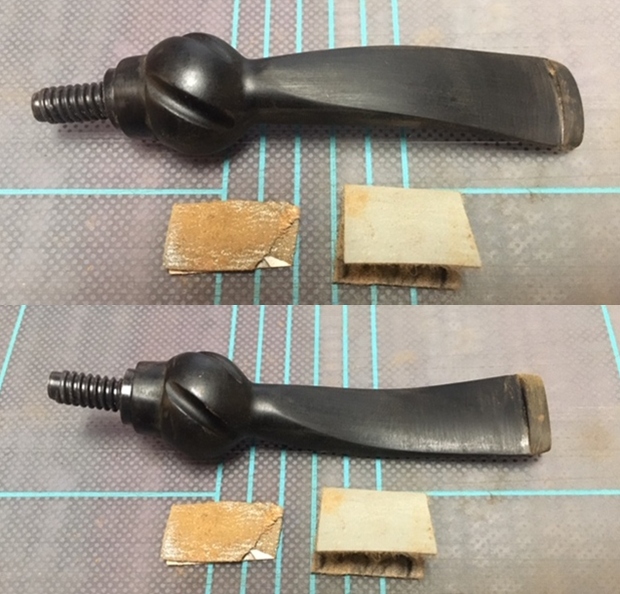
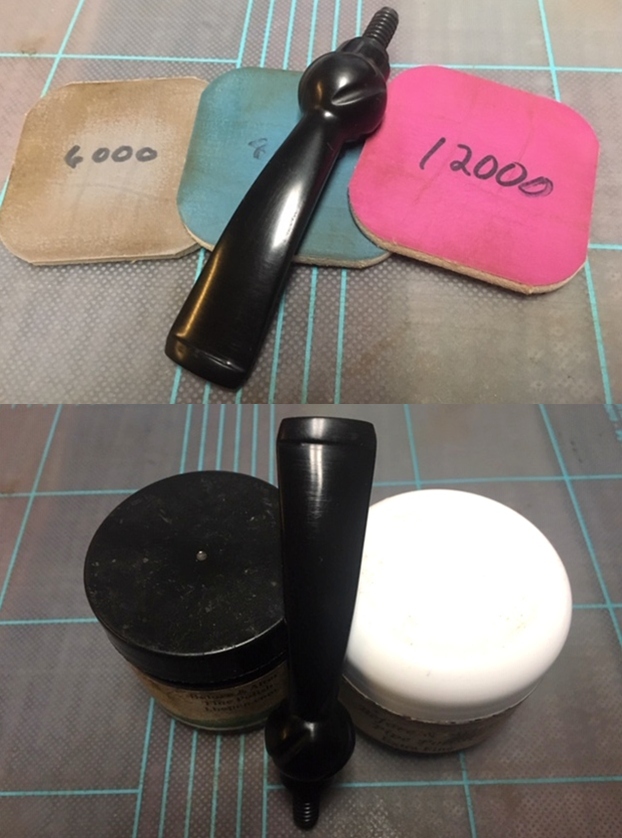
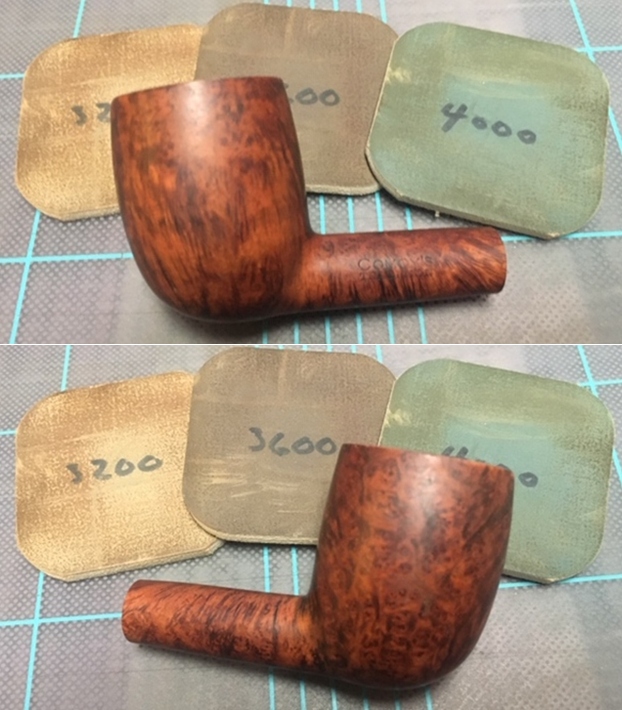
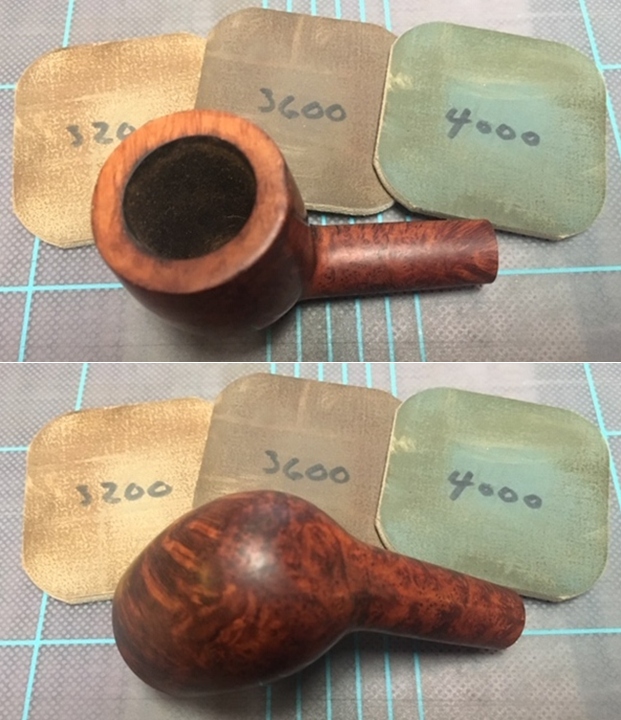
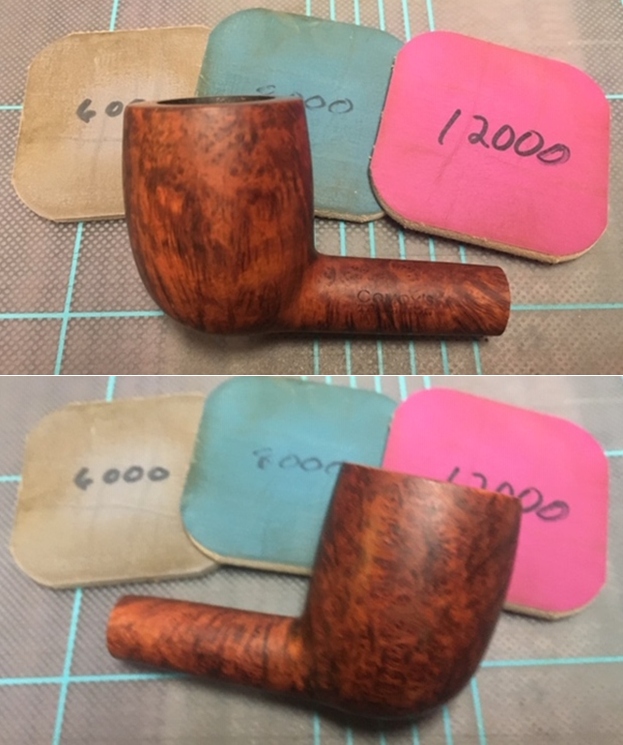
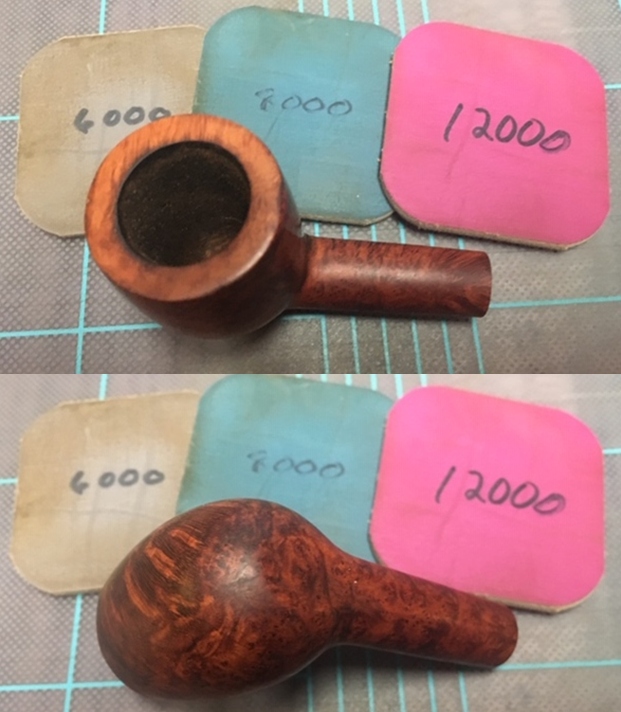
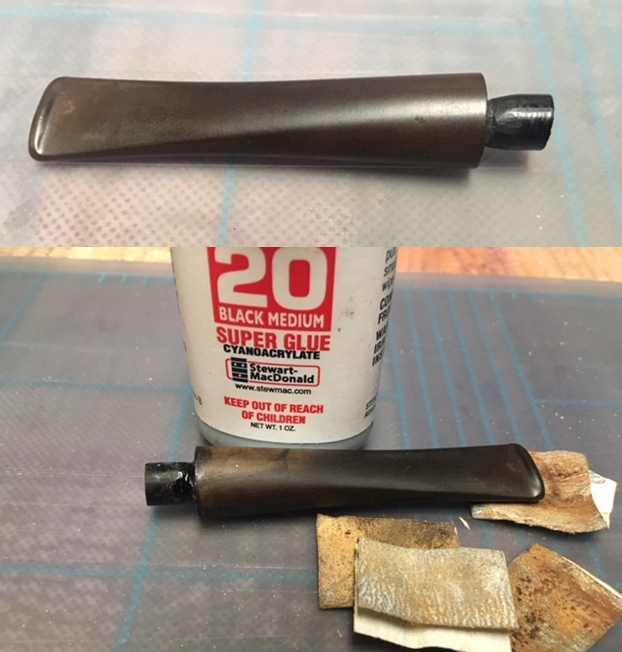
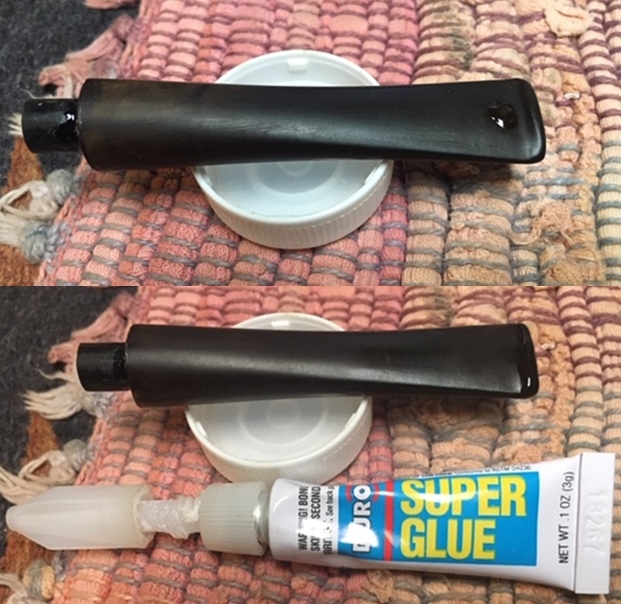
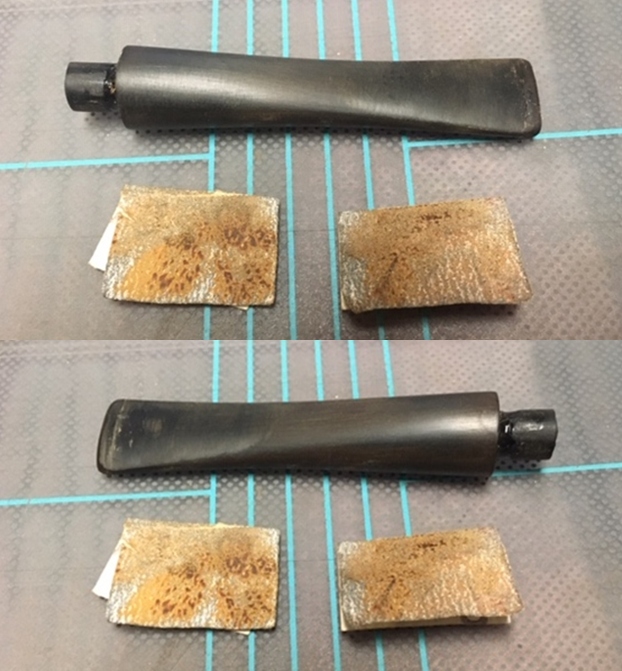
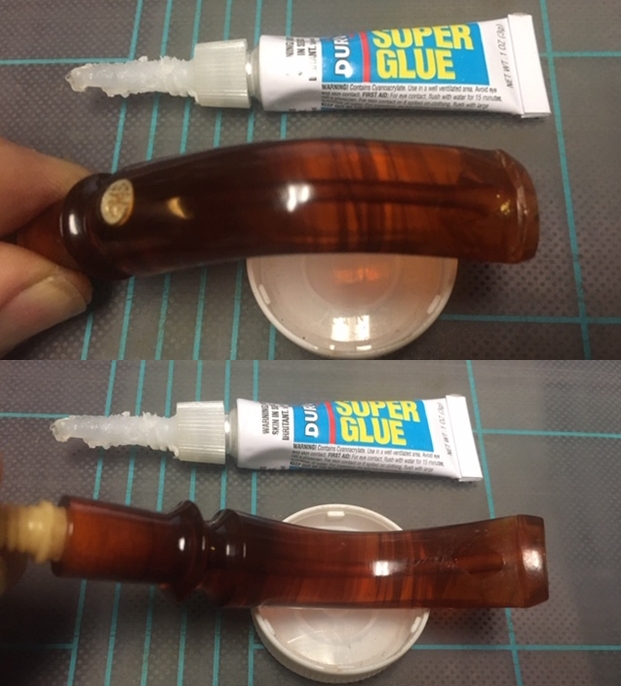
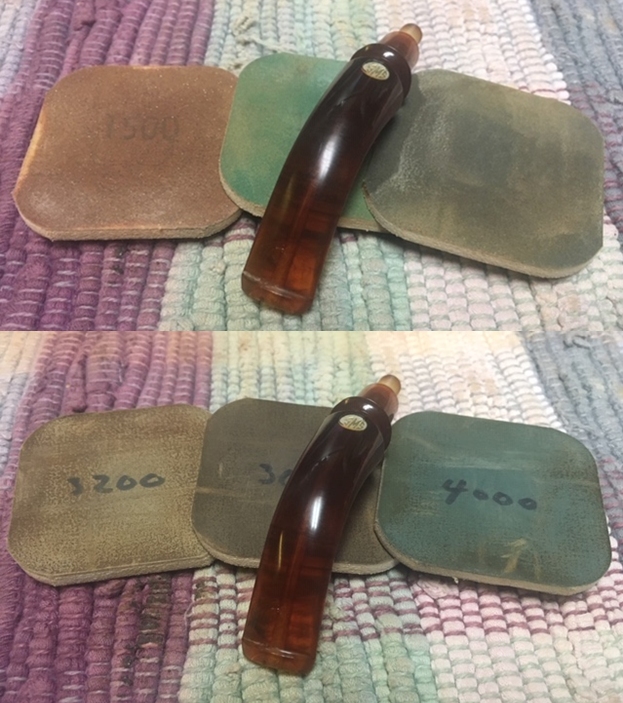
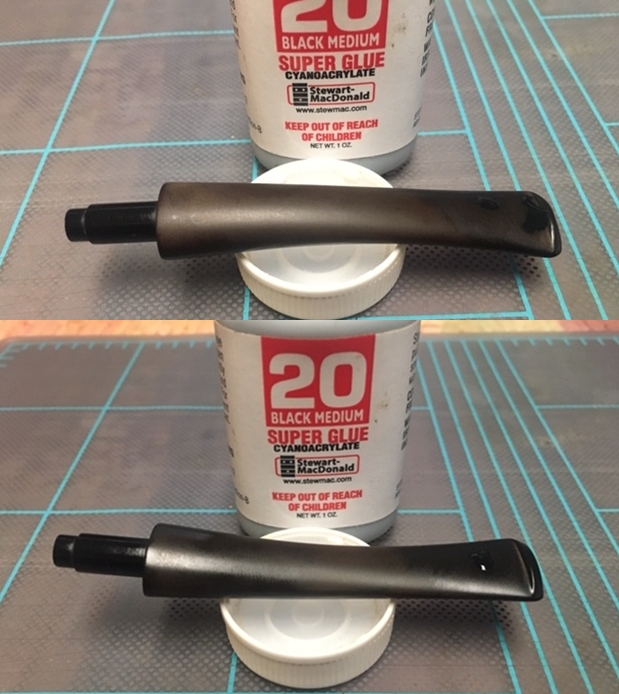
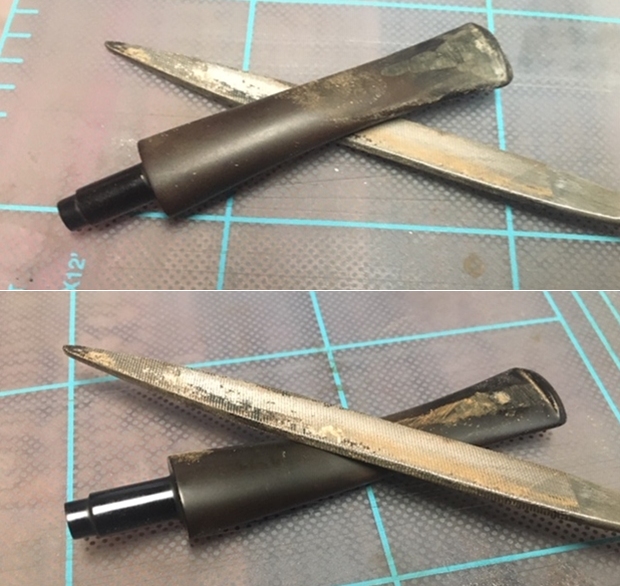
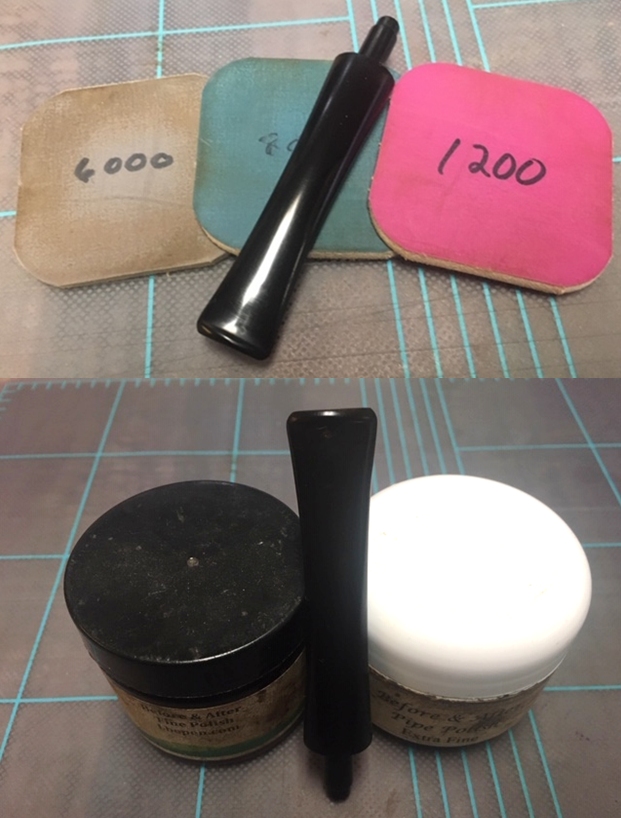
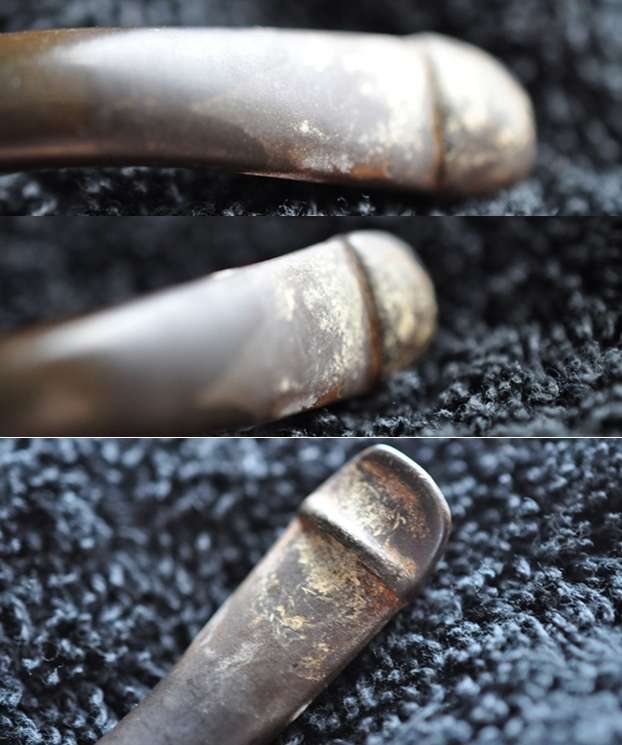
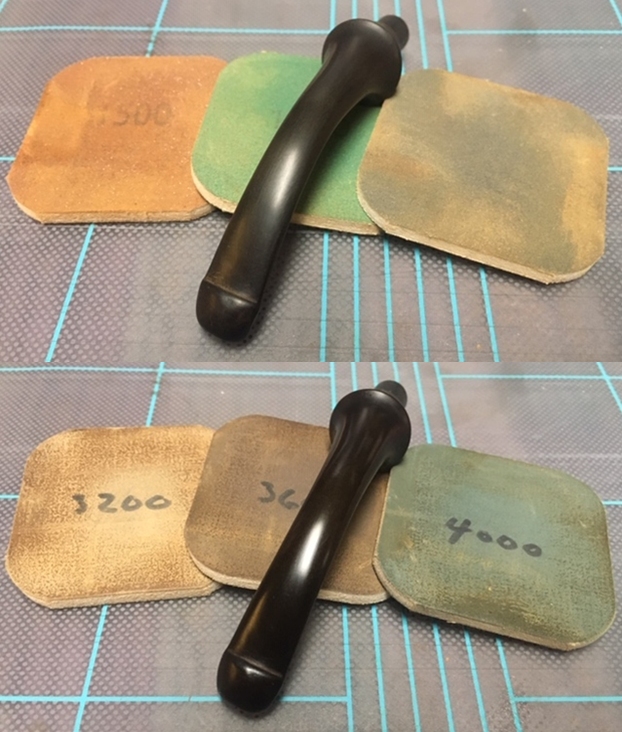
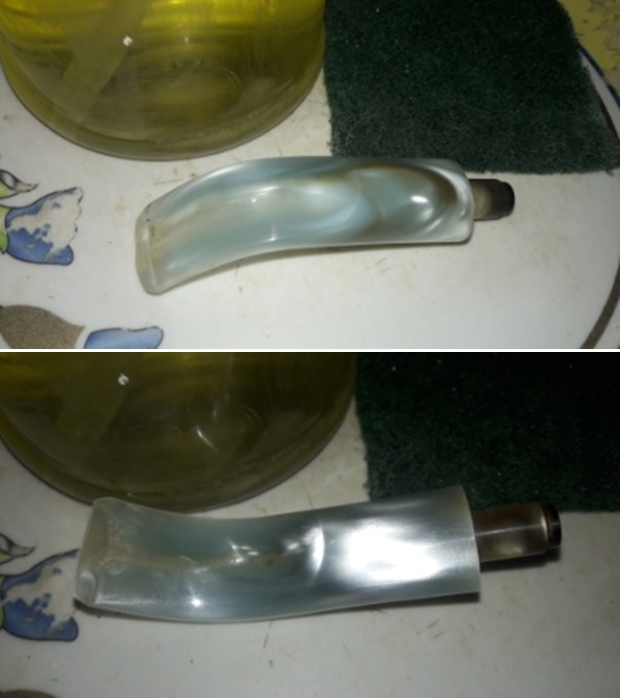
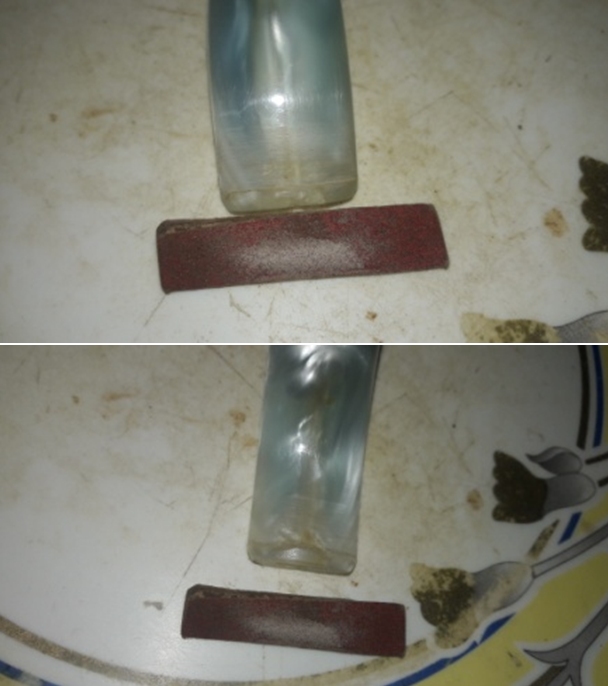
I start this project by addressing the tooth chatter and bite marks on both the surfaces in the bite zone. Since this was a Lucite stem, heating the bite zone with the flame of a lighter would have damaged the stem further; hence, I filled the deeper bite marks with a mix of CA superglue and activated charcoal and set it aside to cure. Once the fills had cured, using a flat needle file, I reshaped the button and roughly matched the fills with the rest of the stem surface. I further fine tuned the match by sanding the filled area with a folded piece of 320 grit sand paper pinched between my thumb and forefinger. I followed it up by sanding the entire stem surface using 400, 600, 800 and finally with a piece of 1000 grit sand papers. This serves to reduce the sanding marks of the more abrasive sand papers. I also sharpened the button edges while sanding. I wiped the stem with a cotton swab and alcohol to remove all the sanding dust from the surface. I applied a little Extra Virgin Olive oil over the stem to impart a shine.
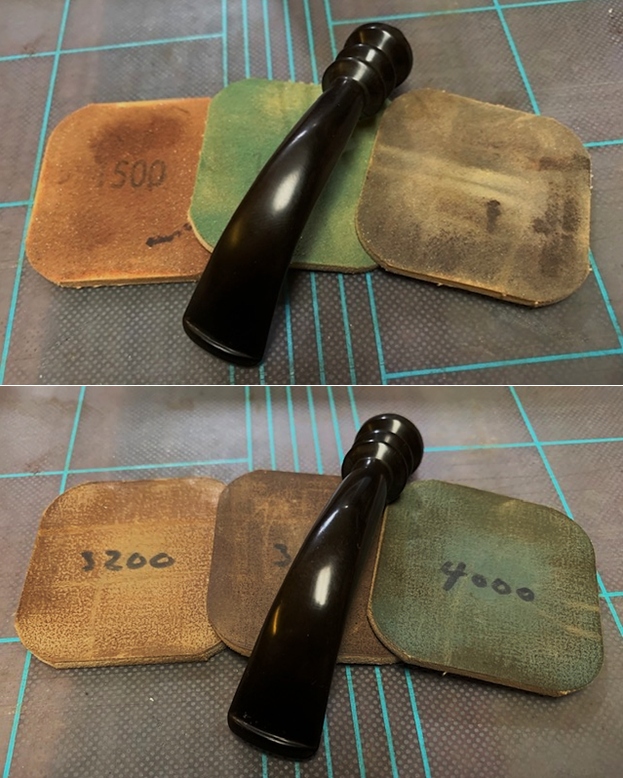
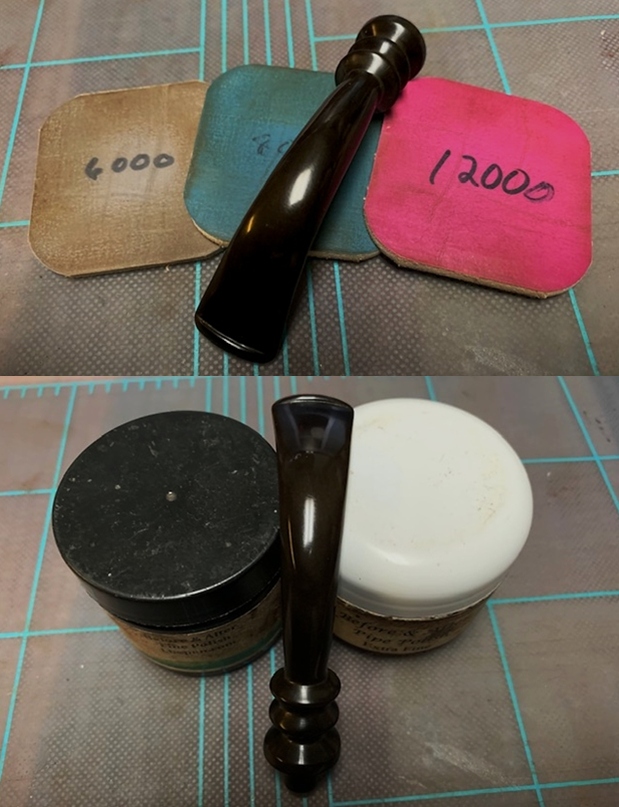
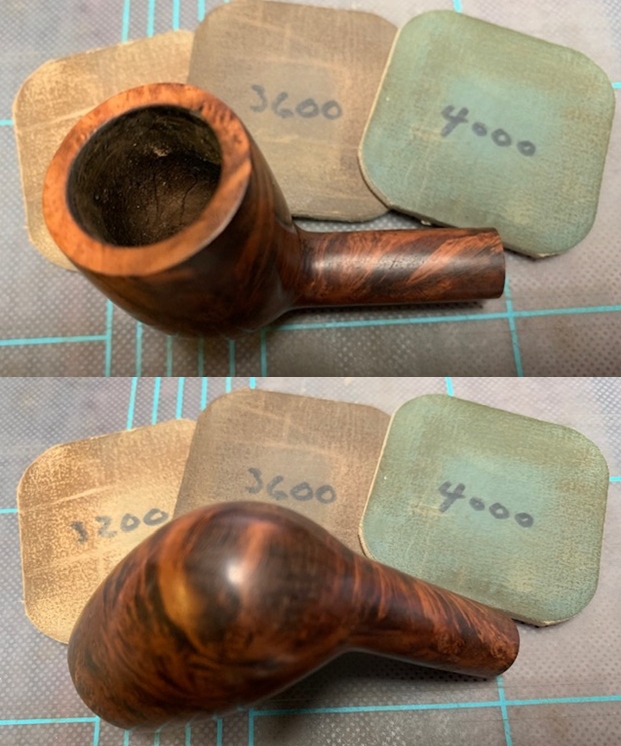
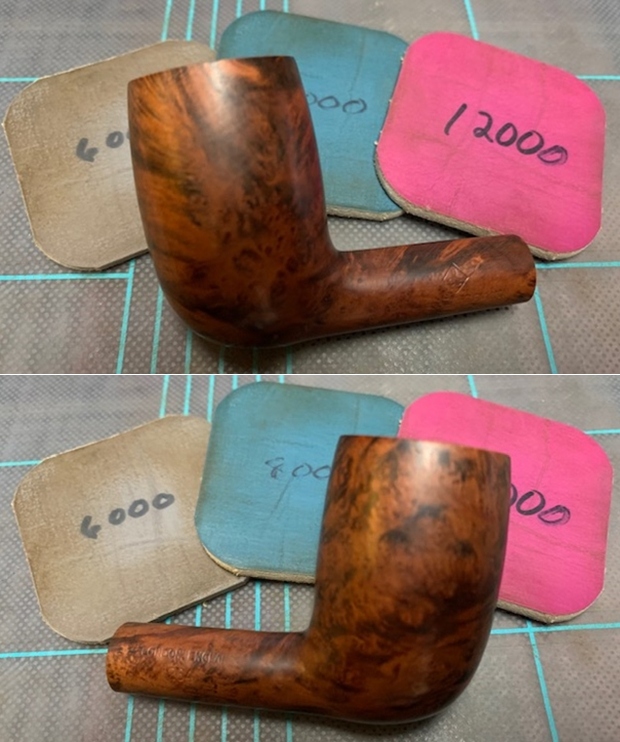
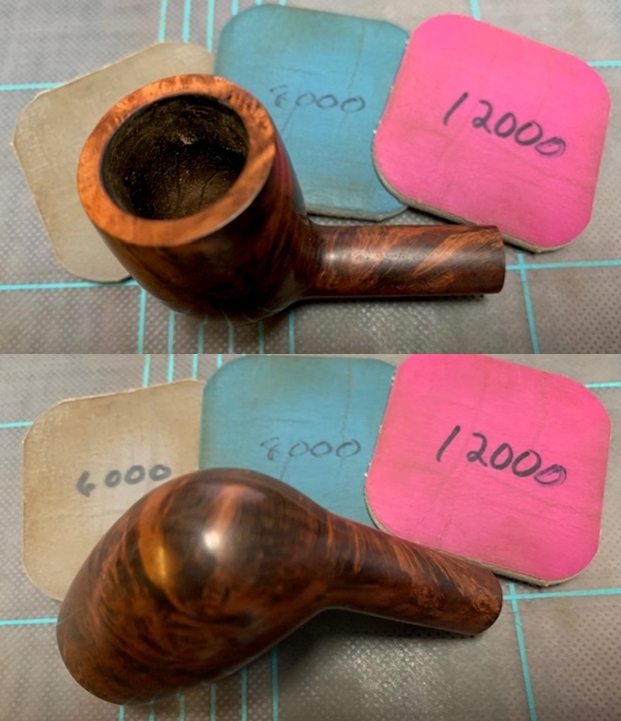
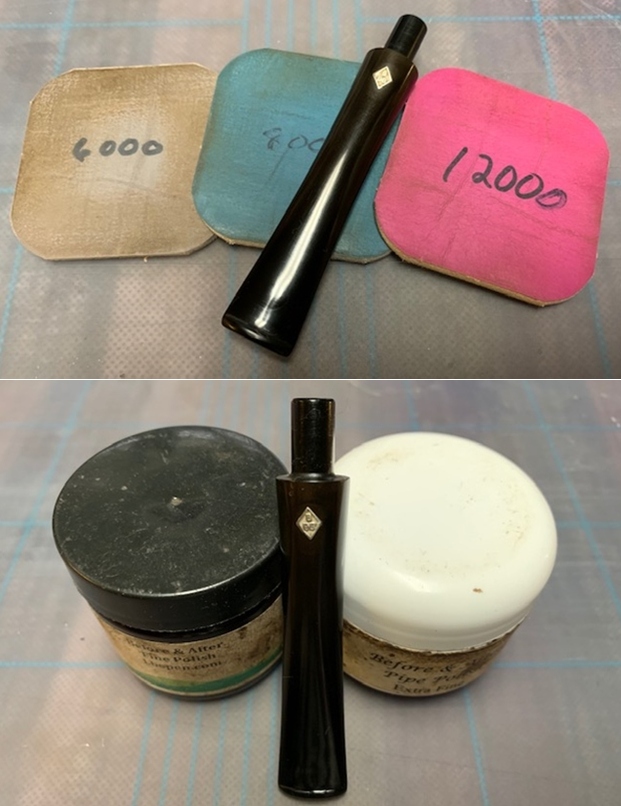
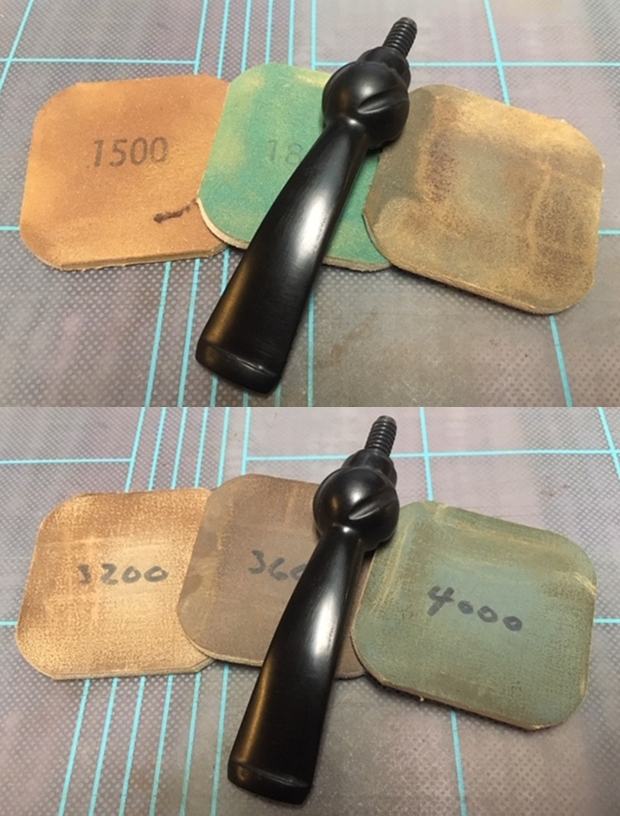
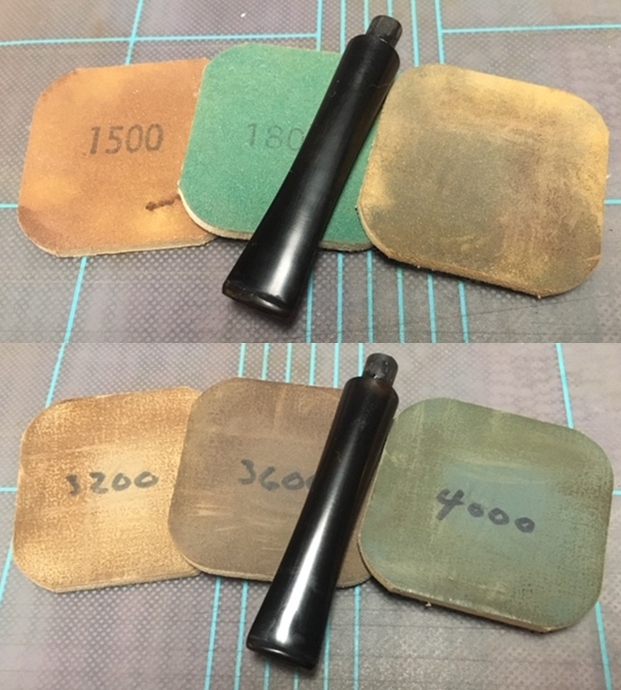
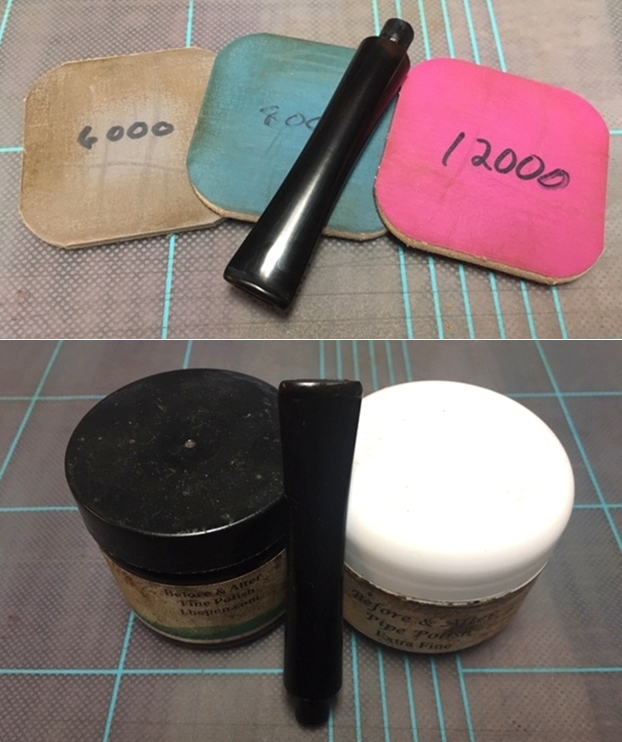
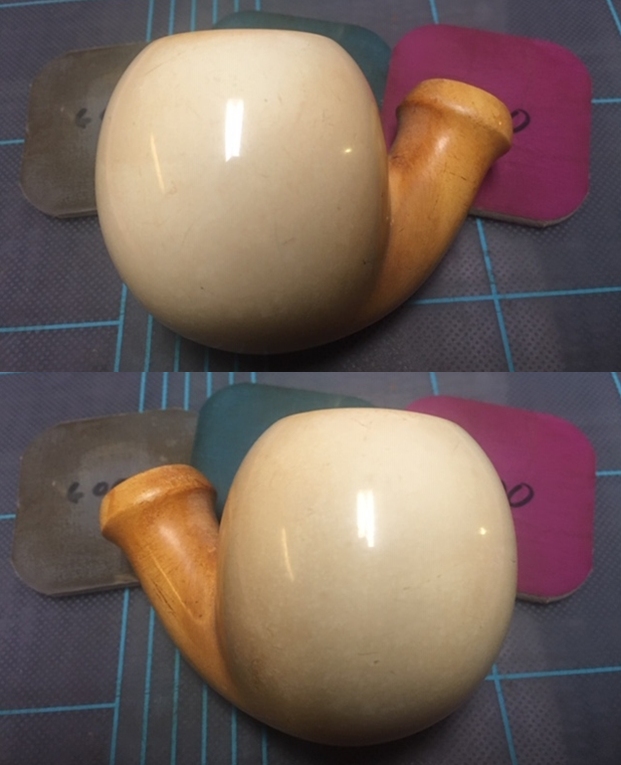
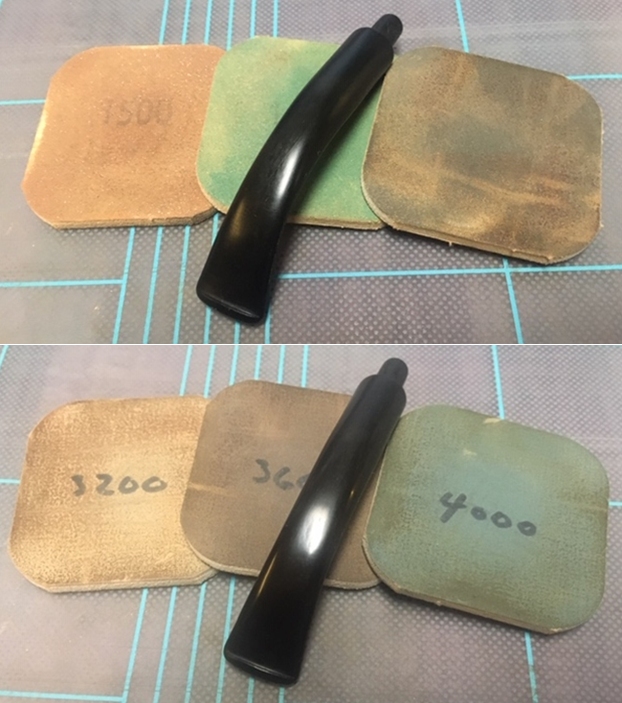
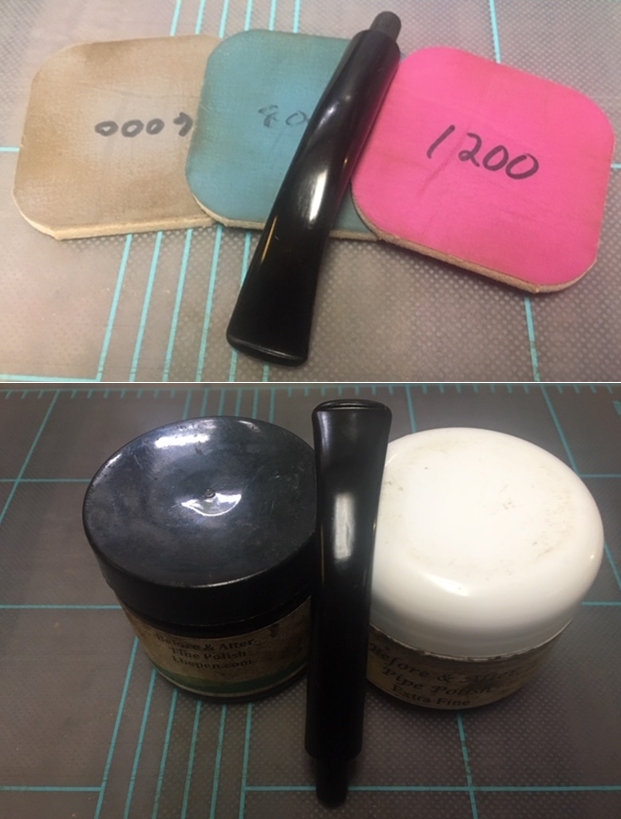
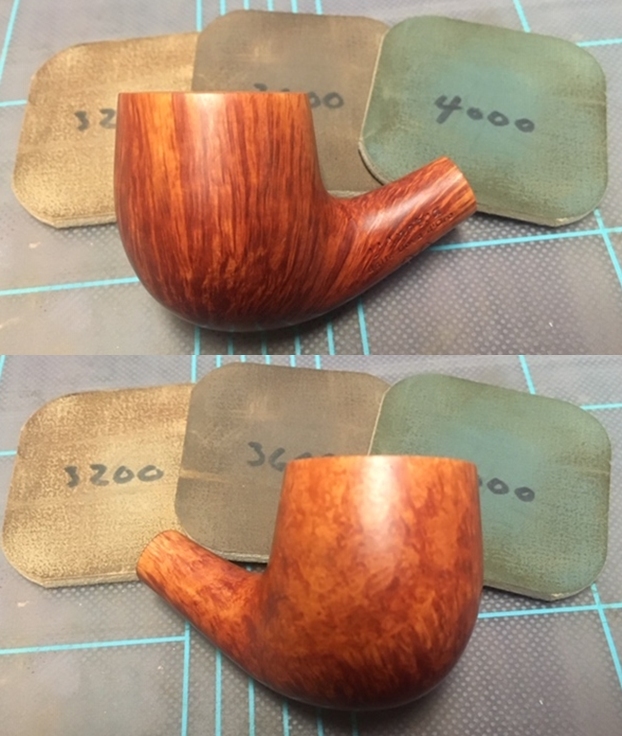
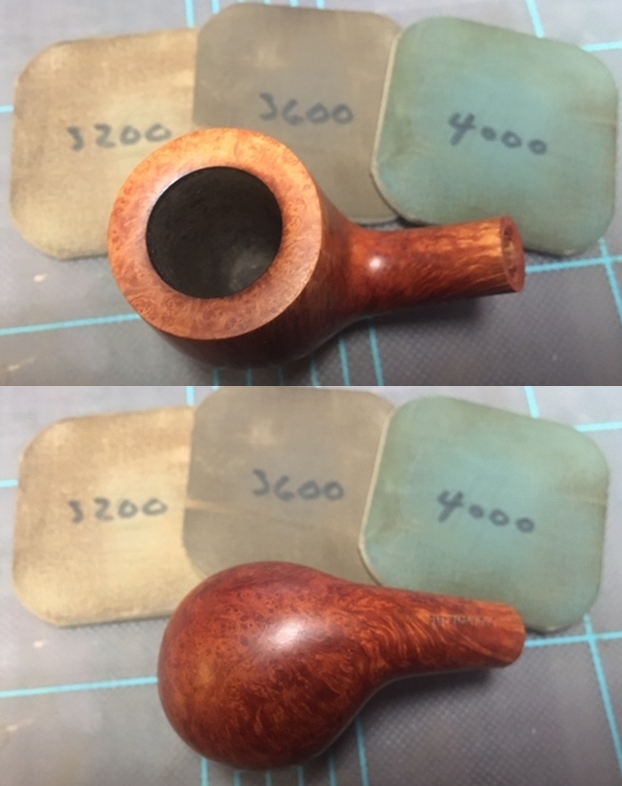
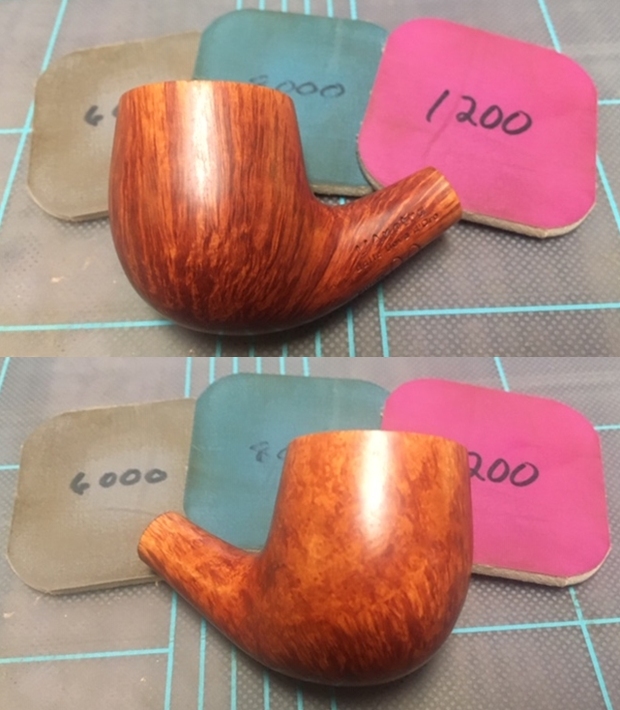
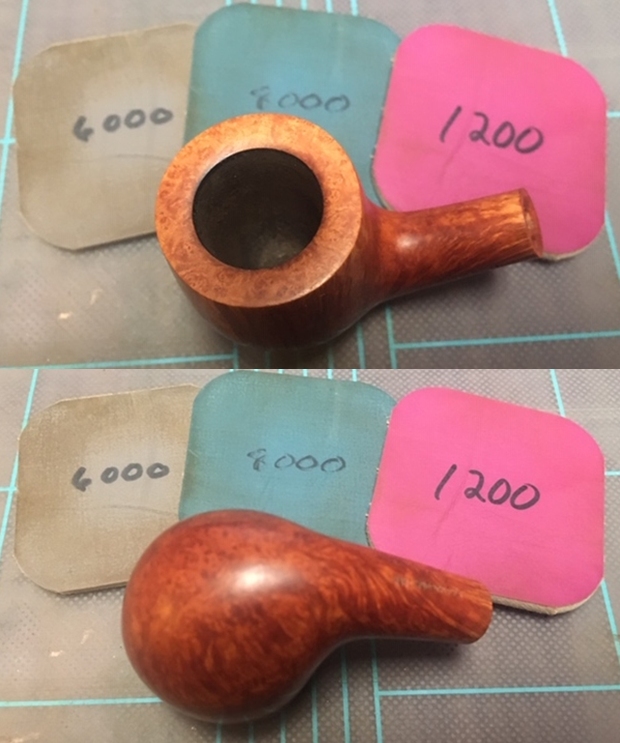
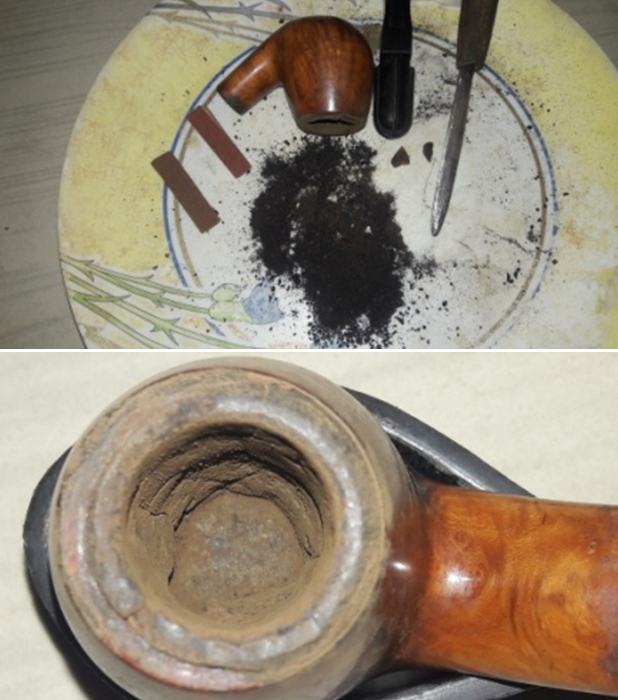
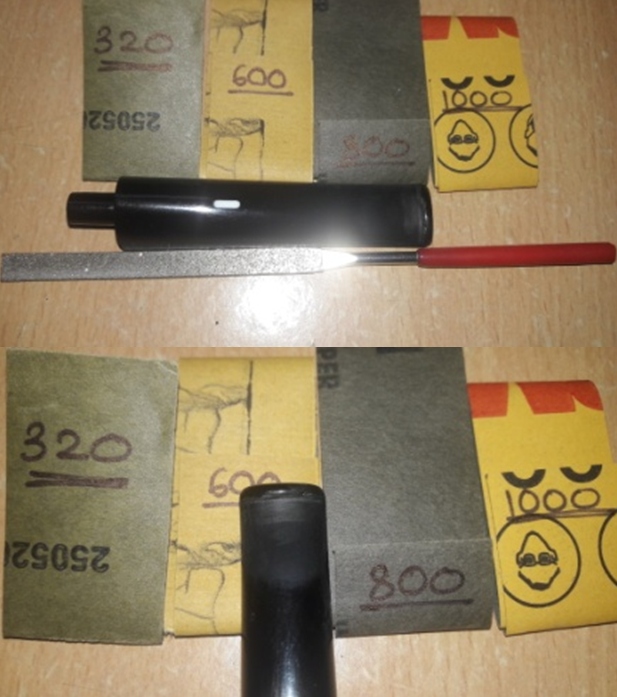 To bring a deep shine to the Lucite stem, I polished it by wet sanding with 1500 to 12000 grit micromesh pads. I wiped the stem with a moist cloth and rubbed it down with “Before and After Extra Fine Polish” to remove the minor scratches left behind by the sand paper while polishing the stem to a nice black glossy shine. The finished stem is shown below.
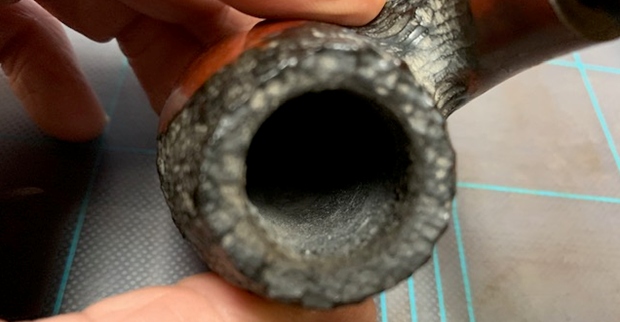
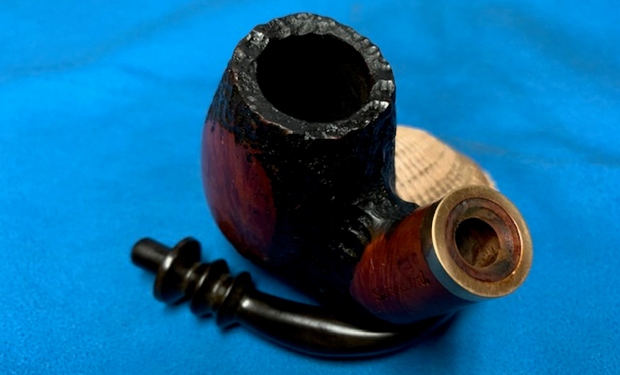
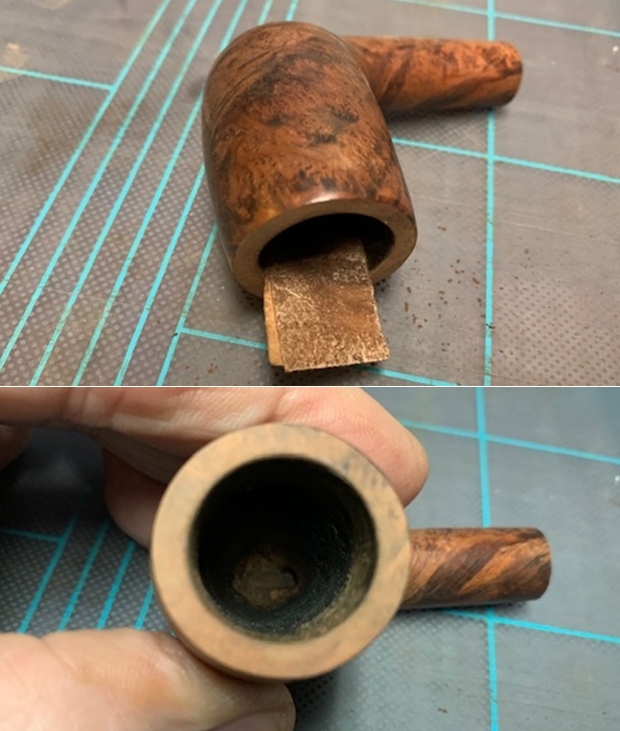
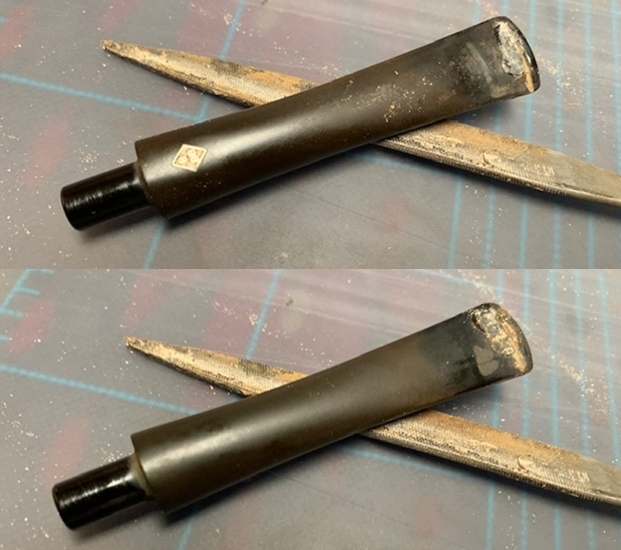
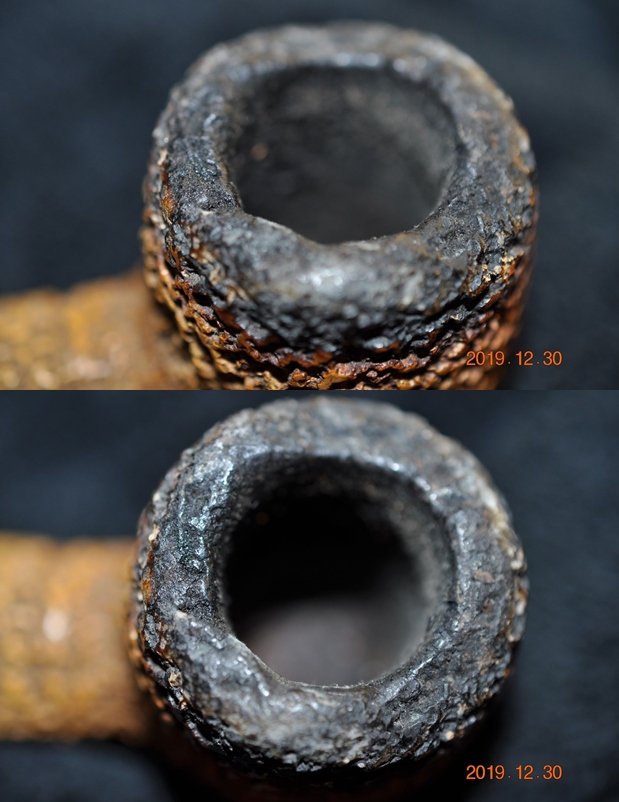
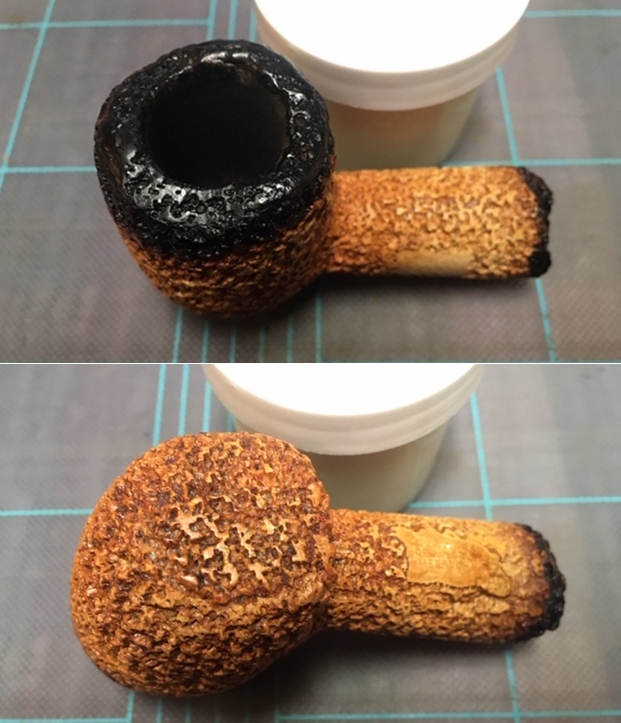
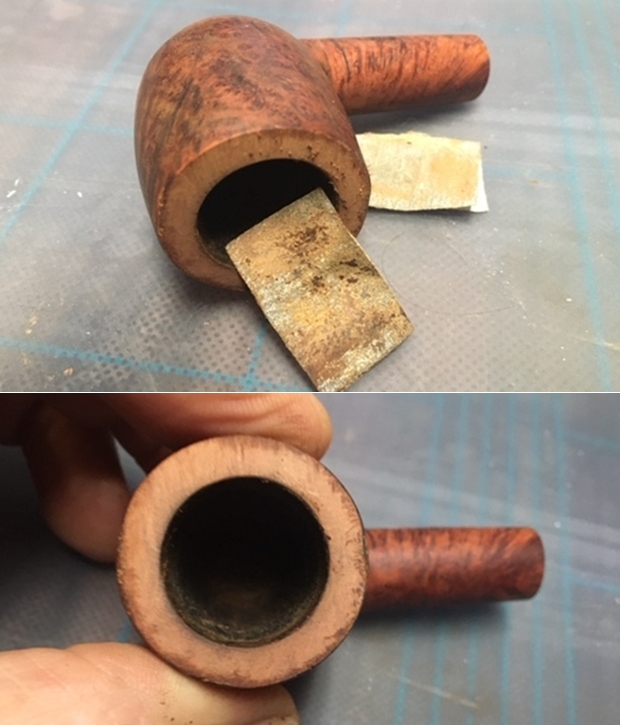
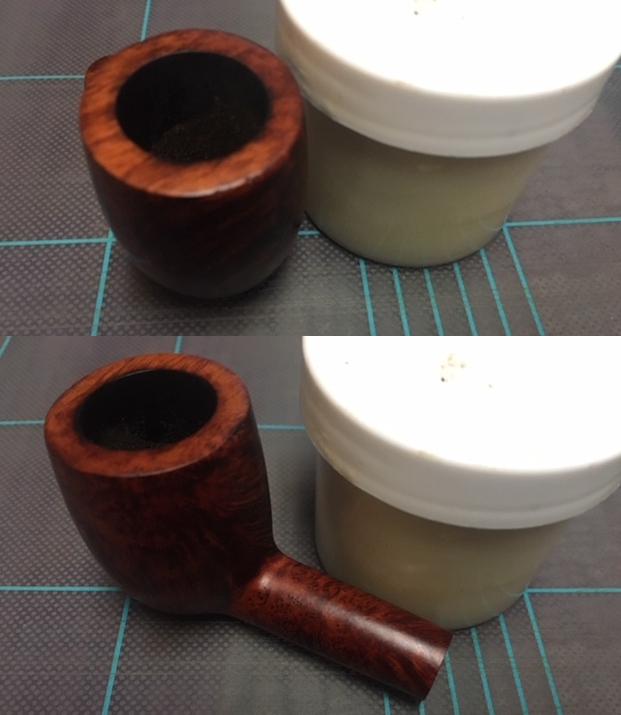
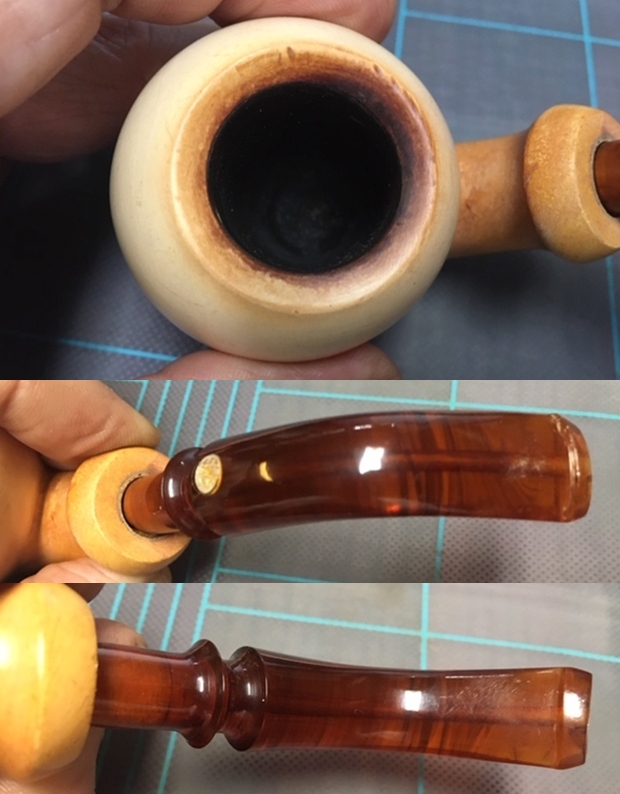
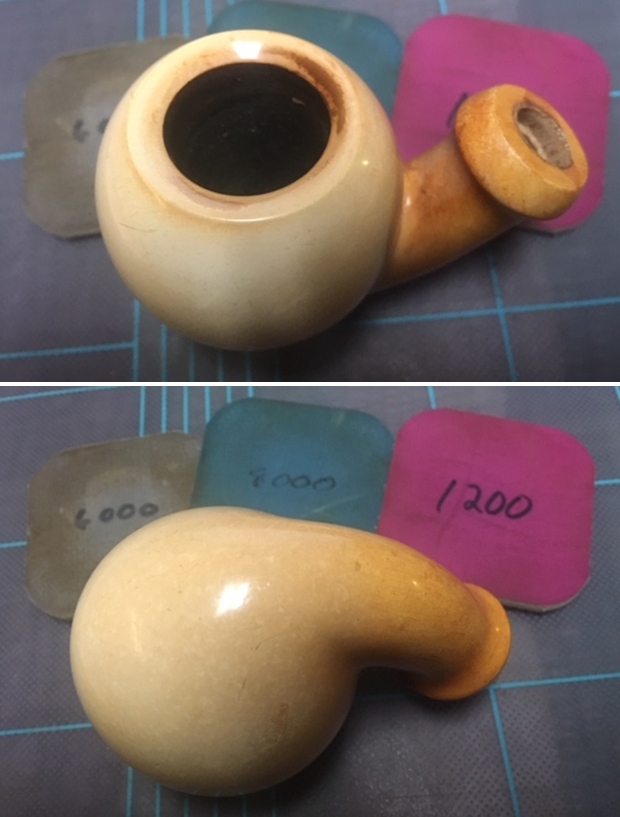
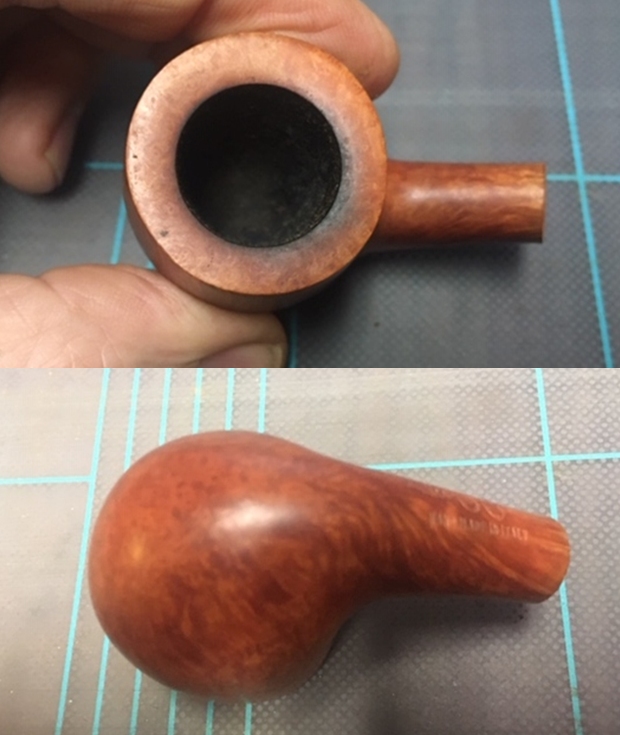
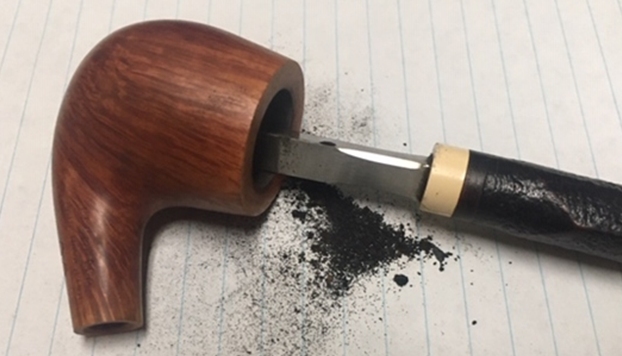
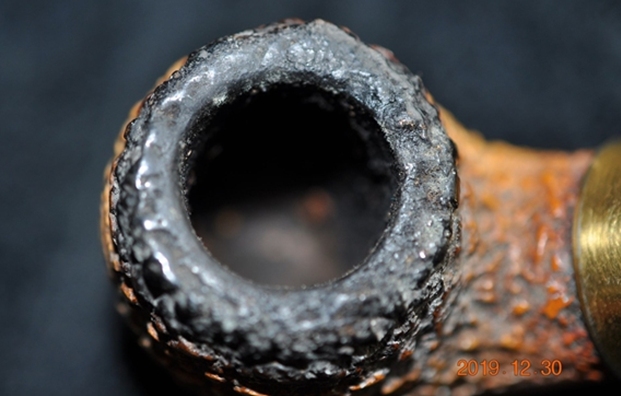
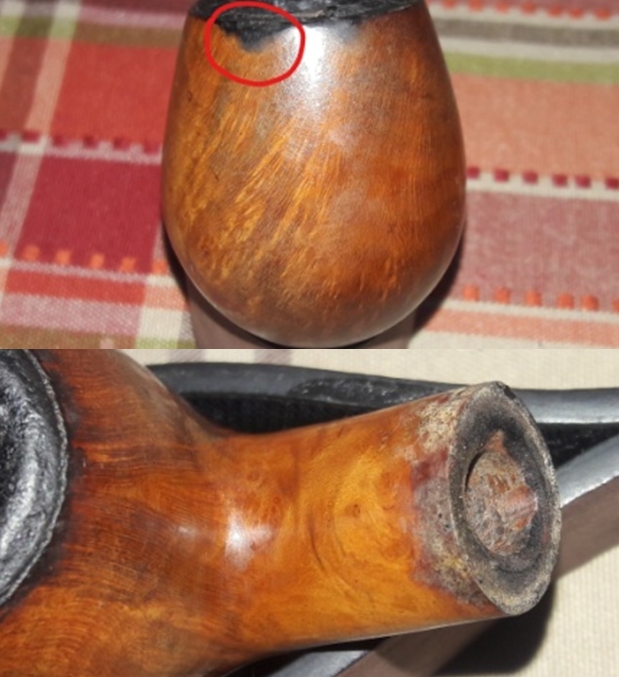
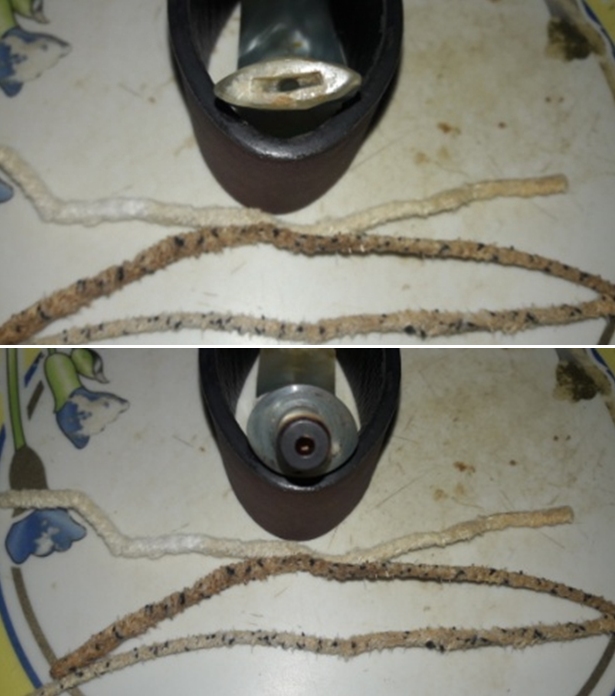
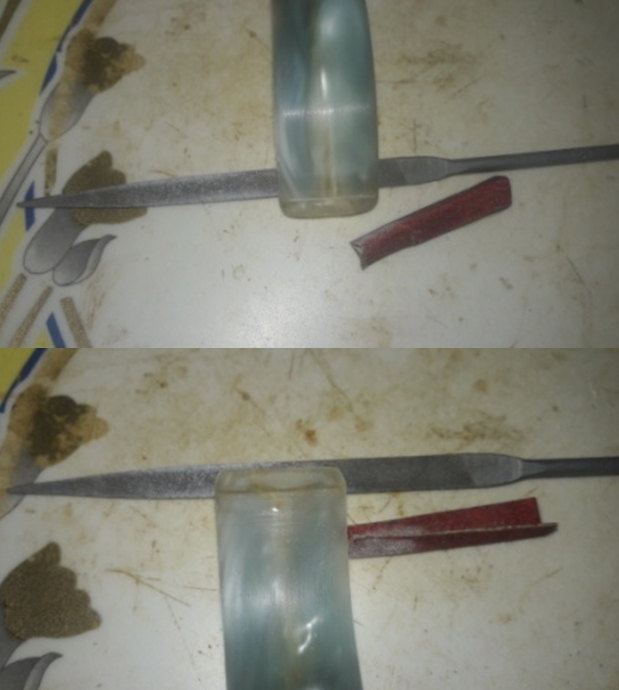
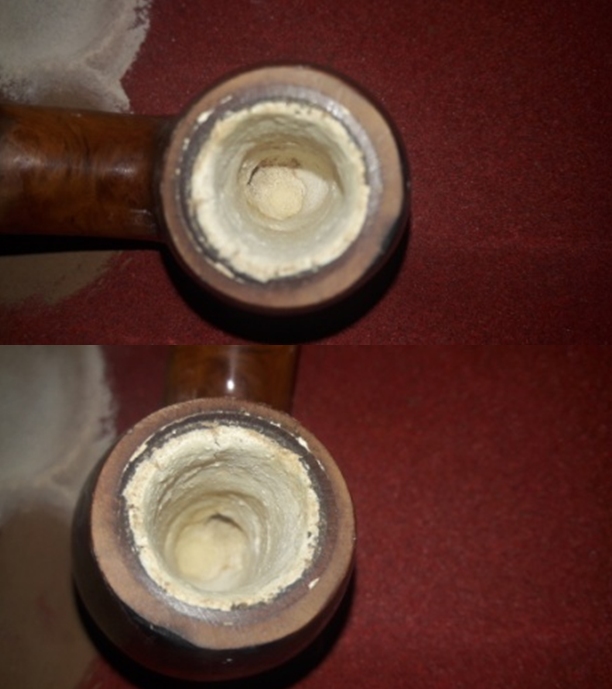
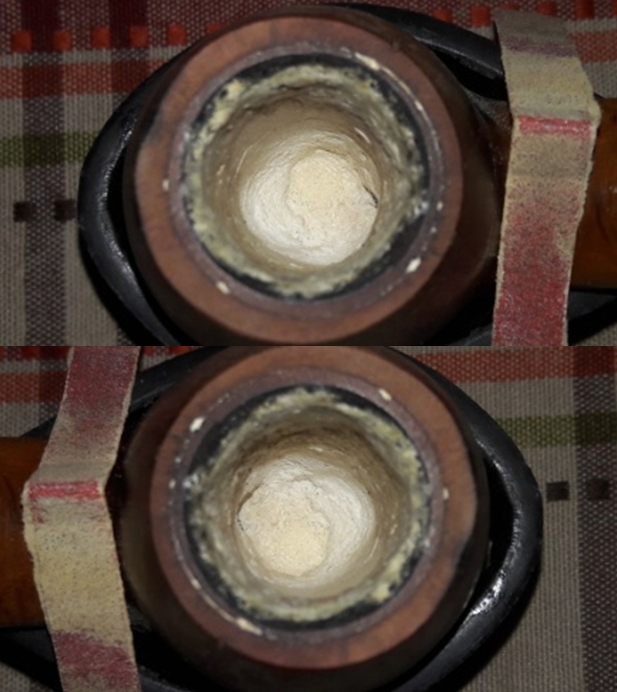
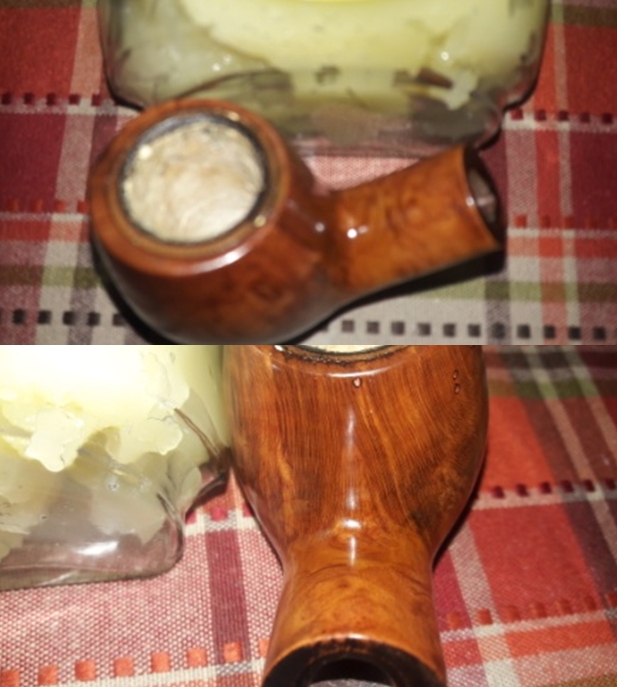
 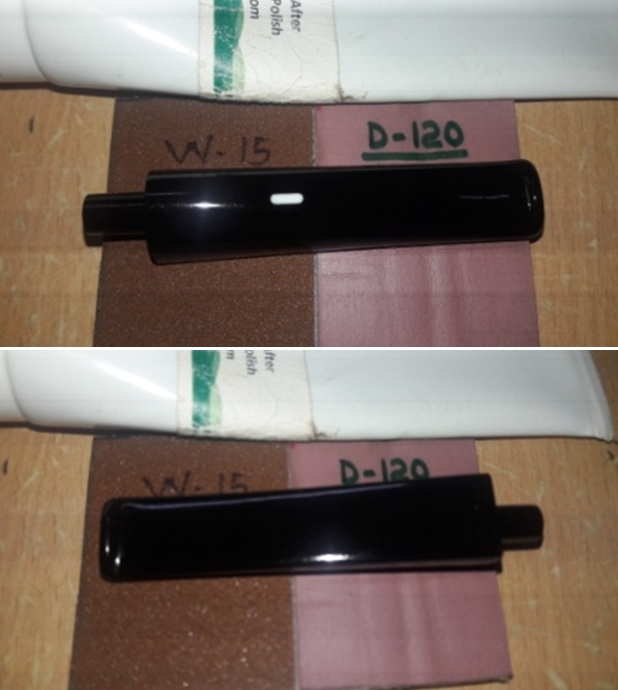 I took a closer look at the walls of the chamber to ascertain the condition of the chamber. To my chagrin, I noticed a distinct line (marked with yellow arrows) extending for about an inch from the inner rim edge in to the chamber. It was the beginning of a heat fissure and from the point of origin (circled in green), there were other two heat lines (marked with blue arrows) extending roughly perpendicular to the first. However, these heat lines were very minor and extremely superficial while the one that moved up towards the rim was slightly deeper. I checked the external stummel surface under bright light and magnification for any corresponding crack. It was heartening to note that there were none! I thoroughly checked the rim top surface and was relieved to note that there is no damage.
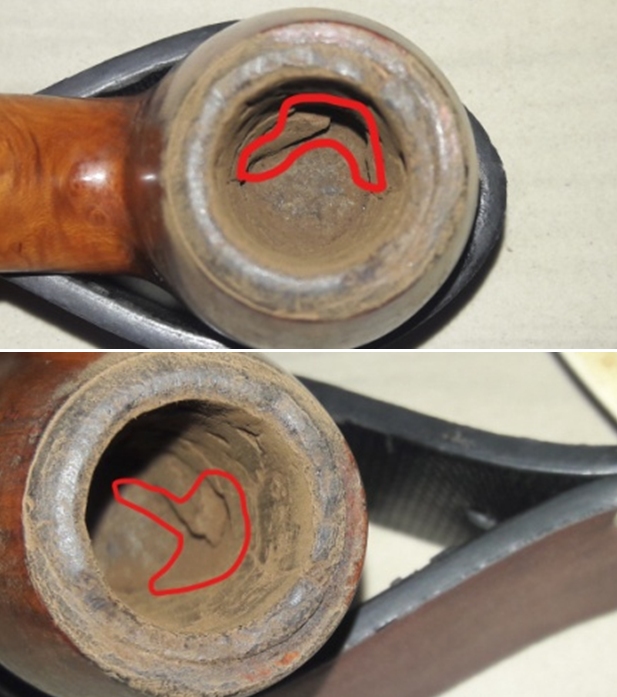
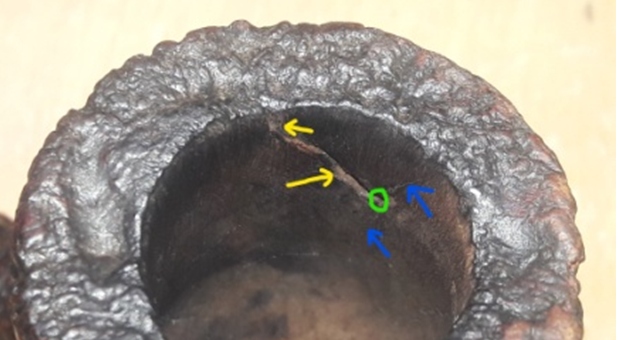 With my sharp dental pick, I probed and removed all the charred briar wood from the crack. It was a big relief to note that the crack did not go all the way to the outside of the stummel. Here are a couple of close up pictures of the crack to the chamber wall. I conferred with my Guru and mentor, Steve, over Face Time video call and after seeing the crack, he concurred that it was best to fill just the crack inside the chamber with J B Weld followed by a coating of activated charcoal and yogurt to the entire chamber for further protection.
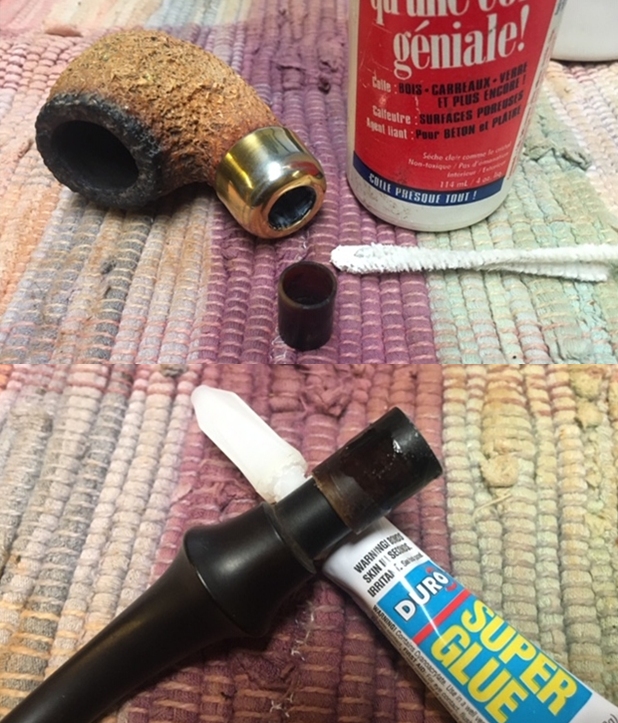
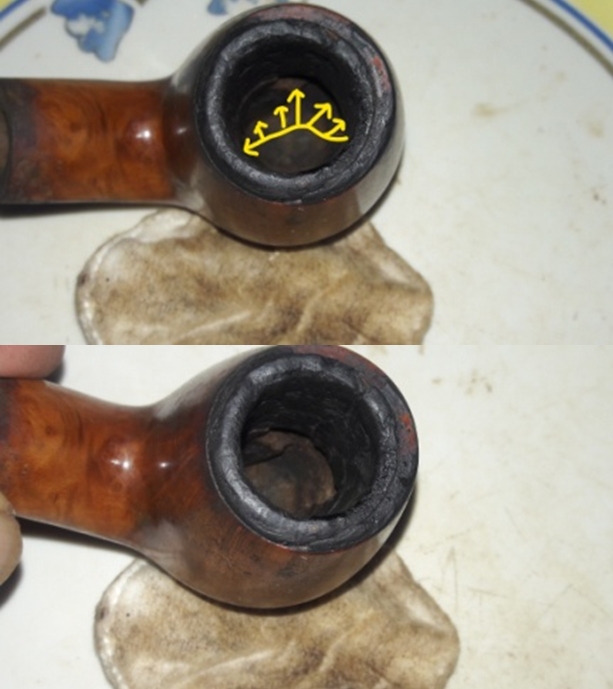
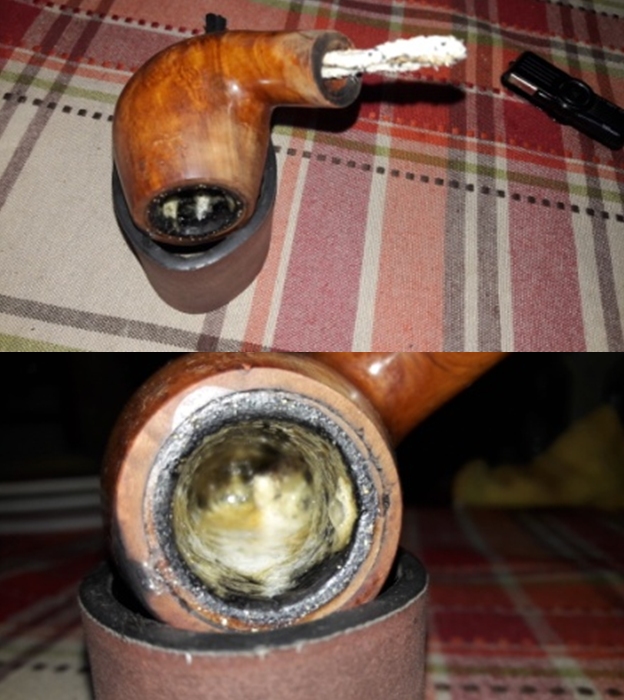
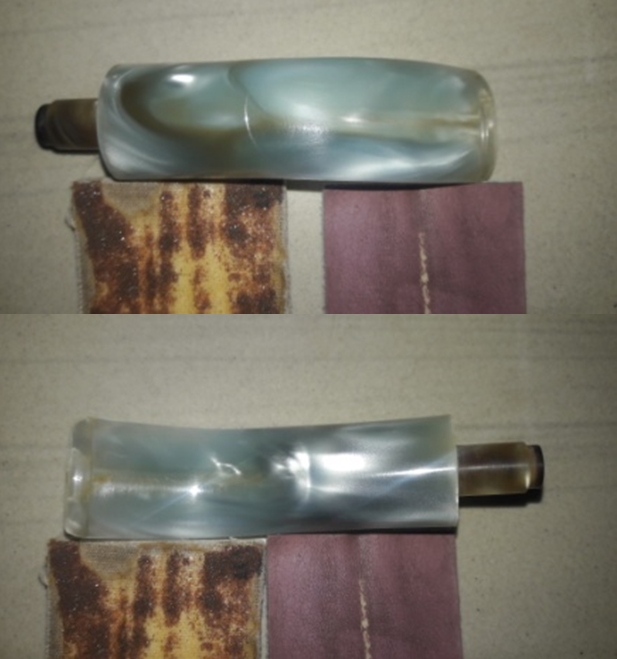
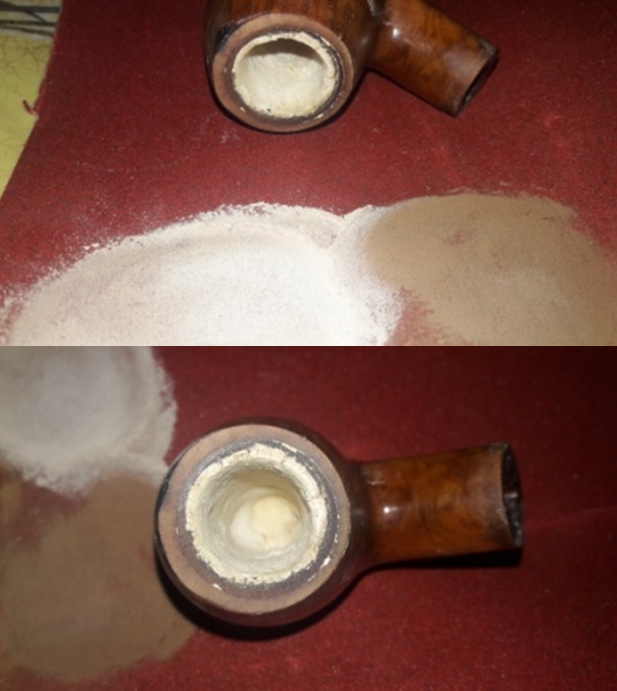
 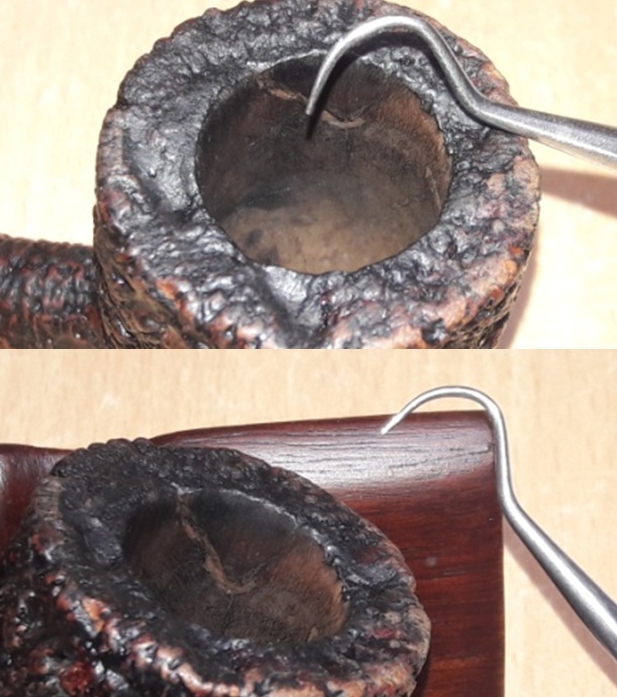 Before proceeding with further repairs, I thoroughly cleaned the rim top to completely remove the lava overflow from the rim top surface Murphy’s Oil soap and a brass wired brush. To protect the crack from coming in to direct contact with the burning tobacco and also to prevent the heat from reaching the external crack to the stummel and causing a burnout, I plan, firstly, to fill only the crack of the chamber with J B Weld followed by a second coat of activated charcoal and yogurt to the entire chamber which would assist in faster cake formation. J B Weld is a two-part epoxy Cold Weld that consists of two parts; hardener and steel which are mixed in equal parts in a ratio of 1:1 with hardening time of 5-6 minutes and complete curing time of 6-8 hours. I poured the contents of the two tubes and mixed it well. With a flat bamboo frond, I applied this mix and filled the intended crack. I worked fast to ensure a complete and even filling of the crack and set the stummel aside for the J B Weld to harden.
 By the next afternoon when I got back to working on this pipe, the J B Weld coat had completely cured and hardened completely. With a folded piece of 150 grit sandpaper, I sand the weld coating to a smooth surface till I had as thin a coat as was essential to protect and insulate the crack from the direct heat of the burning tobacco. The Weld coat has completely covered only the crack and the point of origin which can be seen as a thin line. I am very pleased with the repairs at this stage.
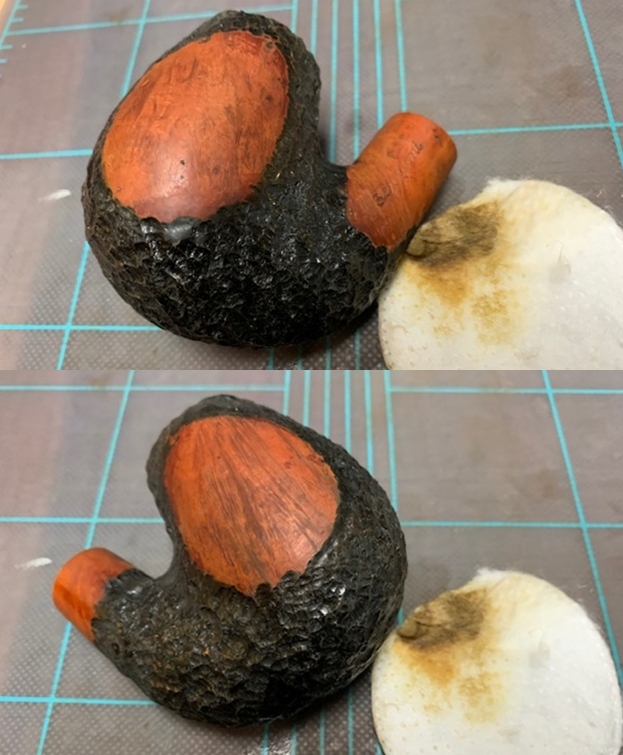
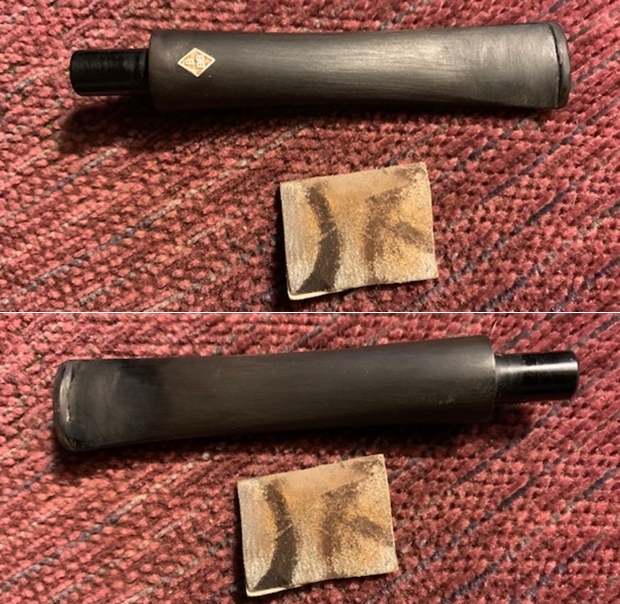
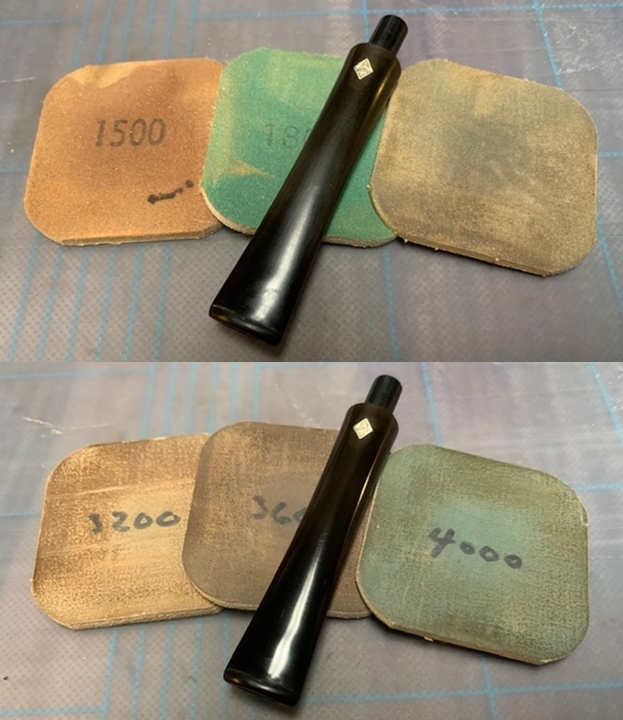
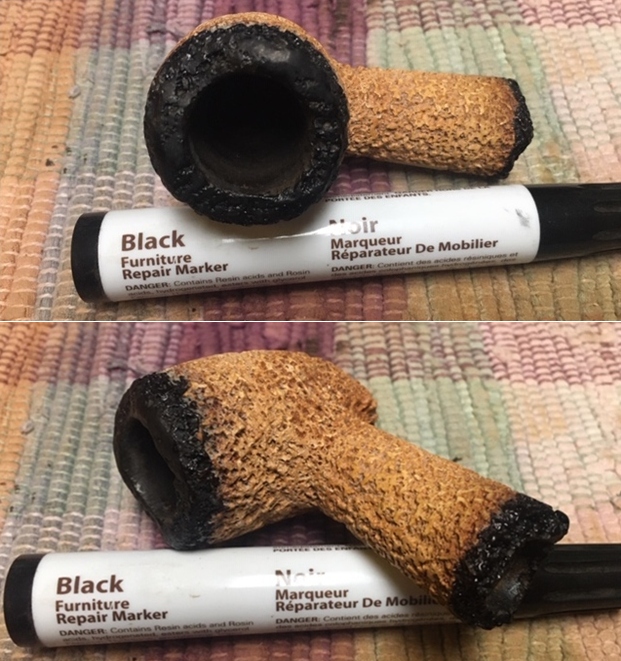
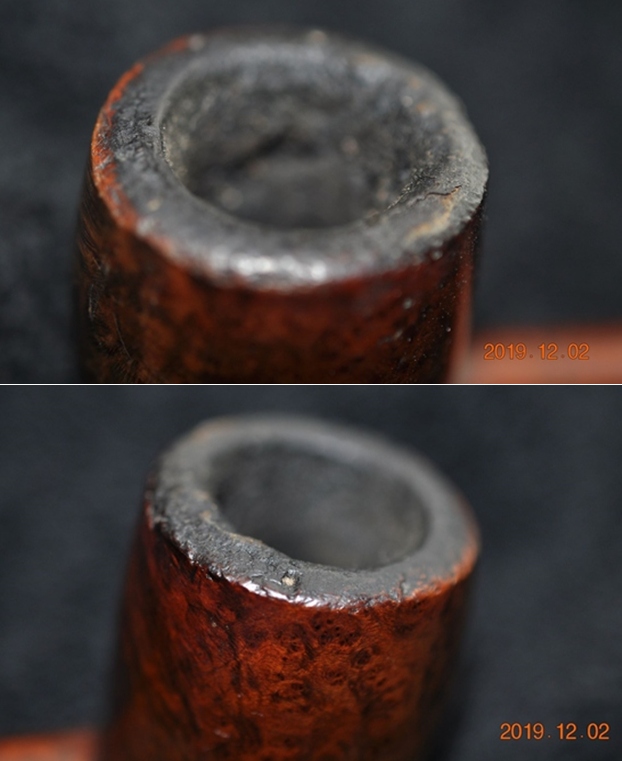
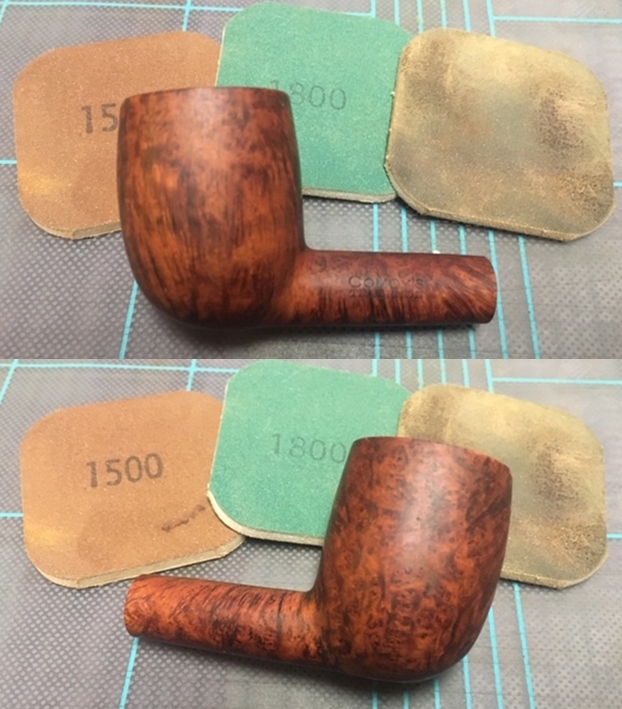
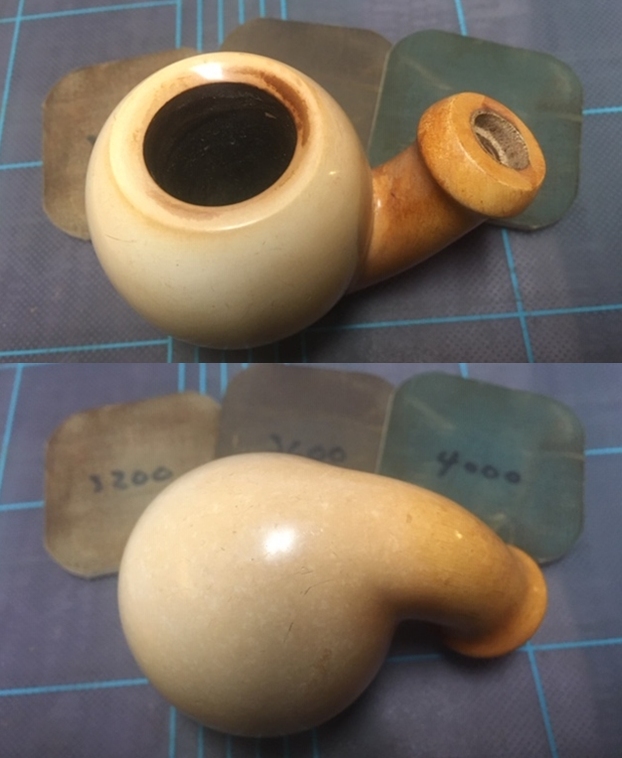
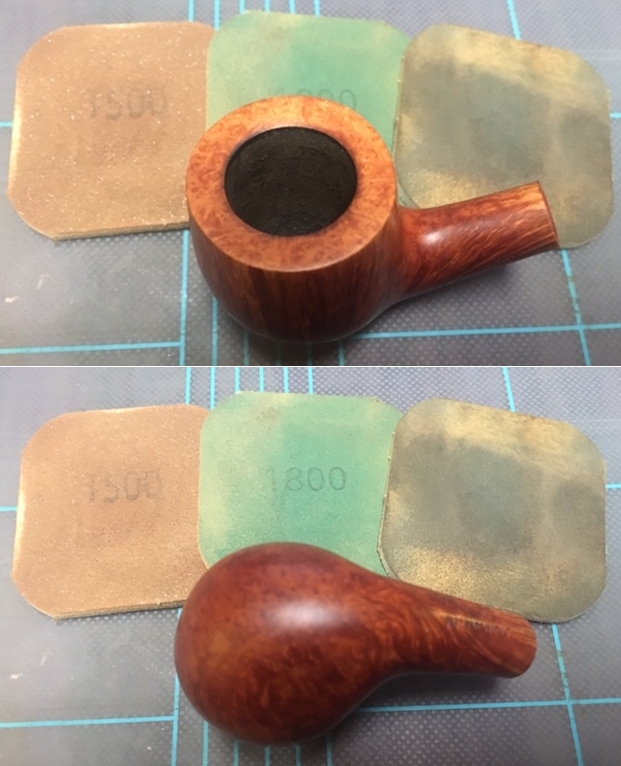
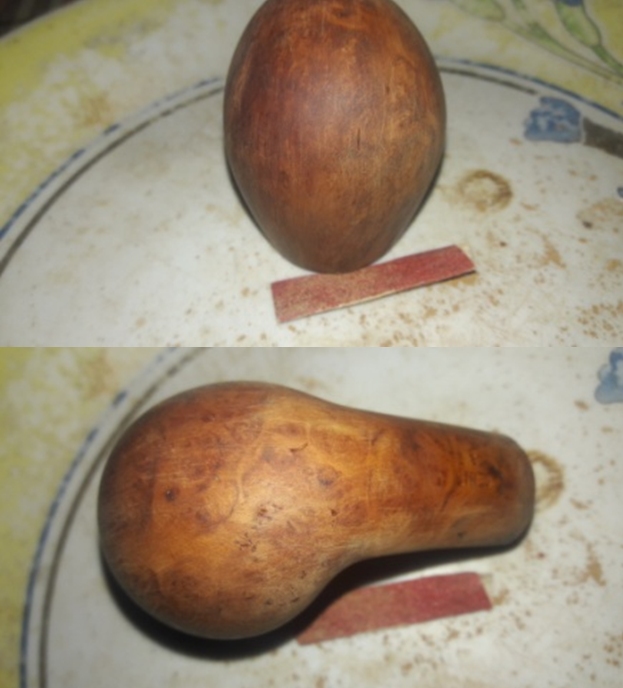
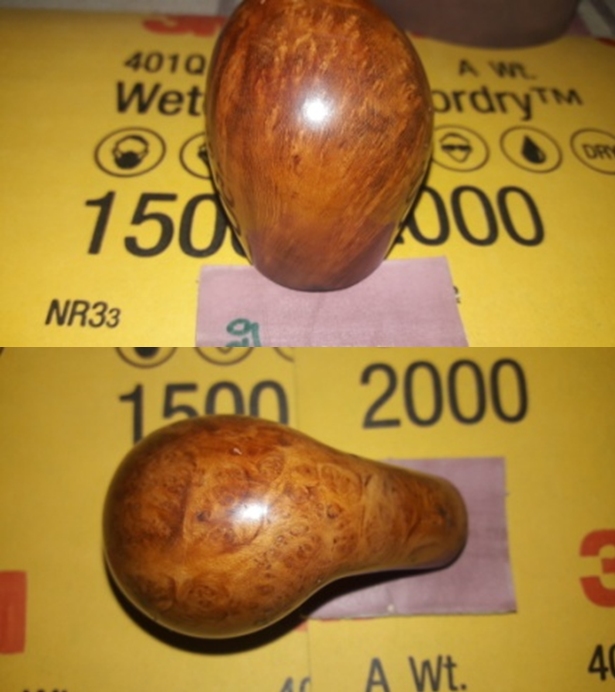
 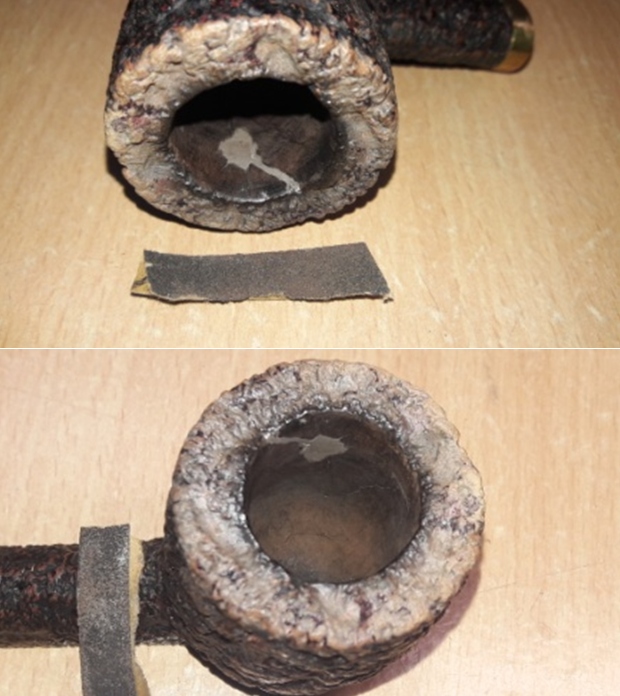 Next issue to be addressed was that of the numerous deep road rash marks that were seen to the flat lower surface of the stummel. With a folded piece of 180 followed by 600 and 800 grit sand paper, I diligently sand away the road rash marks from the lower flat surface of the stummel taking care that the stampings are preserved in total. I followed it up by polishing the surface by wet sanding with 1500 to 12000 grit micromesh pads. Though the road rash marks are not completely eliminated, they are greatly reduced. The road rash marks to the gold band are now distinctly visible in the last picture.
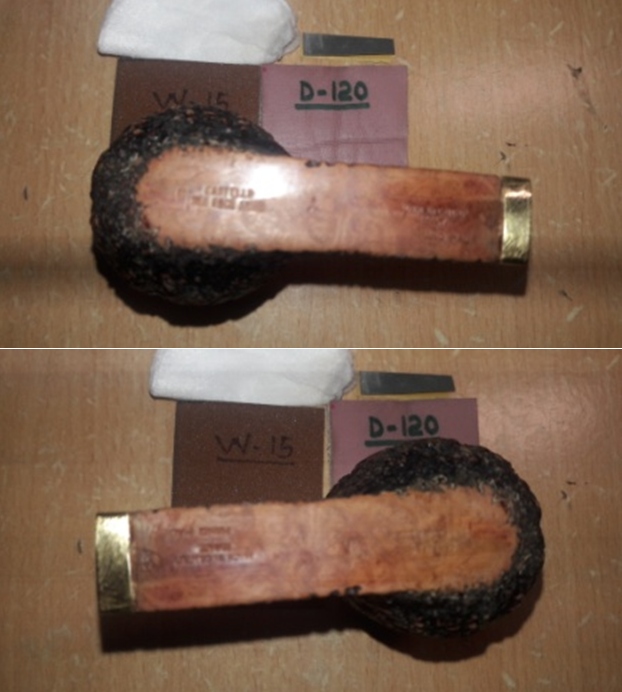
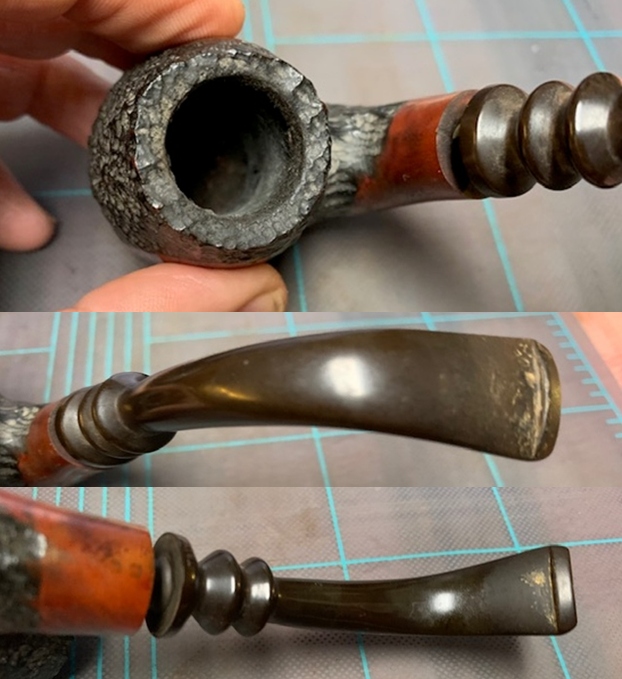
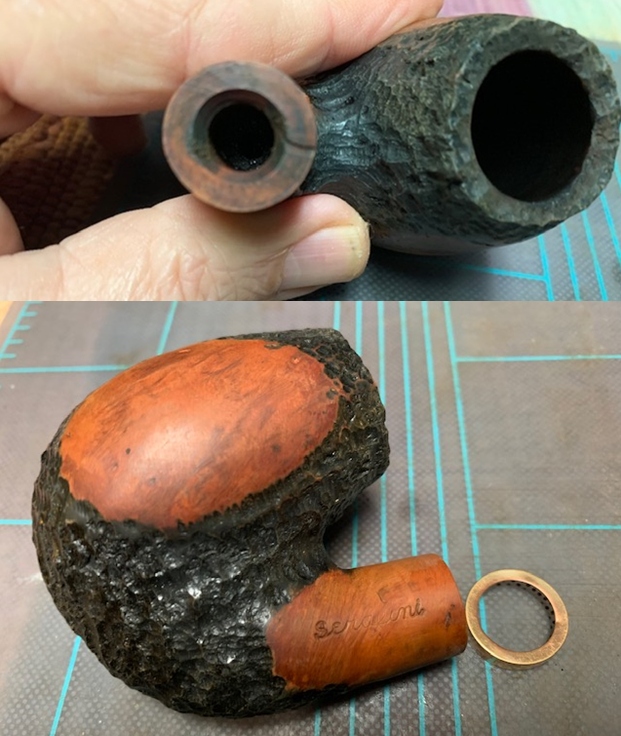
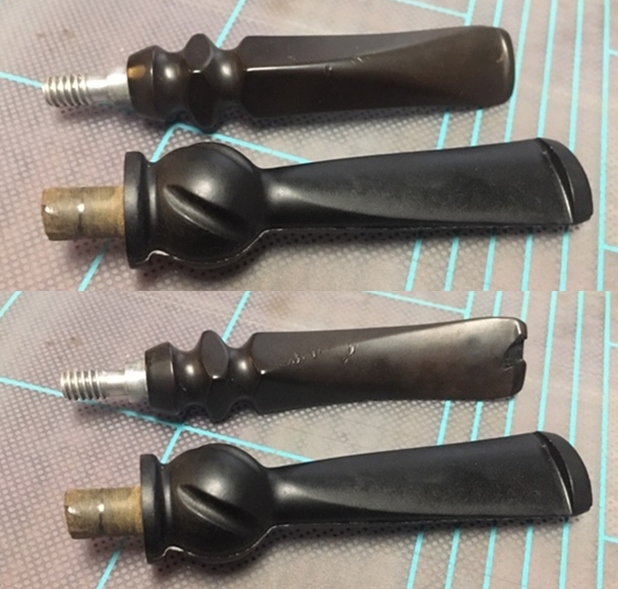
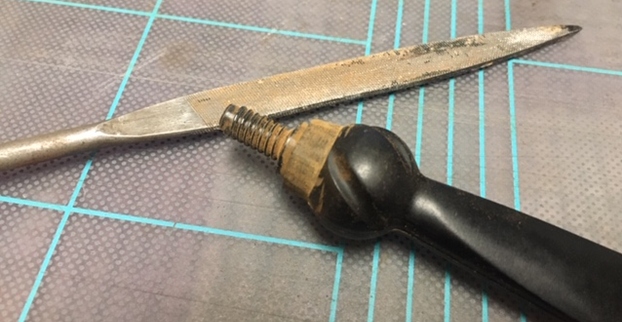
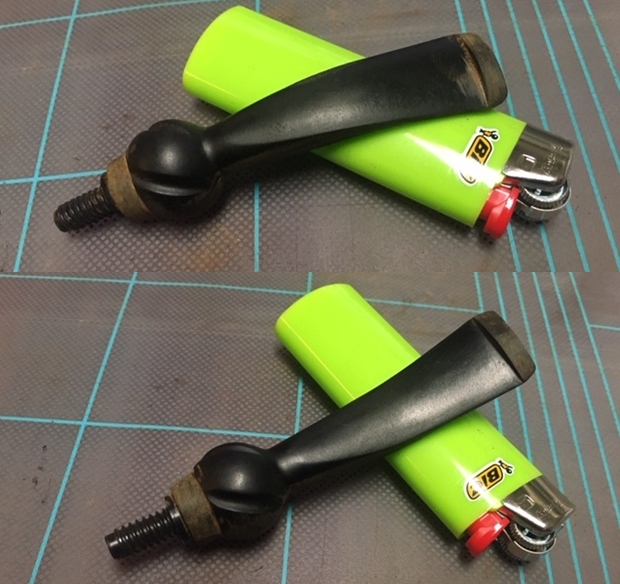
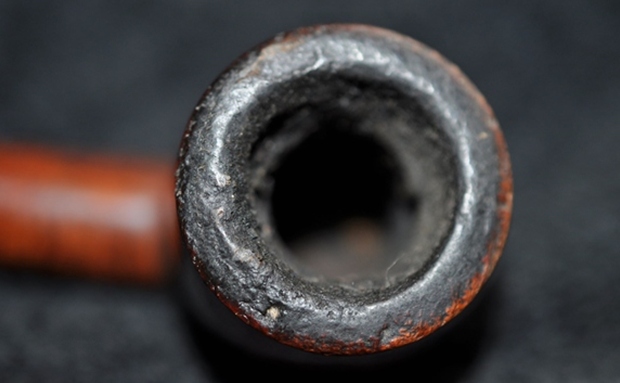
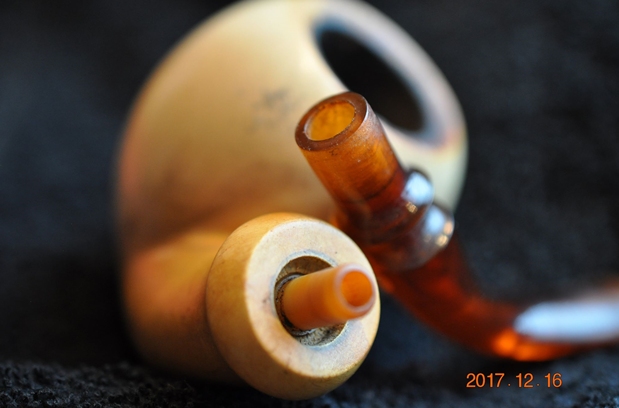
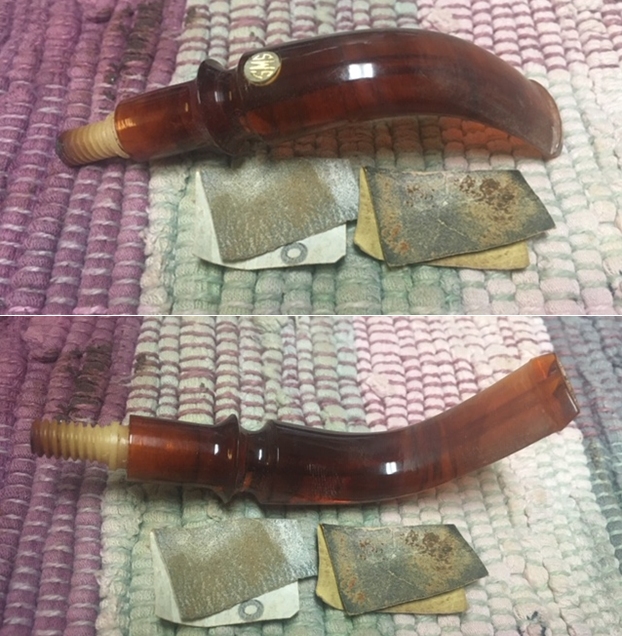
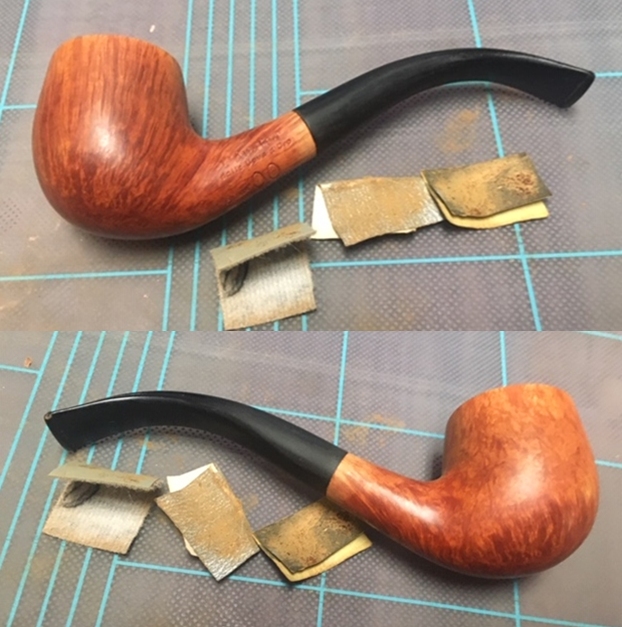
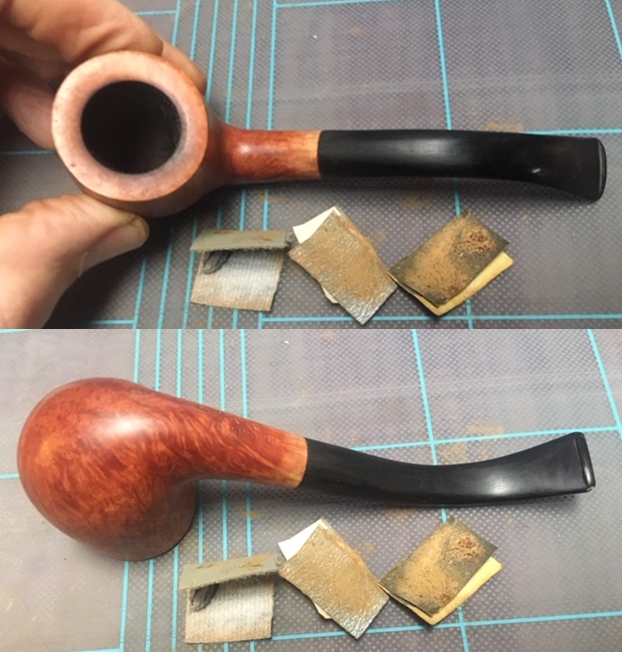
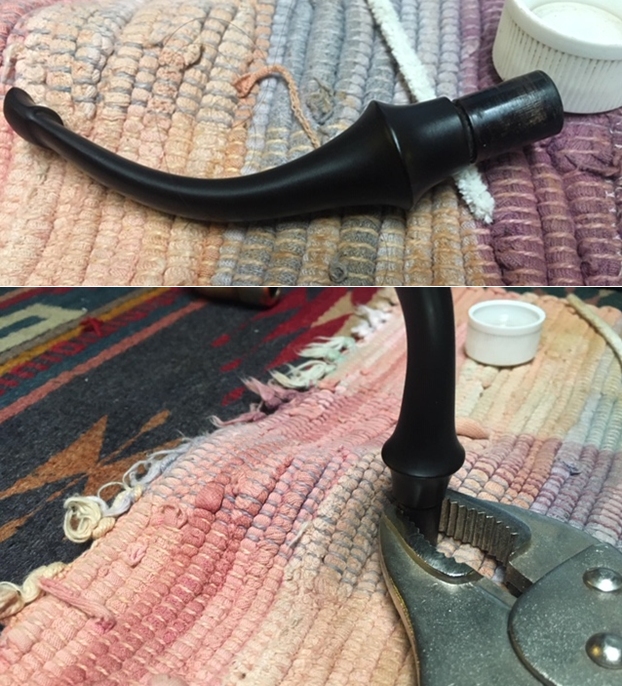
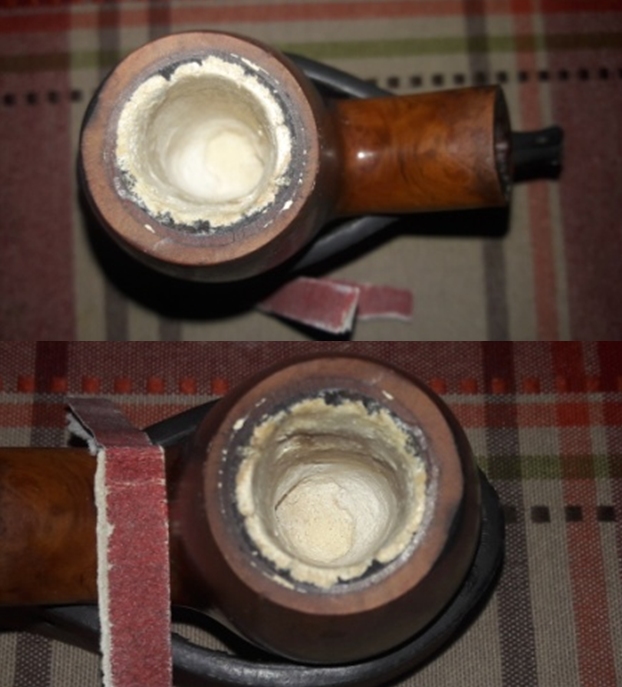
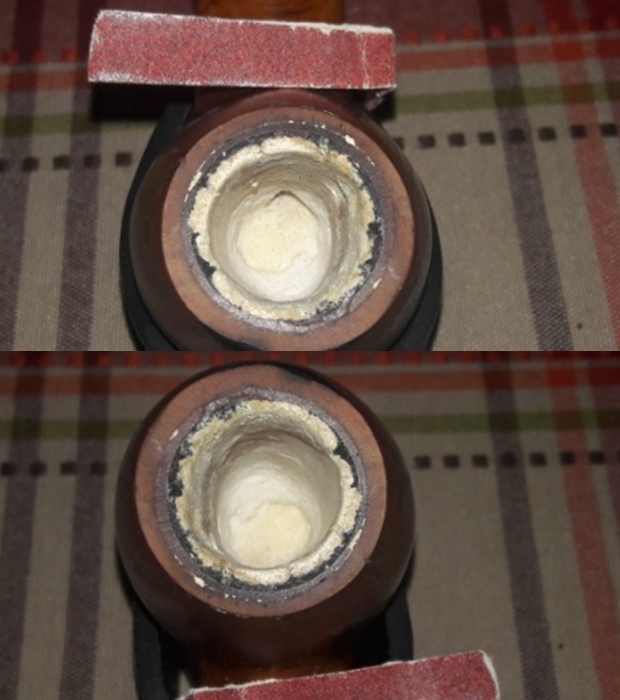
 The last issue that needed to be addressed before final polishing was that of the seating of the stem tenon in to mortise. The pictures below will give the readers an idea of the issue that I needed to address.
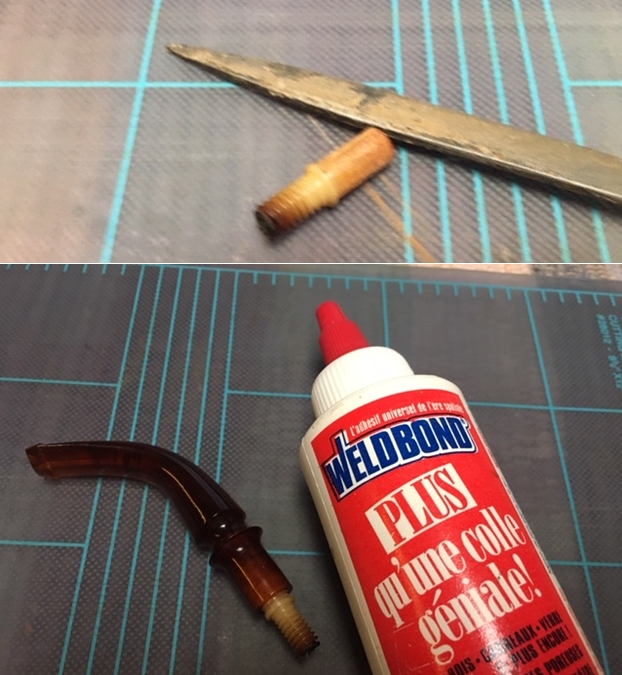
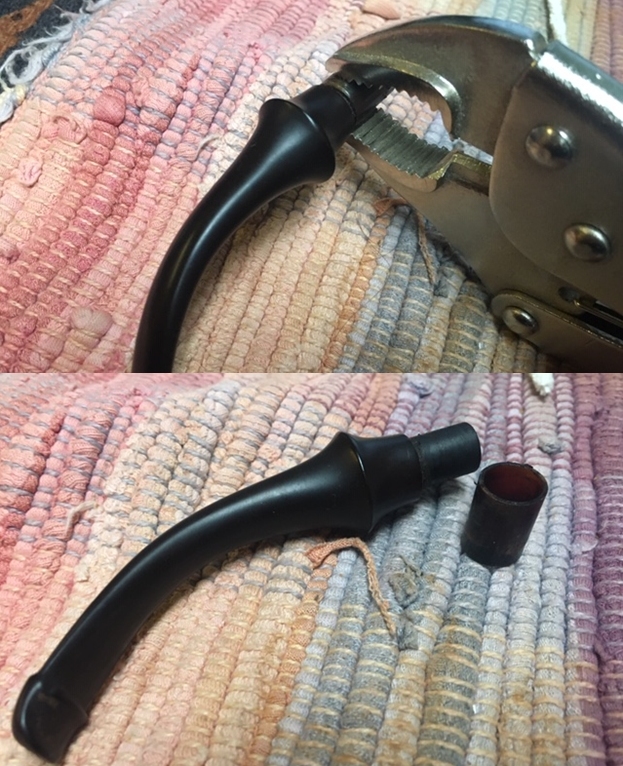
 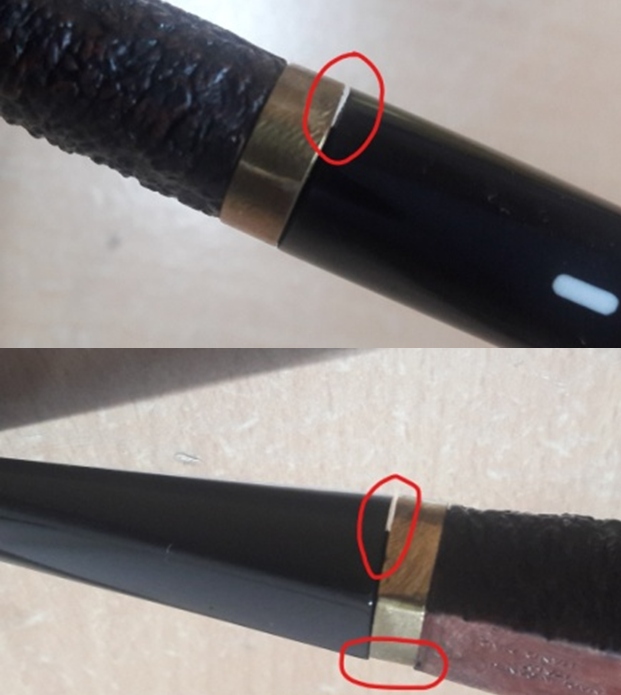 I checked the drilling of the mortise and it was perfect as expected. Next I checked the shank face and the gold band for unevenness but it was nice even and the band sat flush with the shank face. But yes, the seated stem in the mortise had some play in the fitting. I conferred with Steve on Face Time and he asked me to hold the stem upright with tenon side up. Immediately, it was apparent to both of us that the tenon had bent a little and was off center. To address this, I heated the tenon with the flame of a lighter till it was slightly pliable and carefully seated the tenon in to the mortise. Once completely seated, I adjusted the alignment and held the stem in place till the tenon had cooled down sufficiently. Again, though the seating is not perfectly flushed, the alignment of the stem and shank is near perfect. It has to be understood that we pipe restorers are undertaking repairs to the existing damages to make them functional again and not making new pipes, though we do strive for that kind of perfection. All said, I am quite pleased with this repair.
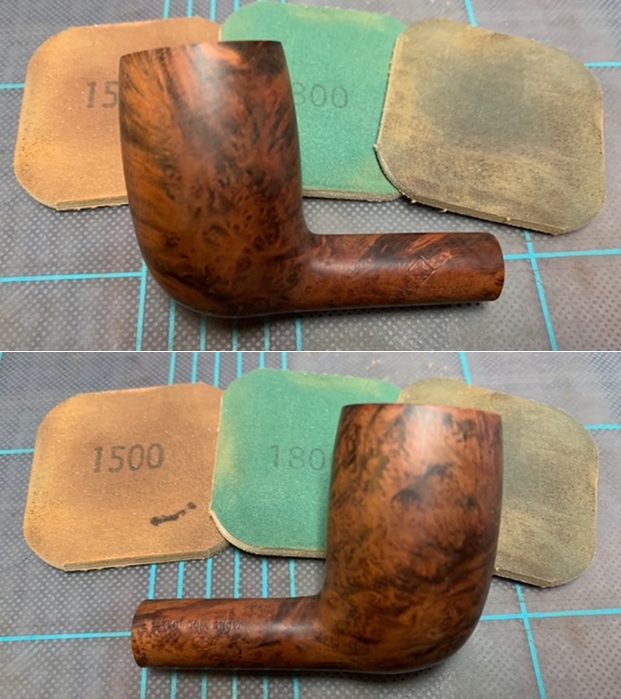
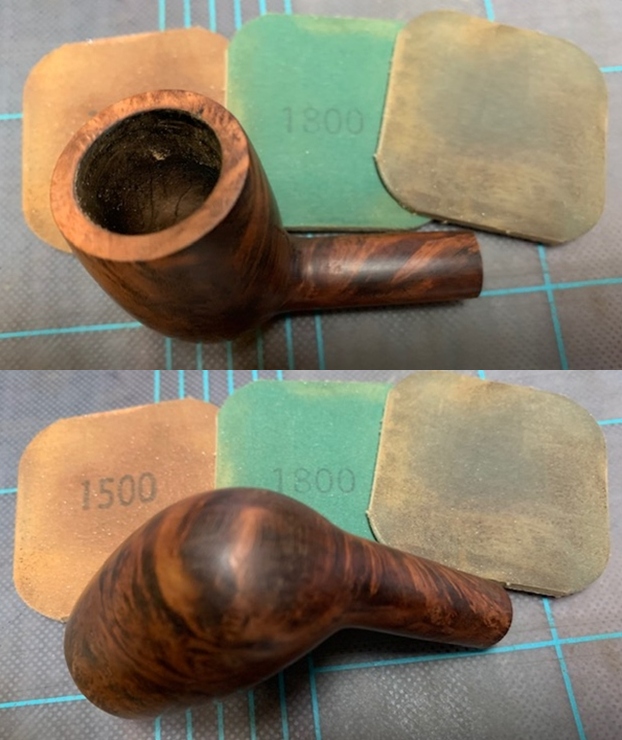
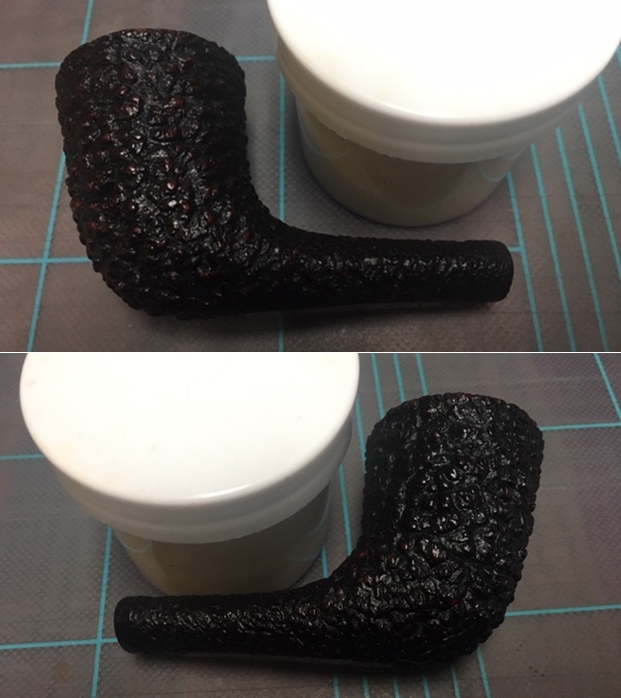
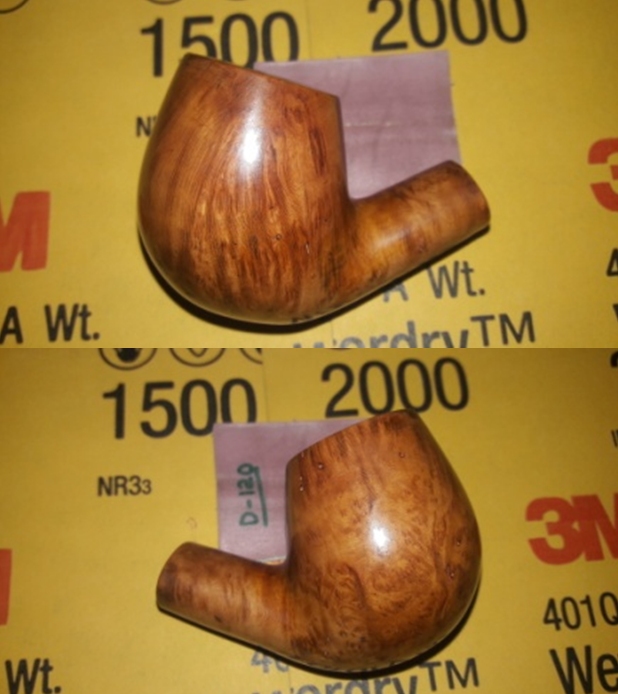
  I rubbed a small quantity of “Before and After Restoration Balm” deep in to the briar with my finger tips and let it rest for a few minutes. The balm almost immediately works its magic and the briar now has a nice vibrant appearance with the beautiful grain patterns displayed in their complete splendor. I further buffed it with a horse hair brush. The dark browns of the raised portions of the sandblast contrasts beautifully with the rest of the dark stummel and makes for a visual treat. It really is a nice piece of briar.
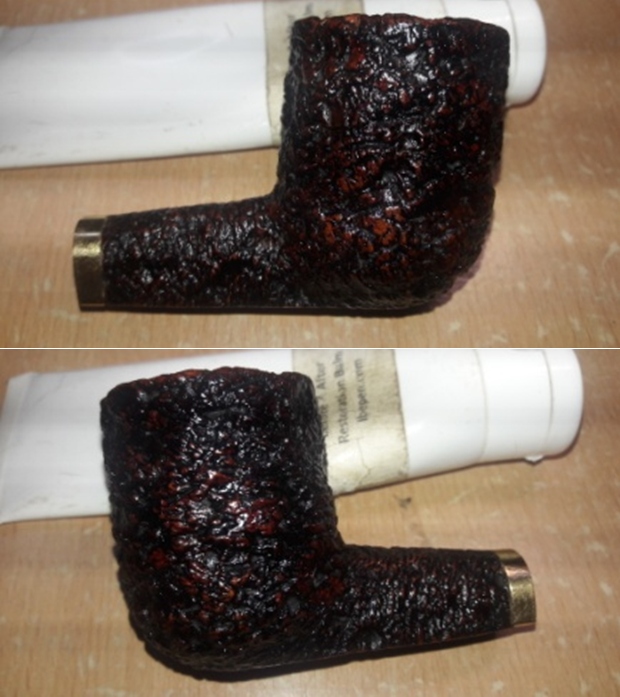
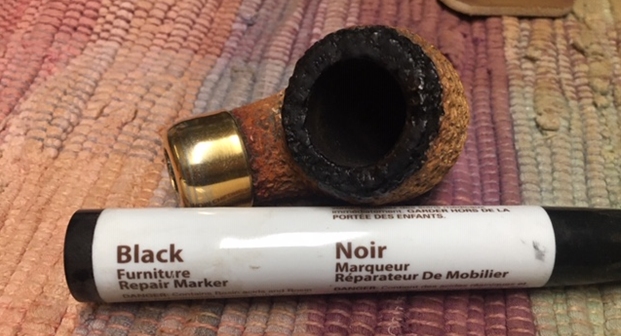
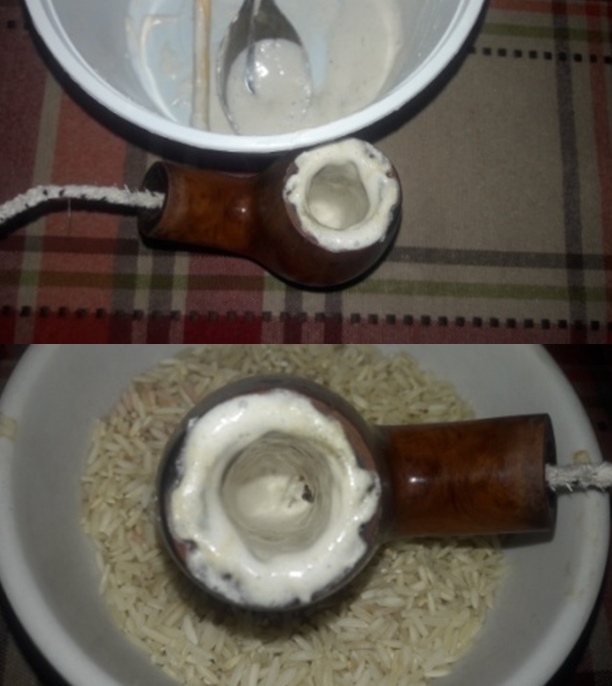
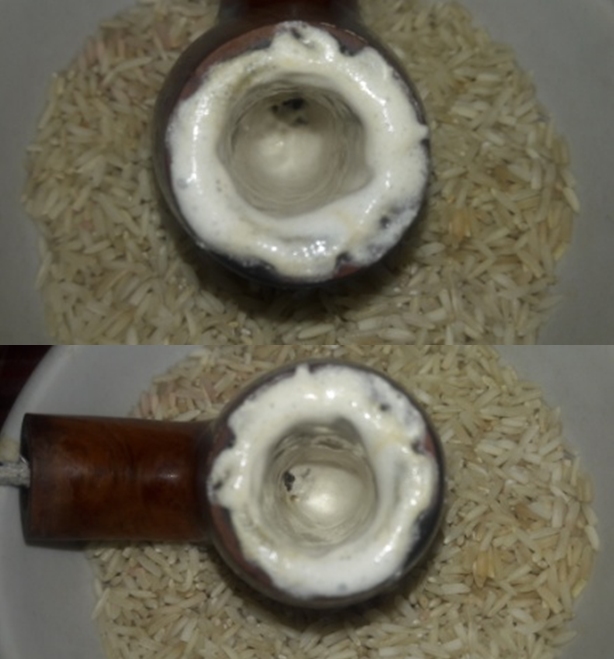
 To protect the J B Weld coated crack from the direct heat of the burning tobacco, I coat the complete chamber walls with a mix of activated charcoal and yogurt and set it aside to harden naturally.
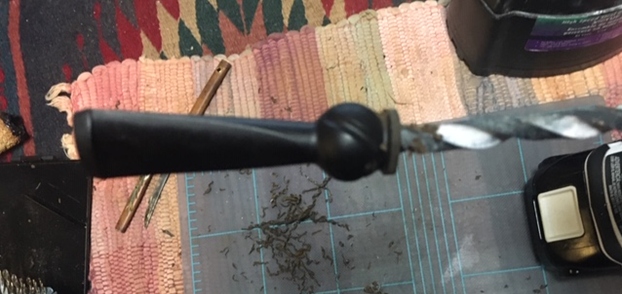
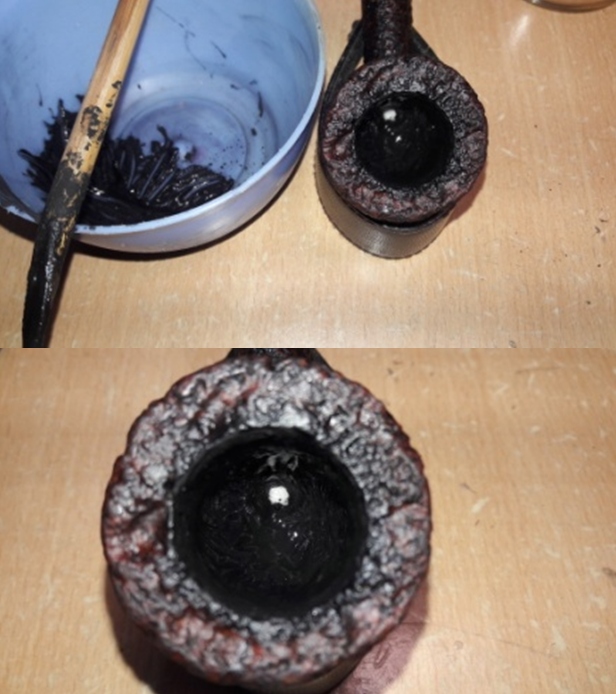 To put the finishing touches, I mount a cotton cloth buffing wheel on to my hand held rotary tool and polished the stem with Blue Diamond compound. This compound helps to remove the minor scratch marks that remain from the sanding.
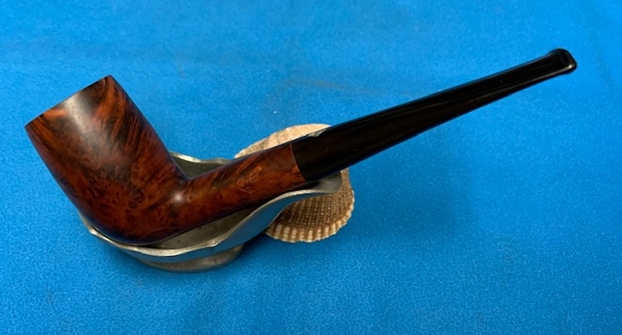
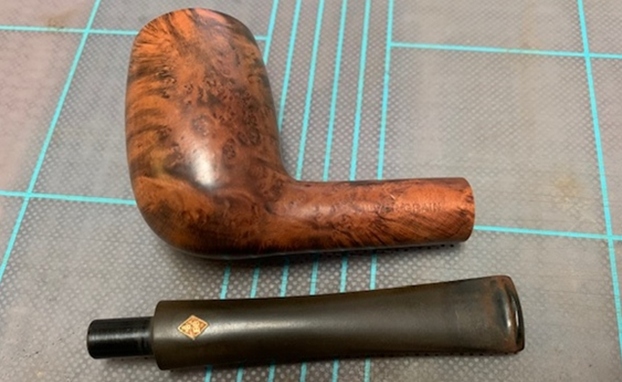
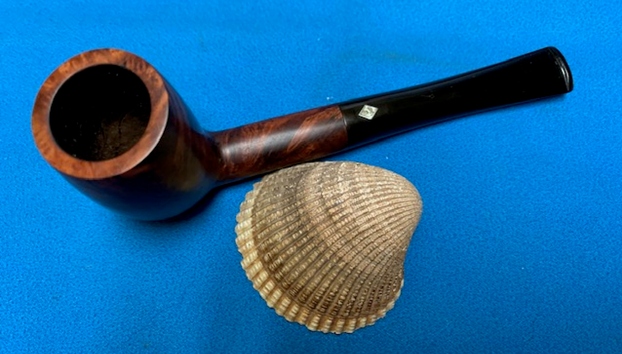
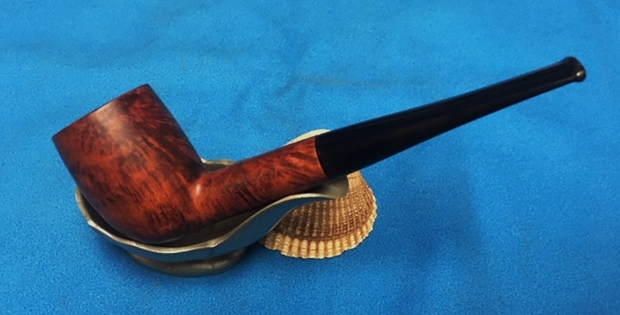
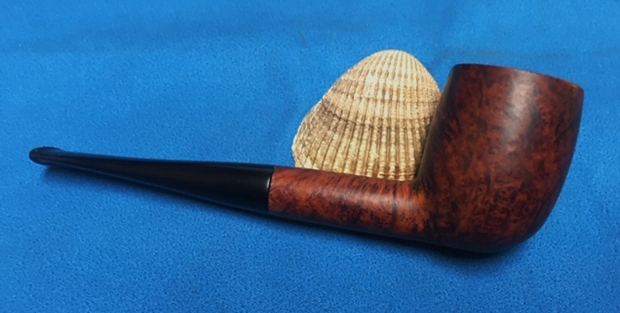
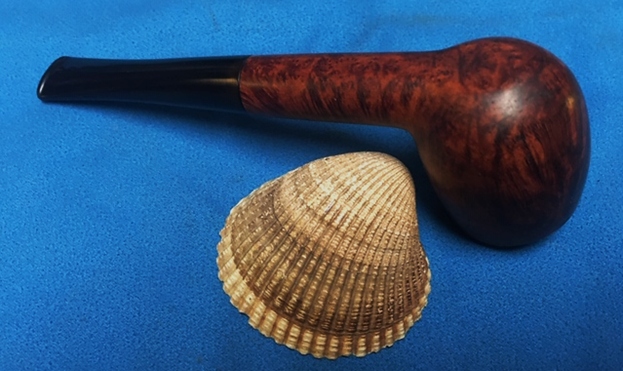
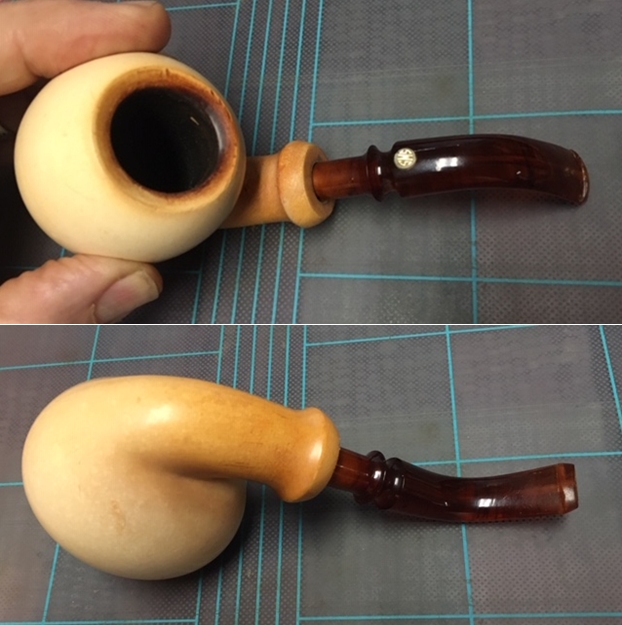
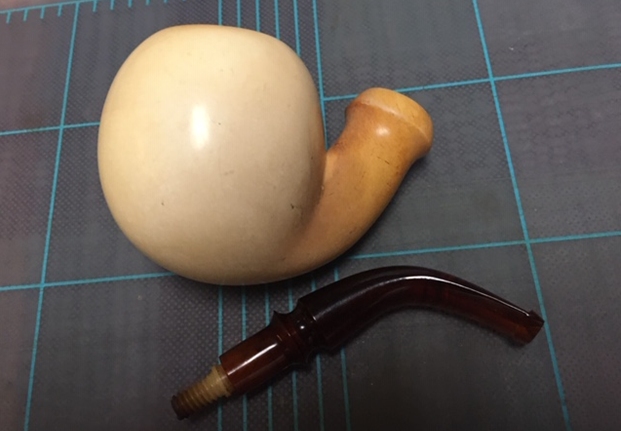
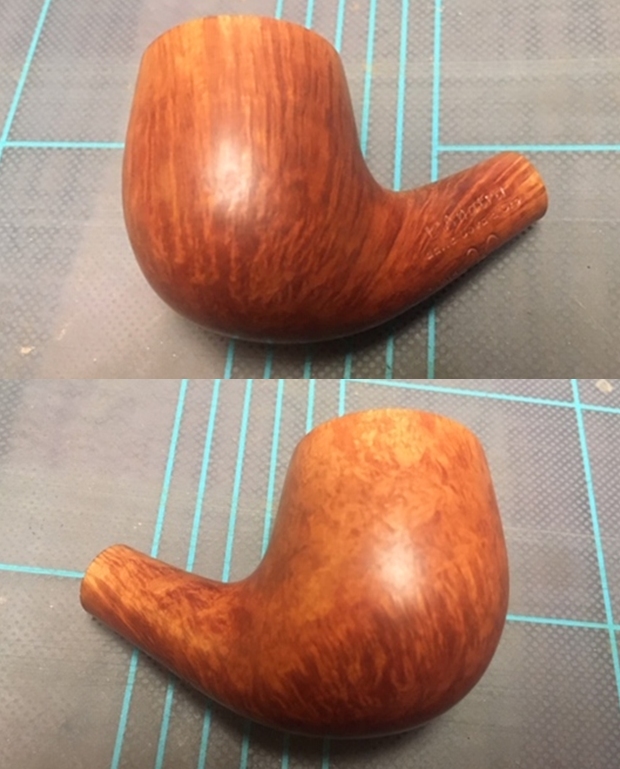
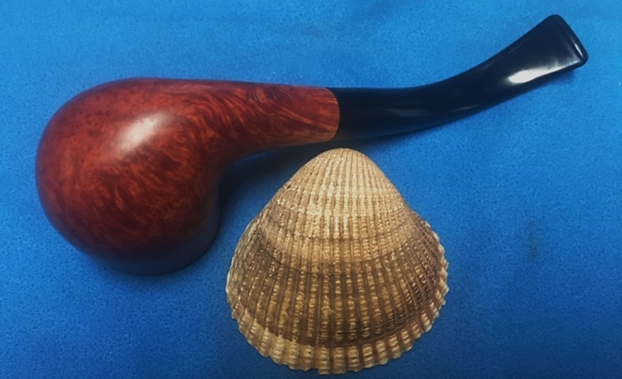
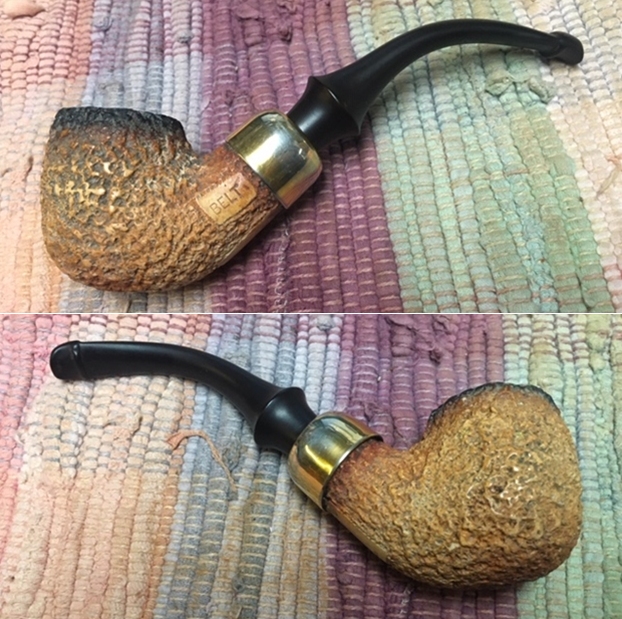
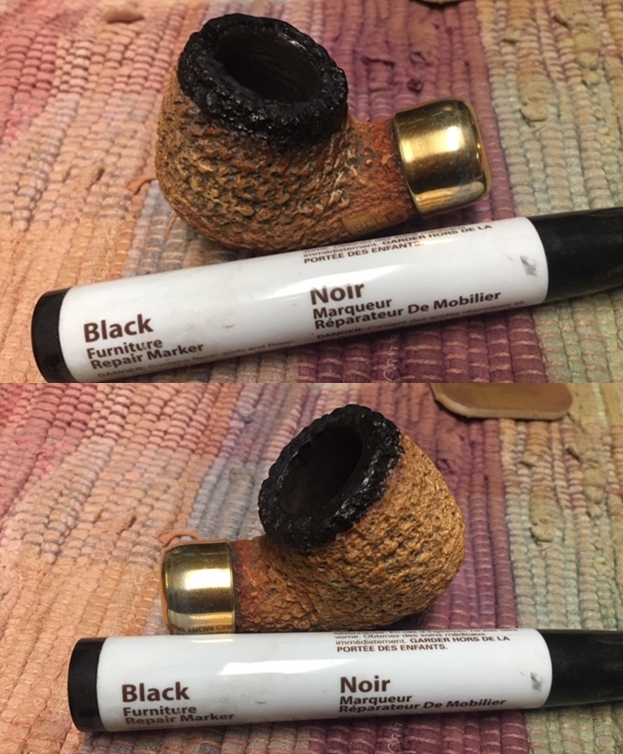
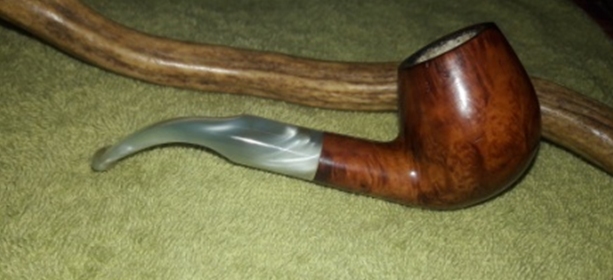
 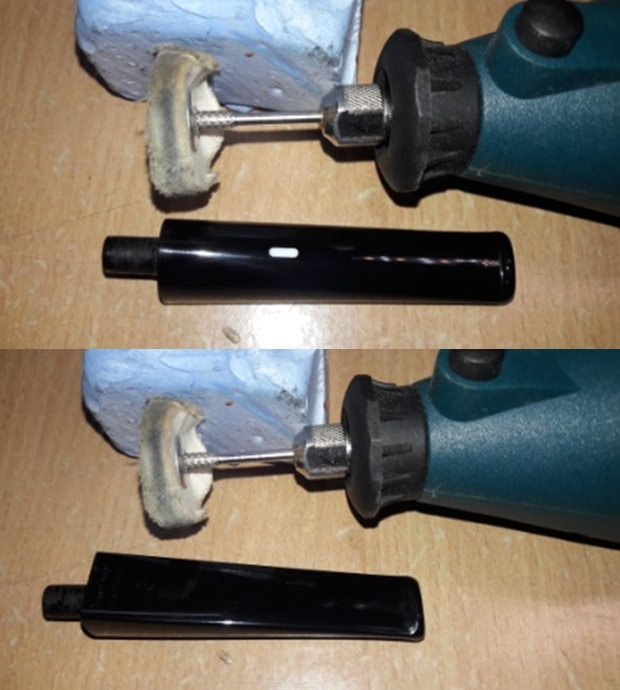 Next, I mount another cotton buffing wheel that I have earmarked for carnauba wax and applied several coats of the wax to impart a nice gloss to the finish. I finished the restoration by giving the entire pipe a rigorous hand buffing using a microfiber cloth to raise the shine further. Lastly, I polish the gold band with a jeweler’s cloth to a nice and radiant shine. The rustications on this finished pipe looks amazingly beautiful and coupled with the brand, vintage, rarity and the contrast that the gold band imparts, makes it quite a desirable pipe. This pipe shall be joining my small collection of Castellos to be admired and be happy that I have restored it to its former beauty and functionality.
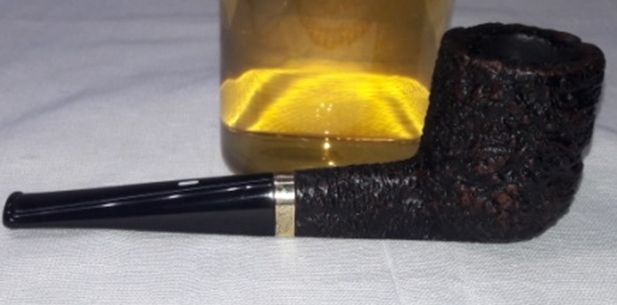


 P.S. Just out of curiosity, I took the stummel to my family goldsmith to check if at all the band at the shank end was gold or a brass made band. I was pleasantly surprised to be told that it was indeed an 18 carat gold band!! I am sure whoever the “FRIEND” was that received a Castello pipe with an 18 carat gold band had to be someone very dear to Carlo Scotti!! If only the pipe could tell me all about this friend…
I wish to thank each one for sparing their valuable time to read through this write up and each one is always in my prayers. Stay home…stay safe!!