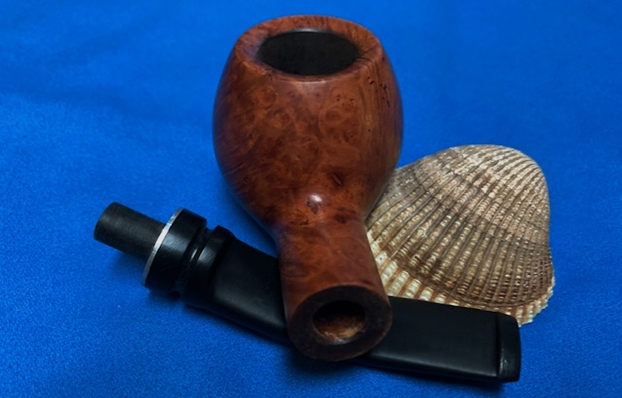
Blog by Paresh
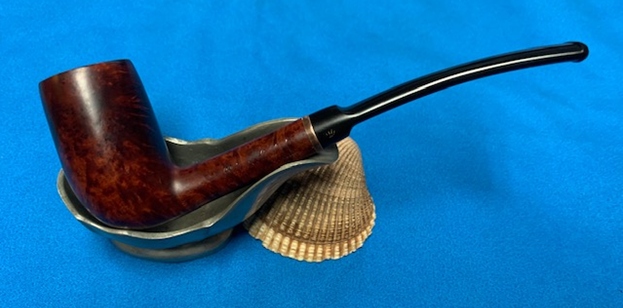
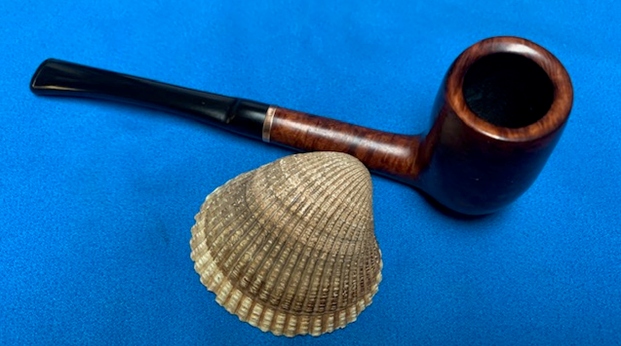
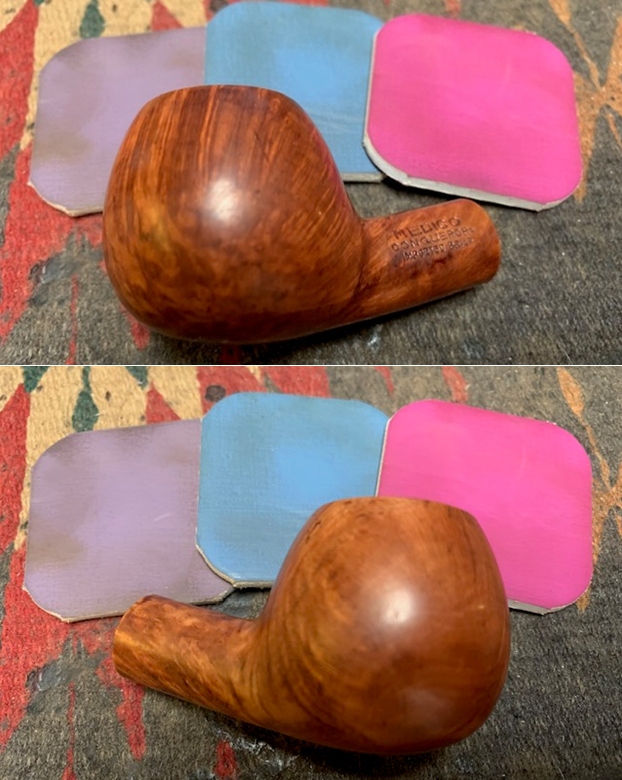
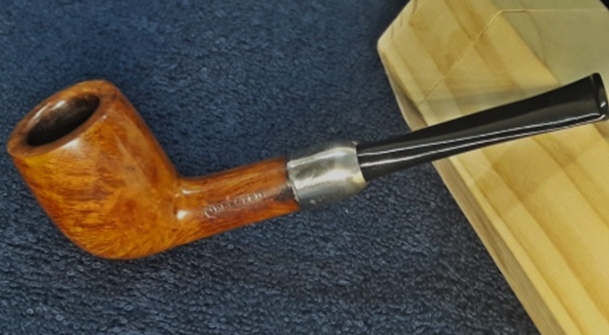
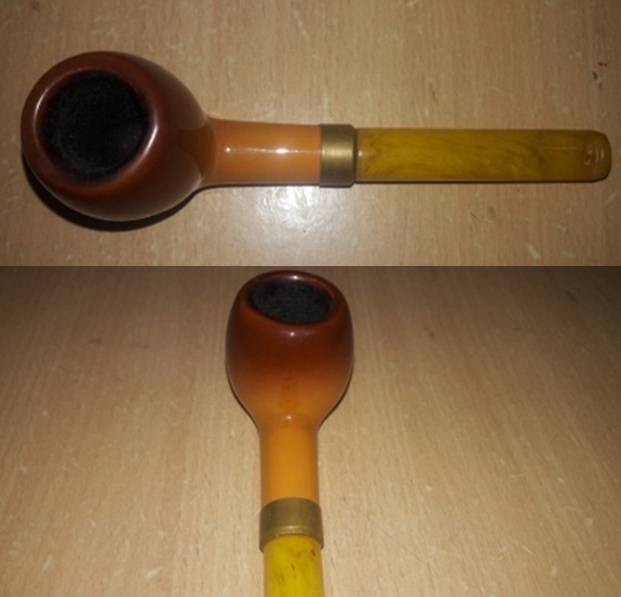
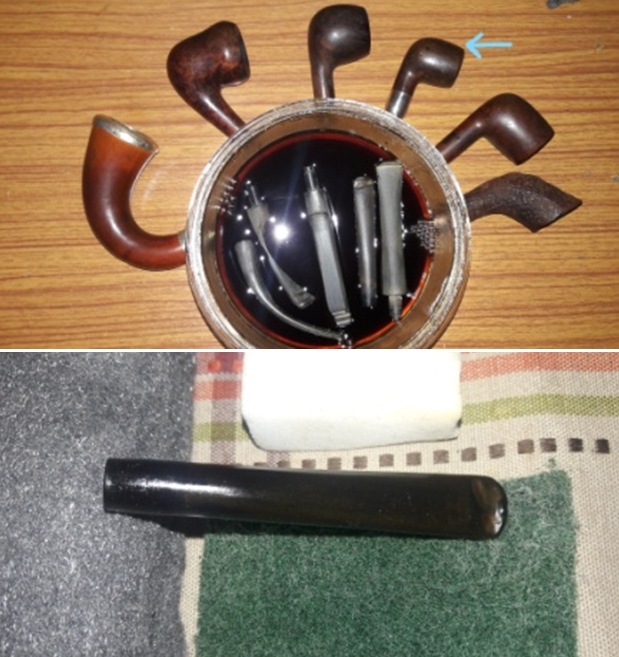
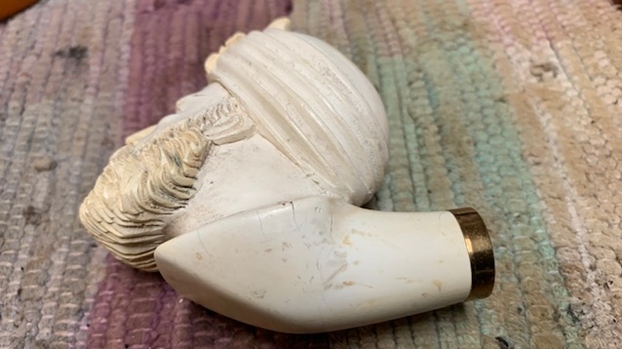
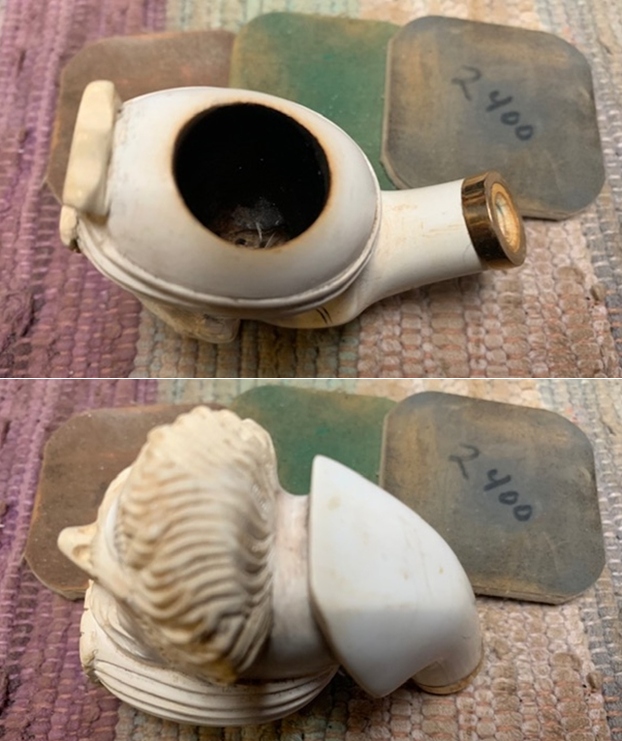
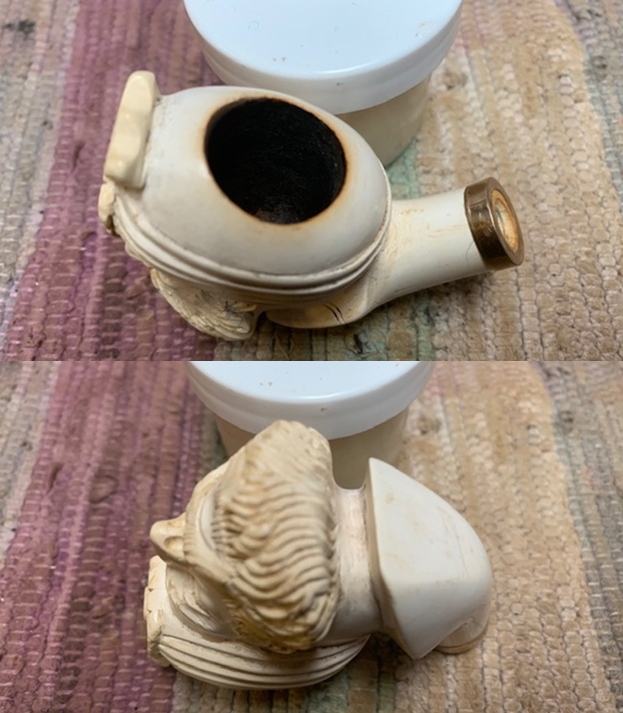
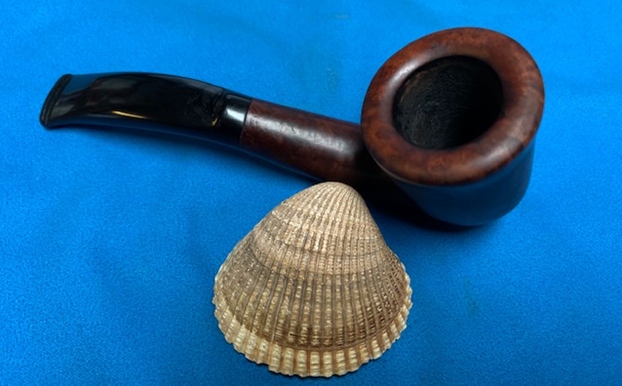
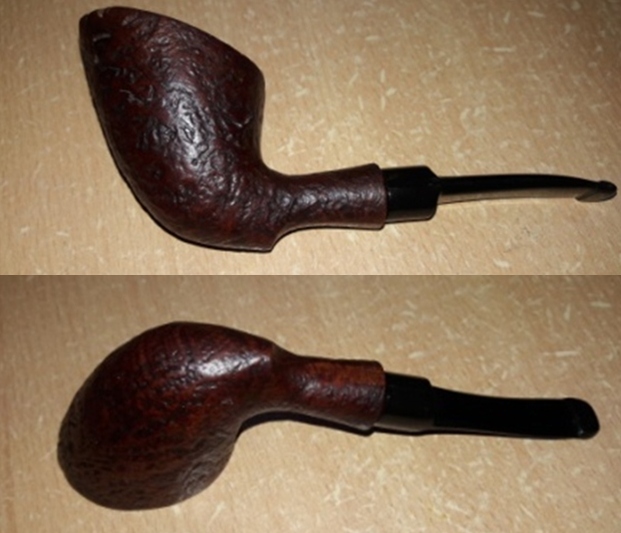
This pipe had been purchased by me on eBay many eons ago and was the first pipe for me from the web store. I had this pipe in my rotation when it fell out of favor after I got a few pipes from Steve and I had commenced my journey in to the world of restoring my huge cache of inherited pipes. I felt that this pipe just did not smoke right, but what was the issue never crossed my mind and neither did I put my mind to it since I now had other pipes to enjoy!!
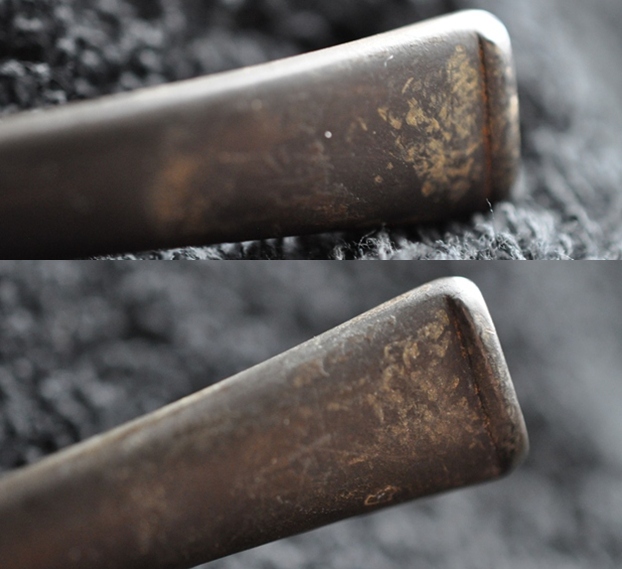
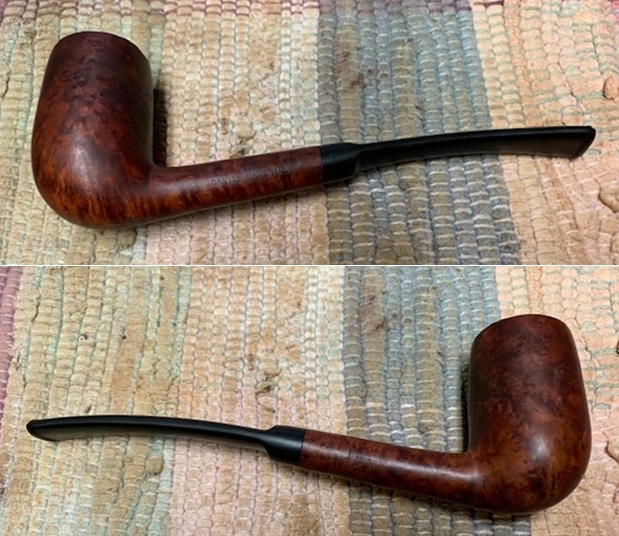
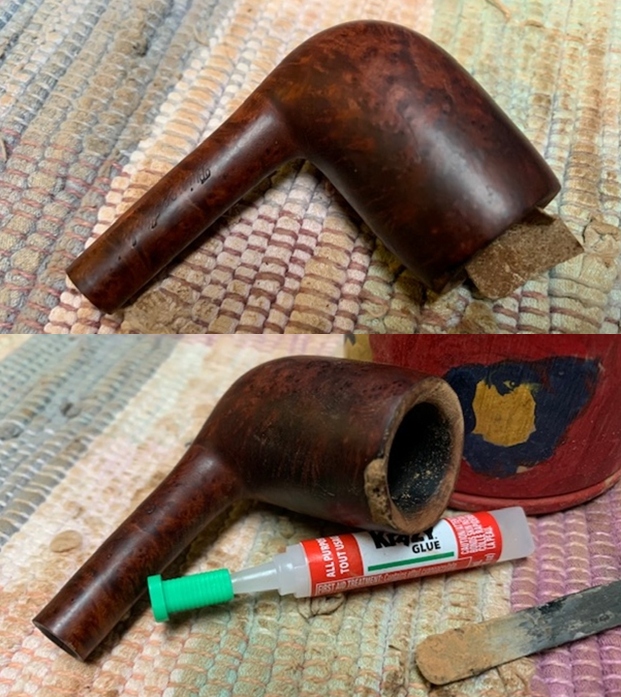
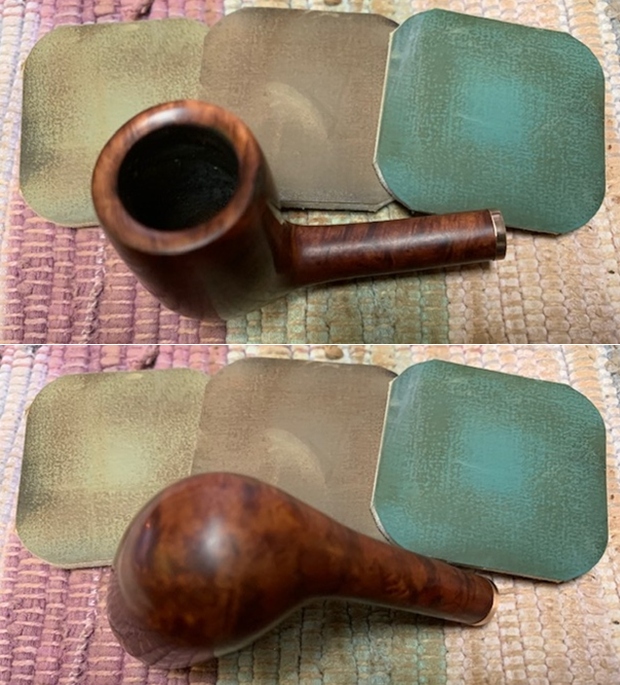
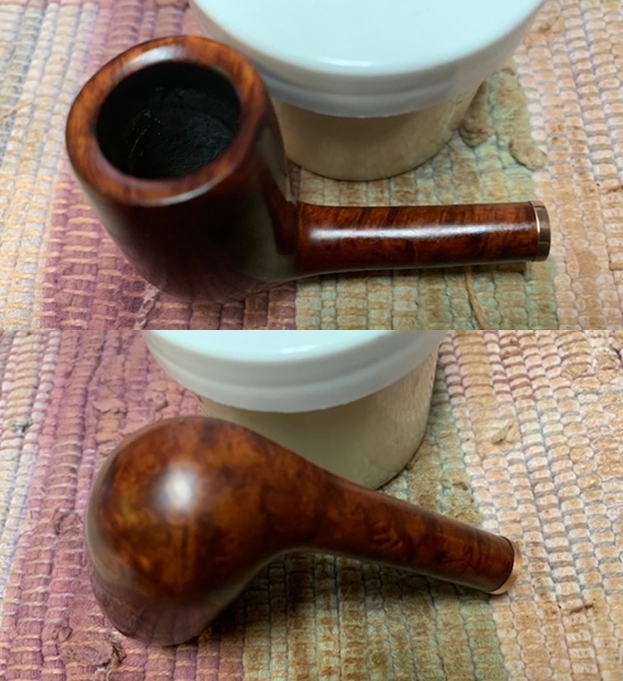
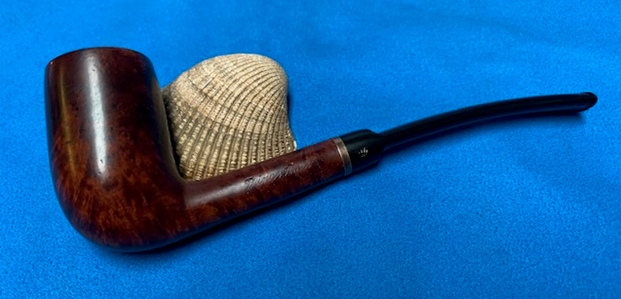
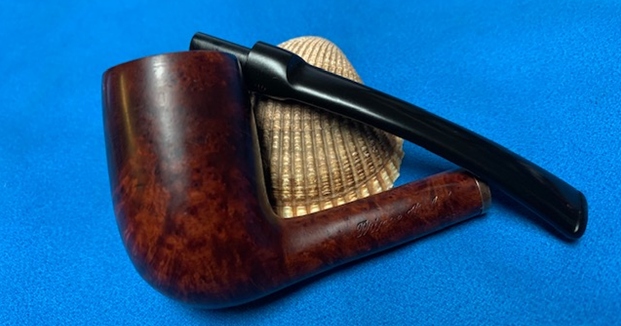
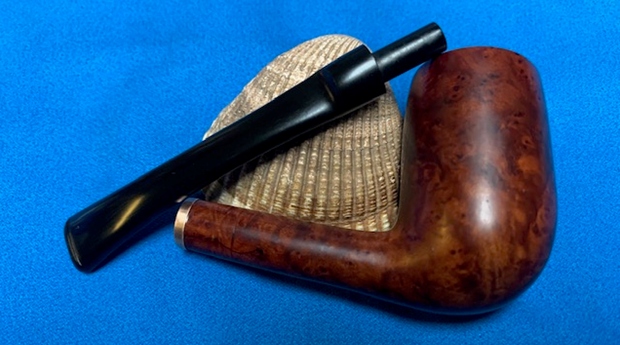
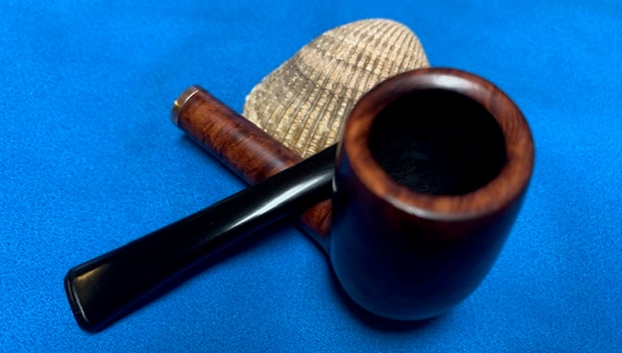
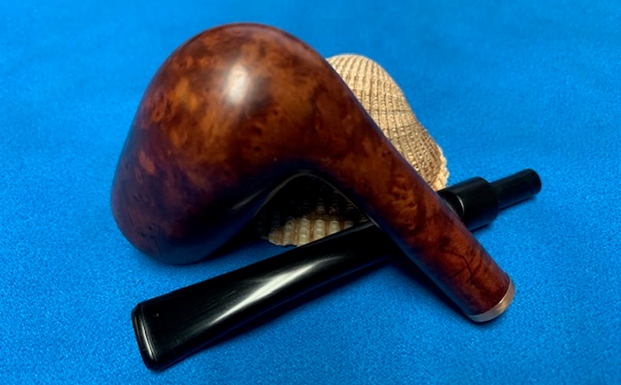
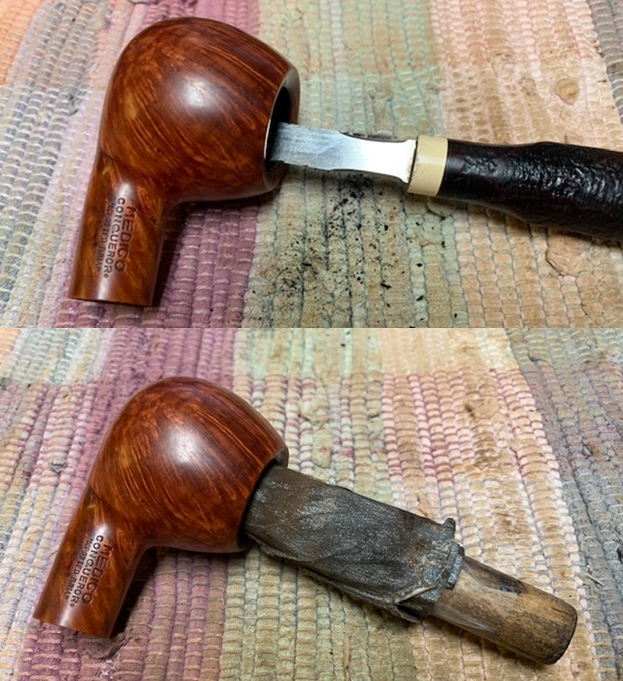
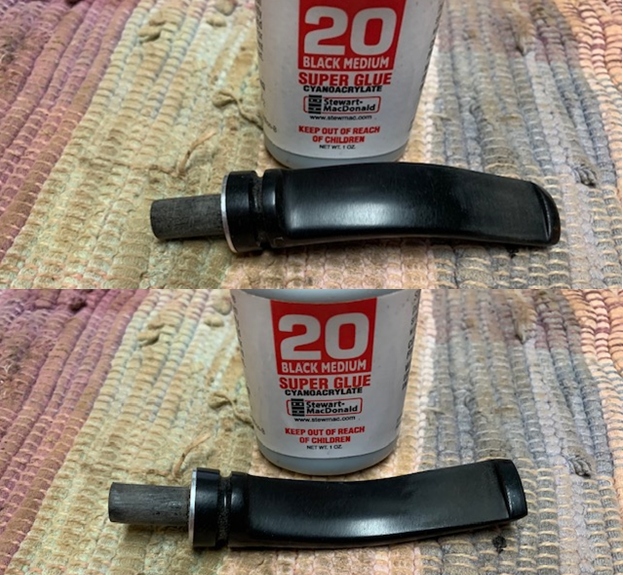
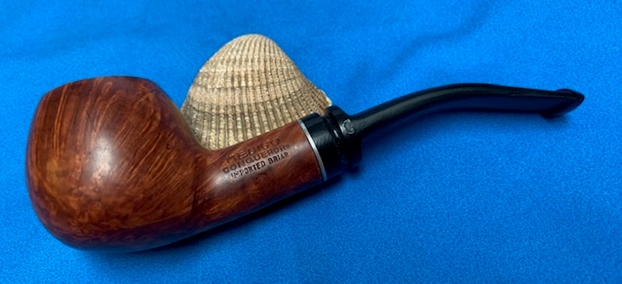
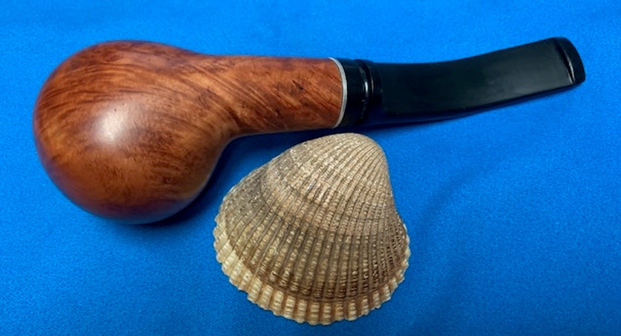
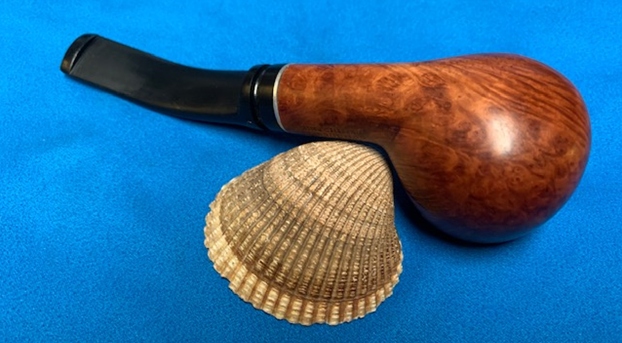
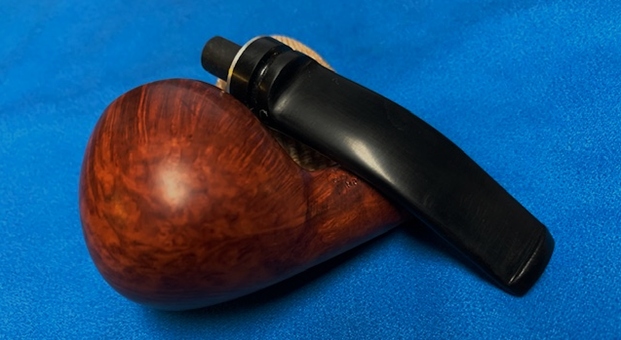
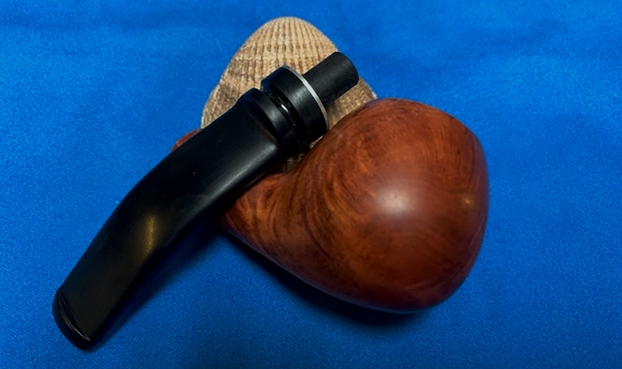
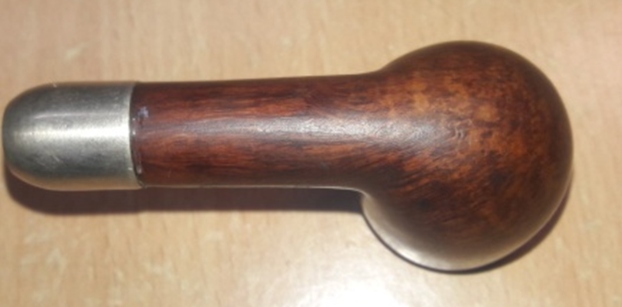
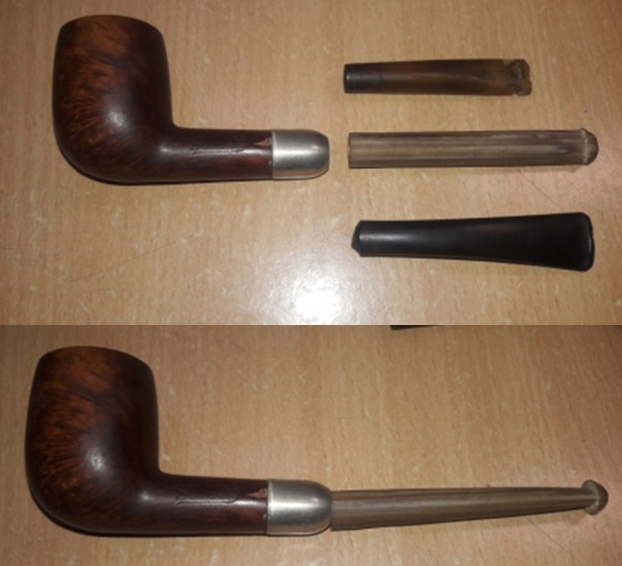
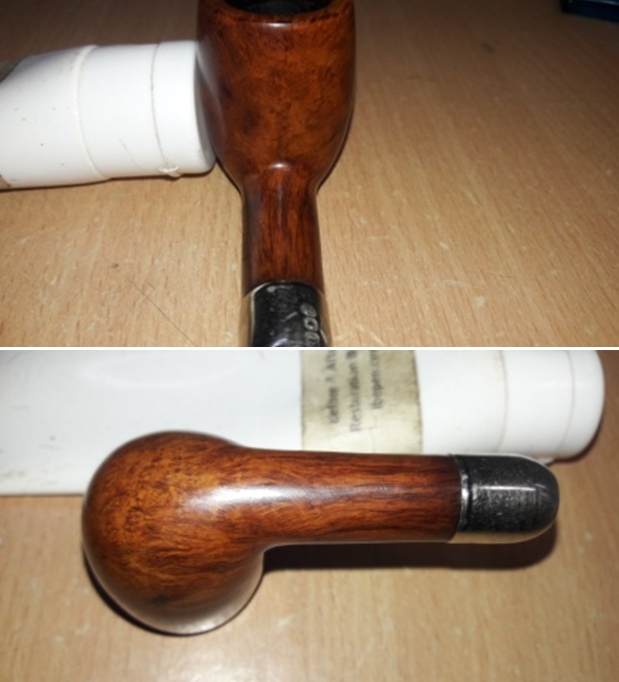
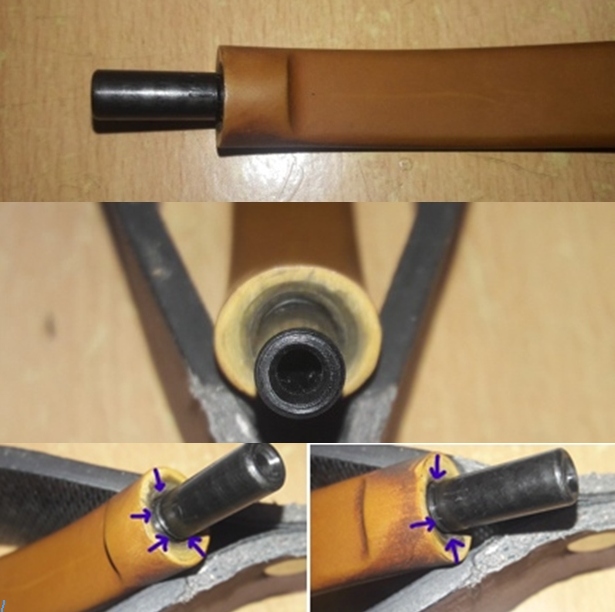
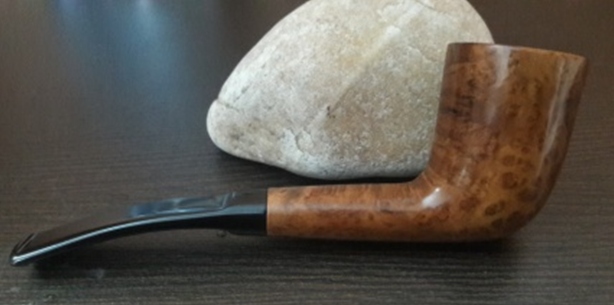
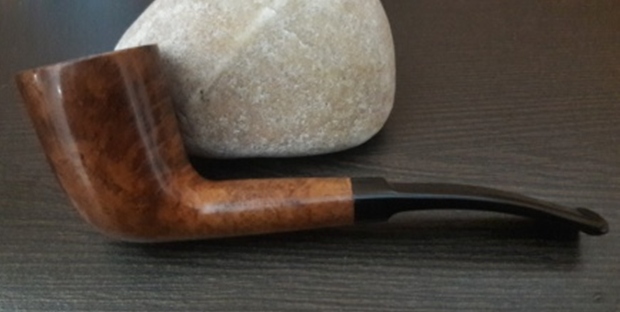
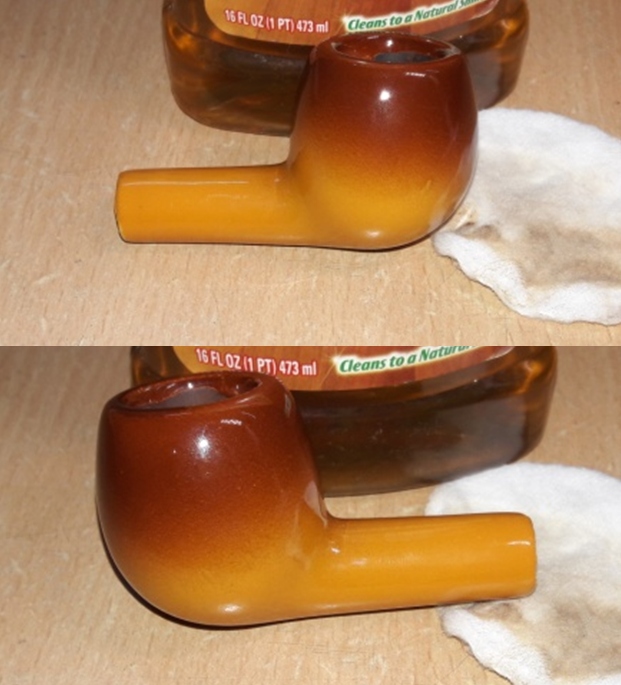
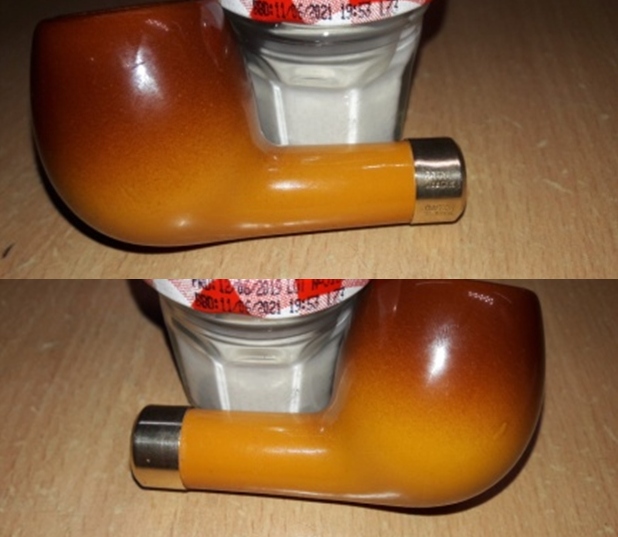
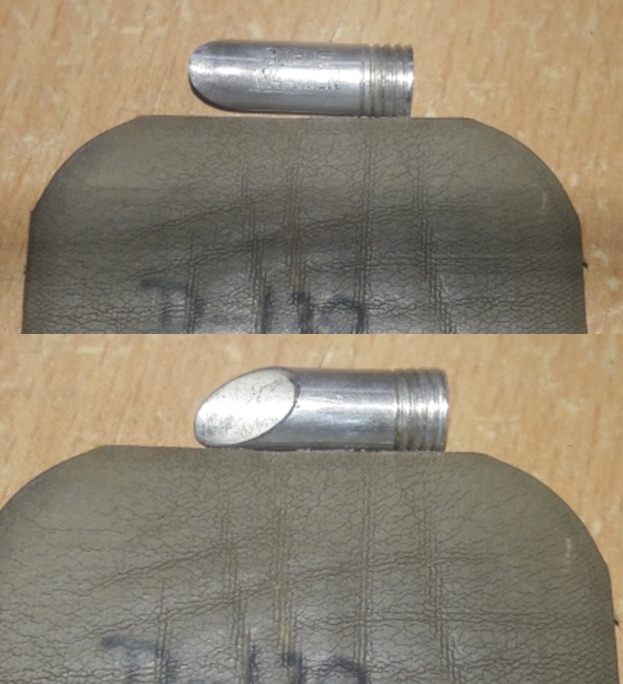
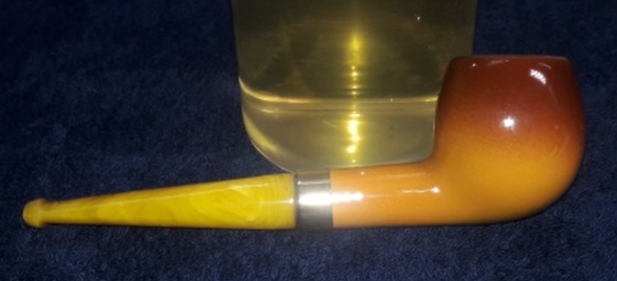
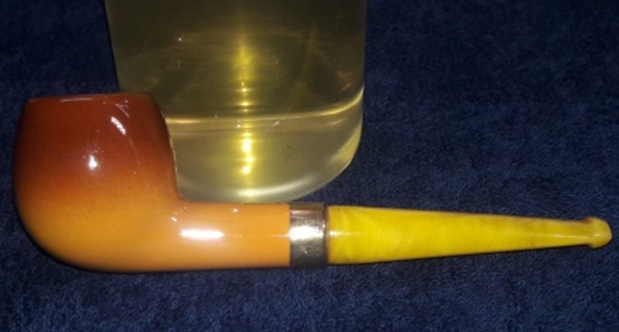
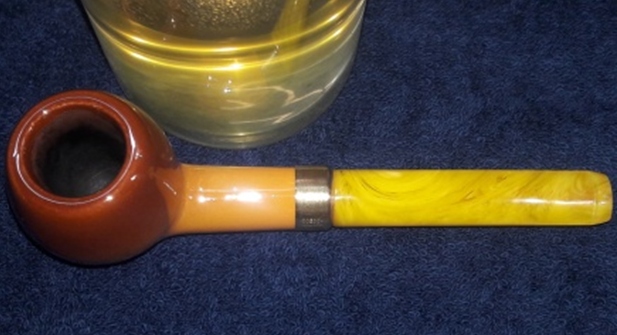
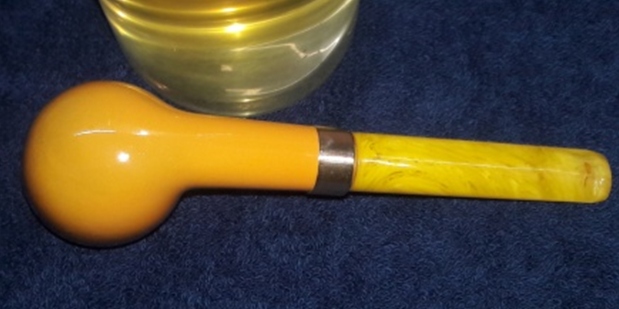
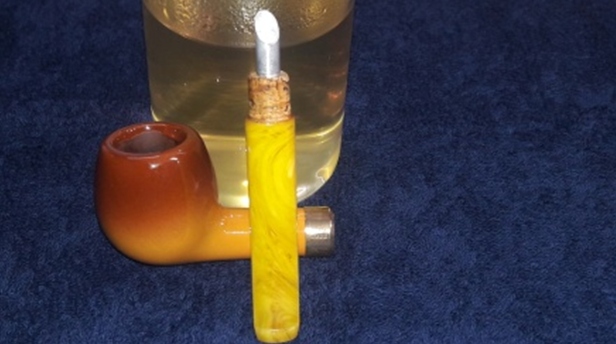
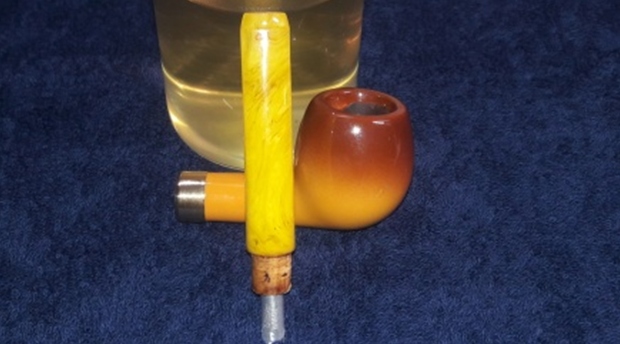
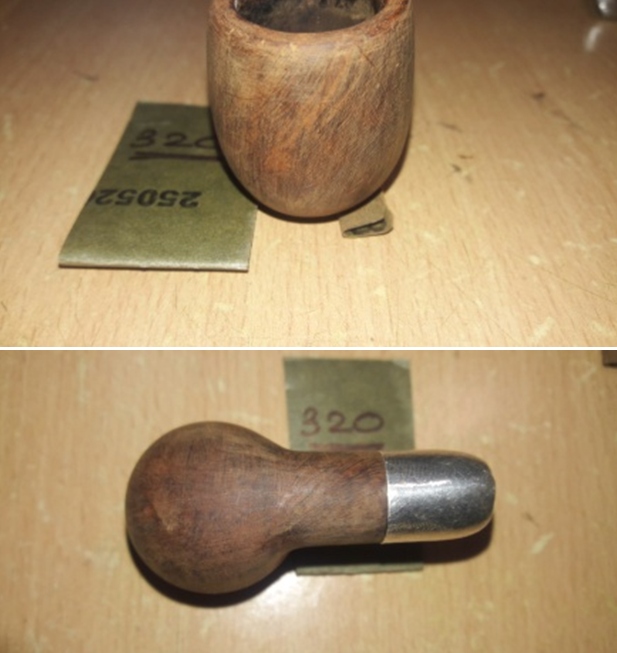
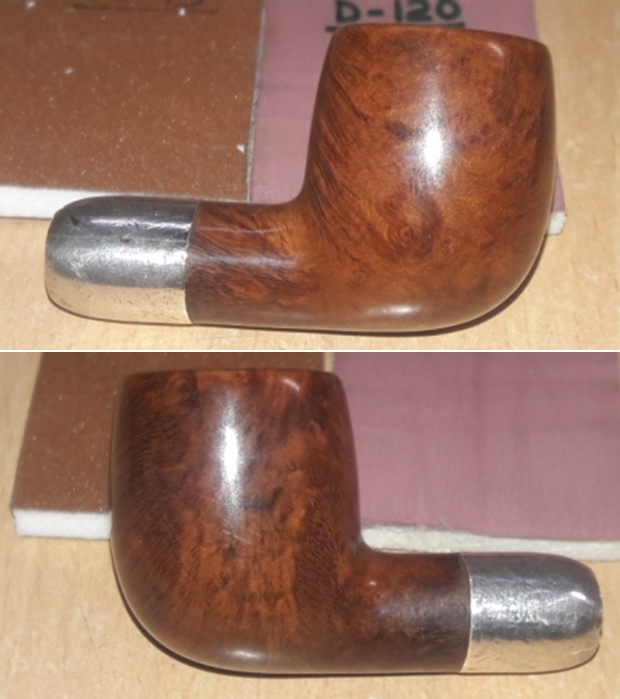
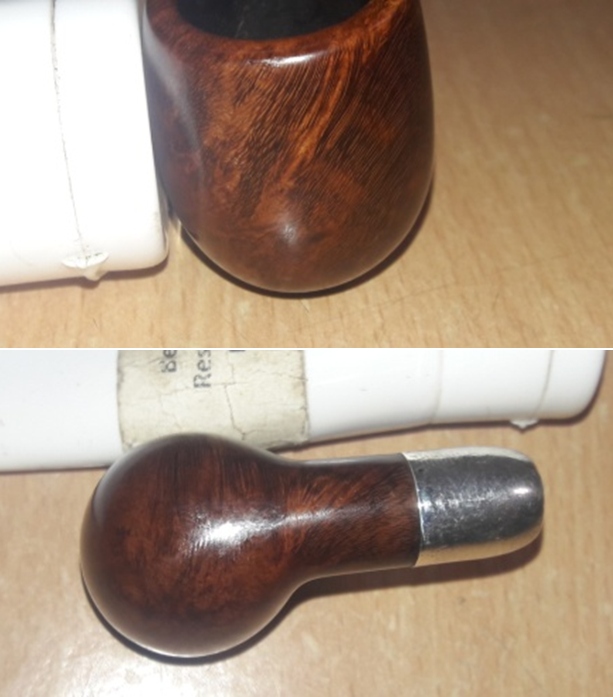
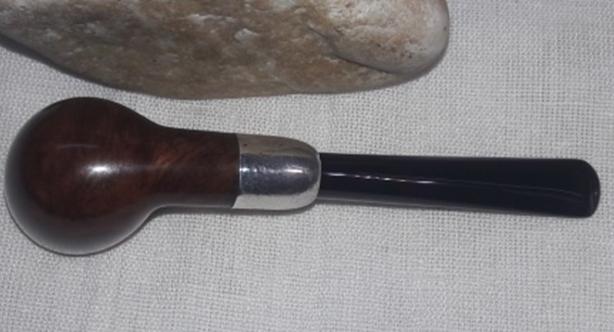
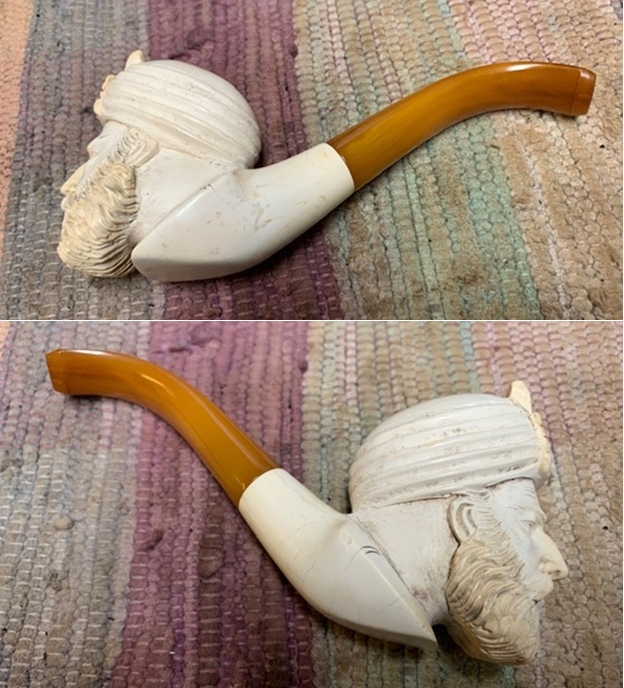
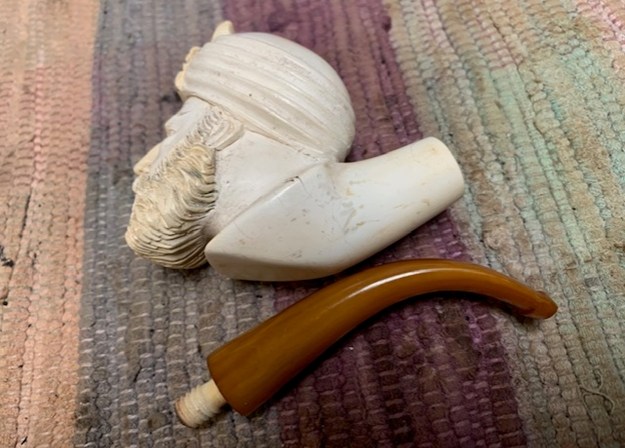
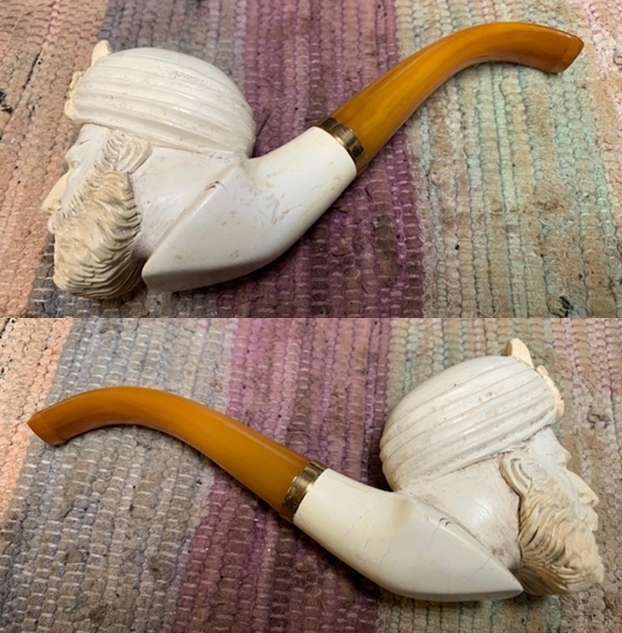
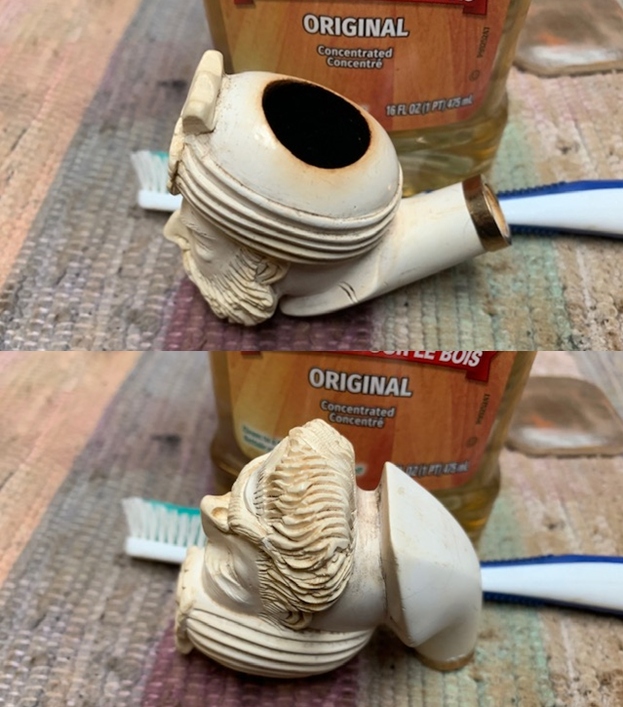
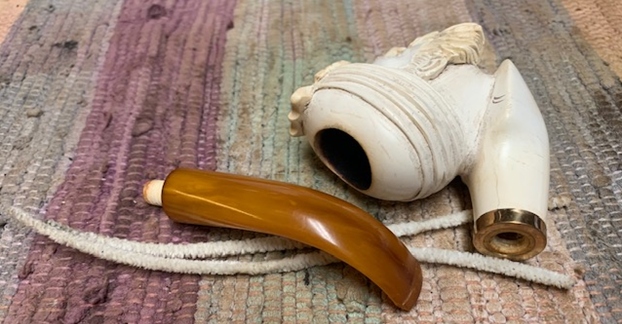
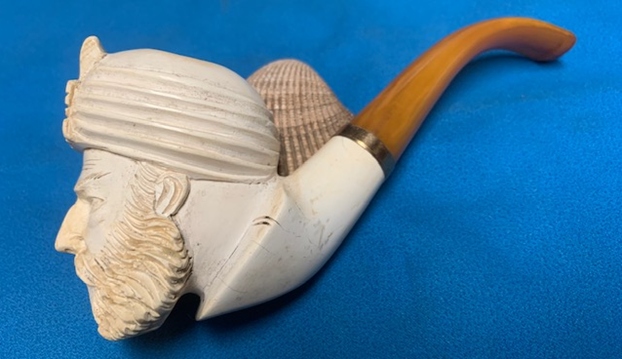
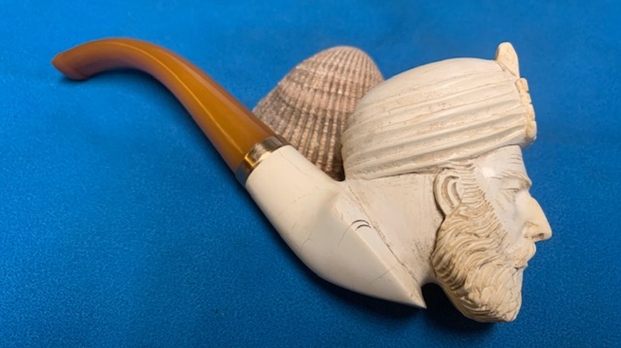
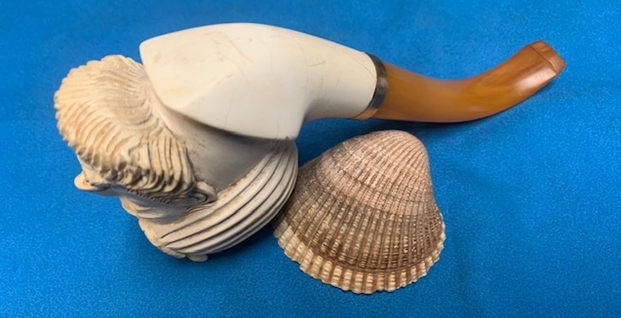
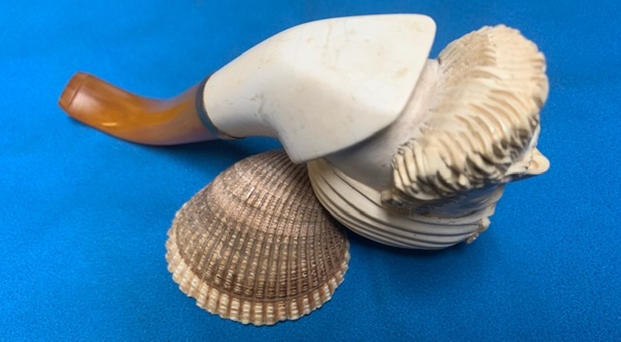
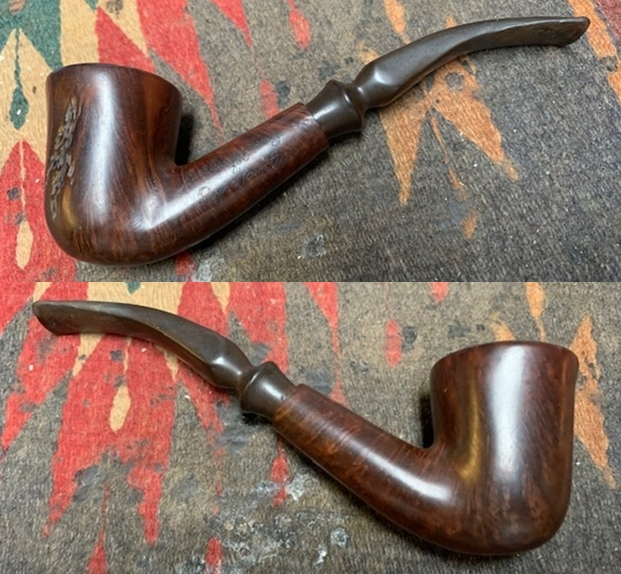
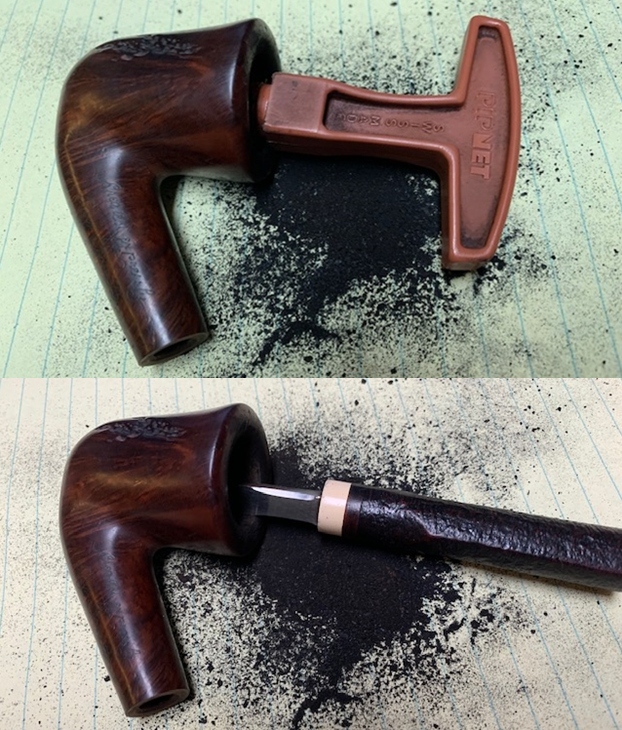
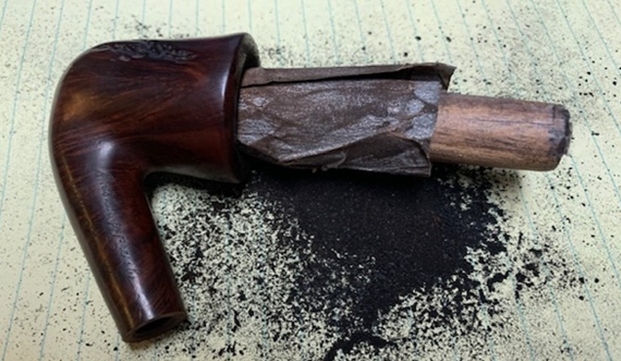
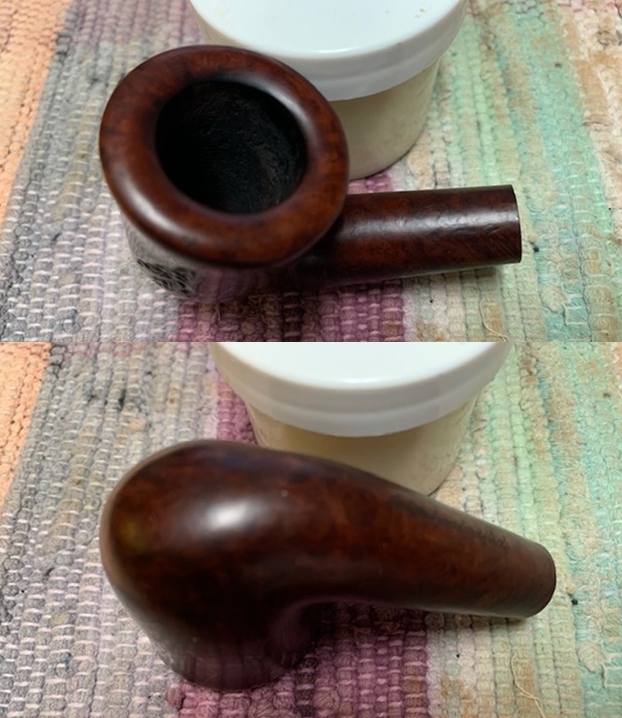
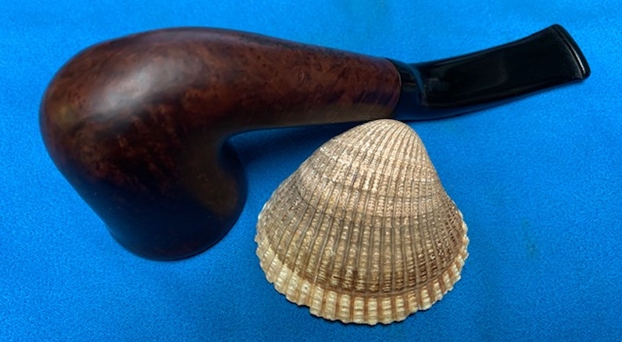
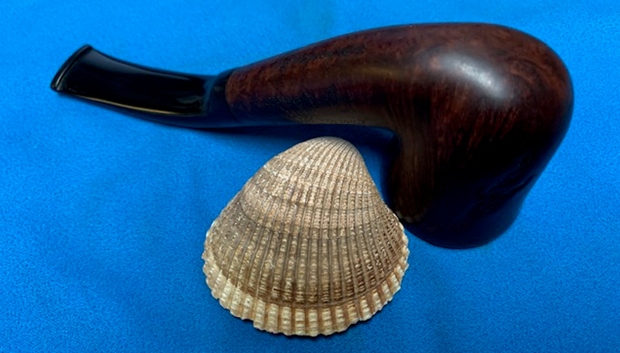
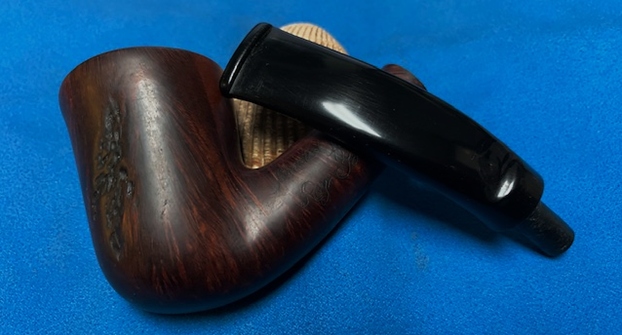
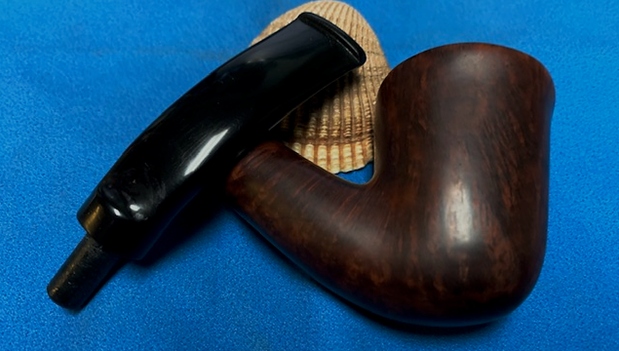
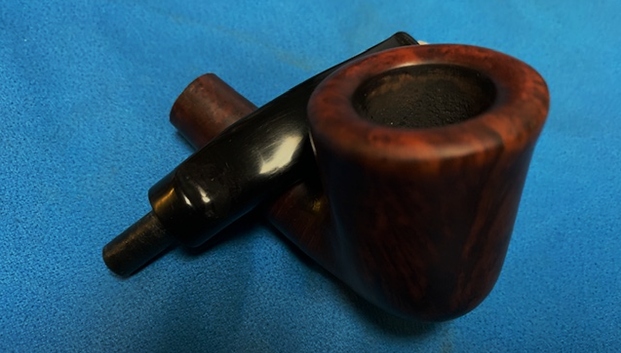
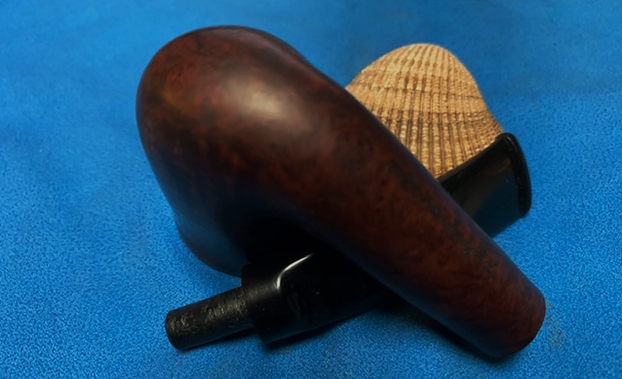
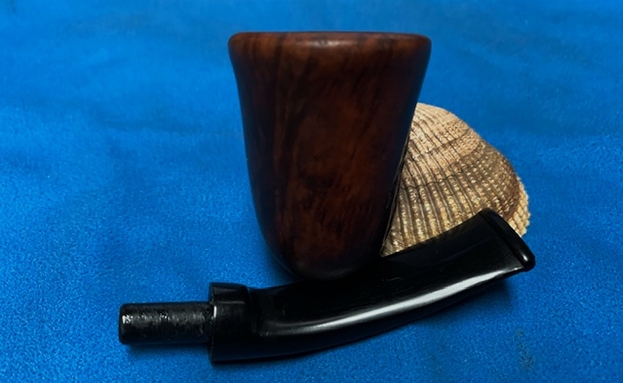
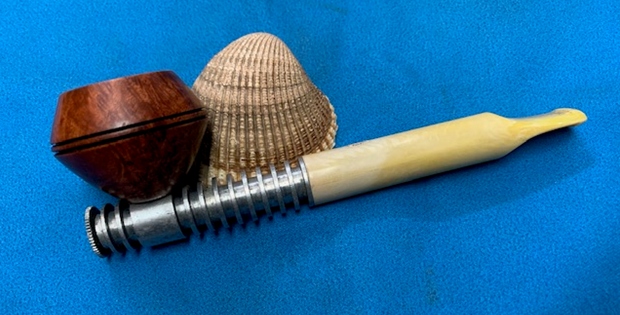
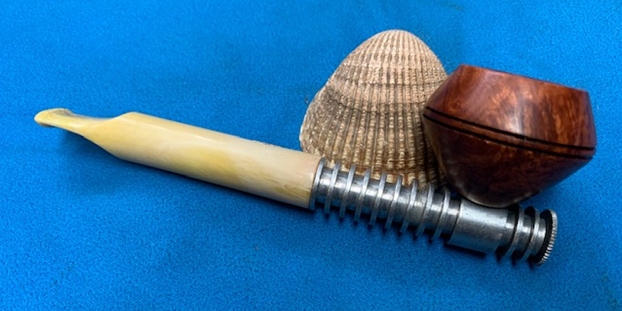
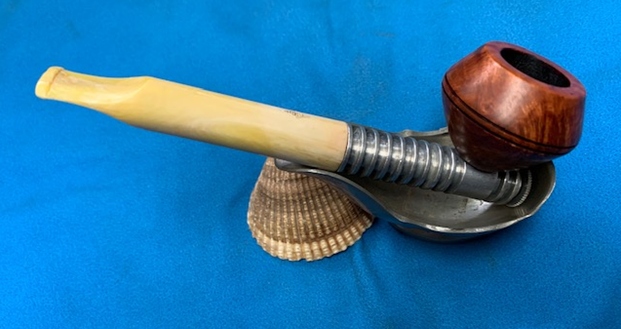
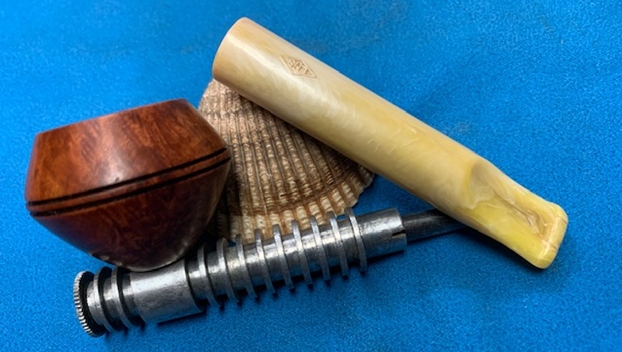
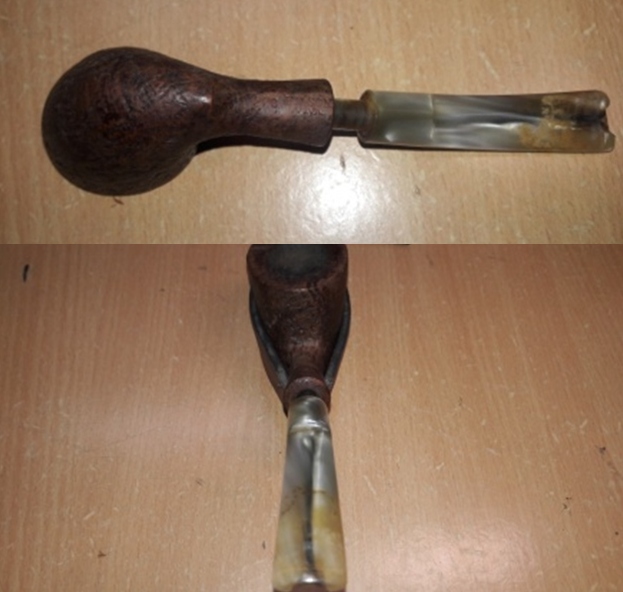
When Steve had visited me last year, we went through the entire pipe collection and this particular pipe caught Steve’s attention. He immediately remarked that the stem was not the right one for this pipe!! It was a replacement stem and a poorly executed job. With the problem diagnosed in a jiffy, we went about identifying a suitable stem for replacing the one currently on the pipe, which was by the way, also in a jiffy!! We found one and the pipe was soon consigned to oblivion. However, this time around after having recently worked on a stem replacement project, I decided to complete the replacement on this Hilson pipe as well. Here are a few pictures of the pipe with the stem that was replaced by the Seller. 
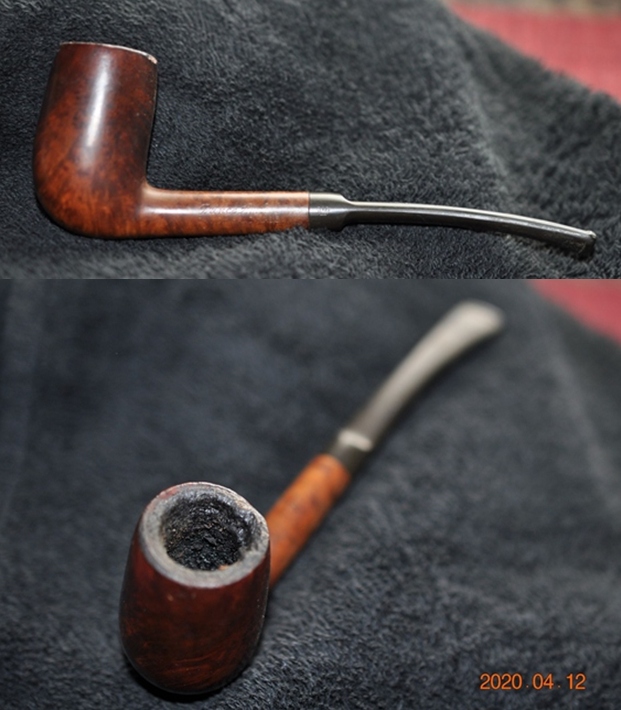
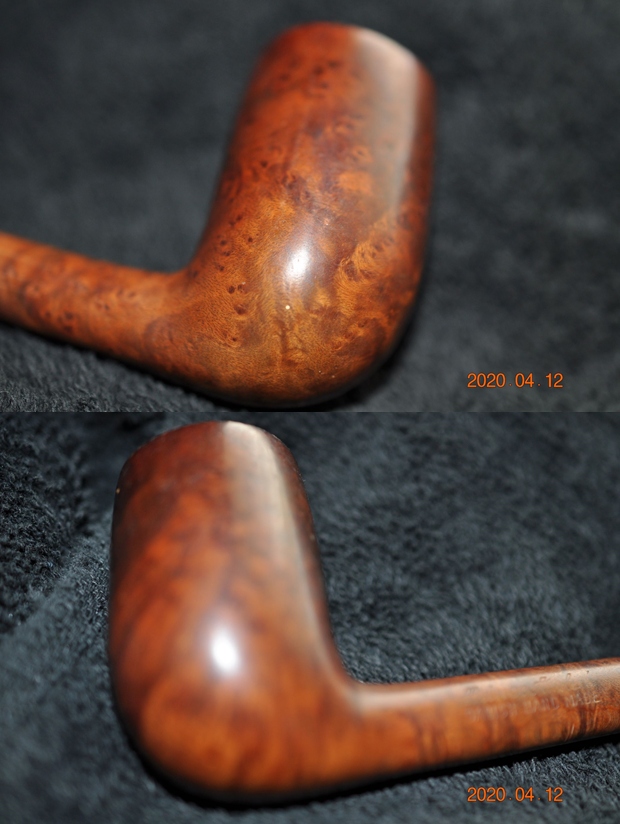
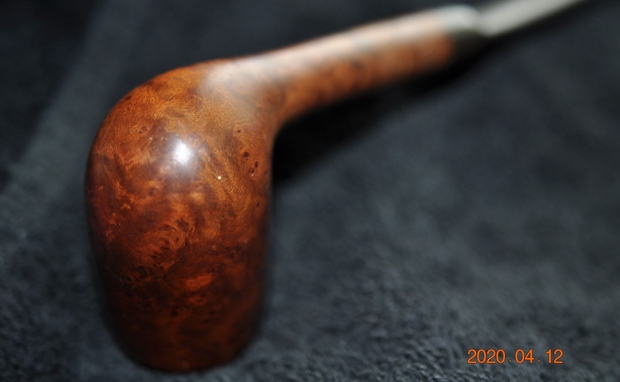
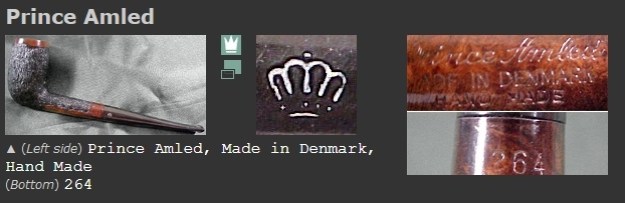
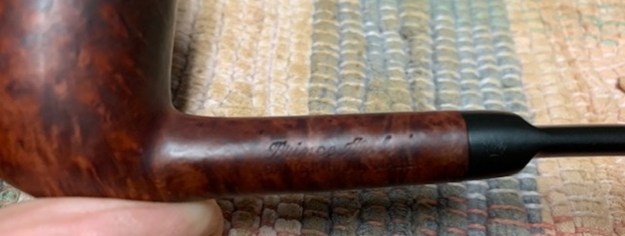
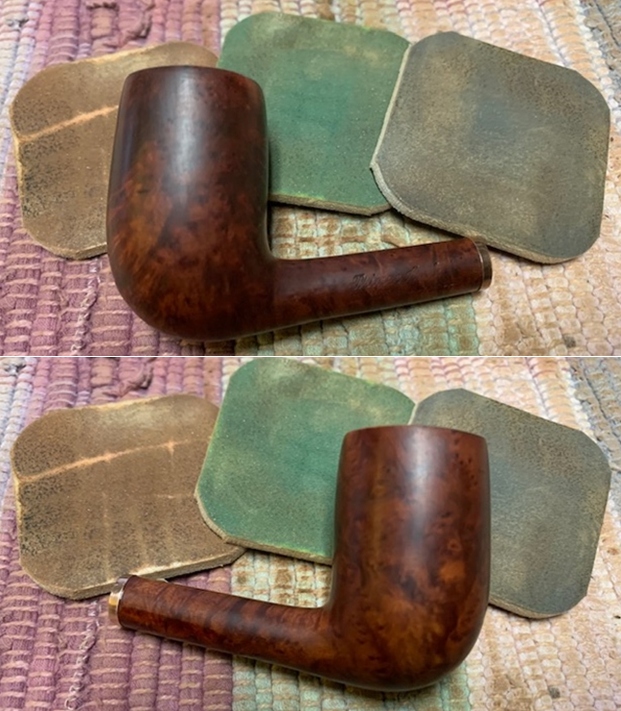
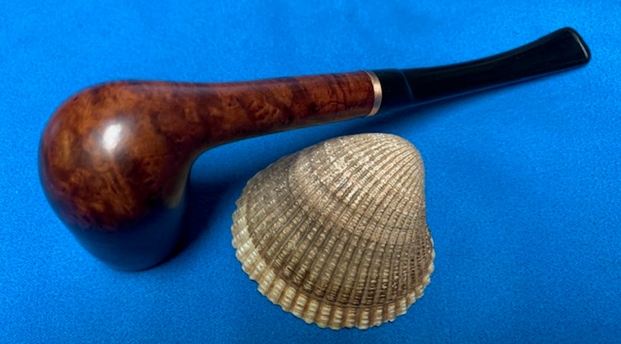
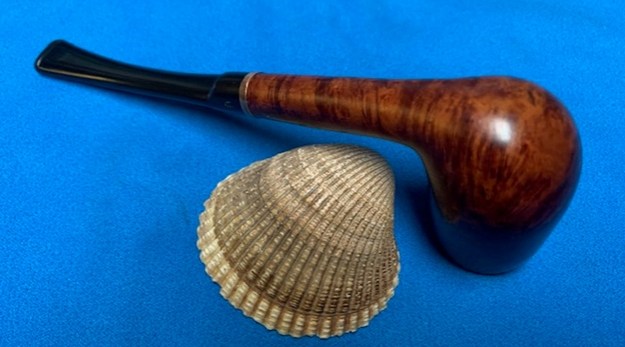
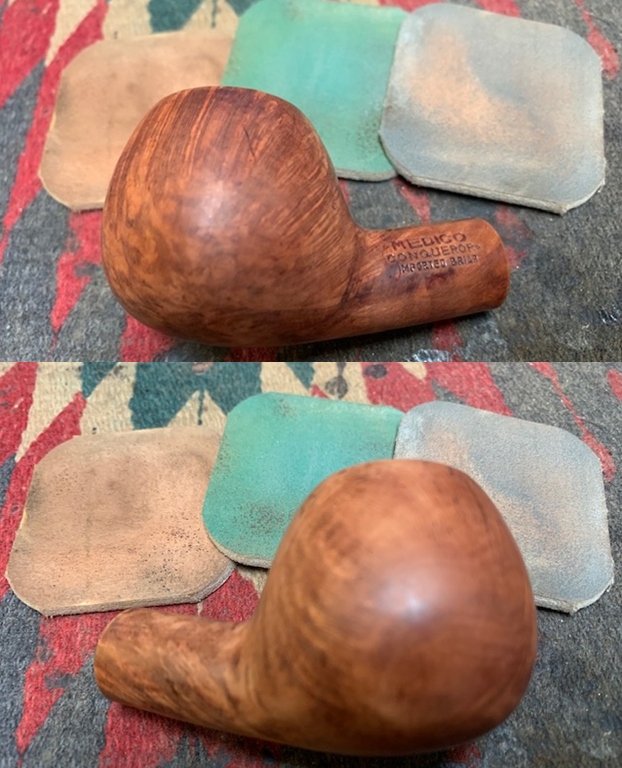
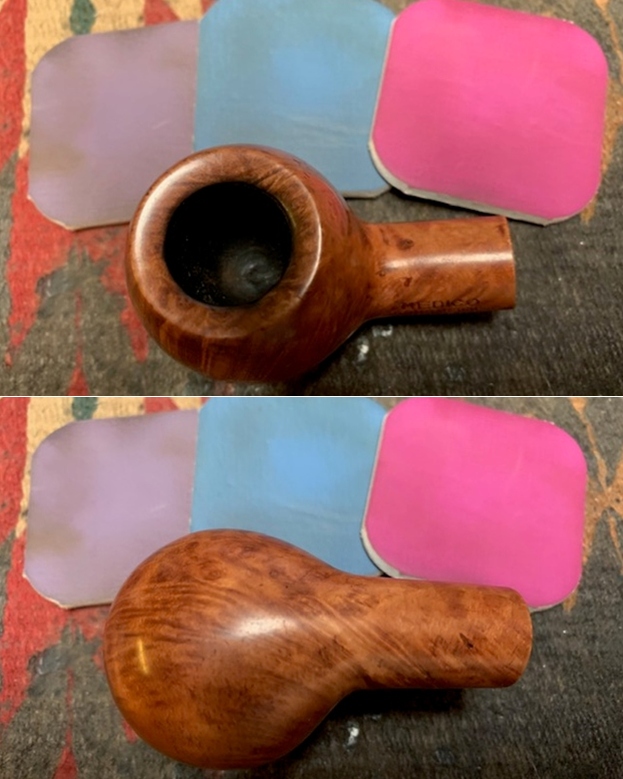
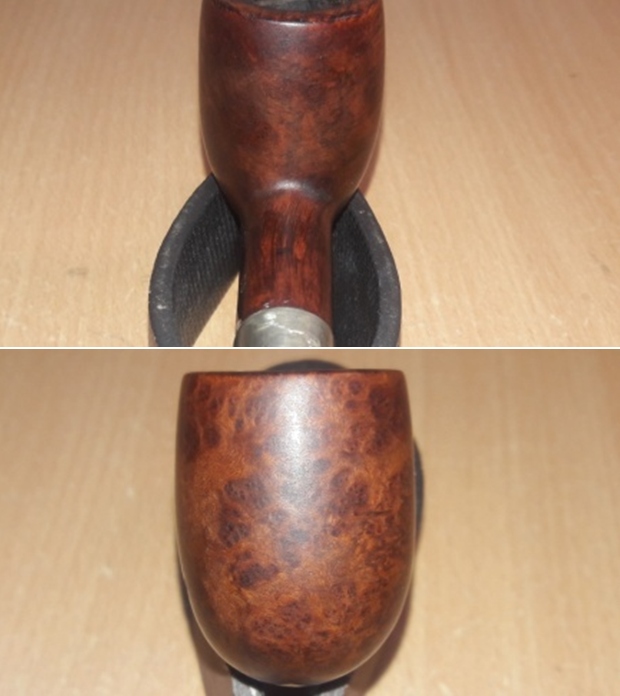
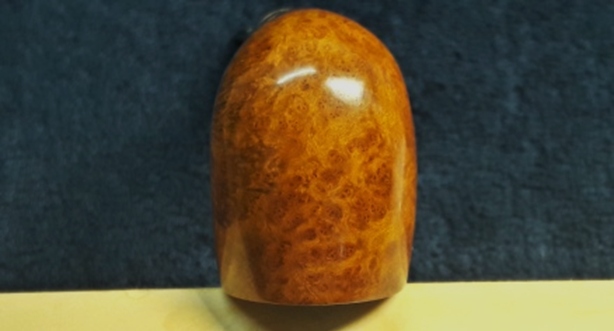
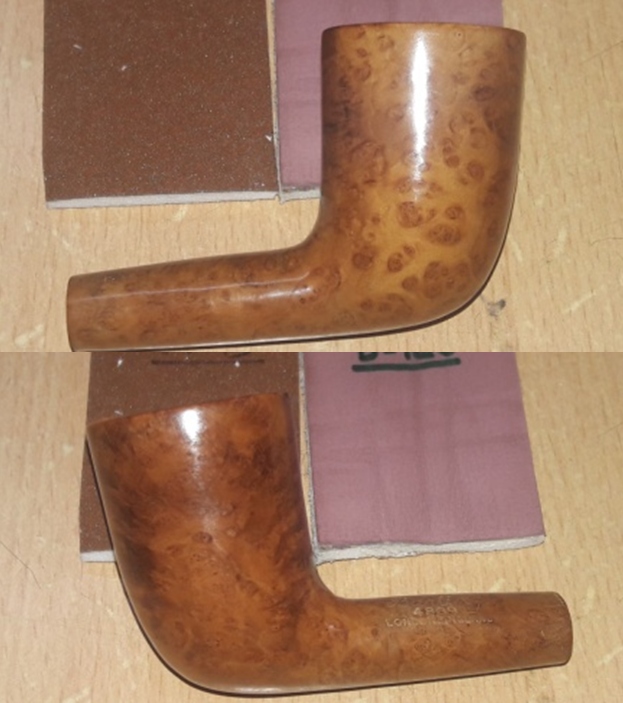
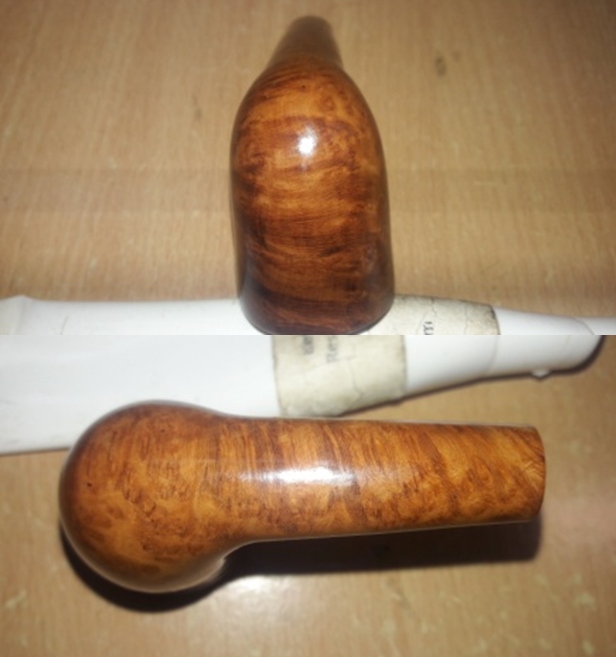
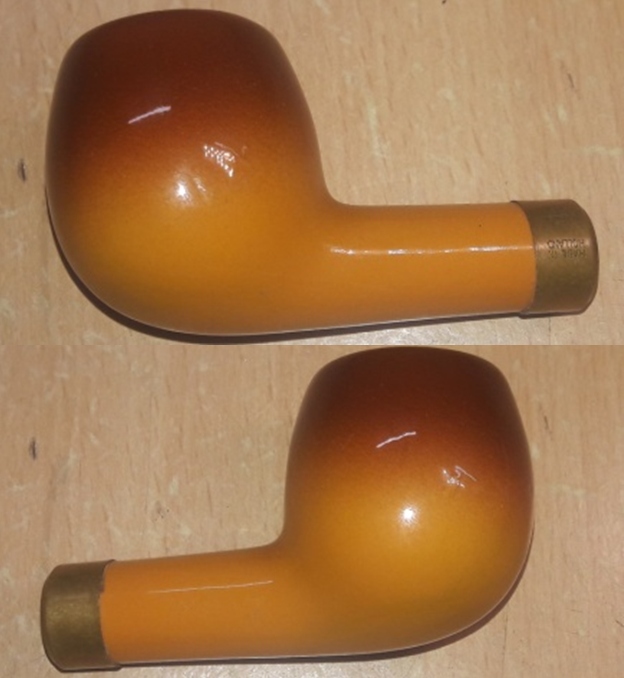
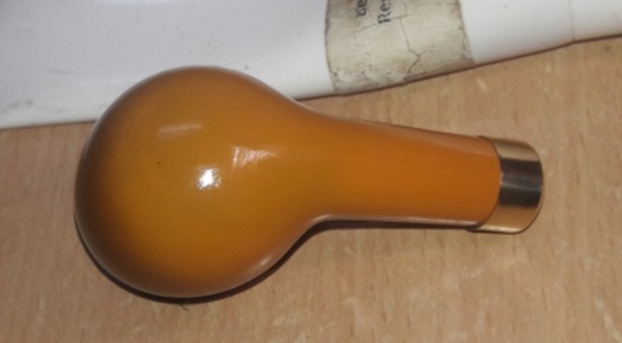
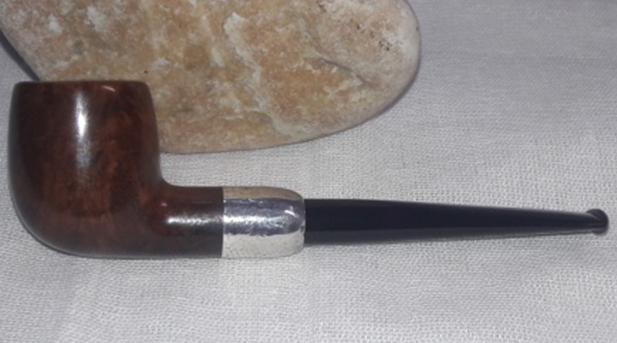
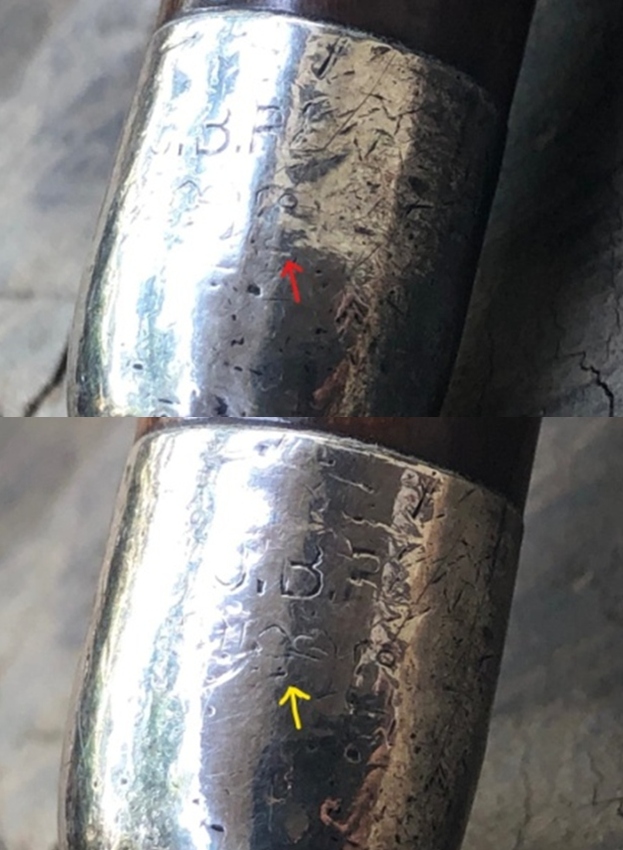
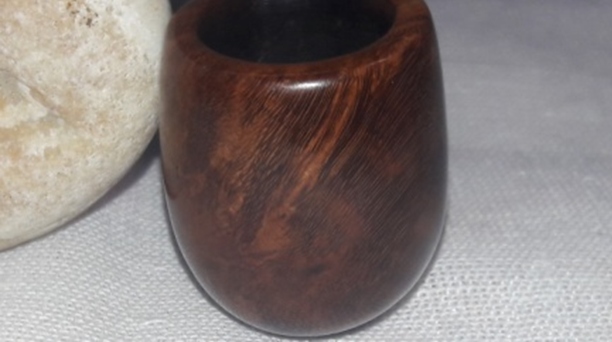
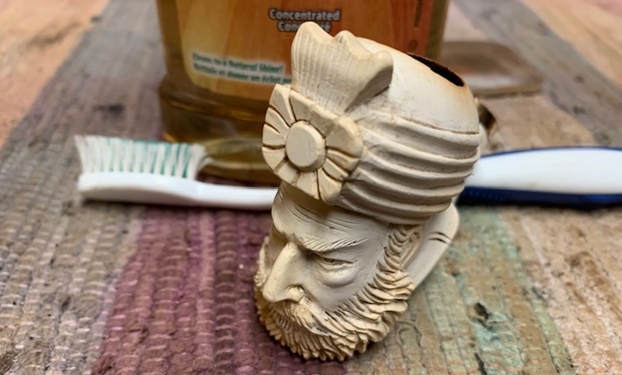
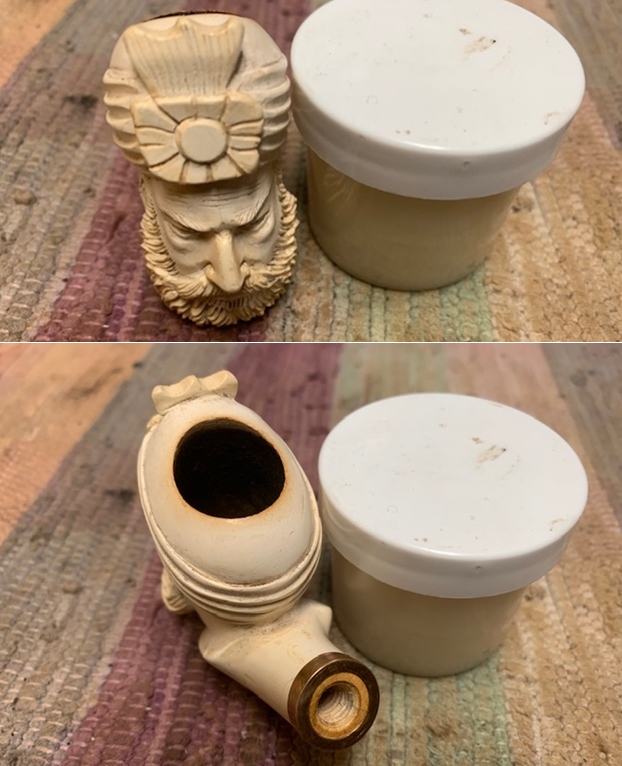
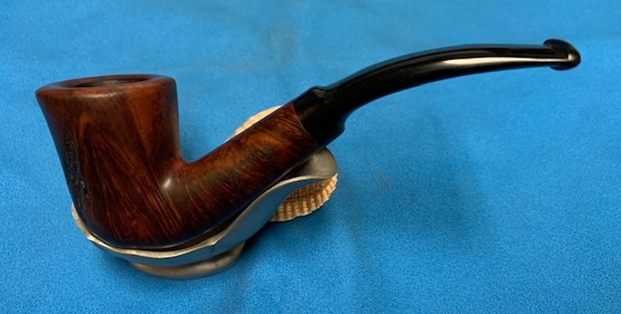
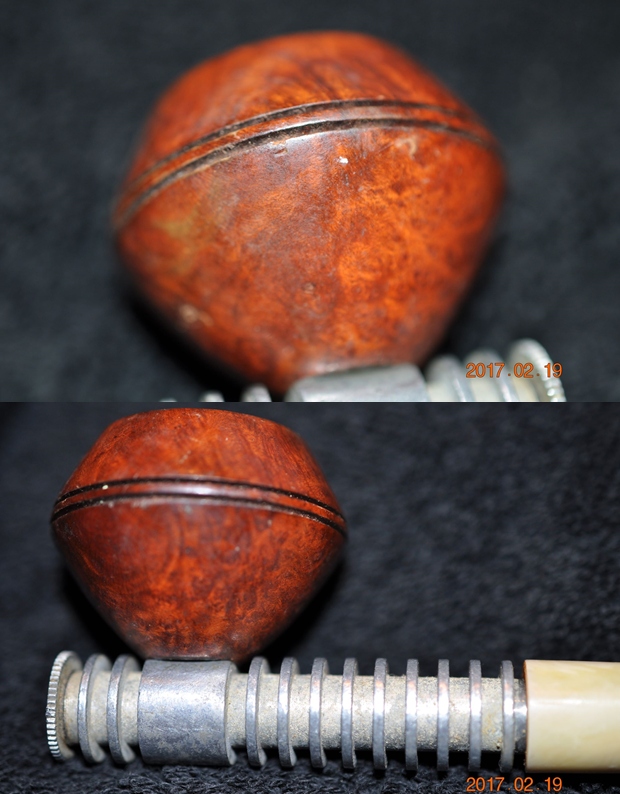
 This pipe has Cutty-like foot, a Dublin like taper from the top of the rim to the foot of the stummel and the front rim top has a pronounced backward rake towards the shank. These features and for the lack of a defined shape, I rather prefer to call it a freehand. The stummel has very shallow sandblasted surface all around with a smooth shank bottom which bears the stampings seen on this pipe. It is stamped on bottom smooth surface of the shank as “HILSON” over “VIVA” in block letters with the shape number “# 278” stamped towards the stummel. The right side of the shank is stamped with COM stamp “BELGIUM” towards the shank end. The stampings are crisp and clear.
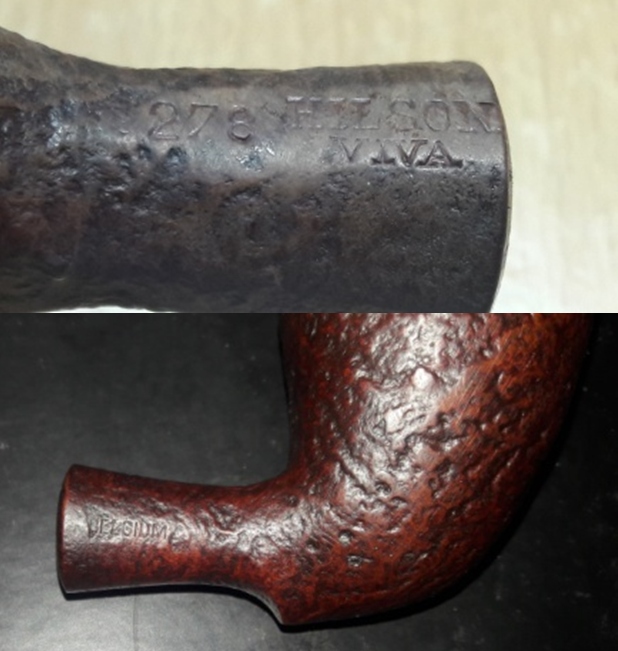 I looked for information on this brand on rebornpipes.com. The information contained therein is both informative and an interesting read. Given below is the link to the write up;
I visited pipedia.org to see if could learn more about this brand. I learned that this pipe was well respected brand in 1960s- 70s as makers of good quality pipes at very moderate prices which traced it’s roots way back to 1846 in the City of Bree!!! The brand faced financial crisis in the 1980s and was brought over by Elbert Gubbels & Zonen B.V. in the Netherlands. Here is the link to the web page;
https://pipedia.org/wiki/Hilson
The information gleaned from the two write ups makes me certain that the Hilson VIVA pipe that I am working on is Pre 1980s.
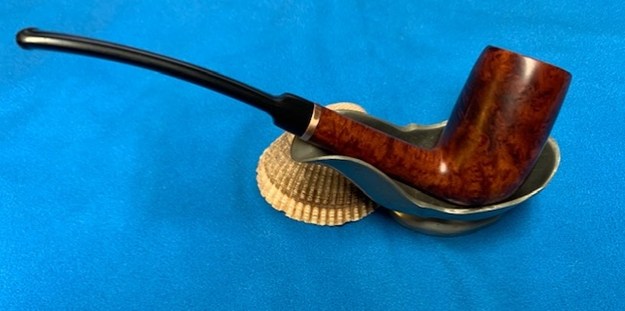
Initial Visual Inspection
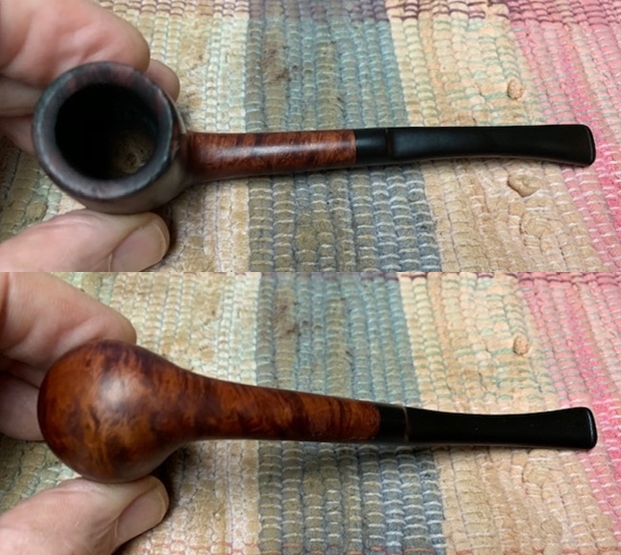
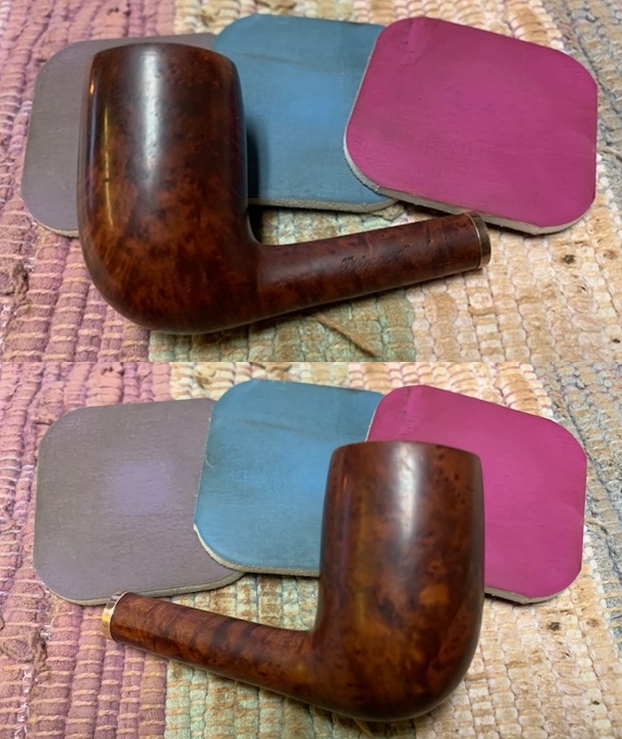
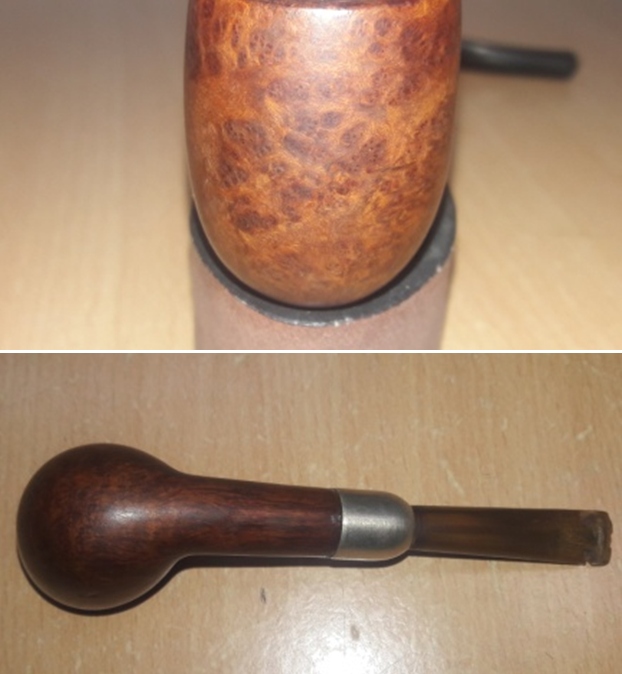
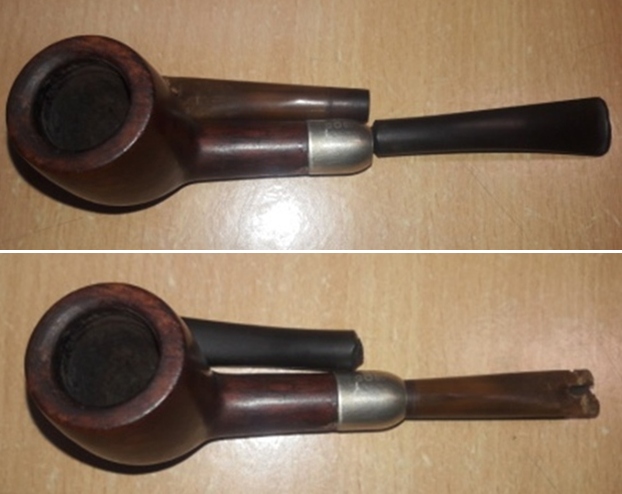
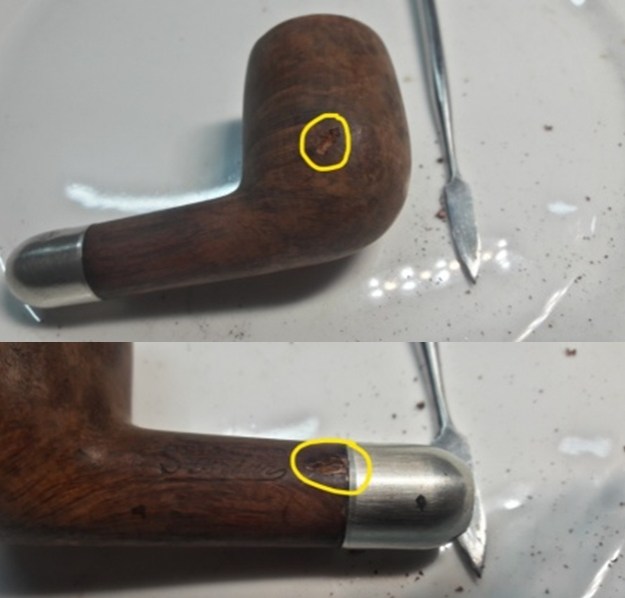
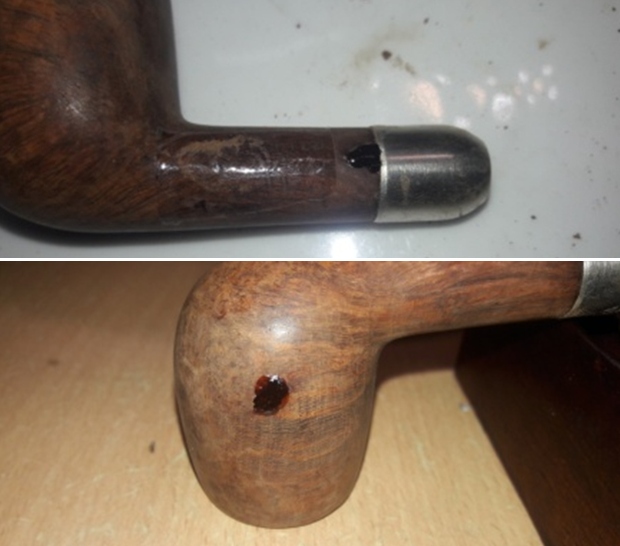
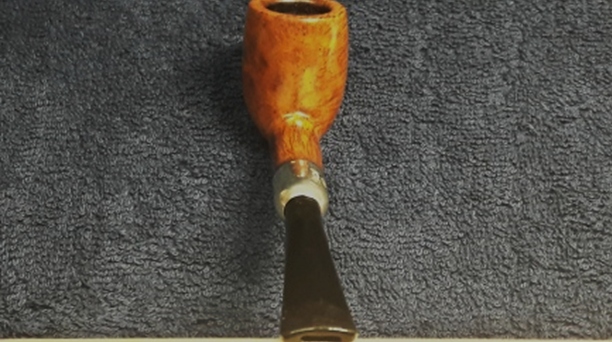
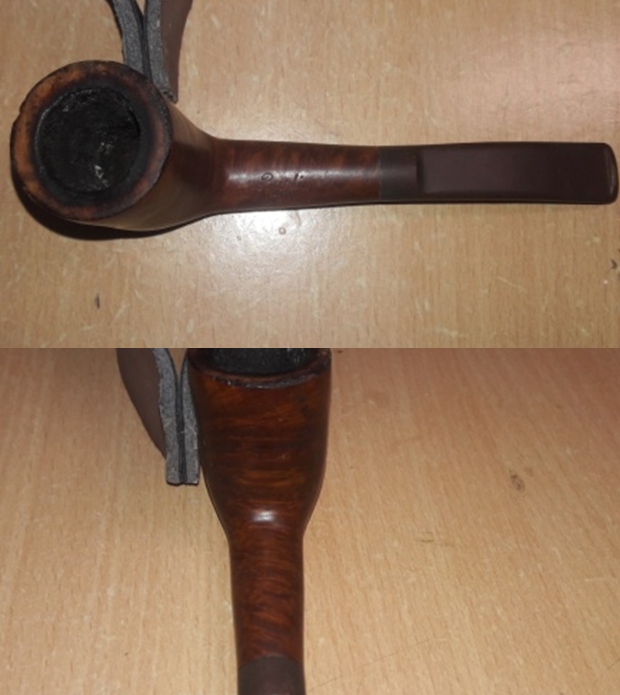
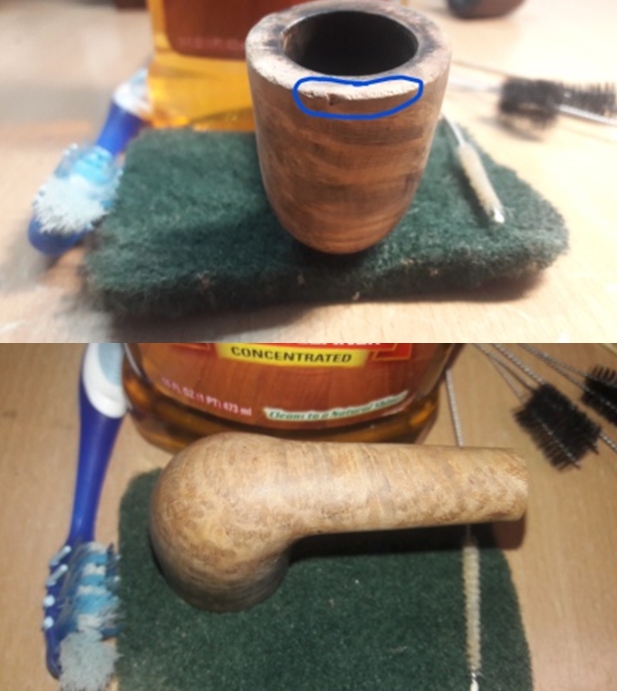
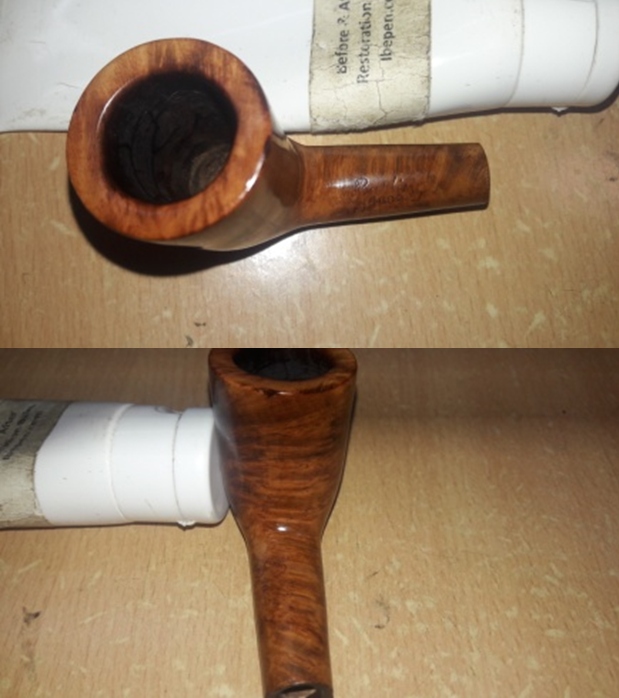
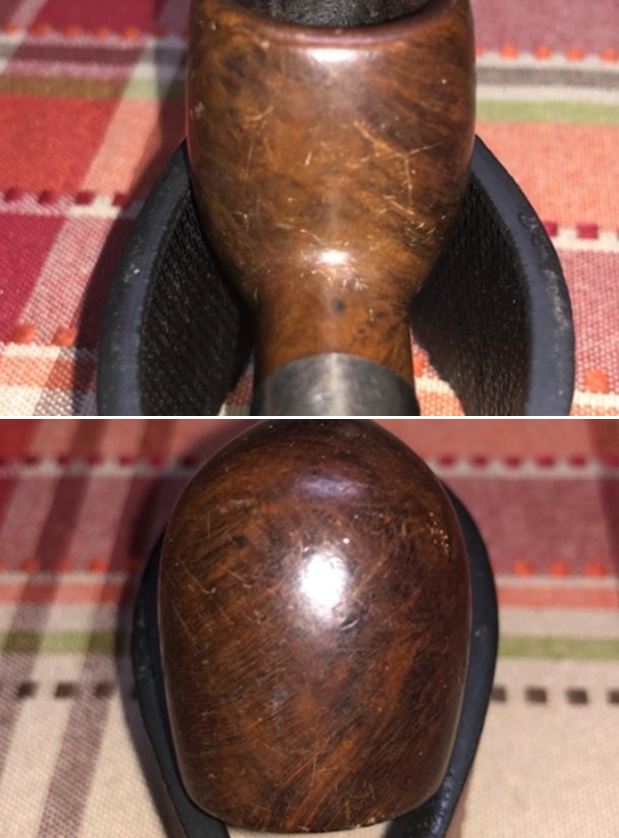
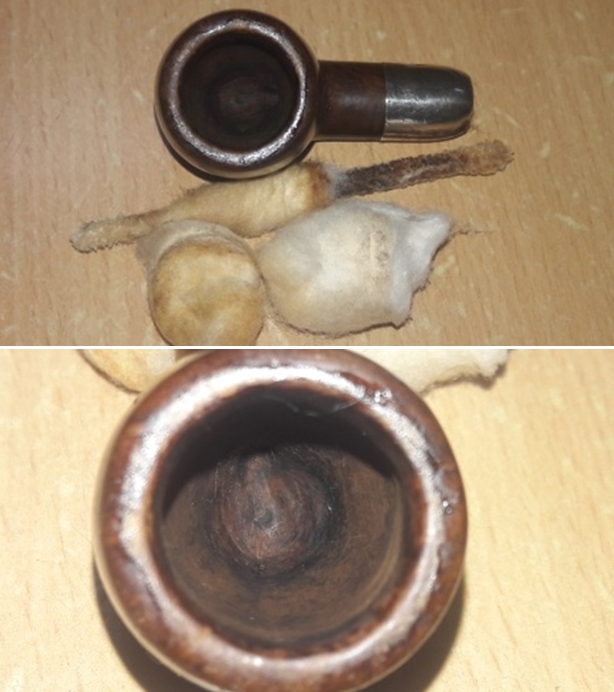
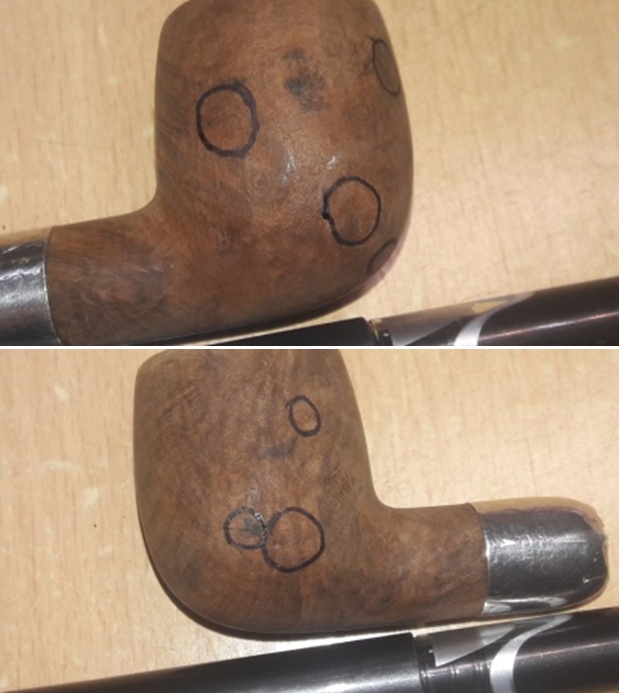
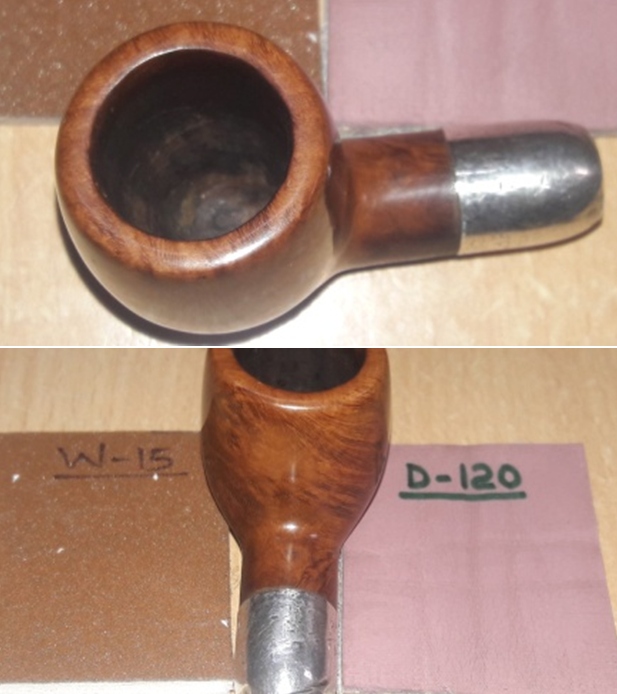
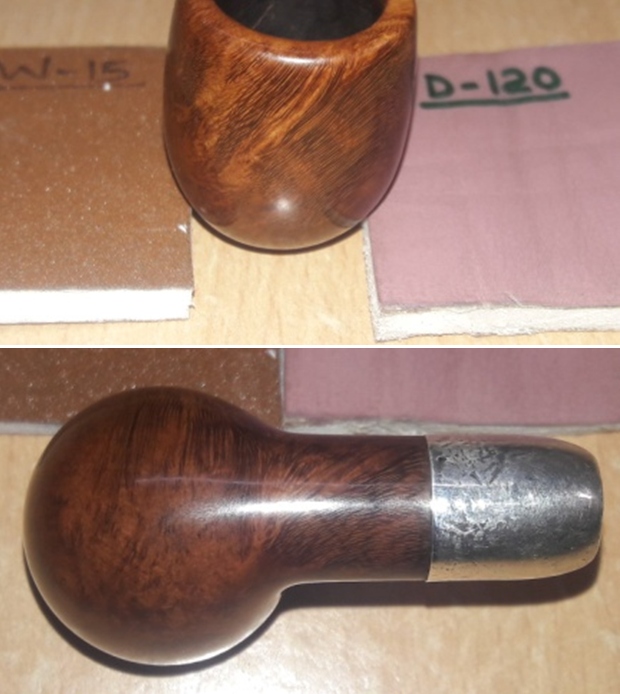
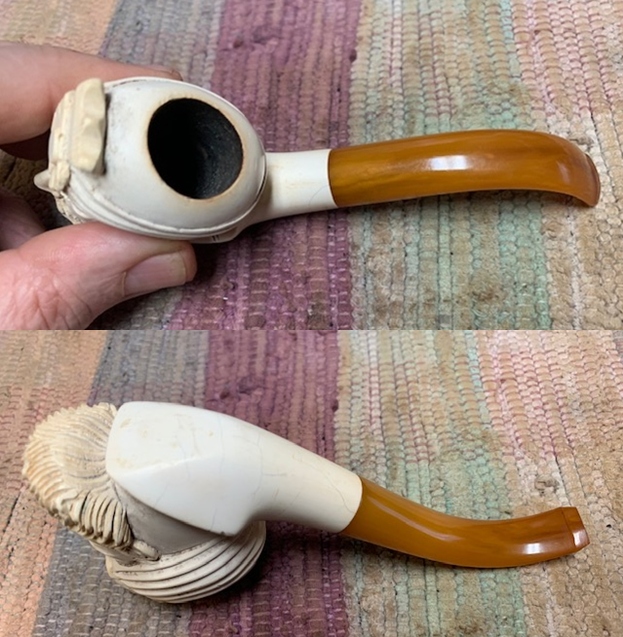
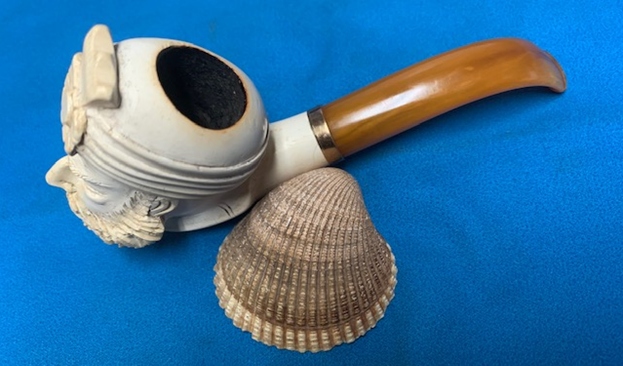
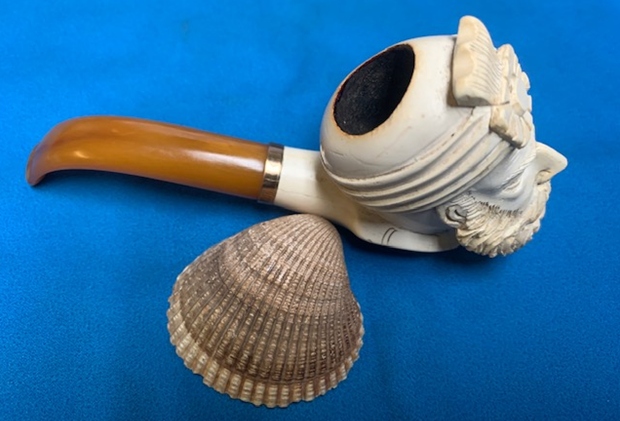
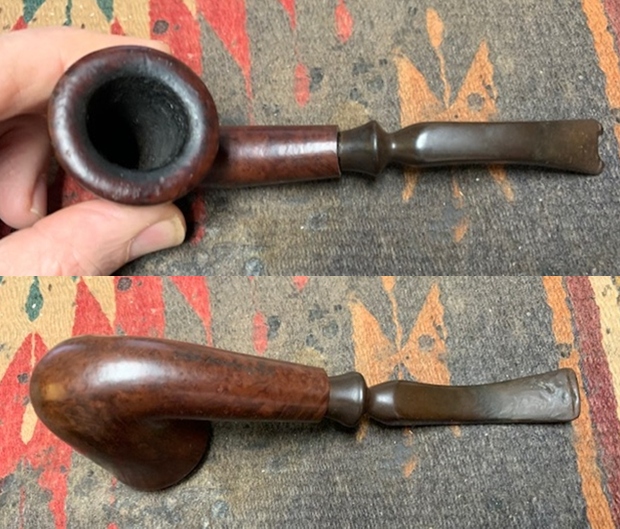
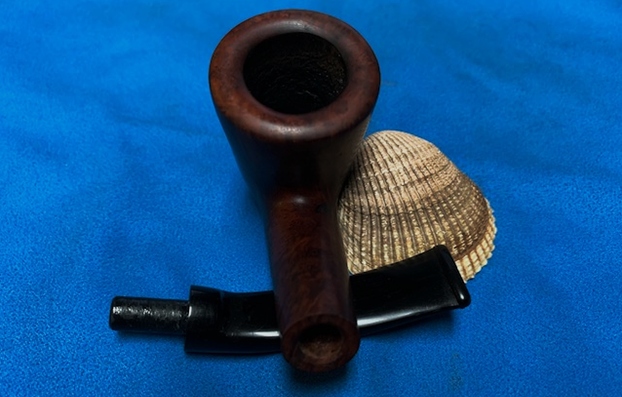
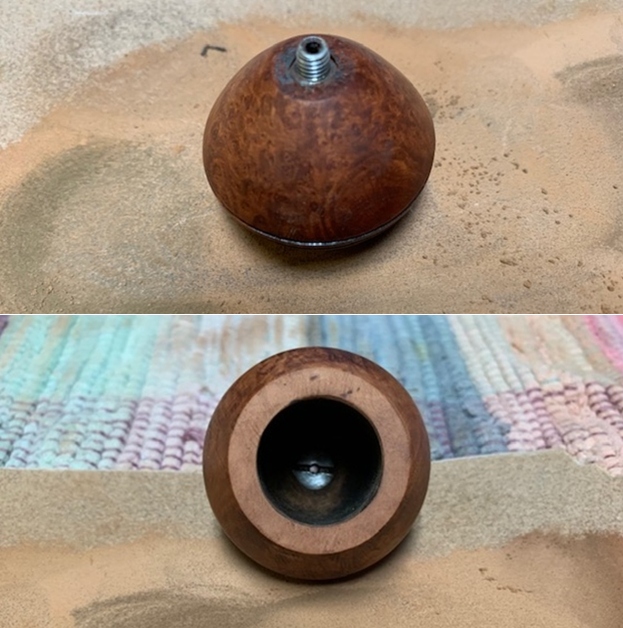
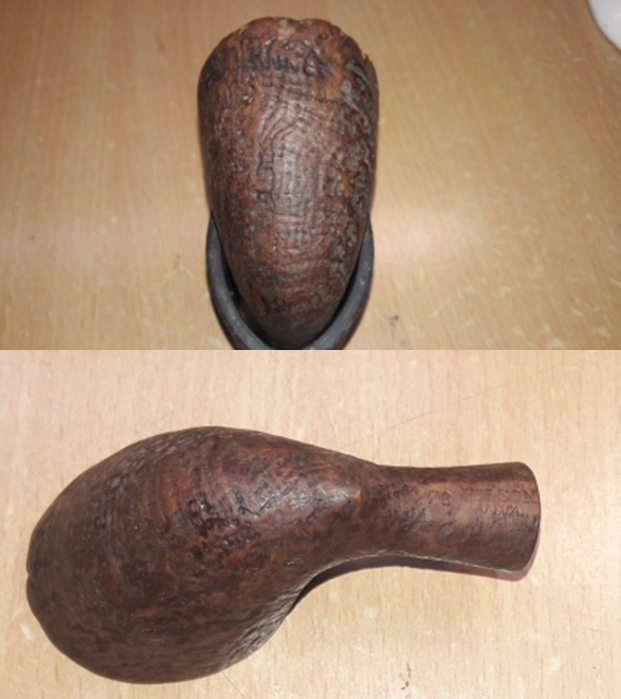
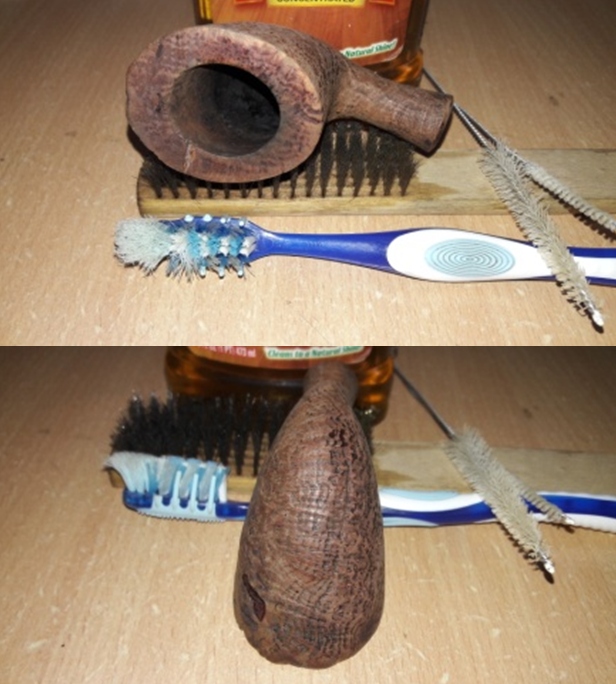
This pipe has been with me for many years and at one point in time was an integral part of my pipe rotation. However the lure of new got the better of me and in my exuberance to try out the newer additions to my pipe collection, this pipe kept falling further and further down the pile. So when Steve suggested replacing the stem, I got this pipe out of oblivion. The stummel has a shallow sandblasted surface that has accumulated a little dust and dirt in the crevices of the sandblast. The left side of the stummel has a few fills and probably, I think, is the reason for the stummel to be sandblasted. Once the stummel surface has been thoroughly cleaned and the fills exposed, will I decided to refresh these fills or let them be. 

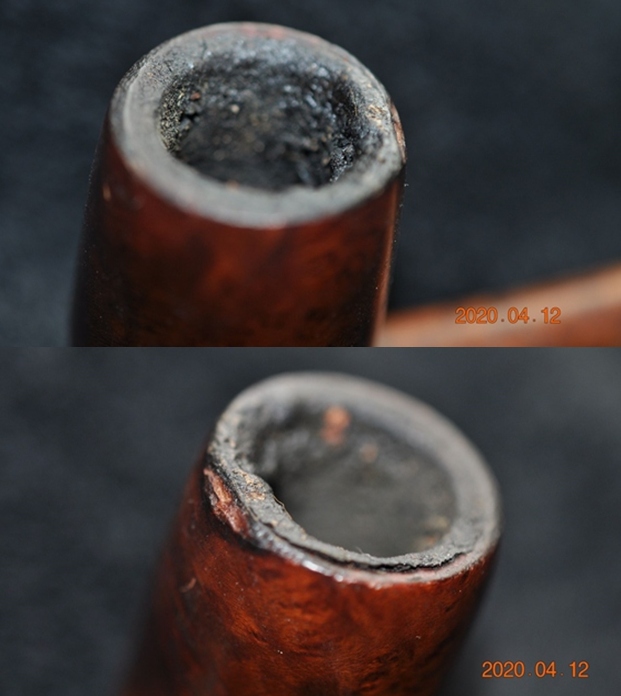
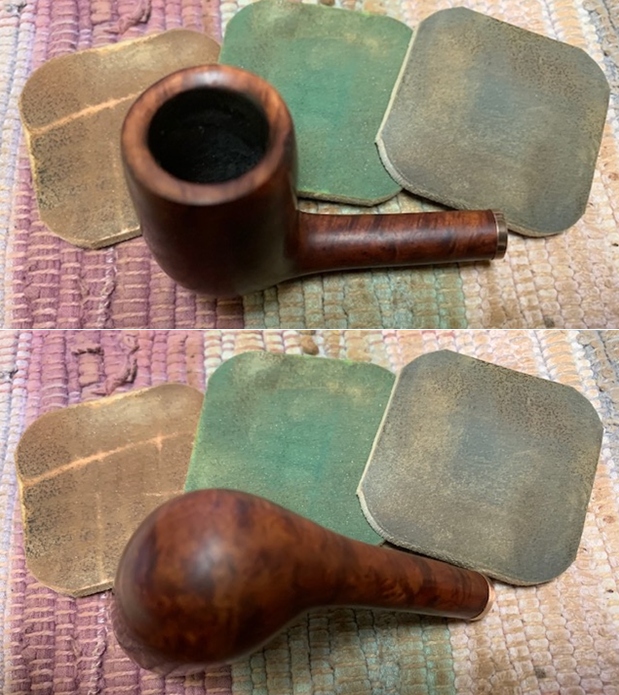
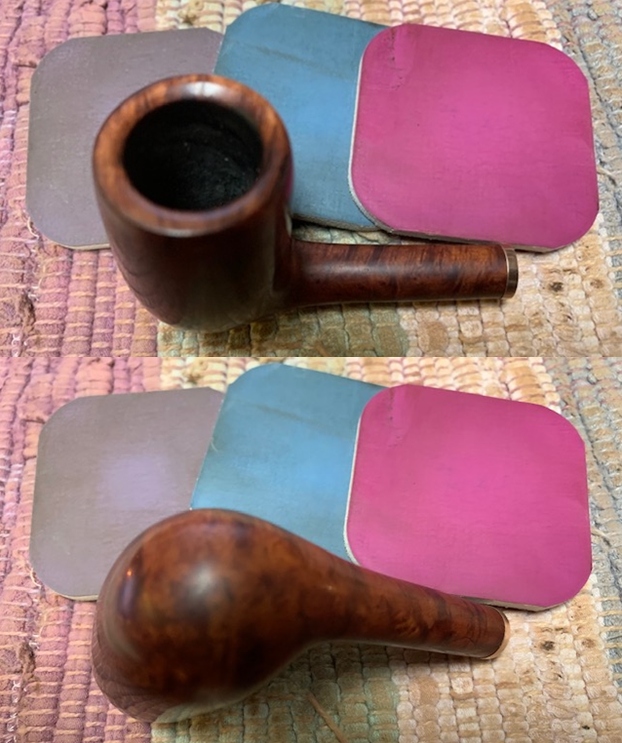
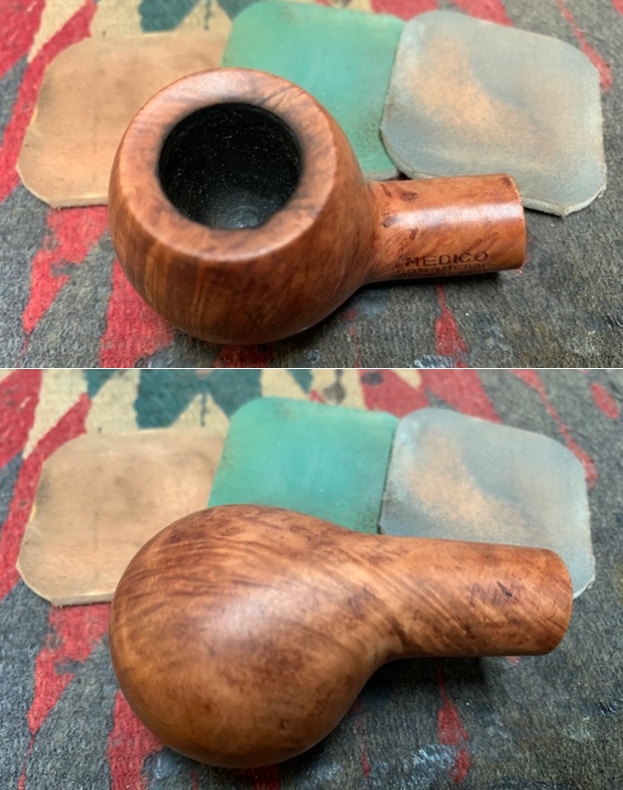
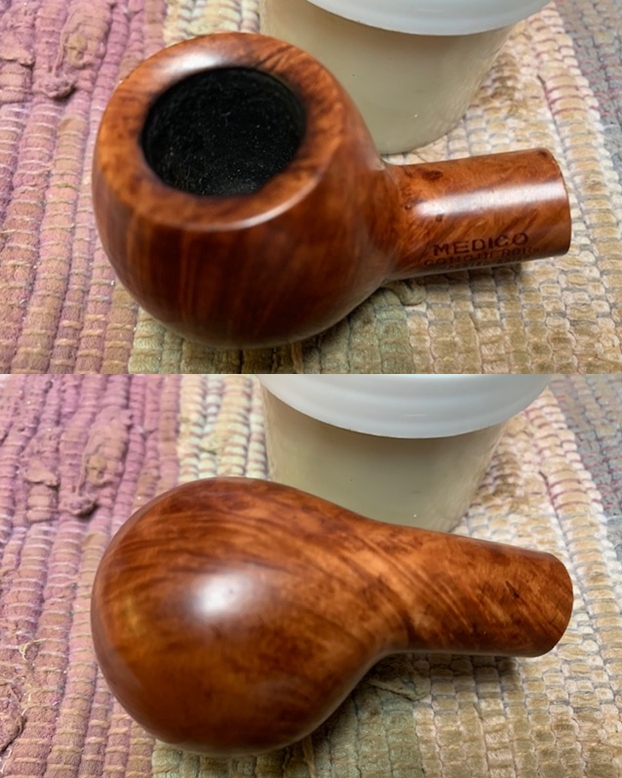
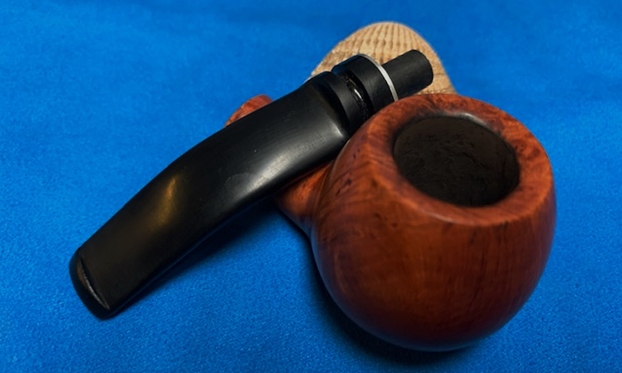
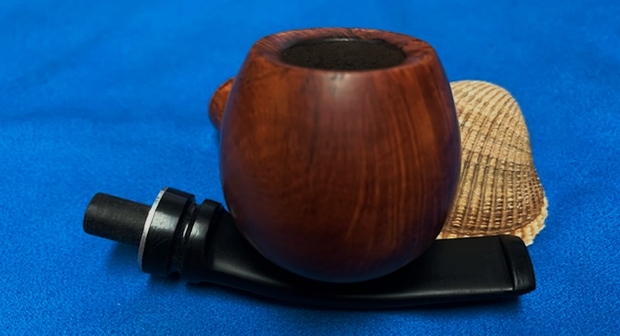
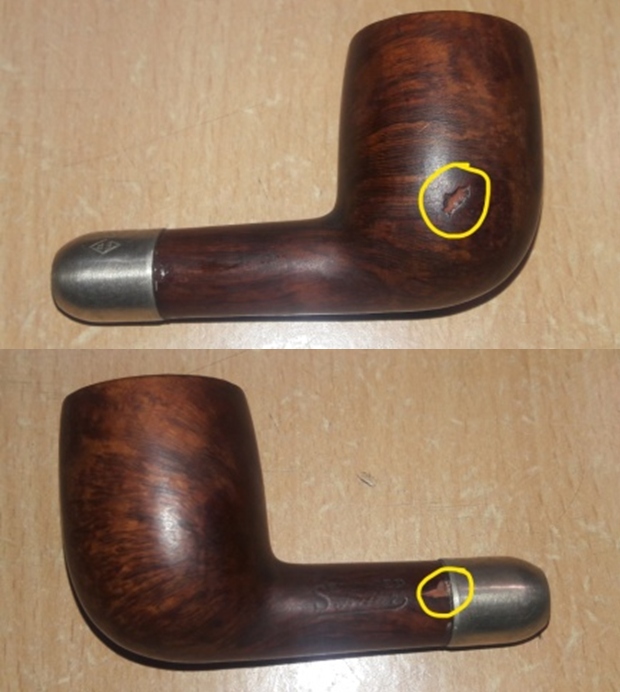
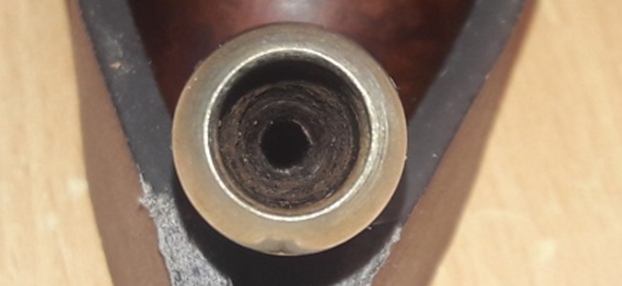
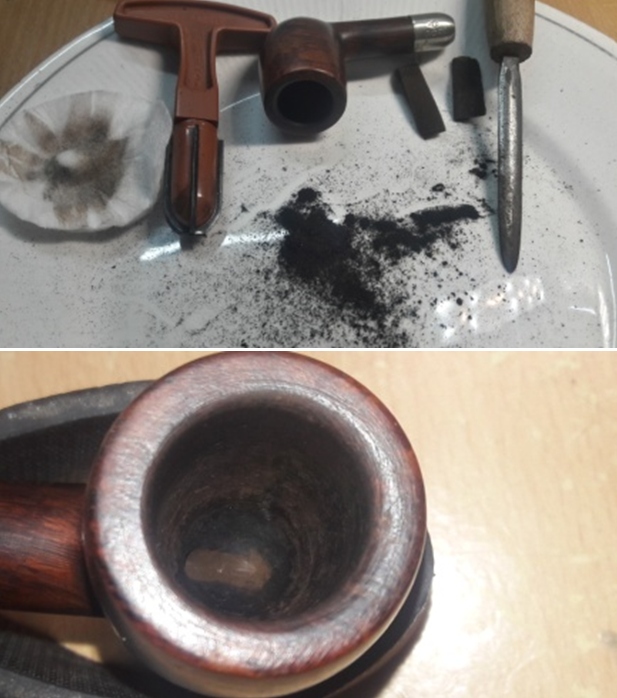
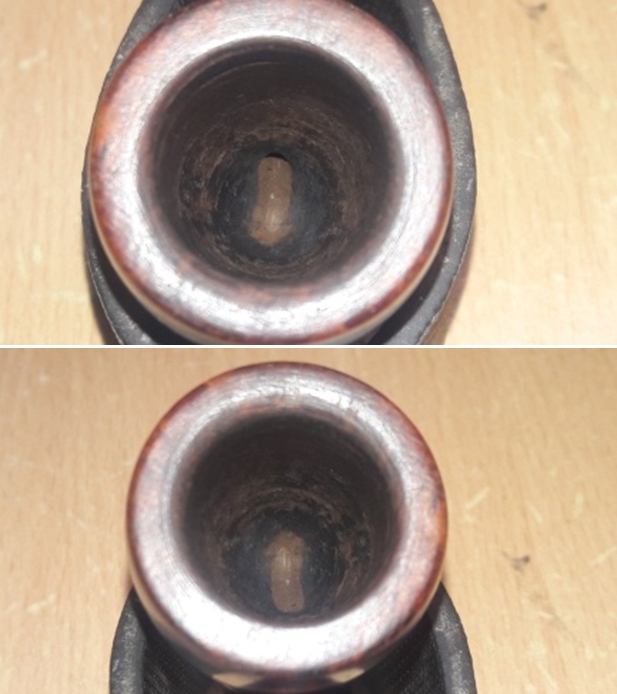
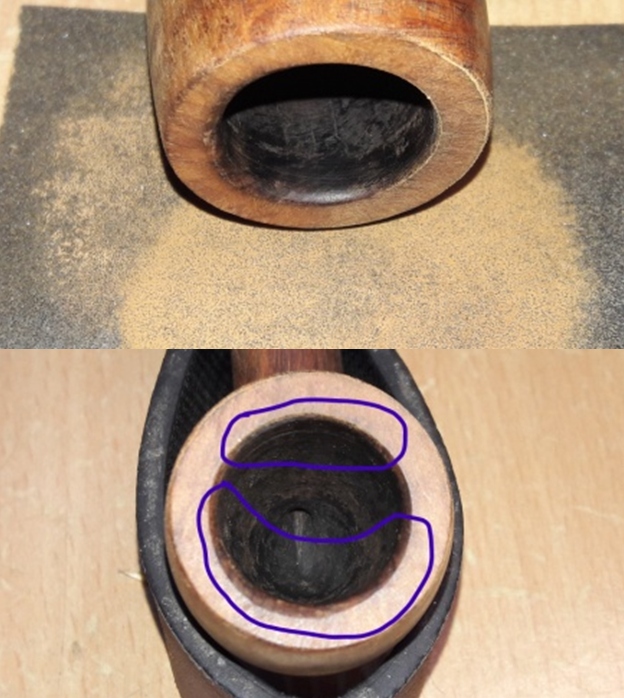
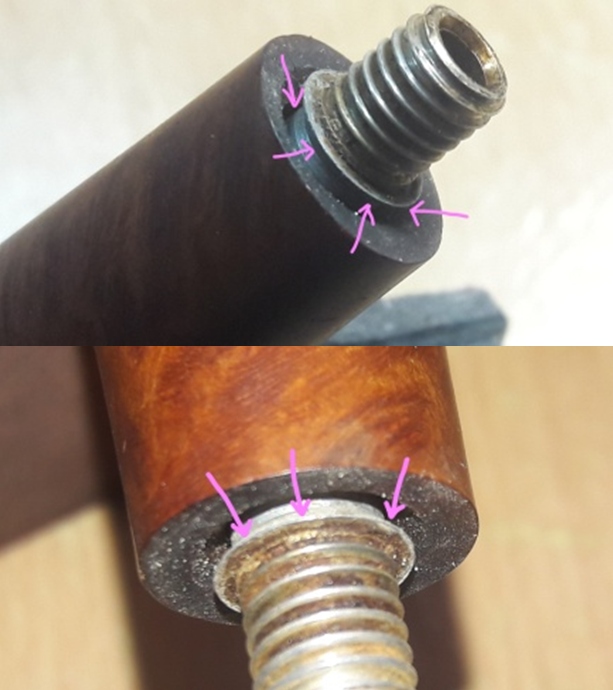
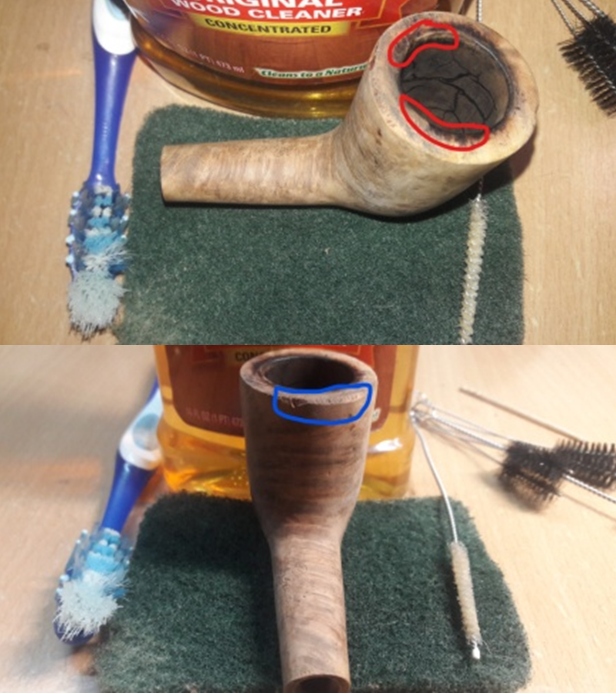
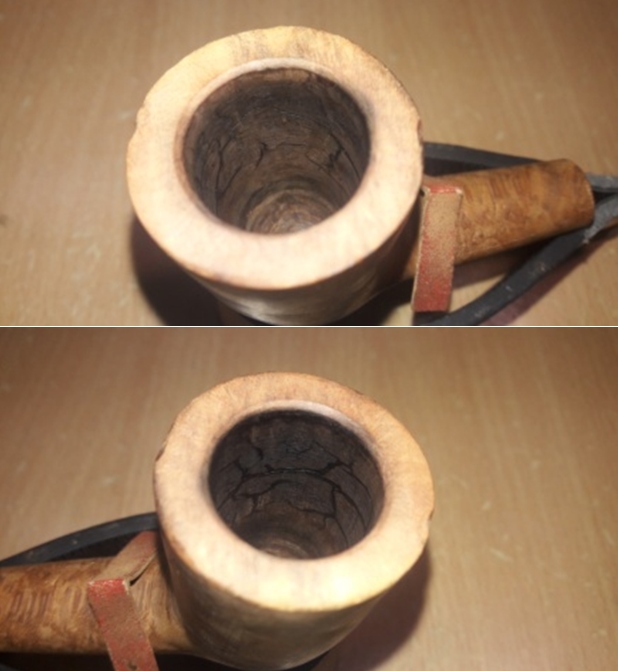
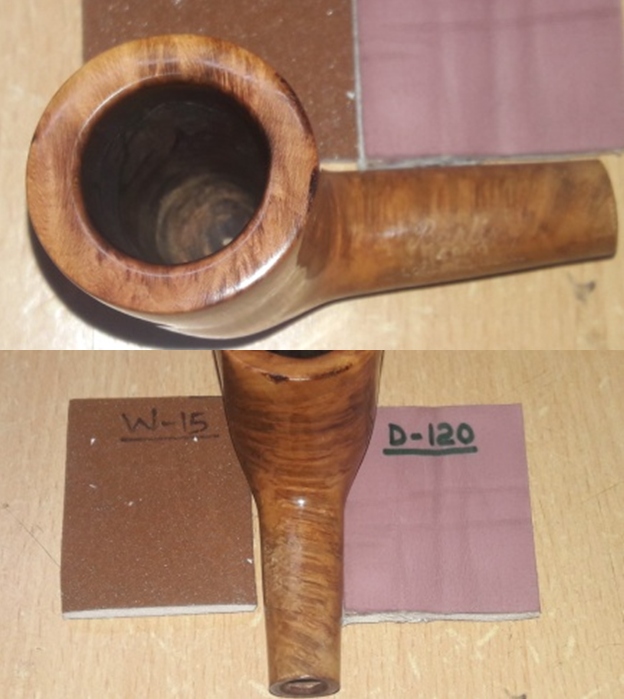
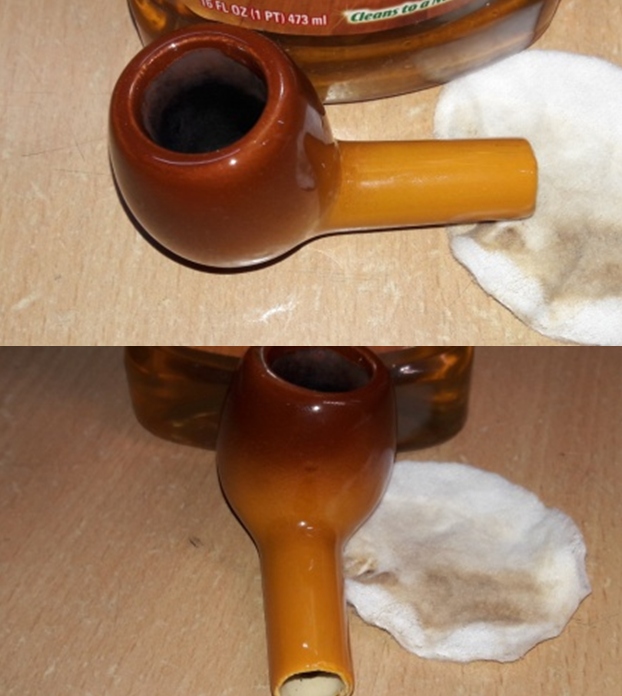
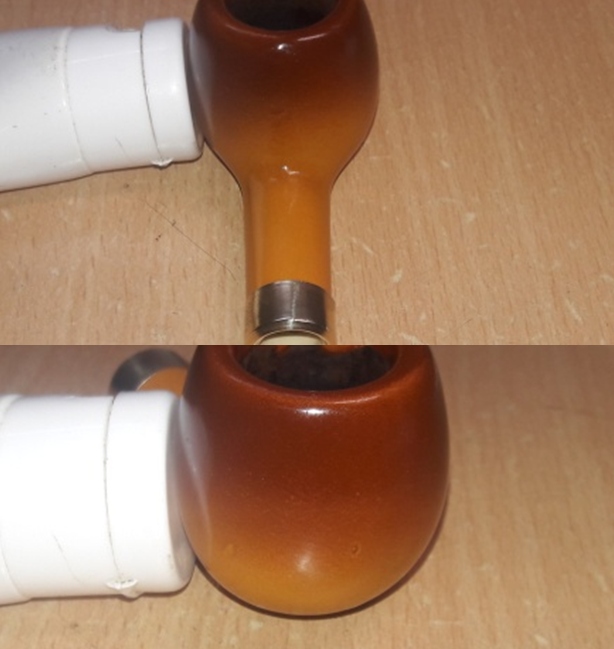
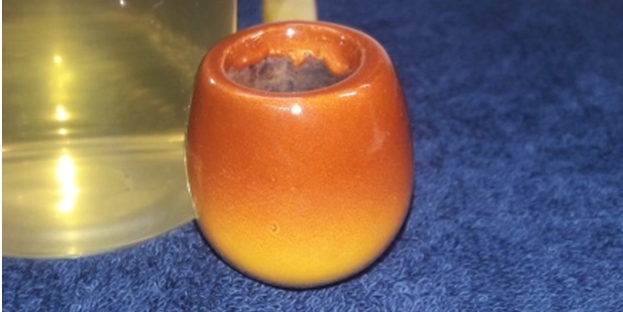
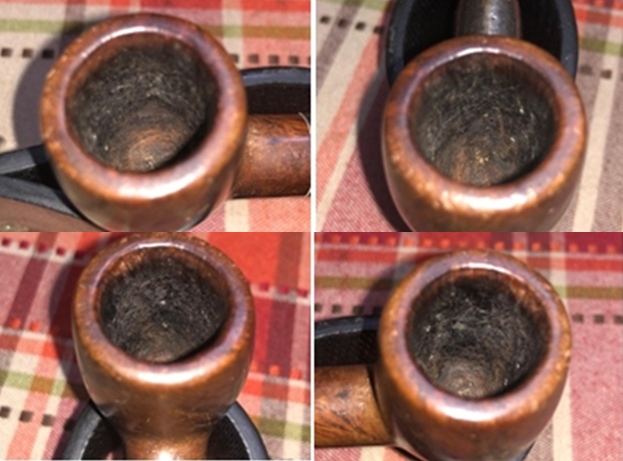
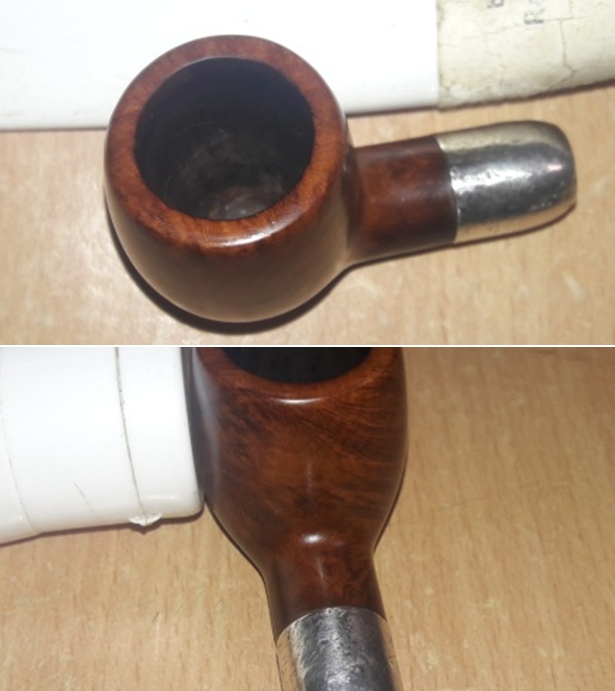
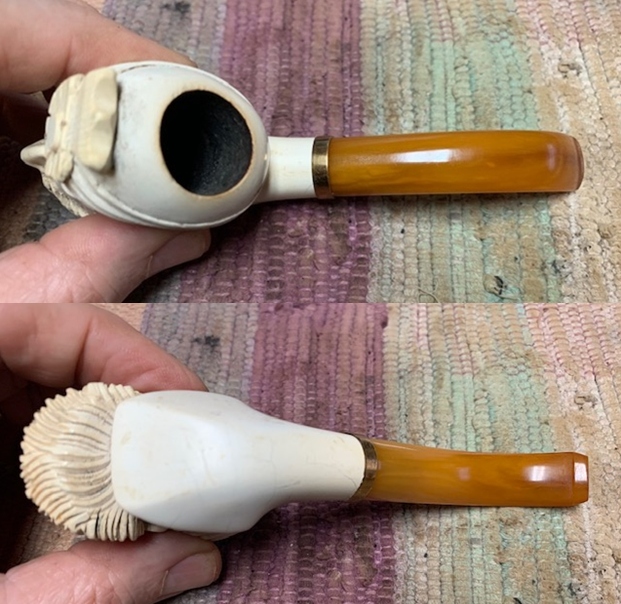
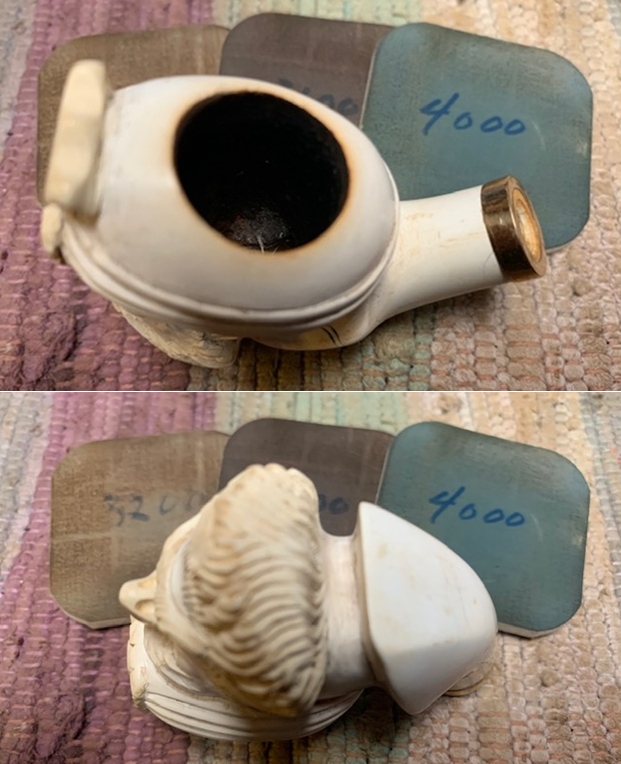
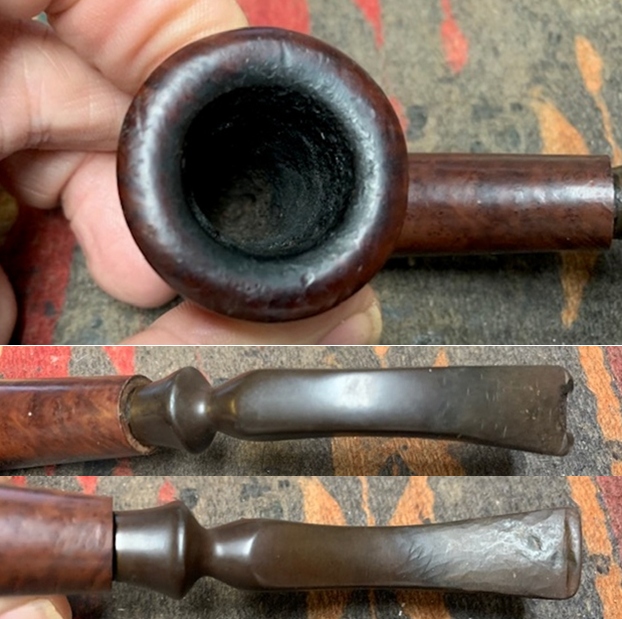
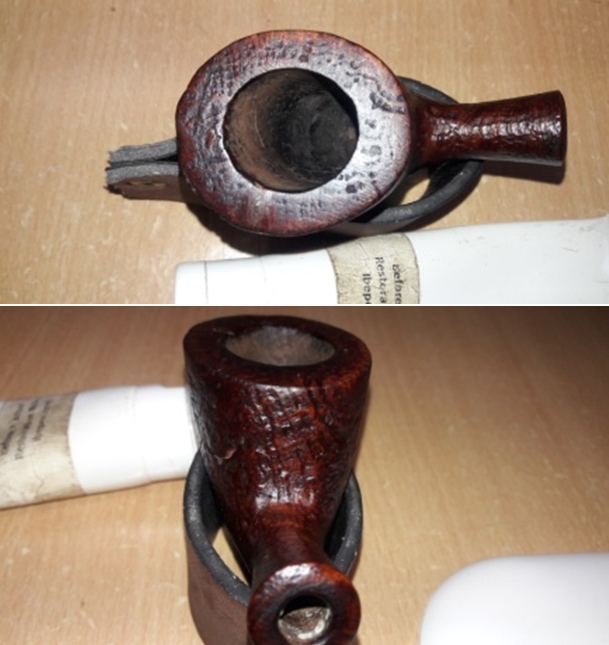
 Before being stowed away, the chamber and the mortise had been completely reamed and cleaned. However, with passage of time, the mortise and the chamber walls are covered in dust and coupled with the high moisture content in the atmosphere, has coated the walls in a thin layer of grime. There is an even layer of thin coat of dust that has hardened over the thick chamber walls. The rim top surface shows very shallow sandblast and was cleaned earlier by me. It is now that I have observed a fill on the left side that runs from the inner to outer edge (indicated by indigo arrows). Both the inner and the outer rim edges are sans damage. The inner walls of the chamber are solid and thick. The chamber odors are mild. The draught hole is dead center and at the bottom of the chamber and coupled with the new stem that would replace the old one, makes me believe that the smoking quality of this pipe should improve manifolds. Further cleaning of the chamber and mortise should completely eliminate the ghost smells from the chamber.
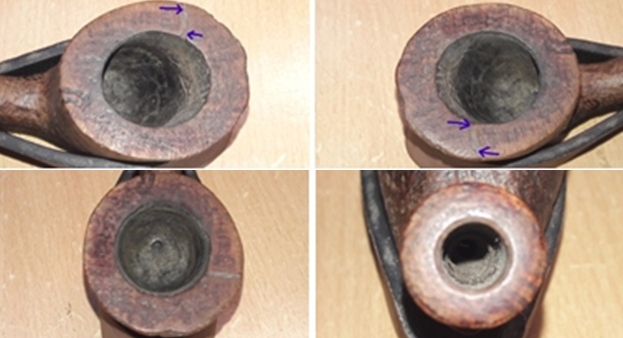 The Process
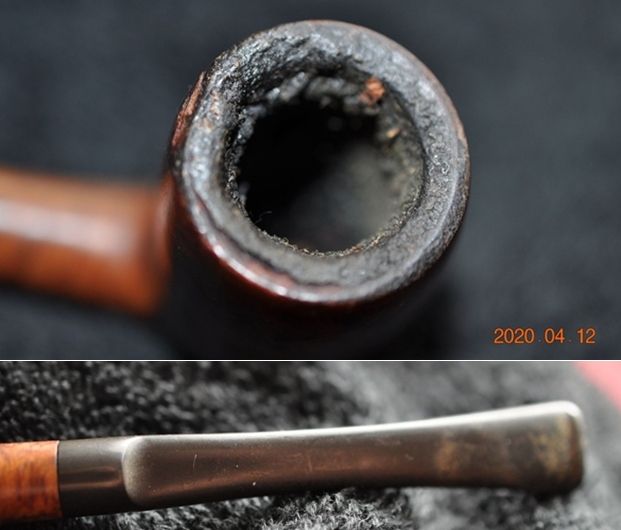
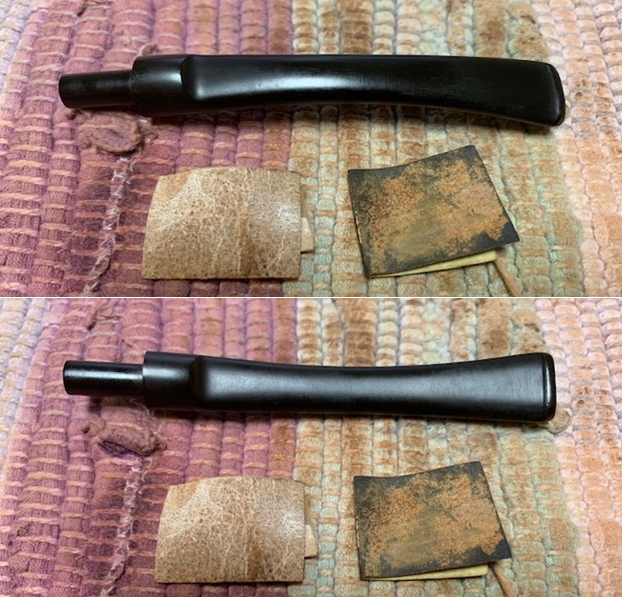
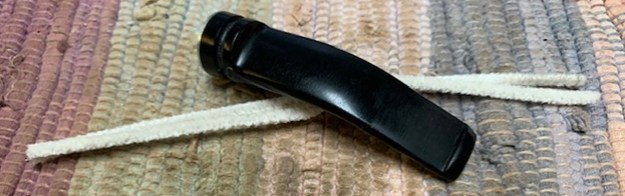
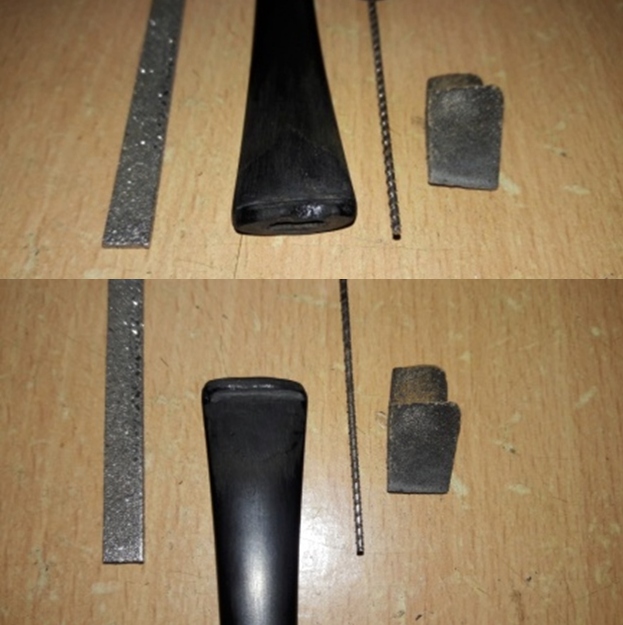
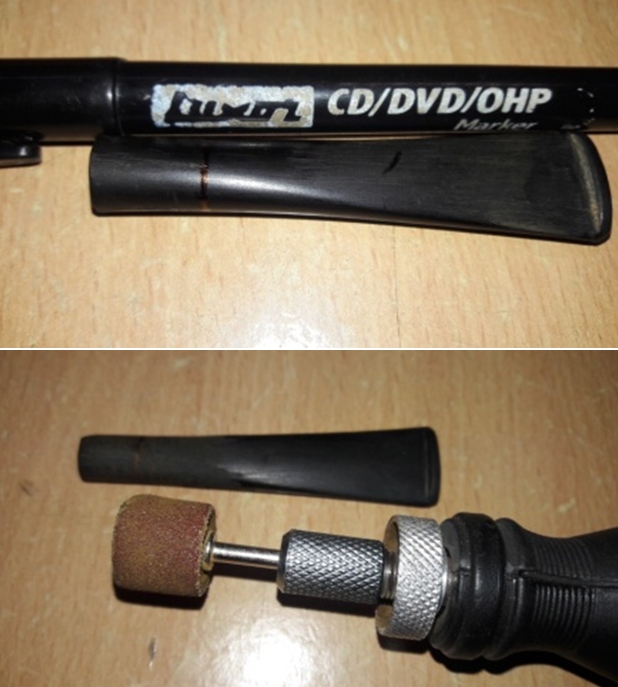
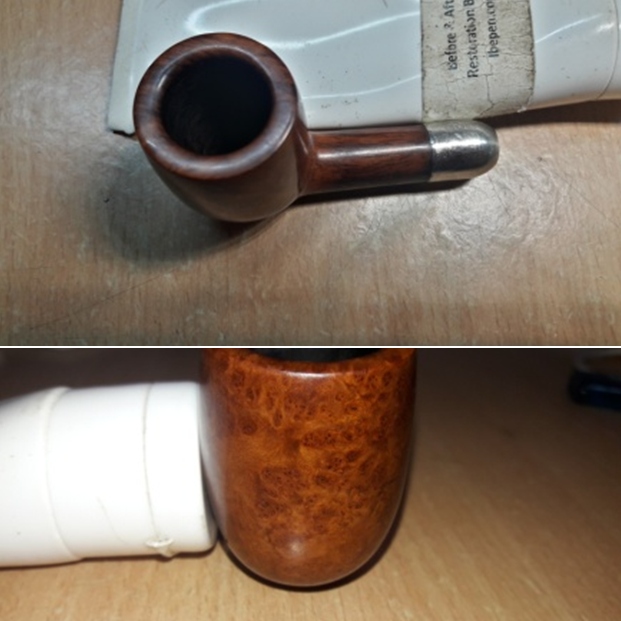
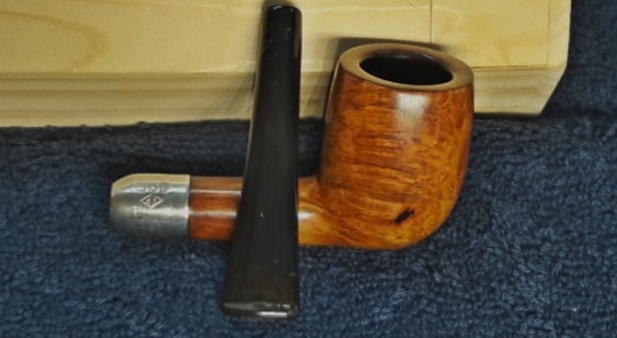
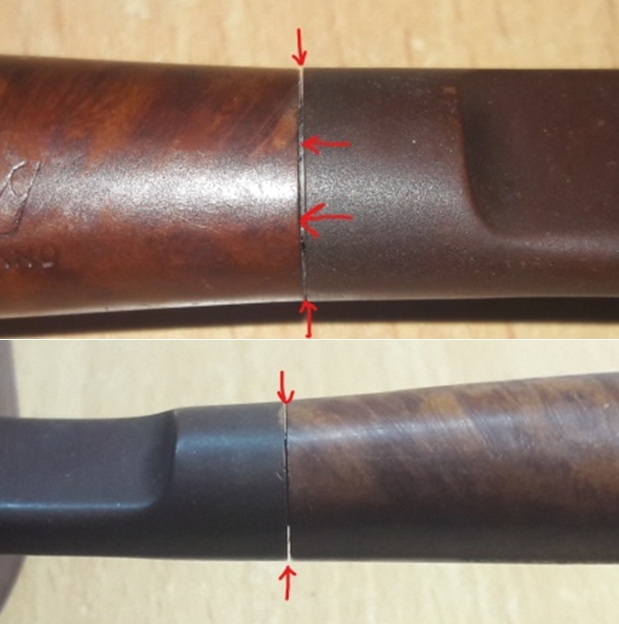
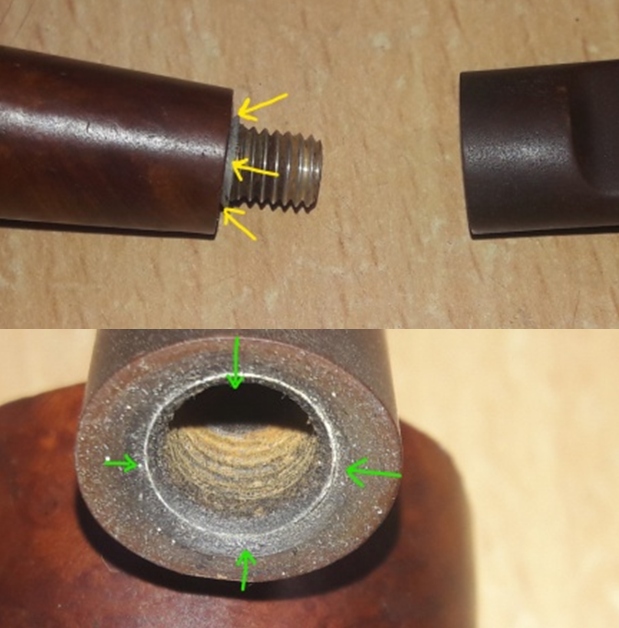
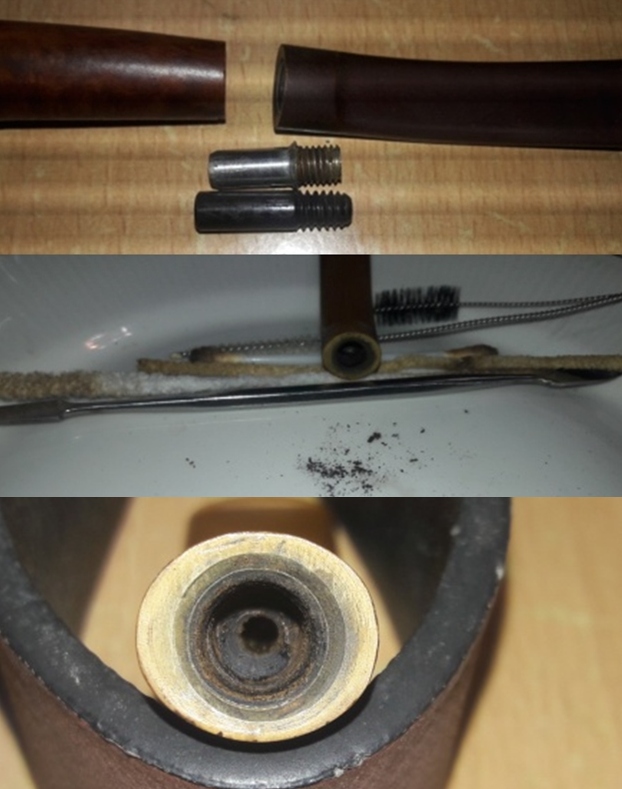
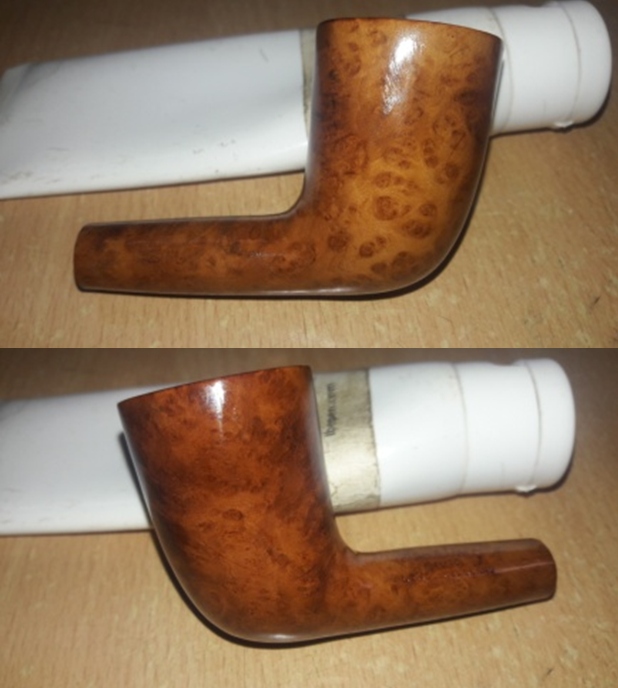
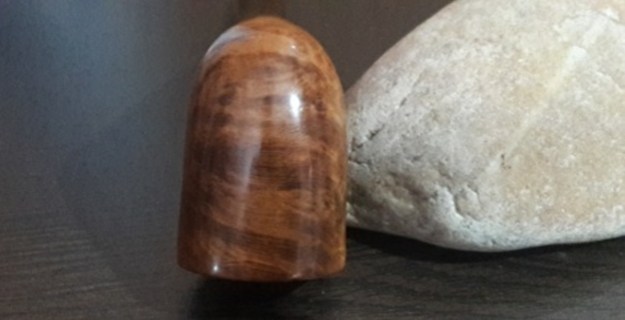
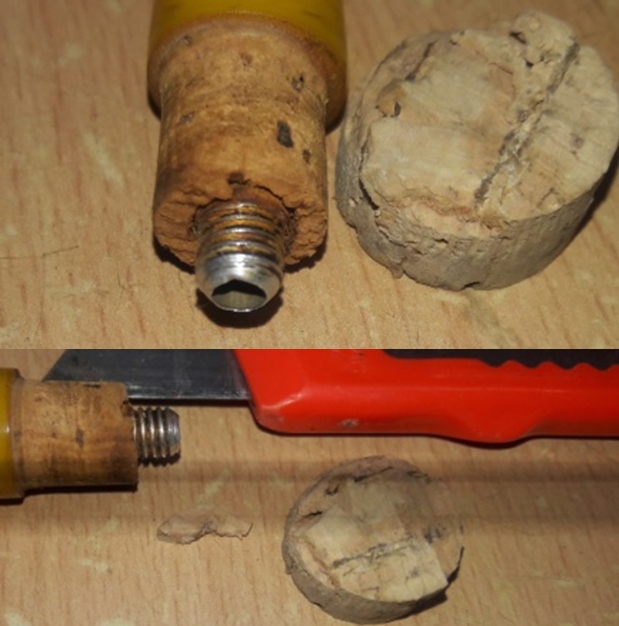
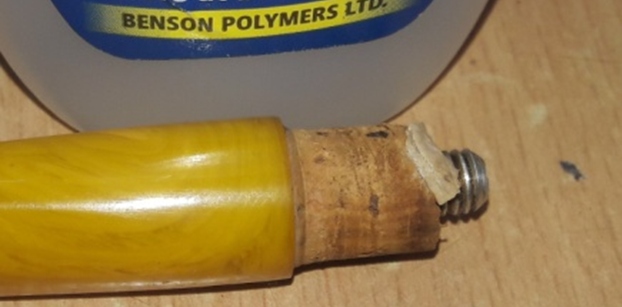
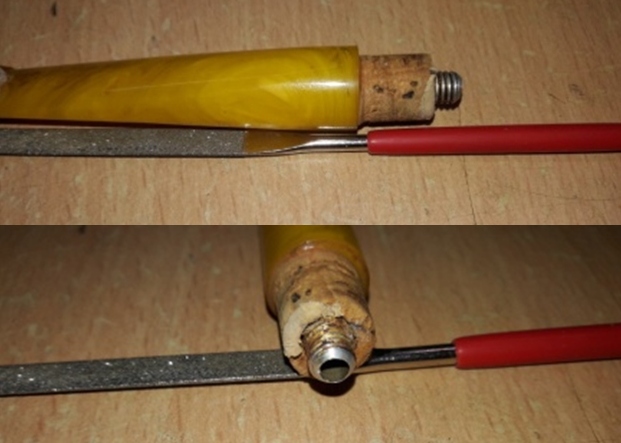
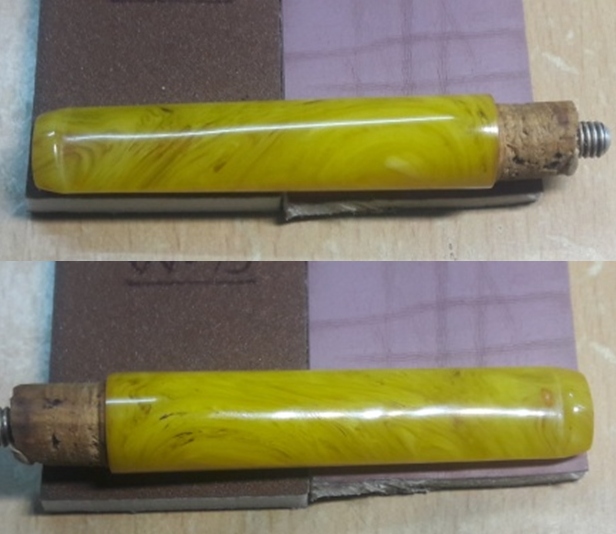
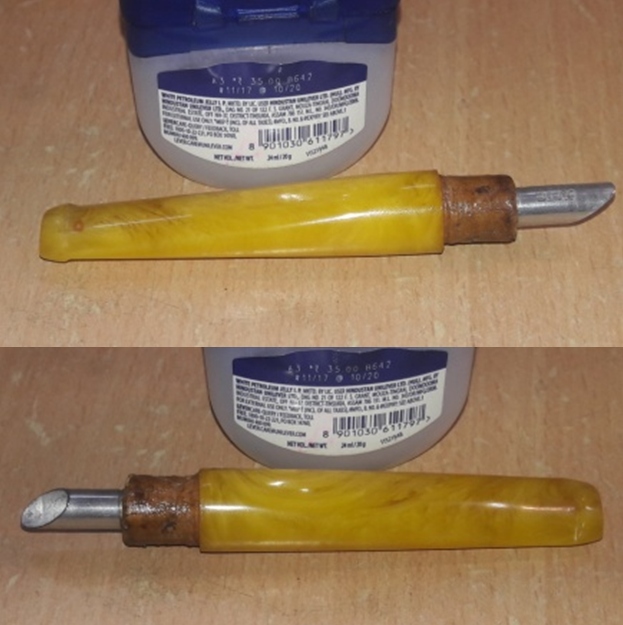
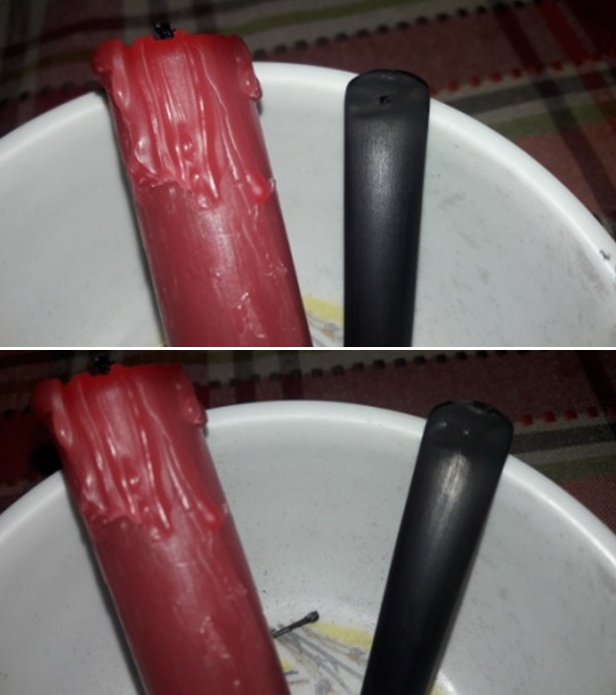
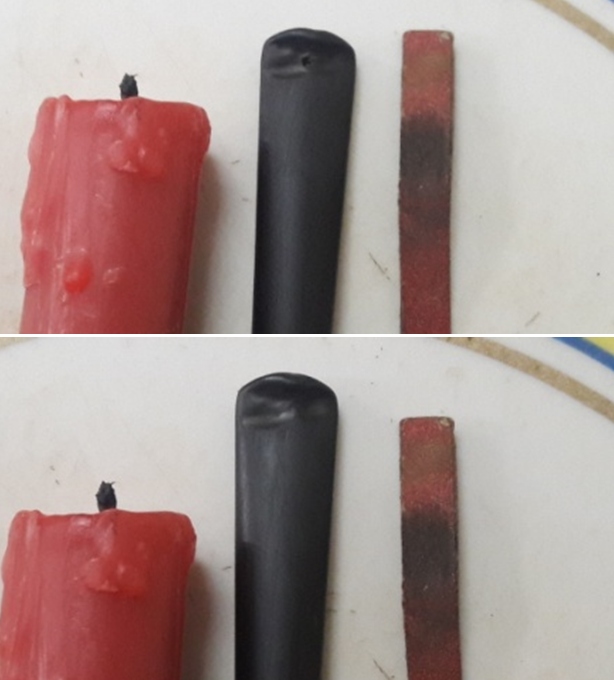
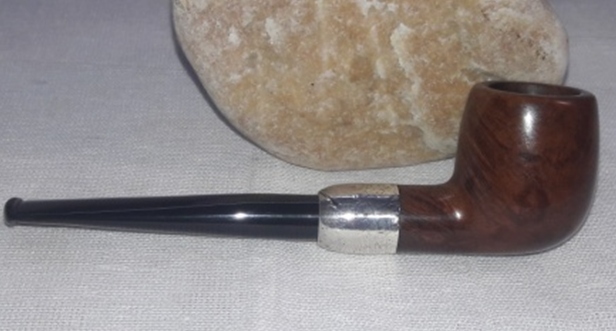
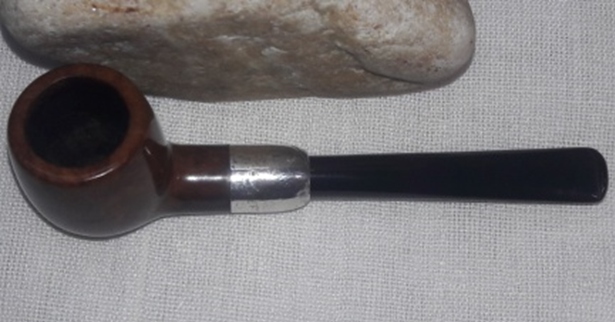
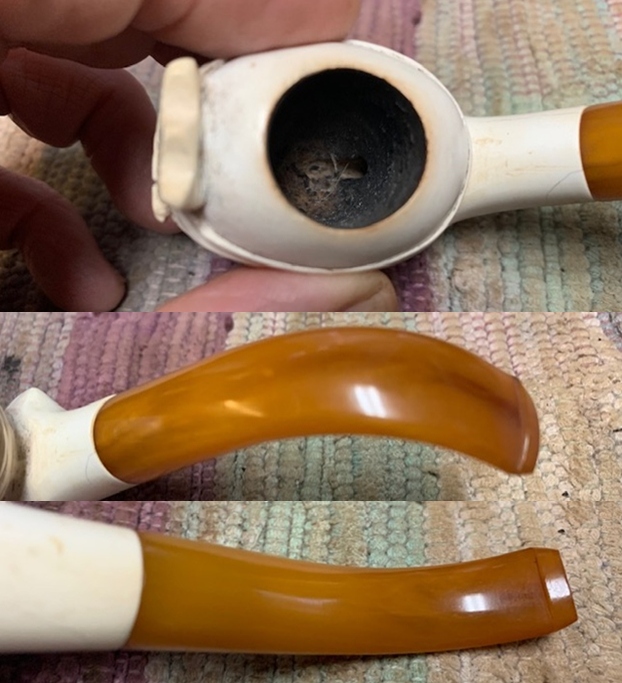
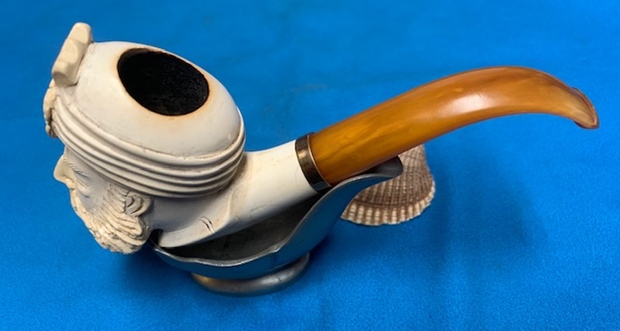
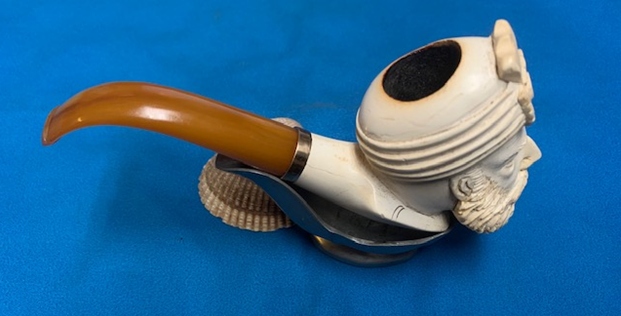
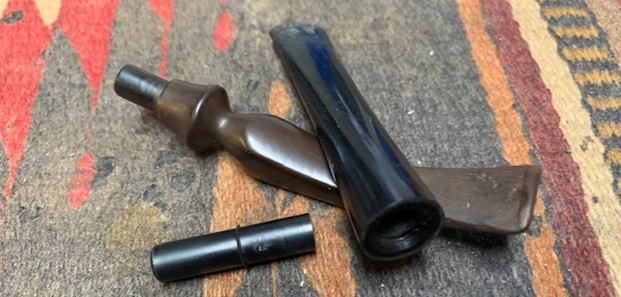
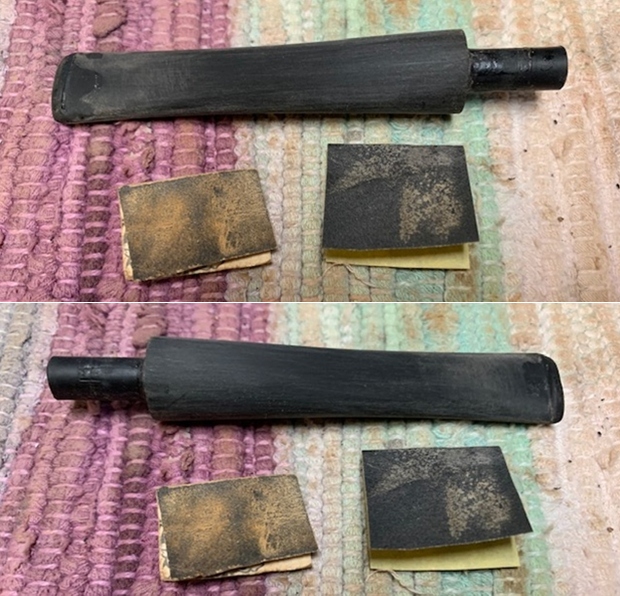
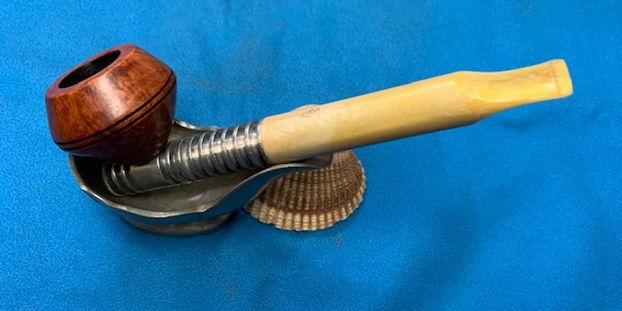
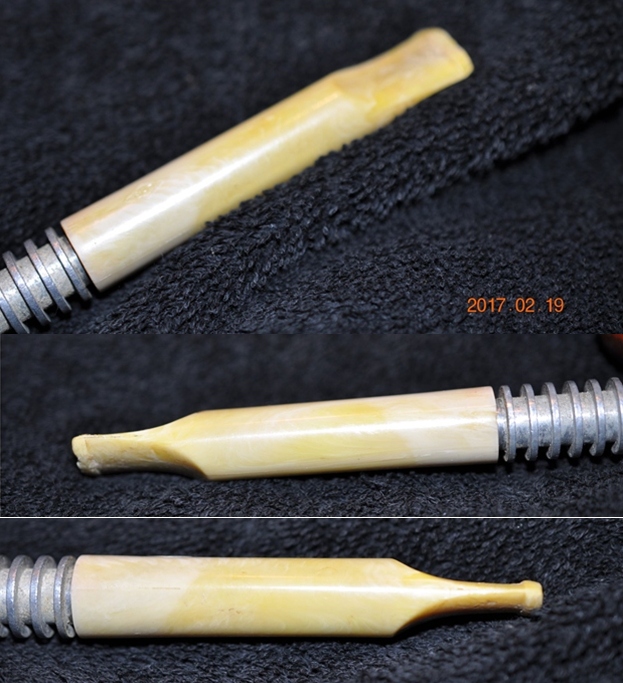
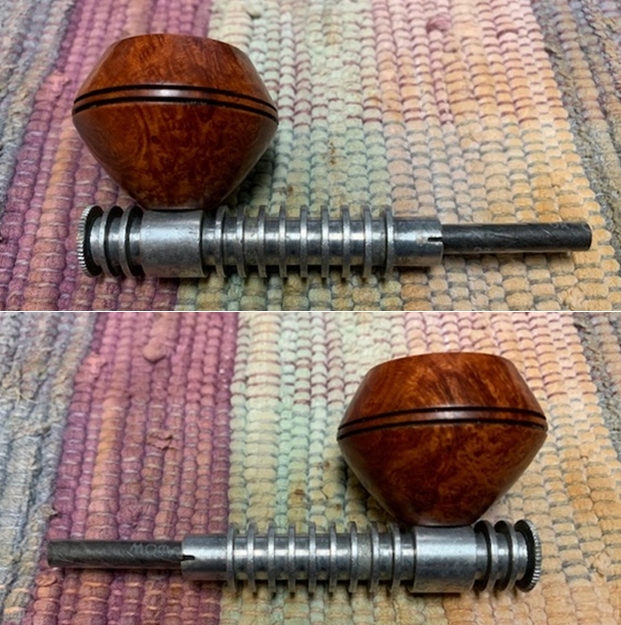
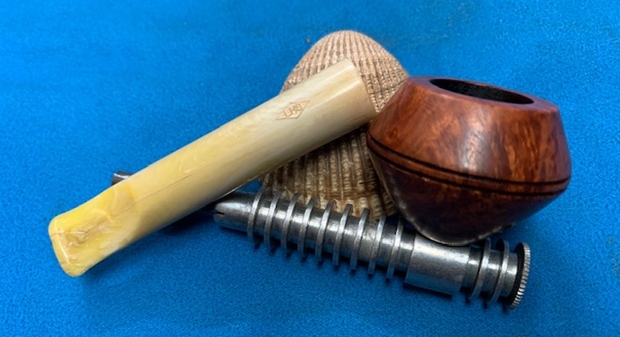
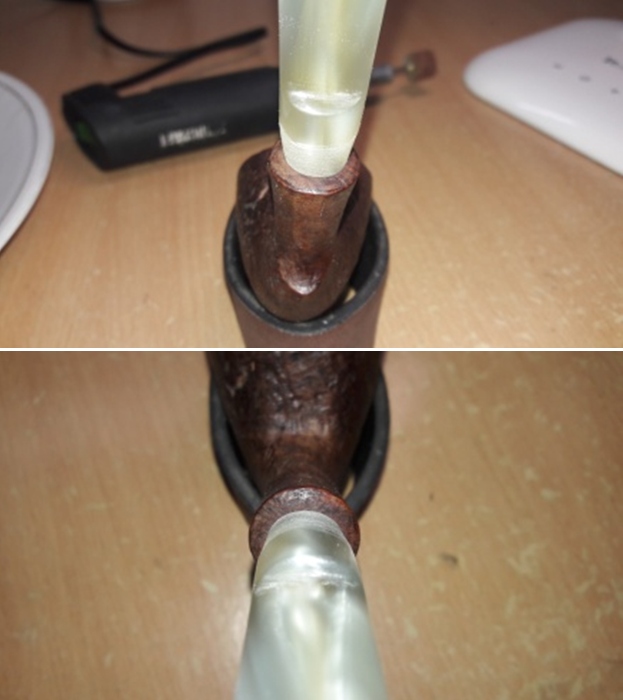
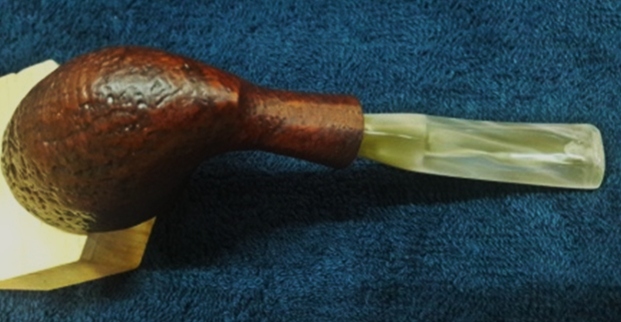
The first issue to be addressed in this project was to replace the previously poorly executed stem replacement job. The whistling sound emanating from the shank when air was drawn from the stem was a pointer that the alignment of the stem air way and mortise/ draught hole was skewed. I tried the pipe cleaner test and it was with great effort and maneuvering that the pipe cleaner came out through the draught hole. Steve and I had selected a pearly variegated acrylic saddle stem with swirls of light browns and grays as a replacement stem for this pipe. It was decided that this saddle stem be modified in to a military mount stem with the tenon seating as close to the walls of the mortise as possible. Here is how the pipe looks with this pearly saddle stem. The tenon would need to be sanded down for it to seat in to the mortise and this would be the trickiest part of this stem replacement. I would have to be very careful to sand it evenly and equally from all around and ensuring this while sanding down manually and eyeballing the evenness is not as easy as it would be while using a tenon turning tool (which I am still on a lookout for at a good price!!). 
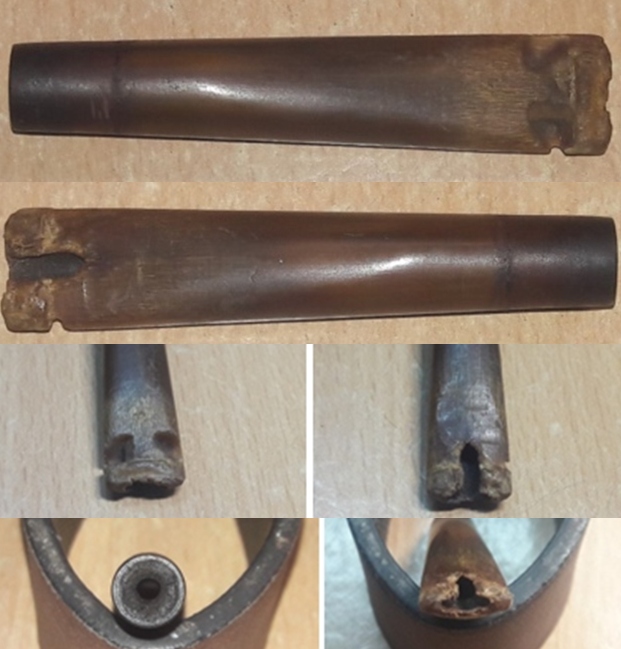
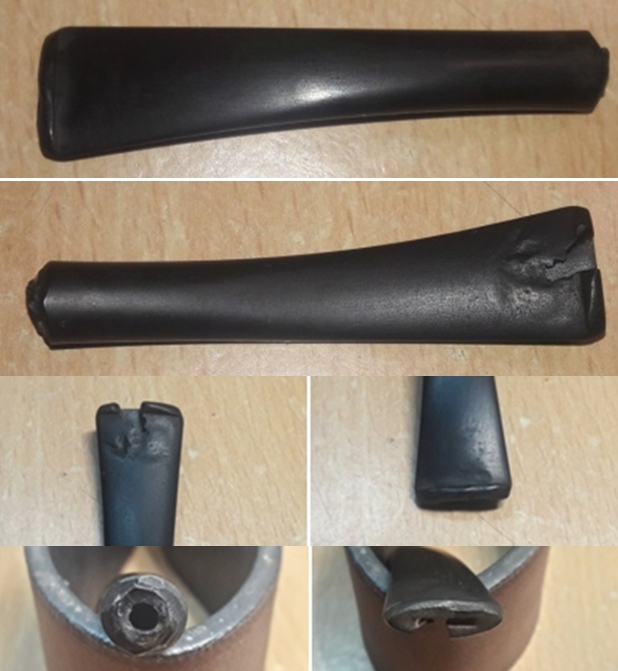
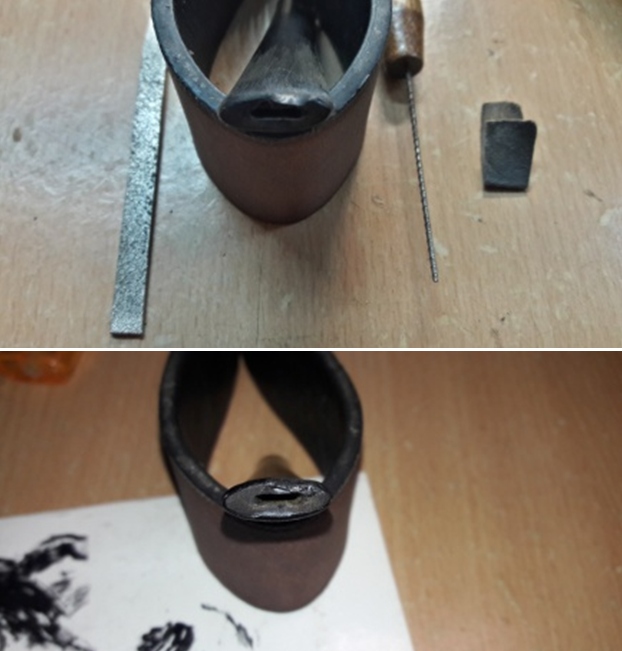
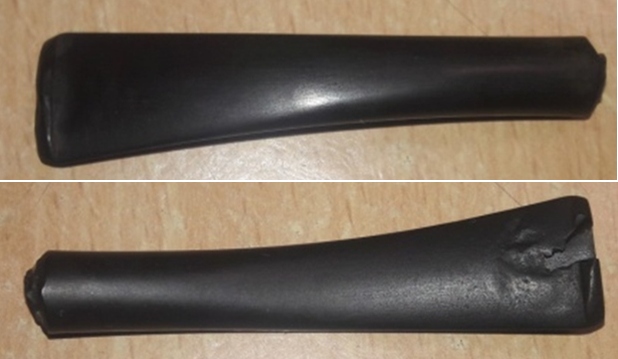
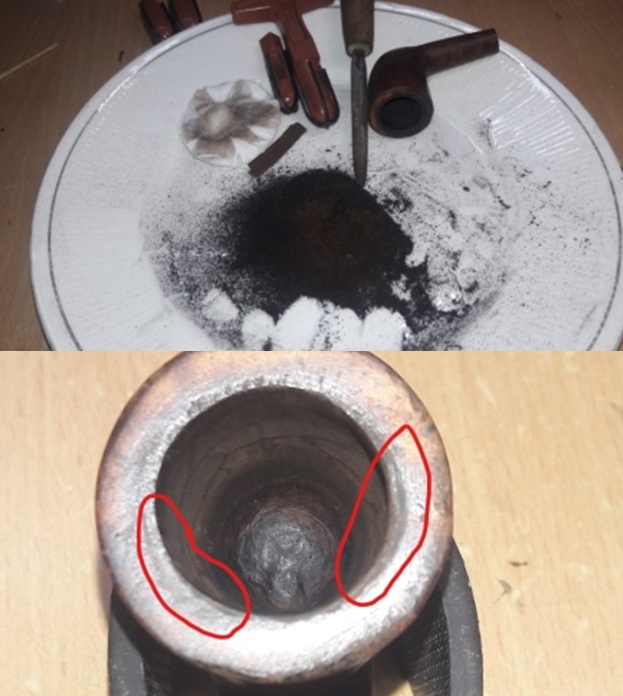
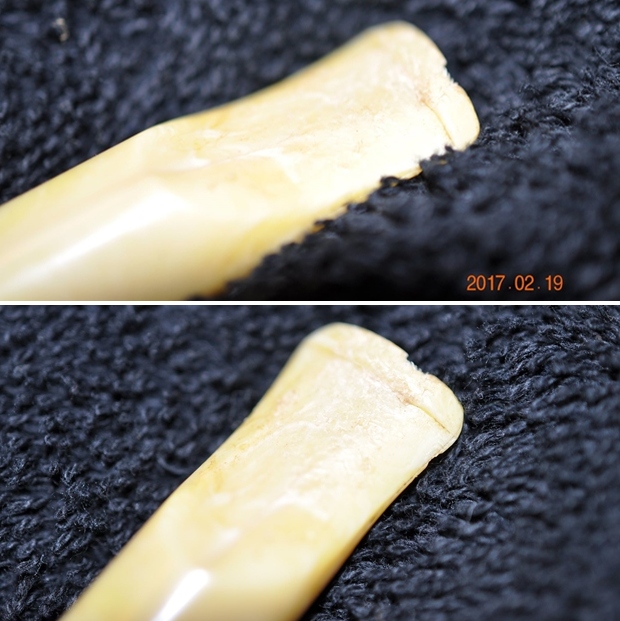
 The replacement pearly variegated acrylic saddle stem too came with its own set of damages. The stem was badly damaged with heavy and deep tooth indentations in the bite zone over the upper stem surface. The button edge on the upper stem surface is also deformed with heavy tooth indentations. The lower stem surface, in addition to the tooth chatter, had a large chunk of the surface chewed off from the bite zone including the button. The bite zone on either surface is covered in a thick layer of calcification, probably a result of using a rubber bit. The stem airway appears BLACK and completely clogged with accumulated saliva, oils and tars. The tenon end and horizontal slot are clogged with gunk. The bite zone and buttons on either surfaces will have to be reconstructed and reshaped. The airway will be a bear to clean. Only after the stem has been thoroughly cleaned and sanitized, the issue of seating of the stem in to the mortise will be dealt with.
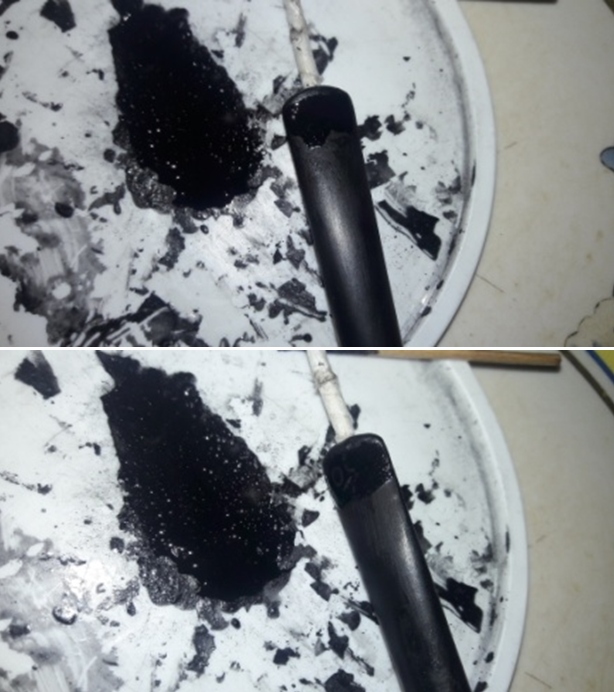
  I cleaned the external surface of the stem with a Scotch Brite pad and liquid dish washing soap. Once the external surfaces were clean, I cleaned the stem internals with a small shank brush and liquid dish soap. I gently scraped out the gunk and grime from the tenon and slot openings with my fabricated knife and dental tools. I thoroughly rinsed the stem surface and internals under warm running water till the stem was sparkling clean. I have realized that using small shank brush and liquid soap reduces consumption of pipe cleaners by about 85%. This is considerable savings considering that I pay thrice the cost of pipe cleaners on cost of shipping!! Next, I ran a couple of dry pipe cleaners through the stem to clean and dry it out. I avoid using isopropyl alcohol in cleaning stem air way just to guard it against crazing (call it my paranoia to use alcohol on an acrylic or Perspex stem!!). The stem surface, tenon end, slot and the air way is now clean. After about an hour of cleaning and ton of elbow grease, I can now handle this stem without any disgust!! I shall first adjust the tenon to achieve a snug seating in to the mortise and thereafter manipulate the saddle portion of the stem to achieve the taper for a military mount style stem.
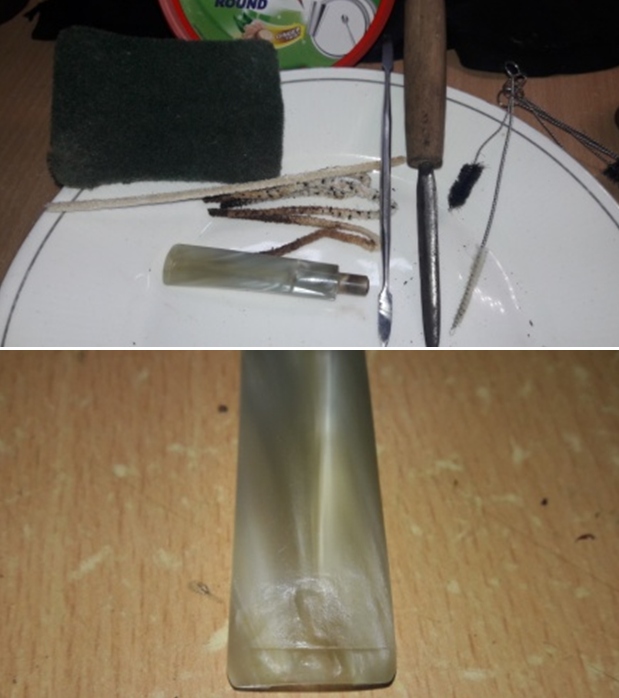
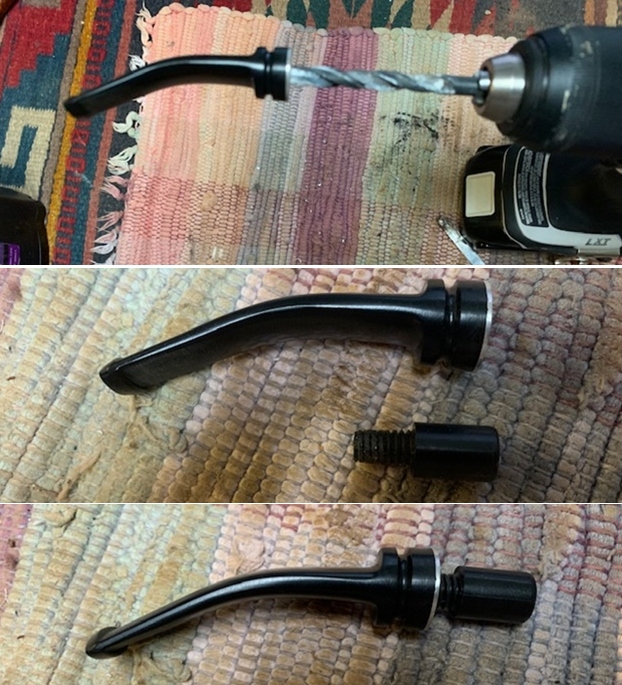
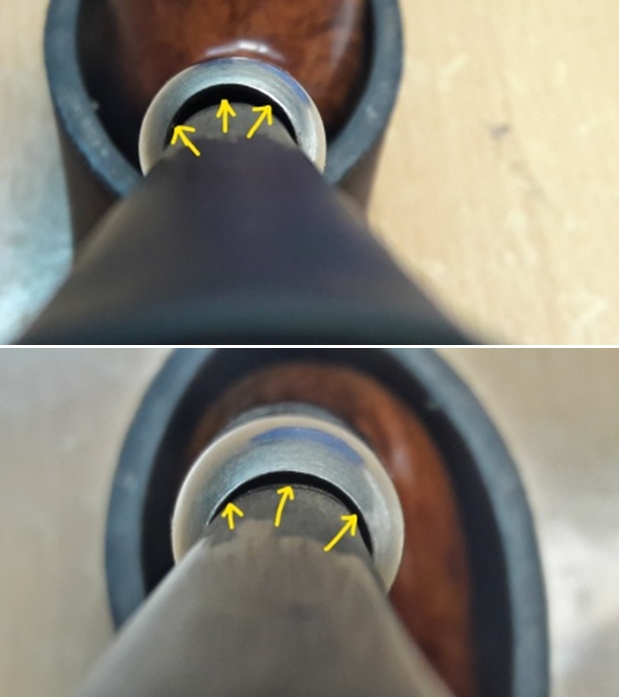
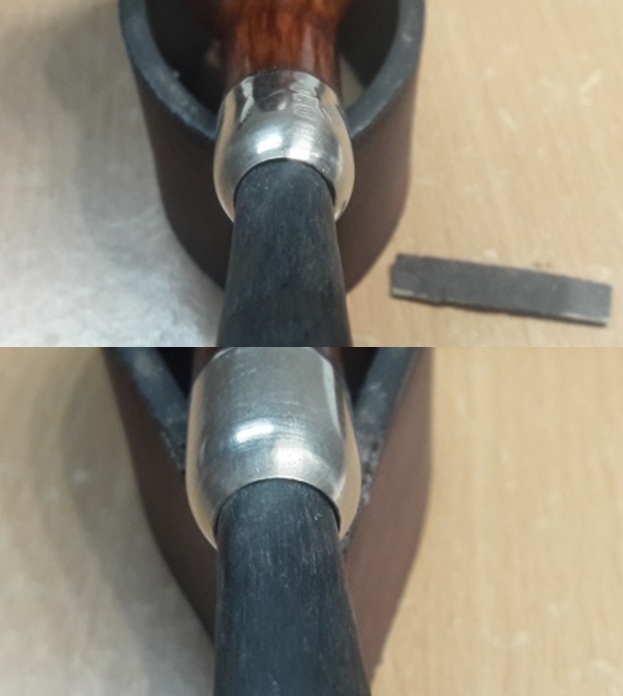
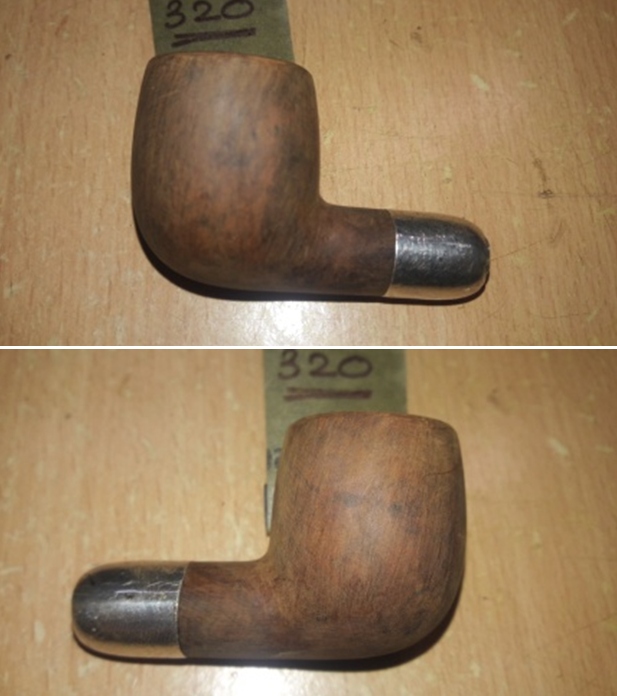
 I mounted a 150 grit sanding drum on to my hand held rotary tool and sand down the tenon till I had achieved a rough seating of the tenon in to the mortise. My previous experience has taught me an invaluable lesson; “SAND ONCE AND CHECK TWICE”!! Once I had achieved a rough seating, I got down to the arduous and time consuming task of manually sanding down the tenon with a folded piece of 220 grit sandpaper till I had achieved a perfect seating of the tenon in to the mortise. Here I was extra careful and vigilant while sanding the sides of the tenon and frequently checked the alignment of the stem airway with the shank airway and finally the draught hole. Excess sanding of any one side of the tenon disturbs this alignment even though the seating may appear to be snug and seamless. I gave final check to progress being made and the seating was perfectly snug and seamless with all the airways perfectly aligned. I am very happy with the progress until now!!
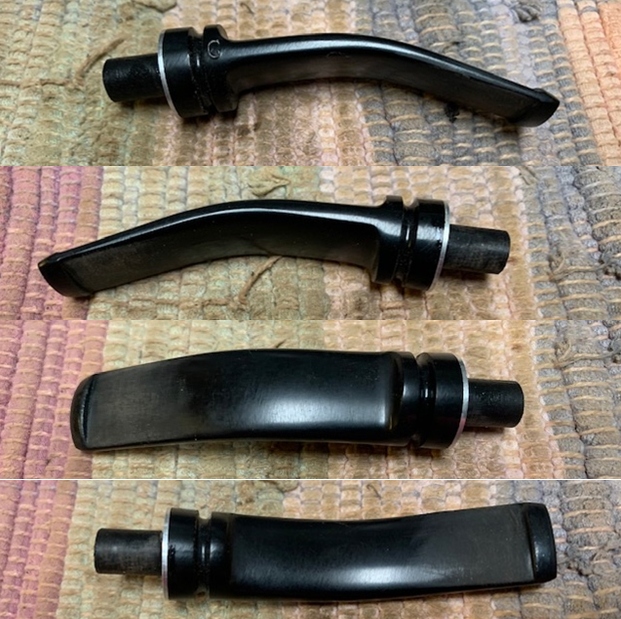
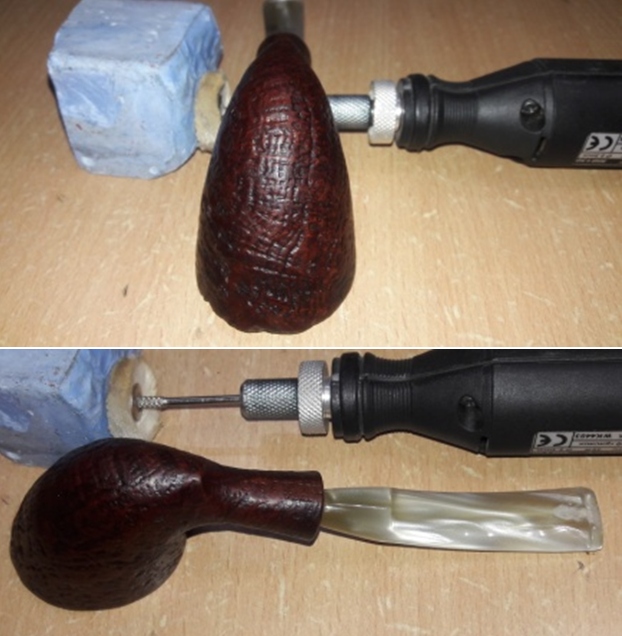
 Next step was to shape the saddle portion to resemble a military mount style stem profile. Continuing with the same assembly of sanding drum and rotary tool used for tenon turning, I gradually start sanding the saddle portion from the tenon end and progressively working my way upwards. I frequently checked the profile of the stem with the stummel. Here is how the pipe appears at this stage. Getting there, but not close yet!!
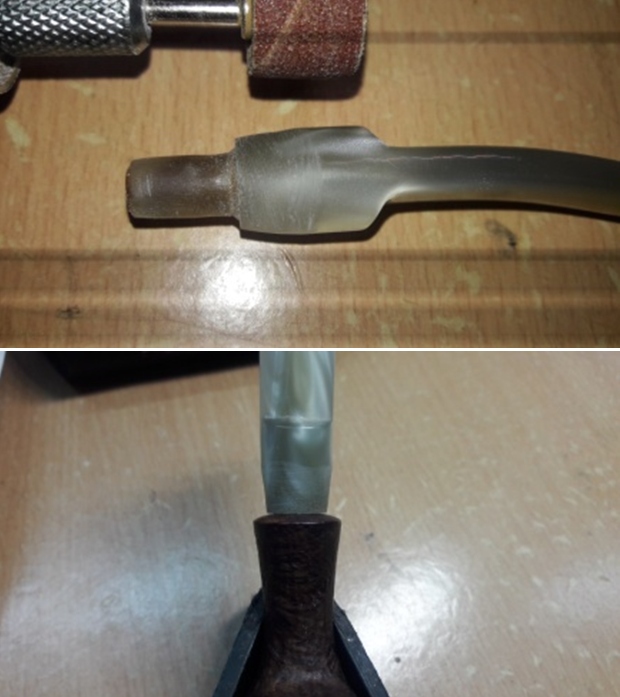
 I continued with sanding down the saddle further till I had a nice taper with the saddle edge merging with the tenon. The profile of the pipe has drastically improved and as per my mantra “LESS IS MORE”, I decided to proceed with manual sanding and shaping with a piece of 220 grit sandpaper to match the surfaces and fine tune the seating of the stem in the mortise.
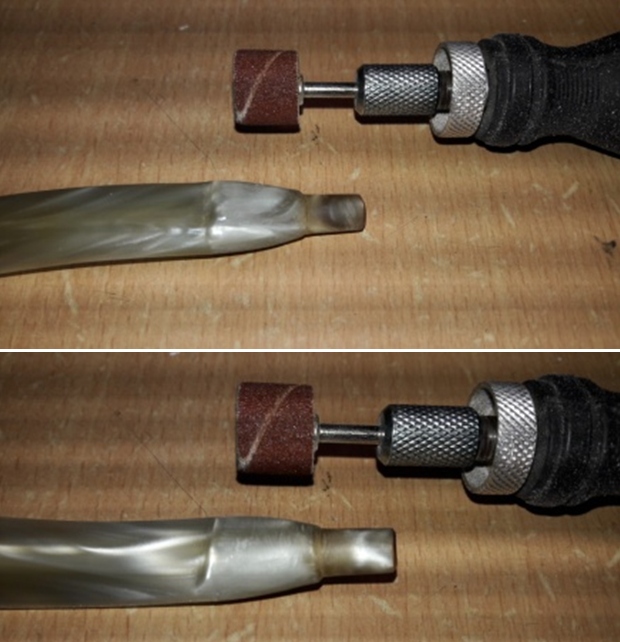
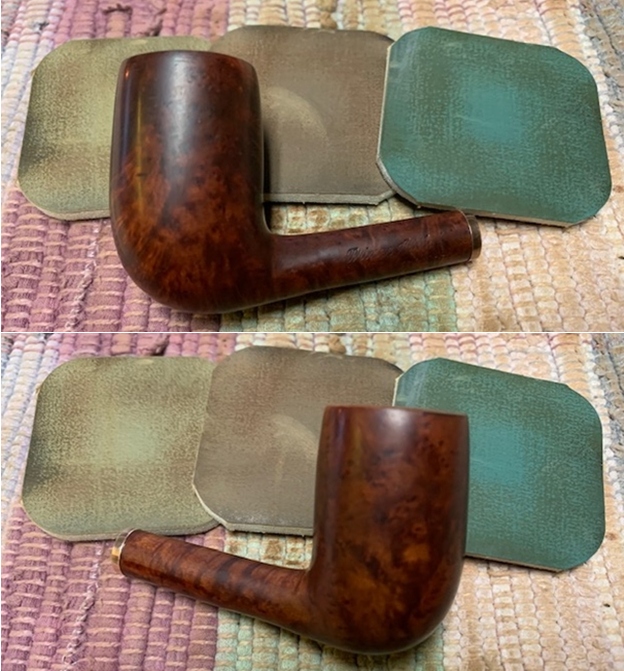
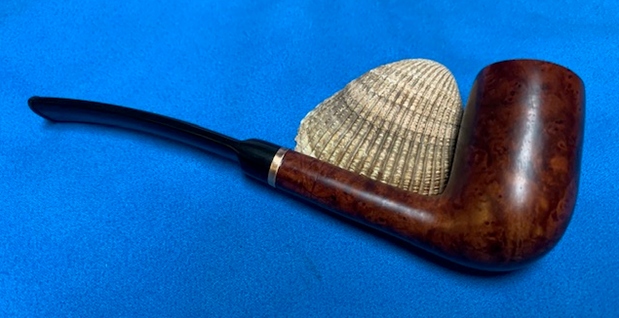
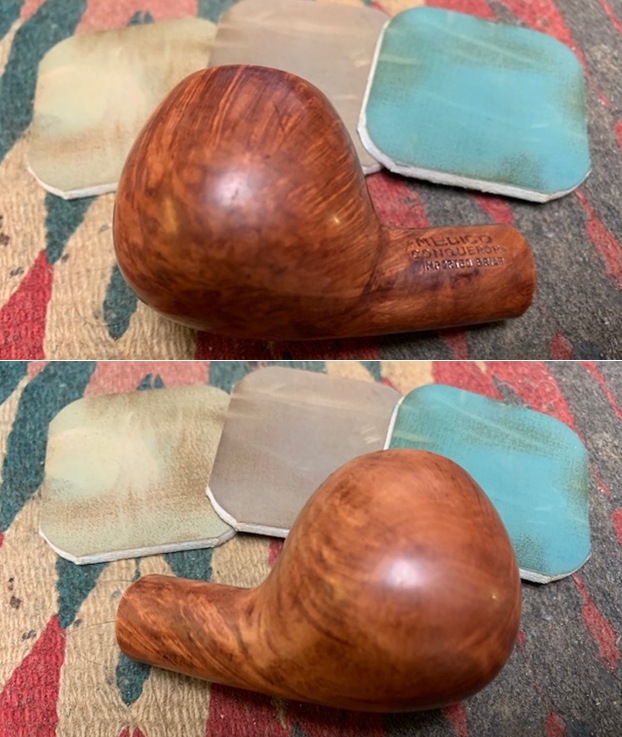
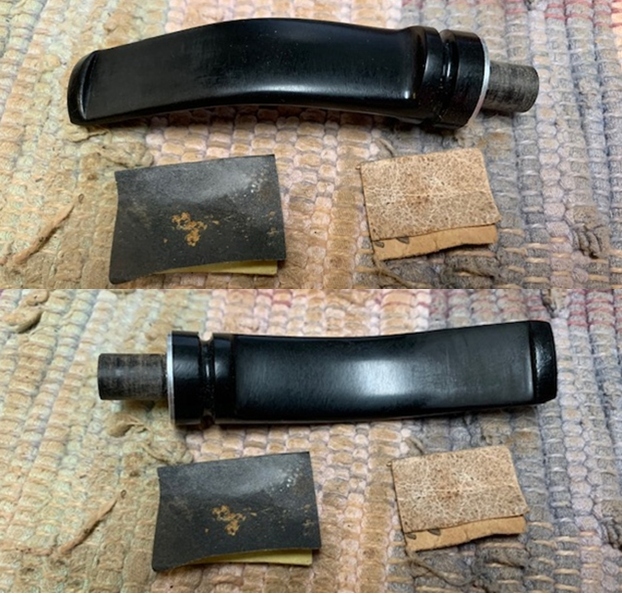
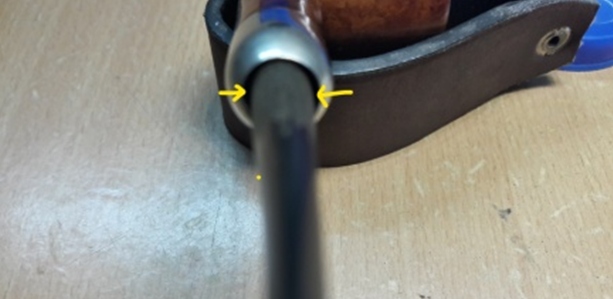
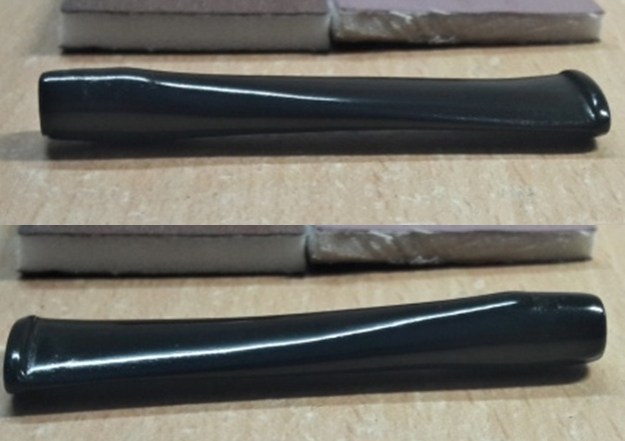
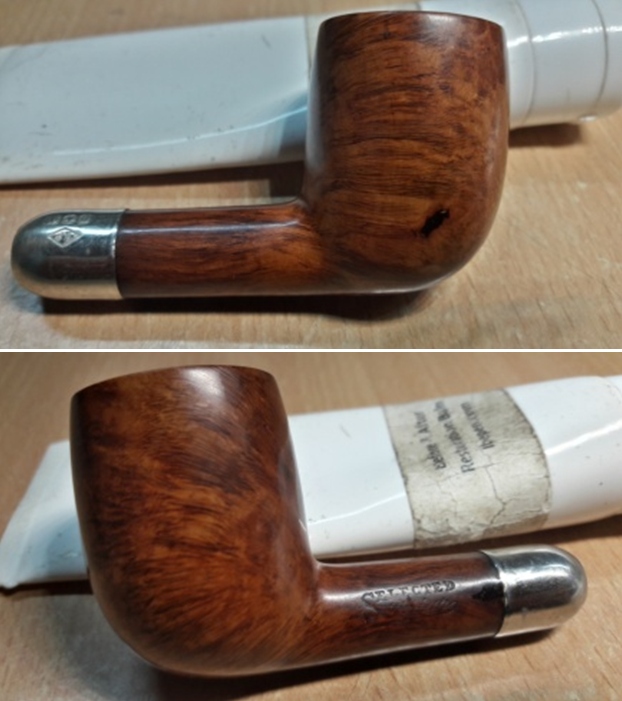
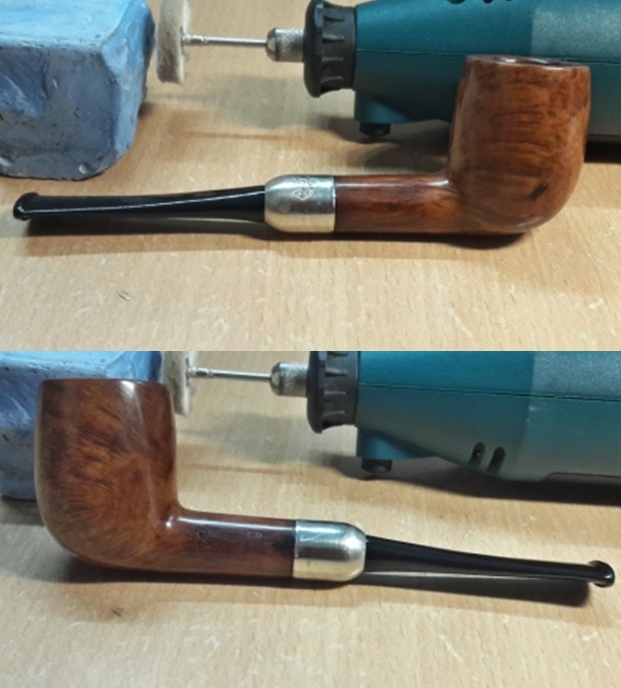
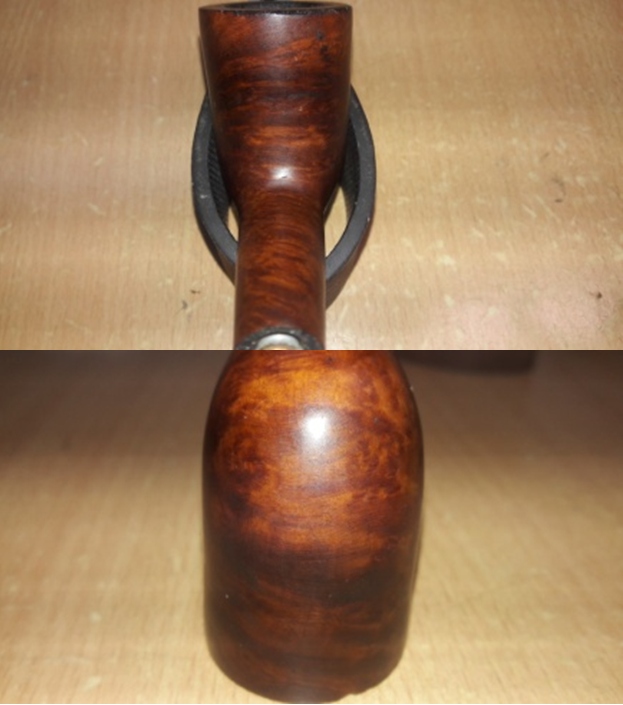
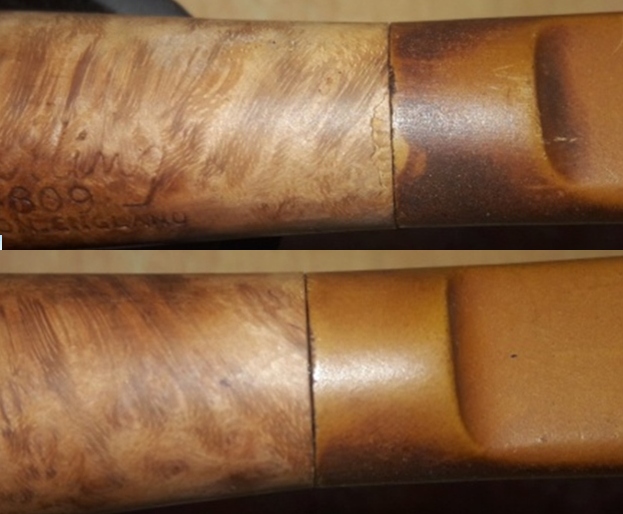
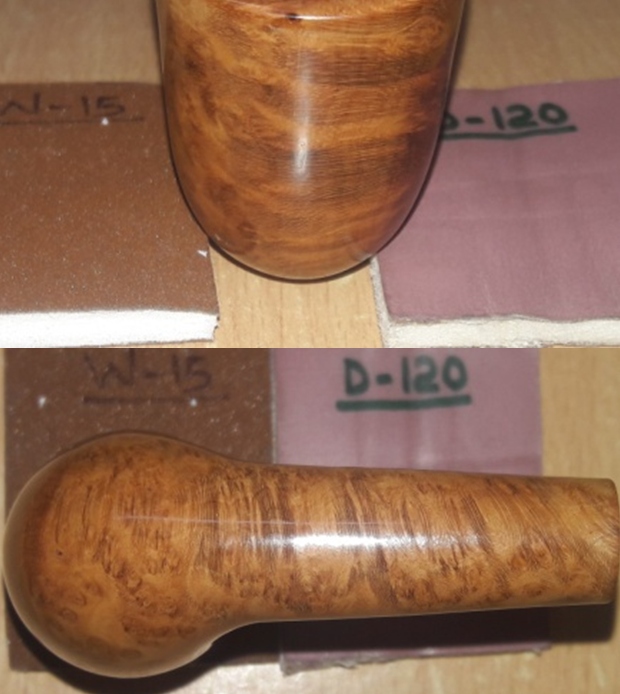
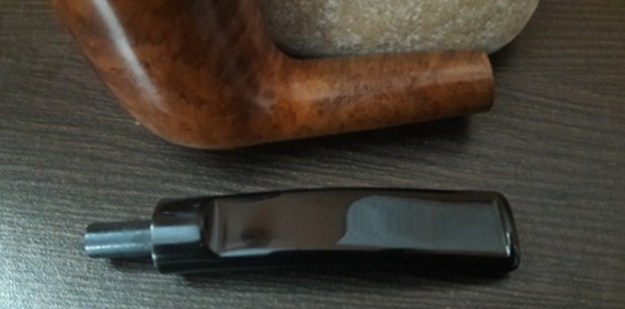
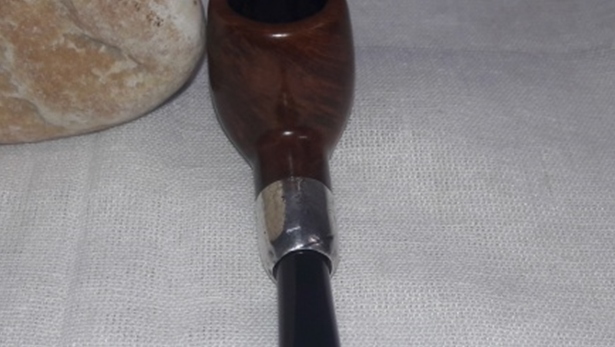
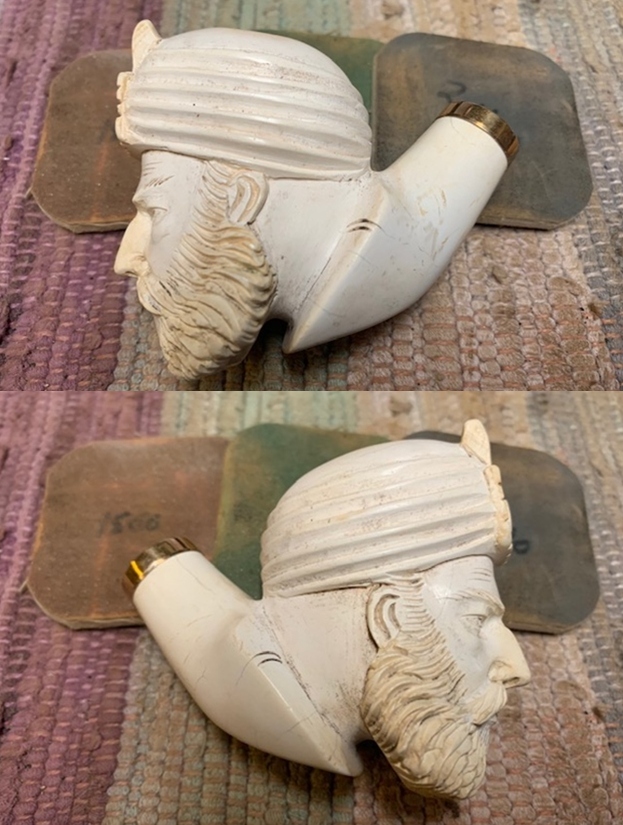
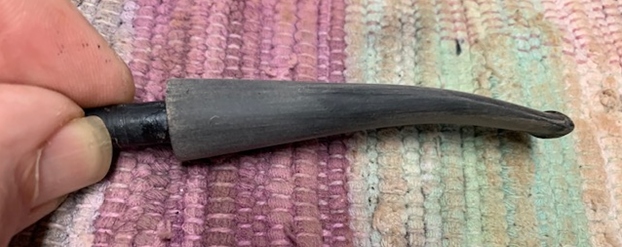
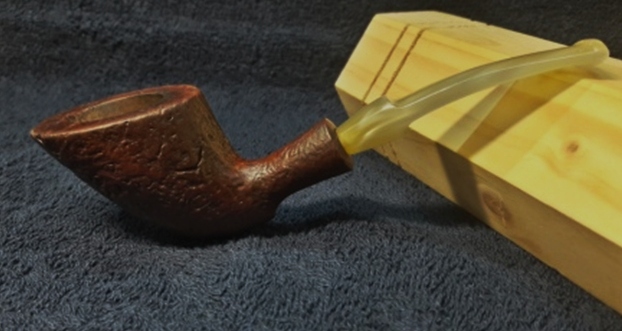
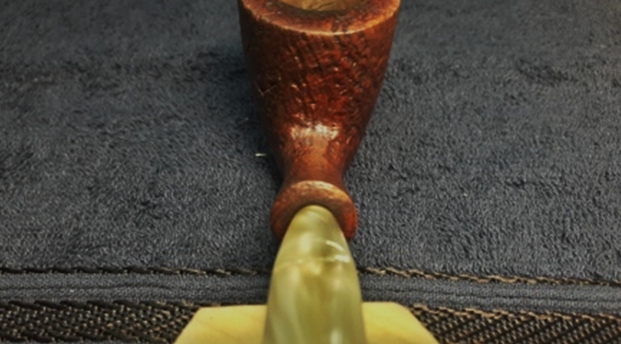
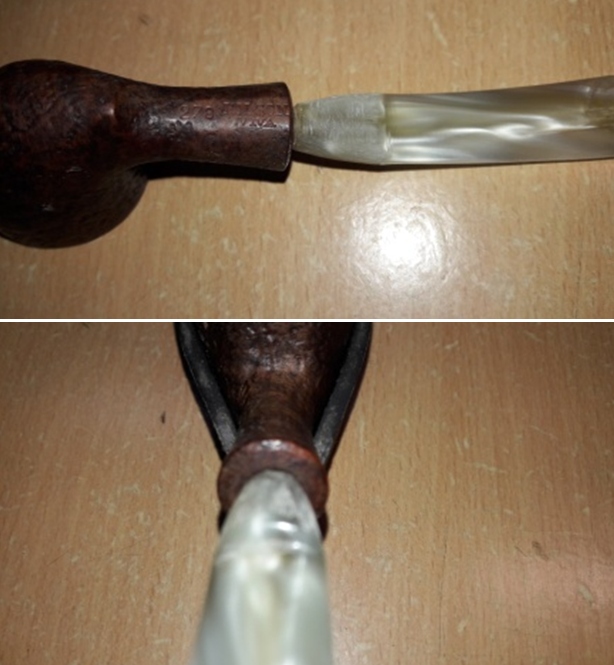 However, contrary to my mantra, I was still not very pleased with the stem profile. Unable to identify what exactly was amiss, I shot off a couple of pictures of the progress made to Steve and sought his advice. He suggested that I should give a bit more taper to the tenon end and it would be good. Ah…. The stem was a bit broad at the shoulders and that’s what was wrong!! I re-profiled the saddle shoulders with the 150 grit sanding drum. This now looks and feels much better and the flow of the stummel in to the stem is about perfect. Here are a couple of pictures that will give the Readers an idea of the seamless merging of the flow of the stummel in to the flow of the stem. With the profiling and seating adjustments to the stem now completed, I can turn my attention to the stem repairs.
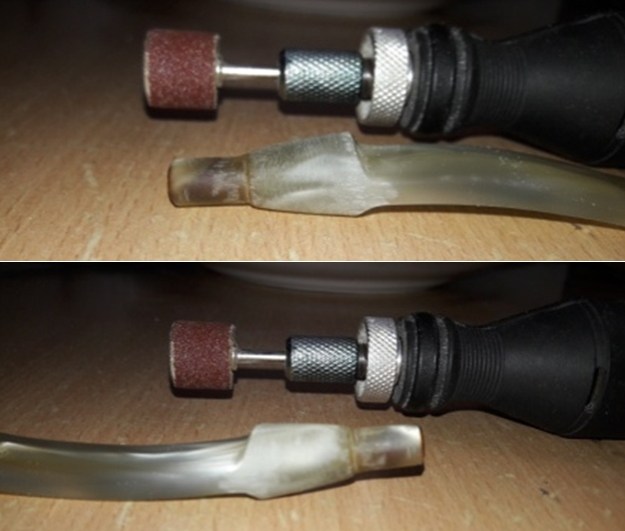
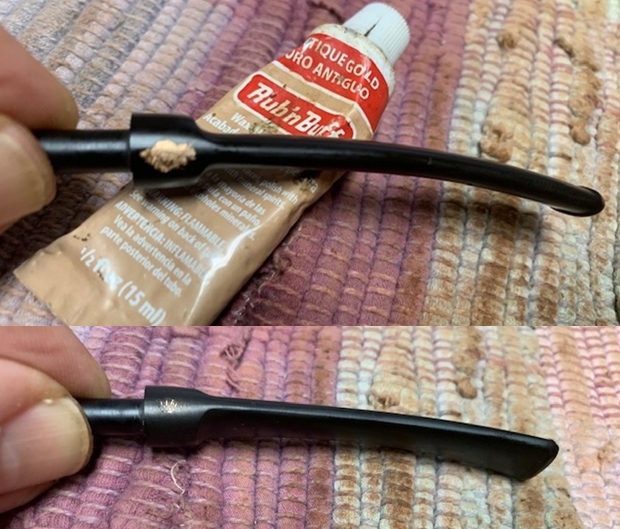
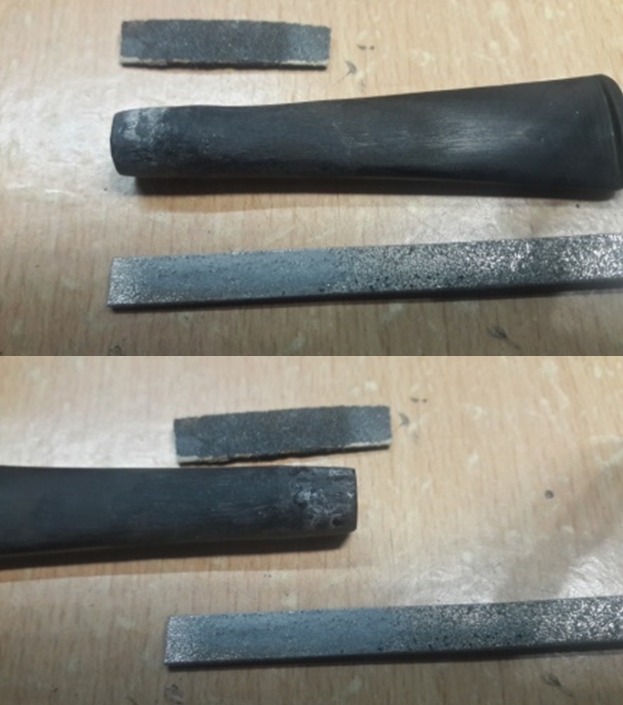
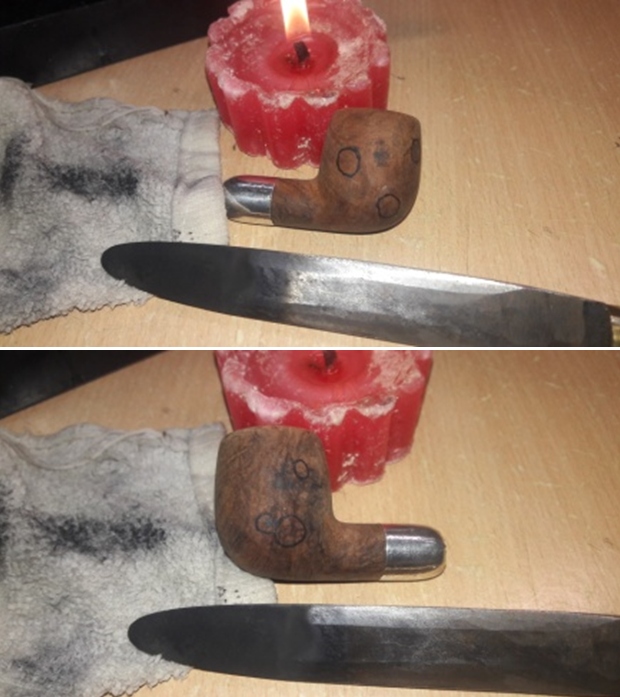
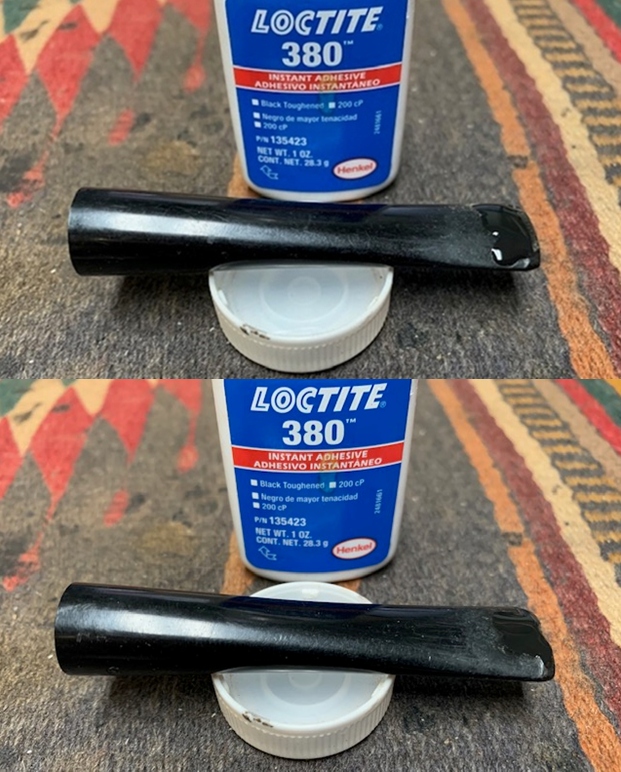
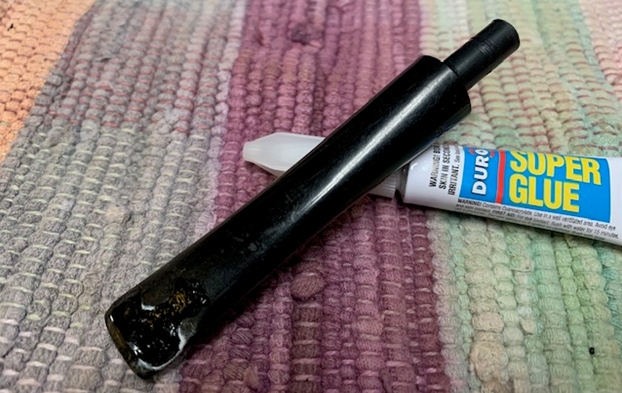
 Next I inserted a pipe cleaner smeared with petroleum jelly in to the stem airway through the slot end. The coating of petroleum jelly on the pipe cleaner prevents the superglue from sticking to the pipe cleaner and seeping in to the air way and blocking it. I applied a generous coat of superglue over the bite zone, including over the buttons, on the lower surface which had a through hole and set it aside to cure. Once the fill had hardened to an extent that it was not runny, I applied a coat of superglue over the upper surface and set the stem aside for the fills to harden completely. Once the fill has hardened, I shall file and sand the fills to match the surface of the stem and sharpen the button edges on either surface.
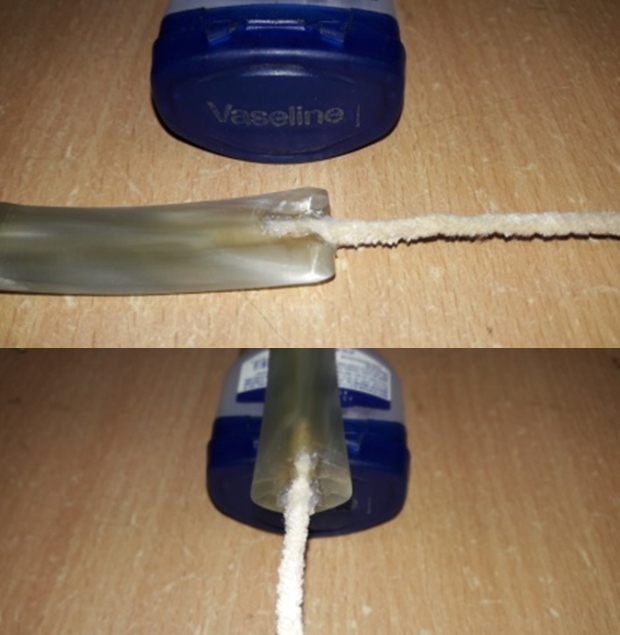
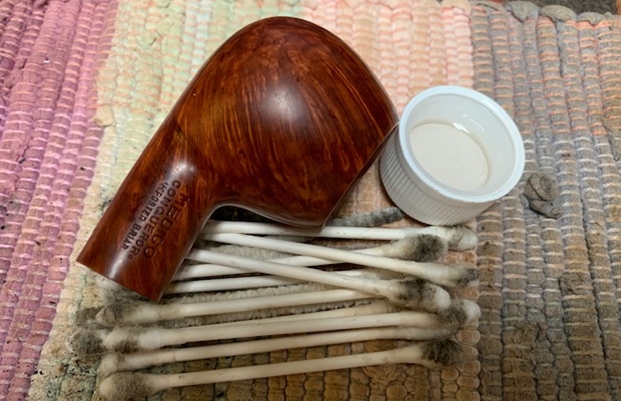
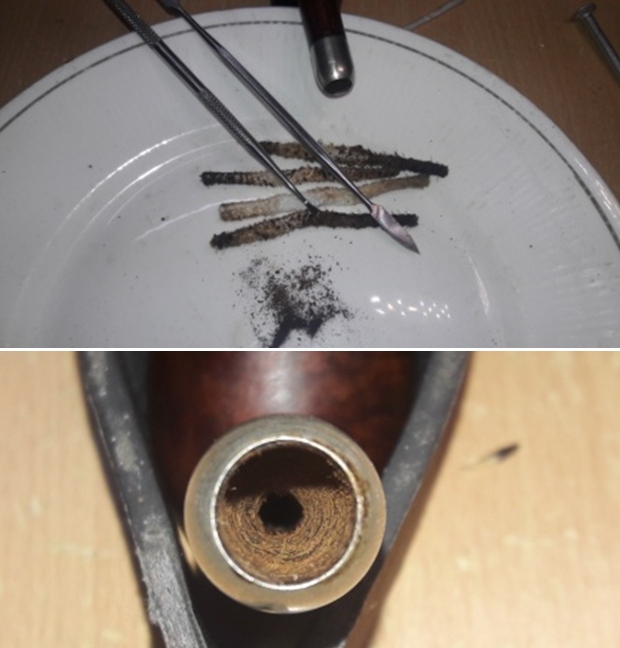
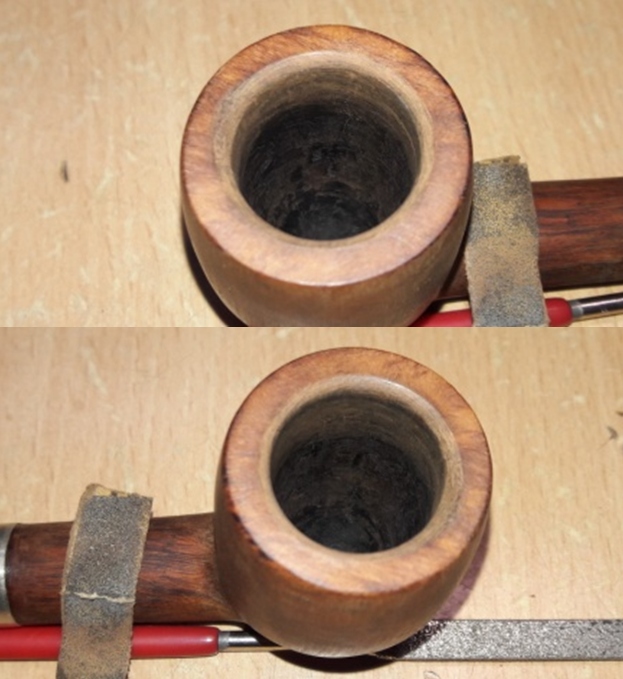
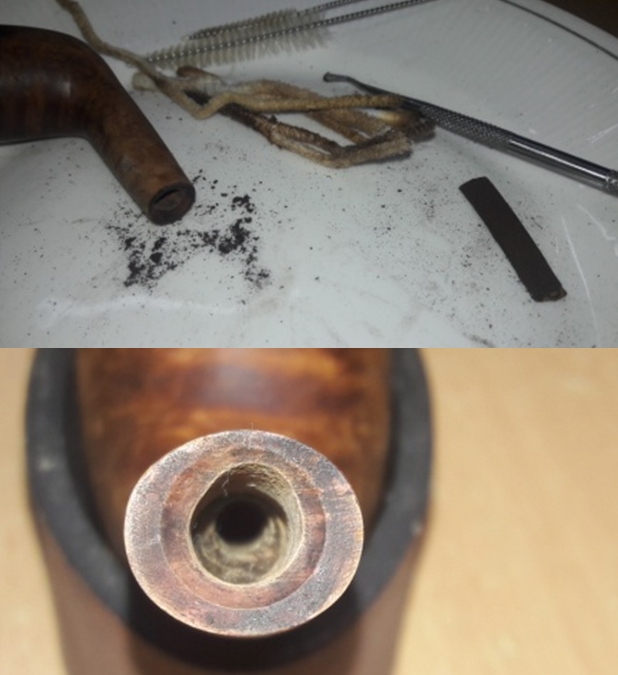
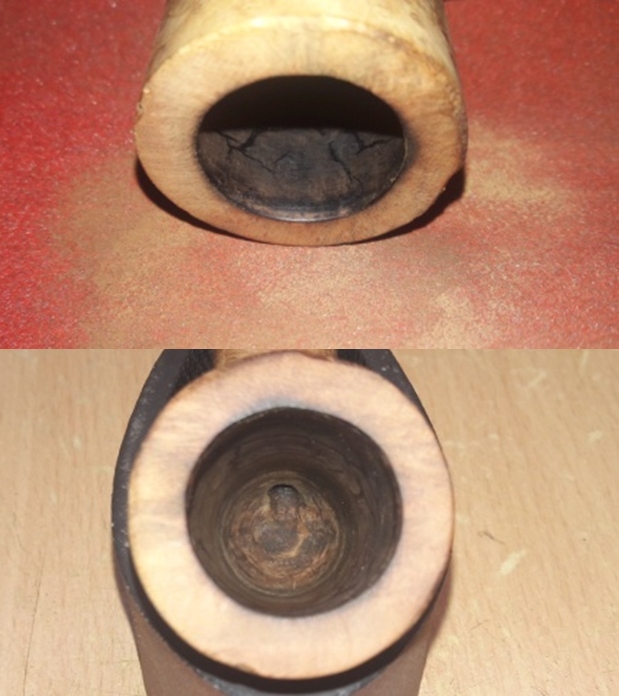
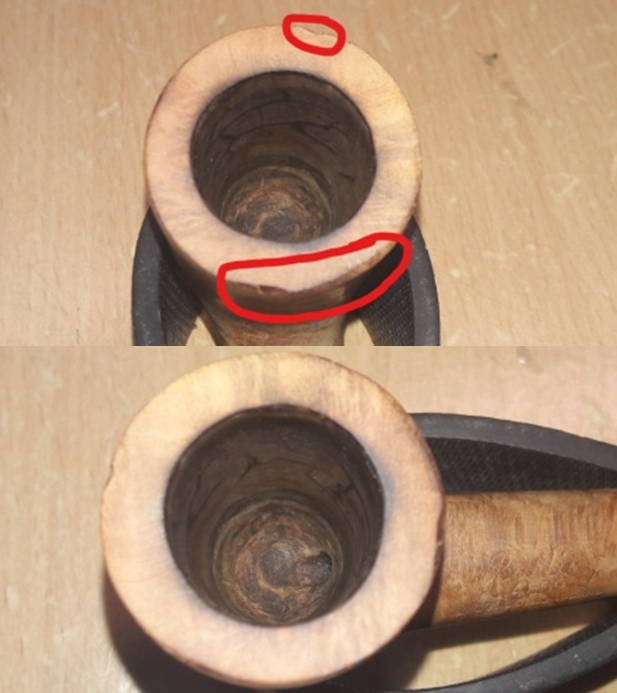
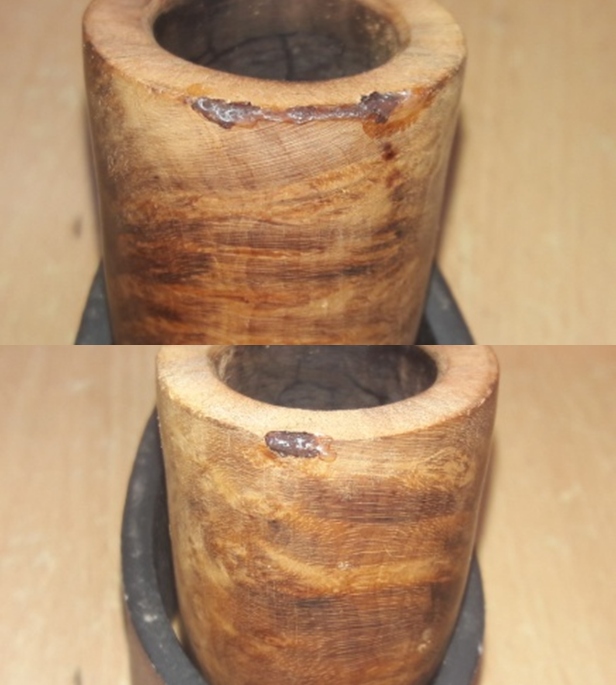
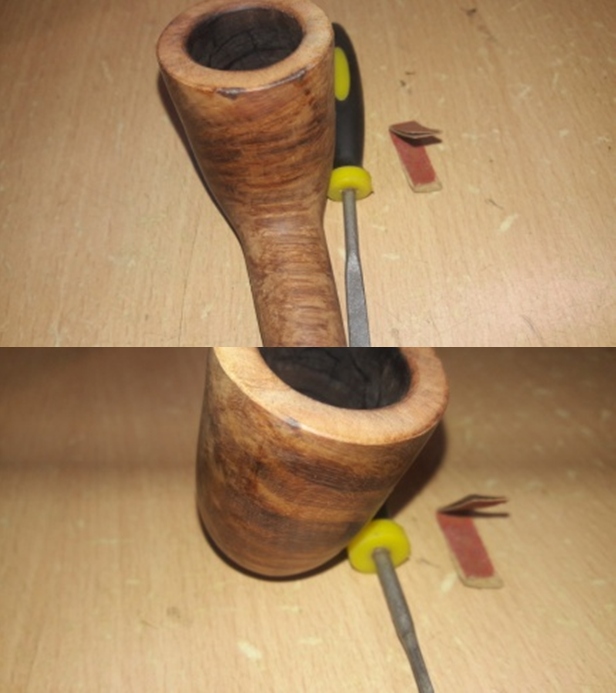
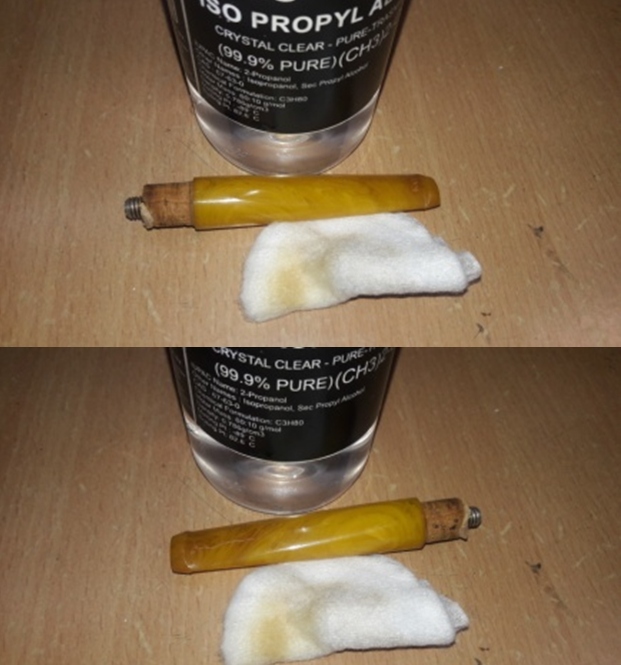
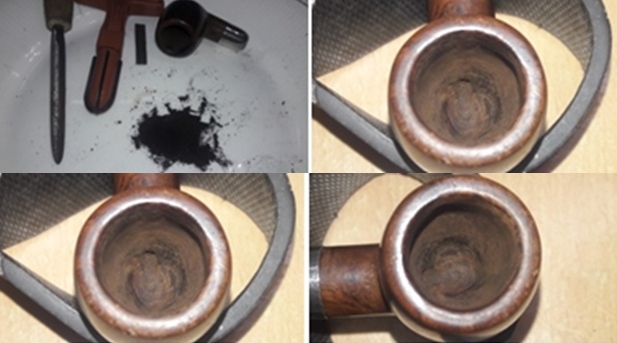
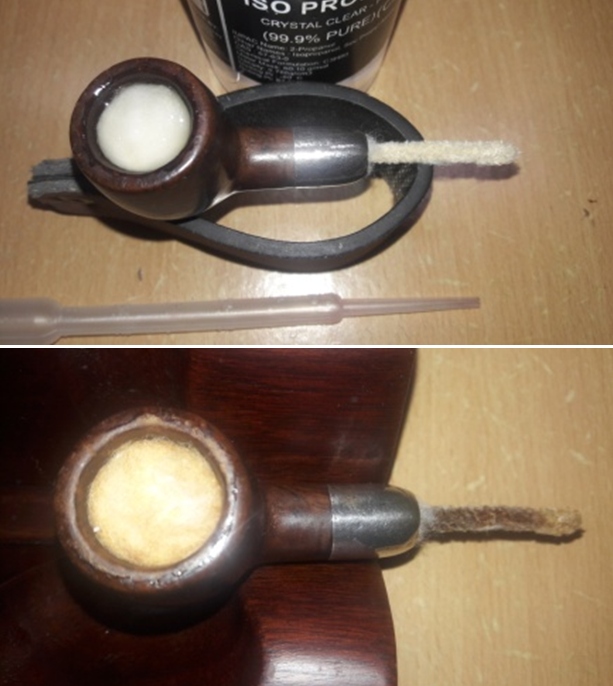
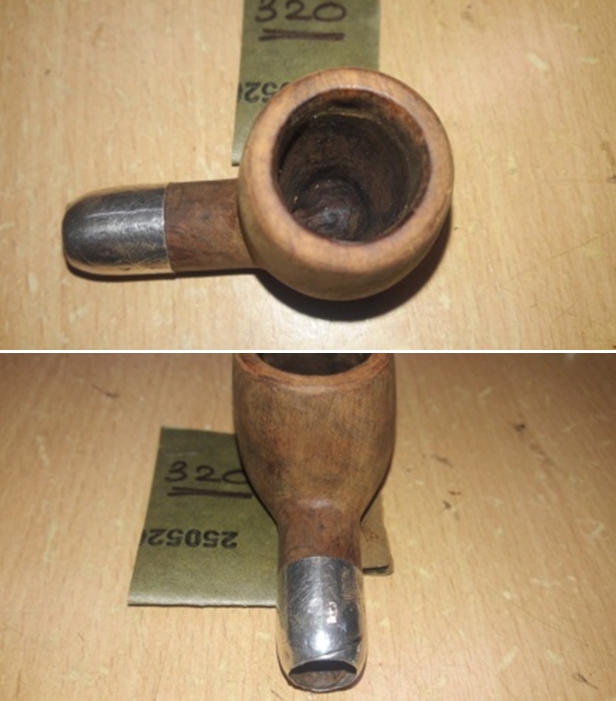
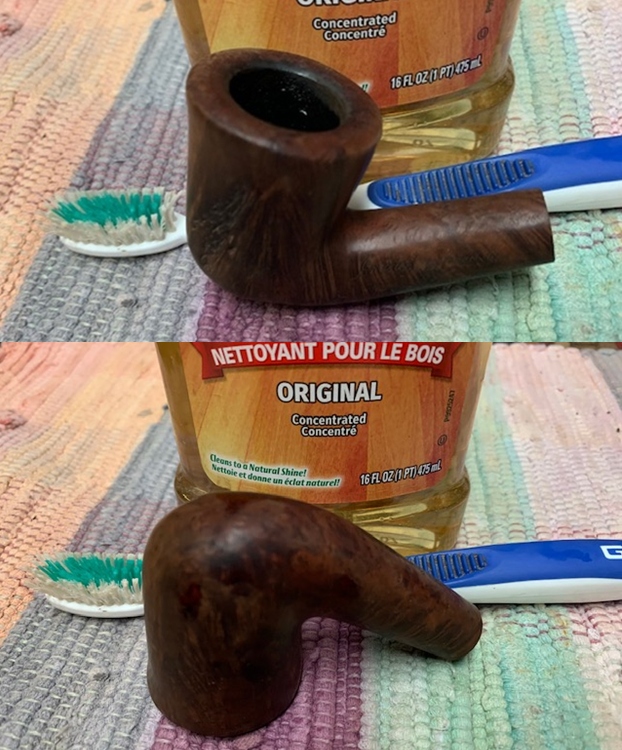
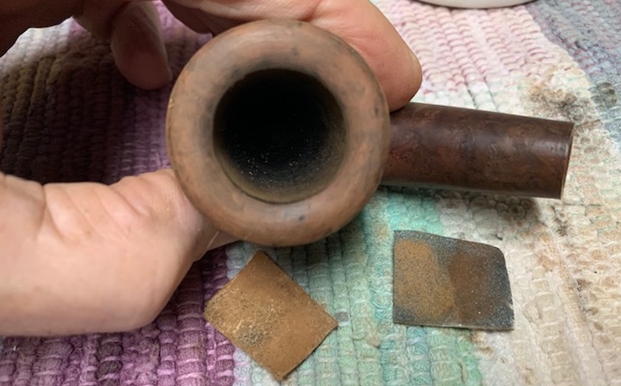
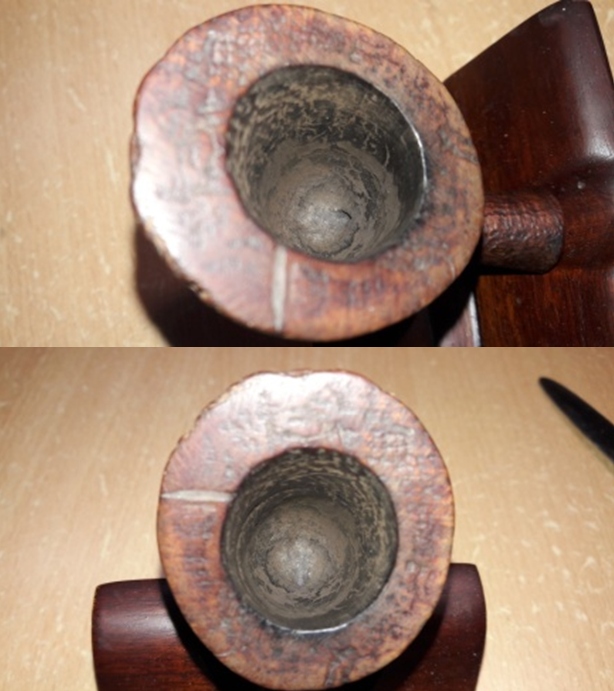
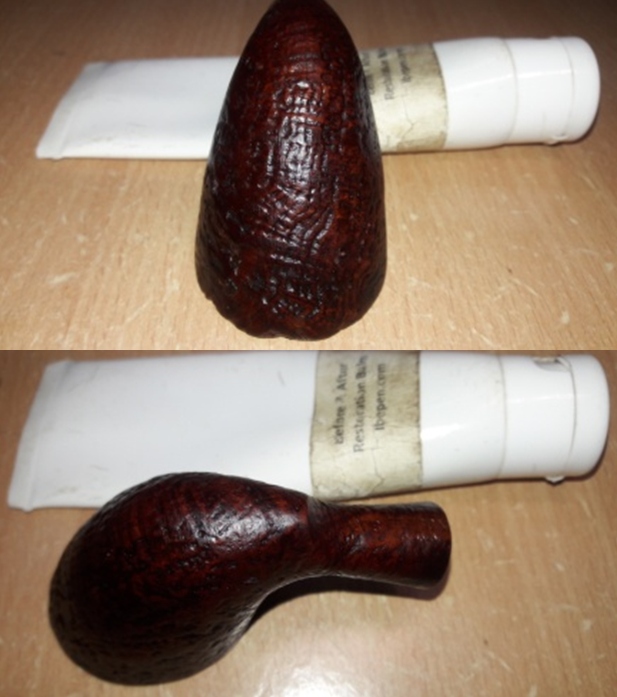
 While the stem fills and repairs were curing, I worked on the stummel by reaming the chamber with my fabricated knife to remove the remaining carbon deposit and the hardened coat of dust and grime. Once the cake was reamed back to the bare briar, I used a 150 grit sand paper followed by 220 grit sand paper to remove all the traces of remaining cake and also to smooth out the inner walls of the chamber surface. Finally, to remove the residual carbon dust, I wiped the chamber with a cotton pad wetted with 99.9% pure isopropyl alcohol. The chamber walls are sans any damage. The outer and inner rim edge is in great shape. The rim top surface is in decent condition, save for the fill on the left side. The ghost smells are greatly reduced and may be eliminated after the shank/ mortise are thoroughly cleaned.
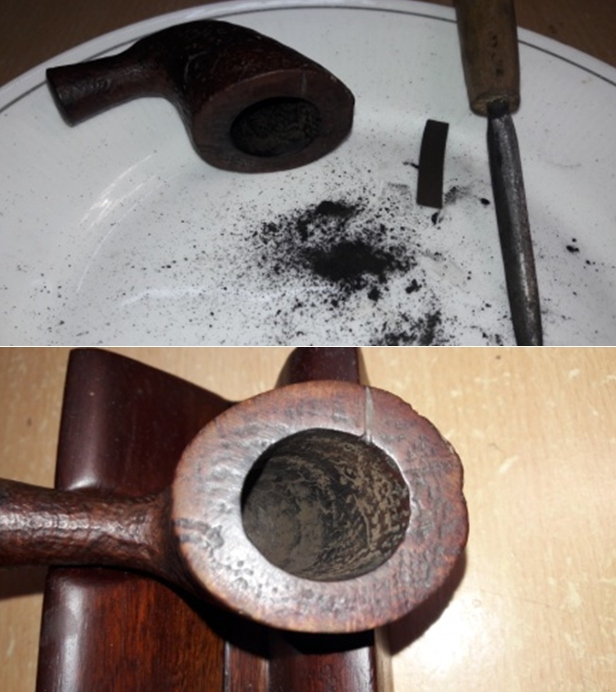
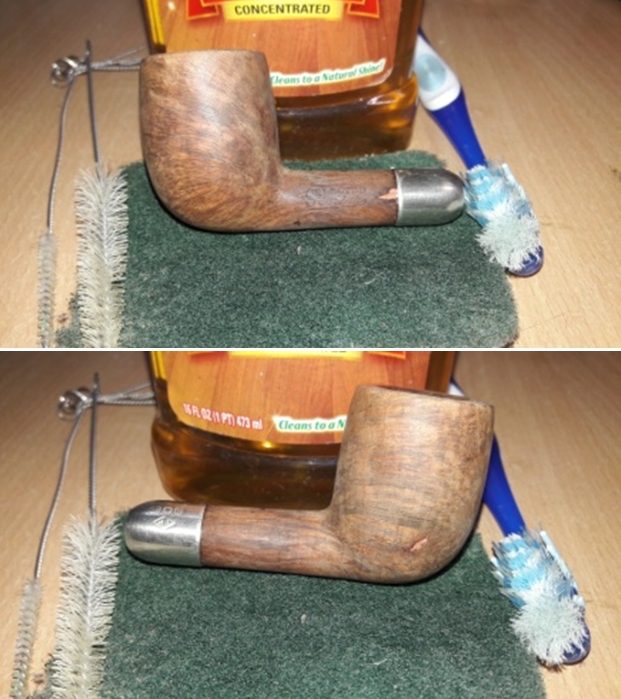
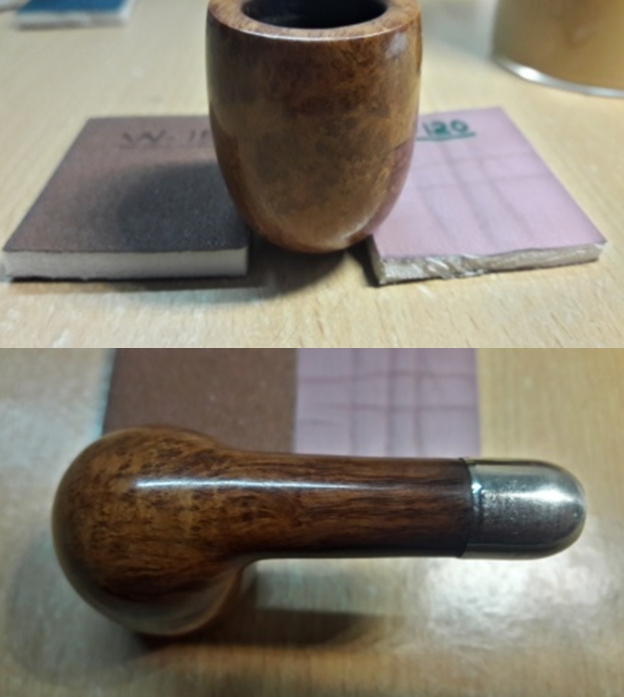
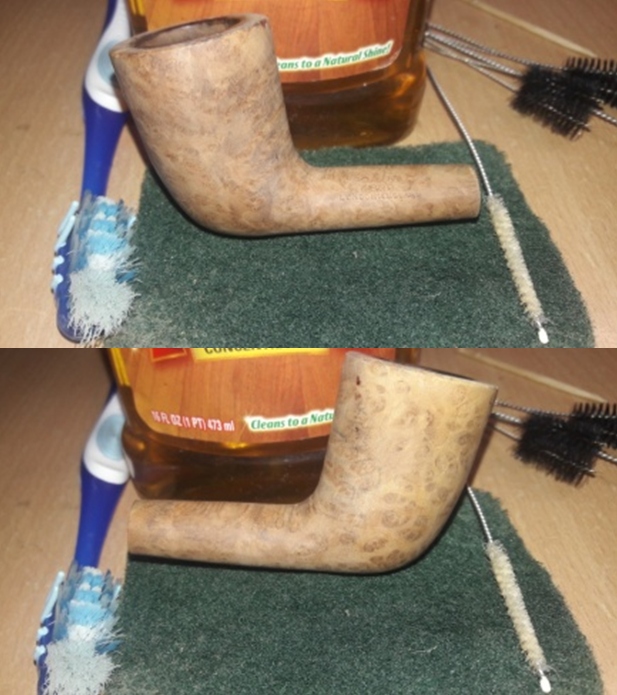
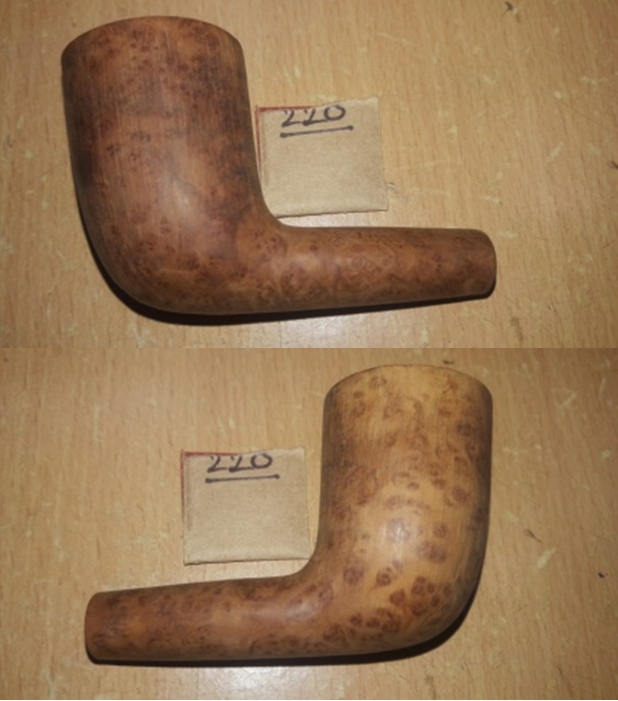
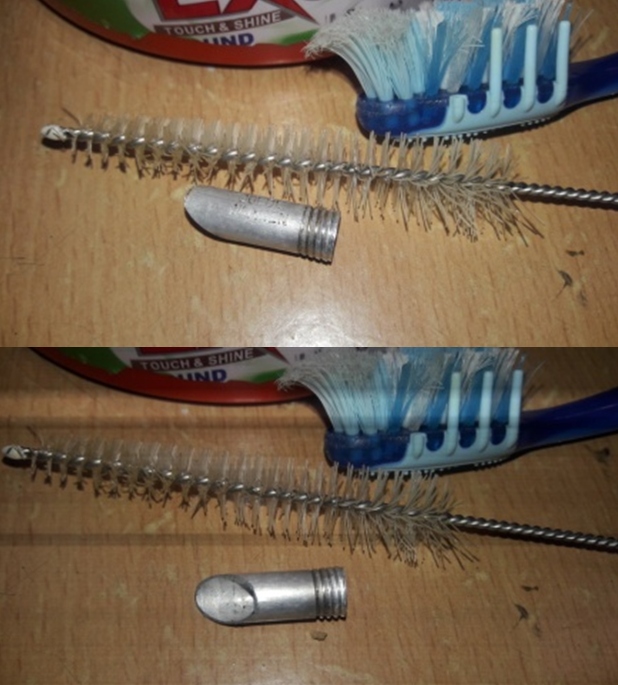
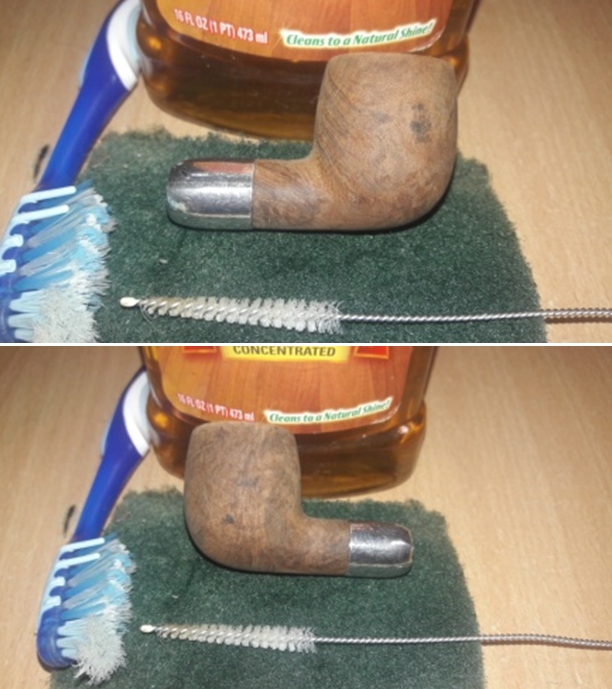
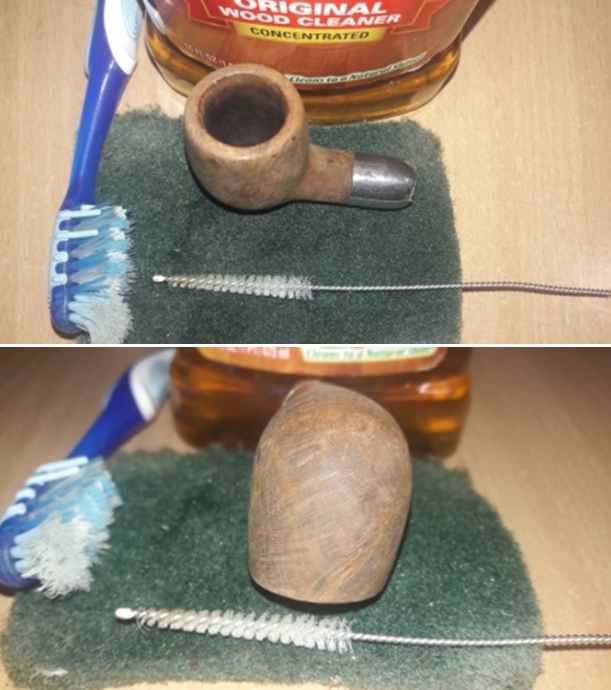
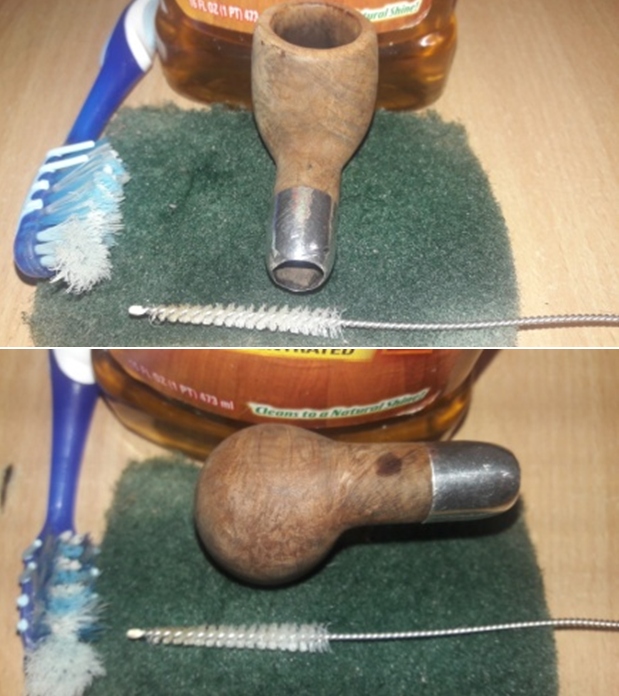
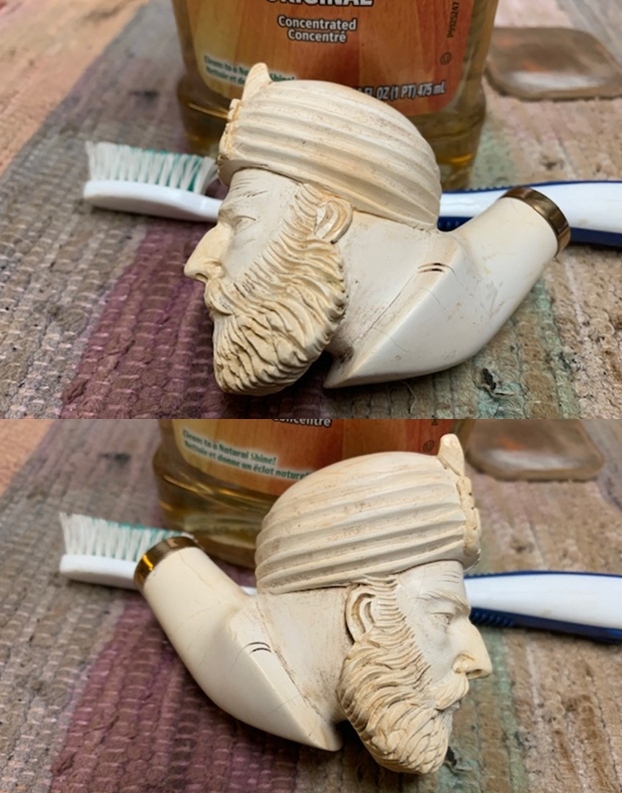
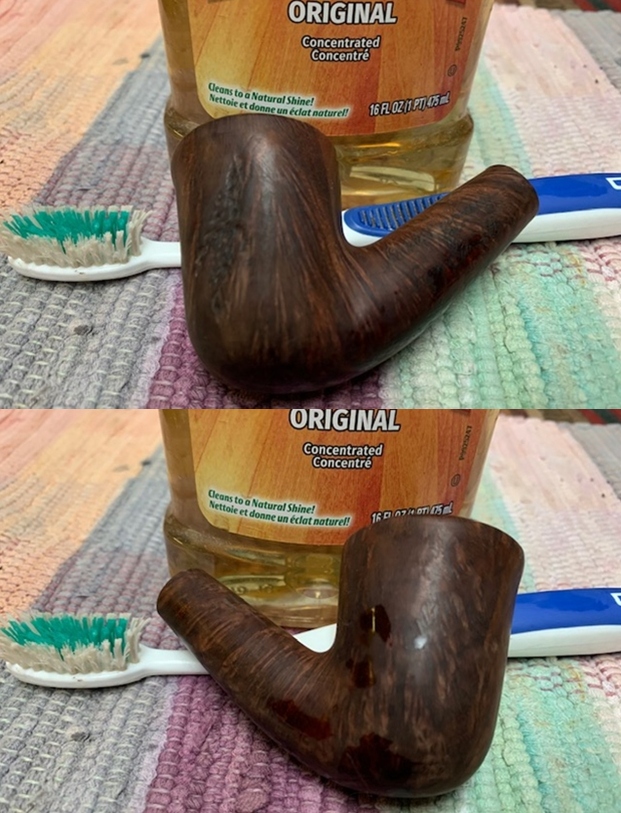
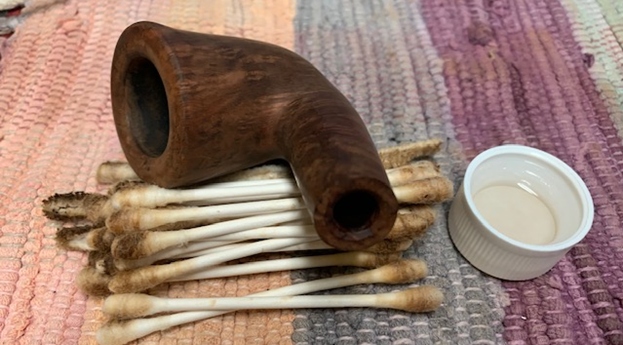
 With the bowl internals clean, I move to clean the exterior of the stummel. I used a hard bristled tooth brush and Murphy’s Oil soap to scrub the stummel and rim top. After the scrub with oil soap, I washed the stummel under running warm water with anti oil dish washing detergent till the stummel surface was clean and dried it using paper towels and soft cotton cloth. I simultaneously cleaned the shank internals with the detergent and hard bristled shank brush and set the stummel aside to dry out naturally. The stummel surface has cleaned up nicely with the beautiful shallow sandblast patterns on full display. There are two major fills that would need to be refreshed; one on the rim top surface and the other on the left stummel surface. The ghost smells are completely eliminated and the pipe now smells fresh, odorless and clean. The shank air way is nice and open. I am sure that the pipe will turn out to be a fantastic smoker with a full wide and open draw.
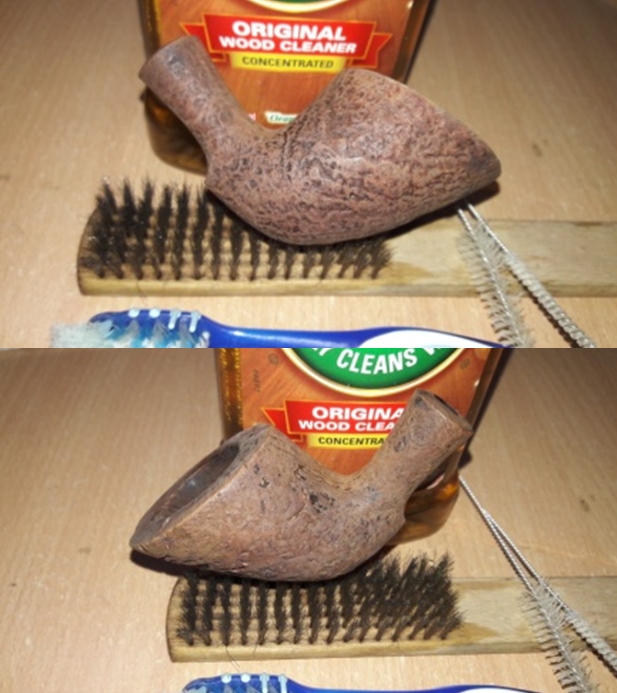
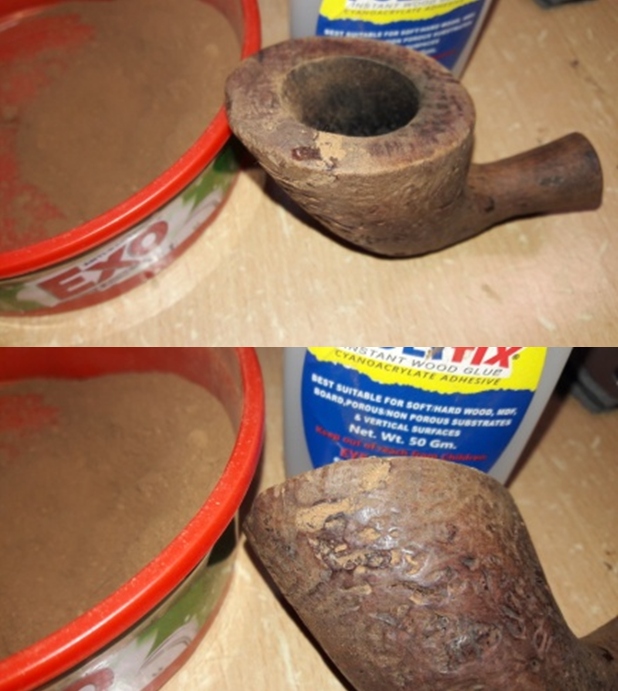
 Next I addressed the issues of the two fills in the stummel surface. With a sharp dental tool, I gouged out the fill to the left side and one on the rim surface. Using the layering method, I filled these gouges with a mix of briar dust and CA superglue till the mound of the mix was slightly above the rest of the stummel surface. This helps in a better blending of the fill with the rest of the stummel surface while sanding and reduces the scratches caused by the use of a needle file as you have a correct perspective of the sanding that is required. I set the stummel aside for the fills to cure.
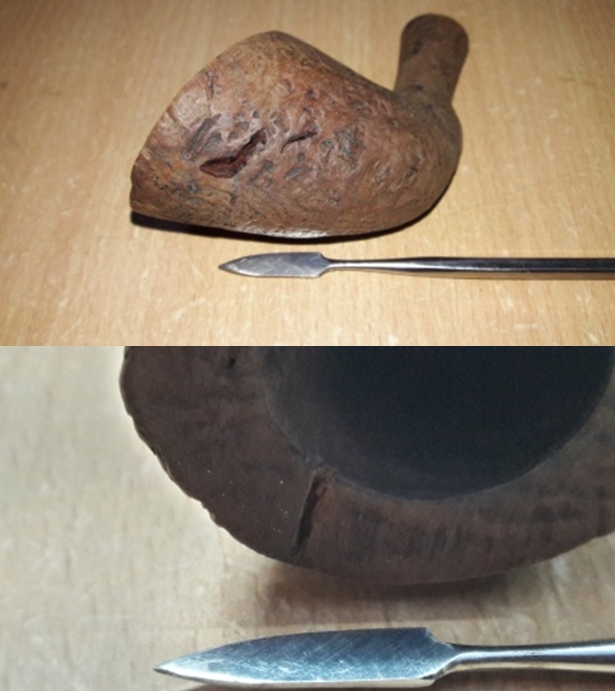
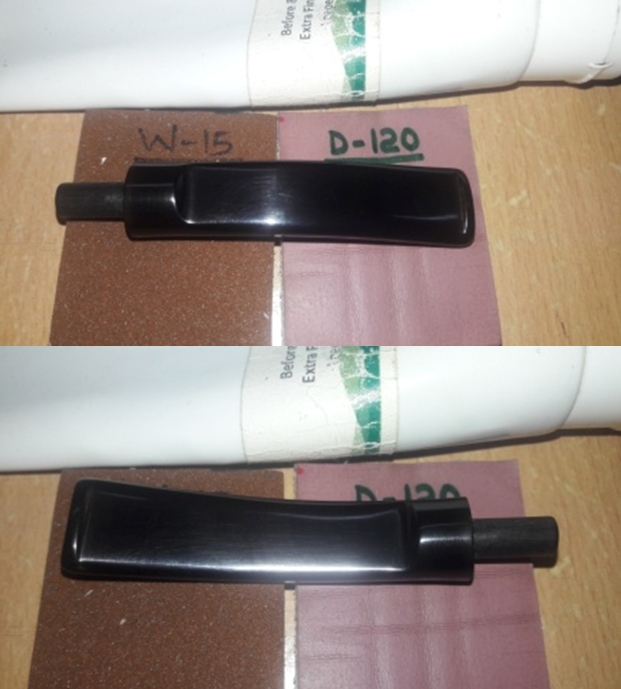
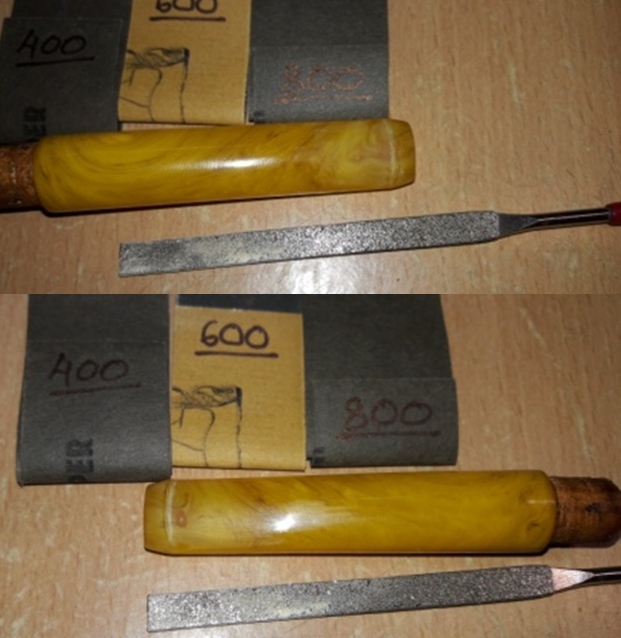
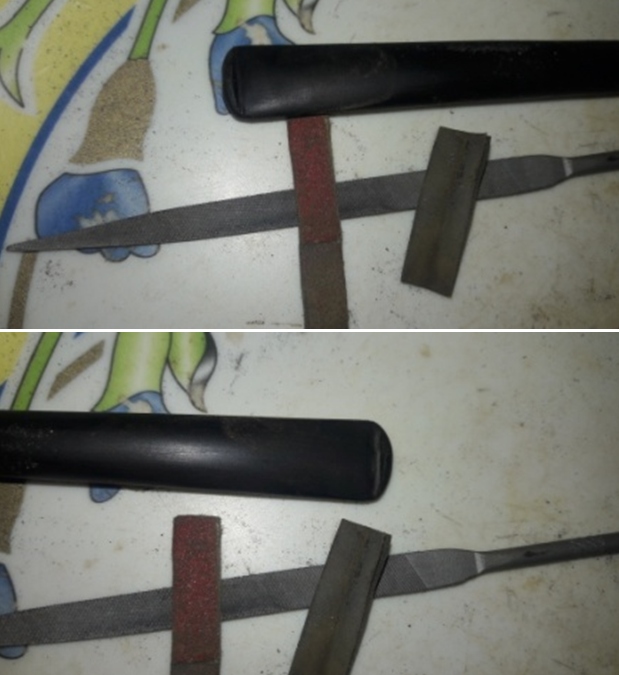
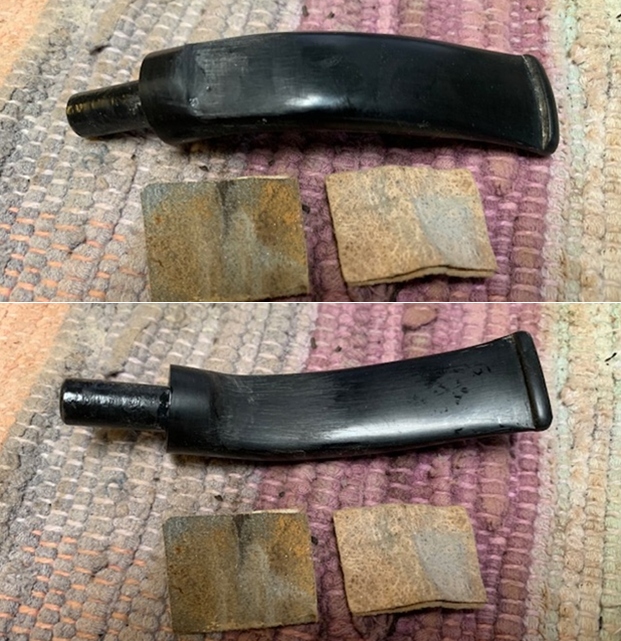
 While the stummel fills were set aside to cure, the next afternoon, I worked on the stem fills which had cured completely. With a flat head needle file, I worked on the filling till I had achieved a rough match with the surrounding surface and had sufficiently sharpened the button edges. I further sand the fills with a piece of 180 grit sand paper to achieve a better match. I used a slot file to even out the horizontal slot edges and widen it a bit. I am very happy with the stem profiling and repairs at this stage in restoration and also the buttons now have a nice crisp edge to them.
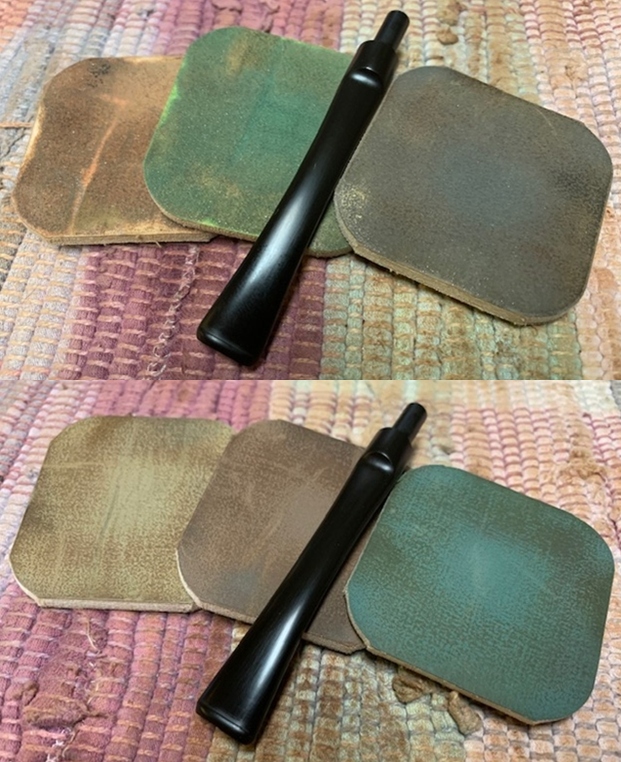
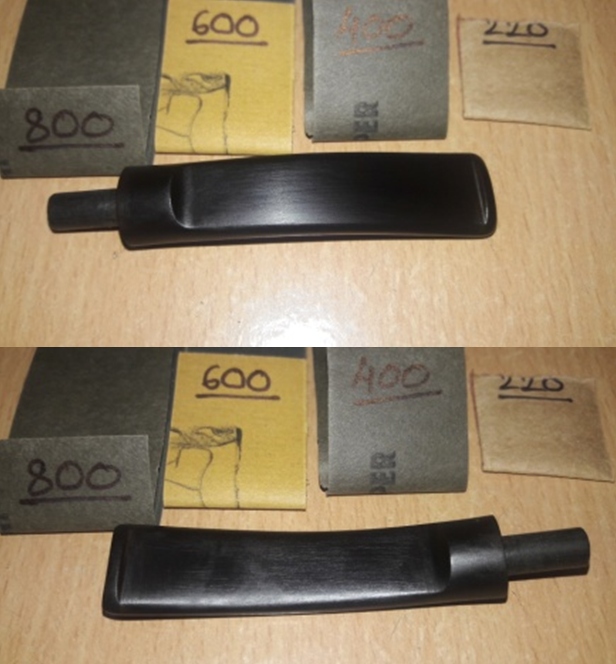
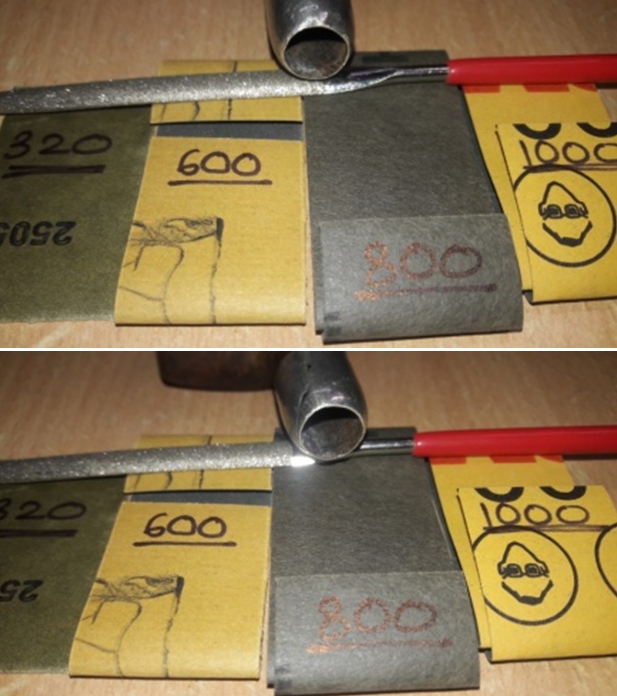
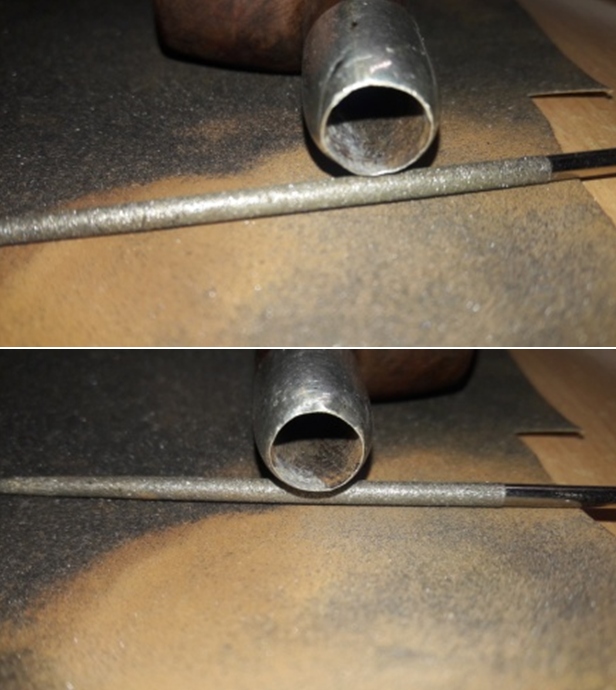
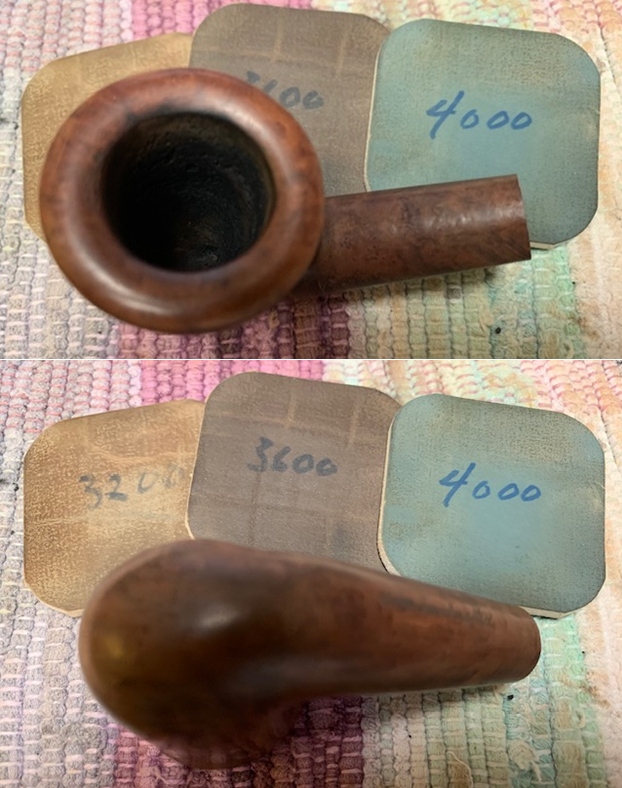
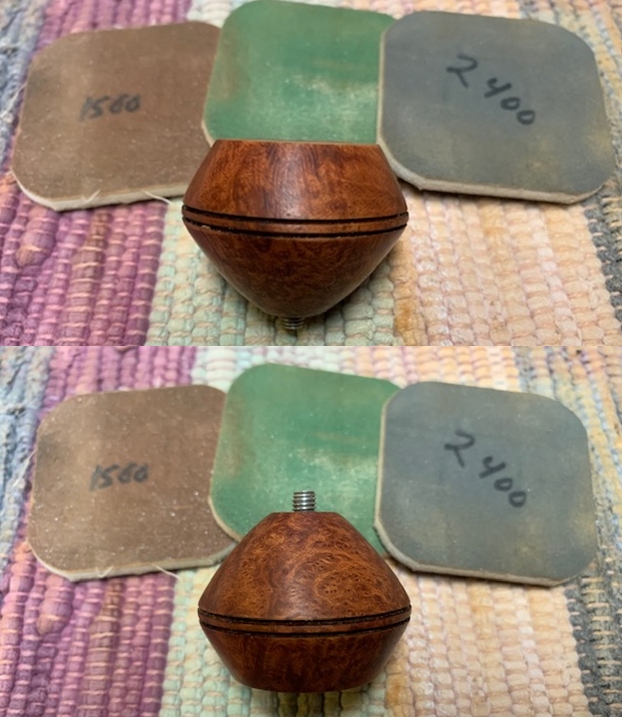
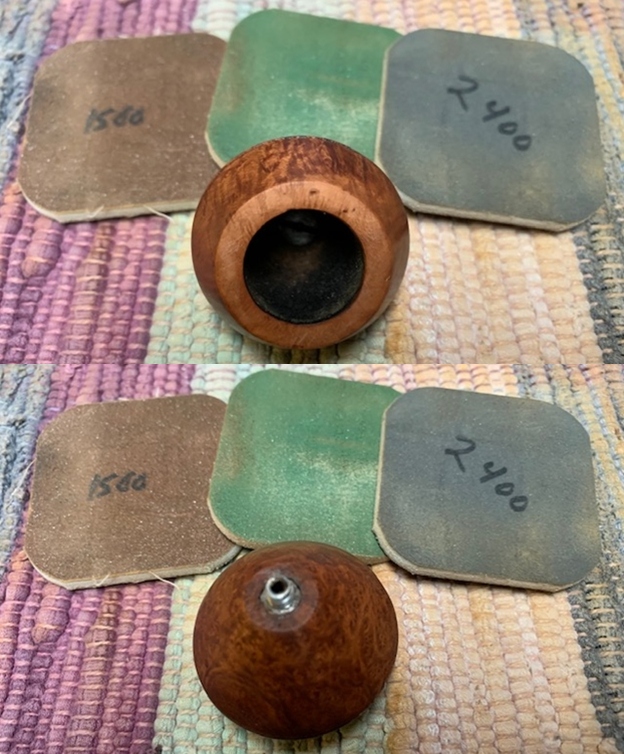
  Thereafter, I began the process of final fine tuning of the seating of the stem in to the mortise, shaping the saddle for a sharper military mount look and bringing a nice shine to the surface by sanding with 320, 600, 800 and 1000 grit sandpapers. The technique that I used is very simple; sand one side, check the seating and if the seating is not snug, sand the relevant side and continue to do so till I achieved a snug airtight fit. The closer I came to the perfect fit, the higher grit sand paper I used. A lot of patient and diligent work, I reached the point where I felt “ no more sanding… this is the perfect seating and perfect military mount profile!!”. My mantra “LESS IS MORE” was also playing at the back of my mind. I had simultaneously sanded the entire stem surface through all the above mentioned grit sand papers. I was very pleased with my efforts as I had achieved a perfect snug seating of the stem in to the mortise while being able to maintain the semblance of a military mount stem!!
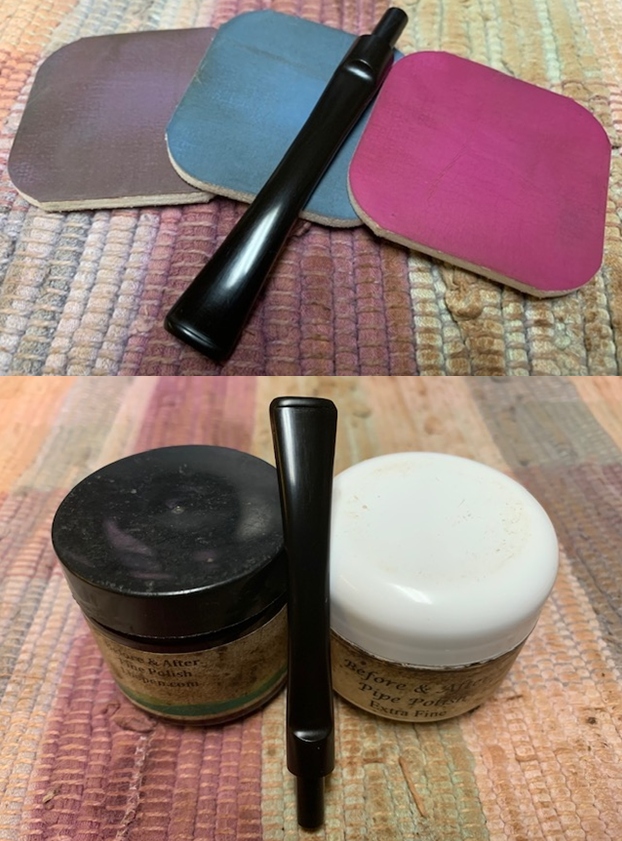
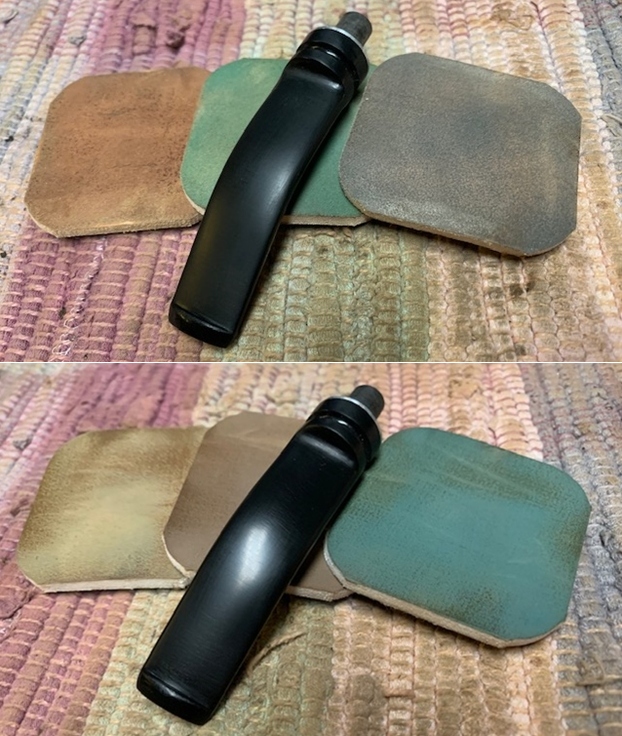
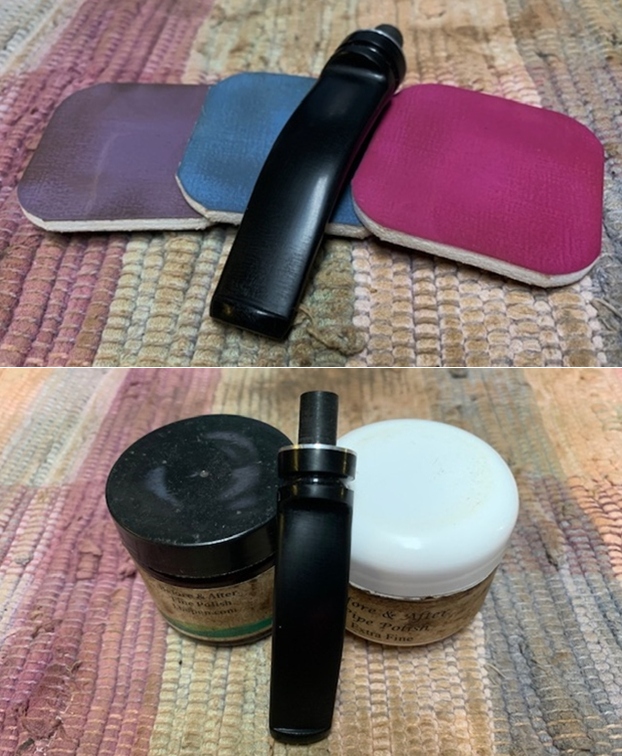
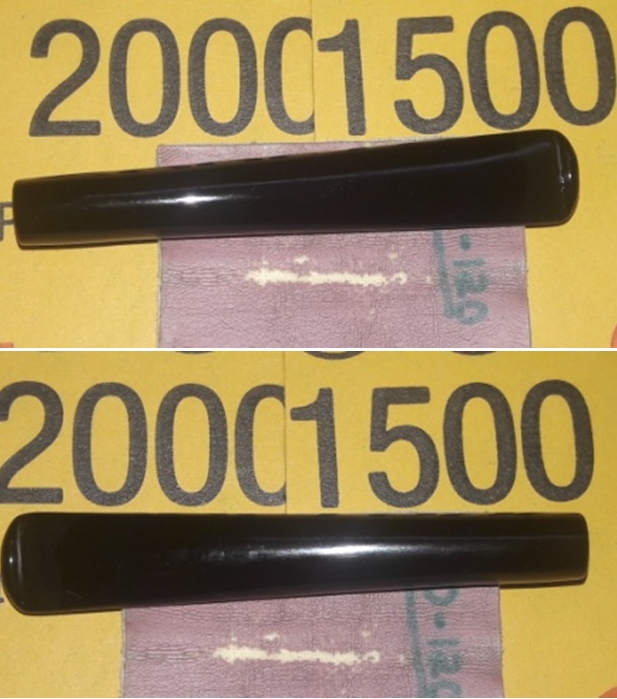
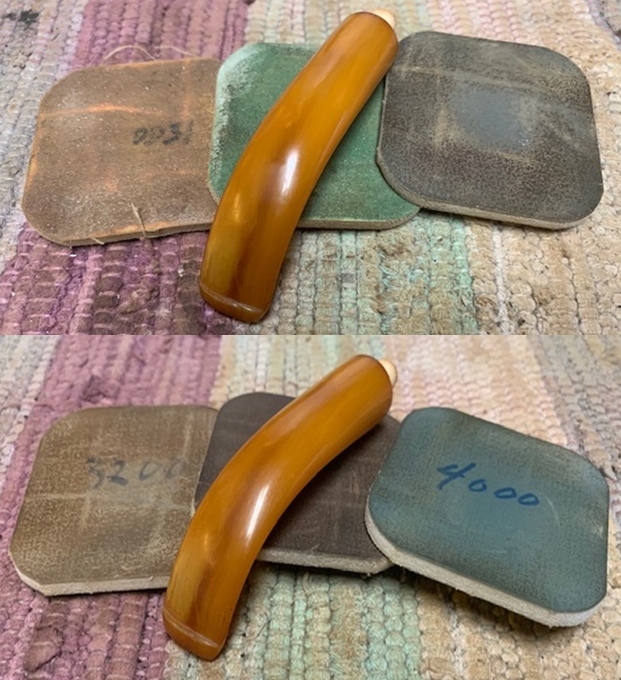
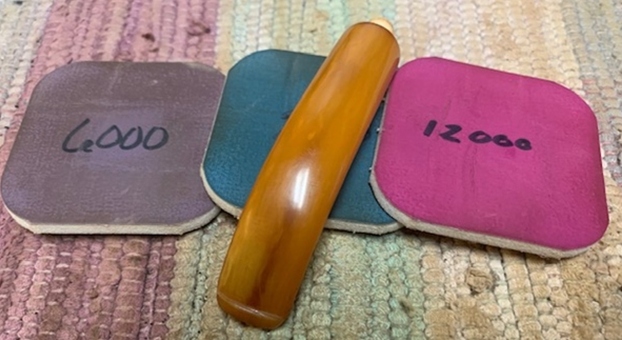
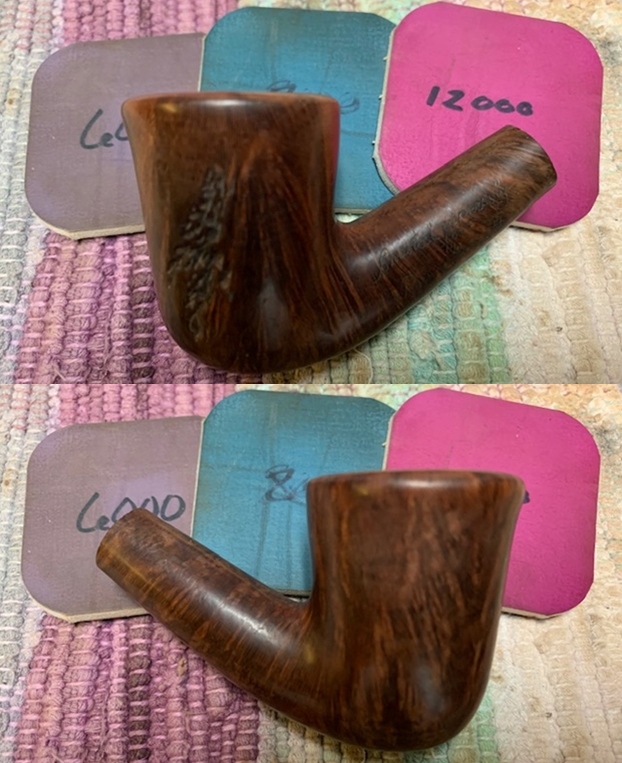
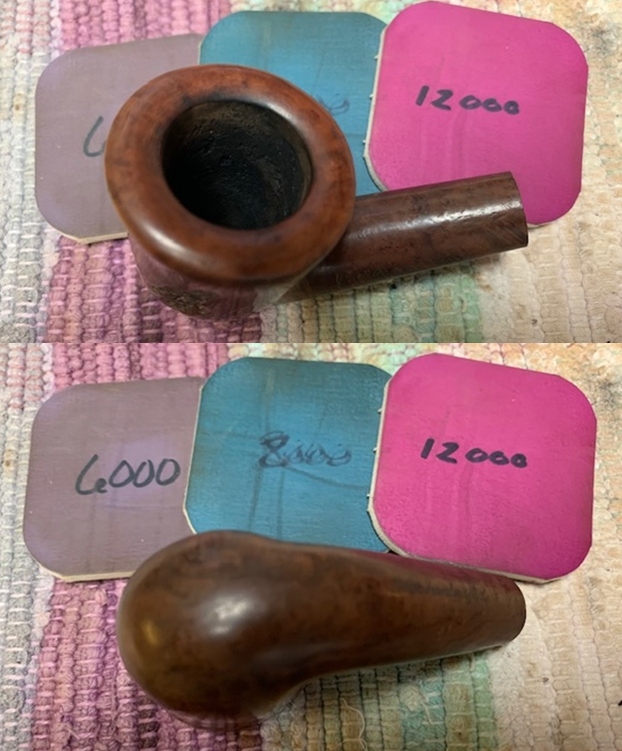
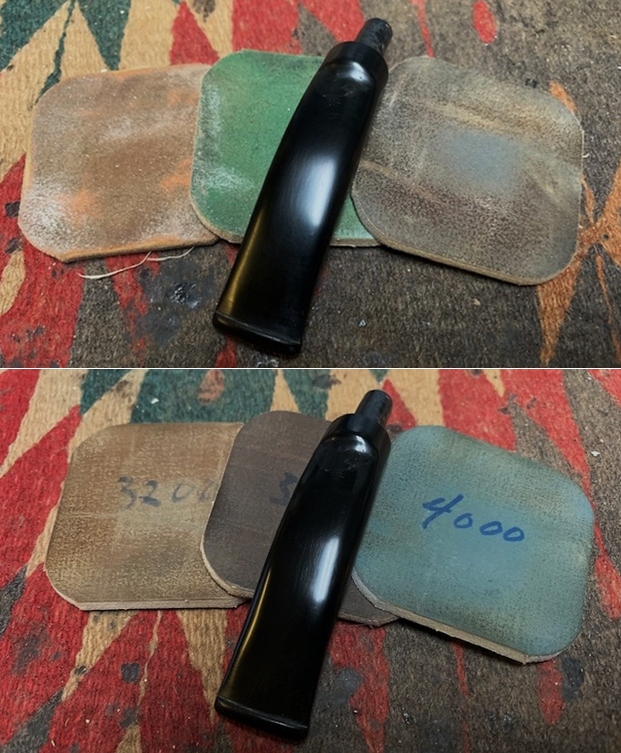
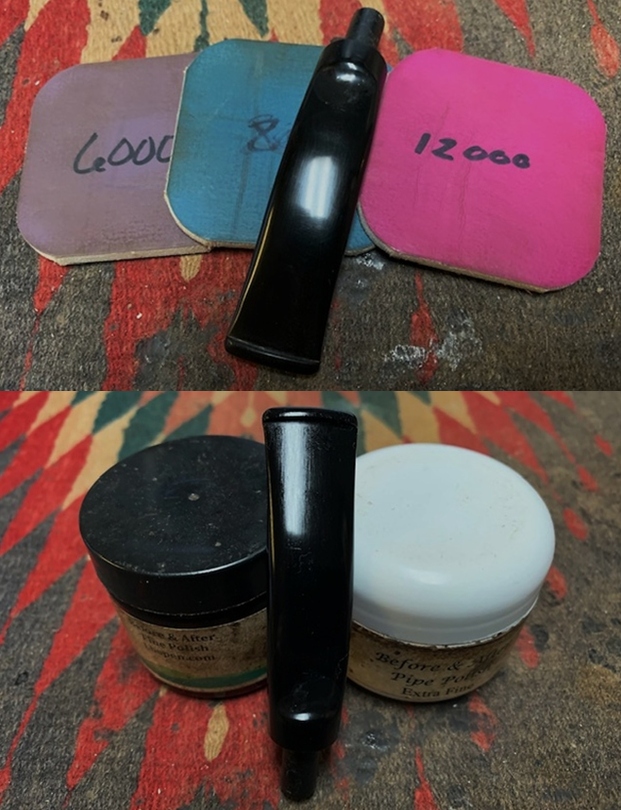
 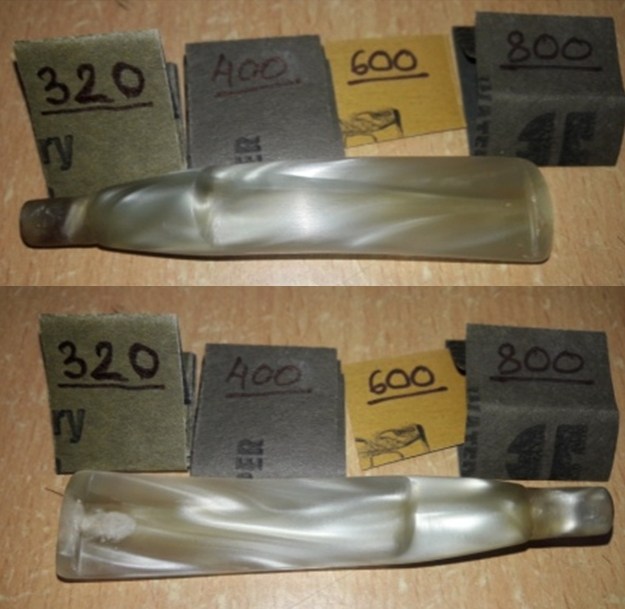 To bring a deep shine to the acrylic stem, I went through the complete set of micromesh pads, wet sanding with 1500 to 12000 grit sandpapers. I wiped the stem with moist cloth after each pad. At the end of micromesh cycle, I polished the stem with “Before and After Fine & Extra Fine” paste. The finished stem is shown below.
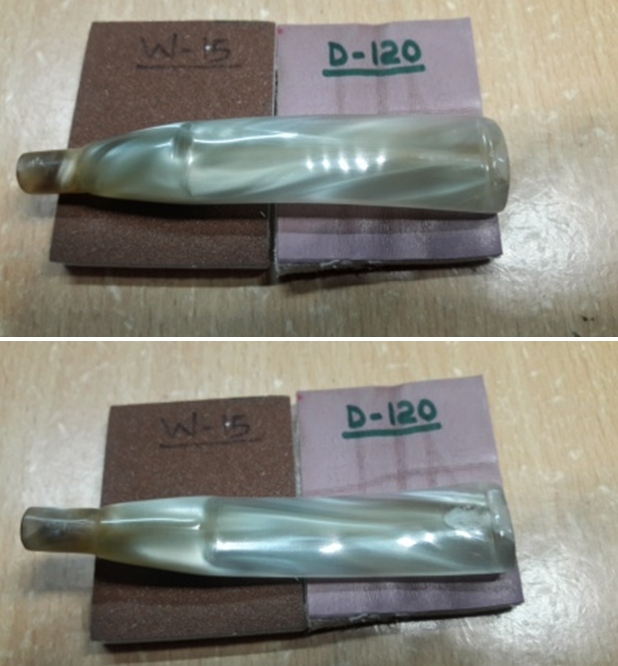 With the stem re-profiling and repairs completed, I turned to the stummel repairs. The fills had cured nicely and using a flat head needle file, I sand the fill till I had achieved a rough match with the surrounding stummel surface. I sand the fills with a piece of 220 grit sand paper to further blend in the fills with the stummel surface.
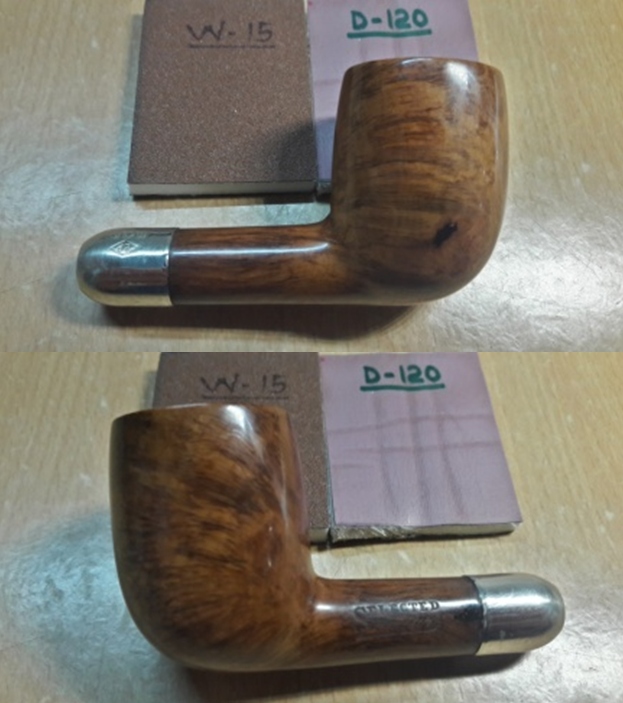
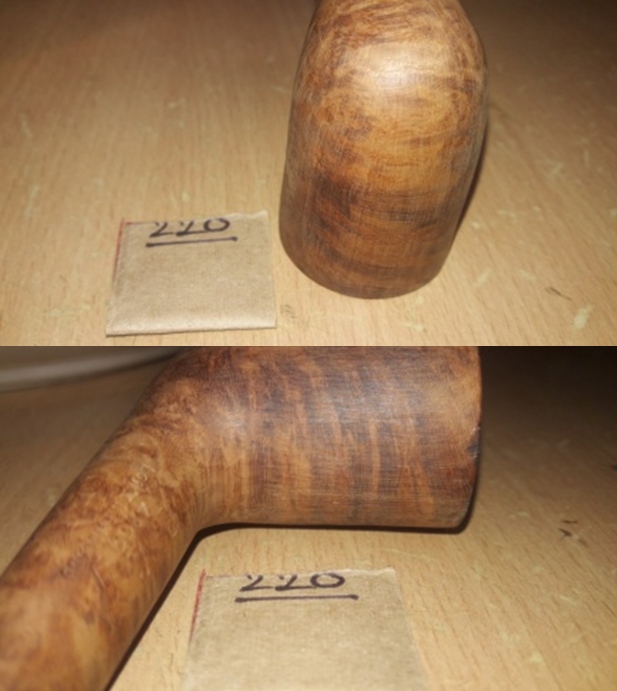
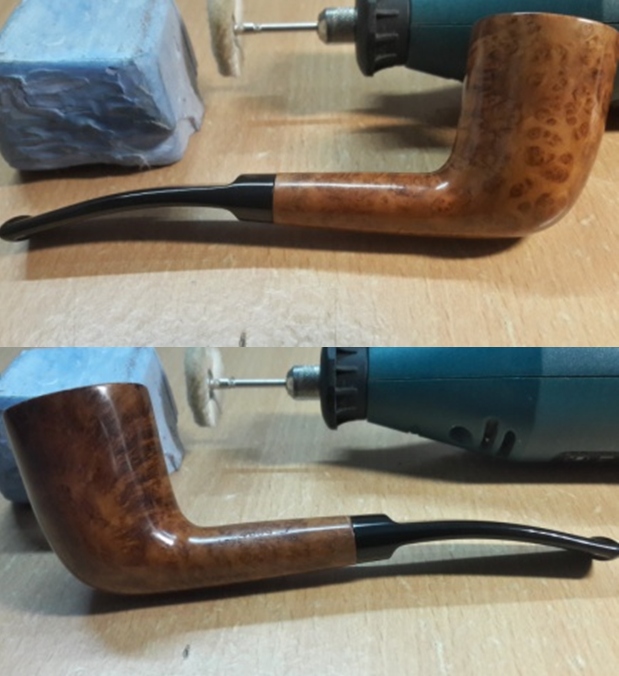
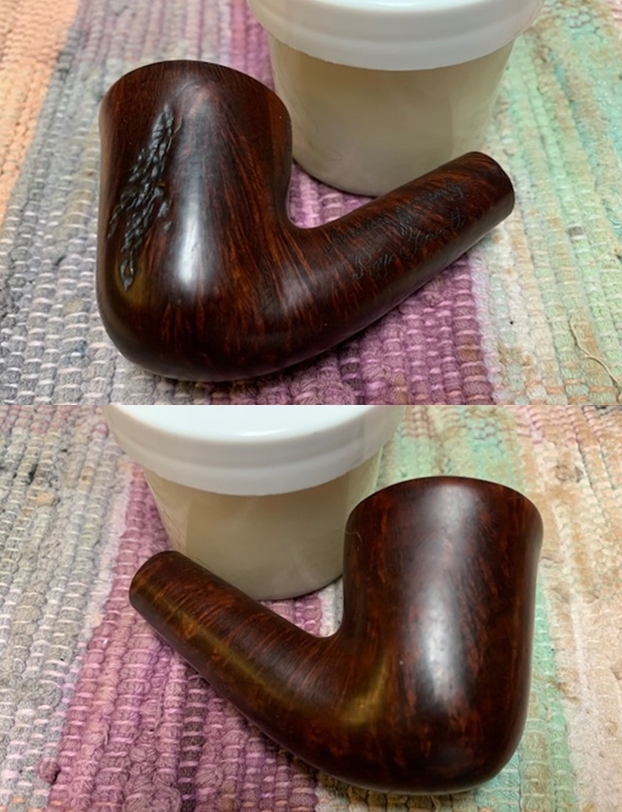
  Next, I rubbed a small quantity of “Before and After Restoration Balm” deep in to the briar and in to the crevices of the sandblast with my finger tips and let it rest for a few minutes. The balm almost immediately works its magic and the briar now has a nice vibrant appearance with the beautiful sandblast patterns displayed in their complete splendor. I further buffed it with a horse hair brush. The contrast of the lighter browns of the sandblast with the natural patina of the rest of the stummel adds an interesting dimension to the appearance of the stummel.
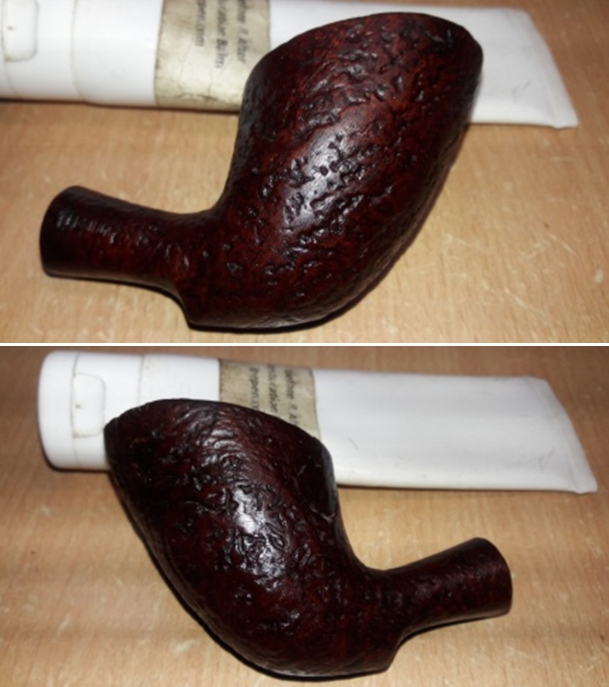
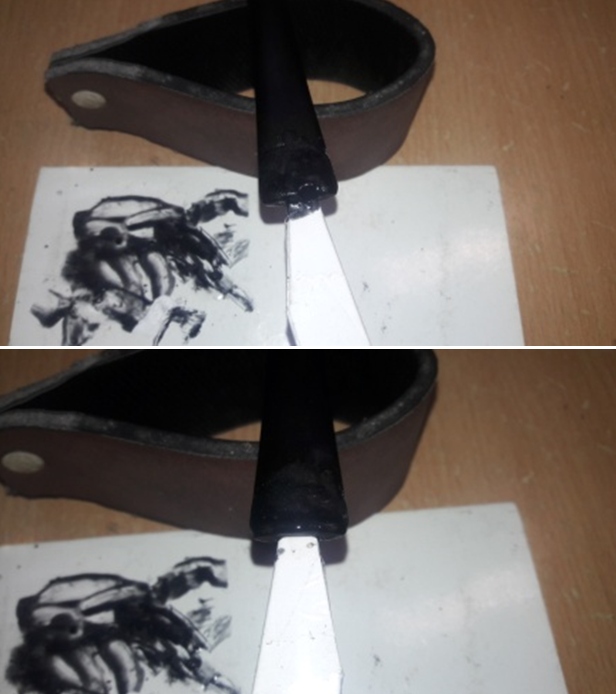
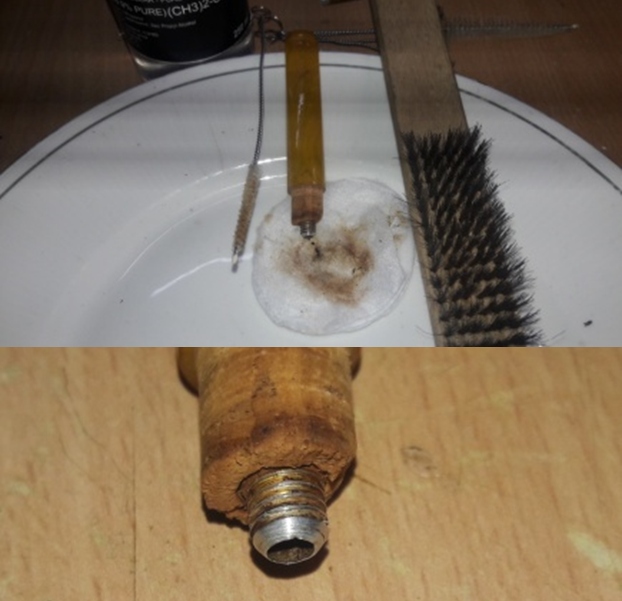
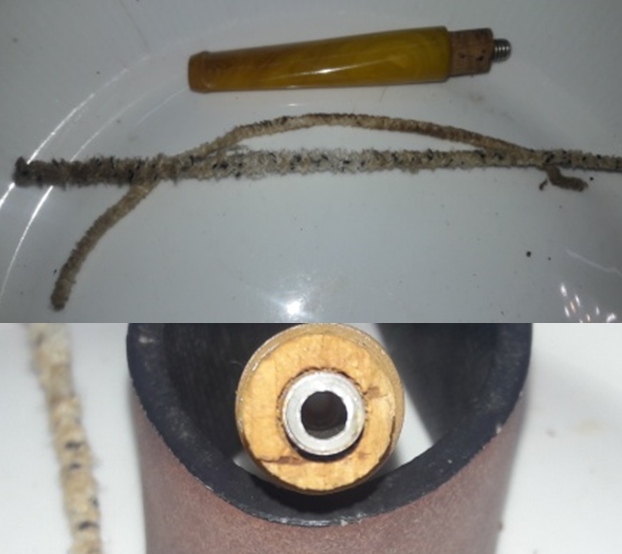
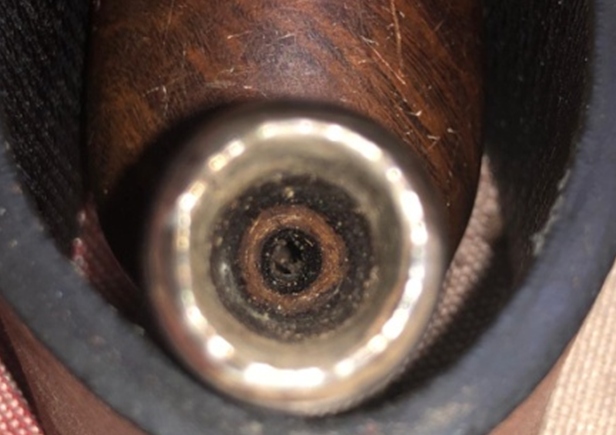
 To check and verify the correctness of the alignment of the stem airway, the tenon opening, shank/ mortise airway and finally through the draught hole, I did the PIPE CLEANER TEST. The pipe cleaner passed through cleanly and without any obstruction from the slot end right through the draught hole.
  I have now reached the homestretch in this restoration project. To complete the restoration, I mount a cotton cloth buffing wheel on to my hand held rotary tool and polished the stummel and stem with Blue Diamond compound. This compound helps to remove the minor scratch marks from the stem surface that remain from the sanding.
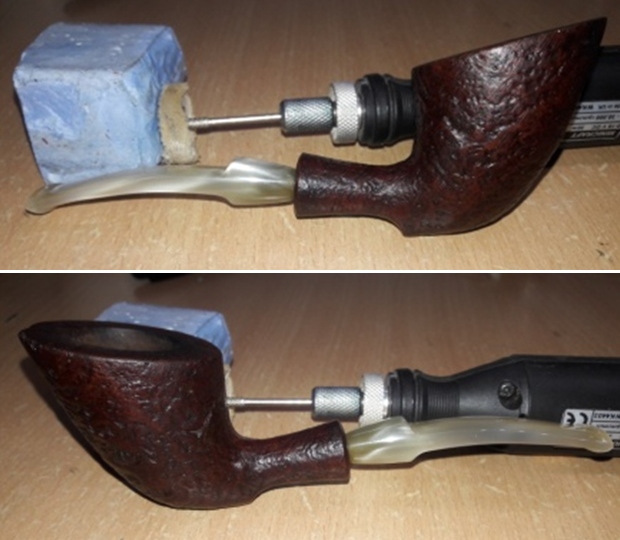
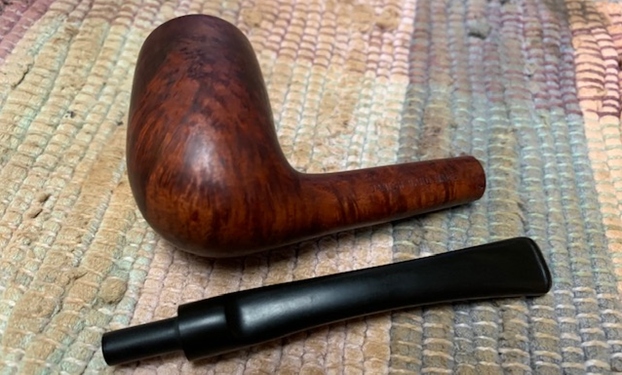
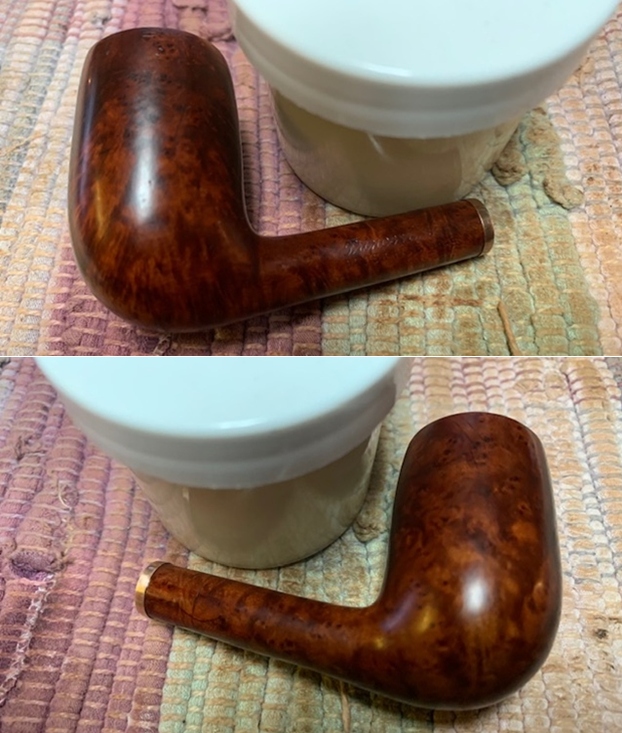
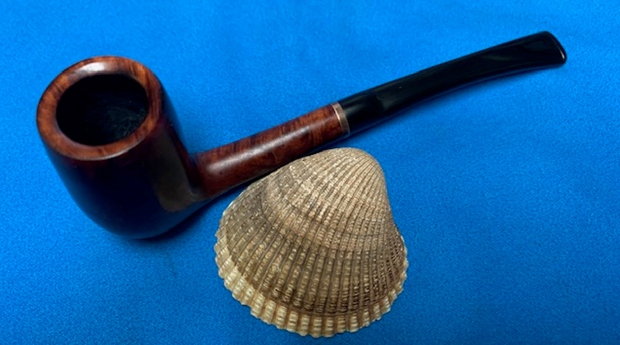
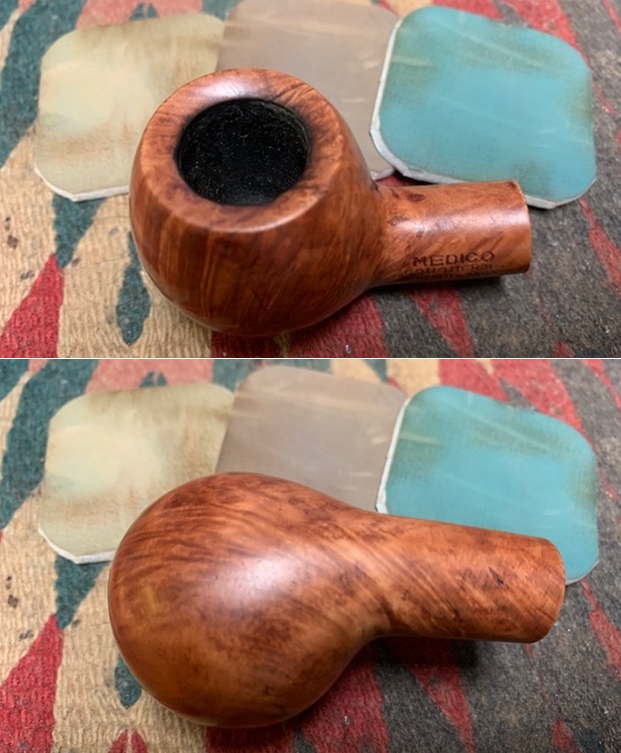
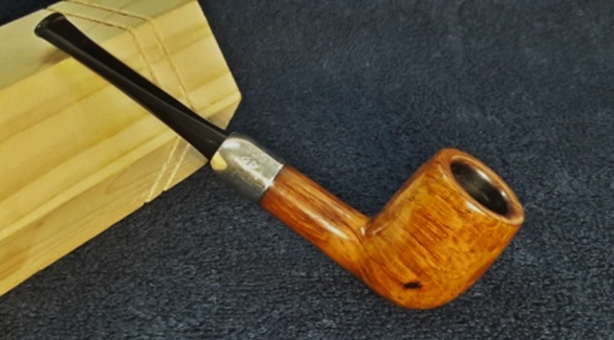
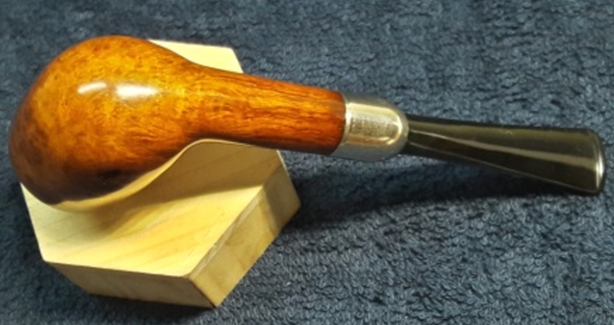
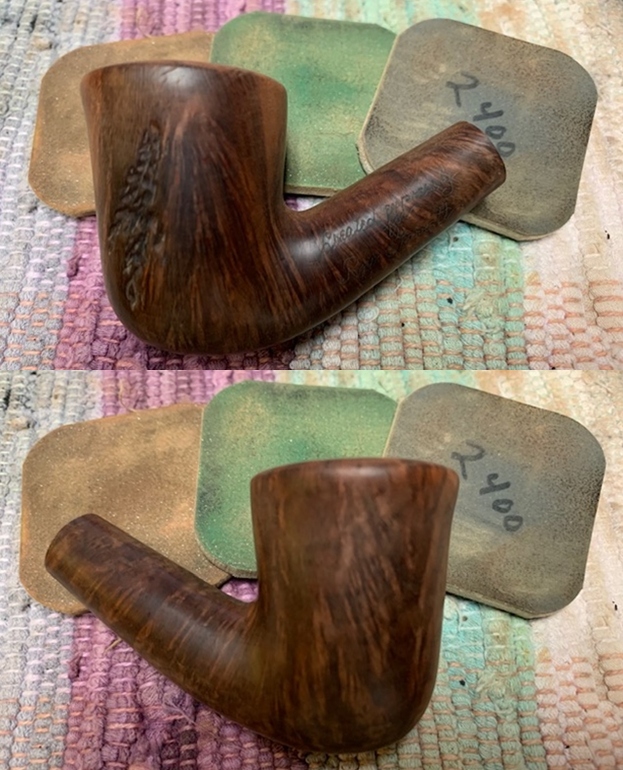
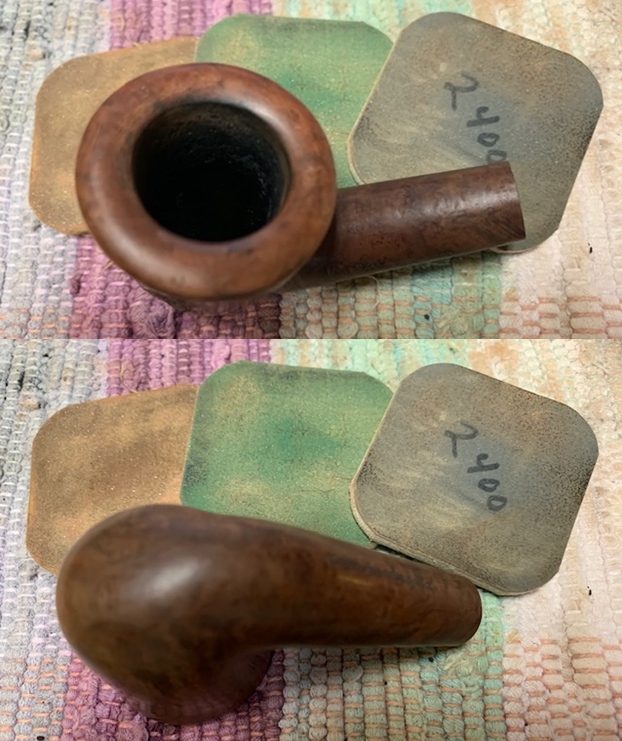
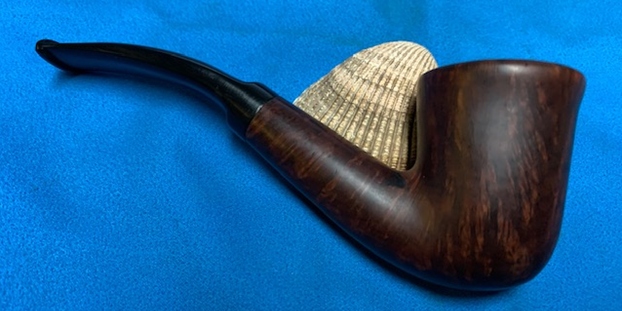
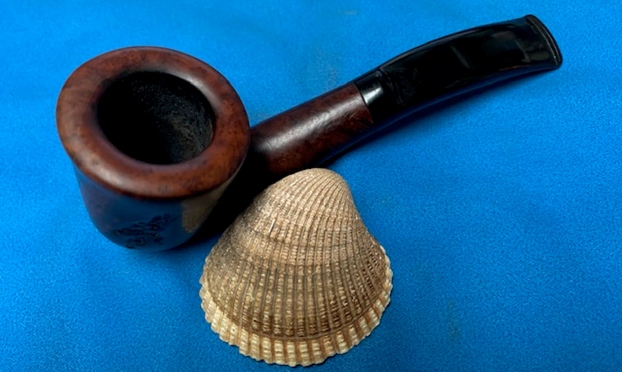
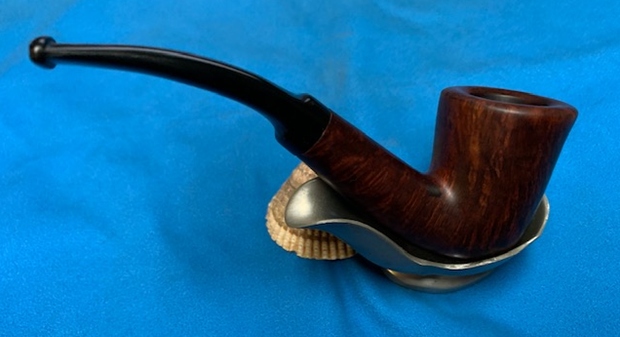
 I mounted another cotton buffing wheel that I have earmarked for carnauba wax and applied several coats of the wax. I finished the restoration by giving the entire pipe a rigorous hand buffing using a microfiber cloth to raise the shine further. The finished pipe looks amazingly beautiful and is ready to move on to another piper to be enjoyed for a long time.
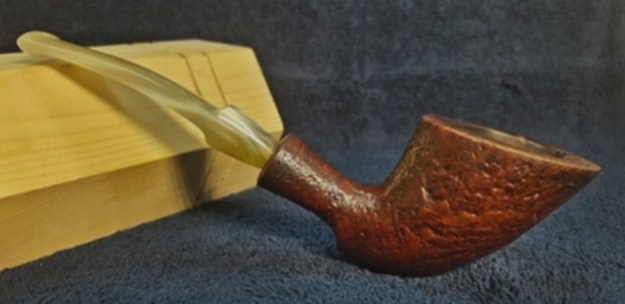


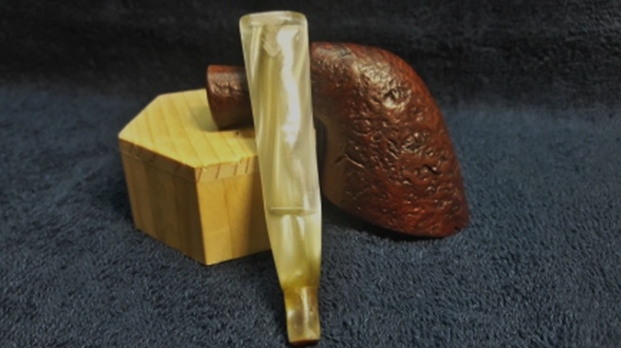
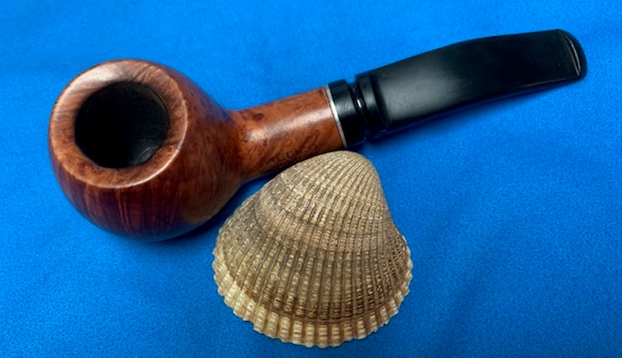
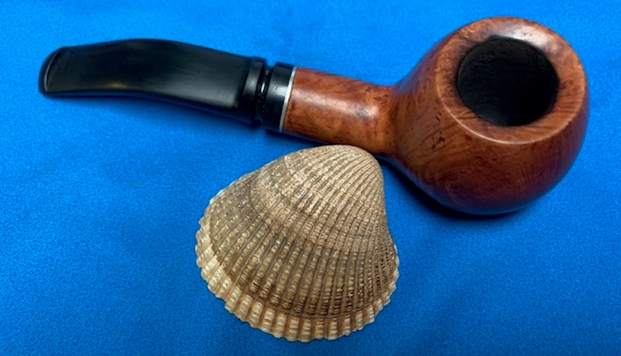
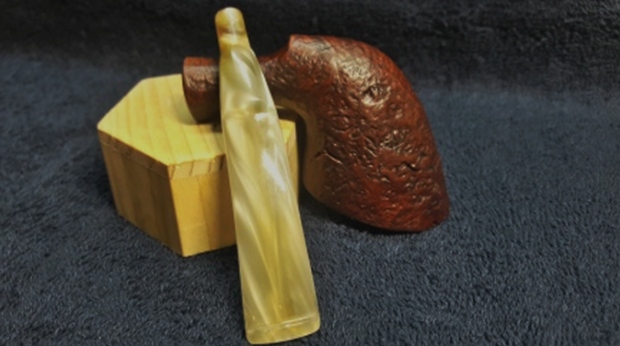 P.S. The finished pipe really looks amazing and with the thick chamber walls, a perfect wide open draw with perfectly aligned airway, this will definitely be a fantastic smoker. The pearly variegated acrylic saddle stem has a nice pearly sheen to it and the swirls of browns and grays add to the visual drama. The rebuilt lower bite zone does show sign of repairs, but it always does with acrylic stems. The beautiful pearl white of the stem appears yellowish in the above pictures and also the background does change in couple of photographs. This is so because of the reflection of light from the prop that is being used. I still need to work on my photography skill set in order to highlight the beauty of the finished pipes!!
Any reader interested to add this beauty to their collection, may please let Steve know and this pipe can be shipped to you from across the seas to be enjoyed for years to come.
A note of thanks to all the readers who have joined me in this journey that has been such a pleasure! You and your loved ones are always in our prayers…