Tag Archives: CPF pipes

Restoring another CPF French Briar – a Remington Silver Mount Billiard


Blog by Steve Laug

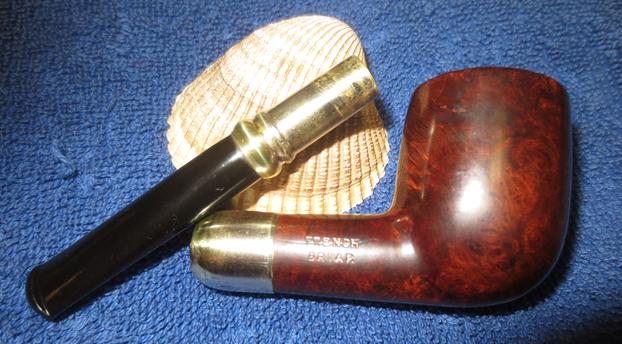
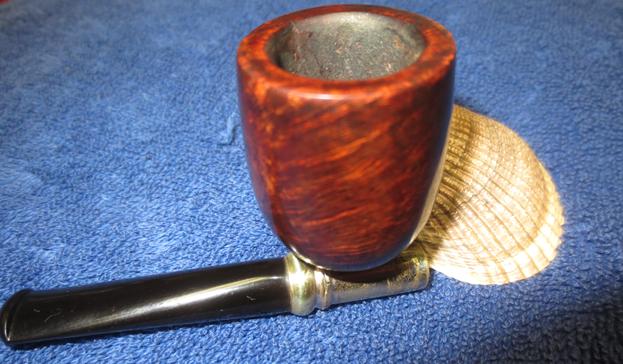
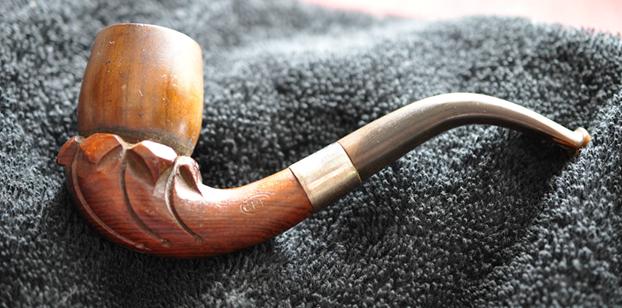
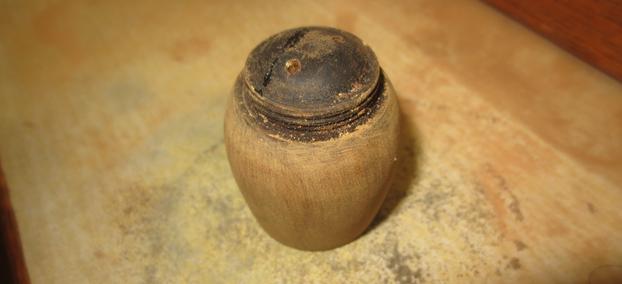
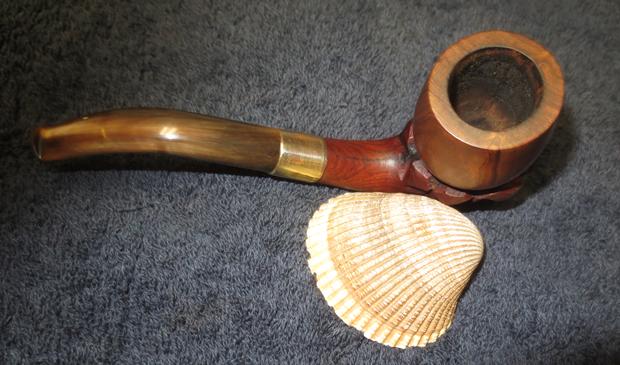
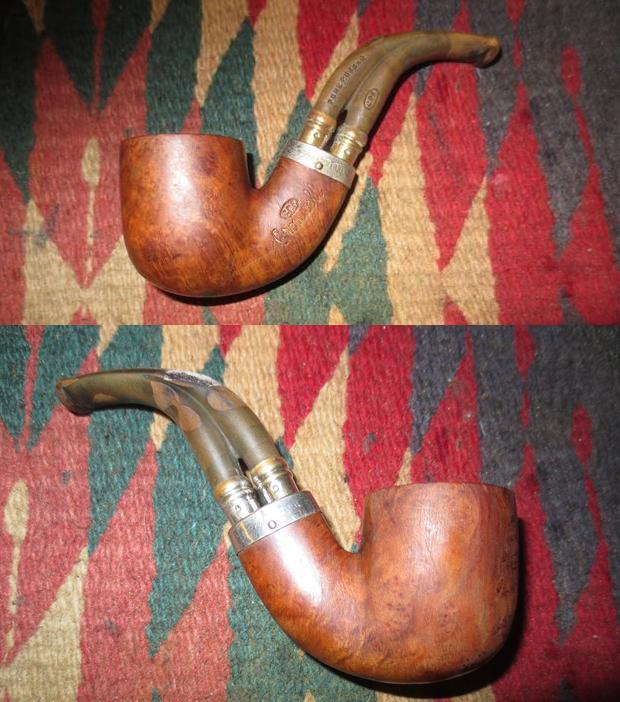
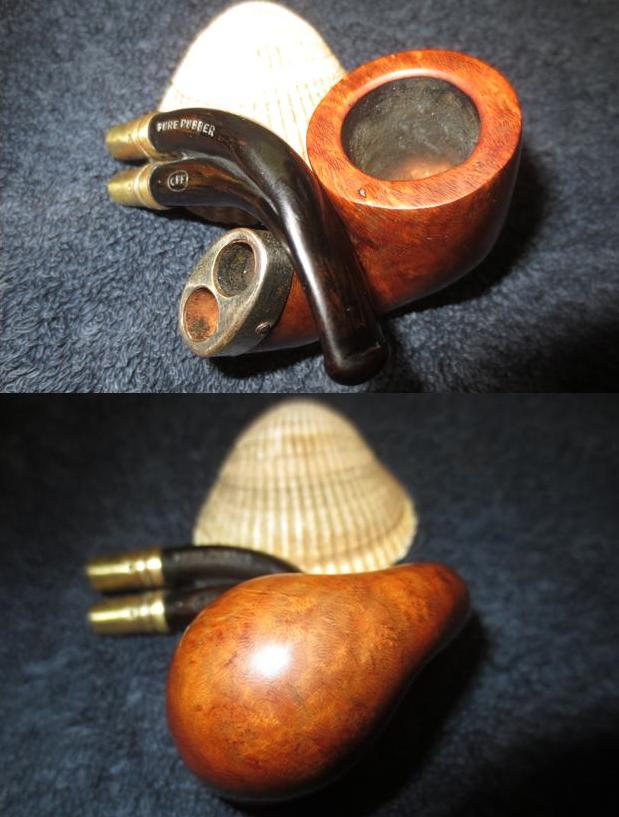
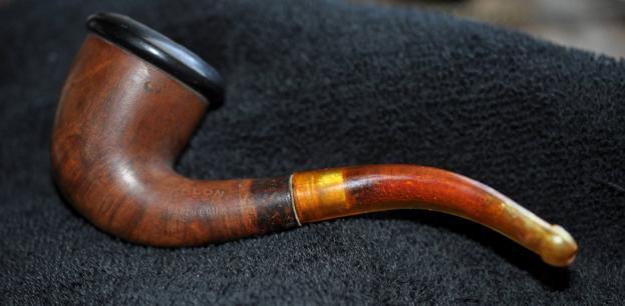
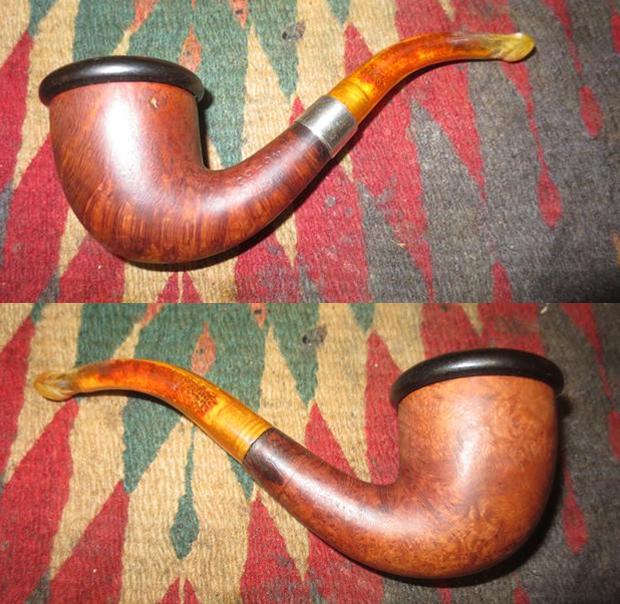
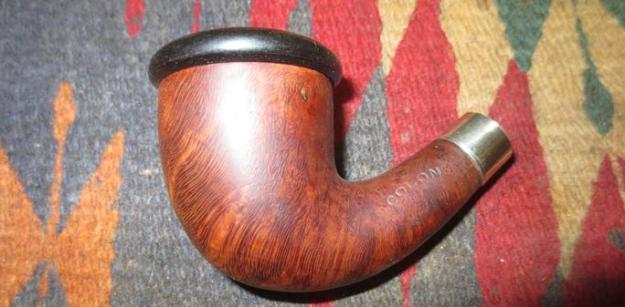
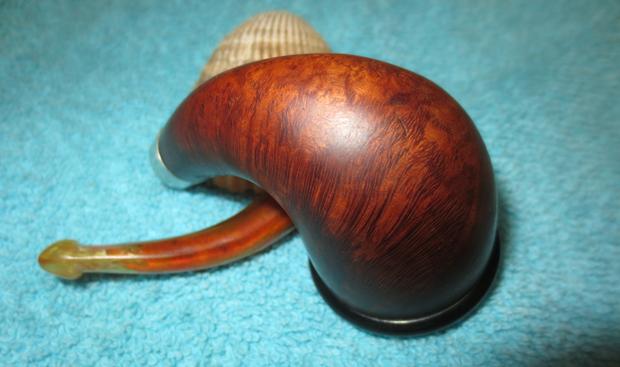
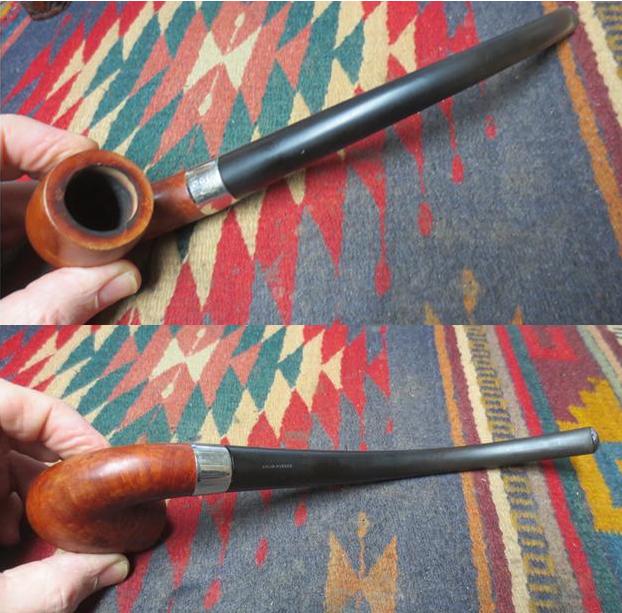
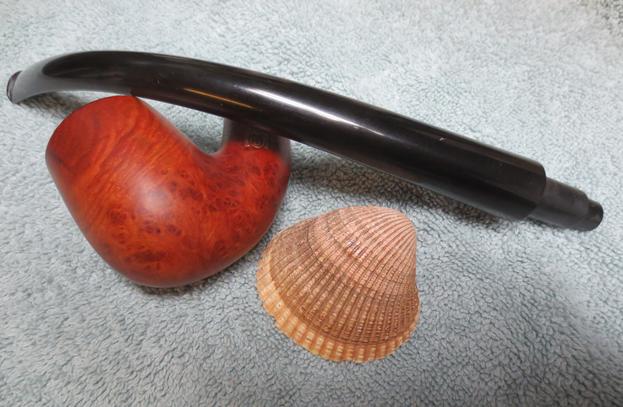
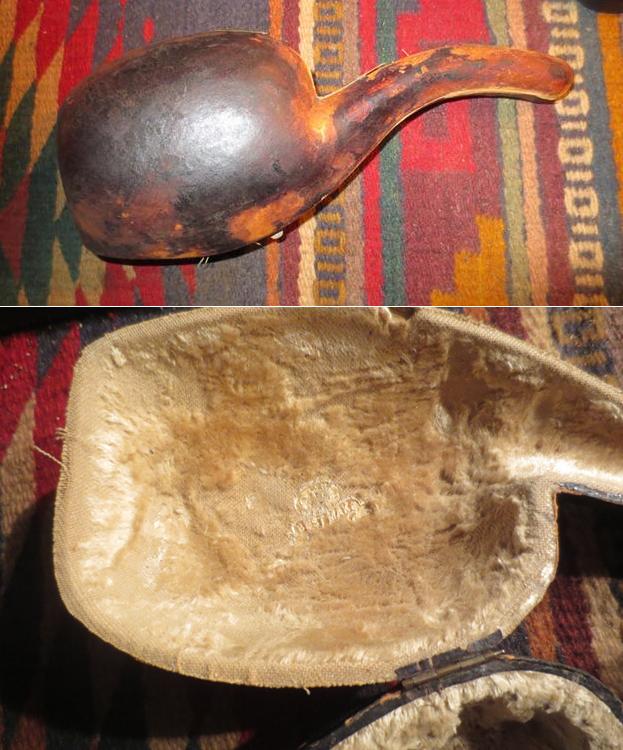
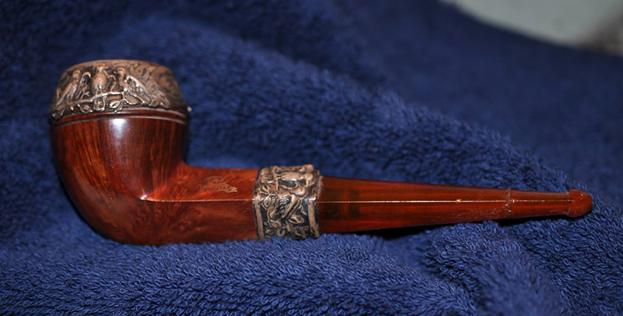
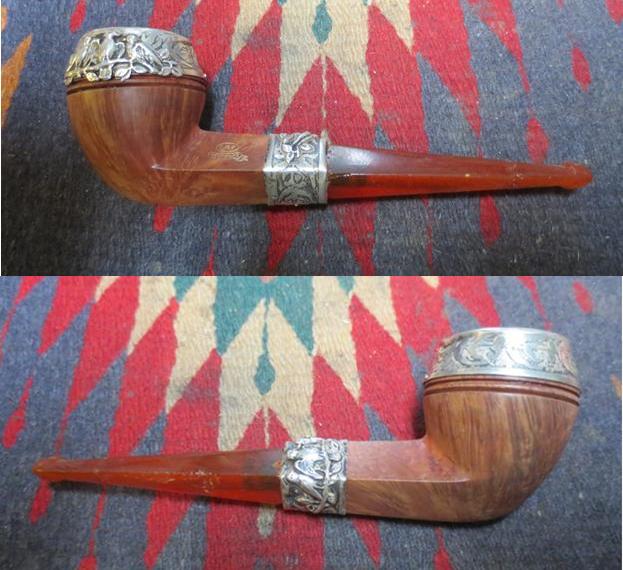
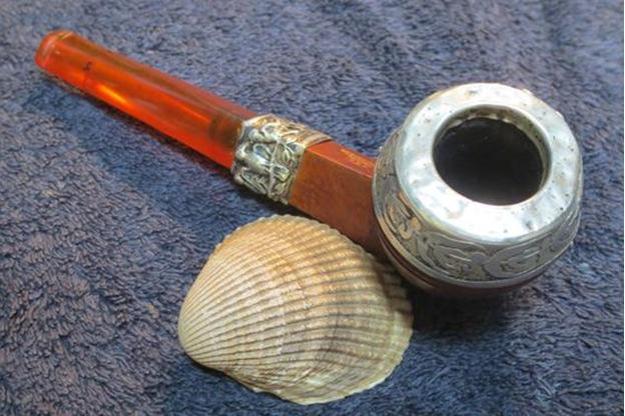
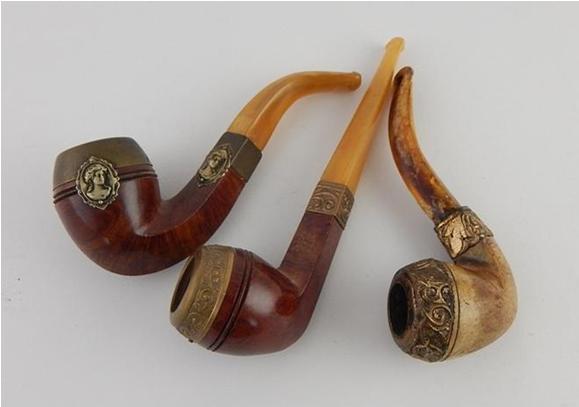
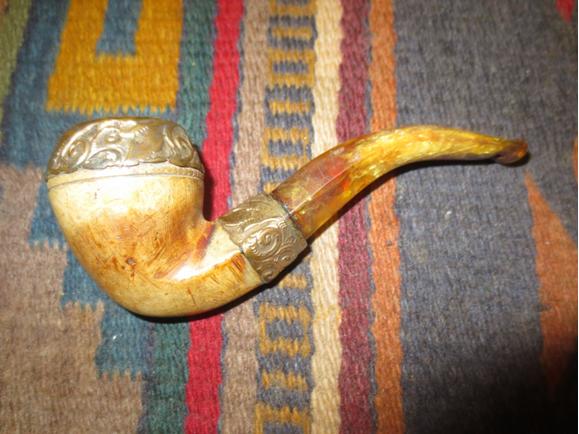
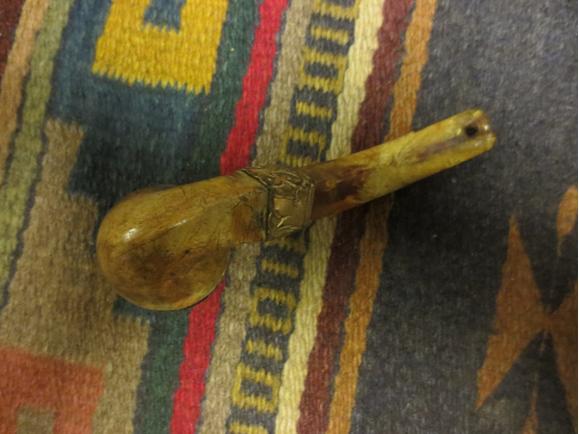
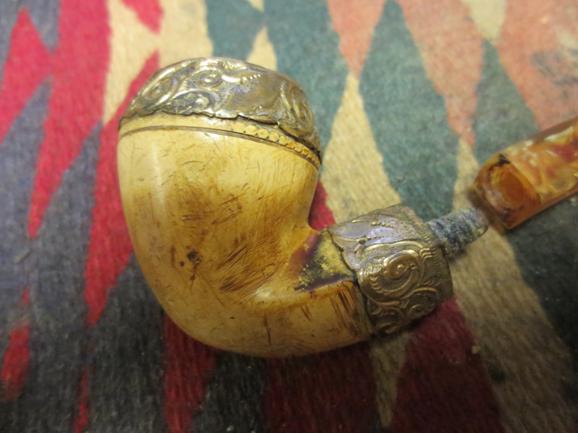
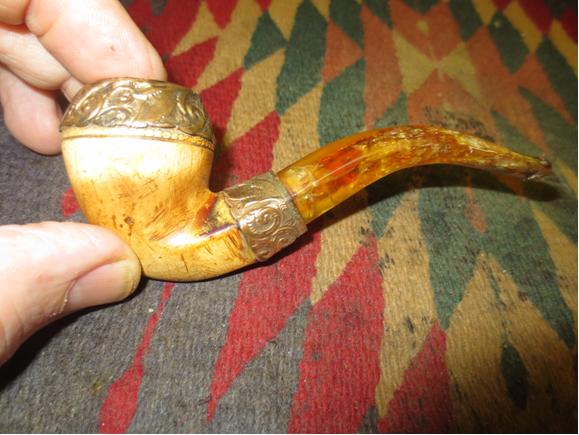
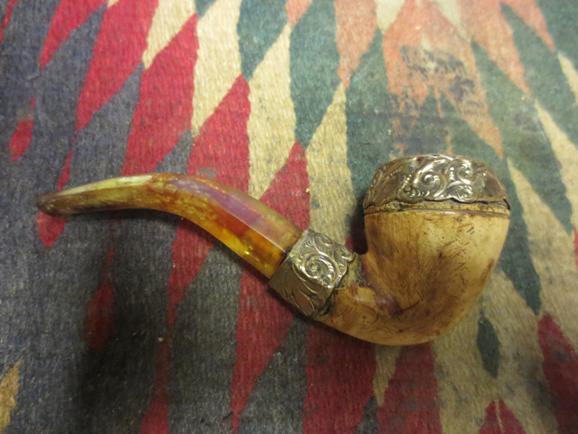
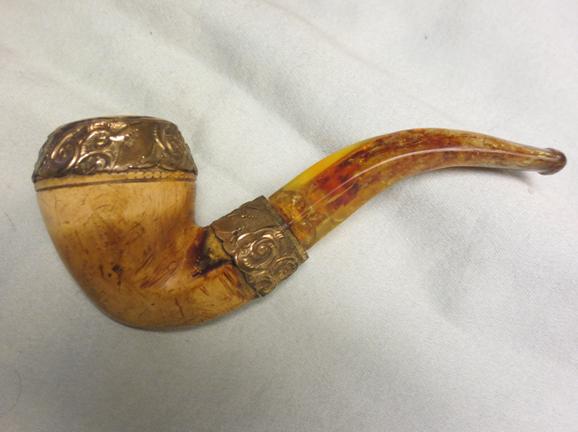
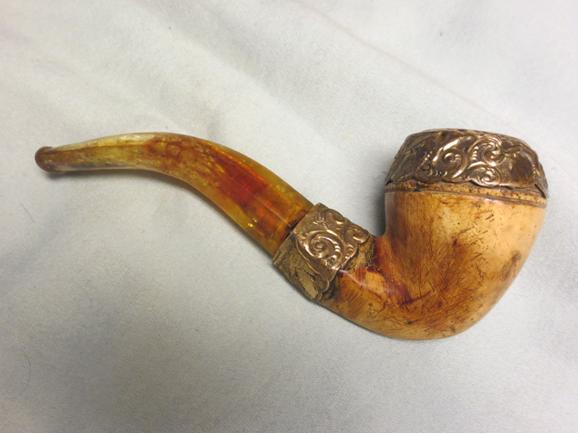
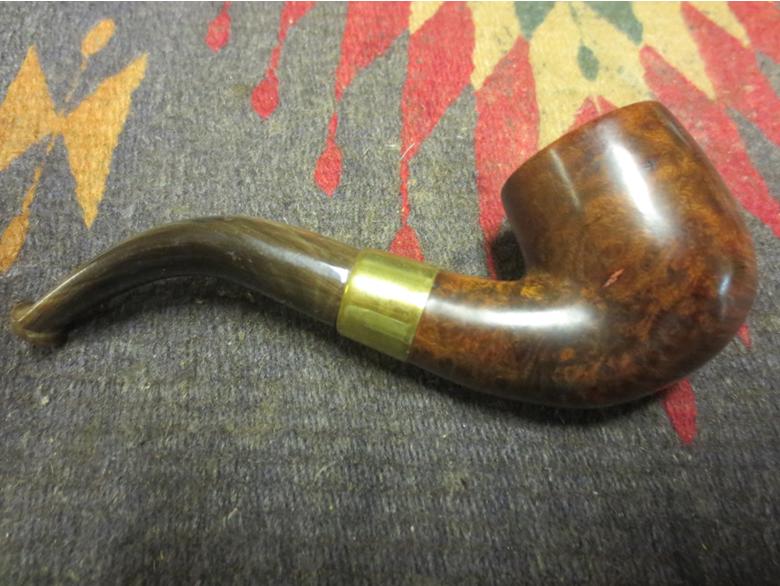
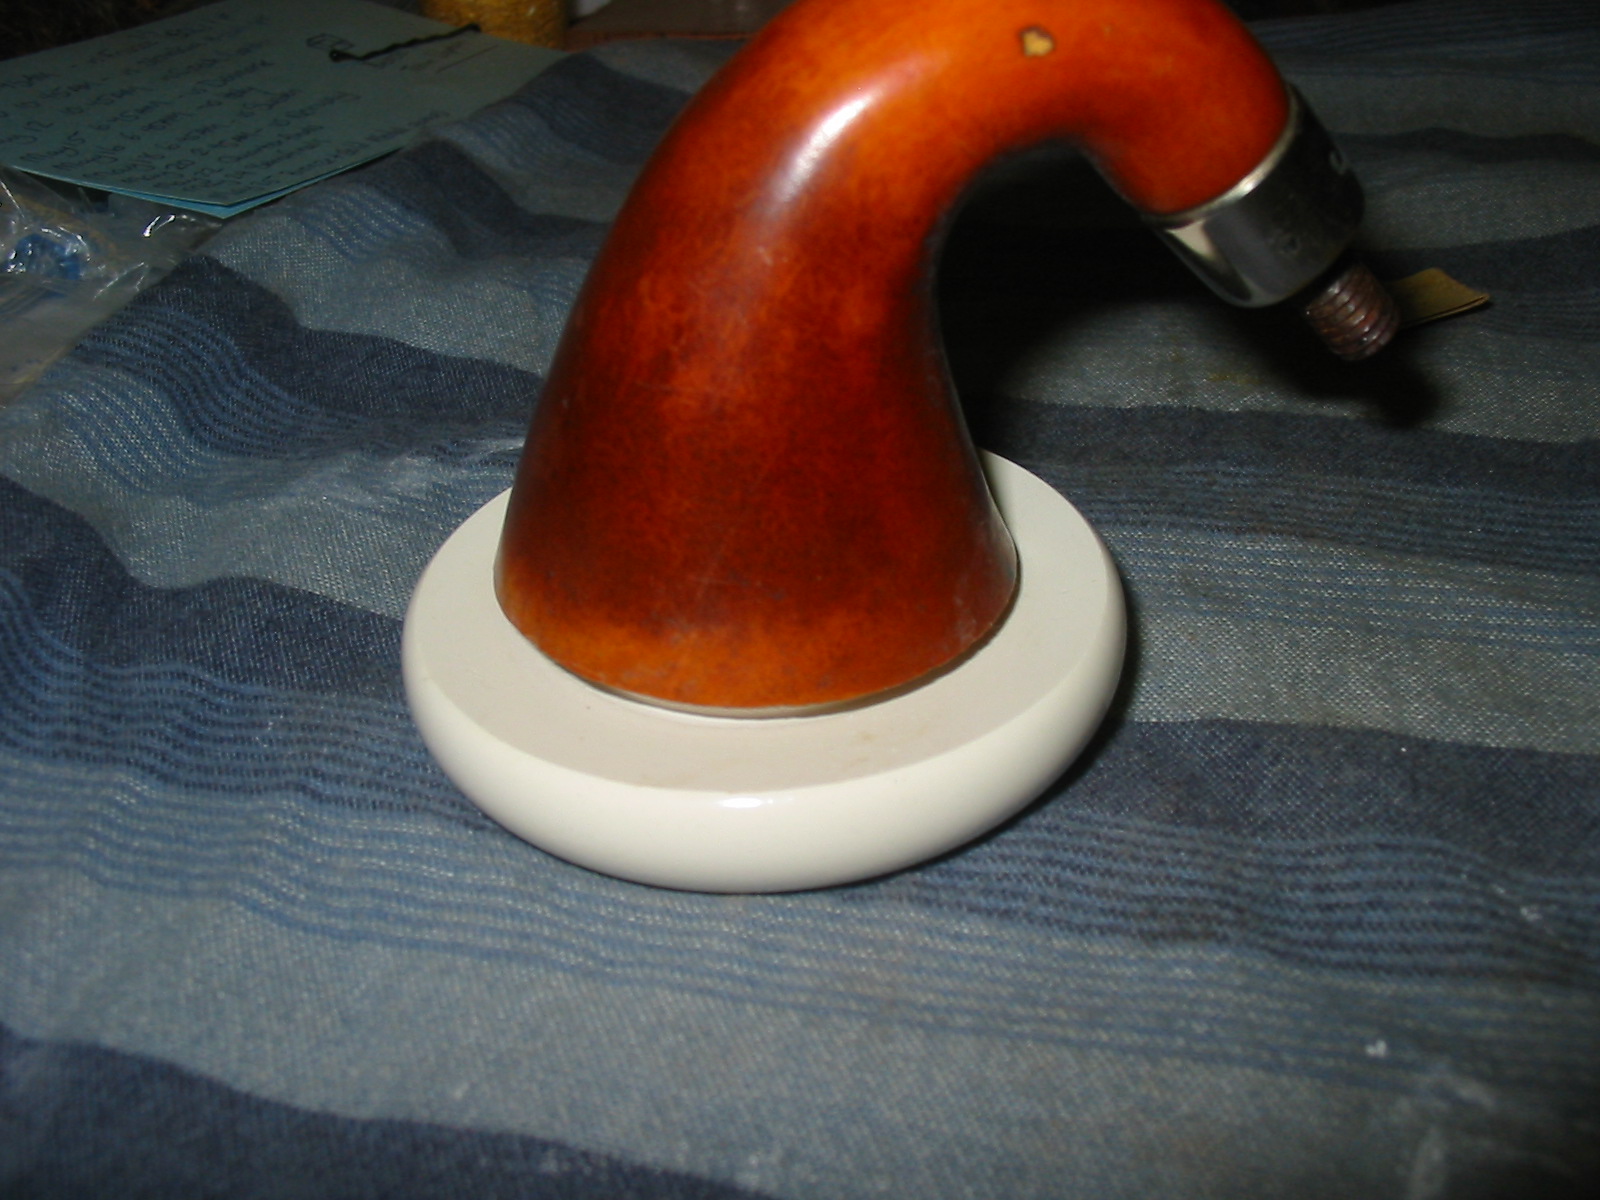
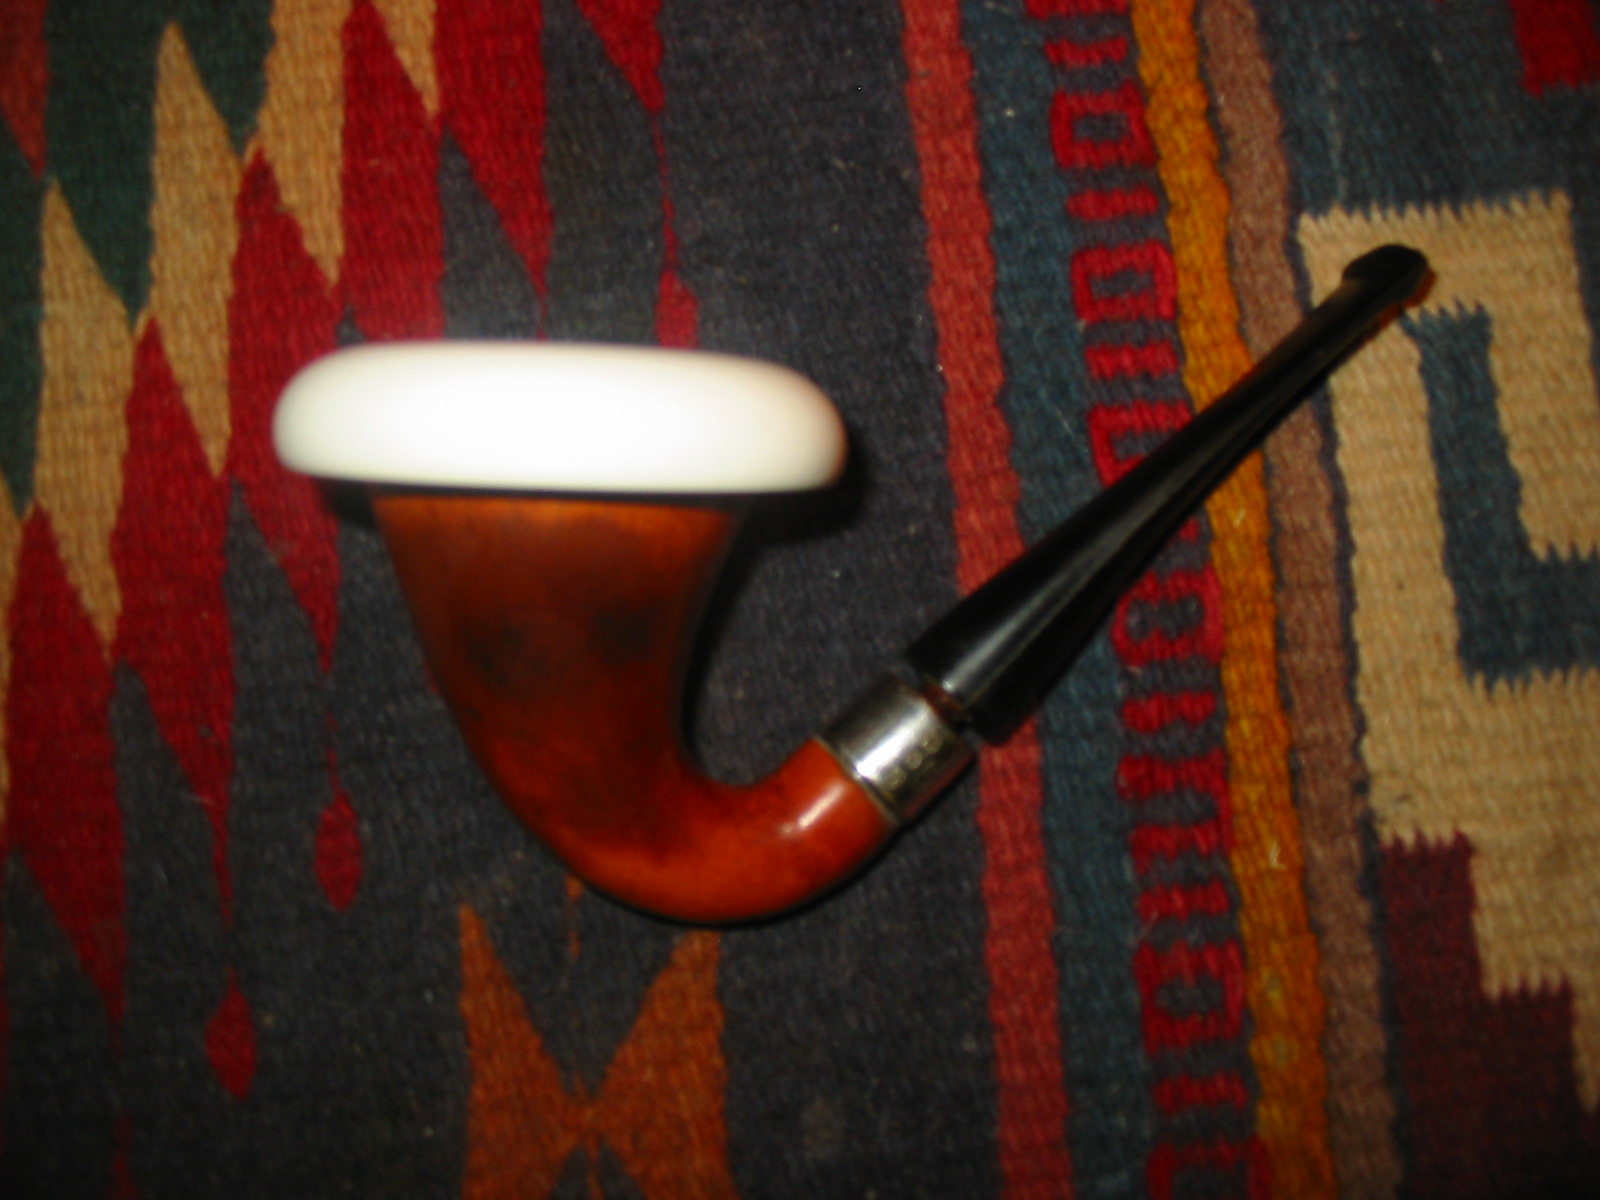
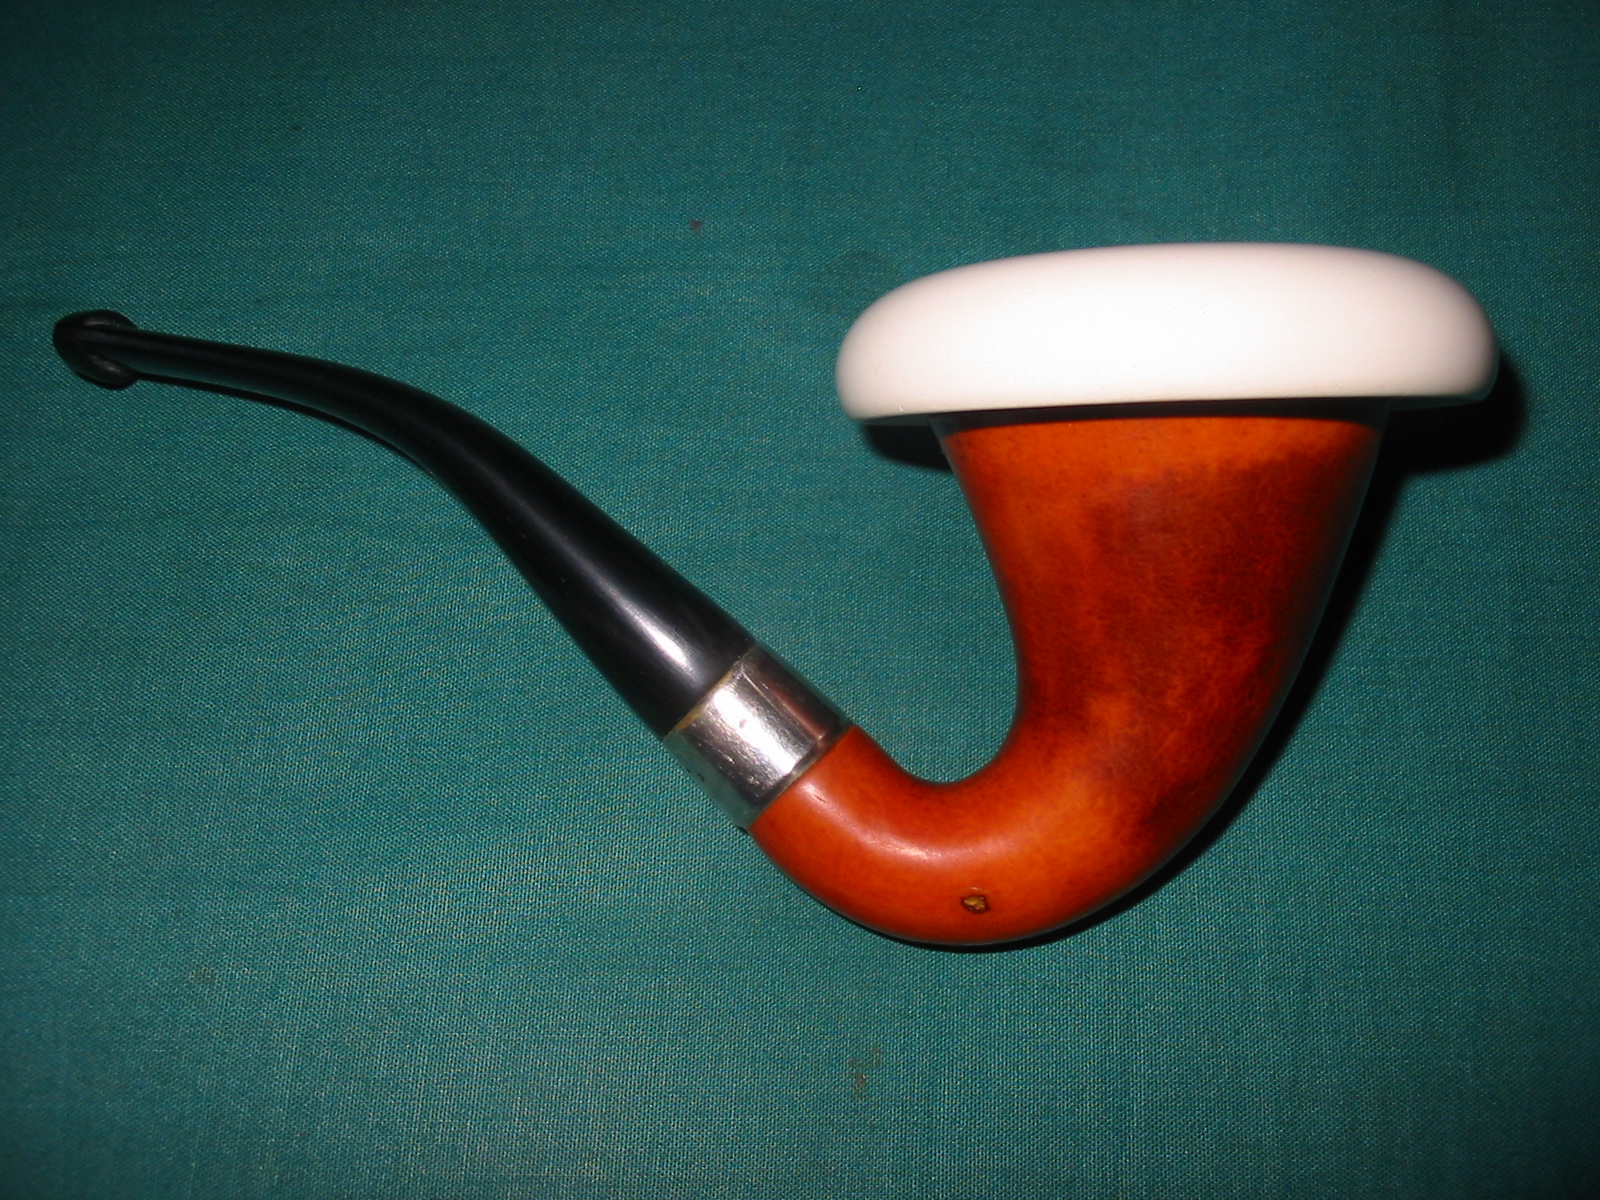
The next pipe I chose to work on from the lot of the lot of pipes my brother and I picked up on our virtual pipe hunt in Montana is a C.P.F. French Briar Silver Mount Billiard. It is a classic billiard shape, while the silver ferrule and cap on the stem end give it a feeling of elegance. The photos below show what it looked like before my brother did his clean up on it. It is another one from the lot of pipes my brother and I picked up on our virtual pipe hunt in Montana. I have written about several of the other CPF finds with the latest being a CPF horn stem bulldog and a CPF French Briar billiard. Just a reminder – CPF stands for Colossus Pipe Factory. The brand was made in the late 1880s and 1890s.
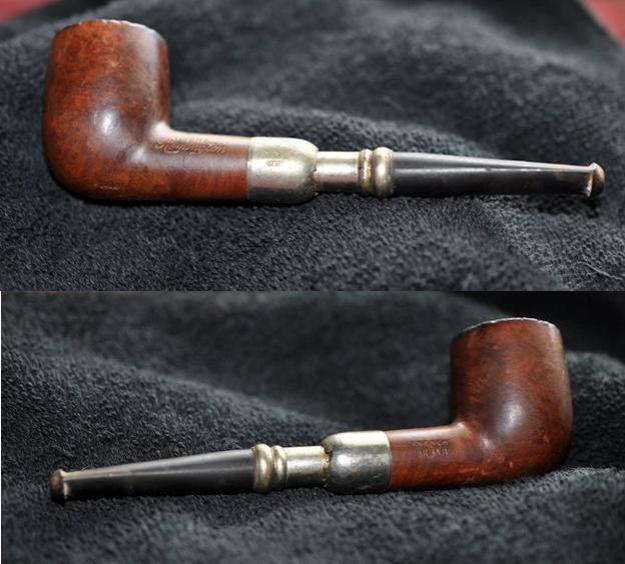
Jeff took the above photos and those that follow to show the condition of the pipe before he cleaned it up. This little billiard comes from the same era as the other pipes in this find late 1880s – early 1890s. It was in worse condition in many ways than the previous pipes I had worked on from this lot. It was worn and was in rough condition. The finish was worn off and there were a lot of nicks, scratches around the outer rim of the bowl and top edge of the pipe. The outside of the bowl was covered with grime and grit. Once again there was a thick, crumbling cake buildup in the bowl and the lava from the bowl overflowed over the top of the rim. The damage to the outside of the rim made me think that the inner edge of the bowl was also damaged from the same kind of knife reaming. But I could not be certain until the cake was gone. The silver ferrule on the shank end was damaged and torn on end with what looked like small cracks in the silver. The tenon endcap was worn, scratched and some brass colour showed through the finish. The vulcanite stem had small tooth marks on the top and underside near the button and was oxidized.
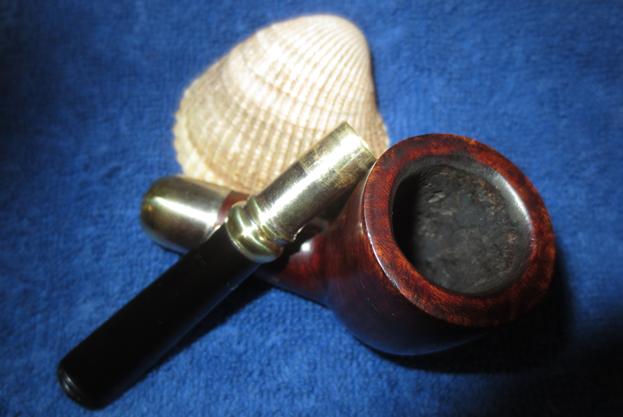
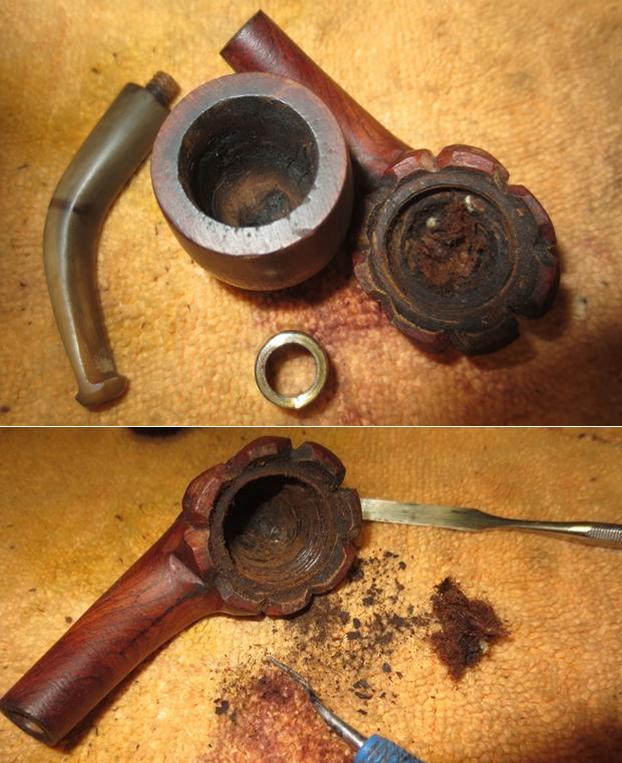
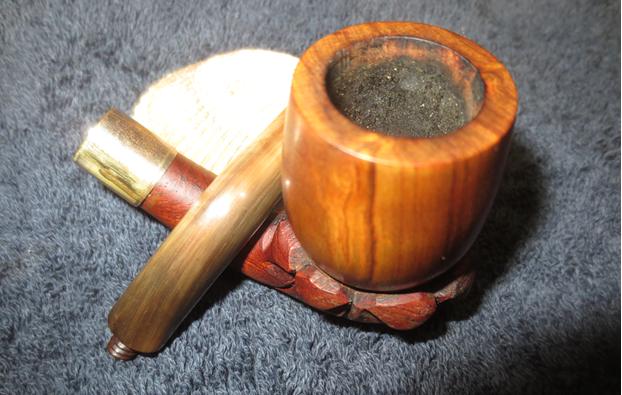
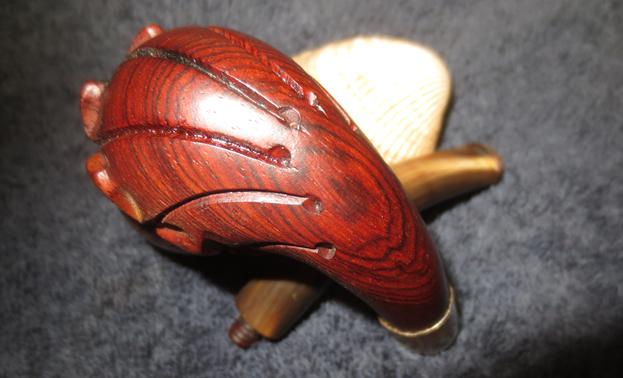
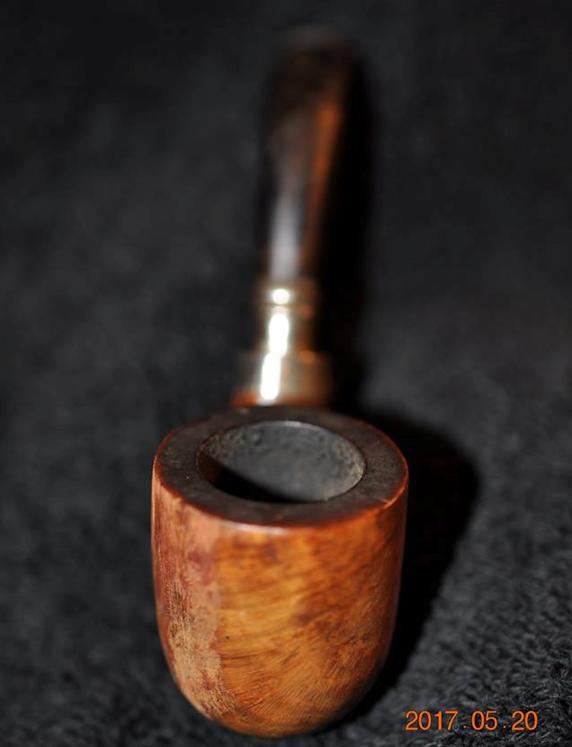
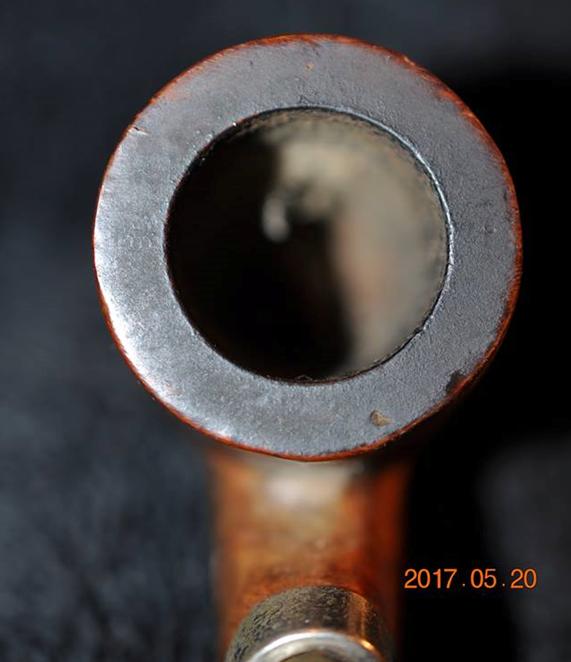
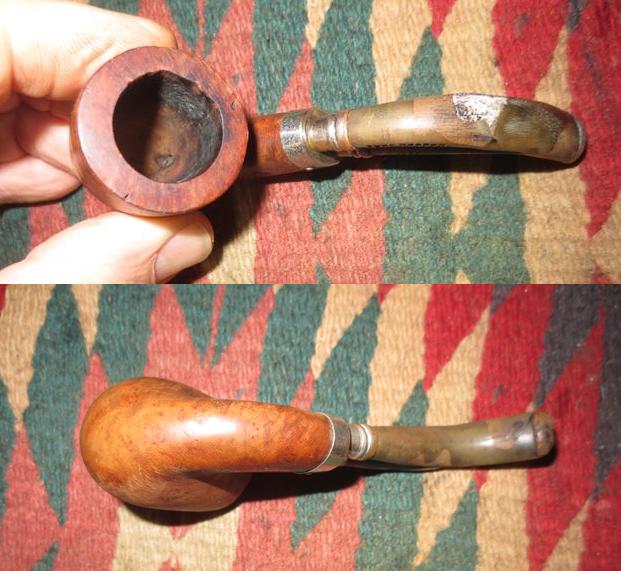
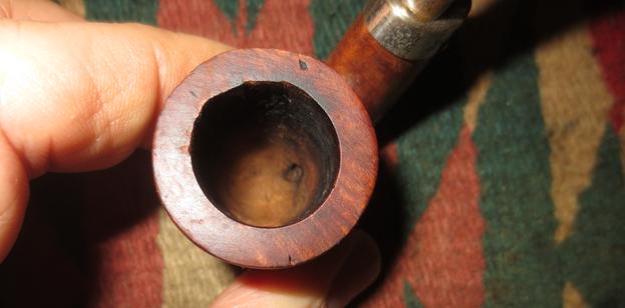
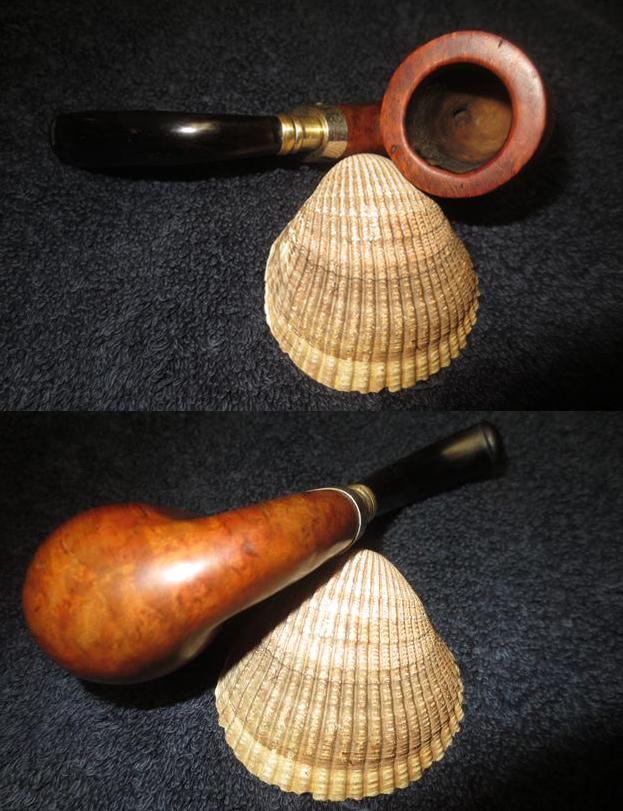
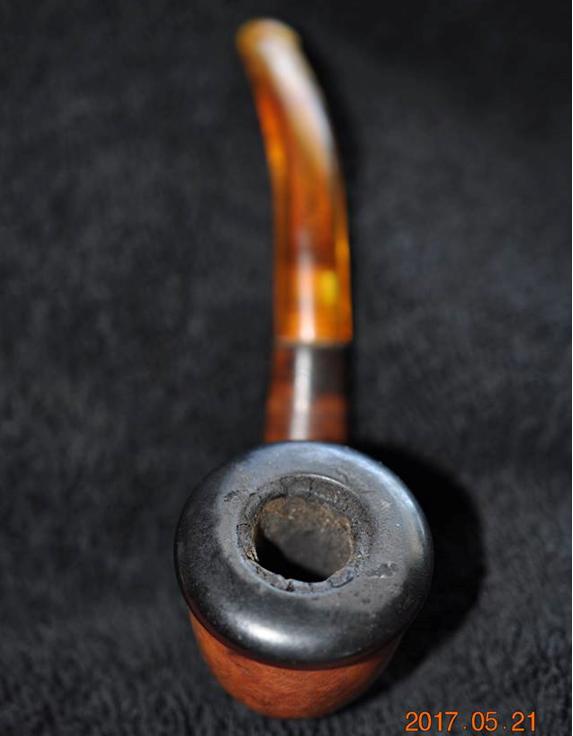
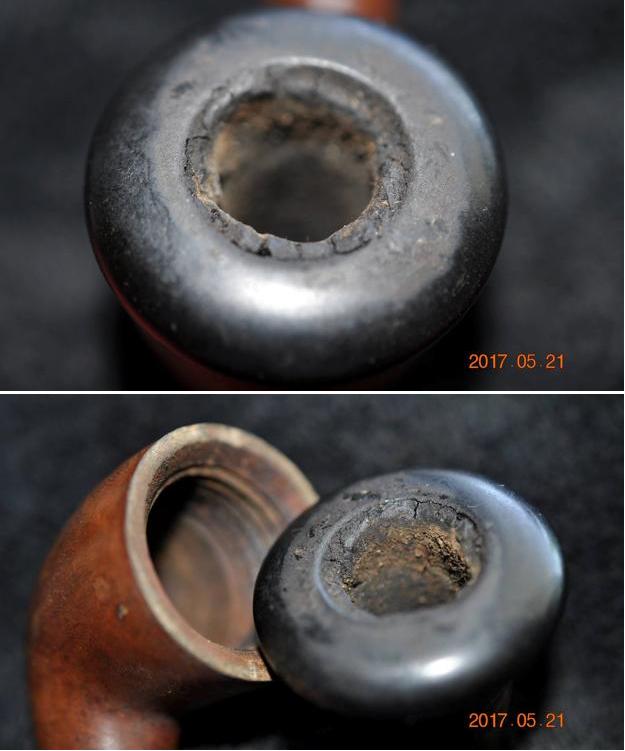
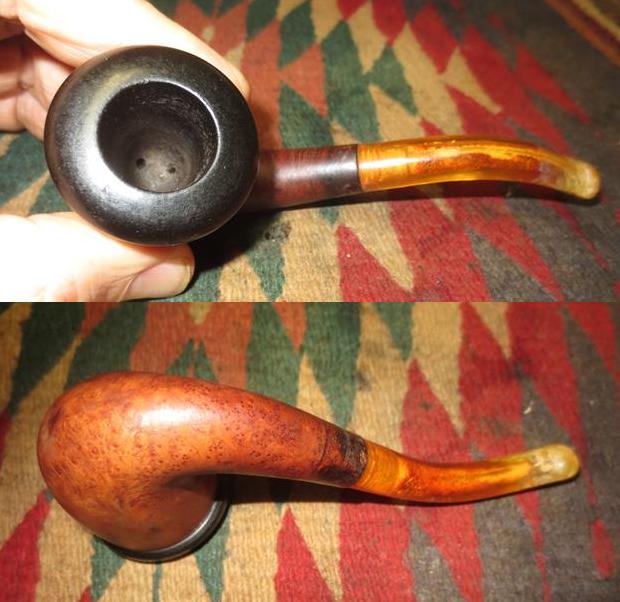
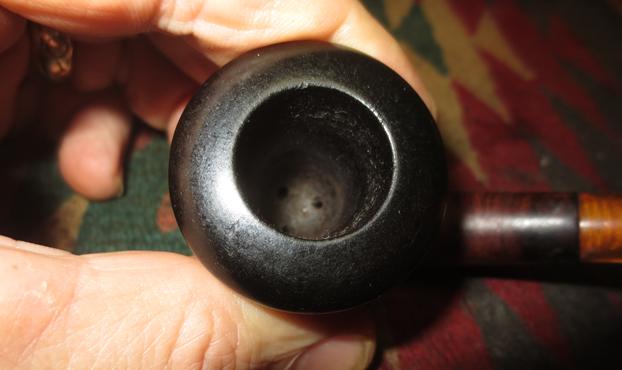
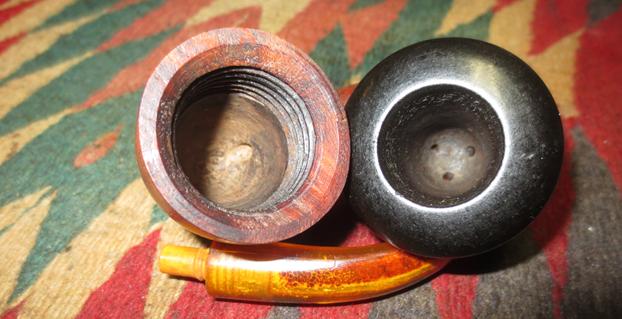
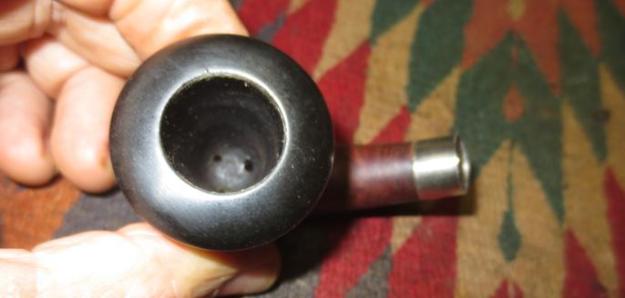
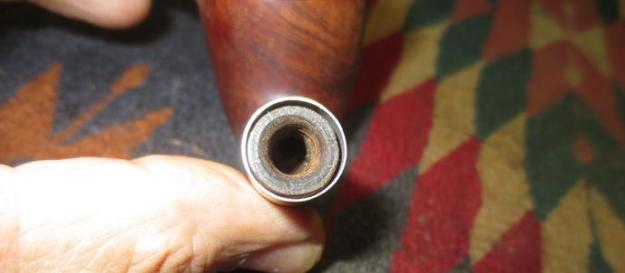
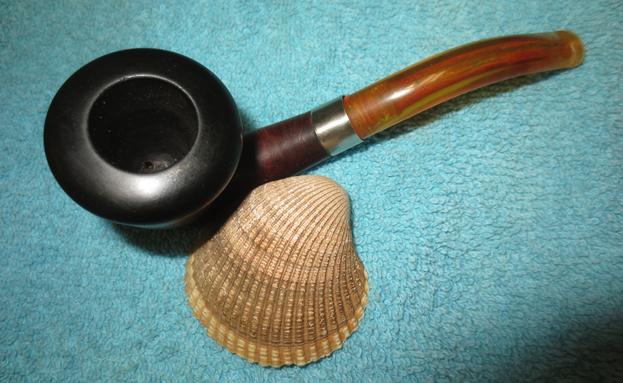
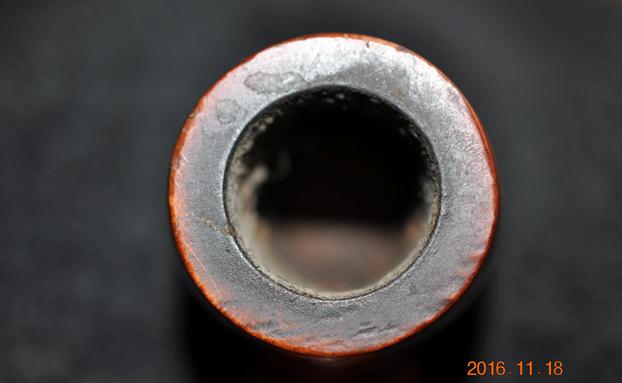
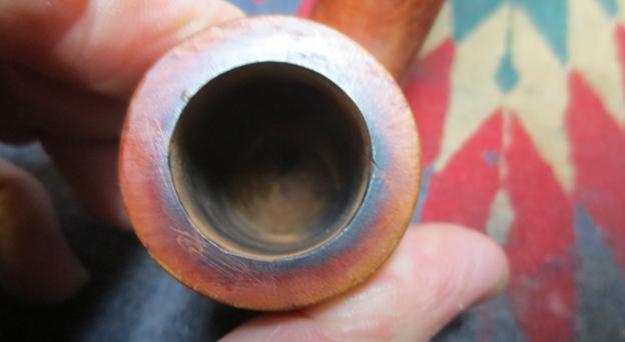
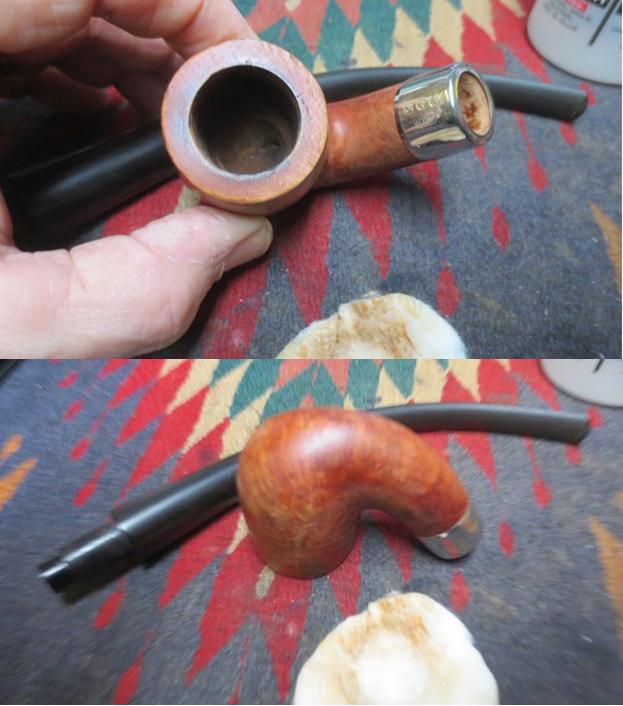
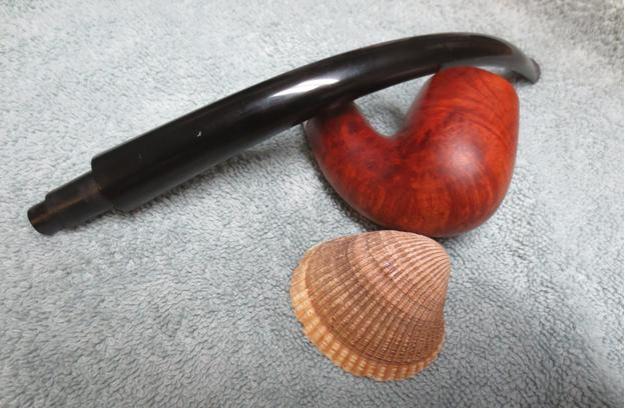
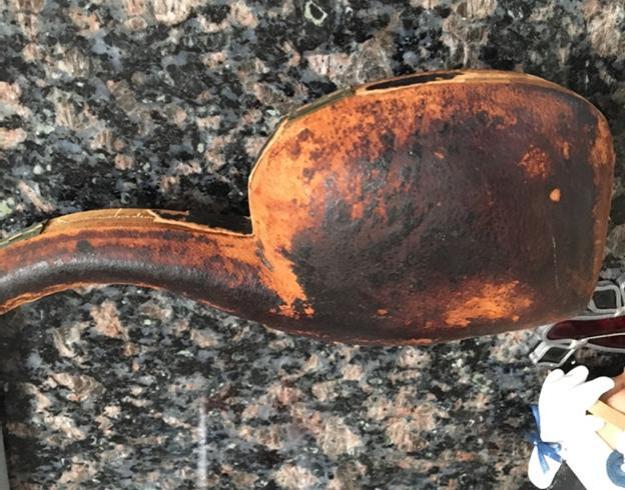
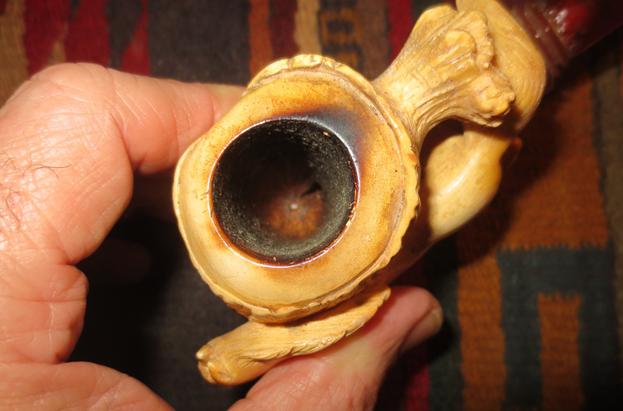
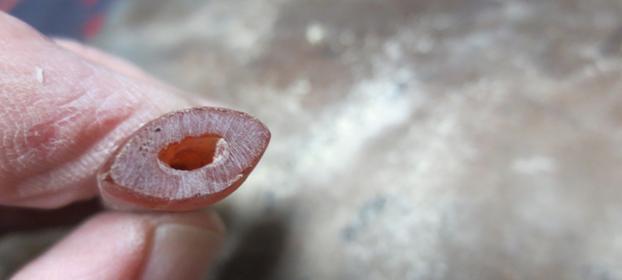
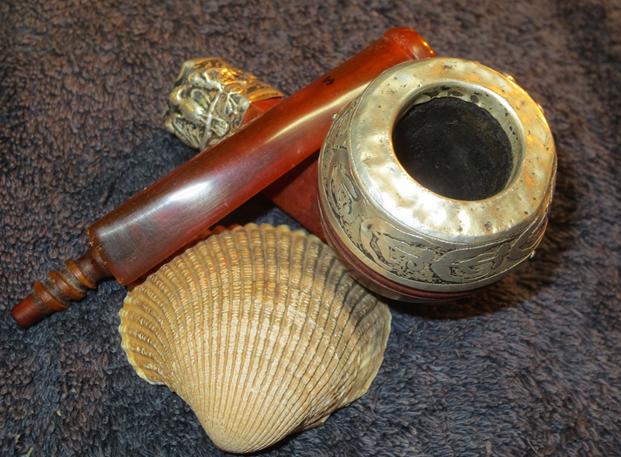
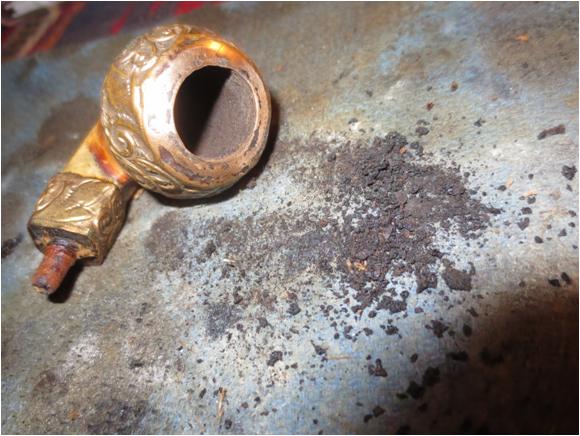
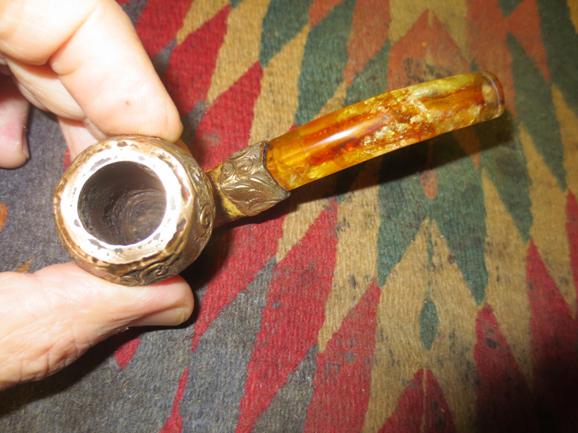
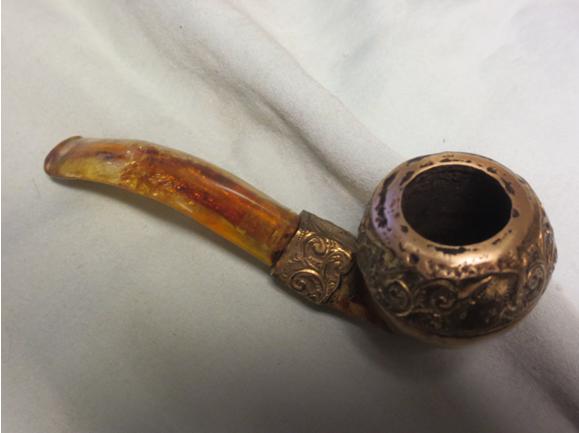
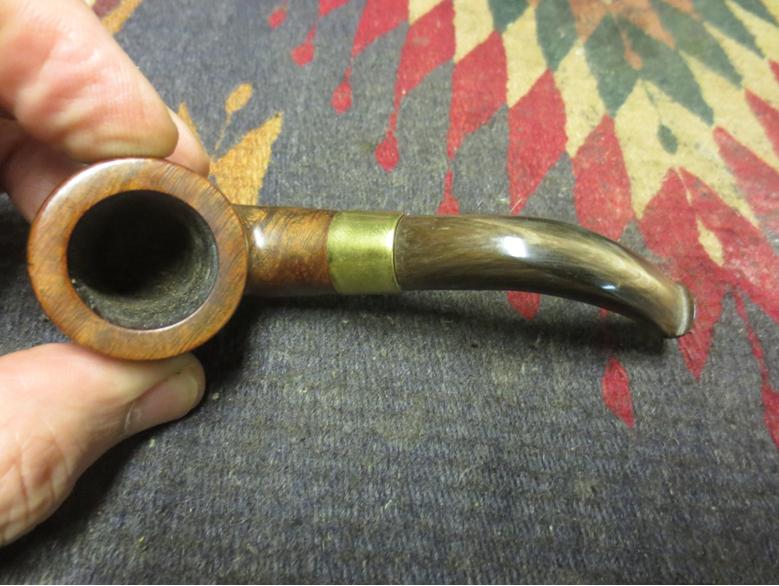
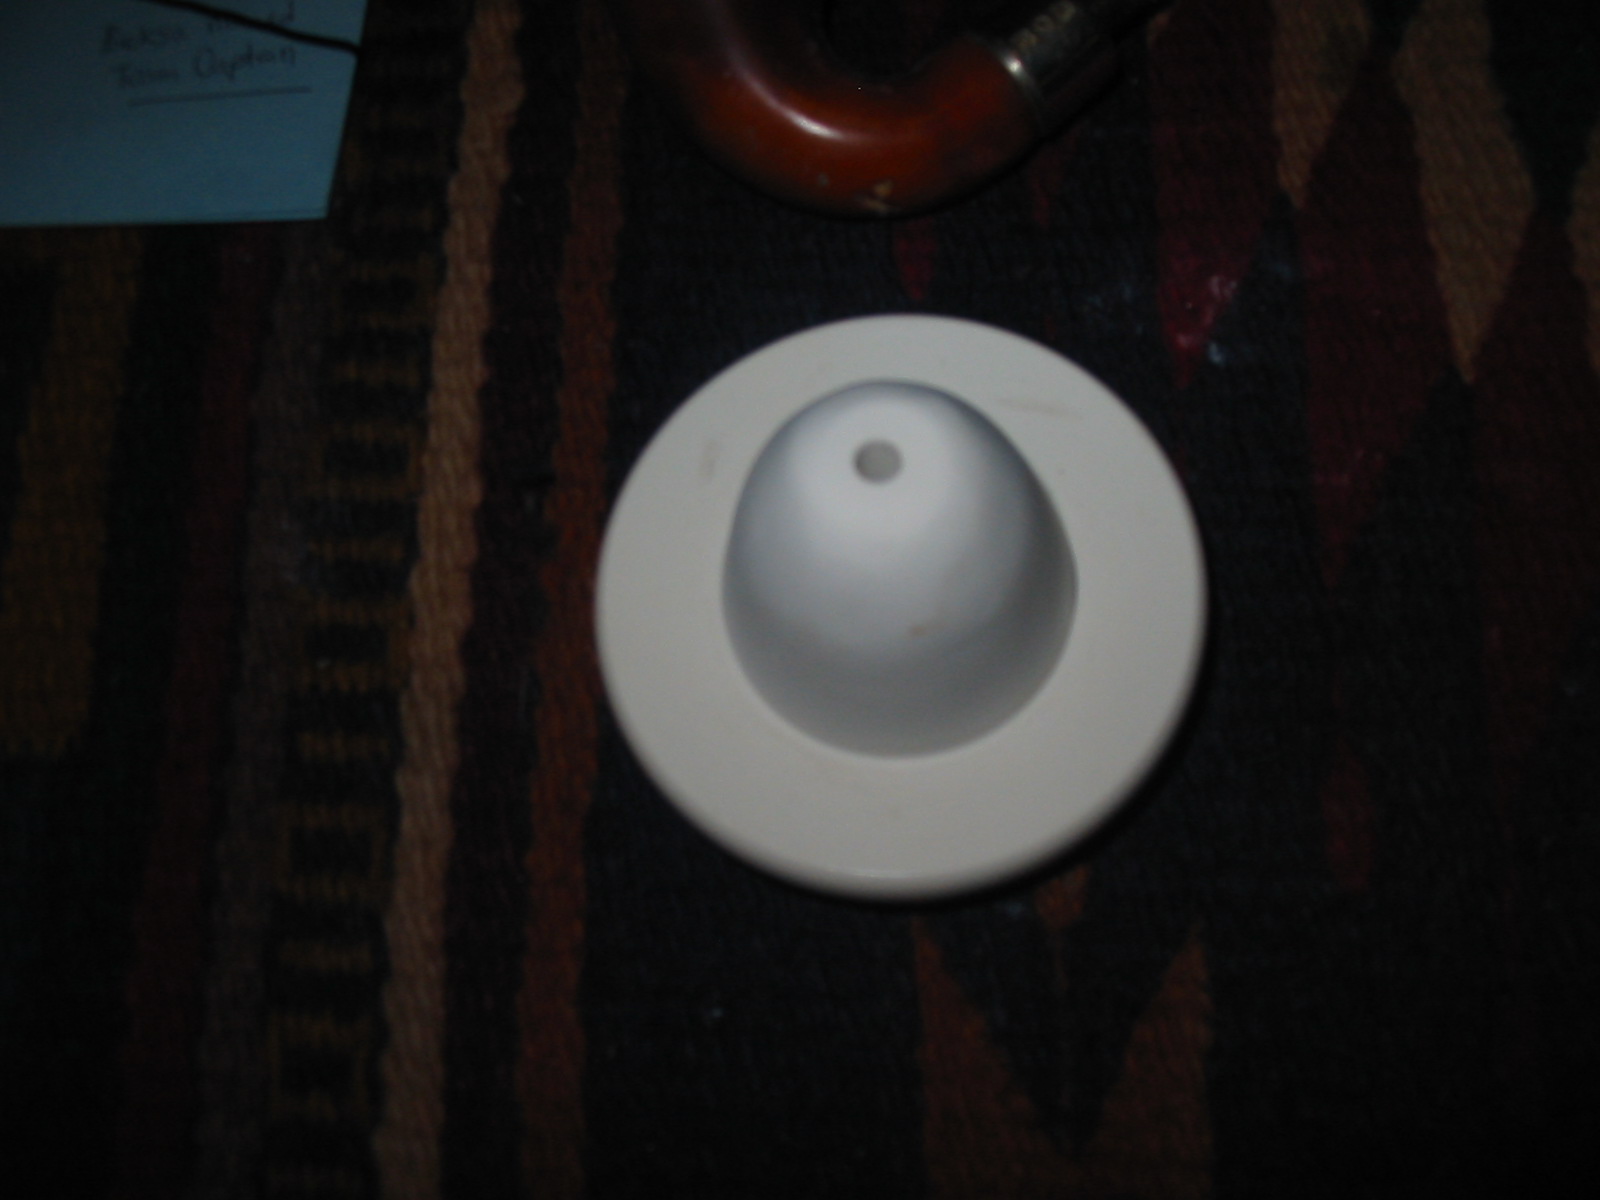
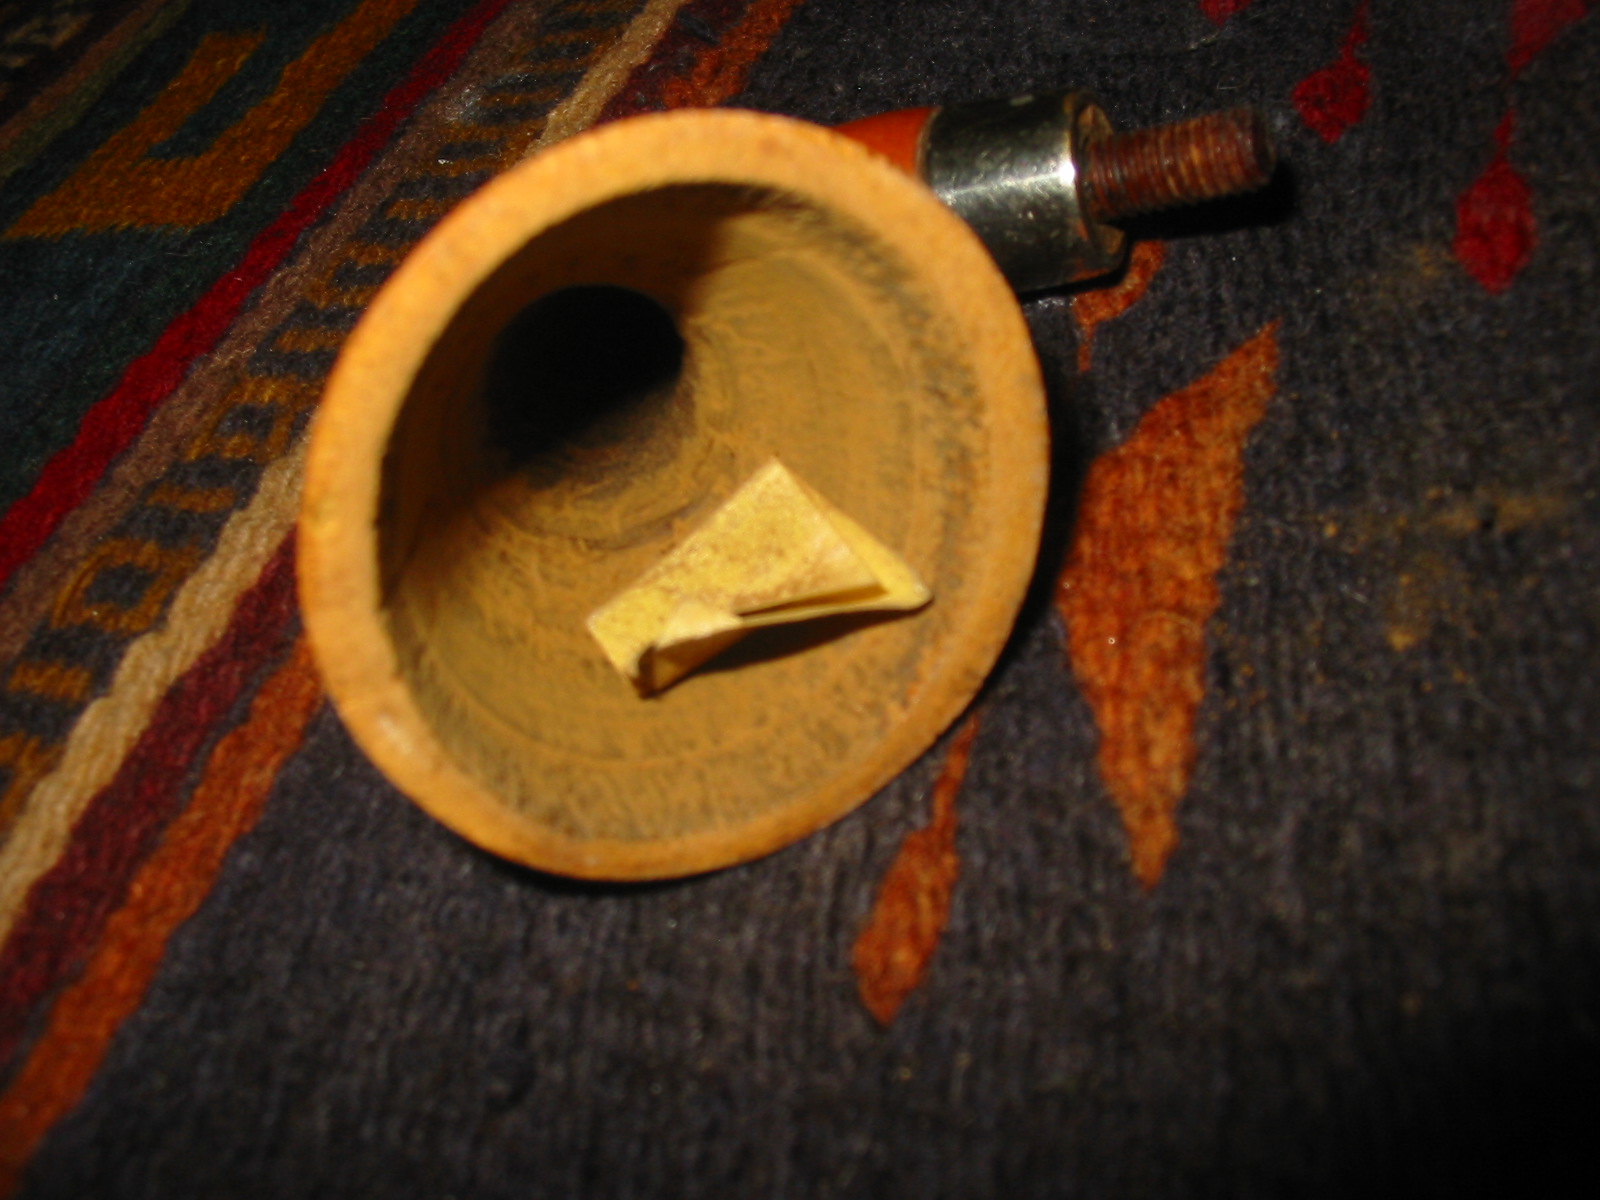
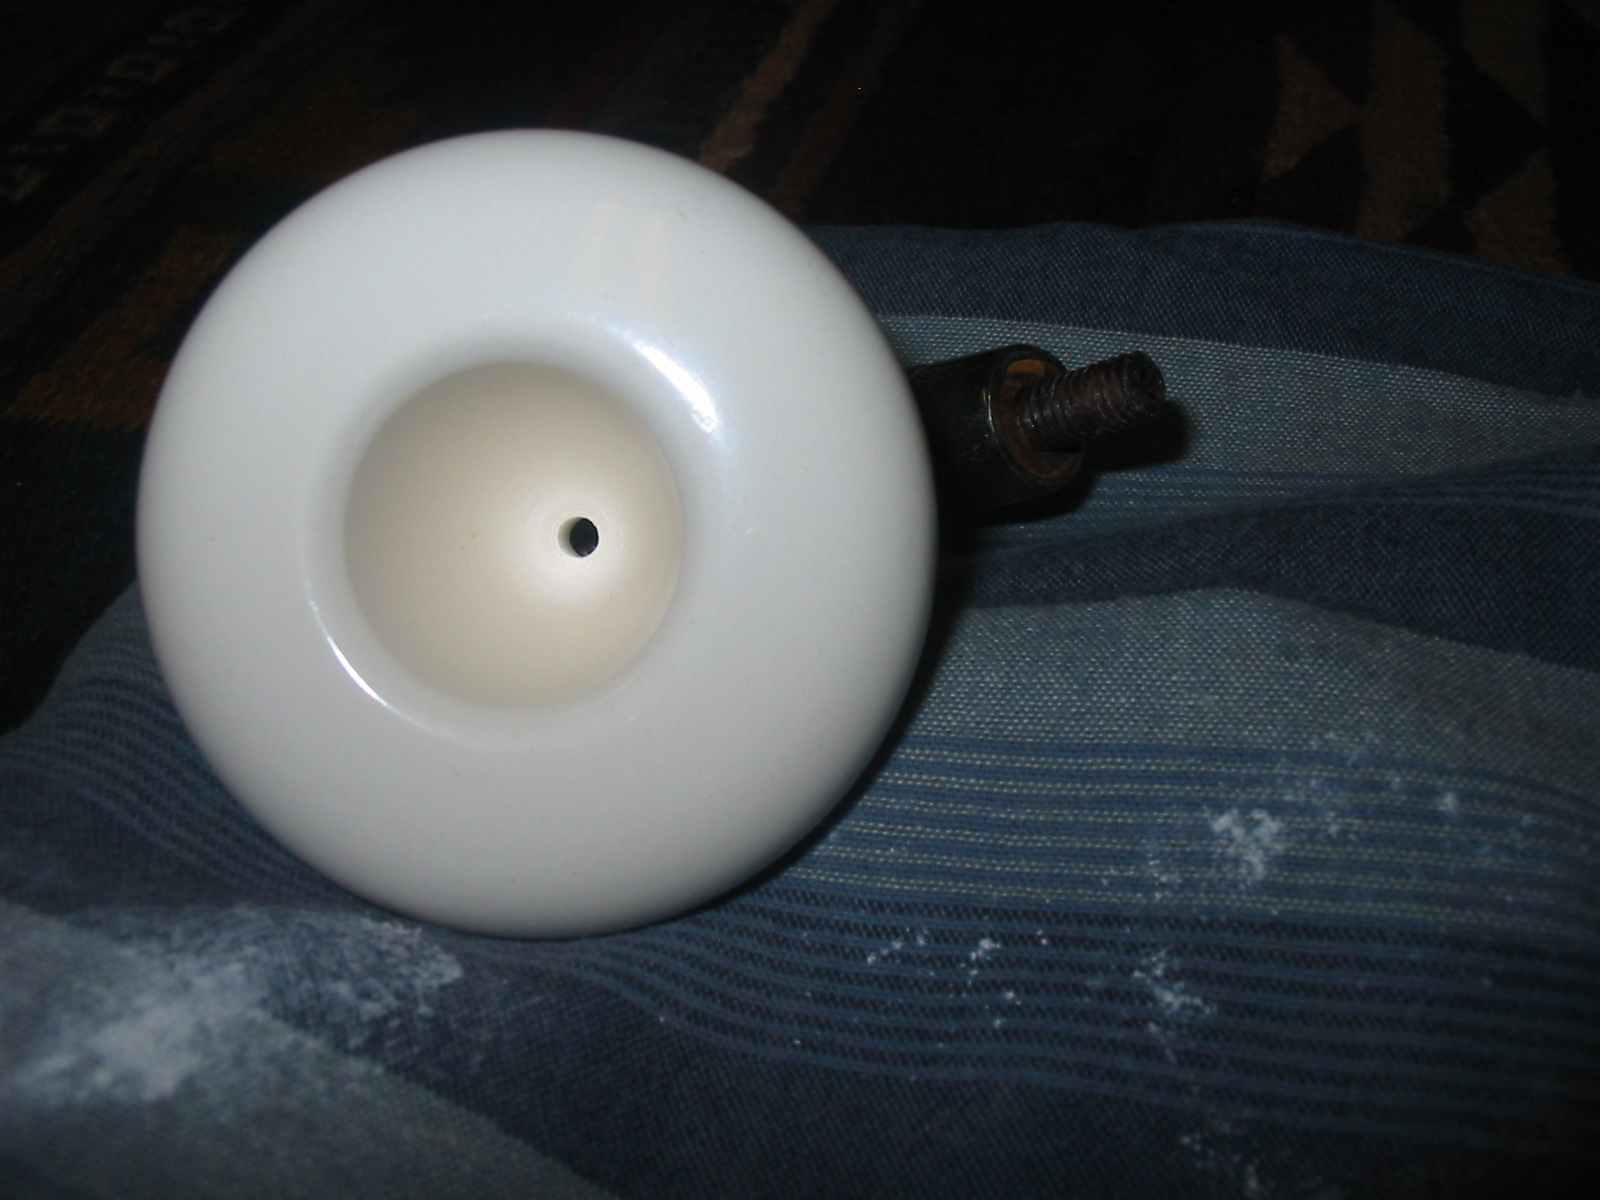
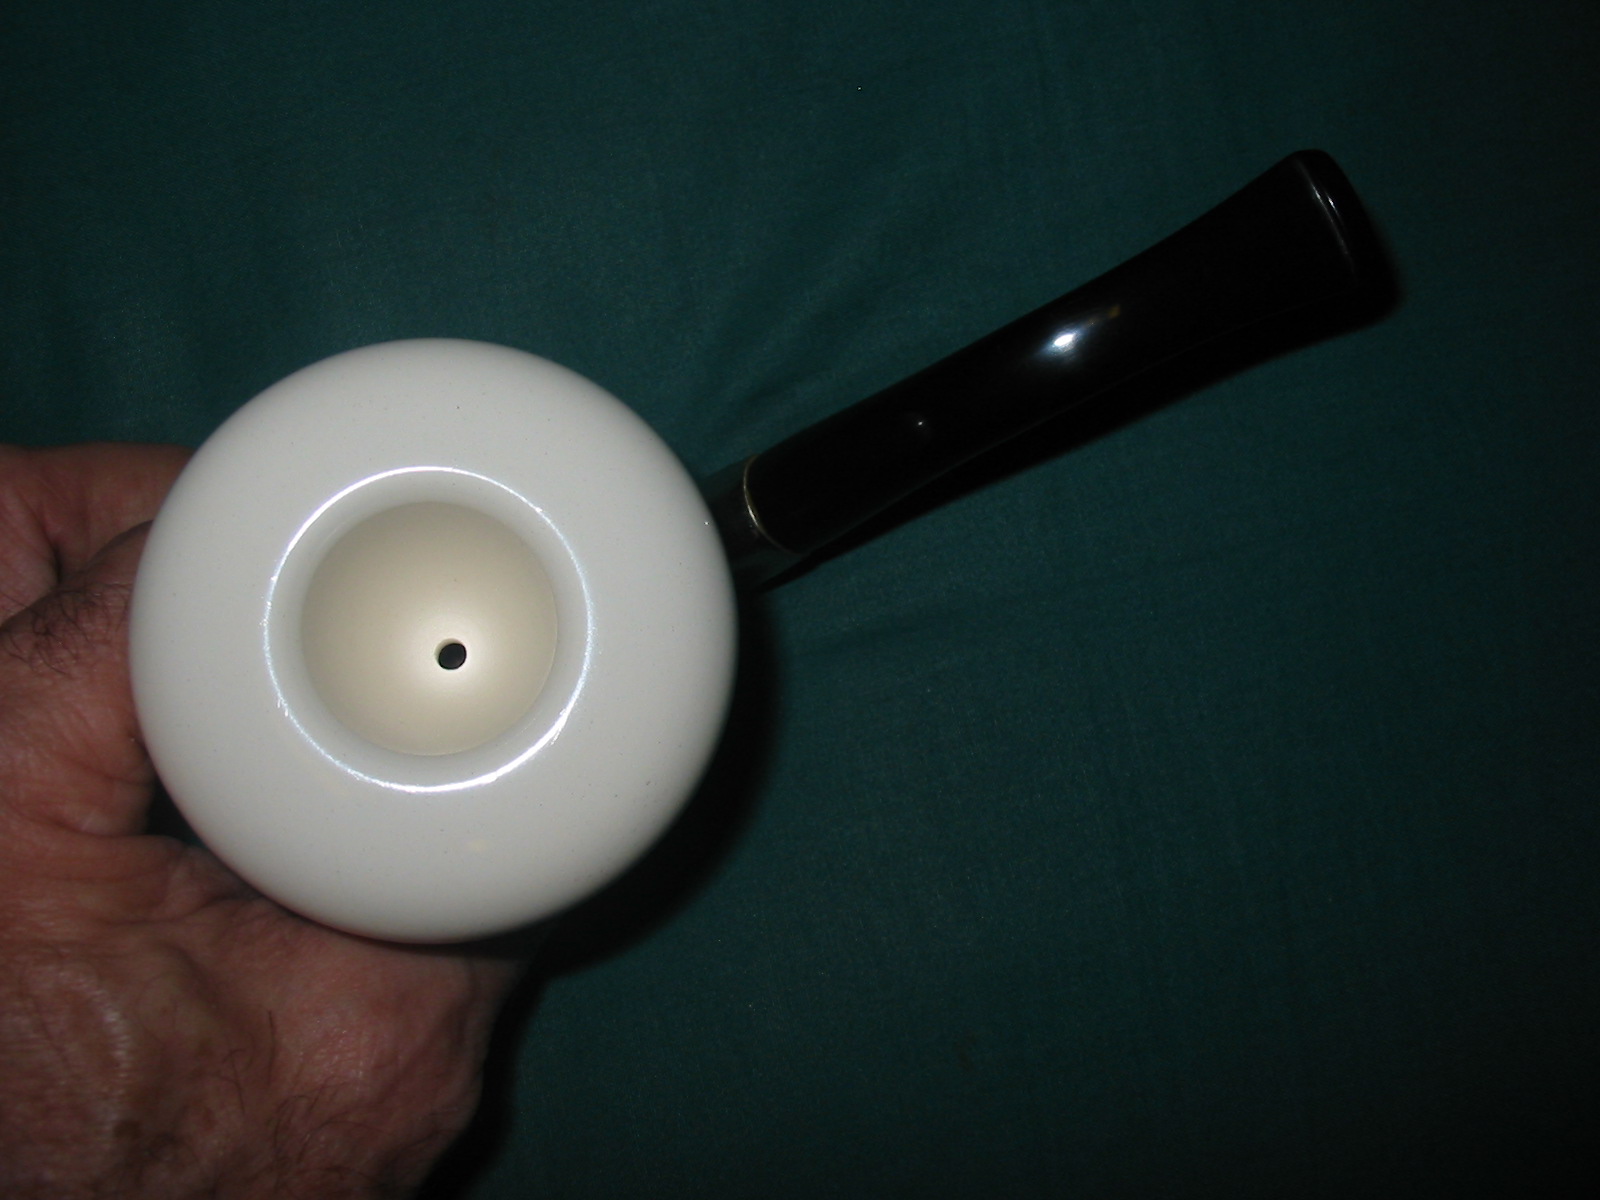
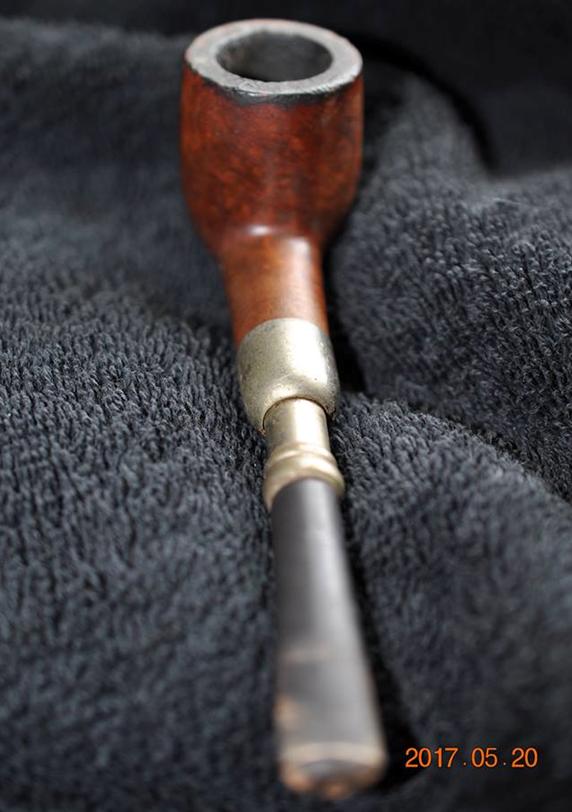
Jeff took the next two close up photos of the rim top and bowl. You can see the thick cake in the bowl and the chipped overflow on the rim top. The damage to the inside edge and the chips on the outer edge are visible under the cake. 
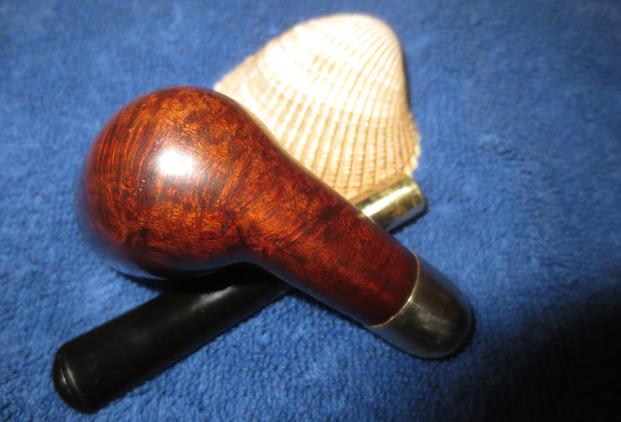
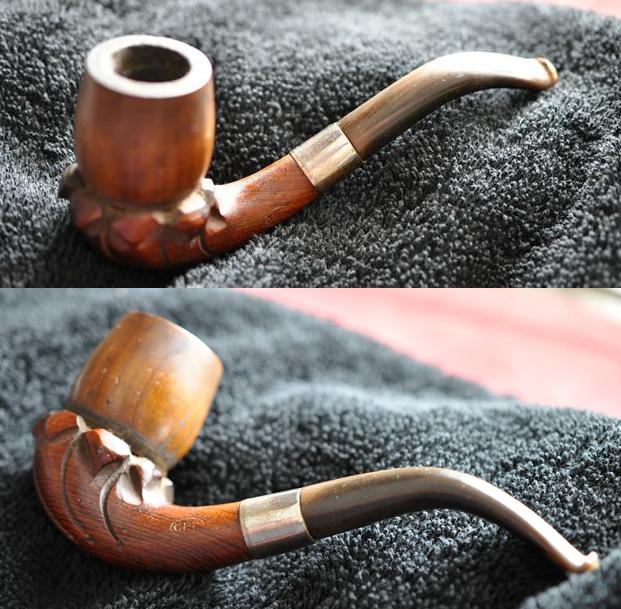
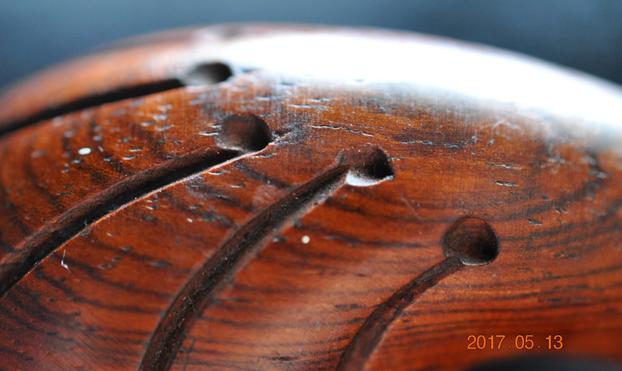
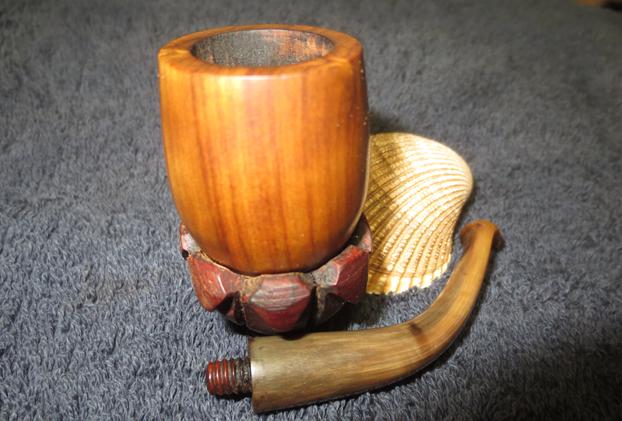
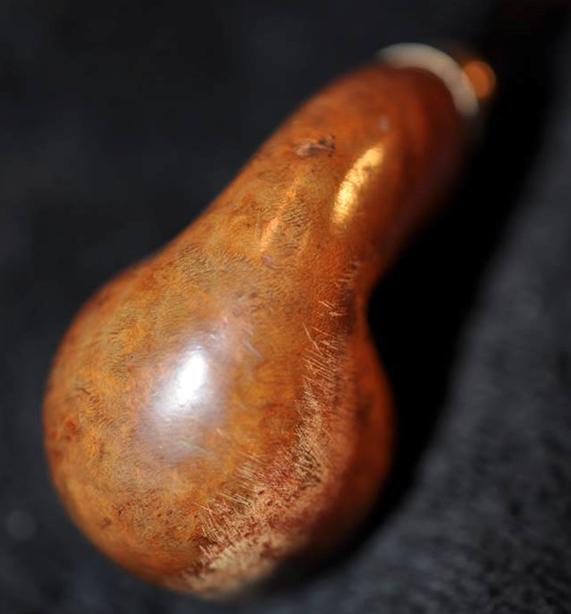
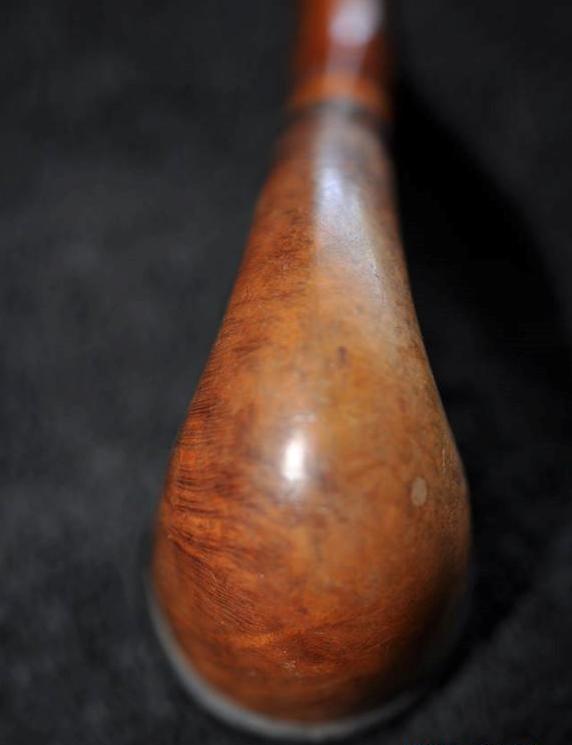
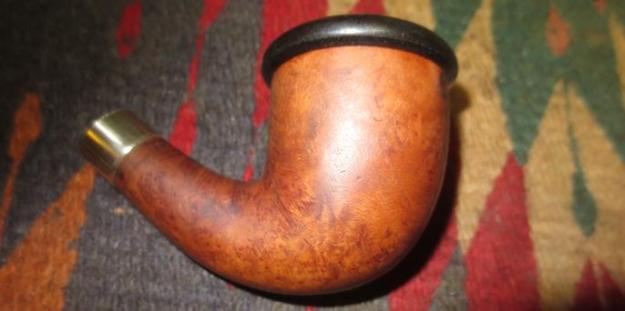
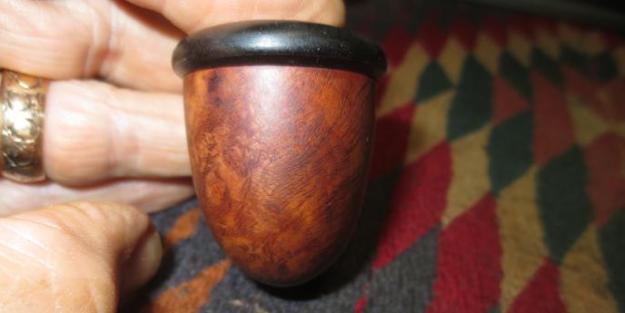
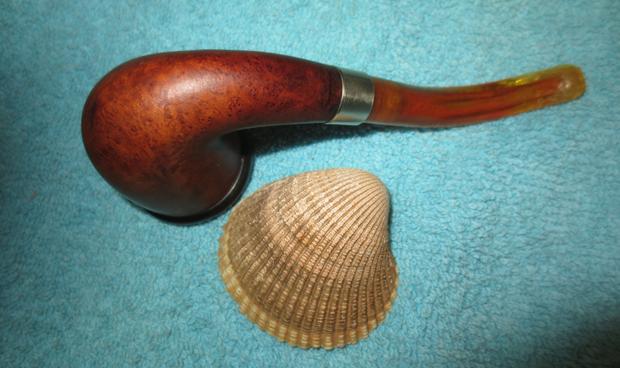
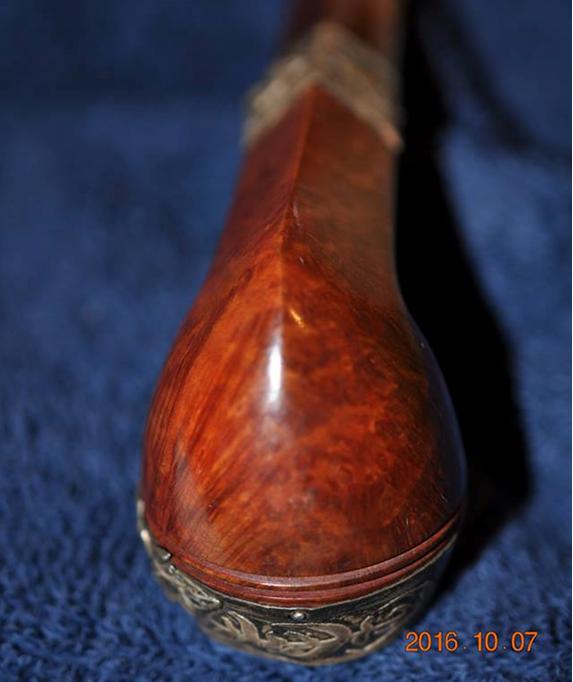
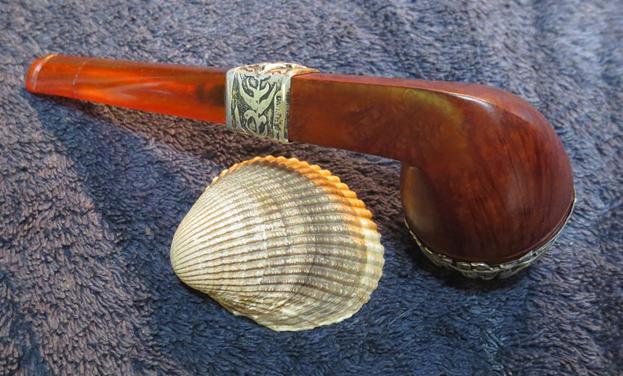
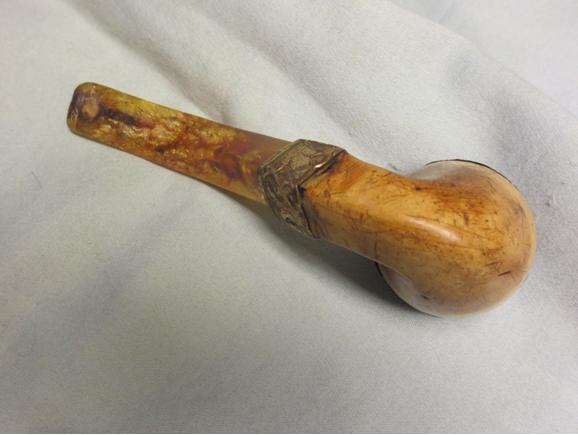
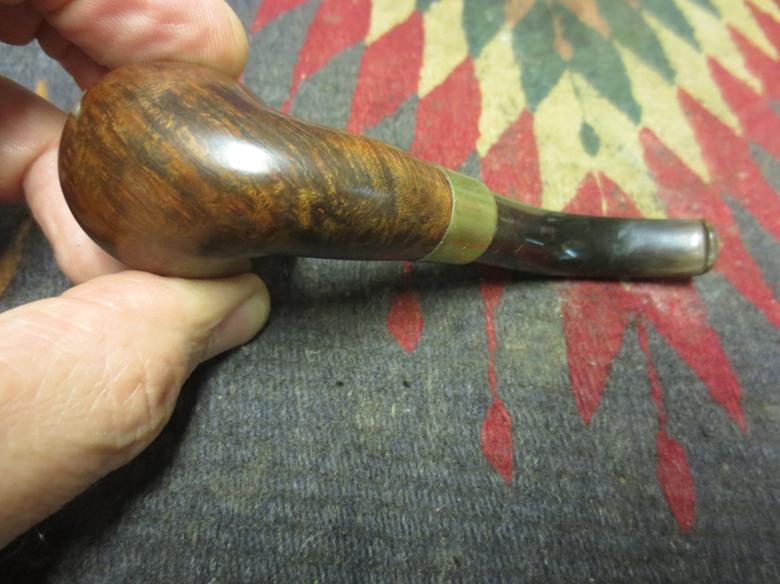
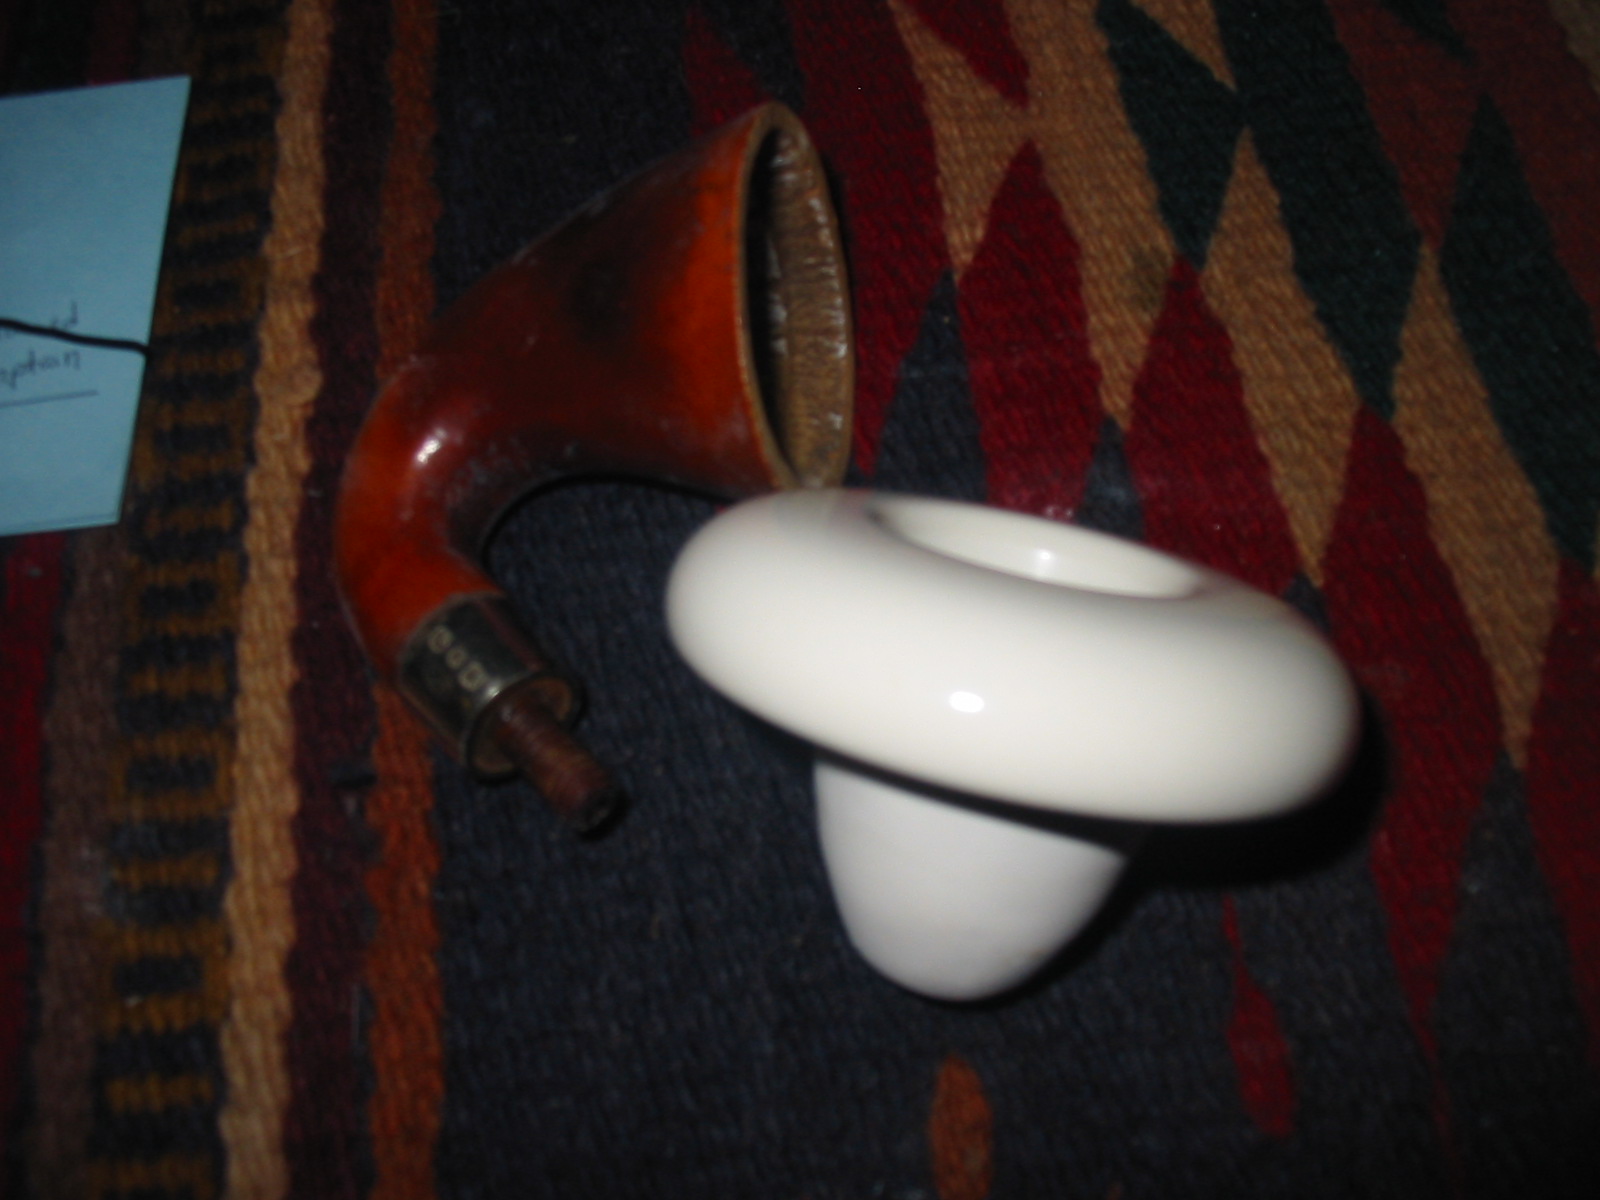
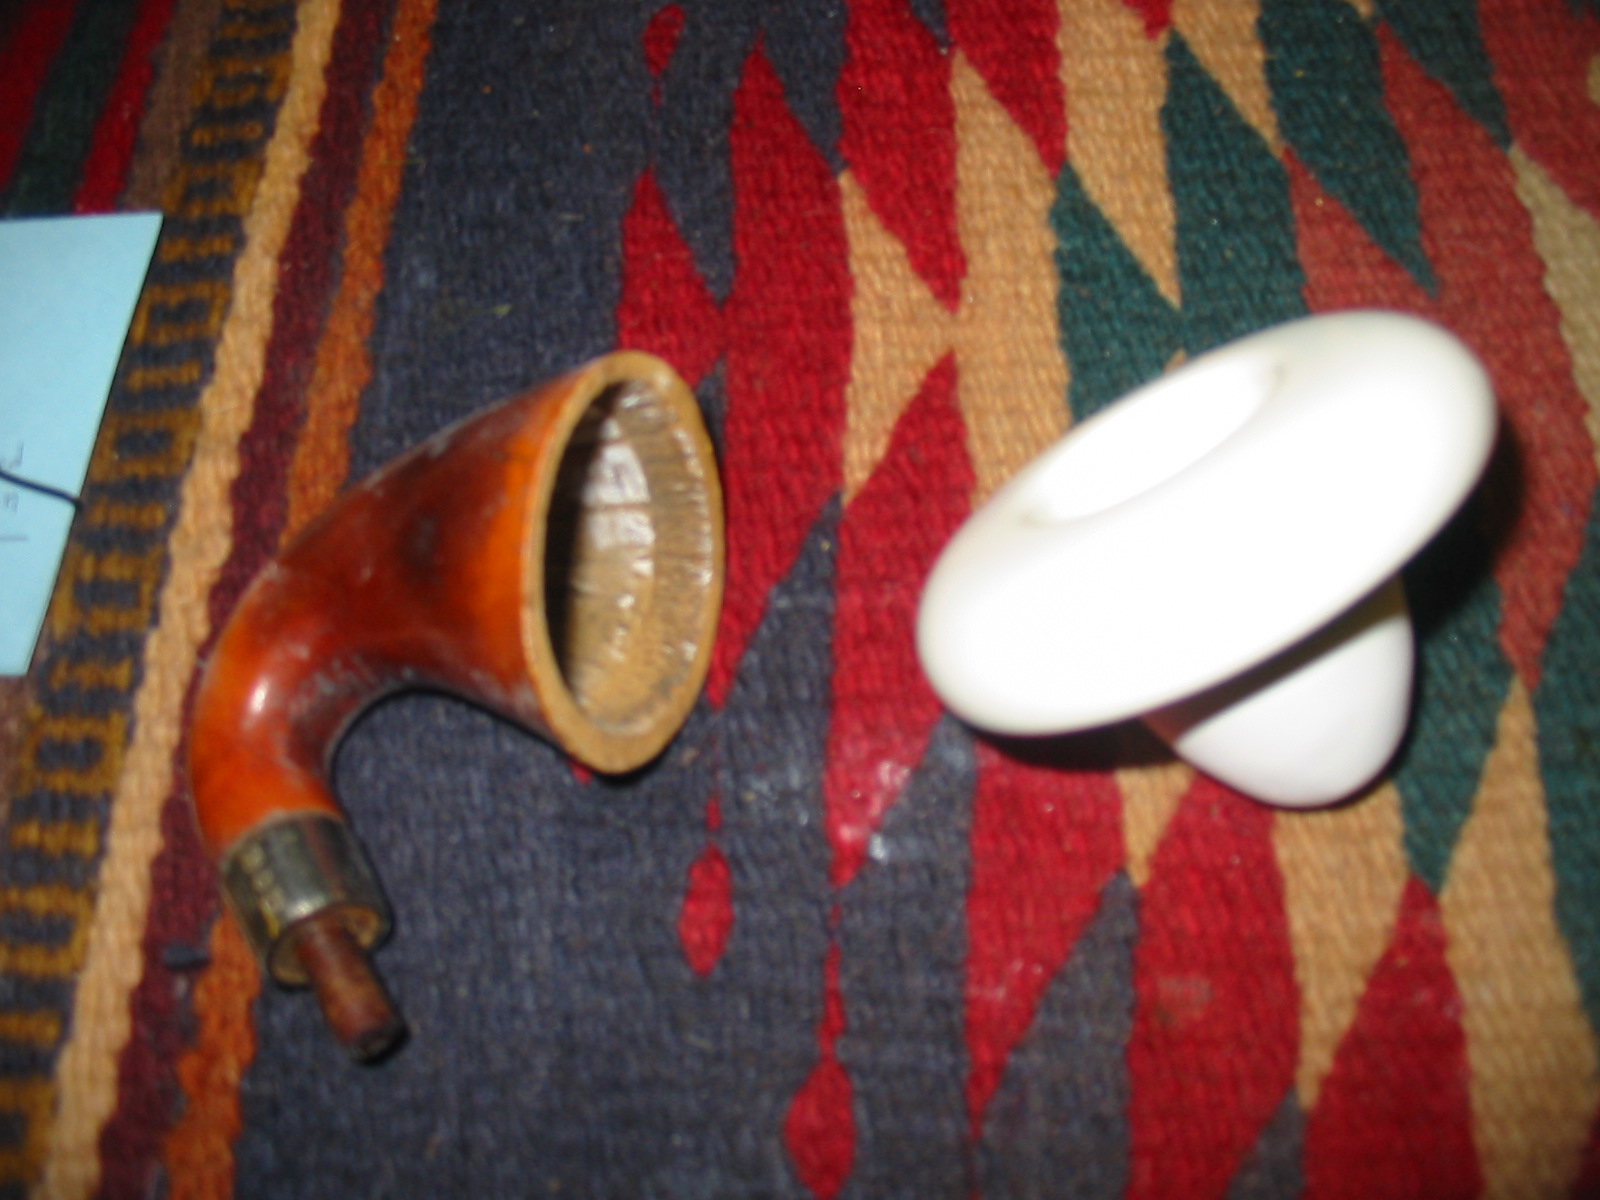
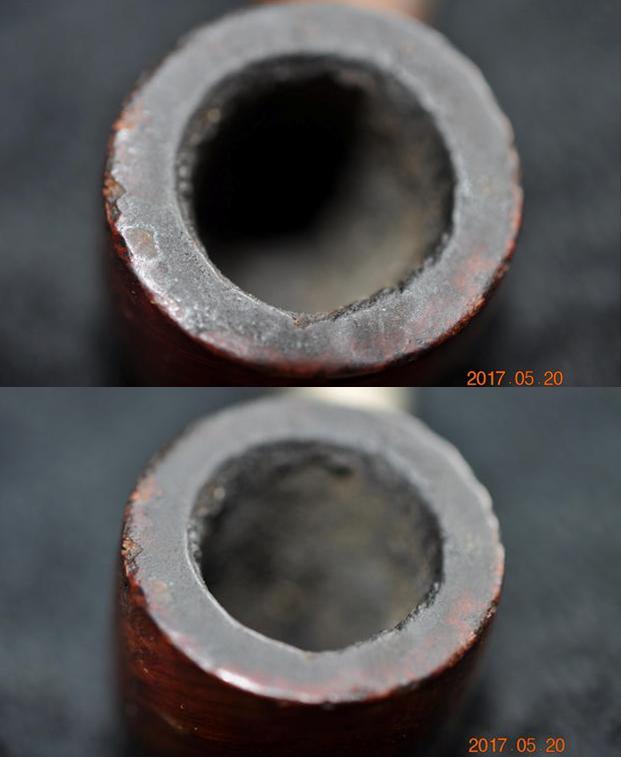
The next three photos show the grain under the dirty and damaged finish on the bowl sides. There are also scratches and nicks in the bowl and around the rim. 
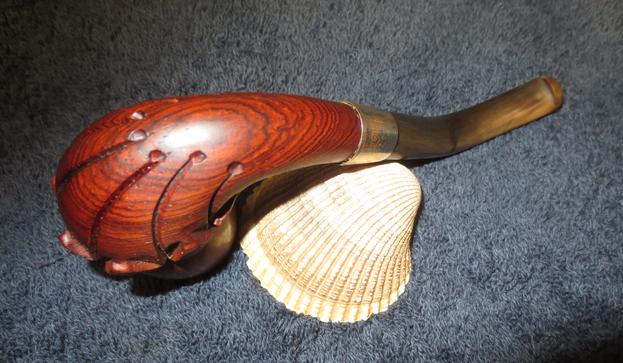
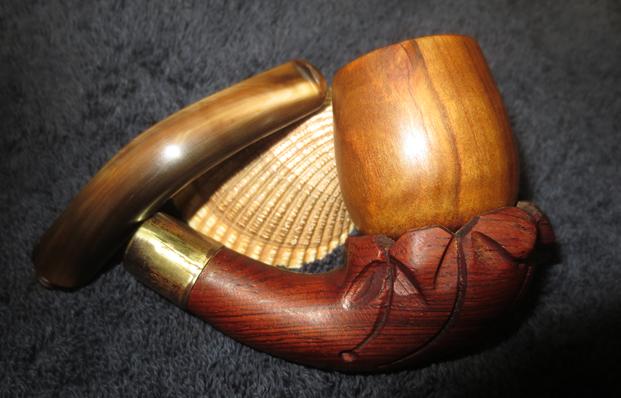
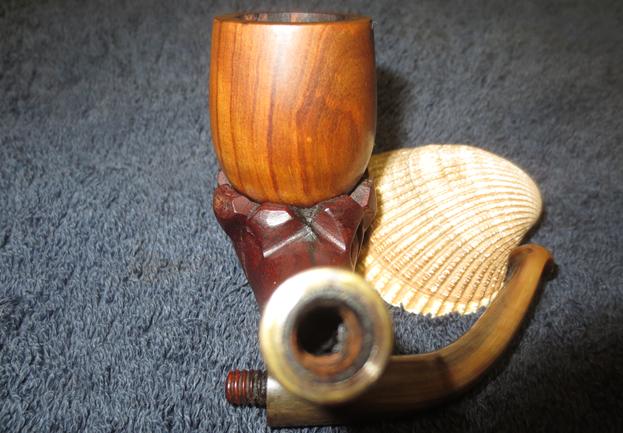
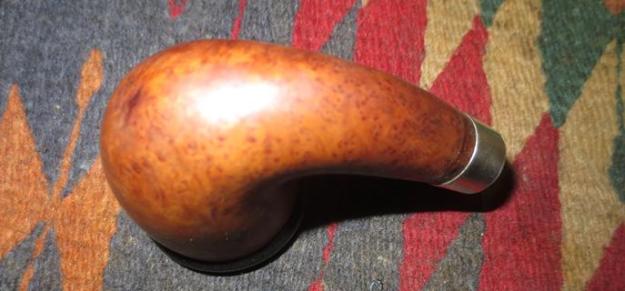
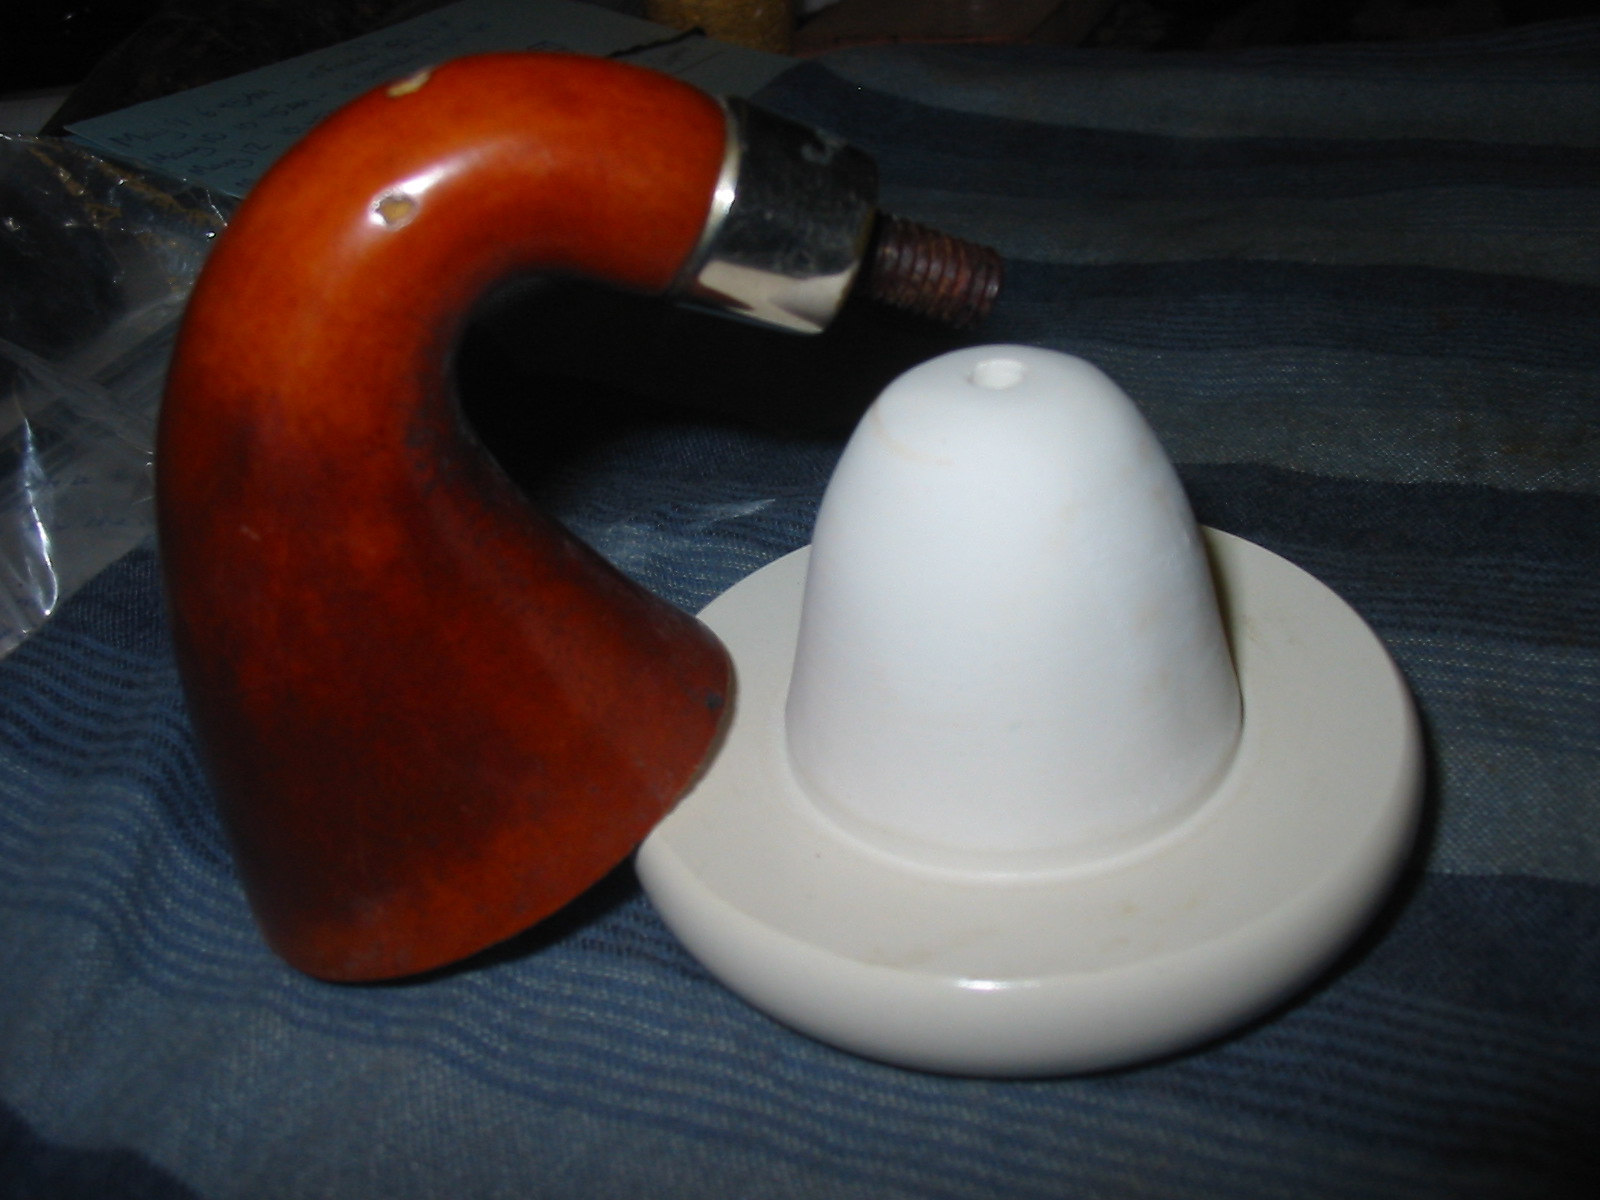
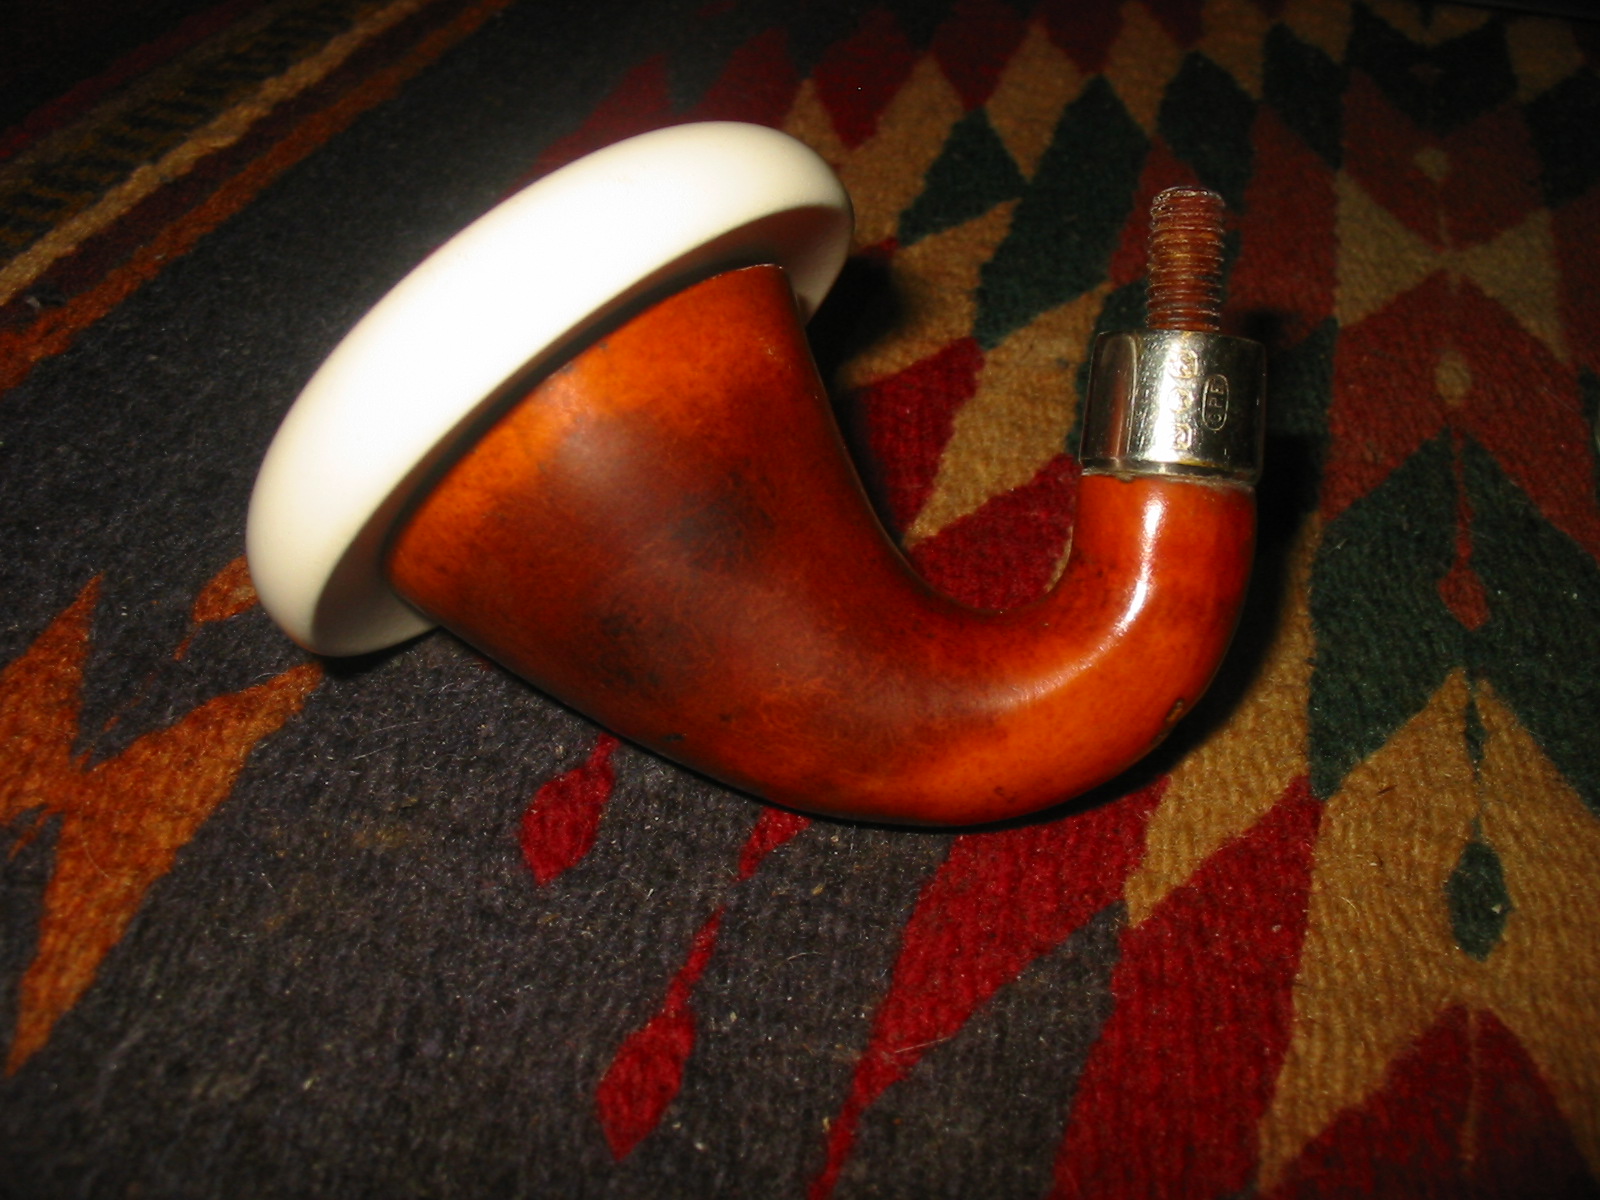
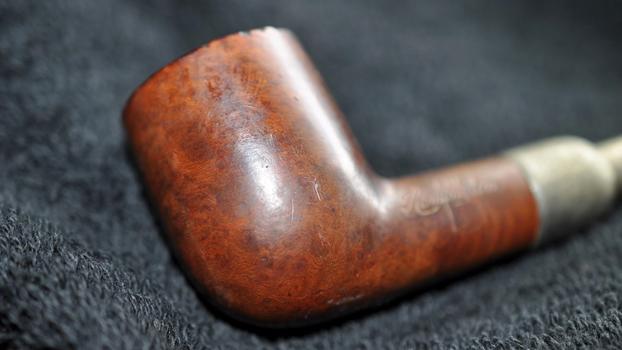
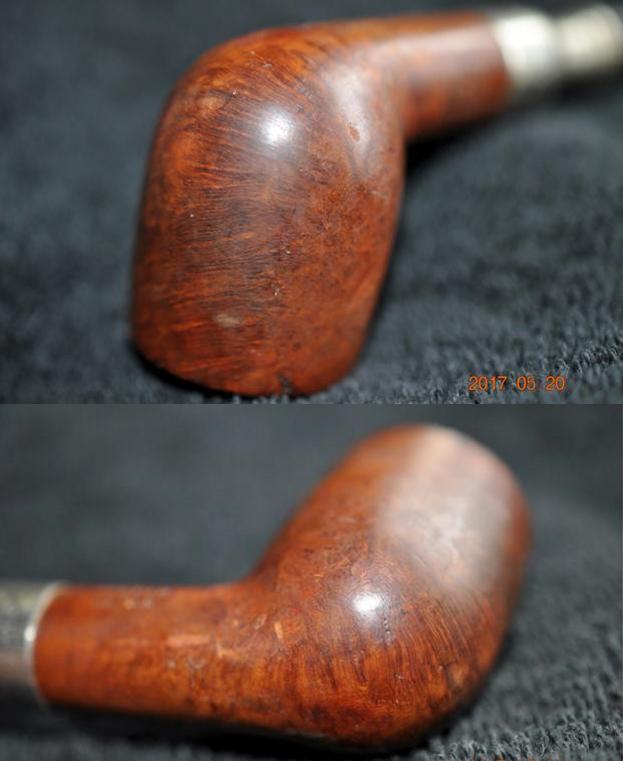
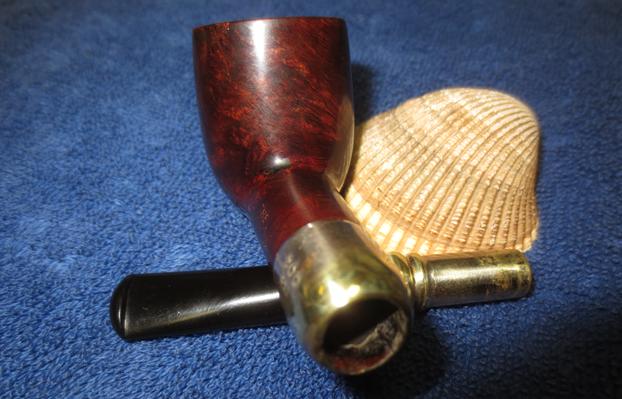
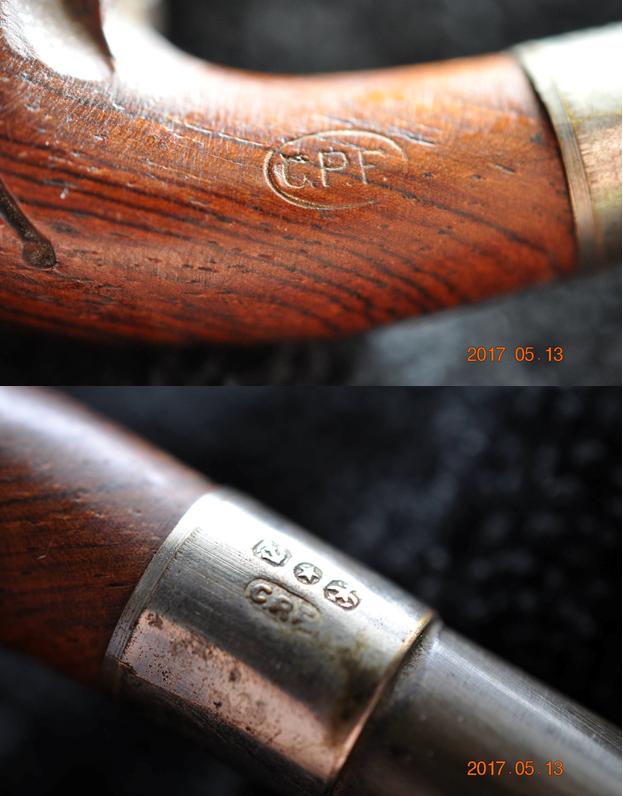
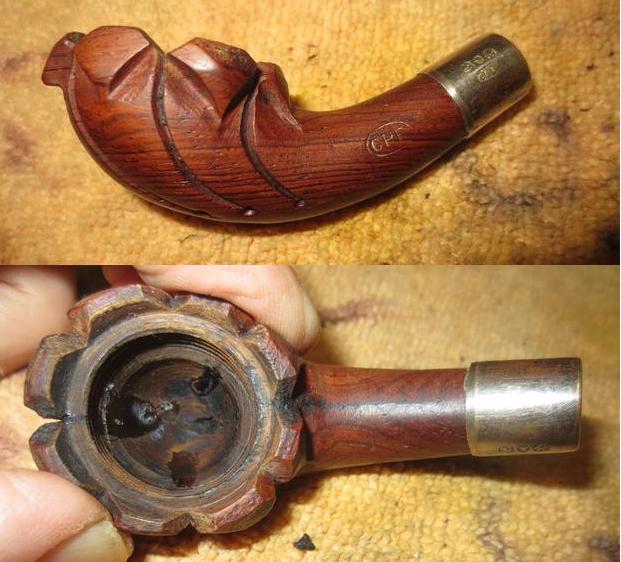
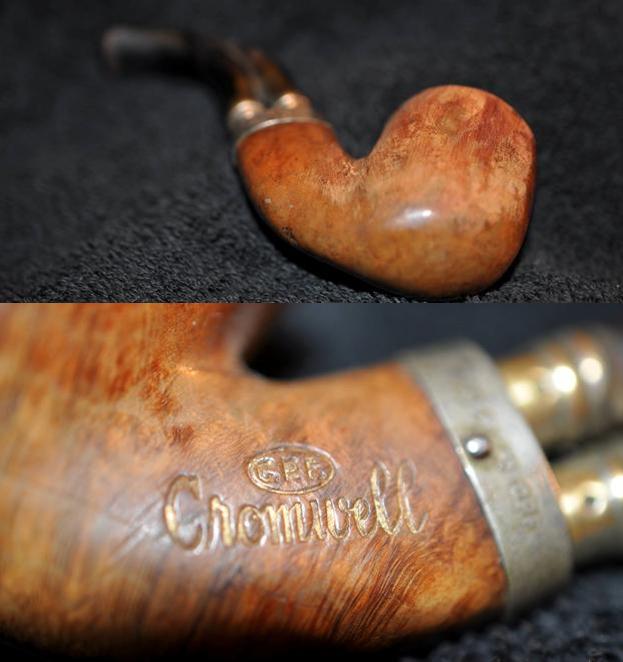
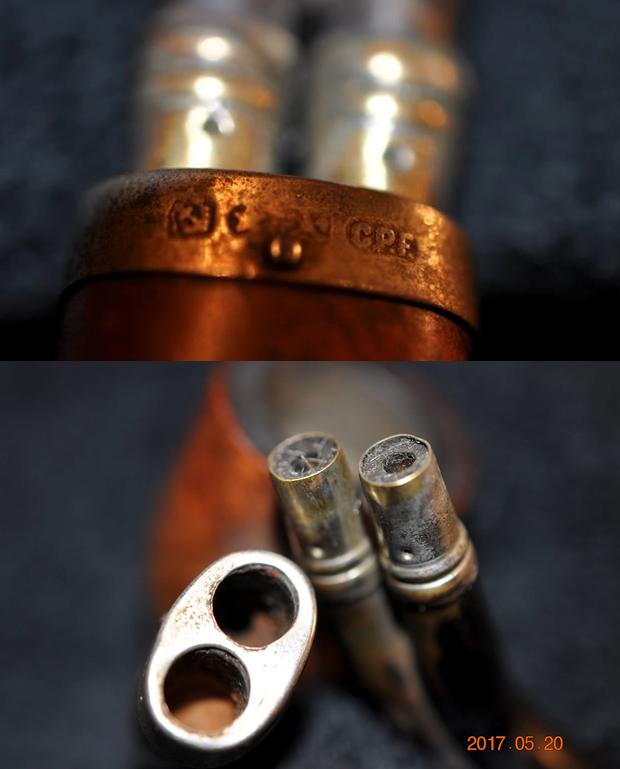
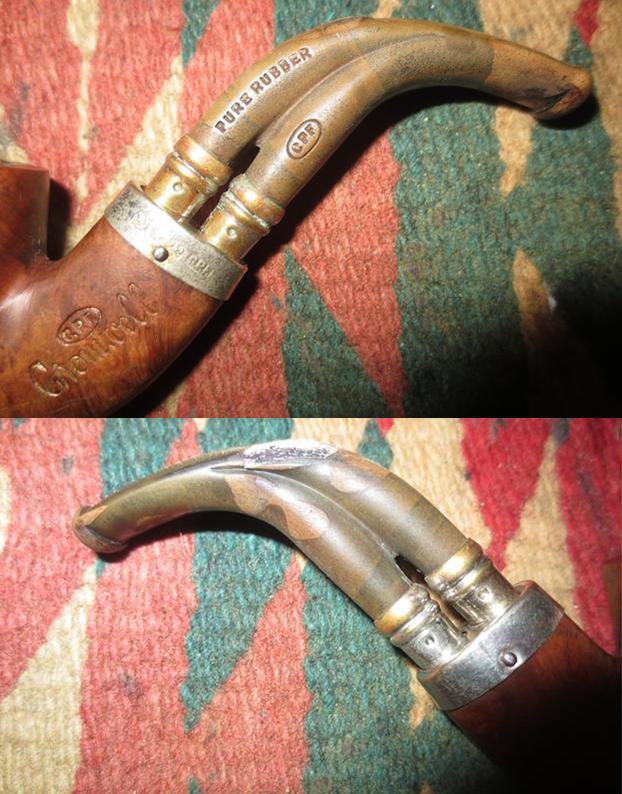
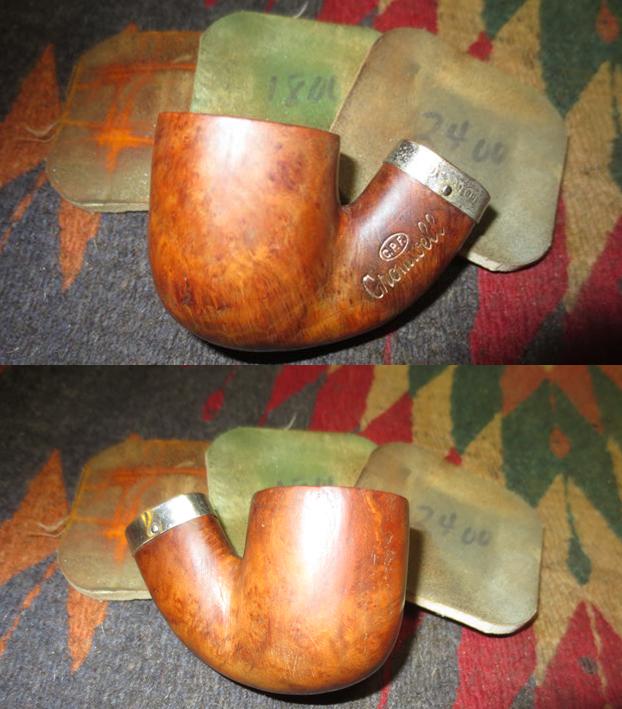
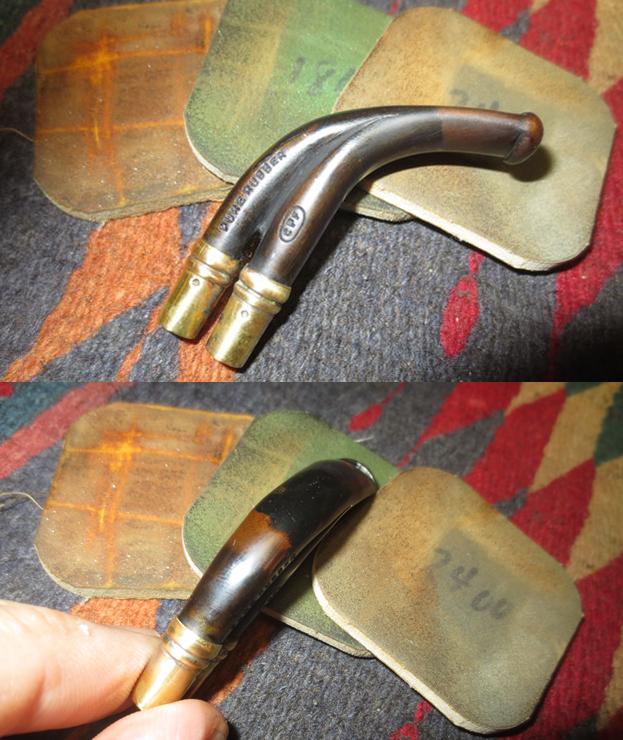
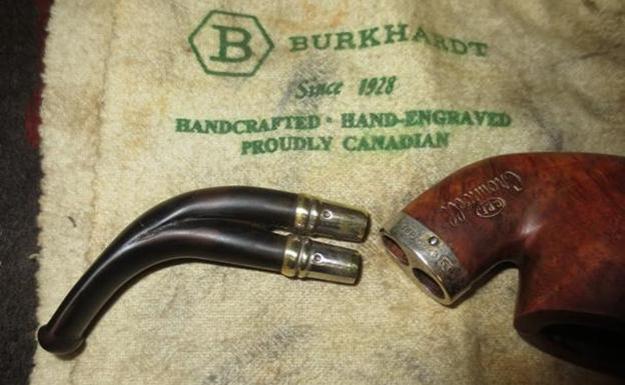
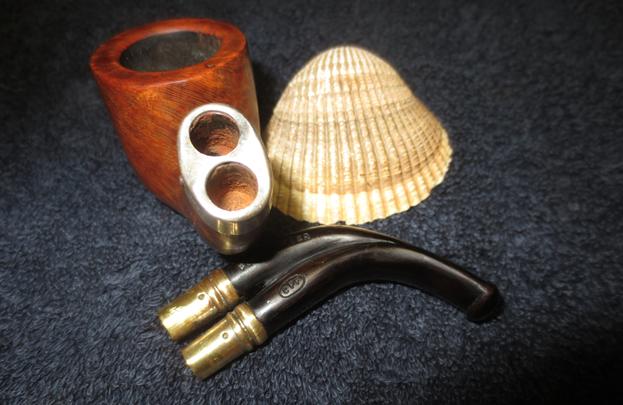
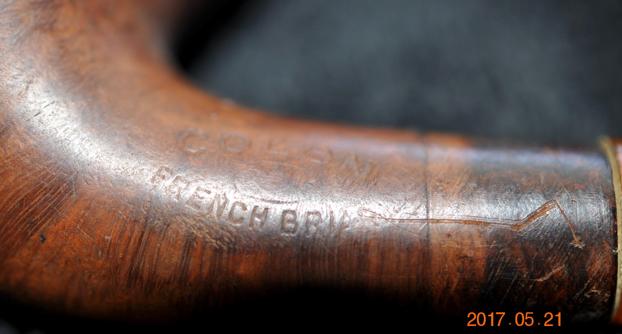
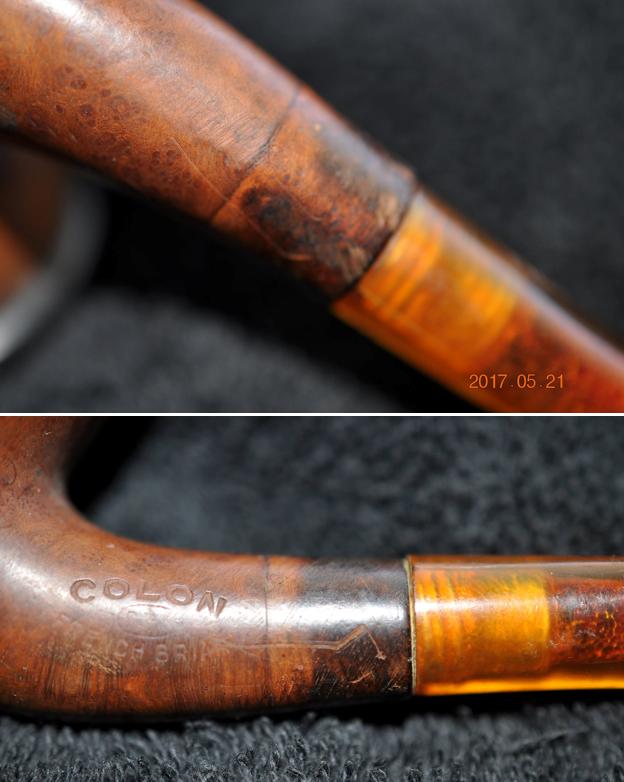
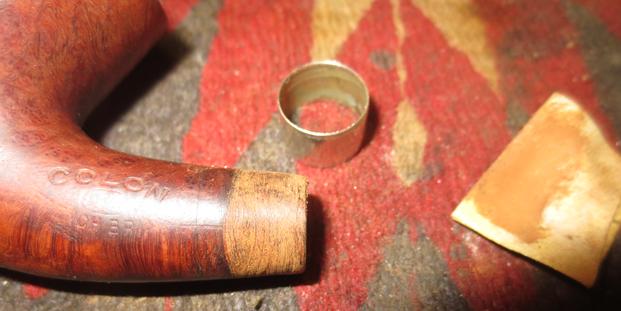
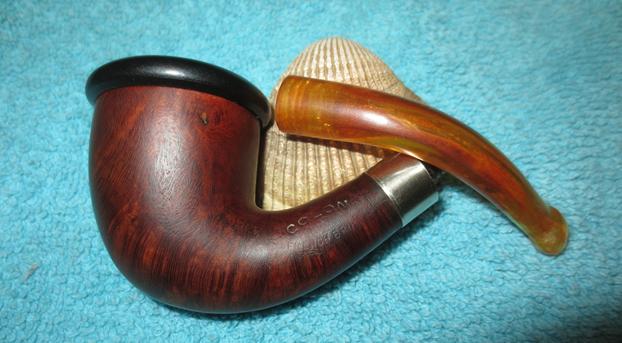
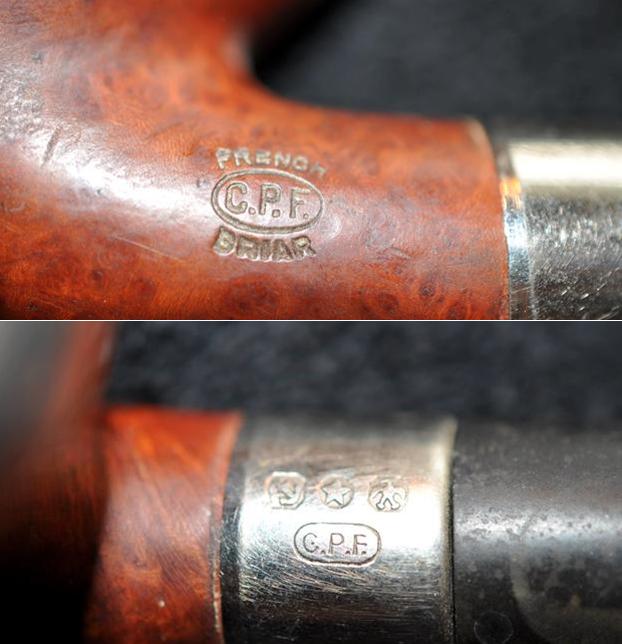
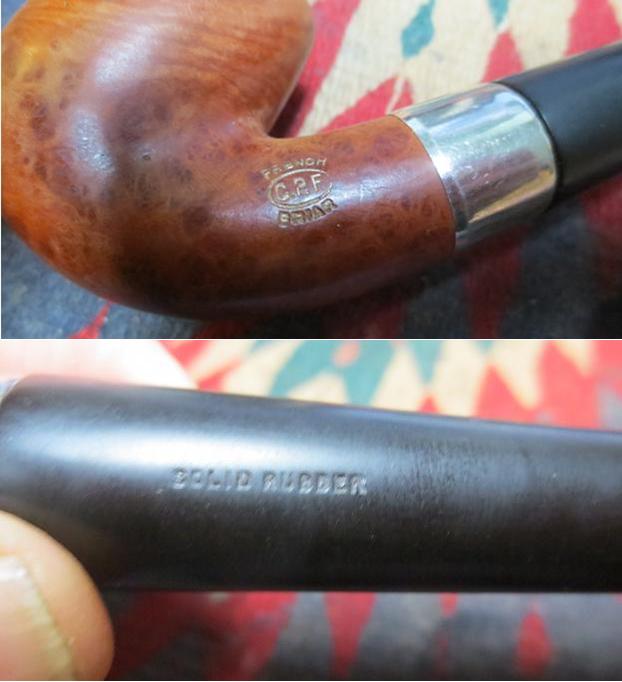
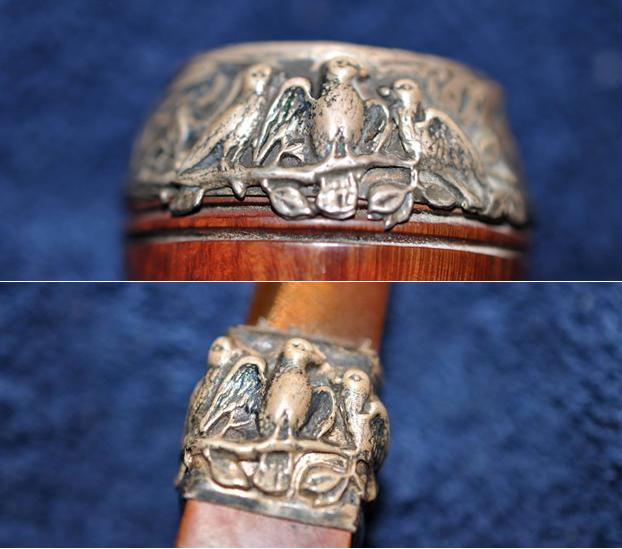
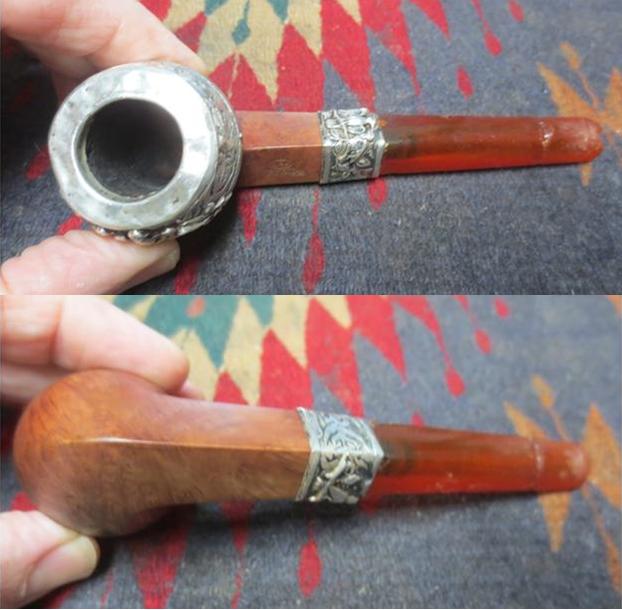
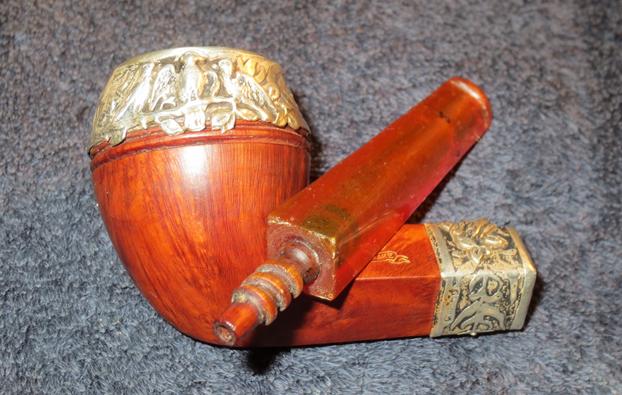
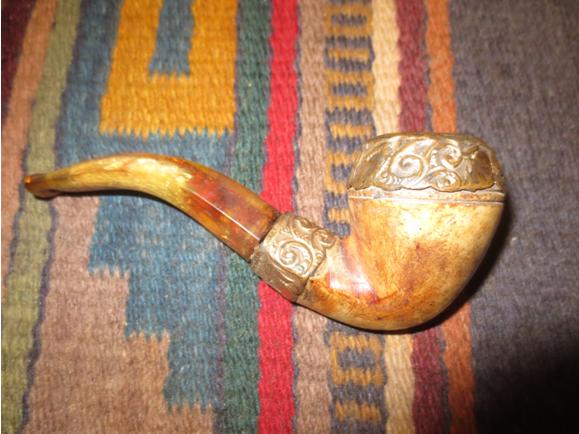
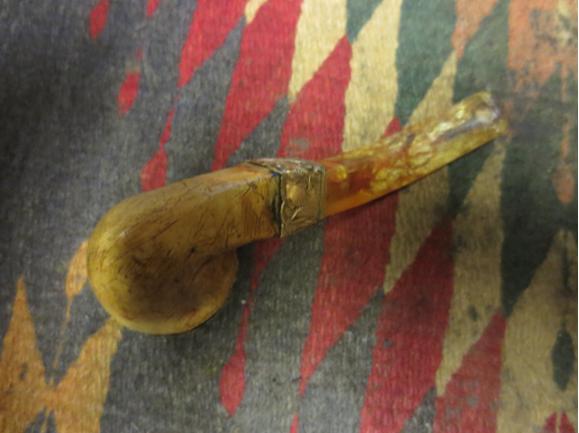
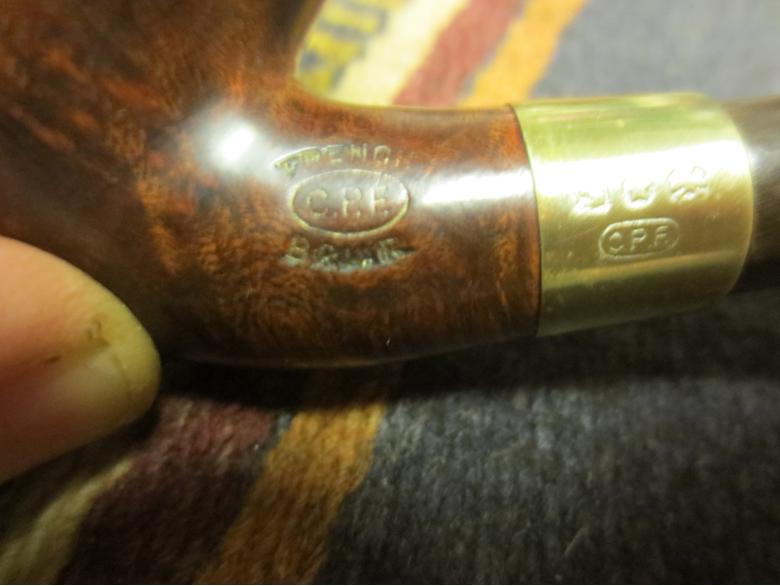
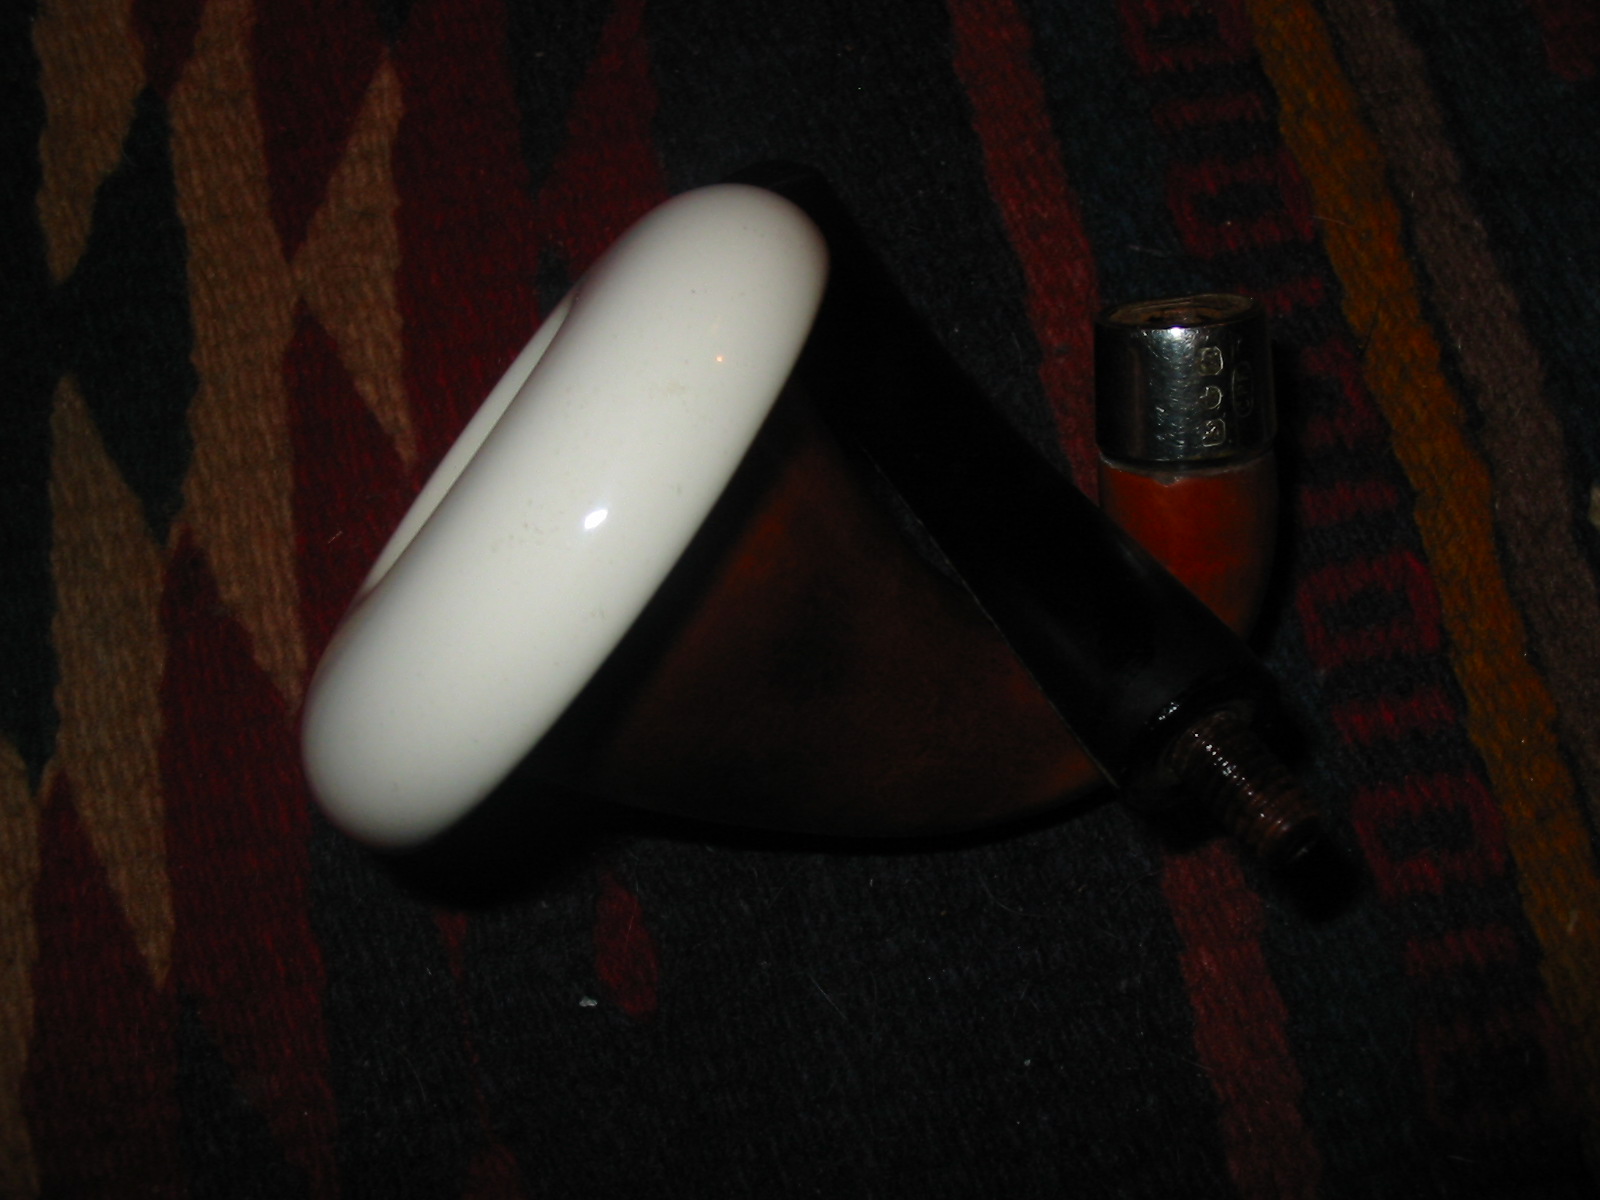
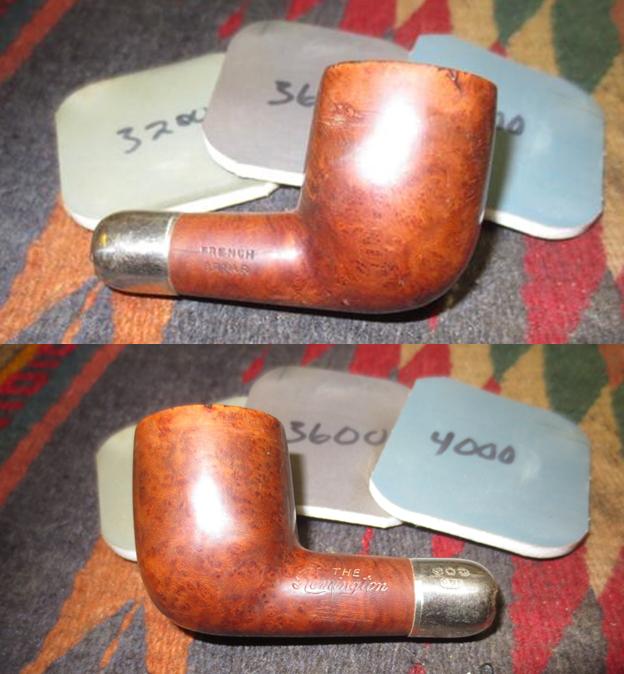
The stamping on the sides of the shank was very readable. The left side read The Remington and the right side read French Briar. The silver ferrule is stamped with three faux hallmarks and the logo of C.P.F. in an oval. Some of the cracks and tears on the ferrule are also visible in the third photo. 
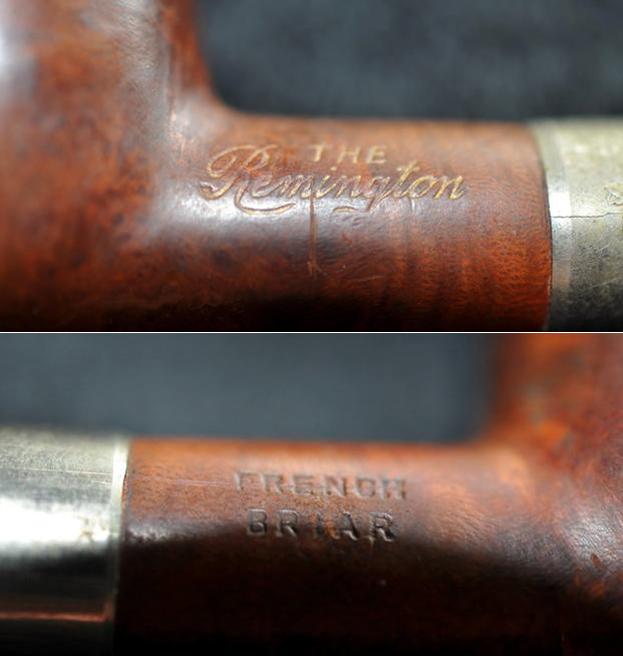
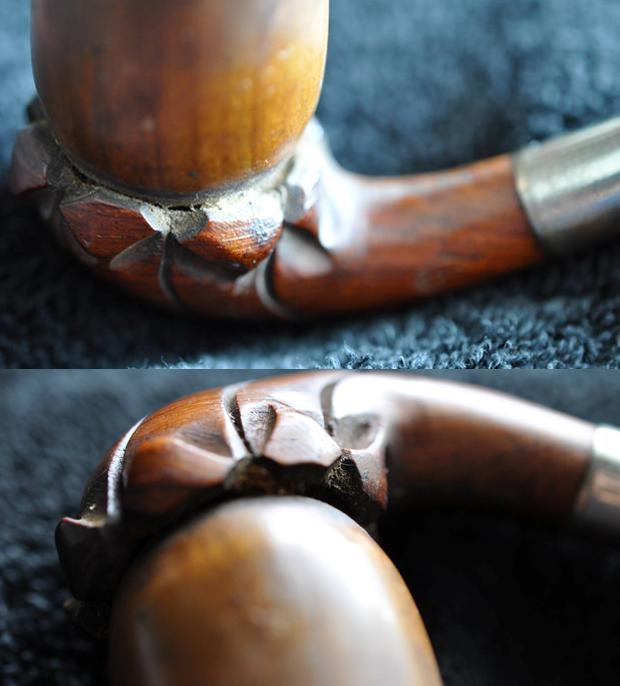
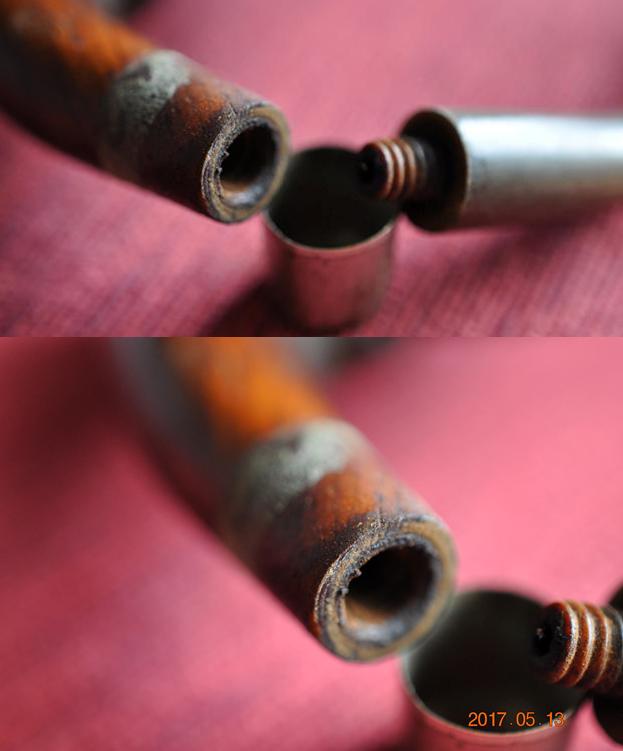
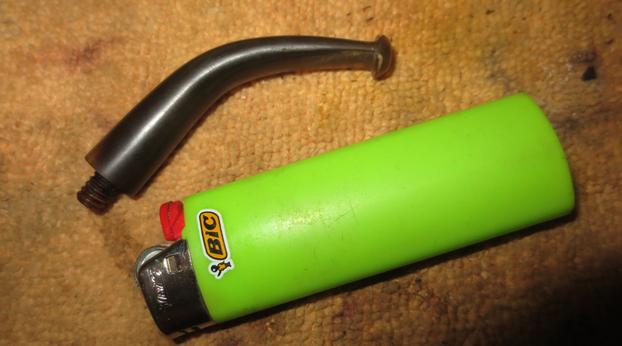
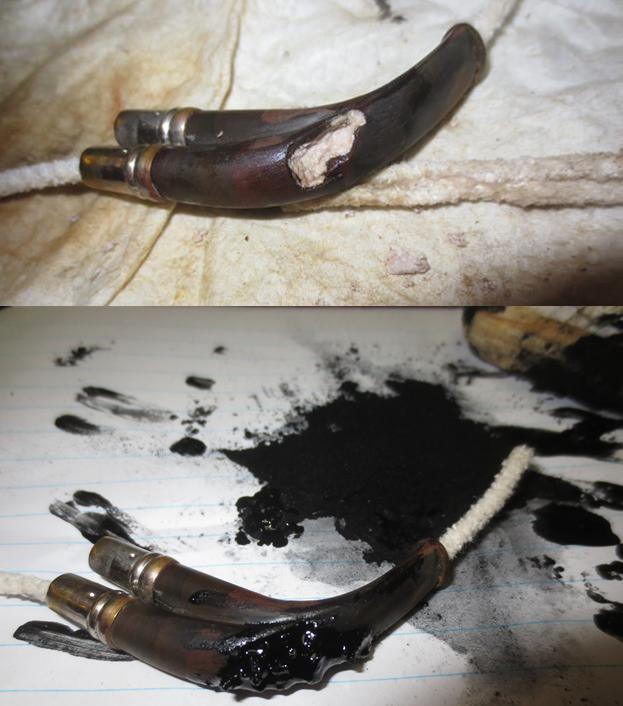
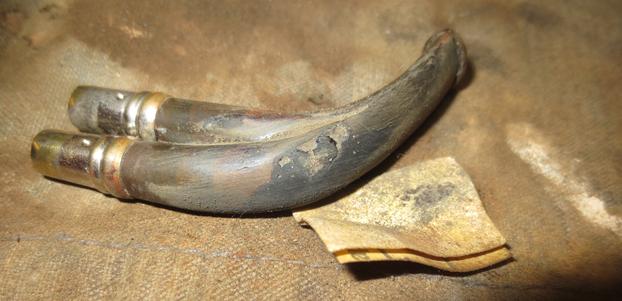
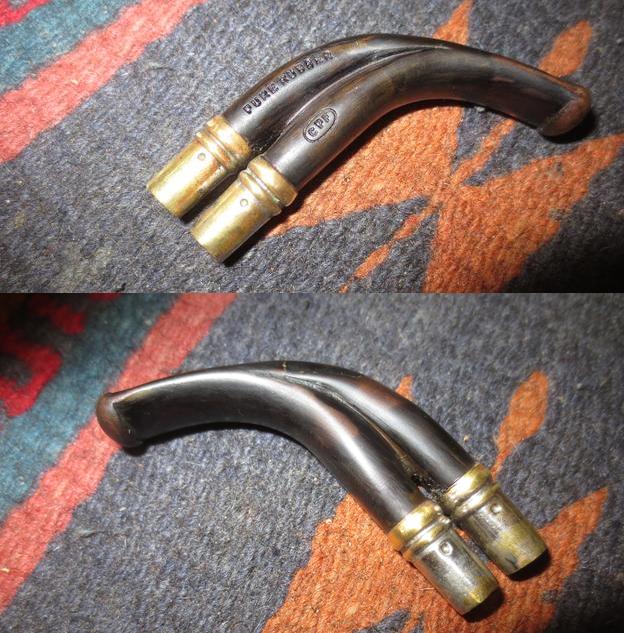
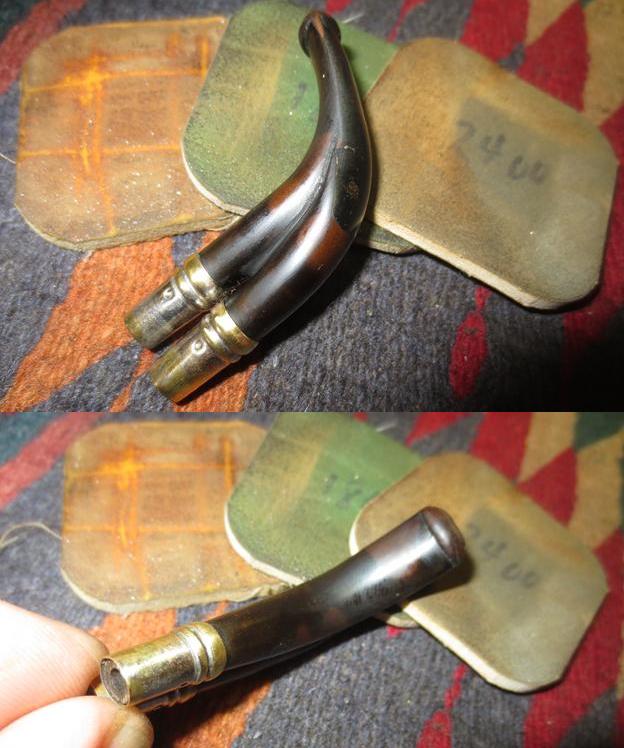
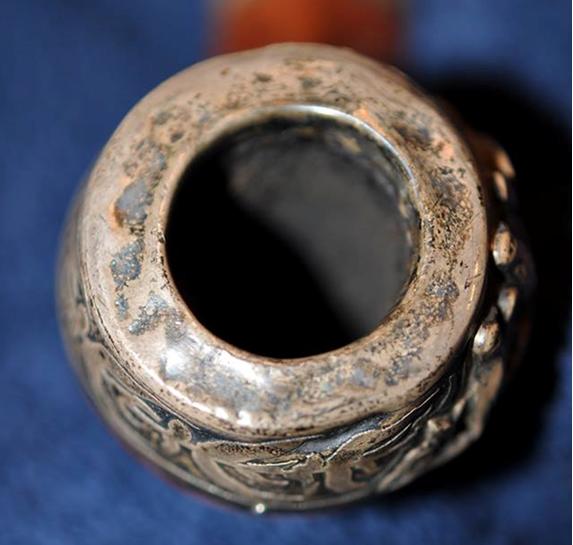
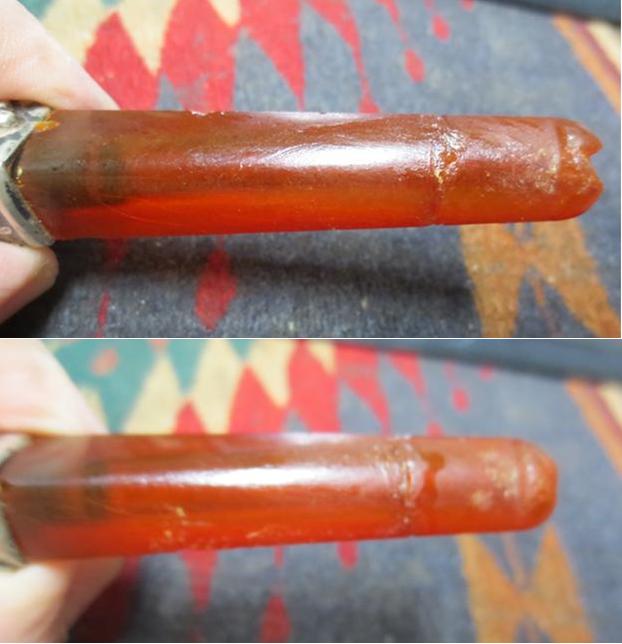
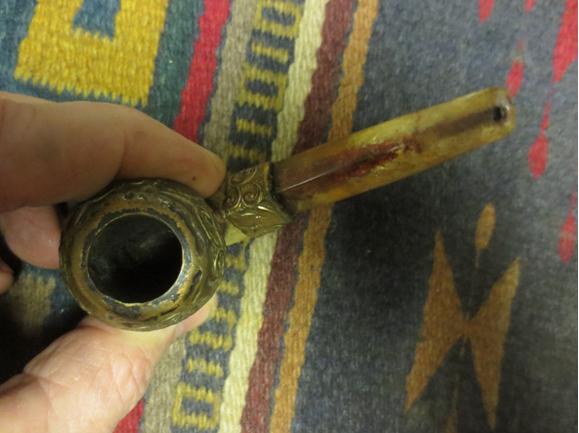
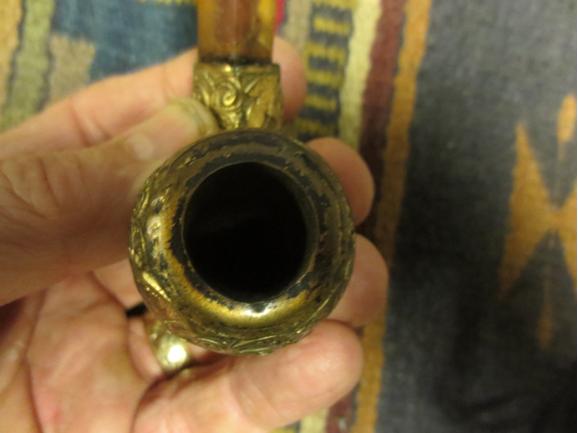
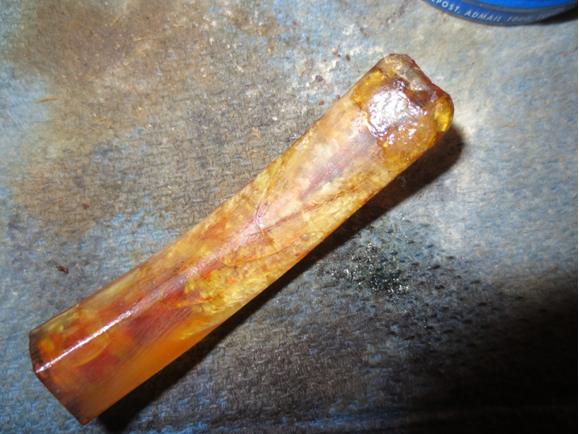
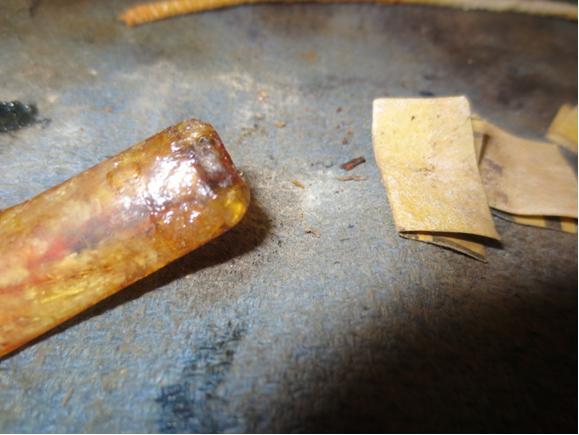
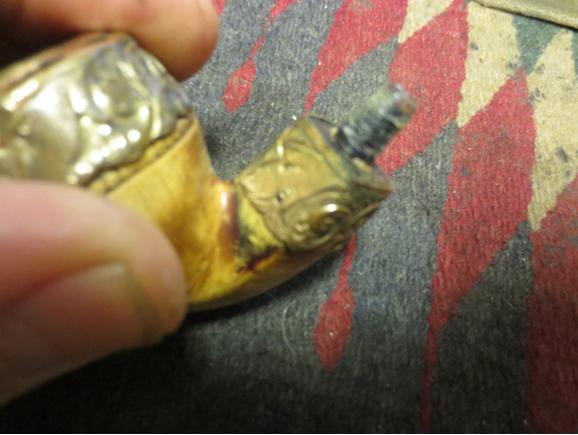
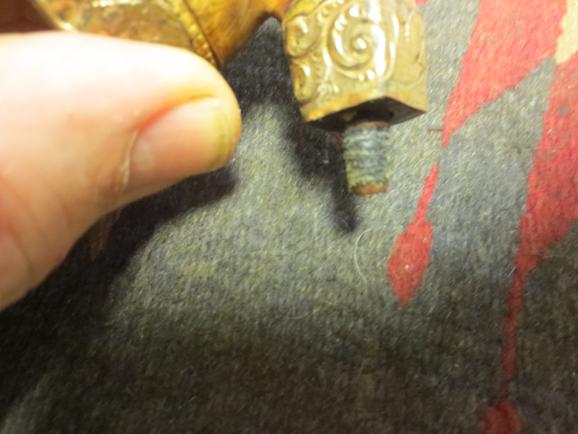
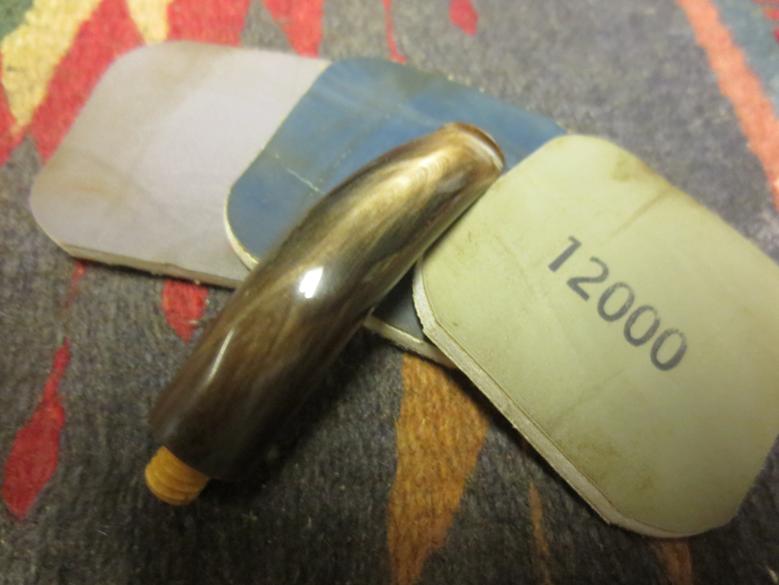
Jeff took photos of the condition and tears in the ferrule. It was in very rough shape and would take some work to repair and smooth out. But was it worth the effort. 
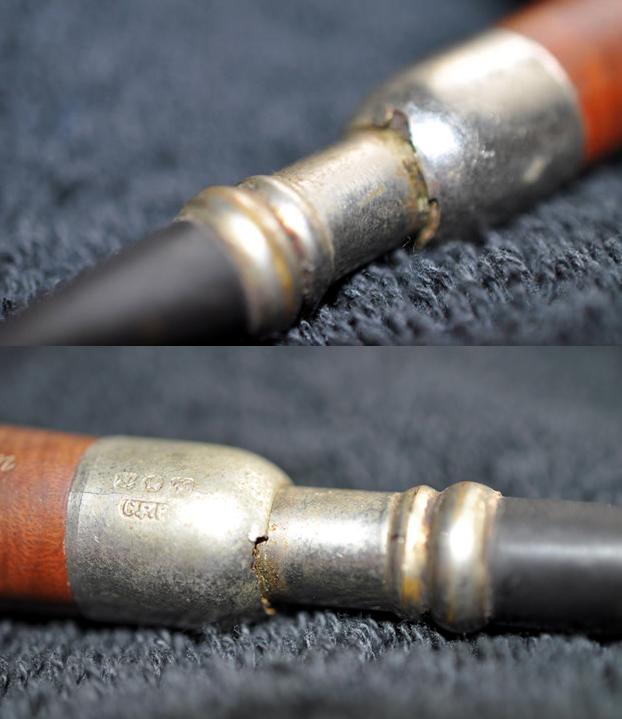
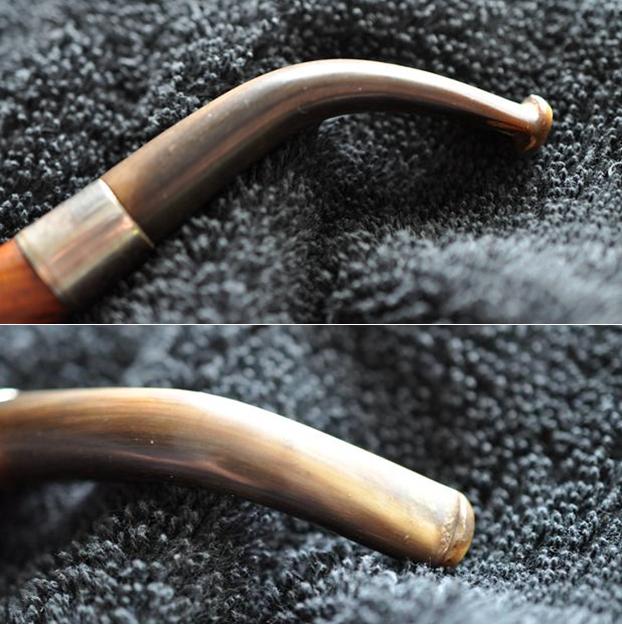
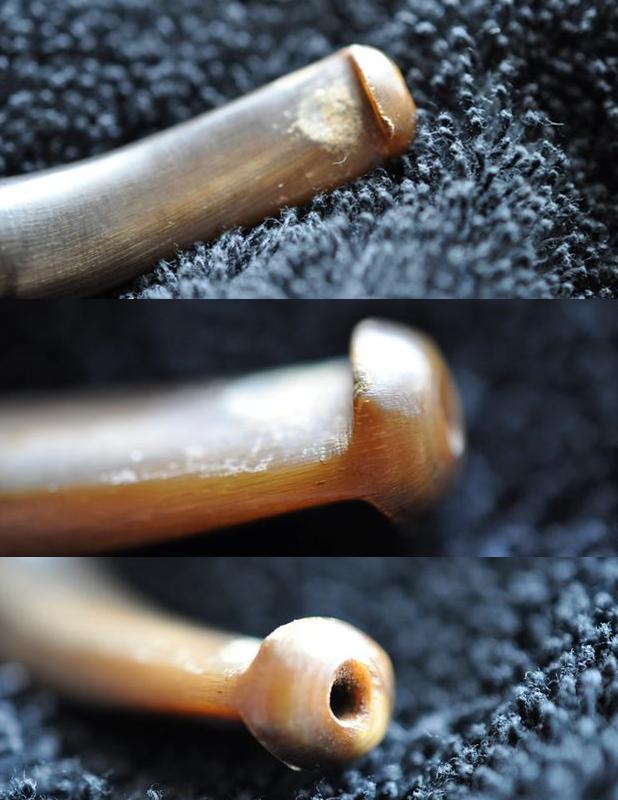
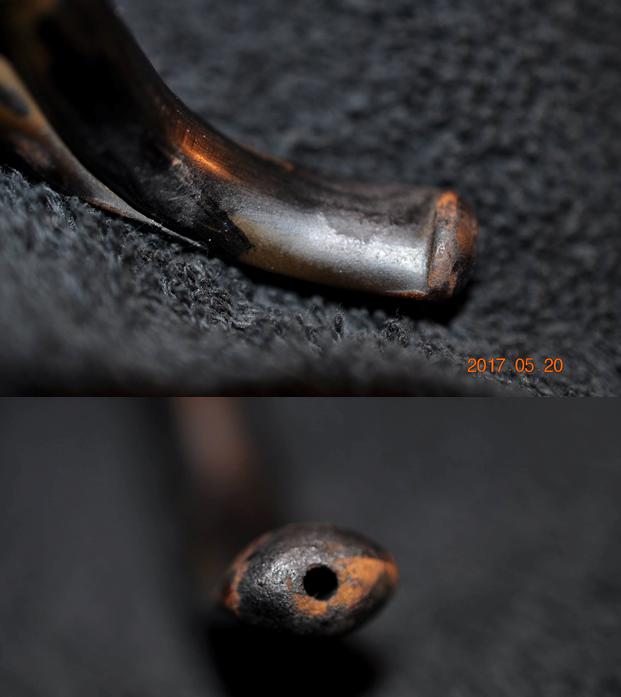
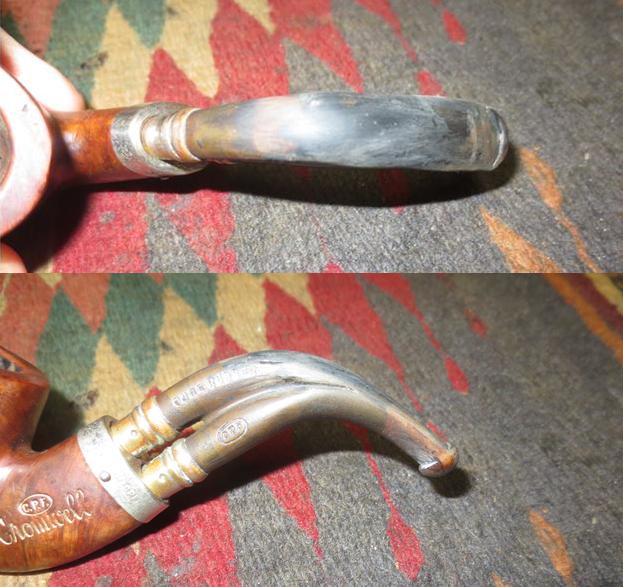
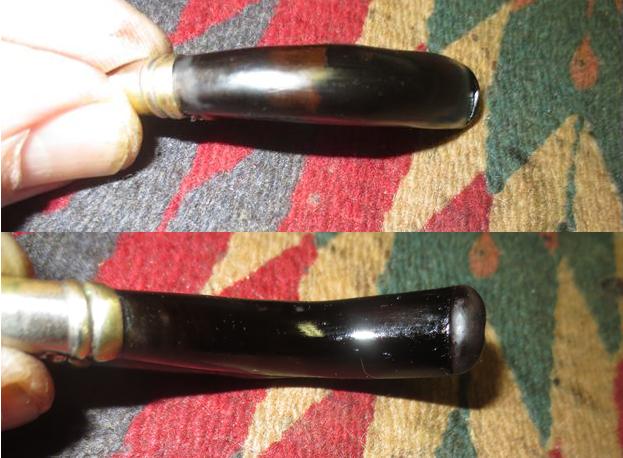
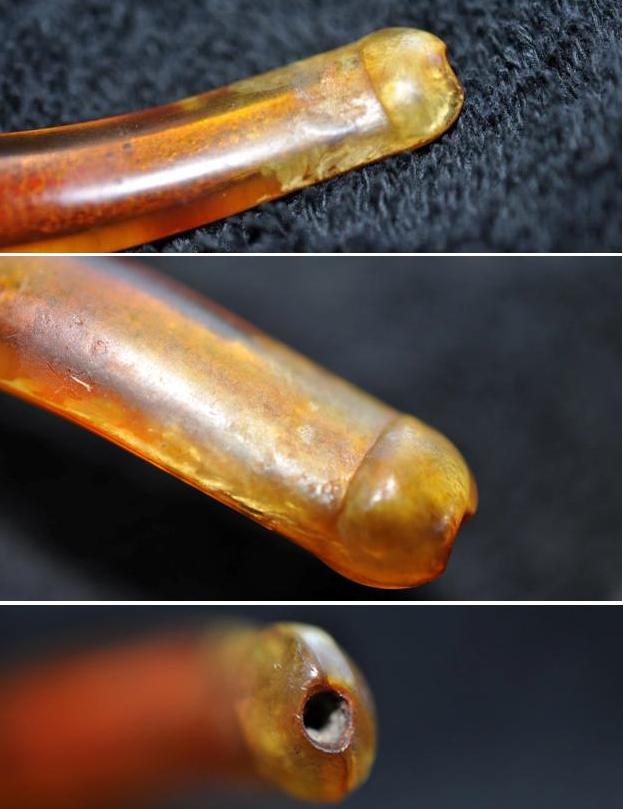
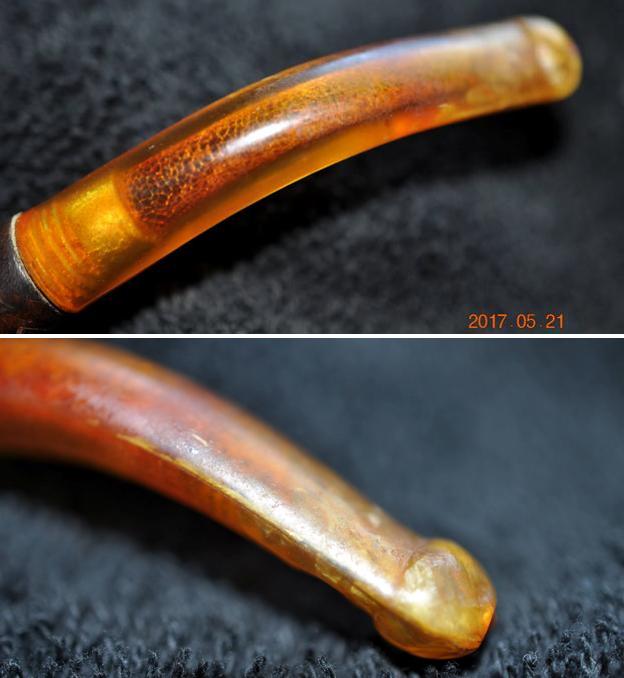
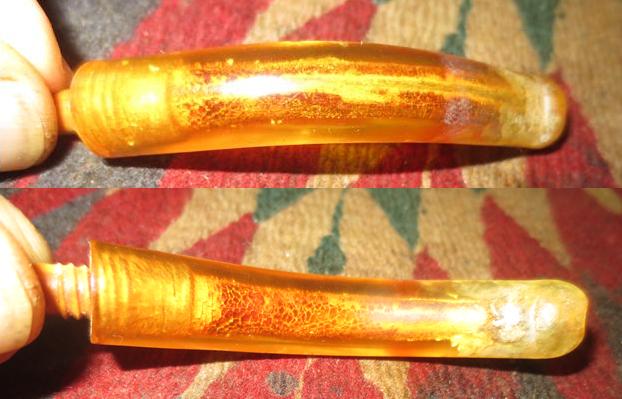
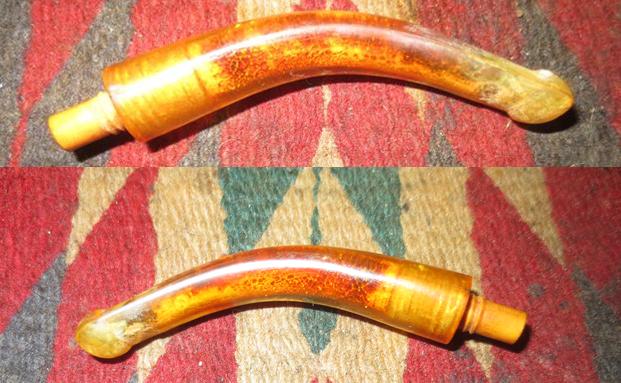
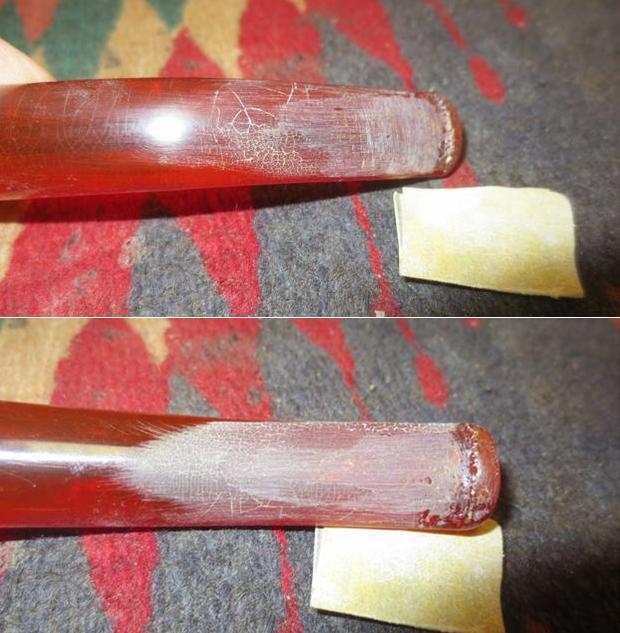
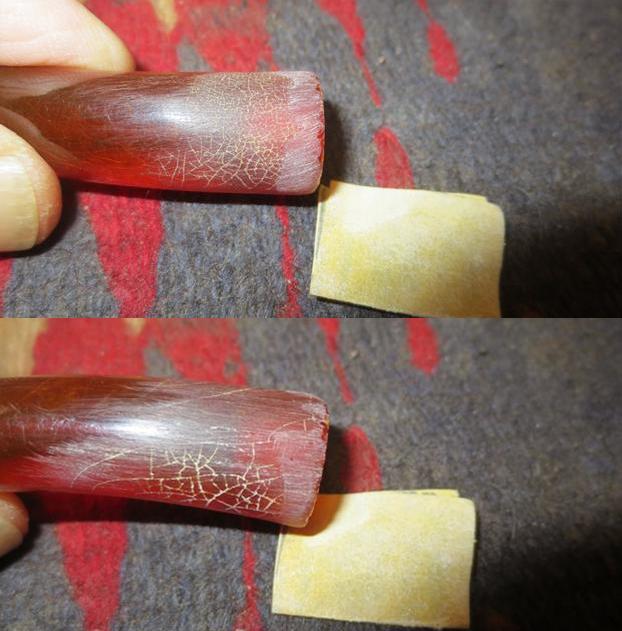
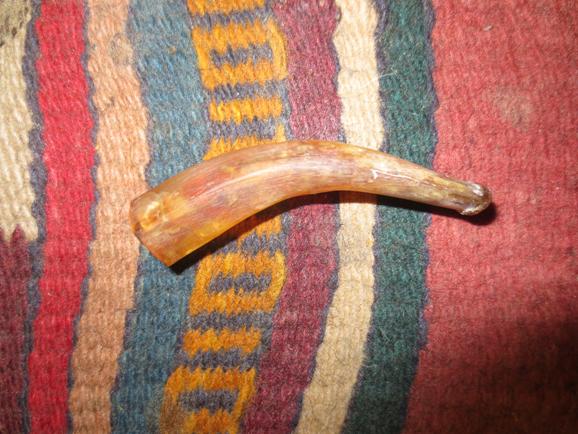
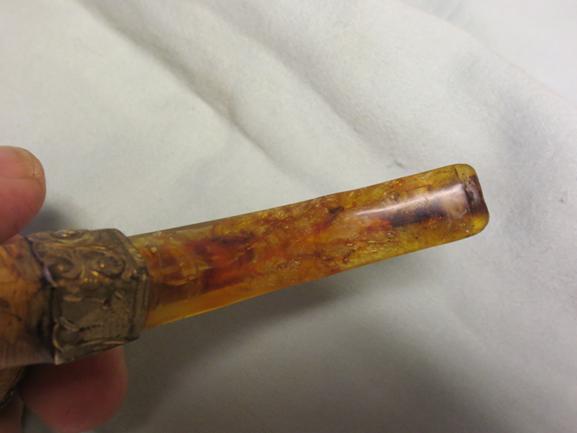
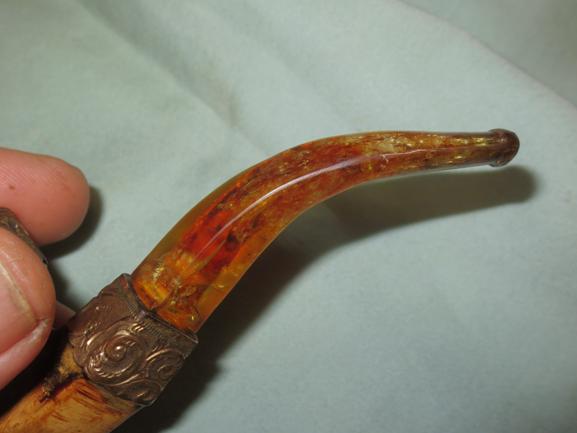
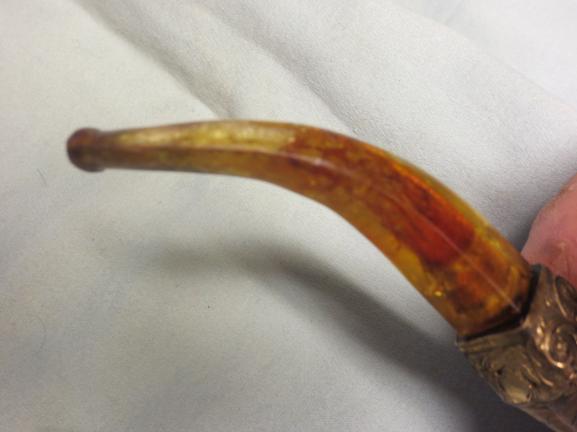
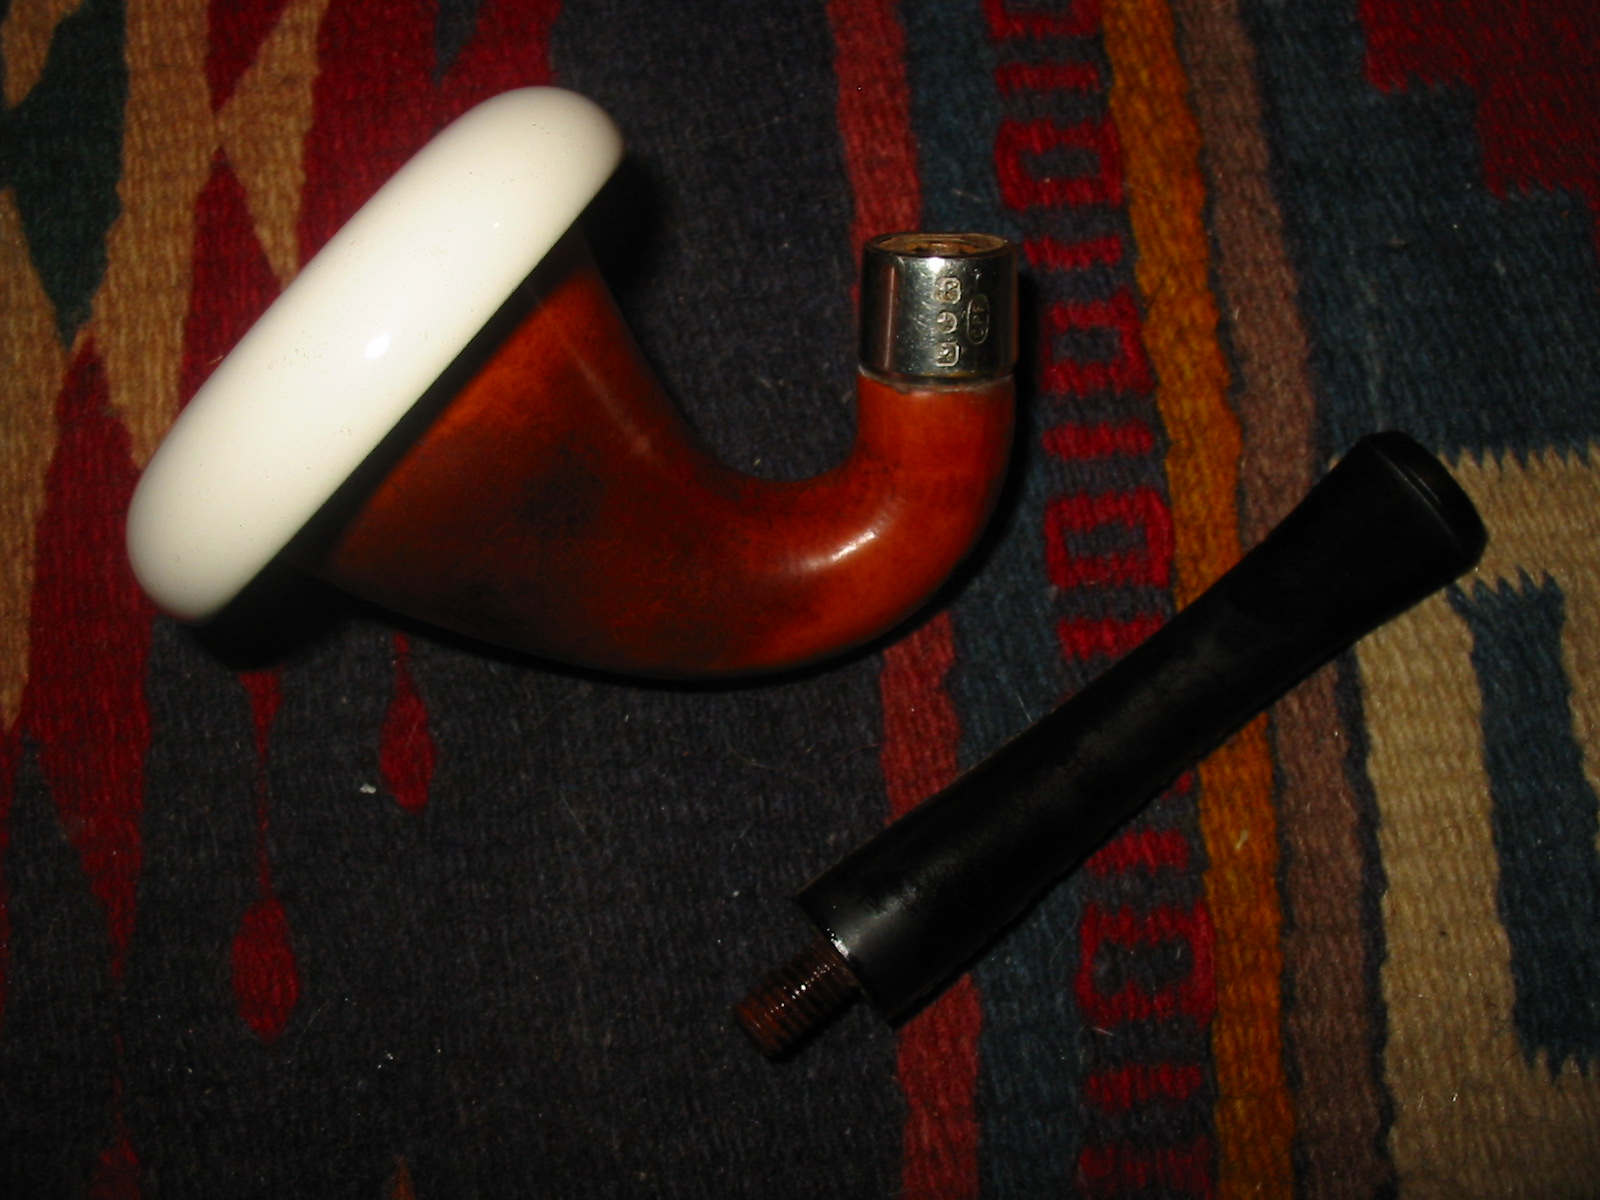
The bite marks, chatter and wear on the both the top and underside of the stem surface are visible in the next photos.
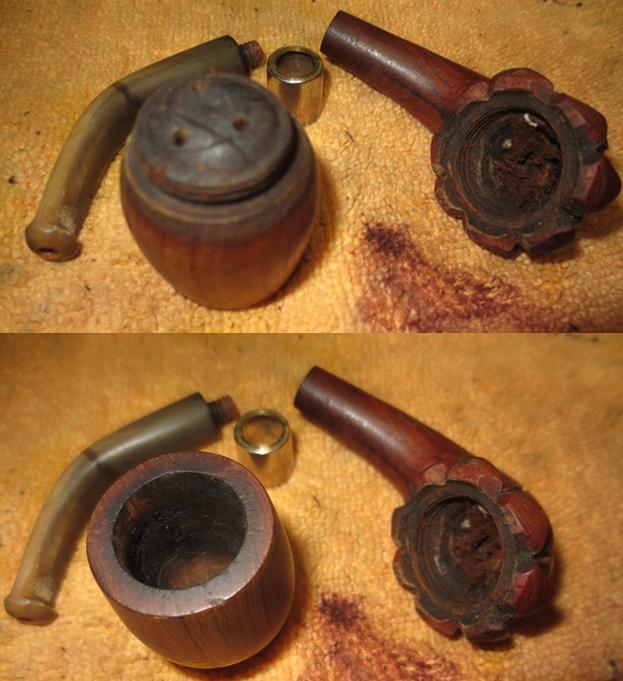
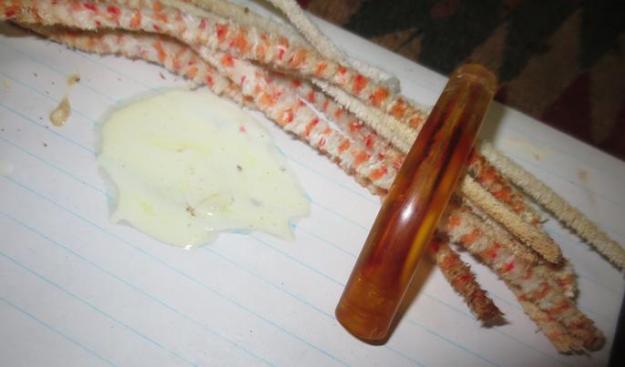
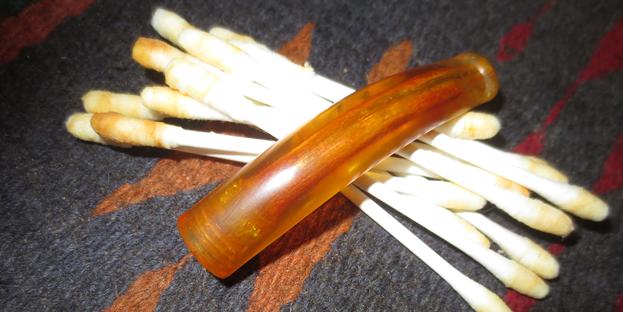
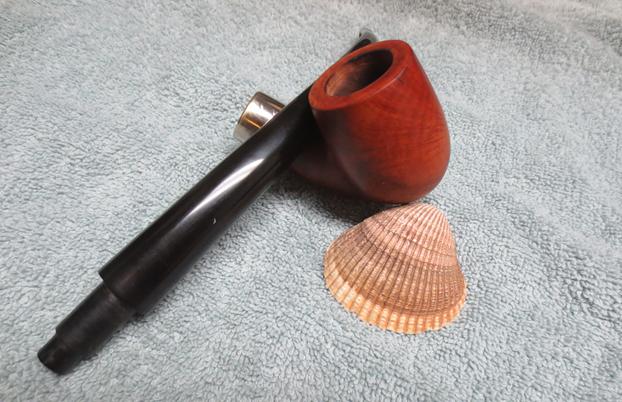
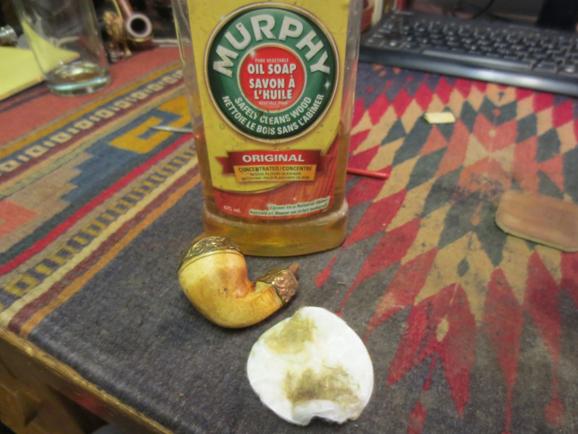
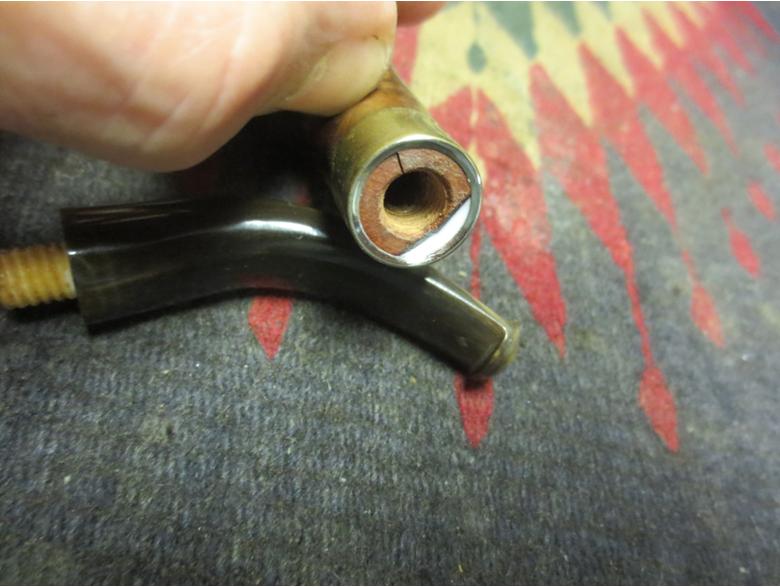
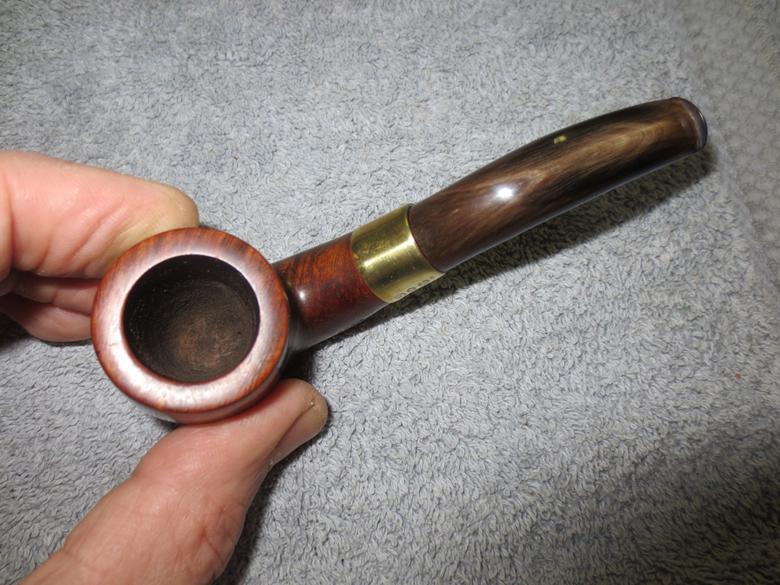
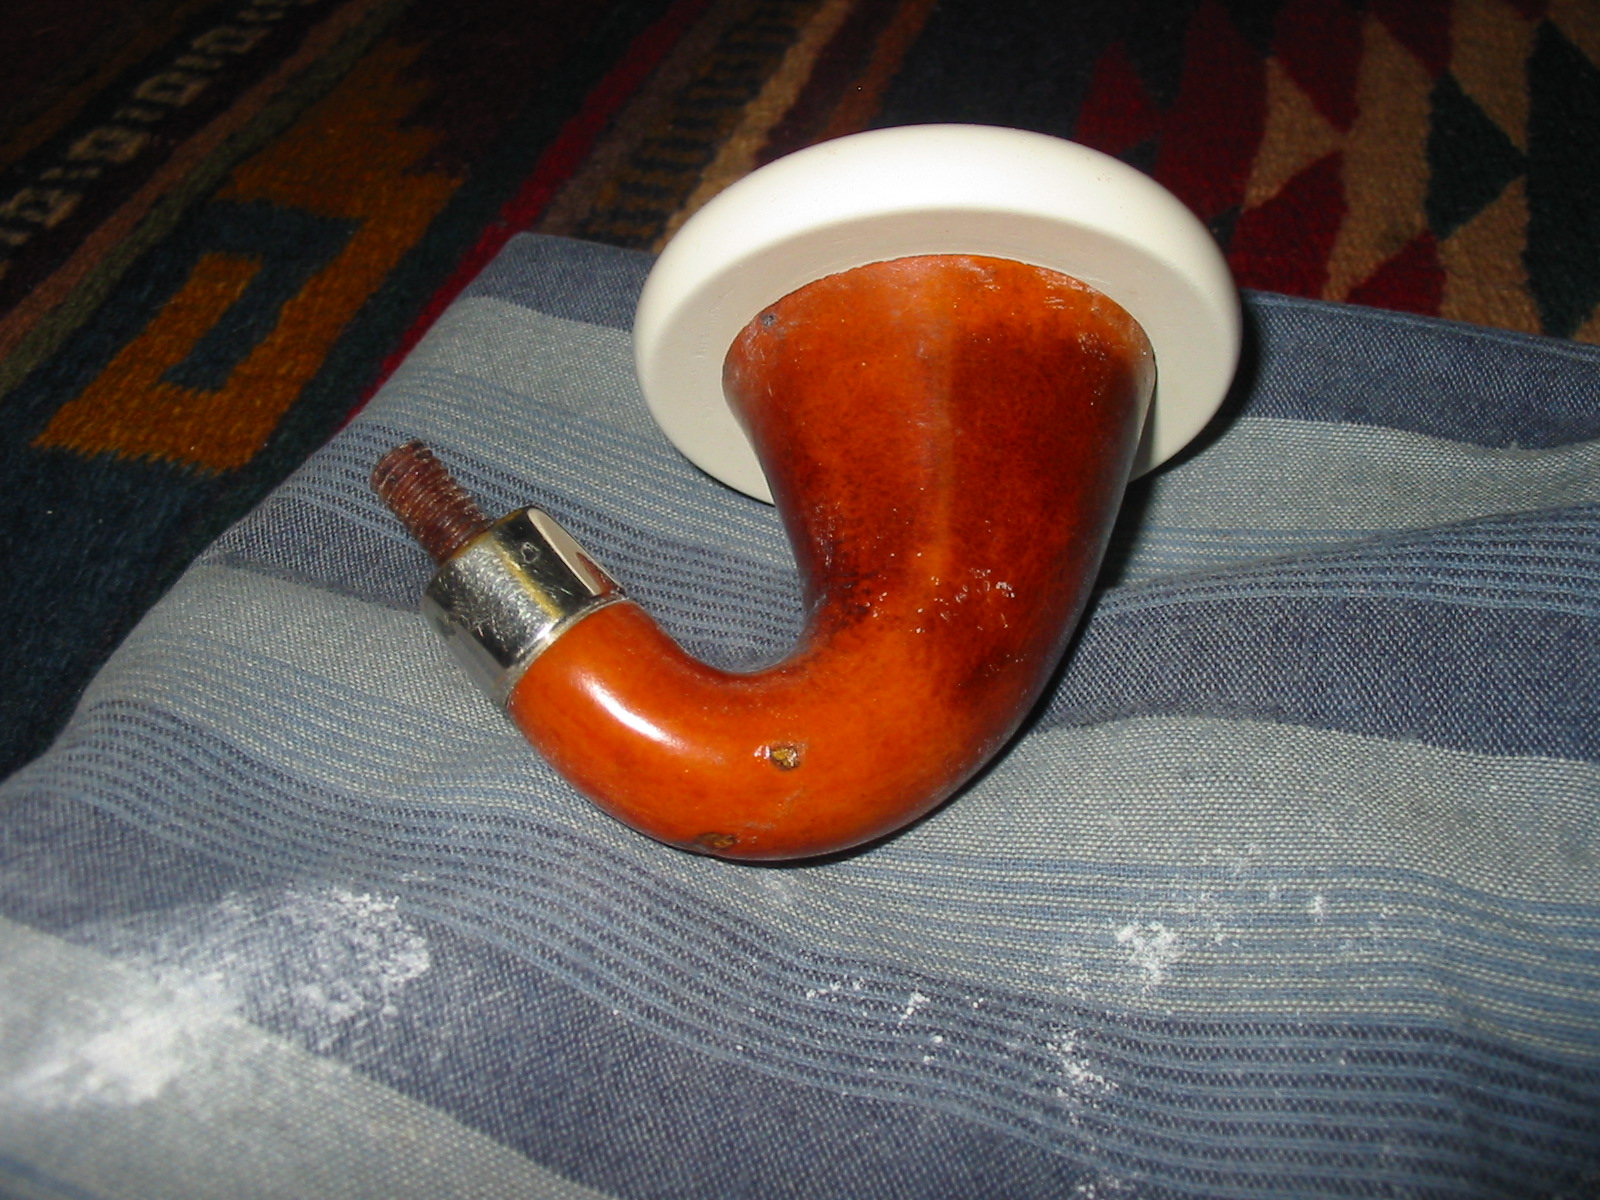
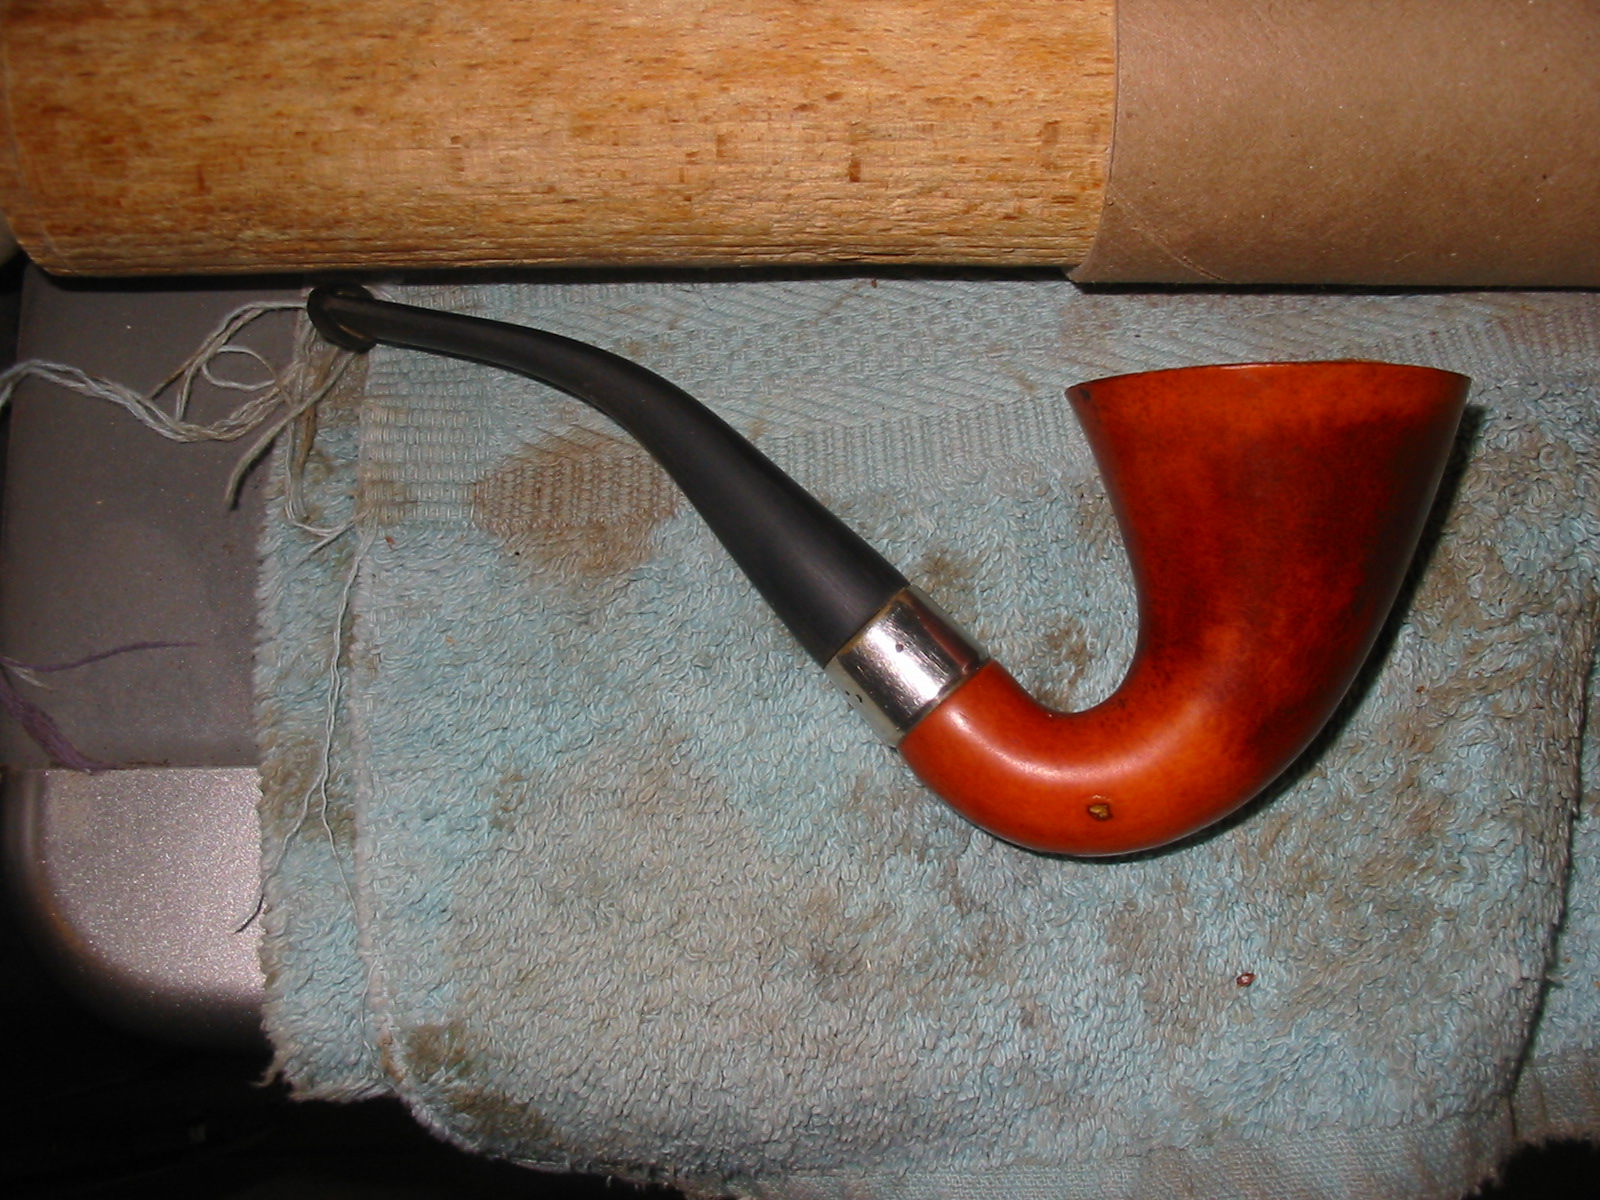
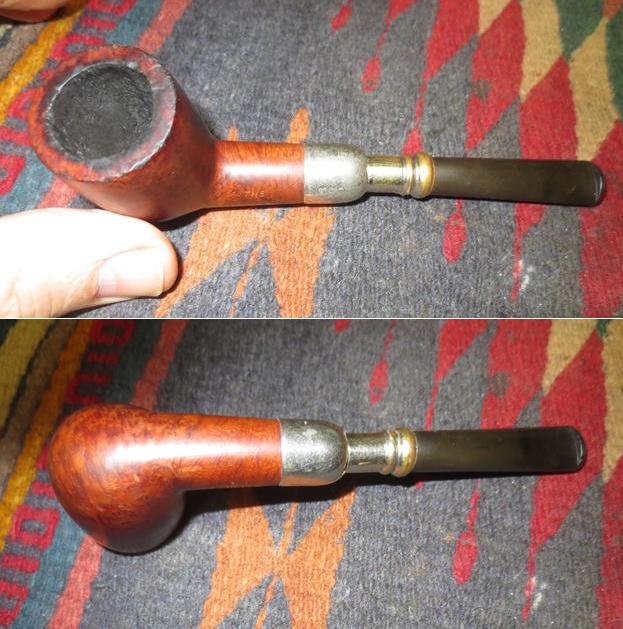
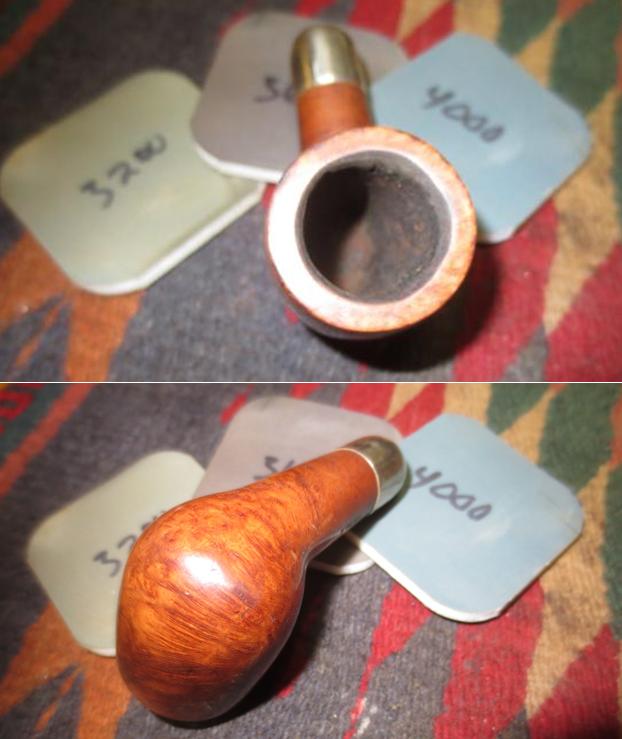
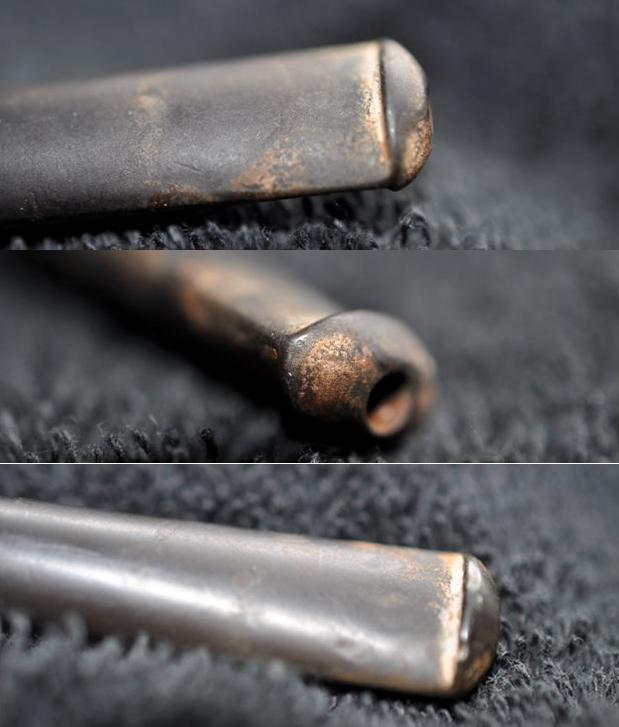
Following his usual pattern, Jeff thoroughly cleaned the pipe. He reamed the bowl with a PipNet reamer and tidied up with a Savinelli Fitsall Pipe Knife. He scrubbed out the mortise and the airway in the shank and the stem with pipe cleaners, cotton swabs and alcohol. He scrubbed the exterior of the pipe with Murphy’s Oil Soap to remove the grime and grit on the bowl. He scrubbed the metal ferrule and stem end at the same time to clean it. I took photos of the pipe to show the condition it was in when it arrived in Vancouver. You can see the damaged rim top and edges and the fill on the right side of the bowl. The condition of the briar is rough and the stem is oxidized. 
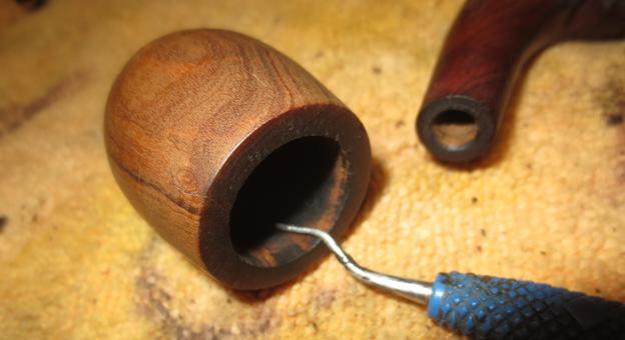
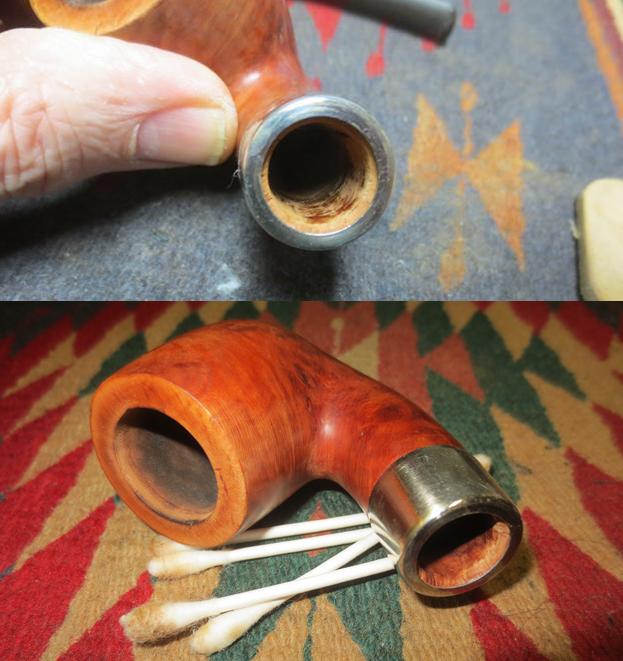
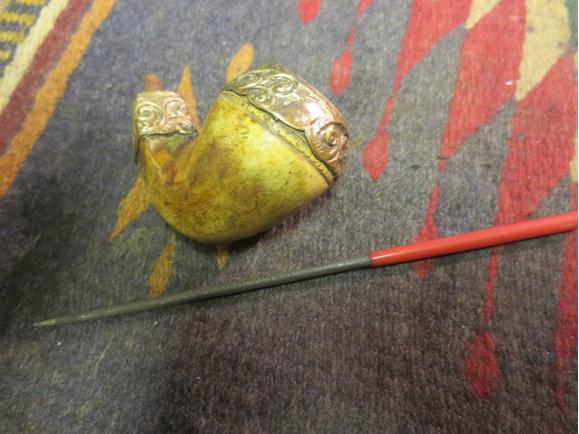
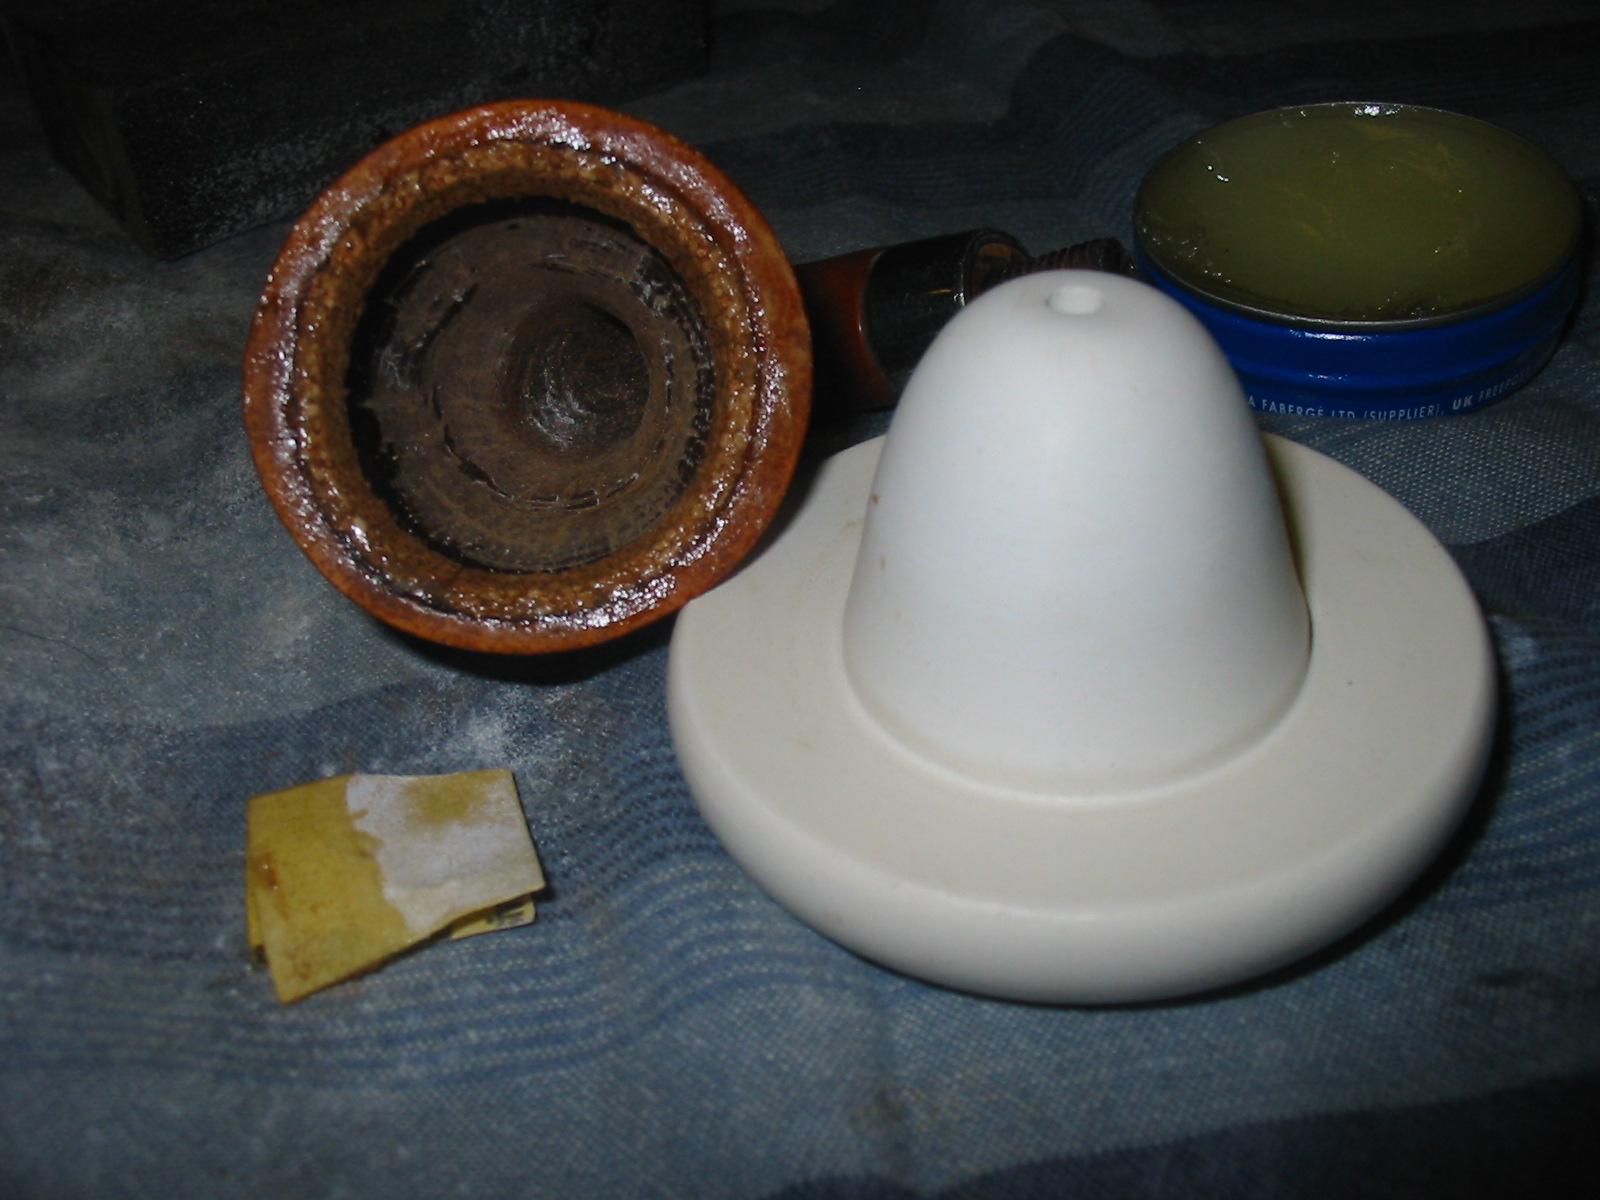
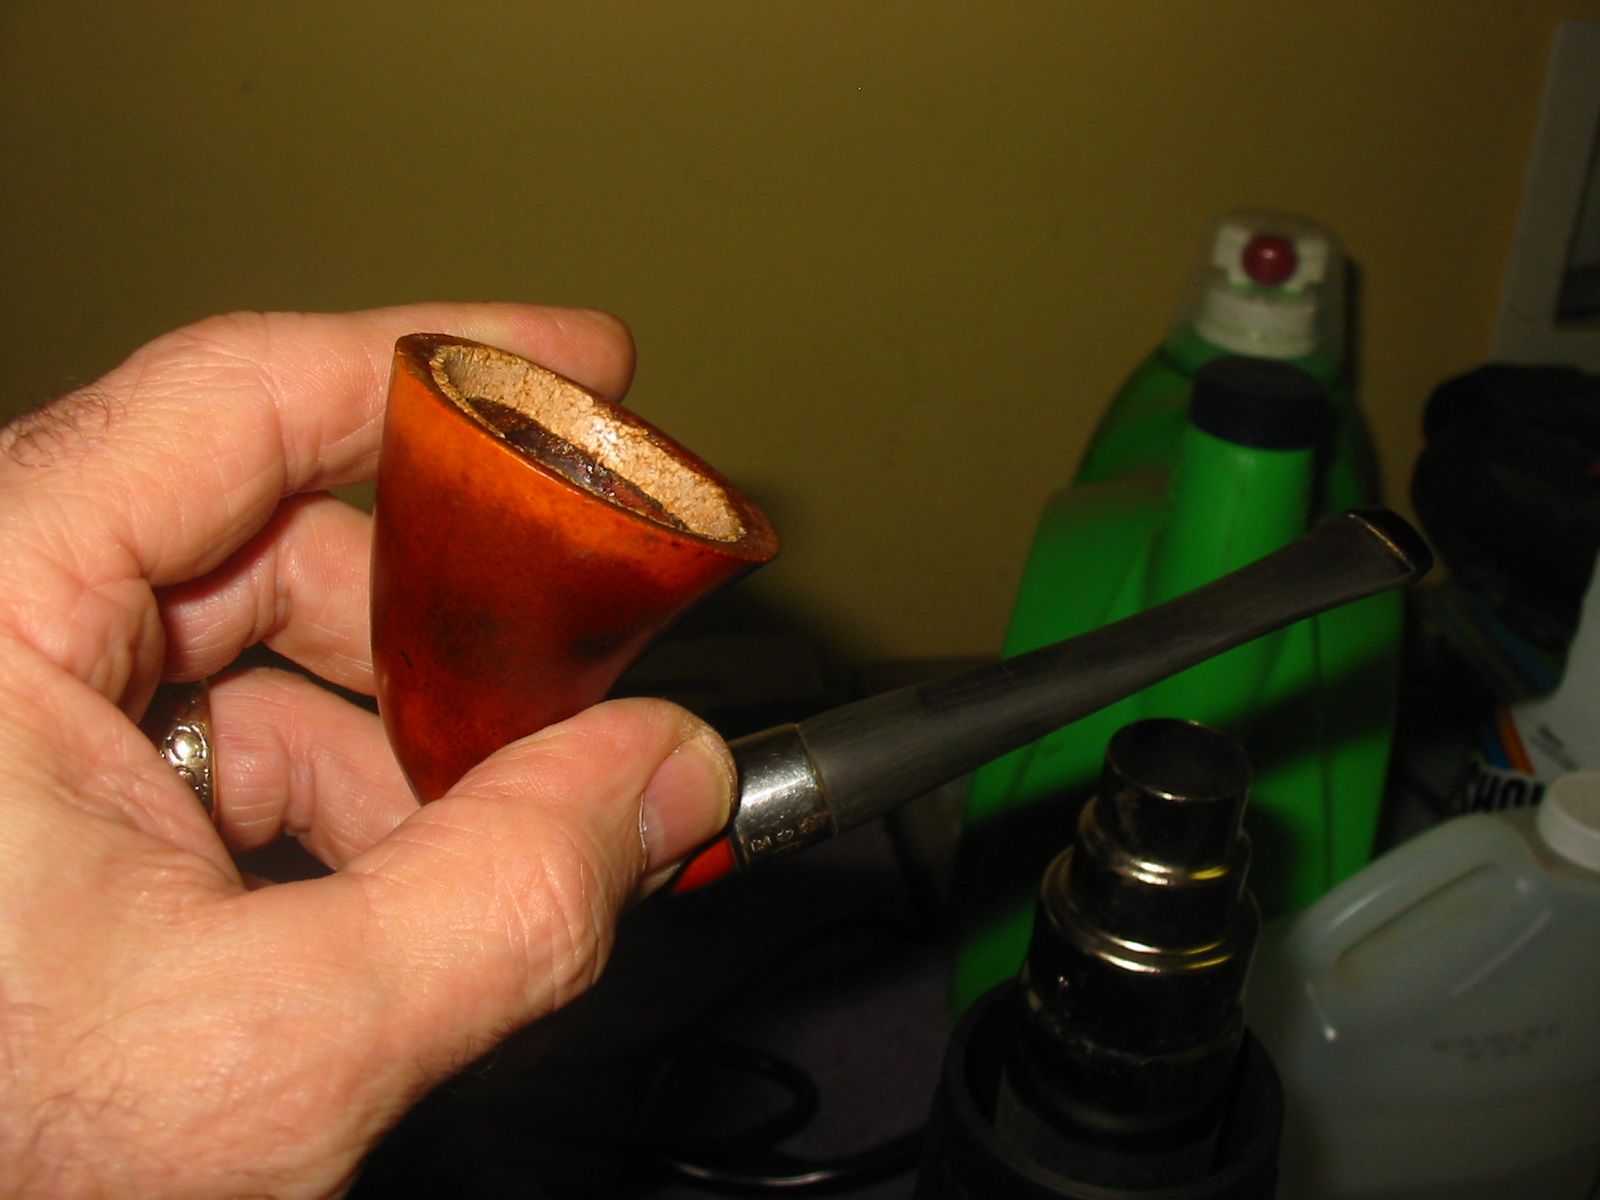
Jeff had cleaned up the rim top and what was underneath was sad. The rim was chipped and damaged. The inner and outer edge of the bowl was badly damaged. The inner edge was out of round and the cuts in it seemed like they had been down when a previous owner had reamed the bowl with a knife. The outer edge was beat up with large chips and nicks going down the side of the bowl.
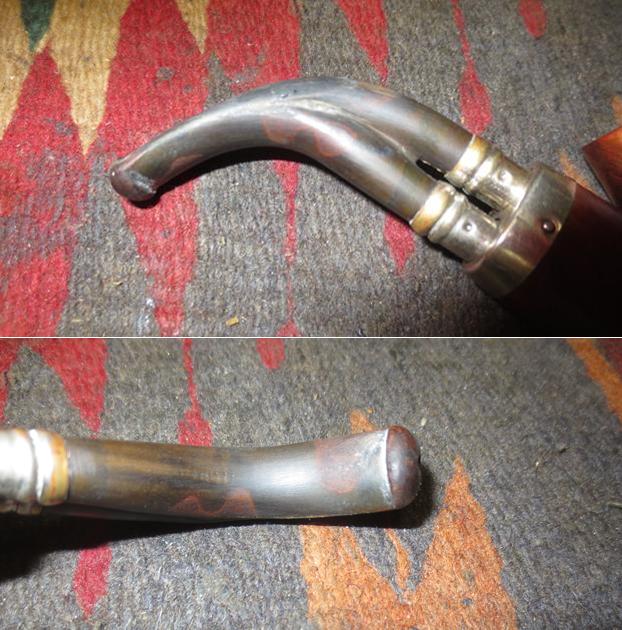
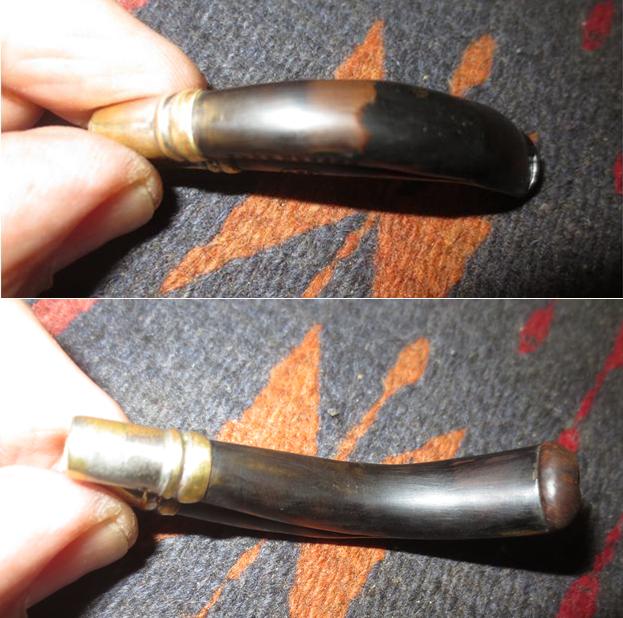
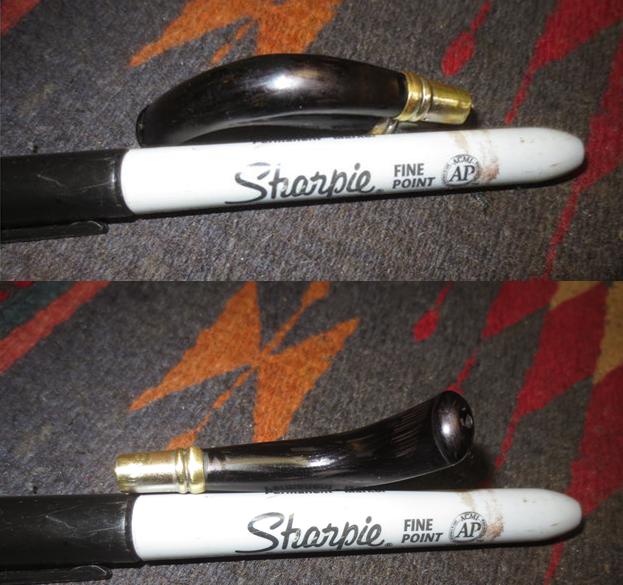
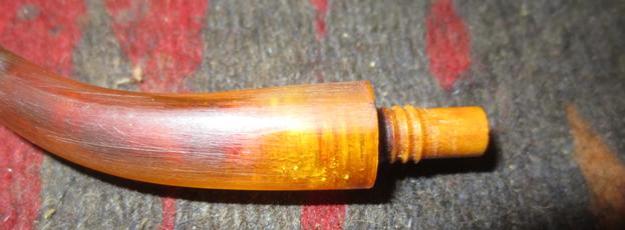
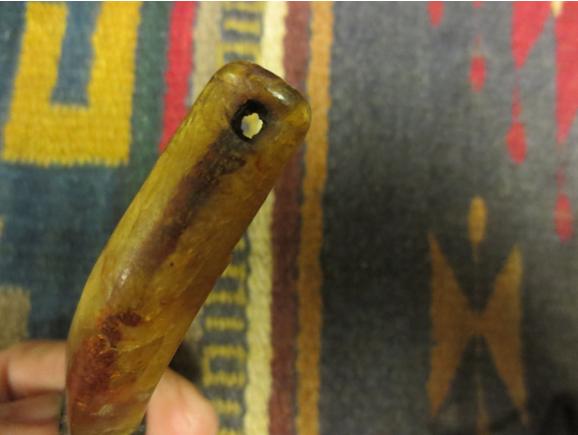
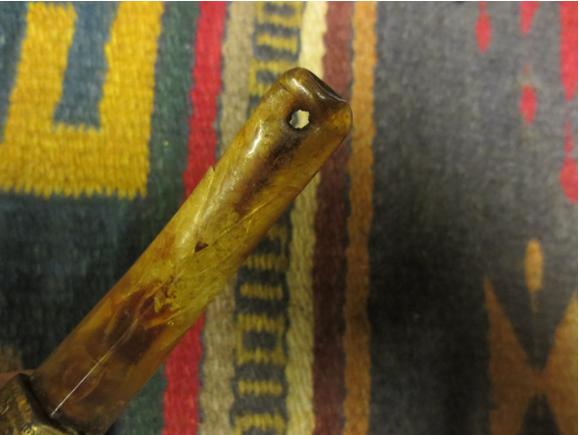
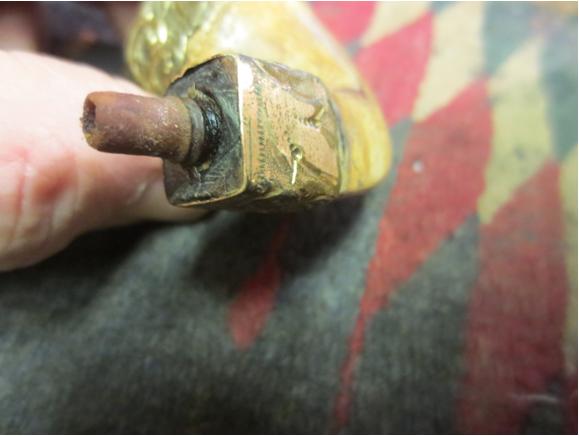
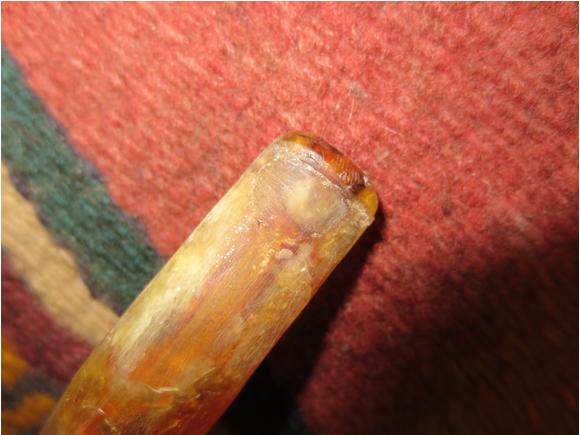
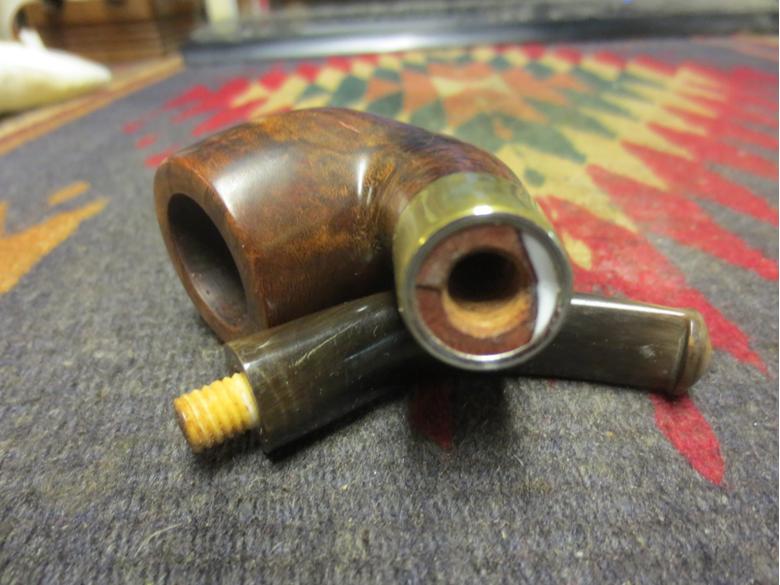
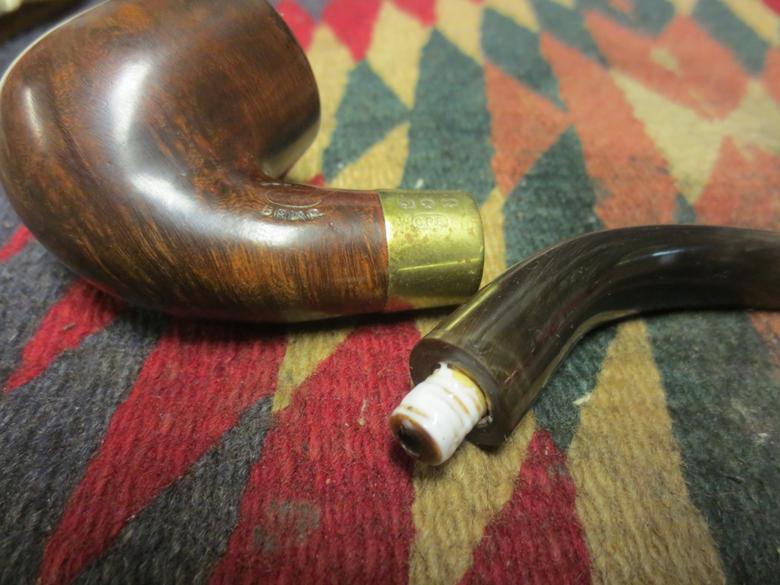
The next photos of the stem and end cap show the brass shining through and the oxidation on the surface of both sides. The tooth marks and chatter are also visible. Fortunately they do not appear to be deep.
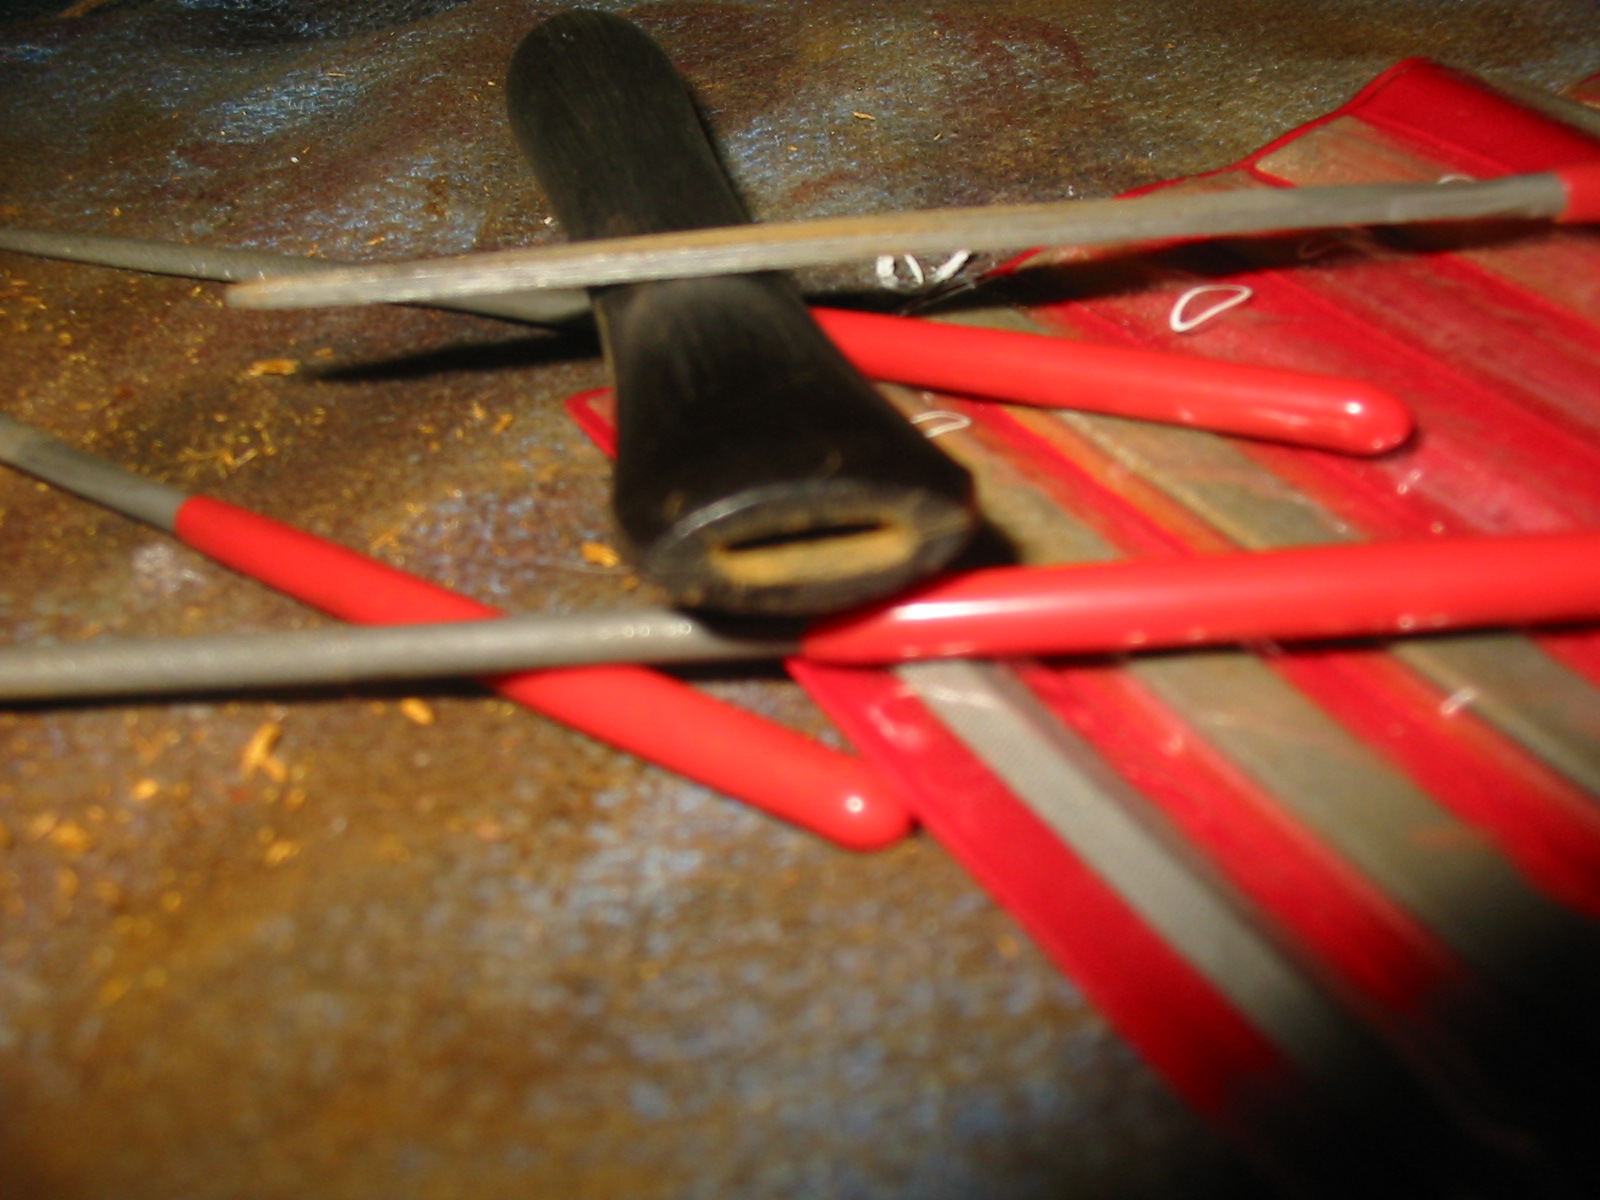
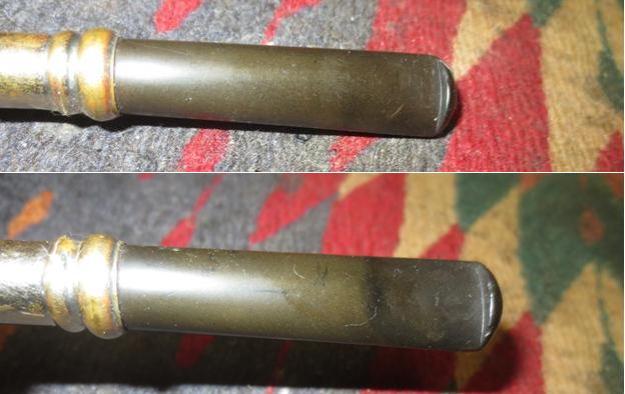
I topped the bowl on the topping board using 220 grit sandpaper to remove the surface damage and clean up the edges from the top view. I did not have to top it too much to smooth out the rim. Topping the bowl also removed much of the damage to the edges as well.
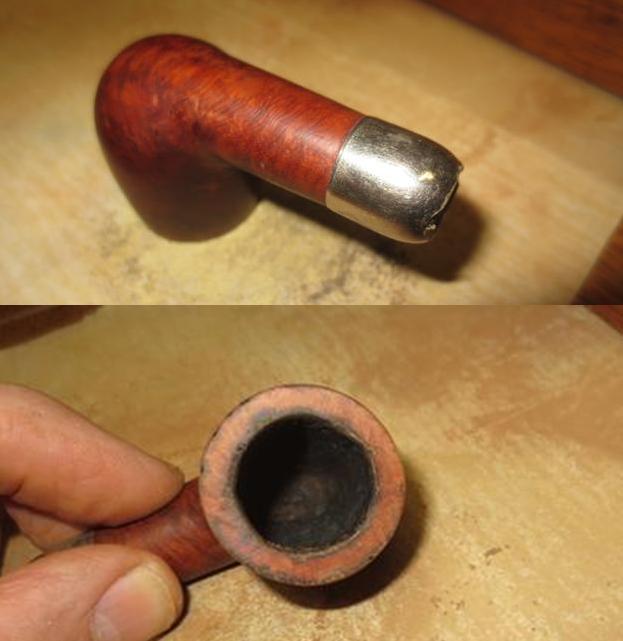
I used clear super glue and briar dust to repair the rough outer edge on the bowl top and the damaged fill on the back right side. I sanded the repairs smooth with 220 grit sandpaper to remove the excess repair and blend it into the surface of the briar.
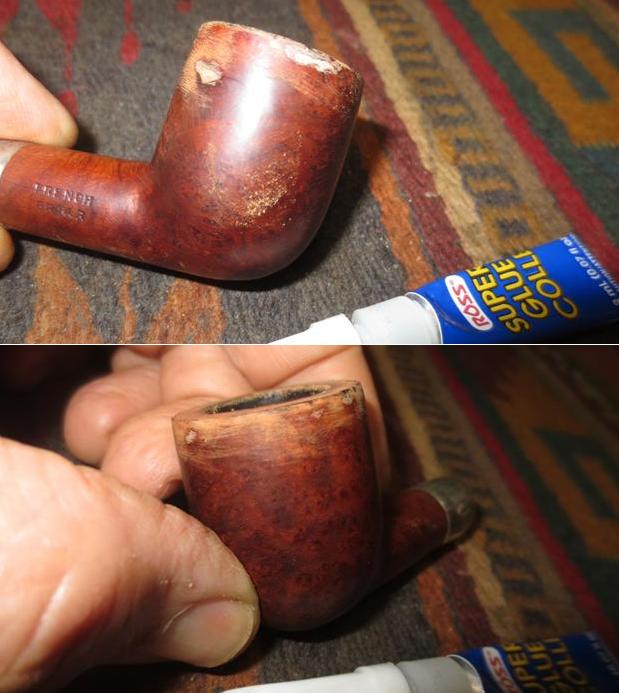
I sanded the repairs smooth and repaired the light bevel to the inner edge of the rim with a folded piece of 220 grit sandpaper to repair the damages to the inner edge.
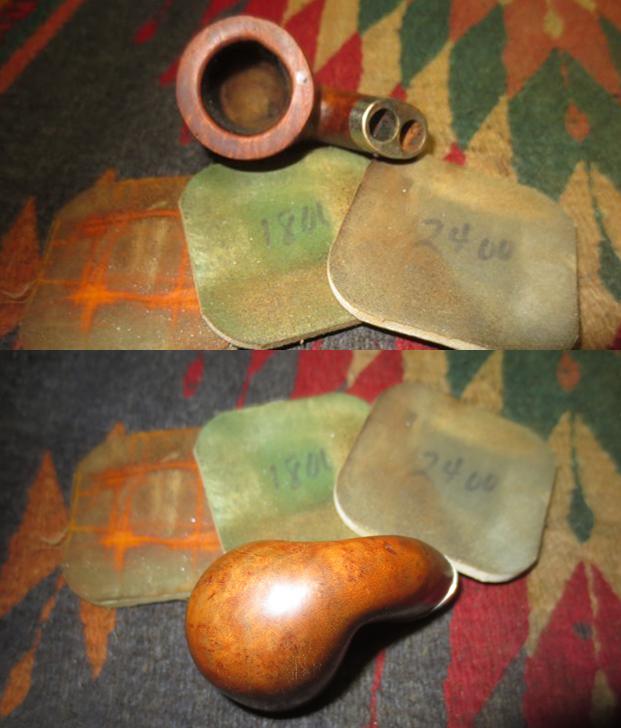
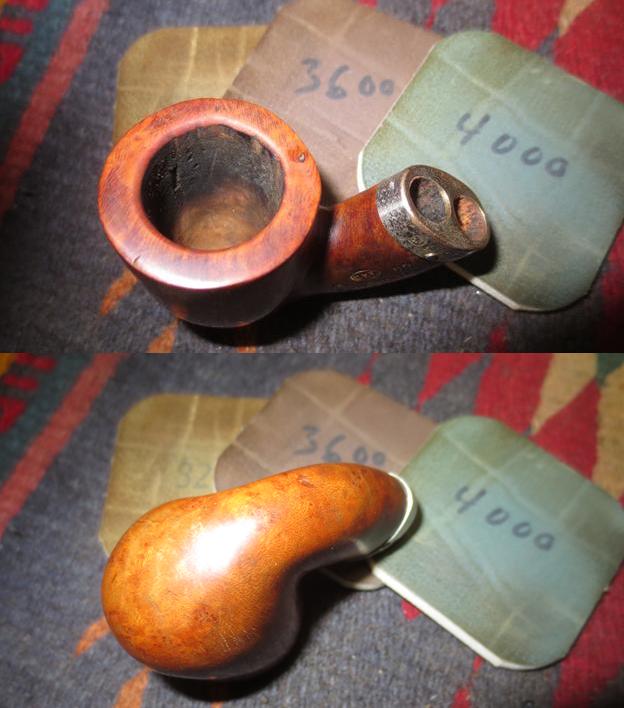
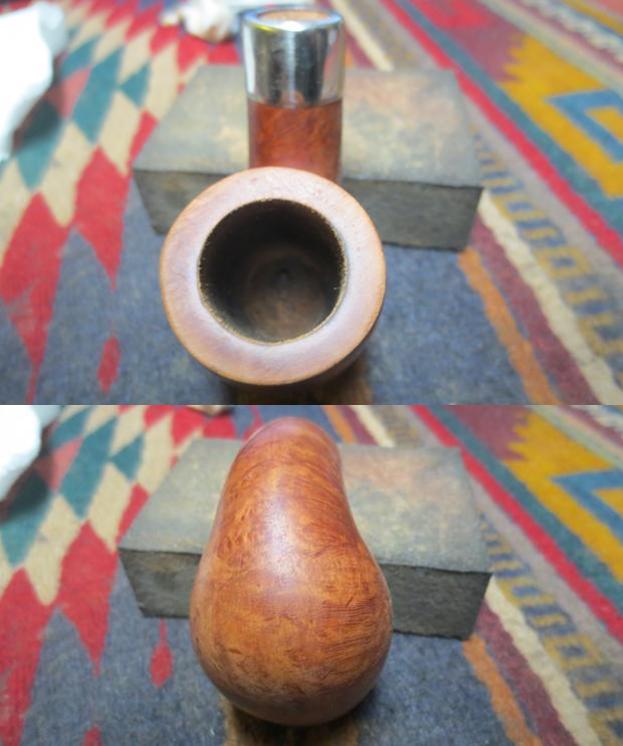
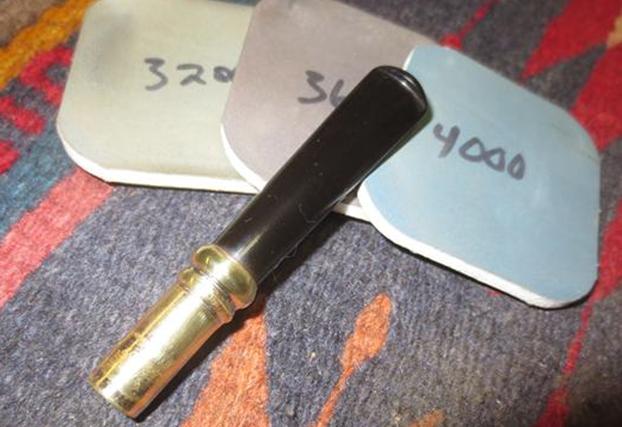
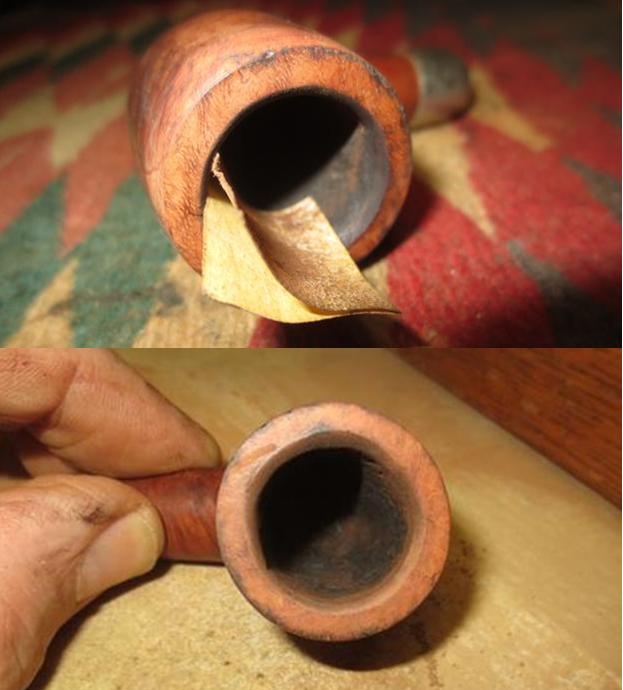
I polished the briar rim and the sides of the bowl with micromesh sanding pads – wet sanding with 1500-2400 grit and dry sanding with 3200-4000 grit pads. I wiped the bowl down after each pad with a damp cotton pad. The photos tell the story of the polishing process on the bowl. 
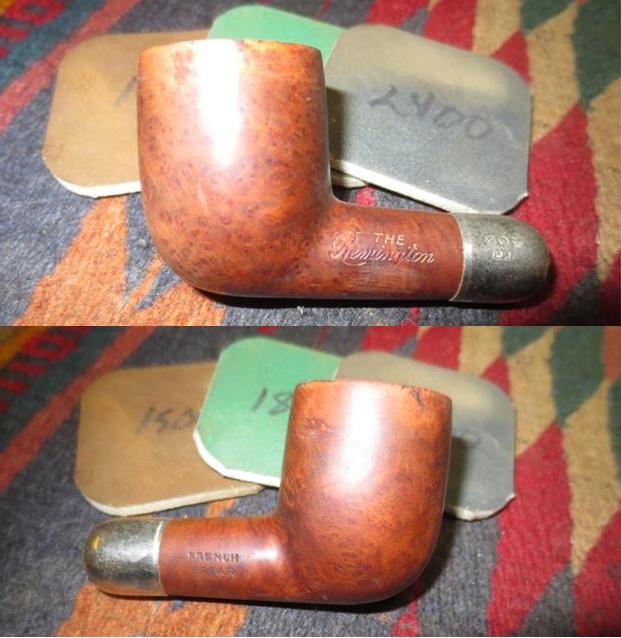
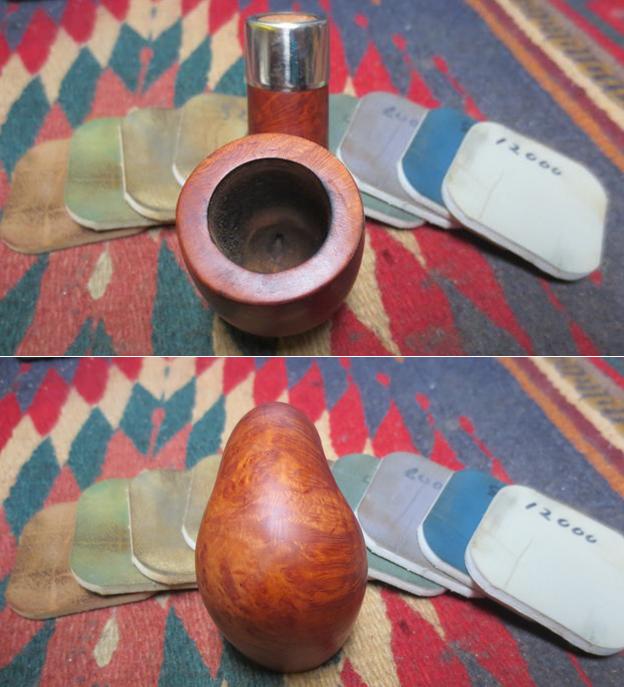
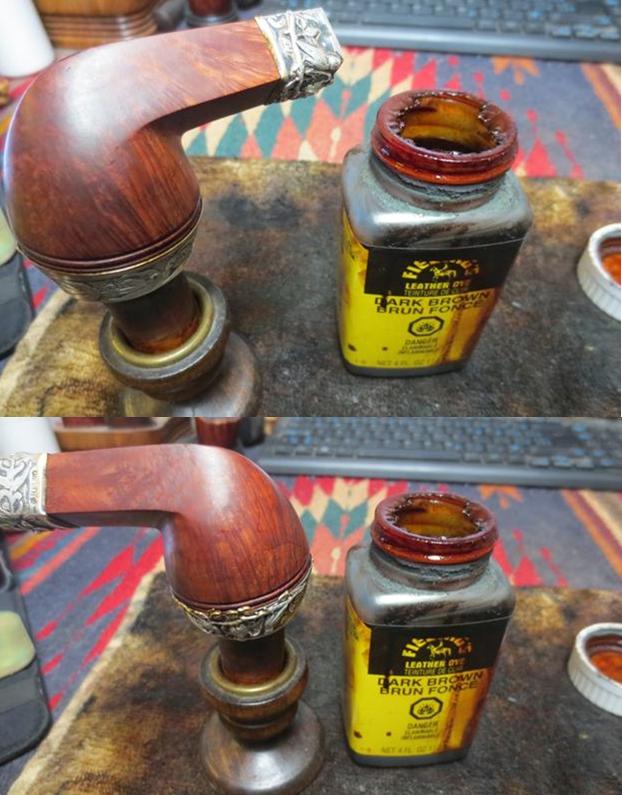
I heated the briar and stained it with dark brown aniline stain thinned by 50% with isopropyl alcohol. I flamed it to set it in the briar and repeated the process until the stain coverage was even all around the bowl.
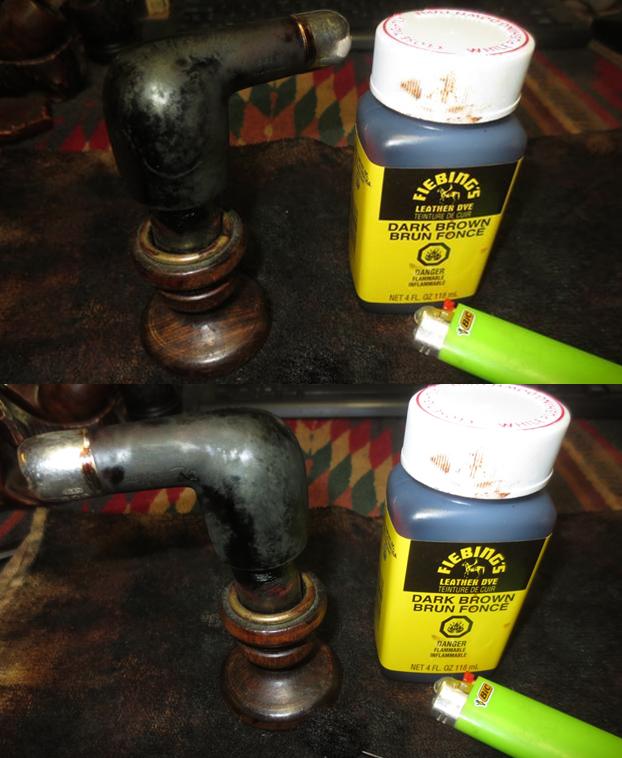
Once the stain had dried I wiped it down with isopropyl alcohol to thin the stain and make it more transparent. When I finished wiping it down I buffed it with red Tripoli to reduce the stain even more. The pictures that follow show the process of reducing the opacity of the stain. 
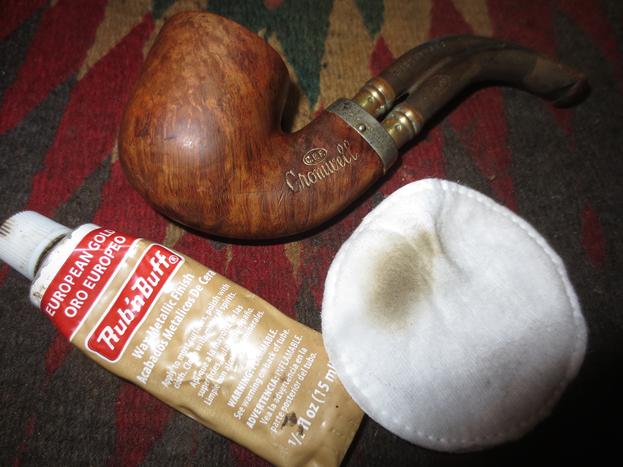
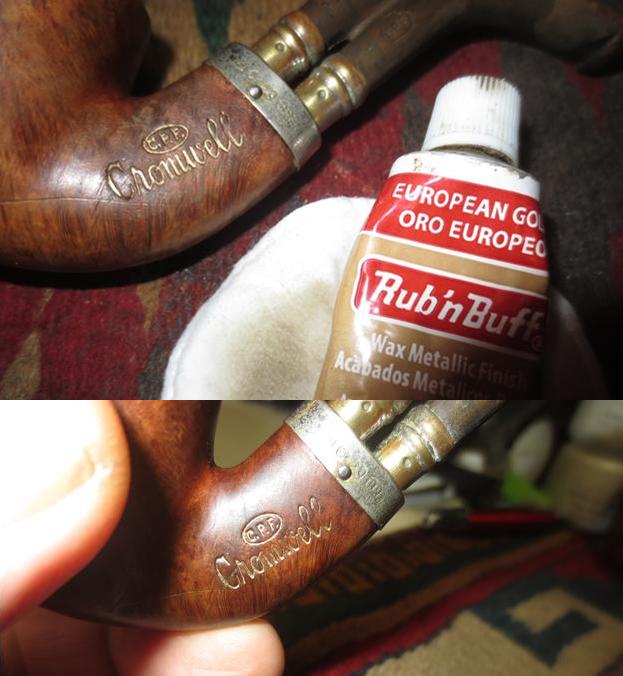
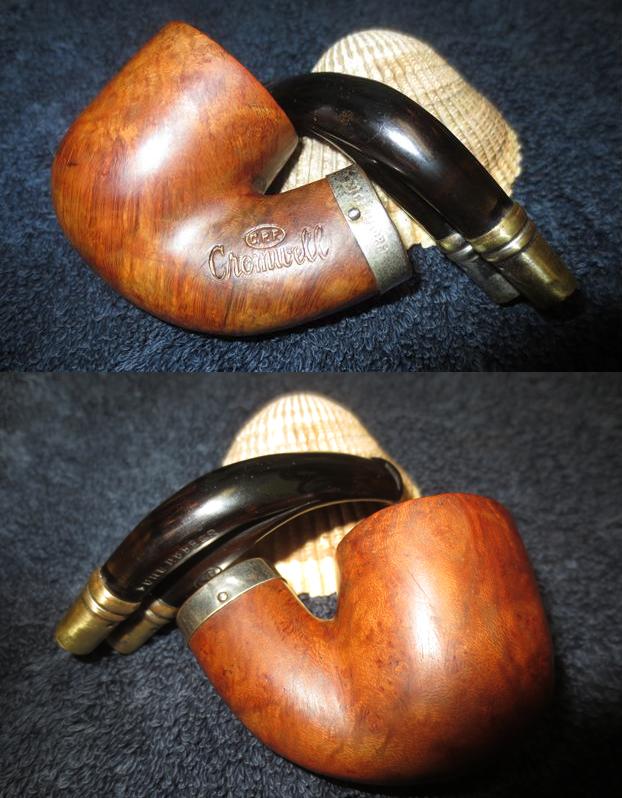
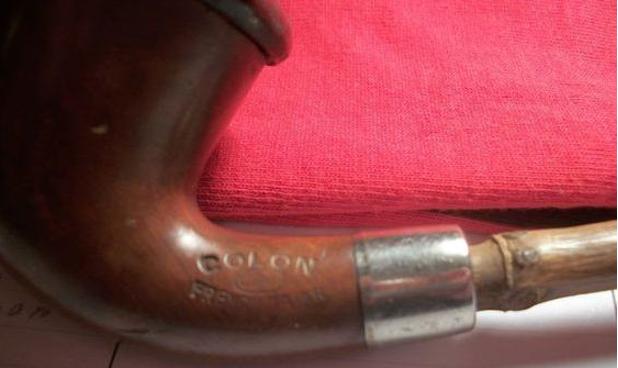
I touched up the gold leaf on the stamping using European Gold Rub’n Buff. I applied it with a cotton swab and rubbed off the excess with a cotton pad. The repaired stamping is shown in the next two photos.
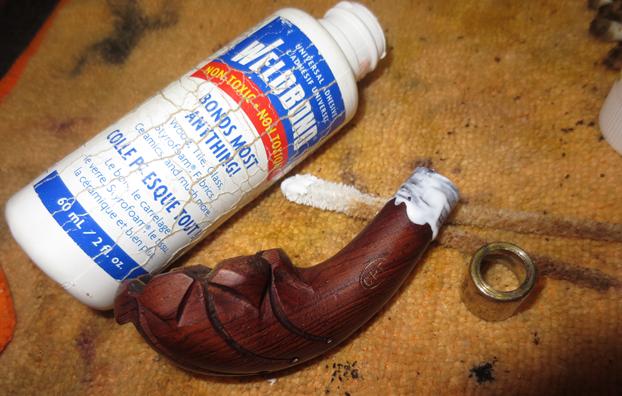
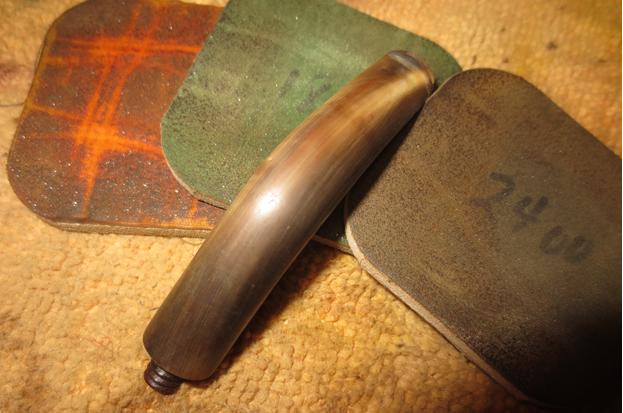
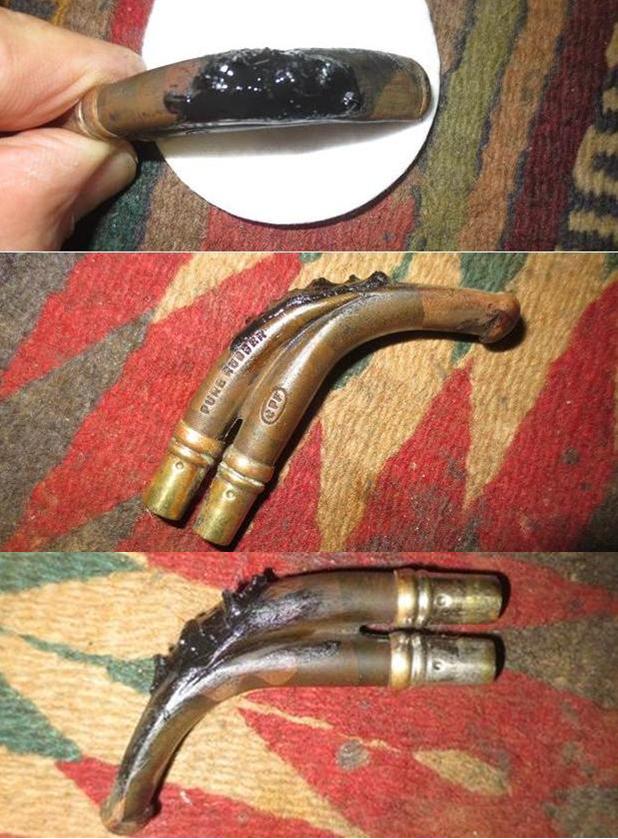
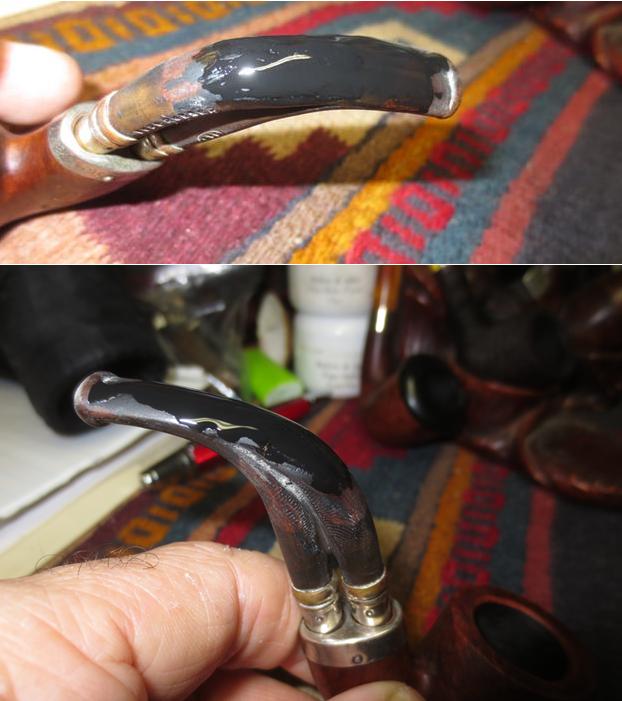
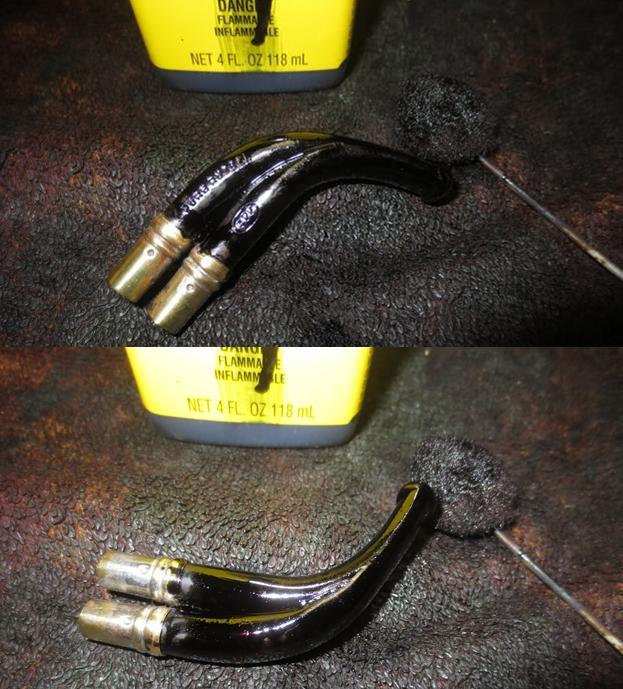
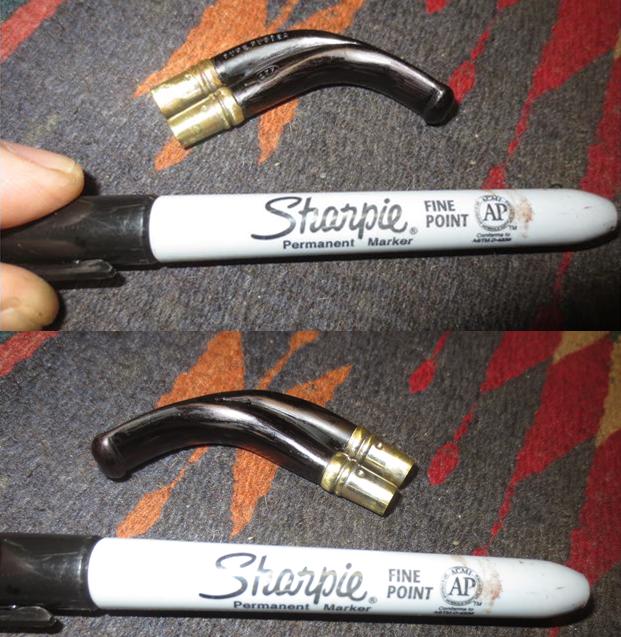
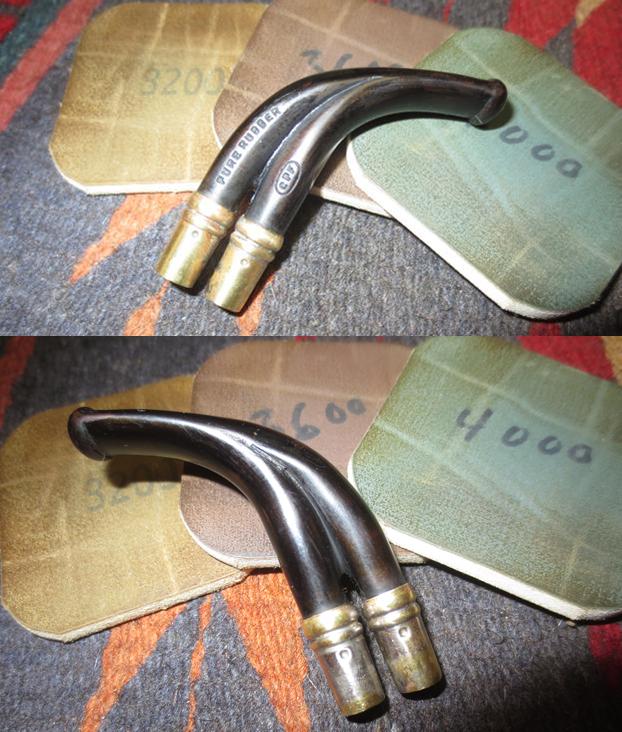
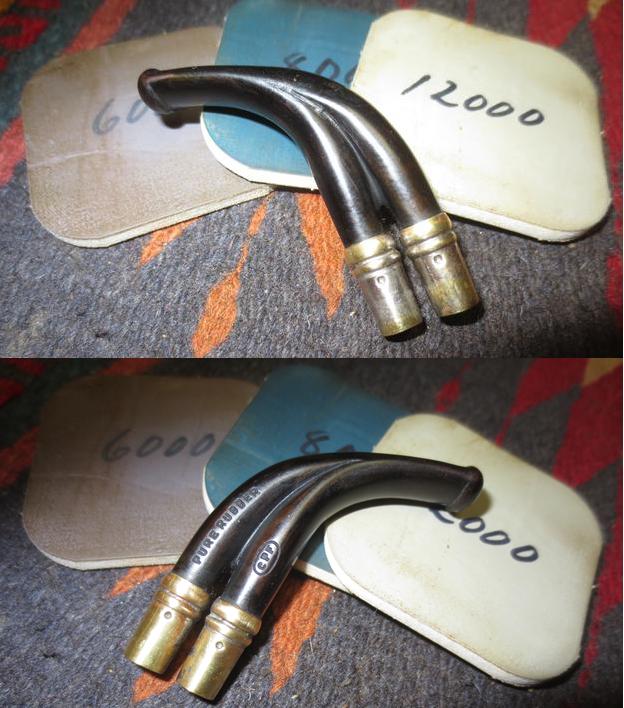
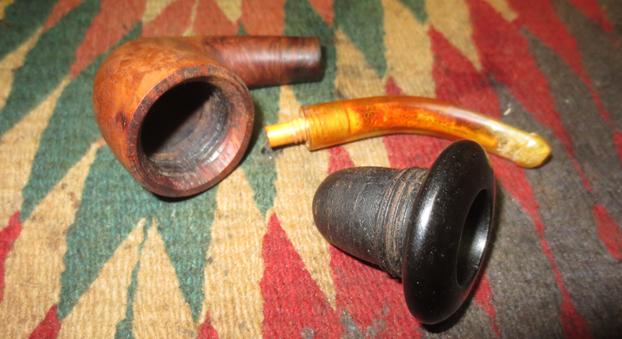
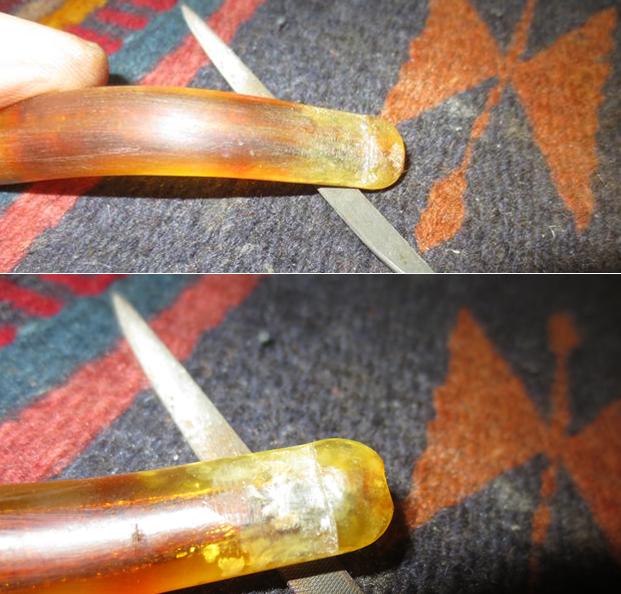
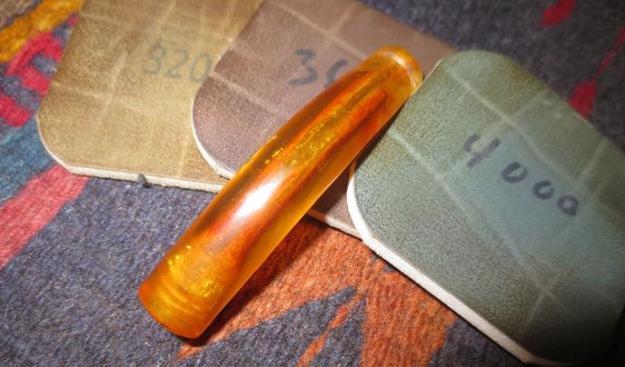
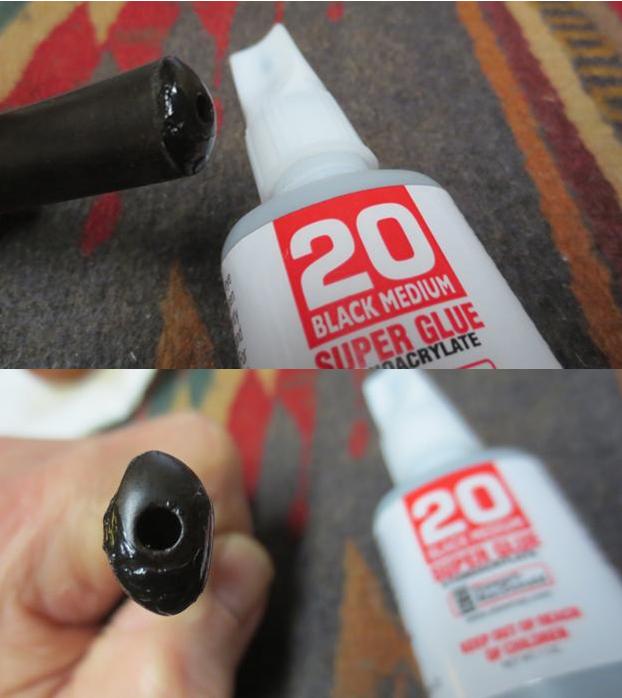
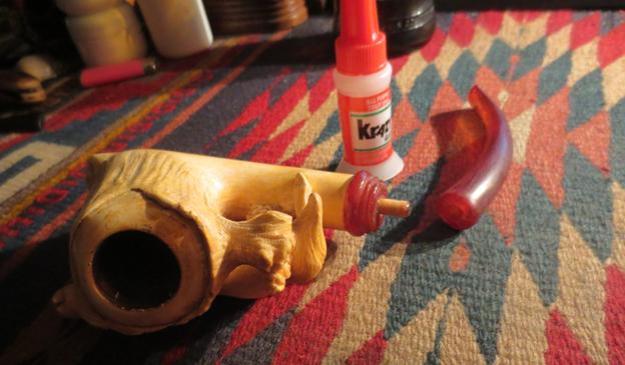
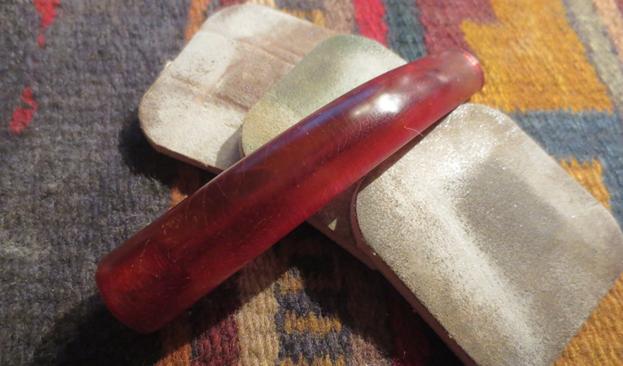
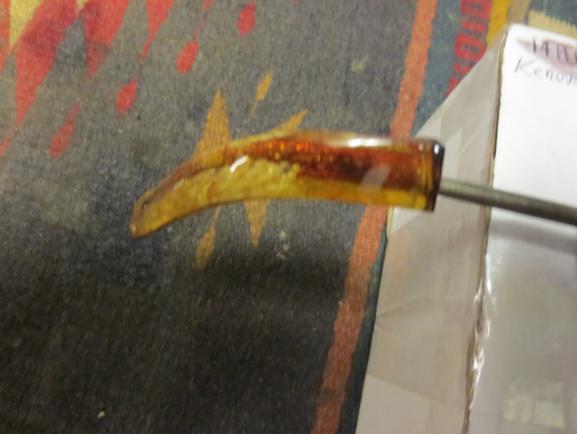
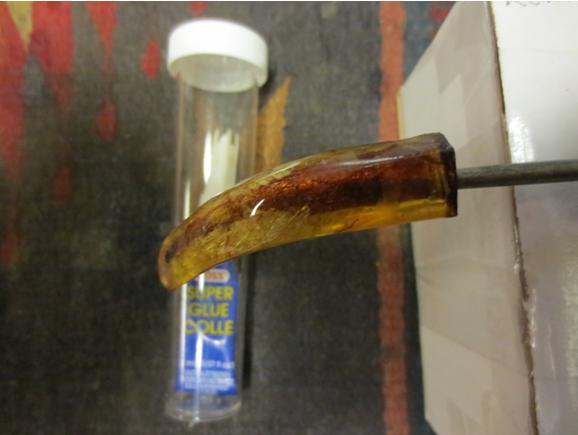
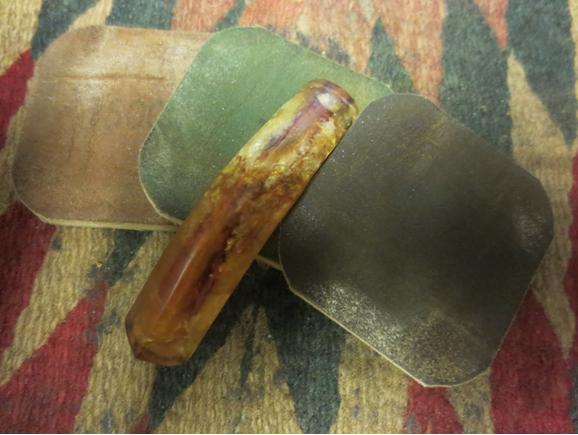
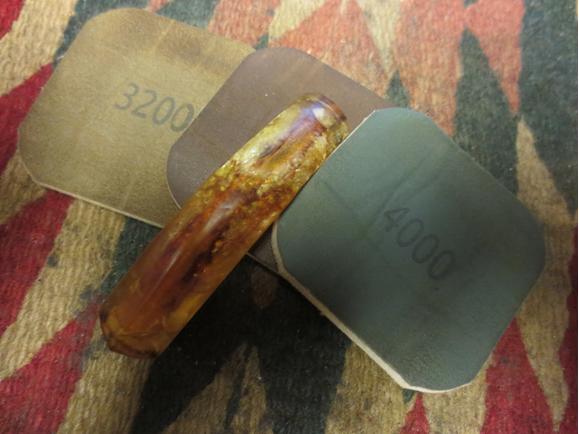
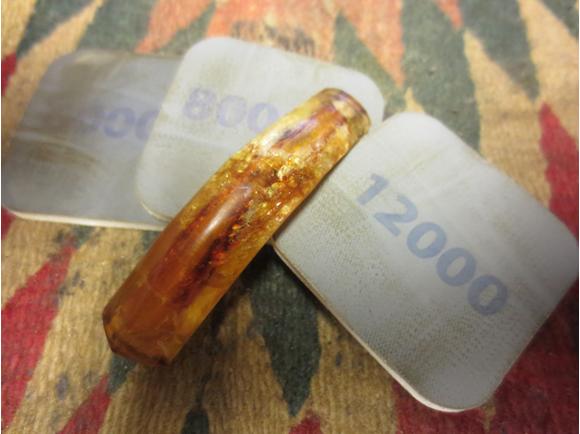
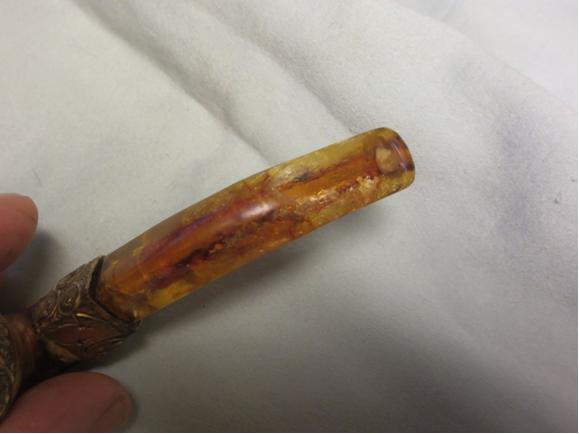
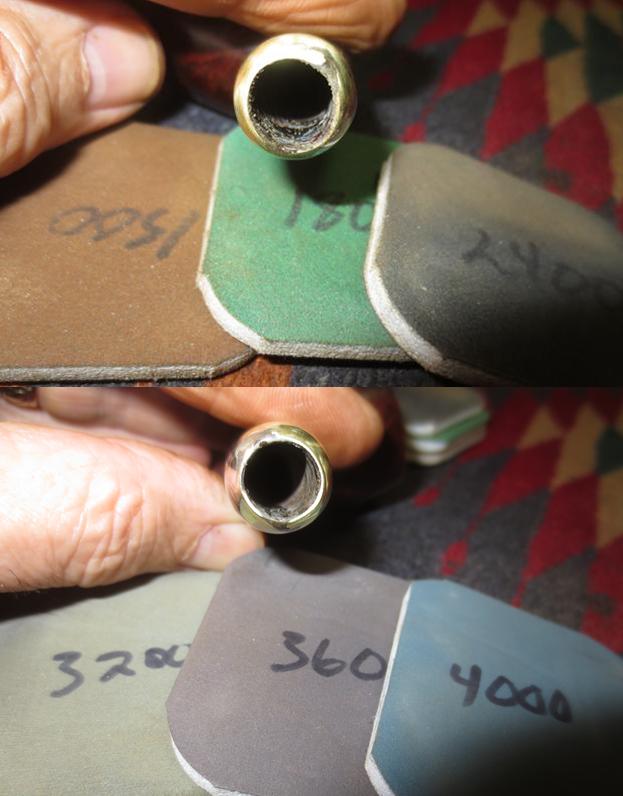
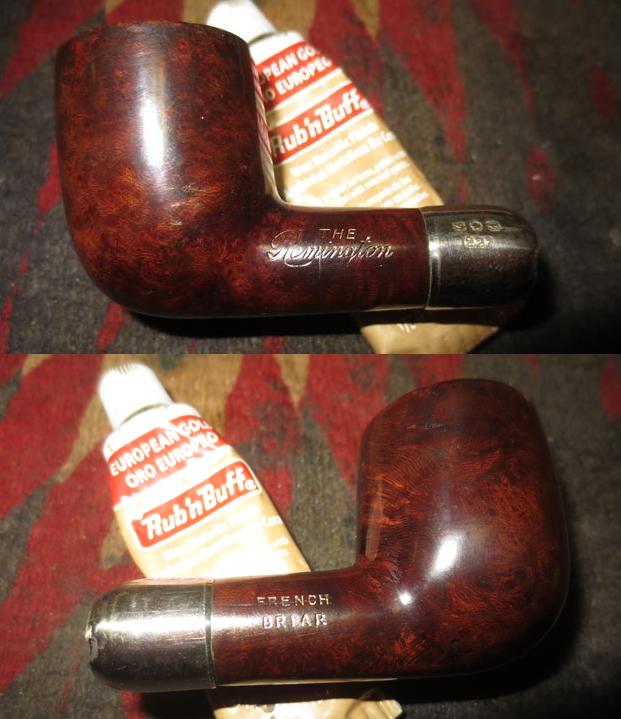
I decided to experiment with a repair to the tears in the ferrule using clear super glue. I had never tried this before but I had a hunch that the hardened glue would fill in the gaps and then I could sand it smooth. I applied the glue in layers until the edge was even with the end of the ferrule. I sanded the repairs after each application of glue until the surface of the repair matched the rest of the ferrule. While the glue is slightly visible it bound the tears together and I was able to sand it smooth and blend it into the silver. I polished the repair with micromesh sanding pads – wet sanding with1500-2400 grit pads and 3200-12000 grit pads. The following photos show the progress of the ferrule repair. 
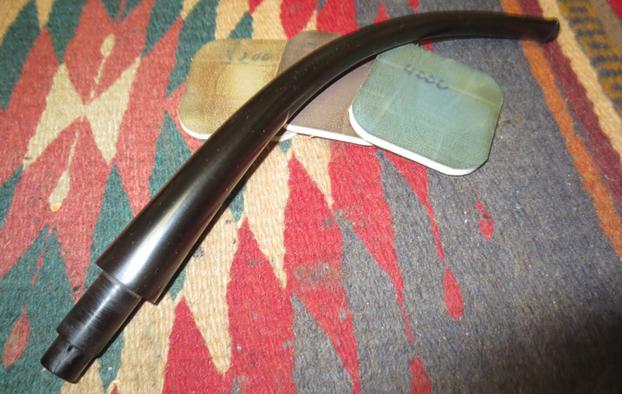
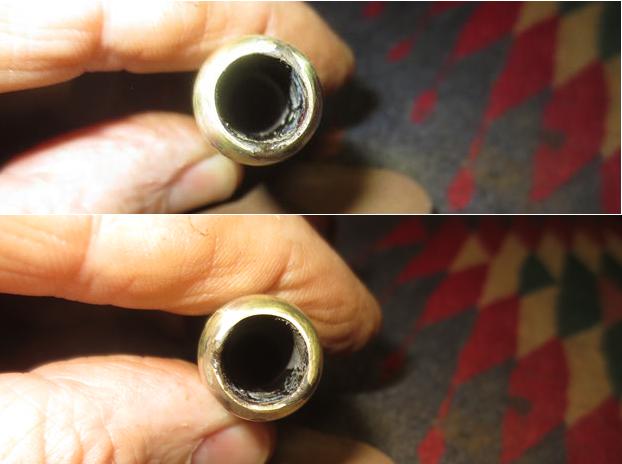
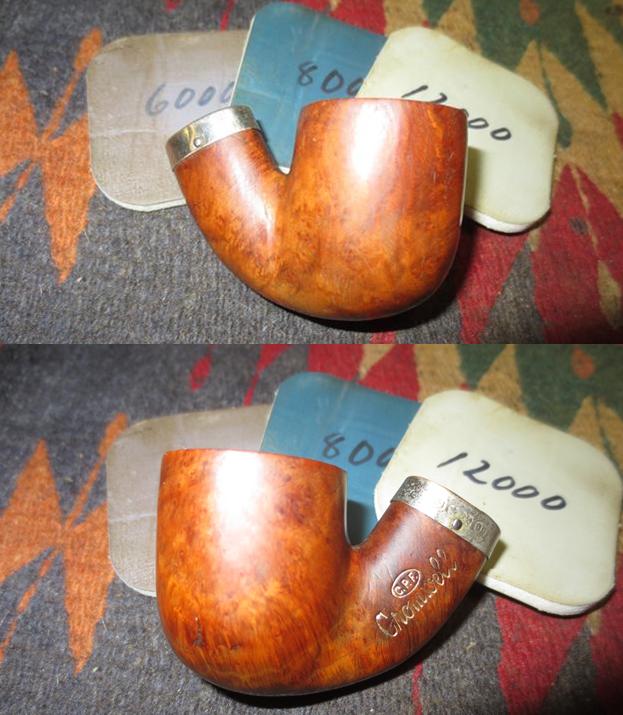
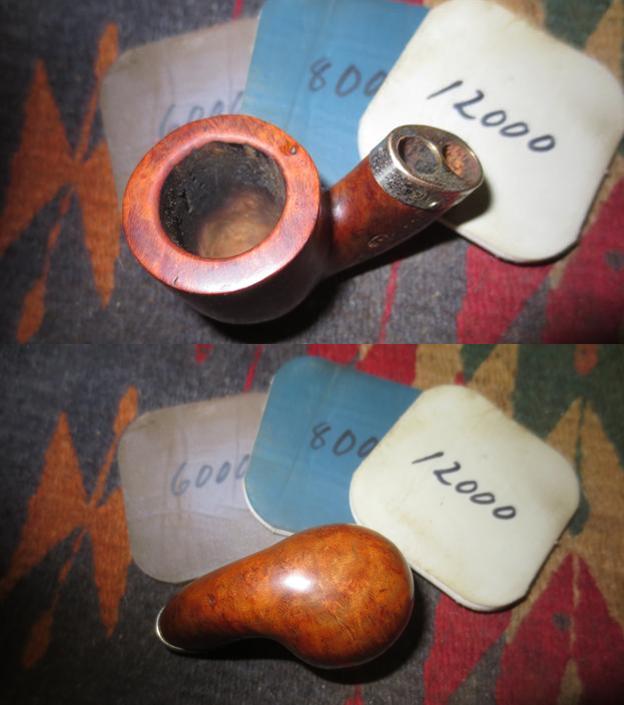
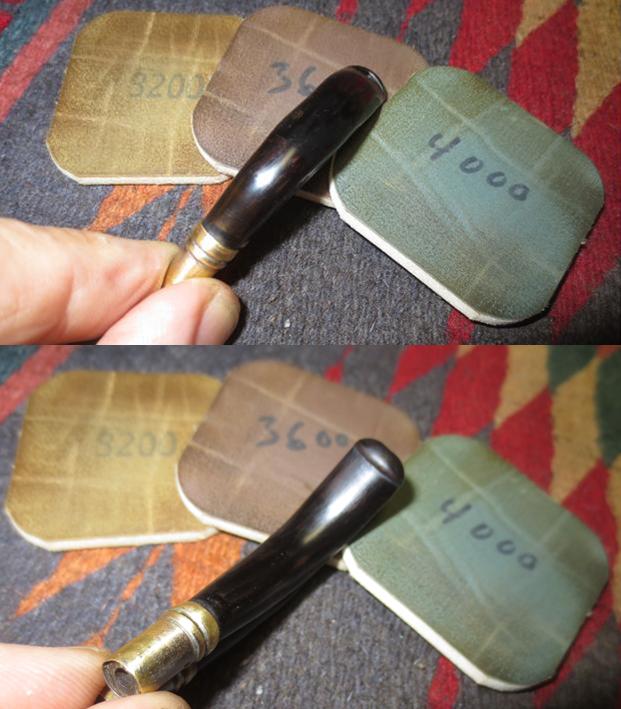
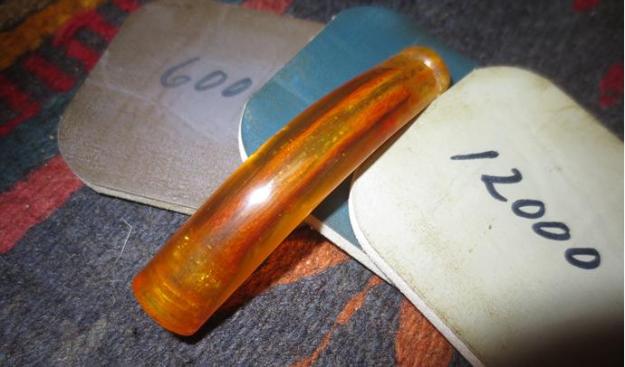
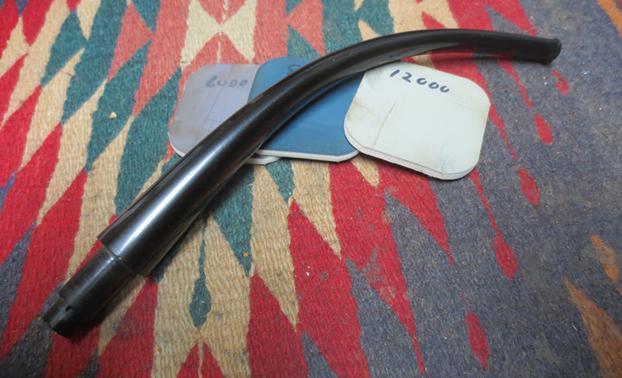
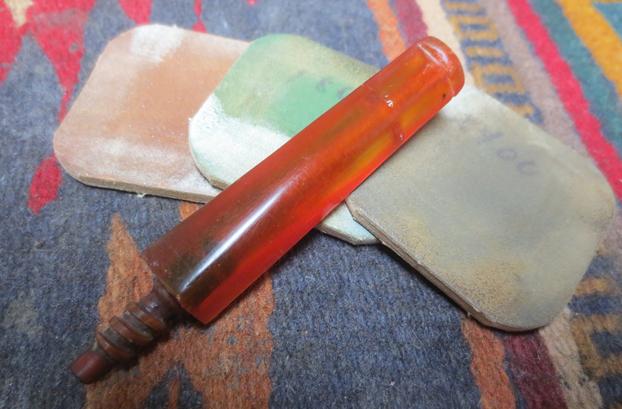
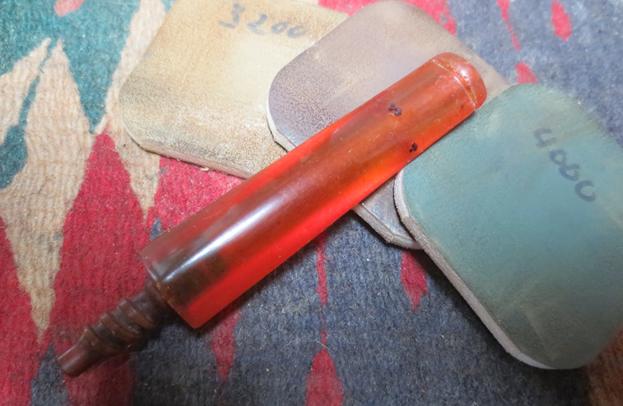
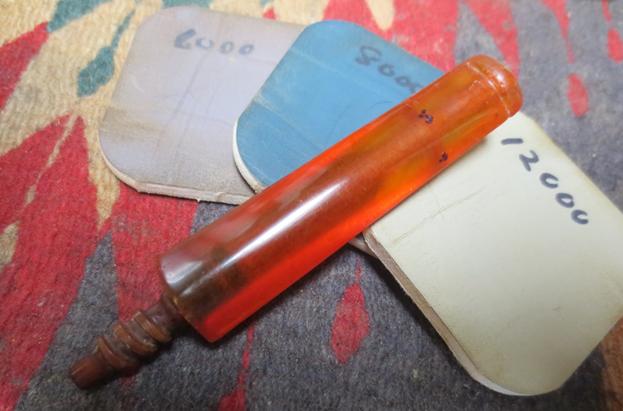
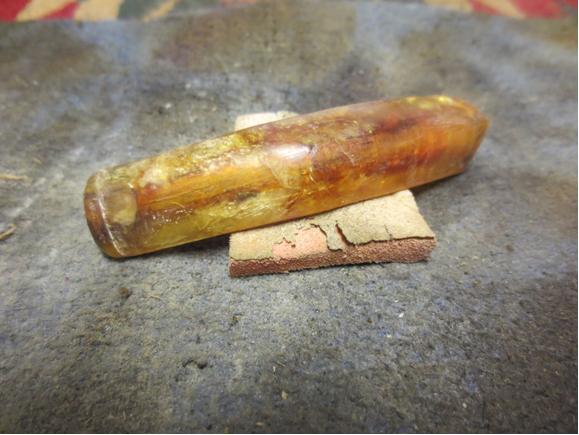
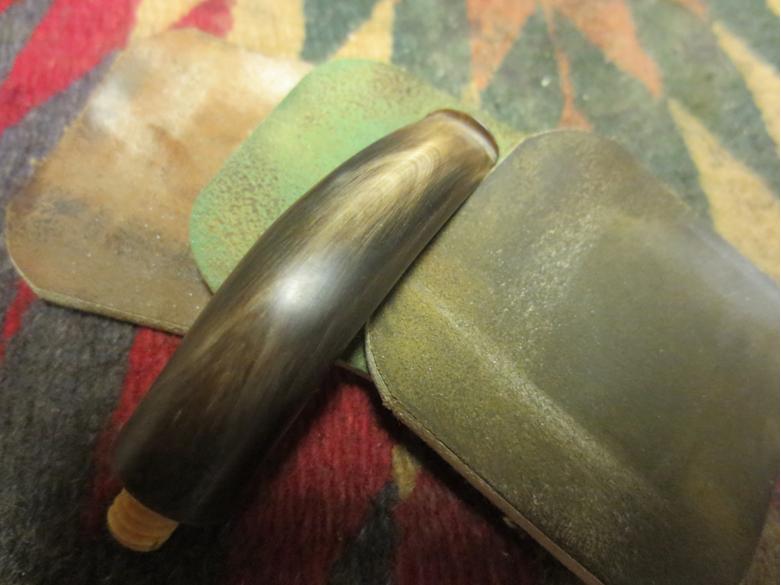
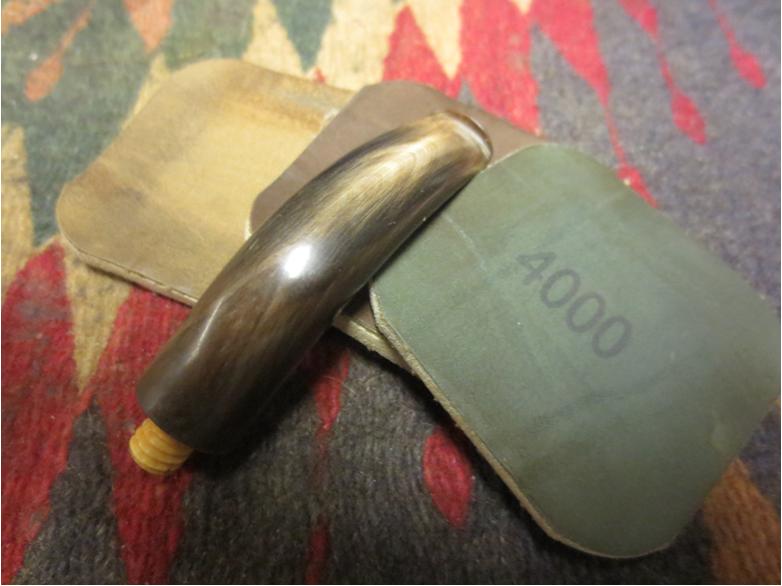
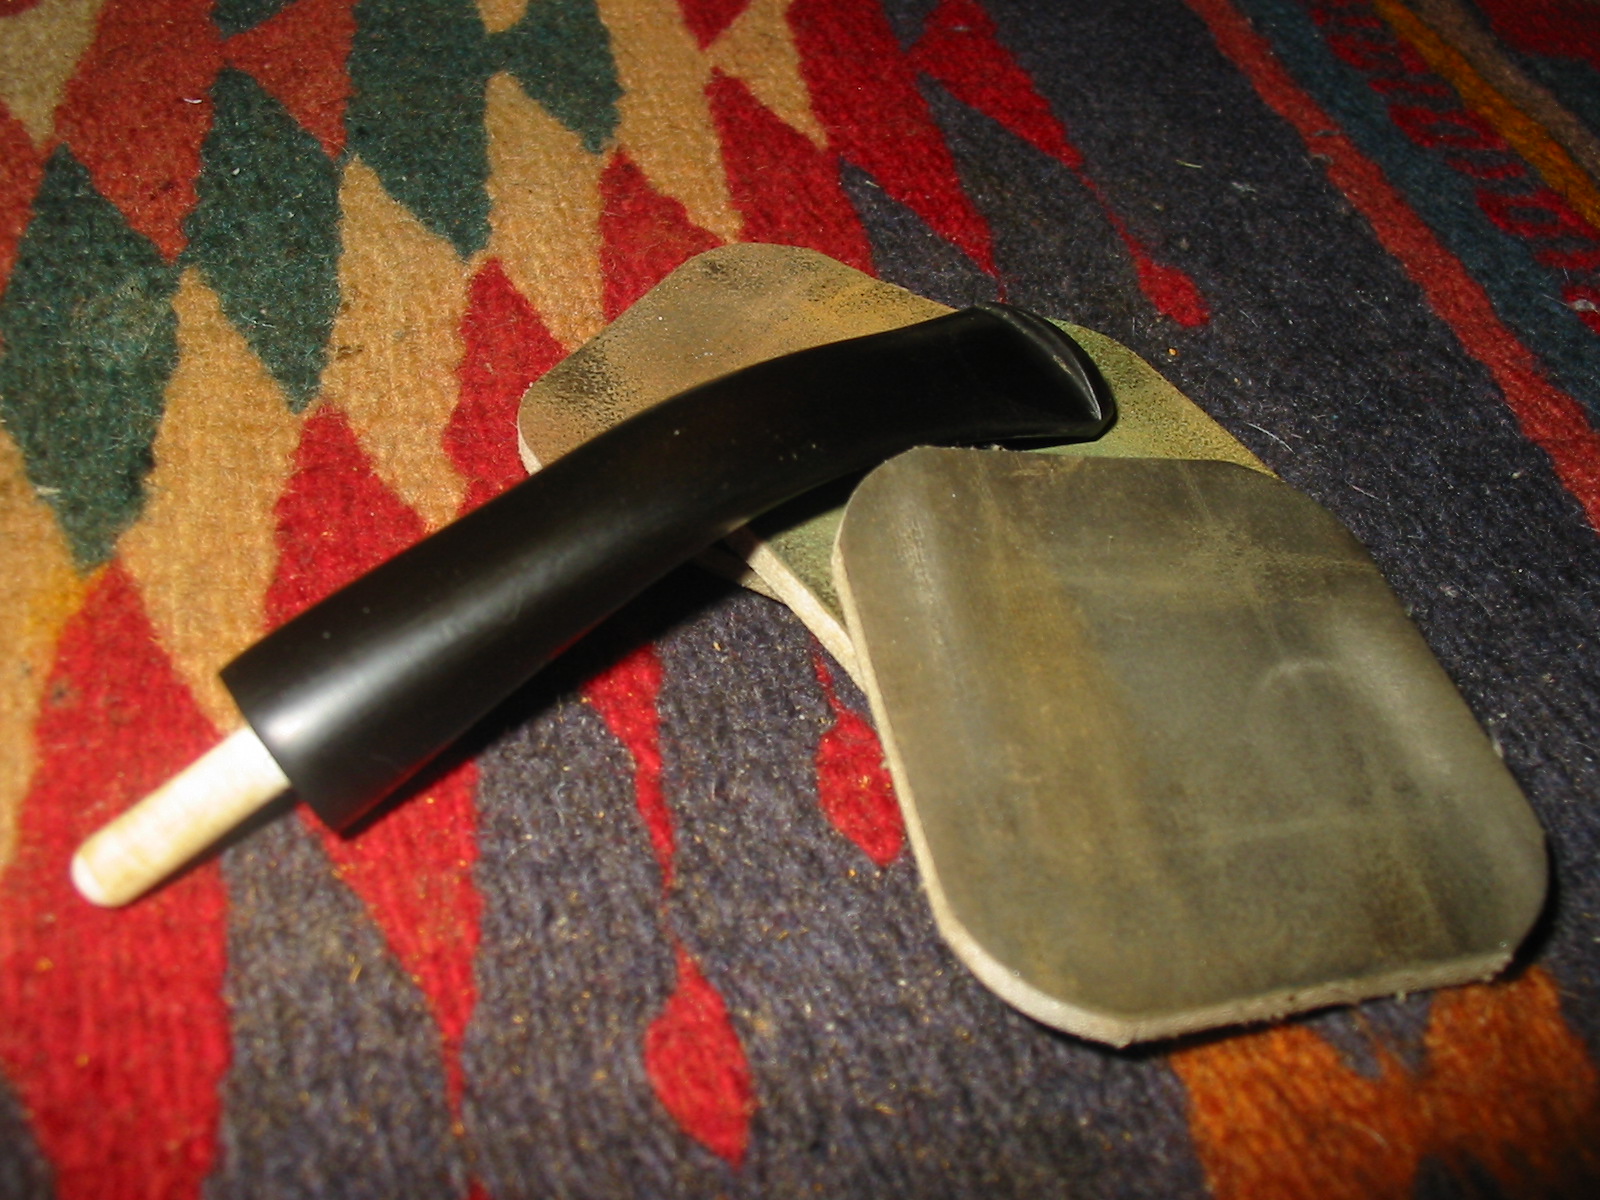
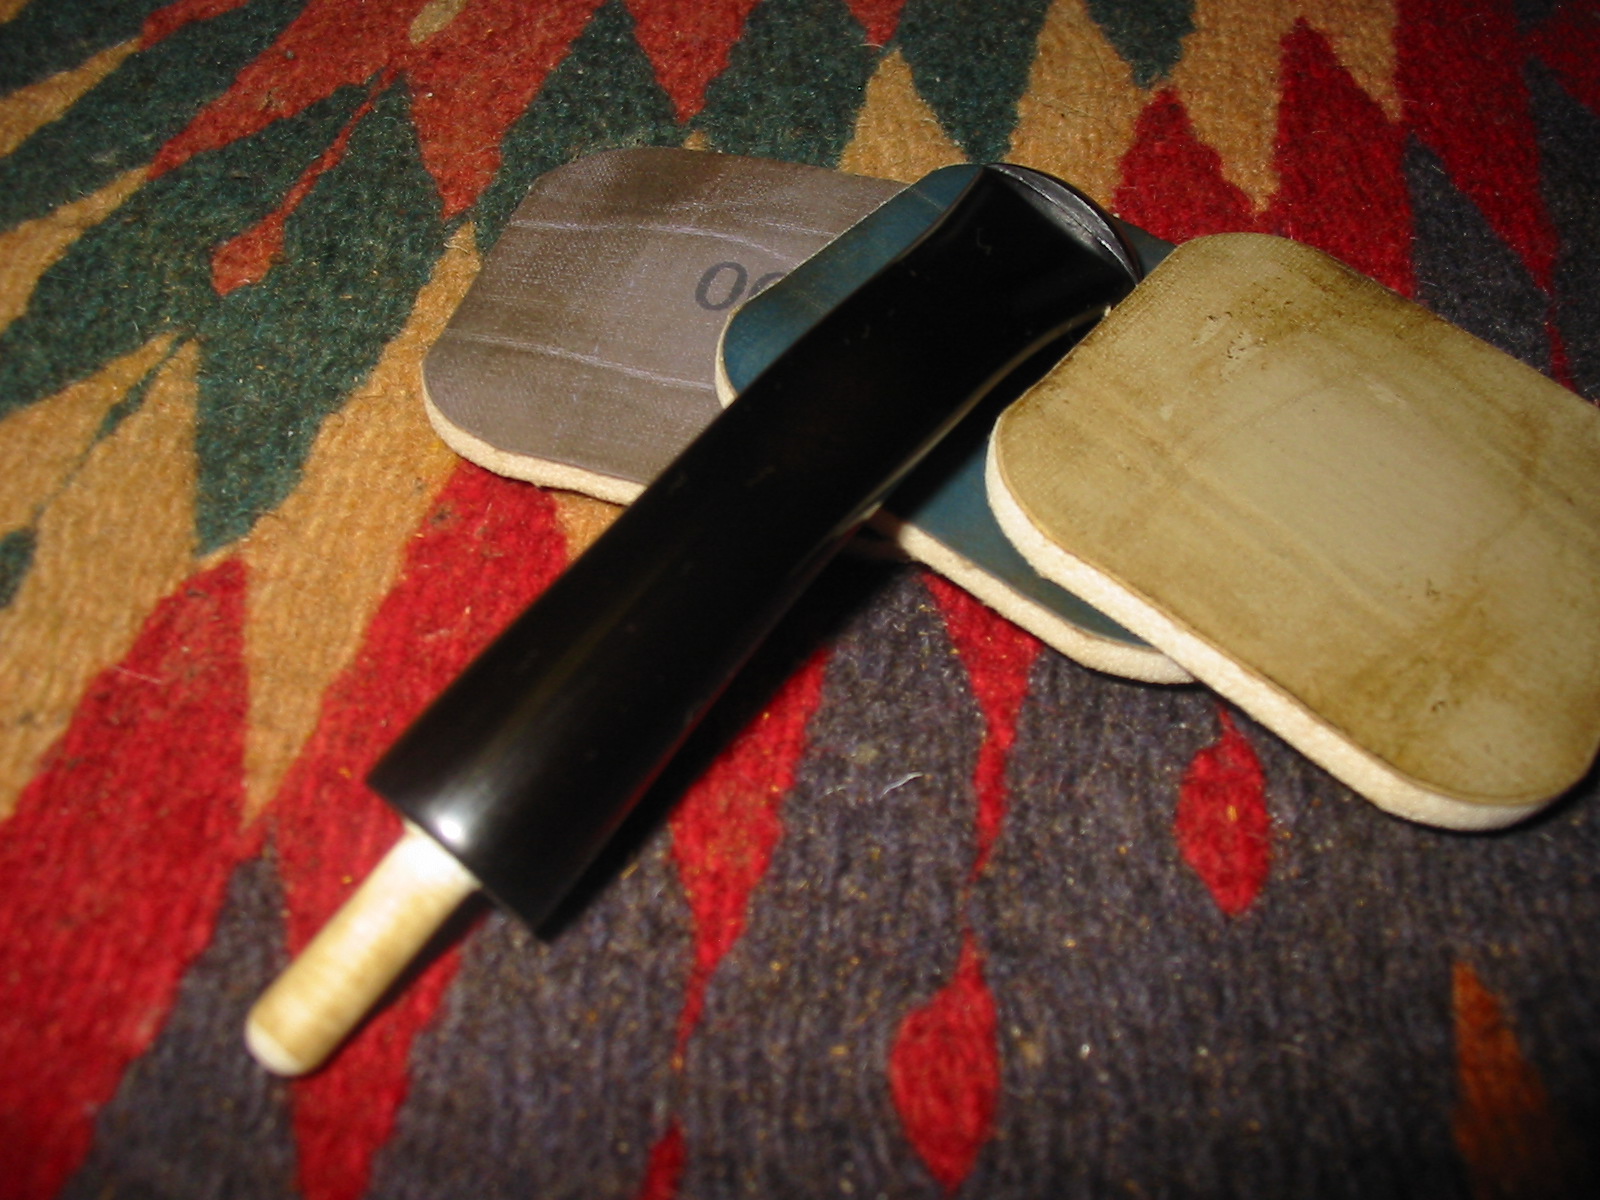
With the bowl and ferrule restored and functional I turned my attention to the stem. I polished the metal end cap with Blue Diamond on the buffing wheel. I polished the vulcanite with micromesh sanding pads – wet sanding with 1500-2400 grit pads and dry sanding with 3200-12000 grit pads. I rubbed the stem down with Obsidian Oil after each pad and after the final pad I set it aside to dry. 
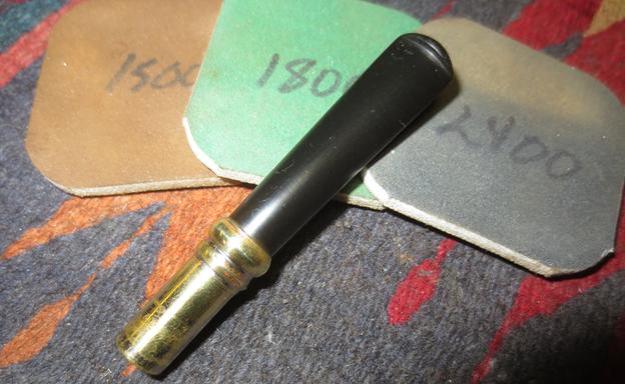
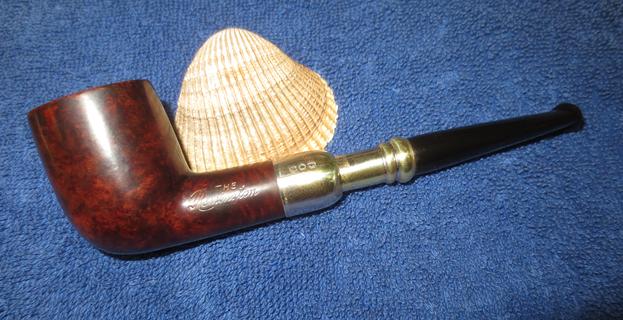
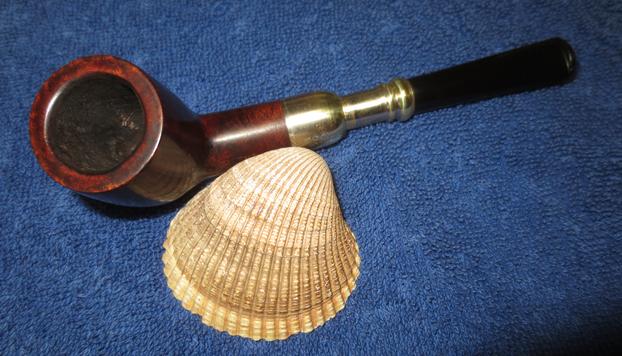
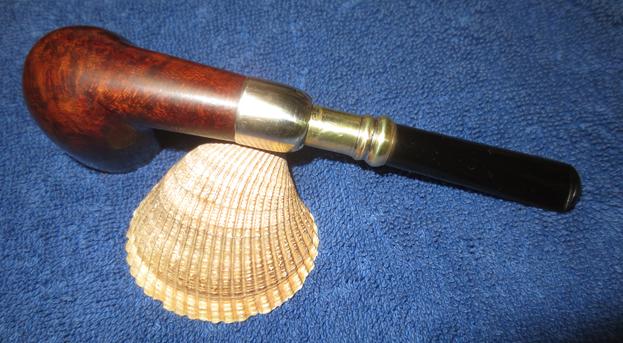
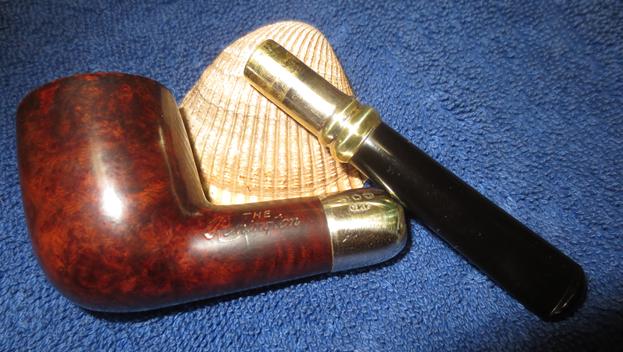
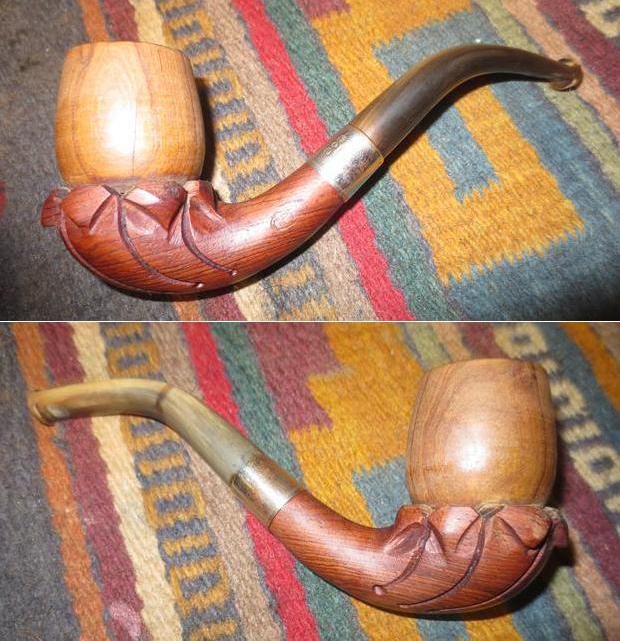
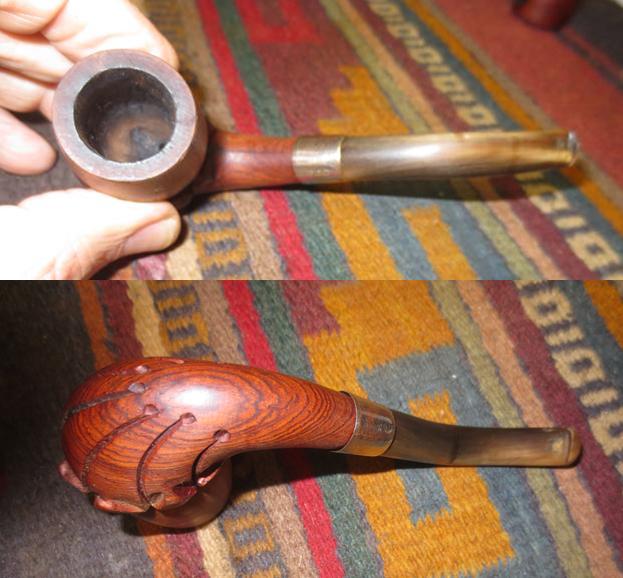
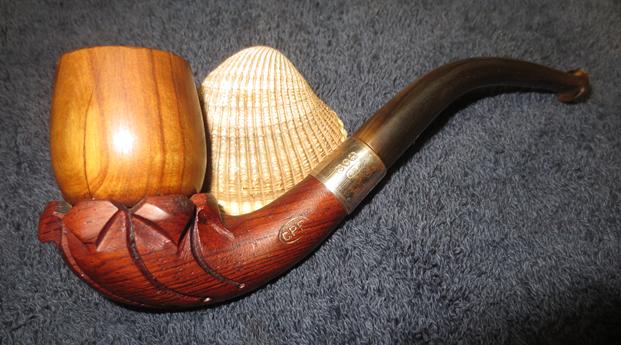
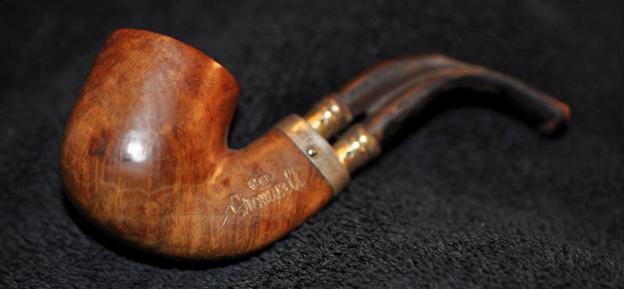
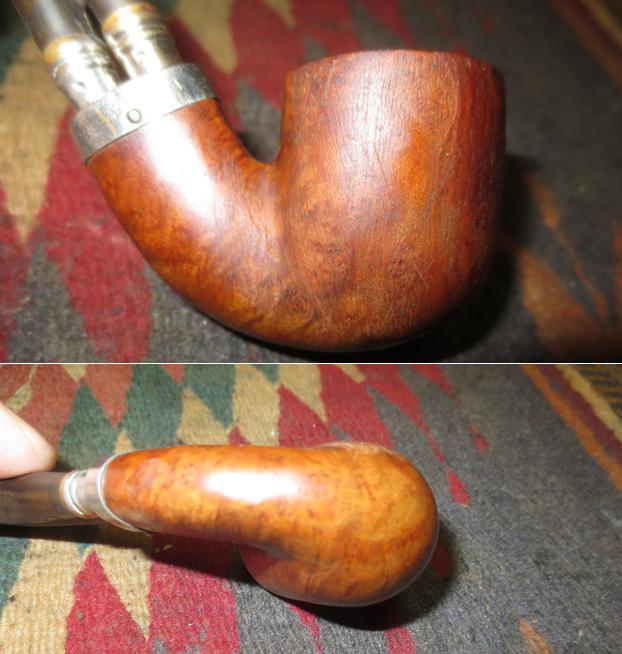
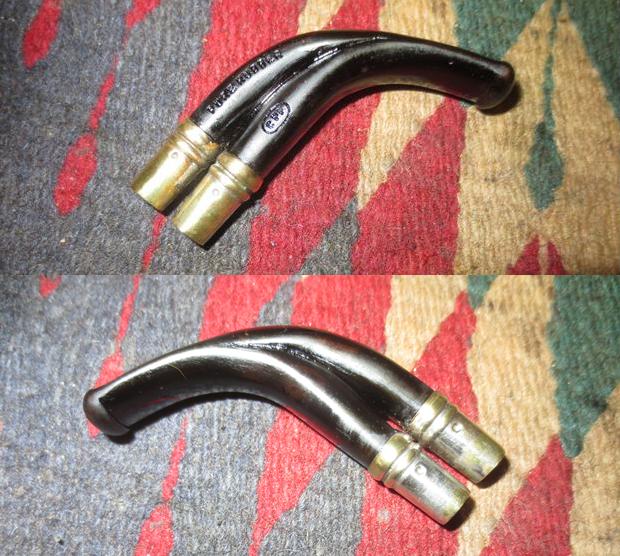
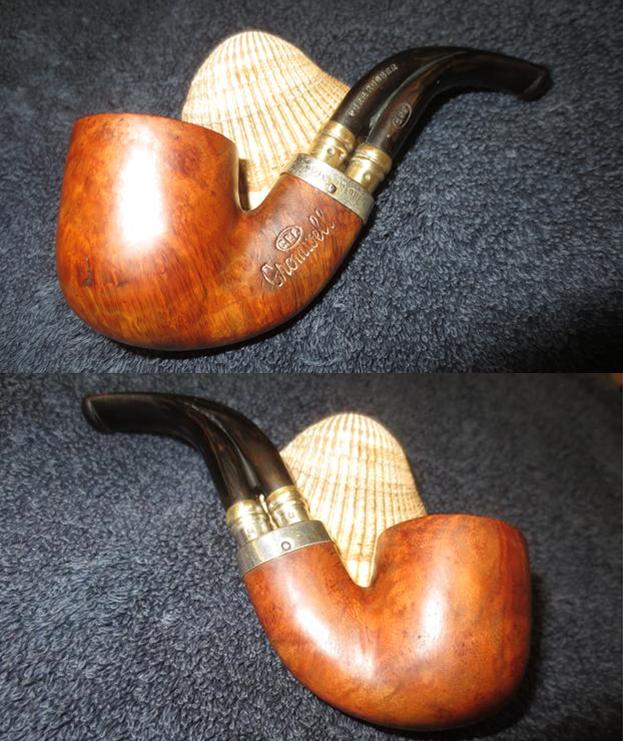
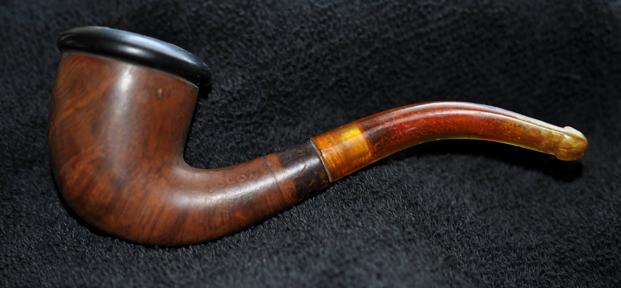
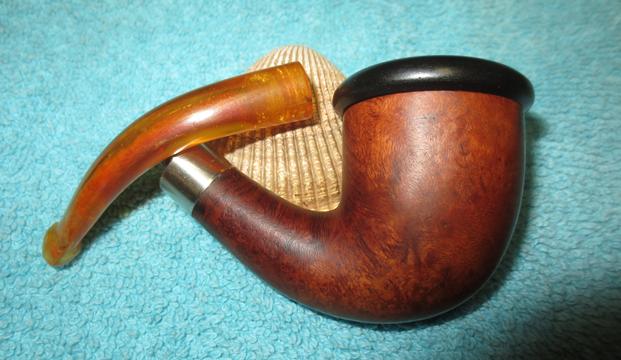
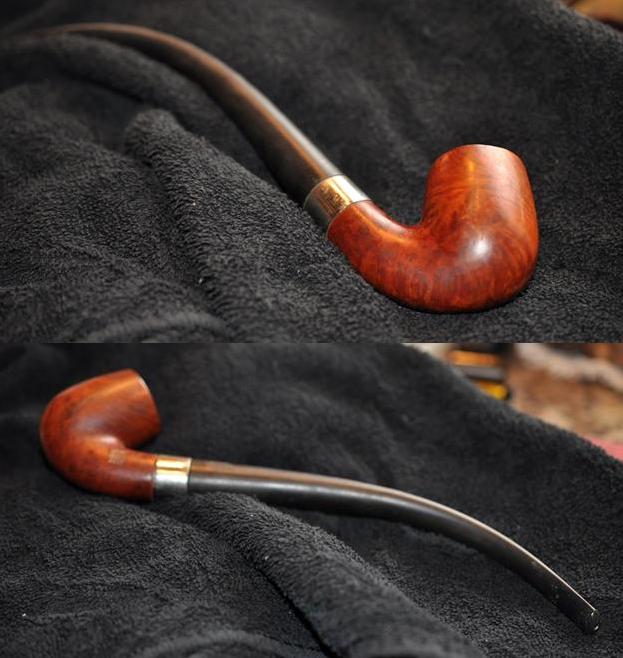
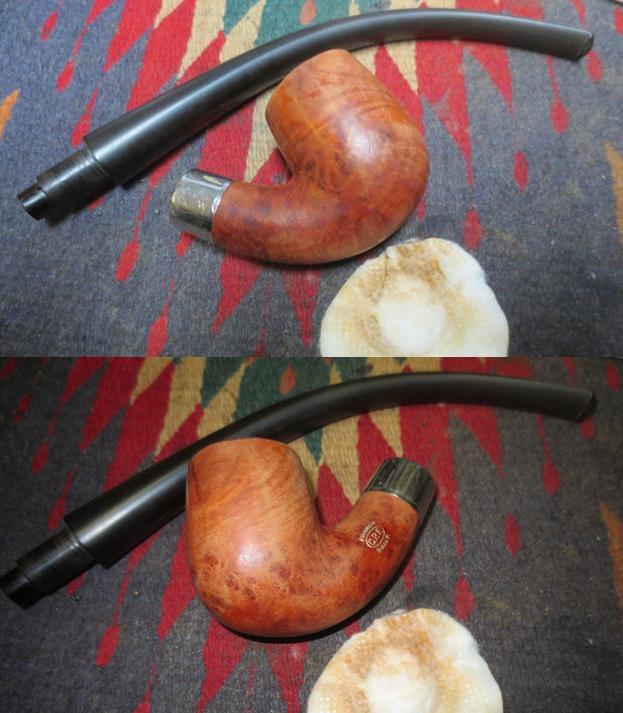
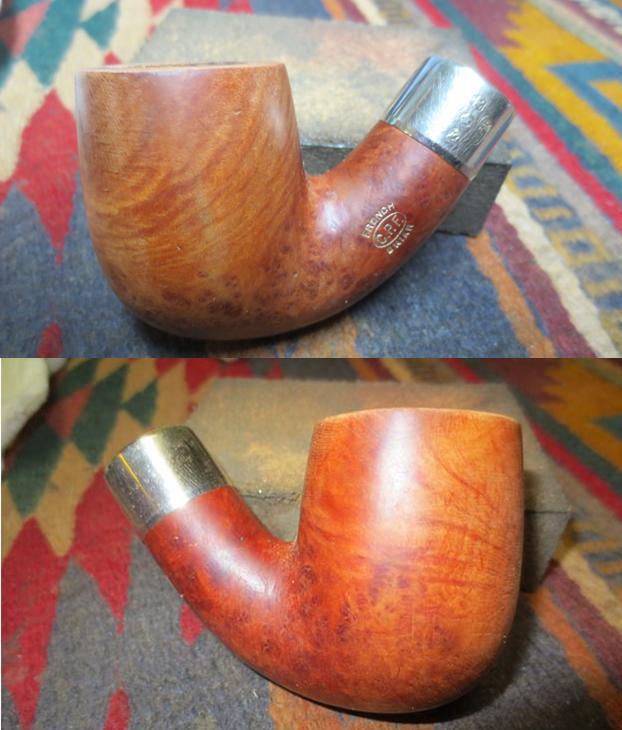
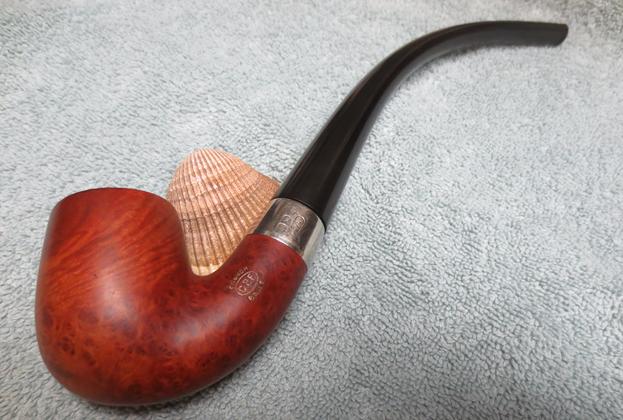
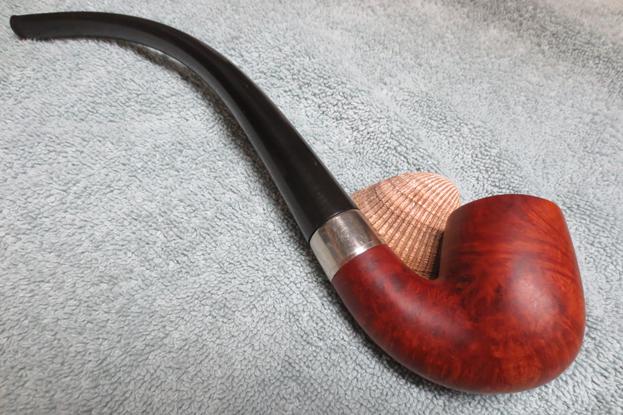
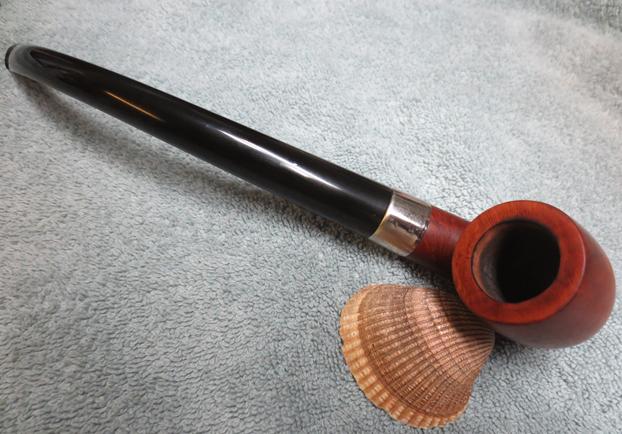
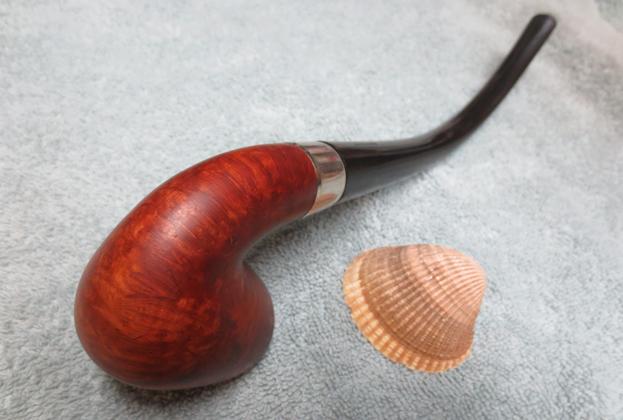
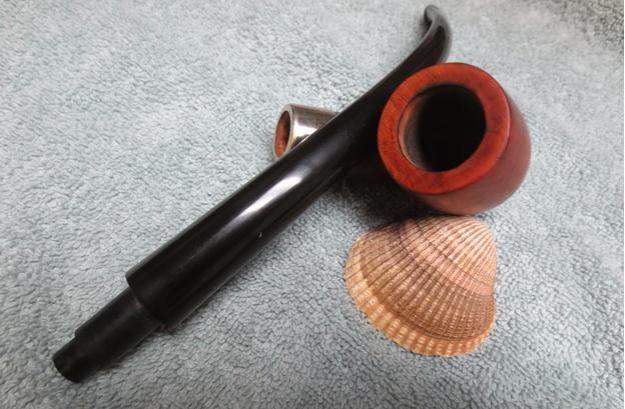
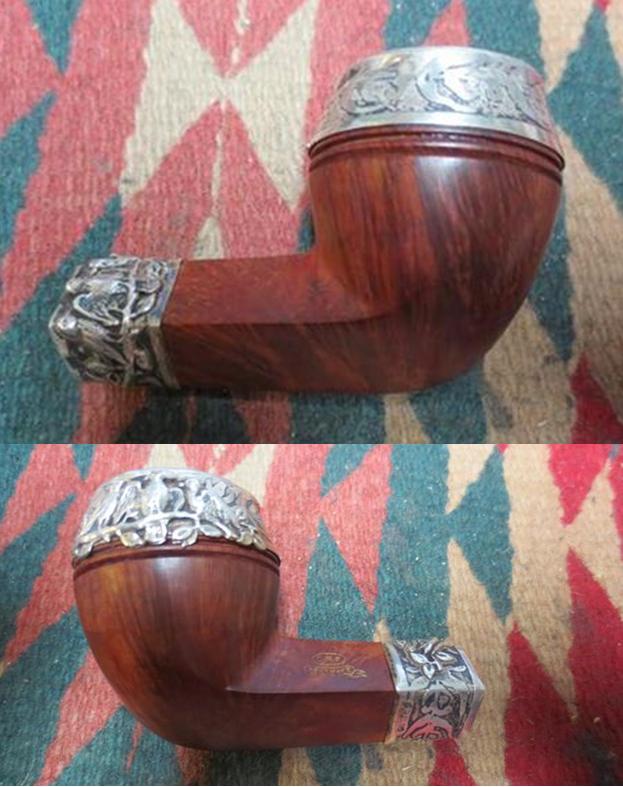
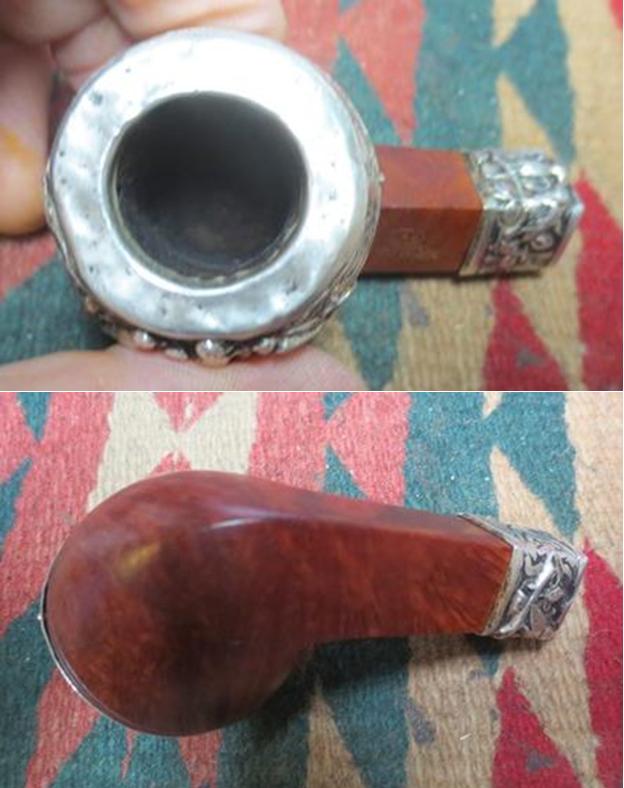
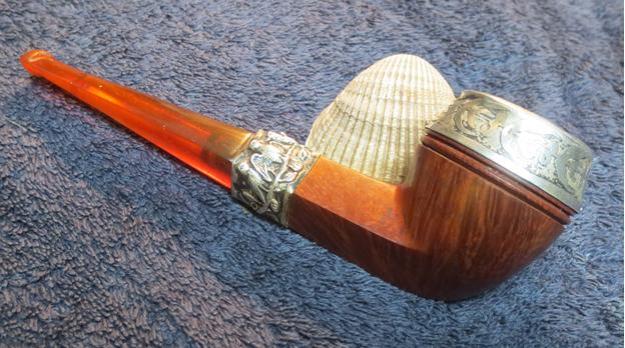
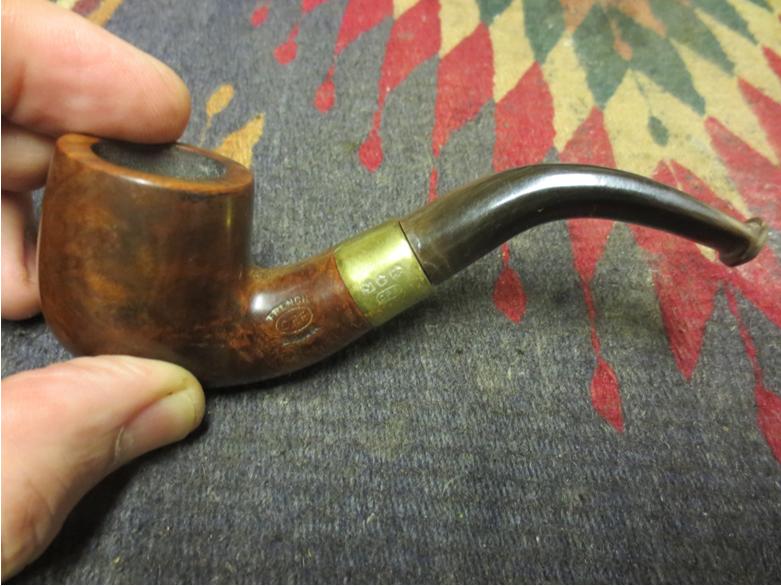
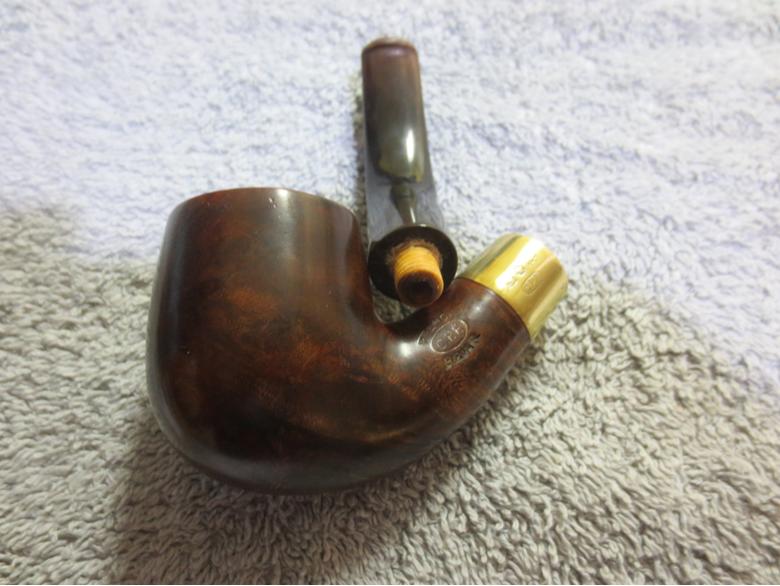
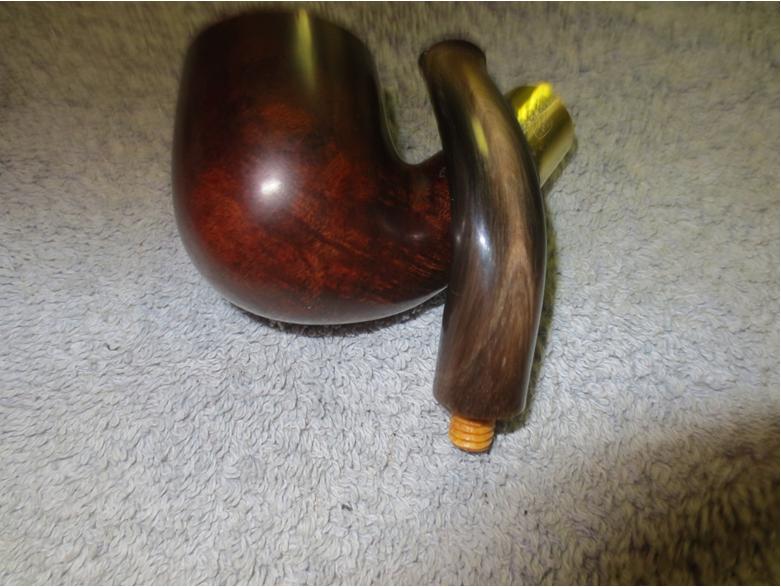
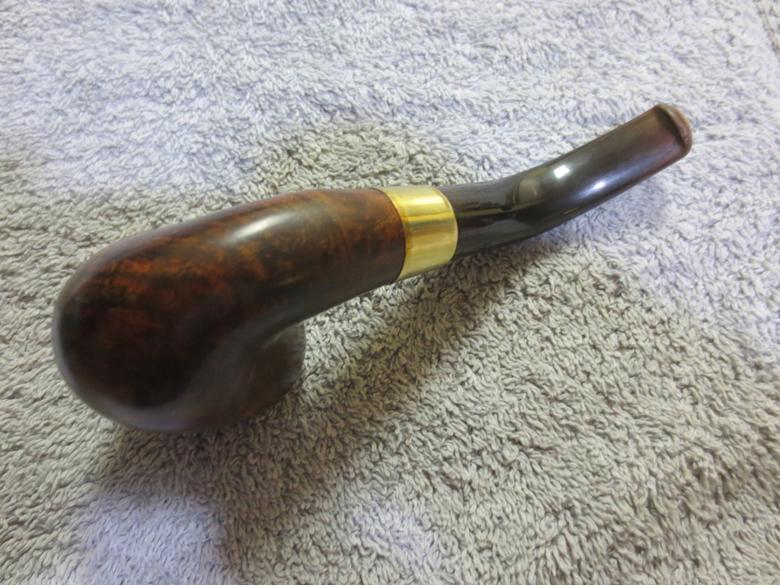
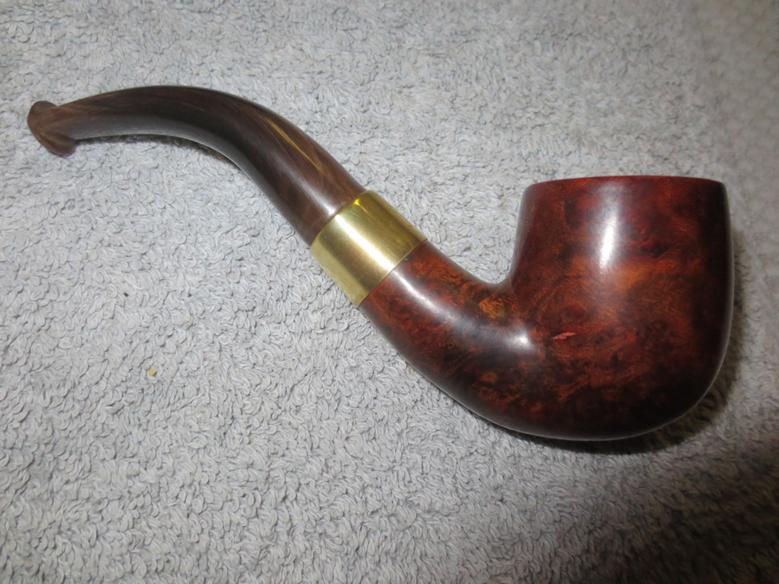
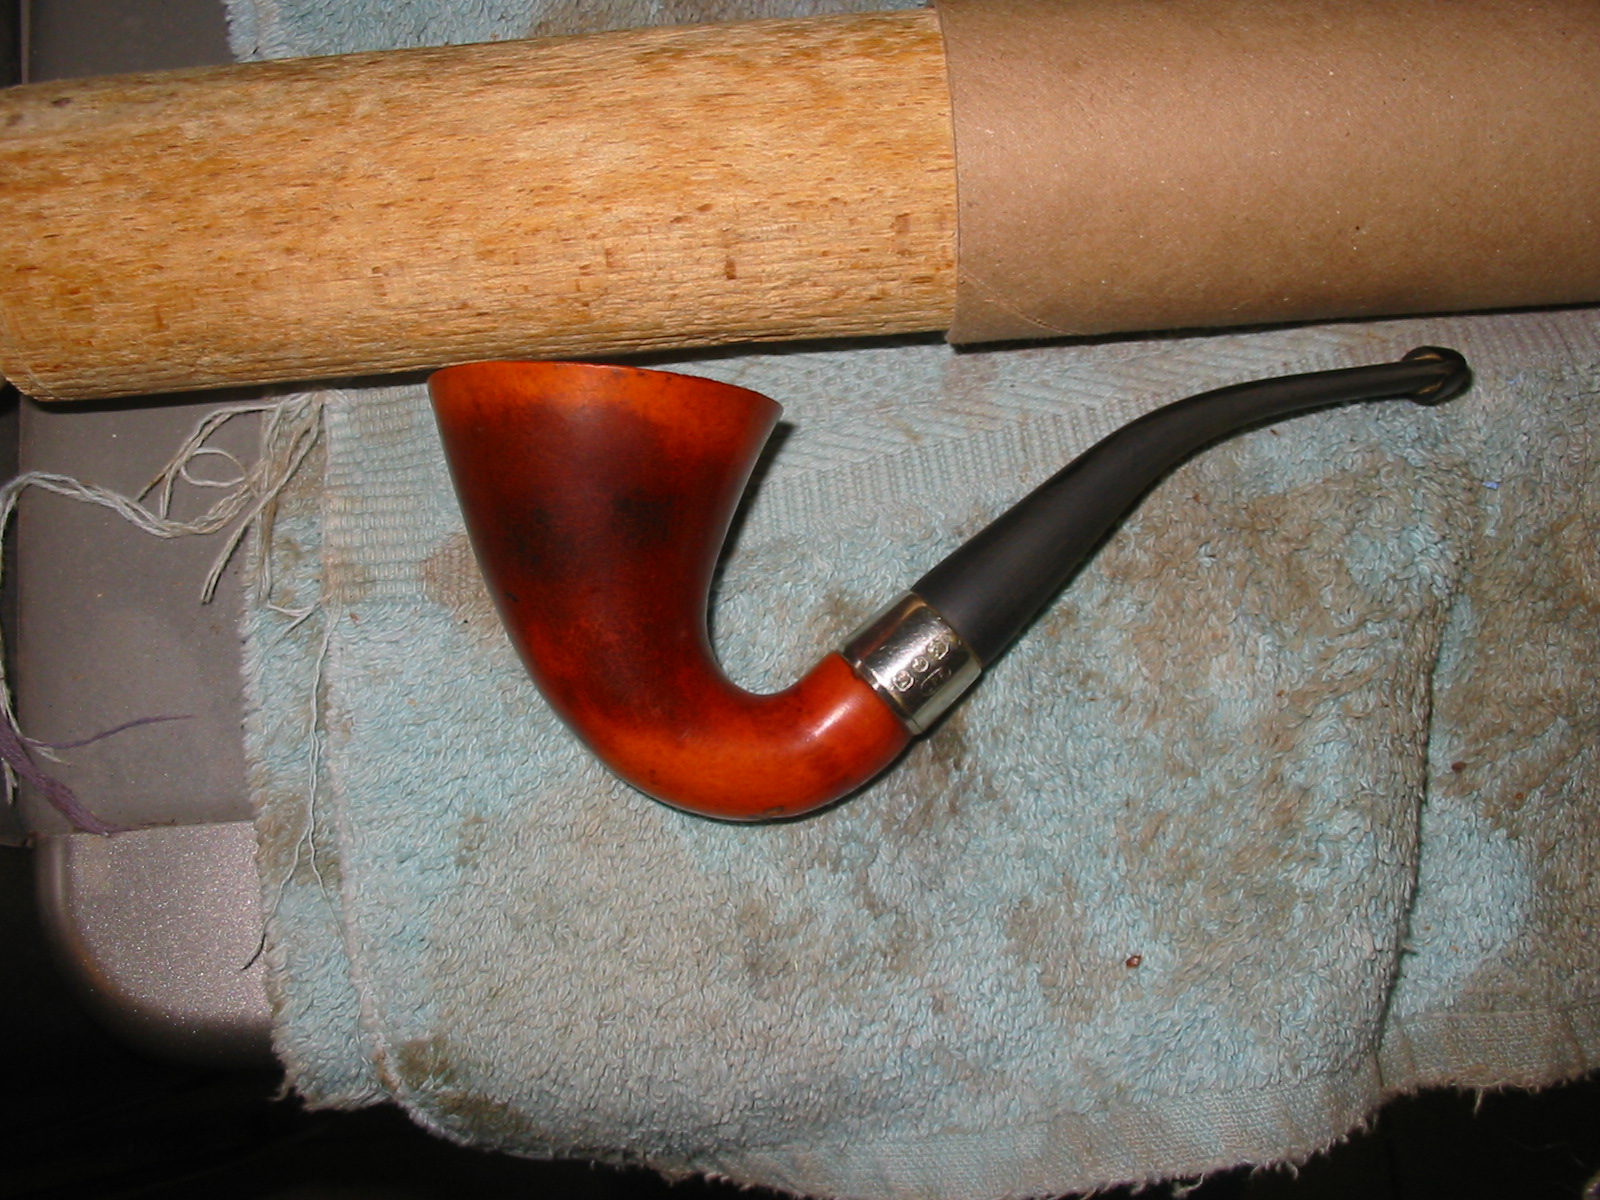
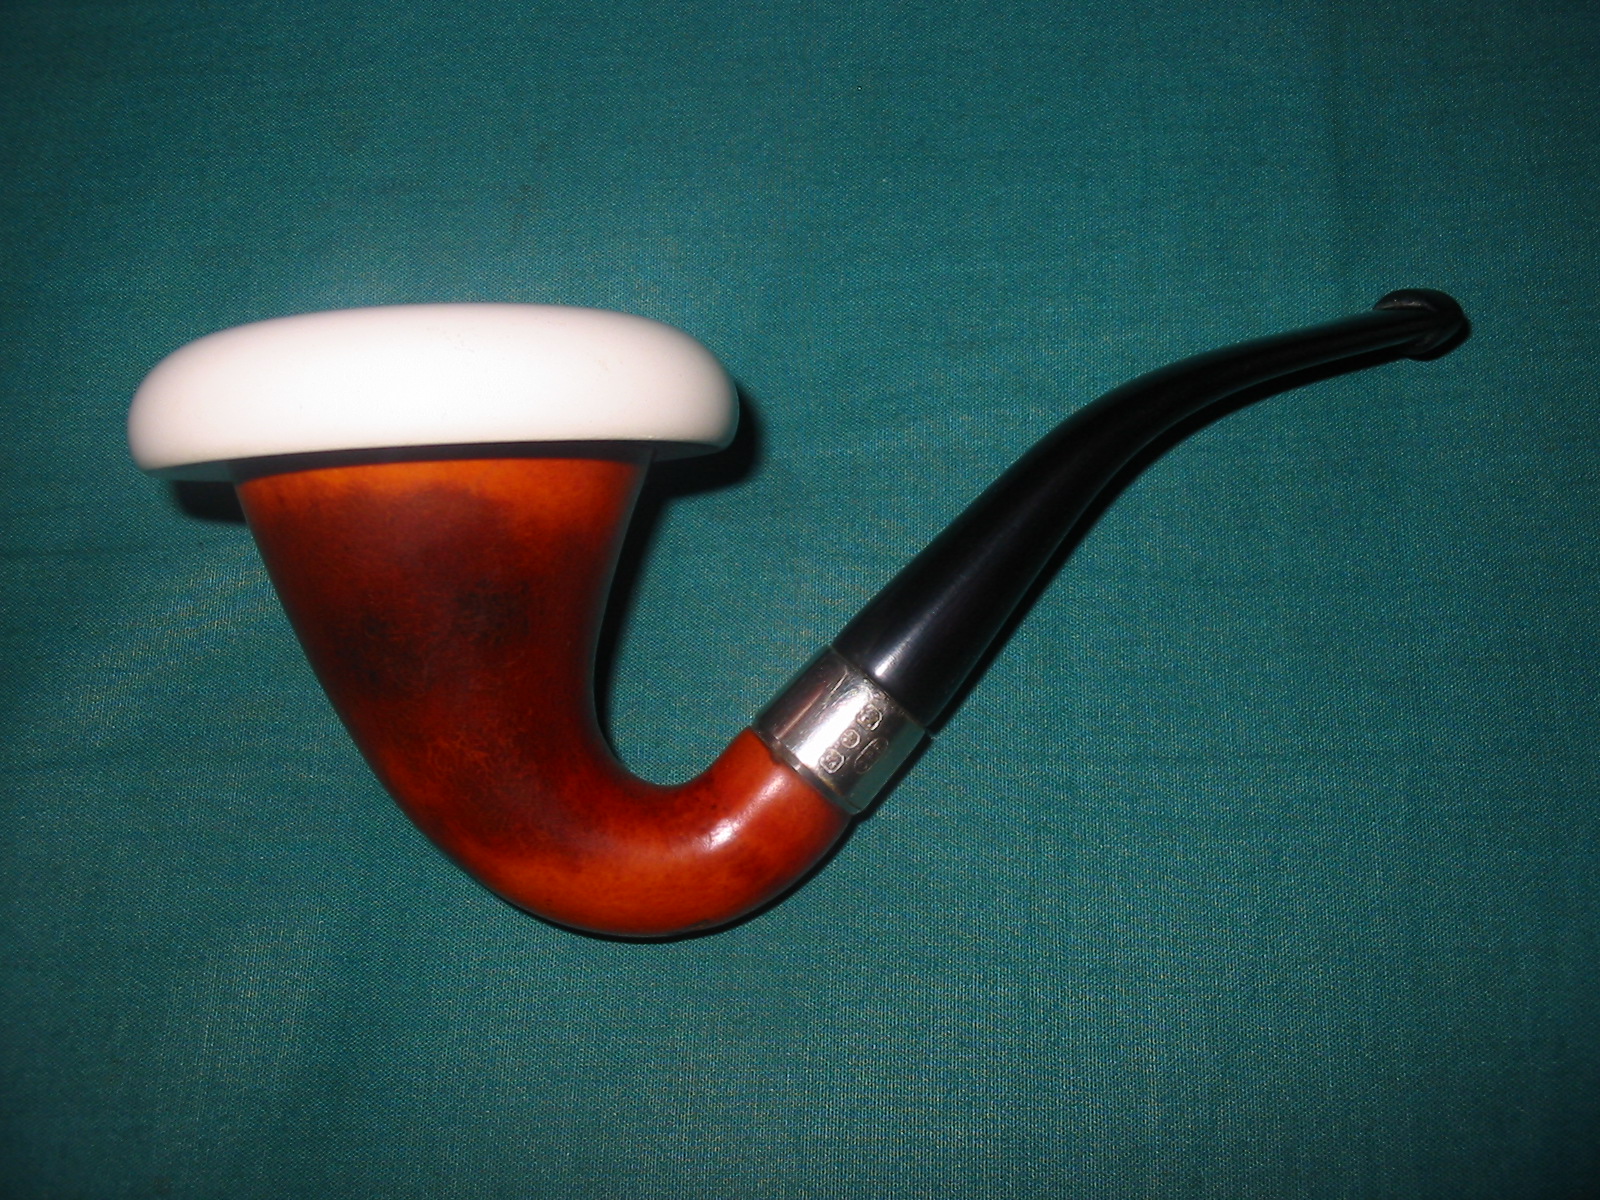
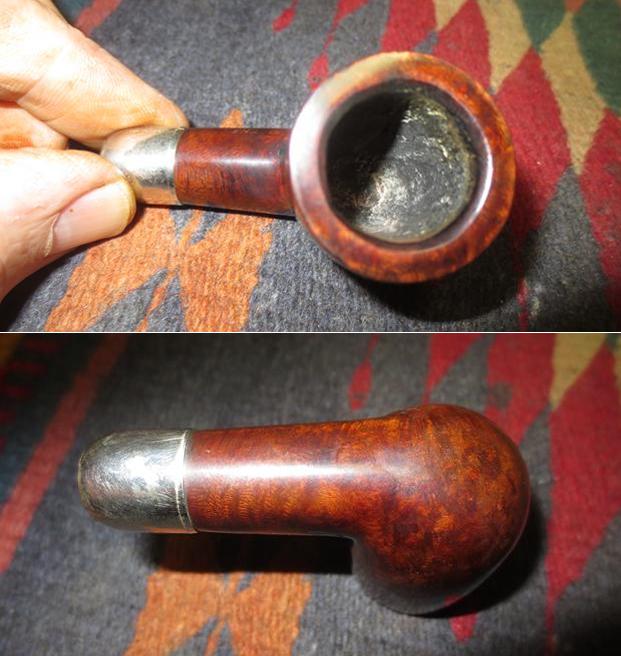
I buffed the pipe with Blue Diamond on the buffing wheel to polish the briar and the stem. I gave the bowl and stem multiple coats of carnauba wax and buffed it with a clean buffing pad to raise the shine on the pipe. I hand buffed it with a microfiber cloth to deepen the shine. The finished pipe is shown in the photos below. It has come a long way from the sad and damaged pipe that I started with when I began the restoration. What do you think? Was it worth the effort? Seems to me that it was more than worth it. Thanks for walking with me through this process.

Restoring a Unique Alternative Wood C.P.F. Tulip


Blog by Steve Laug

This is yet another unique older C.P.F. pipe find from our Virtual Pipe Hunt in Montana. It is amazing the number of older C.P.F. and other brands we found in that antique shop. Even more amazing is the sheer number of shapes that I have never seen or worked on before. This one is a C.P.F. that is made in two parts – a bowl that is screwed onto a base. The wood is not briar. The bowl is olivewood and the base is cherry. The pipe has the C.P.F. in an oval stamp on the left side of the shank. It is also stamped on the band with the faux hallmarks from that era and the logo. The stem is made of horn. It is a graceful and elegant looking pipe and one that I look forward to working on. My brother took quite a few photos of the pipe before he cleaned it up to show the details of the carving and the wood. I have included them at the beginning of the blog. My guess is that this pipe also comes from the mid-1880s to the early 1890s like the other C.P.F. pipes in the lot.The pipe was in pretty rough shape. The bowl had a thick cake with lava overflowing the rim. The finish was very dirty though appeared to look good underneath the grime. The screw in bowl was stuck in place on the base and we were uncertain that it would even come off. It looked like it originally was a separate piece but the grime and grit had locked it in place. The grooves in the base were filled with grime and the silver band was tarnished. The gold C.P.F. logo on the shank was faint. The horn stem had the usual tooth chatter and marks but other than that was in decent condition. With a little work this would be a beautiful pipe.

If you would like to read a bit of history on the brand you can have a look at a blog I wrote concerning C.P.F. or the Colossus Pipe Company https://rebornpipes.com/2013/04/14/some-reflection-on-the-historical-background-on-cpf-pipes/.The next series of photos show the condition of the bowl before cleaning. It was very dirty and there appeared to be cracks in the backside of the bowl. I would not be certain until it was cleaned and I had it in hand. The next photos show some of the detail on the base of the pipe. It is an interesting piece of carving. I have never seen one like it in either the old C.P.F. catalogues or in my online research regarding the brand. The bottom of the base shows the grain on this portion. Notice how well the carver centered the grain pattern on the base. It is a beautiful piece of wood. I am guessing cherry but I am not certain. You can see from the unique vertical grain on the bowl portion of the pipe that it is not briar. My thoughts are that it is olivewood but I could be wrong. Note also the buildup of grime around where the bowl sits on the base.The C.P.F. oval logo can be seen on the left side of the shank and also on the silver band. You can see from the photo that the band appears to be loose. Later photos reveal that it was indeed loose and could be slipped on and off the pipe.The next two photos show the shank with the band sitting under it and the threaded bone tenon on the horn stem. It is really dirty looking in the shank and mortise.The stem was probably in the best condition of the entire pipe. The graceful curve of the horn was undamaged. The striations were not separating and the variation in colour was stunning. The overall condition was really good. There was some light tooth chatter and marks near the button on each side but otherwise it was clean. The button was not chewed and the orific airhole in the centre of the button looked good. Jeff cleaned up the pipe – reaming the bowl with a PipNet reamer and cleaning up the reaming with a Savinelli Fitsall Pipe Reamer. He took the cake back to bare wood. He scrubbed the exterior of the pipe with Murphy’s Oil Soap and rinsed the soap and grime off the pipe. He removed the band and scrubbed under that as well with the soap. He cleaned out the mortise and the airway in the shank and the stem with pipe cleaners, cotton swabs and alcohol. He cleaned the horn stem with some oil soap as well. I took these pictures when the pipe arrived in Vancouver. It was in better shape than when we picked it up. Jeff had not been able to unscrew the bowl from the base as it was stuck with the goop that had covered the bowl and base. The rim top still had some darkening and spotty damage to the surface. Jeff and I were talking last evening on FaceTime and I decided that I would tackle the restoration on this old timer next. While we were chatting I held the base in one hand and wiggled the bowl with the other. After a few moments I was able to turn it from the base. What was underneath was absolutely gross. It looked like someone had packed the base with some kind of coarse material to act as a filter to trap any moisture that came from the combustion of the tobacco above. I also noticed that the bowl bottom had three airholes and one was entirely plugged and could not be seen from the inside of the bowl. The bowl had some dark staining and build up on the bottom of the bowl. I put the junk back in the bowl and set the pipe aside for the night.In the morning I took the pipe apart again to clean out the bowl base. I used a dental pick and a spatula to clear out the debris and hard build up in the base. I scraped out the threads on the bowl and the base to remove the debris. I scraped out the rounded base bottom to also remove the debris. I twisted the tip of a dental pick through the clogged third hole in the bottom of the bowl. I worked it from both the inside and the outside of the bowl until I had cleaned out the blockage. Once again the bowl had three holes that worked.I scrubbed the base and the bottom of the bowl with alcohol and cotton swabs. I scrubbed until it was absolutely clean. I scraped out the ledges on the inside of the base to remove the buildup that was there as well.I painted the shank end with Weldbond white glue so that I could put the band back in place. The band had a split on the right side that would need to be worked on as well. I put the band on the glue and held it in place until the glue had dried. I sanded the split in the band with 220 grit sandpaper and filled it in with clear super glue. There were also cracks in the bottom of the base just below the threads that matched the grooves carved on the outside of the shank. Once the glue dried I sanded the inside of the base smooth. With the repairs done to the base I turned to what had appeared to be cracks in the bowl sides and base. I sanded the stained and dirty base and the part of the bowl that had been seated in the base behind the leaves. I used clear super glue to fill in the small cracks on the bowl sides and bottom. They were very tight and did not move when I worked them with a dental pick. When the glue dried I sanded the bowl with 220 grit sandpaper until they were smooth and blended in well with the surface of the olivewood. I lightly topped the bowl with 220 grit sandpaper on a topping board until all of the damaged areas were removed and the rim top was smooth once again. I polished the olivewood with micromesh sanding pads – wet sanding it with 1500-2400 grit pads and dry sanding it with 3200-12000 grit pads. I wiped the bowl down after each of the micromesh sanding pads with a damp cotton pad to remove the sanding dust. The photos below show the progress of the polishing. I sanded the stem to remove the tooth chatter on the top and underside near the button. There was one deep tooth mark on the underside that I could not remove by sanding. I filled it in with clear super glue and let it dry. Once it had cured I sanded it smooth with 220 grit sandpaper to blend it into the rest of the stem surface. It was smooth but a bit lighter in colour than the surrounding area. Thankfully it was on the underside.When the stem was turned on to the shank it was slightly underclocked and there was no give in the stem to get the alignment correct. I carefully heated the bone tenon without burning it to soften the glue that held it in place. While it was still warm I was able to screw it in and align the stem properly.Now that things were aligned it was time to polish the stem. I polished the stem with micromesh sanding pads – wet sanding it with 1500-2400 grit pads and dry sanding it with 3200-12000 grit pads. I wiped the stem down after each of the micromesh sanding pads with Obsidian Oil to remove the sanding dust and give it more life. The photos below show the progress of the polishing. I love polishing horn stems because as you work them over they seem to take on a life of their own with a deep and resilient sheen. I took the pipe apart and buffed the parts. I buffed the bowl and the bottom and sides with Blue Diamond on the buffing wheel. I buffed the stem with Blue Diamond as well to polish out the tiny scratches that were left behind by the micromesh. I gave the parts multiple coats of carnauba wax and buffed them with a clean buffing pad to raise the shine. I hand buffed all of the parts with a microfiber cloth and put the pipe back together. I hand buffed it once again to finish the restoration. The finished pipe is shown in the photos below. It is a remarkable example of pipe making at the end of the 19th Century. The wood and the shape work well with the beautifully striated and gracefully bent horn stem. The silver band with the hallmarks and C.P.F. logo is a nice transition between the stem and the cherry wood base. Thanks for walking with me through this restoration.

Out Damn Spots – a C.P.F. Cromwell Double Vertical Stem Bent Billiard


Blog by Steve Laug

Like other older C.P.F. pipes this one has some real charm. It is on the petite side of things – 4 ½ inches long and 1 ½ inches tall. It is not a bad piece of briar, a mix of grains. The silver collar on the shank is stamped with faux hallmarks and the C.P.F. in an oval logo. It is probably silver or at least plated but I am not sure. The stem is the unusual part of the mix. It has two silver plated spigot tenons that fit into openings in the silver collar. The twin stems merge into one single airway. Looking at it I could not wait to examine it and see what it looked like with the stem removed and what the mortise looked like. The finish was worn but the pipe looked like it still had some life in it. The left side of the shank is stamped in worn gold leaf C.P.F. in an oval over Cromwell in script. There is no other stamping on the bowl. The stem is also stamped on the left side and reads PURE RUBBER on the top stem and C.P.F. in an oval on the lower stem. This pipe is also from the virtual pipe hunt my brother and I did in Montana. He took photos of the pipe from a variety of angles to show the uniqueness and the condition.I did some digging online and found a WDC Marlborough that had a similar configuration though far more boxy. It did not have the elegance that the C.P.F. does in my opinion. Playing around with the mechanics of the smoke and how it flowed through the stem I examined the dual mortise and the way the stem was laid out. I fed a pipe cleaner through the stem and found that natural flow of the cleaner was from the button through the top of the stem and into the top mortise. I could plug the lower tenon and the air was unobstructed from tenon to button. When I plugged the upper tenon and blew air through it I could feel it against my fingertip and then it made its way out the lower tenon. The airflow seems to have flowed against my finger and back a short distance to an opening between the two stems and out. From that I figured out that the smoker draws smoke through the upper mortise and into the airway on the stem. It flows into the bottom stem and mortise (which is a sump like the Peterson System pipes have) where moisture is collected and the smoke exits up the lower stem and into the button and into the mouth of the smoker. In my online search I found a photo of the Marlborough with the airpath drawn out as I conceived it in my words above. I drew the same kind of pattern on the C.P.F. to show how it appeared from my experiments. Here is the link to the Marlborough;  http://pipesmagazine.com/forums/topic/wdc-marlborough-double-airway. I used the drawing on that link to draw in the airflow on the Cromwell that I have. You can see that in the diagram below.I did some more digging on the internet to see if could find any more information on the brand. I found that C.P.F. did a second dual stem pipe called the Lafayette. Both pipes had military style bits so both were pocket pipes. Was it possible that C.P.F. did a line of pipes in honour or military leaders and these were two of those? You had Cromwell – potentially Oliver Cromwell, Lord Protector in England and Jean Lafayette, mercenary during the US Revolutionary War.The finish was very worn and there are a lot of scratches on the briar. I wonder if this little pipe was somebody’s pocket pipe and bumped against coin and whatever else was carried in the pocket of the pipe man who owned it. The bowl was caked and there was a lava overflow onto the rim top. There were some nicks and sandpits on the rim and the bottom of the bowl. My brother took photos of the stem and the mortise of the pipe. It is an unusual set up. The top portion of the twin stems fits in the mortise and the airway into the bowl is high at the bottom of that mortise. The second mortise for the lower portion of the stem is merely a dead space. It appears that the smoke came up the stem and circulated in the lower mortise before being drawn to the mouth of the smoker – perhaps it is a cooling system somewhat like the sump in Peterson System pipes. The twin ends of the stem are covered with a silver end mount and from the looks of the photos the pipe had been sitting for quite a while and cob webs had formed. The stem was oxidized for sure but something about the colour of the stem made me wonder what was happening with it. He did a lot of cleaning and scrubbing on this pipe and in the process we learned some interesting facts about the repair work that had been done on this pipe. The entire stem had been coated with what appeared to be a black paint. It was flaking and bubbling at the button end as can be seen in the photo above. The oxidized stem had some really strange patterns in the oxidation and there seem to be deep staining in spots on both the top and underside surfaces of the stem. On the topside there was a white repair that looked and felt like putty. The black paint had hidden that repair. Jeff had stripped the remaining finish off the dirty bowl, reamed the bowl and cleaned the rim top. The silver band on the shank looked better and the metal tenon ends on the military style tenons looked more brass than silver. He had cleaned out the two mortises and the airway into the bowl and the shank. Note the spotty appearance of the vulcanite stem. I took a close up photo of the rim top to show the condition of the surface and the damage on the right inner edge of the bowl. The bowl was out of round once he had removed the cake and the sandpits in the flat surface stood out.The next two photos I took show the condition of the stem. The stamping on it is very clear – Pure Rubber on the top stem and C.P.F. in an oval on the lower stem. I have not seen this spotty pattern in the oxidation before and I am wondering if in the process of the previous repair the repair guy did not damage the surface of the rubber. Note the putty fill as well. It is quite large.I used a dental pick to remove the putty fill and you can see from the photo below that it was quite large. It covered a large portion of the top and right side of the upper stem. I wiped the surface down with a damp cloth to remove the debris left behind by the putty in preparation for repairing the damage. I greased a pipe cleaner and put it in place in the airway in the stem so that it would not accidentally fill in from leakage of the repair. I mixed a batch of charcoal powder and black super glue putty and filled in the damaged area. I purposely overfilled it on the top to give me room to work. I carefully filled in the right side of the stem so as not to fill in the groove between the two parts of the stem. I put aside the stem so the repair could cure. Once the repair had dried I used a flat file to smooth out the ridges and peaks in the new surface. I sanded the repaired area with 180 and 220 grit sandpaper to further smooth it out and shape it.I wiped the stem down with a damp cloth and checked for air bubbles in the repair and areas that needed to be built up. I applied some more black super glue to the surface of the repair and smoothed it out with a dental spatula to ensure that all of the air bubbles had glue in them. I set the stem aside to dry.While the stem repair was curing I worked on the rim. I used a folded piece of 220 grit sandpaper to work on the damage to the inner edge of the bowl. It took a bit of work to blend in the damaged areas and smooth them out. I filled in the sandpits with clear super glue. It did not take too long to cure so when it had hardened I sanded it smooth and blended it in with the rest of the rim top. I wiped the bowl down with alcohol on a cotton pad to clean off any debris left behind by my rim work and used some European Gold Rub n’ Buff to touch up the gold in the stamping on the shank. I applied the product and rubbed it into the stamping and wiped off the excess with a cotton pad. The next three photos show the fresh shank. By this time the stem repair had hardened and I sanded the surface with 220 grit sandpaper to smooth things out. I used a folded piece to smooth out the grooves between the upper and lower stems. The stem is looking much better but the reddish spots in vulcanite really looked odd to me. I wondered if I would be able to polish them out of if I was going to be stuck with them in the finished pipe. The finish on the bowl was rough and there were a lot of scratches and worn areas on the sides and bottom. I sanded out the ridges and as many of the deep scratches as possible with 320 grit sandpaper. In the photos below you can still see the scratches but the feel in the hand is much better and the bowl is beginning to look smoother. I sanded these marks smoother with 400 grit wet dry sandpaper and then polished the bowl with micromesh sanding pads. I wet sanded with 1500-2400 grit pads and dry sanded with 3200-12000 grit pads. The next sequence of photos show the progress in smoothing and polishing the bowl. The stem still needed a lot of work. I shaped the repaired area and worked the surface over with 220 grit sandpaper to remove as much of the oxidation as I could. While it was definitely looking better the spotty areas were still visible. I still needed to polish the stem with micromesh pads to see how much more of the spotty surface I could clean. I also needed to finish polishing the silver tenon caps. I worked over the surface with 400 grit wet dry sand paper and 1500-2400 grit micromesh sanding pads and still could not remove the stained spots on the rubber. I decided to try something different. I stained those spots of the stem with a black aniline stain to see if that would bring the red spots more in line with the rest of the stem. When the stain dried the spots were definitely better, but they still stood out. Time to go back to the sanding and polishing! I wet sanded it some more with 1500-2400 grit micromesh sanding pads. I still had those obnoxious spots present in the rubber. They were deep and it really appeared that I would not get them out. I sanded the stem some more to try to remove more of the damaged areas. It did not seem to matter how much I sanded the spots remained. I decided to try one more trick. I used a black Sharpie Pen to colour in the spotted areas. I let the ink dry. I was hoping that these Permanent Markers would actually be permanent and cover the spots. Once the ink had dried I lightly sanded it with 3200-12000 grit micromesh sanding pads. The black seemed to stay in the spots better than any of the other methods so far. Maybe I had some success but polishing would tell the story. The more I polished most of the coverage remained but there were still remnants of the spot in the vulcanite. I polished the metal tenon caps with micromesh sanding pads and finished polishing them with a jeweler’s cloth to remove any remaining tarnish.I lightly buffed the stem with carnauba wax and buffed it with a clean buffing pad to raise the shine. I hand buffed it with a microfiber cloth to deepen the shine. I gave the bowl multiple coats of carnauba wax and buffed it with a clean buffing pad to raise a shine. I hand buffed it with a microfiber cloth. I put the parts back together and rebuffed it by hand. The finished pipe is shown in the photos below. The stem looks far better than when I first started but the spots still show through the polish. The pipe as a whole is a beautiful old piece of history. It does not look too bad for its age – over 125 years old. Thanks for walking through this restoration with me. It was a challenge and it was a pleasure to resurrect this old piece of tobacco history.

New Life for an unusual CPF COLON Calabash Pipe


Blog by Steve Laug

Not too long ago, I wrote a blog about a virtual pipe hunt that my brother and I went on. He was visiting an antique mall in Montana and I was at home in Vancouver, Canada. We met at the mall via Apple Facetime and he was the hands and feet of the exercise. He happened upon a large consignment of CPF pipes as well as others from around the same vintage – late 1880s through early 1900s. Here is the link to that blog, https://rebornpipes.com/2017/04/26/a-virtual-pipe-hunt-a-new-way-to-experience-the-joy-of-a-pipe-hunt/.

I worked on the older alternative wood pipe with a spiral shank and horn stem. It was the first pipe I worked on from the lot we found that day. I wrote about the restoration of the pipe in an earlier blog; https://rebornpipes.com/2017/06/24/bringing-an-older-1890s-era-spiral-shank-horn-stem-billiard-back-to-life/. The next pipe on the worktable was a CPF that was different from any others that I had ever seen or worked on before. It was a briar calabash with a black Bakelite screw bowl/cup. The shank was darkened and appeared to have originally had a band that had been lost somewhere along the way. That is pretty common on these old CPF pipes. The stem was amber and needed some work to bring it back to usefulness. The pipe is stamped on the left side of the shank with the words COLON in an arch over the CPF logo in an oval. Underneath that, is stamped French Briar in a reverse arch thus encircling the CPF logo. There was no other stamping on the right side or underside of the shank. There were two sandpits/flaws in the briar that I would need to address but it was a beautiful little pipe.I did a bit of research on Google to see if I could find any information on this particular CPF pipe. There was not much information on that brand and some of the info was almost comical in that the key word in every listing was “COLON”. You don’t need me to spell out what kind of listings were found. The one thing I did find was a photo that someone pinned on Pinterest. Here is the link; https://www.pinterest.com/pin/495255290248000765/ . I have included the photo below that was posted there. The label on the pinned photo read: TOBACCO PIPE, CIRCA 1915, “COLON” BOWL, French Briar, C.P.F. It is the same pipe as the one on my table but mine has better grain in the briar bowl. Mine also came with a stem.My brother took photos of the pipe (including the first one above) before he started to work on it and clean it up. When he sent me these photos, I was really interested in getting my hands on it and cleaning it up. I could not wait to see it up close.Jeff’s photos showed the condition of the pipe really well and gave the reader some idea of what it looked like from a variety of angles. The top view of the bowl showed the thick cake that had formed in the Bakelite bowl and the lava that overflowed on to the rim top.  The next three photos show the Bakelite bowl and rim top, the bowl unscrewed from the briar bowl and the underside of the Bakelite bowl. The cake is very thick and looks hard. Once the bowl is out of the base it is amazingly clean considering the condition of the Bakelite bowl. The underside of the Bakelite bowl is also clean. It has three holes that carry the smoke from the bowl into the base, shank and stem to the mouth of the smoker. The threads in both are intact. He also included some close up photos of the shank and the stamping. He has a much better camera than I do so the stamping photos clearly show the condition of the stamps – they are worn but readable with a lens and a light. The marks on the shank appear to be from the time that the band was pried off the shank. Looking at it under a lens there are no cracks in the shank. He sent along a photo of the underside of the bowl as well. It is a pretty piece of briar.The photos of the condition of the stem were telling in many ways. There was a lot of tooth chatter and tooth marks on both the top and underside of the stem near the button. There were also fracturing and splintering along the edges that helped me conclude that the stem was amber. The next photos show the stem from a variety of angles including a photo of the orific airway in the button. The stem had a buildup of tars and oils on the inside of the airway that would need to be removed. I reread what I had written regarding the history of the CPF or Colossus Pipe Factory brand before I started the restoration work on this pipe. I am glad I collected the data in one place because I would otherwise have had to redo the work each time I work on a CPF pipe. Here is the link to the history of the brand. https://rebornpipes.com/2013/04/14/some-reflection-on-the-historical-background-on-cpf-pipes/ I have included a few choice paragraphs that help with the identification and the dating of the brand. You can read the entirety at the above link but here is a summary to connect this pipe to the history of the brand.

“One of the secondary hobbies to pipe refurbishing that I enjoy doing is to research the history of a particular brand or make. In a recent EBay lot I bought there were 3 pipes that were stamped with the CPF logo – CPF in an oval with the word FRENCH stamped in an arch above the oval and the word BRIAR stamped in an arch below the oval. I had heard that the CPF stood for a variety of names from Consolidated Pipe Factory to Colossus Pipe Factory and even Chesterfield Pipe Company. There was a wide range of conflicting information available on the websites and forums that I read while looking into the brand…”

“…CPF in the logo stands for Colossus Pipe Factory. The brand was purchased by KB&B sometime between 1884 and 1898 and it continued until 1915. That time frame gives help in dating some of the older CPF pipes you or I might find. It can be said that prior to the dual stamping it is fairly certain that the pipe is pre-1884 to 1898. After the dual stamping it can be placed post 1898 until the closure of the brand line in 1915. CPF made beautiful pipes. I believe Sam Goldberger was correct in his assertion that the carvers who made the pipes were of European training and used the classic shapes and well-aged briar.”

Armed with that information I was able to narrow down the period that this was made. Since the pipe bears only the CPF logo, I think that it is safe to say it was made before the time of the buyout by KB&B in 1898. That would mean that it is dated somewhere between 1884 and 1898. From 1898-1915 all of the pipes that came out of the factory bore a dual CPF/KB&B stamp. The fact that this one does not have the dual stamp further solidifies the date of manufacture as being from the 1880s to the late 1890s. This information goes against the information I included with the Pinterest photo above which identified the pipe as being made in 1915. Like I thought when I took when I first saw it – this is an old pipe.

My brother did a great job cleaning up the pipe – bowl, base and stem. He reamed the bowl with a PipNet pipe reamer and a Savinelli Fitsall Reaming Knife and removed all of the cake. He cleaned the Bakelite with soap and water and scrubbed it with a tooth brush. He scrubbed the briar exterior with Murphy’s Oil Soap to remove the grime and grit. He cleaned the interior of the briar bowl and the mortise and shank with pipe cleaners, cotton swabs and alcohol. The stem was harder. He cleaned out the majority of the oils and tar build up with pipe cleaners and a little alcohol. He sent it to me to finish up but it was pretty decent. I took the next four photos of the pipe to show what it looked like when it arrived in Vancouver. I took a close up photo of the bowl and the rim top to show the difference between what it looked when he brought it home and what it looked like when I got it. I also took the bowl apart and took two photos of the parts. I took photos of the stem to show the condition from all angles. He got a lot of the grime out of the airway but there was still a lot there that needed to be cleaned out. I would need to remove the threaded tenon to do justice to the airway cleaning. I ran some alcohol, pipe cleaners and cotton swabs through the shank and the bowl to double check on the cleaning and it was really well done. The inner beveled edge of the bowl looked really good. I removed the tenon and scrubbed the stem with pipe cleaners, cotton swabs and Soft Scrub Cleanser. I rinsed it with warm water to remove the soap. I was able to get much more of the tars and oils out with the Soft Scrub. I used a needle file to define the edge of the button and make the angle sharp once again. I used the file on both sides.I lightly screwed the bone tenon in place in the stem. I would adjust it once I was ready to put the pipe back together again.I went through my bands and found a nickel band that would fit the shank. I sanded the shank to remove the darkening, nicks and dents and prepped the surface for pressure fitting the band. I used a Dremel and sanding drum to grind back the band width to make it fit the depth of the shank that I wanted to cover. I did not want the band to extend over any of the stamping.I heated the band and pressed in place on the shank. I used the Dremel to grind the band down further and sanded the edge with 1200-2400 grit micromesh to smooth out the sharp edge. I filled in the sand pits on the bowl with clear super glue and briar dust and sanded it in to blend with the rest of the briar. I filled in the nicks on the top of the Bakelite with clear super glue and sanded it smooth once it dried. I needed to buff both bowl and cup but it definitely looked better. I screwed the bowl in place on the base and took the following photos. I polished the stem with micromesh sanding pads – wet sanding it with 1500-2400 grit pads and dry sanding with 3200-12000 grit pads. I rubbed the stem down with Obsidian Oil after each grit to remove the sanding dust and give me some more bite when I sanded it with the next grit of pads. I polished the briar bowl and the Bakelite insert cup with micromesh sanding pads – wet sanding with 1500-2400 grit pads and wiping it down with a dab of olive oil after each pad. I touched upt the gold leaf in the stamping with some European Gold Rub’n Buff. Once I finished I buffed the bowl and insert with Blue Diamond on the buffing wheel to polish it and buffing the stem separately. I waxed them separately as well with Carnauba wax. I buffed them with a clean buffing pad and hand buffed them with a microfiber cloth. The finished pipe is shown in the photos below. I really like the finished look of the pipe.

Refreshing an old giant – CPF French Briar Bent Billiard


Blog by Steve Laug

I have always heard and read that during WWII years it was virtually impossible to get briar in the US and rubber for stems was at a premium. During those years, Mountain Laurel and Manzanita – close kin to Mediterranean Briar – were used. The bowls have a different appearance than briar – the grain on the bowl sides and rim are very different. The stems were often made of repurposed rubber and I have seen bits of metal in the cast rubber of the stems. While that is interesting information the next pipe on the table is far older than WWII. But it could be made of Laurel and it certainly had bits of metal in the solid rubber stem. It came from my brother as well. It is a CPF French Briar bent billiard. It is a large pipe – the length is 11 inches, the height is 2 ¼ inches, the outside diameter of the bowl is 1 ½ inches and the inner diameter is 7/8 inches and the depth of the bowl is 1 9/16 inches. I took the next photo to give an idea of the size of the pipe when I received it.cpf1Don’t you ever wish these old pipes could talk? They could certainly tell some amazing stories of their journeys. My brother wrote to tell me that this old CPF Giant was found in an antique store in Idaho Falls, Idaho. The owner had told him that the pipe was owned by an artist who strictly used it as a art prop… never smoked it. That’s why it was in great shape for the age. My brother took some photos of the pipe before he did his clean up and sent it to me. The finish was in decent shape. There was some spottiness to the finish but no deep nicks of scratches. The rim had overflow from the cake in the bowl that was thick on the entire surface. The metal band had some scratches and appeared to have rotated on the shank in the photos showing that it was probably loose. The stem was clean with minimal tooth chatter near the button with a little wear on the top and underside of the orifice button. There was some oxidation on the rubber.cpf2I have restored quite a few CPF pipes in the past and did a blog on the historical background of the brand. You can read the entirety at this link: https://rebornpipes.com/2013/04/14/some-reflection-on-the-historical-background-on-cpf-pipes/. I have summarized part of it in what follows to connect this pipe to the history of the brand.

One of the secondary hobbies to pipe refurbishing that I enjoy doing is to research the history of a particular brand or make. In a recent EBay lot I bought there were 3 pipes that were stamped with the CPF logo – CPF in an oval with the word FRENCH stamped in an arch above the oval and the word BRIAR stamped in an arch below the oval. I had heard that the CPF stood for a variety of names from Consolidated Pipe Factory to Colossus Pipe Factory and even Chesterfield Pipe Company. There was a wide range of conflicting information available on the websites and forums that I read while looking into the brand…”

“…CPF in the logo stands for Colossus Pipe Factory. The brand was purchased by KB&B sometime between 1884 and 1898 and it continued until 1915. That time frame gives help in dating some of the older CPF pipes you or I might find. It can be said that prior to the dual stamping it is fairly certain that the pipe is pre-1884 to 1898. After the dual stamping it can be placed post 1898 until the closure of the brand line in 1915. CPF made beautiful pipes. I believe Sam Goldberger was correct in his assertion that the carvers who made the pipes were of European training and used the classic shapes and well-aged briar.”

Armed with that information I should be able to narrow down the period in which the pipe was made. Since the pipe and the ferrule both bear only the CPF logo I can safely say the pipe was made before the time period mentioned above as sometime between 1884 and 1898 when the CPF company was sold. I also know that from 1898-1915 all of the pipes that came out of the factory bore a dual CPF/KB&B stamp. The fact that this one does not puts the date of manufacture before or around the early 1880s. It is an old pipe.

My brother took some close up photos of the pipe. The first two show the grain on the bottom of the bowl. It is a mixture of birds-eye and cross grain that is really scrambled up. I have not seen the kind of grain patterns that show up on just one side of this old timer. It is the graining pattern that makes me wonder if I am really dealing with briar here. The third photo shows the bowl and the rim. You can see the thin even cake and the buildup of tars and oils on the top of the rim. The internal and external edges of the rim appeared to be in excellent condition.cpf5cpf6The next two photos show the stamping on the left side of the shank and on the ferrule. The shank reads C.P.F. in an oval with French above the oval and Briar below the oval. The stamping is filled with gold gilding. The stamping on the ferrule has three hallmarks – an anchor, a star and an eagle which from previous research on this brand are determined to be faux hallmarks and are there for looks rather than giving pertinent information on the band. Beneath the hallmarks is the C.P.F. oval.cpf7The stem was lightly oxidized and the orific button on the end had some chips missing on the top and bottom sides. The underside of the stem was stamped Solid Rubber. From what I could find online the Solid Rubber stamp was originally used when rubber or vulcanite started becoming popular for pipe stems in the mid to late 1800s. I have found from working on them that solid rubber stems are different from vulcanized rubber stems. They seem to have less oxidation and seem denser in composition. They are heavier that vulcanite stems that are the same size as well. I have also found that they need to be cleaned differently. Solvents that are fine for vulcanite can cause hard rubber to “ripple”. They require a little extra care when performing maintenance.cpf8My brother did a great job cleaning the pipe up. He reamed the bowl and cleaned off the buildup on the rim. All that was left was some darkening. He cleaned out the internals so that when I got it the mortise, airway in the bowl and the stem were spotless. The bowl interestingly enough was not smoked all the way to the bottom. The last half of the bowl was still raw briar undarkened by smoke and heat. I took the next four photos to show what the pipe looked like.cpf9 cpf10I took a closeup photo of the rim top to show what I needed to deal with on that front. The surface was clean but there were some scratches and there were some nicks in the edges of the bowl. There was also some darkening around the inner edge of the bowl.cpf11I also took some close up photos of the identifying marks that I noted above in my description of the pipe. The CPF stamping on the shank was clear but the ferrule had rolled to one side and would need to be glued. The Solid Rubber stamping is also clear on the underside of the stem.cpf12I scrubbed the surface of the briar with acetone and cotton pads to clean off the remaining finish on the bowl and shank. I was careful to avoid the gold stamping on the left shank side.cpf13 cpf14The ferrule had rolled over to the top of the shank. The stamping was on top and should have been aligned with the stamping on the left side of the shank. I removed the ferrule and cleaned up the briar. I reapplied some all purpose glue to the briar and pressed the ferrule back on the shank. I aligned the stamping on the ferrule with that on the shank.cpf15The fit of the stem in the shank was very tight. I used alcohol and cotton swabs to clean out the stain spots on the inside of the mortise. It did not take too much to remove the shiny spots and once they were gone the stem fit better.cpf16I sanded the bowl and shank with a medium and fine grit sanding sponge to remove the scratches and clean up the rim top. I was able to remove all of the nicks and spots on the rim. The scratching on the bowl sides was minimized.cpf17 cpf18I used black super glue to rebuild the damaged portions of the top and underside of the button edge. It took multiple coats rebuild it back to the size I needed so that I could reshape it with sandpaper and files.cpf19When the glue had dried I sanded it with 220 grit sandpaper to reshape it. I wanted it rounded like the undamageed portions of the button. It did not take too much work to reshape it. I polished the stem and button with micromesh sanding pads – wet sanding with 1500-2400 grit sandpaper and dry sanding with 3200-12000 grit pads. I rubbed the stem down with Obsidian Oil after each set of three pads. After the final rub down with oil I set the stem aside to dry.cpf20 cpf21 cpf22I polished the bowl with micromesh sanding pads as well. I wet sanded it with 1500-2400 grit pads and dry sanded it with 3200-12000 grit pads. I wiped the bowl down with a small bit of olive oil on a paper towel and hand buffed it with a soft cloth.cpf23 cpf24I buffed the bowl and stem with Blue Diamond on the buffing wheel. I gave it multiple coats of carnauba wax and buffed it with a clean buffing wheel to raise the shine on the pipe. I hand buffed it with a microfibre cloth to deepen the shine. It is shown in the photos below. It is cleaned and ready to fire up with a fresh bowl of tobacco. It is a beautiful pipe for being over 130 years old. It will be a great pipe for sitting and reading as the large bowl will last a long time. It is also surprisingly light weight for a pipe of its size. Thanks for walking with me through the restoration.cpf25 cpf26 cpf27 cpf28 cpf29 cpf30 cpf31 cpf32 cpf33

Against a Stump – A CPF Best Make Horse Meerschaum


Blog by Steve Laug

I was on a work trip in Alberta when I received an email from a woman named Nancy who picked up my email address from the blog. She wrote to tell me about a pipe that had come into a thrift store she worked at. Here is the first email I received.

Hello Steve, I volunteer at a thrift store & we received this pipe as a donation. I knew it was too old & precious to sell for a few dollars. It’s in pretty rough shape with cracks but still beautiful in its additional case. It is a horse leaning against a tree stump with a long stem that looks like Bakelite. Is this something you would want to have & restore? I can send pictures if you’ll give me an email. Thank you, Nancy

I wrote her back and asked to see the photos of the pipe. She immediately replied and sent me the following three photos. It looked like the pipe may be a CPF Best Make Meerschaum. The case appeared to have been the original for the pipe.cpf1 cpf2 cpf3After looking at the photos on my cell phone I wrote her back and made an offer on the pipe. She quickly responded with the following email:

Yes, that sounds good. The money will go to Assistance League of Yuma. We are a non-profit, all volunteer organization. There are 120 nationwide. We have Operation School Bell which provides 3 new outfits, shoes, books, hats, etc. Just to let you know where the money will go. 😍 I would love to see a picture of the pipe when you are done. I’m so glad to find a good home for it & that it will be restored. Thank you! Send me your address & I will get it ready to send. Thx, Nancy.

I finished the 2 week trip in Alberta and the day after I returned the pipe arrived. It was far bigger than I expected from the photos. Somehow in my mind it was a typical carved meerschaum pipe but when I opened the box it was quite large. It is 8 ½ inches long, 3 ½ inches tall, with an outer diameter on the bowl being 1 ¾ inches and the bowl itself being 15/16 inches in diameter and 2 ¼ deep. It is a handful.

The condition was better than I expected. The cracks in the meerschaum were on the surface of the horse and the right side of the shank. I was expecting more open cracks but these were tight and seemed to be almost a spidering from the spots where the carved horse was connected to the bowl. The center of the back had tiny cracks radiating down the front and rear haunches of the horse and the place where the rear hooves were connected to the shank had a crack radiating both directions. These cracks on the shank also continued around the bottom of the bowl and shank. Fortunately none of them were deep and really added to the aged look of the pipe.cpf4The left side of the shank and bowl (a carved stump) was in excellent shape with no cracks. The rim of the pipe had some darkening and a buildup of tars and oils on the top back side of the rim. There was a light cake in the bowl that would be easily removed with a pipe knife. There was some dust and debris in the grooves of the stump and the mane and tail of the horse.cpf5I took a close up photo of the top of the bowl to show the cake in the bowl and the condition of the rim top. On the back side of the bowl there is a branch extending toward the stem that has the horse’s tail attached to it.cpf6The condition of the Bakelite stem was a bit worse than I expected from the photos. It had a lot of tooth chatter and tooth marks that extended from the button for about an inch up the stem. It was rough on both sides of the stem. The button was also worn from tooth marks. There were a lot of tiny spidering cracks all over the surface of the stem that gave me some concern as I examined it. Time would tell if these would be more than a surface issue.cpf7The case was in rough shape though solid. The leather cover was worn off the wooden case but the hinges and clasp were still solid. The interior of the case had a worn faux fur lining that was almost worn away. I could still read the gold embossed logo in the top of the inside case – the CPF logo in an oval over an unfurled banner reading Best Make. The case was obviously made for the pipe so it gave me the needed information that this was a CPF meerschaum. Since I am a big fan of older CPF made pipes I was excited to see that this was one of them.cpf8I sanded out the tooth marks and chatter on the stem from the button forward. With the sanding dust present on the rest of the stem you can see the spidering cracks on the rest of the Bakelite stem.cpf9I sanded the shank end as well because there were chips missing from the edge of the stem where it sat against the shank. Again the spidering cracks are visible with the sanding dust.cpf10I cleaned out the airway in the stem and the shank with pipe cleaners and water. I also reamed the bowl with the Savinelli Fitsall Pipe Knife.cpf11There was a Bakelite spacer on the shank as well that I unscrewed and cleaned up. The threaded tenon is integral to the shank. The next photo shows the three parts of the pipe.cpf12The stem had been held in place on the tenon with a packing of twisted paper. The threads in the stem had been stripped and worn over the years. The threads were still present in the stem but were very worn. I built up the tenon end with some clear super glue to allow the stem to grip the threads on the tenon.cpf13I sanded the stem with 220 grit sandpaper to remove as much of the spidering cracks as possible. Many were just on the surface. I polished the stem with micromesh sanding pads – wet sanding with 1500-2400 grit pads and dry sanding with 3200-12000 grit pads. I rubbed the stem down with Obsidian Oil after each set of three pads and after the final set gave it a last rubdown and set it aside to dry.cpf14 cpf15 cpf16I carefully scrubbed the surface of the meerschaum with a soft tooth brush and warm water to remove the dirt and grime. I polished the meer with micromesh sanding pads. I started with 1500-2400 grit pads and was able to remove many of the surface scratches and blemishes as well as the tarry build up on the rim of the bowl. I continued to polish it with the remainder of the micromesh pads from 3200-12000 grit to bring a shine to the patina of the bowl.cpf17I buffed the bowl and stem with Blue Diamond on the buffing wheel carefully working around the horse. I lightly buffed the stem as well. I gave the bowl a rubdown of beeswax and hand buffed it with a shoe brush. The finished pipe is shown in the photos below. I am expecting that the coloration of the meer will come back to the surface once the pipe is smoked. Thanks for journeying with me.cpf18 cpf19 cpf20 cpf21 cpf22 cpf23 cpf24 cpf25 cpf26

CPF Best Make Bulldog with a Silver Rim Cap and Ferrule


Blog by Steve Laug

This is yet another great old pipe that my brother picked up on eBay. It is a classic CPF Best Make Bulldog with what I believed to be a Bakelite stem. It is stamped C.P.F. in an oval over Best Make in an unfurled banner on the left side of the shank in gold filigree. The silver rim cap and ferrule on the shank are ornate, both cast with birds and branches which seem to be doves and olive branches. The band and cap were tarnished and dirty. The top of the rim cap was dented, tarnished and had a buildup of tars and oils. The bowl had some great grain under the grime on the briar. The stem was had been broken off at some time in its long life and been repaired with a clear glue – epoxy maybe. The glue had hardened and was really a mess with it “globbed” all over all four sides of the diamond shaped stem. The button on the stem was missing a large chunk on the top side leaving the top of the airway exposed. There were also some chips missing on the stem at the joint of the shank and the stem. The tenon was a bone threaded tenon and screwed into the shank. The alignment was very good. My brother took the next set of photos to show the state of the pipe when it arrived in Idaho before he did the cleanup work on it.cpf1 cpf2My brother Jeff took a close up photo of the rim and the bowl. The photo shows the damage to the silver rim top as well as the cake that is in the bowl. The second photo shows the bowl of the bowl. The diamond shank carries through to the bottom of the bowl in classic bulldog fashion.cpf3 cpf4The next series of three photos show the cast birds and branches on the rim cap and the ferrule. You can see the look of the birds that I think are doves and the branches that I think are olive branches making this a bit of a “peace pipe”. The third photo shows the stamping on the left shank of the pipe.cpf5 cpf6The next series of photos show the repair to the stem and the damage to the button on the top side. It was a solid repair despite the ugliness of the finished look. The first two photos show the damage to the button top and the airway into the stem. You can also see the repair line where the stem was glued in the second photo. The third and fourth photos show the top and the underside of the stem and the repair can be clearly seen in both photos.cpf7 cpf8I have written about the CPF brand in previous blogs including a blog on the historical background of the brand. You can read the whole article at the link that follows. https://rebornpipes.com/2013/04/14/some-reflection-on-the-historical-background-on-cpf-pipes/. I have also included a short portion of the blog to give a brief summary of the brand.

CPF stands for Colossus Pipe Factory. There is not much known about the Colossus Pipe Factory. I learned that by the mid 1890’s CPF was owned by Kaufman Brothers & Bondy (KB&B). They operated the factory at 129 Grand Street, in New York City, New York. I had a faint memory of some connection between CPF and Kaufmann Brothers & Bondy. But was unsure where I had heard or read that. In the process of reading information I came across this post by Bill Feuerbach on the Kaywoodie Forum: “About 10 years ago I picked up two original invoices from KB&B. One is dated February 5, 1884 and the other December 9, 1898. Both have the address as 129-131 Grand Street, which is in Soho, adjacent to the Bowery in New York City. The 1898 invoice has in the upper left hand corner the initials CPF and Trademark. So by 1898 KB&B was making it known to the trade that they owned the CPF trademark. The 1884 invoice does not have CPF on it. Therefore I think we can assume KB&B acquired or started the CPF line sometime between 1884 and 1898.”

I have also included a link to the blog that shows and old CPF catalogue that links KB&B to CPF – or Kaufmann Brothers and Bondy with Colossus Pipe Factory. https://rebornpipes.com/2014/03/05/an-old-kaufman-brothers-bondy-cpf-catalogue/

My brother did his usual thorough clean up on the pipe. He scrubbed the silver with a tooth brush and some dish soap and was able to remove the tarnish in the deep grooves of the castings. He scrubbed the rim cap and removed the tars and oils in the dents on the surface of the cap. He cleaned the briar with soap and a brush and rinsed it off. He reamed the bowl and cleaned out the inside of the shank and the airway in the stem. He cleaned up the threaded tenon and the threads in the shank. When it arrived in Vancouver I took photos of the pipe before I started to restore it.cpf9 cpf10I took close up photos of the rim cap, bowl and the stem to show the condition of the pipe when it arrived at my work table. The rim cap is dented but clean. The stem repair is visible and you can see the buildup of glue on the stem surface and the damage to the button and airway on the stem.cpf11 cpf12I sanded the stem repairs and stem surface with 220 grit sandpaper to remove the buildup of glue all around the stem. It took quite a bit of sanding to remove all of the thick dabs of glue. I worked on the chipped areas of the stem as well on the tenon end of the stem.cpf13I built up the chipped area on the top of the button with clear super glue until it was even with the rest of the button. I sanded it with 220 grit sandpaper to remove the excess and shape it. I used the topping board to flatten the end of the stem and a needle file to smooth out and shape the slot in the button.cpf14I filled in the small pits and crevices in the stem surface and the chips at the tenon end with clear super glue. I sanded the repaired areas on the surface of the stem to smooth it out blend it in with the rest of the stem. I shaped the button and rounded the edges of the button to slope it toward the slot on the stem end.cpf15I stained the briar with a dark brown aniline stain mixed 50/50 with isopropyl alcohol using a folded pipe cleaner to apply it around the rim cap and shank ferrule. I flamed the stain with a lighter and set it aside to dry.cpf16I gave the bowl several coats of Conservator’s Wax and buffed the bowl with a shoe brush and then lightly with carnauba and a clean buffing pad to raise the shine.cpf17 cpf18I polished the stem with micromesh sanding pads – wet sanding it with 1500-2400 grit sanding pads and dry sanding it with 3200-12000 grit pads. I rubbed it down with Obsidian Oil after each set of three pads. I gave it a final coat of oil after the last set of three pads. I set the stem aside to dry.cpf19 cpf20 cpf21I buffed the pipe with Blue Diamond on the buffing wheel, carefully avoiding the rim cap and the ferrule on the shank. I buffed the stem with the Blue Diamond to shine the finish on the stem. I gave the stem and bowl several coats of carnauba wax and buffed it with a clean buffing pad. I hand buffed the pipe with a microfiber cloth to deepen the shine on the pipe. The finished pipe is shown in the photos below. The old pipe has been given new life. The repaired stem has been smoothed out and though it still shows it is a solid repair and smooth to the touch. I really enjoy the look and the feel of these older CPF pipes and this one is no exception. Thanks for journeying with me in the process.cpf22 cpf23 cpf24 cpf25 cpf26 cpf27 cpf28 cpf29

Taking a Swing at Reconstructing and Refurbishing an old CPF Meerschaum Bulldog


Blog by Steve Laug

In a previous post where I wrote about repairing the overturned stem on the CPF Bulldog for Michael I referred to a Meerschaum Bulldog that he sent to me as a gift project. I had no idea what he meant about that until I took it out of the box and started checking it out. It really was a rescue dog operation. It is shown in the photo below (the pipe on the right). The picture does not show half of the story about the state of the old stem.CPF1 When the pipe was unwrapped what met my eye fit well with Michael’s “take a swing at it” approbation. It was in rough shape. The Meerschaum bowl was scratched and dirty and the bling was worn and tired. The rim was pretty beat up with dents and scratches but the bowl was solid. There was a light cake in the bowl and that was a plus, as it could have been heavily caked and have a clogged airway.

The worst part of the entire pipe was the stem. I am pretty sure it is not amber – at least it does not feel like amber or even have the weight of amber. I am guessing an early version of Bakelite but I am not sure. It is almost fibrous like material – reminds of fibre glass. Somewhere during its lifetime the stem had crazed and cracked all through from one end to the other. It looked like fractured glass. It was barely holding together. There was nothing hold it onto the shank but tars, oils and what seemed like thread that was wrapped around the dirty tenon. I carefully lifted the stem off the tenon and laid it aside. The tenon was covered with a thick tarry substance and what appeared to be thread. I am pretty certain that the previous owner had glued the threaded tenon into the shank and I would never get it loose. Here are a few photos of the pipe, carefully taken so as not to further damage the stem.

I am a sucker for these old timers. This was obviously someone’s beloved pipe. There was a time when I thought a badly abused old pipe was a sign of lack of care. I have come to understand that it is not that at all. It was someone’s constant companion through the good and the bad times. It was one that was always close at hand – to my thinking it may well of road along wherever the pipeman went in the course of his day and was always ready to be loaded and fired up. It is a small bowl so it would not have been a long smoke but it was one that he obviously enjoyed to the point that the pipe was worn and repaired and worn more and repaired more. His repairs were just enough to make the pipe smokeable again but not to make it beautiful. I wish it could talk and tell its story. It lived through two World Wars, the Wright Brothers and the birth of air travel, the first man on the moon, space shuttles and microcomputers. It has seen the turn of two centuries and still survives. Those are the things that I think when I look at a tired old pipe now. I can’t help but wonder about the fellow who once held it in his hands. My repairs are dedicated to carrying on his legacy in this pipe.CPF2

CPF3

CPF4

CPF5 If you are observant you will have noticed the black circular mark on the stem on both sides at the button. That black mark was a large hole, a bite through. That was another thing about the stem that made me pretty certain that it was not amber. I took a close up photo of both sides of the stem to show the size of the hole. It is quite large and centered on both sides. The button was also quite worn down and the slot had been opened leaving the top and bottom of the button very thin. You can see all of the cracks and crazing in the stem material in both photos. The airway and the area around the holes were black with tars. This old pipe was not stopped by the holes in the mouthpiece; the pipeman just moved it deeper into his mouth and carried on smoking his favourite pipe.CPF6

CPF7 I took a close up photo of the rim to show the dents and darkening on the metal cap. The ornamentation on the top the rim was worn down from many years of a thumb rubbing over the top of the bowl and leaving behind the remnants of what must have been a continuation of the pattern on the sides of the cap.CPF8 I decided to deal with the issues in the cracked and crazed stem. It was rough along the edges with what looked like splinters. I carefully worked to stabilize the stem material with clear super glue. I liberally coated the outside of the stem with clear super glue, filling the cracks and chipped areas and smoothing out the surface with the clear gel. Once I had it coated well I set it aside and let it harden. I have used the super glue before on Bakelite and it does a great job getting into the cracks and crevices in the material and hardening and preserving the original material. Once it was covered in the glue I had to figure out how to allow it to harden without sticking to everything it touched. I decide to put an ice pick in the airway and lay it across a box – suspended above the work top until it dried.CPF9

CPF10 After the stem had been sitting for four hours and the glue had dried to touch, I decided to “take a swing” at repairing the bite through issue on both sides of the stem. I cleaned the hole and the airway with a cotton swab and warm water to remove the oils and tars. I wanted a clean surface for the patch. I sanded carefully around the hole to roughen the surface to give the patch something to bond to. Then I greased a thick pipe cleaner with Vaseline and pushed it into the slot in the button. I wiped the edges around the whole so there was no grease on them. I put the first coat of super glue on the hole on the underside and sprayed it with an accelerator to harden the first coat of the repair. I repeated the process on the top of the stem until both sides were repaired with the first coat. I removed the pipe cleaner and set the stem aside to cure. The photos below show the process of the repair to the hole. You can see from the photos that the holes patched pretty nicely. They are rough but they are no longer holes. I will need to do a lot of sanding on the stem to clean up the patches and reshape the button but it will be usuable.CPF11

CPF12

CPF13

CPF14

CPF15 After about an hour I gave it a second coat of glue on top of the repair and set it aside to cure again. While the repaired stem cured I went to work on the bowl. I used a pen knife to carefully scrape out the light cake in the bowl.CPF16 I cleaned out the rings around the bowl with the pointed end of a round needle file. I wanted to get the gunk out of the rings before I scrubbed the surface of the bowl.CPF17 I scrubbed the bowl with Murphy’s Oil Soap on a cotton pad remove some of the grime and clean up the exterior of the bling.CPF18 I used a cotton swab to soak alcohol around the threads of the bone tenon. I was able to pick out some of the thread that had been used to hold it in place. I am hoping that repeated alcohol applications will loosen the tenon so that I can unscrew it from the shank to do a thorough cleaning.CPF19

CPF20 The repeating swabbing with alcohol did not loosen the tenon at all. I think that the previous owner must have glue it in the stem and just pressure fit the stem onto the tenon. I had to come up with a different way of getting the stem to fit the tenon as the threads on the inside of the airway in the stem were worn and the stem just wobbled now that it was clean.

I examined the inside of the cleaned and restored stem and could still see the threads. I thought of trying cork and wrapping the tenon with that but after trying that it was too thick to fit into the stem. I then thought of wrapping the end of the tenon with thread and then coating the thread with wood glue. I tried that and it worked well. I was able to twist the stem onto the tenon and the threads in the stem worked into the glue and thread mixture on the tenon. The fix was a success.CPF21

CPF22

CPF23 I sanded the stem with 220 grit sandpaper to smooth out the repairs. I took down all the high spots and bumps left behind by the super glue. I recut the edge of the button on both sides of the stem with a needle file and then sanded the hole repairs on both sides to blend them into the surface of the stem.CPF24

CPF25

CPF26

CPF27 I reworked the button with files and cleaned up the slot with files as well. Once I had the look right I sanded the stem with a medium and a fine grit sanding sponge. The crackle in the stem material where all the crazing was and now the glue bonding it together gave the stem a bit of a sparkling look. An added benefit of the crackling look was that the patched holes at the button blended in quite well.CPF28

CPF29 I screwed the stem in place on the bowl and took a few photos to see what the finished look was going to be like. The repair makes the material sparkle. I really like the look that is coming together. I still needed to polish the stem with the micromesh sanding pads but you can see the finished pipe taking shape.CPF30

CPF31

CPF32

CPF33 I sanded the stem with micromesh sanding pads to raise the shine in the material. I wet sanded it with 1500-2400 grit pads and gave it a coat of Obsidian Oil. It would not absorb but it would give some traction to the next grits of micromesh. I dry sanded with 3200-4000 grit pads and gave it another coat of oil. I finished with 6000-12000 grit pads and applied several coats of carnauba wax to the stem by hand and hand buffed it with a microfibre cloth.CPF34

CPF35

CPF36 The wax on the stem, polished by hand gives it warmth and a glow that is beautiful. The repairs to the bite through on both sides of the stem blended in quite well do to the crackling of the stem material. All combined the stem came out quite well considering where I started with it in this process.CPF37

CPF38

CPF39

CPF40 I sanded the bowl with micromesh sanding pads to give it a shine. I decided to leave the scratches and dings in the bowl as it adds character to the old timer and are part of its long history as someone’s favourite smoking pipe. I can almost see the old pipeman putting the pipe in his pocket and heading off to work or for a walk. It certainly was not coddled like a pampered thing that wisdom of the age taught about meerschaums. No white gloves or careful handling this pipe saw much in its long life and carries the scars and marks of the journey. Now it is good to go for the next portion of its journey, one in which it will have a bit easier life.CPF41

CPF42

CPF43

CPF44

Bringing a pre-1884 era CPF Bent Billiard Back to Life


Blog by Steve Laug

My friend John gave me an old pipe that needed to be restored and it fits well into my collection of older CPF pipes. This one was a CPF bent billiard with the CPF logo in an oval and the word French arched above it and the word Briar arched below it. On the gold band around the shank were false hallmarks and the CPF logo in an oval. It was an old timer with the orific style button on a horn stem. The tenon on the end of the stem was bone and in excellent shape. The threads on the tenon were perfect and the tenon looked almost new. However, the threads in the shank were worn and would not hold the stem in place. It could be spun around and with a slight wiggle it came out of the shank. The threads on the tenon no longer aligned with the threads in the shank. The horn stem itself had some tooth chatter on both sides of the stem near the button and was dirty and tired looking. The finish on the bowl was in great shape. The bowl itself had been reamed but there was a light coat of ash in the bowl. The rim looked like it had been topped somewhere in its life but whoever did the work did it well.CPF1

CPF2 I have written a blog about the history of the brand previously. You can read it for details at this link: https://rebornpipes.com/2013/04/14/some-reflection-on-the-historical-background-on-cpf-pipes/ CPF3

CPF4 For the sake of summary I include a portion of that blog here.

CPF stands for Colossus Pipe Factory. There is not much known about the Colossus Pipe Factory. I learned that by the mid 1890’s CPF was owned by Kaufman Brothers & Bondy (KB&B). They operated the factory at 129 Grand Street, in New York City, New York. I had a faint memory of some connection between CPF and Kaufmann Brothers & Bondy. But was unsure where I had heard or read that. In the process of reading information I came across this post by Bill Feuerbach on the Kaywoodie Forum it read as follows: “About 10 years ago I picked up two original invoices from KB&B. One is dated February 5, 1884 and the other December 9, 1898. Both have the address as 129-131 Grand Street, which is in Soho, adjacent to the Bowery in New York City. The 1898 invoice has in the upper left hand corner the initials CPF and Trademark. So by 1898 KB&B was making it known to the trade that they owned the CPF trademark. The 1884 invoice does not have CPF on it. Therefore I think we can assume KB&B acquired or started the CPF line sometime between 1884 and 1898.”

Thus we know that the brand was purchased by KB & B sometime between 1884 and 1898 and that it continued until 1915. That time frame gives help in dating some of the older CPF pipes you or I might find. It can be said that prior to the dual stamping it is fairly certain that the pipe is pre-1884 to 1898. After the dual stamping it can be placed post 1898 until the closure of the brand line in 1915. CPF made beautiful pipes. I believe Sam Goldberger was correct in his assertion of the potential carvers that made the pipes being of European training and the classic shapes and well aged briar. That coincides with all the CPF pipes that I have come across.

The pipe I got from John is one of the earlier pre-1884 as it only bears the CPF stamp in faded gold leaf on the shank. I took the stem off the shank to look over the connector in the shank. The threads were worn and there was a chunk of briar missing from the bottom side of the shank exterior inside the band. There also appeared to be a crack at the top of the shank but it turned out to not be a crack but rather an area where the end of the shank is stepped down. I filled in the hollow area with wood glue and used the dental pick to push it down in the divot area.CPF5

CPF6 I tried several methods for dealing with the damaged threads in the shank. The first of these was to build up the tenon with wood glue and then also with super glue. Both methods failed. As soon as I twisted the tenon into the shank the threads were stripped of all of the glue buildup. Those two methods utterly failed.CPF7 I cleaned off the tenon with alcohol on cotton pads and started over. I examined the threads in the shank and it suddenly dawned on me that I could build them up. I carefully used super glue on the threads keeping it totally out of the airway in shank. I filled in the threaded area with the glue and once it dried I was able to recut the threads with the bone tenon itself. The repair worked and the stem fit snugly in the shank.

I have learned over the years that using micromesh sanding pads on horn stems really raises a shine and brings out the grain in the horn. I started by wet sanding this one with 1500-2400 grit micromesh to take care of the tooth chatter and to reshape the oval button. It took some sanding but I finally got is shaped correctly. These first three grits of micromesh do the hard work in polishing the horn. When I finished I rubbed it down with Obsidian Oil. You can really begin to see the bands in the horn and the grain. This was one beautiful piece of horn.CPF8 I dry sanded the stem with 3200-4000 grit pads and the grain began to really show and glow. I love the translucence of horn once it begins to really shine. This stem was truly a beauty to behold. I rubbed it down again with Obisidan Oil before moving on to the next grits of micromesh.CPF9 I finished with the 6000-12,000 grit pads – dry sanding through each grit. I then buffed the stem lightly with the Blue Diamond Plastic Polish to give the final shine.CPF10 I rubbed down the bowl with a light coat of olive oil and then cleaned up the band on the stem with silver polish and micromesh sanding pads. I finished the band by buffing it with a jeweler’s silver polishing cloth. The next photo shows the stamping with the gold leaf on the shank and also gives a clear photo of the stamping and faux hallmarks on the band.CPF11 I buffed the pipe with multiple coats of carnauba wax and then gave it a final buff with a clean, soft flannel buffing pad to raise the shine. The finished pipe is shown below. Note the glow of the horn stem and the contrast of the brass/gold band. This old timer is ready for many more years of service. If you have not smoked a horn stem pipe you have to give one a try. They are a totally different experience from vulcanite or Lucite. They are comfortable and light in the mouth. I am looking forward to breaking this one in again and enjoying smoking it.CPF12

CPF17

CPF16

CPF15

CPF14

CPF13 Thanks for looking

Restoring an old CPF Gourd Calabash Pipe


Blog by Steve Laug

In my grab bag from the antique mall was a gourd calabash bowl. It has the original silver band with the CPF logo stamped on it and some faux hallmarks – an anchor, star and a figure. The CPF stands for Colossus Pipe Factory – a brand I researched and wrote about previously on the blog – https://rebornpipes.com/2013/04/14/so…-on-cpf-pipes/. The hallmarks on the band are an anchor with chain, a star and a figure of a man. From my research these are faux hallmarks. CPF pipes were made in New York and later became linked with KB&B pipes. Here is a link to an old catalogue linking the brand to KB&B that I posted previously on the blog https://rebornpipes.com/2014/03/05/an…cpf-catalogue/. Sadly there are no meerschaum pipes in the catalogue so I cannot ascertain the date for sure. I am fairly confident from comparing the band with others that I have which have similar bands that the pipe can conservatively be dated to the early 1900s or late 1890s. So it is a gourd bowl that has some age on it.
IMG_6432
The bowl came with the band and a threaded bone tenon that was easily removed from the mortise. The gourd had darkened areas around the exterior of the bowl from the hand of the previous owners. There were several nicks in the gourd on the bottom of the shank next to the band and on the right side next o the band. The band had been pressed onto the gourd and it was obvious from the fit and the way it pressed into the shank ahead of it that it was original. The inside of the gourd had hard tars and tobacco oils on the walls down into the shank itself. There was nothing soft or sticky in either the shank or bowl. A pipe cleaner came out clean regardless of whether it was dry or wet. The top edge of the rim was pristine with no dents or nicks. There was a slight crack that ran down about ½ inch on the front of the bowl. I liked the shape of the gourd from the moment I took it out of the bag. It was not oddly shaped but was elegant in both the flare of the bowl and the curve of the shank. It would be well worth bringing back to life.
IMG_6430

IMG_6431
I measured the diameter of the bowl and the diameter of the bone tenon and made a call to Tim West at J.H. Lowe (http://www.jhlowe.com/) with the dimensions to see what he had in terms of a meerschaum bowl and a potential stem for the pipe. He asked for a photo of the bowl so he could have a look before recommending sizes of the stem or bowl. I told him that I was thinking about an amber acrylic a Bakelite stem. Once he saw the pictures Tim talked me out of that and said a vulcanite stem would be perfect for it. I asked if he would tap the stem for me before he shipped it. He said he would do it, no problem. He did a bang up job and sent it along with the meerschaum cup. Both of them arrived here in Vancouver quite quickly. I unpacked the bowl and stem from the box that Tim sent and that was the beginning of the issues that I faced with restoring this pipe. I will spell them out in detail as I write about the restoration of the pipe.
IMG_6747

IMG_6748
I tried fitting the meer cup into the gourd and found that there were several issues that I would have to deal with before it would fit well. The diameter of the bowl was perfect. The mushroom cap was big and draped over the top of the gourd and looked passable to me. The first problem was that the bowl had a lip around the top edge under the cap that was shaped the wrong direction – absolutely the opposite of the angle of the bowl. Because of that ridge the bowl would not sit in the gourd bowl correctly. Secondly I found that even without the ridge the cup was too deep to fit the depth of the gourd. The gourd tapered much more sharply than the meer cup so the bottom of the cup sat high in the gourd bowl. I would need to change the taper on the cup and shorten it so that it would sit in the gourd correctly and I would need to remove the lip around the top under the cap.

I measured the thickness of the bottom of the bowl and the thickness of the walls of the bowl around the cup to make sure I could remove the ridge and shorten the bowl without ruining the meer cup. I was happy to see that I had a lot of room to work with and could easily remove what was needed for a proper fit in the bowl. I used the Dremel to remove the ridge from under the cap edge. It was big enough that hand sanding would have taken a very long time. I took it down to match the rest of the bowl. I also used the Dremel to shorten the bowl. I flattened it out and took off approximately ½ inch. I then hand sanded the bowl with 220 grit sandpaper to reshape it and smooth out the Dremel work. I reshaped the taper of the cup to match the taper of the gourd. I sanded the flat edges of the bottom and reshaped it into a gentle curve. The photo below shows the newly reworked bowl. It fit well in the gourd after all of this work.
IMG_6749

IMG_6752

IMG_6751
I set aside the meer cup and cleaned out the inside of the gourd removing the tars and build up. I washed down the outside with undiluted Murphy’s Oil Soap to remove the grease and buildup on the gourd. I did not want the soap wet as I did not want to wet the gourd. I rubbed the soap on with a cotton pad and scrubbed and removed it the same way. Once it was clean I noticed that the small hairline crack along the front of the bowl was slightly open. I opened it slightly and dripped some super glue in it to bind the crack and clamped it until the glue cured. Fortunately for this impatient man the super glue dries very quickly and I could move on to the inside of the gourd. I sanded it out with a folded piece of 220 grit sandpaper. I was able to reach quite far down into the shank and sanded the ridges of tars and oils out of the bowl. There was a thick ridge at the bottom where the original cup had rested against the walls of the gourd. I used a dental pick to loosen that area and then sanded it smooth. All of this cleaning work served to renew the inside of the gourd but also made a smooth base for the new meer cup.
IMG_6750
I cut a piece of cork to fit the inner edge of the gourd. It had to be trimmed in both height and length to fit properly. I glued it into place with white all-purpose glue. I pressed on it to make sure that it sat tightly against the gourd. This cork would serve as a gasket for the cup and also it fit perfectly against the small crack that I had repaired on the exterior. Together they would bind together the crack and provide a functional repair to that surface.
IMG_6753
Once the glue dried I sanded the cork with 220 grit sandpaper (my go to sandpaper for much of the initial work I do on the pipe). I wanted it to be a smooth pressure fit that would hold the bowl in place. I rubbed down the cork gasket with Vaseline to soften it after the sanding. I find that cork left unused gets dry and brittle and the Vaseline brings it back to life. I pressed the bowl in place to check the fit and found that it still needed some adjustment to sit properly in the bowl. The top edge under the cap needed to be sanded some more to reduce the diameter of the cup.
IMG_6755
I took it out of the gourd and sanded it with the 220 grit sandpaper until it fit correctly. I polished the cup exterior with a fine grit sanding sponge and 1500 grit micromesh sanding pads before pressing it back into the gourd.
IMG_6754
This time it fit was far better. The cup sat in the gourd like they were made for each other. The two photos that follow show the fit and look of the new bowl. At this point the calabash is showing great promise.
IMG_6757

IMG_6756
I cleaned up the mess of the meerschaum sanding dust that was everywhere on my work table. It is a messy fine powder that gets into everything if left to its own devices. Once I had done that I wiped down the exterior of the bowl and cup one more time and took a couple of photos to get a good look at the pipe.
IMG_6758

IMG_6760
With the work on the bowl and cup finished I turned my attention to the stem. Tim’s drilling was spot on. The diameter was exactly what I had sent him – ¼ inch. The second problem I faced with this old calabash was that the bone tenon was not quite the 1/4 inch measurement I gave him. It would not fit in the tapped hole in the stem. I measured it again and found that is was closer to 3/8 inches than a ¼ inch. I re-tapped the stem to 3/8 and was able to thread the tenon into the stem. It looked great and it fit well in the mortise. I glued the tenon in place in the stem with all-purpose white glue and set it aside to cure over night.
IMG_6762

IMG_6763
In the morning I slowly and carefully turned it into the bowl. Things were going really well. It looked like I would need to reduce the diameter of the stem slightly on one side and the top to match the diameter of the shank band. As I was turning it I heard a noise that is dreadful to me and to anyone who has heard it. It generally is not a good sound when you are this far along in a repair and signifies more work. The bone tenon broke in half. It obviously had been cracked and I had not seen that when I examined it. When I had turned it into the shank it had shattered. I was left with the broken half glued into the stem and the threaded half stuck in the shank of the pipe. Talk about frustration. I set the pipe aside and took a deep breath. Now I would have to go back to the drawing board in terms of how to attach a stem. I would have to drill out both the stem and the shank in order to move forward.
IMG_6764
I pulled out a can from my drawer where I keep replacement tenons – threaded Delrin, straight Delrin rods cut to fit as tenons and some push stem conversion kits that had a mortise insert and tenon for converting threaded shanks in old meers to accommodate a push tenon. The conversion kit would work nicely in this situation. I would have to modify the shank of the calabash as the diameter of the mortise insert was too big for the 3/8 inch opening. I had to drill out the end of the gourd and then re-tap it to be able to put the insert in place. The thickness of the shank did not give me much wiggle room so I would only have one chance at this. I was able to drill it and tap it. I mixed the two part epoxy and inserted the mortise in place in the shank.

The tenon was a much simpler to repair. I carefully drilled out the broken bone tenon in the stem and was able to salvage the threads. Once I had blown out the dust from the stem the push tenon screwed neatly into the 3/8 inch tapped end of the stem. I removed it a final time and epoxied it in place. However, it too was not trouble-free. The tenon had a 1/16th inch lip that would not sit in the end of the drilling on the stem. I ended up having to carve it with a sharp knife to remove the lip. In the photo below you can see the epoxied insert in the shank and the tenon in the stem. The insert still needed to be countersunk and cleaned up and the tenon needed to have the lip trimmed away.
IMG_6768
I set aside the calabash until the epoxy set. Once the stem was set I decided to work on the other end of the mouthpiece. It had a very tight slot on the end that was hard to push a pipe cleaner through so I opened that up with needle files. I used a flat oval file, an oval and a round file to do the majority of the work. I finished opening it with a flat angle file to open the top and bottom of the slot.
IMG_6770
When the epoxy had cured I carefully pushed the stem into the shank to check out the fit. The next two photos show the look of the pipe at this point. I removed the stem and countersunk the mortise slightly. I did not want to use a drill and countersink to do the work so I used a very sharp knife and did it by hand. Once it was completed I replaced the stem in the shank and the fit against the band was clean and snug. My initial mission was accomplished. I had not only broken the bone tenon, I had removed it from the shank and stem and converted the pipe to a push stem. There was still work to do but at least I had salvaged the pipe from the damage I had done in my initial repair. Whew…
IMG_6775

IMG_6776
I sanded the stem with a medium and fine grit sanding sponge to remove the scratches left behind by the 220 grit sandpaper. I gave it a light buff with Tripoli on the wheel and then set up a heat gun to bend the stem. I held the stem about three inches above the heat and moved it around as it heated. I have learned that to leave it in one place as you heat it can damage the vulcanite and create more work. Once the stem was pliable I bent it over a wooden rolling pin that I use for that purpose. Lately I slid a cardboard tube over the pin to give a softer, smoother surface to bend the stem over. I had to do it twice to get the bend correct. It takes a bit longer to heat the thicker portion of the stem that needed to be bent so the repeated step made that possible.
IMG_6777

IMG_6778
The finished bend is shown in the next two photos. I still needed to polish the stem before it was finished but the finished look is beginning to appear. The calabash is just about reborn.
IMG_6779

IMG_6780
I removed the stem and worked on it with the sanding sponges and the micromesh sanding pads. I wet sanded with the 1500-2400 grit pads and dry sanded with the 3200-12000 grit pads. Between the wet and dry sanding I rubbed the stem down with Meguiar’s Scratch x2.0 and then buffed it with White Diamond. I finished the sanding and then rubbed the stem with Obsidian Oil. Once it was dry I gave it a quick buff with White Diamond and then gave it multiple coats of carnauba wax and buffed it with a soft flannel buff.
IMG_6782

IMG_6783

IMG_6784
I scrubbed the surface of the gourd with Oil Soap and a light sanding with the fine grit sanding sponge to remove some of the deeper grime and oils in the gourd. I then applied several coats of Paragon Wax and hand buffed the gourd with a shoe brush to raise a shine. I polished the silver band with some silver polish and then reinserted the stem. I gave the whole pipe a final buff with the brush before setting the meerschaum cup in place. The finished pipe is shown in the photos below. It is a deep bowl and should hold a good pack of tobacco. The broad mushroom cap of the meerschaum cup looks good to me. The pipe is ready for its inaugural smoke. Now the only problem remaining is what tobacco to use to christen this restored calabash. Ah well that will sort itself out soon enough. Time to post this on the blog.
IMG_6785

IMG_6786

IMG_6787

IMG_6788