Guest Blog by Robert M. Boughton
Member, North American Society of Pipe Collectors
http://www.naspc.org
http://www.roadrunnerpipes.com
http://about.me/boughtonrobert
Photos © the Author
“Pipes are like dogs: the smokin‘ man’s best friend. Why, you can cuss at ’em, shout out loud about the state of the world to ’em, carry on all you like ’til yer blue in the face an‘ sore in the jaw about how great the whole place would be if only you was in charge, heck, even put ’em out of mind and ignore ’em altogether…for a while. In fact, a perfectly good, loyal pipe, same as an old coonhound, will even put up with a might mess of outright scandalous behavior an‘ never even consider turnin‘ on you – say, like as if the dog was to chomp off yer ignorant head or the pipe up an‘ went to dumpin‘ hot, burnin‘ ash in yer lap all on its own…But Heaven help the man that treats either his pipe or dog like garbage to be thrown in the dumpster or a bug to be stomped on. He’ll end up with a companion called Cujo if it doesn’t find a better master in time to escape. The pipe or the dog, that is.”
― The Author, in “Musings of a Mind Bored Silly by a Roommate with ADHD Who Just Doesn’t Know the Meaning of Silence Is Bliss,” today
INTRODUCTION
My friend, Phil, he’s a heck of a nice guy. He’s a real big fella – six-three, 280 pounds or right there in the ballpark – and one of the smartest dudes you could ever meet. Now by smart I’m not implicating he’s got some big old stuffy nansy-pansy degree from any of your fancy-schmancy Poison Ivy Universities, with a capital U, back east somewheres, or anyplace else, for all that matters. What would he need with some piece of paper, outside of hangin it one of his walls? Now that’s the day I’d like to see! And if he was the type to frame up a piece of paper all marked with gibberish scrawling like the tests I used to get back from my teachers when I was just a young buck, where do you suppose he’d hang it? I’ll tell you, I will! Right in the throne room, direct across from where he’d be sitting to ponder what the heck good it does him, and other earth-shaking notions and such.
No, boy! Phil’s smarts are part on account of he was born that way, with a genius IQ is my guess, and the other part from all the books and fancy magazines he reads. Plus old Phil, why, he never watches regular TV; doesn’t even own one, not counting this huge thin flat monster that rightly belongs on a wall like I’ve seen at some of the old-timey stores you can still find at the mall, only he connects it to his computer with nary a cord somehow, and that’s how he likes it. Hooks it up to his little old lap computer right through the air with what he calls Wi-Fi and something else that goes by Blue Teeth or Blue Fairy or whatever. Anyhow, whatever kind of magic it is he does to make all this confounded tech-nol-o-gy happen that bring all of his gadgets, not just the TV monster but his walk-around pocket phone and even this genuine Made in China nineteen-hundred and seventies-era Ghetto Blaster he has, work together – well, it’s something else, and how! Why, it’s like he’s at Carnegie Hall in New York City, or at least that’s what I hear tell. Personally, I went to the Grand Ole Opry in Nashville once when I was a kid, and that was good enough for me.
Now, to get to the meat and potatoes of this little fireside story, my friend Phil, he’s a good man, and he’s also one heck of a carpenter. When it comes to woodwork, why, there aint a thing he doesn’t know about all the woods ever grown, and how to build a custom home, with balloon walls and the works, from the ground up – and up and up – and pretty much all by himself. He’s as comfortable with his tools, from his cat’s paw and level to a pettibone, as he is with his own big mitts. And when it comes to the strength and soundness of the whole enchilada, Phil just pretends to listen to all the back-seat drivers, even if it’s the new owner! And you can bet all the money in your sock old Phil won’t take any guff from some pissant, oil-palmed CCI snagger with his eyes out for left-over parts to pilfer more than finding any real faults with the job. Yessir, Phil knows his stuff, from cripples to “A” Braces, trimmers, bearing walls and joists. But…
Ain’t there always a but? Well, Phil’s but is that for all he knows about wood and carpentry, he doesn’t have a bull pucket of a clue about restoring tobacco pipes, even if it’s a fair shake he could whip one up that would be right-on engineering-wise and even show his own, one-of-a-kind style. He’s even told me a few of his ideas, and they sound pretty clever and original. Only, as far as using a wood that wouldn’t give him rashes or boils or even the Big C, and staining the shapely wonder with something other than a nice, thick, shiny, Chinese-style lacquer that would leave the wood Code Red as far as breathing goes, he’s, well, clueless. And then there’s all the taking care not to forget to tuck it away all safe and sound instead of setting it on his work table with all of his sandpapers and rasps and drill bits and other implements of construction that are, what you might say, not Kosher to keep around a frail work of art, plus dropping it and all around banging the thing every chance he gets.
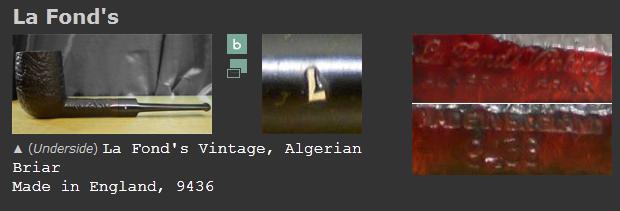
To put it nice, Phil is pretty dang bullheaded when it comes to thinking he can do, make or fix anything, and what’s more, that he’s better than the experts that are here to do it right. And he wouldn’t budge when I suggested he must have had something to do with the billiard’s condition when I got a gander of it. He held to the story that he had nothing to do with it; never touched it, he said, other than smoking it. So I’m sure you all can use whatever cents you had to rub together when you were born and come up with a notion of how dramatic it was for him to – well, ask ain’t the right word – oh, snap! He intimidated that he could use “some advice” on how to fix this no-name, no country but probably Italian bent billiard. Okay, okay, I’m a nice guy, too, and I knew what he was driving at, so when he said it was one of the first pipes I gave him and I said I made it myself, I didn’t want to be rude, but I almost couldn’t help it. One thing is, I’ve never made a pipe in my life nor said I did, even if I have plans to soon; I even bought a nice square block of walnut with grain that’s the bomb and is big enough for two pipes. I figure I’ll go vertical with both of them, seeing as how once I cut it in half I’ll be all-in one way or the other. Anyways, to get back to what I was saying, the other thing is, I did finish a few pre-formed pipes I got my hands on and even made them look pretty smart, if I say so myself, but this here bent billiard wasn’t one of them, no way, no how.
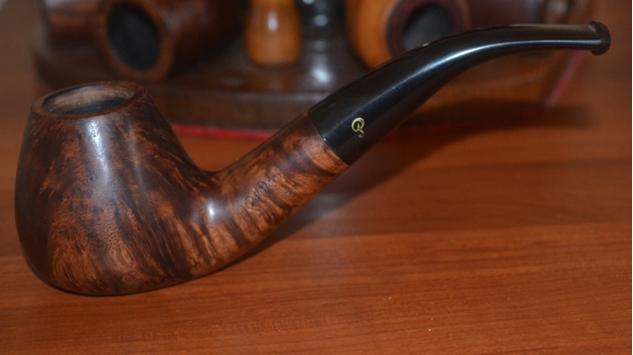
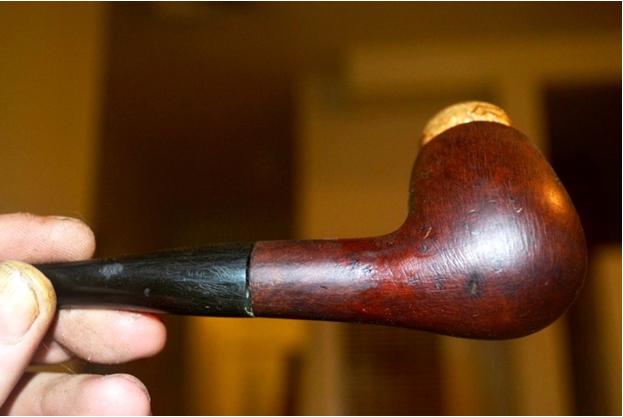
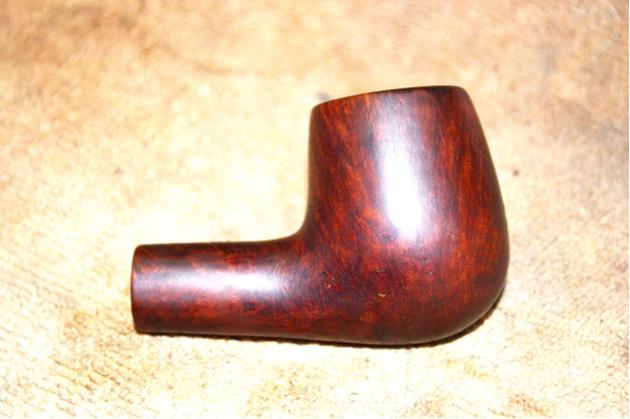
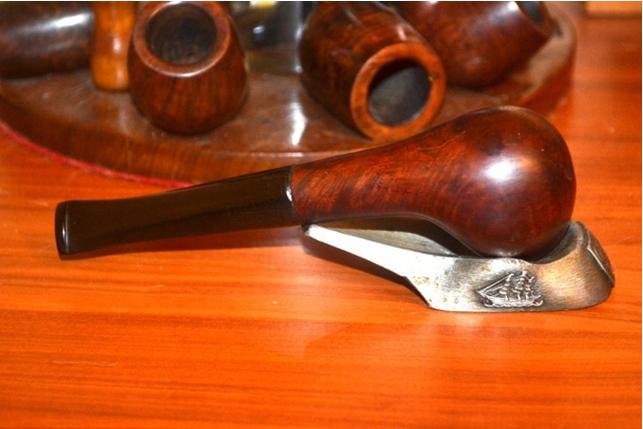
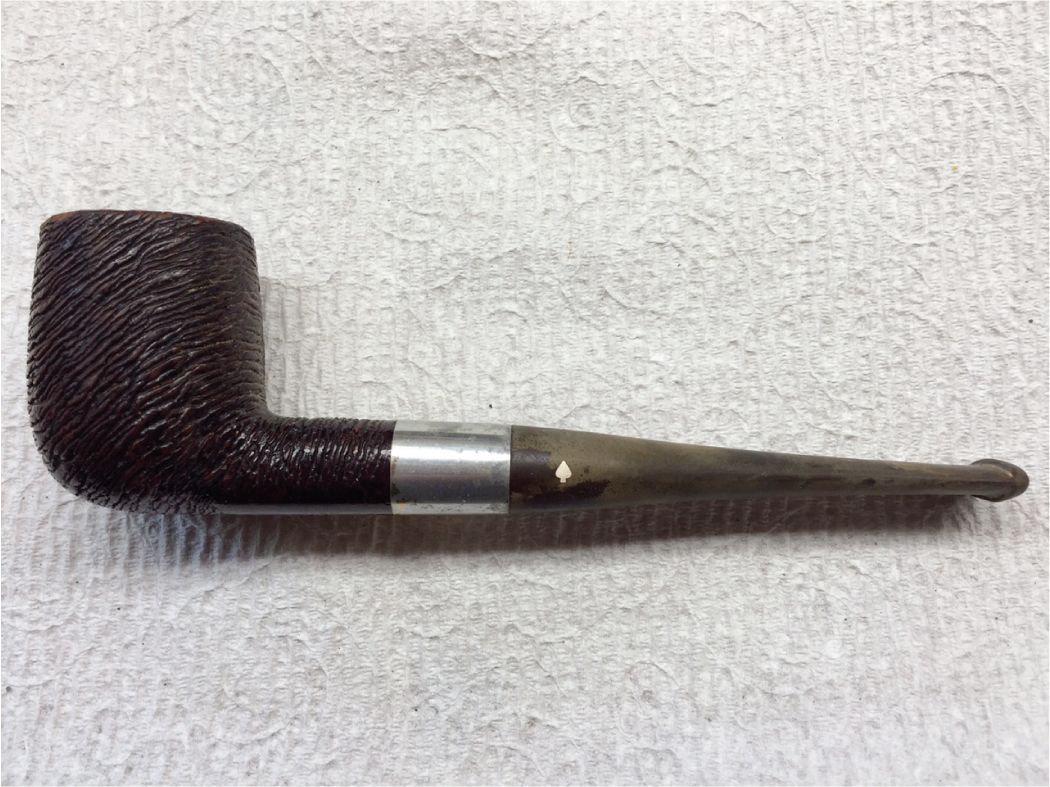
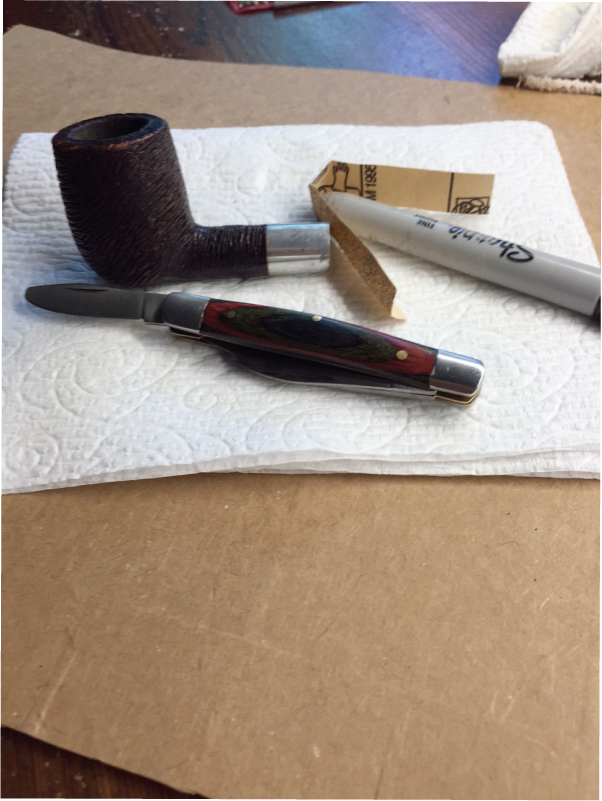
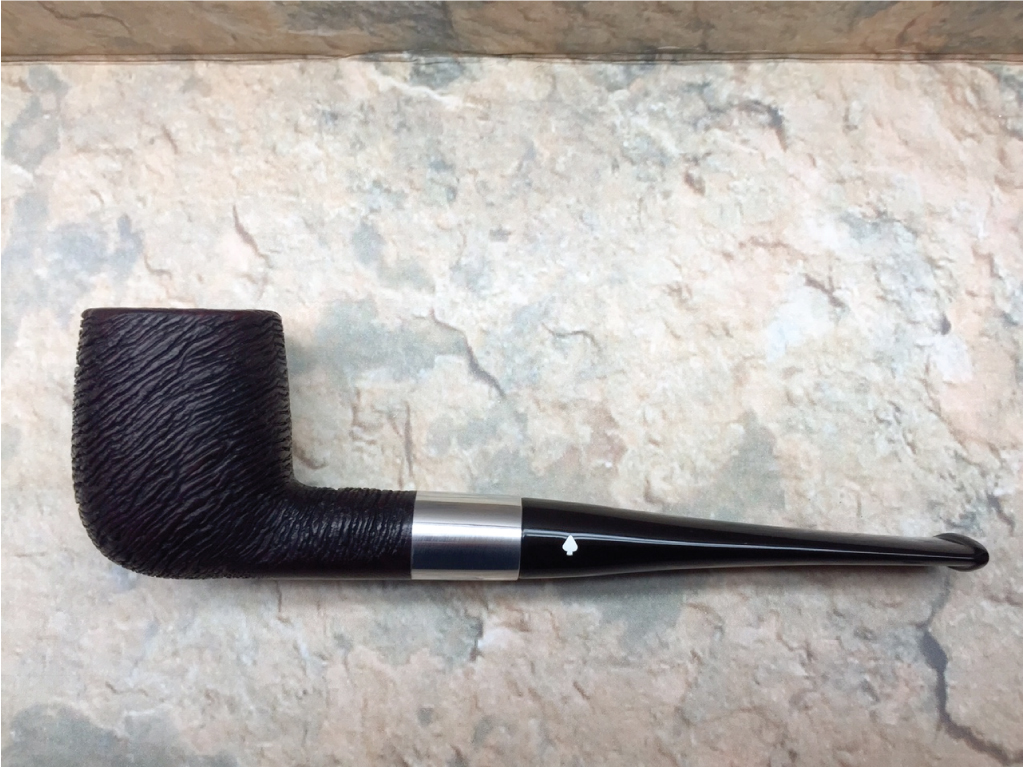
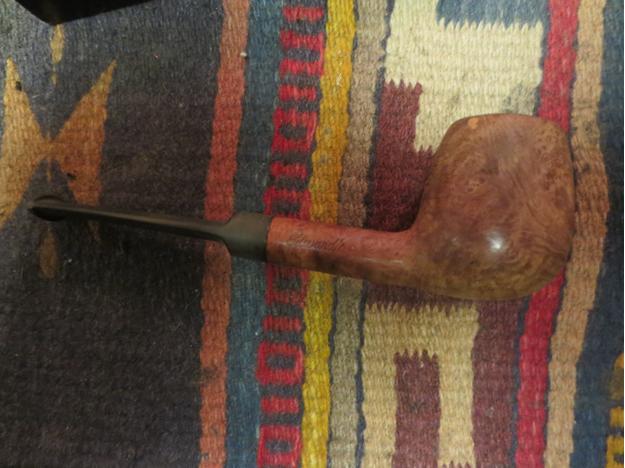
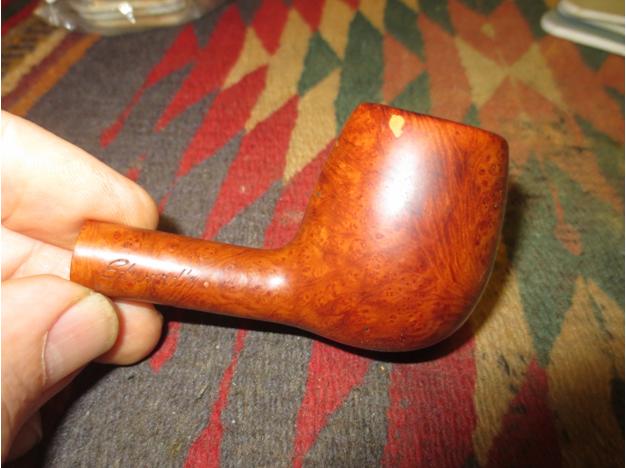
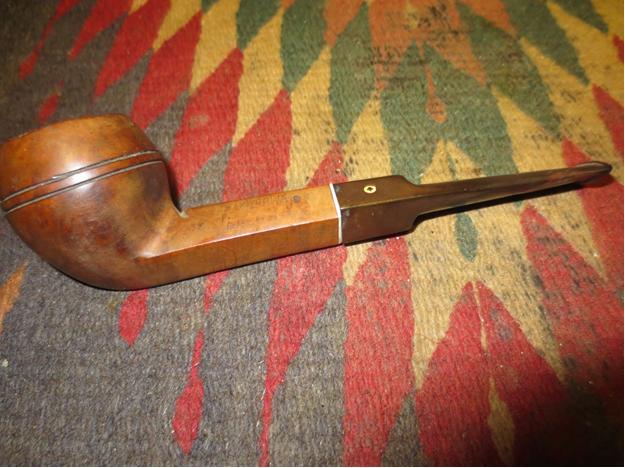
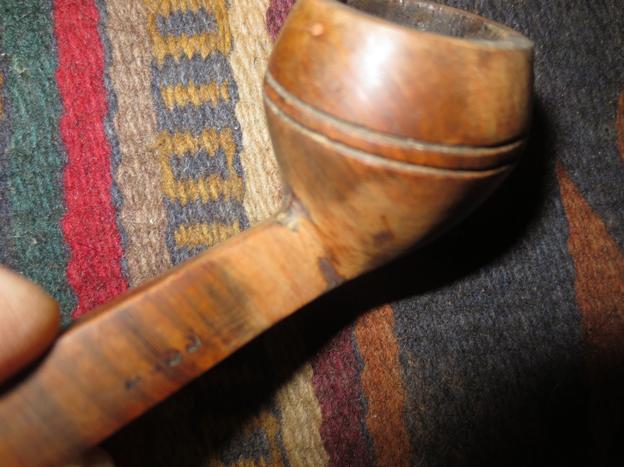
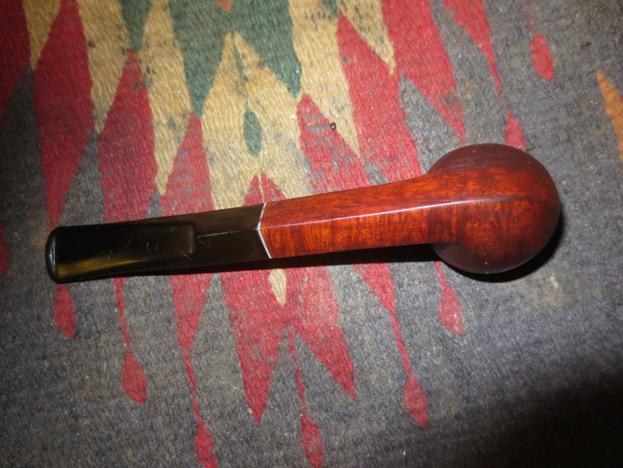
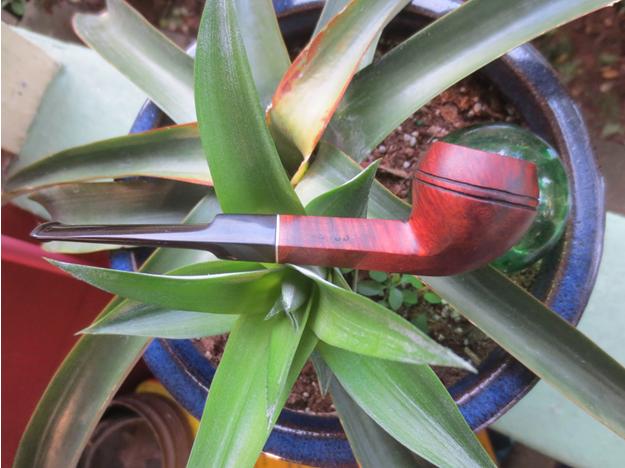
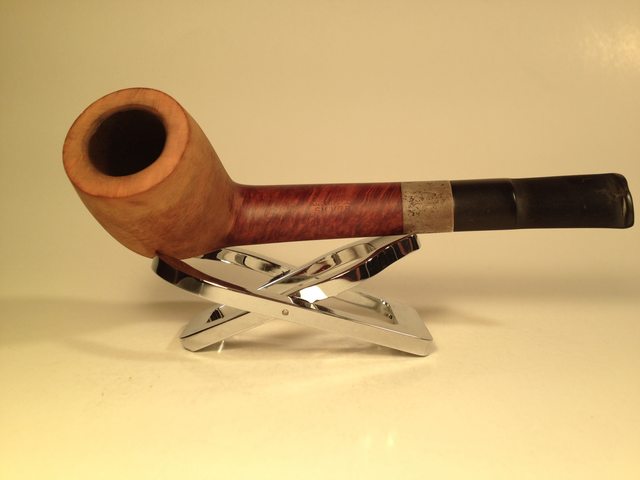
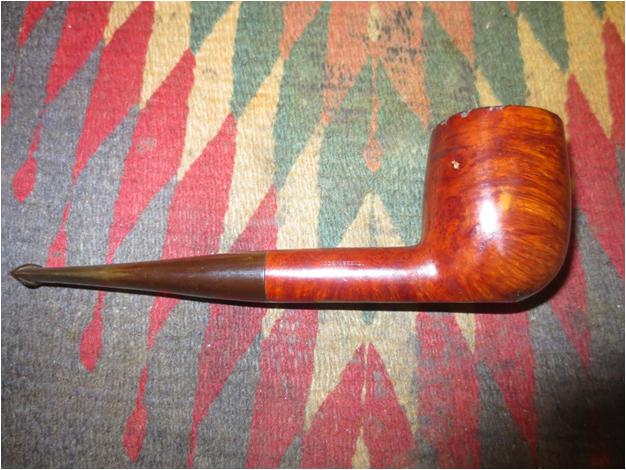
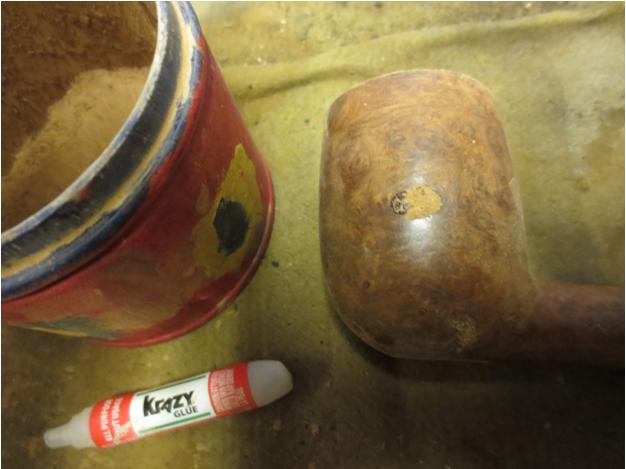
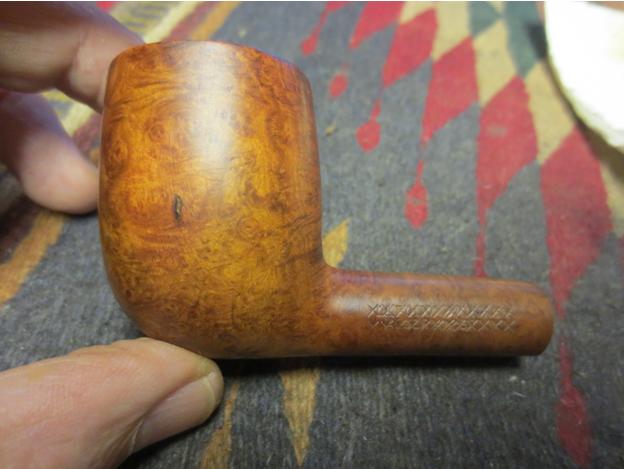
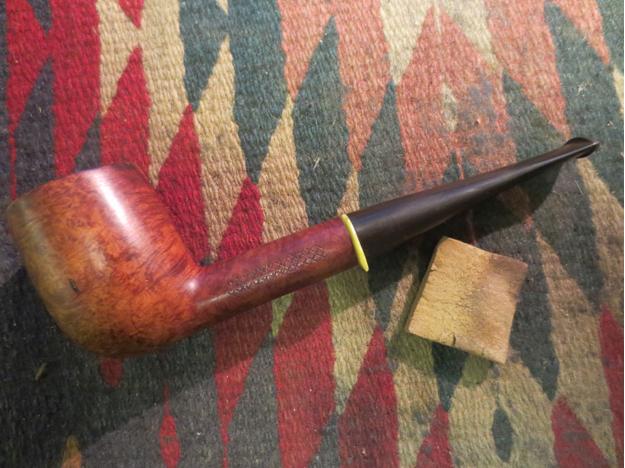
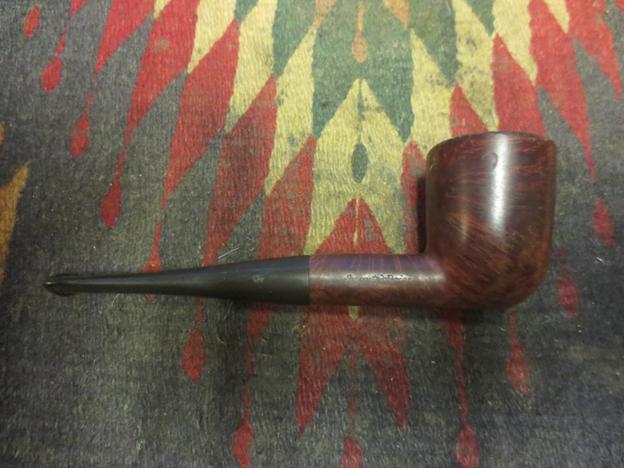
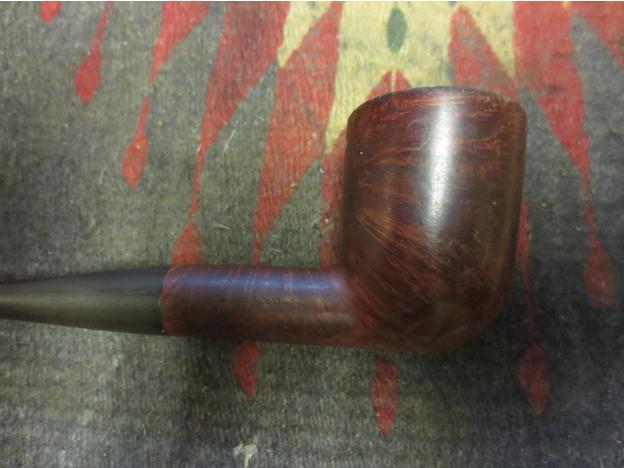
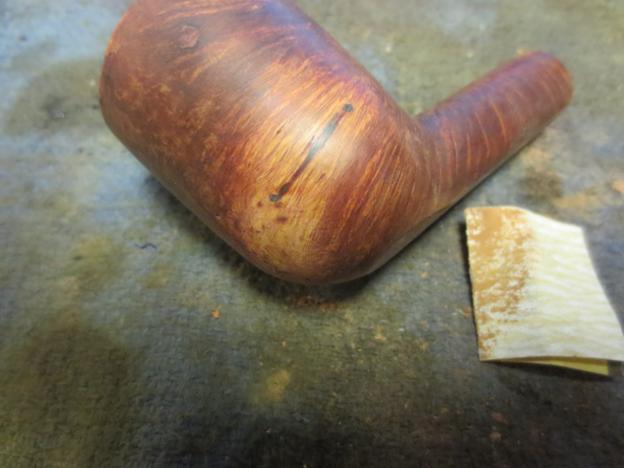
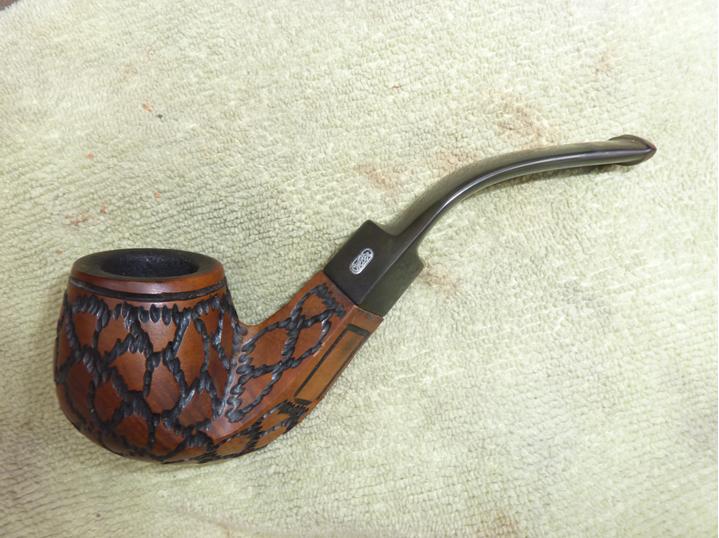
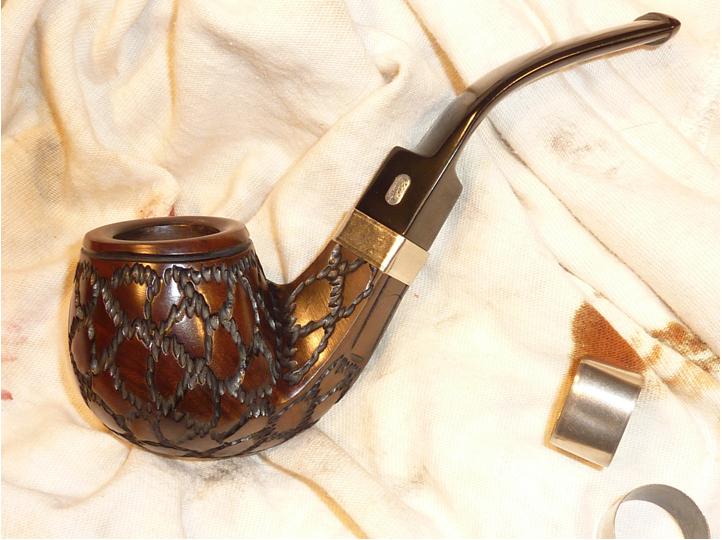
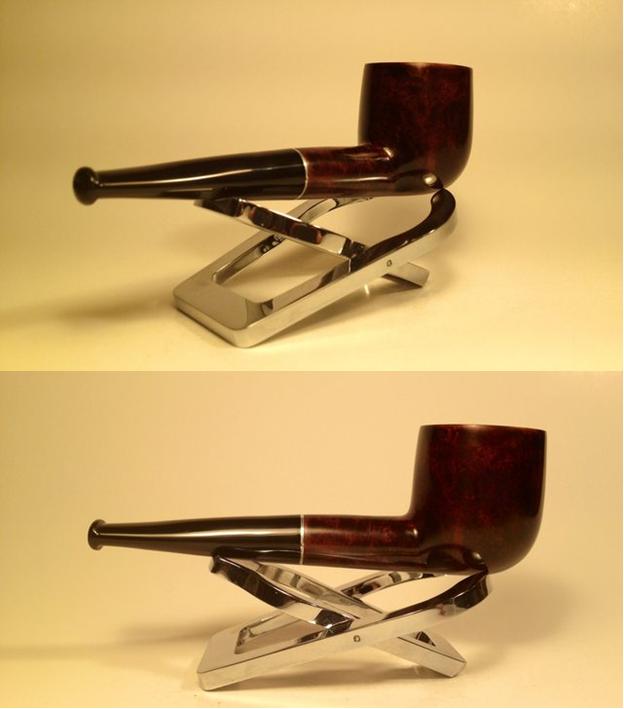
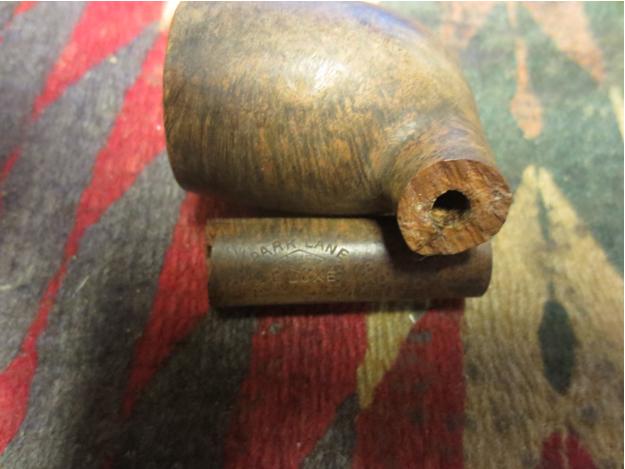
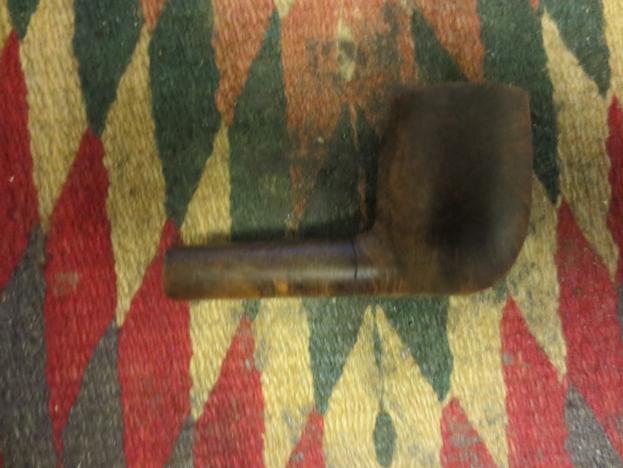
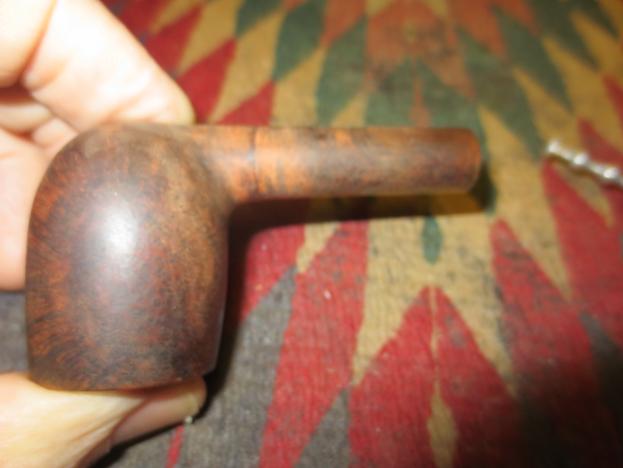
So Phil, he hands the thing to me, and from the second he picks it up from the Blitzkrieg debris that his apartment was full of that day, I saw it was totally FUBAR. I mean, it looked like it was all that could be dug from the rubble of some poor Englishman’s former place of commode during the Battle of Britain after a buzz bomb attack where one of those nasty suckers stopped its buzzing and fell out of the night sky right through his roof before it went off. Okay, so maybe I’m exaggerating, but you get the picture. I’ll tell you, the real shocker to me was that Phil had somehow let this happen when he took real good care of all the other pipes I remembered giving him, including a su-weet, smooth Peterson Aran B11 Bent Brandy I fixed up from my collection and gave to him on his birthday or something after he’d developed a real taste for pipe tobacco. I threw in a sleeve, and he’s kept it the same as the day I gave it to him. Back to the sad billiard, while I’m turning it in my hands, forced to admire the almost total stripping of the wax I told myself had to be there when and if I actually gave him the once proud pipe, not to mention the unbelievable uniformity of scratches all over it that – I kid you not – looked to me to be the work of a man with a careful if twisted plan, Phil even uses that word, plan, just as I’m thinking it! I would have jumped if the awfulness of the billiard’s deformities hadn’t already made me numb all over, like. Here’s my favorite angle.
 Phil’s going on how he has some plans for it, like re-staining it some special, unknown color and yada-yada-yada, but he’s real quiet like he never gets unless he’s embarrassed and wants to ask a favor, which he doesn’t ever quite get around to doing. Well, I wasn’t born yesterday, and I just keep it in hand until I’m set to leave, and then I ask him all casual, “Hey, Phil, mind if I hold onto this to look it over some more?” And of course he just has to put on like he doesn’t want to, when that was the plan all along, but in the end I walked out the door with the mysterious, thrashed pipe still in my hand.
RESTORATION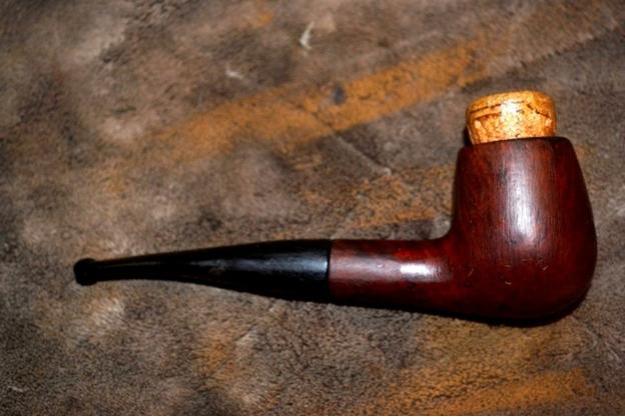

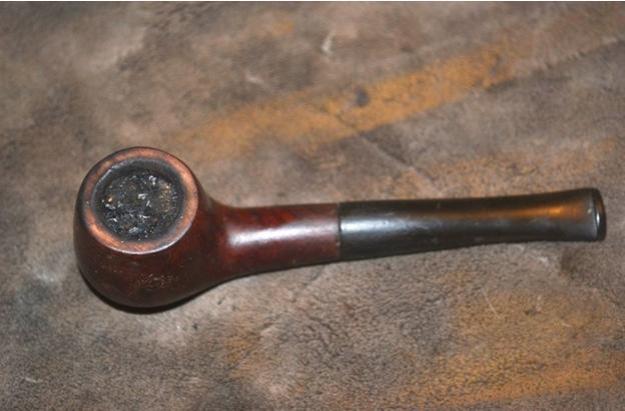


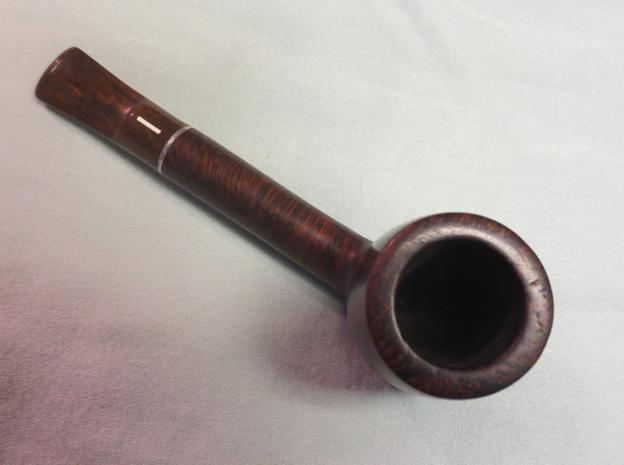
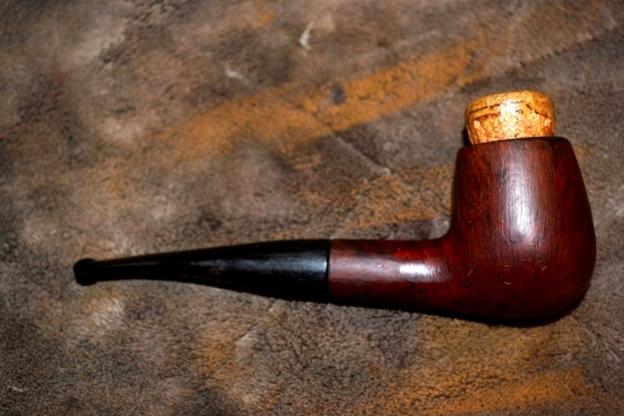
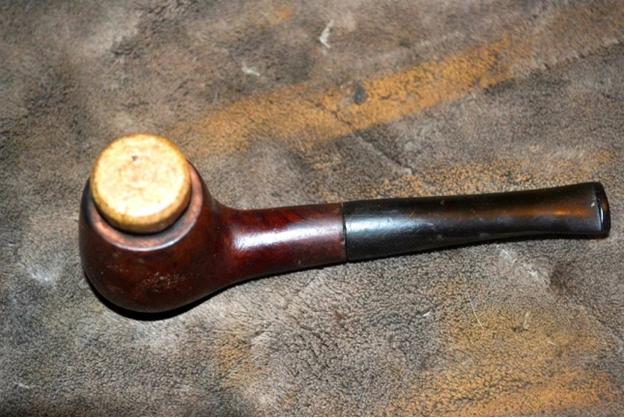
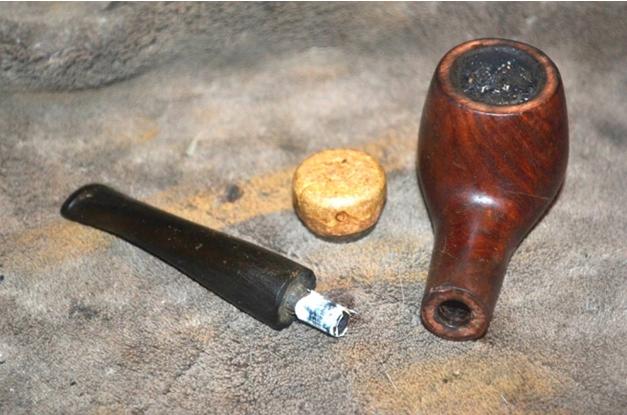
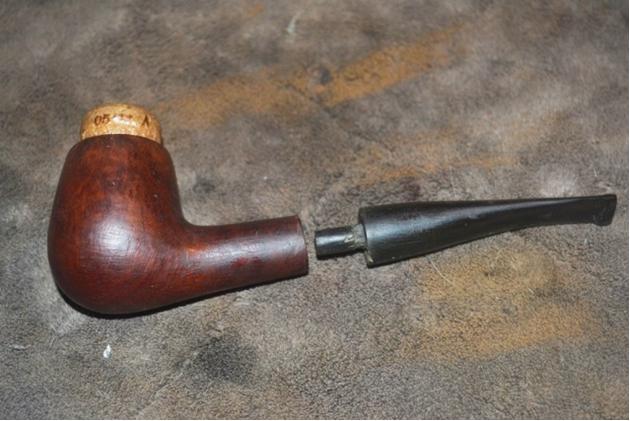
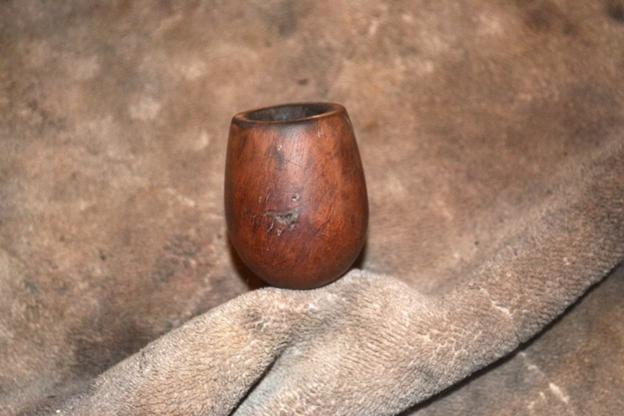
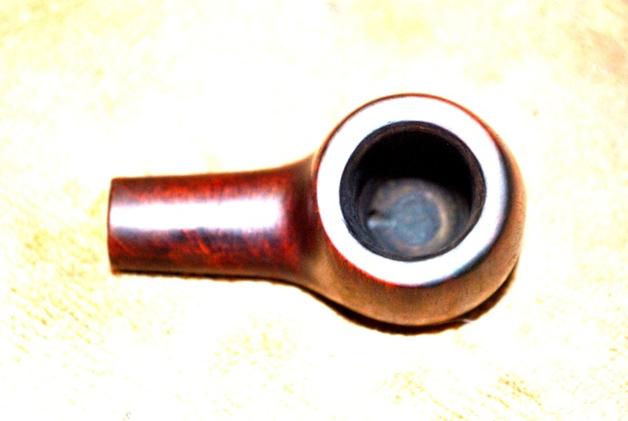
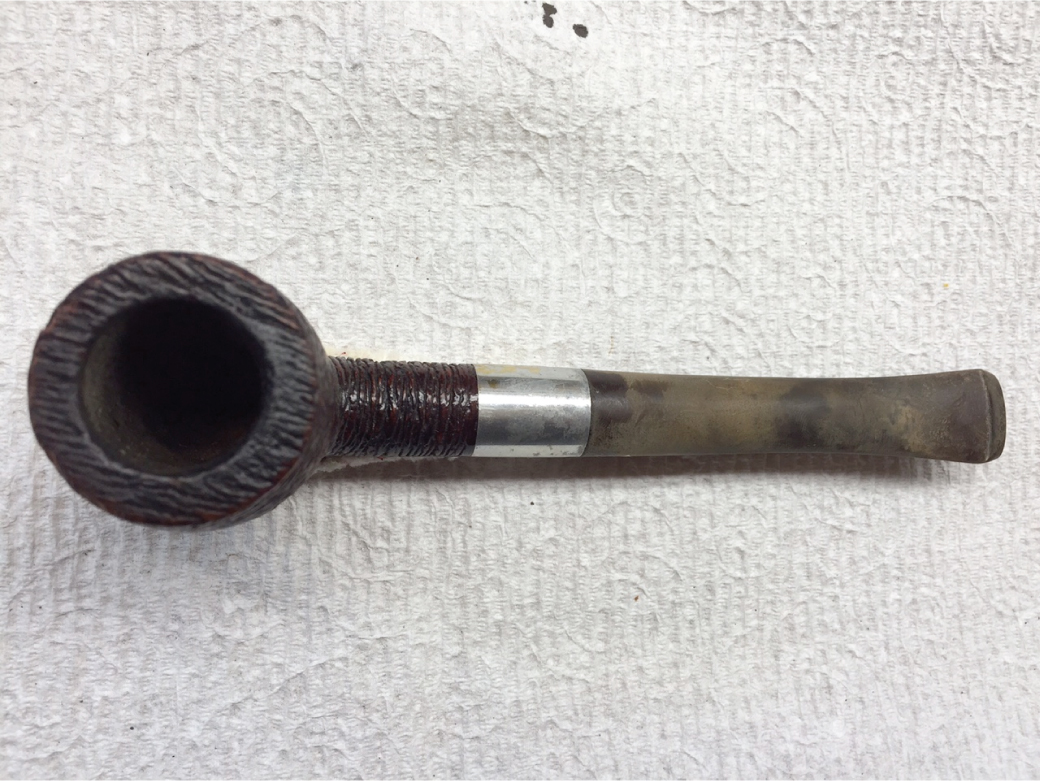
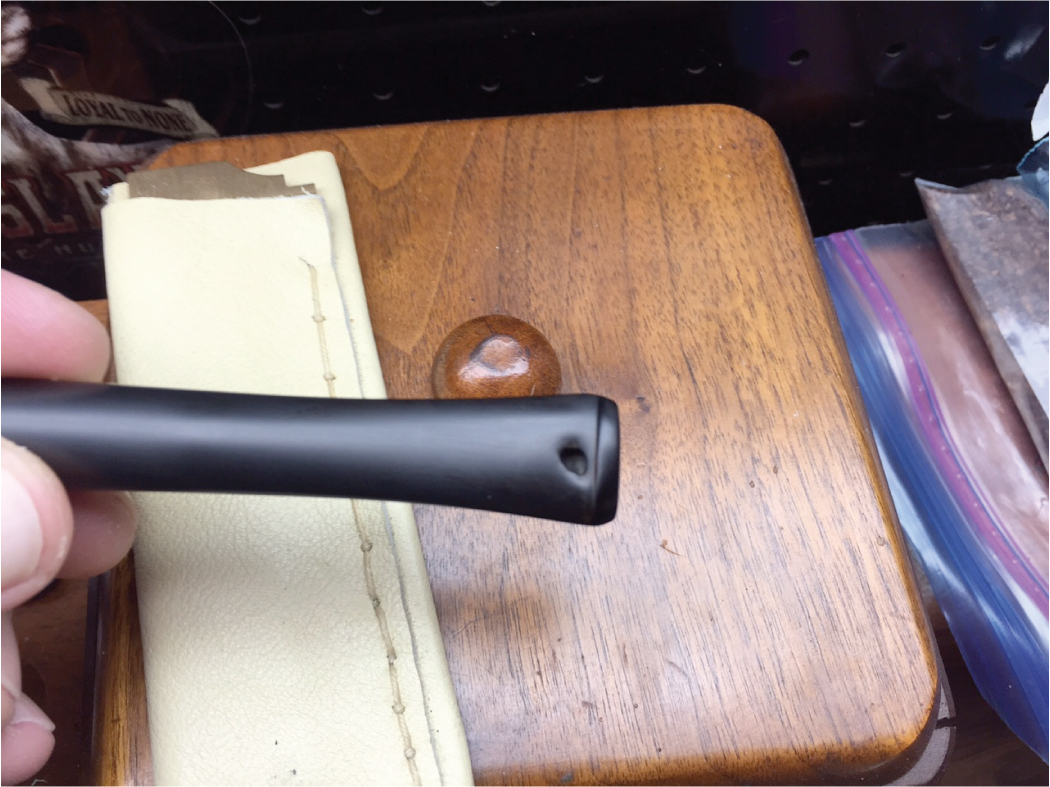
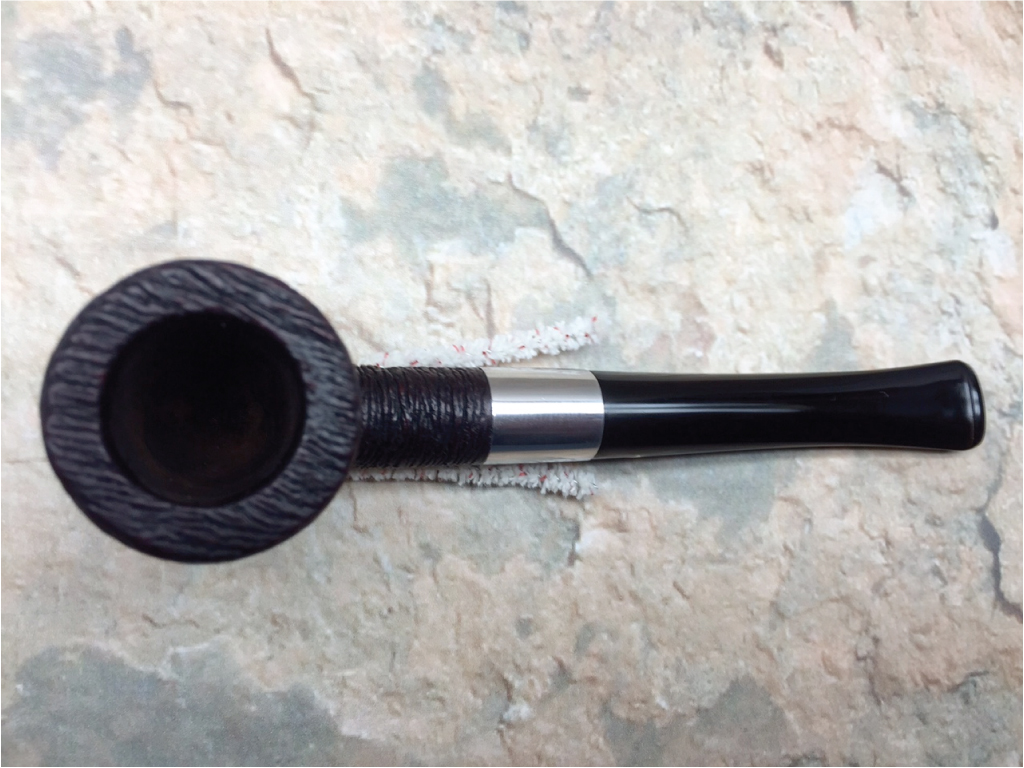
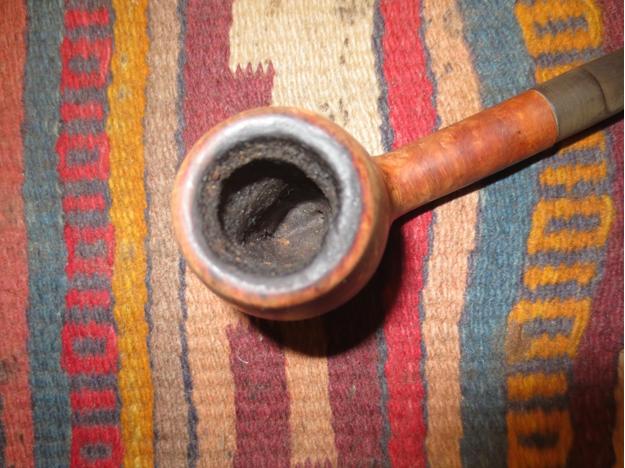
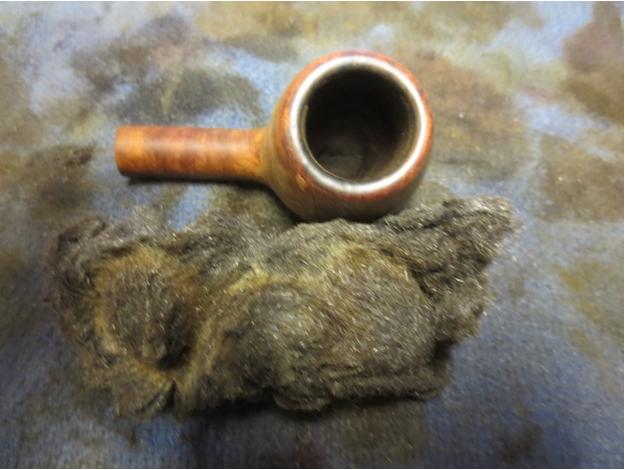
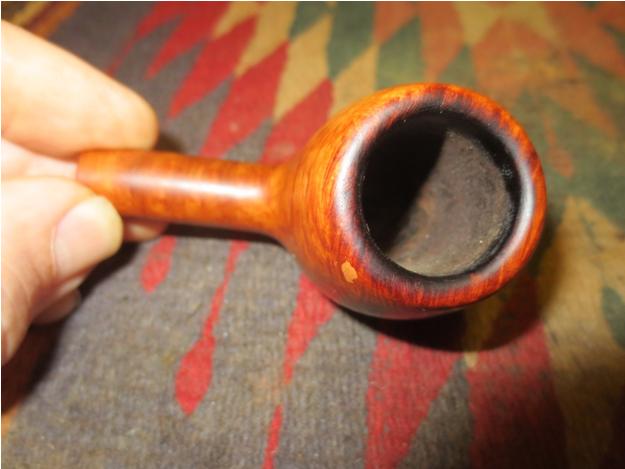
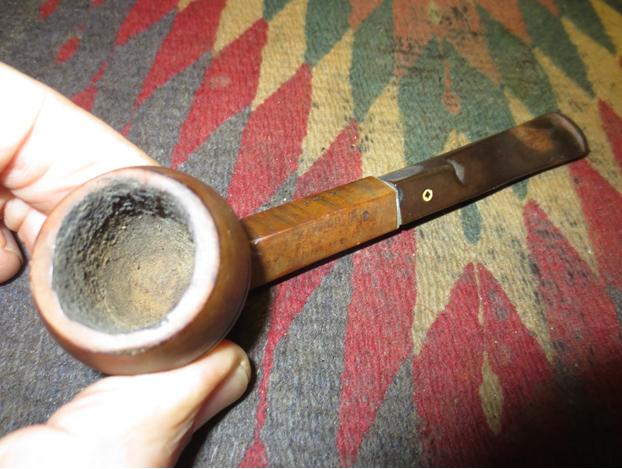
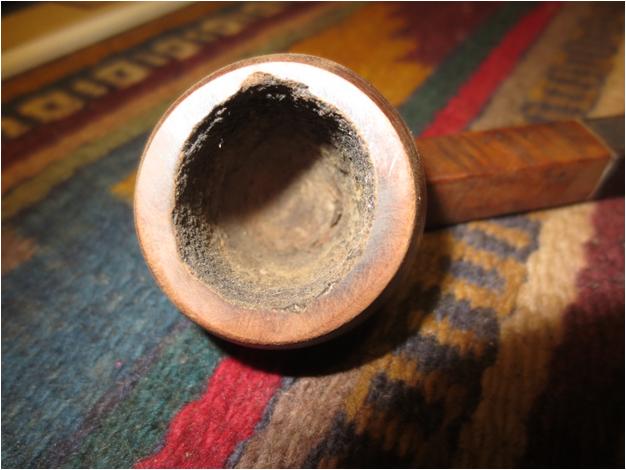
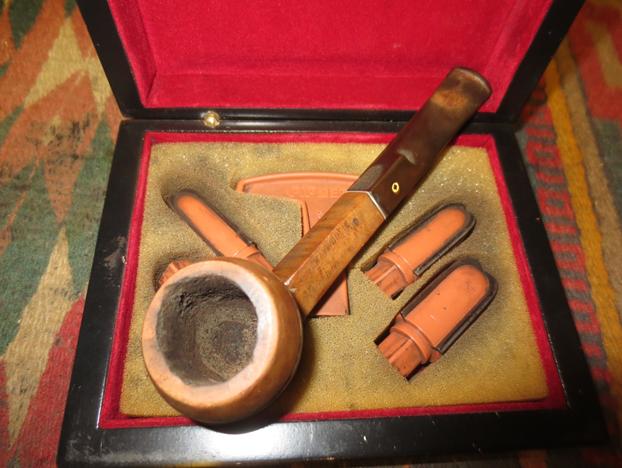
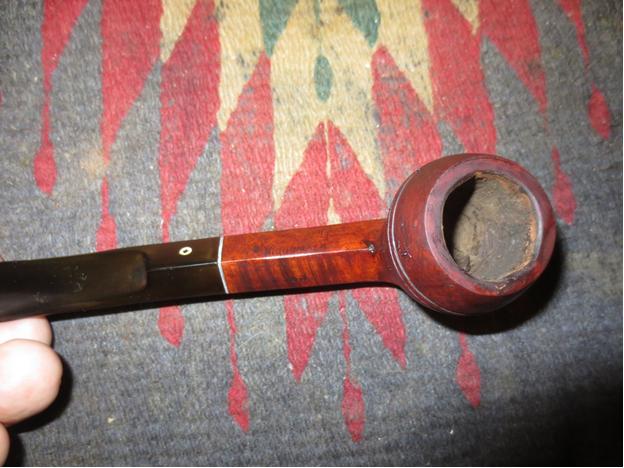
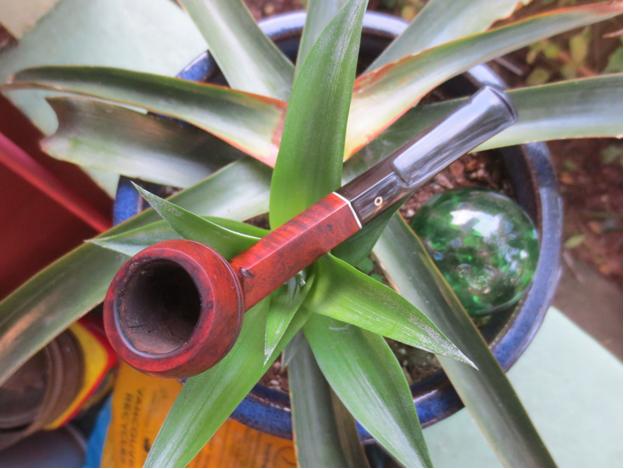
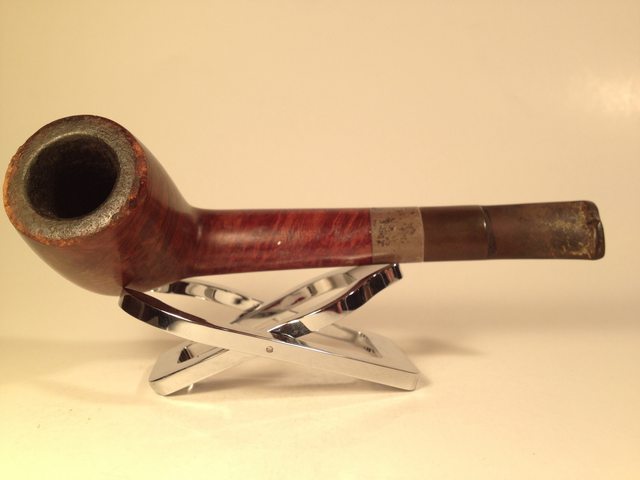
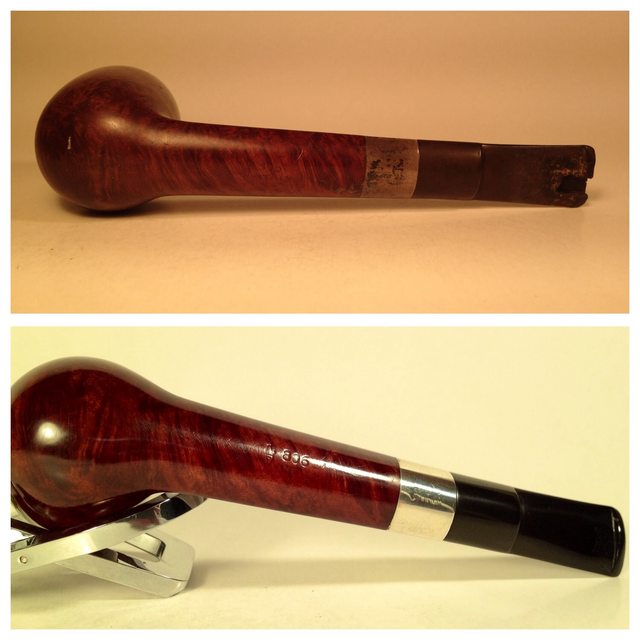
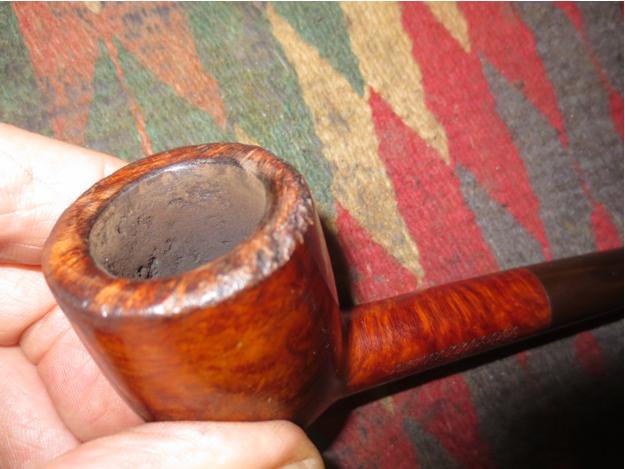
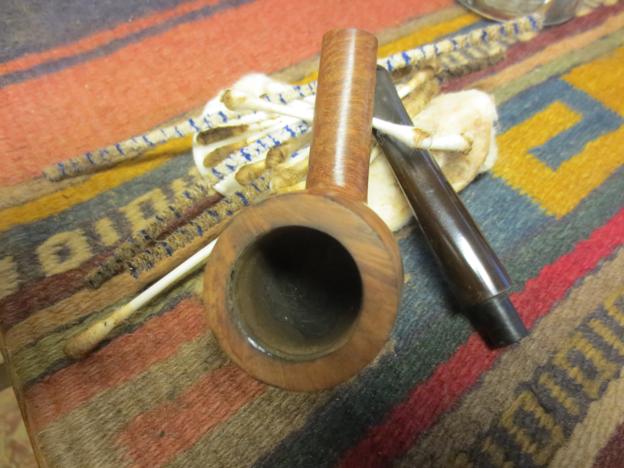
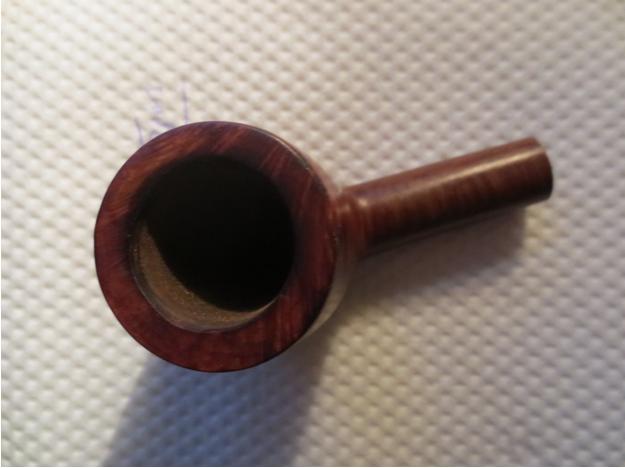
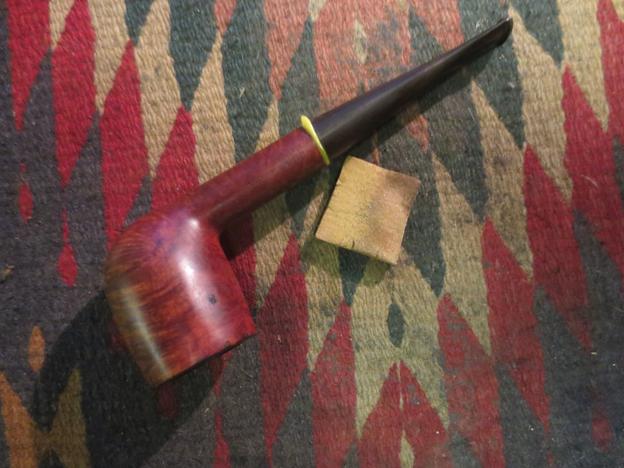
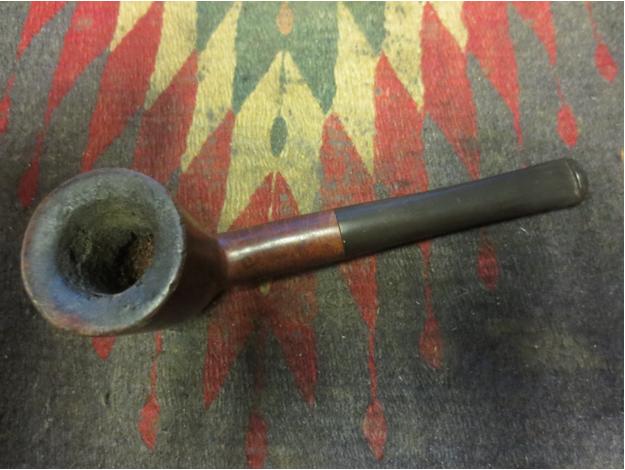
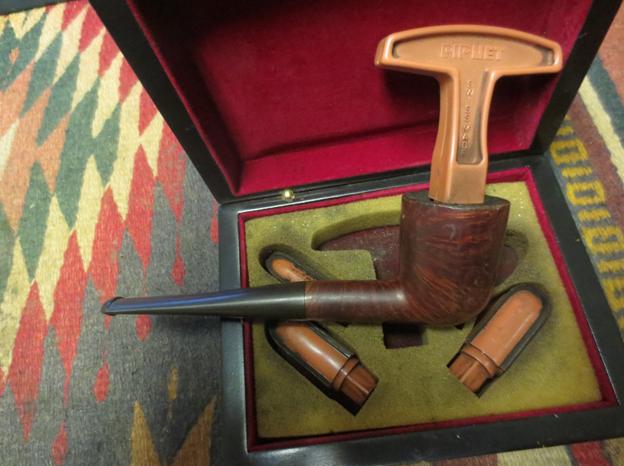
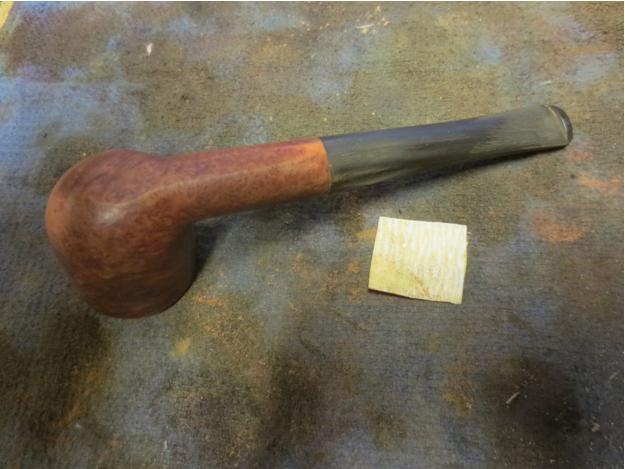
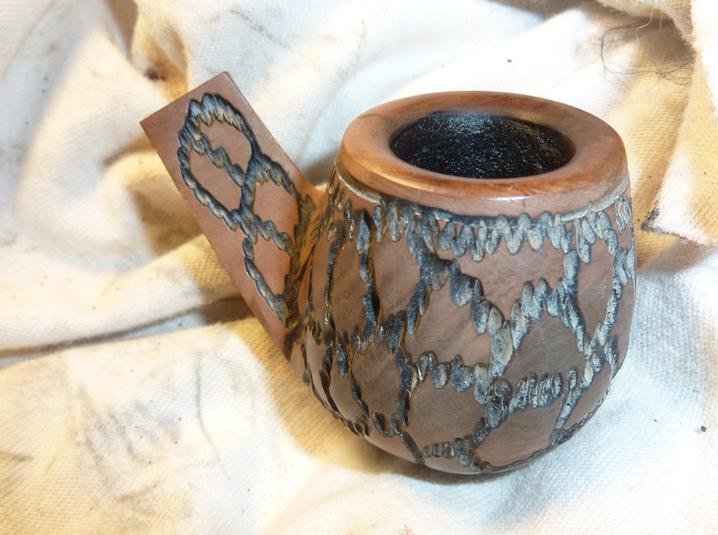
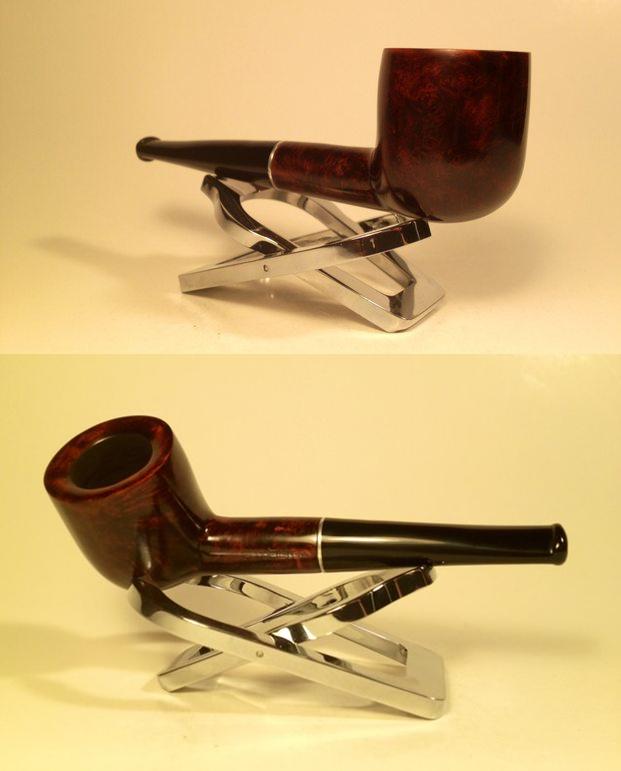
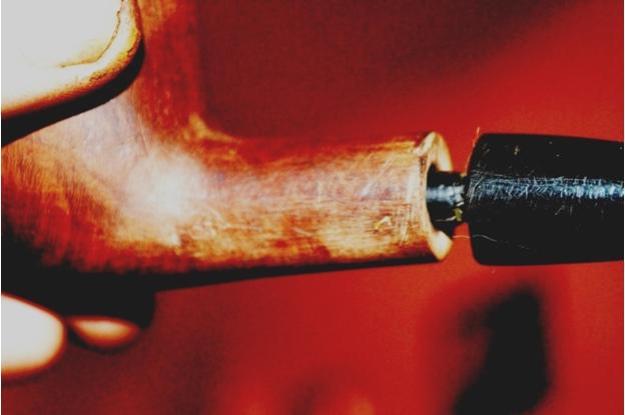
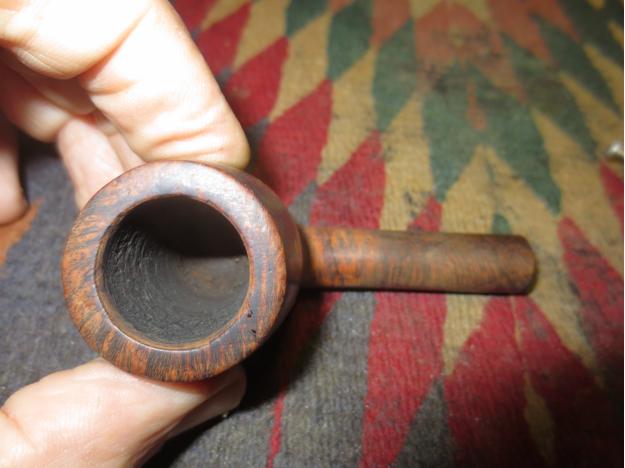
 I really like three of the things you’ll notice in the first of those photographs: the peculiar piece of cork used for some reason I won’t go into, the chamber chock-full of some leaf and the little improvised piece of paper on the tenon to make it fit right like it did when he got it (whoever gave it to him in the first place).
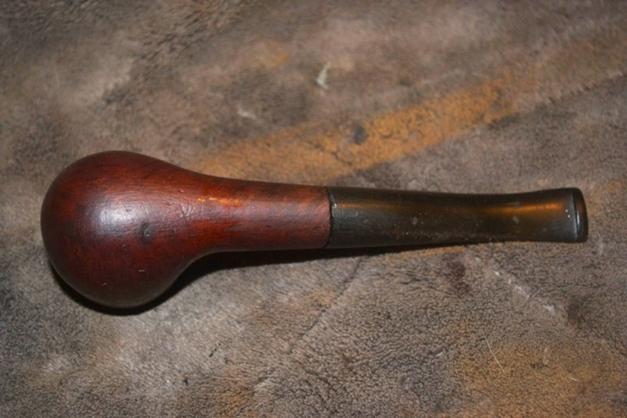
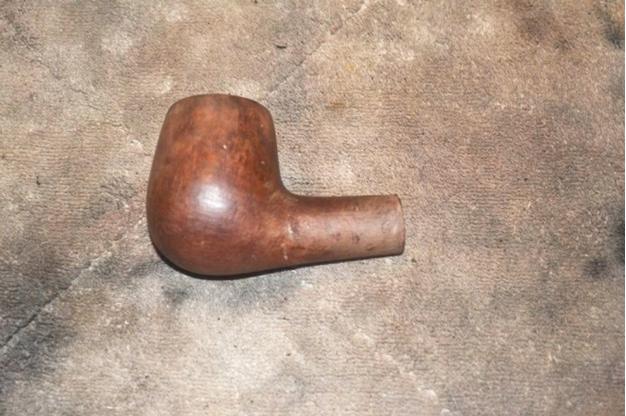
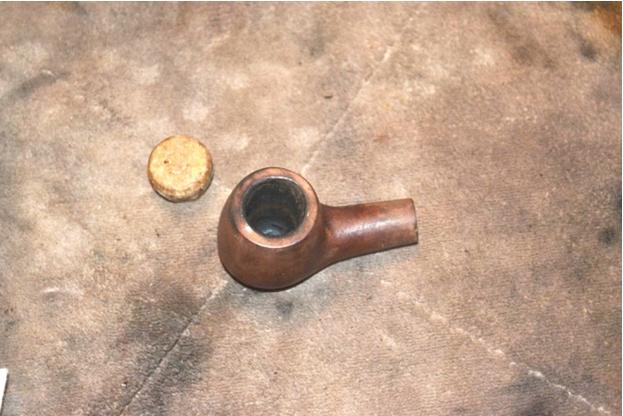
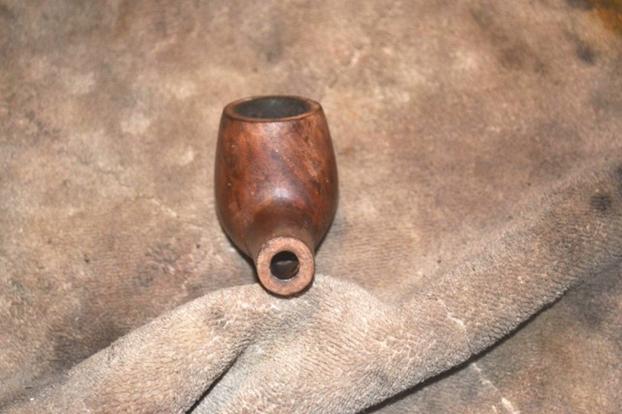
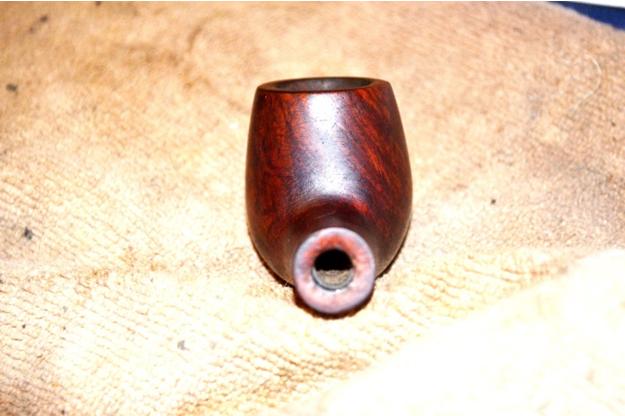
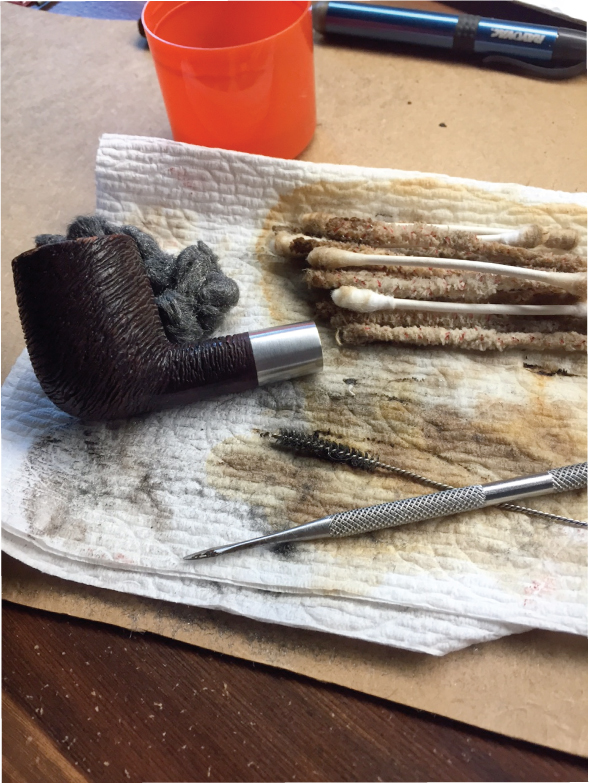
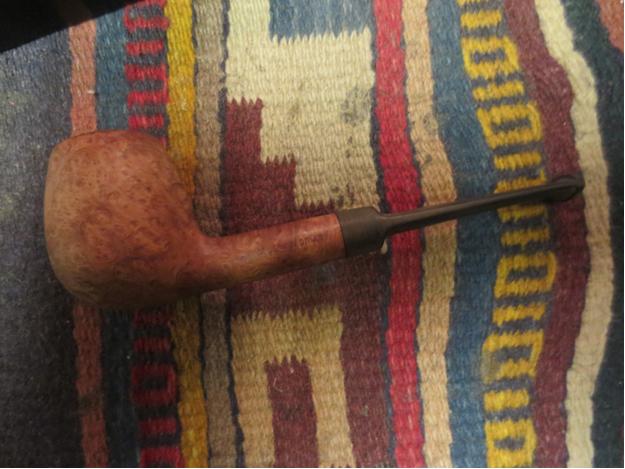
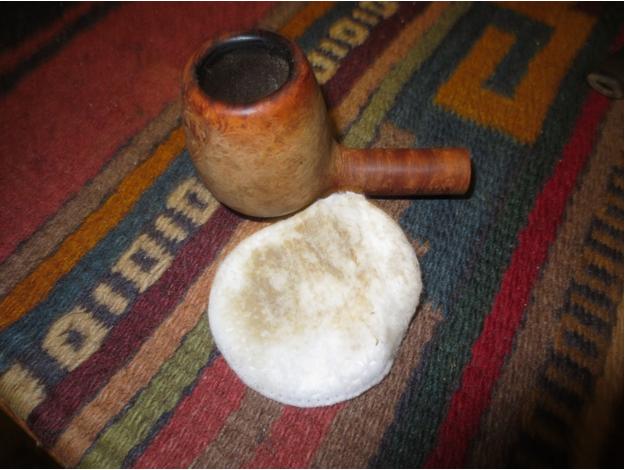
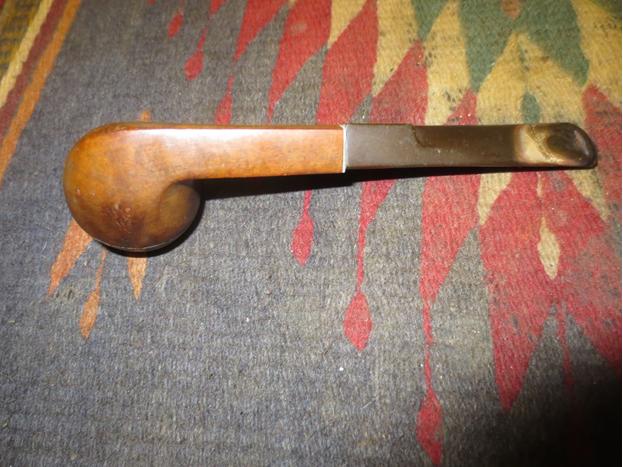
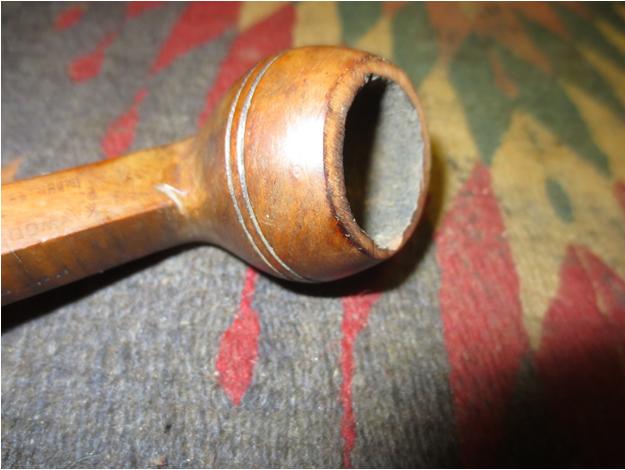
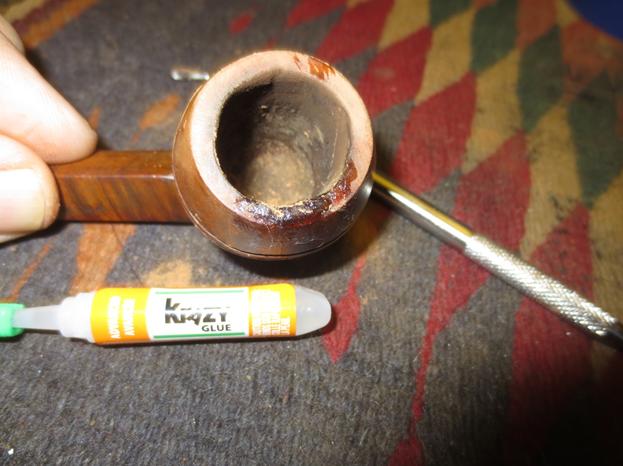
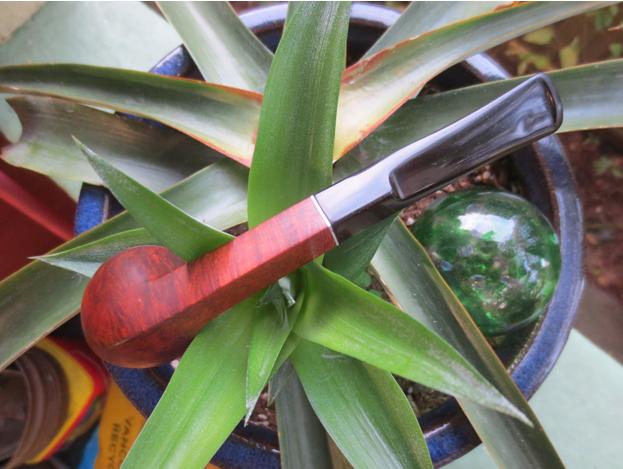
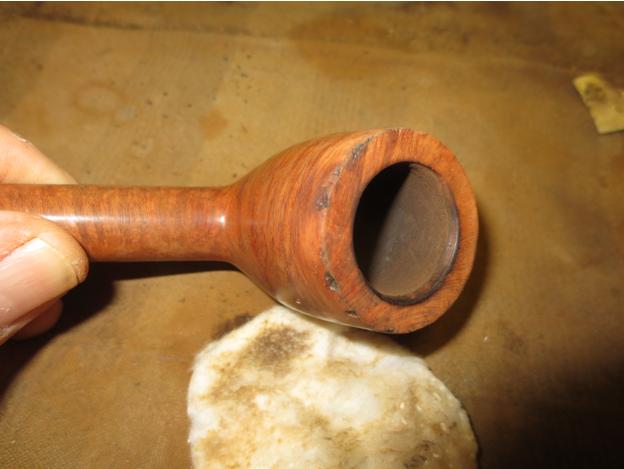
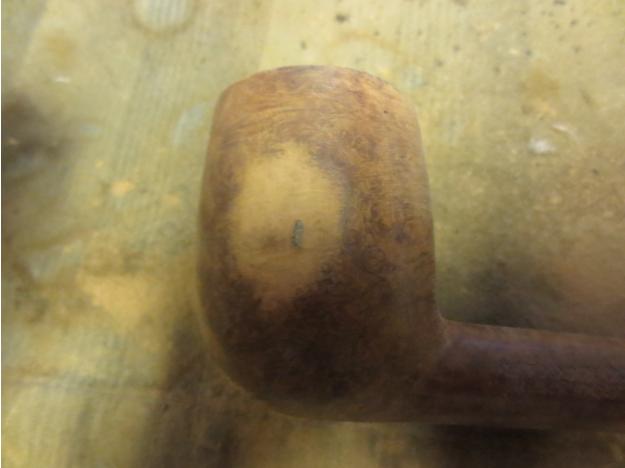
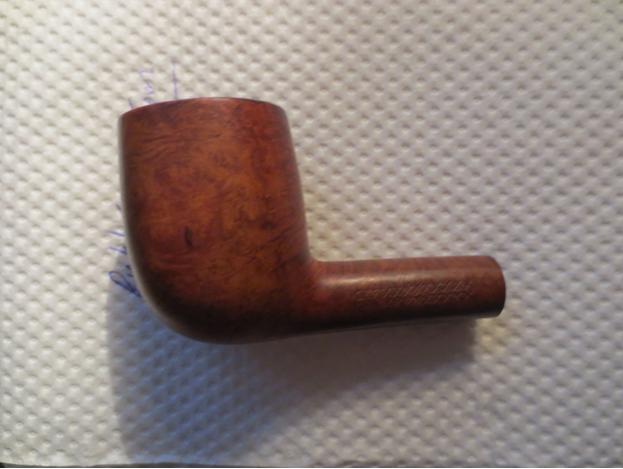
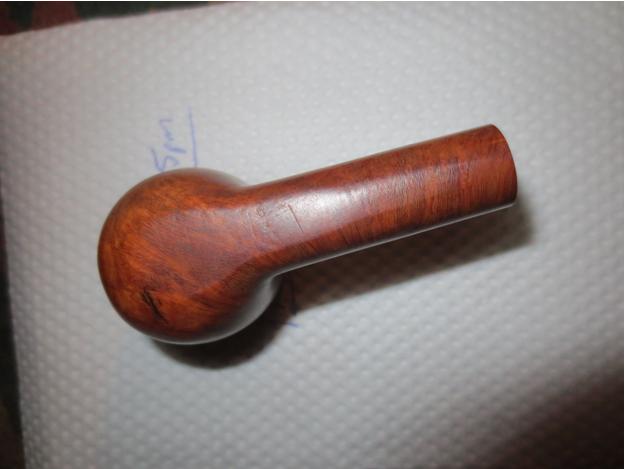
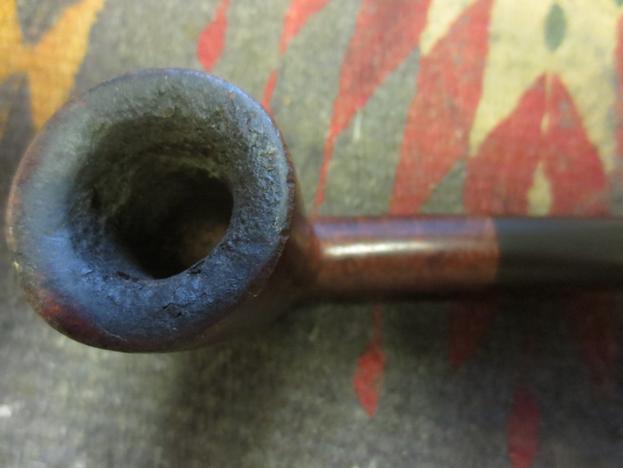
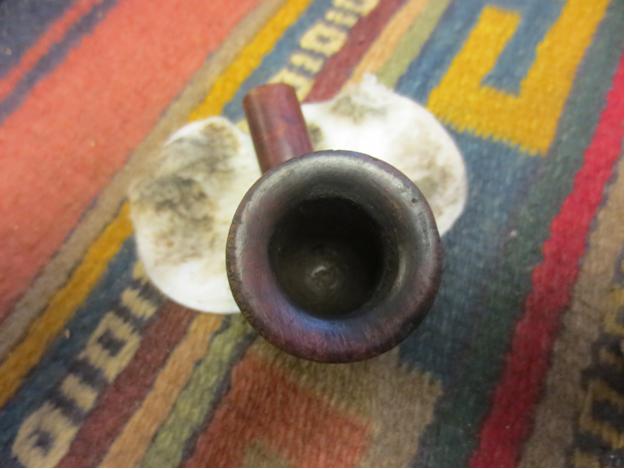
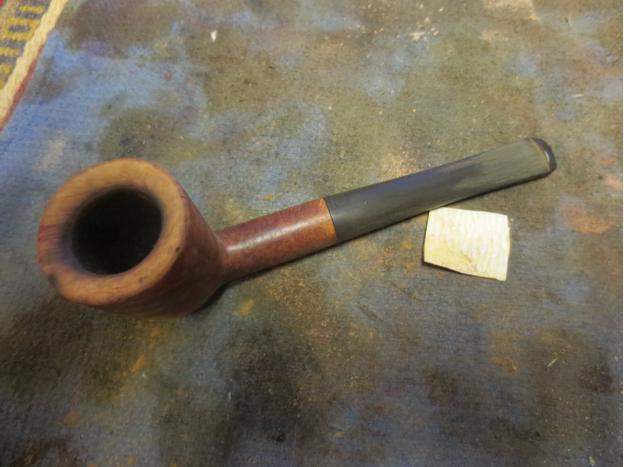
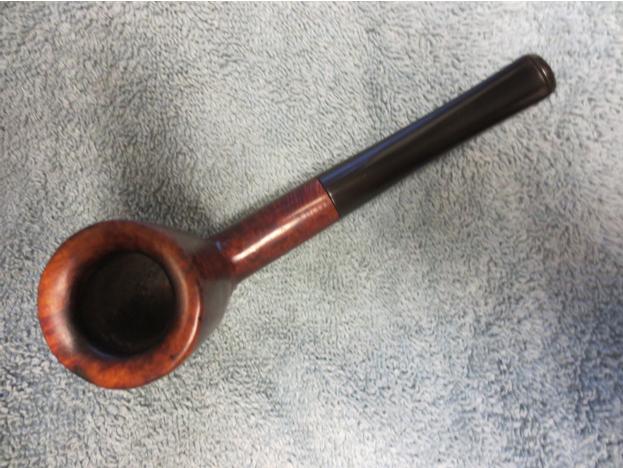
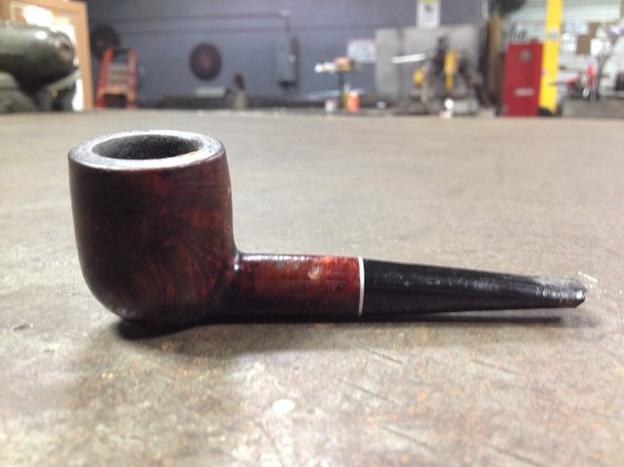
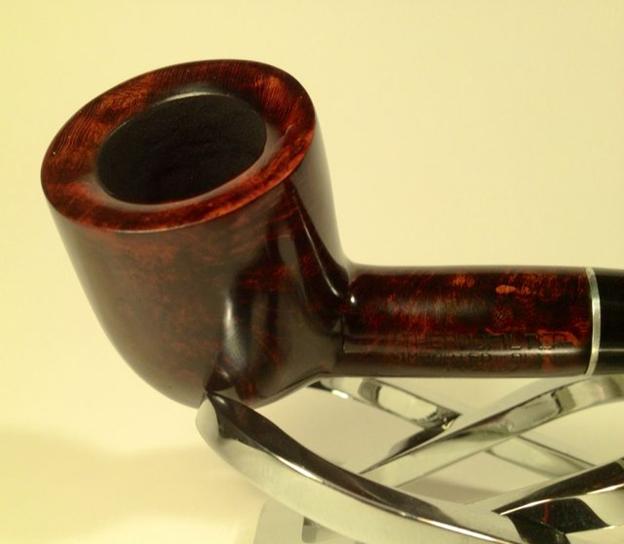
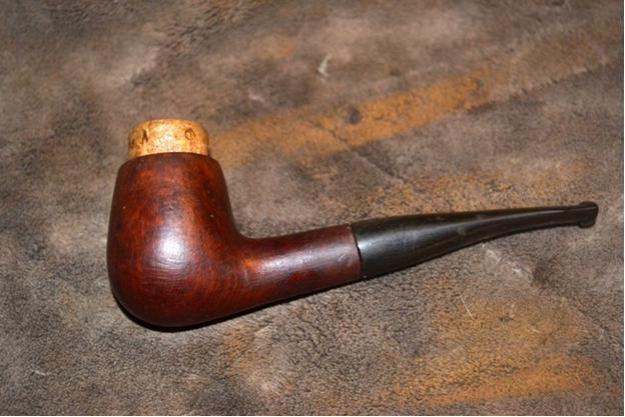
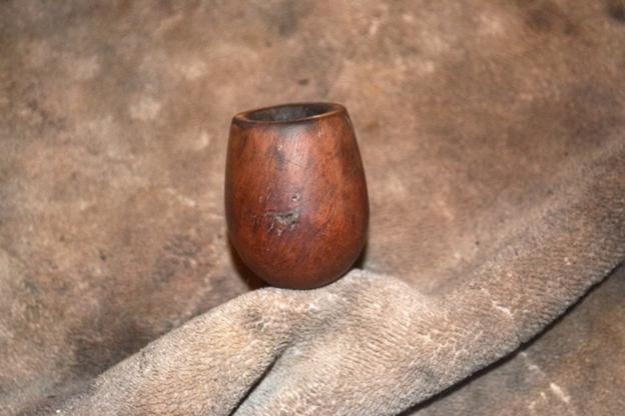
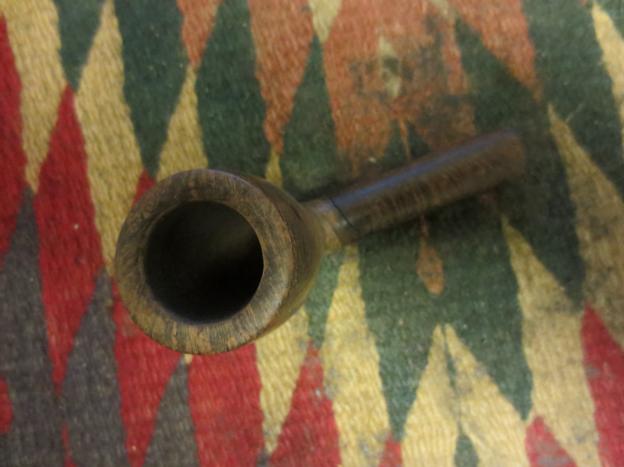
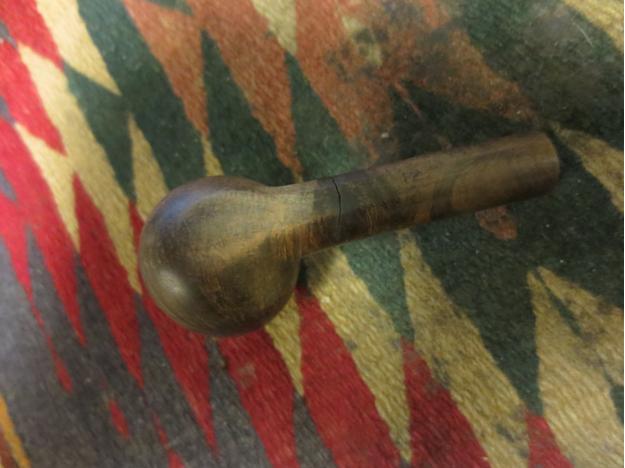
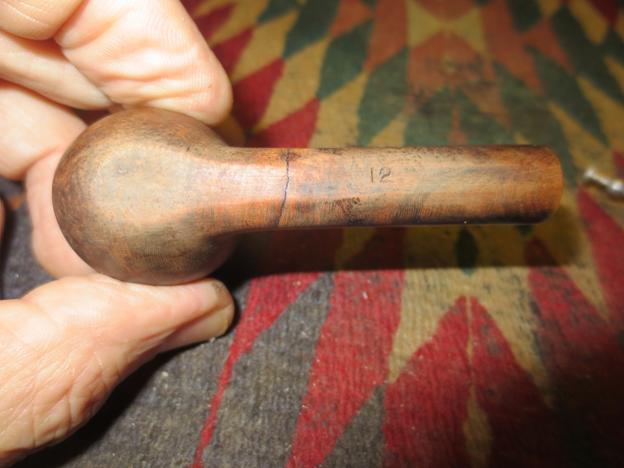
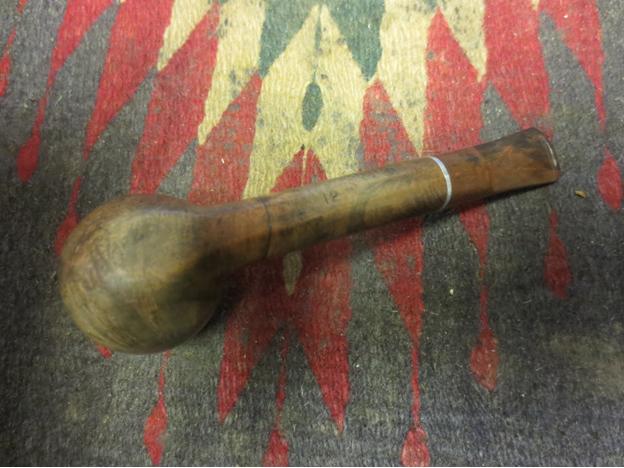
First off I scooped out all the stuff in the chamber and peeled away the sticky paper on the tenon. Without the paper, here’s a good general idea of how it looked. Now I don’t know about you, but I couldn’t abide with that ghostly remnant of stain, so I set to stripping all of it down to the bone and soaking the bit in an OxiClean bath.
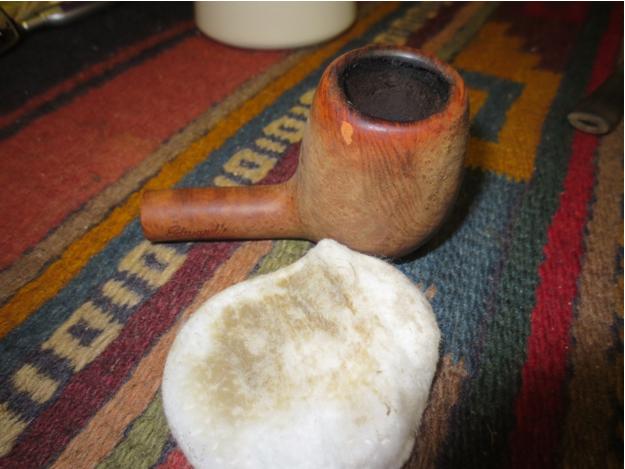
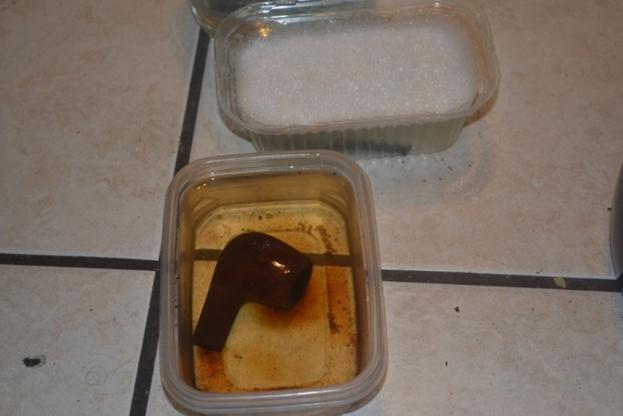 I took the wood out of the Everclear after a couple of hours and saw it still need some help removing the old stain. I used 500-grit paper and made the bowl and shank a little better.

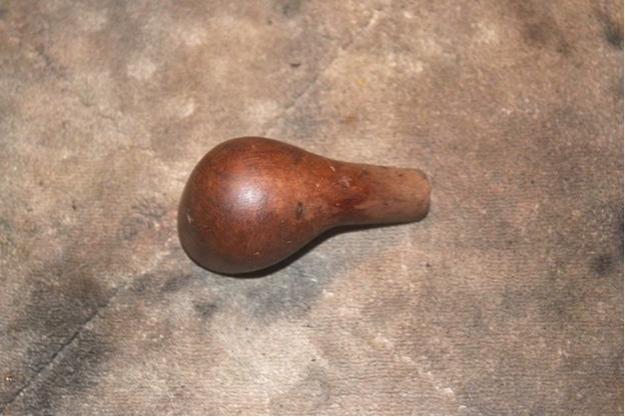
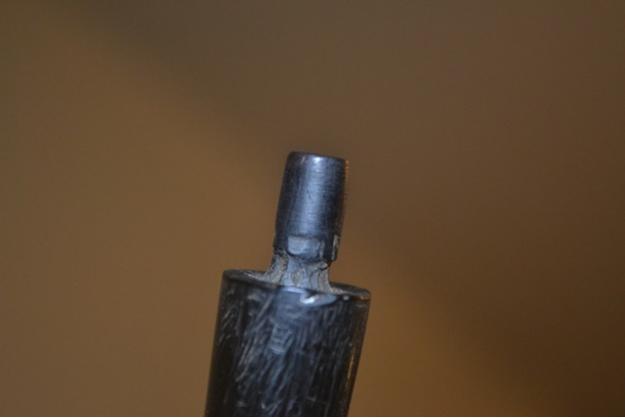
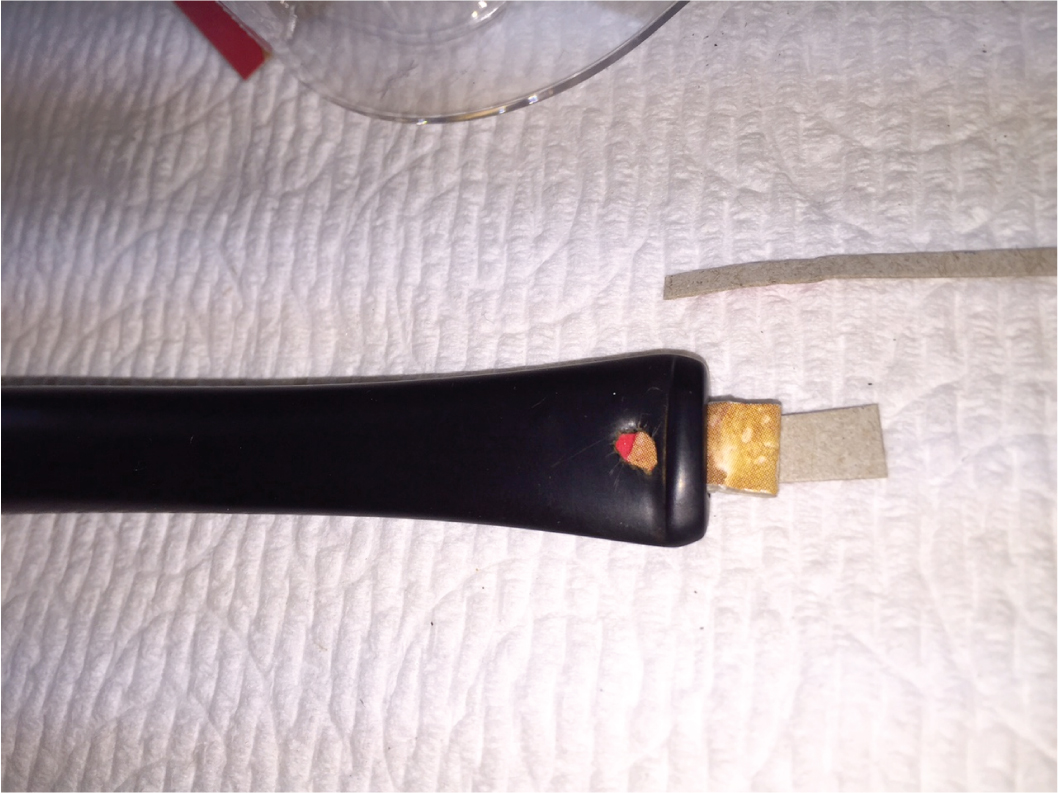
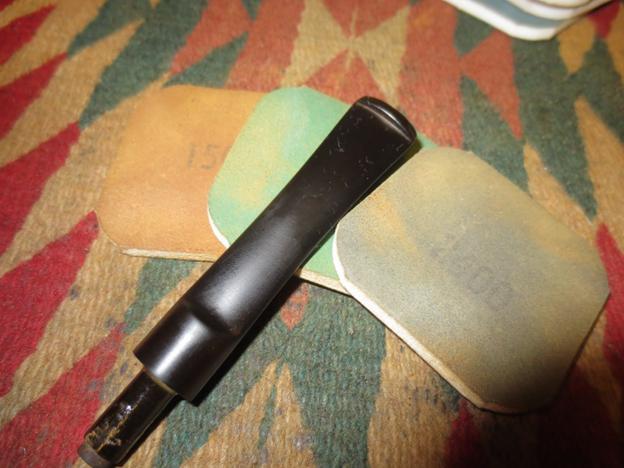
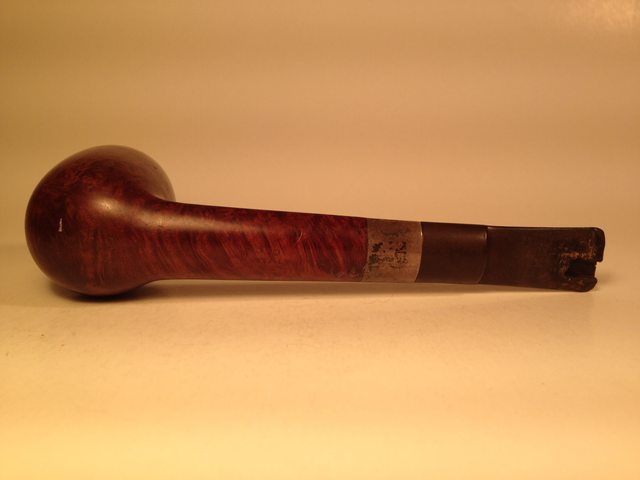
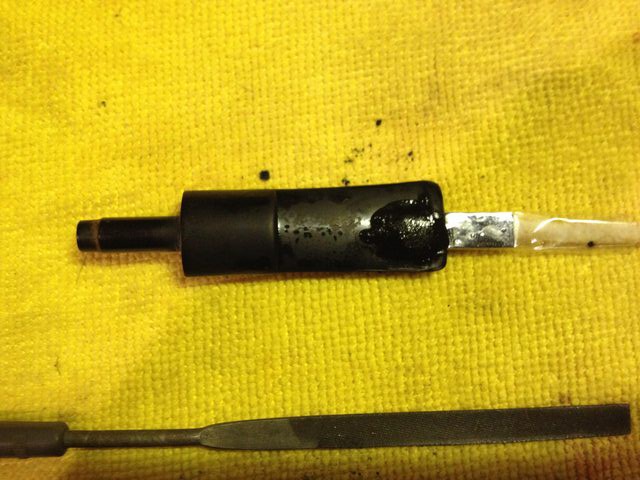
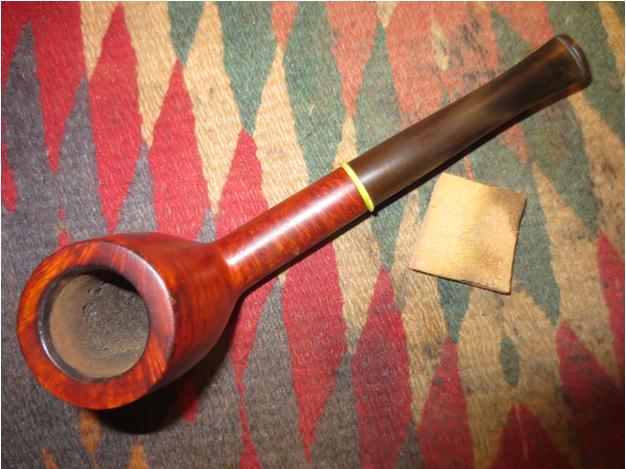
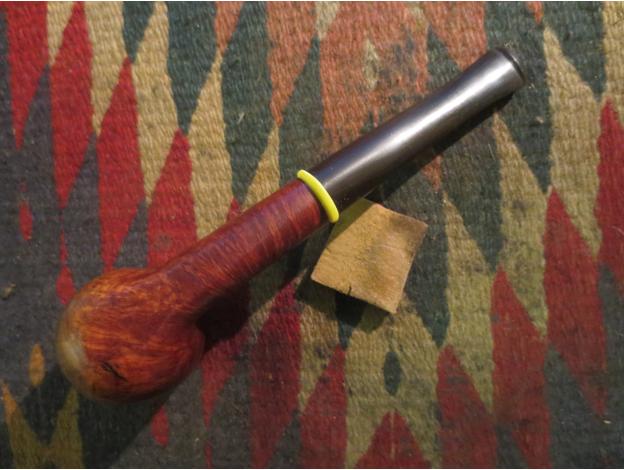
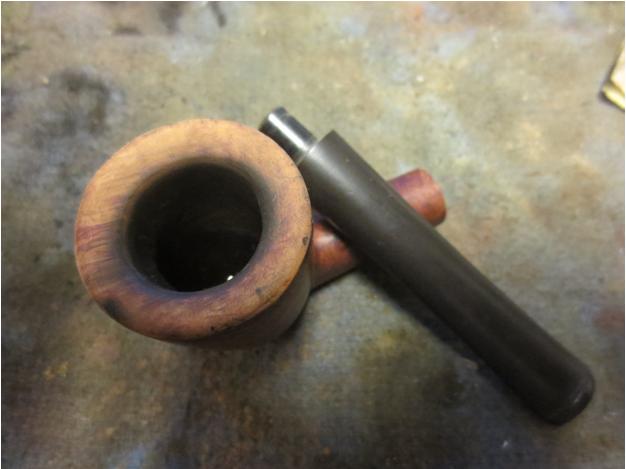
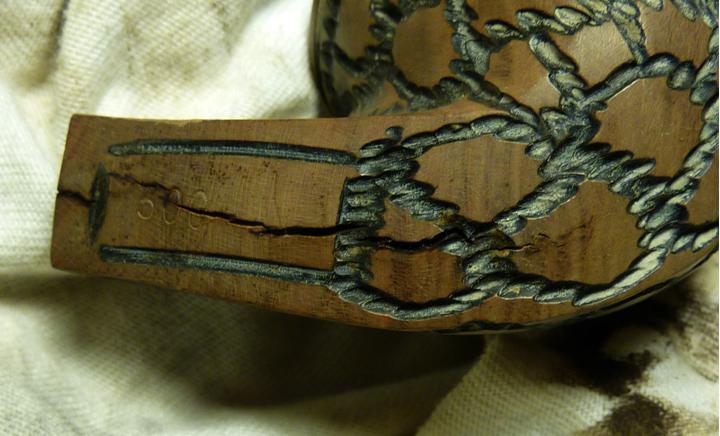
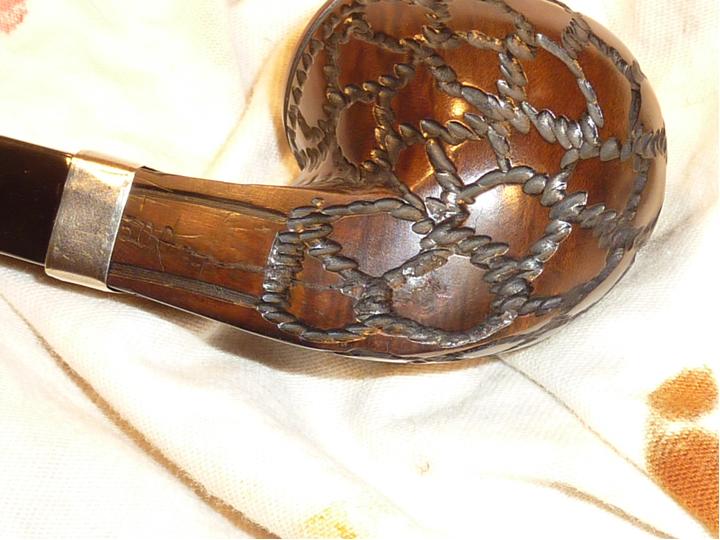
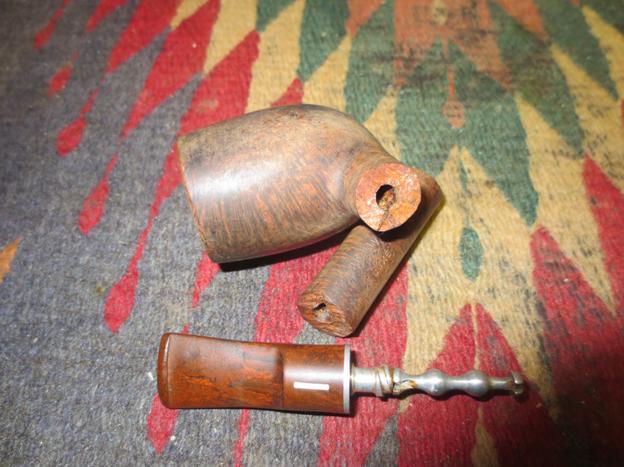
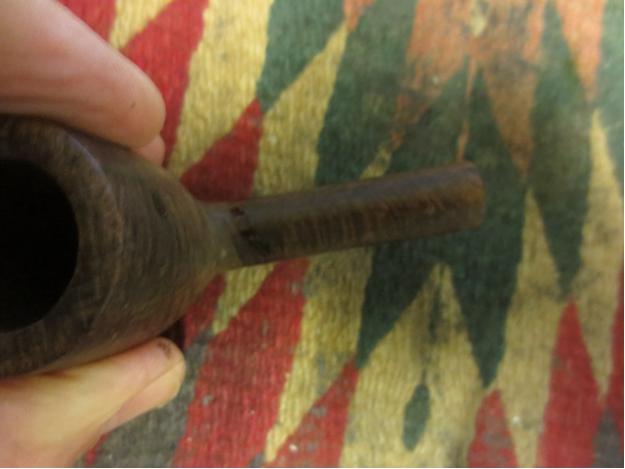
 And back to the stem for a minute. For a number of reasons, it clearly didn’t fit the shank, and so the motive behind the cover-up with paper. The OxiClean didn’t do much other than get rid of a whole lot of dirt and other mess inside and out, but this is a better view of the tenon and how someone had undercut it at the bottom and generally made a mess of the whole try at making it fit right in the shank. I suppose Phil had nothing to do with that, too.
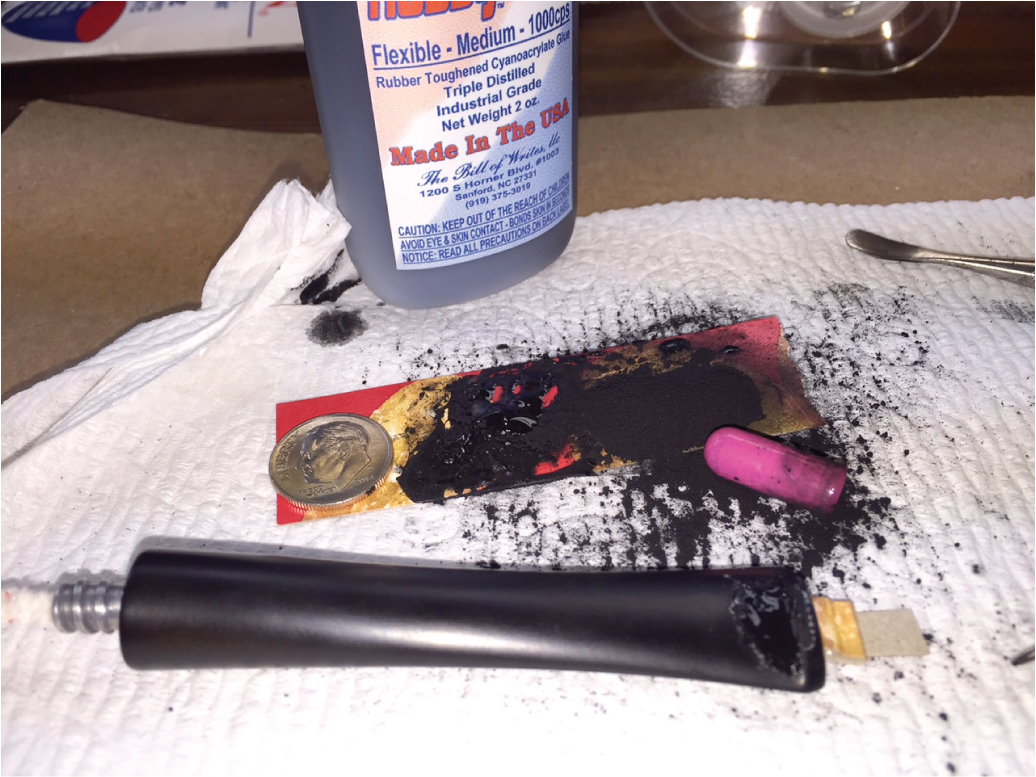
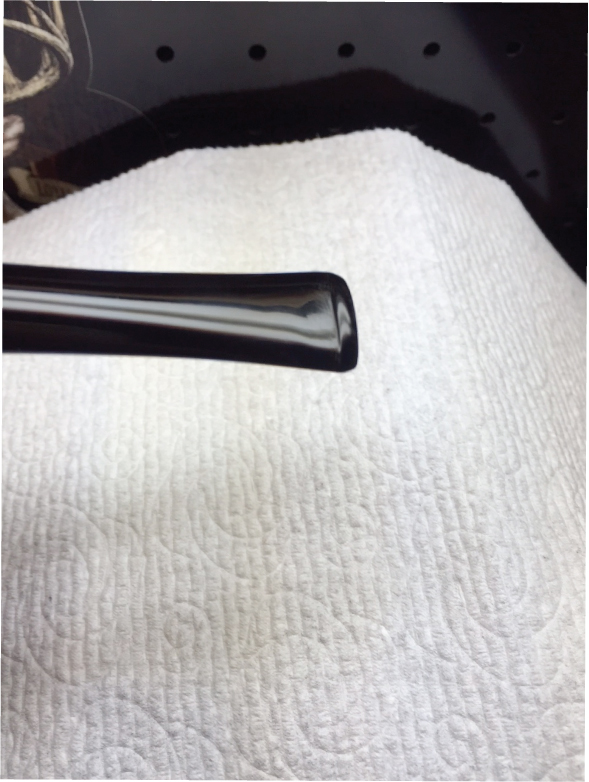
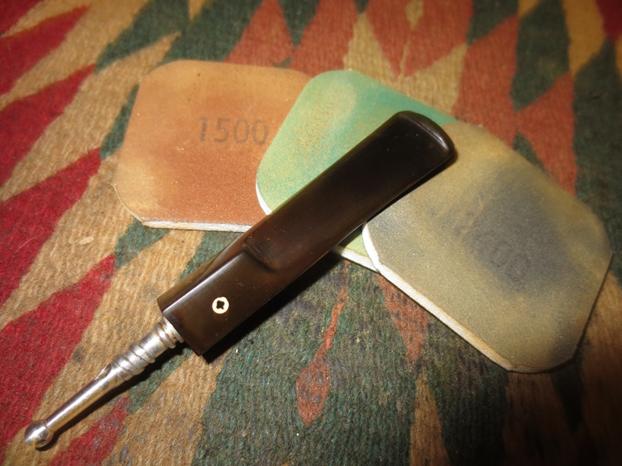
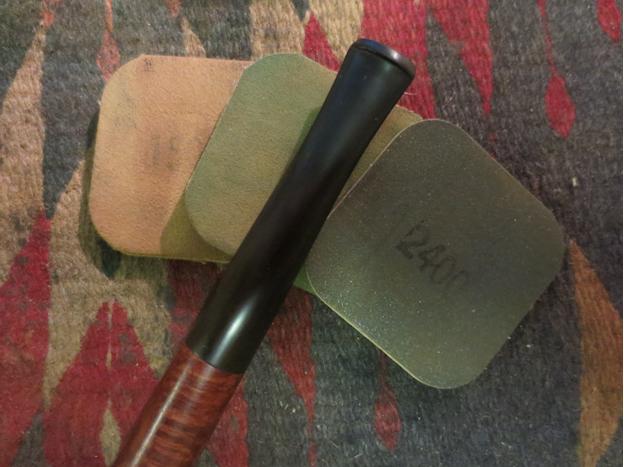
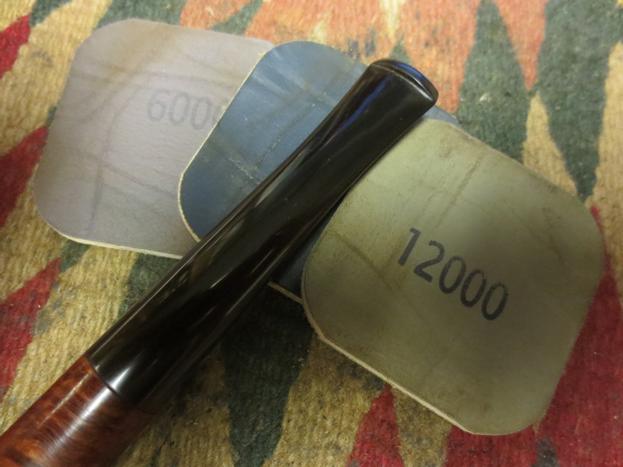
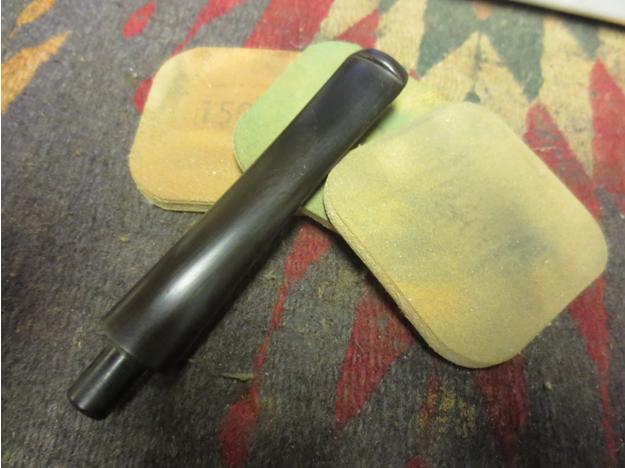
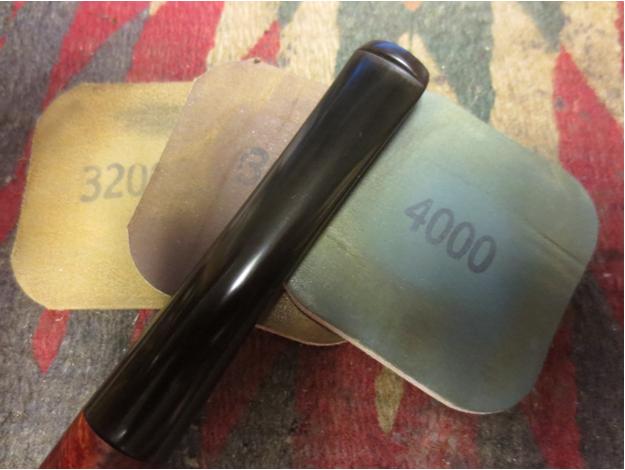
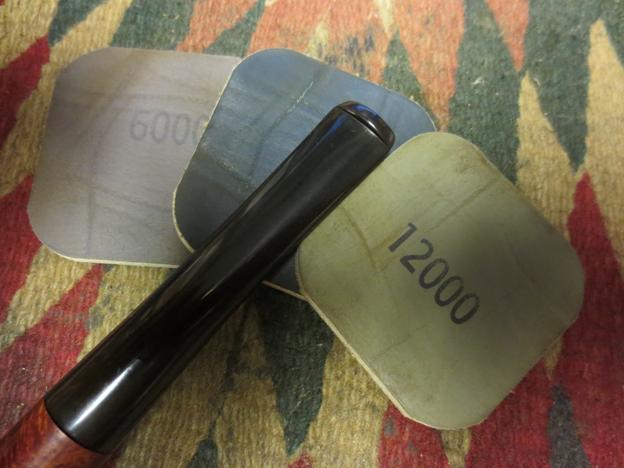
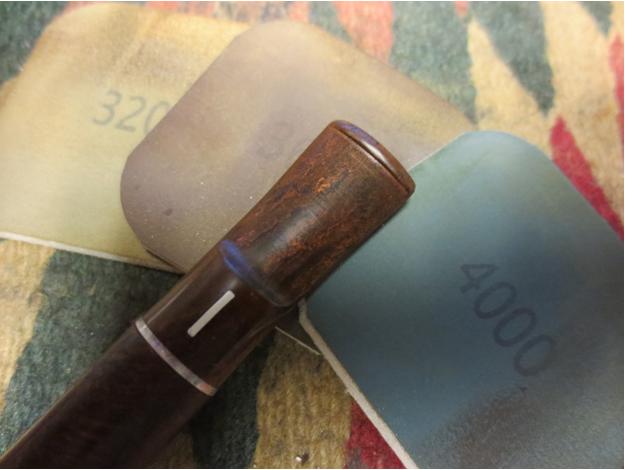
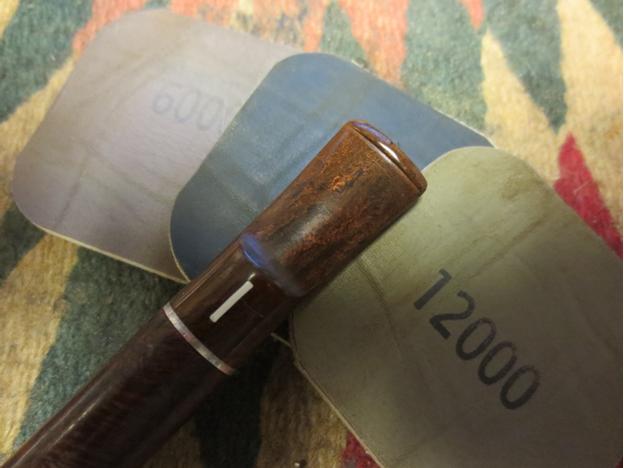
 Other than replacing the whole stem, a plan I wasn’t keen on seeing as how it was going to be for free, I figured I could mend it another way. I sanded it all over with 200-grit paper before putting the 400 to it and micro-meshing as far as I could go, from 1500-12000. With that a done deal, I put a liberal amount of Black Super Glue on the tenon, most of it on the undercut part, to make it all even again.
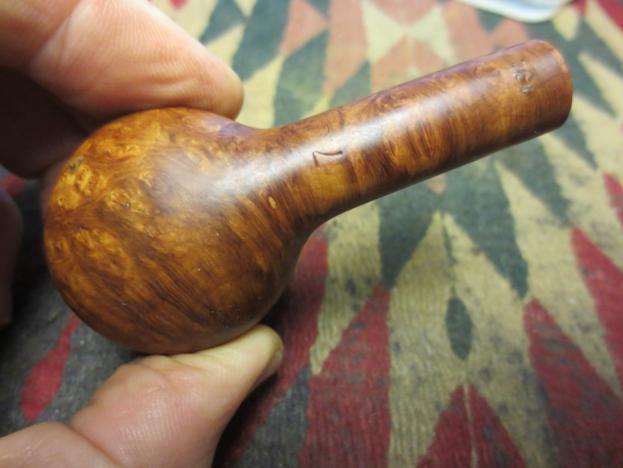
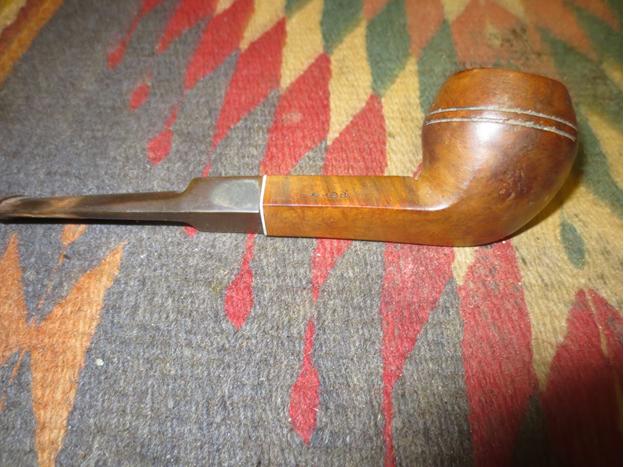
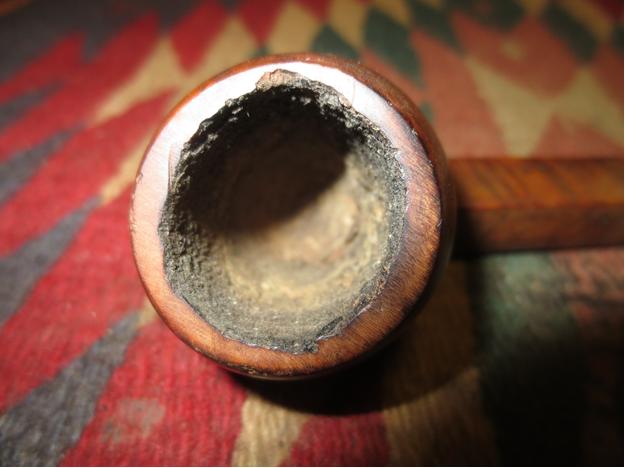
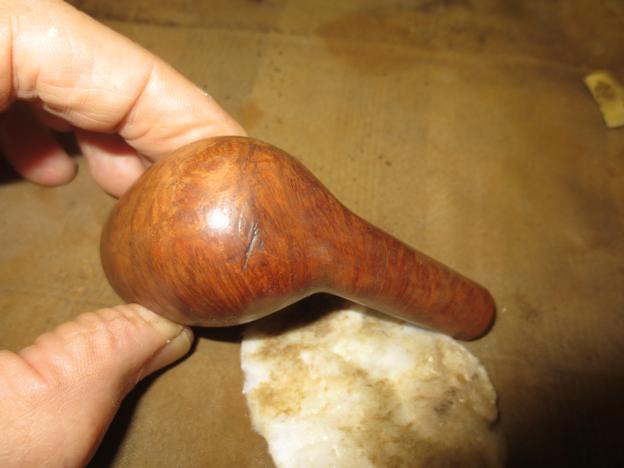
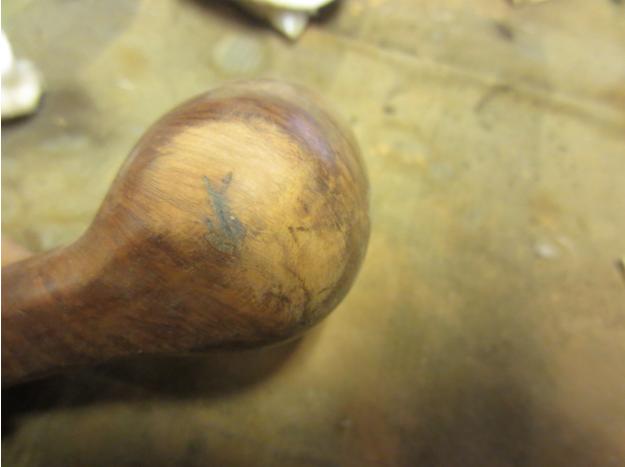
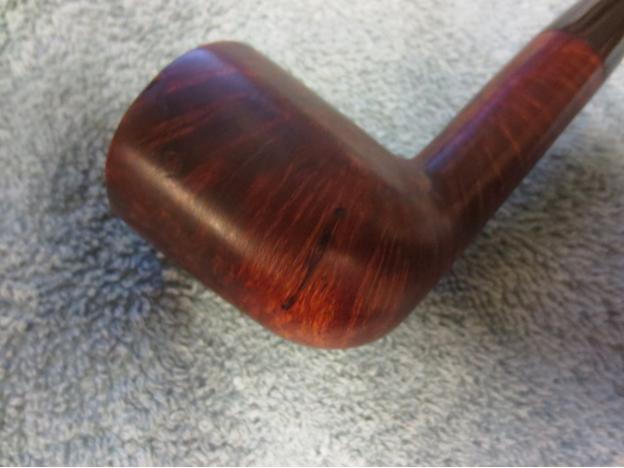
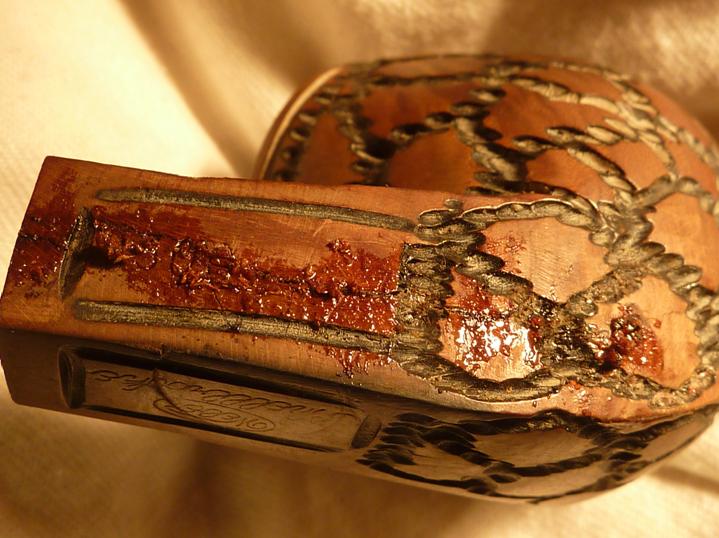
 Meanwhile, back to the bowl and shank. The stripping ferreted out more cover-up: the front of the pipe, no big surprise considering it wasn’t proud enough of the results to put a name to it or even the country it came from, had a nice little weed-like patch of holes that needed wood putty.
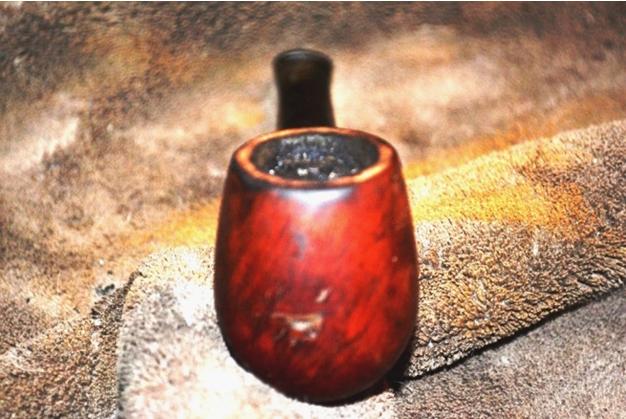
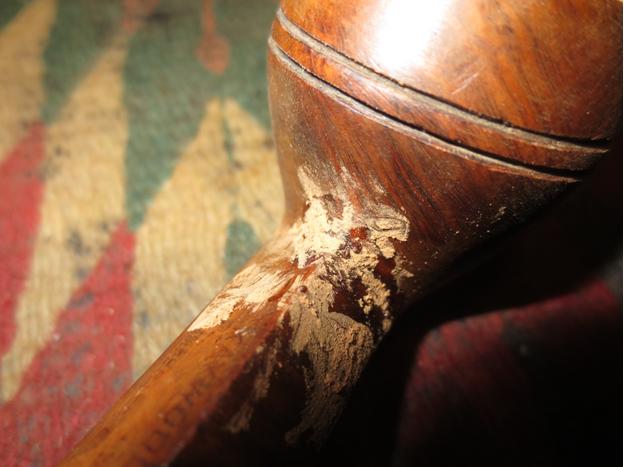
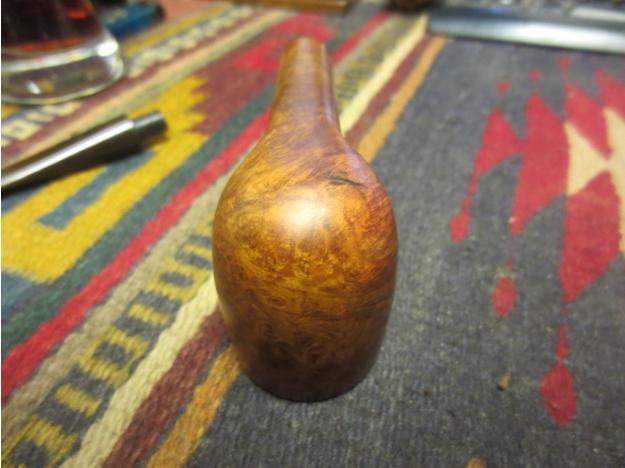
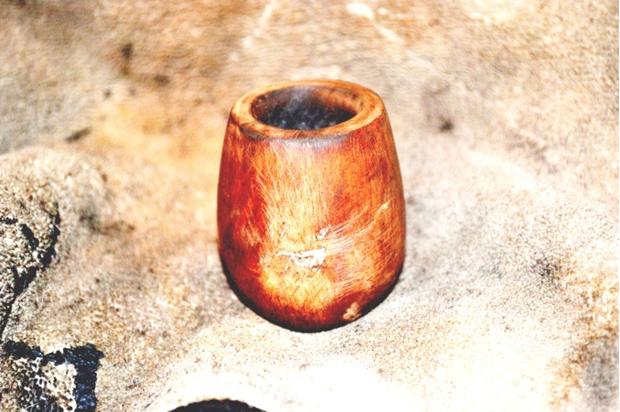
 Since I had some time on my hands while the putty and Black Super Glue finished drying, I smoked my own pipe for a spell. Actually it was one heck of a long spell. But it came to an end, like everything else in this life.
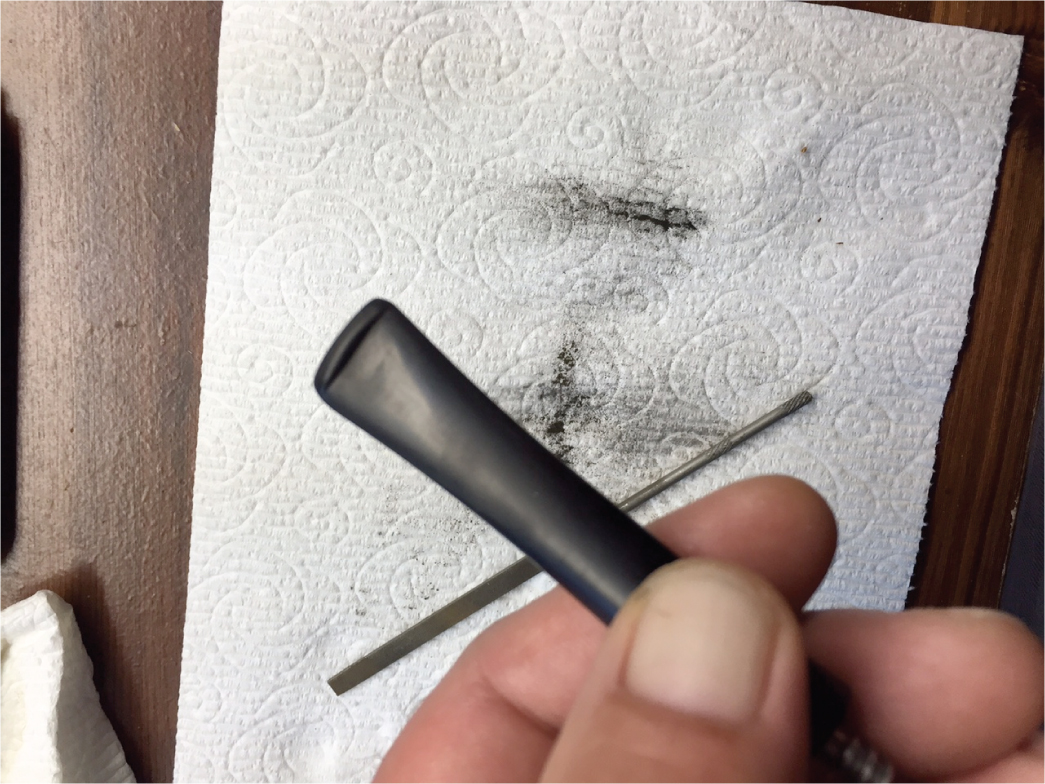
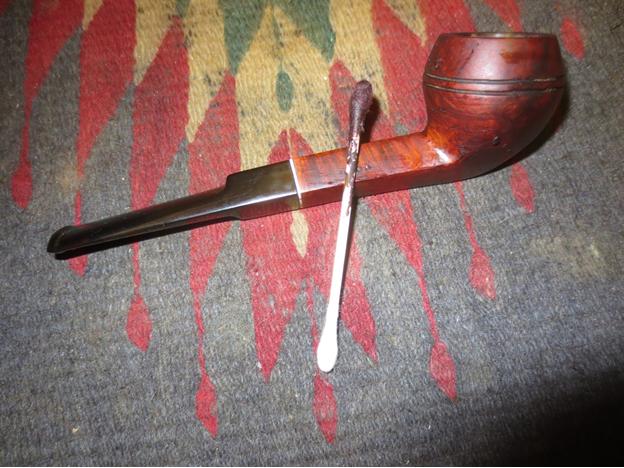
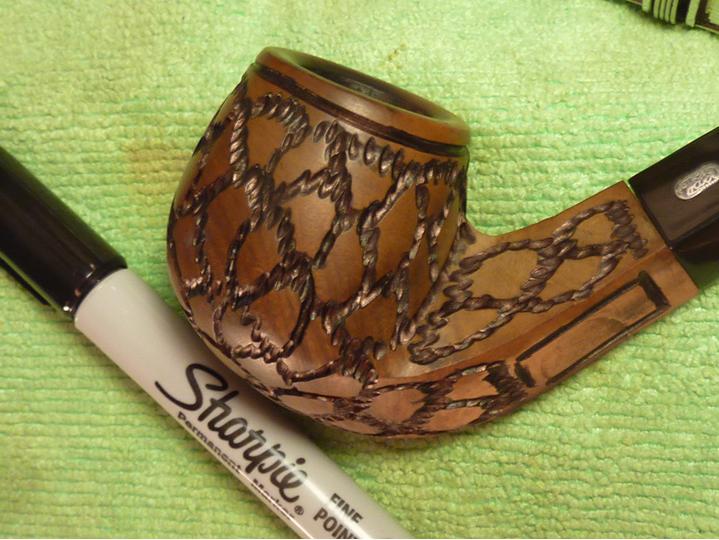
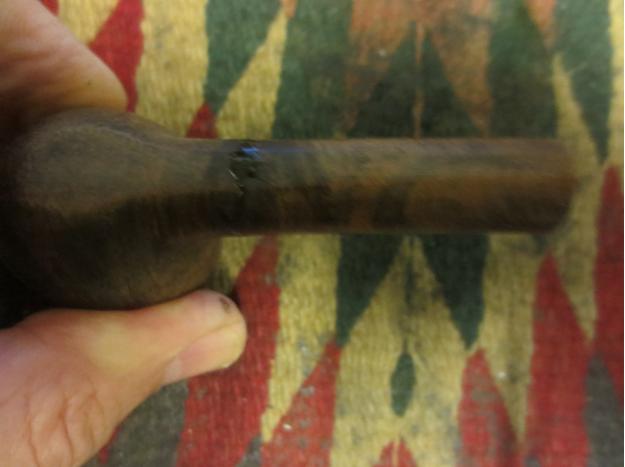
I smoothed the putty real gentle with the old 12000 micromesh and used a brown indelible marker, then an orange one, to make it look a little more natural. Then I put just a thin coat of regular Super Glue over that. I had to get out of my place anyway, so while it dried I did some errands. Heck, yeah, even I have errands to run.
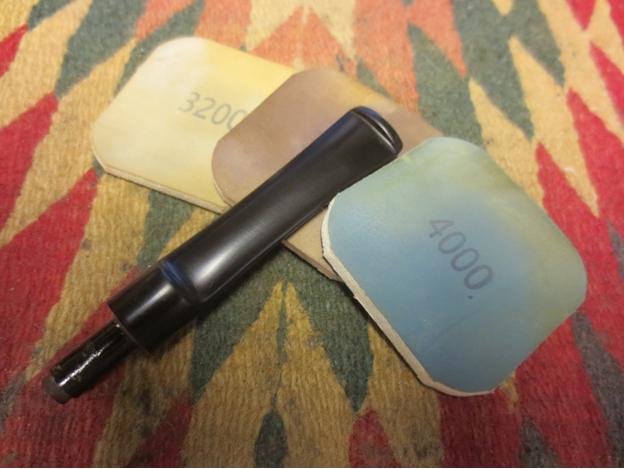
What with the swamp cooler on full-blast, by the time I got home again the Super Glue was good and hard and ready for a smoothing of its own. This time I needed something a little rougher and settled on 3200 micromesh with a respectful light touch. And I’ll be darned if it didn’t just do the trick! The rest of the wood I went the whole nine yards micro-meshing.
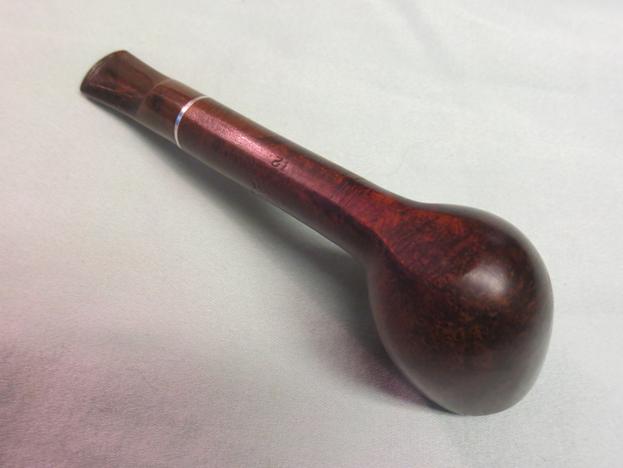
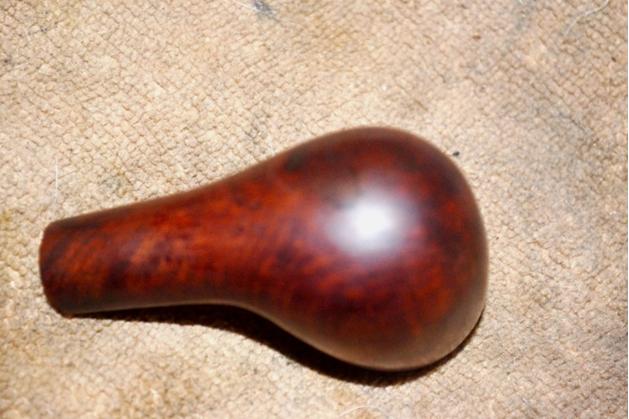
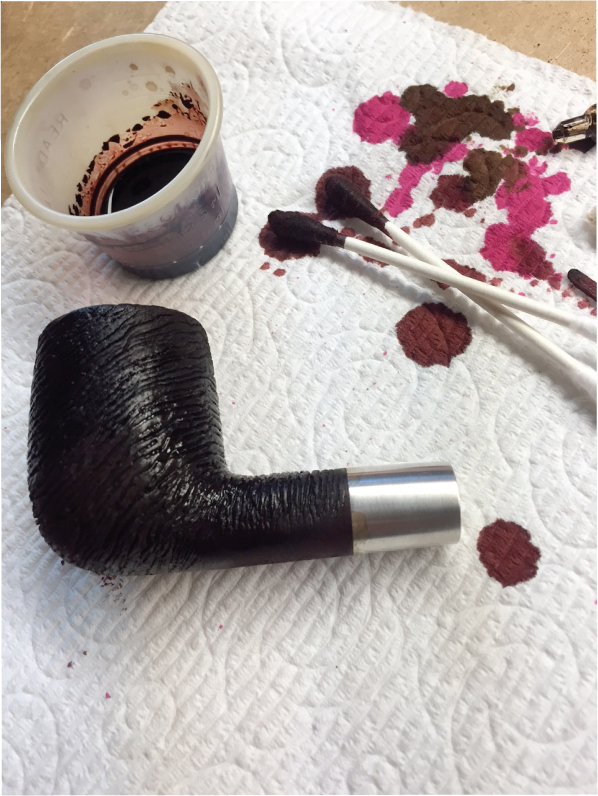
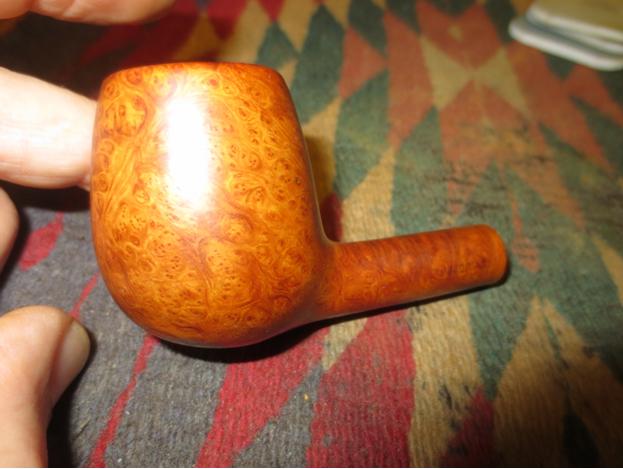
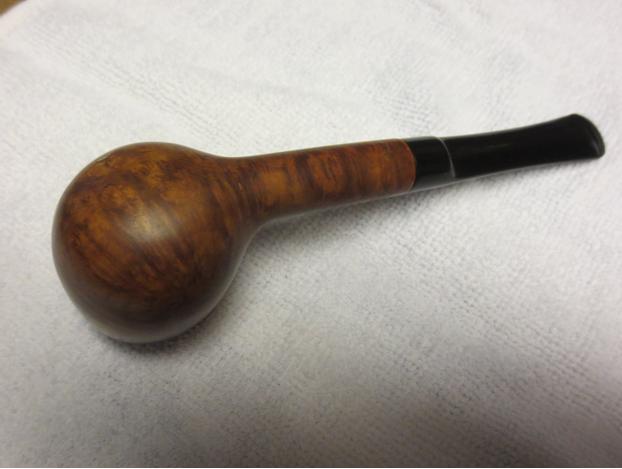
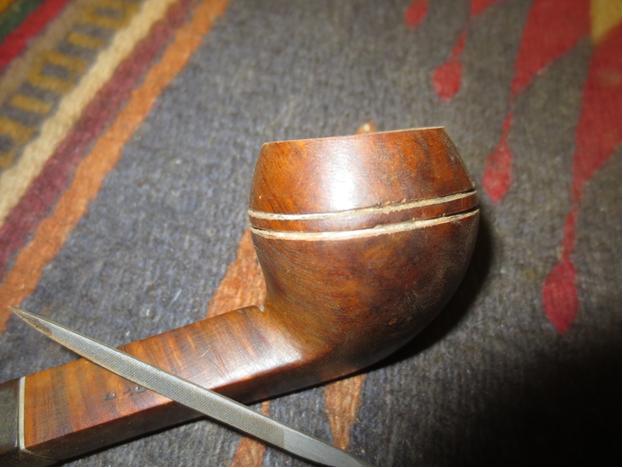
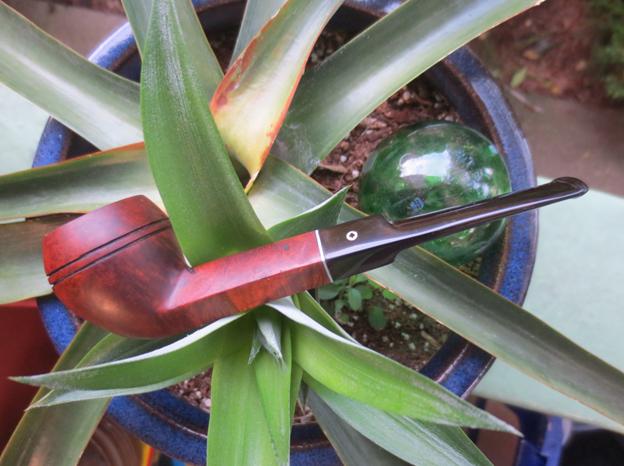
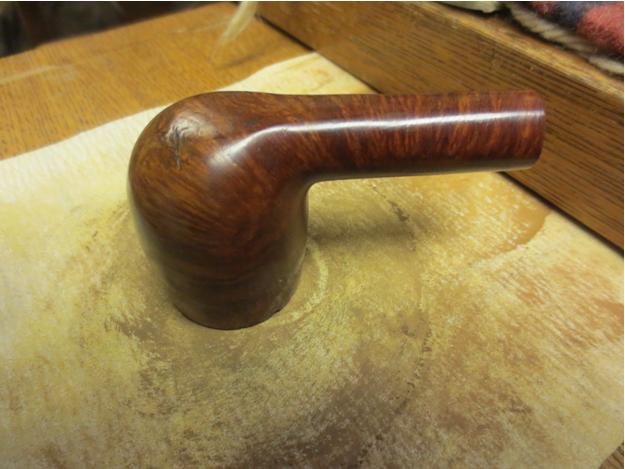
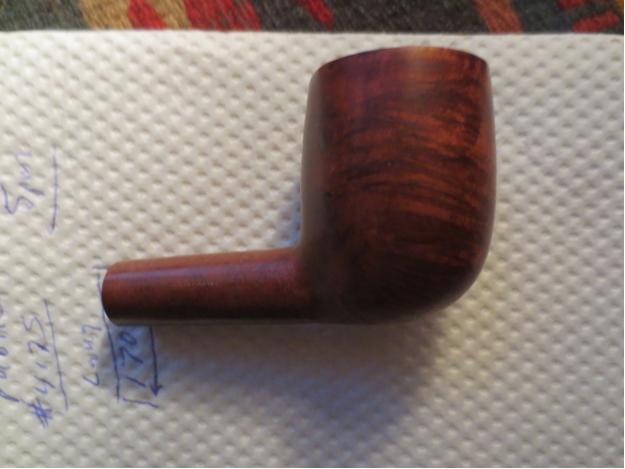
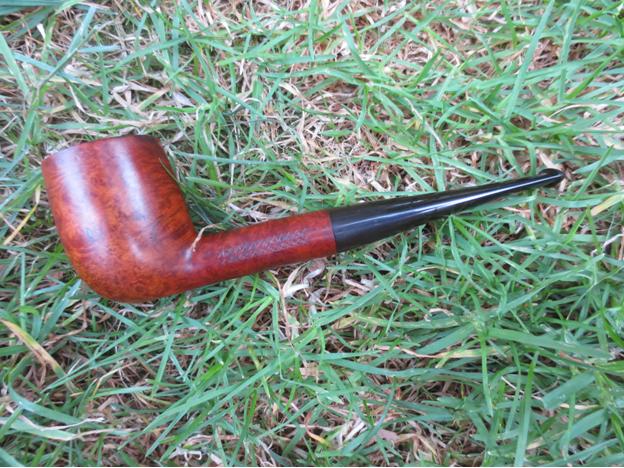
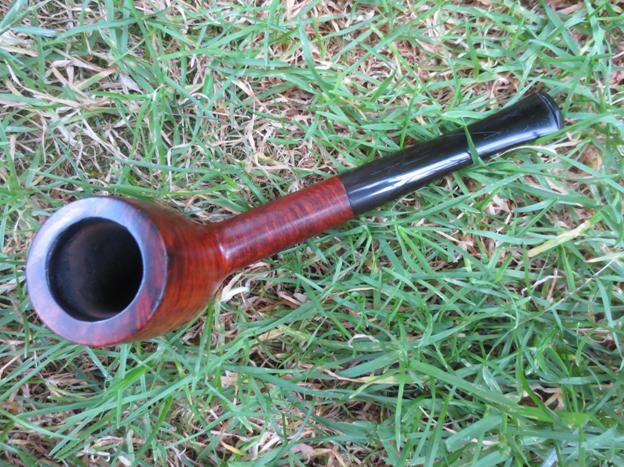
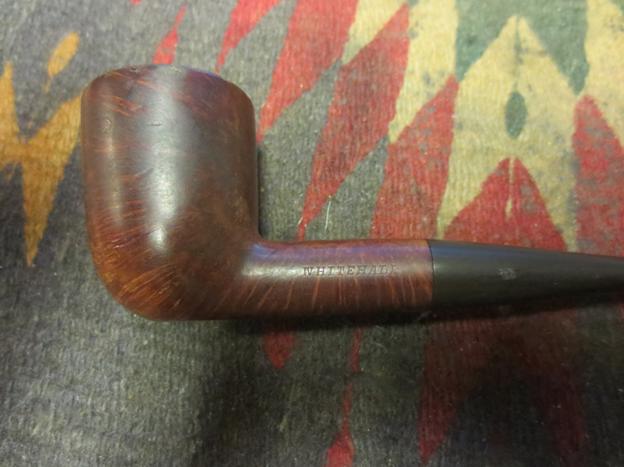
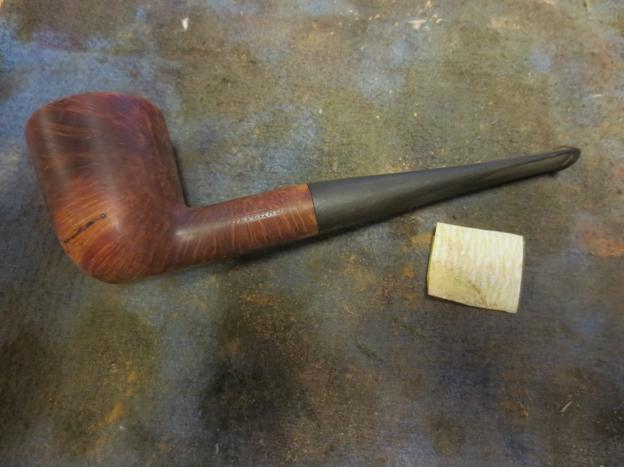
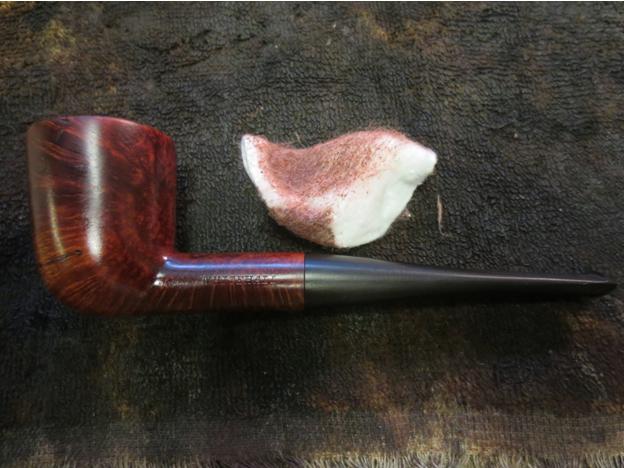
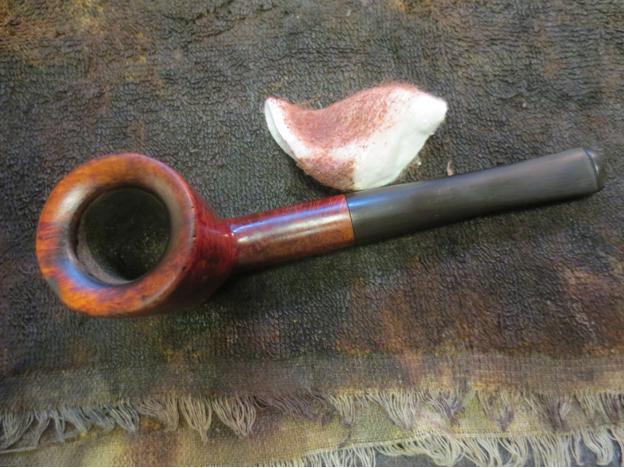
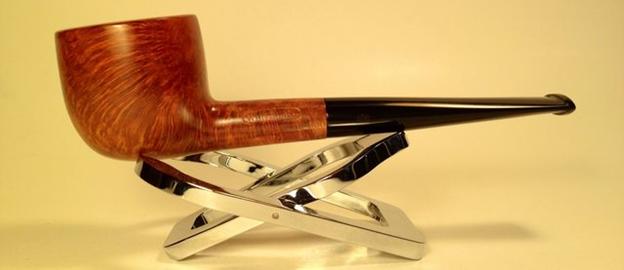
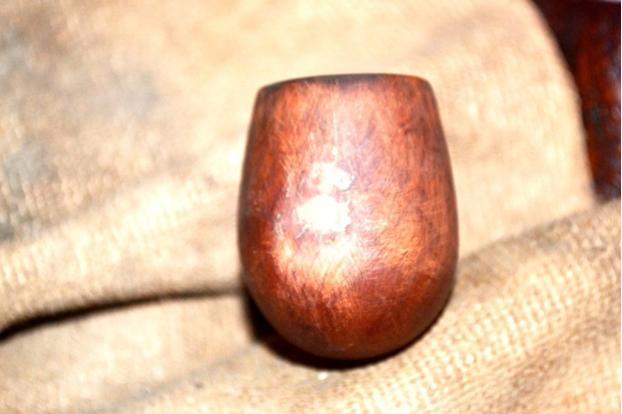
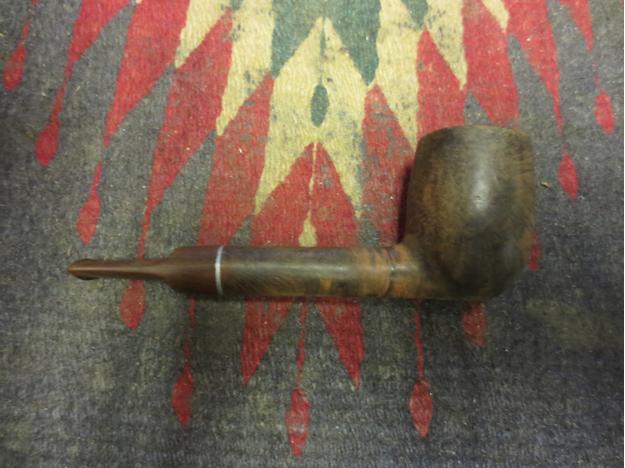
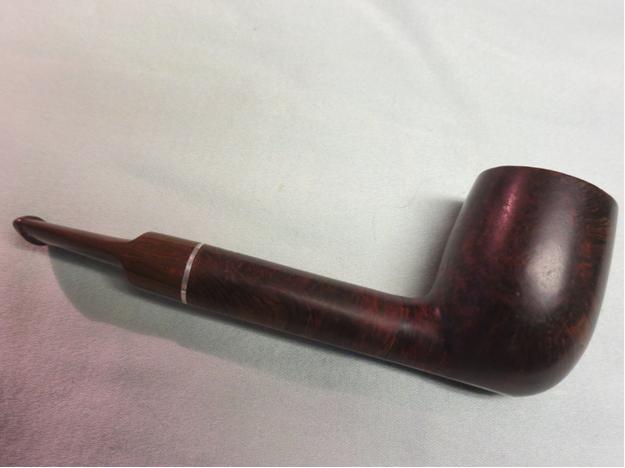
One of the ideas Phil had for doing it himself was to use a “different” color. After thinking on it a while, I came up with a mix of Lincoln Marine Cordovan and Fiebing’s brown boot stains – don’t ask me what was going through my head because I don’t remember. Anyways, it worked nice enough, so I flamed it and let it sit to cool before using the 3200 again to clear off the char.


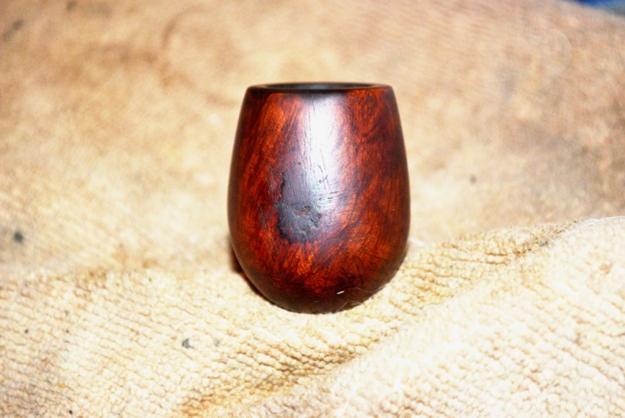
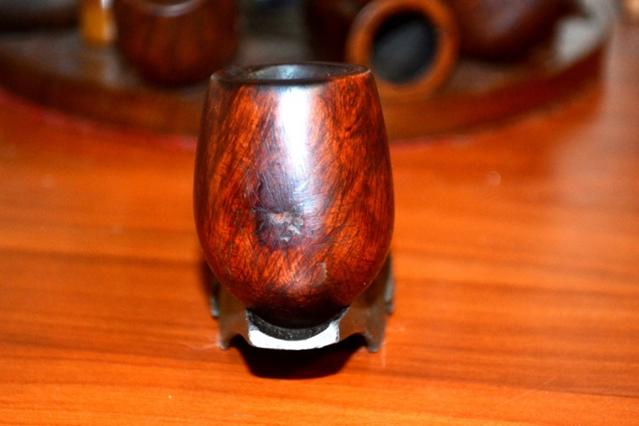
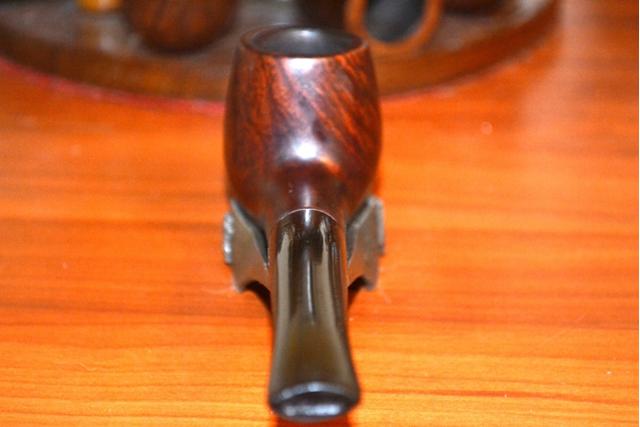
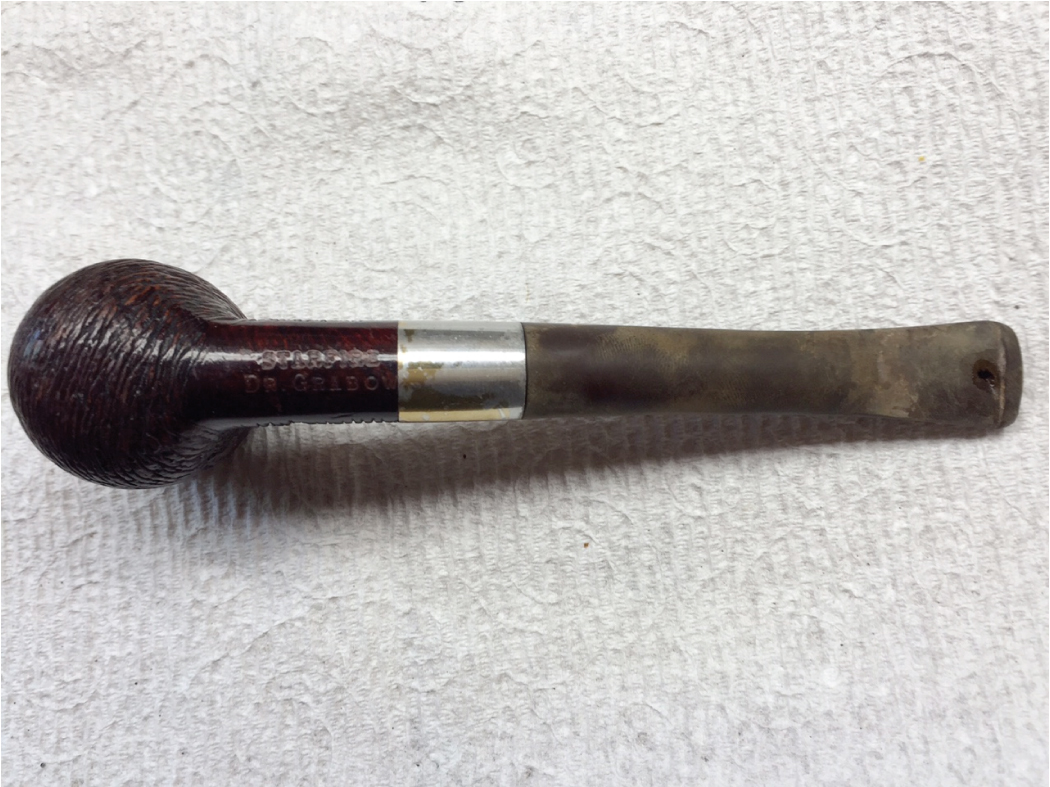
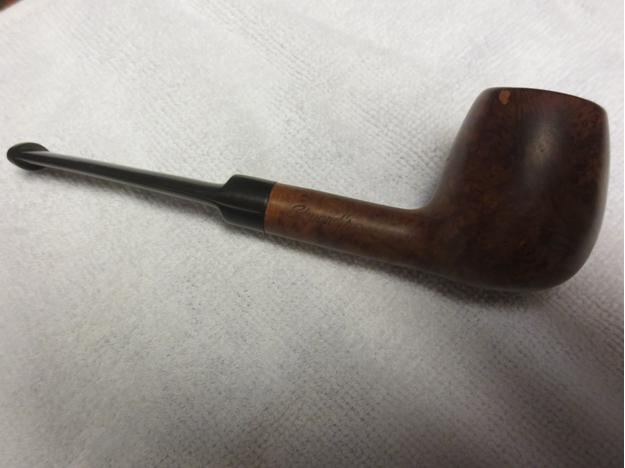
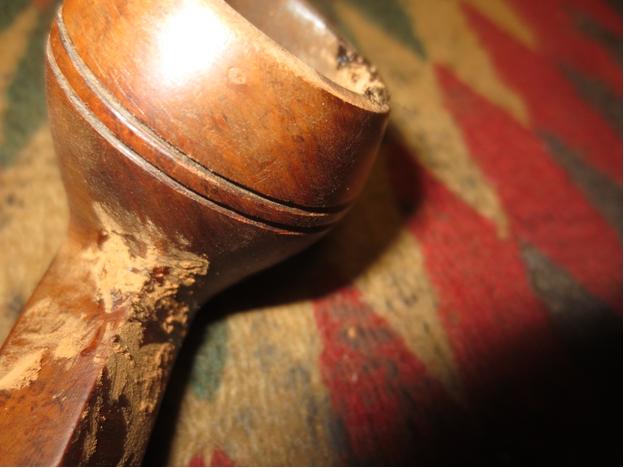
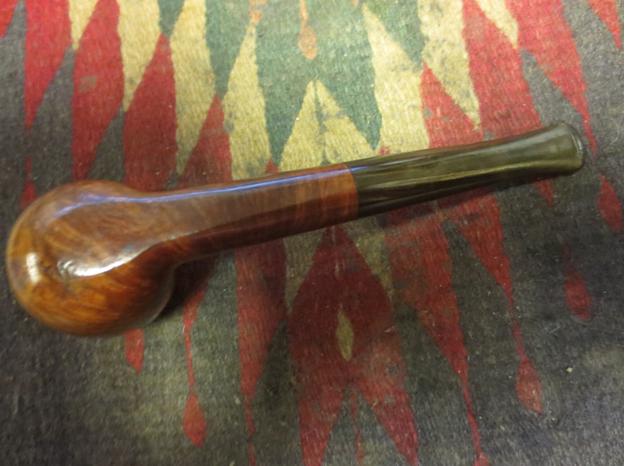
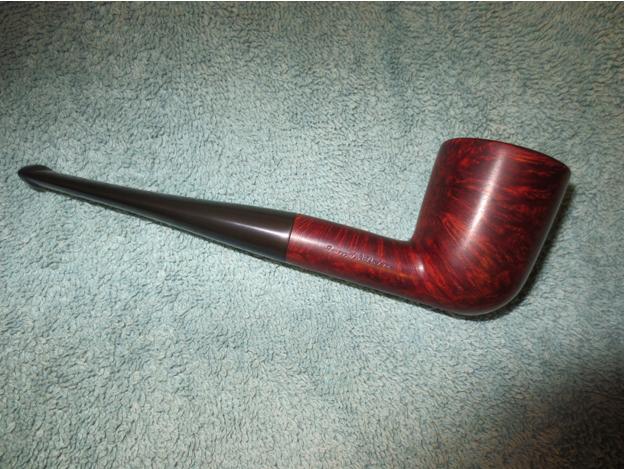
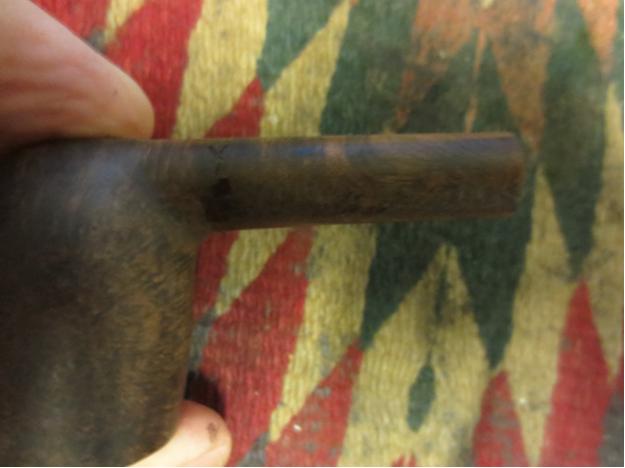
 Alright, now, hold your water! I know it! The front view here shows a need for more attention, which you’ll just have to trust me when I say I gave it because I forgot to snap a shot after. Also I sanded down the shank opening so the stem would meet it better.
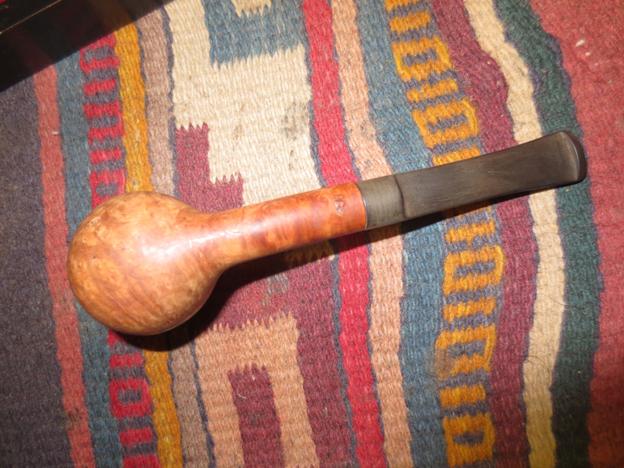
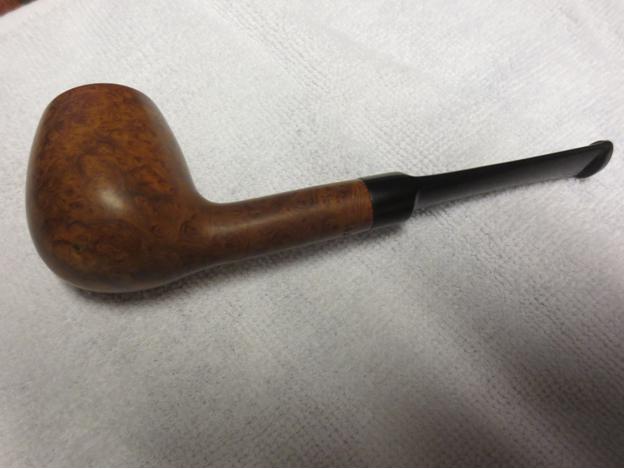
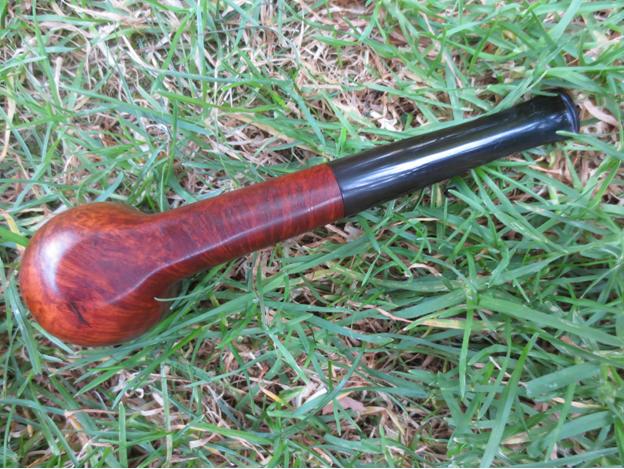
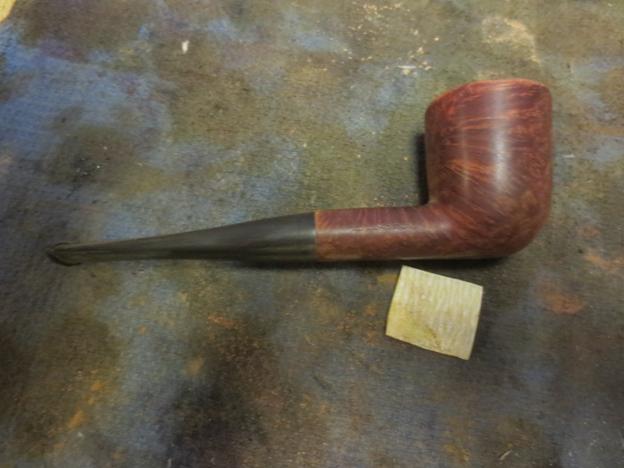
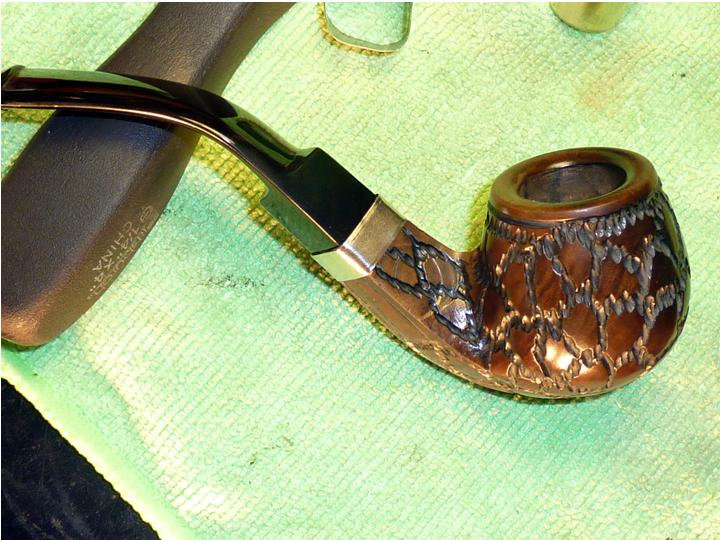
 Again, I know it’s not perfect, but this was for free and besides, Phil was starting to breathe down my neck to get it back. Finally I just buffed it up on the wheels with a few waxes.


 CONCLUSION
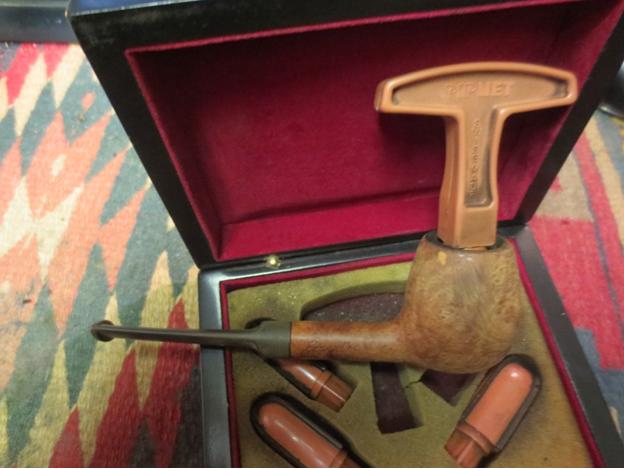
Phil is happy with the job I did – and the replacement cork that fit.
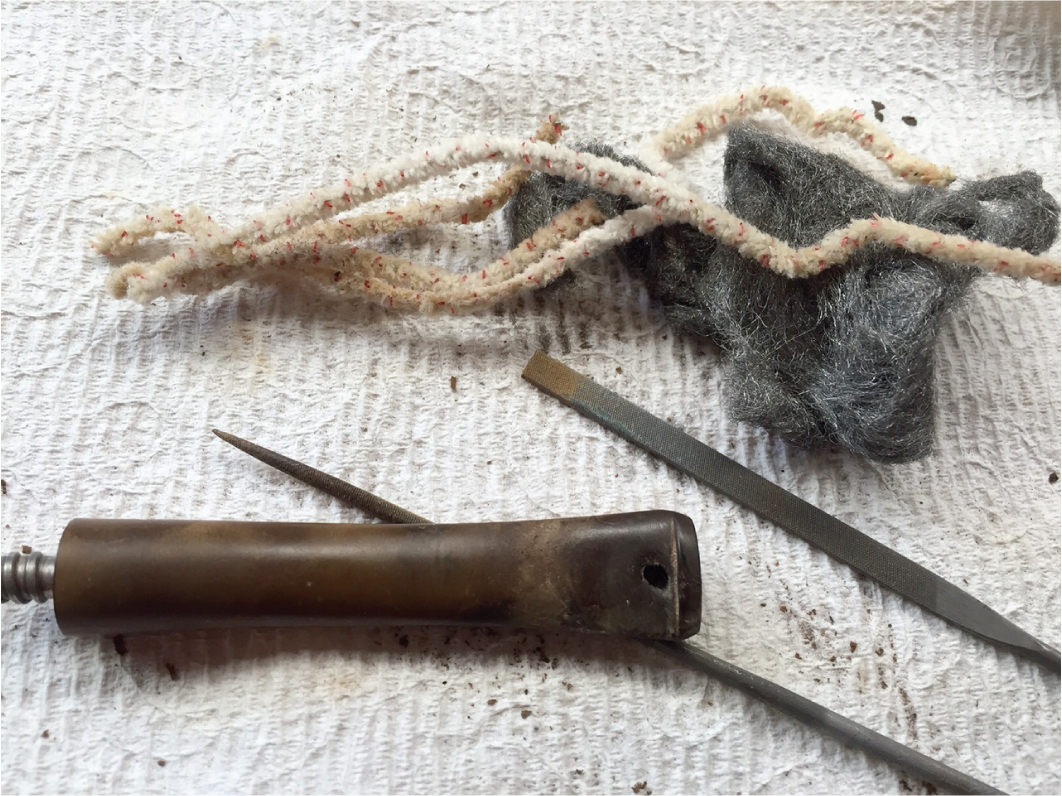
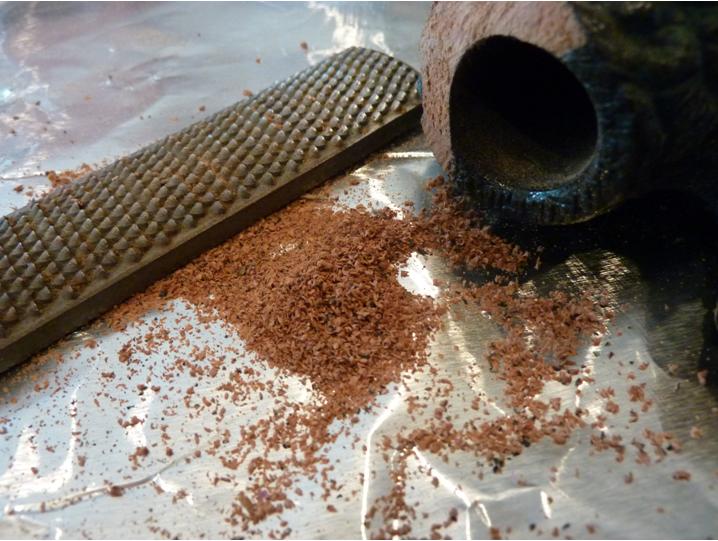
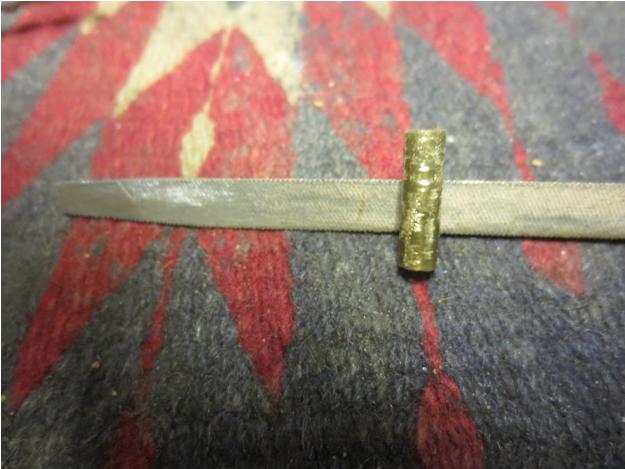
 Just as I suspected I had a piece of brass tubing that was the perfect size and fit for the repair. I used a file to cut grooves into the tube and to roughen the surface for the glue to have something to hold onto when I glued it in the shank.
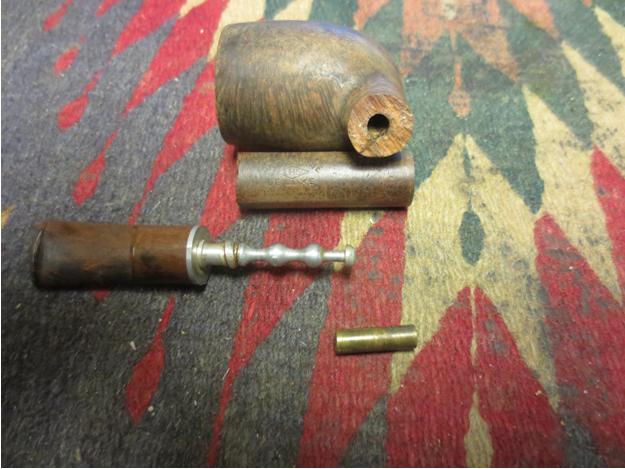
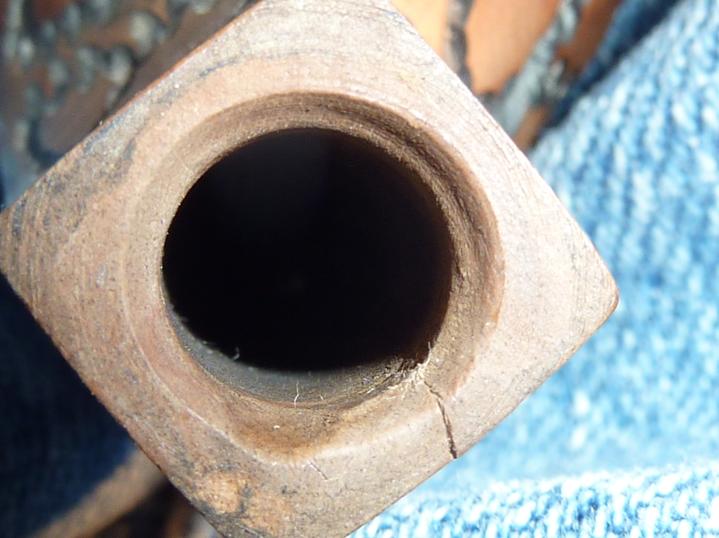
 I cleaned out the airway on both sides of the broken shank to remove debris and to give a good clean surface for the glue to bond with. To check the size and the fit of the tube in the two parts of the shank I inserted it in the bowl end of the break and then twisted the shank end onto it. The fit was perfect and once glued the repair should be solid.
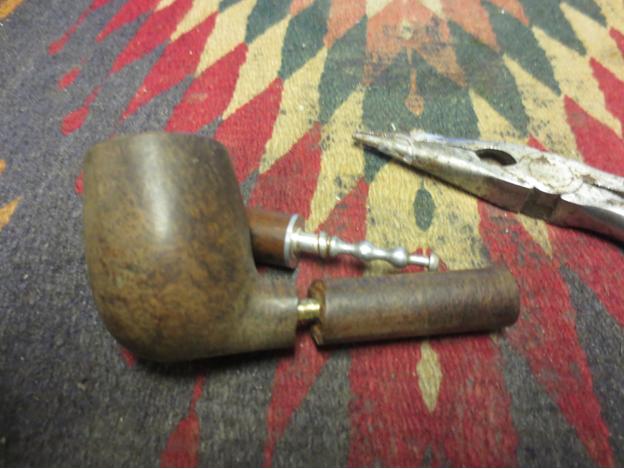 I mixed some epoxy and applied it to the metal tube being careful to not get any inside of the airway. I inserted it into the bowl side of the break. I left slightly over half of the tube extending so that when I put the shank piece in place there would be enough of the metal tube to strengthen the repair on that end.
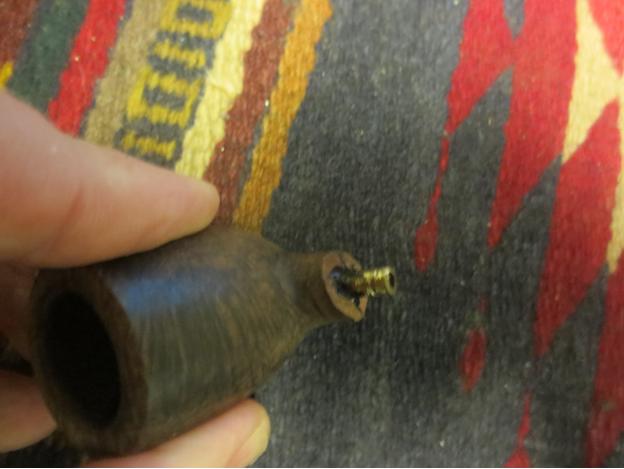
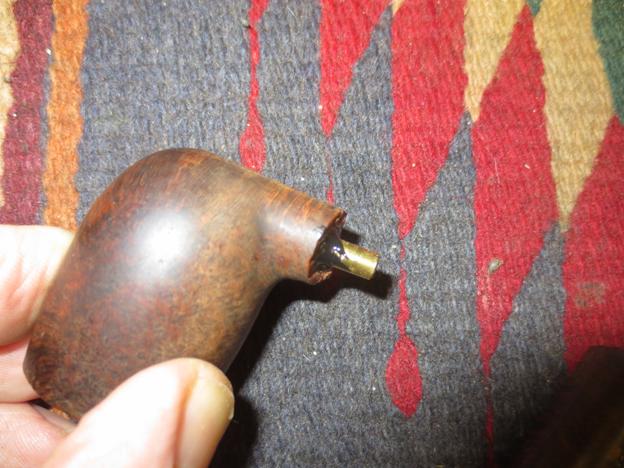 When the epoxy set and the tube was solidly in place I painted some more of the epoxy on the opposite end of the tube and a little on the briar surface of each side of the break. I have learned not to overdo the glue on the briar as it is a pain to remove from the wood when it dries. I twisted the shank piece in place, lined it up and pressed it in place against the bowl side. I held it firmly until the quick set epoxy set and that portion of the repair was finished.
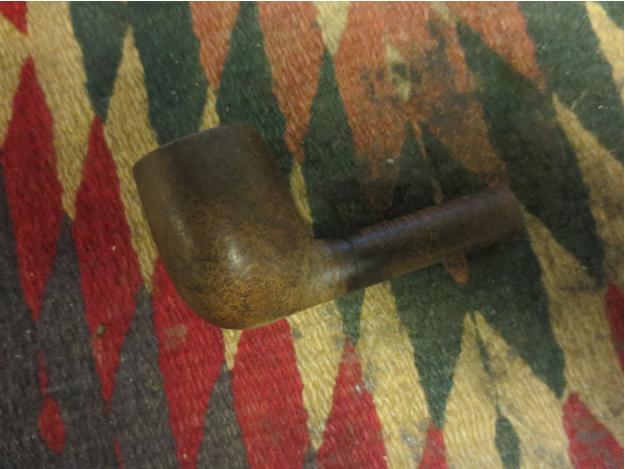
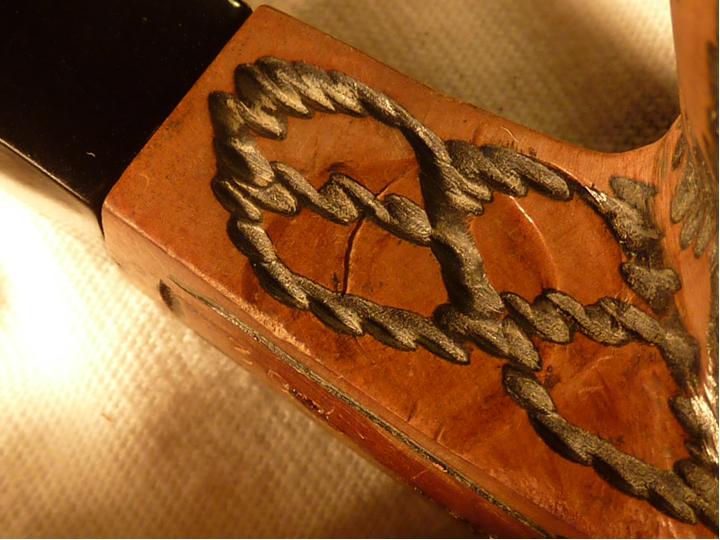
 I pushed some fine briar dust into the small space that remained around the surface of the crack and then filled it with clear super glue. I applied it with the point of a dental pick so as not to get too much glue on the briar.
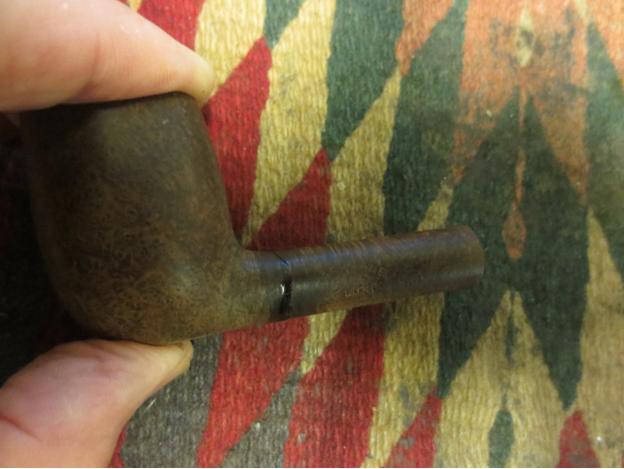
 I sanded the repaired area carefully with a folded piece of worn 220 grit sandpaper to remove the excess glue and briar dust from the patch. Then I sanded with a fine grit sanding sponge to remove the scratches. I used a medium brown coloured stain pen to touch up the sanded area around the patch. I cleaned out the shank with a pipe cleaner to make sure that there was no glue in the tube.
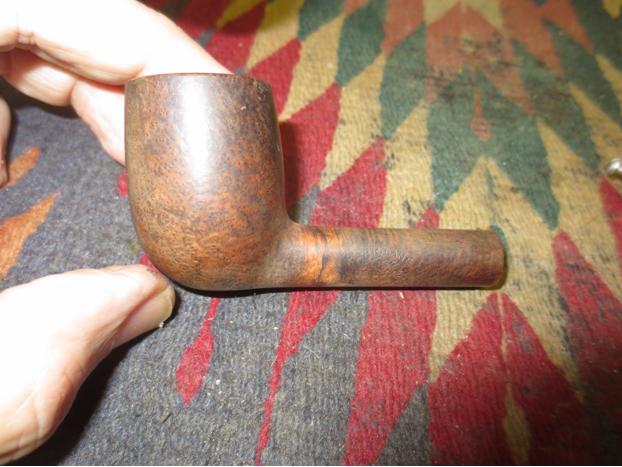
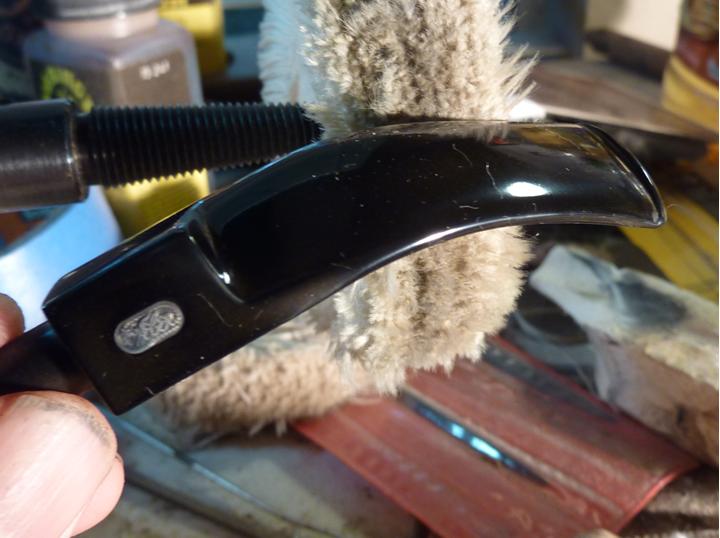
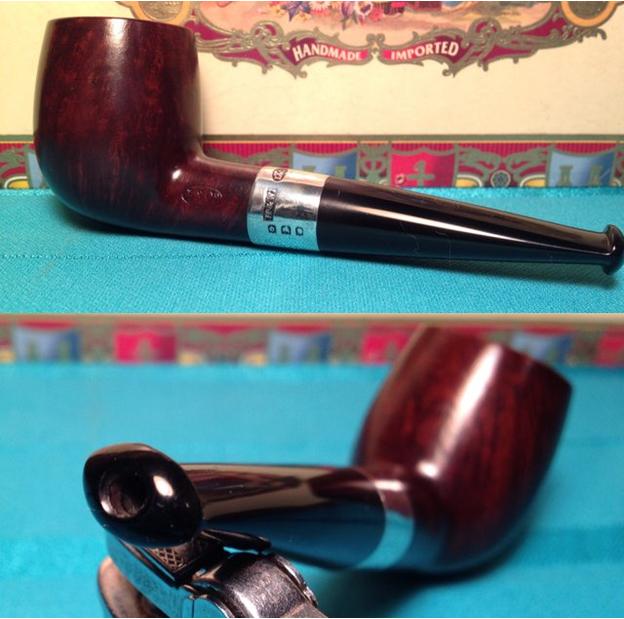
 The stem was slightly under clocked. I heated the stinger with a lighter until the glue in the stem softened and then carefully screwed it into the shank while holding the shank. I was able to align it perfectly with the shank.
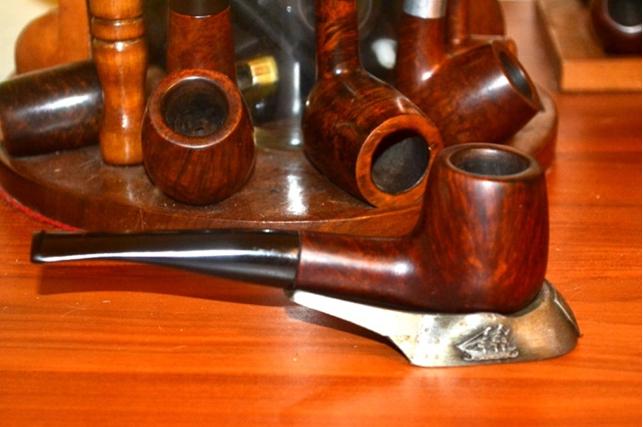
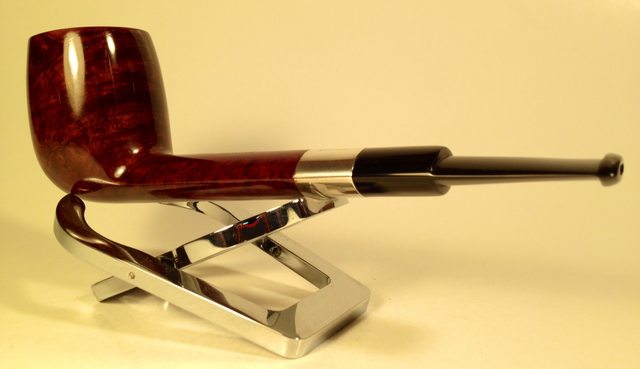
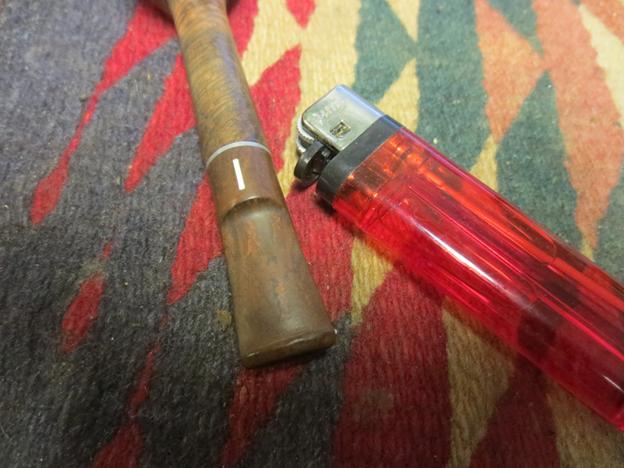 With that completed, the repairs to the pipe were finished. The stem was in the right position. The cracked shank repaired and strengthened with an inner tube. All that remained was to clean up the surface of the pipe and give it a coat of stain to blend in the sanded areas around the repairs. I also needed to do some work on the stem with micromesh to raise the shine and polish the Bakelite. (I rarely use the buffer on these older LHS stems as I do not want to risk it. I would rather polish them by hand than damage them.)
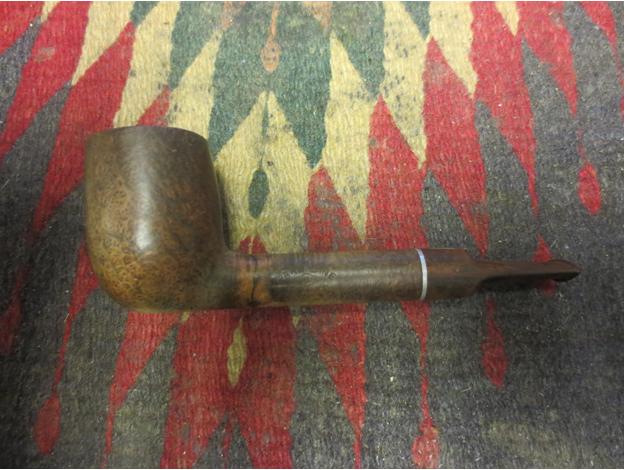
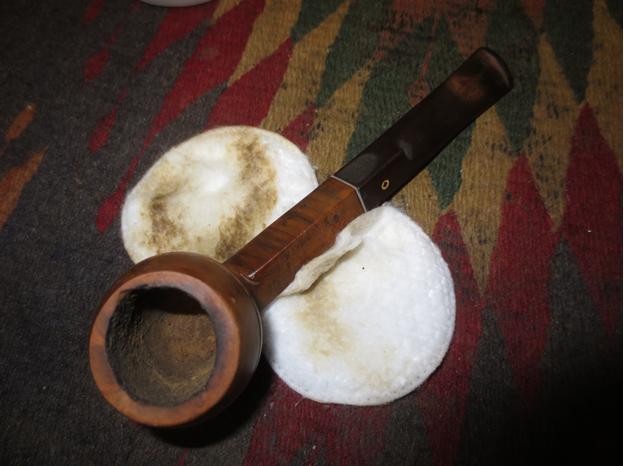
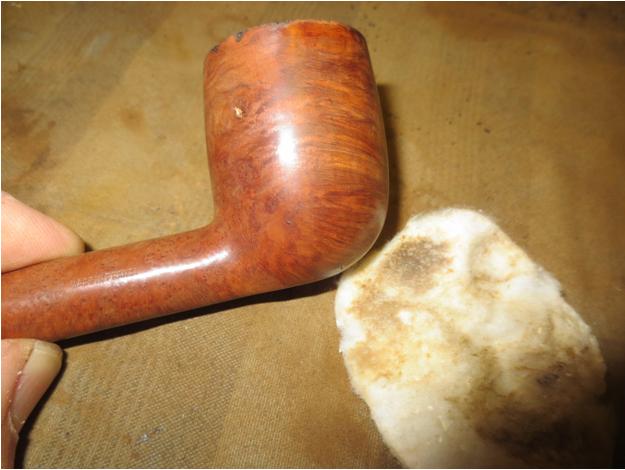
 I wiped the bowl and shank down with alcohol on a cotton pad to remove the grit and grime on the surface of the bowl and to remove the remaining finish.
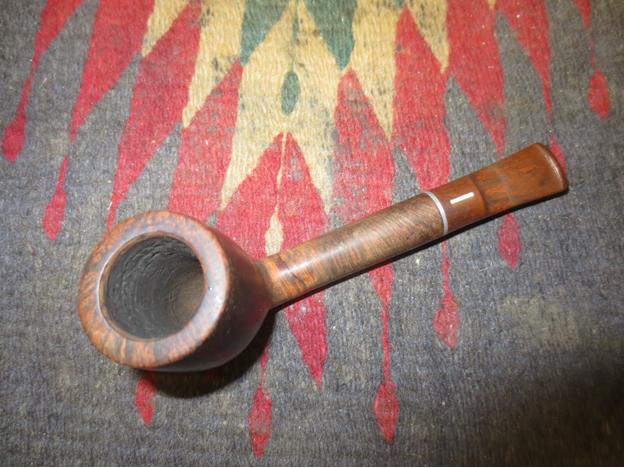
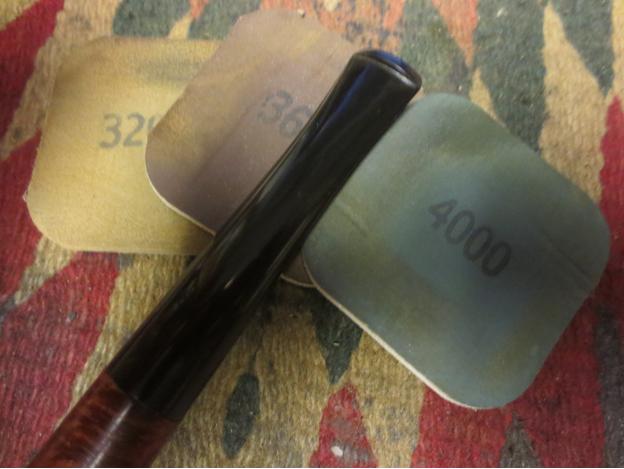
 I cleaned off the tars on the stinger with 0000 steel wool. I wet sanded the stem with 1500-2400 grit micromesh sanding pads and then rubbed it down with Obsidian Oil. I continued to dry sand the stem with 3200-4000 grit pads and then gave it another coat of oil. I finished with the final three grits of micromesh – 6000-12000 – and gave it a final coat of Obsidian Oil. Once the oil dried I gave the stem some coats of Paragon Wax and hand buffed it with a microfibre cloth.
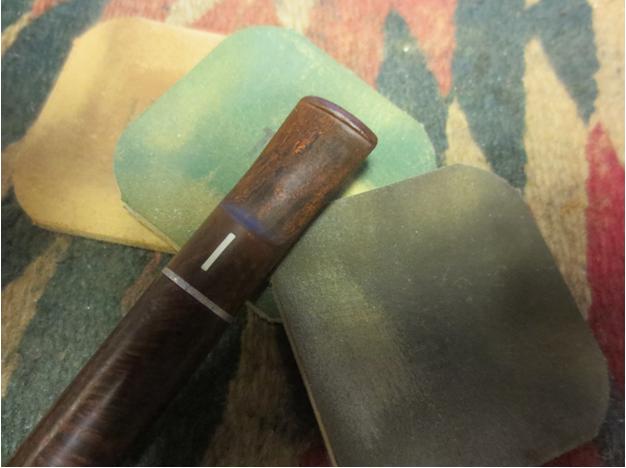
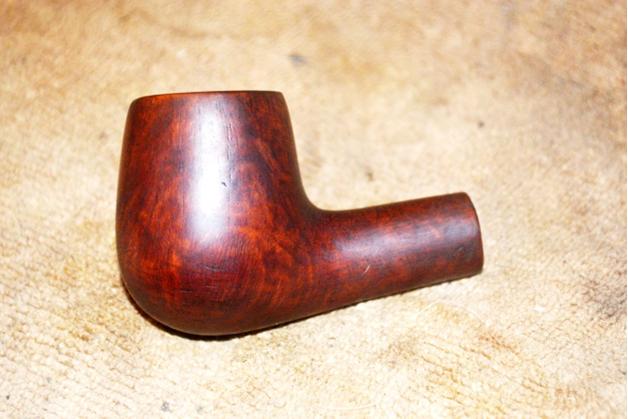
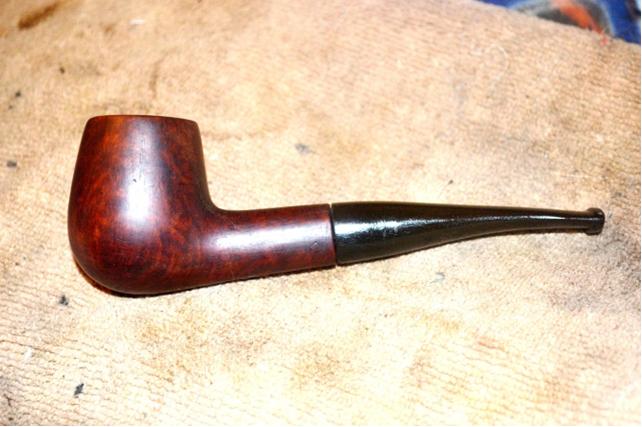
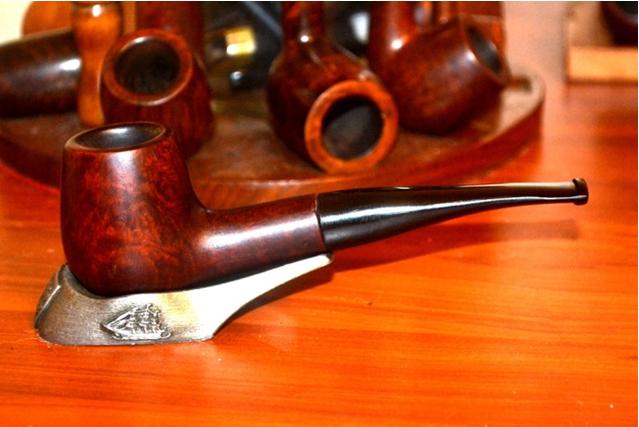
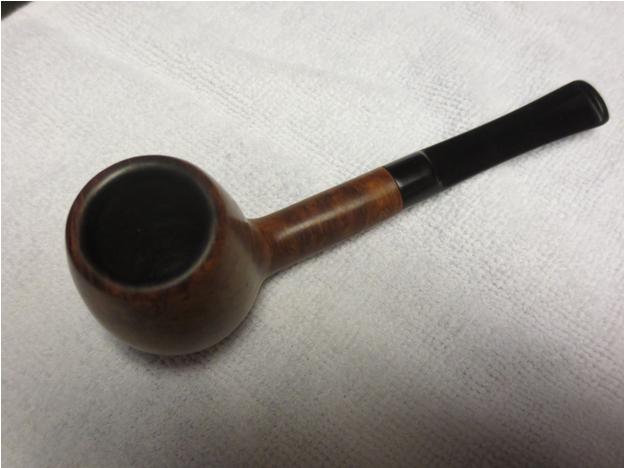
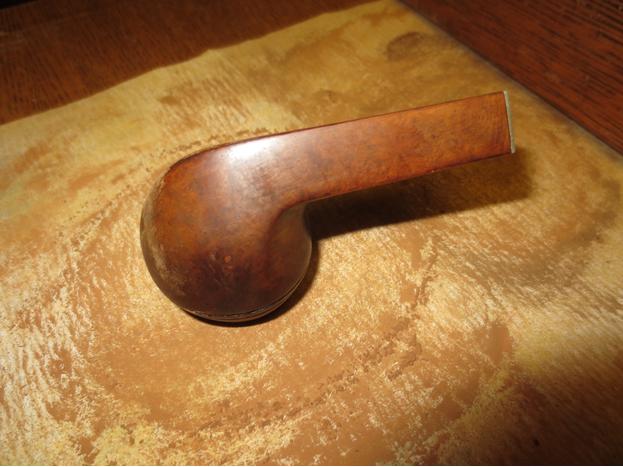
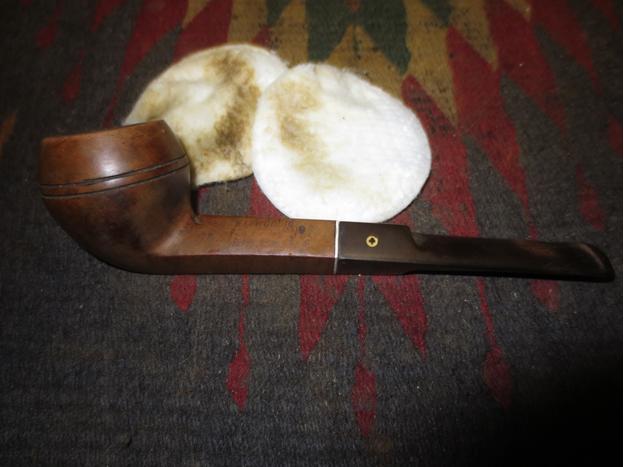
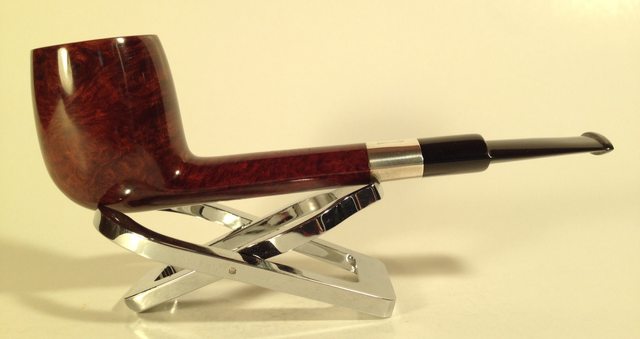
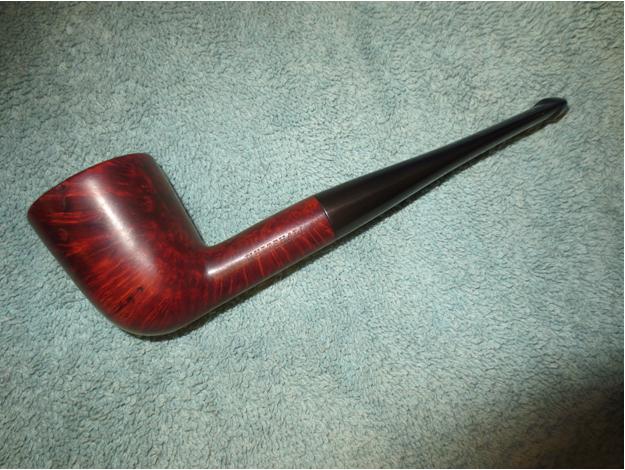
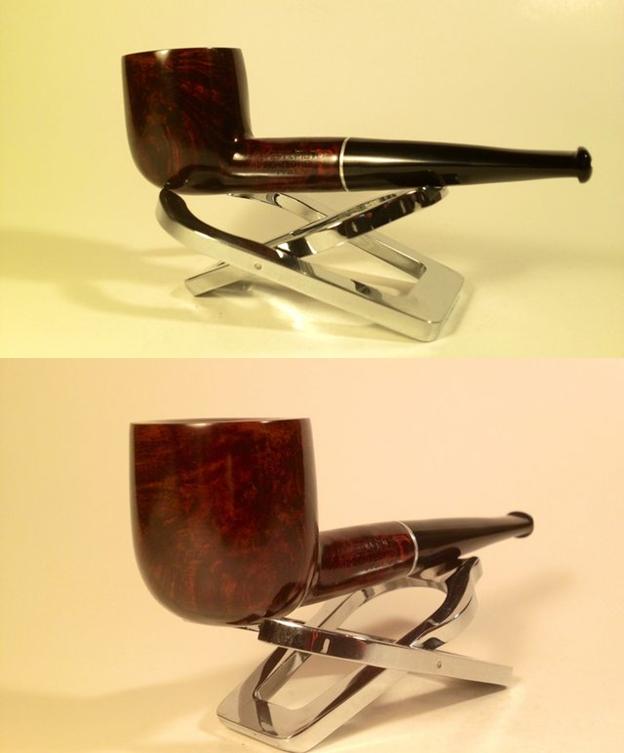
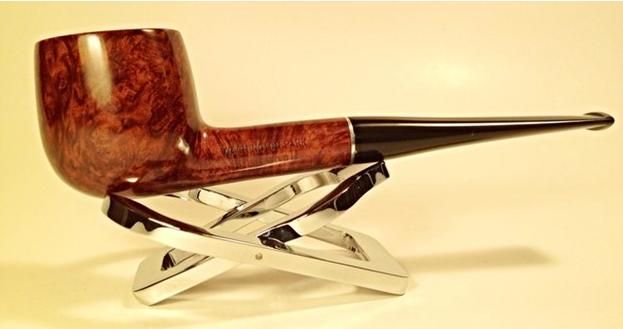
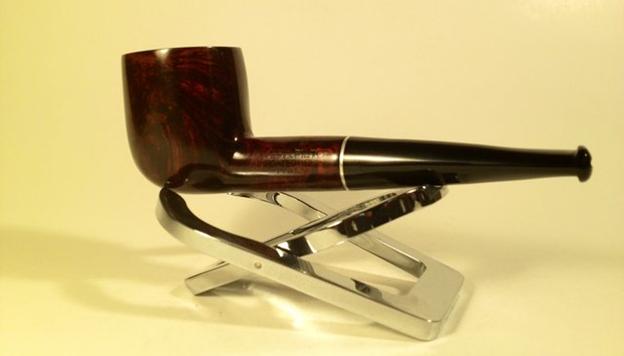
 I gave the bowl a rubdown with some olive oil and then buffed it out. I touched up the light areas of the stain on the repaired shank with a dark stain pen and then rubbed a little more oil onto the shank. I buffed the pipe with Blue Diamond and then gave it several coats of carnauba wax. I buffed it with a clean flannel buff and then hand buffed it with the microfibre cloth. The finished pipe is shown below. I am hoping to put it in the mail later today or tomorrow to get it back to Troy.
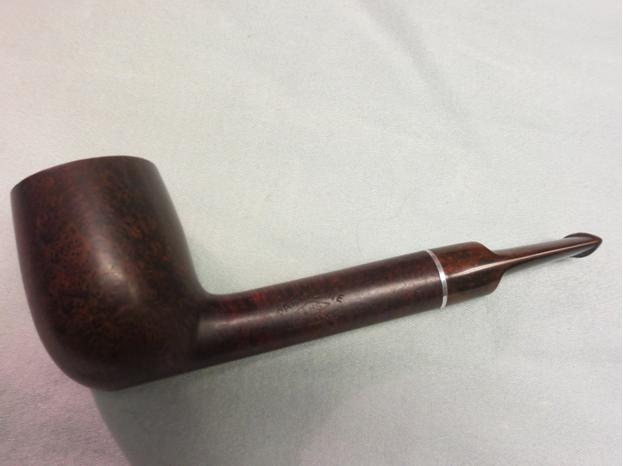
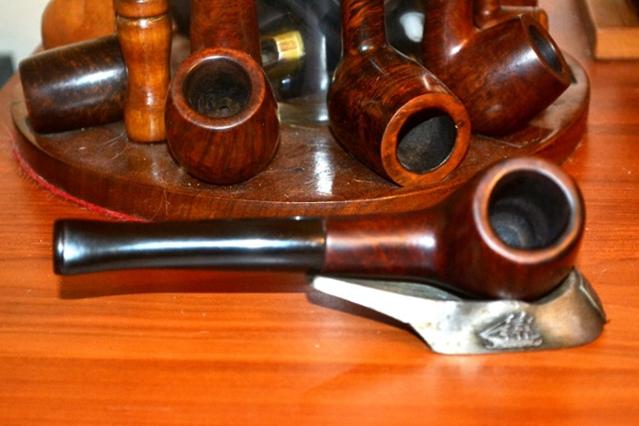
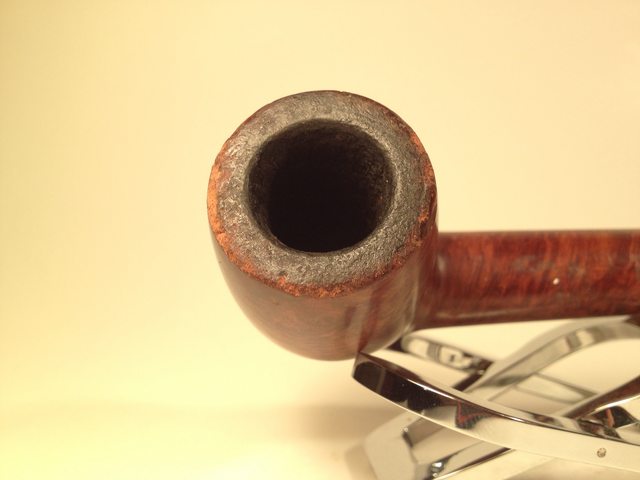
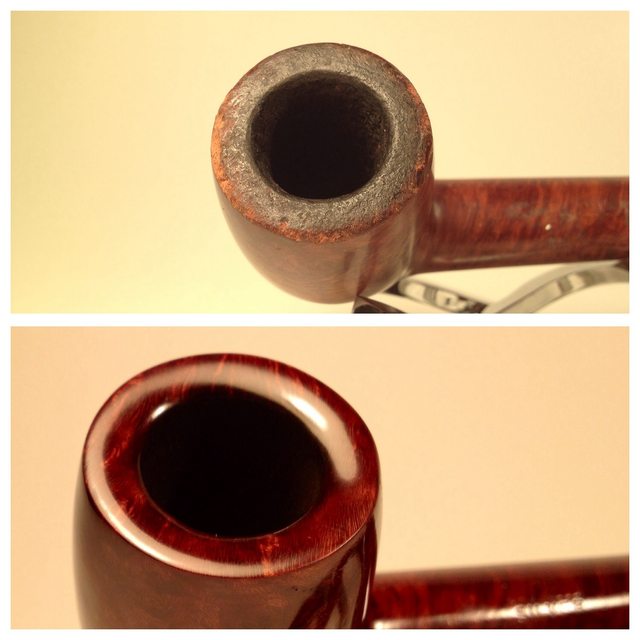
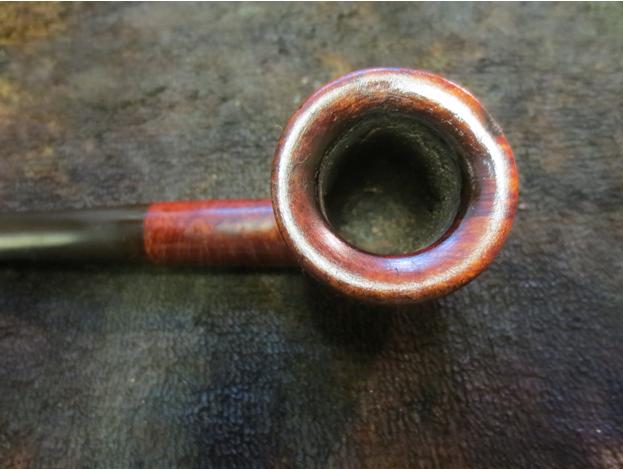
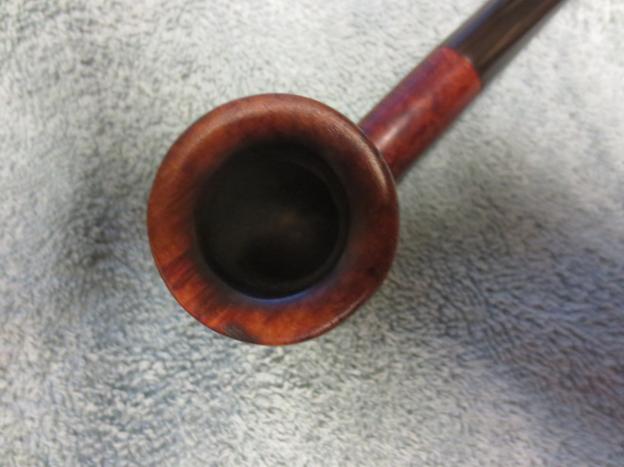
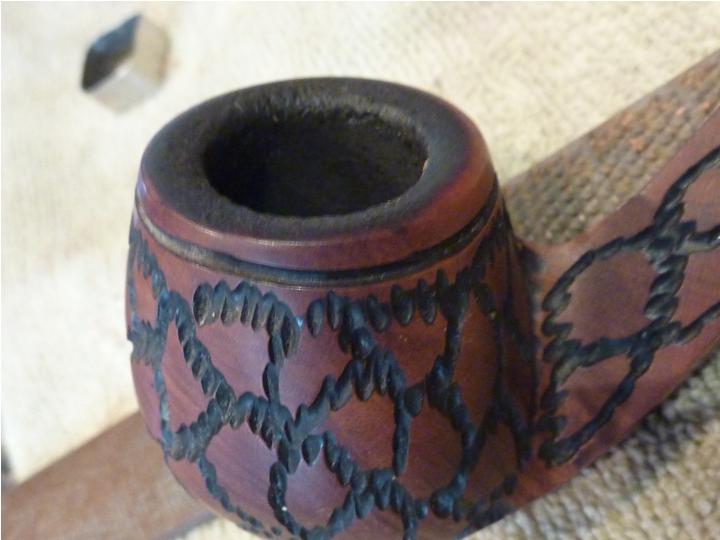
 There was some light damage to the rim surface. I decided to leave it alone as it was not enough to top the bowl. It gives character to this old pipe.