Blog by J.D. Dohrer
I am glad to be able to post this first blog by JD Dohrer. He has done a masterful job in repairing this stem. I am hoping he continues to submit blogs to rebornpipes and we can continue to enjoy and learn from his work.– Steve
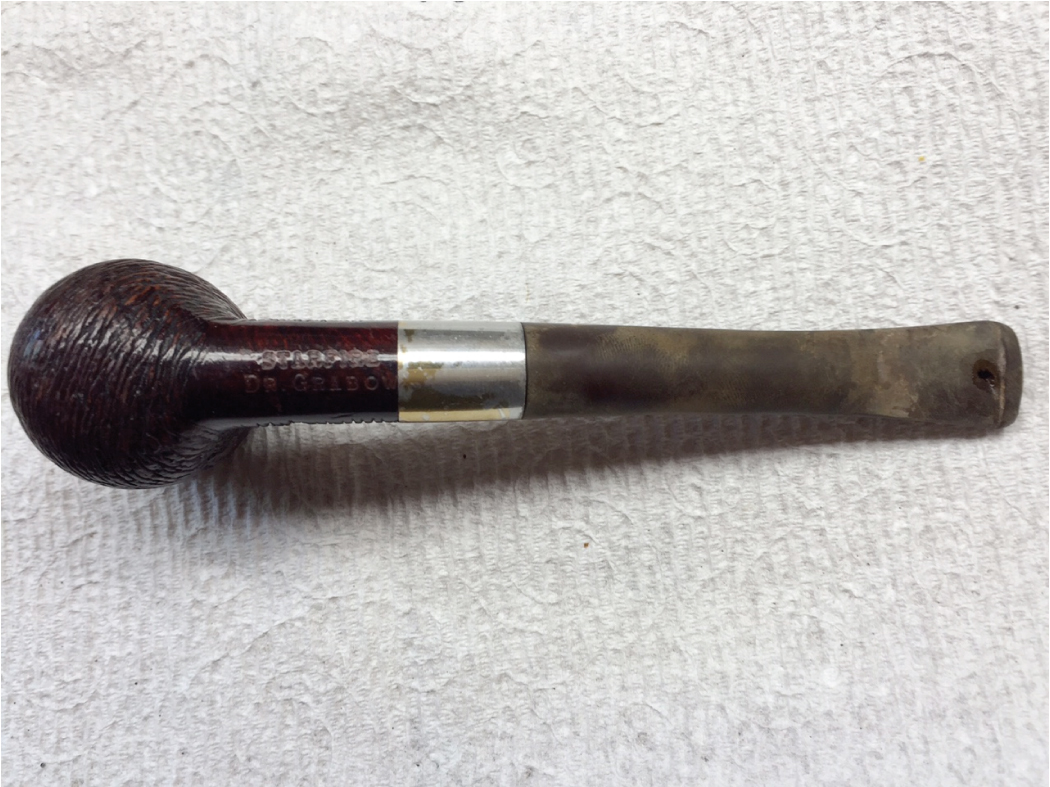
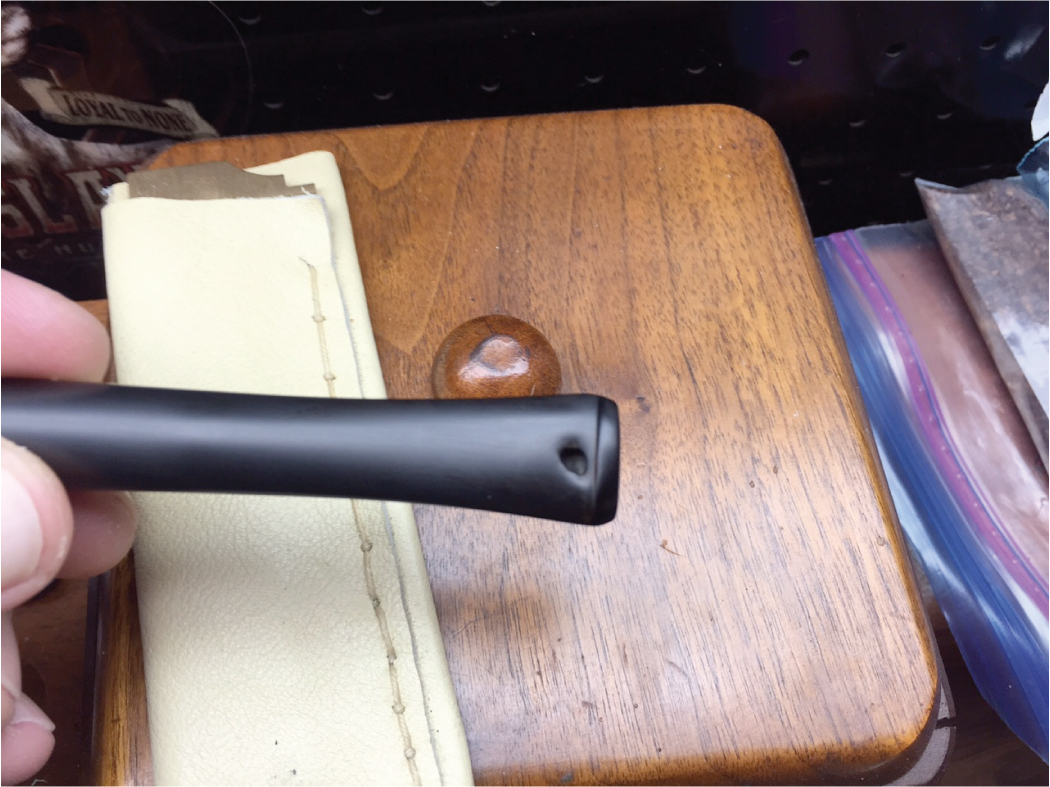
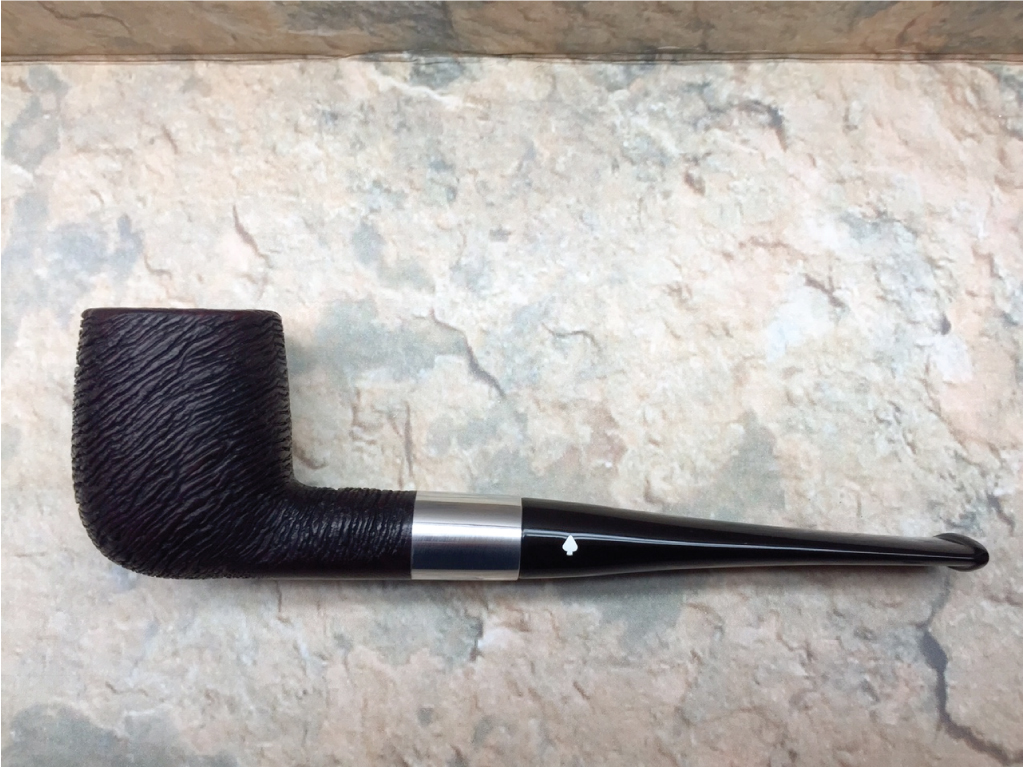
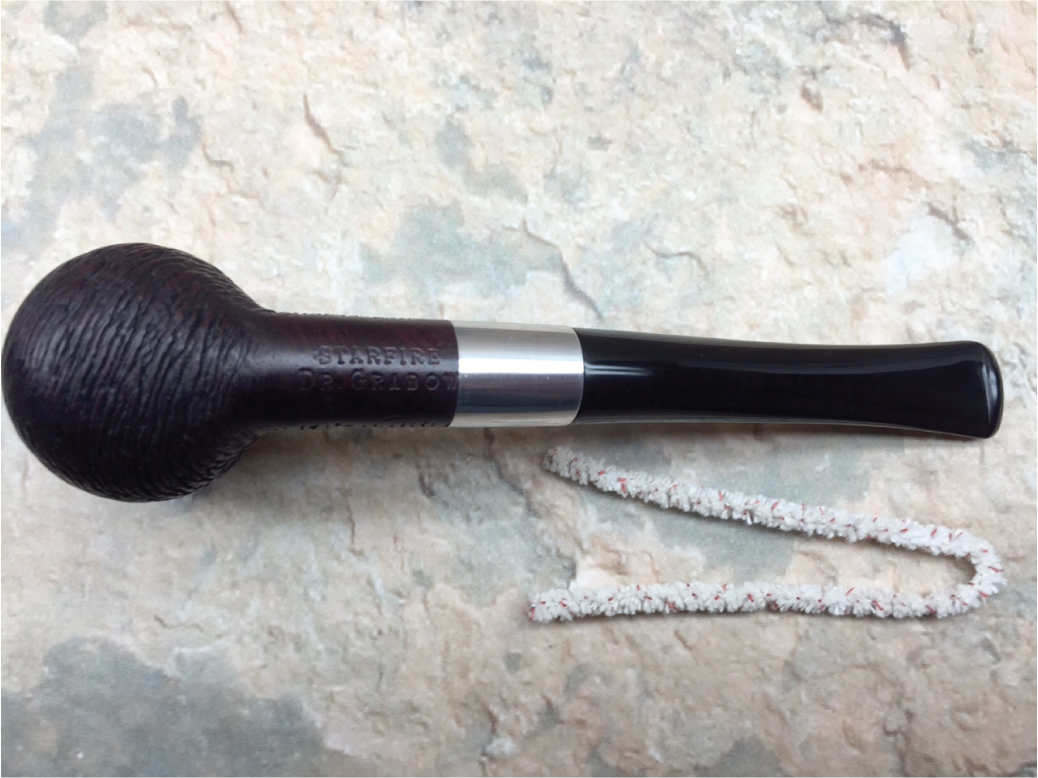
This is a Dr. Grabow Starfire wire carved large billiard #36. DG Starfires are one of my favorite lines/styles of pipes. I am quite keen on the models that have the metal shank extension. I snagged this one off of ebay for 10 dollars, delivered. I bought it specifically for the hole in the stem. I had been wanting to try my hand at a stem rebuild, especially after seeing the results that Steve and some others here on Reborn had completed.
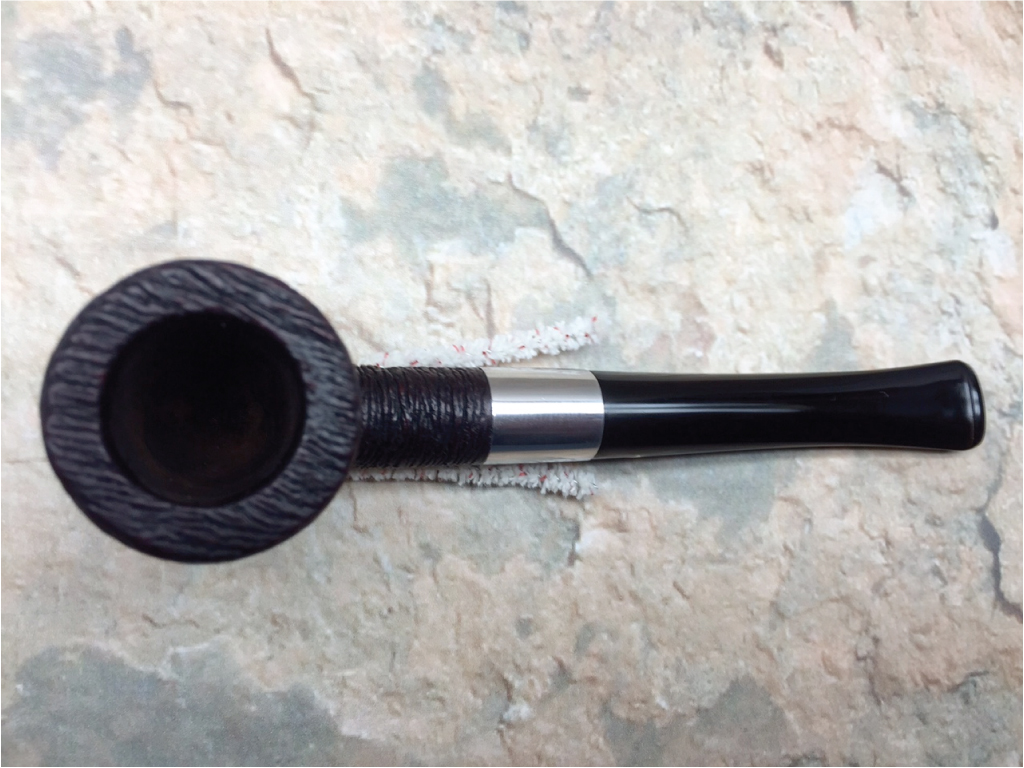
The following pics are how I received it in the mail. It was actually in quite good condition. The stummel was in nice shape, with just some minor chips on the rim and the typical grime in the wire carving. The stamping was still nice, sharp and deep. The cleaner was even still in the tenon. The stem was in rather good condition even considering the hole that was chewed through the button. The hole was on the underside of the button. Which gave me hope, that if I mucked this up terribly, it would be on the less than visible side of the pipe.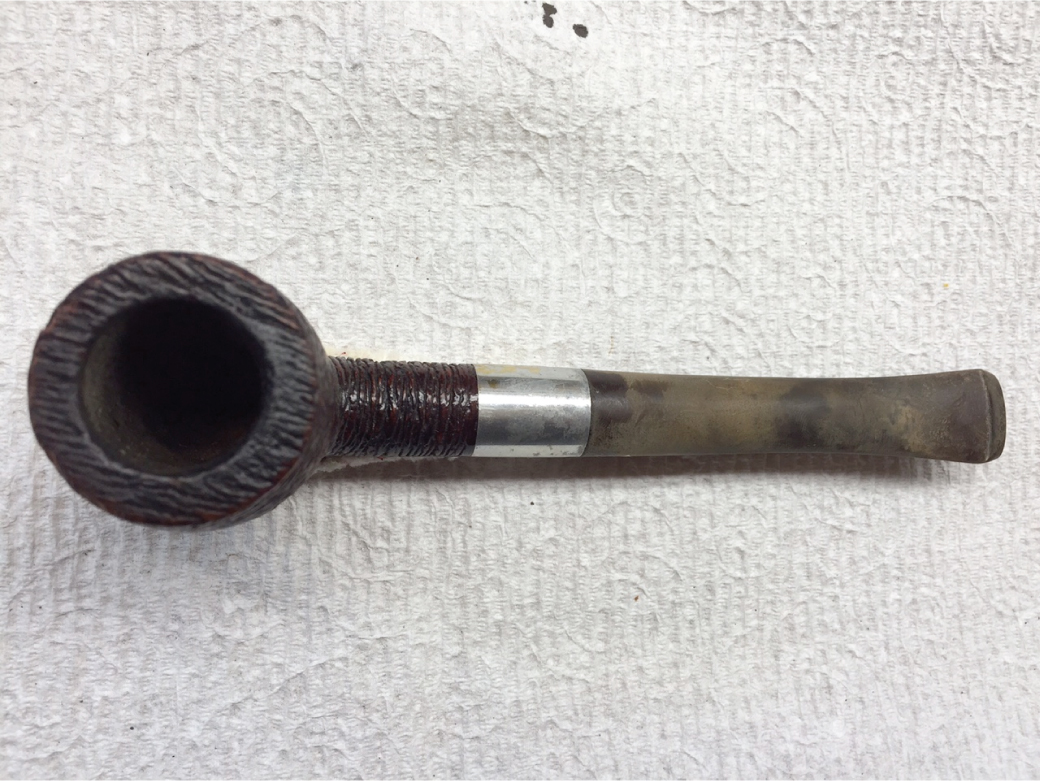
 The first thing I did was give the stem a good soaking in ISO 91% alcohol. I then cleaned the interior of the stem with pipe cleaners. Amazingly it only took a couple of pipe cleaners to get rid of the gunk in the stem. I then did some filing around the hole and inside the button. I also cleaned up the edges of the hole and expanded its size a bit.
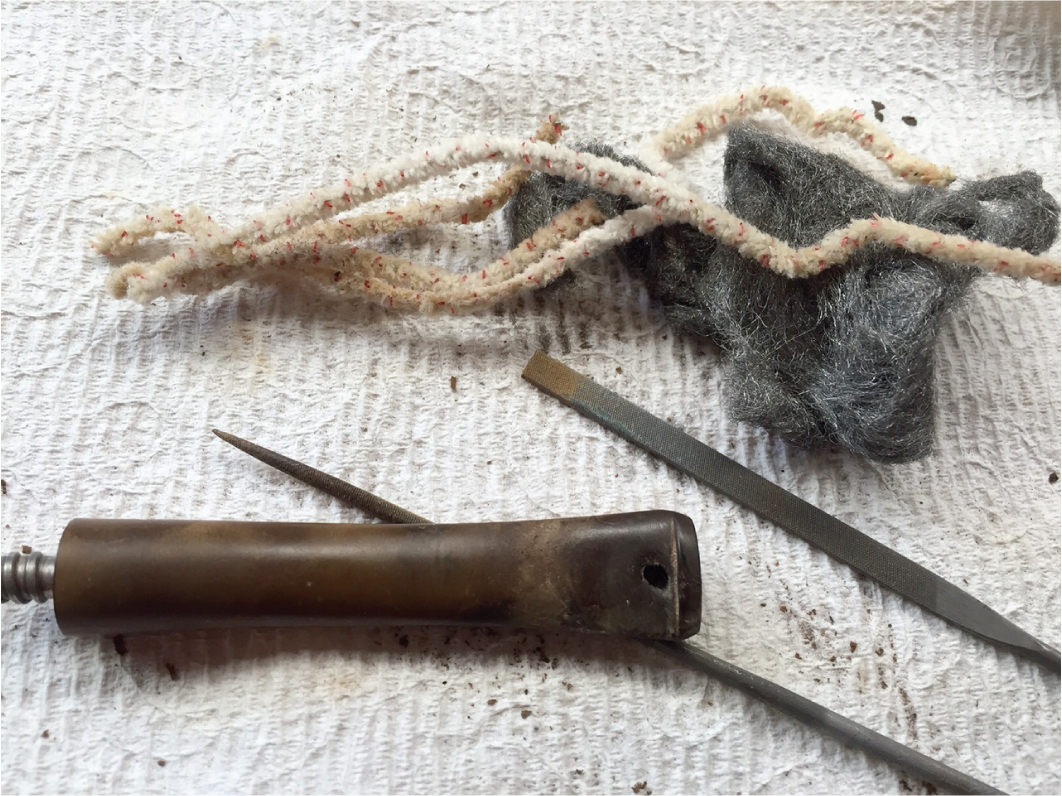 I let the stem soak in oxyclean for a few minutes. I then scrubbed the stem with a scotch brite pad and oxyclean. I wet sanded the stem from 400, 600, 800 and 1500 and got rid of all the oxidation. I took care of some other minor tooth chatter also at this time. I then finished with a good scrubbing and a magic eraser. I then re-cleaned the stem and hole area with 91% and scuffed up the hole.
 At this point I made a cardboard backer that I wrapped in scotch tape. I made sure it was a nice and tight fit. As a precaution I also inserted a pipe cleaner in the airway just to cover my butt.
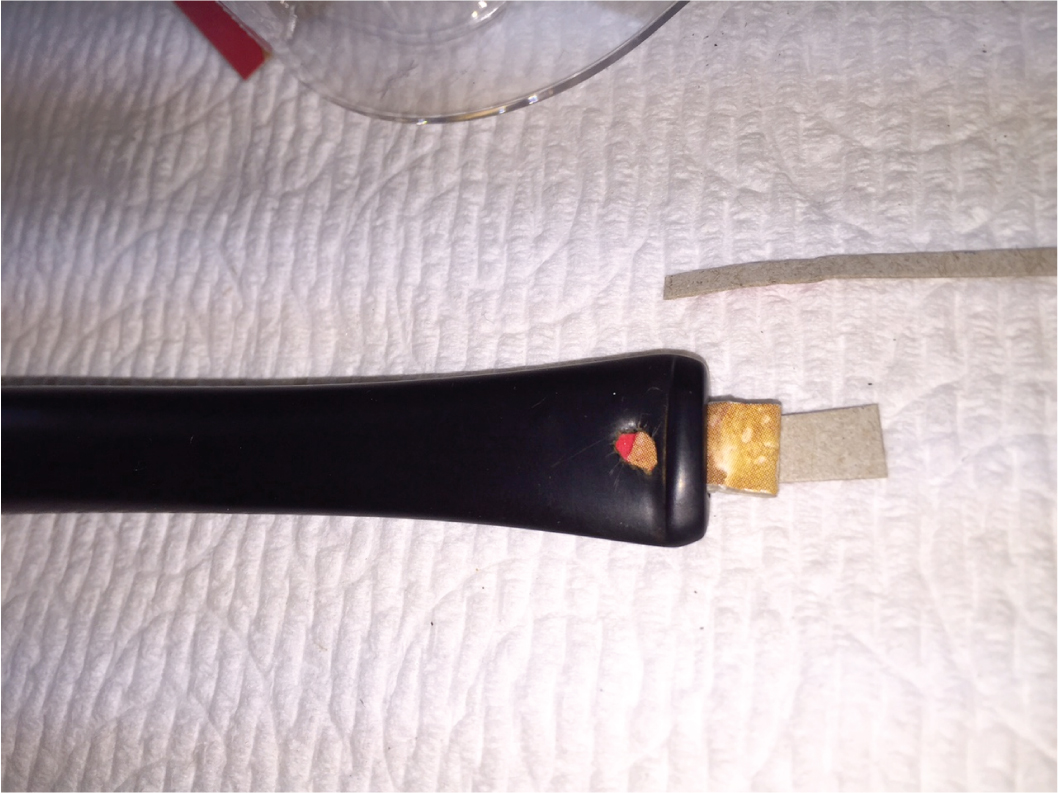 Next I opened up a 250mg capsule of activated charcoal. I crushed up the AC as finely as I could, using a medicine measuring cup and a small wax carving spoon type tool. Next I poured a small puddle of black CA glue on a piece of scrap and mixed in some AC. I got it to a pretty thick consistency that didnt drip off my mini trowel tool. I applied in 3 quick layers. The last layer was pretty messy as it was starting to set up but, I got it smoothed out and set it off to the side to dry. The total amount of AC used was probably less than 100 mg. You can see the glue puddle next to the dime. The puddle is smeared around a bit, as this was when I was done applying the glue.
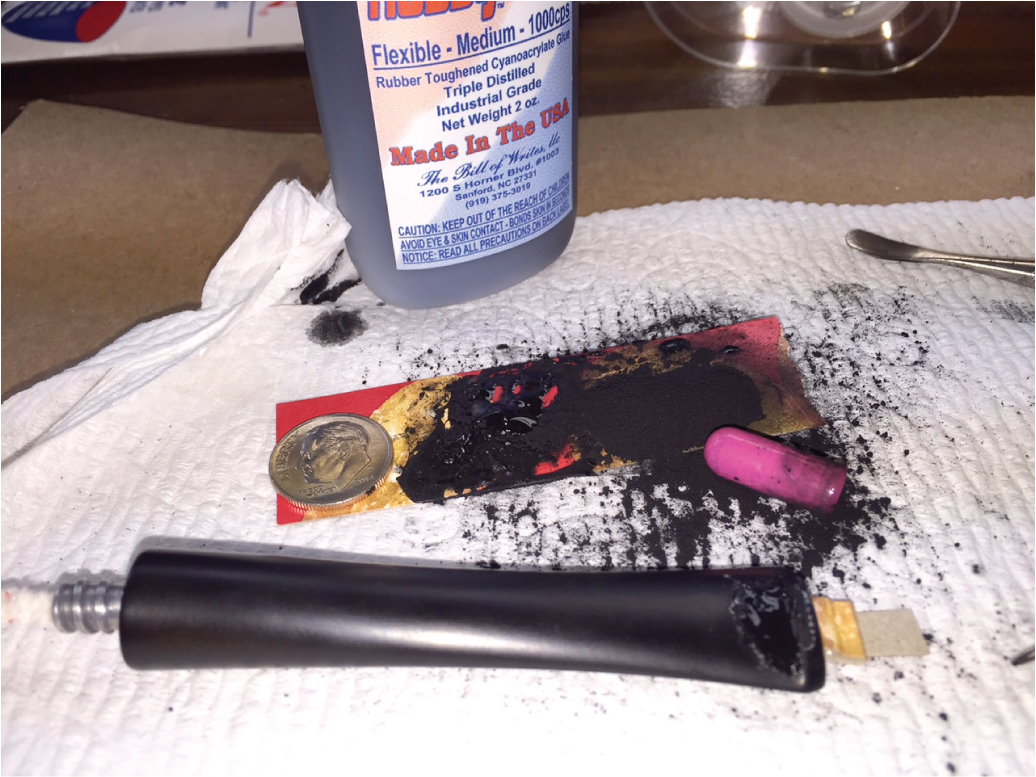 Here is dried glue after 16 hours.
 I filed down the area and then did the same steps again with the wet sanding. The filings were very fine and powdery and the glue sanded very nicely.
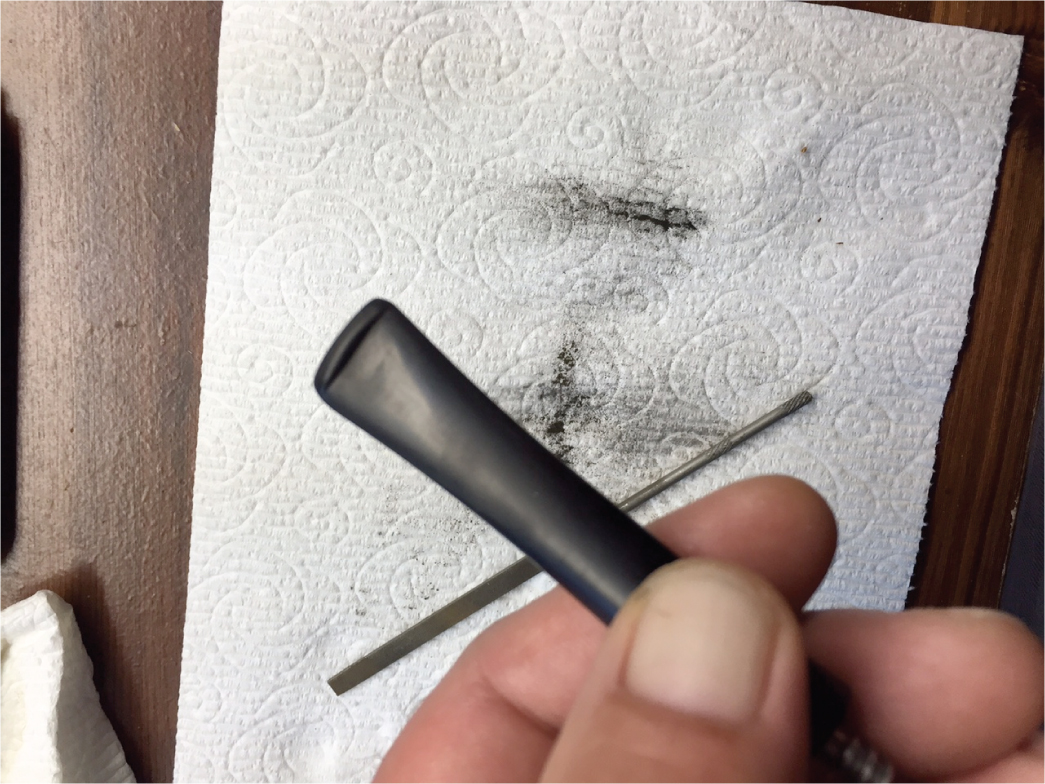 Now it was onto the easy part. I cleaned/reamed the chamber with a small round blade pocket knife and some 100 grit sandpaper wrapped lengthwise over a Sharpie pen. The caking was very light and I took it down just enough to leave the walls blackened.
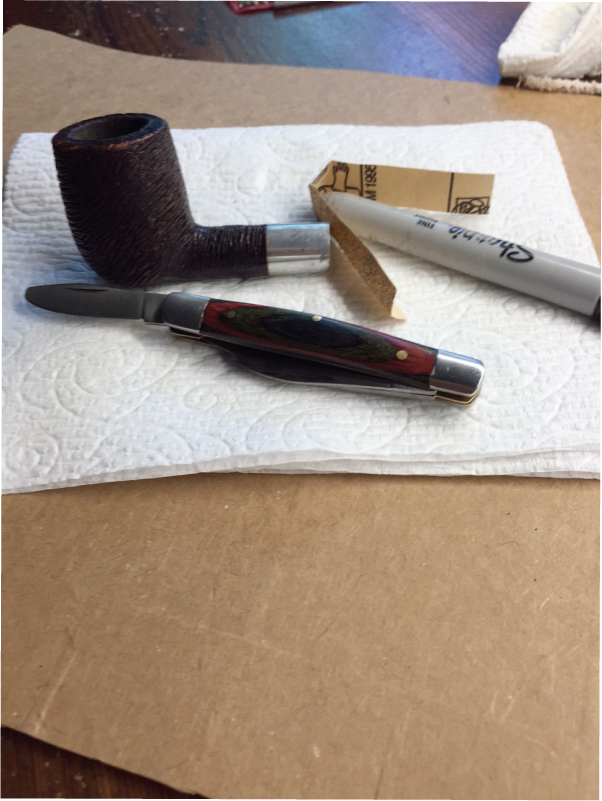 Now it was time for the draft hole and mortise/shank extension. I figured since the stem was such a breeze, this should be just as easy. I was dead wrong. I used ISO 91%, quite a few pipe cleaners, qtips, shank brush and a small bladed wax carving tool. It was definitely the worse job to do on this pipe. I cleaned the threads and exterior of the shank extension with 0000 steel wool.
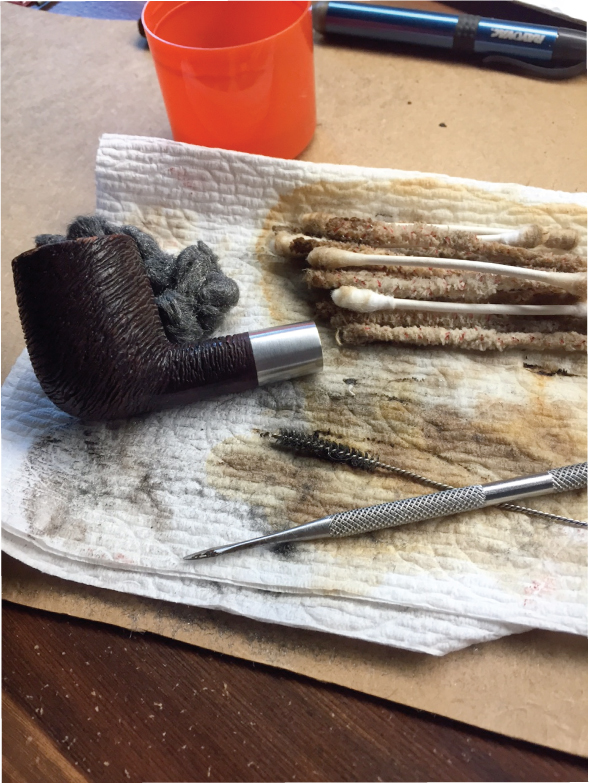 I then moved onto the cleaning of the exterior of the stummel itself. I used oxyclean and a scotchbrite pad to scrub the exterior. I removed a lot of grime and some of the dye on the higher points of the wire carving.
 I smoothed out and blended some of the smaller chips in the rim and redyed the stummel. I used 2 parts Fiebings Oxblood and 1 part Fiebings Cordovan. I gave it a couple of good quick coats of dye. I let dry for a few minutes and wiped off any excess.
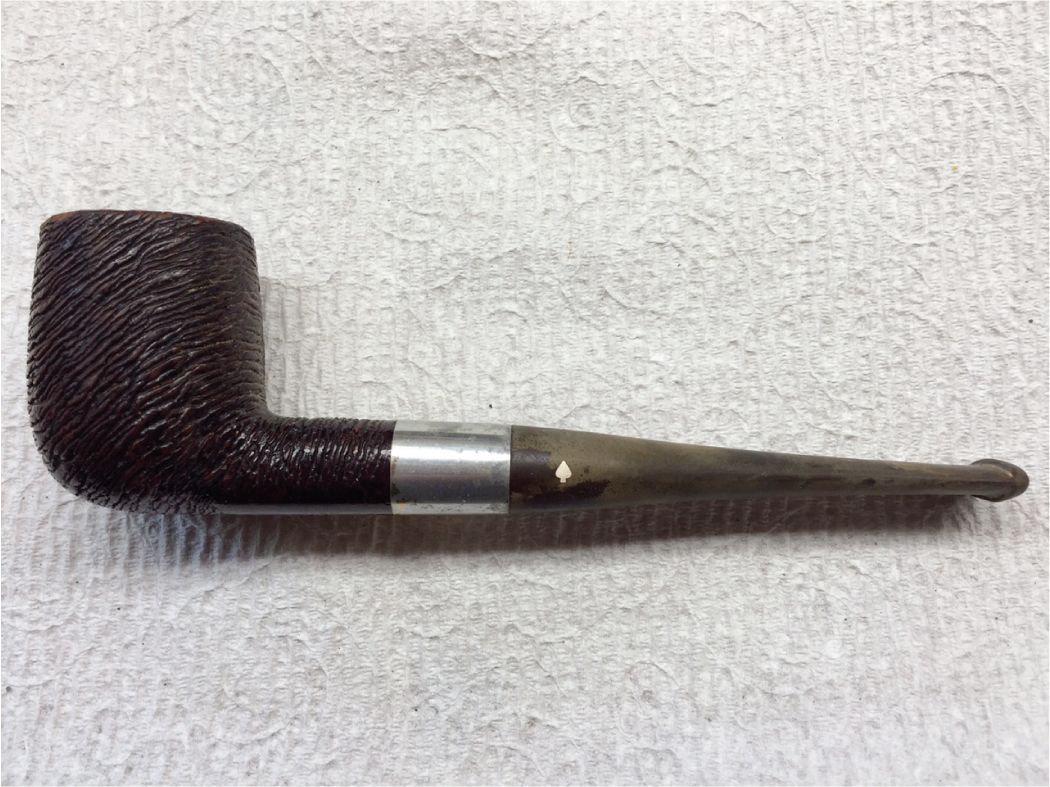
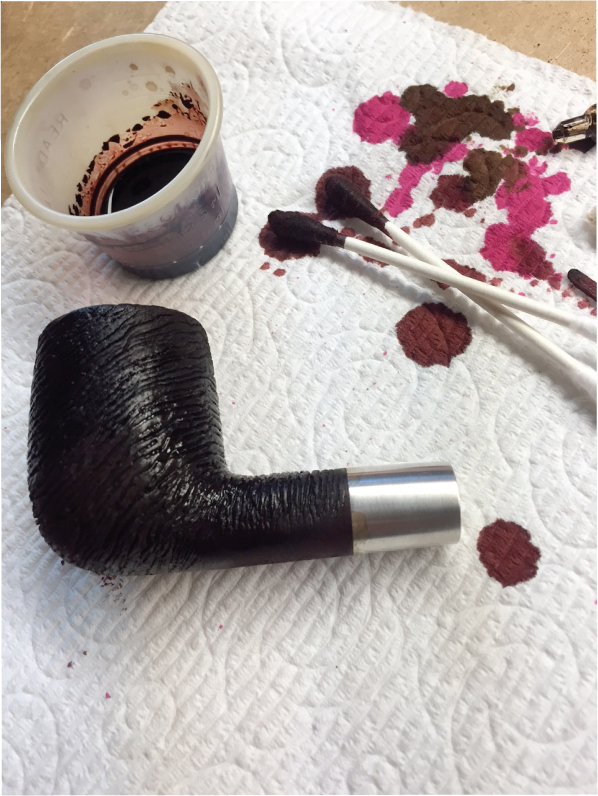 With all the heavy lifting done, it was time for the buffing and waxing. I used tripoli, white diamond and carnauba on the stem. I hit the shank extension with a bit of white diamond. I used a couple coats of Halcyon 2 on the stummel. I then finished up by buffing with a microfiber cloth. Below is the finished product with as good of a close up as I could get with my iphone.
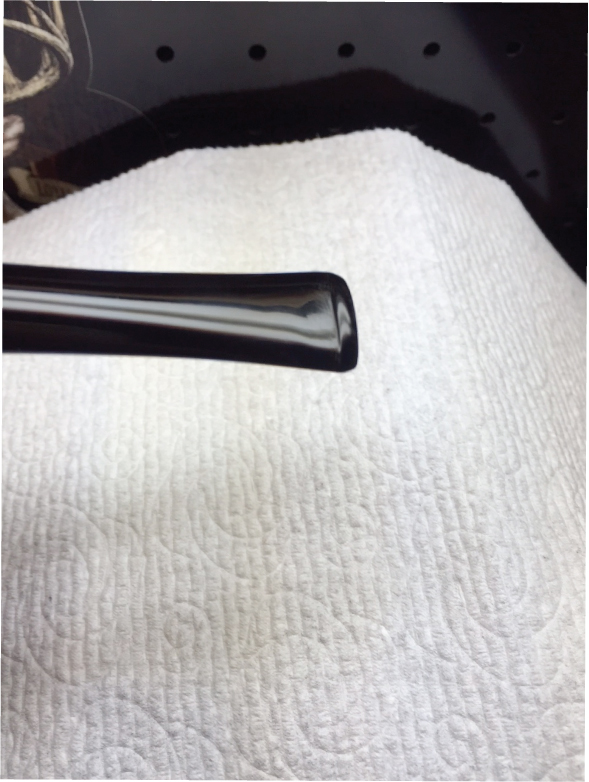

 I am pretty dang pleased with myself on how this pipe came out looking. When I started working on pipes, I always made sure that the pipe I was bidding on had a stem that was in good shape. But, after this project, I will seek those pipes out that need some stem work. In fact, I have 3 pipes on their way that need some intense TLC and stem work. I again thank Steve and all the rest on here and DGCF for their postings, tips and ideas. Truly appreciated.
I fired ‘er up last night and ran a bowl of Carter Hall, Chatham Manor and a burley/cavendish blend through it. It smokes just as well as my other Starfires. Its a keeper and it will join with my other 6 Grabow Starfires.
Thanks in advance for checking it out. My picture taking skills are a bit lacking and my iphone does not take the best close up pics. W
