Blog by Steve Laug
The next pipe I chose to work on came is another one from the lot of 11 pipes I purchased from a lady in Regina, Saskatchewan. She had found them in a house she bought and wanted to know if I wanted them. We struck a deal, I paid for the pipes and shipping and the box arrived while I was traveling in Europe. In the box were 4 Stanwells, 1 Danmore Bowl, 1 Soren Freehand, 1 Calabash with a Briar Bowl, 1 Nording Freehand, 1 Italian Made Bertenetti, 1 Rhodesian with a banded cracked shank, and 1 Brigham. I have restored the Nording, the snapped Stanwell, the Brigham, the Gourd Calabash with the briar bowl, restemmed the Danmore bowl, cleaned the Lorenzetti, restored the Stanwell Made in Denmark 11 Pot, and the Stanwell Antique 25 Scoop. There are blogs on each restoration available. I now am down to two remaining pipes.
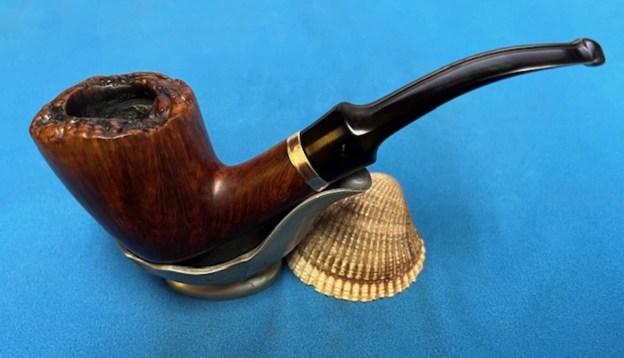
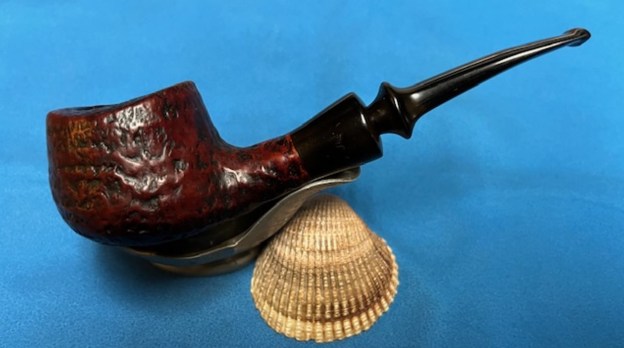
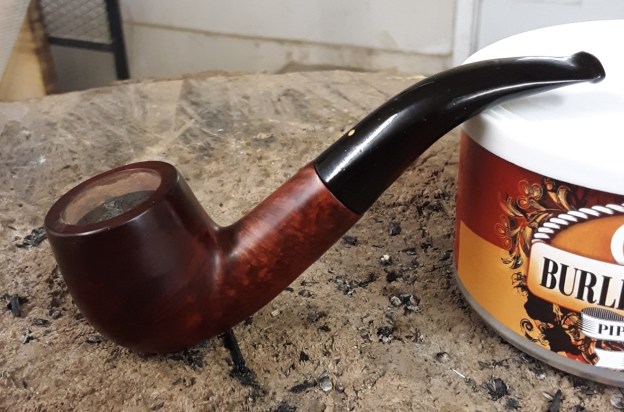
 The next pipe on the table is another one of the dirtiest pipes in a box full of very dirty pipes. It is stamped on the left side of the shank and reads Danish [over] Sovereign (a Stanwell second). There is a shape number 64 on the right side of the shank. On the underside of the shank and reads Made in Denmark. There is a fill in the shank underside which confirms the Danish Sovereign stamping on the shank. It is a great shape for a pipe – a freehand style Dublin that is another Ivarsson design. There was a thick cake in the bowl, debris in the bottom and on the bowl walls and some remnants of tobacco. The airway was plugged and there was no draught on the pipe. There was a heavy lava overflow on the plateau rim top and down the sides of the bowl and shank. It was hard to know the condition of the inner edges of the bowl because of the cake. The outer edge actually looked quite good under the grime. The finish was dirty and dusty and there was lava on the sides and heel of the bowl. The stem was in rough shape in appearance but underneath the calcification and oxidation the tooth marks and chatter looked minimal. I took photos of the pipe before I started my cleanup work on it.
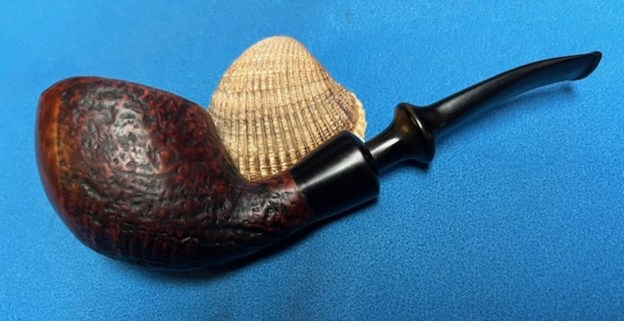
 I took a close-up photo of the bowl and rim top to show the thick cake in the bowl. The rim top shows some thin lava filling in the plateau. The inner edge of the bowl is so thickly coated lava that it is hard to know the condition. The outer edges of the bowl look quite good. You can also see what appears to be damage to the edge of the shank. The stem seats against the end of the mortise but there is still a gap between the shank end and the saddle stem. I took photos of the top and underside of the stem surface and button to show its general condition. It looked very good under the calcification and oxidation.
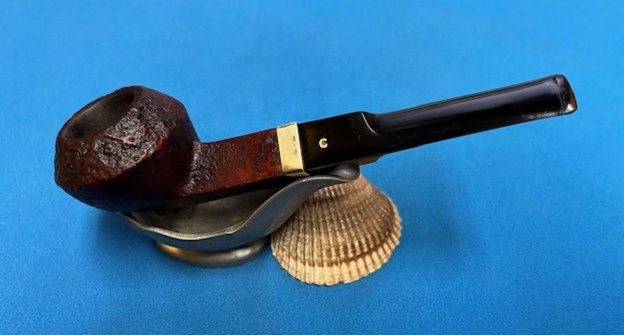
 The stamping on the sides of the shank are faint but readable as noted above. It was very hard to capture them in the light for the photos but they are present. I took the stem off the pipe and took a photo to give a sense of the proportion of the pipe.
 I turned first to Pipephil’s site (http://www.pipephil.eu/logos/en/logo-d2.html) to see what information I could find there. On the site was a pipe similarly stamped to the one that I am working on. It is clearly identified as a Stanwell second that was marketed only in the USA and Canada.
  I turned to Pipedia to read more about the brand (https://pipedia.org/wiki/Danish_Sovereign). There was nothing definitive there only a statement that it may be a Stanwell second line. It looks I am dealing with a pipe made especially for the American and Canadian market by Stanwell.
I recognized the shape as being a Sixten Ivarsson design but Icould not remember the shape number associated with it. I turned to Pipedia’s article on shapes that Bas Stevens originally worked on to check it out (https://pipedia.org/wiki/Stanwell_Shape_Numbers_and_Designers). I am including a shape chart below. It identifies the shape as a 64 (bottom right side of the fourth column in the photo below). I also have included information the site regarding the shape 64. The pipe I am working on is 64a in the list below. Stanwell’s “64” shape number actually corresponds to two different designs. The first is a larger version of the “64,” a Freehand, plateau top, saddle stem and designed by Sixten Ivarsson. This vintage “64” is of the first type, really showcasing flowing Dublin shape and the plateau rim top.
- 64. Two versions of this shape number
- a) Freehand, Plateau top, saddle mouthpiece, by Sixten Ivarsson.
- b) Bent billiard, medium size, full mouthpiece.
List by designer
- Sixten Ivarsson: 01 (Nefertiti), 01 (Pick Ax), 02, 06, 07, 09, 10, 11, 13, 15, 17, 19, 20 (Boat), 20 (Bent Dublin), 21, 22, 23, 24, 25, 30, 32 (Free Hand), 33, 34, 35 (Bent Free Hand), 37, 38, 41, 43, 48, 55, 59, 62, 63, 64, 70 (Free Hand Volcano/Sitter), 75 (Billiard w/oval shank), 79, 82, 85 (Bent e), 86, 87, 90, 91R, 95, 96, 105, 110, 119, 124, 2606, POY 1993.
Now I knew it was an Ivarsson Design shape 64 with a saddle stem. Now it was time to work on the pipe. I removed the stem and turned my attention to the bowl clean up. I reamed the bowl with a PipNet pipe reamer using the fourth (and largest) cutting head to take the cake back to bare briar. I cleaned up the reaming with a Savinelli Fitsall Pipe Knife. I sanded the walls with a piece of 180 grit sandpaper wrapped around a dowel to smooth them out. 
 I scrubbed the exterior of the briar with a brass bristle wire brush, a tooth brush and undiluted Murphy’s Oil Soap. I rinsed it off with warm water to remove the grime and soap. It looked much better and the dust and debris was gone. I dried it with a cotton towel.
 I worked over the plateau rim top and the bowl some more with a brass bristle wire brush to further knock off the debris in the valleys of the finish.
 I scrubbed out the internals of the shank, mortise and the airway in the stem with 99% isopropyl alcohol, pipe cleaners and cotton swabs. There was a lot of tar and oil in the shank and airway. It was a mess.
 Once I had cleaned the shank with alcohol, pipe cleaners and cotton swabs I tried the fit of the stem in the shank. It fit tightly against the mortise end but the gap between the shank end and the stem saddle was still open. I examined the fit and found that the shank end was not even – in fact it was slightly wavy. I heated the brass band and pressed it onto the end of the shank and then checked the fit of the stem and it was perfect. The band created a smooth shank end for the saddle stem. I also really like the look of the thin band.
 I decided to deghost the bowl so I stuffed it with cotton bolls and rolled one into the shank end. I used a ear syringe to fill the bowl with isopropyl alcohol. I set the bowl aside overnight to let it leech out the tars and oils from the bowl and shank.
 I polished the briar with micromesh sanding pads – dry sanding it with 1500-12000 git sanding pads. I worked on the high spots on the plateau top along with the bowl and shank. As I finished the last of the micromesh it looked much better.


 With the briar polished smooth I decided to stain the bowl with a Light Brown aniline wash. I used a wool dauber to apply the stain. I lit it with a lighter to set the stain in the grain. I repeated the process several time until I was happy with the coverage.
 I buffed the bowl with Blue Diamond on the buffing wheel to polish the newly stained briar. I like the way the wash made the grain stand out and blended in some of the darkened spots. It looked very good.
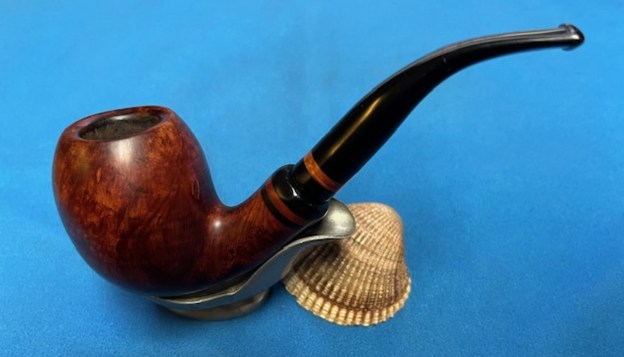
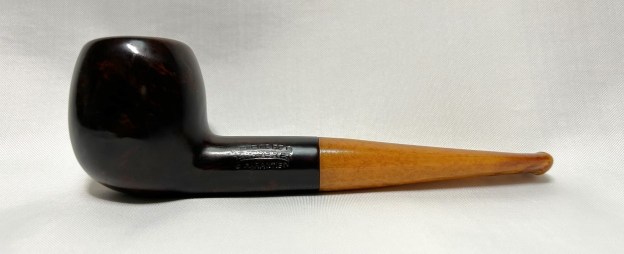
I worked some Before & After Restoration Balm into the surface of the briar with my fingertips to clean, enliven and protect the briar. I let the balm sit for 15 minutes and then buffed with a cotton cloth to raise the shine. The photos show the bowl at this point in the restoration process.

 With that done, the bowl was finished other than the final buffing. I set it aside and turned my attention to the stem. I wiped it down with some Soft Scrub on cotton pads to remove the oxidation and calcification. I was able to remove most of the oxidation and the calcification. It looked much better when I finished.
 I “painted” the stem surface with the flame of a Bic lighter to lift the tooth marks. I was able to lift all of the marks on the top surface and all but three small deeper marks. I filled in those with black CA glue. I flattened the repair with a small file and further blended it into the surface with 220 grit sandpaper and started polishing it with 600 grit wet dry sandpaper. It really was taking on a shine.


 I polished the stem with micromesh sanding pads – wet sanding with 1500-12000 grit sanding pads. I wiped it down after each sanding pad with Obsidian Oil.
 I finished polishing the stem with Before & After Pipe Stem polish (both Fine and Extra Fine) then wiped the stem down with another coat of Obsidian Oil.
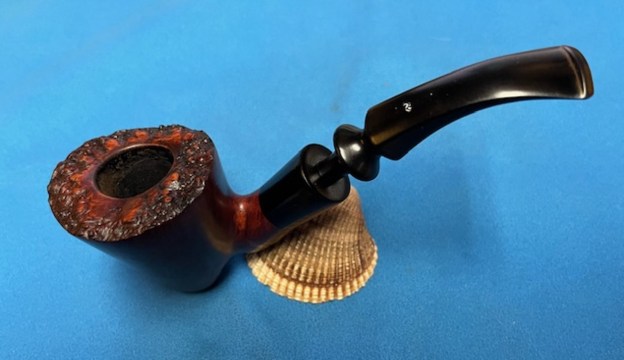
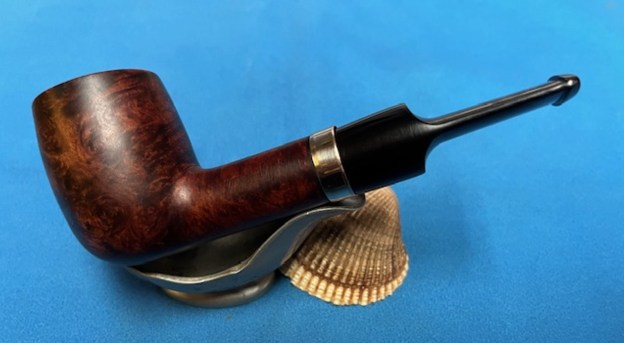
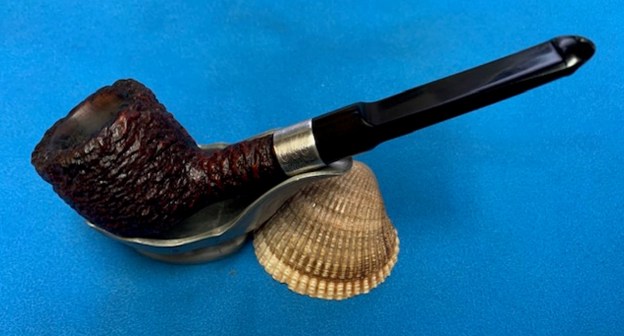
 I am excited to finish this Ivarsson Design Danish Sovereign Made in Denmark 64 Freehand. I put the pipe back together and buffed it with Blue Diamond on the buffing wheel. I gave the bowl and the stem multiple coats of carnauba wax. I buffed the pipe with a clean buffing pad to raise the shine and hand buffed it with microfiber cloth to deepen the shine. It is fun to see what the polished bowl looks like with the polished black, saddle vulcanite stem was beautiful. This Danish Sovereign Made in Denmark 64 Freehand is nice looking and the pipe feels great in my hand. It is light and well balanced. Have a look at it with the photos below. The dimensions are Length: 5 ½ inches, Height: 2 inches, Outside diameter of the bowl: 1 ¾ inches long, Chamber diameter: 7/8 of an inch. The weight of the pipe is 1.83 ounces/52 grams. It is a beautiful pipe and one that I will be putting in the Danish Pipemaker Section on the rebornpipes store. Thanks for walking through the cleanup with me as I worked over this pipe.
As always, I encourage your questions and comments as you read the blog. Thanks to each of you who are reading this blog. Remember we are not pipe owners; we are pipe men and women who hold our pipes in trust until they pass on into the trust of those who follow us. 


