Tag Archives: buffing

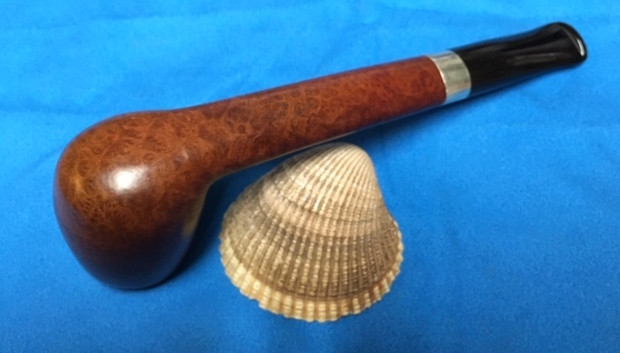
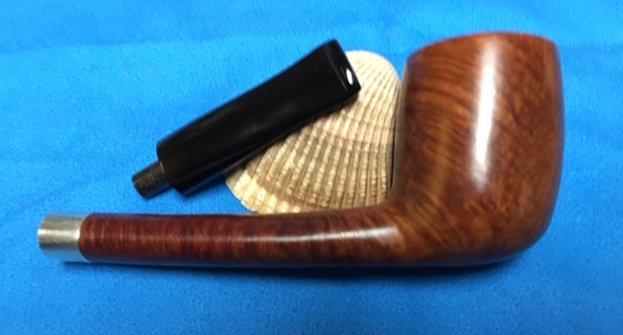
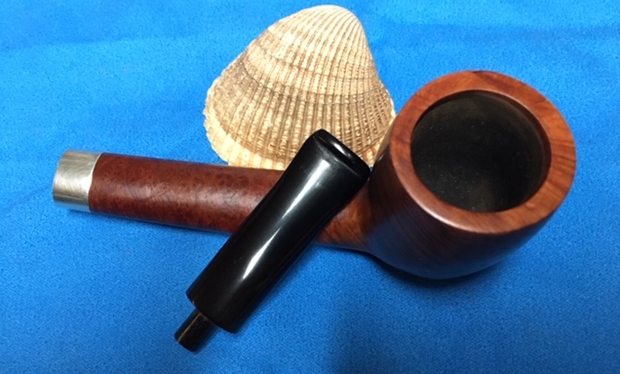
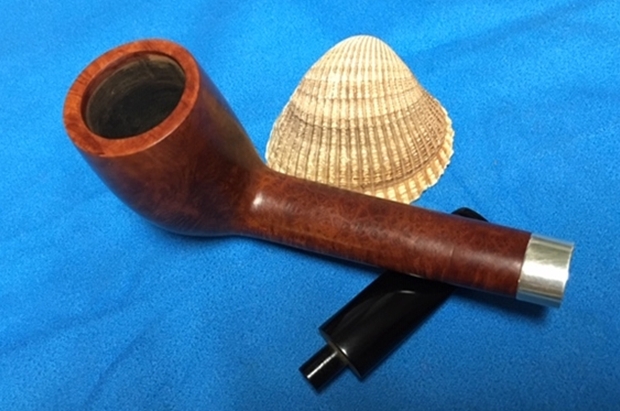
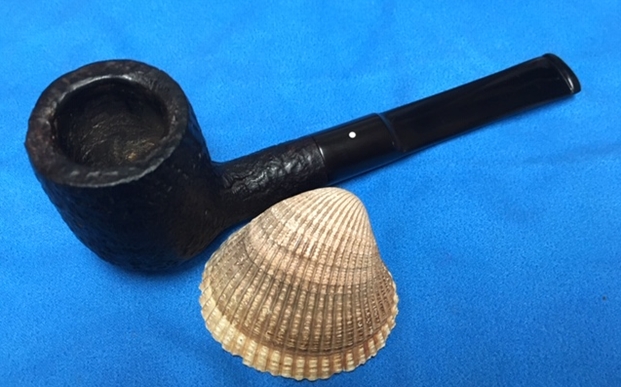
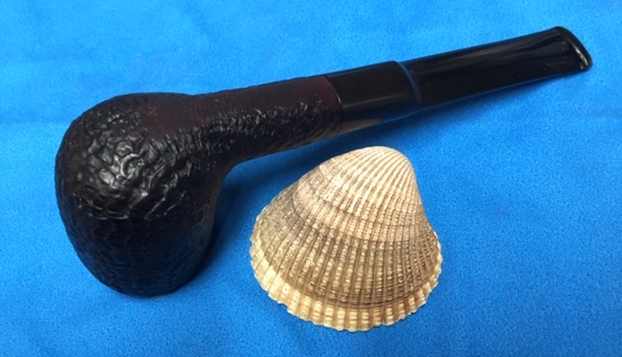
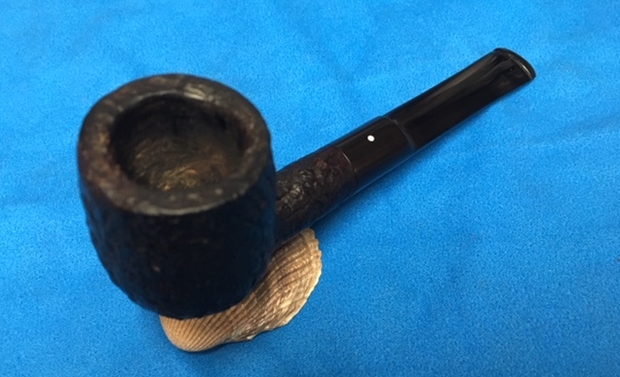
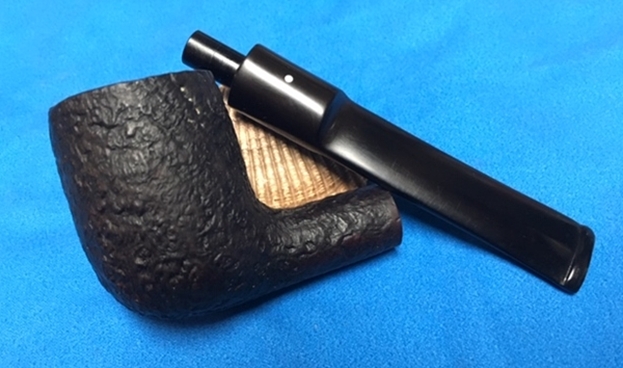
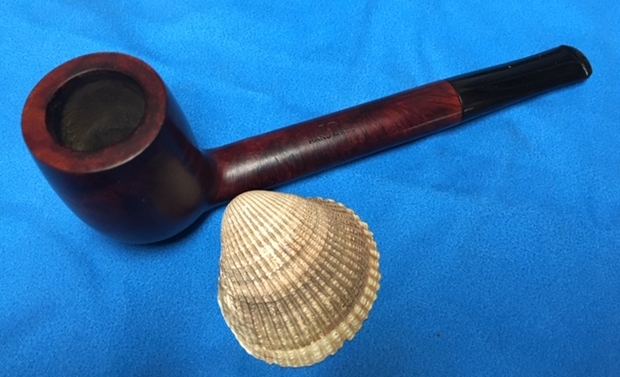
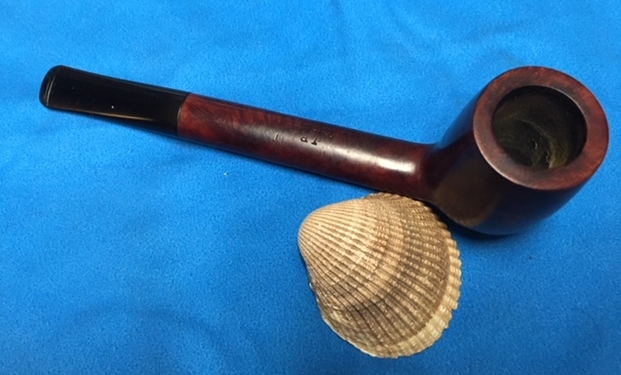
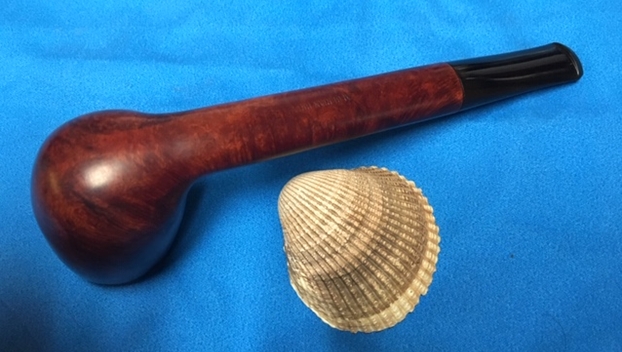
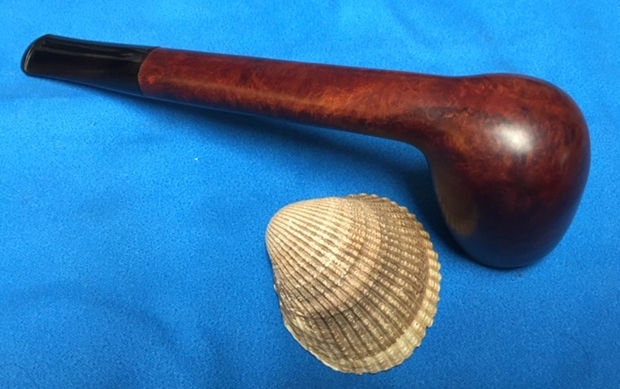
Removing an annoying whistle from a Handmade Canadian by Bill Lator


Blog by Steve Laug

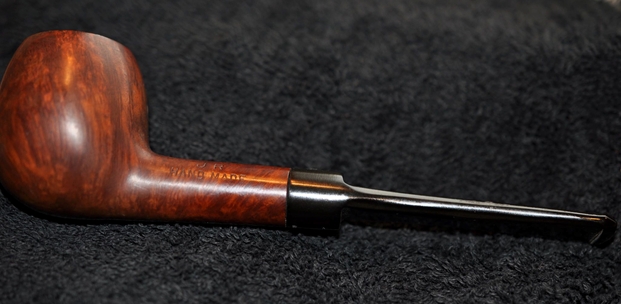
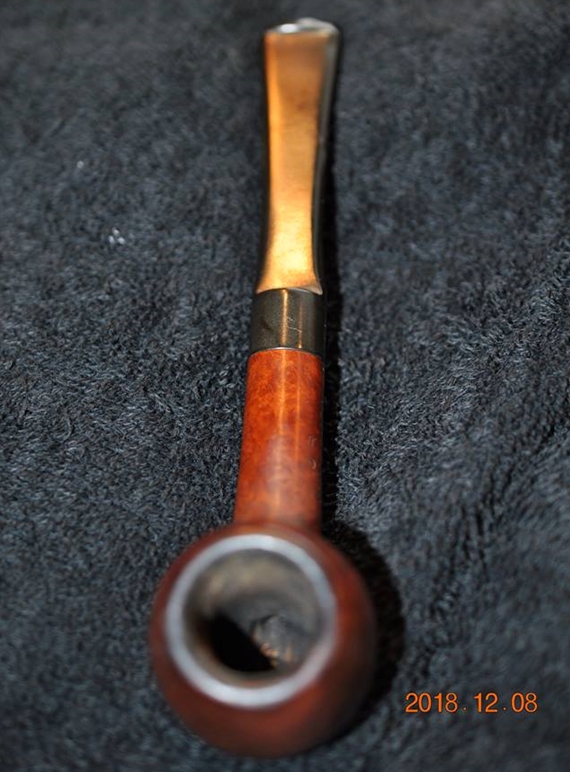
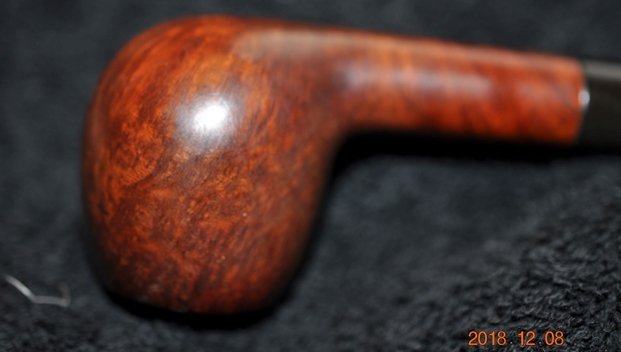
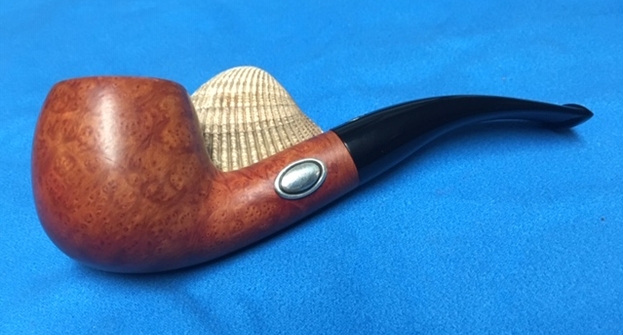
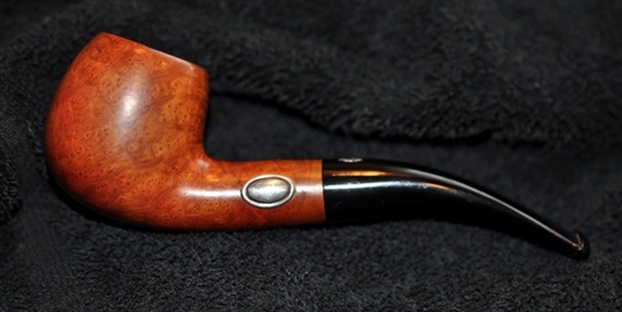
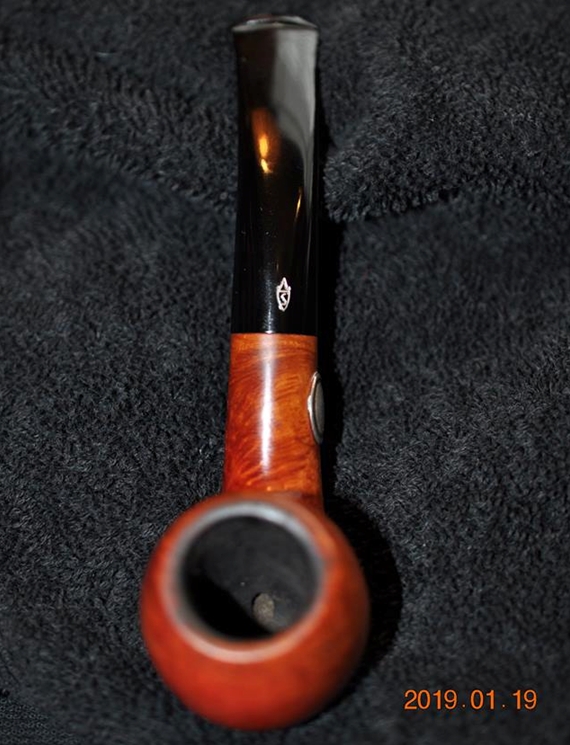
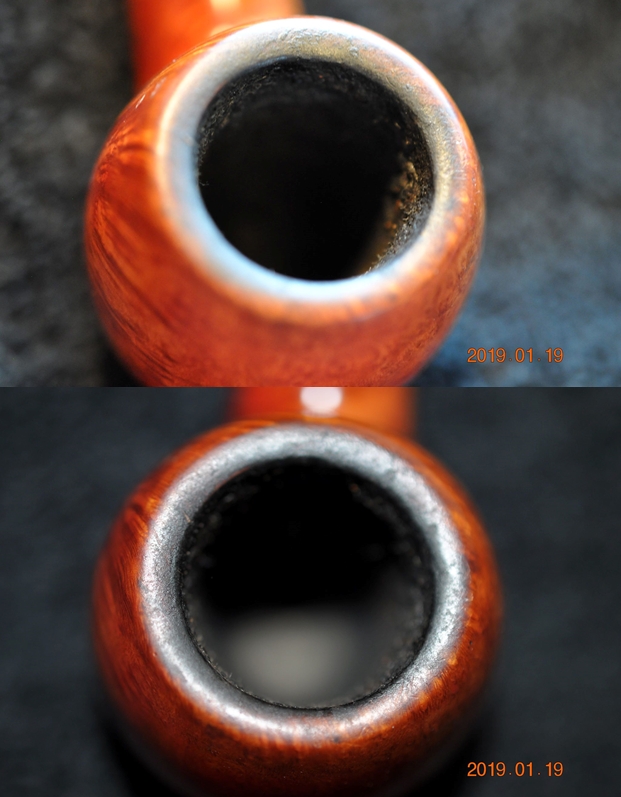
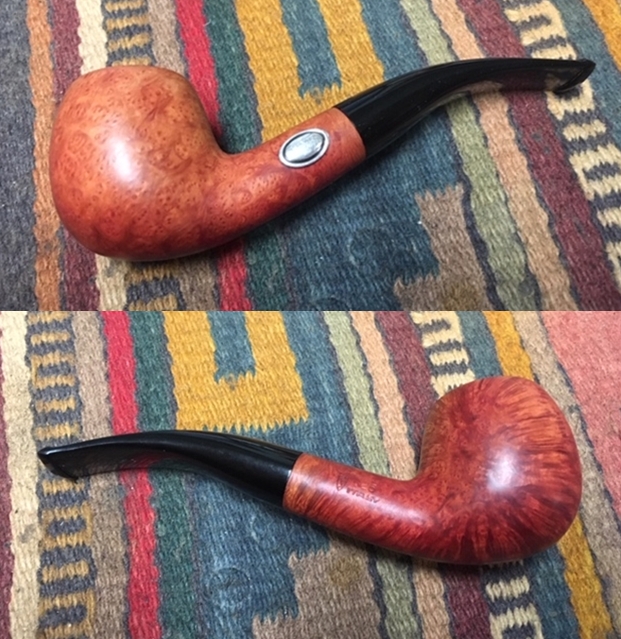
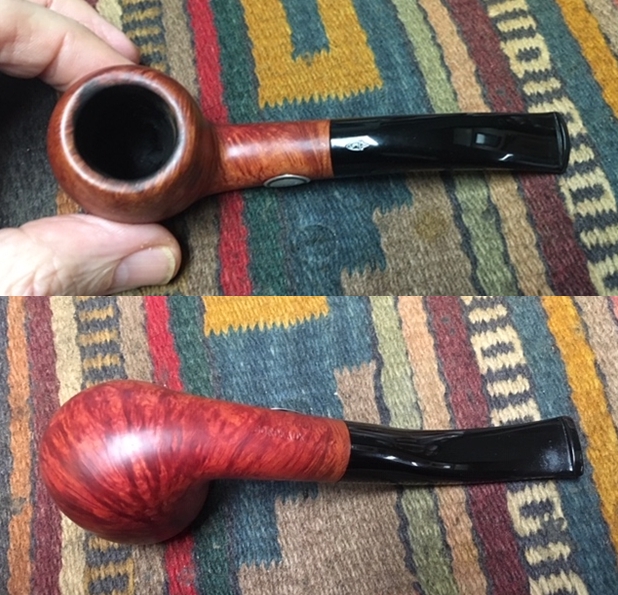
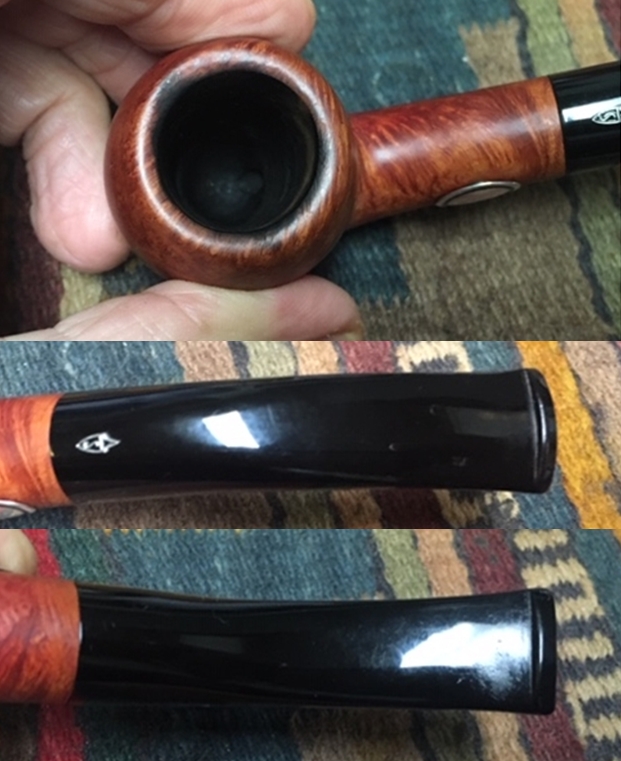
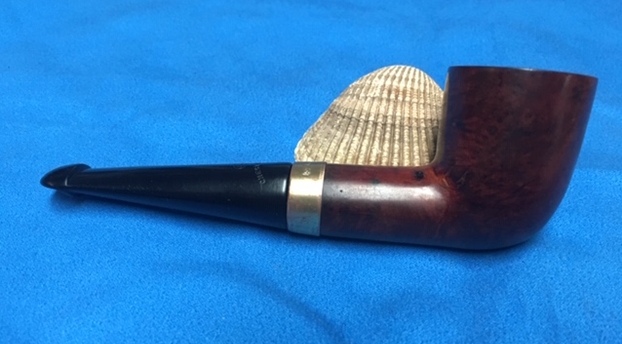
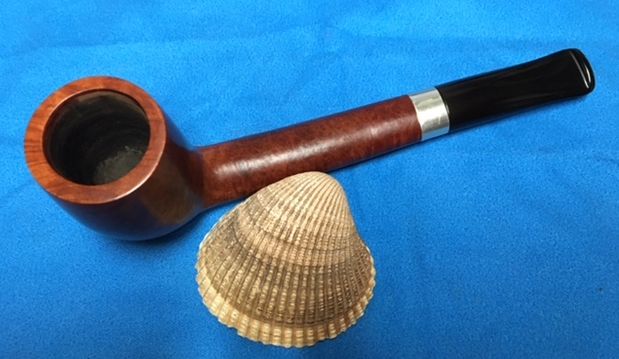
A fellow Vancouver Pipeman named Alex has been keeping me busy with working on the pipes he is picking up. He is selling quite a few of his pipes on the rebornpipes store right now so that he can change the direction of his collection. He is currently picking up a lot of interesting American and English made pipes. One of those is this Canadian that is engraved on the underside of the shank and reads as follows: Handmade Canadian by Bill Lator. It is a nice piece but has some unique features that are visible in the photos that follow. It had a Sterling Silver decorative band (no cracks or damage to the shank). The shank ahead of the band has a definite curve to it… to me it made the pipe interesting. There was also a cant to the bowl with the backside of the bowl more angled. The rim top has some damage that has been cleaned up and the backside of the rim is thinner than the rest of the bowl. The bowl is clean and quite pristine. The stem did not fit well in the shank and had a definite whistle when you drew air through it. I took some close-up photos of the rim to show the condition of the rim top and the inner and outer edge of the bowl. The rim top had some dents and damage to it and the inner edge was thinner at the back of the bowl. The outer edge had a few nicks and dents in it. The stem was in excellent condition though the fit of the stem to the band was off in that the stem circumference was bigger than that of the inside of the band keeping the stem from seating properly in the shank. The silver band is engraved Sterling Silver on the underside.The engraving on the underside of the shank is shown in the photo below. It is also engraved on the left side of the shank with the name of the individual for whom the pipe had been made. It is worn but I can make out “Made For” and under that is the name Keith R. Westerberg (?) at least that is what it looks like. It is faintly etched but the first part is more readable than the last name.When Alex dropped it off I asked him to do a bit of research on the brand and see what he could find out about the pipemaker and the brand. He said he would and over the next couple of days sent me several emails with information that he had found out about the pipe.
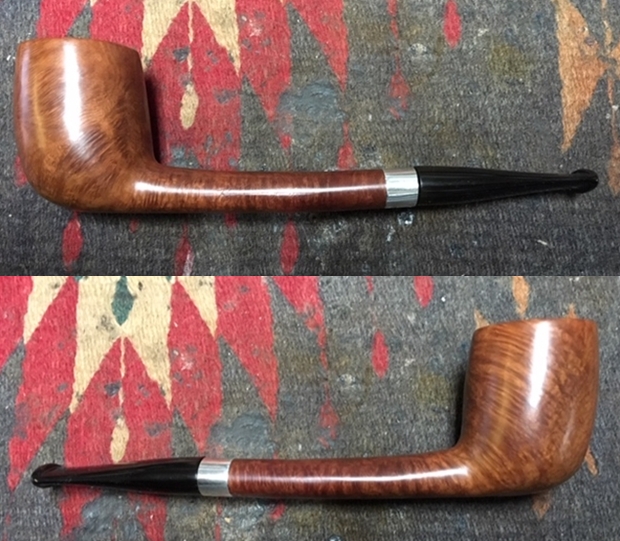
The first email was the description given of the pipe on the SATX Pipes site – the company he purchased it from. They gave a pretty detailed description of the pipe and the stamping on the pipe. He included a photo of the pipe along with the description.

This is a very rare hand made Canadian by Bill Lator. In addition, it bears the customer’s name on it that it was commissioned for. Bill Lator was a pipe maker from Indiana who operated two small pipe shops with his family.

This particular Lator is in fine shape. Stem is shiny black and free from any chatter. Beautiful grain and color is offset by a sterling silver band. This is a non-filtered pipe. Pipe has been sanitized, polished and waxed, and comes ready to smoke. Pipe Dimensions: Length Overall: 6 1/8″ Height Overall: 1 3/4″ Width Overall: 1 1/4″ Chamber Width: 7/8″ Chamber Depth: 1 5/8″ Weight: 1.1 ozAlex added a personal note with the description and reflected that though the description says…it bears a customer’s name, but I didn’t notice that. All I saw was “Handmade Canadian by Bill Lator”.

Alex also sent along picture of a Magazine cover showing …Bing with a BL Canadian on the cover of a magazine.He also included an excerpt from a local newspaper article about the Lators from 1976:

Pipemaking is a family affair for the Bill Lator family. The family owns and operates “The Pipemaker,” 109 N. Broad. Father Bill, Sr. and all three sons, Paul, 28, Bill, Jr., 20 and Kurt, 14 have taken up the rare trade of pipemaking. According to Lator, there are only about 20 pipemakers in the United States. “And three of them are in Griffith,” he quipped. Lator said his pipe making started as a hobby, “a way to relax after a busy day as an executive.” Lator also began doing extensive research into pipe making going through a number of west coast libraries and learning everything he could. About a year ago, his friends started suggesting he open a pipe shop and after more urging by his son Paul, Lator moved to Griffith. The fame of his handmade briar pipes combined with the skills of his wife, Hellen, in blending pipe tobacco made the shop an instant success. Lator said his oldest son turns out artistic pipes, “he is the artist in the family-Son, Bill is the “perfectionist.” His creations have a machined perfection according to his father, “which appeals to certain customers.” The youngest, Kurt, is still an apprentice, learning the trade of pipemaking with the discards and making tampers. Mrs. Lator has gained a reputation as a master tobacco blender.

Alex sent a follow-up email and included a paragraph from Bill Lator’s obituary: “Bill was very artistic and in 1973 found he could make beautiful smoking pipes carved of briar. In 1975 he along with his 2 sons, Paul and Bill, opened The Pipemaker Pipe and Tobacco shop in Griffith, Indiana. He loved that shop and all the customers. He made a very successful business that lasted 13 years. In 1986 he decided it was time for him to retire…”

From this I know that the pipe came from Bill Lator’s Griffith, Indiana Shop – the Pipemaker Pipe and Tobacco Shop. It had been made between 1975 and 1986 when Bill retired.

Now it was time to address three specific issues that I saw with the pipe.

  1. There was a distinct whistle when you drew on the pipe to pull air from the bowl to the button.
  2. The stem did not seat well in the shank and there was a gap in between the end of the shank and the stem when it was in place.
  3. The bowl was slightly out of round and the back wall was thinner than the rest of the bowl.

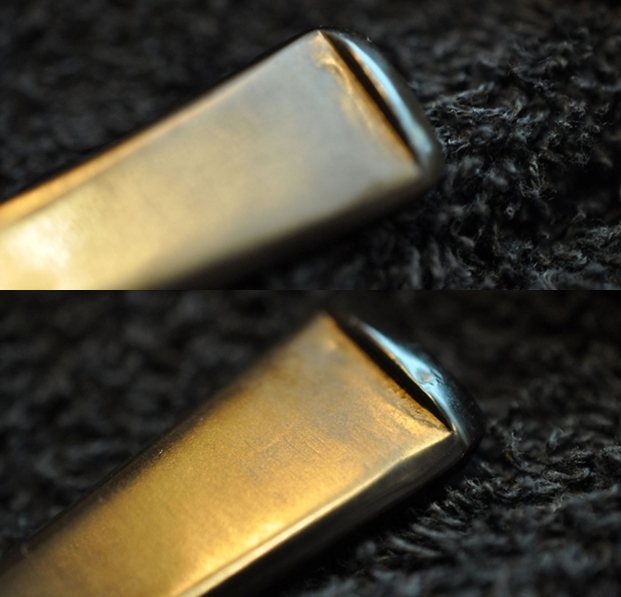
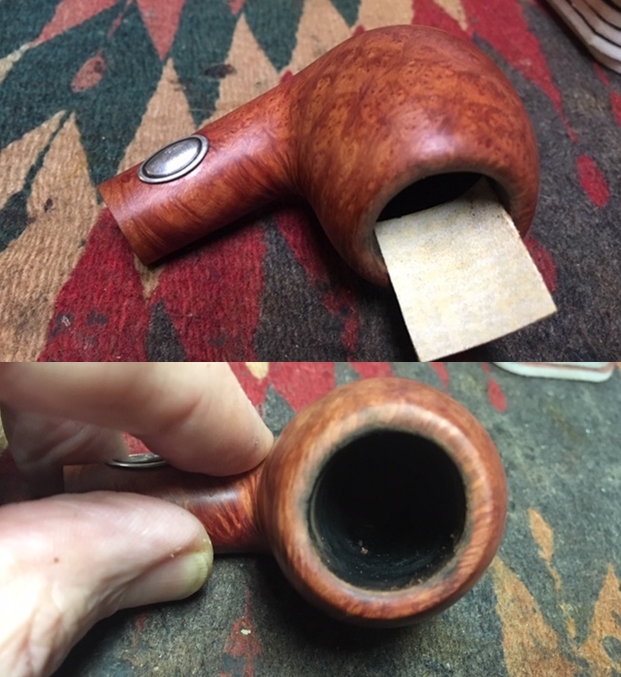
I decided to deal with the whistle in the airway first. I took the stem off and drew air through the shank. It was a clean and open draw with no whistle. With that test I knew that the problem was not in the shank. I turned to the stem and blew air through the tenon and out the slot. The whistle was loud and distinct. I shined a light through the tenon so see if there were any obstructions on the walls of the airway. That is often the cause of the noise. There can be debris left behind by the drilling of the airway. I could not see anything from the tenon end. I shined the light in the slot end and there I found the issue. The slot was deep and T shaped rather than Y shaped. This made the air whistle as it was drawn into the slot. I used a flat and a round needle file to reshape the airway in the slot to a Y shape. In my experience this shape makes the transition of the air from the bowl to the mouth a straight smooth flow with no interruptions.I cleaned up the slot with a folded piece of 220 grit sandpaper to smooth out the edges of and leave it free of debris.
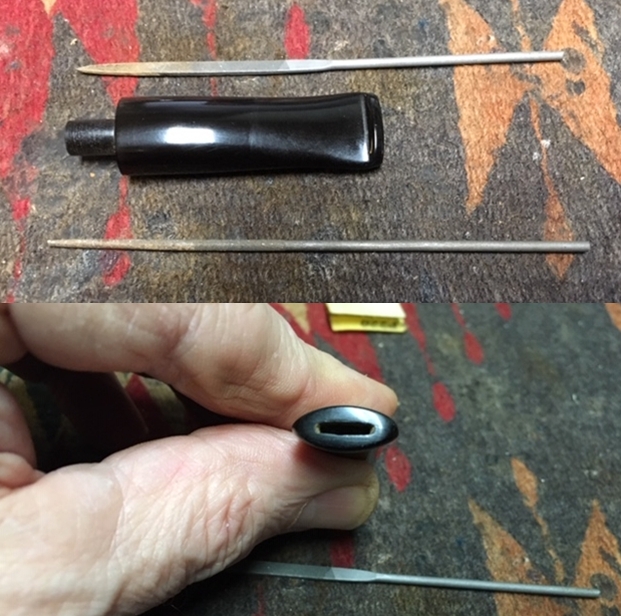
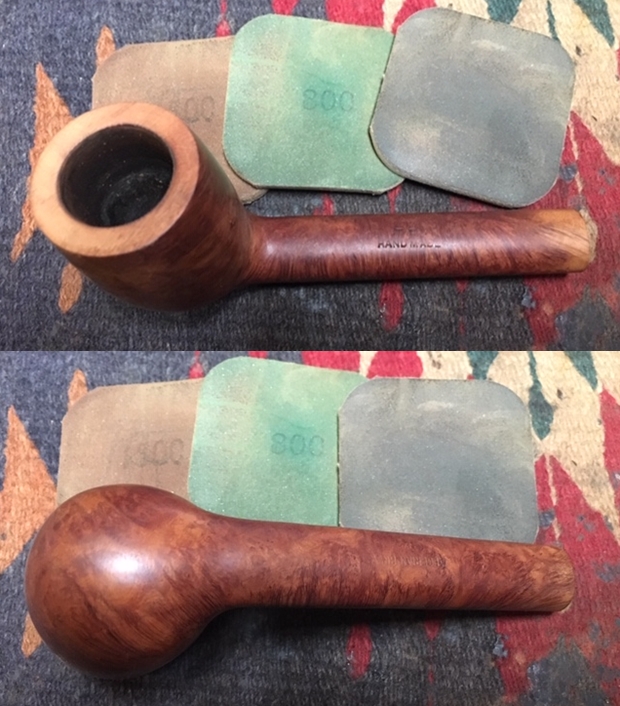
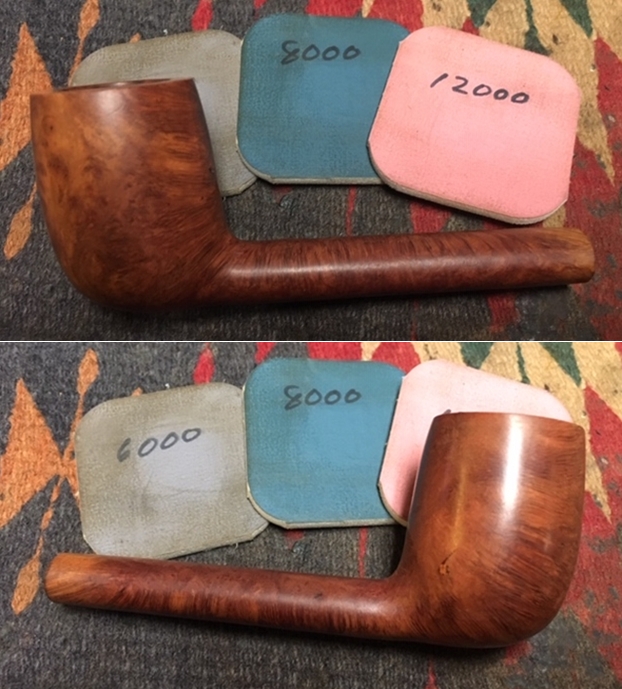
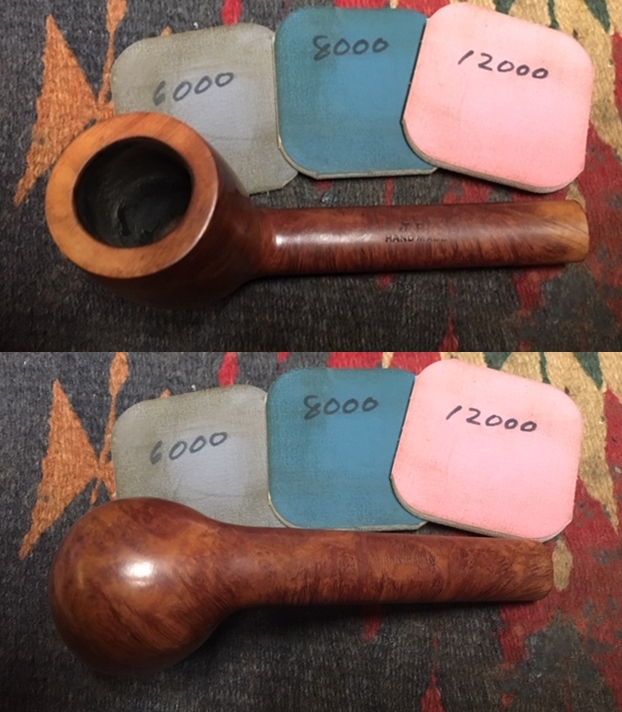
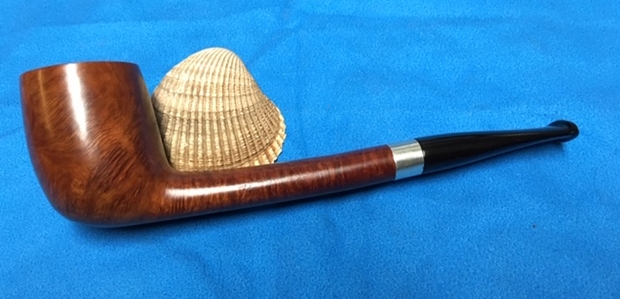
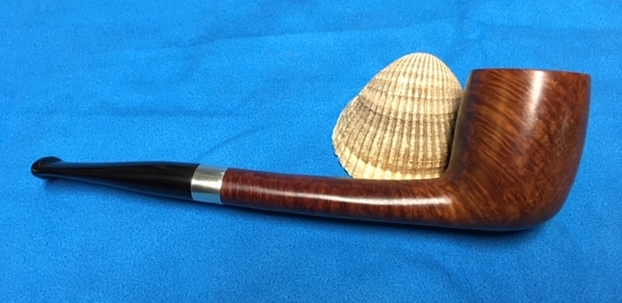
With the airway in the stem cleaned up and the whistling taken care of I turn ed to deal with the fit of the tenon in the shank. I used a sharp pen knife to carve a bevel in the shank face. The initial beveling was rough but when I tried the stem in the shank the fit was snug and there was no gap between the shank face and the face of the stem. I sanded the bevel with a folded piece of 220 grit sandpaper to smooth it out. The second photo shows  the first sanding of the bevel. The third photo shows the final sanding of the bevel smoothing out rough edges. The final photo shows the finished bevel. I stained it to match the rest of the pipe using a Maple stain pen. The second issue was solved.Now it was time to address the third issue – the damage to the rim top and the bowl edges. After measuring the slop of the walls of the bowl on the front, the sides and back I could see that the thinness was primarily an issue with the top of the bowl. To deal with that I decided to lightly top the bowl with 220 grit sandpaper on a topping board. I removed the damage to the top of the rim and in doing so was able to reduce the thinness on the backside of the rim. I did not need to take much off of the rim top to effect this change and I was happy with the results. I polished the rim top with micromesh sanding pads – wet sanding with 1500-2400 grit pads and dry sanding with 3200-12000 grit pads. I wiped the rim down with a damp cloth after each sanding pad. The rim top looked much better than when I started the process. I restained the rim top and edges with a Maple stain pen. I buffed the bowl and stem with Blue Diamond on the buffing wheel to polish the pipe and then gave it multiple coats of carnauba wax. I buffed it with a clean buffing pad to raise the shine and hand buffed it with soft microfibre cloth to deepen the shine. The photos of the finished pipe are shown below. It is finish and the whistle is gone, the stem fits better against the shank and the rim top looks significantly better. I look forward to hearing what Alex thinks of his Lator pipe now… it is a beauty.
ADDENDUM

Yesterday (16 August 2019) Michele, Bill Lator’s daughter left an amazing comment on this blog about her Dad. I am highlighting that message because in the follow up to it she sent some photos of her Dad and the Pipe Shop in Griffith that I am including below.

I am Michele Lator-Murray, Bill Lator is my Dad. He is missed by all of us and so proud to see this article. I have forwarded it to our Mom. Our Brother Billy has passed also. Paul and Kurt are alive and well. My son has taken interest in his heritage and has a small collection of Dad’s Pipes.Thanks for the memories.

The photos include a picture of her Dad, Bill Lator by himself, with her Mom, a photo of the day Michele gave her son his first pipe that she found of her Dad’s online, the Pipemaker Pipe and Tobacco Shop advertisement from a Purdue Student paper and the backside of a book of matches.

Thanks so much Michele for send us these photos. It is always great to have a photo of the pipe man himself and some of the memorabilia.
Restoring a Rare, Limited Edition Brigham X-4


Blog by Steve Laug

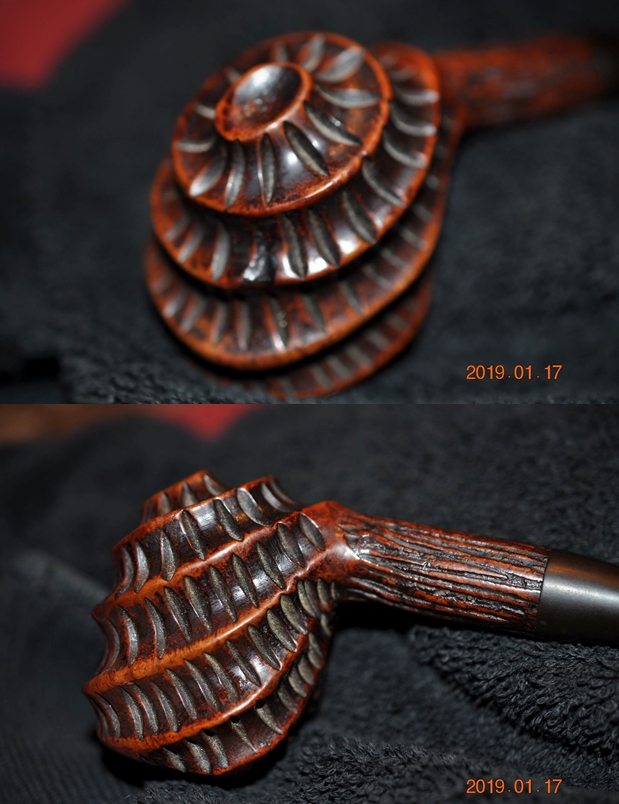
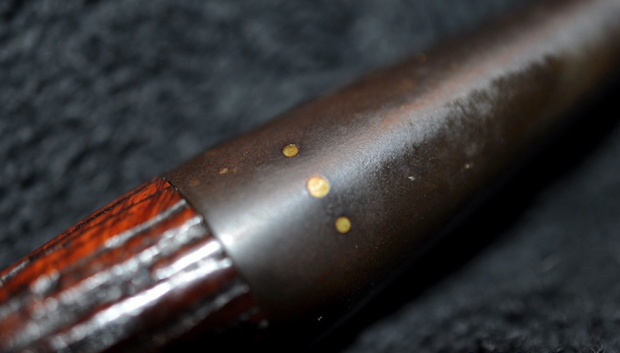
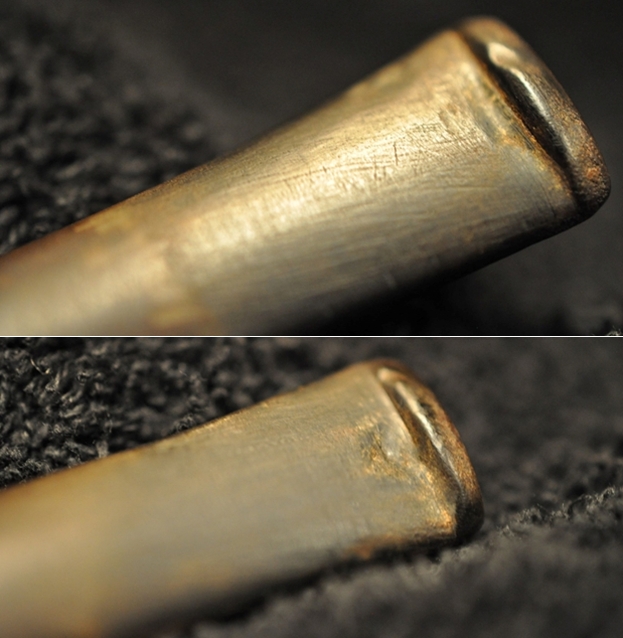
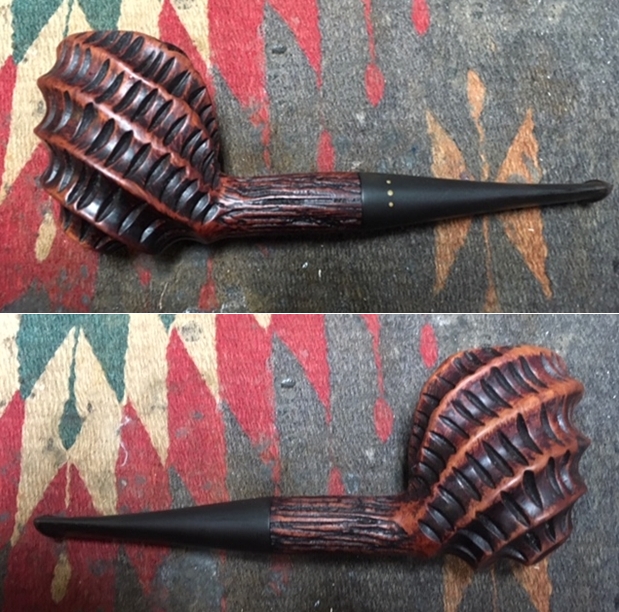
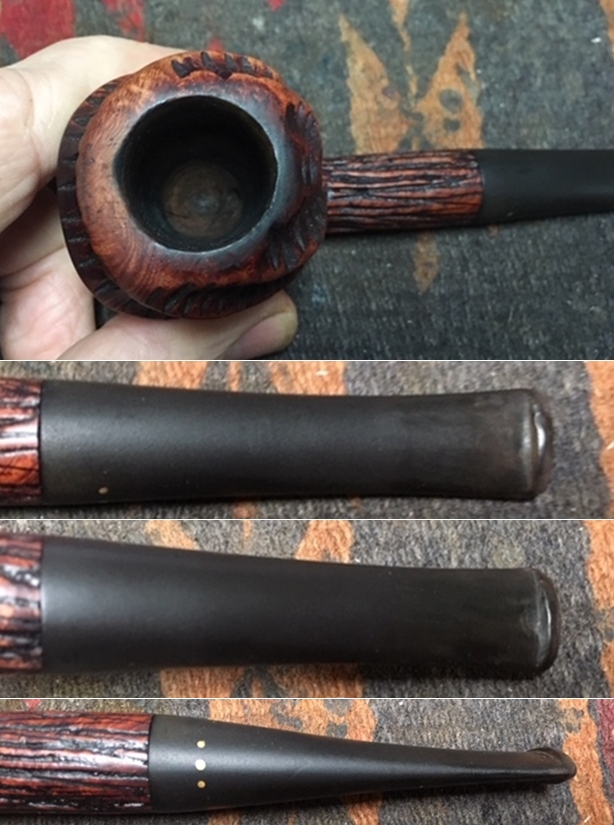
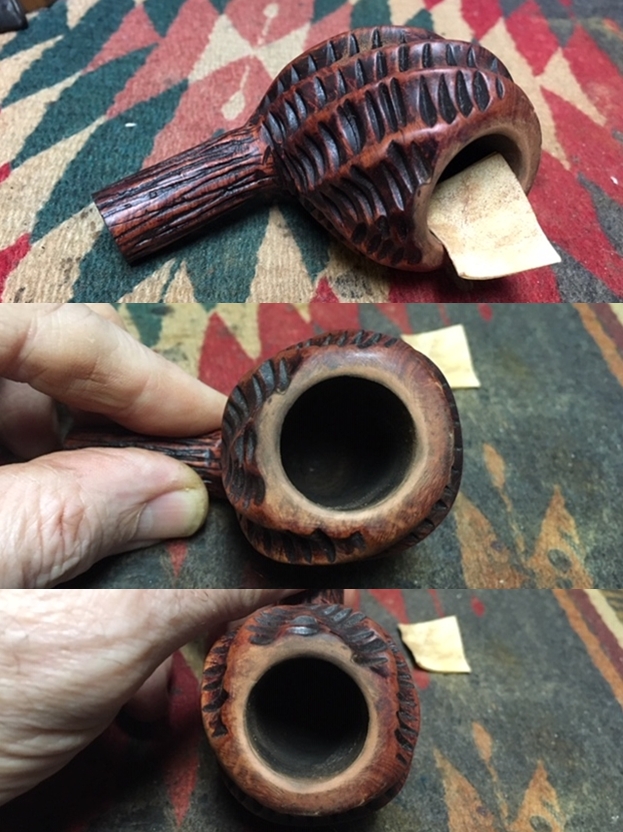
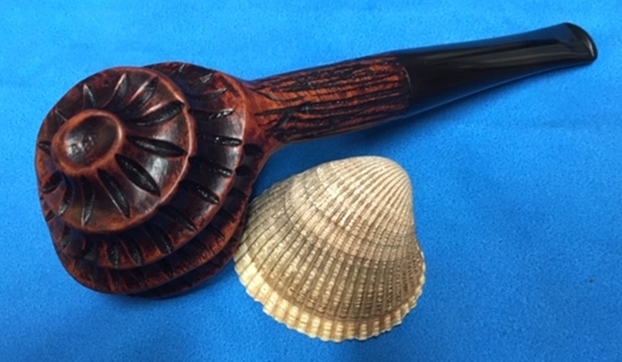
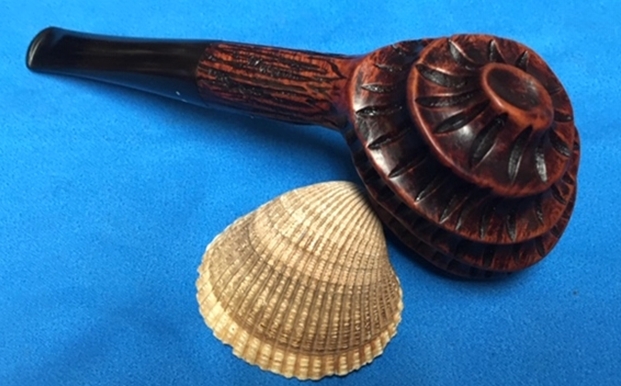
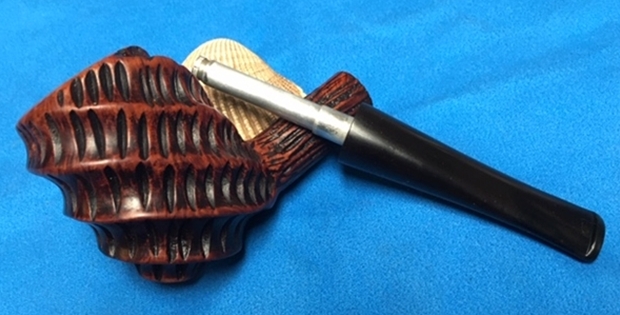
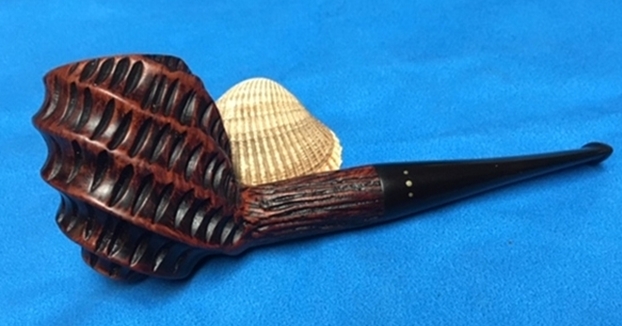
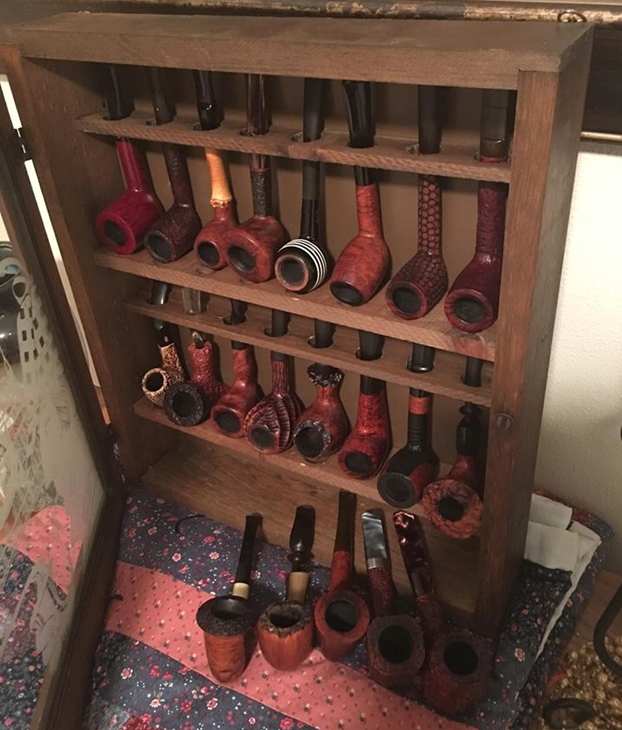
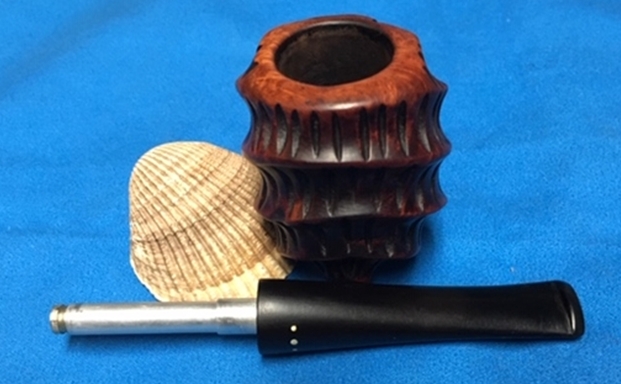
The next pipe on the work table is a relatively new acquisition from a collection Jeff and I purchased from Michigan. It included a pipe cabinet and 21 pipes that is pictured below. There were some nice pipes in that collection and some that I have never seen before. This pipe was so unique that is I just had to tackle it next. It is shown in the photo of the rack above – the fourth pipe from the left side. Jeff showed me photos of the pipe on Messenger and I was intrigued. I had really no idea who had made it and I could not see the shank or stem markings to help with the identification. Jeff looked it over and could see no stamping on the shank that would help us out but it was undeniably unique. The carving reminded me of nautilus shell and Dal said it reminded him of a scorpion…nothing quite captured and accurate description of the shape and the carving on this pipe. Jeff took photos of the pipe before he started his cleanup process. I have included these below.  The next photo is a close up of the bowl. You can see the thick cake in the bowl and heavy overflow of lava on the rim top. You can also see the tars and grime in some of the carvings toward the top of the bowl. It was a dirty pipe and obviously it was someone’s favourite pipe because it is so dirty and caked.He also took photos of the side and bottom of the bowl to highlight the unique carving on the bowl sides. The shank itself had more a striped carving almost bark like that ran the length of the shank to the stem.The photos finally gave me my first clue about the pipe. The three vertical dots on the left side of the stem made me wonder if it was a Brigham. Usually Brigham will use those dots to signify particular lines of their pipes but I had never seen a bowl like this in all the years that I have been working on pipes so I had to wonder if it was on or if it had been a cannibalized stem that had been put into service on some other bowl. I would only know once I had it in hand and saw what it looked like off the pipe.The stem itself had a lot of deep scratches on the surface that looked like someone had scraped away the calcification that can build up under a rubber Softee bit. There were tooth marks on the stem surface on both sides near the button and some wear and tooth marks on the button itself. I have started to mention in the last few blogs that Jeff and I have established a habitual pattern that we both follow when we work on pipes. I include it here so you have a sense of that pattern. Jeff reamed the bowl with a PipNet pipe reamer and followed up with a Savinelli Fitsall pipe knife to remove the cake. He scrubbed out the mortise and the airway in the shank and the stem with alcohol, cotton swabs and pipe cleaners. He scrubbed the exterior of the bowl, rim, shank and stem with a tooth brush and Murphy’s Oil Soap to remove the oils and tars on the rim and the grime on the finish of the bowl. He rinsed it under running water. He dried it off with a soft cloth. He was able to remove the lava build up on the rim top and you could see the damage to the flat surface of the rim and the inner edge on the right side and toward the front of the bowl. I took photos of the pipe to show its condition before I started my work on it. I took close up photos of the bowl and rim top as well as the stem. You can see the condition of the rim top and bowl in the first photo. Jeff was able to remove all of the tar and oils and all that remained was some darkening toward back of the rim top. The inner edge of bowl was slightly damaged toward the front side. The vulcanite stem had tooth chatter and some tooth marks on the top and underside of the stem near and on the button surface. Jeff had soaked it in Before & After Deoxidizer and was able to get the stem really pretty clean. The tooth marks are quite prominent and will need to be addressed on both the stem surface and button. The three vertical brass dots on the side of the stem really stood out now that the stem was clean.At this point I took that pipe apart and I was pretty sure I was dealing with a very unusual Brigham pipe. I was not sure what it was or what era or even the stamping because even though I thought I saw some faint stamping Brigham over Made in Canada on the underside of the shank I was not sure because the rustication went right through the stamping. There was a number on the heel of the bowl in the cone bottom that was either 688 or 889 depending on the how the pipe was held. I really was mystified so I did what I usually do when I am dealing with a Brigham – I go to my resident expert in Eastern Canada. I wrote Charles Lemon of Dad’s Pipes a quick email to see what he could tell me. I am including his response and the copy of the Brigham pamphlet that he included with his email.

Hi Steve. I think you have a real find there!

I was out when your email came through but dug into my Brigham material when I got home. I think what you’ve got is a Brigham X4 – one of their “experimental” shapes from the 60s.

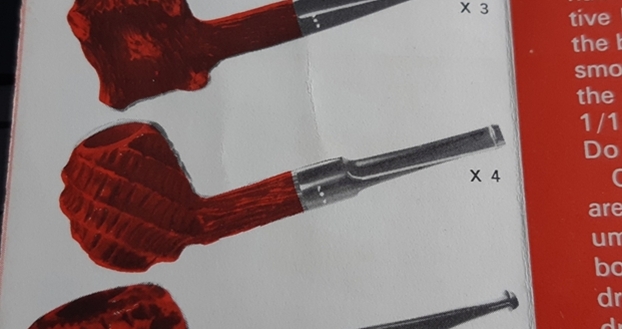
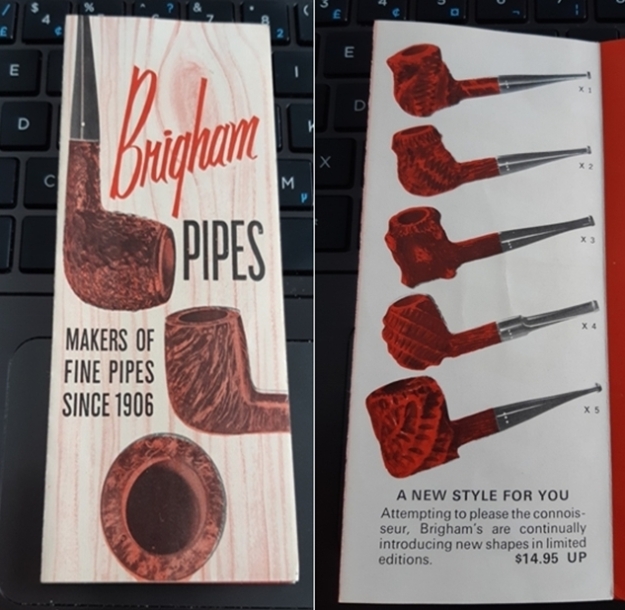
I’ve attached a close up pic from the Brigham brochure titled “Brigham Pipes – Makers of Fine Pipes Since 1906”, published circa 1960s. Same nautilus carving pattern, same stem. All the X shapes in the brochure are marked with the 3-dot vertical pattern.

These originally sold for the princely sum of $14.95 & Up! 😁

This is the first time I’ve seen an example of the X shapes outside of a brochure. They are very rare, limited edition pipes made in small numbers. Kind if Brigham’s way of testing new designs on the market…

Is it yours? If it’s for sale I’d love to add it to my collection.   — Charles

The brochure that Charles included is below. The blow up of the pipe he is referring to is in the first photo. The only difference with the one in my hands is a tapered rather than a saddle stem. So it appears I am dealing with a bit of a rare, limited edition Brigham X4 – one of their “experimental” shapes from the 60s. I wondered when I first took it apart if that was not the case but it is always good to be able to ask someone who knows more about a particular brand than I do. Thanks Charles. We will see if I let this one go.

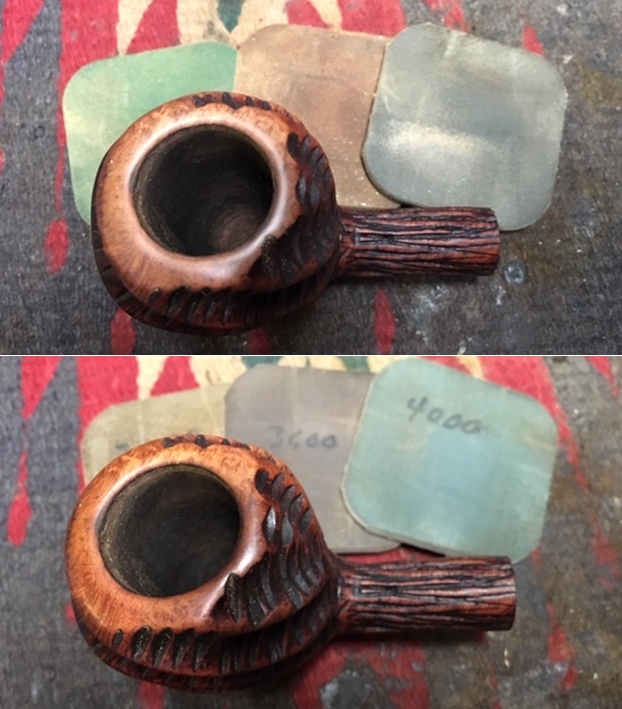
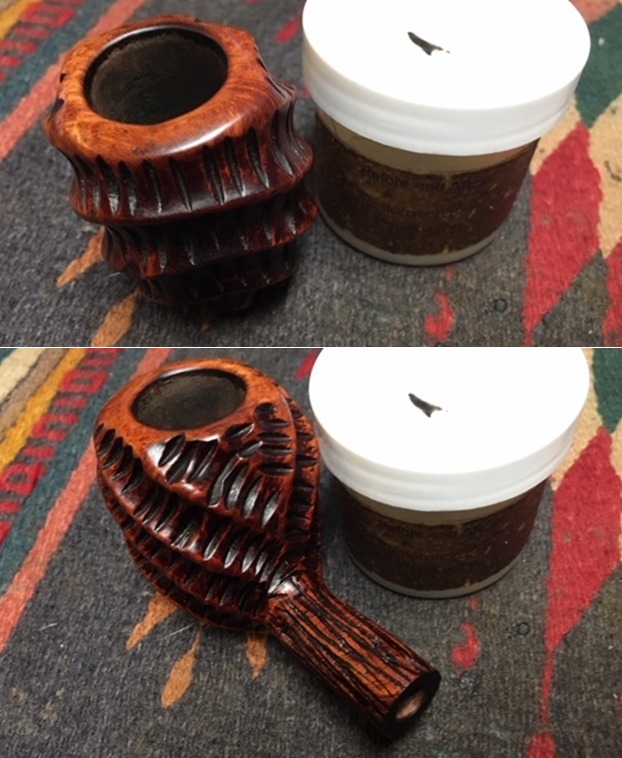
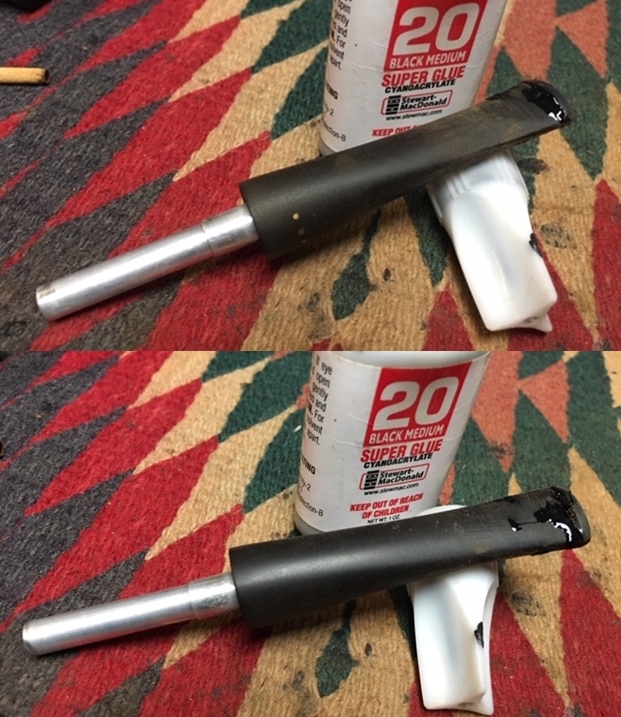
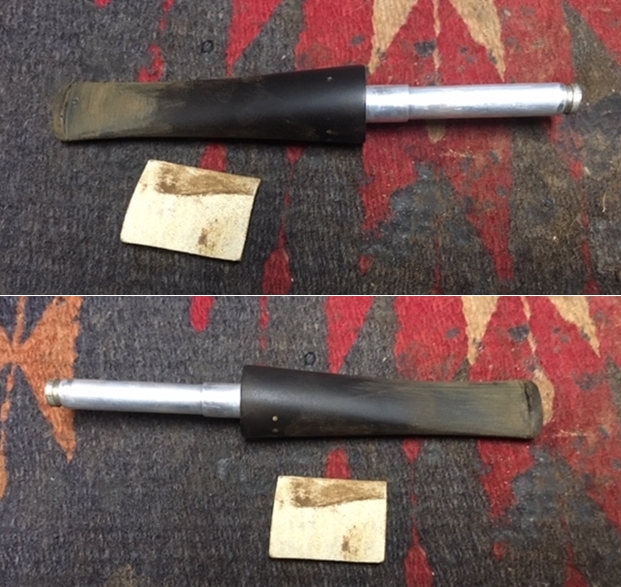
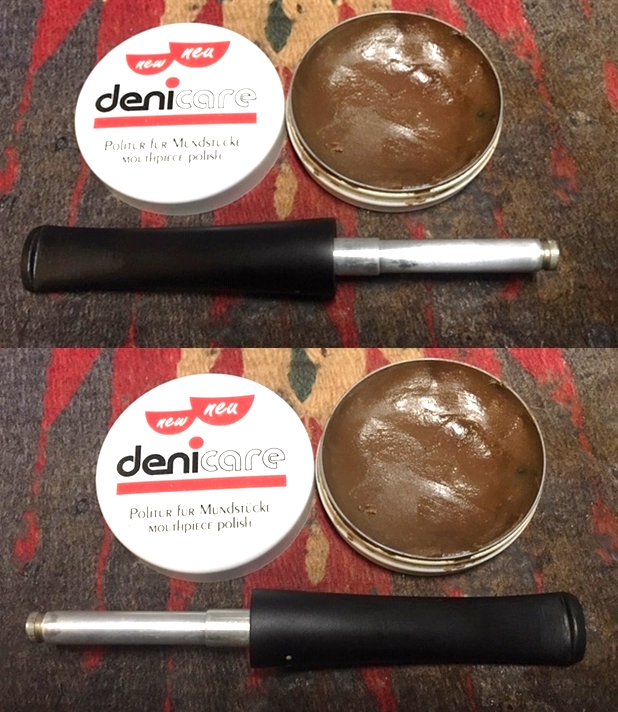
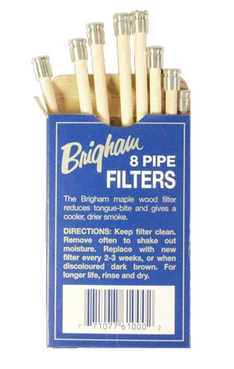
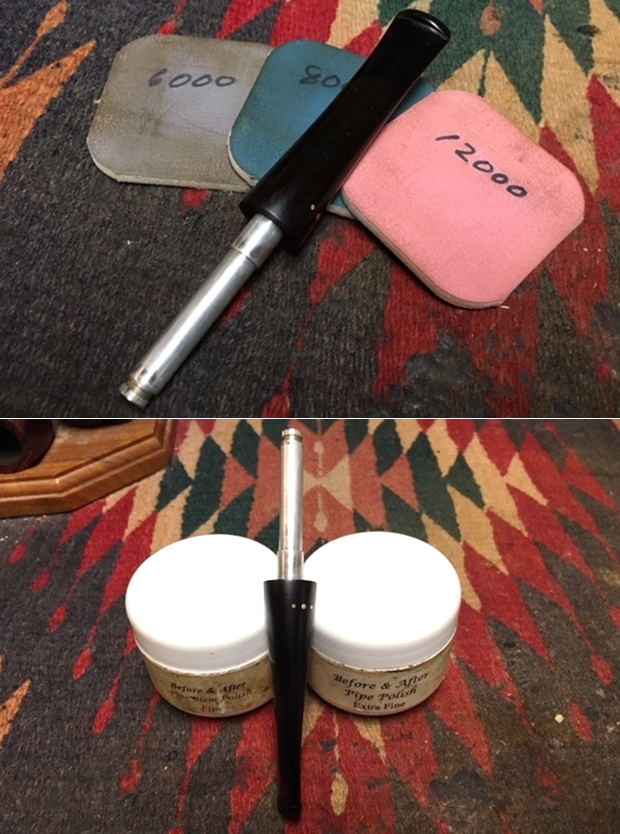
I decided to address the damage to the rim top and the inner edge of the bowl first. I used a folded piece of 220 grit sandpaper give the inner edge a light bevel to minimize the damage to the inner edge of the rim. I also lightly sanded the darkened areas on the back side of the rim top.I polished the rim top and edge with micromesh sanding pads – wet sanding with 1500-2400 grit pads and dry sanding with 3200-12000 grit pads. I wiped the rim off after each sanding pad to remove the dust. The damage on the rim is pretty much invisible after polishing and the rim top really looked good. I worked some Before & After Restoration Balm into the rusticated and the smooth surface of the briar with my fingertips to clean, enliven and protect it. It took some time to really get it into the grooves and valleys of the rustication but I was able to work it in. I used a cotton swab to work it into the smaller divots in each ring around the bowl. I let the balm sit for a little while and then buffed with a cotton cloth to raise the shine. The following photos show the bowl at this point in the restoration process. The reworked rim top looks really good and matches the colour of the rest of the pipe. I am very happy with the results. Before calling it a night I cleaned out the tooth marks and reshaped the button on both sides of the stem. I wiped them down with alcohol on a cotton swab. I filled them in with Black Super Glue and set the stem aside to let the repairs cure overnight. There was morning and there was evening and it was good!The next morning after the repairs had cured I sanded the stem surface with 220 grit sandpaper to blend the surface of the repairs into the stem. I further reshaped the button with a needle file to sharpen the edges.I polished the stem with Denicare Mouthpiece Polish to remove some of the scratches. The gritty substance that makes up this polish makes it work really well as an intermediary step after sanding out the repairs and tooth chatter. (I used it because I have three small tins of it to go through before it dries out and is useless.)Some of you might have notice the Brigham Hard Maple Filter in the long aluminum tenon in all of the above photos and the ones that follow. I forgot to mention that I put one in the tenon when I worked on the stem to protect the aluminum from accidental damage. The Maple filter is a hollow tube made of hard maple that fits in the metal tenon. The metal tip is at the end of the tenon and actually extends all the way down the shank and sits against the opening of the airway into the bowl. It thus provides a distillator to pick up the moisture from a smoke while allowing uninhibited airflow through the pipe. One benefit of the design is that you can easily slide a pipe cleaner down the stem and into the bowl through the wooden filter/distillator tube. It is a pretty unique and effective design and one that is worth a try if you have never smoked one.

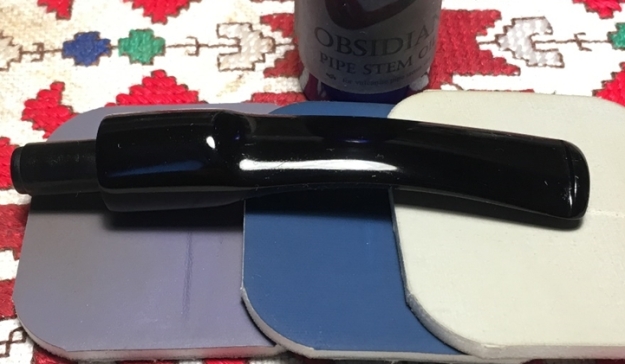
Back to the restoration… I polished the vulcanite stem with micromesh sanding pads – wet sanding with 1500-2400 grit sanding pads and dry sanding it with 3200-12000 grit sanding pads. I wiped it down after each sanding pad with a damp cloth. I polished it with Before & After Pipe Stem Polish and wiped it down with a last coat of Obsidian Oil. I set it aside to let the oil dry. This is one of the most uniquely carved Brigham pipes that I have ever worked on and I have worked on many of them. The unique spiral rustication with slots in the spiral bands and the smooth rim top is really nicely. The striated, barklike rustication on the shank works well with the rest of the shape. I polished stem with Blue Diamond polish on the buffing wheel. I gave the bowl multiple coats of Conservator’s Wax and the stem multiple coats of carnauba wax. I buffed the pipe with a clean buffing pad to raise the shine. I hand buffed it with a microfiber cloth to deepen the shine. The pipe polished up pretty nicely. The spiral rustication and the smooth edges and rim top began to almost take on life with the buffing. The rich contrasting brown colour works well with the polished black vulcanite stem. The finished pipe has a rich look that is quite catching. Have a look at it with the photos below. The shape, finish and flow of the pipe and stem are very well done. The dimensions are Length: 6 inches, Height: 2 inches, Outside diameter of the bowl: 1 5/8 inches, Chamber diameter: 7/8 of an inch. I will be hanging on to this pipe for the time being but may well one day pass it on to Charles. Time will tell. Thanks for walking through the restoration with me as I worked over this unique Brigham X-4.

A Special Gift for Her Grandfather in the People’s Republic of China – A Sculpted Rose Billiard of Italy


Blog by Dal Stanton

You need to first hear the story then the restoration of the pipe will come. Let me first tell you about the granddaughter.

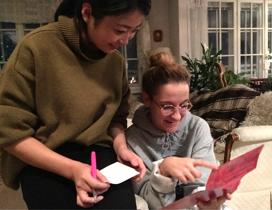
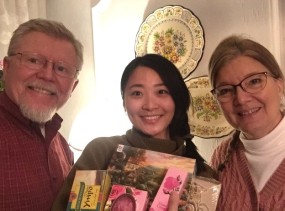
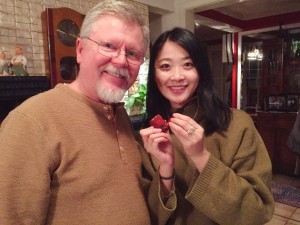
Chrystal, age 30, came to Bulgaria for two weeks from the People’s Republic of China.  My wife and I hosted her in our home.  She has a master’s degree and teaches in an English language department in a university near Beijing.  Her keen interest in the well-being of people was the catalyst in becoming aware of the issues of human trafficking and the devaluation and exploitation of women.  Through foreign acquaintances she has in her role as a teacher, she heard about Daughters of Bulgaria – the work here in Bulgaria seeking to help trafficked and sexually exploited women.

Cross cultural adventure – our Bulgarian friend Ellie, translating Bulgarian menu using English for Chrystal, so that Chrystal can call ordering Chinese in Mandarin, with the hope of surprising the Chinese restaurant worker who speaks Bulgarian and Chinese! It worked!

Chrystal’s aspirations to know and understand more about this issue both intrigued her and struck a chord in her own core experience that prompted her to throw caution to the wind and reach out to the Daughters of Bulgaria staff via email about coming to Bulgaria and to learn about the issue and what tangible things are being done to help women coming off streets and out of brothels.   Her email was received with surprise and question – someone from China desires to come to Bulgaria to learn from us!  In the communications with Chrystal that followed, her deep and sincere concern for people in general and in her home, China, was very evident.  She came to Bulgaria during her annual January break from teaching at the university.  We were amazed at how quickly her visa to enter Bulgaria was approved!

During her visit, we had the privilege of learning about the path of her life in China.  As Westerners, we were anxious to learn about Chinese culture and customs and we were also interested in her personal story.

She, like most Chinese women while growing up, personally experienced the effects of the enduring custom of valuing sons over daughters.  With China’s strict one child per family law to control population which recently changed to allowing two children, Chinese families were faced with pressures to have a son – which is the greater honor for the family in a culture where honor is profoundly important.

During the one child per family period, Chrystal’s

Serenaded at a restaurant in Sophia, Bulgarian style!

parents had a baby and it was a girl – the opposite of honor became Chrystal’s experience as she grew up with this subtle sense of shame.  She recounted remembering the acute feeling of self-guilt that she wasn’t a boy and her presence brought dishonor to her family – she wasn’t what her parents wanted.  Growing up, she understood that her parents had to settle for a girl.

To counteract this sense of having lesser value, Chrystal’s smile was pained while looking down recounting how she sought to excel in everything she did as she emerged from childhood into womanhood – trying especially to earn her father’s love and acceptance.  Her passion to excel did have its benefits. It propelled her growing up, in her studies and eventual appointment as a teacher in the university, being observed and appreciated by her supervisor in the professional and academic university environment.  Yet, Chrystal has discovered that even this accomplishment was not enough to reverse the underlying, unspoken sense that she did not measure up – that she would always be the daughter for which her parents had reluctantly settled.  Chrystal confided that this perhaps, is why she was so drawn to learn more about the Daughters of Bulgaria and the profound effects of devaluing of women resulting in human trafficking – it so resonated in her heart and to some extent, in her experience of feeling the impact of not being valued by others – even by those closest to you.

Even though this part of her story is ongoing and unfolding, Chrystal’s concern for others and her simple joy in living (she always seemed to be laughing and smiling!) confirmed to me that she had found a good place in her life – at her core.  The serendipitous trip to Bulgaria, of all things, revealed to me that she’s taking life as it comes and living to the fullest as she is able – growing as a person and seeking to help others in need.  How will she use what she is learning in Bulgaria in China?  She confessed with a smile, she doesn’t know exactly but she believes it will be used in some way that will be evident in time – like a seed planted in soil.

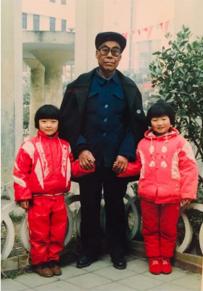
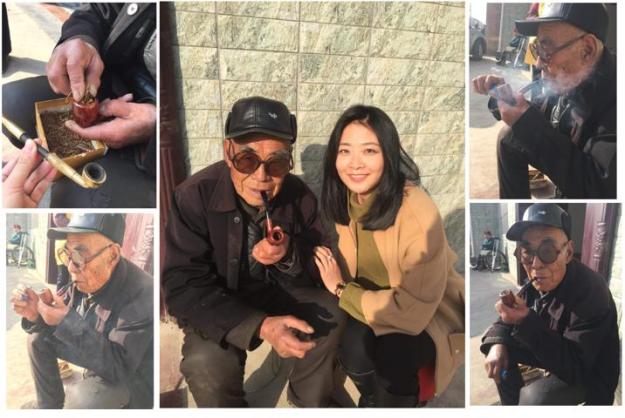
Chrystal with her Grandfather and cousin. Can you guess?

When Chrystal started asking us questions about our life in Bulgaria, she found out that I do something she had never heard of before – restore pipes!  She was fascinated.  And when she heard that I sell restored pipes worldwide to benefit the Daughters, she decided to do her part in helping the Daughters as well.  The first thing she did was post some pictures and information about The Pipe Steward to her friends in China on social media available there.  For the next several days, the stats for www.ThePipeSteward.com launched because of ‘hits’ coming from China – yes, I can see the countries of those looking at the website!

Secondly, and most important in helping the Daughters, was to choose a pipe as a special gift for her grandfather.  I asked her why the gift for her grandfather?  I found out that February is Chinese New Year and it is customary to give gifts or money to family.  I asked her why a pipe?  She said that as a farmer – a common man, her grandfather is considered near the bottom of the social strata and her thoughts of him are of his life as a farmer and that he liked to smoke.  She described him smoking thick cigarettes with strong tobacco and said that he also had an old, long metal pipe that he liked, but she said there was nothing special about it.  (The answer posed in the picture to the right is on the ‘Left’ 😊)

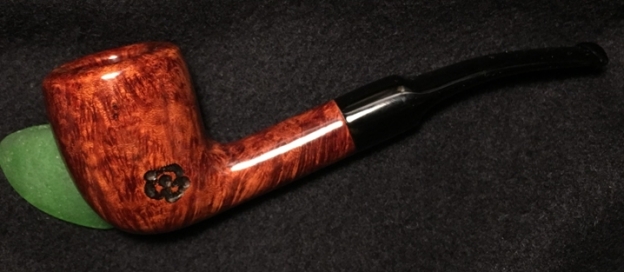
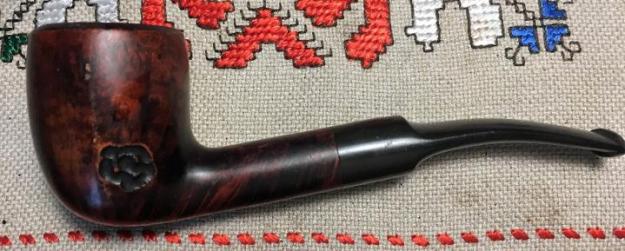
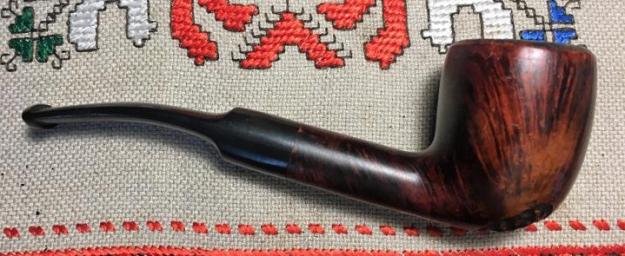
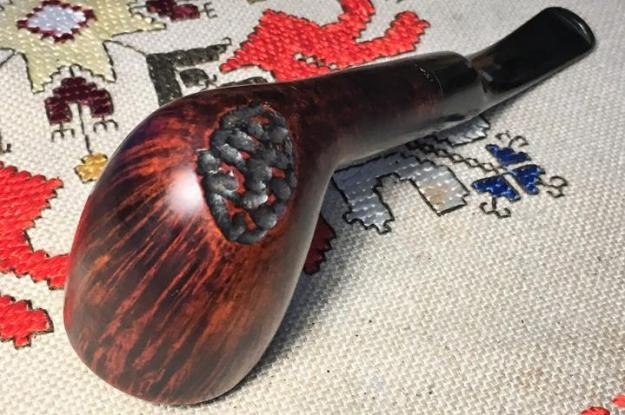
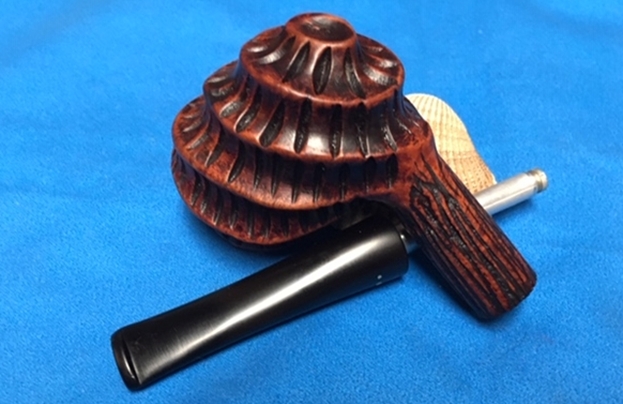
After she methodically explored many ‘Help Me!’ baskets and scrutinizing MANY pipes, she found the special one (or, did it find her? 😊) she would give to her grandfather.  I asked her, out of all the pipes she had studied, why she had chosen the pipe she did?  She smiled as she looked down thoughtfully.  She described the ‘rose’ carving in the briar and said that it reminded her of the rose that forms the logo for the Daughters of Bulgaria – the rose is beautiful but also, fragile and strong.  The ‘rose’ sculpted in the pipe also formed a hope that revealed to me the depth of love that resides in Chrystal despite everything.  She said that when her grandfather smoked this pipe that she hoped that it would remind him fondly of her – that she would be carved in his heart like the rose on the pipe.

With Chrystal’s return to China coming soon, I quickly went to work on the chosen pipe she planned to give her grandfather after returning to China.  Just before her departure from Bulgaria, my wife loaded Chrystal with gifts from Bulgaria for her and her family (but a special jigsaw puzzle for Chrystal!).  I also presented her the restored ‘Rose Pipe’ ready for her grandfather. Her first reaction to seeing it and holding it in her hands was how it had changed!  The second was some concern that her grandfather may not appreciate its value.  She struggled a bit considering keeping it for herself because now it meant so much to her, not to smoke, but to cherish as a reminder of her time in Bulgaria.  It was gratifying to pass this pipe on which I had purchased from a seller in the US New England state of New Hampshire in 2016, brought to Bulgaria and was patiently waiting for Chrystal to come to Bulgaria so it could choose Chrystal and make its way to its new steward, a common man – a farmer in China, Chrystal’s grandfather.
When Crystal left Bulgaria on her trek back to China (on Aeroflot via Moscow and Peking!) she knew that I was writing her story in this write up of the restoration of her grandfather’s pipe.  I agreed to wait to publish this blog after Chrystal promised to send me pictures of her with her grandfather and after she presented the Rose Pipe to him.  True to her word, the pictures arrived less than a week after her departure with these words:

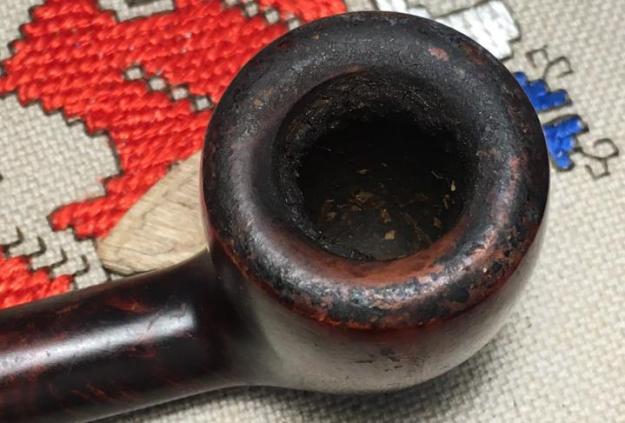
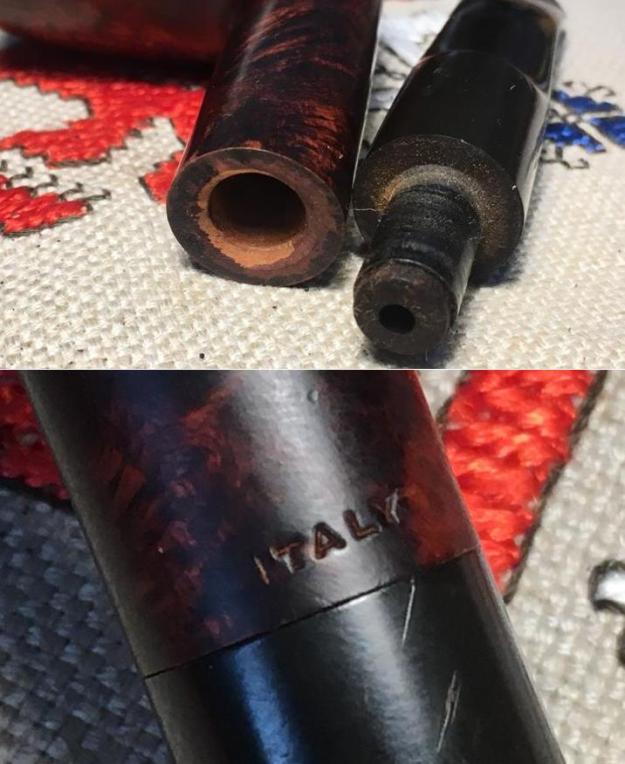
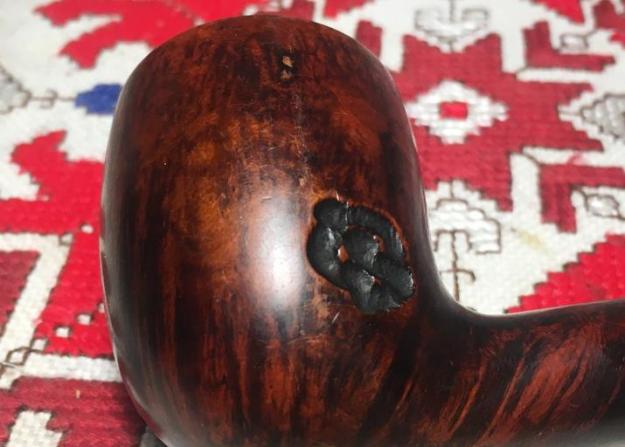
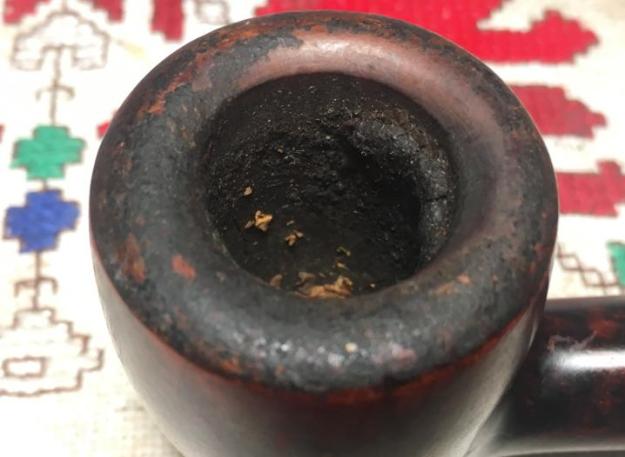
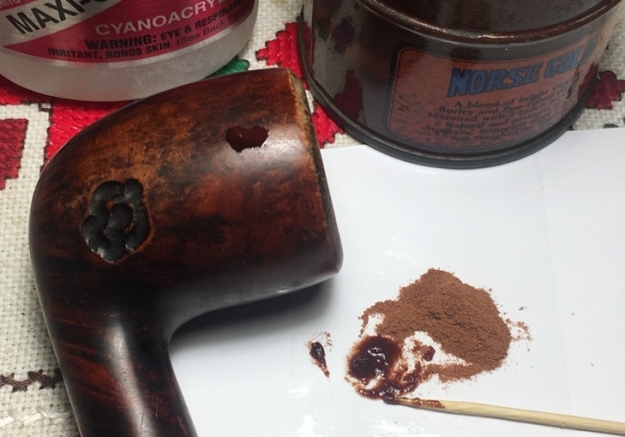
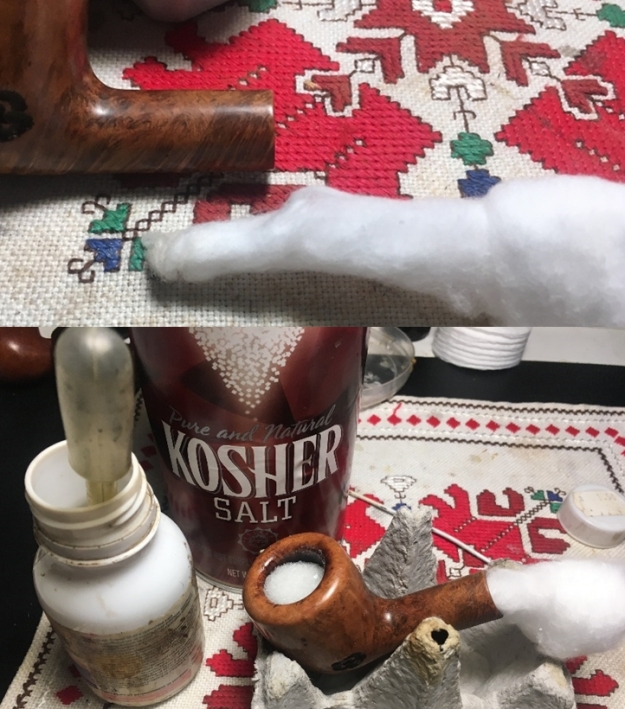
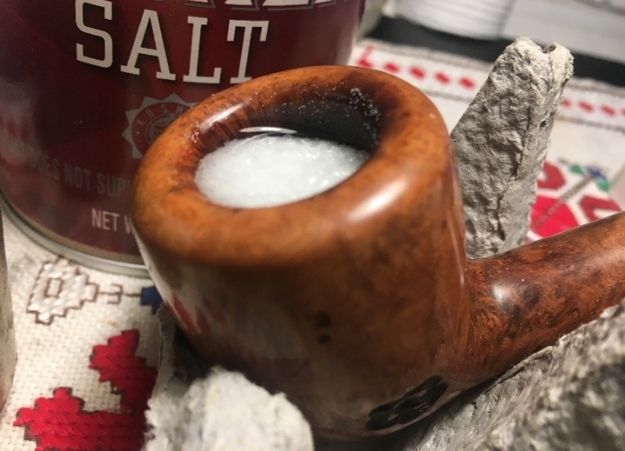
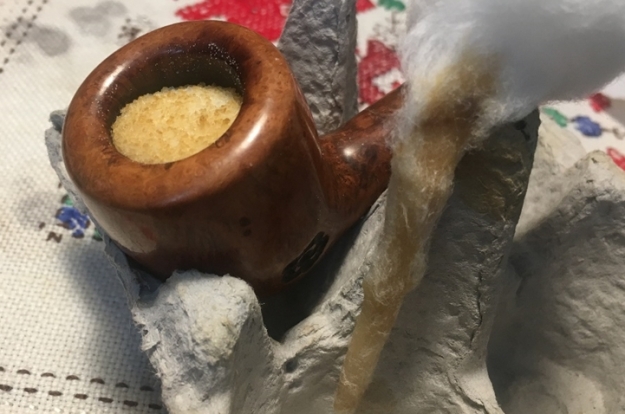
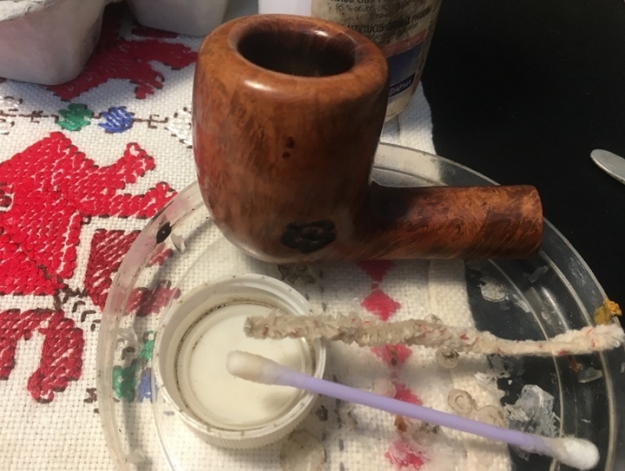
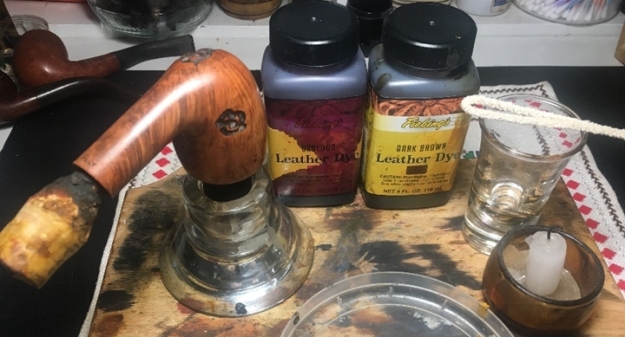
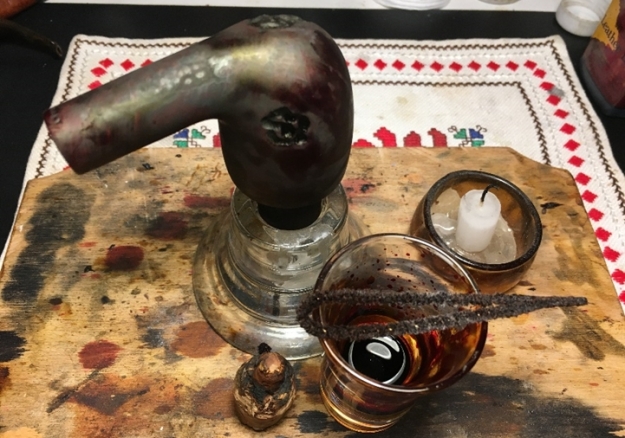
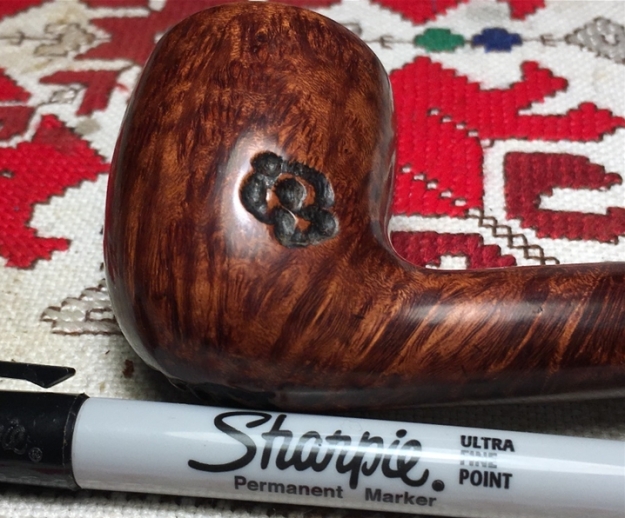
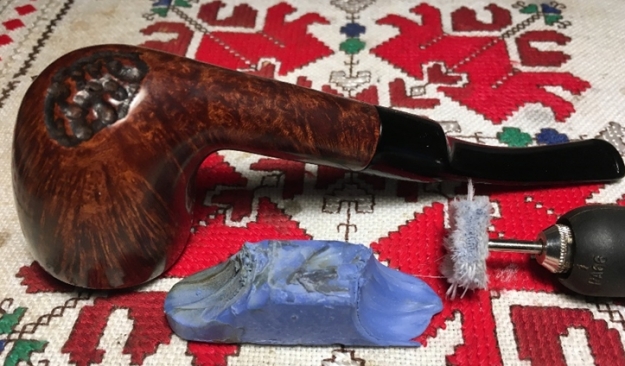
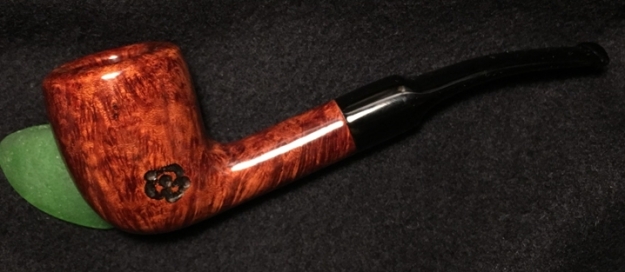
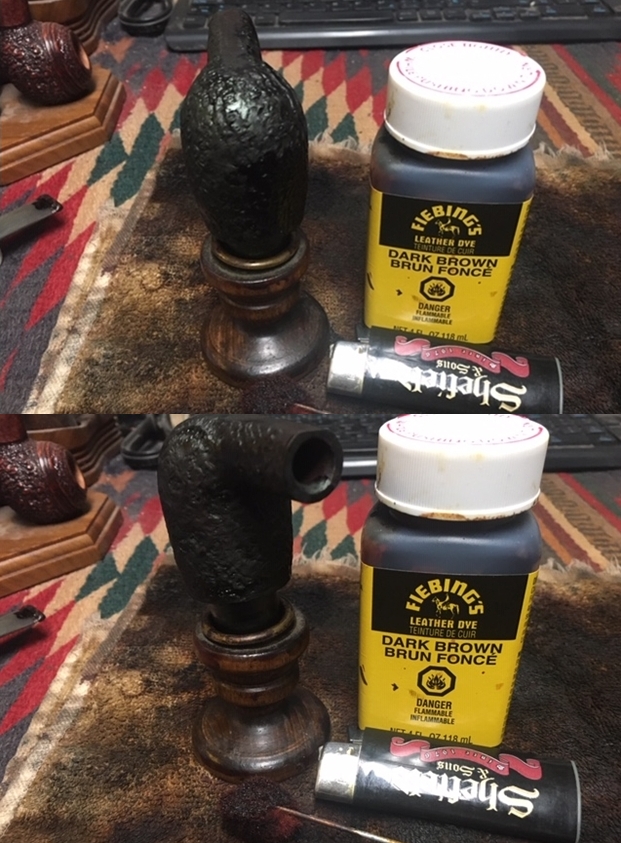
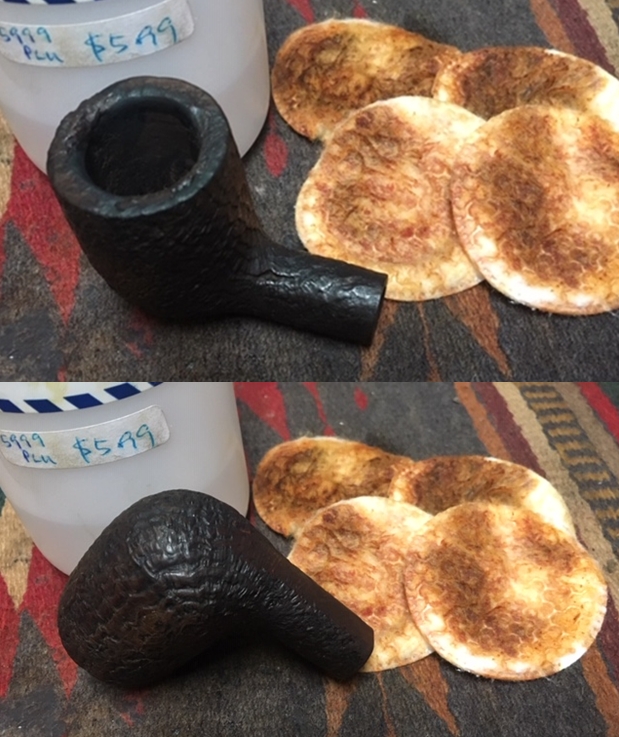
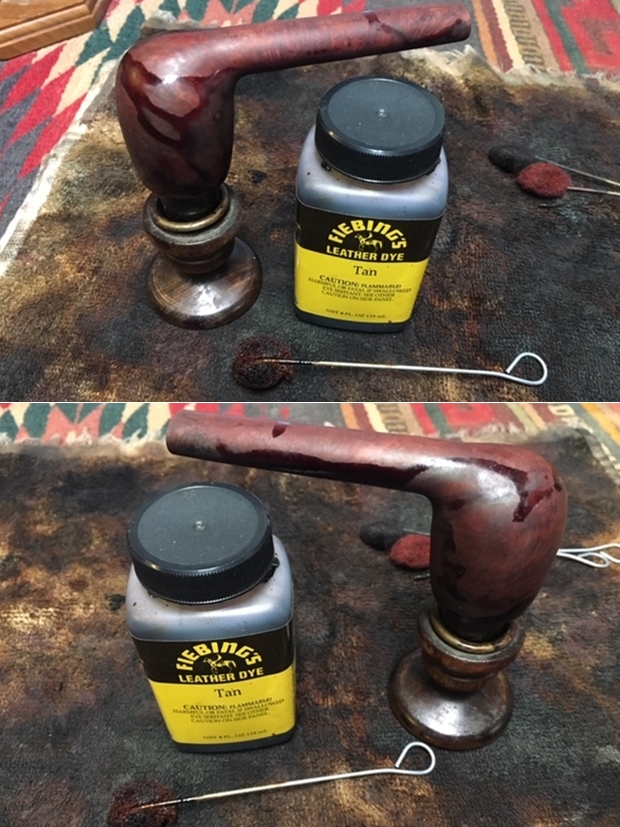
My grandpa really likes your pipe!!! My dad said it is so special and valuable. My mom said it is like an art. Yes, they are happy. My dad even didn’t know my grandpa likes pipe. But it turns out that my grandpa does like it!!  So, my dad is happy. I look forward to your writing [blog write up]. I feel so blessed and so loved to know you!!  By the way, what kind of wood is the pipe made of?With a deepened appreciation for the granddaughter and her love for her grandfather, and for the pipe man in China who has become the new steward of the Rose Pipe, I now tell the story of the restoration of the Sculpted Rose Billiard that was on my worktable but now in China.   First, to answer Chrystal’s question: Briar 😊. The only marking on the pipe is the COM, ITALY, on the underside of the shank.  The pipe has been well loved and used much by examining the chamber and rim.  The chamber shows very thick cake and the rim is gummed up with lava.  Both need to be addressed through reaming and cleaning.  The bowl itself is dark from oils and grime.  The reddish or Oxblood hue is dull and tired.  There are small dents on the surface from normal bumps and at least one small fill that I see that needs checking.  The vertical fire grain beneath the finish is very attractive – showing much, much potential, which I like.  The shank is slightly bent with a nice-looking saddle stem which shows some oxidation but hardly any tooth chatter.  I think this gift for Chrystal’s grandfather will turn out very nicely!  I take a few close-ups to show these issues. To begin the restoration of this special gift for Chrystal’s grandfather, I clean the stem’s airway with a pipe cleaner dipped in isopropyl 95% then I drop it in an OxiClean bath to soak to loosen and raise the oxidation.  After it soaks through the night, I take it out (and realize that I forget to take a picture of it!) and take the stem to the sink and wet sand using 600 grade paper.  This does very well in removing the oxidation.  To hydrate the vulcanite, I then apply paraffin oil (a mineral oil) to the stem and put the stem aside to absorb.  The pictures show these steps. Next, I tackle the thick cake in the chamber.  I take a starting point picture and then employ the Pipnet Reaming Kit blade heads to cut through the cake to give the chamber a fresh start.  I use 3 of the 4 blades available.  I then fine tune the reaming using the Savinelli Fitsall Tool. I follow this by sanding the chamber using 240 grit paper wrapped around a Sharpie Pen.  This gives me leverage to apply pressure and to reach down into the chamber.  I finish by wiping the chamber with a cotton pad wetted with isopropyl 95% to clean the carbon dust. After an inspection of the chamber showing no problems, I move on. I clean the externals of the stummel with undiluted Murphy’s Oil using a cotton pad.  I also use a bristled tooth brush on the sculpting.  I’m anxious to see how this Oxblood hue cleans up.  I also utilize a brass brush on the rim.  Brass brushes do not harm the surface.  The cleaning did a good job on the rounded rim as well as the stummel surface.  The old finish is thin and raw briar is left on the rim. I decide to check the condition of the two small fills on the left upper side of the stummel.  Using a sharp dental probe testing showed that the fills weren’t solid, so I dig out the old fill with the probe.  I see no other fills needing attention, so I decide to address these now. I wipe the area with alcohol to clean it and then I mix a small about of briar dust putty using thick CA glue.  Using an index card, I shovel some briar dust in a small mound.  I then drop some CA glue close to the mound.  Using a toothpick, I then pull briar dust into the CA glue mixing as I go.  As the two mix, it thickens.  When it reaches the thickness of molasses, I apply the mixture to the pits with a small mound of excess to be sanded after it the putty cures.After the briar dust patch sets up, I clean the internals of the mortise and airway using pipe cleaners and cotton buds. I also use a dental spatula to scrape the tars and oils from the mortise wall.  After some effort, the internals are cleaning up and the cotton buds are coming out clean.Turning back to the stummel, the patch has cured and using a flat needle file I file down the briar dust patch to almost flush with the briar surface.  I then use 240 and 600 grit paper to sand it down further to the briar surface and blending the patch.  Amazingly, a face appears for a while as captured in the second picture! I then wipe the entire stummel with alcohol to remove the thin finish and to clean the stummel.  Taking a very close look at the condition of the surface.  I see a lot of nicks, cuts and very small pitting.  The surface is in rough shape. I decide to employ sanding sponges to work on the rough briar surface as well as the rounded rim that has seen better days.  I start with the coarse sanding sponge sanding the smooth surface – I pass over the sculpted areas.  I then graduate from the coarse sponge to the medium grade sponge, then to the fine sanding sponge.  These pictures chronical the progression – starting with the coarsest sponge: Medium sponge: Fine sponge: Moving from sanding sponges, I fine tune further using the micromesh pads.  First, I wet sand using pads 1500 to 2400, then dry sand using pads 3200 to 4000 and 6000 to 12000.  The pictures show the progression. Well, it’s been a productive day!  To finish my ‘pipe work’ day, I’ll continue the internal cleaning of the stummel by allowing it to clean stealthily in a kosher salt and alcohol soak.  To do this I twist and pull a cotton ball to form a wick that I insert and push through the mortise and into the airway.  I then fill the bowl with kosher salt (you can use any kind of non-iodized salt – iodized salt leaves an aftertaste) and give the bowl a shake to settle the salt.  After I place it in an egg crate for stability, I use a large eyedropper and fill the bowl with isopropyl 95%.  After a few minutes, the alcohol is absorbed, and I top off the alcohol once more.  Putting it aside, I shut off the lights. The next morning, the salt and wick have both darkened from drawing out the oils and tars from the internal briar.  I toss the expended salt and wipe the chamber with paper towel making sure to remove left over salt crystals.  To make sure all is clean I run one pipe cleaner and cotton bud wetted with alcohol. Internals are clean!  Moving on. As I’ve reflected on the original reddish, Oxblood hue of the pipe, I think this was partly why Chrystal was drawn to the pipe – with its sculpted rose.  I will apply a dye to the stummel combining Fiebing’s Dark Leather Dye and Oxblood Leather Dye.  I’m envisioning a subtler Oxblood embedded in the darker brown, but leaning more toward the brown than red.  I will mix the two dyes in equal parts and see what happens!  I assemble all the desktop components of my staining process.  I first wipe the stummel with a cotton pad wetted with alcohol to clean it. I insert a shaped cork into the mortise to act as a handle.  After mixing the Dark Brown and Oxblood in a shot glass, I then warm the stummel using a hot air gun.  This expands the briar grain allowing it to absorb the dye more effectively.  After the stummel has been warmed, I apply the dye mixture to the briar surface with a folded over pipe cleaner.  After thoroughly covering the surface, I ‘fire’ the surface using a lit candle.  The alcohol in the aniline dyes immediately combusts when lit and sets the dye pigment in the briar grain.  I repeat this process a few minutes later and set the newly stained bowl aside to rest through the night. With the newly stained stummel resting, I return to the stem waiting in the wings. There are minor tooth chatter and bites on the button. I first freshen the button lips using a flat needle file.  Using 240 grit paper I quickly sand out file scratches and chatter. I then use 600 grit paper on the bit area, erasing the coarser paper scratches and follow by using 0000 steel wool on the entire stem.Moving next to the micromesh phase, I wet sand using micromesh pads 1500 to 2400, then dry sand using pads 3200 to 4000 and 6000 to 12000.  After each set of 3 pads I apply Obsidian Oil to the stem to revitalize the vulcanite.  The stem looks good. I love this part of the restoration process – unwrapping the fired stummel.  After making the decision to dye, often the grain makes its own decisions regarding how the dye is received – I’m never sure how dye mixtures will look in the end.  To unwrap the flamed stummel shell, I mount a felt cloth buffing wheel into the Dremel and set the speed at the slowest RPMs and apply Tripoli compound.  After completing the cycle with Tripoli, to further blend the dye I wipe the stummel lightly with a cotton pad wetted with alcohol.  Before moving to the application of Blue Diamond compound, I use a fine point Sharpie Pen and give a little highlighting to freshen the sculpting on the stummel.  Next, I rejoin stem and stummel and mount a cotton cloth wheel to the Dremel, increase the speed to about 40% full power and apply Blue Diamond compound to the stummel.  Blue Diamond is less abrasive and continues to tease out the natural sanded gloss of the briar.  The briar grain is responding with a smile on its face – oh my! After wiping the pipe down with a felt cloth to clean off the compound dust left by the Blue Diamond, I mount another cotton cloth buffing wheel onto the Dremel, maintain speed at 40% full power and apply a few coats of carnauba wax to stem and stummel.  When completed, I give the entire pipe a hand buffing using a microfiber cloth to raise the brilliant shine and finish up the restoration of Chrystal’s gift for her grandfather.
In Bulgaria, the rose is special.  Even though is a beautiful flower, here in Bulgaria it is not primarily known as a beautiful flower, but as a rugged producer of fine oils and perfumes known and exported world-wide.  This is one of the reasons why the rose became the logo of the Daughters of Bulgaria – but not only a logo, but a symbol of profound value, strength and beauty.  Women who have been trafficked and sexually exploited are treated as valueless property to be used and then discarded.  All people are endowed with intrinsic value – even those that are not treated as Daughters, but are daughters, with identities, stories and value.  When Chrystal chose this ‘Rose’ pipe, she wanted it to be a special gift to her grandfather for the Chinese New Year – a gift that would remind her grandfather of her – not a rose carved in wood, but that she would be carved in his heart.

Chrystal could see the beautiful value and potential of this pipe when she chose it from among many to be her special gift.  She is truly a special young lady – truly a rose.  Thanks for joining me!    


The Final Pipe of the Foursome… a JR Hand Made Apple


Blog by Steve Laug

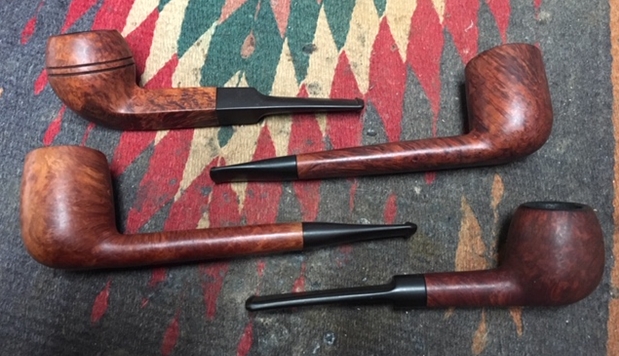
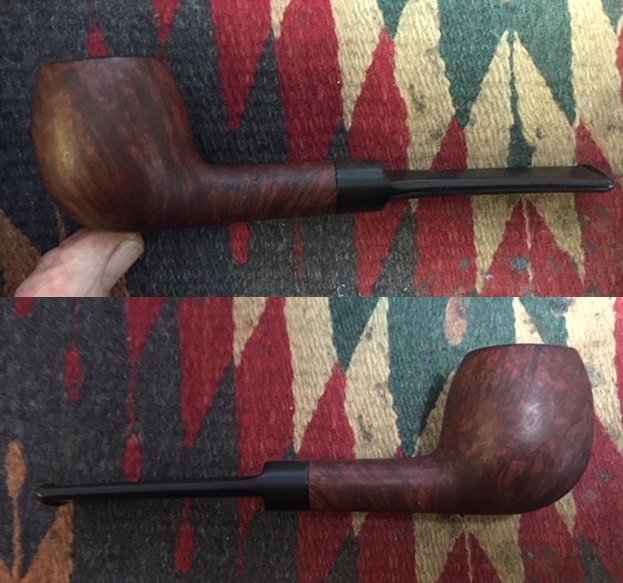
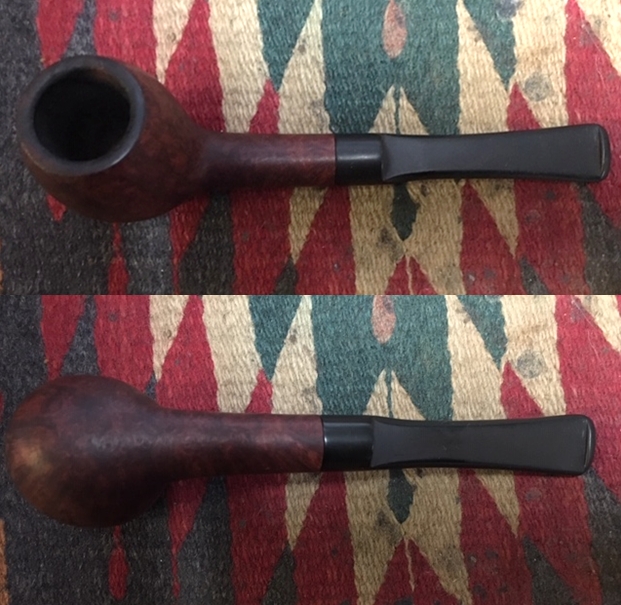
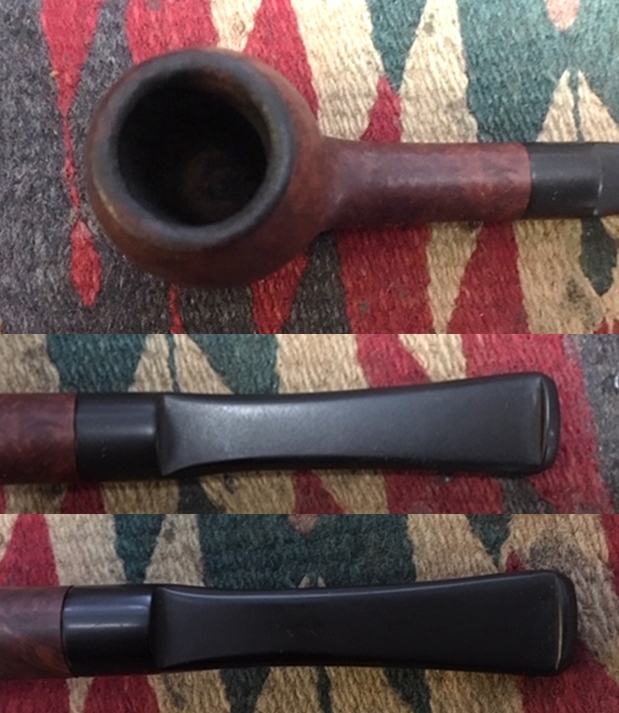
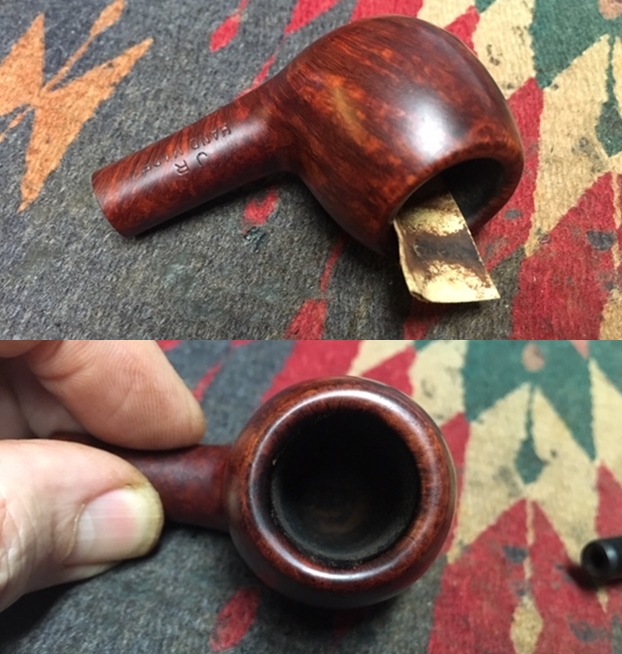
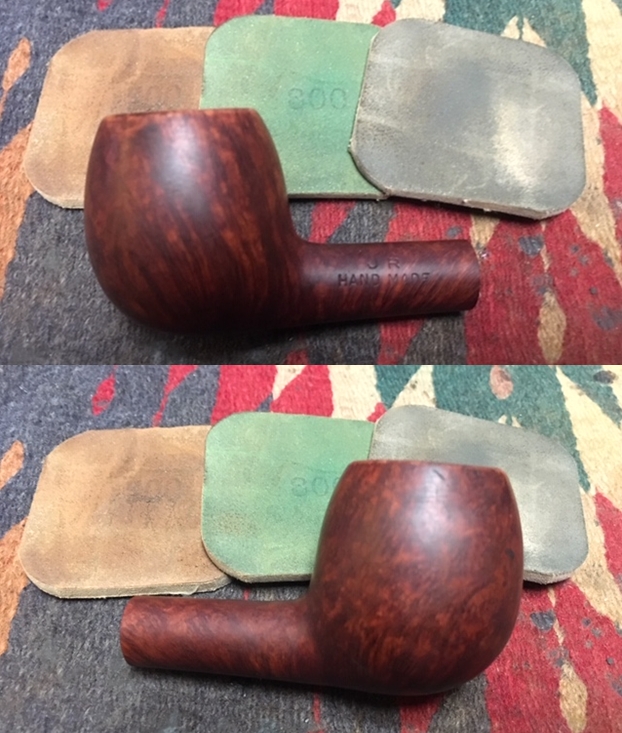
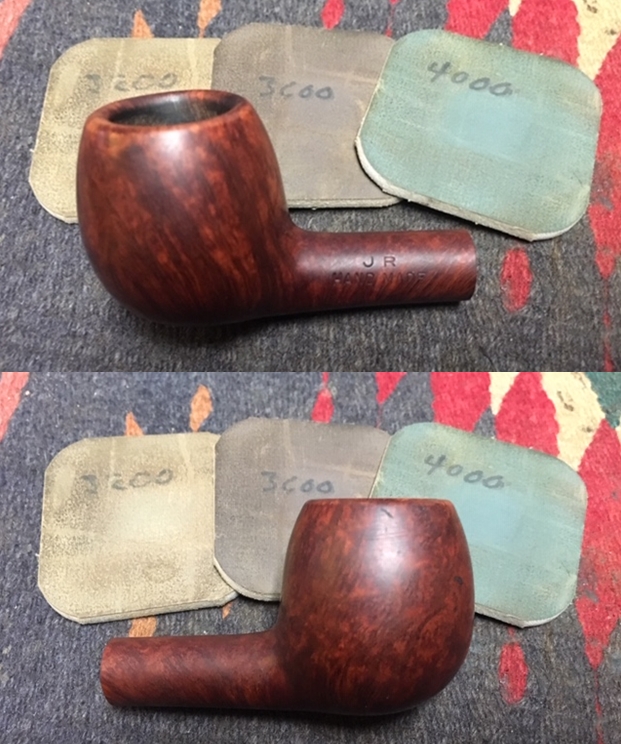
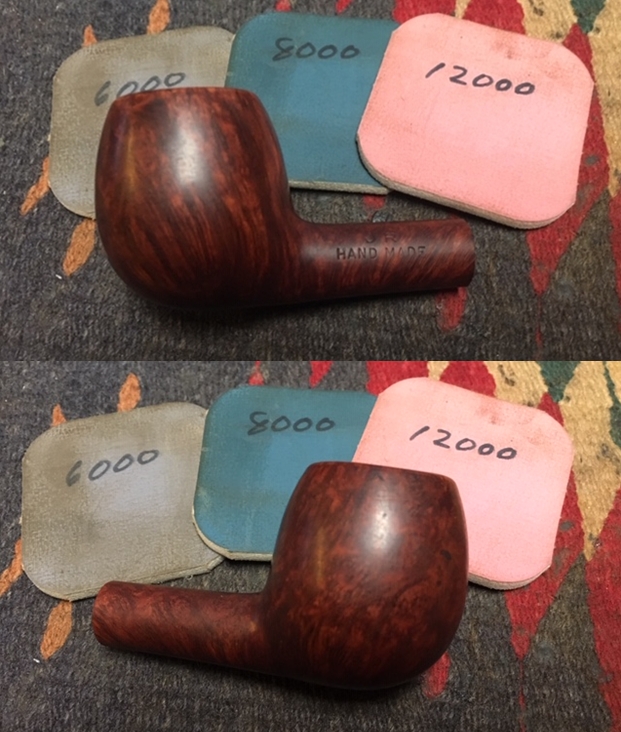
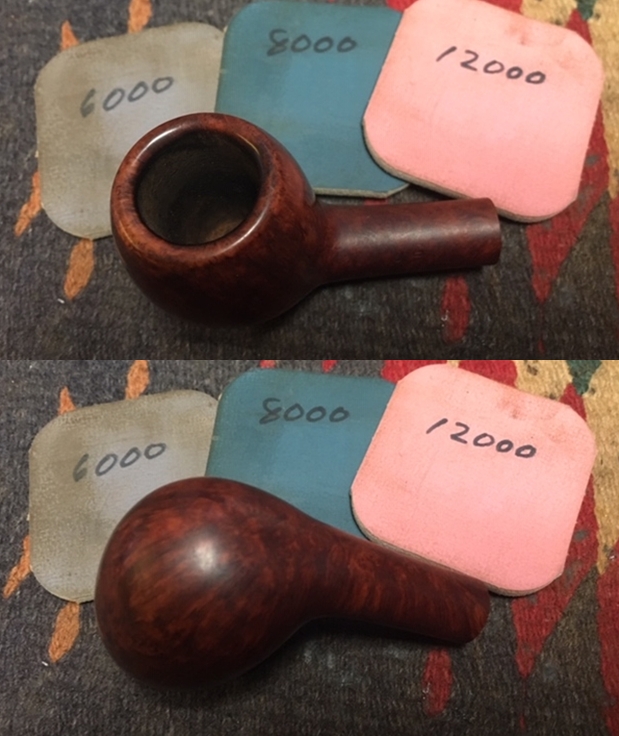
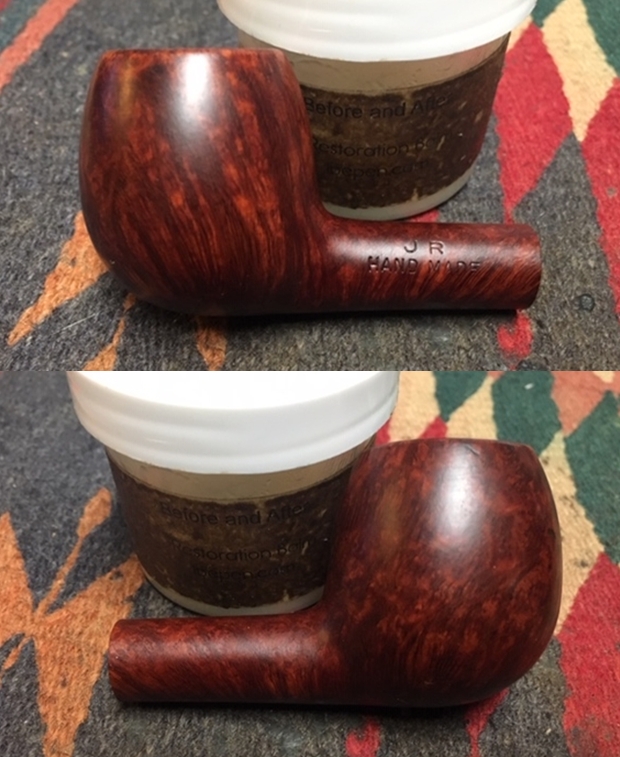
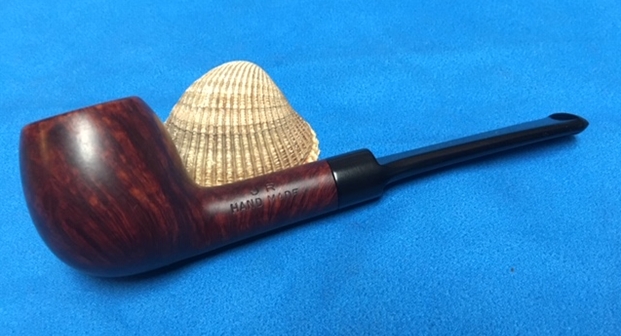
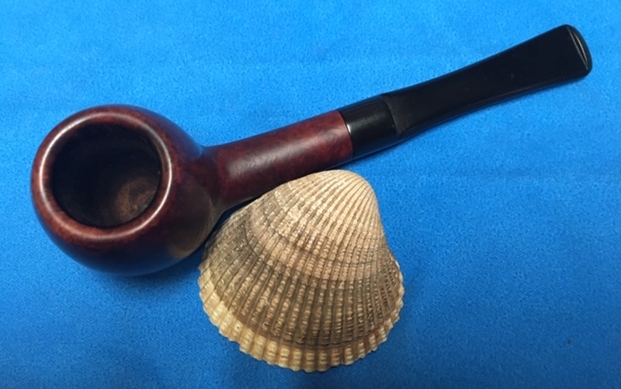
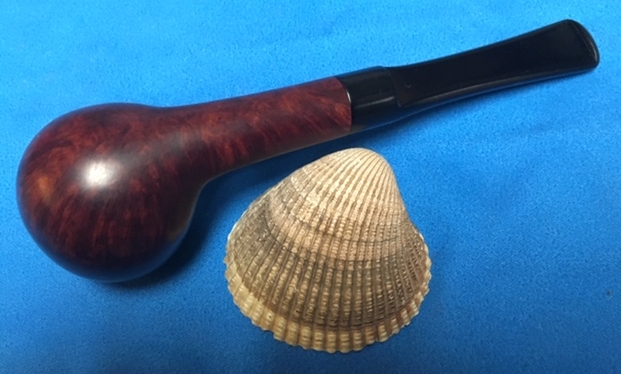
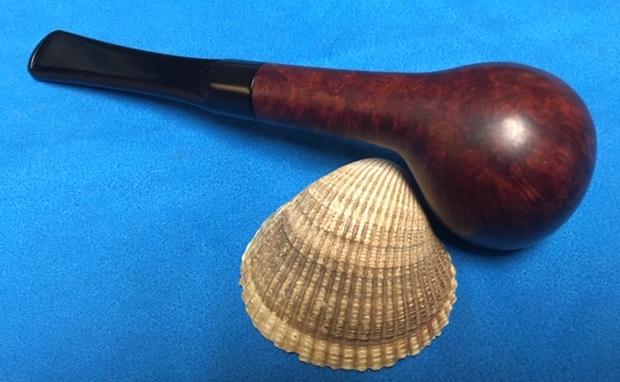
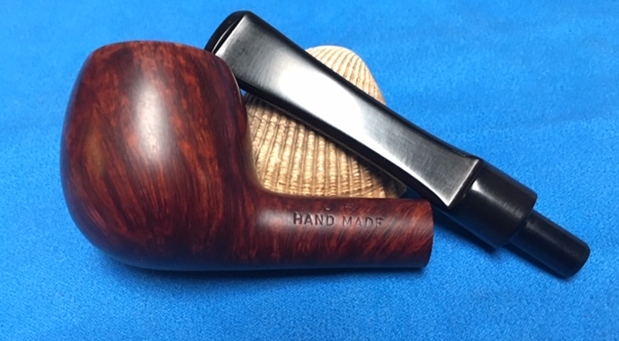
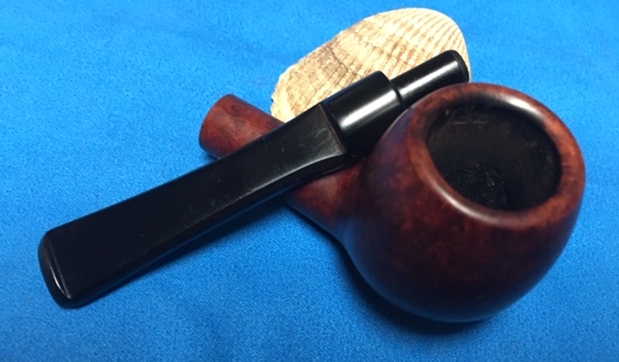
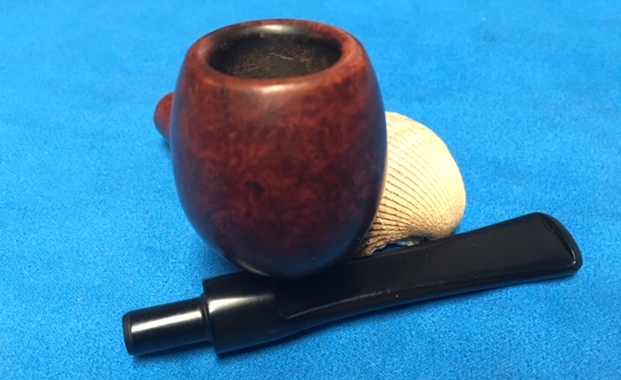
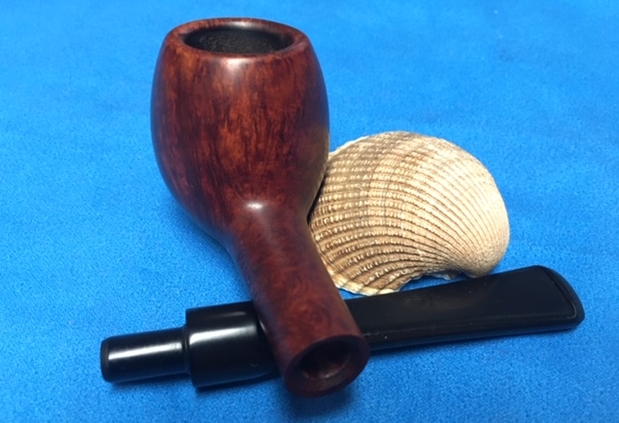
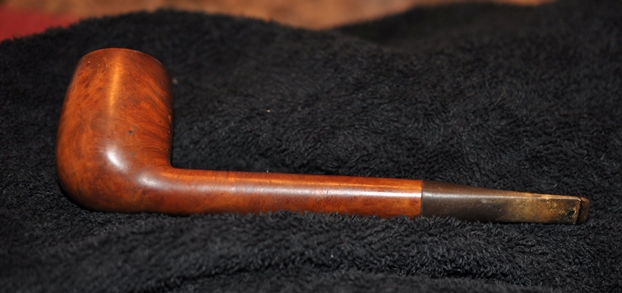
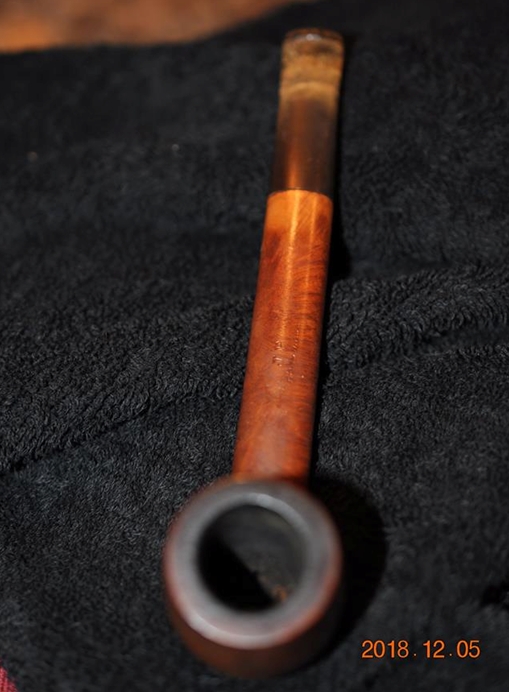
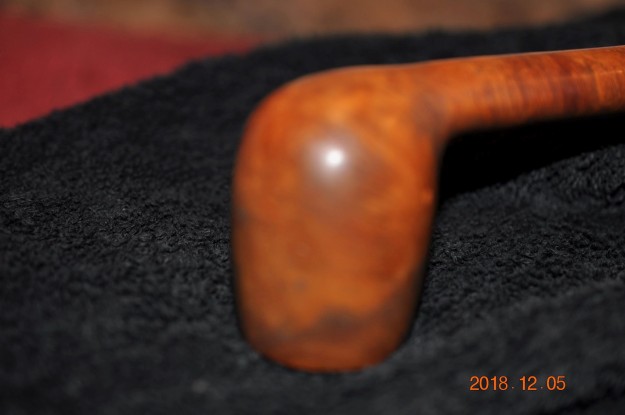
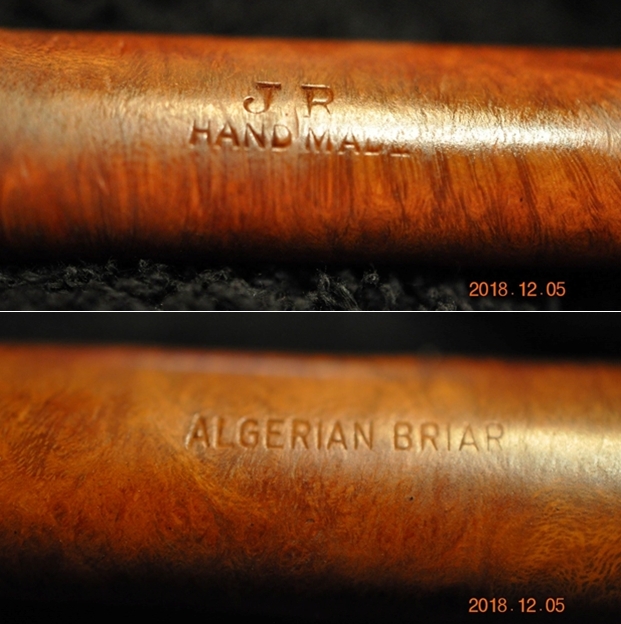
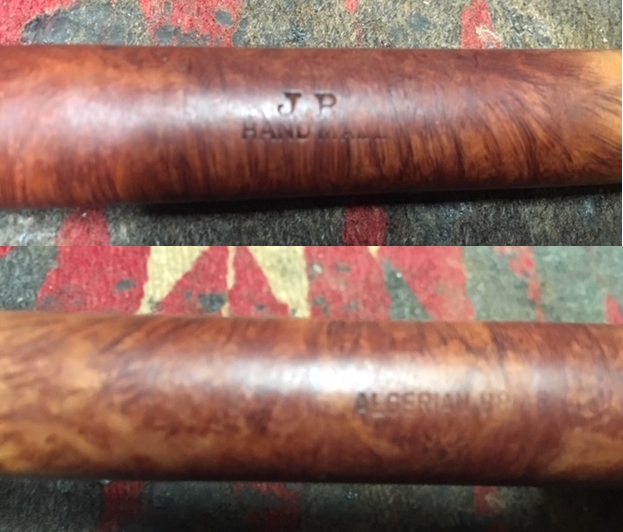
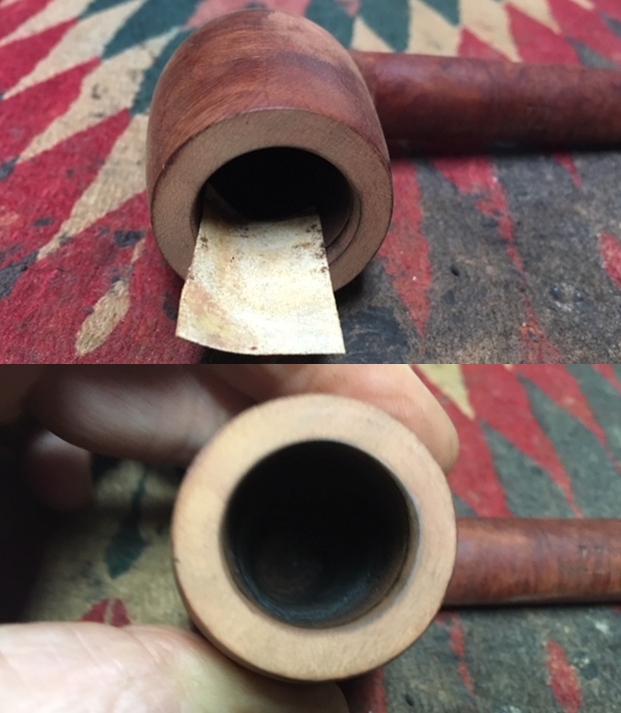
My brother Jeff picked up four pipes in classic shapes at an auction in Nampa, Idaho. All four pipes are stamped JR Handmade. Beside the Bulldog there were two Canadians and an Apple. All were stamped the same on the shank JR over Handmade and the opposite side Algerian Briar. I have been researching the brand on the web. I came across a potential pipemaker with the JR initials on Pipedia named J. Rinaldi but from what I can see he did not make classic shaped pipes. He pipes are very well made and have more of a freehand/freeform shape with shank adornments so it makes me wonder if these are his. I enlarged each photo on the Pipedia article but I was unable to see the stamping on his pipes for comparison sake. This leaves me with a lot of questions about the brand. The foursome came from the Boise, Idaho area like the House of Robertson pipes that I worked on last year. Those came from a pipe shop in Boise, Idaho and I wonder if it is not possible that the JR Handmade brand was also a pipe shop brand from a small shop in that area or even somehow connected with the House of Robertson brand. I heard back from a House of Robertson Collector in Boise about a possibility on the JR brand. Thayne Robertson, the carver of the House of Robertson brand and the shop owner had a son named John. He said John also carved pipes. Perhaps these are some of John’s pipes. But I will probably never know for certain… if any of you readers have any idea about the brand your help would be greatly appreciated.The above photo shows the foursome after Jeff had cleaned them. But before he cleaned each of them he took photos of the pipes as they came to him. I already wrote about the restoration of the Bulldog (https://rebornpipes.com/2019/01/28/the-first-of-a-foursome-a-jr-handmade-bulldog/) and the first Canadian (https://rebornpipes.com/2019/01/30/the-second-of-a-foursome-a-jr-handmade-canadian/) and the second Canadian (https://rebornpipes.com/2019/02/01/the-third-pipe-of-a-foursome-a-2nd-jr-handmade-canadian/). The next pipe is the second pipe down on the right side of the above photo – a classic Apple shaped with a saddle stem. I have included the photos of the Apple before cleanup. The pipe is very well made and follows the classic shape of an Apple perfectly. The bowl was stained with a medium brown top coat over a black undercoat. It is a well-shaped pipe that captures the mixture of flame and straight and birdseye grain around the bowl sides and shank. The top of the bowl had some damage and burn marks on the top and inner edge. The bowl had a very thick cake in the bowl. There was a light overflow of lava onto the rim top. The stamping on the top side of the oval shank read JR over HAND MADE. The black vulcanite stem had light tooth dents and chatter on the top and the underside of the stem. Otherwise it was in very good condition. It was lightly oxidized. He also took a photo of the bottom of the bowl and shank to show the various grains on the pipe. The photo shows the finish of the bowl and though it is very dirty but this is another beautiful pipe.Jeff took a photo to capture the stamping on the topside of the oval shank. The photo shows stamping JR over HAND MADE. The next two photos show the stem surface. There was tooth chatter on both sides near the button. There is also some wear on the sharp edge and top of the button. There is a thick oxidation and coat of calcification.As mentioned before, Jeff and I have developed a pattern of working on the pipes that has become habit to both Jeff and me. I include it here so you have a sense of that pattern. Jeff reamed the bowl with a PipNet pipe reamer and followed up with a Savinelli Fitsall pipe knife to remove the cake. He scrubbed out the mortise and the airway in the shank and the stem with alcohol, cotton swabs and pipe cleaners. He scrubbed the exterior of the bowl, rim, shank and stem with a tooth brush and Murphy’s Oil Soap to remove the oils and tars on the rim and the grime on the finish of the bowl. He rinsed it under running water. He dried it off with a soft cloth. He was able to remove the lava build up on the rim top and the rim top damage and the damage around the edges – both inner and outer is quite extensive. I took photos of the pipe to show its condition before I started my work on it. I took close up photos of the bowl and rim top as well as the stem. You can see the condition of the rim top and bowl in the first photo. Though the photo is a bit dark you can see that Jeff was able to remove all of the tar and oils. You can see the burn damage to the front inner edge of the bowl and some general darkening of the rim top. The vulcanite stem had light tooth chatter and some tooth marks on the top and underside of the stem near and on the button surface.I took a photo of the stamping on the left side of the shank. You can see that the stamping was clear and readable. I wiped down the bowl with a damp cotton pad to clean off the debris; then addressed the damage to the rim top and inner edge. I removed the damage to the top and the edges of the rim top. I was also able to reduce the burn damage to the front inner edge of the rim. I wiped down the rim after sanding with a dampened cloth and I am pleased with the results.I polished the rim top, the edge and exterior of the bowl and shank with micromesh sanding pads – wet sanding with 1500-2400 grit pads and dry sanding with 3200-12000 grit pads. I wiped the rim off after each sanding pad to remove the dust. The damage on the rim edges was virtually gone and the top looked really good after polishing. I worked some Before & After Restoration Balm into the smooth surface of the briar with my fingertips to clean, enliven and protect it. I let the balm sit for a little wall and then buffed with a cotton cloth to raise the shine. The following photos show the bowl at this point in the restoration process. The reworked rim top looks really good and matches the colour of the rest of the pipe. I set the bowl aside and worked on the stem. There were some tooth marks on the top and underside at the button that needed to be addressed. I also needed to do some work on the surface of the button on both sides. I also sanded away some of the surface oxidation.I polished the stem with Denicare Mouthpiece Polish to remove the hard to get spots on the saddle and the button edges. I scrubbed it into the surface with a soft cotton pad and then buffed it off with another pad. I polished the stem with micromesh sanding pads – wet sanding with 1500-2400 grit sanding pads and dry sanding it with 3200-12000 grit sanding pads. I wiped it down after each sanding pad with Obsidian Oil. I polished it with Before & After Pipe Stem Polish and wiped it down with a last coat of Obsidian Oil. With this fourth JR Hand Made pipes from the Nampa, Idaho auction I am even more certain that there is some connection to the House of Robertson Pipe Shop in Boise, Idaho. Since the completion of the third pipe I received an email from a House of Robertson (HOR) collector who lives in Boise, Idaho area. He used to frequent the House of Robertson Pipe Shop in Boise and knew the owner and carver of the HOR pipes, Thayne Robertson. He thought that there may well be a connection. He wondered if the JR Hand Made pipes could possibly been carved by the son of the House of Robertson pipe carver and shop owner. His name was John so it could well be John Robertson pipes. I may not be able to get definitive proof of this but even the hint of it is quite exciting.

The four JR Hand Made pipes that I have restored are really well made and shaped. The stain job was done to highlight the mix of grain on the bowl. I polished stem and the bowl with Blue Diamond polish on the buffing wheel. I gave the bowl and the stem multiple coats of carnauba wax. I buffed the pipe with a clean buffing pad to raise the shine. I hand buffed it with a microfiber cloth to deepen the shine. The pipe polished up pretty nicely. The contrasting grain really began to stand out; it seemed to take on life with the buffing. The rich contrasting brown and black colour works well with the polished black vulcanite stem. This finished pipe has a rich look just like the Bulldog and the two Canadians and it is also quite catching. Have a look at it in the photos below. It is a well-shaped apple. The shape, finish and flow of the pipe and stem are very well done. The dimensions are Length: 5 3/4 inches, Height: 1 3/4 inches, Outside diameter of the bowl: 1 1/4 inches, Chamber diameter: 3/4 of an inch. I will be putting this newly finished JR Hand Made Canadian on the rebornpipes store shortly if you are interested in adding it to your collection. Thanks for walking through the restoration with me as I worked over the final pipe of the foursome from JR Hand Made pipes.

New Life for Farida’s Dad’s Final Pipe – a Dunhill 5203 Shell Billiard


Blog by Steve Laug

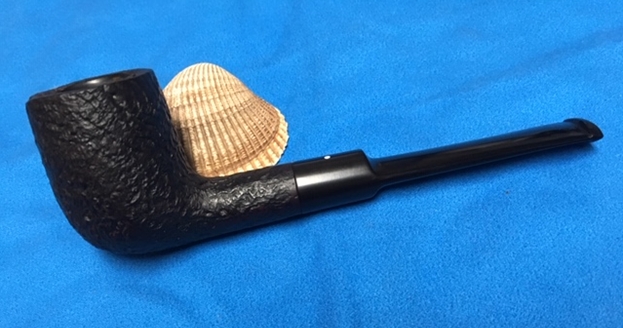
I have had the last Dunhill from Farida’s Dad’s estate sitting on a cupboard behind my desk and every time I sit down I look at it and think that I need to finish it up. I sold the rest of the estate and purchased this one myself so that I could have some time to work on it. Yes you are right, read between the lines – I wanted to put off working on it. Well, this morning I sat down at the desk and posted a couple of blogs and then turned and there it was looking at me. I decided then and there to pick it up and do the work to finish this estate.

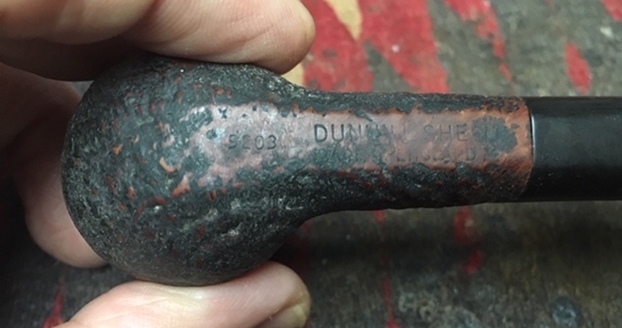
The pipe came from the estate of an elderly gentleman here in Vancouver. I met with his daughter Farida over a year ago and we looked at his pipes and talked about them then. Over the Christmas 2017 holiday she brought them by for me to work on, restore and then sell for her. There are 10 pipes in all – 7 Dunhills (one of them, a Shell Bulldog, has a burned out bowl), 2 Charatan Makes, and a Savinelli Autograph. This is the last of the lot – a lone Dunhill Billiard with a saddle stem. His pipes are worn and dirty and for some folks they have a lot of damage and wear that reduce their value. To me each one tells a story. I only wish they could speak and talk about the travels they have had with Farida’s Dad. The first photo shows the underside of the shank and its virtual illegibility under the tars and filth on the finish.You can see from the above photo the challenge that the pipe I am working on today will be. The stamping identifies it as a Dunhill Shell Billiard with a saddle stem. It is stamped on the underside of the heel and shank on a smooth flat area. On the heel is the shape number, a 4 digit number – 5203. I looked on Pipephil to get the lowdown on the shape number (http://www.pipephil.eu/logos/en/dunhill/shapes.html). I quote that below:

Dunhill pipes are stamped with a four digit code.

Digit 1: (from 1 to 6) denotes the size of the pipe (the group).

Digit 2: denotes the style of the mouthpiece (0,1=tapered, 2=saddle)

Digit 3 and 4: denote the generic pipe shape (in yellow in the chart on top)

Example: 5102 — (5 = size | 1 = tapered stem | 02 = Bent)

When 5 digits occur, the meaning of the 4 first remain the same

The one I am working on, 5203, is thus a SIZE 5 (Group 5), saddle stem (2) billiard (03) shaped pipe. The rest of the stamping is DUNHILL SHELL over MADE IN ENGLAND with the underlined superscript 34 after the D in ENGLAND. The number 34 tells me the date the pipe was made 1994.

My work on each of these pipes has already caused a lot of discussion on the Facebook Tobacco Pipe Restorers Group. The ongoing debate of Restoration vs. Preservation has filled a lot of ongoing airtime on the group. I do not care to relive or recount that as I am only following the directives of the daughter of the original deceased pipeman. She wanted them restored to usable condition so others can carry on her father’s love of these pipes. She is quite happy with the finished results and others of his pipes are now all over the world being enjoyed by the next generation of pipemen.

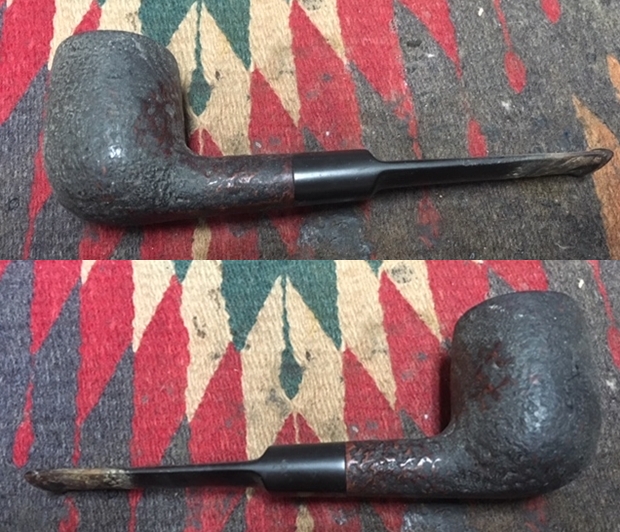
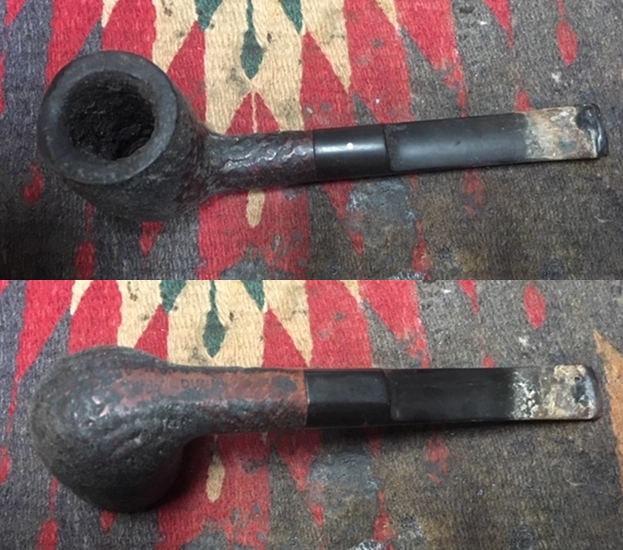
When first looked at the pipe here is what I saw. The bowl was thickly caked and the cake had flowed over onto the sandblast finish on the rim top forming hard lava that made the top uneven. There was a serious burn mark on the front edge of the bowl causing the rim to have a dip in the surface. It was hard to know if there was damage to the inner edge of the rim and I would not know until I removed some of the grime. The outer edge looked far very good all around the bowl except for the front. The finish was invisible under the thick coat of oils and grime that covered the bowl and shank. In fact at this point I had no idea what the stamping looked like because it was covered. I have wondered as I cleaned the other pipes in this lot if the oily build up was just a part of the life lived in the Antarctic. The stem was oxidized and very dirty. There was a thick sticky, oily substance on the surface of the stem and a calcification that I could scrape with my fingernail. There were tooth marks and chatter on both sides in front of the button as well as damage to the edges of the button. I took photos of the rest of the pipe to show what it looked like before I started the cleanup work. I took close up photos of the bowl and rim top as well as the stem. You can see the condition of the rim top and bowl in the first two photos. The damage to the rim top and the front outer edge is very visible even under the grime and lava. The inner edge looks like it has some damage on the backside. I won’t really know the full story until I remove the thick lava overflow on the surface. The stem had tooth chatter and some deep bite marks on the top and the underside of the stem just ahead of the button. The button itself also showed wear and damage. It has been a while since I have worked on the pipes that belonged to Farida’s Dad. I thought it might be helpful to remind us all of the background story of these pipes. Here is the material that I quoted in previous blogs. I have included both the written material and the photo that Farida included of her Dad. Here is what she wrote:

My dad, John Barber, loved his pipes. He was a huge fan of Dunhill and his favourite smoke was St. Bruno. No one ever complained of the smell of St. Bruno, we all loved it. I see the bowls and they’re large because he had big hands. When he was finished with his couple of puffs, he would grasp the bowl in the palm of his hand, holding the warmth as the embers faded. The rough bowled pipes were for daytime and especially if he was fixing something. The smooth bowled pipes were for an evening with a glass of brandy and a good movie. In his 20s, he was an adventurer travelling the world on ships as their radio operator. He spent a year in the Antarctic, a year in the Arctic and stopped in most ports in all the other continents. He immigrated to Canada in the mid-fifties, working on the BC Ferries earning money to pay for his education. He graduated from UBC as an engineer and spent the rest of his working life as a consultant, mostly to the mining companies. Whatever he was doing though, his pipe was always close by.

She sent this photo of him with his sled dogs in the Antarctic sometime in 1953-1954. It is a fascinating photo showing him with a pipe in his mouth. He is happily rough housing with his dogs. A true pipeman, he seems oblivious to the cold. Thank Farida for sending the photo and the story of your Dad. I find that it explains a lot about their condition and gives me a sense of your Dad. If your Dad was rarely without a pipe I can certainly tell which pipes were his favourites. In fact the condition of the billiard I am working on now makes me wonder if it is not the one in his mouth in the photo below.As I looked back over all of her Dad’s pipes that I have restored each of them had rim damage and some had deeply burned gouges in the rim tops. The bowls seemed to have been reamed not too long ago because they did not show the amount of cake I would have expected. The stems were all covered with deep tooth marks and chatter and were oxidized and dirty. The internals of the mortise, the airway in the shank and stem were filled with tars and oils. These were nice looking pipes when her Dad bought them and they would be nice looking once more when I finished.

Here are the links to the previous seven blogs that I wrote on the rest of the finished pipes. The first was a Dunhill Shell oval shank pot (https://rebornpipes.com/2018/02/04/restoring-a-1983-dunhill-shell-41009-oval-shank-pot/). The second was a Dunhill Classic Series Shell Billiard (https://rebornpipes.com/2018/02/08/faridas-dads-pipes-2-restoring-a-1990-lbs-classic-series-dunhill-shell-billiard/). The third pipe was a Savinelli Autograph (https://rebornpipes.com/2018/02/15/faridas-dads-pipes-3-restoring-a-savinelli-autograph-4/).The fourth pipe was a Dunhill Red Bark Pot that was in rough shape (https://rebornpipes.com/2018/03/10/faridas-dads-pipes-4-restoring-a-dunhill-red-bark-pot-43061/). The fifth pipe was a Dunhill Root Briar Bent Billiard (https://rebornpipes.com/2018/07/07/faridas-dads-pipes-5-restoring-a-dunhill-root-briar-56-bent-billiard/). The sixth pipe was a Charatan’s Make Distinction https://rebornpipes.com/2018/08/22/faridas-dads-pipes-6-restoring-a-charatan-make-distinction/. The seventh pipe was a Charatan’s Make Belvedere https://rebornpipes.com/2018/12/05/faridas-dads-pipes-7-restoring-a-charatans-make-belvedere-48dc-pot/.

Like most work the refurbisher does, this walks a fine line between restoration and preservation. The deciding feature for me regarding this pipe was the wishes of the family. They wanted the pipe to be cleaned and smoked by someone who could carry on the pipe man’s legacy of their Dad. None of them was interested in the pipes for themselves. They had no desire to keep them and memorialize their Dad and Grandad in that manner. I understand that to work on this pipe the way they wanted meant changing the current state of the pipe to bring it back closer to the way it was when their Dad bought it.

I decided to change things up a bit in the routine on this one. Holding it in my hand to ream and clean was a dirty prospect so I decided to scrub the thick grime off the exterior of the bowl and shank. The grit was deep in the sandblast finish rendering the pipe almost smooth. I scrubbed it with a tooth brush, a brass bristle wire brush and Murphy’s Oil Soap. I worked hard to get the grime out the grooves and crevices of the blast. I also worked on the rim top to remove the tars and oils that had formed a hard lava coat on the rim top. I worked on the burn damage as well on the front top and edge of the bowl. I rinsed the bowl under running water to remove the debris from the scrubbing. I reamed the bowl with a PipNet reamer. I used two of the four cutting heads to clean out the cake. The bowl was thickly caked I started with the smaller of the two and worked my way up to the second which was about the same size as the bowl. I cleaned the remnants with a Savinelli Fitsall Pipe Knife and scraped it back to bare briar. I finished by sanding the inside of the bowl with a dowel wrapped in sandpaper. I scraped the top of the rim with the edge of the Savinelli Fitsall Pipe Knife to remove the lava. I decided to start with the rebuilding of the rim top the bowl. I wiped the rim top down with isopropyl alcohol on a cotton pad to clean off the damaged areas on the front edge and on the rear inner edge. On the damaged front edge I started by laying down a coat of clear super glue on the gouged out burned area. On top of that I layered some briar dust with a dental spatula. I repeated the process of layer until the damaged area was level with the rest of the rim top. I used the brass bristle wire brush to texture the surface of the rim top over the repaired area to match the rest of the rim. I did the same layering process on the inner edge at the back of the bowl. When I had finished the rebuild I textured that area with the wire brush as well. The photos tell the story of the process. I worked over the inner edge of the rim with a folded piece of sandpaper to smooth it out and bring the damaged edges into round. The rim top was beginning to look normal. It would take a bit more texturing but it was looking a lot better.With the externals clean it was time to clean out the mortise and shank and airway into the bowl and the airway in the stem with alcohol, cotton swabs and pipe cleaners. I scraped the mortise with a dental spatula and a pen knife to loosen the tars before cleaning. I worked on the bowl and stem until the insides were clean.I used a needle file to sharpen the edges of the button on both sides of the stem. I sanded the “crud” off the stem and the tooth marks out of the topside of the stem. The underside would take a bit more work so I spent a lot more time cleaning out the large tooth mark on the stem near the button with sandpaper and alcohol and cotton swabs.It took some work to clean out the damaged area on the underside of the stem. Once I had it clear of debris I wiped it down with alcohol. I  filled in the deep tooth mark on the underside and the small tooth mark and rebuilt the button on the topside using clear super glue. I set the stem aside to let the repairs cure.I decided to stain the bowl with a dark brown stain. It would go over the black stain that was in the grooves of the sandblast. Once it had set I would wipe off the excess stain and buff the bowl and rim to get the finish I wanted. The photos tell the story. I applied the stain and flamed it with a lighter to set it in the grain. I repeated the process until I was happy with the coverage. Once the stain had cured I wiped the bowl down with isopropyl alcohol on cotton pads to make it more transparent. I wanted to be able to see the contrast between the dark brown and the black in the crevices of the finish. I rubbed down the briar with Before & After Restoration Balm. I worked it into the nooks and crannies of the sandblast finish to clean, enliven and protect the new finish. It also evened out the stain coat and gave the stain a dimensional feel. I let the balm sit for a little wall and then buffed it with a horsehair shoe brush. I buffed the bowl with a cotton cloth to raise the shine. I set the bowl aside and turned my attention to the stem. I sanded out the repairs on the stem surface on both sides with 220 grit sandpaper to blend them into the surface of the vulcanite.I polished the stem with micromesh sanding pads – wet sanding with 1500-2400 grit micromesh sanding pads and dry sanding it with 3200-12000 grit pads. I rubbed the stem down with Obsidian Oil after each pad. I polished it with Before & After Pipe Polish – both Fine and Extra Fine and buffed it into the vulcanite with a cotton pad. When I finished I gave it a final rub down with the oil and set it aside to dry.  With the stem polished I put it back on the pipe and lightly buffed the bowl with Blue Diamond. I did not want to get the buffing compound in the sandblast finish. I buffed the stem with a more aggressive buff of Blue Diamond. I hand rubbed the bowl several coats of Conservator’s Wax and the stem several coats of carnauba wax and buffed the pipe with a clean buffing pad to raise the shine. I hand buffed it with a microfiber cloth to deepen the shine. The pipe polished up pretty nicely. The finished pipe is shown in the photos below. This is the last of Farida’s Dad’s pipes that I am restoring from his collection. I am looking forward to hearing what Farida thinks once she sees the finished pipe on the blog. This Dunhill Shell 5203 Billiard will soon be on the rebornpipes store if you want to add it to your rack. The dimensions are Length: 6 inches, Height: 1 7/8 inches, Outside diameter of the bowl: 1 1/4 inches, Chamber diameter: 3/4 inches. Thanks for walking through the restoration with me as I worked over the last of her Dad’s pipes. With the completion of this one I have finished this estate. Thanks for walking through the restoration and reclamation of this lot of pipes. It has been an interesting journey for me and a continuance of my education. Cheers

The Gauntlet Thrown: Restoring a ‘New’, Never Smoked RJ ERGI Grand Luxe Horn Stem Billiard


Blog by Dal Stanton

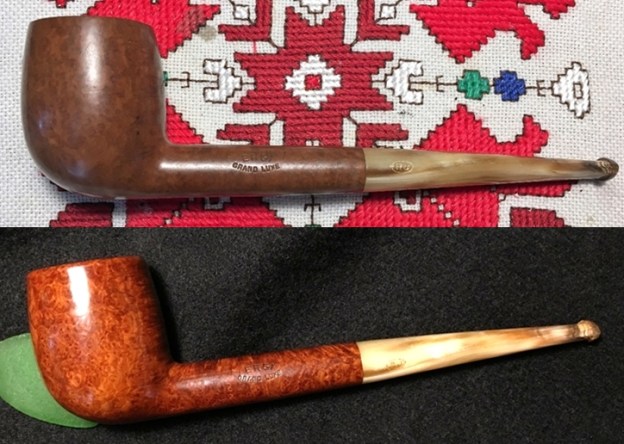
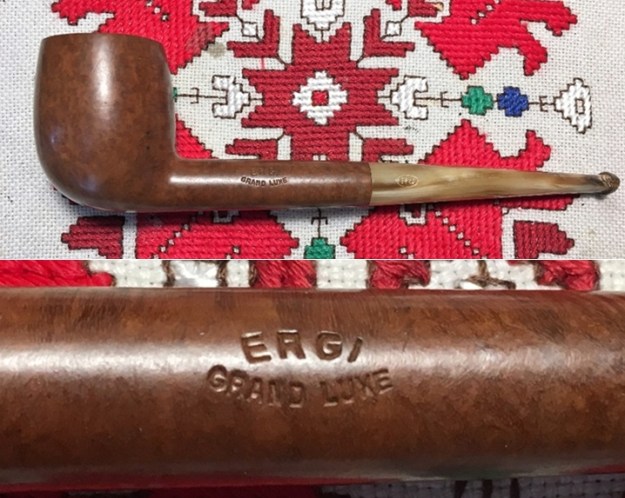
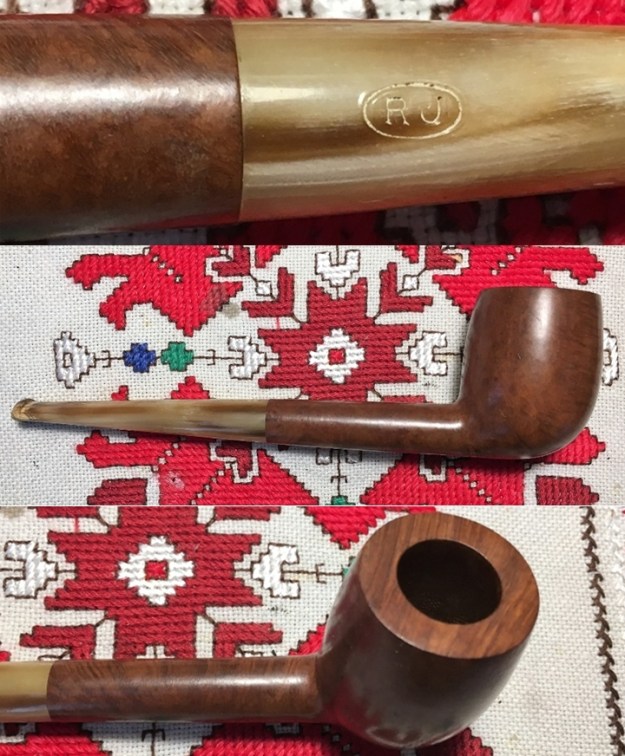
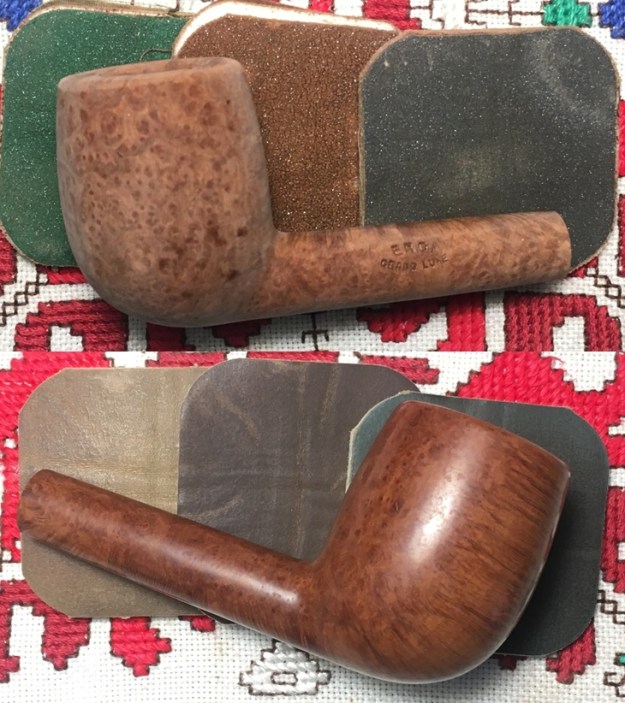
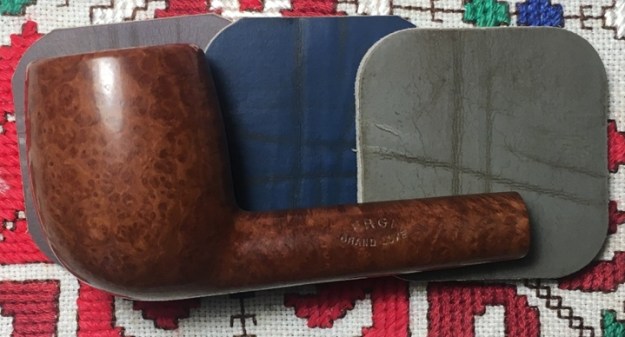
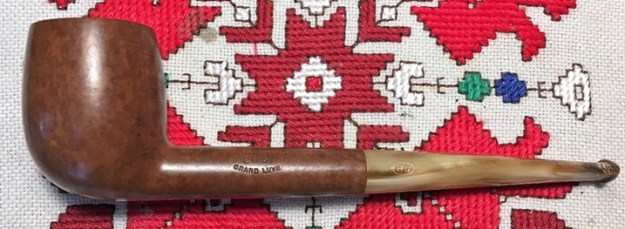
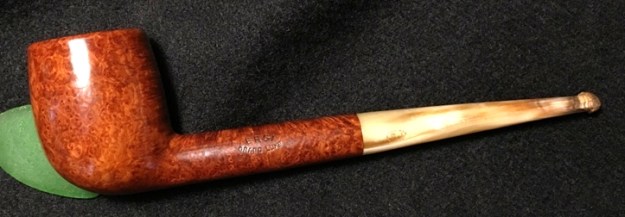
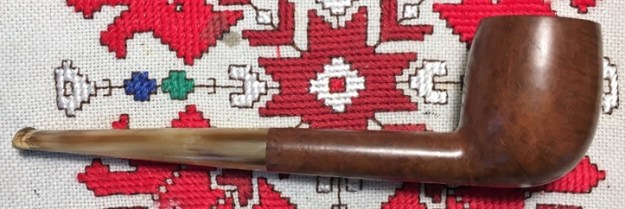
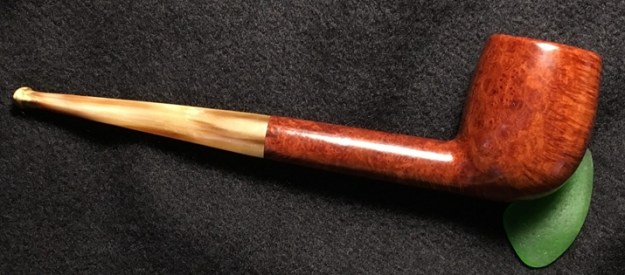
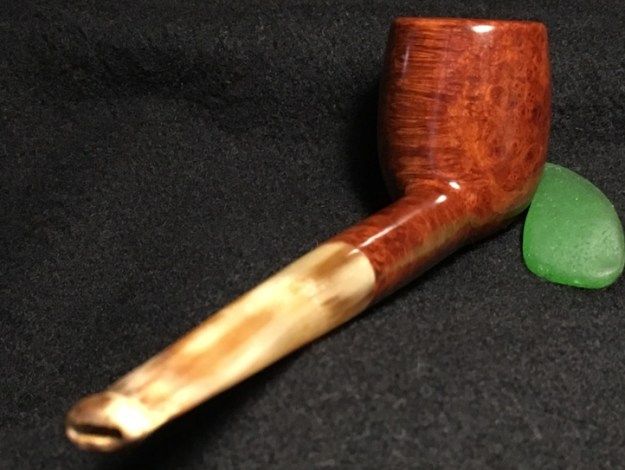
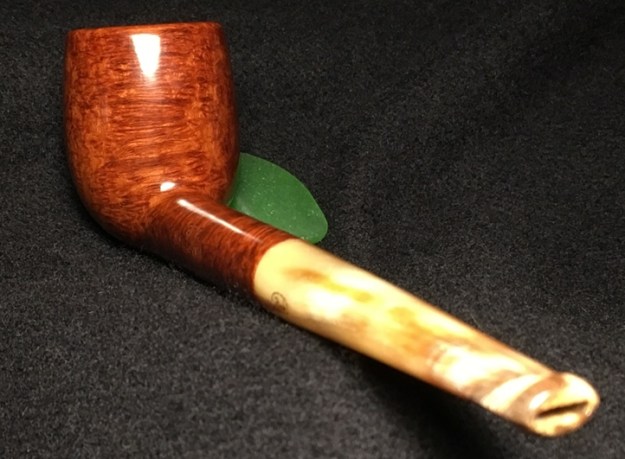
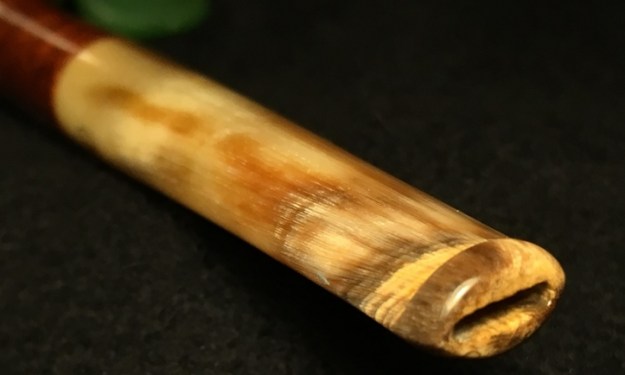
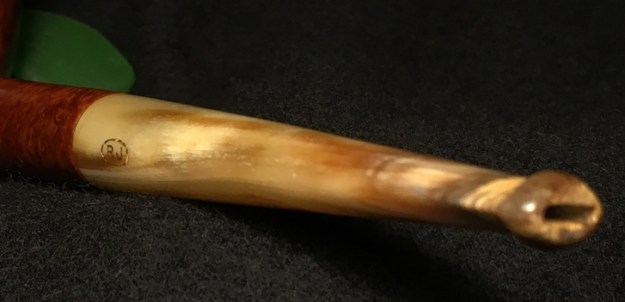
When this pipe came onto my worktable my assumption was that it was French made.  This assumption was formed by it being part of the ‘French Lot of 50’ which I acquired off the French eBay auction block.  Many of the pipes in this Lot bore horn stems which seemed to be the ‘French’ characteristic that formed my assumption that it too, was manufactured in France.  But on my worktable, the only marks stamped onto the Billiard were the ERGI [over] Grand Luxe on the left flank of the shank and an encircled ‘RJ’ stamped on the stem.  Here are the initial pictures of this attractive RJ Billiard with a horn stem and the nomenclature stampings: Intrigued by the question of this pipe’s COM and ‘RJ’ and ‘ERGI’, I went to all my usual places – Pipedia and Pipephil both came up totally empty.  I broadened the search to other blog threads and then to a wide-open Google search campaign.  Nothing.  I posted pictures of the nomenclature on Facebook groups, Gentlemen’s Pipe Smoking Society and Tobacco Pipe Restorers, and received only one response from Mike on GPSS who had this anecdotal information:

Mike: This pipe was made in Paris

Dal: Mike, Thanks. Do you know what RJ is? Company?? Thanks!

Mike: I know that the company closed down in 1998. As for the ERGI I believe it was an abbreviation for where the briar itself was harvested I picked one up years ago while in Paris.  I also remember paying the equivalent of 120 US dollars for it back about 20 years ago.  A really nice smoker. Dense briar.

Armed with Mike’s information about the Paris connection and encouraged by his experience, I Googled more (and a lot!) and also switched over to use Google of France hoping to get different responses.  This did help and I found one other piece of information about another RJ of Paris pipe – formerly on the Worthpoint auction block a Torpedo shape with this scant information.

WONDERFUL VINTAGE TORPEDO PIPE BY RJ PARIS WITH THE MAZE MORTONS PATENT DAMPER

This auction is for a super pipe in a torpedo shape made by RJ Paris (marked to the briar with name) and to the end is a mechanism that allows the damper to open and close – which is marked The Maze Morton’s Patent – a very good and interesting pipe.

An interesting pipe!  Again, a horn stem.  The French must like horn stems or at least ‘RJ’ did.  This confirmed that there was at least one other RJ of Paris pipe out there, but it was also advertised with the “Maze Mortons Patent Damper’.  I then searched again adding this to the search parameters and came up with no additional information – bah!  I’ll keep researching while I work on the pipe and I’m open to anyone reading this write-up to send me a note with more information to add to the scant information I have!

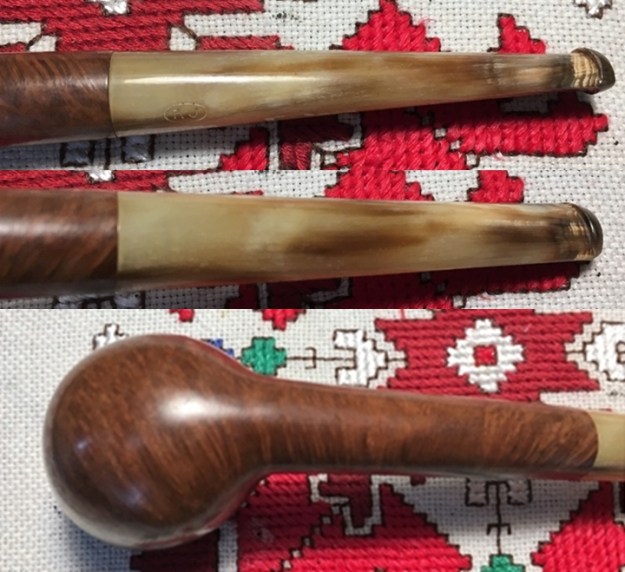
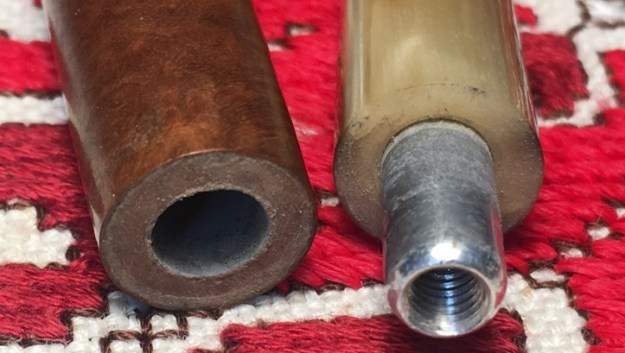
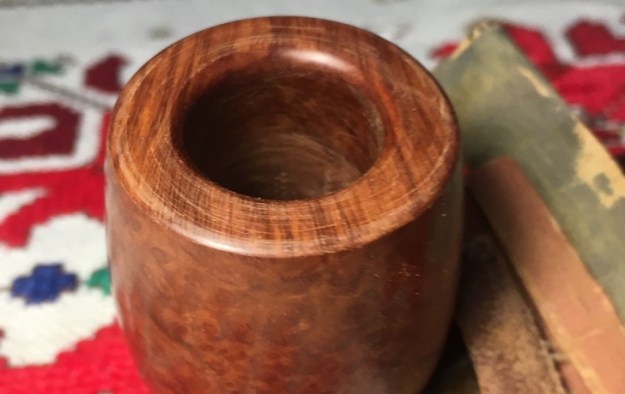
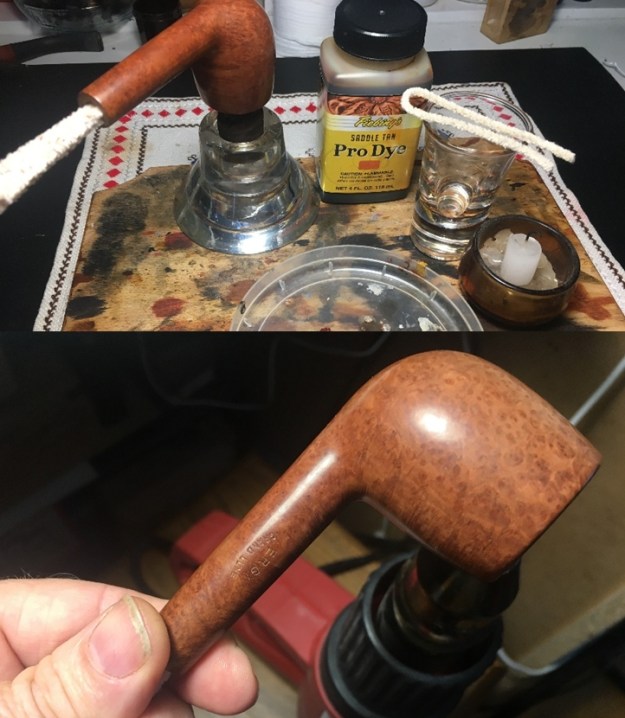
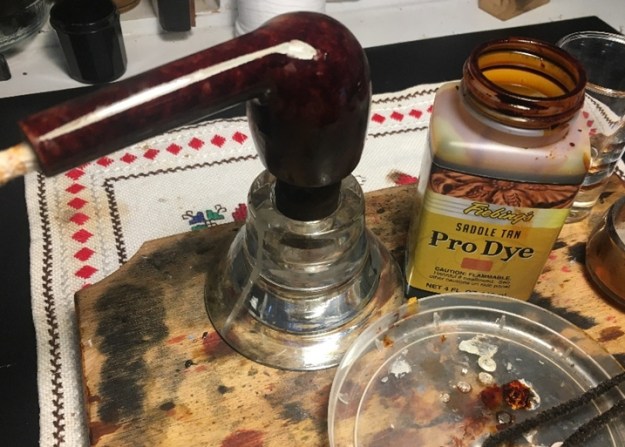
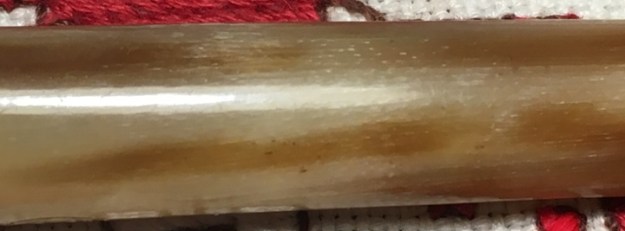
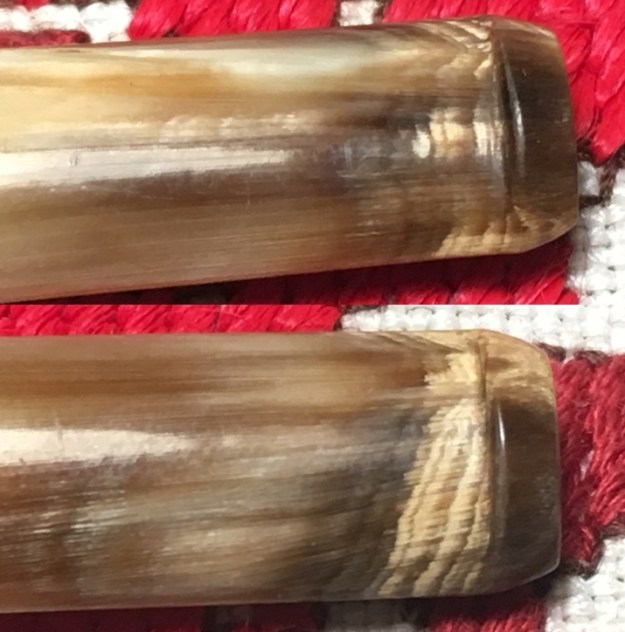
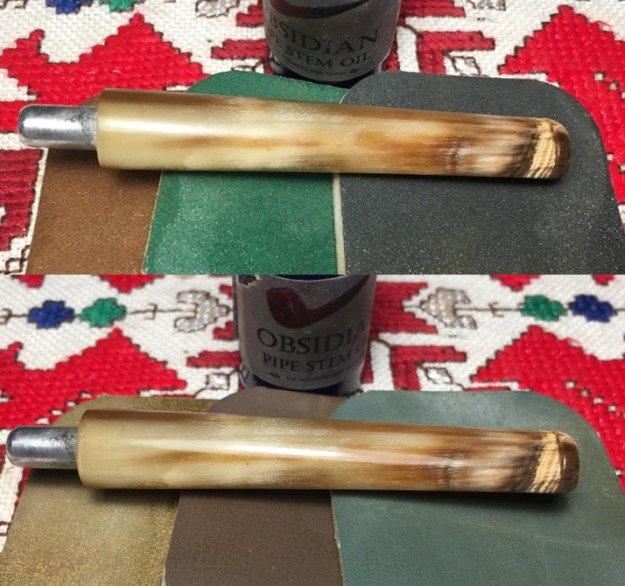
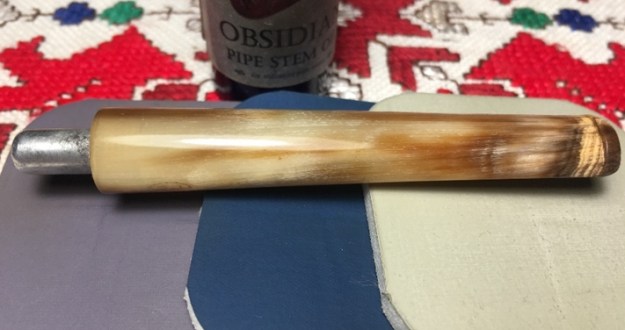
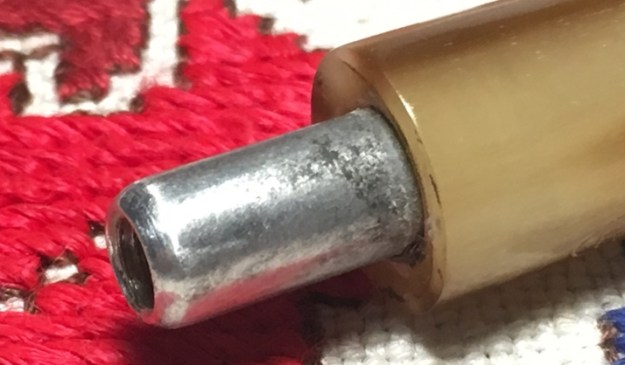
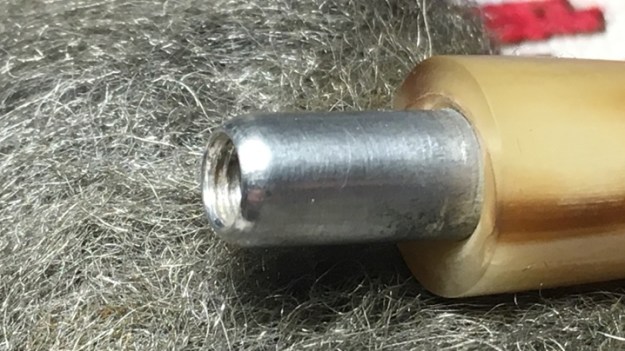
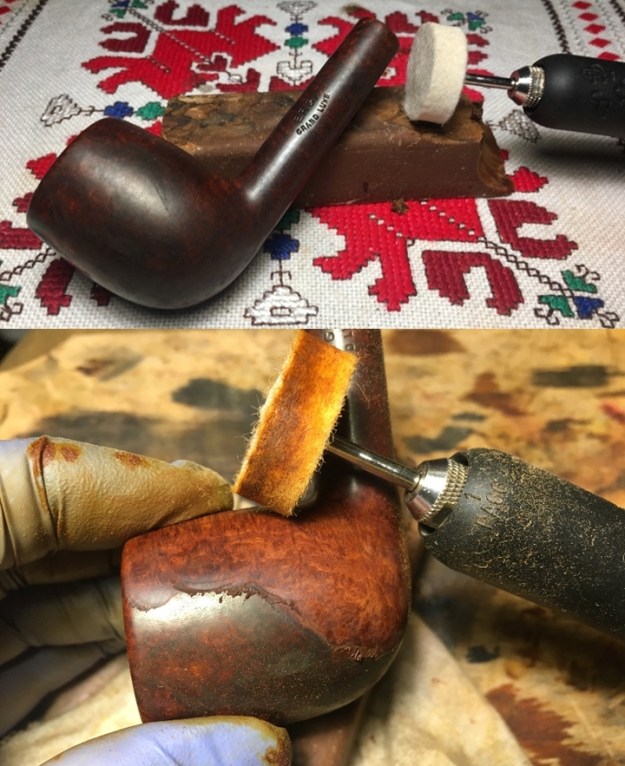
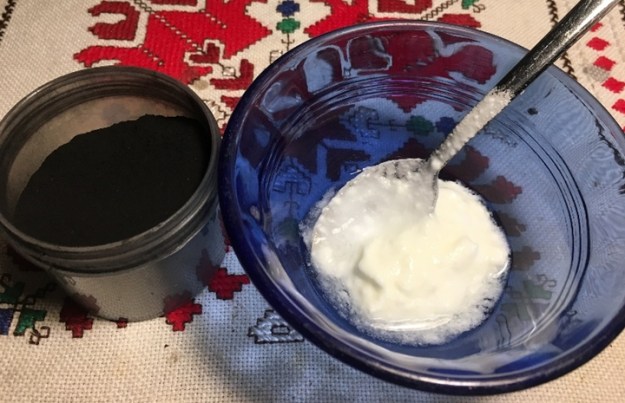
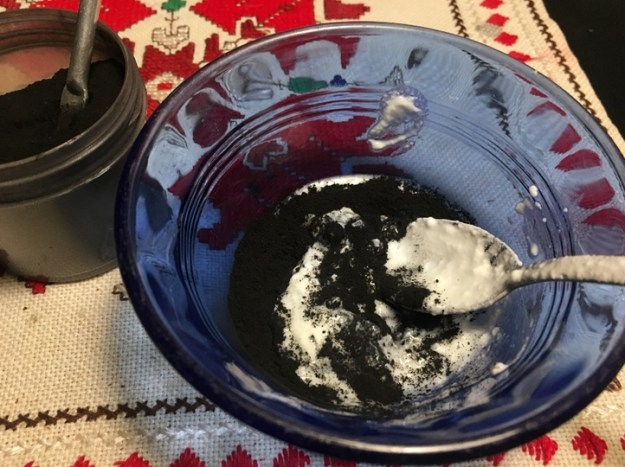
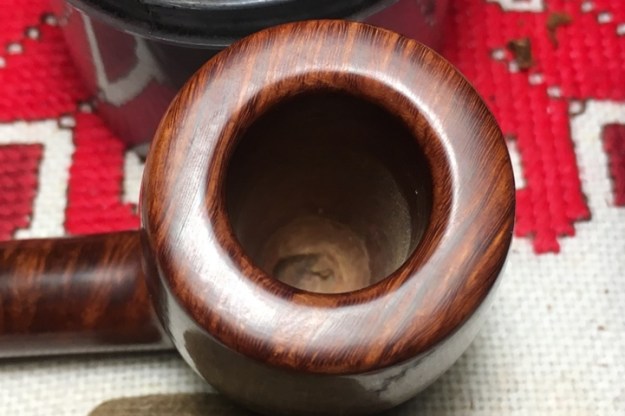
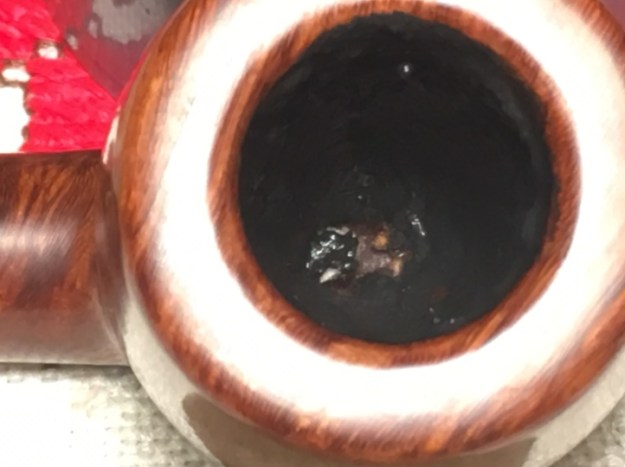
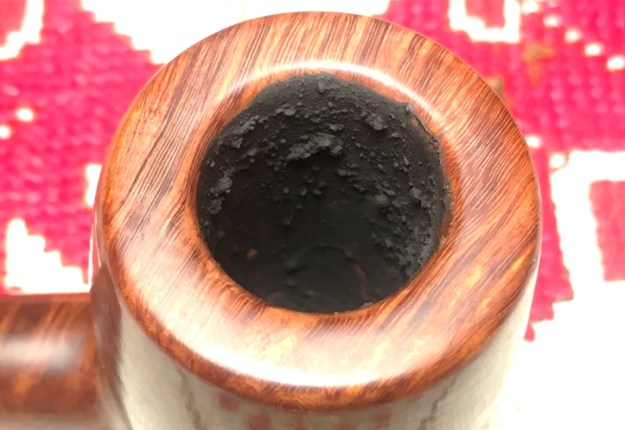
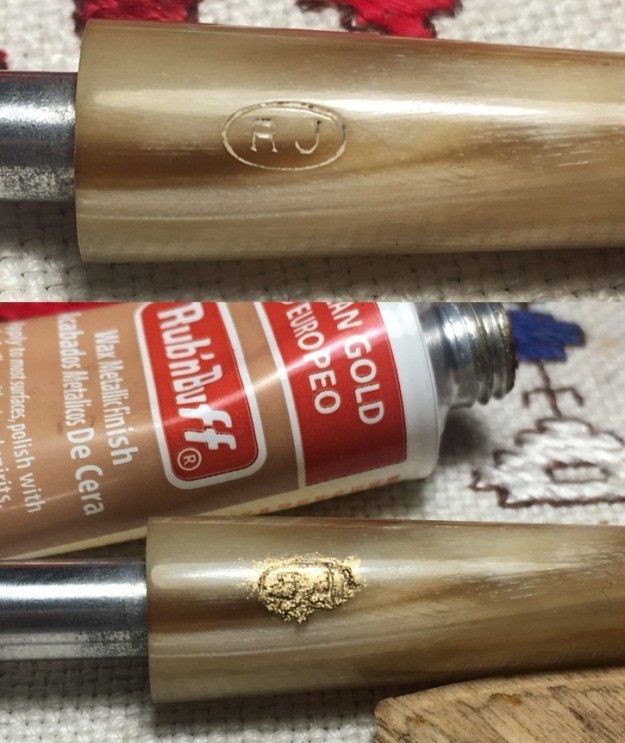
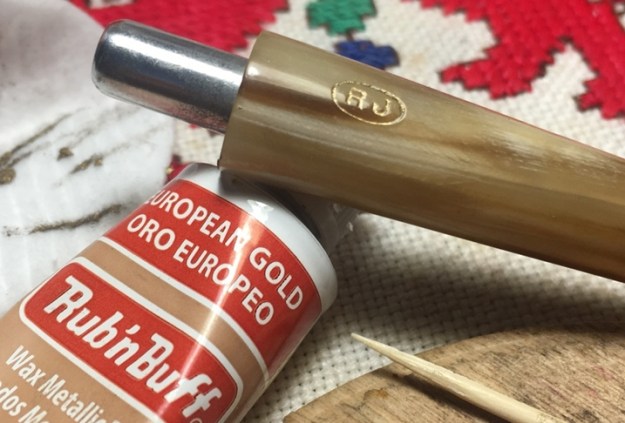
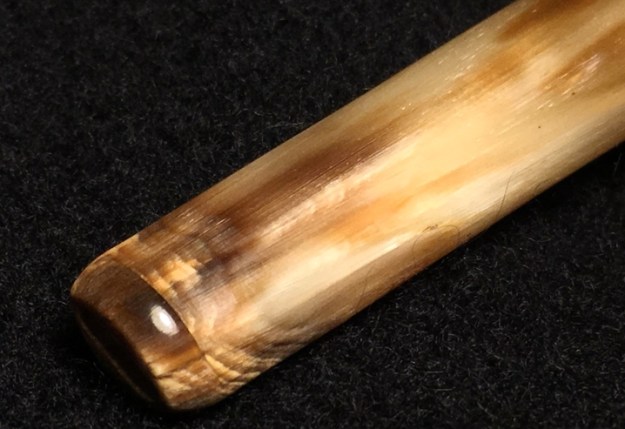
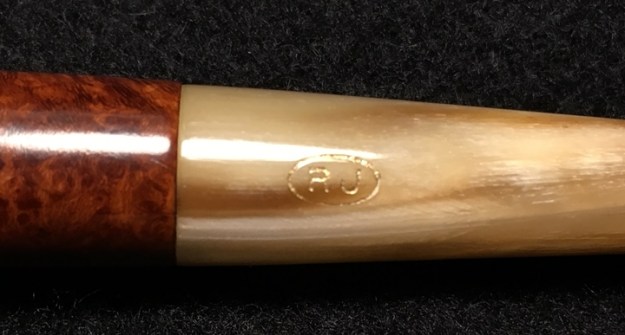
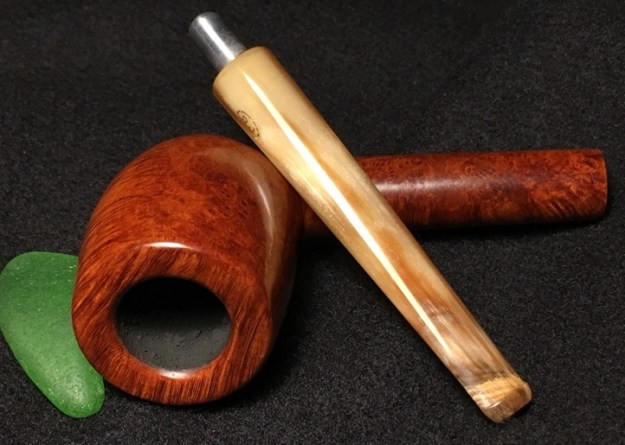
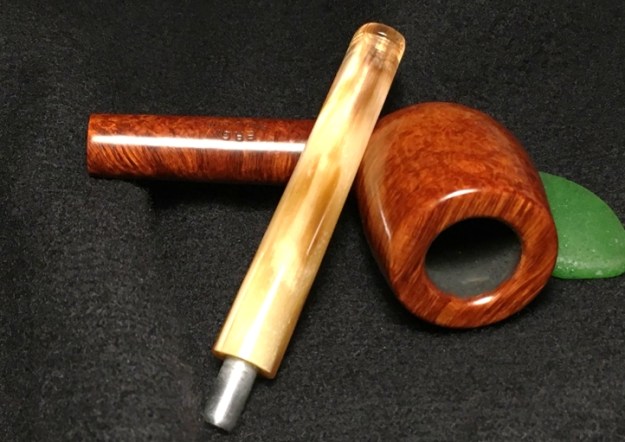
Todd saw this pipe along with two others in the For “Pipe Dreamers” Only! collection – a Ben Wade Hand Model and a very nice GBD Pot with uber grain potential!  Todd is a regular commenter on Rebornpipes and different Facebook pipe groups.  In the past he had offered encouraging words for restorations I had published, so it was great dialoging with him while he chose pipes to commission!  As he whittled his Dreamers list down from 5 pipes to the 3, we discovered we both have 2 grown children living in Denver, a parent living in Florida and connections in the Atlanta area – a small world sometimes in the pipedom community!  Most interesting to me was to discover that Todd is a lawyer and fluent in Mandarin Chinese and who practices both commercial law for corporations and also political asylum cases for individuals.  ‘Political asylum’ cases got my attention and appreciation, especially given our work here in Bulgaria among trafficked women.  Todd’s final three Dreamer’s choices: a Ben Wade, GBD Pot and the RJ on the worktable.With the limited information about the pipe before me and an appreciation for the pipe man who commissioned it, I now look closer at the pipe’s condition.  The interesting thing about this pipe is that it appears to be unsmoked and newish.  The metal tenon appears to be threaded and I’m assuming will take a 5mm filter if one chooses.  The chamber is virgin even though the external briar has some nicks and miniscule pits at places.  The pipe is very attractive, but what strikes me is that the grain of the smooth briar is subdued, even for an unsmoked pipe!  The rim is not marred, but the appearance is sharp and chopped.  Softening the rim presentation would help. The horn stem is in pristine condition and simply needs to be polished.  This ‘restoration’ is primarily a freshening, but my challenge is to show that generally (notice, qualifier!) a good restoration of a ‘new’ pipe will turn out better results than a factory manufactured new pipe.  This is the gauntlet that I’m laying down for myself, and we’ll see! Even though the pipe is unsmoked, I use undiluted Murphy’s Oil Soap and clean the stummel using a cotton pad. Afterwards, I rinse the stummel with cool tap water.  Doing this not only cleans the briar, but I also watch to see how the finish reacts.  As you can see from the results below, the cotton pad picks up some grime.Next, to soften the rim’s ‘cut off’, block look, I introduce both an internal bevel and a gentle external bevel.  At the end, these bevels will soften and will appear simply to be rounded edges, not distinct bevels.  To do the initial shaping, I pinch a tightly rolled piece of 120 grit paper between my thumb and the rim edge and rotate around the circumference.  I follow the 120 with rolled pieces of 240 and 600 grit papers.  In the same way, I introduce a lesser bevel on the external rim edge.  There are some wandering scratches on the rim top that micromesh should erase.Next, to clean up the minor surface imperfections and to tease out the grain, using micromesh pads 1500 to 2400 I wet sand the stummel. I follow by dry sanding using pads 3200 to 4000 and 6000 to 12000.  The grains emerge more distinctly during the micromesh process and I study the patterns.  The block was cut with a primary horizontal cross grain orientation that emerges on the front right and back left bowl quadrants.  On the opposite quadrants, front left and back right – the cross section of the grain emerges in tight bird’s eye patterns.  Very nice – I love the grain!  Decision time.  As I proceeded through the micromesh process, the question I was mulling over in my mind was whether to leave the finish as it is and move on to the compounds and waxing?  Or, to apply a dye and employ the felt buffing wheel technique that will result in heightened grain contrast?  After conferring with my stylistically superior, my wife, I decide to go in the latter direction.  I use Fiebing’s Saddle Tan Pro Dye to do this – an aniline dye.  My aim is not to darken the overall stummel appearance, but to create more contrast in the grains.  I first wipe the bowl with a cotton pad wetted with alcohol to clean it. Then I heat the stummel using the hot air gun which helps expand the briar allowing the grain to be more receptive to the dye.  After heated, using a folded over pipe cleaner, I apply the Saddle Tan dye to the stummel and then fire it with a lit candle.  The alcohol in the dye combusts and sets the pigment in the briar.  After a few minutes, I repeat the process of applying and firing the dye.  I then put the stummel aside to rest for several hours. With the stummel on the resting allowing the dye to fully set, I study the horn stem.  It’s a beautiful piece of horn and the only thing I can do is simply spruce it up.  In the past, I benefited greatly by Steve’s essay on horn stem repair working on my first horn stem, A First Horn Stem on a Throw Away Pipe.  The key thing in repairing horn is to fill the gaps to keep the horn from drying and splintering as horn is very porous.  This stem needs no repairs, but looking closely, I do see normal miniscule porous texture.  The tighter or smoother the horn surface is, helps to guard against the decay of the horn.  I take a few closeups to show this. I treat the horn stem like a vulcanite stem but with greater gentleness 😊.  I run the stem through the micromesh regimen, and I will apply compounds afterward.  I wet sand with micromesh pads 1500 to 2400 and follow by dry sanding with pads 3200 to 4000 and 6000 to 12000.  After each set of three pads, I apply Obsidian Oil to the horn and the horn drinks it up! I’m pleased with the results – even more gloss! While working on the stem, I kept seeing the nickel tenon and thinking that I needed to work on that a bit.  I clean it initially with 0000 steel wool.  After a bit of shining, that’s more like it! The newly stained and fired stummel has been resting for several hours and it’s time to unwrap the fired crust.  I mount a felt cloth buffing wheel to the Dremel and set the speed to the slowest possible, so I don’t scorch the wood with too much friction.  I then apply Tripoli compound to the briar surface which takes quite a bit of time. As the wheel ‘plows’ the crusted dye it loads up quickly requiring me to purge the wheel often.  When finished with Tripoli compound, I wipe the stummel with a cotton pad wetted with isopropyl 95%. I do this to lighten the aniline dye as well as to blend it.  Following this, I mount a cotton cloth buffing wheel to the Dremel, and increase the speed to about 40% full power.  After rejoining the stem and stummel, I apply Blue Diamond compound to both the horn stem and stummel.  When finished, I then wipe the pipe down with a felt cloth to clean it of compound dust before the application of the wax.  The pictures show the process. Before moving to the waxing of the pipe, I apply a mixture of activated charcoal and yogurt (sour cream works too) to form a protective layer for the chamber.  This mixture hardens in the chamber and provides a good starter layer for a cake to develop which protects the briar.  First, I put some natural yogurt in a small dish and then while mixing, I add activated charcoal.  As I add charcoal it thickens.  I want it thick enough, so it doesn’t run after applied to the chamber and I don’t want it so thick that it clumps.  When it looks good, after inserting a pipe cleaner through the draft hole to keep the airway open, I use a cotton bud and paint the chamber wall with the mixture.  With this done, it is late, and I turn out the lights allowing the charcoal/yogurt mixture to cure through the night. The next morning, the chamber coating has cured and I’m ready now to apply the final wax. One more thing to do before applying wax.  I have not seen any other RJ branded pipes that would provide a model informing me about the stem stamp.  The oval-encircled ‘RJ’ appears to have had some color in it, but it’s not clear which.  I decide to dress it up by applying Rub’n Buff European Gold to the stamp.  I apply some over the stamping with a toothpick and after a few minutes, simply scrape most of the excess off using the hard side of a tooth pick and then finish it up by wiping it clean of excess with a cotton pad.  It works exceptionally well and the subtle gold stamping blends well with the horn stem brown and tan hues.  Wow!  I’m liking this. I mount the Dremel with another cotton cloth wheel, maintain 40% full power speed, and apply several coats of carnauba wax to the stummel and horn stem.  After this, I give the entire pipe a good hand buffing with a microfiber cloth to raise the shine.

Earlier, I threw down the gauntlet and made the statement that a well-done restoration has better results than most new, manufactured pipes.  I’ll let you make your own judgement below as I begin with a ‘Before & After’ picture.  John, my fellow GPSC Facebook group member, observed that the RJ pipe he acquired in Paris some years ago had dense briar.  I would say that this ERGI Grand Luxe, if it too is Parisian, displays a grain that could be described the same way.  The bird’s eye is beautiful, tightly wound, and gratuitously showcased throughout the briar landscape – very appealing.  Complementing this beautiful display of briar is the rustic, earthy horn stem with its softly woven brown and tan hues.  I also like the gold embossing of the RJ stamp – it fits well this striking straight Billiard.  This is the first of 3 pipes that Todd commissioned and he will have the first opportunity to acquire it from The Pipe Steward Store.  This pipe benefits our work here in Bulgaria, with the Daughters of Bulgaria – helping women and girls who have been trafficked and sexually exploited.  Thanks for joining me!  Now, ‘Before & After’.  What do you think?


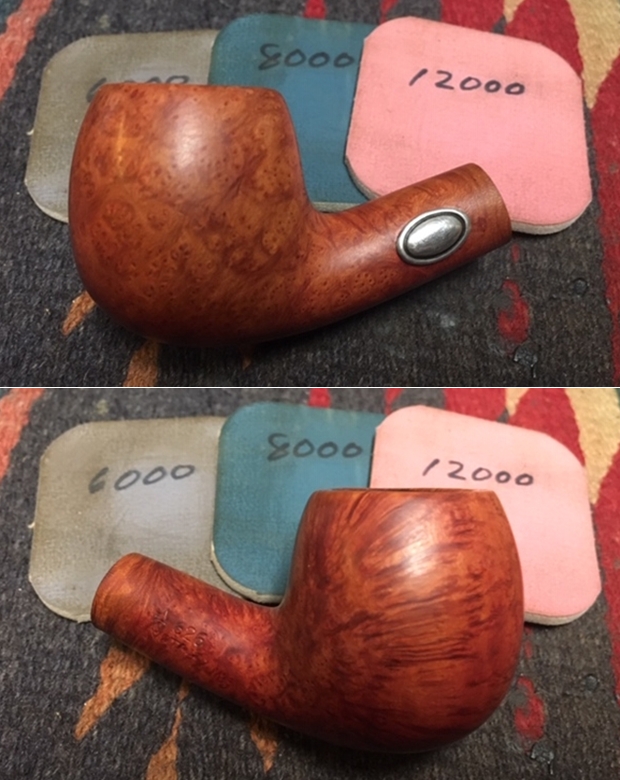
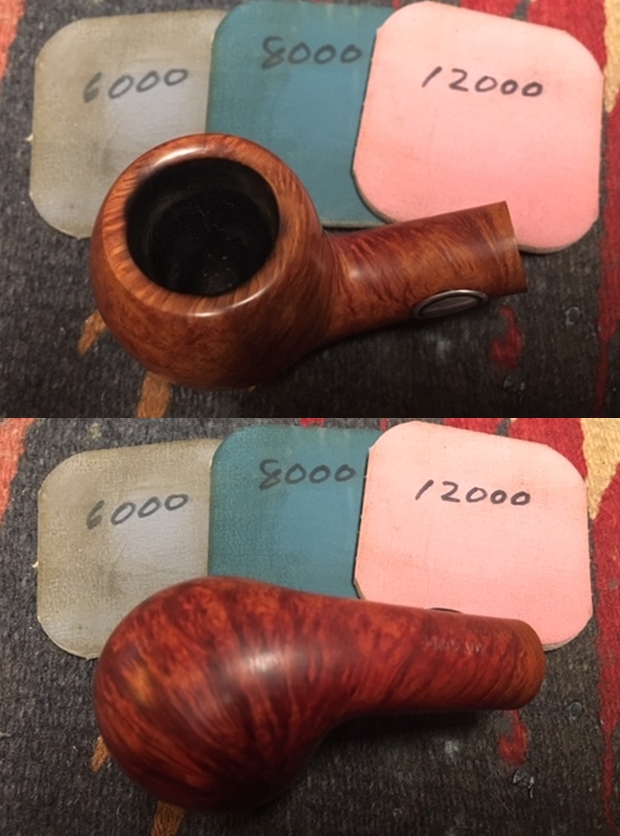
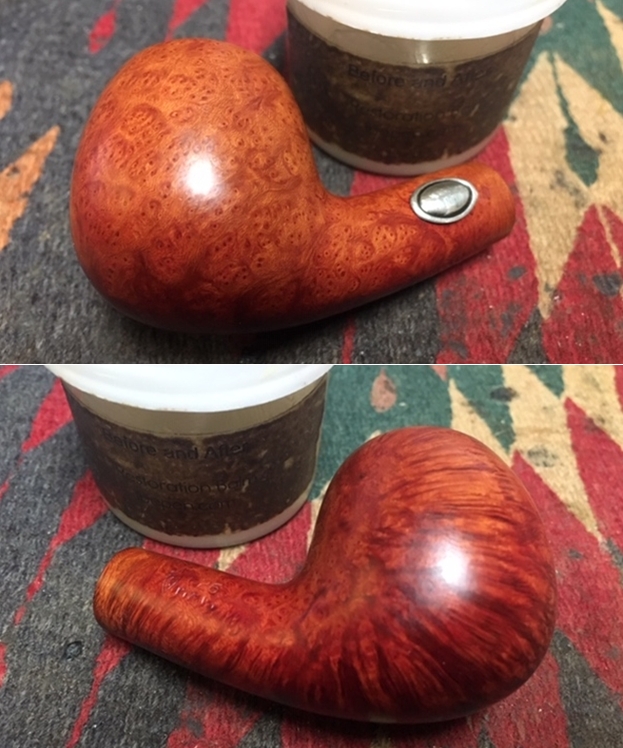
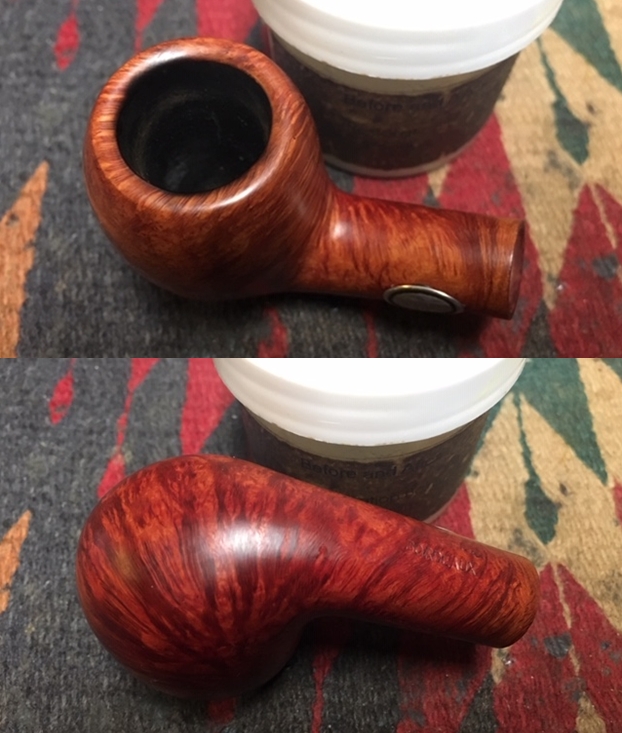
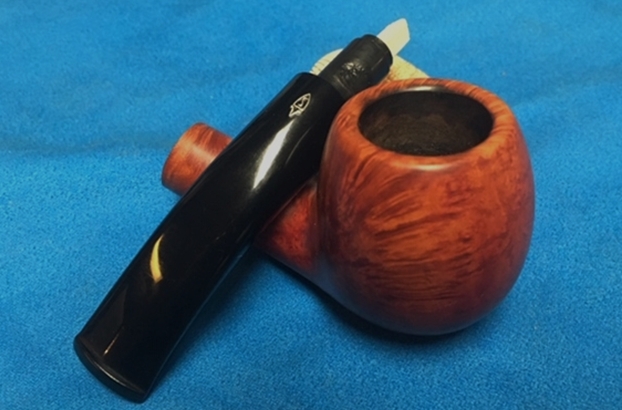
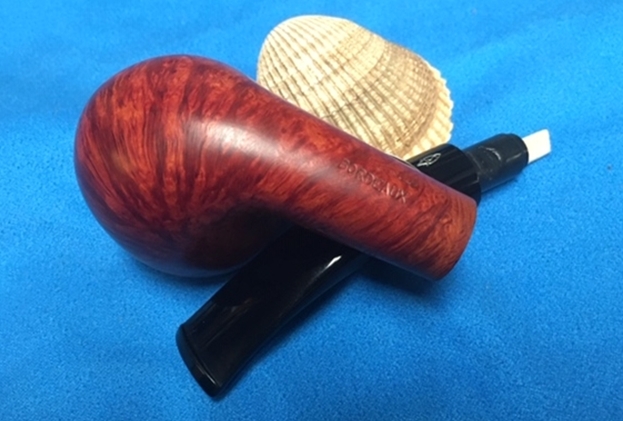
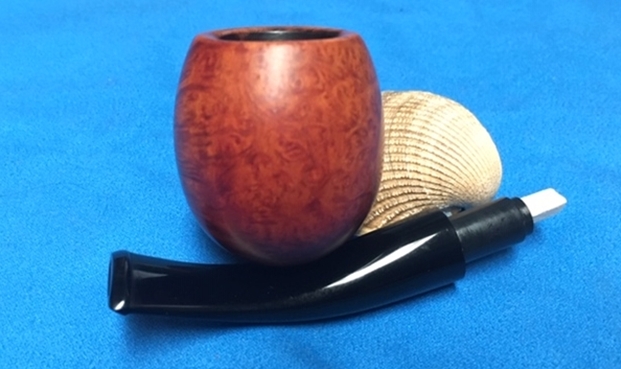
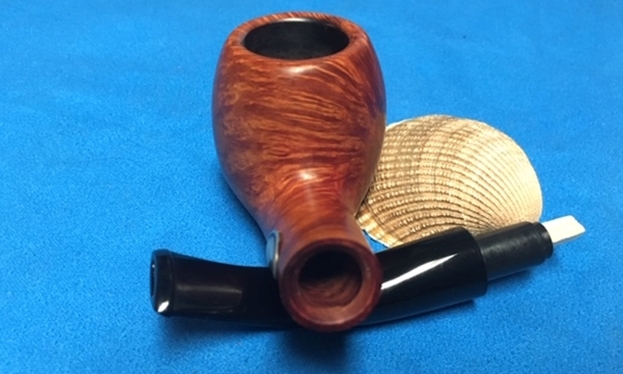
Cleaning up a Savinelli Bordeaux 626 Bent Apple


Blog by Steve Laug

My brother has a good connection in New York who keeps an eye open for good pipes that might interest us. He came across this beautiful little Savinelli Bordeaux 625 Bent Apple. It is a classic Savinelli shape that occurs across the various lines of the brand. The pipe has a silver oval shield on the left side of the shank. It is engraved Savinelli in the raised oval in the centre in an arch over 1876, the year of the birth of the brand. On the underside of the shank it is stamped Savinelli over Bordeaux. On the right side it bears the Savinelli shield S logo and the shape number 626 over Italy. The finish was dirty but underneath there was some beautiful birdseye and cross grain around the bowl. The rim top had some tars and lava overflow toward the back side and there appeared to be burn marks on the back inner edge and on the front right rim top and inner edge. The stem is acrylic and had slight tooth chatter at the button on both sides. It has the Savinelli shield S logo on the top of the bent tapered stem. Upon removing the stem it became clear that it was a filter pipe made specifically for a triangular Balsa wood filter to be inserted in the tenon and extending part way into the shank. Jeff took photos of the pipe before he began his cleanup work. Jeff took two close-up photos of the bowl and rim from different angles to capture the condition of the pipe pre-cleanup work. The rim top had some lava overflow and a lot of damage to the inner and outer edges of the bowl. The pipe is dirty with thick cake and damage around the rim.He also took photos of the right side and the bottom of the bowl and shank to show the various grains on the pipe. The photos show the finish of the bowl and the amazing grain underneath the grime. The finish is very dirty but this is another beautiful pipe. Jeff took photos of the sides of the shank to capture the stamping on the sides and underside of the shank. The photo shows the silver oval Savinelli 1876 on the left side of the shank. The stamping is very clear and readable. The next photo shows the Savinelli shield S logo on the top side of the stem. The next two photos show the stem surface. There is tooth chatter on both sides near the button. There is also some wear on the button. Because it is an acrylic stem there is not any oxidation on the stem surface.Jeff followed our normal regimen of working on the pipes that has become habit to both of us. I include it here so you have a sense of that pattern. Jeff reamed the bowl with a PipNet pipe reamer and followed up with a Savinelli Fitsall pipe knife to remove the cake. He scrubbed out the mortise and the airway in the shank and the stem with alcohol, cotton swabs and pipe cleaners. He scrubbed the exterior of the bowl, rim, shank and stem with a tooth brush and Murphy’s Oil Soap to remove the oils and tars on the rim and the grime on the finish of the bowl. He rinsed it under running water. He dried it off with a soft cloth. He was able to remove the lava build up on the rim top and the rim top damage and the damage around the edges – both inner and outer is quite extensive. I took photos of the pipe to show its condition before I started my work on it.  I took close up photos of the bowl and rim top as well as the stem. You can see the condition of the rim top and bowl in the first photo. Jeff was able to remove all of the tar and oils but you can now see the burn damage to the right front and the back inner edge of the bowl. The acrylic stem had light tooth chatter on the top and underside of the stem near and on the button surface.I decided to address the rim top damage first. I worked on the top and inner edges of the rim with 220 grit sandpaper to remove the damage to the top and edges of the rim top. I was also able to remove the damage to the edges of the rim.I polished the rim top, the edge and exterior of the bowl and shank with micromesh sanding pads – wet sanding with 1500-2400 grit pads and dry sanding with 3200-12000 grit pads. I wiped the rim off after each sanding pad to remove the dust. The damage on the rim edges and top looked really good after polishing.  I worked some Before & After Restoration Balm into the smooth surface of the briar with my fingertips to clean, enliven and protect it. I let the balm sit for a little wall and then buffed with a cotton cloth to raise the shine. The following photos show the bowl at this point in the restoration process. The reworked rim top looks really good and matches the colour of the rest of the pipe. I set the bowl aside and worked on the stem. There was some tooth chatter on the top and underside at the button. I cleaned up the chatter and reshaped the edge of the button with 220 grit sandpaper.I polished the stem with micromesh sanding pads – wet sanding with 1500-2400 grit sanding pads and dry sanding it with 3200-12000 grit sanding pads. I wiped it down after each sanding pad with a damp cloth. I polished it with Before & After Pipe Stem Polish and buffed it with a cotton pad. (Note the casting marks on the tenon. It does not appear to be damaged as these seem to be in the cast of the acrylic.) I have a tin here in which I keep a variety of filters for pipes that I repair that need them. I went through it and found what I was looking for – a Savinelli Balsa System filter. It is a triangular piece of Balsa wood that is inserted into the tenon. The end extends slightly into the shank of the pipe filling in the gap between the end of the tenon and the end of the mortise. The fit in the stem was perfect so I was pretty certain this was the correct filter for this Bordeaux pipe. The photos below show the filter below and inside of the stem.I put the stem back in place in the shank and polished stem and the bowl with Blue Diamond polish on the buffing wheel (I carefully avoided buffing the silver oval on the left side of the shank). I gave the bowl and the stem multiple coats of carnauba wax. I buffed the pipe with a clean buffing pad to raise the shine. I hand buffed it with a microfiber cloth to deepen the shine. The pipe polished up pretty nicely. The birdseye and cross grain around the bowl and shank really stood out. It came alive with the buffing. The rich contrasting brown colour works well with the polished black acrylic stem. This is a beautiful example of Savinelli craftsmanship. Have a look at it in the photos below. The shape, finish and flow of the pipe and stem are very well done. The dimensions are Length: 5 1/4 inches, Height: 1 3/4 inches, Outside diameter of the bowl: 1 1/4 inches, Chamber diameter: 3/4 of an inch. I will be putting this newly finished Savinelli Bordeaux 626 Bent Apple on the rebornpipes store shortly if you are interested in adding it to your collection. Working over this one was a pleasure. Thanks for taking time to read the blog post.

The Third Pipe of a Foursome – A 2nd JR Handmade Canadian


Blog by Steve Laug

My brother Jeff picked up four pipes in classic shapes at an auction in Nampa, Idaho. All four pipes are stamped JR Handmade. Beside the Bulldog there were two Canadians and an Apple. All were stamped the same on the shank JR over Handmade and the opposite side Algerian Briar. I have been researching the brand on the web. I came across a potential pipemaker with the JR initials on Pipedia named J. Rinaldi but from what I can see he did not make classic shaped pipes. He pipes are very well made and have more of a freehand/freeform shape with shank adornments so it makes me wonder if these are his. I enlarged each photo on the Pipedia article but I was unable to see the stamping on his pipes for comparison sake. This leaves me with a lot of questions about the brand. The foursome came from the Boise, Idaho area like the House of Robertson pipes that I worked on last year. Those came from a pipe shop in Boise, Idaho and I wonder if it is not possible that the JR Handmade brand was also a pipe shop brand from a small shop in that area or even somehow connected with the House of Robertson brand. Perhaps I will never know… if any of you readers have any idea about the brand your help would be greatly appreciated.The above photo shows the foursome after Jeff had cleaned them. But before he cleaned each of them he took photos of the pipes as they came to him. I already wrote about the restoration of the Bulldog (https://rebornpipes.com/2019/01/28/the-first-of-a-foursome-a-jr-handmade-bulldog/) and the first Canadian (https://rebornpipes.com/2019/01/30/the-second-of-a-foursome-a-jr-handmade-canadian/). The next pipe is the second pipe down on the left side of the above photo – a classic Canadian with a flat rim top. It is longer than the previous Canadian and also has a longer stem. I have included the photos of the Canadian before cleanup. The pipe is very well made and follows the classic shape of an oval shank Canadian perfectly. The bowl was stained with a slightly different looking finish to the other pipes in the lot. It was more of a medium brown with no black undercoat. Because of that the grain showed up differently on this one. It is a well-shaped pipe that captures the mixture of flame and cross and birdseye grain around the bowl sides and shank. The top of the bowl had some damage on the top and inner edge. The inner edge had some knife marks on the right side at the top that left damage. The bowl had a very thick cake in the bowl. There was a light overflow of lava onto the rim top. The stamping on the top side of the oval shank read JR over HAND MADE. The stamping on the underside read Algerian Briar. The black vulcanite stem had light tooth dents and chatter on the top and the underside of the stem. Otherwise it was in very good condition. It was the most oxidized of the foursome and also had some calcification. Jeff took a close-up photo of the bowl and rim to capture the condition of the pipe pre-cleanup work. The rim top had some lava overflow and a lot of damage to the inner and outer edges of the bowl. The pipe is dirty with thick cake and damage around the rim.He also took a photo of the bottom of the bowl and shank to show the various grains on the pipe. Even though the photo is a bit blurry it show the finish of the bowl and that it is lighter in colour than the other pipes in the foursome. The finish is very dirty but this is another beautiful pipe.

The bowl also has a few fills on the back side of bow and lower right side.Jeff took a photo to capture the stamping on the topside of the oval shank. The photo shows stamping JR over HAND MADE. On the underside it reads Algerian Briar.  The next two photos show the stem surface. There are tooth marks and chatter on both sides near the button. There is also some wear on the sharp edge of the button. There is a thick oxidation and accost of calcification.As mentioned before, Jeff and I have developed a pattern of working on the pipes that has become habit to both Jeff and me. I include it here so you have a sense of that pattern. Jeff reamed the bowl with a PipNet pipe reamer and followed up with a Savinelli Fitsall pipe knife to remove the cake. He scrubbed out the mortise and the airway in the shank and the stem with alcohol, cotton swabs and pipe cleaners. He scrubbed the exterior of the bowl, rim, shank and stem with a tooth brush and Murphy’s Oil Soap to remove the oils and tars on the rim and the grime on the finish of the bowl. He rinsed it under running water. He dried it off with a soft cloth. He was able to remove the lava build up on the rim top and the rim top damage and the damage around the edges – both inner and outer is quite extensive. I took photos of the pipe to show its condition before I started my work on it.   I took close up photos of the bowl and rim top as well as the stem. You can see the condition of the rim top and bowl in the first photo. Jeff was able to remove all of the tar and oils but you can now see the burn damage to the back inner edge of the bowl. The vulcanite stem had light tooth chatter and some tooth marks on the top and underside of the stem near and on the button surface.I took photos of the stamping on both sides of the oval shank. You can see that the stamping on both sides was light toward the front of the pipe. It was still readable but faint nonetheless.I decided to address the rim top damage first. I topped the bowl with 220 grit sandpaper on a topping board to remove the damage to the top and the outer edges of the rim top. I was also able to reduce the damage to the back inner edge of the rim.I also needed to take care of the inner edge so I used a folded piece of 220 grit sandpaper to smooth out the burn marks and darkening around the edge. I gave the edge a very slight bevel to minimize the damage. The pink putty fills bugged me! I used a dental pick to remove them as much as possible and wiped the briar down with alcohol on a cotton pad to remove the dust and debris. I filled in the holes with clear super glue and briar dust to repair the fills.When the repairs had cured I sanded them smooth with 220 grit sandpaper to blend the into the surface of the briar.I sanded the repairs smooth and blended them into the rest of the bowl. It took a bit of work but soon they were blended in. I would need to stain the bowl repairs but first I want to polish the sanding marks out. I polished the rim top, the edge and exterior of the bowl and shank with micromesh sanding pads – wet sanding with 1500-2400 grit pads and dry sanding with 3200-12000 grit pads. I wiped the rim off after each sanding pad to remove the dust. The damage on the rim edges and top looked really good after polishing. I decided to stain the entire pipe with a tan stain. I heated the briar, applied the stain and flamed it to set it in the grain. I repeated the process until I was satisfied with the coverage of the stain.I set the bowl aside overnight to let the stain cure and set in the briar.I buffed the bowl the next evening after work with red Tripoli and Blue Diamond to remove the crust coat of the stain and bring the briar to life. I wiped the bowl down with alcohol on a cotton pad to make it more transparent. Once I finished the cleanup of the stain I worked some Before & After Restoration Balm into the smooth surface of the briar with my fingertips to clean, enliven and protect it. I let the balm sit for a little wall and then buffed with a cotton cloth to raise the shine. The following photos show the bowl at this point in the restoration process. The reworked rim top looks really good and matches the colour of the rest of the pipe. I set the bowl aside and worked on the stem. There were some tooth marks on the top and underside at the button that needed to be addressed. I also needed to do some work on the surface of the button on both sides. I also sanded away some of the surface oxidation.I polished the stem with micromesh sanding pads – wet sanding with 1500-2400 grit sanding pads and dry sanding it with 3200-12000 grit sanding pads. I wiped it down after each sanding pad with Obsidian Oil. I polished it with Before & After Pipe Stem Polish and wiped it down with a last coat of Obsidian Oil. With this third JR Hand Made pipes from the Nampa, Idaho auction I am even more certain that there is some connection to the House of Robertson Pipe Shop in Boise, Idaho. I wonder if it is a seconds line for House of Robertson. Even with the fills and the repairs to the pipe this is another nice pipe. The three of the four JR Hand Made pipes that I have to restore are really well made and shaped. The stain job was done to highlight the mix of grain on the bowl. I polished stem and the bowl with Blue Diamond polish on the buffing wheel. I gave the bowl and the stem multiple coats of carnauba wax. I buffed the pipe with a clean buffing pad to raise the shine. I hand buffed it with a microfiber cloth to deepen the shine. The pipe polished up pretty nicely. The contrasting grain really began to stand out; it seemed to take on life with the buffing. The rich contrasting brown colour works well with the polished black vulcanite stem. This finished pipe has a rich look just like the Bulldog and the other Canadian and it is also quite catching. Have a look at it in the photos below. It is a longer and slimmer looking pipe. The shape, finish and flow of the pipe and stem are very well done. The dimensions are Length: 6 1/2 inches, Height: 2 inches, Outside diameter of the bowl: 1 1/4 inches, Chamber diameter: 3/4 of an inch. I will be putting this newly finished JR Hand Made Canadian on the rebornpipes store shortly if you are interested in adding it to your collection. Thanks for walking through the restoration with me as I worked over the third of the foursome from JR Hand Made pipes.

The Second of a Foursome – A JR Handmade Canadian


Blog by Steve Laug

My brother Jeff picked up four pipes in classic shapes at an auction in Nampa, Idaho. All four pipes are stamped JR Handmade. Beside the Bulldog there were two Canadians and an Apple. All were stamped the same on the left side of the shank JR over Handmade and on the right side Algerian Briar. I have been researching the brand on the web. I came across a potential pipemaker with the JR initials on Pipedia named J. Rinaldi but from what I can see he did not make classic shaped pipes. He pipes are very well made and have more of a freehand/freeform shape with shank adornments so it makes me wonder if these are his. I enlarged each photo on the Pipedia article but I was unable to see the stamping on his pipes for comparison sake. This leaves me with a lot of questions about the brand. The foursome came from the Boise, Idaho area like the House of Robertson pipes that I worked on last year. Those came from a pipe shop in Boise, Idaho and I wonder if it is not possible that the JR Handmade brand was also a pipe shop brand from a small shop in that area or even somehow connected with the House of Robertson brand. Perhaps I will never know… if any of you readers have any idea about the brand your help would be greatly appreciated.The above photo shows the foursome after Jeff had cleaned them. But before he cleaned each of them he took photos of the pipes as they came to him. I already wrote about the restoration of the Bulldog (https://rebornpipes.com/2019/01/28/the-first-of-a-foursome-a-jr-handmade-bulldog/). The next pipe is the first pipe on the right side of the above photo – a classic Canadian with a beveled rim top. I have included the photos of the Canadian before cleanup. The pipe is very well made and follows the classic shape of an oval shank Canadian perfectly. The bowl was stained with a dark brown/black and a medium brown stain over it. It is a well-shaped pipe that captures the mixture of flame and straight grain around the bowl sides and shank. The top of the bowl had some damage on the top and inner and outer edge. There were some chips from the briar on the outer edge on the right and the left side. There was a little darkening at the front outer edge. The inner edge had some knife marks on the right side at the top that left damage. The bowl had a very thick cake in the bowl. There was an overflow of lava onto the rim top. The stamping on the top side of the oval shank read JR over HAND MADE. The stamping on the underside read Imported Briar. The black vulcanite stem had light tooth dents and chatter on the top and the underside of the stem. Otherwise it was in very good condition. It was also lightly oxidized. Jeff took two close-up photos of the bowl and rim with different lighting to capture the condition of the pipe pre-cleanup work. The rim top had some lava overflow and a lot of damage to the inner and outer edges of the bowl. The pipe is dirty with thick cake and damage around the beveled rim.He also took photos of the sides of the bowl and shank to show the various grains on the bowl and shank. The first photo shows the large chip out of the top edge of the bowl. It was quite large and deep. Even though there is damage to this pipe the photos also show the rich colour of the stain that makes the grain just pop. The finish is very dirty but this is another beautiful pipe. Jeff took a photo to capture the stamping on the topside of the oval shank. The photo shows stamping JR over HAND MADE. On the underside it reads Imported Briar.  The next two photos show the stem surface. There are tooth marks and chatter on both sides near the button. There is also some wear on the sharp edge of the button. As mentioned before, Jeff and I have developed a pattern of working on the pipes that has become habit to both Jeff and me. I include it here so you have a sense of that pattern. Jeff reamed the bowl with a PipNet pipe reamer and followed up with a Savinelli Fitsall pipe knife to remove the cake. He scrubbed out the mortise and the airway in the shank and the stem with alcohol, cotton swabs and pipe cleaners. He scrubbed the exterior of the bowl, rim, shank and stem with a tooth brush and Murphy’s Oil Soap to remove the oils and tars on the rim and the grime on the finish of the bowl. He rinsed it under running water. He dried it off with a soft cloth. He was able to remove the lava build up on the rim top and the rim top damage and the damage around the edges – both inner and outer is quite extensive. I took photos of the pipe to show its condition before I started my work on it.   I took close up photos of the bowl and rim top as well as the stem. You can see the condition of the rim top and bowl in the first photo. Jeff was able to remove all of the tar and oils but you can now see the damage to the inner edge of the bowl. The vulcanite stem had tooth chatter and some tooth marks on the top and underside of the stem near and on the button surface.I took photos of the stamping on both sides of the oval shank. You can see that the stamping on both sides was light toward the front of the pipe. It was still readable but faint nonetheless.I decided to address the damage to the rim edges first. I wiped down the outside of the bowl with an alcohol dampened pad and filled in the chipped areas around the edge with clear super glue and briar dust to build up the chips to match the bowl sides.I decided to leave the side repairs for a bit to harden and turned to the rim top. I had to handle the rim repairs a bit differently on this pipe since it had a rim top that was beveled inward. I topped the bowl with 220 grit sandpaper on a topping board to remove the damage to the outer edges of the rim top. I worked the beveled edge to match the outer edge of the bowl and smooth out the transition. I also needed to take care of the inner edge so I used a folded piece of 220 grit sandpaper to smooth out the knife marks there and minimize the damage.   I sanded the repairs smooth and blended them into the rest of the bowl. It took a bit of work but soon they were blended in. I would need to stain the bowl repairs but first I want to polish the sanding marks out. I polished the rim top, the edge and exterior of the bowl with micromesh sanding pads – wet sanding with 1500-2400 grit pads and dry sanding with 3200-12000 grit pads. I wiped the rim off after each sanding pad to remove the dust. The damage on the rim edges and top looked really good after polishing. I stained the rim top and bowl sides with a Cherry stain pen. I gave the sanded edges and repairs several coats of stain and let it cure.I worked some Before & After Restoration Balm into the smooth surface of the briar with my fingertips to clean, enliven and protect it. I let the balm sit for a little wall and then buffed with a cotton cloth to raise the shine. The following photos show the bowl at this point in the restoration process. The reworked rim top looks really good and matches the colour of the rest of the pipe. I set the bowl aside and worked on the stem. There were some tooth marks on the top and underside at the button that needed to be addressed. I sanded the tooth marks and chatter out of the surface of the stem and shaped the button with 220 grit sandpaper.I polished the stem with micromesh sanding pads – wet sanding with 1500-2400 grit sanding pads and dry sanding it with 3200-12000 grit sanding pads. I wiped it down after each sanding pad with Obsidian Oil. I polished it with Before & After Pipe Stem Polish and wiped it down with a last coat of Obsidian Oil. With this second JR Hand Made pipes from the Nampa, Idaho auction I am even more certain that there is some connection to the House of Robertson Pipe Shop in Boise, Idaho. Even with the fills and the repairs to the pipe this is another nice pipe. The two of the four JR Hand Made pipes that I have to restore are really well made and shaped. The stain job was done to highlight the mix of grain on the bowl. I polished stem and the bowl with Blue Diamond polish on the buffing wheel. I gave the bowl and the stem multiple coats of carnauba wax. I buffed the pipe with a clean buffing pad to raise the shine. I hand buffed it with a microfiber cloth to deepen the shine. The pipe polished up pretty nicely. The contrasting grain really began to stand out; it seemed to take on life with the buffing. The rich contrasting brown colour works well with the polished black vulcanite stem. This finished pipe has a rich look just like the Bulldog and it is also quite catching. Have a look at it in the photos below. The shape, finish and flow of the pipe and stem are very well done. The dimensions are Length: 6 inches, Height: 1 7/8 inches, Outside diameter of the bowl: 1 3/8 inches, Chamber diameter: 3/4 of an inch. I will be putting this newly finished JR Hand Made Canadian on the rebornpipes store shortly if you are interested in adding it to your collection. Thanks for walking through the restoration with me as I worked over the second of the foursome from JR Hand Made pipes.

Refreshing an unsmoked 1910-1915 CPF Chesterfield Billiard


Blog by Steve Laug

Not too long ago I was chatting with a friend in New York and he showed me an old unsmoked CPF pipe. He had picked it up and intended to clean it up for resale so I asked him how much he wanted for it and struck a deal. I love older CPF pipes and I really am a sucker for them as I have a small collection of them. This one rang all the bells for me with the unsmoked bowl, the gold stamp on the shank, the brass band and the P-lip style stem. He was pretty sure from his work that the pipe was from the time period of the 1910s and before 1920, which also made it attractive to me. He sent me the following three photos that really sealed the deal for me. He said from his research that the pipe came from the 1910s period before 1920. He picked it up from a fellow who said that it (along with other pipes) came from a clean out of an old retail building that used to be a pipe store in the 1940s. He packed the pipe and put it in the mail to me. It did not take too long for it too arrive on the other side of the continent. And when I opened the box and removed the pipe this is what I saw (it did not disappoint). It was a bit shop worn from sitting – nicks and grime on the finish and a loose band but very clean. The stem was not oxidized but the vulcanite had some small nicks in the surface. The stamping on the left side of the shank read Chesterfield in an arch over the CPF in an oval logo. The band had the CPF logo and some faux hallmarks. The stem read Chesterfield over the CPF oval logo on the topside of the taper. I took photos of the pipe when I received it. The bowl was raw briar and totally looked new and unused. You have to admit this is a beauty – I guess that is subjective but it is to me! I took close up photos of the bowl, rim top and stem to show the overall condition of the pipe. The bowl was pristine as noted above. The rim top had some small scratches and very shallow nicks. The shank ahead of the band was discoloured from the brass band and the band had turned to the left from its original centered location on the top. The stem looked really good – no oxidation. There were a lot of minute scratches in the surface on both sides and a little rounding of the shoulders at the stem/shank junction. The gold stamping on the stem top was faint but still present.The next photos show the stamping on the shank, band and stem. You can see that they are all quite clear.I wrote a piece on the background to the CPF brand earlier on the blog and include the link to that here (https://rebornpipes.com/2013/04/14/some-reflection-on-the-historical-background-on-cpf-pipes/). I quote a pertinent part of the blog below:

From my reading and research it seems to me that CPF brand was discontinued sometime in the 1910-1920 range. Again, turning to Bill Feuerbach I found that he notes the following, which pins down the time frame of the discontinuation of the brand more specifically, “I have a CPF Chesterfield in our office display that has a nametag from way before my time that says 1900 CPF Chesterfield. It looks like most other Chesterfields you’ve seen, including the military type push stem, except this stem is horn and not vulcanite. As far as I have gathered the CPF brand was phased out sometime around 1915.” Interestingly, he noted that the Chesterfield name and style was later introduced in the KB&B, Kaywoodie and Yello-Bole lines. He says that the 1924 KB&B catalog shows KB&B Chesterfields…

… From my research I believe that we can definitively assert that the CPF logo stands for Colossus Pipe Factory. The brand was purchased by KB&B sometime between 1884 and 1898 and that it continued until 1915. That time frame gives help in dating some of the older CPF pipes you or I might find. It can be said that prior to the dual stamping it is fairly certain that the pipe is pre-1884 to 1898. After the dual stamping it can be placed post 1898 until the closure of the brand line in 1915. CPF made beautiful pipes.

From that information I could see why my friend in New York put the date where he did. I would further refine his 1910s period to a time between 1910-1915. At any rate it is an old pipe to remain unsmoked for this long. That fact that it was found in a building that originally housed a pipe store that closed in the 1940s gives a bit of a clue as to how it remained unsmoked at least until that time period. From the closure of the store to 2019 the fact that it is still unsmoked is a bit of a mystery to me.

As I examined the pipe closely I could see a lot of pink putty fills. I took photos of the fills to show their number and placement on the bowl. These tend to irritate me and while some purists may question why I removed them I planned to do so. They were placed in such a way that they were directly in my line of site when I held the pipe in my mouth. They really needed to go. I took the stem off the bowl and the band on the shank came off very easily. I turned it to align it and then decided to take it off to clean up the shank end before I reglued it. I wiped off the old glue and sanded the shank end lightly with a 1500 grit micromesh pad to remove the glue debris. I would need to do a bit more work on it before regluing it but it definitely looked better. I also took photos of the mortise chamber to show what it looked like. It is almost a reverse calabash before those were spoken of, however the tenon filled the chamber completely and negated that function. One of the nice features of working on a NOS pipe is that the internals are very clean. I ran a pipe cleaner through the airway in the stem and shank just to remove dust. I did the same in the mortise with a cotton swab and the internals were finished. I directed my attention to the obnoxious pink putty fills. I picked them out with a dental pick to remove as much of the dried and shrunken putty as possible. It takes some careful work so as not to create more issues than I was trying to cure but it did not take long to remove the offending putty. (Note the band on the shank at this point – to be honest I am not sure why I put it back on. Perhaps to protect the shank end while I was working on the fills?)I wiped down the fills with an alcohol dampened cotton pad to remove the debris and filled them in with clear super glue. I used a dental spatula to apply fine briar dust on top of the glue and to press it into the fill area. When the repairs cured I sanded the patches down with 220 grit sandpaper to blend them into the surface of the briar. I sanded the spots smooth and they were already looking better than the pink putty they had replaced. I used a black sharpie pen to touch up the centres of the fills knowing that as I polished and stained the bowl they would blend in quite well. (Note to self: find a dark brown Sharpie pen.)I polished the repaired areas and the rest of the bowl with micromesh sanding pads – wet sanding with 1500-2400 grit pads and dry sanding with 3200-12000 grit pads. I wiped the bowl down after each pad with a damp cloth to remove the dust. I removed the band again after the first three pads and repeated the sanding on the shank with the first three pads. I decided to combine a Maple and Cherry stain pens to match the colour of the original bowl as much as possible. I colour with the lighter stain and then colour over it with the darker stain. I rubbed the bowl and shank down with a coat of Before & After Restoration Balm. I worked it into the surface of the briar to clean, enliven and protect the briar. The old briar was dry and it drank up the balm. I also found that it allows me to blend the stain coats together and give an even finish to the bowl. I buffed the bowl with a soft cloth to raise a shine. I am liking how the pipe looks as this point in the process. I set the bowl aside and started working on the stem. The nicks and scratches in the stem were very surface so I decided to polish the stem with micromesh sanding pads – wet sanding it with 1500-2400 grit pads and dry sanding it with 3200-12000 grit pads. I wiped it down with Obsidian Oil after each sanding pad. I finished the polishing with Before & After Pipe Polish – both Fine and Extra Fine. I gave it a final coat of Obsidian Oil and set it aside to dry. I love these old CPF pipes. There is some serious thought that they were carved by European trained craftsman who were skilled pipemakers. They were brought to the US by the CPF Company to make pipes. Many of the shapes, bands and stems have the kind of workmanship involved that I really think there is truth to this story. This is little chubby billiard with a classic shape that reminds me of some of the BBB Ultima pipes that I have restored. The stem is a pre-Peterson style P-lip with the airway at the end of the stem rather than on the topside. It had a lot of fills that I have repaired and blended into the bowl for the most part. There are a few fills that still show but they are smooth and not pink. I polished stem and the bowl with Blue Diamond polish on the buffing wheel carefully avoiding the stamping on the shank. I gave the bowl and the stem multiple coats of carnauba wax. I buffed the pipe with a clean buffing pad to raise the shine. I hand buffed it with a microfiber cloth to deepen the shine. The pipe polished up pretty nicely. The contrasting grain really began to stand out; it seemed to take on life with the buffing. The rich contrasting brown colour works well with the polished black vulcanite stem. The finished pipe has a rich look that is quite catching. Have a look at it with the photos below. The shape, finish and flow of the pipe and stem are very well done. The dimensions are Length: 5 inches, Height: 1 5/8 inches, Outside diameter of the bowl: 1 1/4 inches, Chamber diameter: 3/4 of an inch. This one will be joining my collection as it fits in the CPF niche group that I have been building. The shape and feel in the hand is perfect. Now I have to make a hard decision – do I leave it unsmoked or do I load it up with some aged Virginia and break it in. Thanks for walking through the restoration with me as I restored and reworked this old billiard from 1910-1915. It is always a treat for me to work on a piece of pipe history especially when I have learned a bit of the story behind it.