Tag Archives: buffing

An Anton Partsch Crafted Austrian Glazed Clay Long Pipe


Blog by Steve Laug

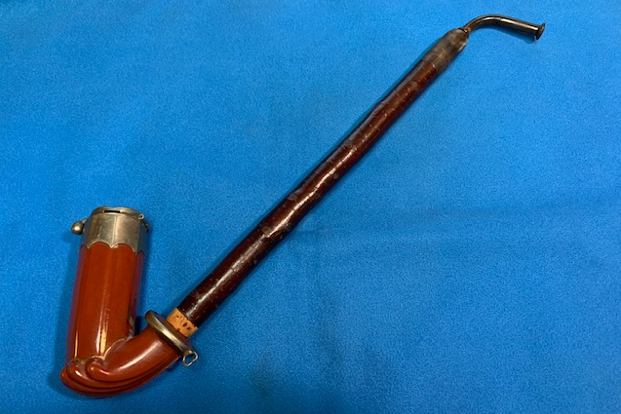
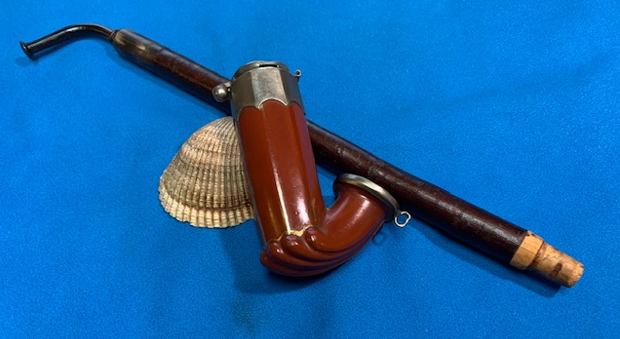
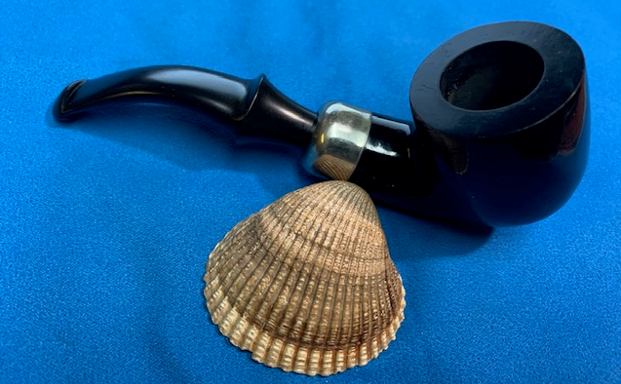
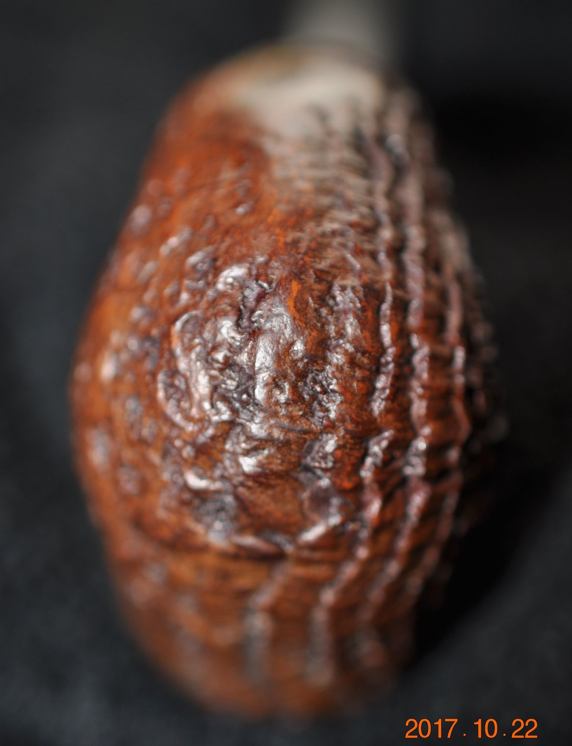
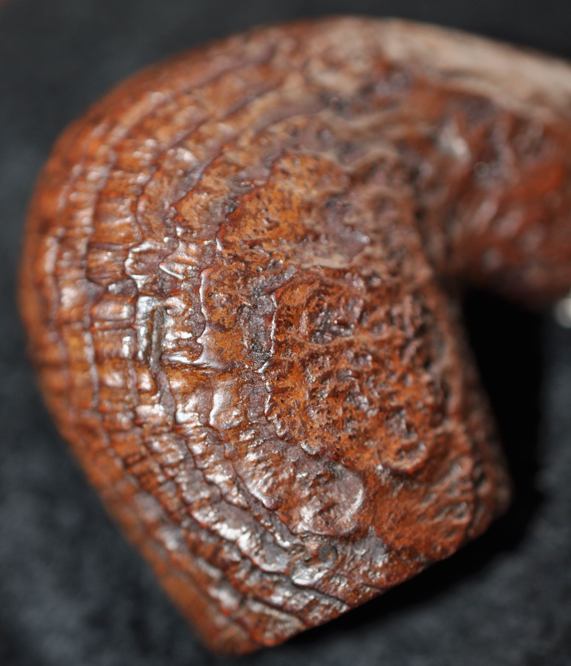
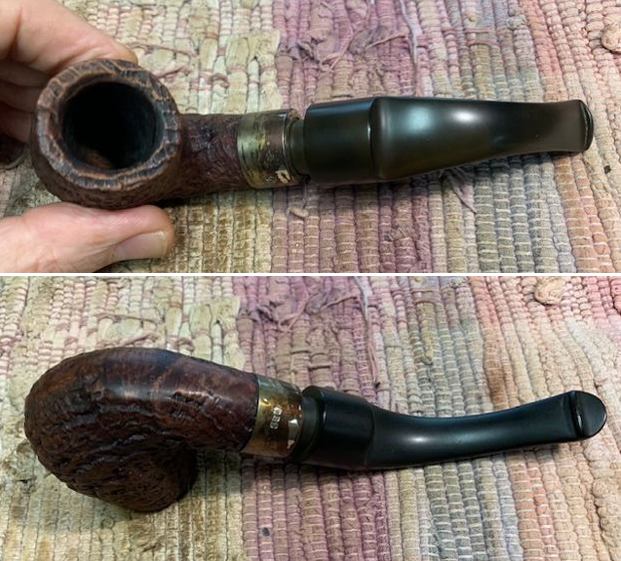
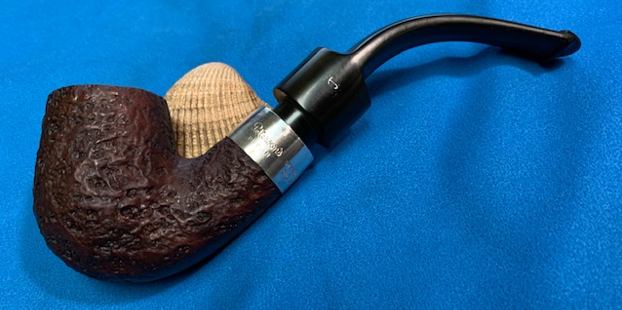
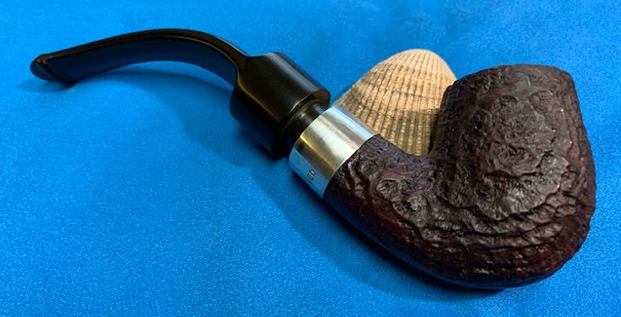
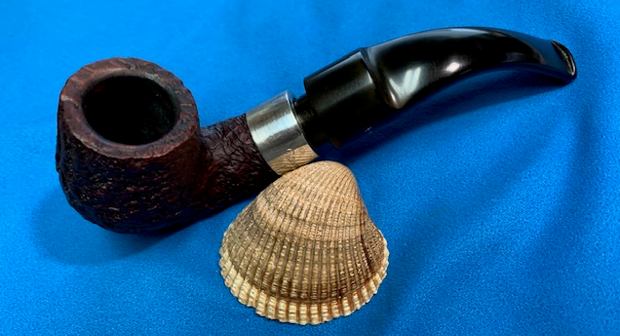
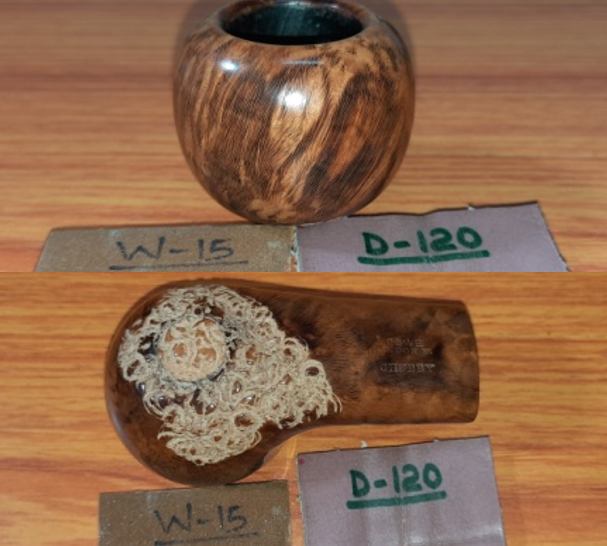
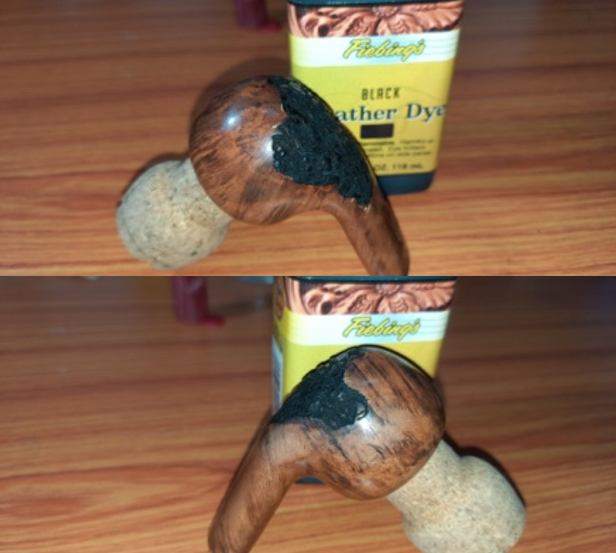
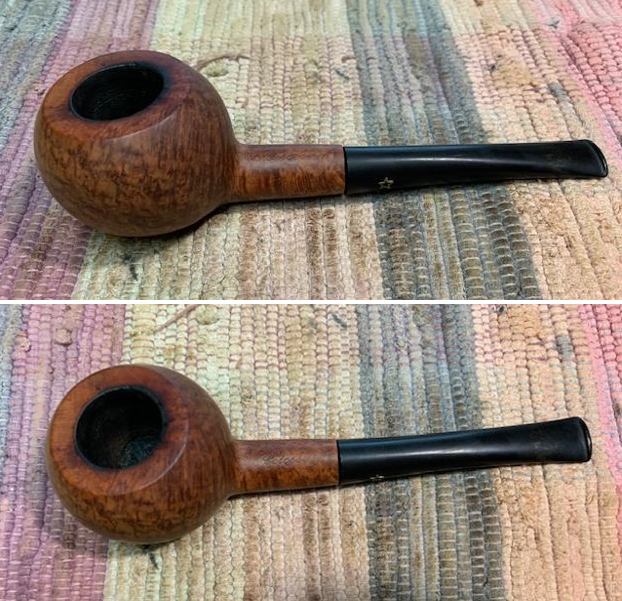
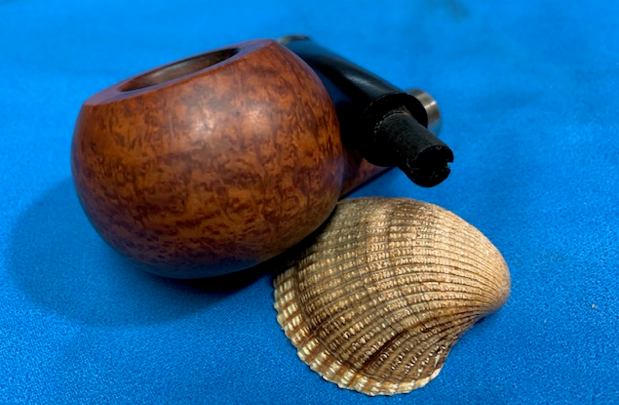
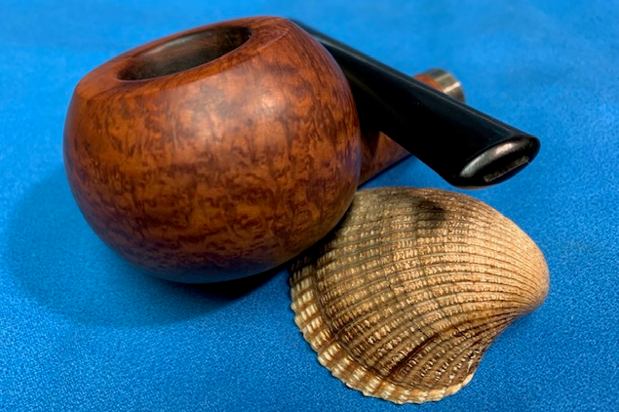
The next pipe has been here for quite a while and it is one that I have repeatedly looked at and passed over. I am guessing that it is an old timer from possibly the early 19th century. It has a red clay bowl that is unsmoked and the outside has been fired with a glaze that looks very good. It has gold paint on all eight of the angles of the octagonal bowl. The base of the bowl is a clam shell that holds the upright chimney of the bowl. There is a nickel rim cap and hinged wind cap on the bowl. There is a nickel band on the shank end with a ring for a piece of string that originally went from there to the top of the horn stem. The pipe has two embossed stamps on the left side of the bowl. The one on the bowl is an eagle with outstretched wings and the one on the base reads Partsch. Both have been embossed with gold. The shank has a corked end on the long cherry wood barked branch to keep it in the bowl end. The top of the cherry wood is capped with a polished horn ferrule and is threaded to receive a bent horn stem. There was some worm damage to the stem. The amazing thing about the pipe is that it has never been smoked. 
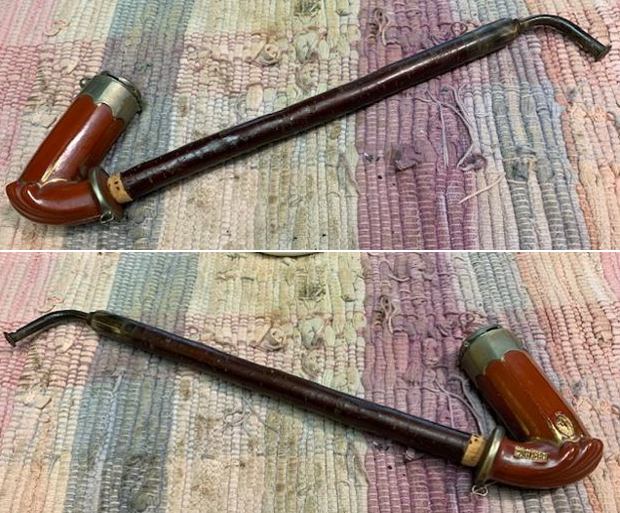
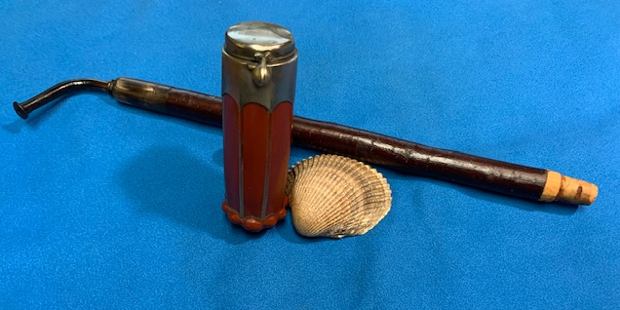
The pipe is quite large with an overall length from the front of the scallop to the tip of the stem of 12 inches. The parts of the pipe are even longer when apart – the cherry wood shank is 9 inches long, the bowl is 2 inches long and the stem is 2 inches long. The bowl is 3 inches tall to the rim top with the wind cap adding an extra ¼ of an inch.

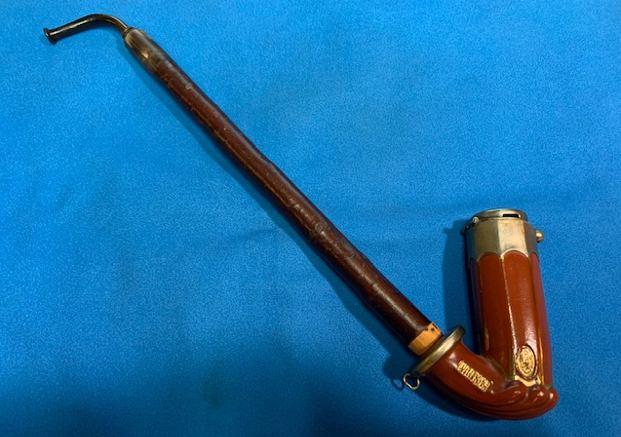
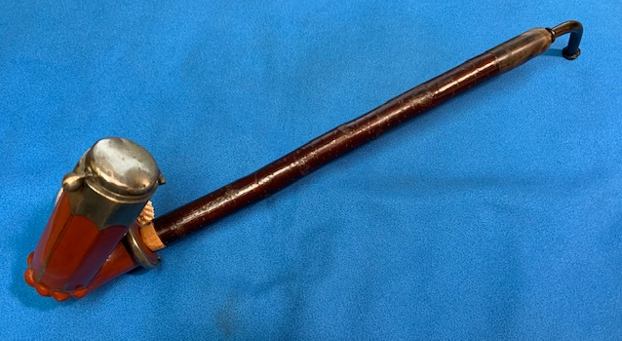
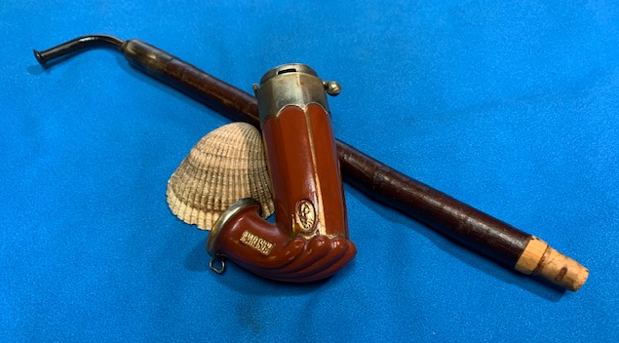
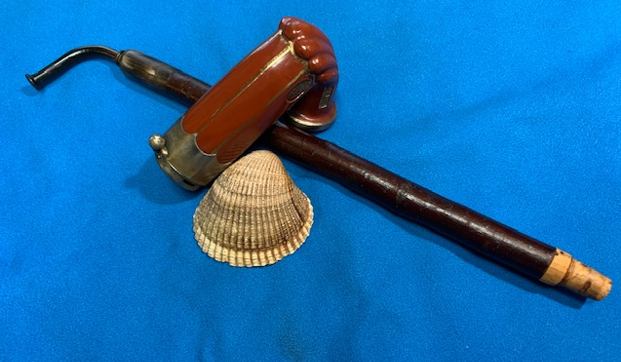
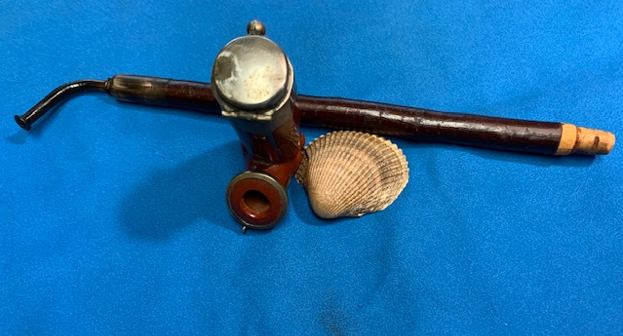
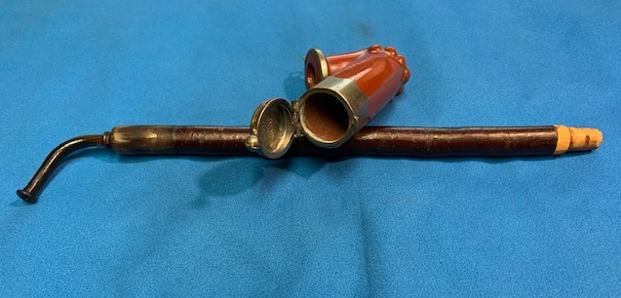
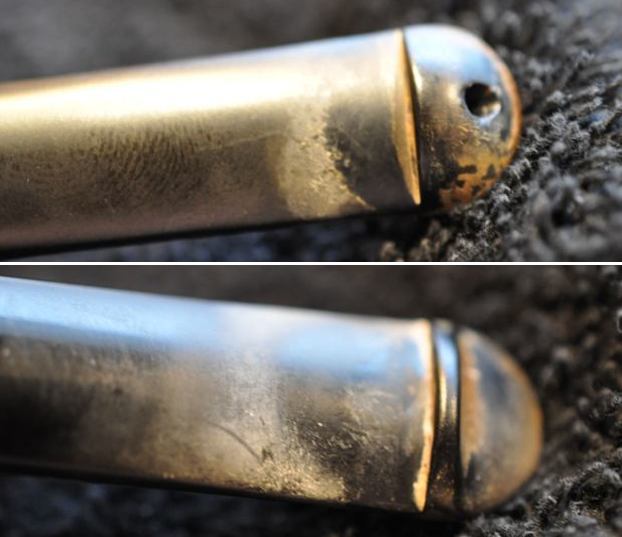
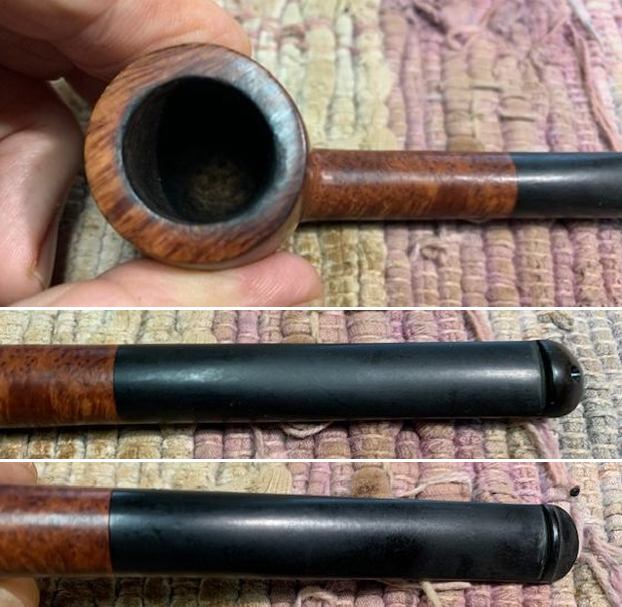
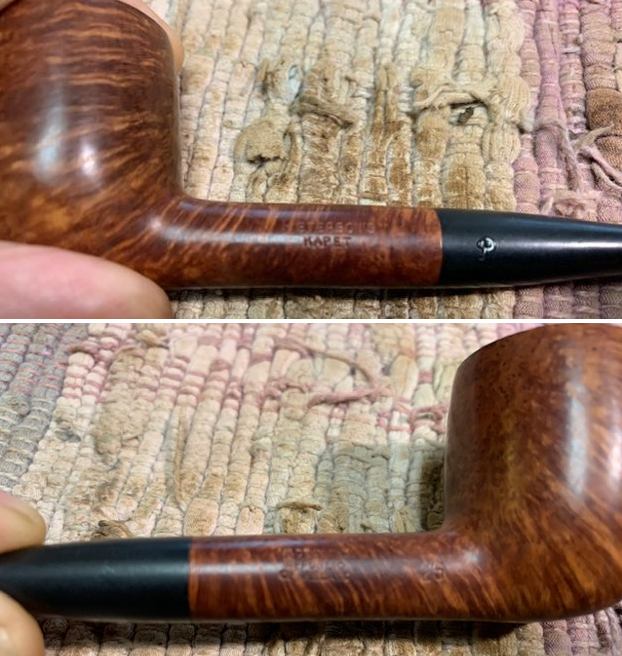
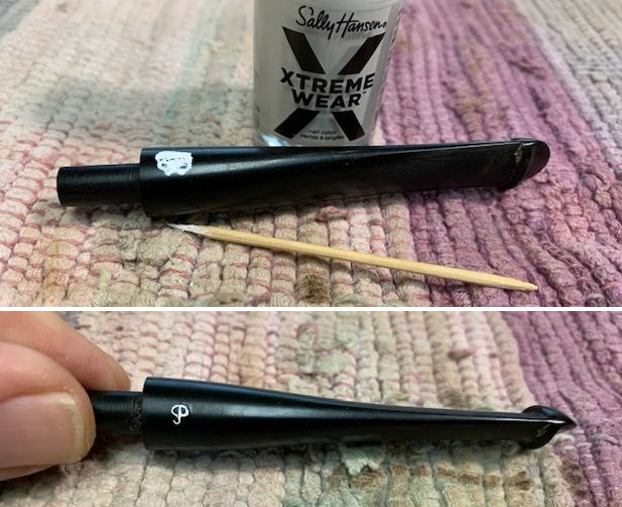
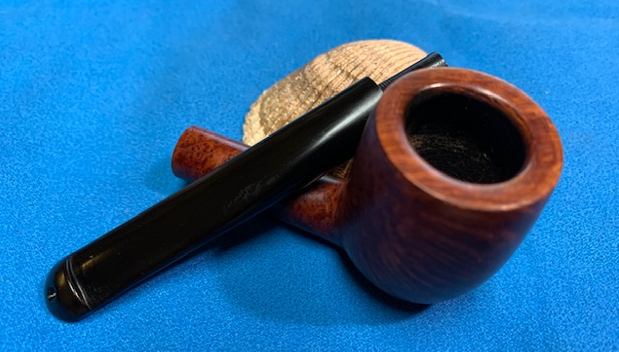
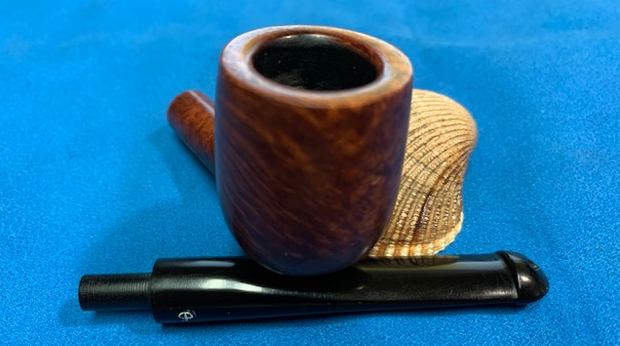
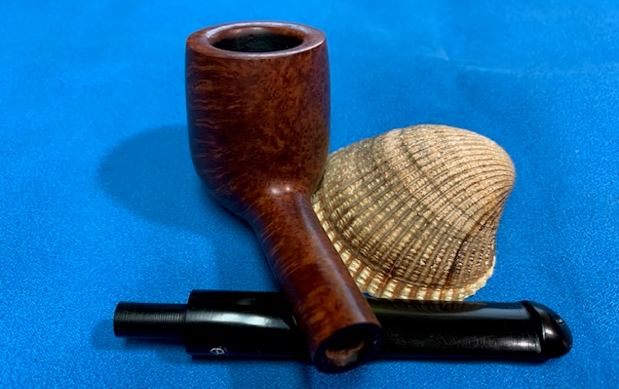
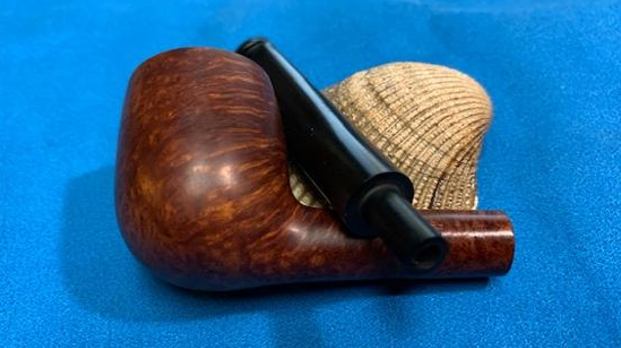
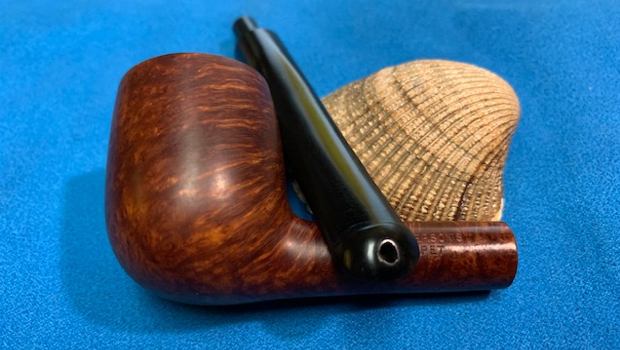
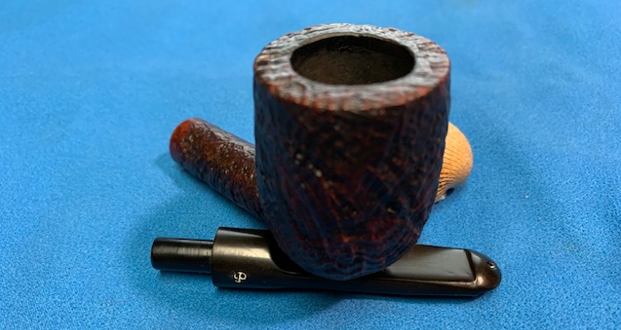
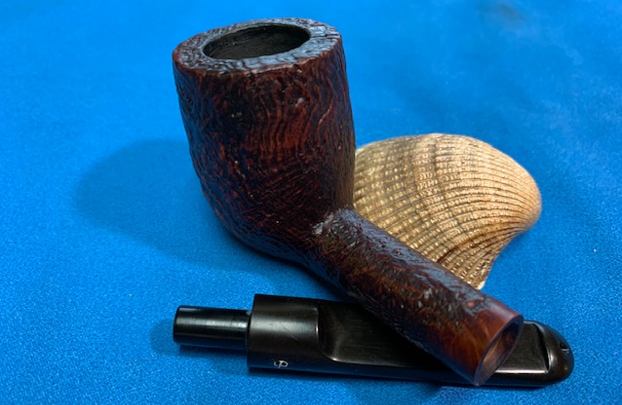
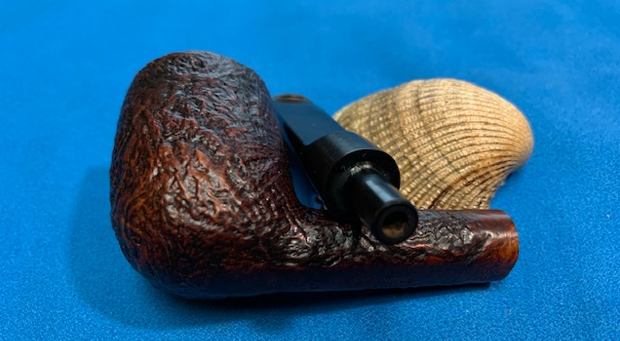
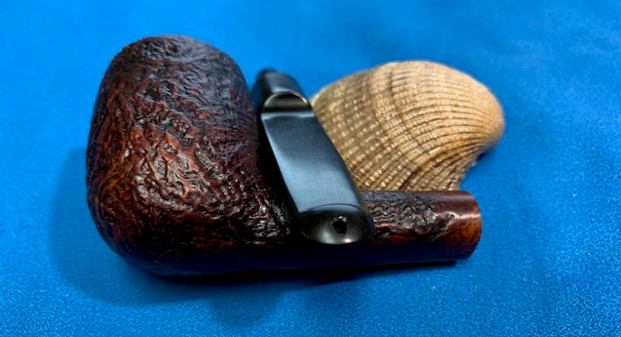
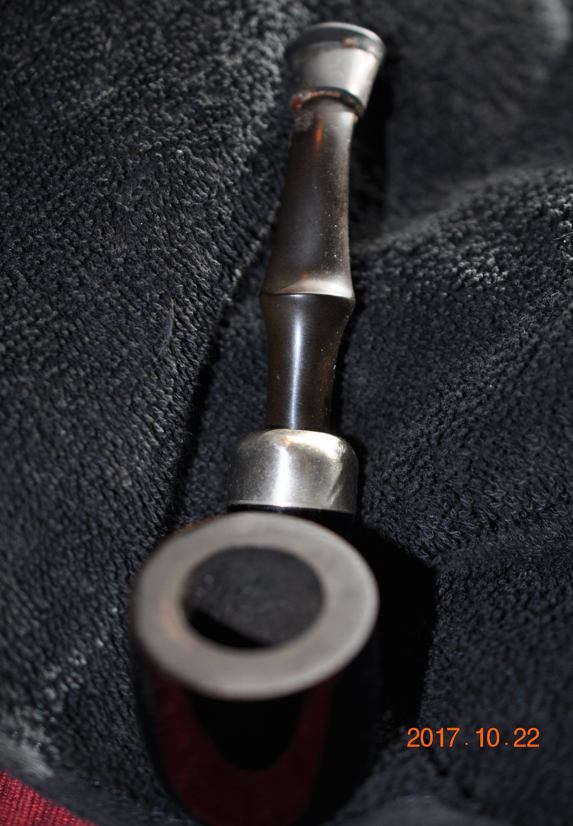
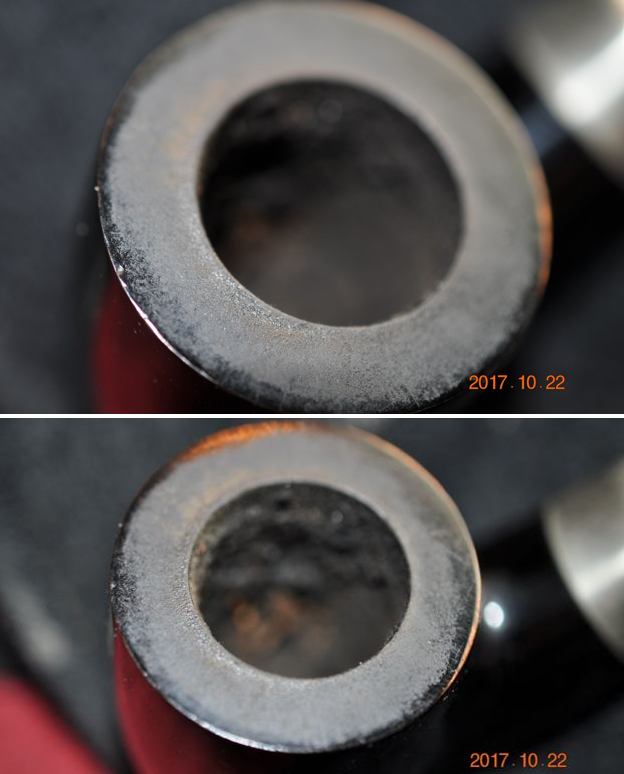
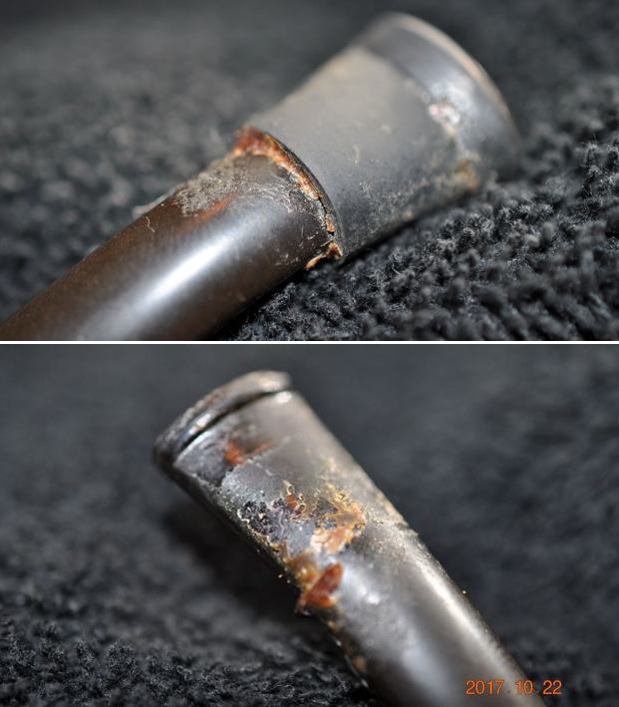
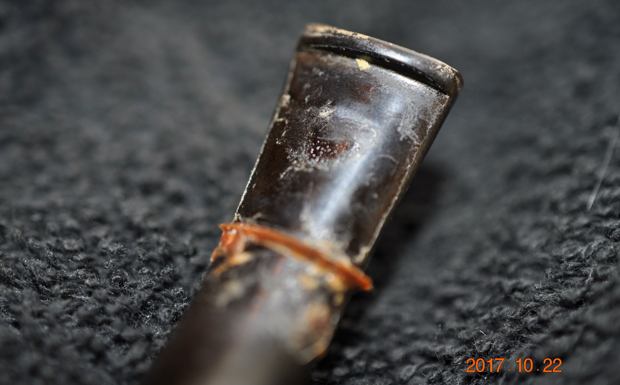
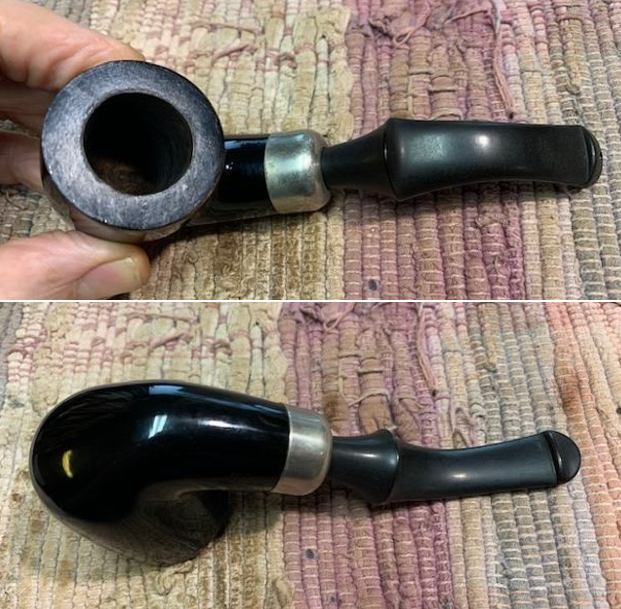
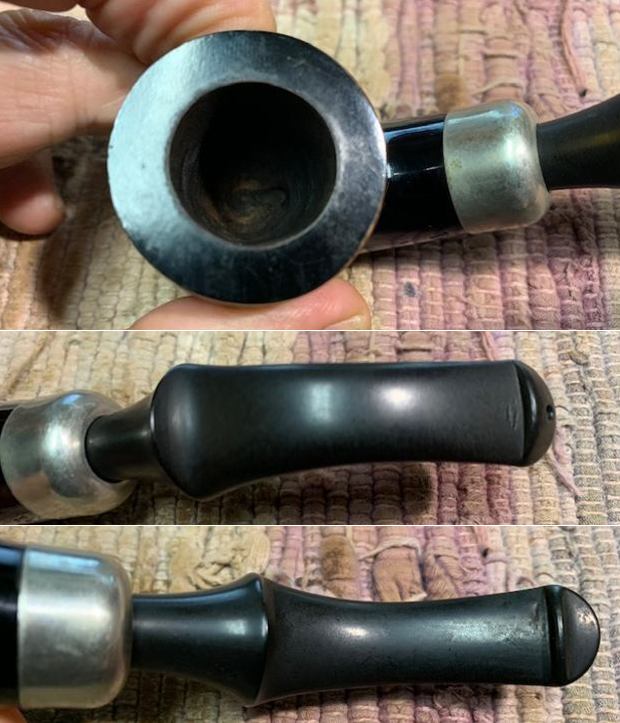
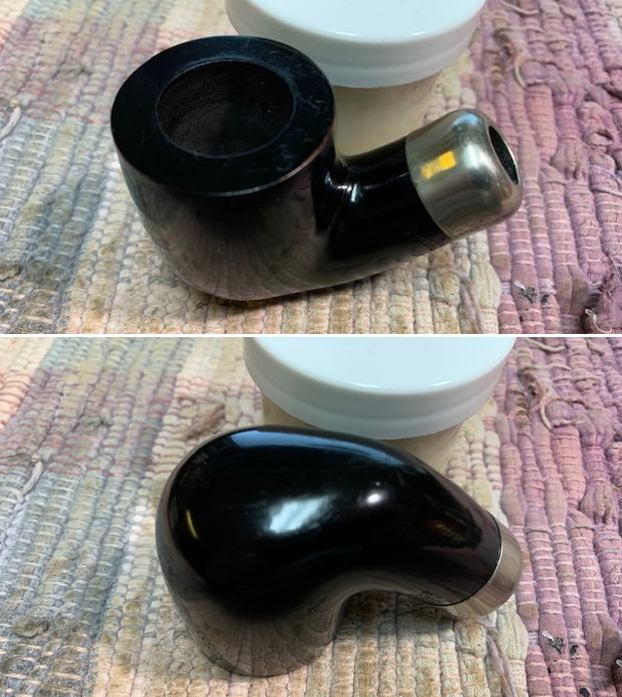
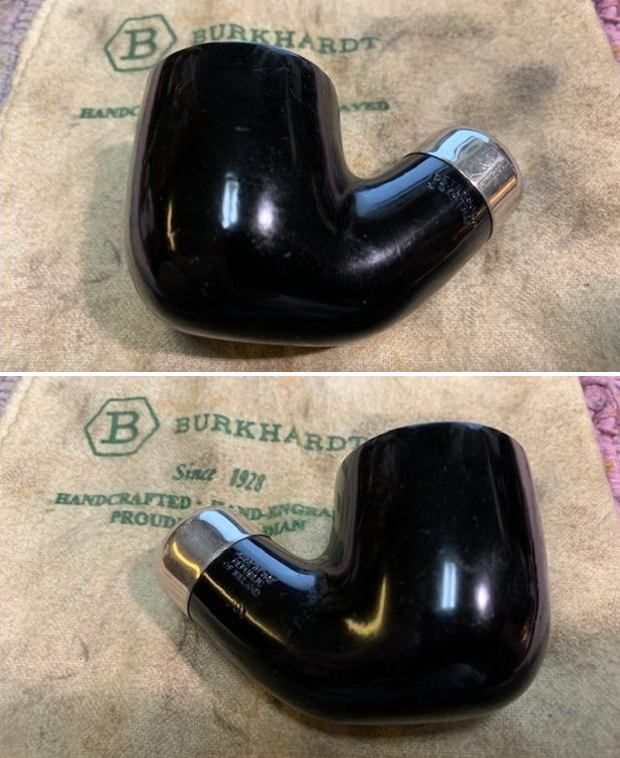
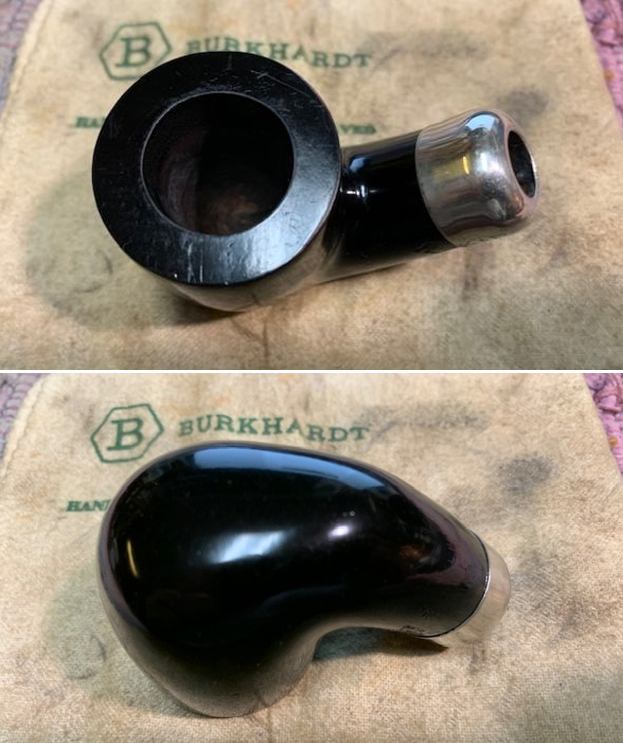
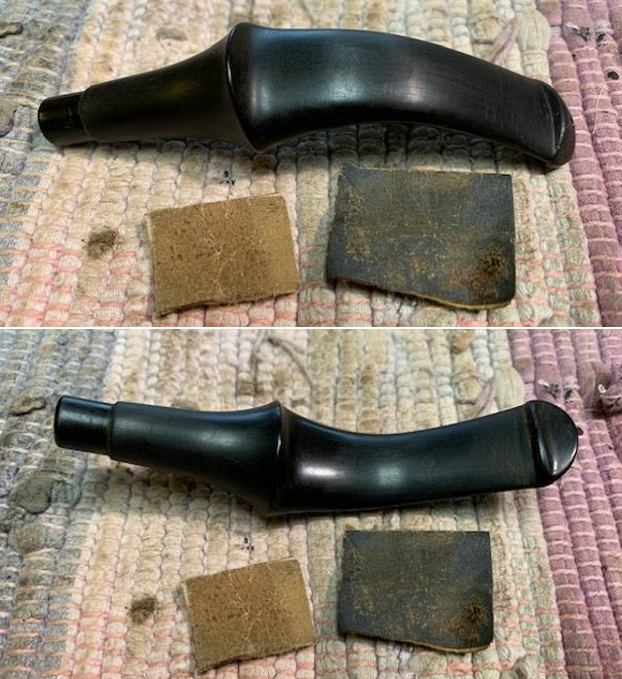
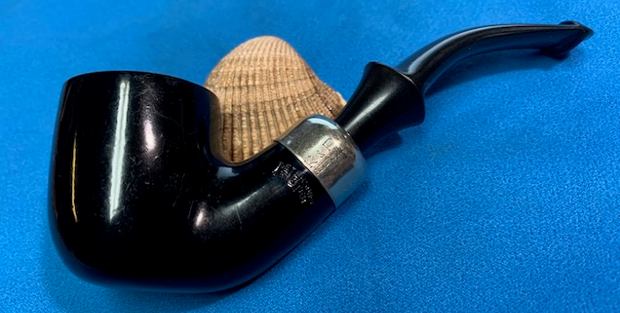
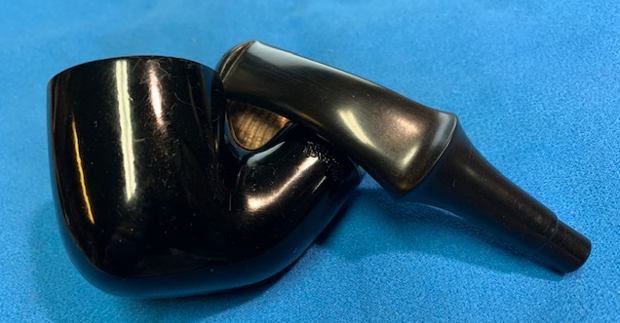
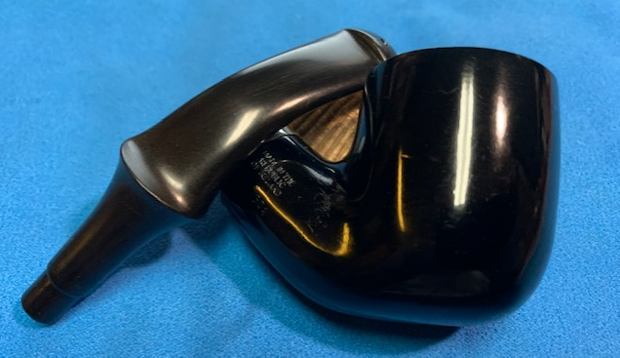
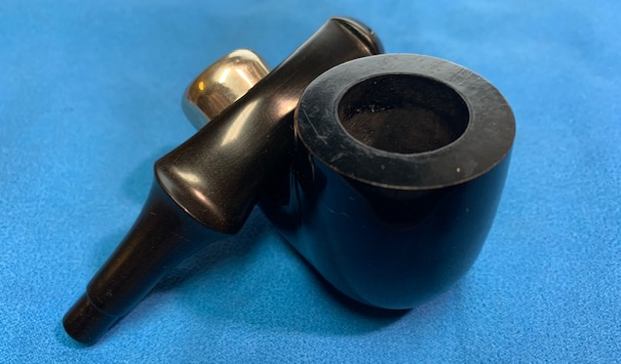
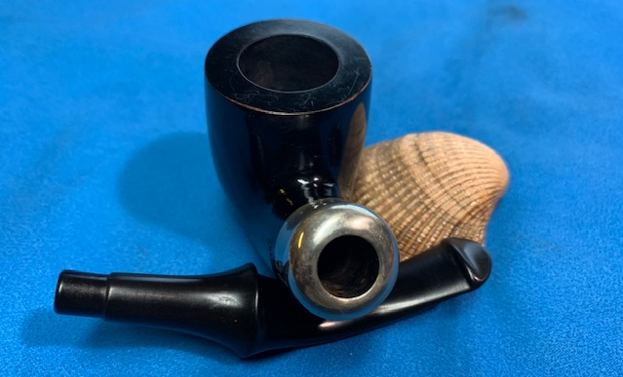
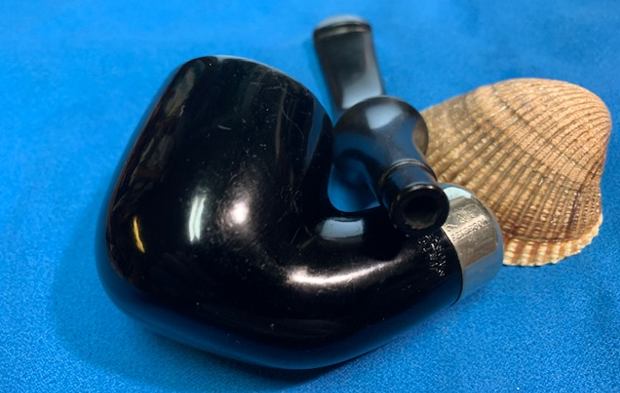
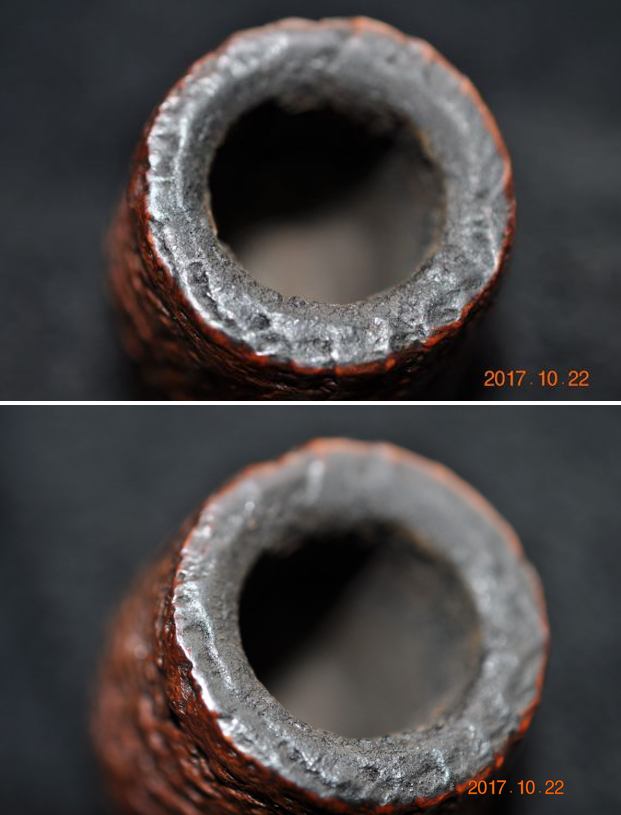
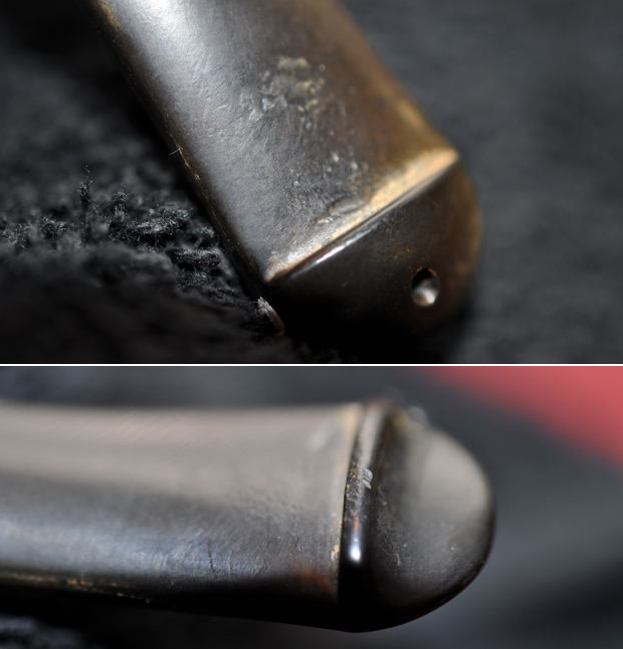
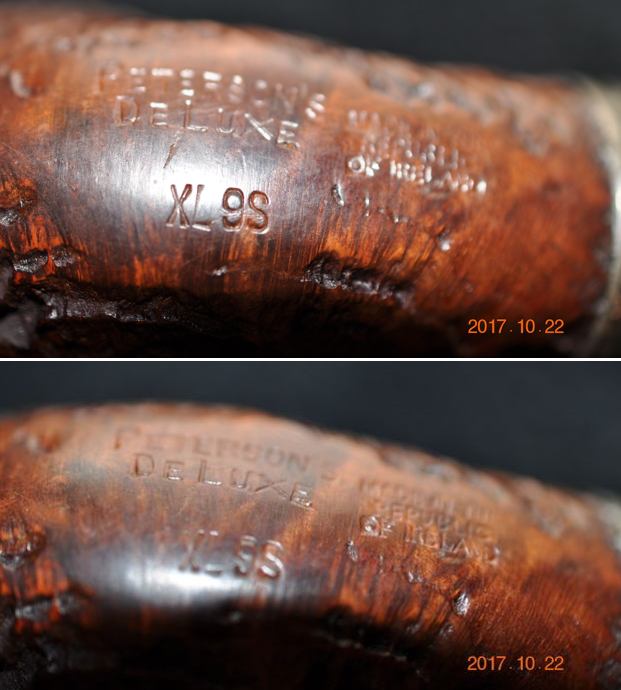
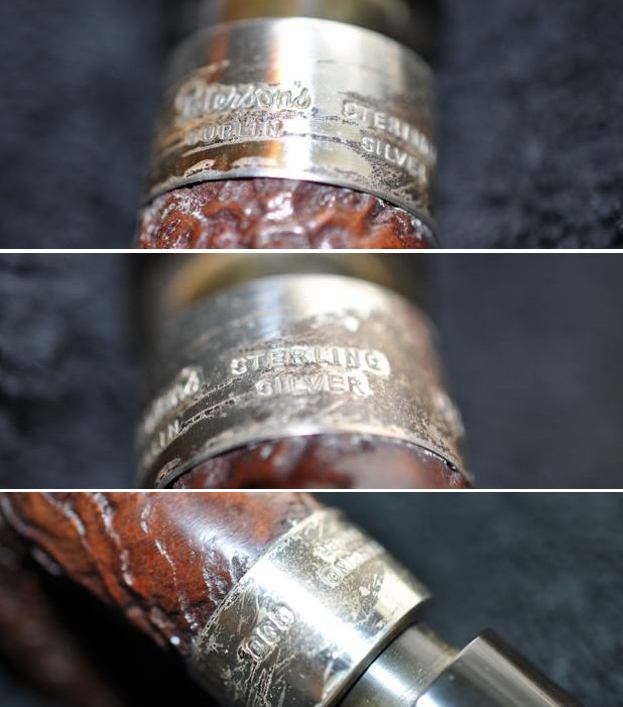
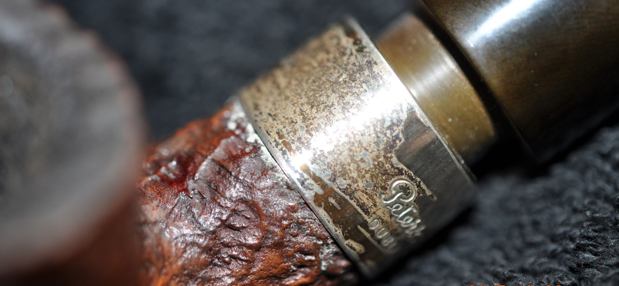
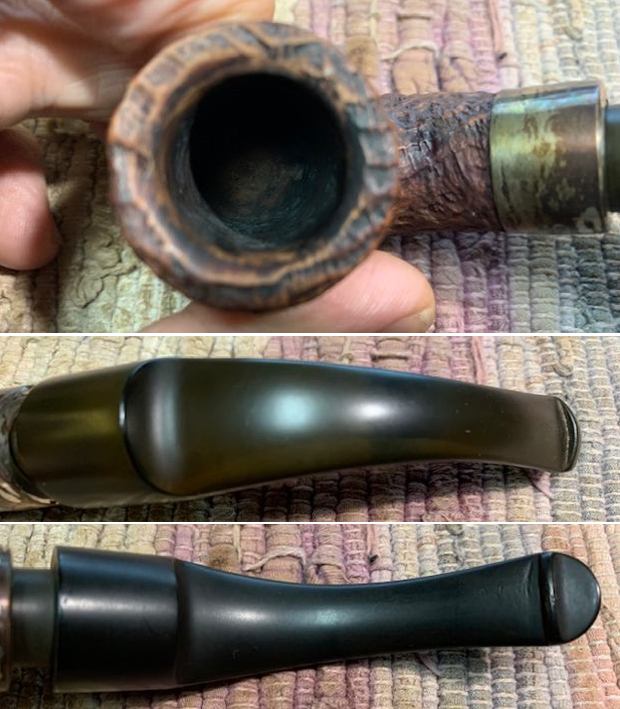
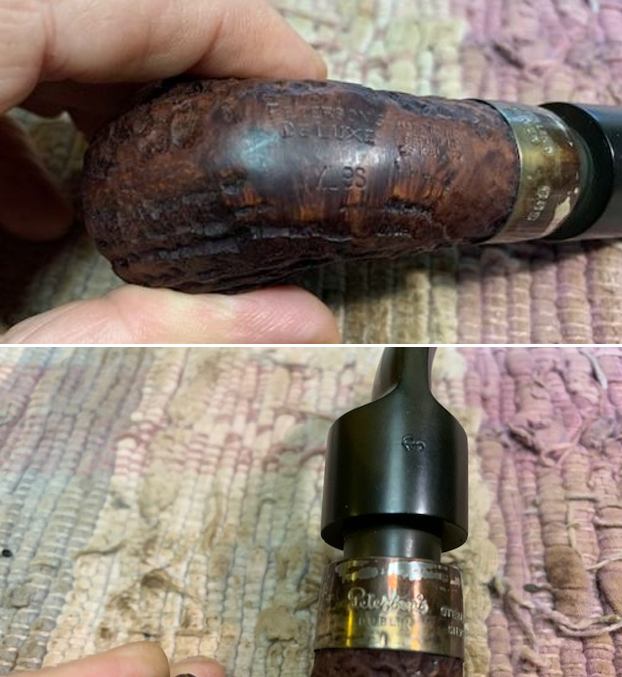
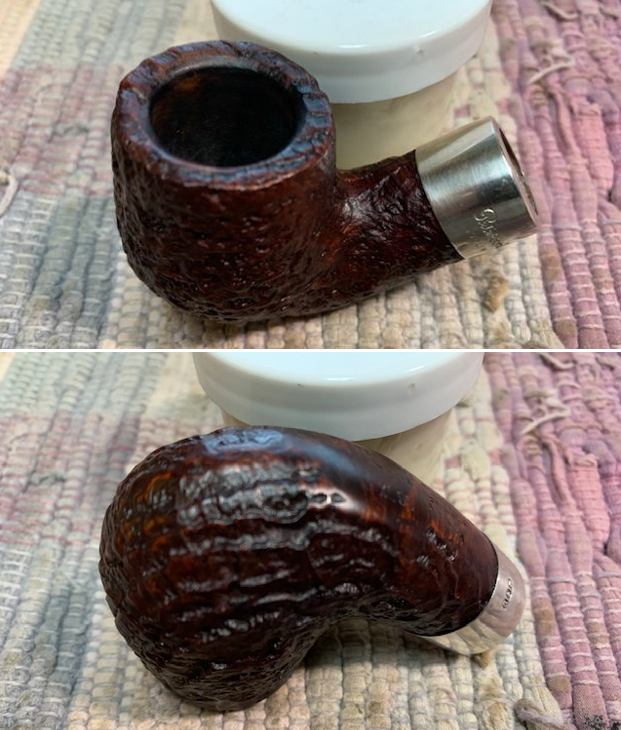
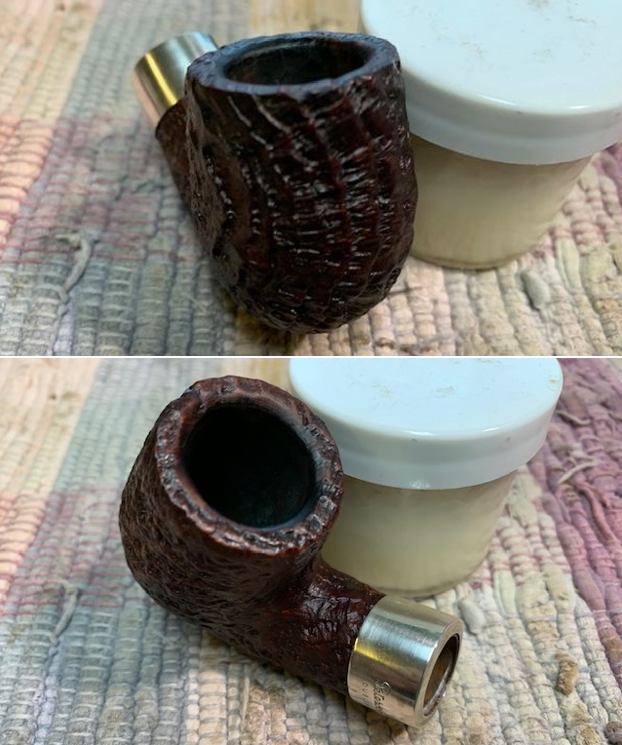
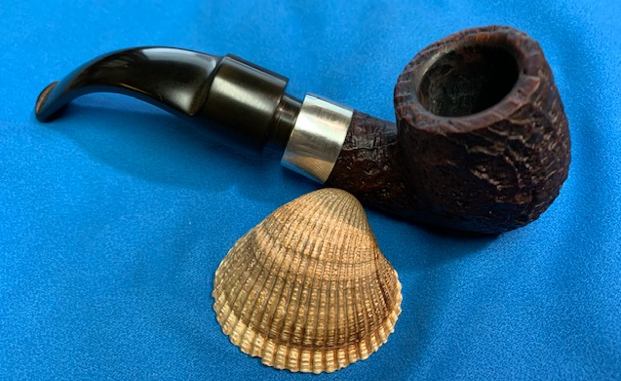
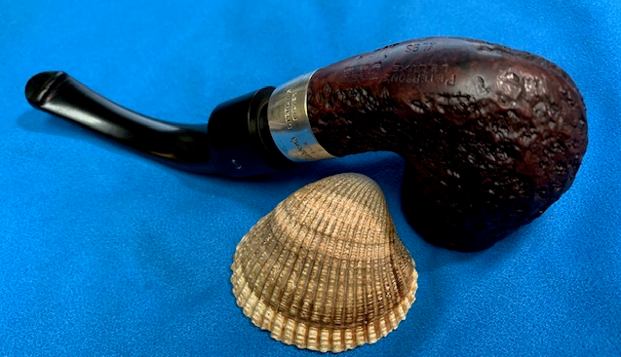
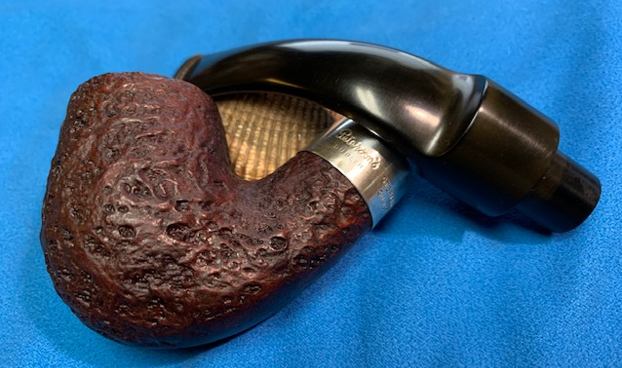
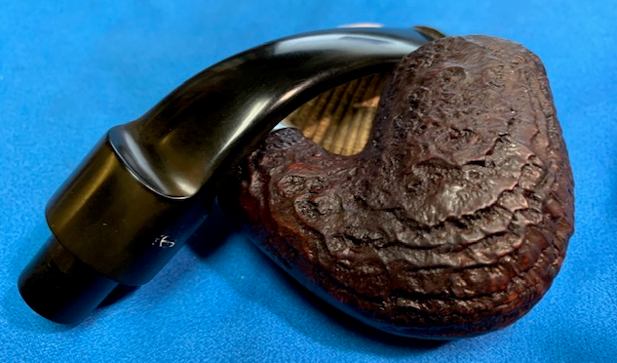
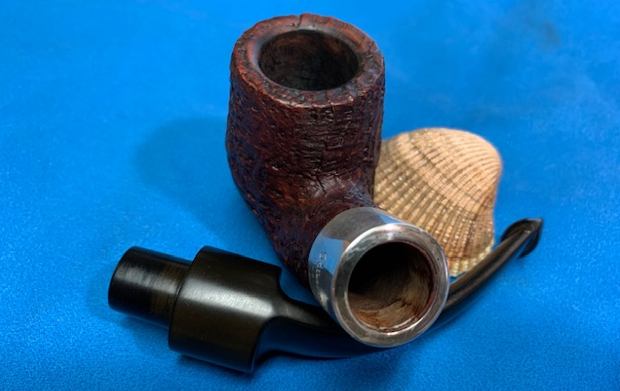
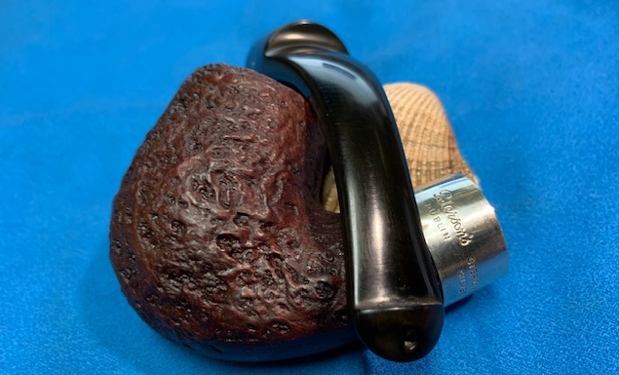
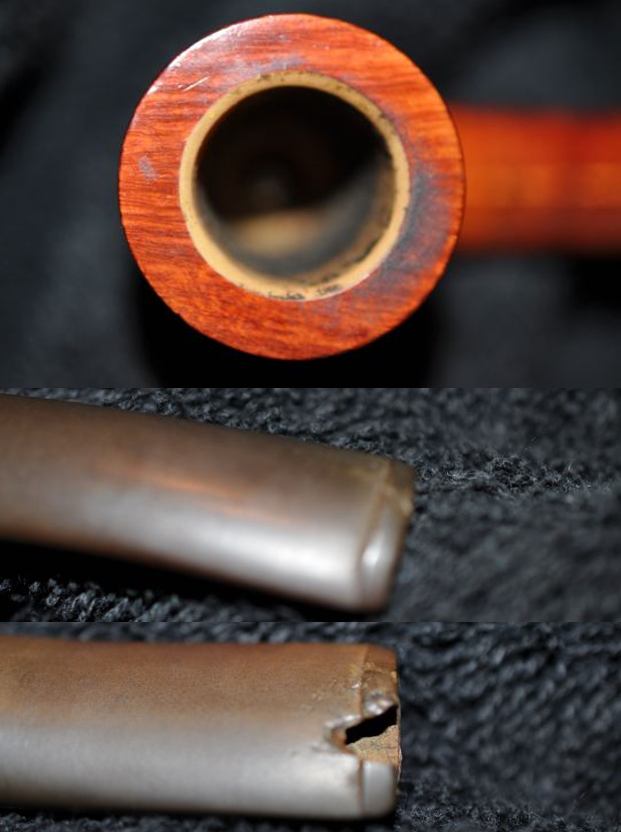
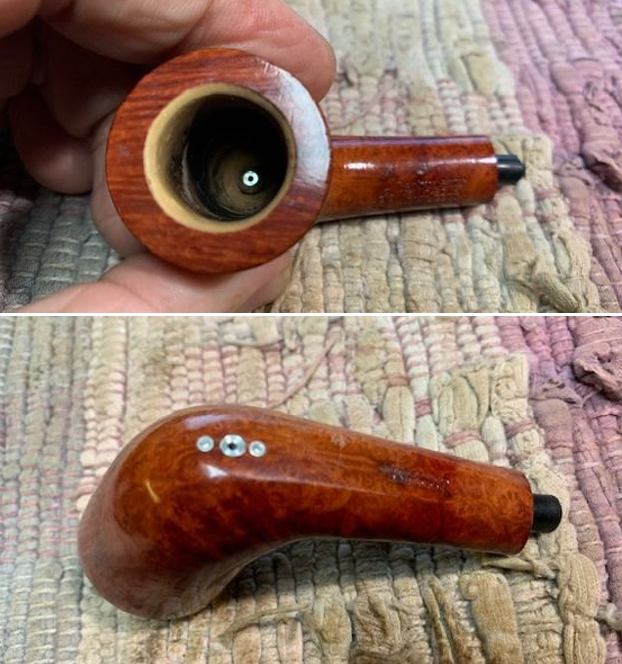
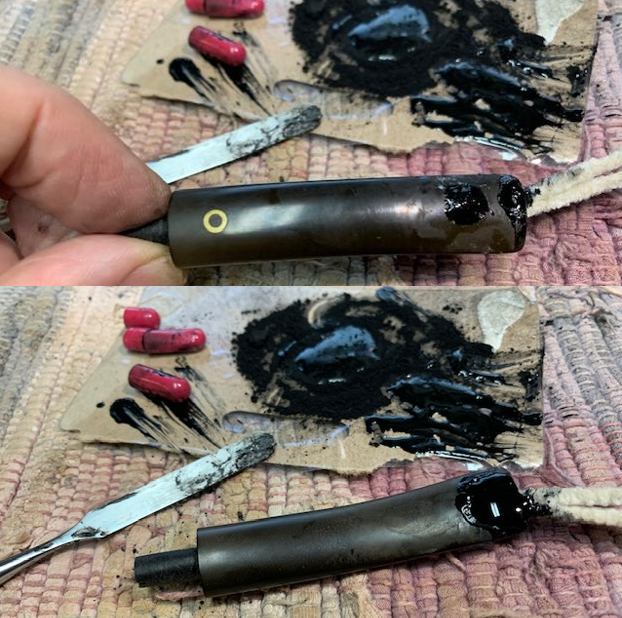
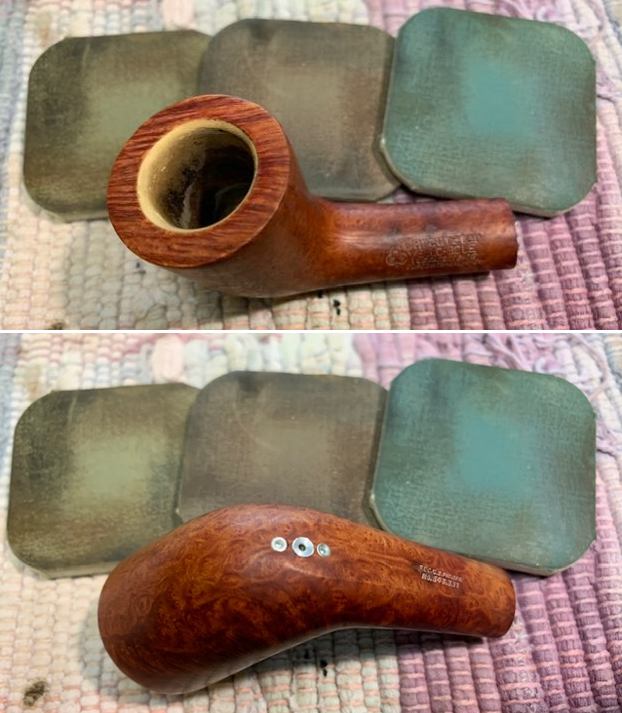
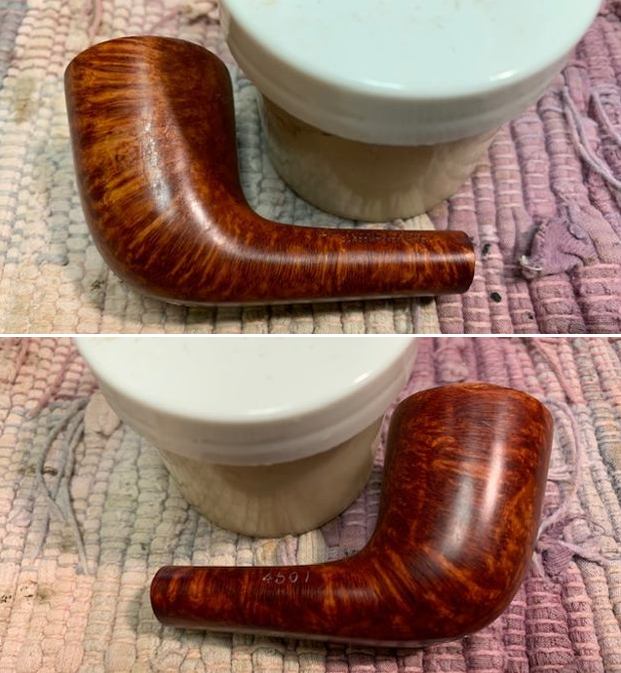
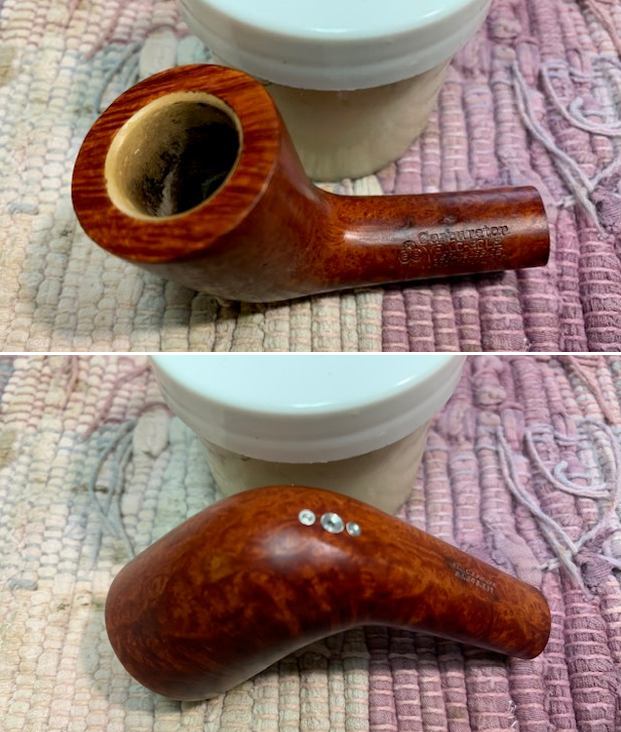
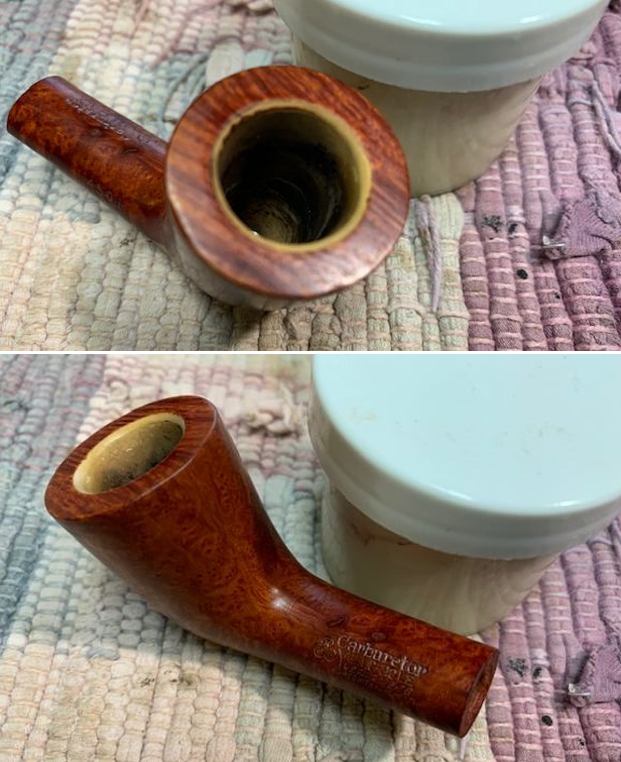
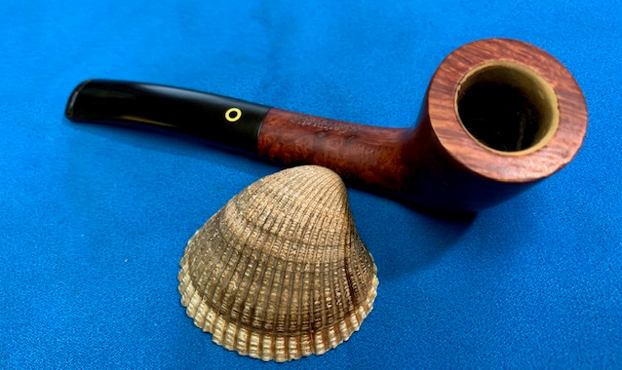
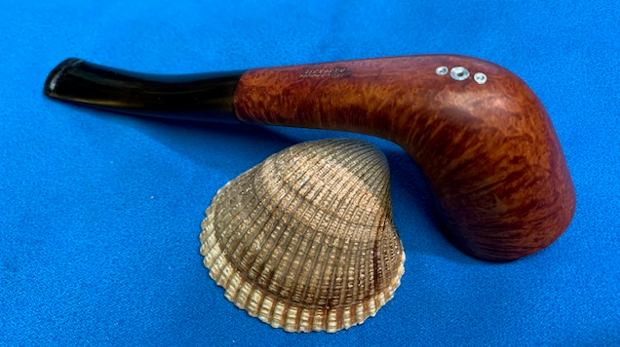
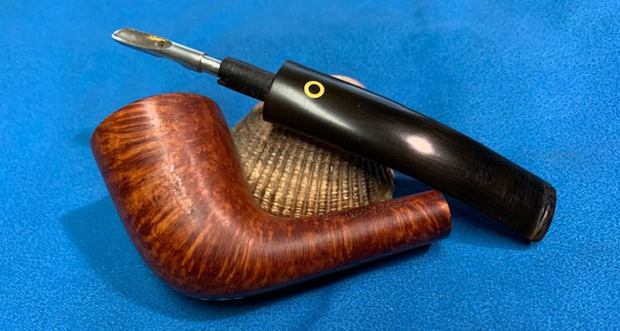
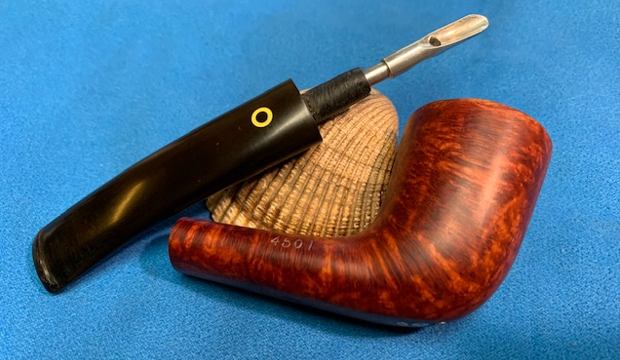
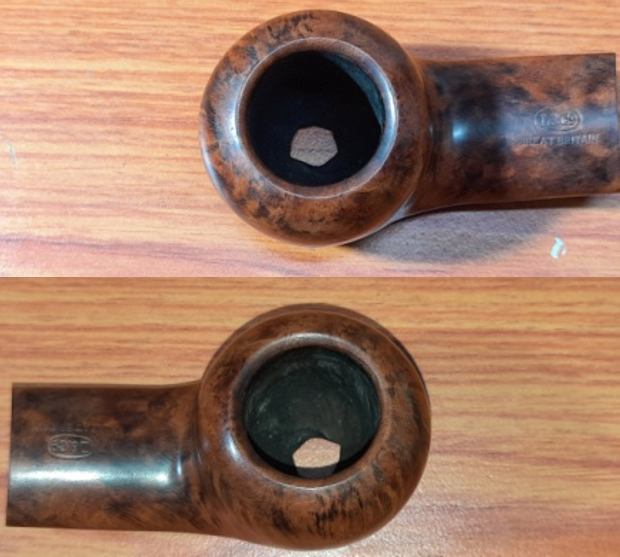
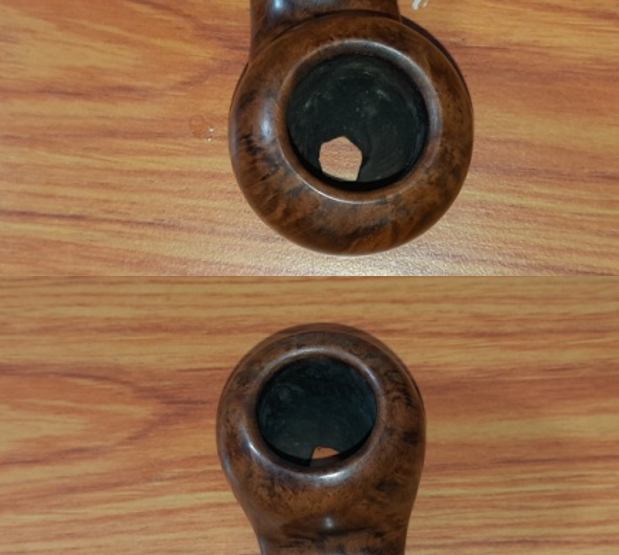
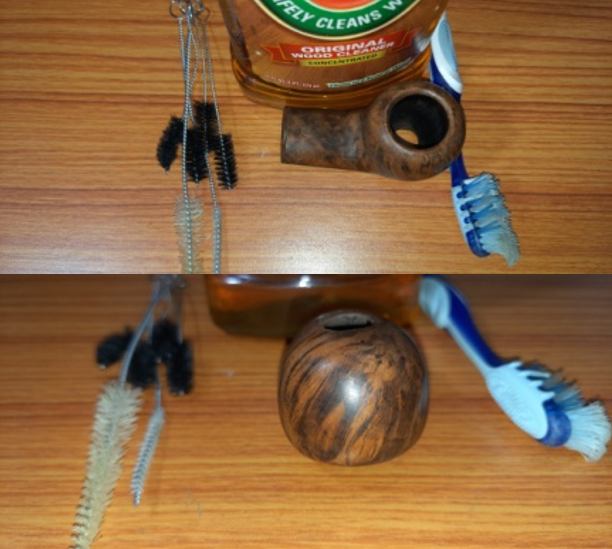
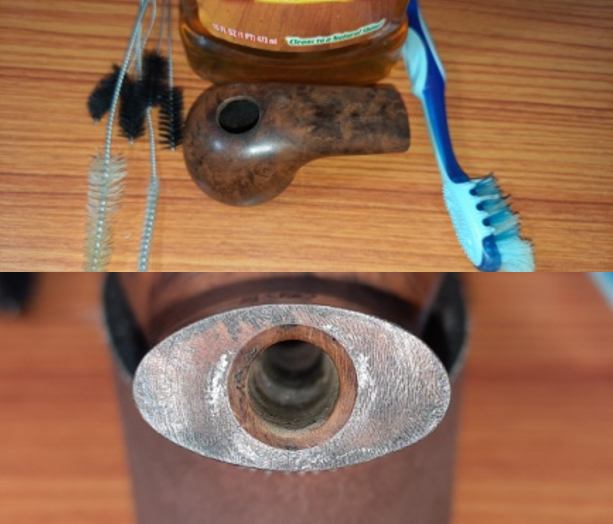
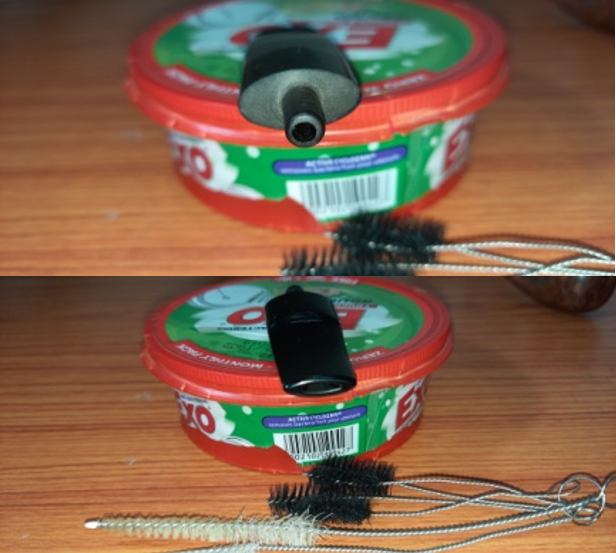
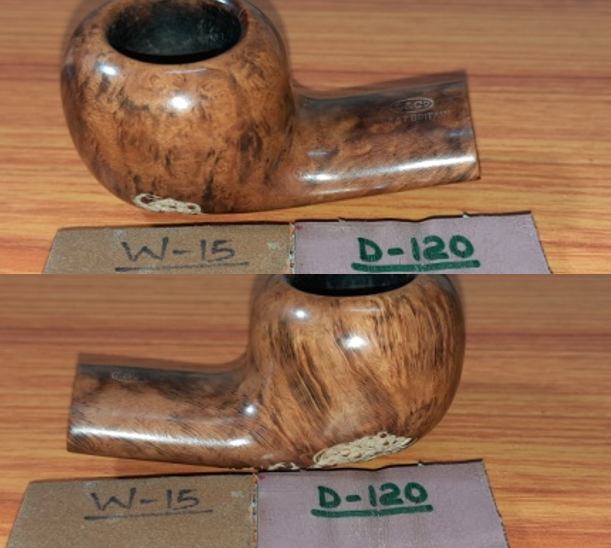
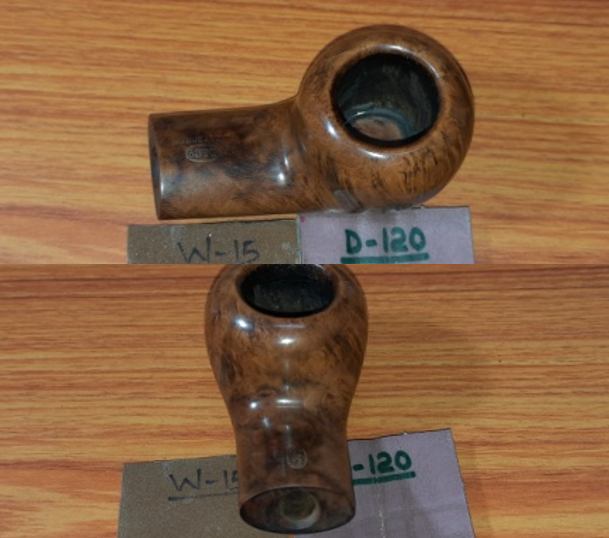
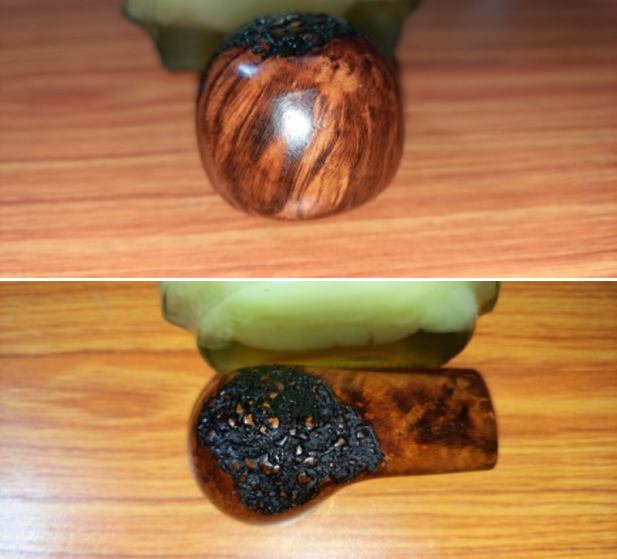
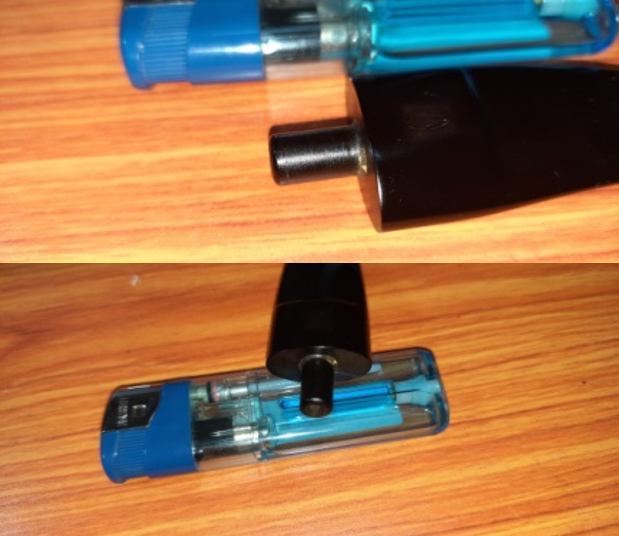
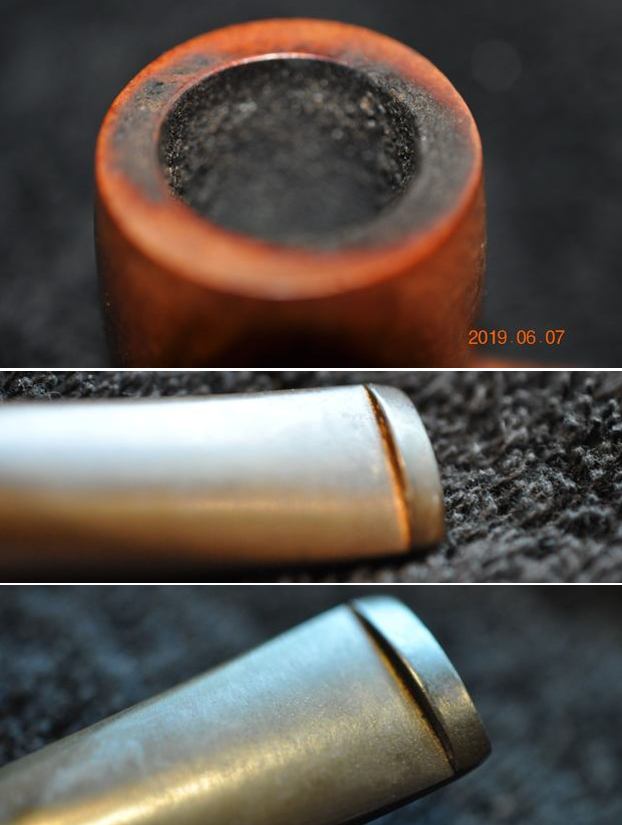
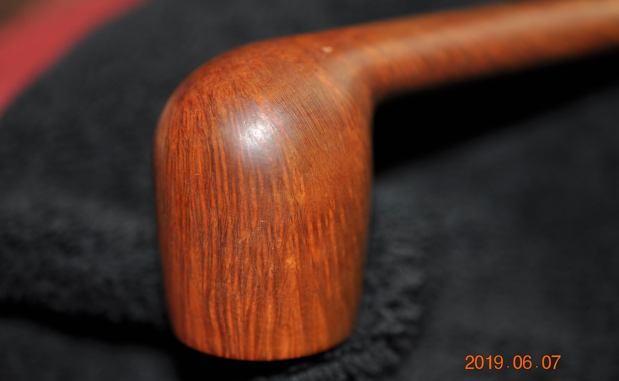
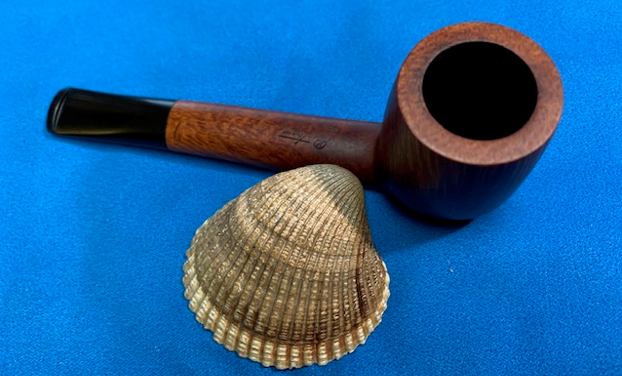
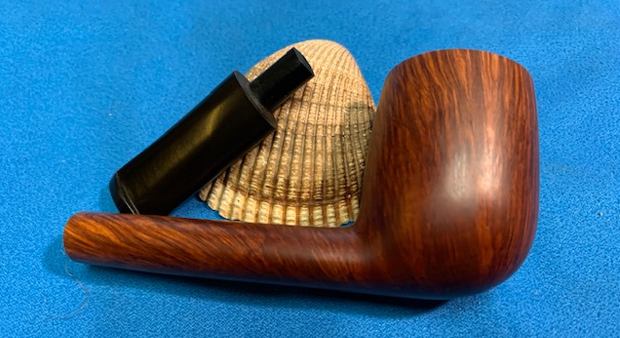
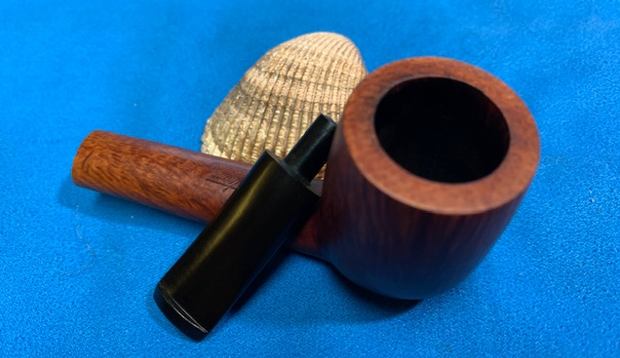
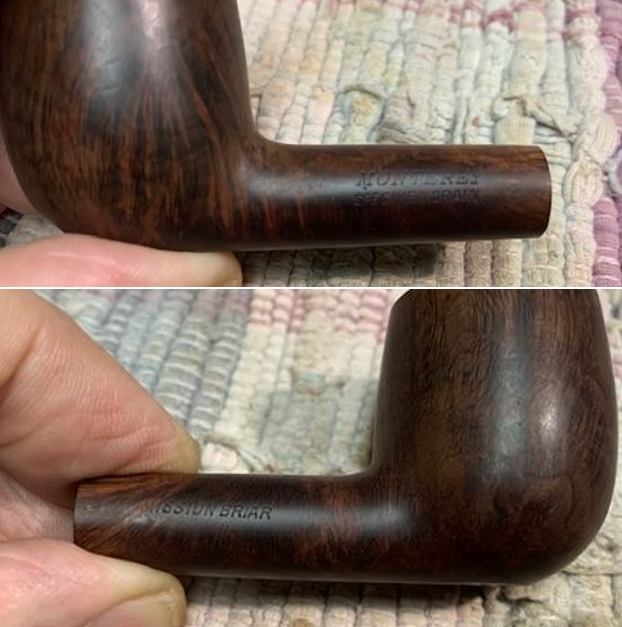
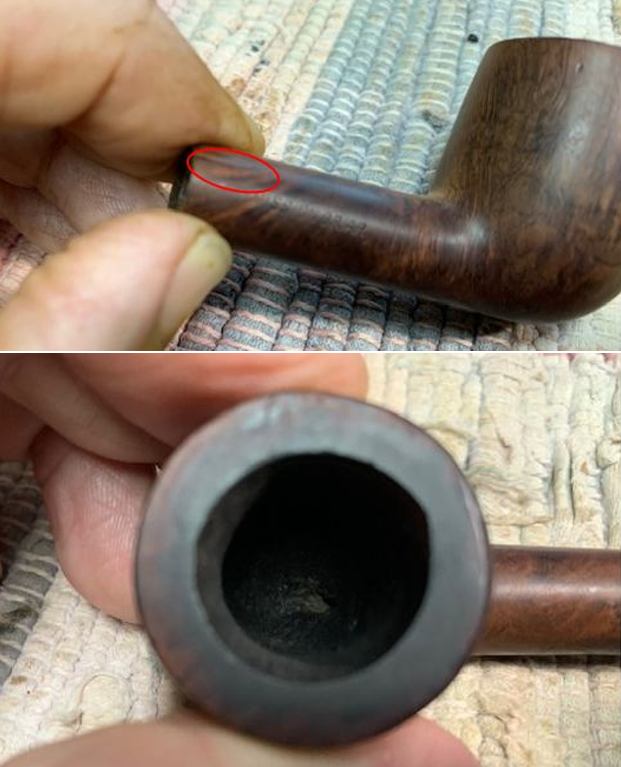
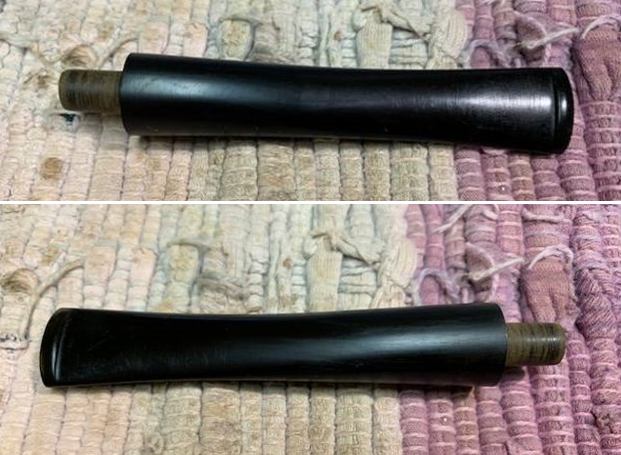
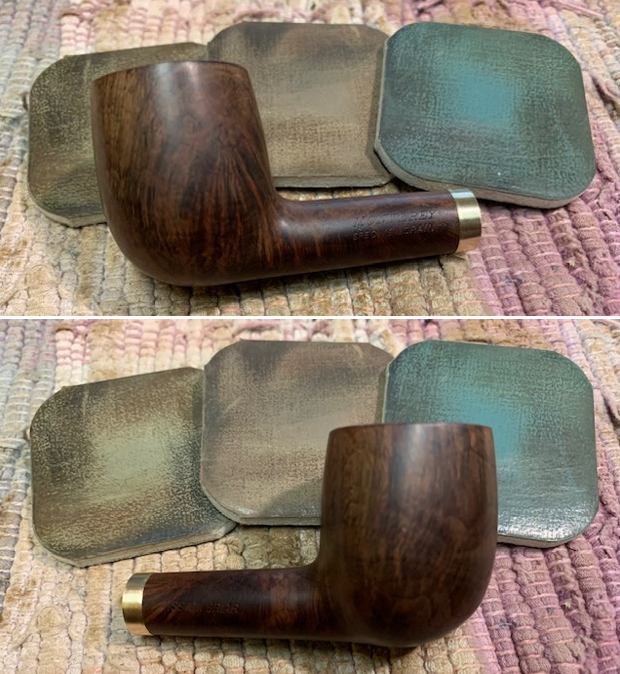
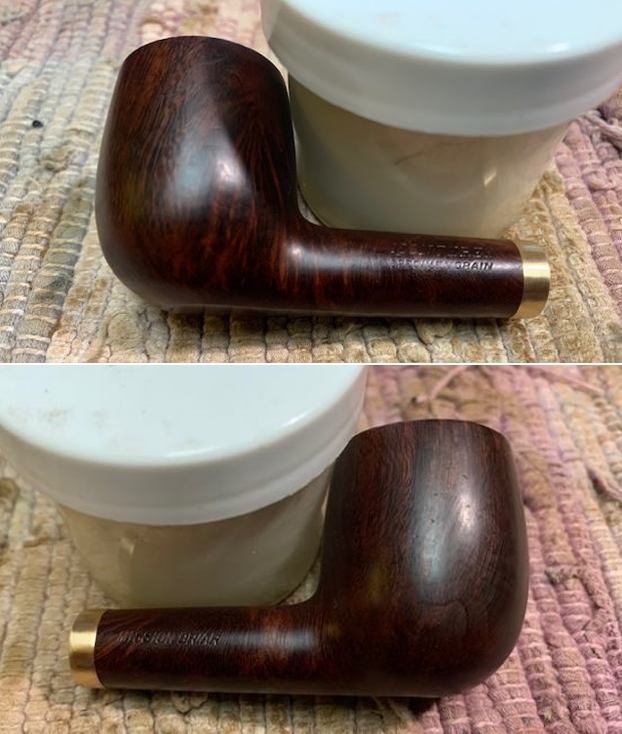
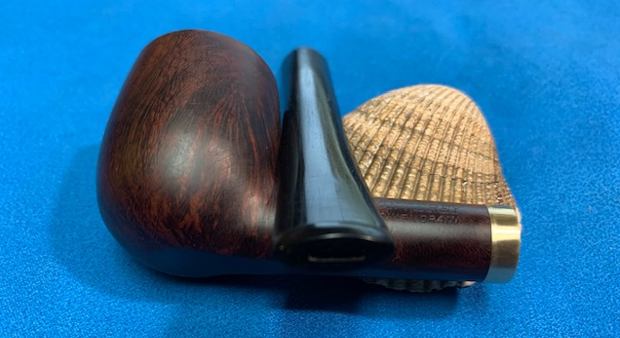
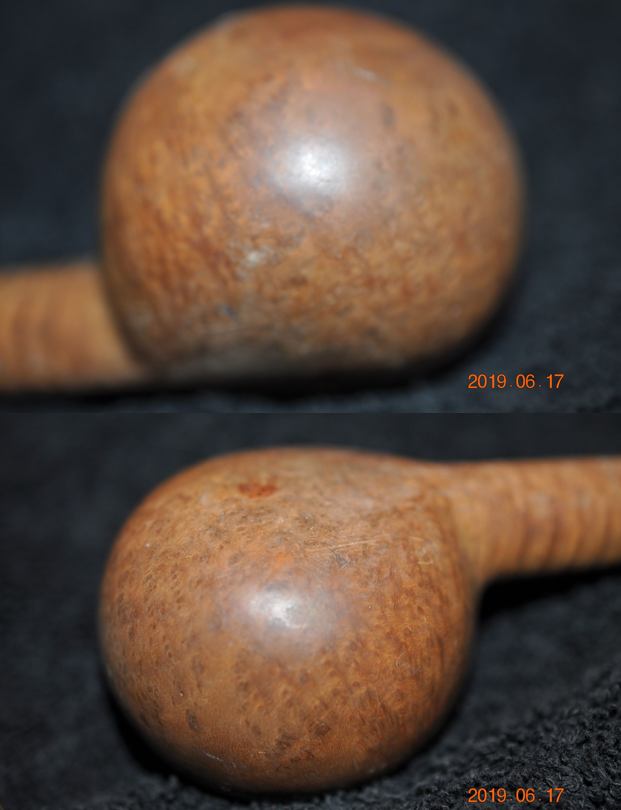
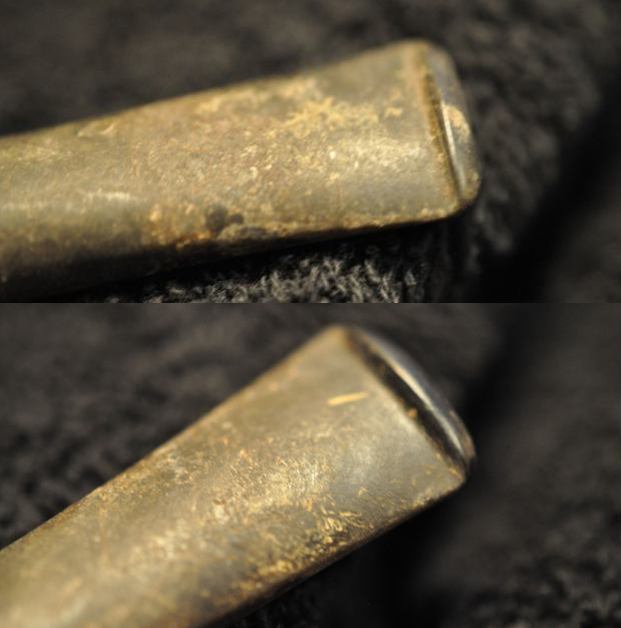
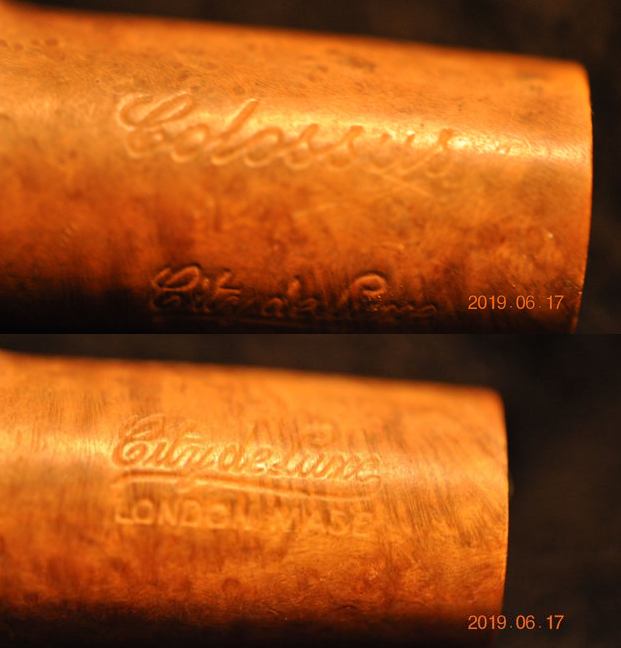
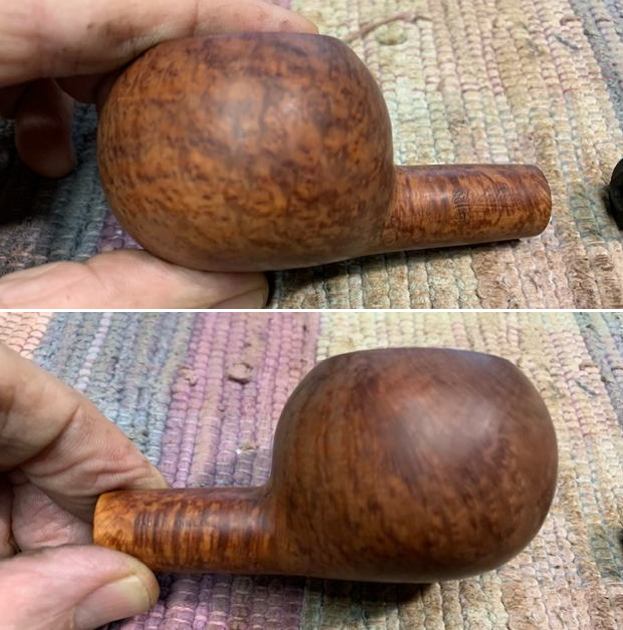
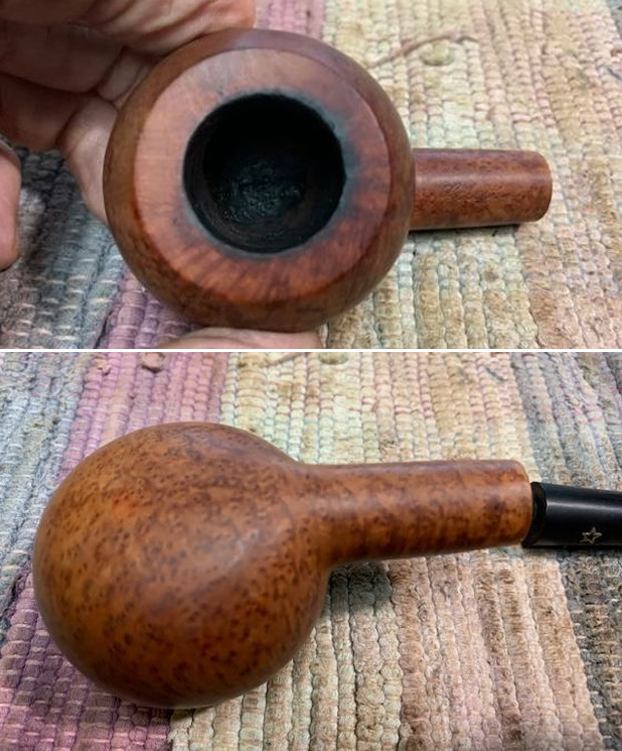
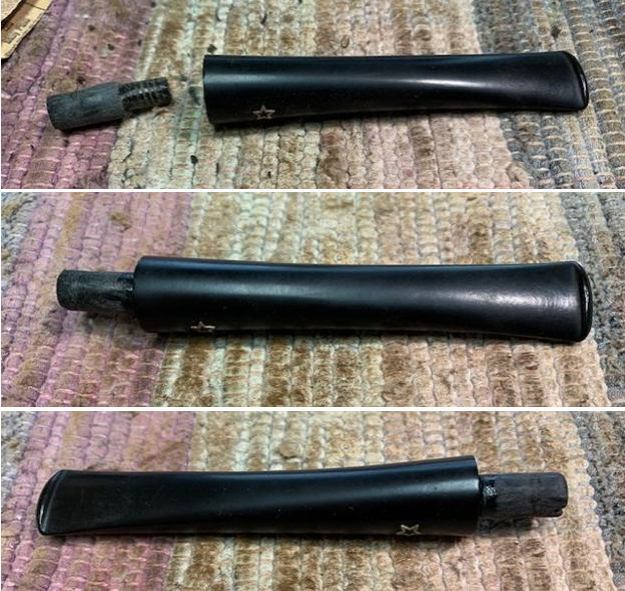
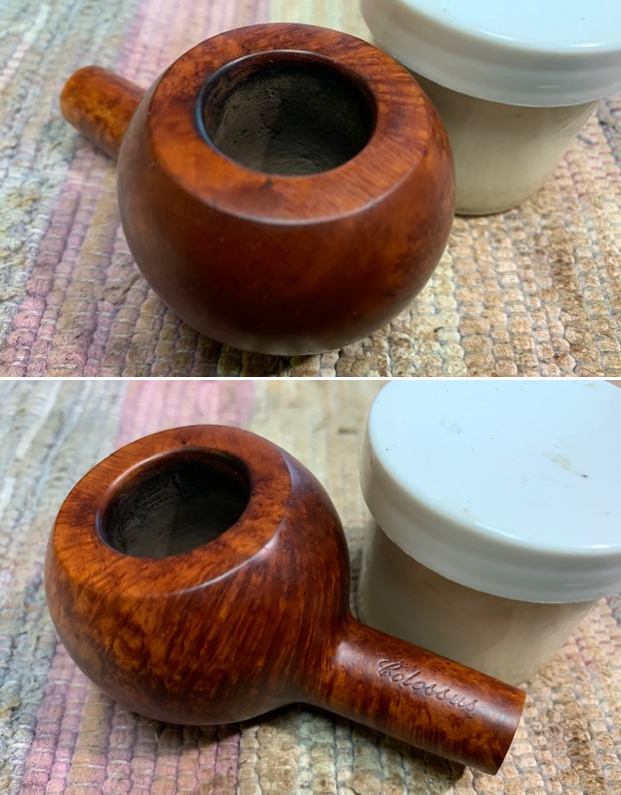
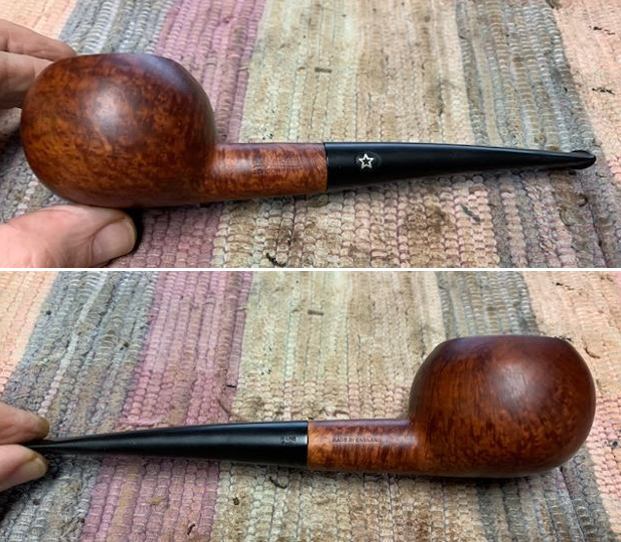
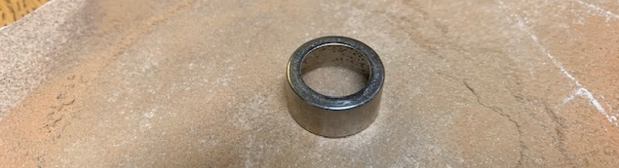
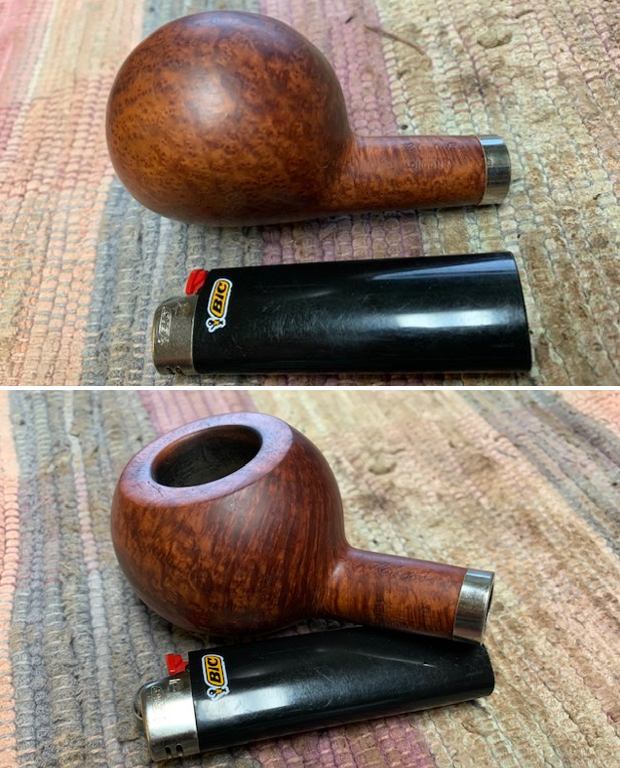
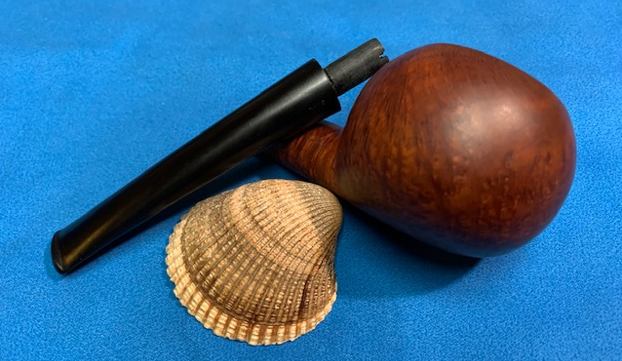
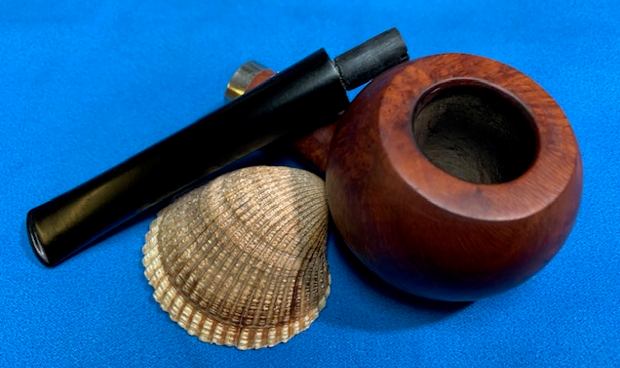
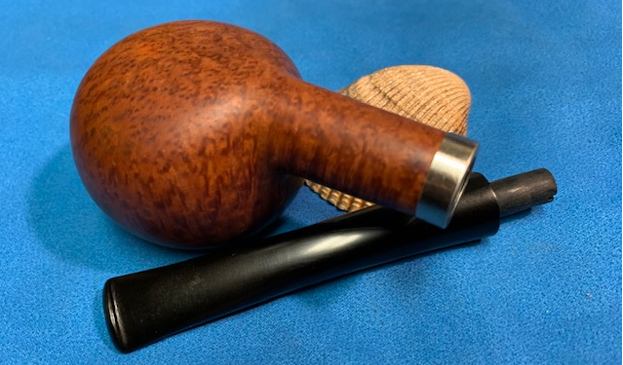
I took some photos of the parts of the pipe to give a better picture of it. The first one below shows the wind cap. You can see that the diameter is quite wide. The cap has some dents and scratches that I will probably leave as is rather than risk damaging it. The second and third photos show the horn ferrule and stem. The worm damage is on the right side of the stem at the button end. The other end is threaded and there is an extra ring where the cord and tassels were attached.
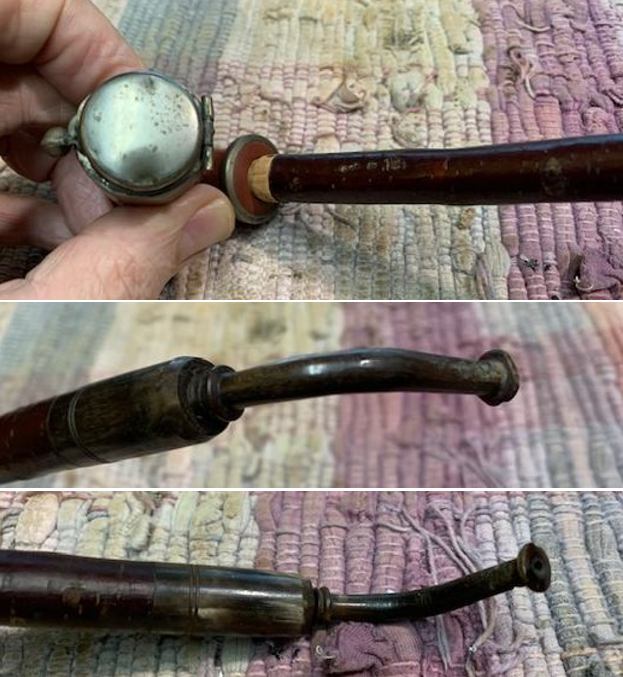
The next photos show the stamping on the inside of the wind cap and the side of the bowl and base. The inside of the cap reads ECHT NICKEL which translates Genuine Nickel. On the right base side it reads PARTSCH in a gold rectangle. On the side of the bowl is an gold oval with an Eagle with extended wings.
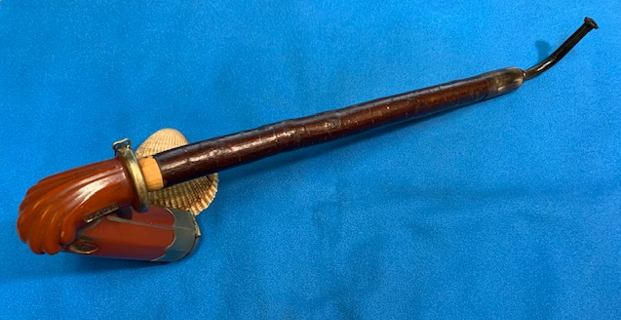
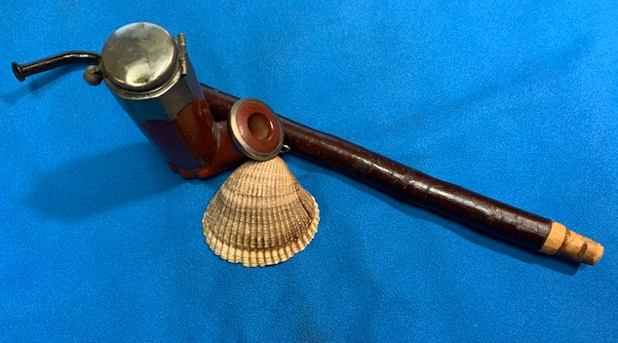
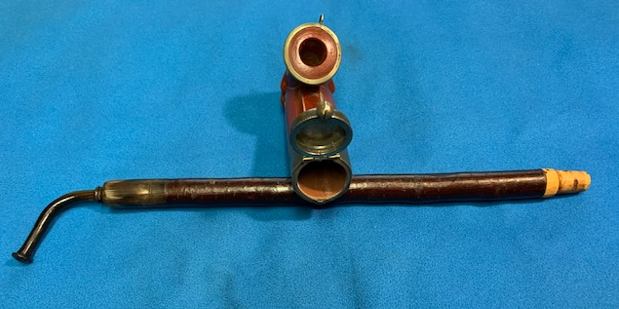
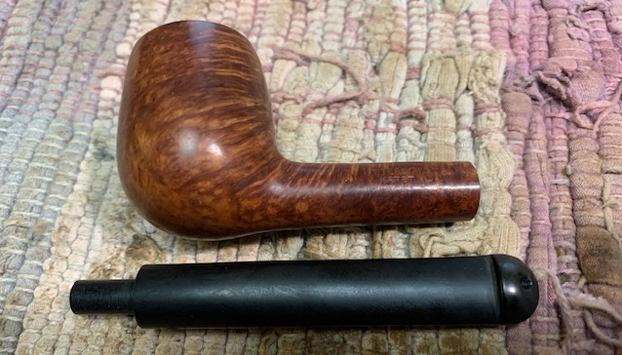
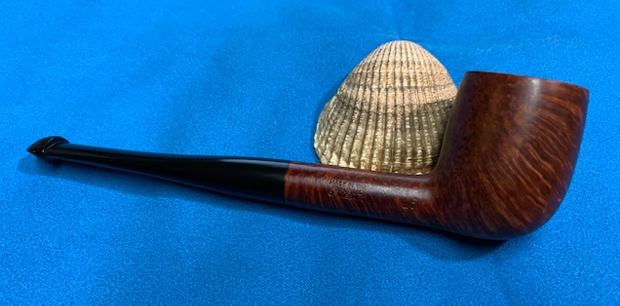
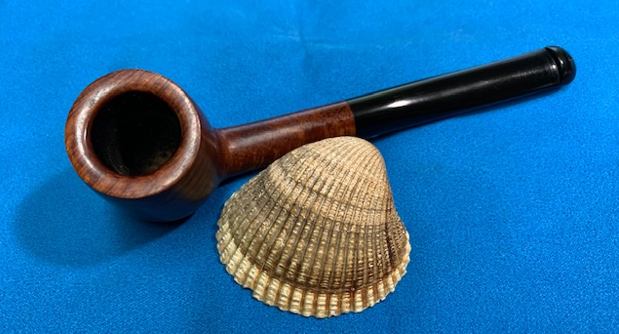
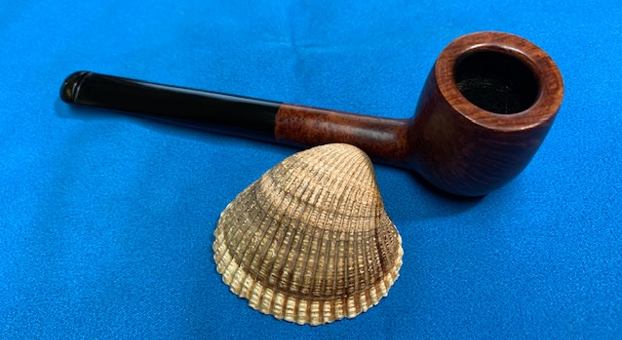
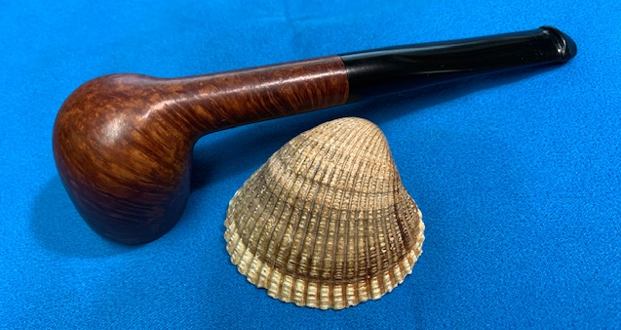
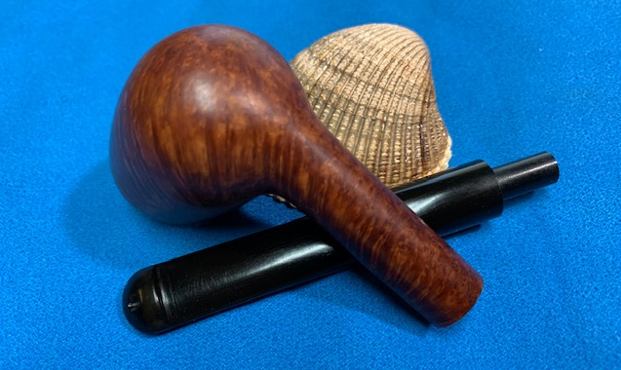
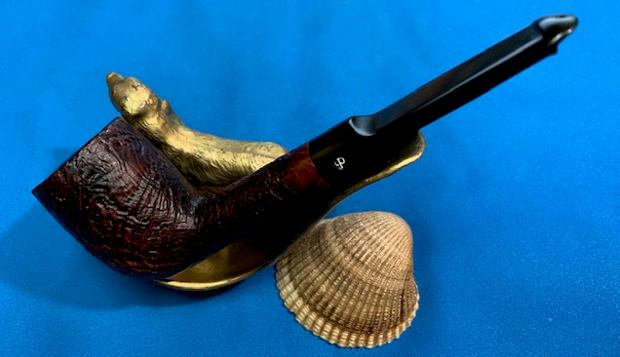
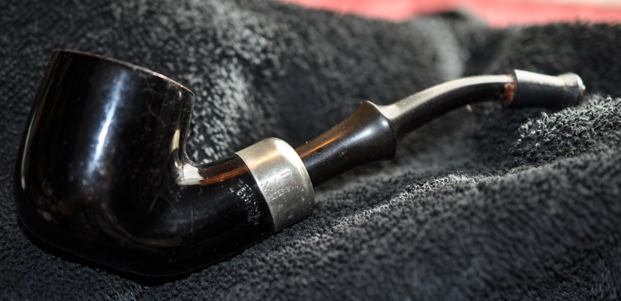
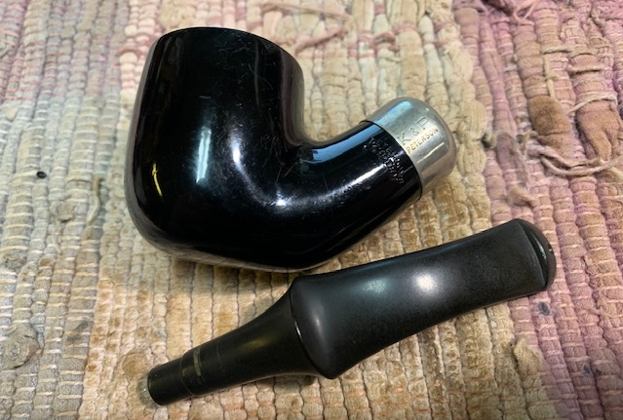
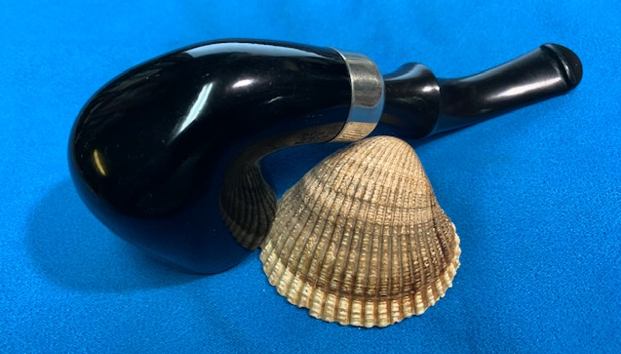
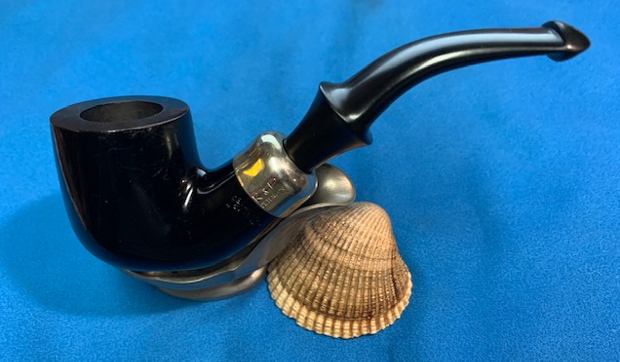
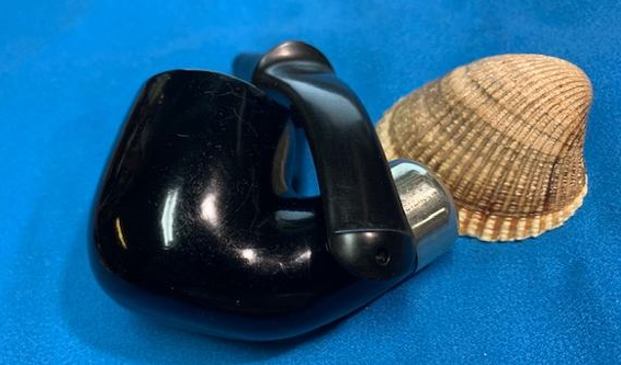
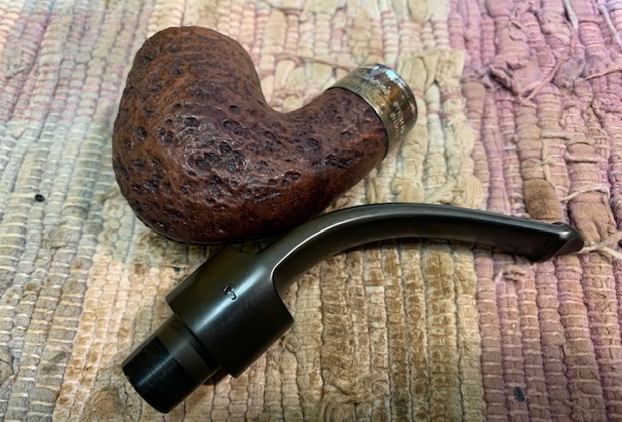
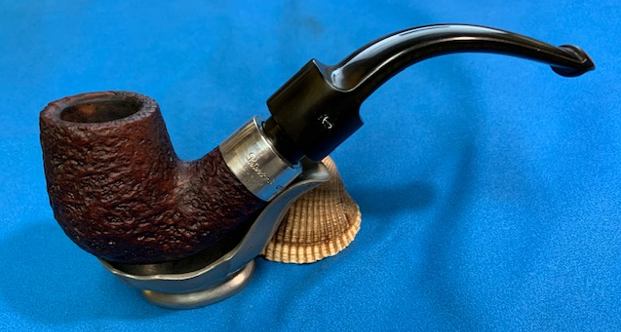
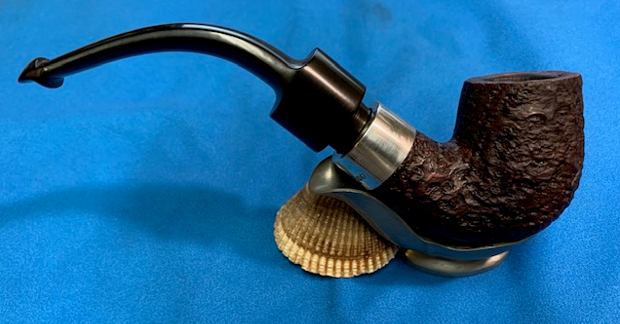
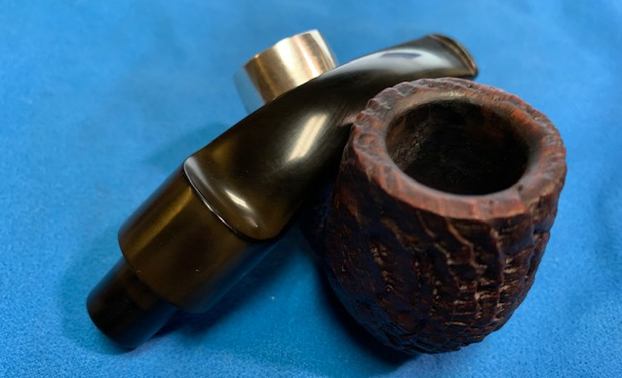
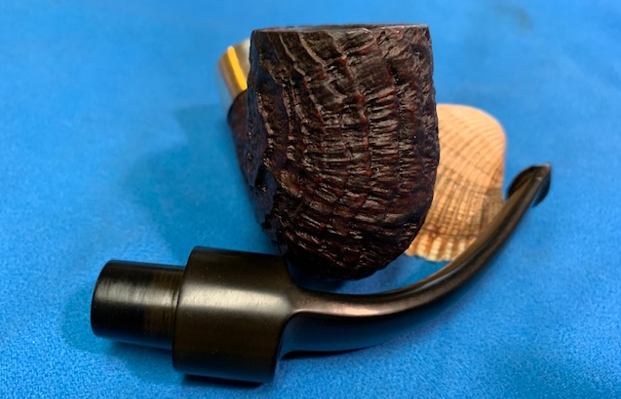
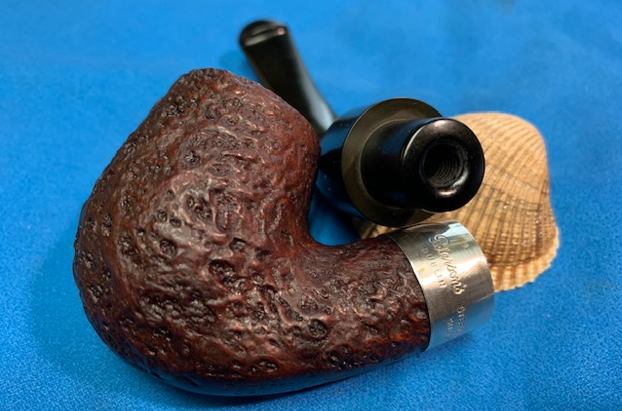
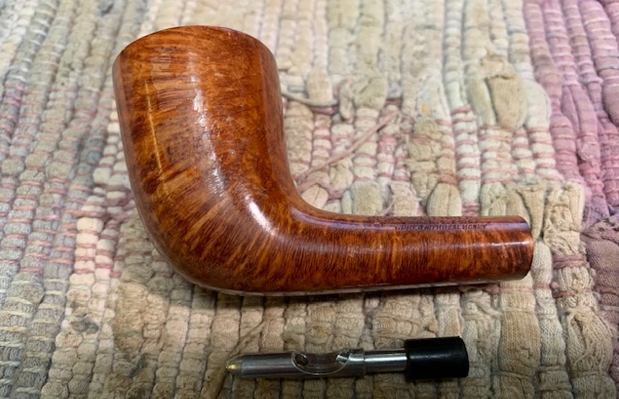
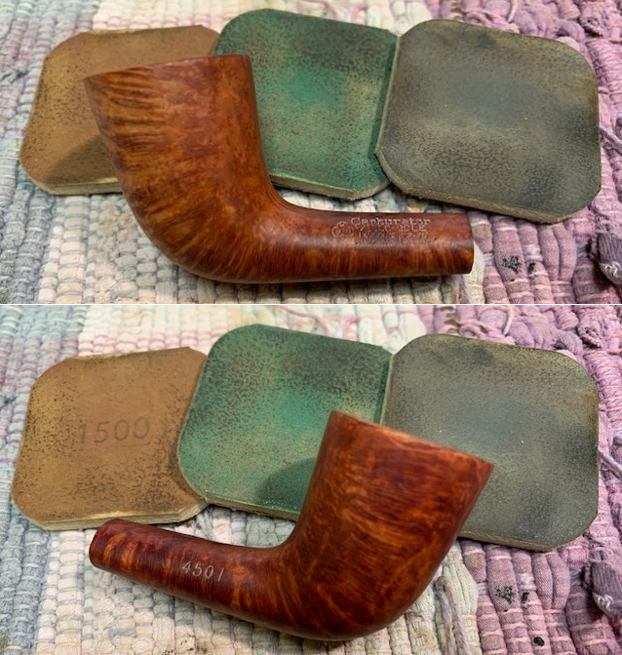
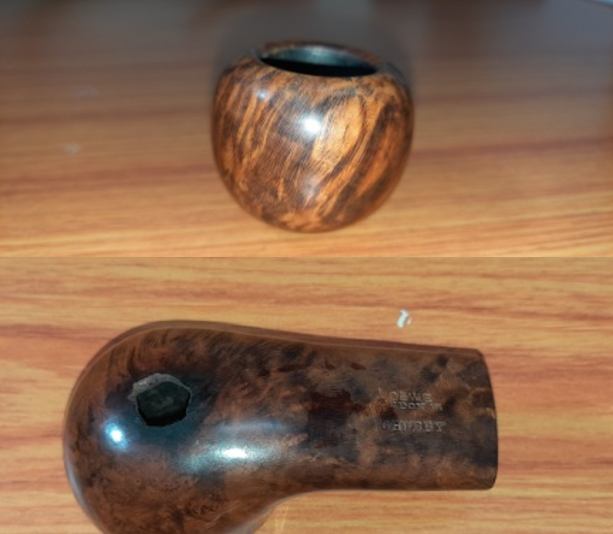
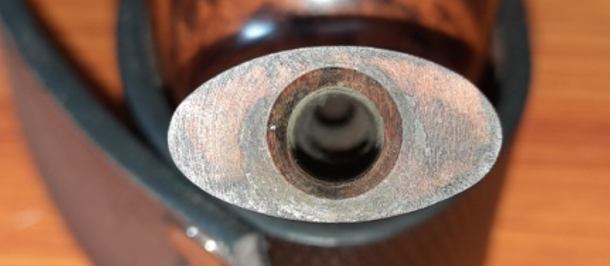
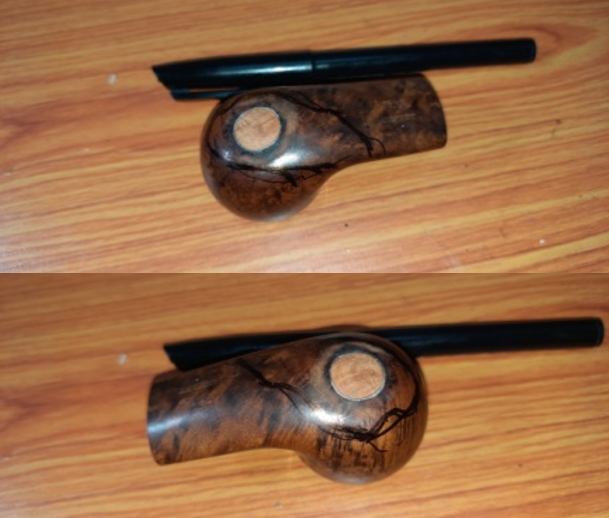
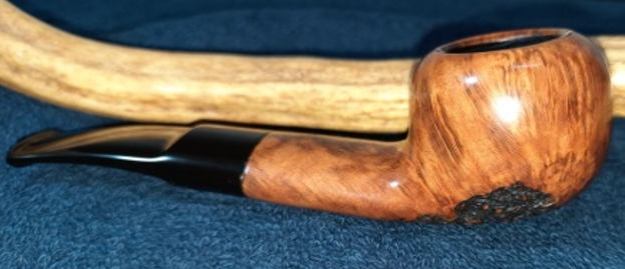
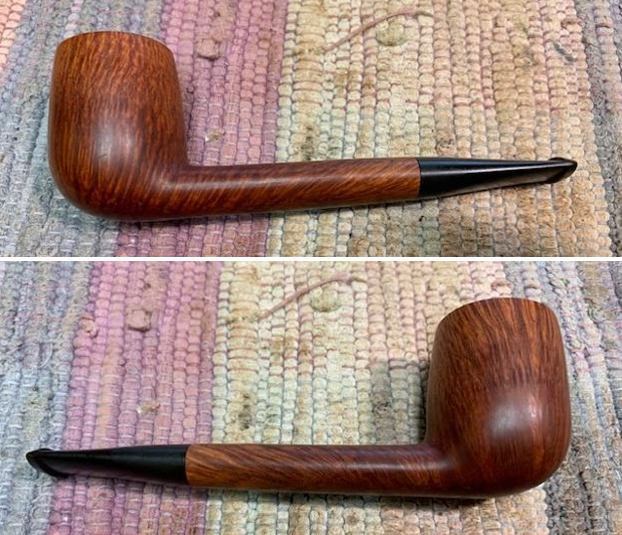
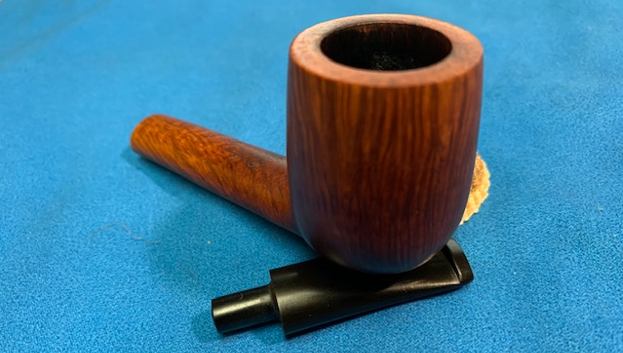
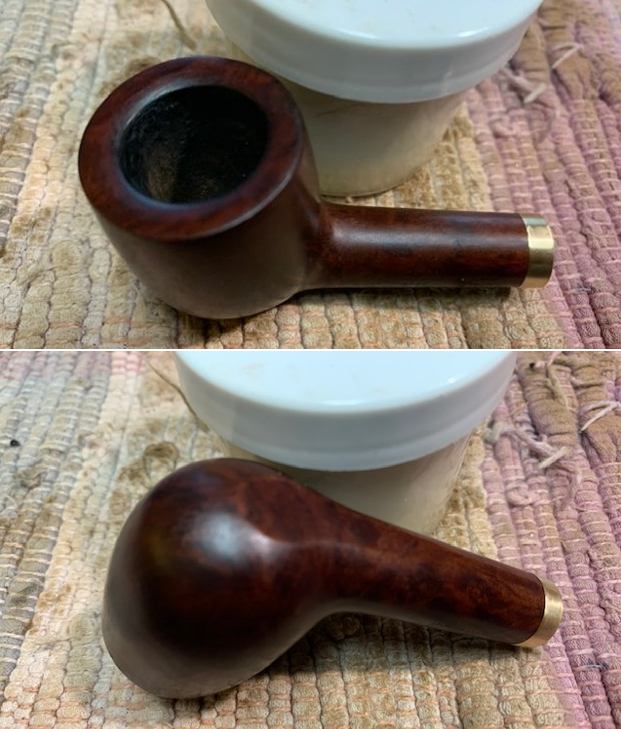
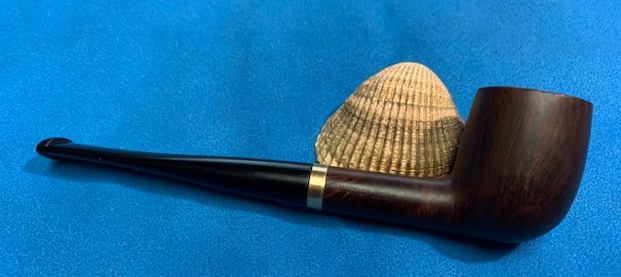
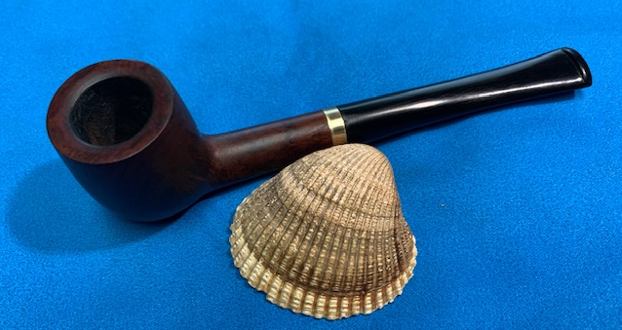
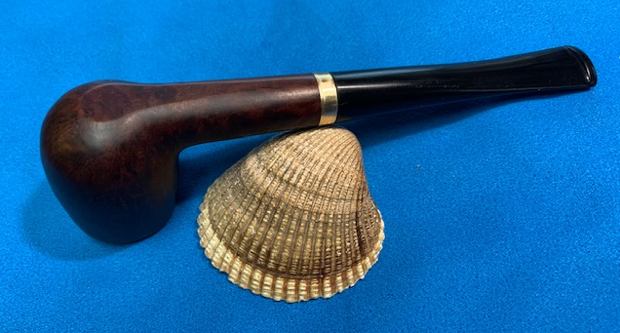
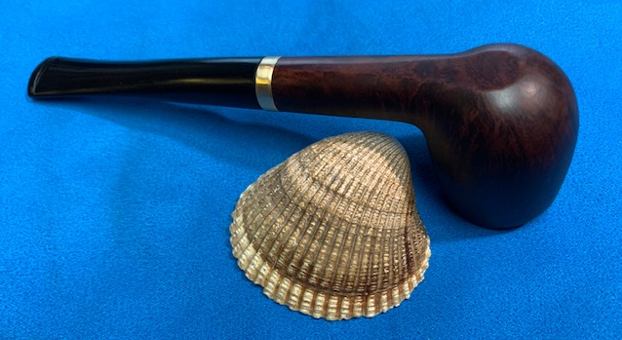
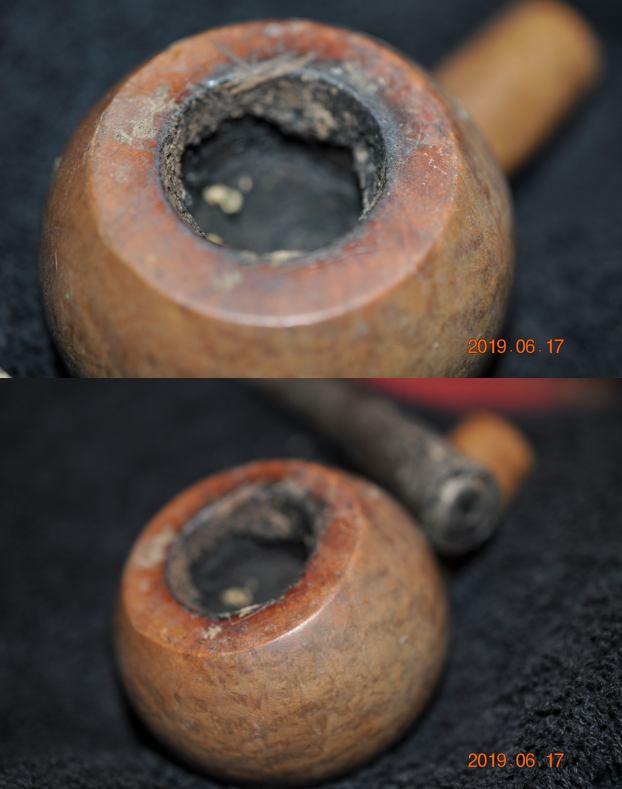
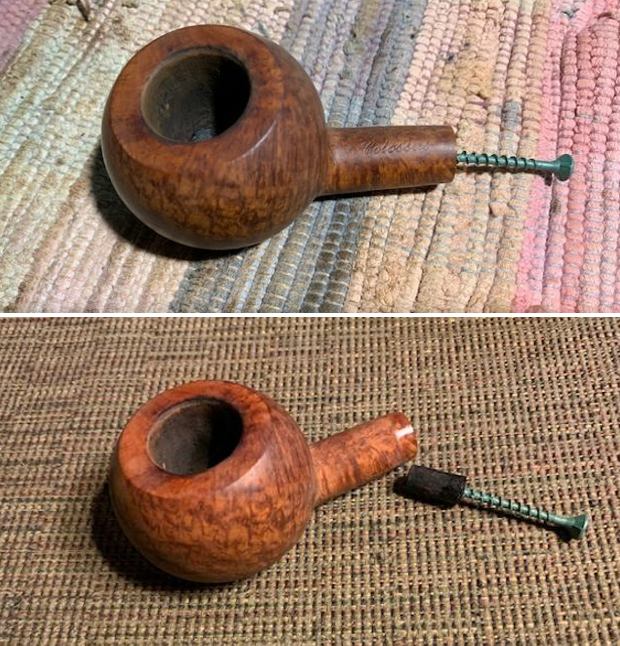
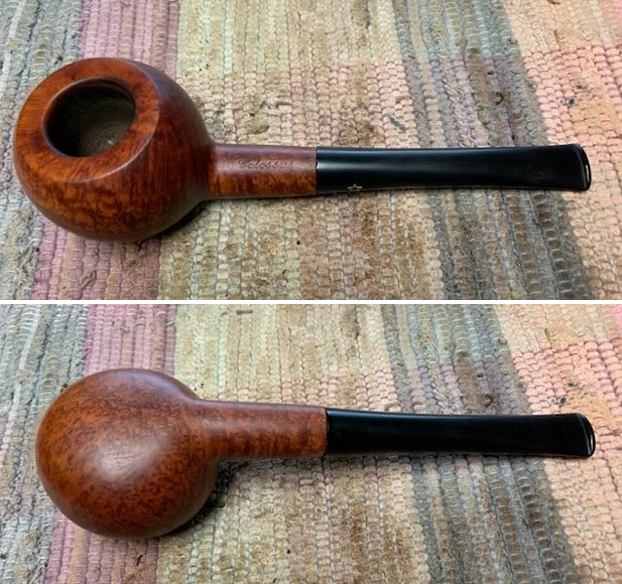
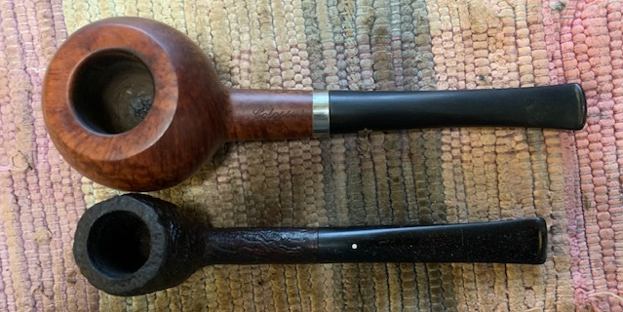
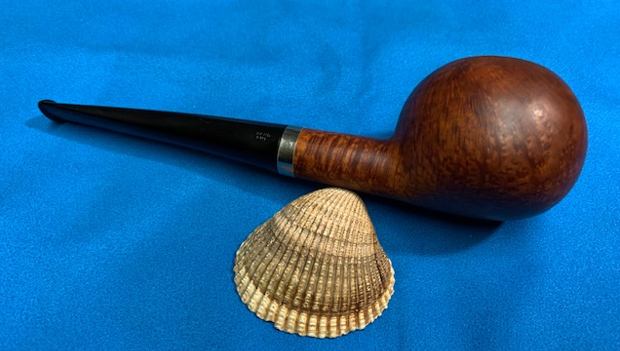
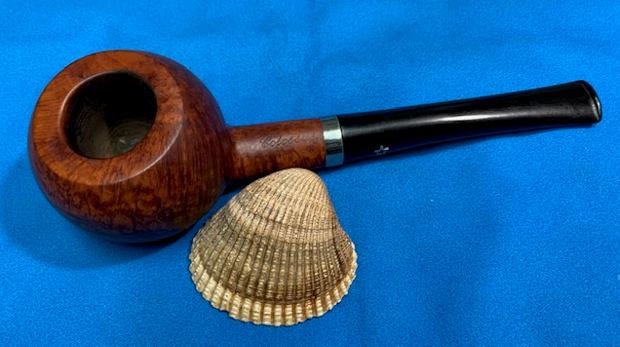
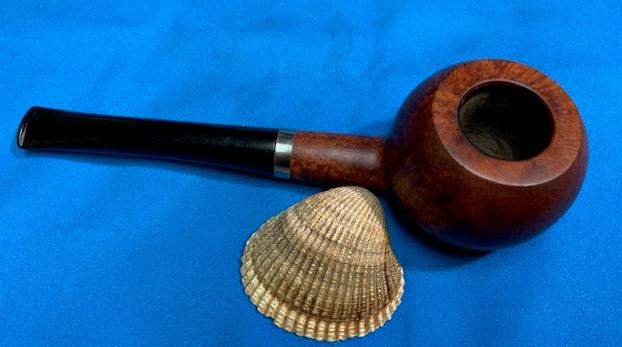
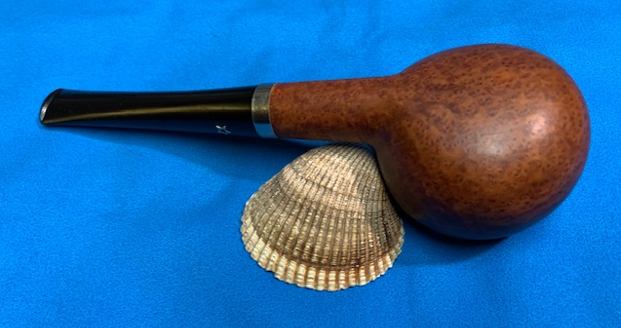
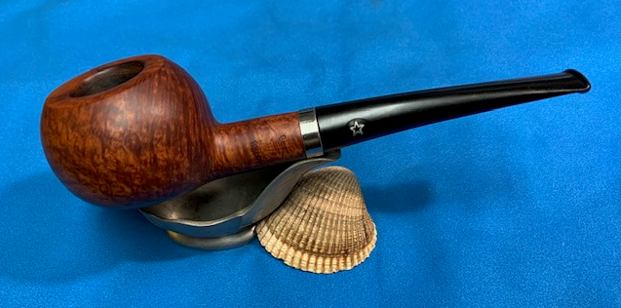
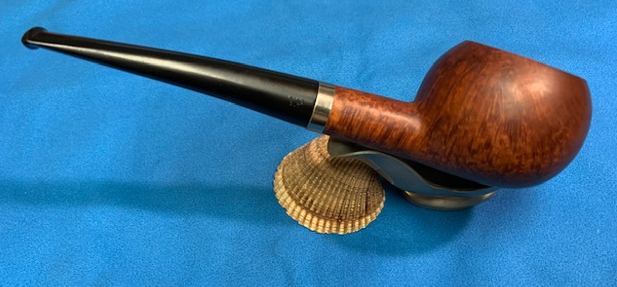
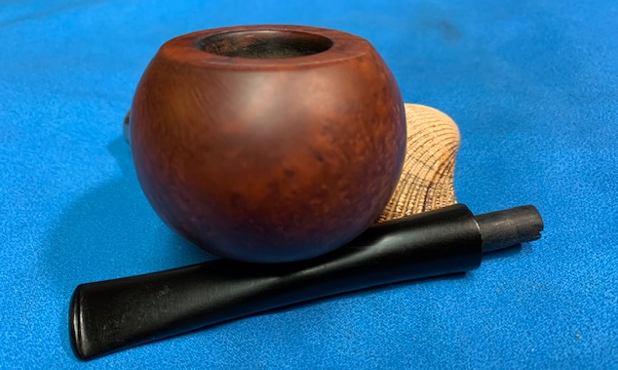
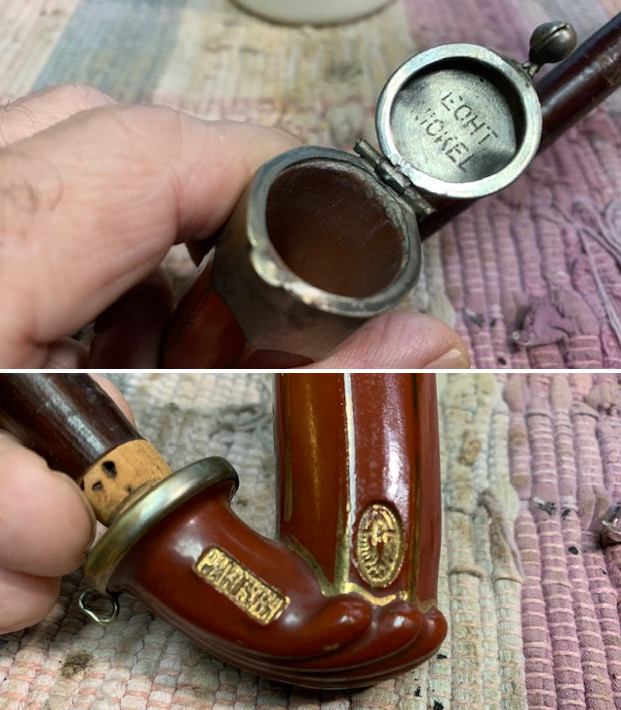
I took the cherry wood shank off the glazed clay base and took a photo of the pipe to give a sense of the proportions and size. The cork is in such good condition that I am almost certain that it has been replaced.
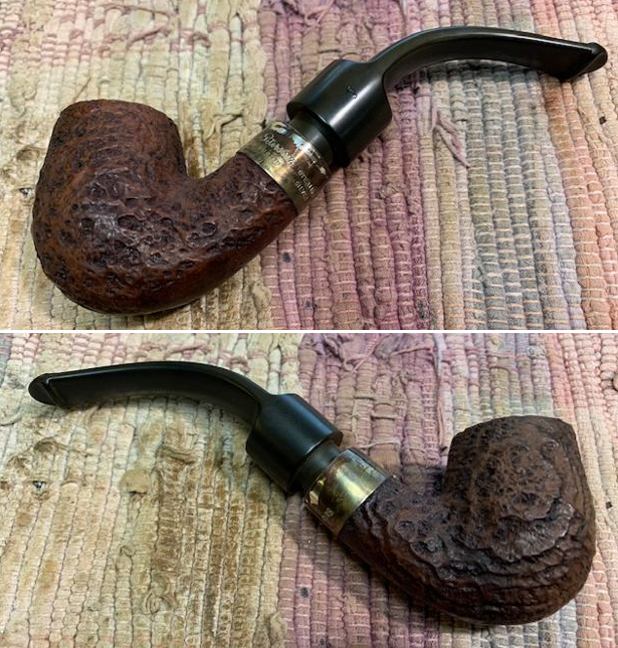
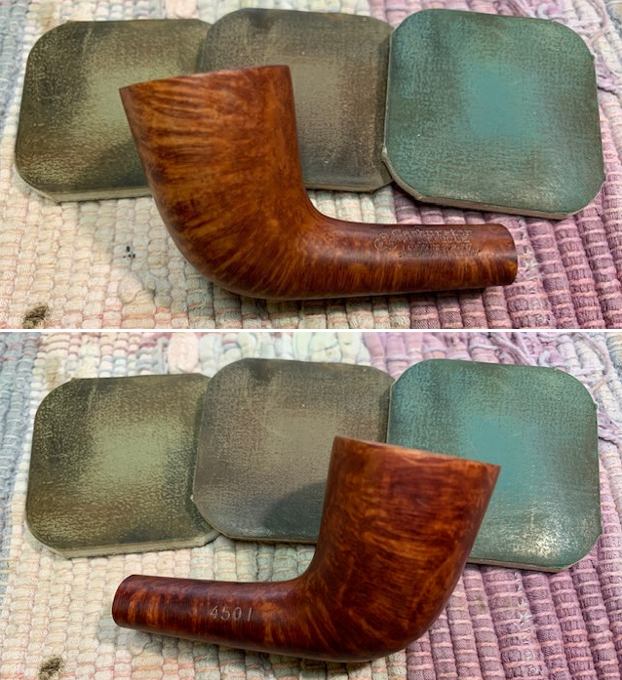
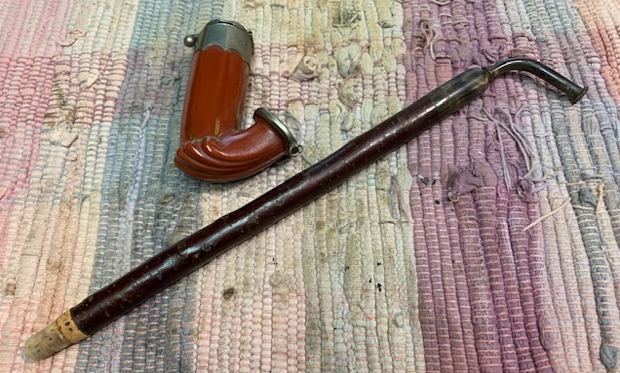
That is the pipe as it stands before I did anything to it. Remember it was unsmoked so it would not be an intrusive or intensive restoration. Rather it would be a polishing and shining up an already beautiful pipe without doing any damage to the antiquity of the pipe. But before I started on that process I wanted to learn more about the brand. What, where and who made this red fired clay pipe. It was time to do some research and dig out what I could find out about the brand.

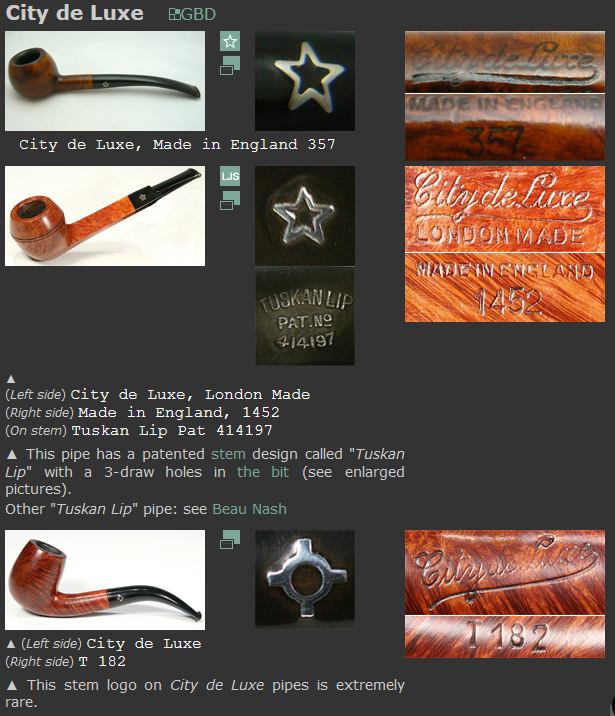
I turned to my usual sources to dig out any information that I could find and there was nothing on either Pipephil’s site or Pipedia. Both came up empty. I expanded the search to a general Google search for the Partsch label to see if I could find anything listed. That was a much more fruitful search. The first site that came up was picclick.co.uk and it had some information on the brand. I quote from the site below. https://picclick.co.uk/Partsch-red-tobacco-pipe-with-original-stem-Smoking-172799026344.html

Partsch red tobacco pipe with original stem. Partsch red tobacco pipe with original stem. A fine antique Partsch German long clay pipe. This beautiful long pipe has a red brown bowl with a nickel cap. The cap is stamped underneath ‘echt nickel’. The bowl is marked Partsch and has also an impressed Austrian eagle. This also appears to have its original cherry wood stem and original mouthpiece. Dimensions: 28.5cms long. Height of the bowl from cover to base 8.5cms. Cross section of the bowl 2.5cms x 2.5cms and bowl aperture is 2.1cms.Weight: 85gms Condition: Rare to get a pipe with all original parts.

The description of the pipe associates the ‘Echt Nickel’ stamp with German and identifies the pipe as a German made long clay pipe. I was not sure of that so the hunt continued.

The next mention on the Google hunt was to a pin on Pinterest. These often are unproductive so I was not overly hopeful regarding information, but I was wrong. I quote from the description on the pin below (https://www.pinterest.ca/pin/25051341664836403/).

This is a fine antique, long handle, smokers pipe that has been well used and well loved. It was made in Austria by Anton Partsch and bears the stamp “PARTSCH” as well as the “Austrian Eagle Crest” on its bowl. The bowl has a clamshell relief pattern at its base and is in a terra-cotta red glazed clay. The hinged metal wind cap has two slots and a turned down ball clasp for closure. There is a cord loop on the metal band around the shank but no cord. I believe the reddish bark coloured wood is cherry…

From that information I learned that I was dealing with a pipe made by Anton Partsch and that the stamps on the side were indeed what I thought they were. What was really helpful was the author identified the Eagle with outstretched wings as the “Austrian Eagle Crest”.

The next link provided more information. It was a pipe that was for sale/sold on Worthpoint and the description added new information to my growing understanding of the brand. (https://www.worthpoint.com/worthopedia/partsch-schemnitz-pipe-bowl-antique-1855443319) I quote below.

The vast majority were finished in subdued solid colors of carmine, terracotta, brown, and black, the last two being the most common. and occasionally found in mottled, marbled, or dappled green and blue. These early, paneled bowls were mass-produced in the town of Banská Štiavnica, Slovakia, Selmecbánya (Hungarian), Schemnitz (German), or Chemnitz (English), once the largest and most famous mining center of the Austro-Hungarian Empire. These pipe bowls are often identified in literature as hard stone, or stoneware, because of their highly polished and transparent-glazed surface finish, but they were not of a hard stone composition; they were fired, containing a mixture of white clay for strength and red clay for sheen.

This was the most detail of the area that the bowl came from in the Austro-Hungarian Empire and that they were made of a mixture of white clay from strength and red clay for sheen. They had a glazed surface that gave them the look of stone but were not made of that. Fascinating how the picture is growing.

The next piece of the puzzle came from a discussion on Pipesmagazine.com forums. I quote some of the pertinent parts of the discussion that added to my understanding. The initial poster refers to an article on Facebook that is no longer available. You can click on the link and read the discussion in its entirety if you so choose (https://pipesmagazine.com/forums/threads/antique-schemnitz-austro-hungarian-clay-pipe-rarity-age.36245/).

…The article says they’re most common in black and brown, less so in terra-cotta and red, and “occasionally” in blue or green. I found some closed auctions on eBay and posts elsewhere showing terra-cotta, mottled brown, and black ones. They usually seem to have a scalloped metal sleeve on the bowl with a hinged wind-cap, and some have a metal band around the end of the shank, presumably to prevent cracks.

…The bowl is glazed in cream color with softly-dappled green swirl patterns, the cream becoming a sort of buttercream yellow behind the green areas. The shell bottom and shank are black, with a tiny hint of gold on the scallops. The wind-cap has eight slots around the edge and a nice curled clasp that snaps down; I’ve seen photos of very plain bands on the bowl, solid with a scalloped lower edge, and some very ornate pierced ones, and this is somewhere in the middle, plain with a fancy, pierced border. The inside of the cap has “ECHT NICKEL” (genuine nickel) stamped in big block letters…

The maker’s mark, stamped into the shank and gold-glazed, is “PARTSCH,” which that article tells me is Anton Partsch. There is also, up on the lower part of the bowl, a gold oval stamp with a soft pattern in the center, I assume the maker’s company sigil. The shank has a plain metal band, with a loop for a cord…

…It has a bark-covered wood stem, with a cork-and-reed tip on the bottom and a turned horn ferrule (which has a tiny age crack) on top and a wooden mouthpiece (on closer examination just now, the lip is translucent under a very bright, focused light, so I think this must also be horn). The stem is kept with the bowl by a brown string or cord, tied around the mouthpiece and ending in two tassels, like many of the German wood and porcelain pipes…

I have highlighted the information that fits my pipe in bold in the quotes above. I did find from the conversation that the Terra Cotta version I have is a bit rarer to find than the black or brown versions of the pipe.

I found two scholarly articles. I have included the link to the first one below. It is a PDF on pipes made in Theresienfeld (Davey 2010 Theresienfeld pipes.pdf). I quote a portion of the paper on the PARTSCH pipes. It is very interesting and confirms the stamping.

These pipes bear a PARTSCH relief stamp in a rectangular  frame  on  the  side  of  the  socket  and  an  oval SCHUTZMARKE  relief  stamp  at  the  base  of  the  funnel  in which the legend surrounds the upper part of an eagle with spread wings.

The next information came from a Master’s Thesis for Oregon State University. I included the link and the identifying information below. I quote tow paragraphs that help give information on the Partsch pipe I am working on.

An Abstract Of The Thesis Of – Oregon State University

AN ABSTRACT OF THE THESIS OF Diane Zentgraf for the degree of Master of Science in Applied Anthropology presented on December 14, 2018.

Title:  Mid-Nineteenth Century Clay Smoking Pipes from Fort Hoskins (35BE15) and Fort

Yamhill (35PO75), Oregon.

 …Reed stem clay pipe manufacturing began in the Austro-Hungarian Empire during
the last quarter of the 17th century (Gačić 2011: 31), utilizing local clays in Northern and
Western Hungary (Gačić 2011:31, citing Ridovics 2009:64). During the 19th century, the
pipe making was concentrated in Wiener Neustadt, Theresienfeld and Pernitz, in the
southern section of Austria, with strong connections to production centers in Hungary
.

Twenty pipe making workshops have been identified by Bielich and Curny (2009: 342-
348), including pipe makers S. Boscovitz, Anton Partsch, Jacob Reinitz, S. Seiler, Károly
Zachar, Anton Ress, Michael Honig, M. Amstätter and Joseph Schmidt.

The Hapsburg dynasty required pipes be marked with a maker’s mark in the early 19th century (Bielich and Curney 2009:358).  In the literature these are termed Austro-Hungarian pipes and are characterized by a consistent form that was repeated with very little change (Gacic 2011:54).  The most common pipe form is termed a Schemnitz pipe and is described as made of good quality clay in molds and having a narrow “tall cylindrical head (with either round or polygonal cross-section) profiled like a shell at the bottom” (Gacic 2011:54). These pipes were popular and often copied (Figure 21) 49 (Morgenroth 2001:56), and are described as having muted colors, reddish to black in color, marbled black-grey color, often mixed with white clay.

I am pretty certain I have found the last piece of information I needed. It seems that there were many pipe making workshops in the early 19th century concentrated in three areas in southern Austria – Wiener Neustadt, Theresienfeld and Pernitz. It is in those areas that Anton Partsch is said to have been a pipe maker. It is also clear that during the Hapsburg Dynasty all pipes had to be marked with the maker’s mark in the early 19th century. That further locks the date down for the pipe I am working on.

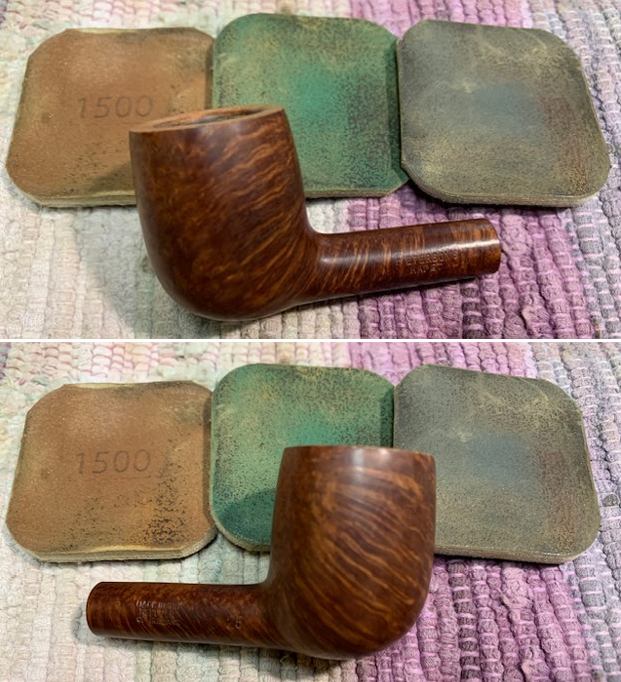
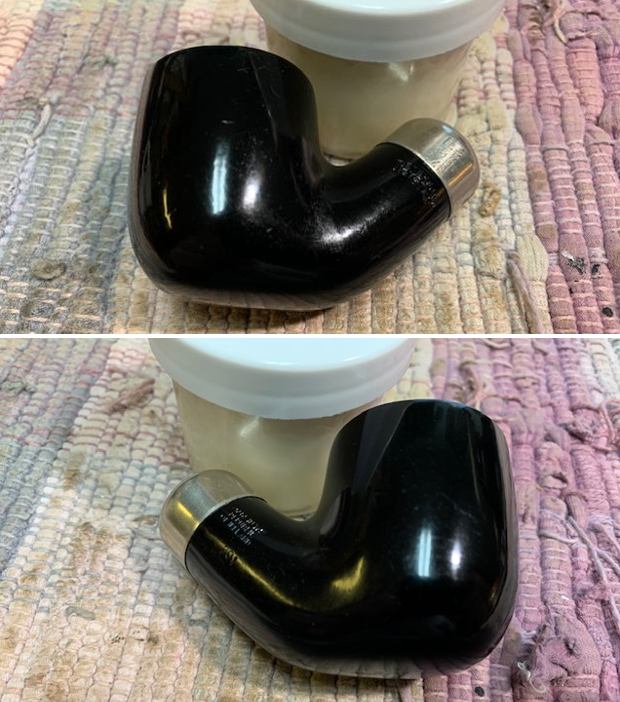
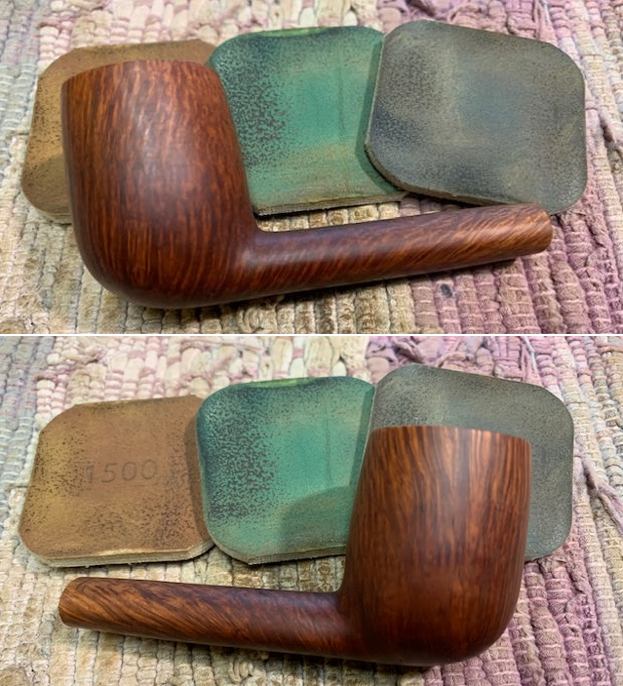
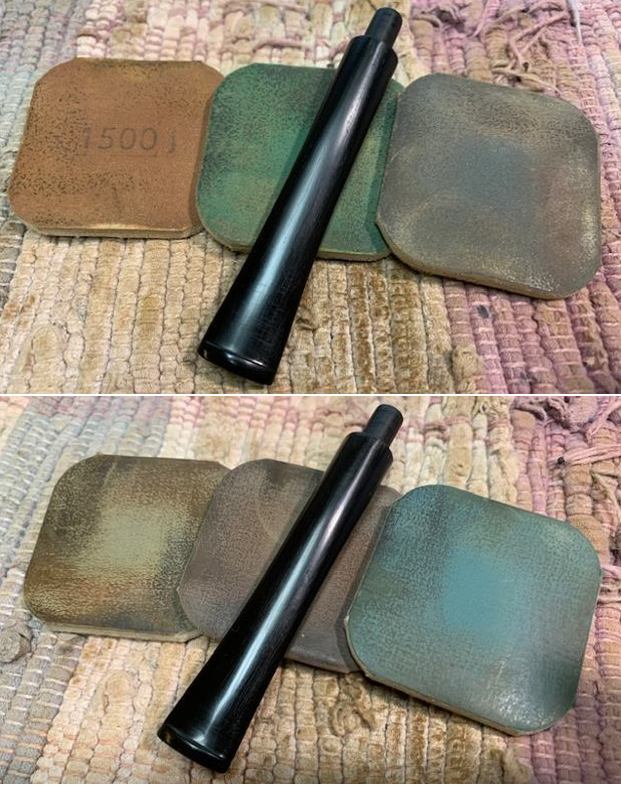
Now that I had gathered a bit of an education on the maker and pipe it was time to do some polishing on the pipe. I polished the horn ferrule with micromesh sanding pads – dry sanding with 1500-12000 grit pads and wiped it down with Obsidian Oil. The horn took on a lot of life and depth from the polishing It is a nice looking piece. 
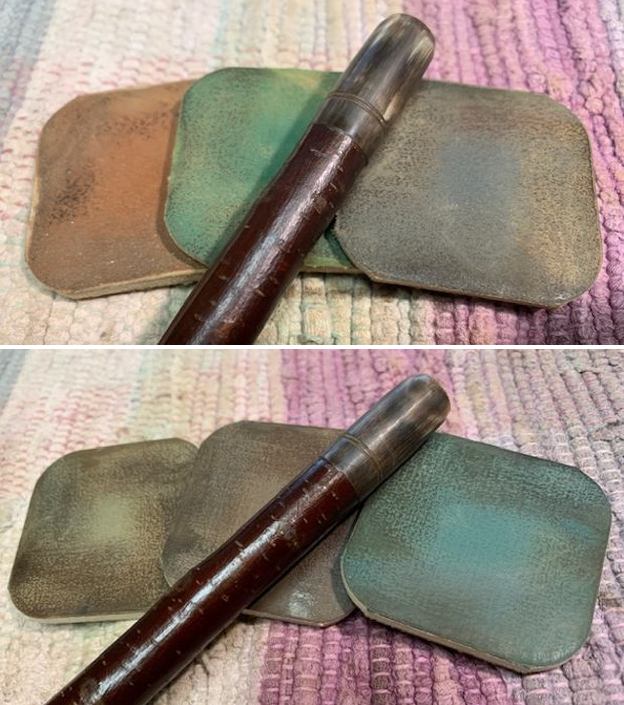
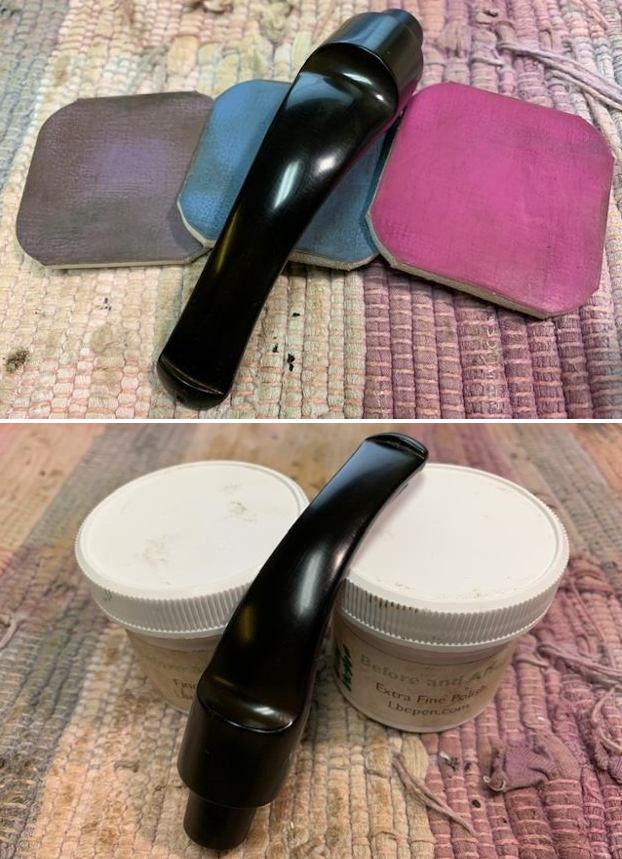
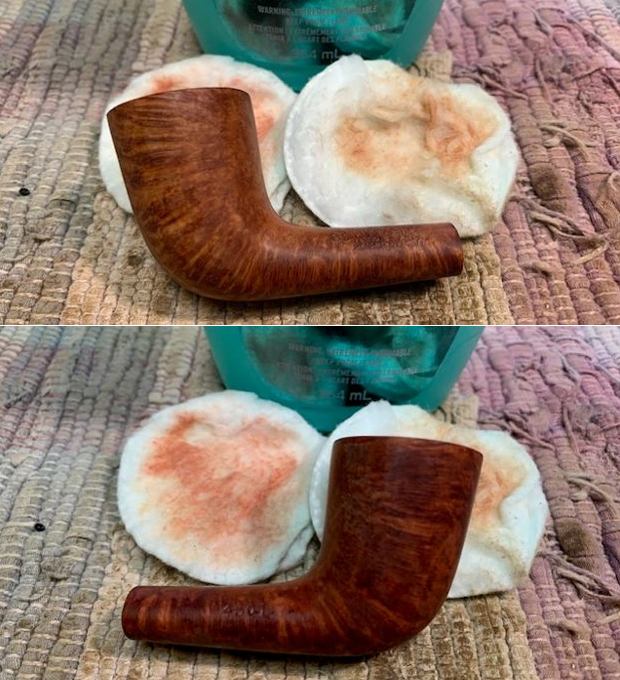
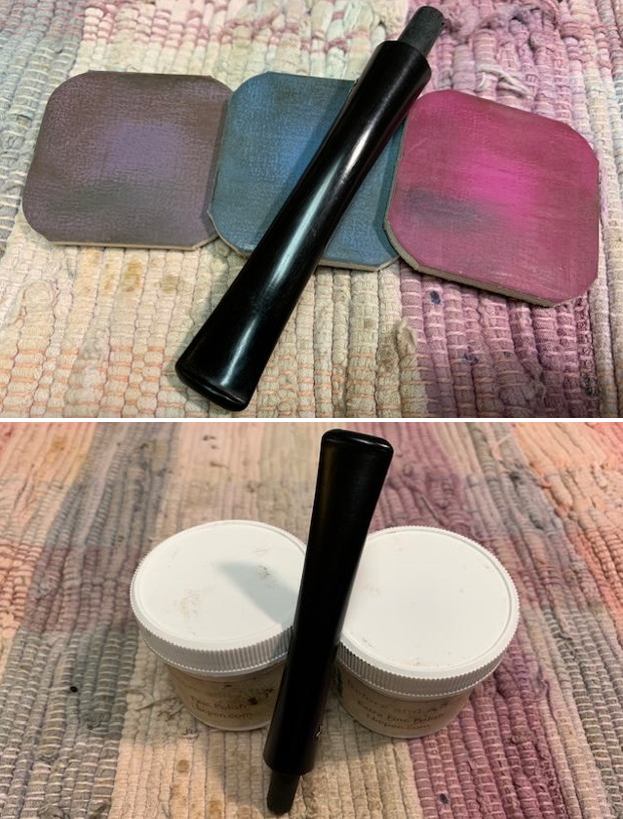
I rubbed the bark of the cherry wood shank piece with Before & After Restoration Balm. I worked it into the bark, cork and horn with my finger tips. It works to clean, preserve and protect wood. I let it sit for 15 minutes then buffed it off with a soft cotton cloth. 
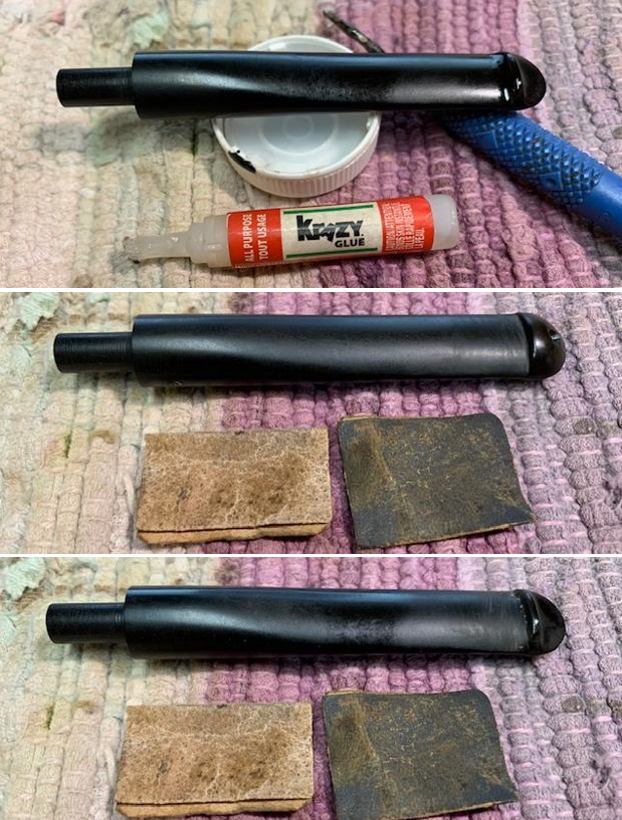
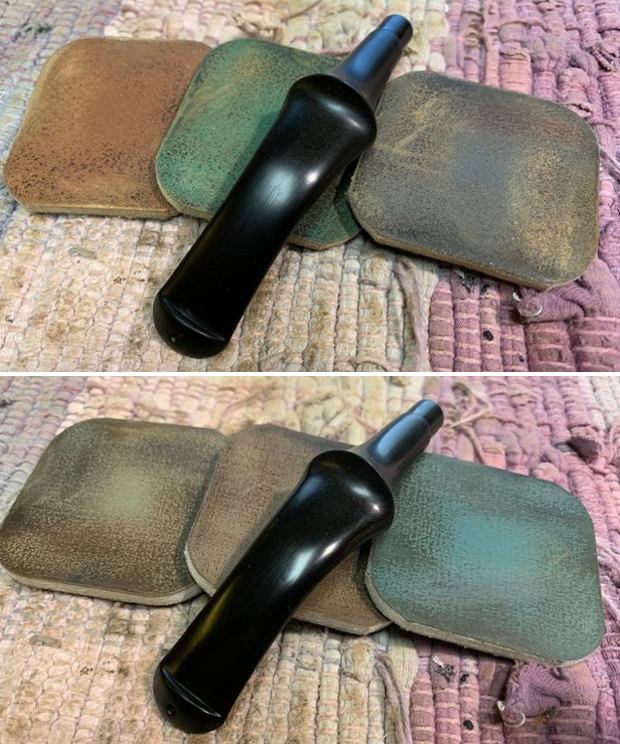
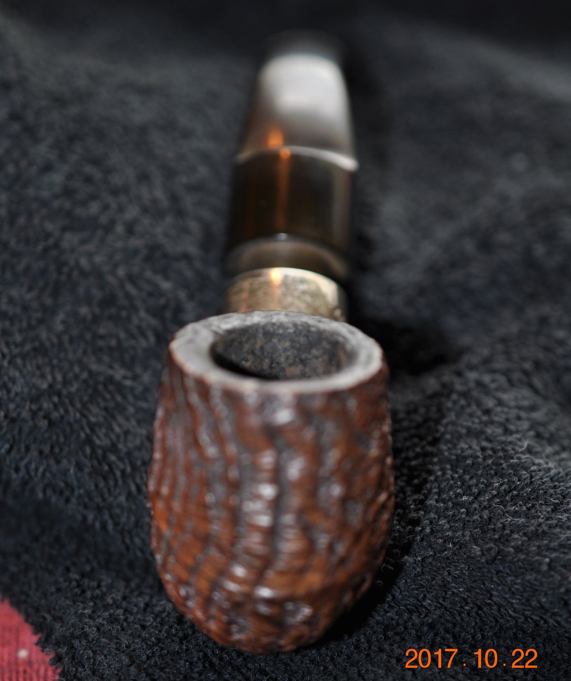
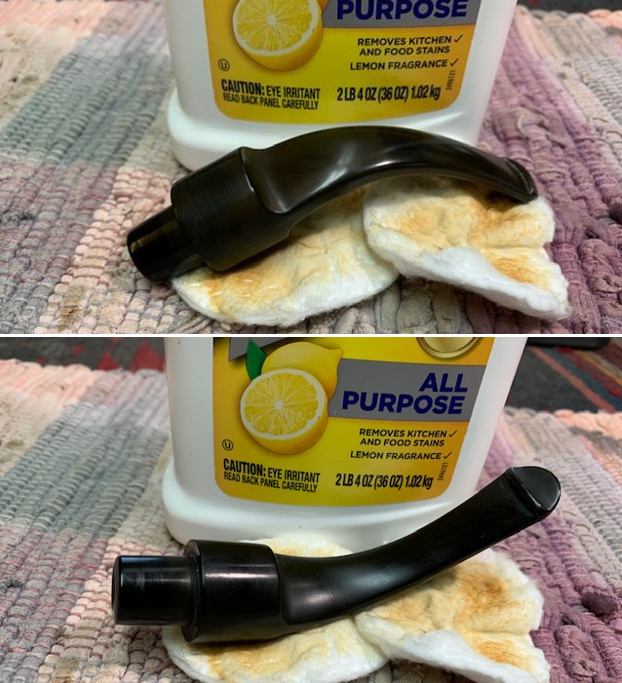
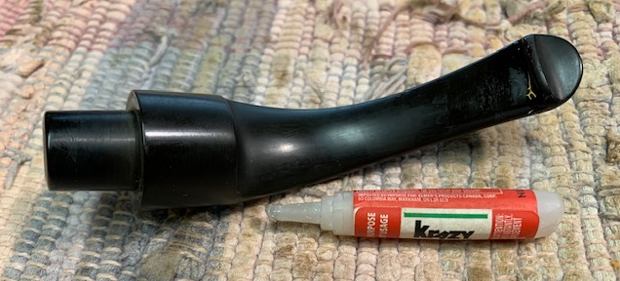
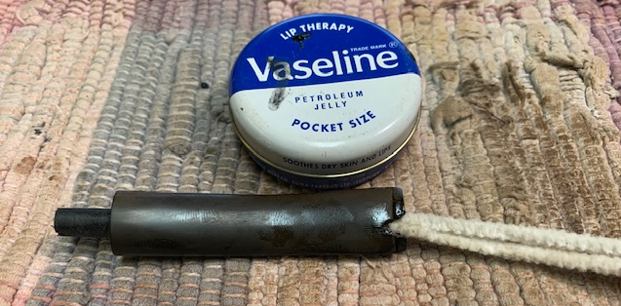
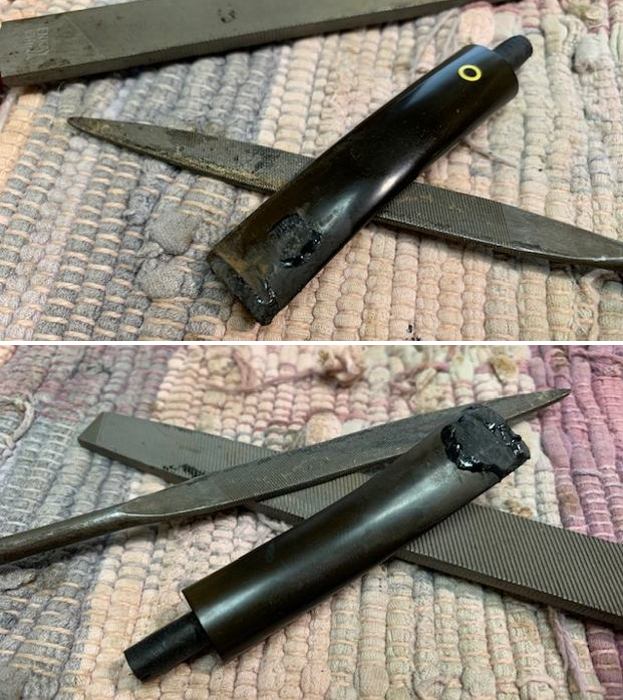
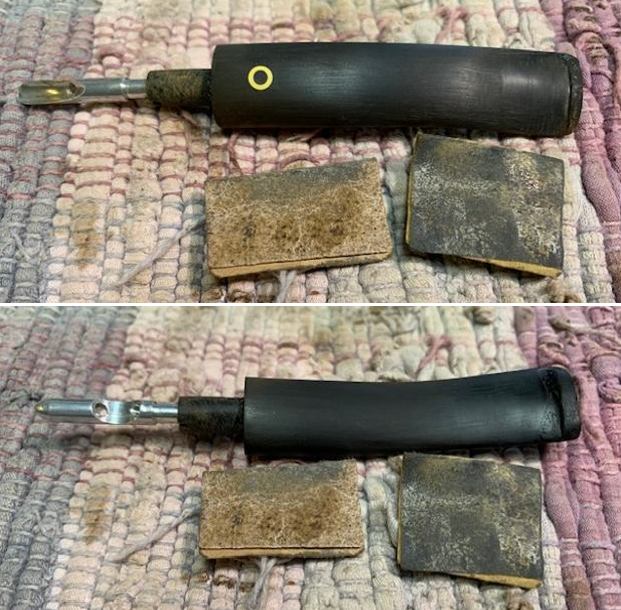
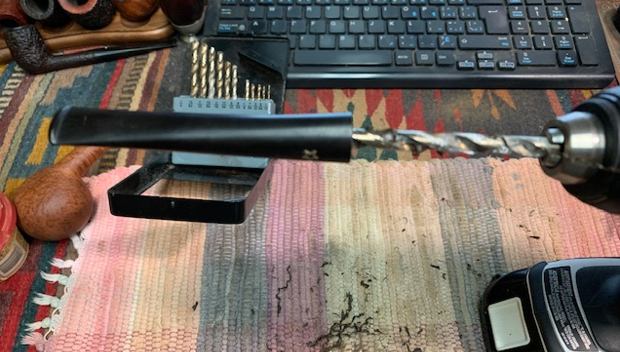
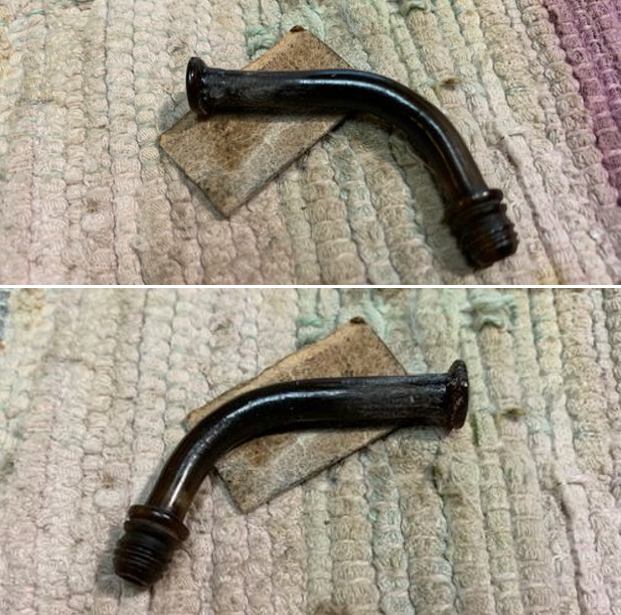
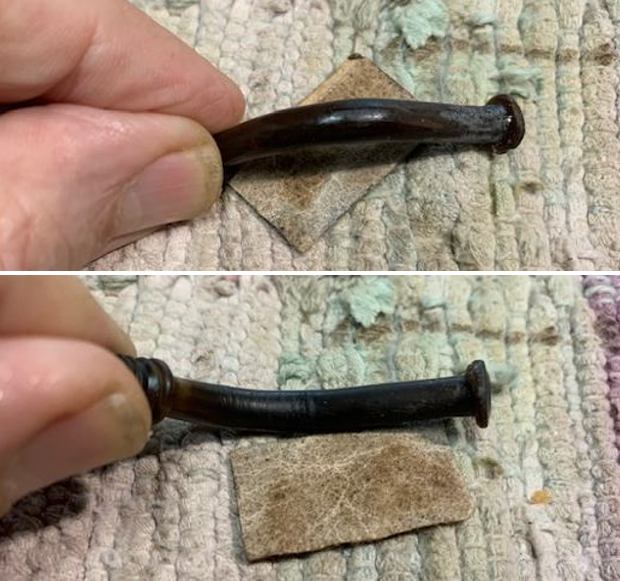
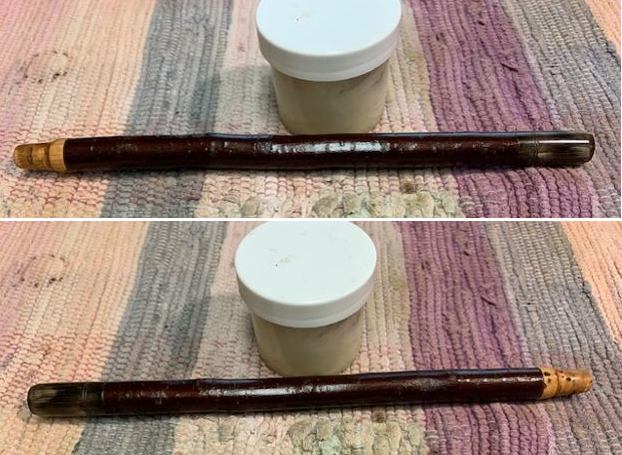
The bent horn stem had some worm damage on the right side near the button. I filled it in with some clear CA glue and built up the damaged area. I reshaped the button as well as it had some nicks in it. I sanded the repaired area with 220 grit sandpaper to smooth it out and then started polishing the horn with 400 grit wet dry sandpaper. It looked better. 
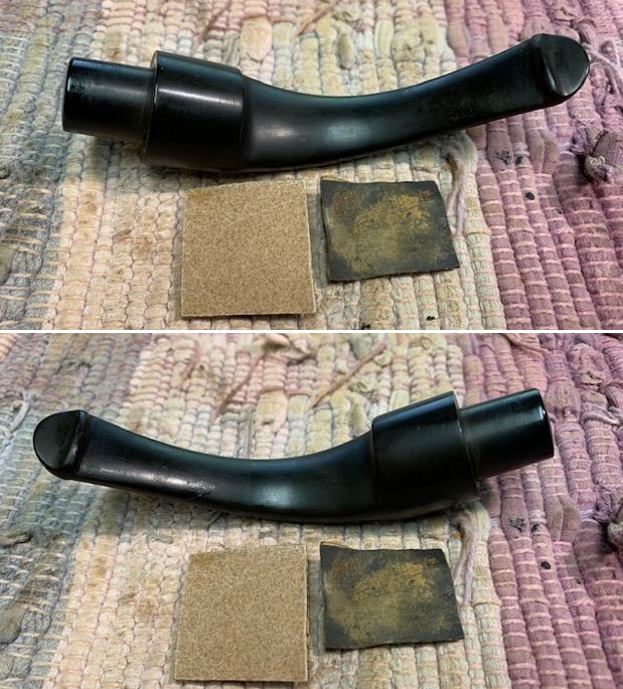
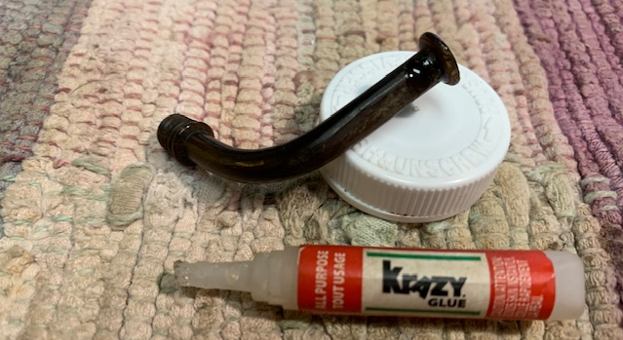
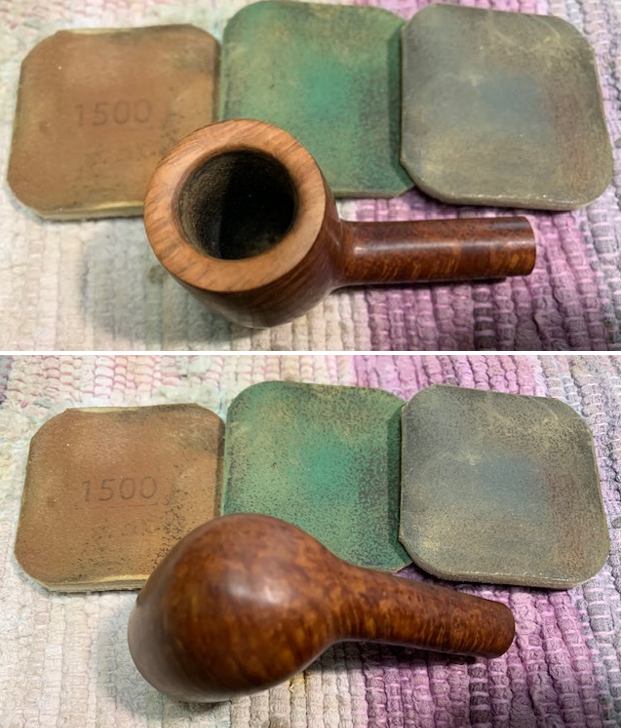
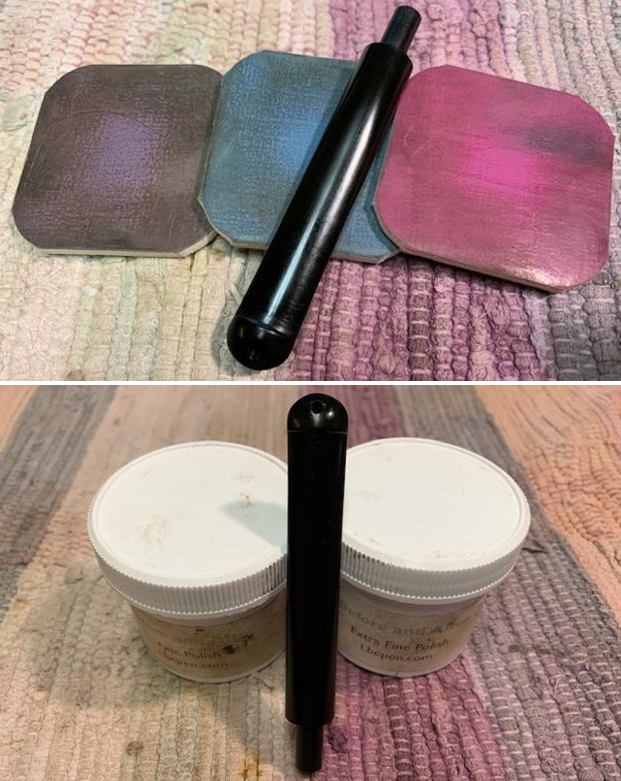
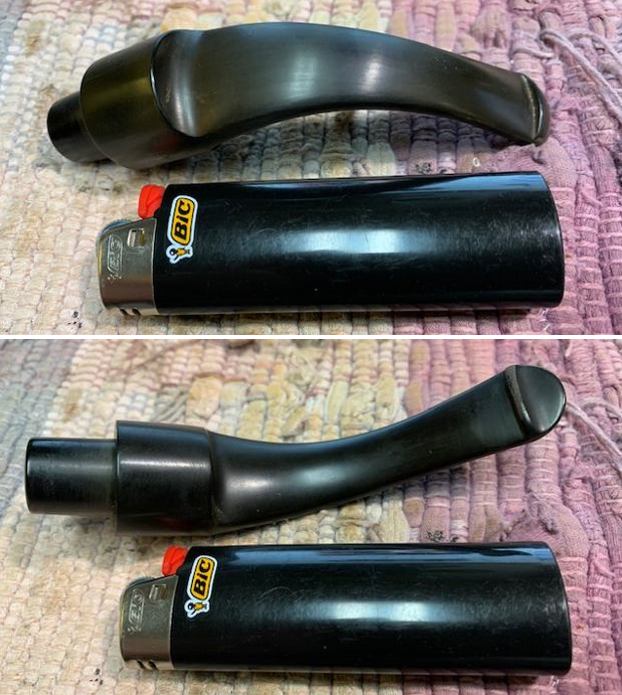
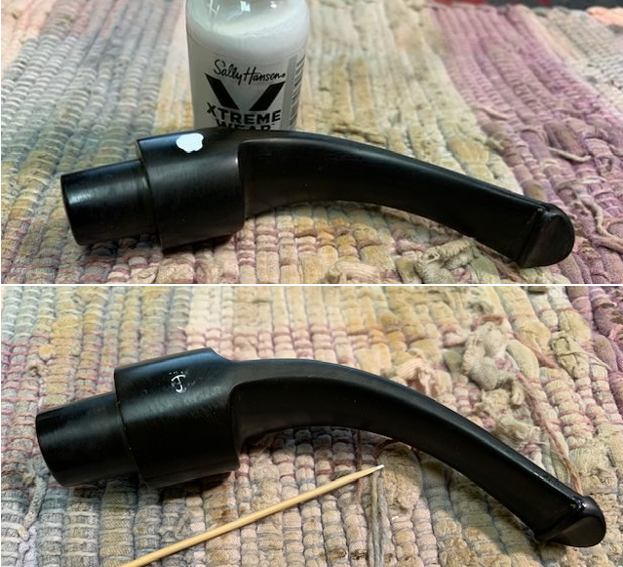
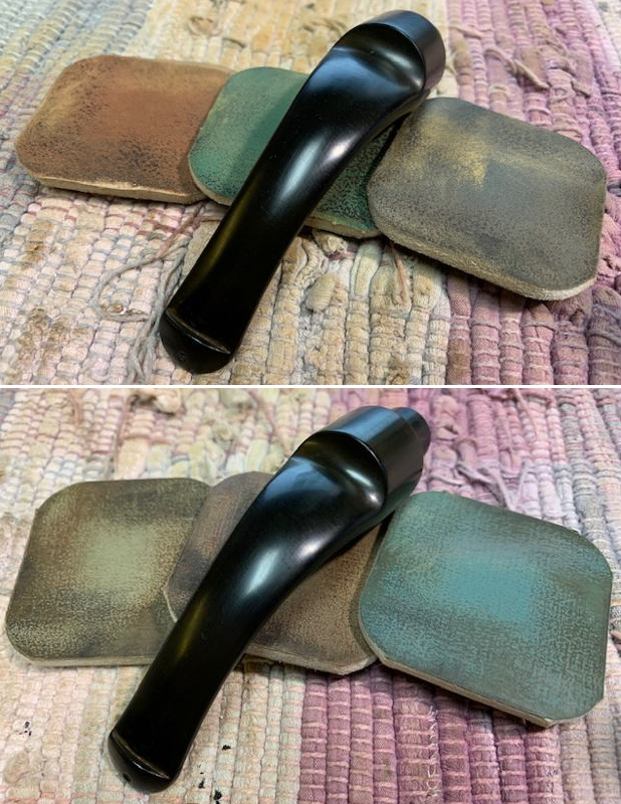
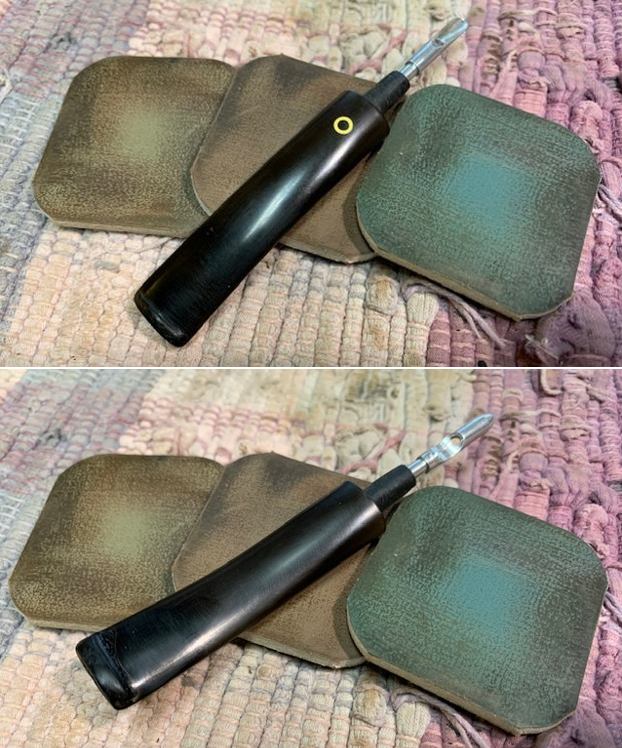
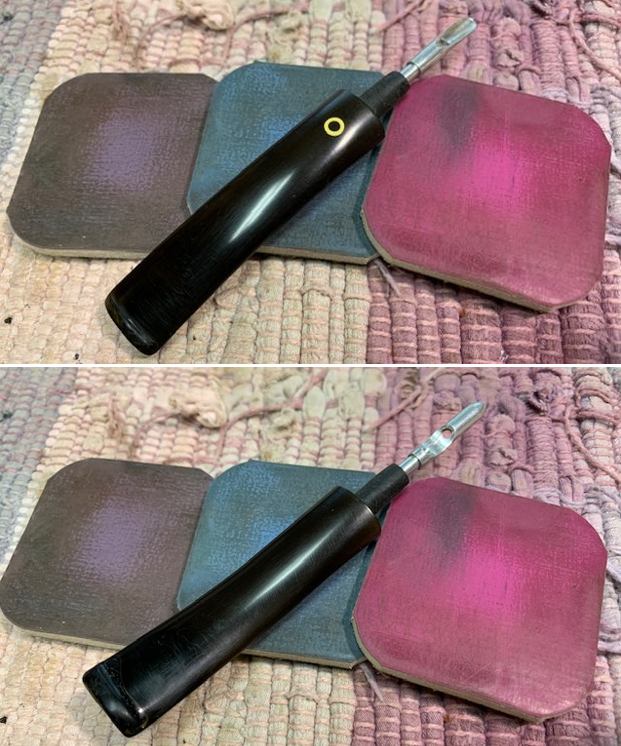
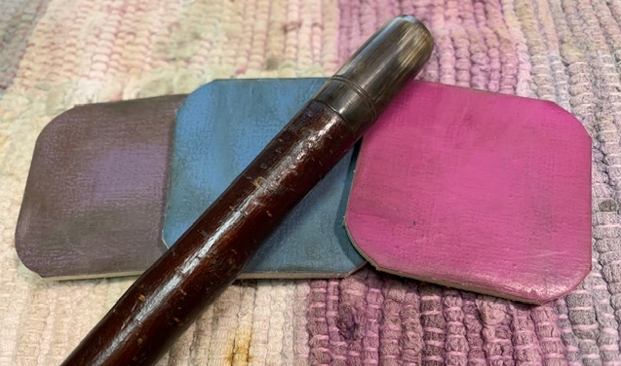
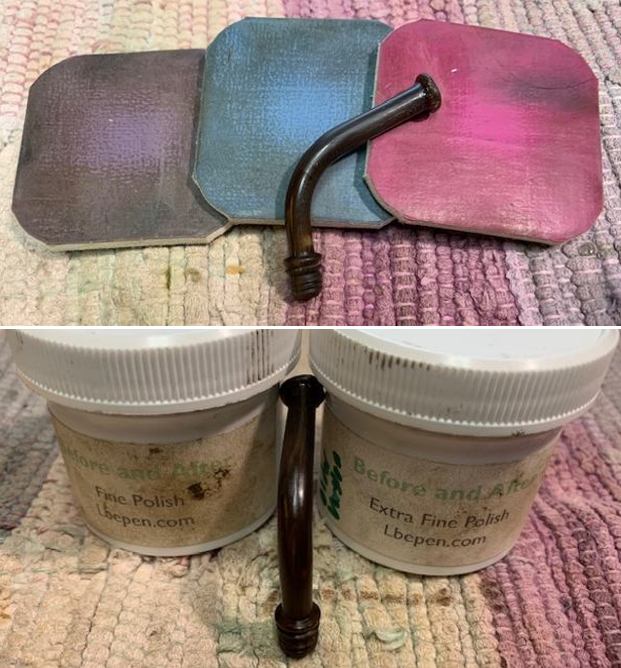
I polished the horn with micromesh sanding pads – 1500-12000 grit pads. I wiped it down after each pad with some Obsidian Oil. I gave it a final polish with Before & After Stem Polish – both Fine and Extra Fine. I gave it another rub down with Obsidian Oil. The horn really began to shine as I finished the polishing. 
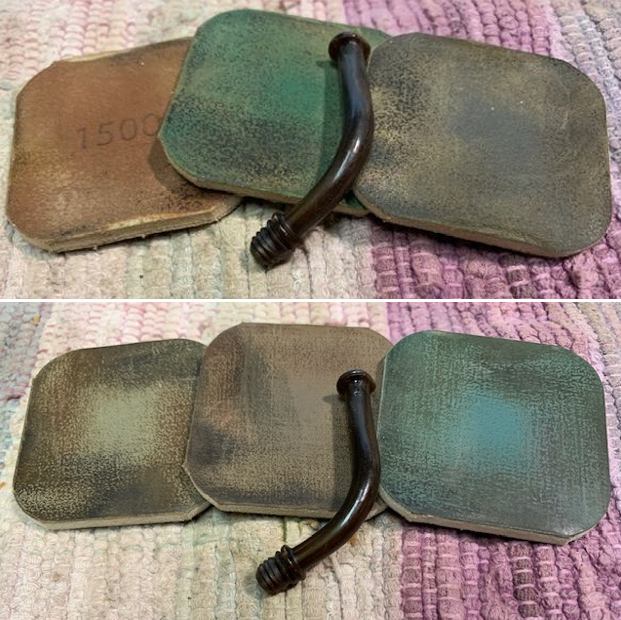
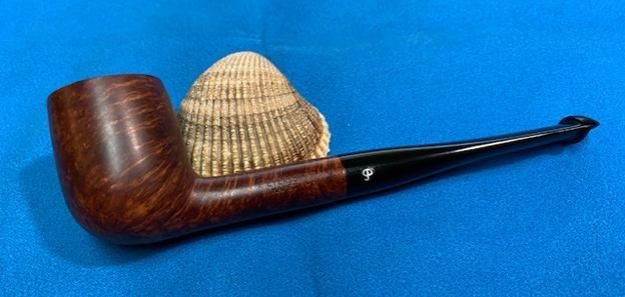
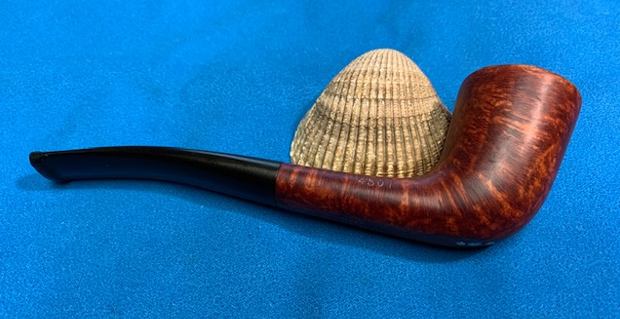
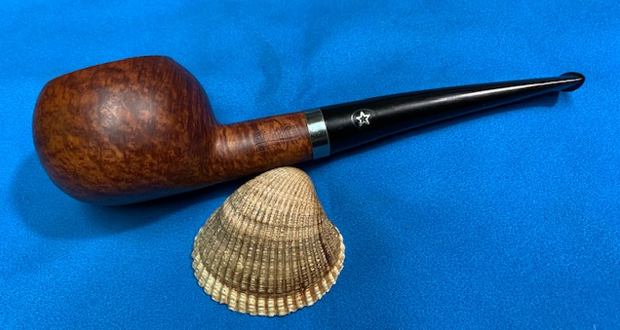
With the stem repaired and polished I was finished with my work on the pipe. I wiped down the nickel plated rim and wind cap as well as the nickel plated shank end cap with a jewelers cloth to remove the moderate oxidation and to protect it. I did not want to remove the dents in the wind cap as it could actually ruin the value of the pipe. I gave it a coat of Conservator’s Wax and a hand buff with a fluffy cloth to raise the shine. This Anton Partsch Red Glazed Pottery Bowled Long Pipe came out looking quite amazing. The horn ferrule and stem polished nicely as did the cherry wood shank. It all came together well. To think that the pipe is at least 200 years old and never been smoked is quite unbelievable. The dimensions of the pipe are, Length: 12 inches, Height: 3 inches, Outside diameter of the bowl: 1 inch, Chamber diameter: ¾ of an inch. The weight of the pipe is; 92 grams/3.25 ounces. I really enjoyed working on this beauty and felt a sense of touching the past in a tangible way. The pipe will stay in my own collection to be enjoyed and savored. I don’t think I will ever fire up a bowl as it has not been smoked since it was made and there is something unique about that. But then again, the right day may come and I will fire it up. We shall see. Thanks for walking through the restoration with me. As Paresh always says, “Stay Safe”.

Rebirthing a Lovely Republic Era Peterson’s Kapet 25 Billiard


Blog by Steve Laug

The next pipe I have chosen is a smooth Peterson’s pipe, a straight Billiard. It was also incredibly dirty. This Billiard is a real beauty under the grime with some great grain around the bowl. The grime was ground into the finish on the bowl sides. The contrast of the brown stains gave the grain a sense of depth. It was stamped on the left side of the shank and read Peterson’s [over] Kapet. The right side had the shape number 25 stamped near the bowl. Centered on the right side of the shank is stamped Made in the Republic of Ireland (in three lines). There was a moderate cake in the bowl and a light overflow of lava on the inner edge of the rim at the back. There was also burn damage on the inner edge of the rim at the back of the bowl. The stem was lightly oxidized, calcified and had light tooth marks, chatter on the top and underside near the button. There is a P stamped on the left side of the taper. It was in great condition. Jeff took photos of the pipe before his cleanup work. They tell the story and give a glimpse of the promise that we see in this pipe. Jeff took photos of the rim top and stem to show the general condition of the pipe. The bowl is moderately caked and the rim top has some lava and you can see the burn damage on the back inner edge. The photos of the stem show that it was oxidized and has light tooth marks on the top and underside near the button. Jeff took a photo of the bowl sides and heel to show the grain that was around this bowl. It is a nice looking pipe.      He took photos of the stamping on the sides of the shank. It is clear and readable and reads as noted above.   I turned to “The Peterson Pipe” by Mark Irwin and Gary Malmberg to get some background on the Kapet line. On page 305 it had the following information.

Kapet (1925-87) Line first described in 1925 brochure and featured in occasional catalogs through ’87. Early specimens will be stamped IRISH over FREE STATE. Described in 1937 catalog as available in dark plum or natural finish. Featured an aluminum “inner tube” or stinger until ’45. Mid-century specimens may be stamped MADE IN over IRELAND. Specimens from 1970 on may have mounts with hallmarks.

I knew that I was dealing with a Republic Era Kapet. Now it was time to work on the pipe.

Jeff had done a great job cleaning up the pipe as usual. He reamed the pipe with a PipNet reamer and cut back the cake back to the bare briar. He cleaned up the walls with a Savinelli Fitsall Pipe Knife. He scrubbed the interior of the bowl and shank with pipe cleaners, cotton swabs and alcohol to remove the tars and oils. He scrubbed the exterior of the pipe with Murphy’s Oil Soap and a tooth brush to remove the grime from the finish. He worked on the rim top lava and darkening with the soap and tooth brush. He scrubbed the inside of the stem with alcohol and pipe cleaners. He scrubbed the exterior with Soft Scrub and then soaked it in Before & After Deoxidizer. He washed it off with warm water to remove the Deoxidizer. The pipe looked far better when it arrived.  I took some close up photos of the rim top and also of the stem surface. I wanted to show how well it had cleaned up. The rim top photo looks good but there is some burn damage on the inner edge at the back of the bowl and all around the inner edge there is darkening. I also took close up photos of the stem to show the light tooth marks and chatter on the surface near the button. I took photos of the stamping on the sides of the shank. You can see that it is stamped as noted above. It is clear and readable.     I took the pipe apart and took a photo of the pipe. It is a good looking pipe and has some great cross grain on the sides of the bowl.I decided to address the rim top damage first. I lightly topped the bowl on a topping board with 220 grit sandpaper to minimize the damage to the top and inner edge of the bowl. I then used a folded piece of 220 grit sandpaper to give the edge a slight bevel to further minimize the damage to the rim. I think that it is definitely better once I finished. I polished the briar rim top and edges along with the rest of the briar with micromesh sanding pads –dry sanding with 1500-12000 grit pads and using a damp cloth after each pad.       I combined a Mahogany and a Cherry stain pen to restain the rim top to match the rest of the bowl. It would match even better once it was buffed and polished.I worked some Before & After Restoration Balm into the surface of the briar with my fingertips to clean, enliven and protect the briar. I let the balm sit for 15 minutes and then buffed with a cotton cloth to raise the shine. The photos show the bowl at this point in the restoration process. I set the bowl aside and turned my attention to the stem. I filled in the tooth marks on the underside of the stem with clear super glue. I let the repairs cure. Once they had cured I sanded the repairs on the underside and the chatter on the topside with 220 grit sandpaper. I started the polishing with 400 grit wet dry sandpaper. I wiped it down with some Obsidian Oil.I touched up the “P” stamp on the stem with an acrylic white fingernail polish. I worked it into the stamp with a toothpick. I let it sit for a few minutes then scraped off the excess. I polished the stem with micromesh sanding pads – wet sanding with 1500-12000 grit sanding pads. I wiped it down after each sanding pad with Obsidian Oil. I polished it with Before & After Pipe Stem Polish – both Fine and Extra Fine. I am always excited to finish a restoration and this Peterson’s Kapet 25 Billiard is no exception. I put the pipe back together and buffed it with Blue Diamond on the buffing wheel. I gave the bowl and stem multiple coats of carnauba wax. I hand buffed the pipe with a clean buffing pad to raise the shine and hand buffed it with a microfibre cloth to deepen the shine. It is fun to see what the polished bowl looks like with the polished black vulcanite stem. This Classic looking Peterson’s Kapet Billiard feels great in my hand. It is light and well balanced. Have a look at it with the photos below. The dimensions are Length: 5 ½ inches, Height: 1 ½ inches, Outside diameter of the bowl: 1 1/8 inches, Chamber diameter: ¾ of an inch. The weight of the pipe is 26 grams/.92 oz. It is a beautiful pipe and one that will be on the Irish Pipe Makers section of the rebornpipes store soon. If you are interested in adding it to your collection let me know. Thanks for walking through the restoration with me as I worked over this pipe. Thanks to each of you who are reading this blog.

Rebirthing a Republic Era Peterson’s Kapruf  5S Saddle Stem Billiard


Blog by Steve Laug

Today is rainy, chilly day in Vancouver. I know in comparison to where many of you live it is not cold but to us it is. It is also one of those kinds of day that my old friend Spencer would have been next to my work table begging for a treat and keeping company. I can’t believe that he died just over a year ago now. I miss him a lot on days like today. The next pipe I have chosen is another Peterson’s Billiard. It is a sandblast pipe that came to us from the estate of an old friend in Ontario, Canada. There was grime ground into the sandblast finish on the bowl sides. I love the way the contrast of the brown and black stains gave the blast a sense of depth. The stain is almost tiger striped. It was stamped on the flat underside in the center of the shank and read Made in the Republic of Ireland (three lines). To the right of that it is stamped Peterson’s [over] Kapruf. To the left of the Republic stamp, on the heel was the shape number 5S. This pipe must have been another favourite of my old friend as it had been well smoked. There was a well maintained cake in the bowl and some darkening on the rim top. The inner edge of the bowl looked good. The stem was oxidized, calcified and had light tooth marks and chatter on the top and underside on and near the button. Jeff took photos of the pipe before his cleanup work. Jeff took photos of the rim top and stem to show the general condition of the pipe. The bowl is lightly caked and the rim top and edges look to be in good condition despite a little darkening. The photos of the stem show that it was oxidized, calcified and has light tooth marks on the top and underside near the button. Jeff took a photo of the bowl sides and heel to show the blast that was around this bowl. It is a great sandblast and the choice of stain adds depth to the appearance of the bowl. He took photos of the stamping on the underside of the shank. It is clear and readable and reads as noted above. I turned to “The Peterson Pipe” by Mark Irwin and Gary Malmberg to get some background on the Kapruf line. On page 306 it had the following information.

Kapruf and “Kapruf” (c.1922-87) Sandblast (hence the name, Kapp-rough) P-lip or fishtail mouthpiece, in catalogs from 1940-87. Early documented specimens stamped IRISH over FREE STATE, no Eire specimens documented. Mid-century specimens may be stamped LONDON MADE [over] ENGLAND or MADE IN ENGLAND forming a circle or MADE IN [over] IRELAND, all dating no later than 1970. Those of recent vintage stamped MADE IN THE[over] REPUBLIC [over]OF IRELAND.

I knew that I was working on a KAPRUF that was made between 1970-1987 as it is stamped MADE IN THE REPUBLIC OF IRELAND as noted above. Now it was time to work on the pipe.

Jeff had done a great job cleaning up the pipe as usual. He reamed the pipe with a PipNet reamer and cut back the cake back to the bare briar. He cleaned up the walls with a Savinelli Fitsall Pipe Knife. He scrubbed the interior of the bowl and shank with pipe cleaners, cotton swabs and alcohol to remove the tars and oils. He scrubbed the exterior of the pipe with Murphy’s Oil Soap and a tooth brush to remove the grime from the finish. He worked on the rim top lava and darkening with the soap and tooth brush. He scrubbed the inside of the stem with alcohol and pipe cleaners. He scrubbed the exterior with Soft Scrub and then soaked it in Before & After Deoxidizer. He washed it off with warm water to remove the Deoxidizer. The pipe looked far better when it arrived.       I took some close up photos of the rim top and also of the stem surface. I wanted to show how well it had cleaned up. The rim top looks very good. There is a little darkening on the top at the back of the bowl but is not too bad. I also took close up photos of the stem to show the light chatter and marks on the surface near the button. I took a photo of the stamping on the underside of the shank. You can see that it is stamped as noted above. It is faint but readable. I took the pipe apart and took a photo of the pipe. It is a good looking pipe and has an interesting shallow sandblast on the bowl.The exterior of the bowl was in great shape. I used a brass bristle wire brush to knock of some of the darkening on the rim top.  I worked some Before & After Restoration Balm into the surface of the briar with my fingertips and a horse hair shoe brush to clean, enliven and protect the briar. I let the balm sit for 15 minutes and then buffed with a cotton cloth to raise the shine. The photos show the bowl at this point in the restoration process.  I set the bowl aside and turned my attention to the stem. I touched up the P stamp on the left side of the saddle stem with some acrylic fingernail polish. I worked it into the stamp with a toothpick and then scraped off the excess once it had dried.    I polished the stem with micromesh sanding pads – wet sanding with 1500-12000 grit sanding pads. I wiped it down after each sanding pad with Obsidian Oil. I polished it with Before & After Pipe Stem Polish – both Fine and Extra Fine.      I always am excited to finish working on a pipe. This Peterson’s Kapruf 5S Billiard, Made in the Republic of Ireland is no exception. I put the pipe back together and buffed it with Blue Diamond on the buffing wheel. I gave the bowl multiple coats of Conservator’s Wax and the stem multiple coats of carnauba wax. I buffed the pipe with a clean buffing pad to raise the shine and hand buffed it with a microfibre cloth to deepen the shine. It is fun to see what the polished smooth rim top and the sandblast bowl looks like with the black vulcanite taper stem. This Classic looking Peterson’s Kapruf Sandblast Billiard feels great in my hand. It is light and well balanced. Have a look at it with the photos below. The dimensions are Length: 5 ½ inches, Height: 1 ¾ inches, Outside diameter of the bowl: 1 ¼  inches, Chamber diameter: ¾ of an inch. The weight of the pipe is 34 grams/1.20 oz. I will be putting it on the rebornpipes store shortly in the Irish Pipe Makers section if you are interested in it. Thanks for walking through the restoration with me as I worked over this pipe. Thanks to each of you who are reading this blog.

It has a shiny black finish so it must be an Ebony Finish – A Peterson’s System 301


Blog by Steve Laug

The next pipe I chose to work on came to us from a pipe hunt back in 2017. Jeff found it in at an antique mall in Sandy, Utah, USA. It is a Peterson’s System 301 pipe with a black painted bowl. The ferrule is nickel and the combination looked amazing when it was new. It is a finish that Peterson called Ebony. The pipe is stamped on the left side of the shank and reads Peterson’s [over] System. On the nickel band it reads K&P [over] Peterson. On the right side of the shank it is stamped Made in the Republic of Ireland (three lines) [over] the shape number 301. It was filthy when Jeff brought it to the table. There was a thick cake in the bowl and an overflow of lava on the rim top and the inner edge of the bowl. It was hard to know what the condition of the rim top and bowl were under that thick lava coat. The nickel ferrule is heavily tarnished. The saddle stem does not have any stamping and was oxidized and had tooth marks and chatter on the top and underside on and near the button. It also had a Softee bit that was rotting and a lot of debris was built up around the edges. Jeff took photos of the pipe before his cleanup work. (When I saw the photos I realized that somewhere between when these were taken in 2017 and today in 2021 the pipe acquired a different stem. You will see that in the restoration.) Jeff took photos of the rim top and stem to show the general condition of the pipe. The bowl is heavily caked and the rim top and edges have a thick lava overflow. The stem is lightly oxidized and a rotting Softee Bit on the end. There is a lot of debris collected against the edges of the rotten rubber. He took photos of the sides of the shank to show the stamping. The stamping is readable in the photos below and is as noted above. He also captured the stamping on the nickel ferrule. I am including the link to the Pipedia’s article on Peterson pipes. It is a great read in terms of the history of the brand (https://pipedia.org/wiki/Peterson).

I turned to “The Peterson Pipe” by Mark Irwin and Gary Malmberg to get some background on the Peterson’s System Line. On page 314 it had the following information.

System (1891-) The Peterson System pipe is the backbone of the company’s body of work, offered continuously since 1891. Defined by its reservoir, graduated bore, and unique Peterson Lip mouthpiece, the design originated with an 1890 patent and was further refined by modifications patented in 1894 and ’98. Offered in numerous shapes and sizes, in bent and straight stemmed styles, marketed in smooth, sandblasted, rusticated or ebony finish, and rendered in briar, clay and meerschaum with mouthpieces of vulcanite, amber, horn, Bakelite, and acrylic. From 1891-1915, Systems were labeled PETERSON’S over PATENT, then from 1906-11 occasionally, PETERSON’S over PATENT over DUBLIN, followed thereafter by PETERSON’S over DUBLIN.

This pipe is stamped PETERSON’S over SYSTEM and there was a subcategory shown on the same page with that information.

Peterson’s over System. Pipes stamped Peterson’s System have been documented since 1920. A ’20 brochure is the earliest printed reference to the Peterson’s System. The pipe came in three quality grades (no mark, 2 or 3) until 1959. Thereafter as De Luxe (no mark), Premier (the old 2) and Standard (the old 3).

Judging from the description above, the pipe I am working on has an ebony finish and could have been made before 1959 as it has no grade mark as noted in red above. It reads MADE IN THE REPUBLIC OF IRELAND in three lines which narrows the date to between approximately 1938 and the present. Now it was time to work on the pipe.

UPDATE: I just heard from a fellow on Facebook Tobacco Pipe Restorers Group. He wrote the following:  The shape 301 was not introduced until 1975. Considering the republic stamp, this one would likely date between 1975 and 2000. Also, if that is the stem the pipe originally came with, I would say this pipe is likely 1975 to mid 80s.

Jeff had done a great job cleaning up this 1979 Peterson’s De Luxe pipe. He reamed the pipe with a PipNet reamer and cut back the cake back to the bare briar. He cleaned up the walls with a Savinelli Fitsall Pipe Knife. He scrubbed the interior of the bowl and shank with pipe cleaners, cotton swabs and alcohol to remove the tars and oils. He scrubbed the exterior of the pipe with Murphy’s Oil Soap and a tooth brush to remove the grime from the finish. He worked on the rim top lava and darkening with the soap and tooth brush. He scrubbed the inside of the stem with alcohol and pipe cleaners. He scrubbed the exterior with Soft Scrub and then soaked it in Before & After’s Pipe Stem Deoxidizer. He washed it off with warm water to remove the deoxidizer. Somehow between the time Jeff worked on it in 2017 and today the stem in the photos above has disappeared and been replaced with a P-lip stem that appears to be the correct one for this pipe. I took photos of  the pipe when I brought it to the work table.   I took some close up photos of the rim top and also of the stem surface. I wanted to show how well it had cleaned up (even though it is dull at this point). The rim top and inner edges around the bowl looked good. I also took close up photos of the newly inherited stem to show the tooth marks on the surface near the button. I took a photo of the stamping on the underside of the shank. It reads as noted above.  I also took a photo of the ferrule on the end of the shank.  I removed the stem and took a photo of the pipe to have a look at the parts and overall look.I polished the rim top with 3200-12000 grit micromesh sanding pads to smooth out the inner edges and to try and minimize the scratching in the rim top. It is not flawless but it looks better. I worked some Before & After Restoration Balm into the surface of the briar with my fingertips to clean, enliven and protect the briar. I let the balm sit for 15 minutes and then buffed with a cotton cloth to raise the shine. The photos show the bowl at this point in the restoration process. I polished the nickel ferrule with a jeweler’s cloth to remove the oxidation and to protect it. The bowl and ferrule looked good. I set them aside and turned my attention to the stem. I “painted” the tooth marks on the vulcanite with the flame of a lighter and was able to lift all of them on the topside. There was one against the edge of the button on the both sides that did not lift all the way. I filled them in with a drop of clear CA glue and set it aside to cure.    I used a folded piece of 220 grit sandpaper to smooth out the repairs and then started polishing the stem with 400 grit wet dry sandpaper.I polished the stem with micromesh sanding pads – dry sanding with 1500-12000 grit sanding pads. I wiped it down after each sanding pad with Obsidian Oil. I polished it with Before & After Pipe Stem Polish – both Fine and Extra Fine.     I am excited to finish this Republic Era Peterson’s System Ebony 301 Bent Pot. I put the pipe back together and carefully buffed it with Blue Diamond on the buffing wheel. I gave the bowl and the stem multiple coats of carnauba wax. I buffed the pipe with a clean buffing pad to develop the shine. I hand buffed the pipe with a microfiber cloth to raise the shine. It is fun to see what the polished bowl looks like the Ebony finish. Added to that the polished black vulcanite stem was beautiful. This Ebony System 301 Pot is great looking and the pipe feels great in my hand. Even though there are a few scratches in the briar none go through the finish so I left them as a part of the pipe’s journey. Have a look at it with the photos below. The dimensions are Length: 5 ½ inches, Height: 1 ¾ inches, Outside diameter of the bowl: 1 ½ inches, Chamber diameter: ¾ of an inch. The weight of the pipe is 64 grams/2.26 oz. It is a beautiful pipe and one that will soon be on the rebornpipes store in the Irish Pipe Makers Section of the store. If you want to add it to your collection let me know. Thanks for walking through the restoration with me as I worked over this pipe. Thanks to each of you who are reading this blog.

Restoring a Republic Era Peterson’s De Luxe XL9S Bent Billiard


Blog by Steve Laug

The next pipe I have chosen is a Peterson’s De Luxe XL9S sandblast bent Billiard. It came to us from an antique store in Pocatello, Idaho, USA back in 10/20/17. The finish is deeply sandblasted and dirty but there is some great grain around the bowl sides and shank. The finish is otherwise in great shape. It was stamped on the underside of the shank and read Peterson’s [over] De Luxe [over] the shape number XL9S. That is followed by a three line stamp MADE IN THE [over] REPUBLIC [over] OF IRELAND. It was filthy when Jeff brought it to the table. There was a thick cake in the bowl and a thick overflow of lava on the rim top and the inner edge of the bowl. It was hard to know what the condition of the rim top and bowl were under that thick lava coat. The Sterling Silver band is heavily tarnished. It is stamped as well and reads Peterson’s [over] Dublin on the top left. Further down the left side of the band it is stamped Sterling Silver. On the underside and starting up the right side it has three hallmarks – Hibernia, a Harp and the lower case letter “n”. The stem had a “P” stamped on the left side of the saddle and was oxidized and had tooth marks and chatter on the top and underside on and near the button. Jeff took photos of the pipe before his cleanup work. Jeff took photos of the rim top and stem to show the general condition of the pipe. The bowl is heavily caked and the rim top and edges have a thick lava overflow. The stem is lightly oxidized and has tooth marks on the top and underside near the button. Jeff took photos of the bowl sides and heel to show the grain that was around this bowl. It is a nice looking pipe. The blast is quite deep and attractive. He took photos of the underside of the shank to show the stamping. The stamping is readable in the photos below and is as noted above. He also captured the stamping on the silver band.    I am including the link to the Pipedia’s article on Peterson pipes. It is a great read in terms of the history of the brand (https://pipedia.org/wiki/Peterson).

I turned to “The Peterson Pipe” by Mark Irwin and Gary Malmberg to get some background on the Peterson’s Deluxe Line. On page 297 it had the following information.

De Luxe (1915-) Introduced in newspaper advertising in 1916, production of this high-grade smooth finish model may have been stalled by the Great War and domestic disturbance. It will not appear in Peterson catalogs until ’37. Specimens documented from 1915 to the thirties are extremely rare and confined to extra-large house pipes and occasionally medium sized pipe with unconventional shapes. Specimens from 1930-1950 appear in a wide selection of Classic Range shapes, often as Canadians. Catalogs from 1937-50 list it as the ‘the finest possible quality obtainable.’ After ’50 the Supreme would supplant the De Luxe as the top of the line model, and to this day the De Luxe is a high quality pipe but not the highest. Early models often have no COM. Models from the twenties until the sixties will be stamped IRISH over FREE STATE, EIRE, LONDON MADE over ENGLAND, MADE IN over IRELAND (forming a circle) or MADE IN THE over REPUBLIC over OF IRELAND. The last three COM stamps, used from ‘38 through ’68 when no hallmarks were stamped on Peterson mountings, can never be precisely dated. If a De Luxe was made in ’69 or later it will be hallmarked with a date designator and always have a Republic COM. See also Special De Luxe.

 Judging from the description above, the pipe I am working on is stamped with the stamp noted in red above. It reads MADE IN THE REPUBLIC OF IRELAND in three lines which narrows the date to between approximately 1938 and the present. It also has a silver Hallmark that make it a pipe made after 1969. Now it was time to narrow down the date further.

I turned to a blog I wrote on rebornpipes that had a Peterson’s catalogue and a hallmarking chart (https://rebornpipes.com/tag/peterson-hallmark-chart/). I have included it below. On the chart I looked for a lower case “n” in a hexagonal cartouche. I also included a enlargement of the chart and drawn a box around the “n” in red. It dates the  pipe to 1979. Jeff had done a great job cleaning up this 1979 Peterson’s De Luxe pipe. He reamed the pipe with a PipNet reamer and cut back the cake back to the bare briar. He cleaned up the walls with a Savinelli Fitsall Pipe Knife. He scrubbed the interior of the bowl and shank with pipe cleaners, cotton swabs and alcohol to remove the tars and oils. He scrubbed the exterior of the pipe with Murphy’s Oil Soap and a tooth brush to remove the grime from the finish. He worked on the rim top lava and darkening with the soap and tooth brush. He scrubbed the inside of the stem with alcohol and pipe cleaners. He scrubbed the exterior with Soft Scrub and then soaked it in Before & After’s Pipe Stem Deoxidizer. He washed it off with warm water to remove the Deoxidizer. I took photos of the pipe when I brought it to the work table. I took some close up photos of the rim top and also of the stem surface. I wanted to show how well it had cleaned up. The rim top and inner edges around the bowl looked very good. I also took close up photos of the stem to show the tooth marks on the surface near the button. I took a photo of the stamping on the underside of the shank. It reads as noted above.  I also took a photo of the band and the stamp on the left side of the saddle stem.   I removed the stem and took a photo of the pipe to have a look at the parts and overall look.I decided to address the tarnish on the silver band of the pipe first. I scrubbed it with some tarnish remover and finished with a jeweler’s cloth. The silver looked very good.  I worked some Before & After Restoration Balm into the surface of the briar with my fingertips and a horsehair shoe brush to clean, enliven and protect the briar. I let the balm sit for 15 minutes and then buffed with a cotton cloth to raise the shine. The photos show the bowl at this point in the restoration process.    I scrubbed the surface of the stem with Soft Scrub Cleanser to remove the oxidation on the surface of the vulcanite. I “painted” the tooth marks on the vulcanite with the flame of a lighter and was able to lift all of them on the topside. There was one against the edge of the button on the underside that did not lift all the way. I filled it in with a drop of clear CA glue and set it aside to cure.     I used a folded piece of  220 grit sandpaper to smooth out the repair and then started polishing it with 400 grit wet dry sandpaper.I painted the “P” stamp on the left side of the saddle stem with white acrylic fingernail polish. I worked it into the stamp with a tooth pick. I scratched off the excess acrylic with the tooth pick and a fingernail. It looked better though the curve of the right side of the “P” was faint. I polished the stem with micromesh sanding pads – wet sanding with 1500-12000 grit sanding pads. I wiped it down after each sanding pad with Obsidian Oil. I polished it with Before & After Pipe Stem Polish – both Fine and Extra Fine.     I am excited to finish this Republic Era Peterson’s Deluxe XL9S Bent Billiard. I put the pipe back together and buffed it with Blue Diamond on the buffing wheel. I gave the bowl multiple coats of Conservator’s Wax and the stem multiple coats of carnauba wax. I buffed the pipe with a clean buffing pad to raise the shine. I hand buffed the pipe with a microfiber cloth to deepen the shine. It is fun to see what the polished bowl looks like with deep sandblast all around it. Added to that the polished black vulcanite stem was beautiful. This sandblast De Luxe XL9S is great looking and the pipe feels great in my hand. It is light and well balanced. Have a look at it with the photos below. The dimensions are Length: 6 ½ inches, Height: 2 inches, Outside diameter of the bowl: 1 ¼ inches, Chamber diameter: ¾ of an inch. The weight of the pipe is 61grams/2.15oz. It is a beautiful pipe and one that will soon be on the rebornpipes store in the Irish Pipe Makers Section of the store. If you want to add it to your collection let me know. Thanks for walking through the restoration with me as I worked over this pipe. Thanks to each of you who are reading this blog.

Reuniting a Yello-Bole stem with its original Pipe and Restoring the Pipe


Blog by Steve Laug

The next pipe on the table is a Carburetor KBB Yello-Bole Zulu. Jeff picked it up on an online auction from New Braunfels, Texas, USA in April of 2016. It has been sitting here since then. You may wonder why once you see the photos below as it is a nice looking pipe. It is stamped on the left side of the shank with KBB in a cloverleaf followed by Carburetor [over]Yello-Bole [over] US. Pat. 2,082,106 [over] Cured with Real Honey. The stamping starts in the middle of the top of the shank and rolls down the side. On the right side it is stamped with the shape number 4501. On the underside it is stamped Reg. U.S. Pat. Off. [over] 343,331. I will have to look up both of the patents and see what I am working with. The finish on the pipe was peeling and flaking off in spots. There was a metal contraption that forms the carburetor on these pipe in the bottom of the bowl and on the heel. The bowl still had the yellow bowl coating. It appeared to have been smoked just a few time so the coating was pretty in tact. There was a light lava coat on the rim top, heavier at the back of the bowl. The inner bevel and outer edge looked very good. The stem was lightly oxidized and had tooth marks on both sides. There was a large chunk out of the underside of the stem at the button. Jeff took these photos of the pipe before he did his work.He took photos of the rim top and the stem surfaces to give a clear idea of what needed to be done with this pipe. The description above is clearly shown in the photos. He took photos of the heel of the bowl to give a clear idea of the carburetor system but also of the beautiful grain on this pipe. It really is a nice piece of briar. Jeff was able to capture the stamping on the shank very well. They are clear and readable. The only photo missing is that of the shape number on the right side of the shank. You can also see the Yellow O on the stem top.Now comes the moment of truth! Somehow (neither Jeff nor I have any memory of this) the tenon had snapped off in the shank and the stem and bowl were separated. Generally when this happens on Jeff’s end he bags the bowl and stem in a sandwich bag to keep them together. But in this case that was not done. It could have broken in transit between Idaho and Canada or I could easily have snapped it when I tried to remove the stem. I too would have bagged the parts together but somehow the two were separated. The bowl went into my box of bowls for restemming and the broken stem went into the can of stems. Seemingly never to meet again.

I took the bowl out of the box about a month ago to restem. It had a broken tenon in the shank. So I popped it in the freezer for a little while then pulled the tenon out with a screw. I was surprised to see that it had the stinger apparatus that was in these Yello-Bole pipes still in the broken tenon and it was undamaged. Jeff had done a thorough cleanup on this one so it was in great shape. I took some photos of the bowl before I started looking for a stem for the pipe. I went through my can of stems and found oval shaped stem with a snapped tenon. It was even a Yello-Bole stem so that was a bonus. Or so I thought. I still did not put it together that this was the original stem. I took the broken tenon and stinger and lined it up with the stem. It was a perfect match! Now I knew that it was the original stem and I would be able to unite the parts again. Remember at this point I had not seen Jeff’s before photos that are above showing what the pipe looked like when he bought it. All of this was a bit of a fluke! Once I saw those photos all doubt was removed but I still had no idea how they got separated. I decided to look up the patents on the US Patent site and see what I could find about about them and the date they were filed (https://patft.uspto.gov/netahtml/PTO/srchnum.htm). I searched first for the US. Pat. 2,082,106 that was stamped on the top and left side of the shank. I assumed it referred to the Patent for the Carburetor but I was not certain. I found a drawing and description of the carburetor system of a patent filed by R. Hirsch on April 21, 1936 and granted on June 1, 1937. I have included those pages below. Now I had an idea of a starting date for the age of this old pipe. On the underside of the shank it was stamped with a different Patent No. It read as follows: Reg. U.S. Pat. Off. 343,331 and I had no idea what this patent referred to so I ran it through the same site’s search and found a Paten filed by A. Muller-Jacobs of New York for a coloured varnish finish. The pipe I was working on had a peeling varnish finish so that also fit well with the pipe. The patent itself was granted on June 8, 1886. I have included that document below for your purview.From there I wanted to see if I could set the date with more accuracy. I looked up a blog I had written on a Yello-Bole with a Double Carburetor to see what I had found when I had researched for that pipe (https://rebornpipes.com/2019/08/09/restoring-a-kbb-yello-bole-double-carburetor-bulldog/). I quote that blog in part below.

I Googled the brand and line to see what I could find out. Here is what I found.

The first link to me to the Kaywoodie Group and a thread on dating this particular pipe. There was a helpful exchange between lifeon2 and Bosun about a pipe that is stamped in a similar manner to the one that I have. Here is a link to the full conversation: https://www.tapatalk.com/groups/kaywoodie/dating-yello-bole-pipes-t86.html

lifeon2 writes: OK so there isn’t a lot of dating information for Yello-Bole pipes but here is what I have learned so far.

  1. If it has the KBB stamped in the clover leaf it was made 1955 or earlier as they stopped the stamping after being acquired by S.M. Frank.
  2. From 1933-1936 they were stamped Honey Cured Briar.
  3. Post 1936 pipes were stamped “Cured with Real Honey”
  4. Pipes stems stamped with the propeller logo they were made in the 30s or 40s no propellers were used after the 40s.
  5. Yello Bole also used a 4 digit code stamped on the pipe in the 30s.
  6. If the pipe had the Yello Bole circle stamped on the shank it was made in the 30s this stopped after 1939.
  7. If the pipe was stamped BRUYERE rather than briar it was made in the 30s.

(Information gathered from Pipedia – https://pipedia.org/wiki/Yello-Bole)

Bosun replies: the one I have is stamped on the left side of shank:

  1. Double Carburetor
  2. yello-bole
  3. u.s.pat.off
  4. with KBB to the left of the above

underside of shank has Cured with Real Honey

right side of shank has 4907

on top of stem is the white circle

lifeon2 replies: According to the list  I have it looks like you have a late 30s model, sweet

I also turned to a blog by Andrew Selkirk on rebornpipes that also added a degree of certainty to the date of manufacture of this pipe (https://rebornpipes.com/2015/05/03/1934-35-yello-bole-carburetor/).

I can say with a fair degree of certainty that this pipe is from 1934 or 35. The carburetor patent was granted in 1935, this pipe is stamped “Pat Applied For.” Interestingly enough, it also has a patent number on the bottom of the shank. Additionally, the four digit number was used by Kaywoodie until 1936. The first two numbers indicate the finish and the second two numbers indicate the shape.

With that information in hand I knew what I was dealing with in terms of age of this pipe. I knew from the information from Pipedia that the KBB in a clover leaf stamp meant that the pipe was made before 1955. The Cured with Real Honey stamp placed the pipe as 1936 or after. The four digit shape code was used until 1936. The shape code on this one was 4982 thus it is another argument for 1936. The patent was given to KBB in 1935 so the stamped “Reg. US Pat. Off also places the pipe after 1935.

The information that I have gathered helps me to know with a high degree of certainty that this Carburetor pipe was made in 1936. The four digit shape number and the patent information that I have included helped identify that with certainty. I also learned that the first two numbers indicate the finish and the second two numbers indicate the shape.

Now it was time to work on the pipe. I removed the peeling varnish with some fingernail polish remover (acetone). It came of nicely and left behind a nice looking piece of briar. With that finished I set the bowl aside and turned to deal with the hardest part of this work. I needed to replace the broken tenon in the stem and I needed to repair the chip out of the underside at the button. Both would require time for the repair to cure. I decided to do the tenon replacement first. I unscrewed the stinger from the broken tenon and chose a new tenon for the replacement. I used a threaded tenon. I used a Dremel and sanding drum to remove the shoulder on the new tenon and reduce the diameter to match the broken tenon. I screwed the tenon in the new tenon and the fit was perfect. Now it was time to drill out the stem.I smoothed out the broken edge with a Dremel and sanding drum. I drilled out the airway using increasingly larger drill bits to open up the airway the depth of the threaded portion of the tenon.I reduced the diameter of the threaded portion of the tenon with the Dremel and sanding drum until the fit in the drilled out stem was snug. I coated the tenon with black super glue and put the parts together to check on the fit and look of the new tenon. I set it aside to cure while I took a break and enjoy a coffee.After coffee it was cured and I put the stem on the shank to have a look at the fit! The fit was really good and the parts looked like they belonged together. Now it was time to work on the next part of the stem repair. I took the stem off the bowl and unscrewed the tenon. I scrubbed the oxidation on the stem with Soft Scrub to get a clean surface to do the repair.I greased a folded pipe cleaner with Vaseline Petroleum Jelly so that it the repair would not stick to it. I inserted it in the slot and spread it out under the chipped area.I mixed a batch of Black super glue and activated charcoal powder to make a paste. I filled in the deep tooth mark on the top side of the stem and the button edge. I turned the stem over and layered in the fill on the chipped area. I sprayed the repairs with an accelerator to harden the super glue and give it a hard shell so that I could remove the pipe cleaner. I purposely overfill this kind of repair so that I have room to work on the shaping of the button and the stem surface. Once it was hardened to touch I pulled the folded pipe cleaner free and set the stem aside for the repair to cure. Tomorrow I will work on shaping the repaired area into a proper button.I set the stem aside to cure further and turned my attention to polishing the bowl – I dry sanded it with 1500-12000 grit micromesh sanding pads. I wiped the bowl down after each pad with a damp cloth to check the progress and remove the sanding debris. It was looking very good. I rubbed the bowl and shank down with Before & After Restoration Balm. I worked it into the surface of the bowl sides and shank with my fingertips to clean, enliven and protect the briar. I let the balm sit for about 10-15 minutes and buffed with a cotton cloth to raise the shine. The grain came alive. I set the bowl aside and turned my attention to reshaping the stem. I used files to do the initial shaping and remove the excess repair material. I sanded out the file marks and shaped the button with 220 grit sandpaper to blend them into the surface of the vulcanite. I started polishing it with 400 grit wet dry sandpaper. I polished the vulcanite stem with micromesh sanding pads – 1500-12000 grit pads. I wiped it down with Obsidian Oil after each sanding pad. I used Before & After Pipe Polish – both Fine and Extra Fine to further polish the stem. This nicely grained Yello-Bole 4501 Zulu turned out to be a great looking pipe now that it has been restored. (The yellow in the bowl is a bowl coating not a Meerschaum lining).The grain around the bowl and shank is quite beautiful and works well with both the shape and the polished and repaired vulcanite taper stem. With the tenon replaced and the stem rebuilt on the button end it looked very good. I put the stem back on the bowl and carefully buffed the pipe with Blue Diamond on the buffing wheel. I gave the bowl and the stem multiple coats of carnauba wax on the buffing wheel and followed that by buffing the entire pipe with a clean buffing pad. I hand buffed the pipe with a microfiber cloth to deepen the shine. The finished Yello-Bole Zulu is another pipe that fits nicely in the hand and feels great. Give the finished pipe a look in the photos below. The dimensions of the pipe are Length: 5 ½ inches, Height: 1 ¾ inches, Outside diameter of the bowl: 1 ¼ inches, Chamber diameter: ¾ of an inch. The weight of the pipe is 25g/.88oz.  I will be putting it on the rebornpipes store shortly. You can find it in the American (US) Pipe Makers Section. If you are interested in adding this pipe to your collection send me a message or an email. Thanks for reading this blog and my reflections on the pipe while I worked on it. There are many more to come!

Repairing A Burnout On A Loewe “Chubby”


Blog by Paresh Deshpande

The next pipe that I selected to work on was purchased on eBay way back in 2016 ! When the pipe reached us, I was aghast to see a charred and completely blackened foot of the stummel. There was no mention of the pipe being damaged anywhere in the description of the pipe uploaded by the Seller. To cut the ramble short, I communicated with the Seller about the condition of the pipe and was promptly issued with a complete refund, including the cost of shipping with a note that I could keep the pipe and a hope of continued patronage of his store on eBay. That’s the story of how this beauty came to me and now after all these years of restoring pipes, it finds its way to my work table. Unfortunately, way back then I never took any pictures of the purchased pipes and neither did I chronicle my collection and thus the reason for lack of pictures!

This beautiful smallish pipe has a unique shape that could be described as an oval shank squashed Tomato, if that’s any shape, and hence would loosely term this pipe as a Freehand. It is stamped over the top surface of the broad oval shank as “L & Co” in an oval over “GREAT BRITAIN”. The bottom surface of the shank is stamped “LOEWE” over “LONDON.W” over “CHUBBY”. The top surface of the high quality vulcanite saddle stem is stamped “L & Co” in an oval. This stamping over the stem is considerably worn out and though I would love to but unlikely to be highlighted. The stummel stampings, however, are deep and crisp.I have quite a few Loewe pipes in my collection and have researched this brand when I had worked on a couple from my inherited pipes. I knew that this brand from Haymarket, London was founded by Frenchman Emil Loewe in late 1850s and has the distinction of being first to manufacture Briar pipes. The company was taken over by Civic and later on as with most of the British marquee, was finally taken over by the Cadogan Group. Pipedia has a wealth of information which I went through again to refresh my memory. Here is the pipedia.org link to the article on Loewe pipes…Loewe & Co. – Pipedia

Further down the article, is a link (Dating Loewe Pipes – Pipedia) to date Loewe pipes by Michael Lankton which was of interest as it is very informative and is a highly recommended read for collectors of Loewe pipes.

For our intents the pipe I have is from the Civic Era (1964-1967), where the nomenclature was unchanged but the pipes certainly were, and 1967-1978 where the past goes out the window and decidedly un-Loewe-like 3 digit shapes numbers appear.

Loewe is my favorite pipe maker. How to rank them in terms of the many great London made pipes of their era? For me in the simplest of subjective terms, Loewe pipes from before the Civic Era are like Comoy’s, but even better. After Civic took over in 1964 I suppose the quality of Loewe was very comparable to a lower end GBD, which means they were still ok pipes but not up to previous standards. But those earlier pipes…to me they’re just as good as it gets.

One thing I’ve noticed is most of the old Loewes you see look rode hard and put up wet, which tells me that their owners loved them and smoked them, which is the highest praise any brand can gain.

From my research on it I can safely that the Loewe pipe on my table is from the Early Civic Era 1964 to 1967.

Initial Visual Inspection
I have a faint remembrance of the pipe being in a decent state with minimal cake and a nice shining black stem. The major issue was the charred and blackened foot of the stummel. I remember having knocked at the charred surface to gauge the extent of burnout and was left with the gaping hole at the foot. There is a thin layer of cake in the chamber and the pipe does not appear to have seen heavy usage. The delicately beveled rim is in pristine condition and so is the stem. In my appreciation of the pipe’s condition, I think this burnout occurred very early in to the existence of the pipe probably caused by smoking the pipe too hot. Given below are a few pictures of the pipe as it sits on my work table.Detailed Inspection
As I had mentioned earlier, I had not taken any pictures either of the burnout at the foot of the stummel or my fiddling to remove the charred briar from the damaged area. The chamber has a thin layer of cake and of course the huge gaping hole at the heel is sans any cake. The surface from where the charred wood was removed by me is highly uneven. The outer rim slopes inwards to form the thin rim top surface and has a delicate bevel to the inner rim edge and is in pristine condition. The minor darkening to the inner rim edge at 6 o’clock is superficial and it should clean up easily. Another issue that I have observed is that the draught hole is above the heel of the chamber. I need to figure out a way to build up the heel of the chamber to the level of the draught hole. The only area that would need some serious work is at the heel of the stummel. The area adjoining the burn out still has remnants of the charred wood that would need to be addressed. The rest of the stummel exterior is in pristine condition and would benefit from some TLC to bring it back to its former stunning newness. The mortise is nice and clean and has just a few speckles of carbon and dust. This should clean up easily.The oval broad stem is also nice, clean and surprisingly shiny. There are no bite marks or chatter or indentations in the bite zone. It is unfortunate that the stem logo is wiped out to a great extent. The one issue that needs to be addressed here is the loose seating of the tenon into the shank. The Process
The first step in restoring this particular pipe was the cleaning of the chamber. I used my fabricated knife to scrap off the thin carbon layer. That the cake was crumbly and completely dry made this cleaning a lot easier and faster. With a folded piece of 180 grit sandpaper, I took the cake down to the bare briar and also smoothed the chamber walls. A final wipe with a cotton swab moistened with isopropyl alcohol removed the carbon dust from the chamber and revealed a chamber sans any damage. The charred briar from around the burned out area on the foot of the stummel was further removed using my fabricated knife. Now that all the charred briar wood was removed, it was necessary to smooth out the edges of the burnt out area to ensure an even round hole for a snug fitting briar plug. I mounted a sanding drum onto my hand held rotary tool and evened out the edges. I continued the process of sanding till I could clearly make out solid briar peeking out from the edges. Next I marked out the inner diameter of the carved out burnout area over a block of briar using a marker pen. I cut a suitably sized block of briar to be shaped into a plug using a small hacksaw blade.Using a sanding drum mounted on a rotary tool, I rough shaped the plug that would fit into the foot of the stummel. I deliberately left the top of the plug duly flanged (indicated with blue arrows). The general idea was to push the plug from inside the chamber to the outside so that the plug flanges will seat over the remaining intact heel of the chamber forming a new heel and also raising the heel to just below the draught hole. Now that the plug and area to be plugged is all prepped up, I decided to complete the internal and external cleaning of the stummel before plugging the burned out area. I ran a pipe cleaner dipped in isopropyl alcohol through the mortise and along the shank walls. I scraped out the dried out oils from the shank walls using a sharp dental tool.I followed the internal cleaning of the shank with external cleaning of the stummel using Murphy’s Oil soap and a hard bristled tooth brush and dried it with paper napkins and cotton cloth. I simultaneously cleaned the shank internals with the detergent and a hard bristled shank brush.Abha simultaneously cleaned the internals of the stem with anti-oil dish soap and brushes. She also cleaned the external surface with the soap and Scotch Brite pad.To fix the briar plug in to the heel of the chamber, I decided to apply a layer of JB Weld to the bottom of the entire heel. J B Weld is a two-part epoxy Cold Weld that consists of two parts; hardener and steel which are mixed in equal parts in a ratio of 1:1 with hardening time of 5-6 minutes and complete curing time of 6-8 hours. I poured the contents of the two tubes and mixed it well. With a flat bamboo frond, I applied this mix over the heel of the chamber from inside. I worked fast to ensure a complete and even spread of the epoxy mix over the bottom and then pressed the plug in place. I set the stummel aside for the epoxy to cure overnight.By the following morning, the epoxy had completely hardened. I turned the bowl over and filled the minor gaps between the briar plug and the adjoining stummel surface with medium CA superglue and set it aside while I went for my work. By the time I would return from my office in the evening, the glue would have hardened completely for further work.While the stummel repairs were under progress, Abha polished the stem with 1500 to 12000 grit micromesh pads. She wiped it lightly with a moist cloth and polished the stem surface with “Before and After Extra fine” stem polish developed by Mark Hoover. This polish helps in removing the minor scratches left behind due to sanding while imparting a nice shine to the stem. She finished the stem polishing and rubbed a small quantity of EVO into the stem surface and set it aside for the oil to be absorbed.By evening when I continued my work on this pipe, the J B Weld as well as the superglue had cured completely. Using a small hacksaw, I cut the protruding plug as close to the foot of the stummel as possible. I further match the plug with the rest of the stummel foot with a flat head needle file. I perfectly matched the plug with the rest of the surrounding surface by sanding with a folded piece of 220 grit sandpaper. The plug is now flush with the foot of the stummel while the flanges of the plug provide additional support to the plug from within the chamber. The floor of the heel is also raised and is just below the draught hole.I had reached that stage in restoration where an important decision was required to be taken which would affect the aesthetics of the pipe. To blend in the repair, I wanted to rusticate only the foot of the stummel and discussed this step with Abha. She was of the opinion that a perfect geometrical pattern does not go with the flow of the shape and recommended a free flowing rustication pattern. I sought her help in designing the free flowing pattern and marked it over the foot of the stummel with a marker. The design she marked makes for an interesting look.To rusticate, I firmly held the stummel in my left hand and with my right hand and began gouging out the briar. The technique is to firmly press the pointed four prongs of the modified Philips screwdriver into the surface, rotate and gouge out the removed chunk of briar. I worked diligently till I was satisfied with the rustications and the appearance of the stummel. I cleaned the debris off the rusticated surface with a brass wired brush. The high points in the rustications were lightly sanded down using a piece of 220 grit sandpaper.Next I polished the stummel using micromesh pads, wet sanding with 1500 to 12000 grit pads. I also polished the high spots in the rustication with the micromesh pads. I wiped the bowl with a moist cloth after each pad to clean the surface. The rusticated part of the stummel is now ready for a fresh coat of stain. I decided to stain the rusticated surface with a black dye which would contrast beautifully with the browns of the rest of the smooth surface. I heated the rusticated portion with my heat gun to open up the pores on the stummel so that the stain is well absorbed. I used Fiebing’s aniline black leather dye and liberally applied it over the heated surface, flaming it with the flame of a lighter. This helps in the setting of the stain in the grain of the briar. I ensured that every inch of the rusticated surface was coated with the dye while the smooth surfaces are not stained. I set the stummel aside for a day to set the dye into the briar surface. 24 hours later, the stain had set completely. To highlight the contrast of the high points in the rustication, I lightly sanded the high points with a worn out piece of 180 grit sandpaper followed by polishing by the method of dry sanding with 1500 to 12000 grit micromesh pads.Next, I rubbed a small quantity of “Before and After Restoration Balm” into the briar with my fingertips, worked it deep into the sandblasts as well as the smooth surface and let it rest for a few minutes. The balm almost immediately works its magic and the briar now has a nice vibrant appearance over the smooth surface with the beautiful rusticated patterns on full display on the foot of the stummel. I further buffed it with a horse hair shoe brush. The next issue that I addressed was that of the loose seating of the stem into the mortise. With the flame of a lighter, I heated the tenon with the flame of a lighter till it was pliable and inserted a drill bit that was a bit larger in diameter than the tenon opening. This helps in expanding the pliable vulcanite for a snug fit. I held the tenon under cold tap water for the tenon to cool down and set the increased diameter. The seating was perfectly snug with just the right amount of resistance.The last functional aspect which I addressed at this stage was the protection of the repairs to the heel of the chamber. I mixed activated charcoal and yogurt to a consistency which allows for an easy and even spread and evenly applied it on the inner walls and heel of the chamber. This coating helps in preventing the epoxy at the heel of the chamber from coming into direct contact with the burning tobacco, a sort of insulation and assists in quicker formation of a cake. I set it aside to dry out naturally for a week. To complete the restoration, I first mounted a cotton cloth buffing wheel that is dedicated for use with Blue Diamond, onto my hand held rotary tool.  I set the speed at about half of the full power and polished the entire pipe after the stem and stummel were united. The Blue Diamond compound helps to erase the minor scratches that are left behind even after micromesh polishing cycle. I followed the Blue Diamond polish by applying several coats of Carnauba Wax with a cotton cloth buffing wheel dedicated to Carnauba Wax. I finished the restoration by giving the entire pipe a rigorous hand buffing using a microfiber cloth to deepen the shine further. The finished pipe looks amazingly beautiful and has been transformed from being a write off to being one in my rotation! The Pipe Gods are being very kind to me now-a-days and pray that they continue to be so. Following are the pictures of the restored pipe.

Yes indeed another Bertram Washington DC Pipe – An Ungraded Canadian


Blog by Steve Laug

The next pipe on the work table came to me from one of our estate purchases. Between us we pick up quite a few pipes for restoration. I try to work them into the restoration queue so that I can keep them moving. We picked up over 120 Bertram pipes from an estate that a fellow on the east coast of the US was selling. I keep fitting some of them into the restoration queue to get these great older US Made pipes back in circulation. The post card below was sent to me by one of the readers of the blog. It is a nice memento of the old shop. I thank him for thinking of us.This next one is from that estate – a beautifully grained smaller Bertram Canadian with a vulcanite taper stem. The pipe is stamped on the top side and reads Bertram [over] Washington D.C. centered on the shank. This is a bit of an odd one in that it does not have a grade stamp. The finish had a lot of grime ground into the smooth finish on the bowl and some darkening around the sides of the bowl. The bowl was caked with an overflowing lava coat on the top of the rim, heavier toward the back of the bowl. The edges looked okay other than some potential burn damage on the back inner edge. The stem was lightly oxidized, dirty and had light tooth chatter on the top and underside near the button. There were not markings or a logo on the taper stem. Like the rest of the Bertrams in this lot the pipe had promise but it was very dirty. Jeff took photos of the pipe before he started his cleanup work. He took photos of the rim top and bowl to give a clear picture of the thickness of the cake and the lava on the rim top. The lava was thicker toward the back of the rim and there were remnants of tobacco on the walls of the thickly caked bowl. He also took photos of the top and underside of the stem to show the chatter. Otherwise the stem is quite clean.      Jeff took photos of the sides and heel of the bowl to give a picture of what the briar around the pipe looked like. There is some stunning grain under the grime.   He took a photo of the stamping on the topside of the shank. It reads as noted above and is clear and readable.As I have worked on Bertrams I have written on the brand and have included the following information. If you have read it in past blogs, you can skip over it. If you have not, I have included the link to Bertram history and information. I would recommend that if you don’t know much about them take some time to read the background. I include a link to the write up on Pipedia (http://pipedia.org/wiki/Bertram). Bertram pipes were based out of Washington DC. They were popular among famous politicians and celebrities of the time. They made many products for them from FDR’s cigarette holders to Joseph Stalin’s favorite pipe. They were considered some of the best America had to offer till they finally closed their doors in the 70s. Bertram graded their pipes by 10s and sometimes with a 5 added (15, 25, 55 etc.), the higher the grade the better. Above 60s are uncommon and 80-90s are quite rare. I have worked on one 120 Grade billiard. I have several blogs that I have written on rebornpipes that give some history and background to Bertram pipes. (https://rebornpipes.com/2015/06/16/an-easy-restoration-of-a-bertram-grade-60-217-poker/).

I have included the following link to give a bit of historical information on the pipe company. It is a well written article that gives a glimpse of the heart of the company. http://www.streetsofwashington.com/2012/01/bertrams-pipe-shop-on-14th-street.html#

From this information I learned that all of these Bertrams were made before the closure of the shop in the 1970s. This Bertram Canadian has a stunning a mix straight and flame grain around the bowl. Why it is not stamped with a grade number is a mystery to me. To my thinking it is at least a Grade 60 or higher.

Jeff had cleaned up the pipe with his thoroughness. He reamed the pipe with a PipNet Pipe Reamer and cleaned up the remnants with a Savinelli Fitsall Pipe Knife.  He scrubbed the bowl with undiluted Murphy’s Oil Soap with a tooth brush. He rinsed it under running warm water to remove the soap and grime. The rim top cleaned up very well. The grain really had begun to stand out. He cleaned out the inside of the shank and the airway in the stem with alcohol, cotton swabs and pipe cleaners. He soaked the stem in Before & After Deoxidizer and rinsed it off with warm water. I took photos of the pipe before I started my work on it. It really is a beautiful piece of briar. The rim top looked very good. The inner edge of the rim also looked surprisingly good. There was no damage to the edges. The stem surface looked very good with some light chatter on both sides near the button. I took photos of the stamping on the shank. The Bertram Washington DC is on the  topside mid shank. I removed the stem and took a photo of the pipe to give a sense of the whole. Now it was time to do my work on the pipe. I polished the bowl and the rim top, sides and shank with micromesh sanding pads – wet sanding with 1500-12000 grit pads and wiping it down after each pad with a damp cloth.    I rubbed the bowl and shank down with Before & After Restoration Balm. I worked it into the surface of the bowl sides and shank with my fingertips to clean, enliven and protect the briar. I let the balm sit for a little while and then buffed with a cotton cloth to raise the shine.    I polished the vulcanite stem with micromesh sanding pads – 1500-12000 grit pads. I wiped it down with a damp cloth after each sanding pad. I used Before & After Pipe Polish – both Fine and Extra Fine to further polish the stem.      This Bertram Washington DC Canadian with a vulcanite taper stem is a great looking pipe now that it has been restored. I put the stem back on the bowl and carefully buffed the pipe with Blue Diamond on the buffing wheel using a light touch on the briar. I gave the bowl and the stem multiple coats of carnauba wax on the buffing wheel and followed that by buffing the entire pipe with a clean buffing pad. I hand buffed the pipe with a microfiber cloth to deepen the shine. The finished Smaller Bertram Canadian fits nicely in the hand and feels great. Give the finished pipe a look in the photos below. The dimensions of the pipe are Length: 5 inches, Height: 1 ½ inches, Outside diameter of the bowl: 1 ¼ inches, Chamber diameter: ¾ of an inch. The weight of the pipe is 30 grams/1.06 ounces. If you are interested in adding this pipe to your collection send me a message or an email. I will be putting it on the rebornpipes store shortly in the American (US) Pipe Makers section. Thanks for reading this blog and my reflections on the pipe while I worked on it. There are many more to come!

Restemming and Breathing New Life into a WW2 Monterey Specimen Grain Bowl


Blog by Steve Laug

The next pipe I chose to work on was another bowl from my box to restem. This one has some great grain around the sides and shank. It is stamped Monterey [over] Specimen Grain on the on the left side of the shank. On the right side it is stamped Mission Briar. It had been cleaned and reamed somewhere along the way by either Jeff or me. I honestly don’t remember when or where we got this bowl. It had a hairline crack on the right side of the shank that ran mid shank for about ½ an inch. The stem was long gone so this would be a restemming job. I would need to band the shank as well. The rim top was darkened and the inner edge of the bowl was out of round. I knew from working on Monterey/Mission Briar pipes in the past that I was dealing with a WW2 years pipe that was made in California using Manzanita in place of hard to find briar. I also remembered a connection to Kaywoodie but the details were not clear to me. I took some photos of the bowl to give a since of the condition of this nice little billiard. I took some photos of the stamping on the sides of the shank. The stamping is clear and readable as noted above.The next two photos show some of the issues that I have to deal with on this pipe. The first one shows the hairline crack in the shank. I have circled it in red. The second one shows the out of round bowl.I took a stem out of my can of stems that had the right tenon size and length. The diameter of the stem was slightly larger than the shank but it would fit with some adjustments.I put the stem on the shank and took a photo of the look of the pipe. You can see that I need to adjust the diameter of the stem to match the shank.To gather some more information on the Monterey brand I turned first to Pipephil to get some more information on the brand (http://pipephil.eu/logos/en/logo-m6.html). I did a screen capture of the information on the site and included it below. I also included information in the side bar below the screen capture.“Mission Briar” is the common denomination for wood from Manzanita burl (Fam: Ericaceae), a shrub growing in California (USA). During WWII, when Briar was rare, it was used by Reiss-Premier Pipe Co and KB&B (Monterey line).

From that information I knew that the pipe was made between 1941-1946 during the time period of World War II. It was made out of Manzanita burl from California. It was also made by KB&B as it was a Monterey Line Mission Briar pipe.

There was also a picture of two different boxed pipes. The first box is for a Specimen Grain the same as the one that I am working on. The second box is for a Forty Niner. On the inside of the box is a description of the Mission Briar. It reads as follows:

Mission Briar is manufactured from Manzanita Burl grown on the sunny slopes of California’s Pacific Coast, and is proudly offered on its own merits.

“Manzanita Burl and tree heath (Imported Briar) are related to each other botanically belonging to the Ericaceae, or heath family.” – U.S. Department of Agriculture.

The intricately woven texture and grain of this hardy burl supplies a quality pipe of beauty, strength and sweetness, a pipe you can you can cherish and enjoy smoking.

Kaufman Bros. & Bondy, Inc., 630 Fifth Avenue, New York City.From there I turned to Pipedia (https://pipedia.org/wiki/Mission_Briar) to see what else I could learn from there. The article there was taken from Jose Mauel Lopes. I quote it in full below.

From Pipes, Artisans and Trademarks, by José Manuel Lopes

Mission Briar was a brand created during WW II, which disappeared soon afterwards. In 1941, due to the difficulty of importing brair, Kaufmann Bros. & Bondy, through Kaywoodie, and the Reiss-Premier Co., started making pipes out of Manzanita burls, known as “mission briar”.

The Pacific Briarwood Company, a Kaufmann Bros. & Bondy subsidiary, owned plantations of the bush in the Santa Cruz mountains in California. As the quality of the wood was not as good as briar, the project was abandoned soon after the war.

Monterey pipes were made using Mission briar by Kaywoodie.

I learned from that it was a short-lived creation by KB&B through Kaywoodie. They created the Pacific Briarwood Company as a subsidiary to make pipes from the bush in the Santa Cruz mountains in California. It last until shortly after the war ended. Monterey pipes were made by Kaywoodie!

Now it was time to work on the pipe itself. I started with fitting the stem to the shank. I removed a lot of the diameter on the stem with my Dremel and a sanding drum. Once I had the fit close I set the stem aside and turned to deal with the issues on the bowl and shank.  I went through my bands and found a thin brass band that fit the shank perfectly. I heated it and pressed in place on the shank. It fit perfectly and I like the look of it. I took photos of the pipe with the newly fit band on the shank. It looked really good. I sanded the inner edge of the bowl with a folded piece of sandpaper. I then used a wooden ball that Kenneth had given me and a piece of 220 grit sandpaper to give a slight bevel to the inner edge of the bowl.I wiped the bowl down with isopropyl alcohol on a cotton pad to remove the shiny spots on the briar and make the stain a bit more transparent to reveal the grain on the wood. It looked really good. I dry sanded the briar with micromesh sanding pads – 1500-12000 grit sanding pads. I wiped the bowl surface down with a damp cloth after each sanding pad to remove the sanding dust. Once I finished the exterior of the briar was clean and the grain really stood out.  I rubbed the bowl down with Before & After Restoration Balm. I worked it into the surface of the briar with my fingertips to clean, enliven and protect it. I let the balm sit for 10 minutes then buffed the pipe with a cotton cloth to raise the shine. Mark Hoover’s Balm is a product that I have come to appreciate and one I use on every pipe I have been working on. I set the bowl aside and worked on the stem. I polished the stem with micromesh sanding pads – wet sanding with 1500-12000 grit pads. I wiped the stem down after each sanding pad with Obsidian Oil. I polished it with Before & After Pipe Stem Polish – both Fine and Extra Fine. Once I had finished the polishing I gave it final coat of oil and set it aside to dry.    I am excited to be on the homestretch with beautiful Mission Briar Monterey Specimen Grain Billiard. This is the part I look forward to when it all comes back together, polished and waxed. I put the bowl and stem back together. I polished the bowl and stem with Blue Diamond to polish out the scratches in the briar and the vulcanite. I gave the bowl and the stem multiple coats of carnauba wax. I buffed the pipe with a clean buffing pad to raise the shine. I hand buffed it with a microfiber cloth to deepen the shine. The pipe polished up pretty nicely. The beautifully grained finish looks really good with the interesting grain patterns standing out on the shape. The grain, the thin brass band and the polished black vulcanite went really well together. This Monterey Specimen Grain Billiard was another fun pipe to work on and came out looking amazingly graceful. It is a small billiard but it is a comfortable pipe to hold in the hand. The finished pipe is shown in the photos below. The dimensions of the pipe are Length: 5 ¾ inches, Height: 1 ½ inches, Outside diameter of the bowl: 1 ¼ inches, Chamber diameter: ¾ of an inch. The weight of the pipe is 27 grams/.95 ounces. If you are interested in adding this pipe to your rack it will be on the rebornpipes store in the American Pipe Makers Section soon. Thanks for reading this blog and my reflections on the pipe while I worked on it.

This Ugly Duckling turned out to be a Beauty!


Blog by Steve Laug

The next pipe I chose to work on has been sitting in a box for several years now. It was in a sandwich bag to keep the parts together. It was a huge bowl, a veritable war club with a relatively slender stem and to be honest it never really grabbed me. I passed over it repeatedly when I went through the box of pipes that I have to complete. That changed a few days ago when I opened the box and the pipe just stood out. Strange how that works! I wrote Jeff and asked for pictures of the pipe before he cleaned it. The bowl was stamped on the top of the shank and read Colossus. Below that on the left side it read City Deluxe [over] London Made. On the right side of the shank it read Made in England. The stem has the silver star insert on the left and on the right it is stamped Hand Cut. Jeff sent these photos and told me that he purchased it (plastic bag with dirty bowl and broken tenon) from an antique mall in Ogden, Utah, USA on 04/28/19. The pre-cleanup photos show what a mess this pipe was when he found it. But don’t miss the amazing grain under the grime. The finish was a mess with scratches and grime ground into the smooth briar. The bowl had a thick cake and a fair share of cobwebs inhabiting the depths. The rim top had a thick coat of lava so it was hard to know what the inner edge looked like. The stem was covered with calcification and oxidation and the tenon was cleanly snapped off and stuck in the shank. There was light tooth chatter and marks on the surface of the stem near the button but even that was hard to see with the debris on the stem. The bag had preserved all the debris in the bowl and the stem and it was very visible. Jeff took some photos of the bowl sides and heel – it is a really nice piece of briar. The next photos show the cake and cobwebs in the bowl. What a mess! You can also see the stem with the broken tenon in the second photo.He took close up photos of the broken tenon and stem to show the clean break and the condition of them both! He took photos of both sides of the stem ahead of the button to show the general condition. It is hard to tell if there is tooth damage or marks due to the calcification and debris on the stem.The stamping on the shank is readable and reads as noted above.The City Deluxe is a GBD Second’s line that was released to expand the brands reach into the European market (http://pipephil.eu/logos/en/logo-c5.html). I have included a screen capture from Pipephil to show his information. The pipe I am working on is stamped like the first and second one in the photo below.I turned then to Pipedia’s article on GBD pipes (https://pipedia.org/wiki/GBD). The history of GBD pipes is very well spelled out in multiple articles on Pipedia. I would encourage you to give them a read as they are well written and very readable. It is truly a grand old brand spanning France and England. I have included the section on the section of the article on the City Deluxe brand and have highlighted it in red for ease of reference.

The solid demand for GBD pipes also encouraged the management to introduce a number of sub brands designed to win new buyers. We can list such sub brands as follows:

  • The City de Luxe (1921) had an inserted star on the stem as trademark and were marketed in England and in France. These pipes were the bestseller of the 5½ Shilling class in the 1930s in Great Britain.
  • Reserved for the French market remained the even more favorable GBD brand Marcee, a derivative of Marechal Ruchon & Co. Ltd. that was offered until the 2nd World War and for another one or two years afterwards.
  • The Camelia – made in London as a 2½ Shilling line – was only around for a few years.
  • Important to mention is also the Riseagle—completely produced in Paris before the wartime for England’s smokers who wanted “a cheap but dependable British made pipe”… one of the most successful 1 Shilling pipes until 1939! The introduction of the luxury impact on the excise tax for pipes after the war put an end to this cheap brand.

I then turned to Pipedia’s article on GBD’s various models to seek further information on the Colossus stamp (https://pipedia.org/wiki/GBD_Model_Information).

The second stamping on the top of the shank was Colossus. I knew that this stamp was used on larger or what GBD called “plus sized pipes”. I read through the above link and found the information below.

Plus Sized Pipes

In addition to the pipe line and shape information stamped on the pipe GBD also had codes for plus sized pipes. These codes in ascending order of size were…

  • Conquest
  • Collector
  • Colossus

From this I know that the pipe is a larger, plus sized pipe that was at the top of the plus sizes – a Colossus. The City Deluxe was started in 1921 and had an inserted star on the stem as trademark and were marketed in England and in France. These pipes were the bestseller of the 5½ Shilling class in the 1930s in Great Britain.

Armed with that information I turned my attention to working on the pipe itself. Jeff had done an amazing job cleaning up the bowl and the stem. He had reamed it with a PipNet pipe reamer and followed that with a Savinelli Fitsall Pipe knife to scrape away the remaining debris. He scrubbed the exterior of the bowl and stem with Murphy’s Oil Soap and a tooth brush to remove the grime and calcification. He scrubbed out the internals of the bowl, shank and stem with 99% Isopropyl Alcohol, pipe cleaners and cotton swabs until it was very clean. He scrubbed the stem surface with Soft Scrub and then put it in a bath of Before & After Pipe Stem Deoxidizer to deal with the oxidation. He rinsed it with warm water and dried it off. I took photos of the parts when I received them. It looks amazingly clean. I took a photo of the rim top to show the darkening and damage to the inner edge of the bowl. It was a little rough but should clean up well. I also took photos of the stem to show the surface of the stem and how well it had cleaned up. I also wanted to show the light tooth marks on the stem surface.I put the stem against the shank and took some photos to have some idea of how the pipe must have looked before it broke. It is an interesting looking war club of a pipe!With that I put the bowl in the freezer for ten minutes to loosen the stuck tenon. When I took it out of the freezer I used a dry wall screw to thread into the airway on the broken tenon and wiggled it free of the shank.With the broken tenon pulled it was time to make a new tenon for the stem. I started out by going through my can of tenons and finding one that would work. It is a threaded tenon that is shown on the left in the photo below (A). I took off the lip at the threads and reduced the diameter with a Dremel and sanding drum as shown in the photo below (B). It was the same diameter as the broken original shown below (C).I drilled out the airway in the stem to accommodate the new tenon. I started with a bit slightly larger than the airway and worked up to the one shown below. It was the same diameter as the threaded tenon end.I sanded the threads to reduce the diameter of the threaded portion of the tenon. I coated it with some black superglue and inserted it in the stem. I set it aside to let the glue cure. I would still need to fine tune the fit in the mortise but it was looking good.While the tenon repair cured I turned my attention to the bowl. I started by addressing the damage on the inner edge of the rim. I used a folded piece of 220 grit sandpaper to give a slight bevel to the edge and remove the darkening. I smoothed the edge further with a piece of sandpaper wrapped around a dowel. The rim came out looking much better.I dry sanded the briar with micromesh sanding pads – 1500-12000 grit sanding pads. I wiped the bowl surface down with a damp cloth after each sanding pad to remove the sanding dust. Once I finished the exterior of the briar was clean and the grain really stood out. I rubbed the bowl down with Before & After Restoration Balm. I worked it into the surface of the briar with my fingertips to clean, enliven and protect it. I let the balm sit for 10 minutes then buffed the pipe with a cotton cloth to raise the shine. Mark Hoover’s Balm is a product that I have come to appreciate and one I use on every pipe I have been working on. I set the bowl aside and turned my attention to the stem. The tenon had set in the stem so I sanded the tenon smooth with 220 grit sandpaper. I still need to polish it a bit but it is looking pretty good at this point.I fit the stem on the shank and took some photos of the pipe. I liked the looks of it but it felt like it was missing something to me.I went through some silver bands that Jeff and I had purchased and there was one that was perfect for the diameter of the shank. It was a little deep for my liking so I worked on the depth of the band on a topping board with 220 grit sandpaper. I took it down until the depth was half of what it was when I started. I removed the stem and worked on fitting the band. I heated the band with my lighter and then pressed it in place on the shank end and it was perfect. It did not cover any of the stamping and added the missing touch for me. I took some photos of the bowl with the band and I liked the look.I set the bowl aside once again and worked on the stem. The tooth chatter was very light so I polished the stem with micromesh sanding pads – wet sanding with 1500-12000 grit pads. I wiped the stem down after each sanding pad with Obsidian Oil. I polished it with Before & After Pipe Stem Polish – both Fine and Extra Fine. Once I had finished the polishing I gave it final coat of oil and set it aside to dry. I put the stem back on the bowl and took a picture of the pipe next to a Dunhill Shell Briar Group 4 Billiard. You can see that it is mammoth in comparison to a rather large Dunhill.I am excited to be on the homestretch with beautiful GBD Made Colossus City Deluxe Large Apple. This is the part I look forward to when it all comes back together, polished and waxed. I put the bowl and stem back together. I polished the bowl and stem with Blue Diamond to polish out the scratches in the briar and the vulcanite. I gave the bowl and the stem multiple coats of carnauba wax. I buffed the pipe with a clean buffing pad to raise the shine. I hand buffed it with a microfiber cloth to deepen the shine. The pipe polished up pretty nicely. The beautifully grained finish looks really good with the interesting grain patterns standing out on the shape. I have to say Jeff called this one correctly. It is probably a pipe I would have left in the shop in the sandwich bag he found it in. But he saw promise and he was right! The grain, the silver band and the polished black vulcanite went really well together. This Colossus City Deluxe was another fun pipe to work on and though it was ugly to begin with it came out looking amazingly graceful. It is a large pipe but it is a comfortable pipe to hold in the hand. The finished pipe is shown in the photos below. The dimensions of the pipe are Length: 7 inches, Height: 1 ½ inches, Outside diameter of the bowl: 1 ¾ inches, Chamber diameter: 1 inch. The weight of the pipe is 83 grams/ 2.89 ounces. If you are interested in adding this pipe to your rack it will be on the rebornpipes store in the American Pipe Makers Section soon. Thanks for reading this blog and my reflections on the pipe while I worked on it.