Tag Archives: Bowls – refinishing

A Berkeley Club 7118 Billiard that turns out to be Sasieni Made


Blog by Steve Laug

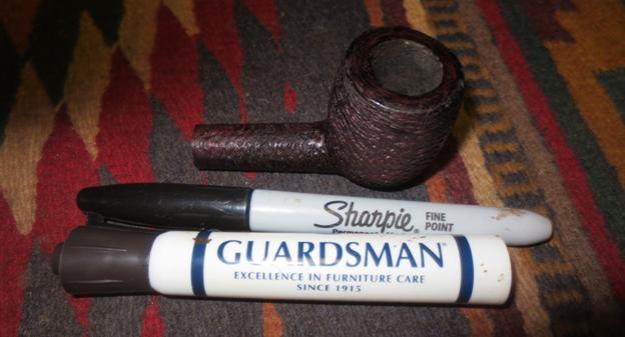
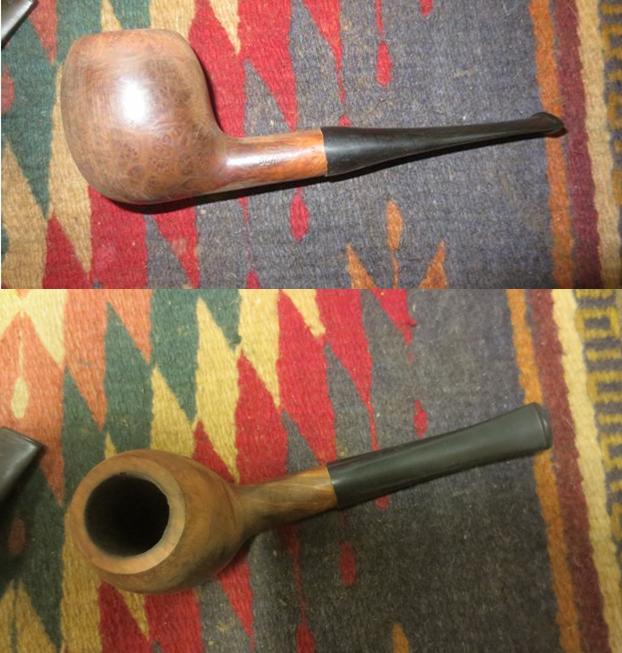
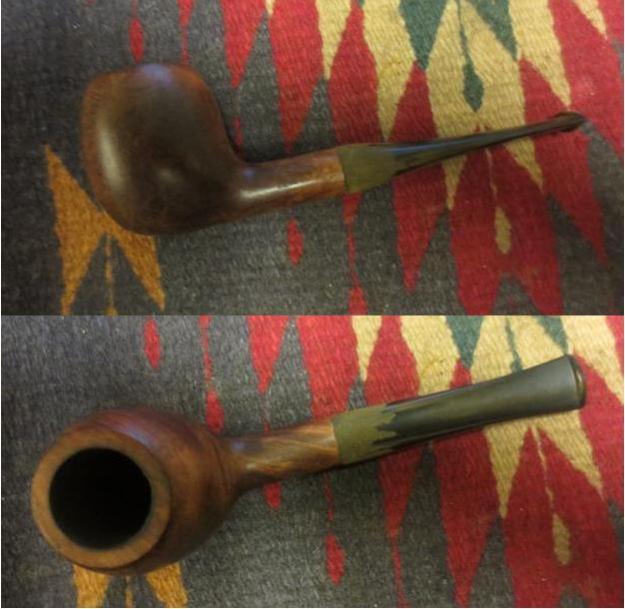
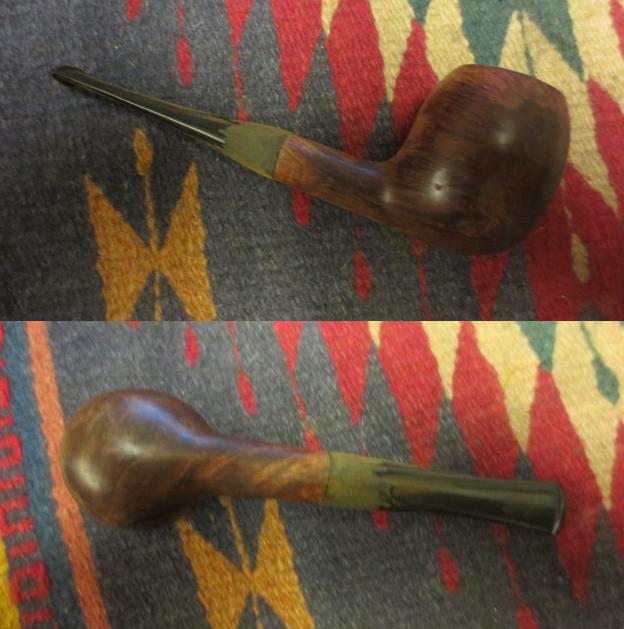
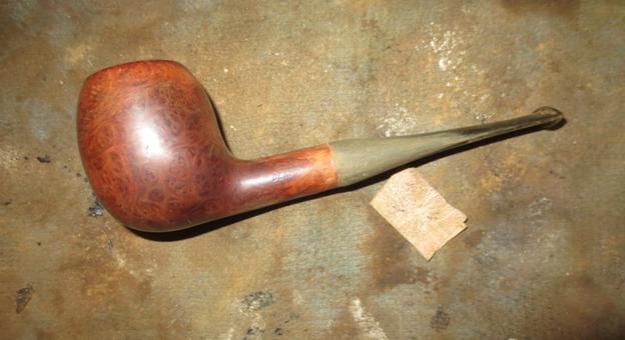
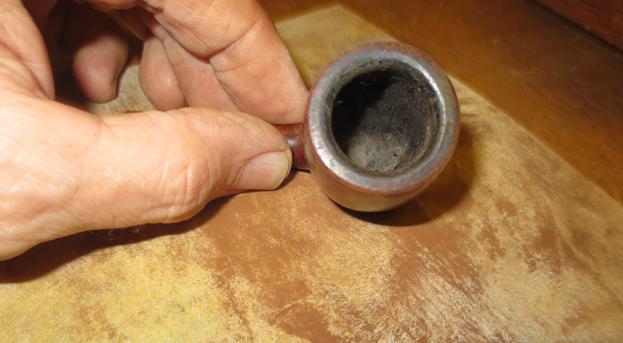
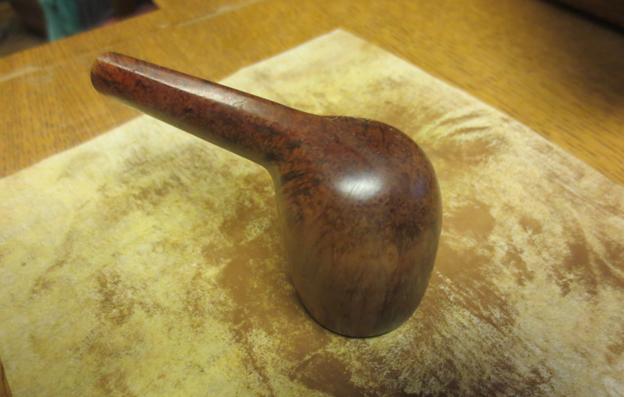
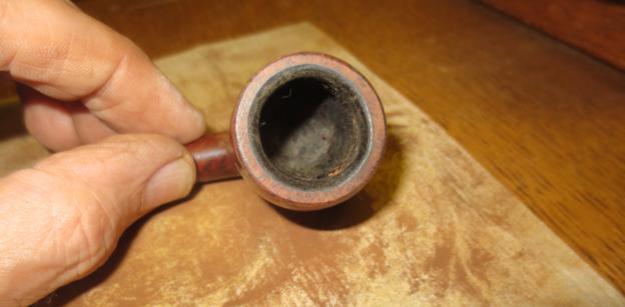
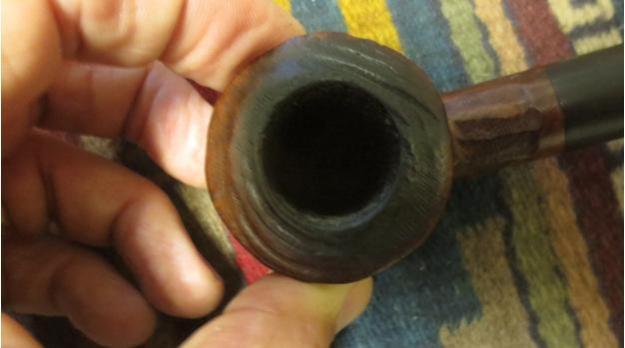
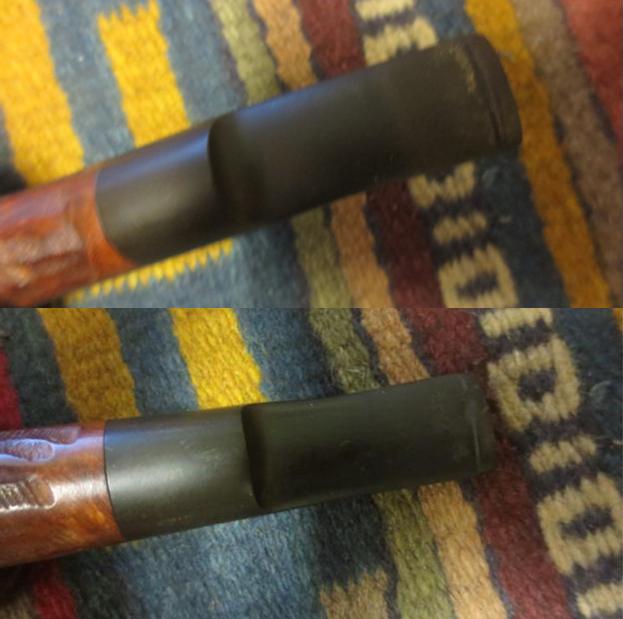
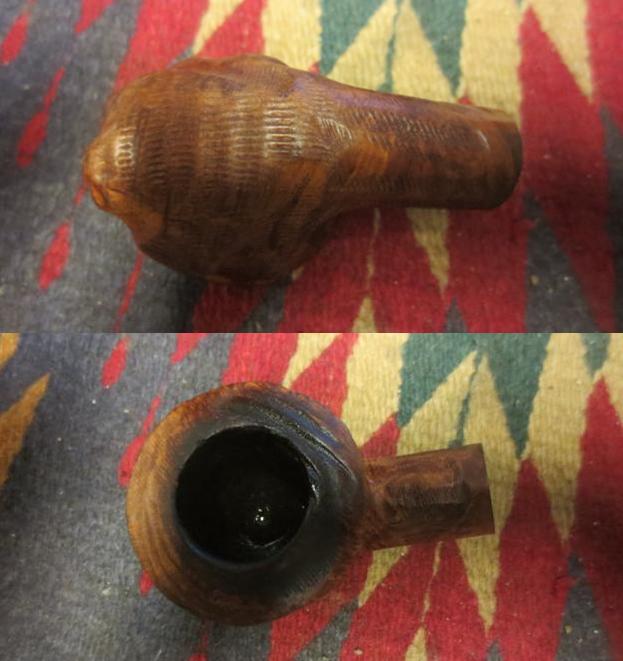
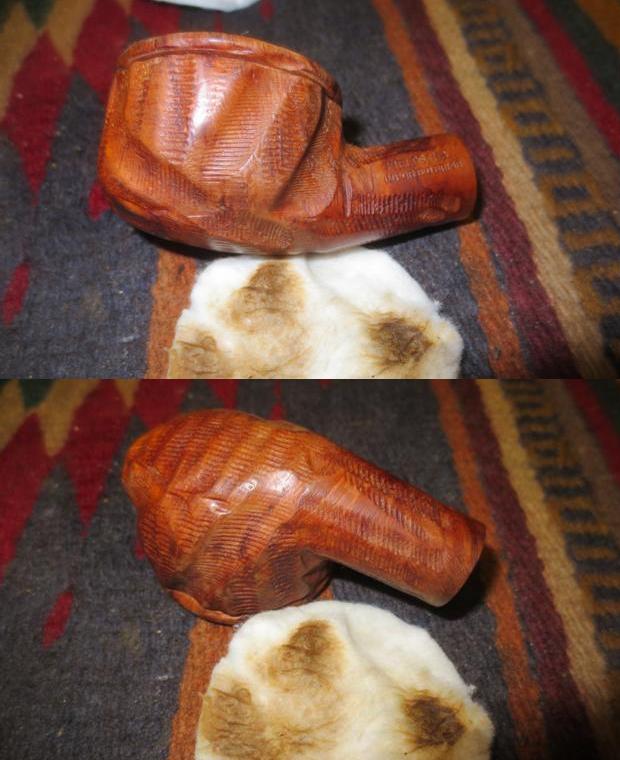
Inside the first boxed set of Picadilly Brand Genuine French Rustique Briar pipes that my brother picked up was a straight billiard that did not bear the markings that were on the bent billiard or on the other complete set of Picadilly pipes. This one had a familiar finish to me but I could not put my finger on it and identify it. It was stamped on the underside of the shank with the following: 7118 over Berkeley Club over London Made. The bowl end of the smooth bottom of the shank it was stamped England in an arch. The finish on the bowl sides was very clean. The rim was a bit beaten. The front edge of bowl had been knocked out on a hard surface repeatedly and left a rash. The entire top of the rim was also beaten up and pitted. It was the only part of the bowl that was in rough shape. The stem had some tooth chatter and some light tooth marks on the top and bottom sides near the button. There was some oxidation and a faded stamp with what looked like a B partially circled by a C.Berk2 Berk3I took a close up photo of the bowl and rim to show the cake on the bowl and the damage to the rim surface. I also took a close up photo of the stamping on the underside of the shank.Berk4I went online to Pipephil’s site Logos and Stampings (http://www.pipephil.eu/logos/en/logo-b4.html) and found the brand and the reminder that had niggled at the back of mind. The Berkeley Club with this stamping was made by Sasieni. The photo below came from that website and shows the same finish and the same stamping on both the shank and the stem.Berk1With that in mind I took the pipe apart to have a look at it. I was expecting the pipe to have an inner tube in the tenon. I looked in the bowl and the point extended into the bowl showing a glint of metal. However when I took the pipe apart there was no inner tube. I shined a light down the mortise and airway in the shank and sure enough the tube had broken off in the airway leaving the mortise unobstructed. I looked at the stem and saw the same – broken off slightly inside the tenon leaving it also unobstructed.

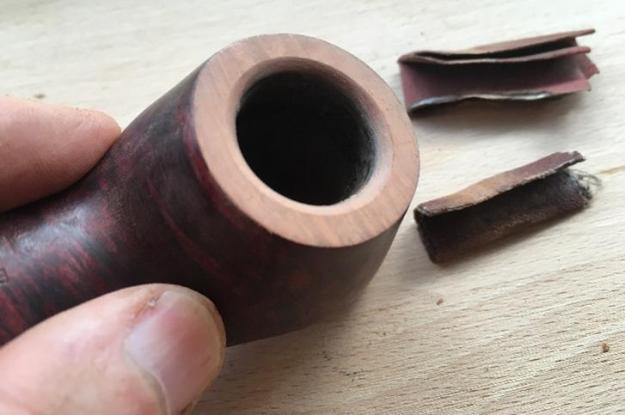
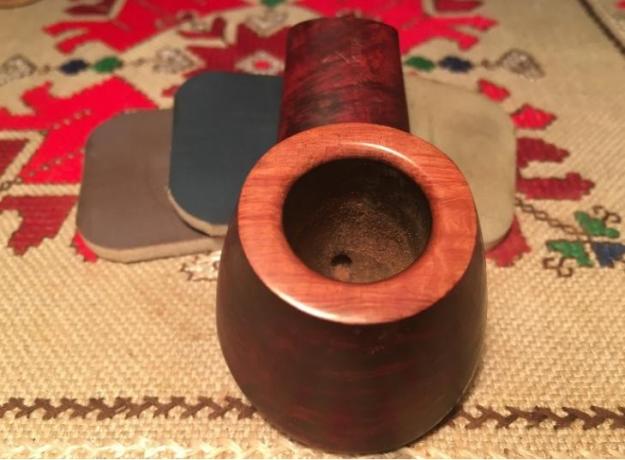
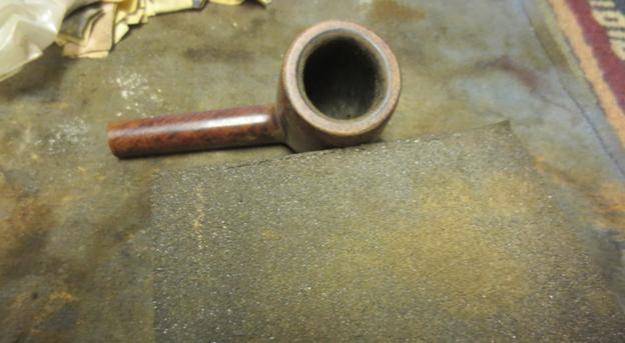
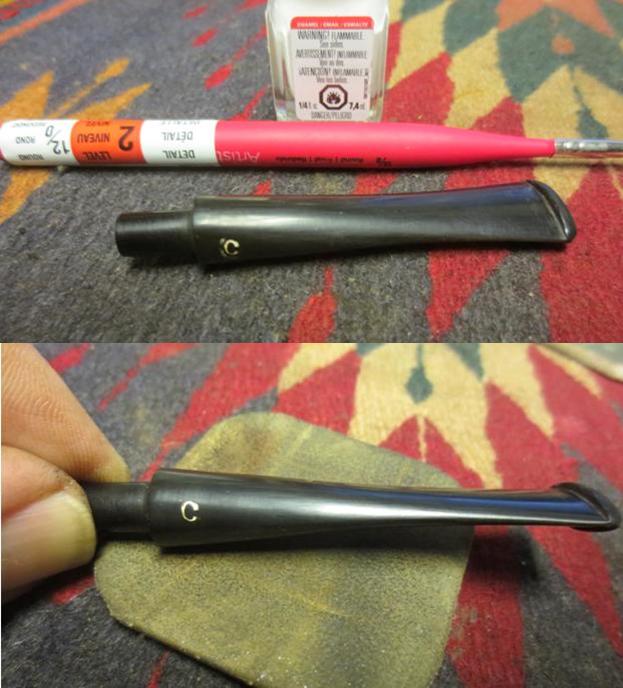
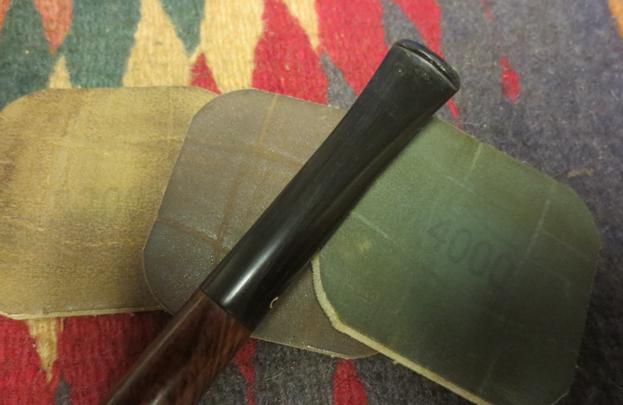
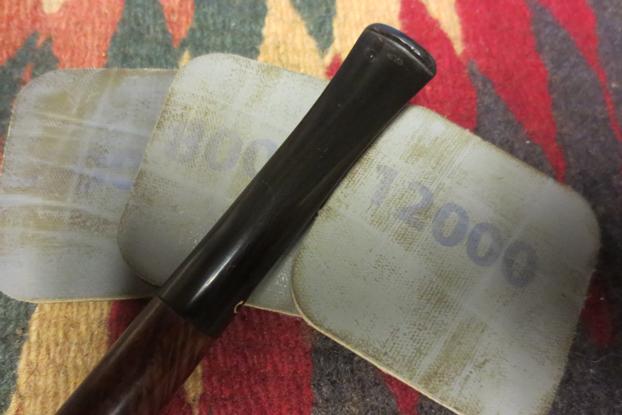
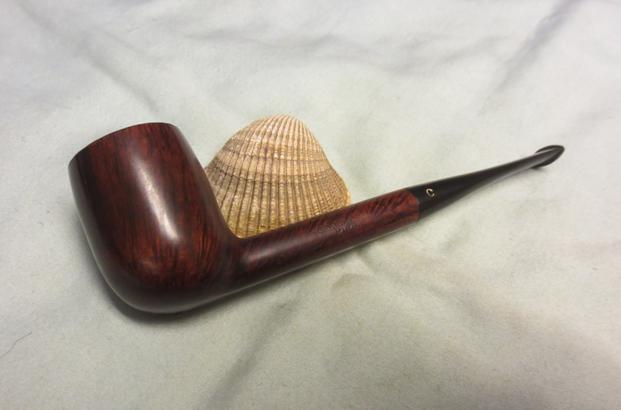
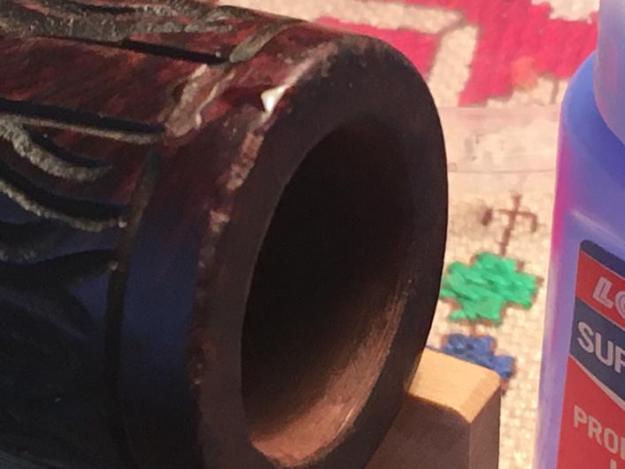
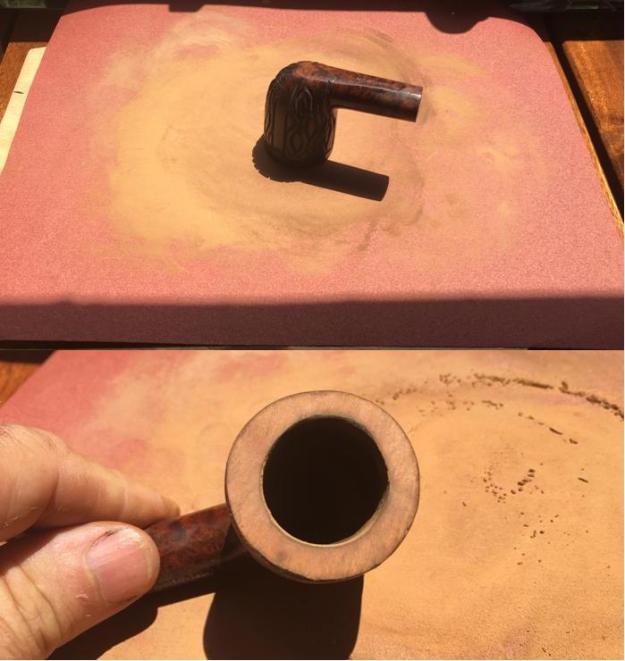
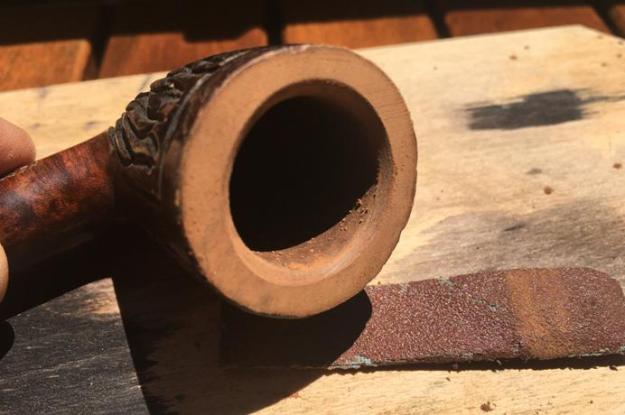
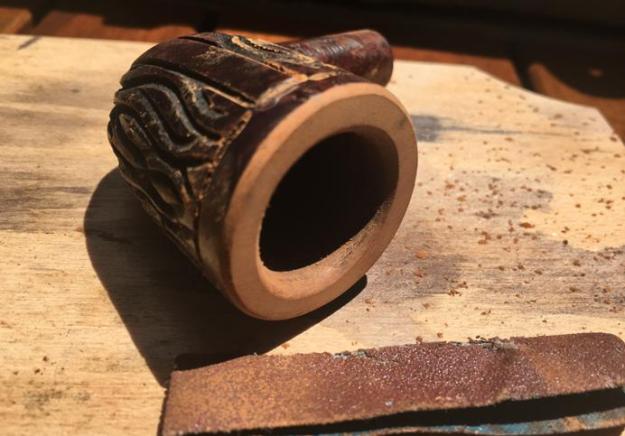
I decided to work on the rim top damage by topping the bowl with 220 grit sandpaper on a topping board. It took some work to remove the damaged portion of the rim. The second photo shows the initial sanding and the third photo shows the finished topping. You can also see the chips in the cake at 12 o’clock in the third photo.Berk5I used the Savinelli Pipe Knife to clean out the cake in the bowl and work on the inside edge of the rim. I was able to remove all of the cake and smooth out the rim edge while keeping it in round in the process.Berk6With that completed I decided to drill out the broken inner tube in the shank of the pipe. I used a drill bit almost the same size as the airway in the inner tube. I increased the size of the bit until it was the same size as the airway and drilled out the broken tube. I never use a power drill when I am doing this – rather I use a cordless drill sans battery (I don’t want to inadvertently hit the trigger and regret it). I turned the shank onto the drill bit until it grabbed onto the tube and I was able to pull it out on the end of the bit. While I was pulling I also used the end of the Savinelli Pipe Knife to push on the end of the inner tube in the bowl. It takes patience but the result leaves behind no damage to the airway or the bowl.Berk7I scrubbed the rustication on the bowl with a tooth brush and Murphy’s Oil Soap until it was clean. I rinsed it under running water to remove the soap and the debris. I dried it off with a soft cotton towel.Berk8I took some photos of the cleaned and dried pipe to get an idea of what I needed to do with the finish on the bowl and shank. The pipe looks really good other than the top of the rim that I will need to restain and polish.Berk9 Berk10I cleaned out the mortise in the shank and the airway in the shank and the stem. The airway was quite clean thanks to the broken inner tube. The mortise had some tars and oils that took a few cotton swabs, pipe cleaners and alcohol to remove. The stem was dirty on the inside and took considerably more pipe cleaners than the shank. I used pipe cleaners and alcohol to clean out the stem airway.Berk11To match the stain on the bowl sides I used a black Sharpie Marker and a dark brown stain pen to restain the rim top and the outer edges of the bowl.Berk12I cleaned up the inner edge of the bowl with a piece of sandpaper wrapped around my finger to smooth out the rough edges of the inner rim. It took a few passes to smooth out the edge but when it was done it looked much better.Berk13I gave the bowl a coat of Conservator’s Wax and buffed the bowl with a shoe brush to bring up the shine.Berk14I used the same method that I spelled out above – a stationary drill and drill bits to remove the broken tube in the tenon. I drilled until the bit caught a hold of the tube and then pulled the tube out of the tenon.Berk15I used some European Gold Rub ‘n Buff to fill in the logo on the stem. I applied it with a cotton swab and then rubbed off the excess. The finished logo is shown in the photo below.Berk16I wet sanded the stem with 1500-2400 grit micromesh sanding pads. I rubbed it down with Obsidian Oil. I dry sanded it with 3200-4000 grit pads and gave it another coat of oil. I finished sanding with 6000-12000 grit pads. I gave it a final coat of Obsidian Oil and set it aside to dry.Berk17 Berk18 Berk19I buffed the stem with Blue Diamond polish on the buffing wheel and then gave it multiple coats of carnauba wax. I buffed the bowl and the stem with a clean buffing pad to raise the shine and polish the wax. I buffed it again by hand with a microfibre cloth. The finished pipe is shown in the photos below. It came out looking really good. This one will eventually be listed for sale on the store. You can send me an email or a message any time if you would like to add it to your collection. Thanks for looking.Berk20 Berk21 Berk22 Berk23 Berk24 Berk25 Berk26

Another ‘Hole in the Wall’ Find – BBB Banker Bent Volcano


Blog by Dal Stanton

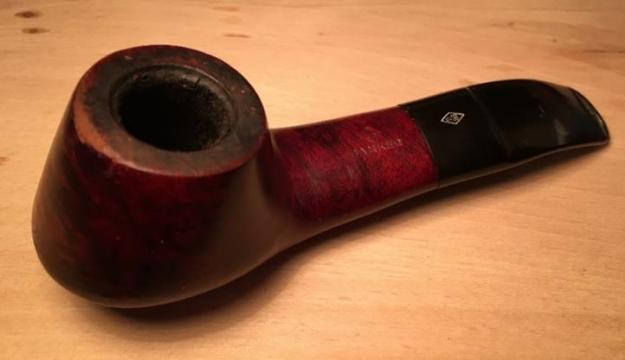
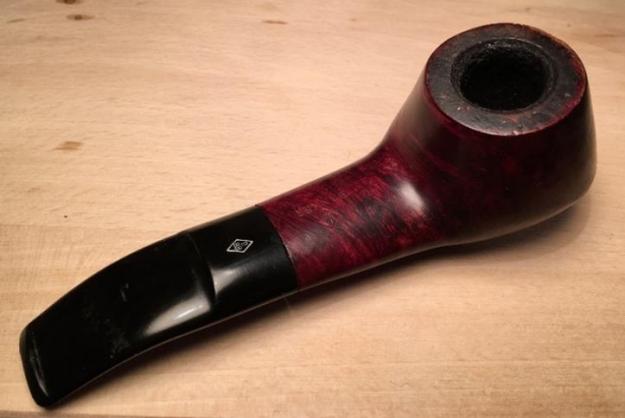
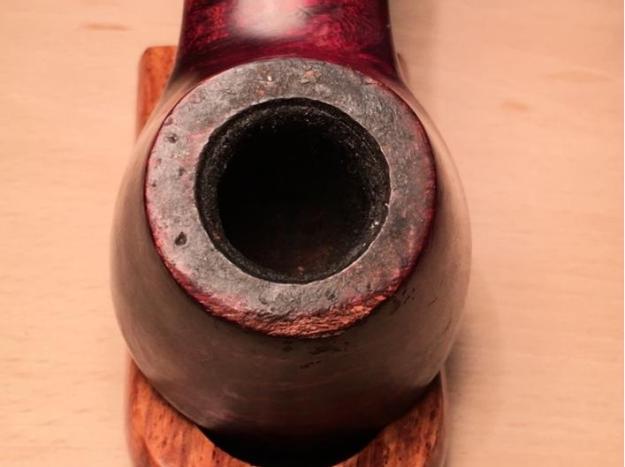
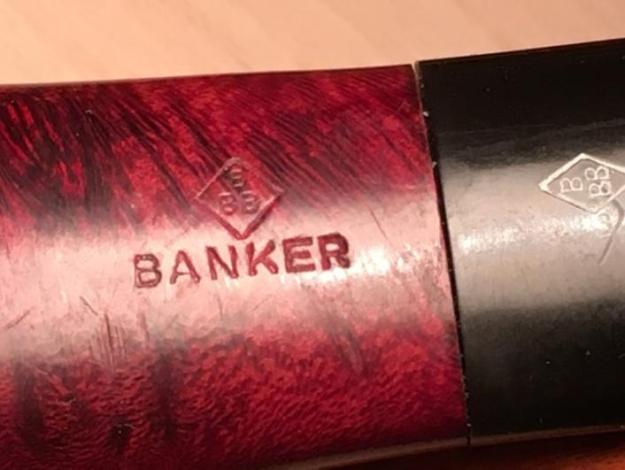
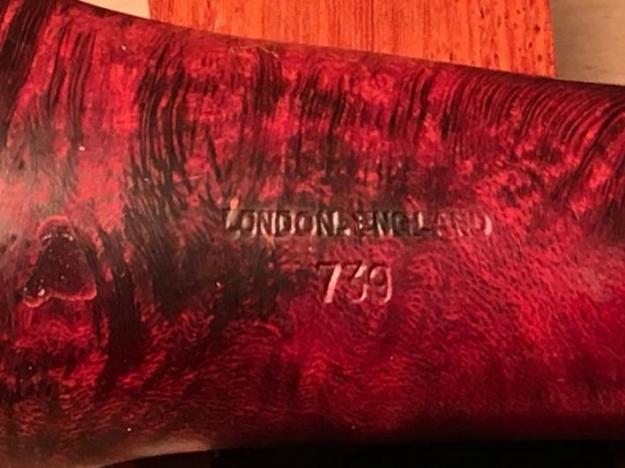
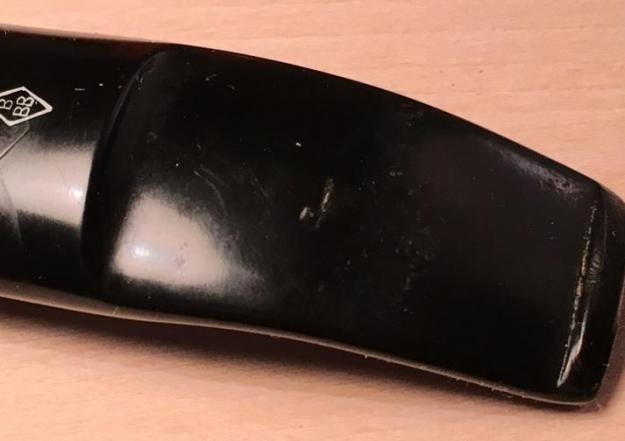
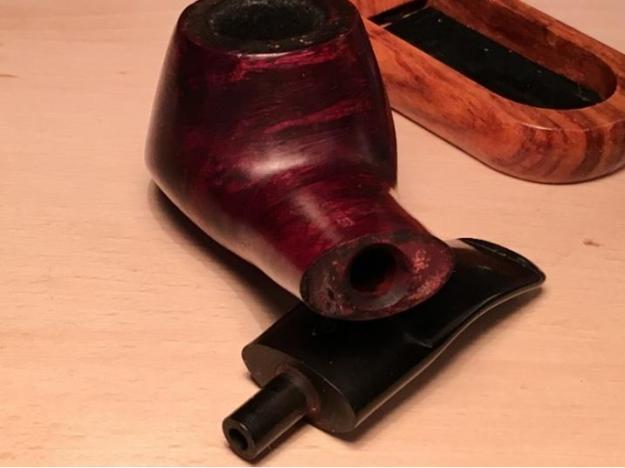
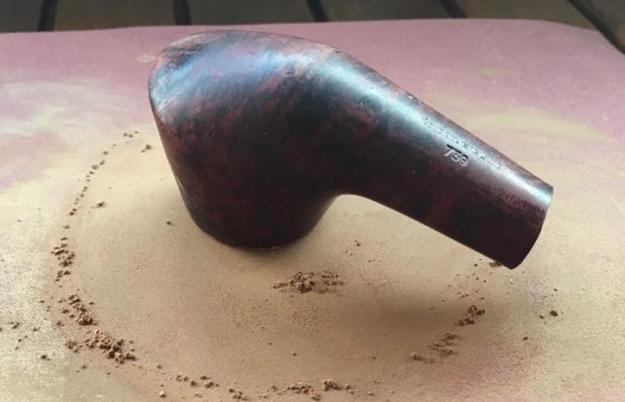
Last April, during one of my earlier visits to what I have affectionately named, ‘The Hole in the Wall’ antique store near the Zhenski Pazar (Women’s Market) in downtown Sofia, Bulgaria, my eyes locked on to a very handsome pipe that called out to me resolutely – “Take me home!”  The pipe was a slightly bent volcano shape, brandishing a broad flattened oval shank and stem that drew my attention.  In my small collection of pipes then, and even today, I have nothing like it.  After taking in the unique shape, the briar grain, obscured by layers of grime and old wax, gave me an internal ‘wow!’ that I carefully kept hidden from the shop owner who would see my excitement as potential greater profit for him – so I played it cool.  I looked at how the grain moves horizontally across the bowl and shank giving the appearance of a tiger pattern looking down on the shank.  Looking straight at the bowl the grain looked like horizontal flames terminating on the sides of the bowl with Birdseye patterns – I was anxious to work on this pipe.  The top of the shank was imprinted with the classic BBB diamond mark over Banker.  Underneath the shank had London, England over 739.  The stem top also had the white diamond BBB mark.  I also spied another pipe in the basket that looked like a good candidate to bundle with the BBB Banker, a French Jeantet Fleuron 70-7 which helped me negotiate 30 Bulgarian Leva for the pair – about 16US.  Not a bad deal at $8 a pipe!  The first picture is the Jeantet followed by the BBB Banker after I arrived home from the ‘Hole in the Wall’ with my newest acquisitions:Bank1 Bank2 bank3 Bank4 Bank5 Bank6 Bank7 Bank8 Bank9I found a lot on the internet about the BBB name.  The small blurb in Pipehill describes the evolution of the BBB moniker:

BBB: ” Best British Briar” is now a brand of the Cadogan Company (Oppenheimer group). American rights to use the brand name were sold to Wally Frank in 1980.

Founder of the brand in 1847: Louis Blumfeld. The oldest pipe brand name in the UK has been registered in 1876 (Blumfeld Best Briar).

Steve also posted a blog on the history of BBB pipes a few years ago using the French article:

https://rebornpipes.com/2012/08/05/history-of-bbb-pipes/

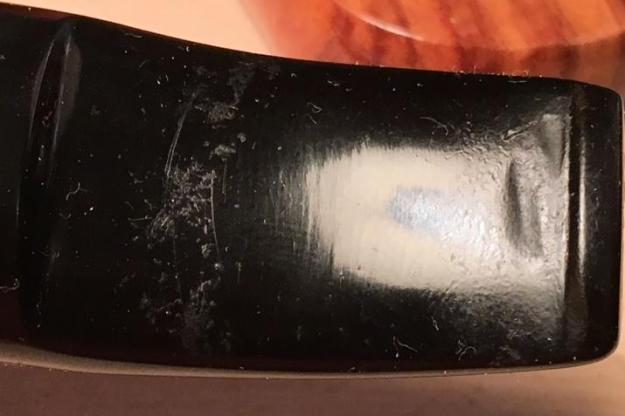
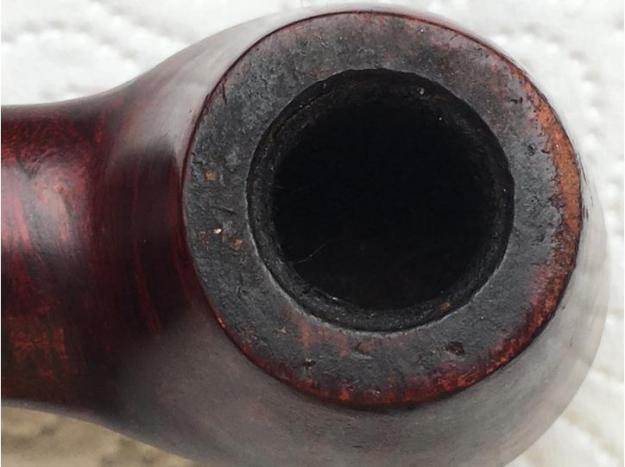
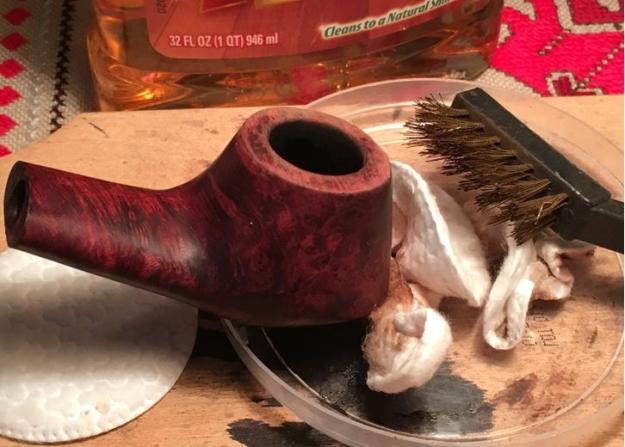
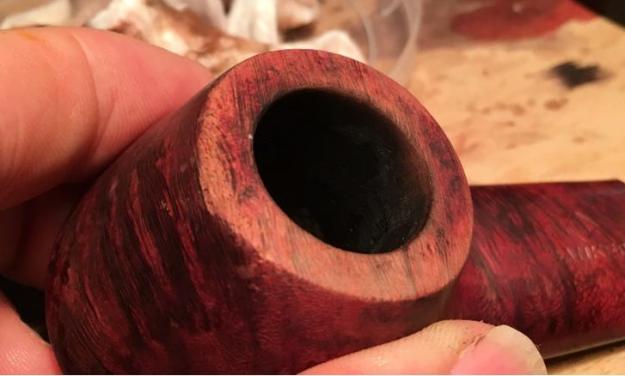
I discovered that there are many BBB collectors and enthusiasts in my research.  Unfortunately, I could find nothing helping me to date or place my BBB Banker except some informed guesses comparing to the BBB stamps (pictured below) depicted in the French article Steve posted above which would probably date the Banker at the earliest in 1989 when the Cadogan Company consolidated manufacturing its various pipe lines at Southend-on-the-Sea, but more likely in the 2000s – not a terribly old pipe (Can anyone help me on that?):Bank10The condition of the Banker is generally good.  There is some cake build up in the chamber but I still want to ream the bowl down to the briar for a fresh start and to be able to make sure there are no problems lurking beneath – which I really don’t expect.  The rim has light grime and lava on it, but a significant wearing down of the front lip so that bare briar is exposed.  The stummel looks to be in good shape – I detect one fill underneath but it looks to be solid and will blend well.  The stummel grain is dulled and obscured by grime and oil build up.  The stem is in good shape – showing almost no oxidation, but has a tooth dent on the lower side of the bit.  I take a fresh close up of the rim to mark the progress.  I begin with reaming the bowl with my Pipnet reaming kit.  As I’ve become accustomed, I try to do the dirtier part of the cleanup on the 10th floor balcony adjoining our bedroom where my work-station is here in Sofia, Bulgaria.  Sometimes I wish I had a basement work area, but we do what we must!  I use only the two smaller blades of the four blades available to ream the cake down to the briar.  I follow the use of the reaming blades with 120 grit sanding paper to clean the cake further and finish with 240 grit on the chamber wall.  The bowl looks good.  True confession – while I was reaming the bowl my thoughts drifted off to a Savinelli reaming knife – on the eBay block, that I’ve had my eye on – one like Steve often employs.  There are still a few days left in the auction and I’m hopeful that I might add it to the arsenal!  I’ll let you know!  In order to get a better idea of the rim’s condition, I clean the external stummel with Murphy Oil Soap and work on the grime covering the rim.  I use cotton pads with undiluted Murphy’s.  I also employ a brass brush to work on the rim.  After the cleaning, I take the stummel to the sink and rinse it with cool tap water.  The pictures show the progress.Bank11 Bank12 Bank13 bank14Ok, for you who have years of restorations under your belts, here are some newbie musings – your patience appreciated!  At this point I realize I need to top the bowl to repair the front lip of the rim – it won’t take much but it is needed.  When one takes the rim down to the bare briar, I’ve learned that one also must have a plan for matching the hue of the old stain if one desires to keep the old stain tone matching the bowl.  I like the color scheme of the BBB Banker and I desire to keep it.  To keep it, I need to match the rim color tone with the rest of the stummel AND I need to address the very minor scratches and wear marks on the stummel surface BUT NOT sand it aggressively to remove the stain.  It is in some ways much easier to take the briar down to the wood with acetone and sanding and then apply new stain and voila!  New surface and color all blended and ready to go.  I know this situation calls for use of polishing compounds and such, which is a more passive approach to dealing with the surface – more opportunity to learn new things!  So, I move forward with topping the bowl with the aim of maintaining the current rich, deep red tones – we’ll see how it goes.  I took the BBB Banker to the topping board – 240 grit paper on a chopping block and rotated it on the paper in a gentle clockwise circle not applying too much pressure – letting the grit do its work.  To make sure I wasn’t leaning into the damaged lip area as I rotated, I eyeballed that the damaged area was untouched during the early rotations which meant the topping was true – I took a picture at this point (second picture).  I took off only enough to clear out the front lip problems.  I think it went well and the bowl looks perfectly round.  As I often like to do, to add a classy touch to the rim I bevel the inside lip.  I make the initial cut of the bevel with 120 grit sanding paper followed by 240 grit.  I’m satisfied with the bevel – not too much but just an accent.  I use micromesh on the rim from 1500-12000 to complete the rim repair preparing it for stain later.Bank15 Bank16 Bank17 Bank18 Bank19Now, the stummel surface.  I have questions rolling through my mind regarding how aggressive I can be to remove small scratches and wear blemishes but maintain the original patina of the briar as it came to me.  I elect to micromesh the stummel surface and leave the small blemishes.  I do not start with the coarsest pad (1500) but at 2400 – gentle approach (though the first picture below shows the 1500 it was not used).  I’m not sure this is the best plan but I can always back up to a more aggressive posture if I’m not satisfied with the results.  After a quick email with Steve, I feel better about the course of action.  I continue on the stummel with micromesh pads 3200-4000 and 6000-12000.  I am loving the briar grain popping out through the micromesh process – one of God’s small creations each piece of briar.  The pictures show the progress:Bank20 Bank21 Bank22As I put the stummel aside to work on the stem, I realized that I was so involved in working on the externals that I forgot that I hadn’t cleaned the internal of the stummel nor stem.  Before working on finishing the stem I decide to use the retort to clean the internals.  Last time I used the retort, an alcohol saturated cotton ball was launched from the bowl during the process.  I was gun-shy of the retort to begin with when I first acquired it – the launch didn’t help.  Notwithstanding, I unwrap the retort, get out the vodka, and proceed to let the retort do its work.  The pipe was surprisingly clean.  After two retort cycles, I finished off with cleaning the internals of stummel and stem with Qtips and pipe cleaners dipped in alcohol.  I think it’s better to clean internals earlier in the process….Bank23 Bank24 Bank25Now to the stem externals.  Earlier, I applied black super glue to two significant tooth dents on the underside of the bit (visible in picture above).  I use 240 grit sanding paper to remove the excess super glue removing traces of the dents as  well as file marks after using a needle file to fine tune the shape of the button. There was very little oxidation on the stem or teeth chatter so I proceed to wet sand with micromesh 1500-2400 and apply Obsidian Oil to the stem.  I follow by dry sanding using 3200-4000 micromesh pads and then the same with 6000-12000 and apply Obsidian Oil and set the stem aside to dry.  I’m pleased with the vulcanite ‘pop’ – that wet reflective look is great.Bank26 Bank27 Bank28 Bank29Well, I mentioned earlier that I was hopeful to add a Savinelli pipe knife to my tool box.  Steve speaks highly of this tool and has increasingly put it to good use in his restoration work.  He also posted a blog describing it when it arrived on his work table in Vancouver.  When I saw one on the block in the eBay’s estate pipes in tobacciana listings a few days ago, I decided to watch the auction and see if I could snag it – it seemed to be calling out to me: “I want to live in Bulgaria!”  As you would guess, others were watching too.  I’m thankful that my bid was sufficient and my new Savinelli pipe knife will be delivered to my daughter and son-in-law who live in Denver.  They will carry it with them to Bulgaria (along with some other supplies I’ve ordered including 32 oz. of Lane BCA Cavendish tobacco which I discovered with great enjoyment on my last trip to the US) when they visit in September!  My son-in-law had no problem agreeing to find space in the suitcases when I bribed him with sharing bowls together of the Lane BCA!  So, I’ll look forward to their arrival for the additional reasons that they will be packing new supplies and my new pipe knife!Bank30The BBB Banker slightly bent volcano is now in the home stretch.  After topping and sanding the rim with micromesh, I left the rim the bare wood until I finished the sanding of the stummel. I did this so that the stain I would eventually apply to the rim would be more closely matched.  Using an Italian brand stick, I applied a dark Mahogany stain to the rim and before it dried, lightly wiped it with a dry cotton pad to remove uneven stain application – the first two pictures below show before and after application of the stick.  I’m very satisfied with the match up of stummel and rim and am anxious to finish the stummel.  Living on the 10th floor of a former Communist block apartment building and with my work station in my bedroom (shared with my gracious and understanding wife!) space is at a premium.  My Dremel high speed tool is my workhorse when it comes to the polishing wheel.  Starting with a felt wheel, I first purge the engaged wheel by using the flat edge of the Dremel’s metal tightening wrench against it.  This softens the wheel and rids it of residue Tripoli caking from previous jobs.  With the newly purged wheel, I begin the final polish of the BBB Banker applying Tripoli to the surface addressing the minor pits and scratches on the bowl surface that I did not sand out aggressively to guard the beautiful patina of this piece of briar.  Bank31 Bank32 Bank33Finished with the Tripoli and Blue Diamond, I change to a cotton cloth wheel for the Dremel and apply several coats of carnauba wax.  I use the slowest setting for the Dremel and keep a continuous circular rotation over the briar surface – oh my, does the grain pop!  I cannot say exactly when this pipe was made, but if it’s been since 1989, someone employed by Cadogan Company’s Southend-on-the-Sea pipe making plant did an amazing job with the choice of this piece of briar and the volcano shape it became.  The grain is beautifully showcased in horizontal movements laterally across the stummel so that one can see the horizontal flame grain facing the stummel straight on and then move to the sides of the stummel and see the grain emerge in Birdseye perspective and swirls.  In the beginning I described the top-down view of the broad, flattened oval shank as reminiscent of tiger fir to me – now as I look at it zebra also comes to mind.  Another example of the beautifully showcased briar grain in the Volcano shape is the broad landscape of its underside – from across the broad shank to the front lip of the volcano base, runs a robust dissecting flow of grain that is majestic from my vantage point.  Yes, I confess, I’m a briar grain junkie.  Its beauty reminds me of its Maker.  With my last application of carnauba wax on stem and stummel, I change to a clean cotton cloth wheel and buff the entire stummel and stem.  Then I give the BBB Banker bent volcano a brisk buffing with microfiber cloth to bring out the richness of this briar even more.  I’ve enjoyed this restoration and look forward to loading the BBB Banker with its first bowl of tobacco in my hands.  Thanks for joining me!Bank34 Bank35 Bank36 Bank37 Bank38 Bank39 Bank40 Bank41 Bank42


Restemming and Restoring a Made in Denmark Apple


Blog by Steve Laug

I got an email from a fellow in Dawson Creek, British Columbia asking if I would be willing to work on a pipe that he had that was one of his favourites. It was an apple that he really liked and he liked the patina on it as well. This is what he wrote to me: “Sir, I have a pipe in need of your skills. I was visiting City Cigar on a trip to Vancouver and William recommended you. I’ve inherited a pipe from my dad that needs to be refurbished. I wish to add a new curved stem. The old stem’s very loose. I will mail, or ship the pipe to you, as I live in Dawson Creek, BC. Once we discuss price & details. After leaving City Cigar, I was left with the impression that you’re “the guy” for the job.” 

I asked him to send some photos of the pipe and give me a look at the pipe. The next two photos are the ones that he sent to me. The saddle stem looked like a replacement to me. I had him send the pipe to me for a closer look.apple1When it arrived I could see that my assumption about a replacement stem was correct. Whoever had added the new stem had sanded the shank and removed half of the stamping on the shank. I could read that it said Made in Denmark and that there were no other stampings. The shank was significantly lighter in colour than the bowl. The rim was dirty and had a chip out of it and its top was damaged. There was some concrete rash on the back side below the chip where the bowl had been knocked on concrete.apple2 apple3I took a close up photo of the bowl top to show the extent of the damage and the uneven cake on the bowl sides. I also took photos of the stem and shank junction to show how the shank had been sanded to meet the stem diameter.apple4

I also took a photo of the back side of the bowl showing the horizontal line across the bowl. That line was a large fill that bulged and stuck out the surface of the bowl.apple5The bowl was covered with a thick grime and sticky material. I wiped it down with a cotton pad and alcohol to remove the grime and get back to the finish. The grain really began to shine through once I had removed the gummy buildup. The left and right sides of the bowl showed some nice birdseye. The front and back showed cross grain that ran along the top and bottom of the shank. The birdseye ran along both sides of the shank.apple6I topped the bowl on a piece of 220 grit sandpaper to remove the damaged portions of the rim.apple7I sanded the backside of the bowl to smooth out the bulging fill that ran across the bowl.apple8I sanded down the outer edge of the rim to remove the rim damage and also the burn and darkening on the edges. I scrubbed the bowl down with acetone and cotton pads to remove the finish so that once it was clean I could blend in the lighter portions with the rest of the bowl.apple9 apple10The owner wanted a new stem for the pipe so I went through my can of stems until I found one that would fit. He wanted a taper stem and the one I found would suit the bill. He also wanted it to have a slight bend in the end. This sharply tapered stem would make that an easy fit and fix. The stem was slightly larger in diameter than the shank so I would need to reduce it to match.apple11I took off the excess vulcanite with a Dremel and sanding drum. I worked on it until it match the shank diameter.apple12 apple13I took it back to the work table to hand sand it. I used 180 grit sandpaper and took back the excess stem material.apple14I sanded the stem further with 220 grit sandpaper until the transition between the stem and shank was smooth to the touch. I heated water in the microwave until it was boiling and put the stem in the water to soften it enough to put the bend in it. I bent it just enough to give it a jaunty look.apple15 apple16I used the medium and the dark stain pen to touch up the shank. The combination of colours matches the rest of the bowl colour.apple17 apple18I wet sanded the stem with 1500-2400 grit micromesh sanding pads to begin polishing it and to begin to remove the scratches. I rubbed it down with Obsidian Oil. I dry sanded it with 3200-4000 grit pads and gave it another coat of oil. I finished sanding it with 6000-12000 grit pads and gave it a final coat of Obsidian Oil. I set it aside to dry.apple19 apple20 apple21I buffed the bowl and stem with Blue Diamond on the buffing wheel and polished the briar and the stem. The polishing took out the last of the scratches in the vulcanite stem. The fill on the back of the bowl blends in perfectly now and it is smooth to the touch. The transition from the stem to the shank is also smooth. The slight bend in the stem works well with the pipe. It is finished and ready to go back to Dawson Creek. Hopefully the owner will enjoy the new stem and the virtually “new pipe”. It still carries with it the memories of his dad giving it to him. It still as some of the marks of its story but the look and the feel of the pipe are better than when we began the journey. Thanks for looking.apple22 apple23 apple24 apple25 apple26 apple27 apple28 apple29

Doing Shaping Work on a Comoy’s Grand Slam Pipe 66


Blog by Steve Laug

Recently I traded the Simpson Sandblast Billiard that I restored with a reader of the blog for a Comoy’s Grand Slam 66. It is stamped on the left side of the shank Comoy’s over Grand Slam over Pipe. On the right side it has the classic Comoy’s Circle Made in London over England Com Stamp and further along with the shape number 66. The finish was in decent shape though there was some sticky dirt buildup on the sides. The right side of the bowl had a small divot on the bottom front of the bowl. On the left side of the bowl there was a ring or a small trough that was indented in the bowl from the left rear of the bowl to left front of the bowl. It looked like a dent in the briar. It is very clearly shown in the second and the third photos below. The stem had some oxidation and three deep tooth gouges on the top of the stem and one on the button top. There were also some deep tooth marks on the underside of the stem and the button. The C stamp on the stem is a newer stamp in the vulcanite that is painted with a white paint.Comoy1 Comoy2 Comoy3I measured and studied the side of the bowl before I decided what to do with it. I was not sure if the trough was caused by and issue inside of the bowl so my brother and I both cleaned and checked that out and could see nothing. I turned to look at the outside of the bowl and noticed that the bowl actually bulged above and below the line. That line itself actually was the same height as the rest of the bowl apart from the bulge. The bulge was thus briar that needed to be removed rather than the line a dent of missing briar. I breathed a sigh of relief and began to work on restoring it to normalcy.

I sanded the side of the bowl with 220 grit sandpaper to try to minimize the groove in the bowl side. The photos below show the progress of the repair. The first photo shows the first sanding on the bowl side. With the initial sanding you can see length of the groove on the side of the bowl. I sanded the bowl side on both sides of the groove until the groove disappeared. I was actually surprised that I was able to remove the damage to the bowl without making the bowl any thinner in the process. It was almost as if when the bowl was turned in the factory the cutting head that turned the bowl slipped and left a hump above and below the groove. Thus the groove itself was actually level with the rest of the bowl other than the humps.Comoy4 Comoy5 Comoy6 Comoy7In the next photo you can see the slight divot at the 11 o’clock position at the top of the photo. It was a deep cut in the briar that must have happened when the pipe was dropped somewhere along process. I sanded it smooth and filled in the divot with clear super glue and briar dust. Once the repair cured I sanded it smooth with 220 grit sandpaper to smooth out and blend in the repair. I sanded it with a medium and a fine grit sanding block to remove the scratches in the briar.Comoy7a Comoy8The rim on the bowl had a light buildup of tars so I lightly topped it on the topping board to remove the buildup. I topped it against 220 grit sandpaper then against a medium and a fine grit sanding block.Comoy9 Comoy10 Comoy11 Comoy12I stained the bowl with a dark brown aniline stain thinned with alcohol to match the colour of the existing finish. I applied it to the surface and flamed the stain. I repeated the process until I had a good even coverage on the bowl sides.Comoy13 Comoy14I wiped the bowl and shank down with alcohol on cotton pads to even out the colour of the stain and make it more transparent. Once that was done, the finish of the bowl looked really good to my eye.Comoy15 Comoy16 Comoy17 Comoy18The stem was a newer style Comoy’s as noted above because of the style of the logo. It was stamped into the vulcanite and then painted. There were some significant bite marks on the stem that needed attention. The lighter tooth marks I was able to sand out with 220 grit sandpaper and remove them. There were others that were quite deep. I cleaned the surface of the stem and used a thick black super glue to fill in the tooth marks. Comoy19I sanded the repaired spots with 220 grit sandpaper and cleaned up the sharp edge of the button with a needle file. I was pleased with the overall look of the stem once the repairs had been sanded smooth.Comoy20I wet sanded the surface of the stem with 1500-2400 grit micromesh sanding pads to begin the process of polishing the stem. I rubbed it down with Obsidian Oil.Comoy21Before proceeding further with the micromesh I decided to touch up the “C” stamp. I used a fine bristle brush and white acrylic paint to fill in the letter. I sanded off the excess with the 1500 grit micromesh pad and went over that section with 1800-2400 grit to match the rest of the stem.Comoy22I dry sanded the stem with 3200-4000 grit pads and gave it another coat of Obsidian Oil. I finished sanding it with 6000-12000 grit pads, gave it a final coat of oil and set it aside to dry.Comoy23 Comoy24I polished the pipe and the stem on the buffing wheel with Blue Diamond polishing compound and gave the entire pipe several coats of carnauba wax. I buffed it with a clean buffing pad and then by hand with a microfibre cloth. The finished pipe is shown in the photos below. The adjustment to the left side of the bowl worked well to smooth out the bulges and crease and the pipe looks as it should have when it left Cadogan. Thanks for looking.Comoy25 Comoy26 Comoy27 Comoy28 Comoy29 Comoy30 Comoy31

A Pipe with a Story – an R.V.W. Handmade 5 pipe


Blog by Steve Laug

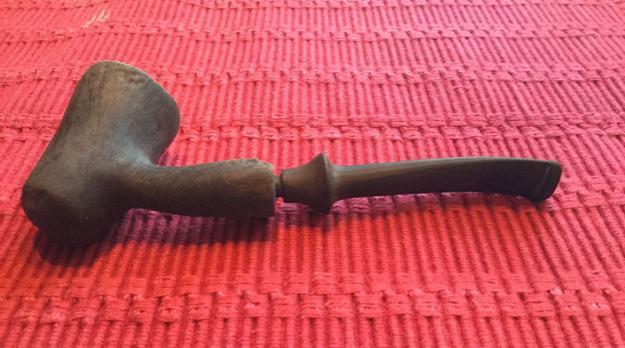
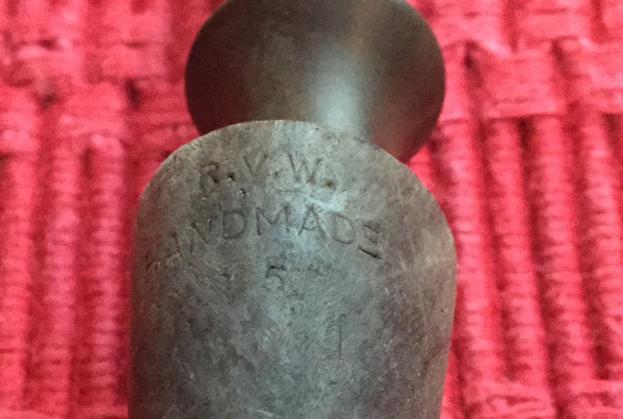
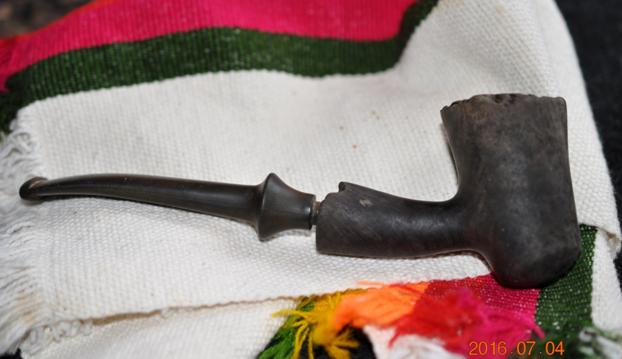
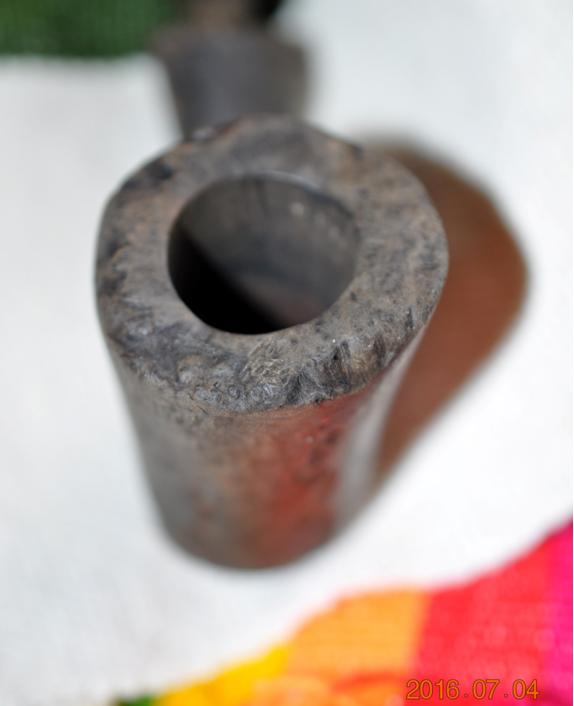
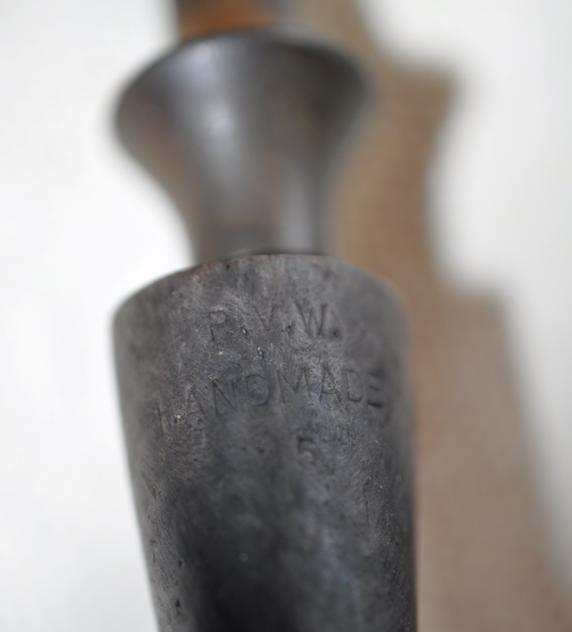
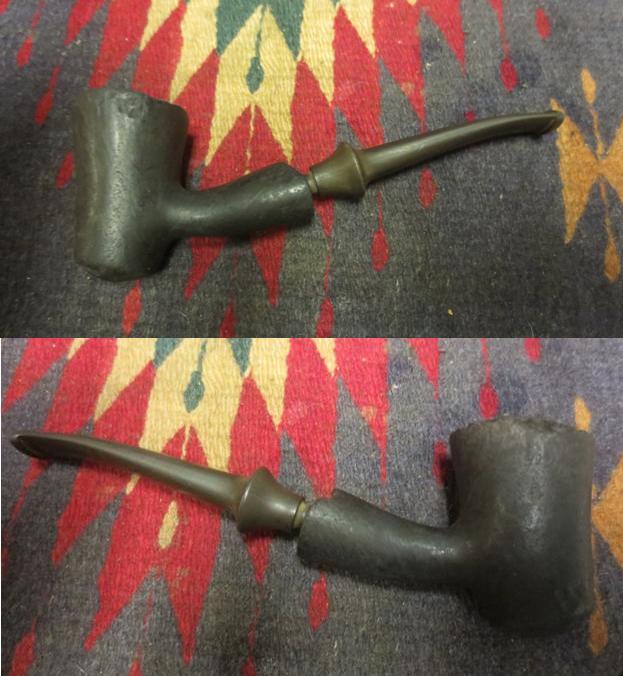
My brother sent me pictures of a pipe he found on eBay that grabbed his attention. It was not so much the pipe but the story of the pipe that caught his eye. He sent me the link and I had a look but was not sold on picking up the pipe. But he wanted it so he threw in a bid and won the pipe. He wrote to the seller and asked about it. He received a reply that the pipe had been found in Northern Michigan, US in a mud bank on the Rifle River – farm country in the middle of nowhere. They had no more information. The pipe was dark and looked like the mud bank it had been found in to my eye. The stem looked too long and the flow of the pipe did not work for me.R1The stamping on the pipe was pretty clear which surprised me. On the underside of the shank it read R.V.W over Handmade and then a 5 underneath that. That piqued my interest a bit so I decided to wait and reserve judgment until I saw the pipe.R2 R3 R4While I waited I did a bit of research and found out the pipe was made by Randy Wiley. I Googled to find his website and was directed to his Faceboook page. The link follows: https://www.facebook.com/wileypipes?__mref=message_bubble. I sent him a message on Facebook and related the story that my brother told me. I also included the above photos of the pipe supplied by the eBay seller. The next day I received a message back from Randy. Here is what he wrote: “Hi Steve, Wow, Glad there wasn’t a body with it. I’ll bet it was dropped while fishing. I’ve heard many stories. One day someone will find a pipe while scuba diving. I know the owner. This pipe is a second, RVW. It retails today for around $105.00”

When I first read his response I missed the part about him knowing the owner. This morning I read his response again as I was working on this blog and wrote Randy back regarding that line. I wonder if the original owner would want the pipe returned. We shall see.

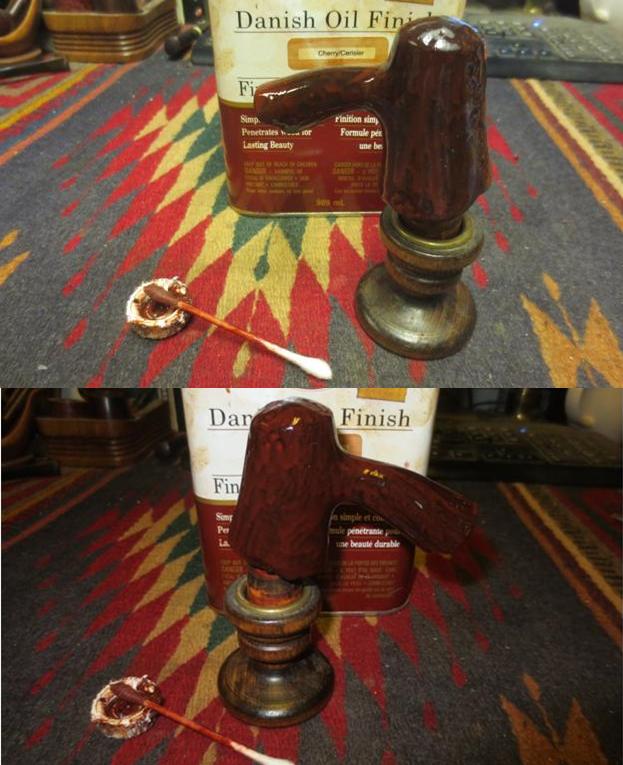
When I was in Idaho I taught my brother to do the initial clean up on the pipes. It has been a real help for me. With the box of pipes to be refurbished filling up on this end it is really nice to have him work on them ahead of time. When I get them they have been reamed and the internals all cleaned so it makes my work much quicker. Because this one attracted his attention he really liked the cleanup of it. He reamed and cleaned the bowl and shank as well as the airway in the stem with pipe cleaners, cotton swabs and alcohol. He scrubbed the exterior of the bowl with a tooth brush and Murphy’s Oil Soap to remove the debris left behind by the mud bank. He took the following photos to show the pipe after his cleanup work. The straight grain on the left side, back and front of the bowl and the birdseye on the right side are beginning to show through.R5 R6 R7 R8 R9When I received the pipe I brought it to the worktable and took some photos of it before I began to work on it. While the grain was showing through it was still too dark to my liking. There were also many tiny nicks and pits in the surface from time spent in the mud by the river. These would need to be sanded out. The rusticated portions on the bowl sides and edges were also in need of deeper cleaning. The heel of the pipe had been knocked around and had many nicks and pits. The combination of smooth and plateau on the rim also needed deeper cleaning. The stem still seemed too long to me and if I end up either keeping the pipe or selling it I think I will make a second stem that is more proportional to the pipe in my opinion. The stem was oxidized but did not have any tooth marks or chatter.R10 R11I ran the Savinelli Pipe Knife around the inside of the bowl out of habit with little effect because my brother had done a great job reaming this one.R12The bowl had some white debris in the bottom which I think was water marks from its time in the mud. I used alcohol pipe cleaners and cotton swabs to remove that debris. I scrubbed the exterior of the bowl and shank to remove more of the dark stain with acetone on cotton pads and was able to remove some more dark stain. There was more work to be done in this area but I would keep trying.R13 R14I scrubbed the exterior with a bleach mixture to further remove the stain. The next photos show the effect of the bleach on the stain. The grain is beginning to show.R15 R16I went through my stem can and found a nice amber Lucite stem that was the right length to my eye and would be a great contrast with the bowl. I did not have to do any fitting or tenon work as the stem fit in the mortise perfectly from the start. The stem was bent too much and would need to be straightened and bent to match the flow of the bowl. You can see in the photo below that the new stem is about an inch shorter than the one that came with it when I got it. I put the stem in place and took some photos to get an idea of how the pipe looked with the stem. You can also see the effect of the bleach on lightening the stain on the bowl in these photos.R17 R18 R19I used a Sharpie pen to darken the plateau areas on the end of the shank and the top of the bowl. I also used it on the rustications down the bowl sides and front.R20 R21I used Watco’s Danish Oil with a Cherry Stain to stain the bowl. It is an oil based product and as it dries on the surface it darkens to a black cherry. I applied the stain with a cotton pad and let it absorb into the warm briar.R22When it had dried I buffed it off. The stain had darkened and with the natural darkening that had happened as the pipe lay in the mud the overall appearance almost a rich charcoal grey with red undertones.R23 R24I forgot to take photos of the process of rebending the stem but what I did was boil water in the microwave in a cup and then heated the stem until it was flexible in the hot water. I inserted the tenon in the mortise and then bent the stem to match the flow of the bowl. I held the stem under cool water to set the new bend. There was some tobacco stains in the stem from a previous pipe it had graced. I cleaned it out with pipe cleaners and cream cleanser/soft scrub cleanser until all of the stains were gone.R25There was a groove in the stem on the top side about a ¼ inch from the saddle that I sanded out with 220 grit sandpaper. I worked over the stem with micromesh sanding pads – wet sanding the stem with 1500-2400 grit pads and dry sanding with 3200-12000 grit pads.R26 R27 R28I sanded the bowl with micromesh sanding pads to try to lighten the dark cherry colour of the stain. I finished sanding it with 6000-12000 grit pads to polish the briar.R29While I was finishing polishing the pipe, I received an message from Randy regarding the previous owner of the pipe. He said that he had confused it with one that had been lost while scuba diving. So he could not remember who had purchased this one. I had also asked whether the stem was original and he was not certain.I actually found that to be good news as I did not like the stem that it came with.

I took the pipe to the buffer and buffed the pipe with Blue Diamond and then gave it several coats of carnauba wax. The briar has many small pits in the surface that I am convinced came from its time spent in the mud alongside the river. Part of me wanted to sand them out and remove them but another part, the part that won decided to leave them to bear witness to the shadow life this pipe had before it was found. I took the next photos with the blanket background as it seems to allow the grain to stand out a bit.R30 R31 R32 R33The next photos I took against a light blue backdrop to show the contrast between the amber stem and the dark cherry stain. Thanks for looking.R34 R35 R36 R37 R38 R39

Restoring ‘The Professor’ – WDC Milano Hesson Guard


Blog by Dal Stanton

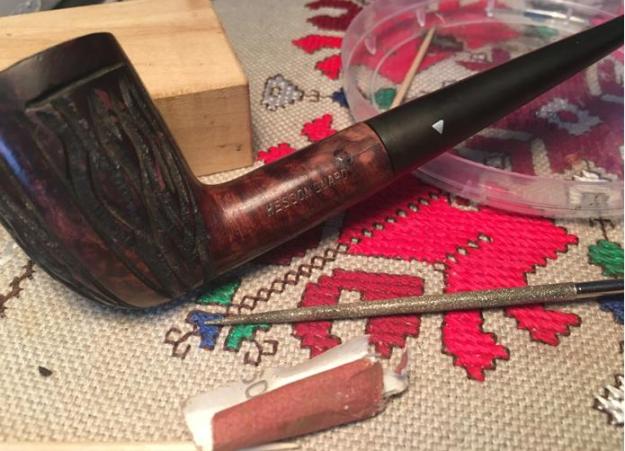
This pipe was gifted to me in 1980 while a seminary student.  I was Professor Freundt’s student assistant and I spent much time with him in his office which was a virtual jungle of books, papers and journals – heaped in piles here and there yet the professor knew where to find the most obscure minutia.  Added to the smells of old books and leather covers were the tobacco and smoke that regularly provided an upper layer haze in his work space.  The Professor introduced me to the art and enjoyment of smoking pipes – now some 36 years ago.  I was young and eager, soaking in the ambiance of academia at a post-graduate level and pipes I discovered, were very comfortable partners in this environment.  Professor Freundt gave me the Hesson Guard, showed me how to pack its first bowl in my hands, and I smoked it, adding my offerings to the perpetual haze.  After these days, pipe smoking was put aside until last fall when Steve reintroduced me to it.  At this point, 3 pipes made up my collection: a corncob I also bought during those seminary days to use while fishing and duck hunting, a Willard I received after my grandfather’s passing (a future restoration), and the WDC Milano Hesson Guard that I had tucked away in drawers over the past three and a half decades.   Anxious to put a pipe back into service last fall, I grabbed the Hesson Guard, to clean it and do what I thought then were needed repairs….  I made a mess of the pipe – cracked the shank, reamed out the mortise so that the metal tenon was too loose – sloppy repair with super glue….  I’m anxious now to return to ‘The Professor’ (its given name) and try to make amends for the rough treatment he received last fall!

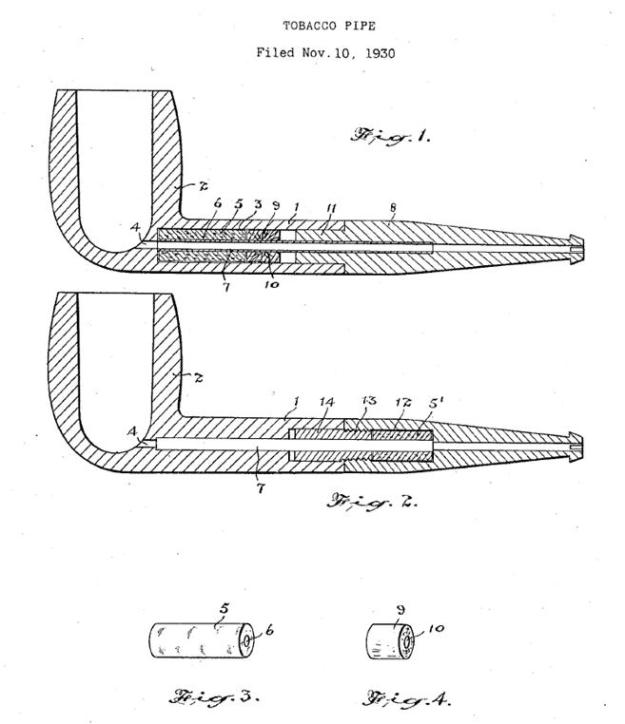
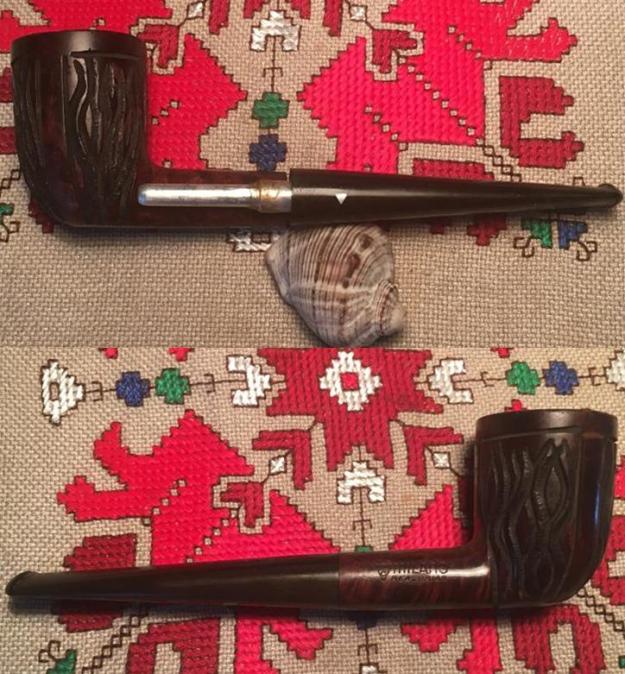
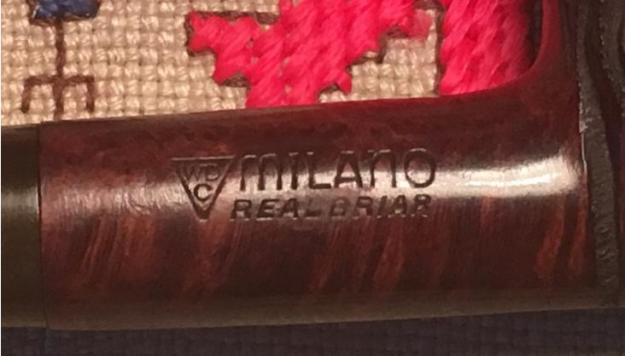
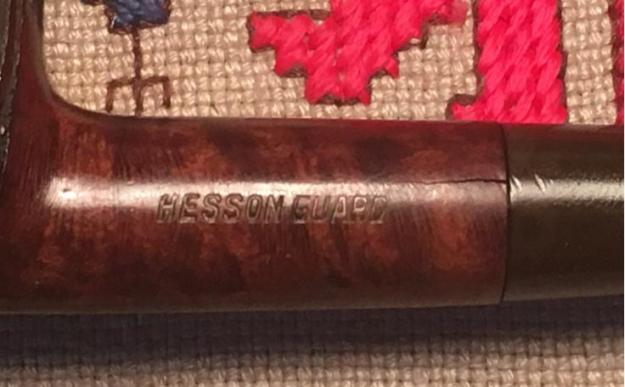
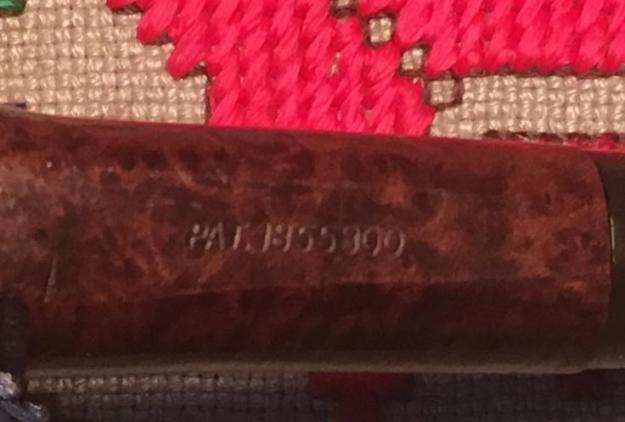
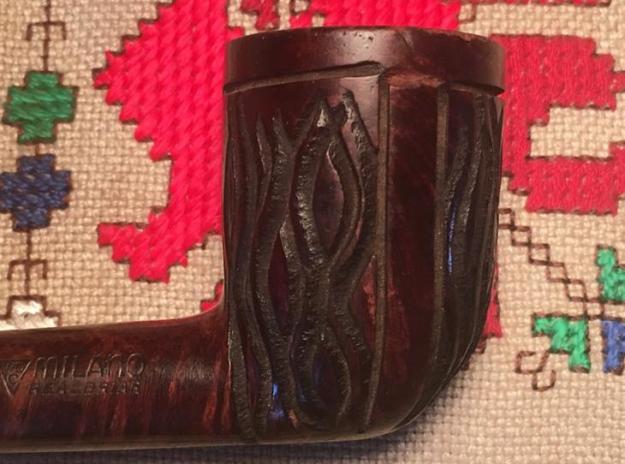
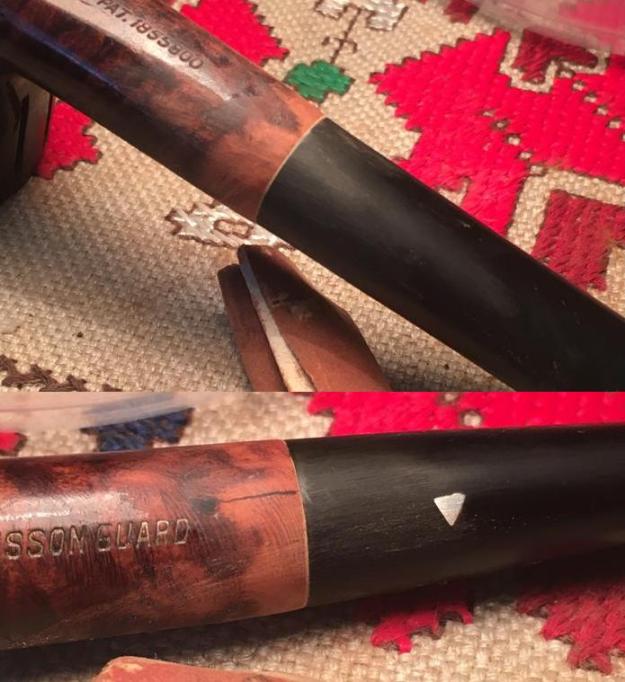
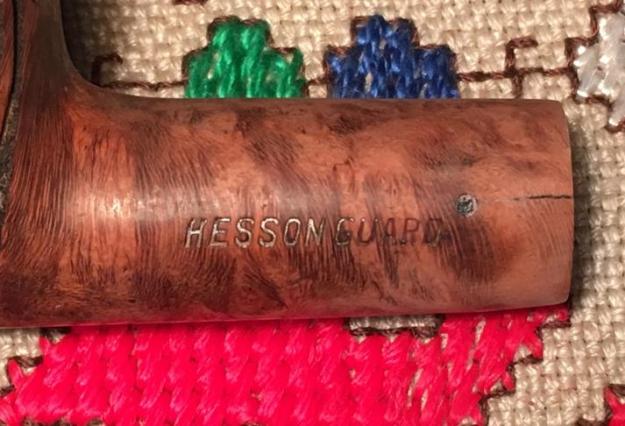
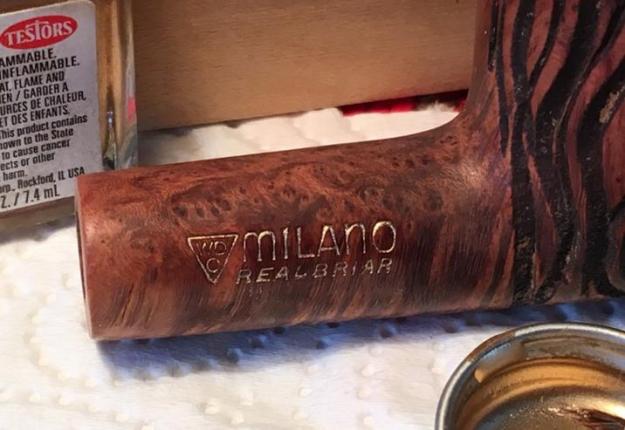
The right side of the shank is stamped with the well-known WDC inverted triangle next to Milano over Real Briar.  The left side holds Hesson Guard.  The bottom of shank had PAT. 1855800 which enabled me quickly zero in on the dating of the pipe.  The patent application was submitted by the inventor of the special internals, William W. Hesson, in 1930 and granted two years later.  An excerpt from the patent documentation describes the essence of the design:

The principal object of the invention is to provide a pipe which will eliminate contamination of the natural aroma of the tobacco through noxious secretions and which will remain sweet and clean.  A further object is to devise a construction of pipe which will be simple and inexpensive to manufacture and which. will be devoid of pockets to harbor noxious elements.  The principal feature of the invention consists in the novel arrangement of a tubular resilient member surrounding and embracing a metal stem which extends from the pipe bowl to the mouth piece and forming a seal to prevent the seepage of moisture around the metal stem.

(https://www.google.bg/patents/US1855800?dq=1855800&hl=en&sa=X&ved=0ahUKEwibqa2KsOjNAhUFVBQKHZ1DAvMQ6AEIGjAA)

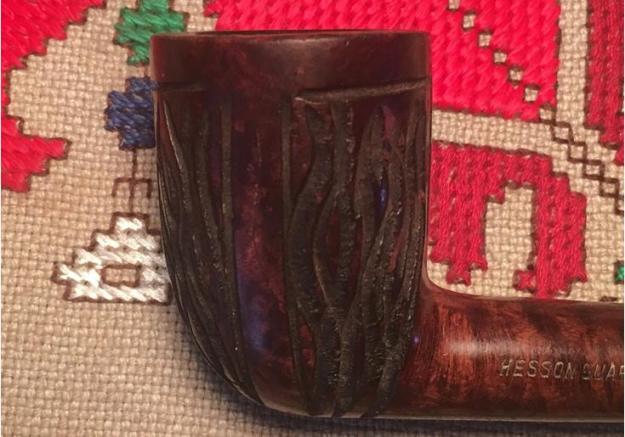
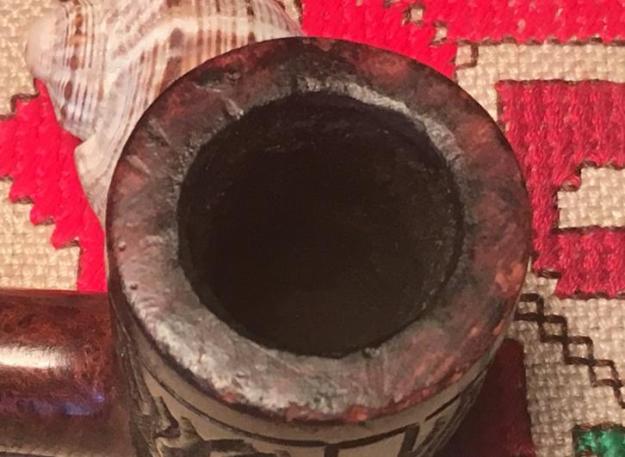
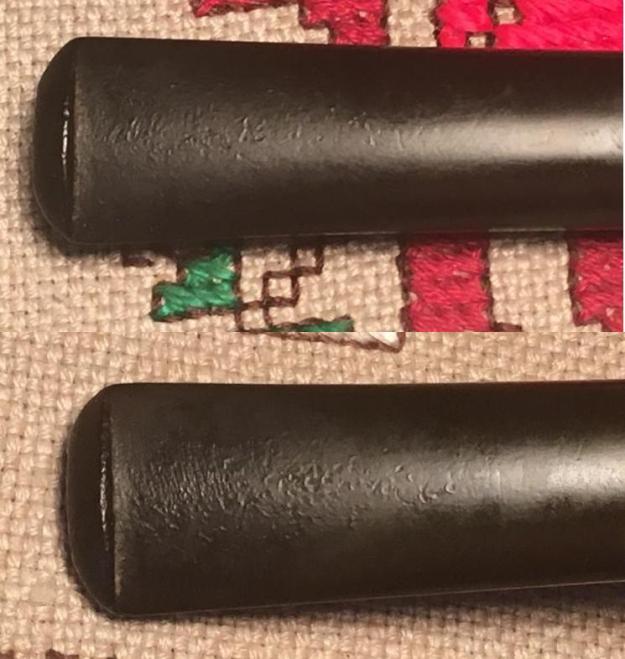
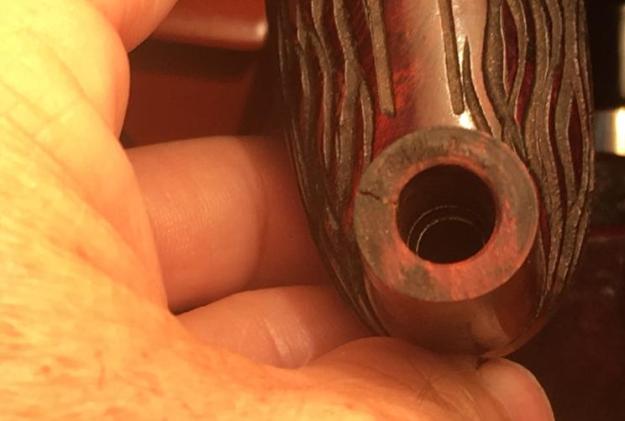
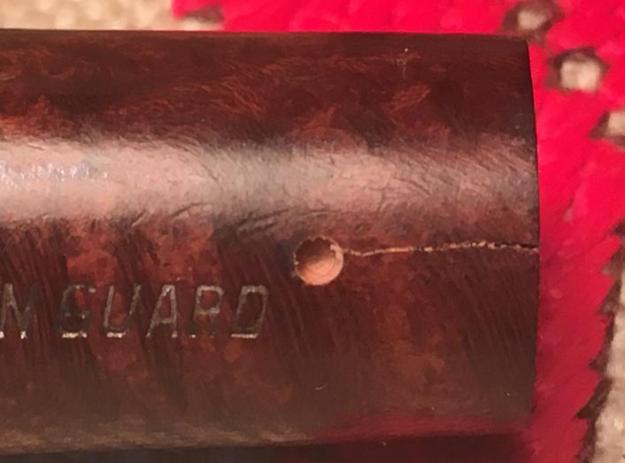
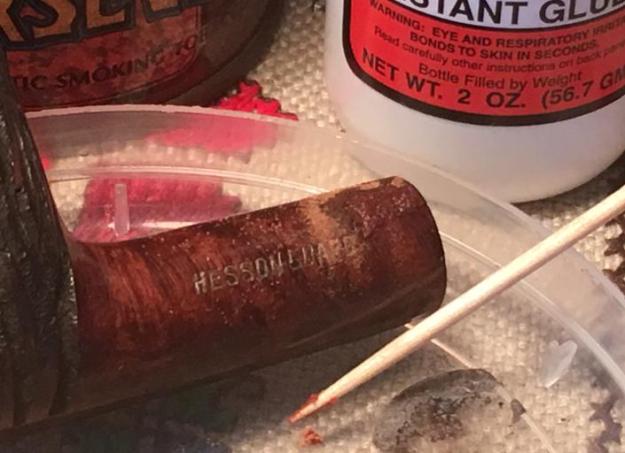
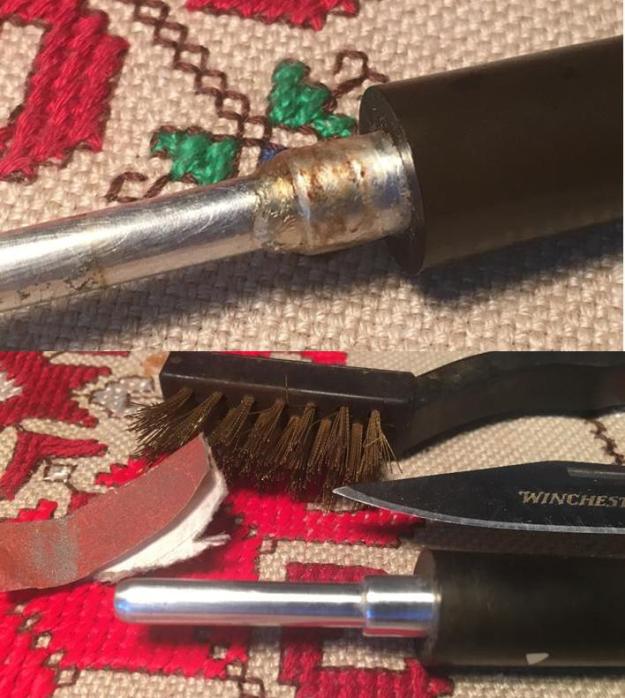
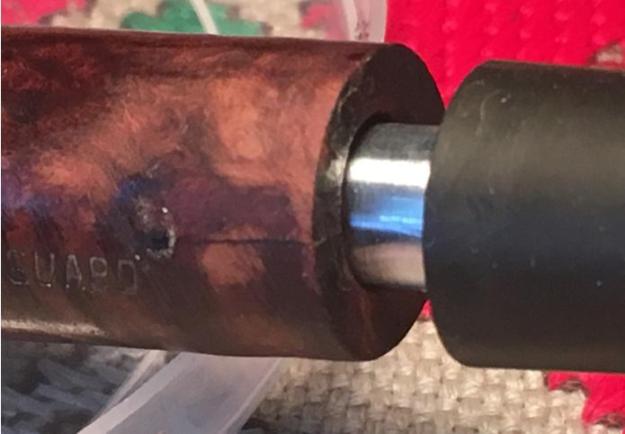
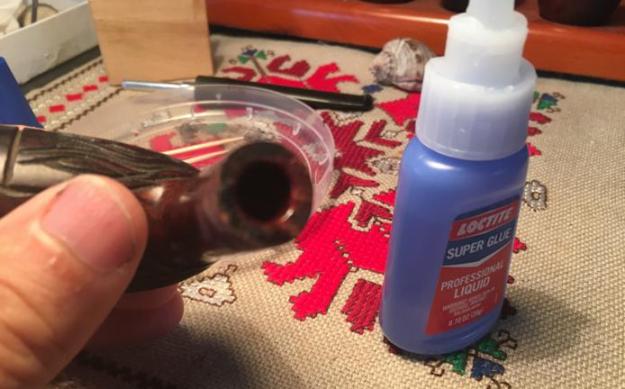
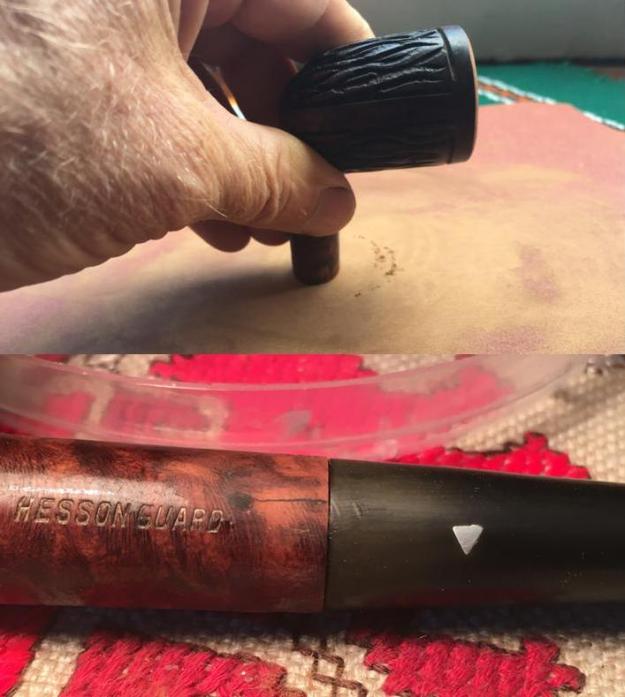
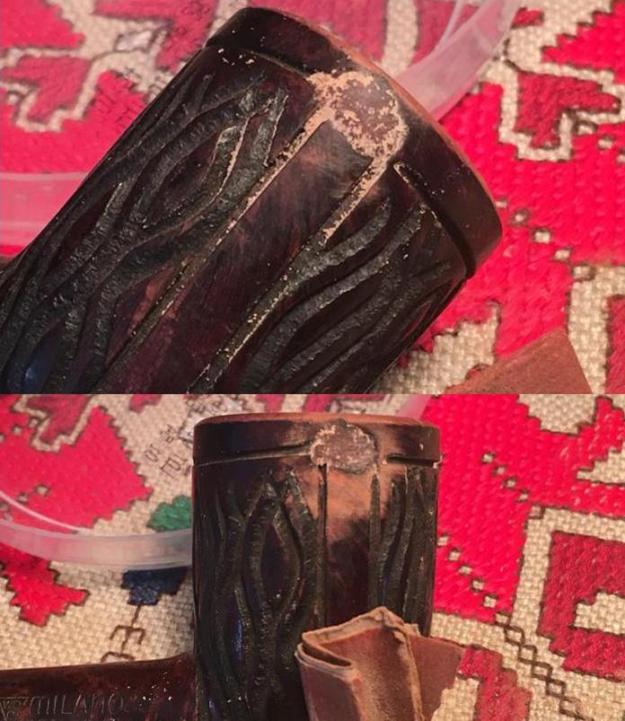
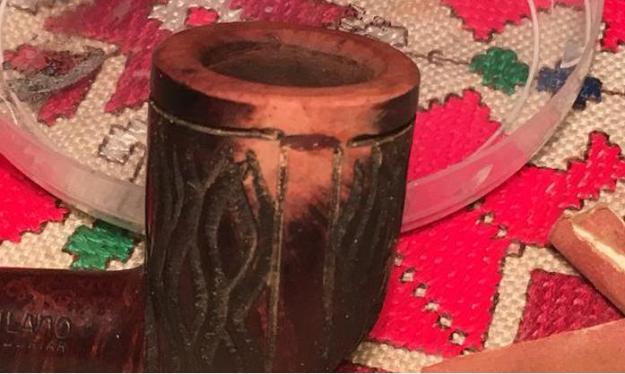
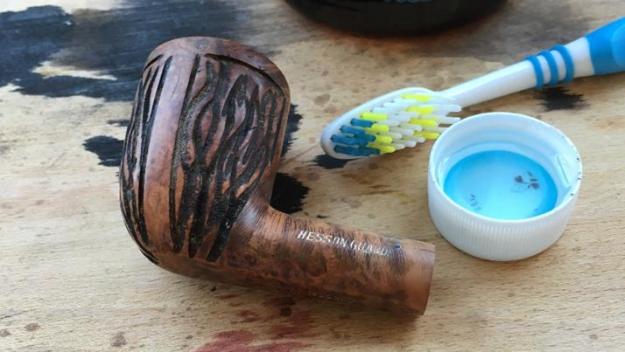
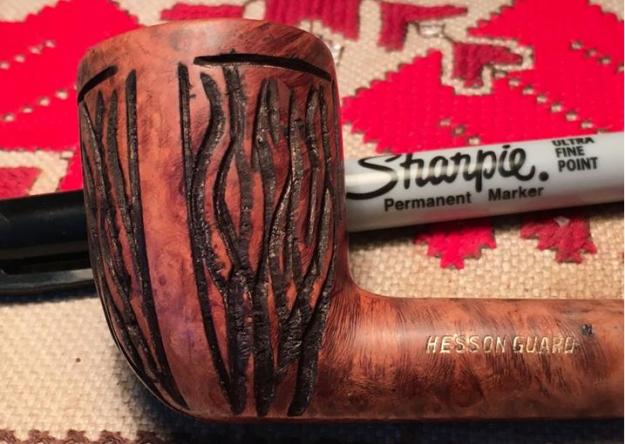
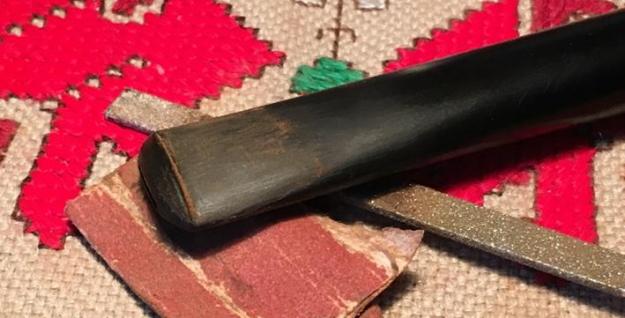
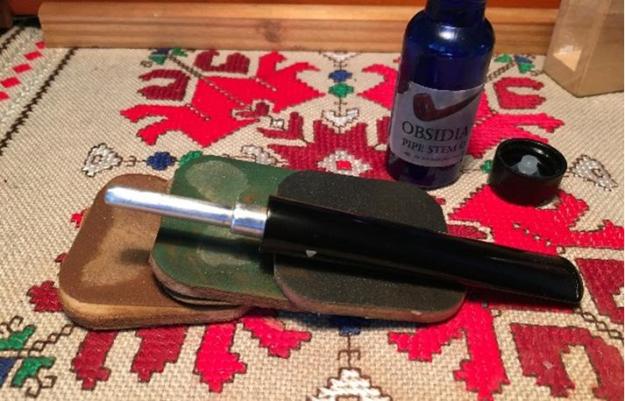
I was curious to compare my Hesson Guard with the patent diagram which essentially is a long metal tenon meeting up with a metal sleeve at the base of the bowl and shank junction.  This design, along with many other designs, was to eliminate the moisture build up, gurgle and gunk.  Figure 1 (below) is followed by my overlay comparison picture – the tube inserts quite a way according to the 1930 design.  Following are pictures telling the current story of The Professor:H1 H2 H3 H4 H5 H6 H7 H8 H9 H10 H11The pipe is attractive and has a good feel in my hand.  The free-hand sculpting on the bowl gives the appearance of flames rising and is showcased in 3 paneled murals around the bowl. I notice that one of the panel dividers has been damaged at the top by cutting the briar.  It looks like they were seeking to connect the panels – not sure.  That will need to be filled in.  The rim will also need some gentle repair to what appears to be nicks created by wear and tear.  The cracked shank will need repair to keep it from growing and cleaning up the metal tenon and creating a good fit with the mortise might be a challenge.  The bit has very mild tooth chatter.  The last picture above captures not only the crack in the shank but the metal sleeve deep in the mortise that the chamfered tube/tenon docks with to create a dryer smoke – according to the patent information.  Before any cosmetic restoration takes place I first must deal with the major issues of the shank crack repair and the tenon/mortise fit.  I start the crack repair by drilling a small hole at the end of the crack to keep the crack from creeping up the shank.  I use my Dremel tool and a 1.5mm drill bit to make the hole. I utilize a magnifying glass to trace the crack which had become a ‘hairline’. I’m careful not to drill too far and breach the mortise wall.  Next time, I want to use a 1mm drill bit to leave less of a footprint.  Next, after inserting the tenon into the mortise to expand the crack area for glue penetration, I create a mixture of briar dust and CA Instant Glue filling the hole and running a line of glue along the crack.  I then sprinkle briar dust over the entire area and wait to dry.  The timing worked out well as my wife just called me for lunch!  After lunch, I work on cleaning up the tenon removing the old superglue with fingernails, Winchester knife, brass brush and 240 grit sanding paper – back in pristine shape. H12 H13 H14Well, after about a week, I return to the Milano Hesson Guard after my wife and I take advantage of the summer opportunities at the Black Sea coast.  We enjoy some days at the beach near our favorite coastal fishing town, Sozopol. While at the beach, I thought about the Milano and how best to approach the overly loose tenon/mortise fit.  Instead of applying clear nail polish around the metal tenon, which is what I did before, I attempt to rebuild the mortise wall by applying a very gentle coat of superglue on the inner wall of the mortise, rotating it as I applied superglue to achieve, what I hope, will be an even texture around the mortise wall.  Amazingly, this seems to have worked!  After drying, I gently reach into the mortise to remove some superglue ‘bumps’ with a needle file and I use a tightly rolled piece of 240 sanding paper carefully to smooth things down.  I don’t want to inadvertently remove too much of the restored mortise wall! I also give the crack repair a light, strategic sanding with 240 grit paper, careful to guard the stampings. I refit the stem and to my relief, a snug fit was restored.H15 H16 H17With the stem refitting correctly and inserted, I return to the shank crack to finish sanding it to remove the excess superglue – I do this with stem in so as to not create unevenness between the mortise and stem shoulder.  Satisfied with the shank crack repair and rebuilding the mortise wall, I put the stem in an Oxyclean bath for a soak to soften up the moderate oxidation buildup. I move my attention to the bowl to ream the mild cake down to the briar and then move to rim repairs and then to the panel repair.  I want to have all these completed before looking at the general stummel cleanup and refinishing. I move out to the 10th floor balcony adjoining my bedroom work station with Pipnet reaming kit to minimize the airborne cake soot – maximizing happy wife status!  I started with the smallest reaming blade moving to use 3 of the 4 blades available to remove the moderate cake in the bowl.  I finished the reaming by employing 120 grit paper on the chamber wall to remove remaining cake and smoothing the wall.  I took a close up of the chamber and rim to show progress and to get a good idea of how to approach the rim repair.  Inspecting the rim, I place a drop of superglue on one particular ‘dent’ that reached significantly down the external side of the bowl.  I’m hoping that this small fill will enable me not needing to take as much off during the bowl topping to repair the rim.H18 H19 H20 H21After the superglue sets up on the rim dent fill, I top the bowl using 240 grit sanding paper on top of a chopping block.  Since the day is beautiful, I again move to the 10th floor balcony to do the work. With the rim having no burns, I expect the surface to plane off evenly without pulls toward softer burned areas of the rim.  I rotate in a clockwise circular even motion and take off only as much as needed to remove the damaged area of the rim.  As I like to do, I create a small bevel on the inner wall of the rim to give a more finished, classier look.  I use 120 grit paper to form the initial bevel angle followed by 240.  I also decide to give the outer rim edge a slight sanding to round off the lip which seems to be consistent with the original Milano design.  Again, I make the initial cut on the lip with 120 grit paper and finish off with 240.  I have grown to appreciate more the rim presentation in finished pipes.  To me, the rim, it’s nuances, are the first thing the eye is drawn to when looking at a pipe – much like the first thing one sees when looking a person are the eyes, then one follows by taking in the general appearances.  The following pictures show the Milano’s rim progress.H22 H23 H24 H25You can see in the immediate preceding picture the rim superglue fill spot at the 11 o’clock position of the rim and the ongoing panel repair just below it (to the left in the picture).  Before moving to the stummel finishing, I now need to resolve the panel repair. I realize at this point with all the stummel repairs (cracked shank, topping and panel line), I will be removing the finish and refinishing the surface in order to achieve an even briar tone appearance.  Now, continue to ‘heal’ the panel cut – earlier I applied superglue to it to build it up.  I take a close up of the panel as it is now in order to know what I have. In order to blend more, I rough up the original superglue with a Dremel stone sander instrument. I apply on top of it a thick mixture of superglue and briar dust to form the restored surface that will join the side briar panel with the solid ring around the top of the bowl. I use toothpicks to mix, spread and tamp the mixture into place. I want this briar dust putty to setup well so I put the stummel aside for the time and turn to the stem which has been soaking in Oxyclean.H26 H27 H28The Oxyclean bath did the job of bringing the oxidation to the stem surface. I attack this initial layer with 000 steel wool and then use 240 grit paper to address the minor tooth chatter – I take pictures of bit top and bottom before starting to show progress. In order to have a good match between the mortise and the stem, I want to eyeball what the fit looks like before I proceed further.  As I suspected, with all the superglue applied to the mortise area, the fit between mortise end and stem was not flush.  I took the stummel back to the topping board and gently rotated the shank end on the board to regain a flush docking between stummel and stem.  After a few rotation cycles and testings to eyeball things, I am satisfied.H29 H30 H31 H32 H33 H34Before starting the micromesh cycles for the stem finishing, I need to remove the lip that I discovered with the shank end over the stem.  With the topping of the shank end, I enlarged the circumference of the end just a bit so that it was a bit larger than the circumference of the stem shoulder – primarily on the lower side of the shank.  I use 240 grit paper to even out the difference between the shank and stem – leaving the stem in place to assure a good, smooth transition! I am careful to use my thumb to cover and protect the nomenclature as I move around the shank with the sanding paper.H35Now to the panel repair below the rim. Using 240 grit sanding paper I bring the hardened superglue and briar dust mixture down to the bowl surface careful to maintain a rounded surface and not to flatten out the area of sanding focus.  The pictures show the progress.H36Dal

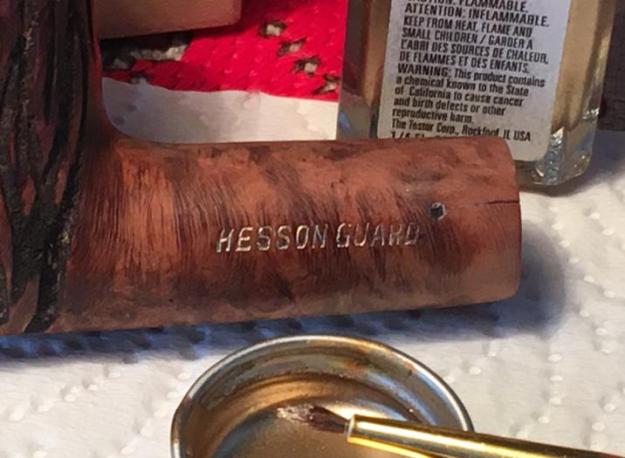
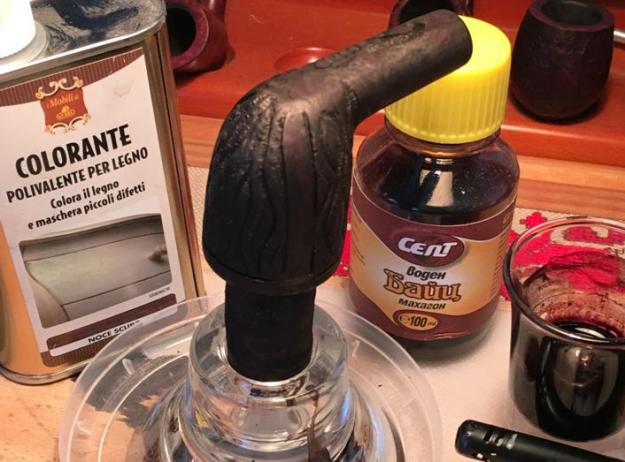
I like the panel patch and it will blend with a darker stain.  On a roll, I launch into the clean-up of the stummel and especially the ‘flame murals’ which are filled with grit and dust.  I use a tooth brush with Murphy’s Wood Soap undiluted and work over the entire stummel with special focus in the fire sculpting to remove the surface finish.  I follow this with rubbing down the stummel using cotton pads and tooth brush with acetone to remove the finish deep in the grain of the briar.  I finish my clean-up of the surface by picking the carved crevices with a dental tool.  Using micromesh sanding pads, I sand the high points of the stummel.  Using 1500-2400 I wet sand.  Following, 3200-4000 dry sand and finishing dry-sanding with 6000-12000.  The pictures show the progress – I’m liking the briar grain the micromesh process is bringing out.H38 H39 H40 H41 H42At this point, I have two questions about how to proceed before staining the stummel.  First, I need to clean out the ‘flame’ sculpting and use a black fine tipped permanent marker to darken the flames to give more contrast after the stain is applied.  The other question was how do I treat the stampings of the WDC Milano – Hesson Guard?  Do I protect it from the stain?  Do I cover them with Vaseline?  What? Upon closer inspection, I notice that the left side stamping, Hesson Guard, appeared to have gold left over in the ‘Hesson’ lettering – the rest having worn off (picture below) after the crack repair.  After a quick email to Steve, his input revealed that both sides would have originally born the gold lettering.  So, from my model kit (I’ve been involved in a project for several years building the USS Constitution sailing ship) I discover a bottle of Testors Gold Enamel Model Paint and my wife finds a small brush which I trim with my knife to create a more distinct point.  With Steve’s counsel stored in my mind, I applied the paint over the lettering and wiped off the excess.  To my relief and joy, the gold paint adhered to the crevices of the lettering and the overflow came off with the paper towel.  My first stamping restoration with paint worked well!  Steve also said that there was no need to worry about the new lettering during staining – that the gold paint would repel the stain.  Careful to avoid the new gold lettering, I clean the bowl with isopropyl using a tooth brush to get rid of the residue from the sanding and then I move to highlighting the flame sculpts to bring greater definition to the paneled murals in the finished pipe.  The pictures tell the story.   H43 H44 H45 H46 H47Time to stain and I decide to use a mixture of an alcohol-based Italian stain I found here in Bulgaria with a color description of dark nut.  I want this as the base, but I mix it with a mahogany color water based stain to bring out a slightly more redish tone in the briar.  I think the red will work with the flame sculpting motif and I think this will look good – but of course the briar does what it will with the hues!  After mixing the stains in the shot glass, I apply the mixture to the stummel mounted on the cork and candle stick with cotton balls making sure to cover everything and getting a good thick coverage.  After applying stain, I use the butane lighter to flame the stain.  With the mixture that I made, the alcohol content was too low to ‘flame’ so I evenly moved the lighter flame across the surface to evaporate the alcohol setting the dye in the grain of the briar.  I repeated the process again and set the stummel aside to dry.H48With the stummel put aside, I turn again to the stem.  I re-inspect the button area after the earlier sanding to remove the teeth chatter.  I decide that the button needed a little more attention.  I use 240 grit sanding paper and a needle file to fine-tune the shape of the button before starting on the micromesh cycles.  I wet-sand the stem using 1500-2400 and complete the cycle by applying Obsidian Oil.  While still wet from the oil I continue to dry sand with 3200-4000 micromesh pads, again concluding the cycle by applying Obsidian Oil. The final cycle, 6000-12000 is used and a final coat of Obsidian Oil and I put the stem aside to dry.  I love watching the shine of the stem progressively make it to the surface getting that final wet, reflective look in the stem.  Nice!  The stem pops.  The pictures capture the progress!H49 H50 H51 H52For me, beginning the process of finishing the stummel after the staining dries, is like opening a Christmas present.  The anticipation is to see what actually is under the crust of flamed stain and what the briar grain will reveal.  With the Dremel tool, I begin to remove the ‘wrapping’ using a felt wheel.  Also with a felt wheel I polish beginning with Tripoli and then move to Blue Diamond.  I focus on bringing out the contrast of briar ‘flames’ showcased in the three panels.  I switch to a cotton cloth wheel and apply carnauba wax to both stummel and stem.  After several coats of carnauba, I complete the job by giving the pipe a clean cotton cloth wheel buff followed by a rigorous buffing with a micro-fiber cloth to bring out the deep tones of the briar.H53 H54I’m pleased with the revitalization of ‘The Professor’, WDC Milano Hesson Guard.  I think Professor Freundt, if he were alive today to comment, would agree.  The rich dark tones of the briar, with the hints of deep reds, reminds me of the myriads of leather bindings and books that filled his hazy office.  I’m pleased with the results.  Thanks for joining me!H55 H56 H57 H58 H59 H60 H61 H62


Restoring a Fieldstub Bullmoose for a Friend


Blog by Steve Laug

This is the second pipe that my friend dropped by for a restoration and cleaning. The first was the Tom Howard that I wrote about recently https://rebornpipes.com/2016/07/09/restoring-a-tom-howard-rhodesian-scoop/. This one is a Fieldstub imported briar. The most I can find out about it is that is American made in the 30-40s by and unknown factory. It shares a lot of features with pipes made by Tracy Mincer and the Custom-Bilt line but I can find no link. This one was dirty and tired looking. The rim had a lot of darkening and the bowl had a cake. The grooves on the rim were dirty and darkened. The stem was oxidized and had tooth marks at the button on both the top and underside of the stem. The pipe is stamped FIELDSTUB over Imported Briar on the left side of the shank.F1 F2I took a few close-up photos of the rim and the stem. The first shows the buildup on the rim top and the cake in the bowl. The second and third show the stem with the tooth marks right next to the button edge.F3 F4I scrubbed the bowl with a tooth brush and Murphy’s Oil Soap, used a brass bristle brush on the rim top and rinsed it under running water. I dried it off and took these photos.F5 F6I scrubbed the top of the rim to remove the darkening using acetone and cotton pads. I was able to remove most of the darkening. I wiped down the rest of the bowl with acetone as well to remove the wax and any debris that remained.F7 f8I cleaned up the inner edge of the bowl with a folded piece of 220 grit sandpaper to smooth out the nicks and dings on the edge.F9I sanded the stem with 220 grit sandpaper to remove the oxidation and cleaned the airway with pipe cleaners, cotton swabs and alcohol.F10I used alcohol and wiped off the damaged areas next to the underside of the button where the worst of the tooth marks remained after sanding. I filled in the tooth marks with black super glue and sprayed it with an accelerator to speed the drying time. F11I cleaned up the edge of the button and smoothed out the repair with a needle file. I wanted a clean, sharp edge on the button.F12I sanded the patch with 220 grit sandpaper to blend it into the surface of the stem and remove the file marks.F13I stuffed a cotton ball into the bowl and filled it with alcohol to pull the tars and oils out of the bowl and shank. I let it sit for several hours while I worked on the stem.F14I took the cotton ball out of the bowl and cleaned out the shank and bowl with pipe cleaners and cotton swabs to clean up the last of the alcohol. I let the bowl dry and turned to the stem. I wet sanded the stem with 1500-2400 grit micromesh sanding pads and rubbed it down with Obsidian Oil. I dry sanded with 3200-4000 grit pads and gave it another coat of oil. I finished sanding it with 6000-12000 grit pads, gave it a final rubdown of Obsidian Oil and set it aside to dry.F15 F16 F17I buffed the pipe with Blue Diamond on the buffing wheel and gave the stem several coats of carnauba wax. I hand waxed the bowl with Conservator’s Wax and buffed the pipe with a clean buffing pad to raise the shine. I hand buffed the pipe with a microfibre cloth. This one joins the Tom Howard as they wait for Theo to stop by and pick them both up. They are cleaned, polished and smelling great! If you read this blog, they are both ready for you Theo. Thanks for looking.F18 F19 F20 F21 F22 F23 F24

A Clean and Restore of a Viggo Nielsen Handmade Freehand


Blog by Steve Laug

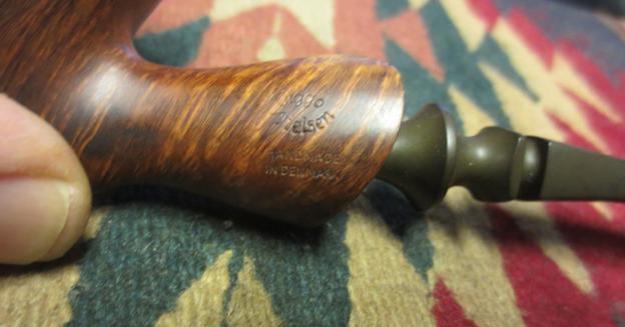
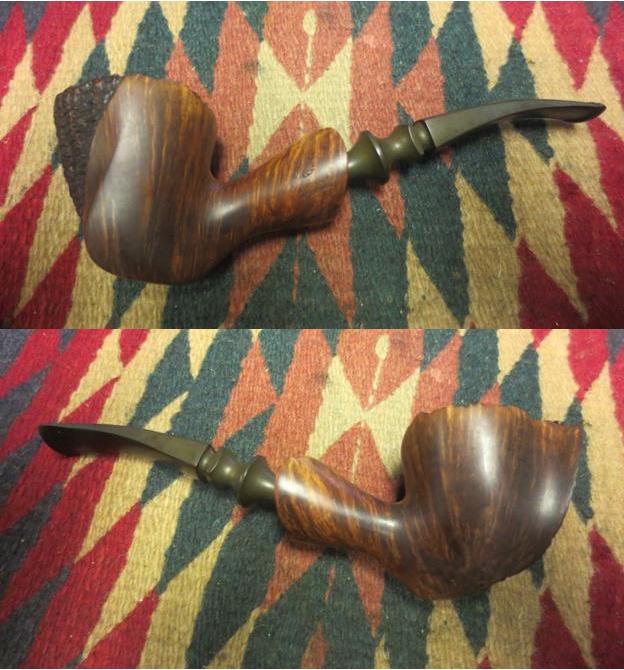
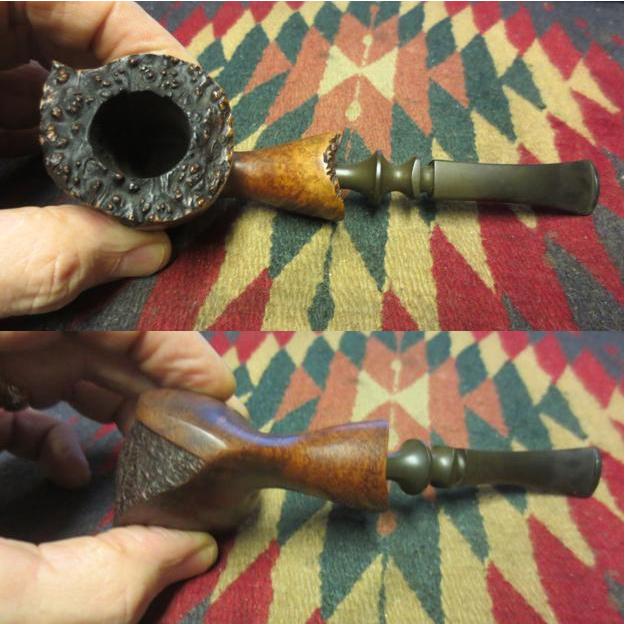
My brother Jeff is developing quite an eye for beautiful pipes. He came across this freehand on eBay and sent me the photos. He bid on it and soon received it in the mail. It is a stunning piece that Viggo made in such a way that the shape absolutely maximizes the grain. It is stamped with Viggo’s normal stamp Viggo Nielsen in a circle over Handmade in Denmark on the left side of the shank.V1Its finish is a combination of smooth and what looks like sandblast but I am not sure it is not just a well done rustication made to look that way. The colours of the stains are a rich medium brown on the smooth portions that accentuate the grain. The colour on the rustication shows both a medium and dark brown stain that is repeated on the plateau on the rim of the pipe and small bit of plateau that peeks out on the top edge of the shank. The stem is a custom cut square piece of vulcanite that is carved with a square ring and a round one just before the tapered tenon.V2 V3 V4The finish was dirty with thick wax and grime from years of use. The bowl had a light cake. The rim edges were in perfect condition and the plateau top look new under the grime. The rustication/blast on the front of the bowl also looked to be in great shape. There were no dings or nicks in the finish. The stem was oxidized and had tooth marks on the top and bottom sides near the button.

V5I turned to Pipedia to learn about Viggo Nielsen. I had memory about him being somehow connected to Kai Nielsen but I was not sure of the relationship of the two. In Pipedia I learned that Viggo, now deceased, was born in 1927. I believe that during World War II he worked for Stanwell making pipes out of birch due to a shortage of briar. In 1948 he opened the Bari pipe factory and in 1951 began to make briar pipes. He carved both classic and freehand pipes.

In 1978 Bari was sold to a company in Germany and he and his two sons, Jorgen and Kai started making Faaborg pipes. Now I knew the connection between the two names that I remembered. https://pipedia.org/wiki/Nielsen,_Viggo

I scrubbed the surface of the bowl with Murphy’s Oil Soap on cotton pads to remove the old wax and accumulated grime. Once the pipe was cleaned I rinsed it under running water and dried it off. The grain just stood out and showed how well Viggo laid out the shape to the grain.V6 V7 I cleaned out the internals of the mortise and airways in the shank and the stem with pipe cleaners, cotton swabs and alcohol until the pipe was clean.V8I reamed the light cake back to bare briar with a Savinelli Pipe Knife – a tool that I am using more and more often since I purchased it. It works exceptionally well to pare back light cake and clean up remnants in a bowl after I have used my other reamers.V9The oxidation on the stem was stubborn so I soaked it in an Oxyclean solution for a day and a half to soften the oxidation. After I removed it from the solution I scrubbed it dry with a coarse towel to remove as much of the softened oxidation as possible. I sanded the stem with 220 grit sandpaper to remove the tooth marks on both the top and bottom sides at the button. There were tooth deep tooth marks on the top edge of the button that needed attention. I cleaned off the stem surface and then used clear super glue to repair the two deep tooth marks. I sanded them back to the surface with 220 grit sandpaper and later with the micromesh sanding pads.V10I wet sanded the stem with 1500-2400 grit micromesh sanding pads. I rubbed the stem down with Obsidian Oil. In the photo below you can still see the battle I am having with the oxidation on the turned stem. It was a bear to get it off.V11I repeated sanding with 220 grit sandpaper and repeated the wet sanding with the 1500-2400 grit pads. I was beginning to conquer the issue. I dry sanded the stem with 3200-4000 grit pads and gave it another coat of oil. I finished sanding with 6000-12000 grit pads to bring out the shine and gave it a final coat of Obsidian Oil. I set the stem aside to dry.V12 V13I buffed the pipe with Blue Diamond and worked on the tight areas on the stem – the grooves in the stem. I buffed the bowl with Blue Diamond – lightly on the rusticated/blast and plateau portions and more heavily on the smooth portions. I gave the bowl and stem multiple coats of carnauba wax and buffed the pipe with a clean buffing pad. I hand buffed it with a microfibre cloth to finish polishing the finish. I have found that this last step adds some depth to the shine. I am pleased with the finished look of the pipe. Thanks for looking.V14 V15 V16 V17 V18 V19 V20

A Beautifully Grained Jobey Designer Cauldron Lay Under Thick Varnish


Blog by Steve Laug

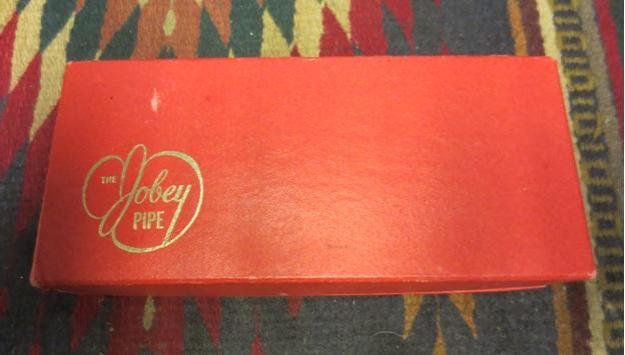
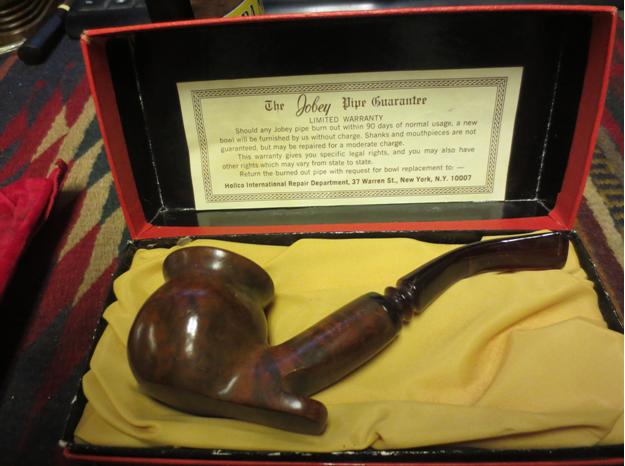
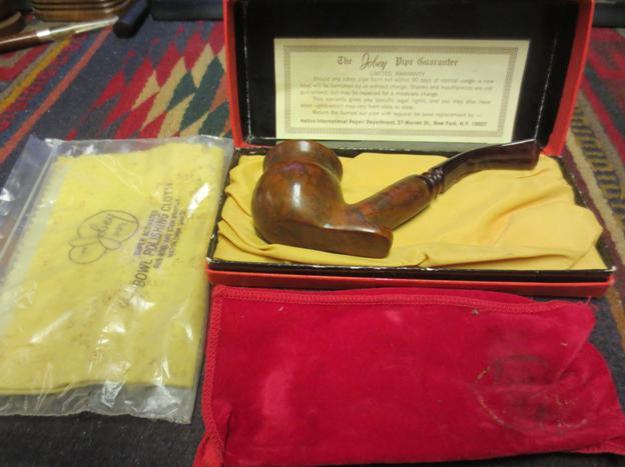
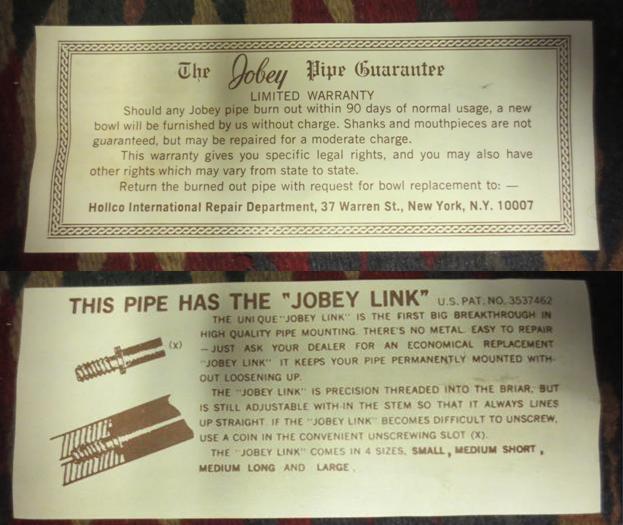
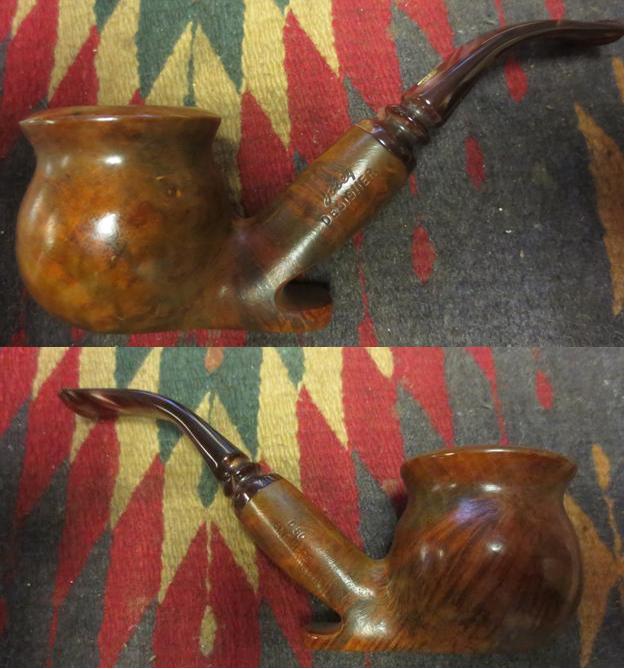
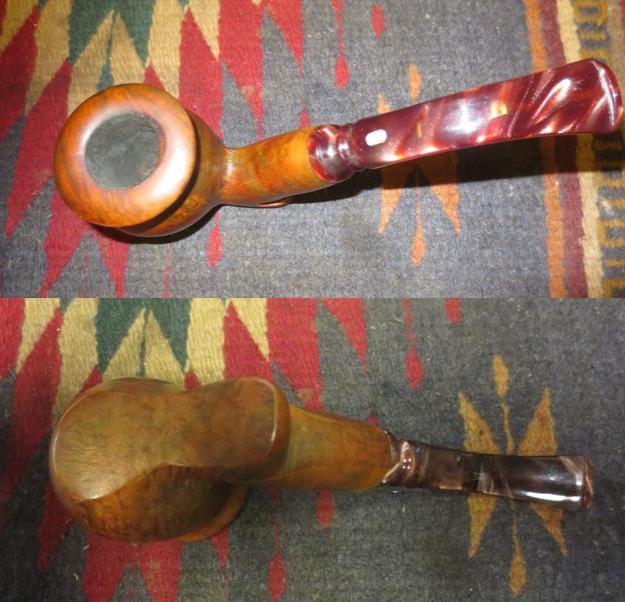
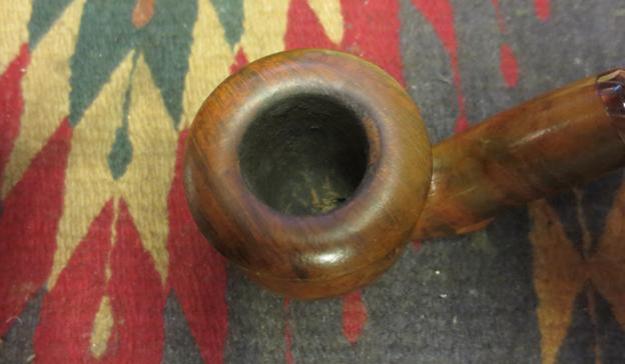
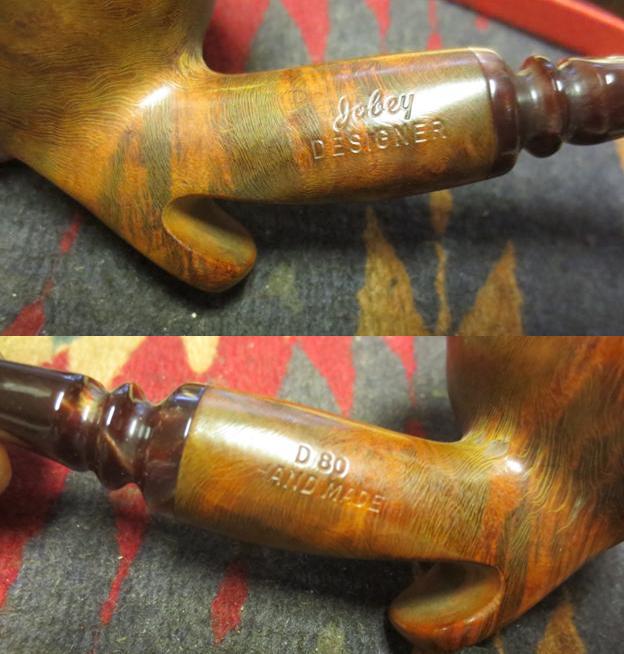
When I was visiting in Idaho my brother Jeff pulled out this Jobey box and handed it to me to look at. I had no idea what to expect once I opened the box. I have cleaned up a lot of Jobey pipes over the years and have really liked the rusticated Jobey Stromboli pipes with their colourful stems and deep rough surfaces. I have seen others that were pretty but nothing spectacular. I turned the box over in my hands to see if there were any hints on the outside what was hidden under the lid but there was nothing – just the classic red box with the Jobey Pipe logo on the lid.Jo1I opened the box to have a look and was surprised. What was inside was actually a really nice looking pipe at first glance. It was stamped on the left side of the shank Jobey over DESIGNER and on the right side of the shank D80 over HANDMADE. The stem was Lucite with a variety of brown tones that ran at an angle across the stem. The finish looked funny to me in that for a handmade pipe it was rough textured. I expected it to be silky smooth but it was rough to the touch and there were brush marks all over the surface. It looked to me like someone had brushed on a thick coat of varnish to give the pipe a perma-shine. The box also had the red pipe sleeve and a Jobey Polishing Cloth in the lid.Jo2Inside the polishing cloth package there was also a cloth for treating the stem. Both were Jobey specialty products. The Jobey sock is slightly worn.Jo3I took the leaflet out of the top of the box to have a look and it was a fun read. It reads: “The Jobey Pipe Guarantee, Limited Warranty. Should any Jobey pipe burn out within 90 days of normal usage, a new bowl will be furnished by us without charge. Shanks and mouthpieces are not guaranteed, but may be repaired for a moderate charge. This warranty gives you specific legal rights and you may also have other rights which may vary from state to state. Return the burned out bowl with a request for bowl replacement to: – Hollco International Repair Department, 37 Warren St., New York, NY 10007.”

The other side reads: “This Pipe has the “Jobey Link” U.S. Pat.No. 3537462. The unique “Jobey Link” is the first big breakthrough in high quality pipe mounting. There is no metal. Easy to repair – just ask your dealer for an economical replacement “Jobey Link” it keeps your pipe permanently mounted without loosening up. The “Jobey Link” is precision threaded into the briar, but is still adjustable within the stem so that it always lines up straight. If the “Jobey Link” becomes difficult to unscrew use a coin in the convenient unscrewing slot (X). The “Jobey Link” comes in 4 sizes, small, medium short, medium long and large.”Jo4I took some photos of the pipe to show how the varnish coat had muddied the finish and hid the grain as well as hopefully captured some of the brush strokes. Under the varnish on the rim on the back inner edge of the bowl there was also some tar that had been painted over.Jo5 Jo6I took some close-up photos of the rim and the stamping on the shank. In those photos you can clearly see the tar on the rim, the clear stamping on the shank and the brush strokes of the varnish on the pipe.Jo7 Jo8I was hopeful that the shiny coat on the bowl was not urethane but merely varnish. The muddiness of the finish and the way it felt in the hand made me hopeful. I scrubbed the bowl with acetone on cotton pads and was amazed at how easily it came off. I was really happy that I was not dealing with a plastic coat. I scrubbed it repeatedly until the grain clearly showed.Jo9 Jo10The bowl was still rough under the varnish so I wet sanded it with 1500-2400 grit micromesh sanding pads.Jo11 Jo12 Jo13I scrubbed the internals of the mortise and airway in the shank to clean out any build up in the threads and airway. I used cotton swabs and alcohol and found that it was really quite clean. I remove the Jobey Link from the end of the stem and cleaned out the airway in the link and the stem with cotton swabs, pipe cleaners and alcohol.Jo14I threaded the Jobey Link into the end of the shank and set it then pushed the stem in place on the other end of the link.Jo15I reamed the bowl back to bare briar with the Savinelli Pipe Knife.Jo16I wet sanded the Lucite stem with 1500-2400 grit micromesh sanding pads and wiped it down with a cotton pad. I sanded 3200-4000 and wiped it down again. I finished sanding it with 6000-12000 grit pads to finish polishing it.Jo17 Jo18 Jo19I gave the bowl a light coat of olive oil and then buffed it and the stem with Blue Diamond. I gave the bowl and stem multiple coats of carnauba wax and buffed it with a clean buffing pad. I hand buffed it with a microfibre cloth to deepen the shine. The finished pipe is shown in the photos below. Personally I have never seen a Jobey quite like this one. The carver who did the work captured the lay of the grain extremely well with it flowing up the shank. The new oil and wax finish really went well with the brown striated Lucite stem. Thanks for looking.Jo20 Jo21 Jo22 Jo23 Jo24 Jo25 Jo26 Jo27

The Scintillating Antique KB&B Redmanol Pipe


Guest Blog by Robert M. Boughton

Member, International Society of Codgers
Member, North American Society of Pipe Collectors
http://www.naspc.org
http://about.me/boughtonrobert
Photos © the Author except as noted

When life was like a summer day,
And I was under twenty,
Three loves were scattered in my way –
And three at once are plenty.
Three hearts, if offered him with grace,
One thinks not of refusing.
The task in this special case
Was only that of choosing.
I knew not which to make my pet –
My pipe, cigar or cigarette!

— Henry S. Leigh (1837-1883), British writer, playwright and lesser poet, “My Three Loves,” 1875

INTRODUCTION

As a writer, I make it a habit to look words up in the dictionary before committing to print, even when I am confident they are the best to convey my true messages.  In the process, I have often been surprised to learn how many words come nowhere close to their common usage.  I have stopped using fantastic (related to a fantasy or other such literary, delusional or wishful thinking, when I want to suggest excellent; I’ve dropped mesmerizing (named for the Australian physician/showman F.A. Mesmer, which deals with the alleged ability to place someone in a trance so deep the subject cannot feel pain, as opposed to something considered fascinating, and of course I have my pet peeve: unique, or existing as one, sole, solitary, alone.  Therefore, there can be no higher degree than unique, such as more, very or, God help us, totally unique, dude.  Thomas Jefferson’s unique literary and diplomatic exception to the same rule applied to another word, in penning the “Declaration of Independence” and referring to a more perfect Union, was a brilliant misuse of the language directed to good old King George V, whom the masterful wordsmith, diplomat and statesman knew would not miss the Colonial revolutionary’s attempt to play nice.

Somewhat of a language purist, therefore, I was disappointed upon checking the past participial adjective scintillating in the OED.  I hoped to find a meaning with common uses I have heard indicating something more alluring in a sensuous sense.  I suffer from chronic migraines and was struck by the sole usage referenced, to scintillating scotoma, the technical name for auras we who live with the often blinding, nauseating, debilitating torture of these attacks call the event that precedes the onset of the pure anguish that can last 12 hours, 24 or for days before running out of air, if you will, burning out (or more descriptive of their quality, terminating with a thermonuclear-like reaction) – and then returning, as they come in cycles of three or so for me.  Thanks to my dear Dad, however, who taught me the value of a good double meaning in any title, I moved to the verb scintillate and found more general references to sparks, flecks, twinkles and flashes of light, without the negative but illustrative connection of scintillating scotoma.

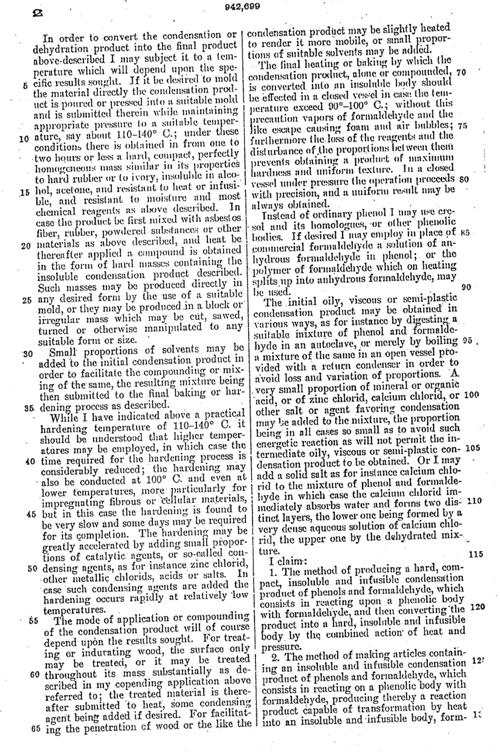
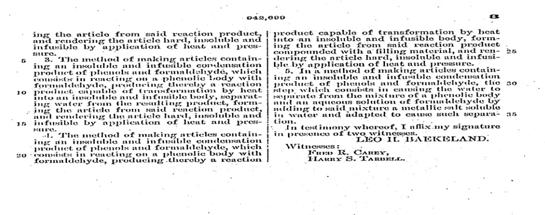
The story behind Bakelite and two of its competitors, and the Machiavellian way the three in time merged into a single Bakelite incarnation, is one for the annals of business law.  The basic original resin used to make Bakelite, a phenol formaldehyde based synthesis, was patented as such in 1900 by Leo H. Baekeland, a Belgian-American chemist.  Baekeland’s synthetic plastic, the first formulated in the world, was named in honor of its inventor and began production in 1907.   See below for the 1900 patent.

The first of many Bakelite satellite companies worldwide, the Bakelite Gessellschaft gmbH, was founded in Berlin in 1910 by Baekeland and two German companies.  Late the same year, the General Bakelite Co. was established in the U.S. by Baekeland.

Two independent chemical research and production companies in the same time period, Redmanol Chemical Co. founded by Lawrence V. Redman after whom the harder, more durable and amber-colored synthetic was called, and the Condensite Co. established by A.J. Aylesworth, developed and sold their products which included substantial differences from Bakelite although they employed the same heat process.  The hard, durable synthetic plastic redmanol was called thus after its developer and is made from the action of formin on carbolic acid.  On the other hand, condensite is formed from the action of chlorine on naphthalene.  In other words, all three have fundamental differences that make them viable as separate synthetic plastic products.

Perhaps seeing the only way to maintain ultimate proprietary control over his original Bakelite idea and not miss out on the opportunity to use newer, better variations on his theme, in 1922 Baekeland sued a distributor of Redmanol, which had a controlling interest in Condensite, for patent infringement.  Baekeland must have known the other companies could not fight the complaint in court and maintain production.  His civil action ending in success, he “arranged” for the two smaller chemical concerns to be consolidated with the formation of the Bakelite Corp.  From then on, Redmanol and Condensite products, including pipes, were stamped Bakelite – but all anyone needed to do was look at the quality of the product to know the difference.  Bakelite Corp. was consumed by Union Carbide and Carbon Corp. in 1939.

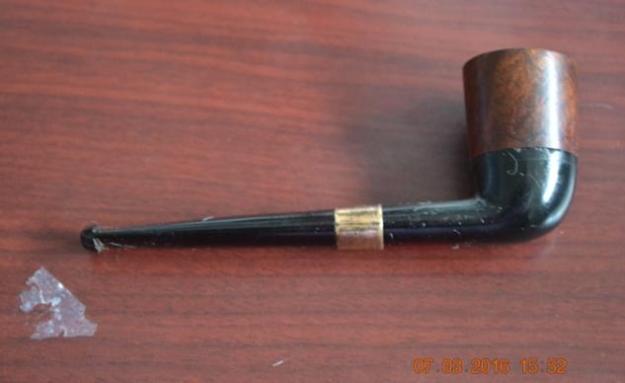
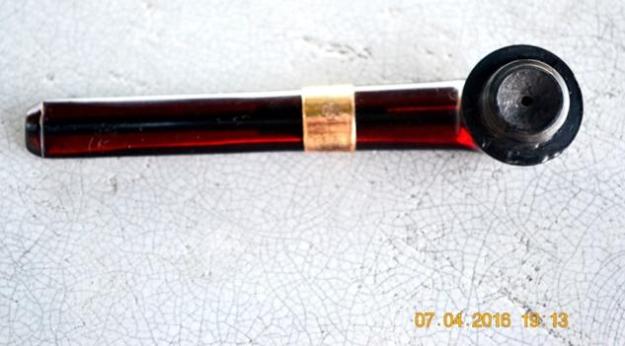
Redmanol so approximated the appearance of amber – which, remember, was prized in meerschaum and other pipes before and after the turn of the 20th century – for which Redmanol Chemical Products in its own name took out ads like one in the June 1919 issue of “The Scientific American.”  High-minded and overblown, as was the custom of the day, the ads were headed, “In Search of the Man Made Amber.”r1 r2 r3This amazing combination of all that one could hope to find in a pipe – artistry, elegance, refinement, style, class and functionality, to name a few attributes – alas does not belong to me, and I will neither hesitate nor pretend not to be jealous of the fact.  Instead, my fellow piper and friend, Darryl Loomis, is the very lucky new owner.  He loves it so much that he was willing to tolerate a somewhat bad taste he detected rather than trust it to someone to restore.  I am honored to clean it up for him.  Shocked to find I have no photo of Darryl, I suspect he will not be unhappy.

Darryl asked me to clean it up.  Well, the fact is, I got one look at it and could almost not keep my voice under control when I said I would love to do it for him if he had no plans for the project.  I admit I was jazzed to be able to take it home with me from Friday night’s local pipe get-together at the tobacconist.  But there’s one important thing I should now note about any pipe “cleaning” job I undertake, unless the owner makes it clear that’s all he wants done, period.  I don’t half-ass anything.  Even when my business site was up (and it will be again this week), I included basic refurbishing with cleaning jobs and the full works with refurbs/restores (any necessary replacement parts not included in the base price).  So that’s what’s happening here.

While we talked about the pipe, Darryl mentioned something peculiar.  He said he noticed a somewhat bad taste but seemed willing to tolerate it as he did not expect to rotate this pipe very often.  I unscrewed the bowl from the shank and saw right away where some of the unpleasant effect may have originated, but mentioning it to him, he was emphatic that he had heard the metal plate inside the shank (just as with any standard system metal, interchangeable bowl pipe such as a Kirsten) was coated with an unknown substance to keep it from overheating.

Being somewhat more curious than usual, after I was home with the pipe, I ran a cleaner through it, loaded a half-bowl of MacBaren 7 Seas Red cherry and lit up.  Very soon the nastiness Daryl had understated rose in full force, ending with such awful dottle I spat it into a handy cup.  My tentative conclusion, until I can query Daryl more, is that he trusted the person who sold it to him and didn’t considered it might never have been cleaned.

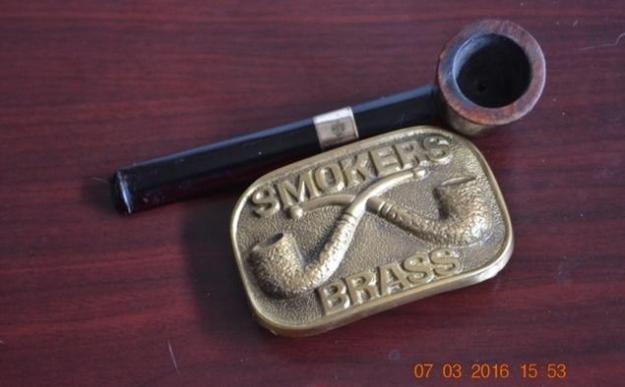
Now, for the before photos of this gorgeous, unique Kaufman Brothers & Bondy work of art – a pipe with a screw-in bowl that predates Kirstens by more than two decades.r4 r5 r6 r7 r8 r9 r10 r11 r12 r13RESTORATION
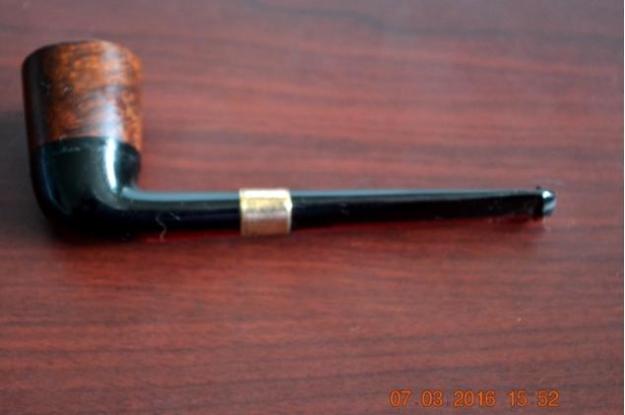
I removed the bowl and began there.  Having come across a couple of Reborn Pipes blogs, one by Troy Wilburn a year ago about a KB&B Blue Line Poker c. 1909-1914 and the other by Steve Laug concerning Redmanol bits from almost four years back, I was prepared for how to deal with the briar bowl as well as cleaning the deep red quality synthetic plastic, the cubic zirconia of the phenol formaldehyde resin world.

Steve had used nail polish remover (acetone) as a less invasive way of stripping the stain, and it worked quite well of course.  Not having any of the stuff on me, however, and being short on cash and time to do this job for gratis, I compromised.  Instead of a long, thorough soak in Everclear, I dunked the bowl in a tiny Tupperware container for a minute, removed it and scrubbed it dry inside and out with a soft cotton rifle cleaning cloth.  I did have to repeat that process, but still, the combined soak time was minimal.r14 r15 r16 r17Again I regretted not being able to follow Steve’s lead using a Pipnet reamer because I saw the good reasoning behind it…BUT, my handle broke some time ago, rendering it useless.  You get what you pay for.  Next time, I’ll invest a little more for a lot better.  But just a couple of turns of the Senior followed by 500-grit and 320 paper made the chamber baby smooth and clear of char.  I also used the 320-grit on the rim to remove some scrapes, and both papers on the bottom side which was rougher from after wear from repeated turning into the grooves of the shank.r18 r19 r20I ran a few cleaners dipped in freshener through the bit’s air hole, the first of which came out filthy, but the end result was clean.r21Next, I used wet micro mesh from 1500-12000 on the entire surface of the Redmanol shank and bowl cup.  The minimal blemishes there made that fast work.  Cleaning out the draught hole was trickier with more cleaners dipped in freshener, but the accreted gunk and juice all came out.  I tested it again later to be sure, but it was clean.  I really don’t like not being able to retort any pipe.r22 r23Near the end, I stained the pipe bowl with Fiebing’s Brown, flamed it and after it cooled gave it a gentle 3200 micro mesh buff.  I was very pleased with the color I got from the wood.r24The bell tolled the time to do that which I had put off and Steve graciously reminded me needed doing.  He suggested a little Super Glue around the sharp edges of the Redmanol ledge where the bowl was to fit would fill in the cracks.  That followed by micro mesh or light sandpaper would do the rest.  Here is the best before shot I could get with my failing flash system, but the cuts on the right side of the synthetic plastic show up well enough.  There was a matching pair on the left side, suggesting the pipe’s enjoyer was screwy in his habits or the bowl never quite fit right.r25Here’s a shot I admit is horrible with the Super Glue applied, and one after it dried.  I opted for super fine “0000” steel wool to even off the ledge.r26 r27I really can’t say what those apparent white flecks are other than that I took it in a hurry outside.
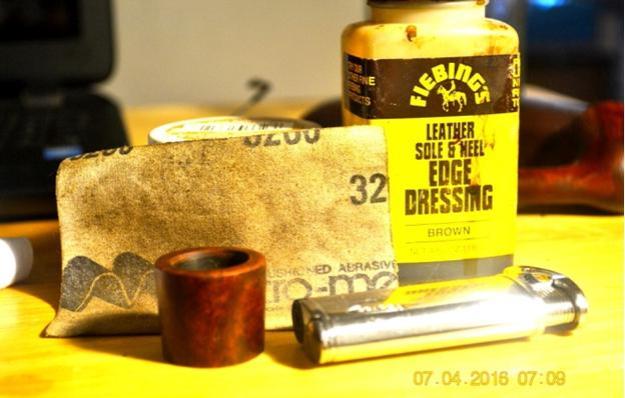
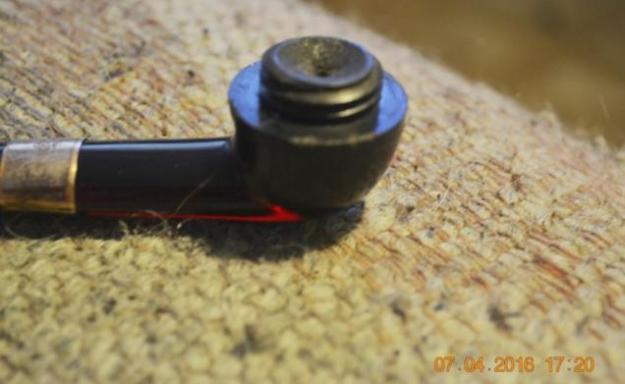
Not touching the bit with any kind of wax, I buffed the briar bowl with white Tripoli, White Diamond and carnauba.

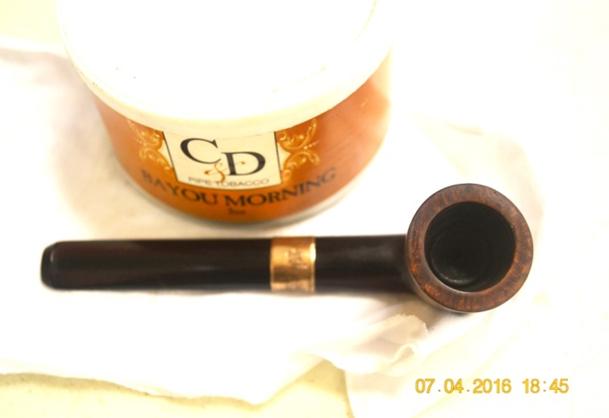
r28 r29 r30 r31 r32 r33 r34 r35CONCLUSION

For this special pipe, instead of my usual last photo being the left side full shot, after a detail picture of the band’s KB&B stamp, I chose the close-up of the wonderful red translucence of the bit held up to the light by a friend.  The old I would have tried to take it myself despite having to hold down the flash pop-up at the same time, and the probable end would have been, well, unthinkable.  But I love those flashes, sparkles and twinkles that make the lovely amber-like bit, which is often called Bakelite because of its more famous owner, so scintillating.

HOLD THE PRESSES!  At the exact moment I was about to hit SEND and dispatch the blog to Steve, I made a connection between Redmanol and a meerschaum-lined art-deco style bulldog Chuck sold me some time back with a bottom he described as what I thought was “red menaul,” or something to that effect.  Now I understand what it was.r36
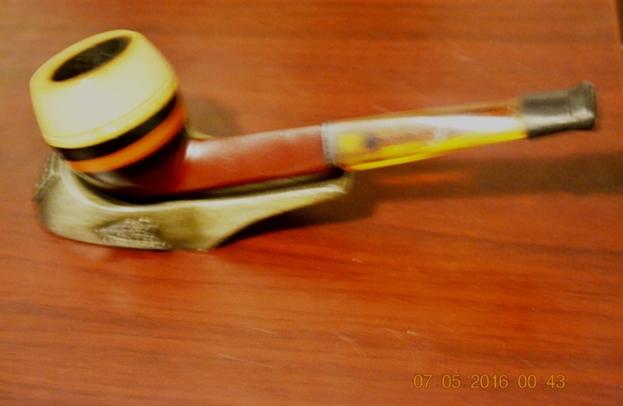
Redmanol art deco style socket bulldog

Redmanol Art Deco style socket bulldog

Here I’ve had this great, smooth and cool smoking pipe in my collection for several years and never knew what to call it.  All mysteries come to an end in time.
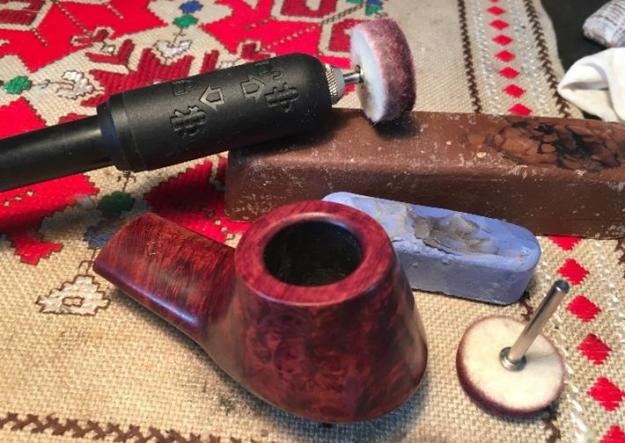
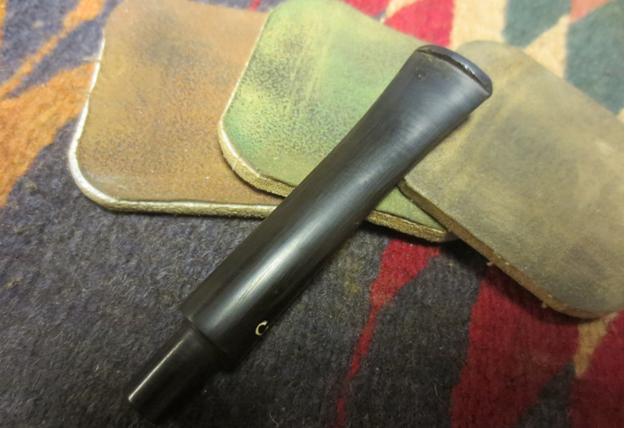
 SOURCES

http://www.pipephil.eu/logos/en/logo-r3.html

“Phenolic Resins Technology Handbook,” p. 6, at https://books.google.com/books?id=oYZGAQAAQBAJ&pg=PA6&lpg=PA6&dq=redmanol+chemical+products+founder&source=bl&ots=juthNFh-rW&sig=b9qO8plogjv6fj_u2TBjkdpIfCM&hl=en&sa=X&ved=0ahUKEwj-gNj4h9nNAhUM9YMKHXKjBwMQ6AEINDAE#v=onepage&q=redmanol%20chemical%20products%20founder&f=false

https://rebornpipes.com/2015/06/06/spiffing-up-a-kbb-blue-line-bakelite-poker-1908-1914/comment-page-1/#comment-18773

https://rebornpipes.com/tag/redmanol-stems/

https://www.acs.org/content/acs/en/education/whatischemistry/landmarks/bakelite.html

https://en.wikipedia.org/wiki/Bakelite

“Compton’s Pictured Encyclopedia, Vol. 2,” pp. 813-816, at https://books.google.com/books?id=11FHAQAAMAAJ&pg=PA816&dq=in+search+of+the+man+made+amber+redmanol&hl=en&sa=X&ved=0ahUKEwis5OvgmNvNAhVk0oMKHYveA6sQ6AEIIzAB#v=onepage&q=in%20search%20of%20the%20man%20made%20amber%20redmanol&f=false

“Factory and Industrial Management,” Vol. 64, p. 167, at https://books.google.com/books?id=nTs8AQAAMAAJ&pg=PA144&lpg=PA144&dq=redmanol+bakelite+infringement+judgment&source=bl&ots=TCel6fmccJ&sig=ehZijKCRrQSs-RnL6xiDbVA5aKM&hl=en&sa=X&ved=0ahUKEwi39veundvNAhUT32MKHbeiCJwQ6AEIHDAA#v=onepage&q=redmanol%20bakelite%20infringement%20judgment&f=false