Tag Archives: Bowls – refinishing

Restoring a Kirsten Generation 1 Medium Straight Pipe


Blog by Steve Laug

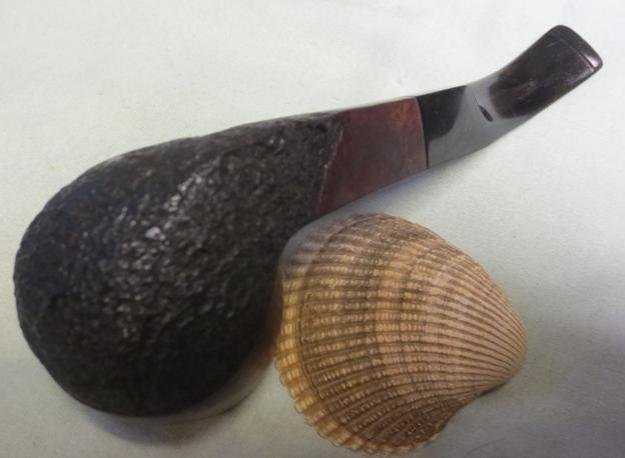
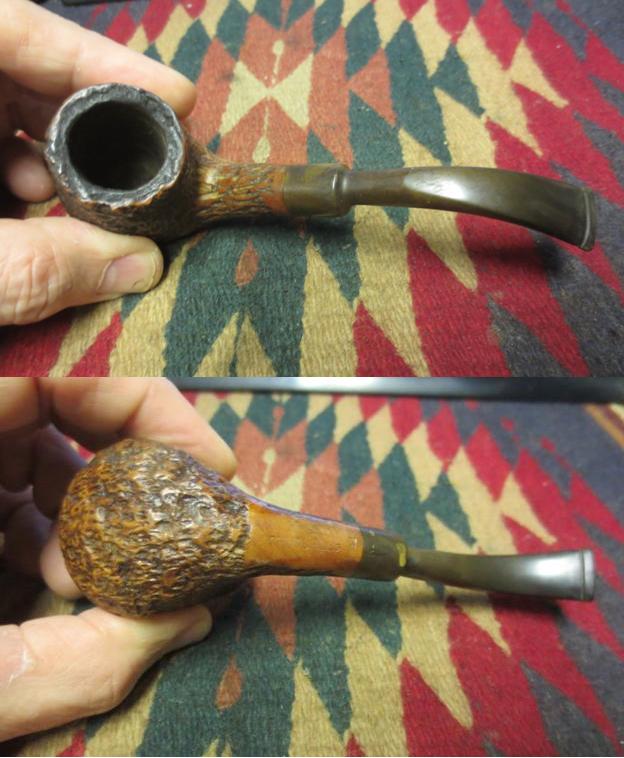
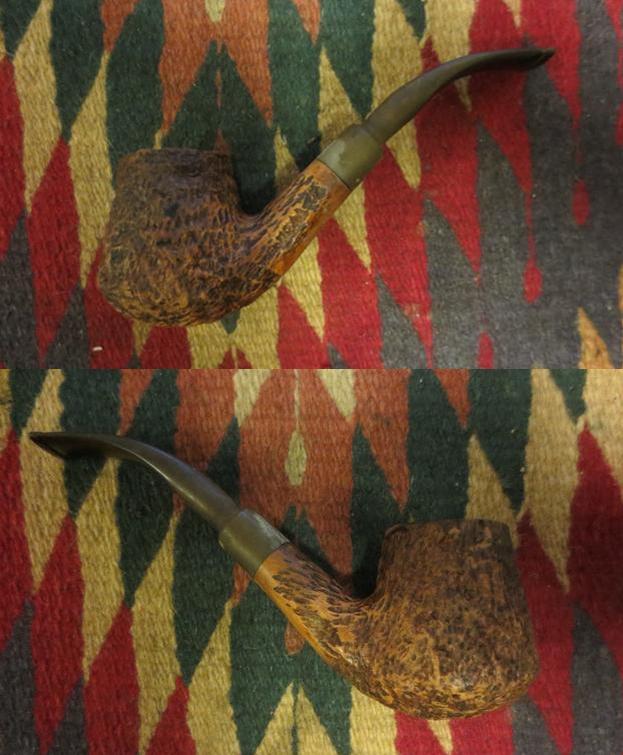
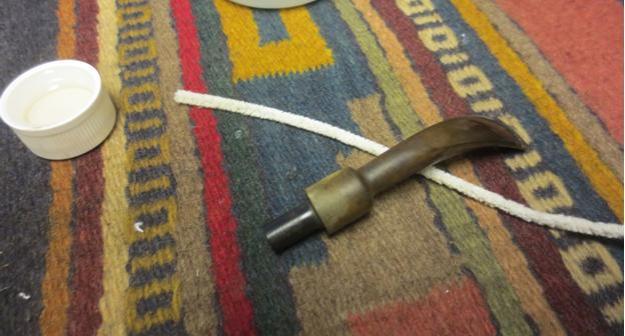
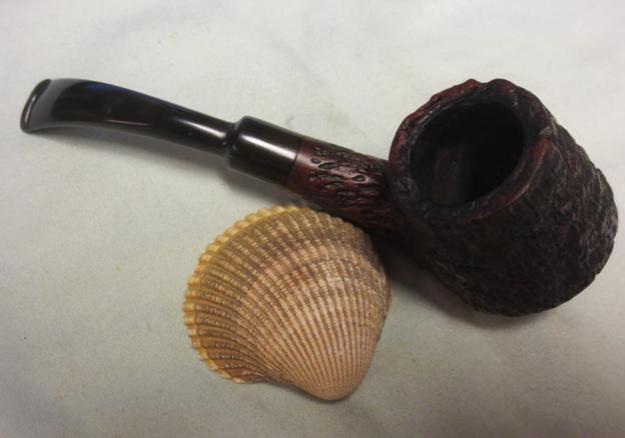
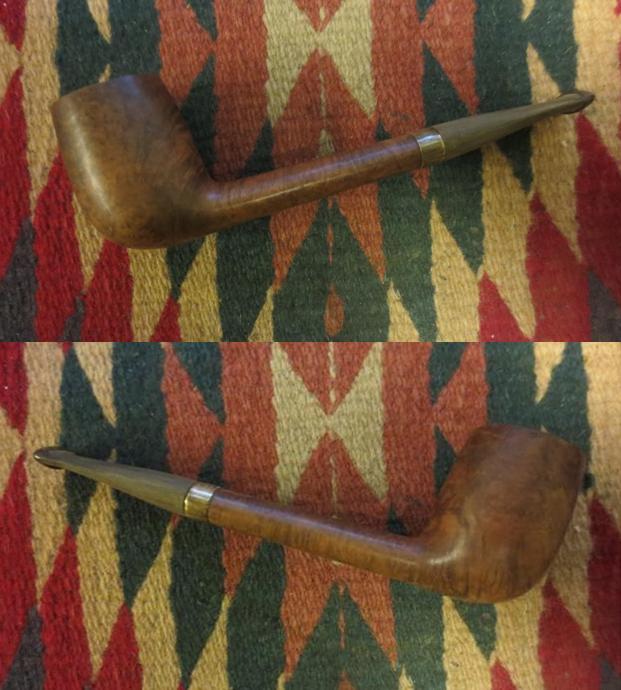
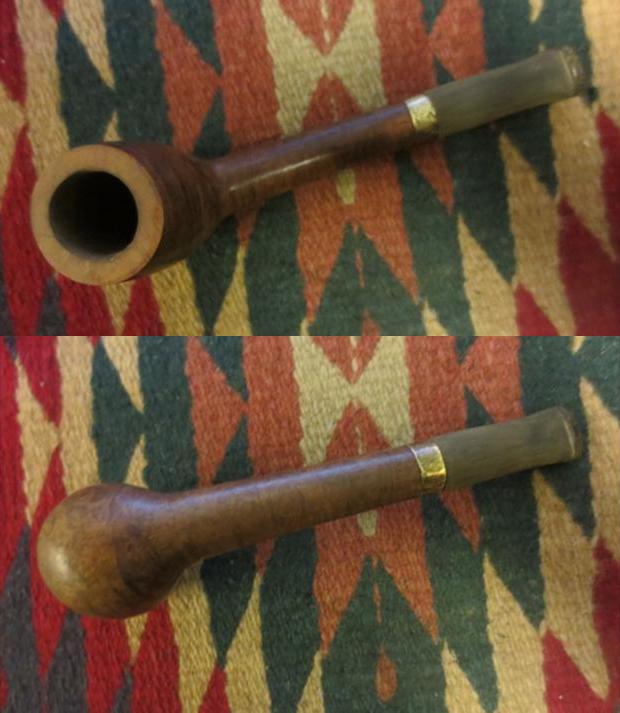
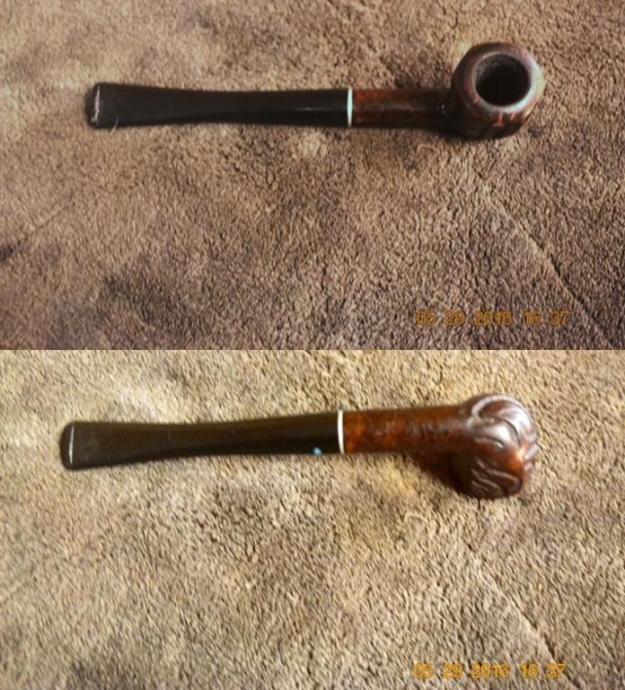
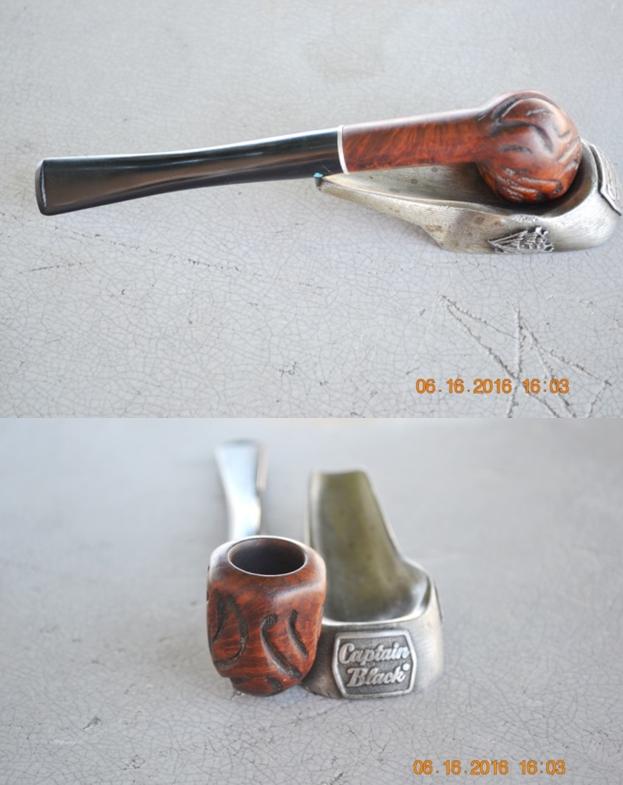
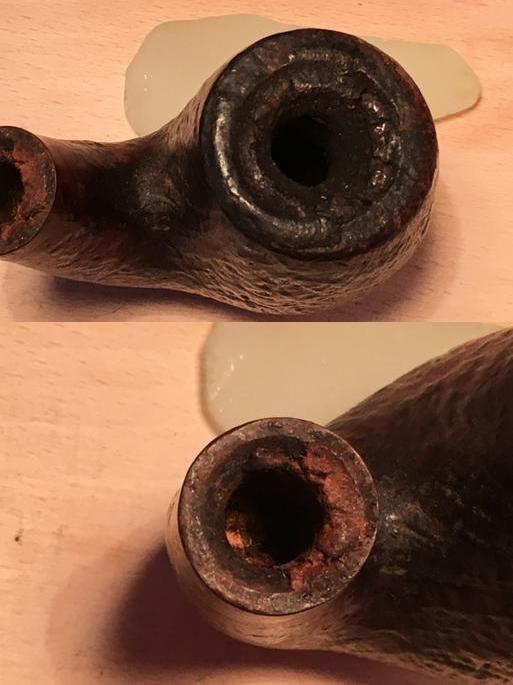
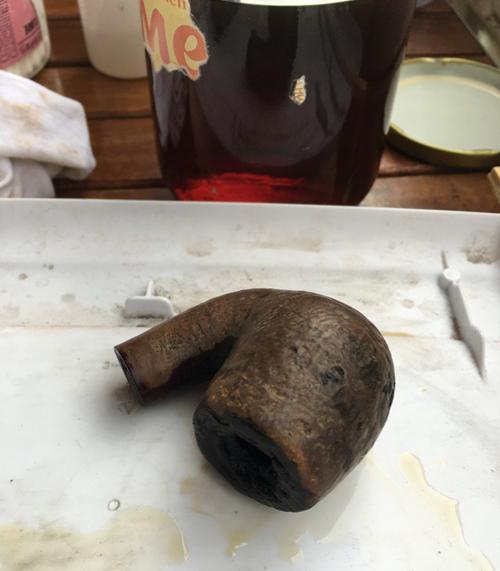
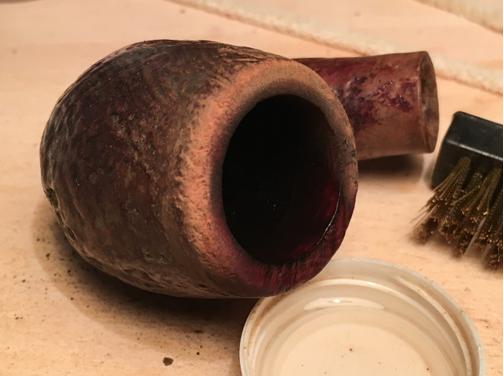
My brother continues to look for Kirsten estate pipes. He picked up this Kirsten because it looked like an old-timer. When I received it I could see that he was right about it being an older one. All the signs were there. The bowl was threaded directly on the barrel of the pipe and bottom cap that is on new models was not present. When the stem was removed there were no O rings on the end of the insert. The valve cap was stuck in the end of the shank and it could not be turned. The rim had a lava overflow on it and there was a heavy cake in the bowl. The screw mount in the bottom of the bowl was caked over to the point that it was stuck in the bowl. The metal barrel was oxidized and pitted. It had no shine left but looked like a well-worn pipe. The stem was oxidized and a dirty brown colour. There were tooth marks next to the button on the top and the bottom sides of the stem. The rod that ran through the barrel was dirty and coated with tars and oils that had hardened.K1 K2
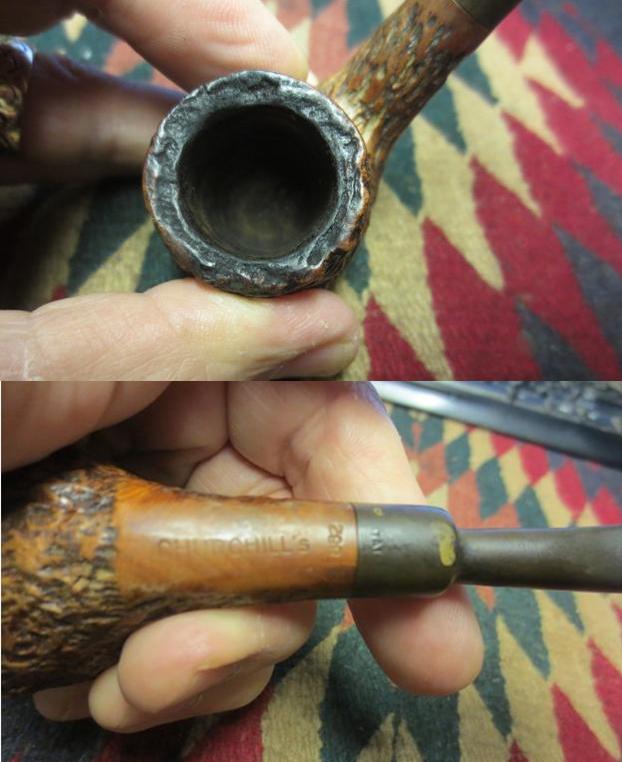
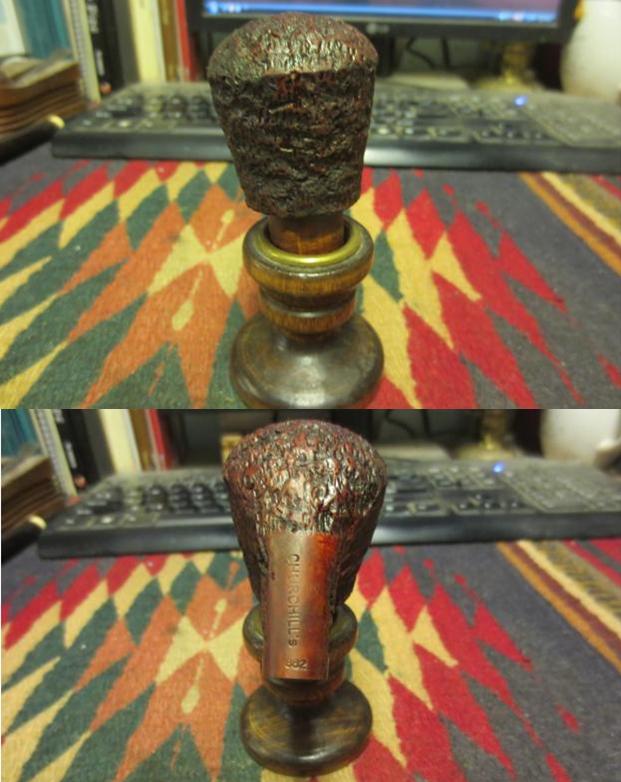
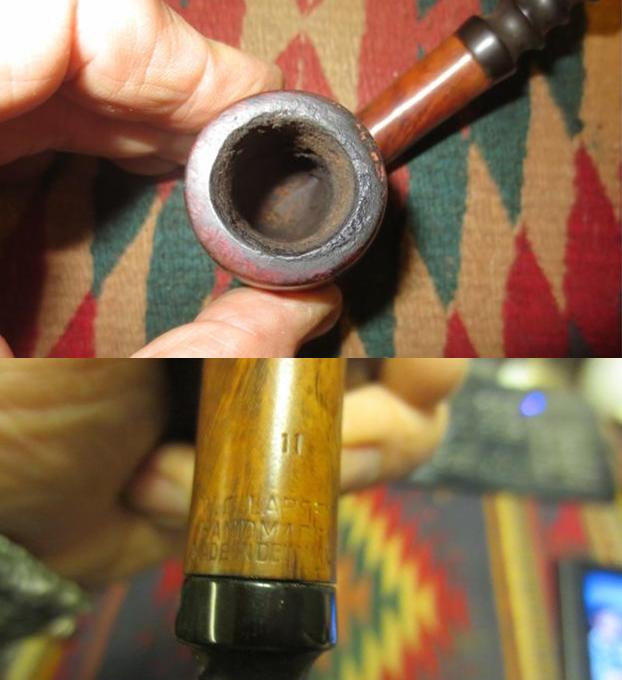
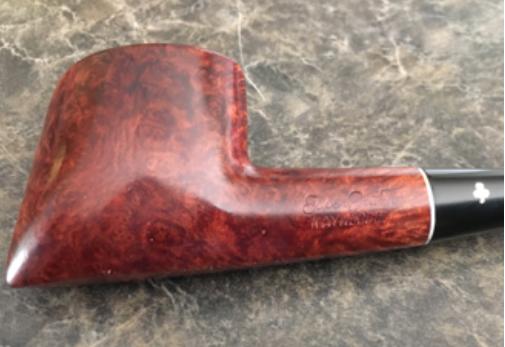
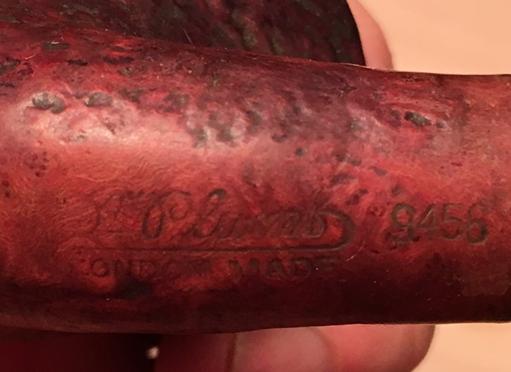
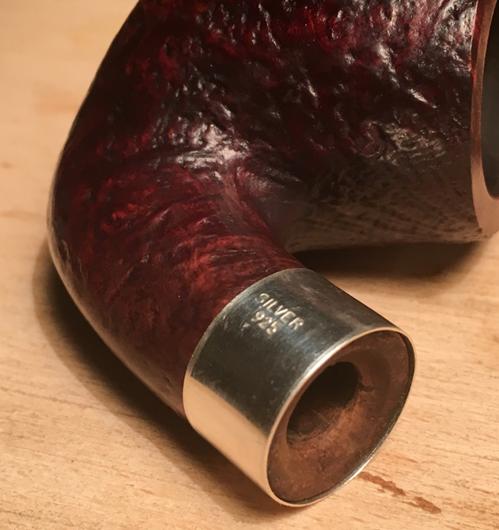
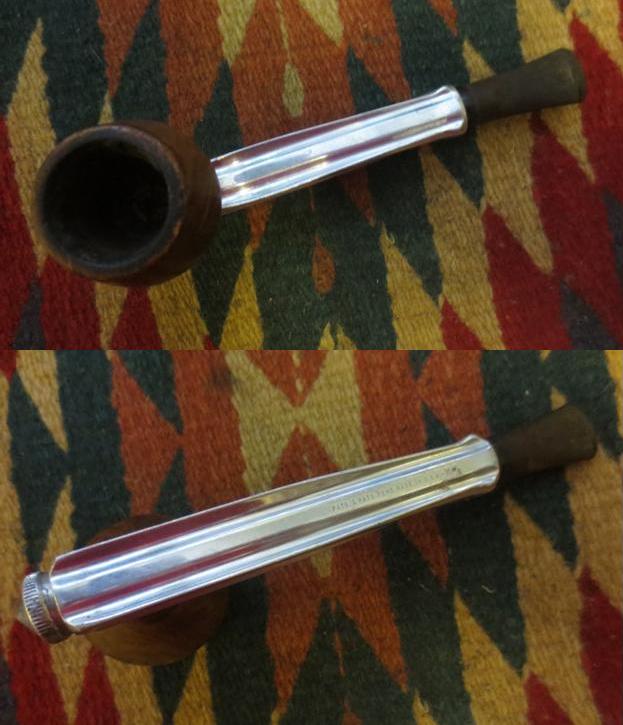
The left side of the barrel is stamped Kirsten in script. The underside is stamped Pats. & Pats.  Pend. USA M. The stamping along with the absence of O rings, the bowl screwed directly on top of the barrel pointed to a Generation 1 Kirsten which dated it between the years 1936-1958. In a previous blog I spelled out the features of each generation of Kirsten pipes that were released. https://rebornpipes.com/2012/11/03/kirsten-generation-1-1-5-2-3/ I quote the following from there: The wooden bowl on this generation connects directly to the metal barrel and there is no metal cup spacer. It is a pretty flush fit that goes flat against the barrel. On the underside of the metal barrel it is stamped with one or more of the following “Pat. Appl. For” (1936-38) and “Pats. & Pats. Pending” (1938-1958) over “Made in USA” – S” (or applicable size – S, M, L). There are no O-rings on the bit or metal shank insert. The M stamp on the pipe identifies it as a Medium sized pipe.

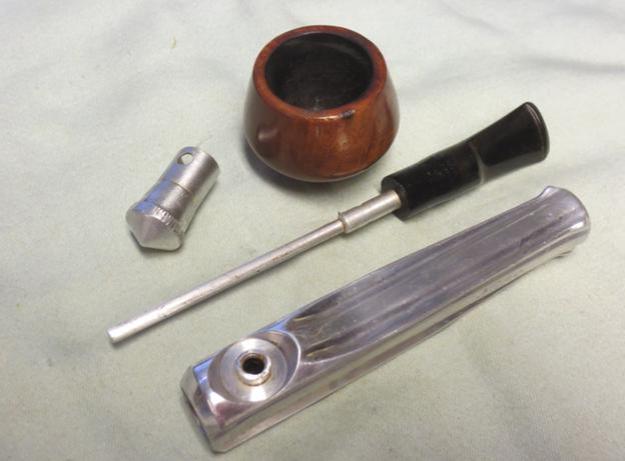
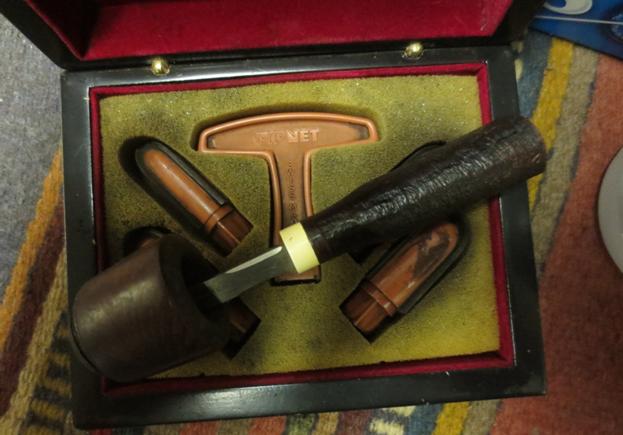
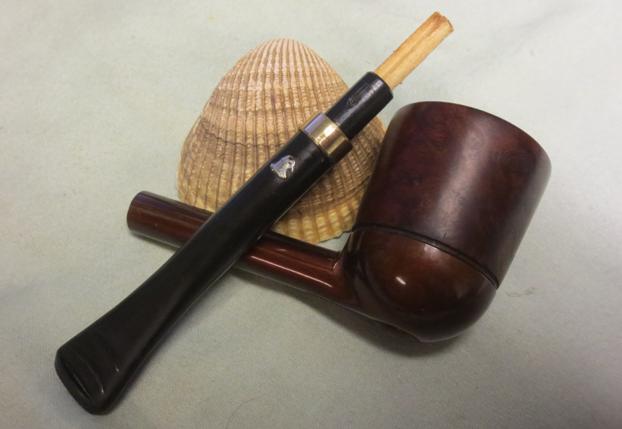
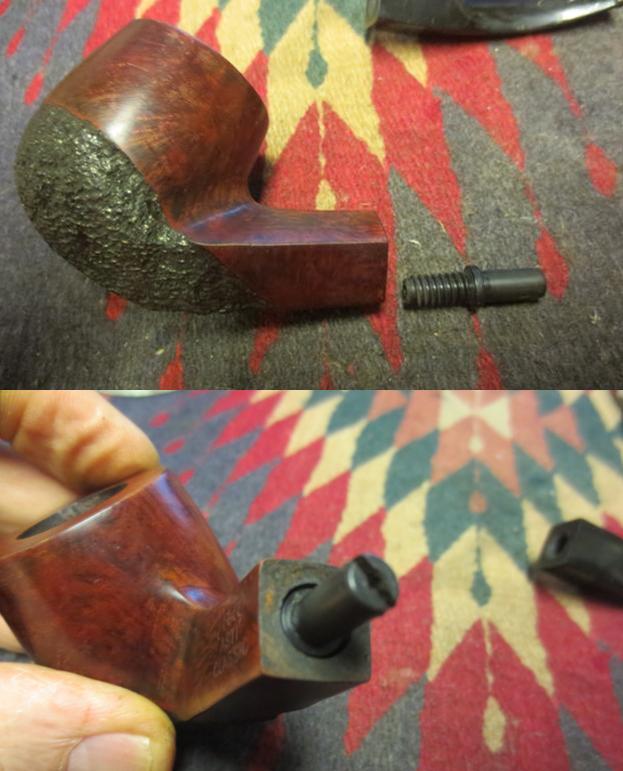
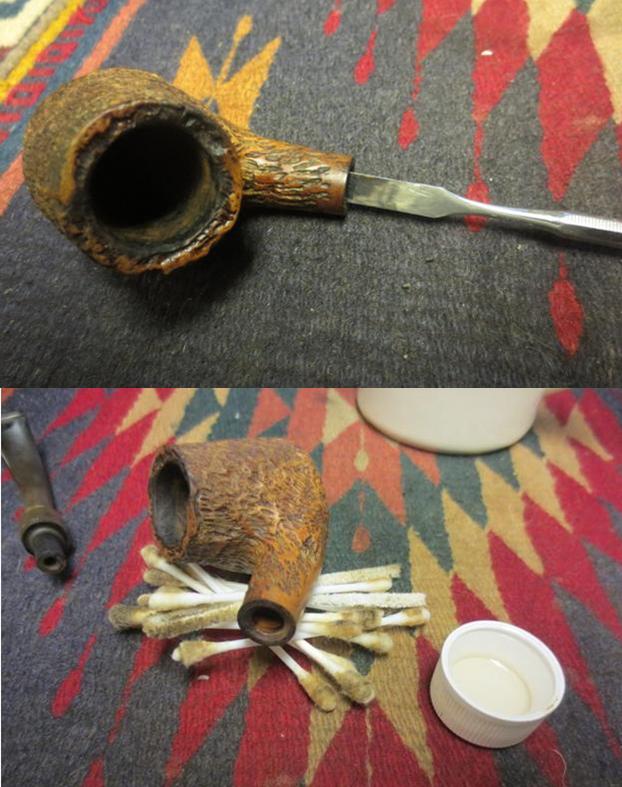
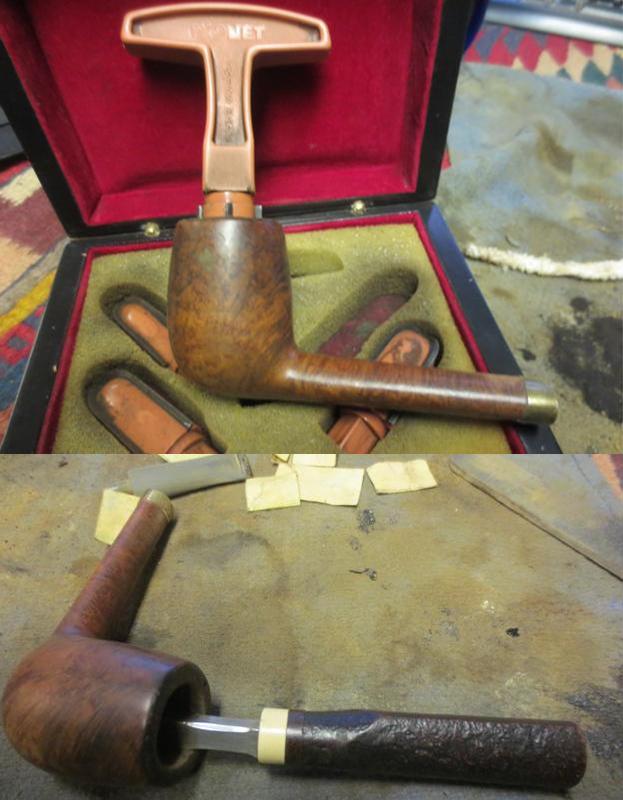
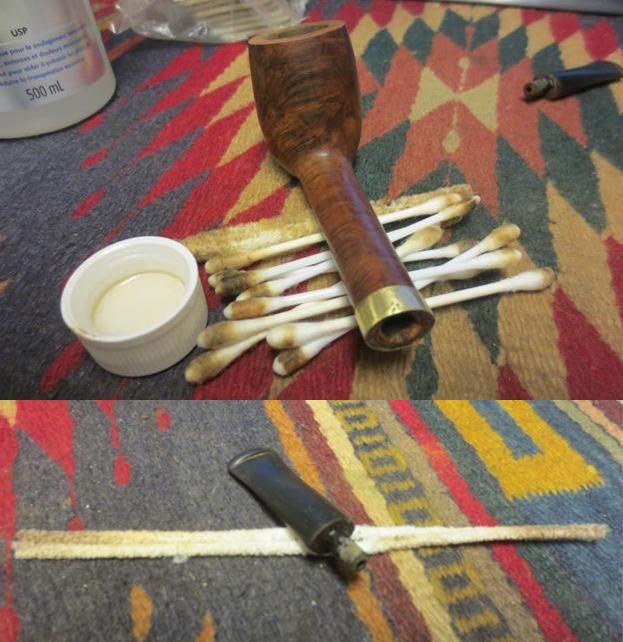
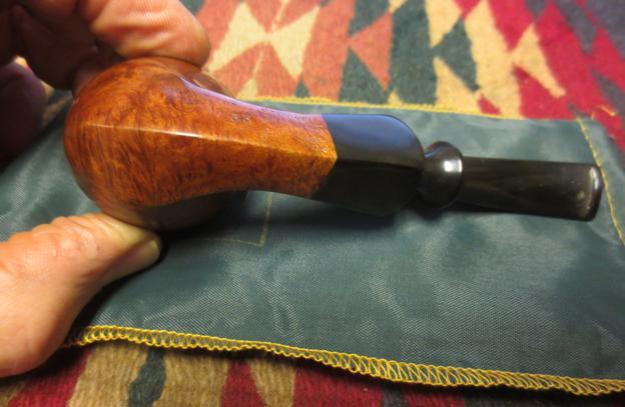
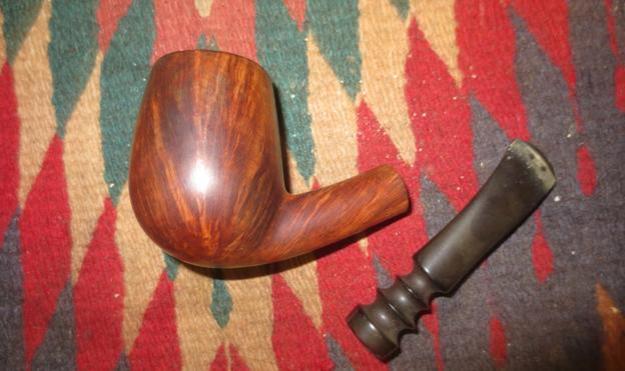
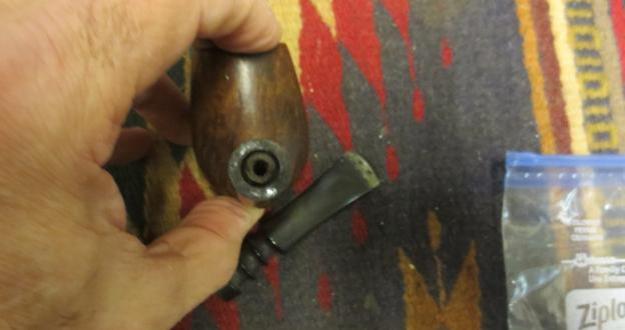
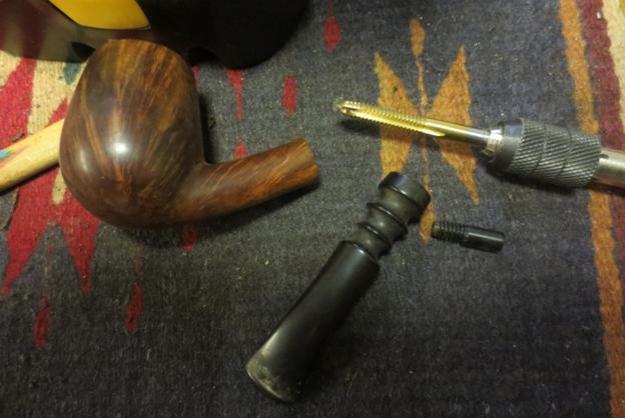
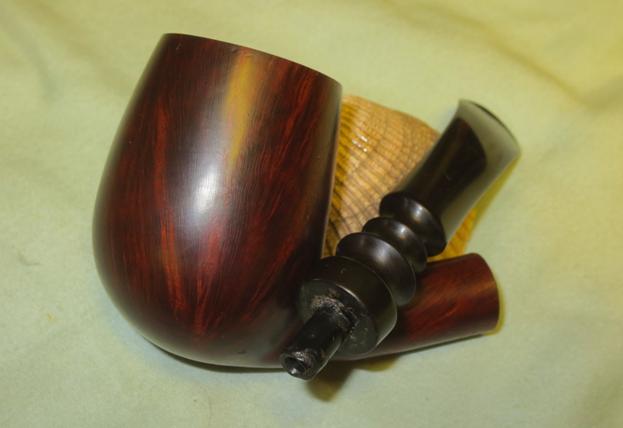
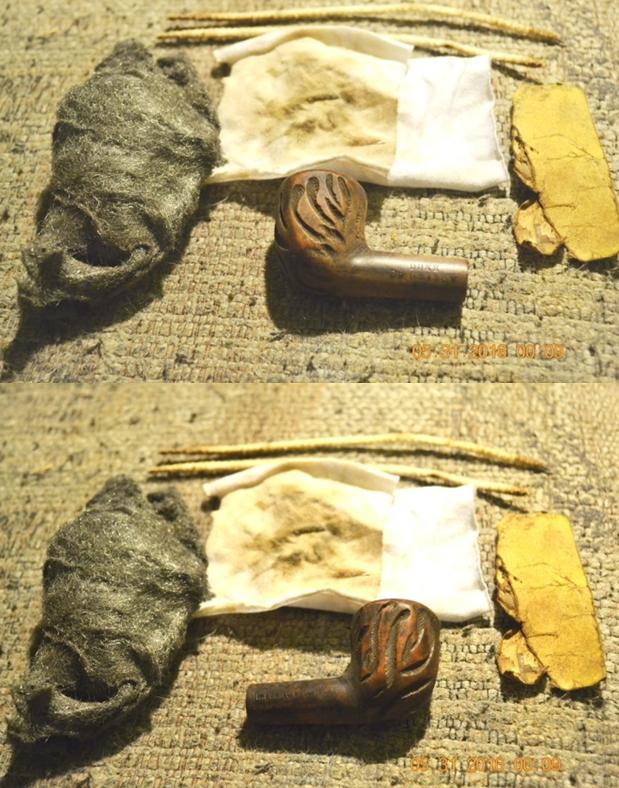
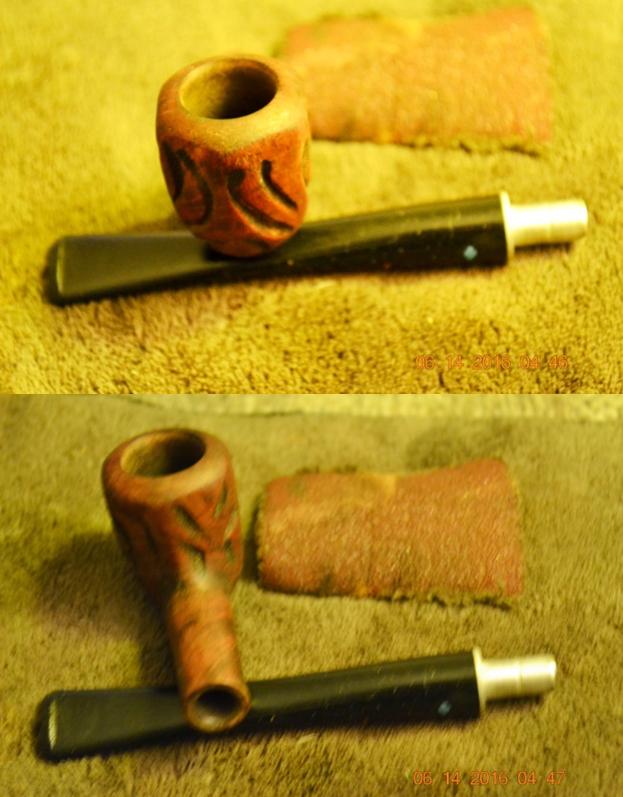
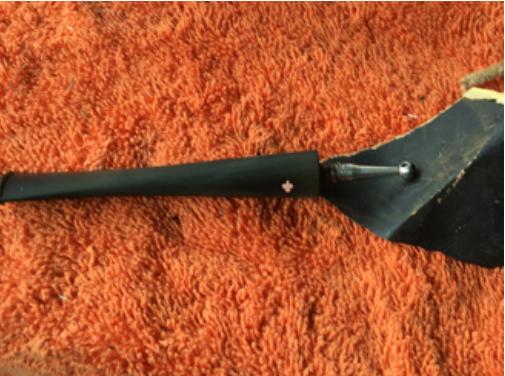
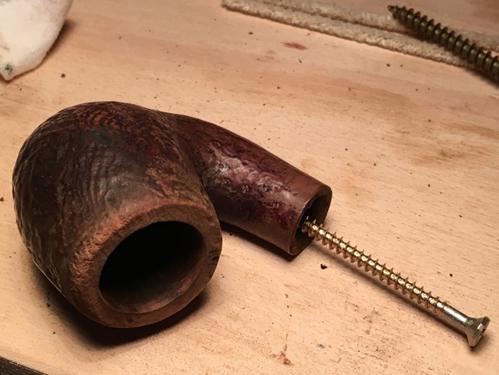
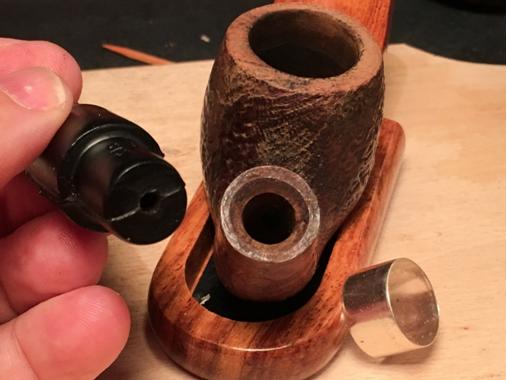
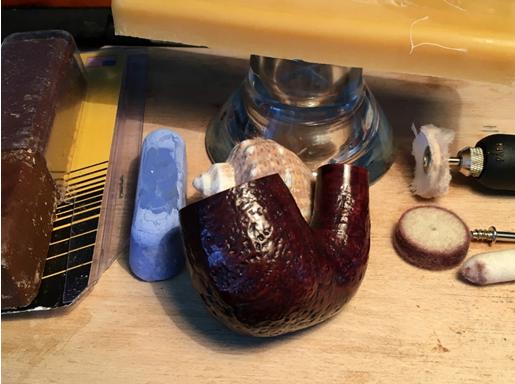
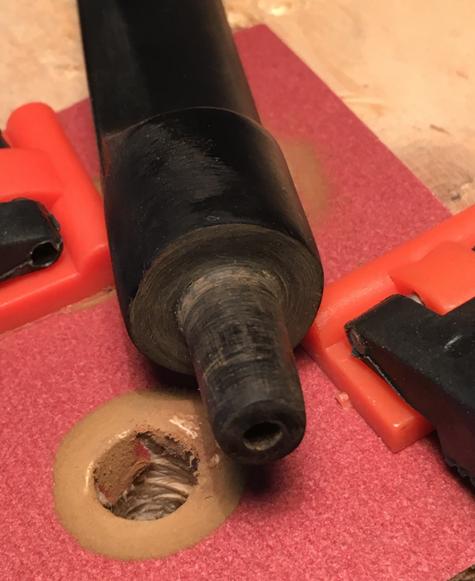
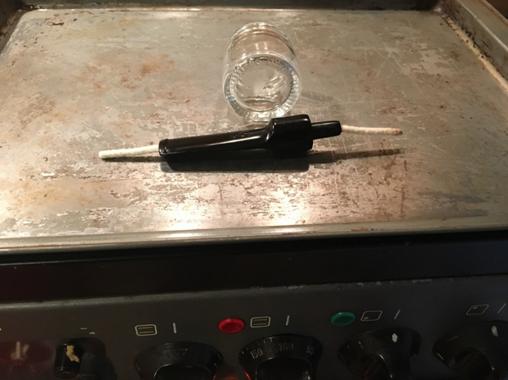
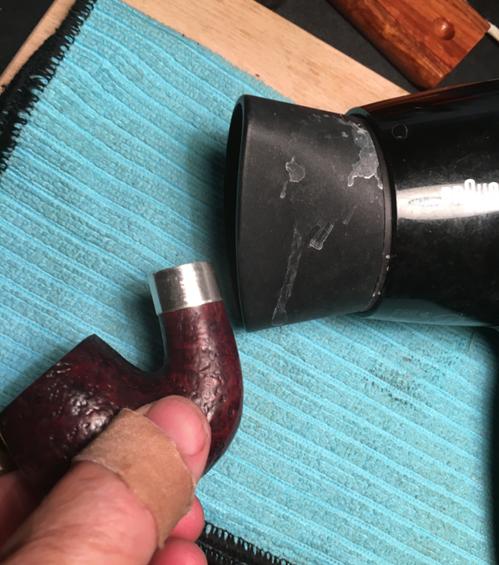
So I armed with that information I knew that the pipe I had, came from the time period of 1936-1958 and the lack of O rings on the mouthpiece and I assumed on the valve once I was able to remove confirmed that. I was ready to get to work on the pipe. I heated the valve insert with a heat gun to loosen the tars that held the cap in place. It did not take too long and I was able to insert a screw driver in the barrel and tap on the valve.K3
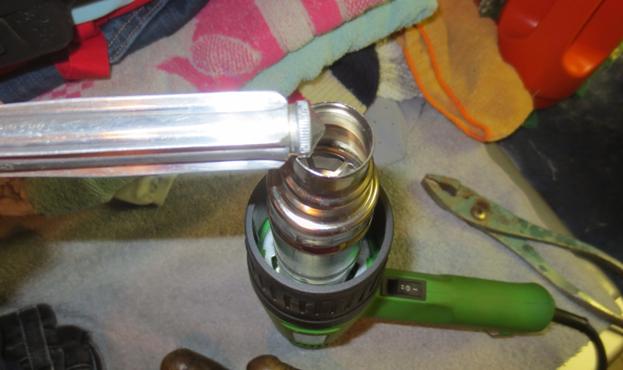
The next photo shows the pipe taken apart. The condition of all of the parts is clear – dirty but functional. The knurled edges on the valve were damaged by previous attempts by someone else to remove the valve with pliers. In the photo above there are pliers present but I did not use them on the end cap.K4
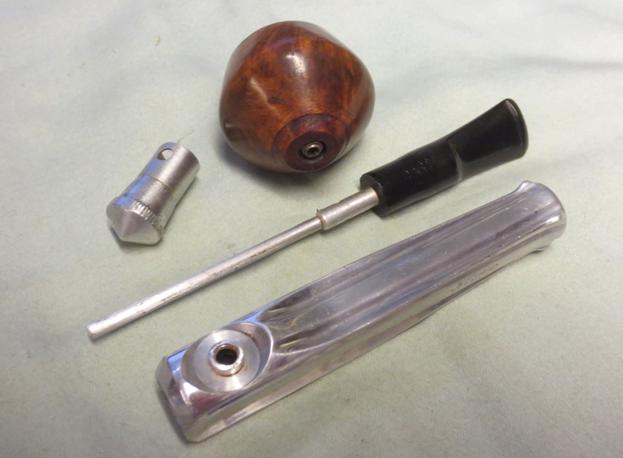
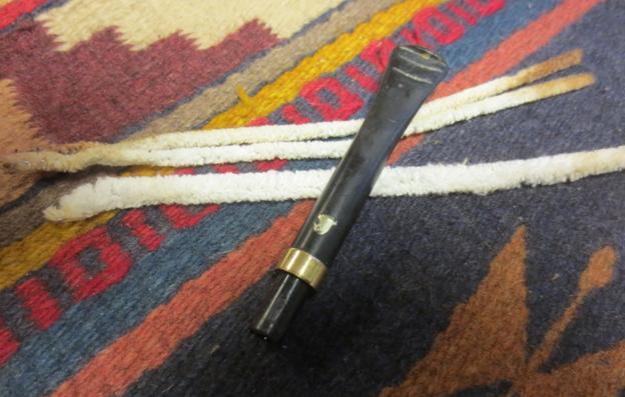
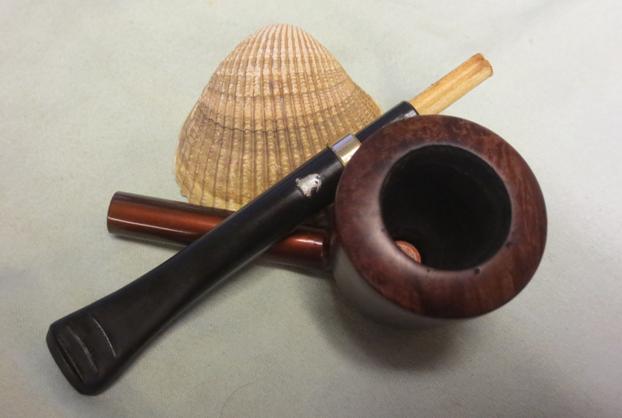
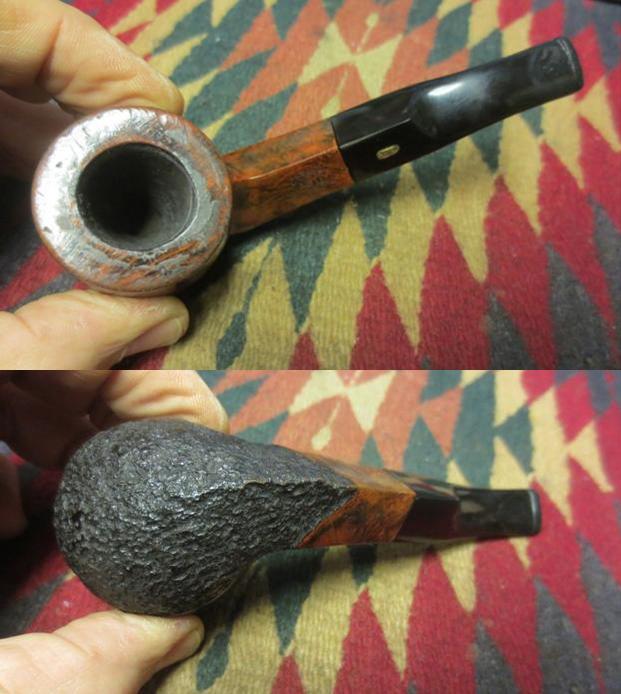
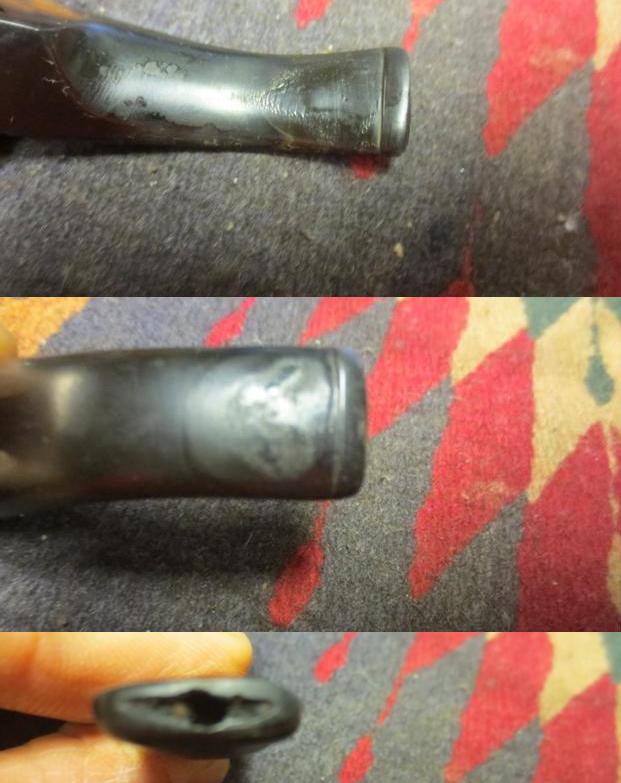
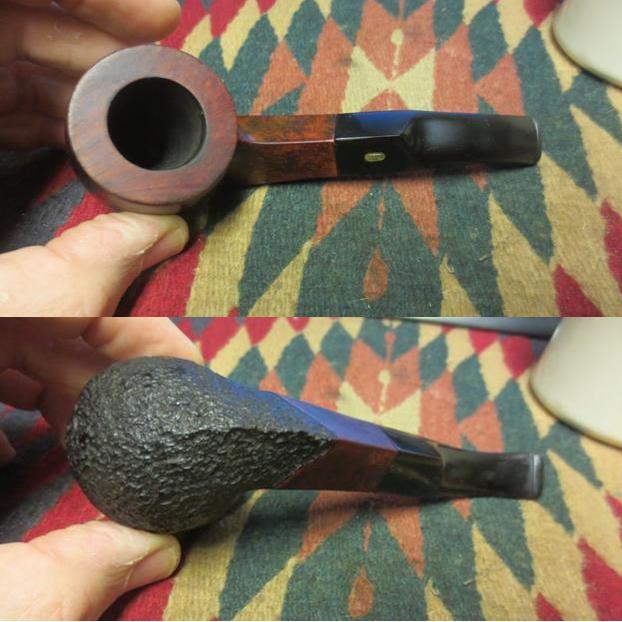
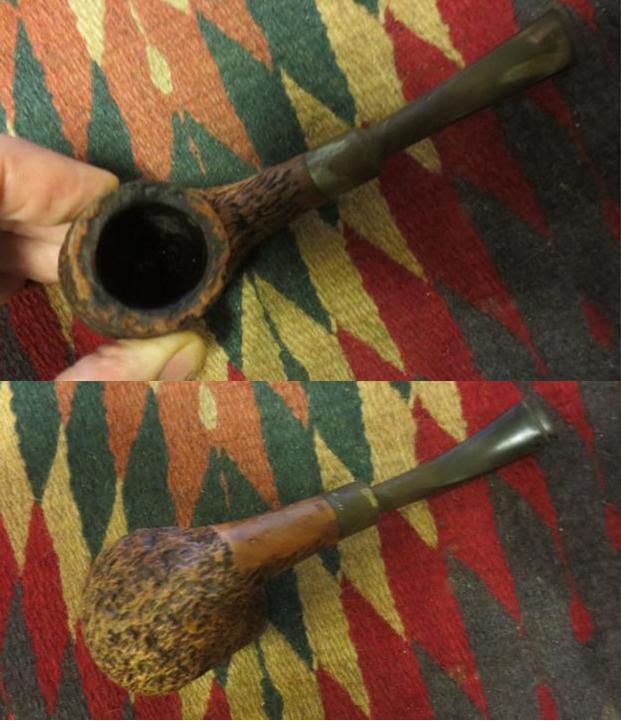
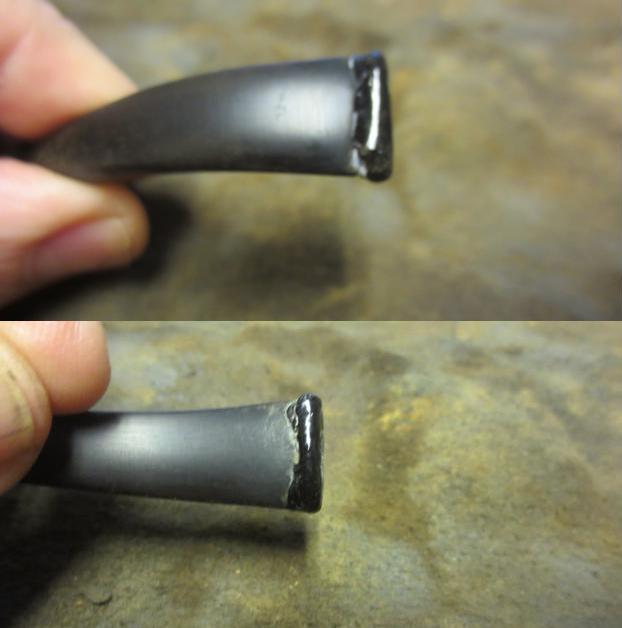
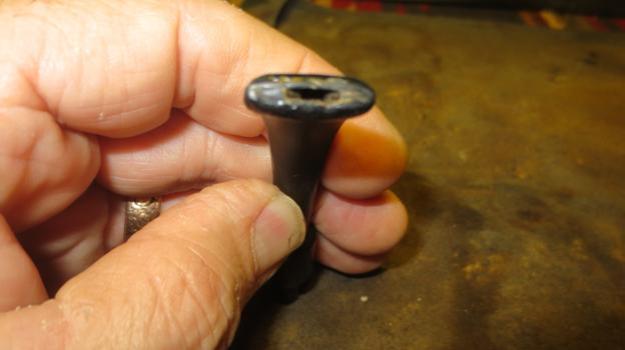
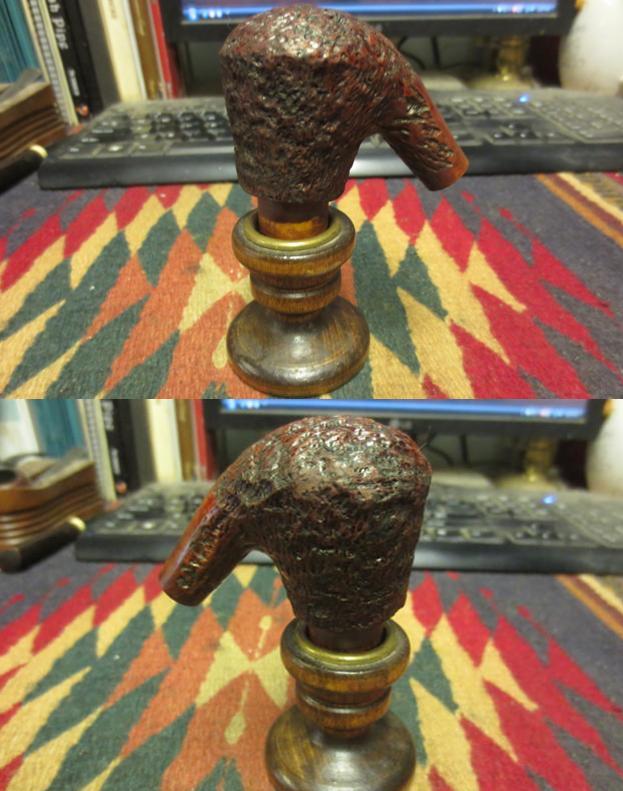
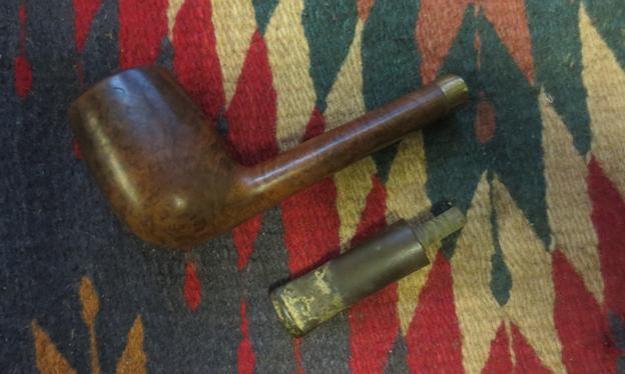
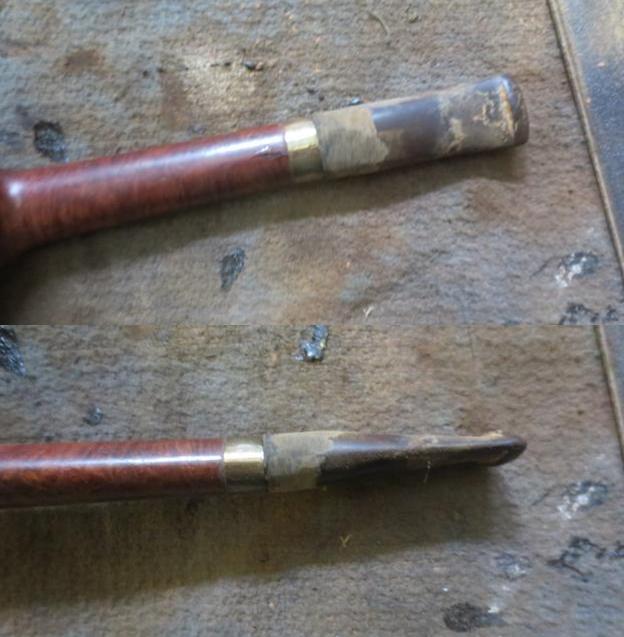
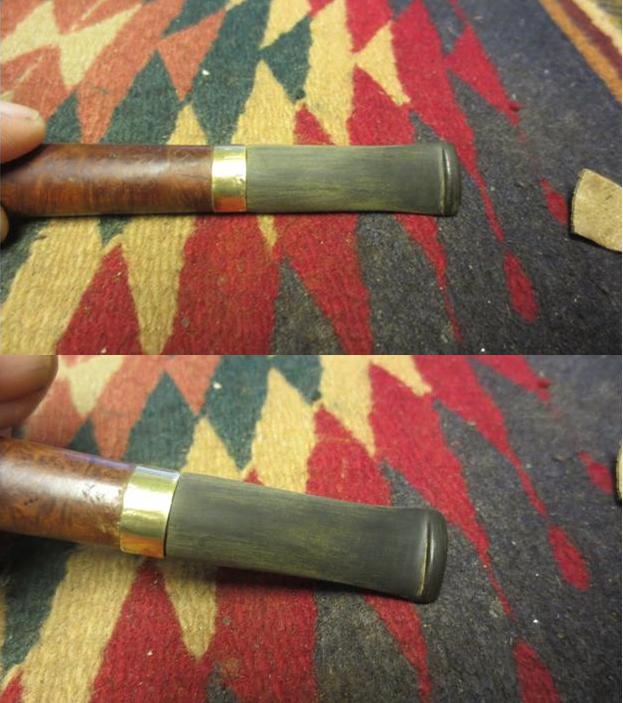
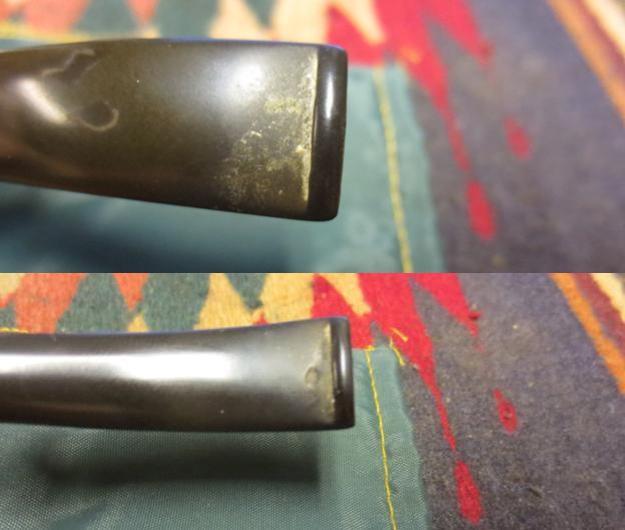
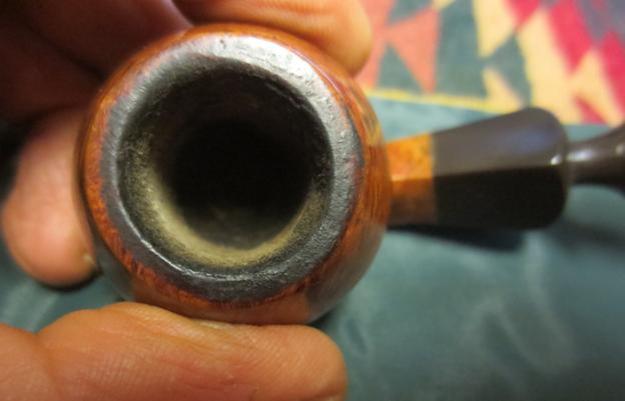
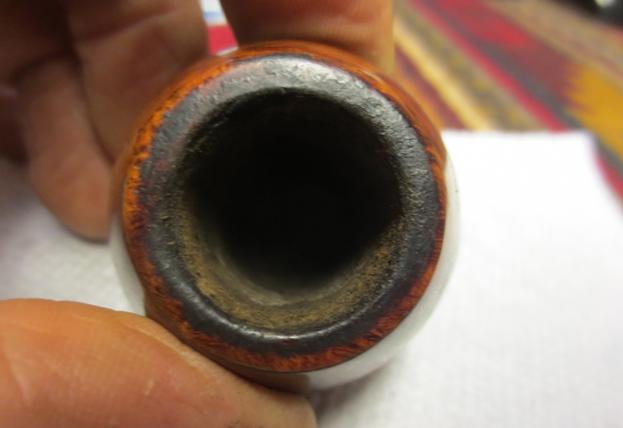
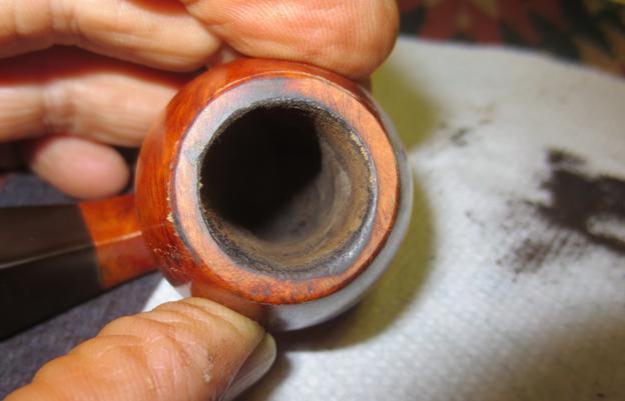
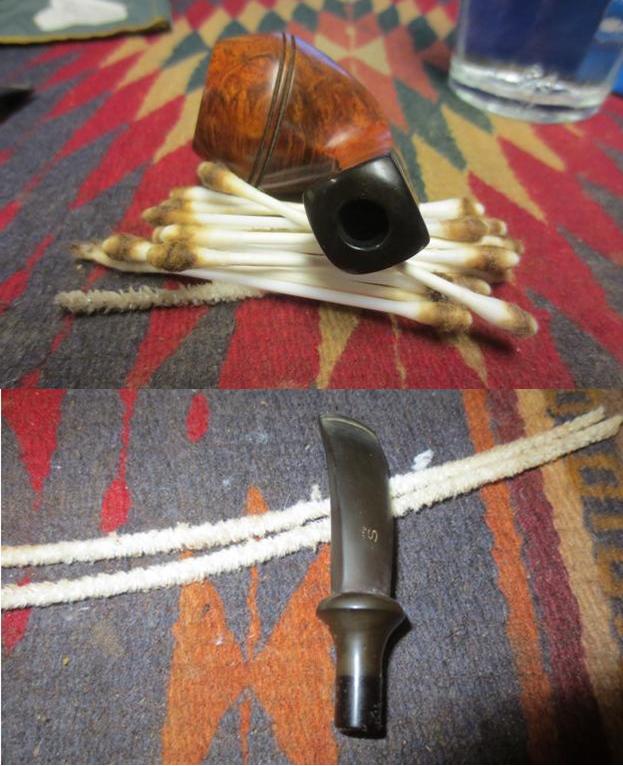
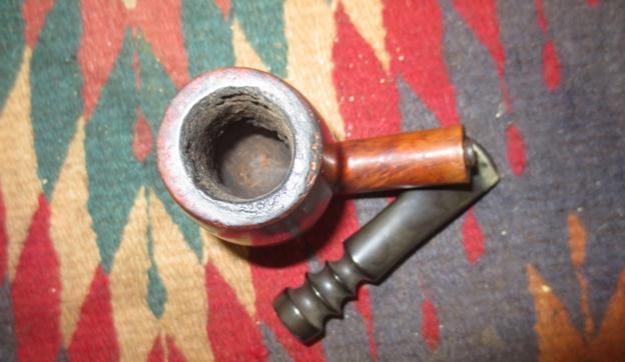
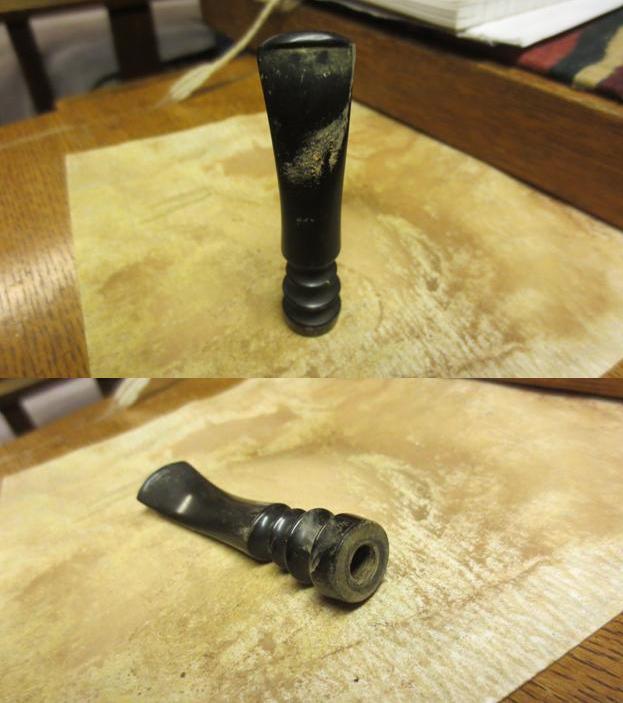
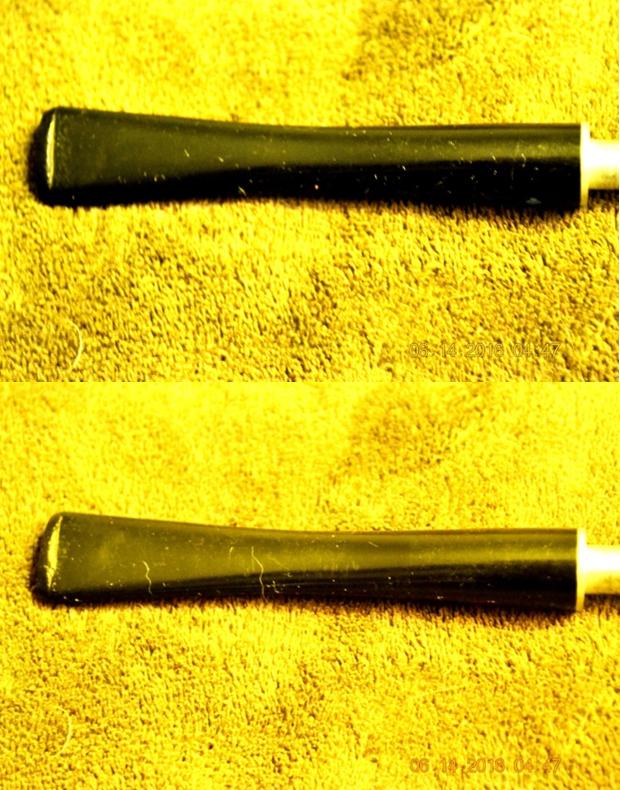
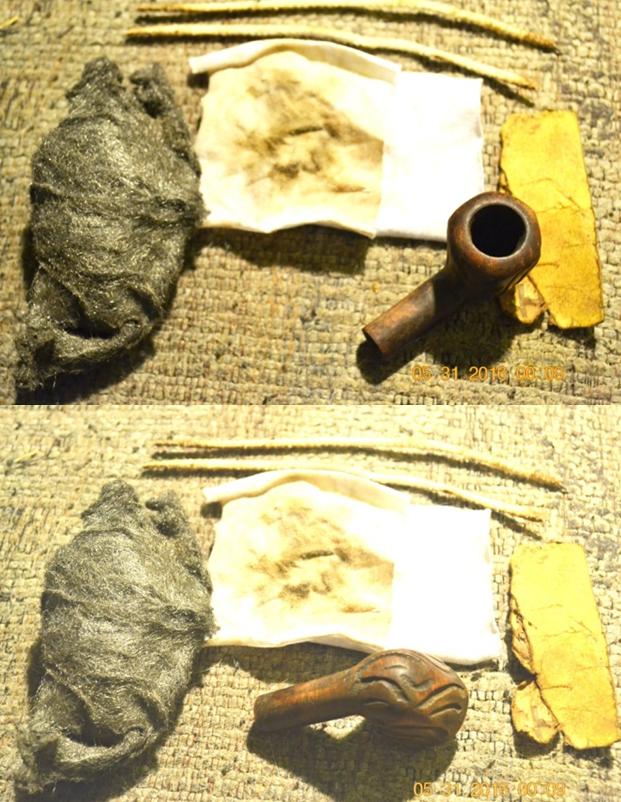
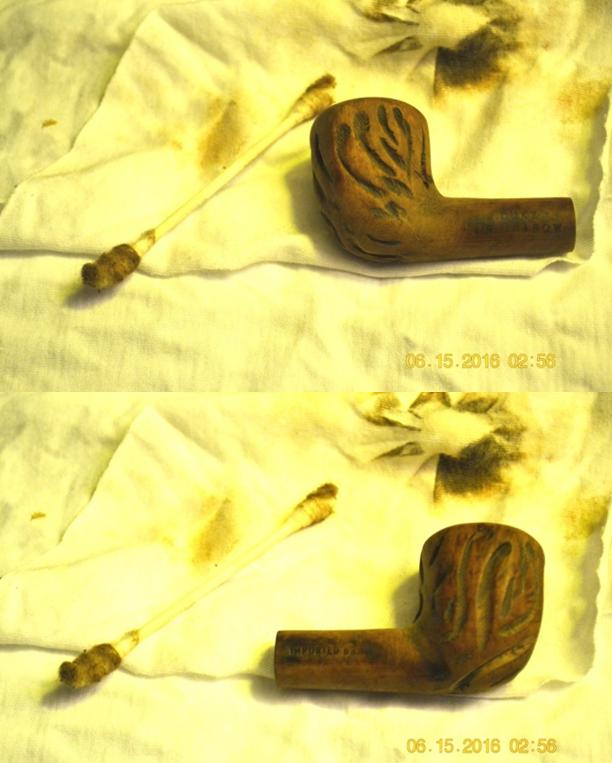
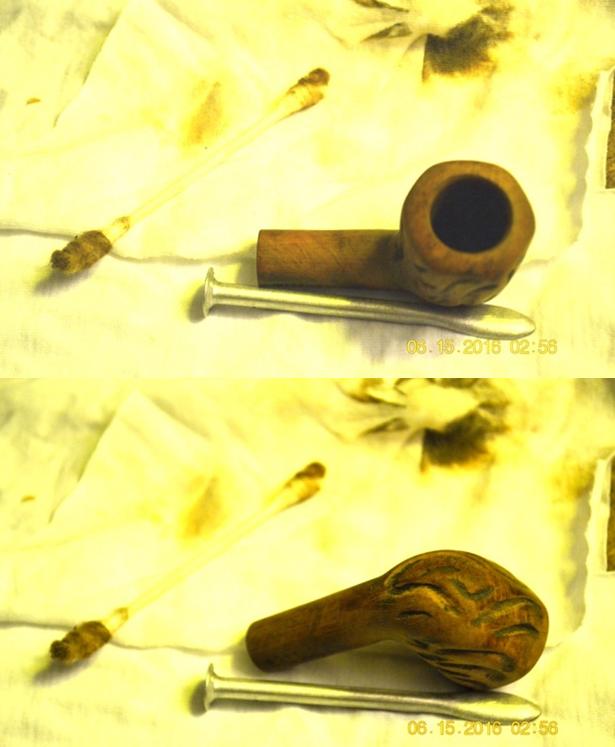
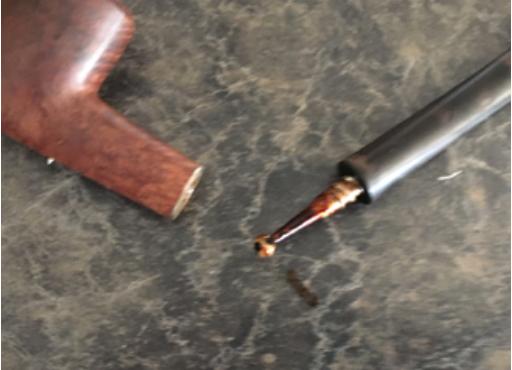
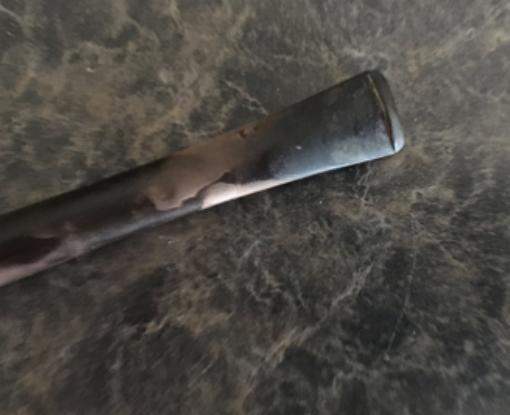
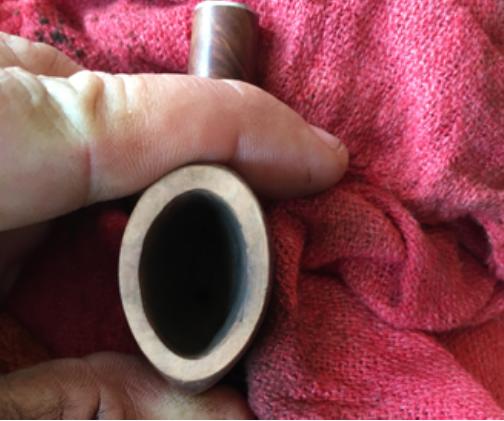
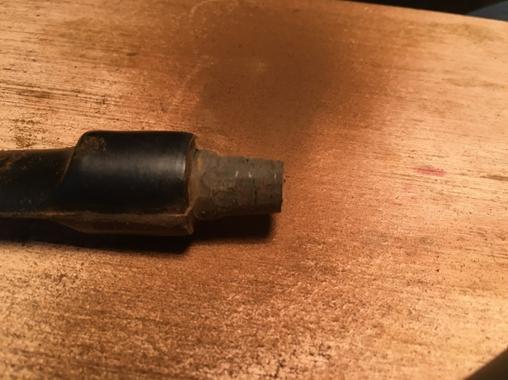
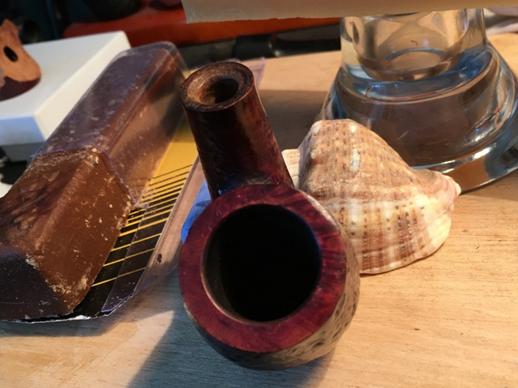
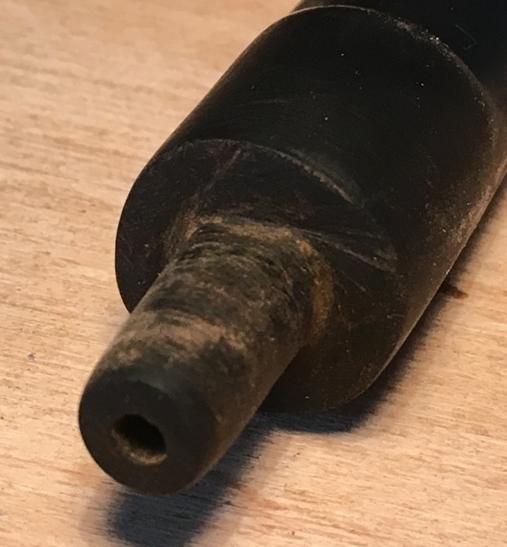
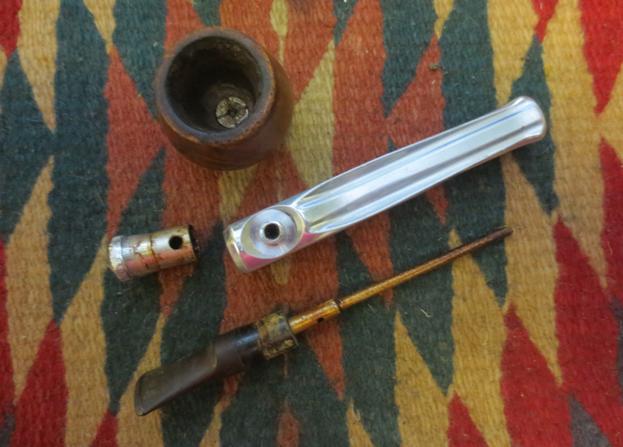
The screw in the bottom of the bowl was held in place by the cake in the bowl. The photo also shows the condition of the bowl and the rim. The other close-up photos show the stem and the tooth marks on both sides near the button.K5 K6
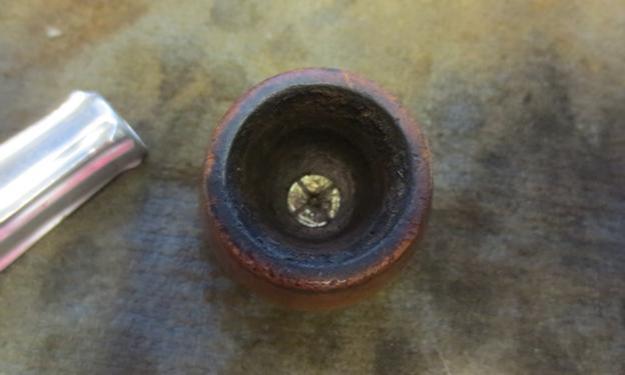
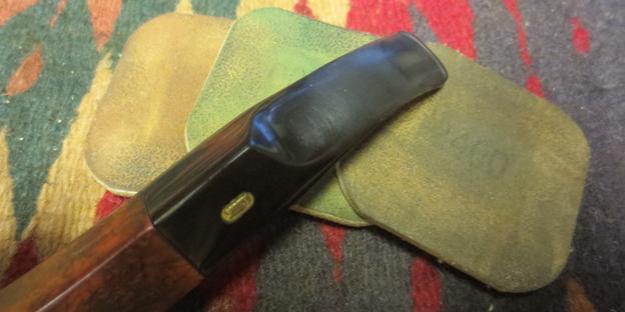
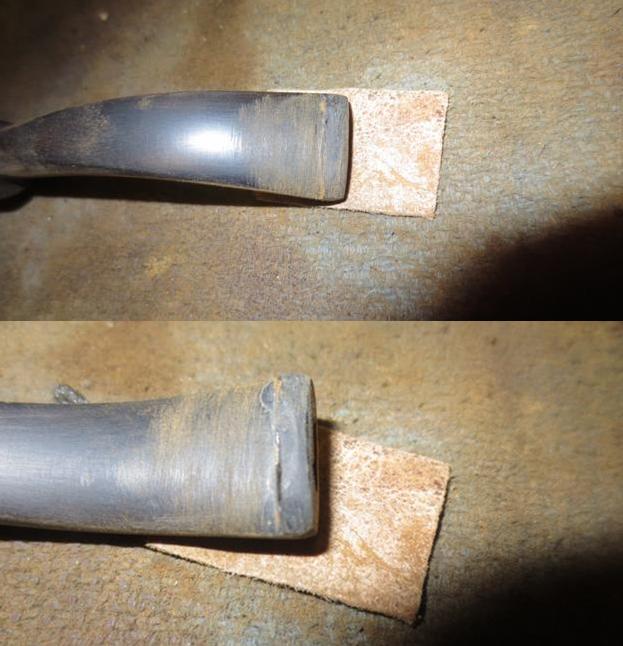
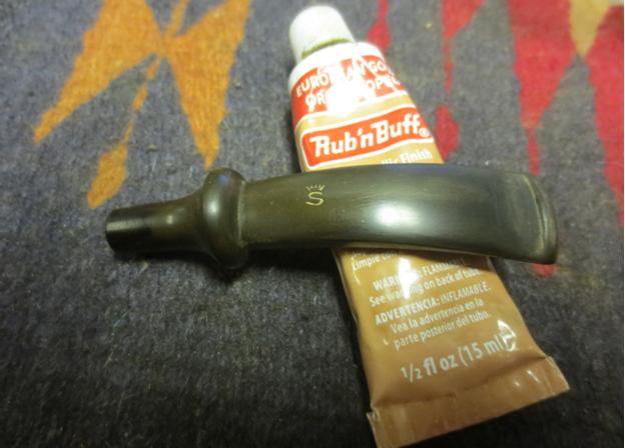
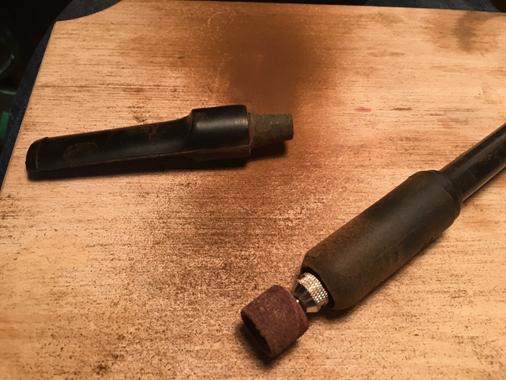
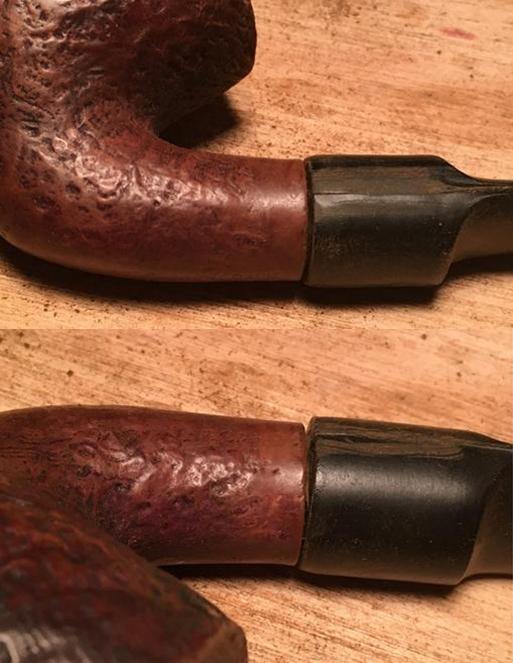
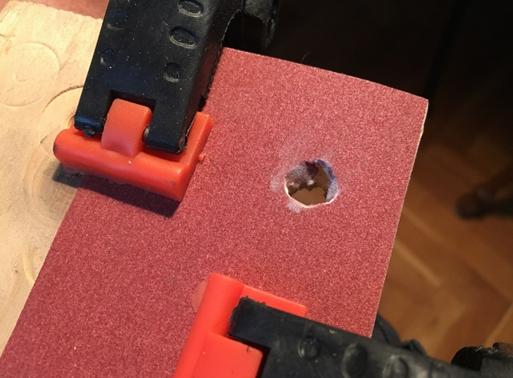
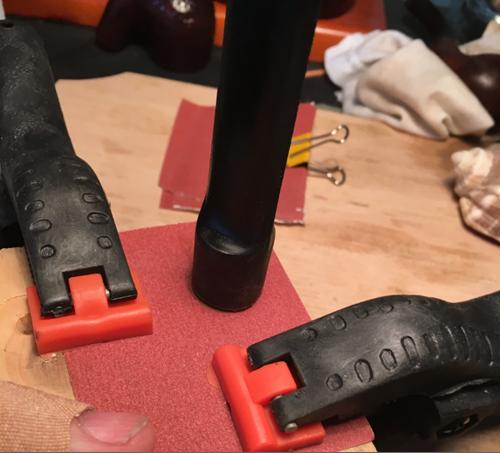
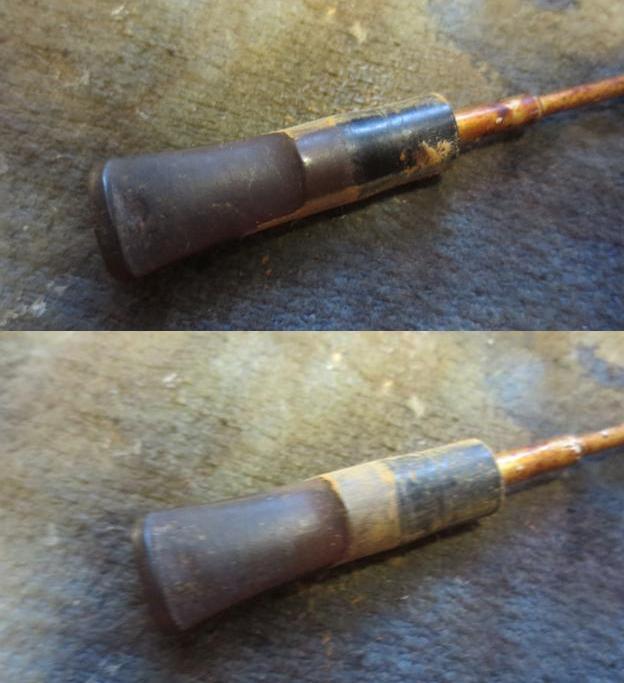
I sanded the stem with 180 and 220 grit sandpaper to remove the oxidation and the tooth marks. I was able to blend the tooth damage into the flow of the stem because fortunately they were not deep.K7
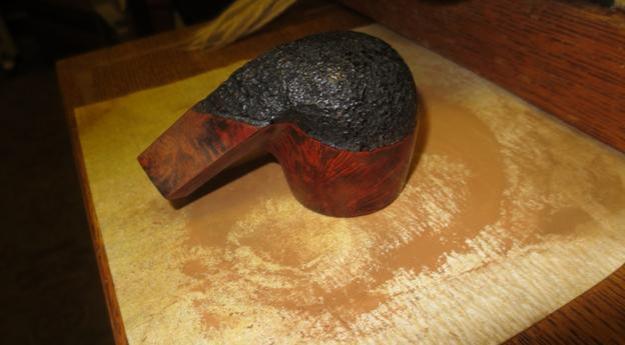
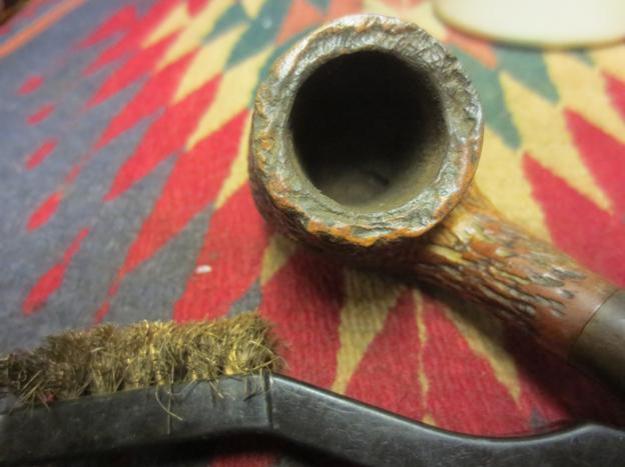
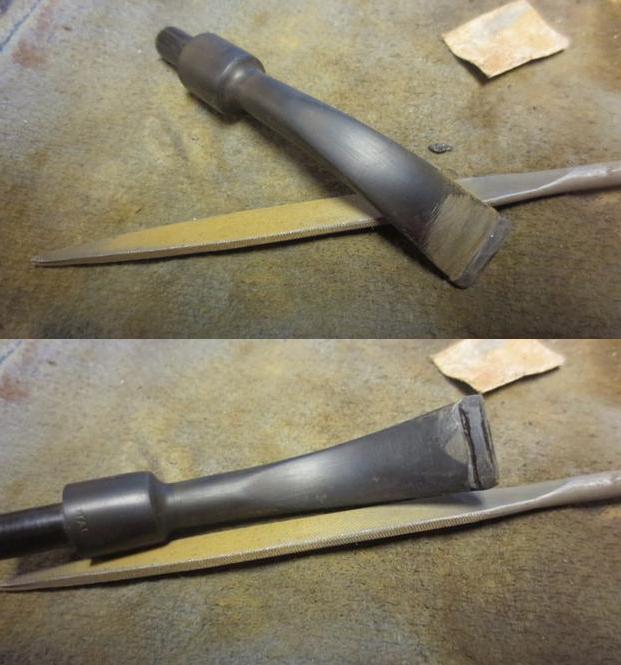
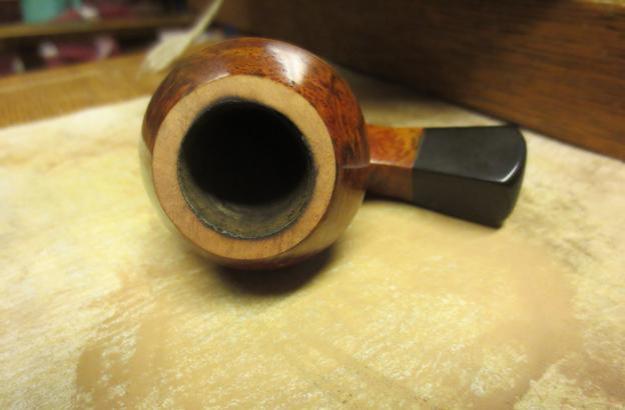
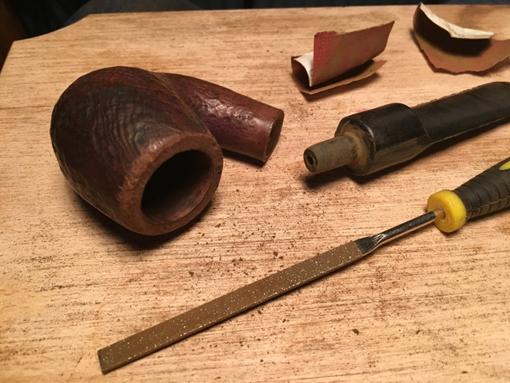
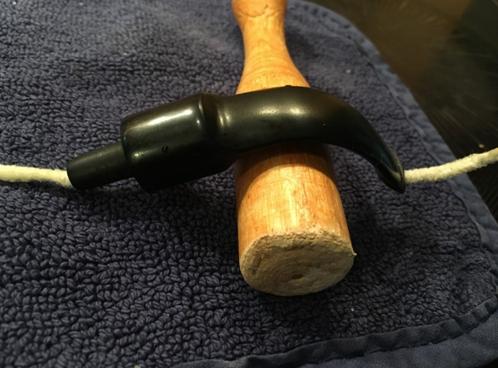
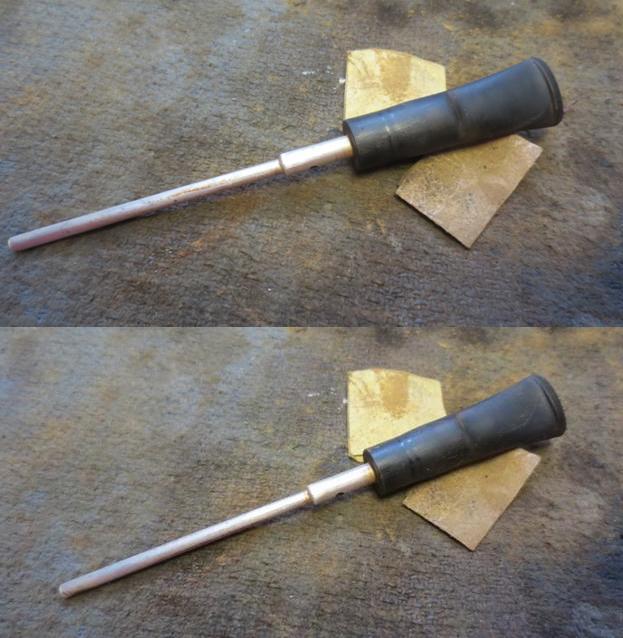
I lightly topped the bowl on the topping board to remove the damage to the rim and the build-up.K8
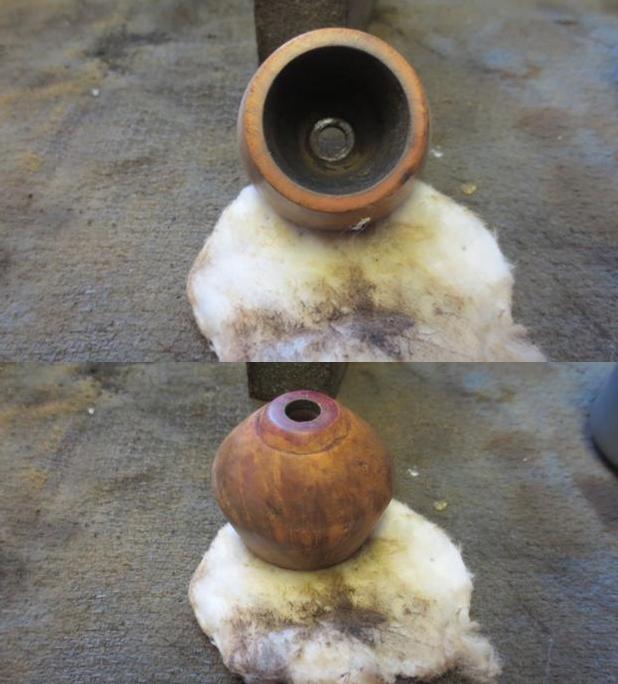
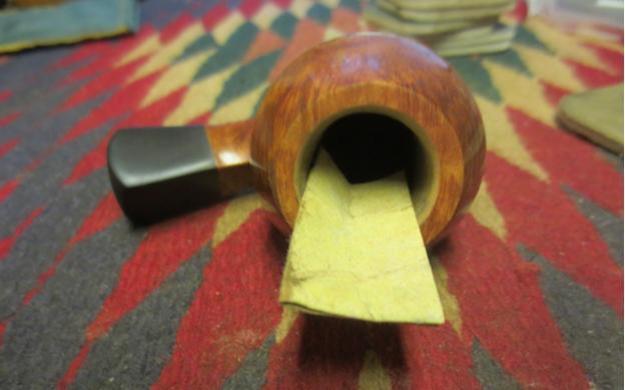
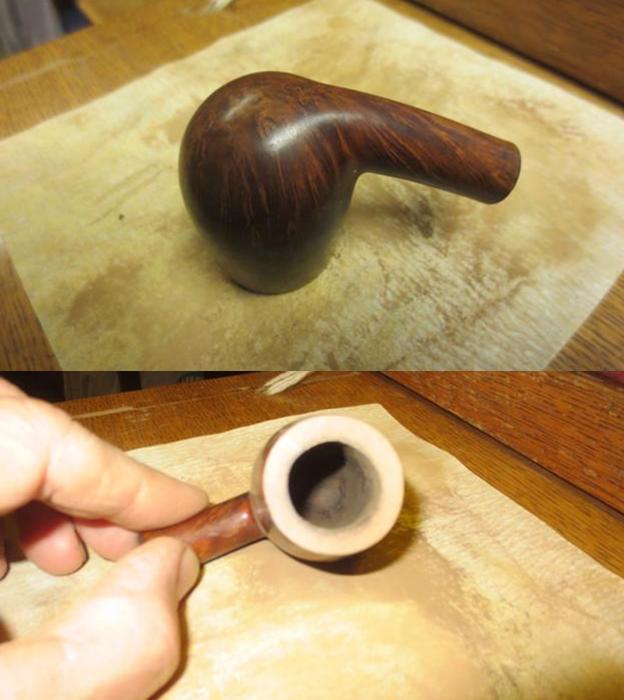
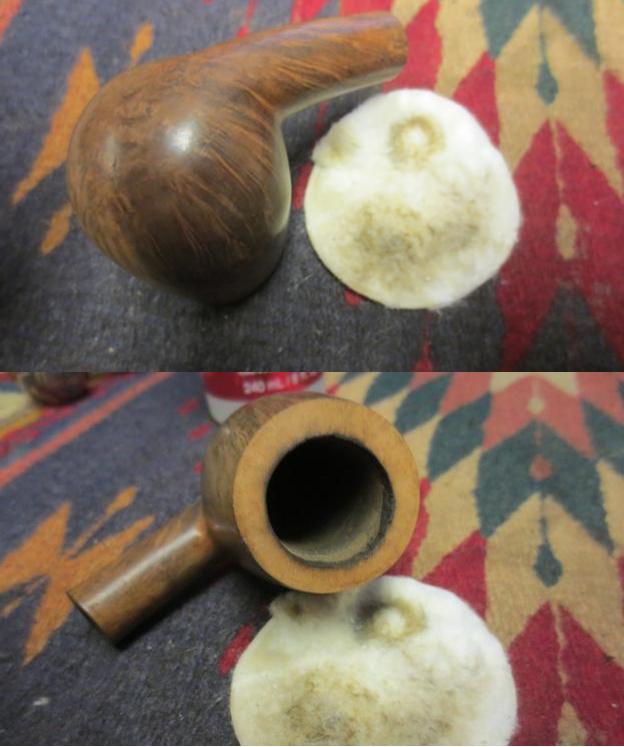
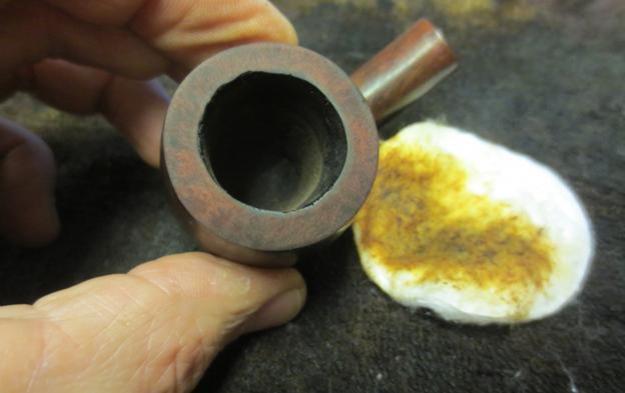
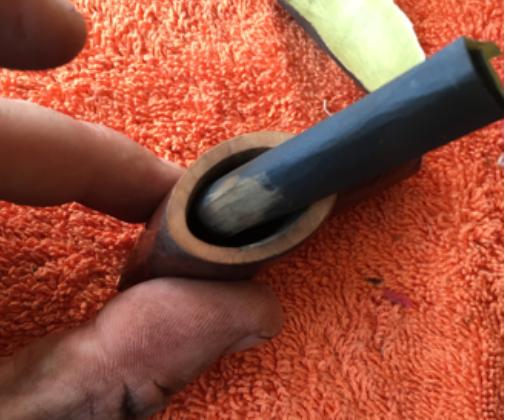
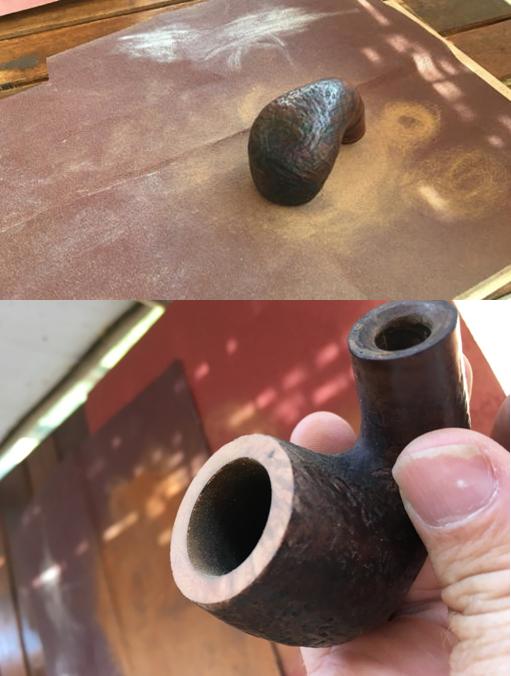
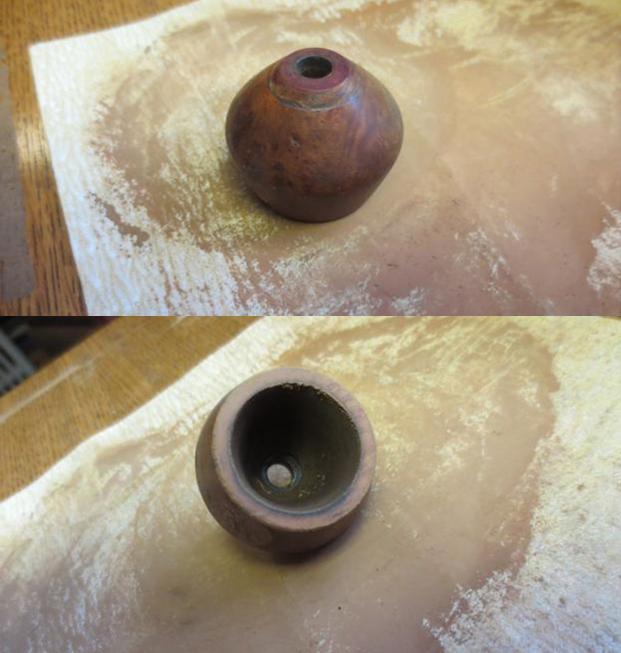
I reamed the bowl with the Savinelli Pipe Knife and took the cake back to bare briar. I sanded the inside of the bowl with a piece of sandpaper to clean out the remaining cake.K9
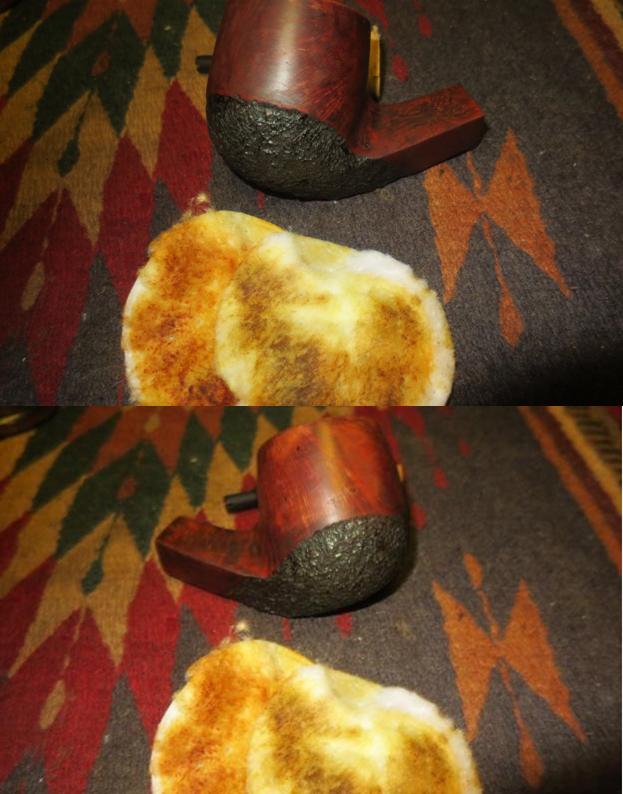
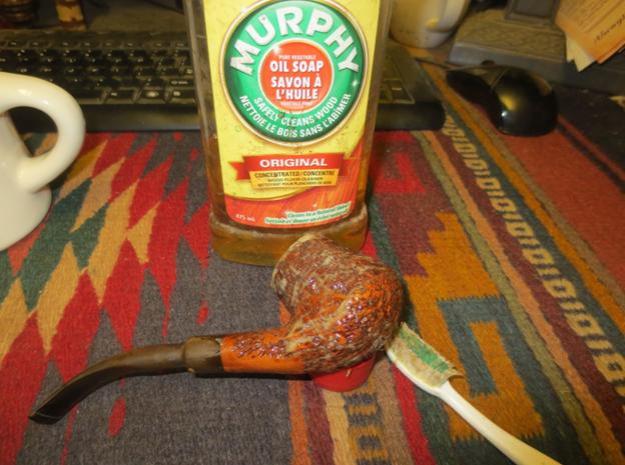
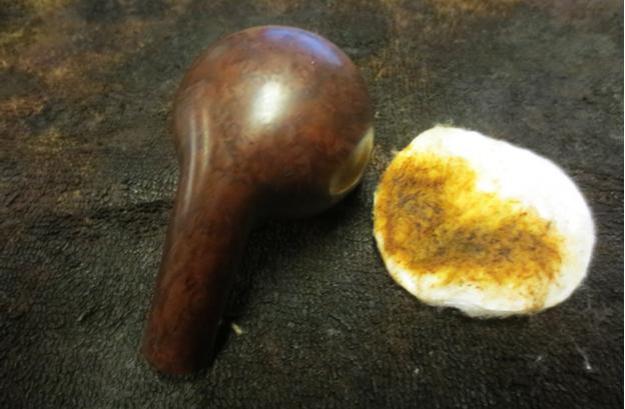
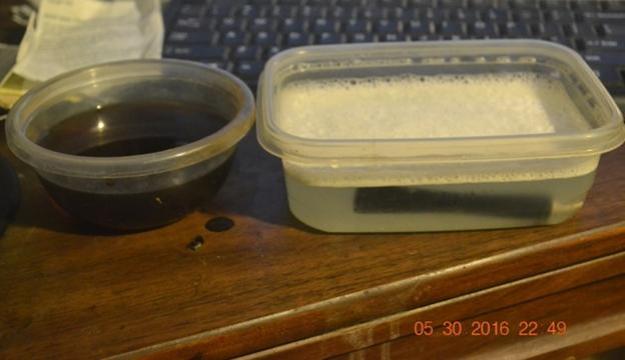
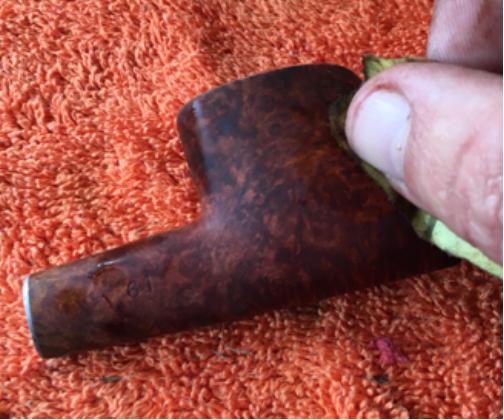
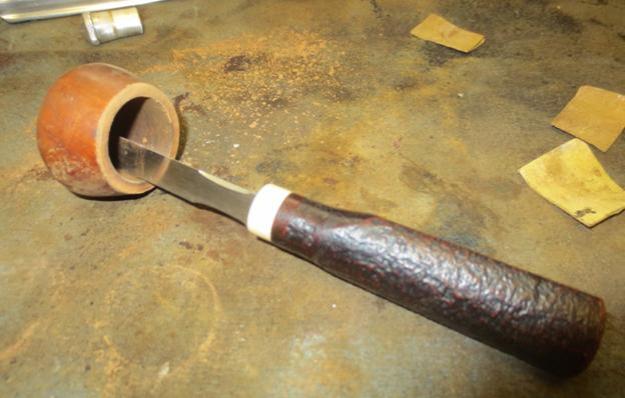
I scrubbed the exterior of the bowl with cotton pads and acetone to remove the grime and the remaining finish.K10 K11
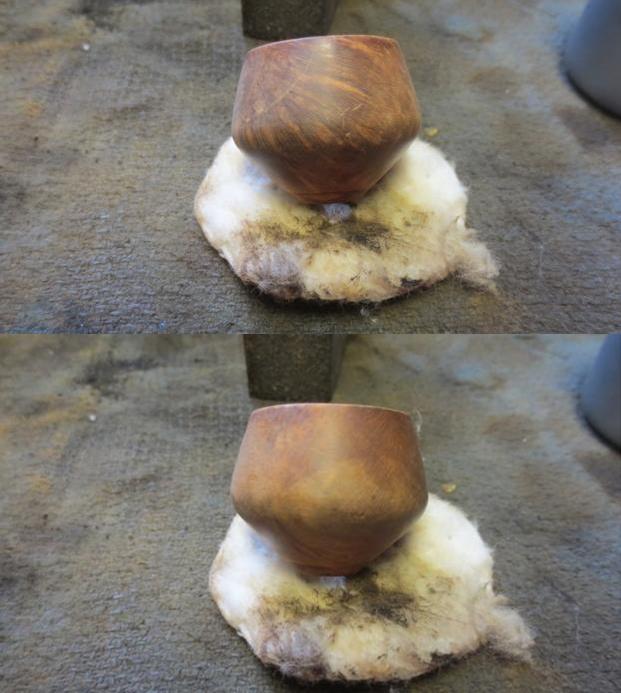
I scrubbed the rod on the stem unit with acetone to remove the tars and oils. I did the same with the exterior of the valve.K12
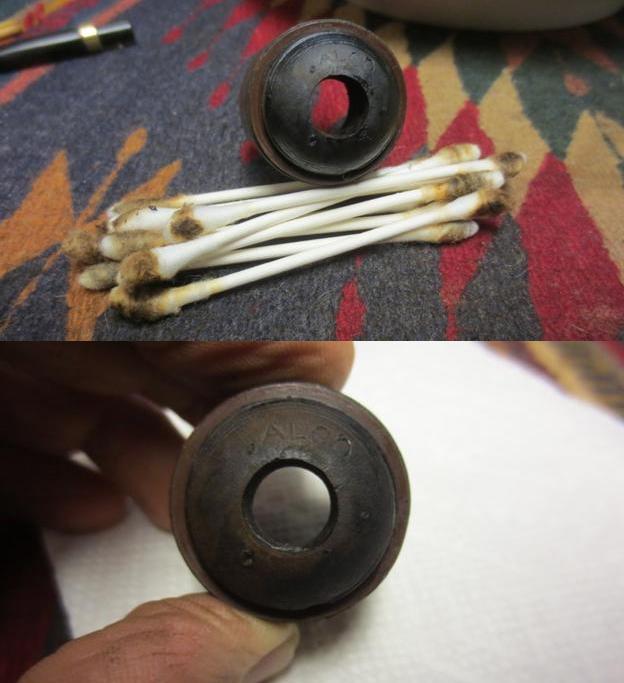
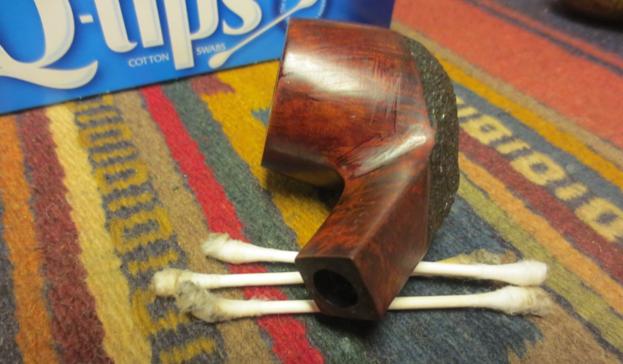
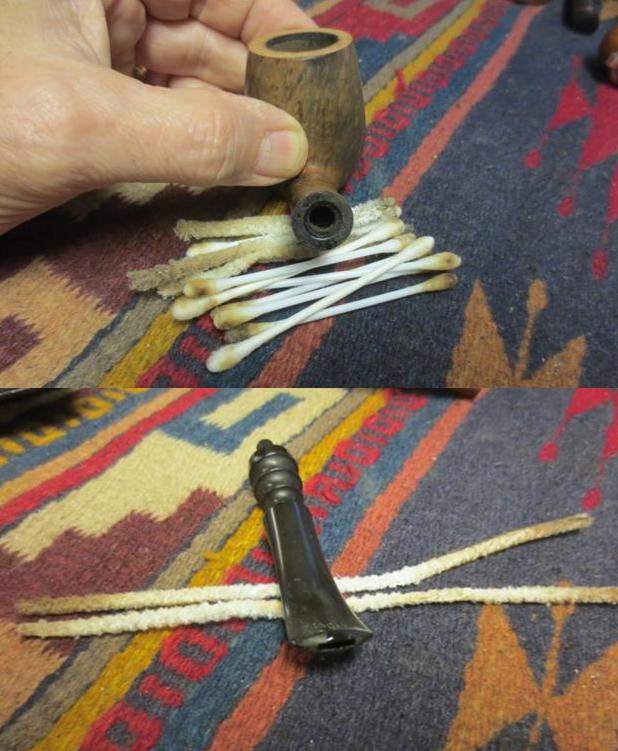
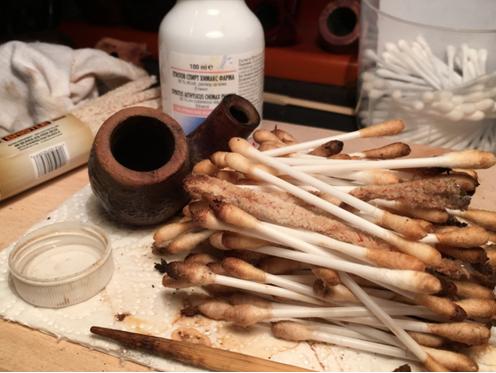
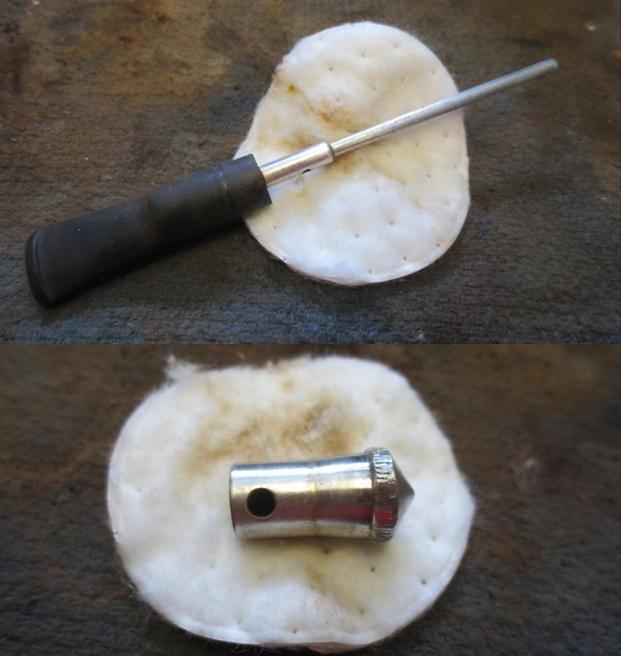
I cleaned out the tarry build-up in the valve/end cap with cotton swabs and alcohol.K13
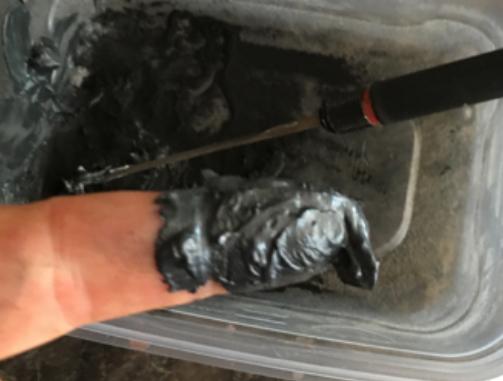
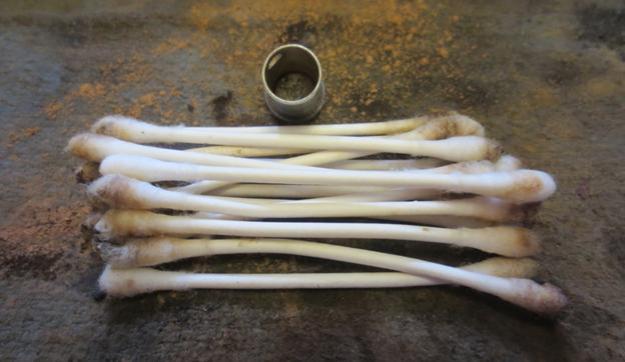
I cleaned out the barrel with cotton swabs and rolled cotton pads and alcohol pushed through the opening with a screw driver. I also pushed a rolled piece of 0000 steel wool through the barrel to polish the inside. I used pipe cleaners to clean out the threads in the opening on the top of the barrel.K14
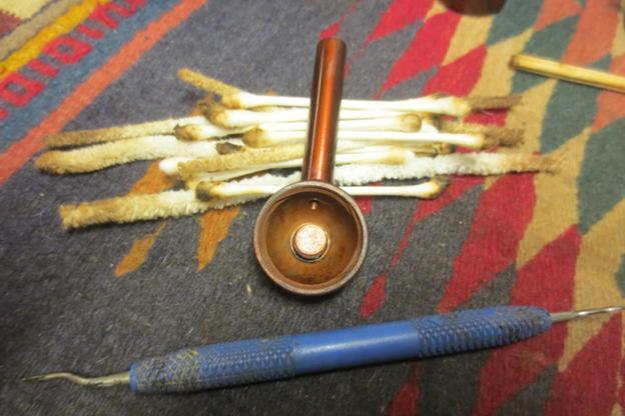
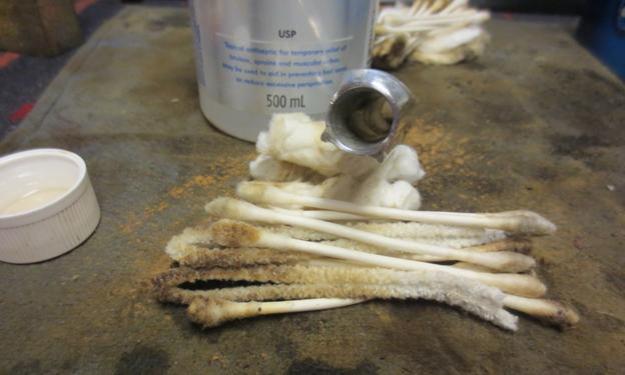
I cleaned up the screw and the airway through the screw with a dental pick, pipe cleaners and alcohol. I cleaned the threads on the screw with cotton swabs and alcohol.K15
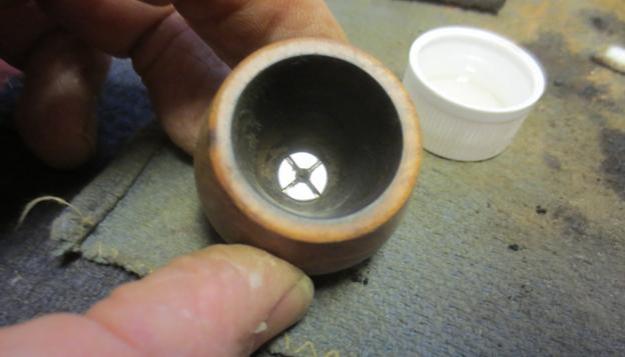
I polished the aluminum barrel with Meguiar’s Scratch X2.0 and cotton swabs.K16
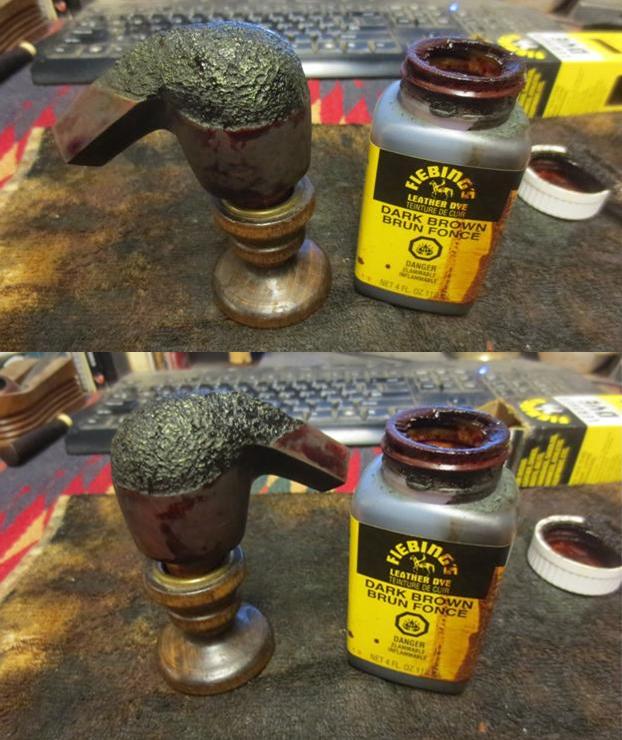
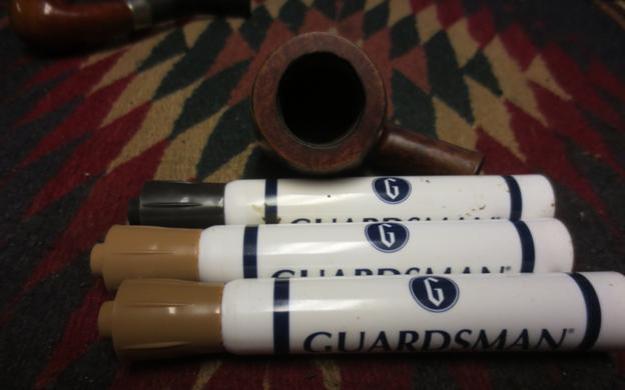
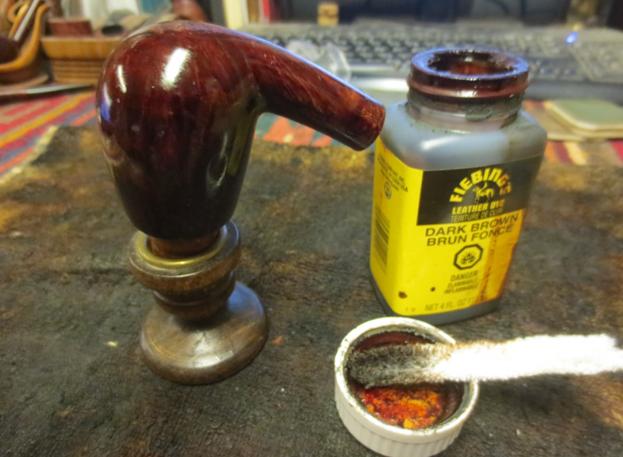
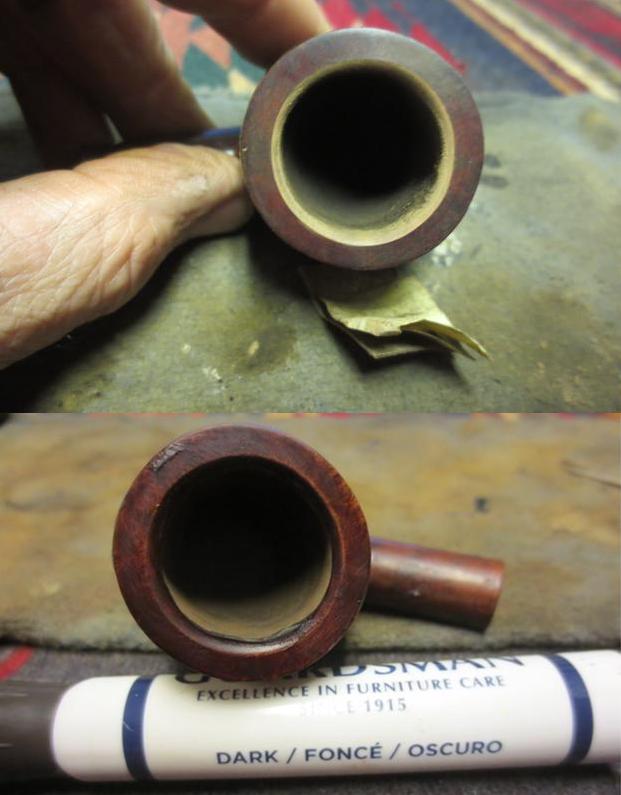
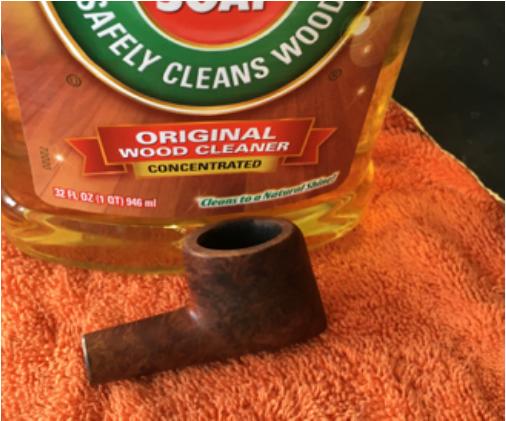
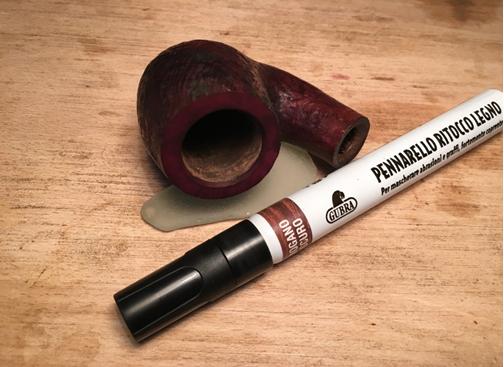
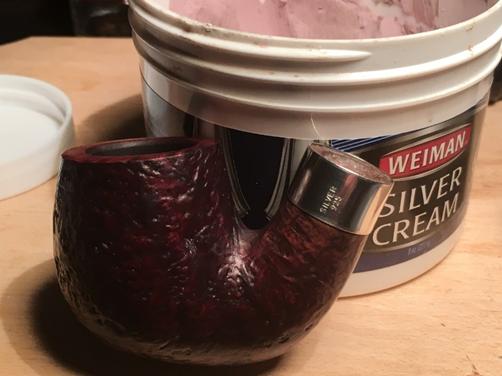
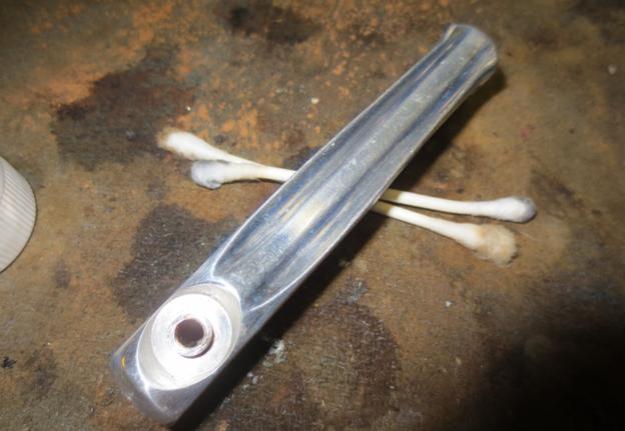
I restained the bowl with a dark brown stain pen. K17
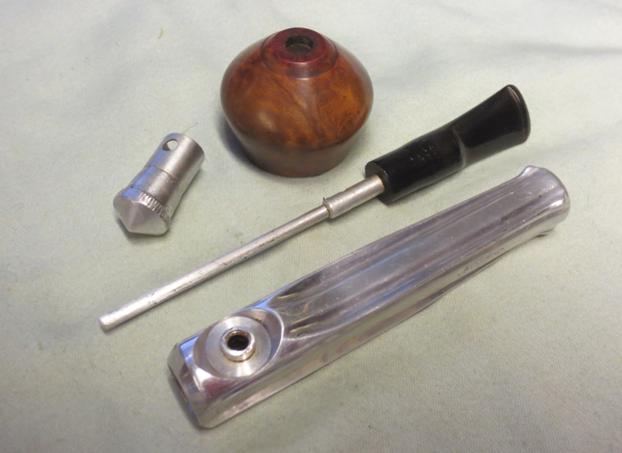
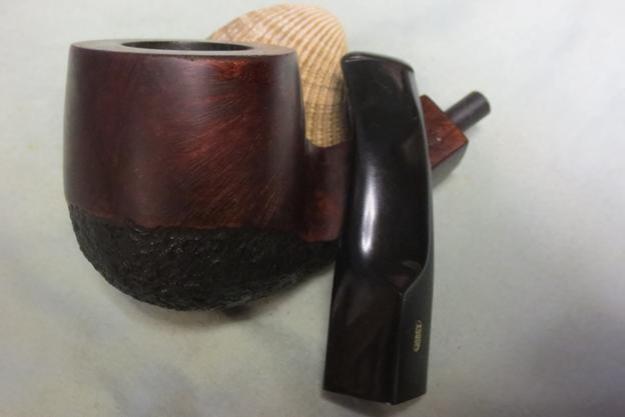
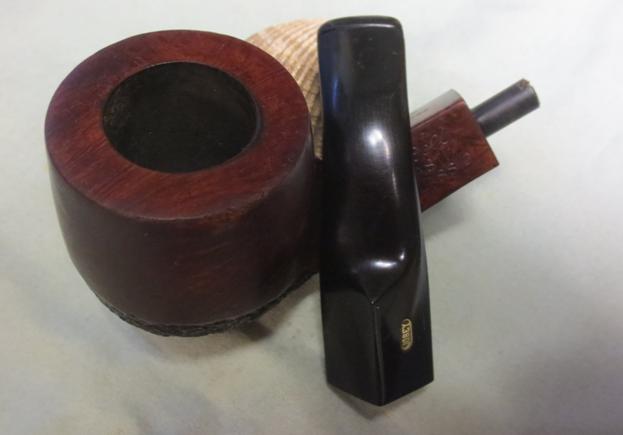
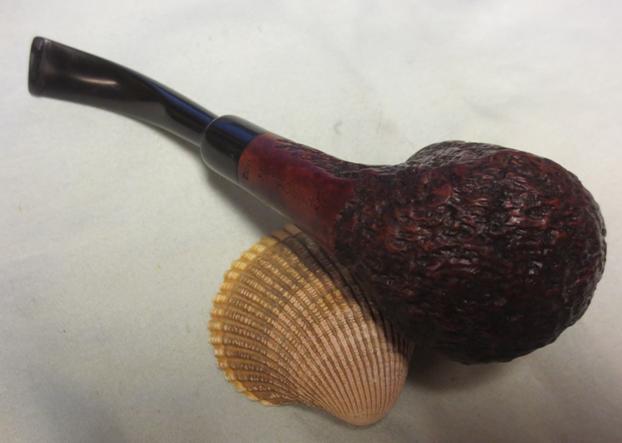
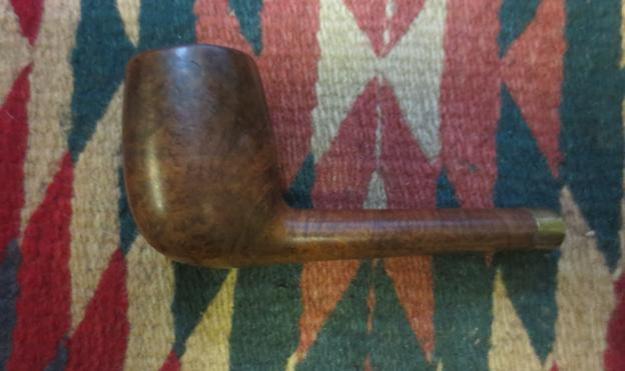
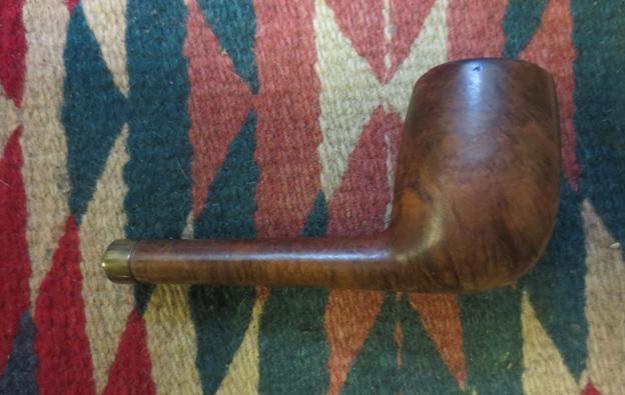
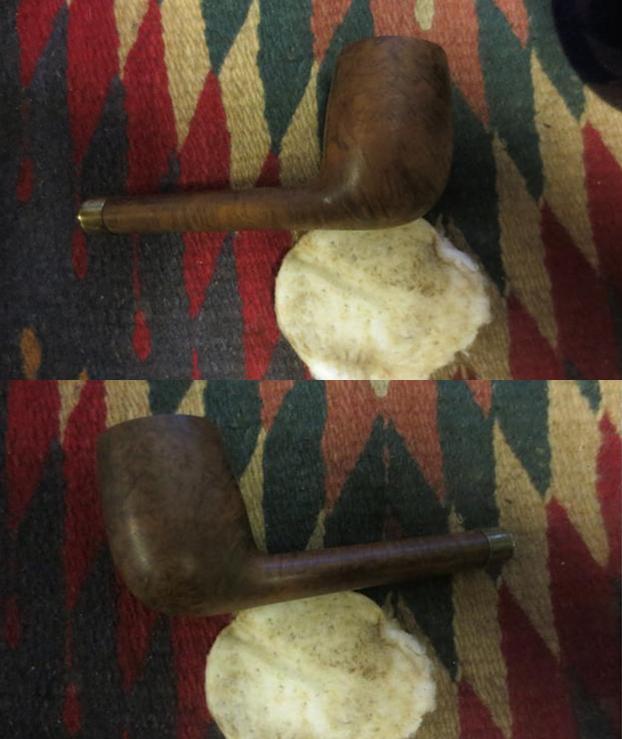
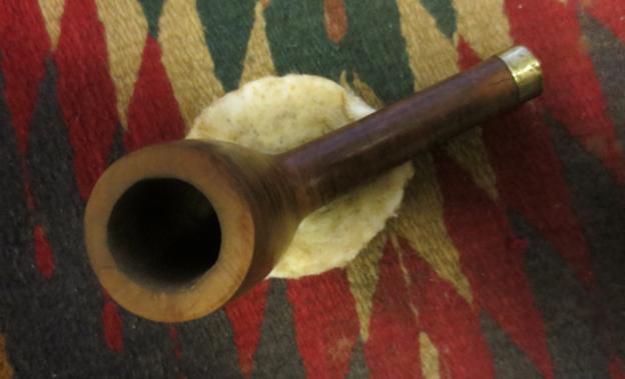
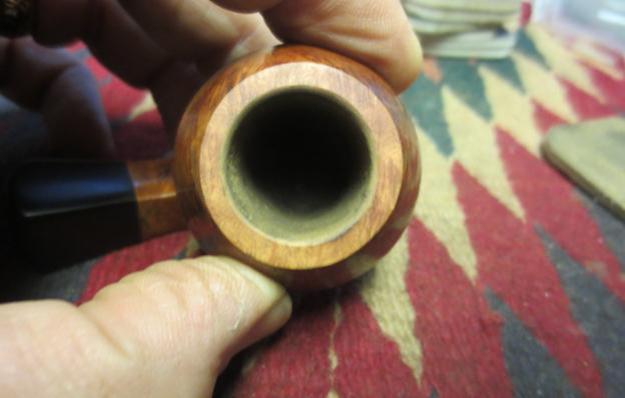
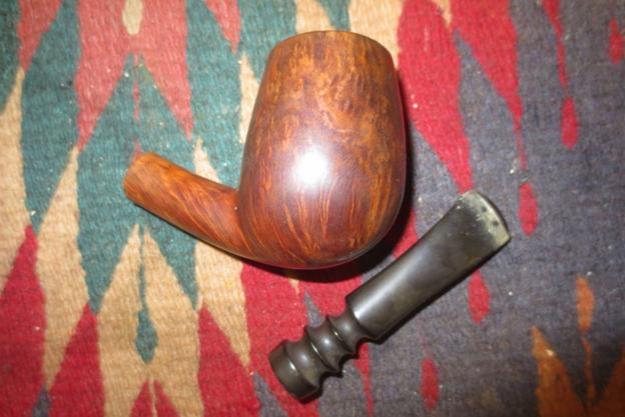
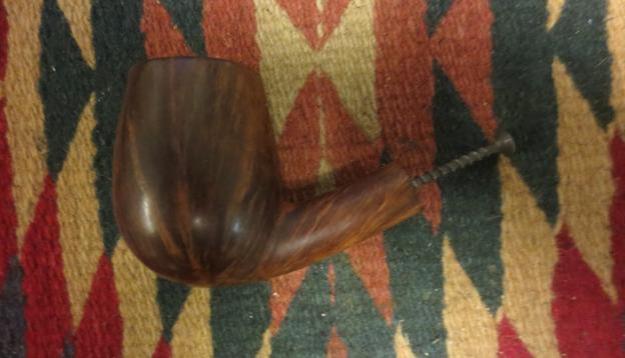
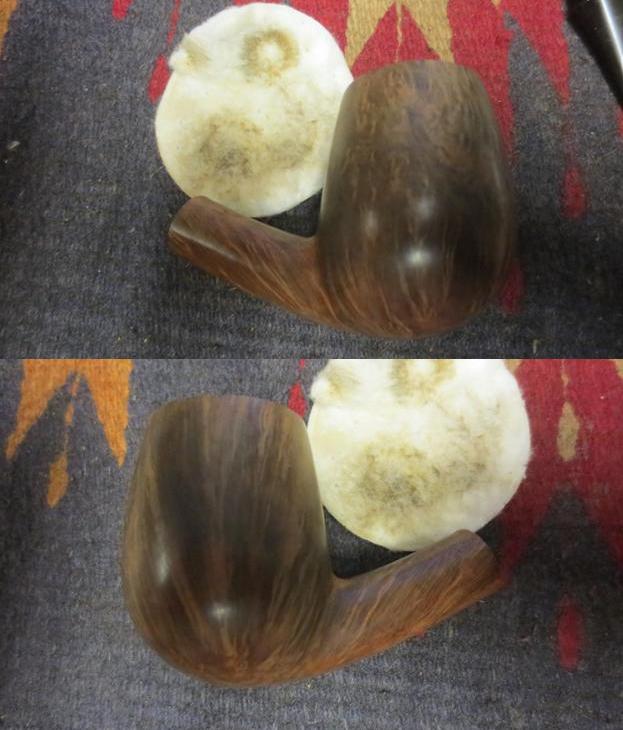
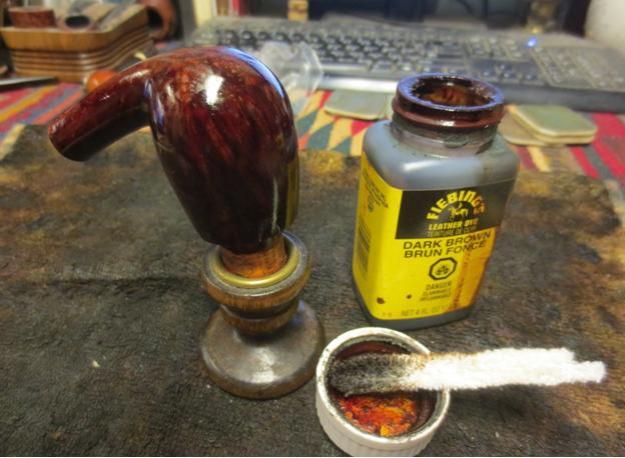
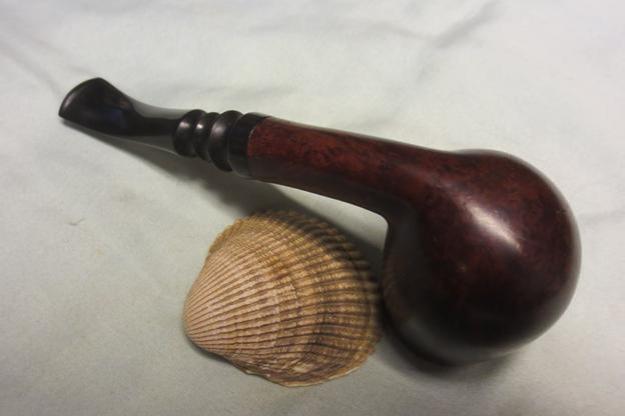
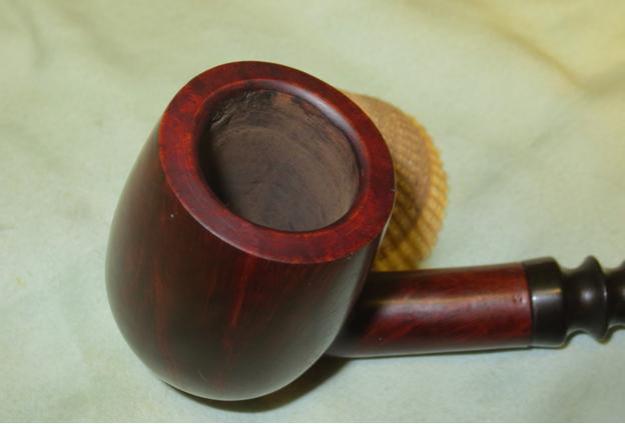
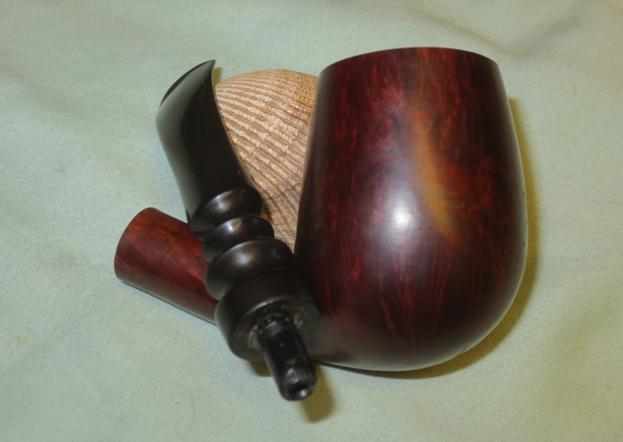
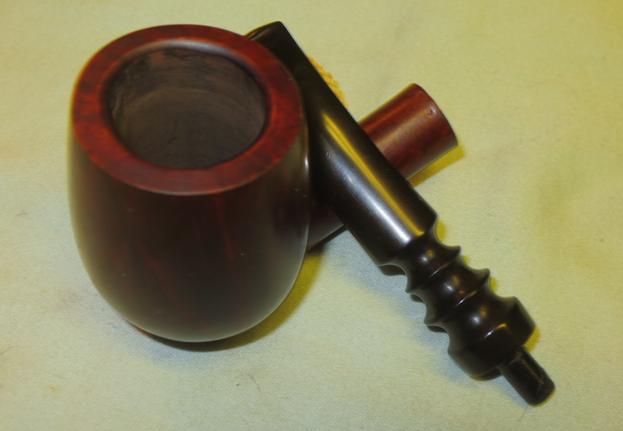
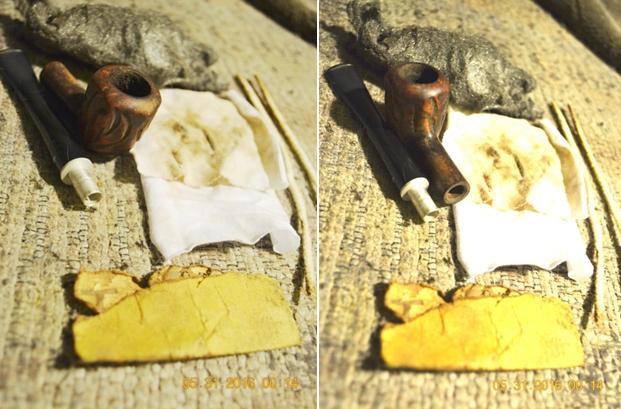
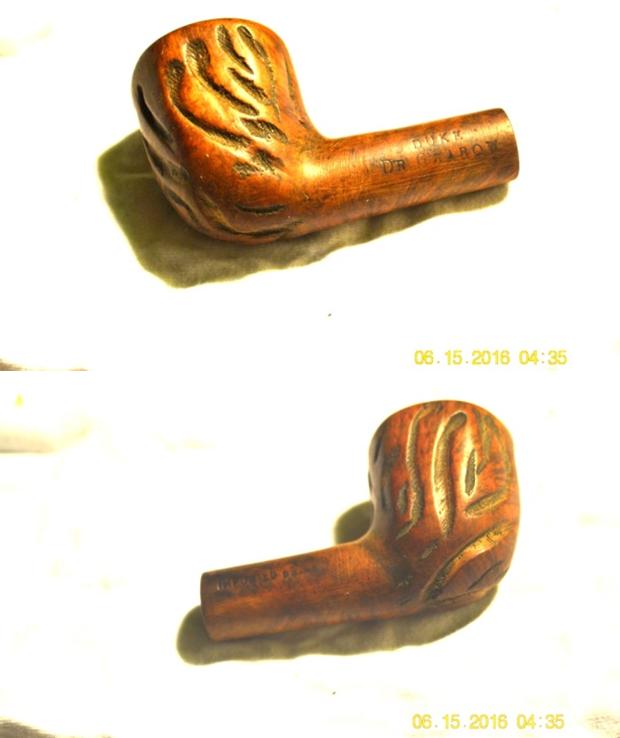
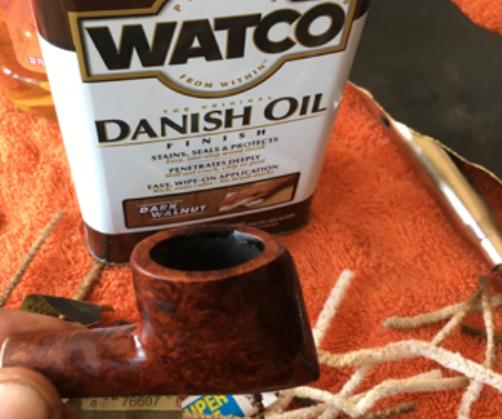
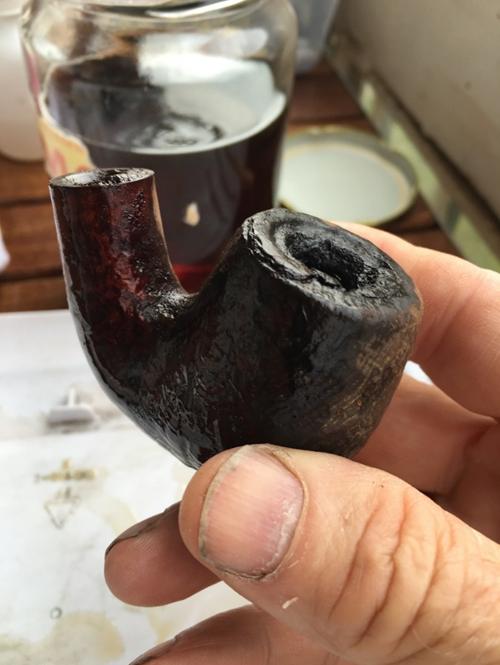
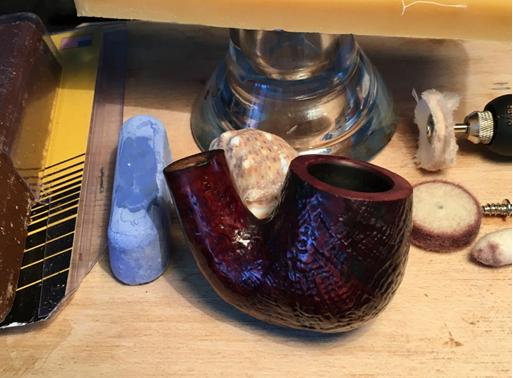
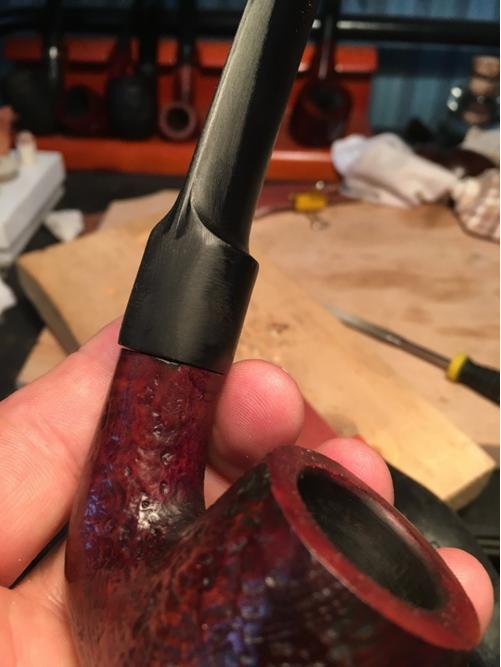
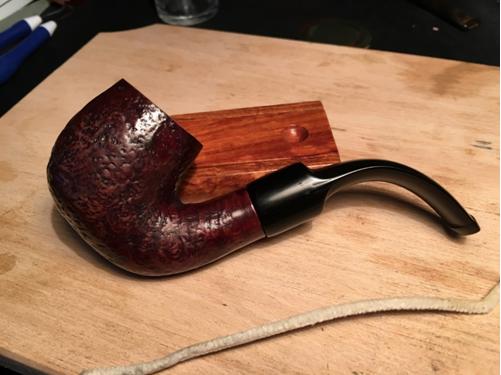
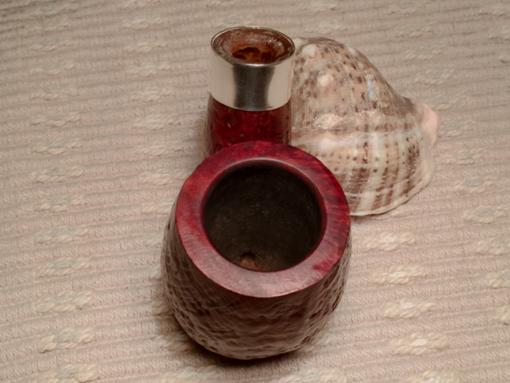
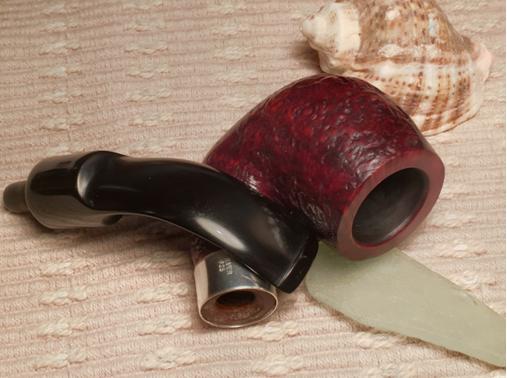
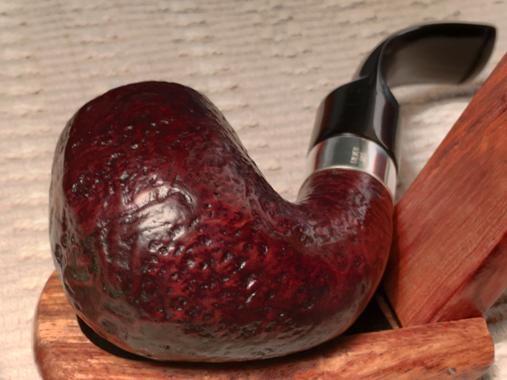
I put the bowl on the barrel buffed them with Blue Diamond on the wheel to polish the stain and even out the coat on the bowl as well as polish the aluminum. The next photos show the bowl and barrel at this point in the process.K18 K19
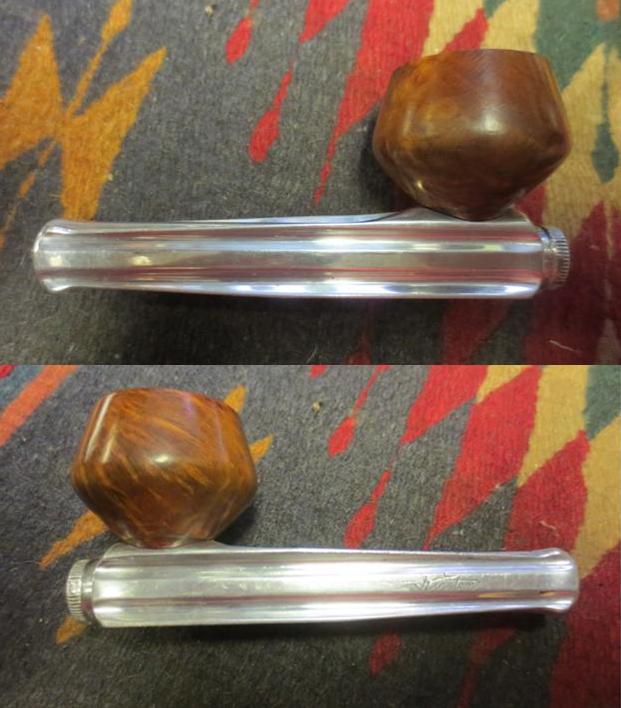
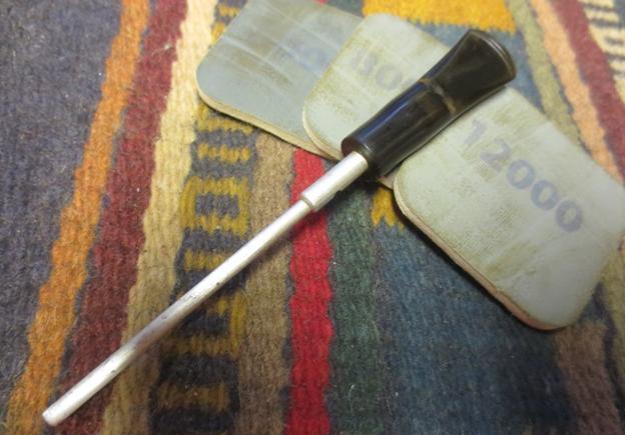
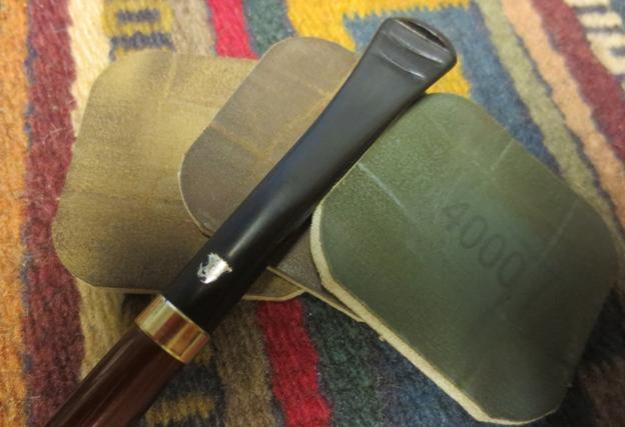
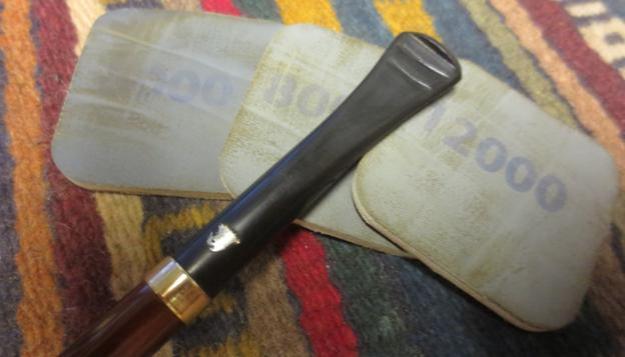
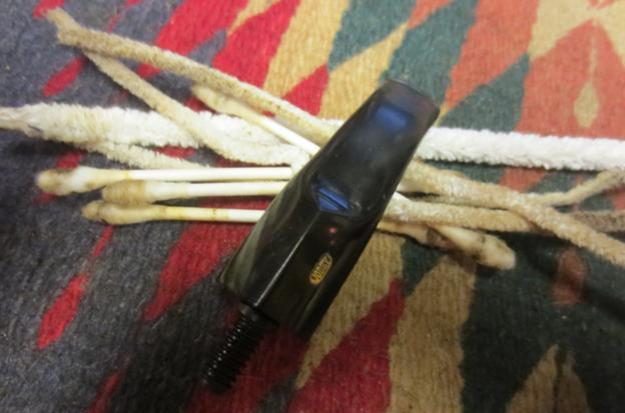
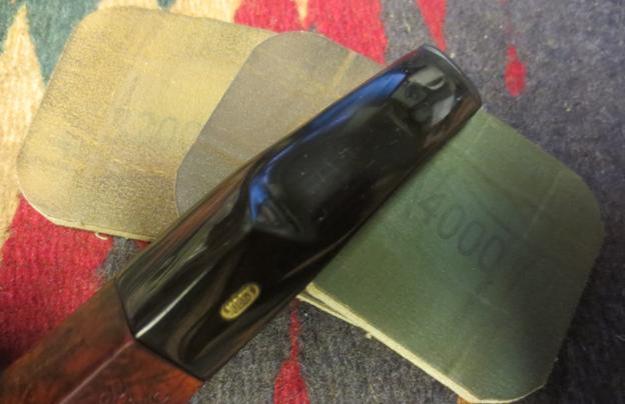
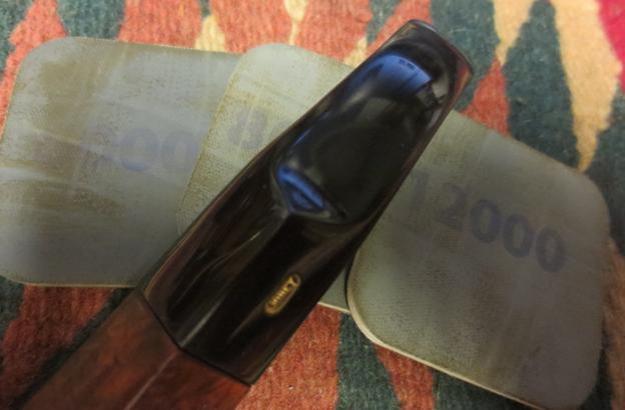
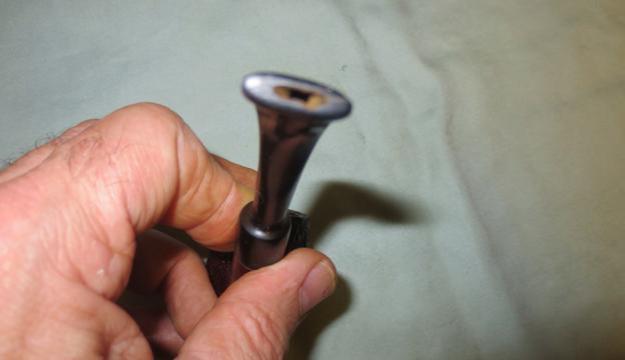
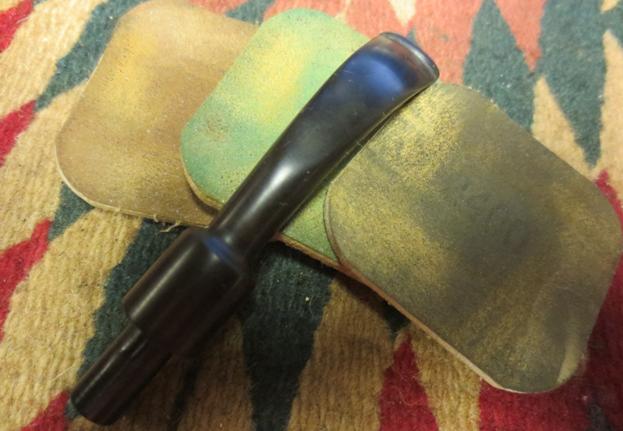
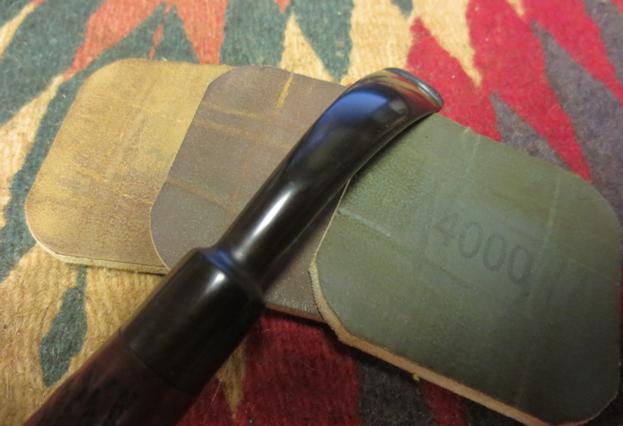
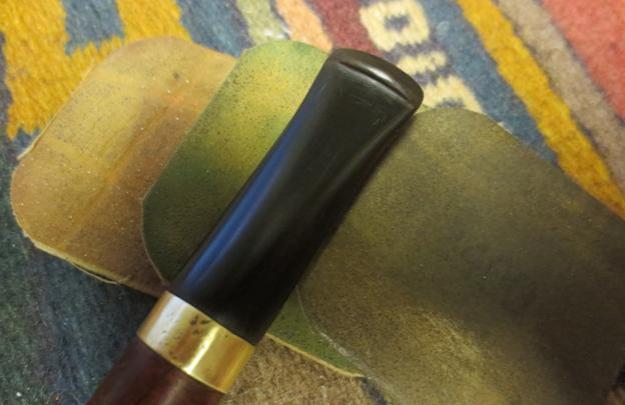
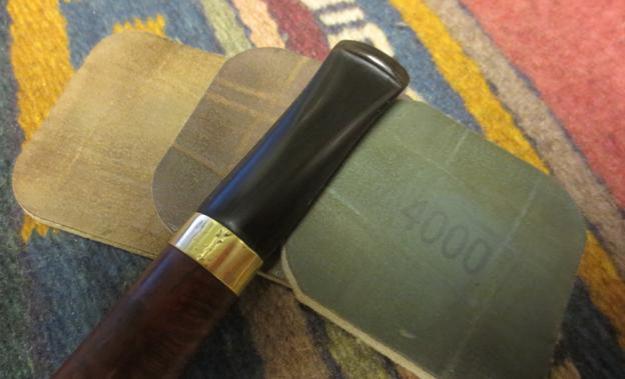
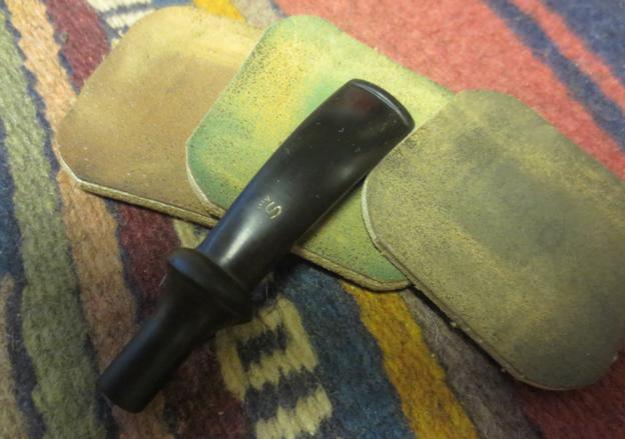
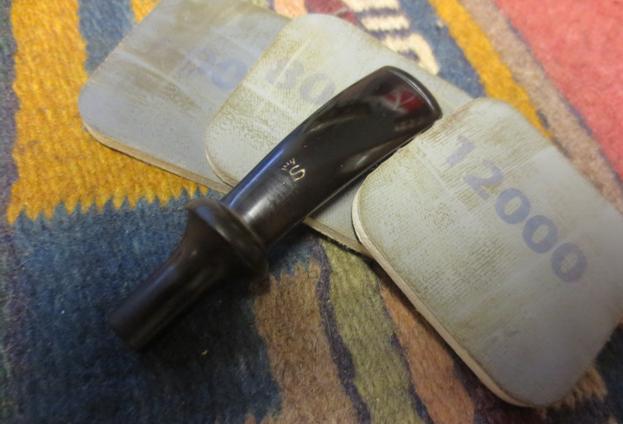
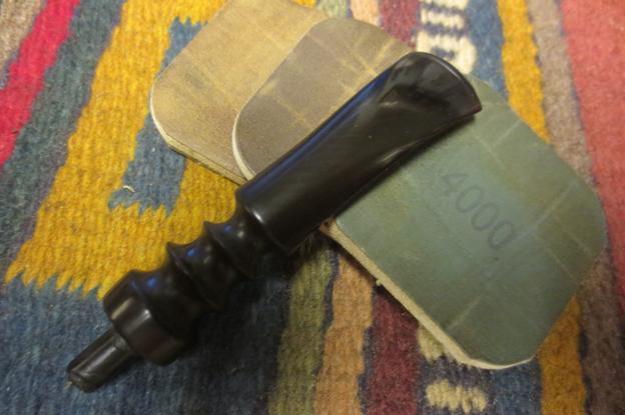
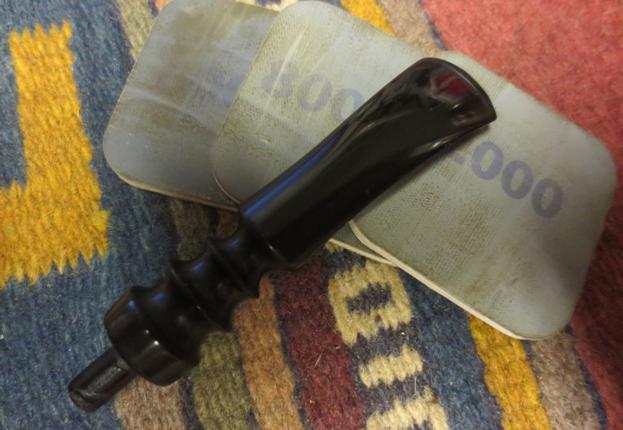
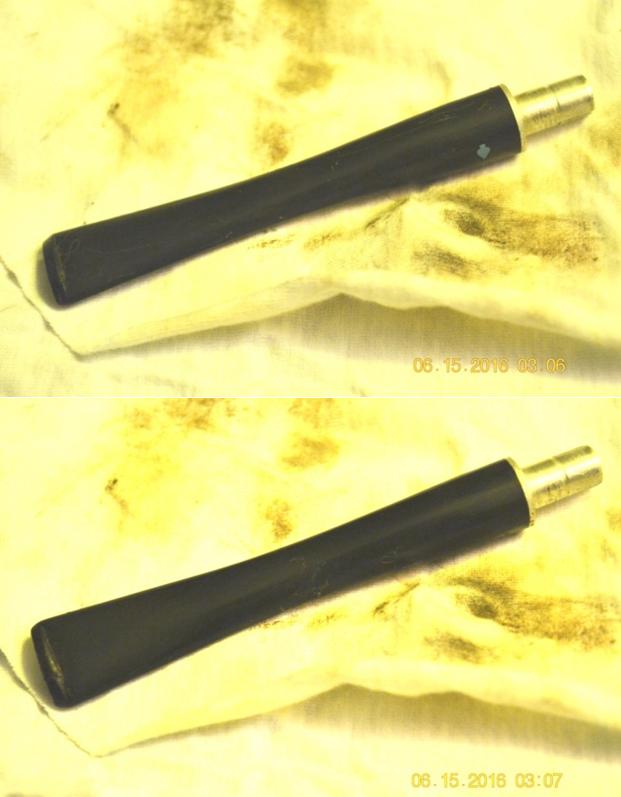
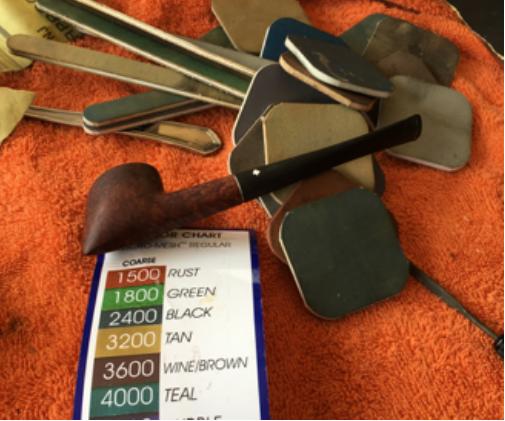
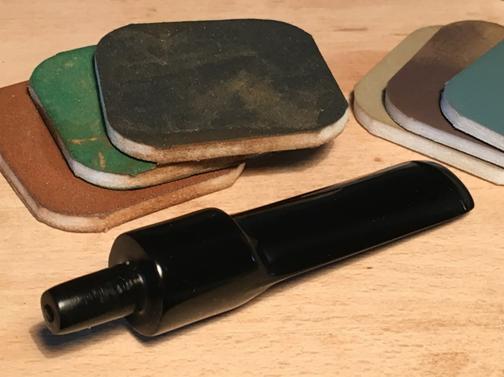
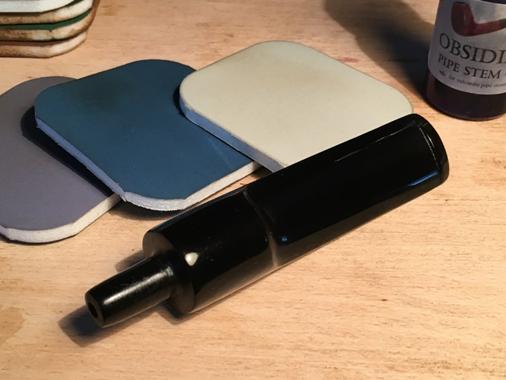
I cleaned out the airway in the stem with pipe cleaners and alcohol and then worked on the stem with micromesh sanding pads. I wet sanded with 1500-2400 grit pads and gave it a coat of Obsidian Oil. I dry sanded with 3200-4000 grit pads and gave it another coat of oil. I finished sanding with 6000-12000 grit pads and gave it a final coat of Obsidian Oil. I set the stem aside to dry.K20 K21 K22
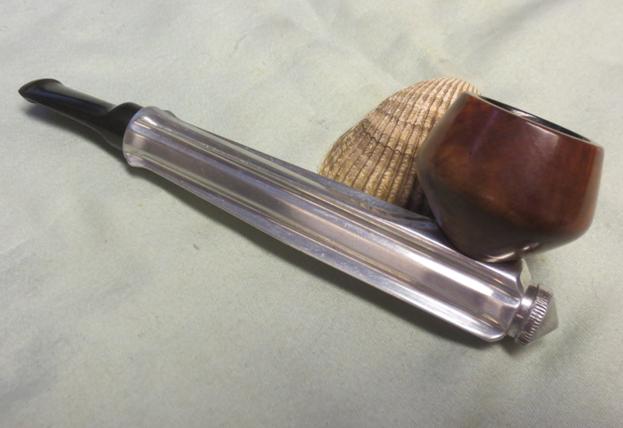
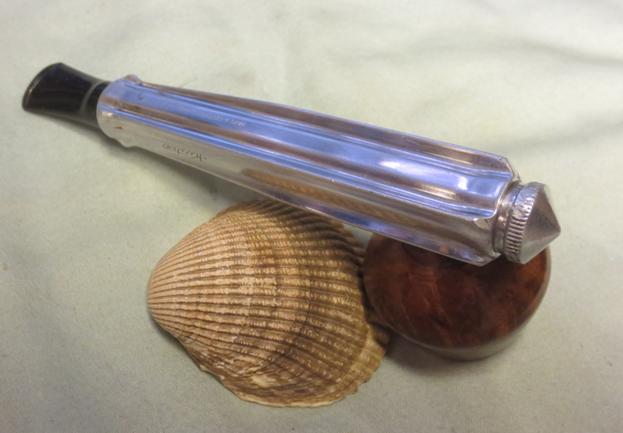
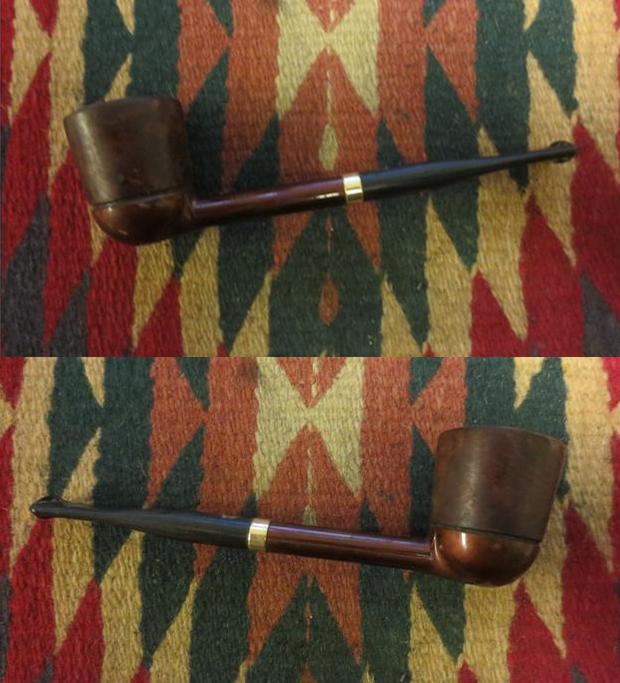
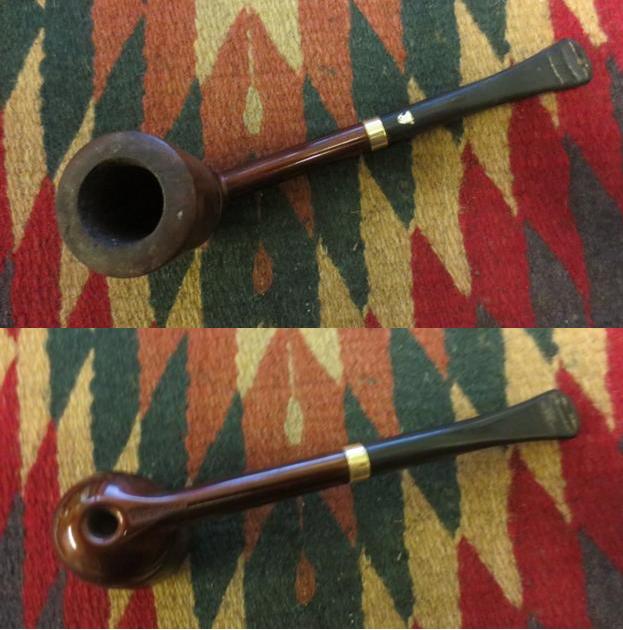
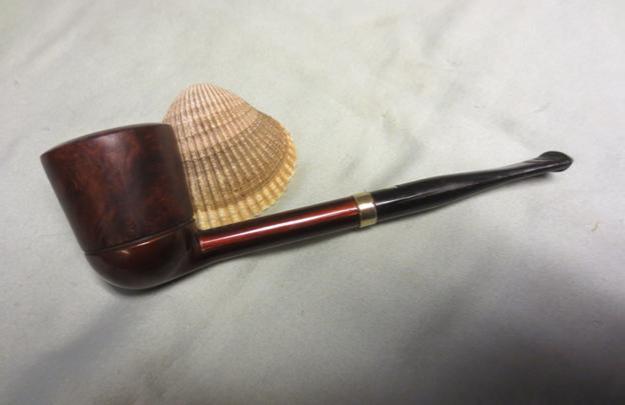
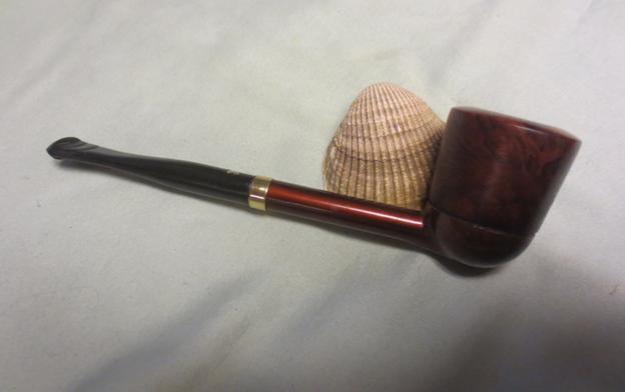
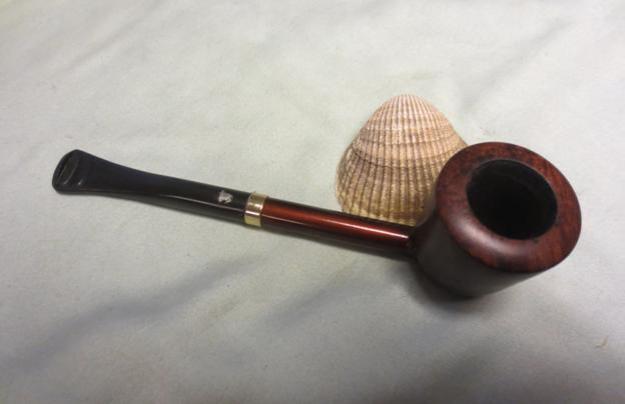
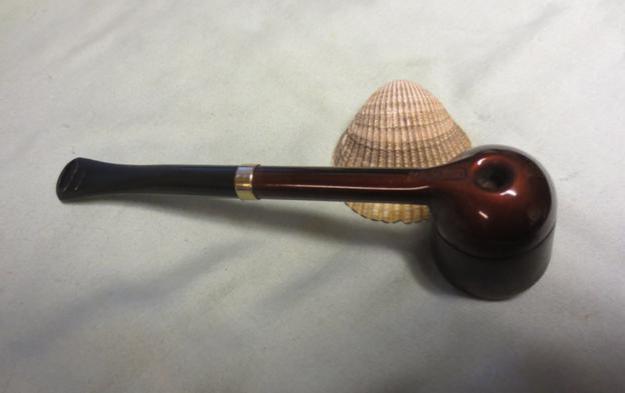
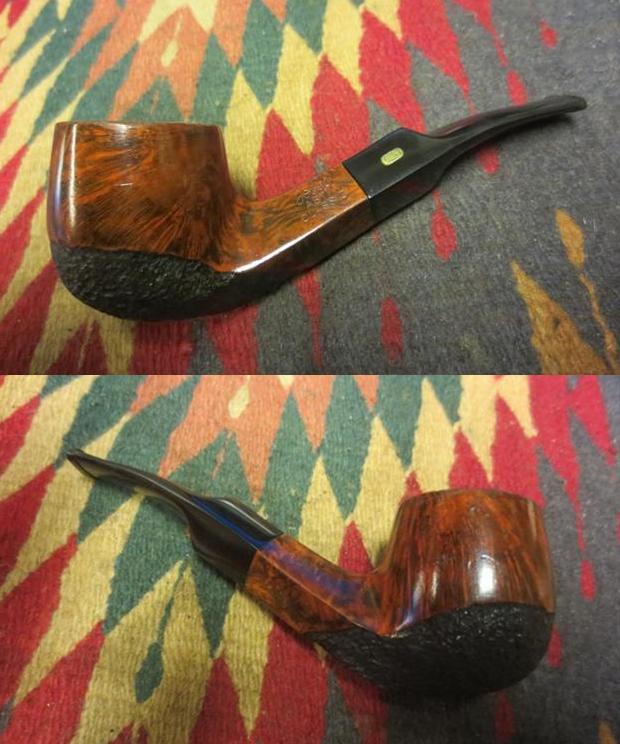
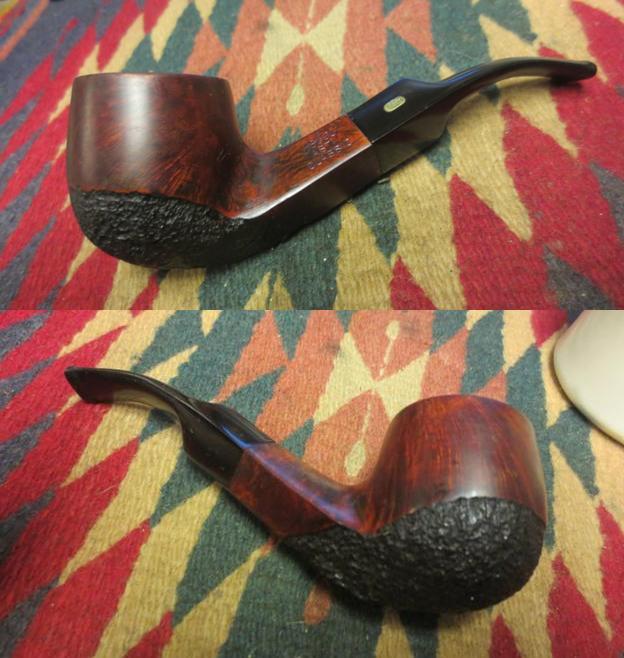
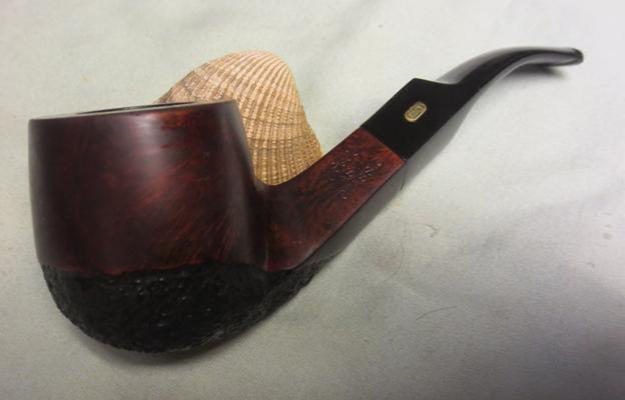
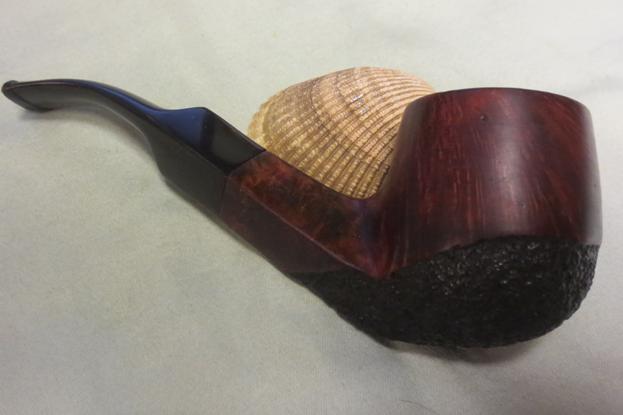
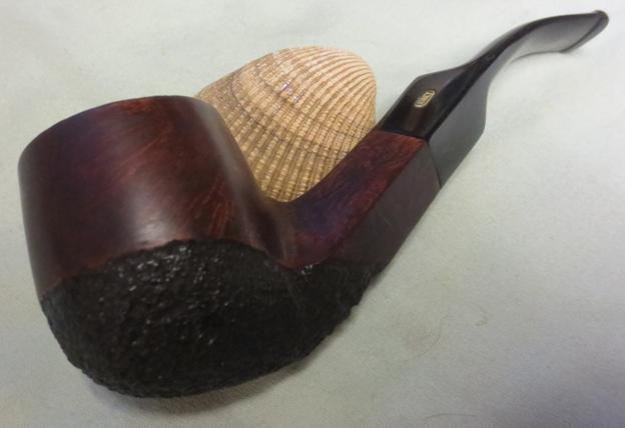
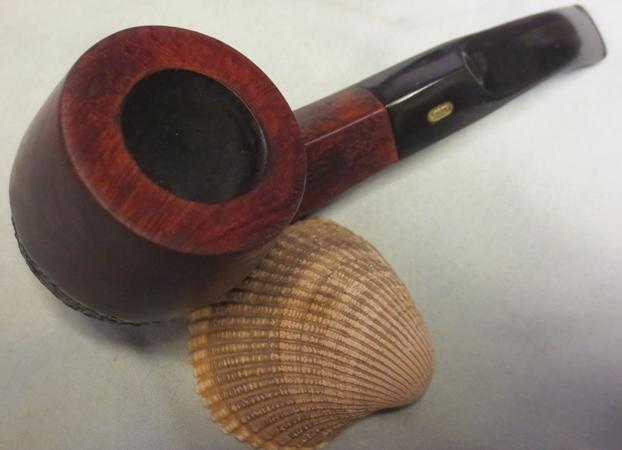
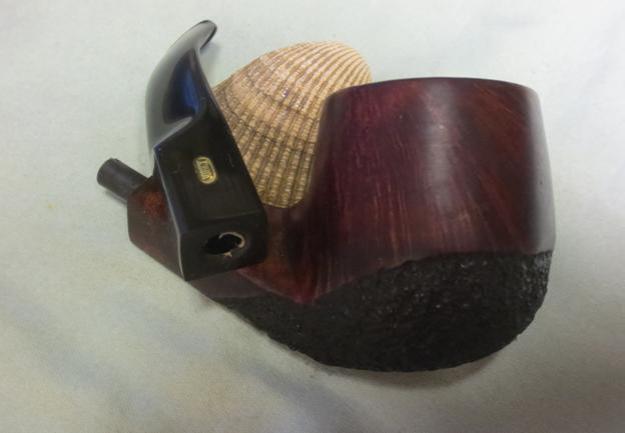
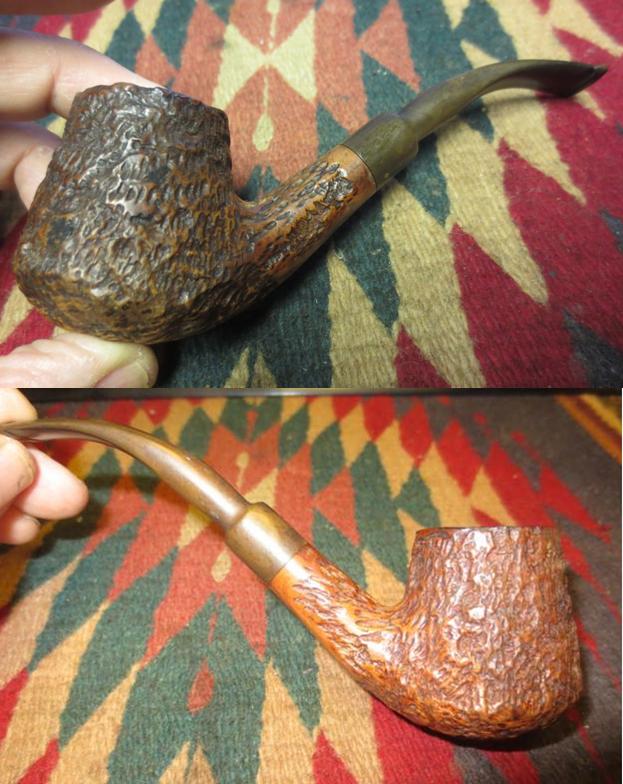
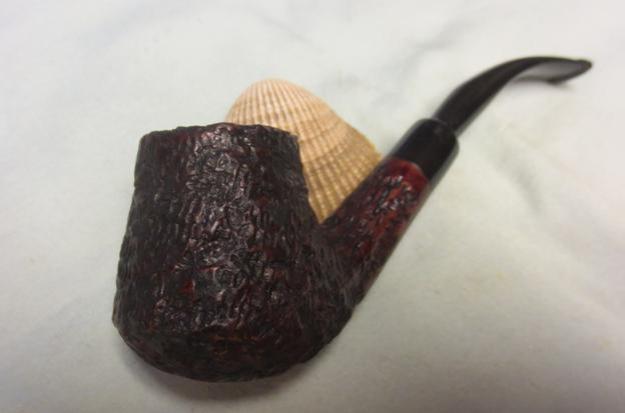
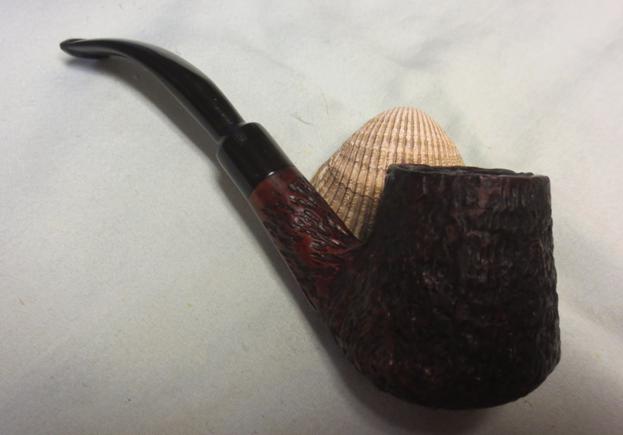
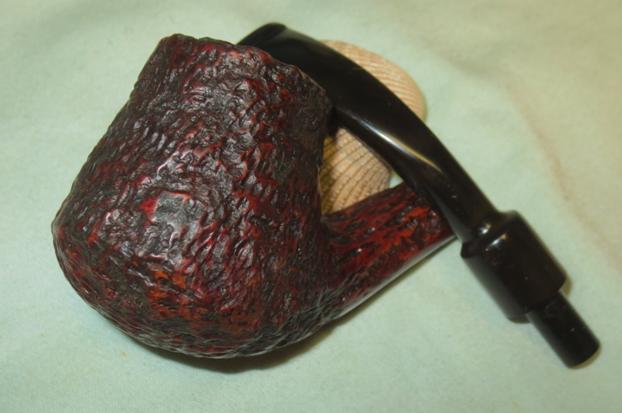
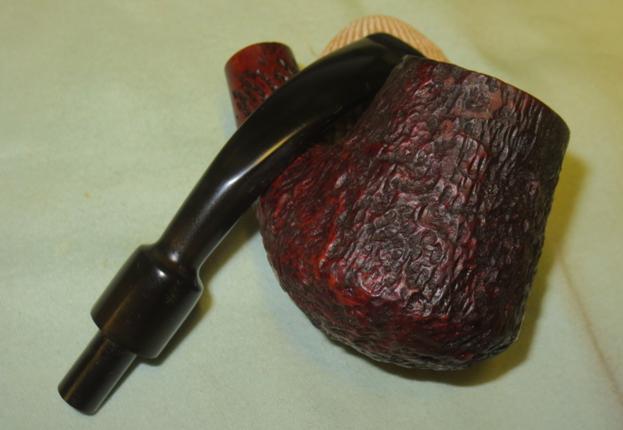
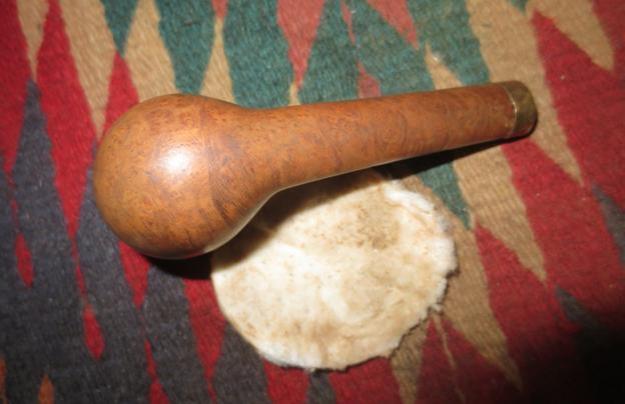
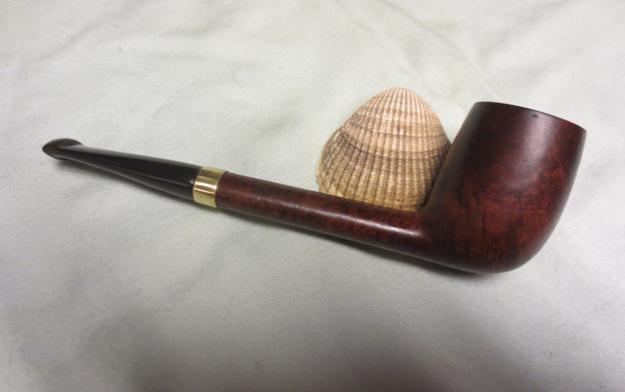
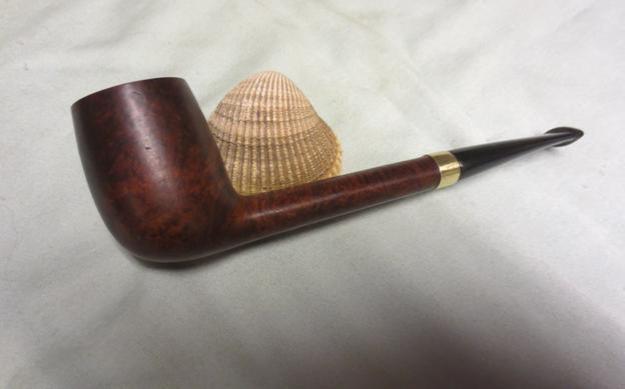
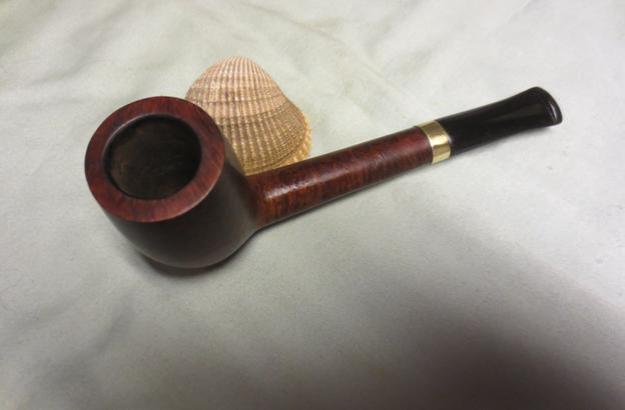
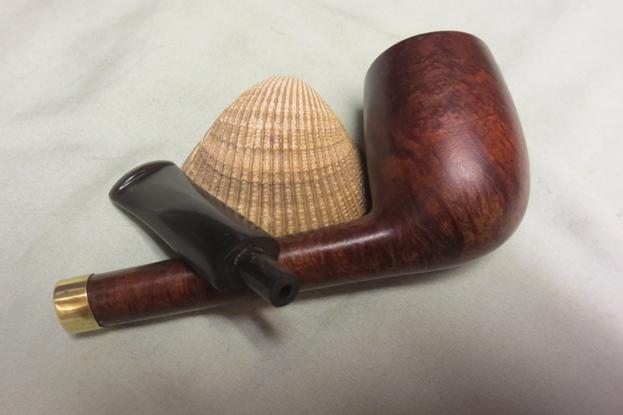
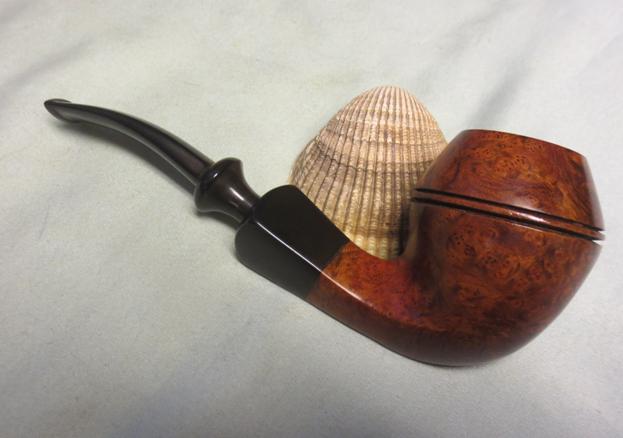
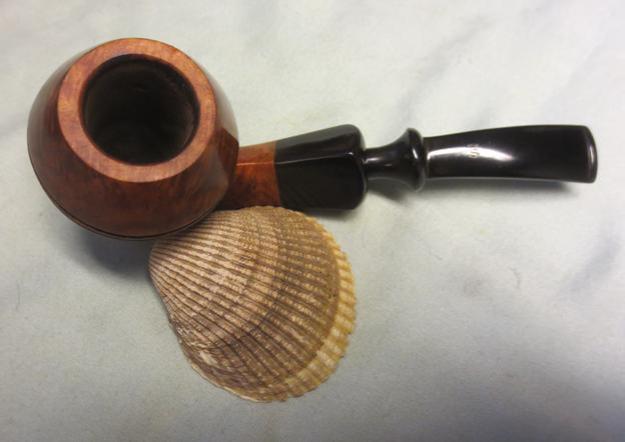
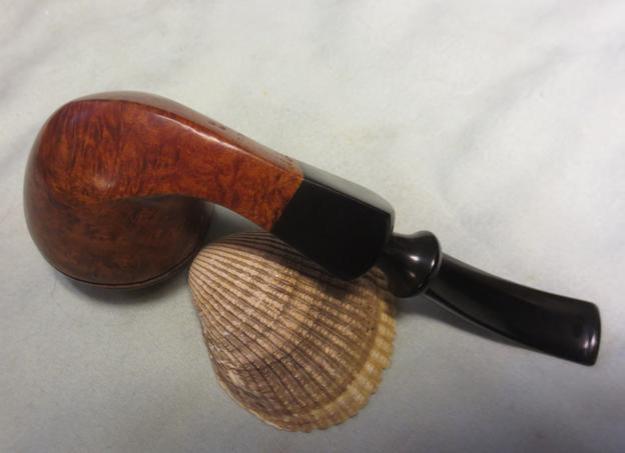
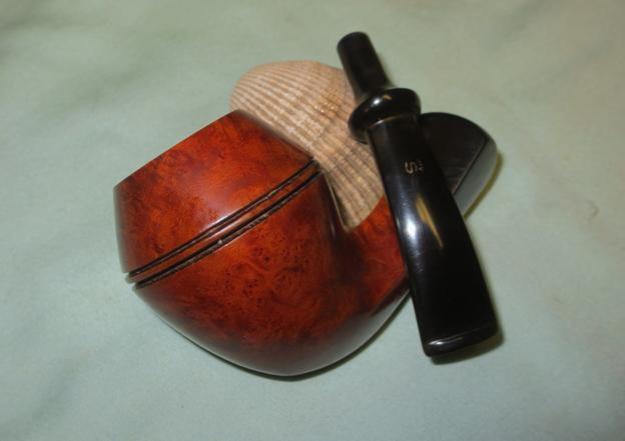
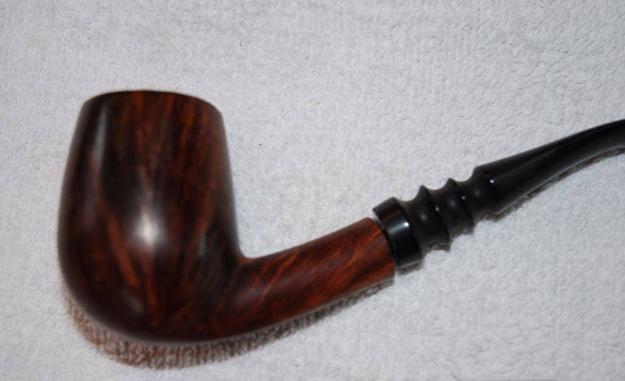
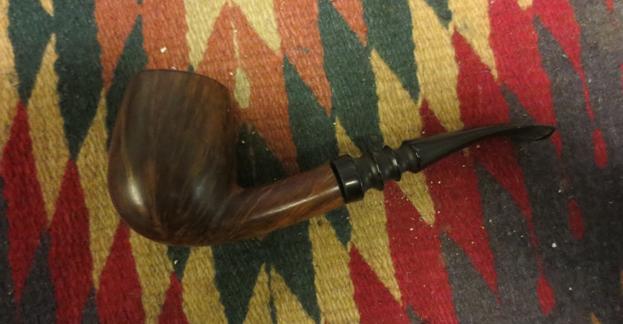
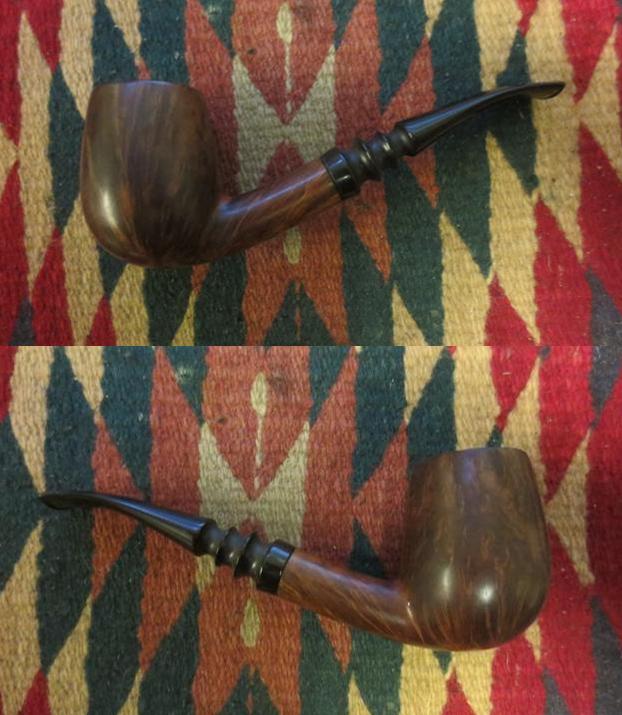
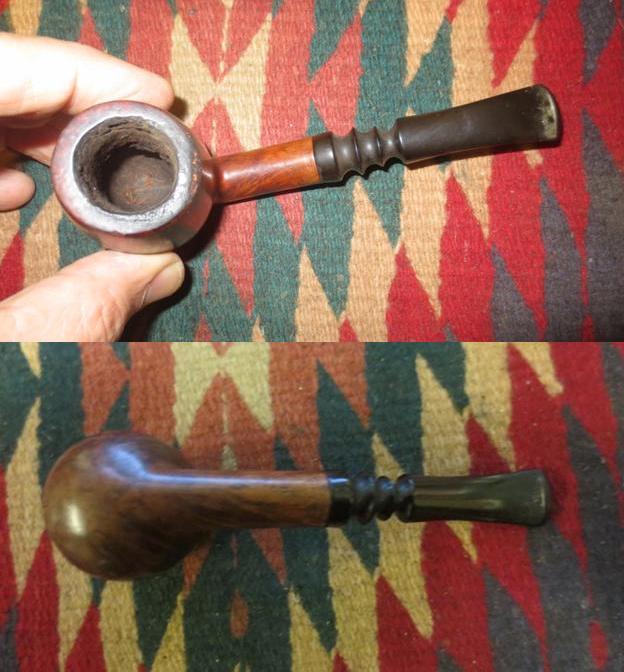
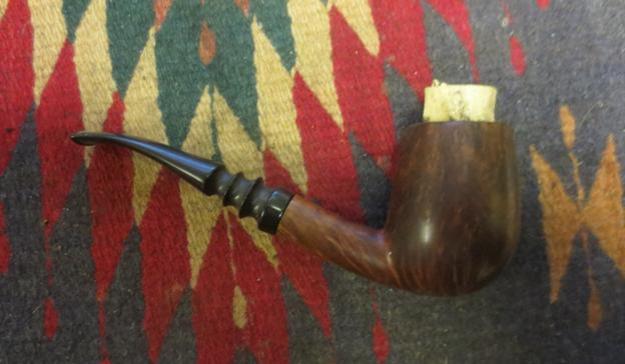
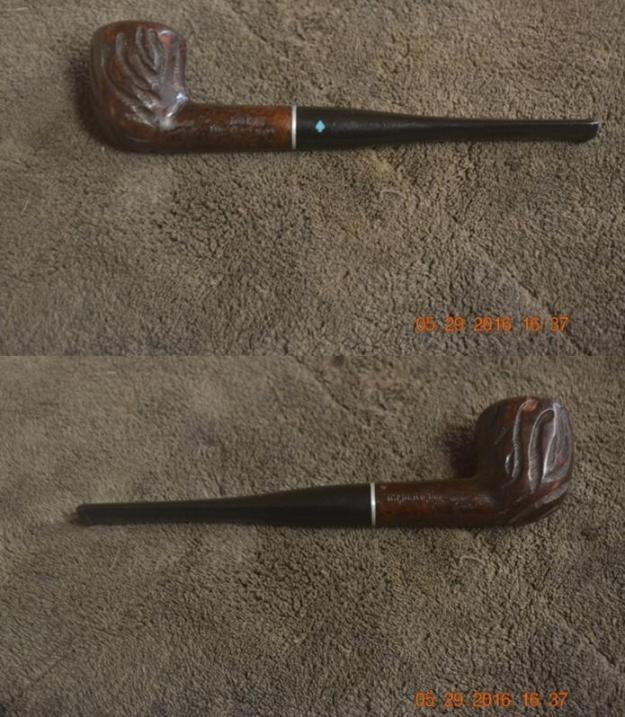
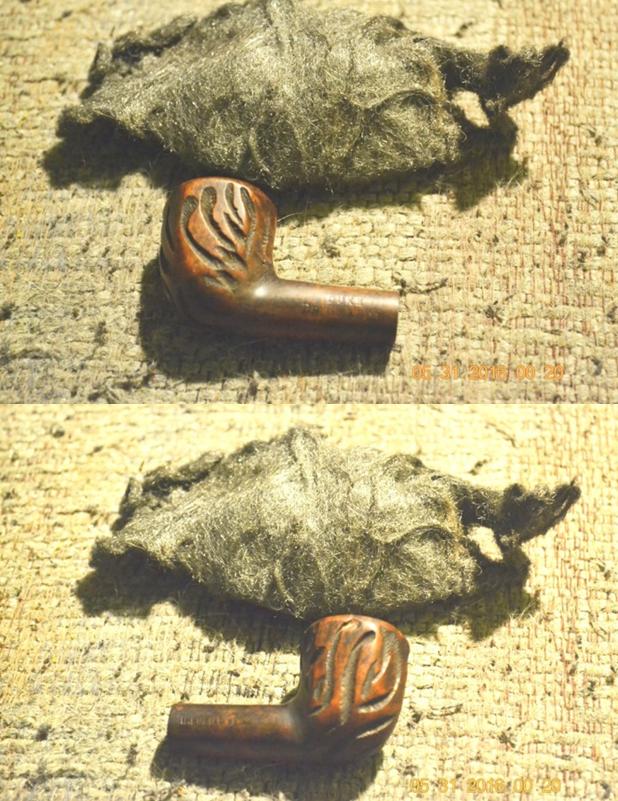
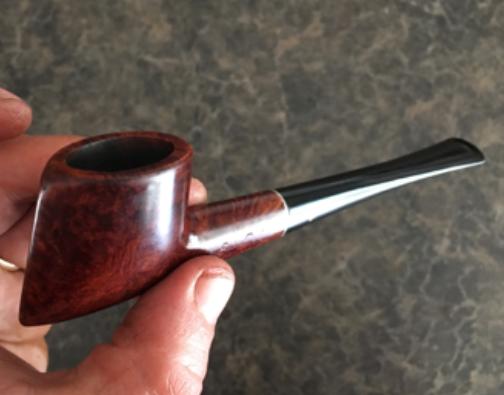
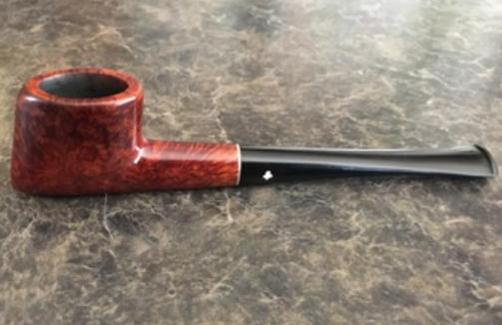
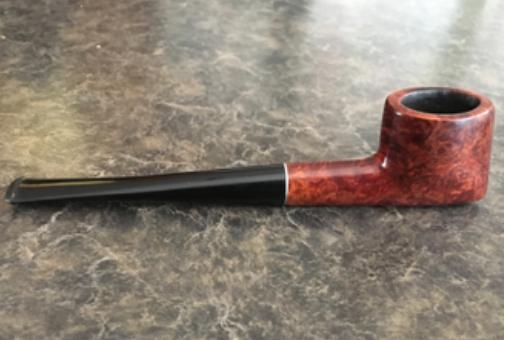
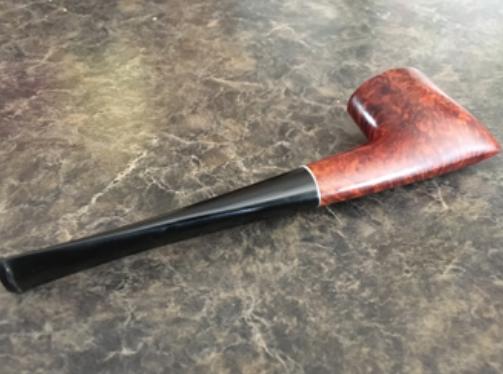
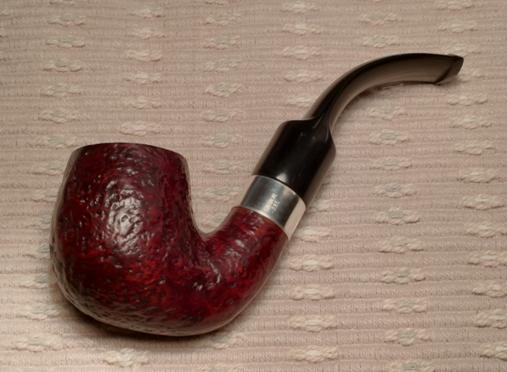
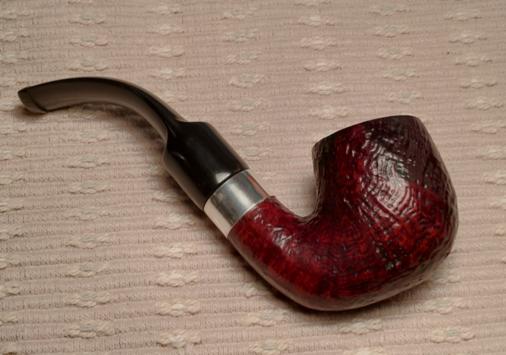
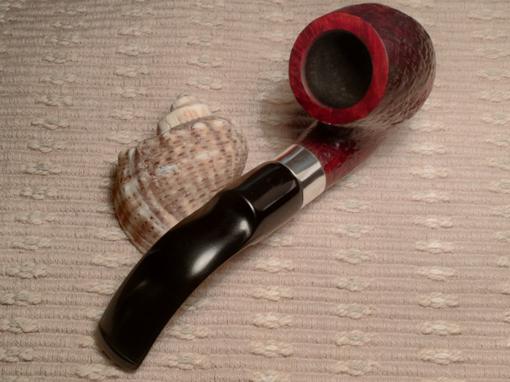
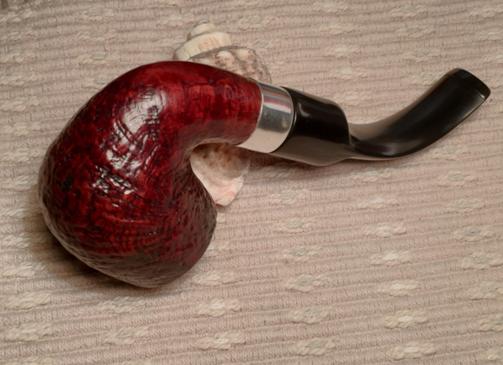
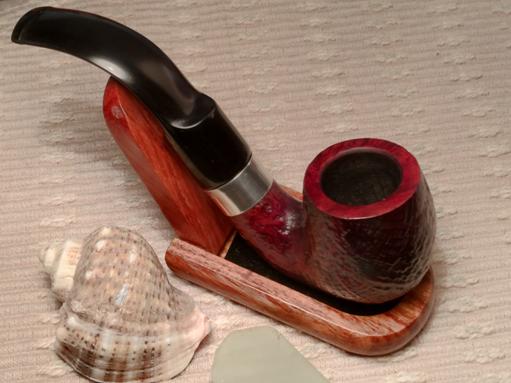
I gave the pipe and stem multiple coats of carnauba wax and buffed the barrel, bowl and stem with a clean buffing pad to raise the shine. I hand buffed it with a microfibre cloth to add depth to the shine. The photos below show the finished pipe. This one will also go on the store soon. If you are interested in it let me know. Thanks for looking.
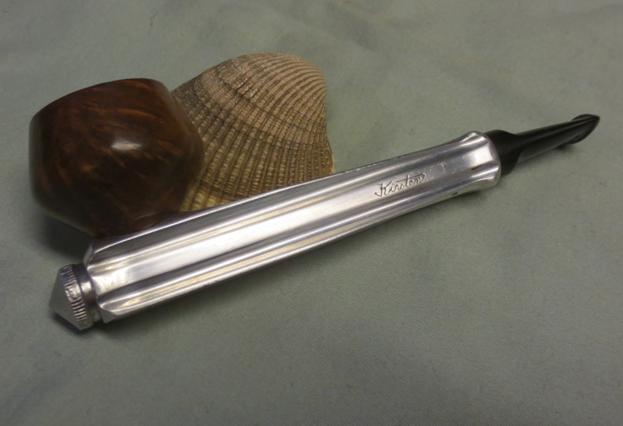
K23 K24 K25 K26 K27 K28 K29


Finally a simple clean up – an Alco Universal Gold Pipe


Blog by Steve Laug

The Alco pipes were made by Falcon in England. This particular version of the Alco was made to hold an in line triple air groove filter. All Alco bowls are interchangeable with any other Alco, but NOT with Falcon. The Alco I was given is an Alco Universal Gold pipe. The pipe was in decent shape with the finish on the bowl in good shape but dirty. The rim had an abundance of lava overflow that came from a thickly caked bowl. There was tobacco debris stuck to the bottom of the bowl. The copper coloured base was dirty but did not show damage. The gold band was attached to the stem and showed some oxidation. The stem itself had a lot of tooth chatter on both the top and bottom sides near the button. What complicated that a little was that the stem was a dental bit and had two scored marks on each side. The airway in the stem was tight and the slot was narrow. The stem had a gold Falcon on the top side. The stamping on the underside of the base read ALCO UNIVERSAL.Alco1 Alco2The pipe came apart easily. I twisted the bowl off the base and found that there was a plastic spacer between the bowl and the base. The bowl had been stamped ALCO on the underside and it was dirty. The base had a lot of tars and oils that had hardened around the centre post. The stem also had the above mentioned “Triple Air Groove Filter”. Surprisingly the filter was pretty new looking.Alco3I cleaned out the airway in the stem with pipe cleaners, cotton swabs and alcohol. It was not as dirty as I expected. It made me wonder if the previous owner had not cleaned it a bit before he put in the new filter.Alco4The base was another story. It looked as if it had not been cleaned for a long time. I loosened the hardened oils and tar with a dental pick. I cleaned up the loosened debris with cotton swabs and alcohol and was able to remove the hardened tars and oils that had accumulated in the base over the years. I used cotton swabs, pipe cleaners and alcohol to clean out the inside of the mortise and airway in the shank.Alco5Reaming the bowl was a challenge as the cake was hard and dense. Starting with the smallest cutting head on the PipNet reamer and moving through the first three heads I reamed the cake back to bare briar. I cleaned up the bowl and airway at the bottom using the Savinelli Pipe Knife. Thinking about it as I write I probably should have tried out the Falcon Pipe Reamer that I picked up not too long ago. I forgot I had it so it will have to be used next time.Alco6 Alco7I scrubbed the base of the bowl and airway with cotton swabs and alcohol to remove the accumulated oils and tars on the bottom. You can see the ALCO stamping on the briar at the top of the picture.Alco8I worked on the rim with a cotton pad and saliva to remove the build-up there. It just took a bit of elbow grease to remove it and the undamaged rim came out of the grime. I wiped down the bowl with alcohol on the cotton pad and cleaned the dirt off the surface of the bowl and touched up the rim.Alco9I wet sanded the rim and bowl with 1500-2400 grit micromesh sanding pads and wiped it down again. I finished by sanding it with 3200-4000 grit pads to raise the shine. I put the bowl back on the base for the photo below.Alco10I have always found plastic stems harder to polish than rubber ones. The dental bit was a challenge to clean out all of the tooth marks in the grooves. I sanded the stem with 220 grit sandpaper to smooth out the chatter and then used 2000-6000 grit wet dry sandpaper to begin polishing it. I wet sanded it with 1500-2400 grit micromesh sanding pads and gave it a coat of Obsidian Oil. I dry sanded it with 3200-4000 pads, gave it another coat of oil and finished sanding it with 6000-12000 grit pads. I gave it a final coat of Obsidian Oil and let it dry.Alco11 Alco12 Alco13I have found that buffing plastic stems is more trouble than it is worth as the heat of the buffing pads can easily melt the stem and create a mess. I hand polished the stem with Meguiar’s Scratch X2.0 with cotton pads to bring up the shine. I buffed the bowl with Blue Diamond and gave it several coats of carnauba wax. I buffed the bowl with a clean buffing pad. I gave the stem several coats of Conservator’s Wax and hand buffed it and the bowl with a microfibre cloth. The finished pipe is shown in the photos below.Alco14 Alco15 Alco16 Alco17 Alco18 Alco19 Alco20


I thought this one would be easy – boy was I wrong


Blog by Steve Laug

I wanted a bit of a breather so I went through my box of pipes for repair and picked this multi-finish Jobey Asti Classic Bent Billiard to clean up. The stamping on the left side reads Jobey Asti Classic and on the right side France and the shape number 470. At first glance it looked like it would be a simple restore and clean. The bowl looked decent in the box and the stem was okay as well. When I got back to the table and did a closer examination I was surprised by what I saw. The bowl rim was in bad shape with the outer edge knocked and damaged. There were dent and score marks in the top of the rim. The lava had flown over the top and it looked as if someone had thrown a coat of Urethane on top of the bowl, grime and all. I looked at the exterior and found that even the grooves in the rusticated bottom of the bowl were thickly coated with the plastic stuff. The stem looked good at first but as I examined it I found that it had been cut off and the button recut and a slot fashioned that was not clean or even. The surface of the stem on the top and bottom next to the button was heavily built up with what appeared to be black epoxy and it was bubbled and full of pin prick like holes. It also was not bent correctly to the shape of the bowl. Truly it would need a lot more work than originally thought. (As an aside don’t use Urethane on bowls it is a bear to clean off and if you have to at least clean them before you dip them in that awful plastic stuff.)Asti1 Asti2I took the pipe apart and unscrewed the Jobey Link from the bowl and took a picture of the parts. I wanted to see how dirty the internals were and if the Link would come out easily. For those of you who don’t know the Link system one of the nice perks is that the end of the tenon that sits in the stem are slotted so you can insert a slot or blade screwdriver to loosen and remove the Link. It is a great piece of forethought on the part of the designer.Asti3Because of the coat of Urethane over the lava I needed to top the bowl to remove the grime and also to clean up the outer edges of the bowl. I topped it with 220 grit sandpaper on my topping board.Asti4I sanded the finish on the smooth portion of the bowl with a medium grit sanding block and then wiped the bowl down with acetone to try to break the plastic finish. I was partially successful in removing it but more work would need to be done.Asti5I reamed the bowl with the PipNet reamer and also with the Savinelli Pipe Knife to remove the remnants of cake that still were deep in the bowl. I reamed it back to bare briar so that the new owner could build a cake of their own choosing. You can also see the top and outer edge of the rim in these photos that show it after the topping of the bowl.Asti6In the next photo you can see the film of the plastic stuff still on the bowl with the scratches from the sanding block visible. I decided to let it soak in the alcohol bath for a day and a half to see if the finish would break down some more now that it had been broken through with the sanding blocks.Asti7When I took it out of the bath the finish was pretty smooth. The plastic stuff was gone. I sanded the bowl and shank with micromesh sanding pads to remove some of the scratching and was careful around the stamping on the sides of the shank. I washed the bowl down with some acetone on cotton pads and then stained it with a dark brown aniline stain. I flamed it and repeated the process to make sure I got and even coverage.Asti8While the bowl dried I turned to work on the stem. I heated it with the heat gun to soften the Lucite enough that I could bend it to the proper angle. It did not take too much to get the angle correct but the heat caused the epoxy patch to bubble. The perk of that was that the airhole pin prick marks disappeared.Asti9I wiped the bowl down with alcohol on cotton pads to remove some of the dark stain and bring the grain to the forefront.Asti10I cleaned out the interior of the stem with cotton swabs, pipe cleaners and alcohol. I cleaned out the area where the Jobey Link sat in the stem and the airway to ensure good fit and draw.Asti11Now it was time to work on repairing the stem repairs! The next photos show what the patches looked like when I started. They stood out clearly and the heat of the gun made them raise and bubble. To me they looked like overkill in terms of a repair. It was almost if the person who did the patch was trying to build up the thickness of the stem at the button to give it strength. It would take some work to make it blend in. I sanded the surface of the stem with 220 grit sandpaper to smooth things out and try to match the stem surface. Of course I forgot to take photos of the process but the ones shown below with the micromesh sanding pads will show the change. The third photo below shows the slot in the button. I worked on it with needle files to clean it up and shape it and again forgot to take photos of the process.Asti12I rubbed the bowl down with some Conservator’s Wax so that when I cleaned out the shank and Jobey Link System with would not damage the finish that I had done. (I know I should have done this before staining but this one irritated me and I forgot to do so.) I cleaned the link and then put a little Vaseline on the threads and turned it into the mortise. I adjusted it with the screwdriver to set it into the shank.Asti13 Asti14I buffed the bowl lightly with Blue Diamond on the wheel and gave it a light coat of olive oil. I took the following photos to show what the pipe looked like at this point in the process. You can also see the state of the stem in these photos. Overall the pipe is looking pretty good at this point. It is far better than I expected when I started. The contrast of the dark stain on the rustication and the lighter stain on the smooth briar makes this pipe look quite “classic” matching its name.Asti15 Asti16I wet sanded the stem with 1500-2400 grit micromesh sanding pads and dry sanded with 3200-4000 grit pads. I finished sanding with 6000-12000 grit pads. Asti17 Asti18 Asti19I buffed the bowl and stem with Blue Diamond. I avoided the rusticated portion so as not to get polishing compound in the crevices and pits of bottom half of the bowl. I waxed the bowl and the stem with multiple coats of carnauba. The finished pipe is shown in the photos below. The grain is quite beautiful and the contrast between the smooth and the rusticated portions gives a unique look to the pipe. Thanks for looking.Asti20 Asti21 Asti22 Asti23 Asti24 Asti25 Asti26 Asti27

An Interesting Churchill’s Volcano Brought to Life


Blog by Steve Laug

The next out of the box of pipes from my brother is the one below. It is stamped Churchill’s on the smooth underside of the shank. The shape number 882 is along the shank stem junction on the underside. I have refurbished several Churchill’s pipes from their pipe shop in Norwich. I wrote a bit about that shop when I did a refurbish on a Churchill’s Bent Pot. The link to that article is as follows: https://rebornpipes.com/2013/09/08/churchills-bent-pot/. This pipe had a rustication that is very similar to those I have seen on Lorenzo pipes. The stem on this pipe is stamped Italy on the underside. The finish was tired and dirty but the rustication was in good shape. The rim was solid with no damage to the inner or outer edge but it was thick with tars. The bowl was reamed while I was visiting in Idaho. The stem was in good shape at first glance. It was oxidized but there were no tooth marks. As I examined it I found that the stem had been cut off and a new button was cut into the surface. The slot was also reshaped. The button itself was very thin as the stem was also thin at this point.Church1 Church2I took a close up photo of the rim and the stamping on the underside of the bowl. The rim is dirty but the rustication is in good shape with no burn marks or damage. The stamping is also very clear.Church3I scrubbed the rim with a brass bristle wire brush to remove the tars and oils that had built up there. Once it was loosened I scrubbed it with a tooth brush and Murphy’s Oil Soap to clean off the grime in the finish. I rinsed the bowl with warm running water to remove the grime and soap.Church4 Church5The next photos show the cleaned finish on the pipe.Church6 Church7I used the dental spatula to scrape out the inside of the shank and break the tars and oil build-up away from the walls of the shank and mortise. I cleaned out the mortise and airway in the shank and stem with pipe cleaners, cotton swabs and alcohol.Church8 Church9I sanded the stem with 220 grit sandpaper to remove the oxidation. I built up the button with black super glue to add thickness and enable a grip on the button.Church10 Church11I used a file to shape the button and recut the sharp edge against the stem surface. I sanded it with 180 grit sandpaper to smooth out the areas in front of the button on the top and the bottom sides.Church12 Church13I continued to shape the stem surface and the button with 220 grit sandpaper and also used the needle files to open up the slot in the button and reshape that.Church14I sanded the stem with 220 grit sandpaper to clean off the oxidation. I wet sanded the stem with 1500-2400 grit micromesh sanding pads. I rubbed it down with Obsidian Oil. I dry sanded the stem with 3200-4000 grit sanding pads and gave it another coat of oil. I finished sanding the stem with 6000-12000 grit pads and gave it a final coat of Obsidian Oil. I let the stem dry.Church15 Church16 Church17I stained the bowl with a dark brown aniline stain and flamed it. I repeated the process until the coverage was good. I hand buffed the bowl with a shoe brush. I gave it a light coat of olive oil and hand buffed it again. I rubbed the surface down with some Conservator’s Wax and then hand buffed it with the shoe brush for a final shine.Church19 Church20I buffed the pipe lightly with Blue Diamond polish on the wheel and then gave the stem multiple coats of carnauba wax. I buffed the pipe with a clean buffing pad and then hand buffed it with a microfibre cloth. The finished pipe is shown in the photos below. The rustication has depth and textures both visually and tactilely. It feels great in the hand. The shape of the bowl and the faux military stem give the pipe a classic look with a flair that is almost Danish looking. I like the finished look of this one. Thanks for looking.Church21 Church22 Church23 Church24 Church25 Church26

An Interesting Antique Store Stummel


Blog by Steve Laug

I have a routine when I visit in Bellingham. I take the ladies in my life to the mall and leave them to shop and I set out on my circuit of pipe haunts to see if I can find some likely object of my attention to repair. I rarely come home empty handed, though I don’t know if that is because I will work on many kinds of pipes or if it is because I generally find something. It may be hard for the observer to discern the difference, I know it is for my wife and daughters. I visited several of my haunts and finally in the last one I did a quick walk through and found nothing… this time it looked like I would come home empty handed. Just to make sure I asked at the counter if there were any old pipes in the shop. The seller pointed directly behind me and there in a case that I had totally missed were four pipes. I bought them all. They had a look of age about them so I jumped and paid the price. It turned out that one of them had a cracked bowl but I was able to cannibalize a sterling silver band for an old KBB Yello Bole from the 20s. Two of them were also older – one a GBD and one a Dr. Plumb. The fourth, a Canadian had a gold coloured band and was missing the stem. It looked pretty dirty and the finish was gone. I figured that it too might be one I cannibalized for parts. I paid for them and went out to my car. I went through them and looked them over. The first three showed no surprises. But the stemless bowl was a real surprise. There on the shank was the arced Barlings stamping and under that was the stamping Ye Olde Wood over 237 on the left top side of the shank and Made in England on the right top side. There is also a remnant of the word EXEL. Boy was I surprised. Suddenly it went from a potential victim for cannibalization to one that had some interest for me. It turned out to be the best of the lot.Barling1 Barling2 Barling3 Barling4I took a close-up photo of the rim to show the extent of the damage to that area. The cake in the bowl had flown over the top of the rim. There were also dings and dents that were quite deep. The outer edge was compromised and rounded over and the inner edge was out of round. I also included a photo of the stamping and the crack in the shank. This is the stamping that I saw in the bright daylight when I left the basement antique shop.Barling5I went through my can of stems and found one that would work on this shank. I had to go with a bit of an oversized stem in terms of diameter as the shank was thinner on the top than on the bottom. I would have to hand fit the stem to accommodate that idiosyncrasy.Barling6I used a microdrill bit to put a tiny pin hole at the end of the crack and then filled in the crack with super glue. The drilled hole would keep the crack from spreading and the glue would fill it in. The integrity of the shank was stabilized by the band as well.Barling7Once I had a good fit of the stem to the shank I used the Dremel and sanding drum to remove the excess vulcanite on the diameter of the stem. The fine tuning and flow of the stem would be done by files and hand sanding.Barling8 Barling9I reamed the bowl with the PipNet reamer and took out the majority of the cake. I cleaned it up and took it back to briar with the Savinelli Pipe Knife.Barling10 Barling11I topped the bowl on a topping board using 220 grit sandpaper. I removed the damaged surface of the rim until the outer edges were sharp and there was no rounding.Barling12I scrubbed the exterior of the bowl with acetone on cotton pads to remove the grime and wax that had built up and made the exterior dull and lifeless.Barling13 Barling14I reworked the inner edge of the bowl to bevel it and bring it back to round using a folded piece of 180 grit sandpaper and then a piece of 220 grit sandpaper.Barling15I wiped the bowl down again with acetone to remove any remaining grit and also the sanding dust from the rim repairs.Barling16I put the stem in place and took some photos to be able to see what still remained to remove from the diameter of the stem and what shaping still needed to be done. There was some width to be removed from the top and bottom sides at the band and then the taper needed to be reduced as well to remove the slight hip. The width on the right and left side also needed a bit more work to make the flow seamless.Barling17 Barling18I sanded the stem with 180 grit sandpaper to further shape it and clean up the flow from the shank to the button. It took a lot of sanding to get the angles and flow just right.Barling19I scrubbed out the mortise and the airway in the stem and the shank with alcohol, cotton swabs and pipe cleaners.Barling20I sanded the rim with a medium and a fine grit sanding sponge to remove the scratches left behind by the topping and then stained it with a light brown stain pen to match the colour of the bowl.Barling21I wet sanded the stem with 1500-2400 grit micromesh sanding pads and gave it a coat of Obsidian Oil. I dry sanded with 3200-4000 grit pads and gave it another coat of oil. I finished the sanding with 6000-12000 grit pads and gave it a final coat of oil. I set it aside to dry.Barling22 Barling23 Barling24I buffed the pipe with Blue Diamond and gave it multiple coats of carnauba wax. The colour darkened slightly with the wax. I buffed it with a clean buffing pad and then by hand with a microfibre cloth. The finished pipe is shown below. I am pleased with the way the fit and finish of the stem came out and also the overall look of the pipe. Thanks for looking.Barling25 Barling26 Barling27 Barling28 Barling29 Barling30 Barling31


Restoring a Stanwell Handmade Danish Bulldog


Blog by Steve Laug

The second pipe I picked up from Charles Lemon of Dadspipes was a nice little Stanwell Bulldog that captured my attention. It is another one that I have added to my own collection. I loved the shape of it when I saw it in the photos that Charles sent me of the estate pipes he had purchased recently. It came in the mail through our ‘ultra quick’ Canada Post Express Mail on Friday. I cleaned up the W.O. Larsen and already wrote about that on the blog. This one looked amazing and came in its own Stanwell pipe pouch. It was stamped on the left underside of the diamond shank with the number 33 and next to that Stanwell Regd. No. 969-48 over Handmade in Denmark.Bull1When I removed the packing material and took the pipe out of the bag it was indeed a beauty. The colour was lighter than what was shown in the original photo that I had of the pipe. That does not matter too much to me as the lighter colour allows the grain to show through. This pipe has some amazing birdseye grain on the bowl sides. The diamond shank culminating in a vulcanite shank extension looks stunning.Bull2 Bull3The finish was quite clean on the pipe and it still had a shine. The vulcanite shank extension was lightly oxidized. The shank stamping was very clear and sharp. The double rings on the bowl were in perfect condition. The finish on the bowl and shank was in excellent condition. The rim was another story. It had some tar and oil (lava) build-up that flowed over from the cake in the bowl. The cake, though uneven, was hard. The rim also had a burned area on the middle of the rim top on the right side. It impacted the condition of the bowl and the roundness of the inner rim edge. The stem was oxidized and the stamping of the Crown S was worn and the gold stamping was gone. There was tooth chatter on the topside of the stem and tooth marks on the underside.Bull4 Bull5I took some close-up photos of the stem to show the tooth chatter and tooth mark on the underside near the button.Bull6I took a close-up photo of the rim to show the condition of the rim with the burned area (top left toward the front of the bowl) and the thickness of the cake.Bull7I reamed the cake back to bare briar with the Savinelli Pipe Knife. The carbon cake came out nicely and left the bowl quite clean. This reaming also gave me a clear picture of the condition of the burned area on the rim.Bull8 Bull9The next series of photos tell the story. I reamed the bowl and then topped it. I took a photo after I had topped it lightly to show the extent of the burn mark on the right side of the rim. I finished topping the bowl using 220 grit sandpaper on the topping board.Bull10 Bull11 Bull12I sanded the rim with a medium and fine grit sanding block to smooth out the scratches. I used the light brown stain pen to touch up the rim surface. The inside rim edge needed some more work but I wanted to see what the rim looked like at this point.Bull13I sanded the inner edge of the rim with a folded piece of sandpaper – beginning with 180 grit and then progressing to 220 grit sandpaper and then on to 1500-3200 grit micromesh sanding pads. I beveled the edge slightly to remove the rim damage and darkening. The second photo below shows the finished rim after sanding.Bull14 Bull15I touched up the inner bevel with a light brown stain pen. I wet sanded the vulcanite shank extension with 1500-2400 grit micromesh sanding pads and gave it a coat of Obsidian Oil. I dry sanded it with 3200-12000 grit pads and gave it a coat of micromesh between the 4000 and the 6000 grit pads. I gave it a final coat of Obsidian Oil and set it aside to dry.Bull16 Bull17I cleaned out the inside of the mortise and the airways in the shank and the stem with alcohol, cotton swabs and pipe cleaners until they came out clean.Bull18I scrubbed the stem with Meguiar’s Scratch X2.0 to begin removing the oxidation on the surface.Bull19Most of the oxidation came off so I used some Antique Gold Rub n’ Buff to highlight the Stanwell Crown S on the stem top.Bull20I wet sanded the stem with 1500-2400 grit micromesh pads and gave the stem a coat of Obsidian Oil. I dry sanded it with 3200-4000 grit pads (I forgot to take the photo) and gave it another coat of oil. I finished sanding it with 6000-12000 grit pads and gave it a final coat of Obsidian Oil. I set it aside to dry.Bull21 Bull22I buffed the stem and bowl with Blue Diamond carefully working over the stem and the shank extension to polish the vulcanite. I gave the bowl and stem multiple coats of carnauba wax to protect and preserve it. I buffed it with a clean buffing pad to raise the shine. I hand buffed it with a microfibre cloth to add depth to the shine. The finished pipe is shown in the photos below. I am looking forward to giving it an inaugural smoke soon. I really like the finished look of the pipe. The slightly beveled rim took care of the burn so that it can no longer be seen. The smooth finish shows off the birdseye grain and the swirls of cross grain. It is a beautiful pipe and I am glad to have it grace my pipe rack. Thanks for looking.Bull23 Bull24 Bull25 Bull26 Bull27 Bull28 Bull29

Restoring a W.O. Larsen 11 Handmade Bent Brandy


Blog by Steve Laug

Charles Lemon of Dadspipes blog picked up a batch of pipes that included a lot of Danish made ones from an estate not long ago. He has been writing about their restoration on his blog. He sent me some photos of the pipes and offered to sell some to me. I chose two of them. The first one was the Larsen that is pictured below. The description of the pipe said that it was stamped on the underside of the shank 11 over W.O. LARSEN over Handmade over Made in Denmark. On the topside of the shank next to the stem/shank junction it was stamped SUPER. The stem had a broken tenon and it was stuck in the shank. Charles had mentioned that he thought it looked like it had been glued in so it would take a bit of work. When I saw the grain on it I decided that it would be a fun piece to work on for my own rack. It has some stunning flame grain on all around the bowl sides and birdseye grain on the rim and the bottom of the bowl and shank.Larsen1I looked up some background on W.O. Larsen and found a great summary on this site. It was helpful and brief so I quote it in full below: https://www.finepipes.com/pipes/danish/w-o-larsen?sort=20a&page=1&zenid=debcdee8f415c1977fb5c359652d6aeb W.O. Larsen was one of the most famous tobacco shops in Copenhagen, with a beautiful store located on Copenhagen’s famous “Walking Street.” During the flowering of the Danish pipe in the ’60’s, they first began retailing pipes by such carvers as Sixten Ivarsson, Sven Knudsen, Poul Rasmussen, and Brakner. Urged on by his store manager Sven Bang, the owner, Ole Larsen, decided to begin making pipes in the basement of the shop. He first hired Sven Knudsen as the pipe maker, who soon passed the job to his protégé Hans “Former” Nielsen. Larsen’s fortunes rose along with the rest of the Danish pipe business and Former was soon managing a group of carvers in the old Larsen cigar factory. Among these were Teddy Knudsen, Tonni Nielsen, Jess Chonowitch, Peter Hedegaard and others, who were responsible for the Select and Straight Grain series before they branched out on their own. After Former left to start Bentley pipes in Switzerland, his duties were taken over by Soren Refbjerg Rasmussen, while the straight grains were made by Teddy’s student Benni Jorgenson. As Ole’s health began to fail, the reins were taken over by his son Nils. Nils became convinced that the way for Larsen to prosper was by entering the low-end market, and acquired the Georg Jensen pipe factory to make an array of less expensive pipes. This turned out to be a fatal error, and Larsen was recently sold to Stanwell, who continue to produce so-called “Larsen” pipes in their huge factory. Thus ended an important part of Danish pipe history.

I was looking forward to seeing it firsthand so I paid Charles and he shipped it on Friday. Wonder of wonders, Canada Post delivered it on Monday. I came home from work to find the awaited box on the table. I opened it and found the Larsen in a bag with the label printed on the outside enumerating it’s stamping. I took it out of the bag and immediately took it to the work table. The photos below show the pipe as it looked when it arrived. It was much lighter in colour than the photo had led me to believe.Larsen2The bowl was dirty and there were some dents and marks in the briar. The rim had a thick coating of tars and the back edge of the rim was worn down from knocking the pipe out to empty it. There was an uneven cake in the bowl. The tenon was stuck in the shank and there were dried bits of glue on the end of the shank and around the end of the stem where someone had glued the stem onto the end of the shank. Fortunately the stem did not stick to the briar but the tenon certainly did. The stem was clean of bite or tooth marks and was lightly oxidized.Larsen3 Larsen4 Larsen5I took a photo of the end of the shank to show the glue spots on the briar and around the broken tenon.Larsen6When I had looked at the initial photo I was uncertain that the stem was original as it looked to be bigger in diameter than the shank. I lined up the broken tenon in the shank with the rough end on the stem and took some photos to see if it actually fit the pipe.Larsen7I decided to try pulling the tenon with my normal screw and it did not budge. It began to shatter and break apart.Larsen8Thus I knew that I would have to resort to drilling out the broken tenon. I set up my cordless drill and put a drill bit slightly larger than the airway in the chuck. I slowly drilled out the tenon, increasing the size of the drill bit until it was the just slightly smaller than the mortise. The last bit I used broke the tenon piece free from the shank and the mortise was clear.Larsen9While I had the drill out I also drilled out the broken tenon in the stem in preparation for the replacement tenon I would use.Larsen10Once the airway was drilled out on the stem I used a tap to thread the newly drilled airway to accommodate the threaded replacement Delrin tenon.Larsen11I used the topping board and 220 grit sandpaper to clean off the glue residue on the end of the stem before I put the new tenon in place. I want a clean, flat surface to work with against the shank when I was finished.Larsen12I used some clear super glue on the new tenon and twisted it into the stem. I put it in the shank to check the alignment several times before putting a few more drops of super glue around the tenon stem union.Larsen13Once the glue dried I put the stem in place in the pipe and took some photos to evaluate the fit.Larsen14 Larsen15With the tenon repair completed it was time to address the bowl. I took some close up photos of the bowl/rim and the stamping on the shank.Larsen16I reamed the bowl with a PipNet reamer using the third cutting head and took the cake back to bare briar. I cleaned up the reaming with a Savinelli Pipe Knife.Larsen17 Larsen18I sanded the inside of the bowl with a tube of sandpaper. This smoothed out the walls of the bowl and began to clean up the damage on the inner edge of the rim.Larsen19The rim damage on the back side needed to be dealt with so I topped the bowl to remove the damaged area.Larsen20I scrubbed the briar with acetone on cotton pads to remove the wax, grime and oils in the wood. The grain is really beautiful in the photos below.Larsen21 Larsen22I scrubbed out the mortise and airway in the shank and stem with alcohol, cotton swabs and pipe cleaners until they came out clean.Larsen23I mixed three of the stain pens together to get the correct brown on the rim. Once it was blended and sanded I stained the bowl with a dark brown aniline stain and flamed it. I repeated the process until the coverage was even on the bowl.Larsen24 Larsen25 Larsen26I wiped down the bowl with alcohol on cotton pads to make it more transparent and make the grain show through. It still needed more work but it was definitely getting there.Larsen27 Larsen28The inner edge of the rim needed more work to remove the damage but the colour was correct.Larsen29I used a folded piece of 180 grit sandpaper to bevel the inner rim of the bowl to remove the damaged areas. I followed up by sanding it with a piece of 220 grit sandpaper and continued to sand the inner edge. I sanded the inner edge and rim with 1800-2400 grit micromesh sanding pads.  I restained the inner bevel with a dark brown stain pen to match the finish on the bowl.Larsen30With the bowl finished I wet sanded the stem with 1500-2400 grit micromesh sanding pads. I rubbed it down with Obsidian Oil and dry sanded it with 3200-4000 grit pads. I gave it another coat of oil and sanded it with 6000-12000 grit pads. I gave it a final coat of Obsidian Oil and let it dry.Larsen31 Larsen32 Larsen33I buffed the pipe with Blue Diamond on the buffing wheel and then gave the bowl and stem multiple coats of carnauba wax. By now you are all probably very familiar with my process. I buffed it with a clean buffing pad to raise a shine and then hand buffed it with a microfibre cloth to add depth. The finished pipe is shown in the photos below. It is one I plan on hanging onto for my own rack and I am happy with how it turned out. Thanks for looking.Larsen34 Larsen35 Larsen36 Larsen37 Larsen38 Larsen39 Larsen40 Larsen41

Spotlight: Ladies Pipes, Part 5/7, a Vintage Dr. Grabow Carved Duke


Guest Blog by Robert M. Boughton
Member, International Society of Codgers
Member, North American Society of Pipe Collectors
http://www.naspc.org
http://www.roadrunnerpipesnm.biz
http://about.me/boughtonrobert
Photos © the Author

If a man loves you…he’s willing to profess it. He’ll give you a title after a while. You’re going to be his lady, his woman, his fiancée, his wife, his baby’s mama, something.
— Broderick Steven “Steve” Harvey (b. 1957), U.S. comedian, actor, TV and radio talk show host, writer of books on relationships, former New York public high school teacher

INTRODUCTION
I neither forgot nor gave up on this special series despite the relative vacuum of responses. Instead, I was sidetracked by developments in a portfolio of litigious necessity that might very well expand with more certainty and regularity than the universe. Returning to the subject of this blog, just the other day I chanced upon a woman with a rather off-putting appearance. Perhaps some significant other had at last given her a title she disliked. At any rate, she was chain-smoking cigarettes with almost the frenetic zealousness of the late great Lloyd Bridges near the end of the comic classic “Airplane.”

Nevertheless, by pure nature, I acquainted her with my name and part-time occupation, and of course mentioned the several new customers I came across in recent weeks, under circumstances that can only be called serendipitous, who were already free of cigarettes. Undeterred when the lady did protest – with a deceptively soft, dismissive laugh that was somehow more like a tiger stifling a yawn before it pounces – that the idea of a woman smoking a pipe did not seem very lady-like. Still not dissuaded, I pulled from my magic box the perfect specimen of a lithe, sleek, petite bent billiard that I had reserved for one other singularly odd woman who never claimed it.

“That’s why I also restore ladies pipes such as this,” I said with a hint of enthusiasm, and held it out.

With the most cursory pretense of a glance I never before had the pleasure of noting in my writer’s mental file, she gave a flick of the head every bit as memorable, so that her long, dirty blonde hair made room for a fresh cancer stick. She shoved in her mouth, so forcefully punctuating her contempt that the nasty, chemical laden coffin nail went farther into her mouth than anticipated and almost choked her. I had to admire the quick recovery with a lengthy, chic, palliative drag, so reminiscent of any one of the many Golden Age of Hollywood starlets now long dead from the same prop rather than age. I know when I’ve been shot down. But it still goes to show the progress society needs to make before a lady can be comfortable walking into a tobacconist to buy a pipe.

On the subject of pipes, it turns out there really was a Dr. Grabow – Paul E. Grabow, MD (1868-1965), a general practitioner in Chicago who was a friend of Louis Linkman, co-founder with August Fisher of M. Linkman and Co. in 1898. During a conversation between the two in the early years of the Great Depression, Linkman reportedly told Dr. Grabow of his idea to introduce a new and improved line of pipes that he felt would sell better if they were named after a physician. Dr. Grabow, flattered by the request to use his name, accepted. The pipe brand named for him was launched in 1932, and until his death at age 97 the good doctor was given new models whenever he wanted them. Grabow1

The free pipe perk persisted despite Linkman’s production of the brand stopping in February 1953, when the Dr. Grabow Pipe Co. filed for dissolution a month before Henry Leonard and Thomas Inc. (HLT) of Queens, New York bought the rights, and they were produced by Sparta Pipes Inc. U.S. Tobacco bought out Sparta in 1969, assuming control of the Dr. Grabow production until Lane Ltd. paid for the rights some time later. Around 2000, RJ Reynolds and British American Tobacco took over.

As for the peculiar little carved Duke that is the subject of this installment, regardless of its smallness, the bowl seems to have six subtle sides. I am inclined to call such a shape a panel. But the best narrowing I can do with the multitude of Dr. Grabow sites is a “textured” slim pear, shape number 74.Grabow2Grabow3Grabow4Grabow5

And here is a photo I found online of a Dr. Grabow “Duke G,” which appears to be the same pipe except for the white spade.Grabow6

RESTORATION
At a glance, the Duke was rough from age and unnatural wear. Here are a few close-ups of the stummel showing the thick, dark stain and some of the damages I faced, as well as the nomenclature I needed to preserve. The bit was in good shape, needing only moderate work. The six-sided paneling (two each on the front and back, and then the sides) is hard to spot by eye, but an inspection with fingers reveals the presence.Grabow7Grabow8

This kind of surface of a pipe stummel – whether it be referred to as carved, rusticated, textured or by any other designation – always poses a challenge in stripping the old stain. No matter how long the wood soaks in alcohol, at least by my concept of safe and sane standards, sanding is always still needed, in particular for the crevices. Of course, I could have started this project with an arduous application of several grades of paper, but the overdone original finish suggested the need for an Everclear soak to begin. And so that is how I commenced the task, putting the bit in an OxiClean bath at the same time.Grabow9

I removed the bit from its bath first and stuck a regular cleaner through the air hole. I was surprised by the remaining blackness of the Vulcanite, which I rubbed dry with a strip of soft white cotton rifle barrel cleaning cloth. Grabow10

I apologize for my camera’s continuing flash problems, which for the above photos required manipulation of the color and brightness settings in my editor to show the minor scratches near the lip of the mouthpiece. Here it is, again with the editor adjustments, after light sanding with 320-grit paper and wet micro mesh from 1500-12000. I know it’s hard to see the difference, but the entire surface was smooth.Grabow11

And here’s the stummel after drying with another piece of cotton cloth, running another cleaner through the shank, sanding with 200-grit paper and wiping down with 0000 super fine steel wool. The additional cleaner is from the bit. Note the still dark crevices.Grabow12Grabow13Grabow14

I began an assault on the crevices that turned out to be the crux of the battle to fix this nice, older Dr. Grabow. I started with super fine steel wool, squeezed into small enough edges to fit into the crevices. This was a tedious process, but it did improve the situation.Grabow15Grabow13 Grabow14I tried 180-grit paper folded to maneuver the edge into the pesky crevices, and the result was an improvement in spots but still disappointing. I only show the next photos as emphasis of the point.Grabow18 Grabow19 Grabow20For the first time in a long while, I concluded a second Everclear soak was needed, as I had not really let the first one complete. The success is clear, following another drying with cotton cloth and scrubbing the shank more with both ends of an ear cleaner. I flashed back to my childhood, at times when such cleaners came out of my ears in about the same condition.Grabow21 Grabow22 Grabow23The task of ridding the crevices of unwanted darker color accomplished, I prepared the pipe for the final steps, very gently using 320-grit paper again and the full scale of micro meshes.Grabow24 Grabow26 Grabow25I retorted the pipe, and for the re-stain used Fiebing’s brown alcohol-based leather conditioner and flamed it with a lighter.Grabow27A clean up of the char with 2400 micro mesh and a little reduction of the darkness with super fine steel wool worked well.Grabow28The fine briar was ready for Halcyon II. For once I laid it on thick.Grabow29When the wax compound had time to set in, I wrapped it in a cotton cloth and wiped it vigorously for about a minute. Then all that was left was buffing on the electric wheels, with red and White Tripoli, White Diamond and carnauba on the bit. To my eye, the wood needed a little more gloss, so I added some carnauba with the wheel, as always followed by the clean buffer. I was more happy than usual with the final results. Please excuse the unfortunate symbol in most of the following shots. I had rushed outside of the club where I was for open sunlight and didn’t notice until I saved the photos from my camera’s memory card to the computer hard drive, by which time the sun had set.Grabow30 Grabow31 Grabow32CONCLUSION
For a weathered old Dr. Grabow, this restoration provided some interesting lessons to me in working with a carved pipe. My dear friend and mentor, Chuck Richards, has always advocated a toothbrush for the crevices, but try as I have, that venerable method has never worked for me. Every situation seems a little different. This one required attacks from several different directions.

SOURCES
http://www.drgrabow.net/dr-grabow-pipes/
https://pipedia.org/wiki/Dr._Grabow
http://www.geocities.ws/lokomac8/grabow.htm
http://drgrabows.myfreeforum.org/index.php?component=content&topicid=15&postdays=0&postorder=asc&start=40
http://www.drgrabow-pipe-info.com/drgrabowp03.html
http://www.pipephil.eu/logos/en/logo-l4.html M. Linkman & Co.
http://www.pipephil.eu/logos/en/logo-drgrabow.html
http://www.drgrabow-pipe-info.com/pipenames09aa.html Date guide
https://1fa1282d-a-62cb3a1a-s-sites.googlegroups.com/site/seanspipes/home/dr-grabow-shape-charts/drg1988shapechart1.jpg?attachauth=ANoY7coHvB5qOmn44n9H_4wsnE06IzBJemJ0T5wa-FPbZh08FdvUUxghql7wG8V643ehj8Lj3Qjz4dhyUHGqC8PjXVHPy7yUihii1MNoOToCN-ZApjh36oFXVhS77OqW1r_meXdwIMaTYJP391i8GxBuwipjRfJyF-PbV4dNJrnK4684TJR7xnektgvTVNZ52aHs8nJKdigkmmVsgS06lld4DlOYIxYa2zismOQMQ1Lavw-0v_HcC4jddbKt2qVHTLKognYdJ2tD&attredirects=0 Slim Pear Shape 74

Restoring a Kaywoodie 61 Circus Pipe


Blog by Lance Leslie

My grandfather was a pipe smoker up until the 80’s. I can remember him plowing the field with his pipe and tractor smoking. His favorite pipe was a Kaywoodie shape 61. He called it his “Circus Pipe”. He called it that because of the odd shape of the bowl opening. It was an oval bowl opening and I have never seen one before and I had yet to find one after years of searching. That is until two weeks ago.

I was scoping out eBay one night and found the elusive shape no. 61 in an auction with 12 minutes left. I put in a ridiculous bid and then it was a waiting game. Twelve minutes later, the pipe was mine!! The bidding did not get too out of hand, so that was a plus, but it did go for a hefty price considering the shape it was in.

I remember my papa gouging out the cake with an old hawkbill knife. The oval bowl could not be reamed with a reamer due to the oval shaped bowl. This led to there being chunks carved out of the top of the bowl. This pipe looked to have the same problem. Here is the pipe as it arrived. BTW, it turned out to be a Super Grain!!!! Bonus!Circus1 Circus2 Circus3 Circus4 Circus5The pipe was in pretty bad shape. The bowl’s top was gouged just like my grandpa’s. I decided to top the bowl and use my Dremel stone sanding tool and put the bowl back in round. This was real nerve-racking because I could really ruin this pipe. But I bit the bullet and went for it.Circus6I then used some rolled up sandpaper to bevel the edges.Circus7 Circus8I then lightly wet sanded the outside of the stummel to get rid of the surface scratches and gave the pipe a rub down of Murphy’s Oil Soap.Circus9 Circus10After the oil soap bath, I gave the pipe a wipe of Watco Danish Oil Dark Walnut and then let that dry.Circus11While the Danish Oil was drying, I took the stem down sanding pad lane using 1500 through 12,000 to bring the stem to a showroom shine.Circus12 Circus13I reamed the pipe with a pin knife and uncovered some gouges inside the interior of the bowl. I mixed up some pipe mud using activated charcoal and sour cream. I mixed the two together into a creamy grey paste. I applied it liberally inside the pipe and let that dry.Circus14 Circus15 Circus16Then with the pipe clean on the inside and out, I shined the pipe using carnauba wax and my buffer. Here are the final results. This is one of my Holy Grail pipes!!!Circus17 Circus18 Circus19 Circus20 Circus21

A Newbie Restore of a Dr. Plumb 9456 Oom Paul


Blog by Dal Stanton

It is a pleasure to introduce Dal Stanton to you all. He has become a good friend through the work that I do. I just returned from spending time with him in Sofia, Bulgaria where we went pipe hunting and enjoyed some great smokes over dinner together. Here is his first blog for rebornpipes. I hope that he will do many more. Thanks Dal. Welcome to rebornpipes as a contributor. — Steve

Well, after much encouragement and a bit of prodding from Steve, I’m submitting this, my first full restore, to rebornpipes exclusively (and hesitantly) from a newbie’s perspective.  After discovering the hobby of restoration only last year, I’ve been intrigued by the restoration process and amazed at the skills and blogging of Steve Laug (rebornpipes.com), and Charles Lemon (Dad’sPipes.com) and several other contributors.  I thoroughly enjoyed the ‘Mission Impossible’ episodes that Steve and Charles collaborated on.  All the posts have been workshops for me as I’ve pieced together the different steps and techniques of pipe restoration.  Since I live in Sofia, Bulgaria, and on the 10th floor of a formerly Communist ‘Block’ apartment complex, I do not have a basement or a garage to set up a workspace.  My wife has lovingly allowed me to set up shop in our bedroom (yes, I know that limits the night-time hours for restoration and reflection!) but it has forced me to develop ‘compact’ ways of approaching the hobby.  Instead of polishing wheels I utilize a Dremel with many wheels purchased from China on eBay!  It works well for me and most importantly, I’m enjoying something that has surprised me with the satisfaction involved in finding a tired candidate that can be redeemed and brought back to life.

So, in April I found the Oom Paul bowl from a vendor in an outside antique market in the shadow of Sofia’s largest church building – Nevski Cathedral.  I enjoy my developing relationship with the young Bulgarian man who enjoys the bartering event as much as I and has begun to recognize me in the crowd as I have become a regular buying customer.  After looking through his holdings and striking deals for a few tired candidates for future attention, he produced a bag full of orphaned bowls and stems.  At this point in my early pipe collecting strategy, my eye is drawn to the styles I’ve yet to add.  The Oom Paul jumped out even though I wasn’t sure I wanted to touch it!  The first question that came to my mind as I got a feel for the bowl in my palm was, “How could anyone smoke a pipe to a state that I was looking at!”  I took the pictures below when I got home from the antique market. Dal1 Dal2 Dal3 Dal4My initial look at the markings found Dr. Plumb over London Made with what I assume is the shape number 9456.  I checked it out in Pipedia and found this:  The Dr. Plumb brand name is owned by A. Oppenheimer & Co., Limited, owners of Cadogan Investments, Ltd. J.B. Rubinovich, GBD’s Parisian sales manager, created this brand in 1925. The pipe was produced by the Ruchon & Verguet and also Ropp factories (Saint-Claude, France). In 1962 a Dr. Plumb pipe sold for between C$3.95 and C$4.95, or $31.72 in 2015 U.S. dollars and pipes can still be purchased from this brand for a similar price today.  These pipes have long been advertised as Dr. Plumb’s Perfect Pipe, that name coming from an aluminum tube system designed to keep the smoke cool and dry while at the same time permitting the “cooling chamber” to be cleaned by simply twisting the stem. While Dr. Plumb pipes were long made in France and stamped accordingly, they are now British made.

The bowl was almost closed with the buildup of lava and the rim was in pretty tough shape revealing at least one unfortunate drop on the front – that part that I could see.  A look down the shank revealed something lodged.  I couldn’t detect any cracks or burns.  I enjoyed the feel of the bowl in my hand and the briar had great potential – I liked the dark reddish hue of the briar and the gentle rustification seemed to enhance the mostly hidden grain but showing promise.  I would have to ream the bowl and clean the rim before I could know what might lie underneath.  I would also have to find an appropriate stem too to fit the Dr. Plumb, no small task in Bulgaria.  Since I was soon to make a trip to the US for my daughter’s graduation from college (Yes!), I decided to order the needed stem and bring it back to Bulgaria in order to complete the restoration.  Steve recommended J. H. Lowes (http://www.jhlowe.com/).  I discovered that finding the correct stem wasn’t too difficult but I was a bit nervous about the measurements.  The directions on the website were pretty clear that the shank diameter would do the trick.  I wasn’t sure whether the tenon measurements factored in at all.  I purchased the Giudici bit – Round Saddle 17mm X 75mm.  While I was buying a stem for my Oom Paul project, I bought a selection of nickel silver bands to have on hand in Bulgaria.  While I was looking at the bands, I had the idea of dressing the Oom Paul with a band – and since it was my first honest to goodness restore – I splurged and bought a sterling silver band – oh, to get the correct size!  Again, the size was measured by the diameter of the shank as the stem which looked to be at 17.5mm.   I might also mention that Tim West at JH Lowe answered my emailed newbie questions and was a great help.  Having put in motion the strategic plan with the stem and band, I moved to the cleanup of the bowl.  In order to soften the muck buildup in the bowl I put the bowl in a bath of isopropyl 95% overnight.  The pictures reveal the post-bath bowl working in my ‘satellite workspace’ on the 10th floor balcony!Dal5 Dal6 Dal7I tried unsuccessfully to remove the obstacle in the shank using a wooden chopstick as a tool.  It works great on Chinese food, but not so well here.  I decided to leave the shank for the time and I moved to reaming the bowl with the Pipnet reaming kit that recently arrived from Germany – eBay of course.  I started with the smallest blade working toward the larger bringing the tobacco chamber back to the wood.  Not having used the reaming kit too much, I’ve learned that it works best if I allow each blade to do the work – not applying too much vertical pressure on the tool.  Simply rotating the tool (clockwise) with consistent pressure proved to do the job.  I had a pretty big pile of ‘charcoal dust’ resulting from the ream – Question: Can this be used for stem repairs mixing with superglue?  After completing the ream I turned my attention to the rim.  I used a brass brush and isopropyl to clear away the remaining lava flow allowing me to see more clearly the condition. The rim would need to be topped but the prospect of ’re-rustifying’ the rim was a daunting thought at this point.  The rim appeared to have a ‘lined’ rustification before, but I decided to put that question off till later. These pictures show the progress.Dal8 Dal9Moving to the shank, I knew that I would need to do extraction work.  After working with several Qtips and a dental probe I was not able to extract the muck.  Drawing on previous rebornpipes posts, I decided to use a wood screw to remove an obstruction.  While I don’t have an extraction tool like Steve’s, in Bulgaria we do have wood screws.  Carefully I inserted a smaller diameter wood screw into the mortise slowly rotating the screw to grip the obstruction without damaging the briar.  Thankfully, the battle was not long and the pictures reveal the unearthed obstacle to now allow pipe cleaners to do their part.Dal10 Dal11 Dal12When the remains of what appeared to be an old filter were removed, I went to work on the airway with pipe cleaners and Qtips dipped in isopropyl 95%.  Cleaning the Oom Paul seemed to go on forever.  Part of the problem was that I could not quite figure out through ‘Qtip feel’ what the design was in the internals of the bowl.  No matter how many Qtips I put in, they didn’t seem to make a dent on the muck.  So I went to the internet and discovered on puff.com questions from what appeared to be another newbie trying to figure out Oom Paul gunk problems.  I discovered that Dr. Plumb’s internal design had a trap that would collect the moisture while the airway flowed over it – theoretically giving the proverbial ‘dryer and cooler’ smoking experience.  I’ve included the cut-away picture that helped me understand what I was dealing with in my seemingly unending cleaning project.  If I had a retort at this point, I would have put it to work (I just ordered one on eBay that I would also pick up in the US and bring back to Bulgaria!).  I settled for loading the bowl and shank with isopropyl and letting it sit overnight again hopefully to loosen things up more.  The next day I used a bunch of Qtips and pipe cleaners to clean the bowl sufficiently for me.  At this point I put the project aside in anticipation of my trip to the US.  I needed to have stem and band in hand before I proceeded with the bowl preparation and finishing.  I would also return from the US with purchased cleaning and finishing supplies that I cannot find in Bulgaria.  Thankfully, Qtips are in great supply in Bulgaria!Dal13http://www.puff.com/forums/vb/general-pipe-forum/175391-oom-paul-gunk-problem-2.html

Dal14My time in the US for my youngest daughter’s graduation from college was a blessing as my wife and I were reunited with our 5 children and now, 2 grandchildren.  We were happy to meet our newest grandson who was born only recently!  I returned with a suitcase full of eBay estate pipe purchases to compliment my local finds – as well as cleaning and finishing supplies that I could not find in Bulgaria.  My new retort arrived too and I’m looking forward to giving it a go – though I am a bit nervous about boiling alcohol!  Also in hand were the new stem and band that JH Lowe had delivered to my US mailbox.  I was anxious to see if my measurements were accurate and to continue my Oom Paul project.  The first thing I discovered was that the tenon of the new stem was too large and would need to be resized.  I was relieved to see that the actual diameter measurement of the shank was correct.  From this I learned that there seems to be no standard tenon sizing with new stems – the most important measurement is the exterior dimensions, so that the stem and the shank have a proper mating.  Given that I had not shaped a tenon before, I discovered that I had all the tools needed after a quick email question to Steve – what I didn’t know I would have was the patience to go slowly!  My biggest concern was that the ’rounding’ of the tenon would not be true as I downsized it with the use of Dremel, files and sandpaper.  I knew also that I didn’t want to have to repair a previously uncracked shank by forcing a too large tenon into the mortise.  I ALSO knew that I didn’t want to take too much off the tenon and it be too loose and then have to build it back up with clear nail polish (epoxy) which I’ve had to do before.  With questions and concerns loaded in my conscious mind, I went to work on the brand new stem.  The pictures show the progress. Dal15 Dal16 Dal17 Dal18After bringing the tenon down to close proximity to the mortise size, I gently tried the fit the tenon without pushing.  I did this several times while slowly taking more vulcanite off the tenon.  I discovered that when I partially inserted the tenon into the mortise to test it, the places on the tenon that were more firmly in contact with the mortise wall would be shinier – thus cluing me in to where I needed to apply the file more directly.  I also discovered that the positioning of the stem in the shank – as it progressed more deeply into the mortise – began to reveal a more favorable positioning of the stem for the eventual bend direction that would be made.  The technique I used (discovered!) that seemed to make sense as I started the process was to shape the tenon as a cone that gradually brought the tenon tip to the correct diameter of the mortise.  I then moved gradually working that diameter toward the base of the tenon.  By doing this I was more effectively able to remove the vulcanite evenly and not have a crooked or untrue tenon.  The pictures below show the seated tenon from different angles.  I realized that the base of the tenon where it ties into the stem was pretty roughed up from my use of the Dremel. It unevenly pushed out at the shank and needed more attention.  I decided to put the stem aside for a while and turn to the bowl – I needed some new scenery at this point!Dal19Looking to the rim, I took some closer pictures as a reminder of the rustification design.  The damage on the front of the bowl was significant and the bowl needed to be topped. I moved out onto the balcony so as to minimize the sawdust in our bedroom (helping my wife to be happier 🙂 and I spread out 230 sandpaper on a flat surface (cutting board).  I wanted to take off enough of the top to remove the rim damage but not too much to maintain the bowl proportions.Dal20 Dal21I was satisfied with the topping at this point.  However, what the topping revealed was the beautiful briar underneath.  Part of what has attracted me to this hobby is the ‘surprise’ I get from each peek of revealed briar grain – never the same, always creatively new with potential beauty to be more fully revealed.  Getting ready for staining the bowl, I used a dark mahogany stain stick (from Italy) to darken the rim and bring out the dark rich reds I’m seeing in the briar.Dal22 Dal23I have yet to find an alcohol based stain in Bulgaria that Steve uses in his restorations.  The stains are pigment based with water.  So, the ‘flaming’ technique that I’ve studied on rebornpipes doesn’t come without some help.  I used a Cherrywood stain and diluted it with 50% alcohol as the base stain.  Again, reaching for the red-tones that I see in the briar.  When I applied the stain mix I used a cotton ball and let it flow over the bowl surface.  I was careful to have full coverage by picking up the candle stick and cork set-up and manipulating the stain so it reached the inverted rim.  When I applied the lighter, it still didn’t flame but I was able to essentially ‘dry’ the stain to the wood by moving the lighter lightly over the surface.  I think it pretty closely achieved the same thing – sealing the dye in the grain.  I repeated the process a second time – the pictures show the progress.  Oh, and shot glasses make for good stain mixers in cramped quarters! (Also, thanks to my wife for providing the candle holder :-).  I put the stained bowl aside for several hours to allow the stain to set – I suppose it needed it, but I had other things to do!Dal24I was anxious to get back to the project because I would be able to employ new supplies that I just brought back from the US – Tripoli, Blue Diamond and carnauba wax!  I also had purchased different Dremel wheels for each different application.  Based upon my readings, I used felt wheels for the Tripoli and blue diamond applications – in that order.  Then, to bring out the grain further, I used a cotton wheel attachment for the carnauba wax application.  Since Dremels have a very high RPM potential, I buffed at the slowest setting and kept the wheels moving so as to not overly heat up a particular area.  Applying the carnauba wax needed some heat to spread the wax evenly over the bowl surface, but I soon was able to see the way the wax liquefied and I used that to work over a particular area and then move on.  Its difficult describing the ‘rush’ of seeing the beauty of the briar grain emerge with each application.  It was at this point I decided not to rusticate the rim, but to leave it smooth, revealing the grain and to me, a very classic appearance when adding the band.  The pictures show the bowl but I know that I will need to polish up more after applying the band later on.Dal25 Dal26 Dal27 Dal28With the bowl restoration nearly complete, I was re-energized to look at the stem.  The tenon needed to be more finely-tuned to fit the mortise, but first, I had to deal with scars from the over-anxious Dremel sanding wheel that ate a little too much into the base of the tenon.  The result was that small ridges kept the stem from seating snugly up to the shank.  I remembered a technique I read on, I believe, Dadspipes.com (I’ve read so much I can’t remember for sure!) that was able to help me uniformly smooth out the base of the tenon, which is almost impossible using files freehand.  I drilled a hole in a piece of wood providing enough space for the tenon to rotate freely and covered the hole with 230 sanding paper and clamped it.  I punctured the paper and then forced the tenon into the hole.  I rotated the stem on the flat board back and forth to evenly sand down the tenon base.  I stopped the rotation periodically and let the stem ‘free-stand’ in order to eye-ball it and to make sure I was not sanding unevenly and unintentionally creating a tilt. The pictures show the process and the successful results of a more snuggly fitting stem!Dal29 Dal30 Dal31 Dal32 Dal33 Dal34Again I was anxious to move to finishing the stem proper and to utilize the micro-mesh pads that were newly acquired in the US!  Up to this point I had been utilizing sanding paper I found here in Bulgaria and I was anxious to see the results of using micro-mesh pads.  I employed Steve’s stem finishing pattern that he utilizes with almost each stem finish: Picture 1 reveals the results of wet-sanding with micro-mesh 1500, 1800, and 2400 then an application of obsidian oil.  Following is dry sanding with 3200, 3600, 4000 again followed by an application of obsidian oil.  I have to confess, I was so excited to see the luster popping out I forgot to document the two sets with a picture!  Finally, picture 2 shows the results from dry-sanding (with obsidian oil) with 6000, 8000, and 12000.  After this, I gave the stem another coat of obsidian oil and put it aside to dry.Dal35 Dal36Now I’m stoked!  While the obsidian oil was drying I was re-reading the blogs on bending stems (https://rebornpipes.com/2012/07/15/bending-vulcanite-stems/) and turning on the oven to warm it up.  My experience was limited – I bent one stem for a pipe I acquired off eBay from Budapest, Hungary.  I named that pipe, Budapest (I may have developed a bad habit of naming my pipes like pets…).  I warmed the oven to about 200 to 220 Fahrenheit, (for those living in Europe that is about 93 to 100 C).  I found a ‘bender’ using a small jar measuring about 1.5 inches in diameter and stuck the pipe cleaner in the airway to keep it open during the bend.  I had researched pictures of Oom Pauls and I found another Dr. Plumbs 9456 online (http://www.bidorbuy.co.za/item/222662283/VINTAGE_DR_PLUMB_LONDON_MADE_SMOKING_PIPE_NO_9456.html).  I wanted the bend to reflect the original as closely as possible.  I wanted the bend to be tighter toward the stem expansion at the base – the effect was that the button end of the stem reached out more, or it seemed to me.  It didn’t take long for the vulcanite to become pliable – about 5 minutes or so in the oven on a cookie sheet (thanks again to my wife!).  When I brought it out the first time and bent it over the jar, I was not pleased with the bend – it was too much of an arch for my liking.  So I found a pestle from my wife’s mortar and pestle set that she uses to grind up spices.  Its diameter was smaller.  I put the stem back into the oven and it slowly flattened back out as it heated up.  After about 7 minutes I took it out and bent it around the pestle – that got it.  I held the bend (careful, it’s hot!) and ran the stem under tap water to galvanize the bend.   I wanted the angle to be right – anxious to see the stem with the bowl, I took a few pictures to show what I feel are better results.Dal37 Dal38 Dal39Almost home.  The sterling silver band was awaiting my attention but I wasn’t in a mood to be rushed!  I re-read again Steve’s blogs on banding (https://rebornpipes.com/2012/10/31/banding-a-cracked-shank-pressure-fitting-a-metal-band-on-a-pipe-shank/). Armed with renewed knowledge and the resounding warning not to work too quickly (or else you will tear the band!) I started the work on the band.  I had one large obstacle – I did not have a heat gun to apply heat to the band to enable its expansion to fit successfully over the shank (and not tear!).  I did not have a heat gun, but my wife owns one of the wonders of German technology, a Braun hairdryer.  It gets pretty hot and I gave it a try.  The first picture shows the band placement (about 50% shy) before I started the hairdryer heating process.  I heated up the band on the shank as shown in picture 2 and after about 1 minute or so I took the shank and pressed it down against the cloth on a flat cutting board and applied gentle vertical pressure against the band to slide it further onto the stem.  Patience – I kept hearing “Don’t tear it!”  After I felt a wee bit of movement from the band I stopped the downward pressure and started the reheating process again and then again, a wee bit of band movement as I pressed it vertically against the cloth.  I repeated this process about 7 or so times and was able to move the band to where I wanted it – without tearing it! (picture 3).  I finished up by applying some Weiman Silver Cream to shine the band up nicely.Dal40 Dal41 Dal42 Dal43I’m very pleased with the results of restoring this Oom Paul and putting him back into service.  I’ve already identified areas that I want to improve next time around.  I didn’t describe how I had to re-top the bowl after I put the stem in and discovered that the rim was not perpendicular to the shank.  Result?  The stem was tilted out and not aligned.  I re-topped the rim to straighten it.  I also detected areas on the stem I had missed during the sanding process.  Yet, overall I’m very pleased and appreciate the rich color and grain of this piece of briar.  I think the band sets if off in a classic way.  Since this Oom Paul will remain in my collection, I’ve named it – a bad habit probably, but I enjoy the life rekindled in restored pipes and names seem appropriate.  Steve told me about the history of Oom Pauls in his recent visit to Bulgaria.  This is when I learned that Oom Paul was Afrikaans Dutch meaning ‘Uncle Paul’.  So, in Bulgarian, meet ‘Chicho Pavel’!  Thanks for reading!Dal44 Dal45 Dal46 Dal47 Dal48 Dal49 Dal50 Dal51 Dal52 Dal53