Blog by Dal Stanton
Ryan described his Dr. Grabow Omega as a lowly drugstore pipe – not me! 😊 He emailed me several months ago about his Dr. Grabow Omega and which set the table for what followed:
Dear Mr. Stanton, I recently came across one of your blog posts from 2017 detailing a restoration you performed on a Dr. Grabow Omega billiard. The final product was stunning and made me wonder whether you allow customers to send pipes in for restoration or whether commissions are limited to the pipes listed on your website. I ask because I also own a Dr. Grabow Omega and have always been bothered by the heavy red finish that completely obscures the grain. I wanted to ask (if outside commissions are accepted) whether you could perform the same sort of restoration on my pipe and about how much it might cost. Thanks for any information you can provide!
Part of my response to Ryan shortly followed:
Ryan, Great to hear from you! Thanks for your kind words regarding the restoration of the Omega I did. I think the Omega is a nice-looking pipe. Dr. Grabow’s ‘Peterson’ and you share my problem with Dr. Grabow’s production of Omegas with the ‘candy apple’ finish. It’s a quicker way to finish a factory pipe and it’s always a question about what lurks beneath the artificial gloss. The Omega I did surprised me with a nice patch of briar beneath and left me with the question, why would anyone cover this grain with a finish like that? I’m sure economics is a partial answer. So, for your Omega, I would examine it closely to see if you can see some huge fills in the briar beneath the finish. Even if it has fills, natural briar just beats candy apple even with sub-par blocks of briar, in my opinion.
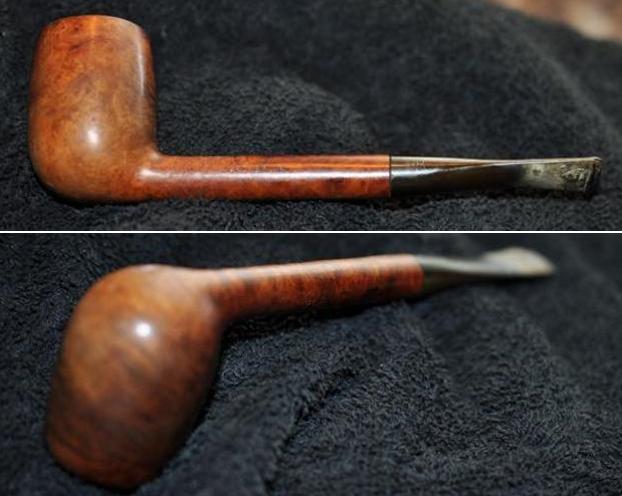
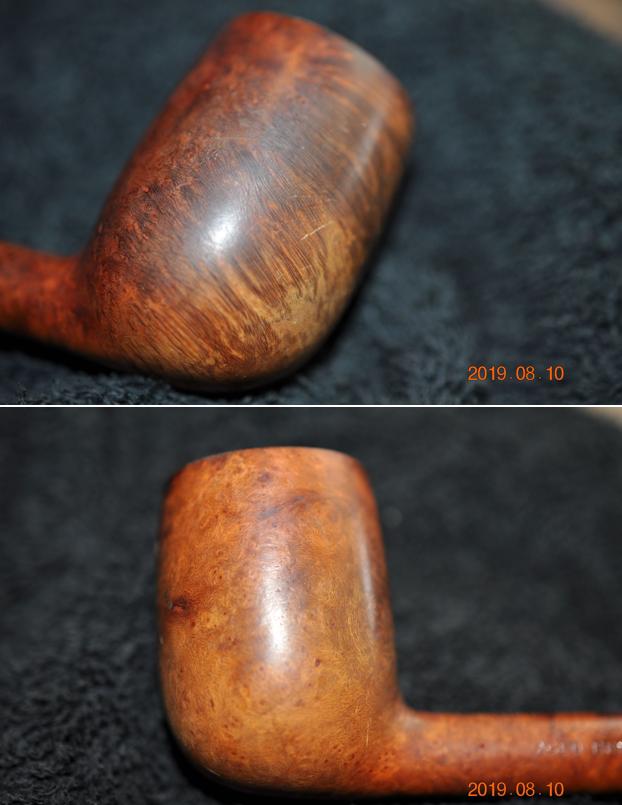
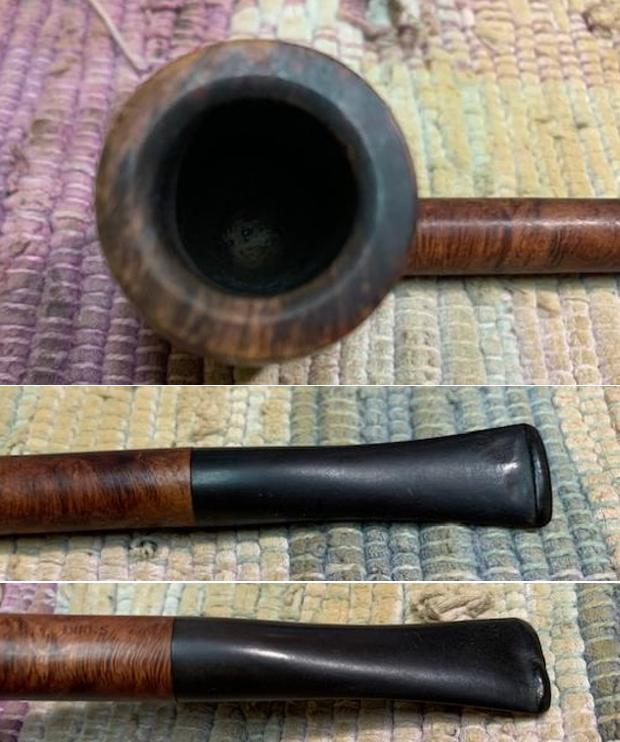
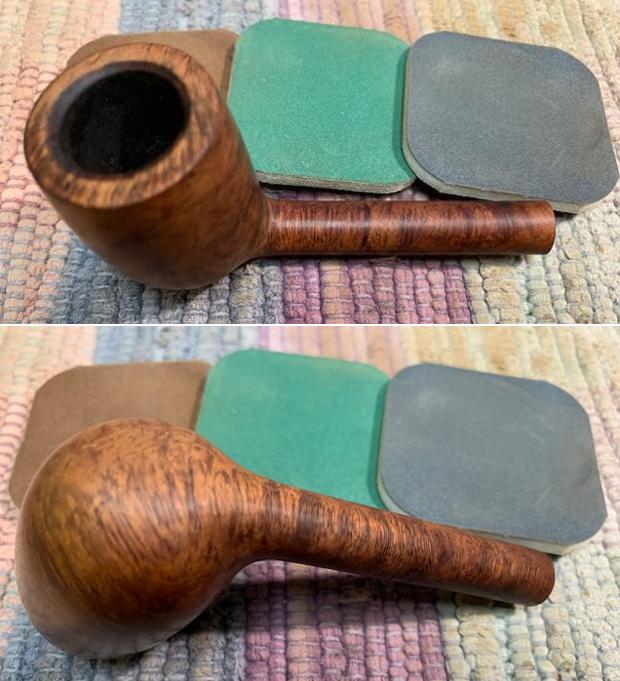
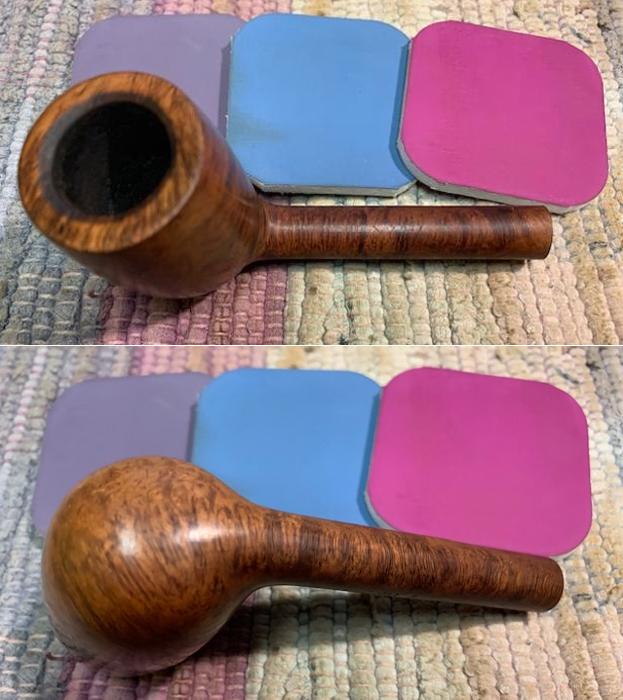
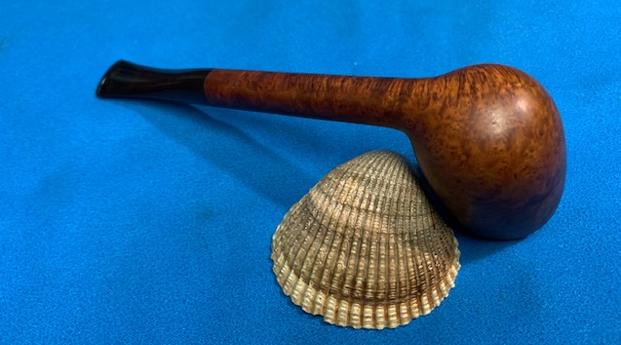
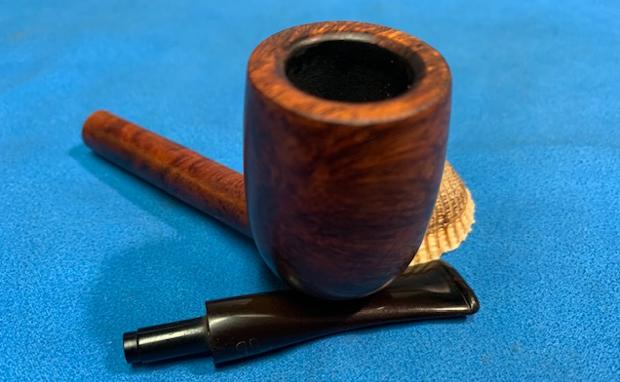
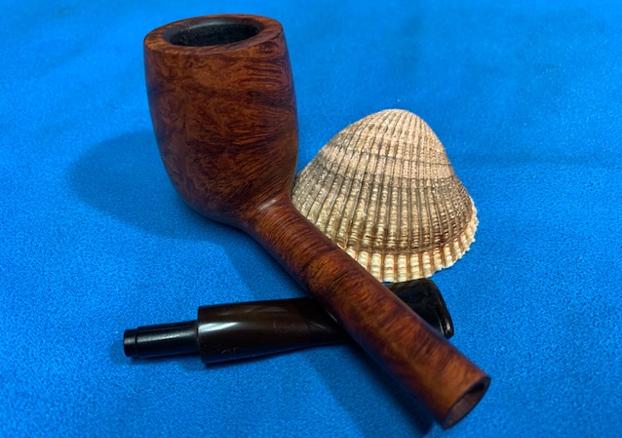
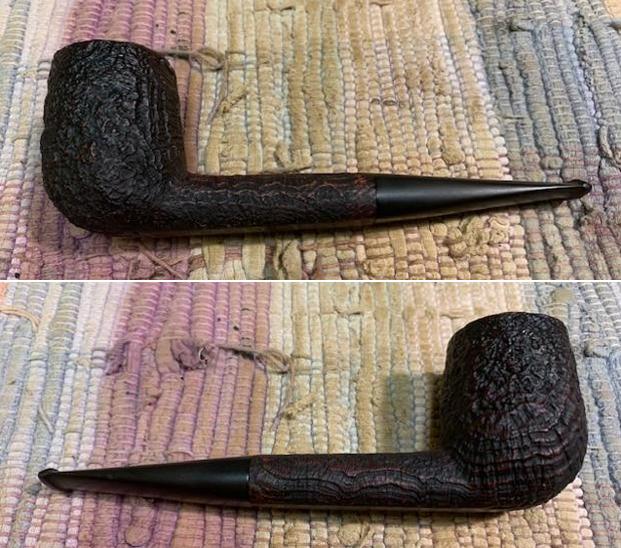
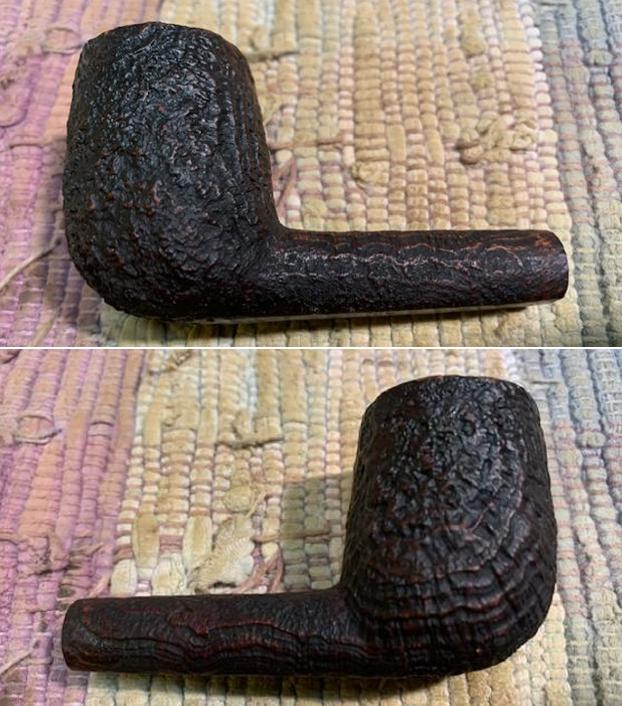
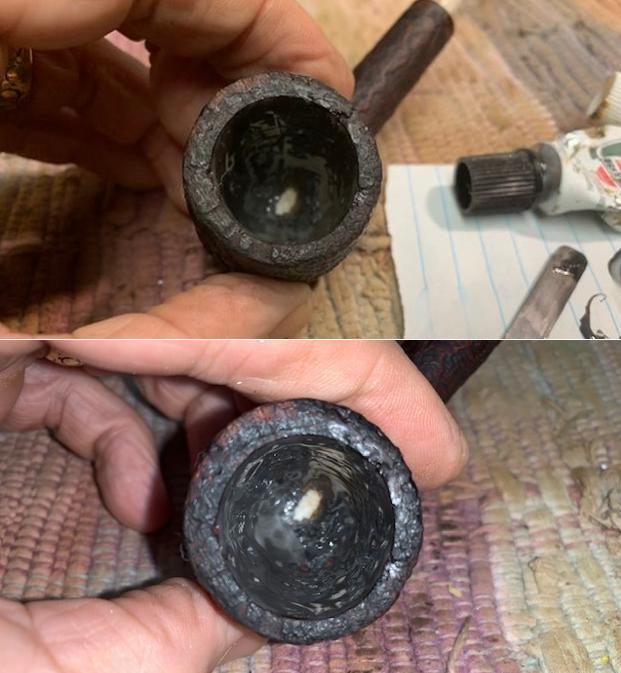
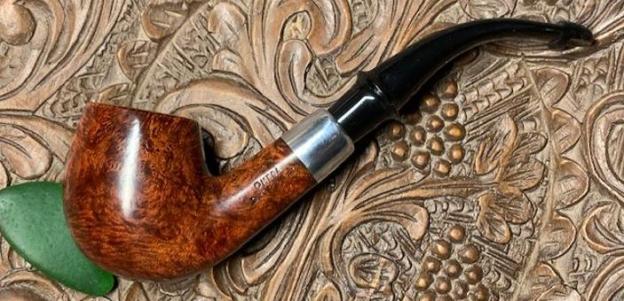
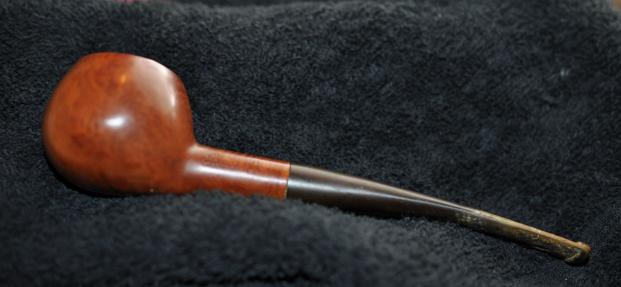
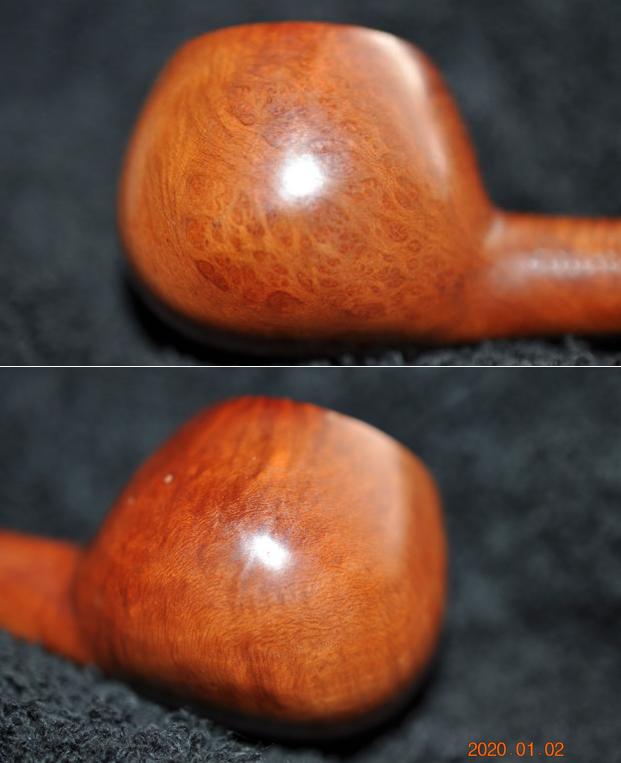
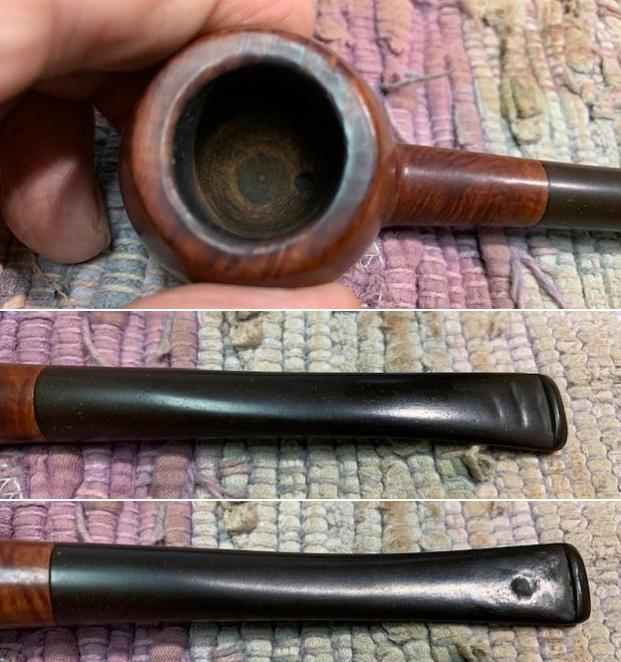
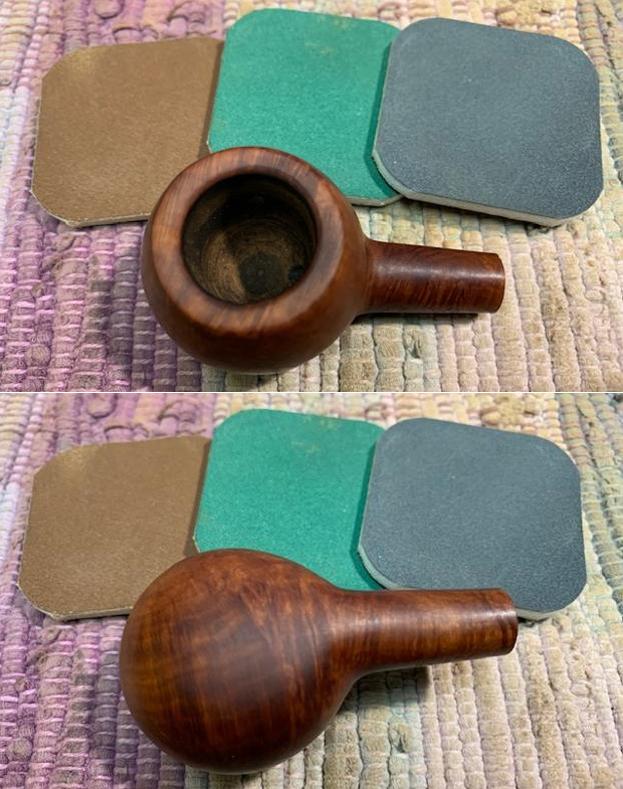
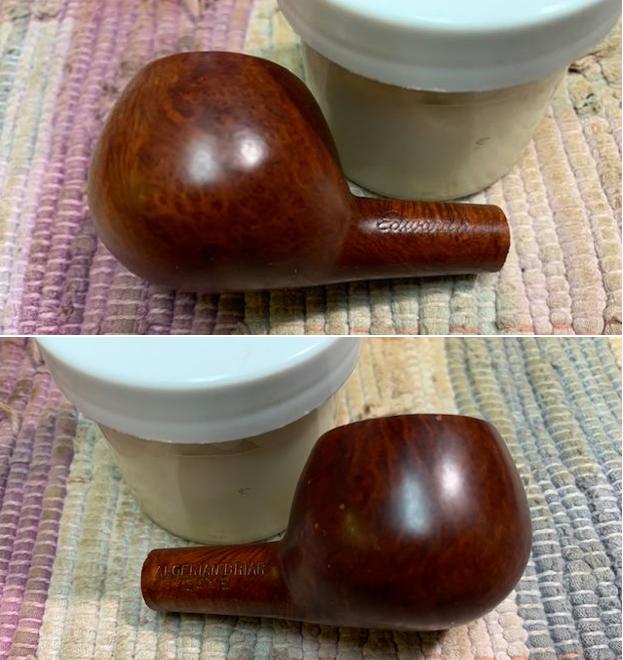
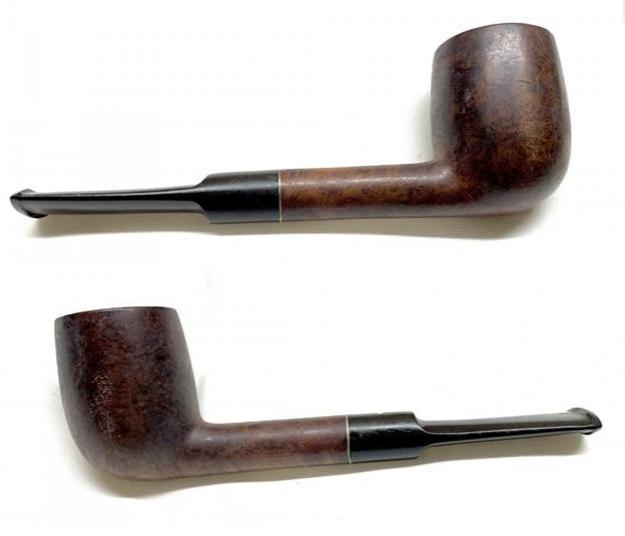
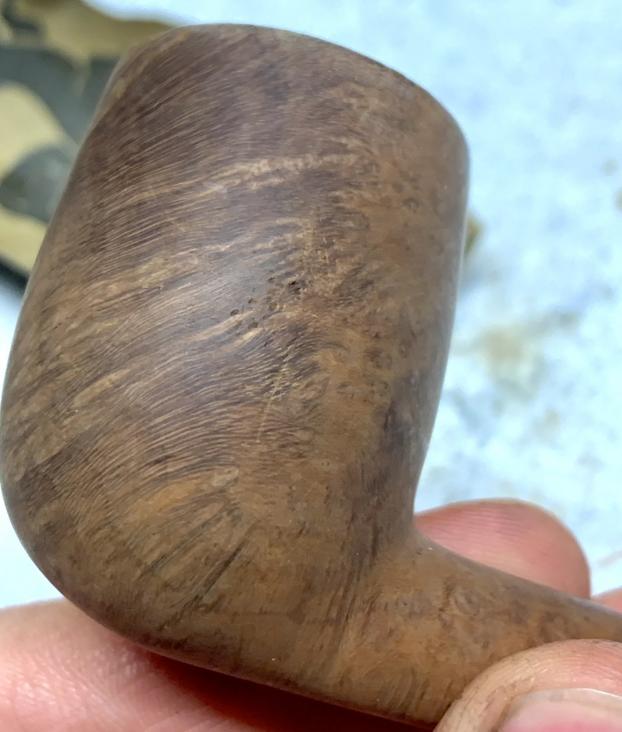
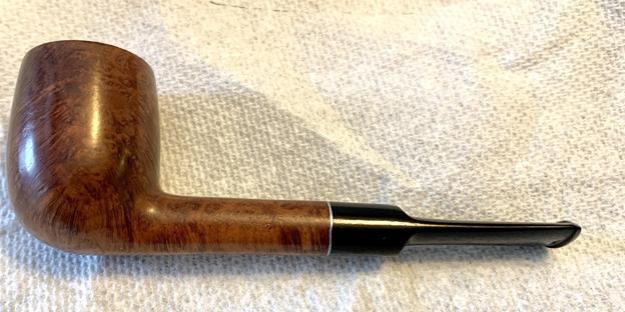
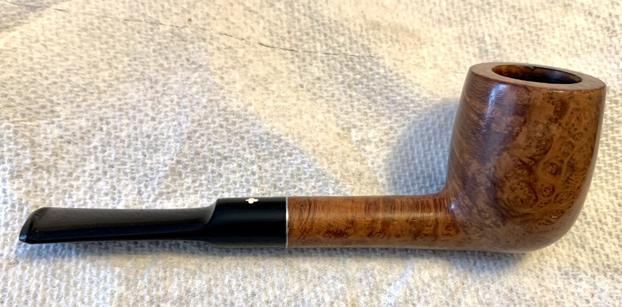
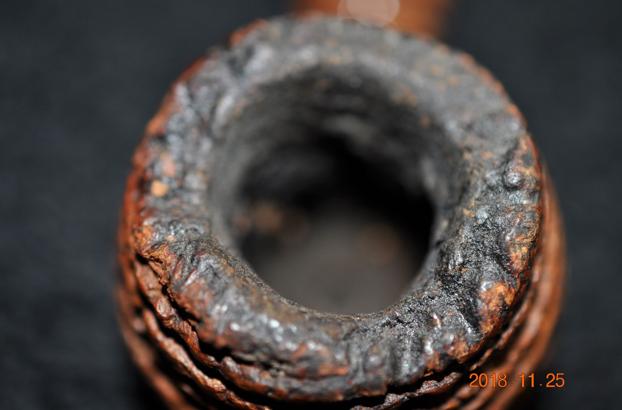
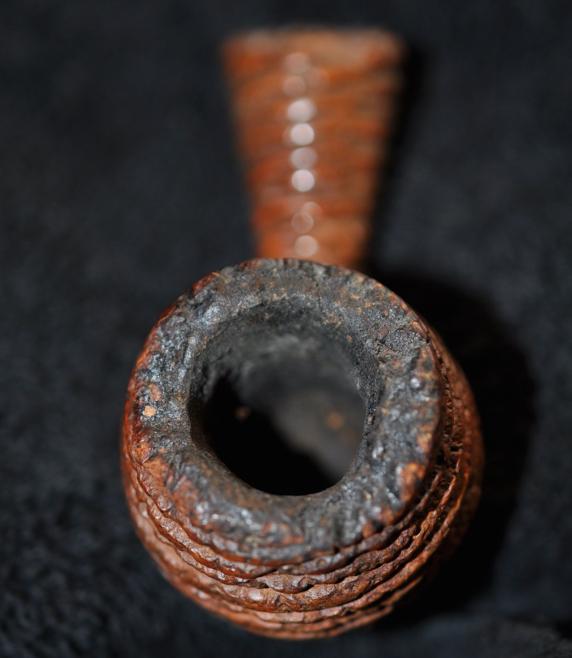
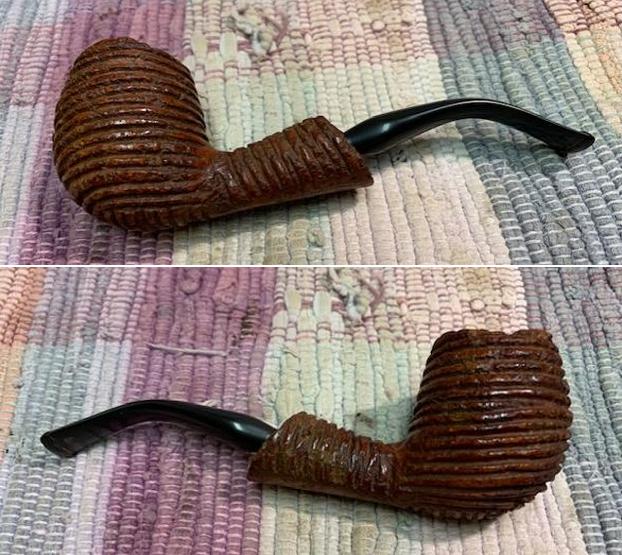
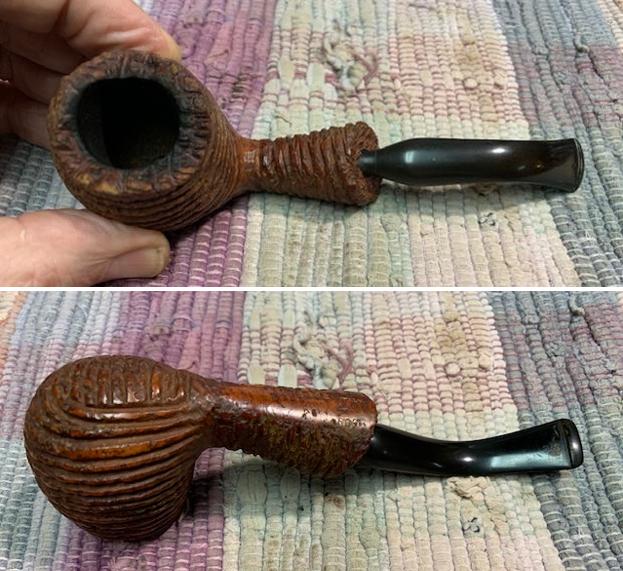
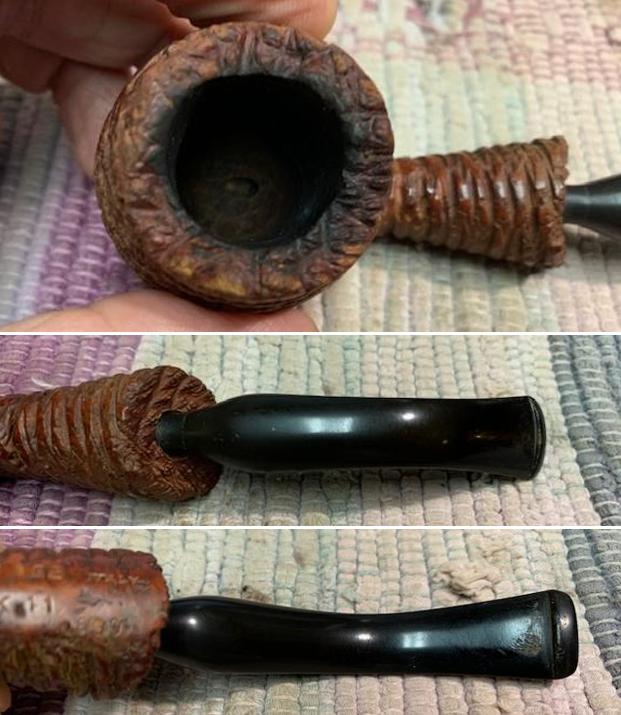
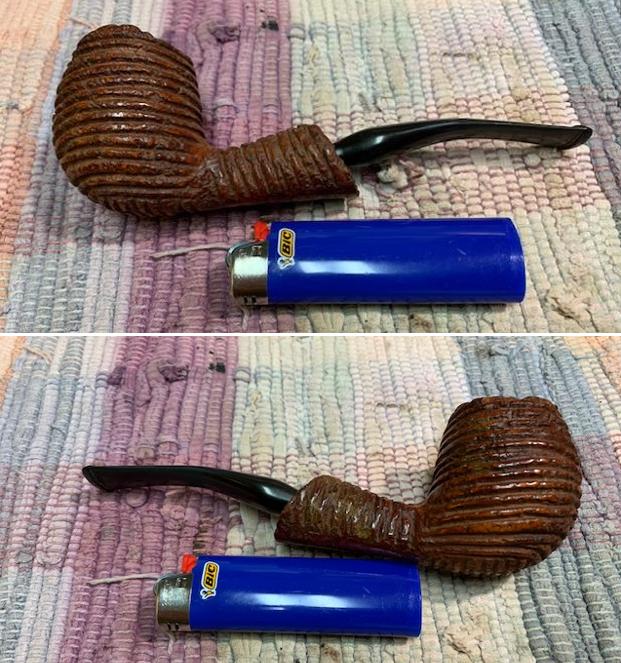
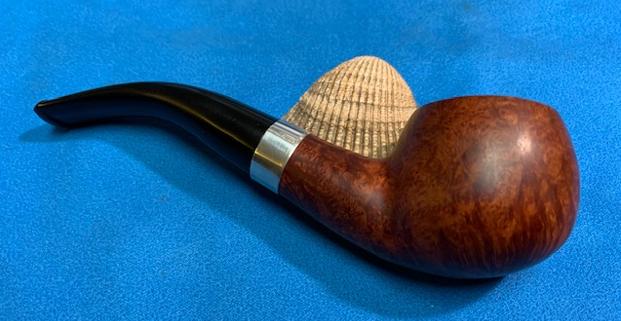
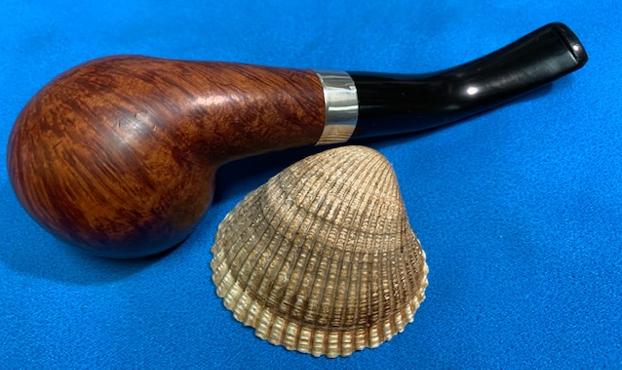
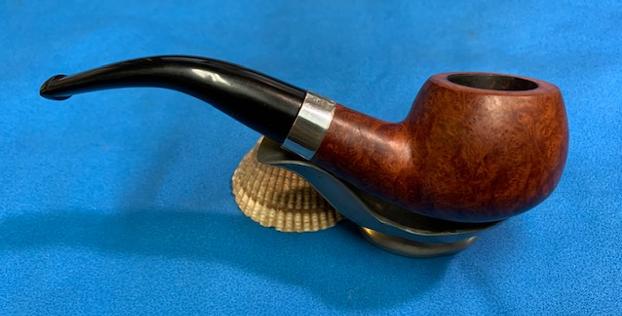
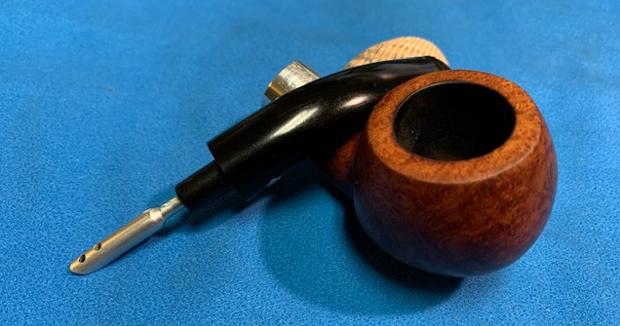
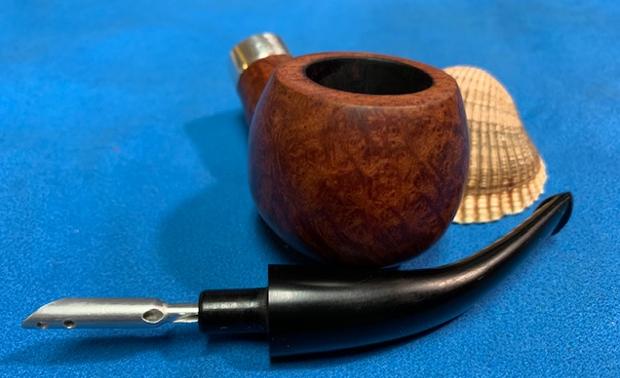
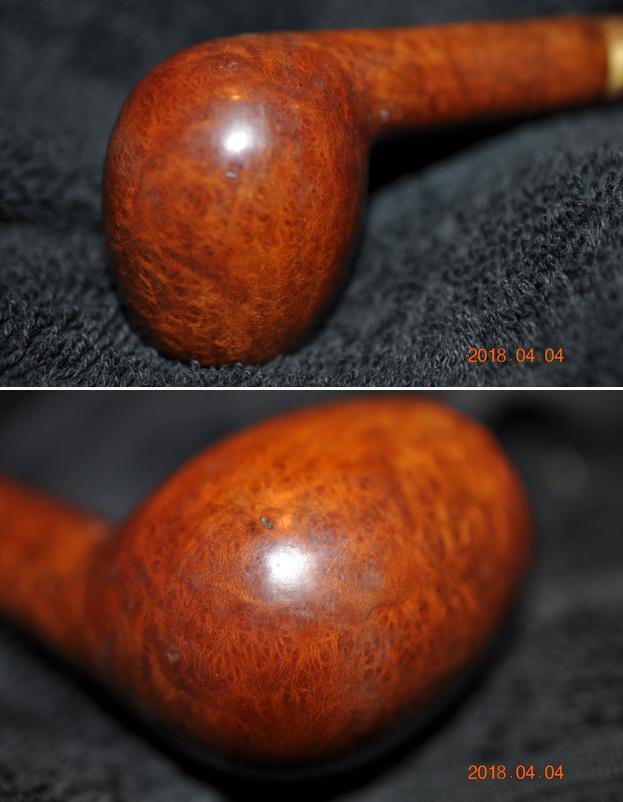
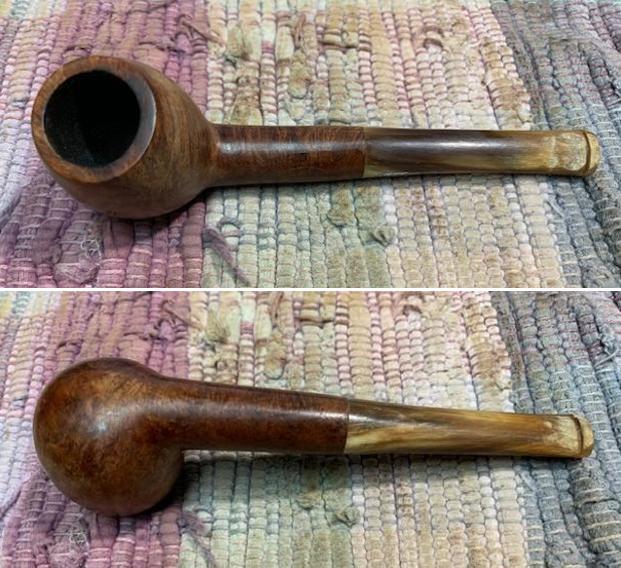
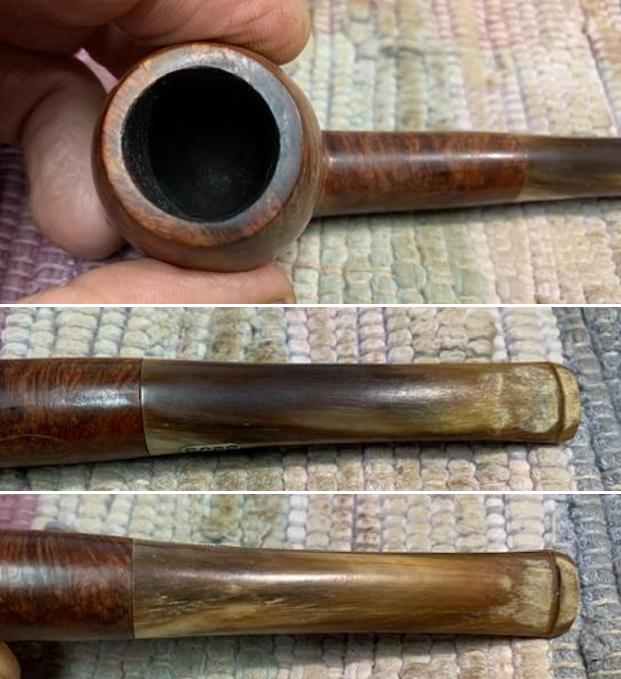
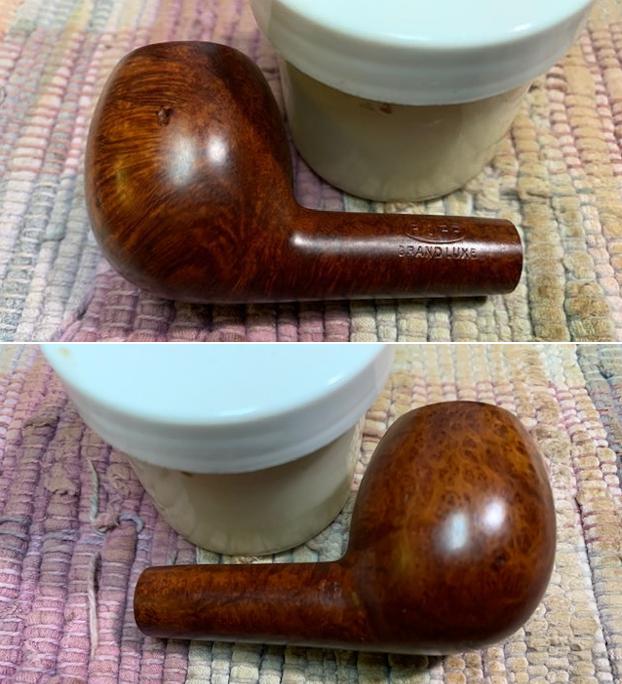
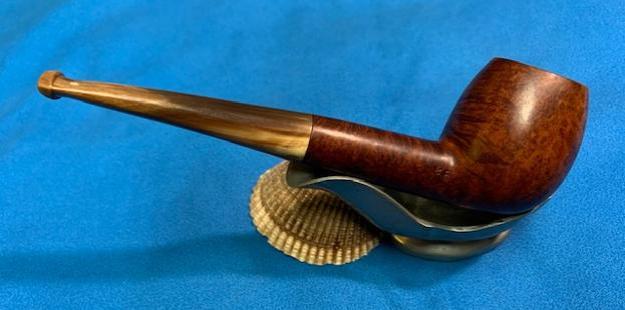
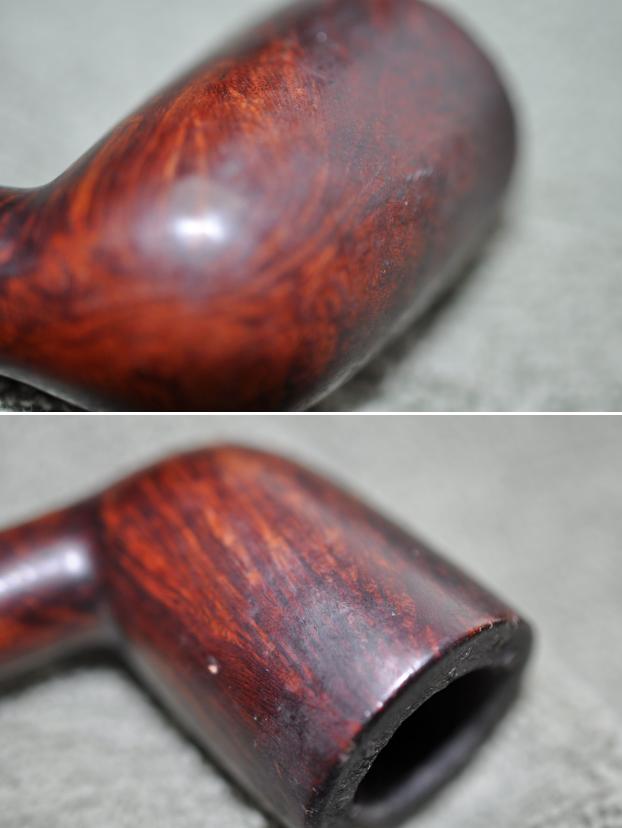
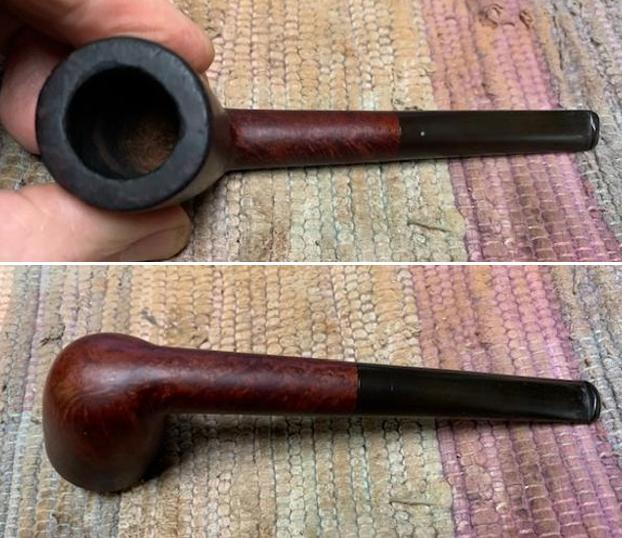
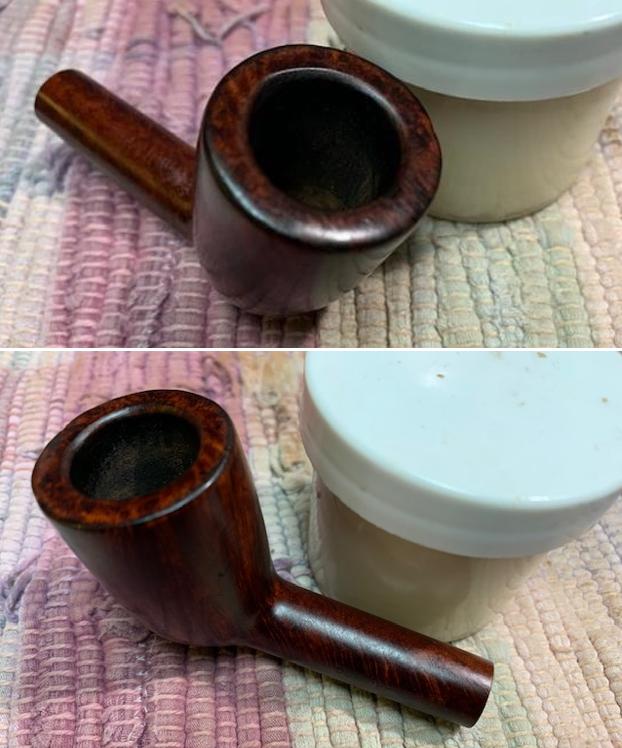
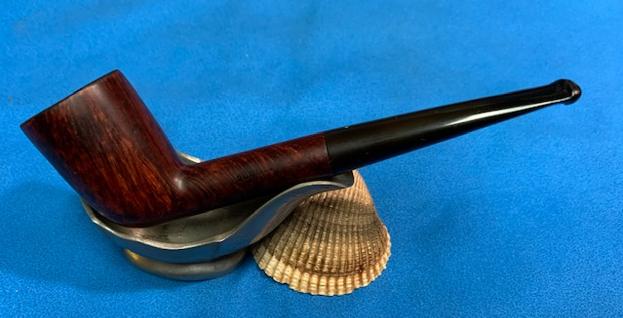
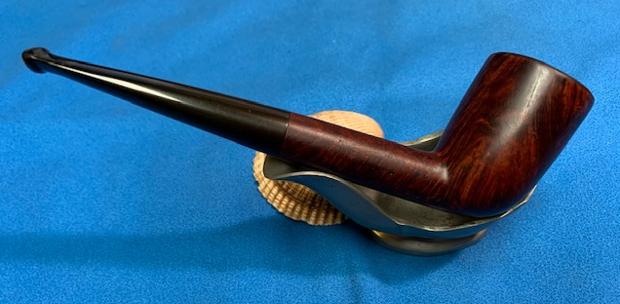
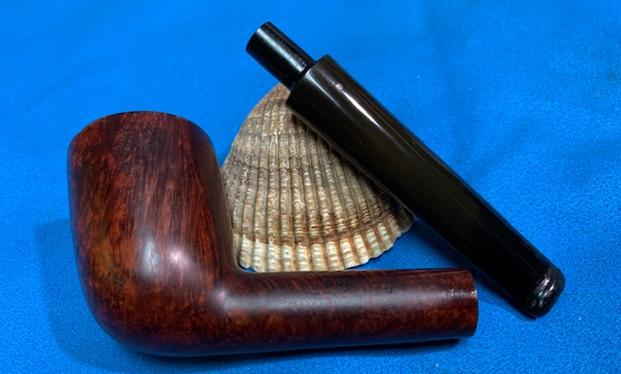
In our emailing back and forth, I discovered that Ryan too, was living in Europe at the time. He had finished up his graduate work in Scotland and was teaching in the Black Forest region of Germany for the past 10 years and was also in the process of transitioning back to the US. When he said he was in the Black Forest region of Germany, I perked up. Several years ago two of our five children attended Black Forest Academy in Kandern, Germany – a very beautiful part of Europe which we enjoyed visiting several times. Ryan sent me some pictures of his Omega from Germany, which he had used only a few times. Here are the pictures Ryan sent:


 My impression of his pictures was that the Omega was practically new and not beat up at all. Since we both were in the process of transitioning to the US, he from Germany and we from Bulgaria, the decision was made to wait till we both were settled on the other side of the pond and he would send the Omega to me. Which brings us to the present – Ryan’s Dr. Grabow Omega is now on my worktable. I am in Golden, Colorado, and Ryan is in Albuquerque, New Mexico. We both are adjusting to our new realities!
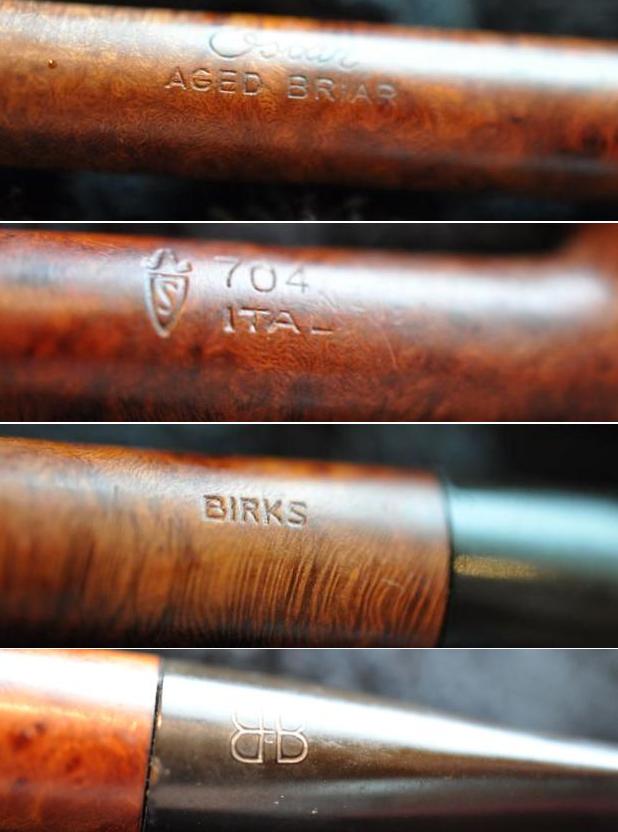
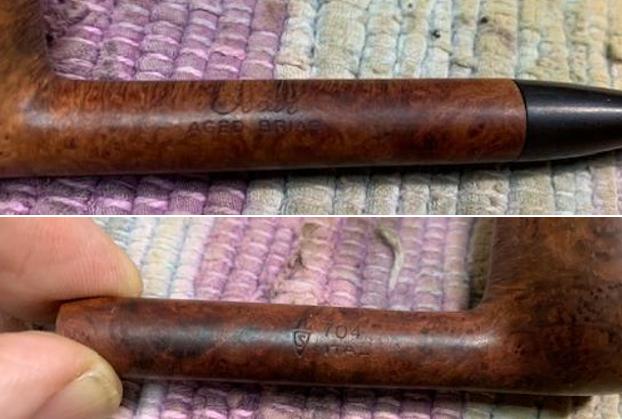
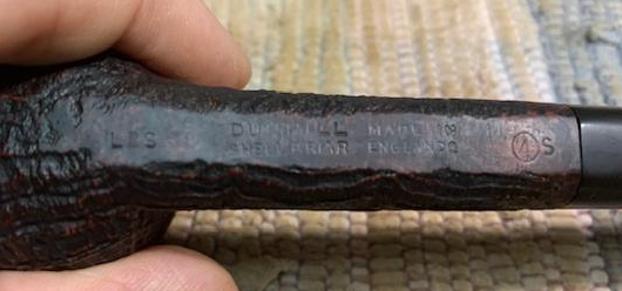
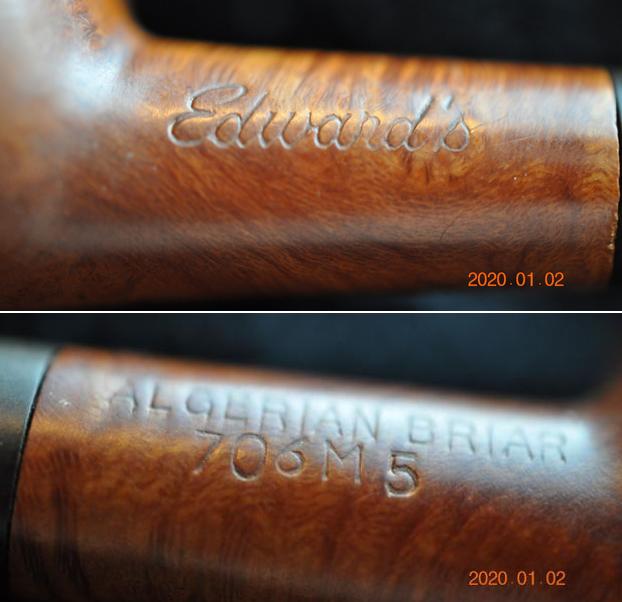
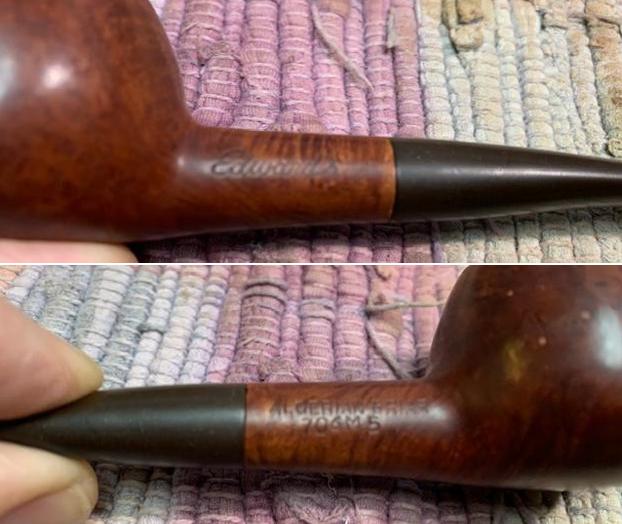
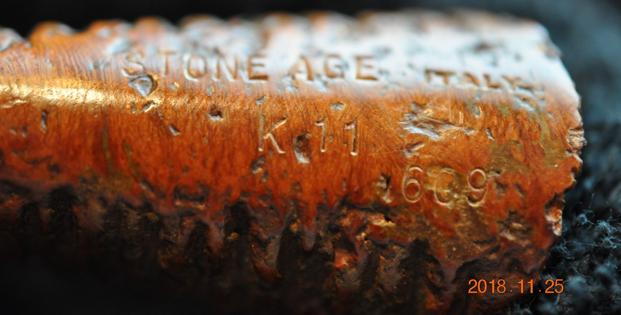
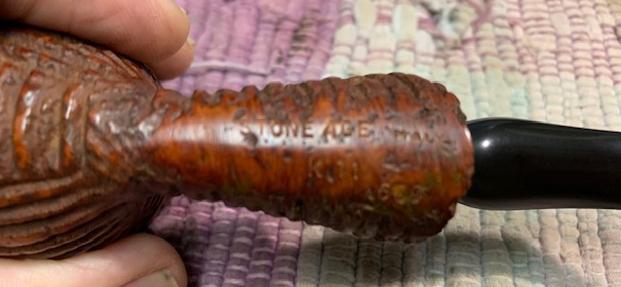
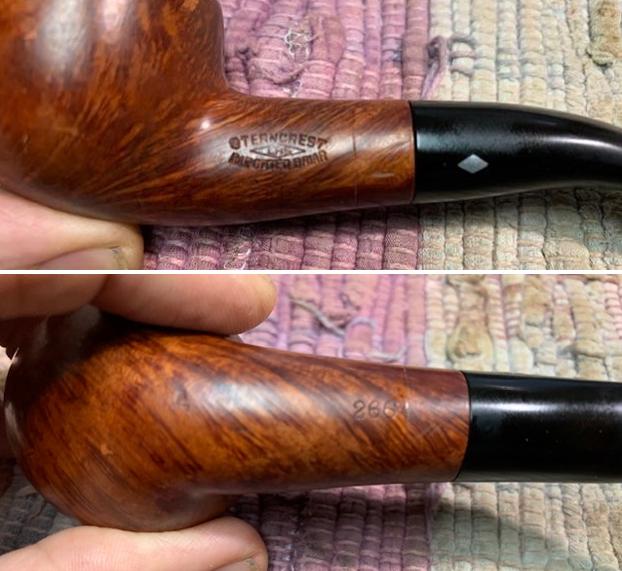
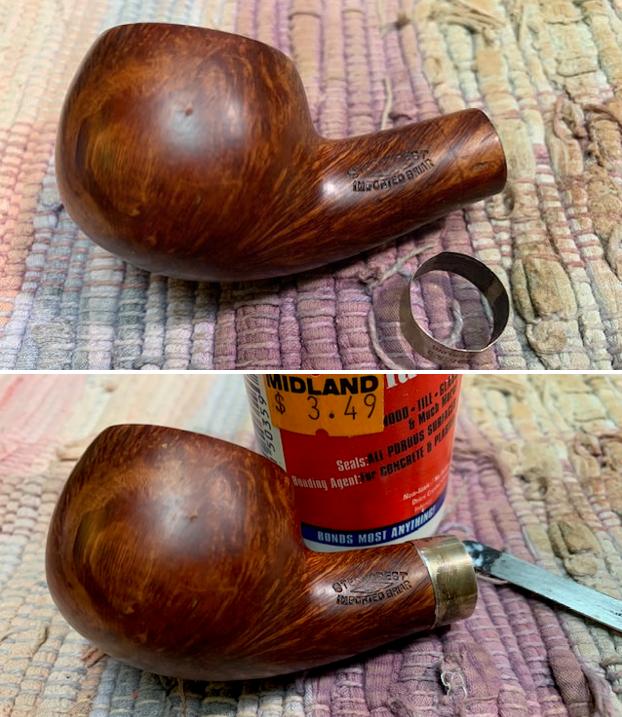
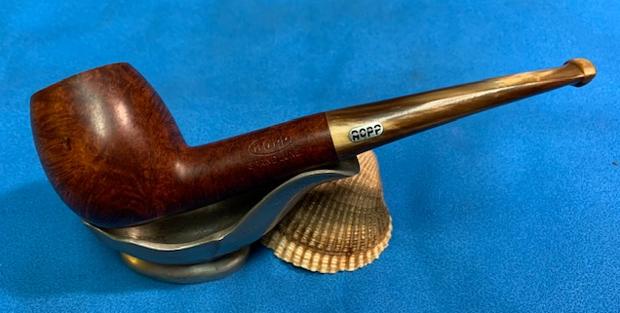
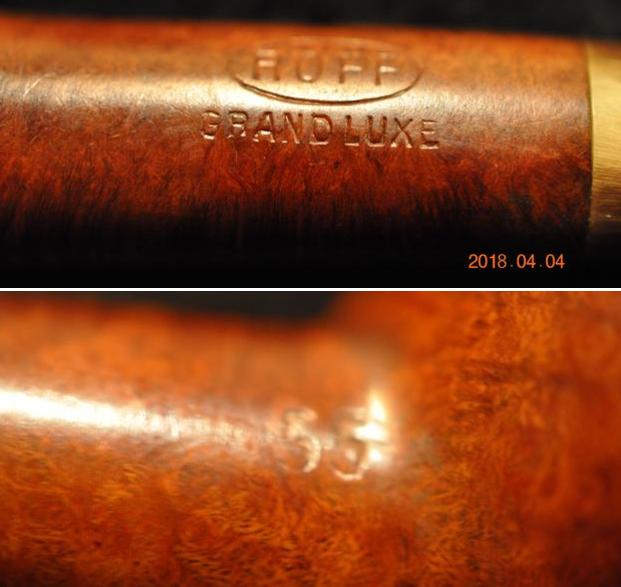
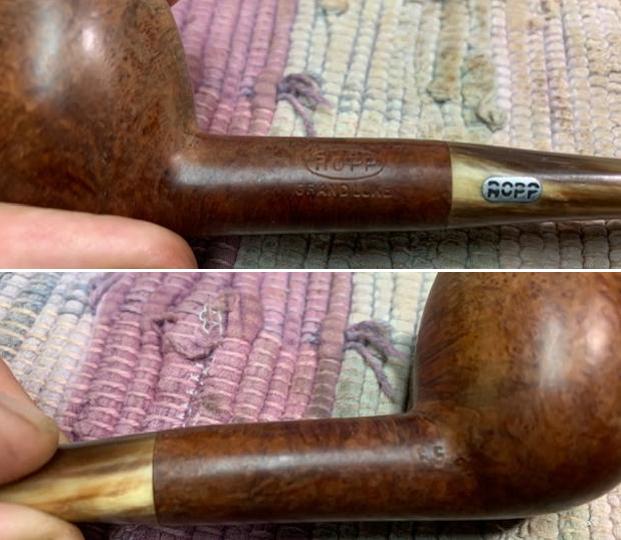
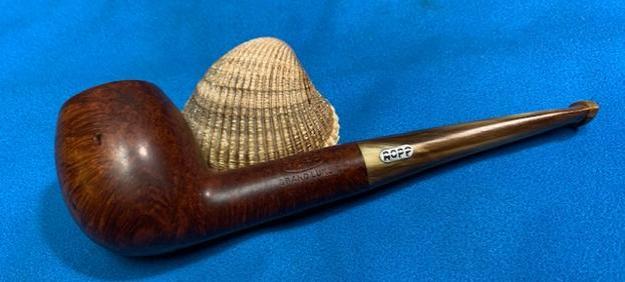
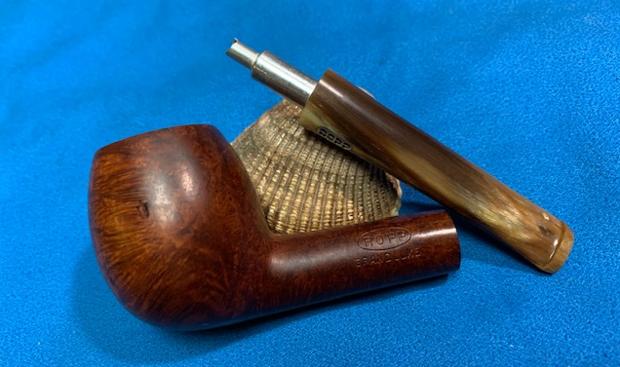
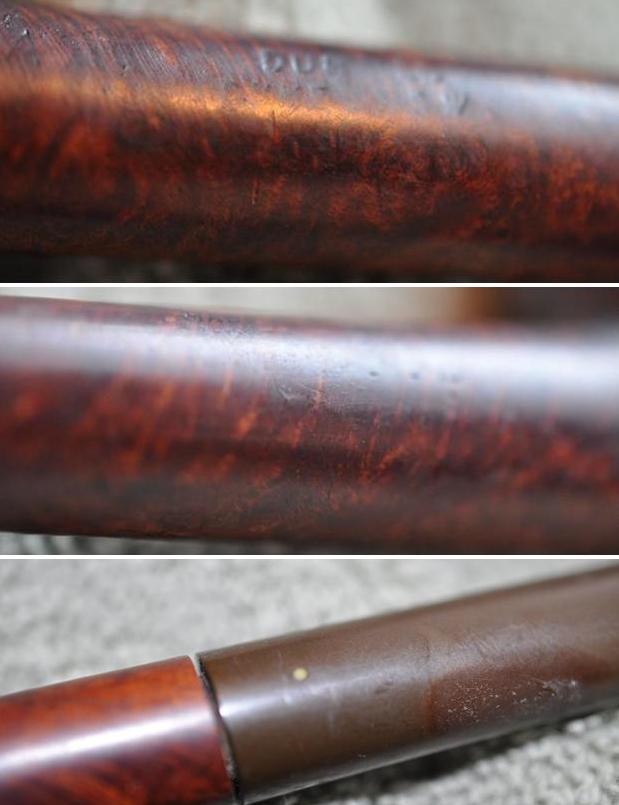
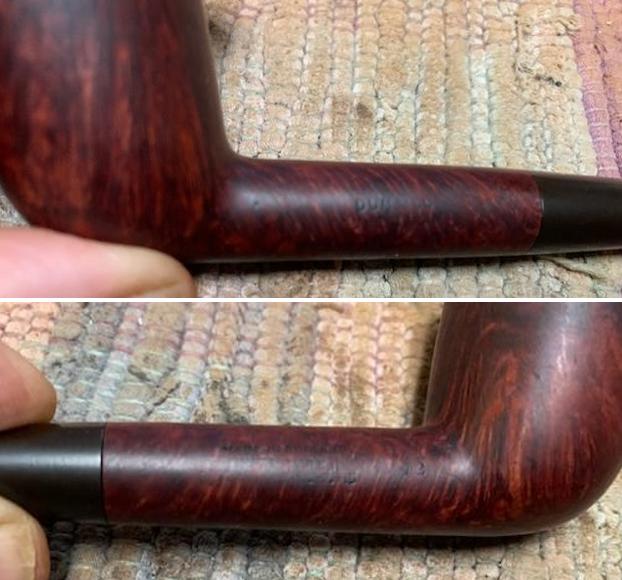
The primary desire Ryan expressed was to allow the natural briar to emerge by removing the candy apple, thick factory finish. He referenced seeing a restoration for another Omega I had done for Jenny, a former intern we had with us in Bulgaria. She had commissioned several pipes from the For “Pipe Dreamers” Only! collection to give as gifts to the special men in her family and she kept one for herself too! (See: Jen’s Trove No. 8 – Restore & Upgrade of a Dr. Grabow Omega Smooth Billiard) The Dr. Grabow Omega she chose for one fortunate person turned out well – before and after results were striking! This was the result that Ryan compared to his Dr. Grabow factory fresh Omega finish which shrouded the natural grain. Ryan’s Omega appears to me to be a newer pipe off the production line and differs in the nomenclature from the former older Omega I restored. In common is that both are stamped on the left shank flank: OMEGA [over] DR. GRABOW. The right was stamped on Jen’s Omega, IMPORTED BRIAR, which is not present on Ryan’s Omega.
In the former Omega restoration, the biggest problem that I expressed was the finish. I did not like it! In my research for that Omega, I found these two comments from bloggers on a Pipes Magazine Forum discussion about Dr. Grabow Omegas’ cost, quality, and appeal, which resonated with my own thoughts regarding the positives and negative:
Positives: An Omega was the first briar pipe that I ever owned. It still gets regular use and like Brewshooter, I have no complaints with it. Bowl size is a little bit smaller than I like, but it makes for a nice quick smoke, and the military mount makes it really easy to clean. I have Savinellis that I have easily paid four times more for, and sure, they smoke a little bit better, but in terms of a good smoking instrument, the Omega will do you well as long as it is smoked properly and maintained properly.
Negative: One thing I noticed about my Omega is that it had a heavy varnish or clear coat. I sanded it and gave it a nice wax. It seems to breathe a little better now and I like seeing more of the grain. I also gave the band a bit of a brushed look with some fine grain sandpaper. It’s a nice little pipe for that quick smoke.
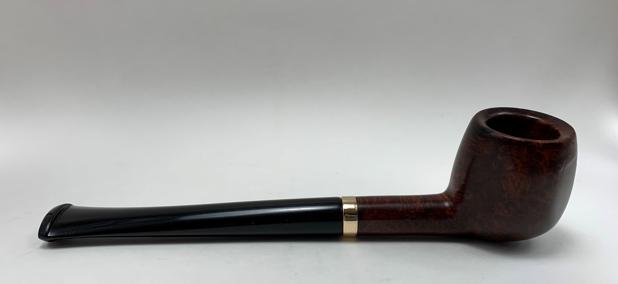
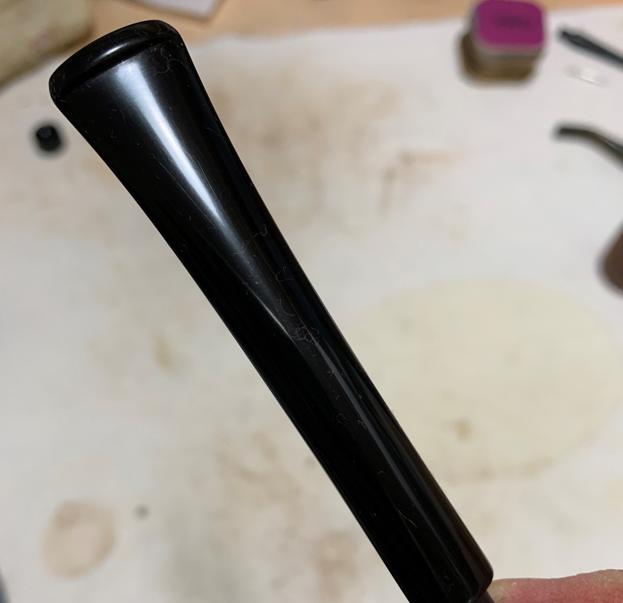
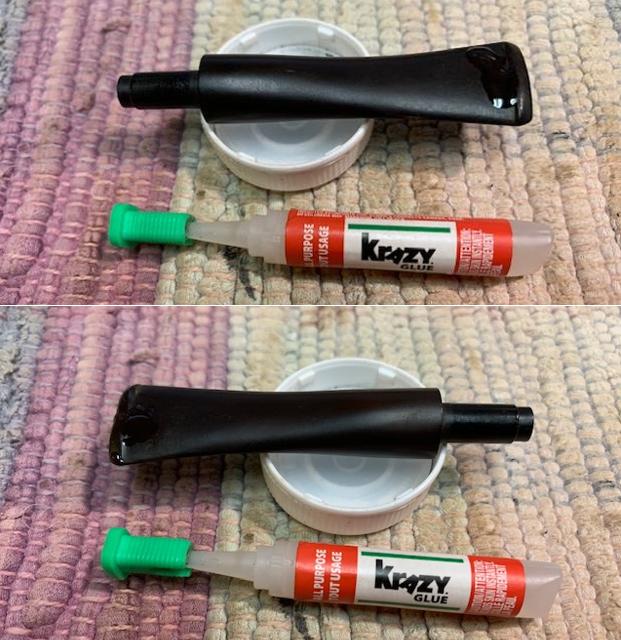
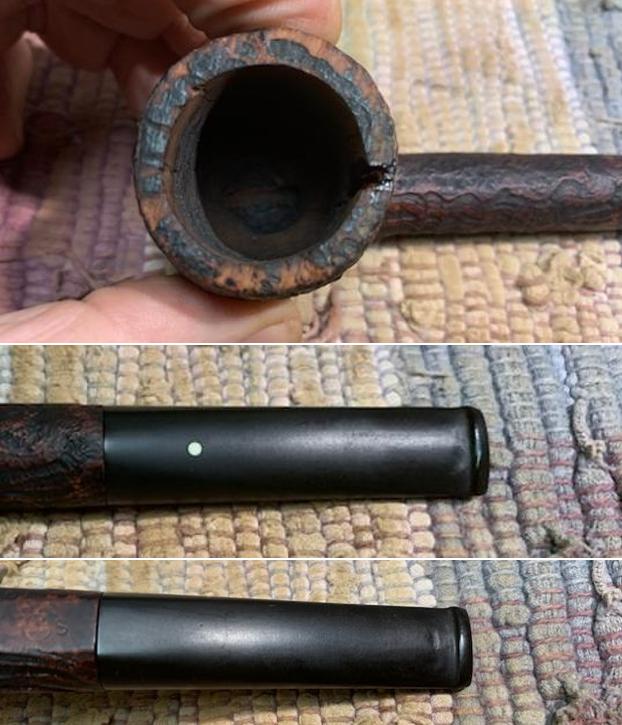
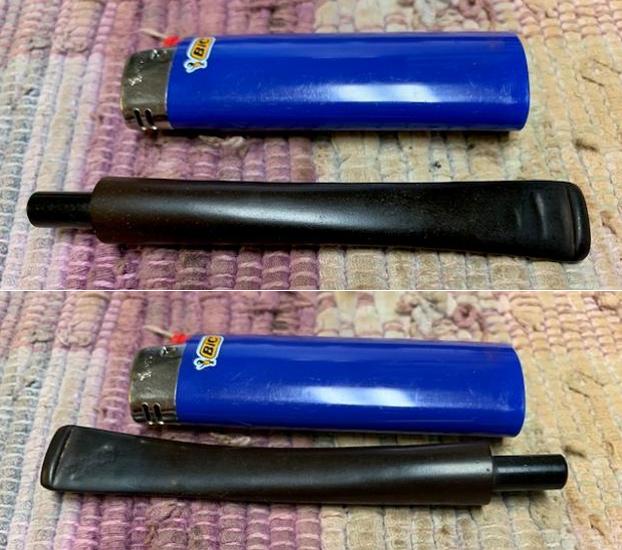
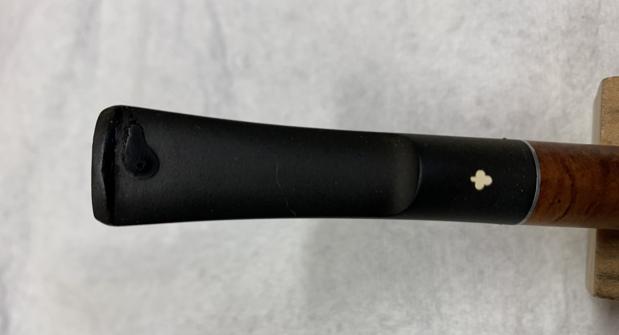
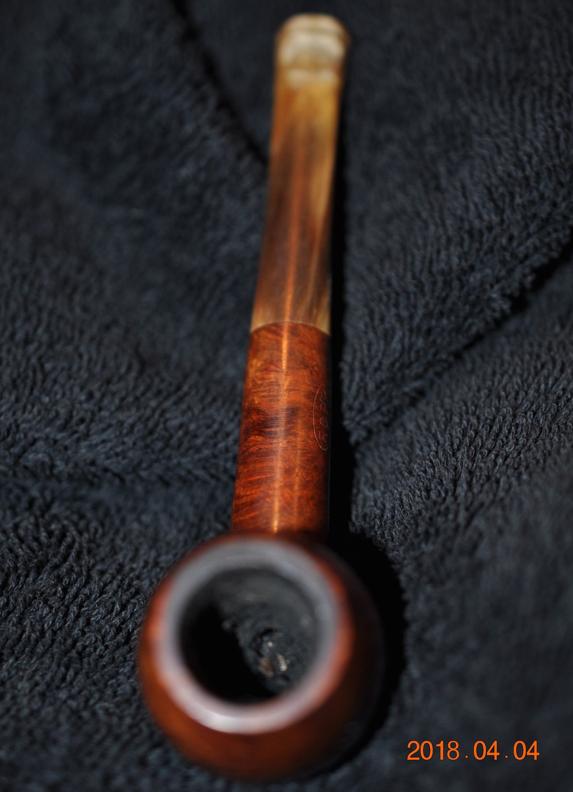
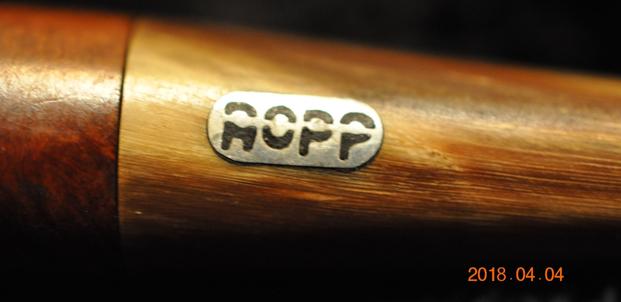
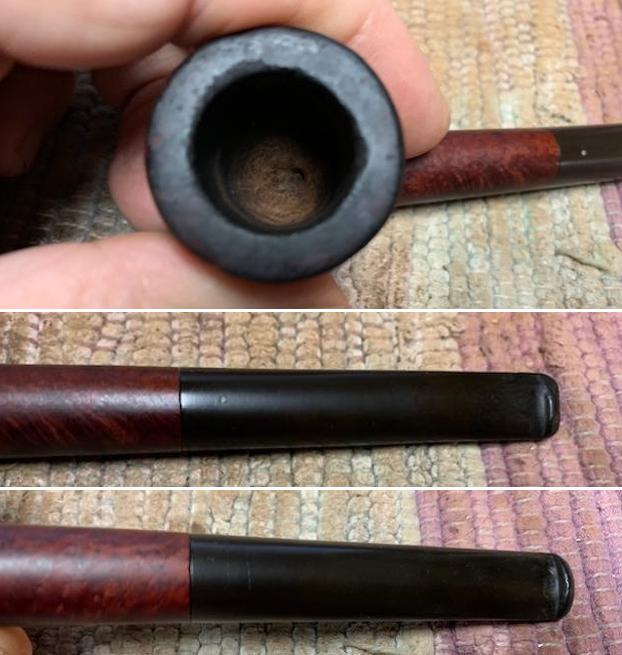
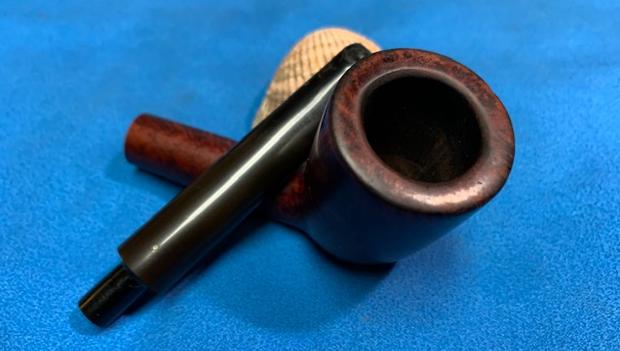
Ryan’s desire for his Omega is to remove the ‘candy apple’ or heavy varnish finish. He is also hopeful that there is a nice patch of briar beneath it. I am hopeful, too! The second issue that Ryan expressed about his Omega was that the factory stem was made of a plastic material and not rubber or vulcanite. I could not recall that the former Omega’s stem I had restored was plastic – I believe it was indeed vulcanite because of the way it spruced up. Ryan shared with me that his research uncovered that Dr. Grabow started using plastic stems along the way. Ryan said he could live with the factory plastic stem but did not like it.
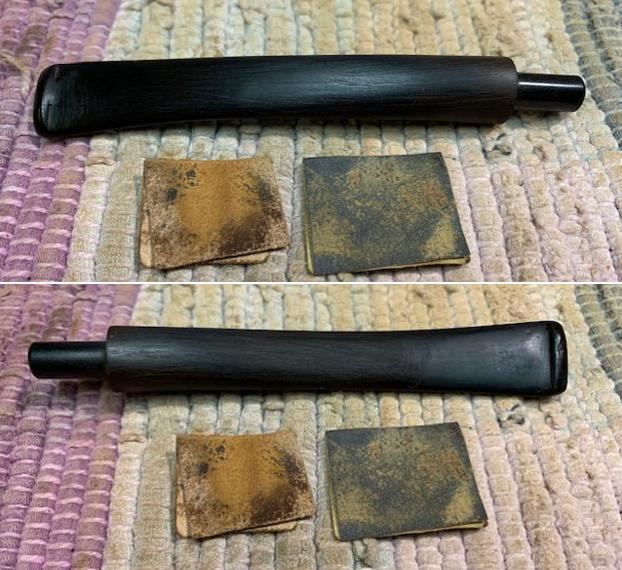
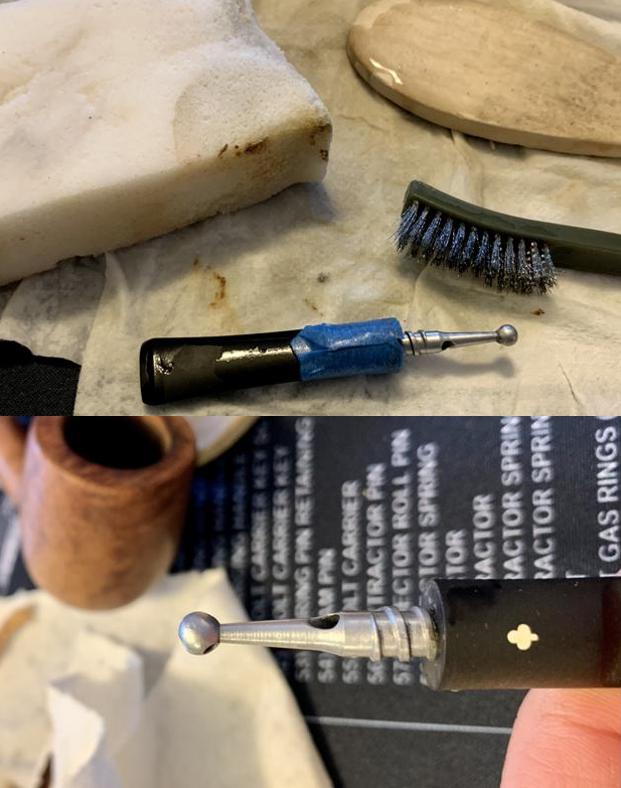
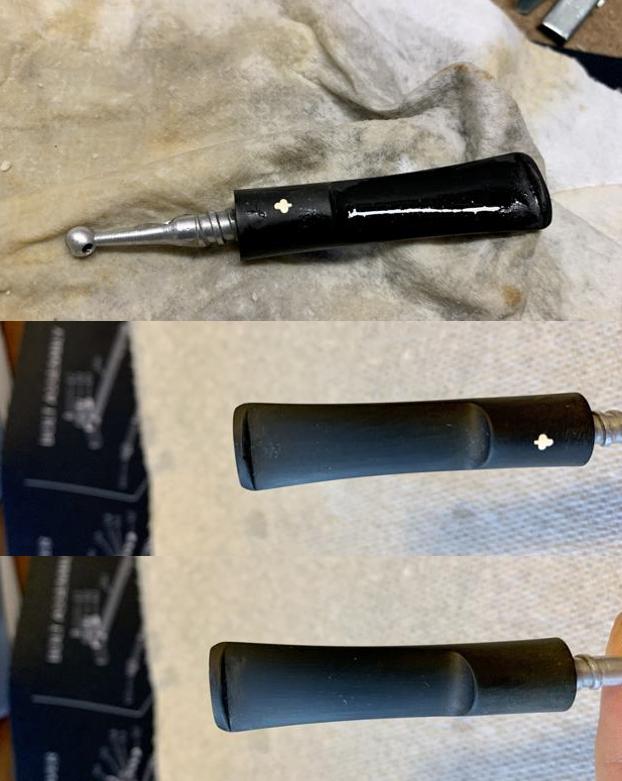
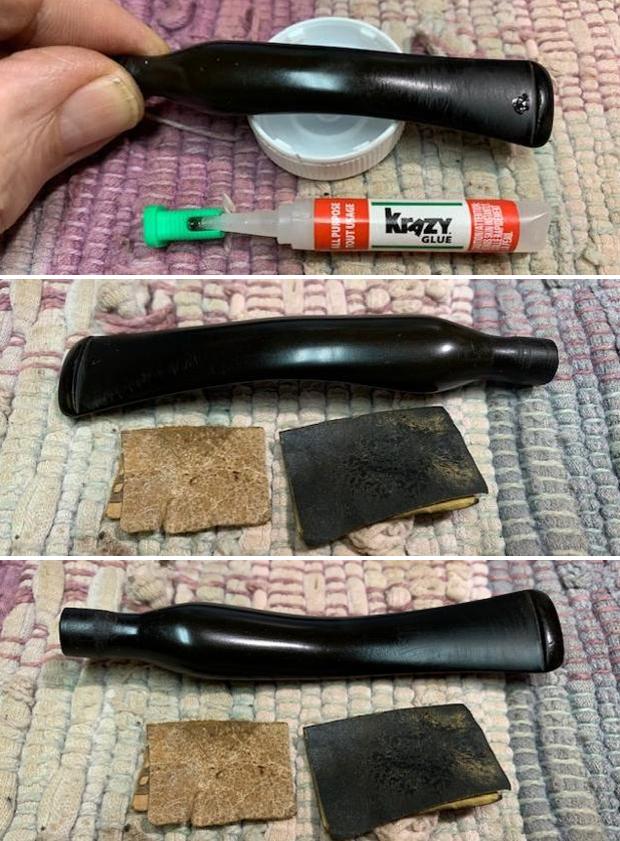
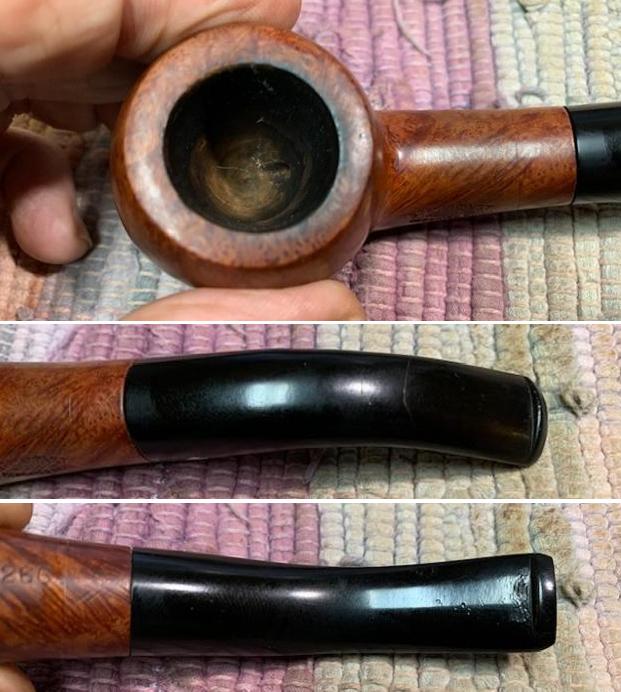
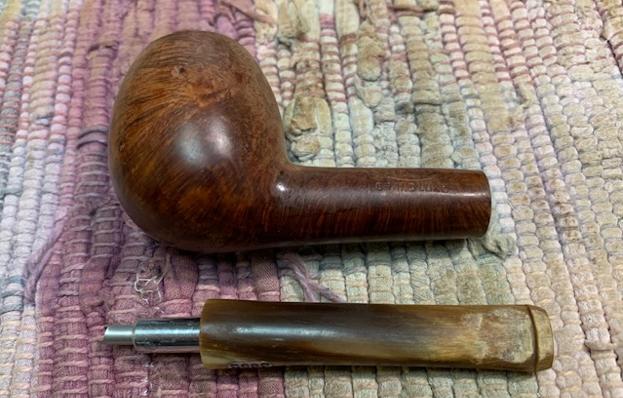
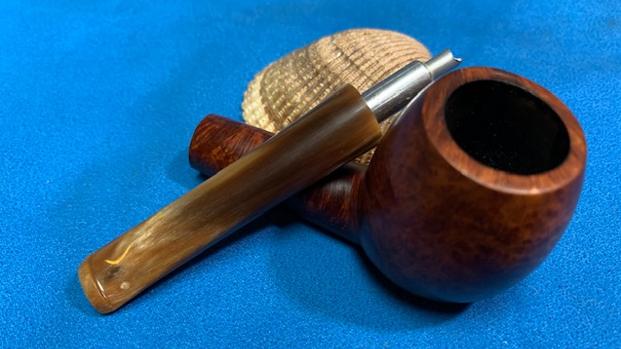
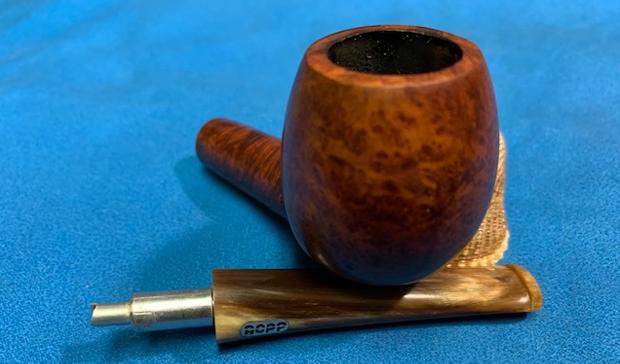
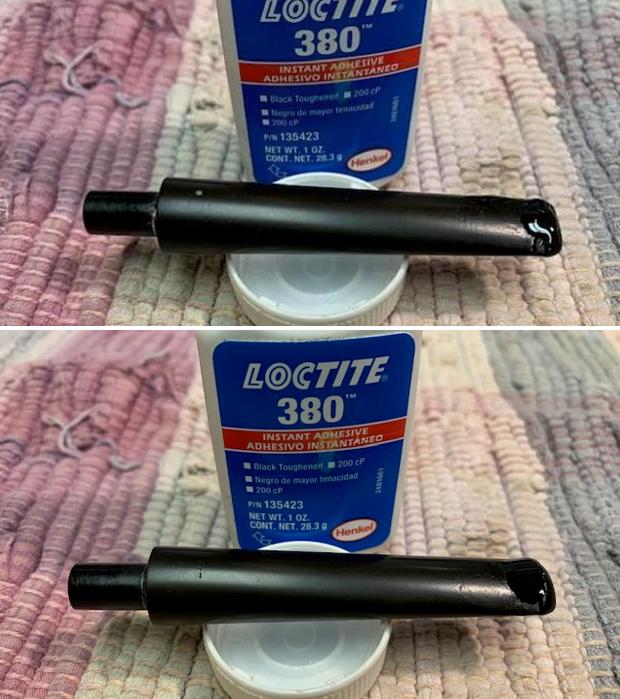
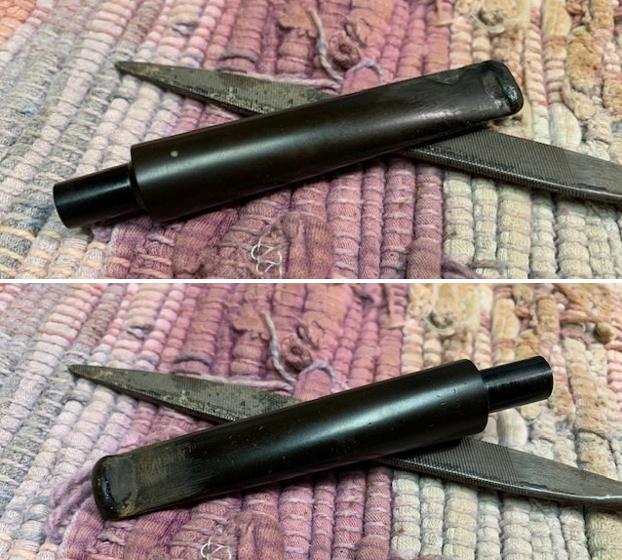
When Ryan’s Omega arrived, I was curious to check out the stem as well. The seam is different from a normal precast rubber stem – the factory seam is vertically dissecting the stem rather than a horizontal seam – the norm for rubber precast stems. The picture below shows the vertical seam that splits the P-Lip and runs up the stem. I would say that I agree with Ryan’s assessment. The stem is plastic. I decided to investigate whether I could find a rubber stem that would match the Omega’s Military Mount, fancy P-Lip stem. I sent a note to Tim West at J. H. Lowe (www.jhlowe.com) where I acquire pipe supplies and included pictures for Tim to see if I could find a non-factory match for the Omega. Ryan had indicated to me that a factory stem with the Dr. Grabow ‘Spade’ logo was not critically important to him. Tim’s email came saying that he had a Greek rubber stem that had similar style and shape to the Dr. Grabow Wellington stems for a few dollars. He said that they were rough and needed bending and polishing – plain with no logo on the stem. I asked Tim to send it along with 5 additional Churchwarden stems. When the stems arrived a few days ago from Tim, I was pleased with the match he provided with the Wellington stem. The pictures below show the comparison. The Wellington stem is precast with rough horizontal seams running down the sides of the stem rather than vertically in comparison to the factory stem.
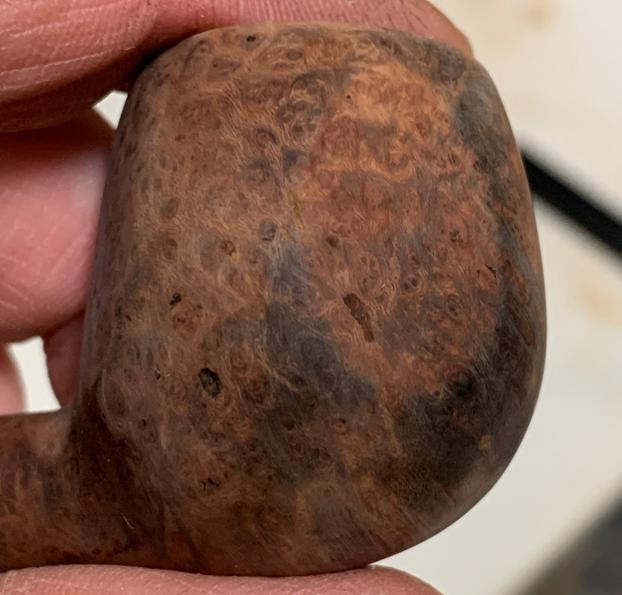
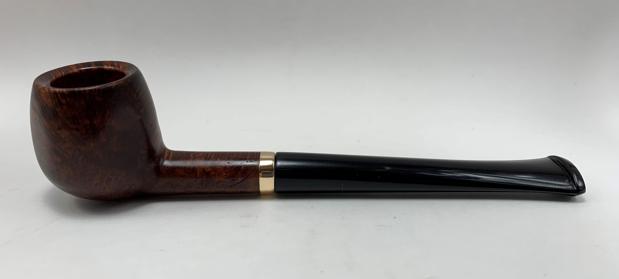
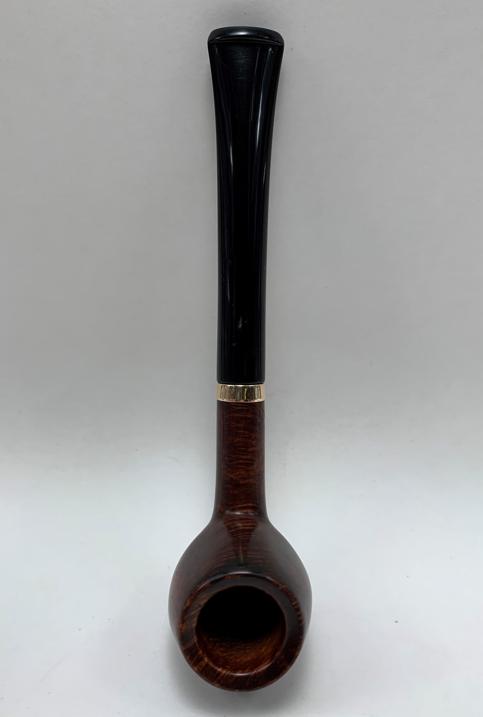
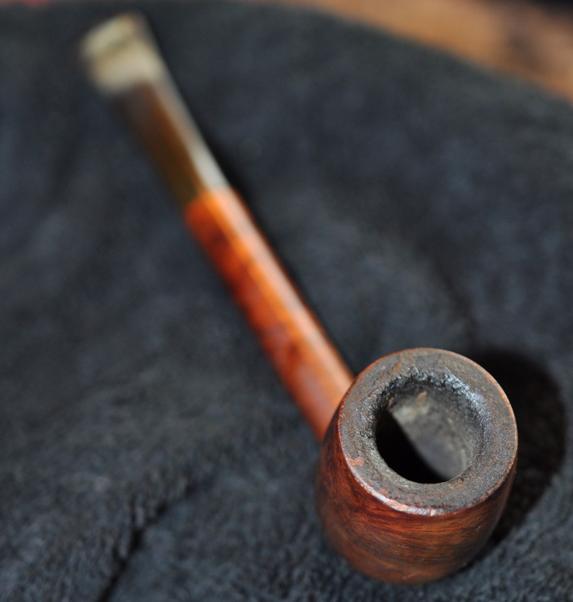
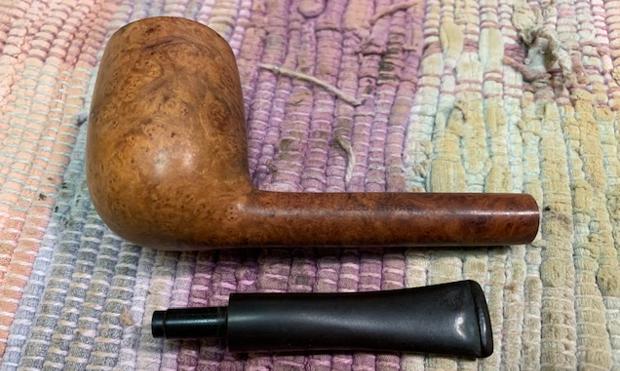
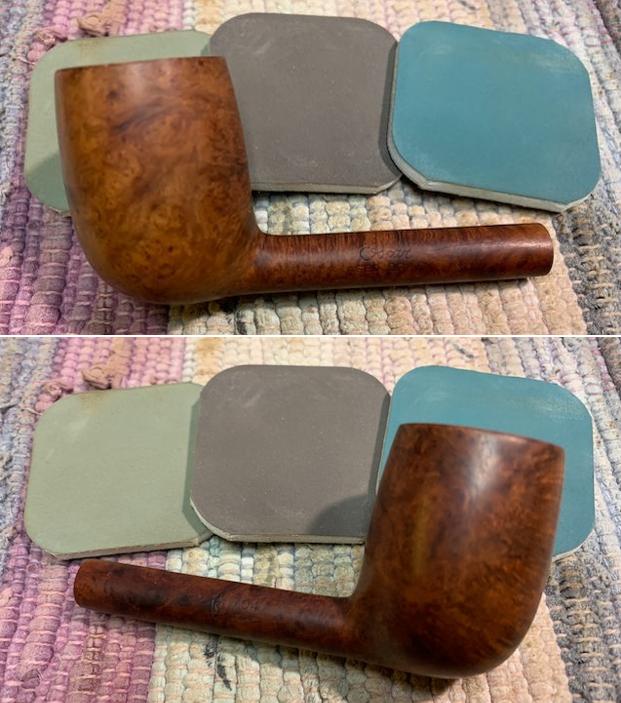
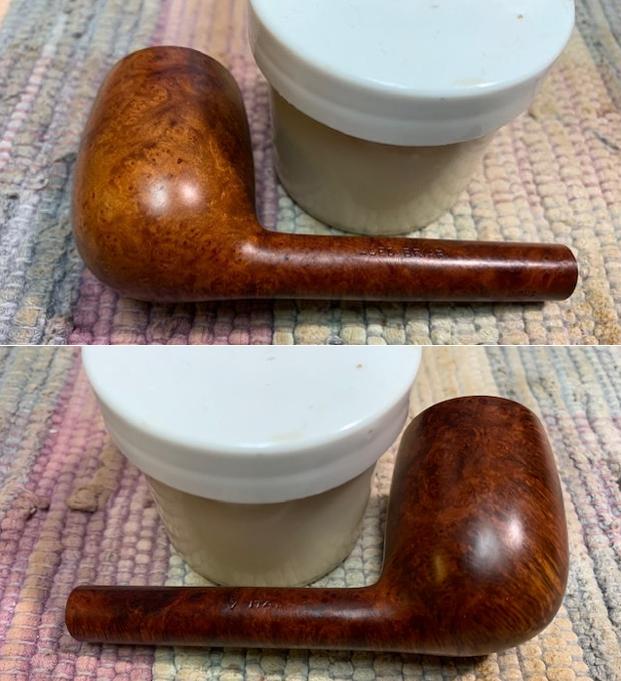
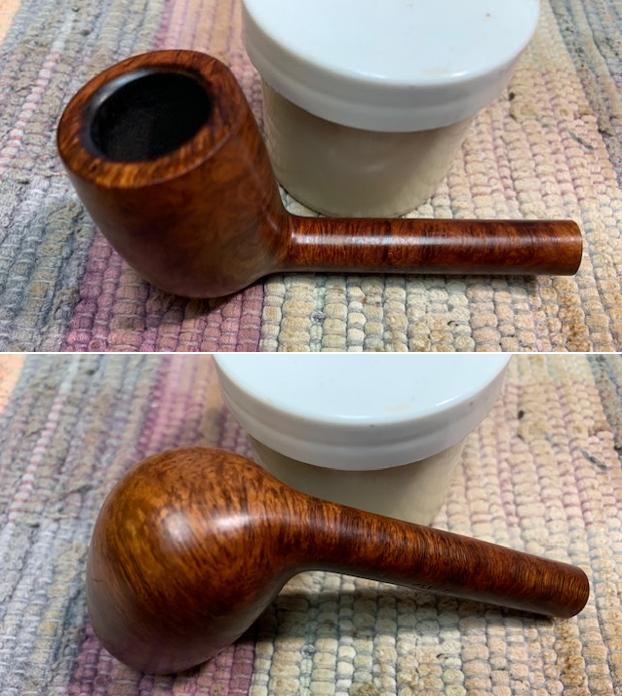
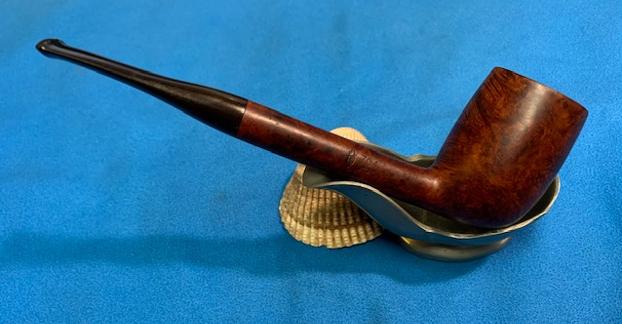
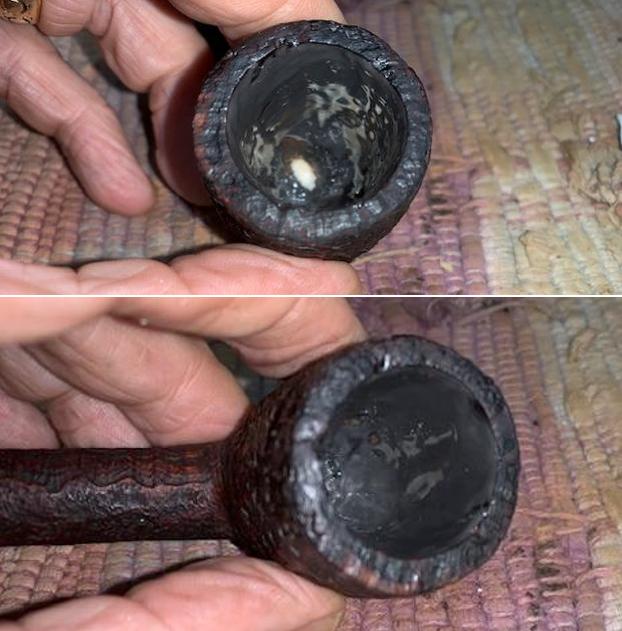
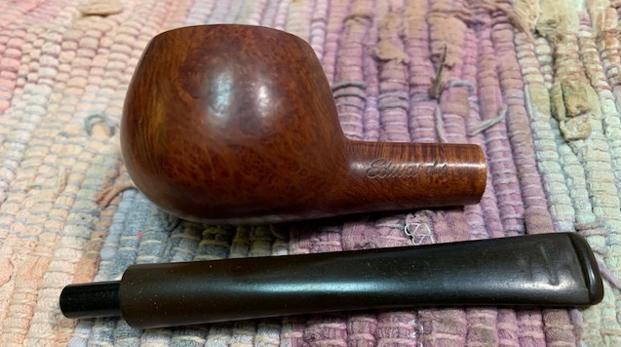
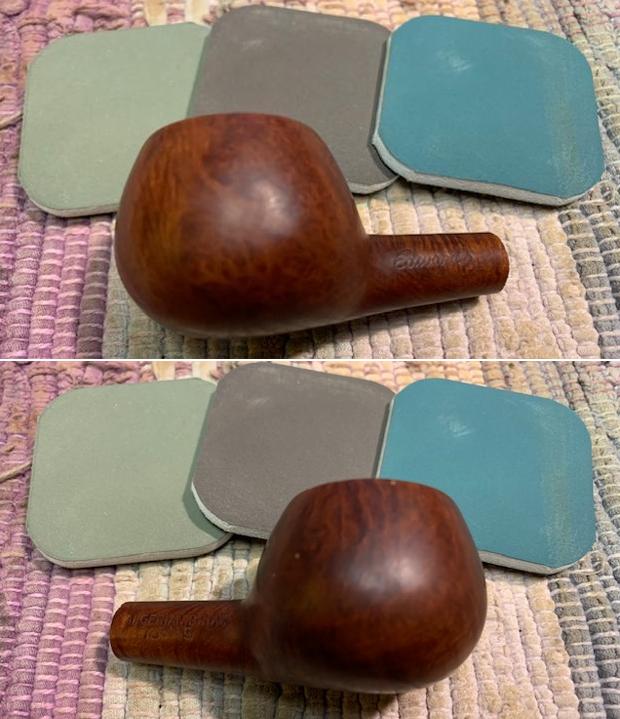
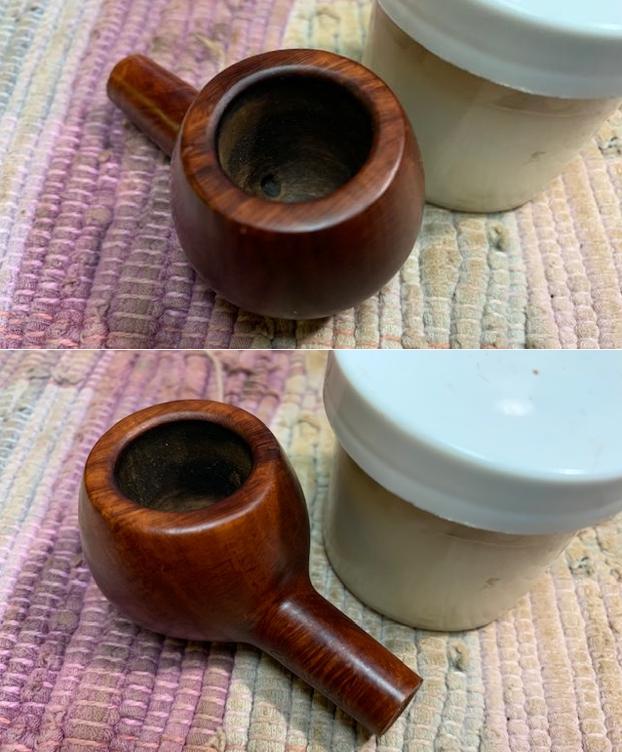
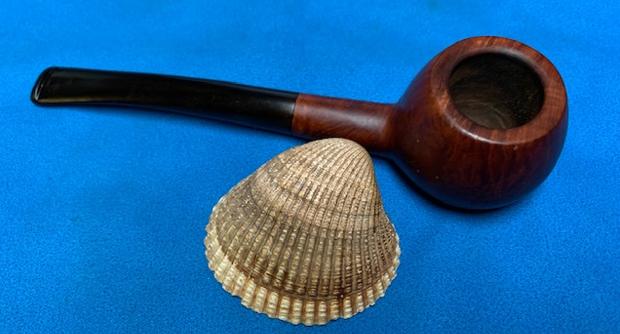
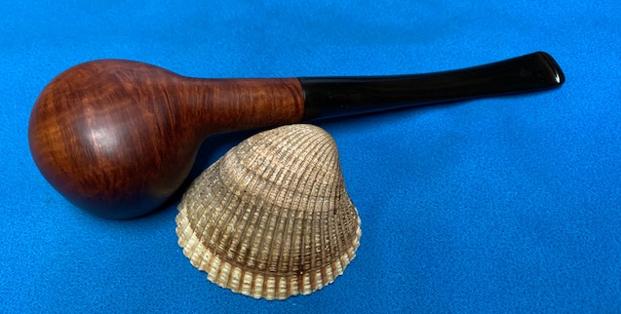
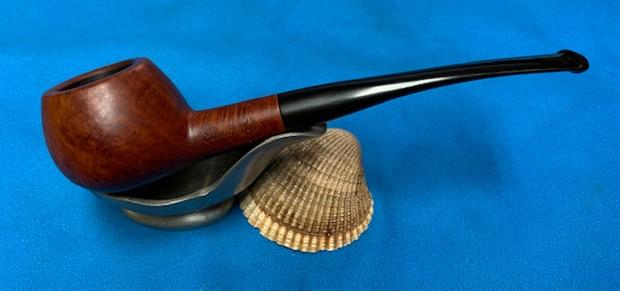
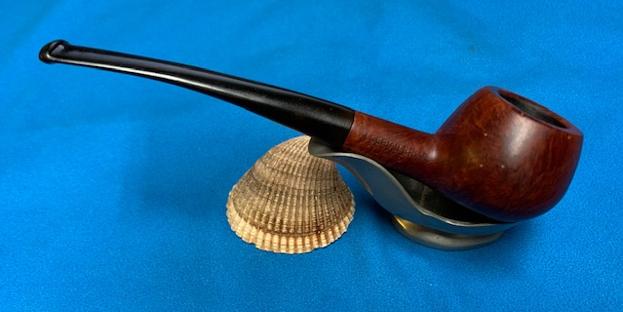
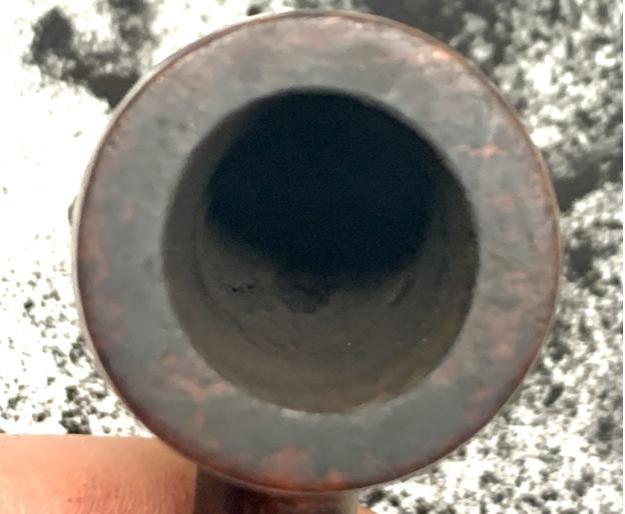
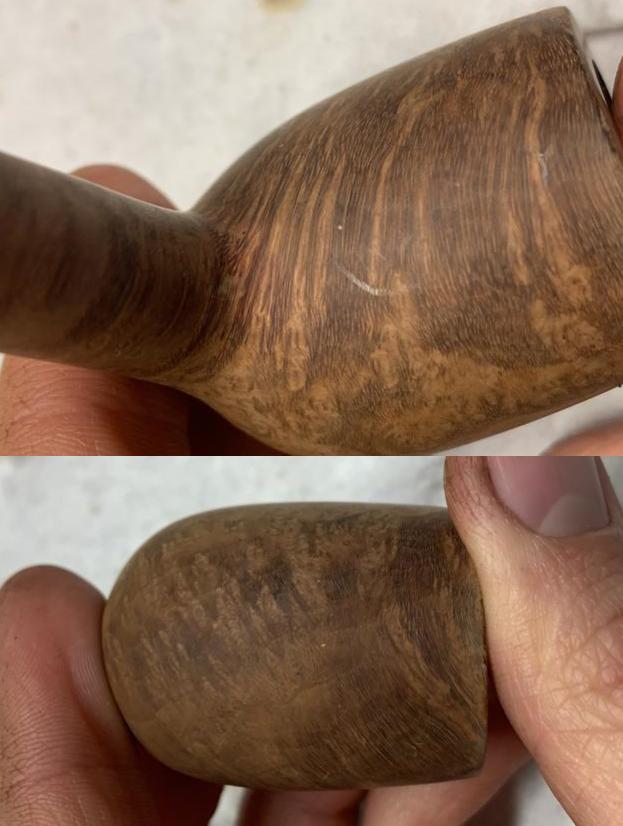
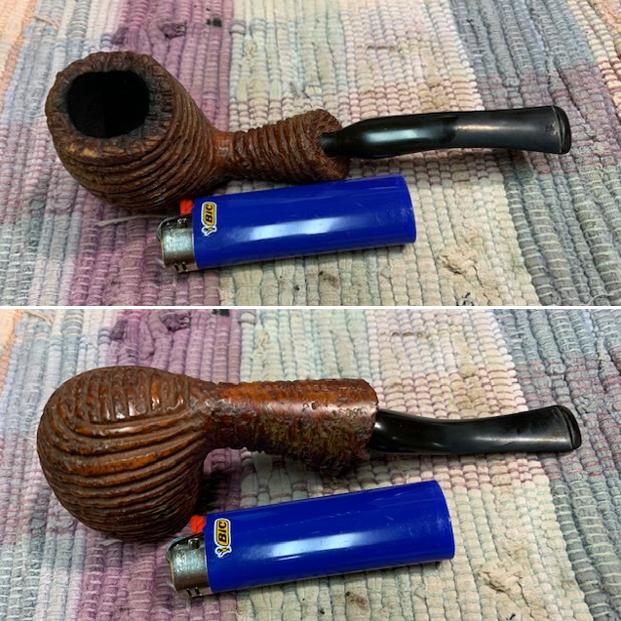
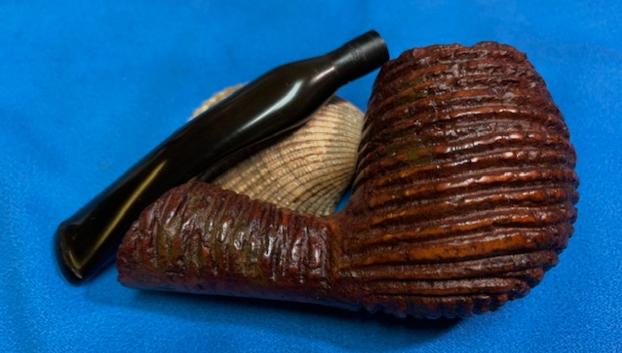
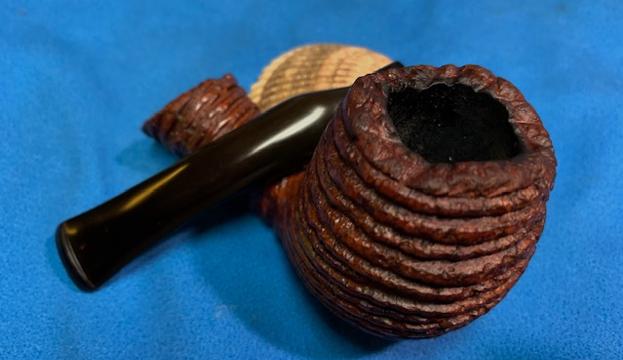
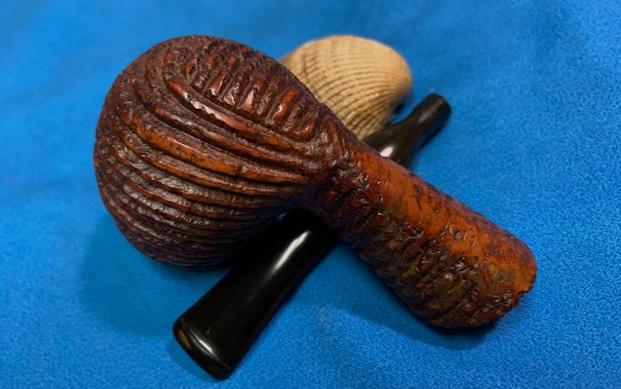
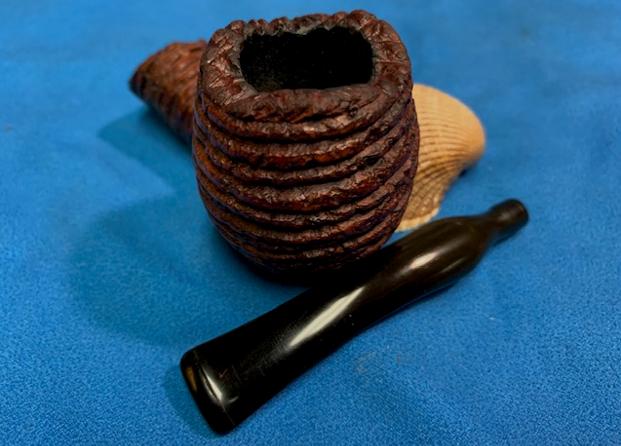
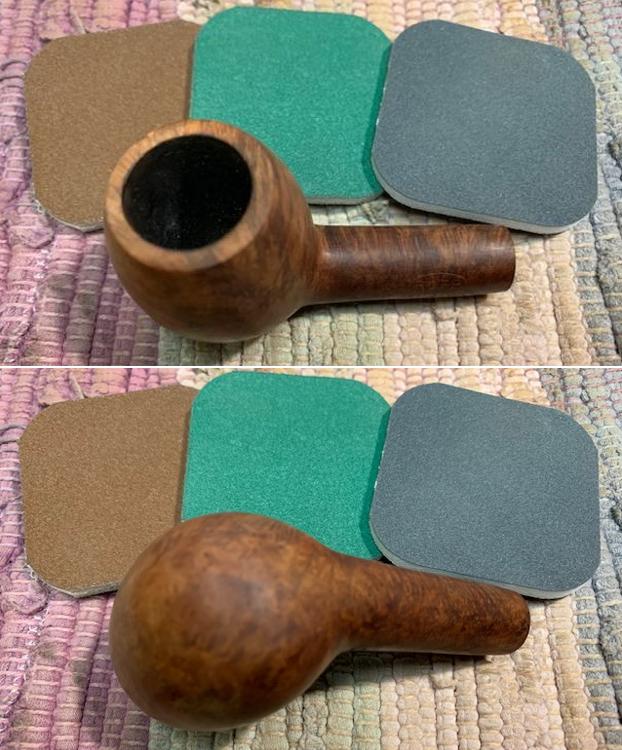
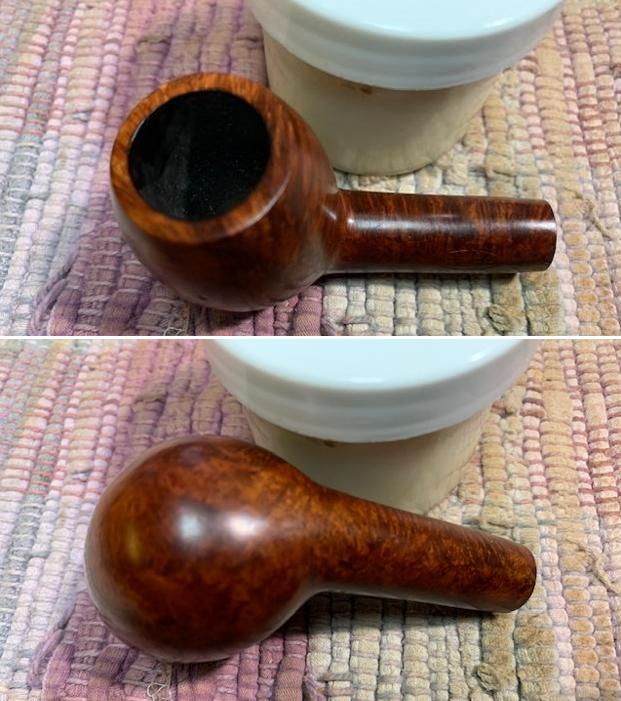
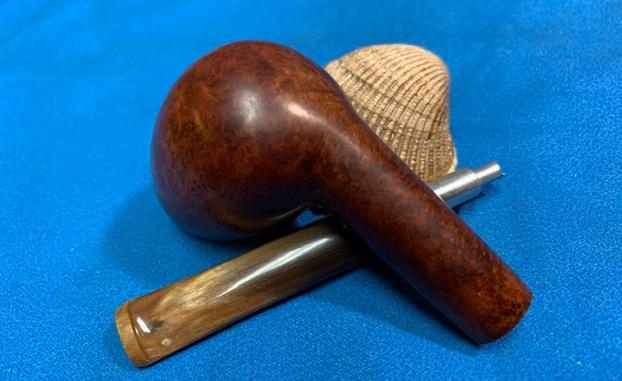
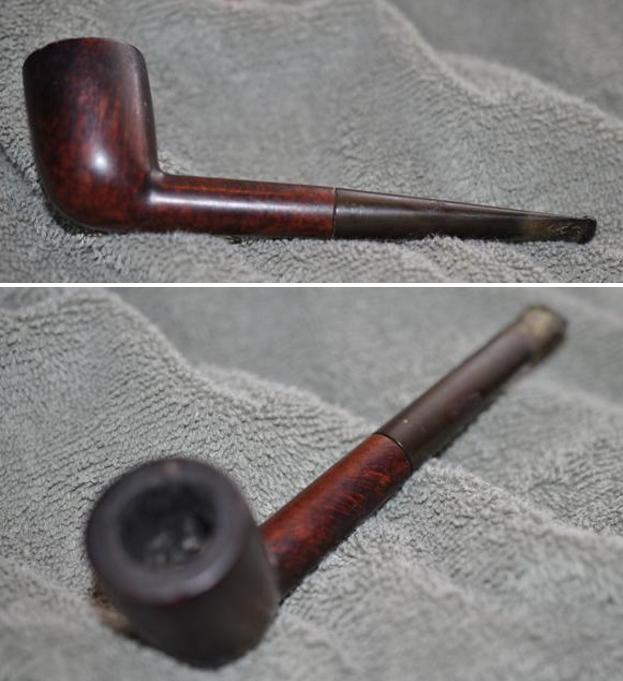
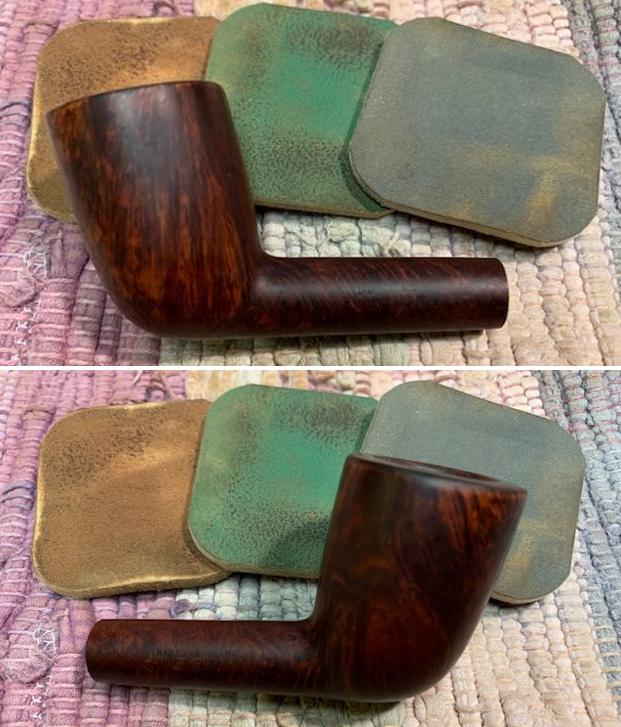
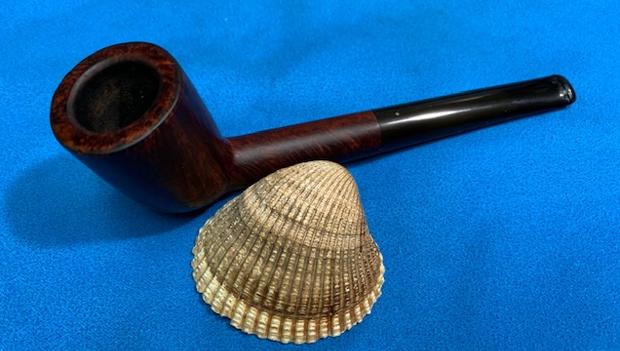
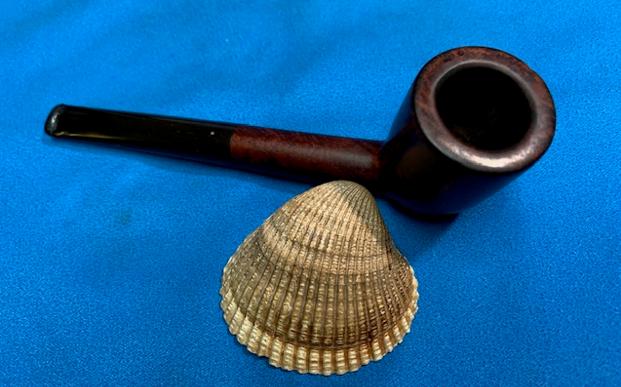
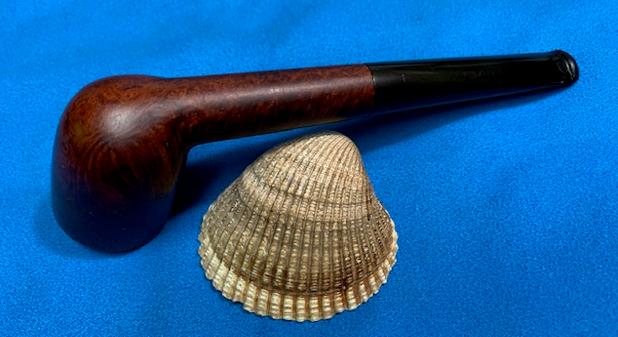
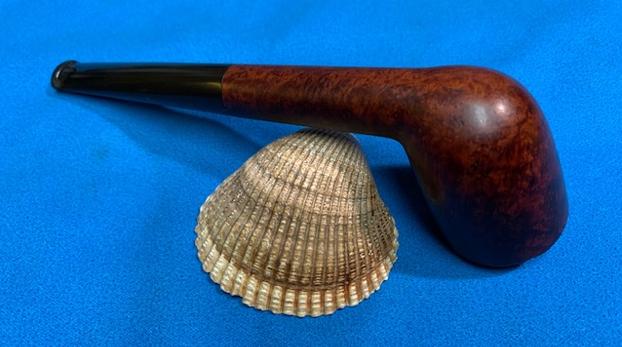
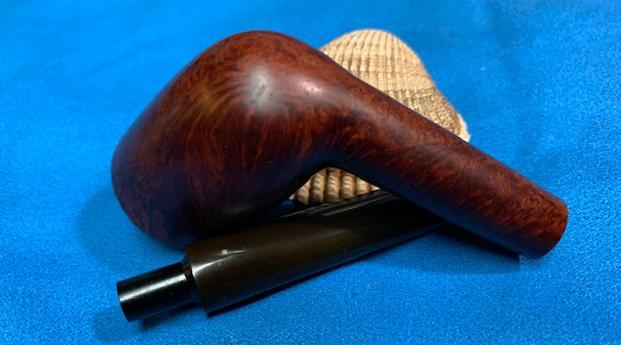
 Before beginning on the upgrade of Ryan’s Omega, I take a few fresh pictures of the stummel on my worktable. The finish is not as ‘candy apple’ acrylic as was the first Omega I restored but the finish is thick and obstructive. In addition to the finish, the stummel has some minor dents from normal wear.
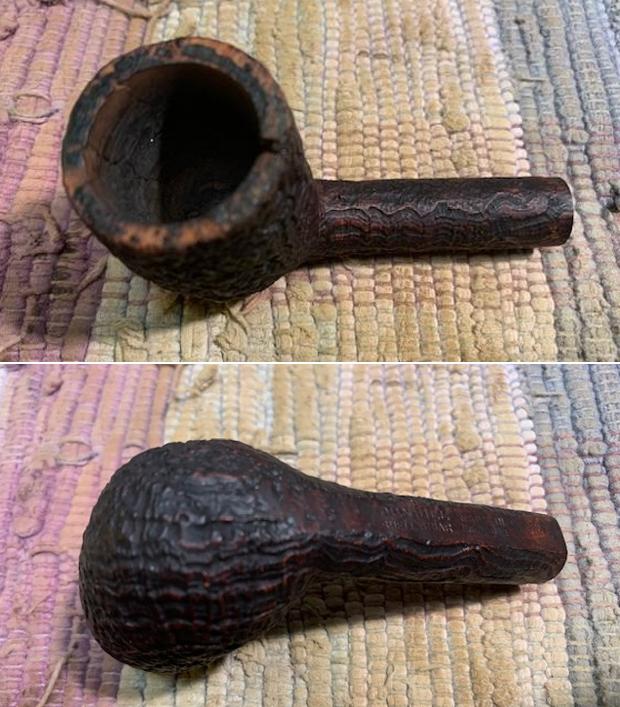
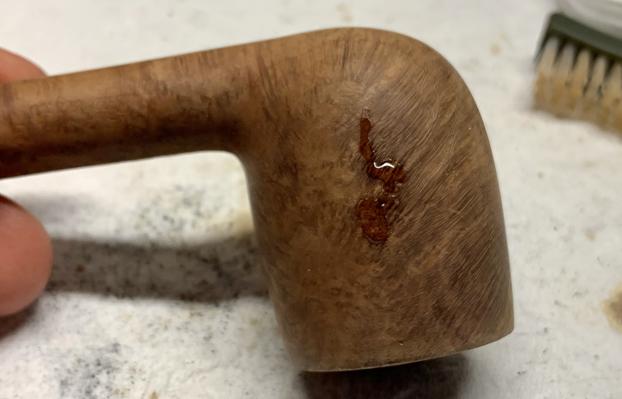
  There appears to be a round fill on the right shank side. When the stummel is cleaned, I will need to see if this apparent fill needs attention.
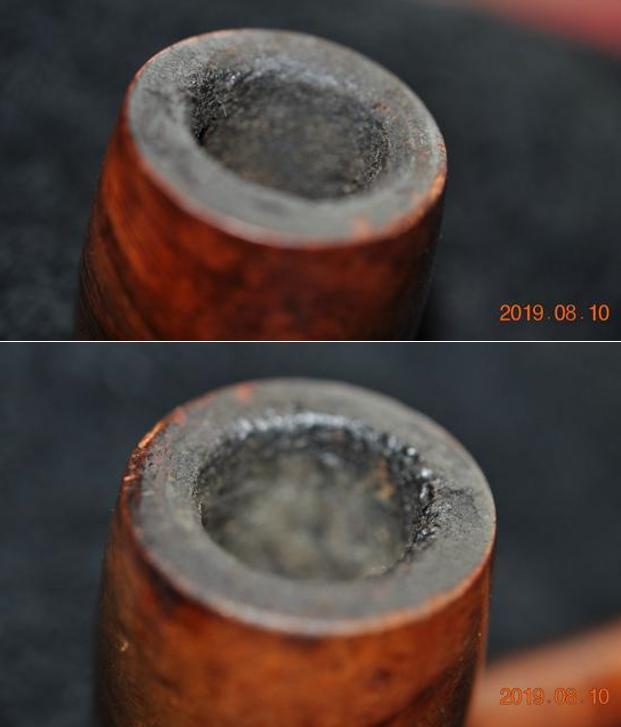
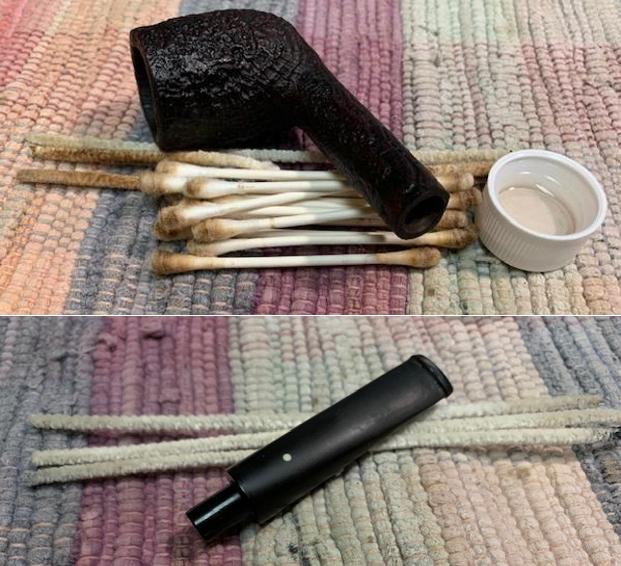
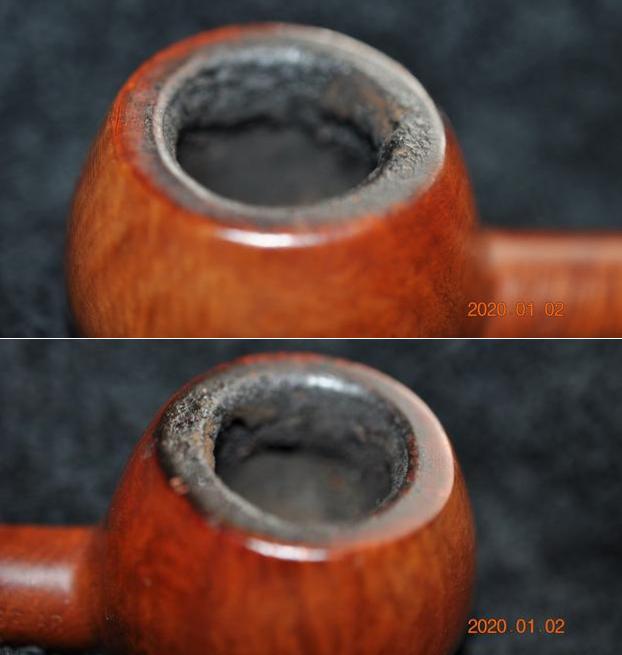
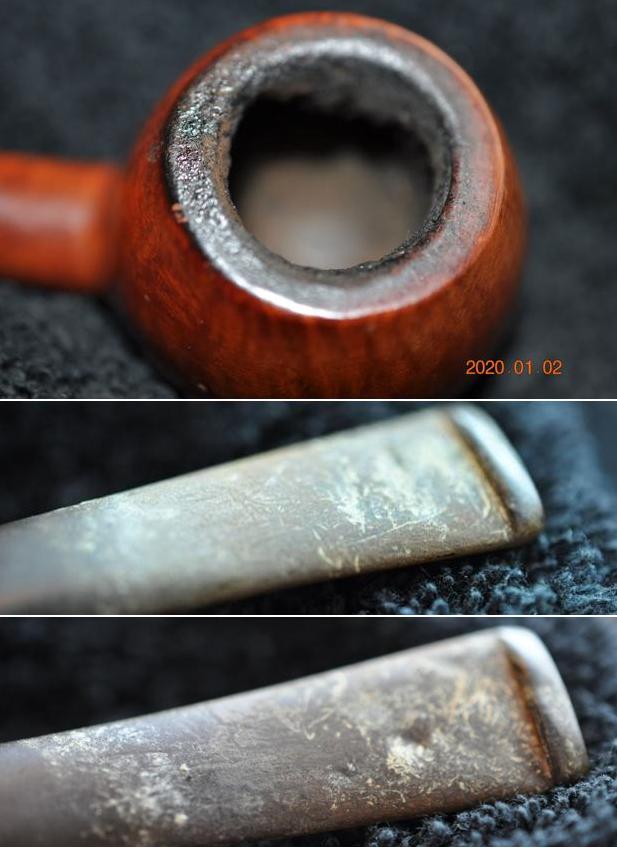
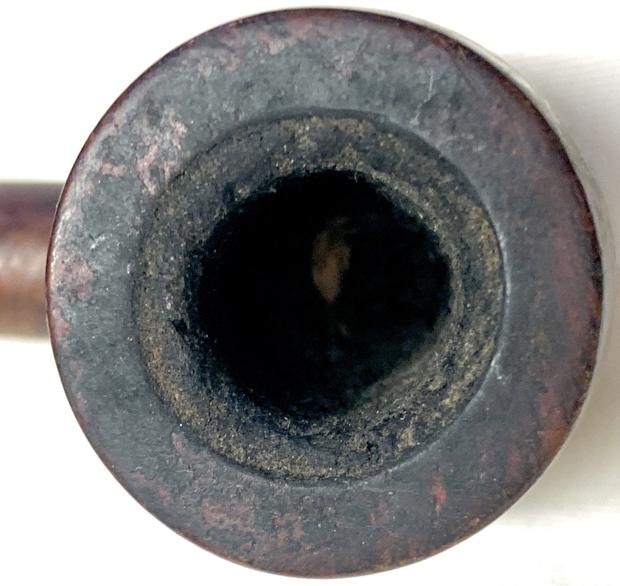
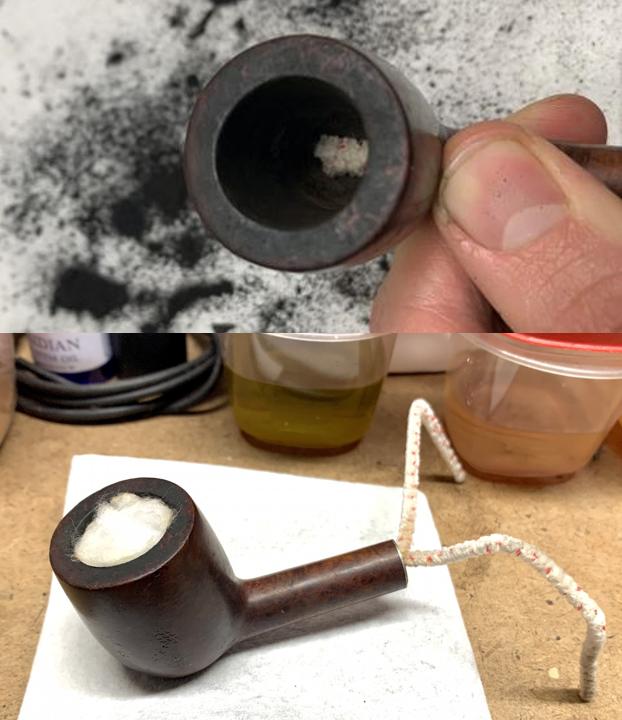
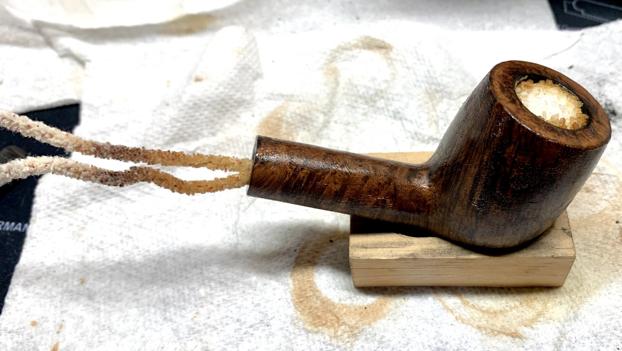
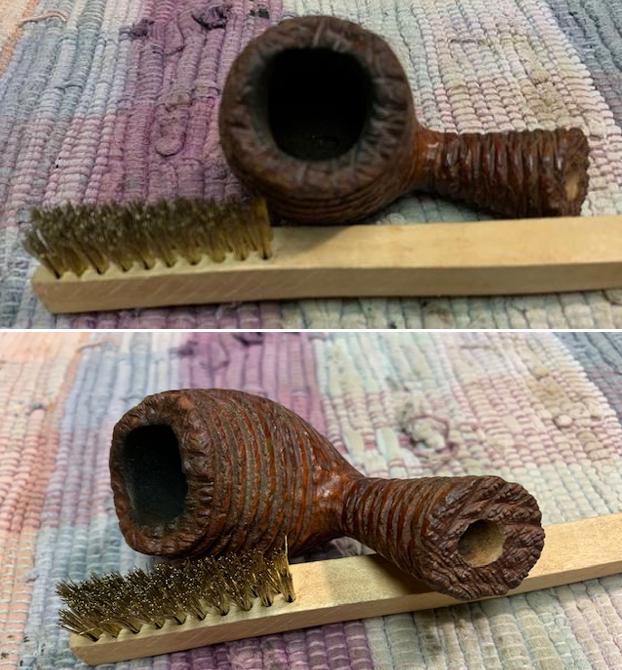
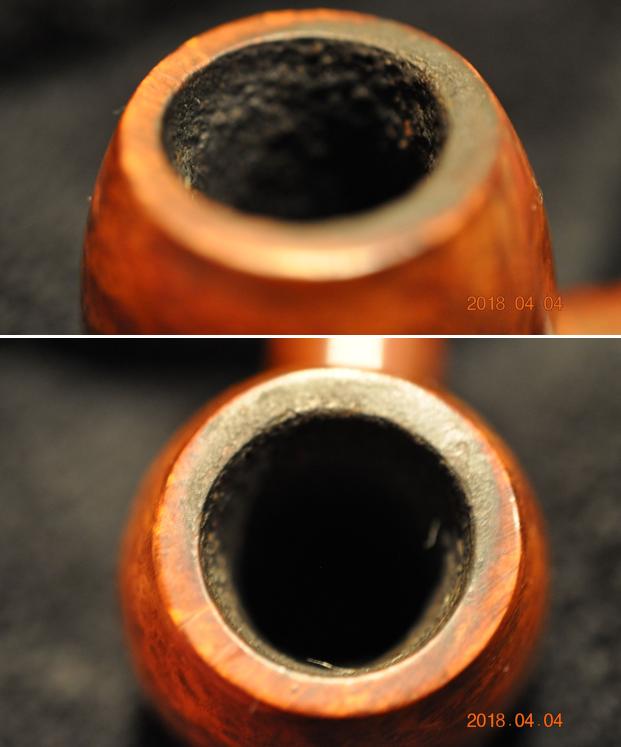
 Because I like working on clean pipes, I first use the Savinelli Fitsall Tool to scrape the chamber. Ryan had said that he had used the pipe only a few times – the lack of carbon cake buildup confirms this.
 A quick spin with one pipe cleaner and one cotton bud confirms that the internals are clean.
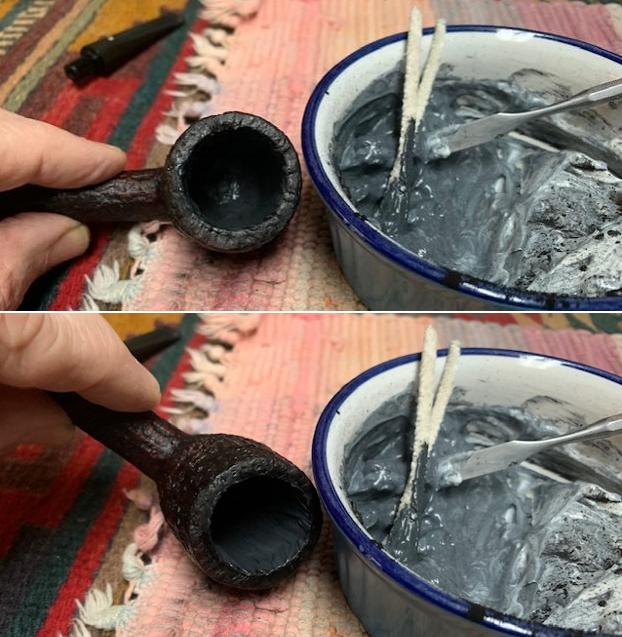
 My general approach will be to emulate what I did with the first Omega I restored that Ryan noticed. The goal is to provide a briar canvas that will produce more natural grain pop. To do this I start the upgrade of this Dr. Grabow Omega by using acetone on a cotton pad to see if this will be sufficient to remove the finish. The acetone cuts through the finish efficiently. The cotton pad shows a purple-ish or dark burgundy/Oxblood hue of the factory finish.
  As I did before, I decide to put the stummel in a soak of acetone to remove the old finish more fully.
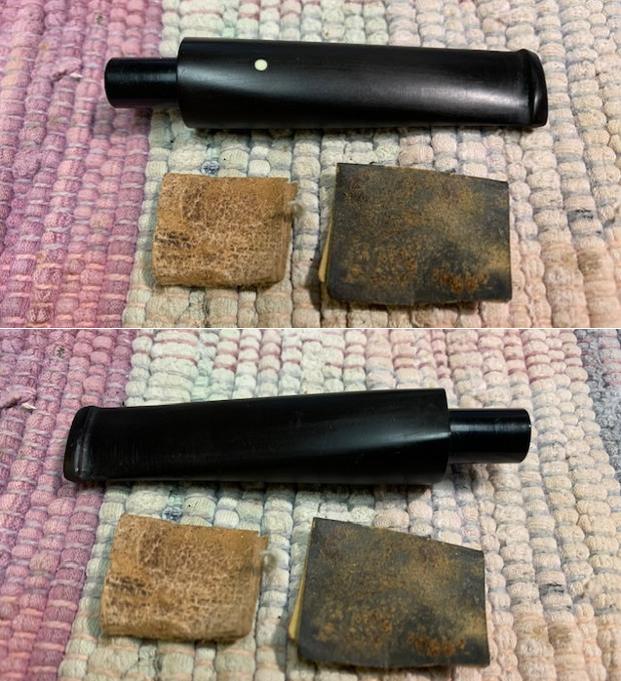
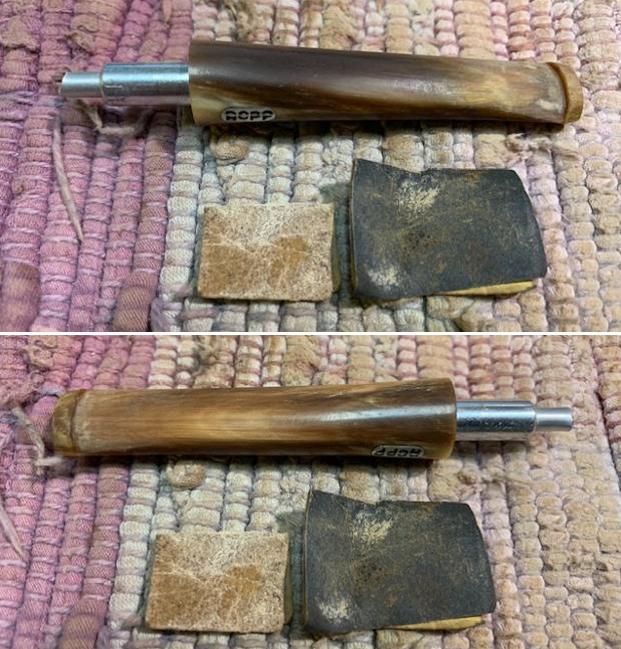
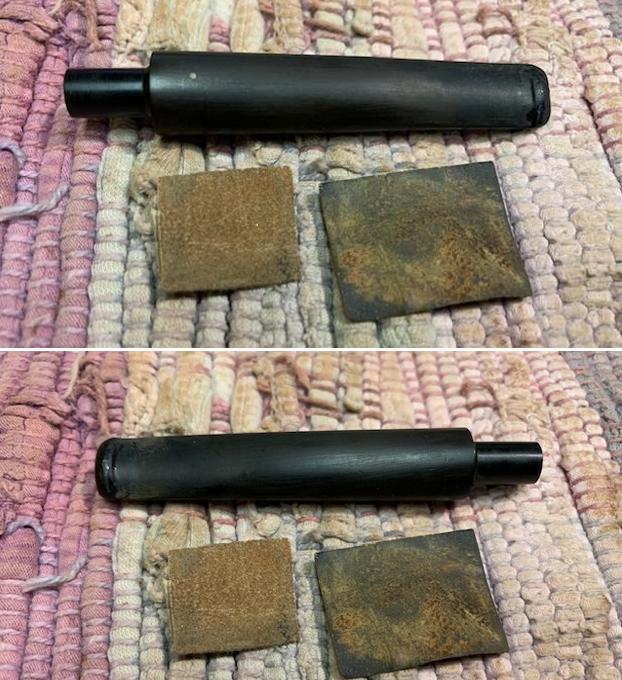
 With the stummel soaking in acetone, I turn to the precast Wellington stem. Even though the stem is new, it is in a rough state. The seam is rough from the excess rubber during the fashioning process.
  Around the P-Lip button the edge is also rough as is the rubber surface itself.
 To begin, a small sanding drum is mounted onto the rotary tool and with care the seam edges are smoothed off. I’m careful because the rotary tool can easily dig a wedge into the rubber if I’m too impatient!
 After the sanding drum, 240 sanding paper is used to sand the entire stem. Special attention is given to the seam lines to make sure there are no factory divots remaining in the vulcanite. The precast factory surface is not even and has ribs and small gaps. Sanding with 240 takes some time but helps to smooth out the surface.
  After 240, the entire stem is first wet sanded with 600 grade paper then 0000 grade steel wool is applied to smooth the surface further.
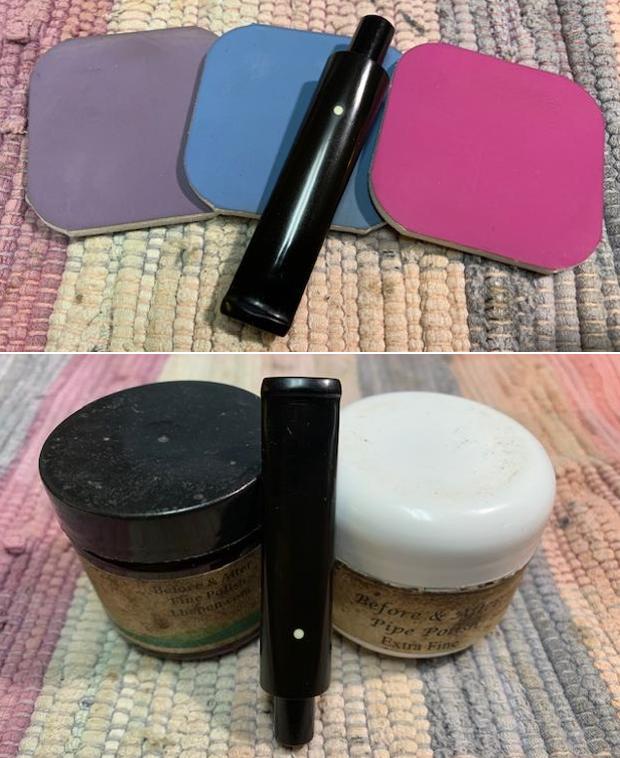
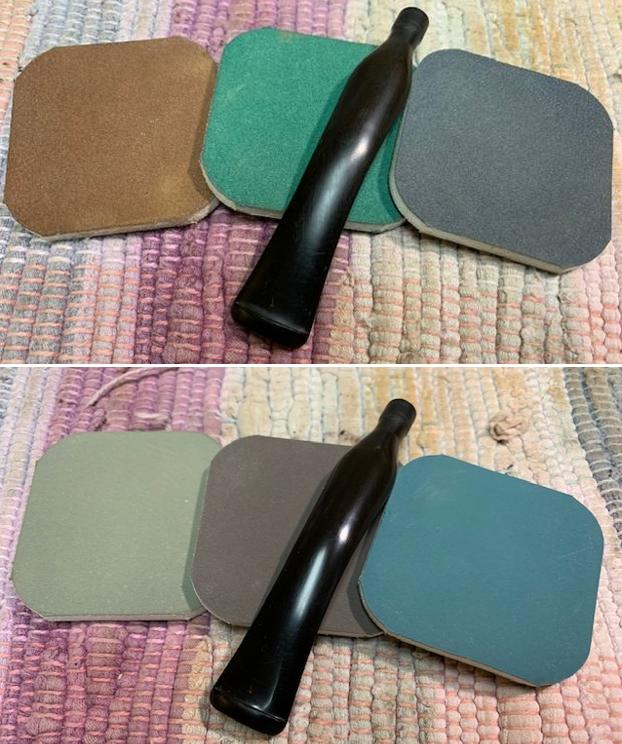
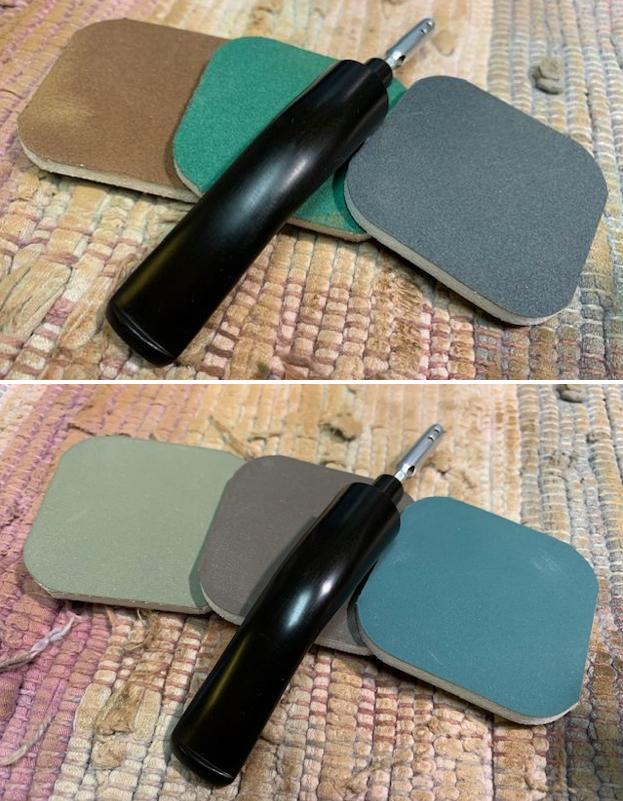
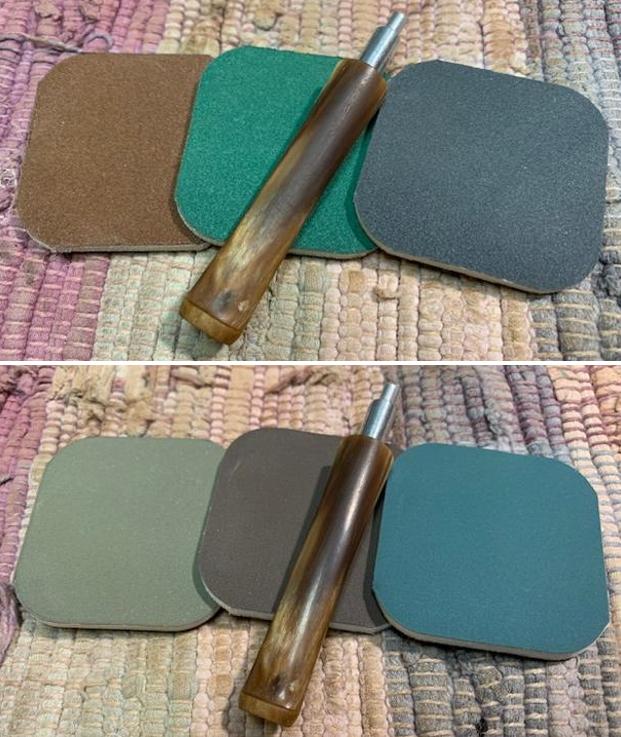
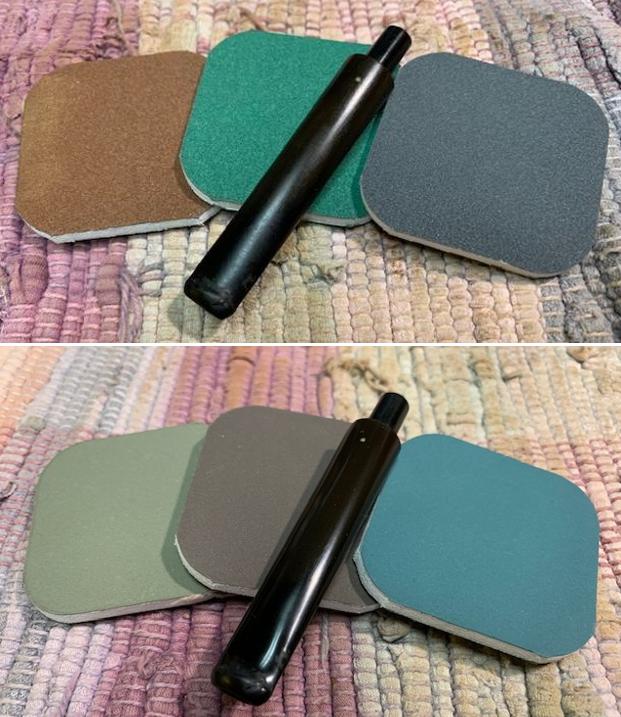
 Next, the full regimen of micromesh pads is applied starting with wet sanding using pads 1500 to 2400. Next, the stem is dry sanded with pads 3200 to 4000 and 6000 to 12000. Between each set of 3 micromesh pads, Obsidian Oil is applied to the stem to help guard against oxidation. Wow! The Greek rubber Wellington stem shined up with that pop I like.
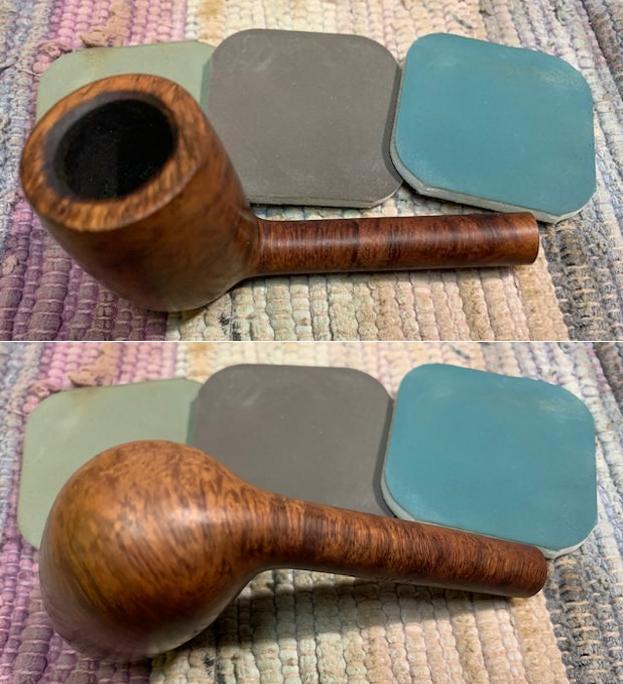
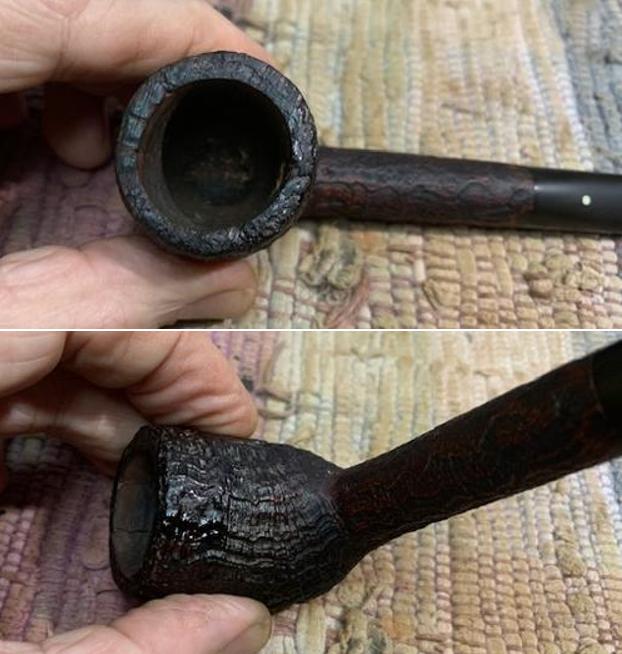
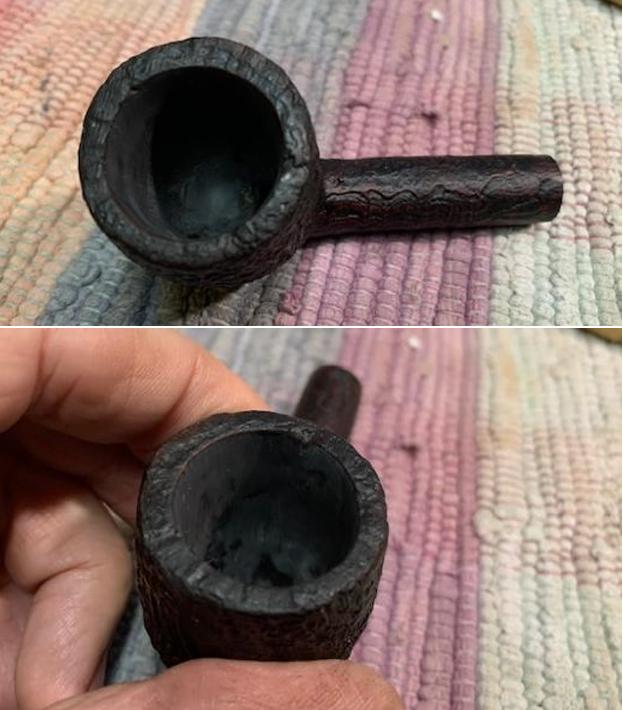
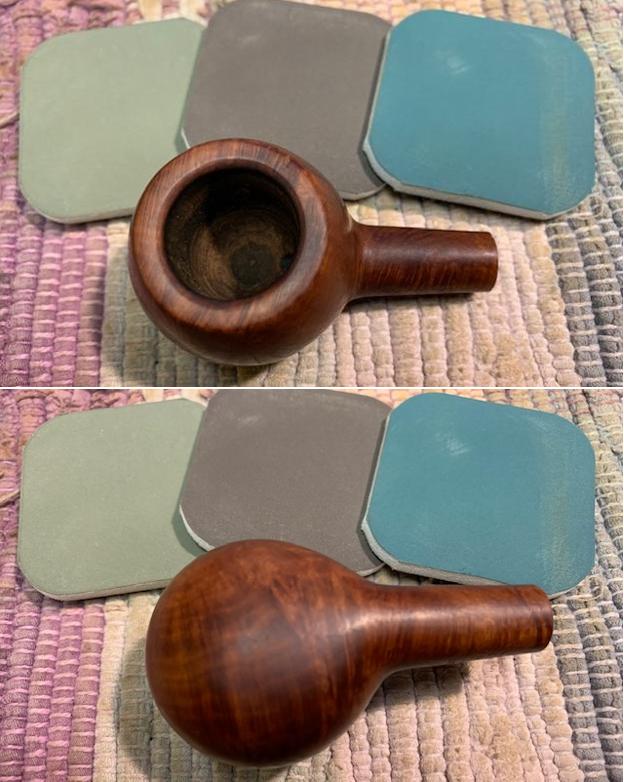
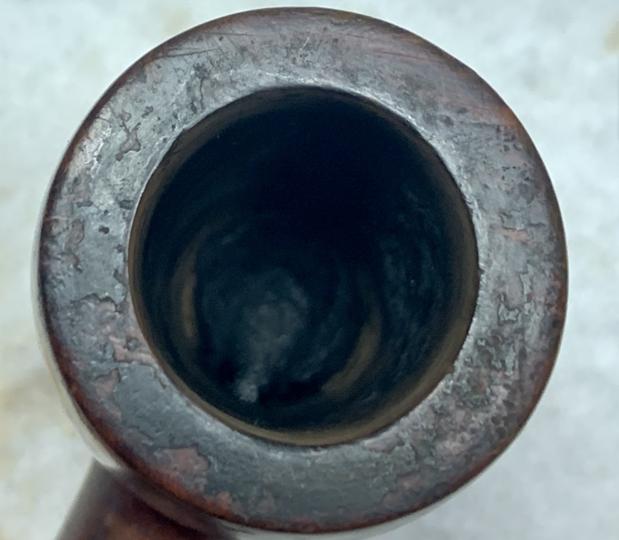
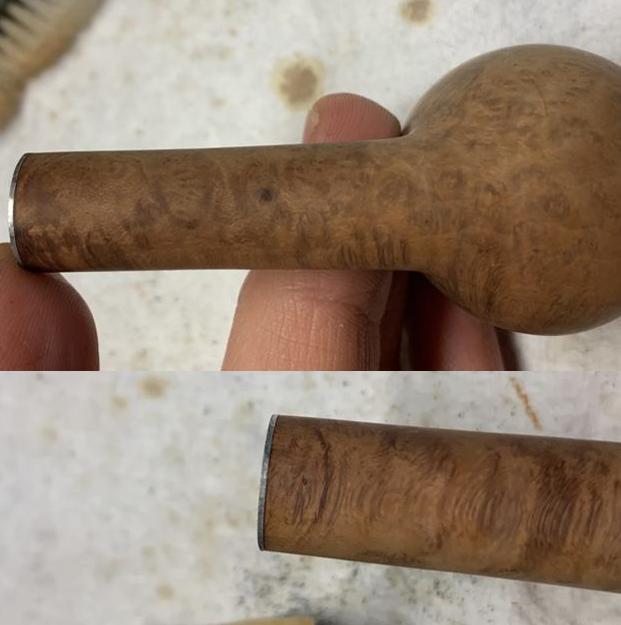
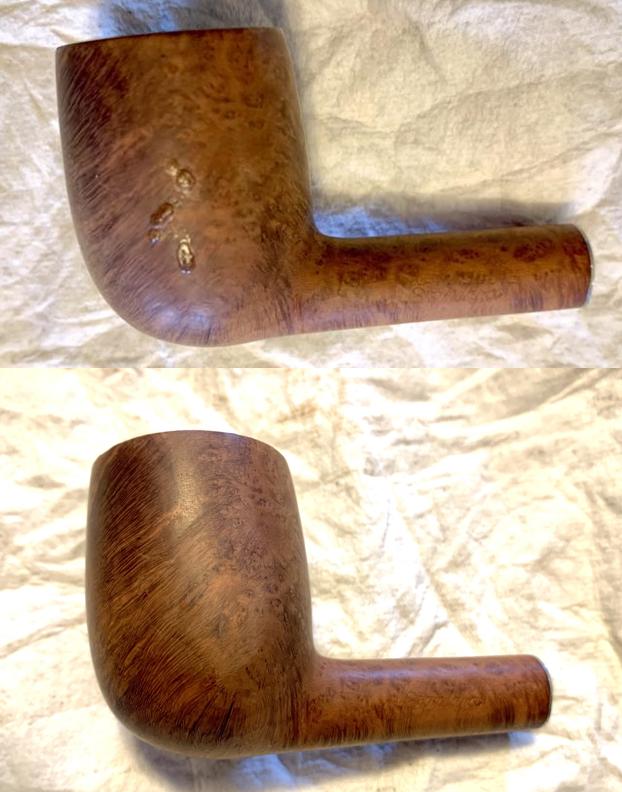
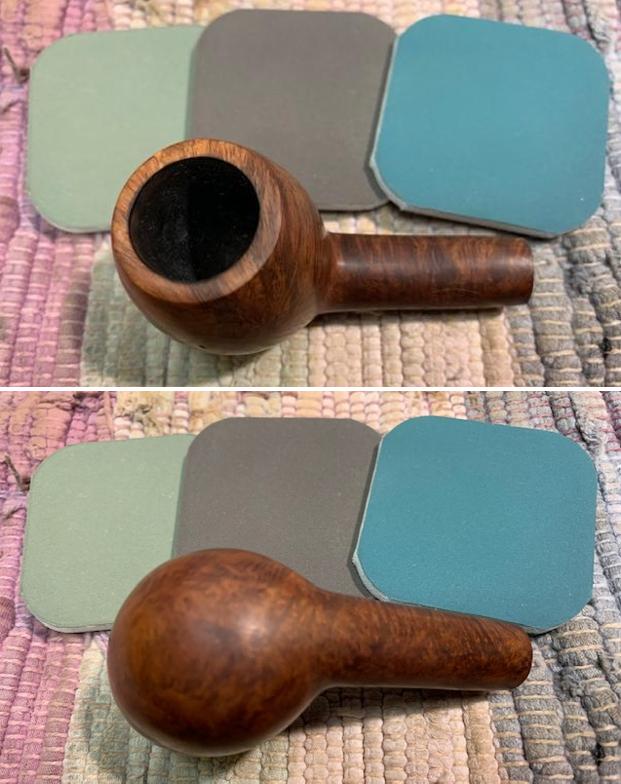
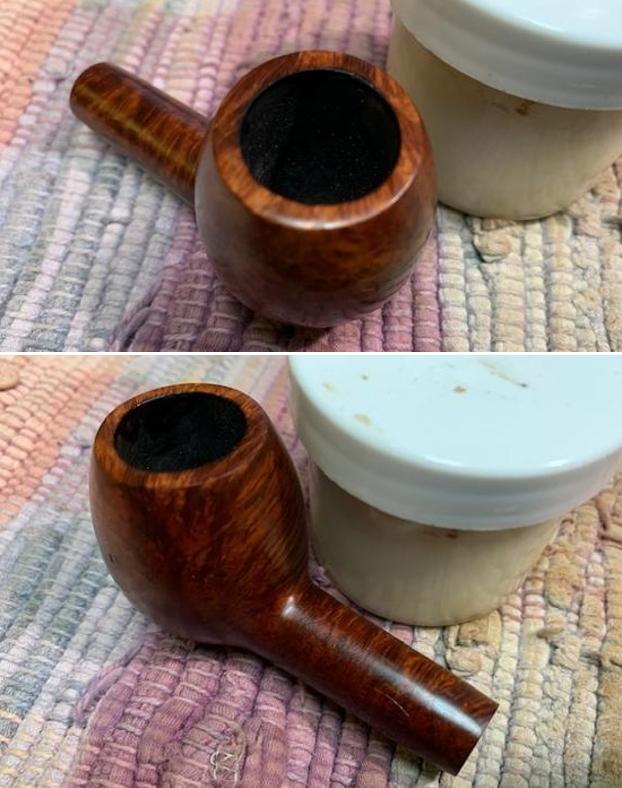
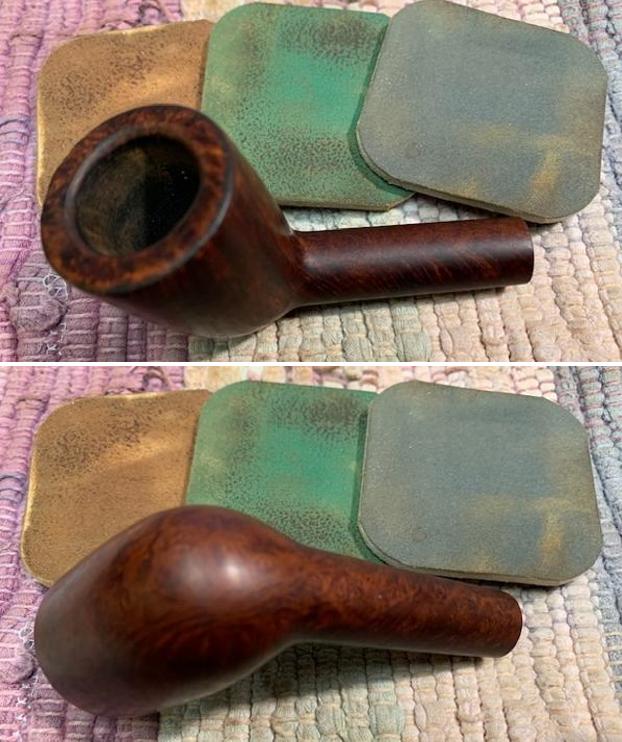
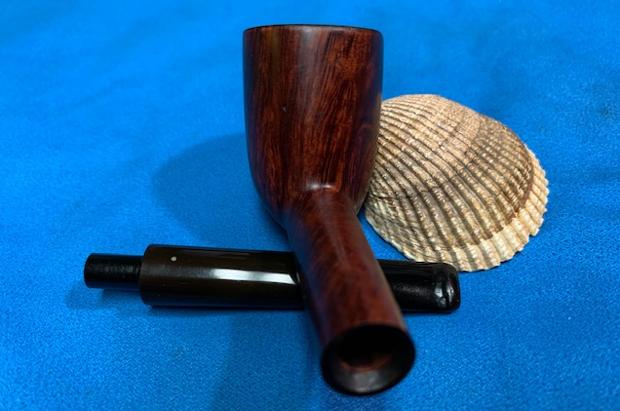
 After several hours of soaking in the acetone, the stummel is fished out and I take a closer look at the results. The briar is a salmon color. Interesting! An inspection of the briar surface shows the minor dents I saw previously. The round fill on the right shank is solid – second picture.

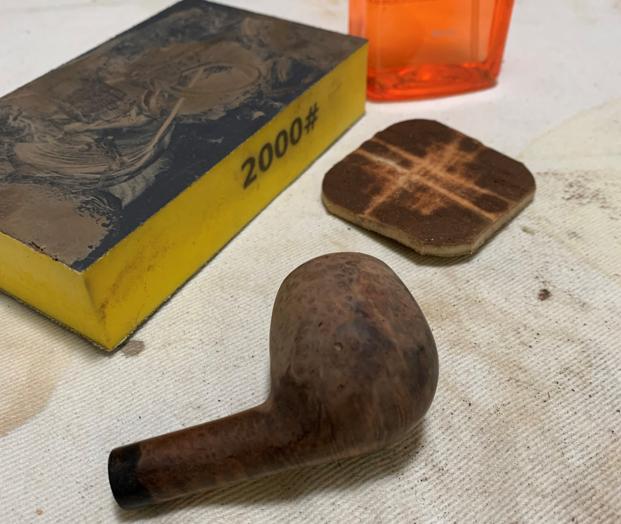
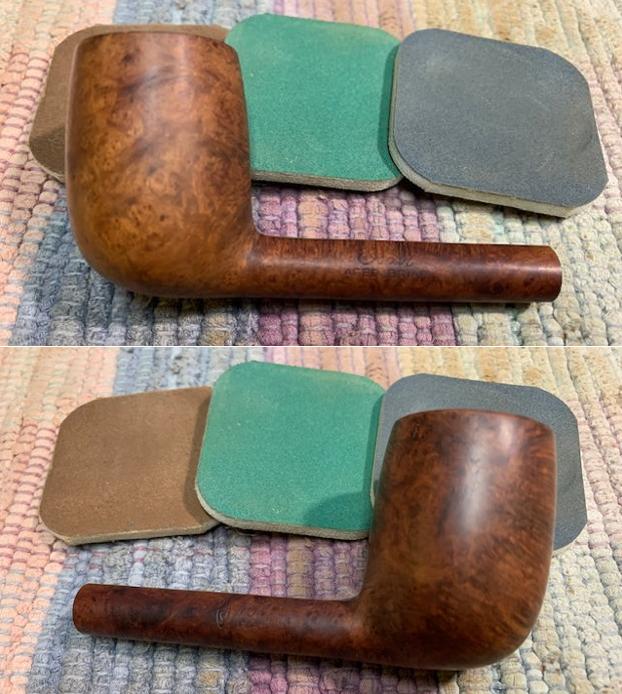
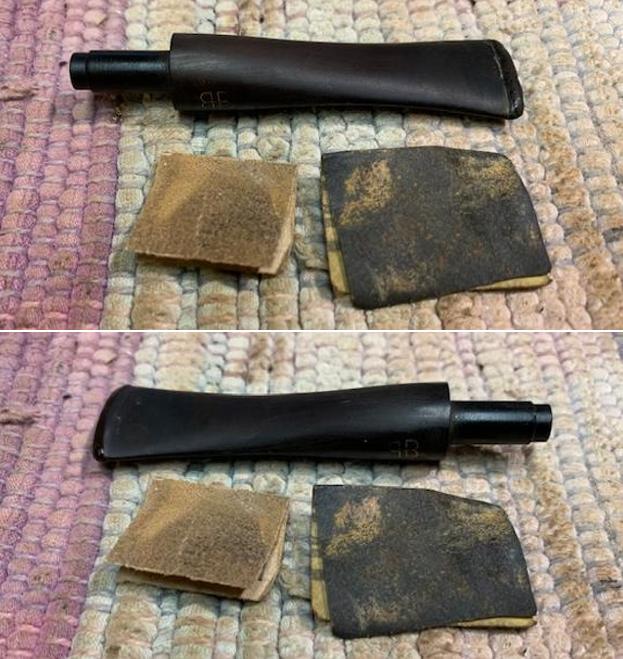
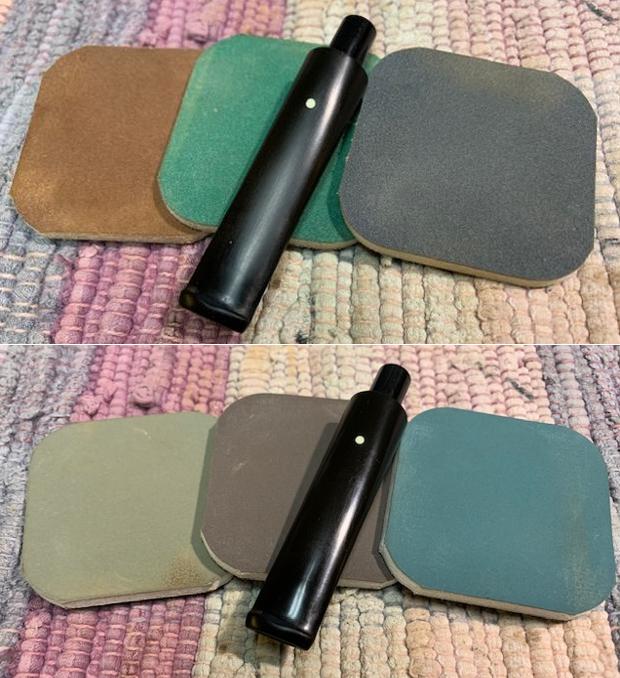
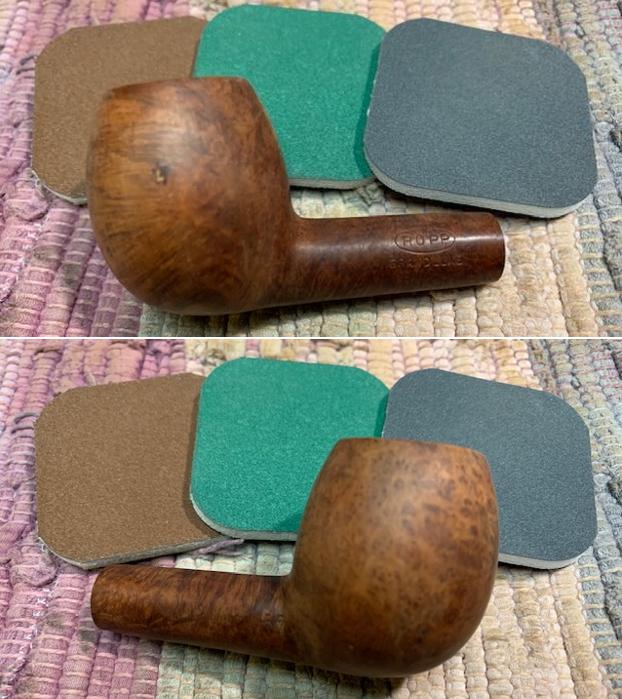
 To clean the surface of minor dents and scratches, sanding sponges are used. The sanding sponges are good for not being invasive but sanding enough to clean the surface. I start with a coarser sponge and then transition to a medium, then light grade sanding sponge. I avoid the nomenclature on the shank during the first two sponges.

 Before moving on with the application of micromesh pads, I dress up the bland rim a bit. To do this, a small internal bevel is cut in the rim to give it some additional contour. To me, this adds a touch of class to the Omega and that’s what ‘upgrading’ is all about.
  Using 240 paper, a hard surface is pressed behind the sanding paper to create the fresh lines of the bevel. This is followed again using 600 grade paper. I like the results.
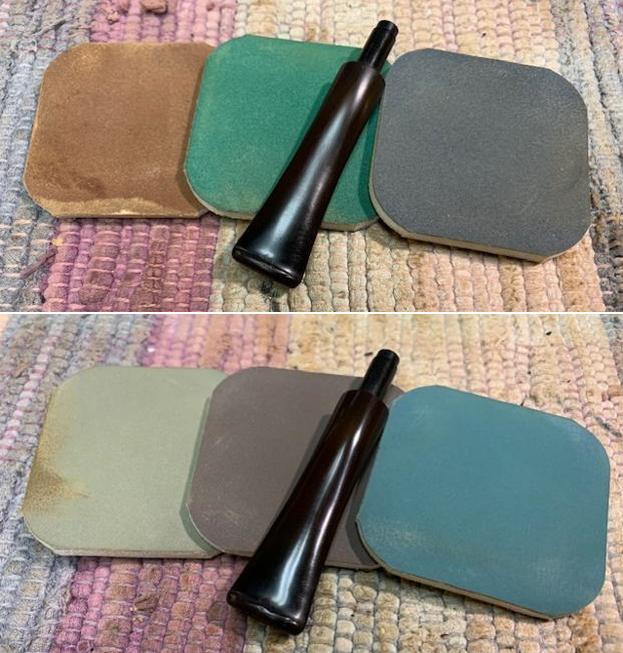
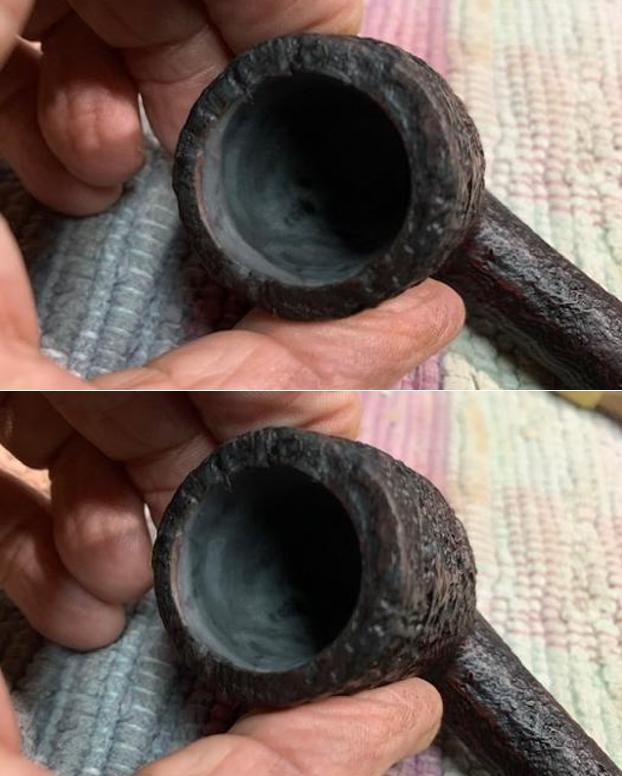
 Next, the stummel is sanded with the full regimen of micromesh pads to coax out the tight, compact grain. Starting the process by wet sanding with pads 1500 to 2400, this is followed by dry sanding with pads 3200 to 4000 and 6000 to 12000. I stay clear of the nomenclature on the shank during the wet sanding phase. The grain emerges through the micromesh process of sanding. The pictures show the progression.
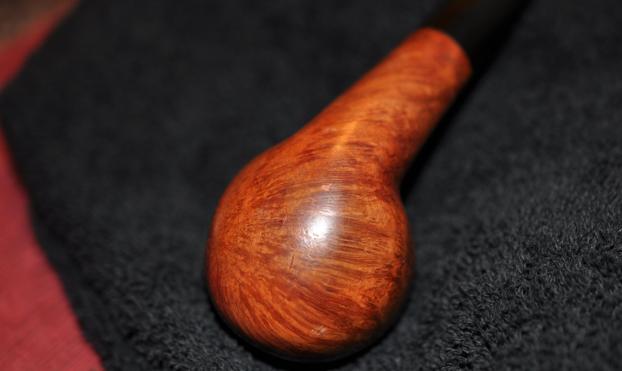
 The grain is subtle on this Omega which is different from the Omega I worked on before. That Omega had more expressive and turbulent grain patterns. My reading about briar grains suggests that Ryan’s Omega was fashioned from a briar block that was more toward the center of the briar bole and not the edge. The ‘edge’ blocks tend to be more twirly, expressive, and distinct but also contain more imperfections which require patching. Whereas, blocks cut closer toward the center of the bole, have more subtle grain patterns but fewer imperfections – the wood seems to be tighter or compressed. The grain is there but lacks distinction at this point.
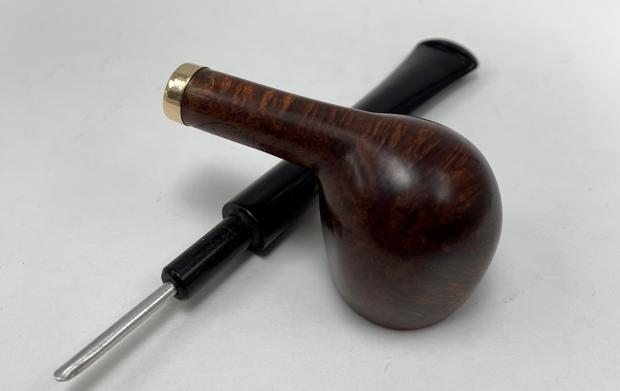
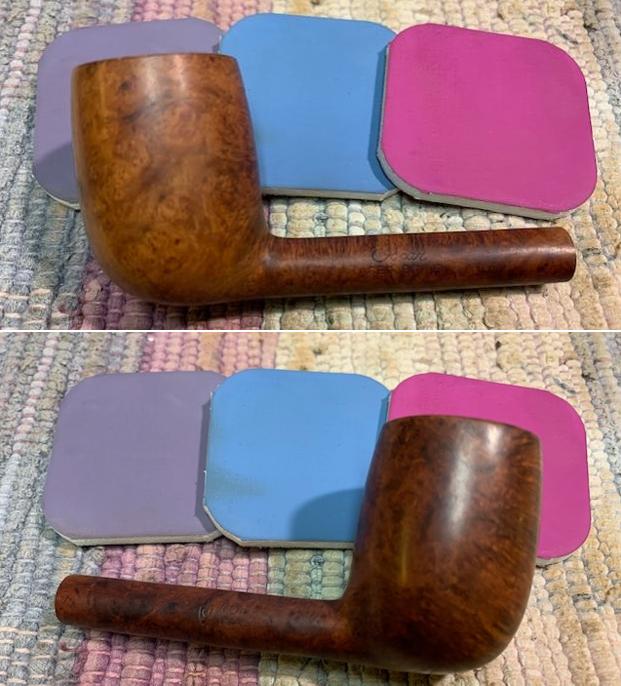
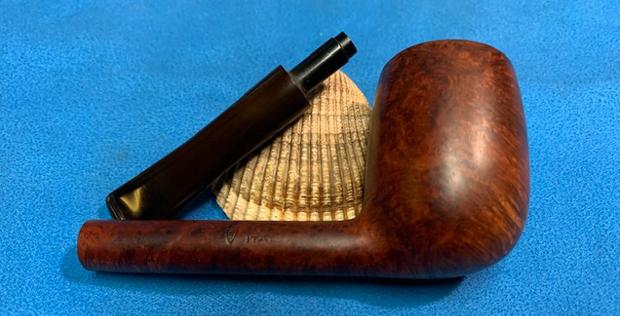
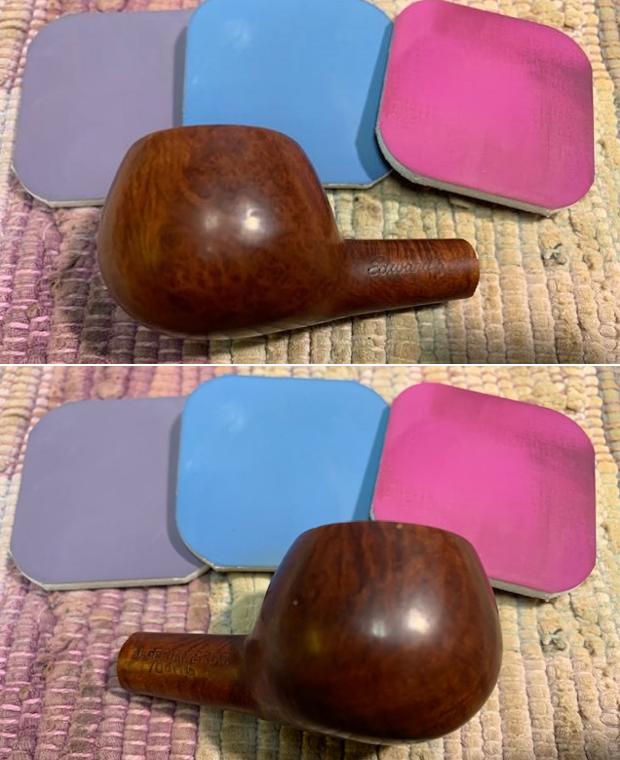
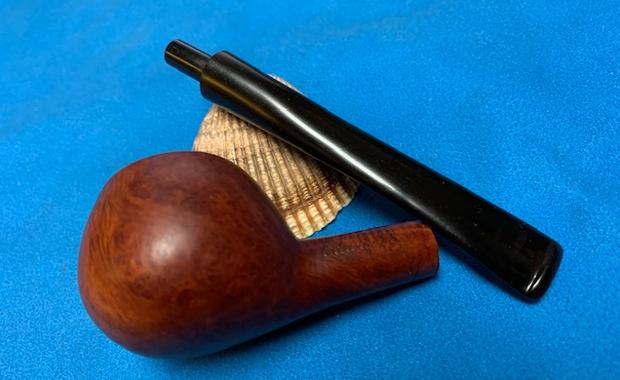
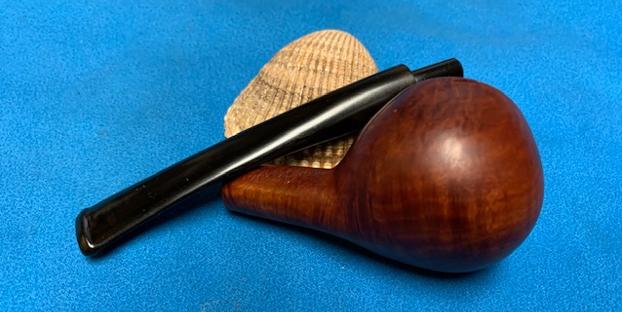
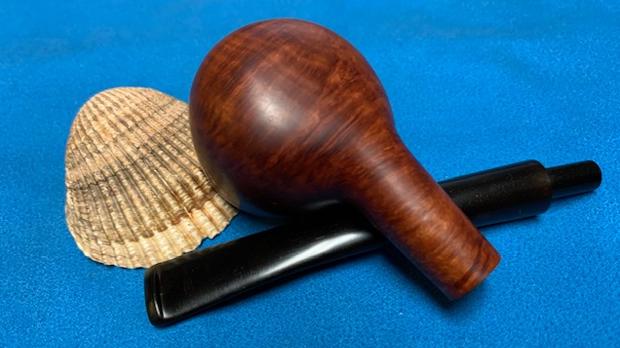
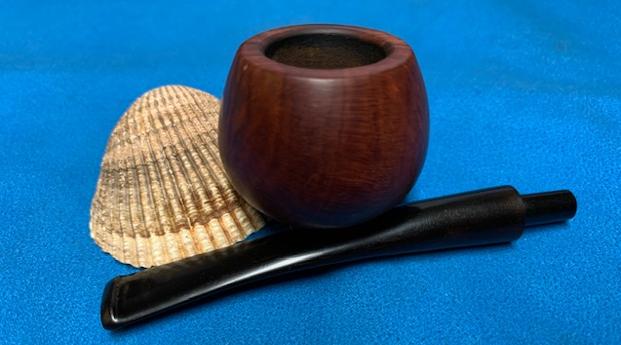
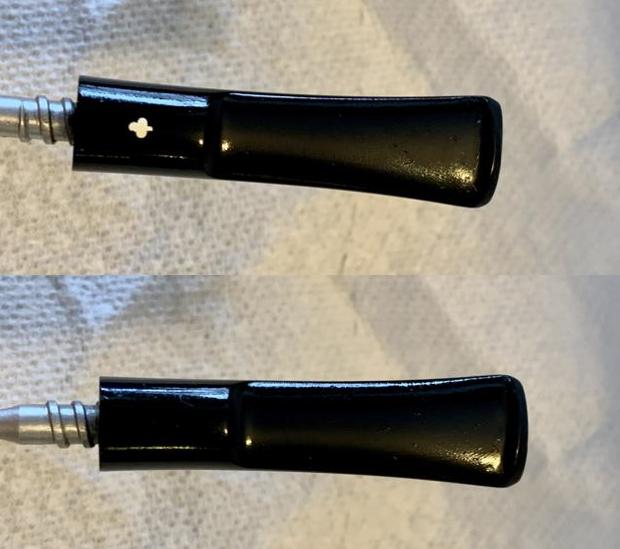
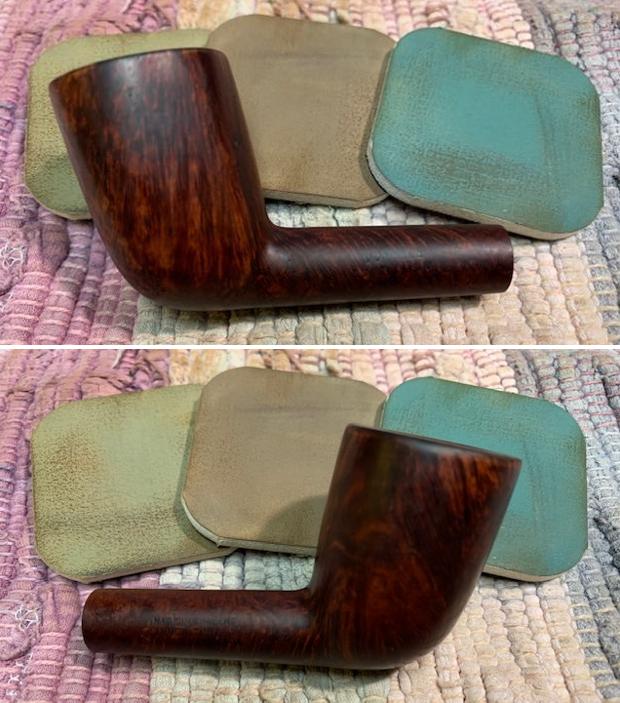
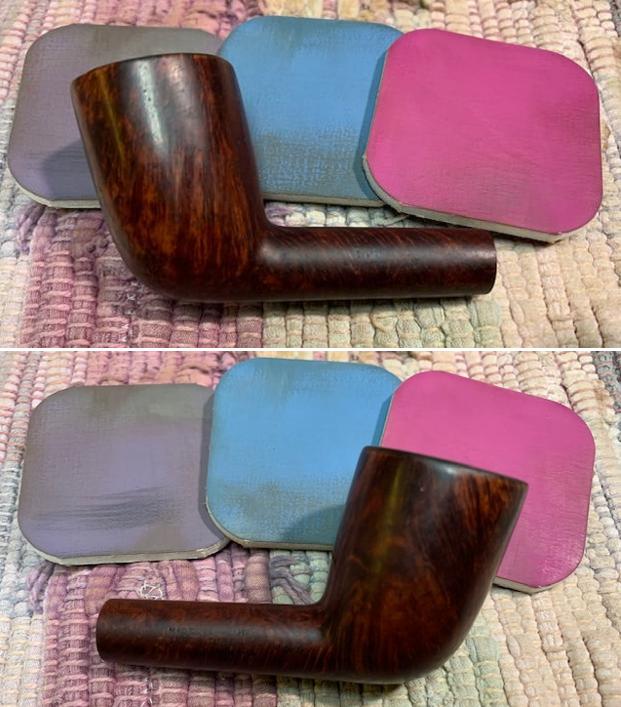
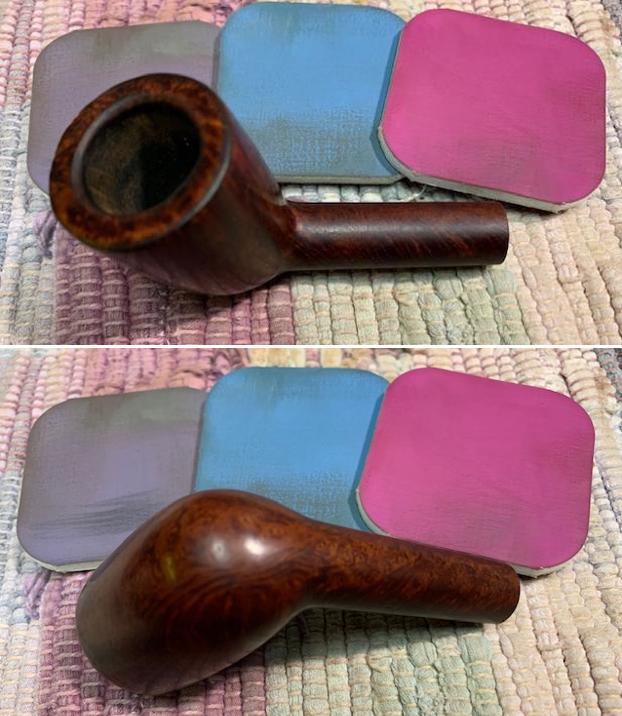
 At this juncture, I can’t resist uniting the stummel with the unbent Wellington stem to get a sense of the progress. I also take a picture of the factory Grabow stem. Not bad! Ryan will have his pick whether he’s in the mood for the factory Dr. Grabow stem or the Greek rubber Wellington stem – as far as I can see, a perfect match.
 As I think about the next step in coloring the stummel, I decide to bend the Wellington replacement stem. To do this the stem is threaded with a pipe cleaner to guard the integrity of the airway during the bend.
  Using the hot air gun, the vulcanite is gently warmed at the mid-stem where the bend is to happen. To heat gradually, I rotate the stem to balance the heating and not scorch the stem.
 I use a small shot glass which is about 1 1/2 inches across to serve as the bending template. As I’m heating the stem, I gently bend the stem a bit with my hands as it become supple. When it has heated enough and the rubber has softened, the stem is placed over the glass and bent over it to form the shape.
 I hold the stem in place while it is taken to the sink where cool water is run over the stem, thus solidifying the bend in place.
  When the stem is taken back to the work table to compare with the factory stem, it looks like a match to me the first time around! The great thing about bending rubber stems is that if you do not get it right the first time, the process is easily repeated until the bend is on target.
 I have given some thought to the finish to apply to the Dr. Grabow Omega bowl. With my last Omega I applied a mixture of 2/3s-part Fiebing’s Dark Brown Leather Dye with 1/3-part Fiebing’s Black Leather Dye with the lightening option available by wiping down the bowl with alcohol later. With this Omega, I will do the same for the dark brown/black undercoat. However, following this, an additional step will be tried. A wash dye with red I believe will deepen the tones and bend the finish toward a reddish palette and not toward the purplish/burgundy of the original Omega motif. I believe this will give the pipe more eye-catching pop in the end – or this is my hope! Applying dyes often feels like a roll of the dice – different woods absorb dyes differently and one never knows for sure what the exact results will be! My goal is to bring out the grain distinctiveness with the undercoat and then to get in the ballpark of the right color template with the overcoat washing. To begin, after assembling all the components on the worktable, Fiebing’s Dark Brown Leather Dye and Fiebing’s Black Leather Dye are mixed at a 2 to 1 ratio to use as the undercoat.
  After wiping the bowl with a cotton pad wetted with alcohol, the stummel is heated with the hot gun. This heating expands the briar and makes the wood grain more receptive to the dye.
 When the stummel is heated sufficiently, the aniline dye mixture is applied to the stummel in sections with a folded pipe cleaner and then ‘flamed’ using a lighted candle. The alcohol in the aniline dye combusts setting the dye pigment in the briar grain. This flaming process continues as dye is applied in sections until the entire stummel is covered.
 The stummel is then put aside to rest for several hours. This helps the dye to ‘settle’ and be absorbed into the wood.
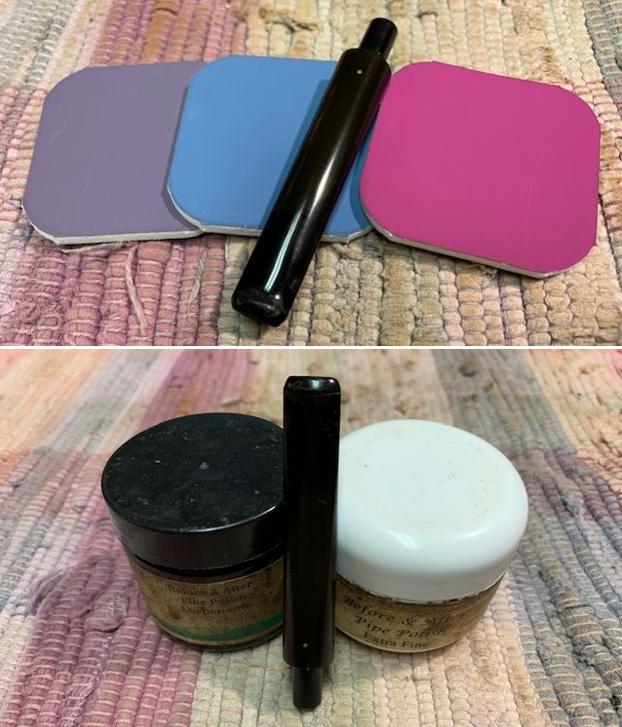
  After several hours, the time to ‘unwrap’ the stummel has arrived – one of my favorite parts of a restoration when new dye has been applied to a stummel. I call this phase unwrapping because the fired dye is crusted around the stummel like a shell. The shell is unwrapped using more abrasive Tripoli compound and a felt buffing wheel mounted onto the rotary tool. The speed of the rotary tool is set to about 25 to 30% full power – slower than usual guarding against too much heat buildup from friction generated by the more abrasive combination of compound and felt wheel. This combination is like a bulldozer!
 As the crusted dye is removed, I purge the felt wheel repeatedly with the edge of the metal rotary tool wrench. This keeps the felt wheel softer and cleaner. As hoped, as the Tripoli compound is applied to the crusted surface, an eye-catching landscape of grain is now more distinctive. The pictures below show the unwrapping in process. I love to watch this unveiling! The dye process darkens and accents the grain patterns.
 After the crusted dye is removed, the bowl is gently wiped with a cotton pad and alcohol. This is done not to lighten the stummel but to blend the dye. Little dye is removed on the cotton pad which seems to indicate that the undercoat of dye is well established.
 The next step, to deepen the hue and bend it more to a rich red tone, the stummel is dye washed with red dye. The stummel is again heated, but this time the dye is washed on with a pipe cleaner without firing because the alcohol content in the red dye is not as great.
  After the red dye is applied thoroughly, the lesser abrasive, Blue Diamond compound is applied to the stummel with a cotton cloth buffing wheel on the rotary tool set at about 40% full power. This removes the excess dye. Not pictured is that I wiped the stummel a number time with a cotton pad wetted with alcohol to blend the red dye with the dark brown/black under coat. Afterwards, Blue Diamond was again applied until the hue looked good. Also not shown is that the Wellington stem was also polished with Blue Diamond compound with a cotton cloth buffing wheel.
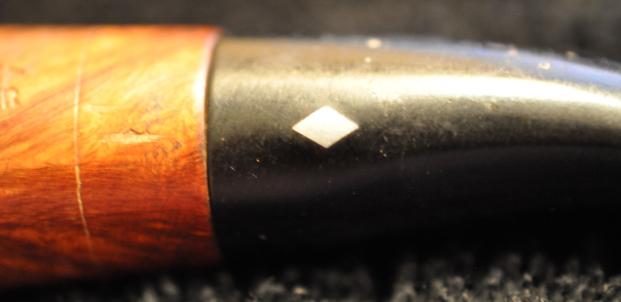
 To refresh the Omega’s nickel shank cap, another cotton cloth buffing wheel dedicated to applying compound on metal is mounted on the rotary tool. Blue Diamond is applied, and the bling factor of the shank cap went up a few notches!
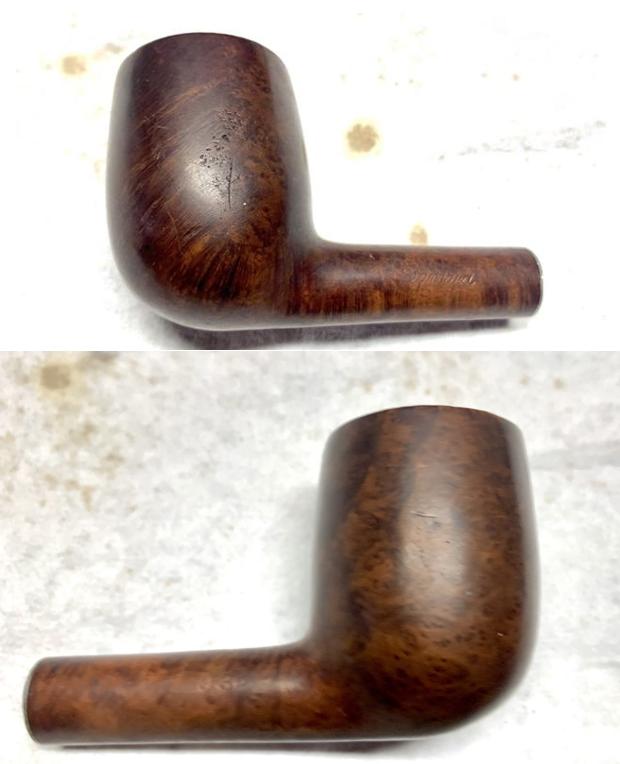
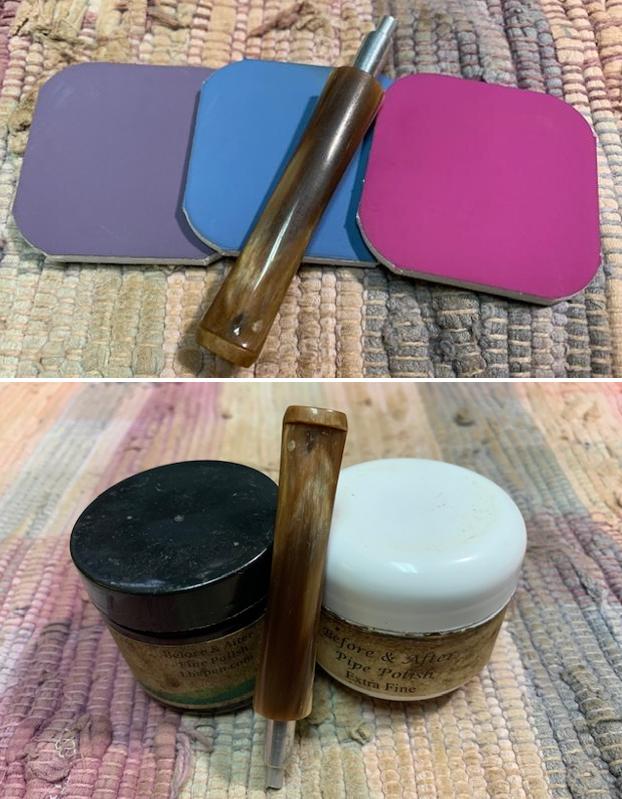
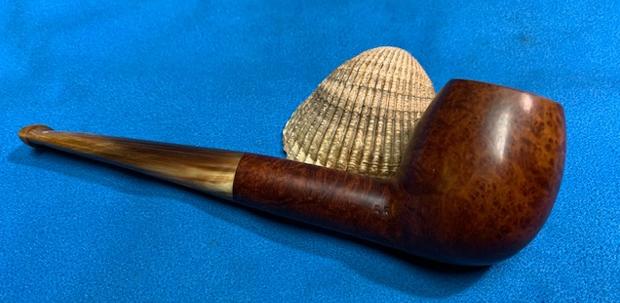
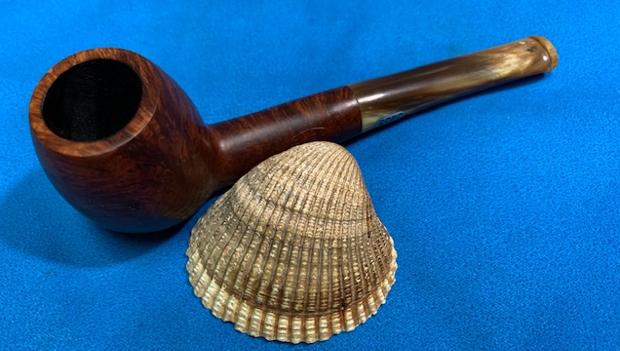
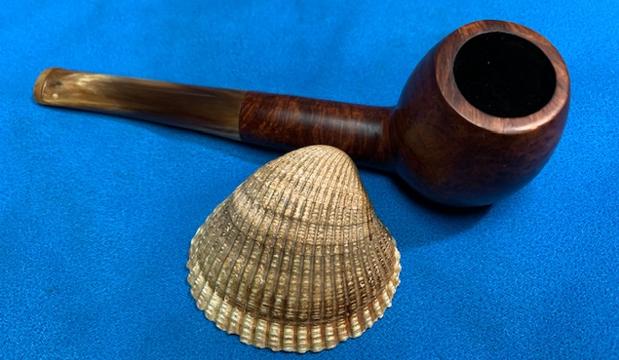
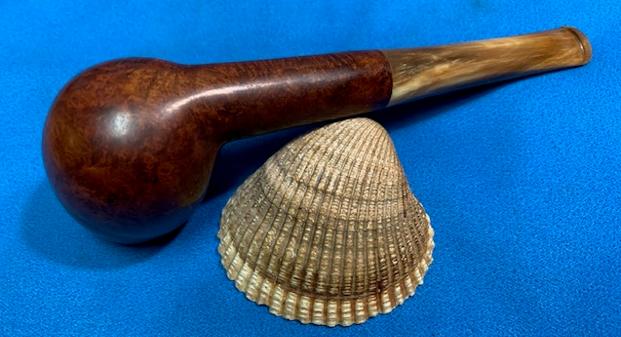
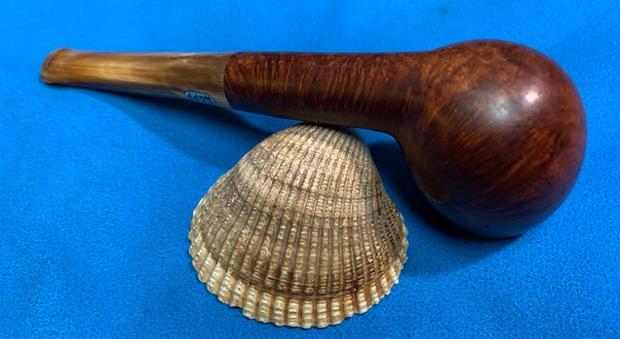
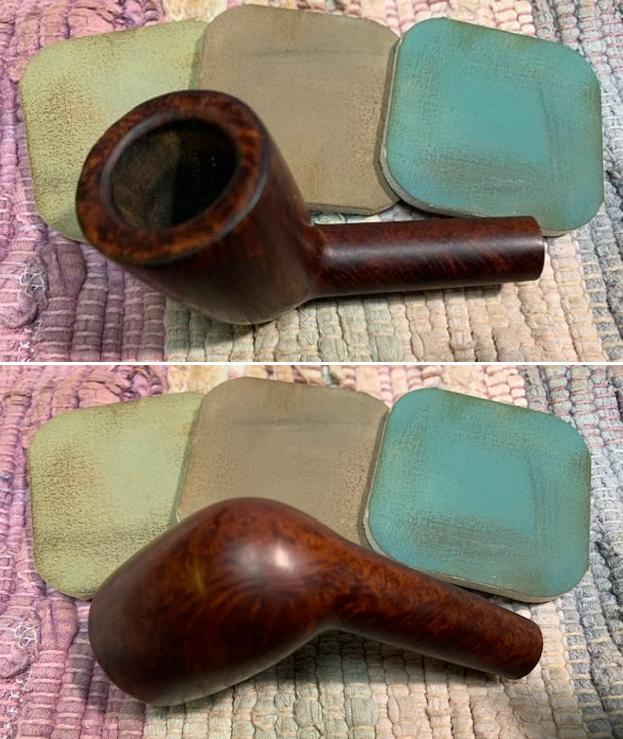
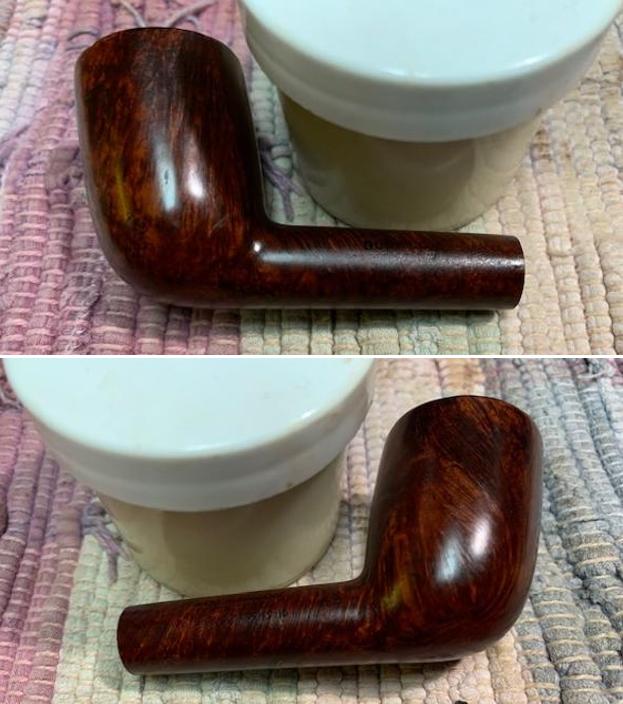
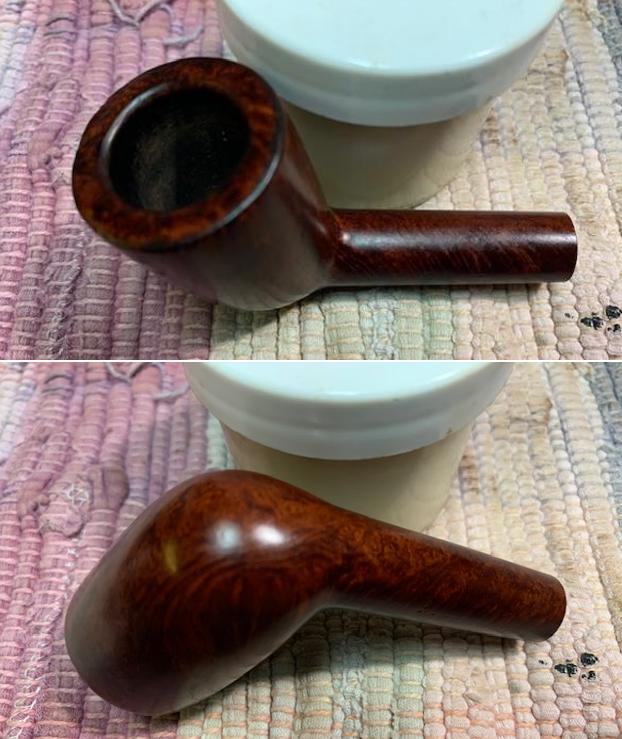
 The final step is to apply carnauba wax to the entire pipe. After mounting another cotton cloth buffing wheel, with the speed set at about 40% full power, the wax is applied to the stummel and Wellington stem – not to the nickel shank cap. After application of the wax, the Omega is given a rigorous hand buffing to raise the shine and to remove any excess wax that may have collected on the surface.
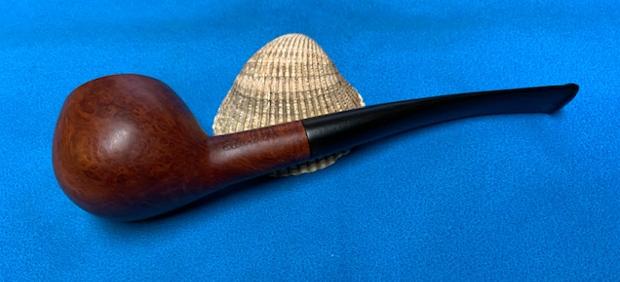
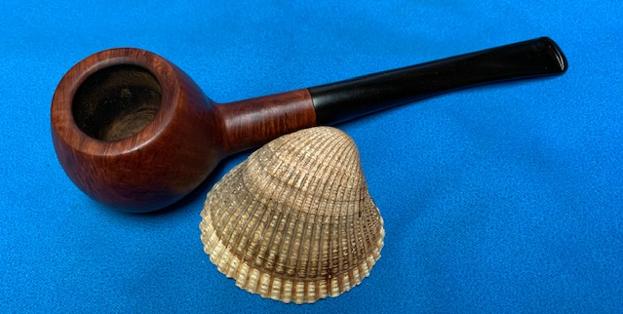
 Wow, what a change! And then the next thought, ‘Wow, maybe too much change!’ At this point I was ready to send the write up to Steve to publish on rebornpipes, but my concern continued to grow, and that small voice was gnawing inside – the finish may have gone a little too far from the original Dr. Grabow Omega motif which was bent more to the burgundy pallet than what I did, going more toward the red. I decided to send a pre-published PDF of the write up with final presentation pictures to receive his assessment. I expressed to Ryan that I could take the Omega back to the worktable and bend the hue back to more of a burgundy palette – that working with dyes is like a dance. After sending that email and PDF, I waited to find out if the Dr. Grabow Omega was finished or whether I was headed back to the worktable. Ryan’s response did not take long:
Hi Dal, I think we can definitely call it finished (and then some)! I couldn’t stop smiling as I read through your write-up because every time I thought the pipe must be nearly finalized (I was already amazed at how much better it looked after unwrapping the initial coat of dye), there would be another step in the process that made it look even better. I’m genuinely awestruck at how well it turned out. That a lowly drugstore pipe can be transformed to such a degree is a testament to the tremendous skill and care you put into your work. As far as the color is concerned, I think you chose the ideal shade: not too dark, not too light, and a perfect showcase for the more subtle grain patterns of this pipe. I wouldn’t change it one bit. The stem came out looking like a million bucks, as well, which is quite a feat considering how (literally) rough around the edges it was at the beginning. Just extraordinary work all around. I can’t thank you enough!…. Once again, thanks very much for doing such a wonderful job and taking the trouble to document each individual step. I really enjoyed reading about the restoration process and I can’t wait to see the pipe in person!
Best regards,
Ryan
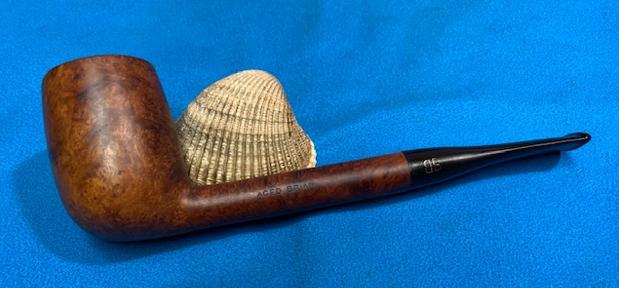
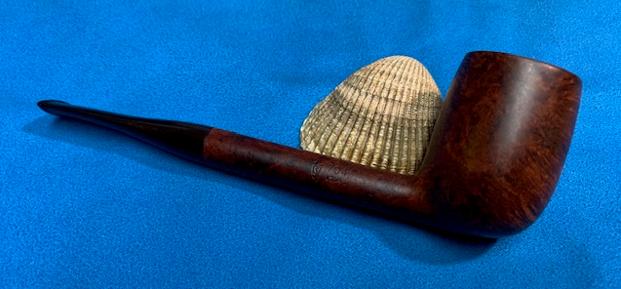
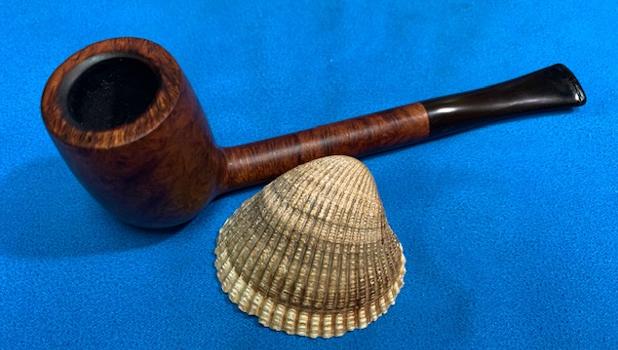
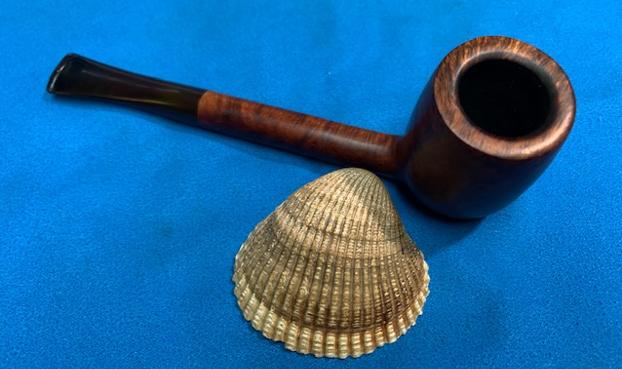
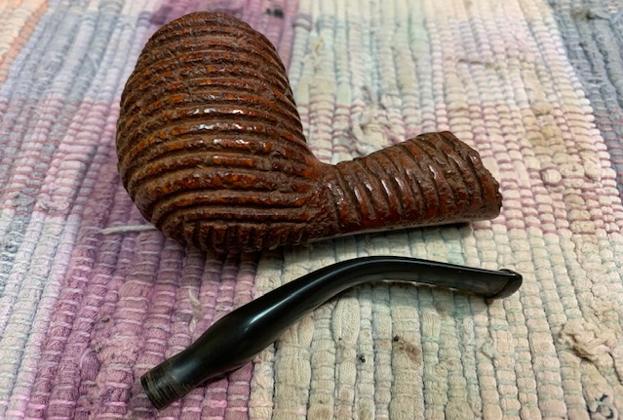
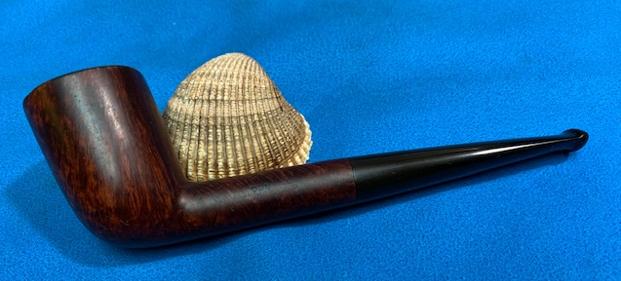
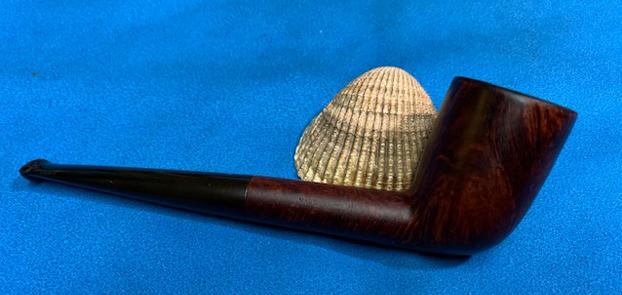
The upgrade of Ryan’s Dr. Grabow Omega ‘drugstore pipe’ is an amazing transformation and a grain popping display. The transition from the finish that clouded the grain has been replaced with a sharp, distinctive cornucopia of grain patterns. The Wellington stem is a perfect replacement for the Dr. Grabow factory stem. This Omega upgrade, as with all my restorations, benefits the Daughters of Bulgaria – helping women and girls who have been trafficked and sexually exploited. Thanks, Ryan! Thank you for joining me!


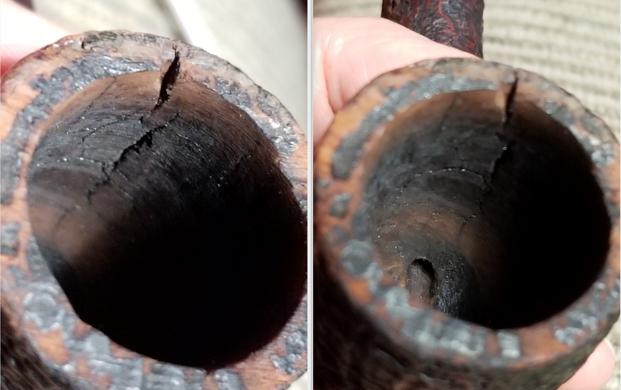
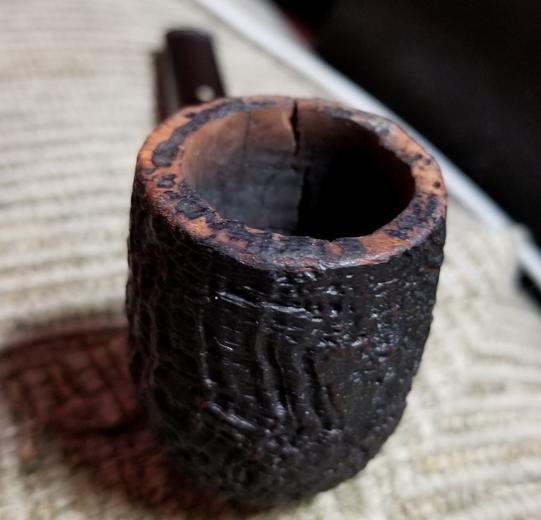
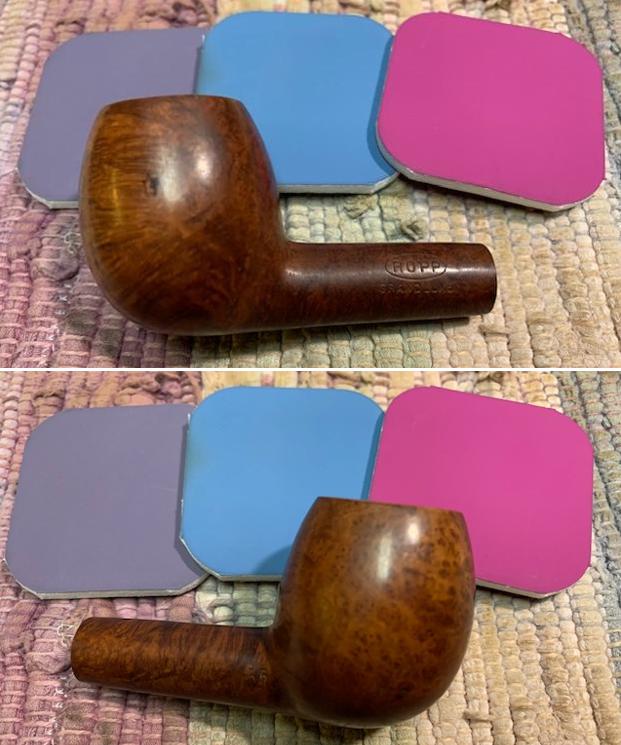
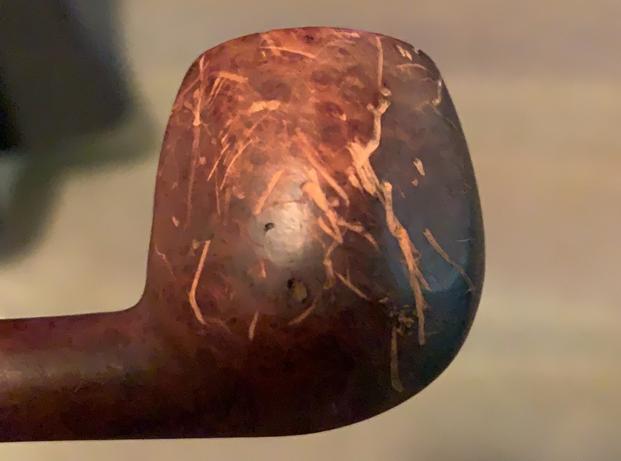 Oof! My immediate thought was ‘Nelson got gouged’! You want me to clean up this pipe? How about raise this pipe from the dead? Actually, my first order of business was ascertaining the actual brand name. At first, I thought it was ‘Delson’ (or something similar), but, after rubbing chalk on the shank, I could see that it was, in fact, ‘Nelson’.
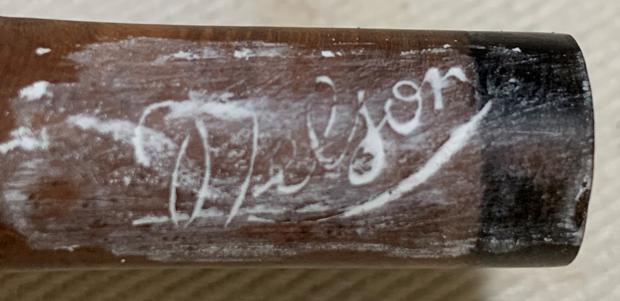 So, I set about disassembling the pipe to see what needed to be done – beyond dealing with the obvious gouges. The insides of the bowl and stem were actually quite clean, but I set about giving them a thorough cleaning nonetheless. Using isopropyl alcohol in combination with Q-tips and pipe cleaners, I then proceeded to clean out the insides of both the shank and stem. I also added some Murphy’s Oil Soap to remove the external grime, just for good measure.
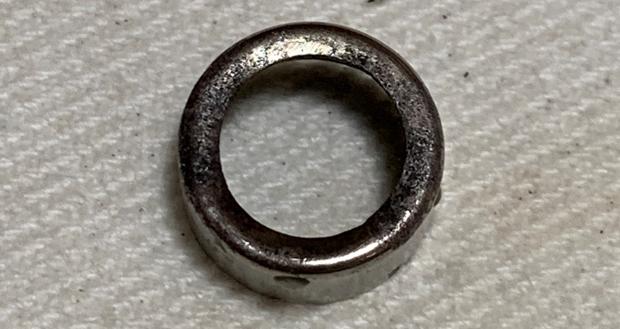 Using oxalic acid, I carefully scrubbed the shank end to remove as much of the staining as possible – and I think it worked quite well.
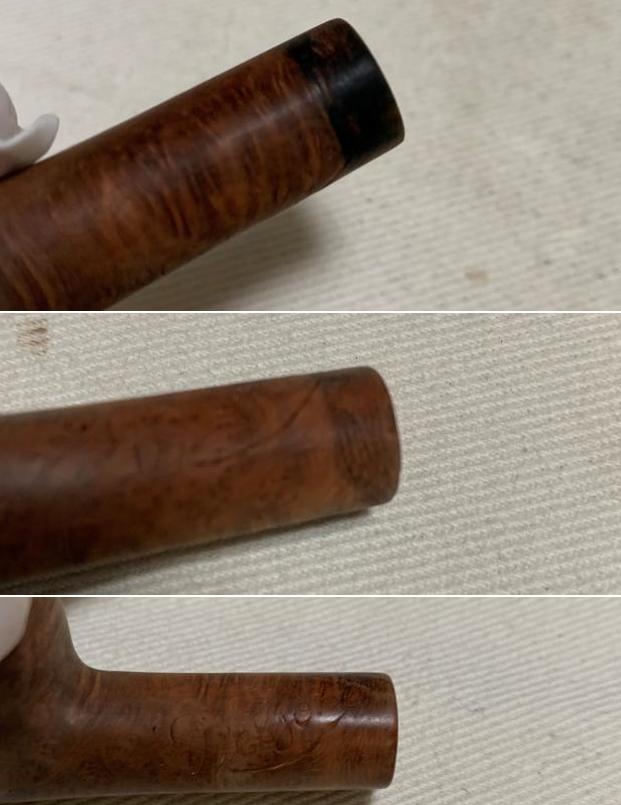 I feared the prospect of having to deal with the scratches, holes, gouges, etc. on the bowl, so I thought I would move on to the stem first. I took a BIC lighter and ‘painted’ the stem with its flame in order to remove the light tooth marks. This was quite successful in raising the dents. Once this process was done, the stem went for a soak in the Before & After Hard Rubber Deoxidizer. This soak caused the oxidation to migrate to the surface. I used 220, 400, and 600 grit wet/dry sandpapers to remove the oxidation from the stem. I then used all nine Micromesh pads (1,500 through 12,000 grit) to bring out the lovely black lustre on the stem. I also used Obsidian Pipe Stem Oil in between each pad scrubbing.
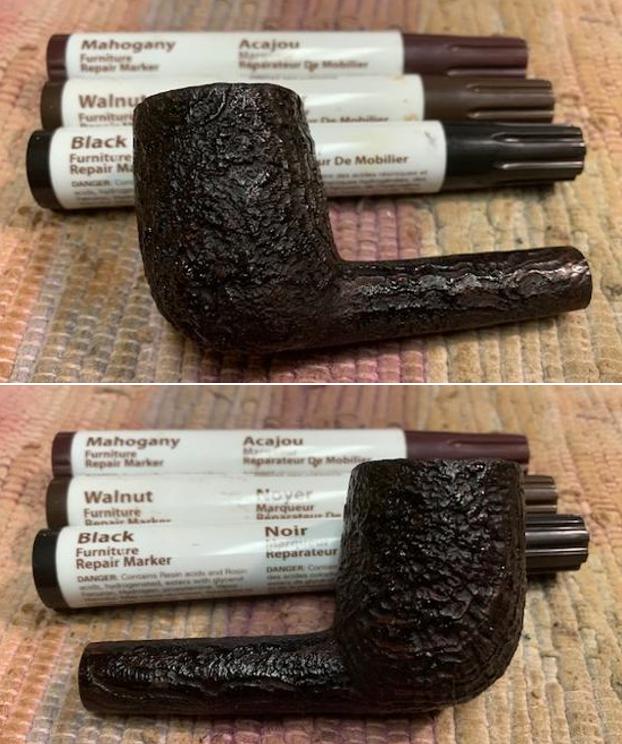
 Now, on to the biggest problem of all: the bowl. What were we going to do? No matter what, the wood needed to be stripped and sanded down, and so I set myself to the task.
 I had a long discussion with Steve about what to do and he suggested that this pipe was a perfect candidate for rustication. I agreed and thought it would be a good experiment for me to try out the process of rusticating a stummel. I approached my friend with the idea and, although he was open to it, I sensed that he would prefer to keep the pipe as close to its original form as possible. So, going back to Steve for advice, he proposed using an iron and a damp cloth to try and raise the scratches. I expected some limited success, but I was stunned at how well it worked.
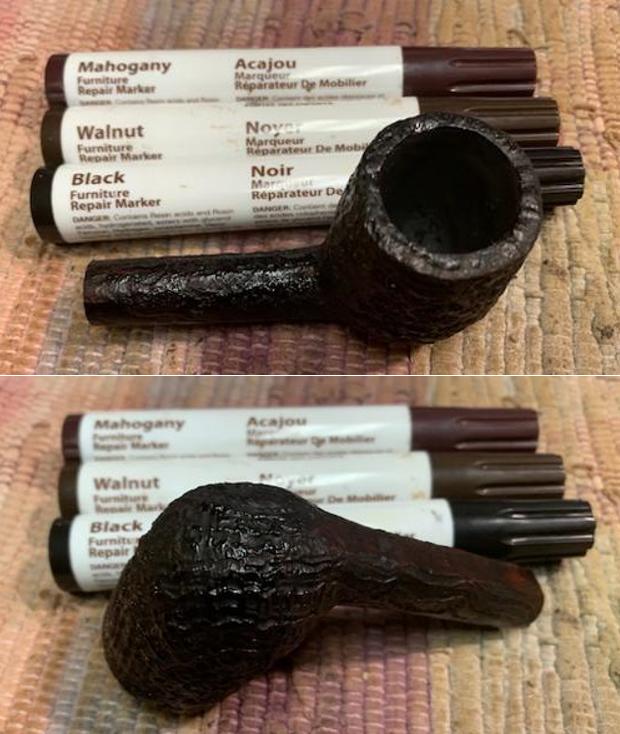
 The vast majority of the gouges were lifted. The small number that were not, were easily filled with cyanoacrylate adhesive.
 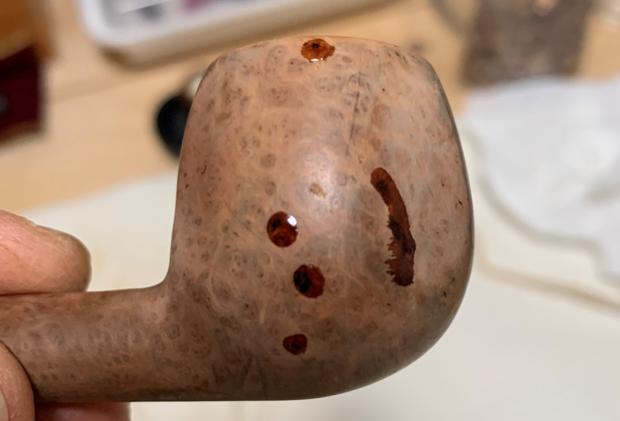 Just like the stem, I used all nine Micromesh pads (1,500 through 12,000 grit) to sand everything smooth. A light application of Before & After Restoration Balm brought out the best in the stummel’s grain.
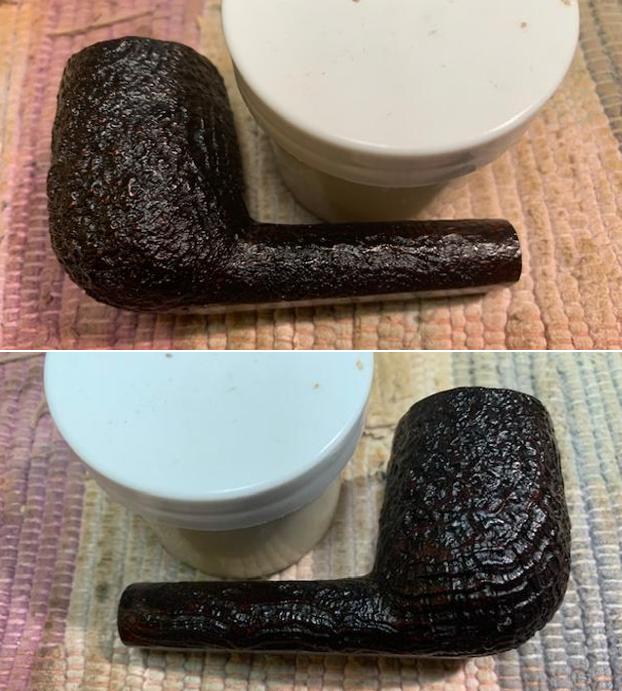
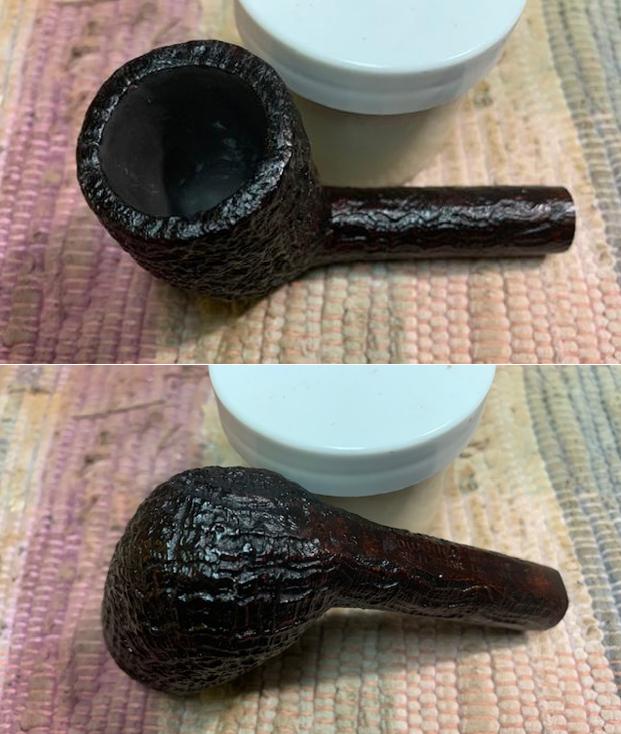
 Although I considered the idea of trying to remove the corrosion from the existing band, ultimately this was an exercise in futility. I went to my jar of bands and found one that was less wide than the original, but actually looked better than the original. I sanded and polished the band until it shone like the sun.
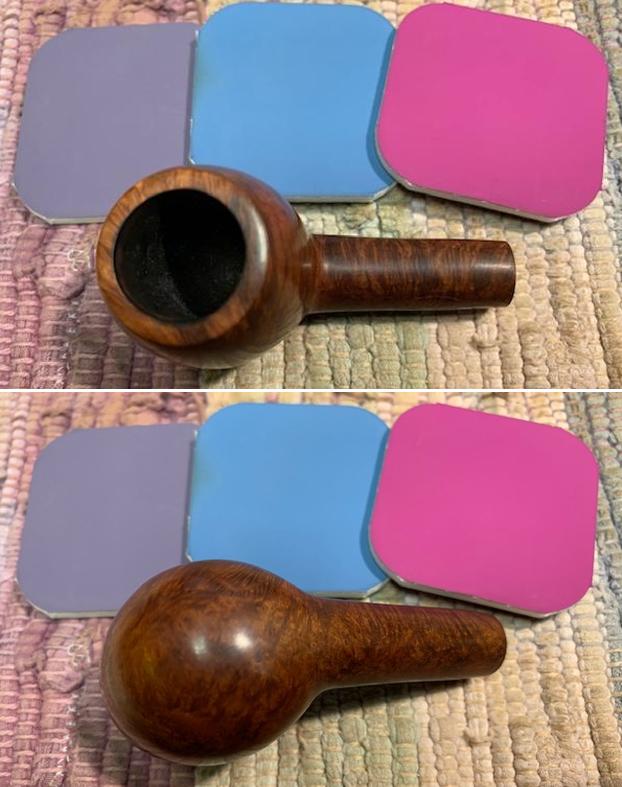
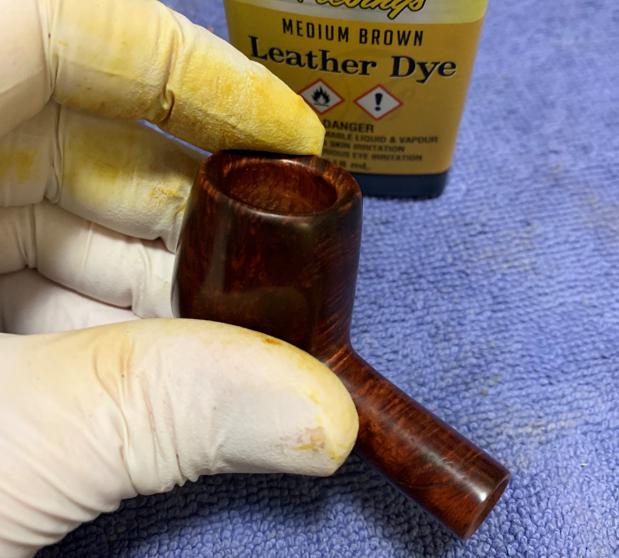 I applied more Before & After Restoration Balm and some Paragon Wax. I polished it by hand with a microfibre cloth and I could not believe how good it looked! This modest pipe had started its time with me as a candidate for the fireplace and ended up as a lovely pipe whose owner will be able to enjoy it for many years to come. The dimensions of the pipe are as follows: length 5¾ inches (14.6 cm); height 1⅜ inches (3.5 cm); bowl diameter 1¼ inches (3.2 cm); chamber diameter: ¾ of an inch (1.9 cm). The weight of the pipe is ¾ of an ounce (or 24 grams of mass).
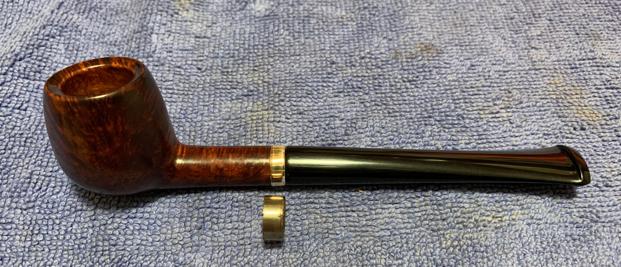


