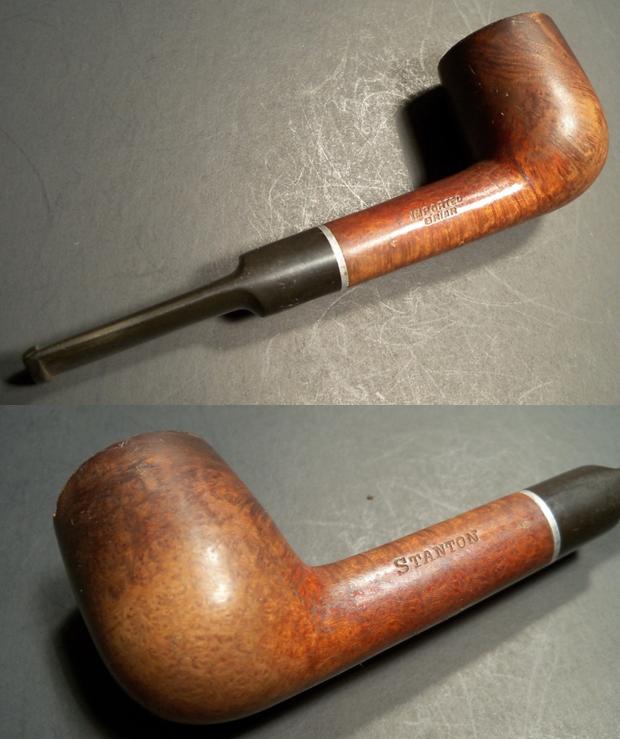
Blog by Dal Stanton
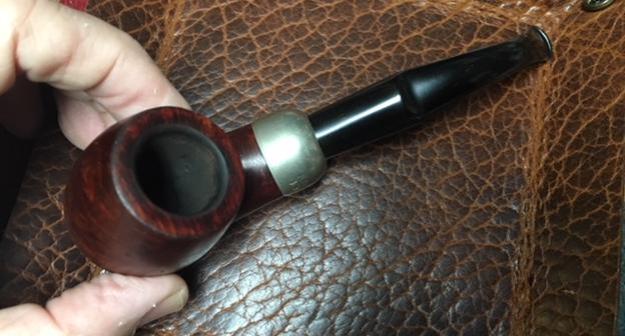
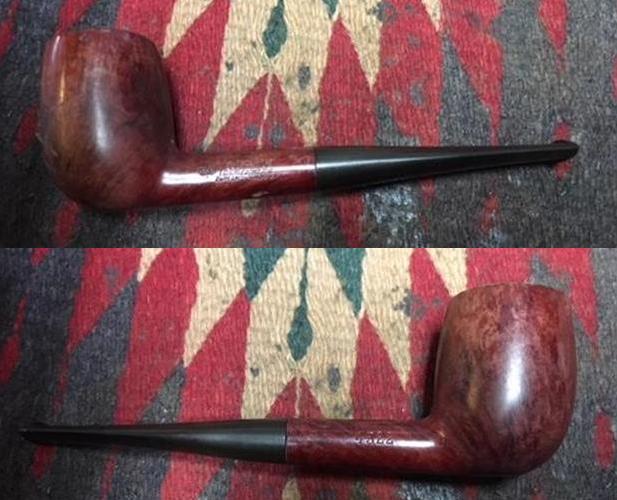
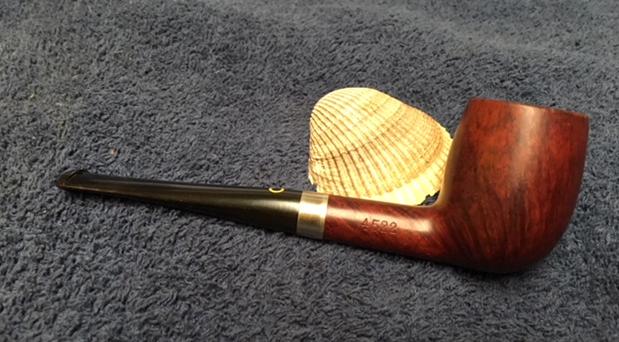
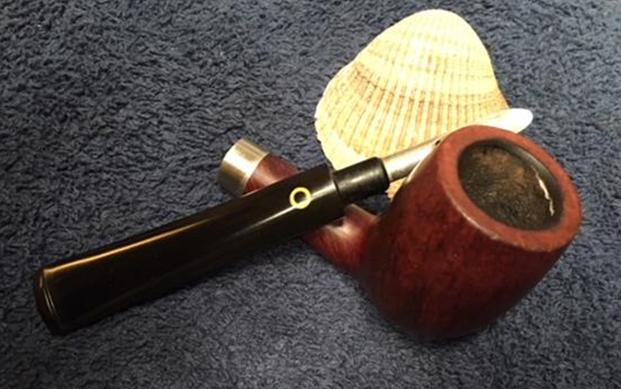
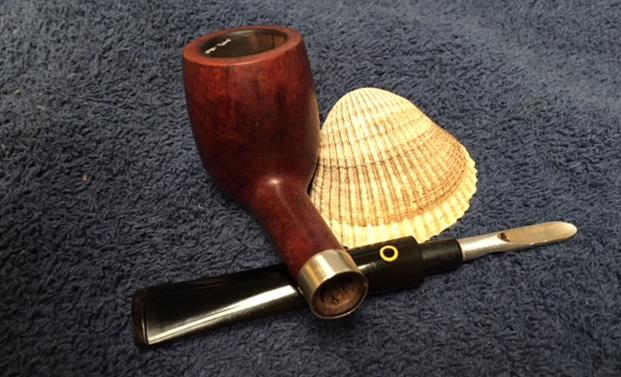
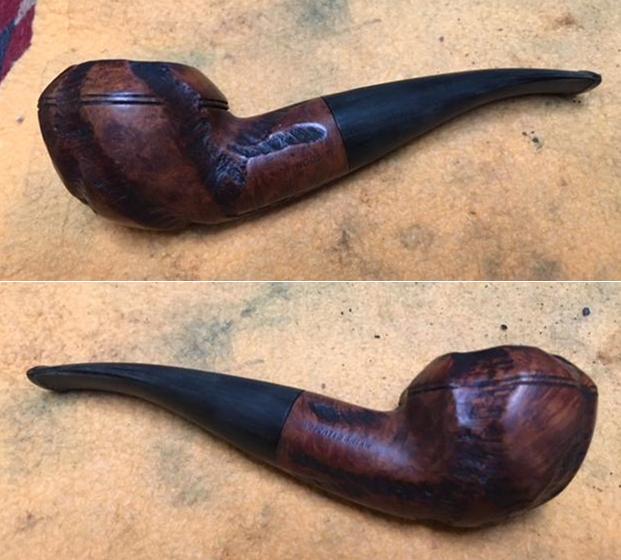
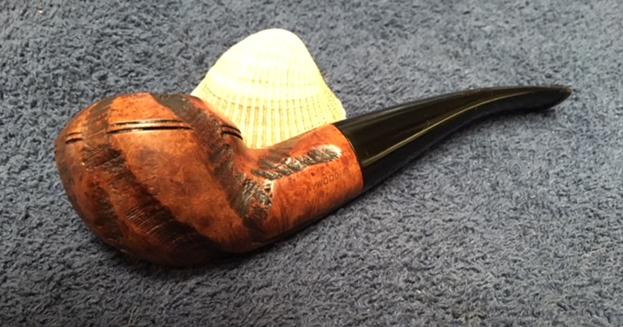
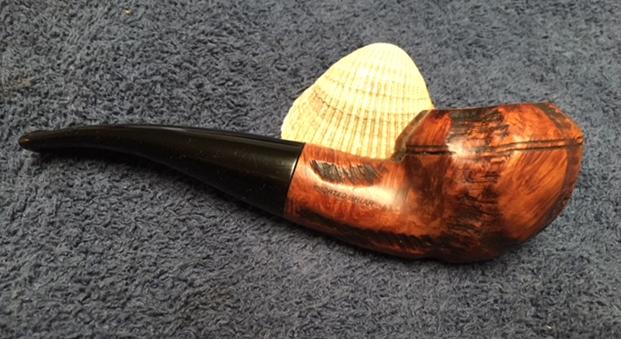
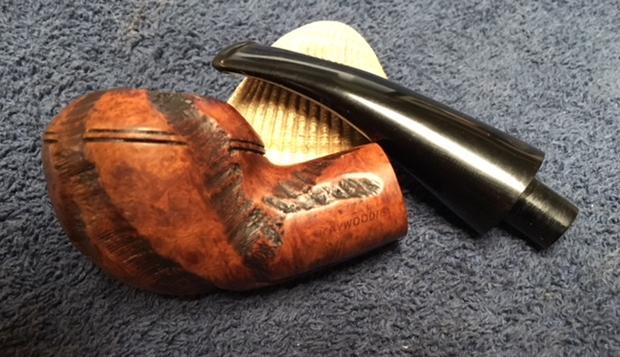
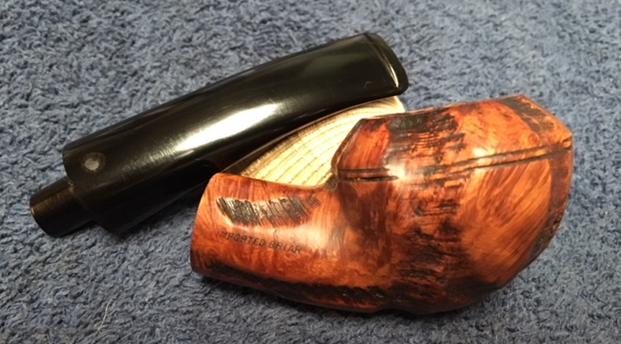
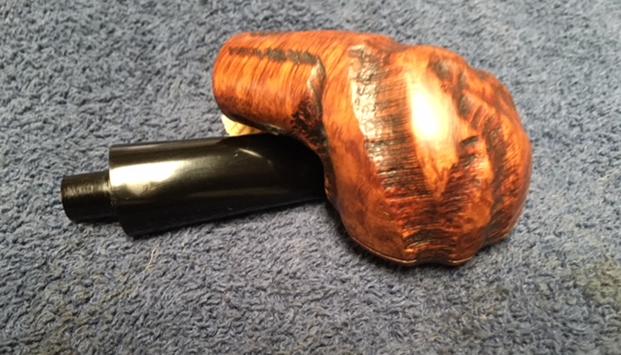
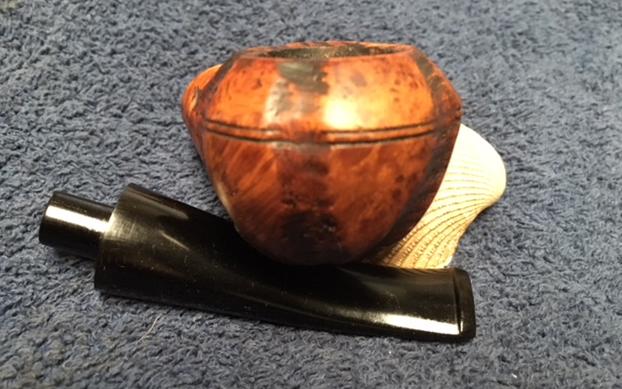
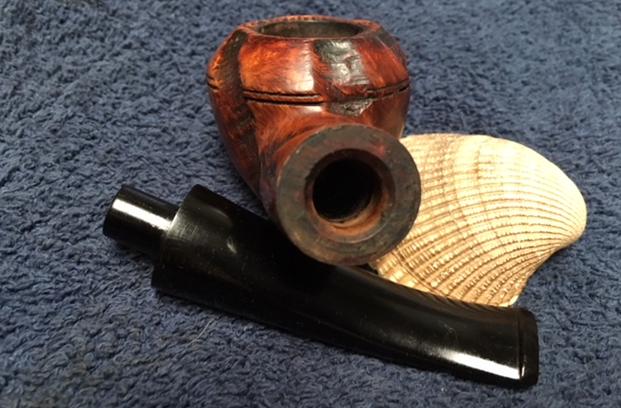
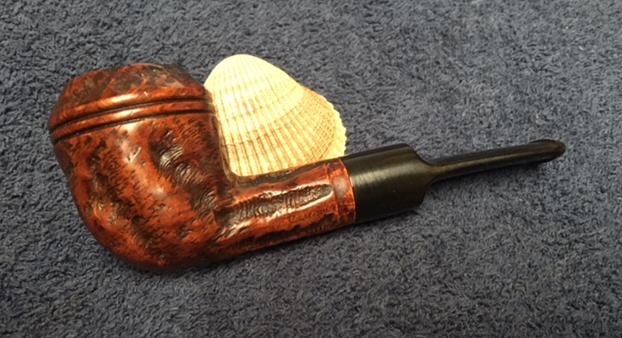
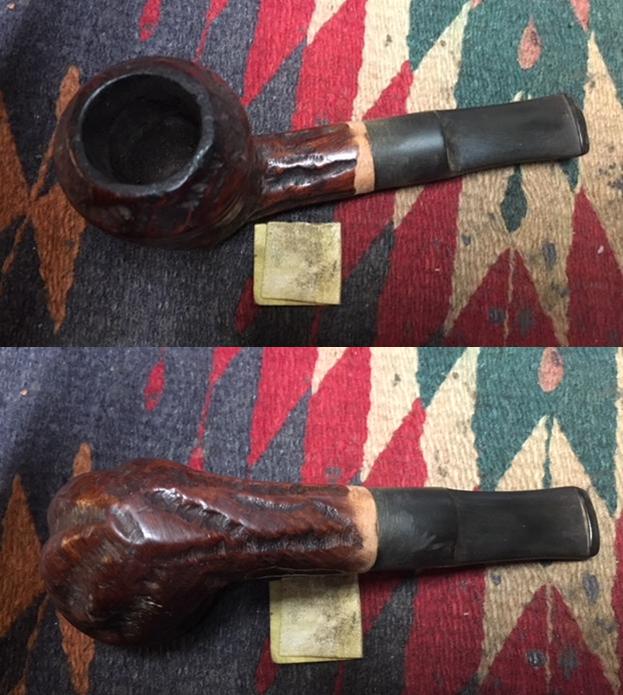
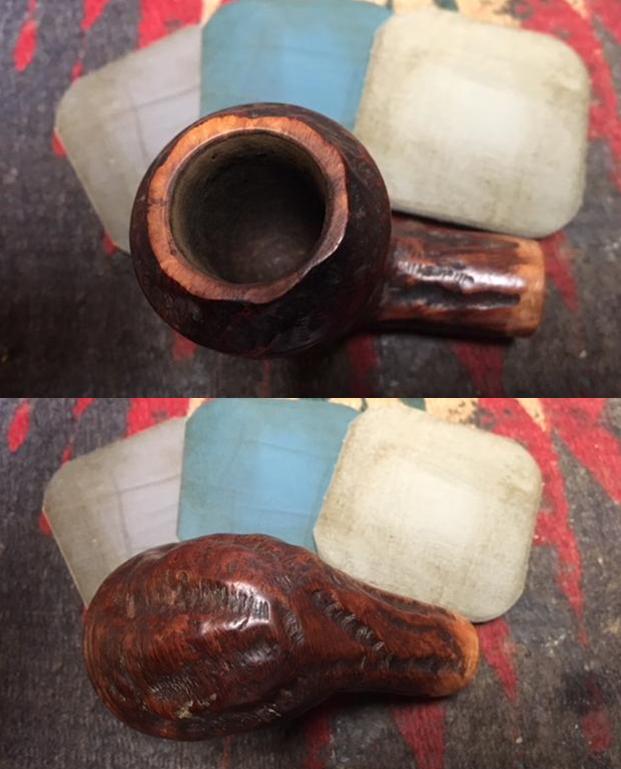
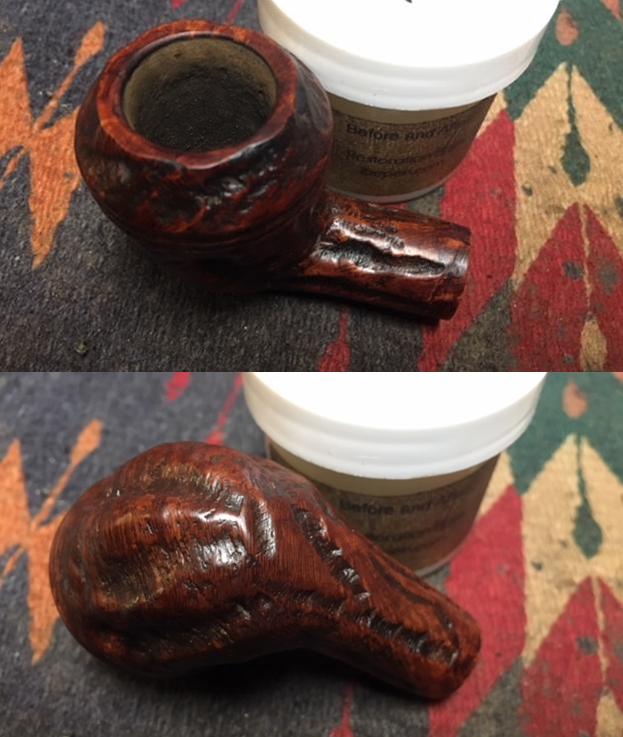
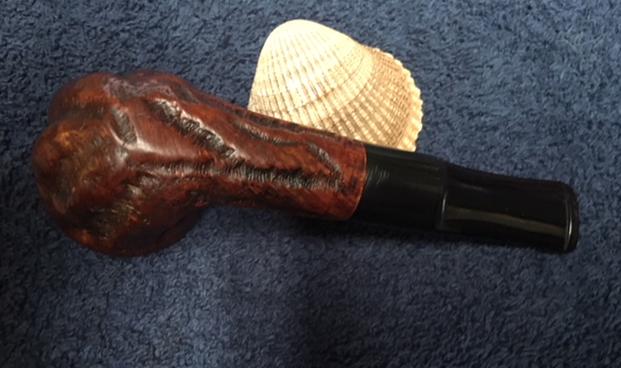
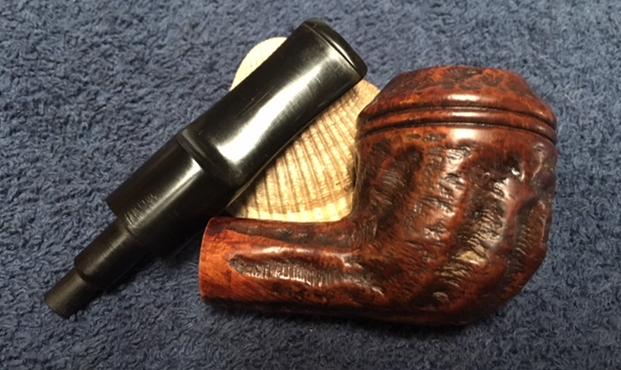
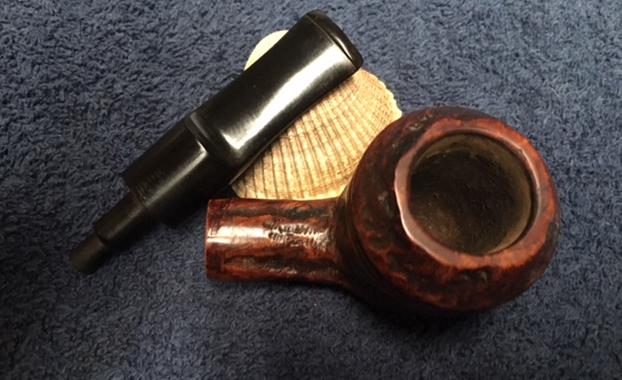
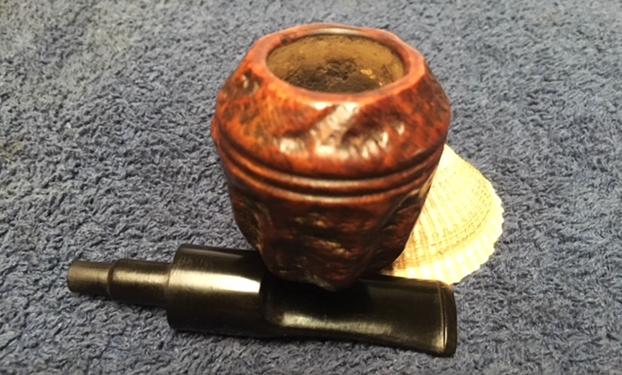
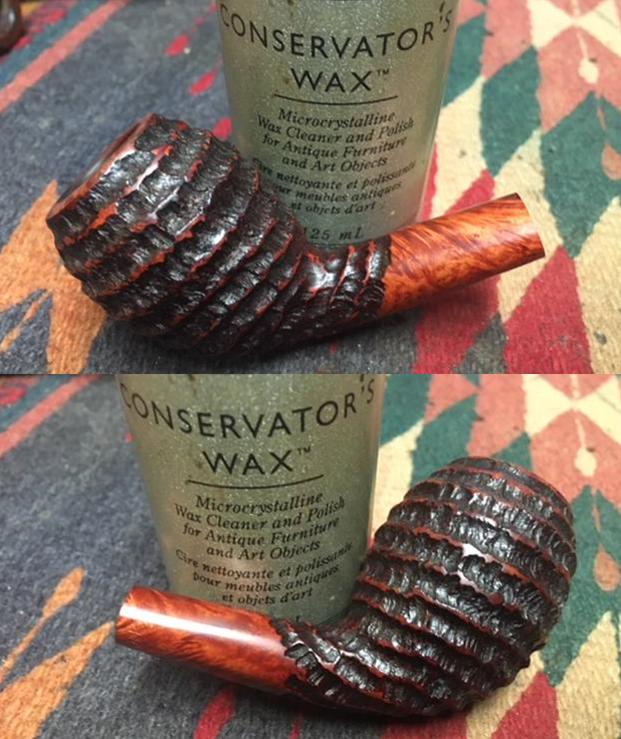
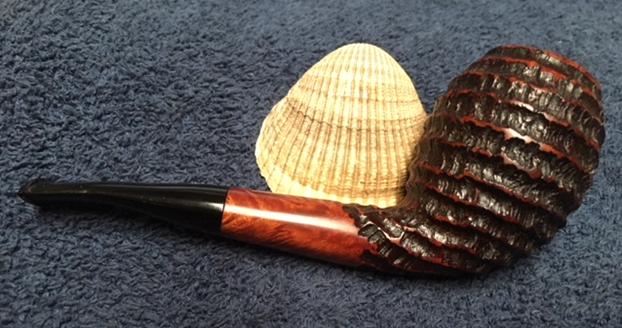
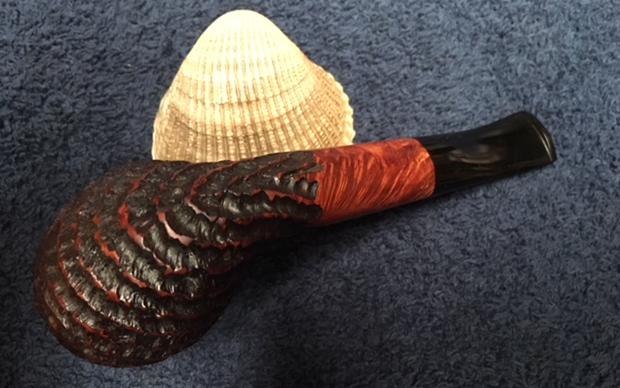
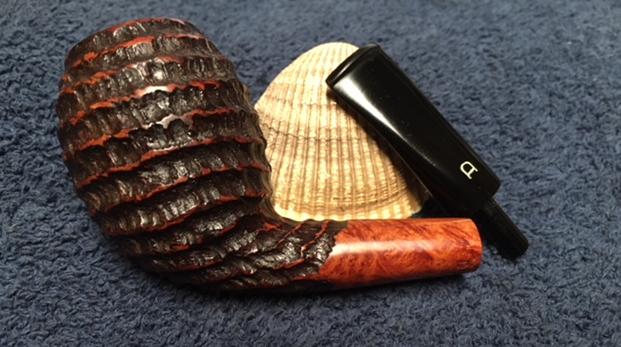
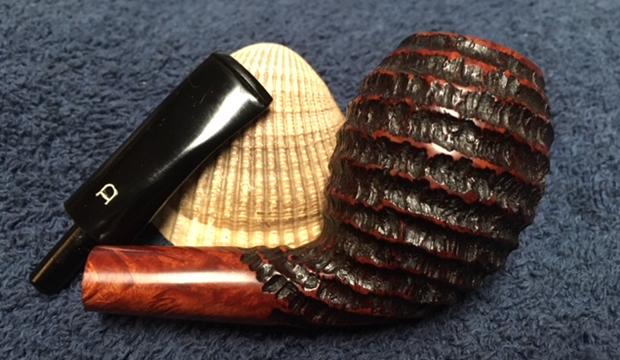
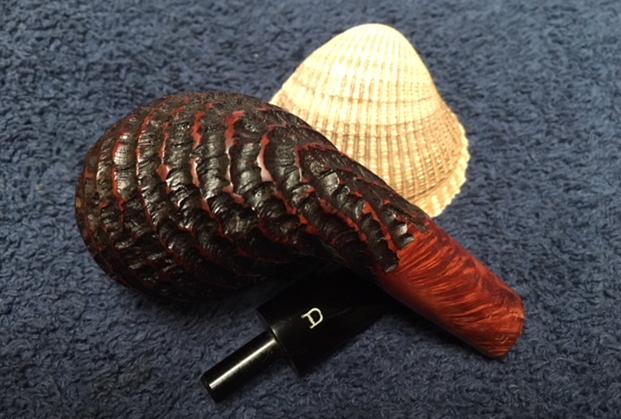
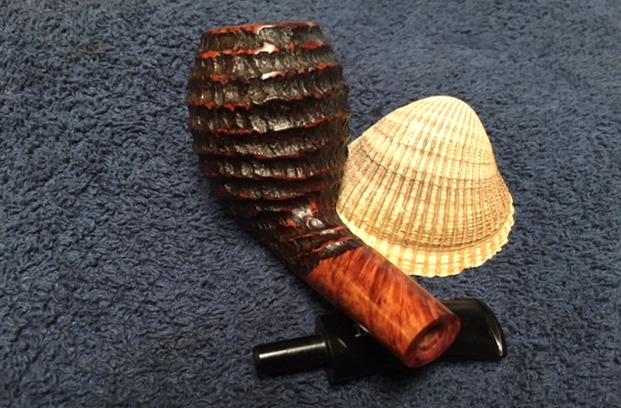
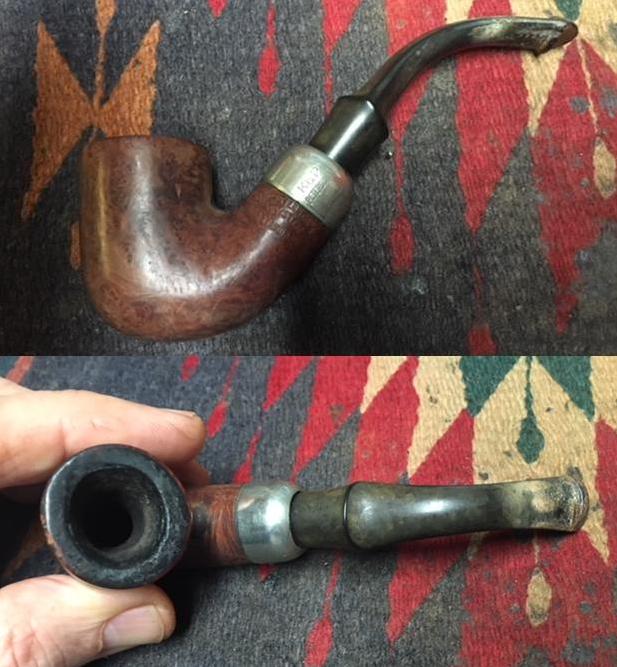
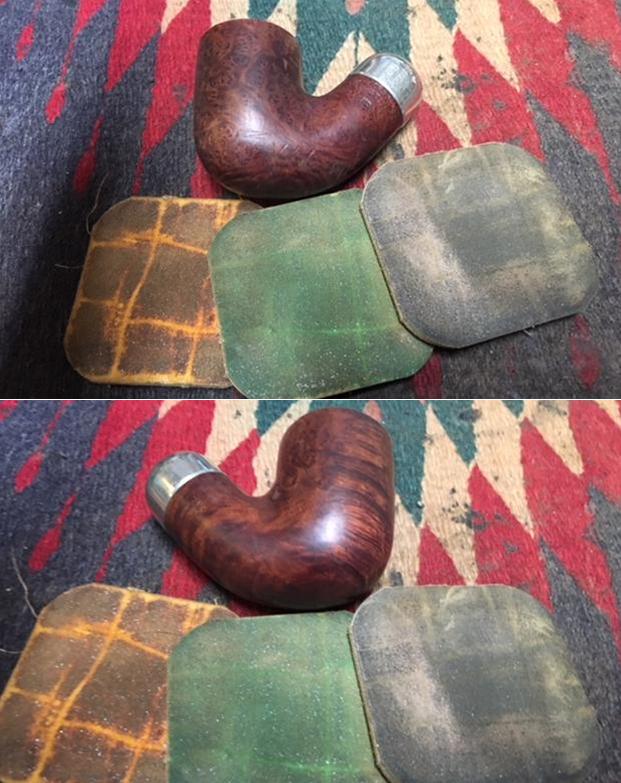
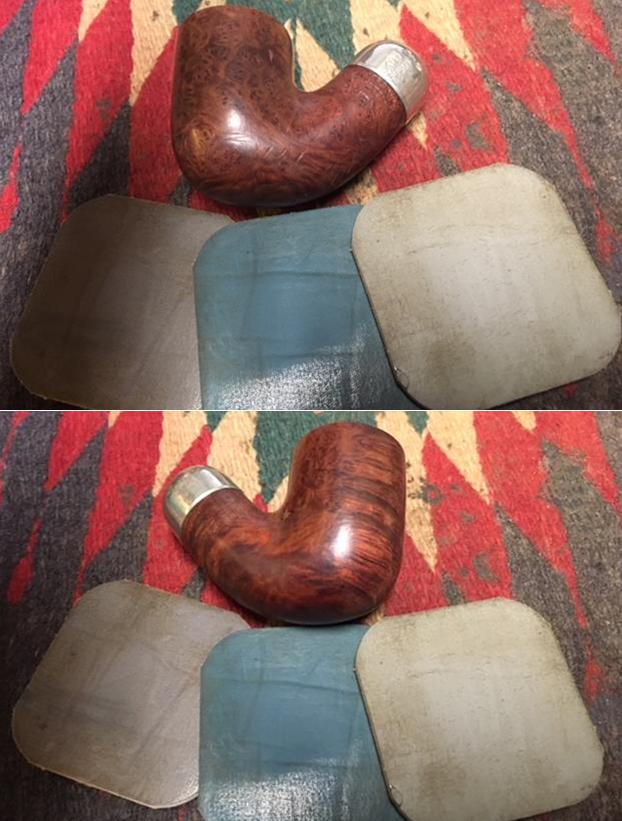
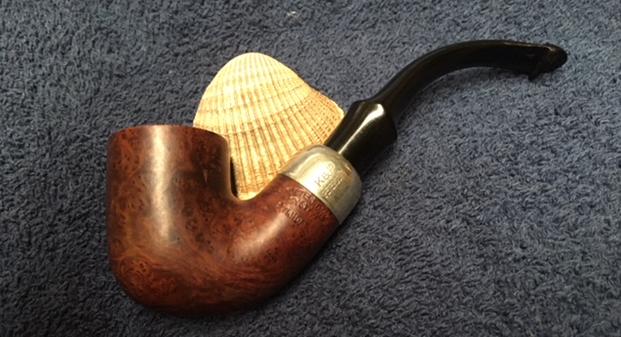
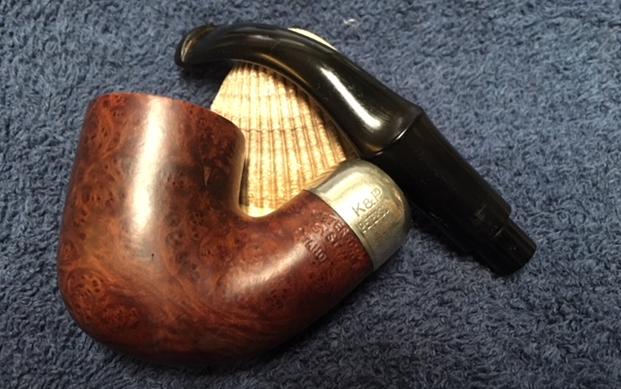
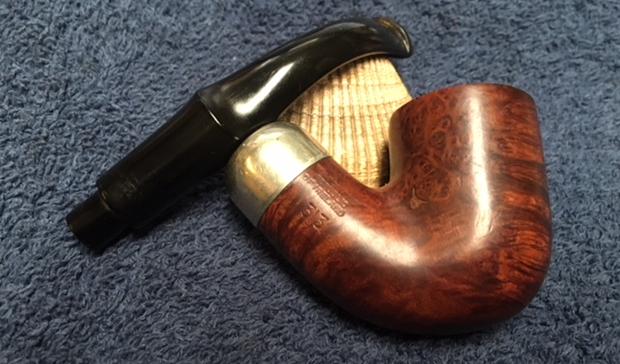
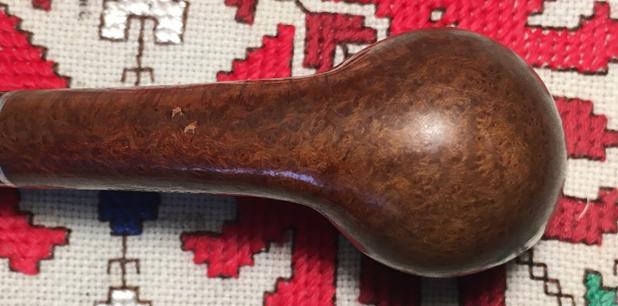
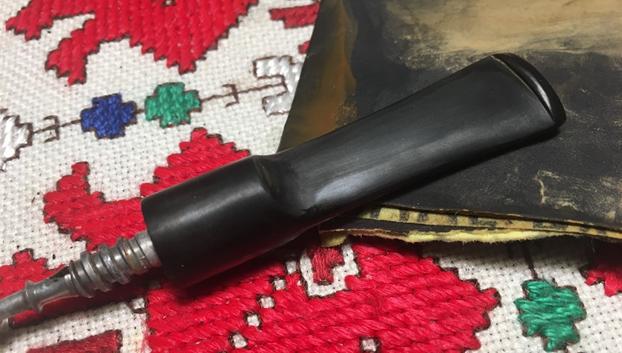
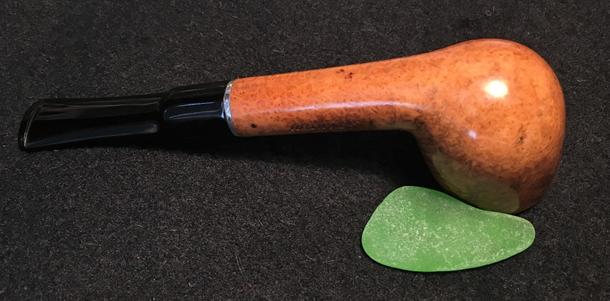
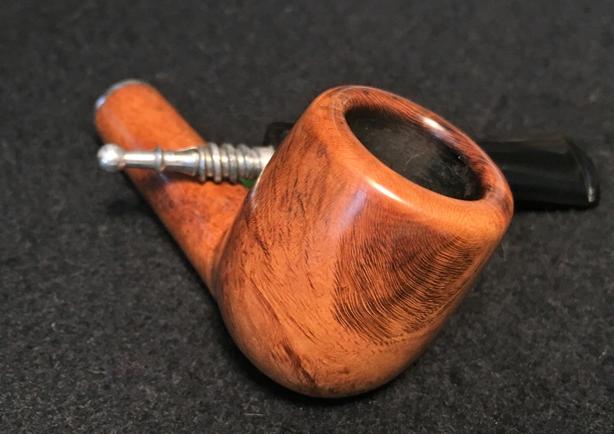
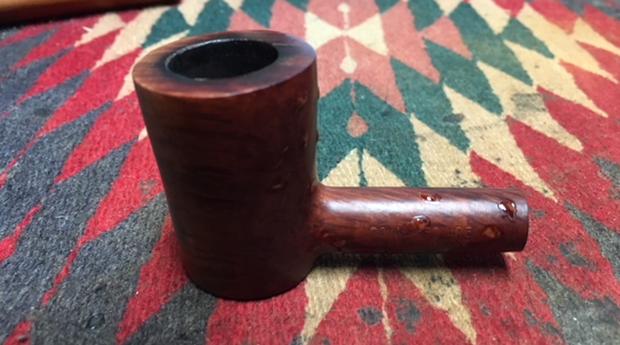
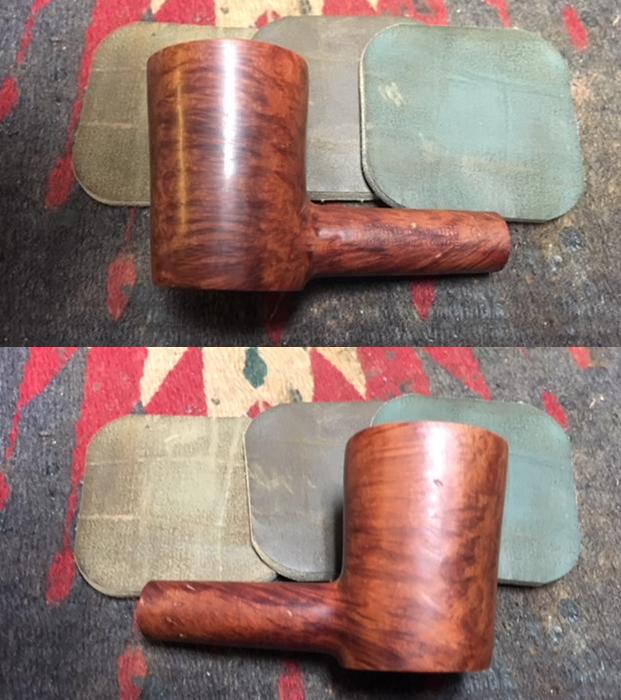
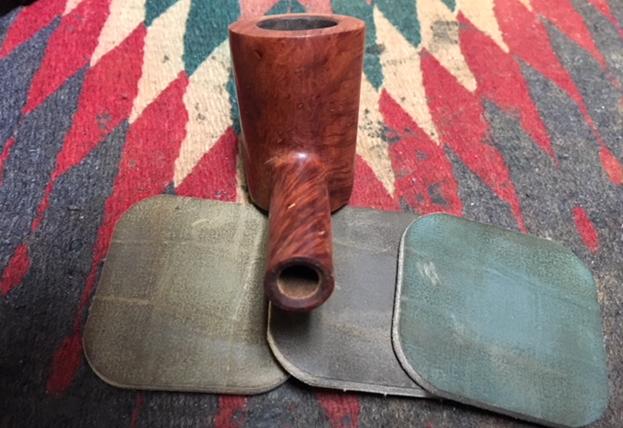
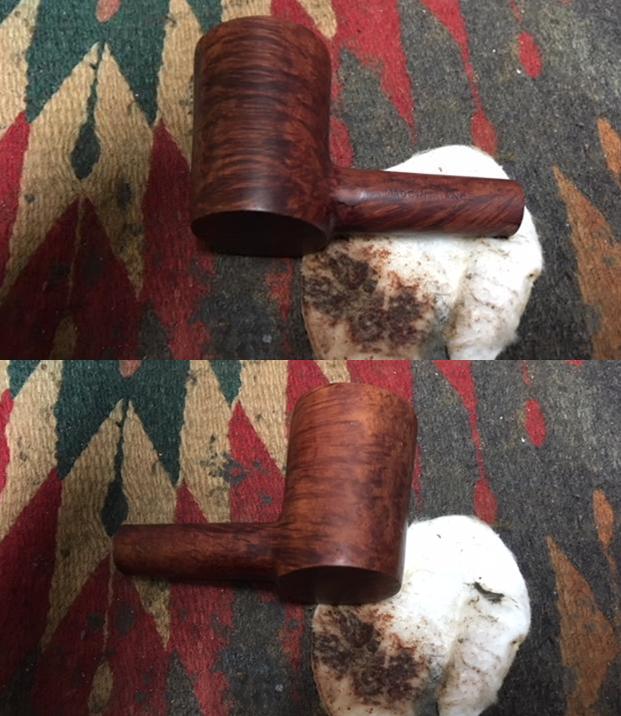
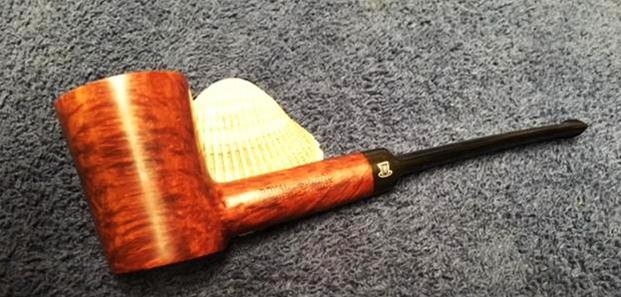
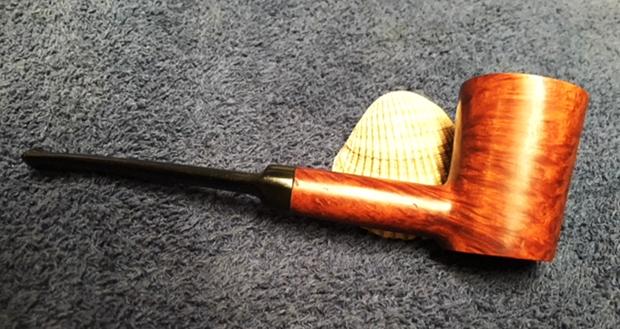
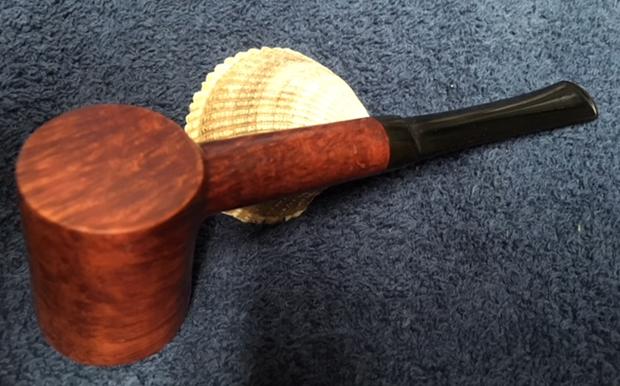
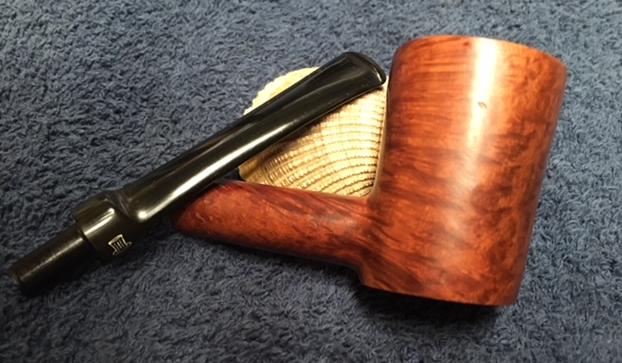
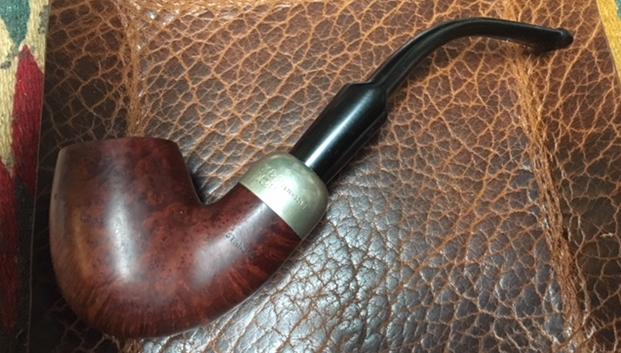
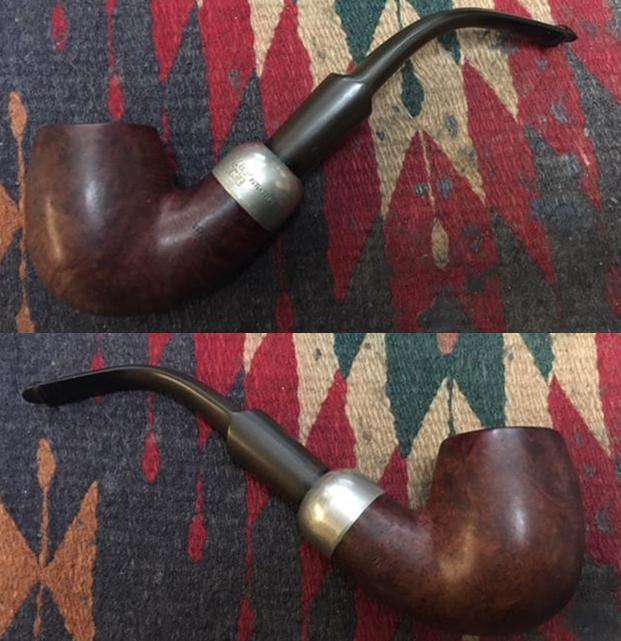
This Zulu caught my eye along with a striking, Comoy’s Royal Falcon bent Bulldog on the UK eBay auction block. I have always been attracted to the canted stummels of both Dublin and Zulu shapes. They strike me as pipes with a bit of attitude! The second thing that caught my attention was the exquisite, tight crocodile skin-like texture of the rustification. When I first took the Zulu out of the ‘Help Me!’ basket, I wasn’t quite sure how to best describe the pattern. Initially, I was thinking maybe, pine cone – mainly because of the tight, uniform design. I showed it to my wife for her first impressions. Without hesitation she said that it was iguana or crocodile skin… I chose the croc description because it seems to go better with the Zulu motif! Of course, the final selling point was the Meer lining. That is always cool not only because of the aesthetics but also because of the special attributes of Meerschaum. The seller provided some helpful information on both pipes. After sealing the eBay deal in pounds, it did not take long for the Zulu and Bulldog to arrive in my box here in Sofia, Bulgaria. I restored the Royal Falcon already and if you’re interested, you can take a look at it HERE. Here are pictures I took on my worktable of the Zulu. 


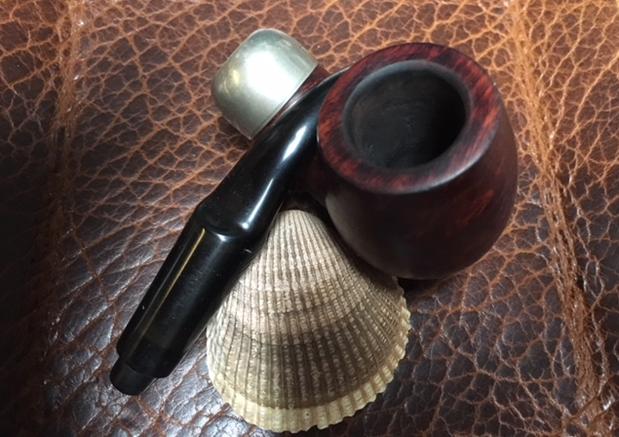
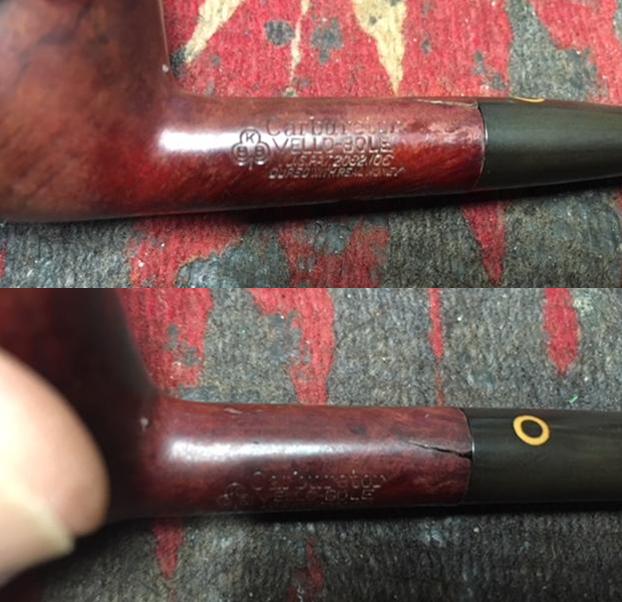
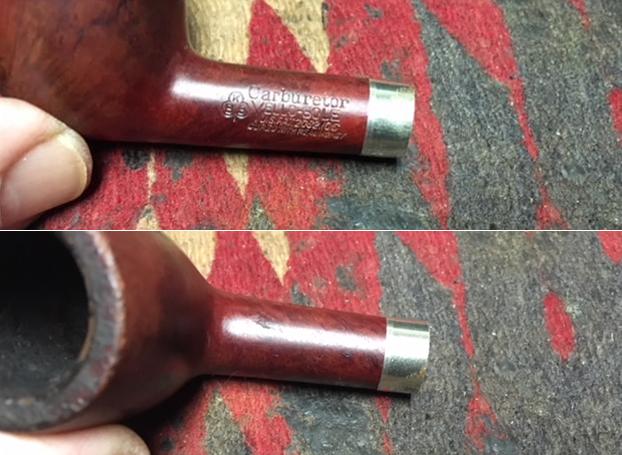
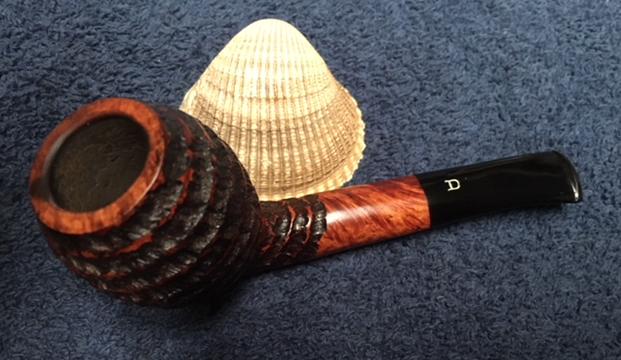
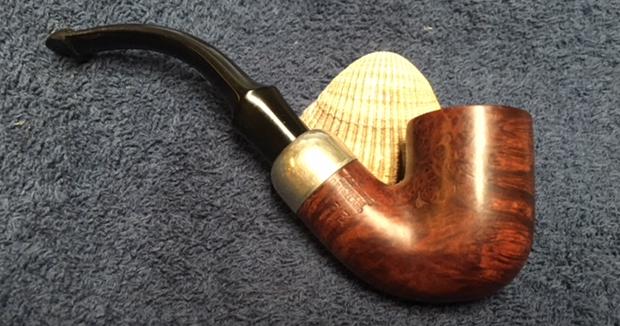
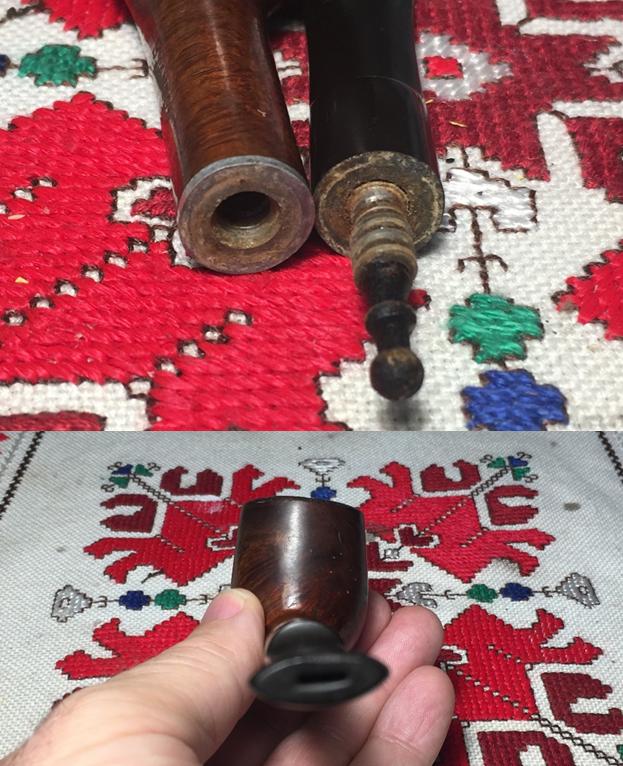
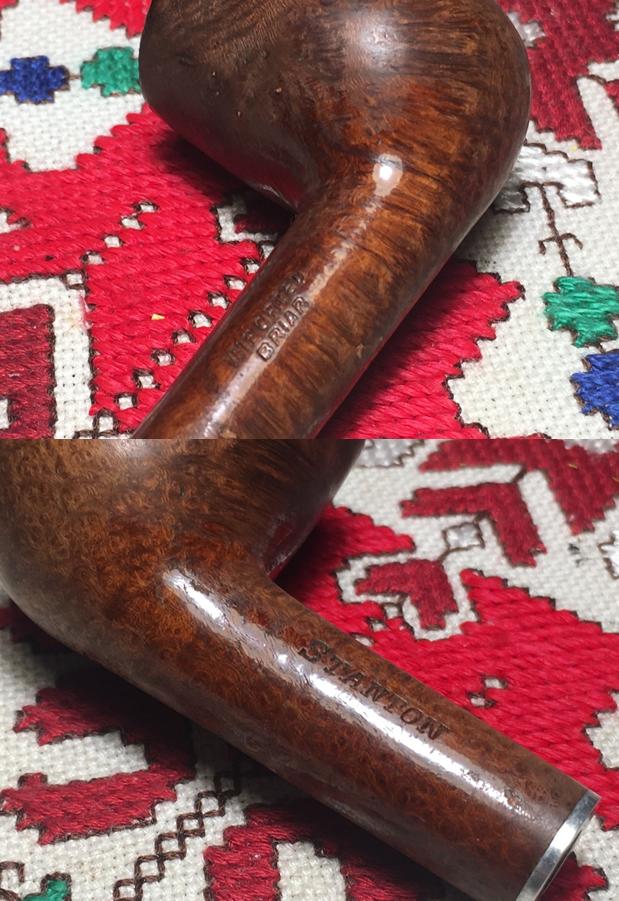
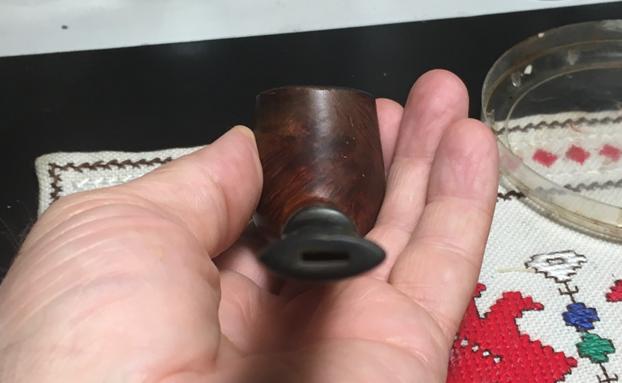
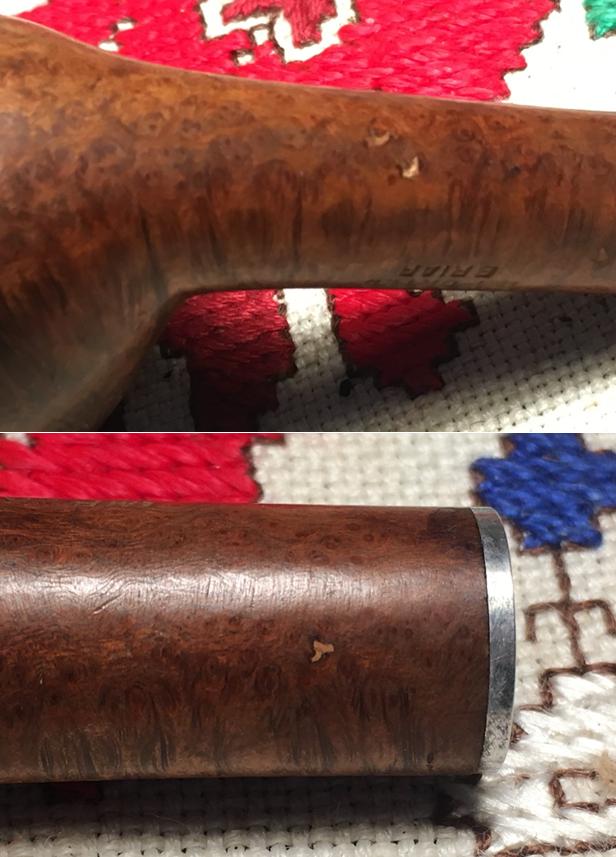
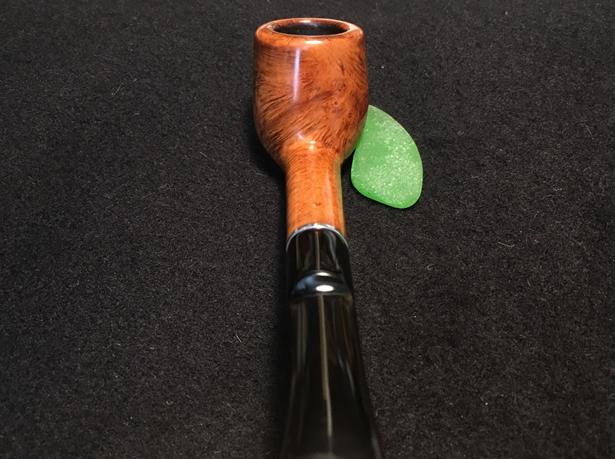
 The Zulu is clearly marked on the bottom of the shank, on the left side Ariston [over] Rustic, and to the right, Veritable [over] Ecume, a French reference which means, “Real Foam”, referencing the Meerschaum lining. “Meerschaum” means, ‘sea foam’ in German. The other identifying mark is a gold rondel with a tilted ‘R’ ensconced in it.
  When I went to all my usual places to identify the origins of this Ariston Rustic, what I found was not a lot, and what I did find did not seem to line up. My first stop was Wilczak & Colwell (3/3/97) ‘Who Made That Pipe?’ listed ‘Ariston L’ as coming from the Lane Tobacco Co. Importer 1942 – ENG/USA. However, subsequent searches for Lane Tobacco Co., didn’t turn up anything. The seller on eBay provided information saying that the Zulu was made by “Empire State” and referenced this link to Pipephil.eu (See: LINK). The gold stem rondel with the tilted ‘R’ was the common connector. I had wondered before why an ‘R’ on the stem with a name, ‘Ariston’? But this link pointed to ‘Regis’ bearing the same logo – probably the source of the ‘R’. ‘Empire State’ below also states an Italian connection.
 Going to the ‘Regis’ link in Pipephil brings you to the listing below with the connecting stem rondel. A seller of another Regis on eBay gave more information which is helpful, but I’ve not been able to substantiate it.
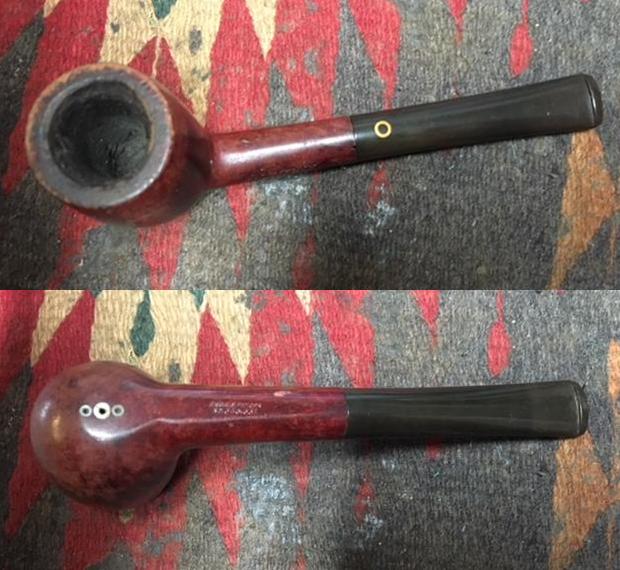
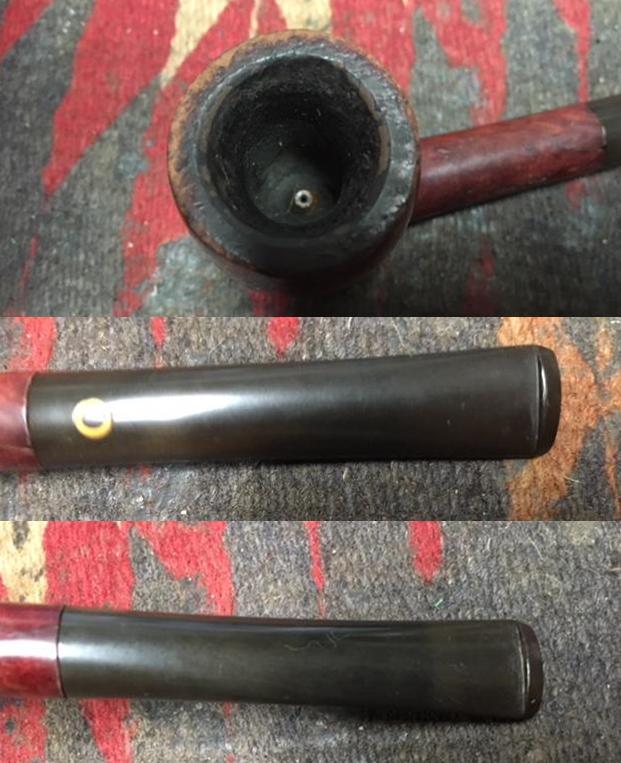
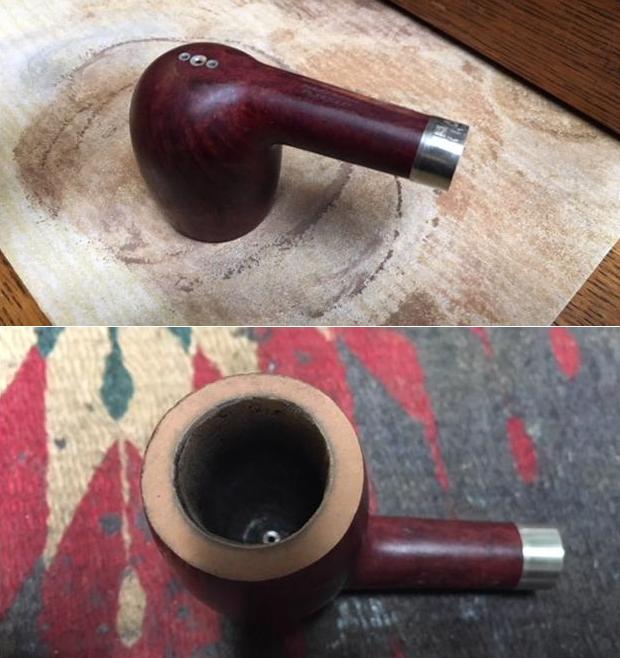
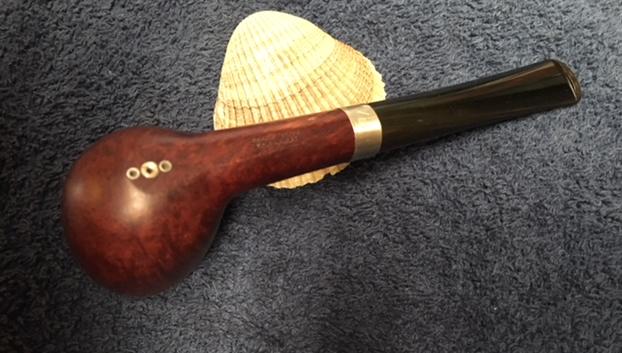
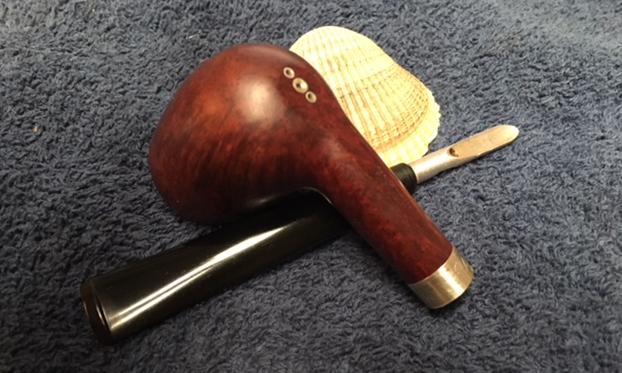
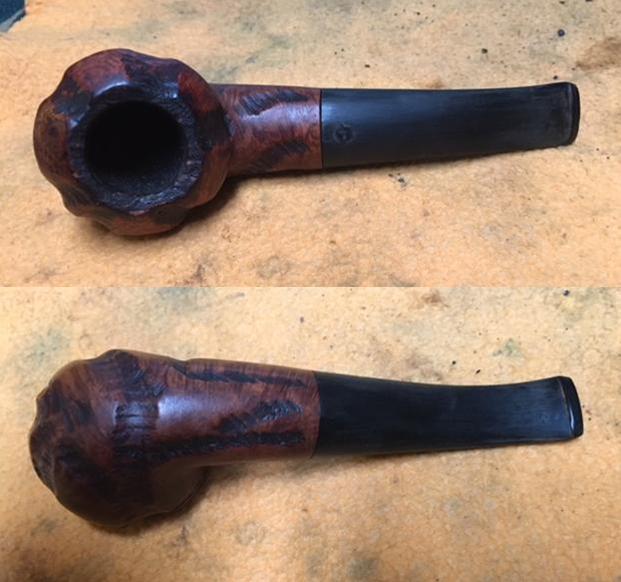
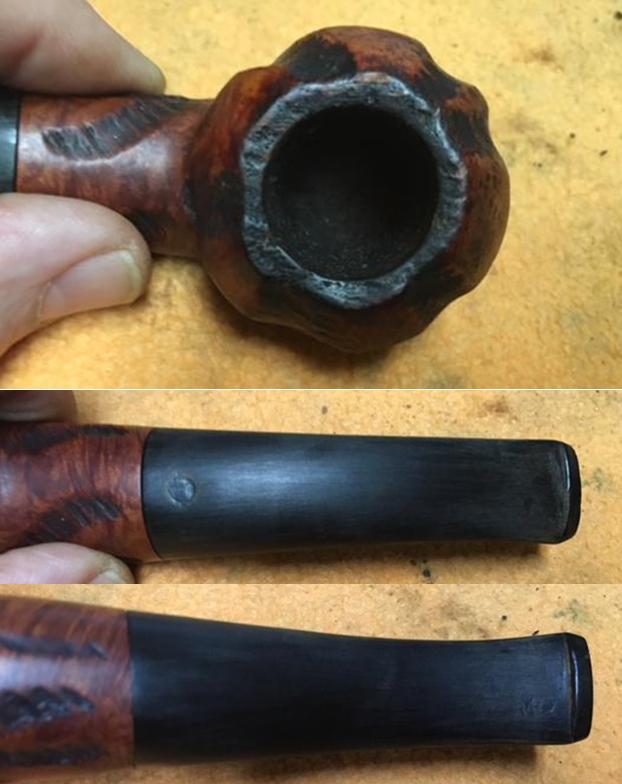
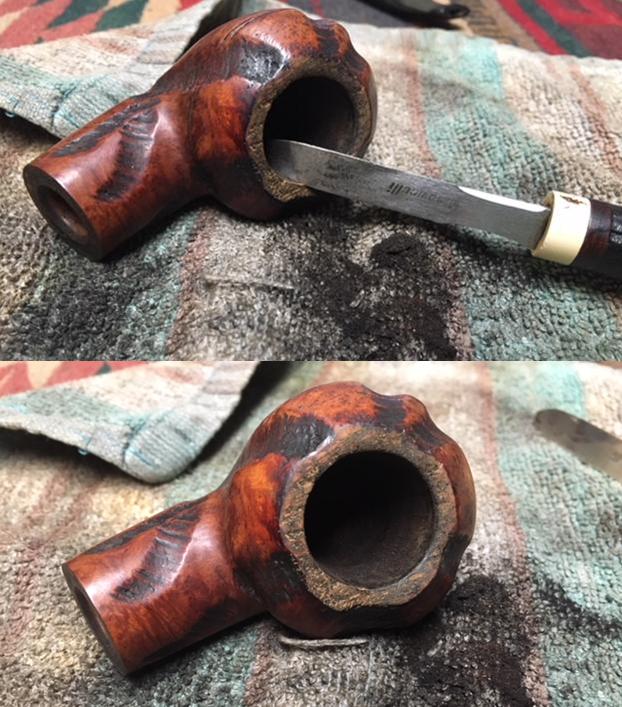
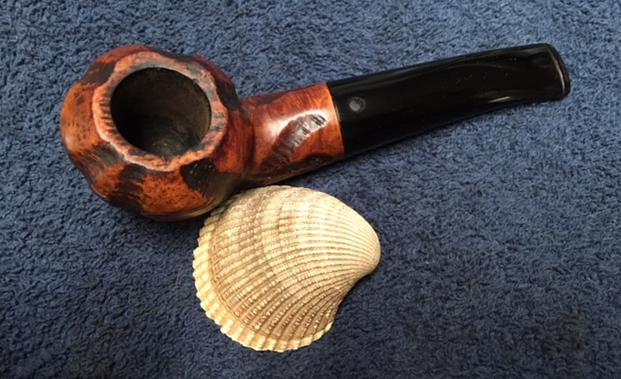
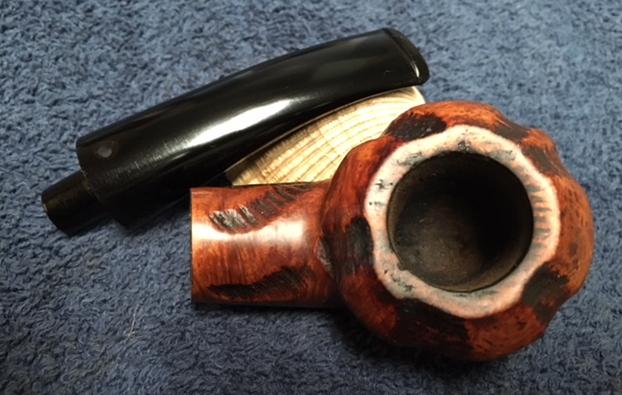
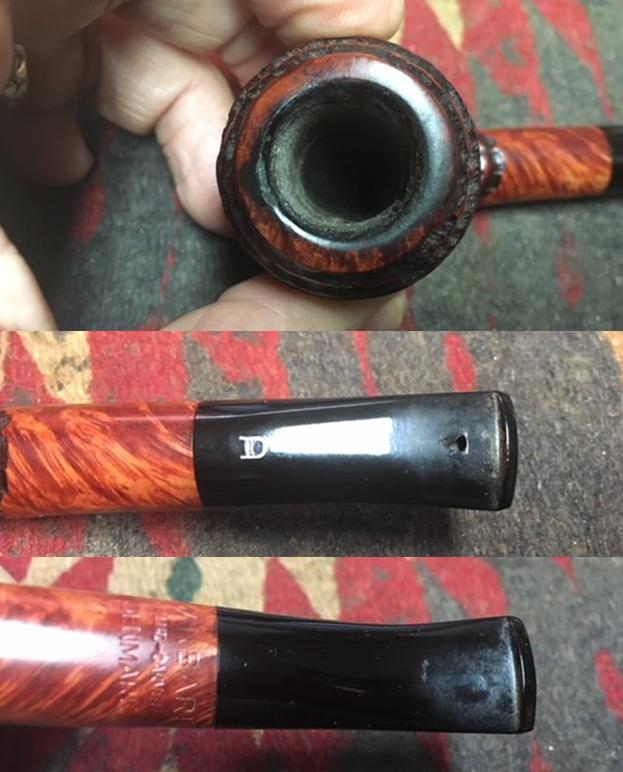
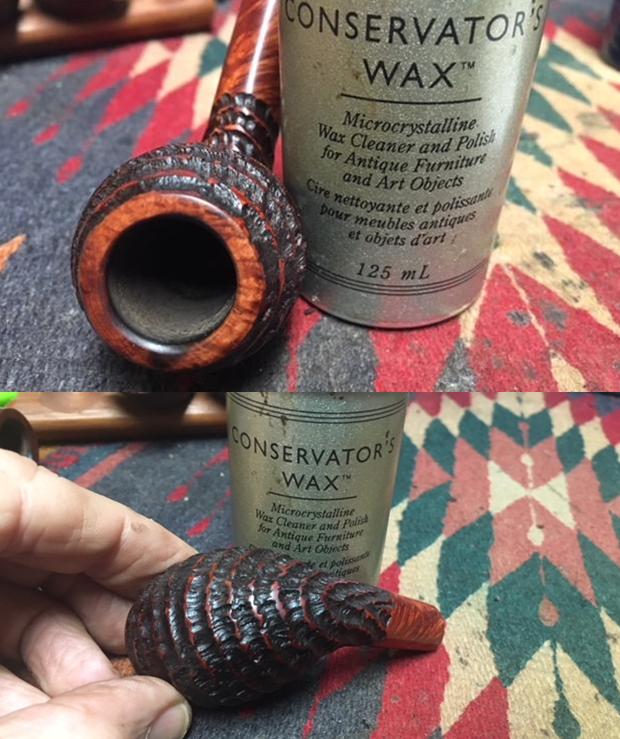
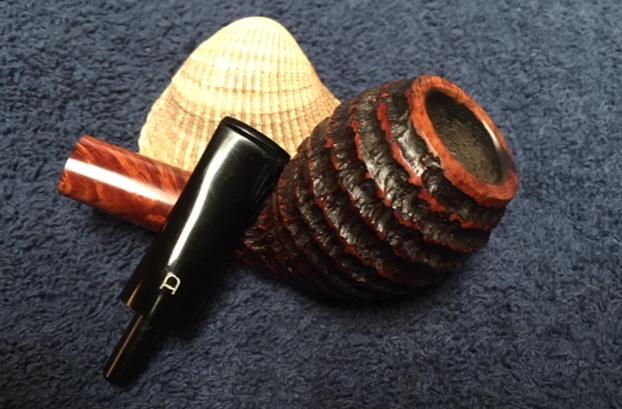
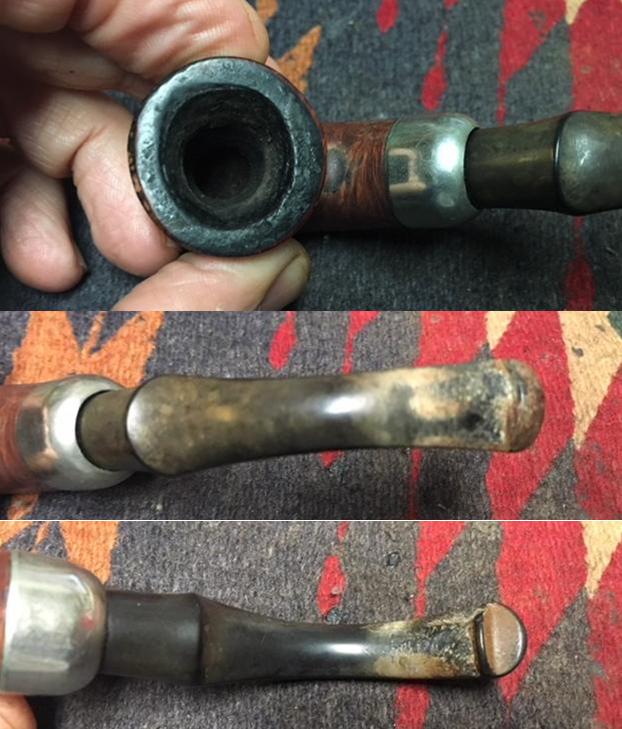
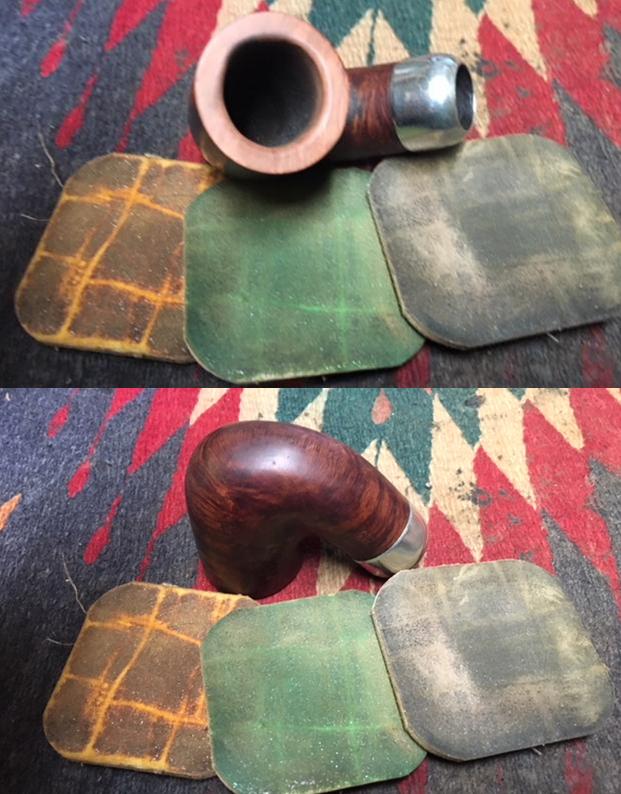
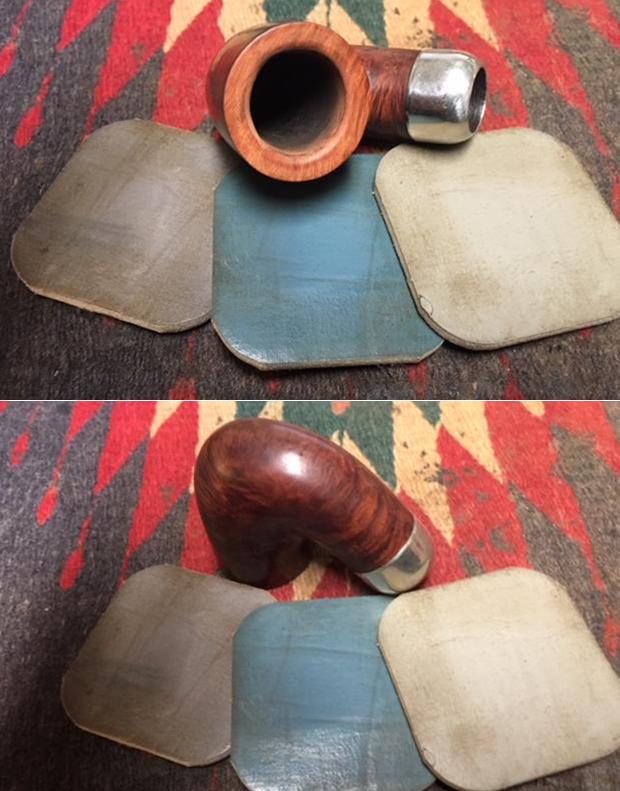
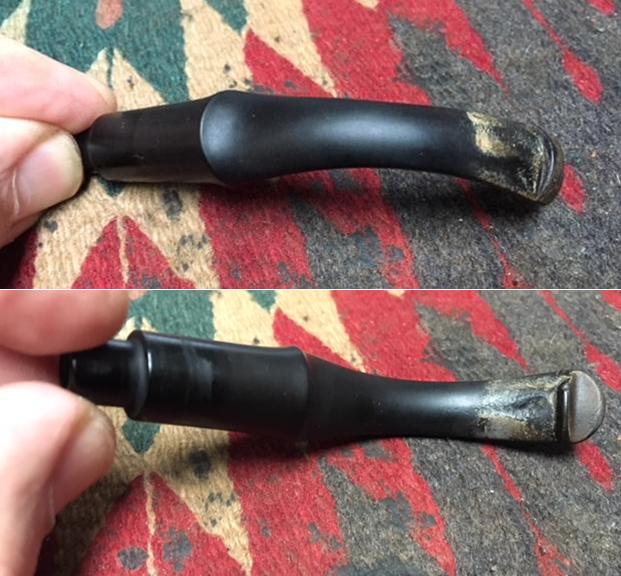
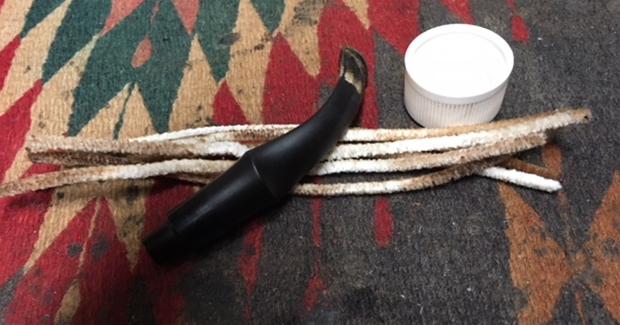
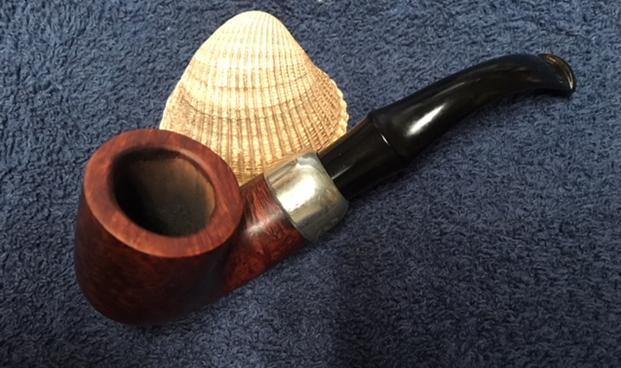
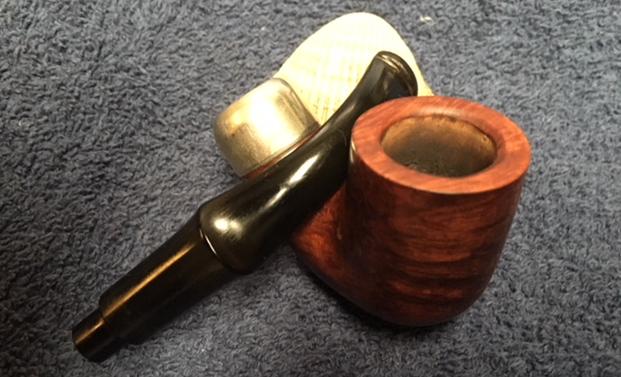
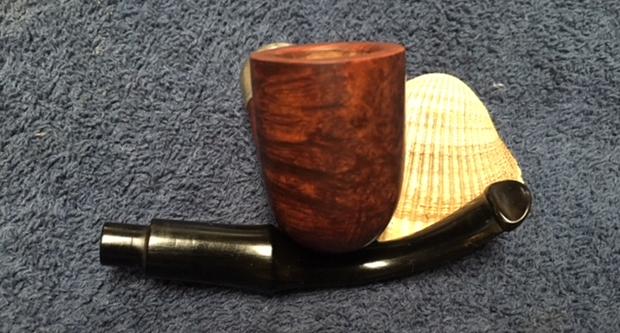
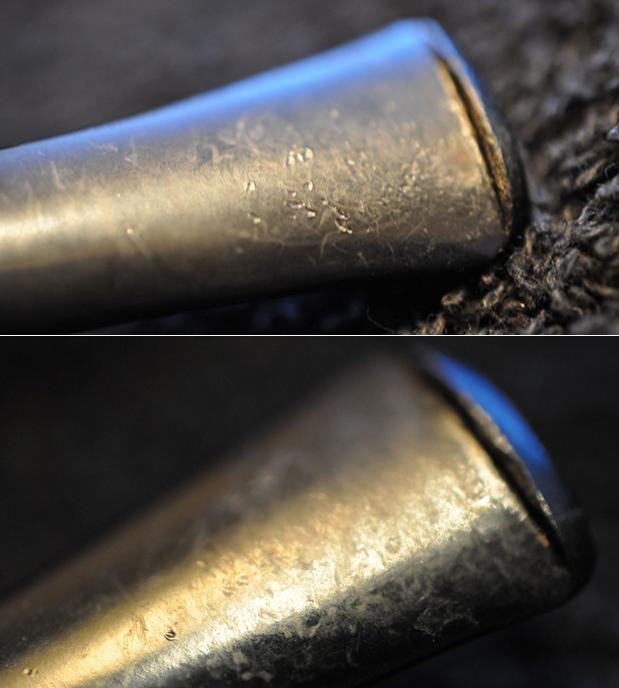
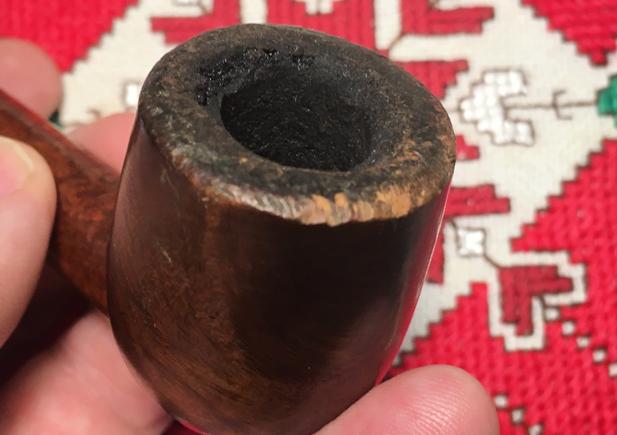
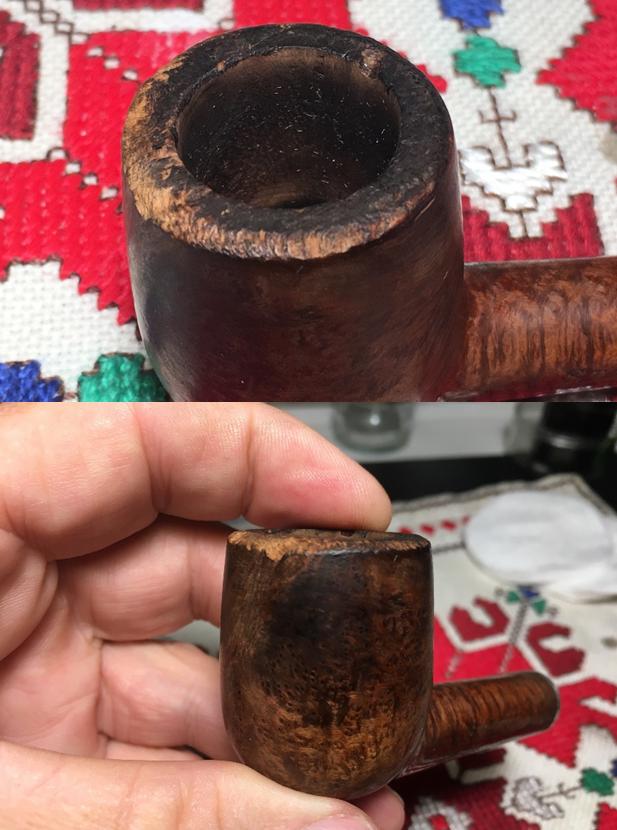
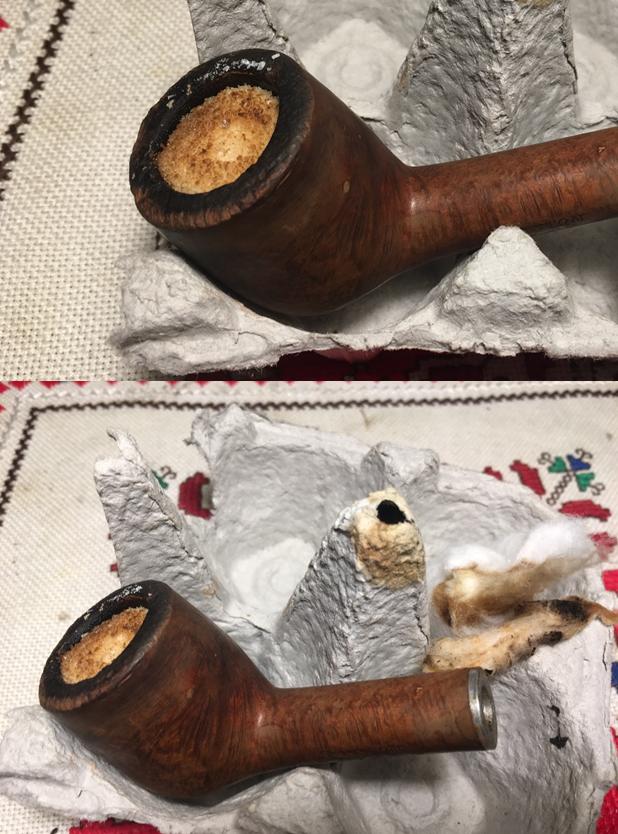
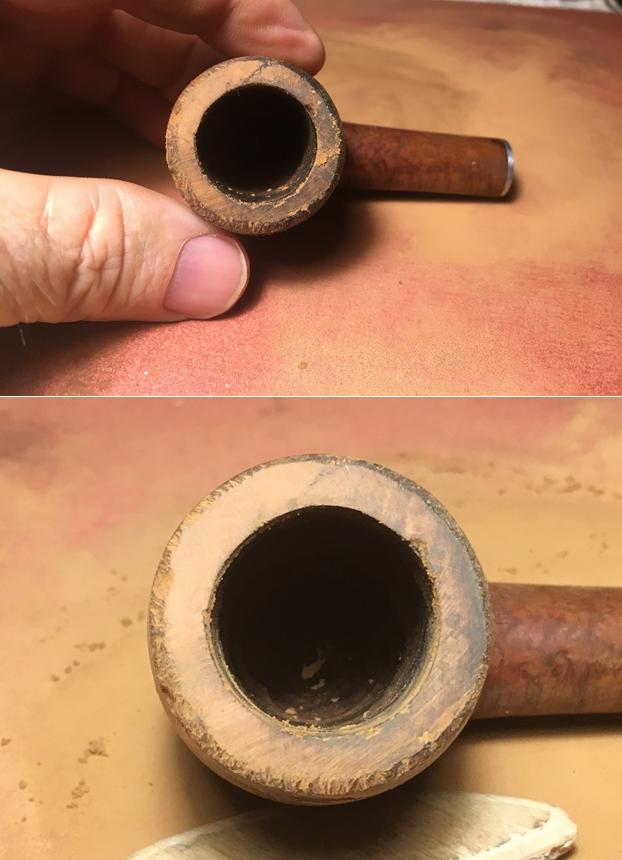
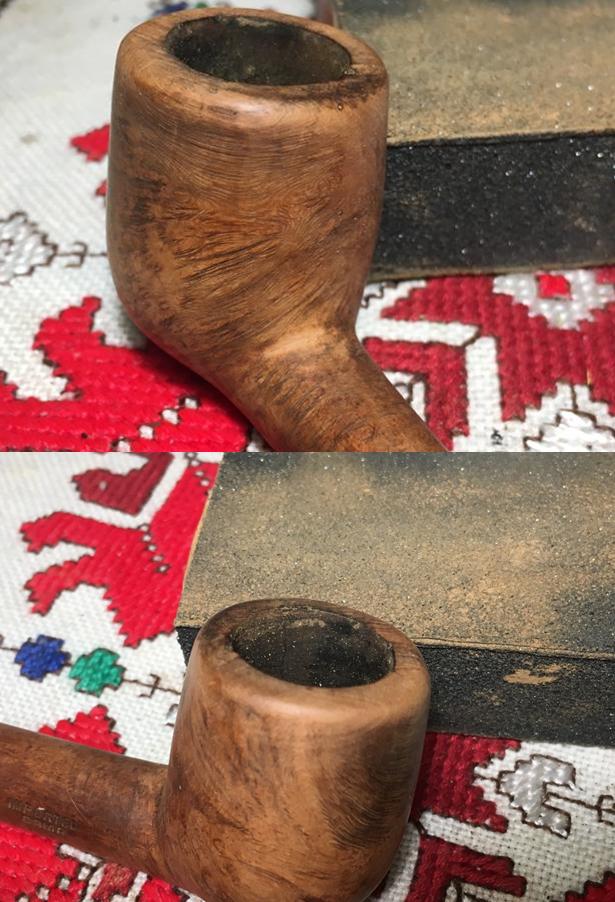
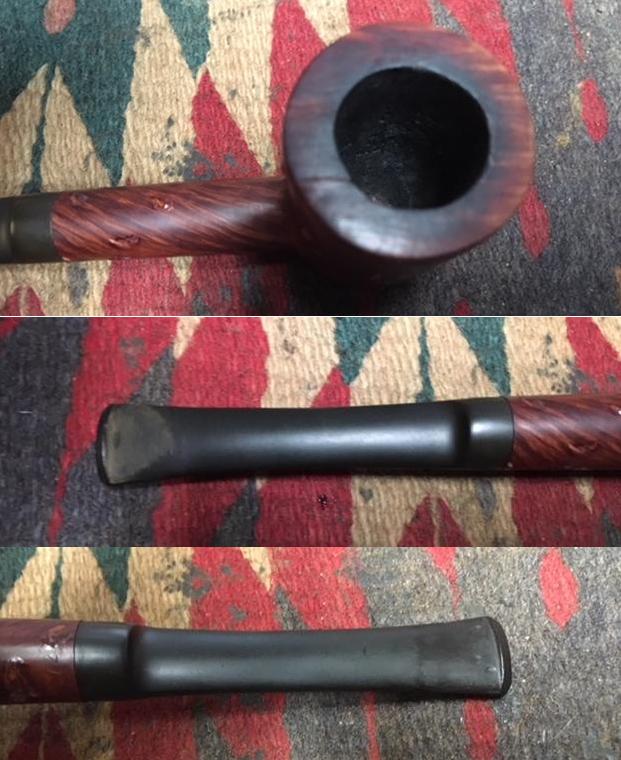
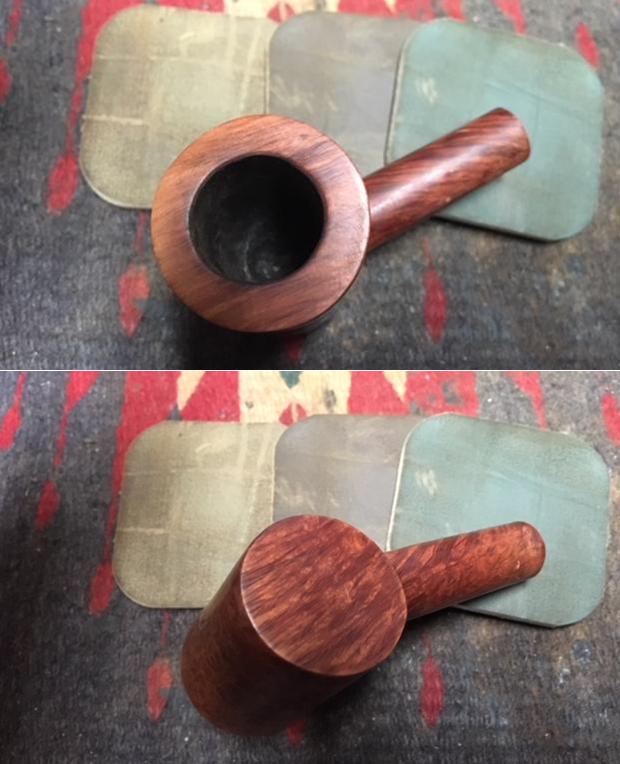
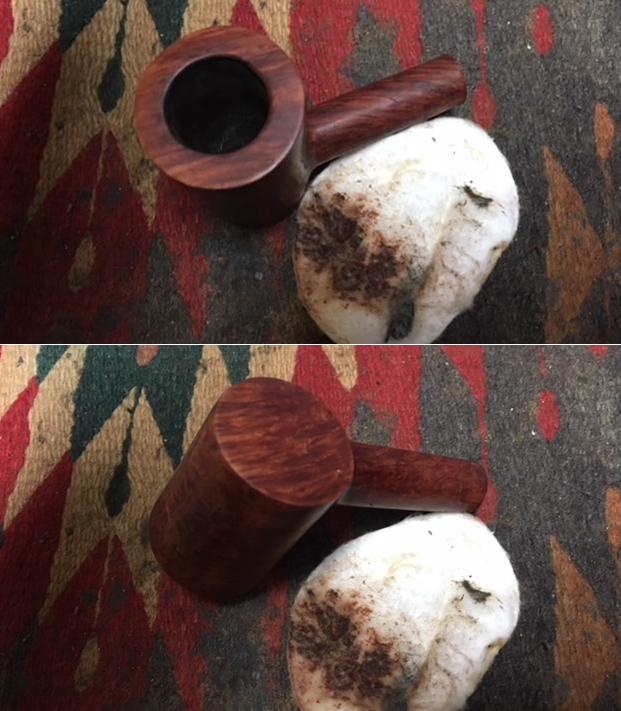
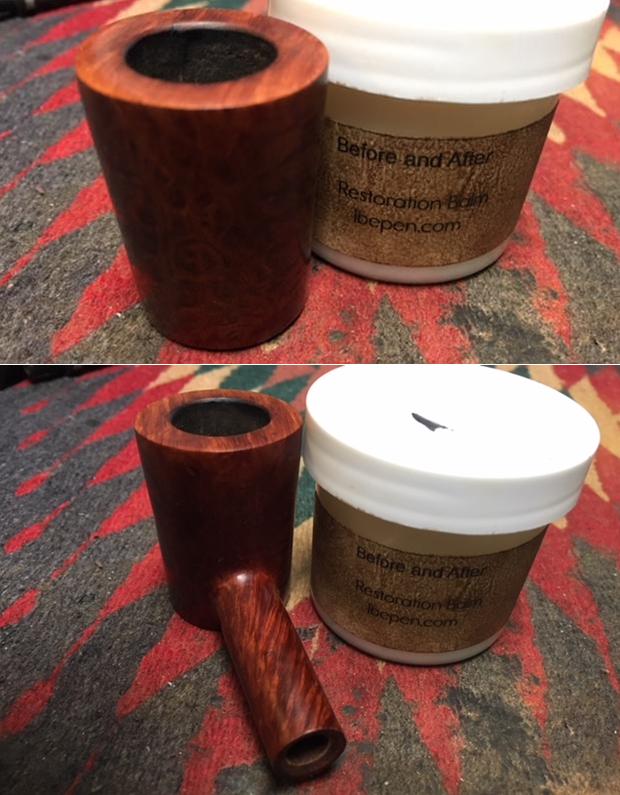
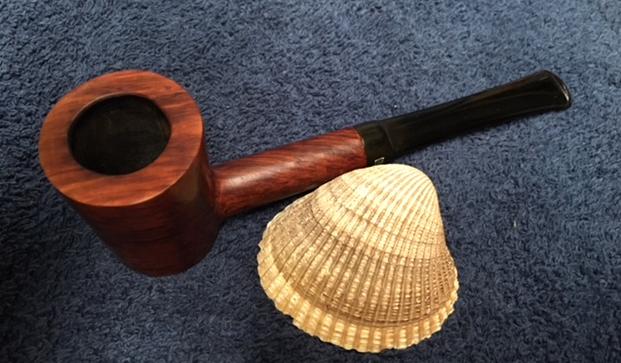
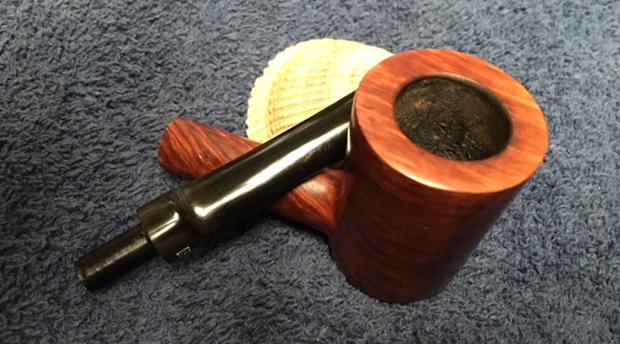
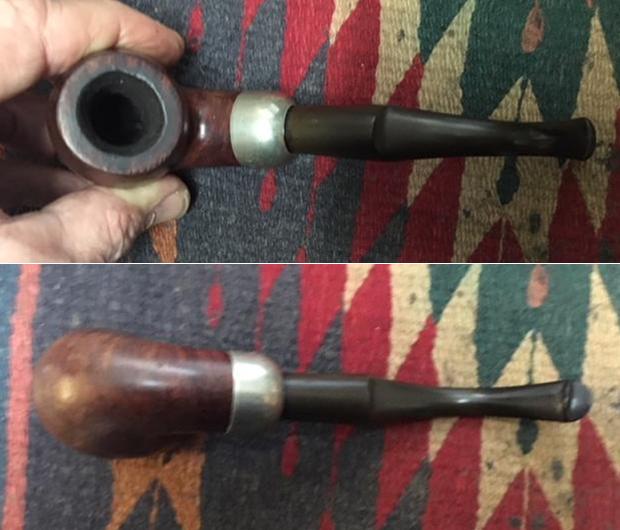
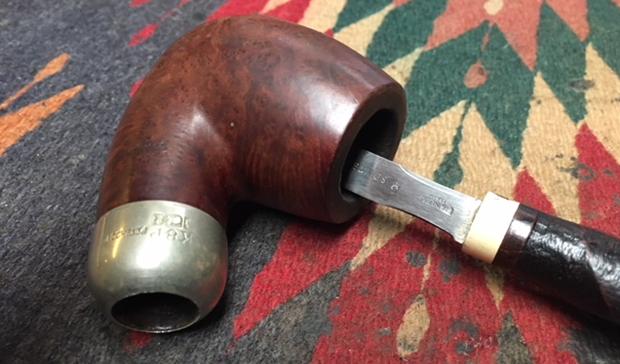
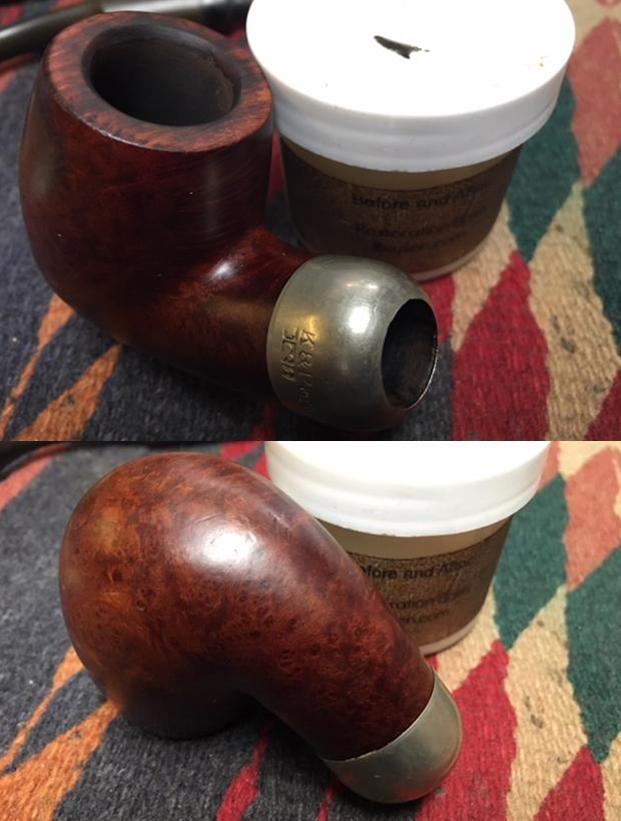
Aristons were originally made in Italy under the trade name “Empire State” (go figure) for a niche market in France that catered to dignitaries in the French Government, somewhat like Bertram pipes were for the US Government dignitaries. Who knows – this pipe might have been smoked by French President Charles DeGaulle ! Well, maybe…. As I look at the Italian, perhaps, Regis Ariston Rustic Zulu with a critical eye to the issues it has, the rusticated surface appears to be in good condition. It needs to be cleaned. The Meerschaum lining has carbon cake buildup and the rim shows lava flow which has formed a caked layer on the top of the Meer lining and has flowed over the rim briar. I will not know the condition of the Meer until I carefully remove the cake in the chamber. Meerschaum, a stone, needs no cake to protect it like briar pipes. When carbon cake forms on a Meerschaum surface, it can crack and damage the Meer as the carbon heats up and expands and contracts. The stem has little oxidation as I can see. The larger issue is the bit. The former steward of this Zulu was a clincher and there are significant bites on the top of the bit and the lower lip of the button is compressed and the bit suffers from a hole. That was probably when the Zulu was retired. The bit needs some TLC.
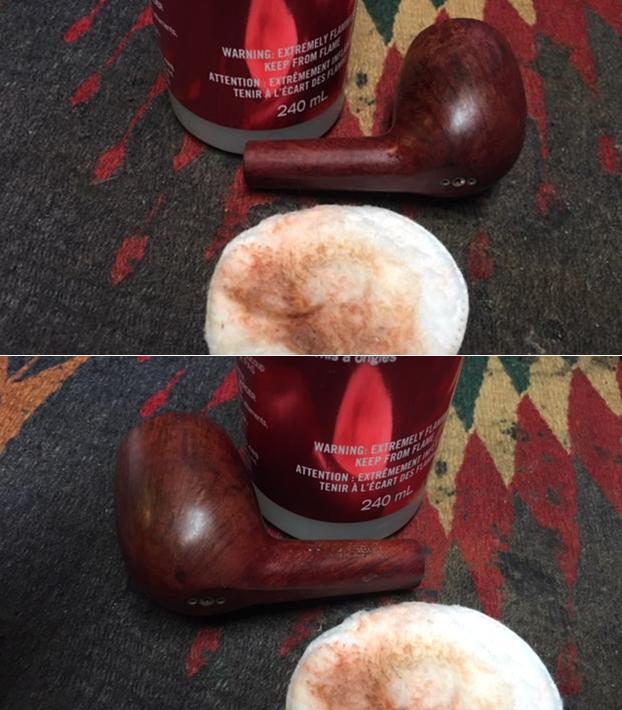
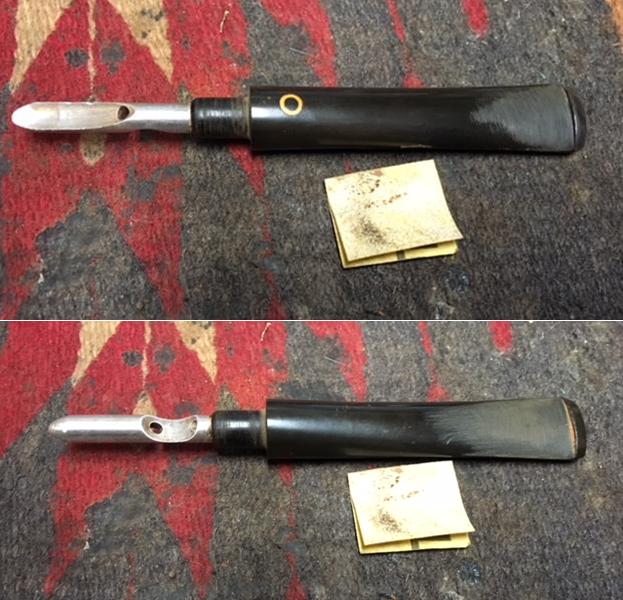
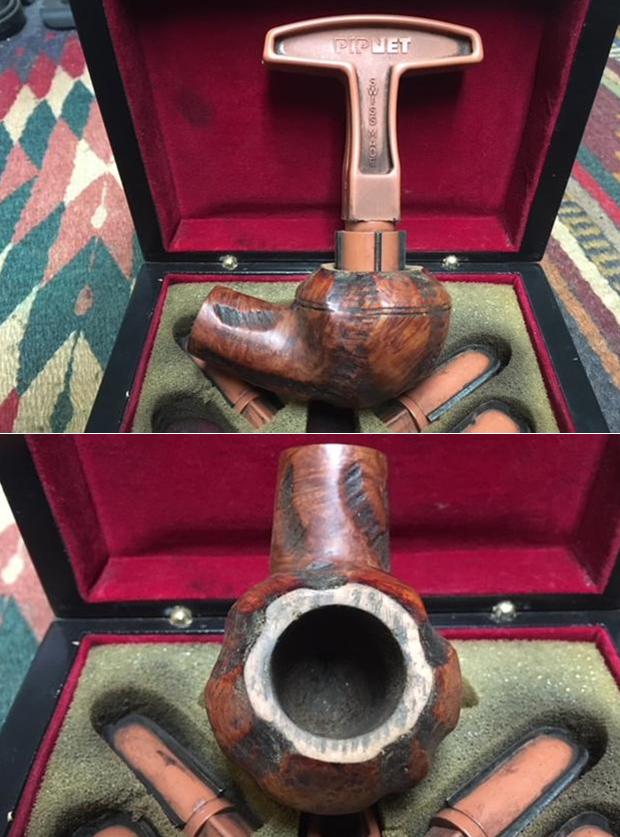
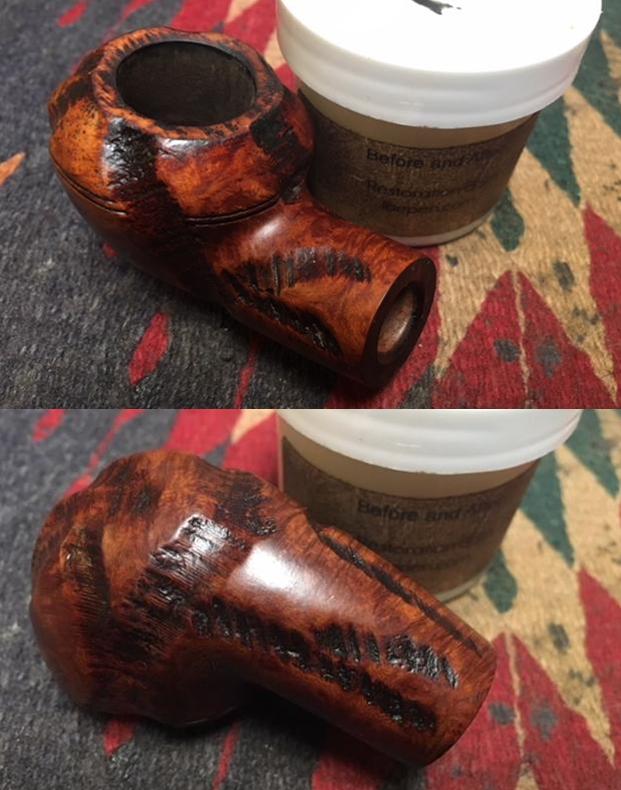
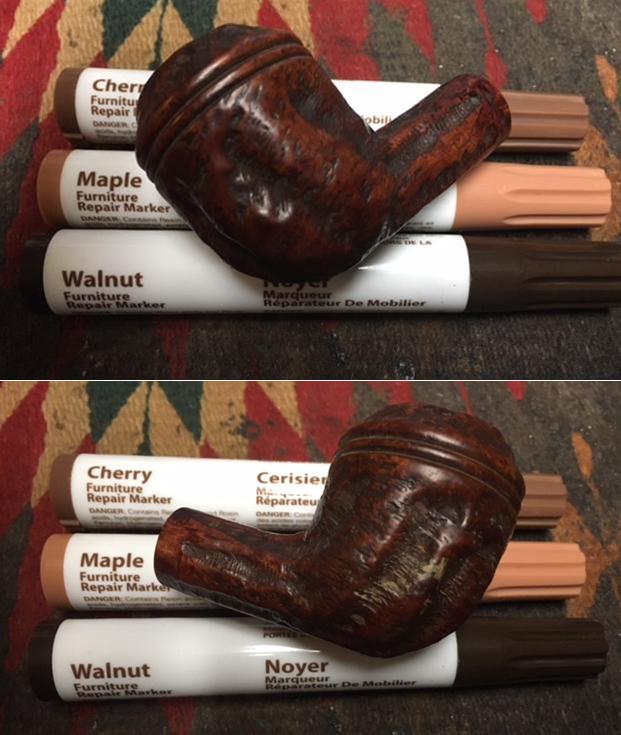
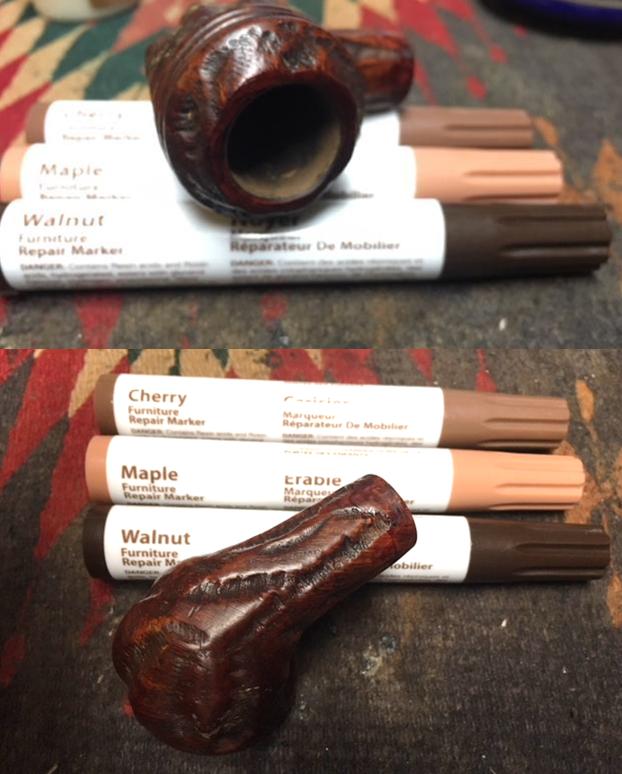
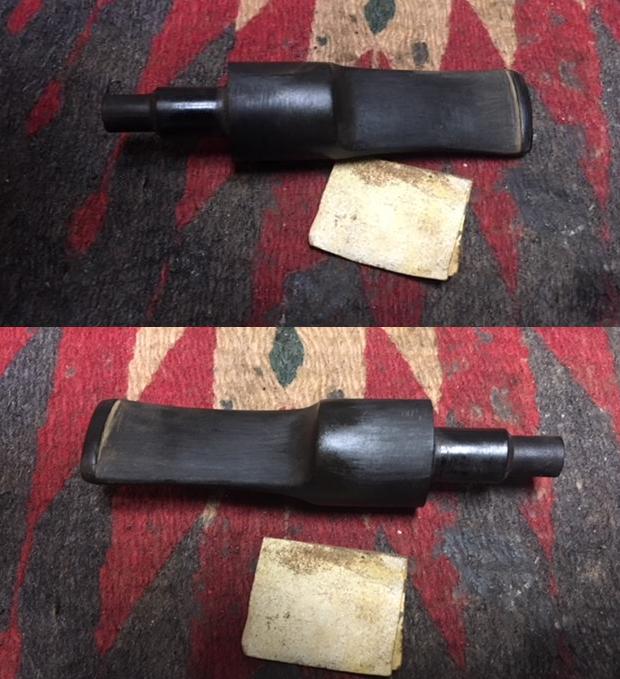
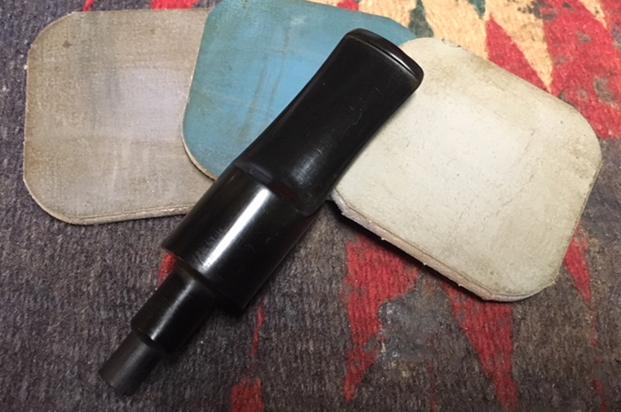
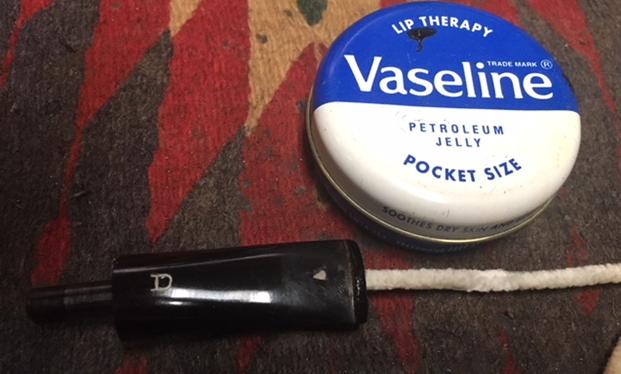
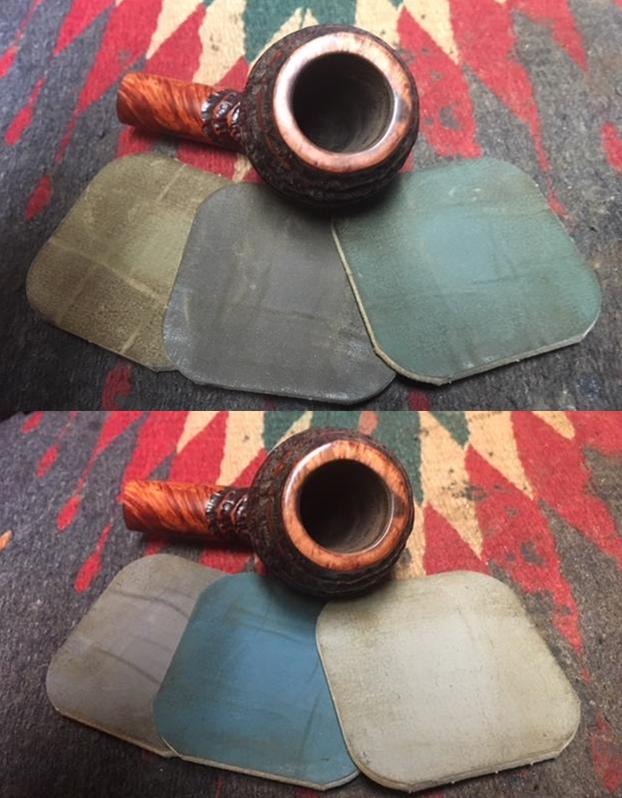
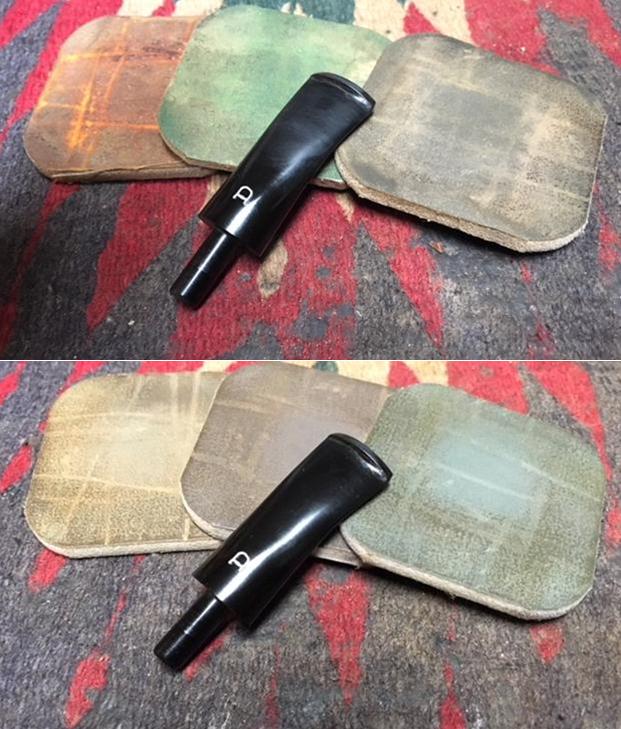
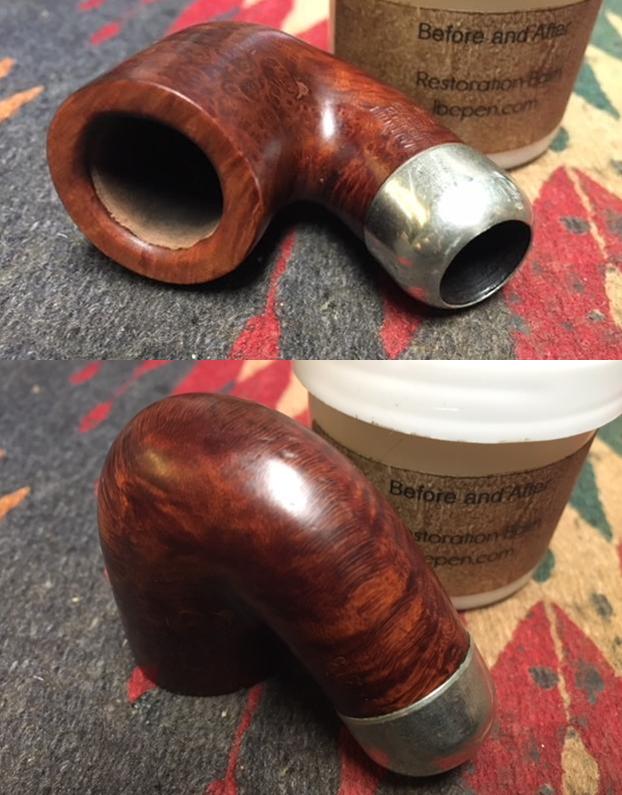
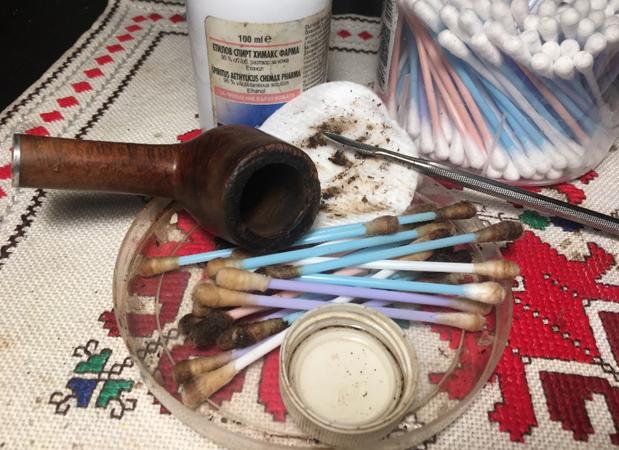
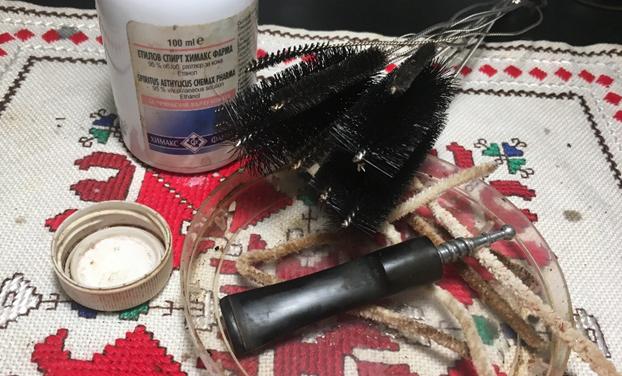
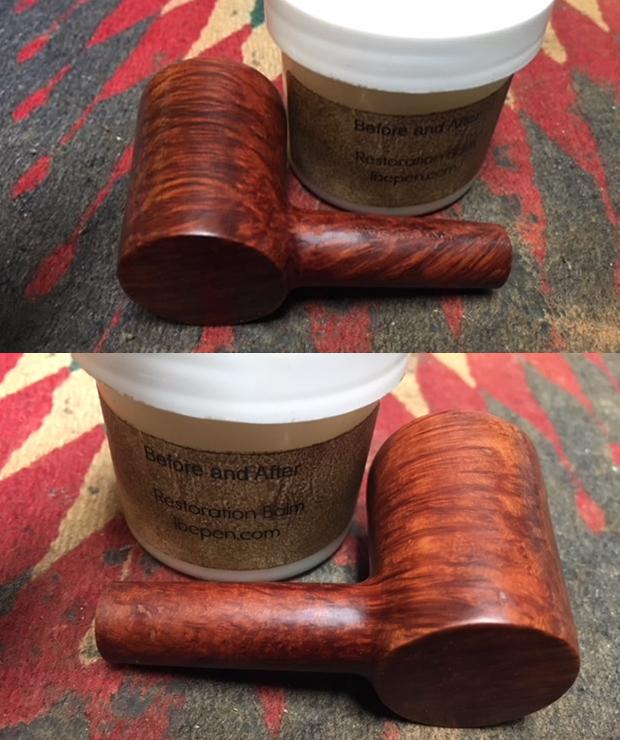
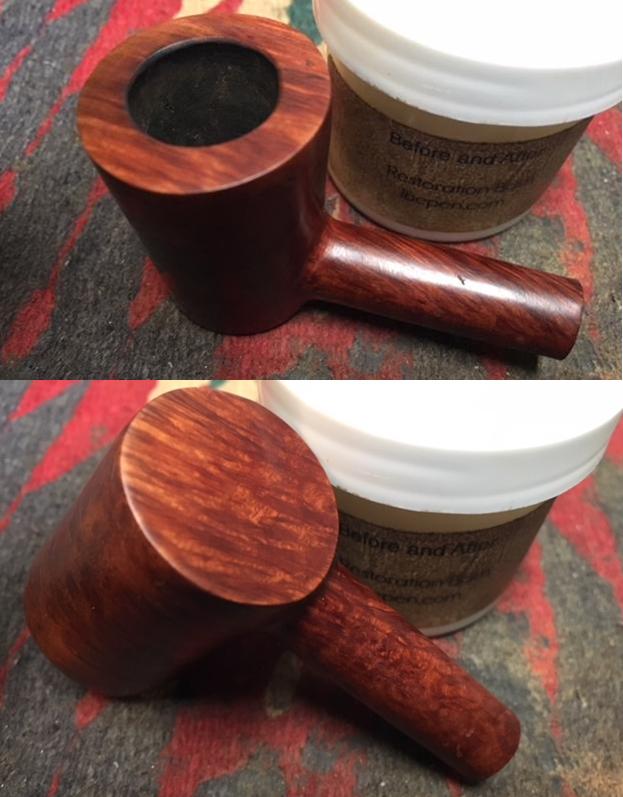
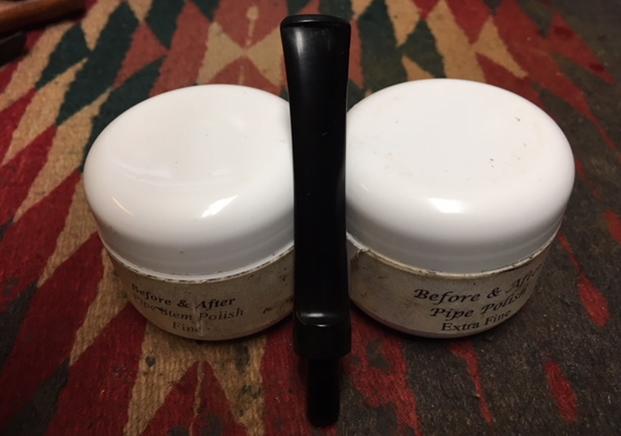
Beginning the restoration, I will deal with oxidation in the stem. I decided to use the Before and After Hard Rubber Oxidizer that Steve ran through the paces several months ago to test the product put out at www.iberen.com. Steve published his findings on Rebornpipes (A Review – Before & After Pipe Stem Deoxidizer and Fine and Extra Fine Polishes) which is very helpful. So, I picked up some of the Before & After product while I was in the US and decided to try it. As Steve discovered in his review, its important to read the directions 😊! I did, and Steve’s input was beneficial. One of the things I learned was that the Deoxidizer isn’t aggressive toward stem stampings and marks – that is a big plus. The other, which is impacting how I restore pipes, is that the solution is geared to deoxidize several stems in one soaking. My usual practice is one pipe at a time – I’m not thinking too far ahead what’s next or working on more than one pipe at a time. So, with that in mind, I decide to move forward with a project restoring several L. J. Peretti pipes I purchased in a Lot from a seller near Boston – this Lot contained several Oom Paul’s which will be sold to benefit the Daughters of Bulgaria, helping women, girls (and their children) who have been trafficked and sexually exploited. So, I fish those pipes out of the ‘Help Me!’ basket and clean the internals of each Oom Paul stem with pipe cleaners and a long bristle brush dipped in Isopropyl alcohol 95% before putting them into the Before & After Deoxidizer.
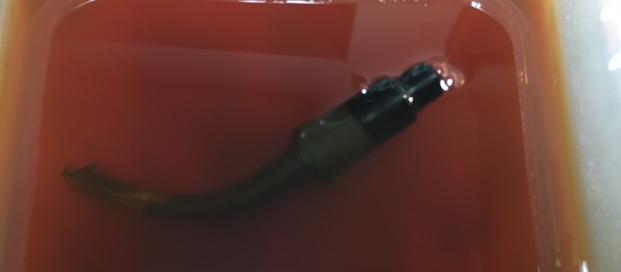
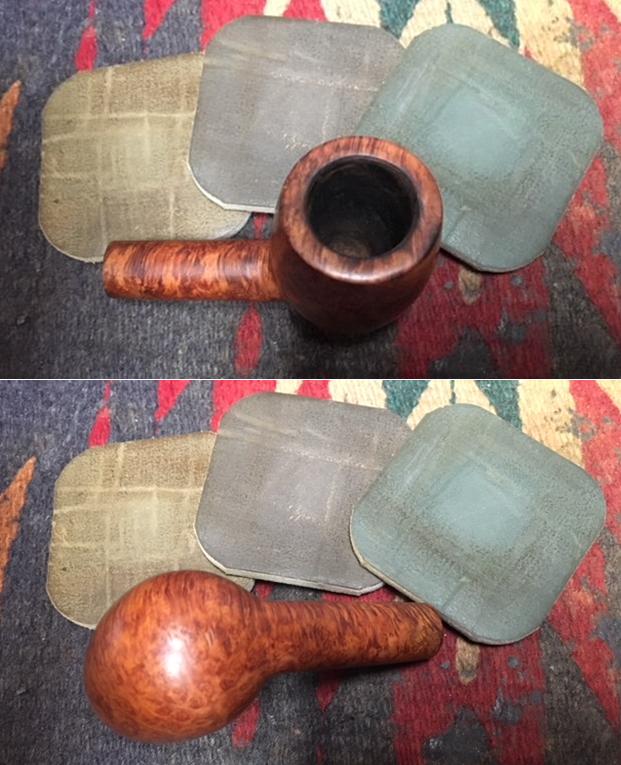
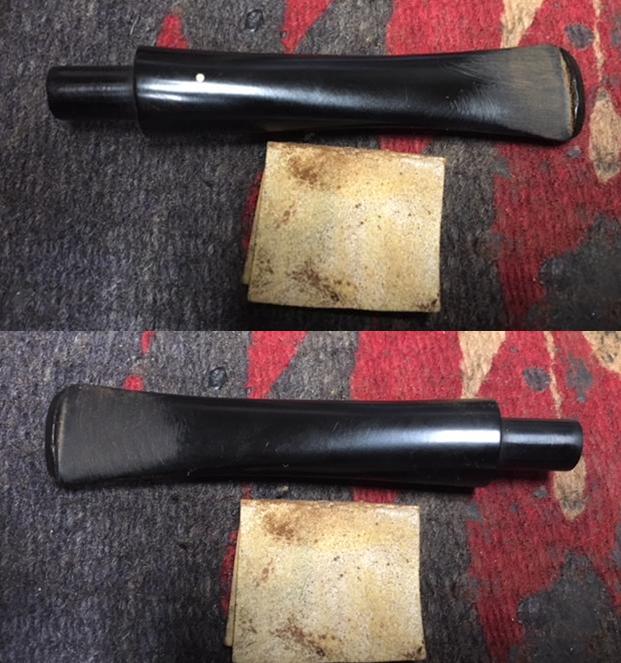
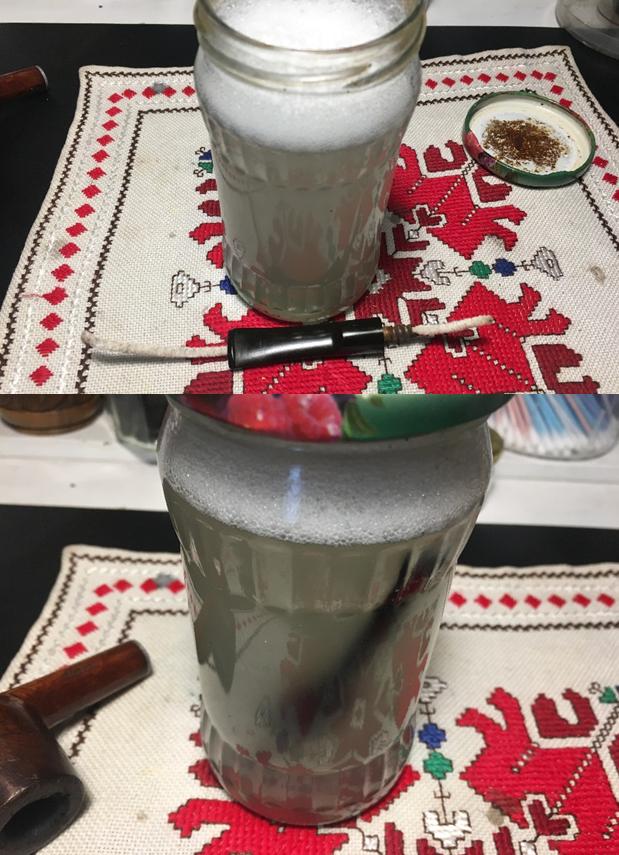
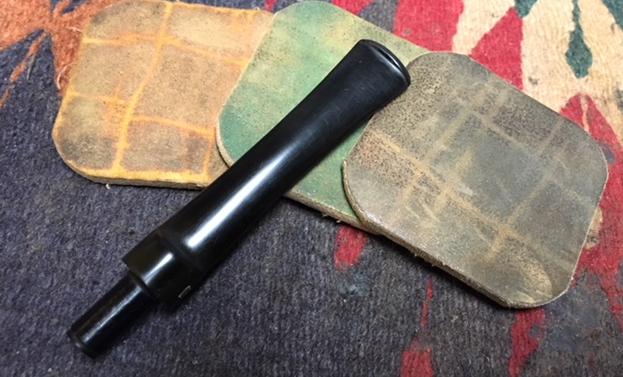
 I pour the Before & After Deoxidizer in a plastic container that can be sealed up and airtight. The liquid reminds me of slime products out there for people’s morbid entertainment! It has an odor too, that’s not too pleasant.
 I lay out the full Lot of L. J. Peretti boys that are destined for the worktable eventually! I’m choosing the 4 Oom Paul’s to serve as both an experiment to test the new deoxidizer product which is more beneficial to soak several stems at once and to give me a jump start for the next restoration projects! I pull 4 of the Perretti Oom Paul stems and clean the internals. Then I take a picture to show the ‘before’ condition. Along with the Ariston Zulu’s stem, which has minor oxidation, 2 of the 4 Perretti stems, I would say also have minor oxidation. The other 2, one stamped with the Peretti “P”, are heavily oxidized. I slip the stems into the slime goo, careful not to mix the order of the stems so they make it back to the correct Oom Pauls! Pictues of the Peretti Lot and the deoxidation in process:


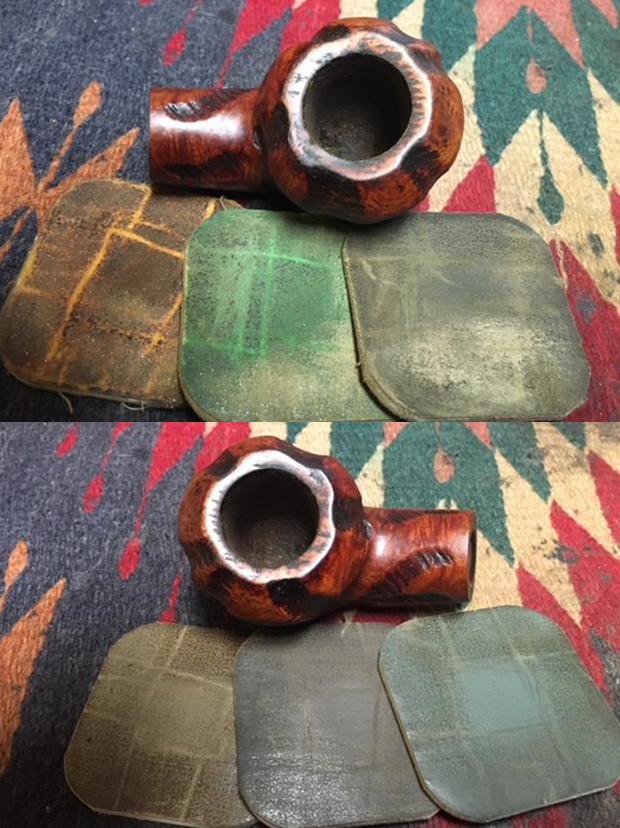
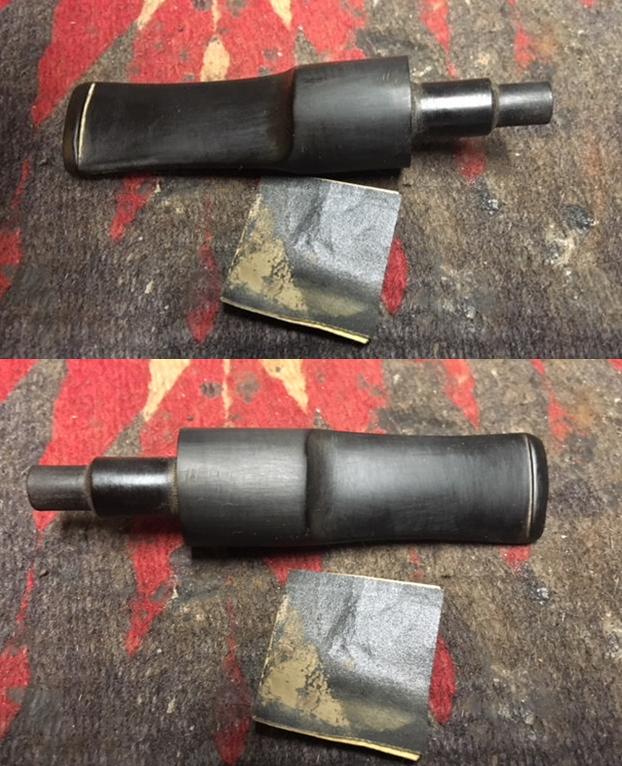
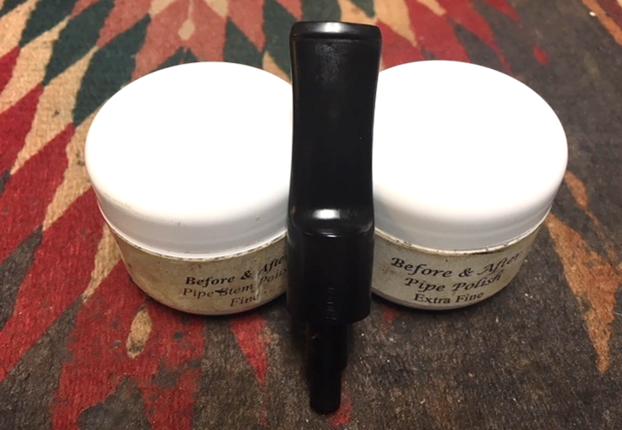
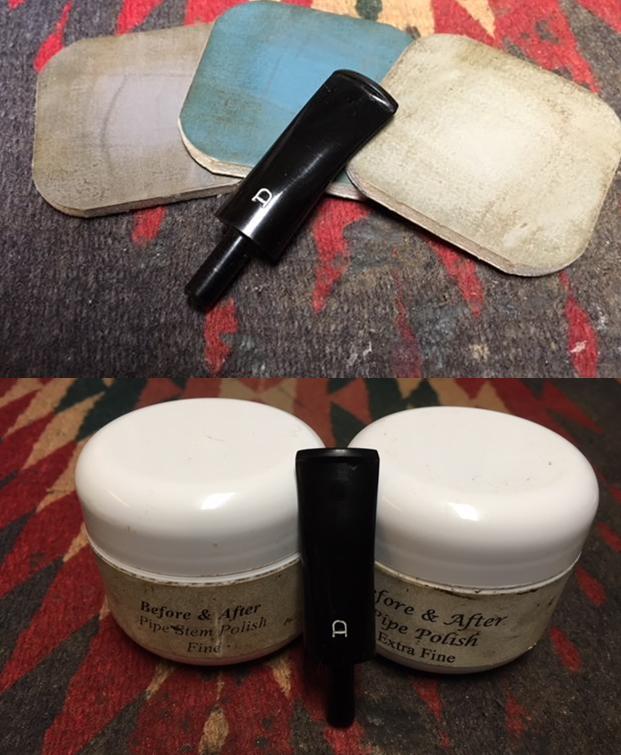
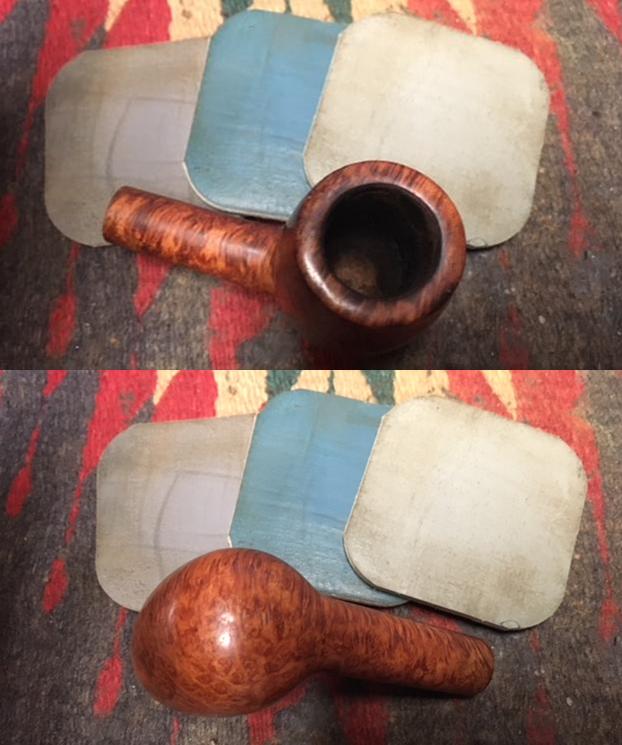
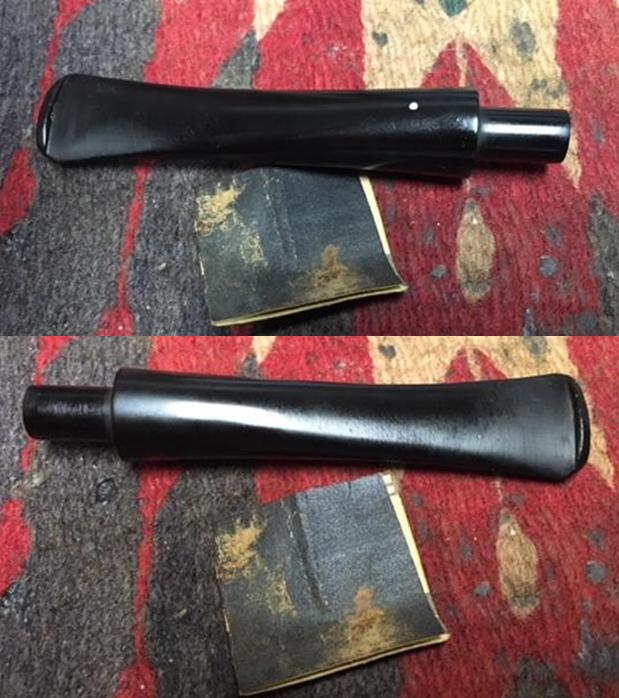
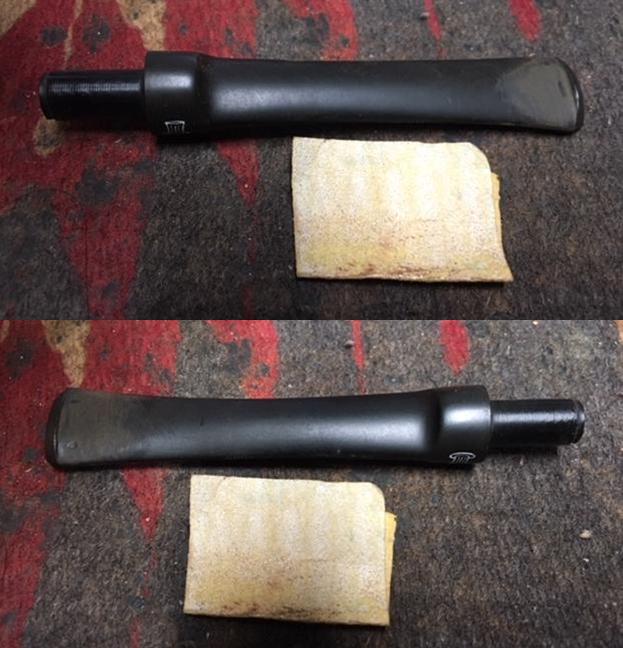
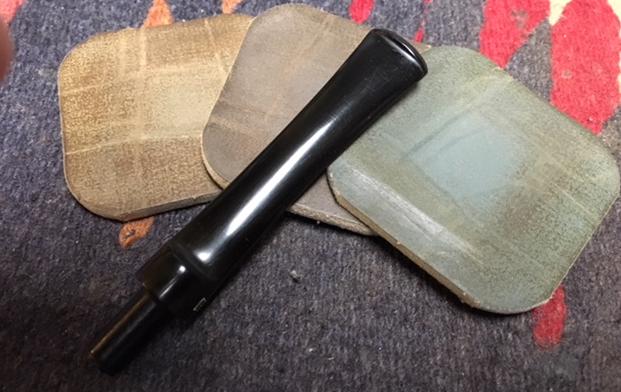
 The instructions indicate that even for the most oxidized stems, the process takes less time than with my usual OxiClean bath, but I leave them in the solution overnight because its late and I need some sleep! The next morning, I take one stem at a time, hooking it with a tooth pick and allowing the goo to run off the stem as much as possible to save the product. I finally found Bulgaria’s version of mineral oil to use to clean off the goo – staying away from water. A pharmacist friend here looked it up and she provided me with a bottle of Paraffin Light Liquid – used in Bulgaria for ingestion for certain lower abdominal blockages 😊. With a cotton pad I use paraffin oil to remove the deoxidizer. With each stem I follow the same procedure by scrubbing off the oxidized layer with the cotton pad to then buffing with the cotton pad. Then with each, I apply Before & After Polish, first Fine and Extra Fine, by putting a dab on my finger and working the polish in, which has a gritty oily feel (Fine) and then smoother (Extra Fine). With each application I work it in then, with cotton pad, I wipe the polish off but buffing at the same time. I have to say, I’m impressed. The more oxidized of the Peretti stems came out looking good, apart from one oxidation shadow in the first stem to the left. But overall, the vulcanite appears darker, blacker, rejuvenated. I take the ‘after’ pictures and I think this product is working as advertised.
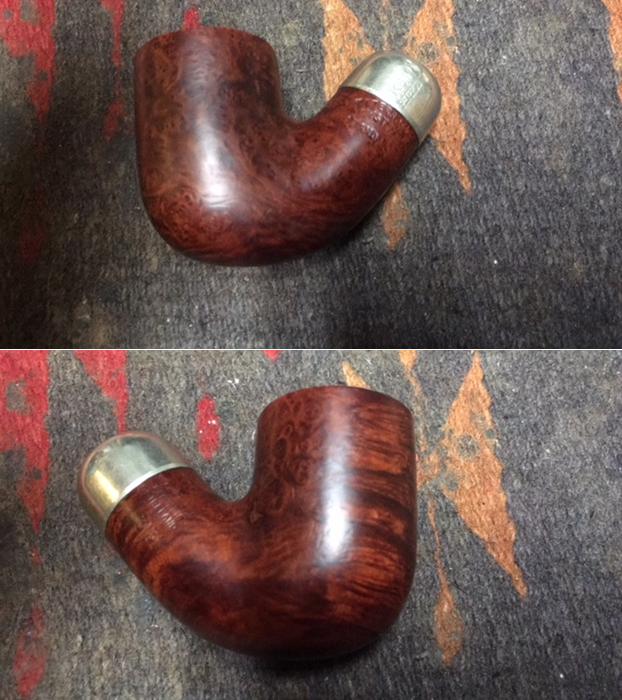
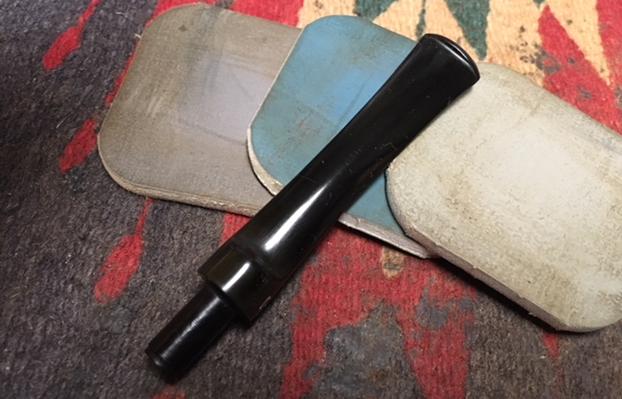
 Back to the Ariston Rustic Zulu, here are shots of the stem after the Deoxidizer and then after each Before & After polish regimen. From above’s ‘P’ Peretti marked stem and the ‘R’ gold rondel mark in the Zulu, it also appears that the B&A Deoxidizer is not harmful as reported and acted to polish and bring out the stamps.
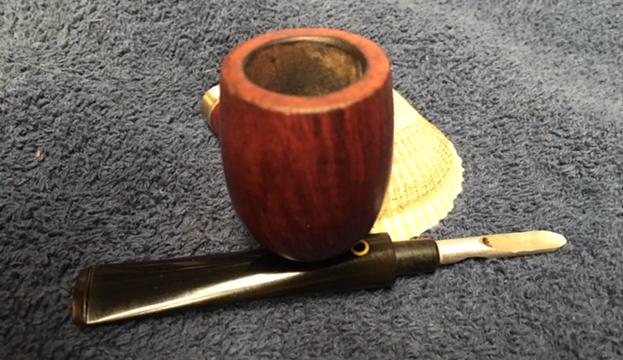
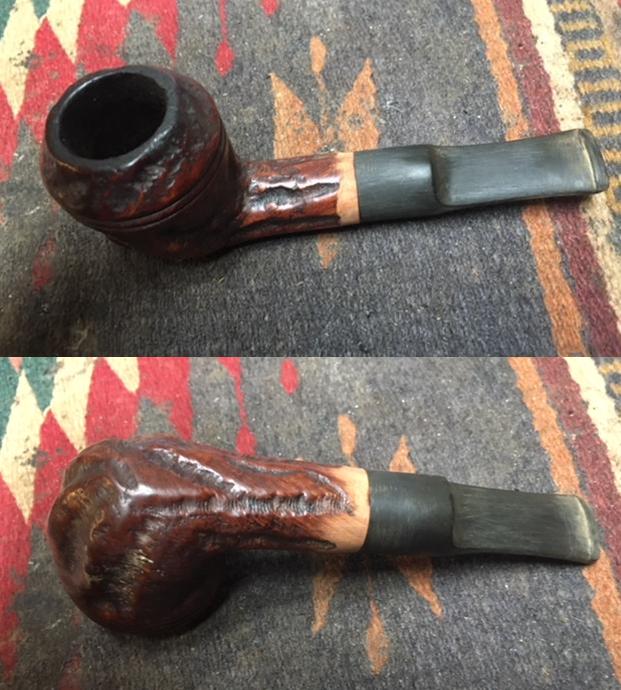
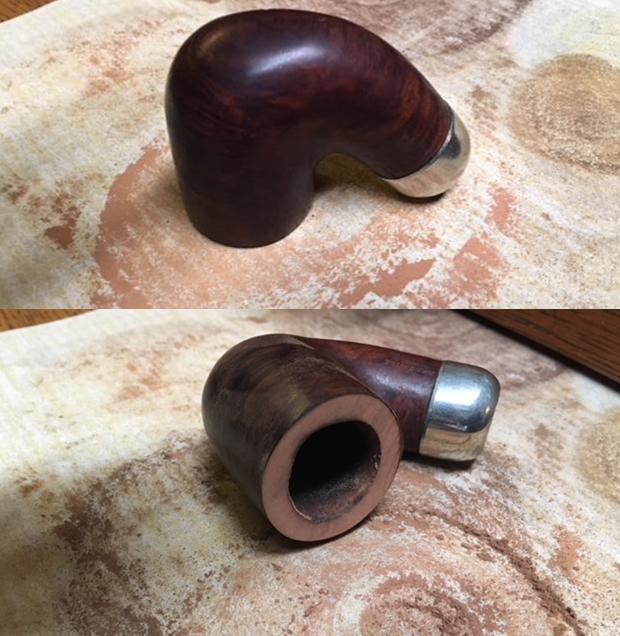
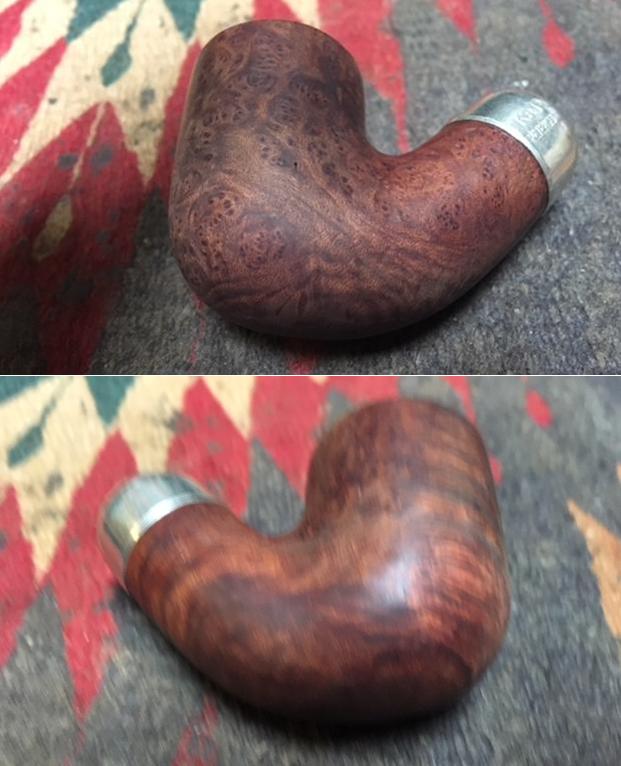
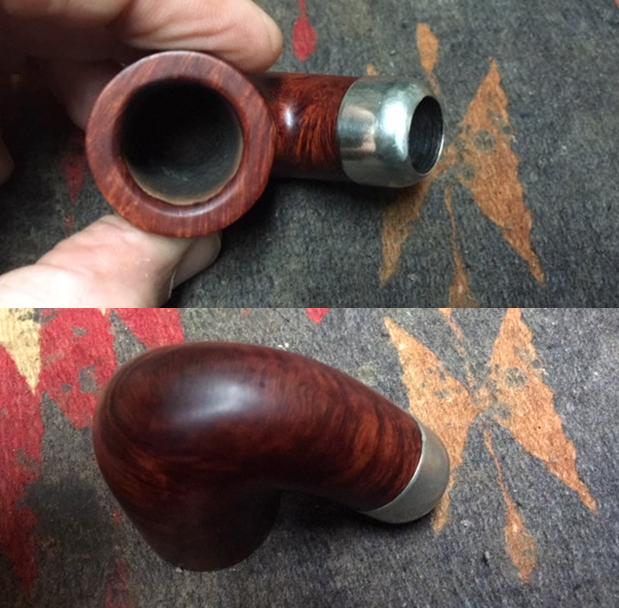
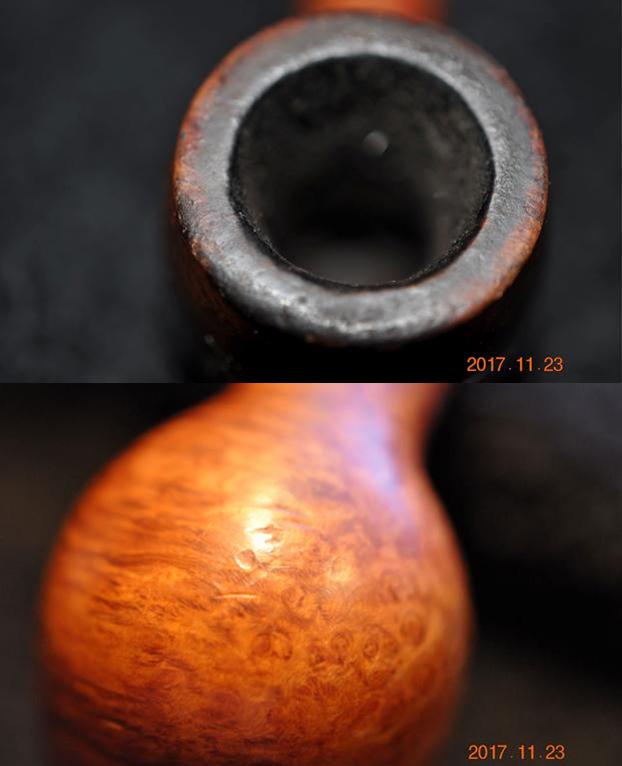
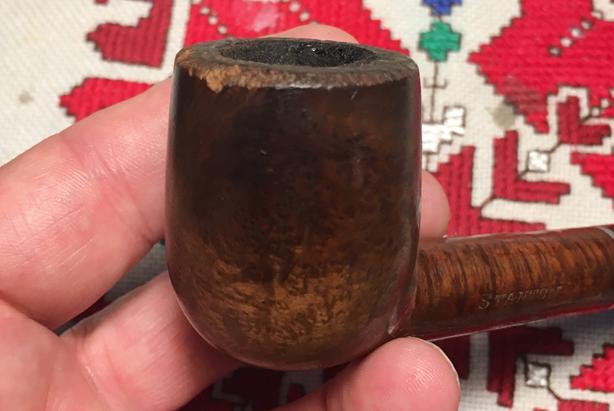
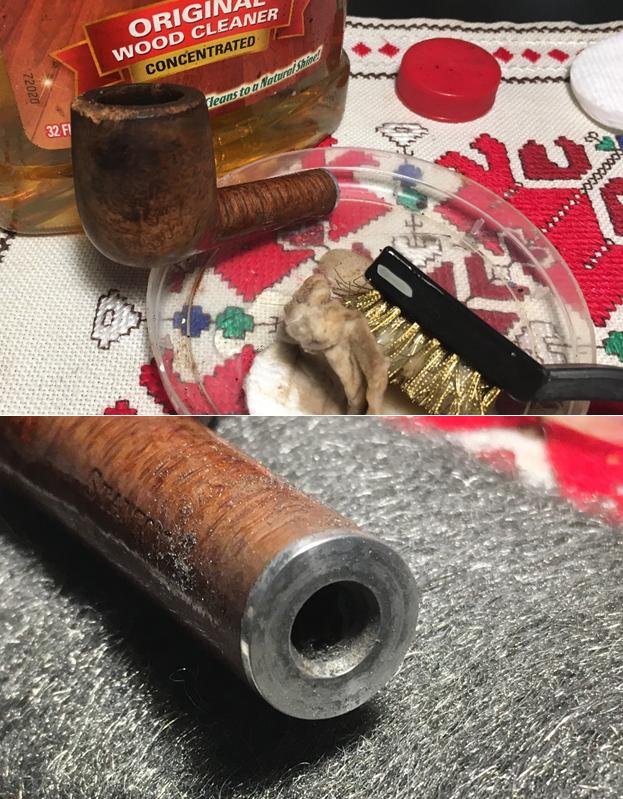
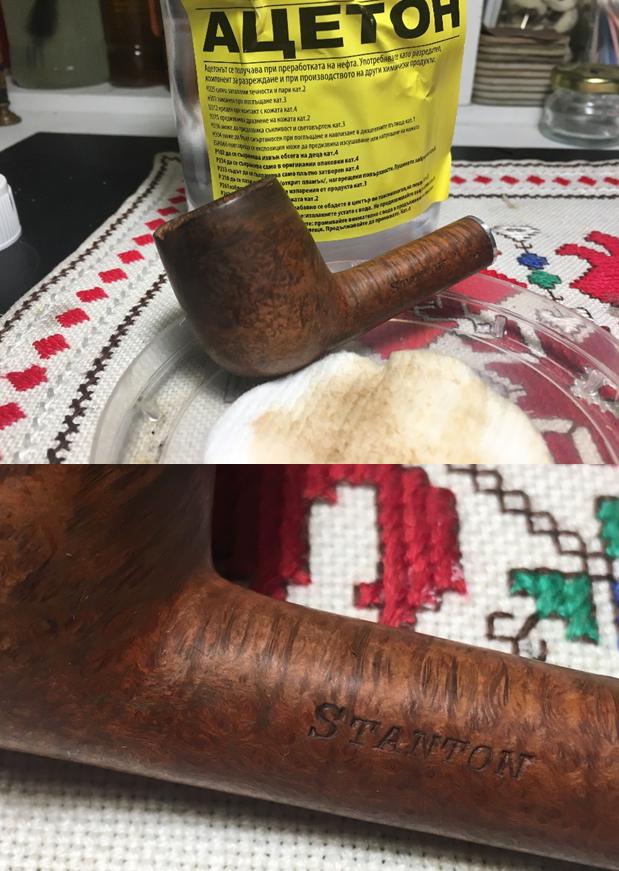
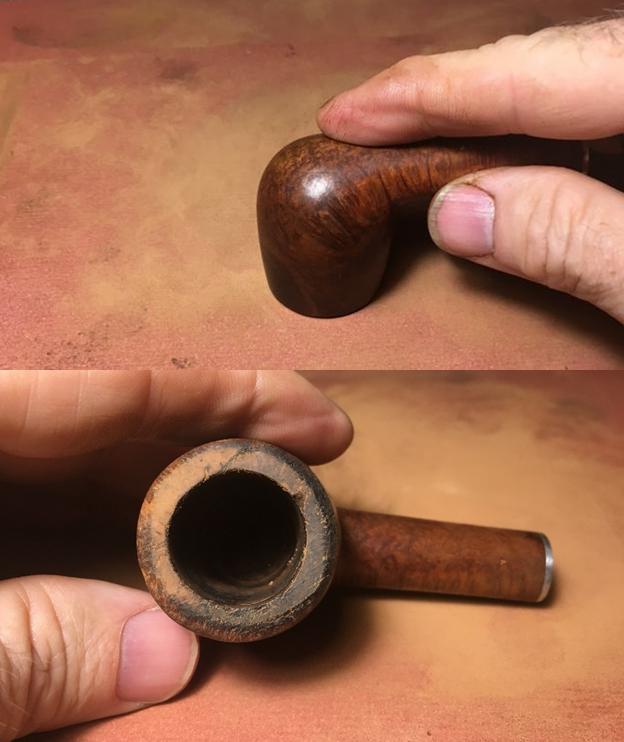
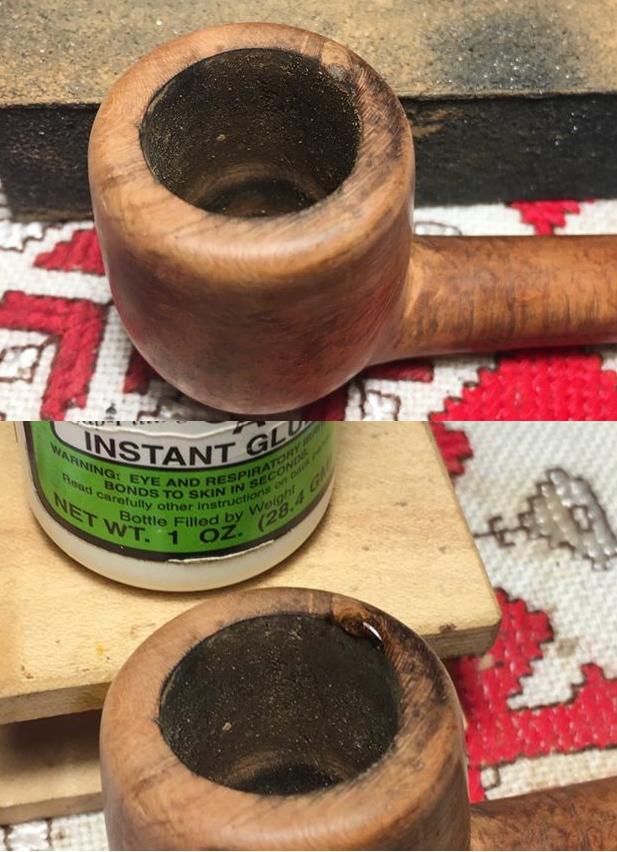
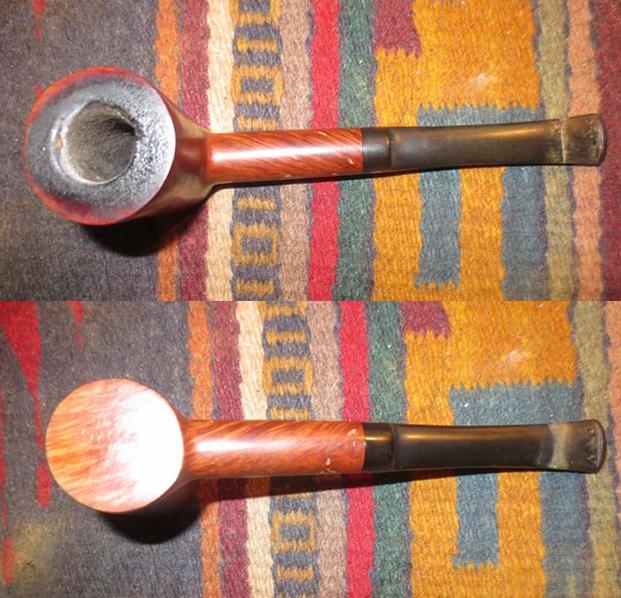
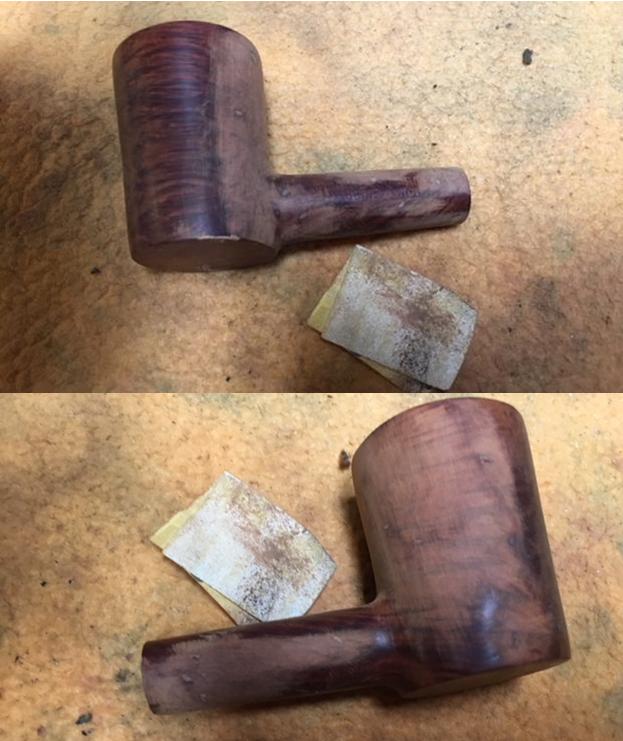
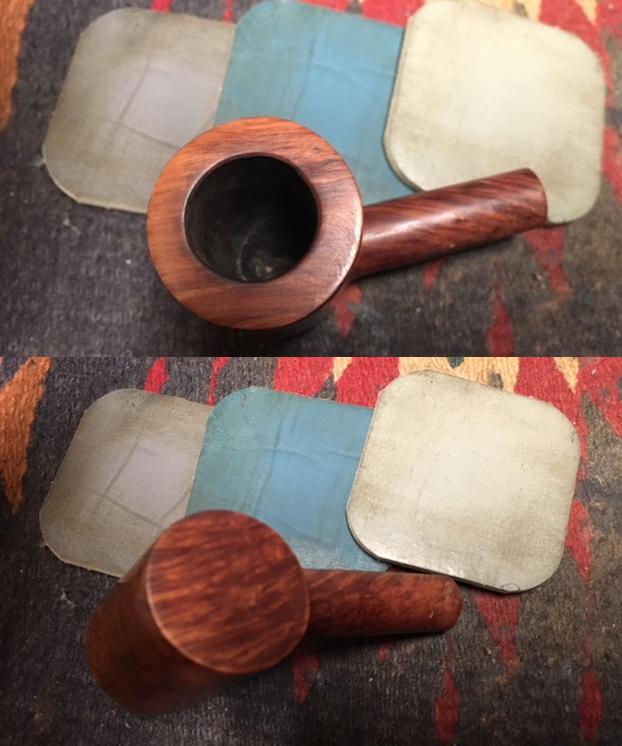
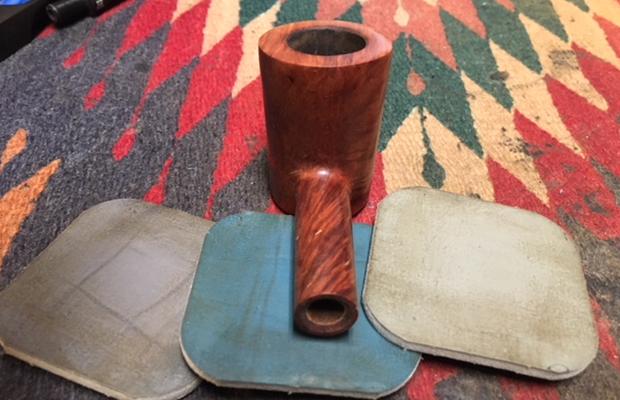
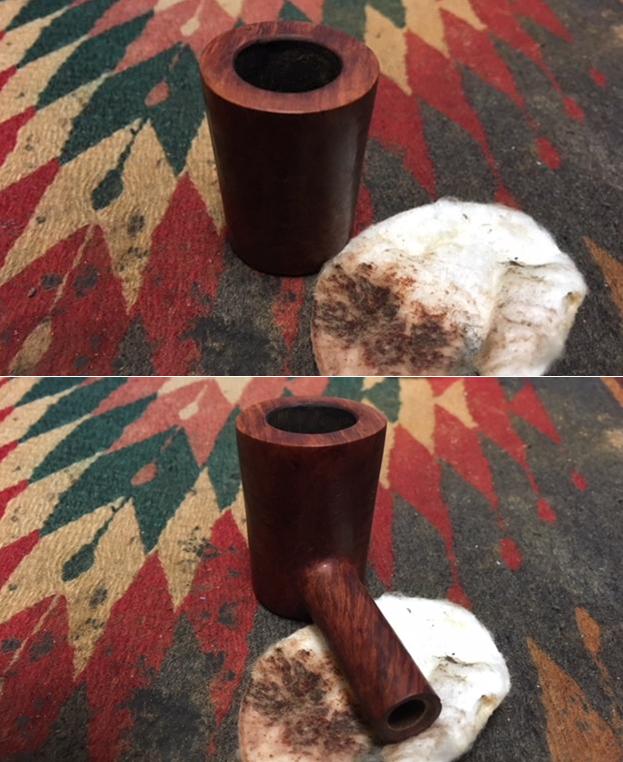
 I put stems aside for the time and turn to the croc skin rustification, rim and the Meerschaum lined chamber and take a closer look. Two-thirds of the rim is hidden by a thick lava flow, but the forward third, shows the briar rim. I like the lighter smooth briar that provides the border between the Meer and the external surface. When cleaned up, that will look good. Before working on the Meerschaum chamber, I want to clean the rim and get a better look at the condition of the Meerschaum’s topside. While I’m doing this, I will clean the Zulu’s surface. First, using undiluted Murphy’s Oil Soap, I use cotton pads and a bristled tooth brush to do the scrubbing in the nooks and crannies. I also lightly utilize a brass brush to work on the rim. I then rinse the Murphy’s with cool tap water, careful to keep water out of the internals. The croc skin stummel’s surface is in good shape dirt-wise. I see nice attractive, minute reddish flecks on the peaks of the black rustification which brings out some contrast to the croc texture. The cleaning did not make a dent on the hard, caked lava over the rim. The pictures show the progress.

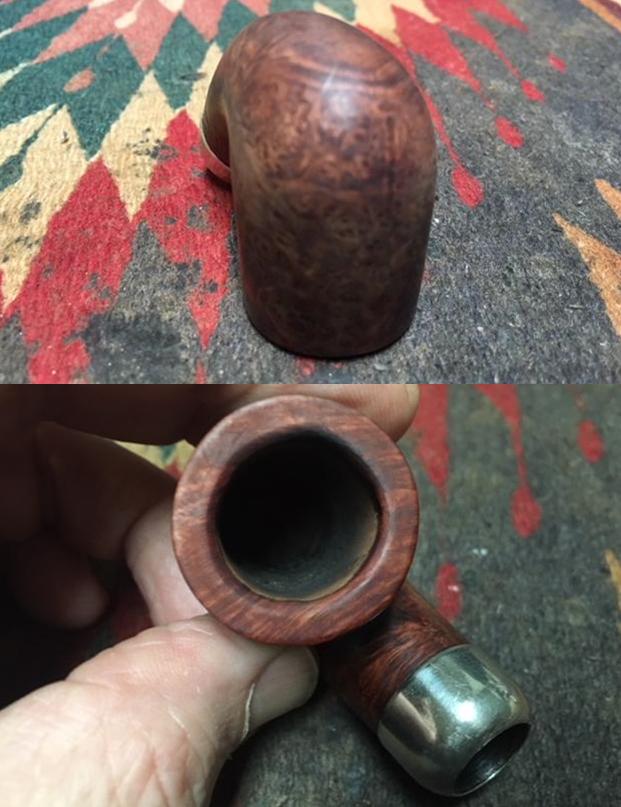
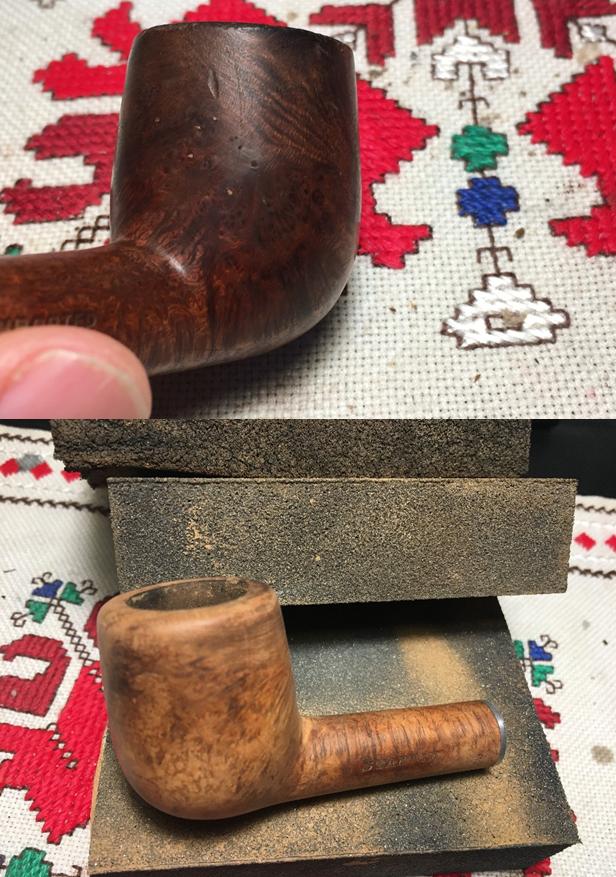
 To clean the rim and reestablish crisp lines, I take out the topping board, which for me is a small chopping board with a piece of 240 grade sanding paper on top. I lightly top the Zulu’s rim first with 240 grade paper then 600 to smooth things up. It didn’t take much to remove the lava build-up and to reintroduce the crisp lines – the rim will look great contrasted to the black croc rustification.
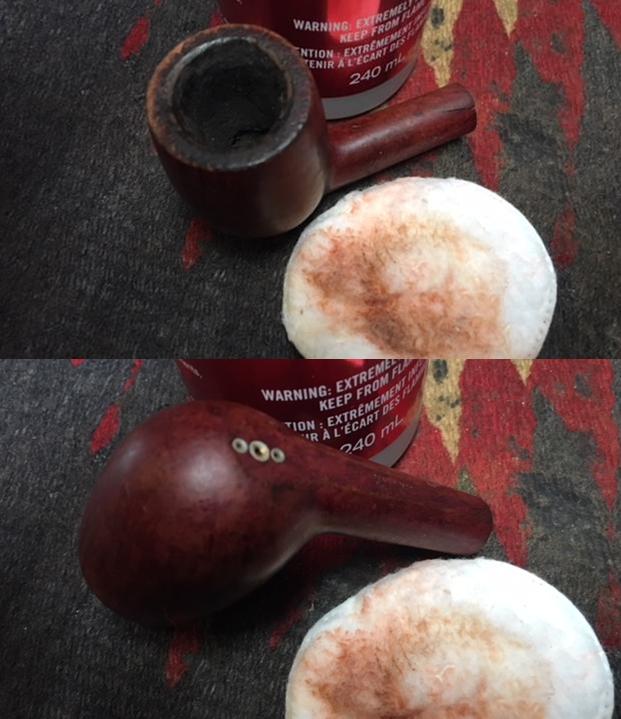
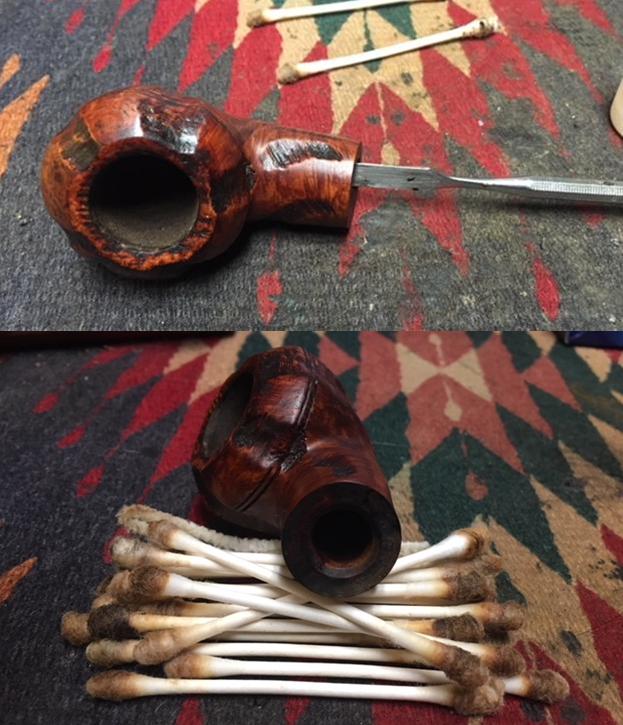
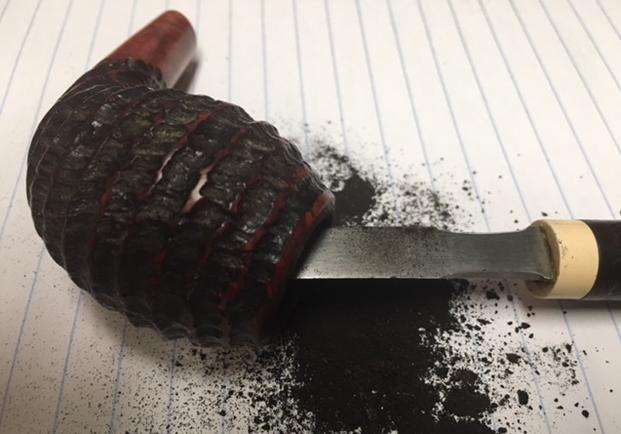
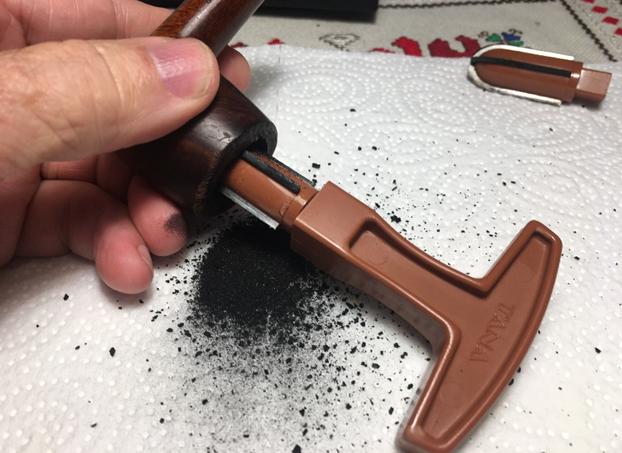
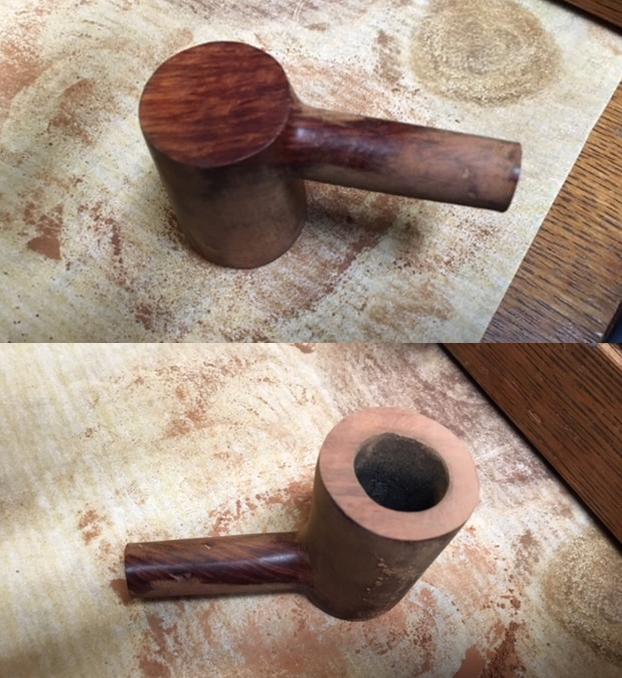
 Now to clean the fire chamber. Working on the Meerschaum requires care and most of all, patience. I’ll first start on the chamber proper to remove the thickest carbon cake buildup. I use my Savinelli Fitsall pipe tool to scrape the cake from the Meer gently and slowly! The trick is to know when the Savinelli Fitsall starts meeting the Meer surface. The sound and feel of the carbon cake a crunchiness. When the crunch stops, and the feel is more solid on the surface, this lets me know that I’m on the Meerschaum.
  When I remove what I can with the Savinelli Fitsall, I then wrap a piece of 240 grit paper around a dowel rod and sand the Meer surface – removing more of the carbon from the Meerschaum surface. With the carbon cake removed, I can inspect the Meer surface revealing some minor perforations, but no threatening cracks, that I see!
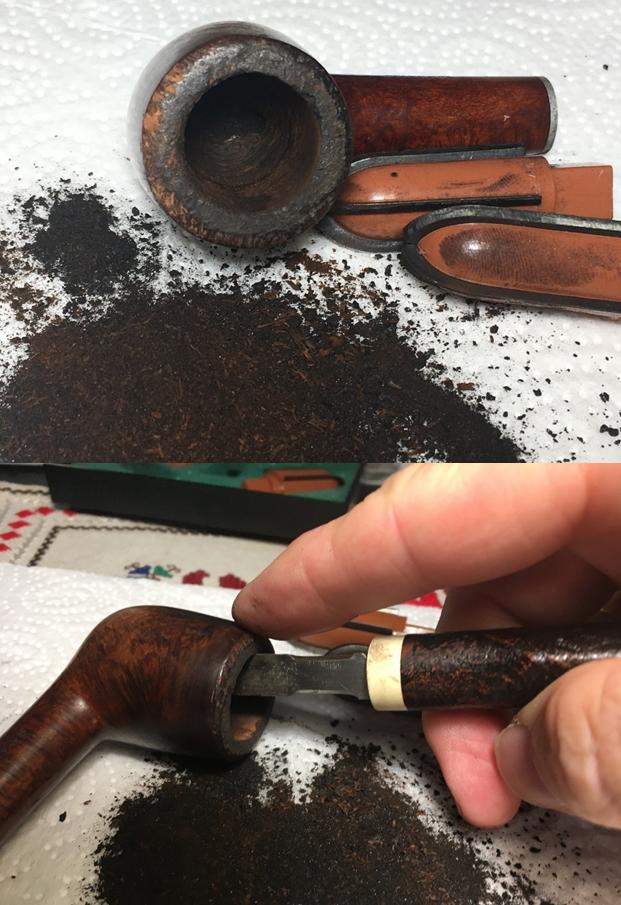
 Now, to remove the lava from the beveled top and smooth out some nicks on the Meerschaum lining, I again use a rolled piece 240 grade sanding paper. I first pinch the paper with my thumb and run it around the circumference of the Meerschaum bevel. To get more of an edge in contact with the bevel, I then wrap the paper around the dowel rod and work methodically around the rim to remove the cake and scratches. After the 240 grit paper, I switch to 600 and repeat the movement around the rim. During this process, the sanding of the Meer bevel causes a slight rounding of the rim’s briar in contact with the Meer. I take the stummel back to the topping block and lightly top again using 600 grit paper. This does the trick restoring the crisp lines of the rim which I like.

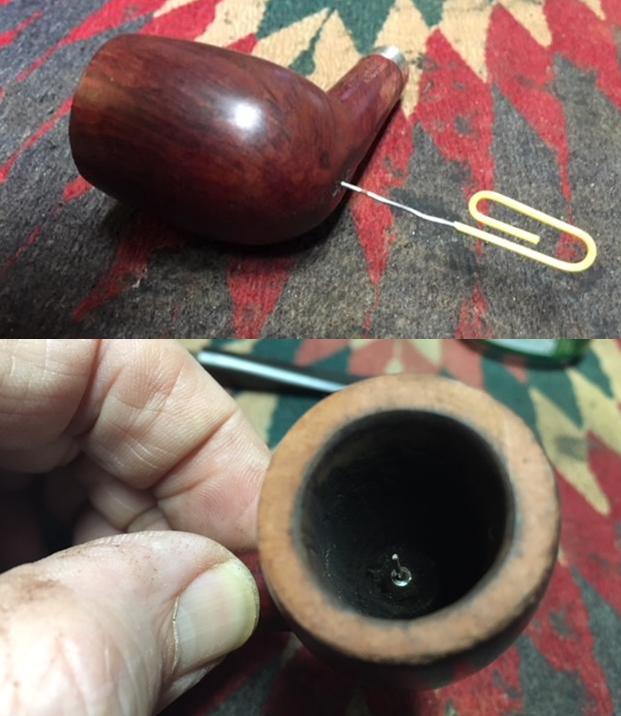
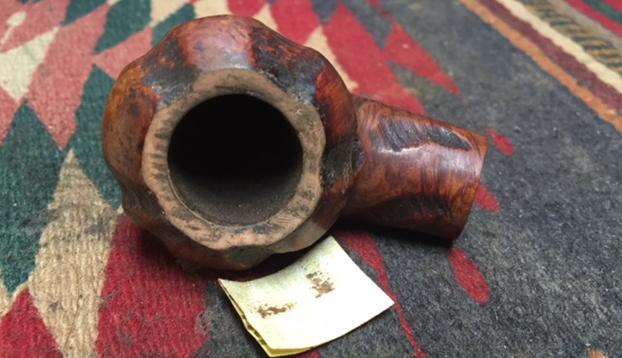
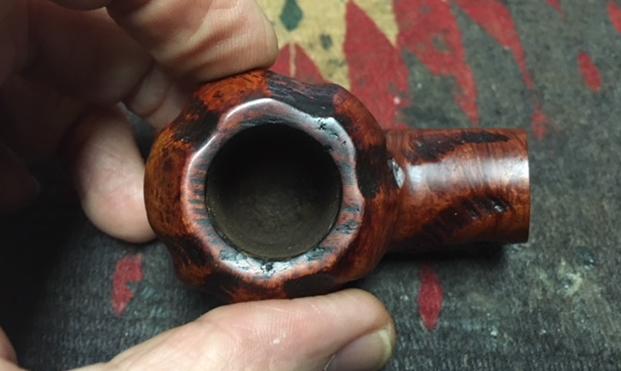
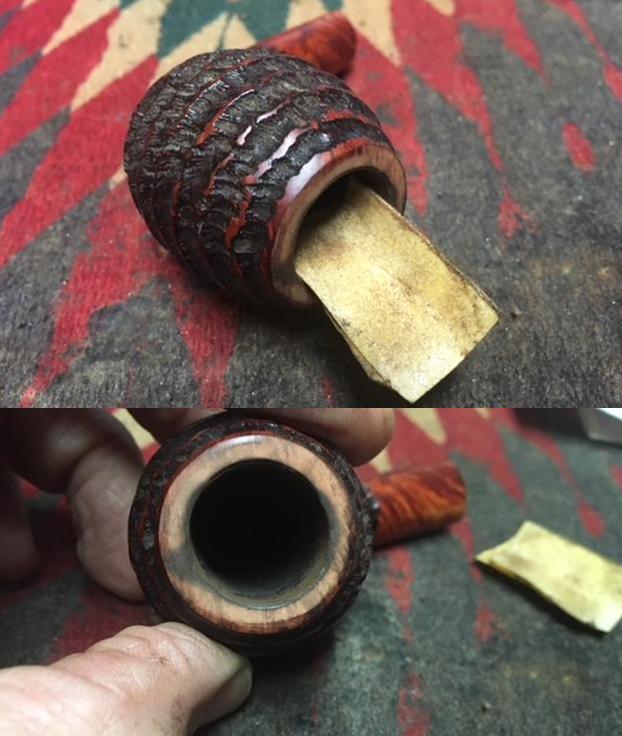
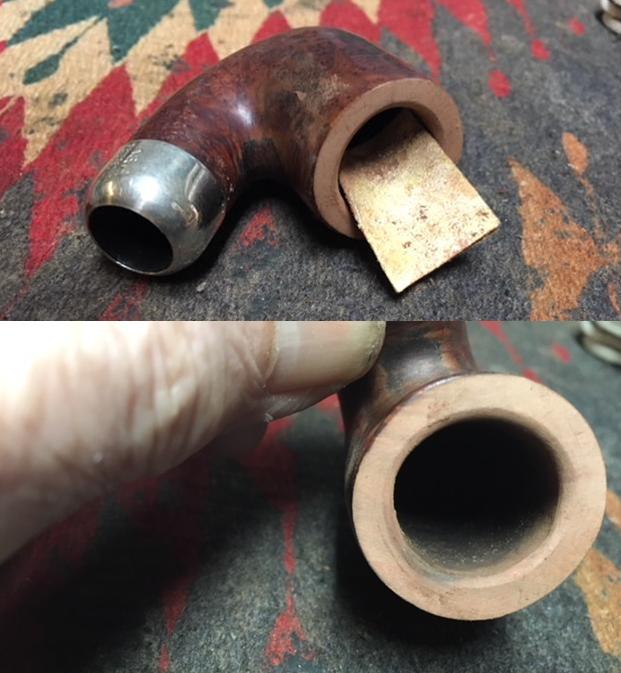
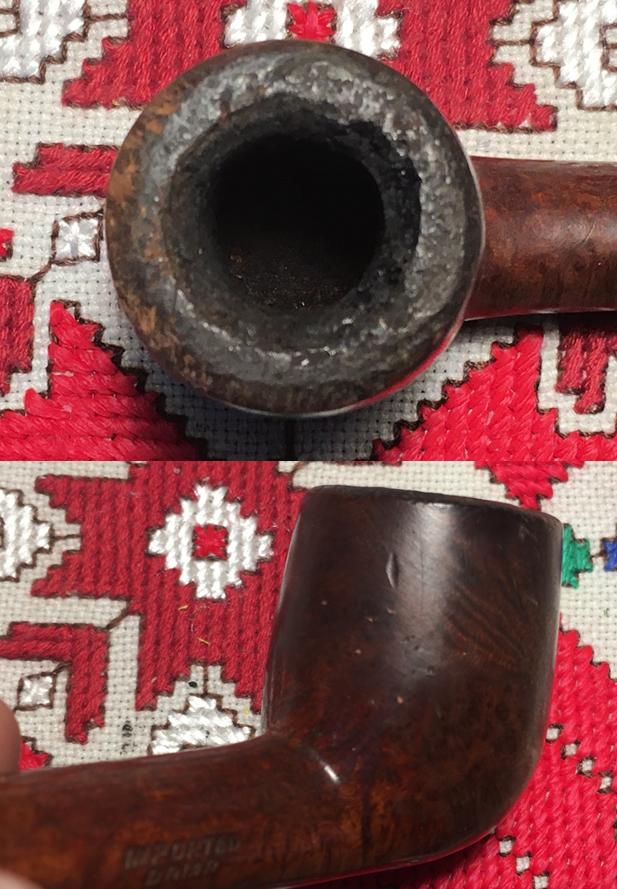
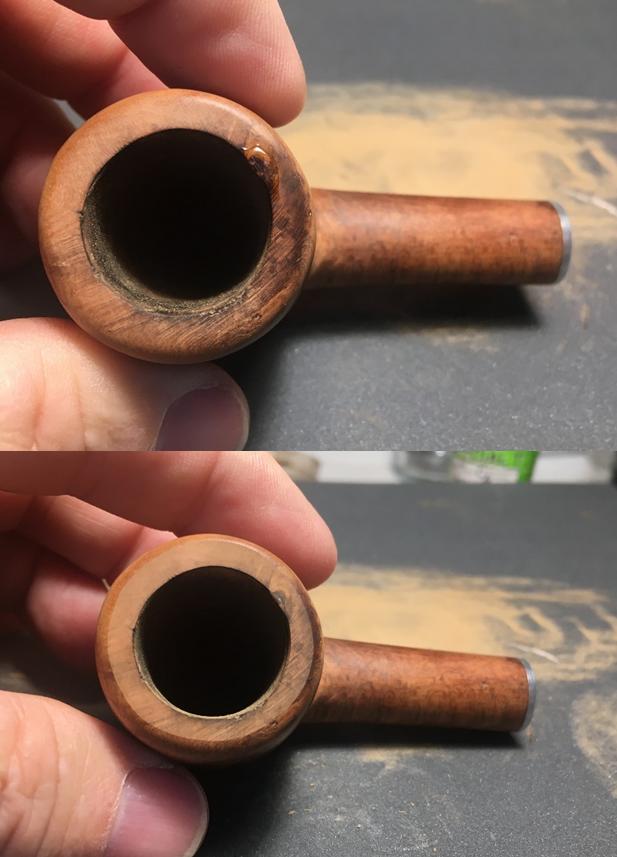
 To remove the dust in the chamber, I wet a cotton pad with alcohol and wipe the chamber, using tweezers to grip the pad as I pushed it into the chamber. That cleaned things up but also revealed a crack in the Meer lining starting at the front of the stummel and going down about halfway into the chamber – where there is some wearing in the Meer surface – a bit craggy. I take some closeups to get a better look at the culprit and try to assess the seriousness of what I’m seeing. In the second picture below, I lighten the exposure to enable seeing in the darker chamber – the crack starts at the 9PM position in that picture. Wanting to be sure of my next steps and not wanting to miss something, I decide to send the following pictures to Steve, with his vast RebornPipes restoring experience he is usually able to give some help. His response came quickly from Vancouver – 10-time zones away! His assessment agreed with mine, that the Meerschaum was most likely OK, that it seemed solid. He also agreed that I could utilize Troy’s (of Baccy Pipes) method of using chalk and egg whites to repair Meer surfaces. Steve had reposted Troy’s blog on the methodology and I had saved it as a keeper in my resource bucket. Steve’s repost can be found here: Old Time Meer Lining Repair Method On a Kaywoodie Shellcraft #5651 | Baccy Pipes
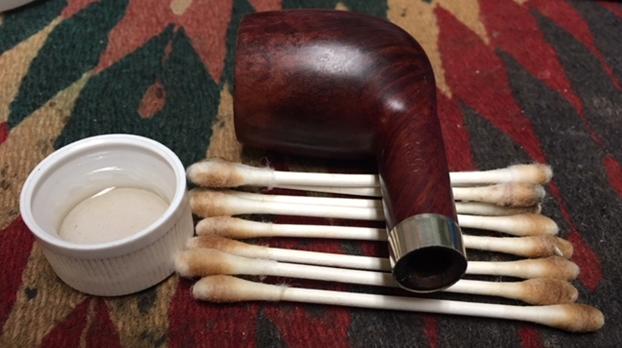
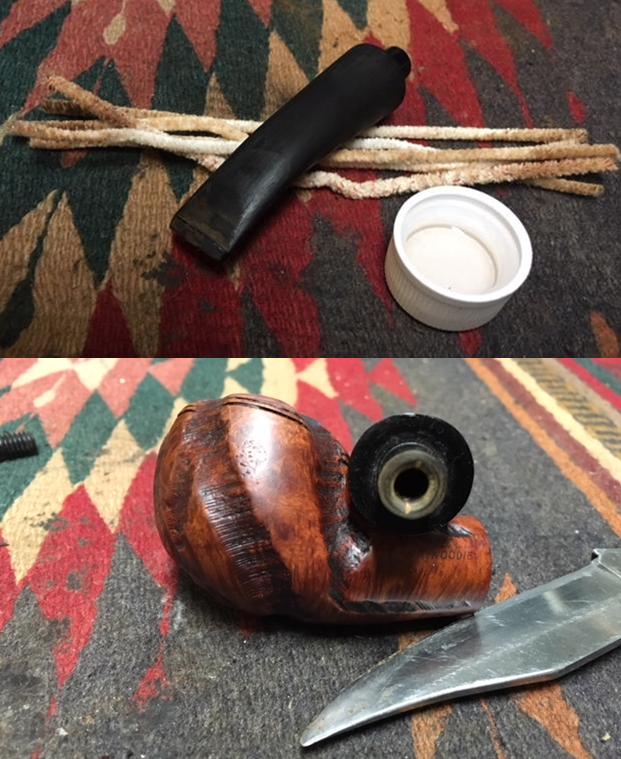
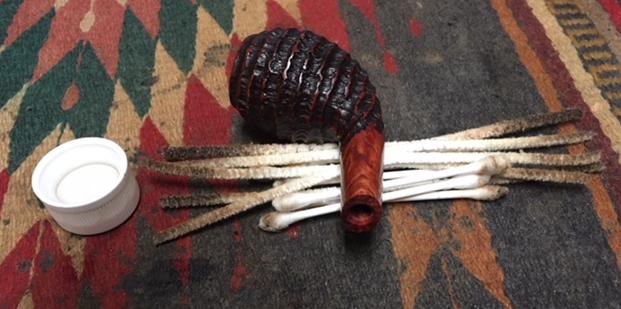
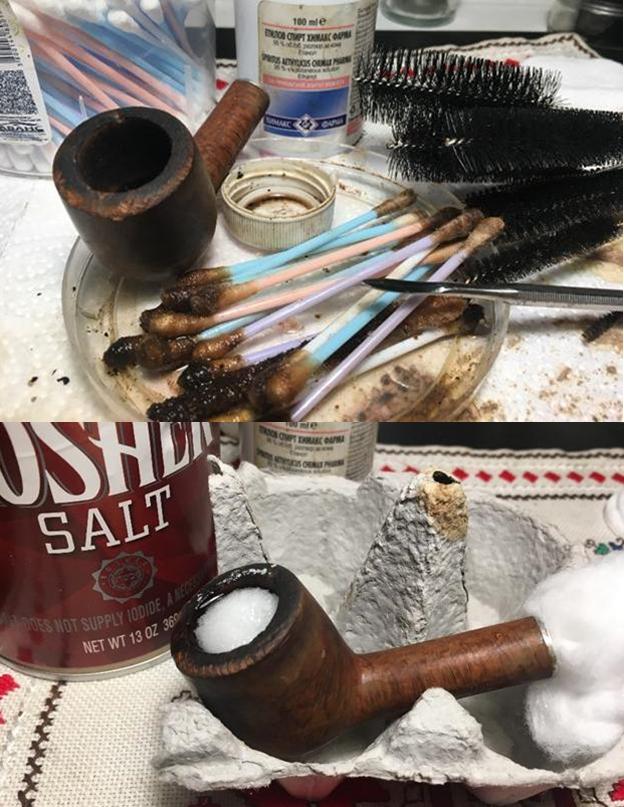
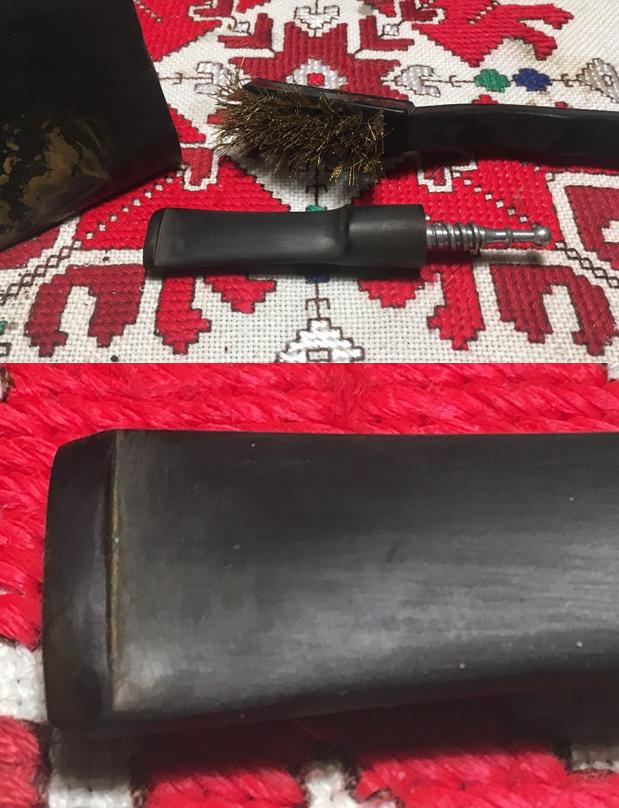
 While I’m mulling over this new challenge to restore this Ariston Rustic Zulu, and how I’m going to find white chalk here in Bulgaria (I asked my wife and neither of us have seen old fashion chalk for sale here), I decide to finish the cleanup of the stummel by taking cotton buds dipped in isopropyl 95% and working on the buildup in the mortise. I also utilize a shank brush (thanks to Charles Lemon of DadsPipes.com for giving me a name for what I was calling a ‘long bristled brush’ foever!) which does the job.
 I reread Troy’s blog describing his Meer lining repair and the basic concept is simple – a mixture of ground white chalk and egg whites creates a surface that, when it cures, is very durable and emulates amazingly the composition of Meerschaum. If you’re new to Meerschaum, here is a quick easy read about how Meerschaum is mined (See: LINK) which I found interesting. Chalk! On a recent two-day trip to Plovdiv, Bulgaria’s second largest city where we have colleagues working, I put out the appeal for ‘Chalk!’ and Tammy, a Kindergarten teacher by profession, had some in store! So, unloading the small paper bag of my precious chalk from Tammy onto my work desk, I follow Troy’s direction to pulverize the chalk, getting it as fine as possible. I use an old fashion mortar and pestle to do the job. I have absolutely no idea how much powdered chalk is necessary for the applications Troy’s method utilizes. If too much, then I’ll have some on queue for the next Meerschaum lining repair project!
 Troy described in his blog how he came upon this strategy as he approached repairing his first Meer lining:
I had read and heard from other pipe restores that an old late 19th-early 20th century druggist recipe for fixing broken meerschaum was egg whites and finely ground chalk, so that was what I was going to try and fix the meer lined rim with. It is said to have about the same porous properties of meerschaum and imparts no taste to the tobacco.
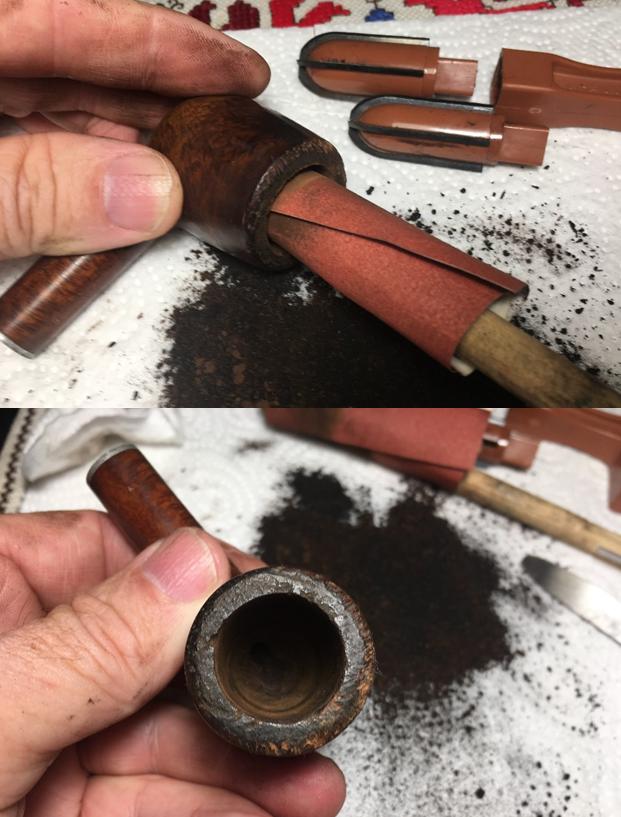
I follow Troy’s lead in masking the stummel to protect it from the chalk/egg white mixture because it sets up very hard – not something I want on the croc skin rustified surface!  My plan is to apply an initial thin coating of the Meer patch mixture to fill in the cracks in the fire chamber and over the cracked area originating from the rim. I would like to build up the lining toward the rim so that it will cover the crack as well as provide a new platform for an internal bevel or rounding. For the first application, I mix about 1 tablespoon of white to 1 tablespoon of chalk to create a thinner mixture to get into and fill the cracks for the first two applications.
  After mixing the chalk and whites well, I used my finger to apply the mixture to the Meer surface. I’ll let it sit for a few hours then apply another coat.
 The first thin coat.
 After a couple of hours, I apply another thin coat which I leave to cure overnight. To be on the safe side, I insert a pipe cleaner into the airway to be sure that it remains open. I made enough of the egg white/chalk mixture to apply the next coats. I put the Meer patch mixture in the fridge, sealed in a small plastic container for use tomorrow.
 The next morning, I jiggle the pipe cleaner to make sure its keeping the airway open. I take the mix out of the fridge, pour some of it into a smaller mixing cup and I add more chalk to thicken it. Troy described a more methodical ‘parts to parts’ ratio. I simply added more so that it would provide a somewhat thicker application. After it looks right, after thoroughly mixing with a pipe nail tool, I apply it to the chamber walls with my finger as Troy describes. Using the finger enables me to feel the foundation and spread the mixture evenly. I leave it until I return tonight after my workday! It should have about 7 to 8 hours to cure before I apply another coat.
 Seven hours later, I return to the worktable. I decide the next coat of Troy’s Meer Recipe mixture will be my final and thickest application. I take the mixture out of the fridge and add a portion to a smaller mixing cup. I add more chalk until it looks right – thicker than before but not too thick it sets up in the mixing cup! I take a picture of the finished mixture and the final application. I’ll set the stummel aside now for 24 hours to assure that the Meerschaum coating has cured thoroughly and ready for sanding.
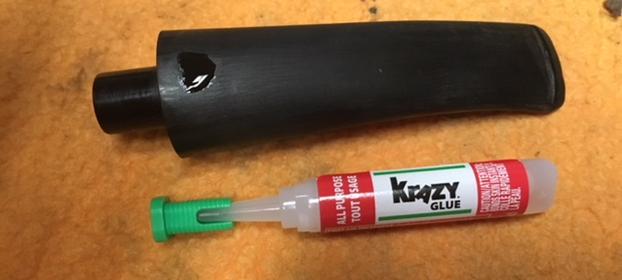
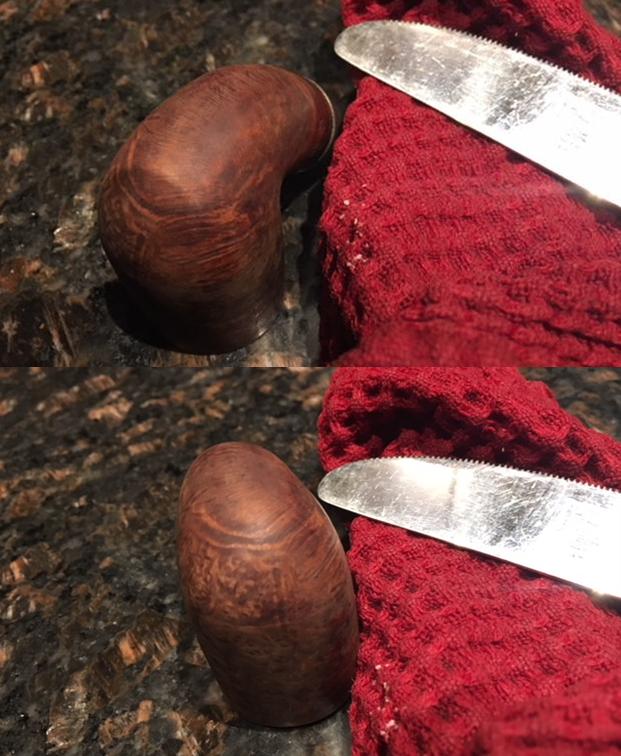
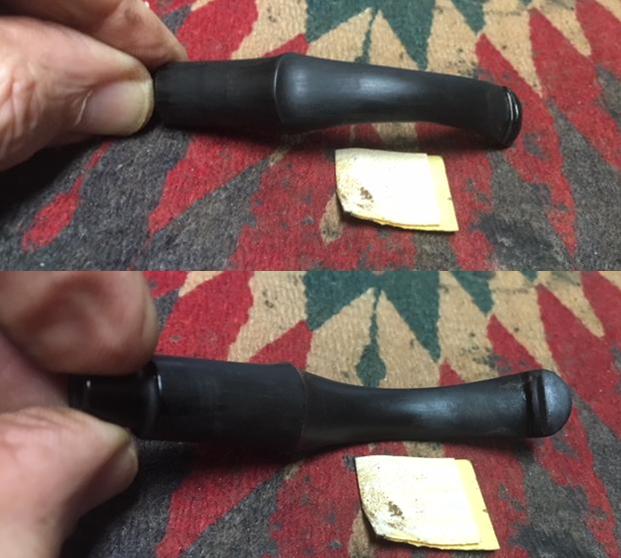
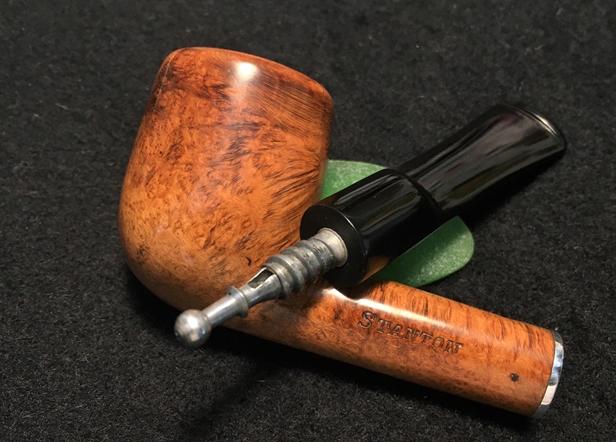
 With the Meer Recipe curing, I now turn to the stem work. The former steward of this Zulu liked his pipe. Zulus or Yachtsmen, being lighter weight, usually ride very well hands free. Yet, without a bit protector, over time the teeth work as God created them, furrowing in the vulcanite to achieve a tight, comfortable grip. Eventually, as this Zulu bears witness, the bite breaks through under the pressures and a hole is the result. I take pictures to show the forensics of this bit. There is a long, elongated tooth dent on the top, and some chatter, the breakthrough on the bottom, and the button has a cut of sorts – not sure how that happened. All are pictured – I insert a pipe cleaner to highlight the hole.
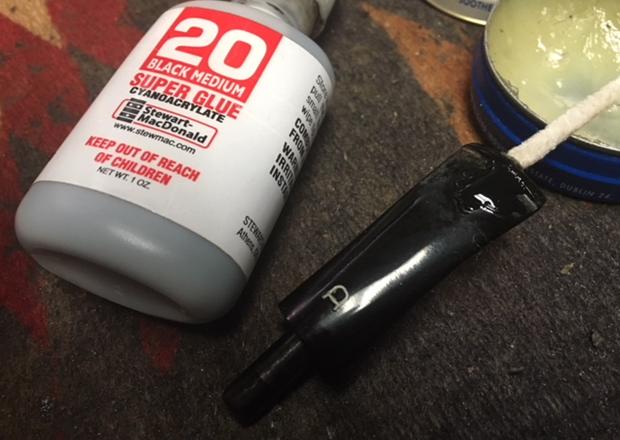
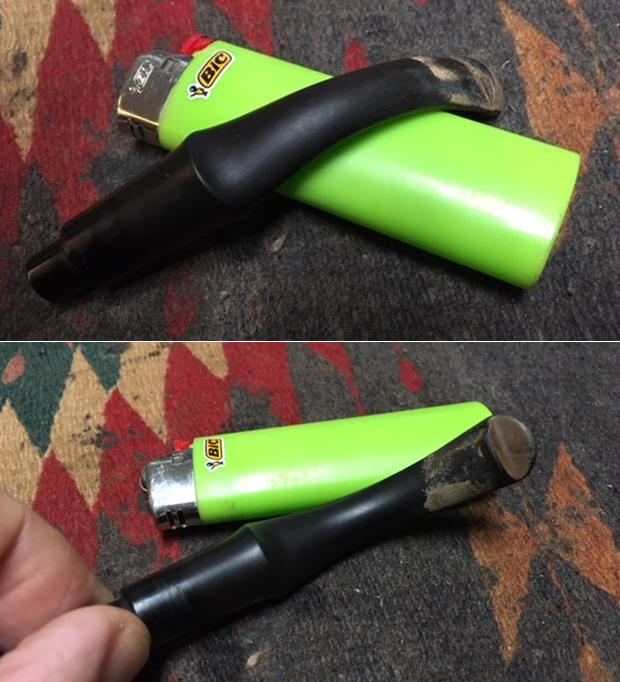
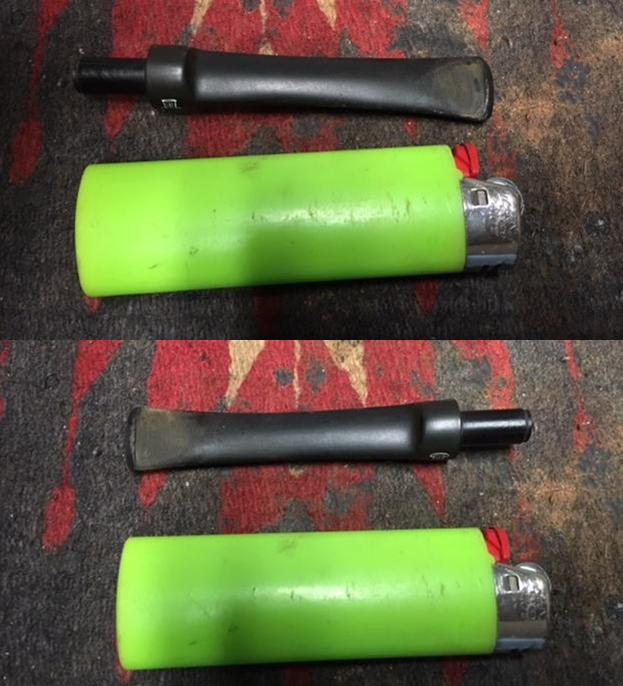
  To work on the dents, I first use heat to expand the vulcanite. With a cheap bic lighter, I paint the top dent first with the flame – moving the flame back and forth without scorching the surface. This method helps some, but not enough to avoid the next step, mixing up Special T CA glue and activated charcoal to patch the hole and fill the dents. After forming a point with an index card, covering it with scotch tape to keep the glue from sticking, I insert it into the button to form a backing for the patch material. I then empty one capsule of activated charcoal with a bit of the glue and mix it with a tooth pick. When it arrives at a molasses-like consistency, I apply it to both hole and the upper dent, applying more than needed to build a mound to file down to shape a button later. To quicken the curing process, I use an accelerator. Pictures show the progress.
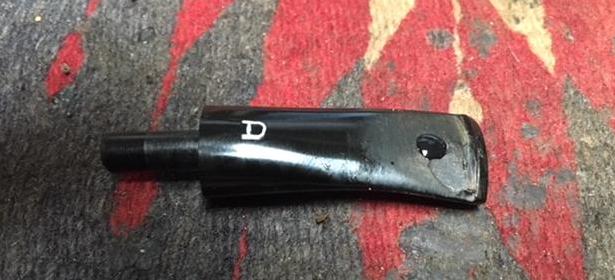
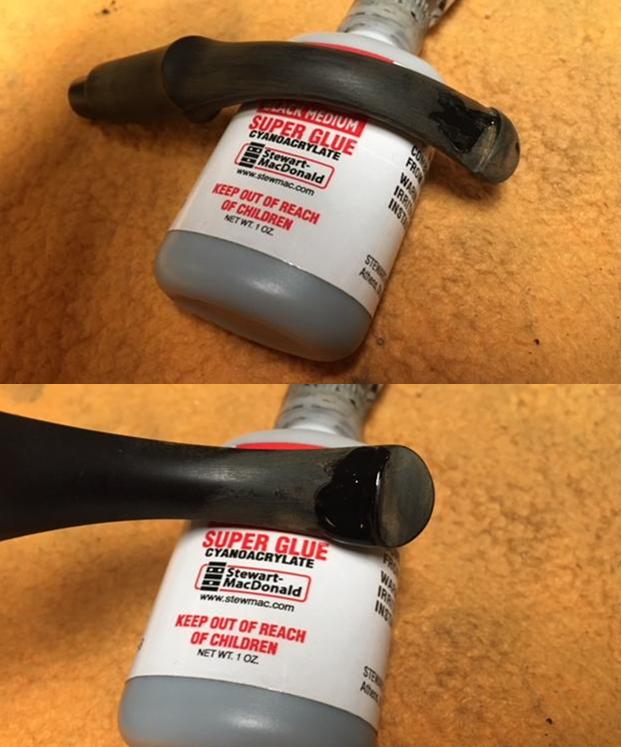
 I also apply a drop of Starbond Black Medium KE-150 glue to the cut on the button and let it sit to cure until tomorrow. Another day has come and gone in Sofia, Bulgaria.
 The next day, after a LONG day on the job, I’m thankful to return to the worktable with both stummel, with cured Meerschaum lining repair and stem bit/button reconstruction waiting for my attention. I decide to work on the stem. To establish a button baseline, I use a topping board with 240 grit paper to remove the excess patch glue.
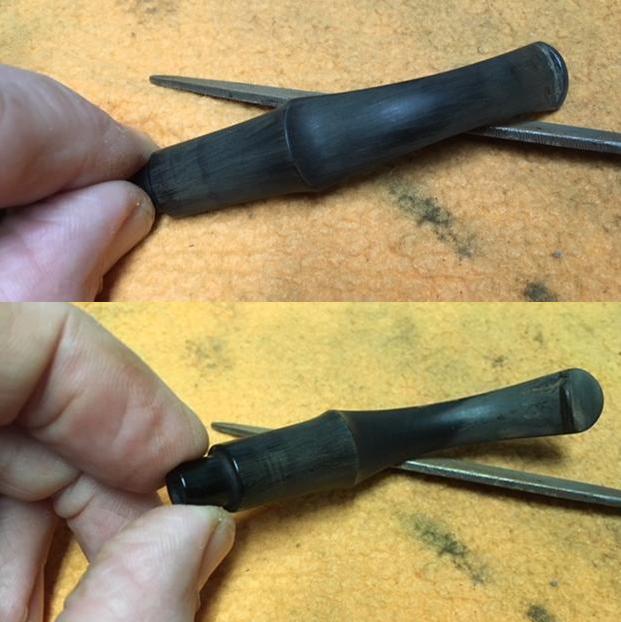
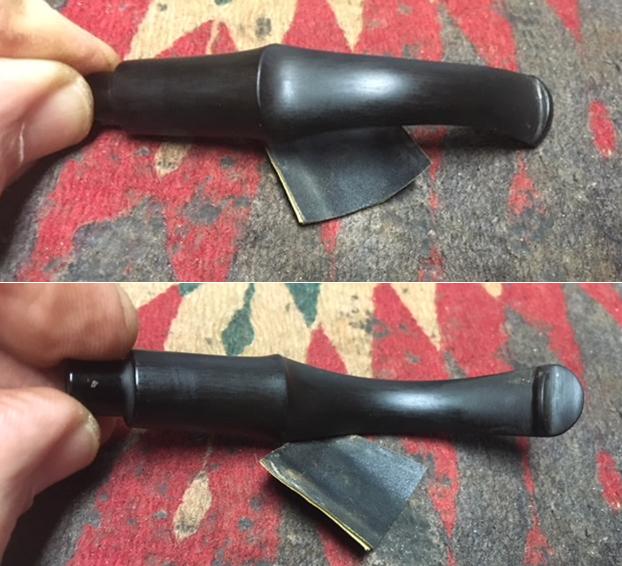
 Next, using a flat needle file, I score a working starting point to establish a new upper, button lip. The score is intentionally leaving a large ‘button real estate’ to enable a patient, methodically sculpting of the button from large to normal sizing. After the scoring, I file toward the stem’s vulcanite surface, removing the patch mound. Of all the mini-projects in restoring pipes, stem work as I’m doing now, is probably the most time consuming. So, I put on my favorite Spotify jazz station, set back, and enjoy the moment. I take pictures to chronicle the upper bit progress.

 After the top is roughed in, I turn to the lower bit.
 The initial shaping with files is completed! It’s normal to uncover small pockets where air was trapped in the glue as I can see. I’ll fill those in later.
 Now, continuing the removal of excess patch material and shaping with 240 grit sanding paper, I also remove the marks left over from the filing. I also work on the tooth chatter left over on the upper side of the bit. After 240, I use 320 grit, then 600. Pictures show the progress.

 Now to address the air pockets that have emerged in the charcoal/superglue patch. I clean the area with alcohol and cotton pad, even using a dental probe to make sure the pockets and surface are free of dust and leftover sanded vulcanite. When it’s clean, I paint the surface of the button with a thin film of regular, clear super glue, filling the pockets. I use the tip of a toothpick to spread the glue evenly over the surface. I do both sides and set the stem aside to allow the glue to cure.
 Finally – in the interest of full blog disclosure – I had several iterations of filling the air pockets with thin glue and sanding. I think I’m finally satisfied with the button/bit repairs! Moving on.
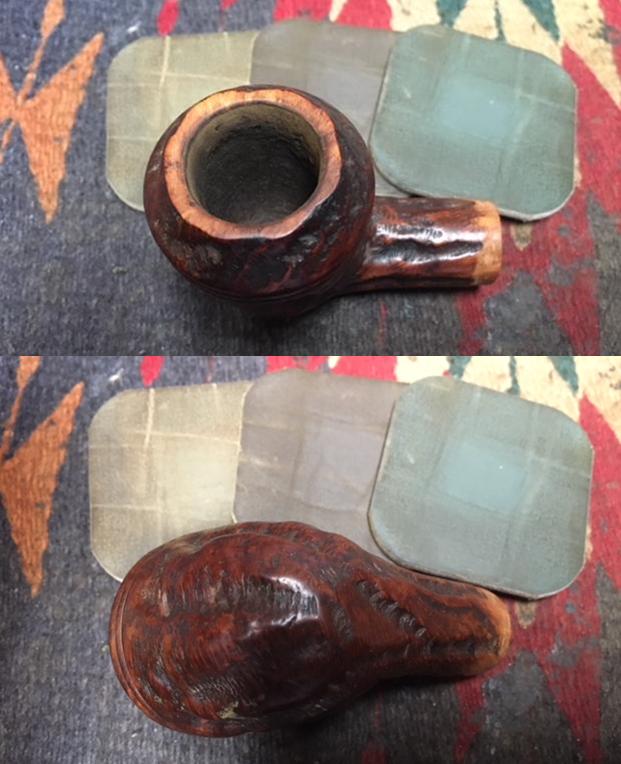
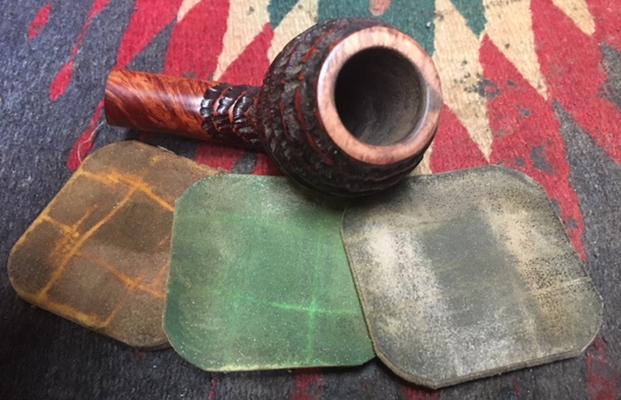
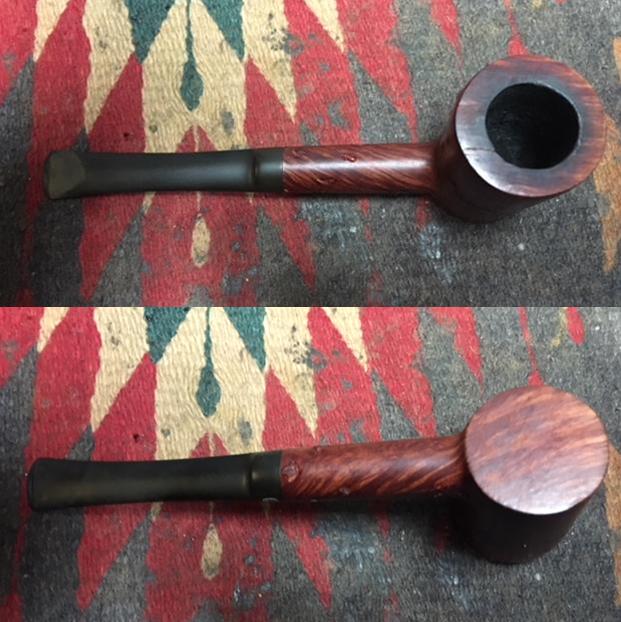
 I turn to the Zulu’s Meer lined stummel. The egg white/chalk layering has cured thoroughly. I unmask the stummel to get a closer look at the results. I am careful to peel away the masking tape at the rim. I’m not sure how the Meer mixture will respond – will it crumble away? It doesn’t, and I find that my fingernail is a good tool to remove excess Meer Recipe from the rim surface showing me the general lay of the land.
  My priority is to clear away the excess Meer Recipe from rim plateau. I first use a flat needle file reaching across the chamber to remove material. When near the briar surface, I top the stummel very lightly using 600 grade sanding paper. As I have my first experience working with Troy’s Meer Recipe, I’m pleased with how durable it is. It doesn’t feel fragile. After a gentle topping, I am VERY pleased at the appearance and composition of the Meer Recipe and the rim, now with clean briar, looks great. The pictures show the rim’s emergence.
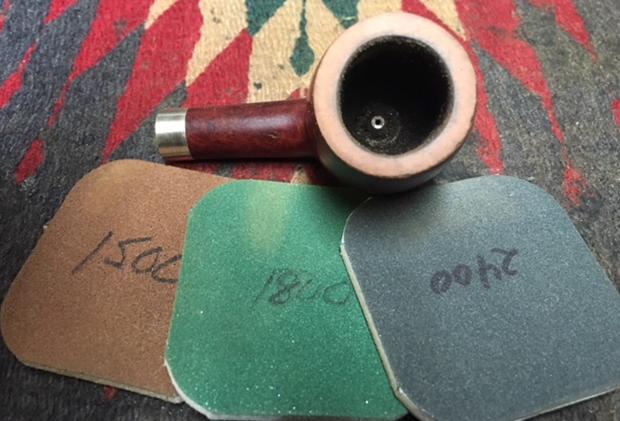
 Next, after wrapping a piece of 240 grit paper around a sharpie pen, I carefully start smoothing the chamber walls, removing the rough Meer Recipe and expanding the chamber, marching it back towards the original Meerschaum surface. The method that emerges is that I rotate the stummel in my hand and allow the natural shape of the cylinder to emerge. I do this with 240, followed by 320, then finally with 600 grit papers. I leave enough of a layer of the Meer Recipe to cover the old Meerschaum and do not expose it.
 Now to cut a gentle bevel to remove the rough Meer Recipe on the rim and to lower the threshold of greater vulnerability of the surface where pipe tools go in and out. I roll a tight piece of 240 paper to shape the bevel. I do a combination of sawing it vertically to smooth rougher rises and pinching the paper with my thumb over the top of the rim. I follow with 600 grit paper doing the same. Here are pictures showing the progress.
 I notice that there are a few pockets around the circumference of where the Meer Recipe and briar meet. I decide to bring out the unused Meer Recipe and apply a thin coating on the surface of the rim to fill these gaps. I’ll give it a few hours and then clean off the residue. I think this bit of improvisation works. It looks good. The lining will require TLC as any Meerschaum deserves. Troy’s Meerschaum Recipe looks like Meerschaum and has essentially the same composition characteristics. I think the Meer Recipe repair is now completed! Thanks for your pioneering and sharing, Troy!
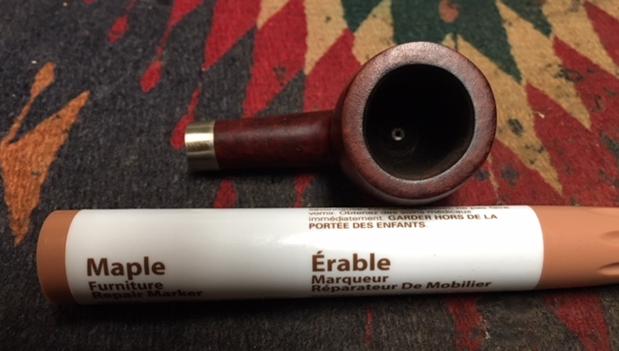
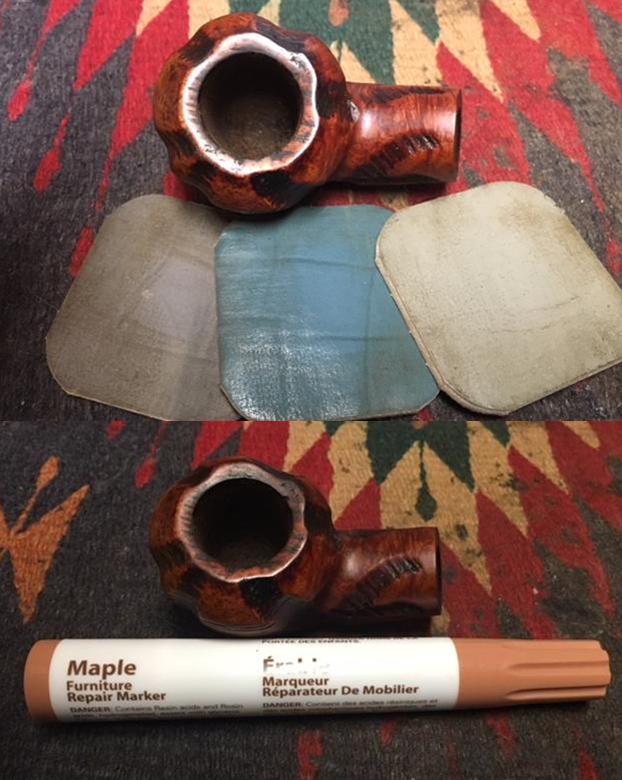
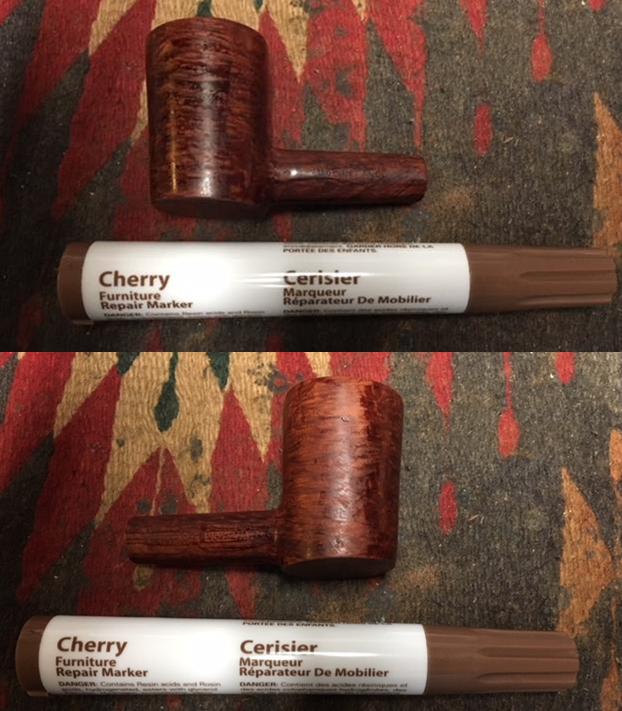
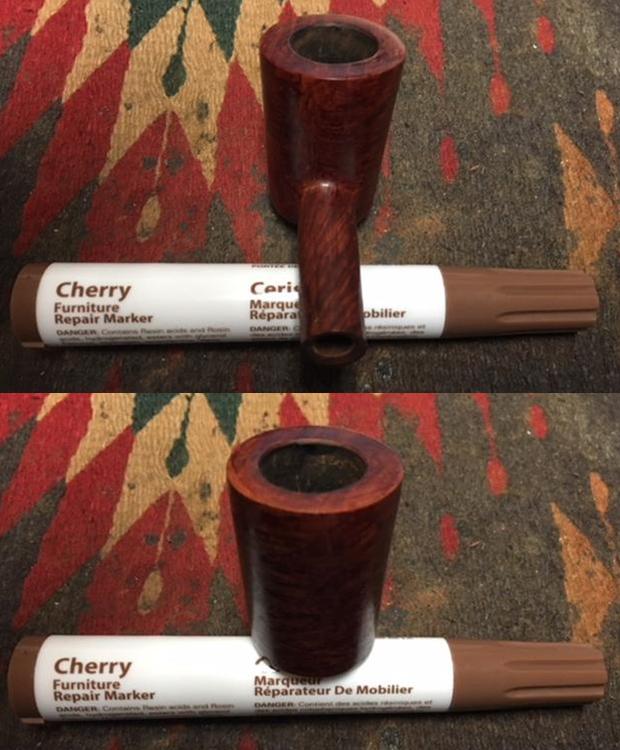
 Now to the Zulu’s croc skin surface. I clean the stummel using mineral water, which in Bulgaria is light paraffin oil. I remove the dust from all the Meer Recipe sanding and I am again reminded why I was attracted to this sharp looking Zulu – the Croc Skin rustification is striking. I take a black dye pen and darken many of the valleys of the rustification to freshen the black pop of the croc skin. Earlier I noticed that the texture of the croc skin rustification was enhanced and given depth by lighter, reddish flecks on the peaks of the rustification. To further enhance this, I use an 1800 grade micromesh sponge pad and randomly sand on the Croc Skin surface – nipping the ridges to lighten them here and there allowing more briar to peek through. These are subtle enhancements to the Zulu and I think they look good.
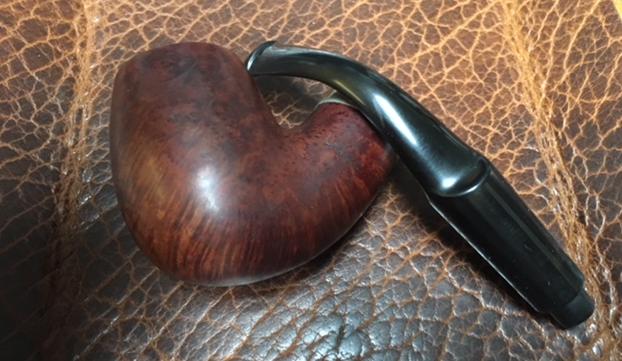
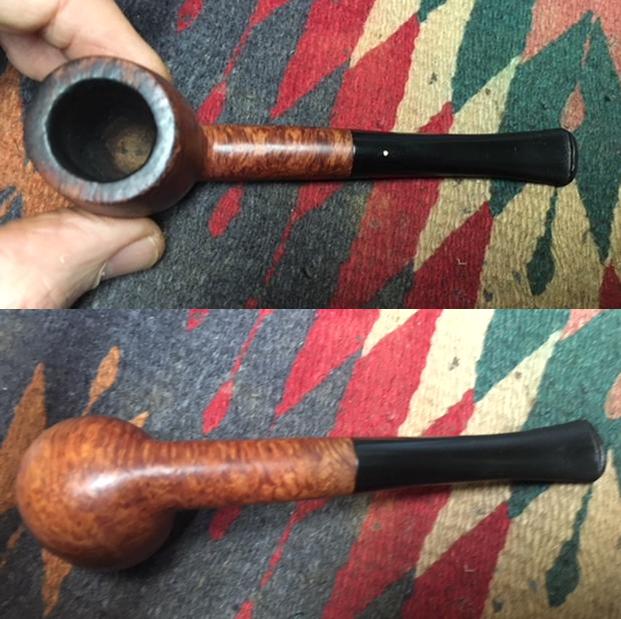
 Back to the final stages of the stem’s refurbishment. I reunite the Zulu bowl with the stem to give me a bird’s eye view of the progress. I like what I’m seeing!
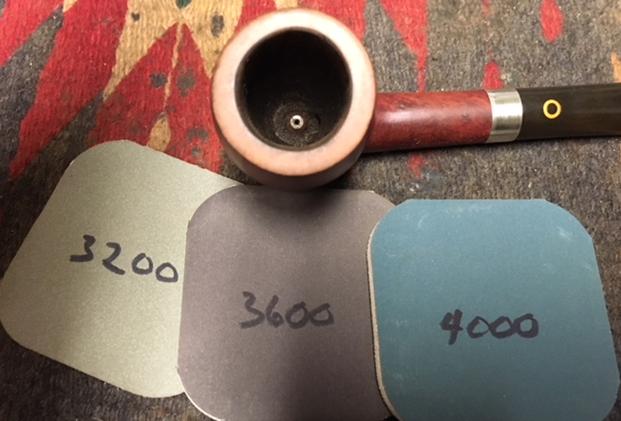
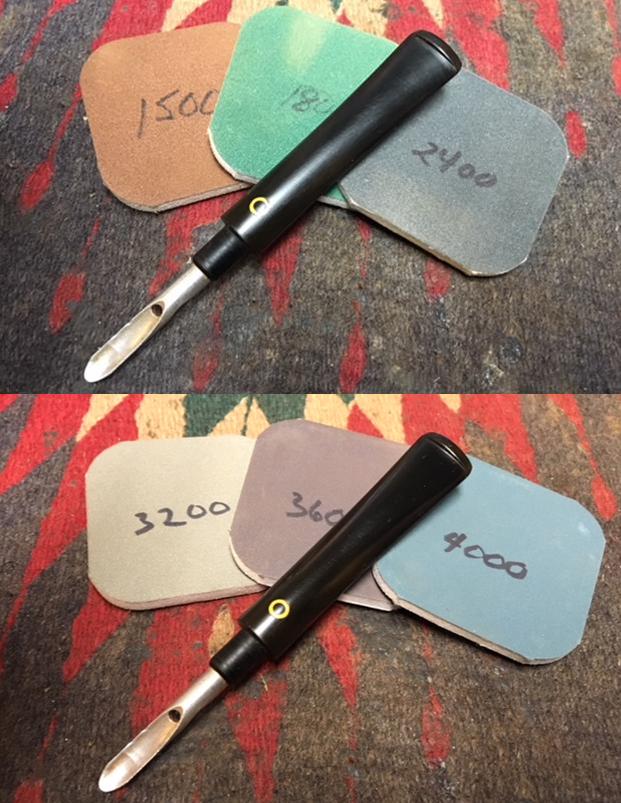
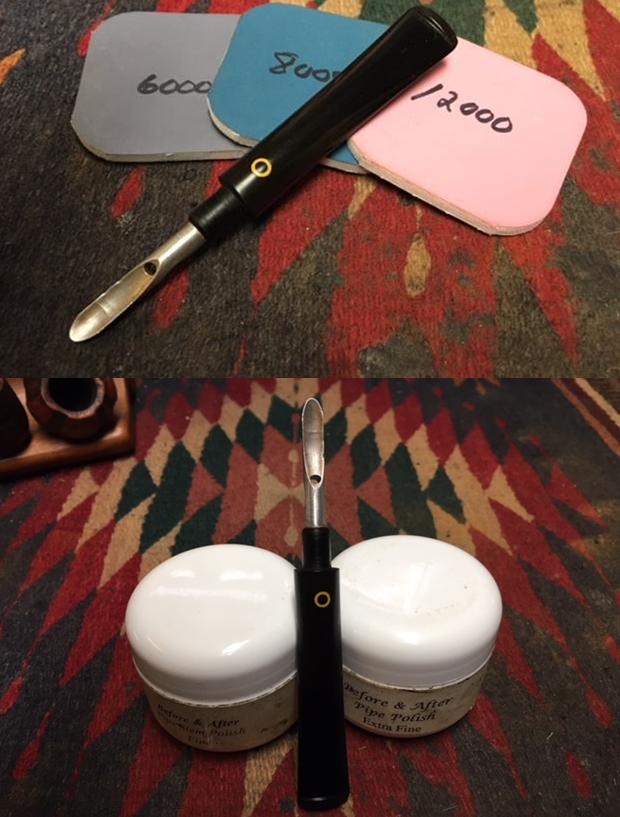
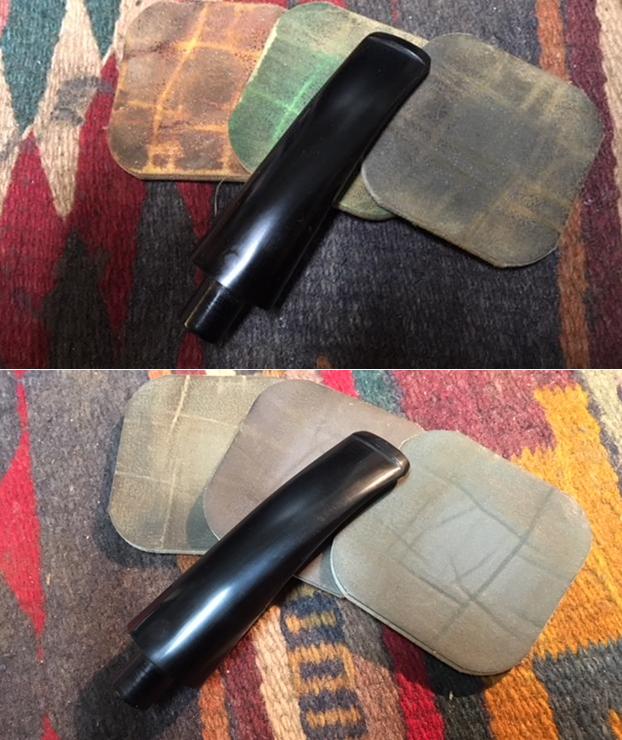
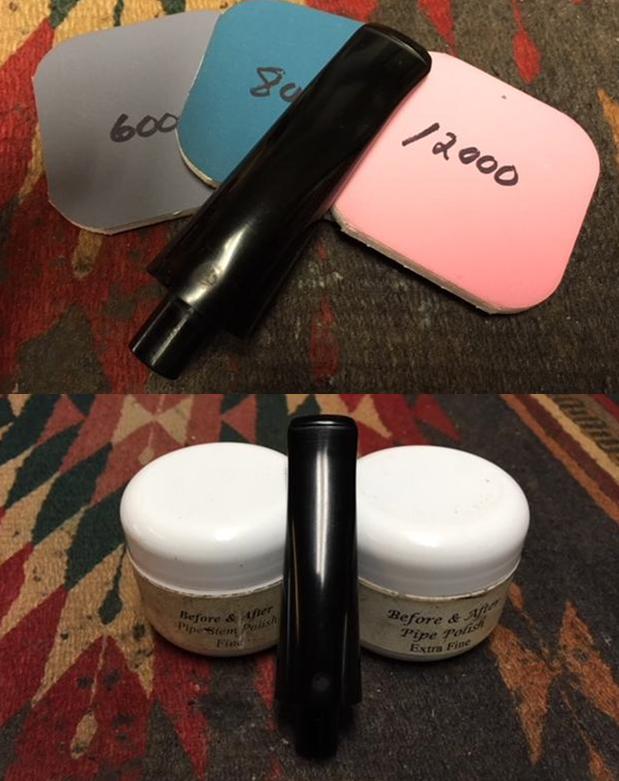
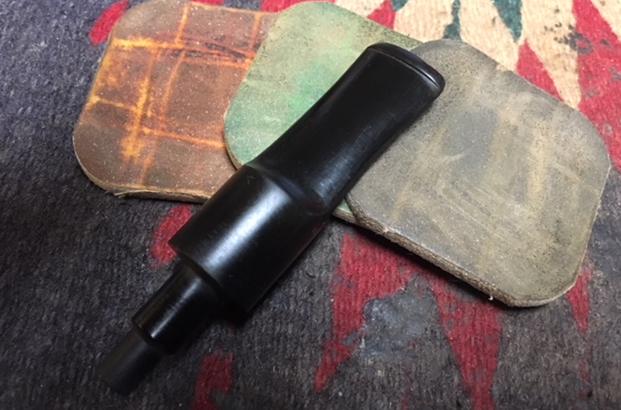
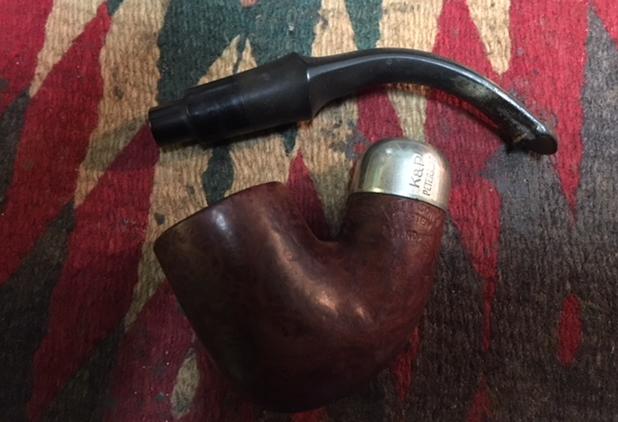
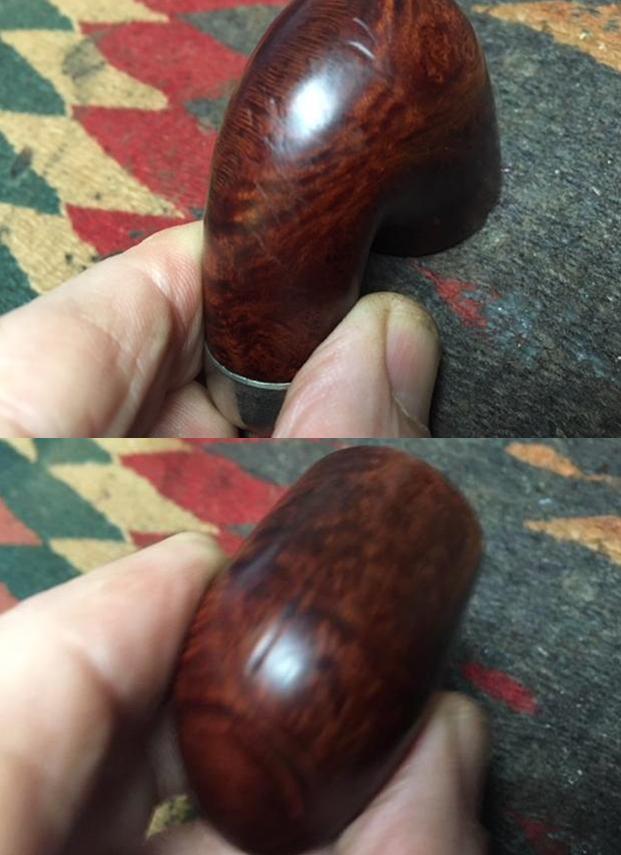
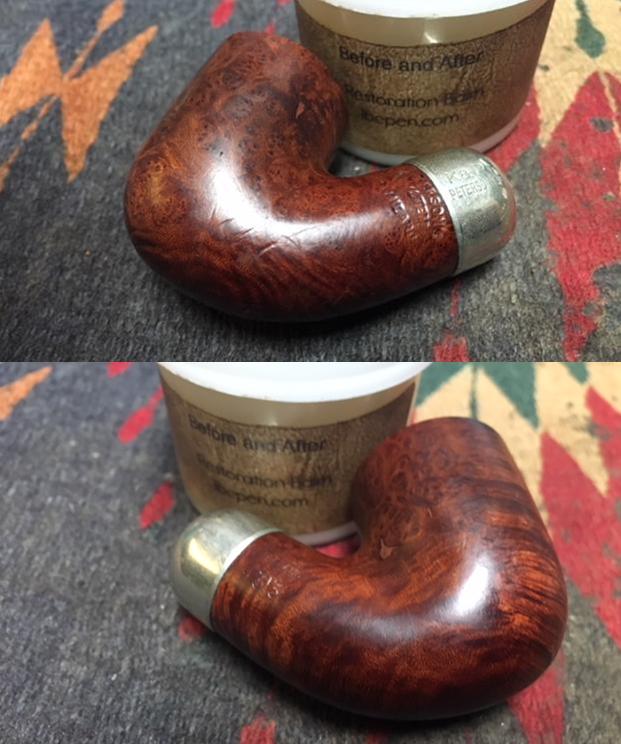
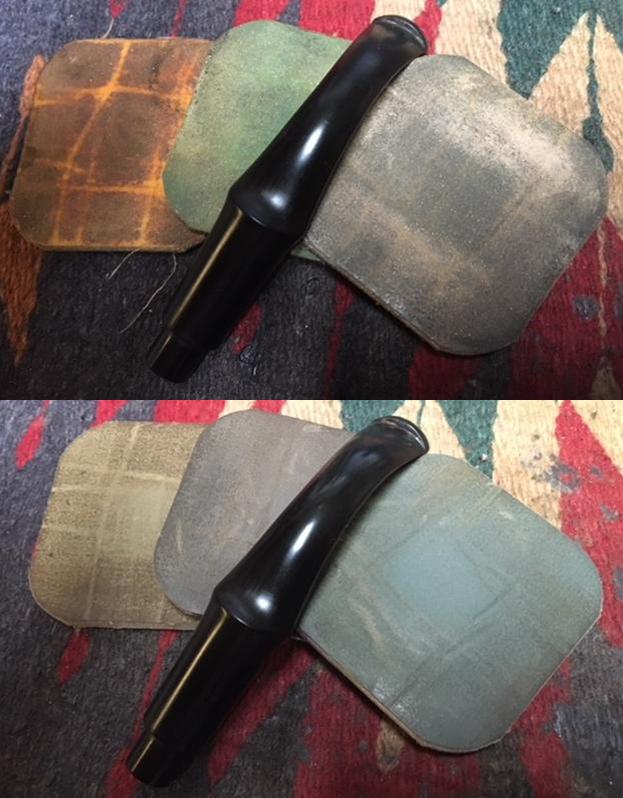
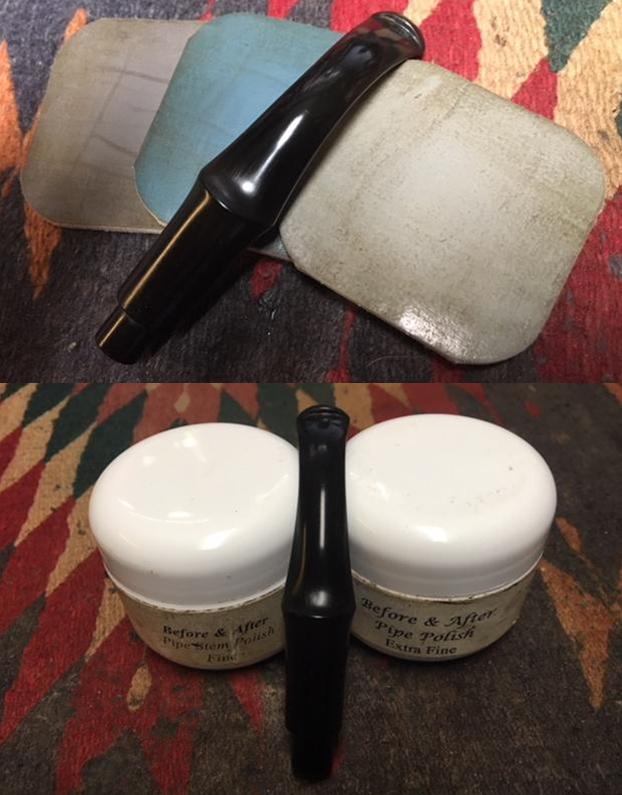
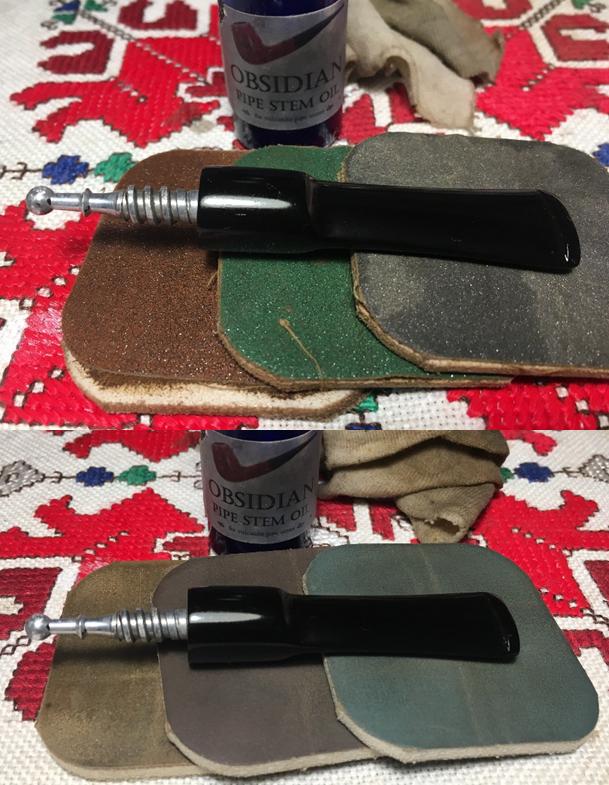
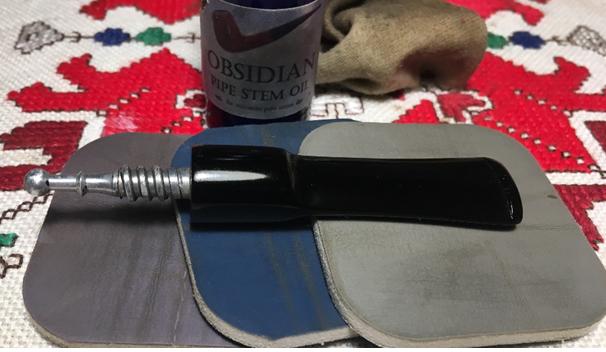
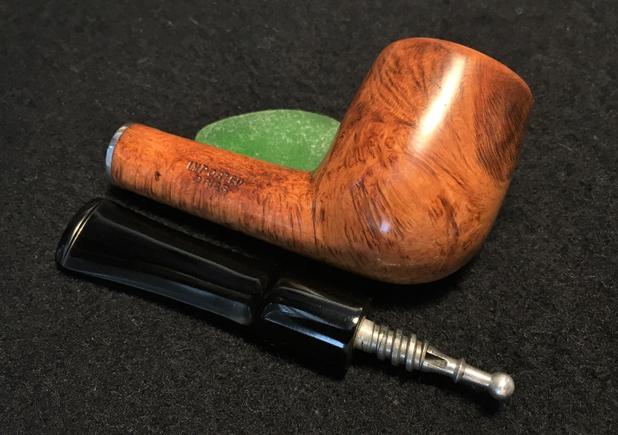
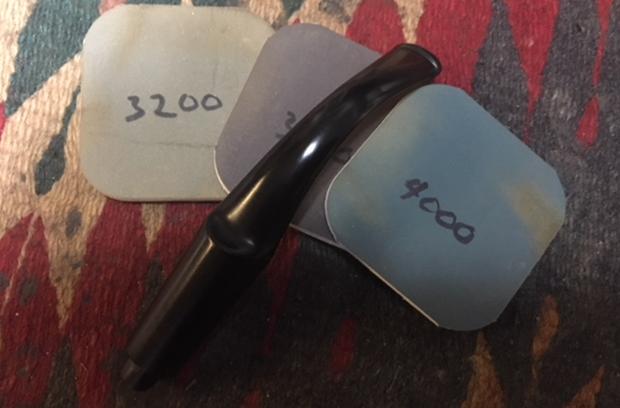
 Now to the final stage of the stem restoration. I use 0000 grade steel wool and buff the entire stem, including the Regis ‘R’ gold rondel. The steel wool removes the final scratches and tracks left from sanding and buffs the stem up. I then do a complete cycle of micromesh pads from 1500 to 12000. I wet sand using 1500 to 2400, then dry sanding with 3200 to 4000 and then 6000 to 12000. Between each cycle the stem receives a coating of Obsidian Oil which refreshes the vulcanite. At the end of the process, the stem is looking great – including the bit and button repairs.
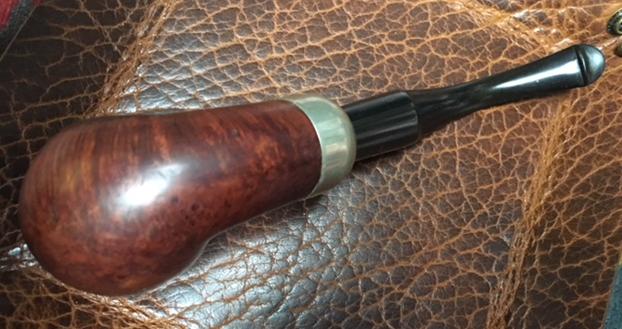
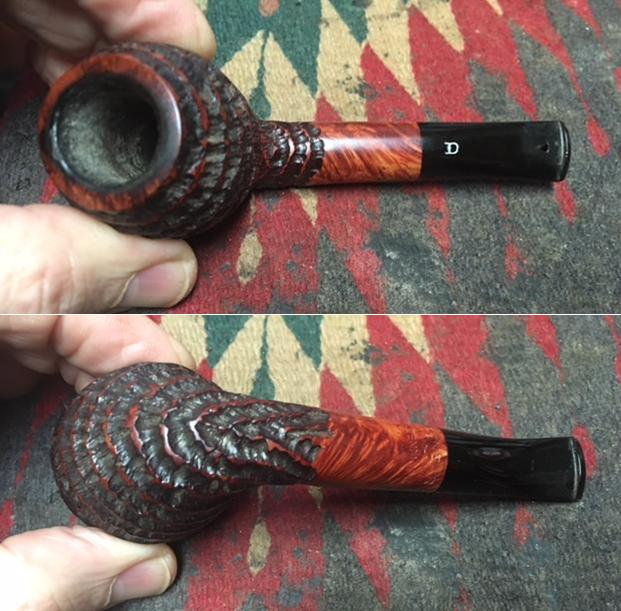
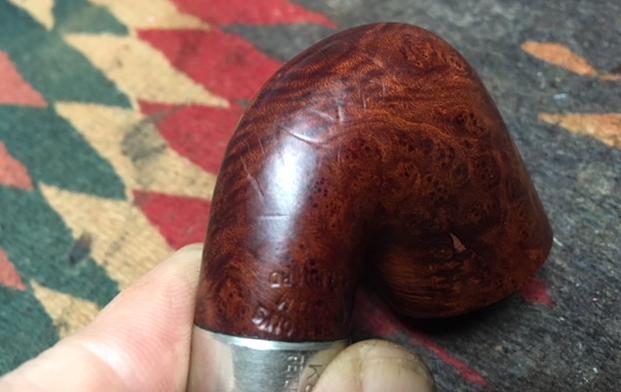
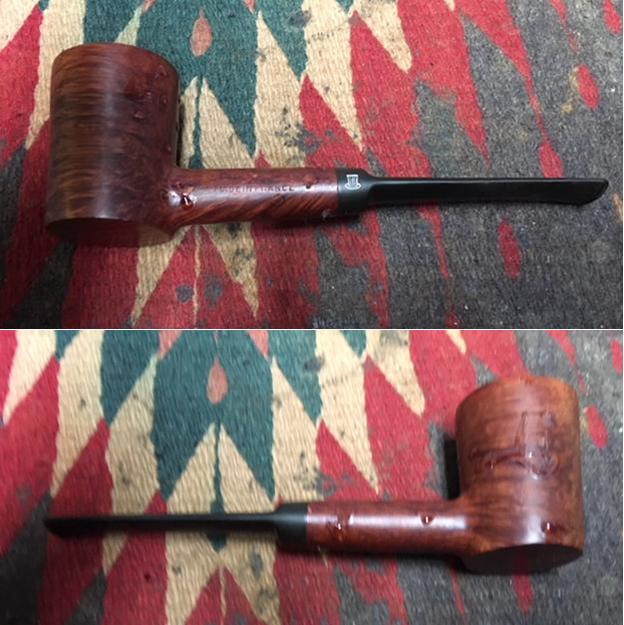
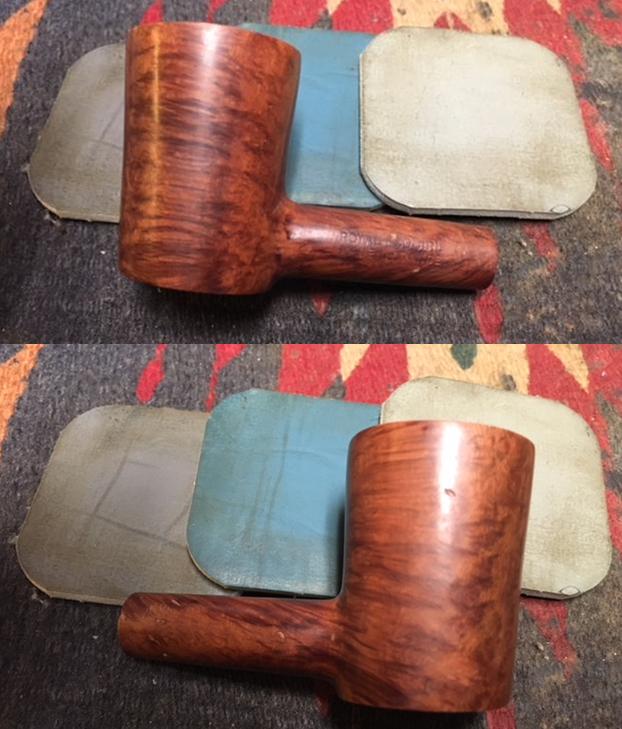
 Now, looking at the rim, I will buff up the bare briar ring forming the rim. I use the full 9 entourage of micromesh pads from 1500 to 12000 to shine and deepen the briar ring. I think this bare briar ring is one of the attractive features of a Meer lined pipe. The contrasts enhance the overall attractiveness of the pipe. This Zulu surrounds the rim with the dark, craggy croc skin rustification – the center is the light Meer and the rich, butterscotch bare briar pops in contrast. I like it. The first picture is before the micromesh sanding – then after.
  On the home stretch, I use a Dremel with cotton cloth wheels and I go over the stummel applying Tripoli and Blue Diamond compounds. These compounds bring out more the bare briar flecks in the rustification. I also apply the compounds to the rim and lower shank nomenclature area where the briar is smooth. Then, with another cotton cloth wheel, I apply coats of carnauba wax to the stem and stummel. I find that by using the high speed and compact Dremel, I’m able to effectively apply wax even to most rustified and blasted finishes without the wax gunking up.
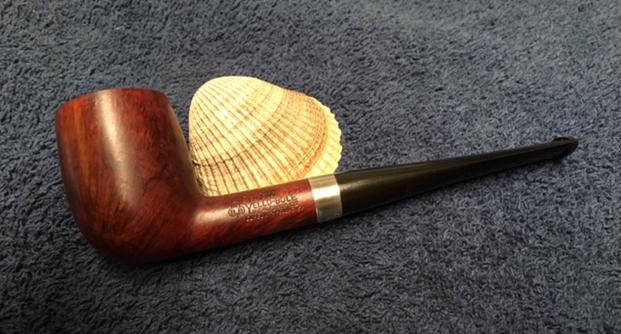
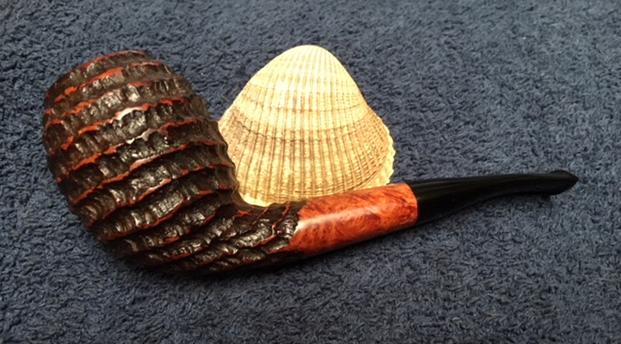
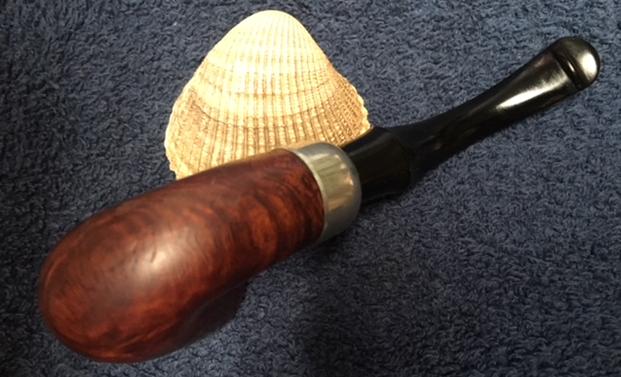
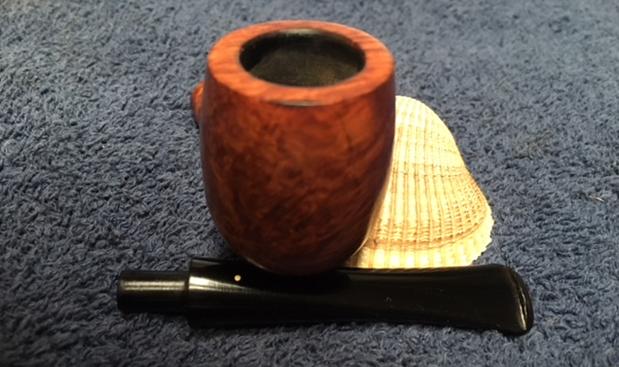
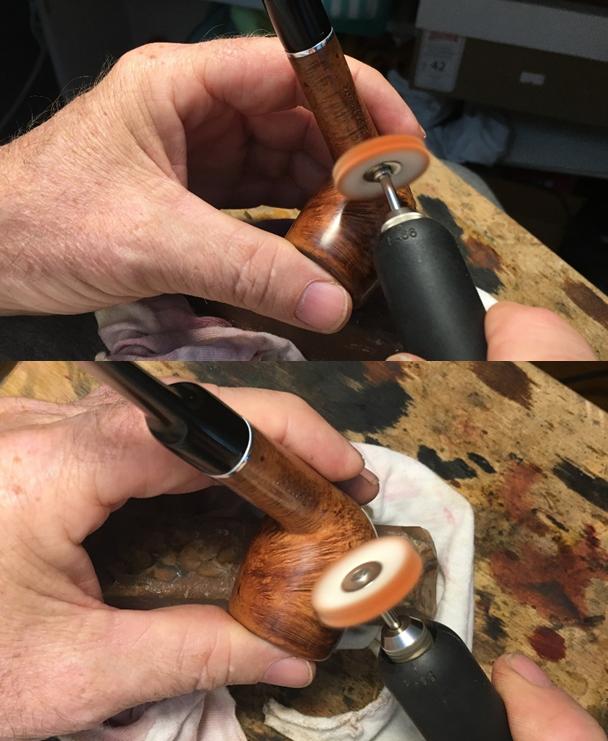
  I’m pleased with the restoration and recommissioning of this Italian (perhaps) Meerschaum lined Ariston Rustic croc skin rustified Zulu. The use of Troy’s Meer Lining Recipe worked well and looks good. I’m also pleased with the stem button/bit hole repair and button rebuild. The Zulu is 5 ¾” long, 2” in height, bowl depth: 1 ½”, internal chamber diameter: ¾”, and full rim diameter: 1 ¼”. If you would like to add this Meerschaum lined, croc skin rustified Zulu to your collection, go to The Pipe Steward Store and leave a comment or send me a note at ThePipeSteward@gmail.com. This Zulu will benefit the Daughters of Bulgaria, our work here in Bulgaria helping women and girls (and their children) who have been trafficked and sexually exploited. Thanks for joining me!


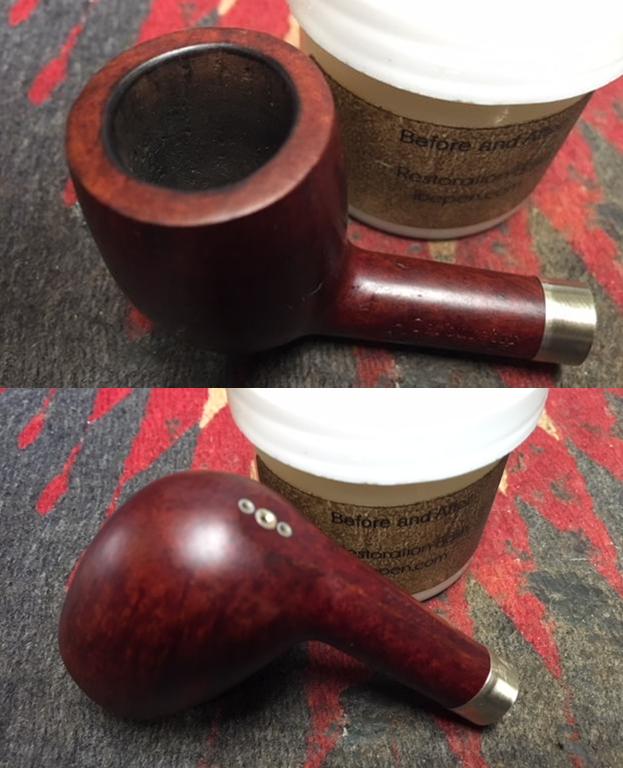
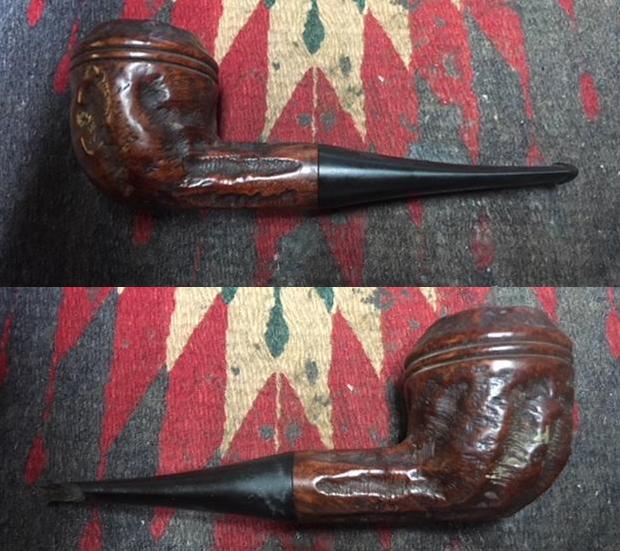
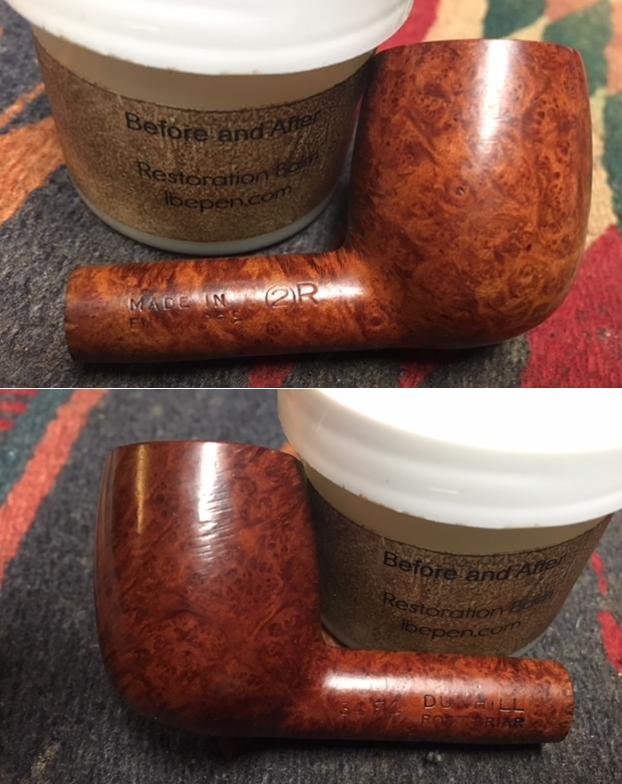
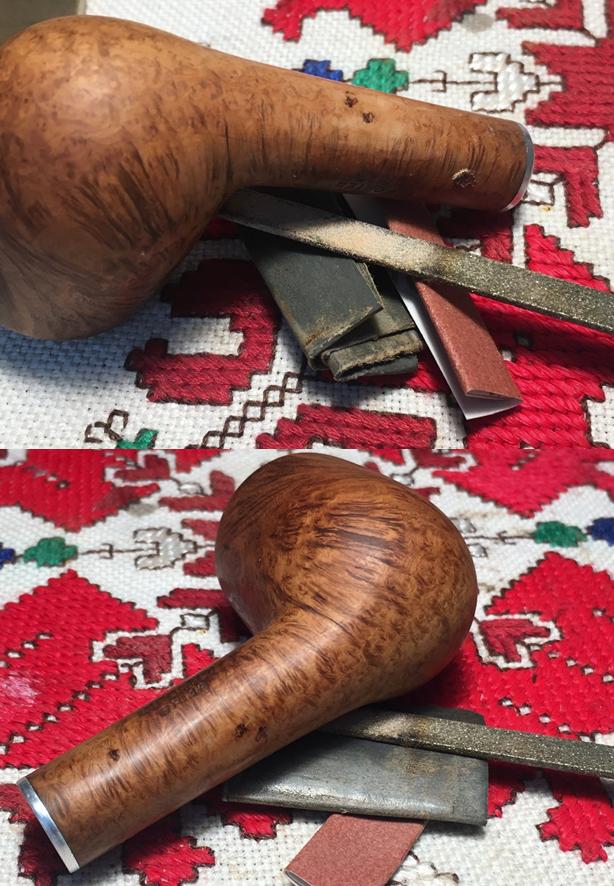
 The rim top was clean and the bowl reamed. Abha had once again done a great job cleaning the finish. She had scrubbed it with Murphy’s Oil Soap and removed all of the debris and dust from the smooth finish. There was some darkening to the rim top and some light dents in the top surface. The inner edge of the bowl was slightly out of round with some damage from reaming. The bowl had a light cake and it appeared that Abha had removed a lot of the cake in her reaming. I also took a close up photos of both sides of the stem. You can see that there is light tooth chatter on the top and underside of the stem just in front of the button. There is a deep tooth mark on the topside in front of the P-lip. The surface of the stem is lightly oxidized.
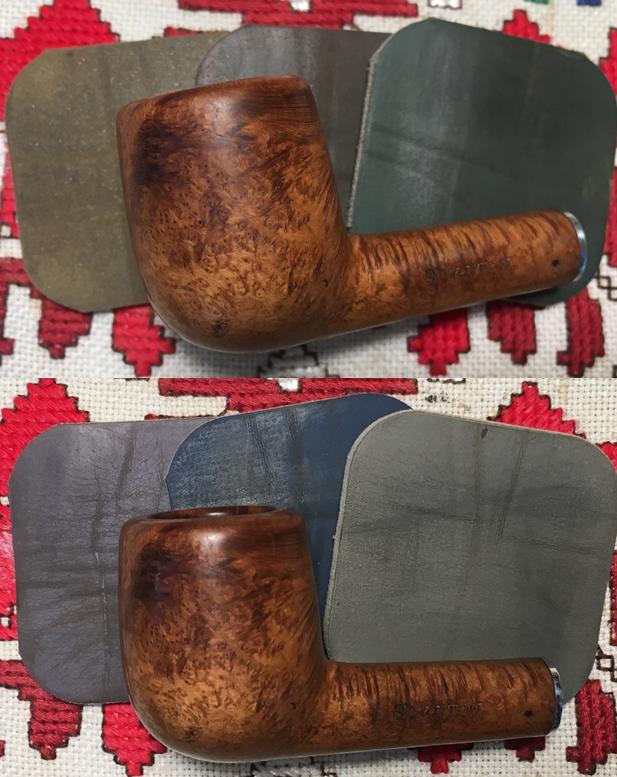
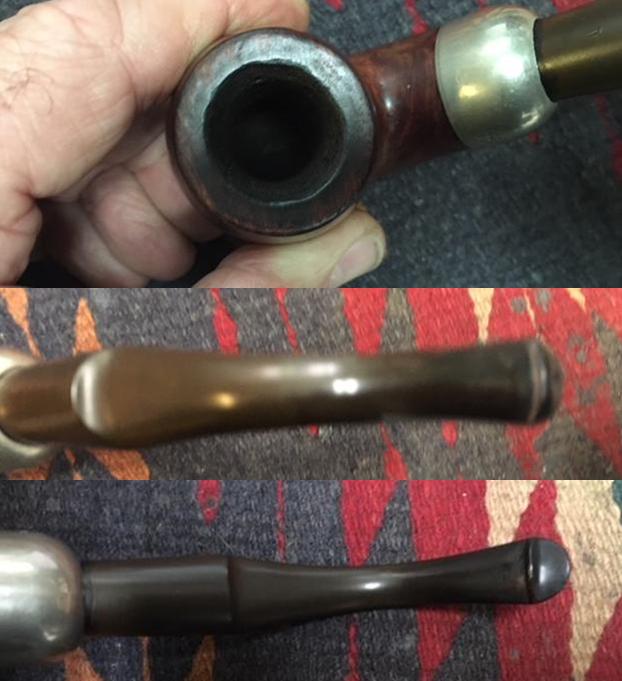 The stamping is faint and worn but it is readable under a light and with a lens. The stamping on the left side of the shank reads Peterson’s System Standard. On the right side of the shank it is stamped Made in the Eire in a circle and under that is reads 307 which is the shape number. I looked up the Made in Eire stamp on Pipedia’s section on Peterson pipes to see if I could find out information (https://pipedia.org/wiki/Peterson). There I found out that the Made in Eire era stamps were from 1938 through till 1941. Peterson stamped their pipes with “Made in Eire” in a circle format with “Made” and “Eire” in a circle with the “in” located in the centre of the circle. This was used during the years of 1938 – 41. This is exactly how the pipe I am working on is stamped. I learned that the pipe was made between 1938-1941. After that Peterson stamped their pipes with “Made in Ireland” in a circle format 1945-1947 and still later with “Made in Ireland” in a block format 1947-1949. The “Made in Ireland” block format came in either one or two lines.
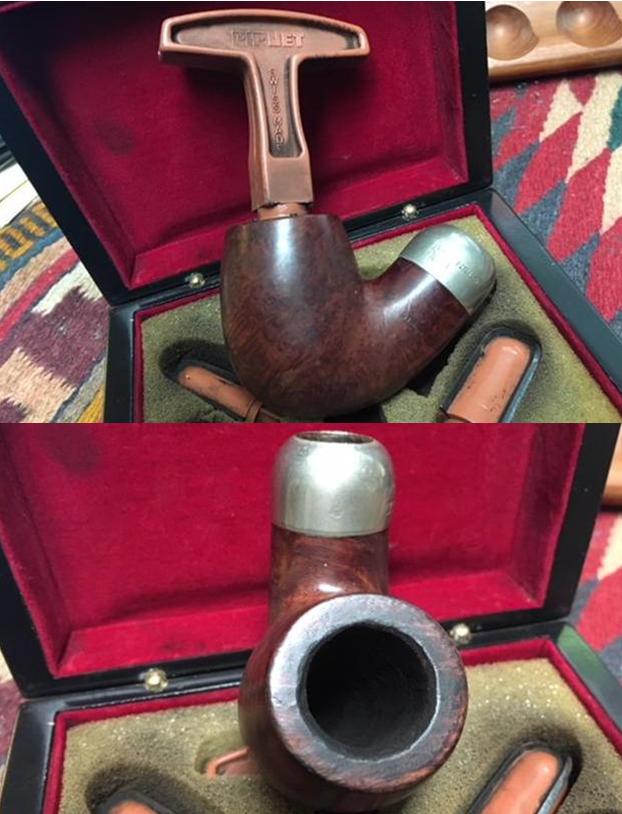
 I cleaned out the internals of the mortise and shank with the Savinelli Fitsall Pipe Knife, pipe cleaners, cotton swabs and alcohol. I scraped the walls of the sump and the mortise with the pipe knife to get rid of the hard tars and oils on the walls. Once I had removed the hardened cake I cleaned the inside with pipe cleaners, cotton swabs and alcohol until the interior was clean.
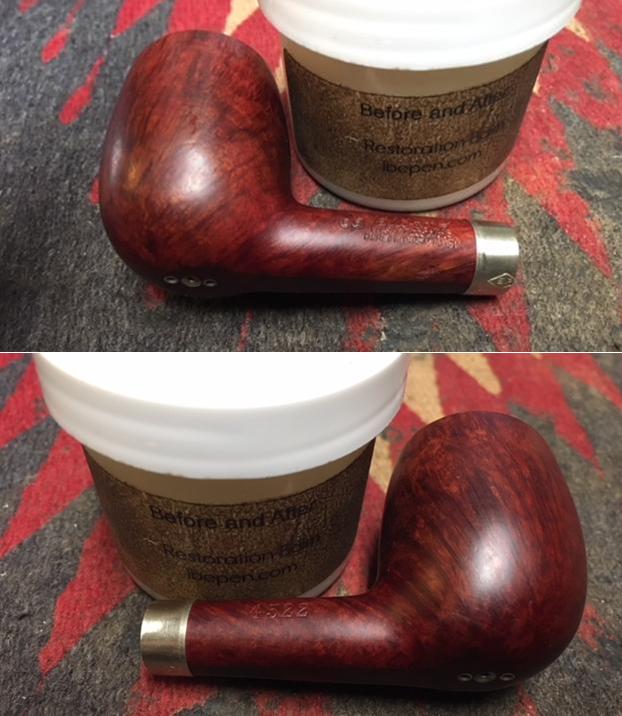
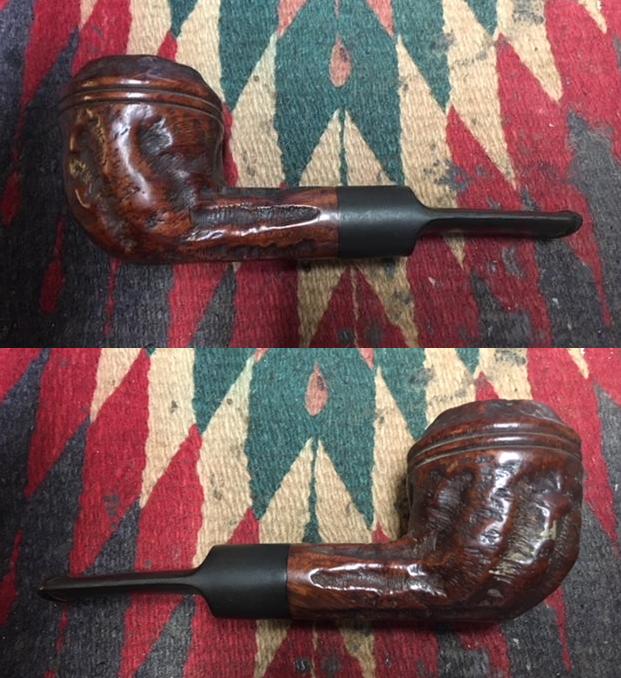
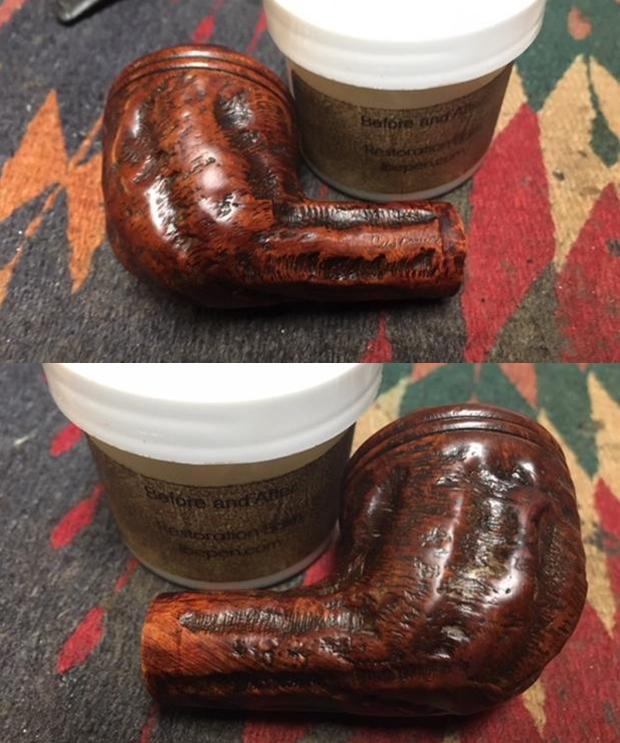
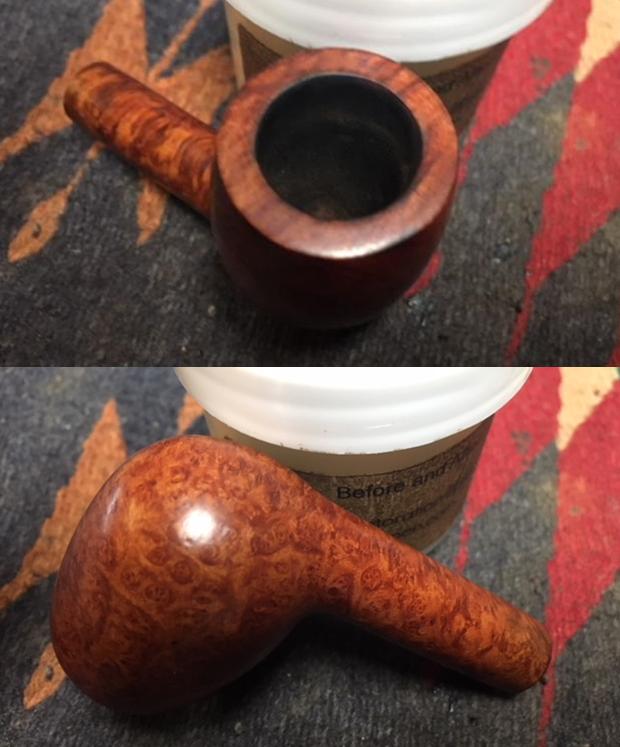
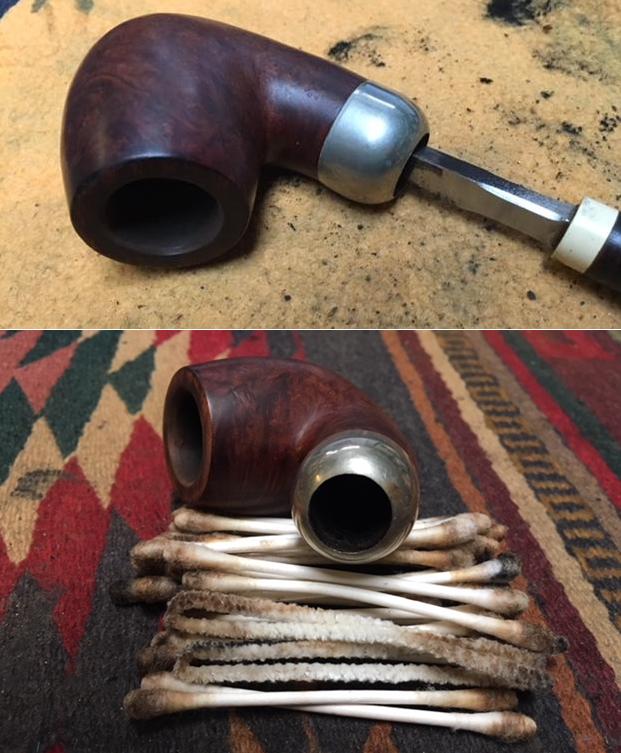 I worked Before & After Restoration Balm deep into the briar of the bowl and shank to clean, enliven and protect it. I worked it in with my fingertips and set it aside for a few minutes to let the balm work. I wiped it off and buffed it with a soft cloth to polish it. The briar really began to have a deep shine and the grain began to shine through. I took photos of the bowl at this point to mark the progress in the restoration.
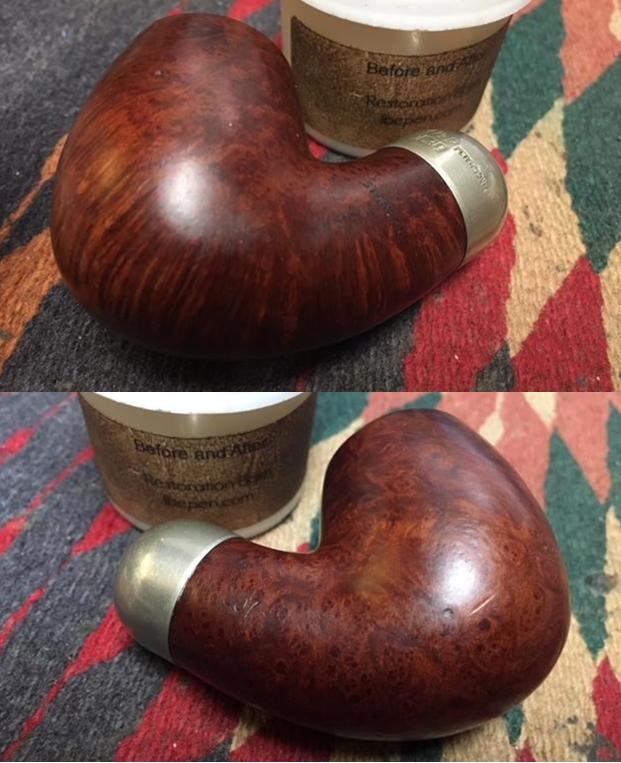
 I set the bowl aside and began the work on the stem. I cleaned up the tenon end of the stem with alcohol and cotton swabs. The first photo below shows the end of the tenon with the large chunk of vulcanite missing. I made a mixture of black super glue and charcoal powder and rebuilt the end of the tenon. I filled in the chipped area and built it up until it was roughly the same size and shape as the rest of the end. It would take several coats to fill in the rough spots in the repair but I layered it in and let it cure between coats.
 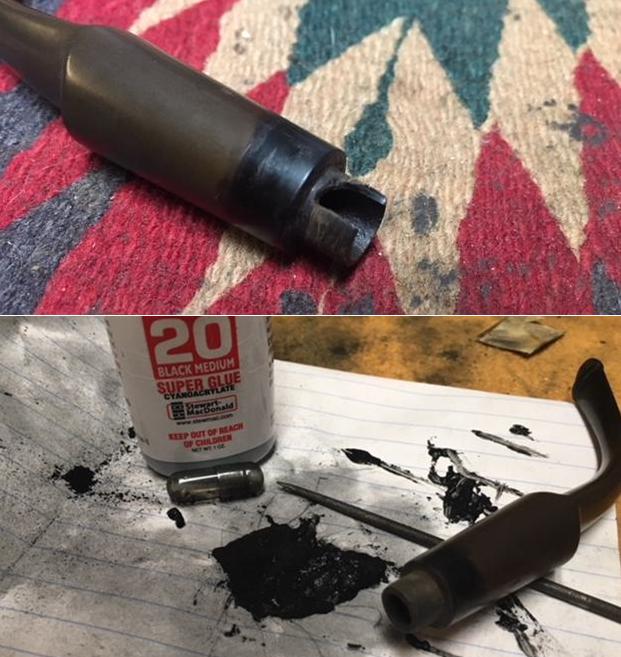 Once the repair had cured, I rough shaped it with a needle file to remove the excess repair. I worked it over until it was close to the right shape. I sanded it with 180 grit sandpaper and with 220 grit sandpaper. I used a half round, a round and a flat blade needle file to reshape the inside of the airway of the tenon end. I reshaped it until it matched the remainder of the existing tenon.
 There were some deep gouges in the surface of the stem near the tenon end. It looked as if the stem had been twisted out with a pair of pliers. The gouges were deep and visible. I cleaned the areas with alcohol and filled in the marks with super glue.
 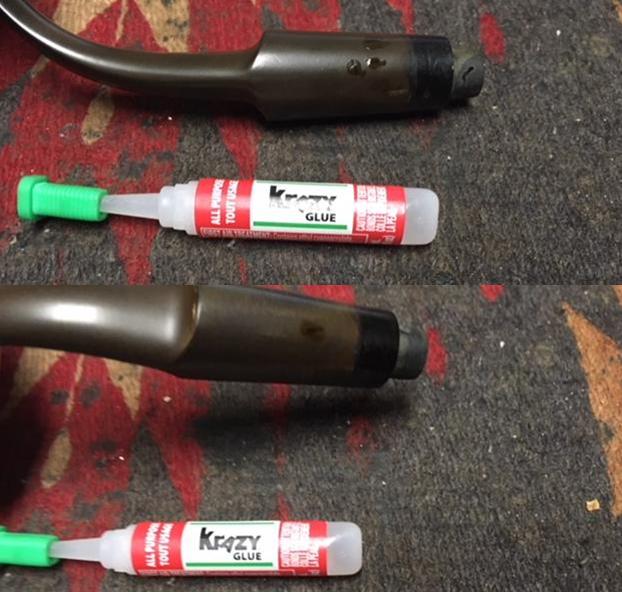 I used a Bic lighter to lift the tooth mark on the right top side of the stem, filled in the tooth marks with super glue and when it dried, sanded it smooth with 220 grit sandpaper. I sanded the repairs on the tenon end of the stem at the same time.
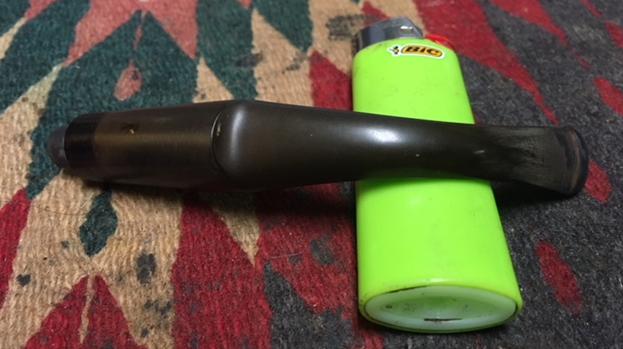 I polished the stem with micromesh sanding pads – wet sanding with 1500-2400 grit sanding pads and dry sanding with 3200-12000 grit pads. I wiped the stem down with Obsidian Oil after each sanding pad and set it aside to dry.
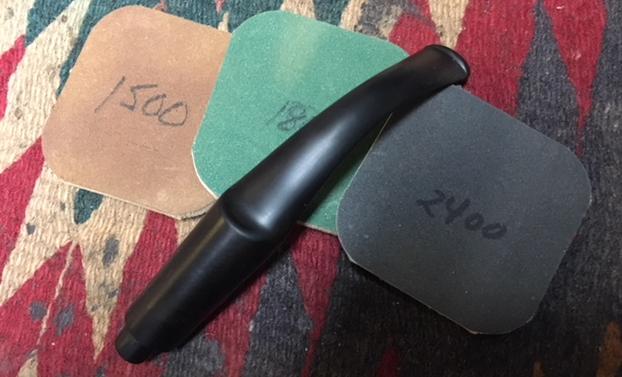
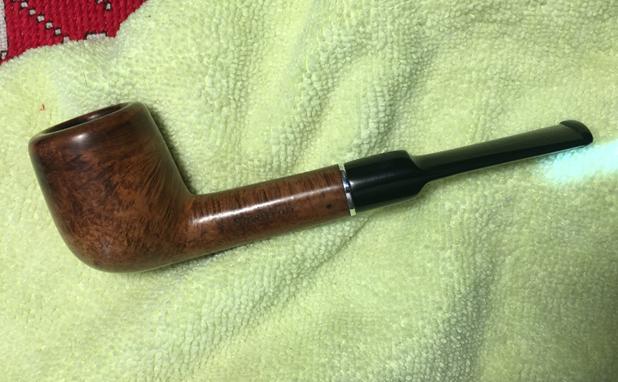
 With the stem polished I put it back on the pipe and lightly buffed the bowl and stem with Blue Diamond. I gave the bowl and stem multiple coats of carnauba wax. I buffed the pipe with a clean buffing pad to raise the shine and hand buffed it with a microfiber cloth to deepen the shine. The pipe polished up pretty nicely. The finished pipe is shown in the photos below. I have one more of Paresh’s Grandfather’s pipes to finish and then I will pack them up and send the whole lot across the sea to India where he can carry on the legacy. I know that he is looking forward to having them in hand and enjoying a bowl of his favourite tobacco in memory of his Grandfather. Thanks for walking through the restoration with me as I worked this pipe over.