Blog by Dal Stanton
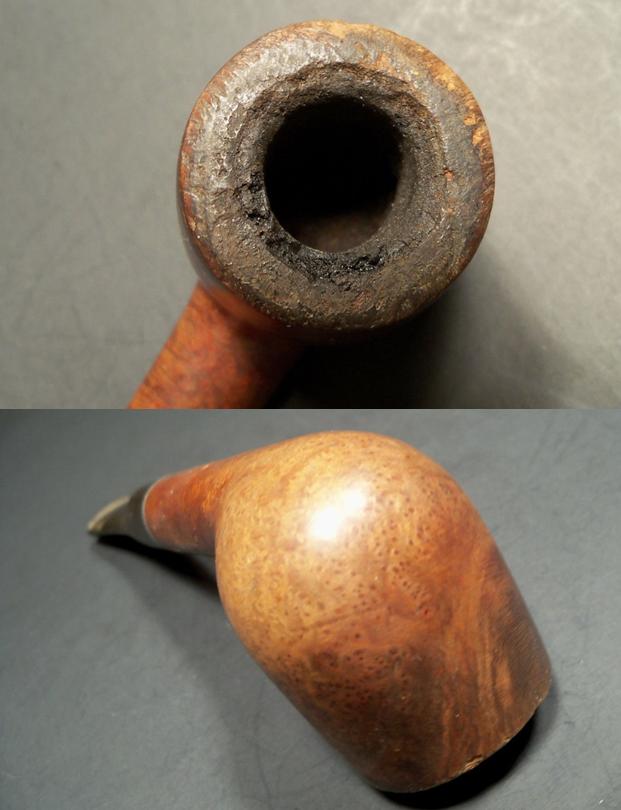
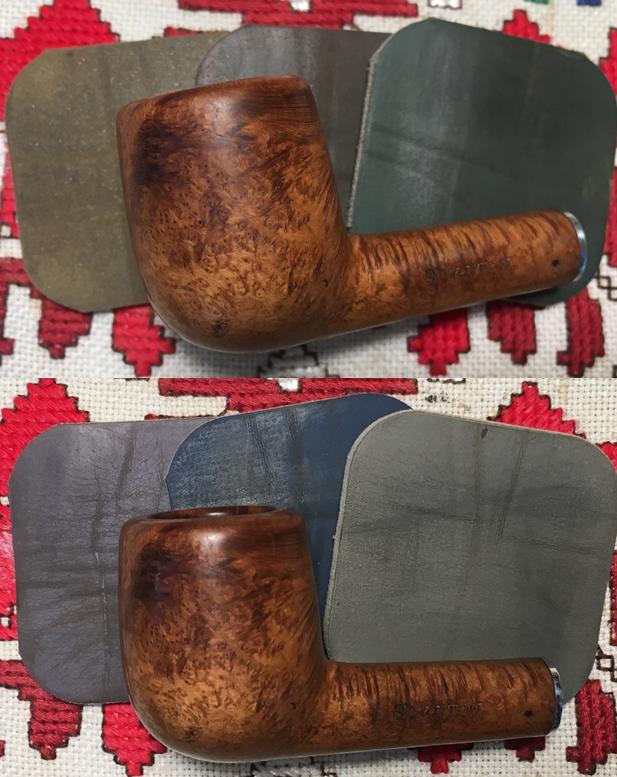
I suppose it IS vain to restart my restoration operations after 6 months with a pipe bearing my name. In my recent travelogue blog, ‘There and Back again – to Bulgaria’, I described what I called my ‘Vanity Pipe’ as one of the 105 pipes I acquired during our 6 month US visit. I came across this name-sake while trolling eBay’s offerings. I hadn’t come across a ‘Stanton’ before and so I decided to place a bid. As it turned out, I was the only Stanton bidding on the Stanton and claimed my Vanity Pipe with no competition.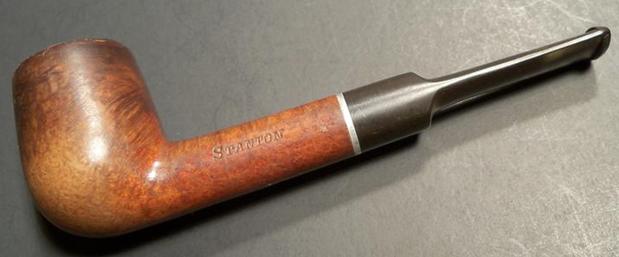 Name aside, the medium sized billiard looked to me like he was a hearty pipe – I will see if he’s a good smoker. Yet, if the heavy use, thick cake, and banged up stummel is any indication of the former steward’s affections, I would say it was very much part of the rotation and saw much active duty! The eBay seller provided good pictures of the Stanton which show the numerous challenges, but also the potential. The grain is attractive and will look great when the surface is refurbished and polished up. Here are some the pictures I saw on eBay.
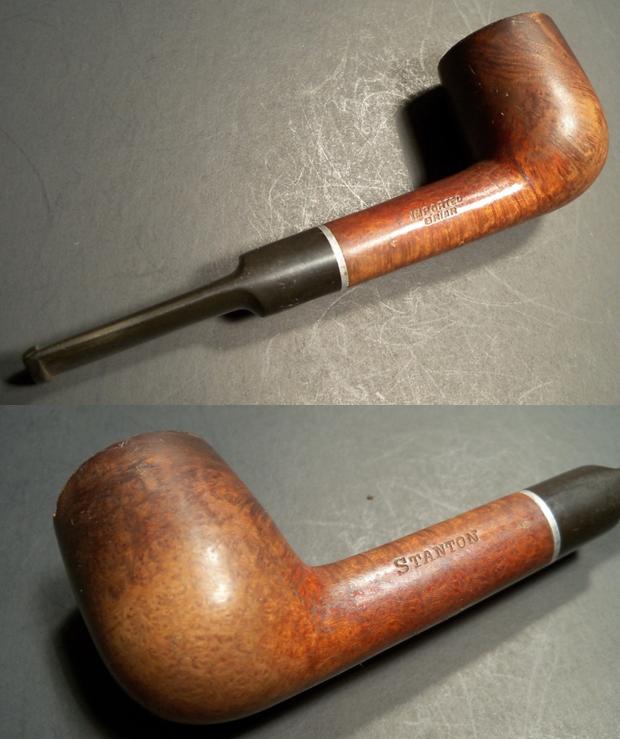
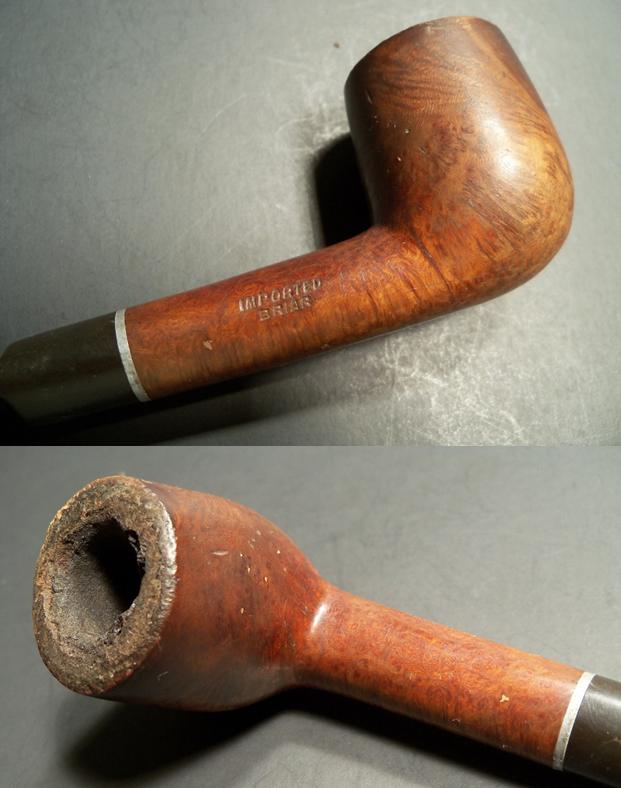
 ‘STANTON’ is stamped on the left side of the shank, and ‘IMPORTED’ over ‘Briar’ on the right. Of course, one of my first questions when I landed the Stanton from eBay was, where was this pipe manufactured? Are there any clues? My first inquiry was in Wilczak & Colwell’s, ‘Who Made That Pipe?’ Stanton was listed but designated as ‘Unknown’. My next stop after Pipedia came up empty, was PipePhil.eu where I found my first Stanton cousin listed:
 There were some differences in the nomenclature – my Stanton has ‘Imported Briar’ stamped on the left side shank. The specimen from Pipephil has ‘Genuine Briar’ under Stanton. Another difference is the dot. My Stanton’s saddle stem has no identifying mark. Yet, what was very clear from the comparison of the ‘Stanton’ on both pipes is that the same stamp pressed Stanton in the briar. The font is identical. My Stanton is the lower comparison.
 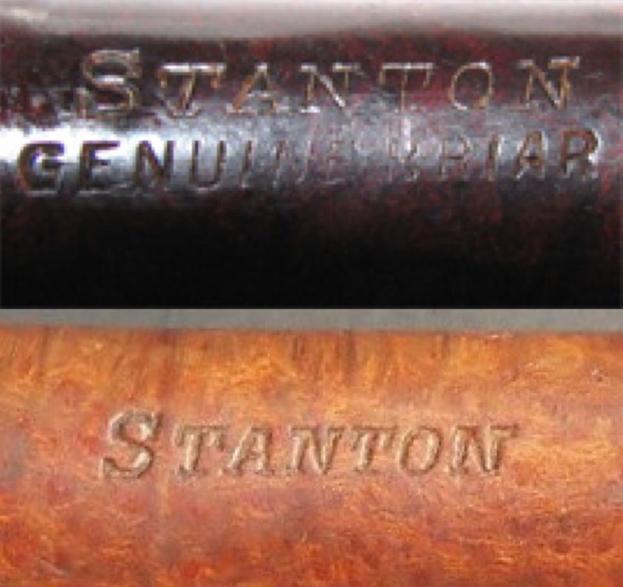 Simple google searches revealed the clan was larger with additional Stanton cousins showing up demonstrating a variety of shapes being produced under the Stanton name.
Two cousins from eBay: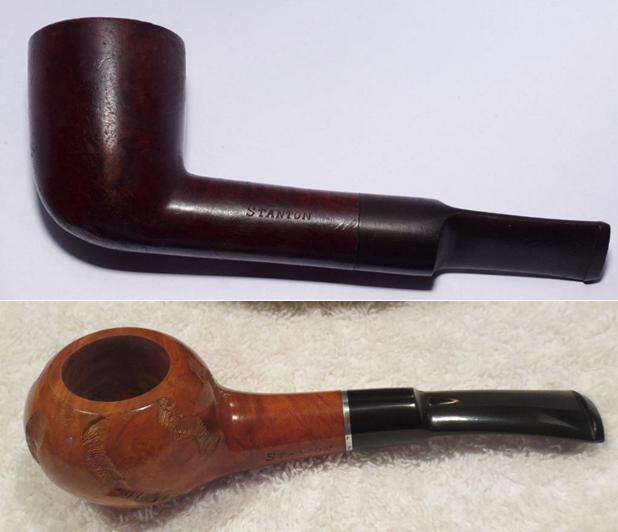 The only thing I found of a Stanton that provided any remote tidbit on origin was from SmokingPipes.com where the listing was for a very attractive Stanton Rhodesian described as an American Estate pipe. I liked Eric N. Squires’ description which I thought was apropos for my rugged and worn billiard:
American Estates: Stanton Smooth Rhodesian
Product Number: 004-009-6323
Here is another example of a pipe that was built extra stout, where it is a good thing that it was. This is because whoever else owned it, sure as hell didn’t baby it. I can see why they kept it so long though, as the broad chamber promises plenty of flavor, the drilling is nice and straight, and wide, firmly rounded bowl is pleasing in hand.
– Eric N. Squires So, it’s starting to become clearer – my new Vanity Pipe isn’t quite as vain as I! He has humble origins it would seem. If anyone can add information to this query into this Stanton’s roots, I would be appreciative.
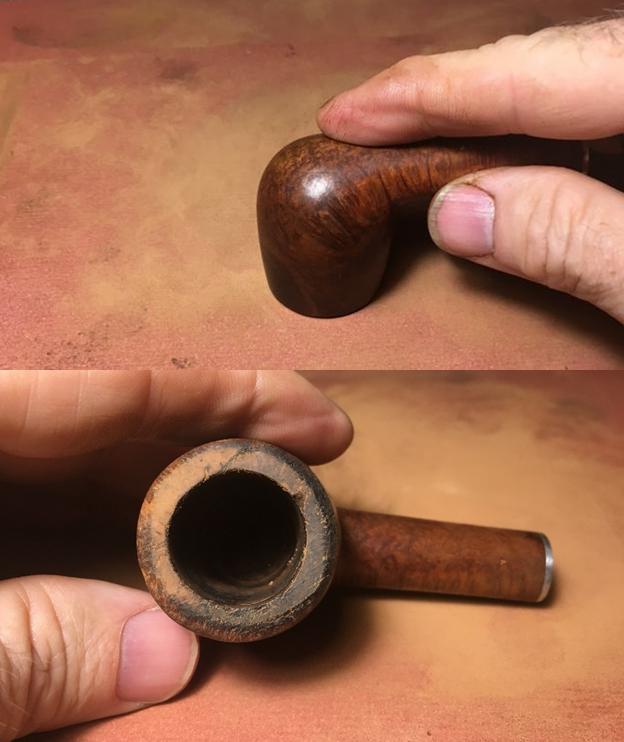
When I take a closer look at the Stanton billiard on my Pipe Steward work table here in Sofia, Bulgaria, I take a few more pictures to chronicle some of the challenges. The rim is in rough shape, with most of the front quadrant showing heavy wear – almost looks like the edge was scraped on concrete.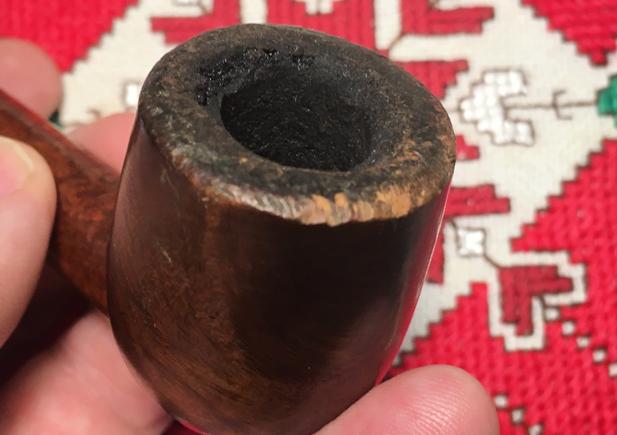
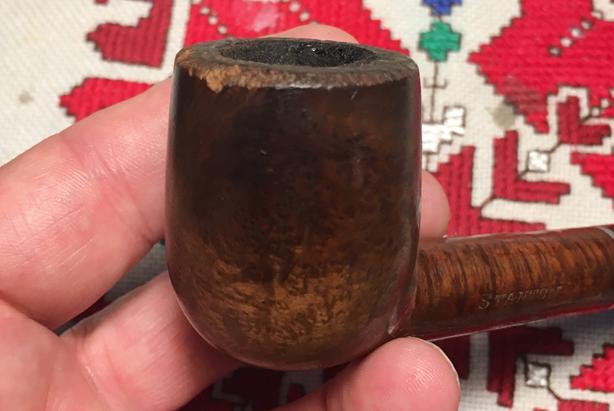 The cake is heavy and thick in the chamber and will need to be removed to reveal the condition of the chamber wall. The bowl surface is grimy and dark with old finish, several pocks and dents. Surprisingly, I do not detect any fills – the briar underneath the surface carnage looks to be very expressive, with much flow and character. The heel of the stummel is populated with tight bird’s eye grain.
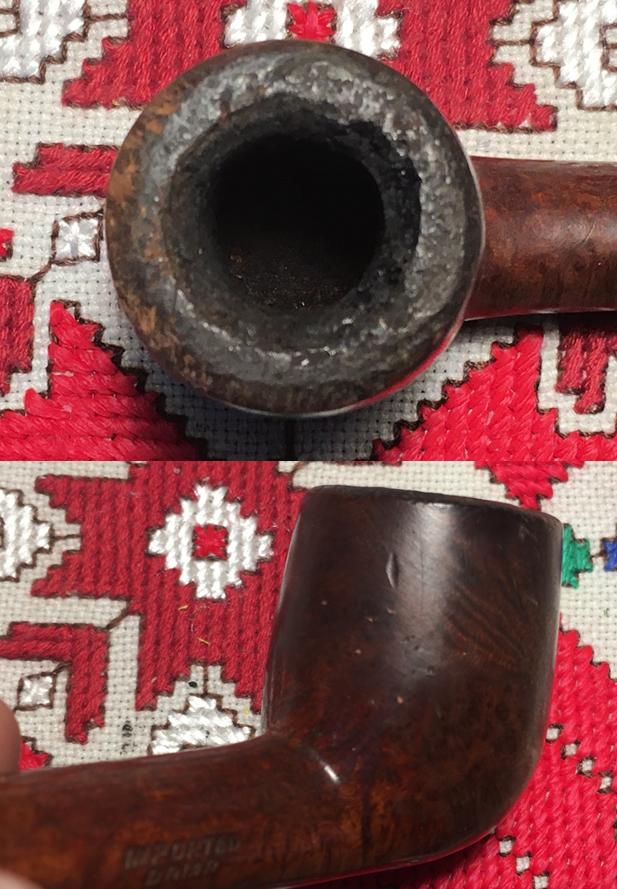
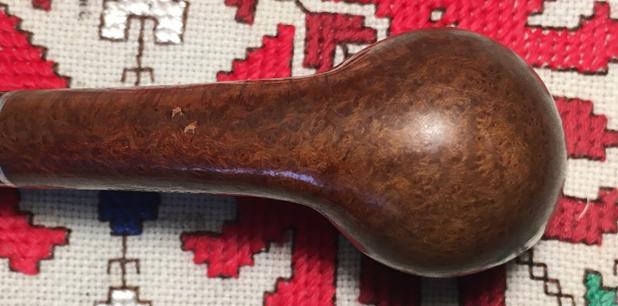 The saddle stem looks to be in good condition, with some oxidation and wee bit of tooth chatter and dents. The old screw in stinger needs to be cleaned along with the nickel insert/band – which seems to be a consistent design with the other Stantons. I did note that the set of the tenon, when fully engaged, is under-clocked. I’ll need to address this as well.
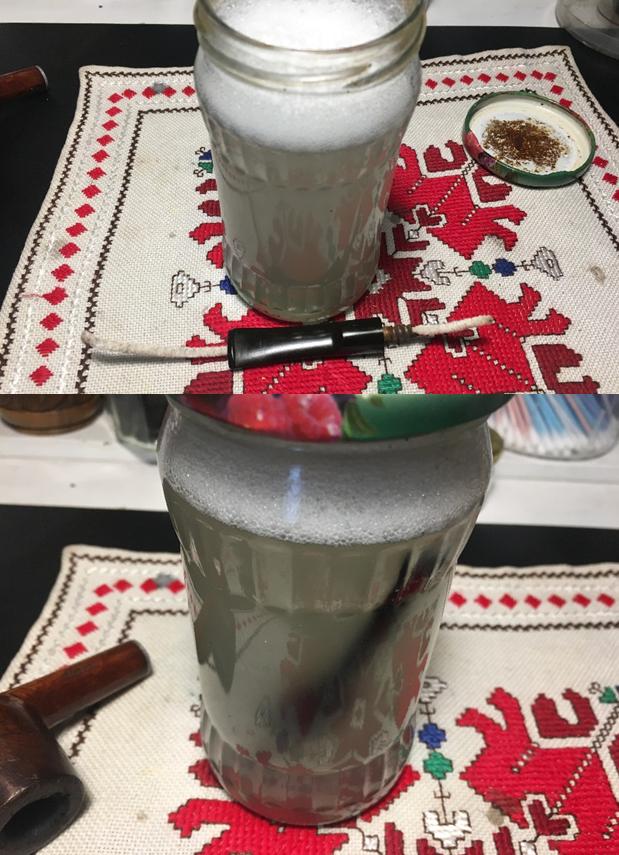
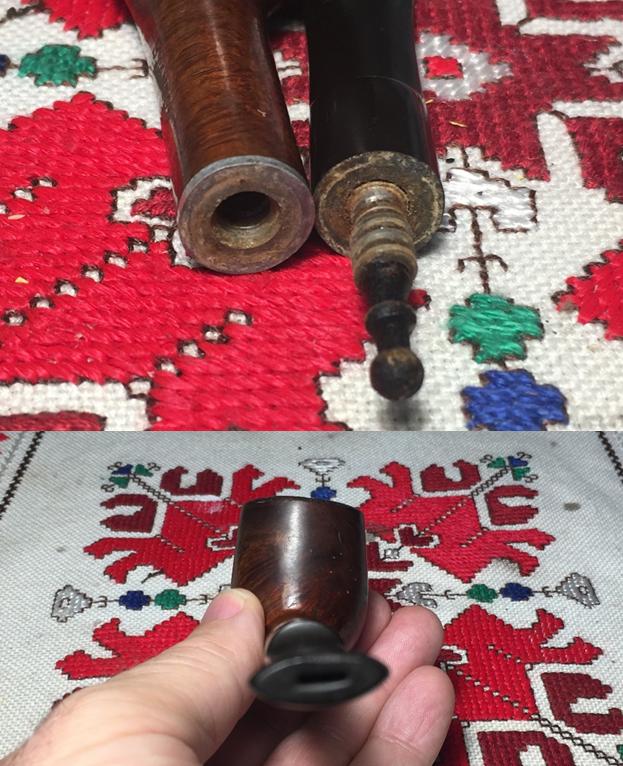 I begin the restoration of my first pipe after a 6-month hiatus AND one bearing my name by inserting a pipe cleaner into the stem, through the stinger, and putting it into OxiClean solution to raise the oxidation from the vulcanite. As a side note, after reading several of Steve’s posts testing and then using Before & After Deoxidizer from Ibepen.com, I decided to try it. I brought a bottle of it back with me to Bulgaria along with the balm and polishes. Down the road I’ll give them a try.
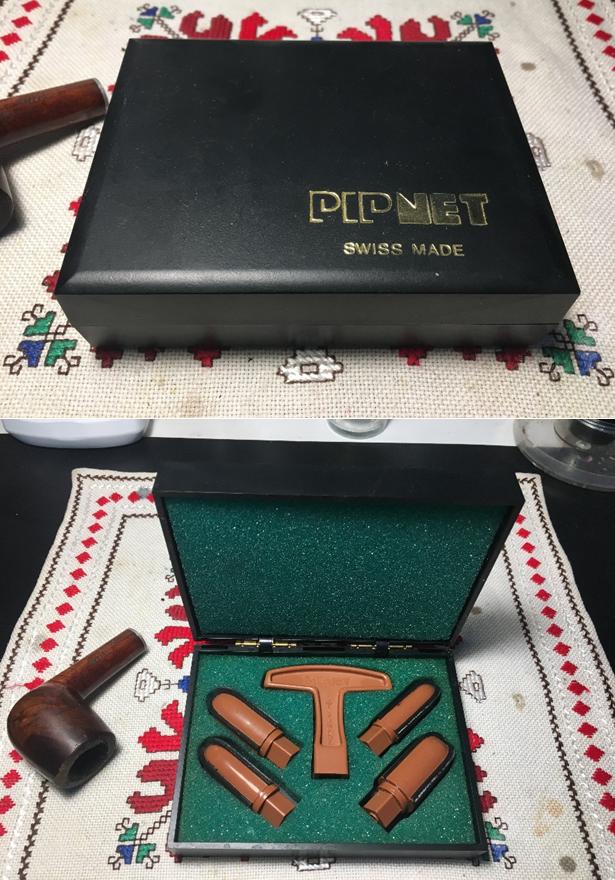
 Turning to the stummel, I begin the reaming process with my newly acquired vintage Swiss Made Pipnet reaming kit made with heavier duty hard rubber. Previously, I used the acrylic version that Pipnet put out later which tended to be more prone to breaking – the blades cracked on harder jobs. With a bit of patience watching eBay, the older, stronger Pipnet system surfaced and I’m thankful to have it back in Bulgaria!
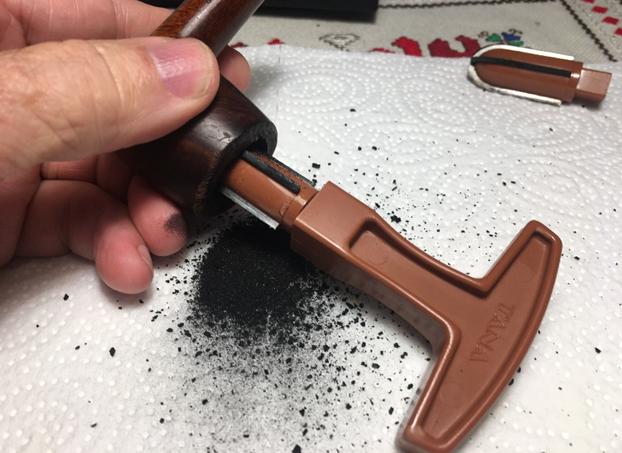
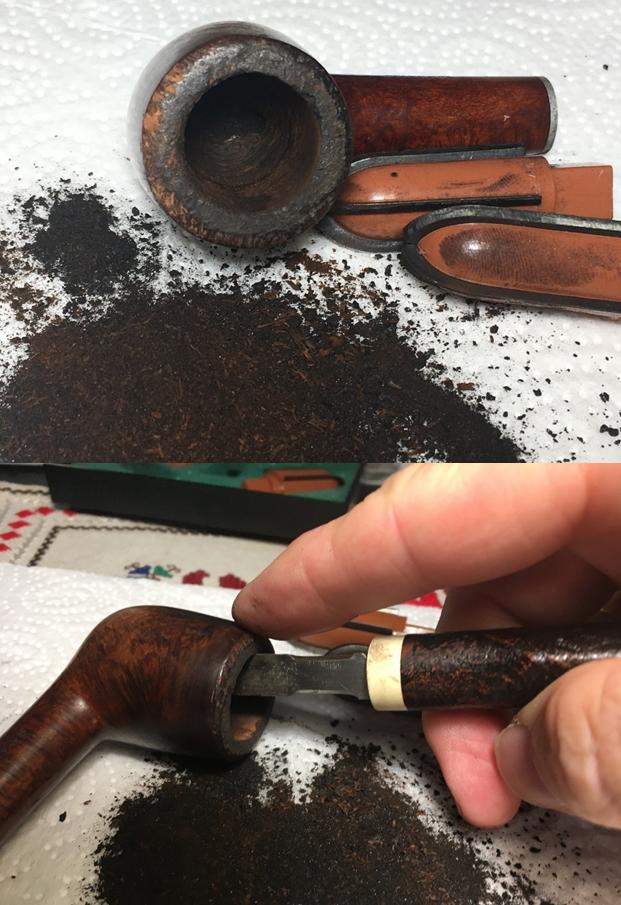
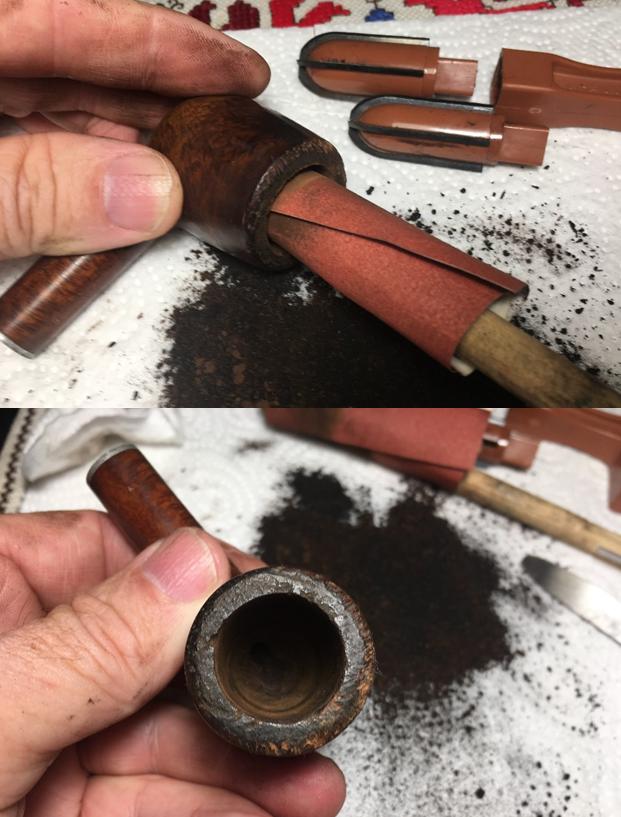
  Now, to take the new Pipnet blades for a test spin! After putting some paper towel down to help in cleanup, starting with the smallest blade, I work on removing the hard, thick cake. The blade went through with little effort. The next larger blade did its job as well. I then used the Savinelli Fitsall reaming tool to fine tune, removing more of the carbon in the harder to reach places. Then, wrapping a piece of 240 grade sanding paper around a dowel rod, I sand the chamber walls and finish the job wiping out the remaining carbon dust with a cotton pad wetted with alcohol. The pictures show the reaming process.
 Turning to the rim and the stummel surface, I need to clean the lava off the rim and the grime on the briar surface. Using undiluted Murphys Oil Soap, I scrub the rim and surface with a cotton pad. I also utilize a brass brush to work on the rim which will not add to the damage already present. I then rinse the stummel with cool tap water. While I’m working on the surface, I take 0000 steel wool and clean the nickel plate band/connector. An inspection of the clean chamber walls reveals no problems.
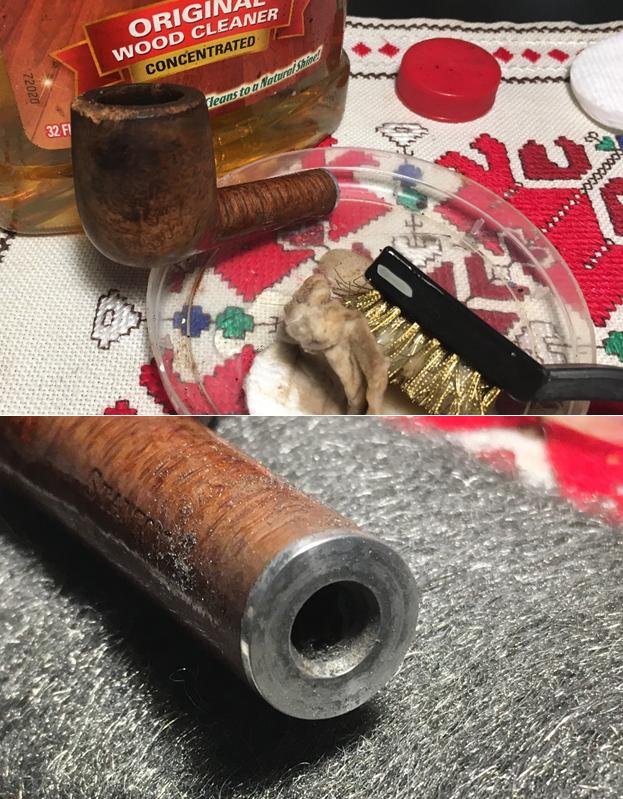 After the surface cleaning, I take a closer look at the stummel surface. The rim will need to be topped, but it is possible that the severe outer lip damage to the rim can be leveraged to my advantage. I can introduce an outer, rounded bevel and blend it with the freshened top. This can allow less real estate to be lost in the topping process. Along with the dents and pocks I saw before, I notice a dark area on the left front quadrant of the stummel which may indicate overheating of the stummel. I also note that in the shank area, around the stamping, the old, shiny finish persists. I want to remove all the old finish, especially around the stampings.
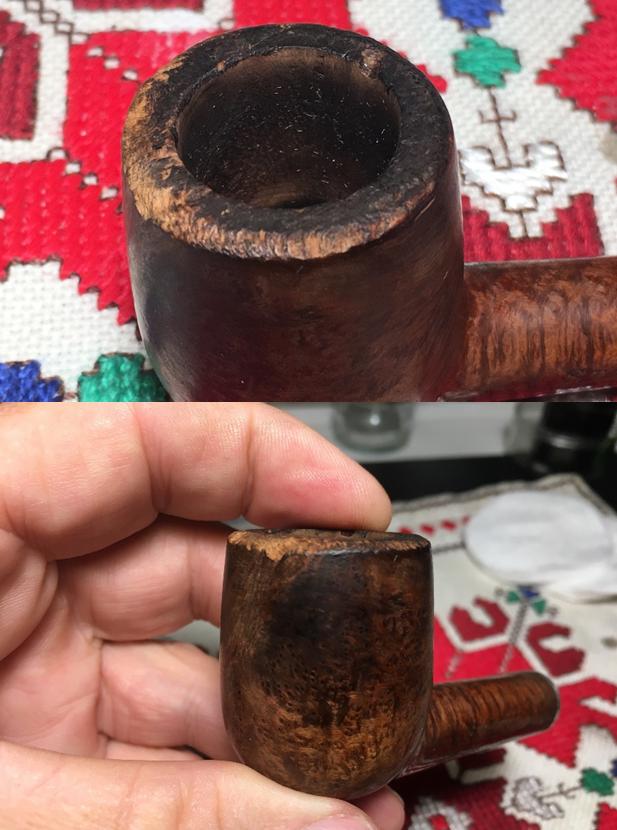
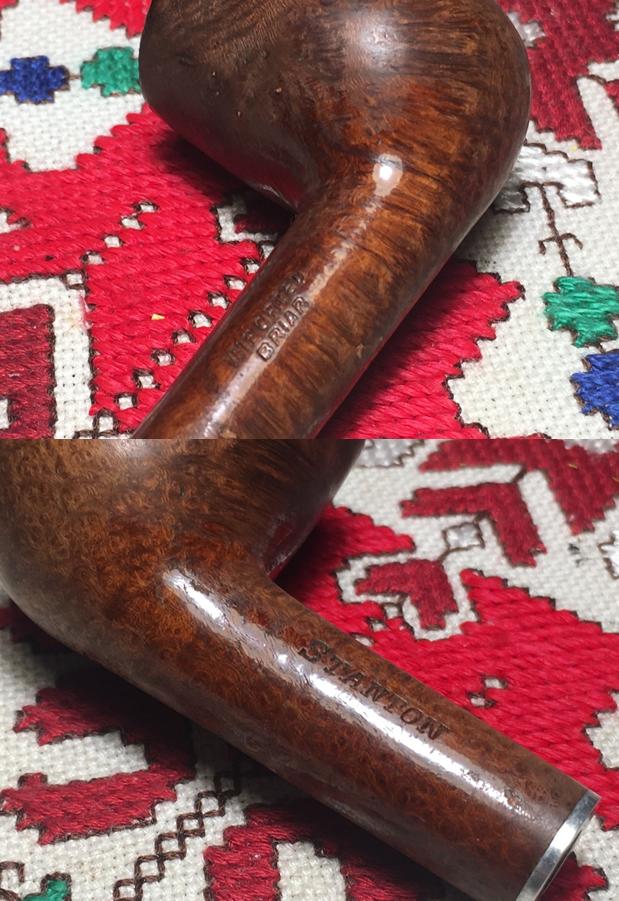 To address this old residue of finish I use acetone and a cotton pad and make short work of the finish. As hoped, the surface is now clean.
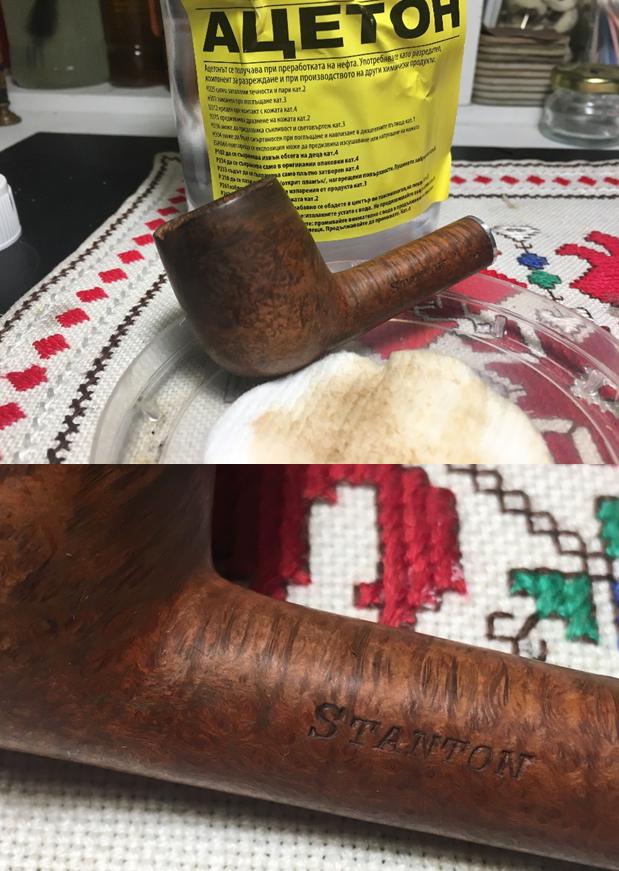 Before moving further with the surface, I attack the internal cleaning of the mortise and airway. I use pipe cleaners, cotton buds wetted with isopropyl 95% to do the dirty work. I also use a dental probe to scrape the mortise surface and to excavate the oils and tars that have congealed over time in the airway. That was the frontal attack. With grunge still surfacing on the cotton buds, and with the late hour approaching, I decide to use the passive-aggressive approach. Using Kosher salt, I fill the bowl and then add alcohol to sit overnight to work on cleaning the mortise. I set the stummel in an egg crate to provide stability. Then I fill the bowl with Kosher salt – not iodized salt which leaves an aftertaste. I then stretch and twist a cotton ball, to create ‘wick’ to draw the crud out of the mortise as the salt/alcohol does its work. I then fill the bowl with isopropyl alcohol 95% until full. I wait a few minutes and top it off. With that, I turn off the lights and head to bed. Another day coming.
 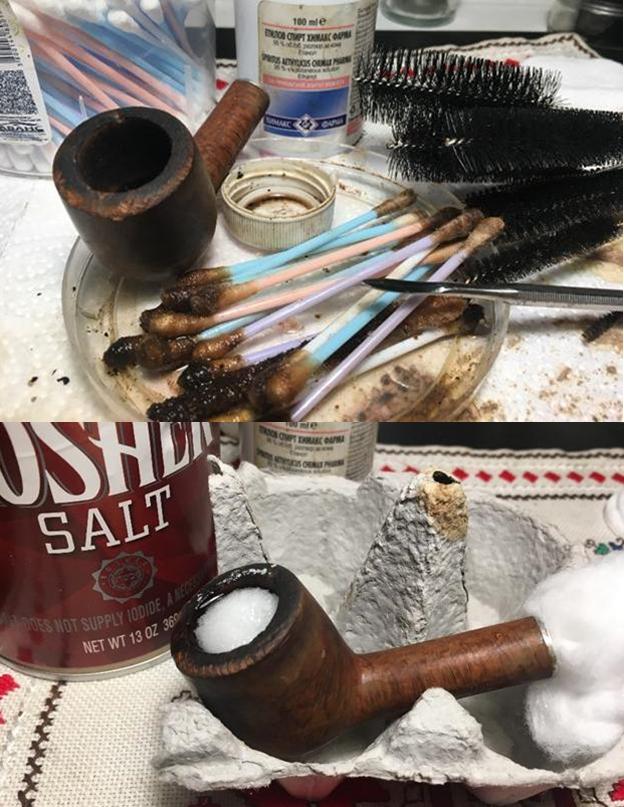 The next day, as hoped, the salt and cotton wick showed signs of the extraction of old oils and tars from the internals of the stummel. I clean out the dried salt and used a dry paper towel and bristle brushes to remove the residue salt. I also blow through the airway to help out. Even after the salt treatment, there is gunk left in the mortise. I continued to scrape the mortise wall with a dental spatula and follow with cotton buds dipped in alcohol to finish the job. The pictures tell the story.
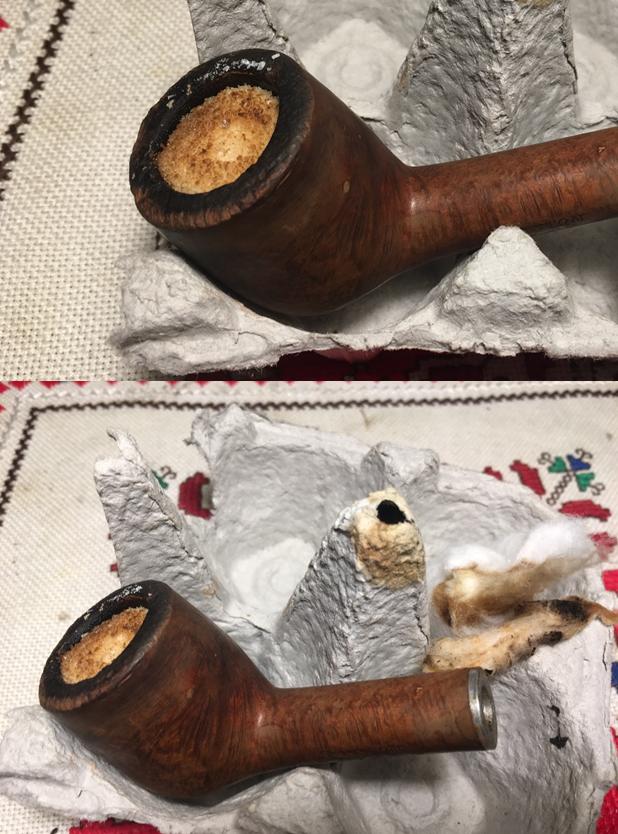
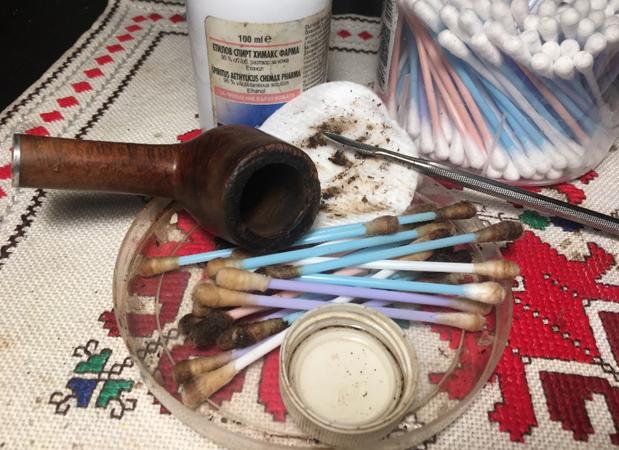 I put the stummel aside to work on the stem, now soaking in OxiClean. After taking it out of the soak, I take a picture and see that a moderate amount of oxidation had raised to the surface. Taking a piece of 600 grade paper I wet sand the stem removing the oxidation from the vulcanite. I also use a brass brush to remove the caked residue off the stinger. Taking a close look at the bit, there were only very small dents remaining after the sanding. I returned with the 600-grade paper focusing on those minute points and the stem is looking good.
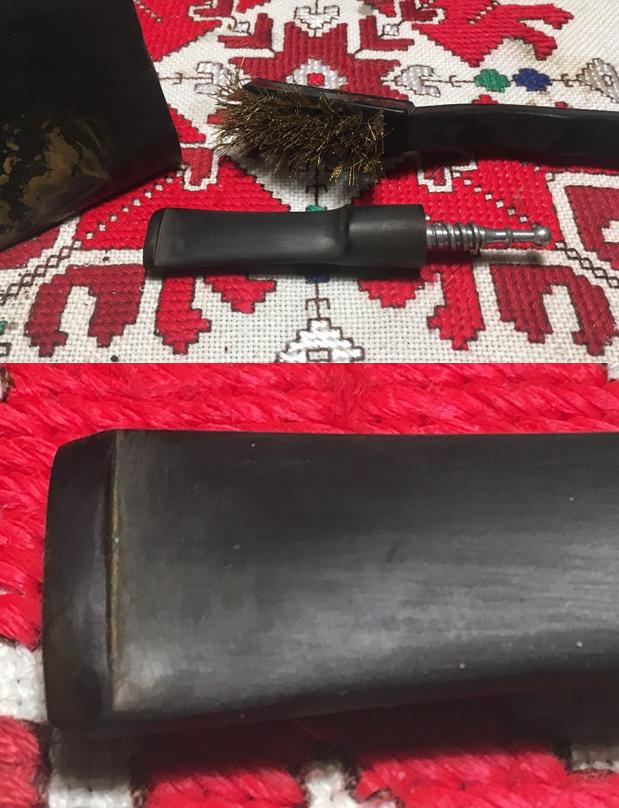
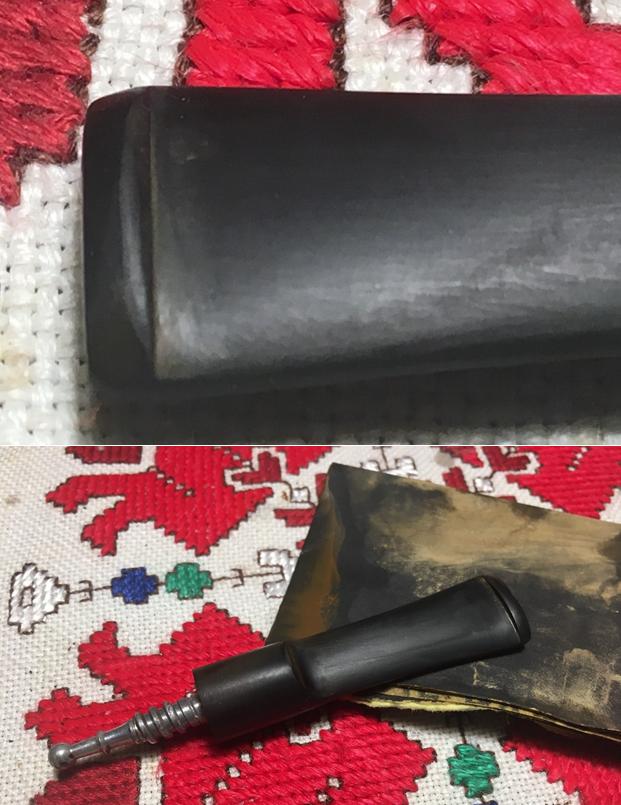
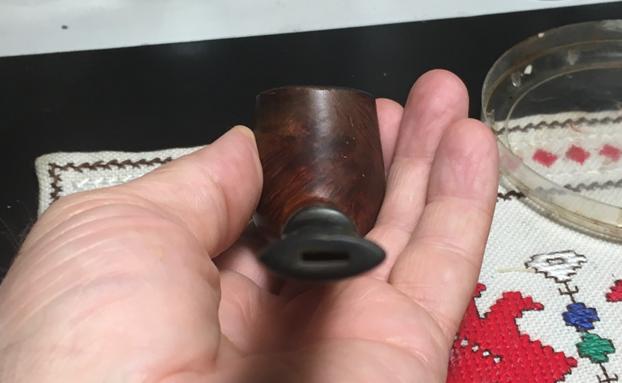
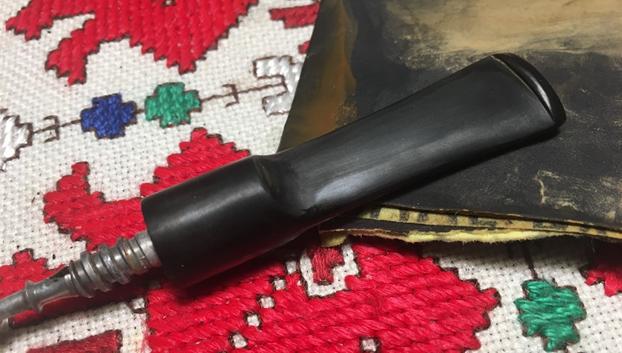 On a hunch, after the cleaning of the stinger and the mortise receptor band/plate, I refitted the stem to see if it still was under-clocked a few degrees as I saw earlier. As hoped, the cleaning corrected the alignment – now, looking down the pipe from the steward’s view, one sees a true alignment. Nice..
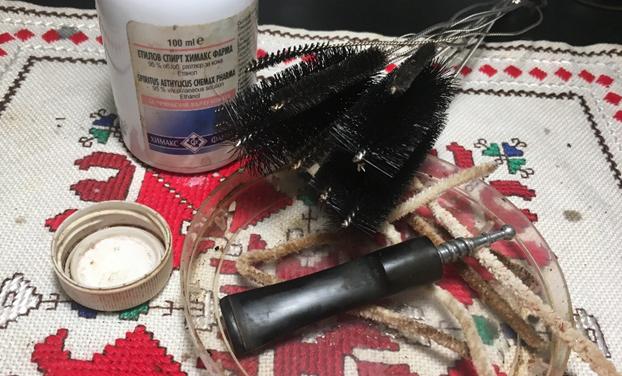
 To complete the clean-up, I turn to the stem using pipe cleaners dipped in isopropyl 95%. I also utilize a long-bristled brush. I find that utilizing the set of bristled brushes that I acquired some time ago saves on the pipe cleaners and are effective in getting at the gunk. Stem and stummel are now clean.
  The rim needs my attention now. I take a close look again. I will top the stummel using 240 grade paper on a chopping board. Looking at the first picture below, most of the external rim damage is on the front – 7 to 11 o’clock in the picture. What I’m a bit concerned about is the large internal rim divot at the 2 o’clock position. I’ll top a little and see if can address this without taking too much briar off. Otherwise, I’ll need to fill it with a superglue/briar dust patch to build it up to the rim surface.
 On the topping board with 240 grade paper, I rotate the stummel as evenly as I can to avoid leaning in one direction or the other. I check the progress to make sure I’m not leaning into softer wood. I take some intermittent pictures below to show the progress. I come to a point where not all the damage is removed, but enough that can be addressed by cutting bevels in the external and internal lips of the rim. To me, applying bevels to rims generally makes it look classier. I finish the topping by using a sheet of 600 grade and rotate the stummel several times to provide a smoothing of the surface. The pictures show the progress.
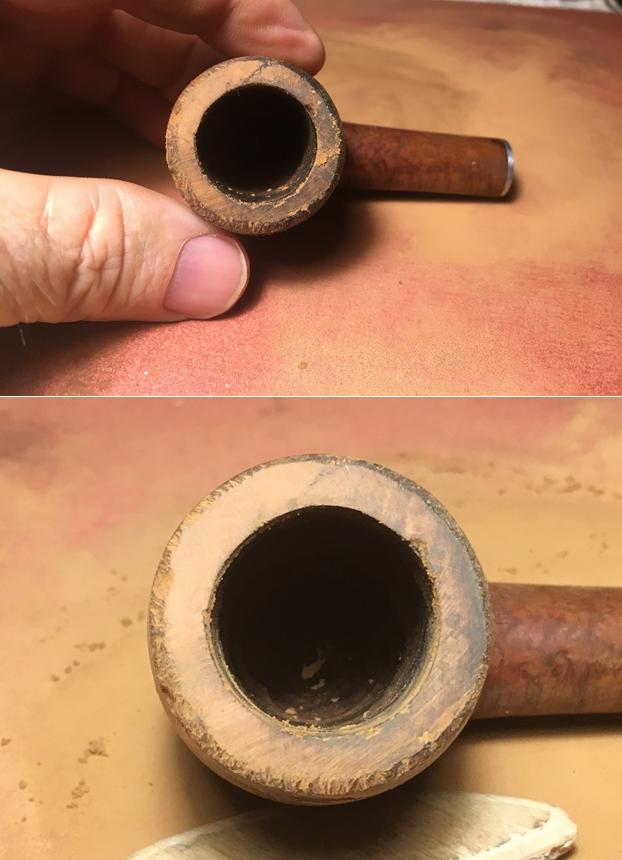
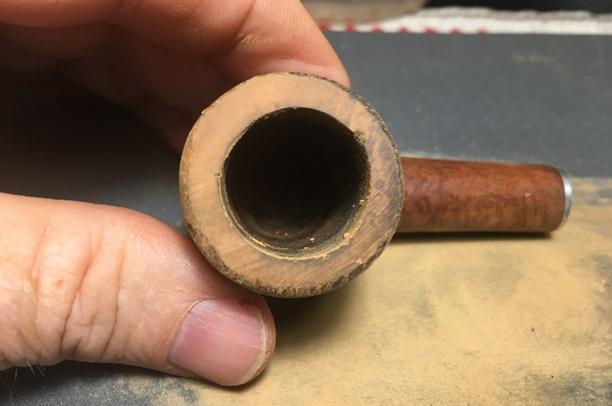 Without going any further with the topping, I look closely at the dents and pocks on the stummel surface. I see that some of the ‘pocks’ as I’ve described them may be very small fills on the underside of the shank and one on the top. The fill is a light material. The shank-side of the stummel is especially banged up with small dents. I utilize sanding sponges to remove these and work toward smoothing out and rounding of the outer rim lip to remove the damage. Careful to avoid the stampings on the shank, I progress by using the roughest grade, medium then fine grade sanding sponges in order. I’m pleased with the results with most all the damage removed from the stummel. The rounding of the rim looks great. The pictures show the progress.
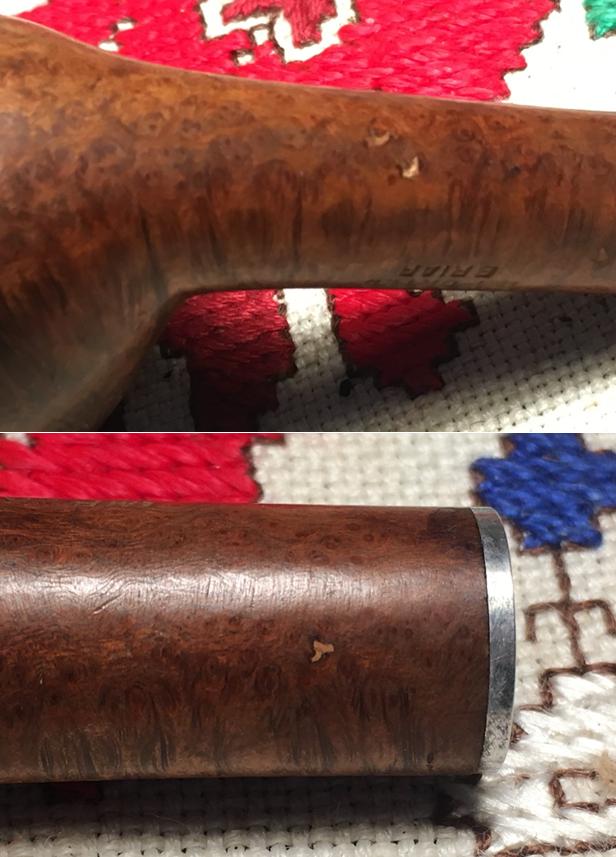
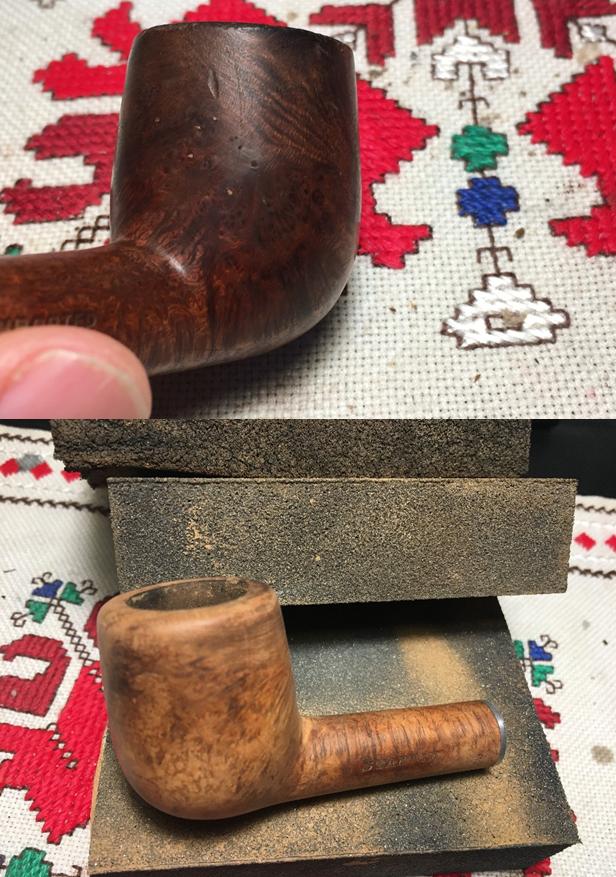
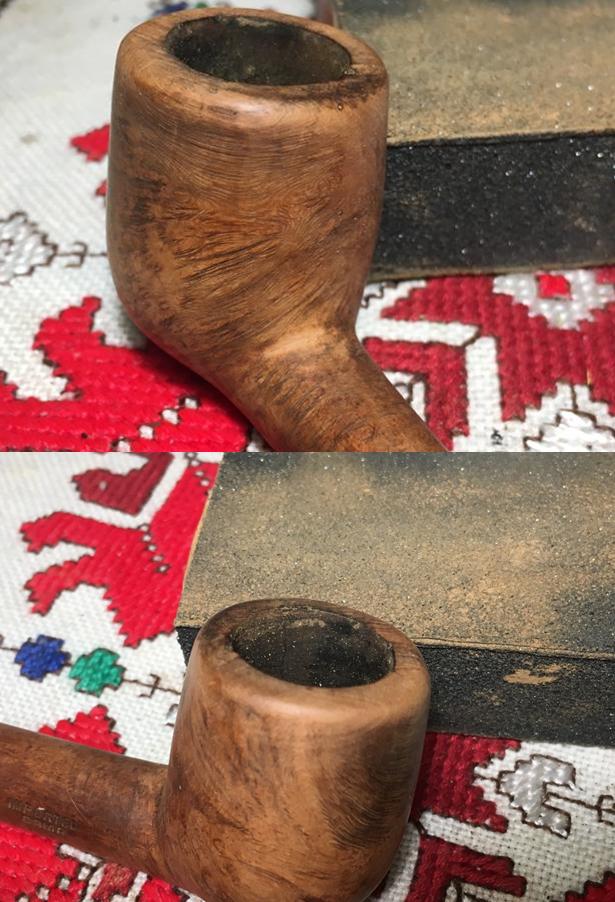 The inner lip of the rim is next. The one major divot at the 2 o’clock position I decide is too deep to remove it by creating an internal bevel. To build this divot up, I apply a few drops of Hot Stuff Special ‘T’ CA Glue. I’ll let the glue sit overnight before I bevel the inside lip.
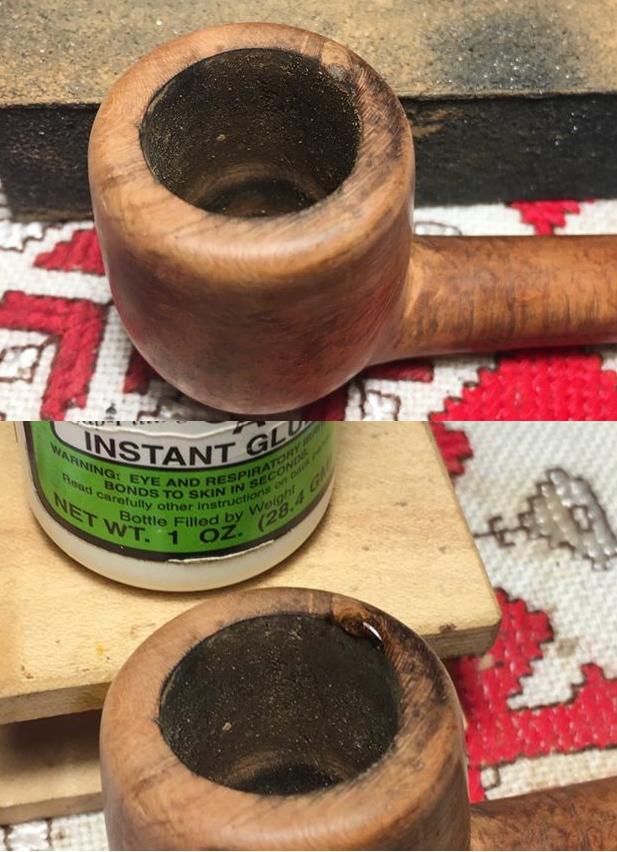 The next day, the CA has cured well. To re-establish crisp rim lines, I take the stummel again to the topping board covered by 600 grade paper. I’ll remove the CA glue mound and redefine the rim after the rounding of the rim edge. I take a before and after pix. That does the job.
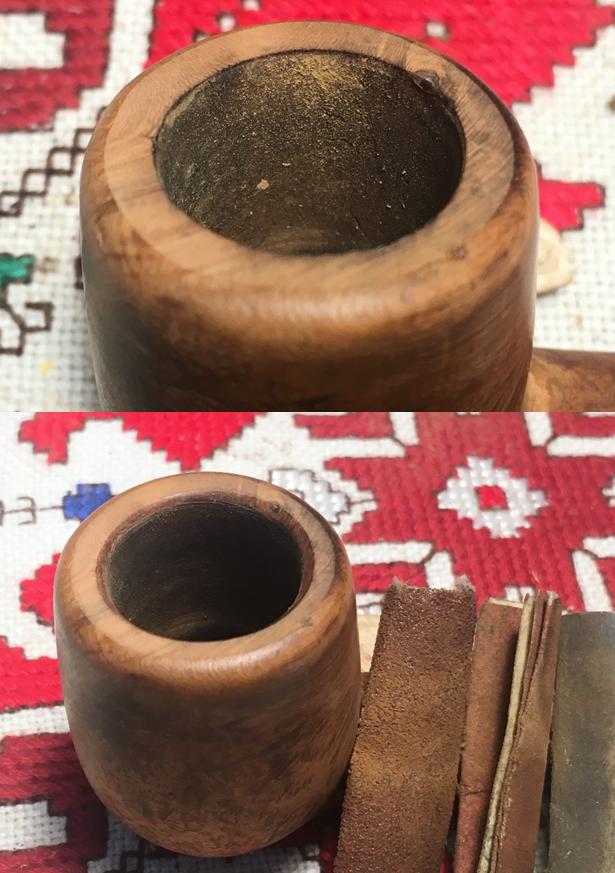
 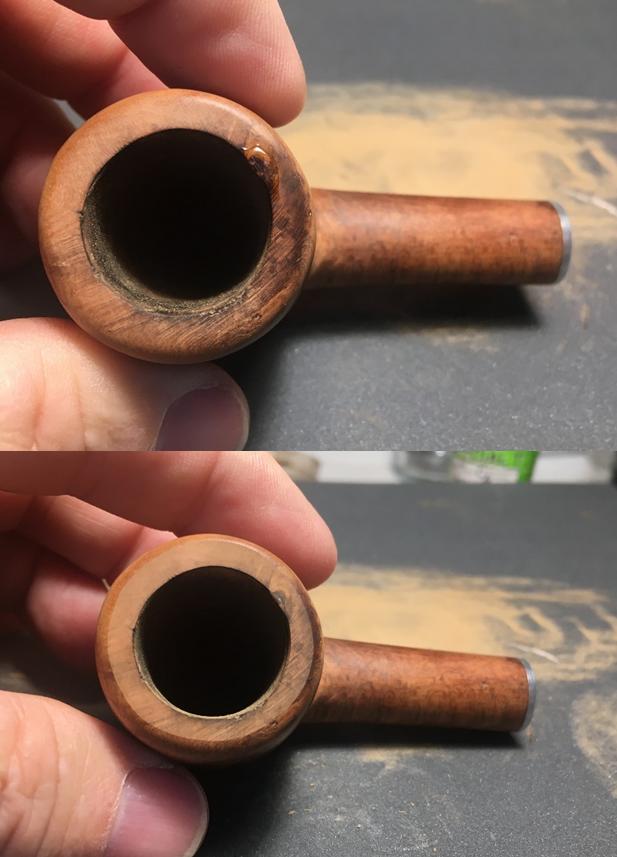 Next, to complete this phase of the rim repair, I roll pieces of 120, 240 and 600 grade papers and cut an internal rim bevel to remove the remaining nicks and to soften the look. With each rolled piece, I pinch the inside of the rim with the paper using my thumb and rotate evenly around the circumference. The bevel is slight, and I think it looks good. Again, before internal bevel and after pictures.
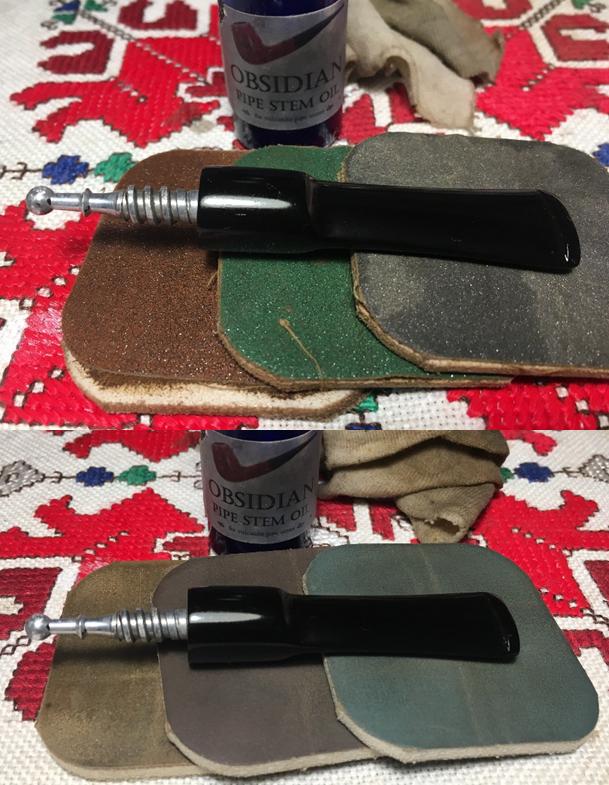
  I set the stummel aside and turn now to the stem. The initial wet sanding of the stem with 600 grade paper removed the minor bite marks and I’m ready to move to the micromesh cycle. Using all nine pads, 1500 to 12000, I wet sand with 1500 to 2400, then dry sand from 3200 to 4000 then 6000 to 12000. Between each set of 3 pads, I apply an ample amount of Obsidian Oil to refresh the vulcanite stem. I love the pop of newly polished vulcanite! My vanity pipe is shaping up nicely.
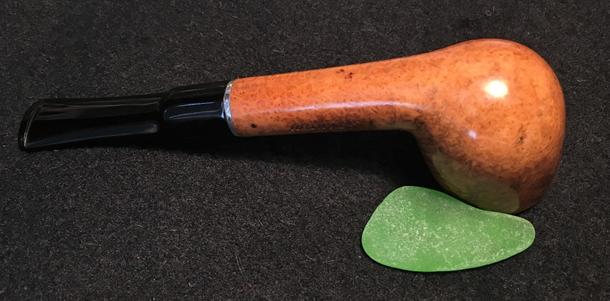
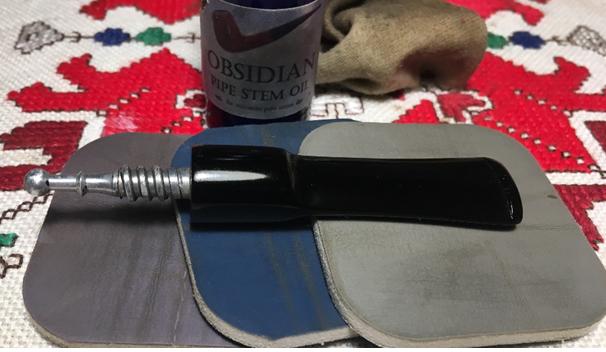 As I pick up the stummel, I look closely at the briar grain and a dark area I thought might be an overheating of the stummel – scorching. Now, with the old finish off and the hidden briar making an appearance, the area is a briar knot – a tight swirl of briar. It has character and I think it looks good. To continue the preparation of the stummel, I wet sand using micromesh pads 1500 to 2400, followed by dry sanding with grades 3200 to 4000 then finishing up with pads 6000 to 12000.
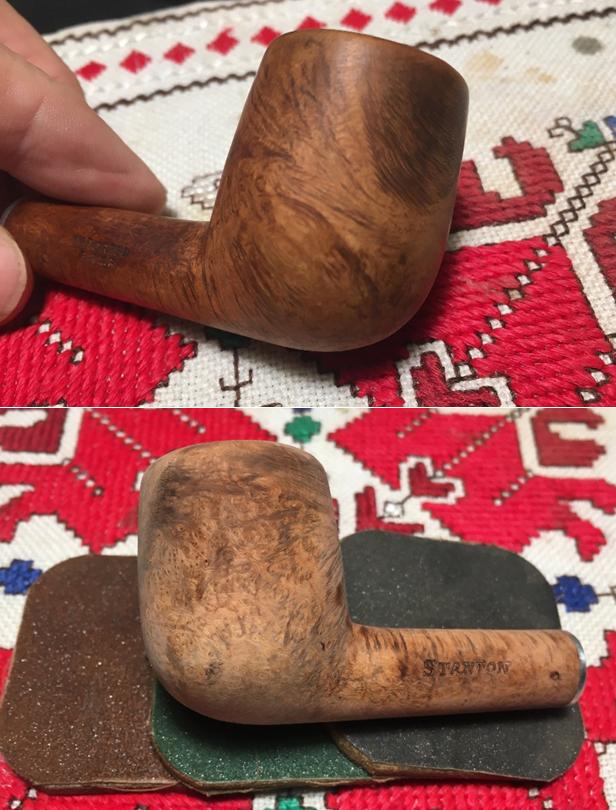 After finishing the first wet sanding cycle, I notice that the ‘pocks’ or fills on the shank had softened and become more noticeable and in need of filling. A detour, but better now than later! I use a dental probe to work out the softer fill. I then mixed a small batch of superglue and briar dust to fill the holes. I use a dental spoon to pack the mixture in the holes and put the stummel aside for it to cure.
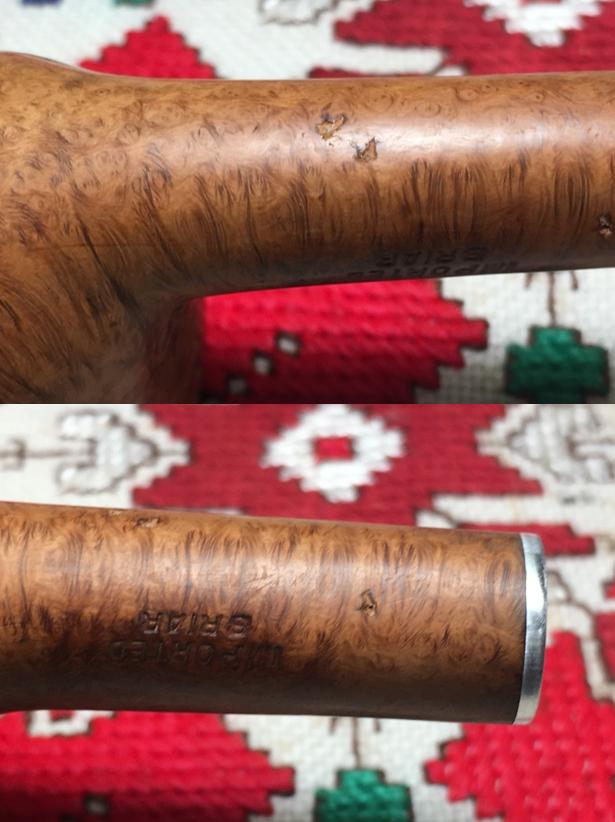
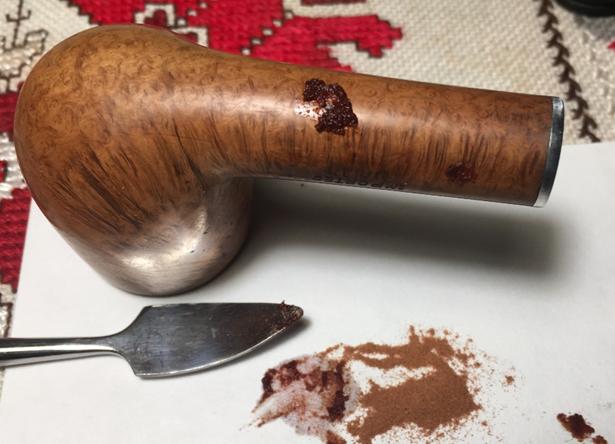 After the glue cures, I use a flat needle file surgically to bring the patch mounds down to the briar surface. I am careful to keep the file on the glue mound not to create collateral damage to the surrounding briar. Then using a tightly rolled piece of 240 grade paper, I remove the remaining glue residue by using the tight abrasive edge of the roll and rotate it in a circular motion over the mound area. With touch and a close look, I’m able to determine the excess glue is removed. Then, using 600 grade paper, I fine tune the entire area, not as concerned about the overrun on neighboring briar. At this point the fine abrasion is blending and shining. I finish the patches by catching the repair areas up with the first 3 micromesh pads. The areas are still visible, but now smooth and will blend better as I continue with the finishing process. The pictures show the detour progress.
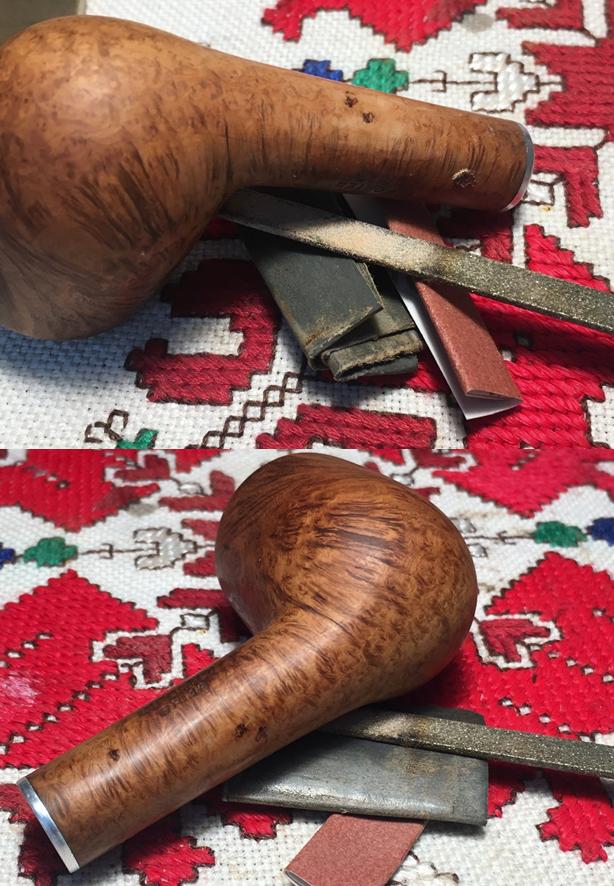
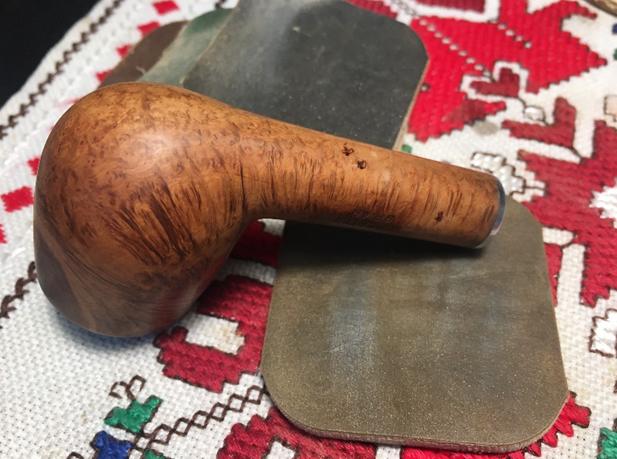 With the detour completed, I continue with the last two sets of dry sanding with micromesh pads 3200 to 12000. This pipe’s briar is looking very nice.
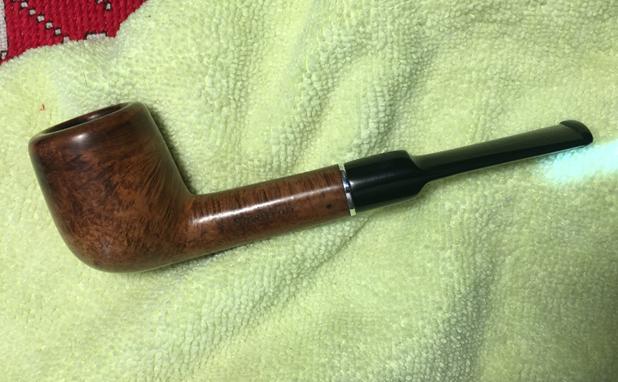
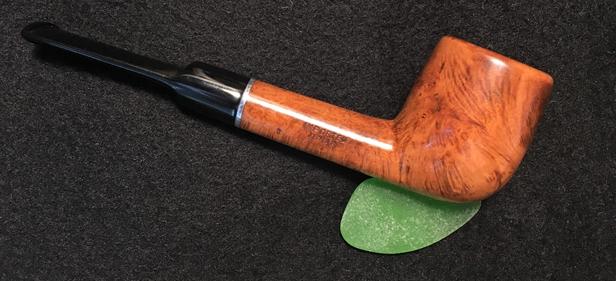
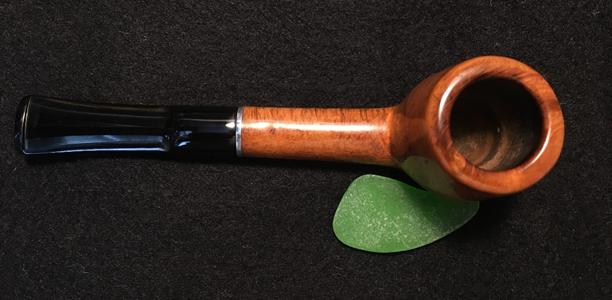
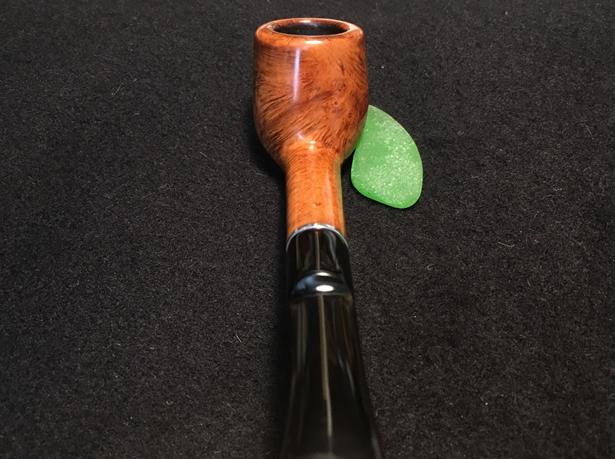
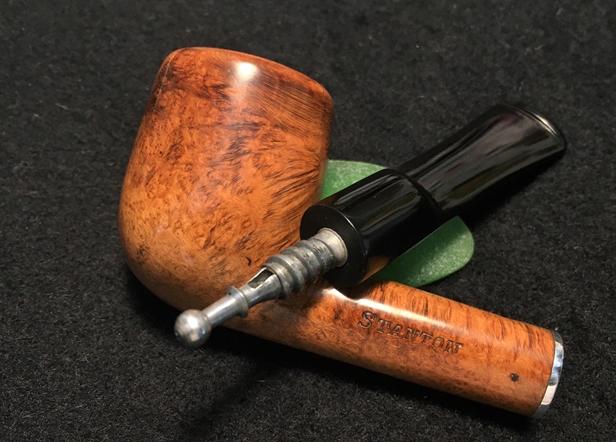
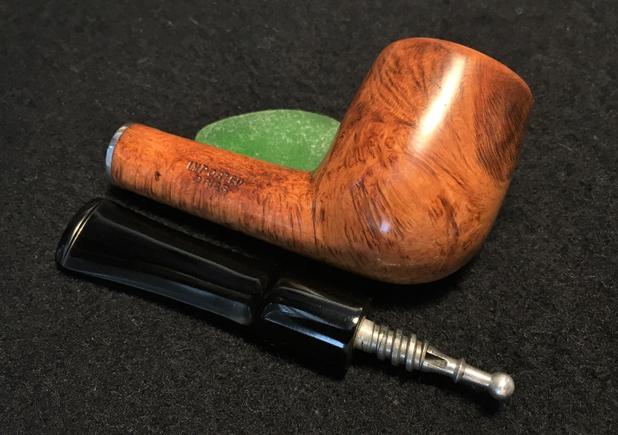
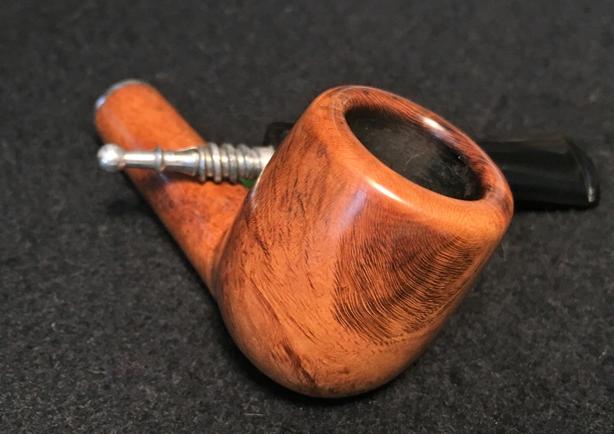
  Well, there are a few pipes the make it through the restoration gauntlet up to this point, and the natural briar just says, I’m enough. I had been planning to apply a lighter dye to the surface, but now…no. The actual look of the briar is lighter than the pictures above, which I like. So, with that decision made by my Stanton Vanity Pipe 😊, “I’m enough!”, I reunite the waiting stem with the stummel and take a picture – the bird’s eye view looks good.
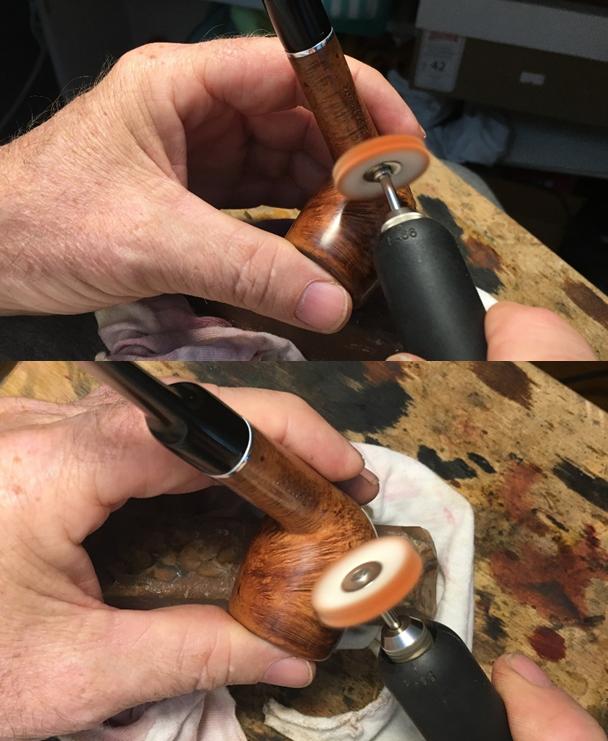
 To tease out the briar grain even more, I finally take my Dremel off the hook and again use it after the 6 months hiatus! Using Red Tripoli compound, I begin the buffing process on stem and stummel using a cotton cloth wheel mounted on the Dremel at the lowest speed. After completing a methodical circuit with the Tripoli, I switch to the lesser abrasive, Blue Diamond, using another cotton cloth wheel at the same speed. Completing the abrasive compounds, I give the pipe a quick buff with a clean cotton cloth to remove the compound dust/powder before applying the wax. I apply the carnauba wax with, yet another cotton cloth wheel dedicated to application of wax. I increase the speed of the Dremel by about 20% and I apply a couple of coats of wax to the entire pipe. For those who have not read my restorations, I live on the 10th floor of a former Communist block apartment building here in Sofia. I do not have a lot of room, so my techniques for restoration, especially polishing techniques have had to bend to the realities – hence, my exclusive utilization of a Dremel with no room for the more powerful full wheel buffers. After Steve asked me to write an essay on my techniques using a Dremel, I discovered out in the blogosphere many people who appreciated what I had written out of my own trials and errors. You can find this essay at the Pipe Steward website here: My Dremel Polishing Techniques with a No-Name pipe from Sozopol Bulgaria. My techniques have developed since then, but it’s a helpful essay. Thanks to my wife for helping take the following pixs since I don’t have a third hand to use!
 After completing the application of carnauba wax, I give the pipe a rigorous hand buffing with a microfiber cloth. This helps bring out the shine even more but also removes wax buildups that I may have not spread adequately with the Dremel.
The Stanton Vanity pipe came out well. I’m please with the rim repair that was significant. The removal of the old finish and cleaning revealed a very nice presentation of briar grain – the highlight is the dark knot cluster that almost looks like a thumb print. If anyone has any leads on more information about the ‘Stanton’ nomenclature I would appreciate a note! It is good to back to The Pipe Steward work table. The vast majority of my pipes are put in the store to help benefit the Daughters of Bulgaria, helping women and girls who have been trafficked and sexually exploited, but this fellow, Stanton, is staying in my collection. Thanks for joining me!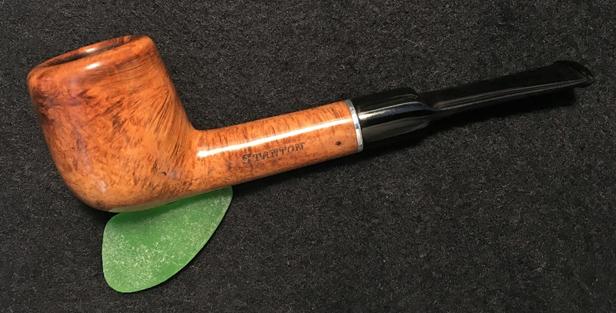

…I am always amazed at what a fantastic job you do in restoring pipes… you really pulled a gem out of this one… beautiful job!!!
LikeLike
Thanks, Harry! I enjoyed his inaugural smoke, and as it turns out, he smoked very well even with the older stinger system. He’ll join the rotation.
LikeLike
Reblogged this on The Pipe Steward.
LikeLike
New life to an old pipe. Great restoration job Dal. Enjoy your new pipe!
LikeLike
Thanks Mark! I will, I believe- I still need to take him for a test bowl, but I’m hopeful 😊.
LikeLike
Think positive. I know you can do it Dal 😉
LikeLike