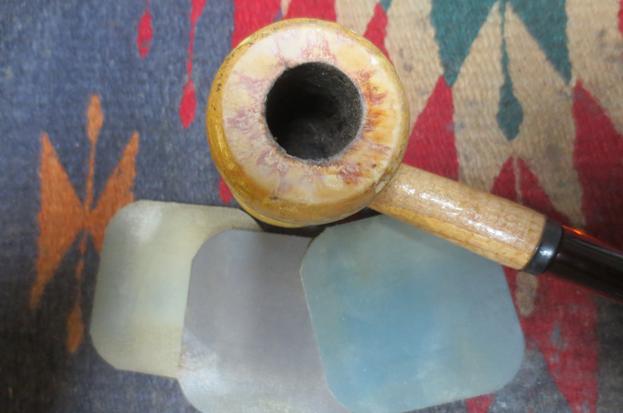
Blog by Aaron Henson
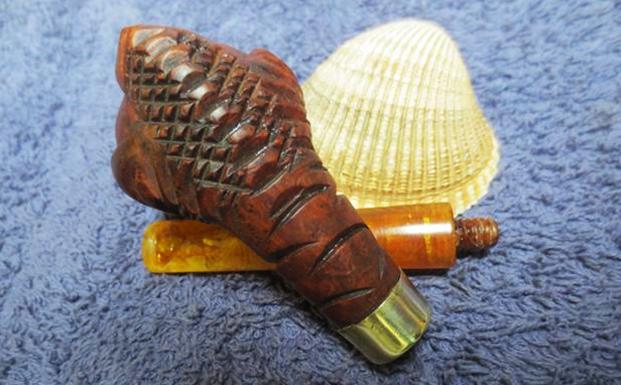
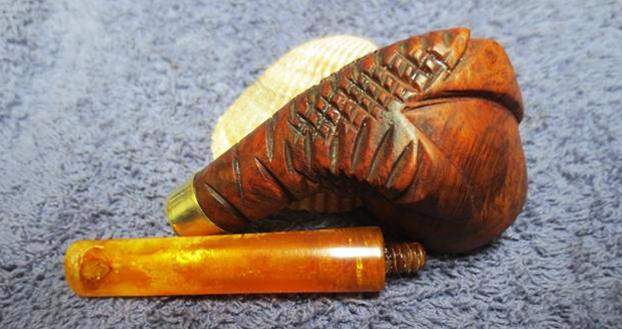
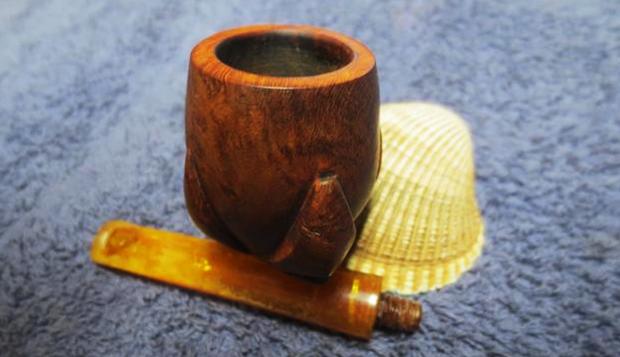
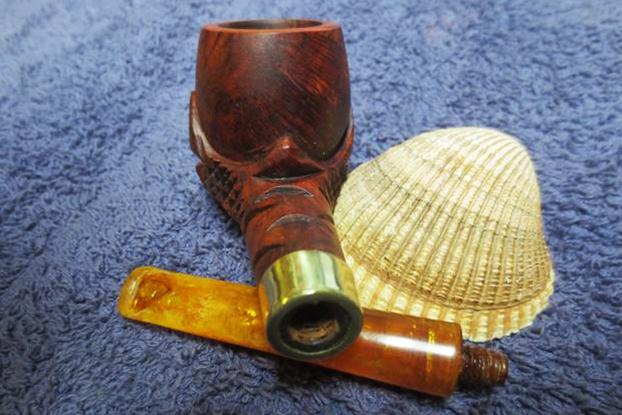
Before you get into this write up, I need to confess that despite my best efforts, I did a poor job of photo documenting this repair and restoration. I had good intentions, but the project was spread out over two months, working on it as I had time. Because of this, some of the pictures were taken out of sequence and others were chosen that best show a repair but also show repairs that have not yet been covered in the write up.
I realized a while back, that I had not restored a pipe recently that I was really excited about. There have been a number pipes that have crossed my work table and some have even posed some new challenges but the pipes themselves were hardly memorable. With the pickings at the second hand store in my area being slim – I turned to eBay to see if I could find a project pipe that would peak my interest. After a few hours of browsing I, found just what I was after: a stemless, GBD Garland II stummel – shape 9552. I submitted my bid and picked it up for a price that I thought was reasonable.
I don’t typically like to buy pipes on eBay. I prefer to be able to see them first hand so I know what I am getting myself into. But in this case the seller was forthcoming in the auction description, revealing that the pipe had a major crack in the bowl and another in the shank and of course, it lacked a stem. But what really fascinated me was the shape of the stummel and what promised to be some beautiful grain patterns.
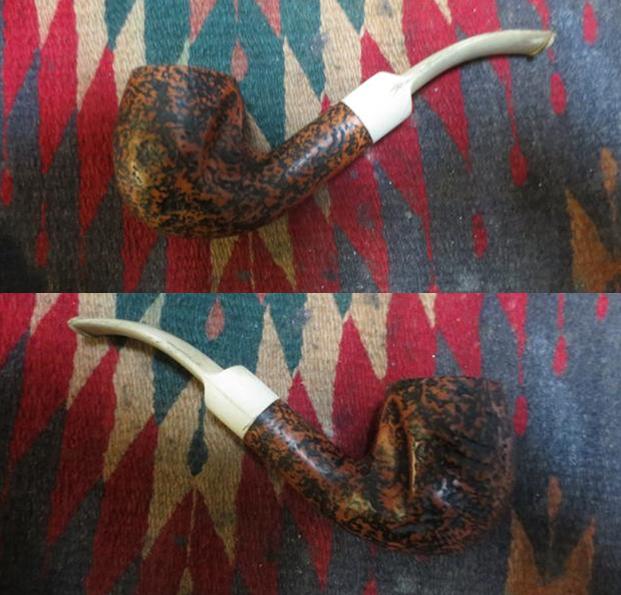
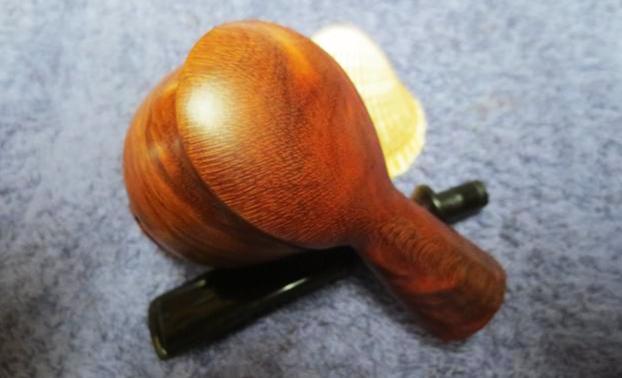
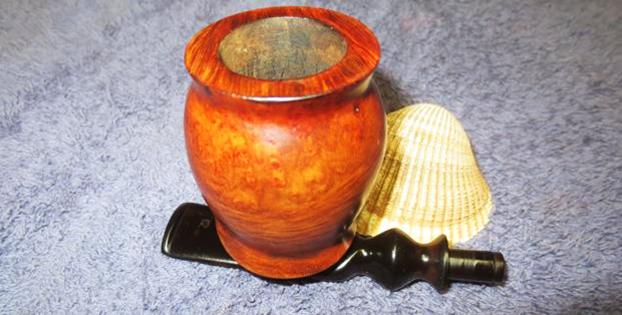
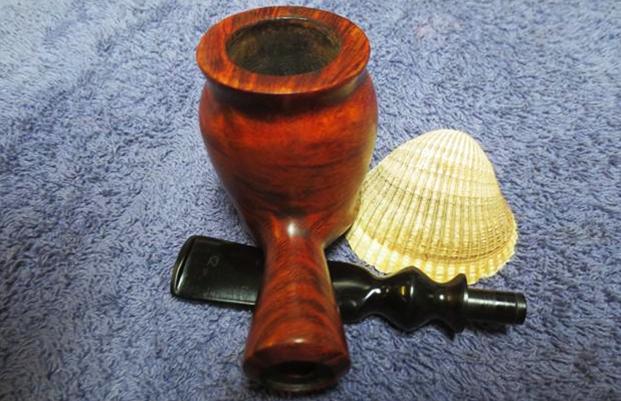
The following pictures were from the seller auction page: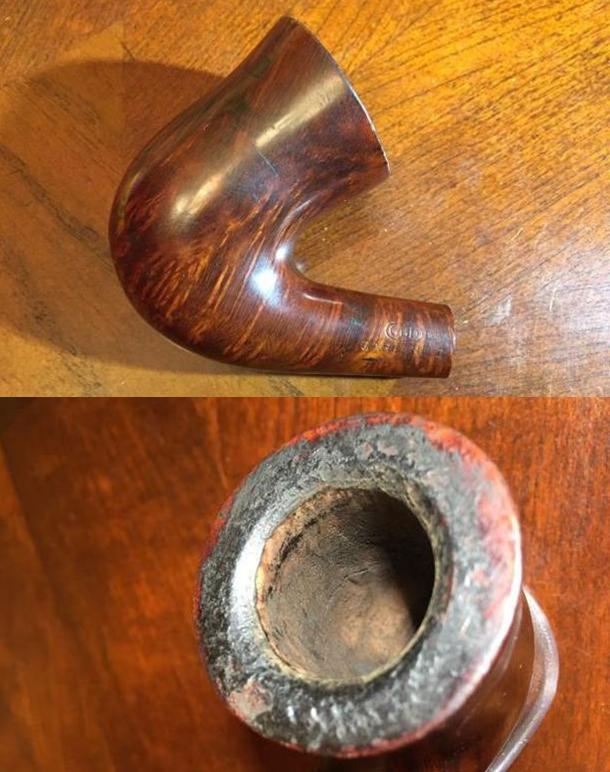

 Wanting an idea of what kind of stem was originally on the pipe, I headed on-line to see what I could find. My first stop was here at Reborn Pipes. In a 2016 article, our host, Steve, restored a GBD Colossus Fantasy 9552. I found additional examples of the 9552 shape in the GBD’s Prehistoric, Prestige and Virgin lines. In all cases the 9552 originally came with a bent saddle bit – some fancier than others.
These next two pictures are of a Garland II I found online. I was not going to try to duplicate the band in the stem, but knew I was going to need a band on the shank and that wouldn’t look too bad.  Then I ended up at a Pipedia article for GBD Models where I learned that the Garland is a seconds line from GBD. I found this surprising because the Garland that I have and the ones I have seen online are excellent specimens of briar. Admittedly, my eye is not that experienced, but just from the quality of the briar and the lack of fills and pitting I would guess that the Garland line is GBD’s higher end seconds consisting more of fabrication errors rather than materials flaws. Can anyone confirm my guess?
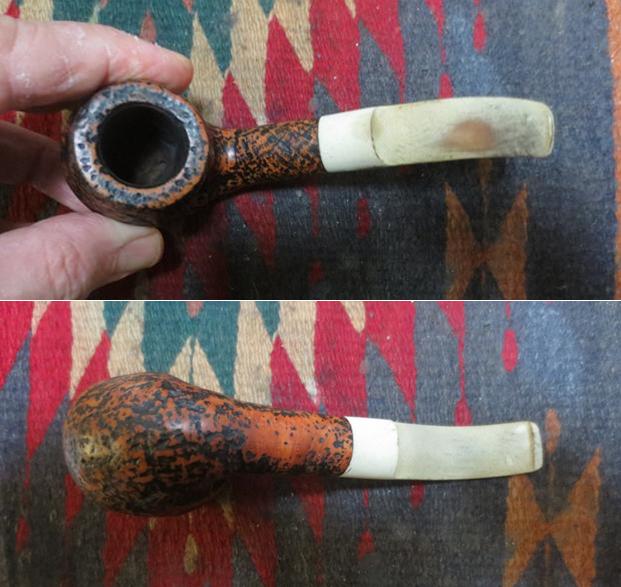
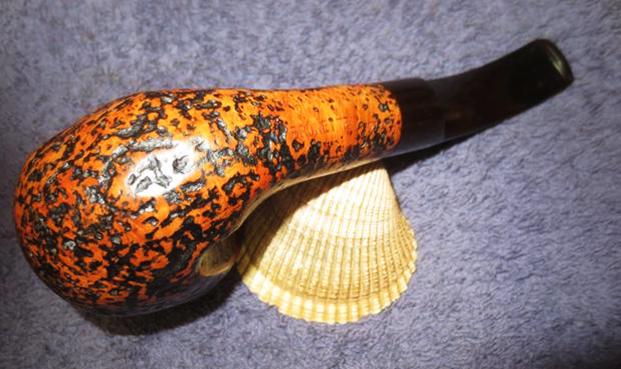
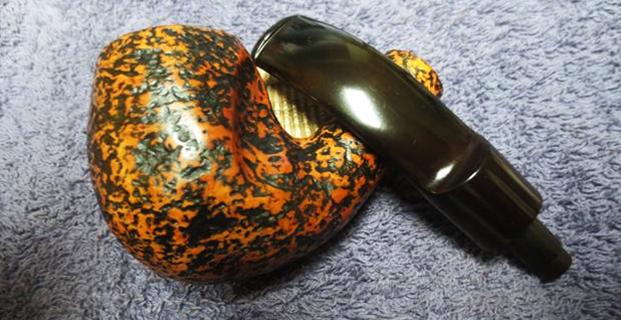
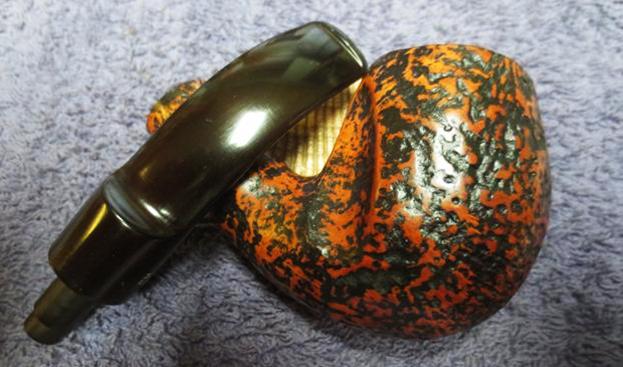
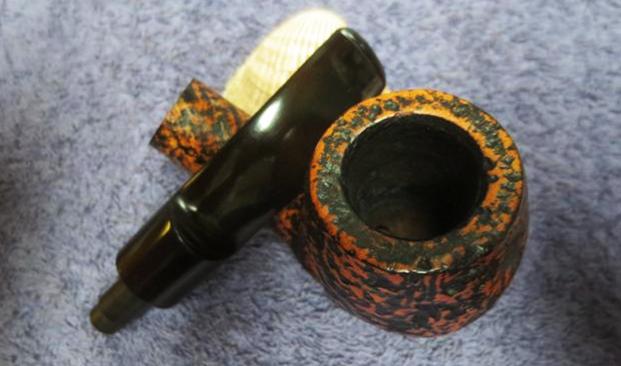
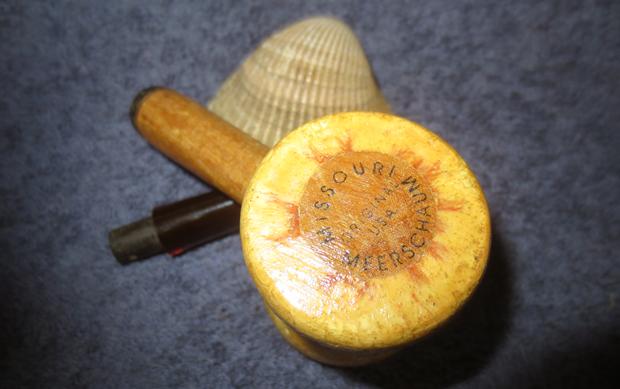
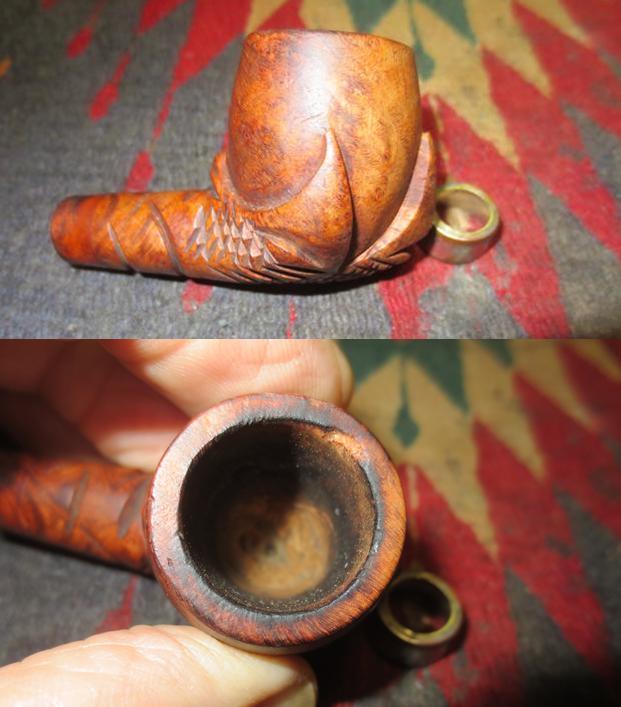
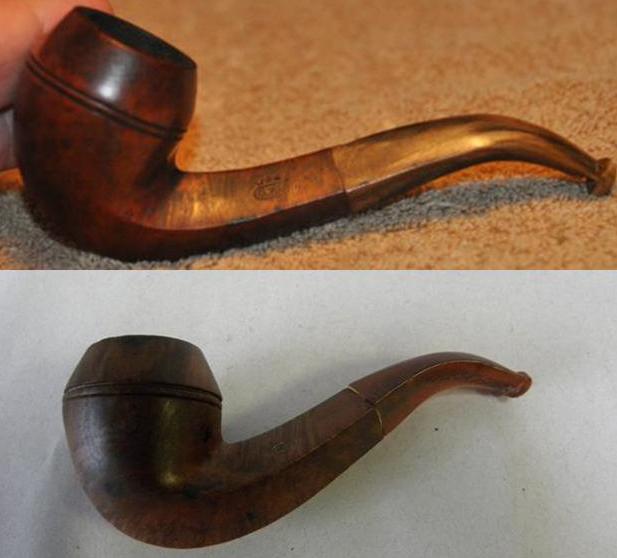
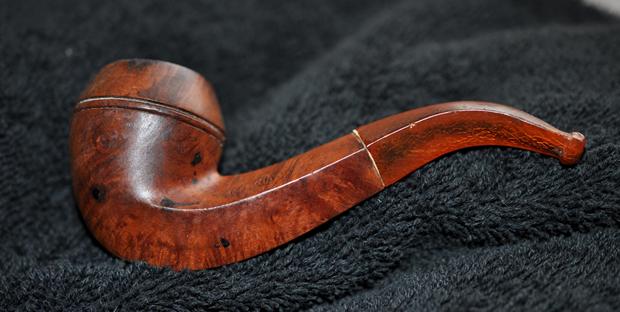
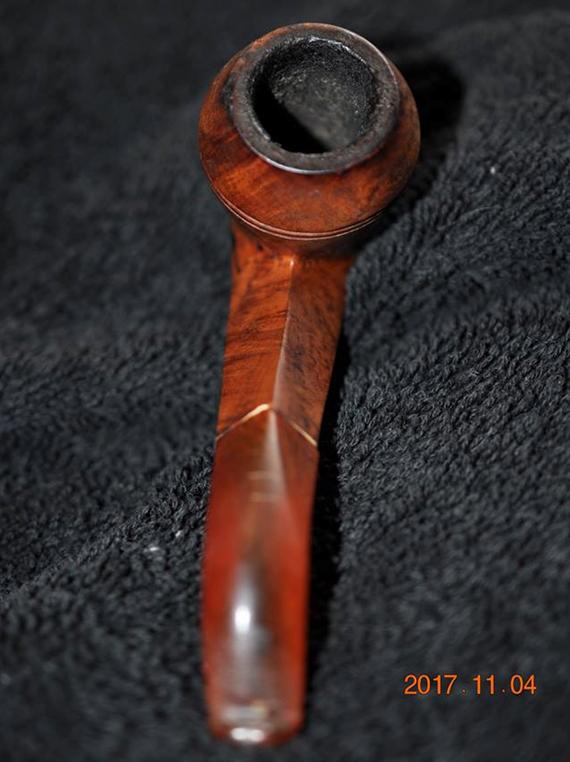
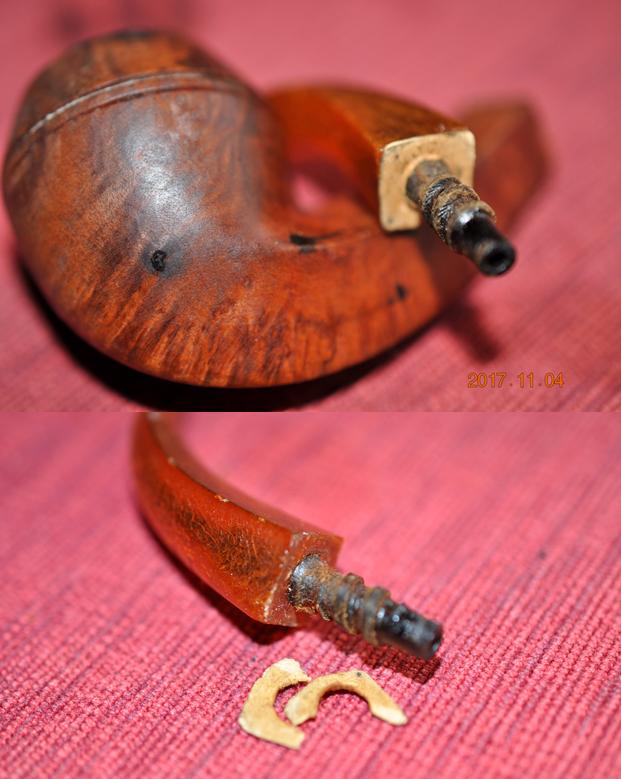
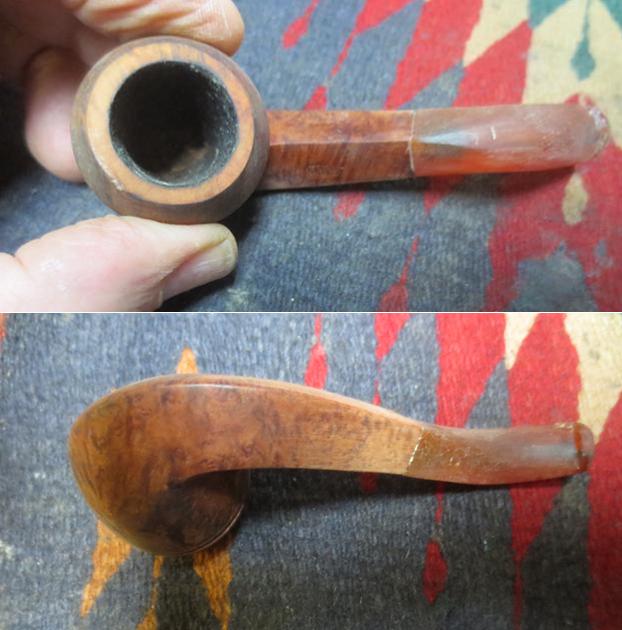
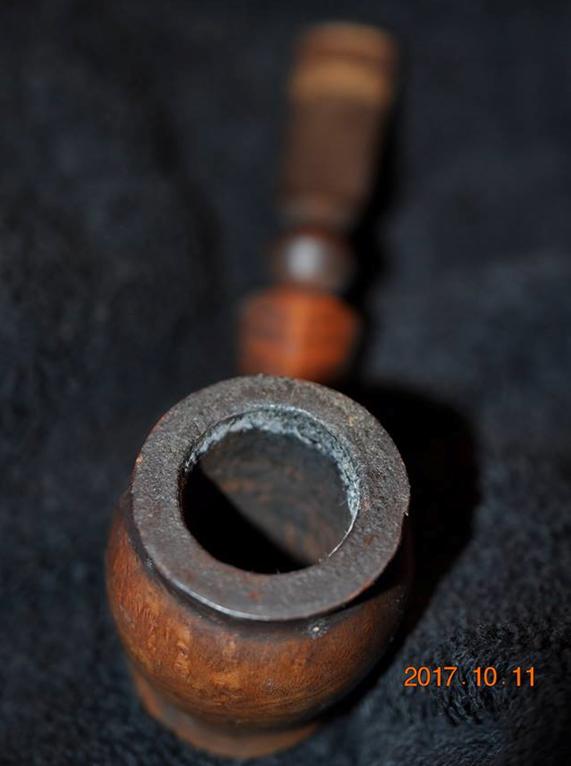
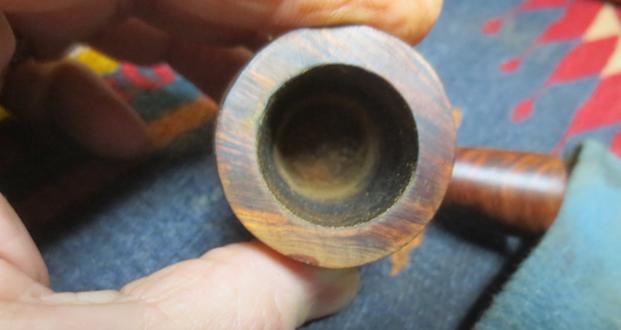
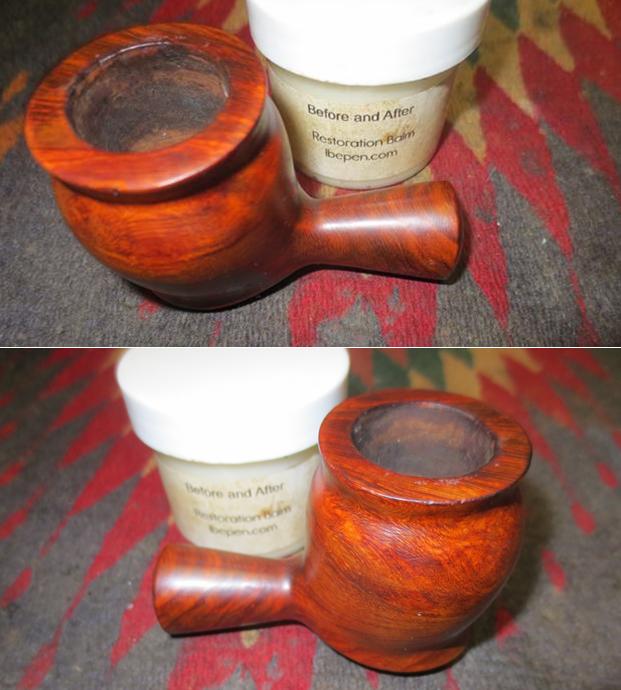
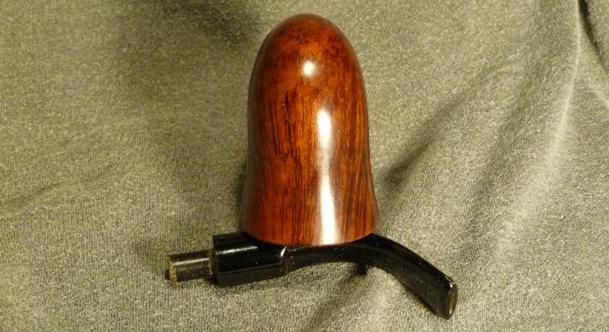
Another interesting fact that I note is that the 9552 shape is often stamped with “Colossus”. The term Colossus was used by GBD as plus sized pipe designation. This size designation is used on all the GBD lines of pipes, but is lacking on this particular Garland II stummel. 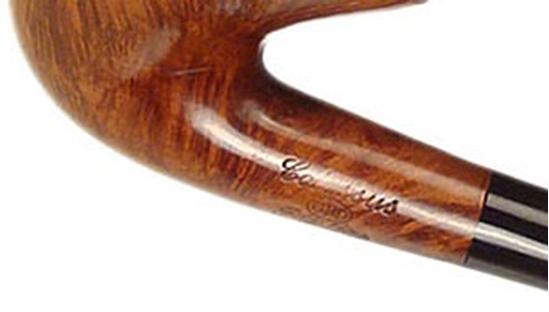 When the stummel arrived, I eagerly open the package and began to inspect the damage up close, fearing that some of the worst damage may not have been disclosed. But the seller’s pictures and description were accurate and I didn’t find hidden issues. The pipe was indeed big; the bowl height is 2.4 inches and the outside diameter is 1.75 inches. The chamber is 0.96 of an inch in diameter and 1.9 inches deep.
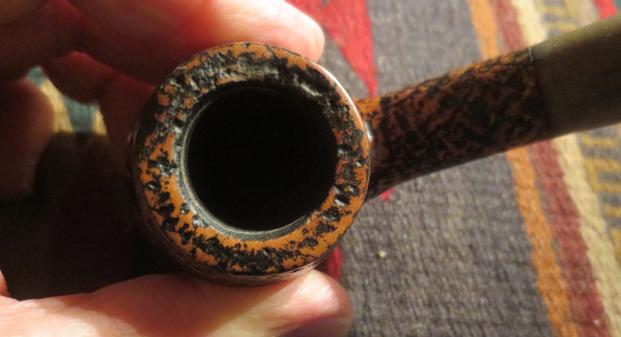
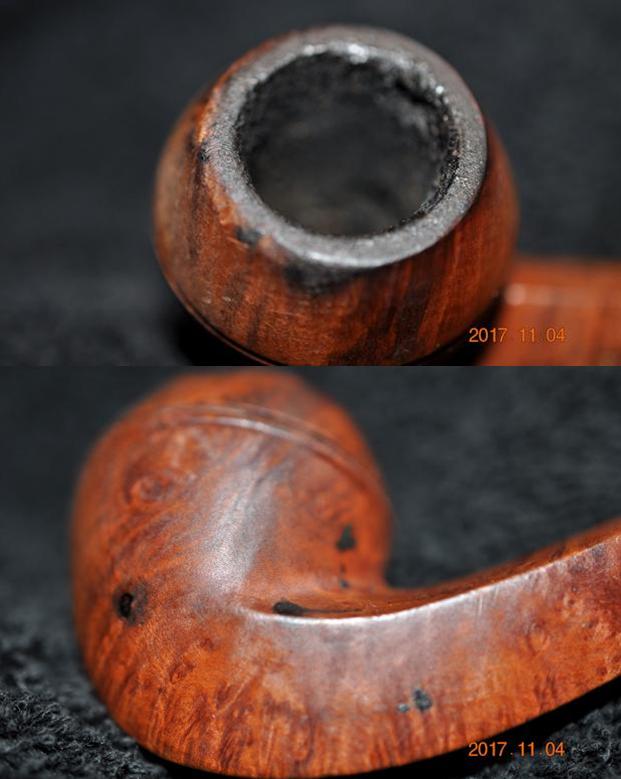
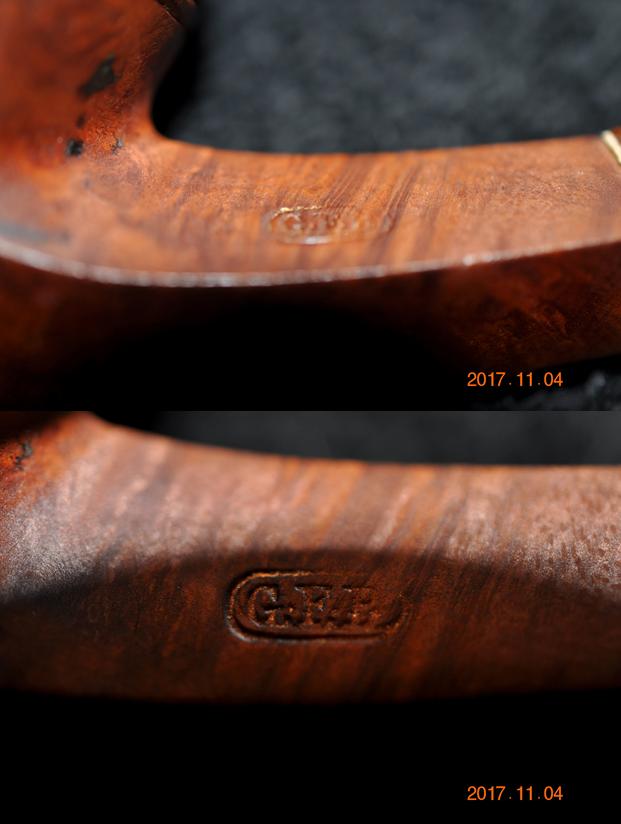
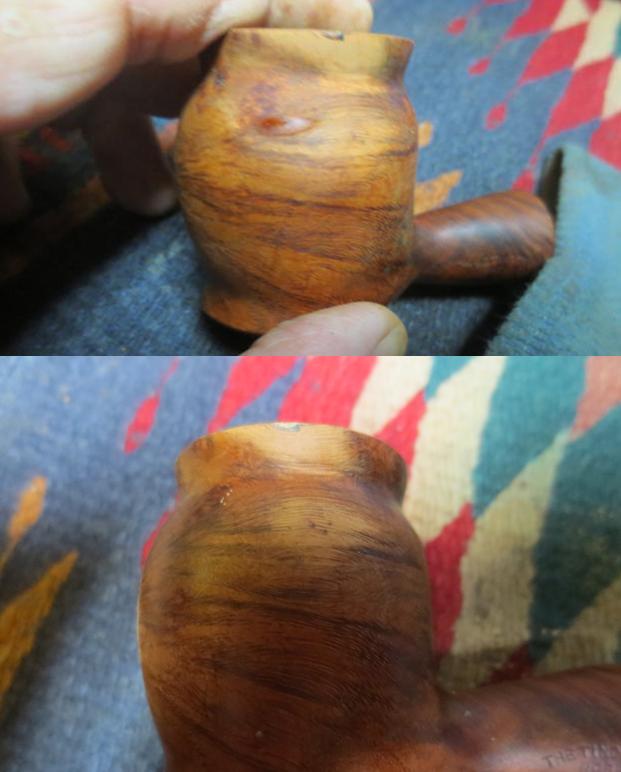
The left side of the shank is stamped GBD in an oval over Garland II. The left side has the COM (Country of Manufacture) stamp: MADE IN LONDON in a circle over ENGLAND and the shape number to the right: 9552. 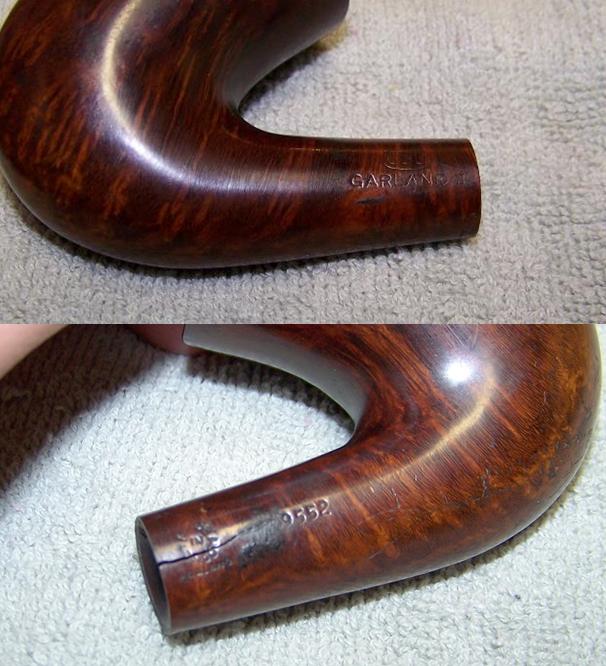 There was a heavy amount of the lava on the rim and the bevel at the edge of the chamber was a little distorted. The chamber too seemed to be drilled a little off center. Perhaps this was the why it was a second? The chamber had been reamed but not back to briar.
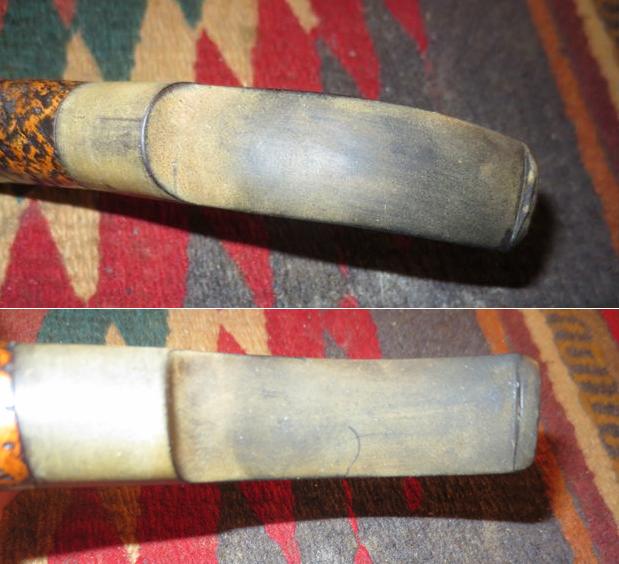
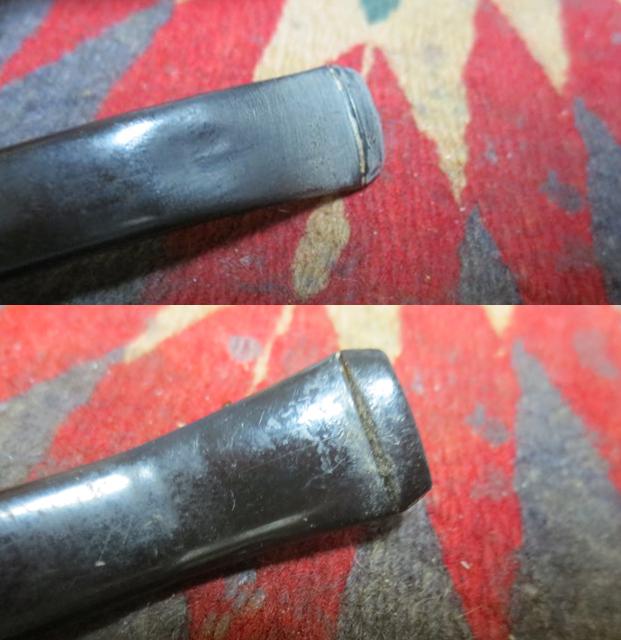
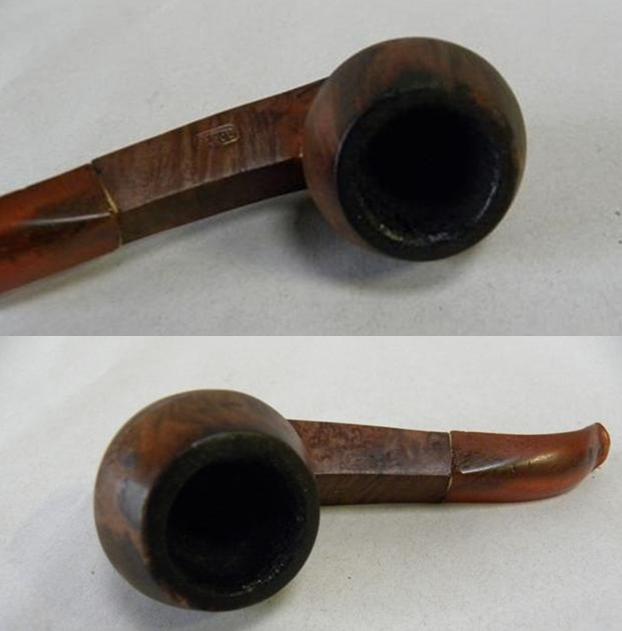
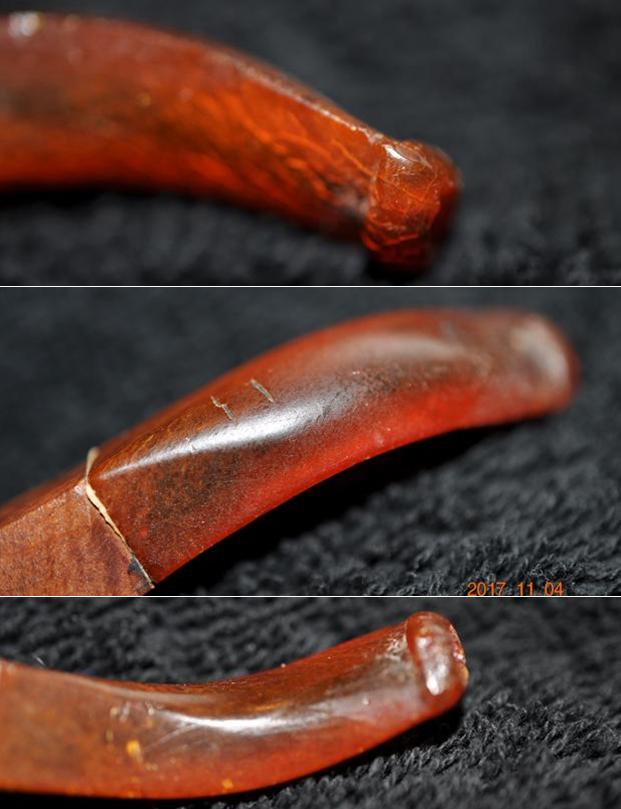
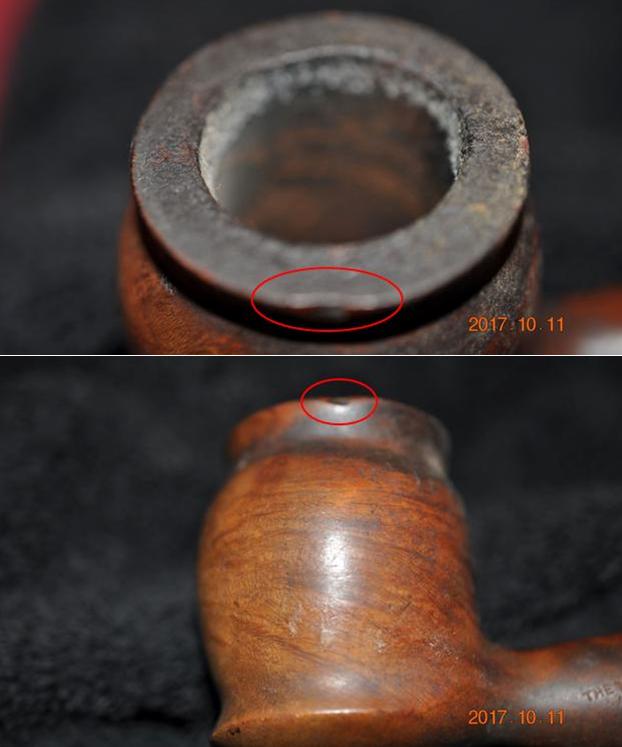
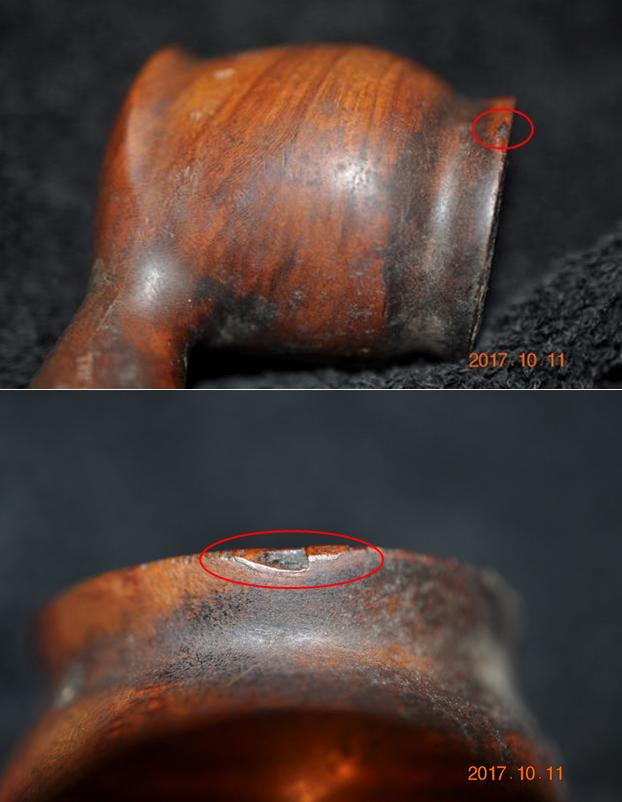
 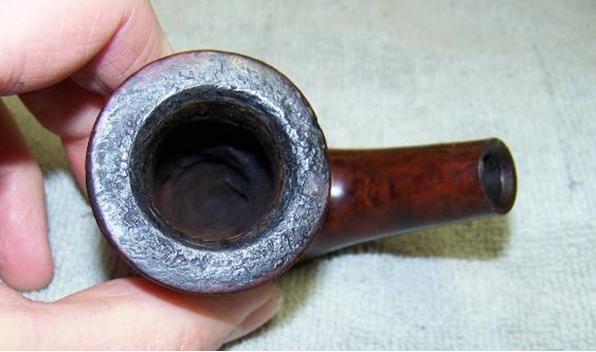 The horizontal crack in the bowl was located on the left side and was a little over an inch long. I suspected that it went all the way through bowl wall but I could not be certain until I finished reaming the chamber. The crack in the stem was about half an inch long from the end of the shank right through the COM stamp but missing the shape number.
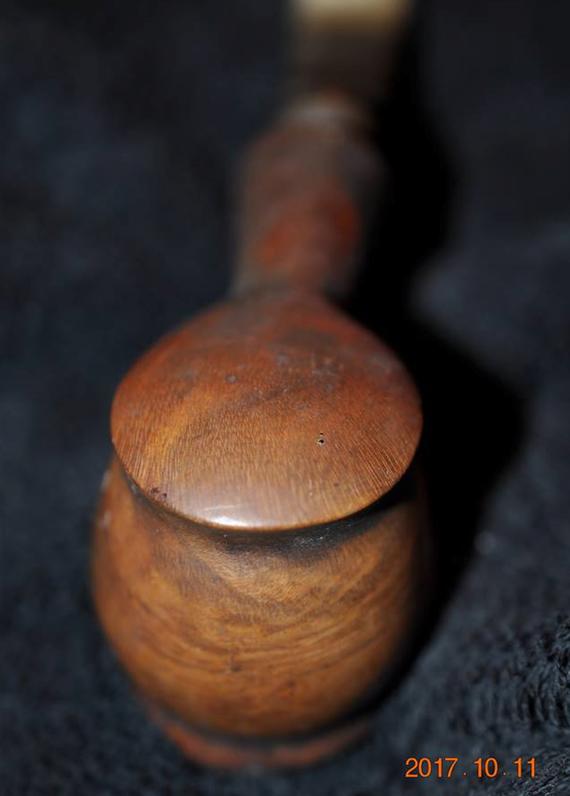
 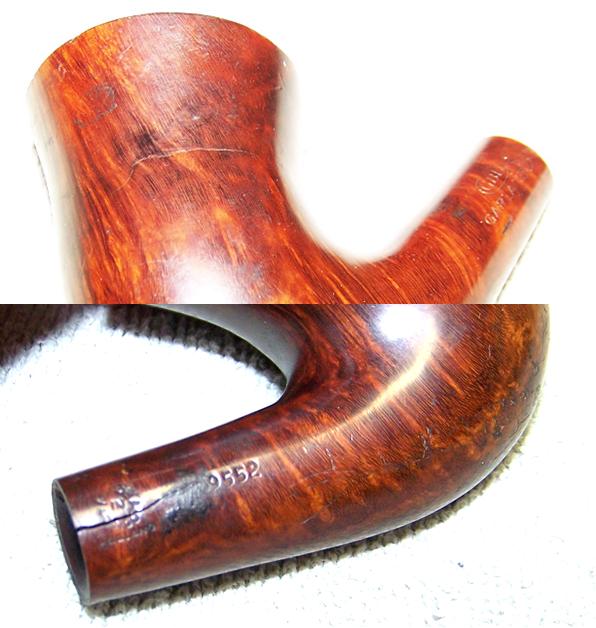 Looking the pipe over closely, I noted quite a few dents in the heel of the stummel and handling scratches on the sides of bowl and the rim. I guessed that this piece of briar had been rattling around in a drawer for some time.
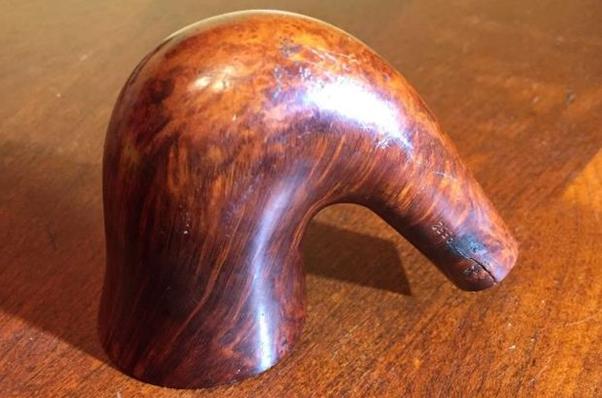 Now that I had the stummel in hand I could measure the shank diameter (.610” at the end) and estimate the length that I wanted the new stem to be; about 3-1/4 inches. I took these measurements to the Vermont Freehand website and selected a stem that best fit. I chose the vulcanite stem blank number 722, a round saddle bit 21/32” diameter and 3-1/16” inches long. I always order two in case I ruin the first one. I also ordered four nickel plated shank rings, two 15.5 mm and two 16 mm not being sure which would be the better fit.
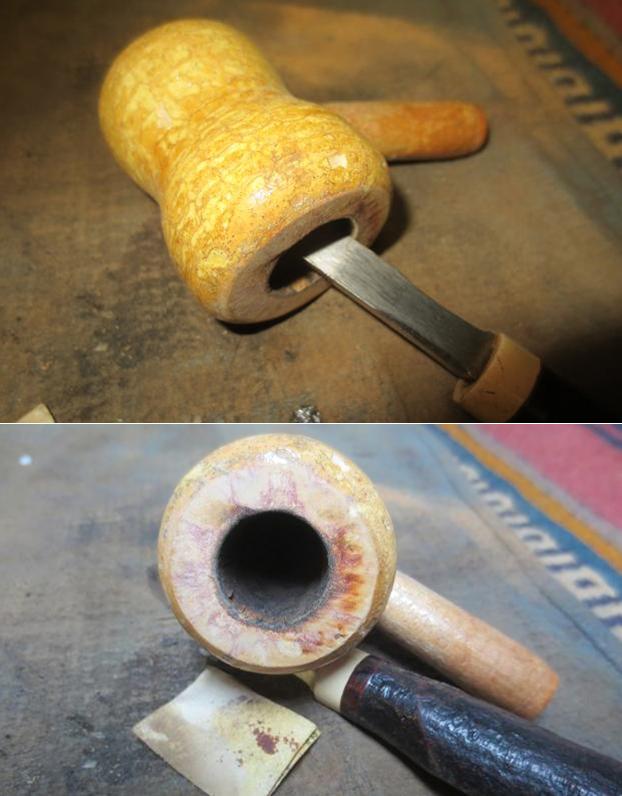
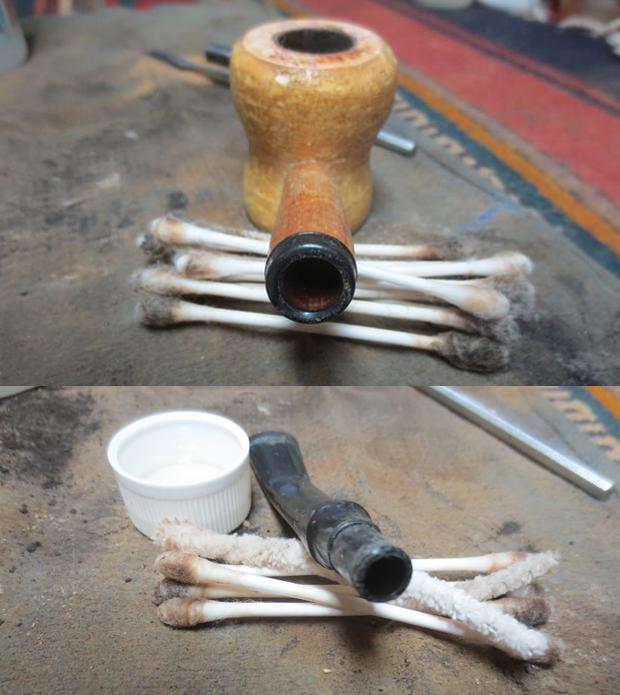
  With the parts on order, I started cleaning up the interior of the stummel. I reamed the chamber back to bare wood with my Castleford reamer and Decatur pipe knife. I also cleaned the shank alternating with bristled and soft pipe cleaners dipped in 91% isopropyl alcohol. The last person who tried reaming the chamber must have also ran a pipe cleaner or two through it because it only took five or six pipe cleaners before they started coming out as clean as they went in. The mortise I cleaned with cotton swabs. In all, the stummel was relatively clean.
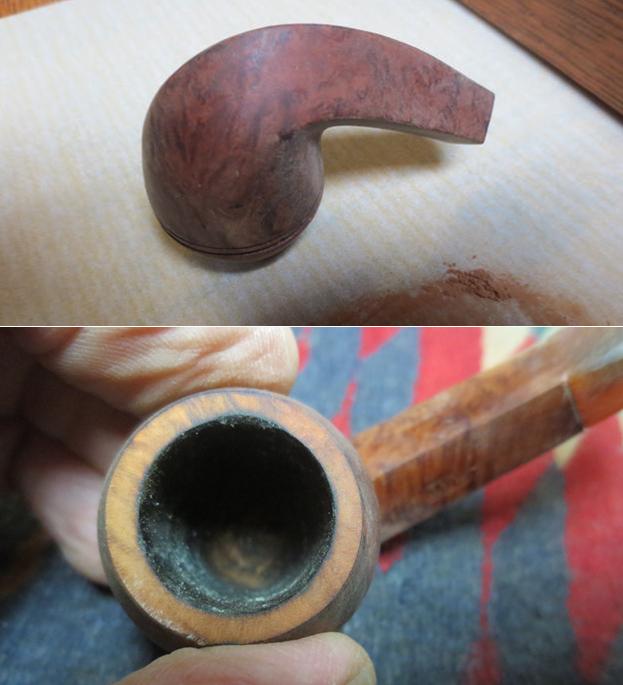
 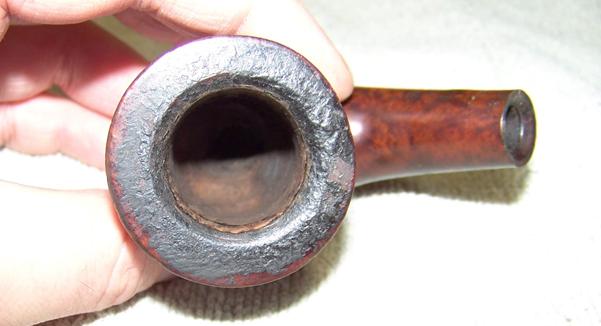 I wiped down the outside of the stummel with alcohol and acetone to remove the grime. Underneath the dirt and oils was some beautiful straight grain with a birds-eye heel. I looked closely and could not find any fills. Next, I addressed the thin crust of dried tars on the rim. I wetted down a green pad (mine was actually blue and did not work as well as the original green ones) with a mixture of tap water and granulated Oxy-clean. Placing the pad in a shallow dish, I pressed the rim of the pipe down on the pad and scrubbed in a circular motion. A little elbow grease and the moist Oxy-clean solution did its job. I dried the stummel with a paper towel and set it aside to dry for a bit.
 Next, I wanted to remove the ghosts of the previous tobacco that I could still smell in the chamber with an alcohol soak. I use the cotton ball method because it seems to do the job and is easier to clean up than the salt method. This chamber needed three cotton balls and I used 98% grain alcohol for the soak. I placed a cap over the top of the bowl for the first couple of hours to keep the alcohol from evaporating too fast then I removed the cap so the evaporative action can draw out the tars from the briar.
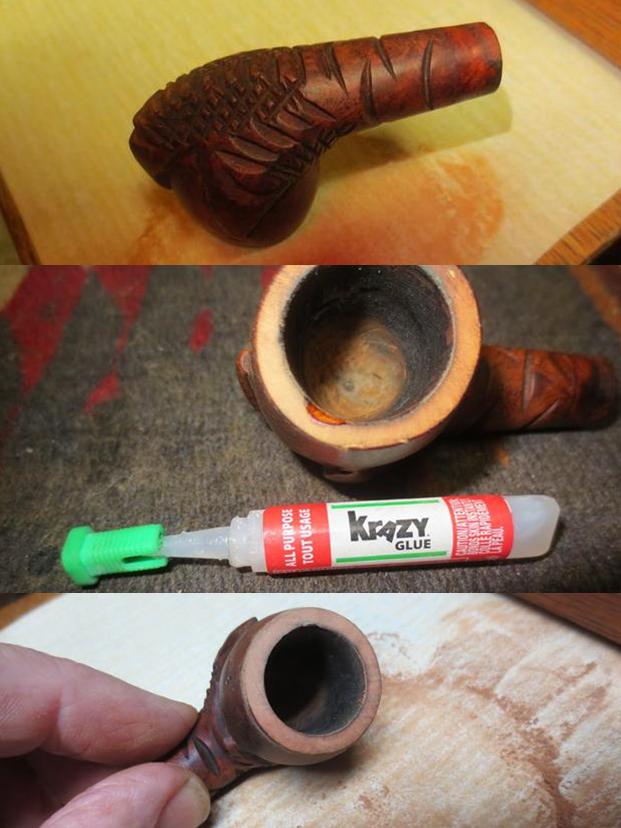
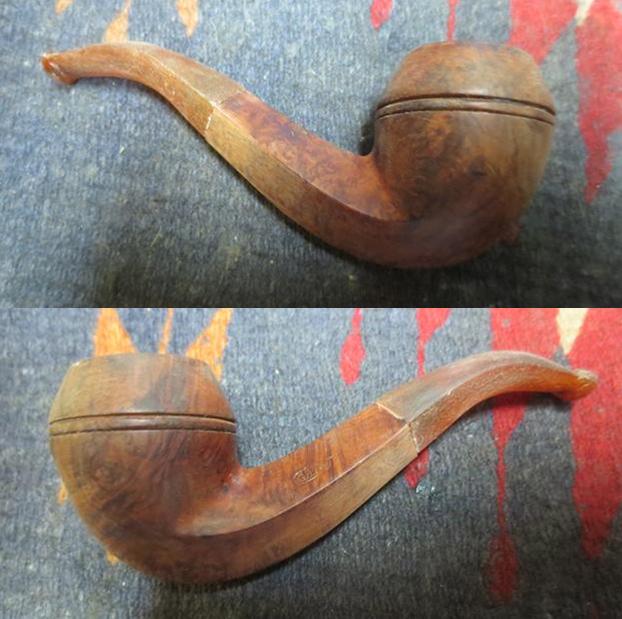
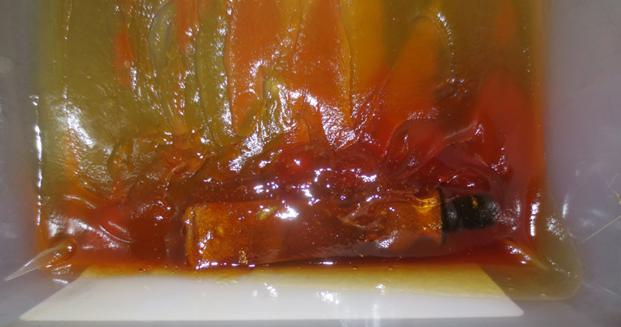
 When I got back to it the next day I was disappointed (though not surprised) that the crack in the bowl was wet where alcohol had been seeping through. At lease now I knew for sure that the crack went all the way through the bowl wall. The good news was I could easily see the ends of the hairline crack. I used a dental pick to mark the ends so I could find them later, then I removed the cotton balls and wiped out the chamber with a dry paper towel.
  I began the crack repair by using a small drill bit (0.5 mm) and hand drilled the stopper holes at the location I marked with the dental pick. Since the crack went completely trough the chamber wall I also drilled the hole all the way through the wall. I have not dealt with a crack that was this deep before so I was on unfamiliar ground. I packed the hole the half full with briar dust using a tooth pick then placed a drop of clear CA glue into the hole – coaxing it in with the tooth pick. I filled the holes up the rest of the way and dripped more glue. I used a magnifying glass to locate the end of the shank crack and gave it the same treatment.
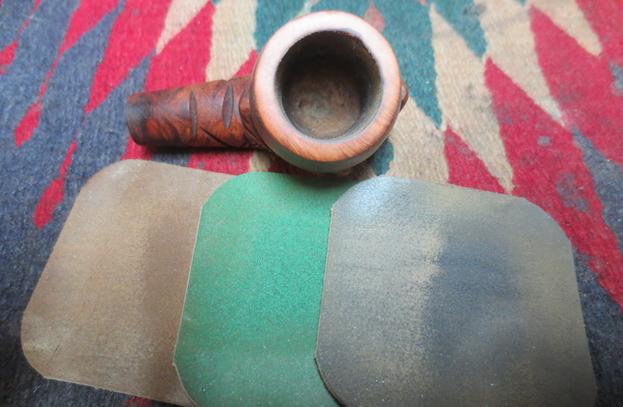
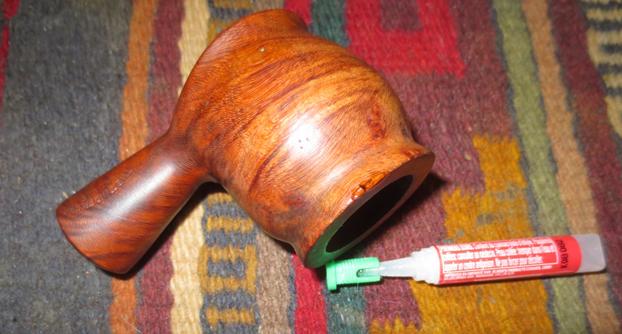
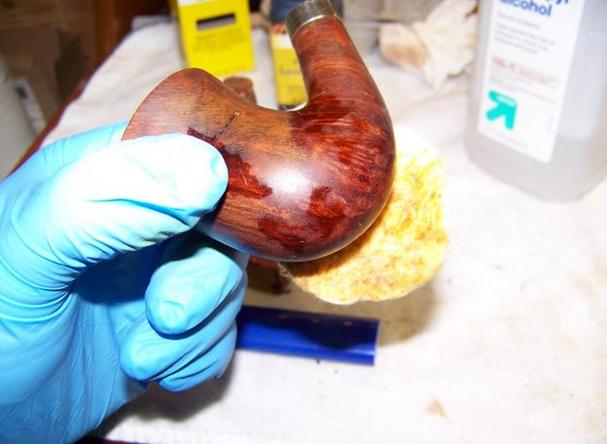
I unsuccessfully tried working some CA glue into the bowl crack. The glue just seemed to set too fast and did not penetrate the crack. The shank crack on the other hand I could work open and get the glue to flow into it. I put a clamp on the shank while the glue set. Then when dry, I sanded the glued repairs smooth with 220 grit paper, careful not to over sand and change the shape of the pipe or damage the stamping on the shank. 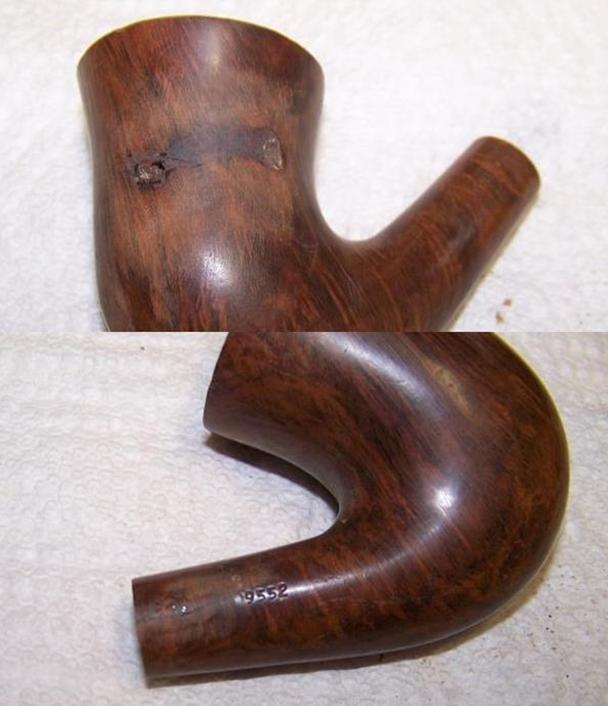 I resolved to repair the bowl crack by applying coat of heat resistant epoxy to the inside of the chamber. In this case I used the two part JB Weld – not the Quick Weld, which is useful for other pipe repairs. For pipe chamber repairs, I like the original JB Weld epoxy, it is easy to use and when cured it has a 550 degree (F) heat resistance. It is also easy to sand smooth. I apply it with my finger because it is much easier to get an even coat. I highly recommend wearing a pair of powder free Nitrile blue gloves for this operation!
 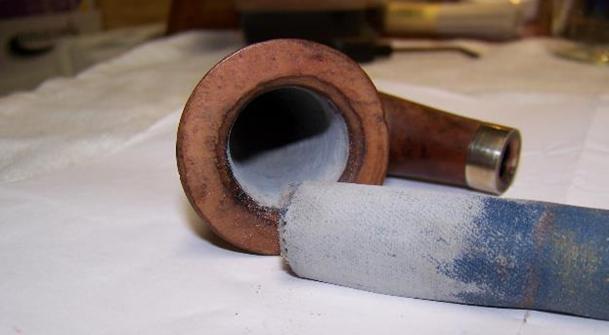 By this time the parts from Vermont Freehand arrived and wanted to band the shank. I have fixed a few banded pipes before but never put a band on an unbanded pipe. I tried dry fitting the two different sized bands I had bought. The smaller band would only just slip on the first fraction of an inch so I was glad I had ordered the next size up.
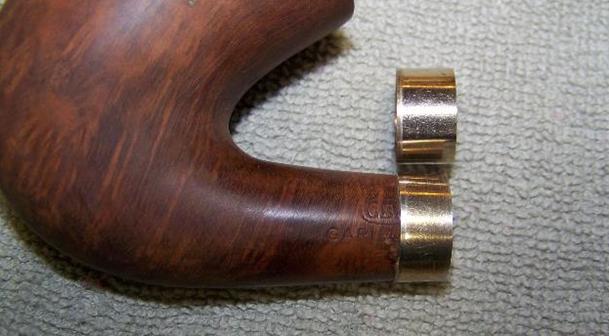
 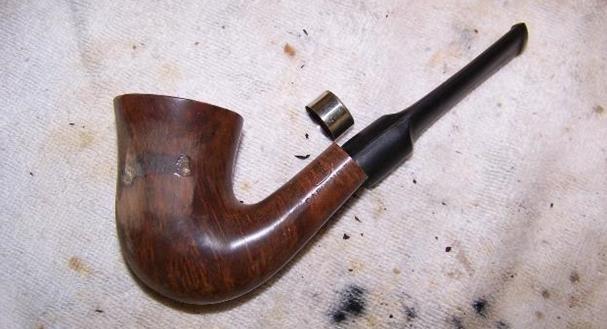 The bands were a bit wider than I wanted because I did not want it to cover up too much of the stamping. Not sure what to do about the band width, I kept focusing on the seating of the band. I used a heat gun to heat up the band and get it to expand. Then with the band resting on a wood block, I pressed the shank down into the ring. The first attempt didn’t go well. The band was a bit cocked and only seated about a quarter of an inch. I realized that the shank’s taper was going to prevent the band from going on much farther and that was going to resolve the width issue; I was going to have to trim the band.
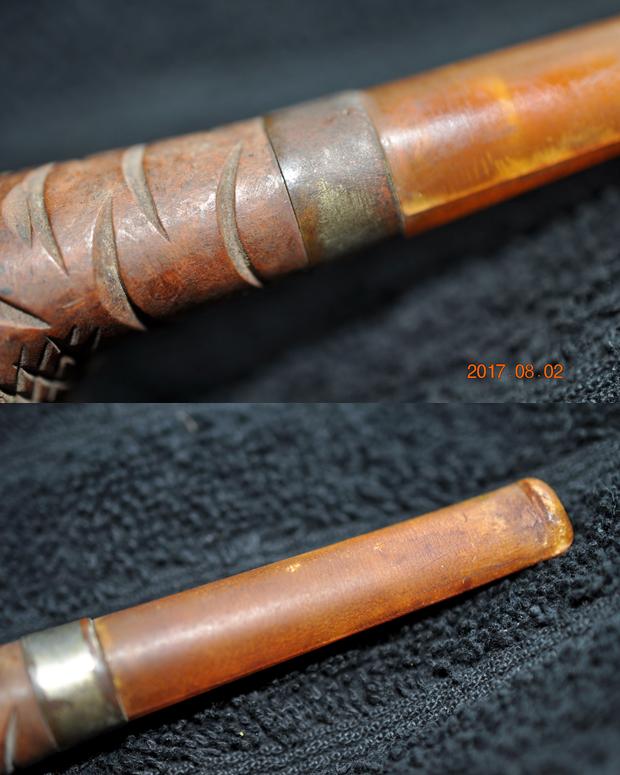
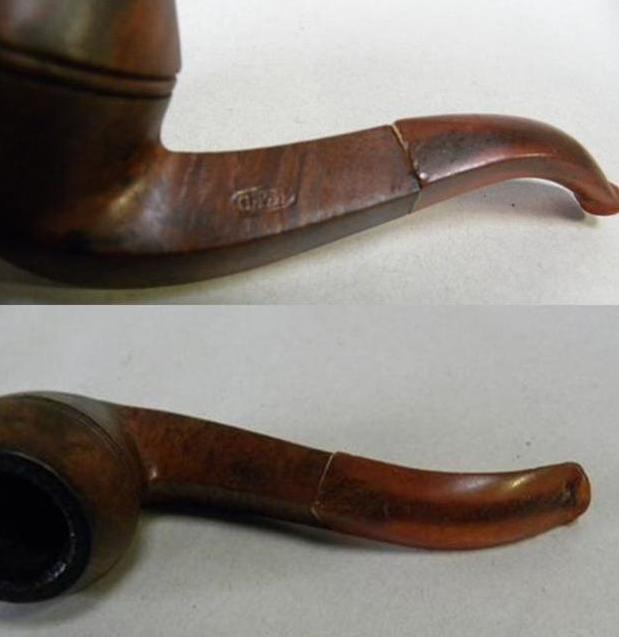
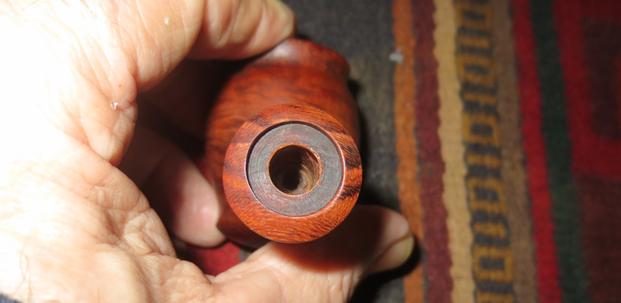
I removed the band and heated it up again. I smeared a little CA glue around the end of the shank and was able to seat the band squarely. This time about 3/8” onto the shank. Once cool, I used a skinny wheel on a rotary tool to trim of the excess band material and flush it up to the end of the shank. Although the band covered up the COM stamp and ‘AND II’ of ‘GARLAND II’ it was necessary and it gives the stummel a touch of class.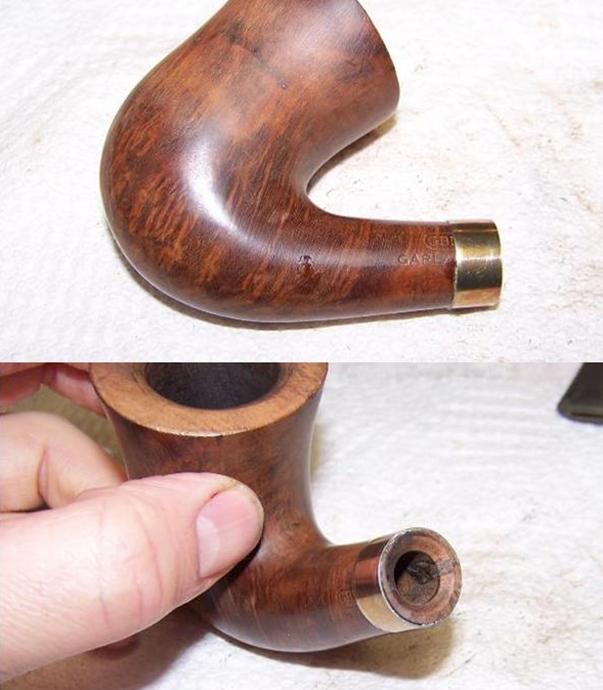
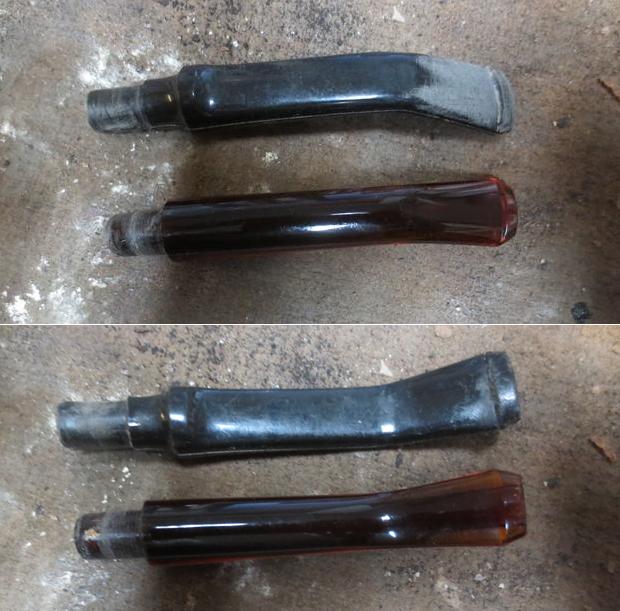
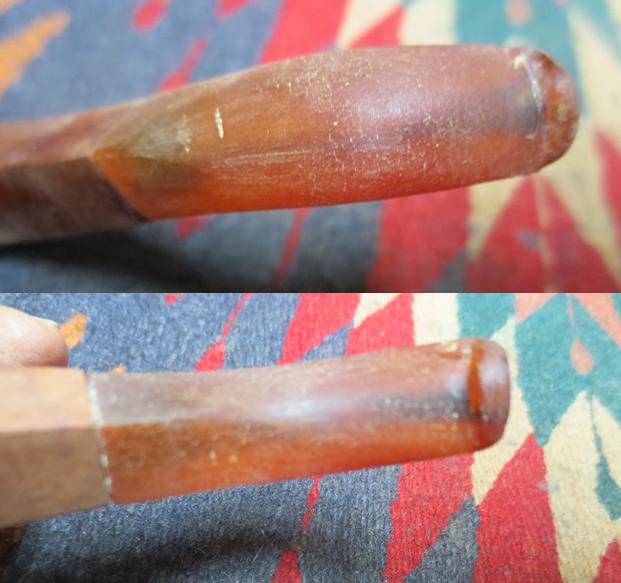
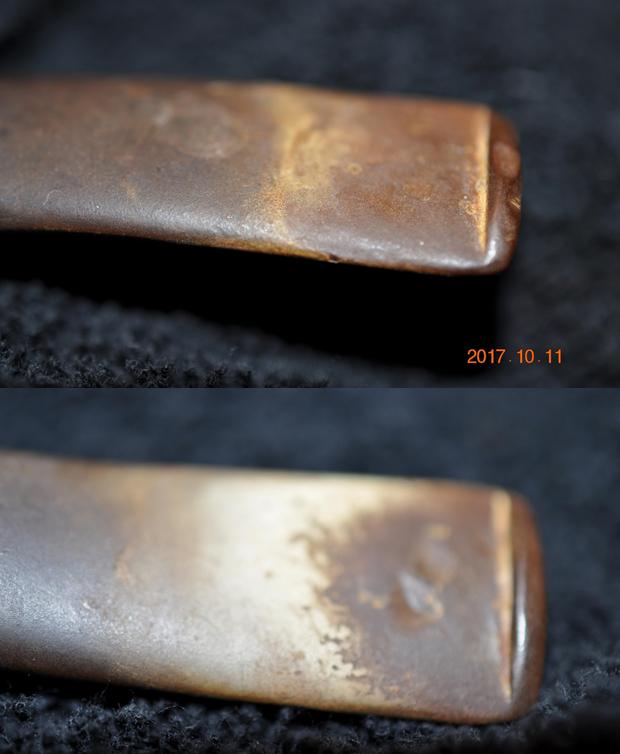
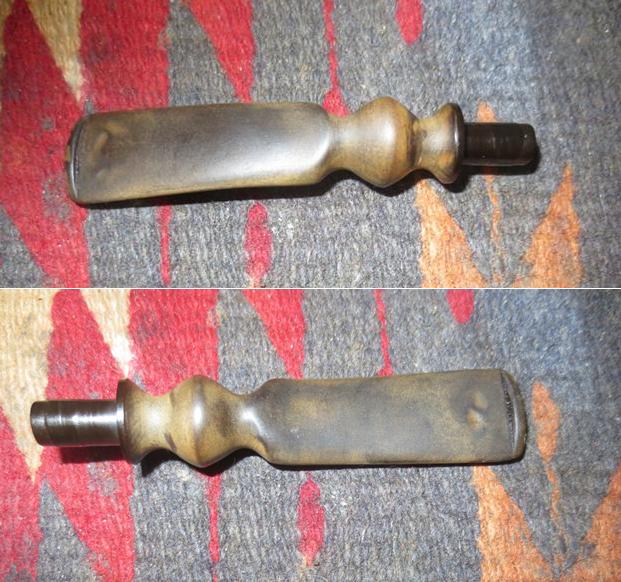
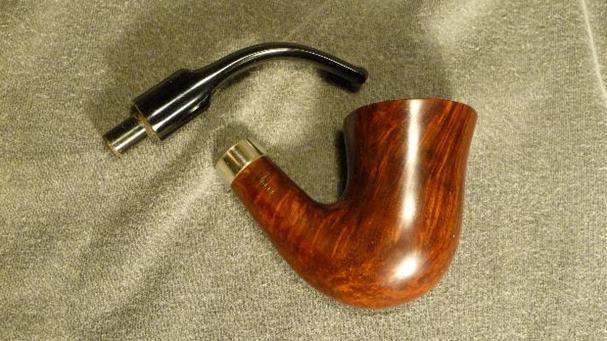
 I was pleased that the replacement stem I had chosen seemed to be a good fit although it was going to need some work. I started by using a fine tooth file to square up the face of the stem so it sits flush to the shank and removing the casting burrs.
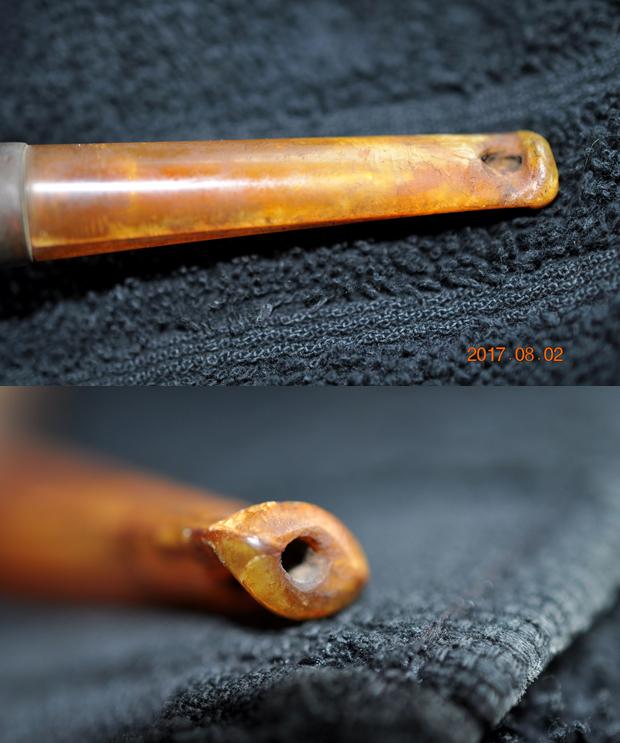
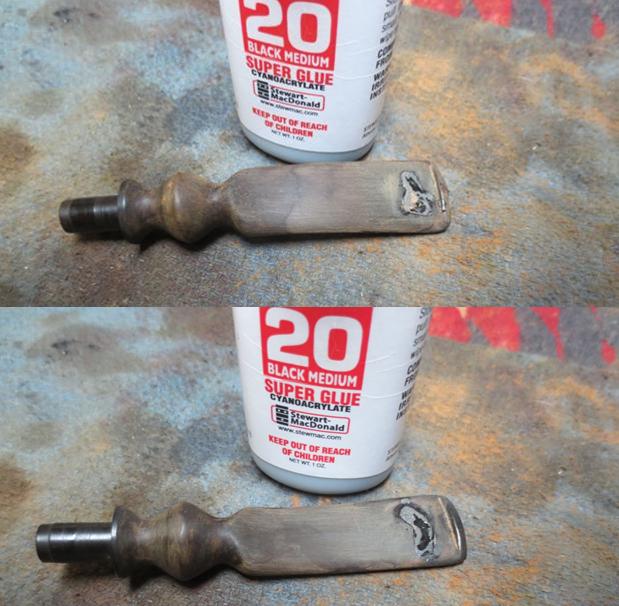
 The tenon on the blank was way oversized as was the body of the stem. I don’t have a tenon turning tool, so I use my drill press to turn the stem. Wedging a bamboo skewer into the air hole at the tenon end, I leave about an inch of skewer exposed that I can secure into the chuck of the drill. Setting the drill to about 1300 RPM I use small pieces of 60 grit sand paper to slowly reduce the diameter of the tenon and the stem until it the correct size.
 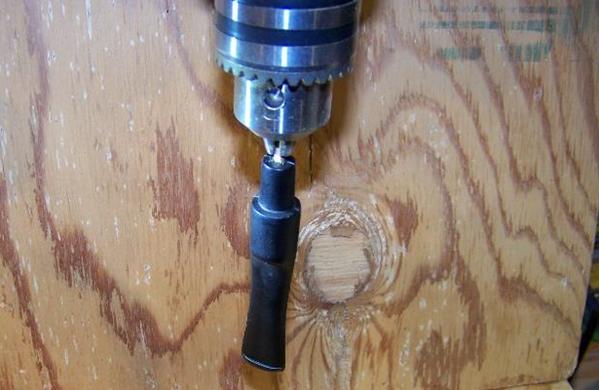 The drill press method works well in theory. Once in a while the stem slips loose from its friction fit with the skewer and I have to reseat it. I work the vulcanite with 60, 120 and 220 grit sand paper, leaving the polishing to be done by hand with micromesh pads.
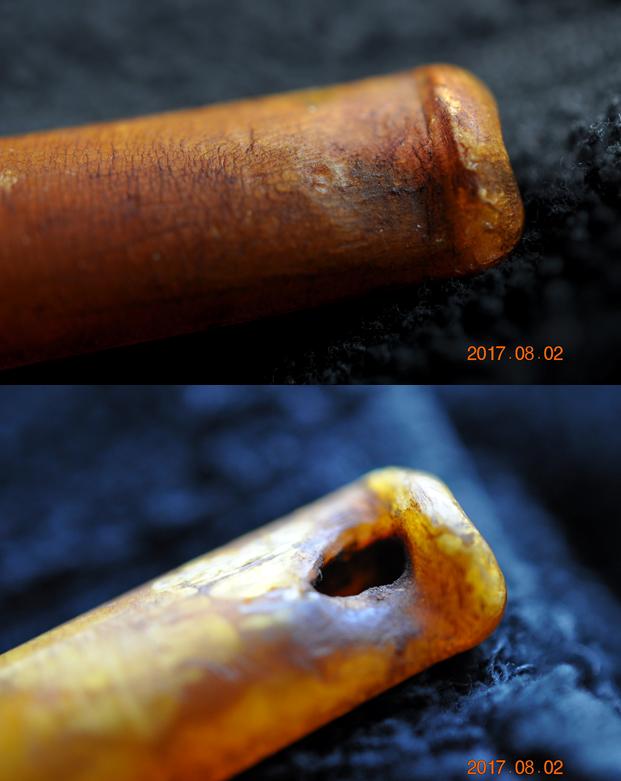
I kept a caliper nearby set at the correct tenon diameter to check my progress. As I got closer to the correct size, I switched to 120 and 220 grit paper. But I didn’t switch soon enough! By the time I got some of the deep scratches of the 60 grit out I had overturned the tenon and it was a hair too small. I finished turning the body of the stem before addressing the tenon issue.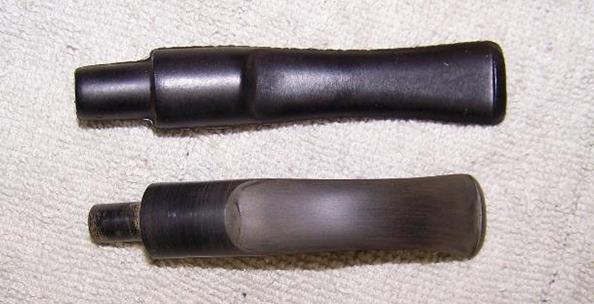 I thought at first that a little bee’s wax on the tenon would be enough to tighten the fit but in the end I had enlarge the tenon. To do this, I heated the tenon and inserted a drill bit into the air hole to enlarge the tenon. Letting the tenon cool with the bit in it I checked the fit: A little too big. I didn’t want to take anymore material off the tenon because if the tenon gets hot during a smoke it will return to its original size, vulcanite has a memory. I looked around my tool box and found a small punch that had a slightly smaller diameter than the drill bit and repeated the heating process. This time the fit was much better.
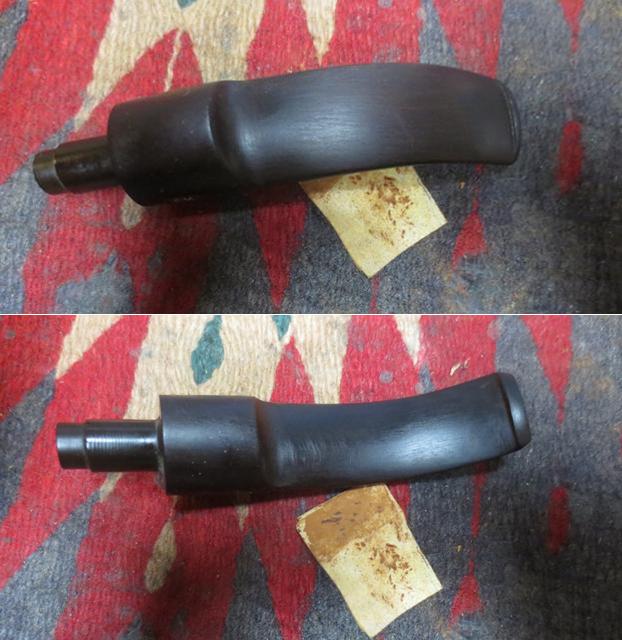
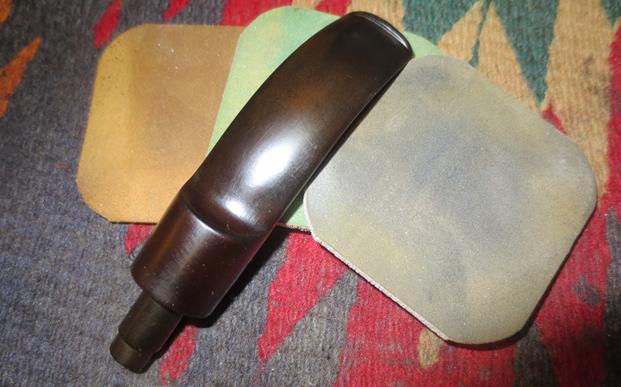
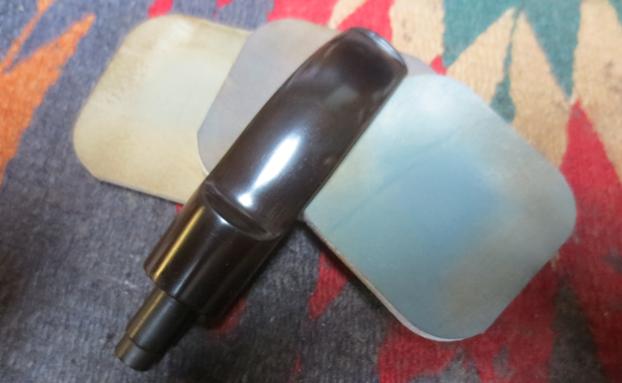
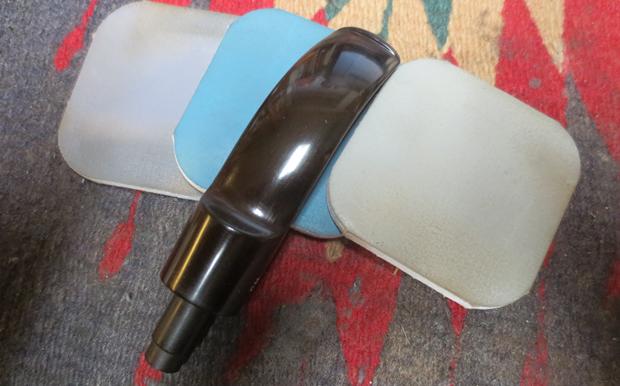
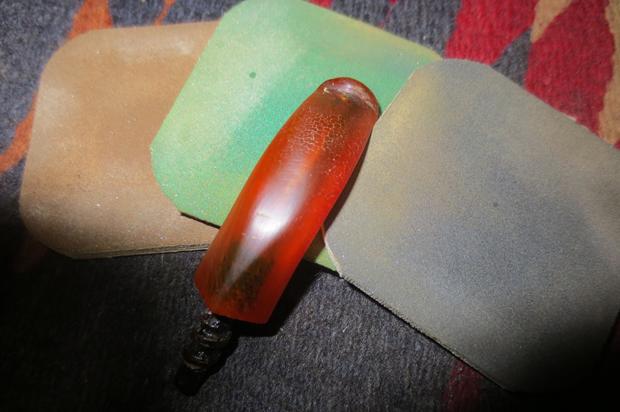
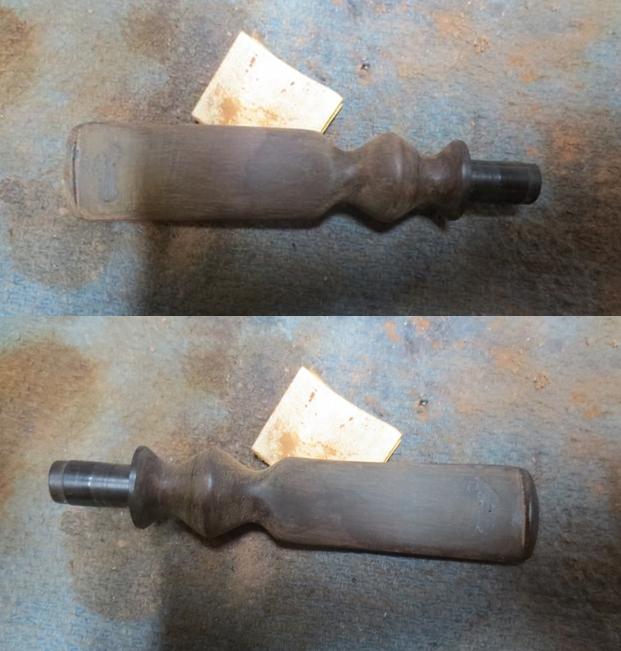
With the stem fitted it was time to bend the stem. I have jig for holding round stock and I used this to hold the assembled pipe steady with the bit resting on a 1-1/4” round dowel. Using my heat gun, I heated the bit until it draped over the dowel. I dipped the bent stem in water to cool the vulcanite and set the shape. Then I checked the angle of the bend and had to repeat the process a couple of times until I had what I thought was the original stem shape just right.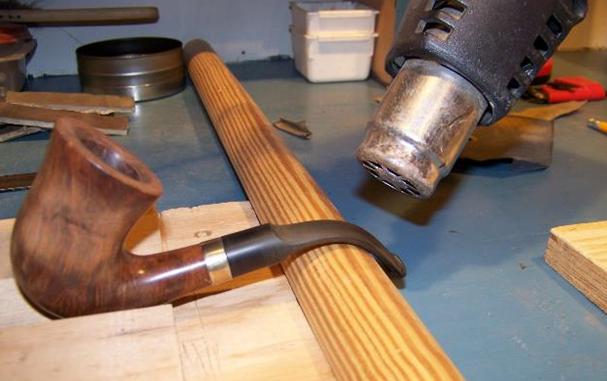 Stem polishing started with 220 grit to remove the remainder of the casting burrs. Then I wet sand with micromesh pads 1500 – 4000.
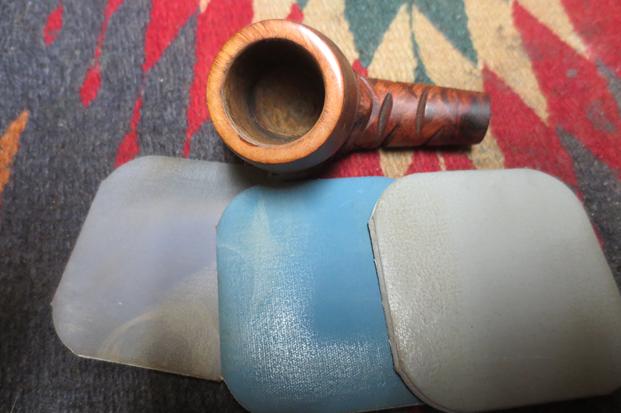
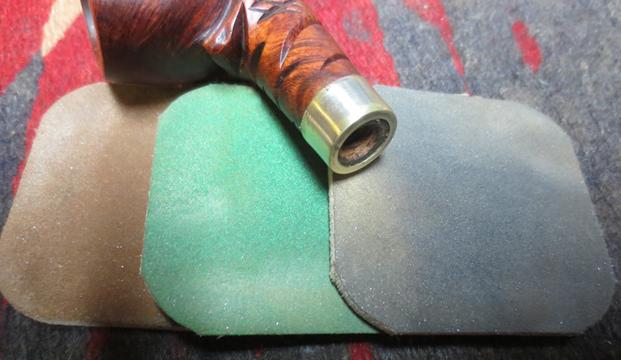
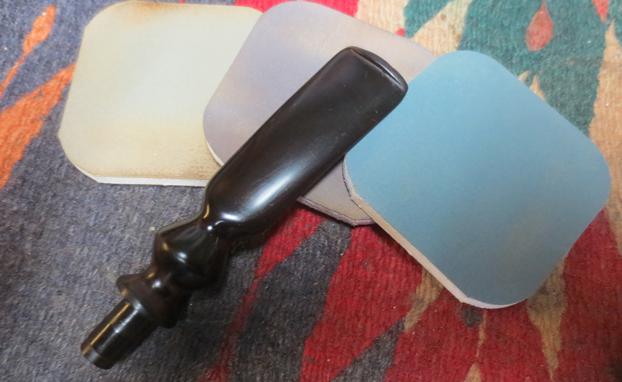
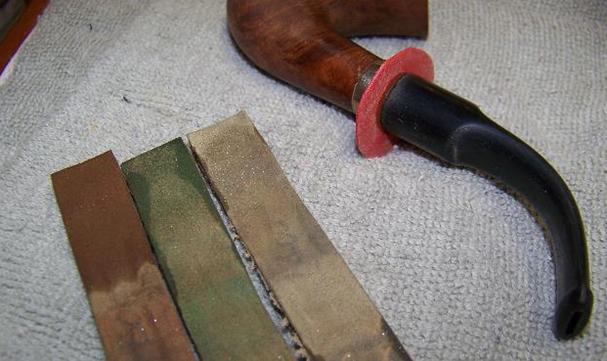 I removed the plastic guard after the 2400 pad. I used the 3200 and higher micromesh pads to also polish the band.
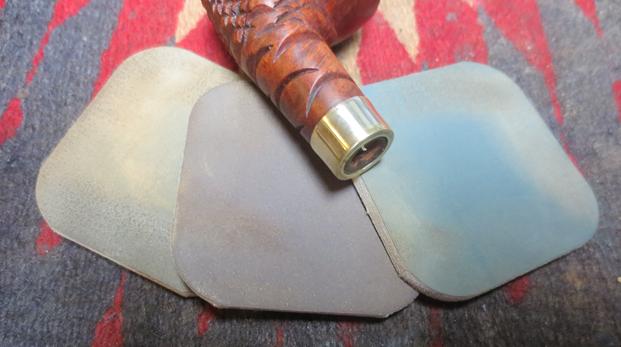
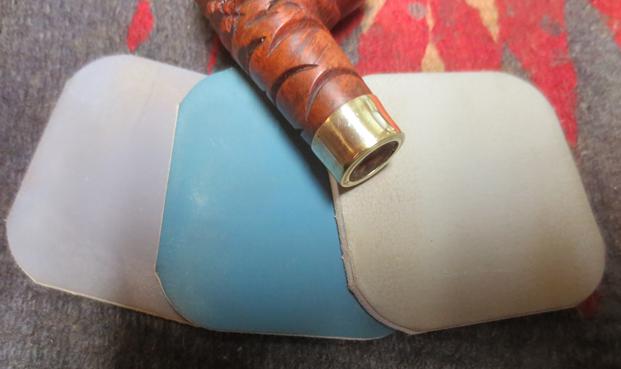
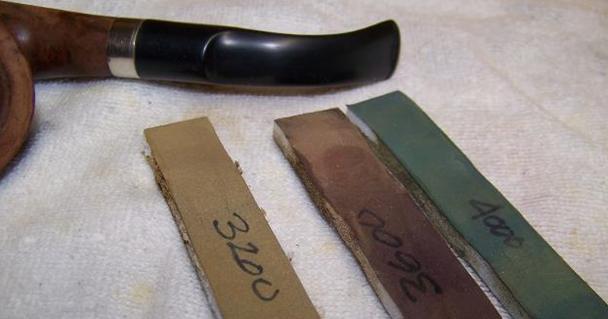 After the 4000 pad I coated the stem with mineral oil and let it sit for a few hours. Then I finish polishing with pads 6000 to 12000.
 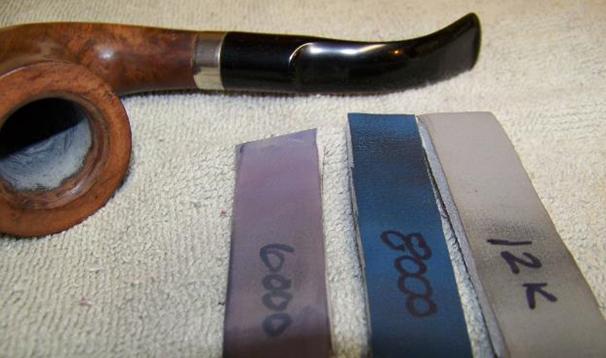 I started finishing the stummel by giving it a steam treatment to raise the dents and handling damage. Holding a wet terry cloth rag on the briar I press a hot iron on to it. This method works very well but I have two points of caution: 1) don’t burn your fingers in the steam; and 2) do not press the iron near the stamping, it will ruin stamping very quickly. I only apply the iron around the bowl body and the heel where the dents are the worst anyway.
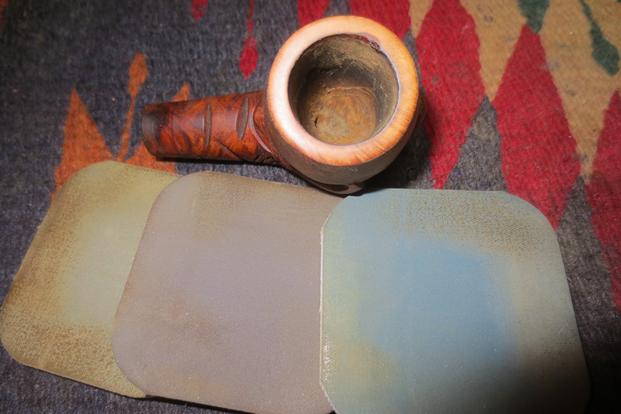
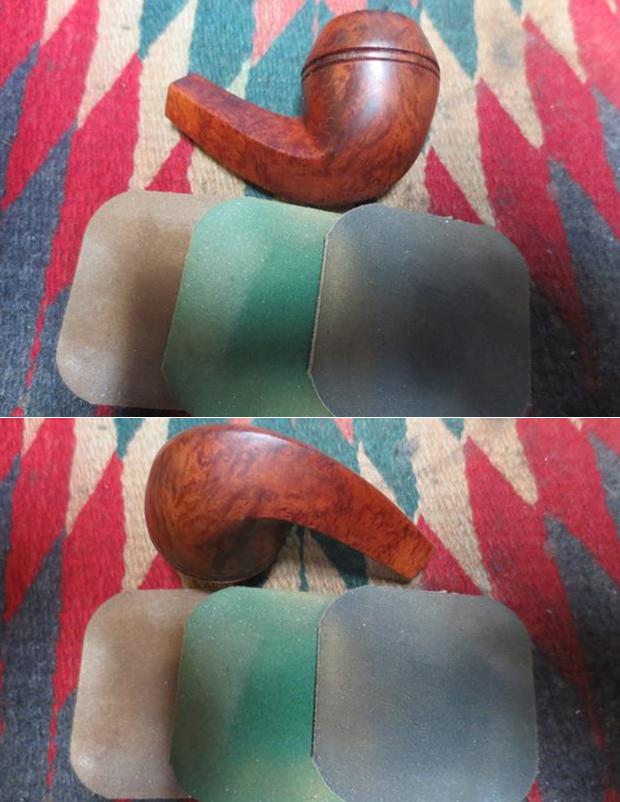
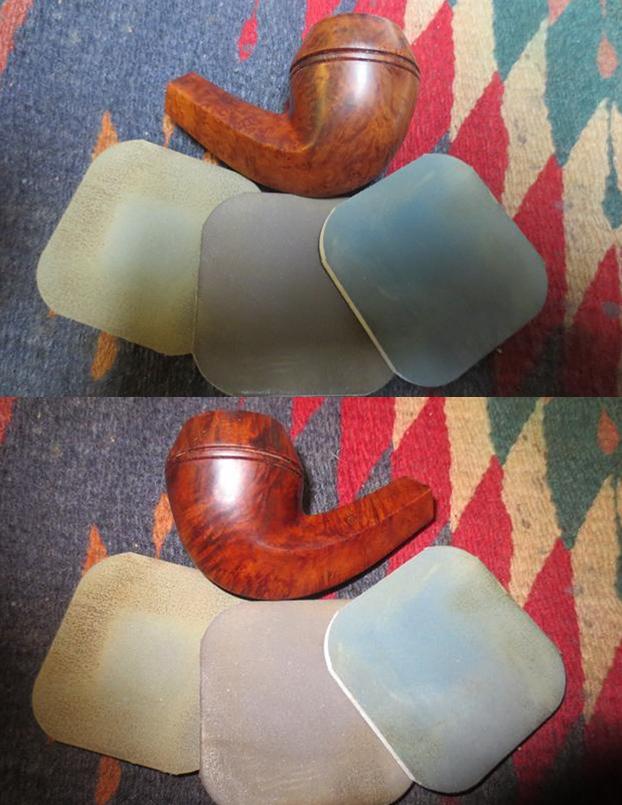
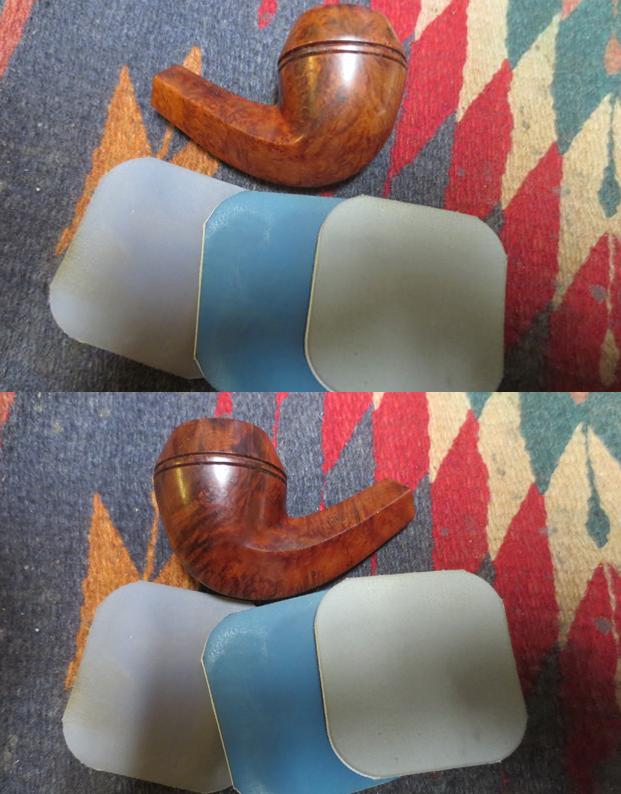
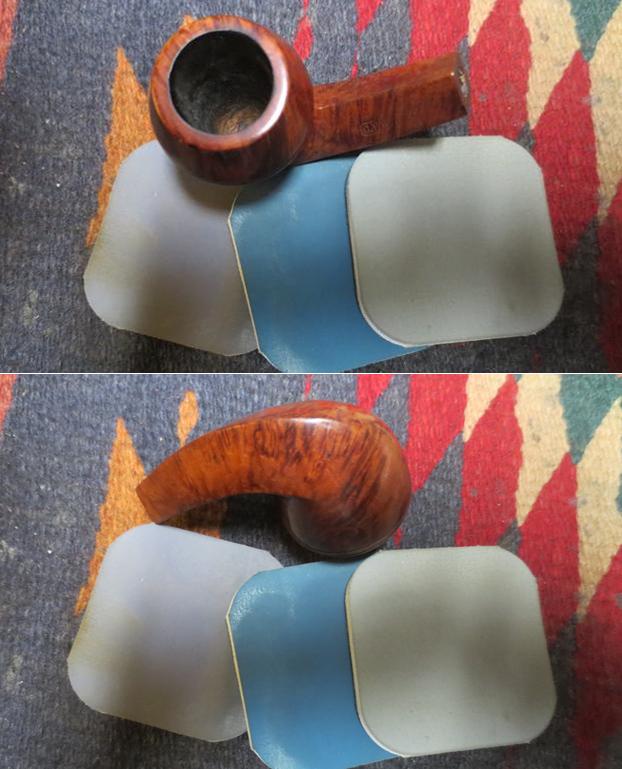
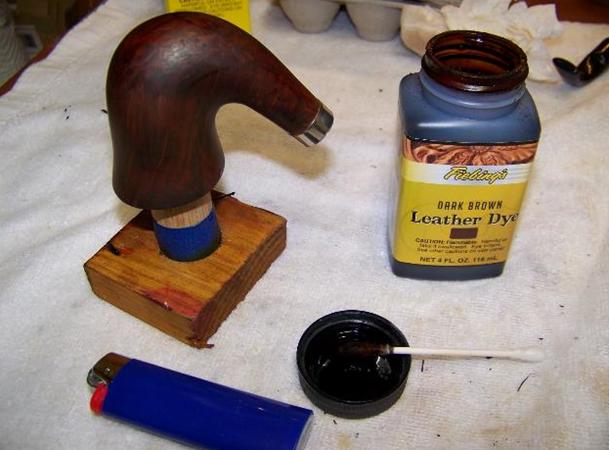
I sanded the stummel with micromesh pads 1500 through 3200, with special attention paid to the rim to make sure it was smooth. I selected Fiebing’s dark brown aniline dye to better hide the repairs and applied the stain, without dilution, using a cotton swab straight from the bottle. I used a flame to heat and set the stain. I wiped down the stummel with isopropyl alcohol on a cotton pad to remove the excess stain. I kept wiping it down until the level of color was what I thought it should be.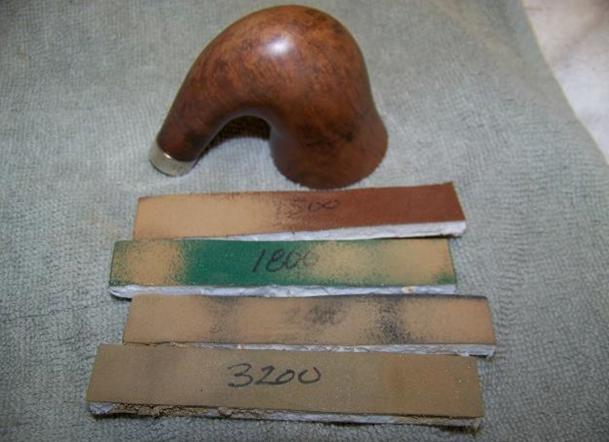
 After staining the stummel I like to refresh the briar with a light coat of mineral oil and let the oil soak in overnight. All of the alcohol in the stain and the wiping down tends to dry out the stummel and I find the mineral oil helps to bring some of the life back to the briar. It also seems to give the finished pipe a healthy look.
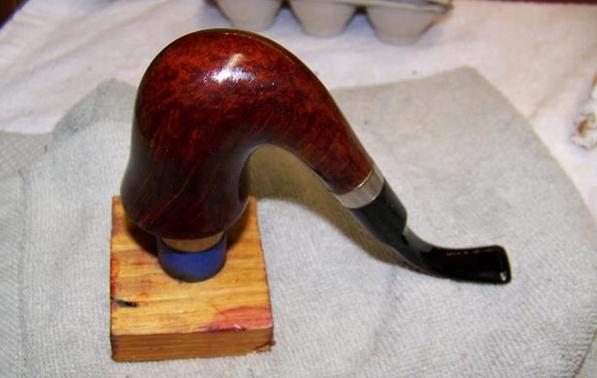 After the oil soaked in, I polished the briar with the 3200 – 6000 micromesh pads. Wiping it down with a clean cloth when finished.
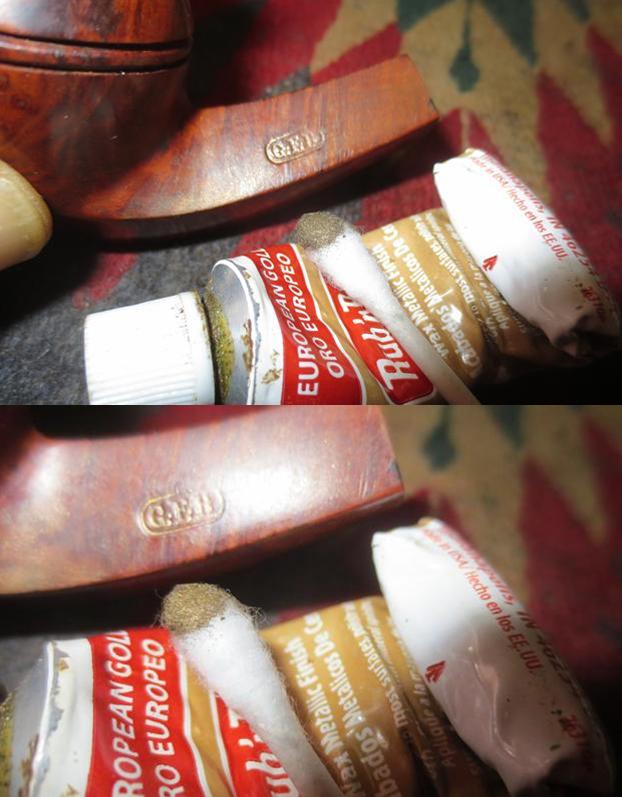
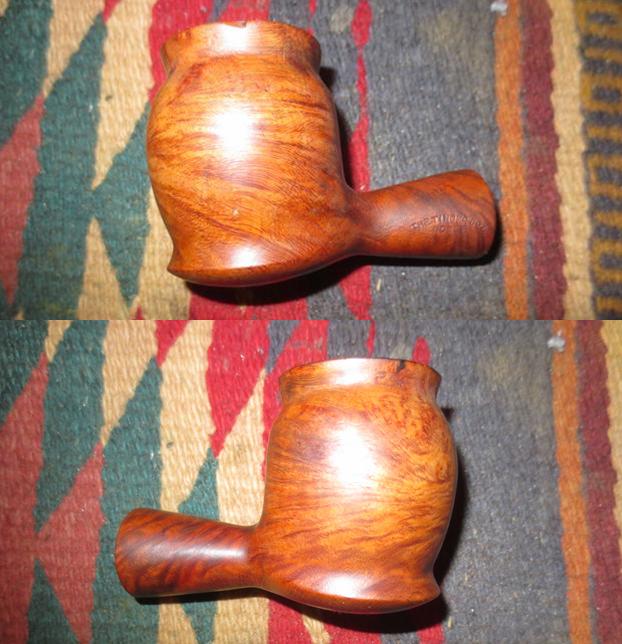
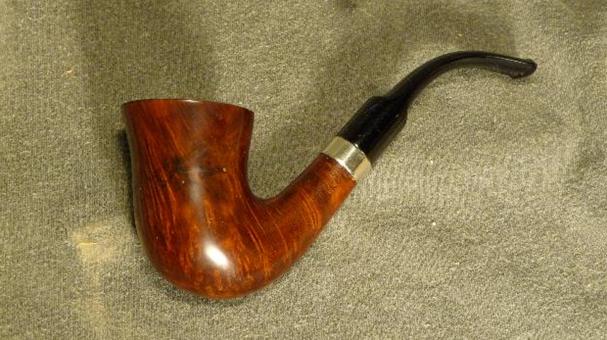
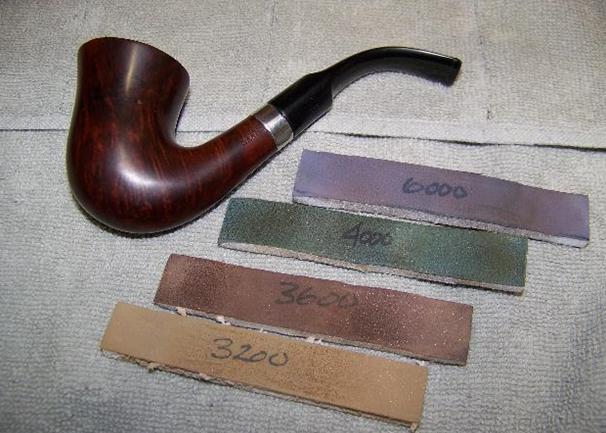 I took the assembled pipe back to my drill press/buffing station and ran over the entire pipe with red diamond polishing compound. Two or three passes of the pipe seems to prepare the pipe well for the final finish. I wiped the pipe down with a microfiber cloth to remove the buffing compound and then changed the buffing wheel for the waxing wheel. Three coats of carnauba wax put a nice shine on the pipe.
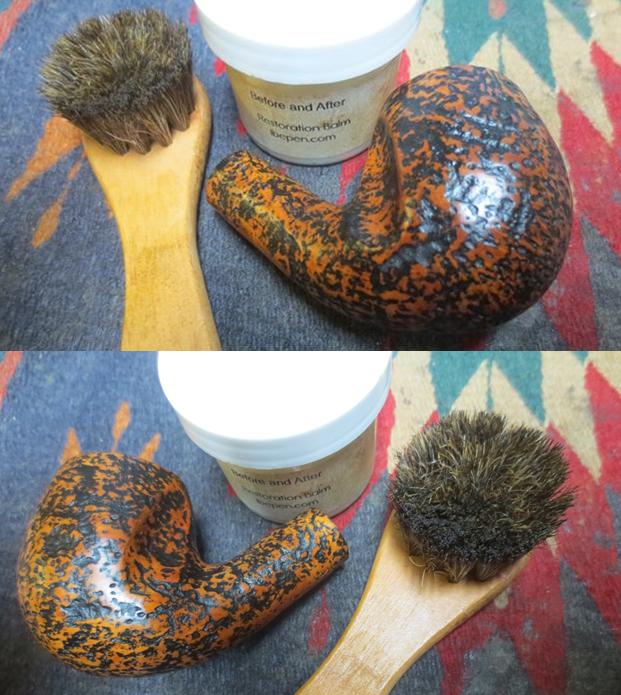
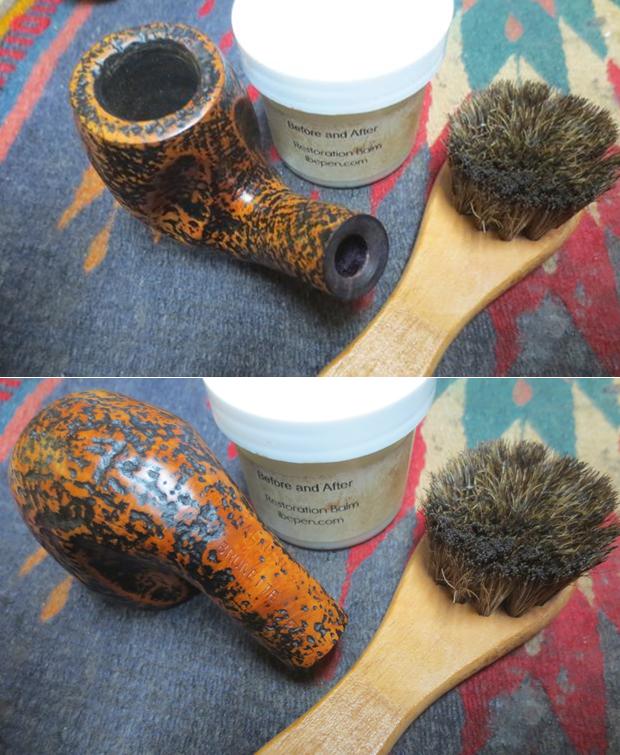
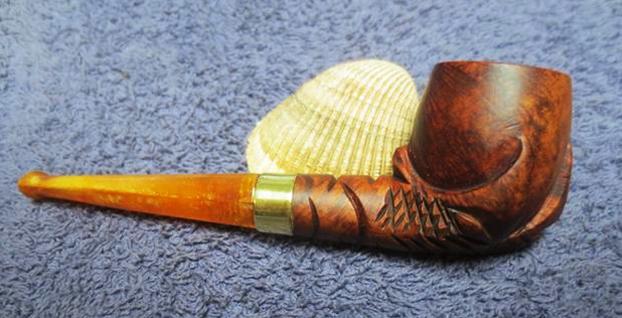
The last step in this restoration was the bowl coat. I had earlier sanded the epoxy chamber repair and wiped out the bowl with alcohol so the inside was relatively smooth. I mixed up a small batch of bowl coat using 2 teaspoons of sour cream and about three activated charcoal capsules. This made a thick, black, creamy paste that I spooned into the chamber with a wood spatula made from a popsicle stick. Donning the Nitrile gloves again, I used my finger to evenly spread the coating around the inside of the chamber. Wiping the excess coating off the rim with a cotton pad I set the pipe aside to dry for a few days.
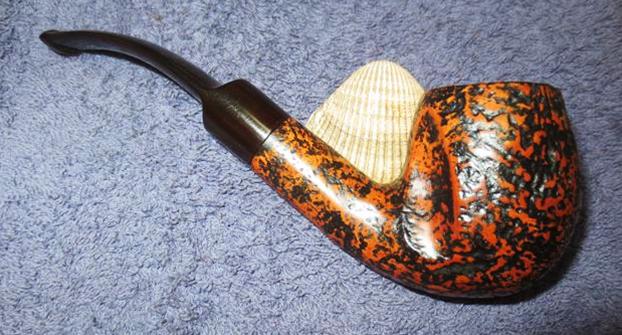
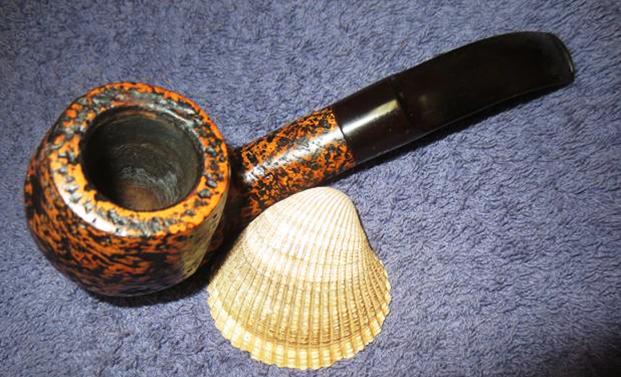
Now am I looking forward to the weather warming up so I can break in this pipe. I think it might become one in my regular rotation. Thank you for sharing in my adventure.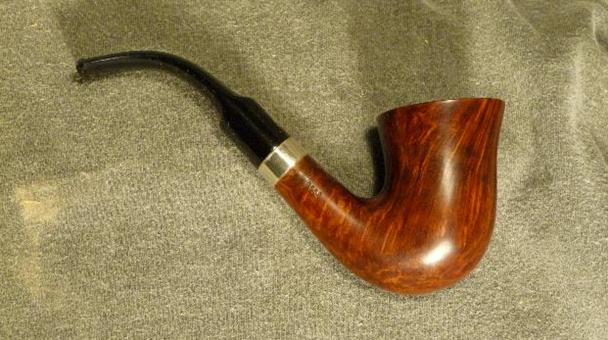

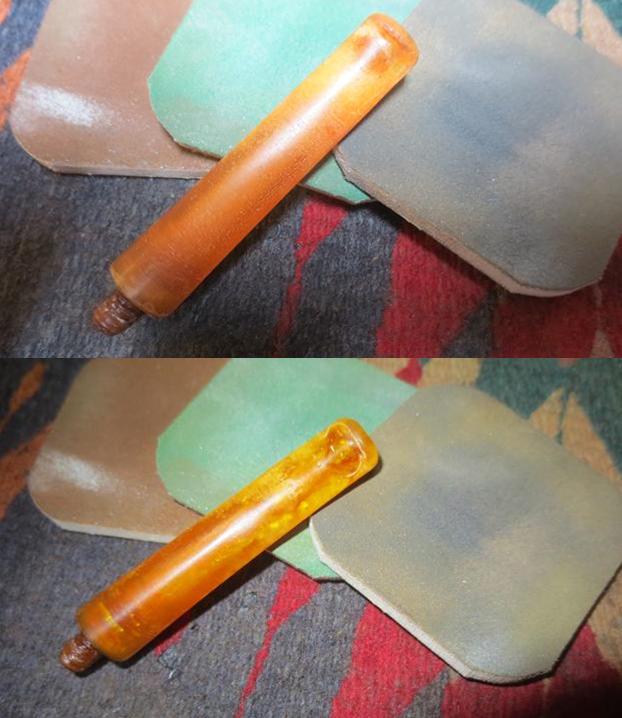
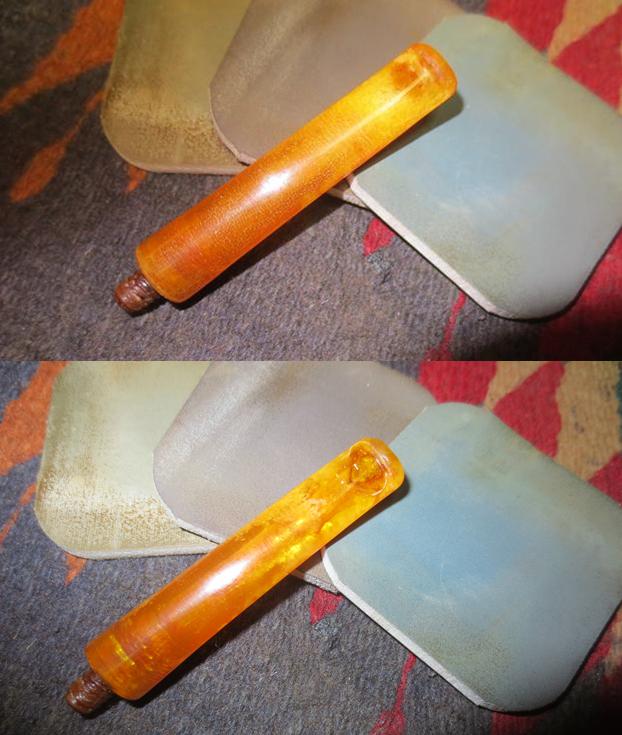
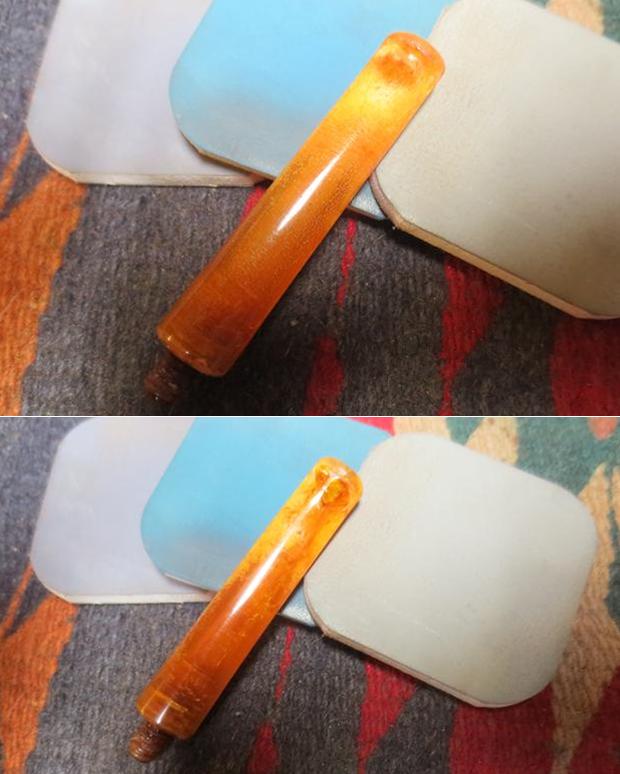
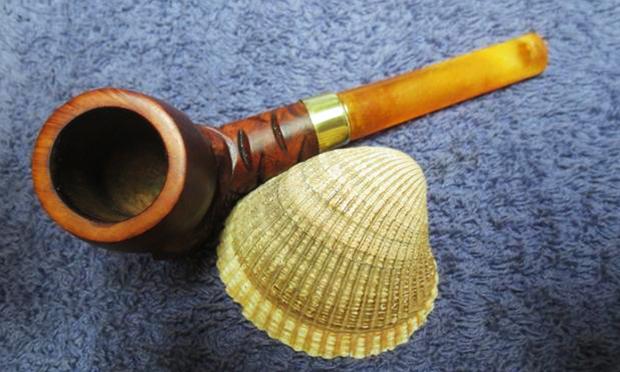
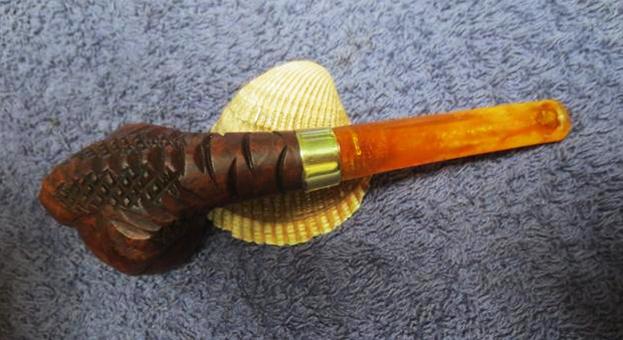
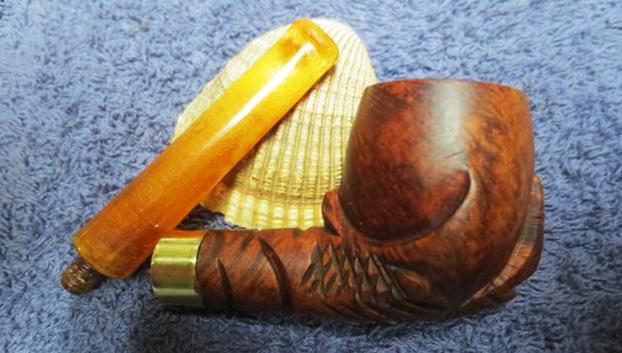
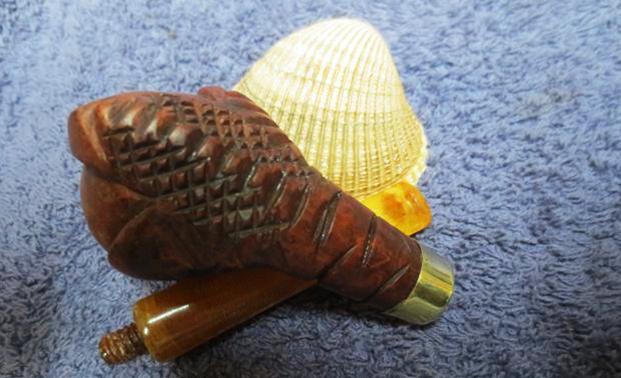
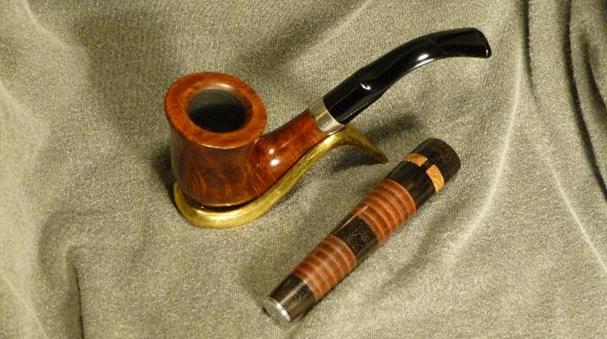 If you like the tamper in the picture above, it is one that I made and is for sale. Please see the Reborn Pipes Store page for it and other tampers. All proceeds go to charity.
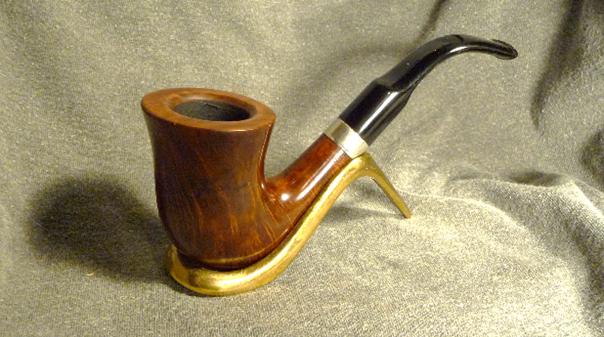
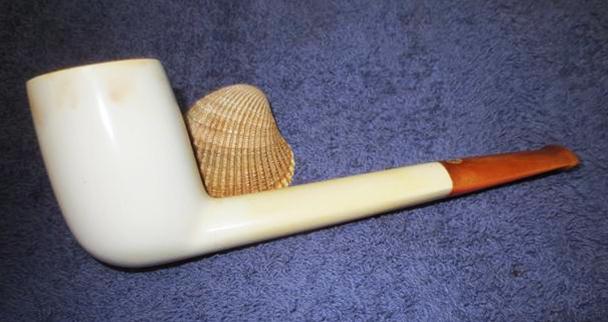
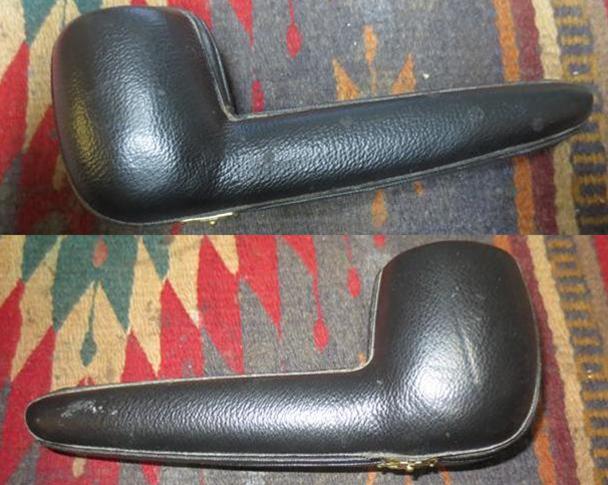
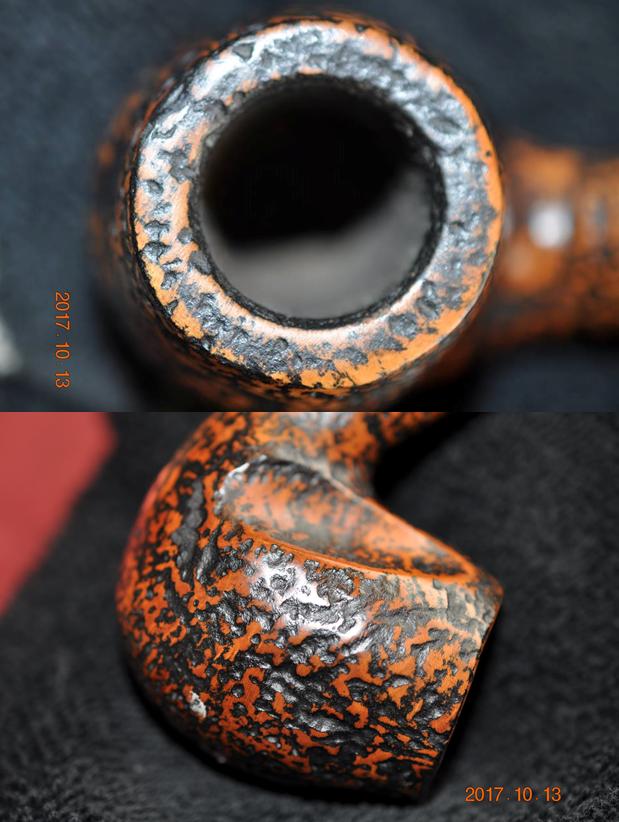
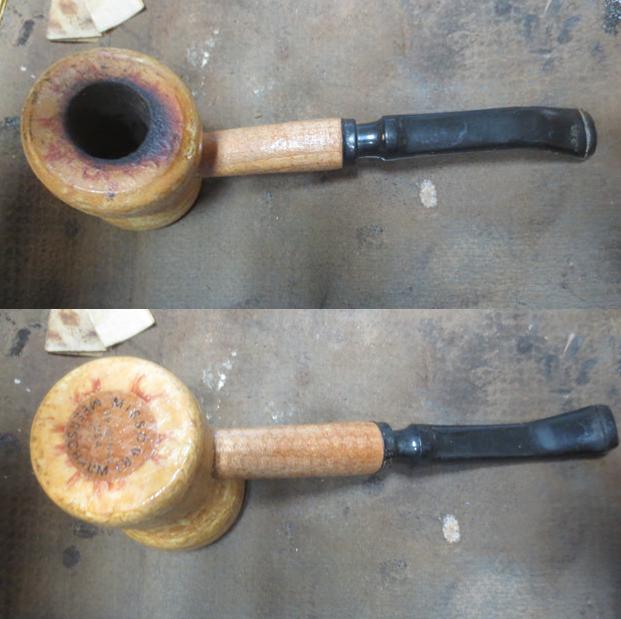
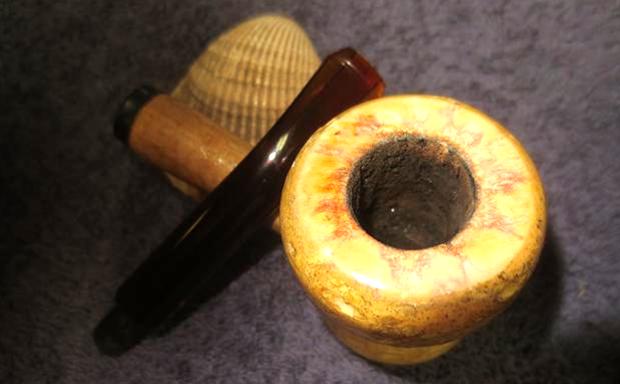
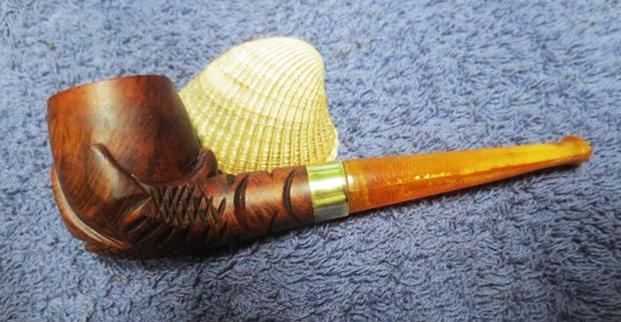
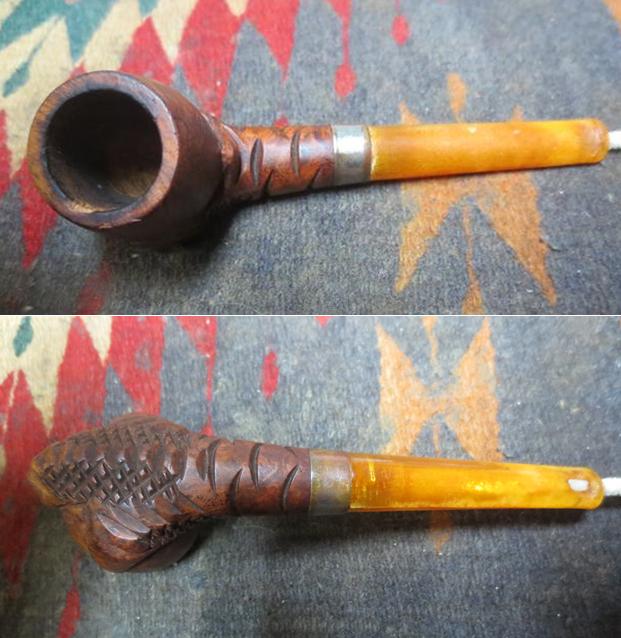
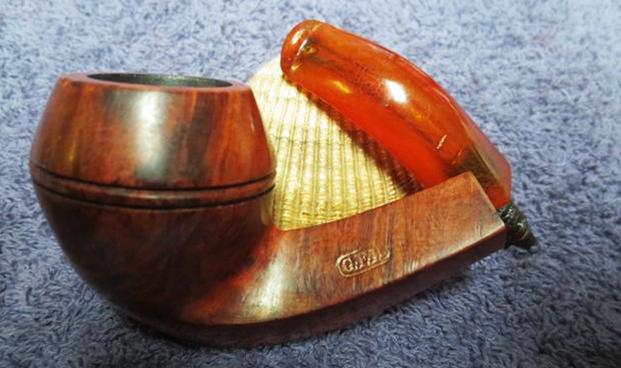
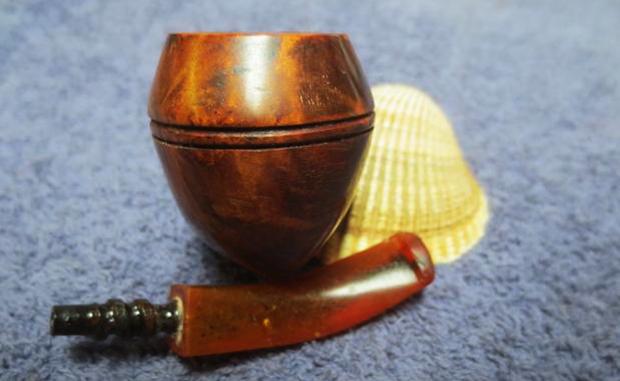
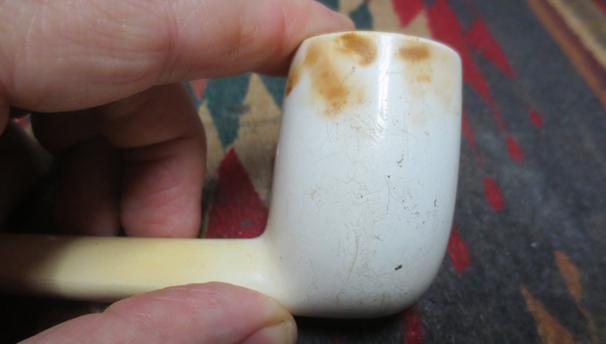
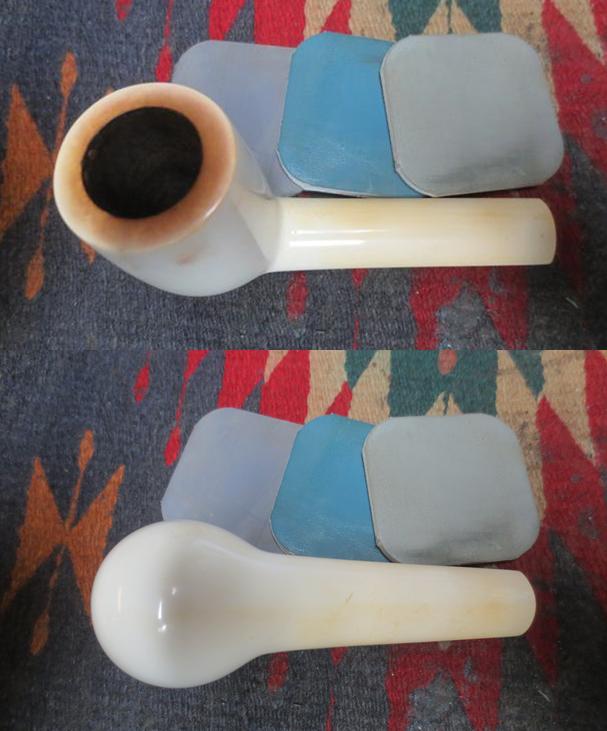
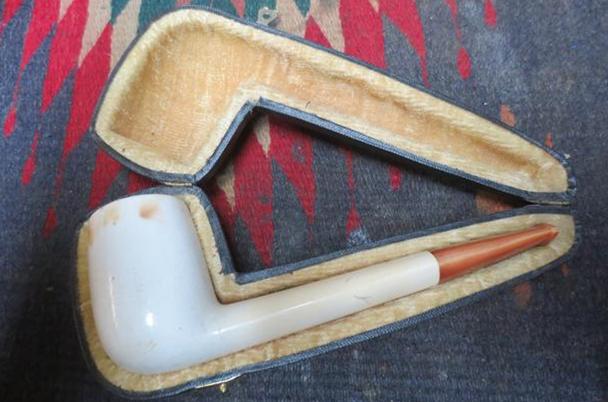 The pipe inside was in pretty decent condition. There was a cake in the bowl and some rim darkening and lava overflowing over the back of the rim. The bowl and shank had a lot of scratches and nicks in the finish with a bit of “road rash” on the bottom edge of the left side of the bowl. There were also some colour developing on the long shank of the pipe and some odd spotting around the top of the bowl. It was patina developing but it was spotty and strange – I have never seen that kind of colouring on a meer before. The stem was in good condition but had tooth marks and chatter on both sides near the button. The stem had a threaded tenon that screwed into and inset in the shank. It aligned perfectly. The SMS brass logo was set in the top of the stem and had been covered with a spot of clear acrylic to make it smooth and even with the surface of the stem. It should clean up well with a few character marks from its journey through the hands of different pipe men.
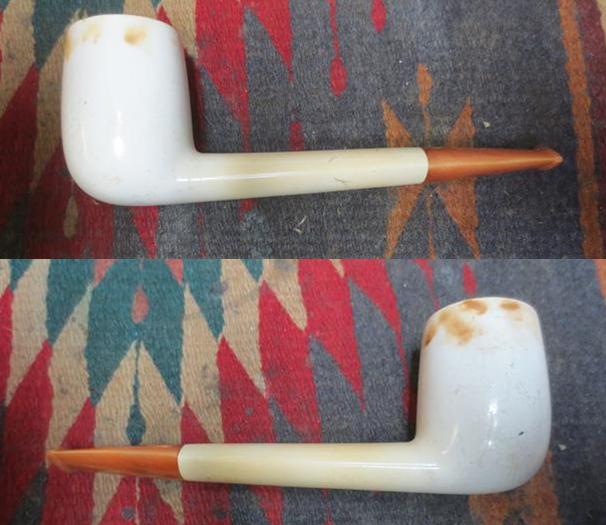
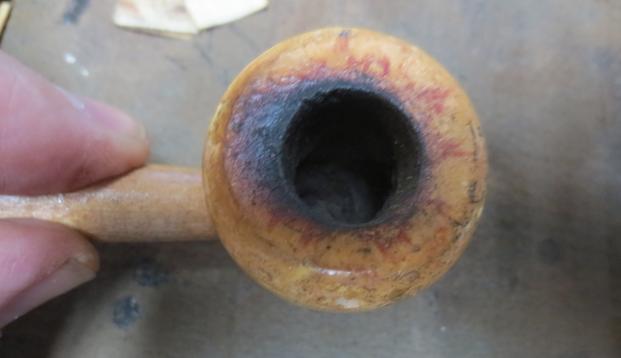
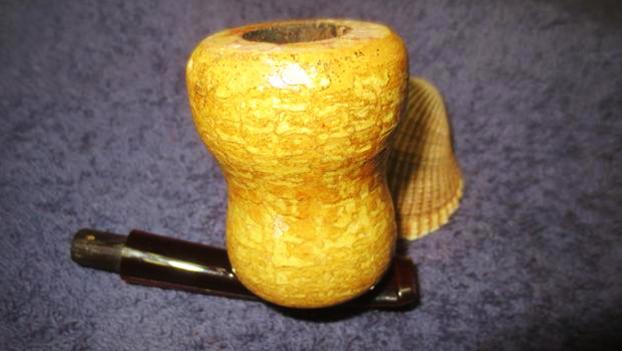
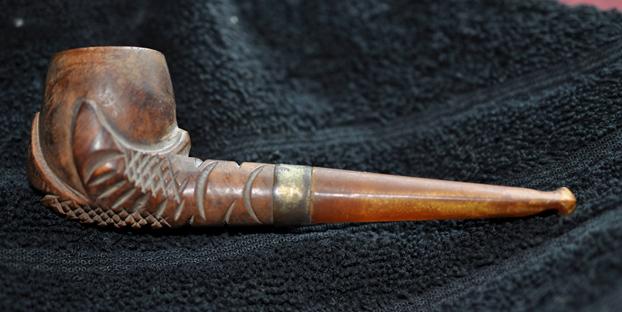
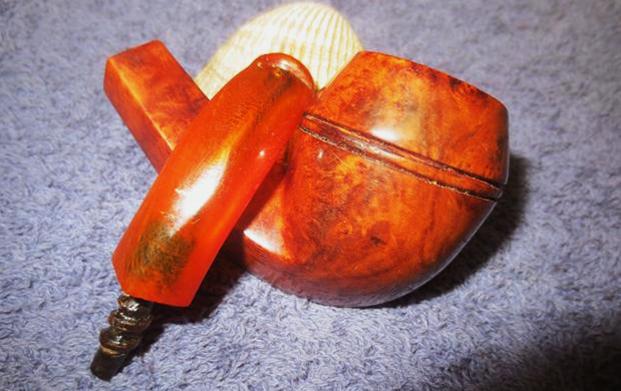
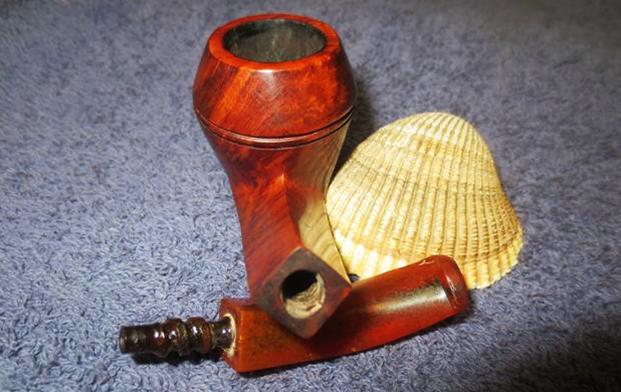
 I took some close up photos of the bowl, rim top and sides of the bowl to show the scratching and general condition of the pipe. The nicks and scratches on the left side of the bowl are visible in the second photo. The colouration process on the pipe is also visible through the scratches.
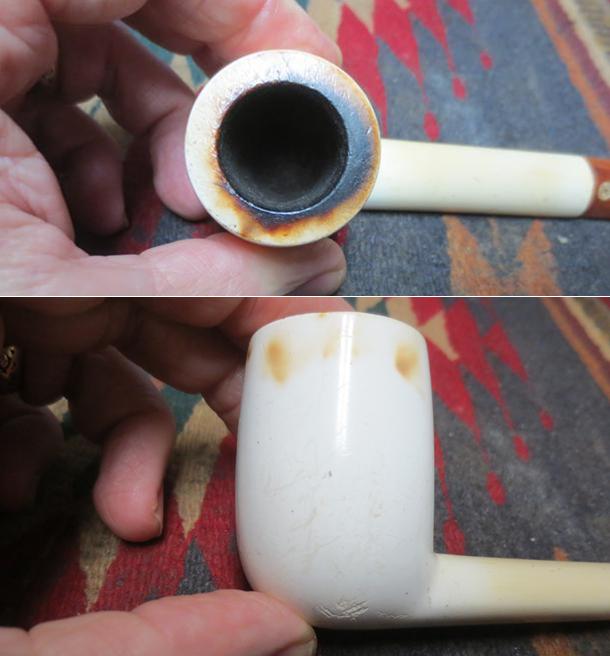
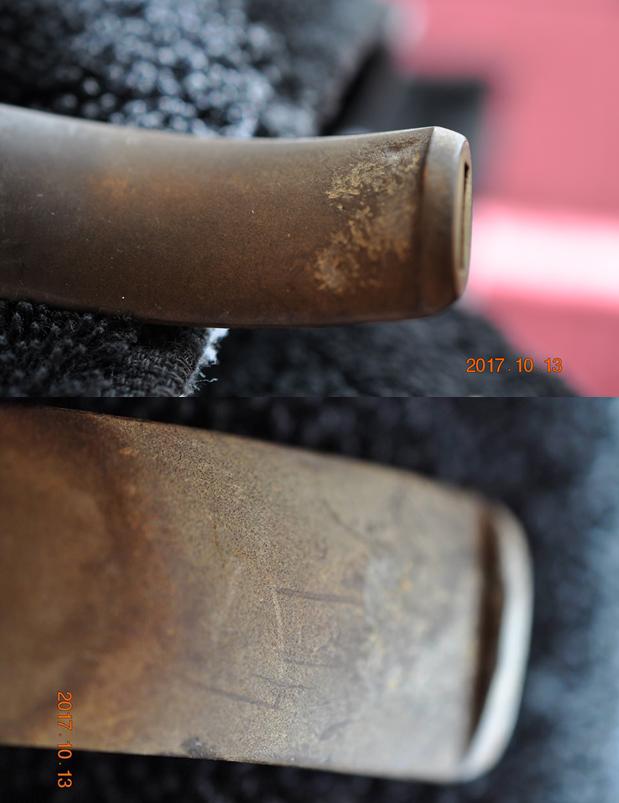
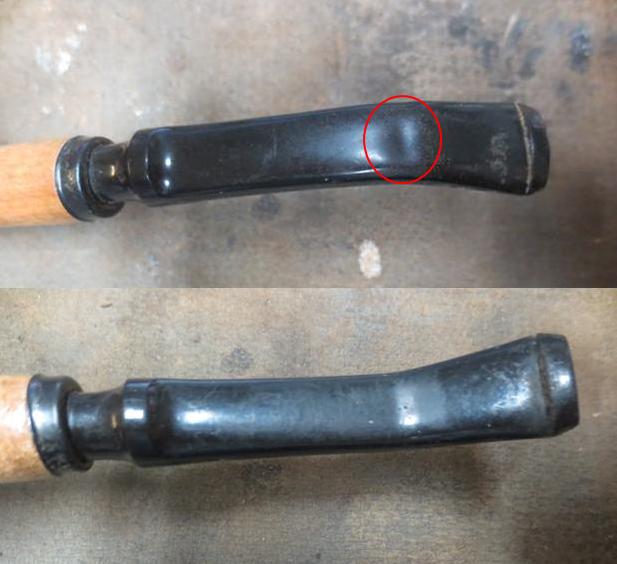
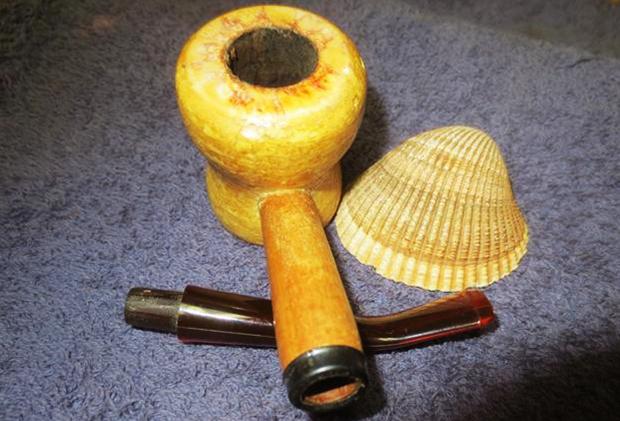
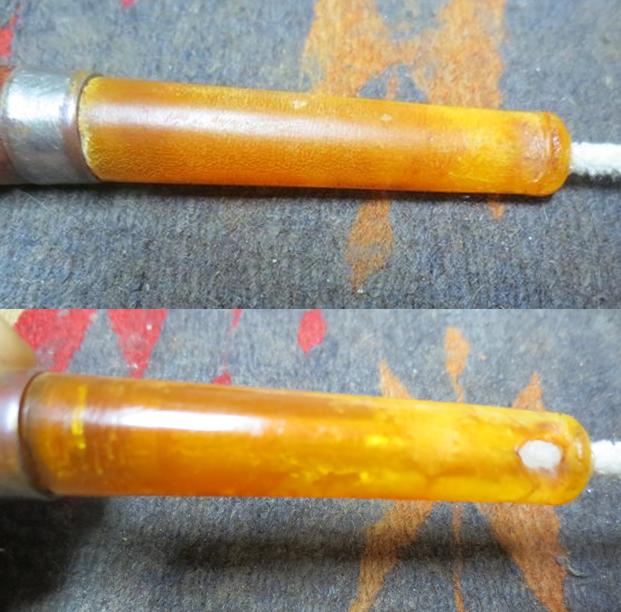
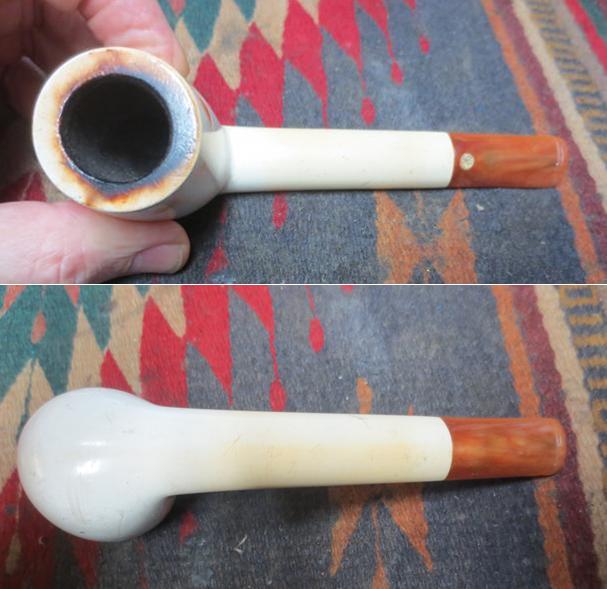
 The tooth marks and chatter are visible in the photos of the stem. They are predominantly around the button area on both sides. There are also some scratches and nicks on the sides and close to the shank/stem junction.
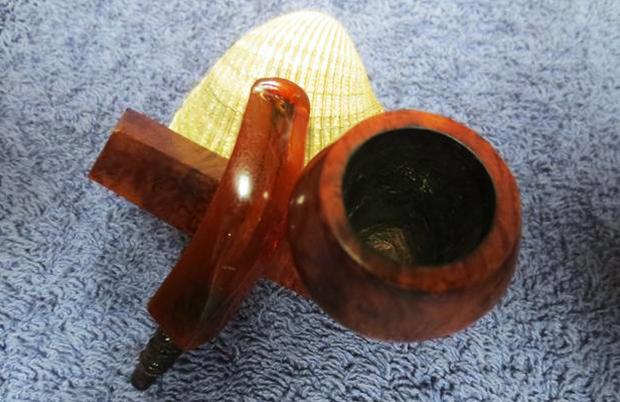
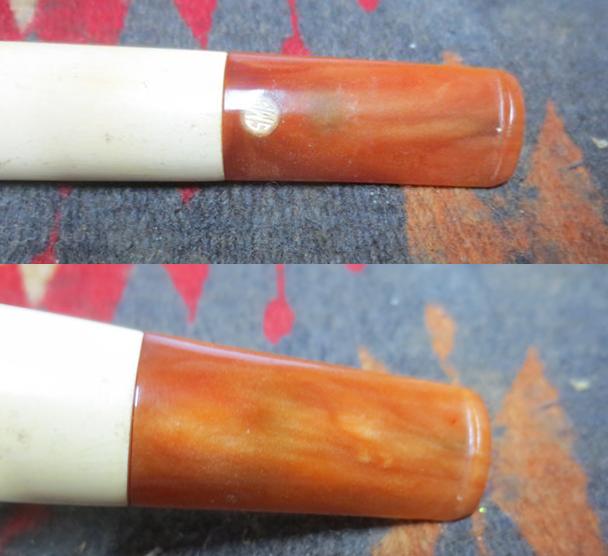 I have to say how spoiled I have become when it comes to cleaning up pipes before I can do the restoration work. Thank you Jeff for the great work that you have been doing behind the scenes at rebornpipes. It is times like this when I have to clean up a pipe before I begin working on it that I am reminded of how much you do before I ever get the pipes. On this one I began with the cleanup work. I reamed the bowl with a Savinelli Fitsall Pipe Knife and took out all of the cake on the walls.
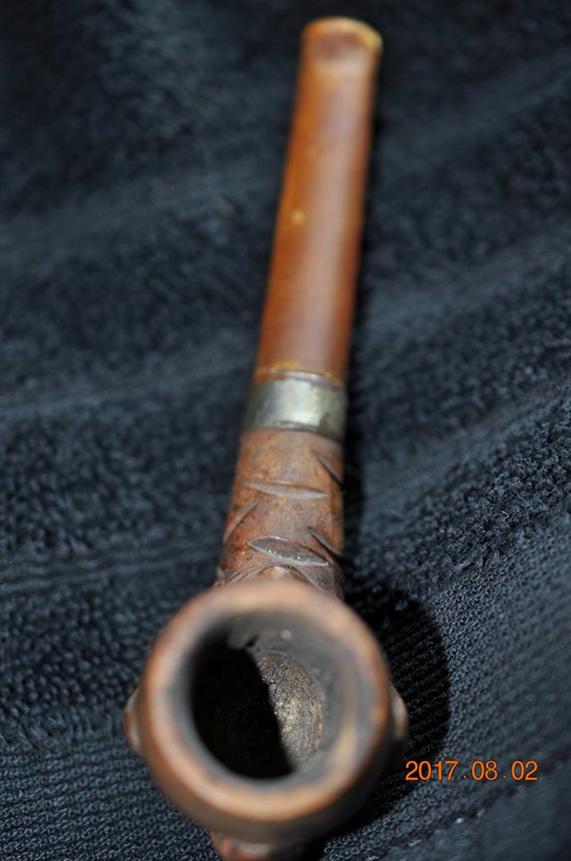
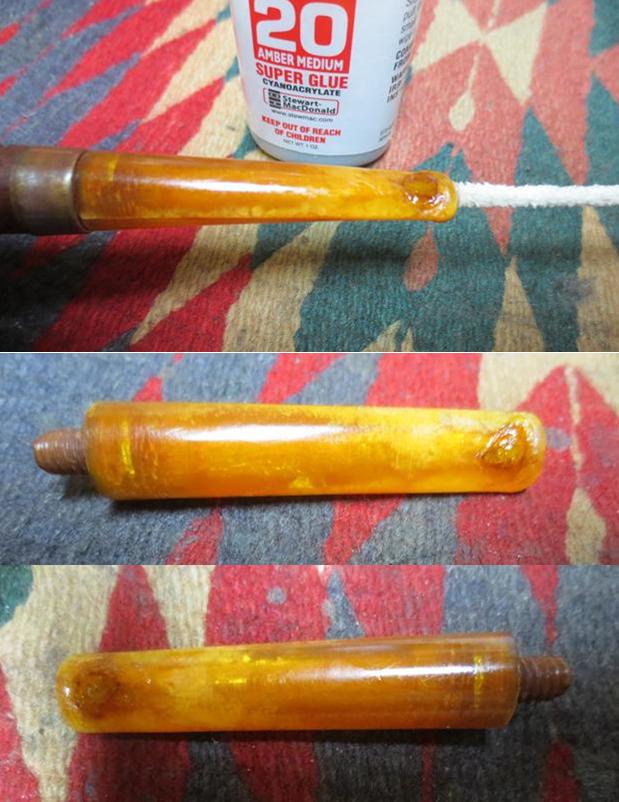
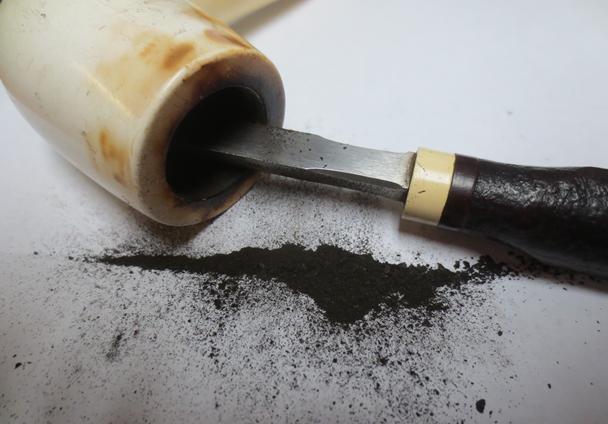 I unscrewed the stem from the shank and wiped down the tenon with a damp cotton pad to remove the tars and oils in the threads on the outer edge of the airway. Afterwards I cleaned out the mortise and the airway in the shank and stem with alcohol, cotton swabs and pipe cleaners until it was clean.
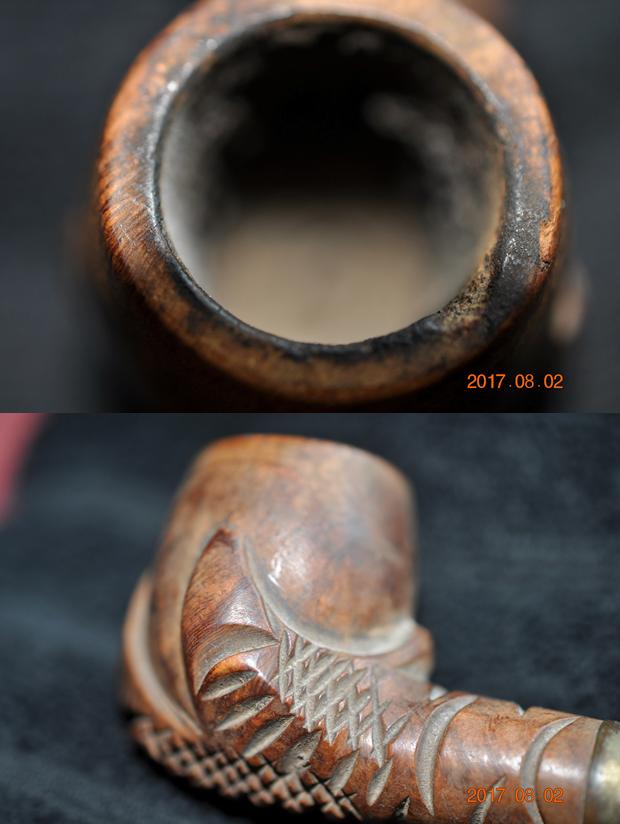
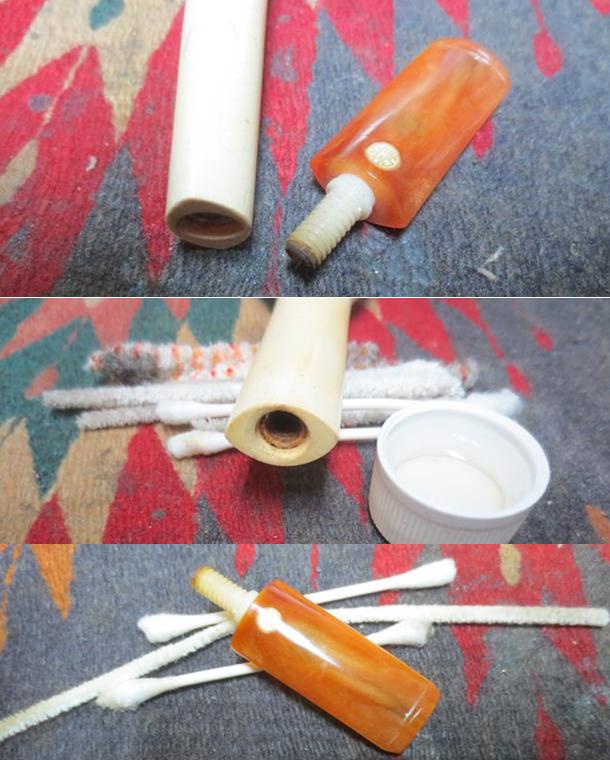 I sanded out the tooth chatter and marks with a folded piece of 220 grit sandpaper. I also sanded out the nicks and marks further up the stem sides and near the shank/stem union.
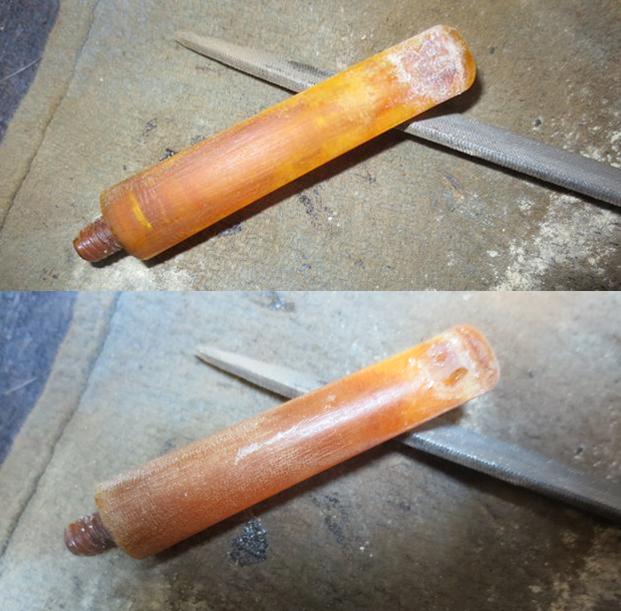
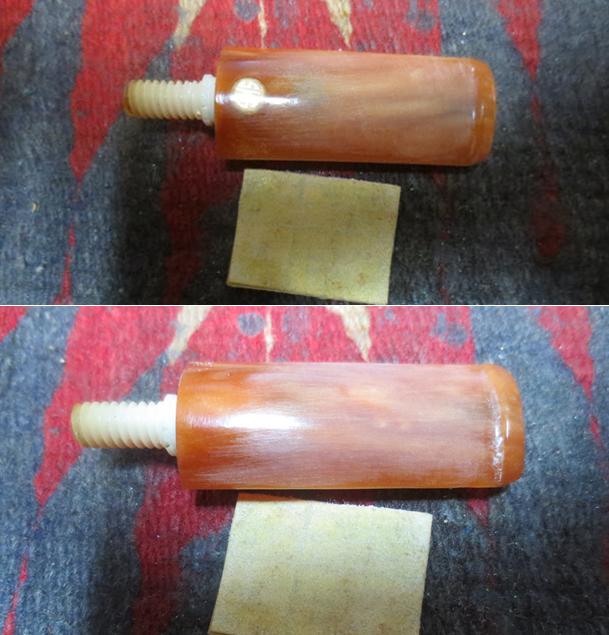 I worked over the stem with micromesh sanding pads. I polished out the sanding scratches and marks in the amber acrylic – wet sanding it with 1500-2400 grit pads and dry sanding it with 3200-12000 grit pads and wiped it down with damp cotton pad after each one. When I finished with the 12000 grit pad I wiped it down a final time and dried it off. I set the stem aside and turned my attention to the meerschaum bowl.
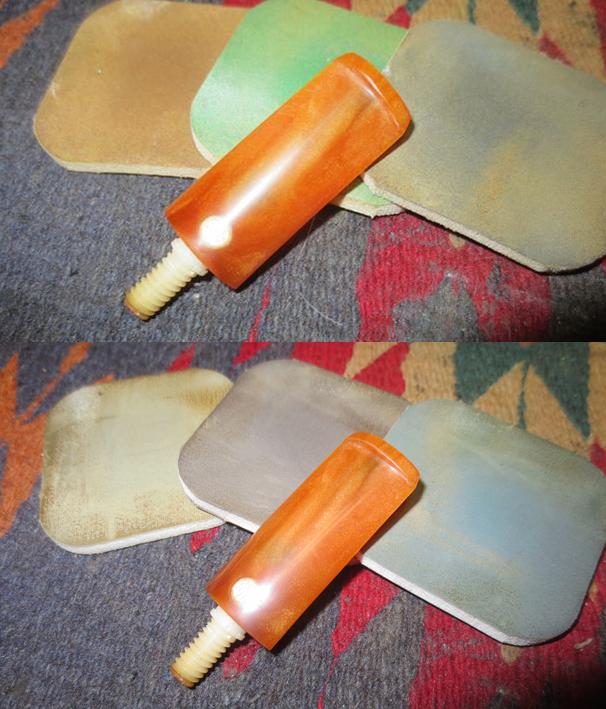
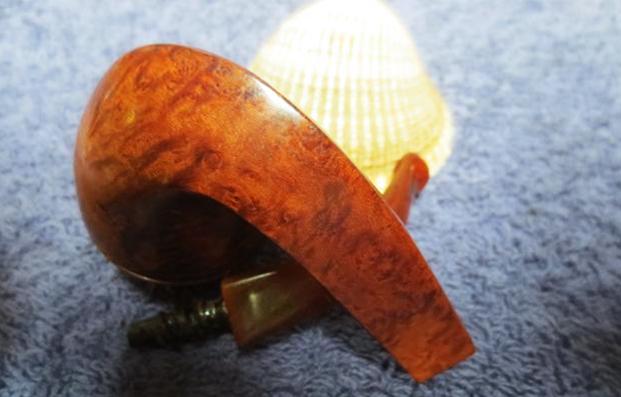
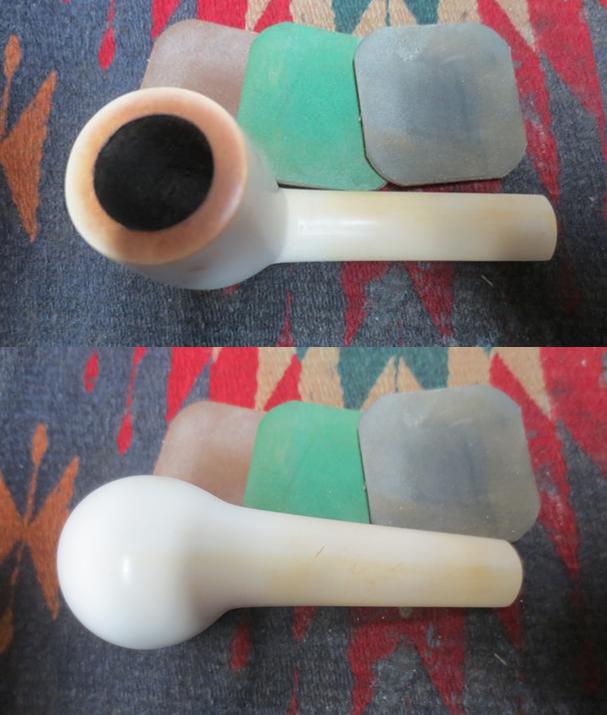
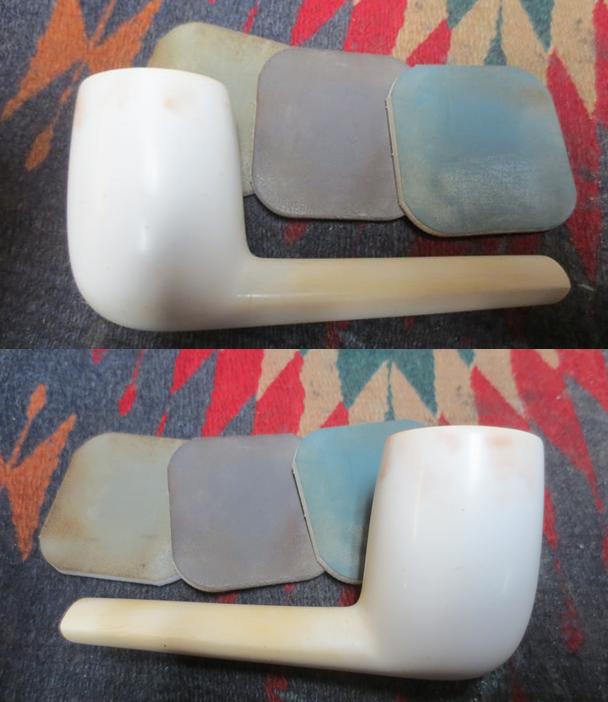
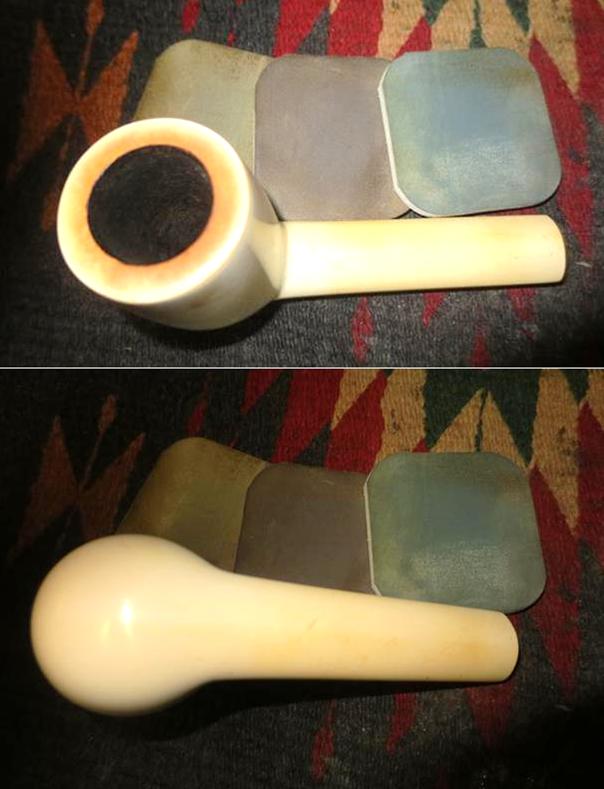
 I polished the meerschaum bowl and shank with micromesh sanding pads – wet sanding with 1500-2400 grit pads to remove the damage of the scratches and nicks in the bowl. I was able to remove almost all of the surface scratches (leaving behind only those that add character) and most of the heavy damage to the marks on the lower left side of the bowl. I dry sanded the bowl and shank with 3200-12000 grit pads. I wiped the rim down after each pad with a damp cotton pad.
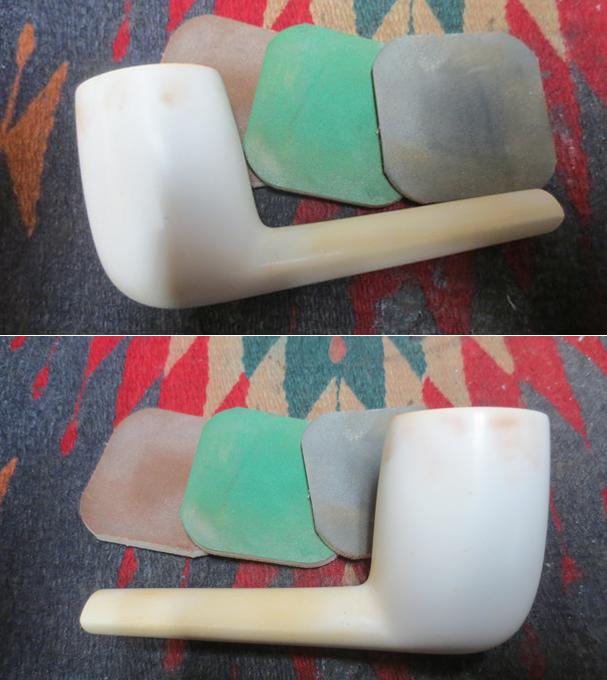

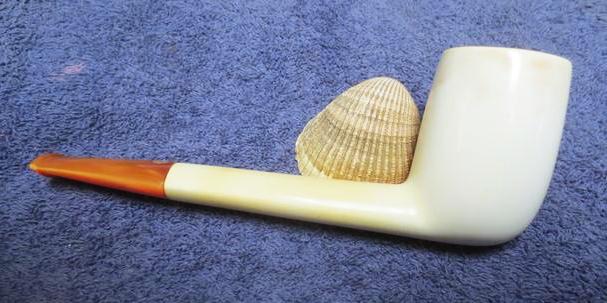
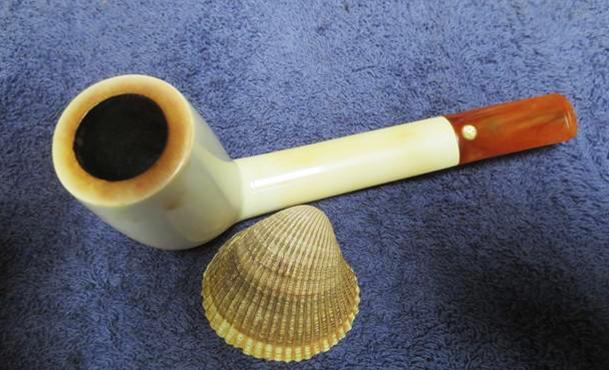
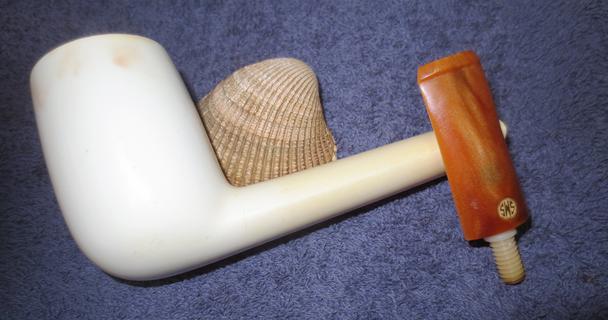
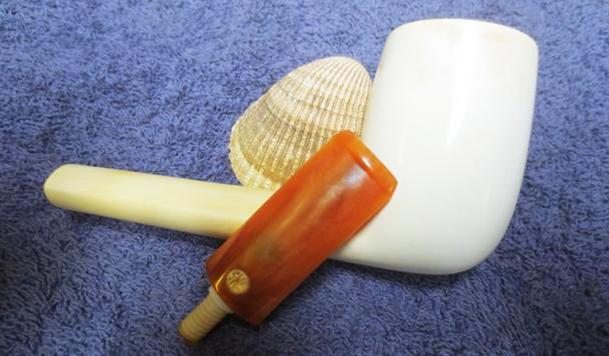
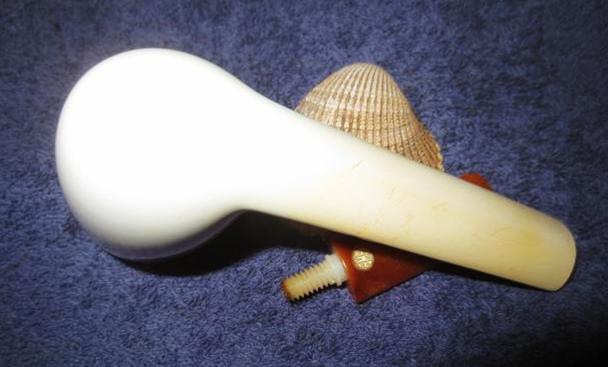
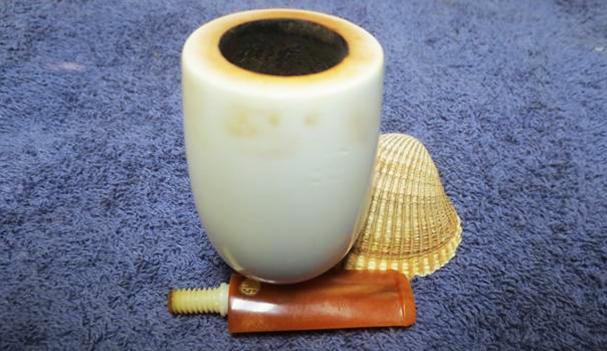
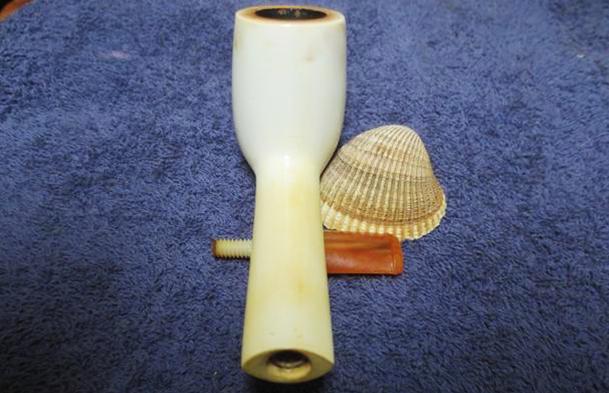
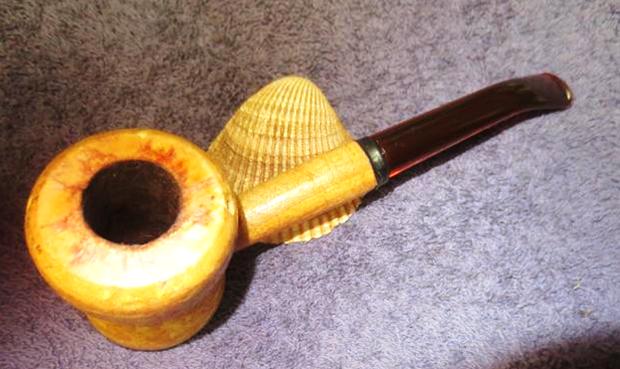
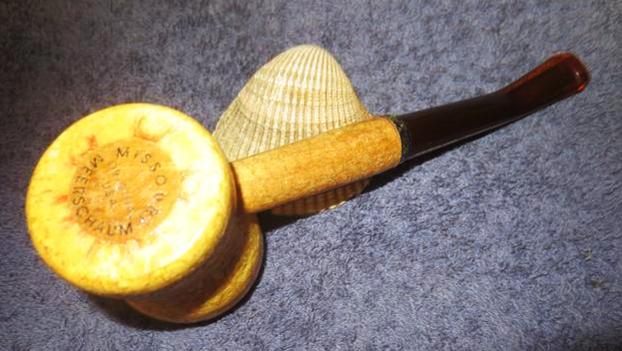
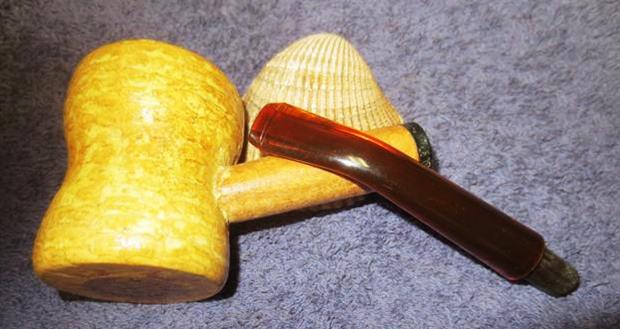
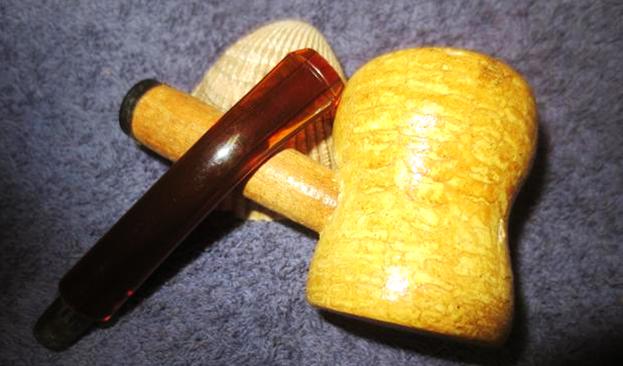
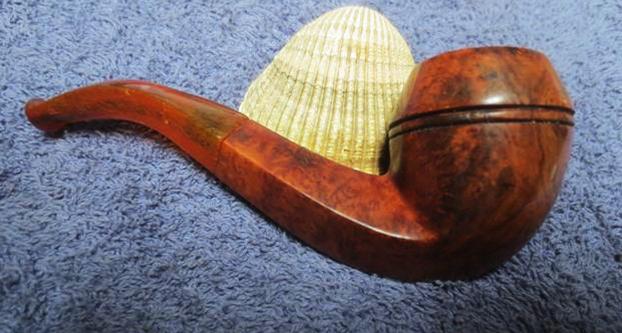
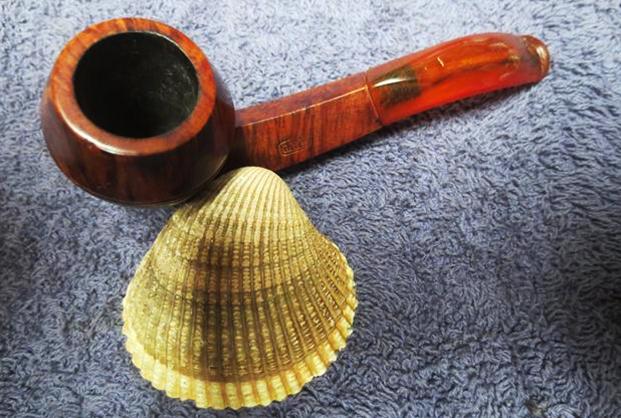
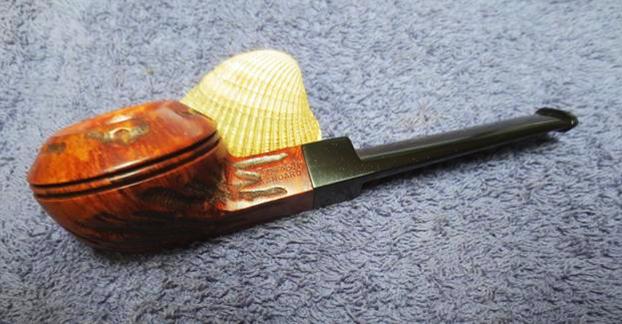
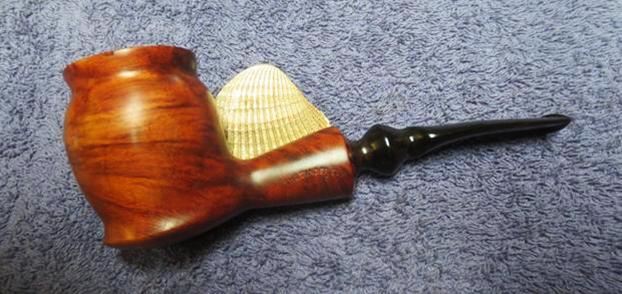
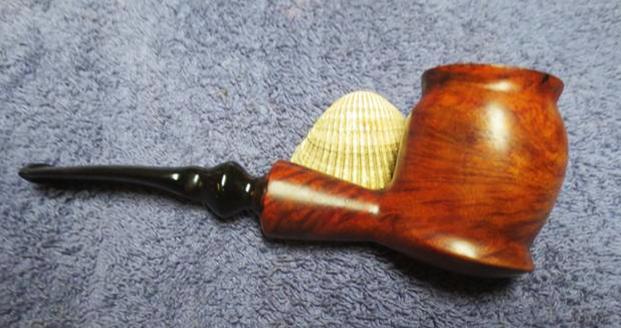
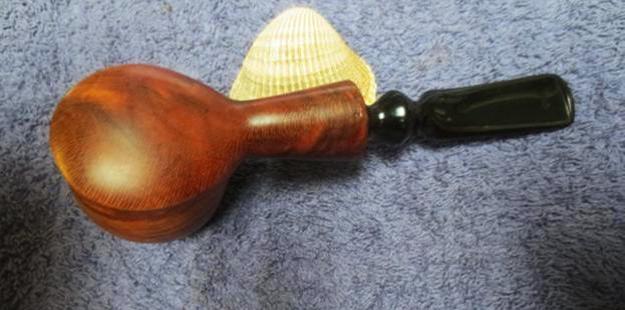
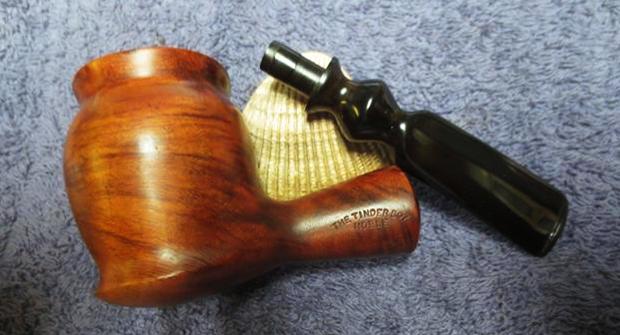
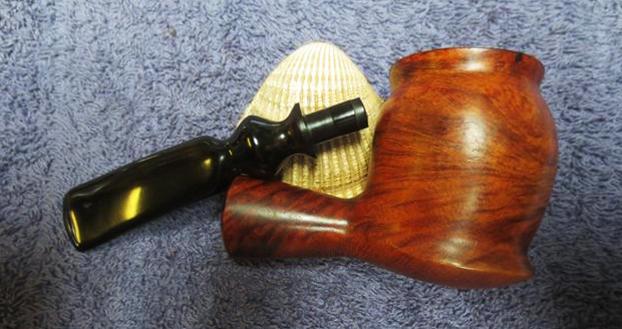
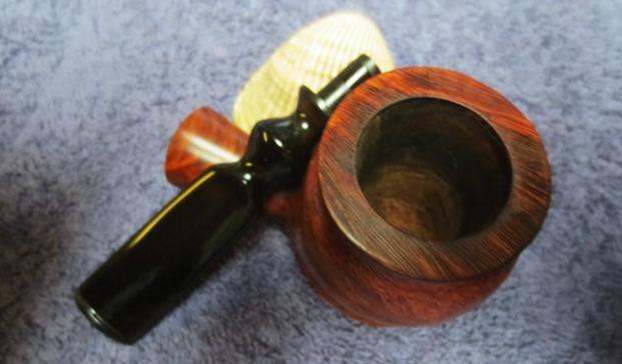
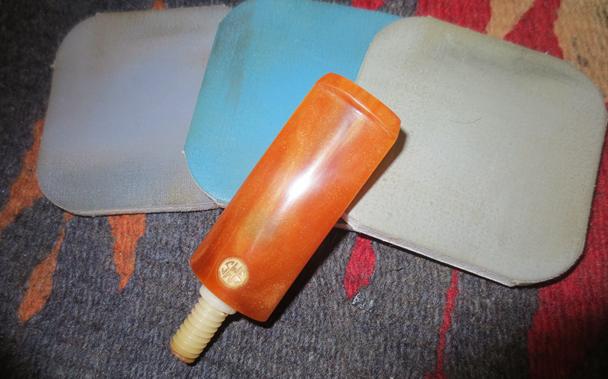
 I put the stem back on the bowl and carefully worked the pipe on the buffing wheel with Blue Diamond to further polish the bowl and the shank. It really brought life to the meerschaum. I also buffed the acrylic stem at the same time and worked it to a shine. I gave it several coats of Conservator’s Wax and buffed it with a clean buffing pad. I hand buffed the pipe with a microfiber cloth to deepen the shine in the meerschaum. The finished pipe is shown in the photos below. The dimensions of the pipe are: Length: 6 1/4 inches, Height: 2 1/4 inches, Diameter of the bowl: 1 1/2 inch, Diameter of the chamber: 7/8 inches. I will be adding this one to the rebornpipes store shortly if you are interested in adding it to your collection. It is an unusual shape in my opinion and it will make a fine meerschaum addition to the rack. If you are interested email me at slaug@uniserve.com or send me a message on Facebook. Thanks for looking.