Blog by Dal Stanton
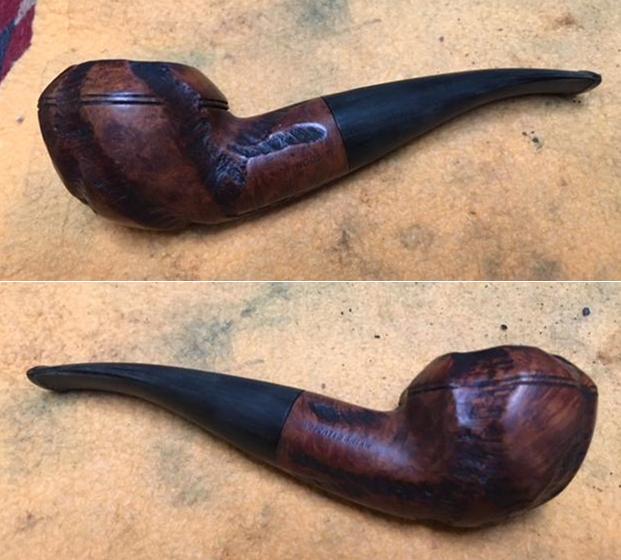
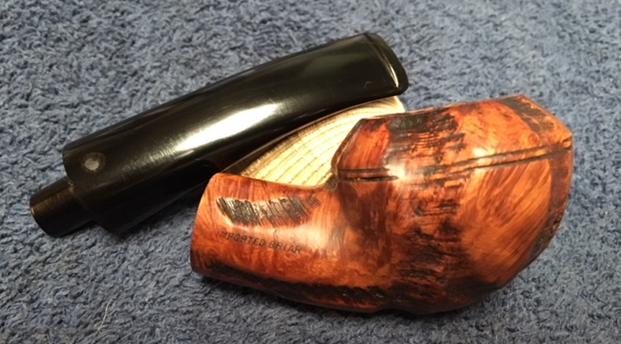
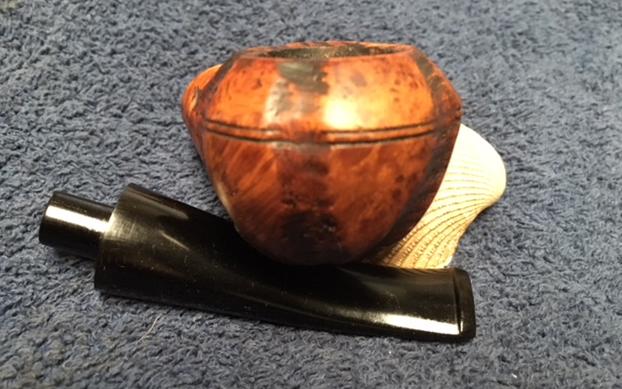
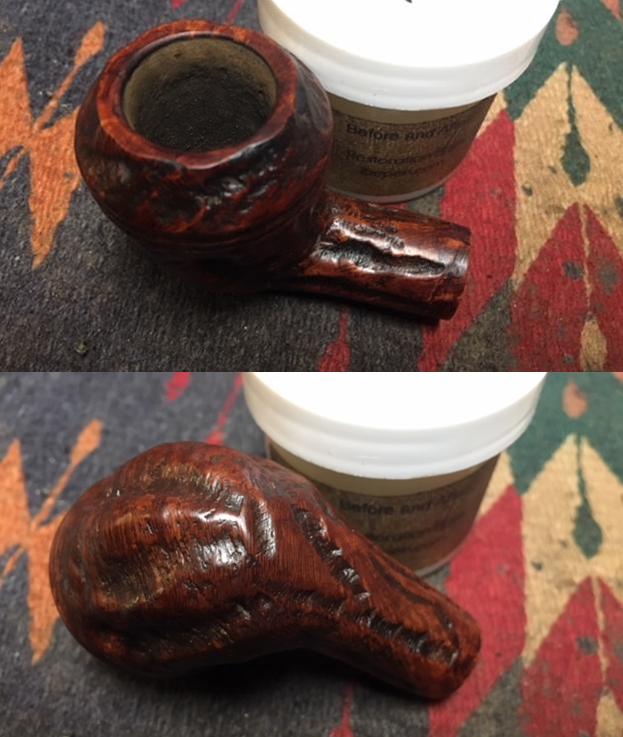
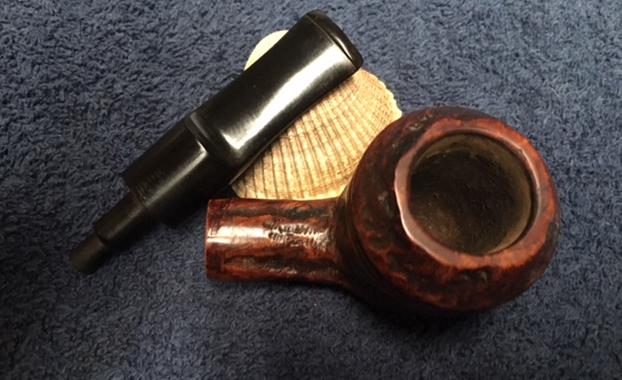
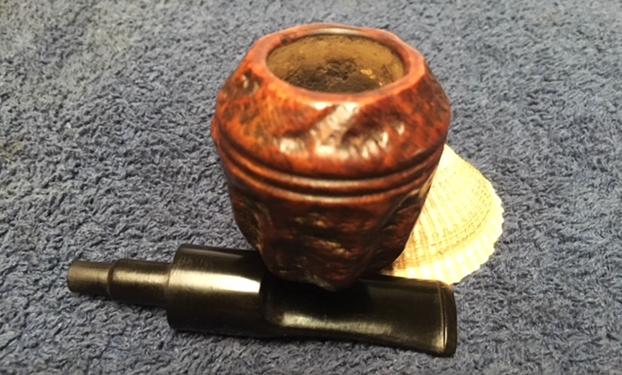
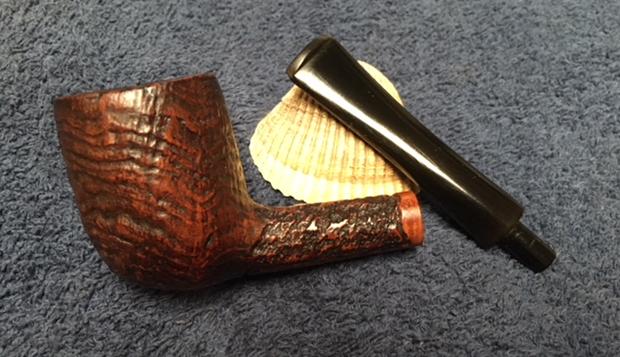
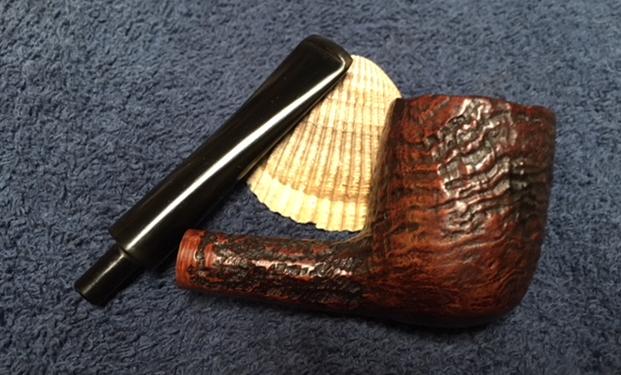
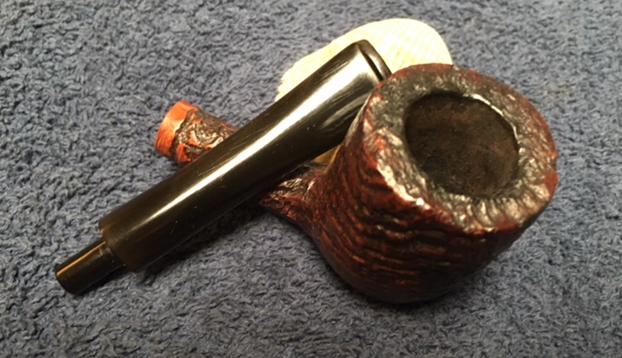
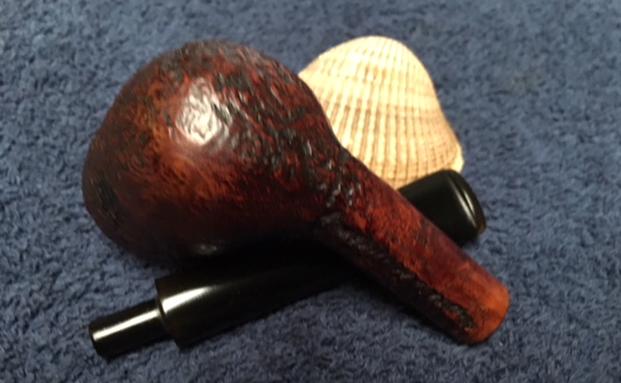
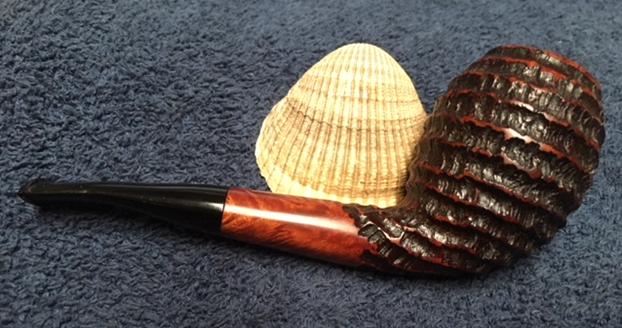
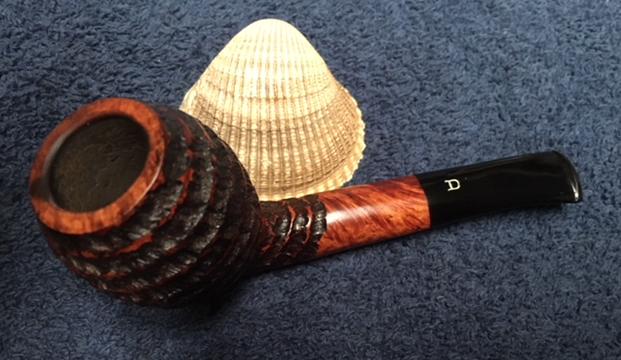
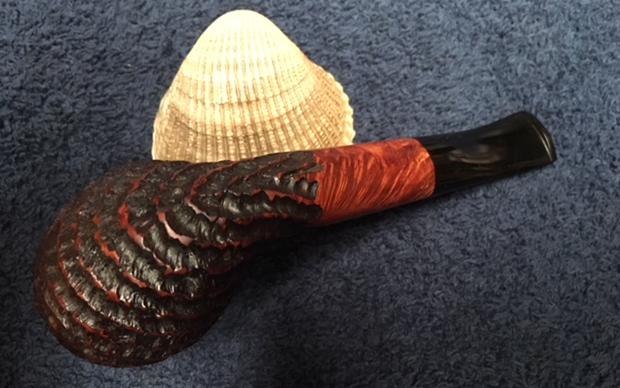
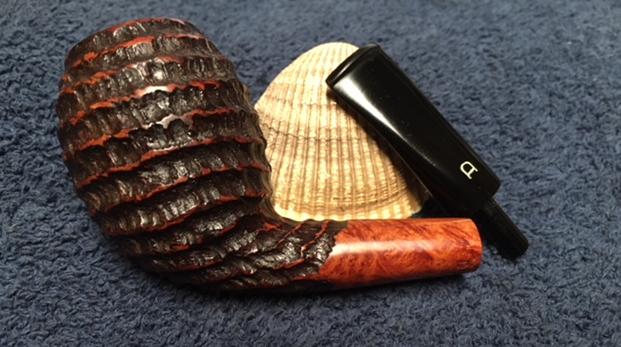
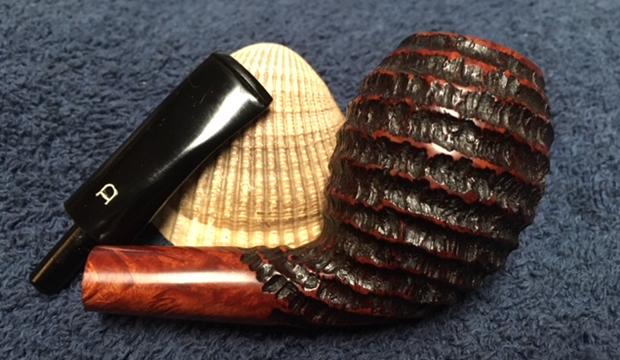
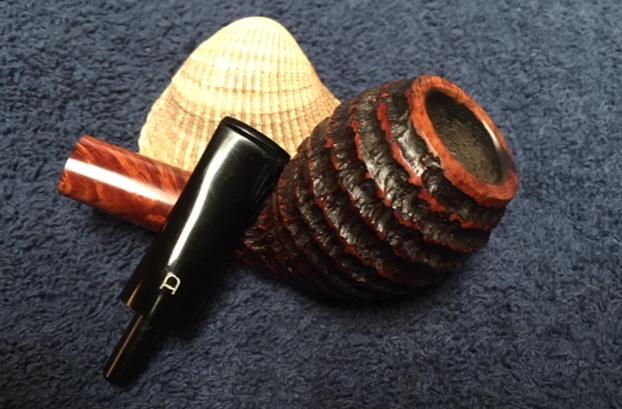
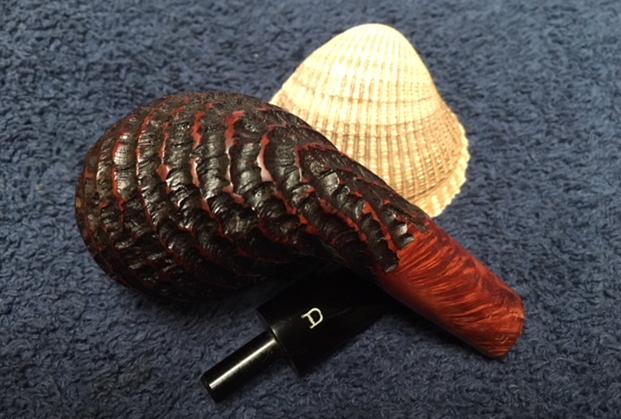
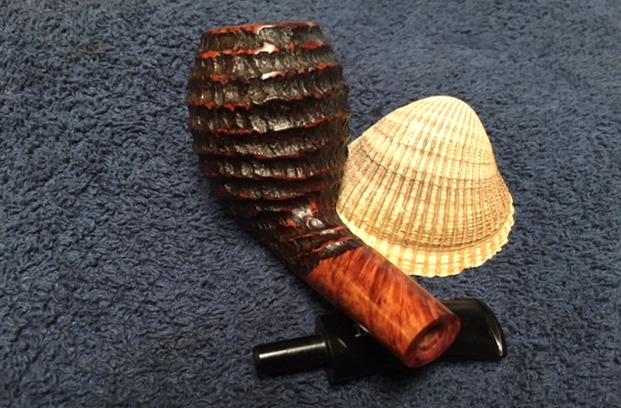
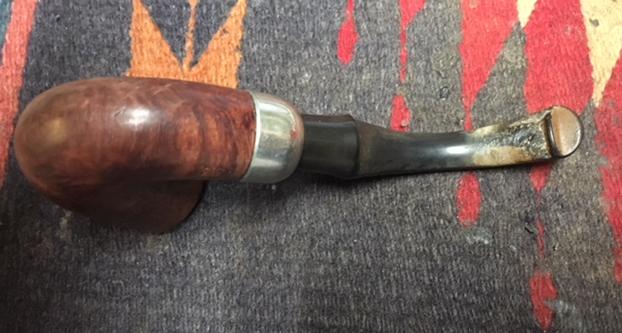
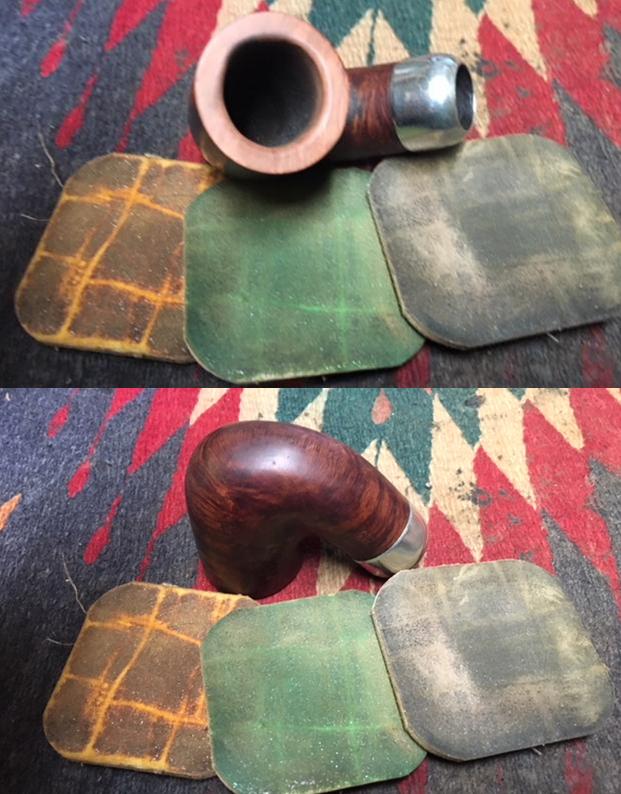
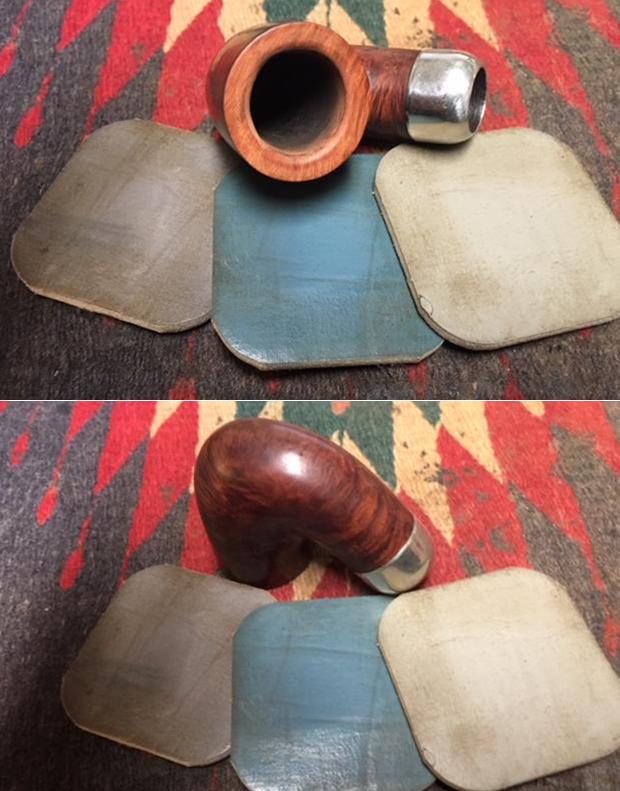
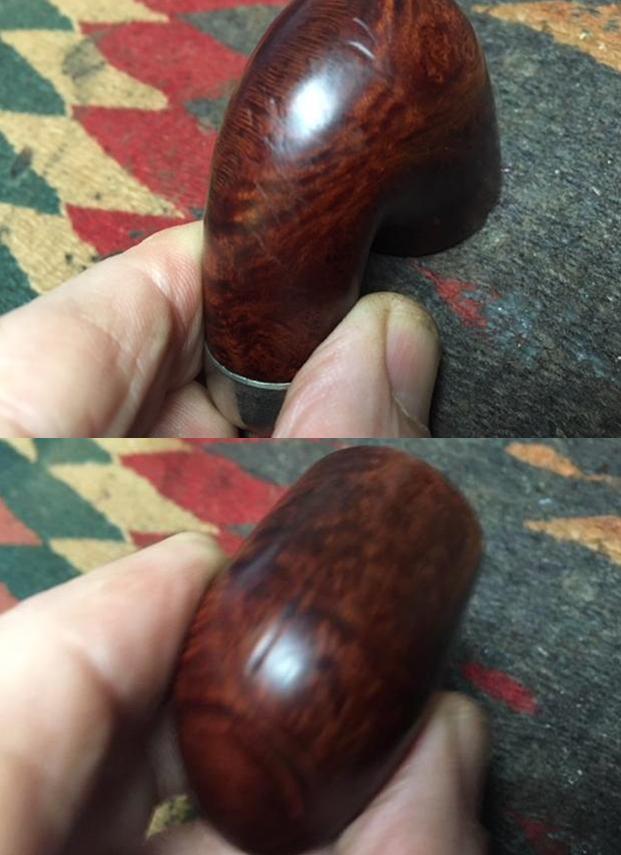
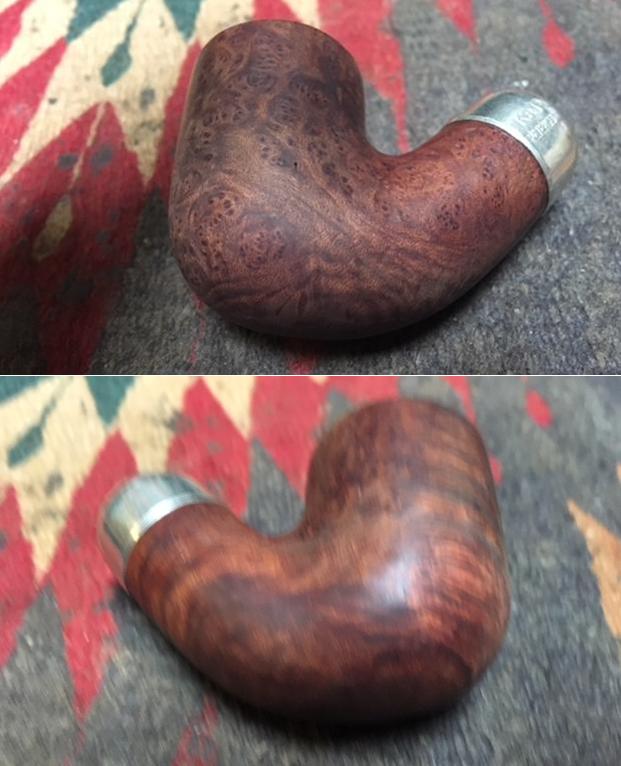
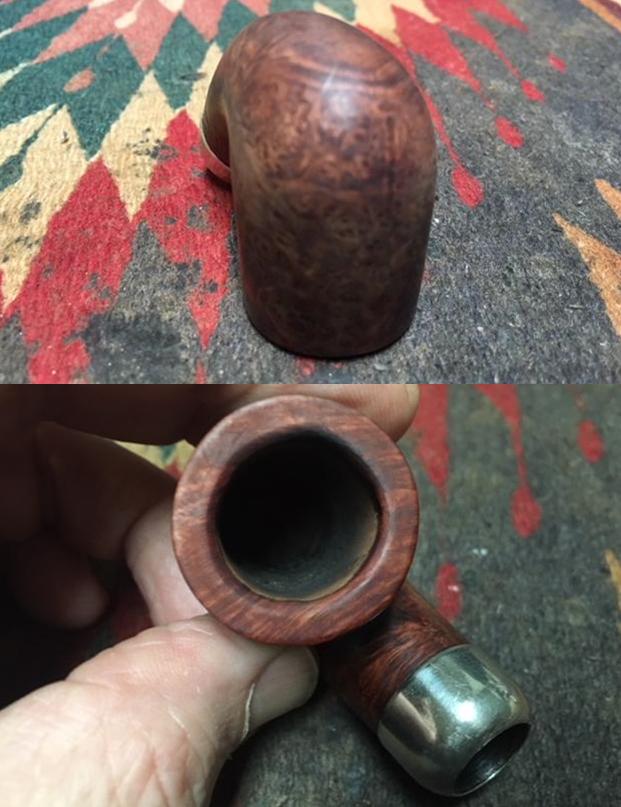
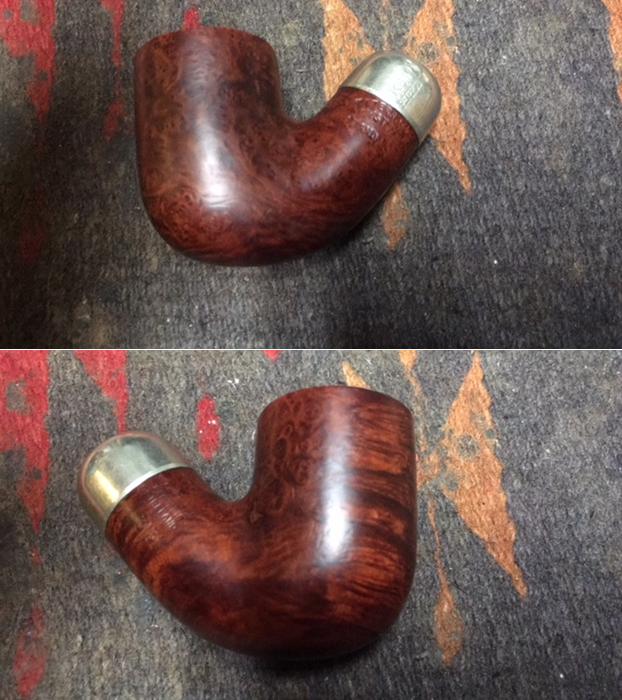
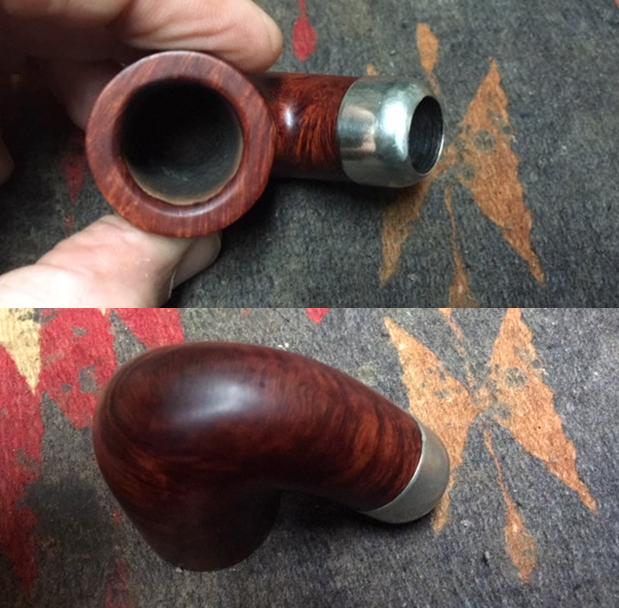
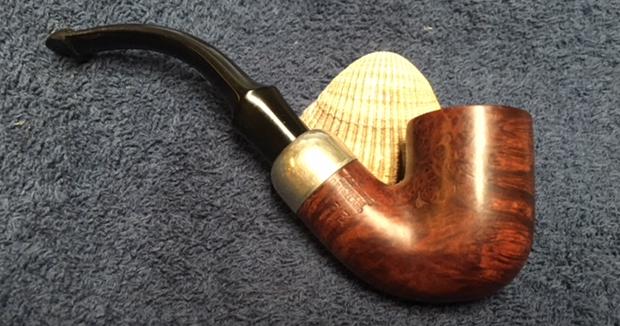
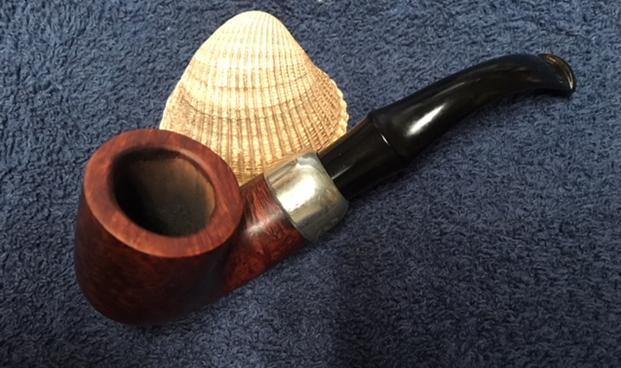
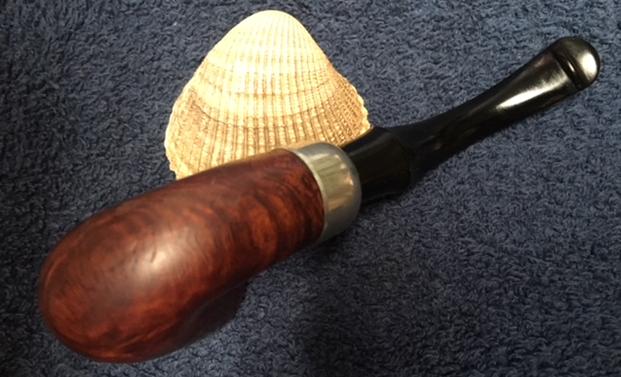
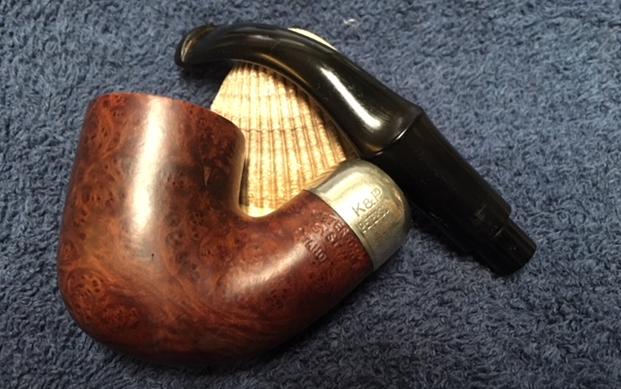
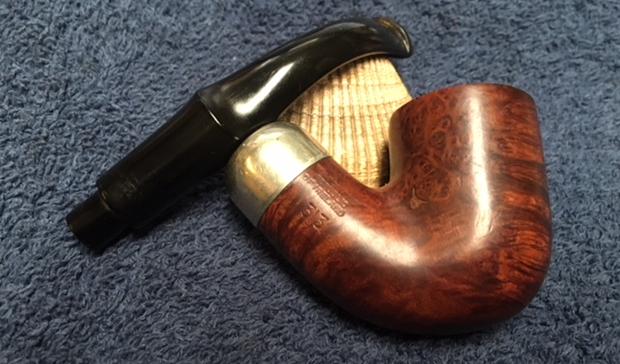
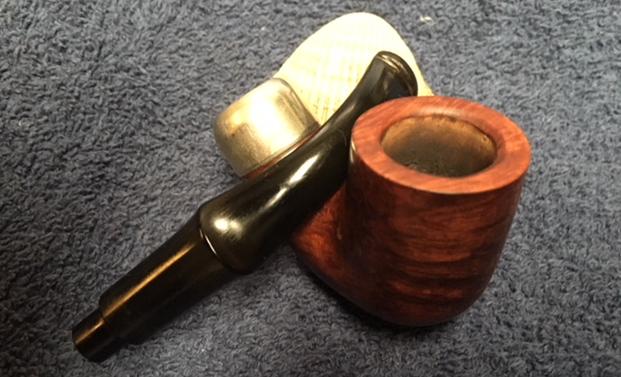
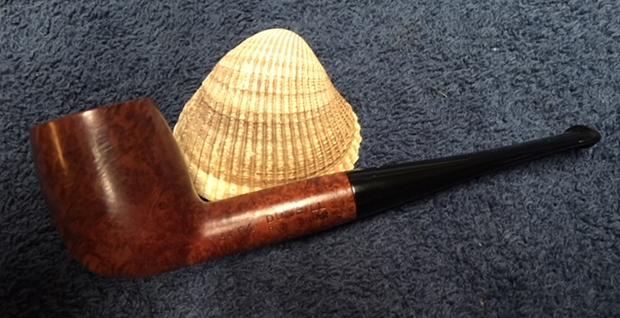
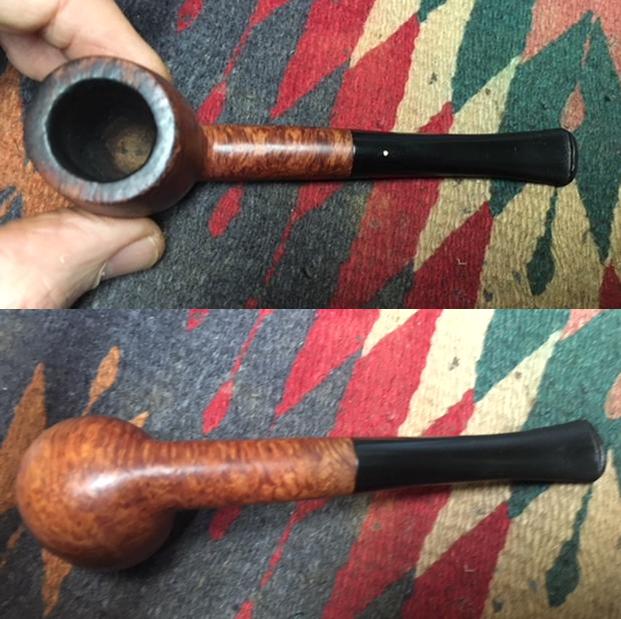
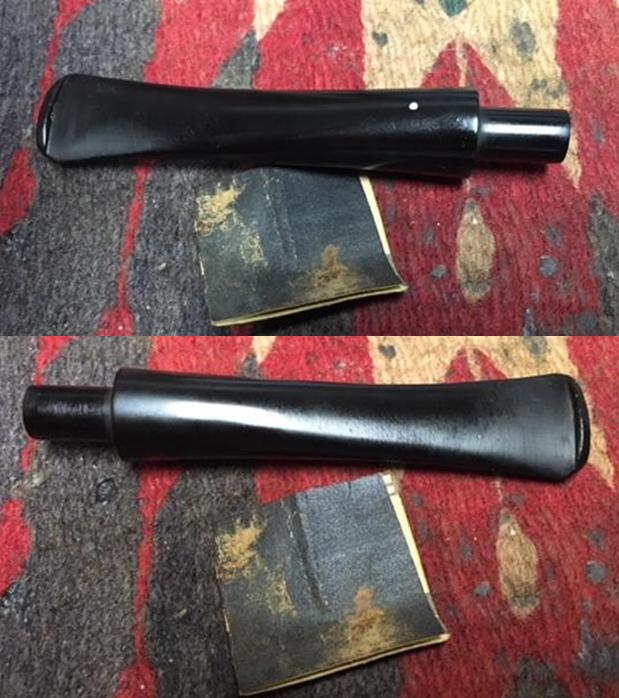
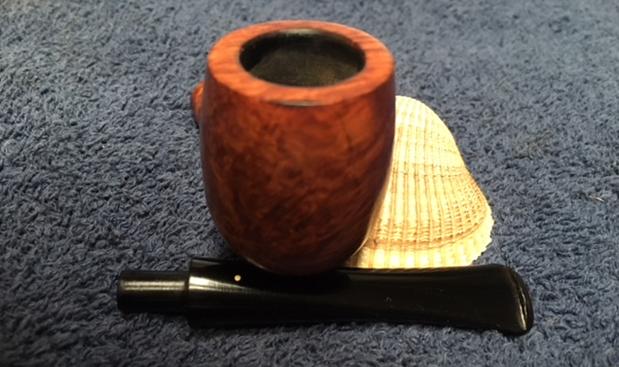
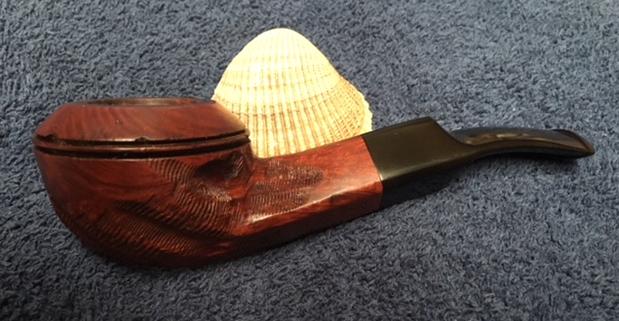
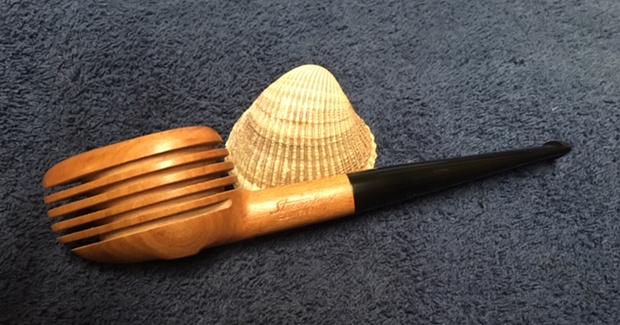
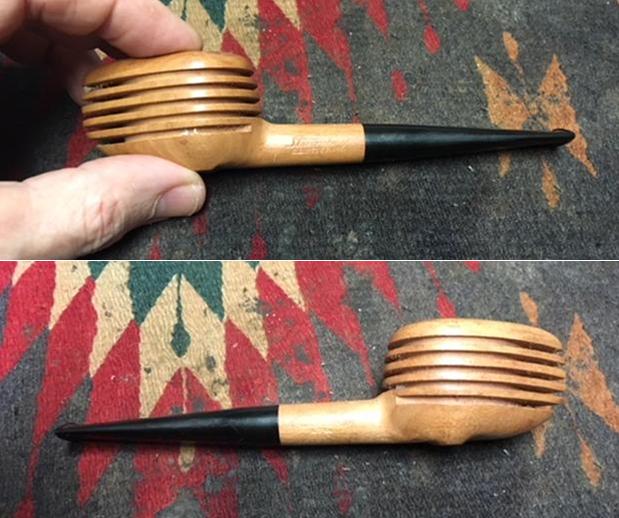
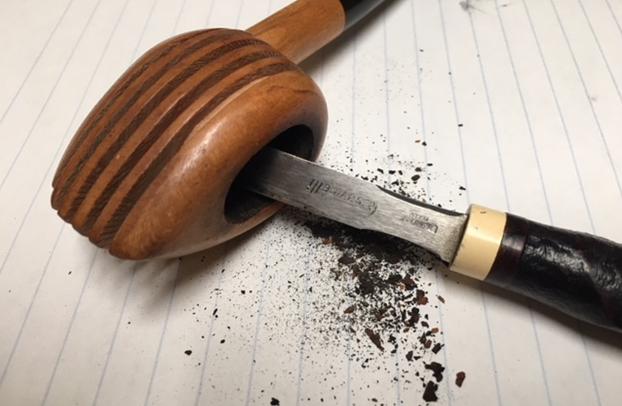
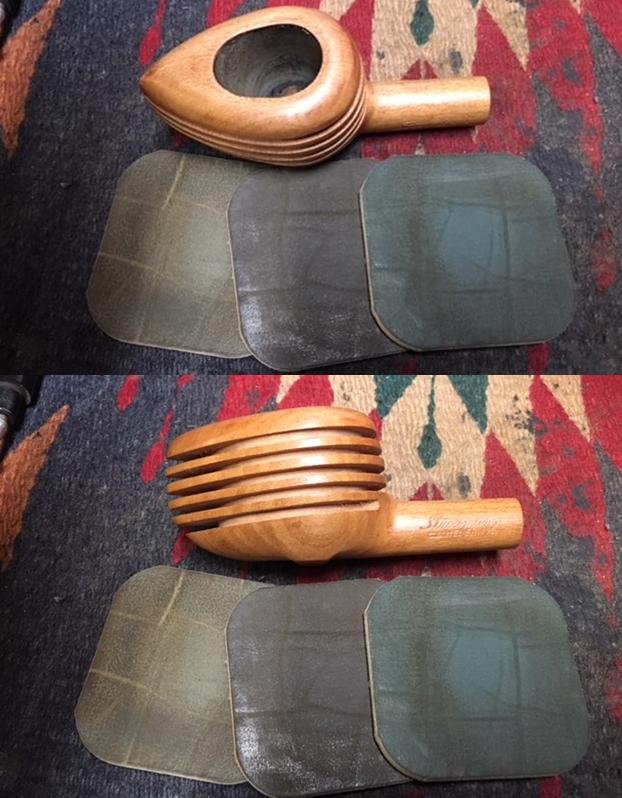
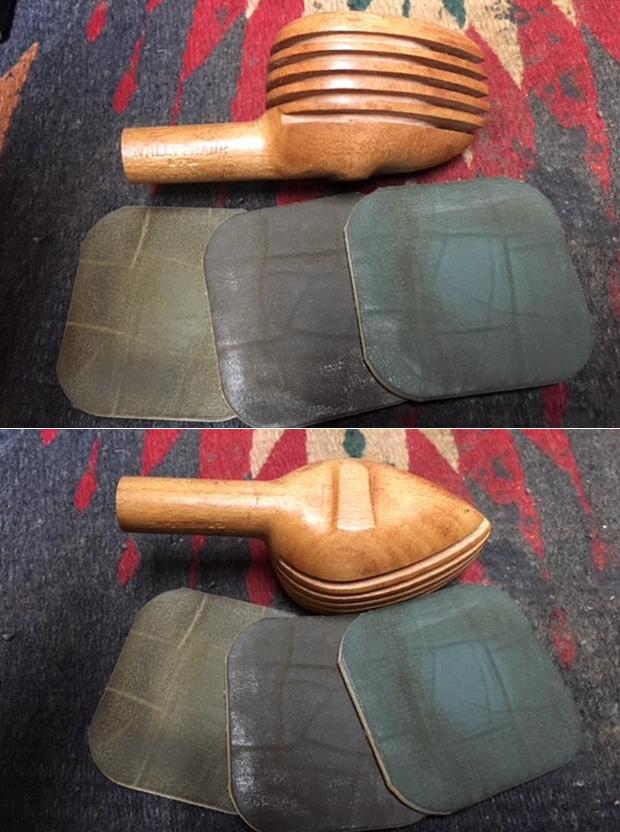
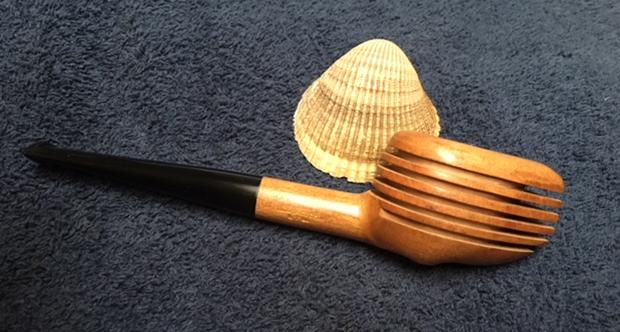
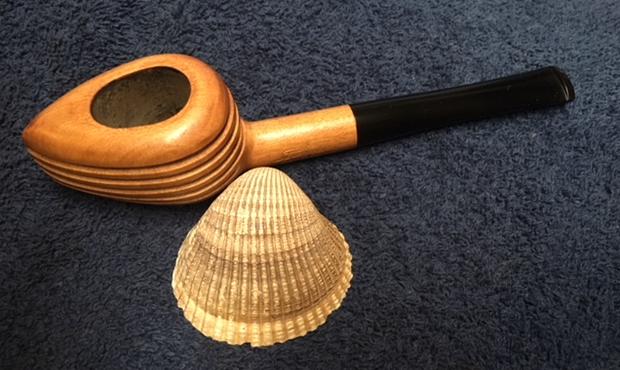
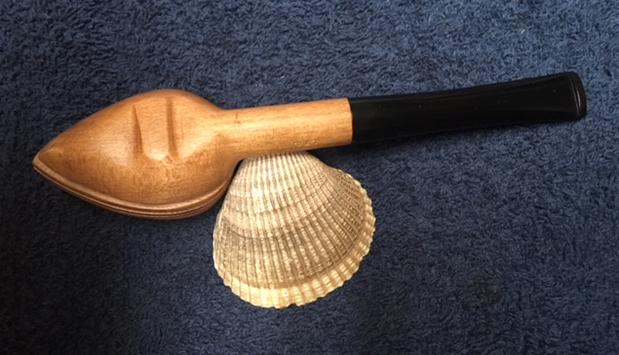
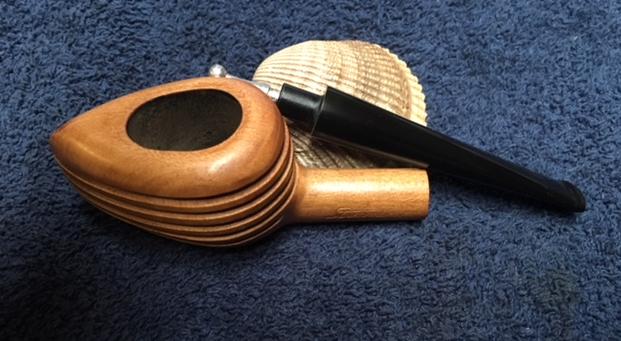
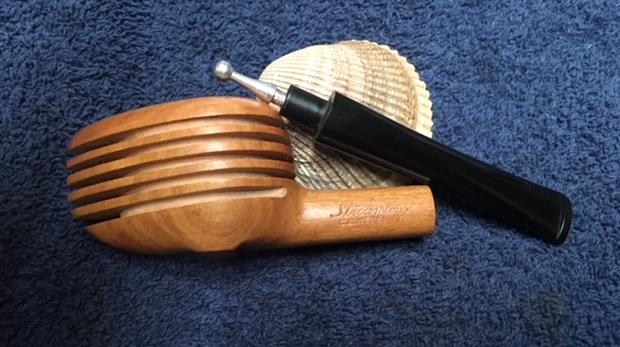
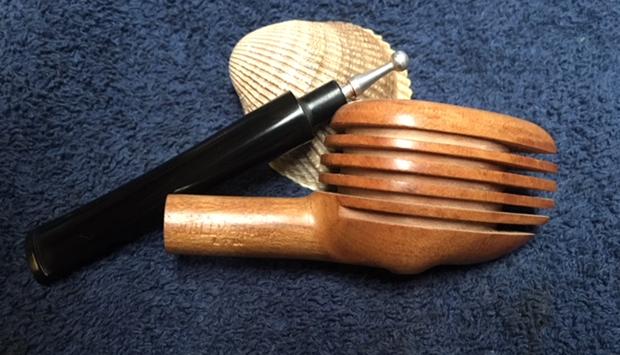
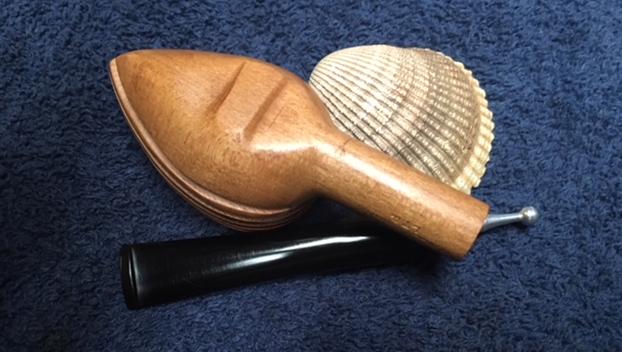
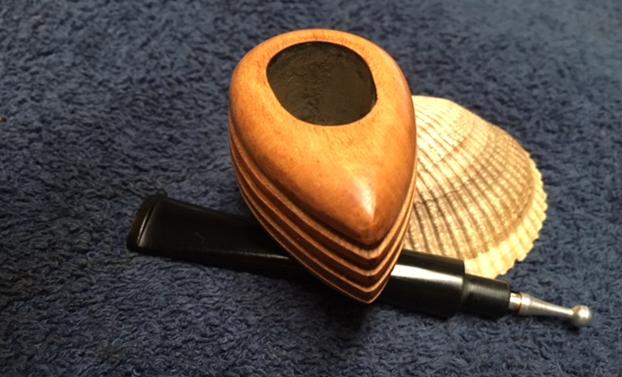
One of the great things returning to Bulgaria after 6 months in the US, was again reuniting with our colleagues, fellow team members – our family in Bulgaria. One of those reunions was in Bulgaria’s second largest city, and arguably one of the most beautiful, Plovdiv, declared to be the ‘European Capital of Culture’ in 2019 by the EU. I met with our team working there, and one of my team members, Brett, confided that he had something for me in his flat. When we arrived, I was not expecting what he pulled off the top shelf of the bookcase, waiting some months for my return to Bulgaria. What I saw was a massive Poker with an eye-catching brown-swirl acrylic stem. The shank was joined with the stem by an attractive silver ensemble – stem extender joining a shank ferrule. As frosting is to cake, I turned the stummel over in my hand and found the eye-catching starburst heel. Oh my! I was speechless – wafting in Pipe Man Heaven. When I looked closer, I saw the round silver rondel embedded in the stem, which I had not seen before. I asked Brett where he found this beauty and as I expected, in one of the many second-hand antique shops in Plovdiv’s Old Towne quarter was his reply. He told me I could keep it for my own collection as a gift or sell it to benefit the Daughters of Bulgaria – our work helping women and girls trafficked and sexually exploited. I thanked Brett as thoroughly as I knew how – what better gift for a pipe man??? When I returned to Sofia, I took these pictures of this very striking Poker. The last picture I took with the pipe in my hand to give an idea of its size – the stummel is 2 ¼” tall and 1 ¾” wide at the rim – a wonderful handful! 


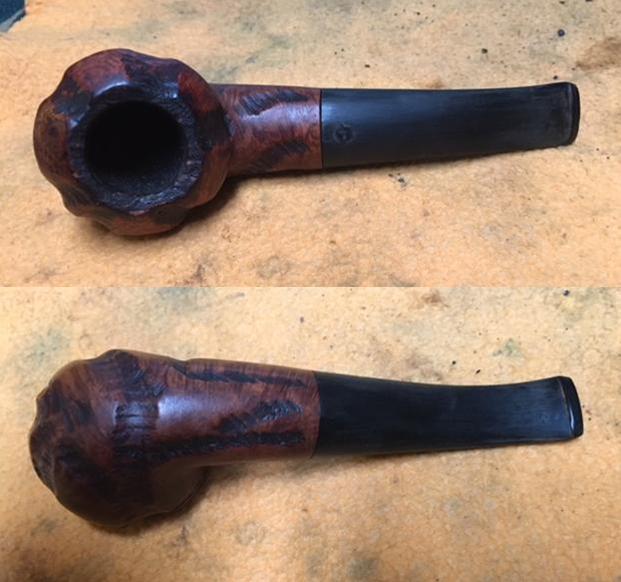
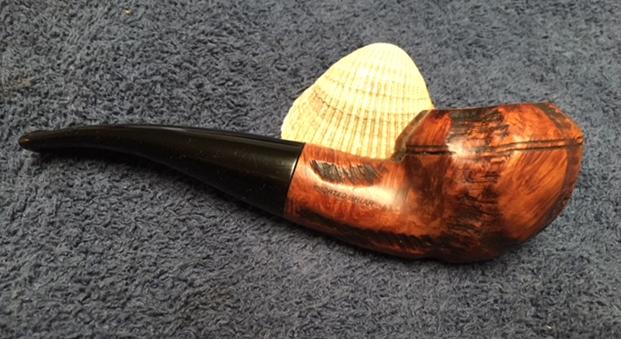
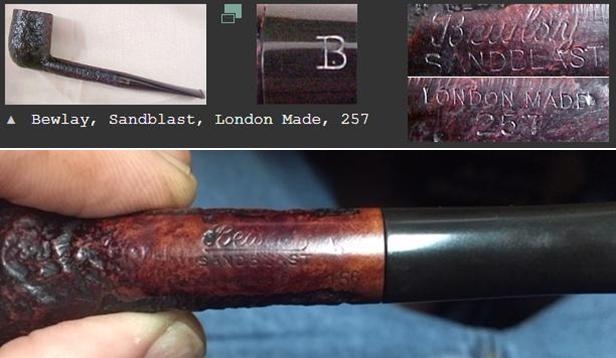
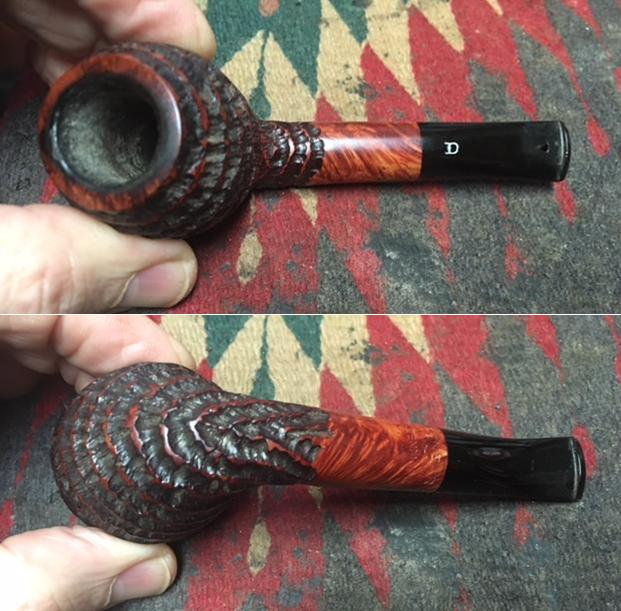
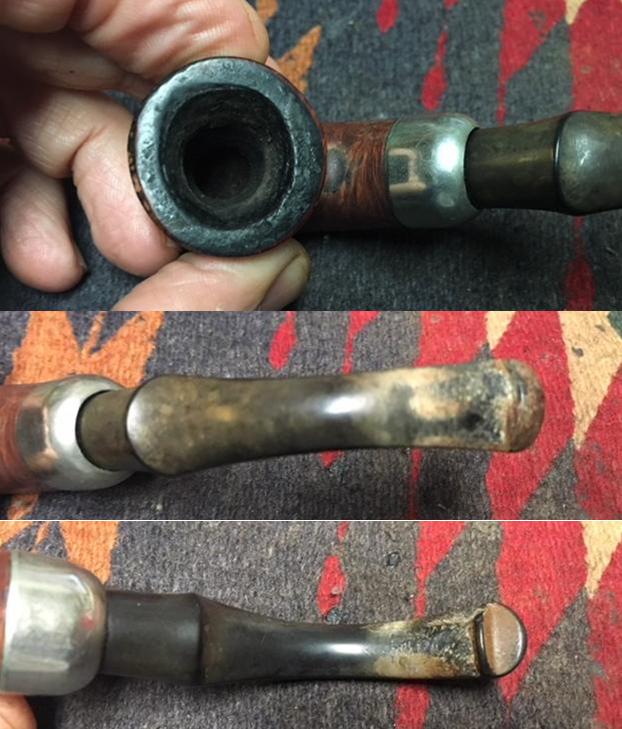
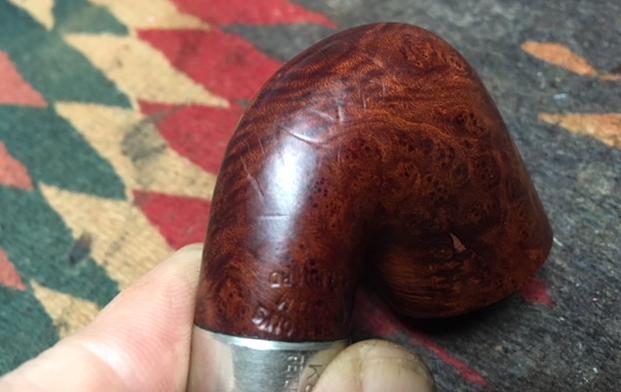
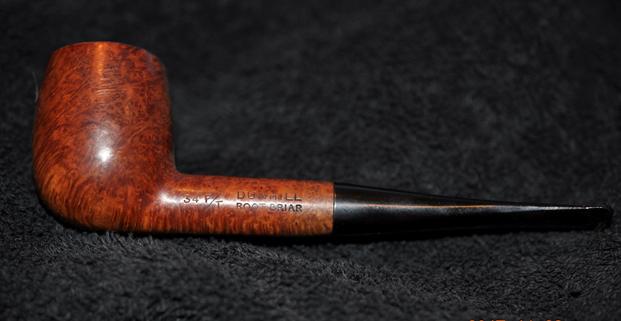
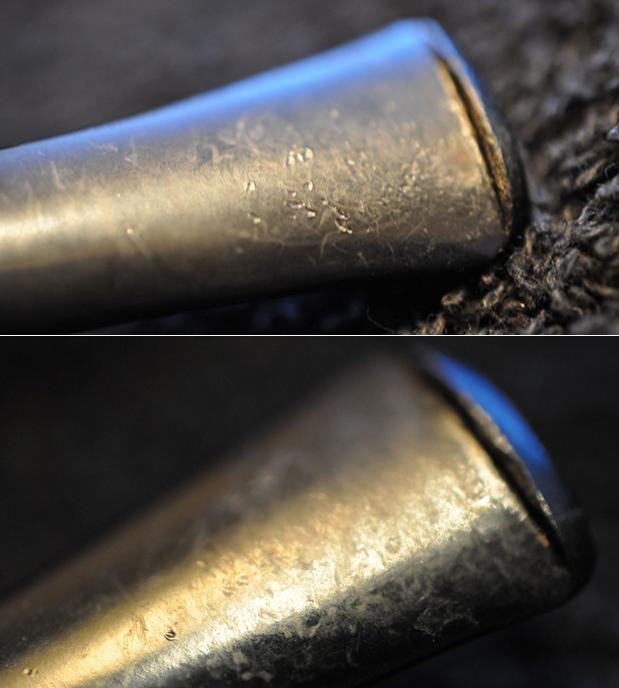
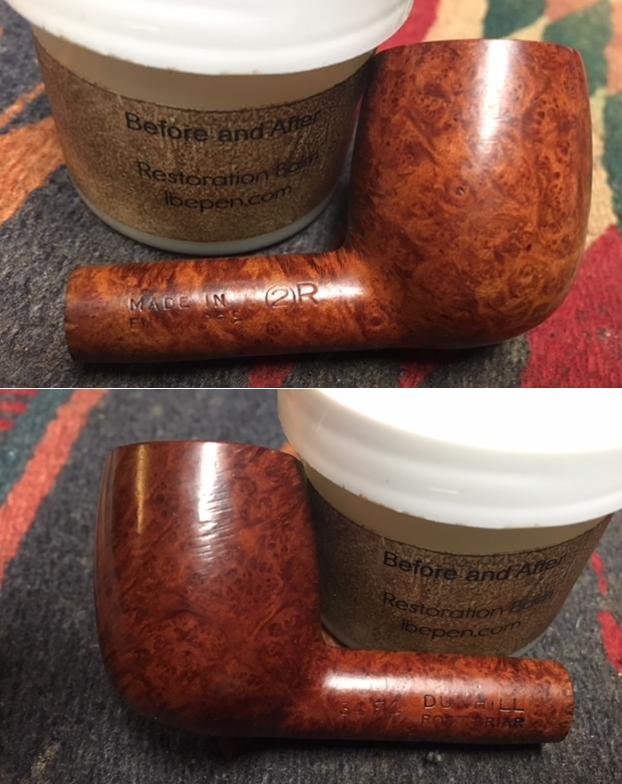
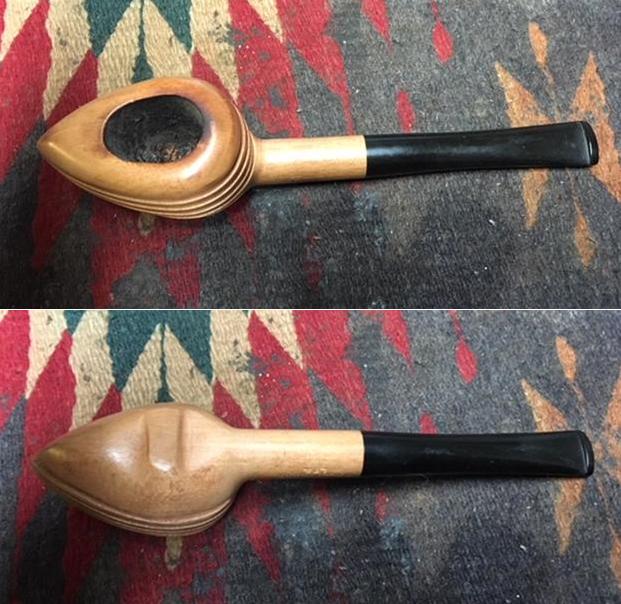
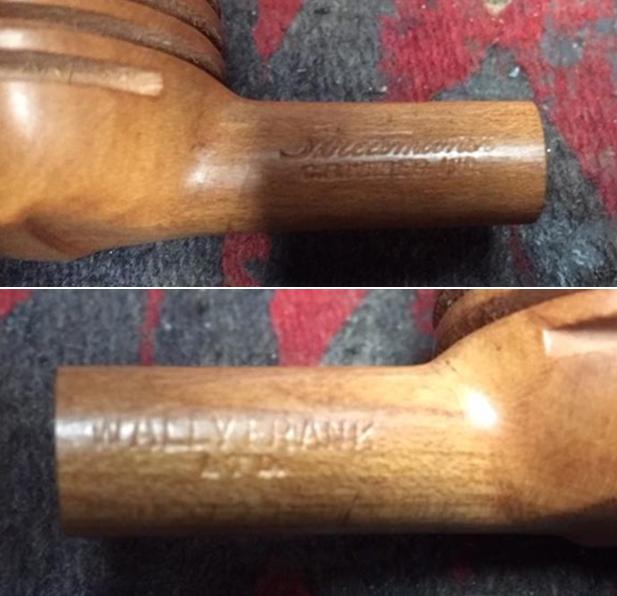
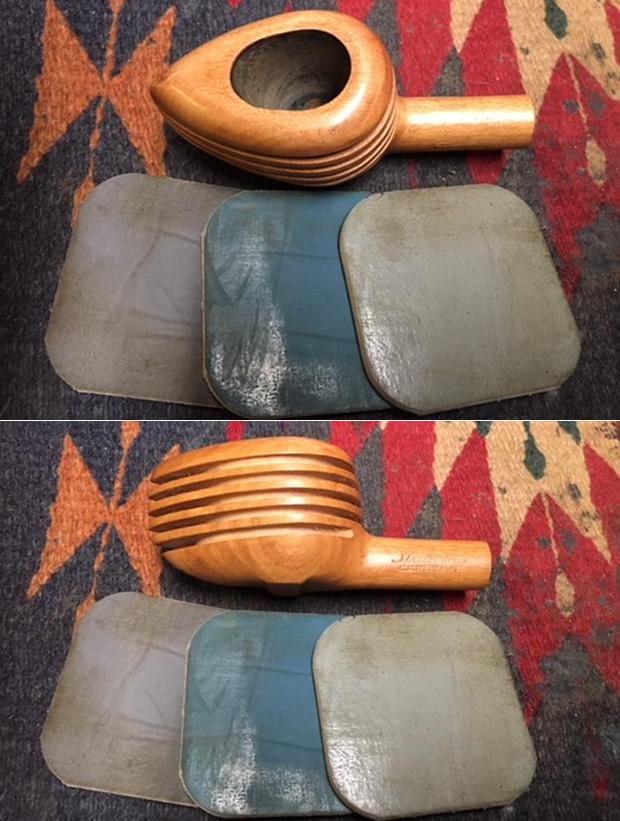
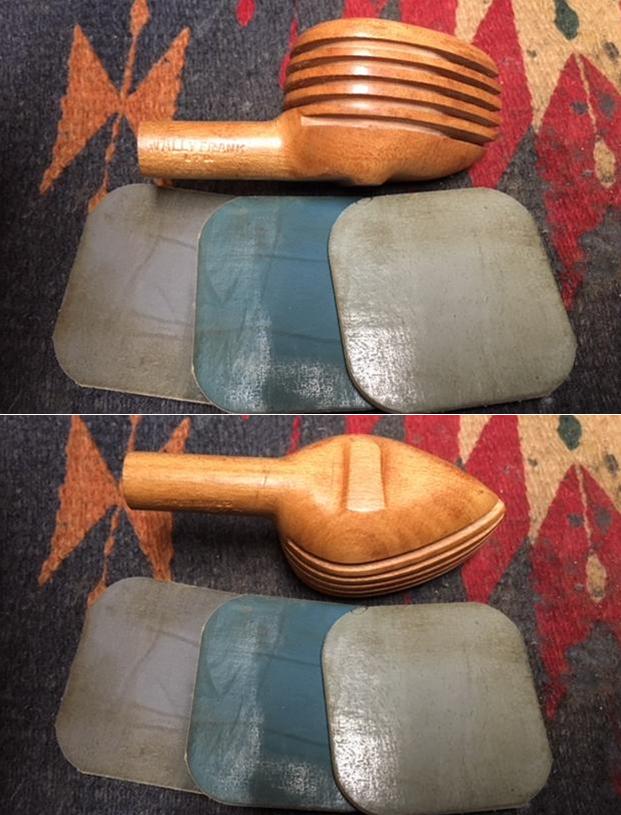
 Normally, I’m not drawn as much to swirly, acrylic stems because sometimes, it seems to me, they are too ‘blingy’ for my taste and detract from the real show, the beauty of the briar. However, this multi-brown hued acrylic stem compliments well the massive and expressive Poker stummel. My first impressions of this pipe, mainly because of the starburst heel, was that it was probably a freehand – someone’s creatives juices unleashed in a classic Poker shape – a shape which to me is iconic and fun. Pokers got their name from the ease of setting them on the card table as their stewards looked at their dealt hands, preparing the strategy to take the hand of poker warfare. The pipe is distinctive and the first question that came to mind was whether there was a mark on it that would identify its origin. What I found on closer examination of the shank was this mark.
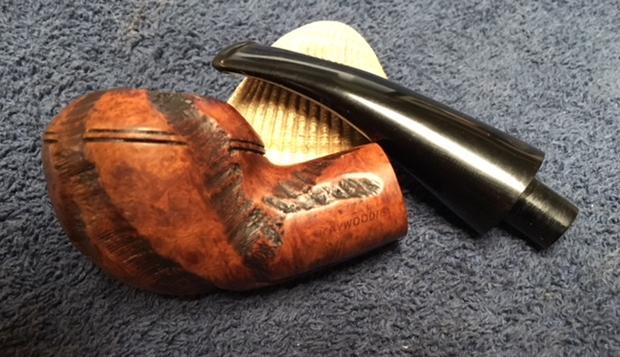
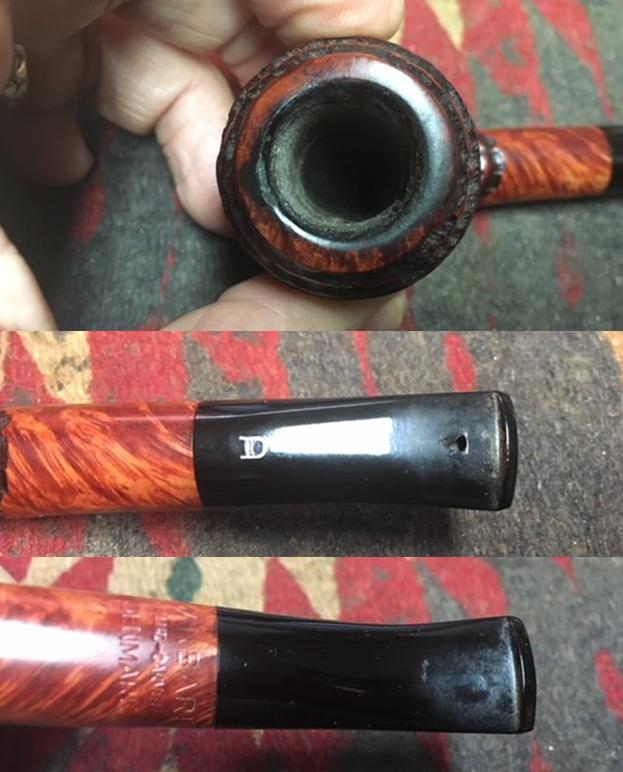
 As I considered the small mark on the left, underside of the shank, was it was a rustic ‘W’ or perhaps an ‘M’? I could find no other identifying marks except for the silver rondel unexpectedly embedded purposefully in the stem. I didn’t have a lot to go on to uncover the origins. So, as I’ve done before, I sent the pictures to Steve. With the 100s of pipes he’s seen and chronicled in Reborn Pipes, perhaps he’ll have a clue. Steve’s response to my query was quick and helpful:
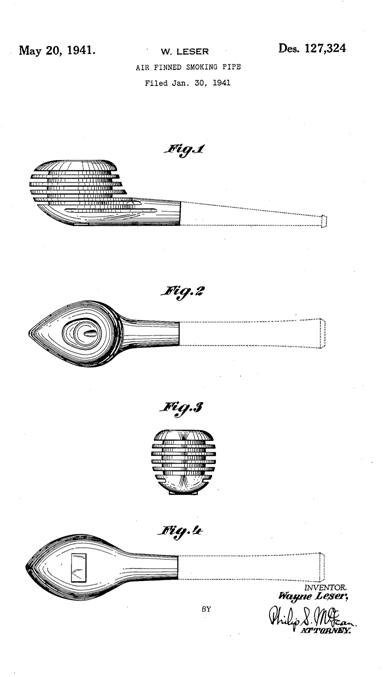
For sure the shape is a Poker. I would not even call it a freehand. No plateau and a standard shape. I think it is a Mastro de Paja from the silver spot on the stem and the silver work on the stem and shank. The mark on the bottom is a sunburst which I have seen on those pipes. I wonder if the lack of stamping and the marks are not XX which is a mark reserved for pipes that did not meet the grade. Not sure but the pipe certainly looks like a Mastro to me…
Steve
Hmm, maybe a Mastro. My first stop after receiving this lead from Steve was to Pipedia and to its article (see LINK) on the Italian, Mastro de Paja name.
In 1972 Giancarlo Guidi, after having spent some time as a hobbyist in producing pipes, decided to officially found a production workshop called “Mastro de Paja”. Mastro: obviously as a master craftsman, De Paja: it derives from the name with which he was affectionately called by friends “Pajetta” because of his curly hair and translated into a dialectal expression “de Paja”.
After describing the ups and downs of the company and the changes in oversite of the company, I found this statement interesting revealing Mastro de Paja’s commitment to excellence:
Currently the Mastro produces about 2 thousand pipes a year with strictly artisan procedure, at the Mastro currently reigns a warm harmony, is a group of friends who strives to get the best. This also stems from the fact that pipes for Mastro de paja are not to be considered as any other object to be produced and sold following cold strategies common to everyone in the business world, it’s completely different, it is necessary to love it, it is a style of being, a philosophy of life that can only be appreciated by a noble soul and not noble by title but by principles.
Looking over the entire article, it became clear that Mastro de Paja produces very high quality, high-end pipes – way beyond my budget! As I looked through the pictures in the Pipedia article, the Mastro stem rondel displayed throughout was the sun with a face – pictured in the top, right in the example pictured below. From Pipedia, I found some Mastro de Paja examples at Pipe Phil’s site. Here I found what I was looking for. The solid, silver rondel like the Poker on my worktable. Here is one example for comparison.
  What was clear was that my Poker, in some significant ways, resembled the Mastro pipes, but the Poker was missing typical markings on the shank identifying it specifically, as did the other Mastro pipes. I decided to go to the source, to Mastro de Paja’s website which was listed in the Pipedia article. My impression of Mastro de Paja via it’s website, overwhelmingly confirmed what I read earlier – production of very high-end pipes, and a commitment to quality with an artistically complimenting use of fine metals augmenting their creations. I would describe it as a ‘Tobacconist Boutique’. I looked through several of their catalogues which can be downloaded via PDF files after giving one’s contact information. Then the idea hit me – to email the Mastro contact address and ask if they had a mark ‘XX’ which identified their sub-par pipes/seconds or rejects? I’ve done this in the past and had surprisingly positive results. I sent the same pictures as I had sent to Steve and received a response the very next day from Mastro de Paja! Here is the note from Alberto:
Dear Mr. Dal Stanton
First of all thanks a lot to appreciate our pipes.
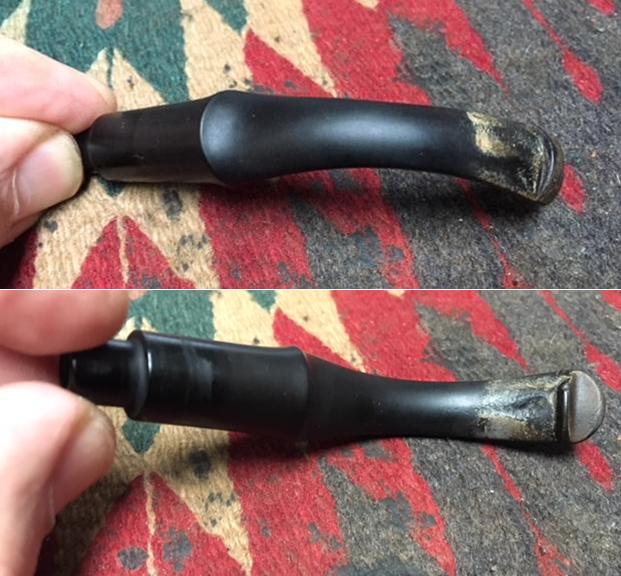
Talking on the pipe in the photos, I am so sorry to inform You that this pipe is a FAKE.
I see on the mouthpiece the silver dot but this is not our production.
May I ask You where did You get?
Thanking in advance for Your help waiting to read You, I remain
Friendly Your
Alberto
Hence, the title on this post, “Refreshing a ‘Faux’ Mastro de Paja Poker”. I responded to his question about where I acquired the pipe and assured him that I would be sure that the genuine name of Mastro de Paja was clearly communicated in my publication of this restoration. I have yet to hear back from Alberto, but my curiosity is piqued as to whether he is the same ‘Alberto’ who is the current owner of the company which Pipedia described:
Soon after even Spadoni decides to leave (and create his own new company), Cecchini then puts his eyes on a very smart young man who he considered capable of giving new glaze to the mastro de paja which, meanwhile, inevitably presented some productive and commercial problems. That young man is called Alberto Montini and he start like this in his thirties his beautiful adventure in the pipes world.
The Pipephil.eu information said that Alberto Montini became the sole owner of the brand in 1995. Whether Mr. Montini responded to my inquiry or not, I appreciate that I received a response and had the opportunity to learn more about this distinctive Italian pipe name.
What is amazing to me, is that the Poker on my worktable is a striking pipe. Whether it is an intentional copying of the Mastro style or not, I don’t know. Nonetheless, it stands on its own as a pipe that I would gladly add to my collection!
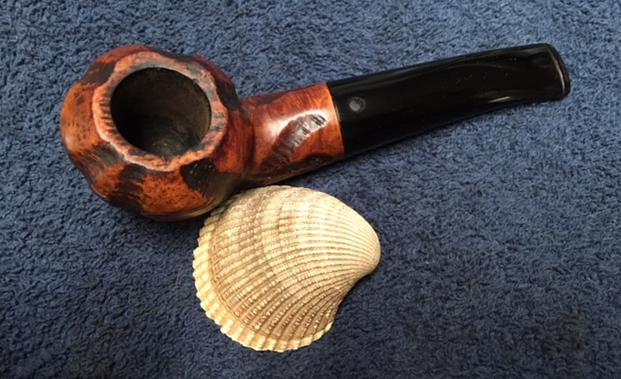
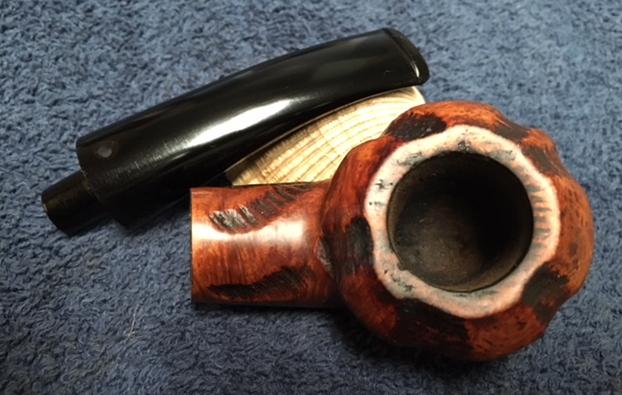
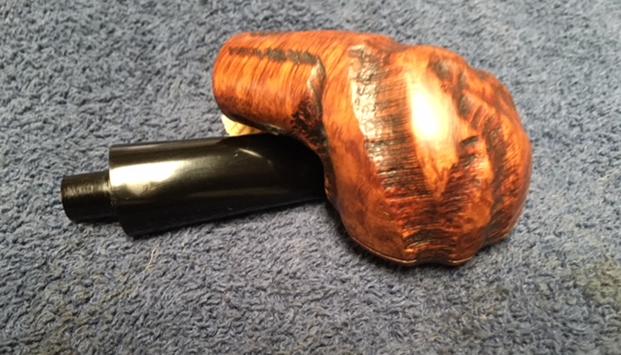
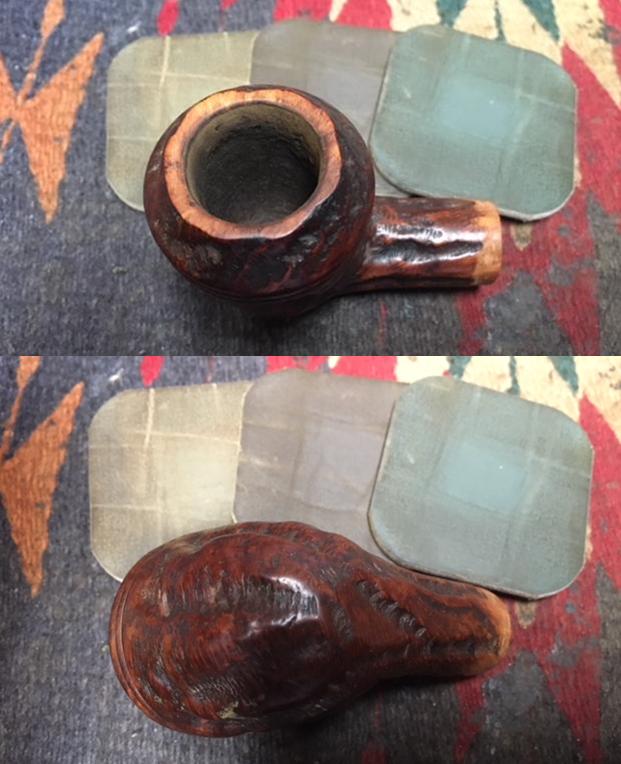
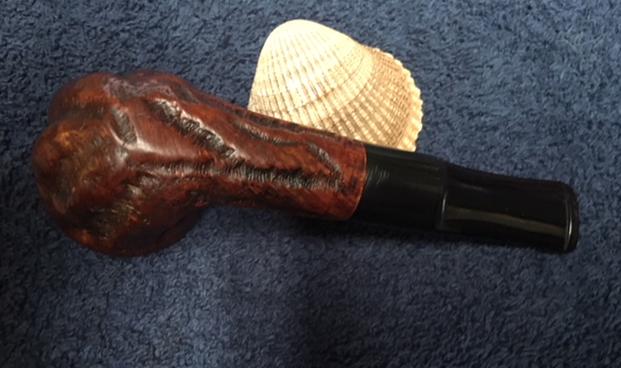
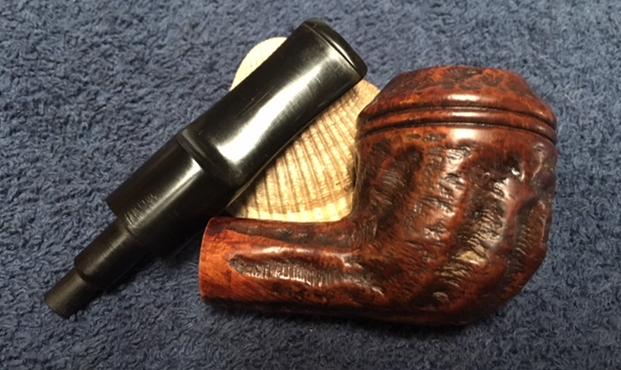
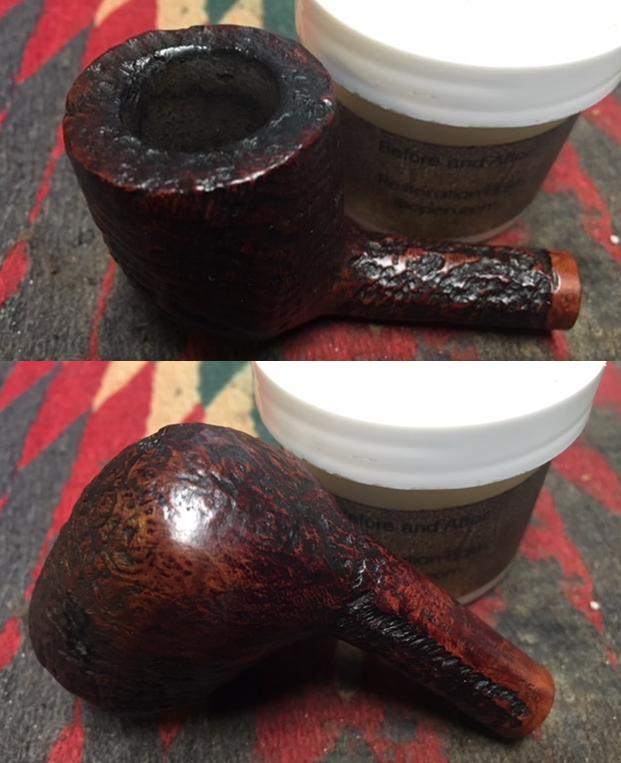
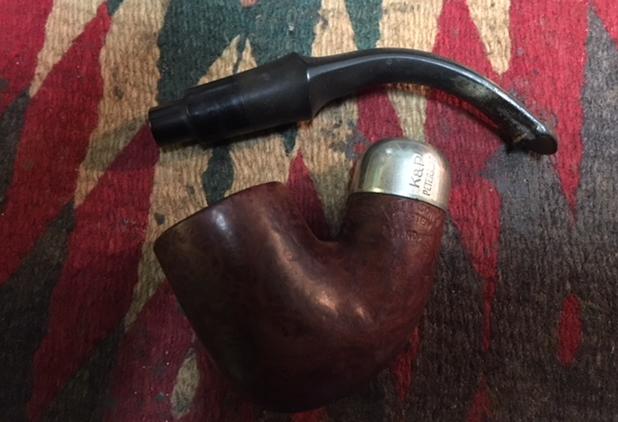
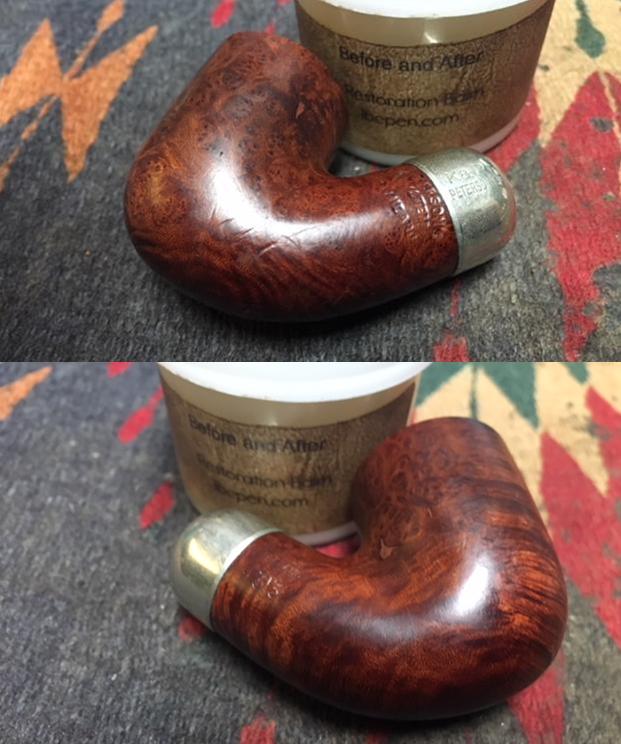
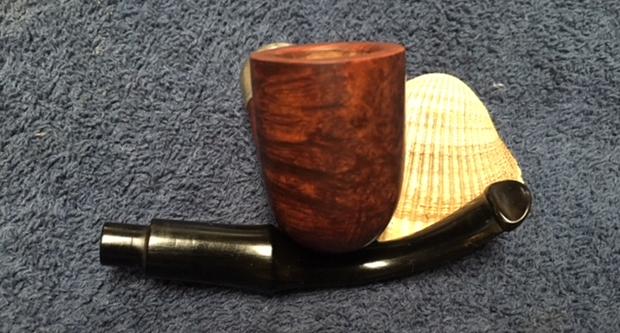
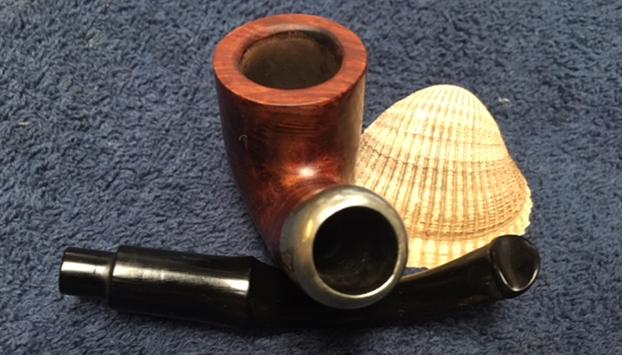
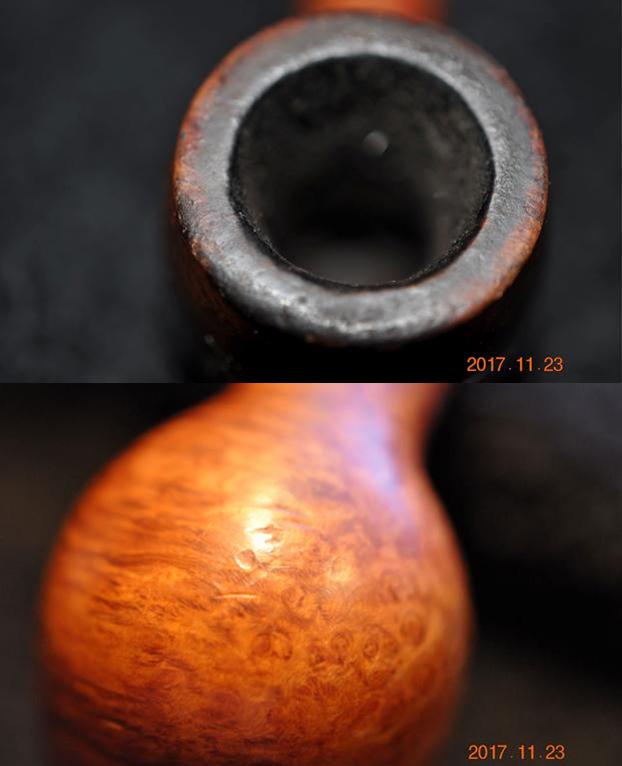
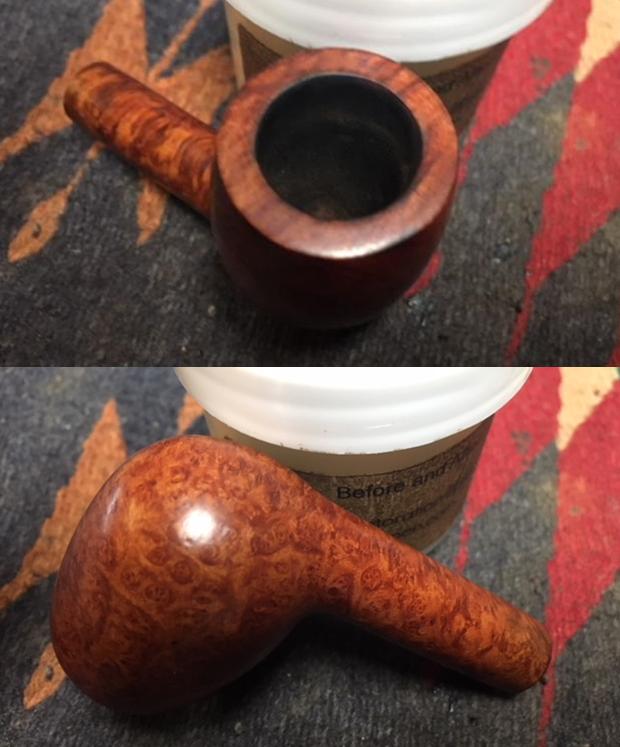
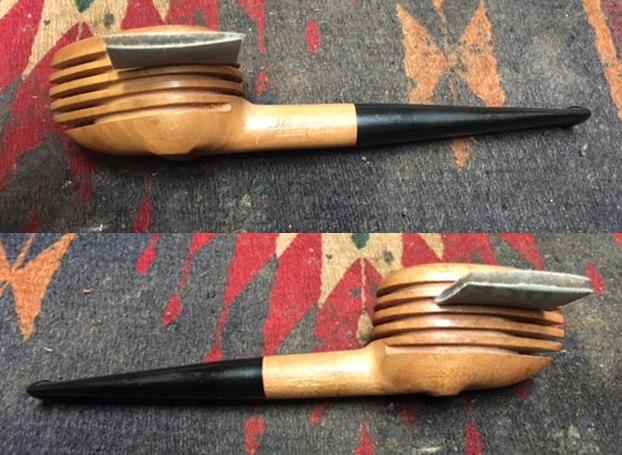
I take a closer look at the stummel. The pipe is in excellent condition. It has been smoked, but very lightly. The briar’s flame grain is striking along the circumference of the Poker’s cylindrical stummel – I see no fills but the finish is dulled some. There is very light dirt and oils on the surface and tiny hair-like scratches that come from normal wear.

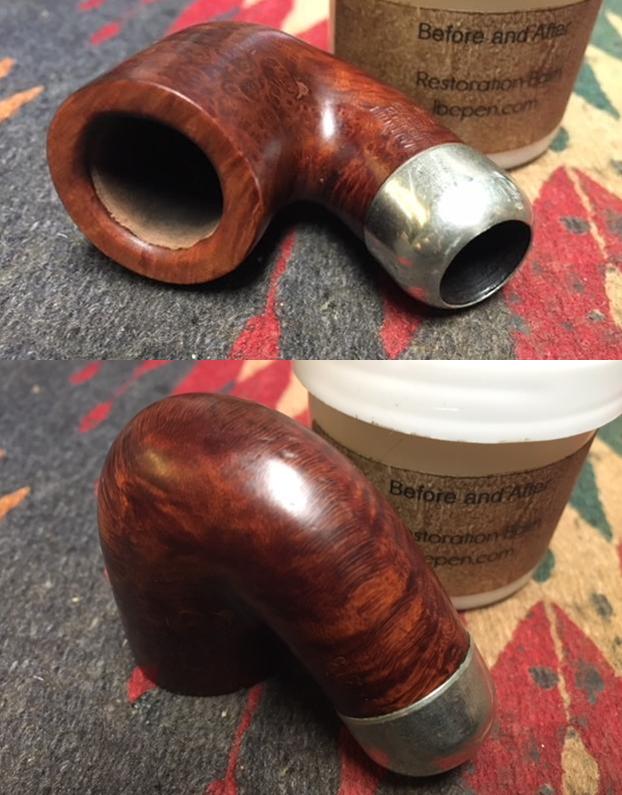
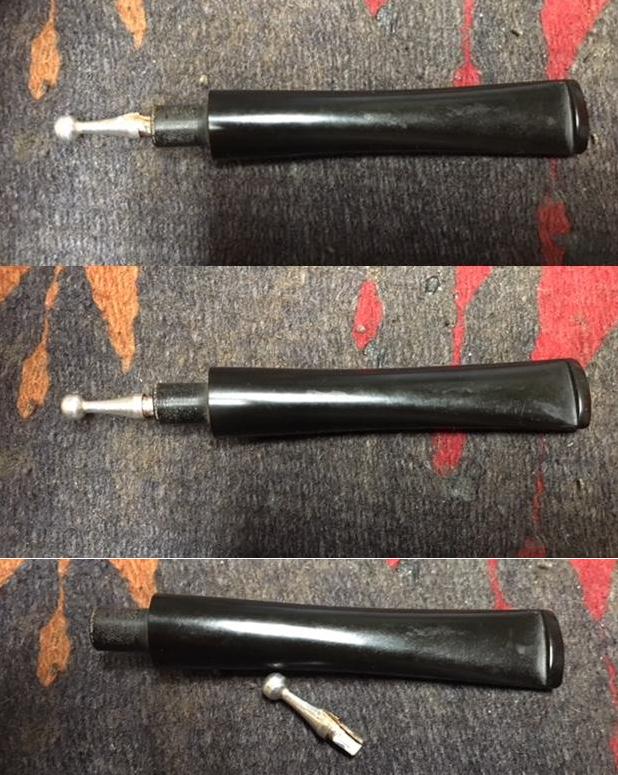
 The acrylic stem is pristine and is prepared for a 9mm filter or airway restrictor for those who prefer this – like I do. The silver-plated ferrule and stem extender will shine up very nicely.
 First, I turn to the chamber and only use the Savinelli Fitsall tool to scrape the chamber wall removing the light cake. I then roll a piece of 240 grade paper wrapped around a dowel rod and sand the chamber uncovering the fresh chamber briar. I finish the chamber cleaning with a cotton pad wetted with alcohol and wipe out the carbon dust. Inspecting the chamber wall, I find no problems.

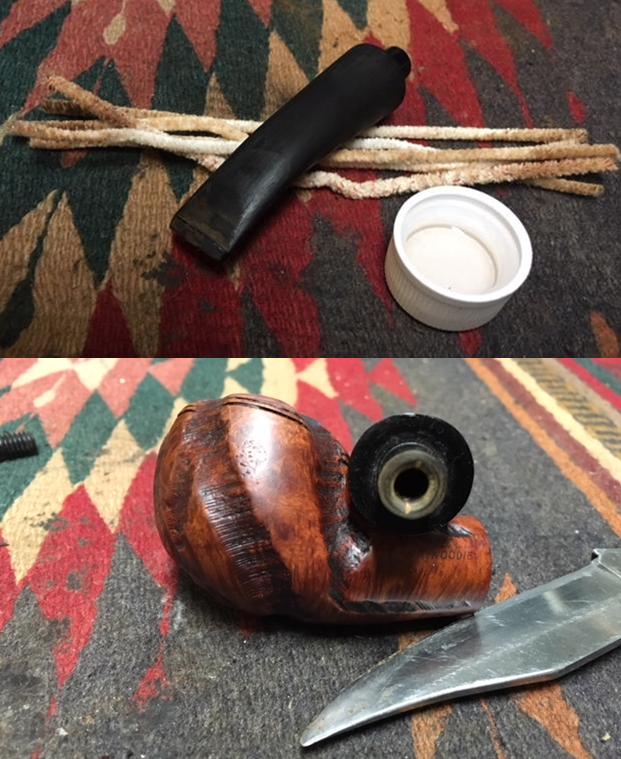
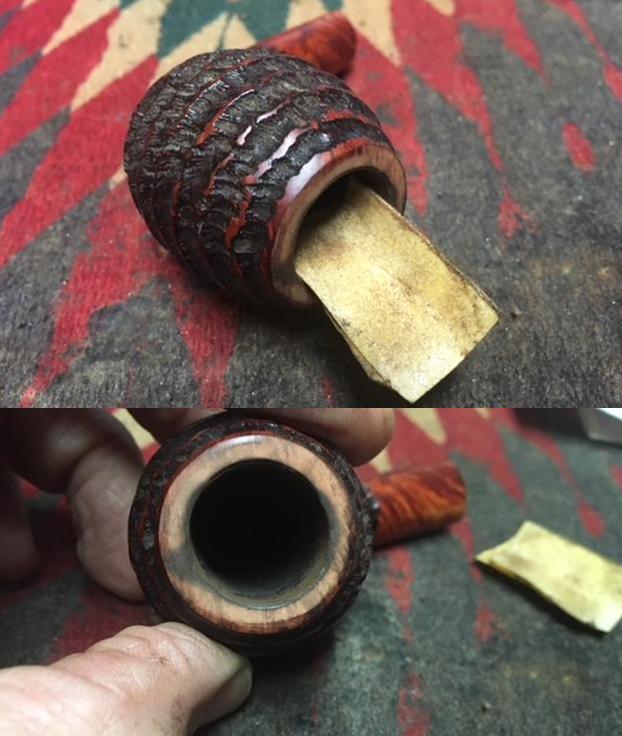
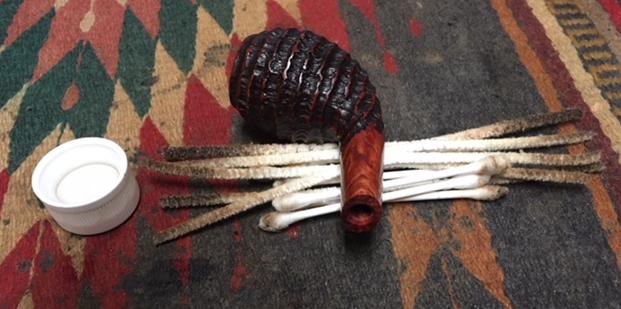
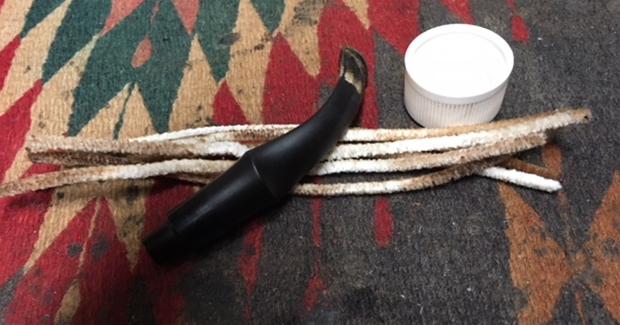
 Turning to the internals, for both the mortise and the stem, the grunge is very light. Using pipe cleaners and cotton buds, and a long bristle pipe brush, wetted with isopropyl 95%, the internals clean up quickly.
  Using undiluted Murphy’s Oil Soap, I clean the stummel surface using a cotton pad. I also employ a bristled tooth brush especially on the starburst ridges of the Poker’s heel. Afterwards, I rinse the stummel surface in cool tap water.
 I take a closer look at the stummel after the Murphy’s cleaning and I see two fills on the base of the stummel. They don’t look like they will be an issue – they are solid and already well blended. I also look at a small imperfection on the rim. It is small and is part of the grain. I let it pass as it adds character.
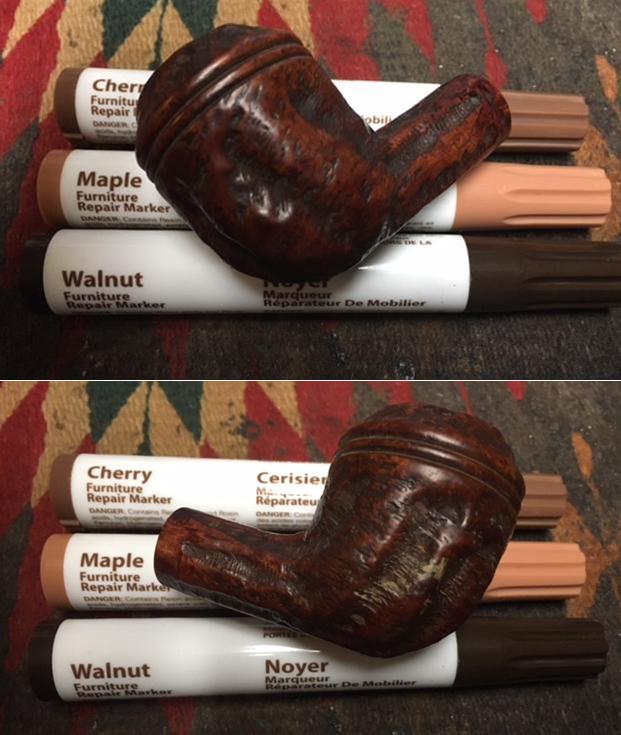
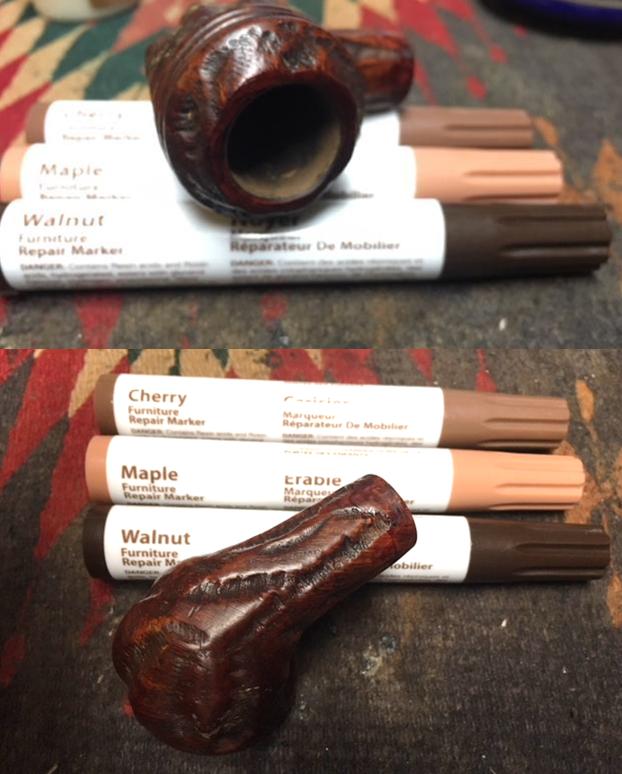
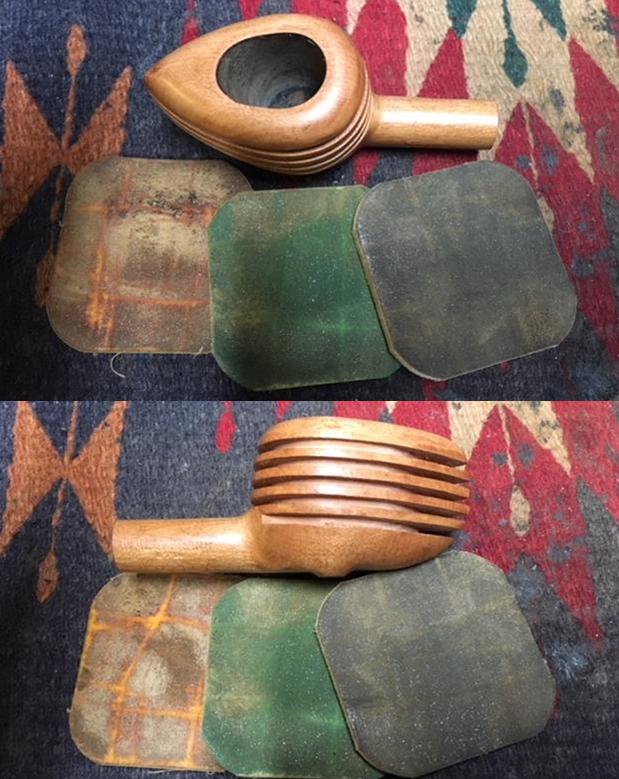
 Looking at the starburst heel of the Poker, I like the look – very rustic and gives the whole stummel the impression of a tree branch. What I decide to do is to deepen the darker hues in the crevices of the sculpted burst. I’ll then remove the upper ridges with sanding to give the multi-textured look. I first use a darker walnut colored dye stick to apply the color getting down into the valleys. Then I follow with an even darker, slightly redder hue, mahogany dye stick to add contrast. Finally, I use 1800 and 2400 grades micromesh sanding pads lightly to sand swipe the peaks of the ridges to lighten the ridge peeks. I’m pleased with the overall look and the darkening and shading.
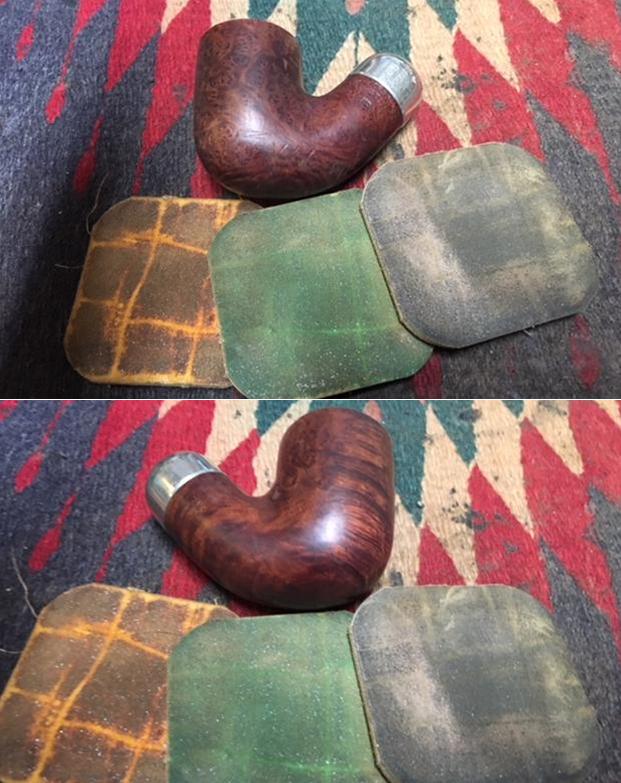
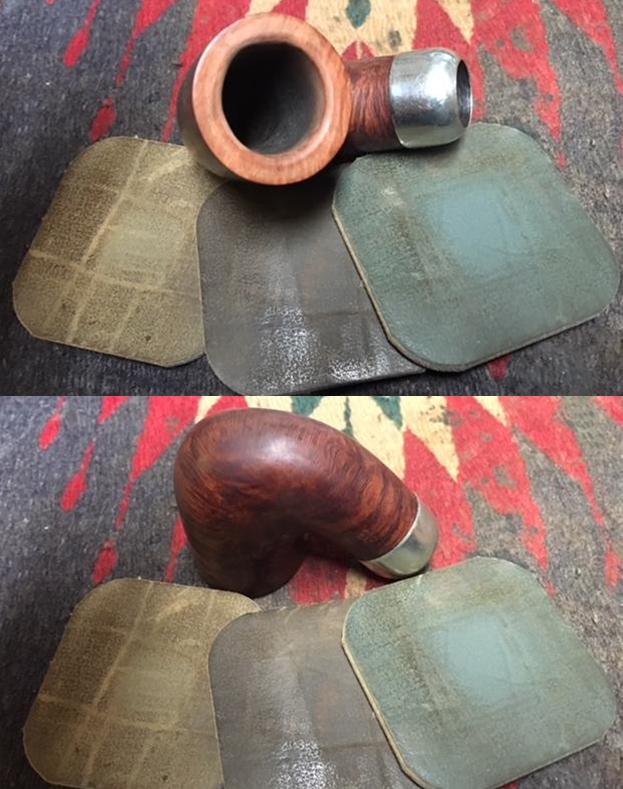
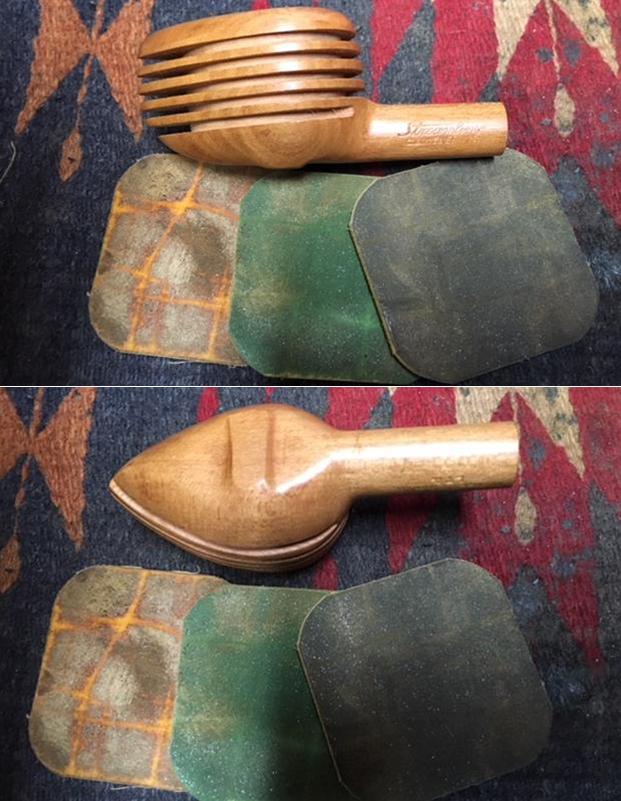
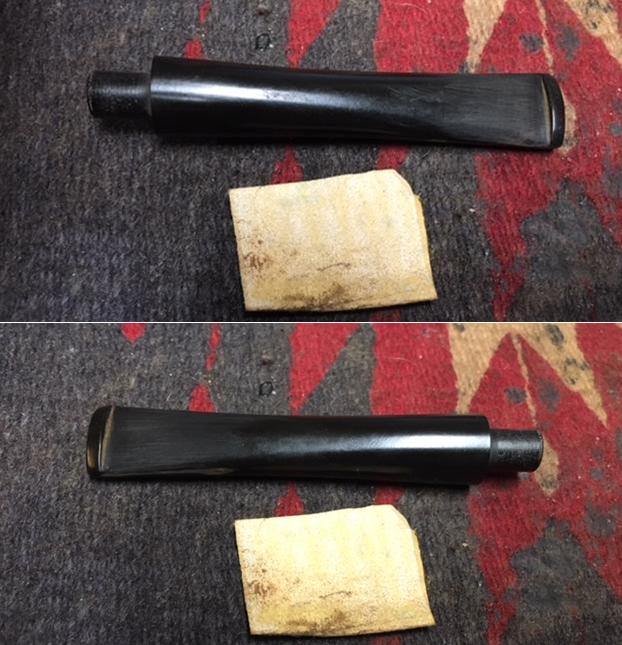
 Without removing the finish, I put the bowl and rim through the full micromesh sanding regime with pads from 1500 to 12000. This teases out the minor, simple wear scratches on the stummel surface. The micromesh pads do a great job of abrasive polishing with major intrusion on the wood and the grain responds!
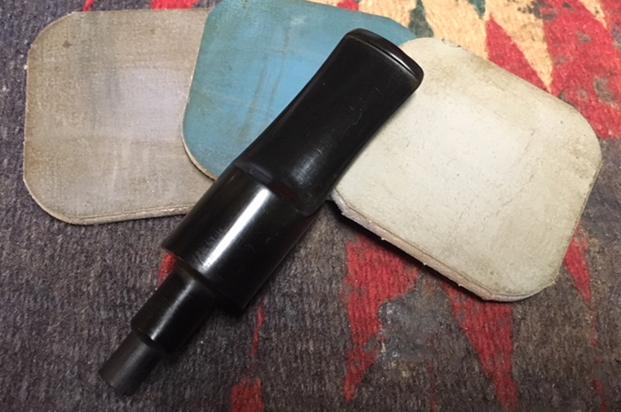
 Next, to fine tune the abrasive buffing more, I apply Red Tripoli compound to stem and stummel, while avoiding the silver ferrule and stem extender. I use a felt buffing wheel (which applies more abrasion than a cotton cloth wheel) mounted on the Dremel, set to the slowest speed. I apply the Tripoli methodically to the stummel using the sheen of the lamp light reflecting off the briar surface which helps me in applying the fine abrasive. Because of my small, compact workspace on the 10th floor of a former Communist apartment block, I use a Dremel for all my buffing procedures. This enables me to get up close and personal to see the effects of the buffing using the compounds and later the wax. After completing the smooth briar on the Poker’s sides and rim, I run the wheel sparingly over the ridges of the sculpted starburst on the heel of the Poker. The starburst is meant to look rustic and I rough it up a bit with the felt buffing wheel and Tripoli going with the ridges, not across them. After Tripoli, I repeat the same on the stummel with the slightly lesser abrasive, Blue Diamond compound – but this time, I mount a cotton cloth wheel and turn the Dremel’s speed up about 20%. With my wife’s help, one picture below shows the application of Blue Diamond compound in action.
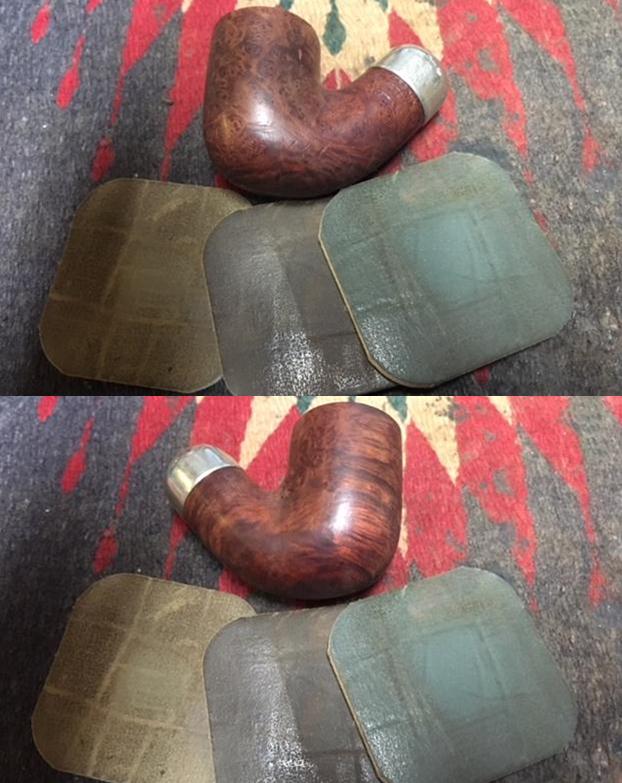
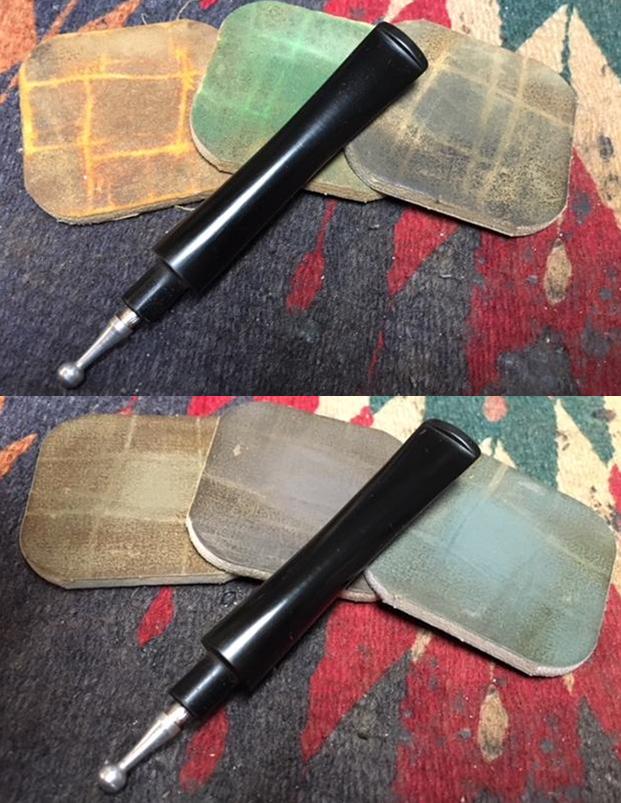
 I complete the use of compounds using White Diamond – the finest of the 3 compounds. I mount a new, cotton cloth wheel, applying the White Diamond on the ferrule and stem extension to shine up the silver. I’m careful not to overrun onto either the briar or acrylic stem. The polishing of silver produces a dark residue that can color the briar – not good. I can see the coloration on the new, white cloth wheel. I take a picture at the end of the silver polishing to show this. Then, I give the entire pipe a buffing with a cotton cloth to remove the powder left behind after the compounds. This prepares the surface for the carnauba wax application.
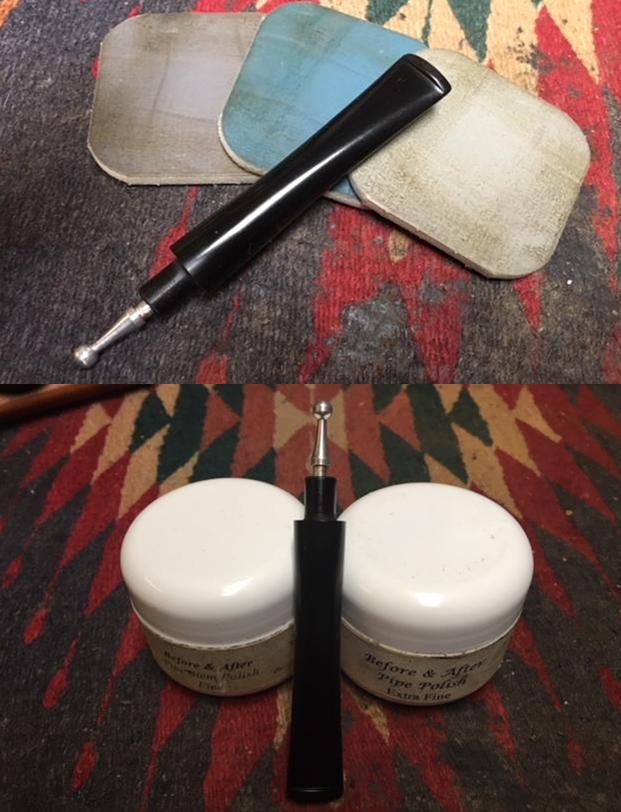
  I mount the Dremel with a cotton cloth wheel dedicated to applying carnauba wax and maintain the speed at plus 20%. I apply several` coats of the wax on stem and stummel and finish by giving the entire pipe a good, hearty buffing using a micromesh cloth. This brings out the shine and the richness of the briar even more. It looks great!
This iconic Poker shape was not, in the end, claimed by the Italian pipe maker, Mastro de Paja. I appreciate Alberto’s response to my inquiry. The origins will probably not be known with certainty, but what I do know with certainty is that this is a beautiful pipe regardless of the origin. Its robust size amply fills the hand and the grain is a sweeping display of God’s amazing handiwork. The front of the Poker has a tight grain pattern that reminds me of the pattern of a tiger and the starburst heel of the Poker gives it a classic, rustic feel – ‘down home’. Both the acrylic swirled stem and silver work joining the stem and bowl completes a very attractive ensemble that is both upscale but not pretentious. I’m tempted to keep this Faux Mastro de Paja Poker for my collection, but it’s going into the Pipe Steward store to be sold to benefit the Daughters of Bulgaria, helping women and girls who have been trafficked and sexually exploited. Thank you, Brett, for this wonderful gift which will help the Daughters as well as make a new pipe steward very happy! Thanks for joining me!


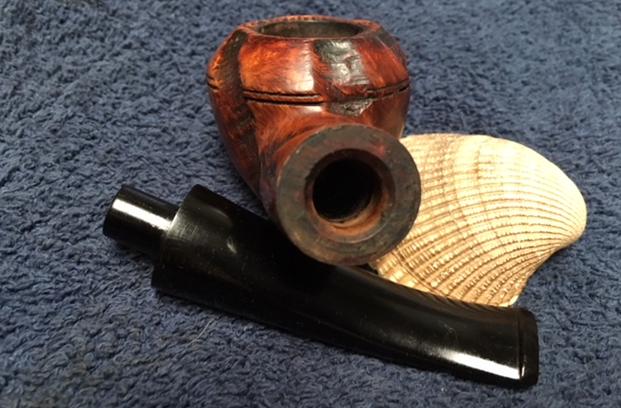
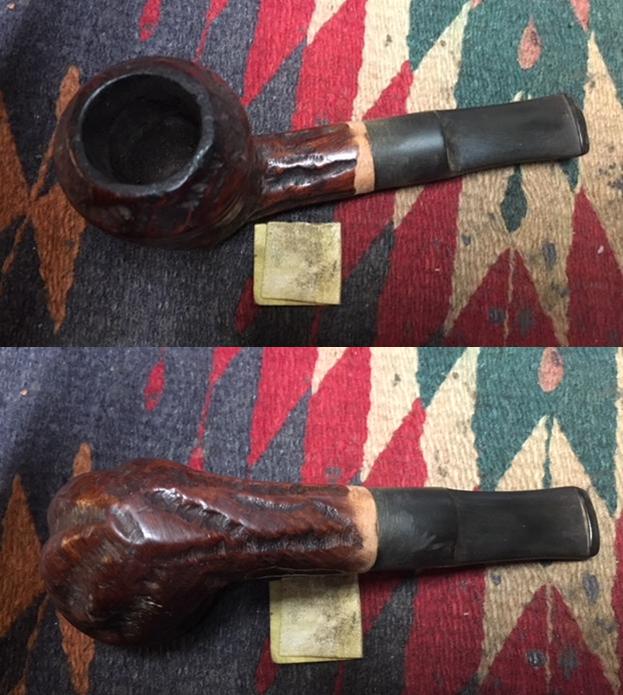
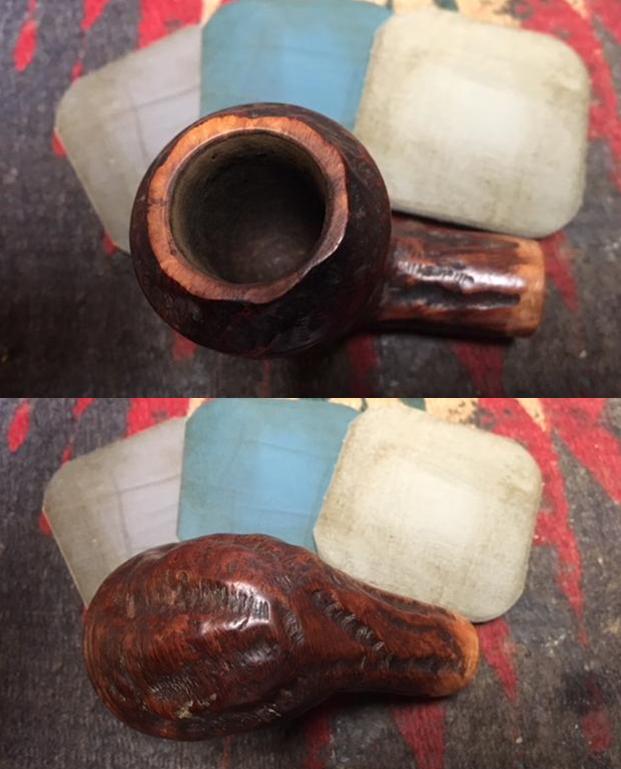
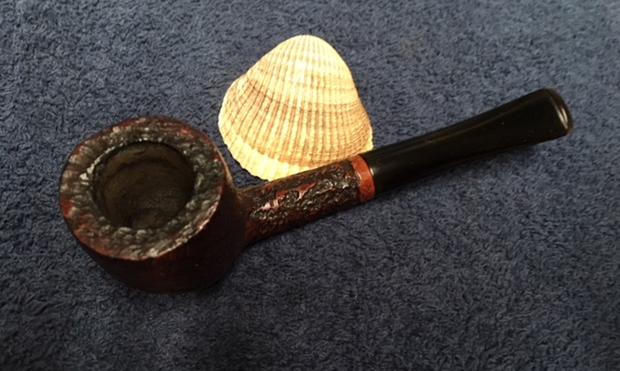
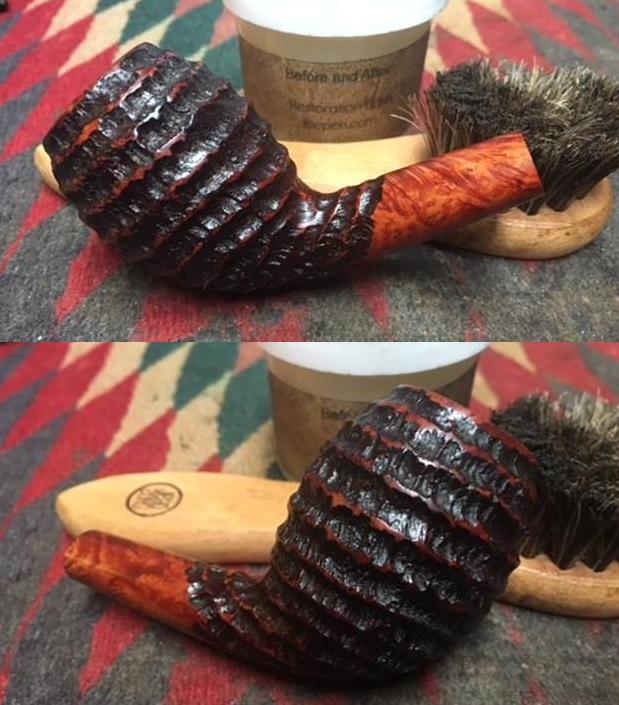
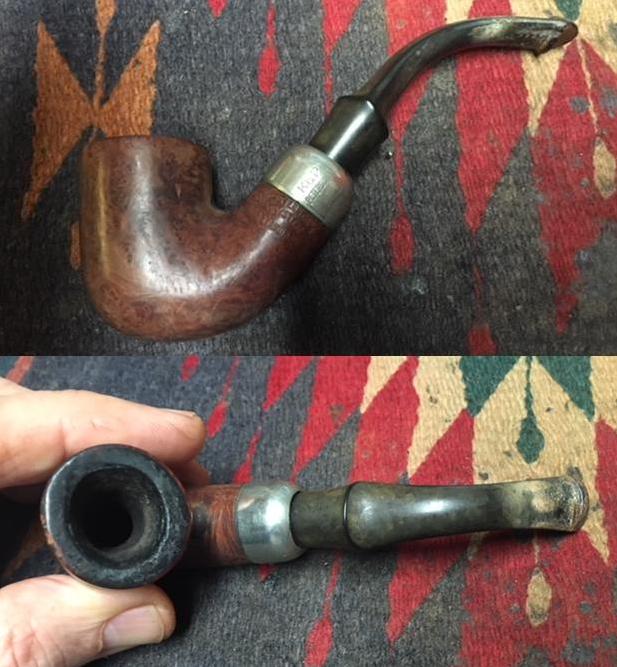
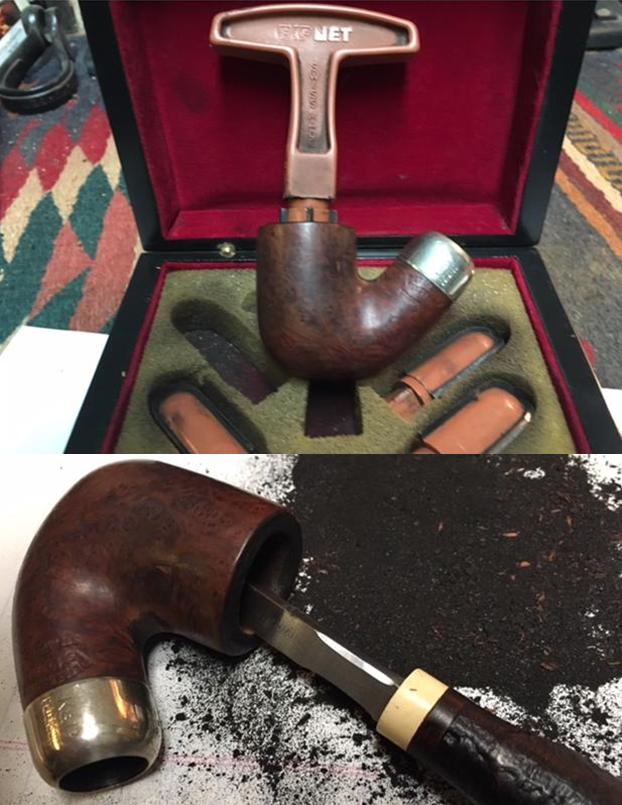
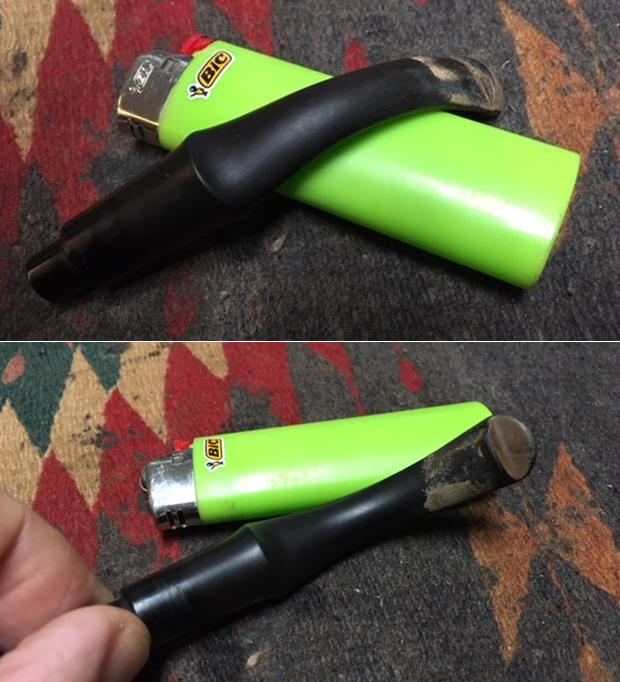
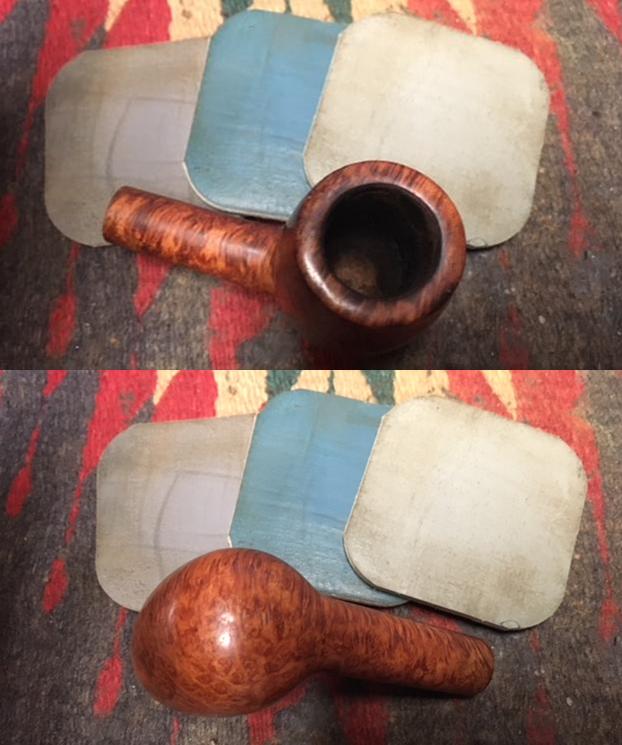
 I took close up photos of the bowl, rim top and both sides of the stem to show the condition prior to cleaning. The buildup on the rim top is a combination of thick lava and damage to the surface of the briar. There appears to be some rustication on it but at this point I am not certain it is actually rusticated or just damaged.
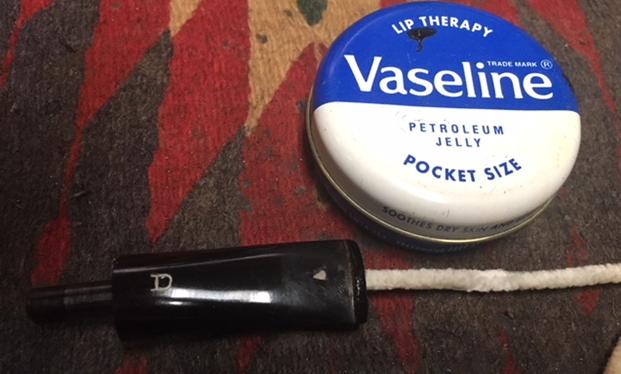
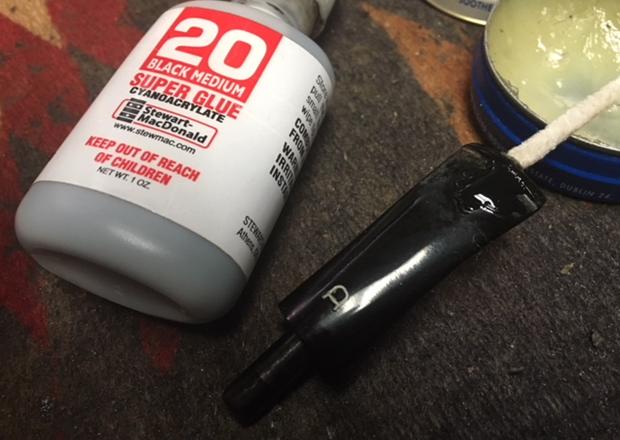
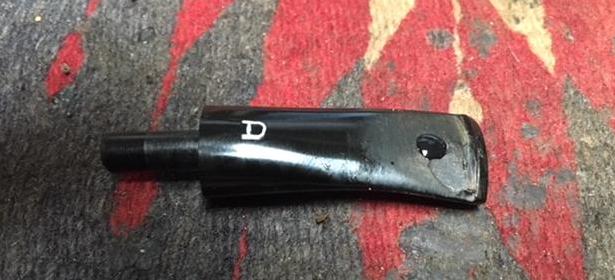
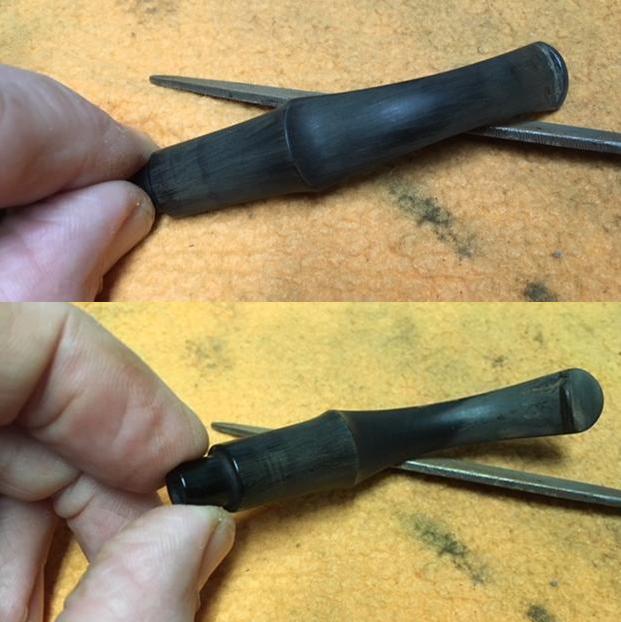
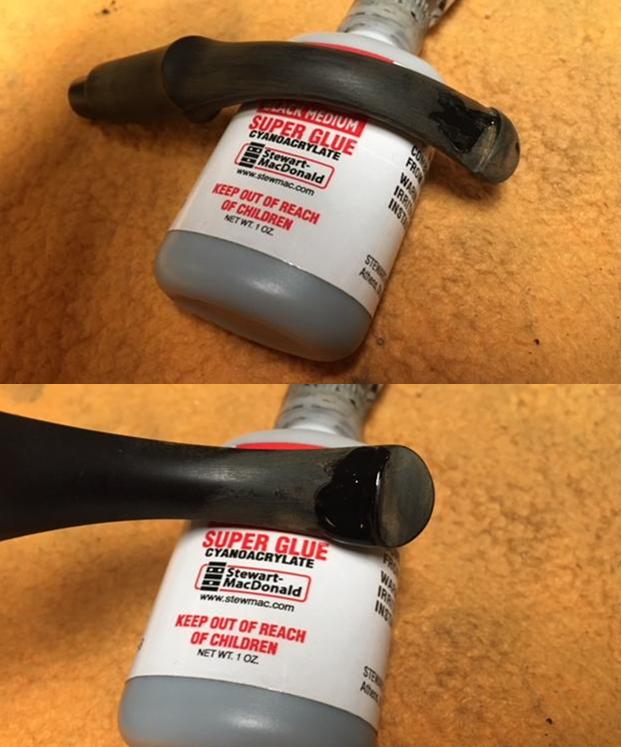
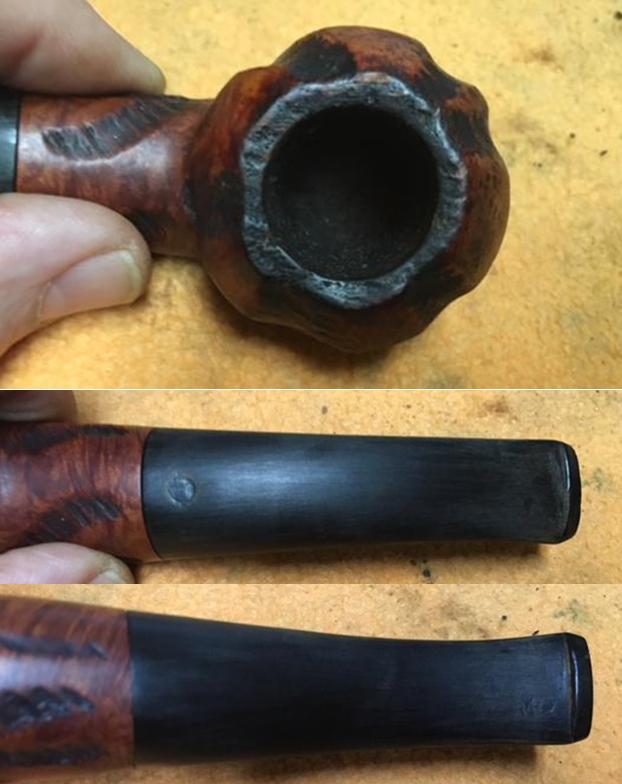 On the top side of the stem was a round spot that I think had originally held a Kaywoodie logo. It was missing and there was a slight divot in the stem. I filled it in with a clear super glue and set it aside to cure.
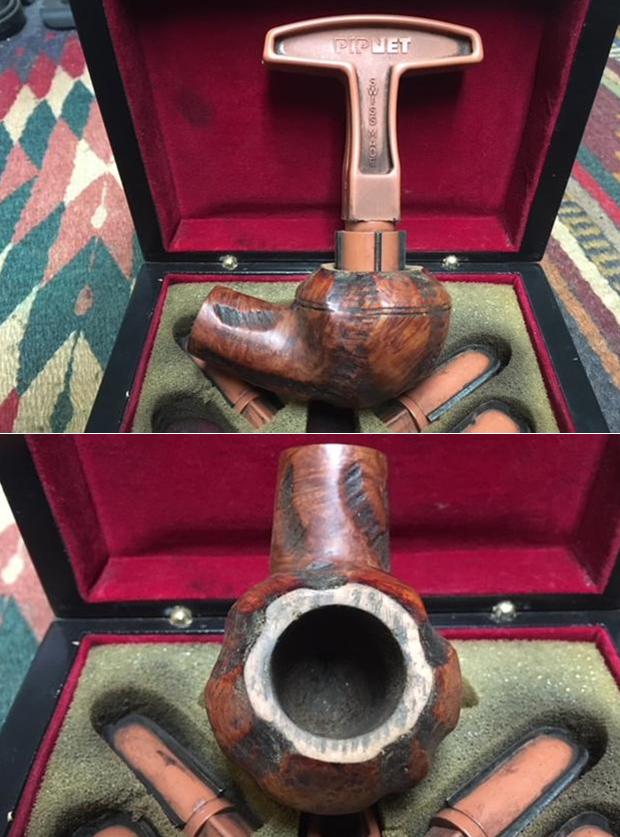
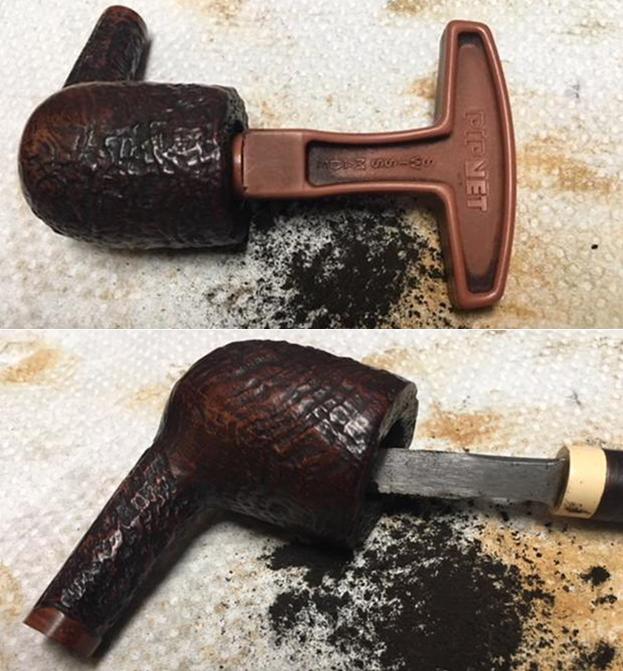
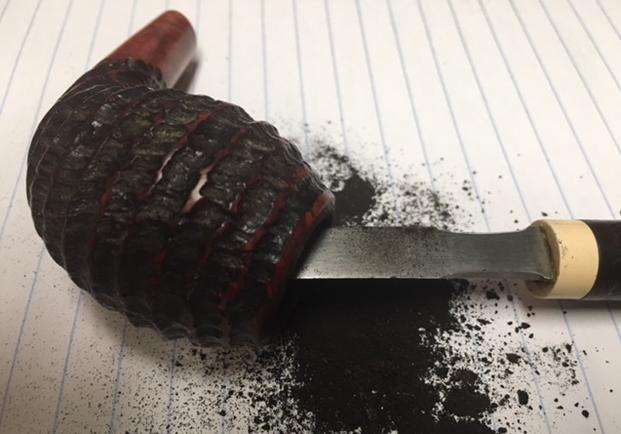
 I cleaned up the rim top with a Savinelli Fitsall Knife blade. I scraped the surface of the rim and also the inner edge of the bowl to smooth things out. Once the rim was cleaned off the damage to the surface of the rim was visible. It was rough to touch. I reamed the bowl with a PipNet pipe reamer starting with the second cutting head and finishing with the third head which was the close to the same size as the bowl itself. I reamed the cake back to smooth briar.
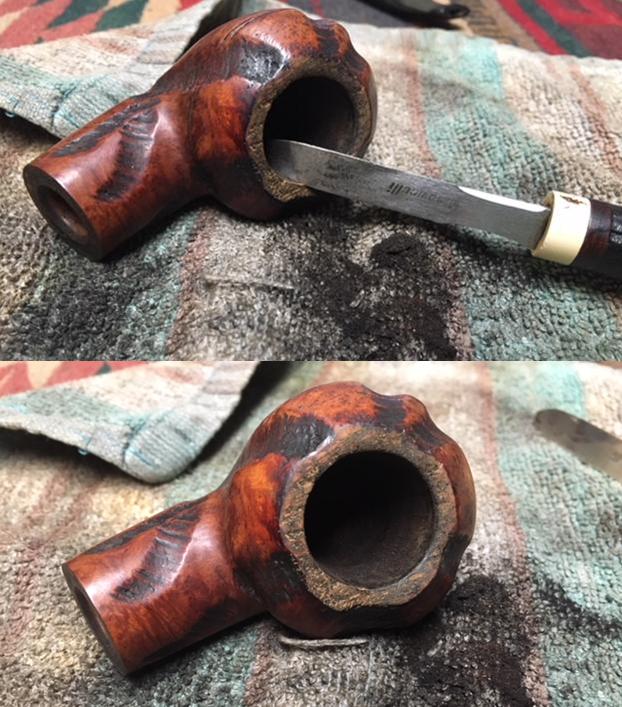
 I worked over the beveled rim top with a folded piece of 220 grit sandpaper to smooth out the rough surface and remove as much of the damage as possible.
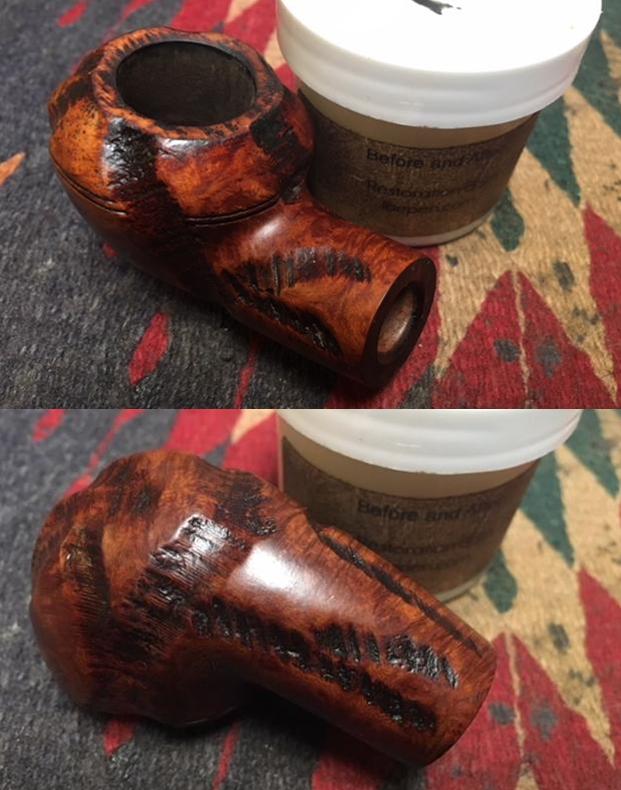
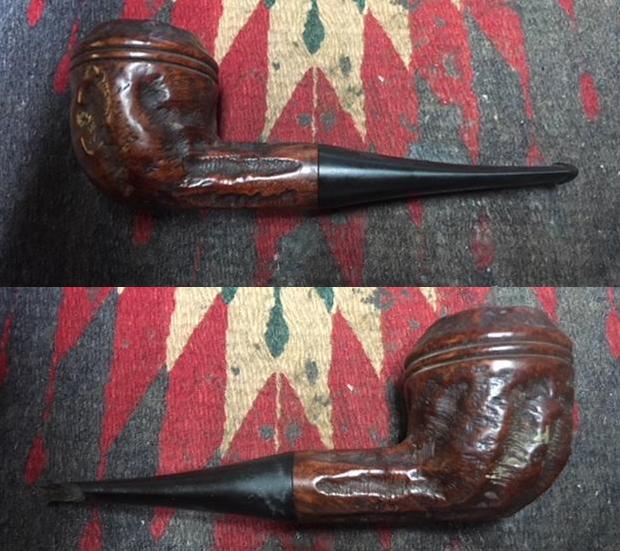
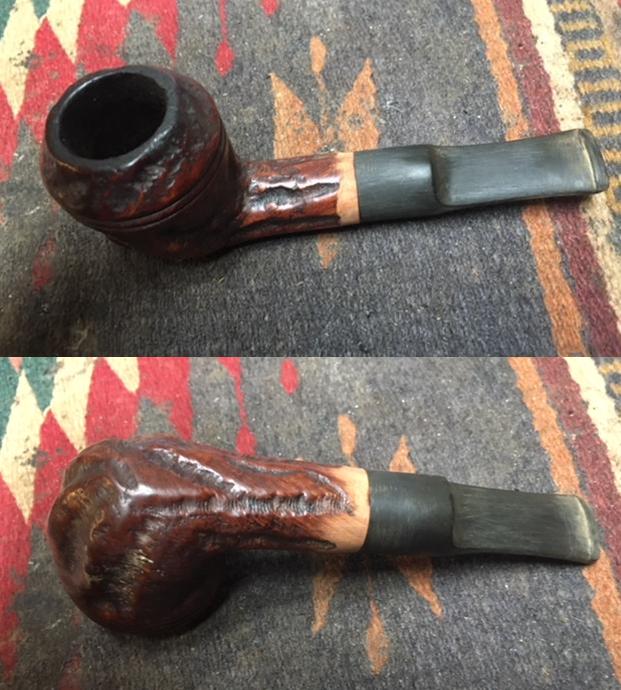
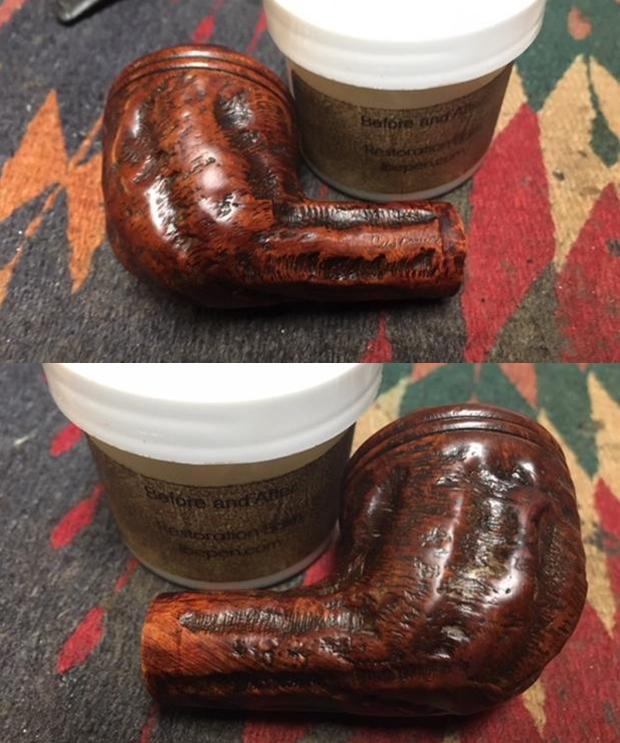
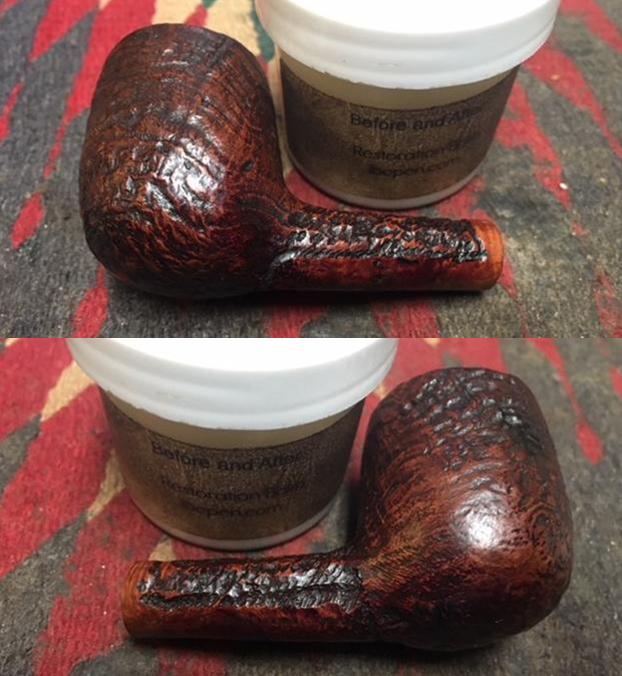
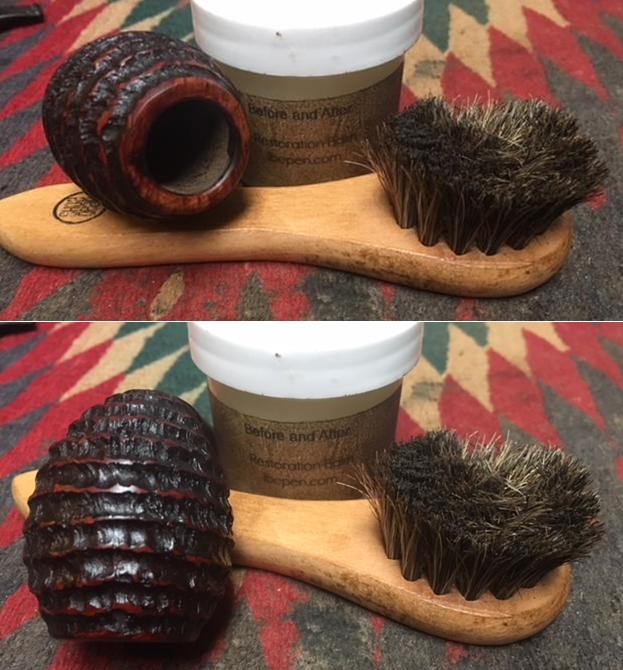
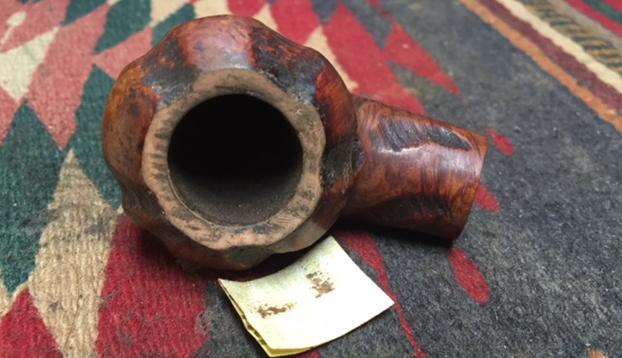 I worked Before & After Restoration Balm deep into the rusticated patterns of the briar to clean, enliven and protect it. I worked it into the rustications with my fingertips and with cotton swabs. I worked it into the rim and shank end. I set it aside for a few minutes to let the balm work. I wiped it off with a soft cloth and buffed it with a horsehair shoe brush to polish it. The briar really began to have a deep shine. I took some photos of the bowl at this point to mark the progress in the restoration. The grain on the bowl is really beginning to stand out and will only do so more as the pipe is waxed.
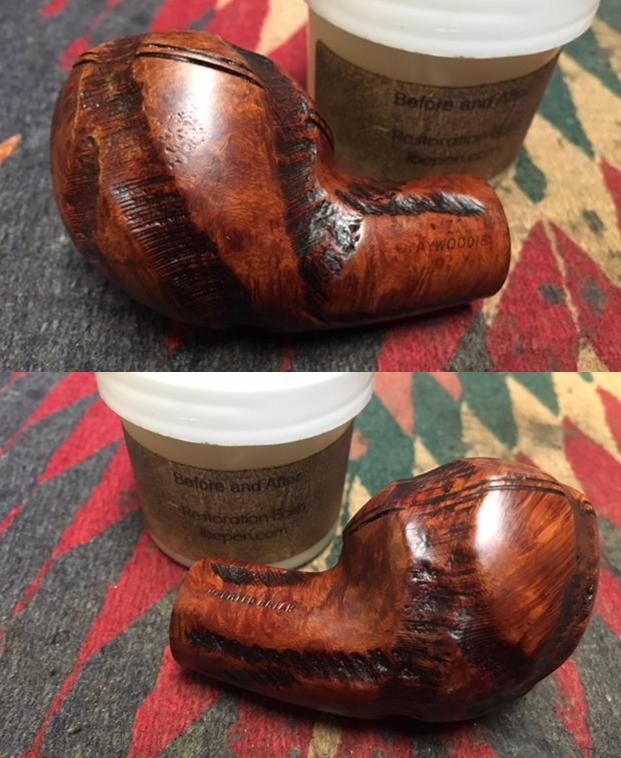
 I wiped down the rim top and polished it with micromesh sanding pads – wet sanding with 1500-2400 grit pads and dry sanding with 3200-12000 grit pads. I wiped the rim top down with a damp cloth after each sanding pad. I restained the rim top to match the contrasting stains on the rest of the bowl.
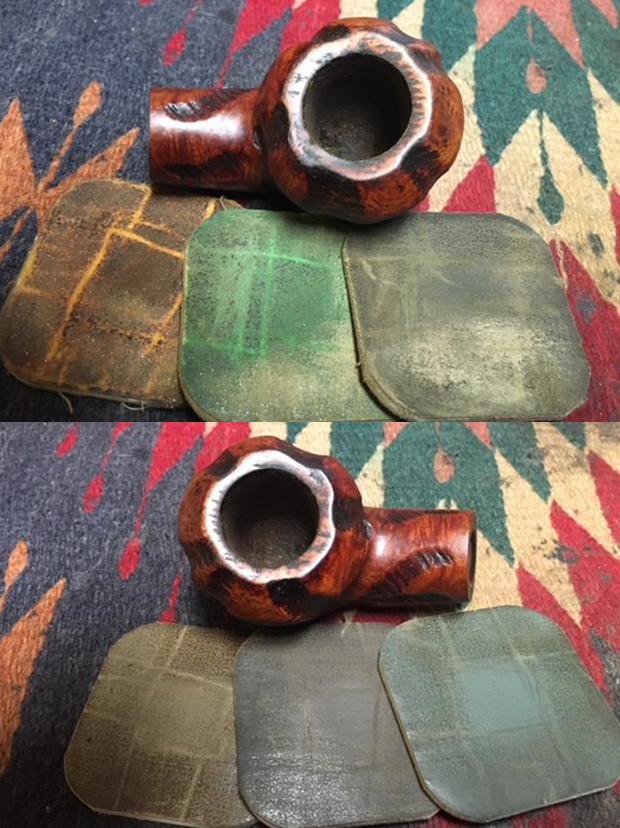
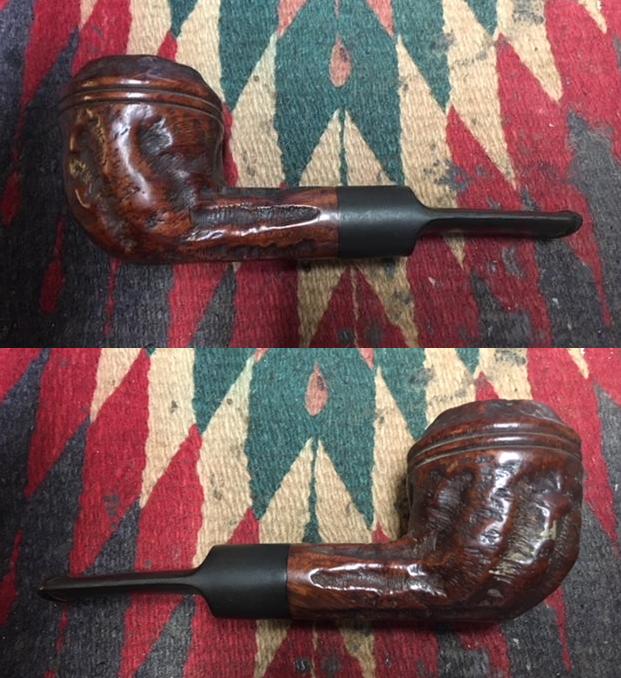
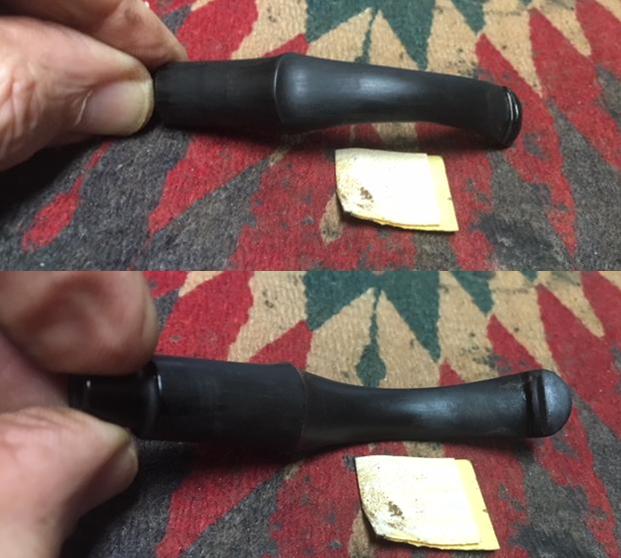
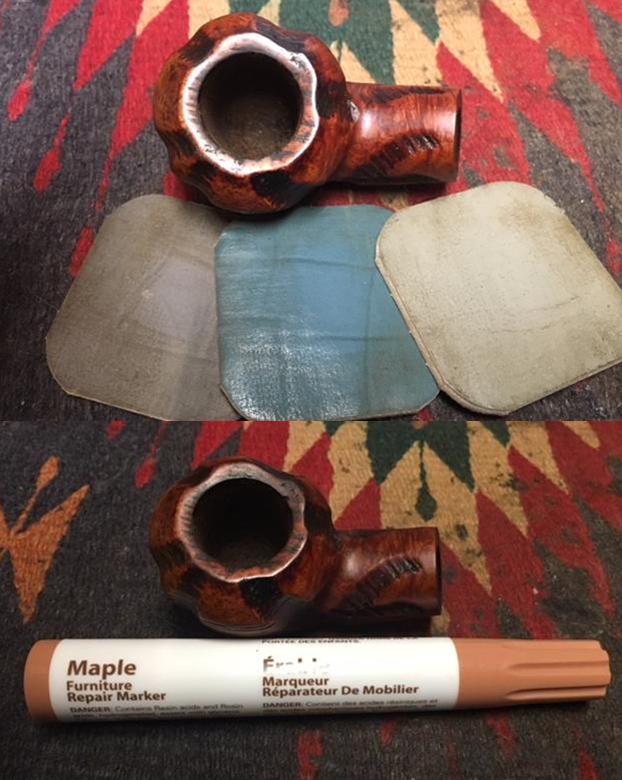 I used a black Sharpie pen to colour in the grooves on the top of the rim to match the grooves around the bowl. When I had finished I like the final look of the pipe.
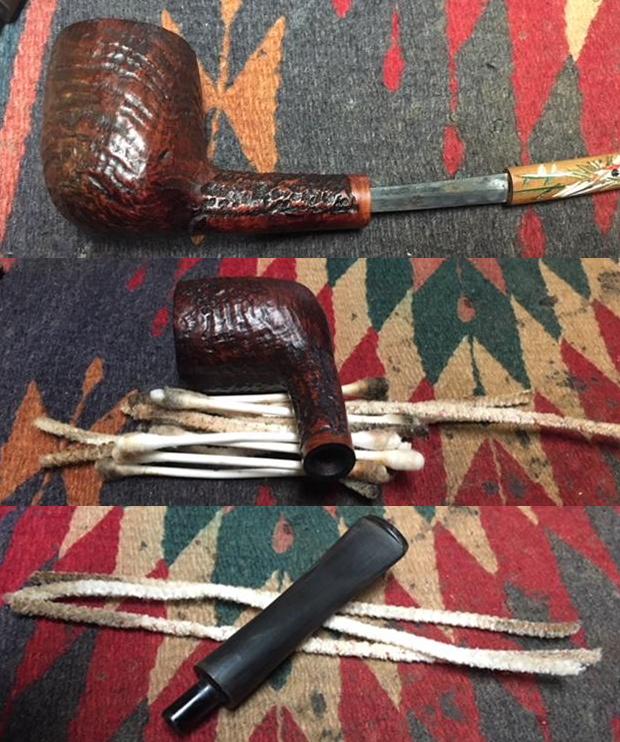
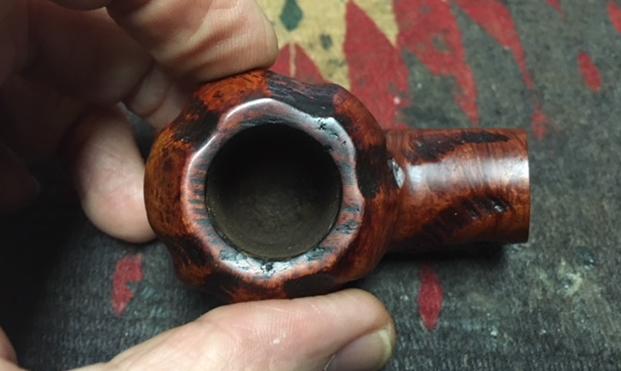 I used a dental spatula to clean out the hard tars and oils on the walls of the mortise. It did not take too much work to remove the hard build up. I scrubbed out the shank after that using cotton swabs, pipe cleaners and isopropyl alcohol. I cleaned out the airway in the stem with pipe cleaners, cotton swabs and alcohol. The airway in the end of the tenon was slightly out of round because somewhere along the way the stinger had been removed and the airway damaged. I used a knife to bevel the edge of the airway in the tenon and then sanded it with a folded piece of sandpaper to smooth it out.
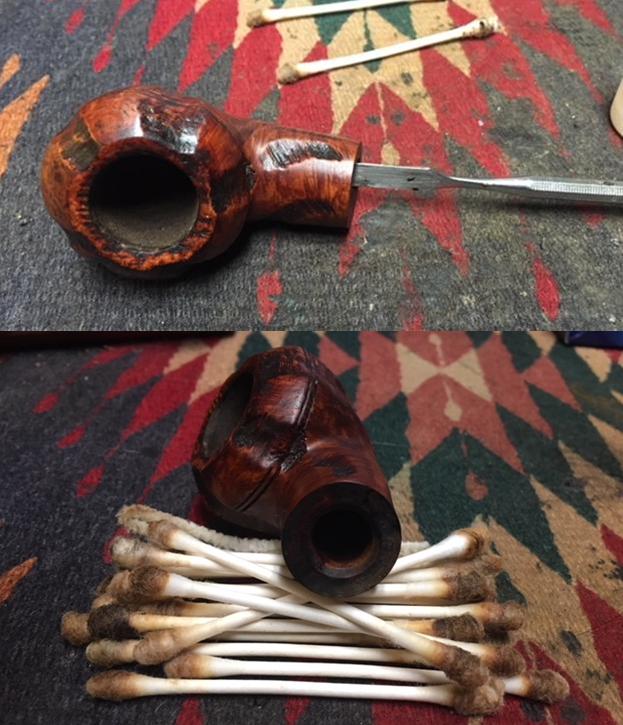
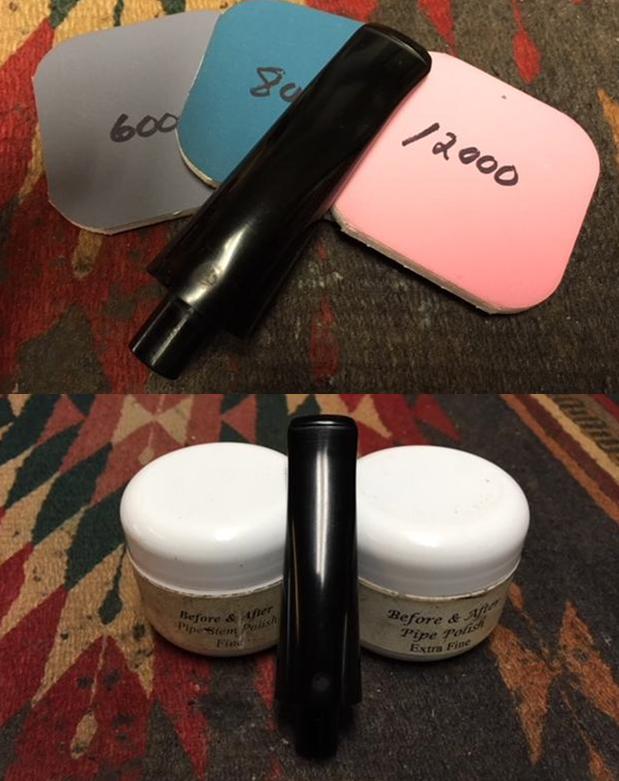
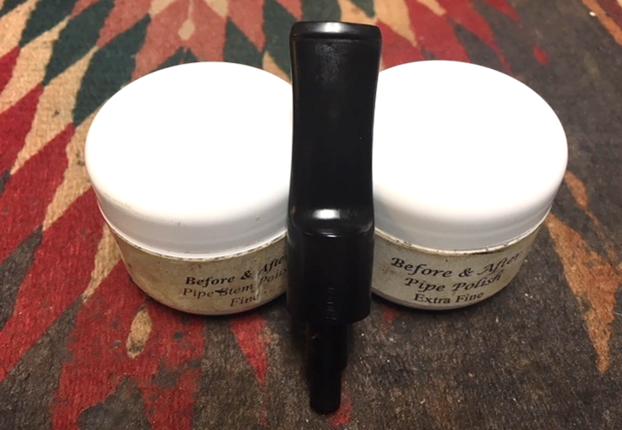
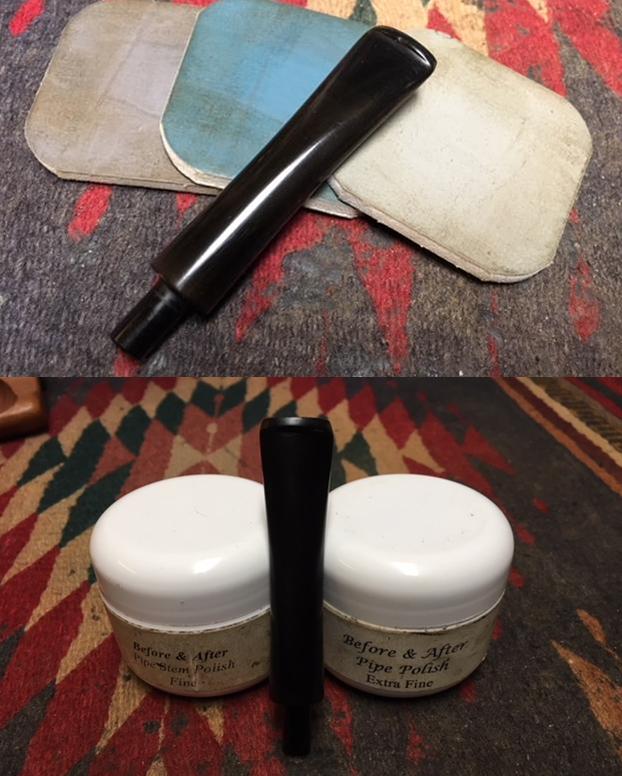
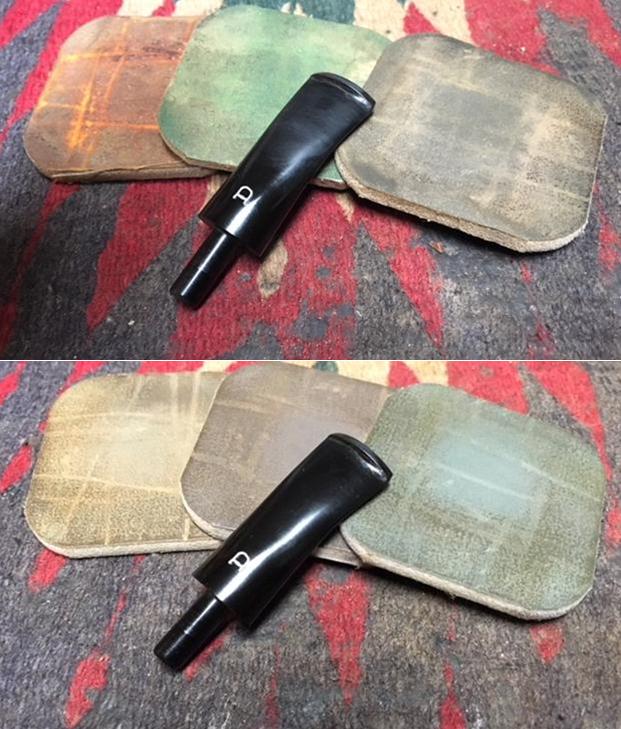
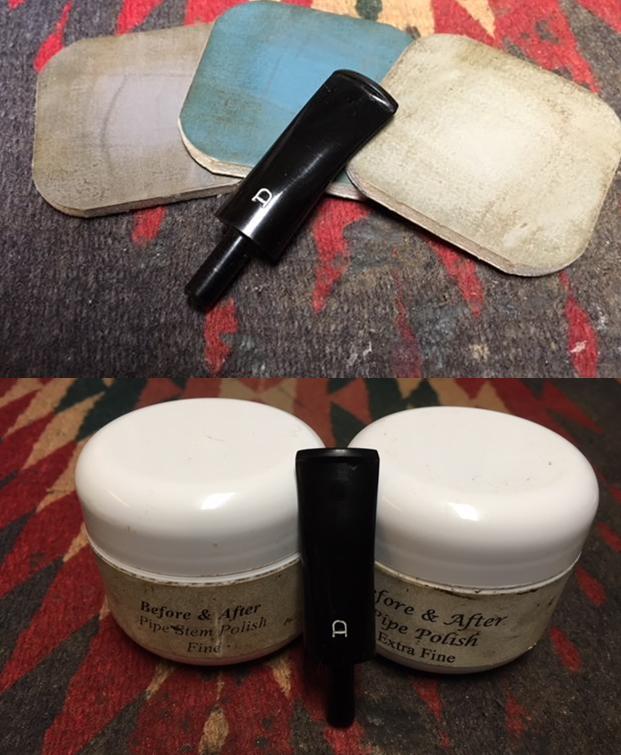
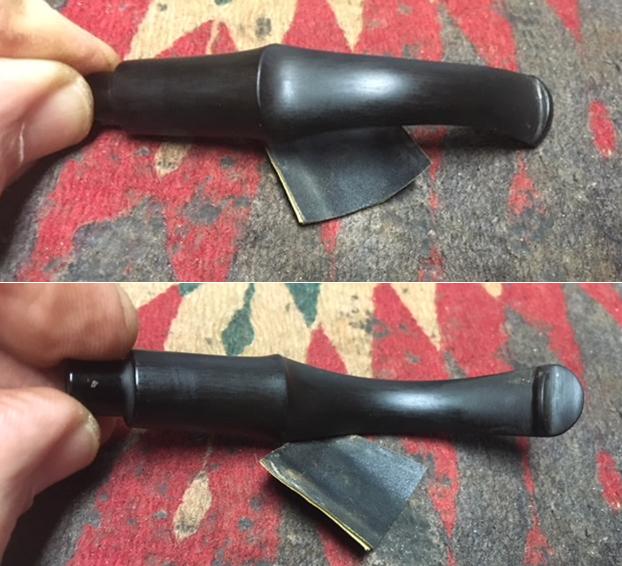
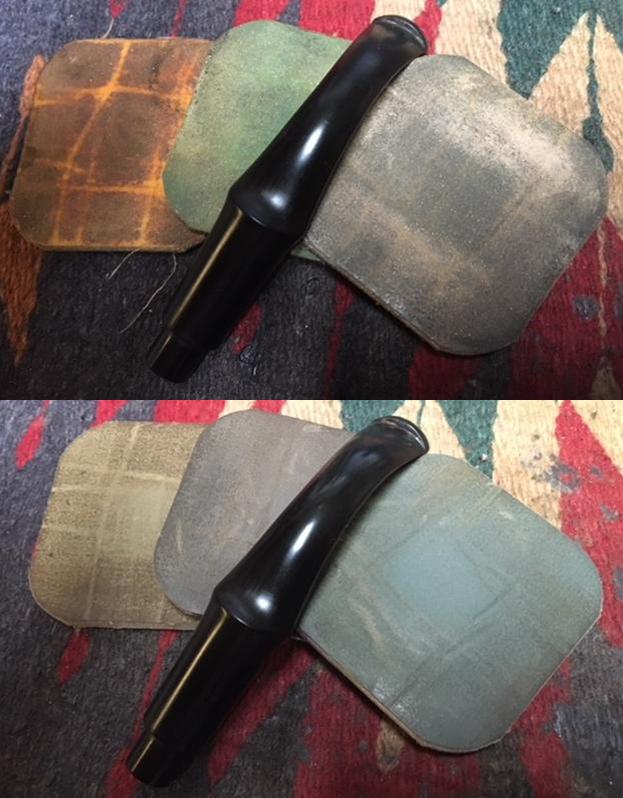
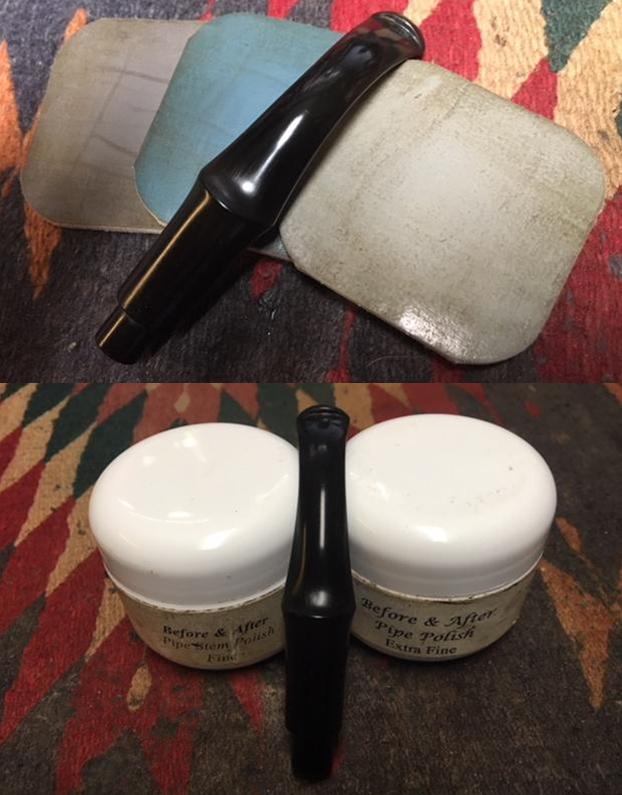
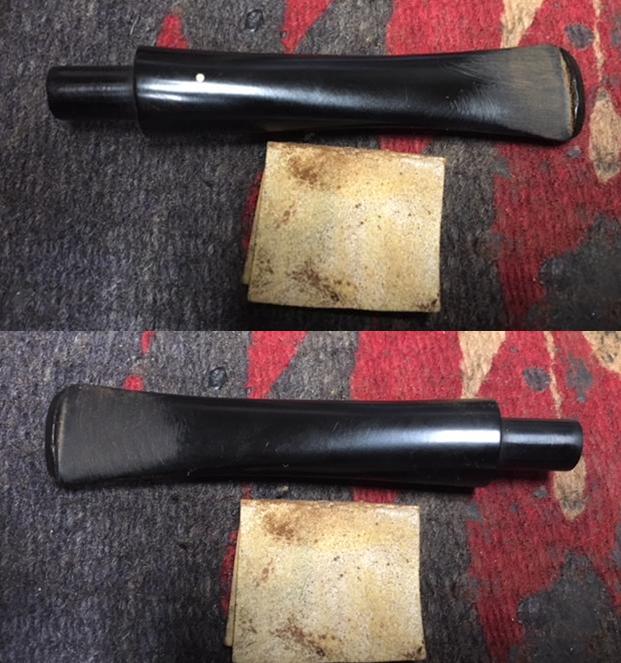
 I polished the stem with micromesh sanding pads – wet sanding with 1500-2400 grit sanding pads and dry sanding with 3200-12000 grit pads. I wiped the stem down with Obsidian Oil after each sanding pad. I finished polishing the stem with Before & After Pipe Stem Polish both Fine and Extra Fine to remove the last of the scratches. I gave it a final coat of Obsidian Oil and set it aside to dry.
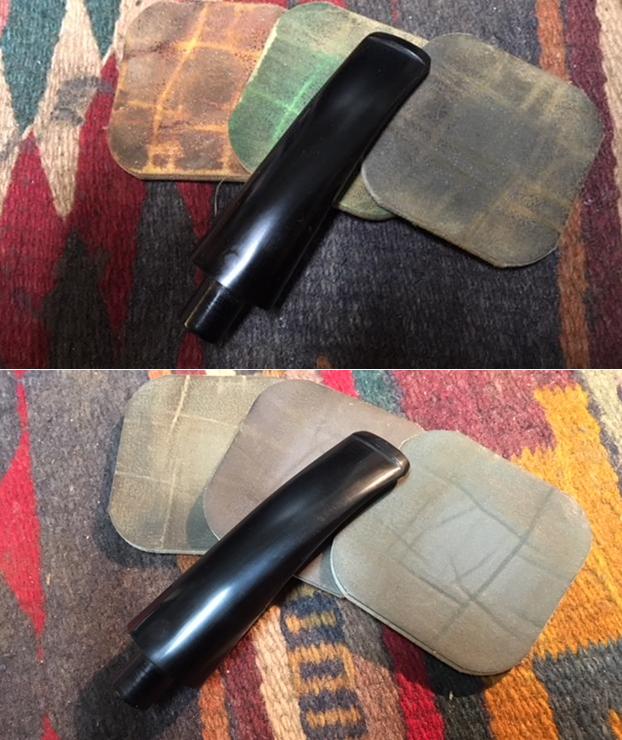
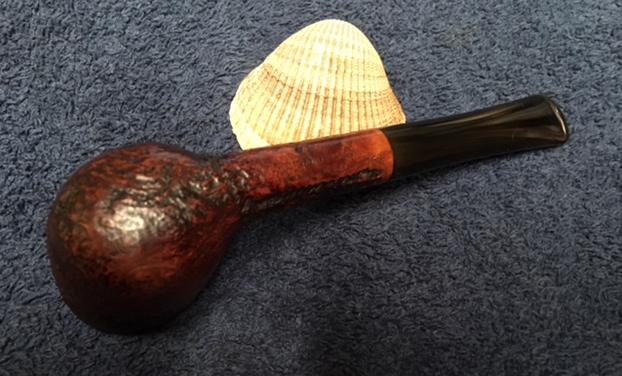
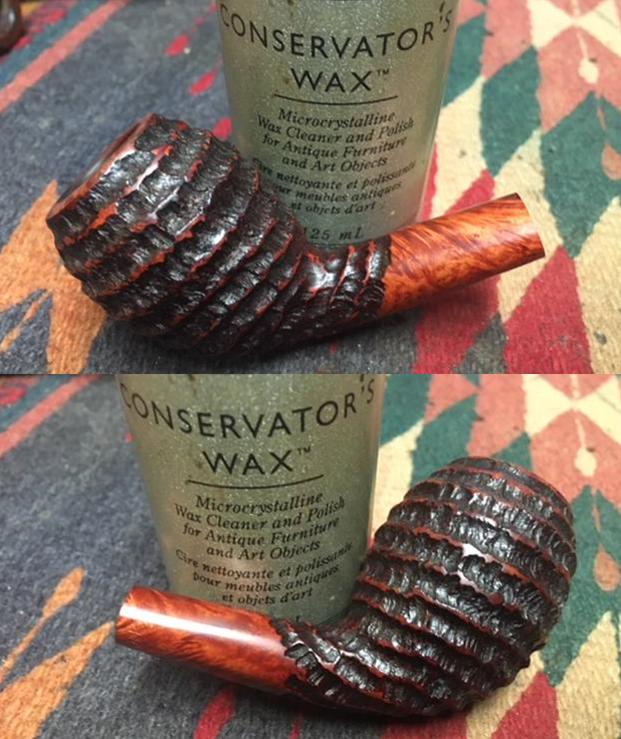
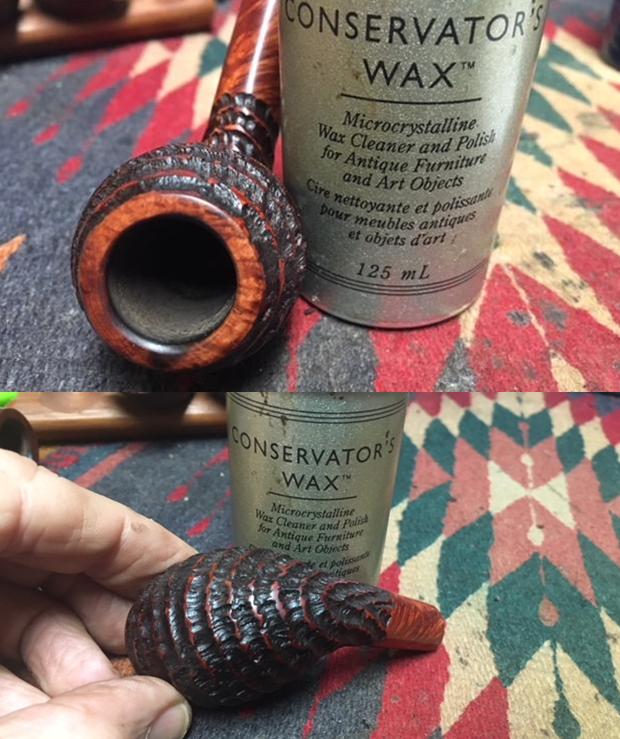
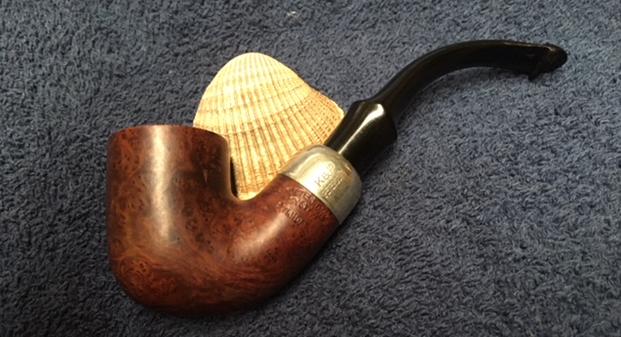
 With the stem polished I put it back on the pipe and lightly buffed the bowl with Blue Diamond. I buffed the stem with a more aggressive buff of Blue Diamond. I gave the bowl multiple coats of Conservator’s Wax and the stem several coats of carnauba wax and buffed the pipe with a clean buffing pad to raise the shine. I hand buffed it with a microfiber cloth to deepen the shine. The pipe polished up pretty nicely. The finished pipe is shown in the photos below. I will be posting it on the rebornpipes store very soon. It should make a nice addition to your pipe rack if you have been looking for a reasonably priced older Kaywoodie Hand Made Rhodesian carved in an almost classic Custombilt style. It should be a great smoking pipe with a good hand feel. The dimensions are Length: 5 3/4 inches, Height: 1 1/2 inches, Outside diameter of the bowl: 1 3/4 inches, Chamber diameter: 7/8 inches. Thanks for walking through the restoration with me as I worked this pipe over.
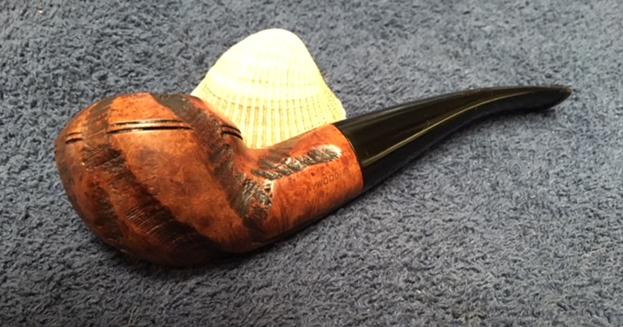


