Tag Archives: bite marks

Restoring a Kaywoodie Churchwarden


Blog by Kenneth Lieblich

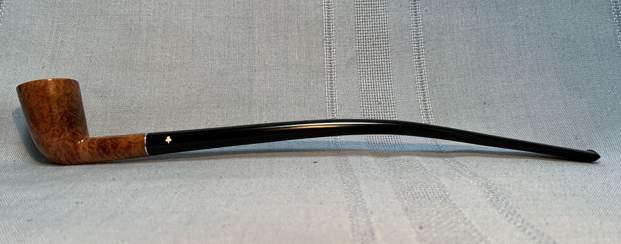
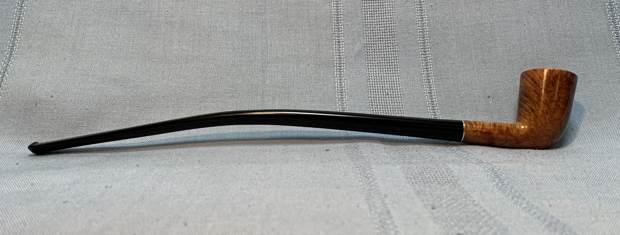
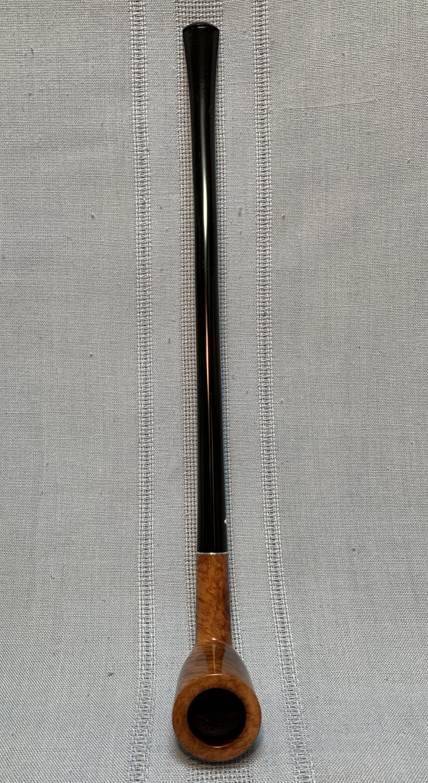
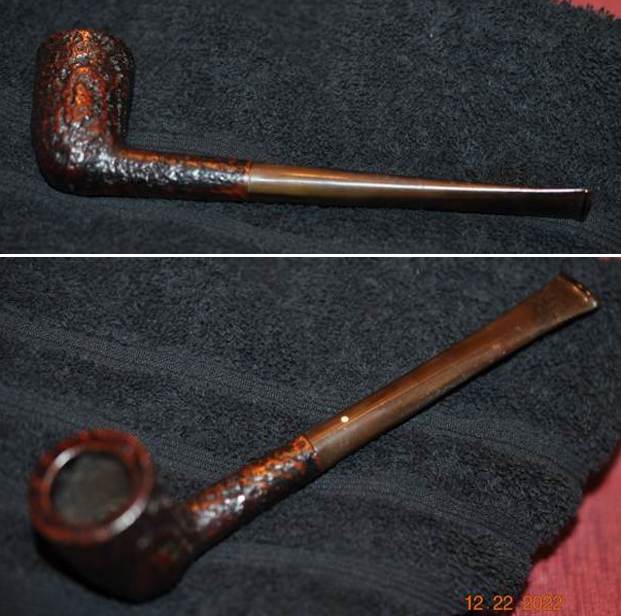
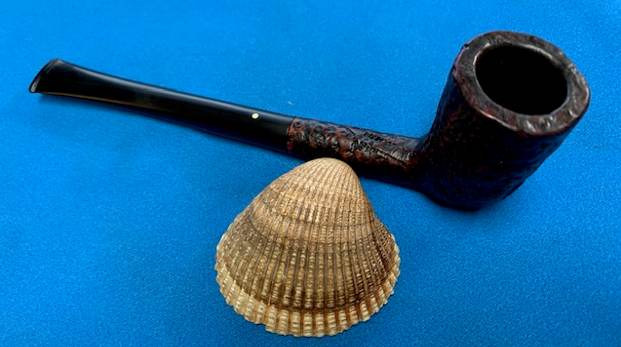
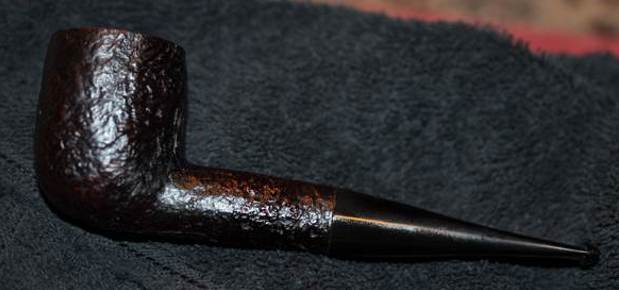
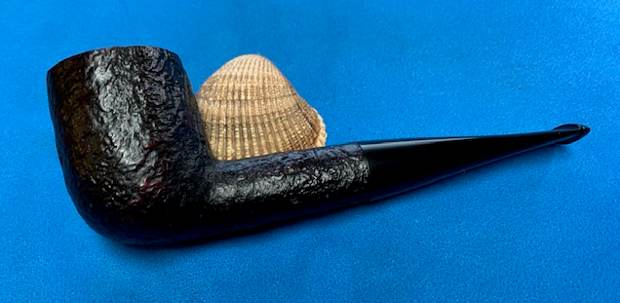
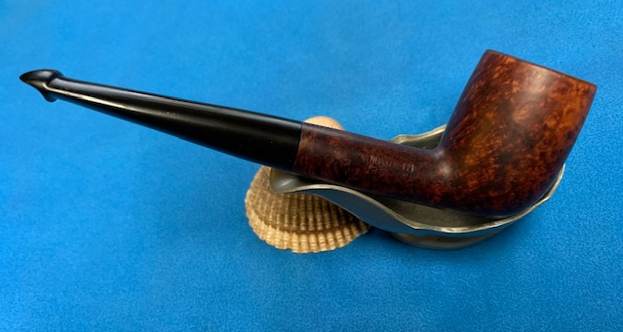
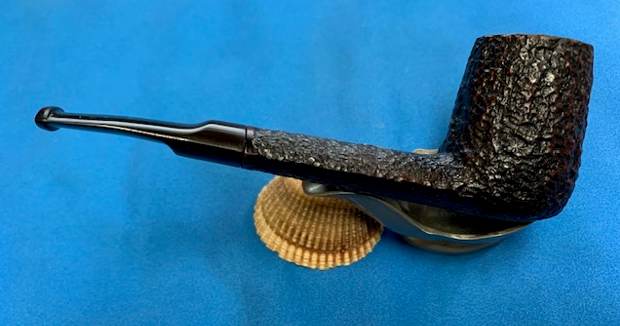
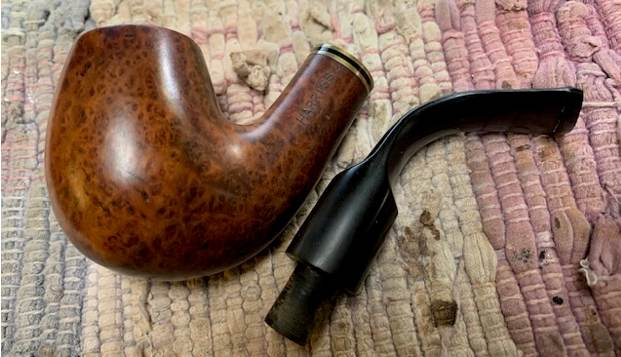
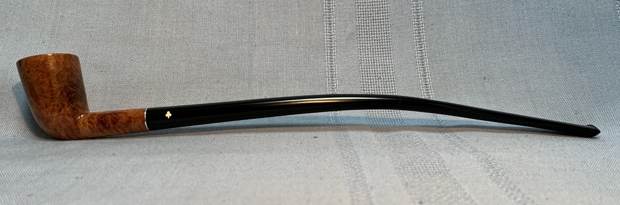
Next on the chopping block is a charming and looooong Kaywoodie Dublin churchwarden (twelve inches long), commissioned by the daughter of a friend, for her fiancé. She was determined to get her beau a churchwarden as a gift. Fortunately, I was able to lay my hands on one and did a nifty restoration job on it. 
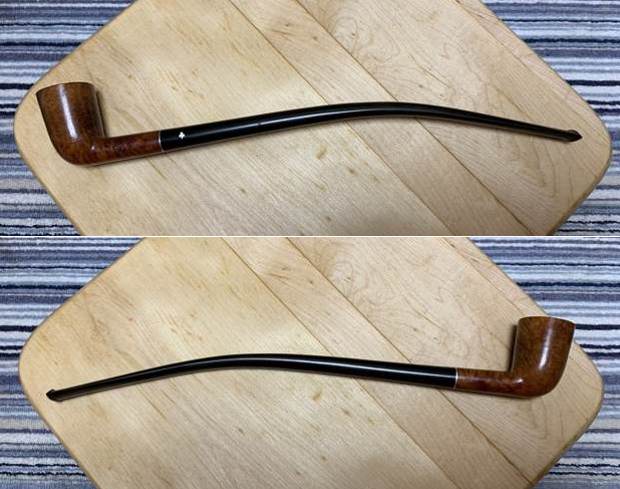
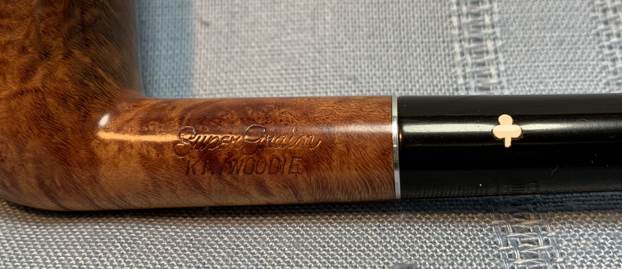
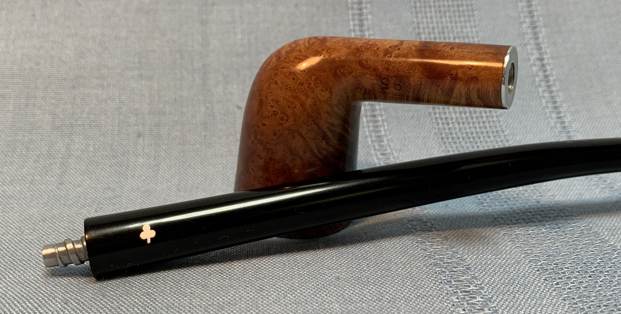
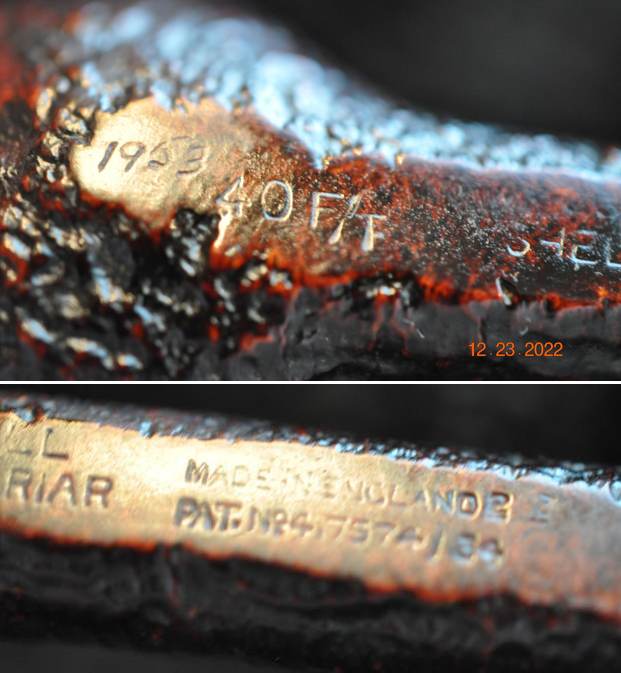
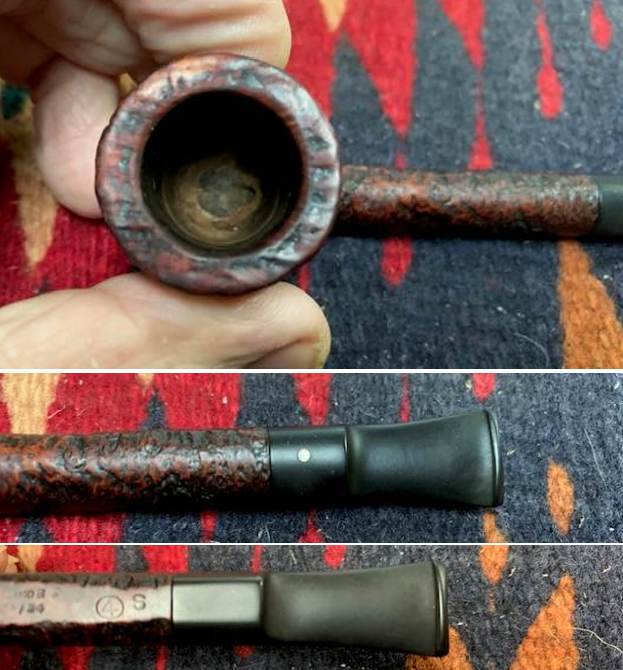
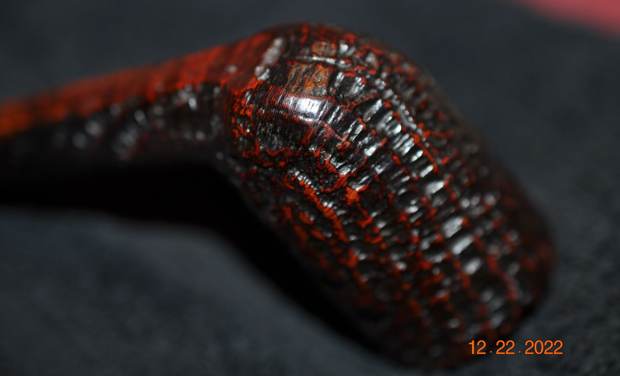
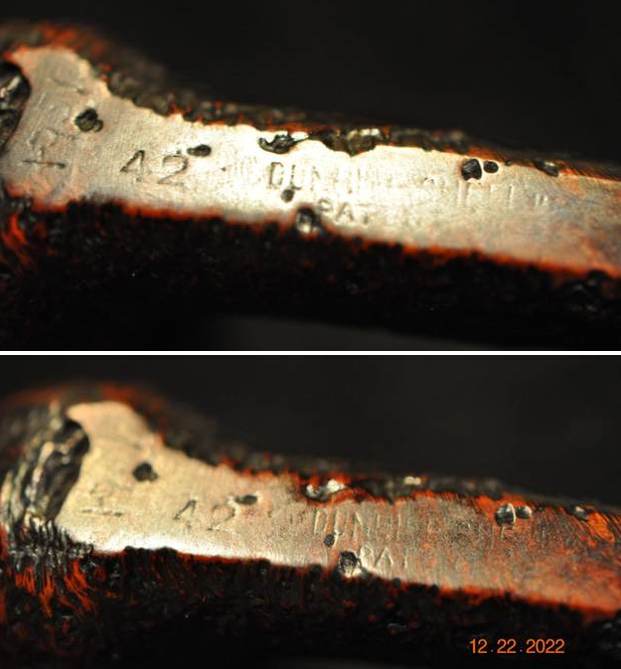
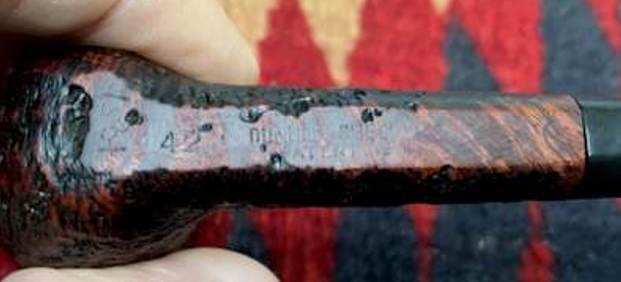
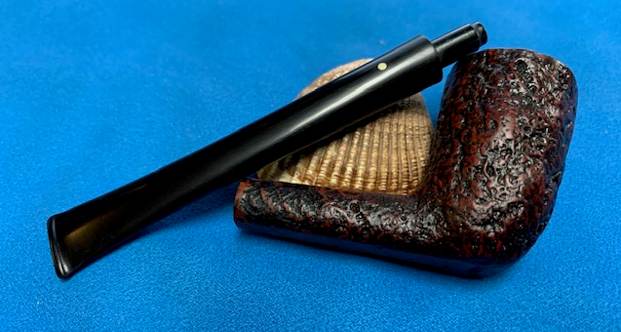
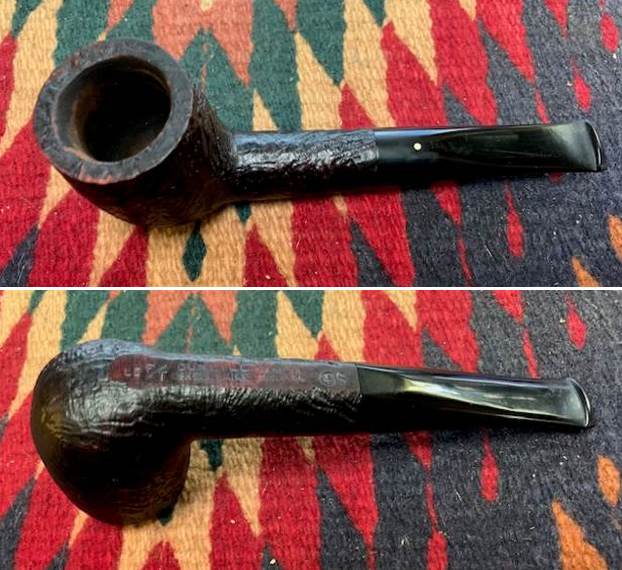
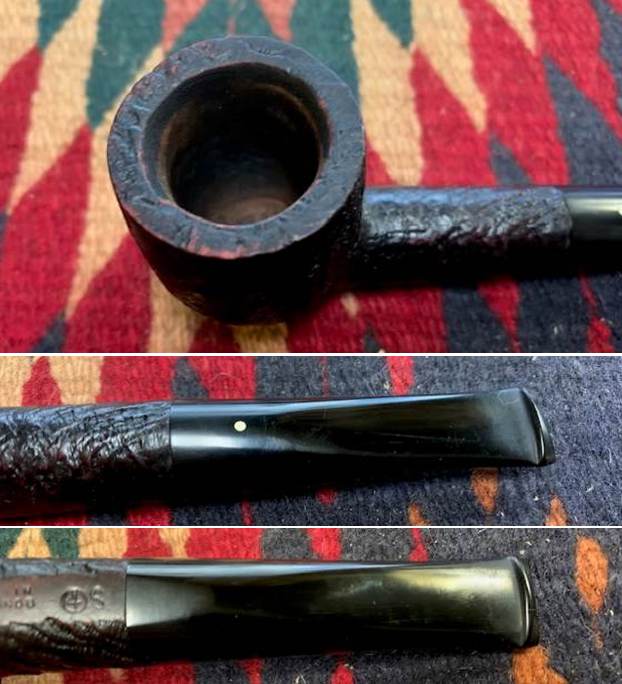
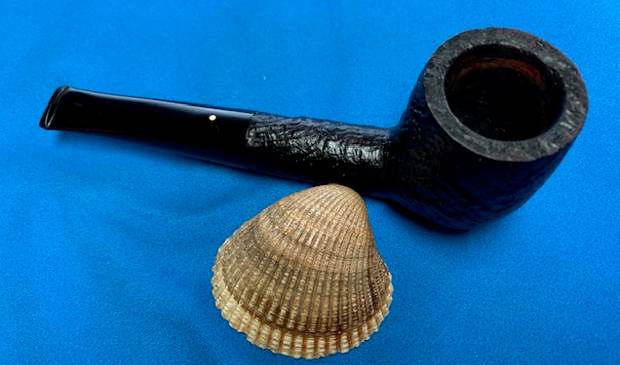
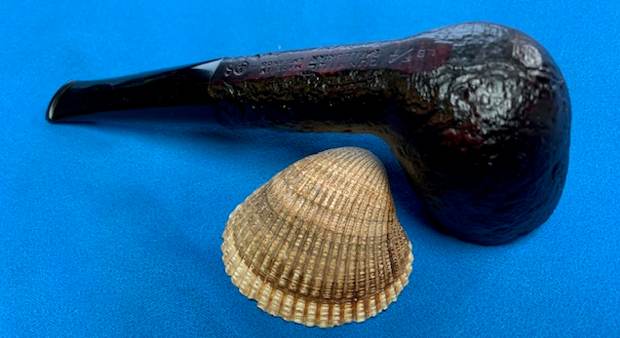
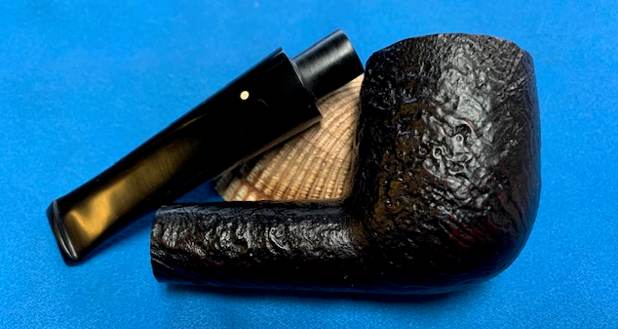
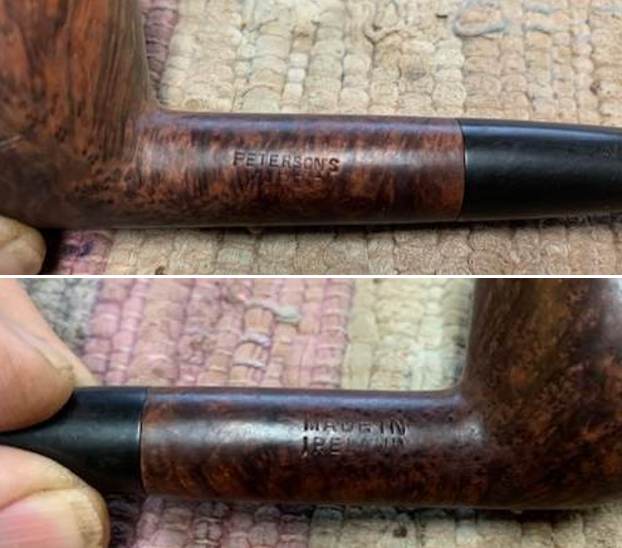
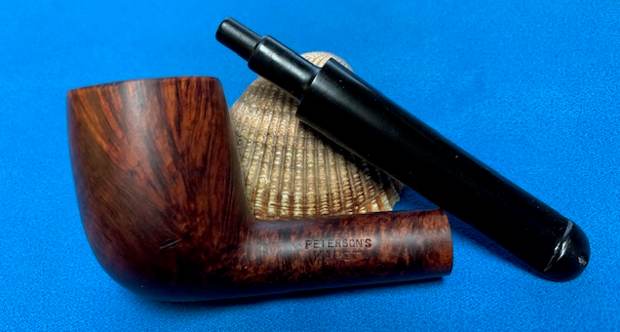
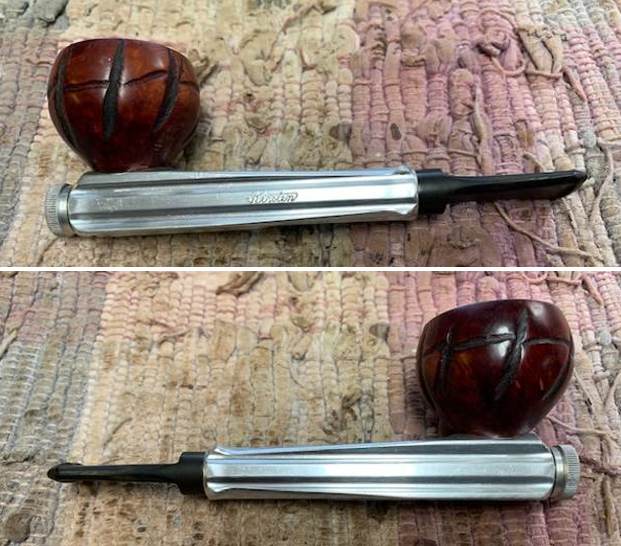
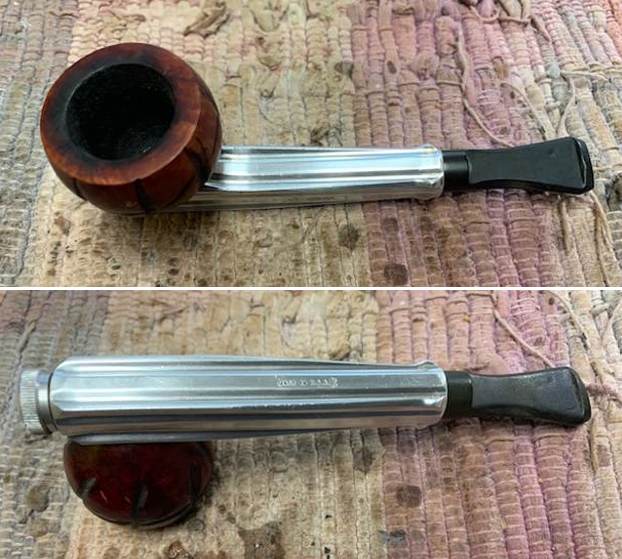
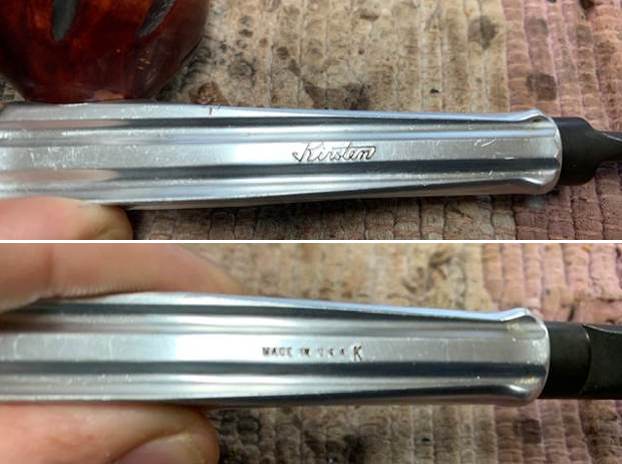
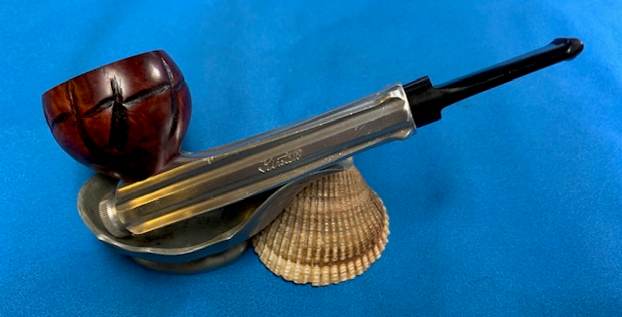
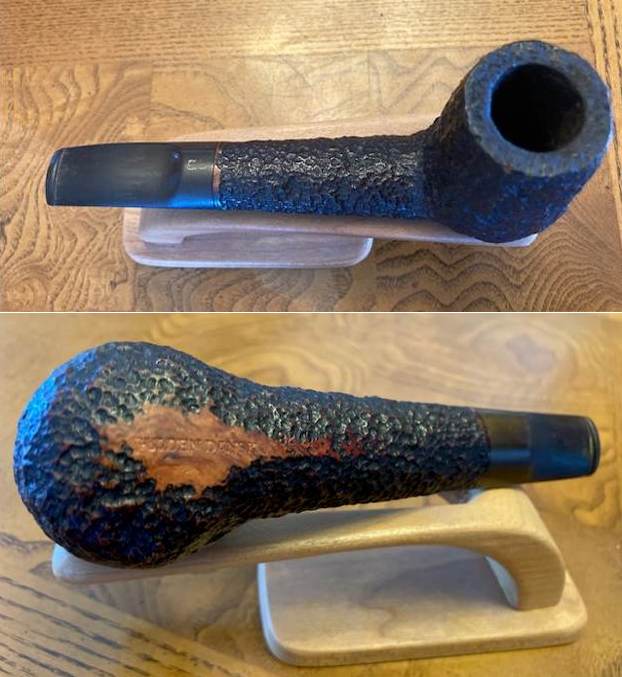
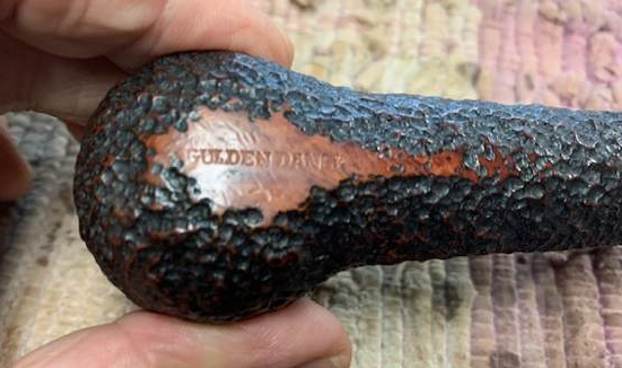
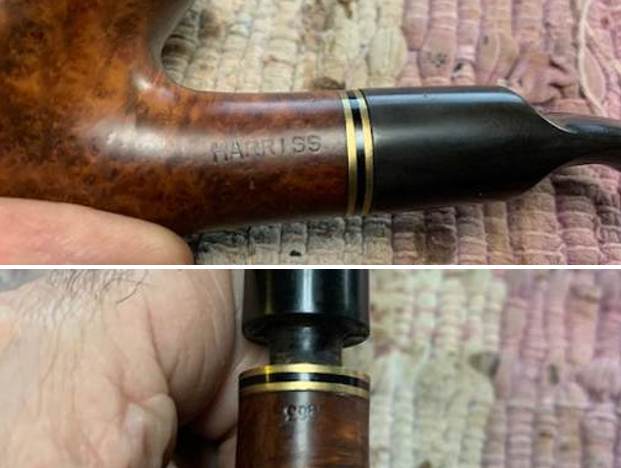
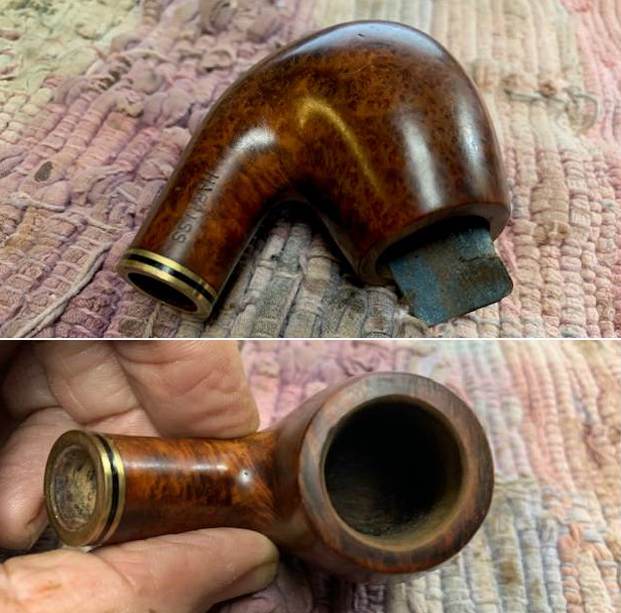
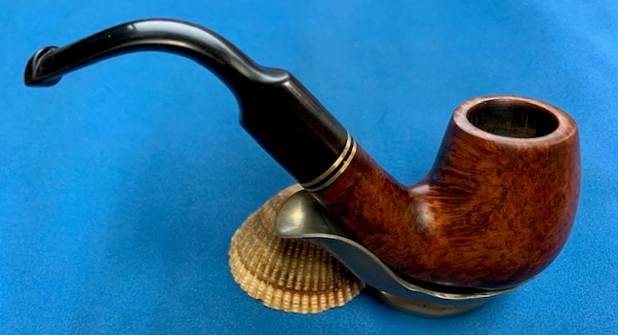
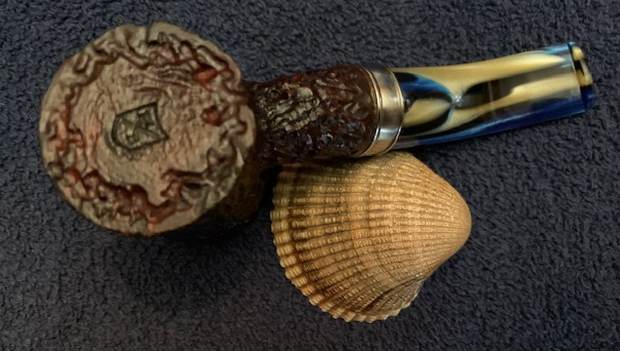
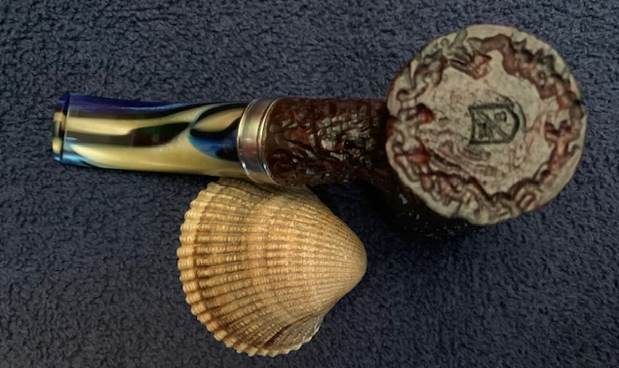
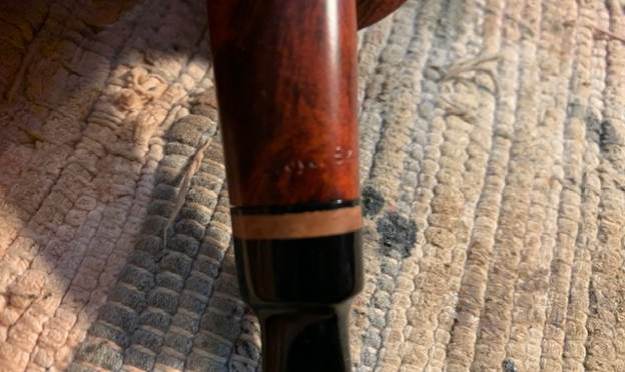
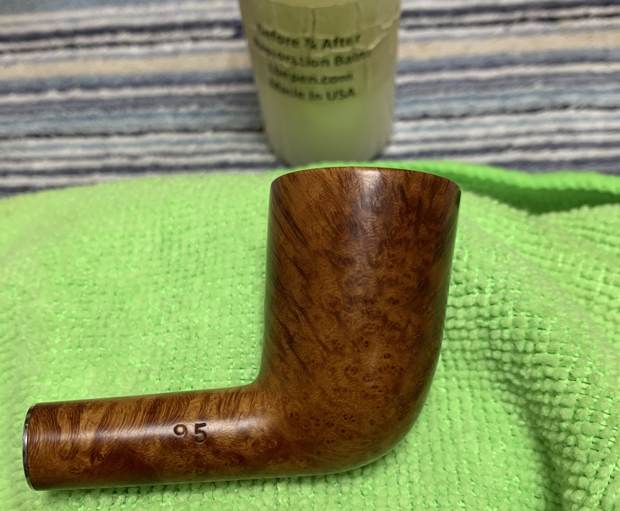
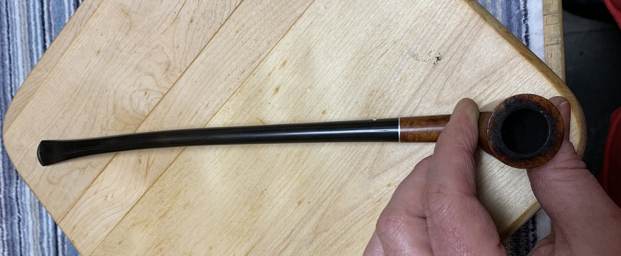
This pipe was made by the well-known American pipe company, Kaywoodie. The markings on the left side of the shank read Super Grain [over] Kaywoodie. On the right side of the shank is the shape number: 95. The left side of the stem has the traditional Kaywoodie logo, a club: ♣.   
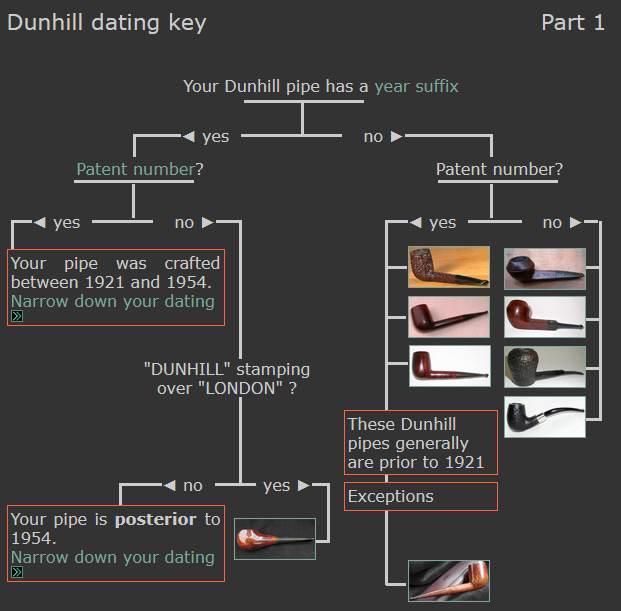
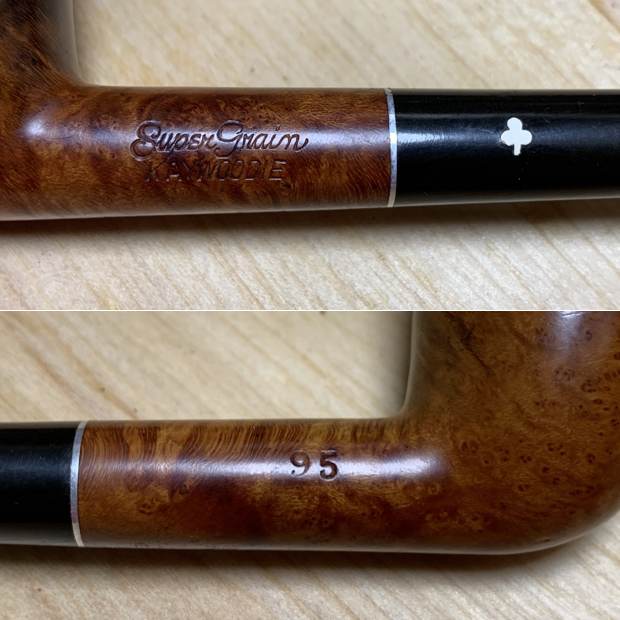
I went over to Pipedia, in order work out a rough date for this pipe. I know that the very old Kaywoodies have four-digit shape numbers – and this pipe obviously only has two digits. On the list of Kaywoodie shape numbers, the following information was shown:

Shape #                 Description                                                         Years Produced

95                           Extra Long Dublin Churchwarden              1932-1937, 1947-1972

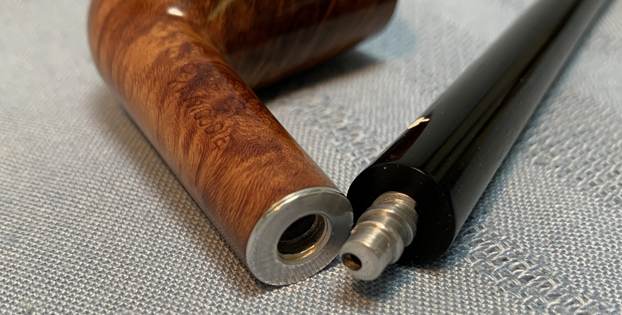
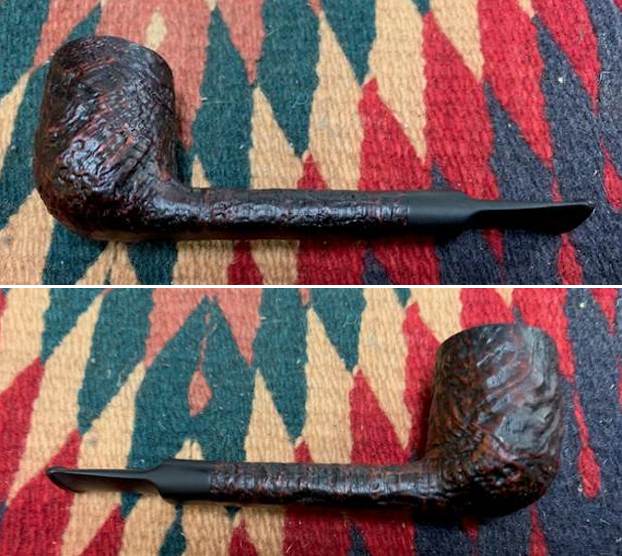
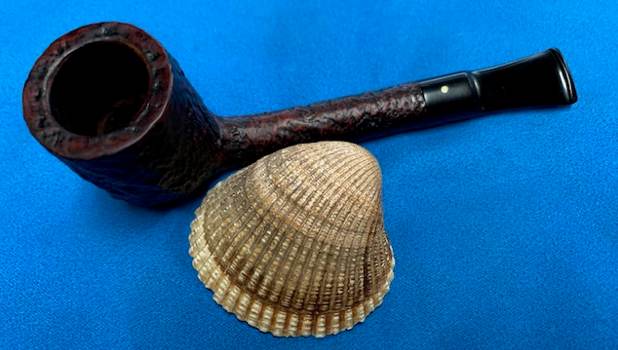
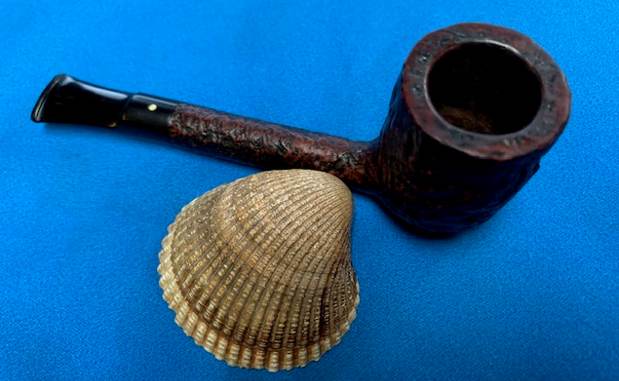
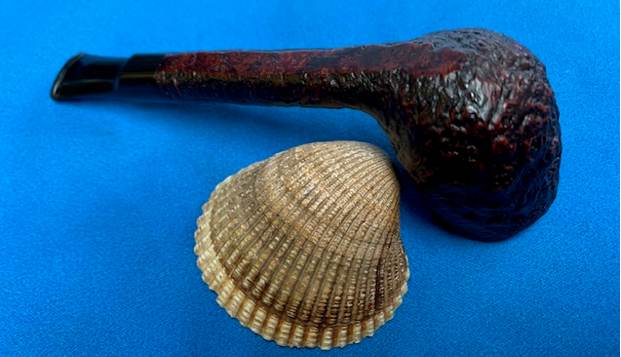
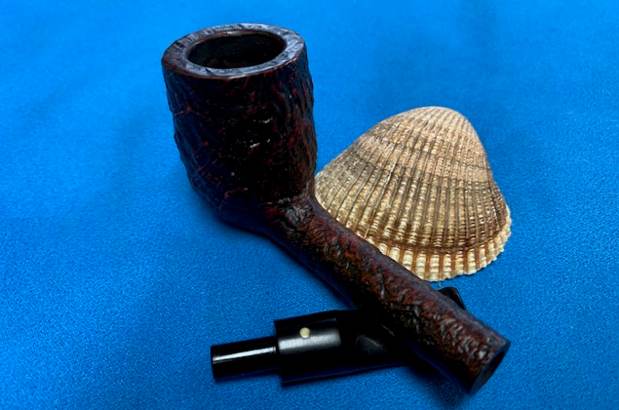
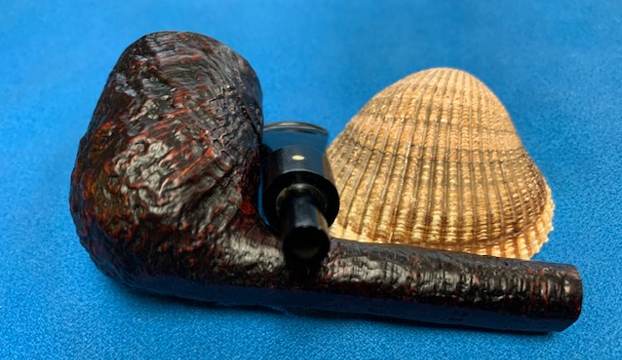
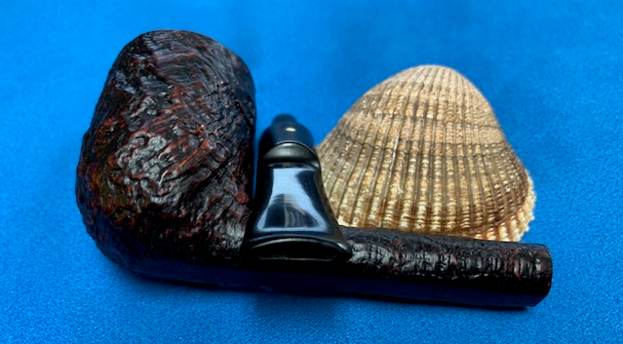
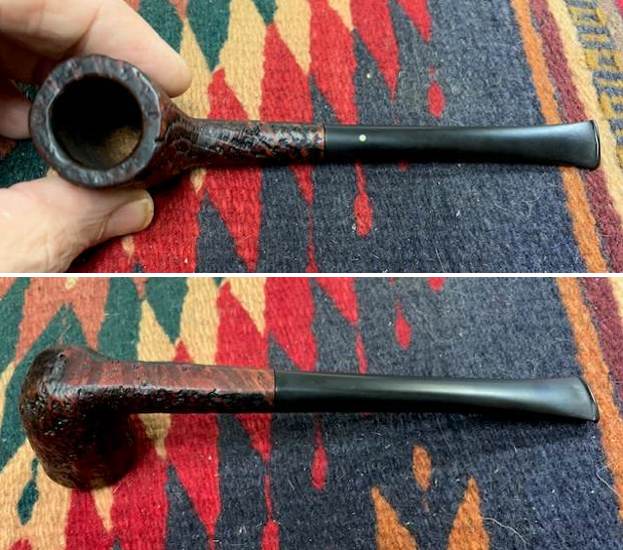
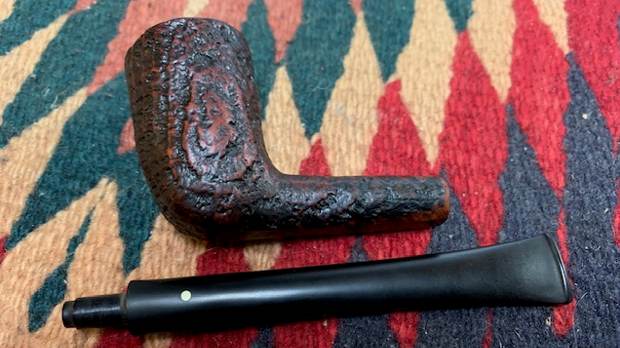
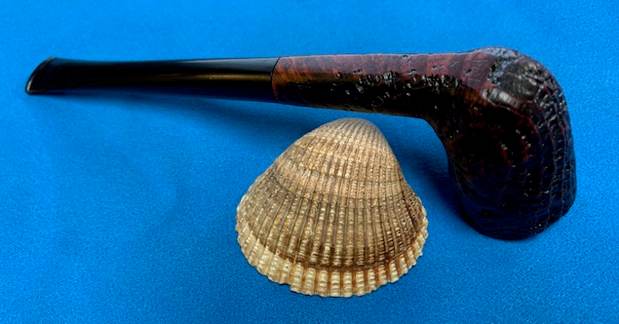
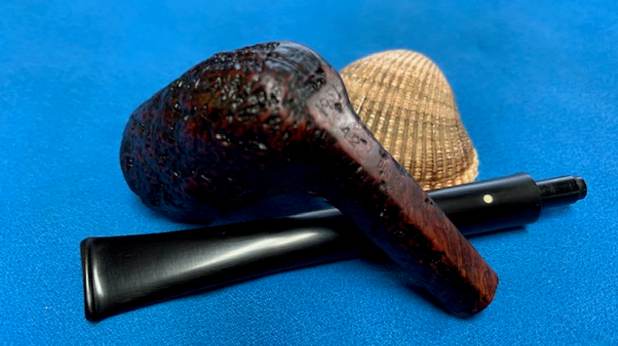
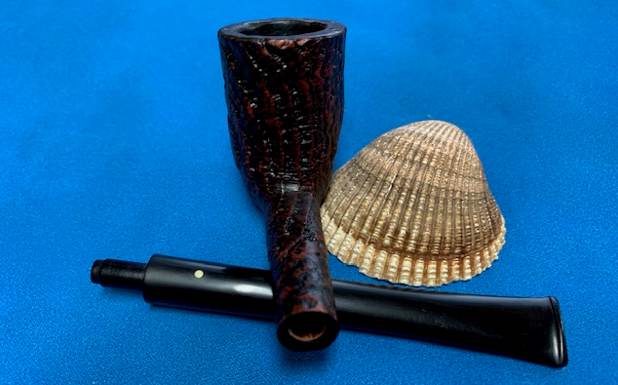
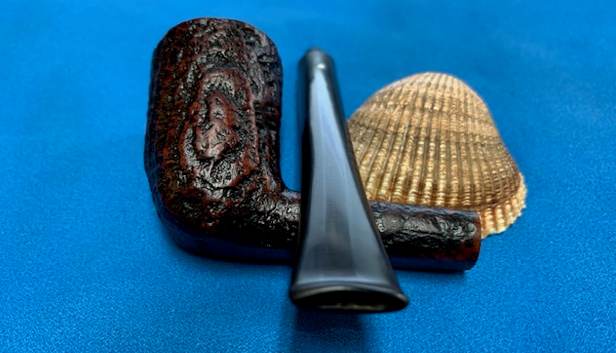
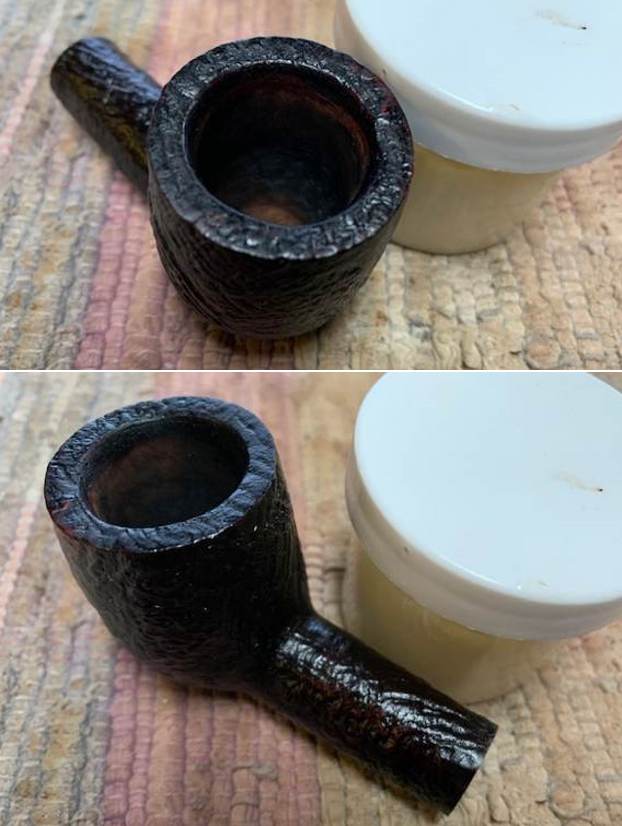
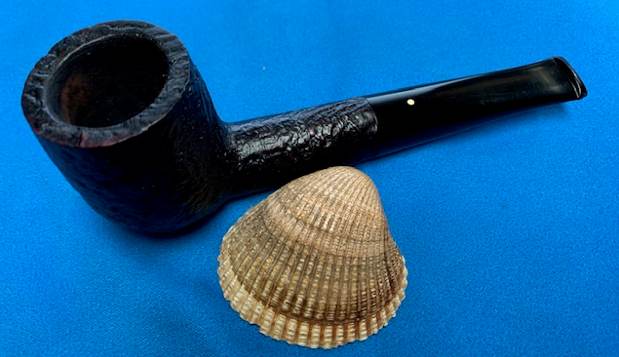
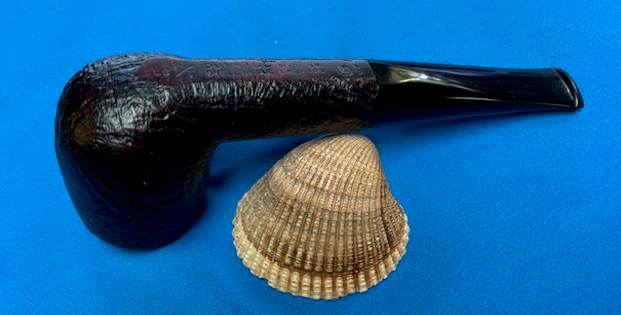
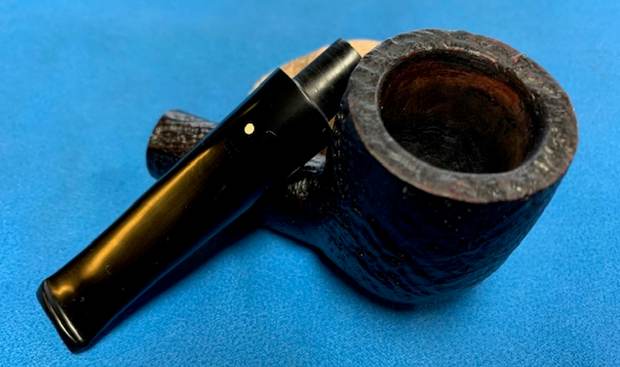
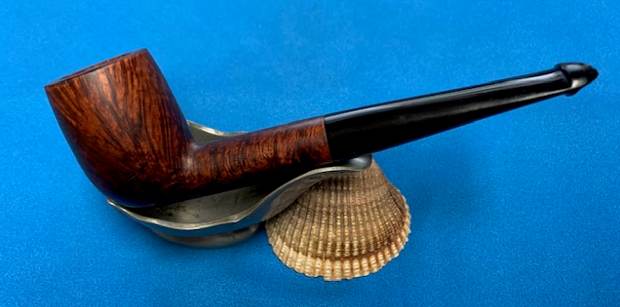
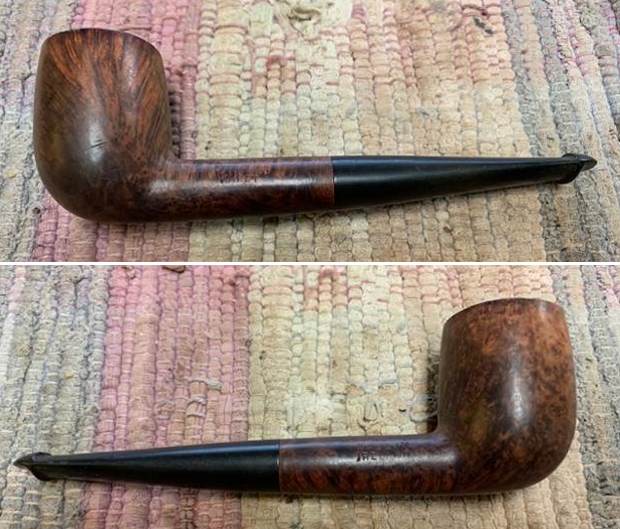
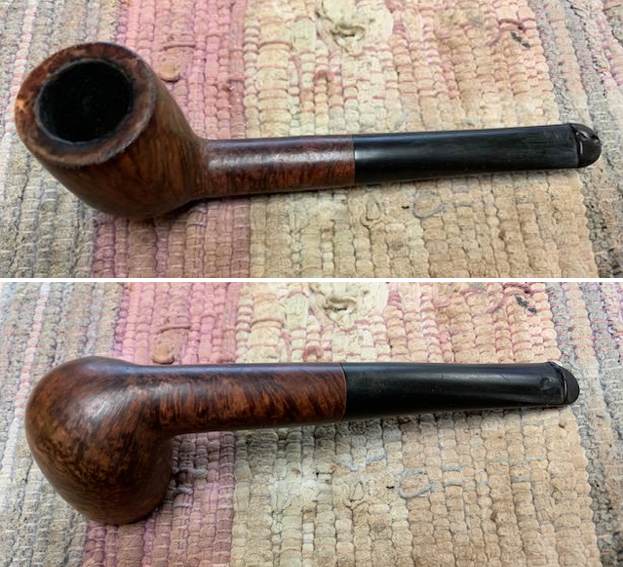
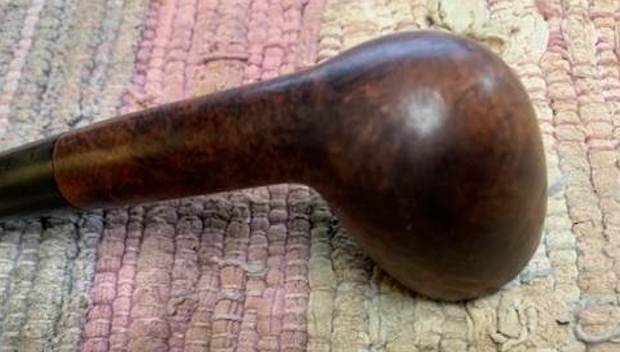
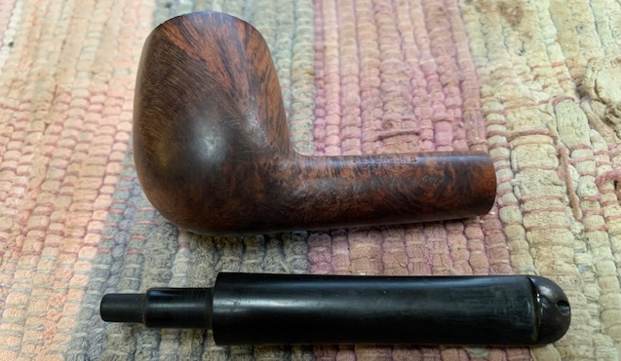
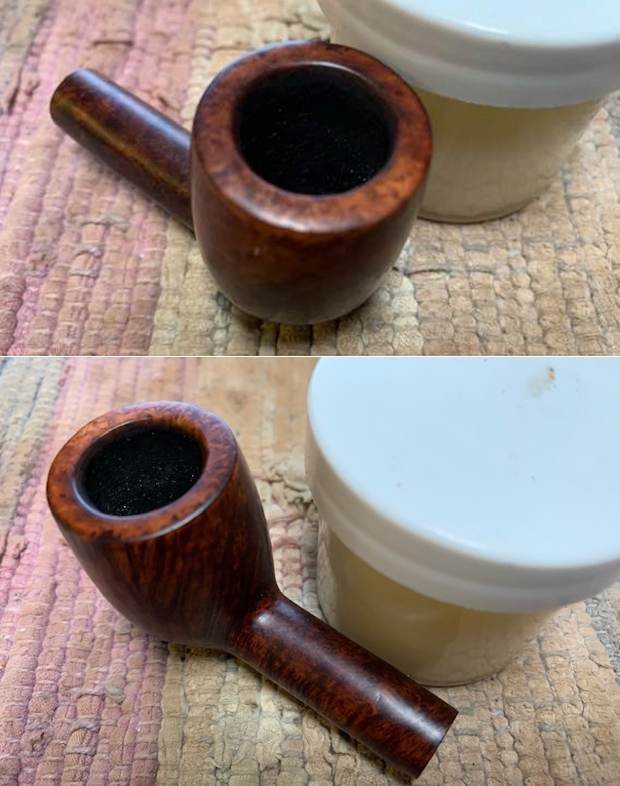
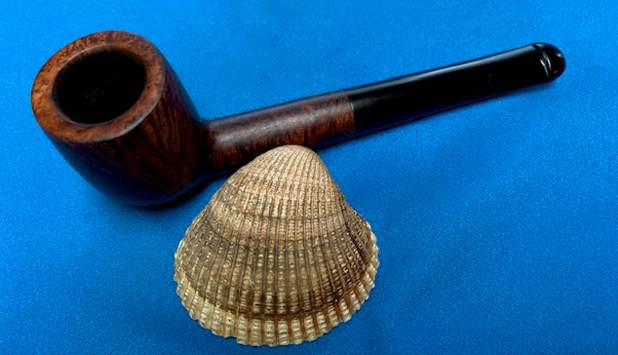
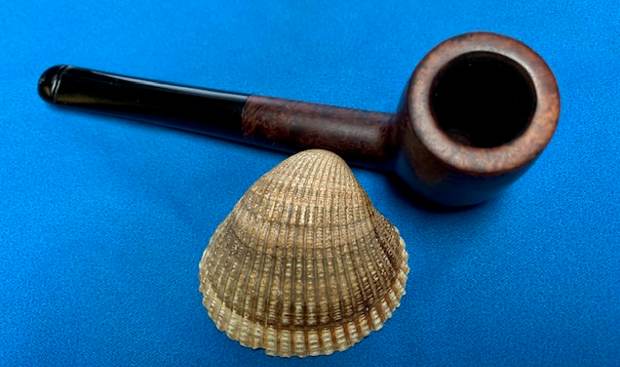
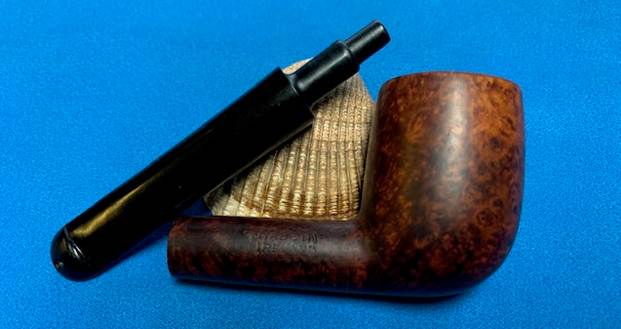
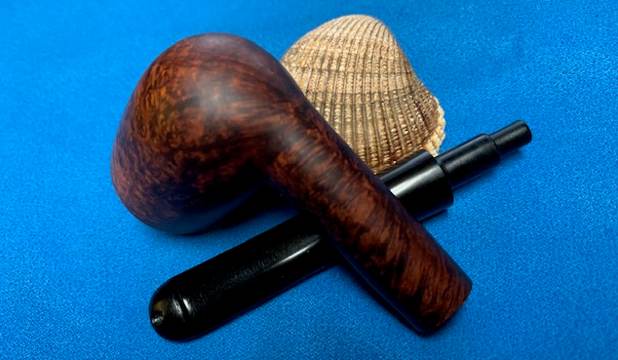
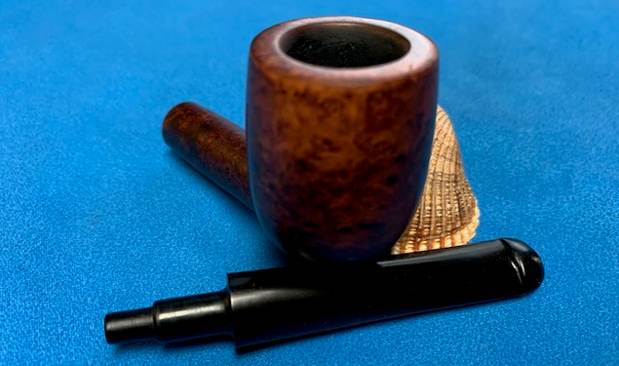
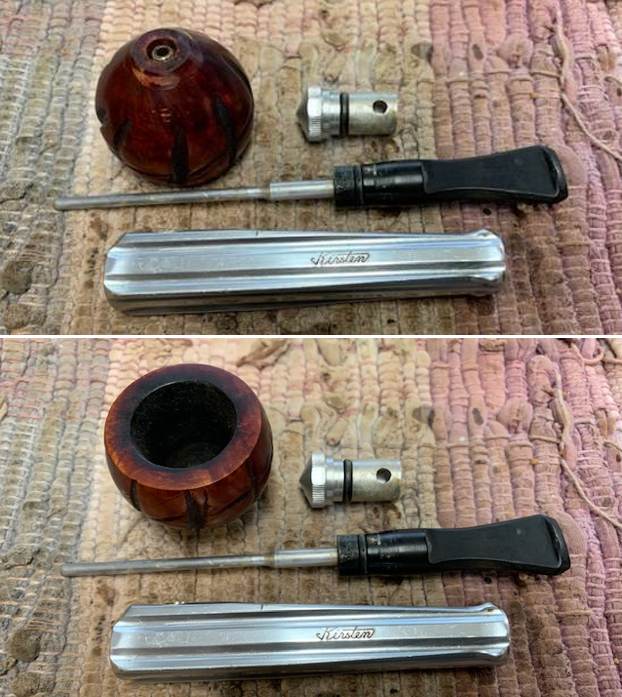
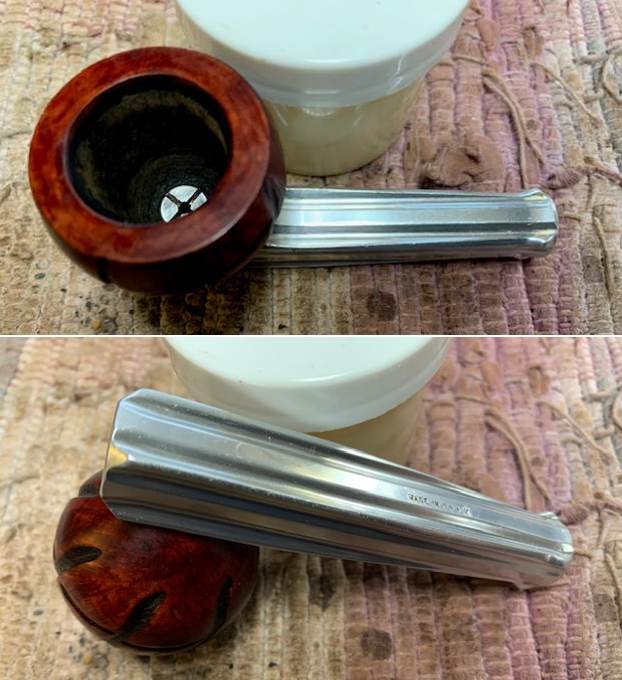
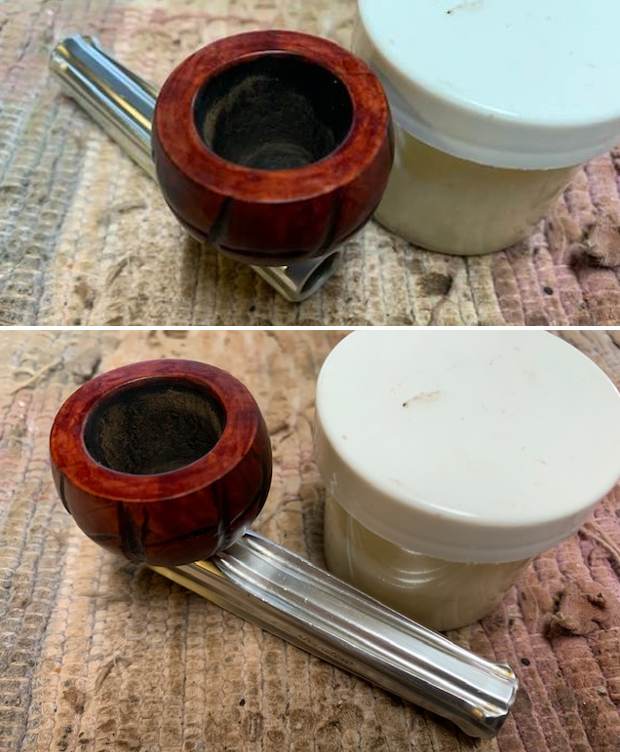
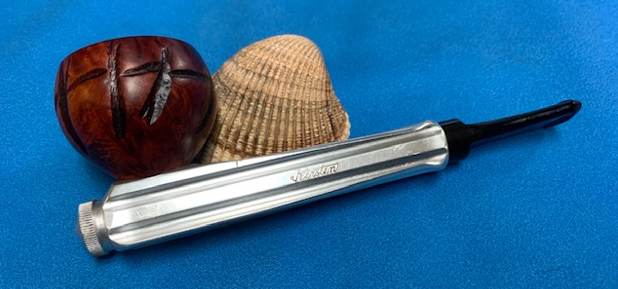
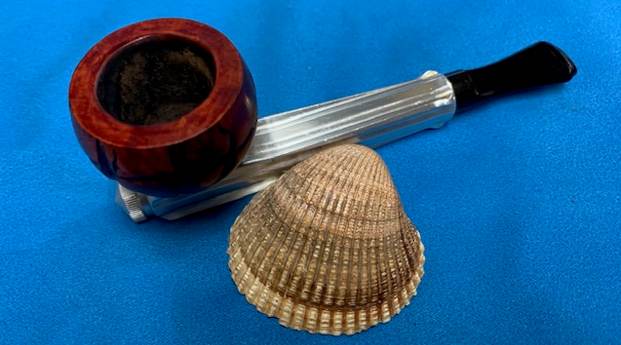
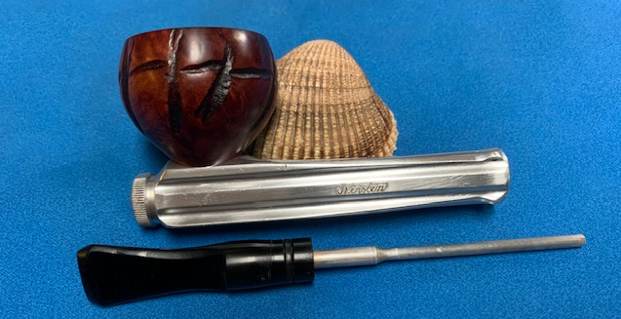
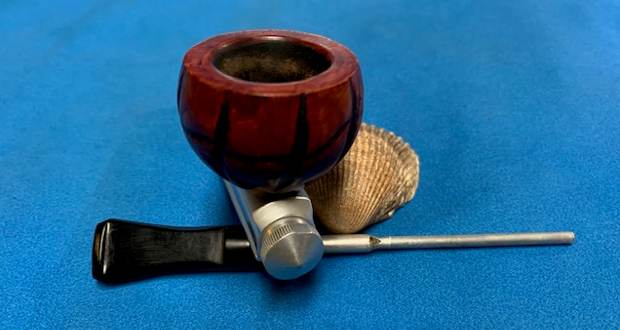
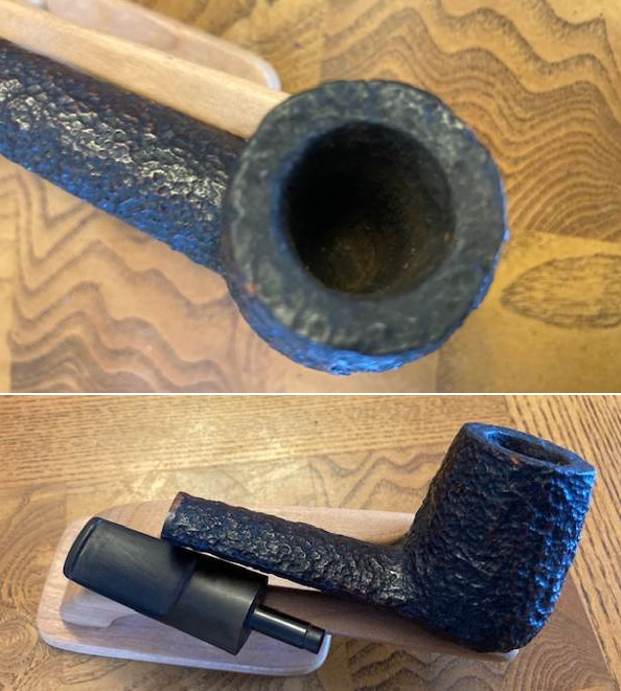
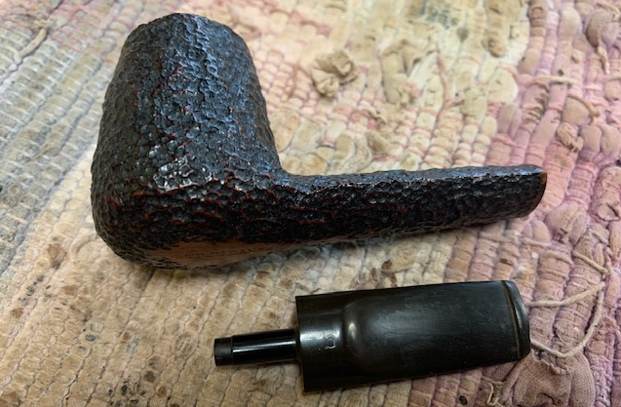
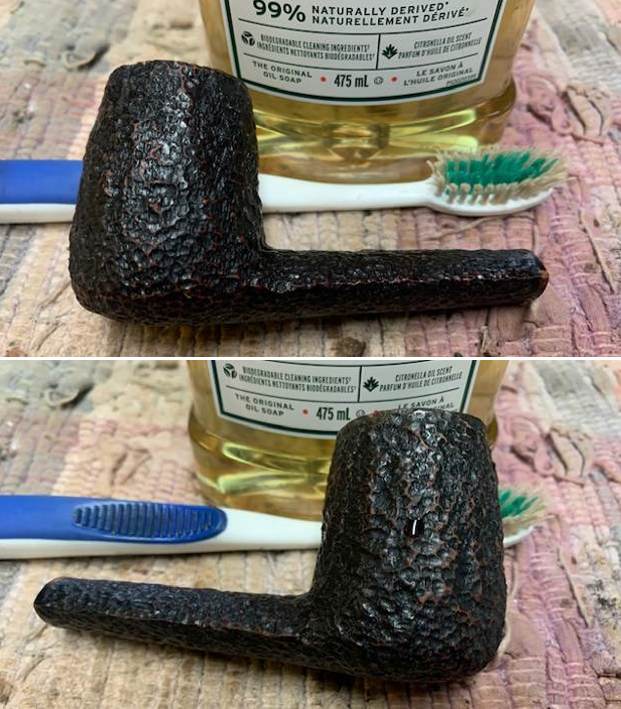
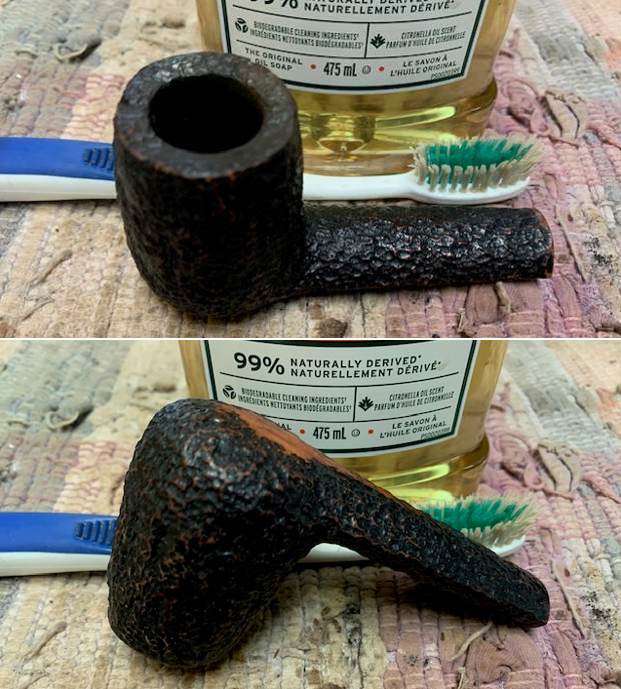
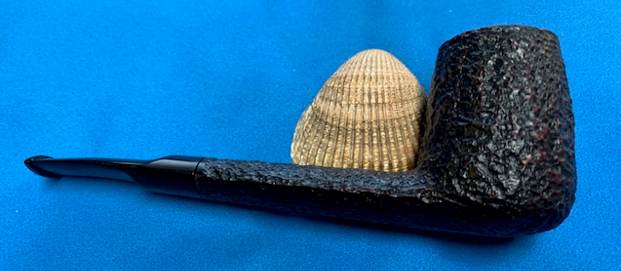
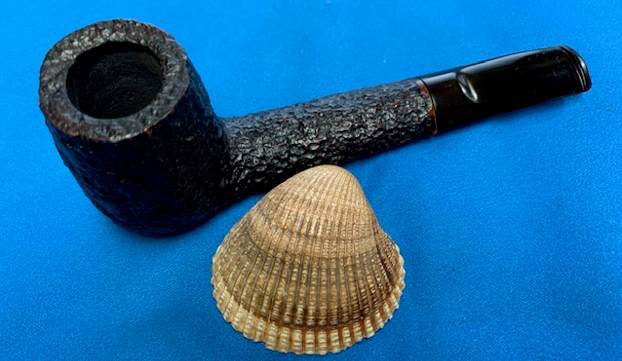
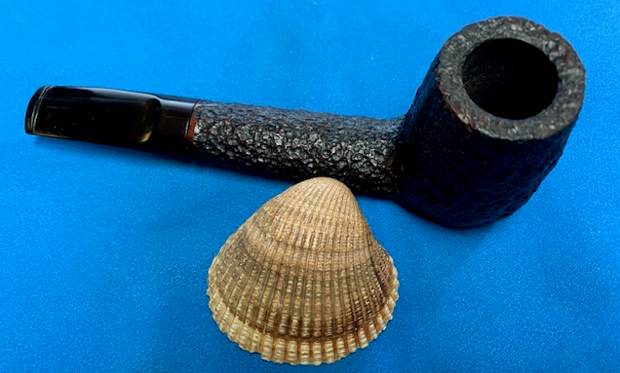
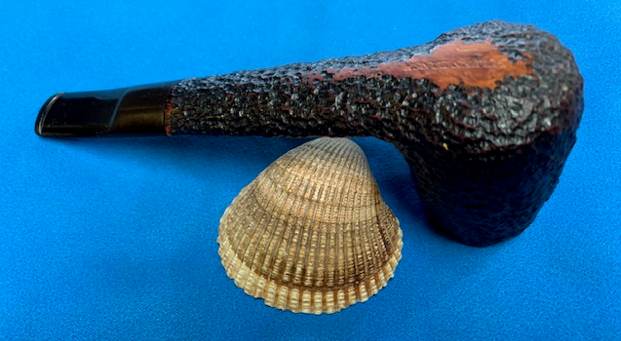
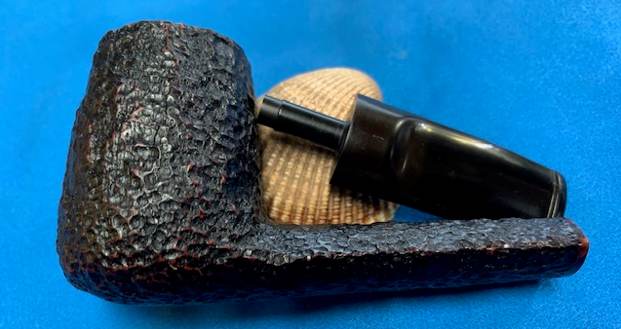
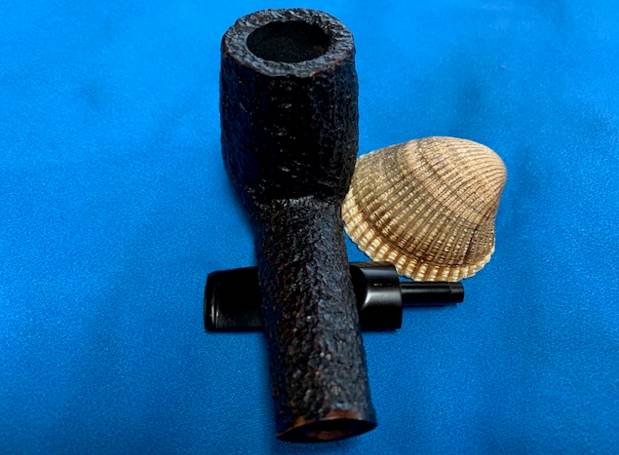
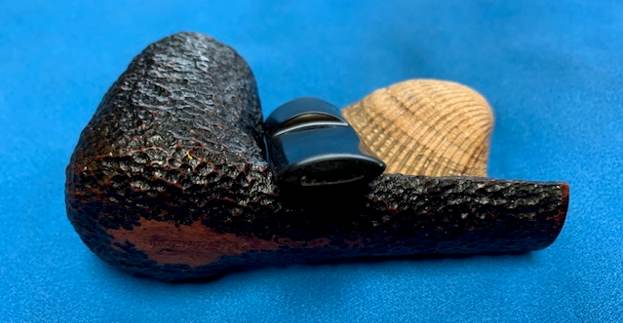
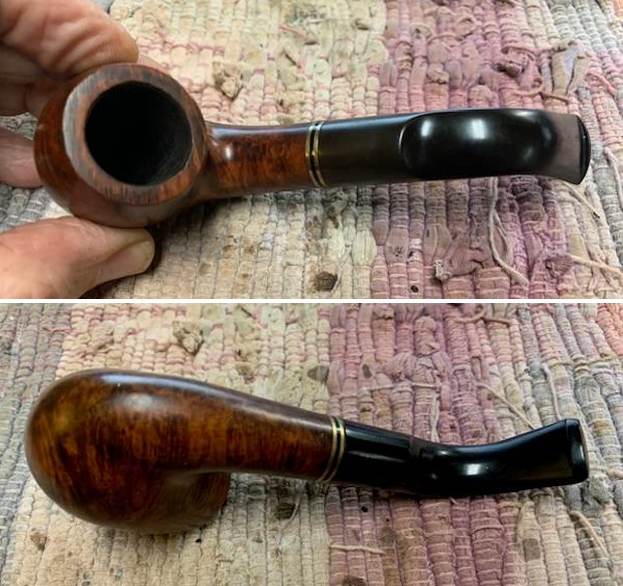
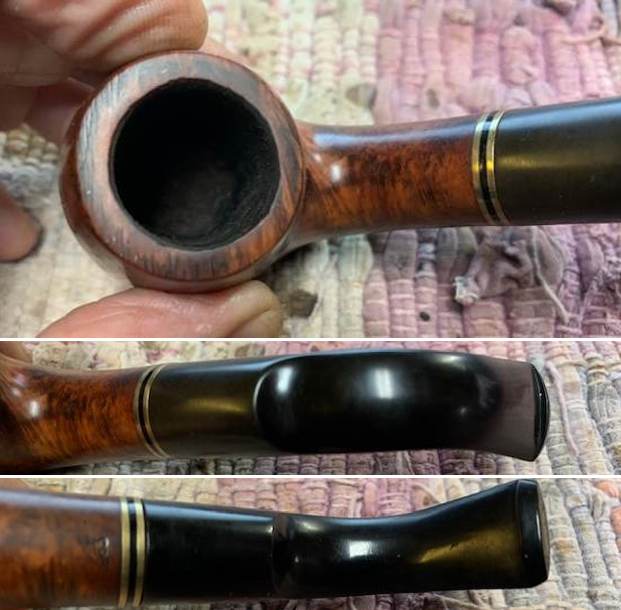
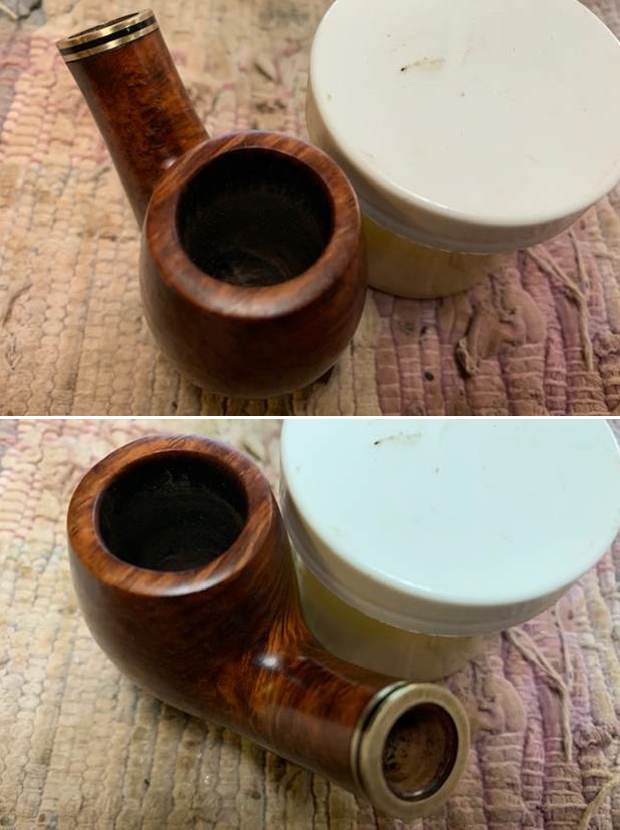
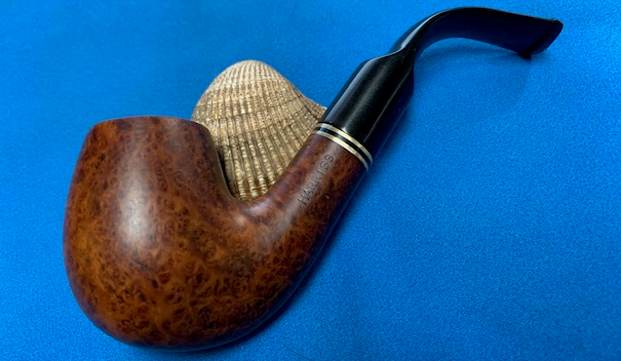
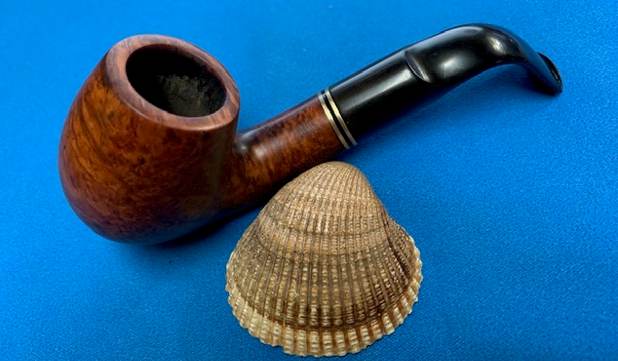
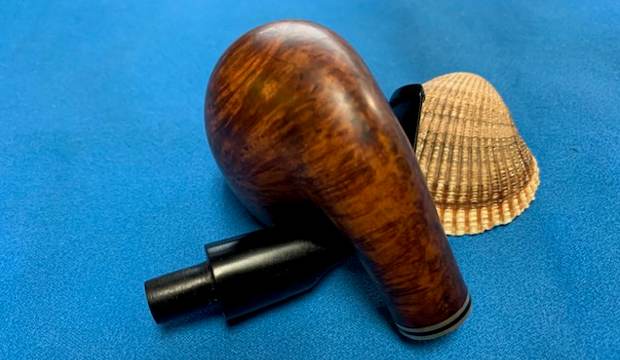
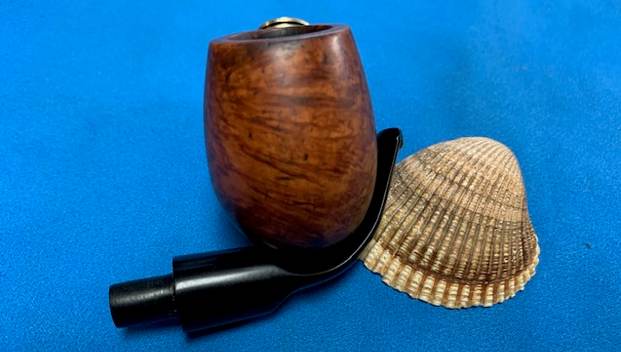
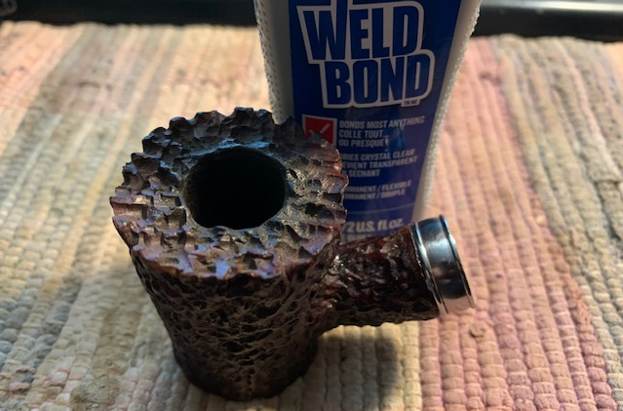
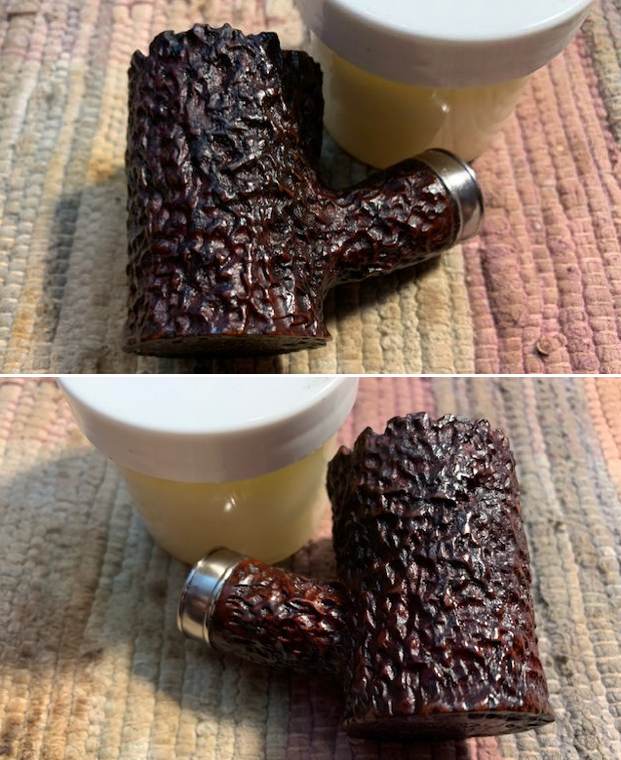
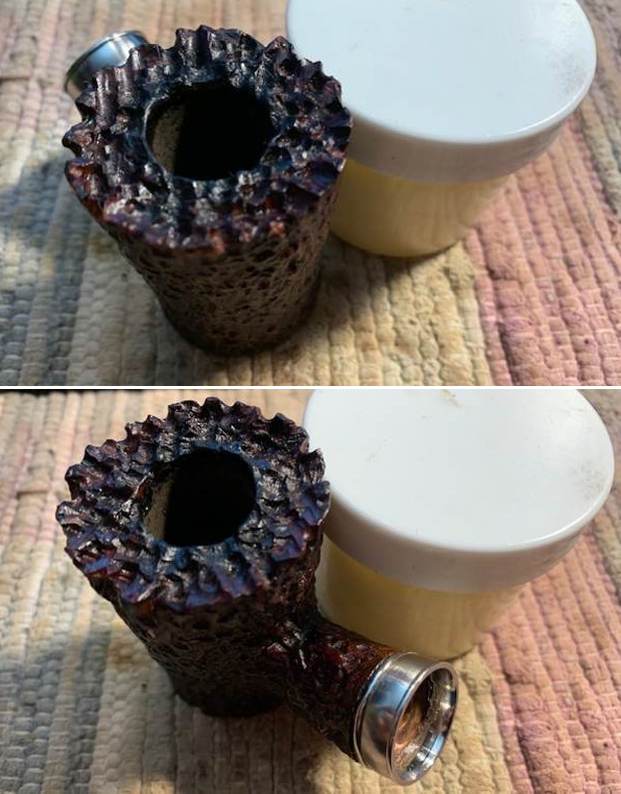
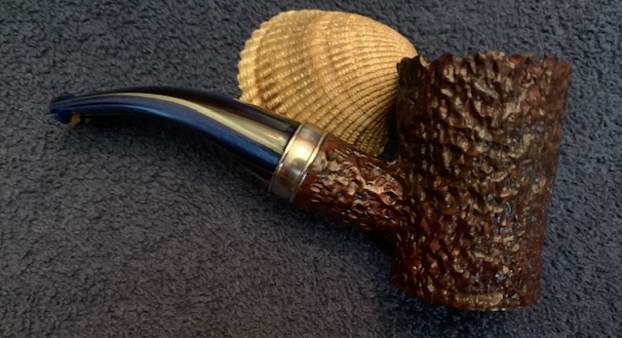
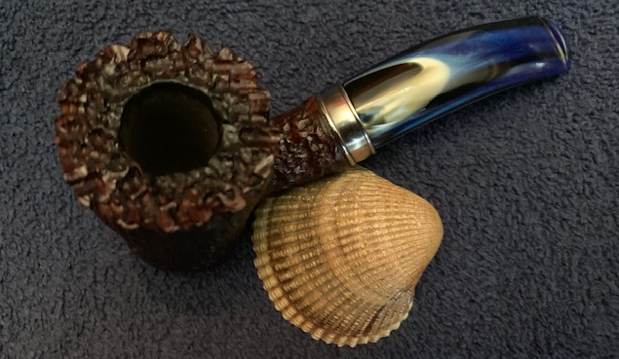
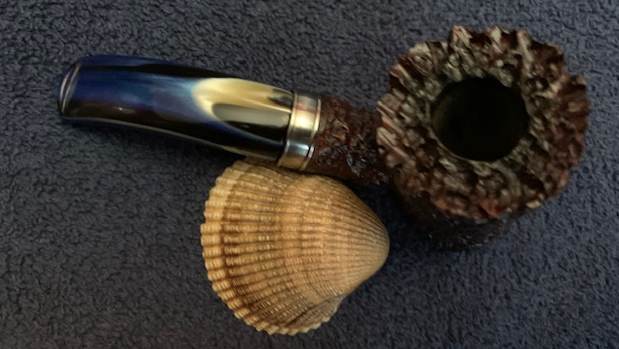
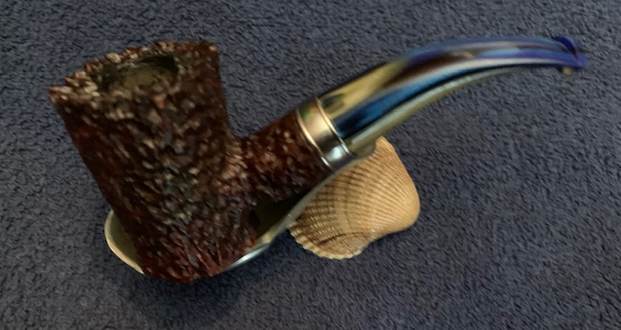
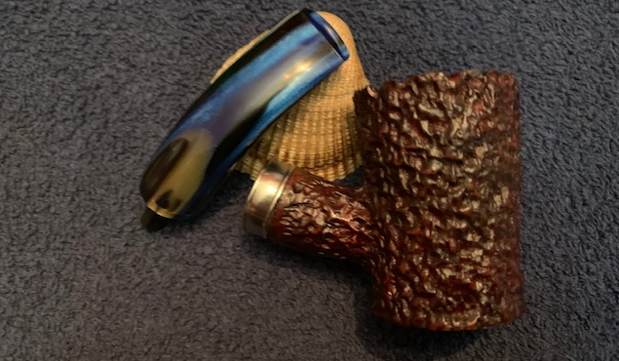
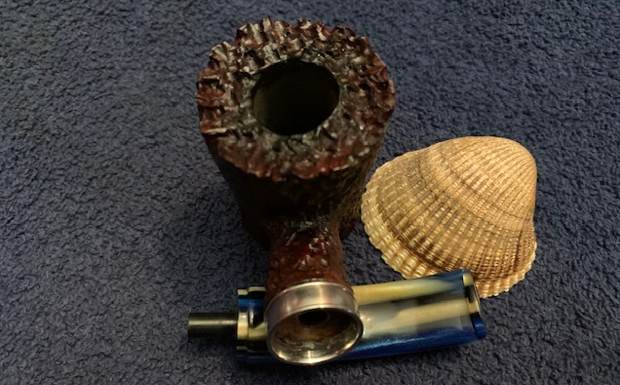
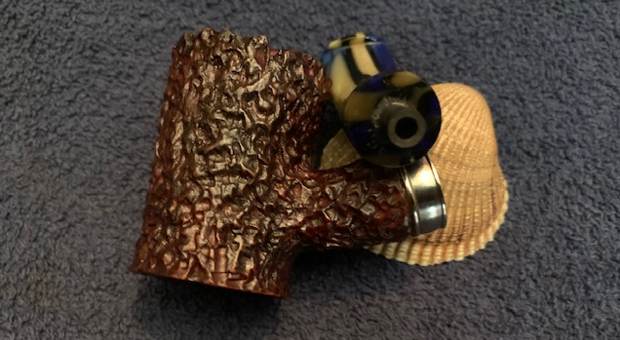
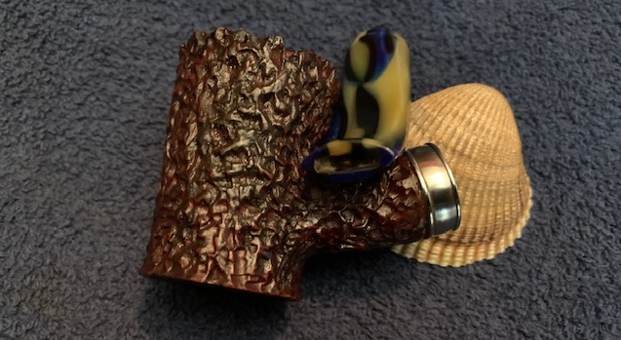
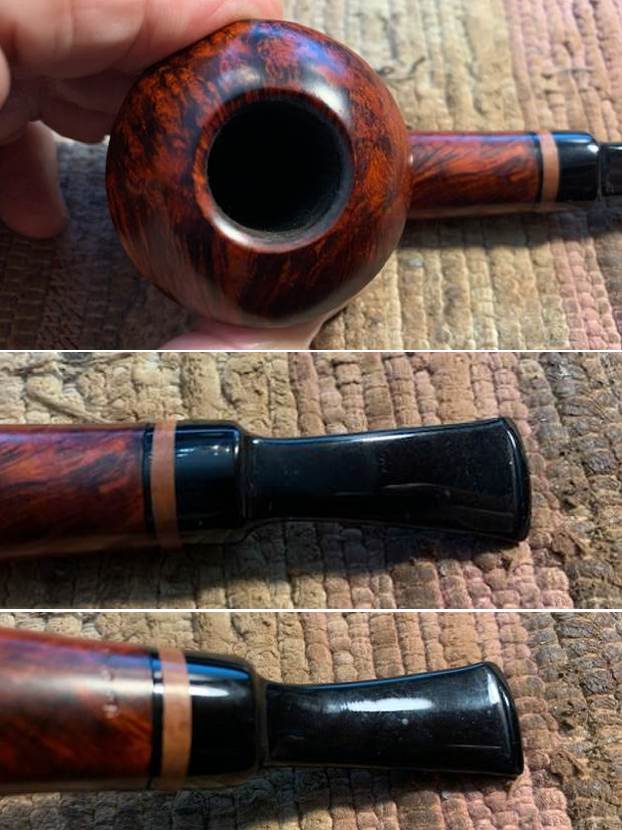
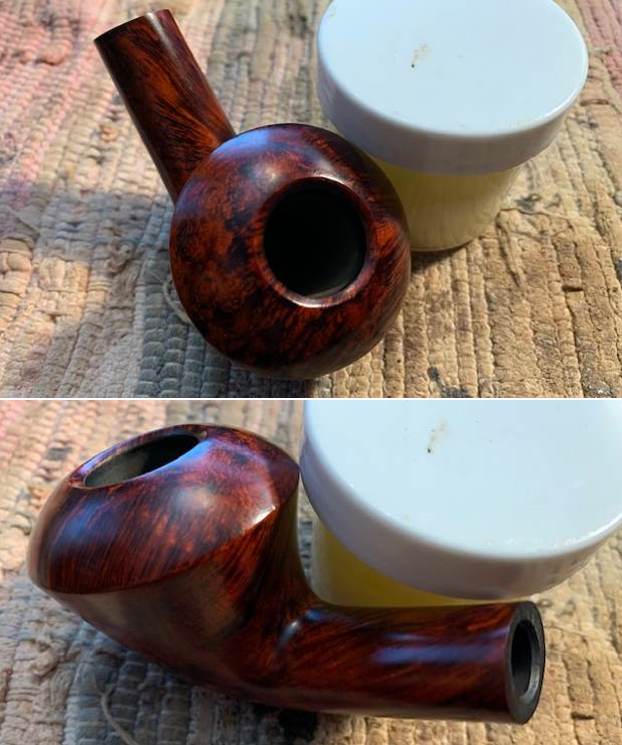
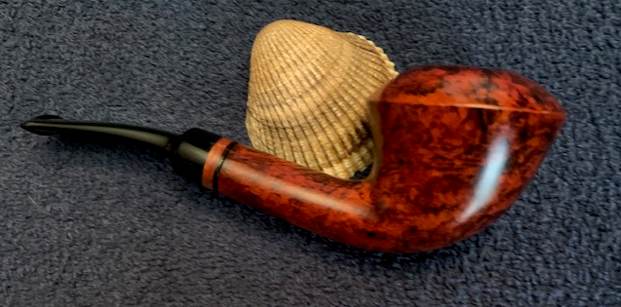
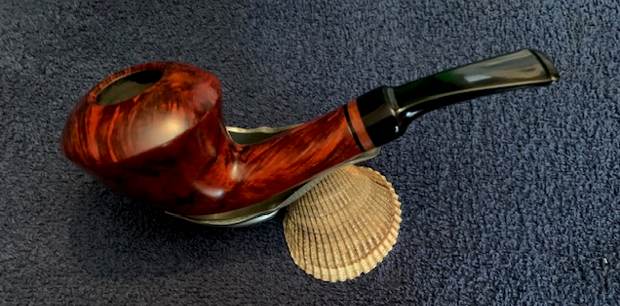
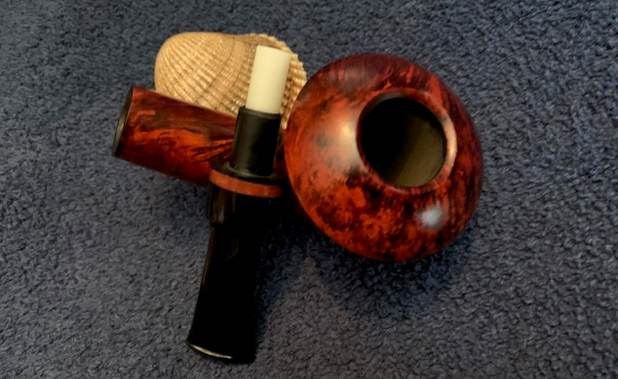
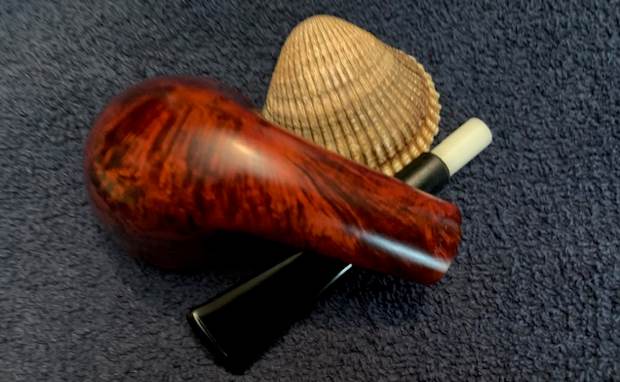
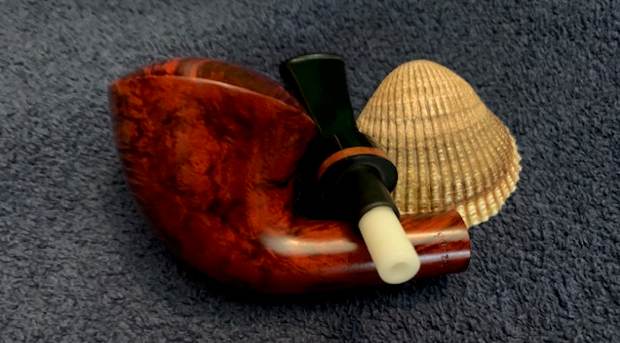
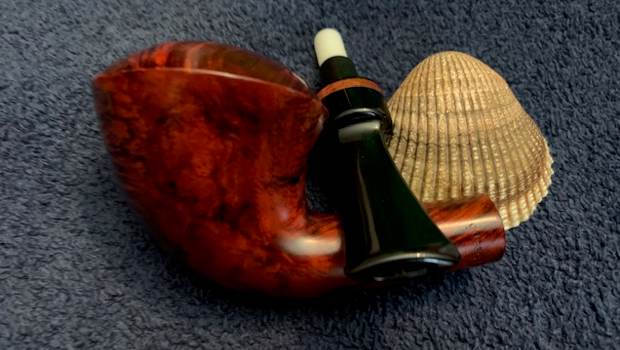
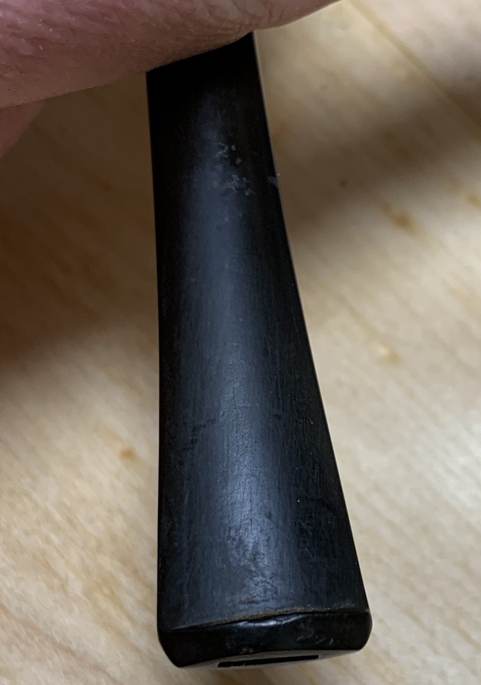
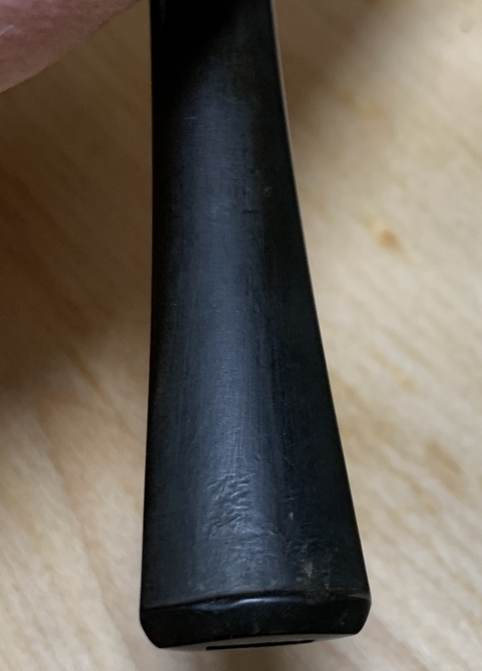
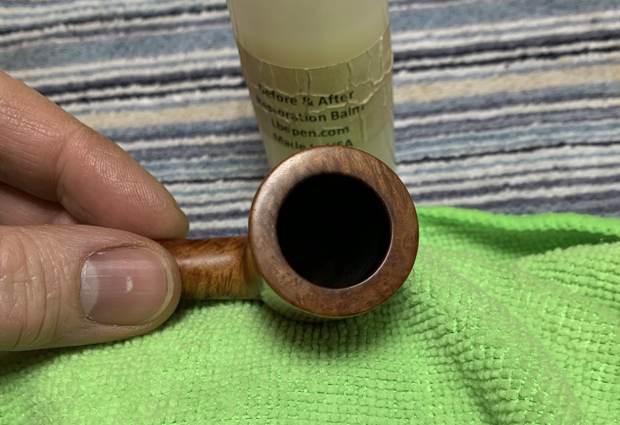
So, at its youngest, this pipe is a minimum of 50 years old. Having said that, however, I think it’s older because the scant information I could find suggests that the 95 was not produced in Super Grain from at least 1968. I also don’t feel that this pipe falls into the earlier year ranges. My best estimate is that this pipe dates from the period of 1955 to 1968. Sadly, I cannot be more precise than that. The following photo shows the pipe in question from a 1955 Kaywoodie catalogue:The pipe was in decent condition. The pipe had been well-smoked add the bowl and shank were quite dirty, but nothing outlandish. The bowl had notable cake on the inside and some lava on the rim. I felt that some burning was possibly there too. Similarly, the stem was relatively clean – not much oxidation to speak of, and what I would describe as “typical” tooth marks on the bit. The stem was somewhat bent out of shape (in the yaw, pitch, and roll axes) and would need to be corrected. Finally, some previous owner had decapitated the drinkless filter system. 
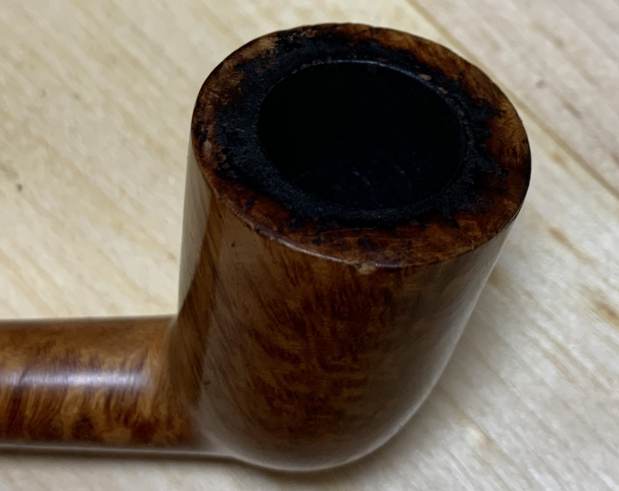
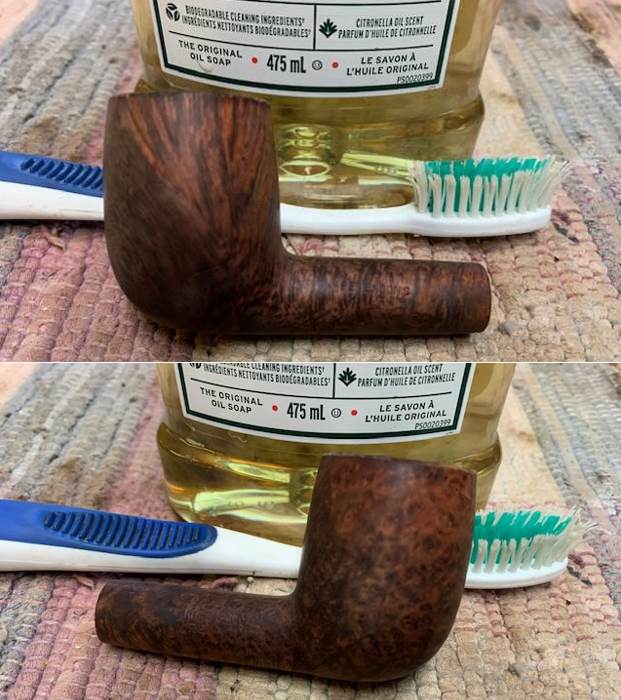
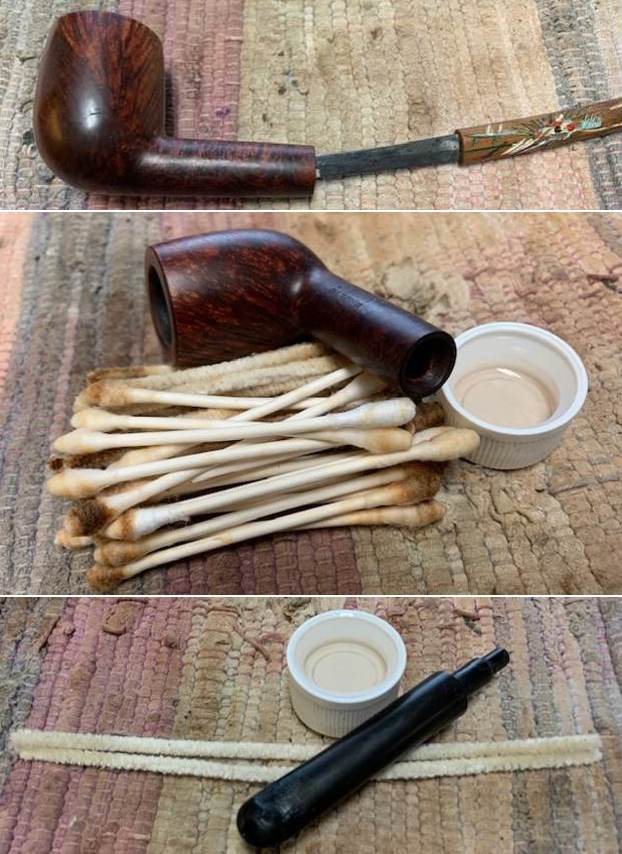
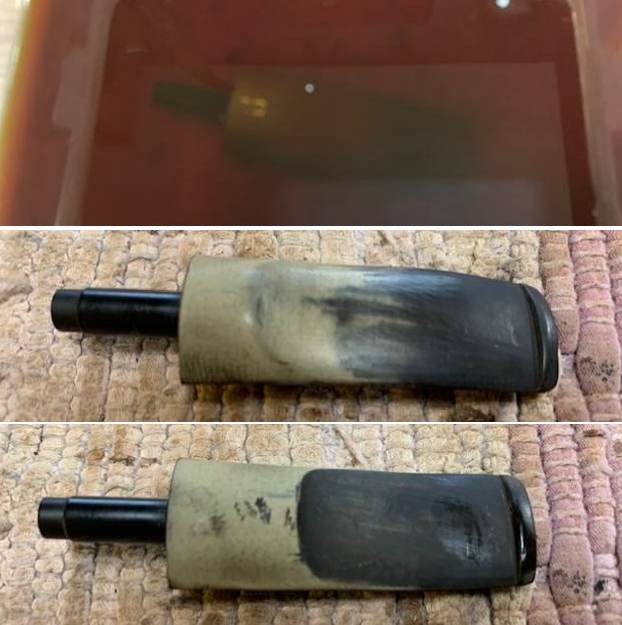
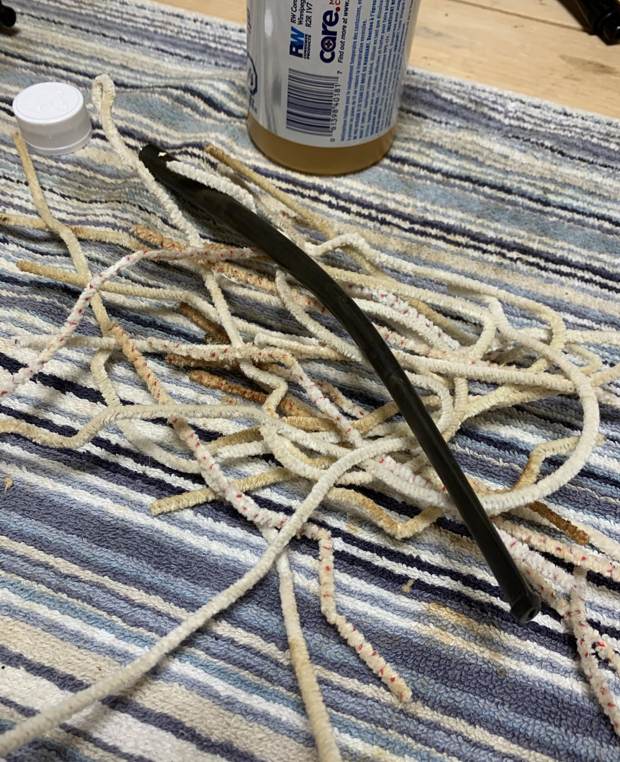
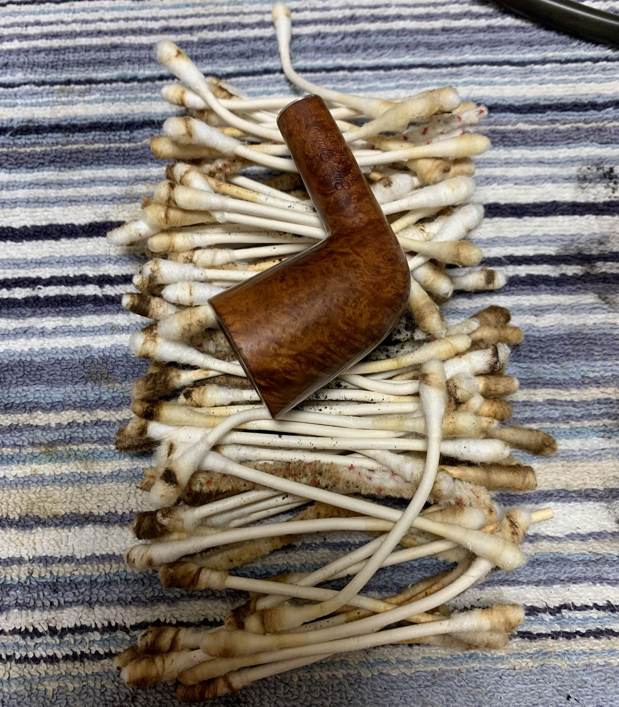
Time to get to work. The stem was first on my list. I wiped the outside down with Murphy’s Oil Soap on some cotton pads. I cleaned out the insides with lemon-infused isopropyl alcohol and some churchwarden pipe cleaners. 
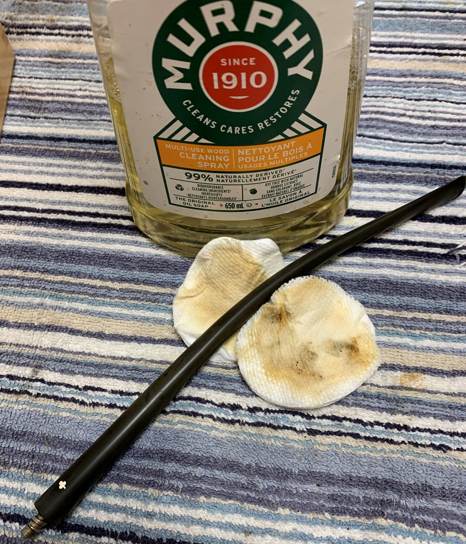
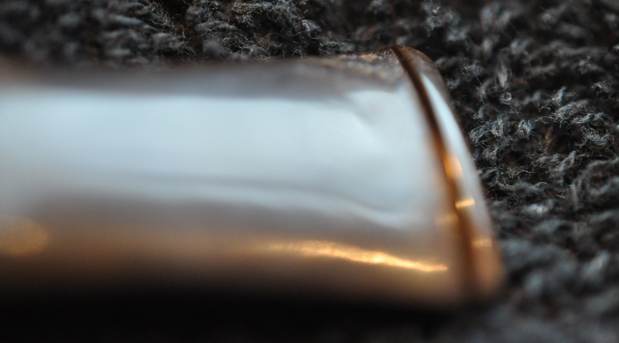
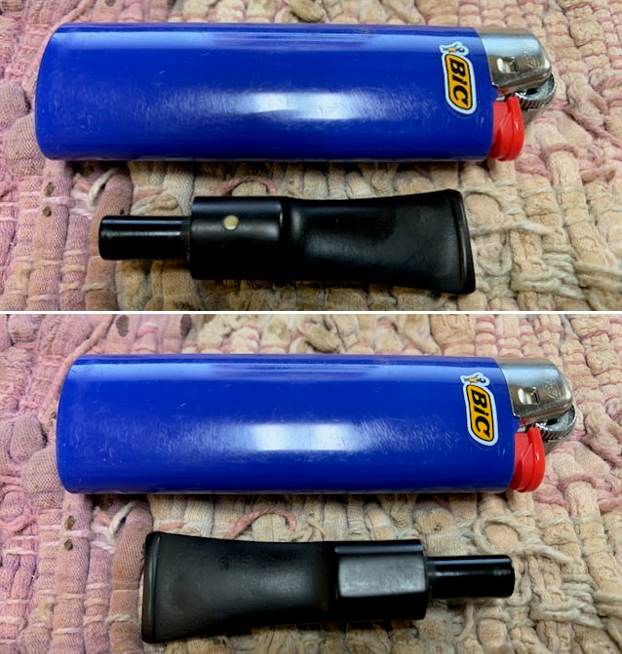
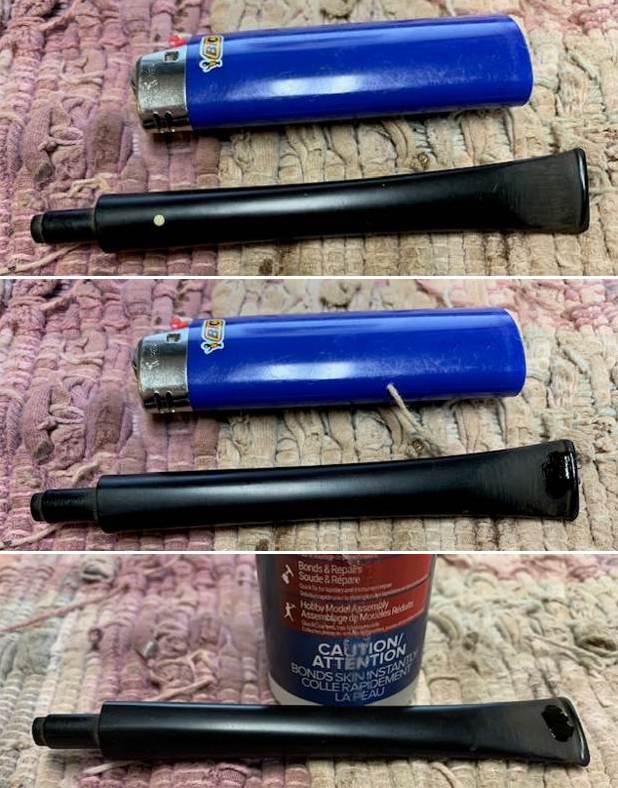
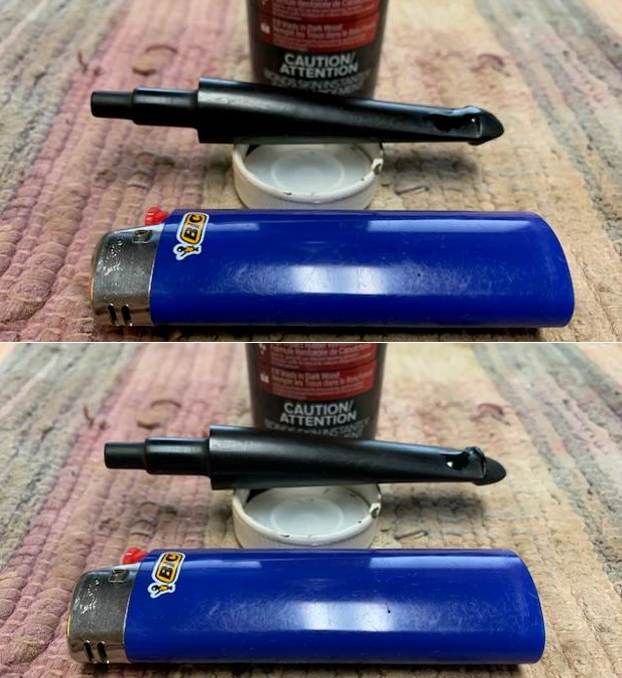
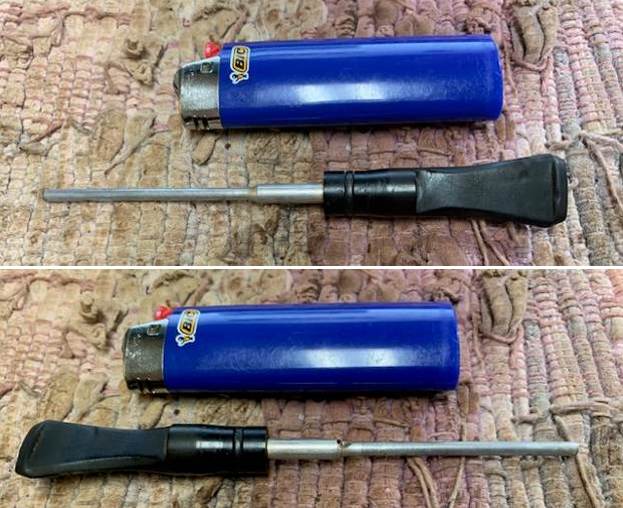
I also took a BIC lighter and ‘painted’ the stem with its flame to lift the few bite marks and dents. This was reasonably successful in raising the damage. It wasn’t perfect, but it was improved.

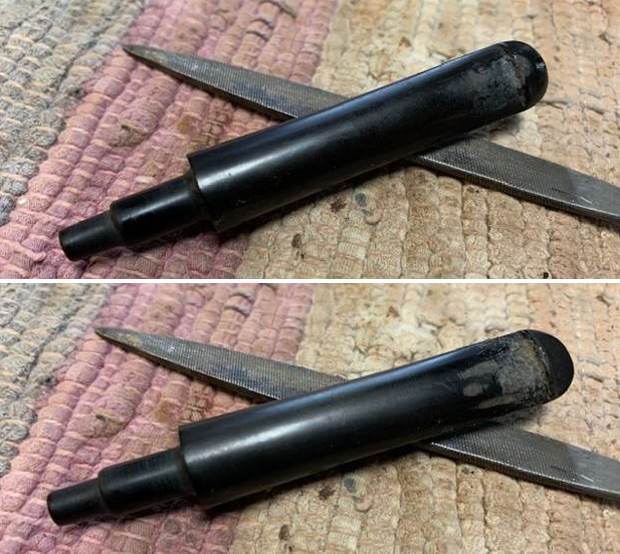
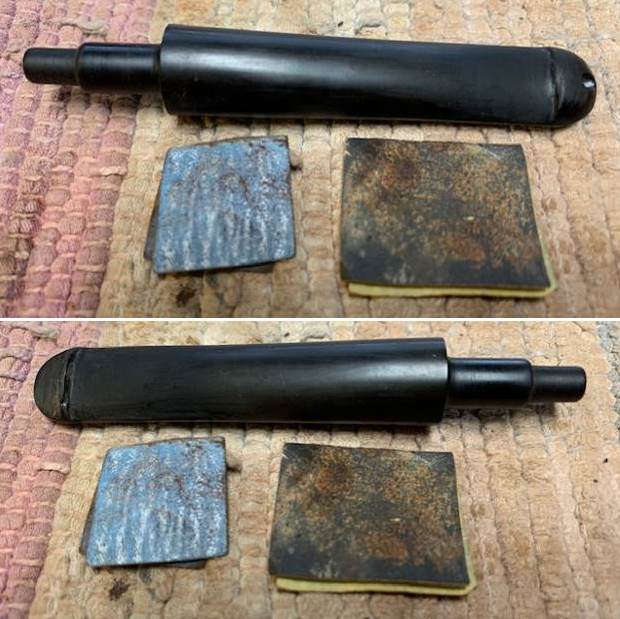
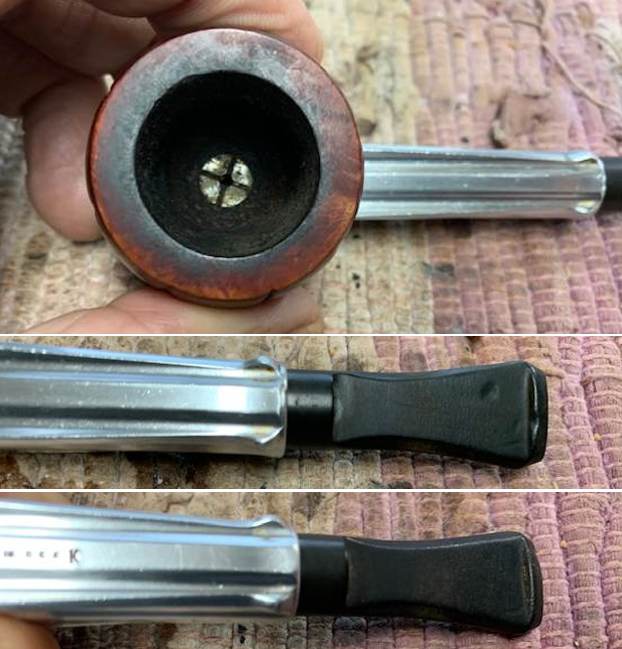
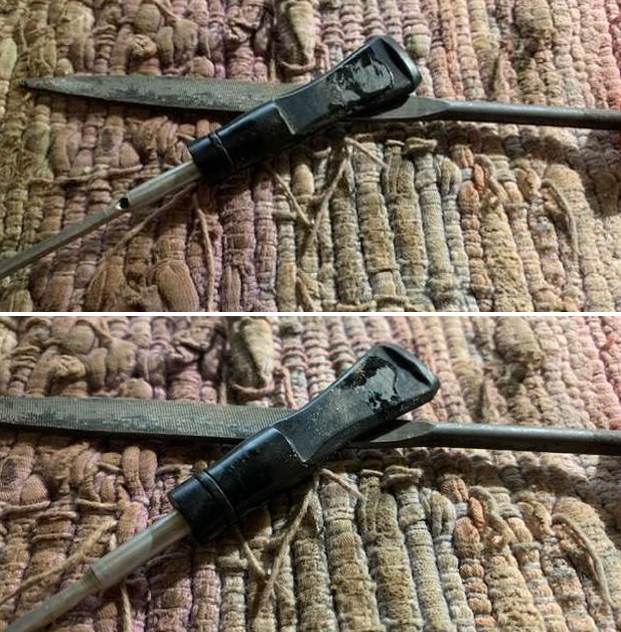
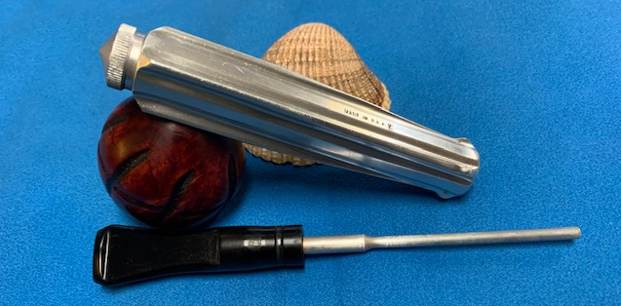
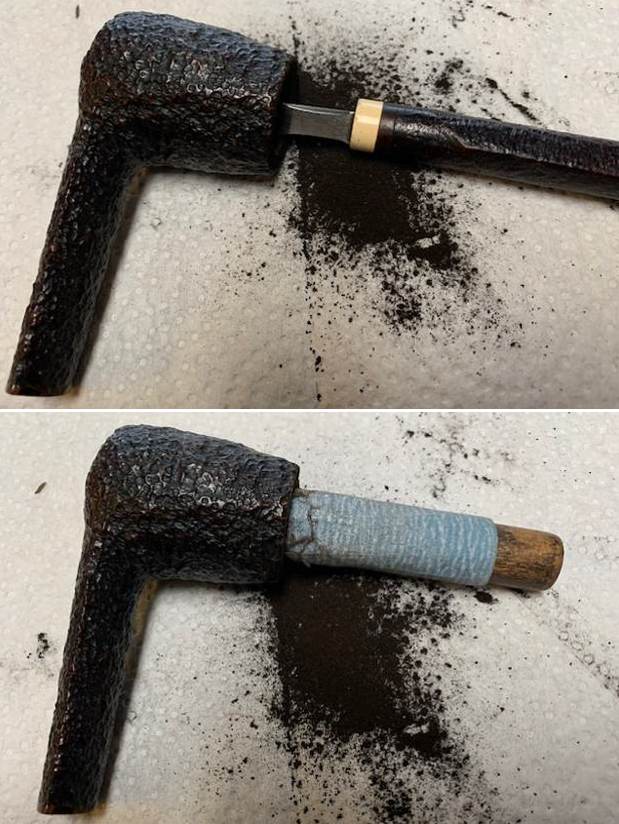
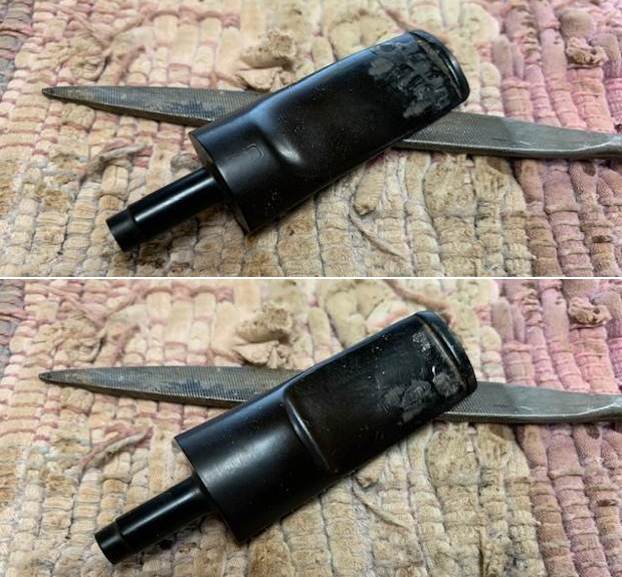
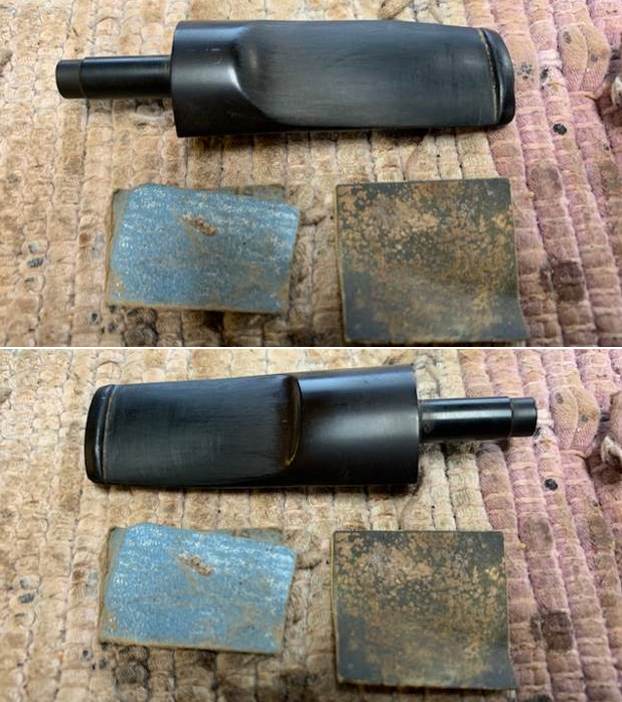
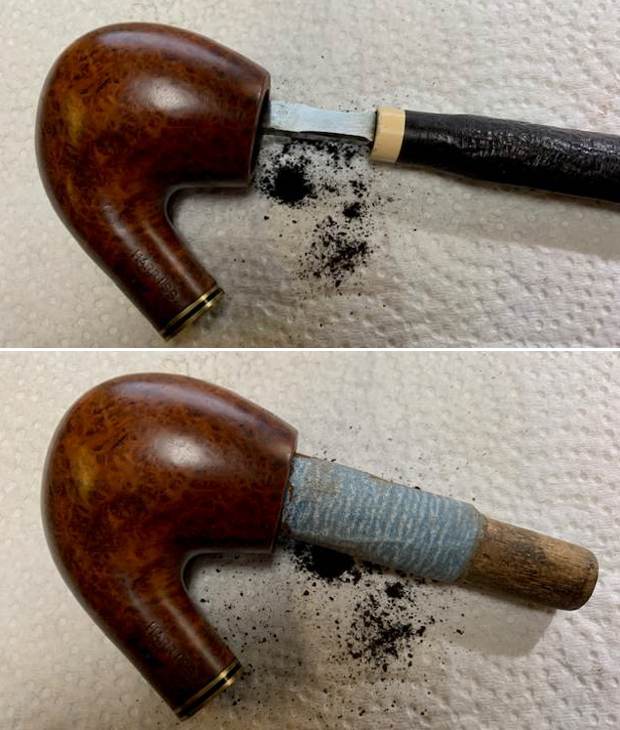
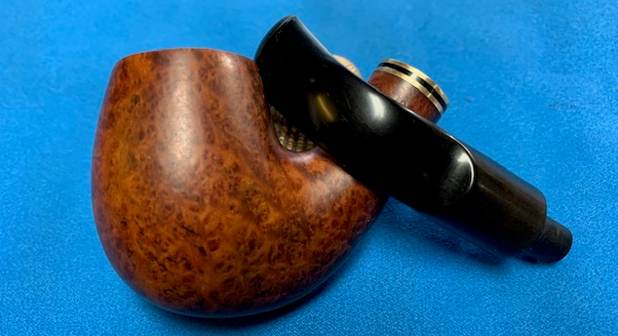
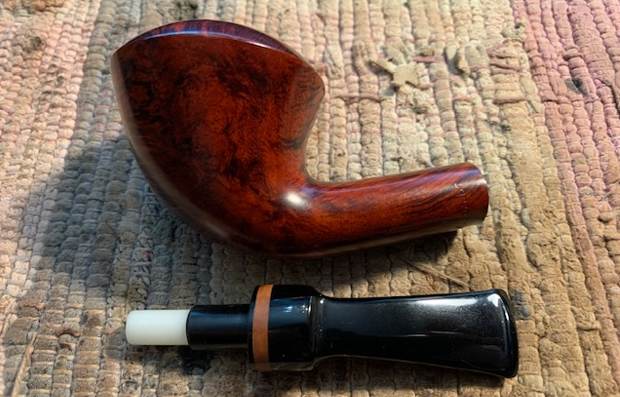
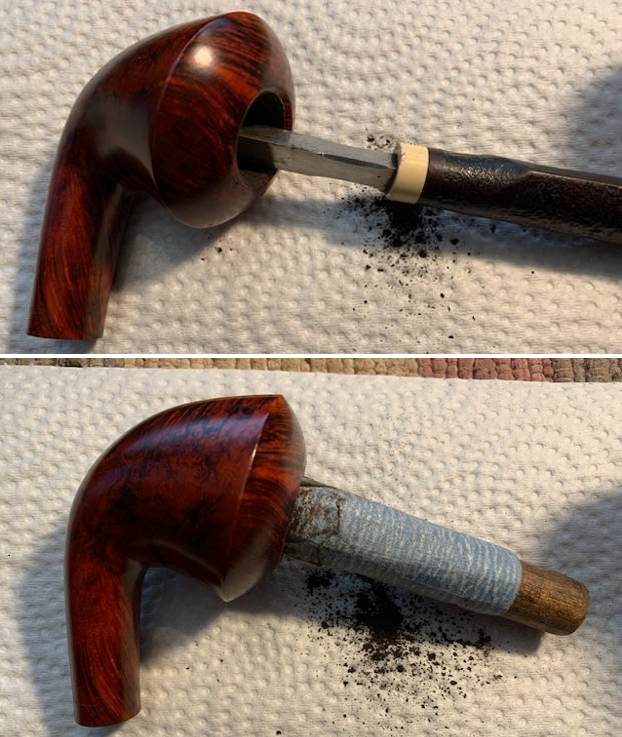
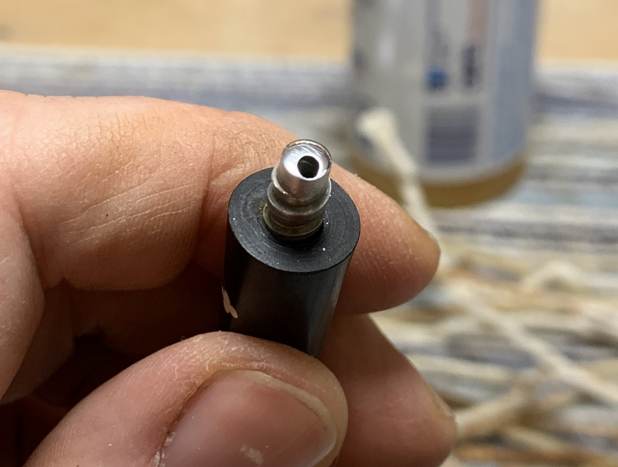
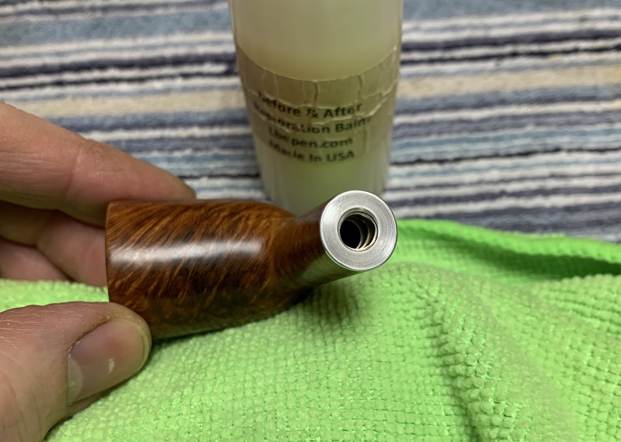
As I mentioned, the stinger thing had been lopped off. There was no repairing it – and I didn’t want to anyway! What I did do, however, was to gently sand down the cut edge with metal sandpaper in coarse, medium and fine grits. This worked beautifully and I was pleased with the results. I cleaned off the end with some alcohol on a cotton pad and gave the metal a quick polish. 
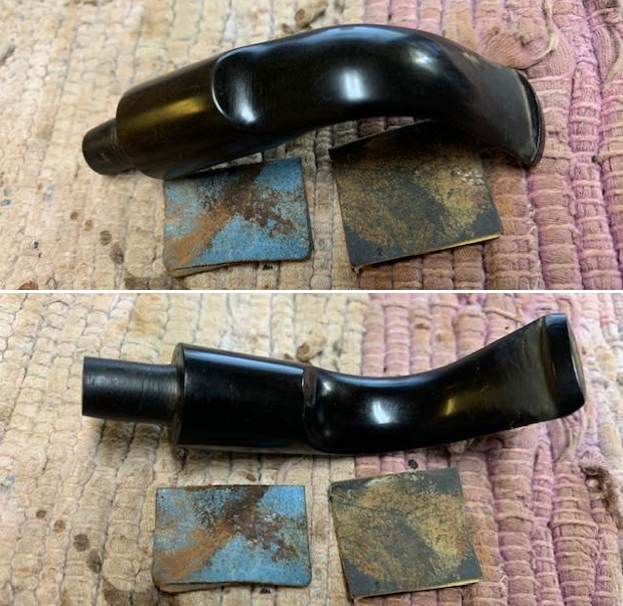
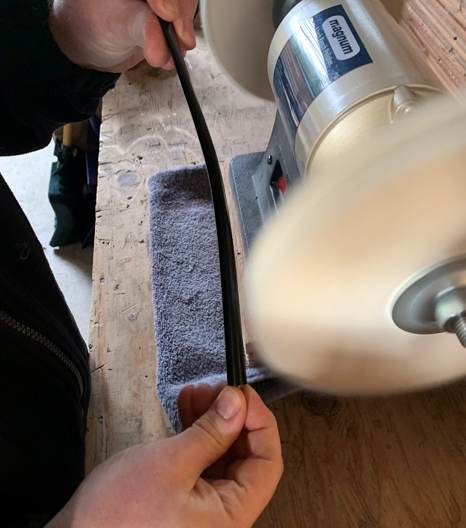
I then heated the stem with my heat gun and gently worked the twisted stem back into place. I have bent many stems before, but this one was by far the trickiest – perhaps because it was so long. There was considerable resistance in the stem and, after correcting the yaw and roll axes, I opted to leave some of the pitch – figuring that discretion was the better part of valour. Or, rather, I didn’t want to break the darn thing!

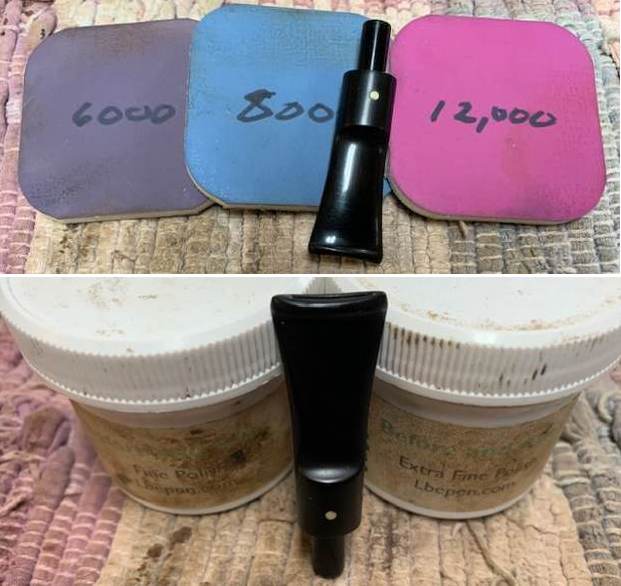
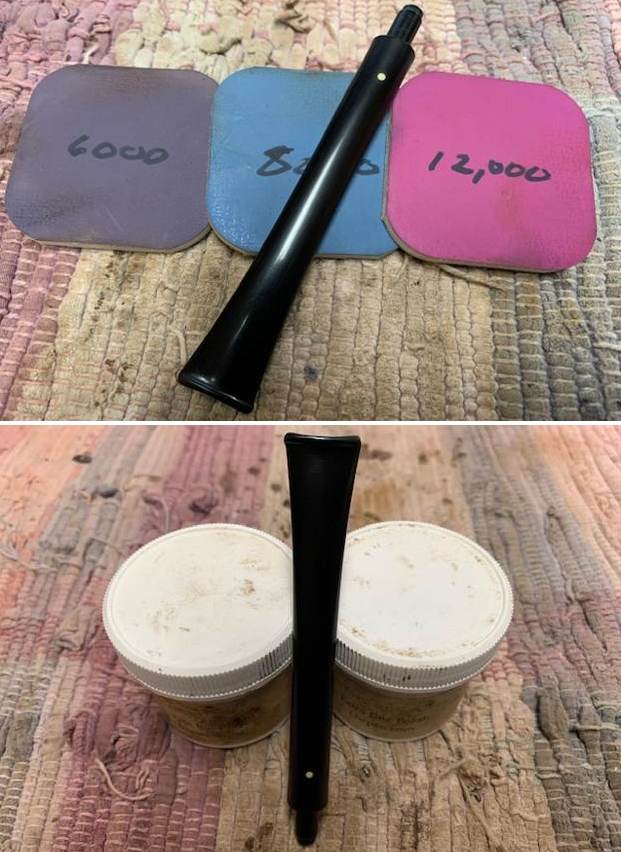
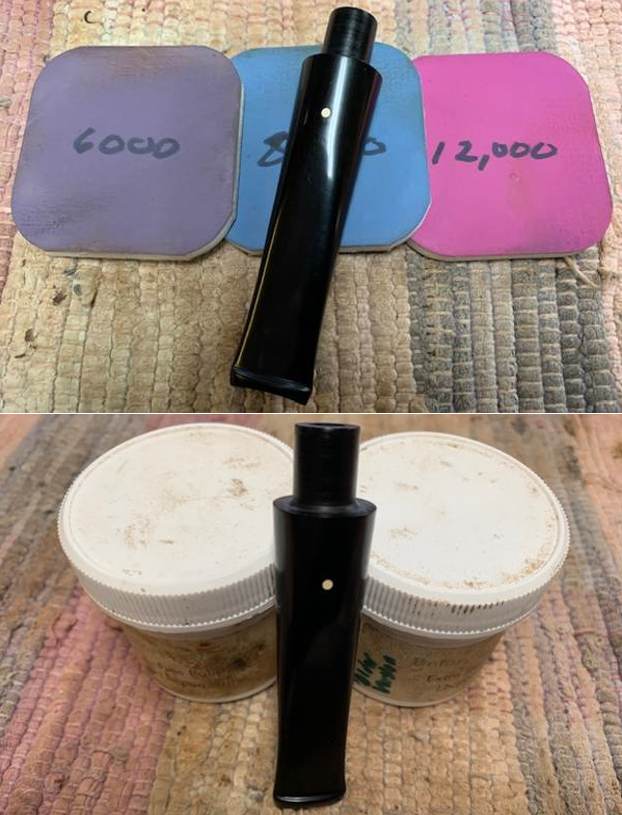
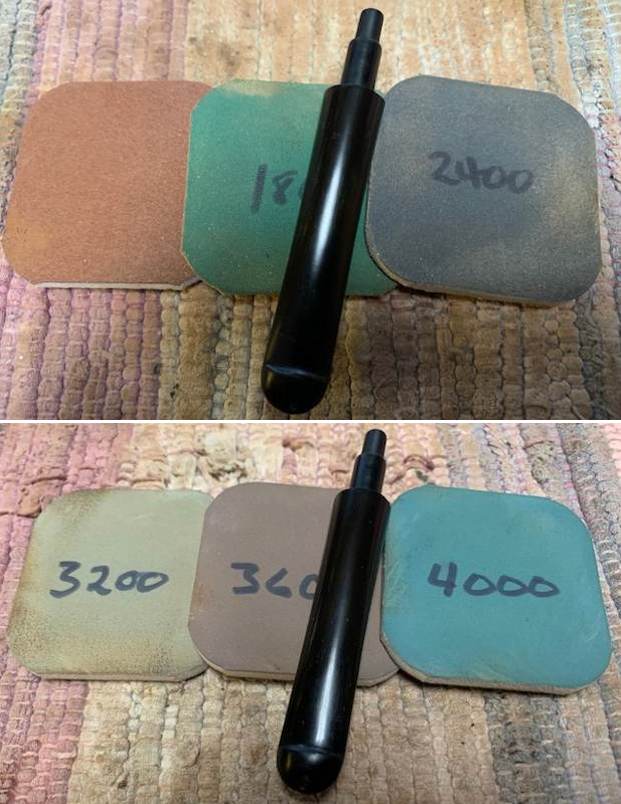
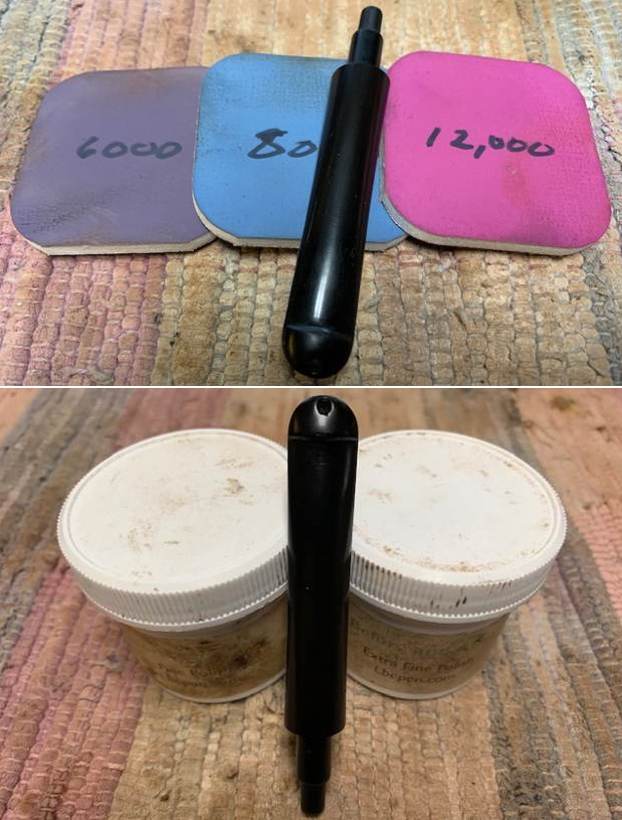
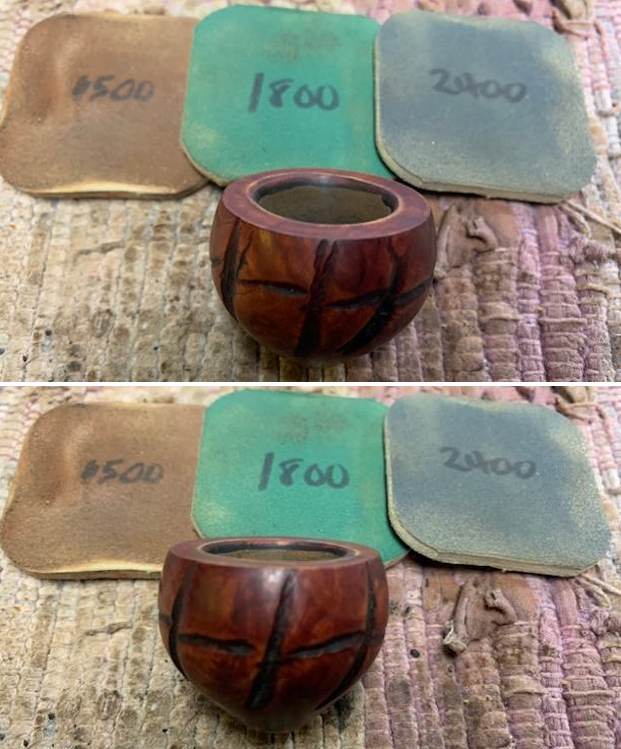
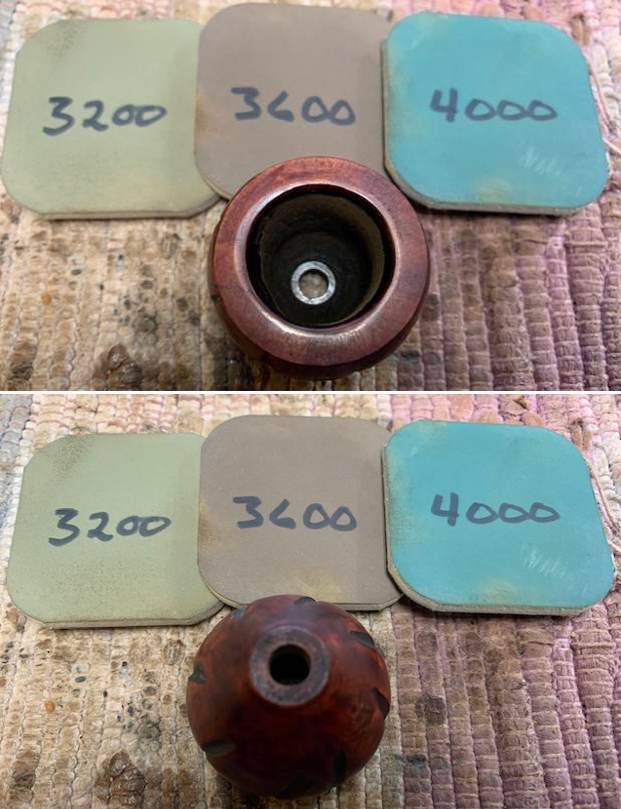
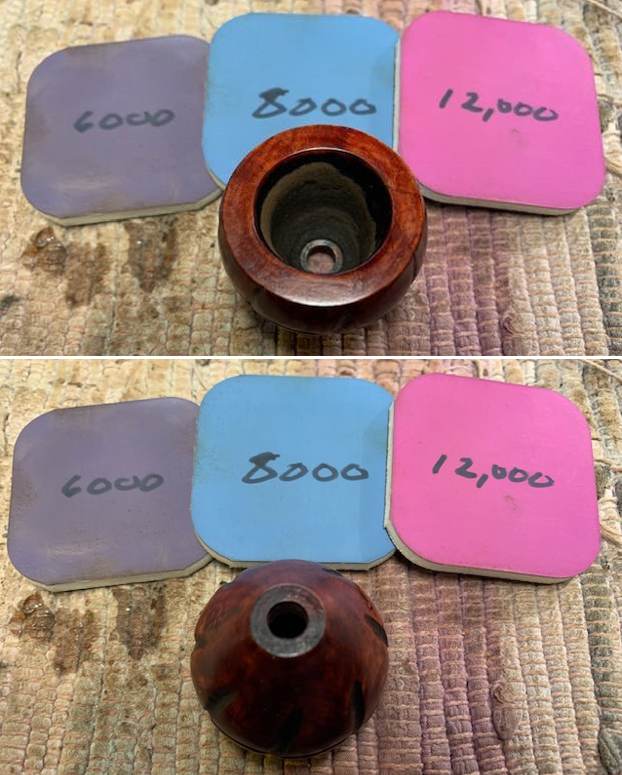
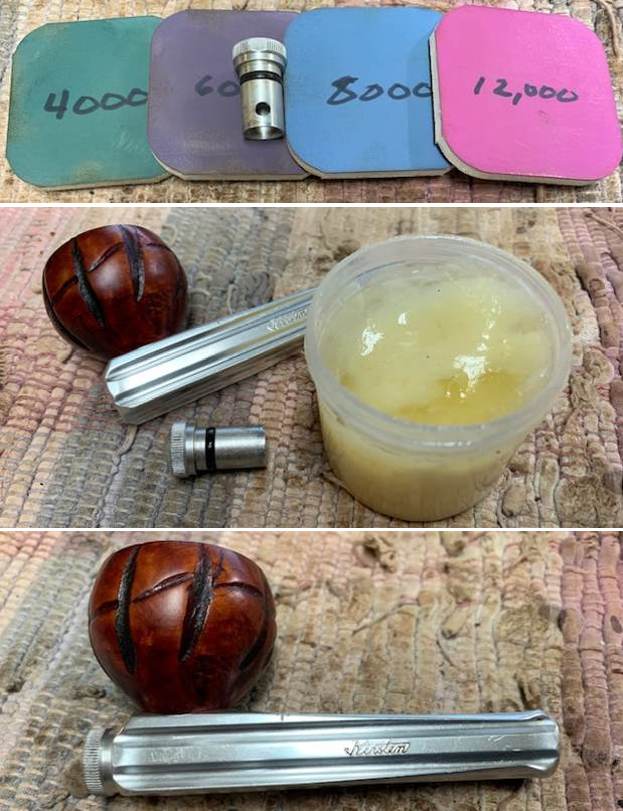
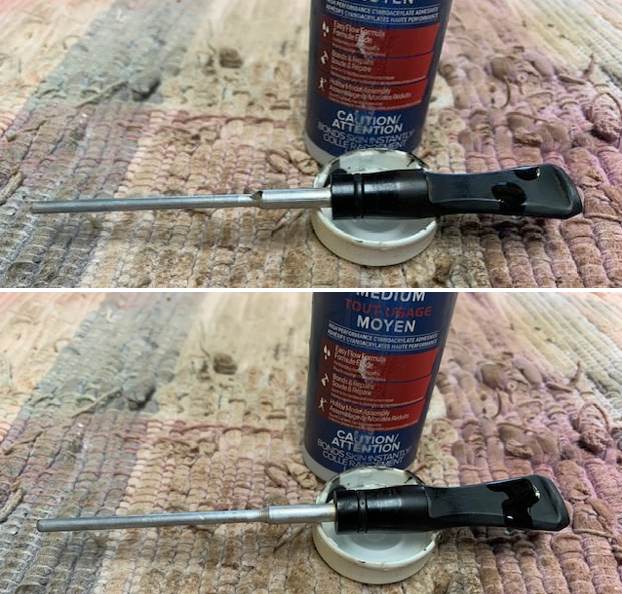
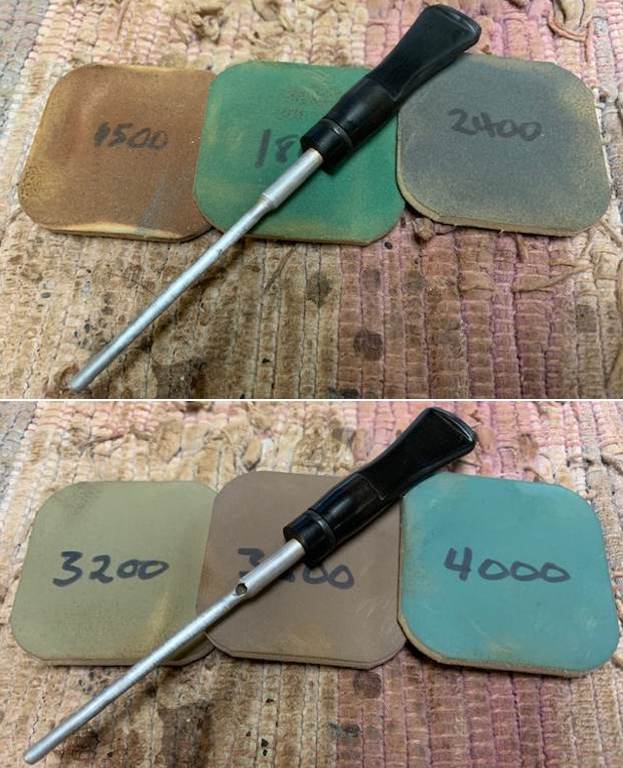
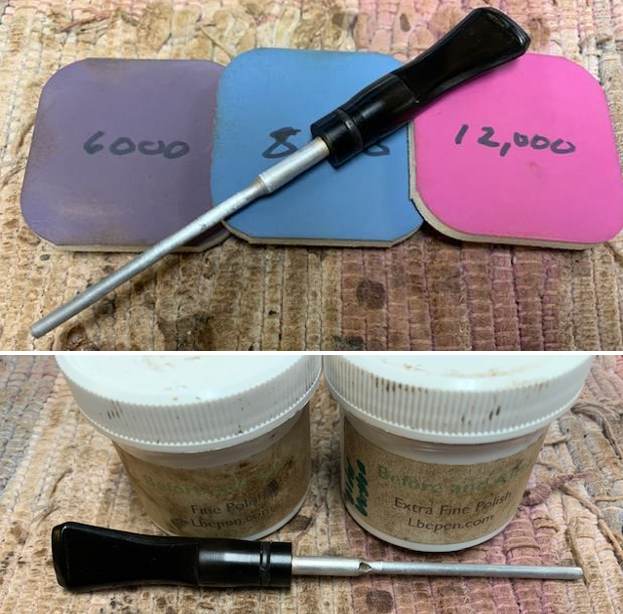
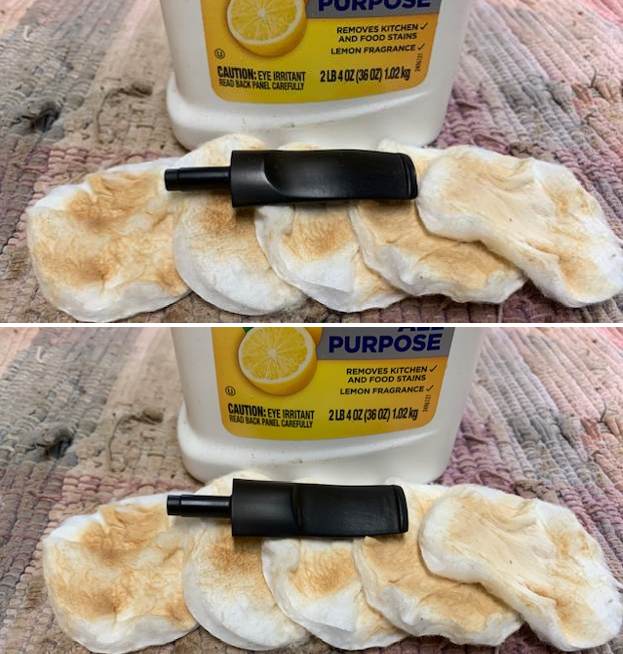
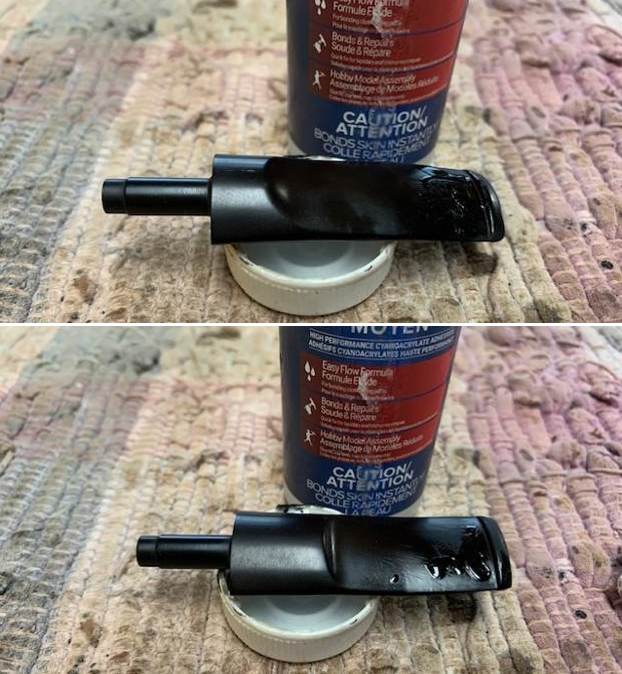
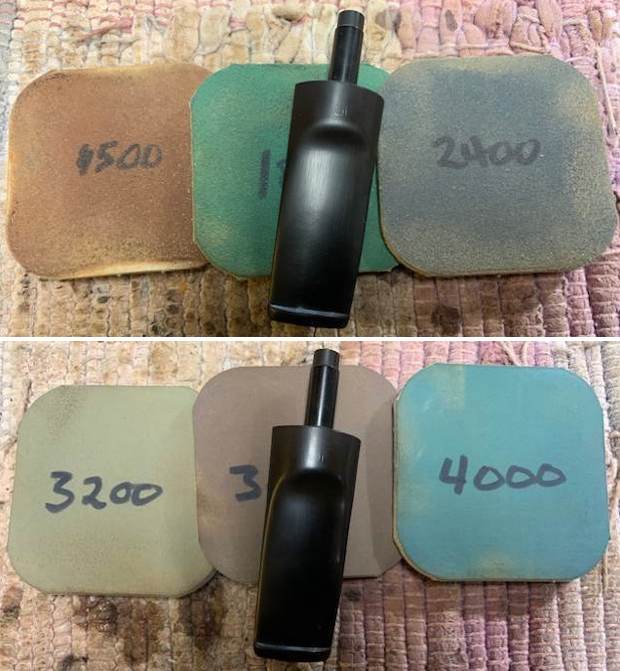
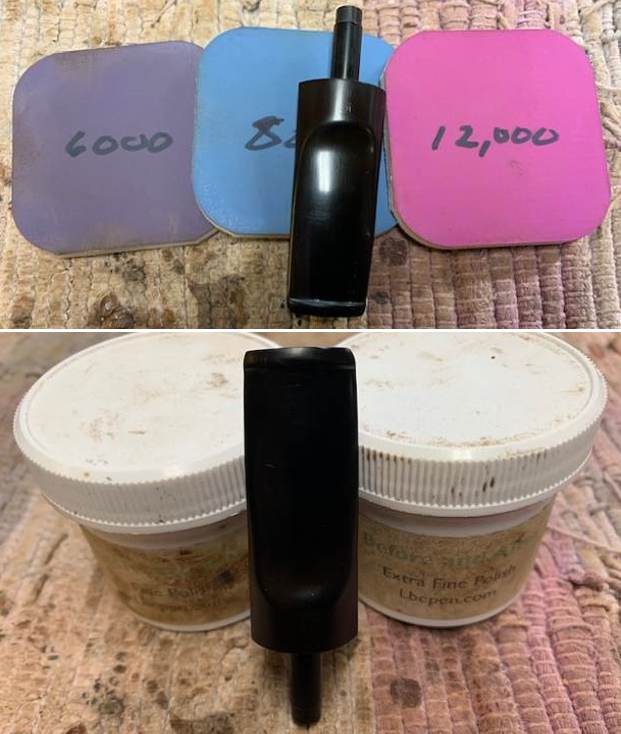
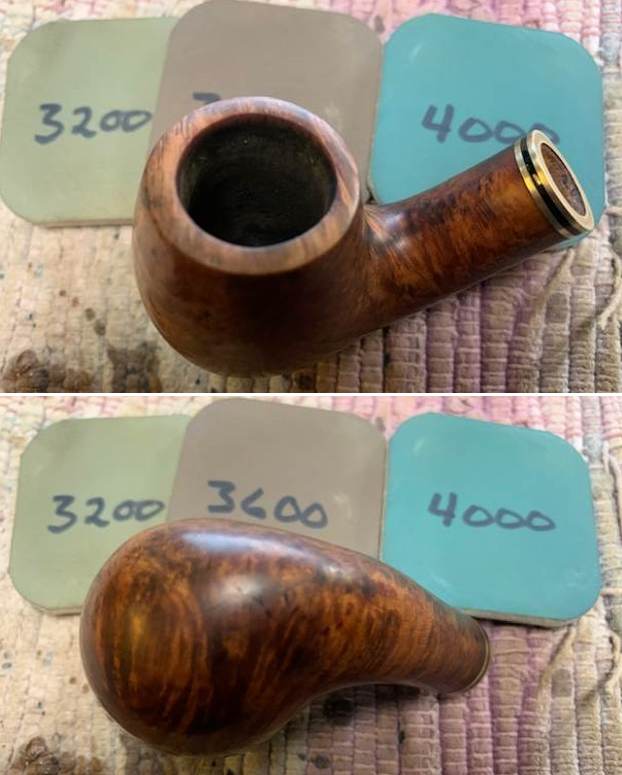
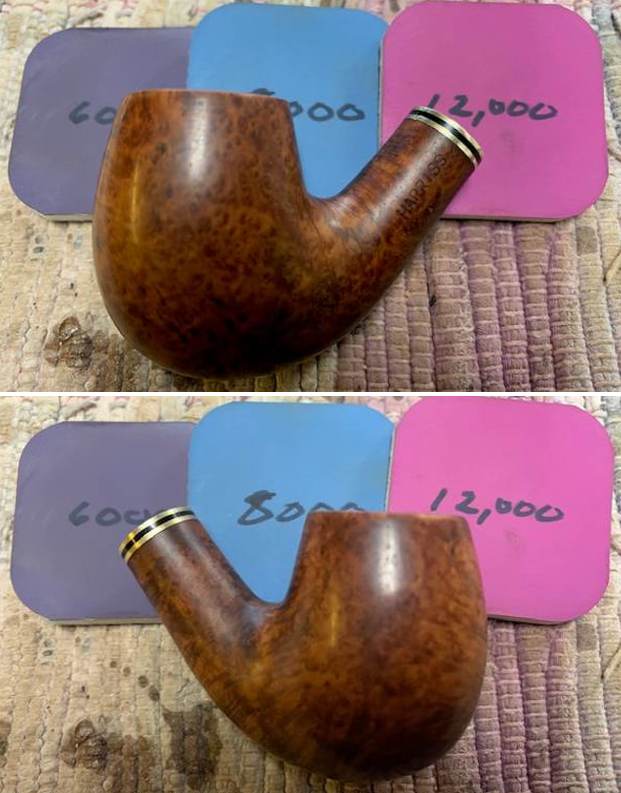
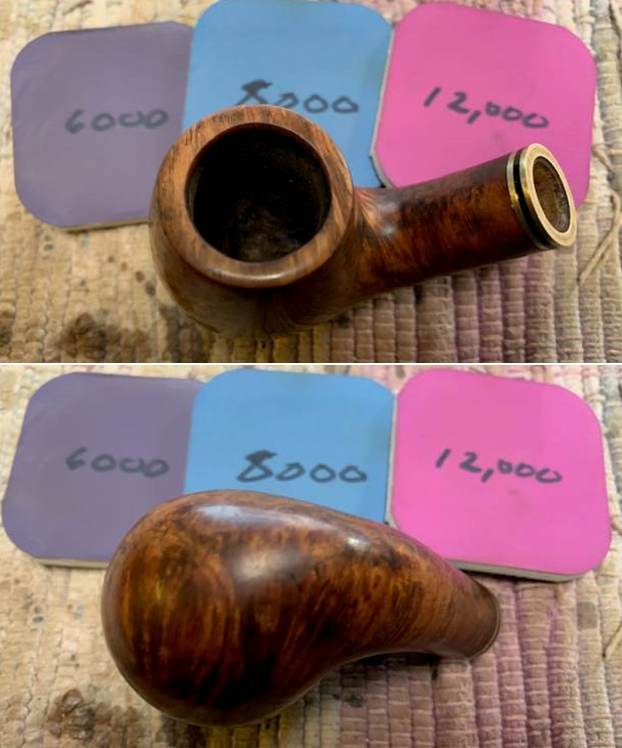
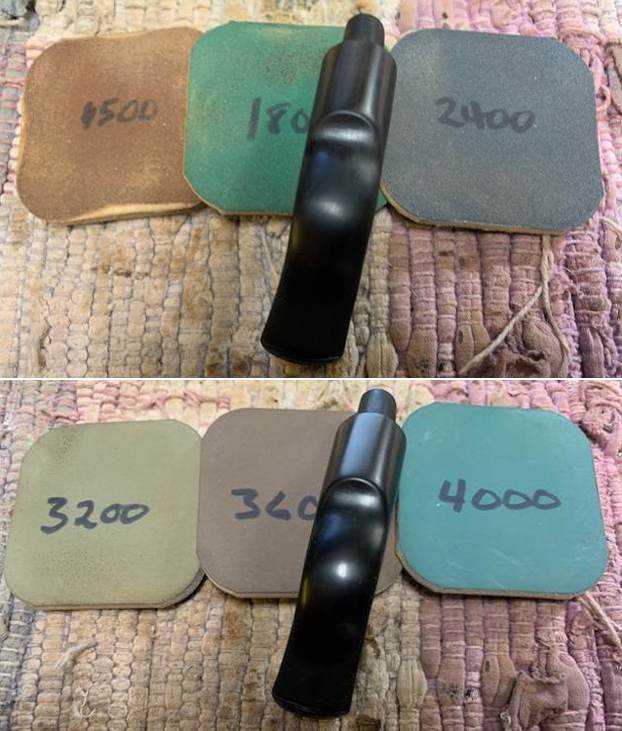
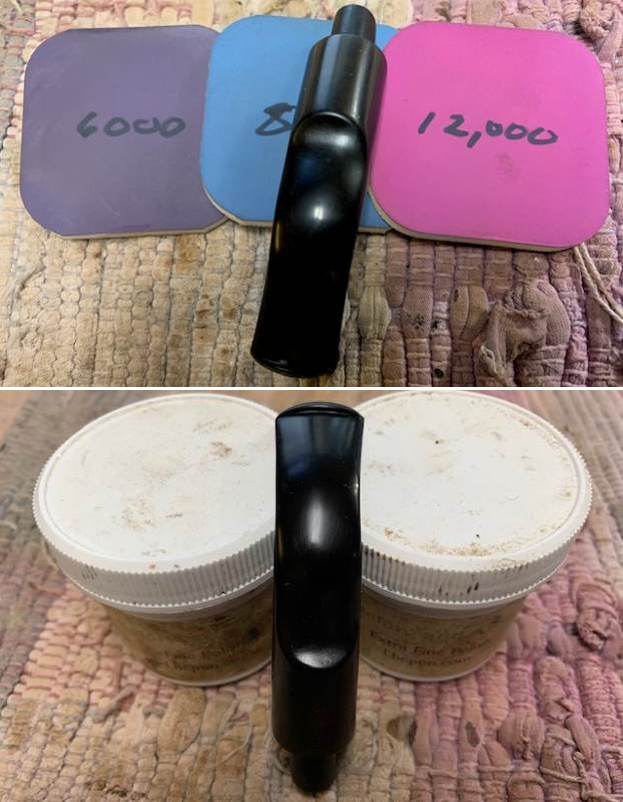
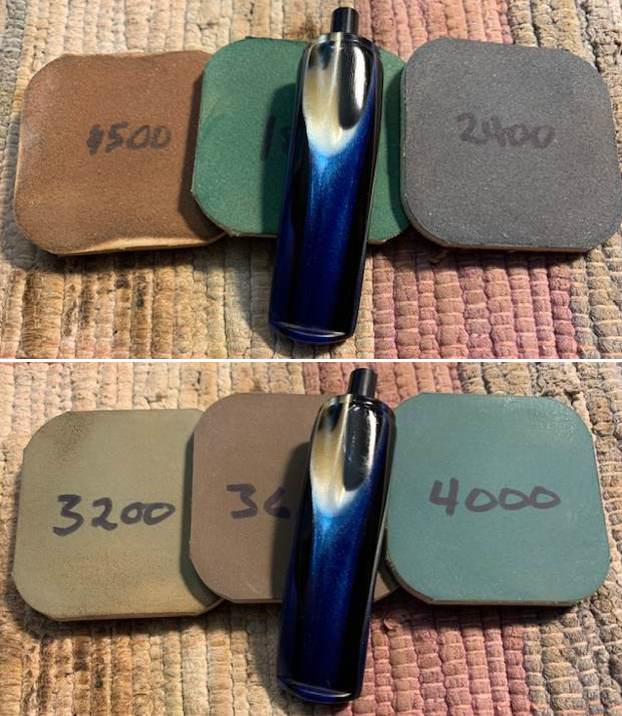
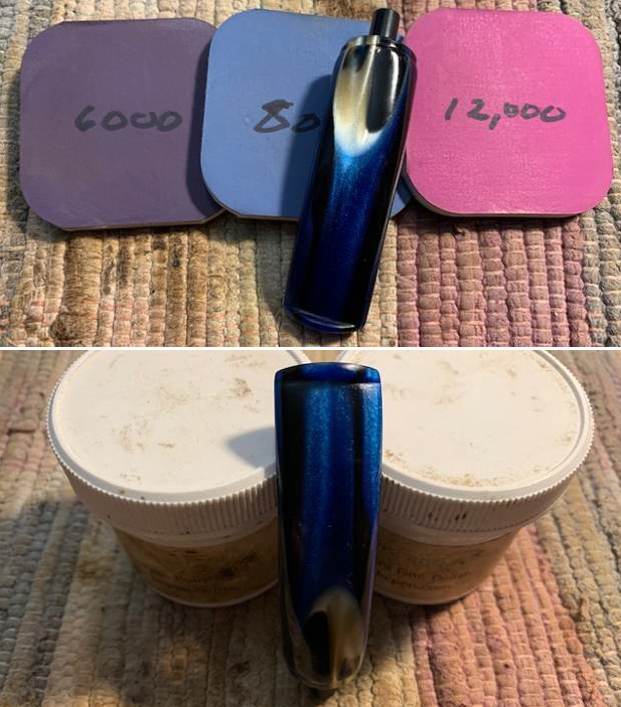
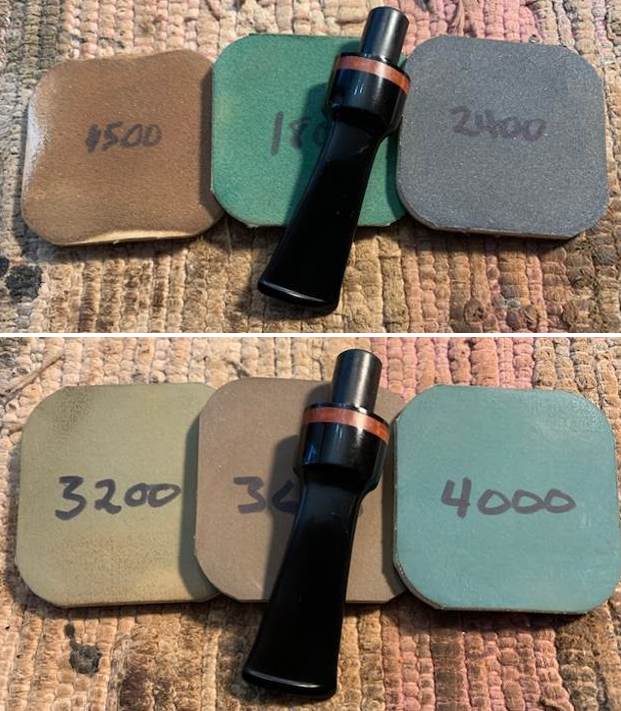
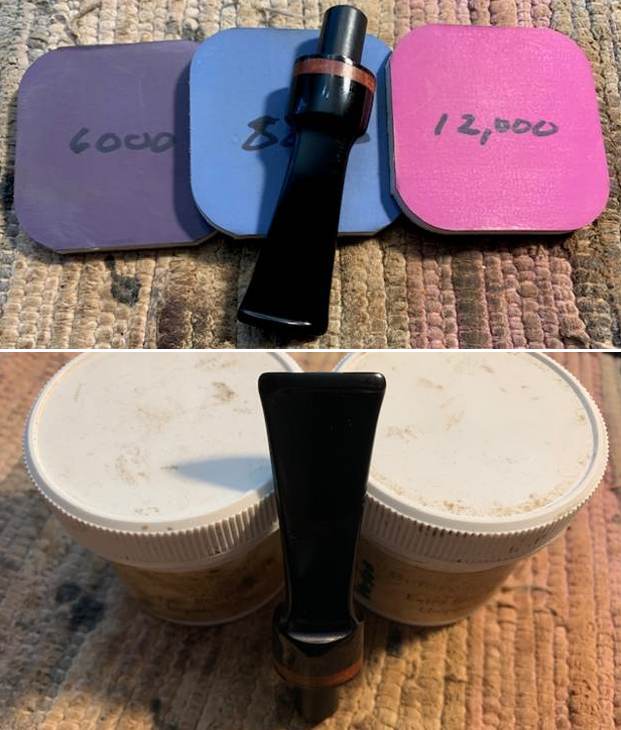
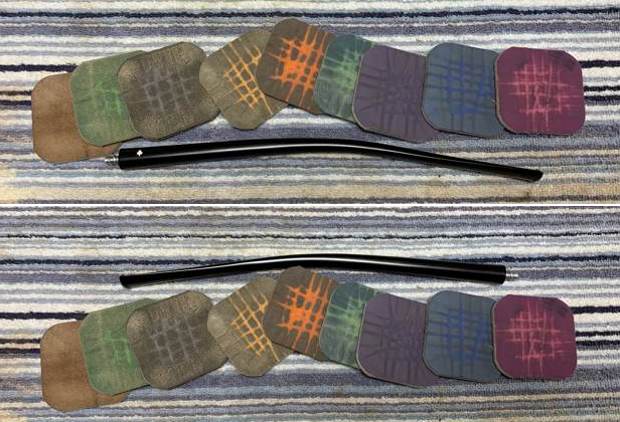
Fortunately, the stem was in good enough shape that it didn’t need a soak in the Pipe Stem Oxidation Remover. I simply scrubbed and scrubbed with SoftScrub on some cotton pads. I built up the remaining marks on the stem with black cyanoacrylate adhesive and then cured it with the aid of some CA glue accelerator. I then carefully sanded the adhesive down with 220-, 400-, and 600-grit sandpapers to meld seamlessly into the stem. I then used all nine Micromesh pads (1,500 through 12,000 grit) to bring out the lovely black lustre on the stem. I also used Obsidian Pipe Stem Oil in between each pad scrubbing (from 3,600 onward). 
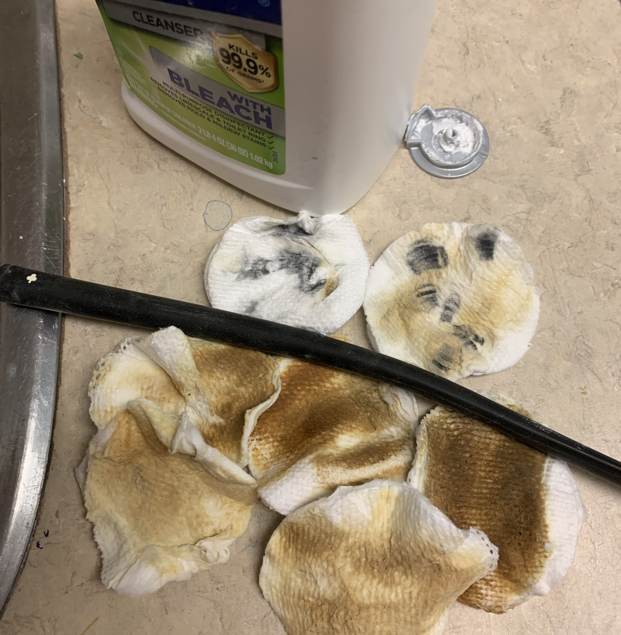
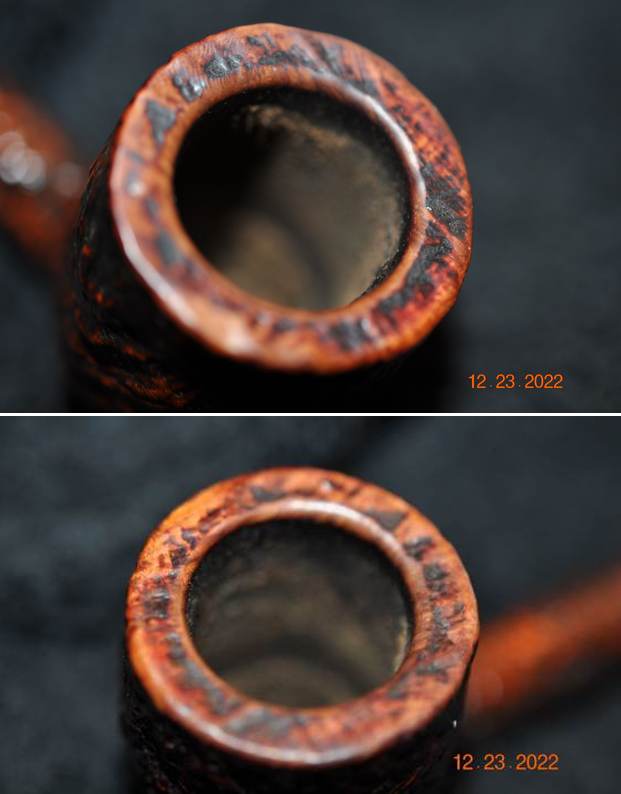
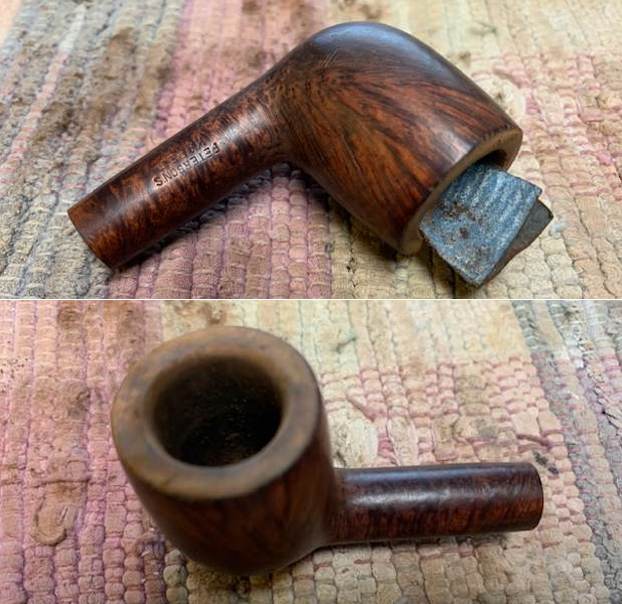
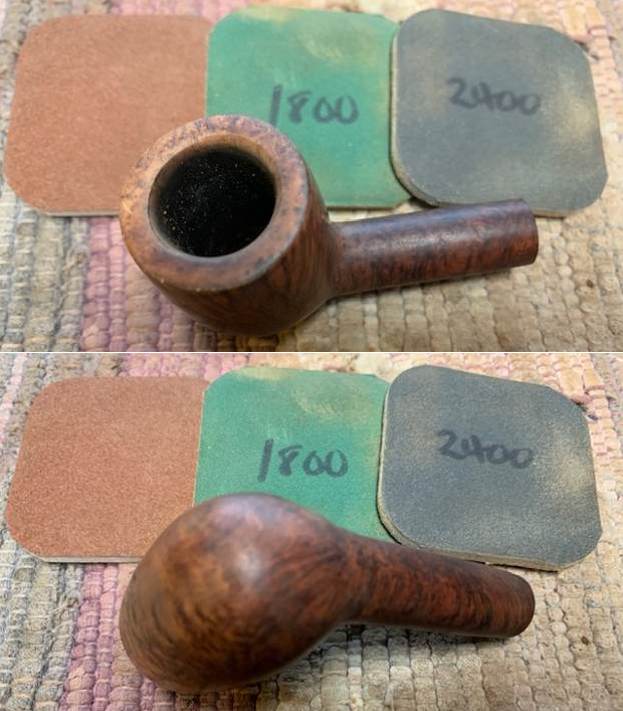
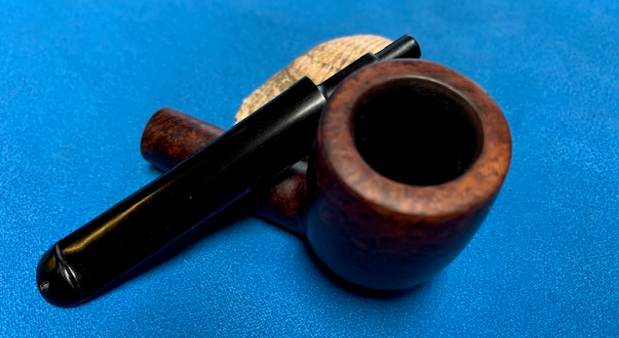
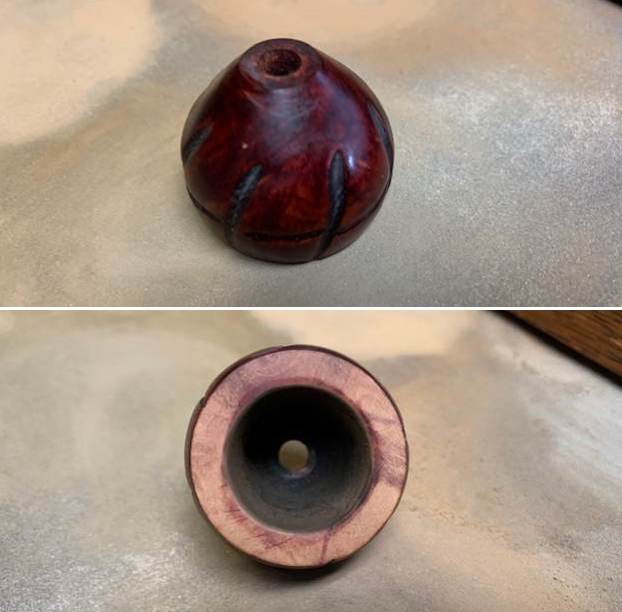
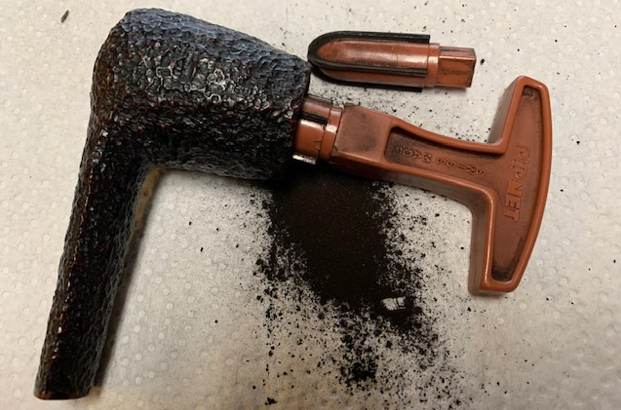
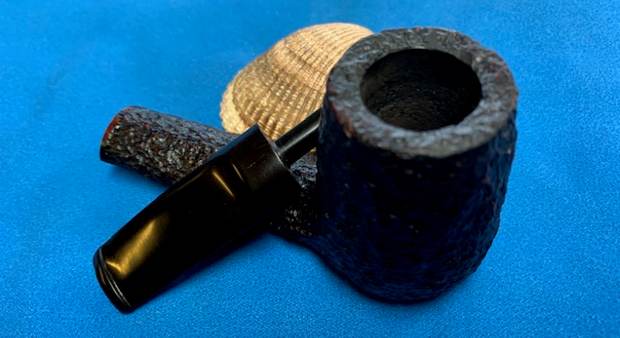
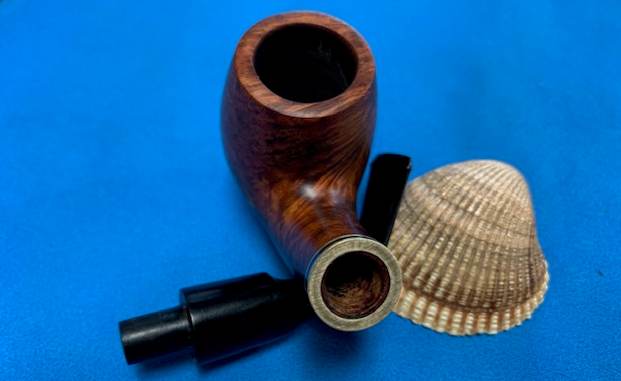
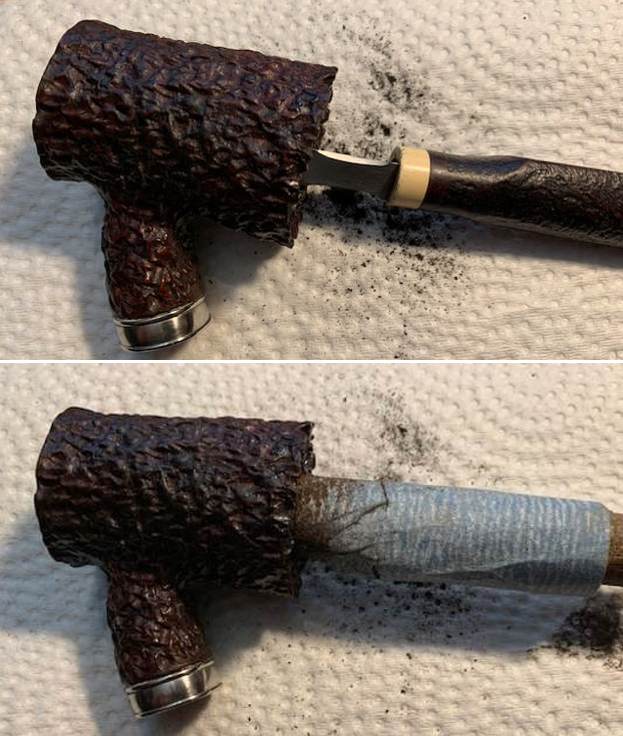
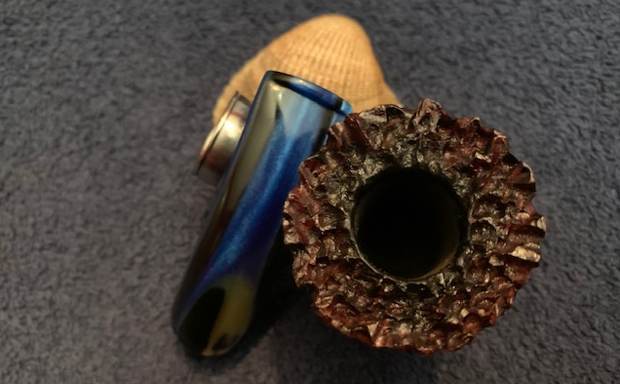
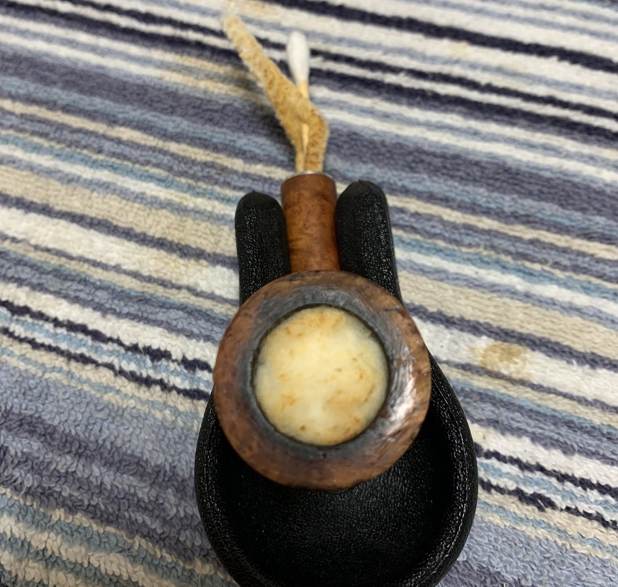
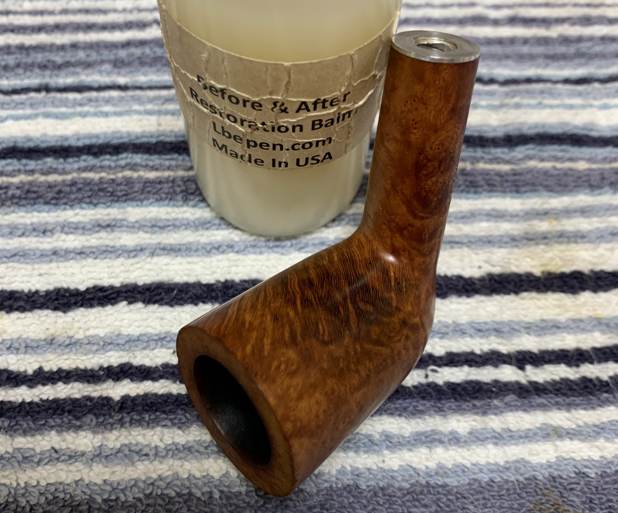
Now for the stummel. I decided to ream out the bowl. I used the PipNet reamer to remove the built-up cake and followed that with 220-grit sandpaper taped to a dowel to eliminate as much as I could. I took the chamber down to bare briar, as I wanted to ensure there were no hidden flaws in the wall. Fortunately, there were none.   
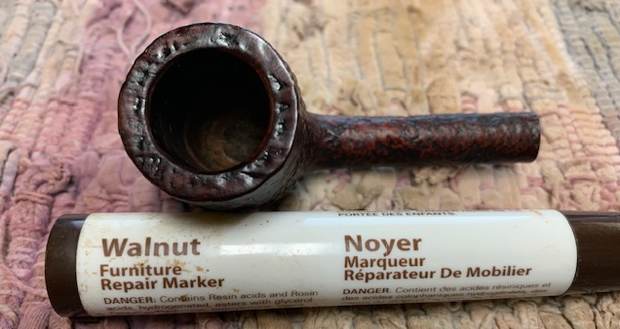
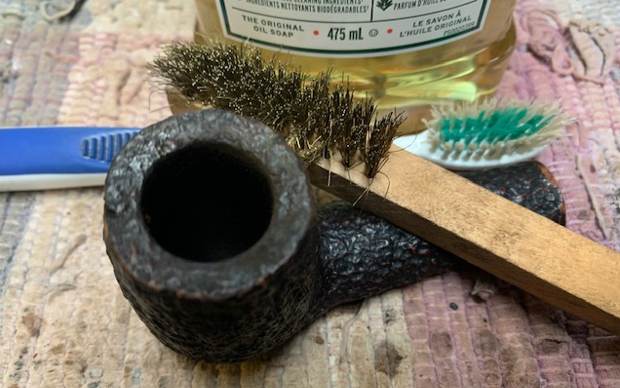
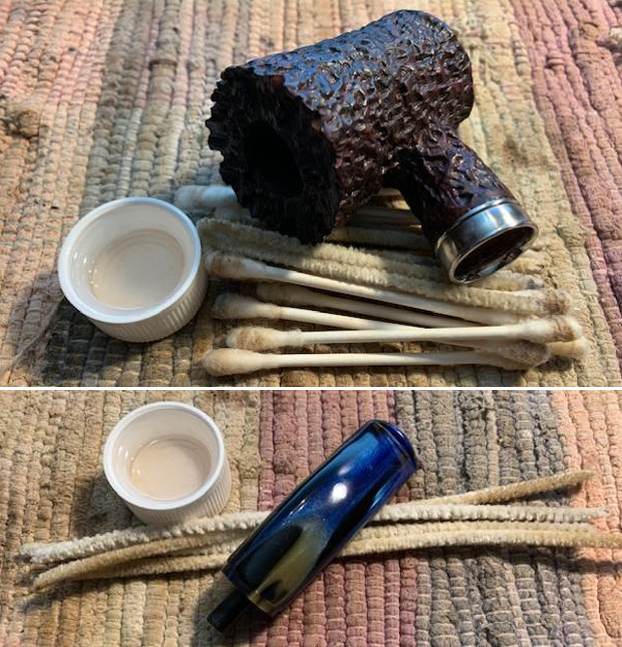
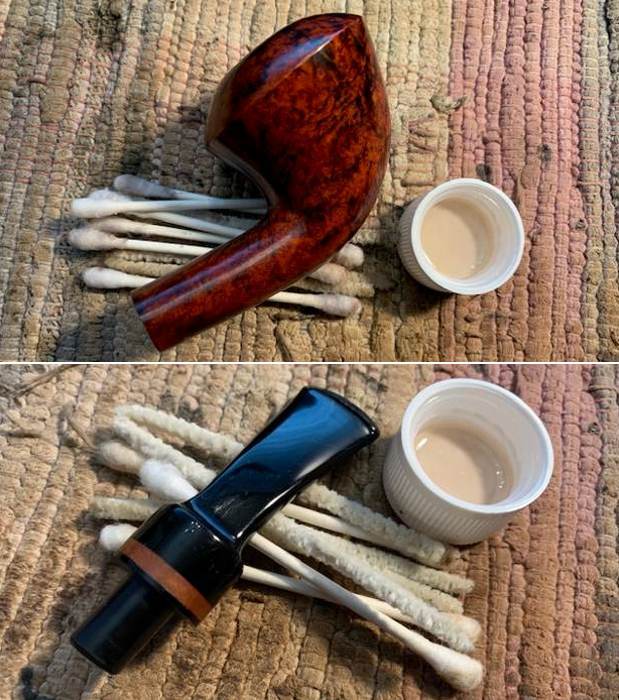
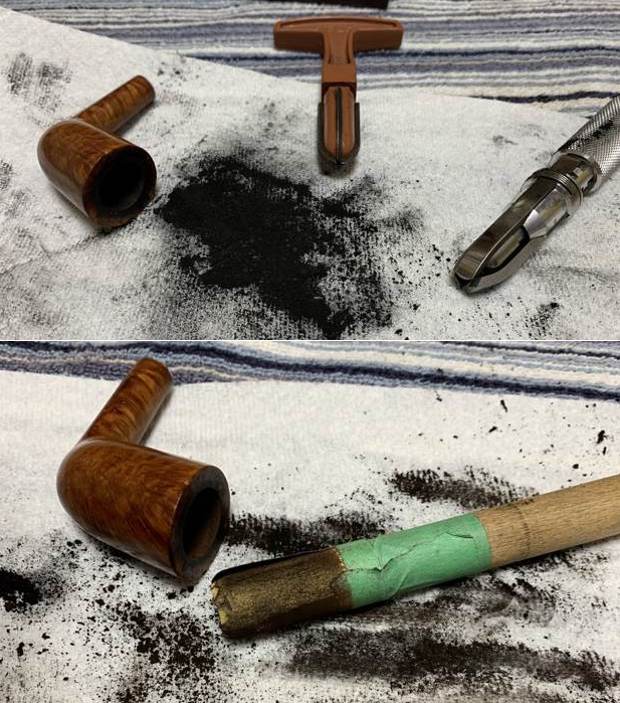
I then proceeded to clean out the insides of the shank with Q-tips, pipe cleaners, and lemon-infused isopropyl alcohol. There was quite a bit of filth inside this stummel and it took a fair amount of cotton to get it clean. I used cotton rounds and some Murphy’s Oil Soap to scrub the outside of the stummel. I soaked the rim of the pipe in Murphy’s in order to soften the lava. This worked well, but burn marks remained on the wood of the rim. I followed that up by cleaning the insides of the stummel with some dish soap and tube brushes. 
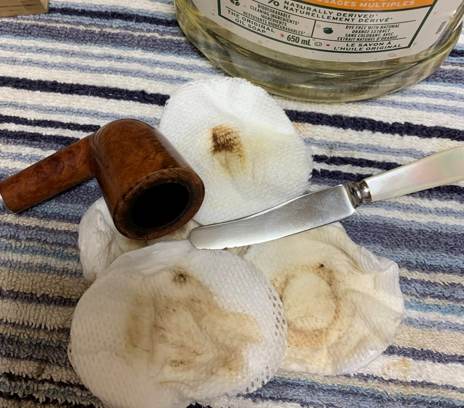
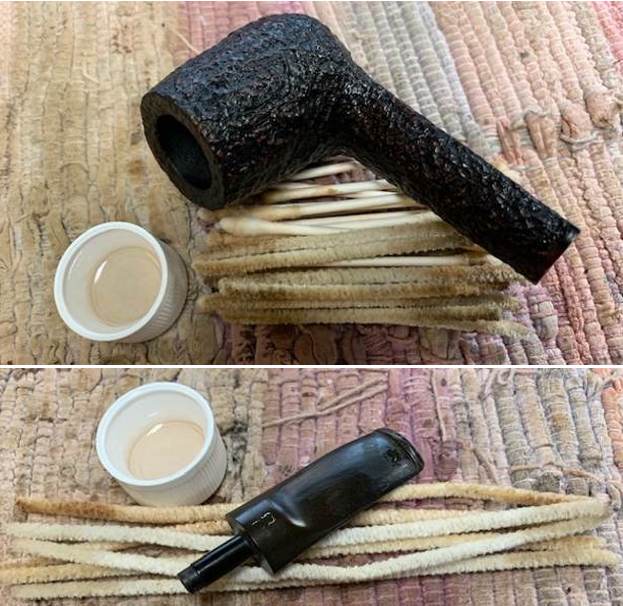
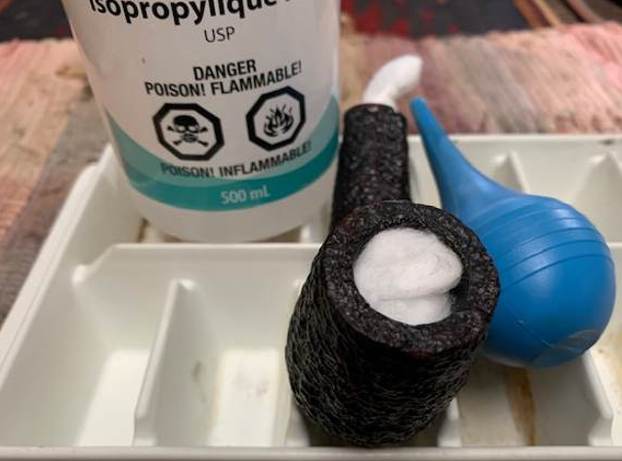
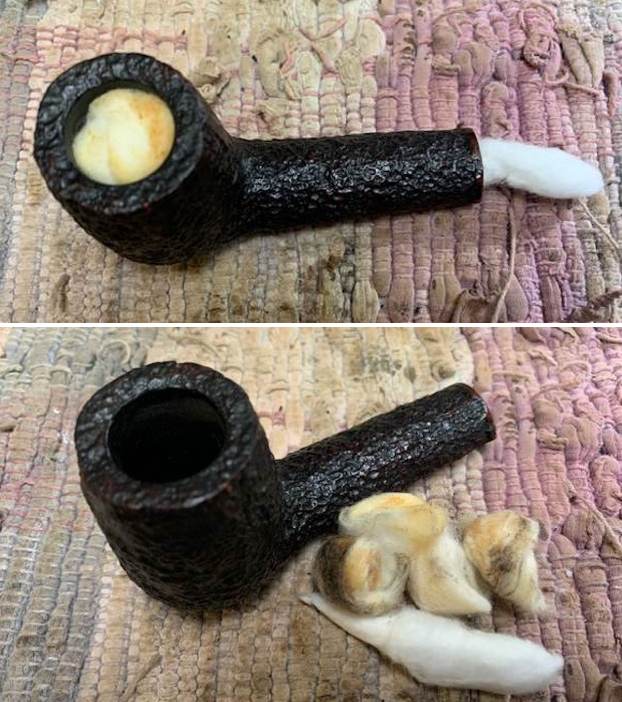
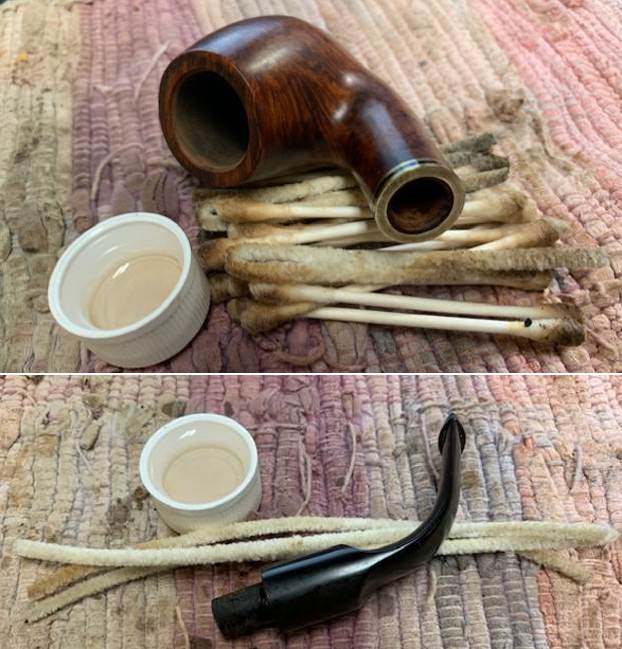
Next, I decided to de-ghost the pipe in order to remove any lingering smells of the past. I thrust cotton balls into the bowl and the shank and saturated them with 99% isopropyl alcohol. I let the stummel sit overnight. This caused any remaining oils, tars and smells to leach out into the cotton. The bowl was nice and clean after this. 
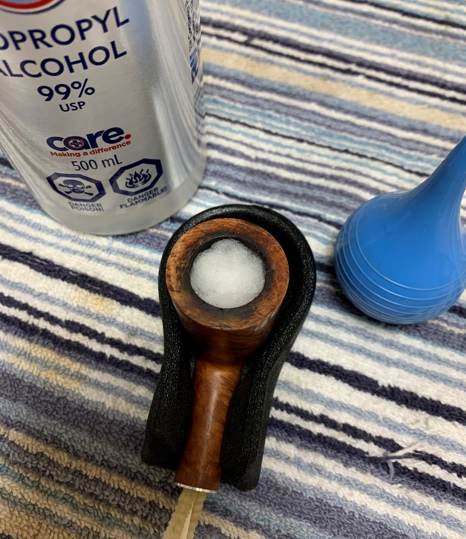
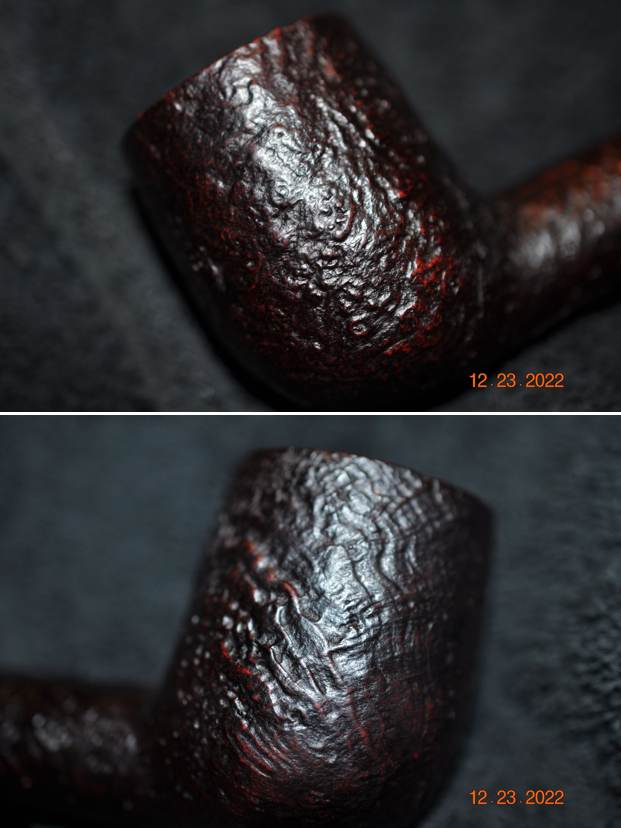
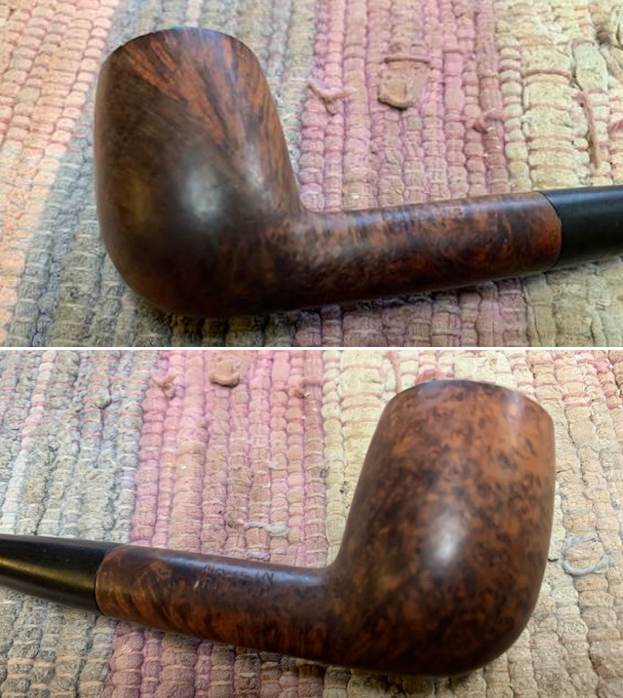
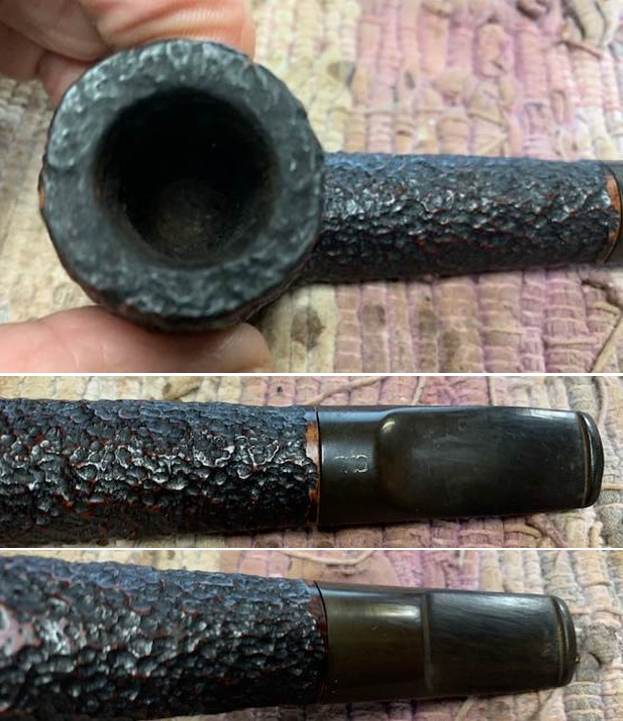
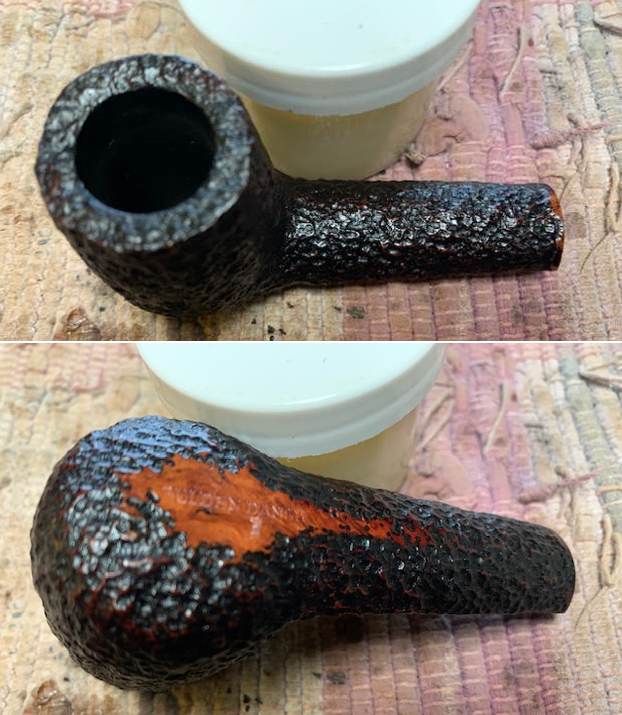
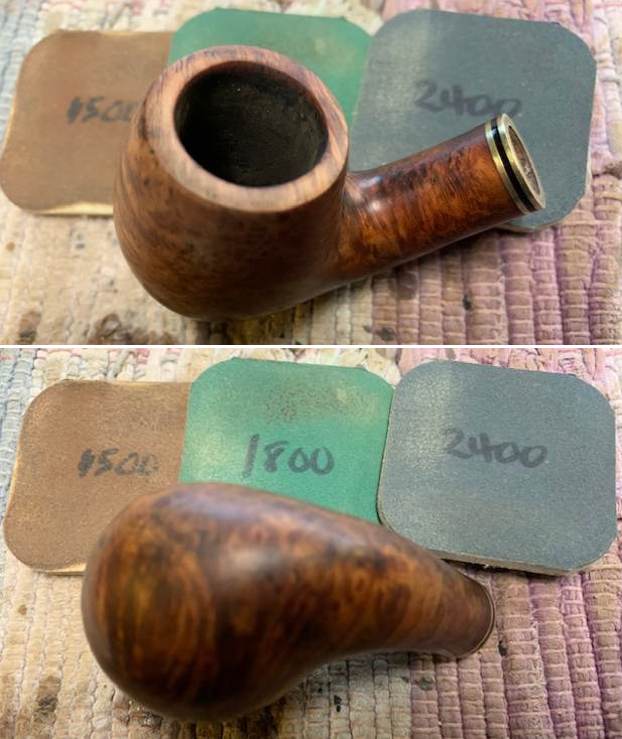
Often, to remove burn marks, I use oxalic acid, but, in this case, the burning was too extensive. I should say that the burning wasn’t severe or deep – just wide. In order to safely remove the burns on the rim, I “topped” the pipe – that is to say, I gently and evenly sanded down the rim on a piece of 220-grit sandpaper. This effectively removed the damage, without altering the look of the pipe.
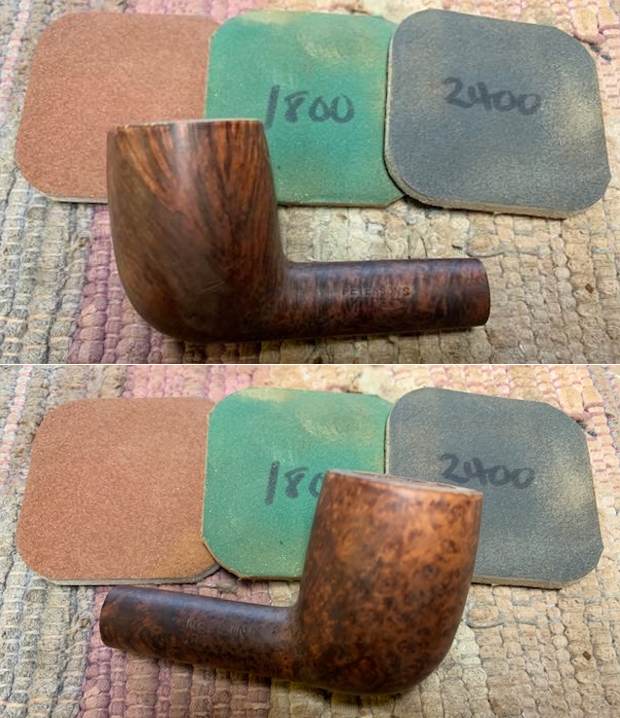
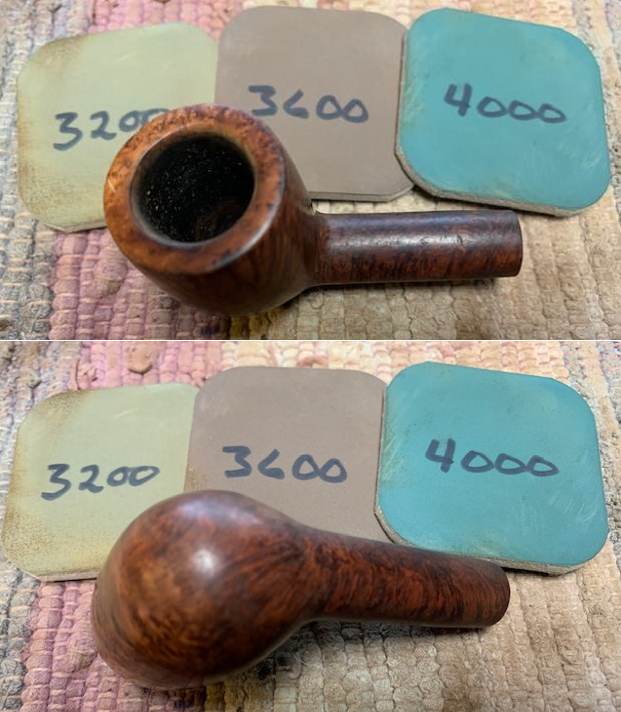
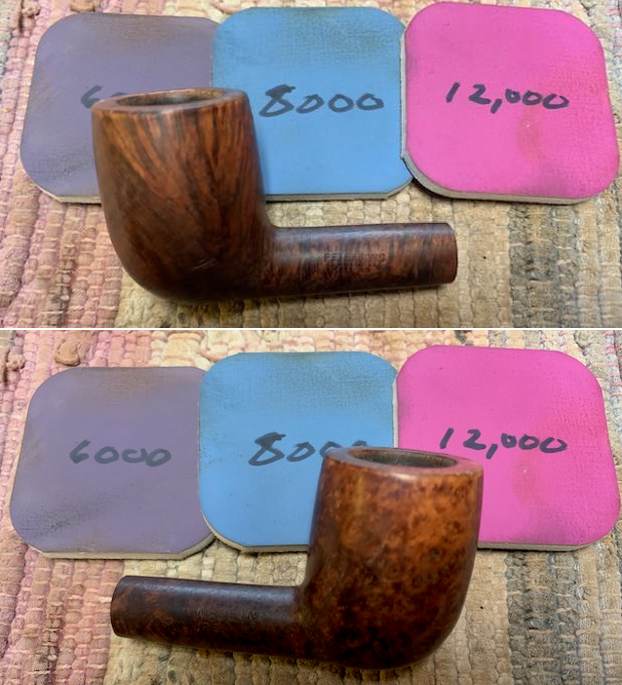
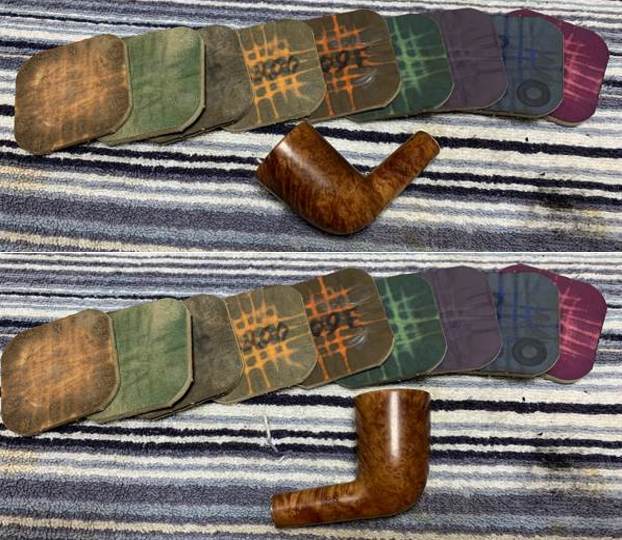
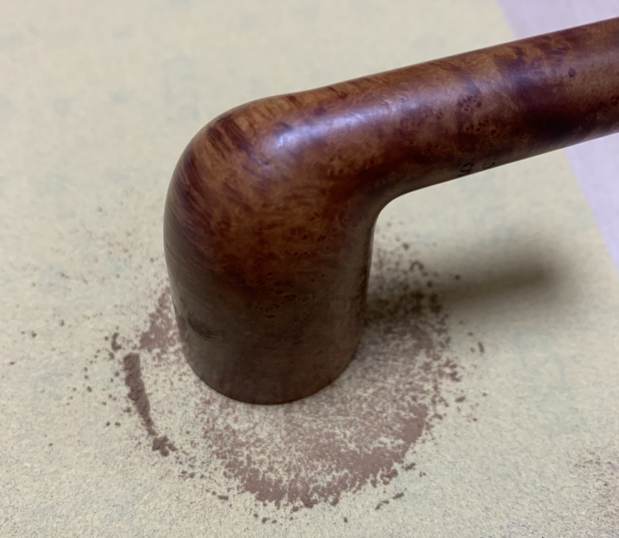
Before sanding, I applied some Before & After Restoration Balm and let it sit for 20 minutes or so. It does lovely things to the wood. Once I polished it with a microfibre cloth, I sanded the stummel down with all nine Micromesh pads (1,500 through 12,000 grit). 
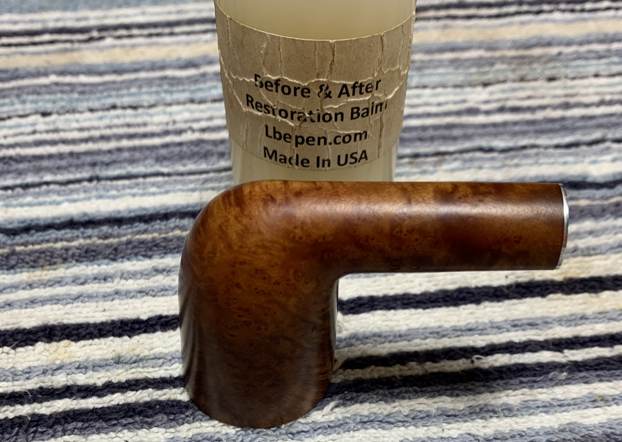
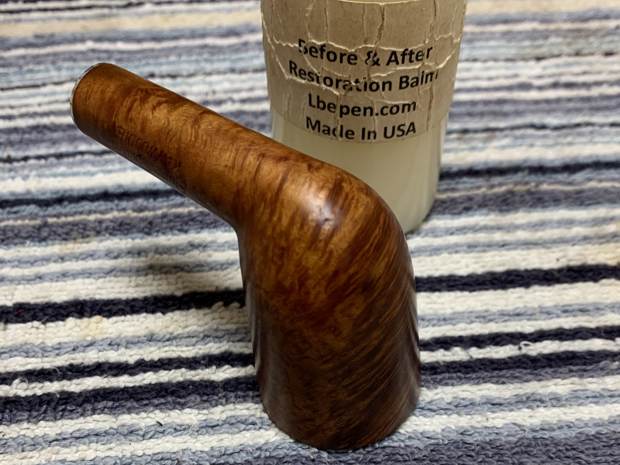
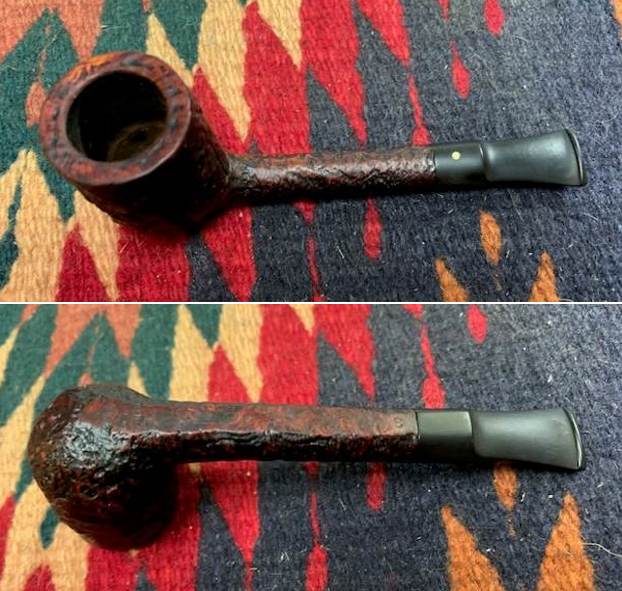
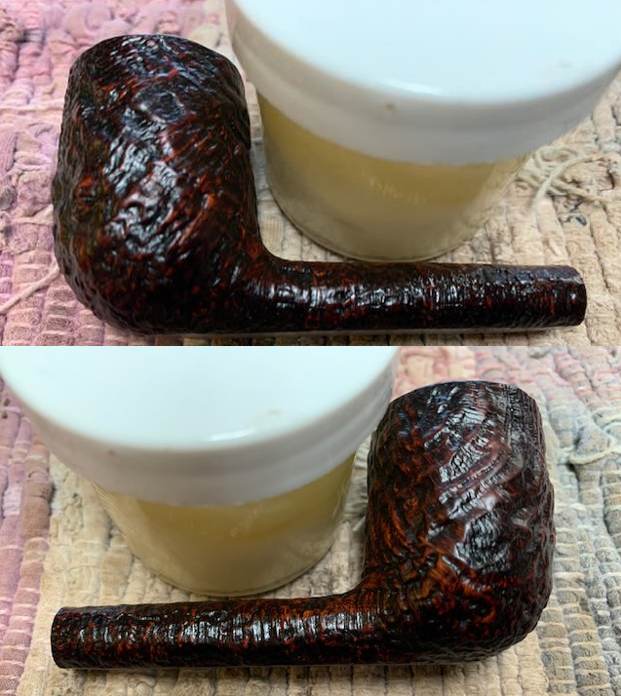
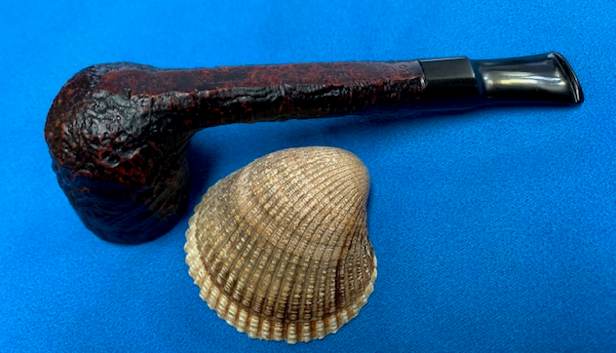
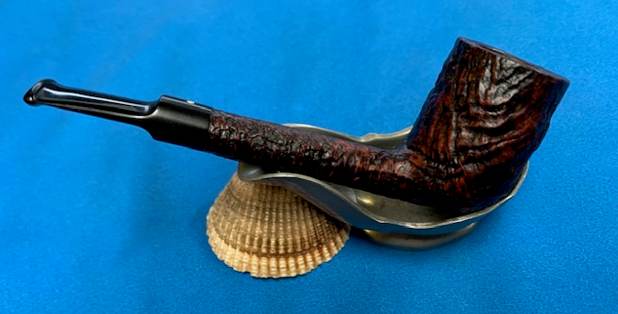
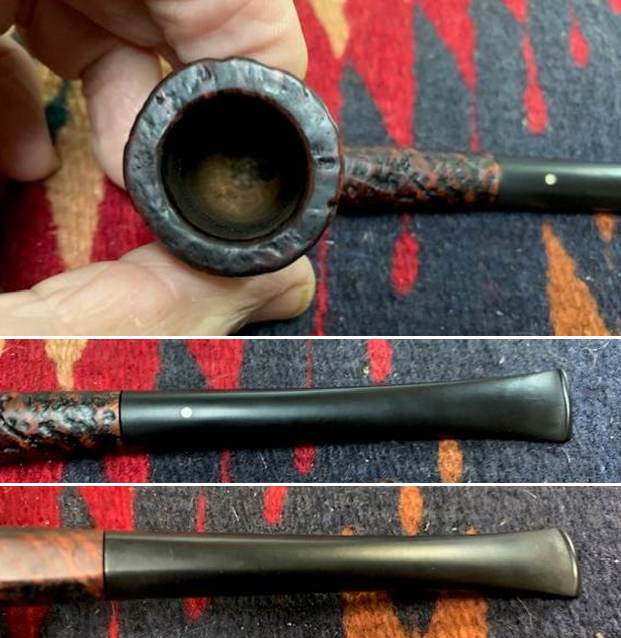
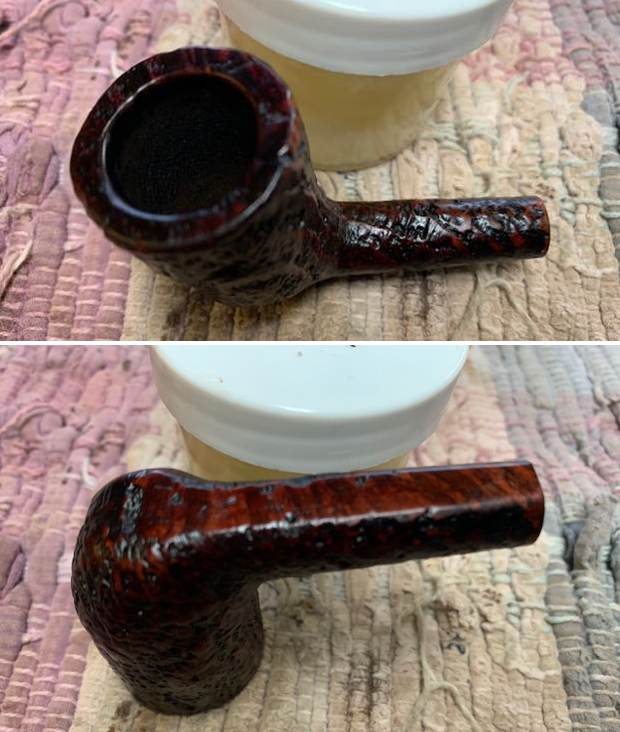
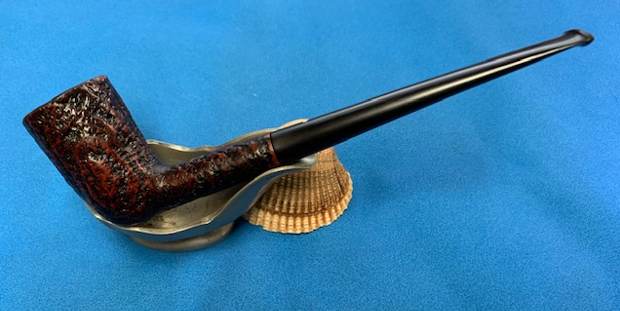
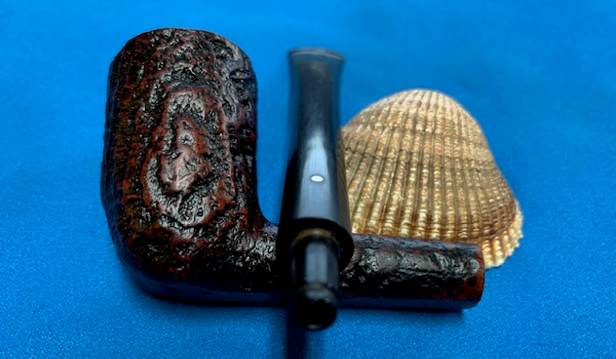
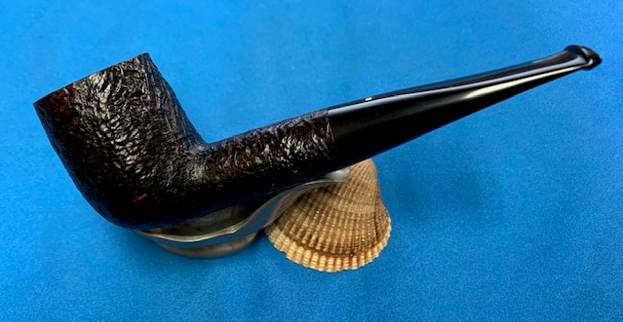
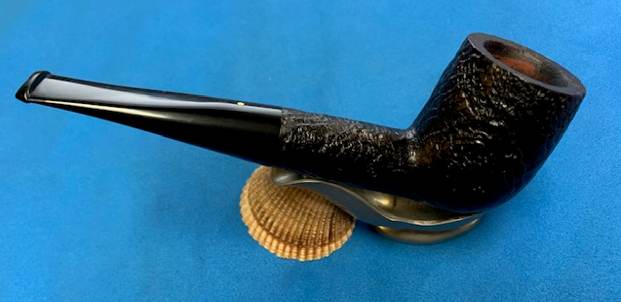
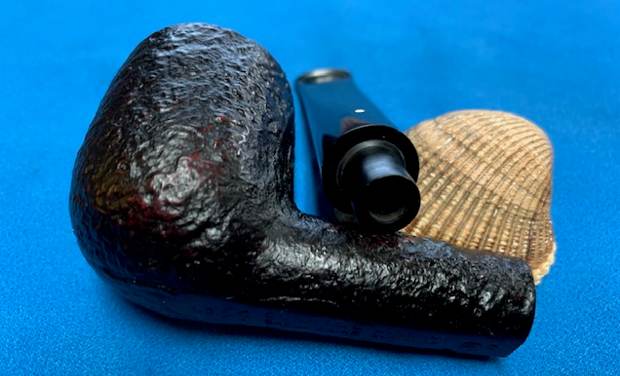
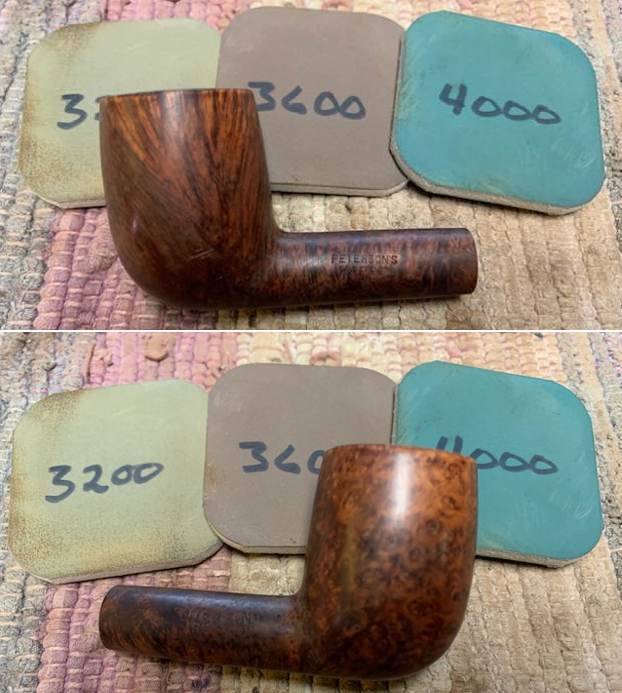
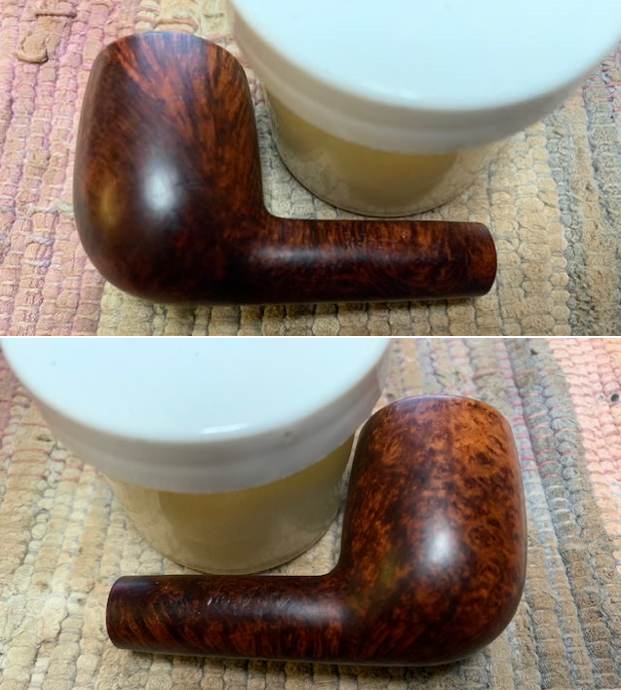
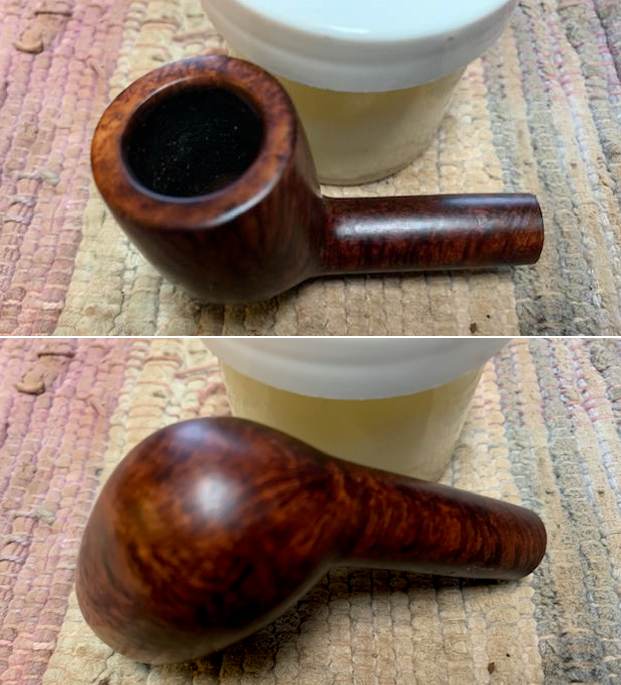
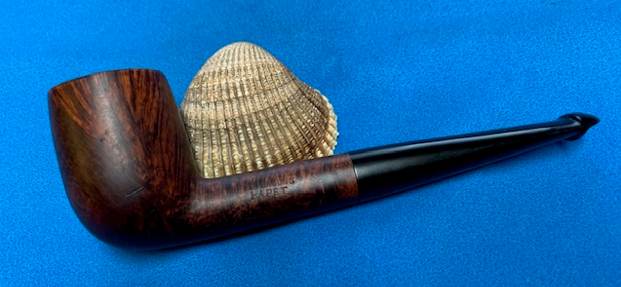
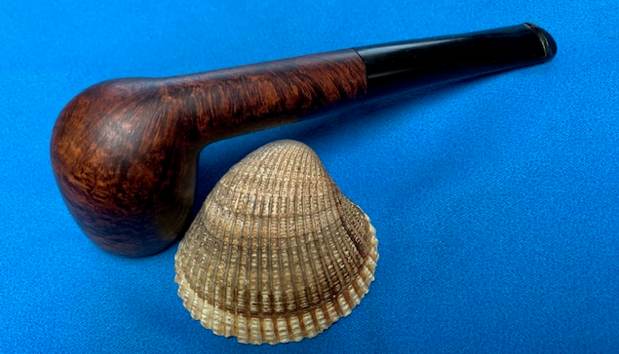
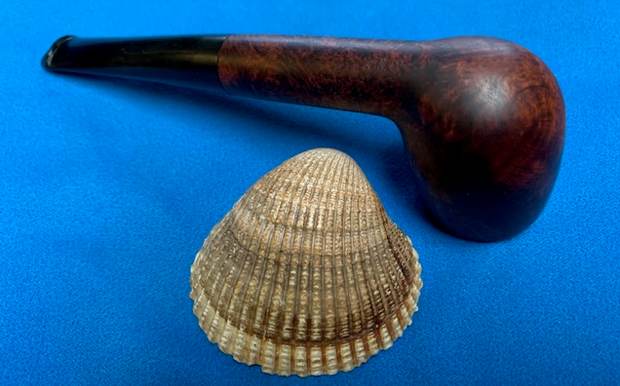
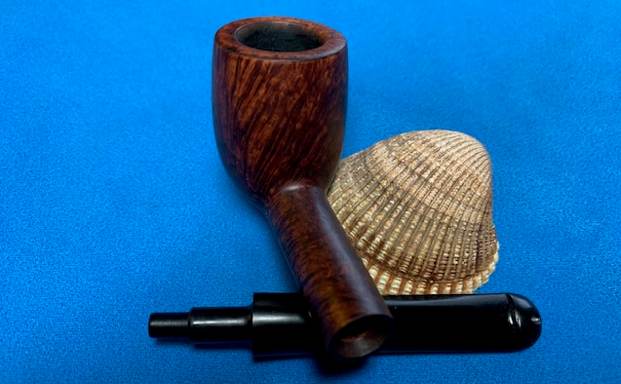
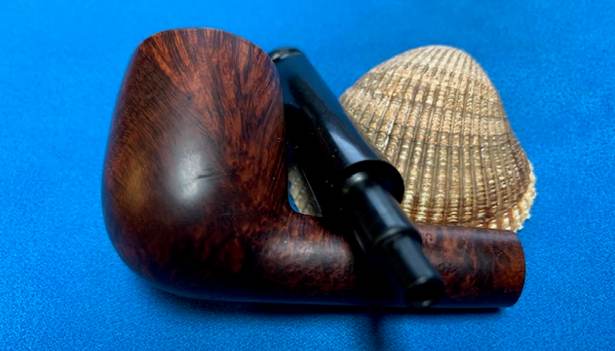
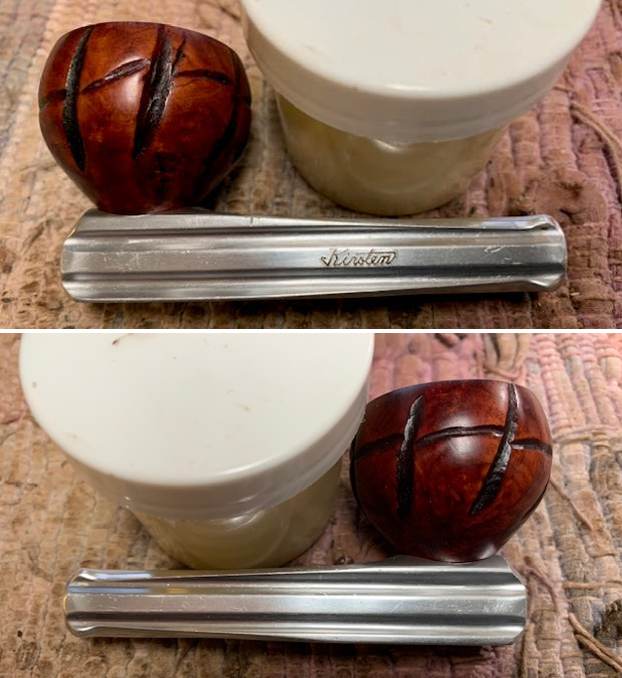
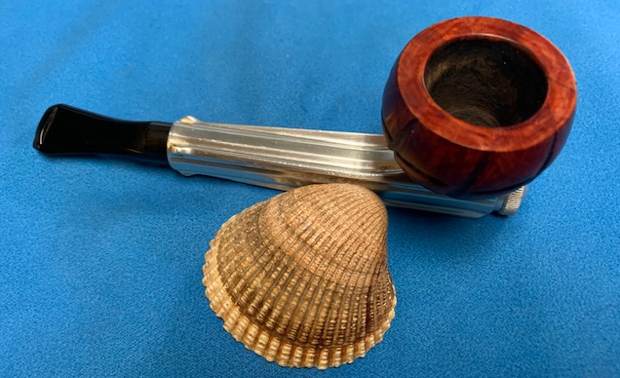
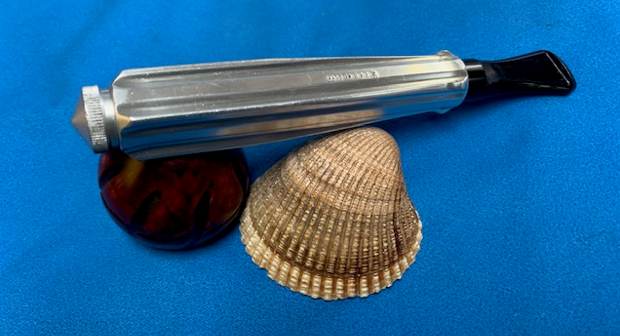
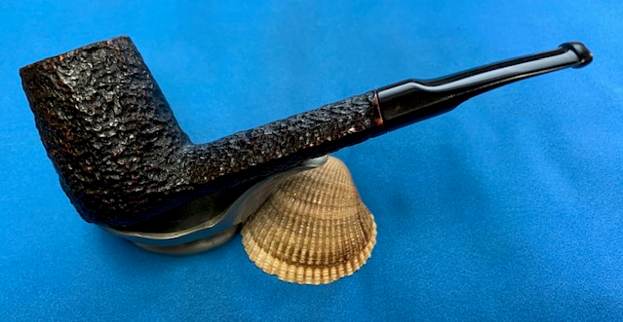
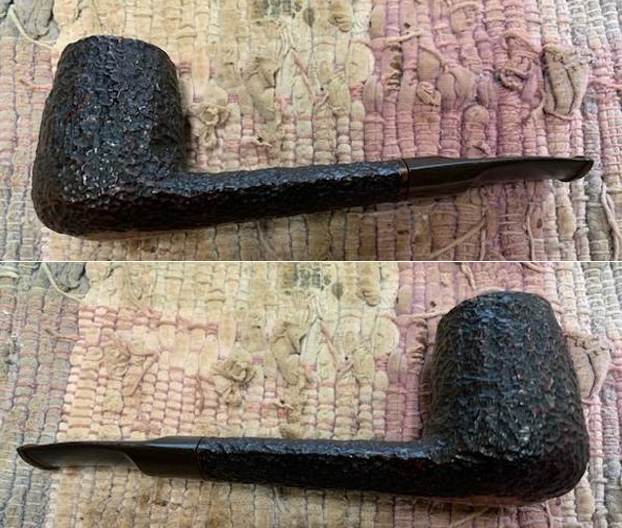
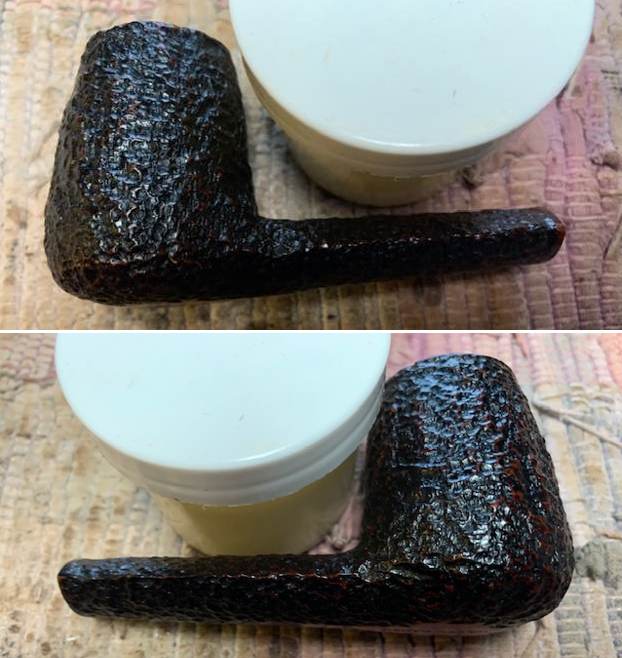
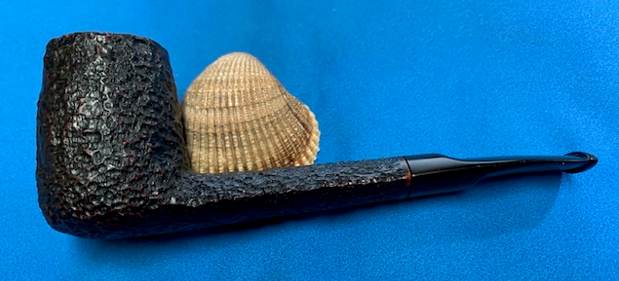
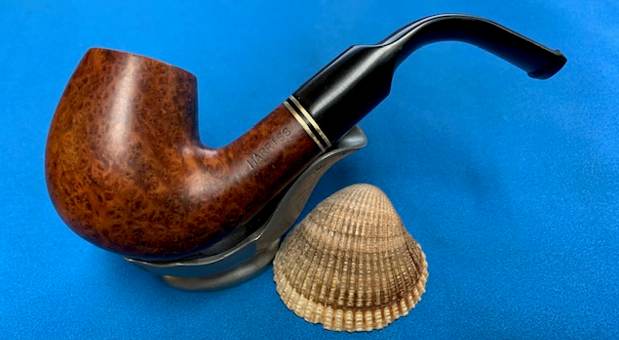
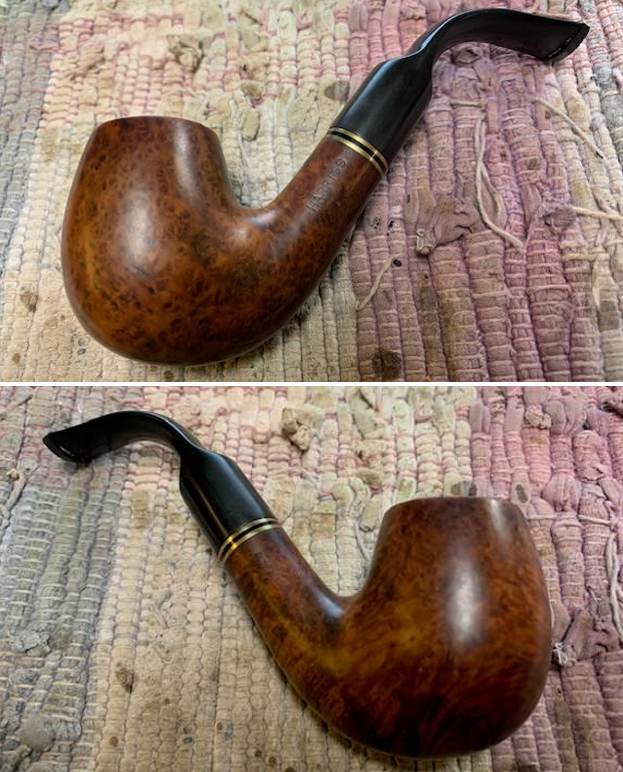
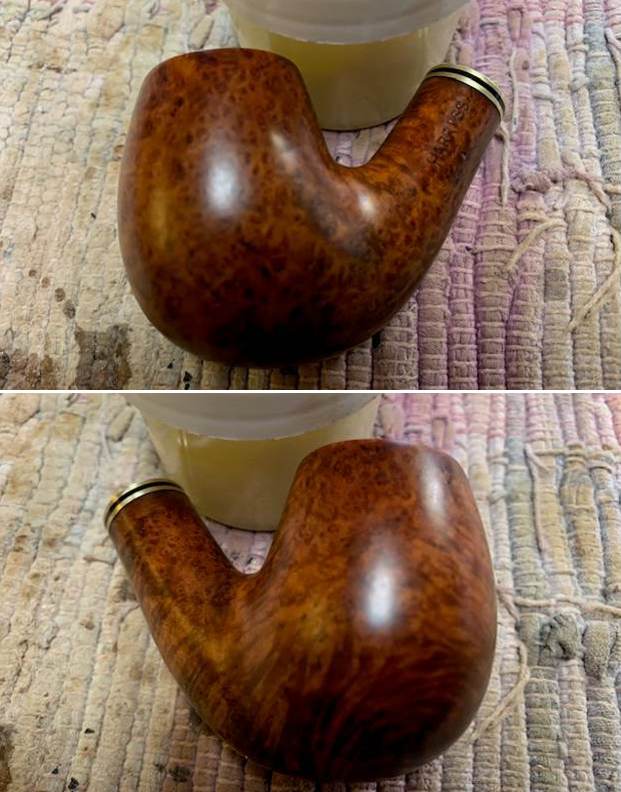
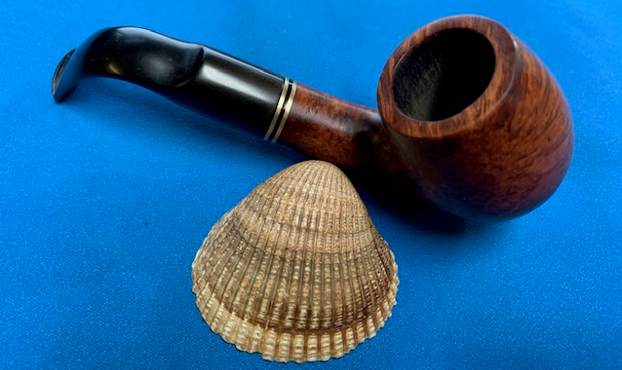
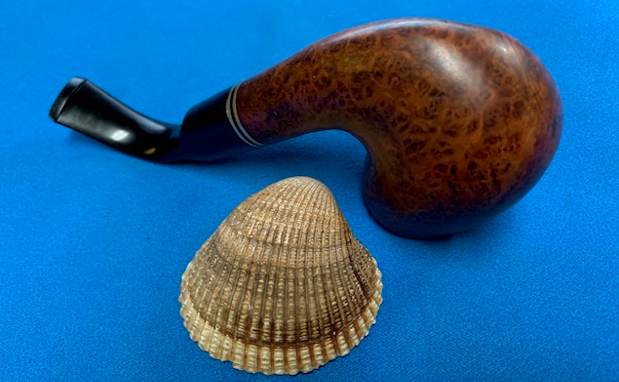
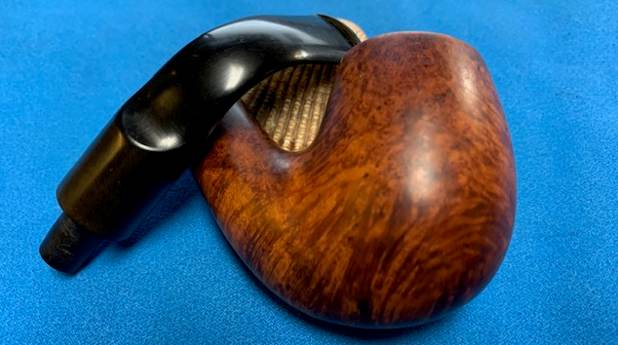
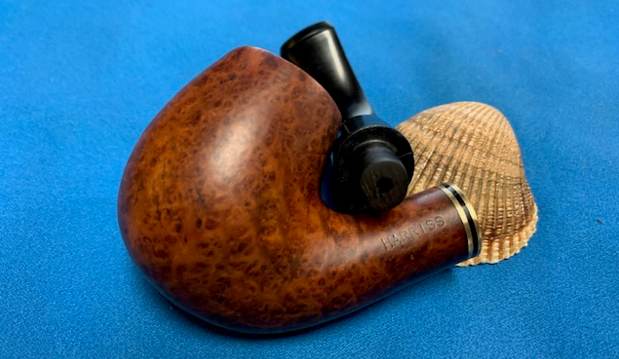
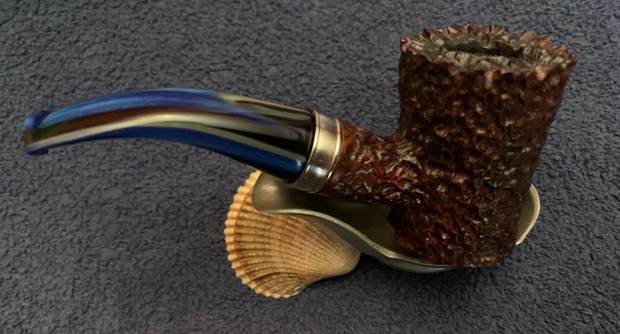
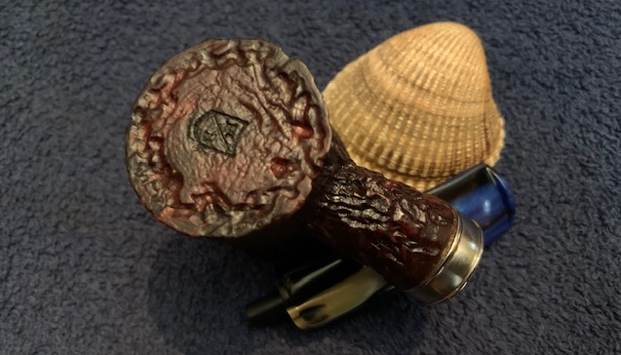
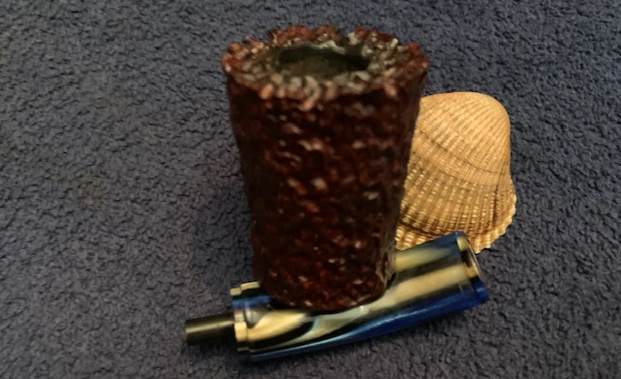
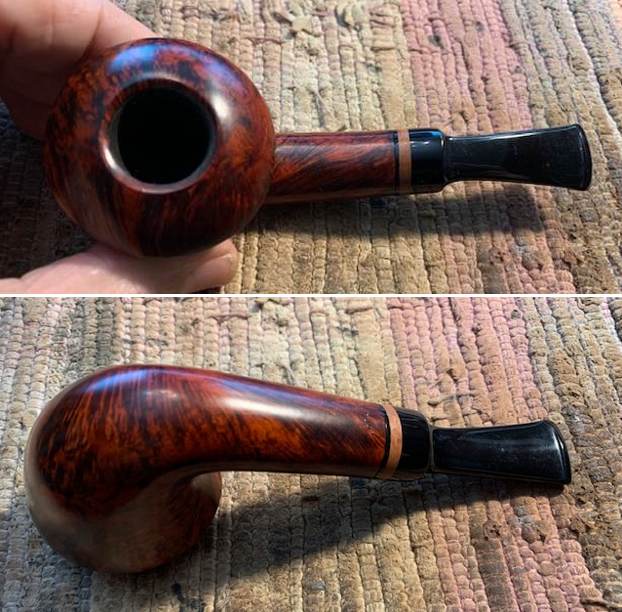
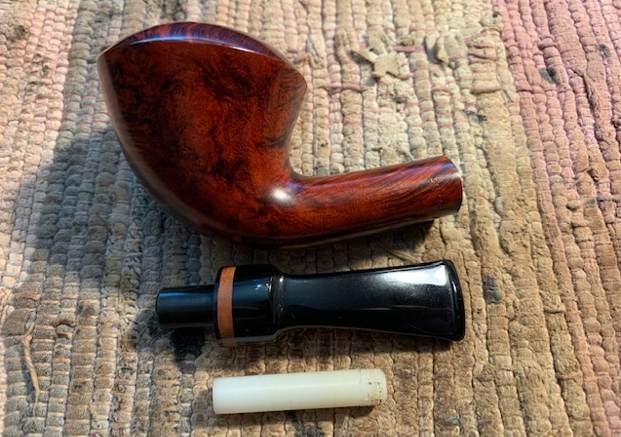
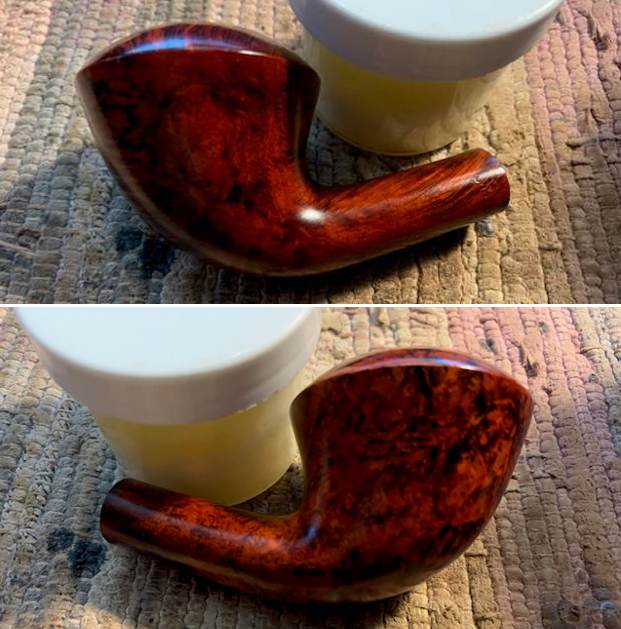
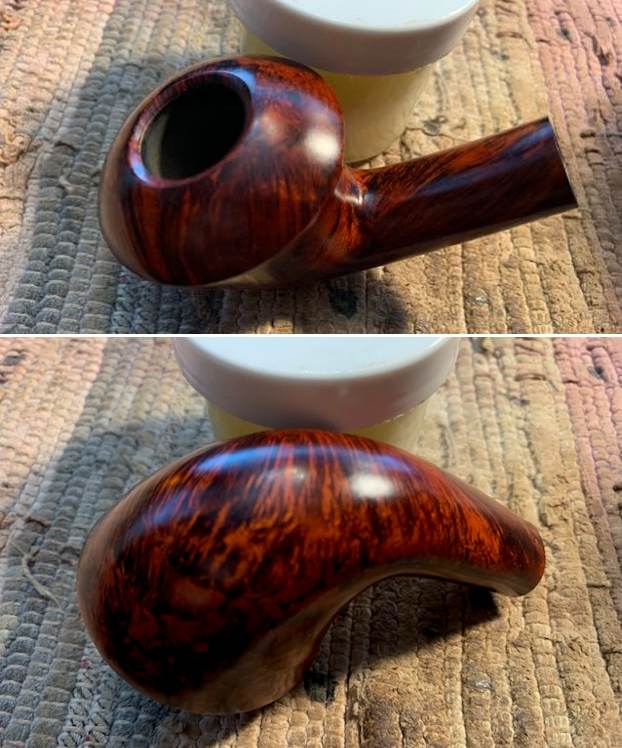
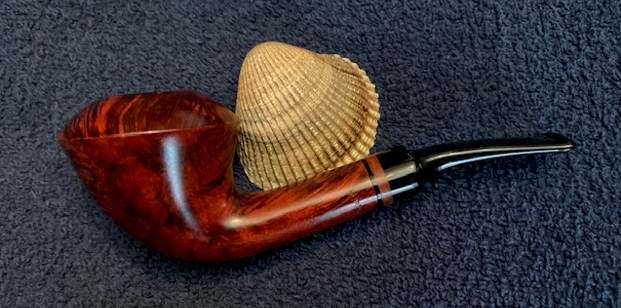
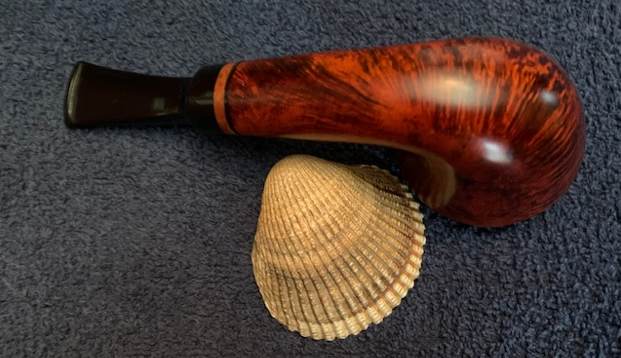
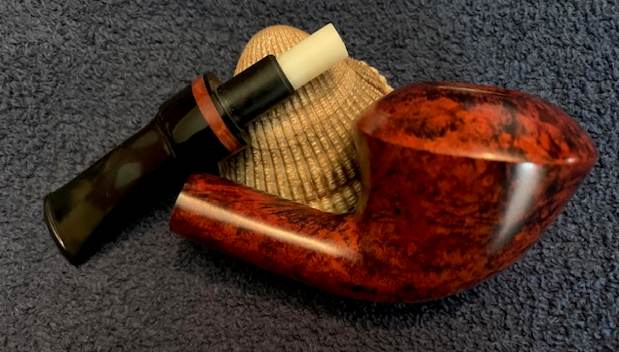
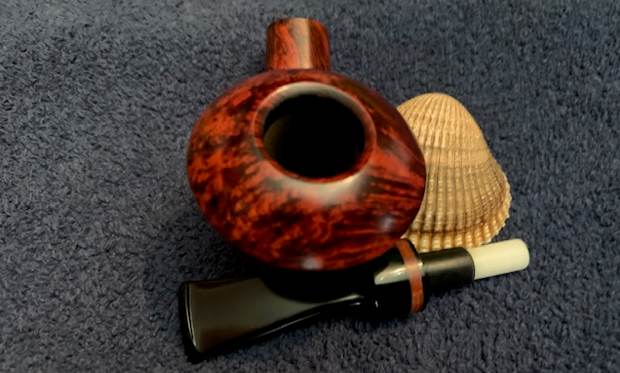
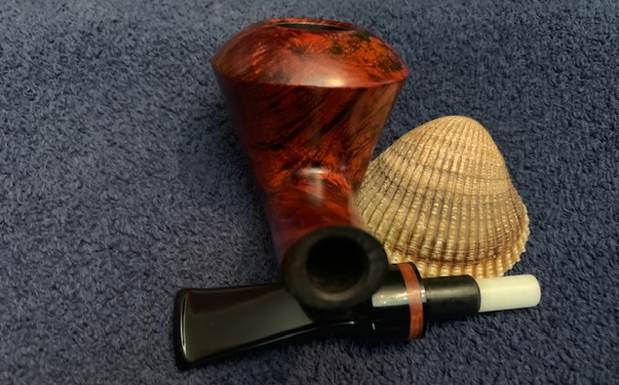
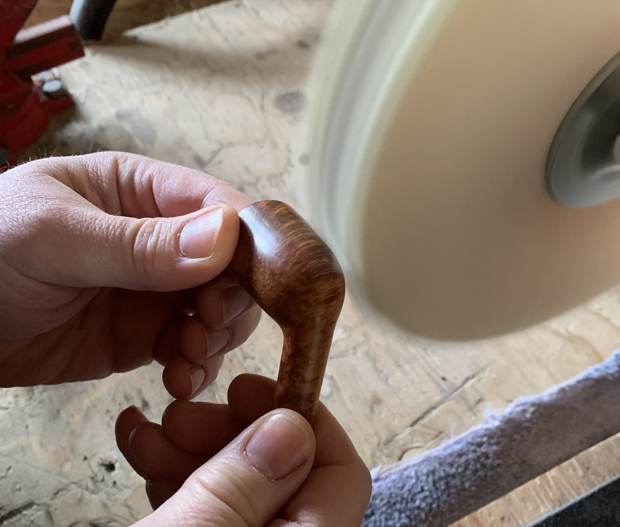
Finally, I applied some more Before & After Restoration Balm and buffed it with a microfiber cloth a second time. I then took the pipe to my bench polisher and buffed it with White Diamond and a few coats of carnauba wax. Wow – the pipe really looks lovely. 
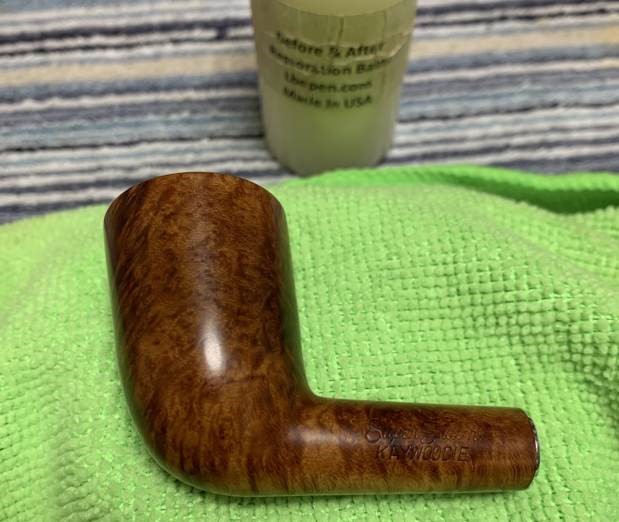
My friend’s daughter presented her fiancé with the pipe and he seemed quite pleased with it. I met the lucky fellow myself and I know that he will enjoy smoking it for many years to come. I hope you enjoyed reading the story of this pipe as much I as I did restoring it. If you are interested in more of my work, please follow me here on Steve’s website or email me directly at kenneth@knightsofthepipe.com. Thank you very much for reading and, as always, I welcome and encourage your comments.

Another Old Timer – A Patent No. Dunhill Shell Briar 40 Made in England Lovat


Blog by Steve Laug

The next pipe on the table came to us from a group of pipes that Jeff and I purchased from a fellow in Copenhagen, Denmark on October 3, 2022. It is a Dunhill Shell Lovat that is in good condition. It is stamped on a smooth panel on the underside of the shank. On the heel of the bowl someone scratched 1953. Then it is stamped with the shape number 40 F/T followed by Dunhill [over] Shell Briar. Next to that it is stamped Made in England followed by the date number superscript 2 and next to that superscript 3. Underneath that it reads Pat. No. 417574/34. After that it is stamped with a 4 in a circle [followed by] S for shell. The stamping is clear and readable as noted above. The pipe has a mix of black, cordovan and brown stains on a sandblast finish and some amazing grain that the shape follows well. The finish was dusty around the nooks and crannies of the sandblast but otherwise fairly clean. The bowl had a light cake and there was some light lava on the sandblasted rim top or edges. The short saddle stem was oxidized, dirty and had tooth marks and chatter ahead of the button. Jeff took photos of the pipe to show what it looked like before he started working on it. He took photos of the bowl and rim top to show their condition and of the stem to show the condition of both sides of the stem. The photos of the sides and heel of the bowl show the deep sandblast grain on the pipe. It is a beauty.  The stamping on the underside of the shank is shown in the photo below. It looks very good and faint but readable. It reads as noted and explained above. Jeff captured the detail in the photos below. One of the first things I like to do is to unpack the stamping and understand each element in it. I turned to Pipephil helpful site (http://pipephil.eu/logos/en/dunhill/shell-briar1.html). The stamping is interpreted as follows: The scratched date 1951 is in question. The number 40 is the shape number for a Lovat. The F/T is the designation for a Fishtail stem. The Dunhill Shell is the finish which is corroborated the S at the end of the stamping. The size of the pipe is a Group 4. The 2 3 following the D of England gives the date the pipe.Pipephil also has some helpful dating keys on the site that are basically flow charts that you can walk through to date your pipe (http://pipephil.eu/logos/en/dunhill/cledat-en1.html). I turned to Part 1 of the Dating Key and followed the chart. This pipe has a suffix of 2 3 following the D in England. It is raised and underlined so that took me to the section on the chart below (column one) which instructed me that the pipe could be dated as being made between 1921 and 1954. The date stamp 2 3 which made the pipe a 1952 Shell that was sold in 1953.I followed the link following the “Your pipe was crafted between 1921 and 1954. Narrow down your dating”. That took me to Page 2 of the dating key (http://pipephil.eu/logos/en/dunhill/cledat-en1b.html). The first column on the left led me to the section on 1…4 where the directive of dating the pipe is spelled out as follows: 1950 + suffix which gives the  pipe a date of 1954.I then turned to Pipedia’s section on Dunhill Root Briar to get a bit of background on the Duhill finishes (https://pipedia.org/wiki/Dunhill#Root_Briar). I quote:

Shell
A deep craggy sandblast with a black stain finish (usually made using Algerian briar) – the color of the stain used has varied over the years. Although there is some doubt as to them being the first to sandblast pipes, Dunhill’s Shell pipes, and the sandblasting techniques developed to create them are considered one of Dunhill’s greatest and most lasting contributions to the art of pipe making.

The documented history of Dunhill’s inception of the Shell is largely limited to patent applications — there are no catalog pages or advertisements promoting blasted pipes at the time. The preliminary work on the English patent (No. 1484/17) was submitted on October 13, 1917. The patent submission was completed half a year later, on April 12, 1918, followed by the granting of the English patent on October 14, 1918. This was less than a month before the end of The Great War on November 11th.

In 1986 Dunhill released a line of premium Shell finish pipes – “RING GRAIN”. These are high-quality straight grain pipes which are sandblasted. Initially only Ring Grain, but now in two different finishes. In 1995 the “Shilling” was introduced with Cumberland finish – it is an extremely rare series. These pipes exhibit a deeper blast characteristic of that of the 1930’s – mid-1960’s (and the limited ‘deep blast’ pipes of the early 1980s) and show a fine graining pattern. These are considered the best new Dunhills by many enthusiasts today and are very rare. The finish is sometimes described as tasting like vanilla at first, with the taste becoming more normal or good as the pipe breaks in.

I have also included a chart from the site from Dunhill spelling out the Standard Pipe Finishes and giving short information and a timeline. I turned to work on the pipe itself. Jeff had done an amazing cleanup of the pipe. He reamed the light cake with a PipNet reamer and cleaned up that with a Savinelli Fitsall Pipe Knife. He scrubbed the internals of the bowl and stem with alcohol, cotton swabs and pipe cleaners. He scrubbed the externals with undiluted Murphy’s Oil Soap and rinsed the bowl off with running water. He soaked the stem in Briarville’s Pipe stem Deoxidizer and once it had soaked rinsed it off with warm water to remove the residual solution. He dried it off and rubbed it down to remove any oxidation that was still on the stem. The pipe looked very good when I received it. I took a photo of the rim top to show the condition. You can see the clean bowl. It almost looks as if it was never smoked to the bottom of the bowl. The stem came out looking quite good. There are some tooth marks and chatter on both sides ahead of the button.  I took a photo of the underside of the shank to show the stamping. The photo clearly shows the stamping and is actually more readable in the photo than in person. I removed the stem from the shank and took a photo of the pipe parts to show what I was working with. It is a nice looking pipe.The bowl was in such good condition that I had to do some minimal work with it. I touched up the stain on the worn spots on the rim with a walnut stain pen. I rubbed the briar down with Before & After Restoration Balm. I worked it into the briar with my fingertips and a horsehair shoe brush to work it into the nooks and crannies of the sandblast finish. The product works to clean, enliven and preserve the briar. I let it sit for 10 minutes then I buffed it with a cotton cloth to deepen the shine. The briar really comes alive with the balm. I “painted” the stem surface on both sides to lift the dents. The heat lifted the ones on the top completely and the ones on the underside for the most part. I filled in the two small remaining marks on the underside of the stem with clear CA glue. Once it cured I sanded repairs out with 220 grit sandpaper and started the polishing with 400 grit wet dry sandpaper. I polished the vulcanite with micromesh sanding pads – 1500-12000 grit pads. I wiped it down with Obsidian Oil after each sanding pad. I used Before & After Pipe Polish – both Fine and Extra Fine to further polish the stem.  This 1952 Patent No. Dunhill Shell 40 F/T Lovat has a beautiful, unique Dunhill Sandblast finish that is very deep and craggy. The dark mixed black/brown/red finish highlights some great grain around the bowl and shank. It has some great rugged sandblast that Dunhill specialized in making. The polished black vulcanite short saddle stem adds to the mix. I put the stem back on the bowl and buffed the pipe with Blue Diamond on the buffing wheel being careful to not buff the stamping. I gave the bowl multiple coats of Conservator’s Wax and the stem multiple coats of carnauba wax on the buffing wheel and followed that by buffing it with a clean buffing pad. I hand buffed the pipe with a microfiber cloth to deepen the shine. The finished Dunhill Shell 40 F/T Lovat is quite nice and feels great in the hand. Give the finished pipe a look in the photos below. The dimensions of the pipe are Length: 5 inches, Height: 1 ¾ inches, Outside diameter of the bowl: 1 1/8 inches, Chamber diameter: ¾ of an inch. The weight of the pipe is .92 ounces/26 grams. Thanks for walking through the restoration with me as I worked over another beautiful pipe. If you are interested in adding it to your collection I will be adding it to the British Pipe Makers Section of the rebornpipes store. Thanks for your time.

An Old Timer – A Patent No. Dunhill Shell 42 Made in England Dublin


Blog by Steve Laug

The next pipe on the table came to us from a group of pipes that Jeff and I purchased from a fellow in Copenhagen, Denmark on October 3, 2022. It is a Dunhill Shell Dublin that is in good condition. It is stamped on a smooth panel on the underside of the shank. On the heel of the bowl someone scratched 1951. Then it is stamped with the shape number 42 F/T followed by Dunhill Shell [over] Patent No. 417574/34. That is followed by Made in England followed by the date number 4 (faint but under a bright light seems to be a 4). So the dating is a bit of a mystery – 51 or 54? I lean toward the 54 date but it is not certain. After that it is stamped with a 4 in a circle [followed by] S for shell. The stamping is clear until the Made in stamp and shape number. The pipe has a mix of black, cordovan and brown stains on a sandblast finish and some amazing grain that the shape follows well. The finish was dusty around the nooks and crannies of the sandblast but otherwise fairly clean. The bowl had a light cake and there was some light lava on the sandblasted rim top or edges. The taper fishtail stem was oxidized, dirty and had tooth marks and chatter ahead of the button. Jeff took photos of the pipe to show what it looked like before he started working on it. He took a photo of the bowl and rim top to show their condition and of the stem to show the condition of both sides of the stem. The photos of the sides and heel of the bowl show the deep sandblast grain on the pipe. It is a beauty.   The stamping on the underside of the shank is shown in the photo below. It looks very good and faint but readable. It reads as noted and explained above. Jeff captured the detail in the photos below.One of the first things I like to do is to unpack the stamping and understand each element in it. I turned to Pipephill helpful site (http://pipephil.eu/logos/en/dunhill/shell-briar1.html). The stamping is interpreted as follows: The scratched date 1951 is in question. The number 42 is the shape number for a Dublin. The F/T is the designation for a Fishtail stem. The Dunhill Shell is the finish which is corroborated the S at the end of the stamping. The size of the pipe is a Group 4. The 4 following the D of England gives the date the pipe.Pipephil also has some helpful dating keys on the site that are basically flow charts that you can walk through to date your pipe (http://pipephil.eu/logos/en/dunhill/cledat-en1.html). I turned to Part 1 of the Dating Key and followed the chart. This pipe has a suffix of 4 following the D in England. It is raised and underlined so that took me to the section on the chart below (column one) which instructed me that the pipe could be dated as being made between 1921 and 1954. The date stamp 4 which made the pipe a 1954 Shell.I followed the link following the “Your pipe was crafted between 1921 and 1954. Narrow down your dating”. That took me to Page 2 of the dating key (http://pipephil.eu/logos/en/dunhill/cledat-en1b.html). The first column on the left led me to the section on 1…4 where the directive of dating the pipe is spelled out as follows: 1950 + suffix which gives the  pipe a date of 1954.I then turned to Pipedia’s section on Dunhill Root Briar to get a bit of background on the Duhill finishes (https://pipedia.org/wiki/Dunhill#Root_Briar). I quote:

Shell
A deep craggy sandblast with a black stain finish (usually made using Algerian briar) – the color of the stain used has varied over the years. Although there is some doubt as to them being the first to sandblast pipes, Dunhill’s Shell pipes, and the sandblasting techniques developed to create them are considered one of Dunhill’s greatest and most lasting contributions to the art of pipe making.

The documented history of Dunhill’s inception of the Shell is largely limited to patent applications — there are no catalog pages or advertisements promoting blasted pipes at the time. The preliminary work on the English patent (No. 1484/17) was submitted on October 13, 1917. The patent submission was completed half a year later, on April 12, 1918, followed by the granting of the English patent on October 14, 1918. This was less than a month before the end of The Great War on November 11th.

In 1986 Dunhill released a line of premium Shell finish pipes – “RING GRAIN”. These are high-quality straight grain pipes which are sandblasted. Initially only Ring Grain, but now in two different finishes. In 1995 the “Shilling” was introduced with Cumberland finish – it is an extremely rare series. These pipes exhibit a deeper blast characteristic of that of the 1930’s – mid-1960’s (and the limited ‘deep blast’ pipes of the early 1980s) and show a fine graining pattern. These are considered the best new Dunhills by many enthusiasts today and are very rare. The finish is sometimes described as tasting like vanilla at first, with the taste becoming more normal or good as the pipe breaks in.

I have also included a chart from the site from Dunhill spelling out the Standard Pipe Finishes and giving short information and a timeline. I turned to work on the pipe itself. Jeff had done an amazing cleanup of the pipe. He reamed the light cake with a PipNet reamer and cleaned up that with a Savinelli Fitsall Pipe Knife. He scrubbed the internals of the bowl and stem with alcohol, cotton swabs and pipe cleaners. He scrubbed the externals with undiluted Murphy’s Oil Soap and rinsed the bowl off with running water. He soaked the stem in Briarville’s Pipe stem Deoxidizer and once it had soaked rinsed it off with warm water to remove the residual solution. He dried it off and rubbed it down to remove any oxidation that was still on the stem. The pipe looked very good when I received it. I took a photo of the rim top to show the condition. You can see the clean bowl. It almost looks as if it was never smoked to the bottom of the bowl. The stem came out looking quite good. There are some tooth marks and chatter on both sides ahead of the button.I took a photo of the underside of the shank to show the stamping. The photo clearly shows the stamping and is actually more readable in the photo than in person. I removed the stem from the shank and took a photo of the pipe parts to show what I was working with. It is a nice looking pipe.The bowl was in such good condition that I had to do some minimal work with it. I touched up the stain on the worn spots on the rim with a mahogany stain pen. I rubbed the briar down with Before & After Restoration Balm. I worked it into the briar with my fingertips and a horsehair shoe brush to work it into the nooks and crannies of the sandblast finish. The product works to clean, enliven and preserve the briar. I let it sit for 10 minutes then I buffed it with a cotton cloth to deepen the shine. The briar really comes alive with the balm. I “painted” the stem surface on both sides to lift the dents. The heat lifted the ones on the top completely and the ones on the underside for the most part. I filled in the two small remaining marks on the underside of the stem with clear CA glue. Once it cured I sanded repairs out with 220 grit sandpaper and started the polishing with 400 grit wet dry sandpaper. I polished the vulcanite with micromesh sanding pads – 1500-12000 grit pads. I wiped it down with Obsidian Oil after each sanding pad. I used Before & After Pipe Polish – both Fine and Extra Fine to further polish the stem.  This 1954 Patent No. Dunhill Shell 42 F/T Dublin has a beautiful, unique Dunhill Sandblast finish that is very deep and craggy. The dark mixed black/brown/red finish highlights some great grain around the bowl and shank. It has some great rugged sandblast that Dunhill specialized in making. The polished black vulcanite taper stem adds to the mix. I put the stem back on the bowl and buffed the pipe with Blue Diamond on the buffing wheel being careful to not buff the stamping. I gave the bowl multiple coats of Conservator’s Wax and the stem multiple coats of carnauba wax on the buffing wheel and followed that by buffing it with a clean buffing pad. I hand buffed the pipe with a microfiber cloth to deepen the shine. The finished Dunhill Shell 42 F/T Dublin is quite nice and feels great in the hand. Give the finished pipe a look in the photos below. The dimensions of the pipe are Length: 6 ½ inches, Height: 1 ¾ inches, Outside diameter of the bowl: 1 1/8 inches, Chamber diameter: ¾ of an inch. The weight of the pipe is .95 ounces/27 grams. Thanks for walking through the restoration with me as I worked over another beautiful pipe. If you are interested in adding it to your collection I will be adding it to  the British Pipe Makers Section of the rebornpipes store. Thanks for your time.

A Well Traveled 1968 Dunhill Shell Briar LB F/T Filter Stem Billiard


Blog by Steve Laug

The next pipe on the table came to us from a group of pipes that Jeff and I purchased from a fellow in Copenhagen, Denmark on October 3, 2022. It is a Dunhill Shell Briar Billiard that is in good condition. The original stem is on the pipe and it is made for a filter. It is stamped on a smooth panel on the underside of the shank. On the heel of the bowl it is stamped with the shape number LB F/T followed by Dunhill [over] Shell Briar [followed by] Made in England 8. After that it is stamped with a 4 in a circle [followed by] S for shell. The stamping is clear and readable. The pipe has a mix of black, cordovan and brown stains on a sandblast finish and some amazing grain that the shape follows well. The finish was dusty around the nooks and crannies of the sandblast but otherwise fairly clean. The bowl had been reamed and there was no lava on the sandblasted rim top or edges. The taper filter stem was dirty and had light tooth marks and chatter ahead of the button. Jeff took photos of the pipe to show what it looked like before he started working on it. He took photos of the bowl and rim top to show how clean they were and of the stem to show the condition of both sides of the stem. The photos of the sides and heel of the bowl show the deep sandblast grain on the pipe. It is a beauty.    The stamping on the underside of the shank is shown in the photo below. It looks very good and readable. It reads as noted and explained above. Jeff captured the overall look in the first photo followed by some closer photos of sections of the stamp so you can read it. One of the first things I like to do is to unpack the stamping and understand each element in it. I turned to Pipephill helpful site (http://pipephil.eu/logos/en/dunhill/shell-briar1.html). The stamping is interpreted as follows: The LB is the shape for a larger thick shank billiard and the F/T is the stem shape – a Fish Tail stem. The Dunhill Shell Briar is the finish which is corroborated the S at the end of the stamping. The size of the pipe is a Group 4. The 8 following the D of England gives the date the pipe.Pipephil also has some helpful dating keys on the site that are basically flow charts that you can walk through to date your pipe (http://pipephil.eu/logos/en/dunhill/cledat-en1a.html). I turned to Part 2 of the Dating Key and followed the chart. This pipe has a suffix of 8 following the D in England. It is not raised /smaller so that took me to the section on the chart below (column three) which instructed me that the pipe could be dated by adding the suffix 8 to 1960 which made the pipe a 1968 Shell Briar.I then turned to Pipedia’s section on Dunhill Root Briar to get a bit of background on the Duhill finishes (https://pipedia.org/wiki/Dunhill#Root_Briar). I quote:

Shell
A deep craggy sandblast with a black stain finish (usually made using Algerian briar) – the color of the stain used has varied over the years. Although there is some doubt as to them being the first to sandblast pipes, Dunhill’s Shell pipes, and the sandblasting techniques developed to create them are considered one of Dunhill’s greatest and most lasting contributions to the art of pipe making.

The documented history of Dunhill’s inception of the Shell is largely limited to patent applications — there are no catalog pages or advertisements promoting blasted pipes at the time. The preliminary work on the English patent (No. 1484/17) was submitted on October 13, 1917. The patent submission was completed half a year later, on April 12, 1918, followed by the granting of the English patent on October 14, 1918. This was less than a month before the end of The Great War on November 11th.

In 1986 Dunhill released a line of premium Shell finish pipes – “RING GRAIN”. These are high-quality straight grain pipes which are sandblasted. Initially only Ring Grain, but now in two different finishes. In 1995 the “Shilling” was introduced with Cumberland finish – it is an extremely rare series. These pipes exhibit a deeper blast characteristic of that of the 1930’s – mid-1960’s (and the limited ‘deep blast’ pipes of the early 1980s) and show a fine graining pattern. These are considered the best new Dunhills by many enthusiasts today and are very rare. The finish is sometimes described as tasting like vanilla at first, with the taste becoming more normal or good as the pipe breaks in.

I have also included a chart from the site from Dunhill spelling out the Standard Pipe Finishes and giving short information and a timeline. I turned to work on the pipe itself. Jeff had carried out his usual thorough cleanup of the pipe. He did not need to ream the bowl as that had been done. He scrubbed the internals of the bowl and stem with alcohol, cotton swabs and pipe cleaners. He scrubbed the externals with undiluted Murphy’s Oil Soap and rinsed the bowl off with running water. He soaked the stem in Before & After Deoxidizer and once it had soaked rinsed it off with warm water to remove the residual solution. He dried it off and rubbed it down to remove any oxidation that was still on the stem. The pipe looked very good when I received it. I took a photo of the rim top to show the condition. You can see the clean bowl. It almost looks as if it was never smoked to the bottom of the bowl. The stem came out looking quite good. There are some light tooth marks and chatter on both sides ahead of the button.I took a photo of the underside of the shank to show the stamping. It is clear and readable as noted above. I removed the stem from the shank and took a photo of the pipe parts to show what I was working with. It is a nice looking pipe.The bowl was in such good condition that I had to do some minimal work with it. I touched up the stain on the worn spots on the rim with a mahogany stain pen. I rubbed the briar down with Before & After Restoration Balm. I worked it into the briar with my fingertips and a horsehair shoe brush to work it into the nooks and crannies of the sandblast finish. The product works to clean, enliven and preserve the briar. I let it sit for 10 minutes then I buffed it with a cotton cloth to deepen the shine. The briar really comes alive with the balm. I polished the vulcanite with micromesh sanding pads – 1500-12000 grit pads. I wiped it down with Obsidian Oil after each sanding pad. I used Before & After Pipe Polish – both Fine and Extra Fine to further polish the stem.  This Dunhill Shell Briar LB F/T Chunky Billiard with Filter stem has a beautiful, unique Dunhill Sandblast finish made in 1968. It is a great looking pipe that is in almost new condition. The dark finish that is identified as a black highlights some great grain around the bowl and shank. It has some great rugged sandblast that Dunhill specialized in making. The polished black vulcanite taper stem adds to the mix. I put the stem back on the bowl and buffed the pipe with Blue Diamond on the buffing wheel being careful to not buff the stamping. I gave the bowl multiple coats of Conservator’s Wax and the stem multiple coats of carnauba wax on the buffing wheel and followed that by buffing it with a clean buffing pad. I hand buffed the pipe with a microfiber cloth to deepen the shine. The finished Dunhill Shell Briar LB F/T Shell Briar Billiard is quite nice and feels great in the hand. Give the finished pipe a look in the photos below. The dimensions of the pipe are Length: 5 ¾ inches, Height: 1 ¾ inches, Outside diameter of the bowl: 1 ¼ inches, Chamber diameter: 1 inch. Thanks for walking through the restoration with me as I worked over another beautiful pipe. If you are interested in adding it to your collection I will be adding it to the British Pipe Makers Section of the rebornpipes store. Thanks for your time.

Fresh Life for a Made in Ireland Peterson’s Kapet taper stem Billiard


Blog by Steve Laug

This is the second pipe on the table for restoration in 2023. It is another rainy, chilly day in Vancouver. I know in comparison to where many of you live it is not cold but to us it is. The next pipe I have chosen to work on is another Peterson’s Billiard. It is a smooth nicely grained pipe that is a bit of a mystery to Jeff and me as to its provenance. There was grime ground into the finish on the bowl sides. I love the way the contrast of the brown stains gives the finish a sense of depth. The stain is almost tiger striped. It was stamped on the sides of the shank. On the left side and it read Peterson’s [over] KAPET. On the right side it read MADE IN [over] IRELAND. This pipe must have been someone’s favourite as it had been well smoked. Somewhere on its journey the bowl had been reamed and the pipe cleaned. The inner edge of the bowl had some nicks and marks that made the bowl slightly out of round. The stem was lightly oxidized from sitting around here for a long time. It had tooth marks and chatter on the top and underside on and near the button. I took photos of the pipe before my cleanup work. I took photos of the rim top and stem to show the general condition of the pipe. The bowl is clean and has been recently reamed. The rim top and edges had some darkening and there was some lava in the sandblast of the finish on the back side. The photos of the stem show that it was lightly oxidized and has tooth marks on the top and underside near the button.I took photos of the bowl sides and heel to show the blast that was around this bowl. It is a great sandblast and the choice of stain adds depth to the appearance of the bowl. I took a photo of the stamping on the sides of the shank. It is clear and readable and reads as noted above.I took the pipe apart and took a photo of the pipe. It is a good looking pipe and has an interesting shallow sandblast on the bowl.I am including the link to the Pipedia’s article on Peterson pipes. It is a great read in terms of the history of the brand (https://pipedia.org/wiki/Peterson). There was a short note toward the bottom of the page about the series. It is definitely referring to the newer line that came out later. I quote:

I turned to Pipedia (https://pipedia.org/wiki/Peterson) to first pin down a date that the pipe was made. I knew that the Made in Ireland stamp would give me that. I quote:

As usual when trying to get accurate facts in regard to Peterson history, something will jump up and get in the way. They are missing many of their records. The following is the best that we can do for a guide to the myriad markings during the period 1922 – 1949. Prior to 1920 it was rare for a country of origin to be stamped on the pipe, just Peterson’s Dublin on the band. After 1921/22, if it is stamped “MADE IN IRELAND” and the “Made in” is stacked over “Ireland” or “MADE IN EIRE” or several other forms, it was made between 1922 and 1938. A considerable number of Peterson pipes were stamped “Irish Free State”. From about 1930 to 1949, most of the pipes (those which were stamped) were stamped “Made in Ireland”.” If the stamp reads “MADE IN IRELAND” in a circle, the pipe was made between 1939 and 1948. These are all “Pre-Republic” pipes. I can tell you that the mark “Irish Free State” was adopted in 1922; and replaced by “Eire” in 1937 and then by “Republic of Ireland” in 1949.

That gave me a date for the pipe – it was made between 1922 and 1938 as can be proved by the Made in Ireland stamp on the right side of the shank.

I turned to “The Peterson Pipe” by Mark Irwin and Gary Malmberg to get some background on the Peterson’s Kapet Line. On page 305 it had the following information.

Kapet (1925-87) Line first described in 1925 brochure and featured in occasional catalogs through 1987. Early specimens will be stamped IRISH over FREE STATE. Described in 1937 catalog as available in dark plum or natural finish. Featured an aluminum “inner tube” or stinger until 1945.  Mid-century specimens may be stamped Made In over Ireland. Specimens from 1970 on may have mounts with hallmarks.

Judging from the Made in Ireland stamp, the pipe I am working on is probably made between 1922-1938. Those dates work also for the Kapet information above. The stem does not have the P emblem on the stem side or the inner tube.

I started my work on the pipe by working on the rim top and the inner edge. I cleaned them up with a with a folded piece of 220 grit sandpaper. I was able to remove almost all of the darkening with the sandpaper and reshape the damaged inner edge of the bowl.  I scrubbed the externals of the pipe with undiluted Murphy’s Oil Soap with a tooth brush. I rinsed it under running warm water to remove the soap and grime. The bowl and rim top cleaned up really well with the lava coat removed. The inner edge of the rim was in good condition. I polished the briar with micromesh sanding pads – dry sanding with 1500-12000 grit pads. I wiped the briar down after each sanding pad with a damp cloth to remove the sanding debris.  I worked some Before & After Restoration Balm into the surface of the briar with my fingertips to clean, enliven and protect the briar. I let the balm sit for 15 minutes and then buffed with a cotton cloth to raise the shine. The photos show the bowl at this point in the restoration process. I scraped out some thick tar on the mortise walls with a pen knife. Afterwards, I cleaned out the inside of the mortise, shank and airway in the stem with alcohol, cotton swabs and pipe cleaners.I set the bowl aside and turned my attention to the stem. I “painted” the stem surface on both sides with the flame of the lighter to try and lift the deep tooth marks. I was able to lift them significantly but some deep spots remained. I filled those in with black CA glue and set the stem aside to let the repairs harden.I flattened the cured repairs with a small file and then sanded them with 220 grit sandpaper to blend them into the stem surface. I started polishing the stem with 400 grit wet dry sandpaper. I polished the stem with micromesh sanding pads – wet sanding with 1500-12000 grit sanding pads. I wiped it down after each sanding pad with Obsidian Oil. I polished it with Before & After Pipe Stem Polish – both Fine and Extra Fine.   I always am excited to finish working on a pipe. This Made in Ireland Peterson’s Kapet Billiard is no exception. I put the pipe back together and buffed it with Blue Diamond on the buffing wheel. I gave the bowl and the stem multiple coats of carnauba wax. I buffed the pipe with a clean buffing pad to raise the shine and hand buffed it with a microfibre cloth to deepen the shine. It is fun to see what the bowl looks like with the black vulcanite taper stem. This Classic looking Peterson’s Kapet Smooth Billiard feels great in my hand. It is light and well balanced. Have a look at it with the photos below. The dimensions are Length: 5 ½ inches, Height: 1 ½ inches, Outside diameter of the bowl: 1 1/8 inches, Chamber diameter: ¾ of an inch. The weight of the pipe is 30 grams/1.06 of an ounce. I will be putting it on the rebornpipes store shortly in the Irish Pipe Makers section if you are interested in it. Thanks for walking through the restoration with me as I worked over this pipe. Thanks to each of you who are reading this blog.

Restoring a Generation 1.5 Kirsten – Made in U.S.A. K


Blog by Steve Laug

This past week I received an email from a fellow named George. He was hunting for a specific Kirsten Pipe that he wanted as a gift for his son. I am including his first correspondence with me about the pipe.

Hi Steve

I am inquiring about the Kristen Companion K Straight Pipe. I read the posting on this pipe and am wondering if there is any place where I can purchase this style pipe. My father had and used this style pipe. It was his favorite of all the pipes he had. He had purchased it because the bowl was replaceable. He was very poor growing up, coming out of the Depression and WWII times and every penny counted. Having a pipe that he could replace just the bowl and not have the expense of purchasing the entire pipe appealed to him. My son is looking for this pipe to remind him of his grandfather and I want to find one for my son. Any leads you could provide me would be deeply appreciated. Thank you.

I wrote him back and sent him a picture of an anodized Kirsten Companion K and polished aluminum Kirsten K both of which I had here in my clean up queue. I asked him to have a look and get back to me on whether one or both would fit his needs.He wrote me back and gave me a bit of the back story on the pipe he was seeking. I have included a portion of that email below.

Hi Steve,

Thank you so very much for getting back to me. As with any pipe, there is always a back story, but I will only relate the Reader’s Digest version.  I have a son who remembers his grandfather’s (my dad’s) pipe of this style and regrets that he was only 14 and too young to speak up and get one of my dad’s pipes when he passed in 1982.  I am trying to surprise my son with this replica of my dad’s favorite pipe.  I am thrilled you have two of this style and are willing to sell one or both… I do like the bowl on the lower one better since my dad had only very plain bowls…

George

I corresponded with George and answered his questions regarding the difference on the two pipes and he wrote back with his choice. I quote from that email as follows.

Steve,

Thank you for your reply and your clear explanation of the difference in the pipes.  I would be interested in the smooth finished as that is the type pipe my dad had.  The less ornate, smooth finished, brown bowl would be the one I would like. Please keep my informed, but there is no rush on getting the pipe to me as I want to send it to my son on my father’s birthday which was on 18 February… Thanks for your help in doing this for my son and my dad’s memory.

George

With his choice made I knew what pipe I was working on next – a Kirsten metal pipe with a smooth briar Dublin bowl with carvings around the smooth finish. It is stamped on the left side of the shank, Kirsten in a cursive script. On the underside it is stamped Made in U.S.A. – K.

Here is some background information on the brand. These pipes were made for a long period of time in the Seattle, Washington area of the US. They came in four generations or iterations – Generation 1, 1.5, 2 and 3. The stamping on this one, the absence of a metal cap to hold the bowl, and the presence of the rubber O rings on the metal valve and on the stem insert, point to it being a Generation 1.5 pipe or a transitional one.

I am thankful to Dave Whitney for the information he provided for an earlier blog on Kirstens to help date this pipe (https://rebornpipes.com/2012/11/03/kirsten-generation-1-1-5-2-3/). The blog gives following information on the Generation 1.5 – transitional period – mid to late 50’s.

This was an experimental stage. Kirsten realized that the bit and insert were prone to seizure as the condensate dried. This model always has O-rings on the metal insert, and later models can have O-rings on both. Same markings, as I remember it. There is no metal cup spacer under the bowl. This generation has O rings either on the valve or mouthpiece but no O rings on the other end. This transitional period is stamped “Pat. Pending” and “Pats. & Pats. Pending” some with “Made in U.S.A. It seems like the company was using surplus parts to combine into this series of pipes. This particular pipe is stamped K after the U.S.A. thus making it a Companion.

With that I knew that the Kirsten K I was working on was a Companion (what George had asked for). It was made from the mid to late 1950s during the transitional period of Kirsten manufacture. It will be a great, smokable piece of both Kirsten history and George’s family history once it is finish. Now it was time to work on the pipe itself.

Somewhere along the journey of this pipe Jeff had done a great cleanup on the pipe. He reamed the bowl with a PipNet pipe reamer and followed up with a Savinelli Fitsall pipe knife to remove the cake. He scrubbed out the mortise and the airway in the shank and the stem with alcohol, cotton swabs and pipe cleaners. He scrubbed the bowl exterior and the aluminum barrel with a tooth brush and Murphy’s Oil Soap to remove the grime on the finish of the bowl and the lava from the rim top. He rinsed it under running water. One of the benefits of this scrub is that it also tends to lift some of the scratches and nicks in the surface of the briar. He dried it off with a soft cloth. He cleaned the internals and externals of the aluminum barrel and the vulcanite stem with alcohol, pipe cleaners and cotton swabs. He soaked the stem in Before & After Pipe Stem Deoxidizer and rinsed it off with warm water and cleaned out the airway in the stem with alcohol, pipe cleaners and cotton swabs. I took photos of the pipe as I saw it when I put it on the table.   I took photos of the rim top and stem to show the condition. The rim top and beveled edge looked amazing. The stem was vulcanite and there were tooth marks and chatter on both sides ahead of the button. I took photos of the stamping on the sides of the aluminum barrel. They are clear and readable as noted above.   I removed the stem from the barrel and the flow adjuster valve from the front of the barrel. I removed the bowl from the top of the shank and took a photo of the pipe to give a sense of the components of the pipe.I set the parts aside and worked on the bowl. I removed the screw from the bottom of the bowl so that I could clean up the bowl. I sanded the inside of the bowl and topped the rim top to remove the burning and darkening. I worked on the inner edge with a folded piece of 220 grit sandpaper to smooth out the darkened and damaged inner edge of the bowl. In the photo below there is a mark at the 5 o’clock section of the rim top below. The mark is actually a fill in the rim top. It is solid and undamaged. Once finished, the top and inner edge looked better.I used a Maple stain pen to restain the rim top to match the sides of the bowl. Once it was finished and polished it would look a lot better.I polished the bowl sides and top with micromesh sanding pads – dry sanding with 1500-12000 grit pads. I wiped it down with a damp cloth after each sanding pad to remove the grime. The finish began to look much better. I rubbed the bowl down with Before & After Restoration Balm and worked it into the grooves as well as the smooth surface of the briar. I let it sit for 15 minutes then buffed it off with a soft cloth. The bowl took on a rich glow and the grain shown through the finish. I polished the aluminum valve on the from of the barrel with 4000-12000 grit micromesh pads to polish off the oxidization that was on it when I first took it out of the box. It shined up very well. I coated the rubber gasket on the valve with some Restoration Balm as it worked to bring the rubber back to life. Once it had sat for awhile I wiped it off and put the valve back in the barrel of the pipe and the bowl. The valve was easily adjustable and would act like a flue on a wood stove when the pipe was smoked. I set the bowl and barrel aside and turned my attention to the stem. I “painted” the vulcanite stem surface with the flame to lift the tooth marks. I was able to lift them considerably. I filled in the remaining tooth marks with clear CA glue and set it aside for the repairs to cure. I used a small file to flatten the repairs and start the process of blending them into the surface of the stem. I then sanded them with 220 grit sandpaper to blend them into the surface of the vulcanite stem. I used micromesh sanding pads to polish the stem and bring back the shine. I dry sanded the stem with 1500 – 12,000 grit pads and rubbed it down with Obsidian Oil after each sanding pad. I polished it with Before & After Fine and Extra Fine Polish and then gave it a final coat of Obsidian Oil and let it dry. This Kirsten Gen. 1.5 Made in U.S.A. – K straight pipe with a vulcanite saddle stem has a smooth reddish finish. The rich reds and blacks of the contrasting stain makes the grain come alive with the polishing and waxing. I buffed the barrel lightly with the Blue Diamond and also buffed the bowl. I gave the bowl and barrel several coats of carnauba wax and then lightly buffed it with a clean flannel buffing pad to raise the shine. I put the vulcanite stem back on the bowl and carefully buffed the pipe with Blue Diamond on the buffing wheel using a light touch on the briar and followed that by buffing the entire pipe with a clean buffing pad. I hand buffed the pipe with a microfiber cloth to deepen the shine. This older Kirsten Companion K is a great looking pipe and the Dublin bowl gives it a distinctive look. Give the finished pipe a look in the photos below. The dimensions of the pipe are Length: 5 ½ inches, Height: 1 ¾ inches, Outside diameter of the bowl: 1 ¼ inches, Chamber diameter: ¾ of an inch. The weight of the pipe is 1.66 oz./46 grams. The finished pipe is shown in the photos below. It is ready for George to give to his son in memory of his grandfather. Thanks for reading this blog and my reflections on the pipe while I worked on it. There are many more to come!

Restoring an Italian Made Gulden Dansk Long, Oval Shank Brandy


Blog by Steve Laug

Last week I received an email from Sonny, the fellow I had restored the Gulden Dansk 9200 Freehand Dublin. He was sending me a package with what he called the brother to that Gulden Dansk pipe to work on that he wanted restored. It arrived this week and it was another old Gulden Dansk pipe made by Savinelli with a vulcanite saddle stem. He wanted me to restore it like I had the other one. It had the same rusticated finish with a tight pattern around the bowl. The finish was dirty with dust in the grooves but it was still quite pretty. The rim top was rusticated to match the bowl finish. The rim top was dirty with lava overflow filling in the grooves. The edges of the rim were very good. The pipe was stamped on the underside of the shank and read Gulden Dansk. It was quite lightweight and would clean up quite nicely. In chatting with him over email that he wanted the pipe cleaned up and restored. The stem was oxidized and the GD stamp was faded but the stamping looked to be deep enough to try to restain it. I am including the photos that Sonny sent me. It is an intriguing looking pipe. When I received the pipe in the mail on this week, I went back to the previous blog I did for Sonny and reread what I had written there from a Blog that Kenneth wrote about a pair of pipes he had worked on – a Gulden Dansk and a Silveren Dansk. I turned to his blog and read through what he had written about the brands there (https://rebornpipes.com/tag/savinelli-made-gulden-dansk/). I quote the research that Kenneth did on the brand before I started my clean up work. It is very helpful and tied the pipe brand to Savinelli as I assumed looking at it.

The brands Gulden Dansk and Silveren Dansk are ones about which there is very little information. I cobbled together as much information as I could, and I will do my best to record that here. Both brands are sub-brands of Savinelli, according to smokingpipes.com. You can see in the photo below that smokingpipes.com states this clearly, and they are quite knowledgeable. Pipedia had no information at all regarding these brands. Meanwhile, pipephil.eu had precious little info (see below). One small clue is their reference to Italy in the Gulden Dansk image. Comments from some old pipe forums suggest that the brand(s) might be made for the Canadian market and came to full prominence in the early 1980s. See below.The newspaper ad above (sorry for the poor quality) is taken from the Montreal Gazette, November 1st, 1980. It shows that, in addition to pipes, they also sold tobacco.Furthermore, I found Canadian trademark registrations for both brands. I have shown some of that information below. For reasons unknown, the Silveren Dansk trademark is still active, whilst the Gulden Dansk one has expired. I also found an Australian trademark registration for the same, but it was noted on the Australian site that the origin of the application was Canada. Kenneth concluded his work as follows:

In short, we can say a few things about both Gulden Dansk and Silveren Dansk. They were both made by Savinelli, probably for the Canadian market (and perhaps other markets). The Canadian connection obviously fits with the gentleman in Winnipeg. They made pipes and tobacco, and all the comments I could find on the quality of the pipes were very positive. If you have any further details on these brands, I would love to hear from you.

Now it was time to work on the pipe itself. I took photos of the pipe when I opened the box. It is a nice looking shape – a long, oval shanked Brandy with a saddle stem. It is a great looking pipe with a tight rusticated finish that was quite beautiful. The stem and shank have a slight cant and angle that looks good. You can see the finish as noted above and the oxidation on the stem as well. I took photos of the rim top and the top and underside of the stem. You can see how it fit against the shank. It is oxidized with light tooth chatter and marks on the surface on both sides. You can see the grime on the right side of the rim top and the moderate cake in the bowl. It is a nice looking pipe.The next photo shows the stamping on the underside of the shank. It is clear and readable as noted above.I removed the stem from the shank and took a photo of the parts to give a sense of the overall look of the pipe. It is really a nicely designed looking bent Dublin that will look great once it is cleaned up.I reamed the bowl with a PipNet pipe reamer using the first two cutting heads to take the cake down to briar. I followed up with a Savinelli Fitsall Pipe Knife to clean up the remnants. I sanded the walls smooth with 220 grit sandpaper wrapped around a piece of dowel. I scrubbed the exterior of the bowl with a tooth brush and undiluted Murphy’s Oil Soap. I worked over the rim top and edges and rinsed it with warm water scrubbing it while rinsing it. I scrubbed the rim top with a brass bristle wire brush to loosen up the lava coat. I dried it off and took these photos. I cleaned out the mortise and airway in the shank and the stem with cotton swabs, pipe cleaners and isopropyl alcohol until they came out clean.  With the pipe cleaned it still had a ghost of a smell to it. It was a sweet aromatic smell with lingering smells of vanilla. I stuffed the bowl with cotton bolls and twisted a plug of cotton and turned it into the shank. I used an ear syringe to fill the bowl with isopropyl alcohol and set it aside in an old ice tray to let the deghosting happen! In the morning I woke up to find the cotton bolls in the bowl to be brown around the edges and the shank cotton was also brown at the shank end. I removed it and cleaned the shank once more. The bowl smelled better and the ghost had been exorcised to a large degree. I rubbed the bowl and shank down with Before & After Restoration Balm. I worked it into the finish with my fingers and used a shoe brush to press it deep into the crevices of the sandblast. The product works to deep clean the finish on the bowl and shank and enliven and protect the briar. After it sat for 15 minutes I wiped it off with a soft cloth. The briar really came alive with a rich shine. I took some photos of the bowl at this point to mark the progress in the restoration. It is a beautiful bowl. While the bowl sat deghosting I put the stem in a Briarville Stem Deoxidizer soak. I let soak overnight. When I took it out in the morning the oxidation had risen to the surface of the vulcanite. The GD logo on the top lost its remaining colour and it is very faint.I scrubbed the vulcanite with Soft Scrub to remove the oxidation from the surface of the bowl. Once finished it looked much better.I “painted” the surface of the stem with the flame of a Bic lighter and was able to lift them a little. I filled in what remained with clear CA glue and set the stem aside to cure. I used a small file to flatten the repairs. I sanded them flat with 220 grit sandpaper and started the polishing with 400 grit wet dry sandpaper. I polished the stem with micromesh sanding pads – dry sanding with 1500-12000 grit pads. I wiped the stem down after each pad with Obsidian Oil to remove the sanding dust. I used the Before & After Pipe Polish to remove the small minute scratches left in the vulcanite. I finished by wiping the stem down with a final coat of Obsidian Oil and set it aside to dry.  As usual at this point in the restoration process I am excited to be on the homestretch. I look forward to the final look when it is put back together, polished and waxed. I put the Gulden Dansk Oval Long Shank Brandy back together. I polished the bowl and stem with Blue Diamond to polish out the scratches in the briar and the vulcanite. I gave the bowl and the stem multiple coats of carnauba wax. I buffed the pipe with a clean buffing pad to raise the shine. I hand buffed it with a microfiber cloth to deepen the shine. The pipe polished up pretty nicely. The grain really pops with the wax and polish. The shiny black vulcanite stem is a beautiful contrast to the dark browns of the bowl and shank. This rusticated Gulden Dansk Oval Long Shank Brandy was another fun pipe to work on. It really is a quite stunning piece of briar whose shape follows the flow of the grain on the briar. The pipe is comfortable pipe to hold in the hand. The finished pipe is shown in the photos below. The dimensions of the pipe are Length: 5 ¾ inches, Height: 2 inches, Outside diameter of the bowl: 1 ¼ inches, Chamber diameter: ¾ of an inch. The weight of the pipe is 1.80 ounces/ 51 grams. I will be sending this beautiful Gulden Dansk back to the pipeman who dropped it off. Thanks for reading my reflections on the pipe while I working on it.

Moving yet another one of my own – Harriss 863 Bent Billiard


Blog by Steve Laug

This is another pipe that I have taken out of my personal collection as I just do not use enough to warrant keeping it. This pipe was one that I purchased on a pipe hunt many years ago. I honestly can’t remember when or if I even smoked it. But I know from its condition it has not been smoked much. The airway in the shank and the mortise were quite clean. The smooth finish and rim top were in good condition. There was some damage to the inner edge of the bowl and it was slightly out of round. The stamping on the pipe is very simple on the left side of the shank it is stamped Harriss in block letters. On the underside it is stamped with a shape number 863. There nothing stamped on the stem on either side or the top. The rich brown finish goes well with the vulcanite saddle stem. It is in good condition with some light tooth chatter and some tooth marks ahead of the button on both sides. I took photos of the pipe before I did my clean up work on it. I took a photo of the bowl and rim top to verify the description above. I also took photos of the stem surface showing the light chatter and tooth marks on both side. I took a photo of the stamping on the sides of the shank. It is clear and readable as noted above.  I took the stem off the bowl and took a photo of the pipe to give a sense of proportion of the pipe. You can also see the deep and rugged rustication on the briar and it is a beauty.Now it was time to work on the pipe. I worked on the inner edge of the bowl 220 grit sandpaper to give the inner edge a slight bevel and clean up the damage that was present there. The rim came out looking quite good. I reamed the light cake in the bowl with a Savinelli Fitsall Pipe Knife. I sanded the walls of the bowl to smooth them out with a piece of 220 grit sandpaper wrapped around a dowel.I cleaned the mortise and airways in the shank and stem with cotton swabs, pipe cleaners and isopropyl alcohol to remove the debris and tars from my smoking. You can see that it was not too bad as I tend to keep my pipes clean. I polished the rim top and the briar with micromesh sanding pads – dry sanding with 1500-12000 grit pads. I wiped the bowl down with a damp cloth after each sanding pad to remove the dust and debris. The rim top polished out and matched the oil cured look of the bowl and shank. The bowl was in such good condition that decided to give the bowl and shank a coating of Before & After Restoration Balm. I worked it into the surface of the briar with my fingertips to clean, enliven and protect the briar. I let the balm sit for 15 minutes and then buffed with a cotton cloth to raise the shine. The photos show the bowl at this point in the restoration process. I set the bowl aside and sanded out the tooth marks and chatter on the stem surface and button with 220 grit sandpaper. I started polishing the stem with 400 grit wet dry sandpaper. I was able to smooth out the marks on the surface of both sides.I polished the stem with micromesh sanding pads – dry sanding with 1500-12000 grit pads. I rubbed it down between pads with Obsidian Oil. I polished it with Before & After Fine and Extra Fine Pipe Stem Polish. I wiped it down with some Obsidian Oil and buffed it off. It is a beautiful stem. I am excited to put the final touches on the Harriss 863 Bent Billiard. I put the pipe back together and buffed the stem with Blue Diamond on the buffing wheel. I gave the bowl and the stem multiple coats of carnauba wax. I hand buffed the pipe with a clean buffing pad to raise the shine. It is fun to see what the polished bowl looks like with the beautiful grain, the triple sandwiched brass and black acrylic band on the shank end and the polished vulcanite saddle stem. This smooth Harriss Bent Billiard is great looking and the pipe feels great in my hand. It is light and well balanced. Have a look at it with the photos below. The dimensions are Length: 5 inches, Height: 2 inches, Outside diameter of the bowl: 1 1/8 inches, Chamber diameter: ¾ of an inch. The weight of the pipe is 52 grams/1.80 ounces. It is a beautiful pipe that I will soon be putting on the rebornpipes store in the English Pipe Makers Section. If you are interested in adding it to your collection send me an email or a message. Thanks for walking through the restoration with me as I worked over this pipe. Thanks to each of you who are reading this blog.

Moving another one of my own – an American Artisan Rusticated Cherrywood Pipe


Blog by Steve Laug

This is another pipe that I have taken out of my personal collection as I just do not use enough to warrant keeping it. This pipe was given to me in a group of pipes and I used it a bit when it came in. It is from a period of my journey where I smoked solely Virginia tobaccos so it is quite clean. The airway in the shank and the mortise were quite clean. The rusticated finish and rim top were in excellent condition. I don’t remember who made the pipe but I do remember it was a relatively new artisan American carver. It is stamped on the heel of the bowl with the letters B/B in a shield. There was a light cake in the bowl but the top and inner edge of the bowl clean and a bit faded. There is a polished steel band on the shank end. It is loose and the attachment is a bit odd. The shank end and stem end are both stepped down to receive the band. The blue and gold/tan acrylic stem is in good condition with some light tooth chatter ahead of the button on both sides. It has a inserted Delrin tenon that is a great fit in the shank. I took photos of the pipe before I did my clean up work on it. I took a photo of the bowl and rim top to verify the description above. I also took photos of the stem surface showing the light chatter on either side.I took a photo of the stamping on the heel of the bowl. It is clear and readable as noted above.  I took the stem off the bowl and took a photo of the pipe to give a sense of proportion of the pipe. You can also see the loose band and the step down area on the shank end and stem end. There was still some bits of glue on the shank end that I would clean off when I reglued the band. I used a toothpick to spread some Weld Bond all purpose glue around the shank end.I pressed the band on the shank end and wiped off the excess glue around the edge of the band.I cleaned up the rustication on the rim top with a brass bristle wire brush. It looked cleaner and more distinct.I touched up the stain on the rim top and worked it into the faded spots on the rim top, working it down into the valleys of the rustication.Now it was time to work on the pipe. I cleaned up the light cake in the bowl with a Savinelli Fitsall Pipe Knife. I sanded the bowl walls with a piece of dowel wrapped in 220 grit sandpaper.I cleaned the mortise and airways in the shank and stem with cotton swabs, pipe cleaners and isopropyl alcohol to remove the debris and tars from my smoking. You can see that it was not too bad as I tend to keep my pipes clean.The bowl was in such good condition that decided to give the bowl and shank a coating of Before & After Restoration Balm. I worked it into the surface of the briar with my fingertips and a horsehair shoe brush to clean, enliven and protect the briar. I let the balm sit for 15 minutes and then buffed with a cotton cloth to raise the shine. The photos show the bowl at this point in the restoration process. Since the stem was in quite good condition other than tooth chatter I polished out the chatter with micromesh sanding pads – dry sanding with 1500-12000 grit pads. I rubbed it down between pads with Obsidian Oil. I polished it with Before & After Fine and Extra Fine Pipe Stem Polish. I wiped it down with some Obsidian Oil and buffed it off. It is a beautiful stem. I am excited to put the final touches on this great looking American Made Artisan BB Rusticated Cherrywood. I put the pipe back together and buffed the stem with Blue Diamond on the buffing wheel. I gave the bowl multiple coats of Conservator’s Wax and the stem multiple coats of carnauba wax. I hand buffed the pipe with a clean buffing pad to raise the shine. It is fun to see what the polished bowl looks like with the rugged rustication all around it. Added to that the polished blue and gold/tan acrylic stem combined with the bowl and make a stunning pipe. This rusticated BB Cherrywood is great looking and the pipe feels great in my hand. It is light and well balanced. Have a look at it with the photos below. The dimensions are Length: 5 inches, Height: 2 inches, Outside diameter of the bowl: 1 ½ inches, Chamber diameter: ¾ of an inch. The weight of the pipe is 59 grams/2.08 ounces. It is a beautiful pipe that I will soon be putting on the rebornpipes store in the American Pipe Makers Section. If you are interested in adding it to your collection send me an email or a message. Thanks for walking through the restoration with me as I worked over this pipe. Thanks to each of you who are reading this blog.

Moving another one of my own – a Hungarian Made Bruyere Szabo Dublinesque Pipe


Blog by Steve Laug

This is another pipe that I have taken out of my personal collection as I just do not use it too much. I picked this pipe up along with another on one of my trips to Budapest, Hungary. It is a Hungarian made pipe that I picked up at the Pipatórium . It is another pipe that I smoked solely Virginia tobaccos in so it is very clean. The airway in the shank and the mortise were quite clean. The smooth rim top and edges were in excellent condition. The smooth finish was very clean and still had a shine. It is stamped on the underside of the shank near the stem/shank joint and reads Bruyere Szabo. There was a light cake in the bowl but the top and inner edge of the bowl was dark at the back. The acrylic saddle stem is in good condition with some light tooth chatter ahead of the button on both sides. I took photos of the pipe before I did my clean up work on it. I took a photo of the bowl and rim top to verify the description above. I also took photos of the stem surface showing the light chatter on either side.I took a photo of the stamping on the underside of the shank. It was hard to capture with the camera as it is wrapped around the shank end. It is clear and readable as noted above.  I took the stem off the bowl and took a photo of the pipe to give a sense of proportion of the pipe. It is a beauty. There was also an adapter in the stem that was removable so that the pipe could be smoked with or without a filter. I turned to Pipephil’s site for a quick overview of the brand (http://pipephil.eu/logos/en/logo-s14.html). I have included a screen capture of the brand below. From that I knew that the pipe I was working on was post 1970 because of the stamping and the star on the stem.There was also a side bar that gave further information on the brand. I quote below

After the politcal changes in the early 1990s, Balázs Szabó Jr. bought back the Nagykörösi Pipe Factory established about 1930. This grandson of one of the founders renamed the corporate and focused production on briar pipes.

Pipedia has a short history on the brand (https://pipedia.org/wiki/K%C3%B6r%C3%B6s_Pipes). I quote from the page below.

The brand origins from the central Hungarian city of Nagykörös, where the Nagykörösi Pipe Factory was founded in 1930. Balázs Szabó Jr., a grandson of one of the founders, was able to buy back the company in 1989 after the politcal changes in the former Warsaw Pact territory. Now named Szabó Körös Pipe Factory.

I googled and found the website of the pipe maker (https://www.pipagyar.hu/?lang=en). I quote from the front page below.

Our company specialises in traditional handmade smoking pipes with deigns unique to Nagykőrös in Hungary. While we respect traditions, we always follow the latest trends and customer needs besides the classical and unique designs. Together with other specialist smoking pipe manufacturers and colleagues we strive to pass on smoking pipe manufacturing and the culture of pipe smoking to the next generations. It is our company philosophy to support wholesalers as well as small businesses.

THE ONLY TRADITIONAL SMOKING PIPE MANUFACTURER WITH FAMILY PASSION IN HUNGARY SINCE 1930.

The Szabó Smoking Pipe Manufacturer Ltd. is the home of Hungarian smoking pipe manufacturing, based on the high street in the city centre of Nagykőrös. It is a historical fact that wooden smoking pipes and their accessories were made exclusively in Nagykőrös even after the nationalisation took place in Hungary. We have been continuously manufacturing the usual classical pipe shapes. We follow customer needs and the latest trends and sell our smoking pipes nationally as well as internationally.

Irony of fate, that after the Change in Hungary, the Pipe Manufacture become the private property of Szabó Balázs. The Szabó’s have guaranteed and do it also nowadays that the tradition and secret of handmade pipe-craftsmanship will be continued to live up to generations. Sen. Szabó Balázs founded he firm in 1930. His son Szabó Balázs followed his father’s footsteps and now Szabó Balázs, the third in the generation directs the firm.

We have been manufacturing the classical pipe types continuously. Following the latest trends, we produce our products to Hungary and import them to different countries.I clicked on the button at the bottom of the graphic above and found the photo below that is the exact pipe that I purchased (https://www.pipagyar.hu/portfolio-posts/sc056/?lang=en). I include the photo below of the Szabo Bruyere sc056 pipe.Now it was time to work on the pipe. I cleaned up the light cake in the bowl with a Savinelli Fitsall Pipe Knife. I sanded the bowl walls with a piece of dowel wrapped in 220 grit sandpaper.I cleaned the mortise and airways in the shank and stem with cotton swabs, pipe cleaners and isopropyl alcohol to remove the debris and tars from my smoking. You can see that it was not too bad as I tend to keep my pipes clean.The bowl was in such good condition that decided to give the bowl and shank a coating of Before & After Restoration Balm. I worked it into the surface of the briar with my fingertips to clean, enliven and protect the briar. I let the balm sit for 15 minutes and then buffed with a cotton cloth to raise the shine. The photos show the bowl at this point in the restoration process. The tenon adapter used to reduce a filter tenon to a regular tenon was included with the pipe when I bought it. It is white and the end is threaded though the stem is not threaded inside to hold it. It was stained from smoking but I cleaned it up a bit with 220 grit sandpaper. I put the adapter back in the tenon.Since the stem was in quite good condition other than tooth chatter I polished it with micromesh sanding pads – dry sanding with 1500-12000 grit pads. I rubbed it down between pads with Obsidian Oil. I polished it with Before & After Fine and Extra Fine Pipe Stem Polish. I wiped it down with some Obsidian Oil and buffed it off. It is a beautiful stem. I am excited to put the final touches on this Hungarian Made Bruyere Szabo sc056. I put the pipe back together and buffed it with Blue Diamond on the buffing wheel. I gave the bowl and the stem multiple coats of carnauba wax. I hand buffed the pipe with a clean buffing pad to raise the shine. It is fun to see what the polished bowl looks like with beautiful mixed grain all around it. Added to that the polished black acrylic stem combined with the bowl and make a stunning pipe. This smooth Hungarian Made Bruyere Szabo is great looking and the pipe feels great in my hand. It is light and well balanced. Have a look at it with the photos below. The dimensions are Length: 5 ¾ inches, Height: 2 inches, Outside diameter of the bowl: 2 inches, Chamber diameter: ¾ of an inch. The weight of the pipe is 58 grams/2.05 ounces. It is a beautiful pipe that I will soon be putting on the rebornpipes store in the Pipes From Various Makers Section. If you are interested in adding it to your collection send me an email or a message. Thanks for walking through the restoration with me as I worked over this pipe. Thanks to each of you who are reading this blog.