Blog by Dal Stanton
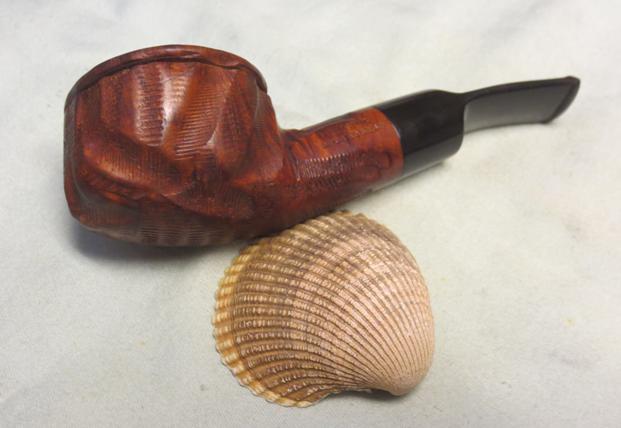
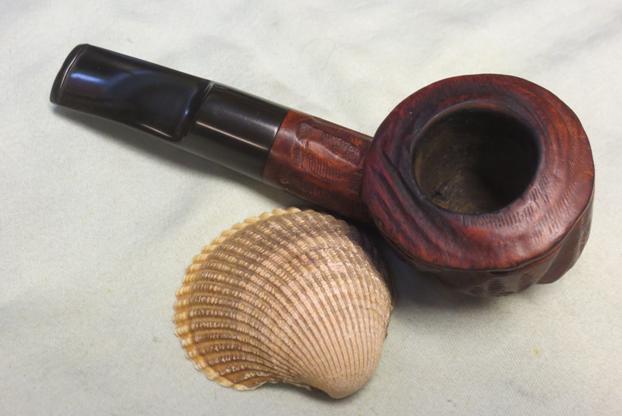
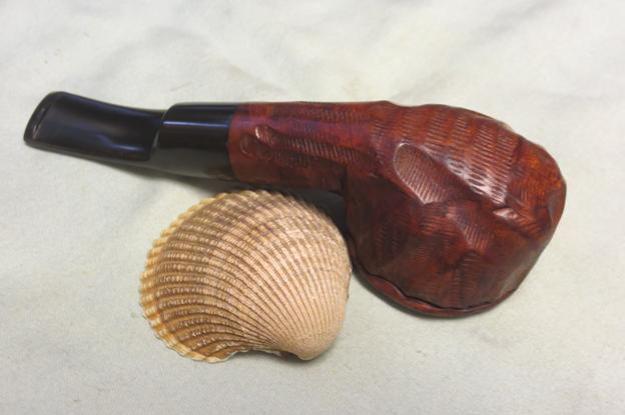
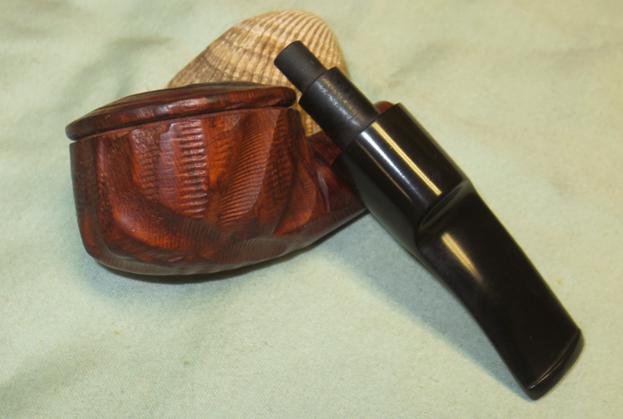
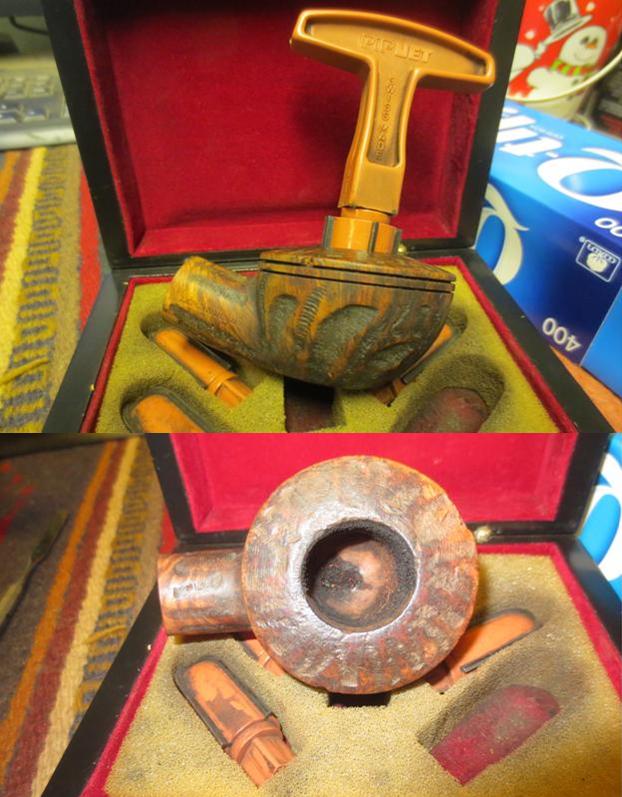
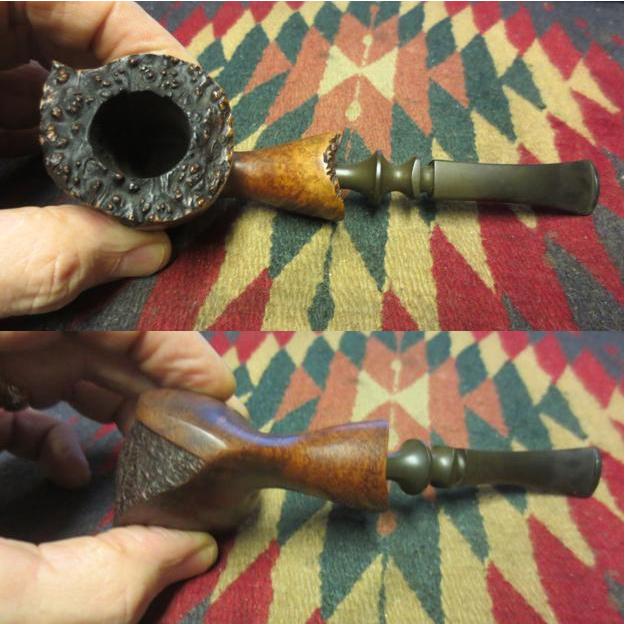
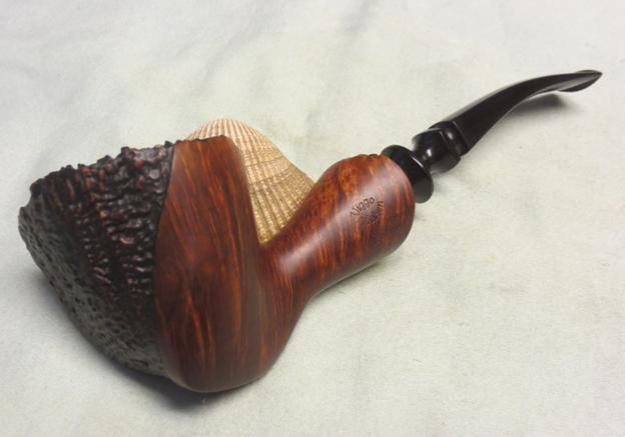
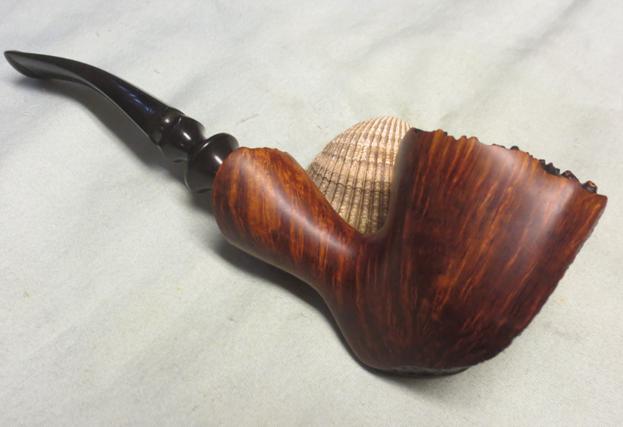
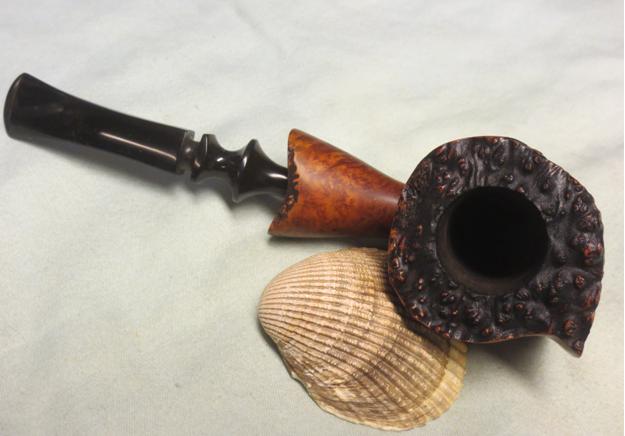
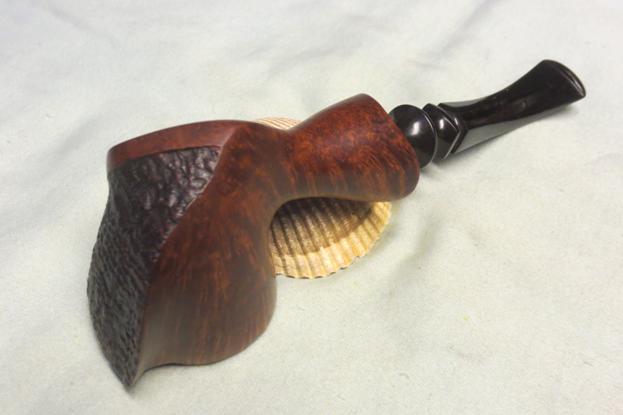
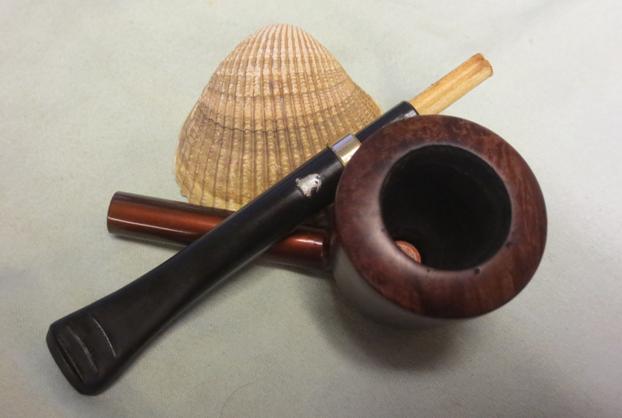
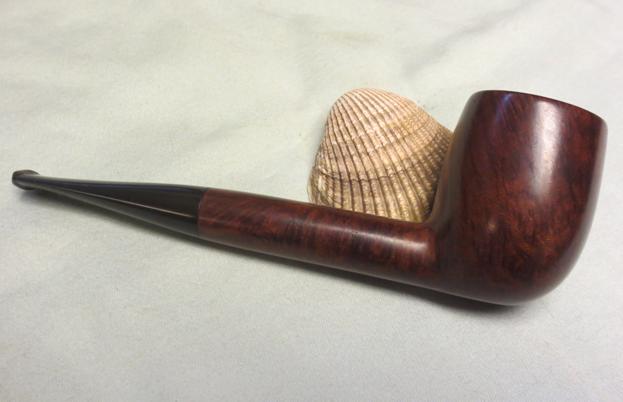
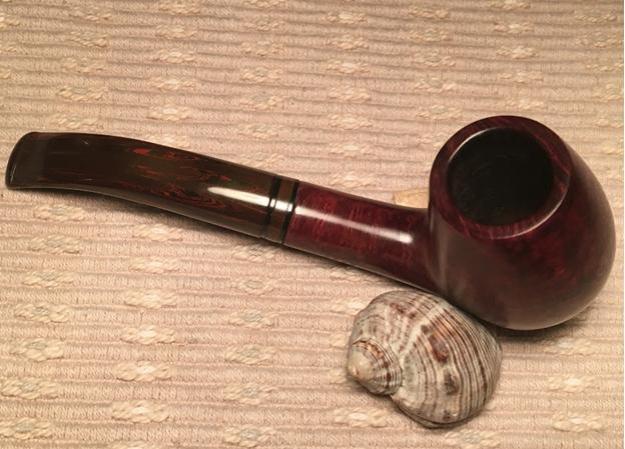
This is my third restoration from what I called the ‘Bag of 4’ that Steve and I saw at the ‘Hole in the Wall’ antique store during his visit to Sofia, Bulgaria. Thanks again for indulging my ‘newbie’ offerings. My favorite of the bunch was a Savinelli Tortuga (https://rebornpipes.com/2016/06/18/sofia-hole-in-the-wall-find-savinelli-tortuga/). The second, which I didn’t write up, was a beautiful Danske Club Vario, which I discovered on Pipedia is a Stanwell second. Behind the Tortuga, the Vario was a close second. It is now next to my Tortuga in regular rotation – a great addition to my growing collection. Take a look at a few pictures of the finished Danish Danske Club Vario. I’m drawn to the blended smooth and sandblasted briar finishes on this pipe: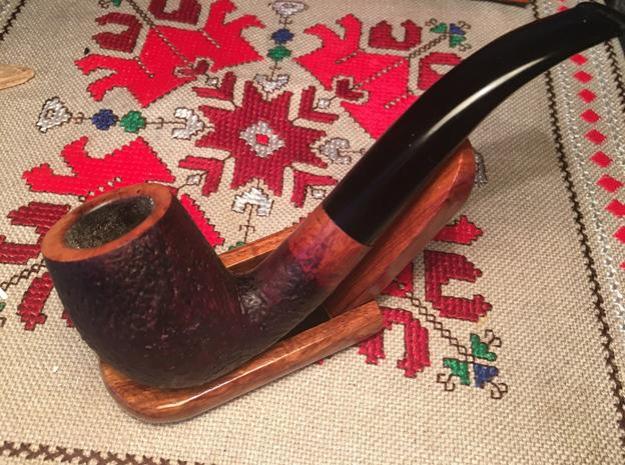
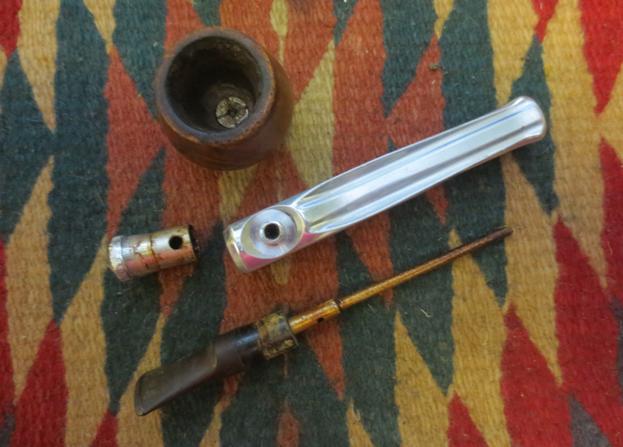
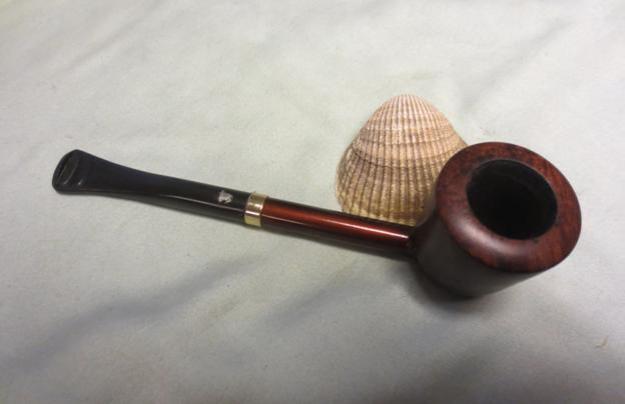
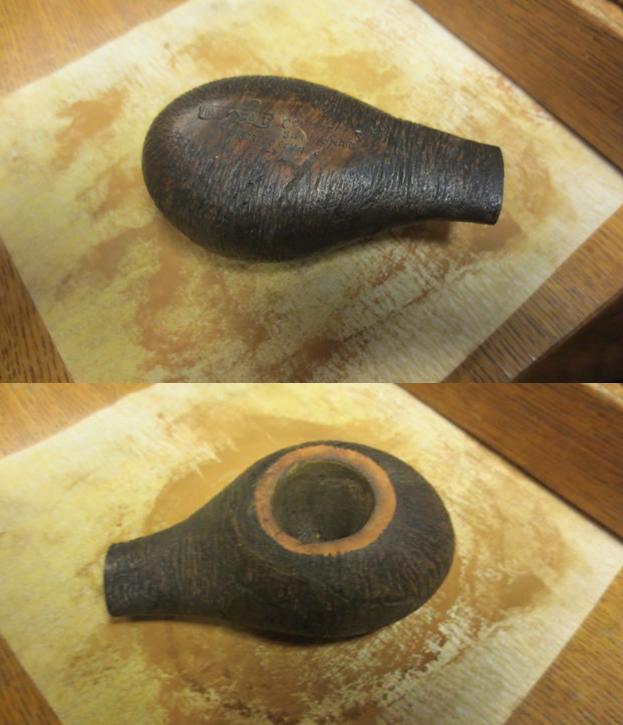
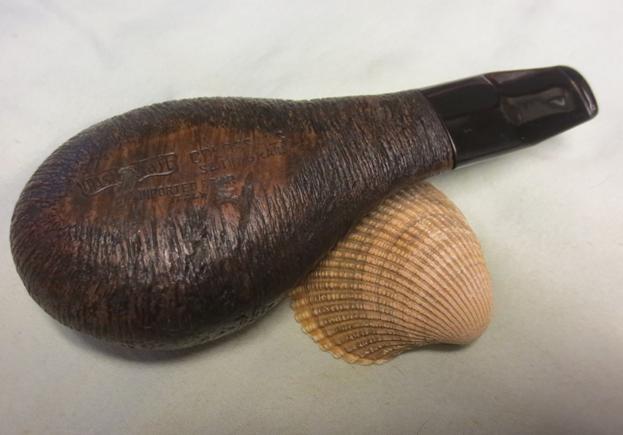
 The markings I found on pipe #3 on the left side is Butz-Choquin over Rocamar with a ‘Filter 9’ diagonal imprint. On the right side, St. Claude, France 1333, which I assume is the BC shape or series number. The Cumberland stem has the BC imprinted marking. From Pipedia I discovered a bit of the early history of the name from Pipedia:
“Jean-Baptiste Choquin of Metz started out as a tobacconist. This enterprise was prosperous; he had several employees. Among those, there was a certain Gustave Butz who was its first workman and who became his son-in-law by marrying Choquin’s daughter Marie in 1858. In 1858 Jean-Baptiste Choquin created, in collaboration with Gustave Butz, the Choquin pipe. This bent pipe with a flat-bottomed bowl was finished with an albatross-bone mouthpiece, fixed with silver rings. In 1858, still in Metz, Gustave Butz built an establishment for the manufacture of the Choquin pipe which took the name of -. In 1951, the Berrod-Regad company bought the trademark, continuing manufacture until 2002. Departing from Metz, the workshop was relocated to Saint-Claude, then also called ‘the world capital of the briar pipe,’ under the Berrod-Regad group.”
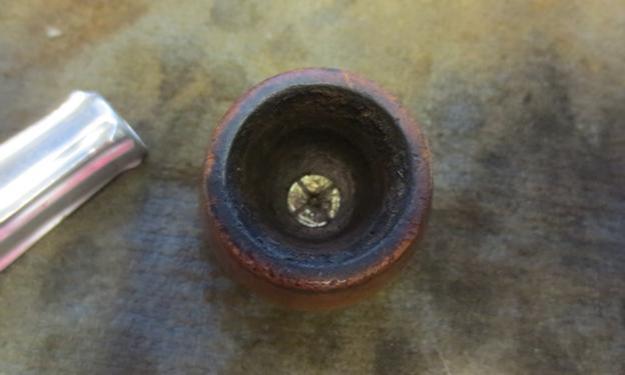
I could find nothing specific about the series name Rocamar so I decided to send an email to Butz-Choquin using their info contact from their current website which is under construction (http://www.butzchoquin.com/). We’ll see where that goes.
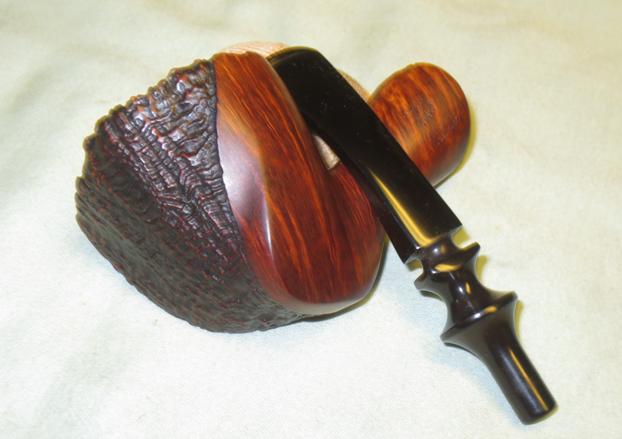
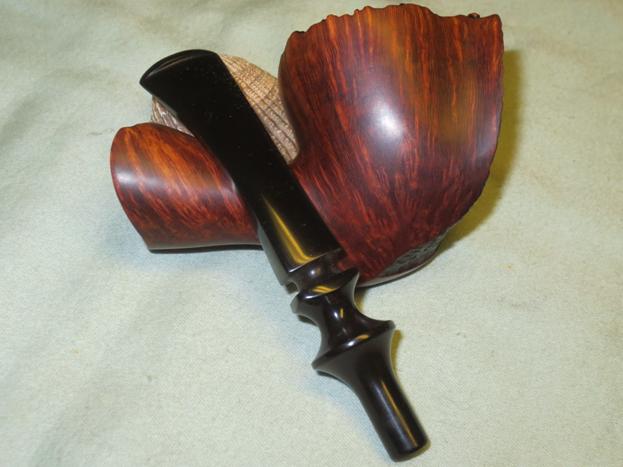
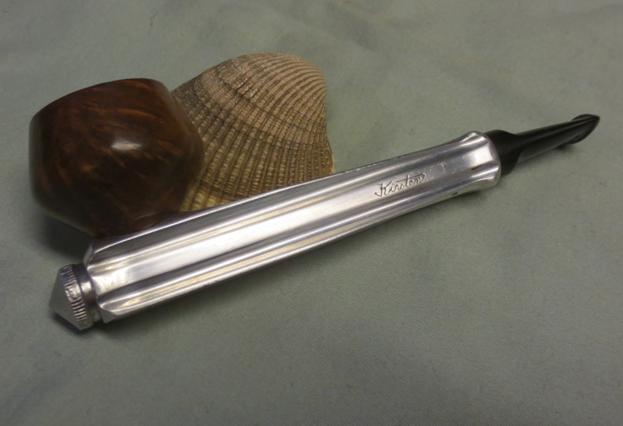
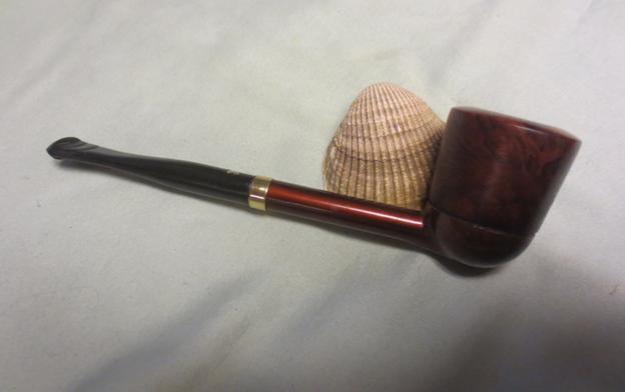
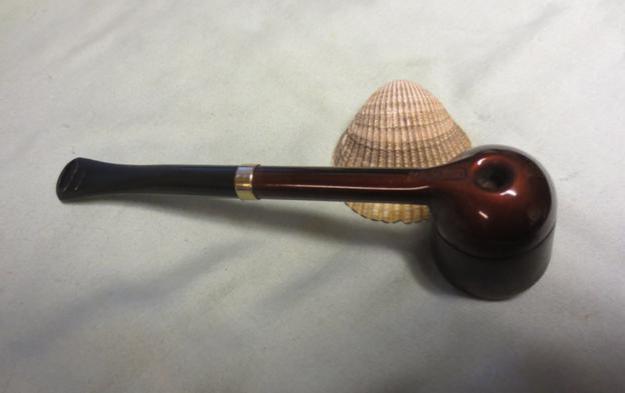
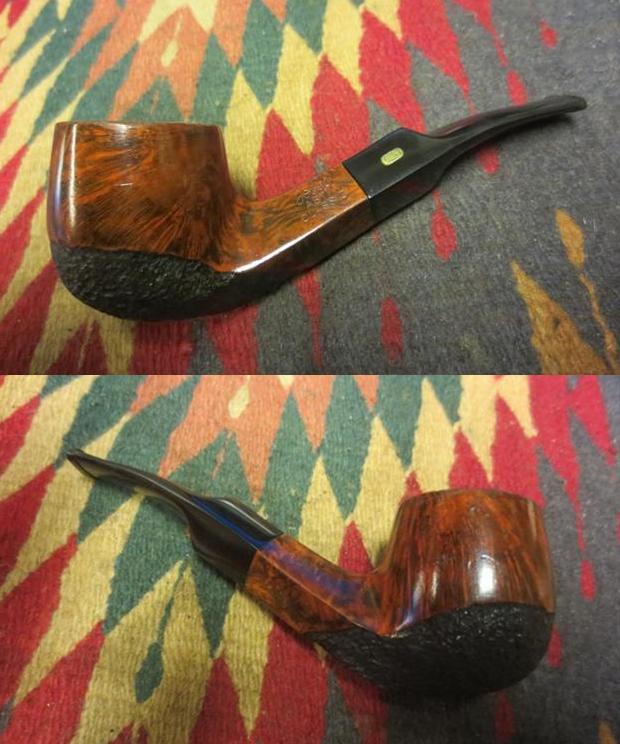
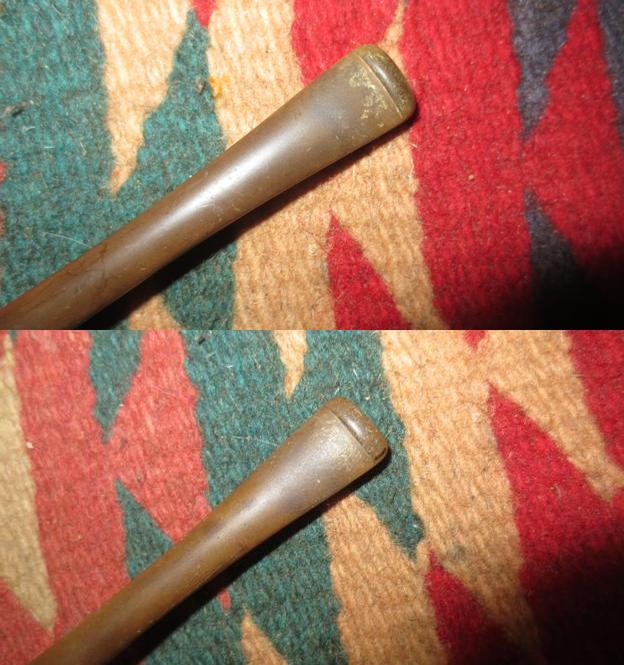
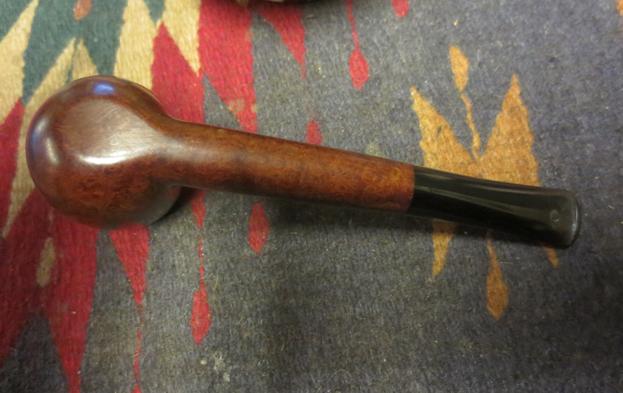
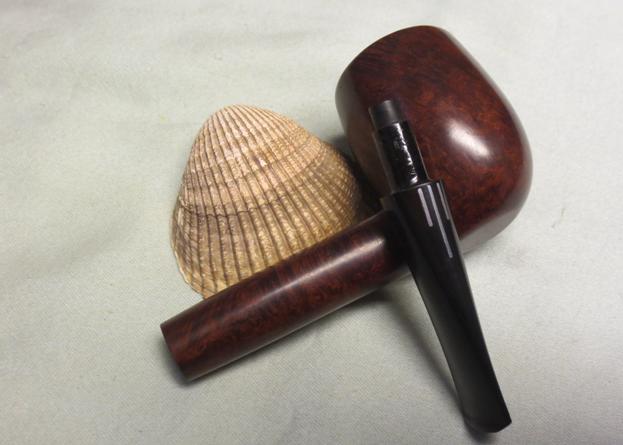
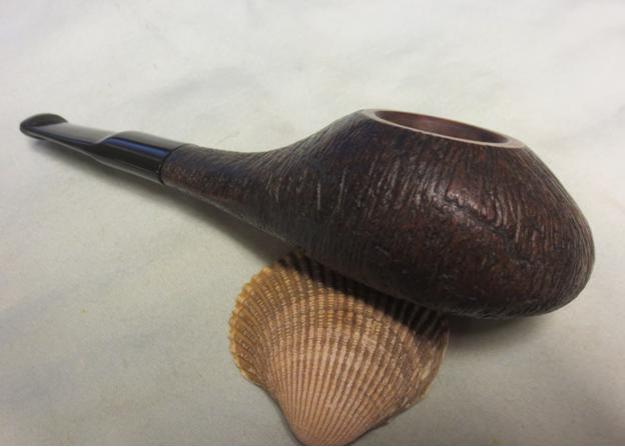
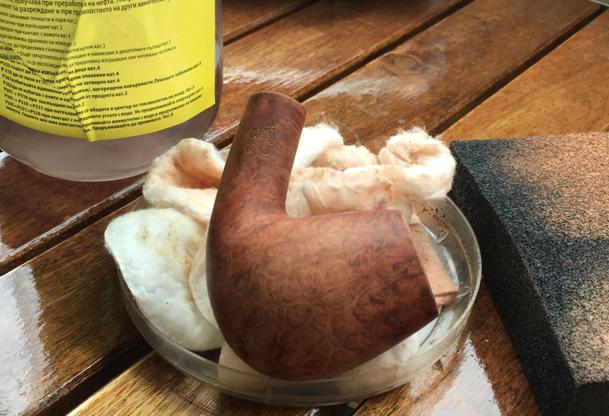
The BC Rocamar has an attractive fiery grain and the bent billiard chimney is tall and elegant to me – perhaps tending toward an egg shaped bowl. What I’m drawn to also is the bent Cumberland stem – my first to work on. Not quite knowing what kind of stem it was I did a bit of research and discovered pipesmokersforum.com a thread discussing this stem:
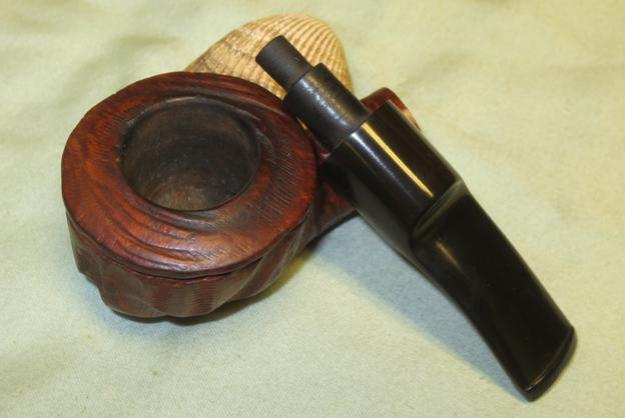
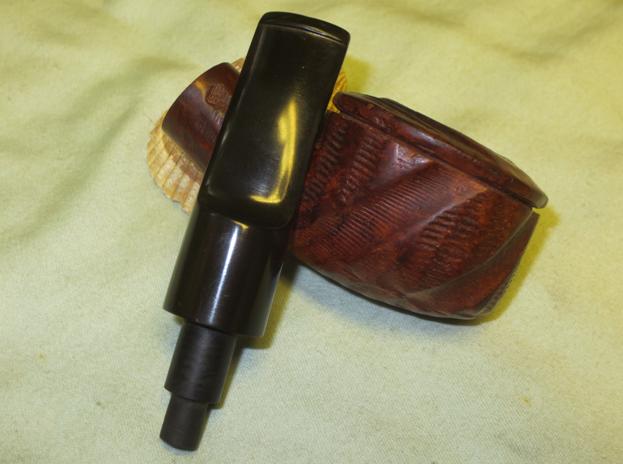
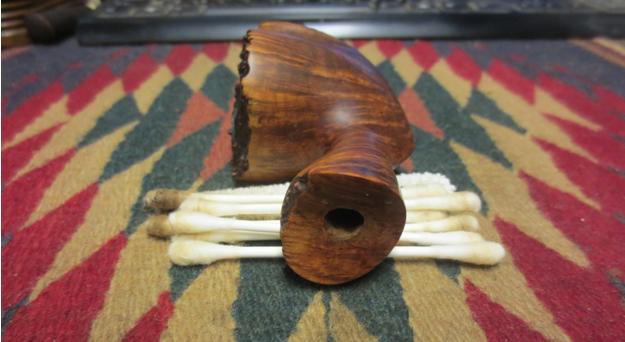
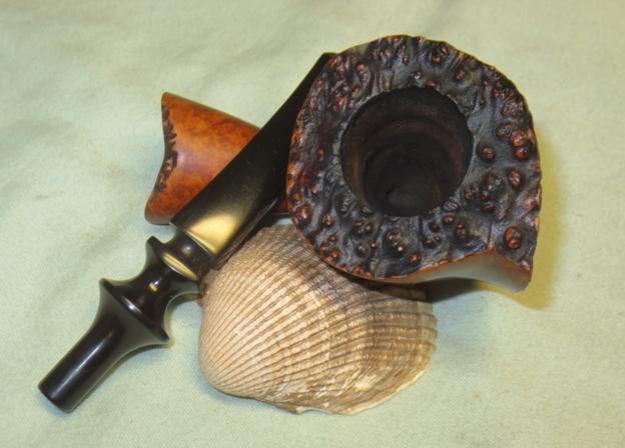
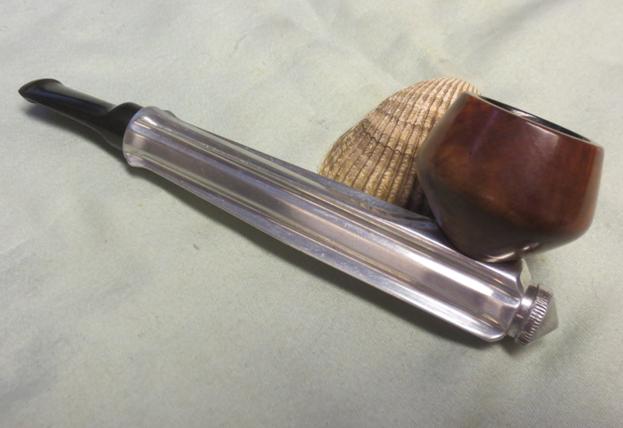
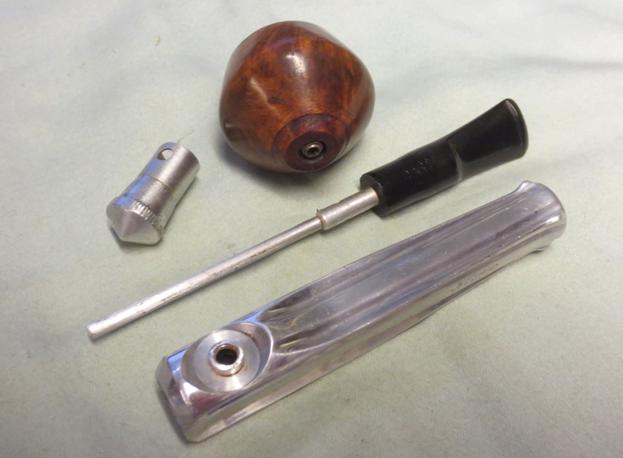
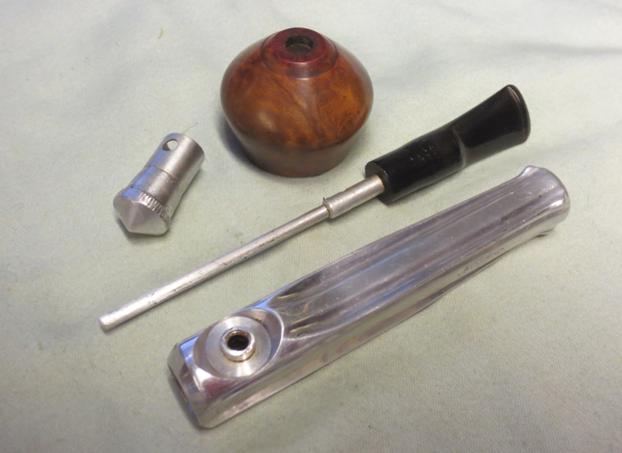
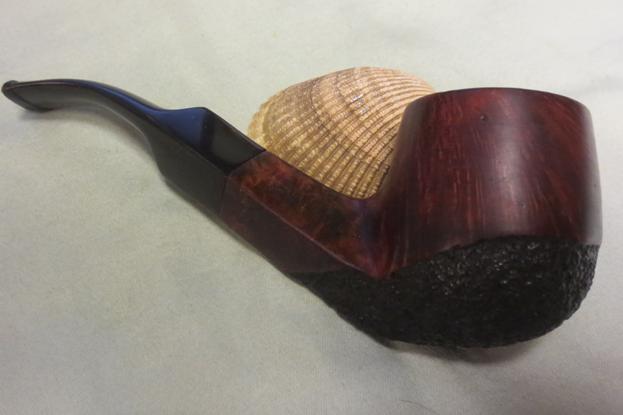
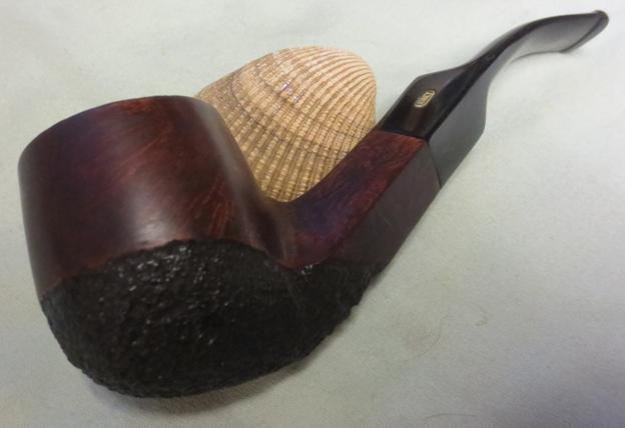
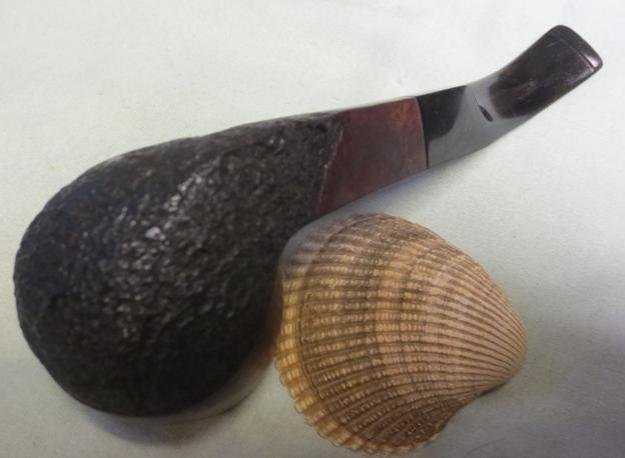
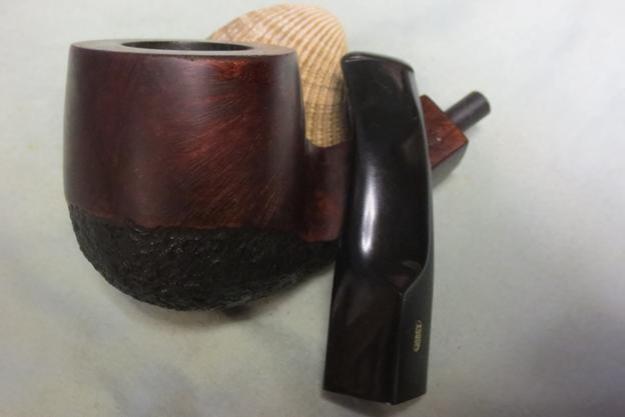
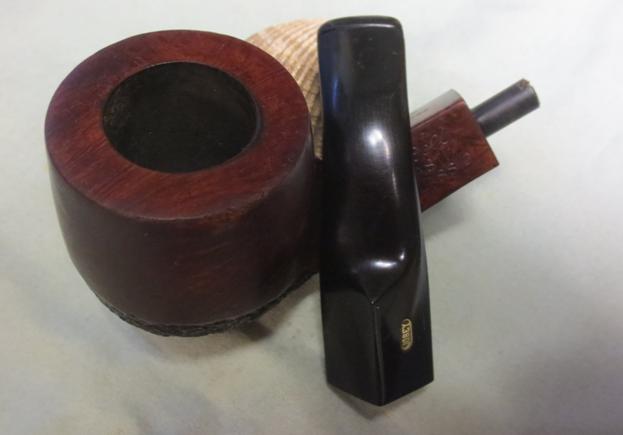
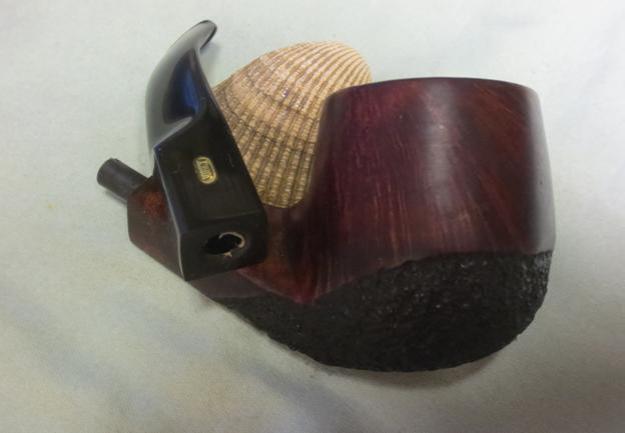
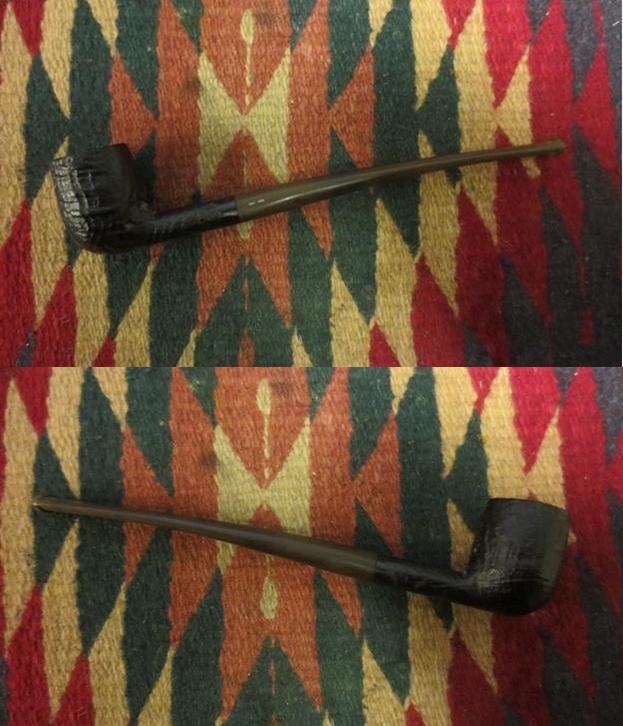
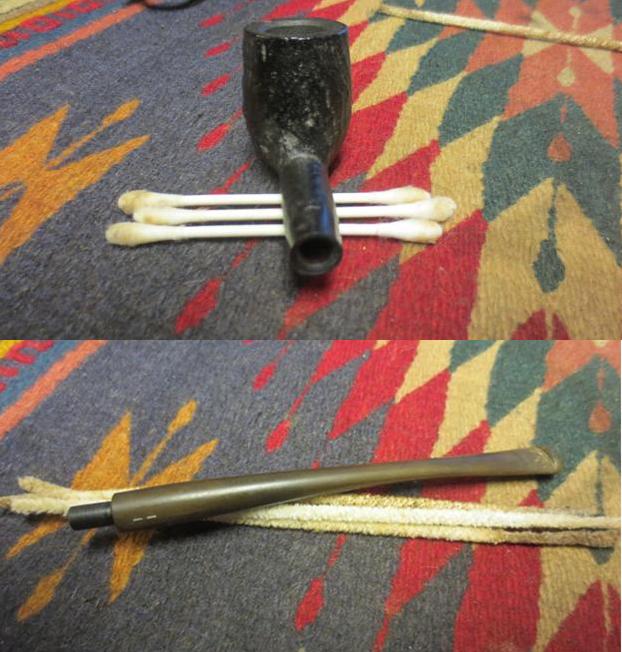
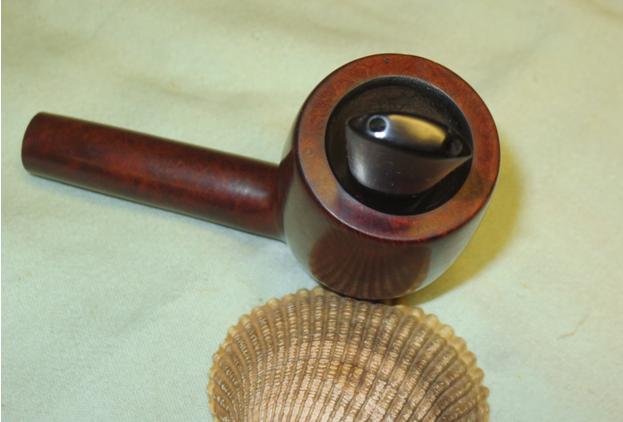
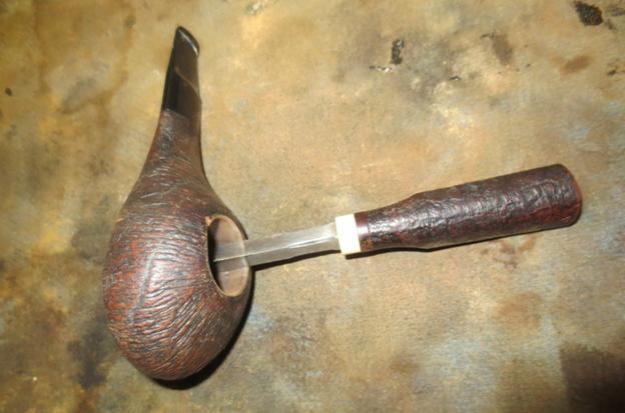
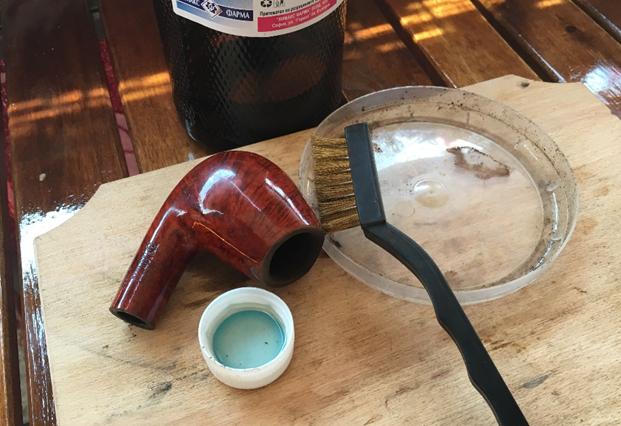
“Cumberland proper is a vulcanite rod made up from red and black rods, melted and swirled together for the brown/red marble effect. It is very soft, and oxydizes fairly quickly if the protective wax coating is scraped off. There is a harder version in ebonite, which has a higher sulfur content if I understand these things correctly, but the color combos are not quite as subdued as the vulcanite version. It’s a bit more “brick” colored.” Another comment I read was that if one found a Cumberland stem it was most likely hand cut – to me that is cool. Helpful information. Here are pictures of the BC Rocamar when it arrived home from the Hole in the Wall: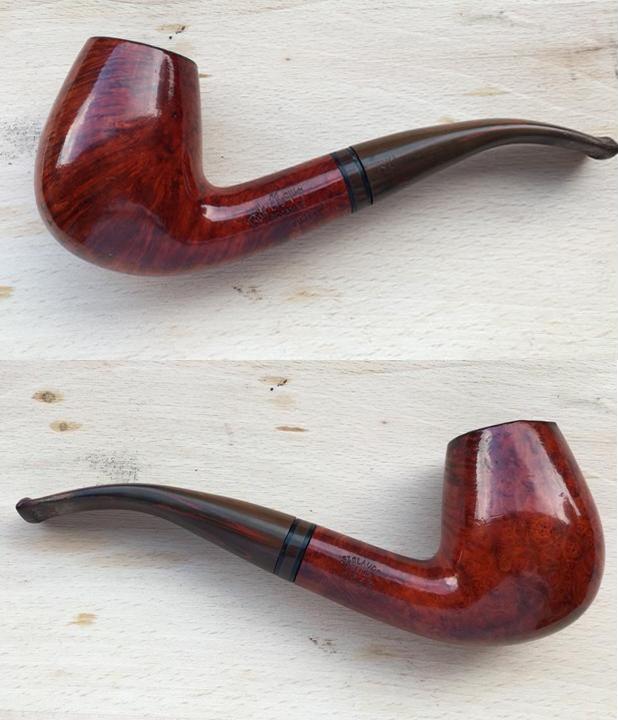

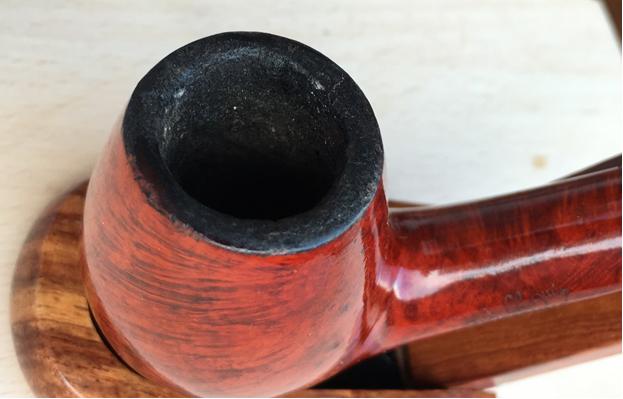
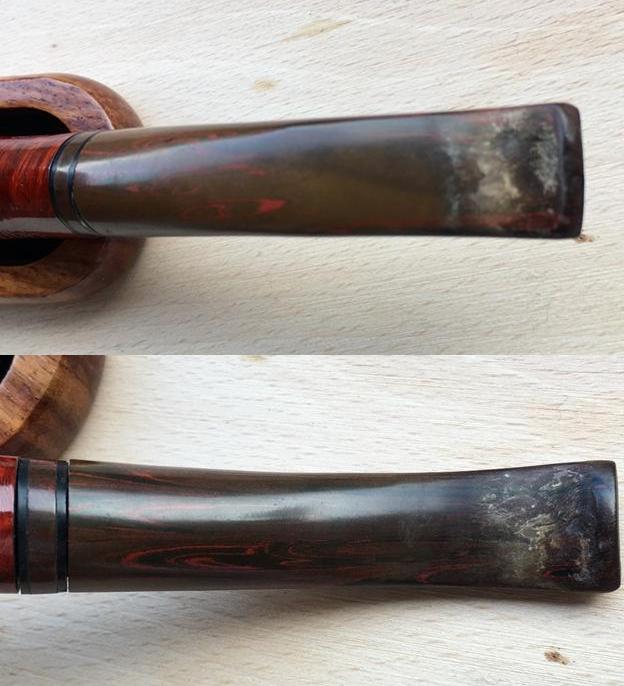
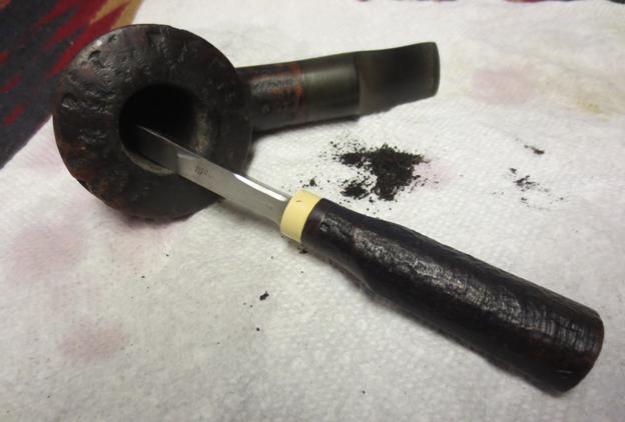
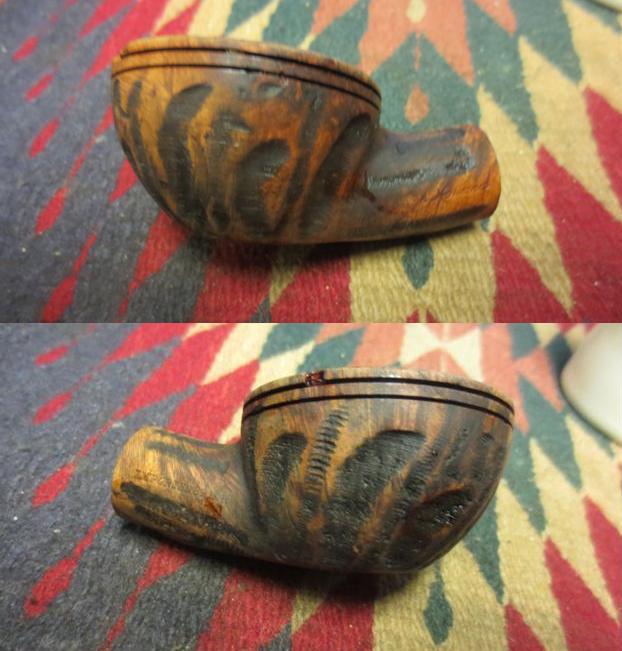
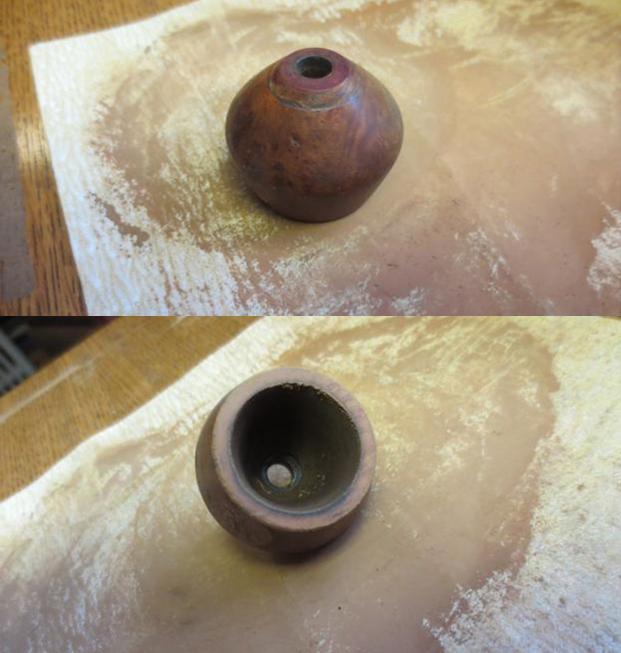
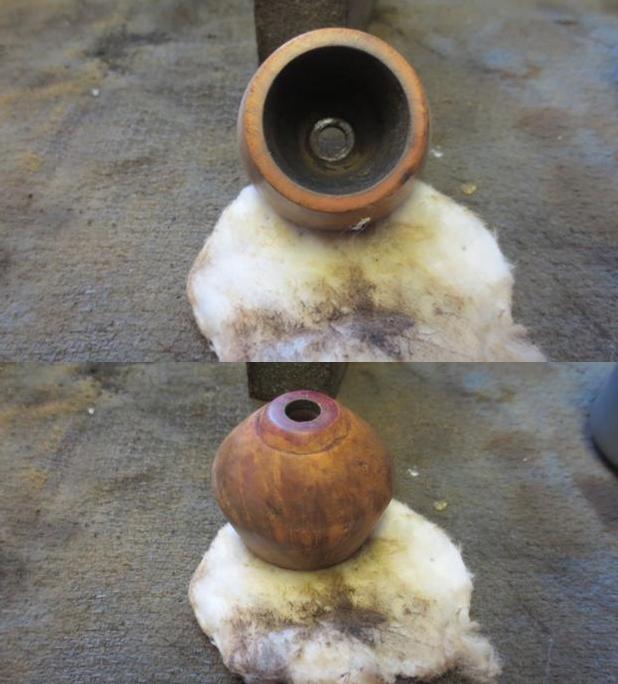
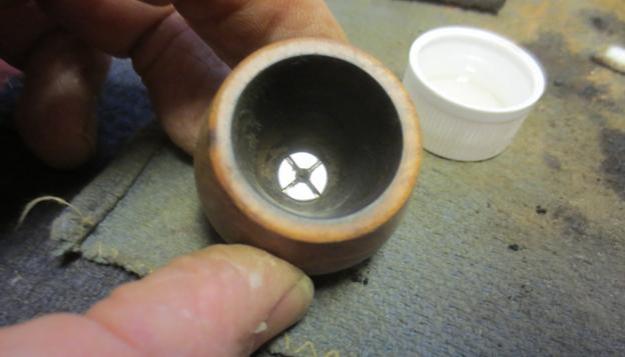
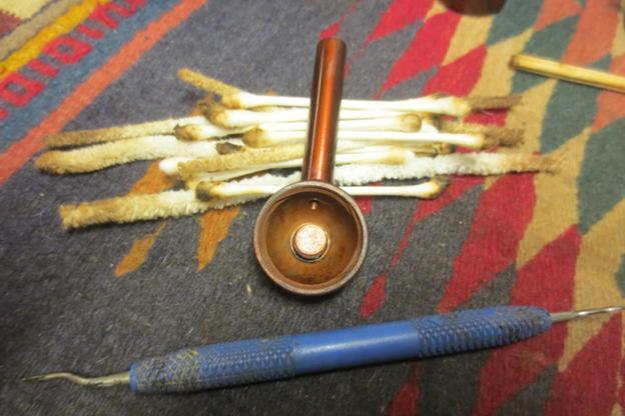
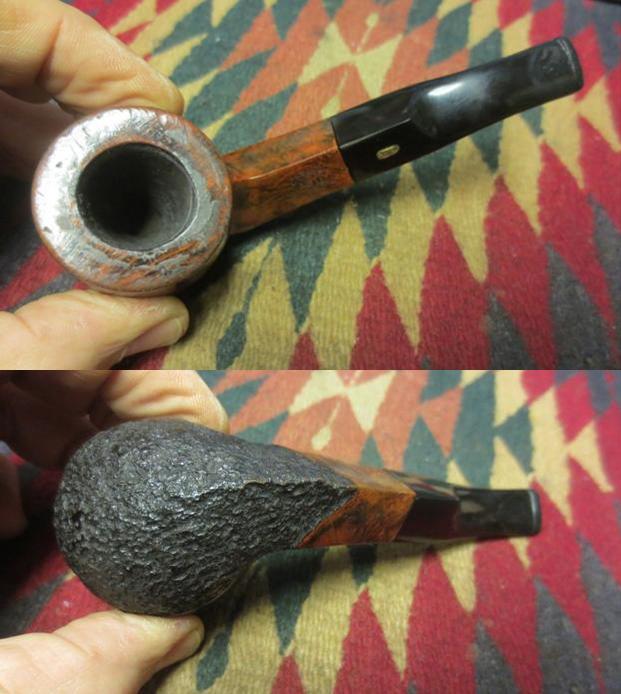
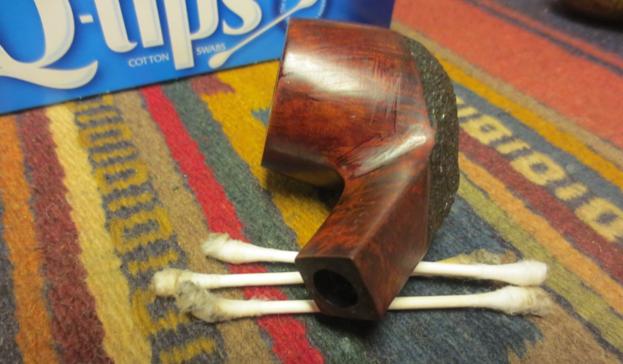
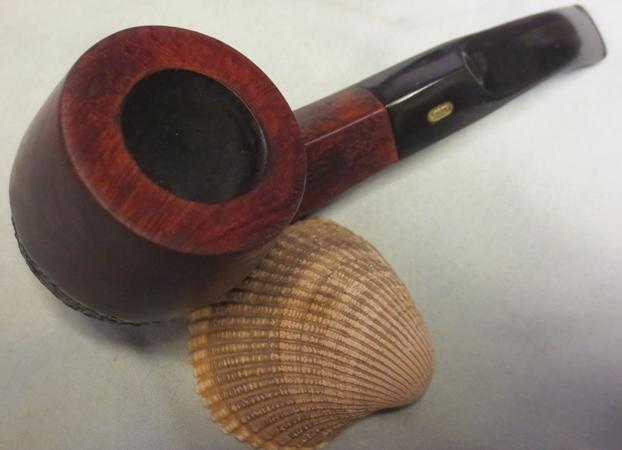
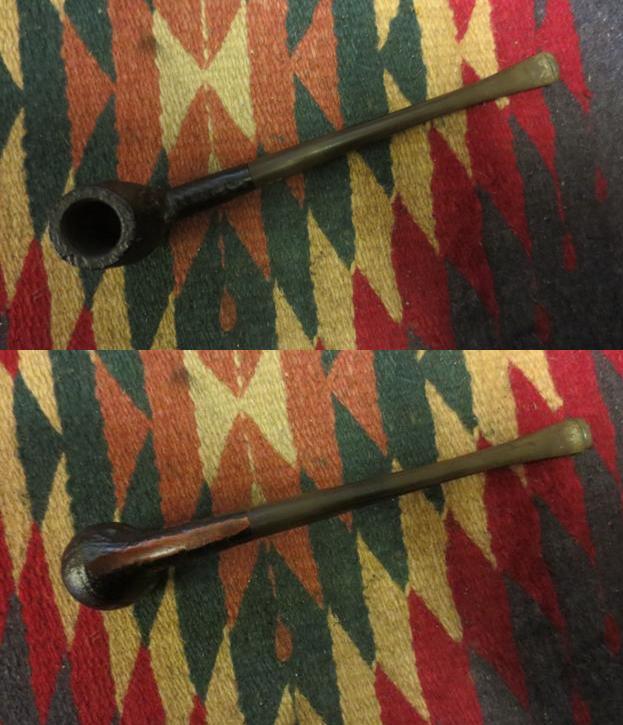
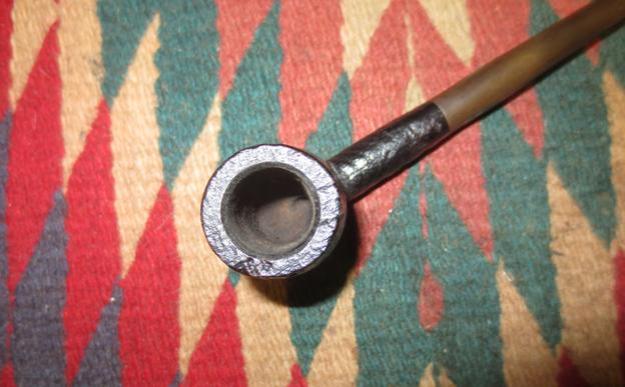
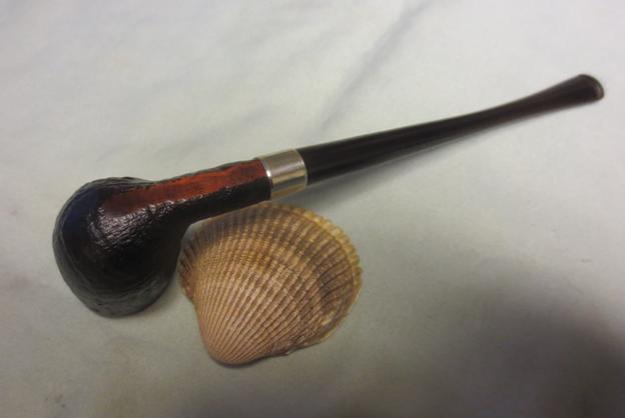
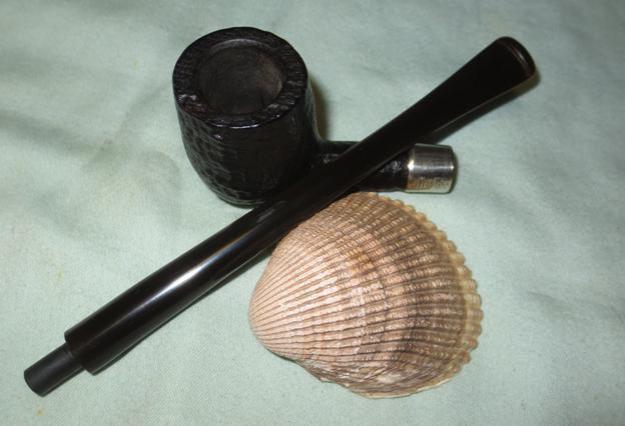
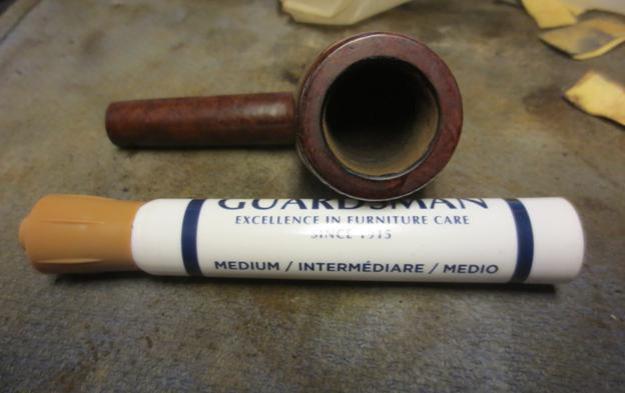
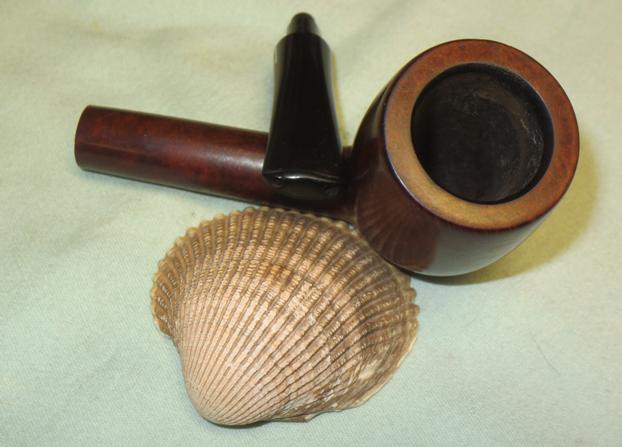
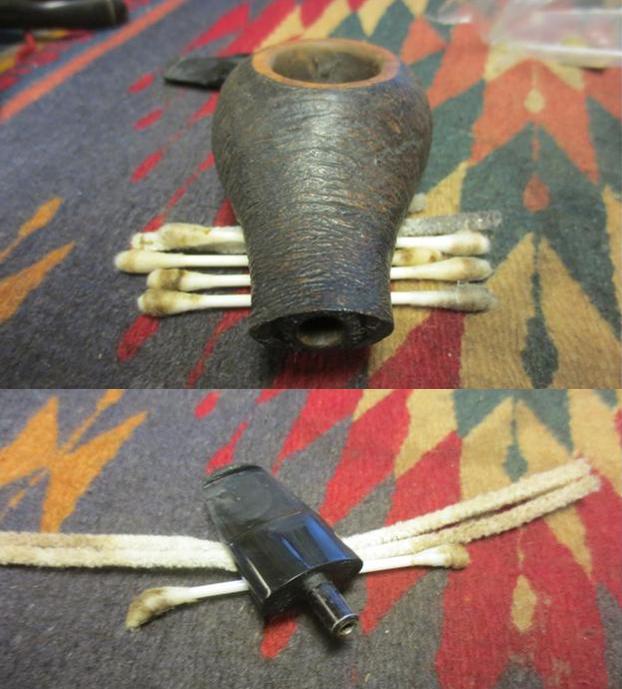
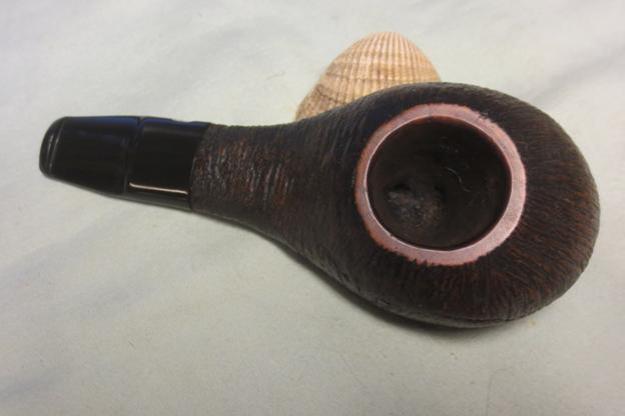
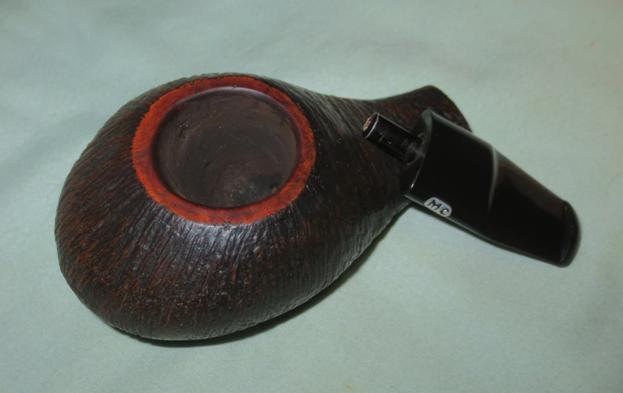
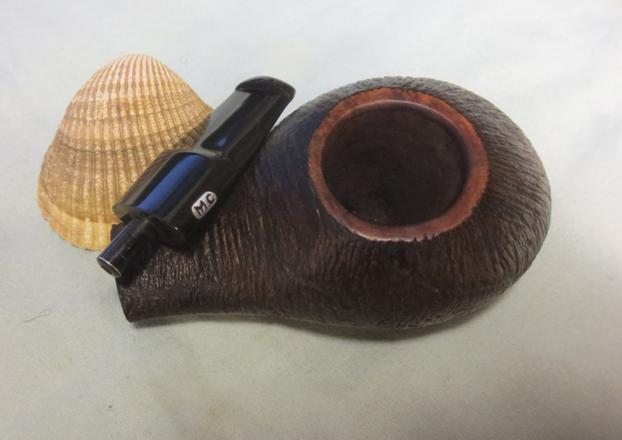
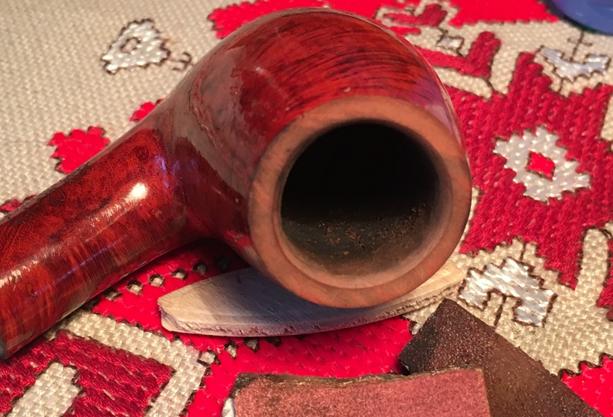
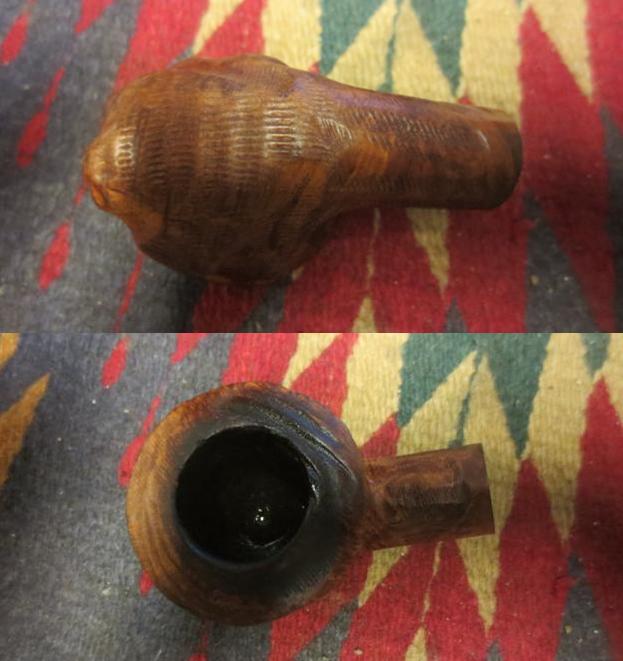
 The briar is in great shape and will need basic clean-up. The rim shows a burn scar about 2 o’clock and lava build up. As the comments about Cumberland stems and oxidation stated, this one had its share. The bit has significant teeth chatter and some significant divots that will need repair. Yet, I see the potential of the color swirl of the Cumberland being a very nice augmentation to the fiery briar stummel. The filter casing had dislodged from the stem and that will need to be reattached. I decide to drop the stem in an Oxyclean bath to start working on the oxidation while I turn my attention to the bowl – whoops, that is after I retrieved the stem from underneath the bed – I forgot it was on my lap when I stood to head for the Oxyclean! I took a close-up of the rim and bowl before I go to work. I moved from the bedroom work table to the 10th floor balcony mobile work station with Pipnet reaming kit in hand. I want to minimize pipe soot being released into the bedroom atmosphere resulting in a happier wife. I use only the two smallest blades from the reaming kit to take the cake down to the wood. I finish the fire chamber by rubbing it with 120 then 240 grit sanding paper to smooth and clean the chamber walls even more. Turning to the rim, I clean it with isopropyl 95% and a brass brush which will not scratch the surface of the bowl. I want to see the rim wood clearly before I top the bowl to repair the burn scar and reveal the briar. With the sunshine helping I can see the rim (and holding tightly not to lose it over the edge!). I note that the rim circumference is small as the sloping shape of the bowl culminates.
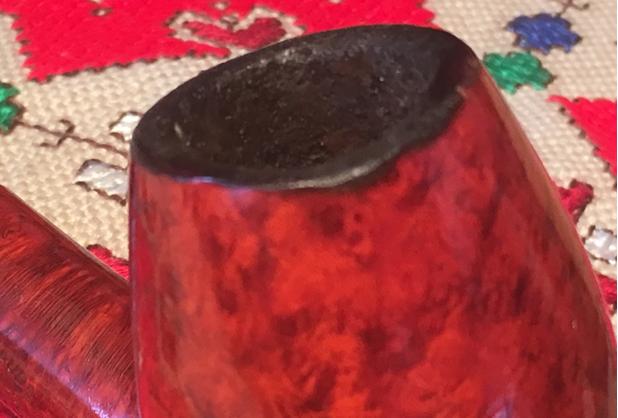
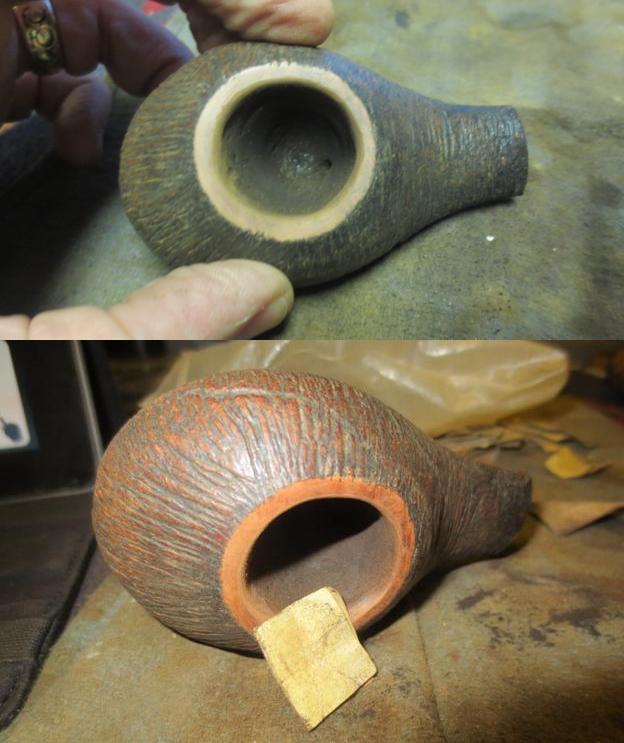
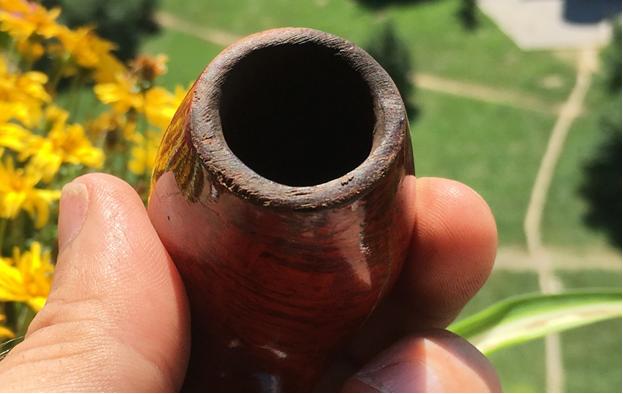 I move to top the bowl but with a view to take off as little as possible to preserve the dimensions of the slender egg-peeked chimney of the bowl. With the stem soaking in the Oxyclean bath I’m not able to reattach it to the stummel to help make sure I’m maintaining a true perpendicular top and not leaning into the softer burned area. Before rotating the bowl to top it, I let it free stand and gently rotated the pitch of the bowl so that I could ‘feel’ the low spot where the rim was burned. By doing this I was able to acclimate to the ‘healthy’ flat part of the rim during the sanding rotation. It worked well! I took a picture after only a few rotations on the topping board. It revealed that I wasn’t fudging into the low spot as it was not yet impacted by the sanding but the other ¾ of the rim was. I’m careful to keep eyeballing the progress. I use 240 grit paper on a chop board as my topping table. Moving in a circular, even motion I remove only what is needed. Satisfied with the topping, I made a small bevel on the inside of the rim using 120 and 240 grit paper. I did this to take out a bit of inner rim damage and a small bevel is always nice and gives a classy touch. I followed this by using micromesh (1500-12000) on the rim to remove all scratches. The pictures tell the story.
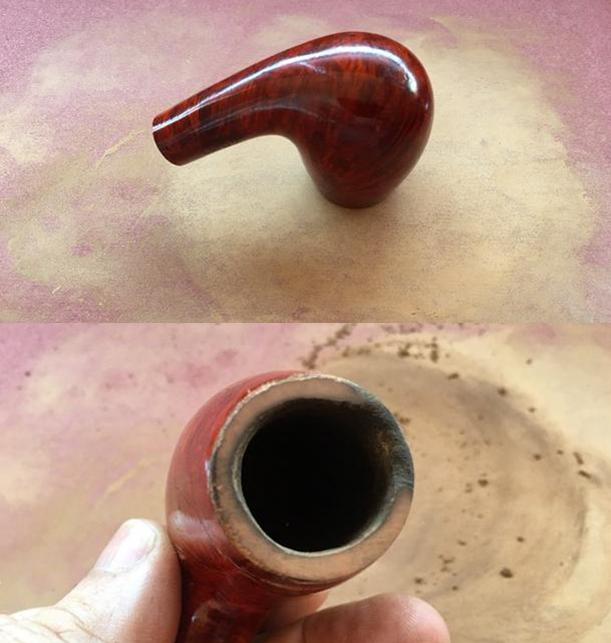
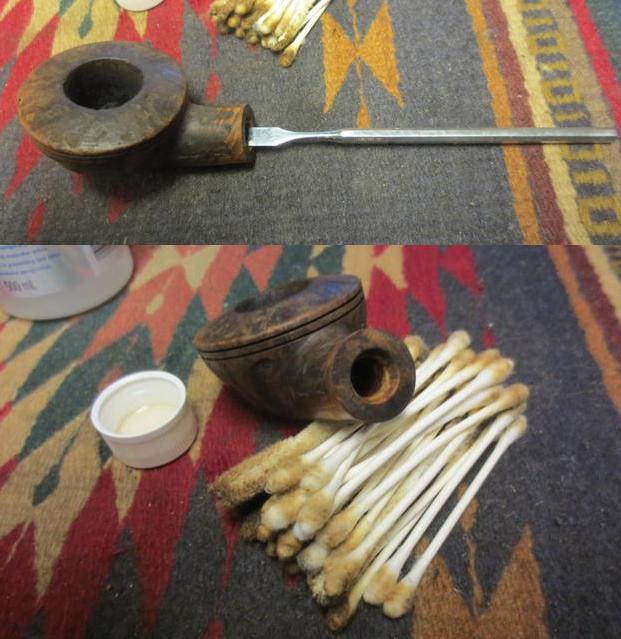
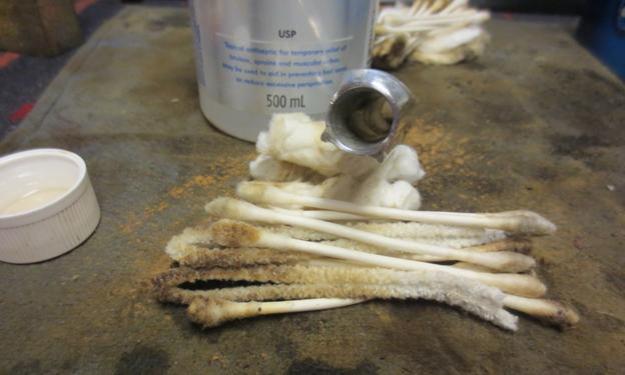
 I decided to wait on staining the rim using a stain-stick and move to the cleaning of the internal and external of the bowl. The reason I did this was I was able to differentiate the actual unstained color of the briar by looking at the newly repaired rim and compare it to the bowl color. The rim briar leaned brown whereas the bowl, to the reds. With cleaning with Murphy’s Soap of the external bowl, I expect there to be a slight change in the color of the bowl briar. At that point I would go to work again on the color of the rim aiming for the best match. I decided at this point to move to cleaning the internals of the stummel with Q-tips and pipe cleaners dipped in isopropyl 95%. I found the internals to be amazingly free of muck and it was not long before Q-tips and pipe cleaners were coming out clean. Turning to the external cleaning, I used Murphy’s Soap undiluted with cotton pads to remove the wax and grime on the bowl. The bowl itself is in great shape – no significant scratches or fills.
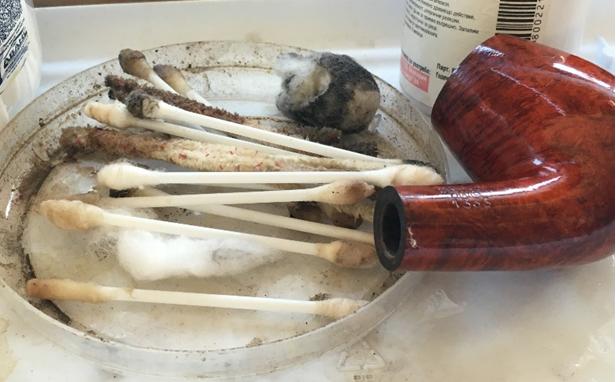
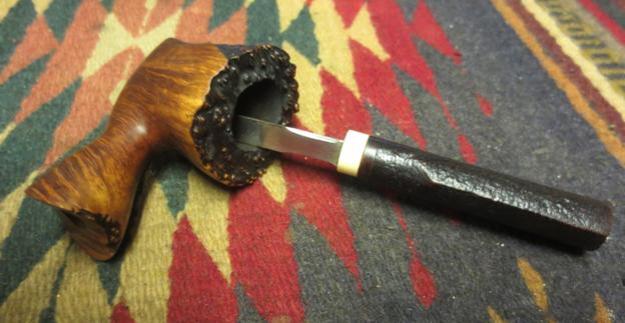
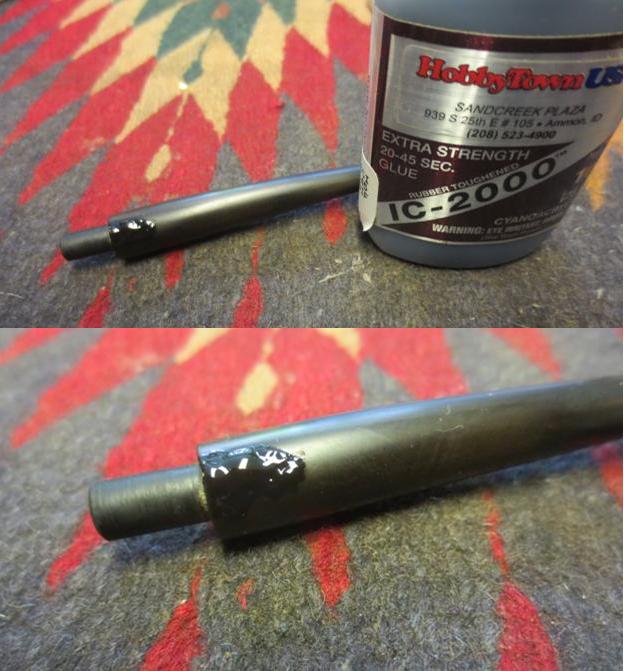
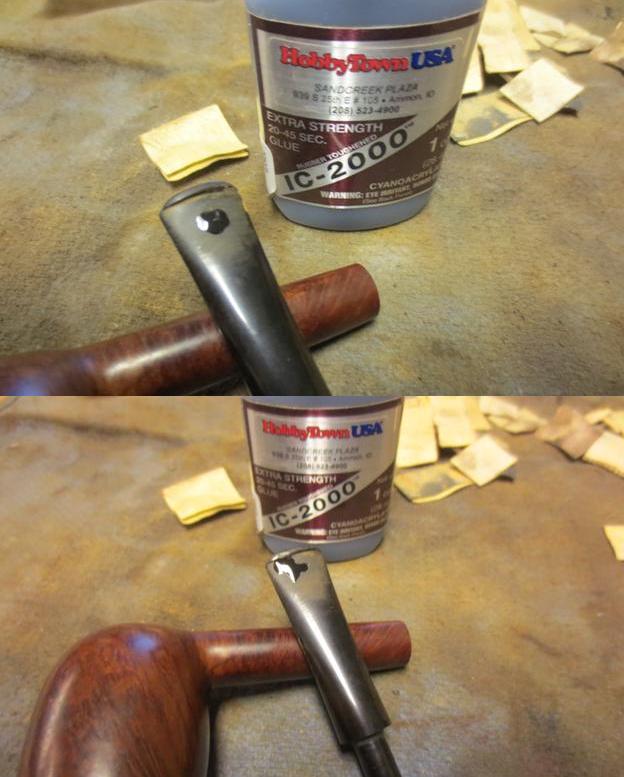
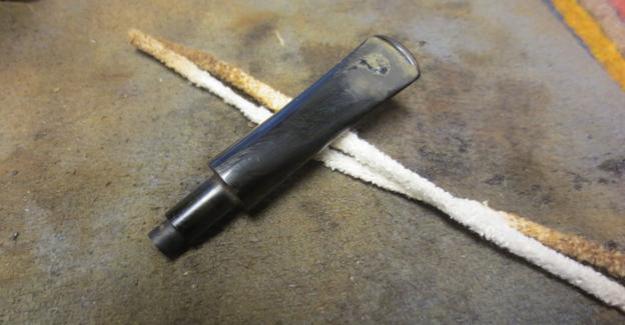
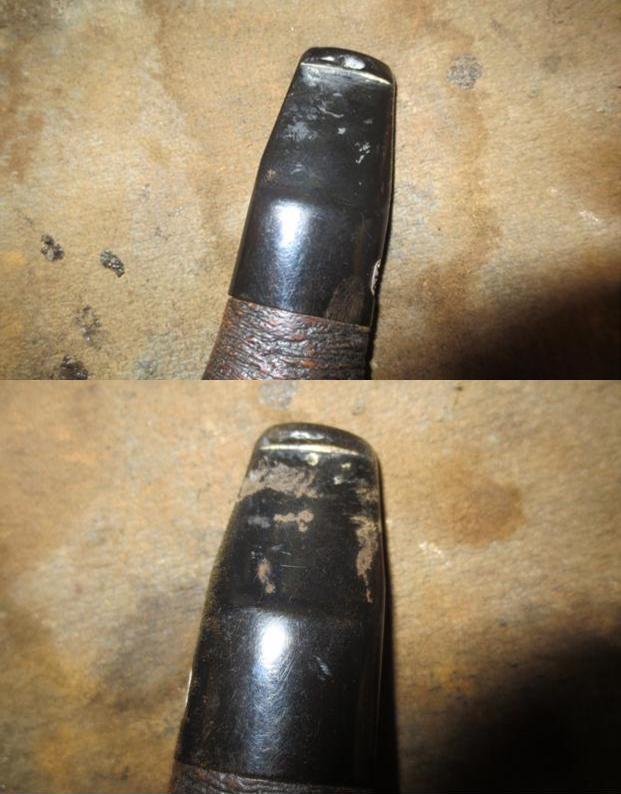
 At this point, I came to a road block which necessitated a quick email to ‘Master Obi-wan Steve’ for his input. After the Murphy’s Soap cleaning I was expecting/hoping the high gloss finish on the bowl to have been dulled – getting to a more natural grain look not competing so much with the bared rim – at least this is what was in my mind. My hesitations were not wanting to be too aggressive with the bowl finish and mess up the patina that is under the gloss…. With the time difference between Sofia and Vancouver, I put the stummel aside and turn to the much anticipated work on the Cumberland stem – what to me is the unique part of this BC stummel/stem ensemble. After I extract the stem from the Oxyclean bath, I take some pictures to chronicle the progress. After an initial buff with 000 steel wool to remove the surfaced oxidation, I take a closer look at the significant teeth divots on the bit and decide to apply super glue to the top and bottom to be able to redefine the button and cover the chatter damage. I want the superglue patches in place before beginning the sanding of the stem.

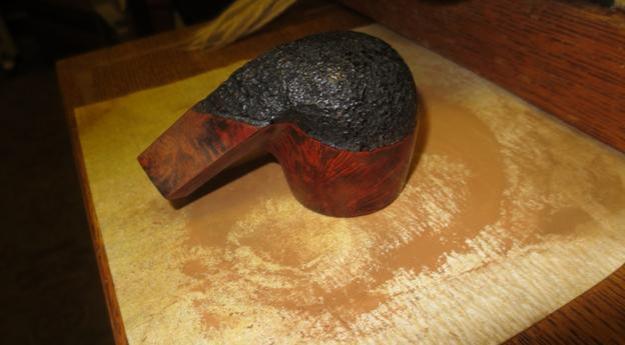
 With the superglue curing, Steve’s reply came about my bowl conundrum and it is now decision time. He suspects that I’m dealing with a urethane finish much like he just dealt with in a Jobey restore (https://rebornpipes.com/2016/06/29/i-thought-this-one-would-be-easy-boy-was-i-wrong/) that was a bear to remove. The options before me are to either come up with a high gloss finish for the rim seeking to match up with the bowl or to aggressively remove the plastic, gloss finish and rescue the beautiful briar beneath. The close-up picture below revealing the bare briar in rim repair sealed my decision – I put the bowl in an overnight alcohol bath hopefully to soften the glossy finish to be revisited tomorrow. The time had come to watch some European football – Portugal and Poland – on my widescreen HDTV in my favorite recliner.
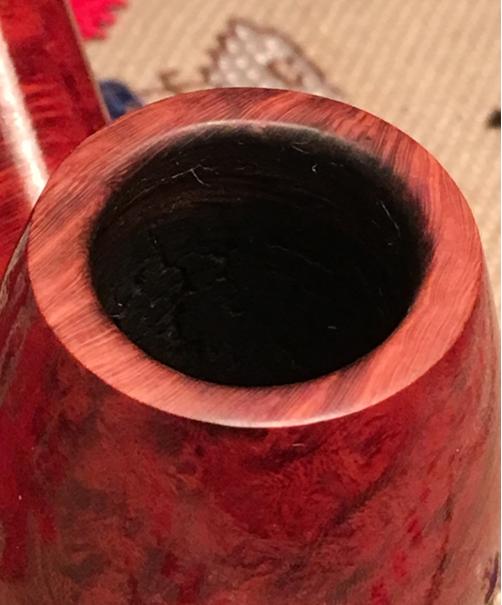 The next day, with Poland and Portugal playing to a 1-1 tie the night before, I was anxious to see if the alcohol bath made a dent on the glossy finish. Upon inspection (picture 1) it was still pretty shiny so I took a light grit sanding sponge to loosen the finish. I was careful to lightly work around the nomenclature. This did the trick. The alcohol bath undoubtedly softened things up. After the sponge sanding, I followed with rubbing the bowl with acetone with cotton pads to draw the stain out of the grain. I finished with wiping down the stummel with isopropyl 95% to make sure all was cleaned and no grit left behind.
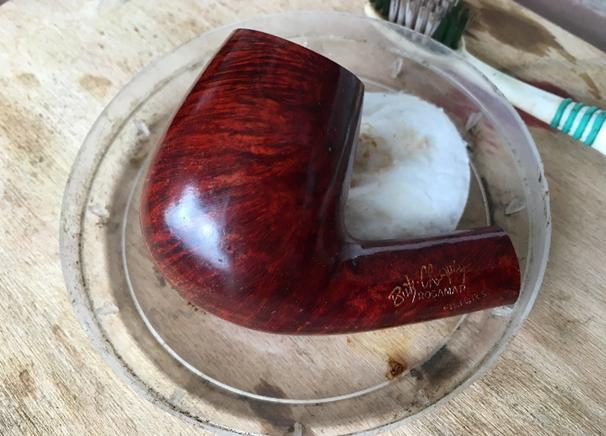

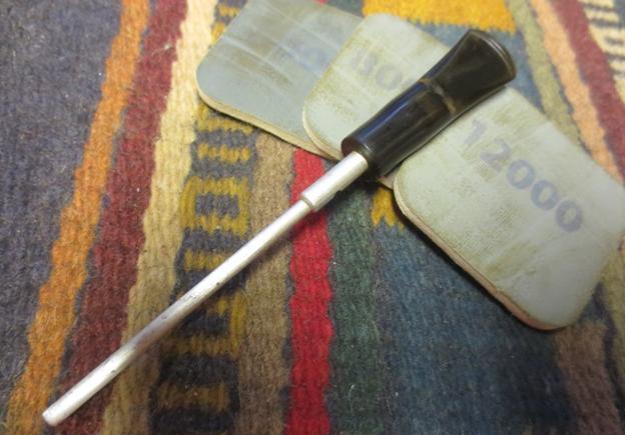
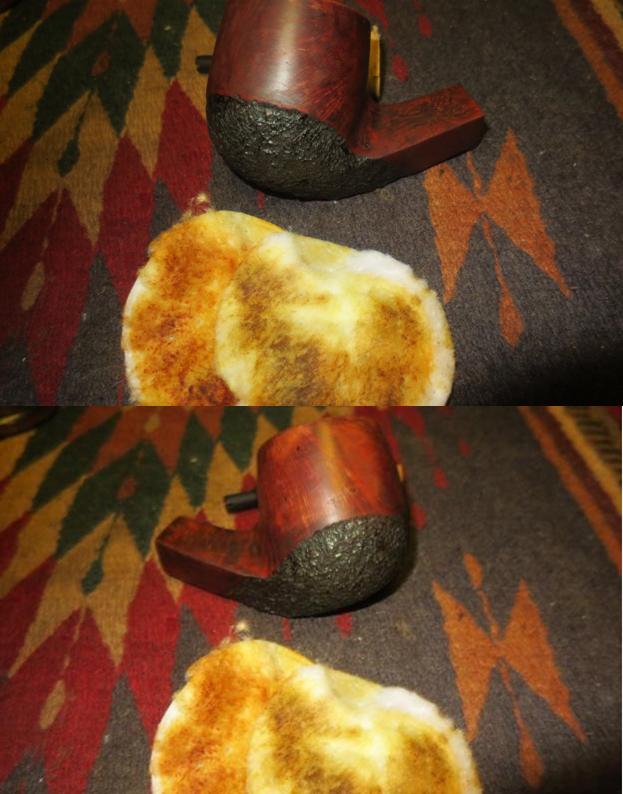
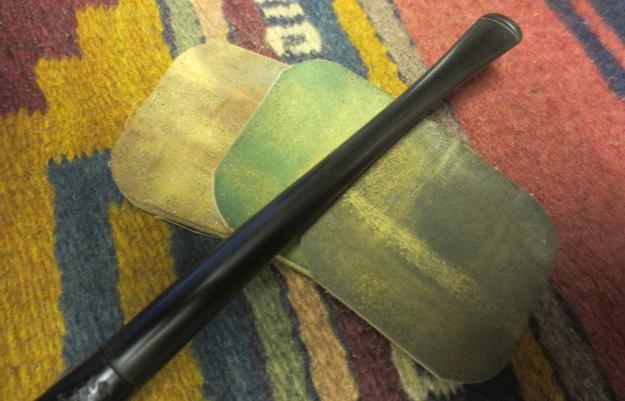
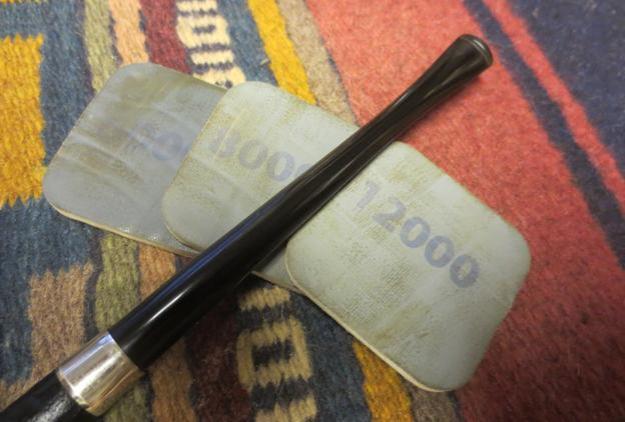
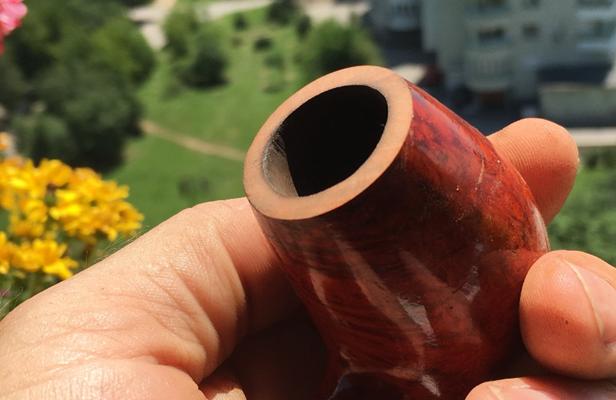
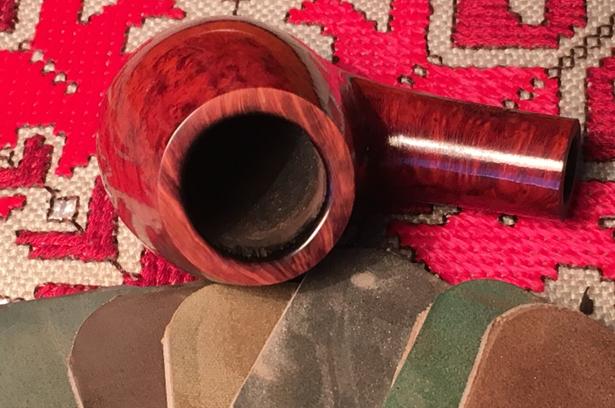
 I feel like I’m on a roll and I’m anxious to see the grain of this piece of briar unveiled. I use micromesh pads from 1500 to 2400, 3200 to 4000, and 6000 to 12000. The pictures below show the progress. I have to be honest, this is perhaps my favorite part of the restoration process – each set of micromesh pads brings out more of the grain revealing the profoundly unique ‘fingerprint’ of each piece of briar we handle. I euphemistically think of micromesh pads as ‘magicmesh’ pads – they bring the wood to life. In my opinion, the grain that I’m now enjoying is much more satisfying than looking through the plastic shiny sheen of the original Butz-Choquin design.

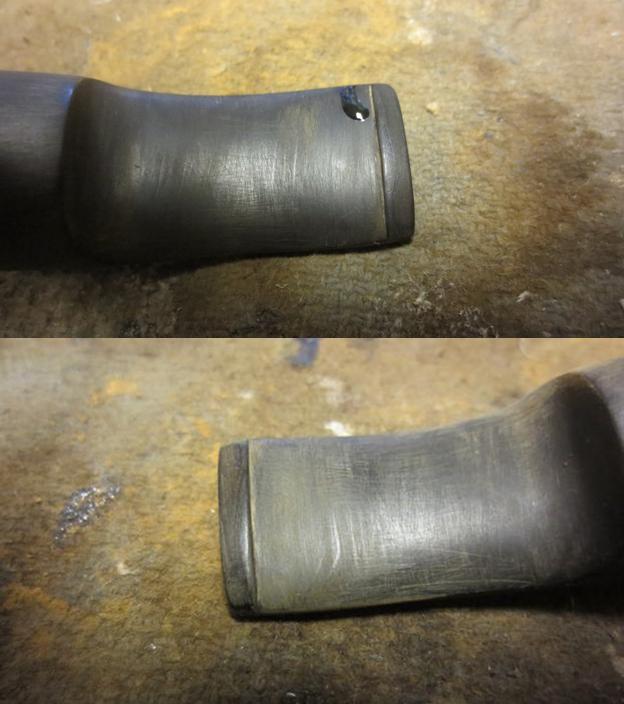
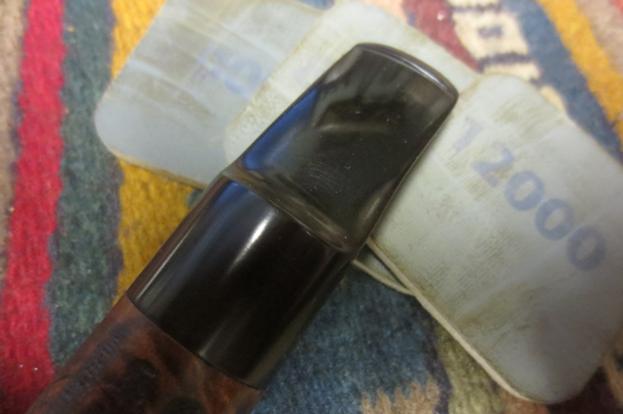
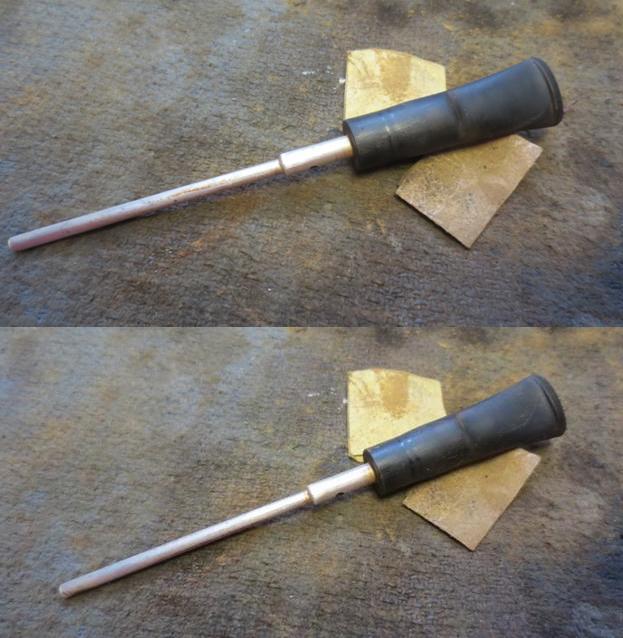
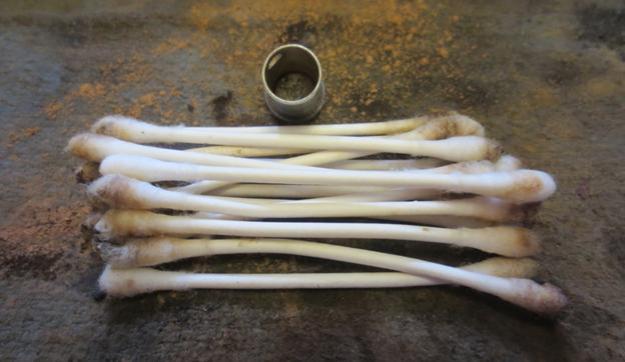
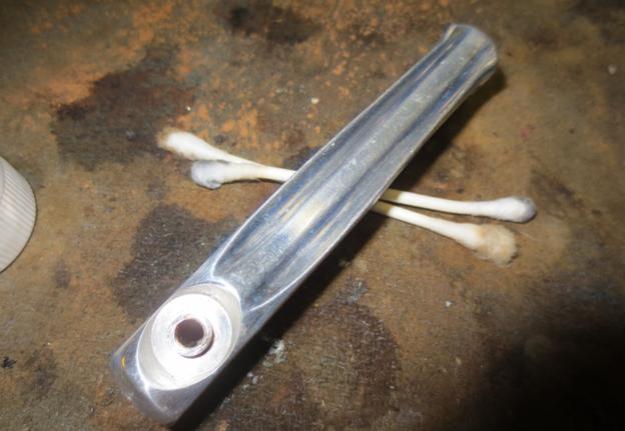
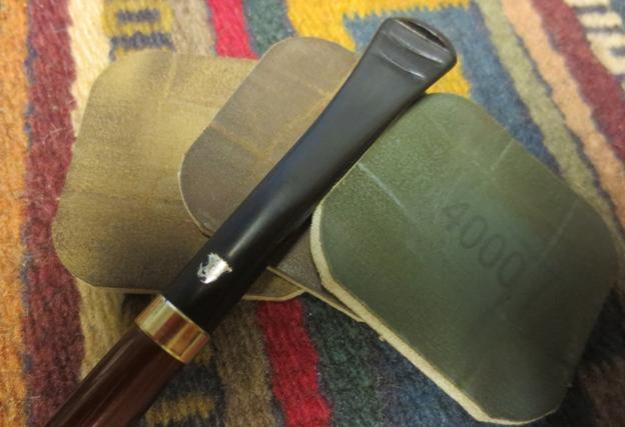
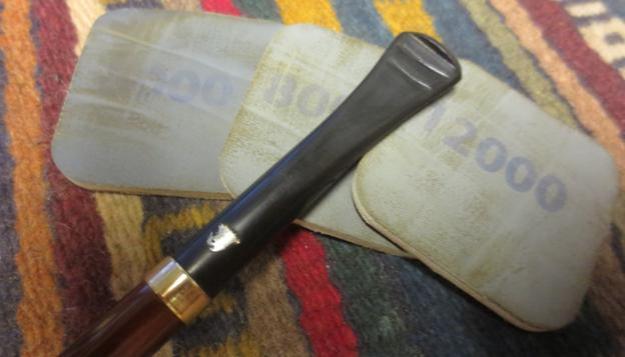
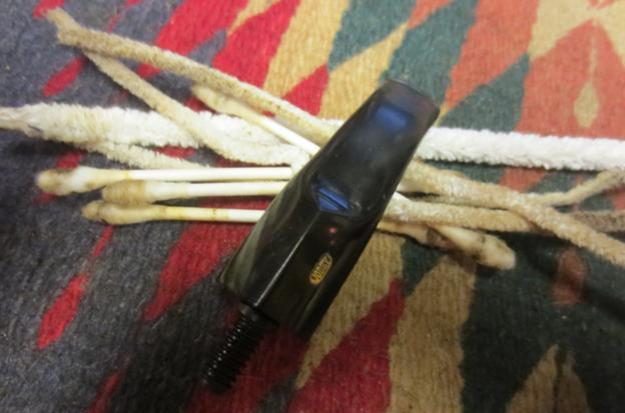
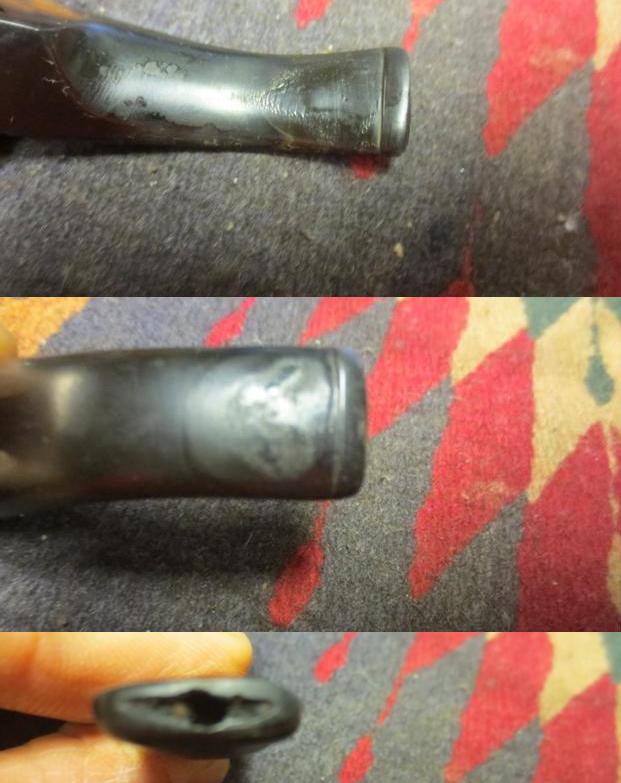
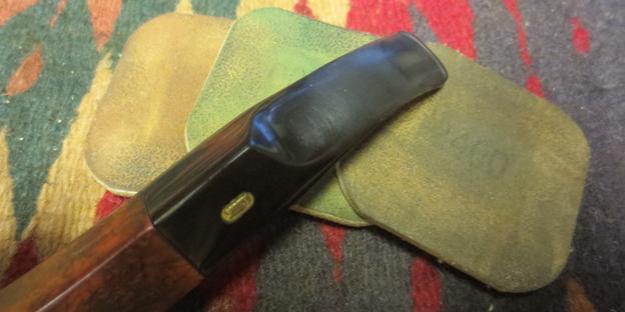
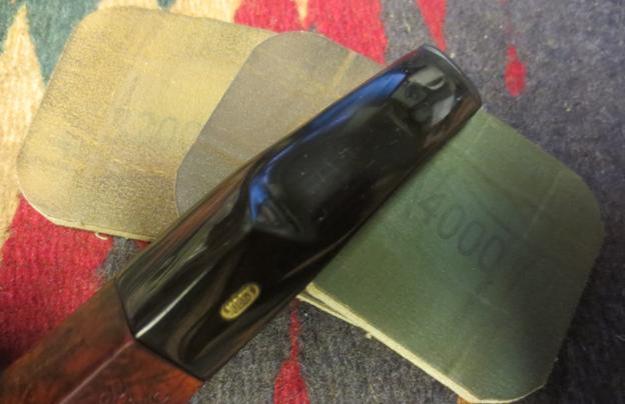
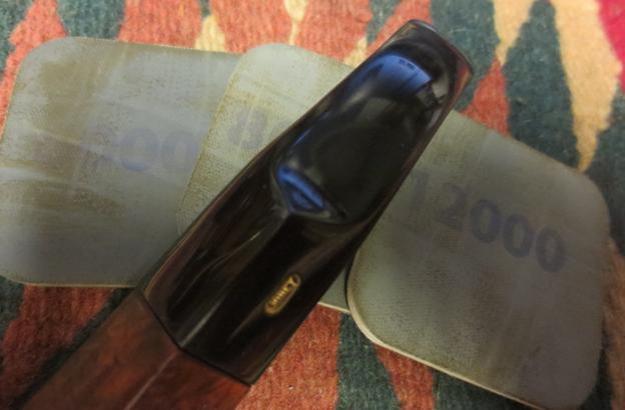
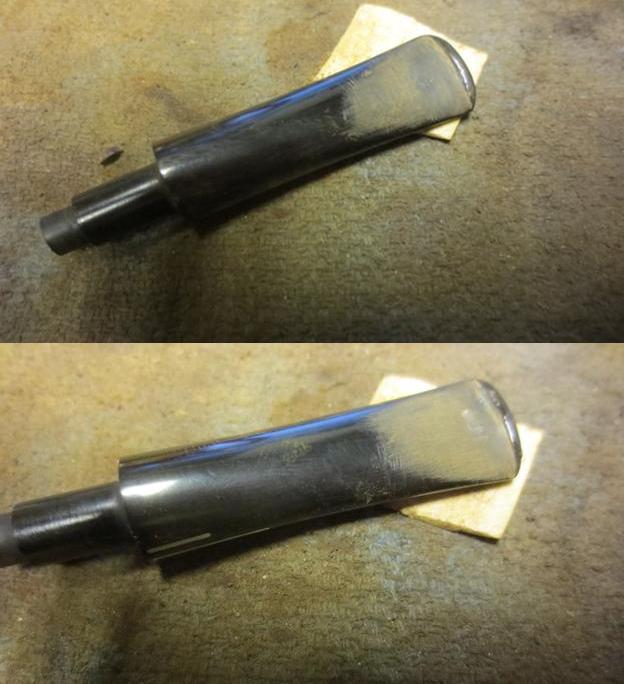
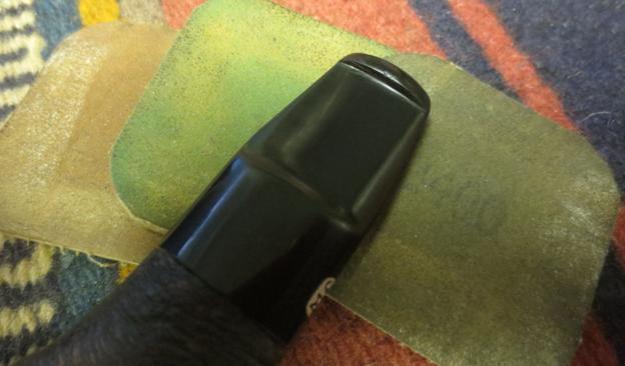
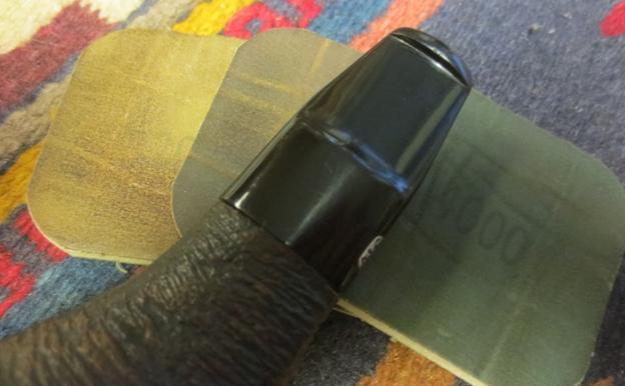
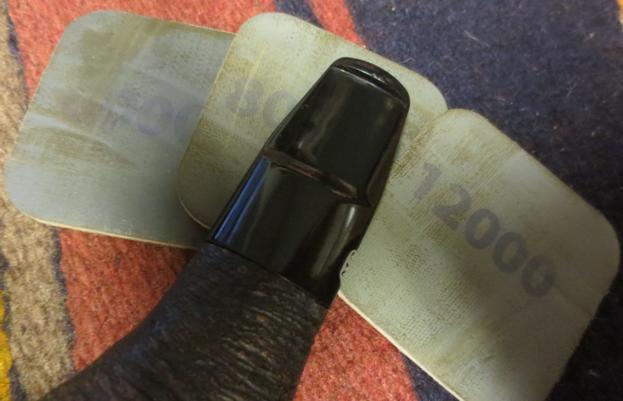
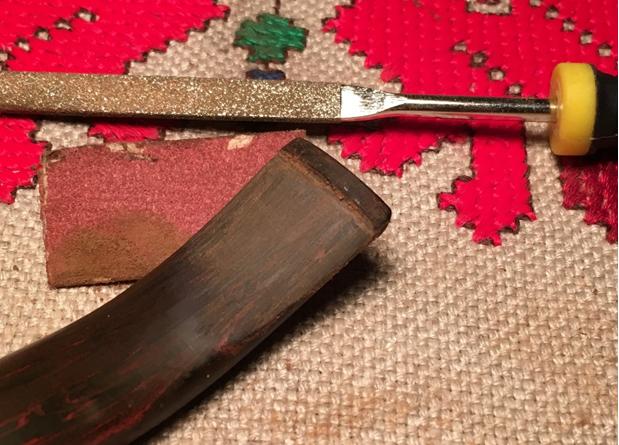
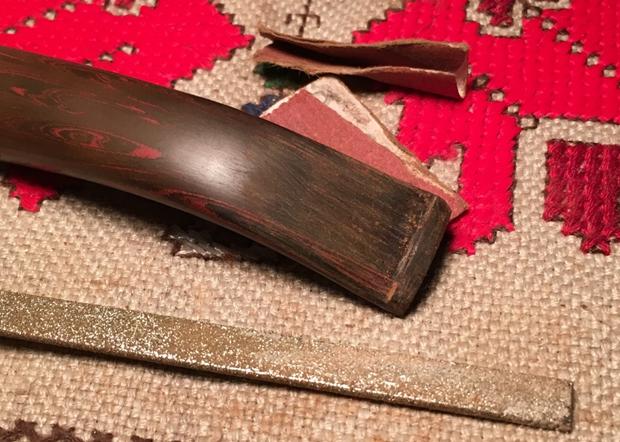
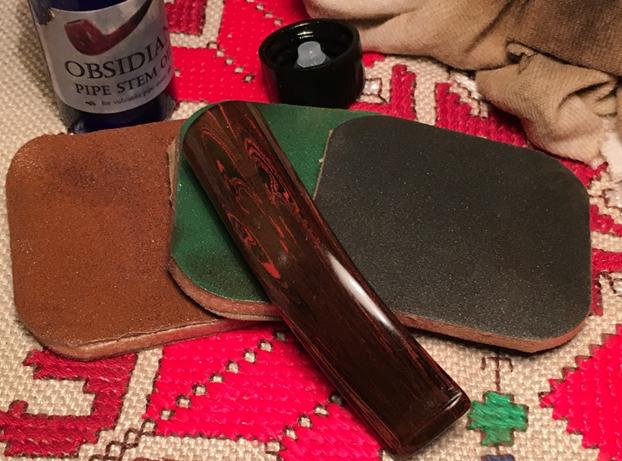
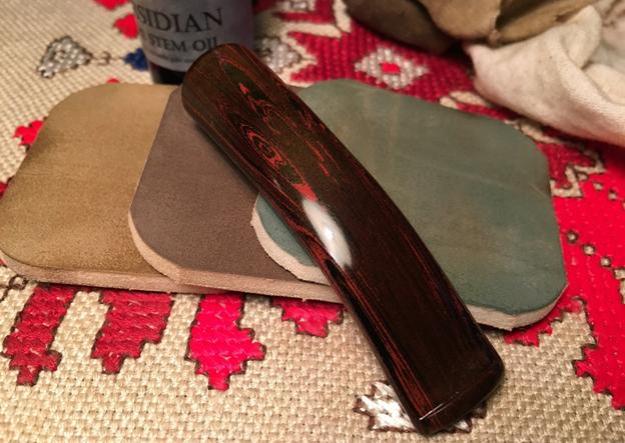
 I decide to put the bowl aside and focus now on completing the Cumberland stem clean up and restoration. I want to have an idea of the colors of the finished stem before I decide on the best finish for the stummel. I like working on a clean stem so I first clean the airway using pipe cleaners and Q-tips dipped in isopropyl 95%. During the cleaning, I saw something that I had missed before. The button airway opening has a divot – I’ll need to add that to the list. The superglue applications on the bit and button have had plenty of time to dry. I use 240 grit sanding paper and needle files to work on the bit and button repair. The bit repair looks good so I move to micromesh and the homestretch. I wet sand using 1500-2400 and then apply Obsidian oil to the stem. At this point, I inspect the repair work on the bit to make sure there are no scratches that I’ve missed before proceeding. I’ve learned that often scratches are covered by the rough vulcanite. With the Obsidian oil on the stem I dry-sand using micromesh pads 3200-4000 and apply more Obsidian oil. I do the same with the last set of three – 6000-12000 and give a good coat of oil and put it aside to dry. The pictures show the progress rejuvenating the Cumberland stem. I like what I’m seeing.
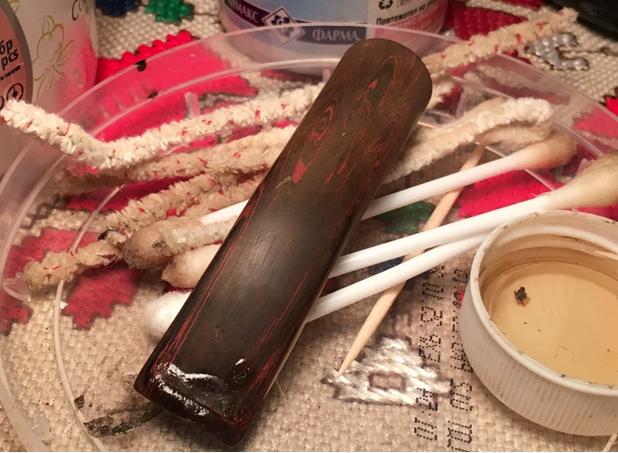
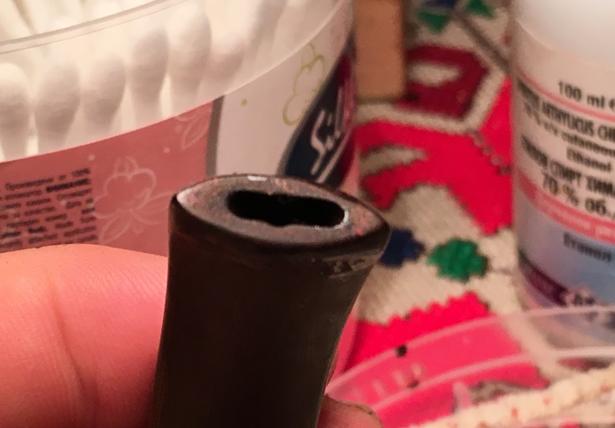
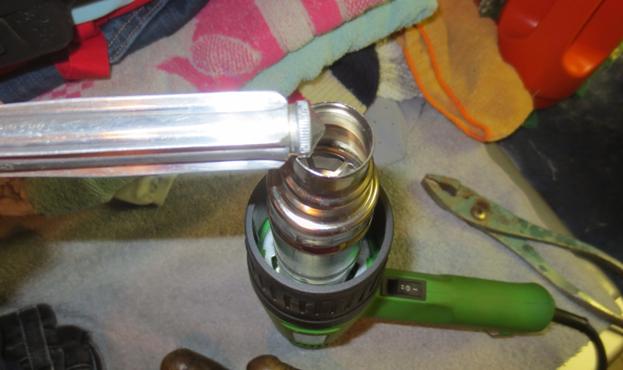
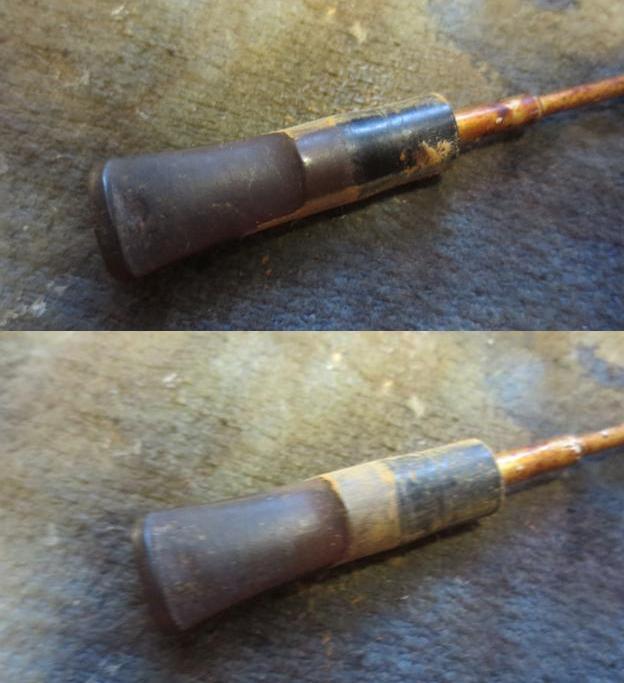
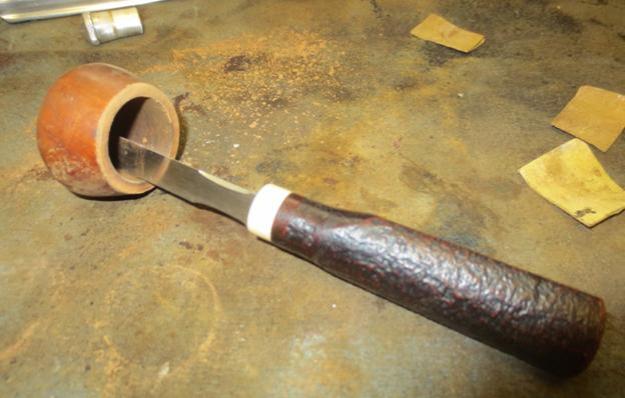
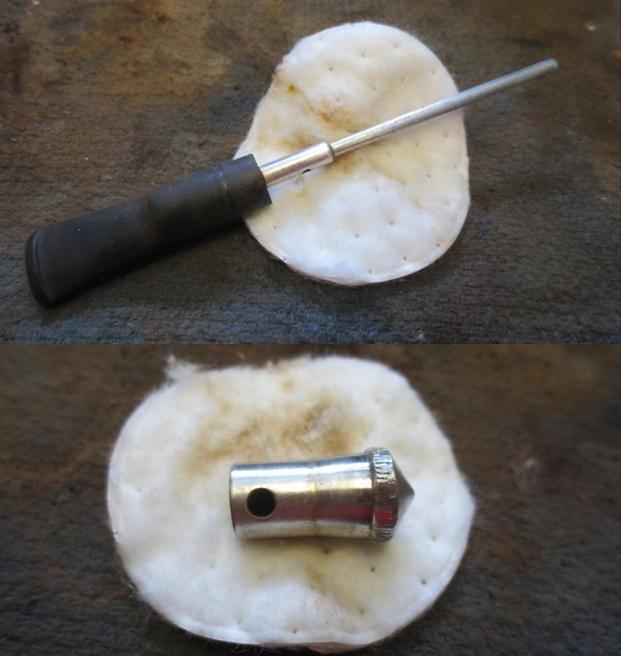
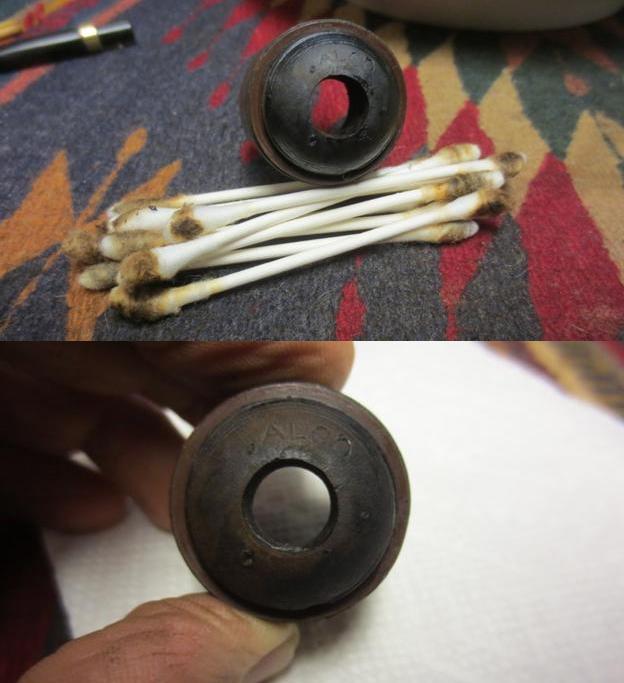
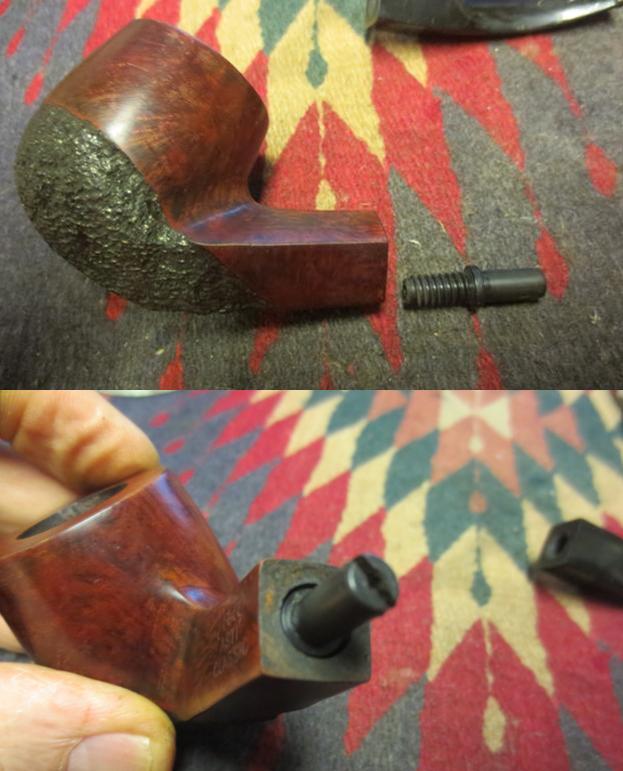
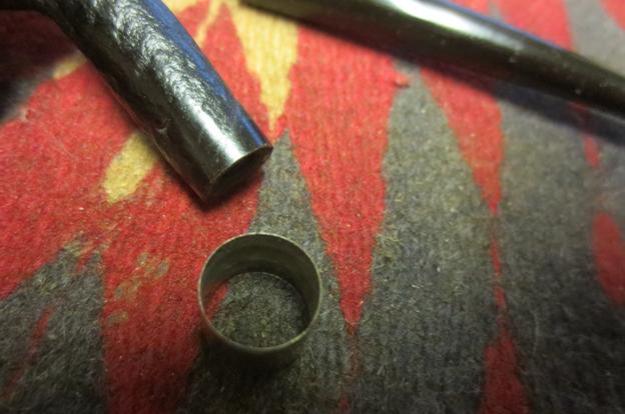
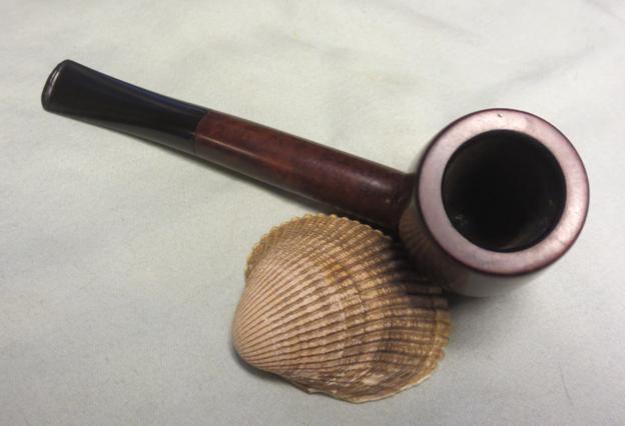
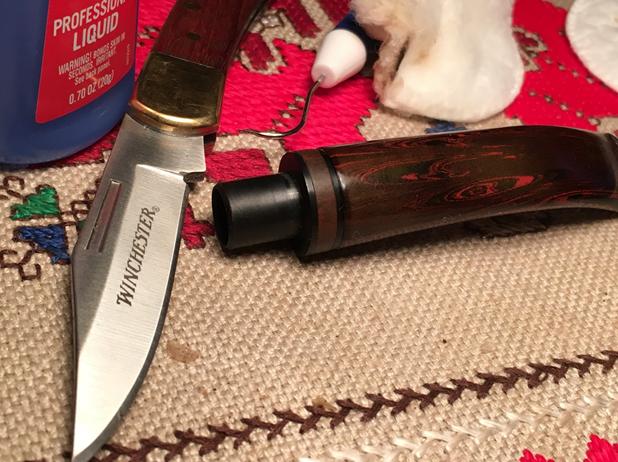
 I had one undone job – re-attach the filter casing to the stem. My assumption is that it was initially glued and after inspecting the inside of the stem, I detected residue that I assume was the glue previously used. I clean the old gunk off the housing and the inside of the stem with alcohol and cotton pad and reattach the housing with superglue. To get the job done I used my Winchester pocket knife and a dental pick to dig out the old glue. With the filter housing reattached, the stem is complete. I really like the rich color of the Cumberland stem.
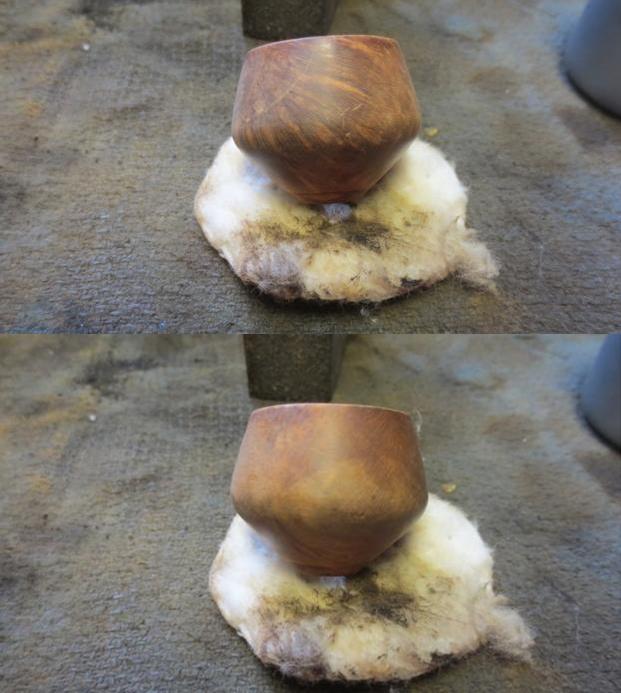
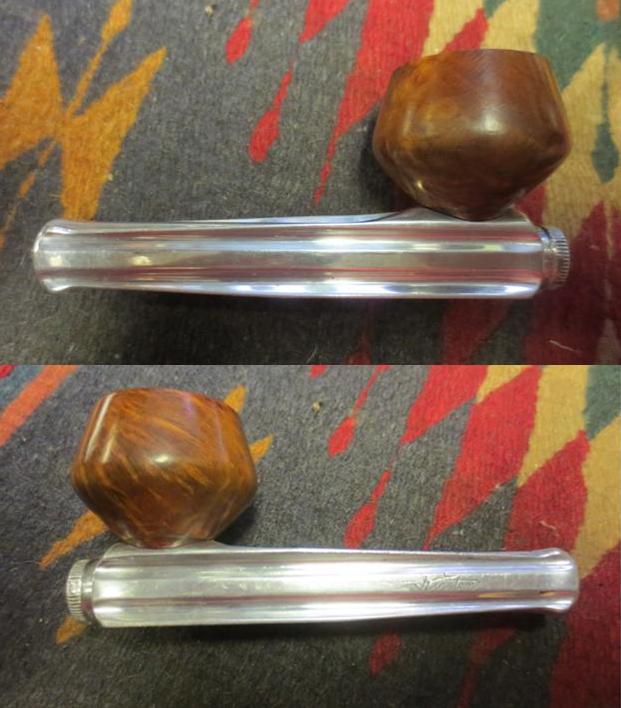
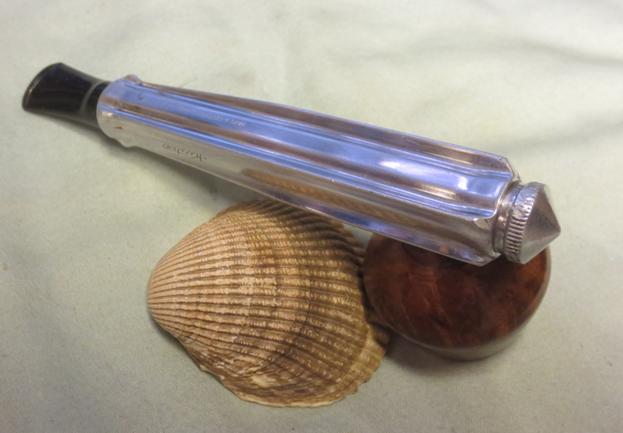
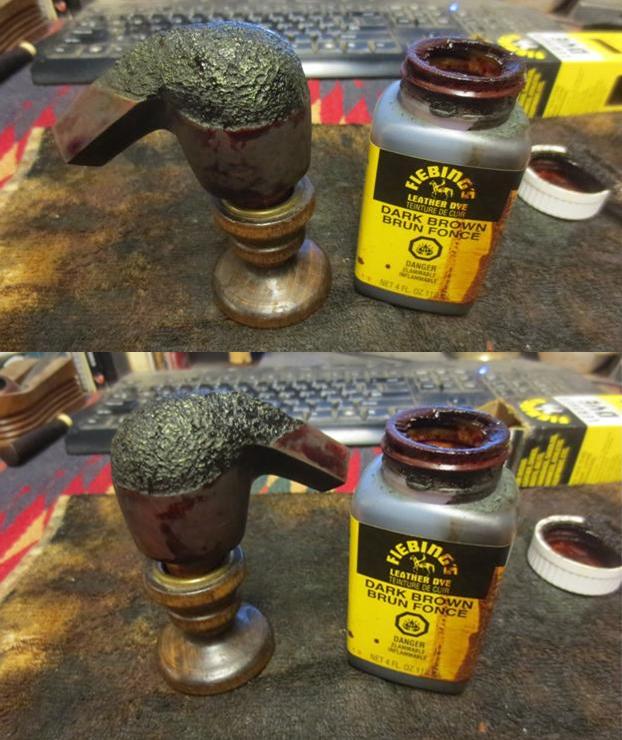
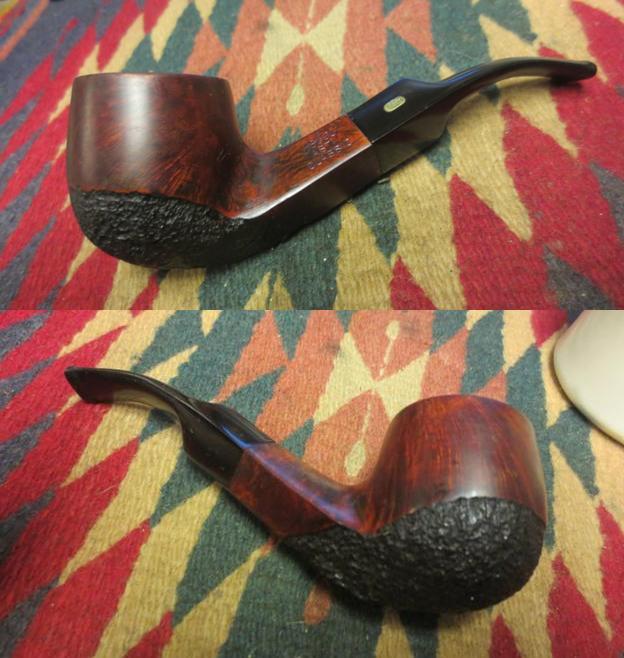
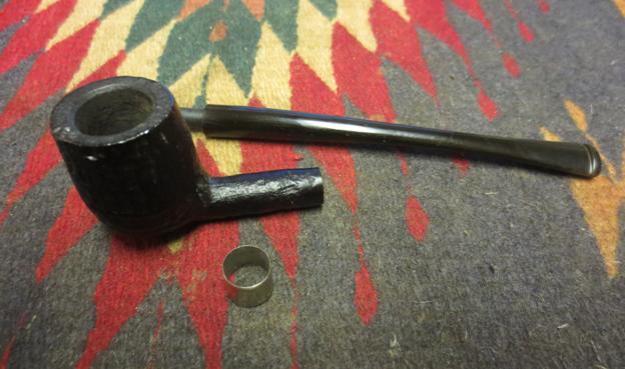
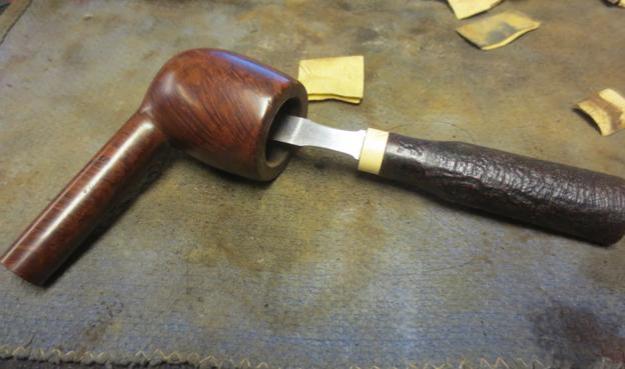
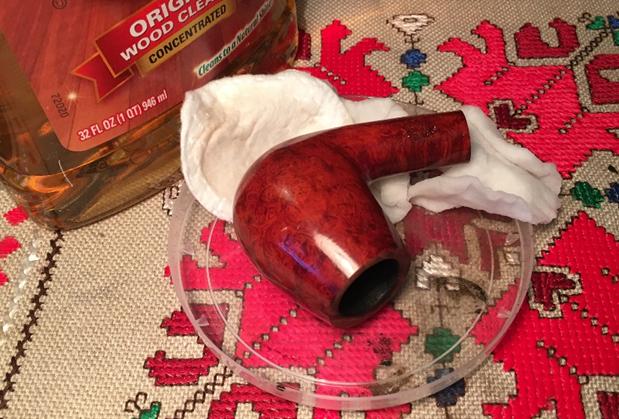
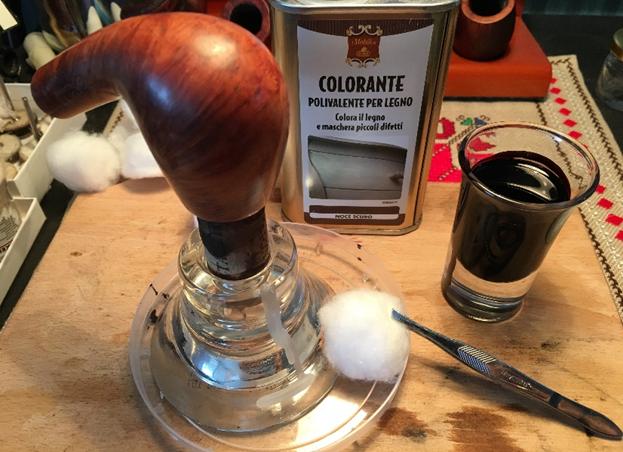
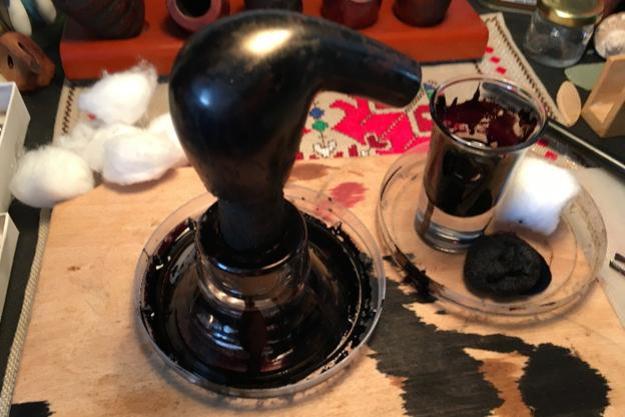
 After allowing the filter housing glue to dry I want to see the lay of the land, I rejoin the Cumberland stem to the stummel (picture #1 below). I decide to stain the bowl with a new stain I found at the German owned ‘Mr. Prakteker’ – like Home Depot in the US. Finding alcohol-based stains in Bulgaria has been a challenge so I’ve been mixing my own batches up to this point. The brand is Italian and the cost was a bit more – I’m hoping that translates into better quality. When I opened the tin, a whiff of the stain revealed alcohol. With the help of Google Translate, the flavor of the stain is Dark Nut. The Bulgarian stick-on information tag said Dark Walnut. My thinking is to aim for a darker stummel to blend with the darker hues of the stem. If this succeeds, then I’m hoping the reds of the Cumberland stem ‘pop’ more instead of competing with the stummel. We’ll see! I can use alcohol-dipped cotton pads to lighten the stain after application if I choose. After setting the stummel up on the cork/candle stand I apply the stain undiluted with a cotton swab to see how it goes. I liberally allow stain to move over the inverted stummel – making sure of coverage over the inverted rim. After a good covering I use a lighter to fire the stain which is a quick-combustion of the alcohol leaving the stain to set well into the grain. The Italian stain ‘fired’ as hoped! I repeated the procedure and then used the alcohol dipped pads to clean off the burn layer of the stain revealing how the grain received the stain – it’s never the same! I take a picture to do a quick compare of stummel and stem. After comparing I’m thinking that I like the dark hue but it needs some reds so I decide to add a layer of Cheren stain – red which I will mix with alcohol as it is a water based stain. In my mind I’m thinking of the ‘Ox Blood’ depth that Steve uses – which is not found in Bulgaria! I think the addition of the red stain does the trick (last picture) though it’s difficult to see the difference comparing the last two pictures.
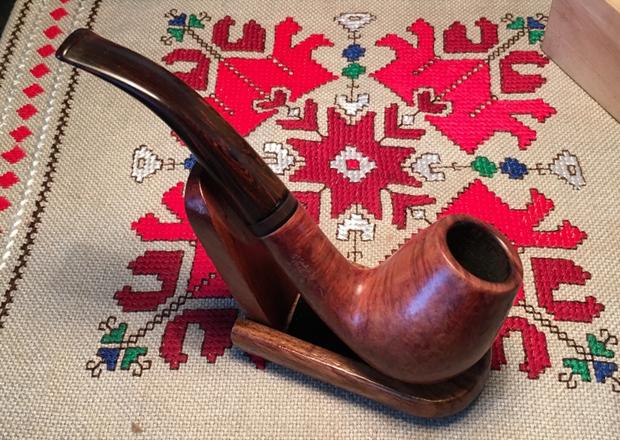

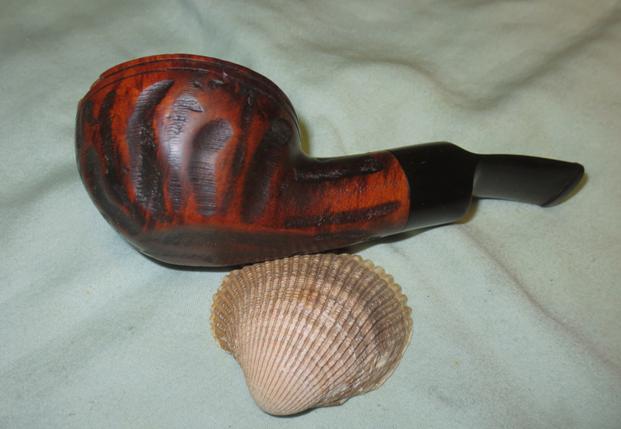
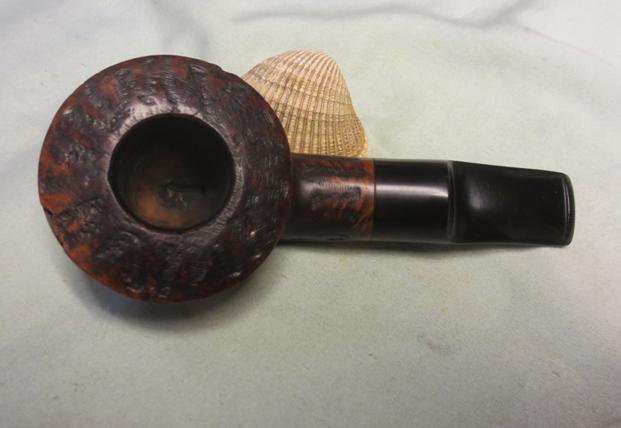
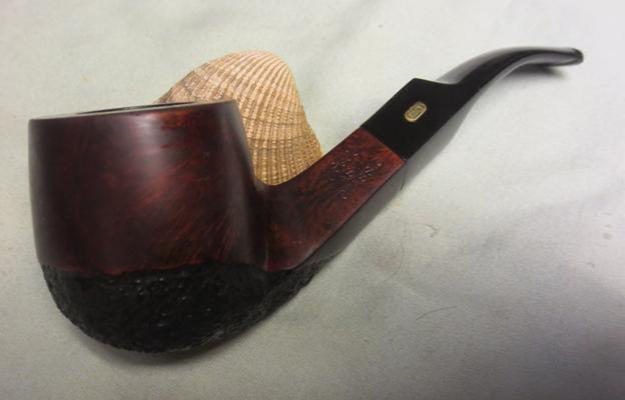
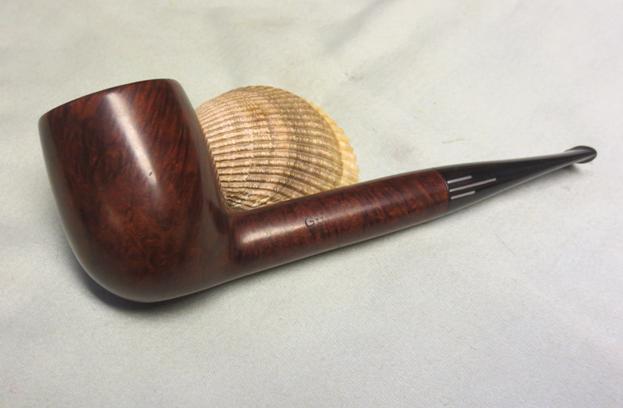
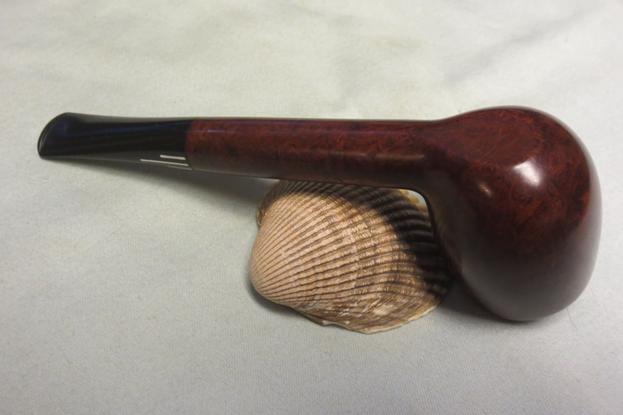
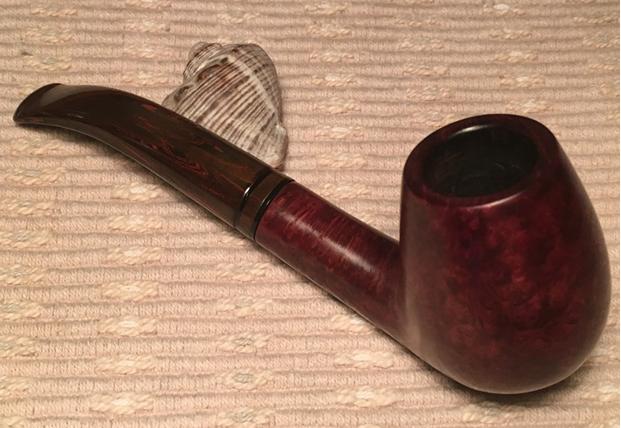
 Next, I apply several layers of carnauba wax to the stummel and stem with Dremel and cotton wheels. I’m careful to keep the Dremel wheel moving in rotation over the wood and use the lowest speed so not to overheat the wood. The buffing brings out the grain and the luster of the Cumberland stem. I continue the buffing with a clean cotton wheel over the entire stummel and stem surface. I finished with a thorough vigorous buffing with microfiber cloth to bring out the grain depth while watching Germany and Italy’s World Cup match. The recommissioning of this Butz-Choquin Rocamar was more of a project than I was expecting. I prefer the finish now before me to the shiny finish I started with. I like the new color scheme for the bowl and Cumberland stem – I believe it works well. The reds in the Cumberland stem match the grain amazingly well and the grain swirl in the rim has the appearance of continuing in the stem – a neat effect. I’m very pleased with the color blends. Another project done with new things learned to draw upon for the next candidate brought back to life! Thanks for joining me!
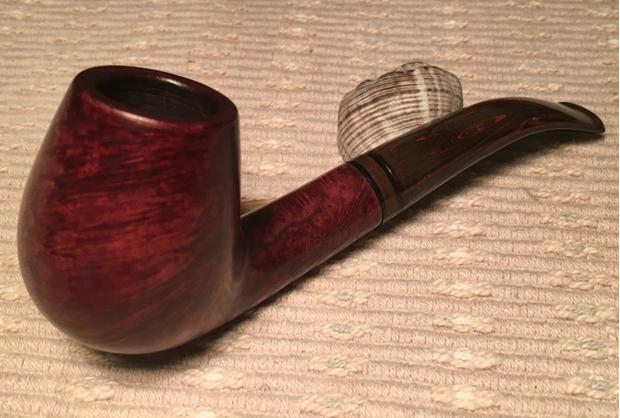


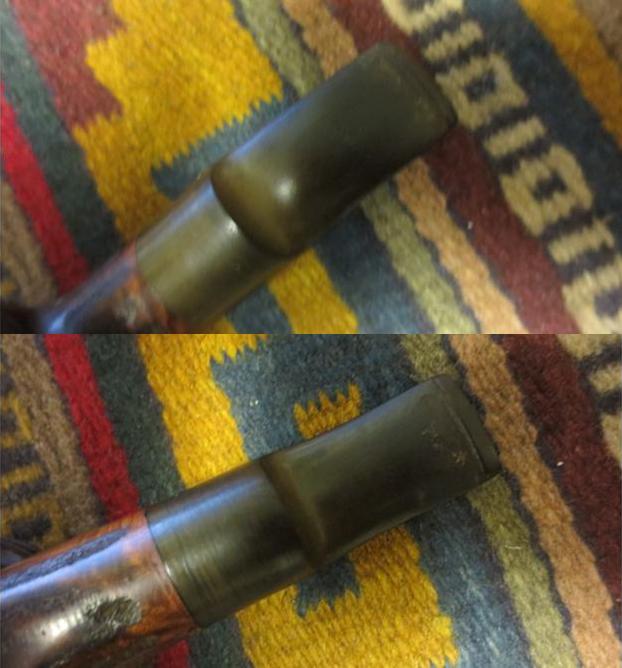
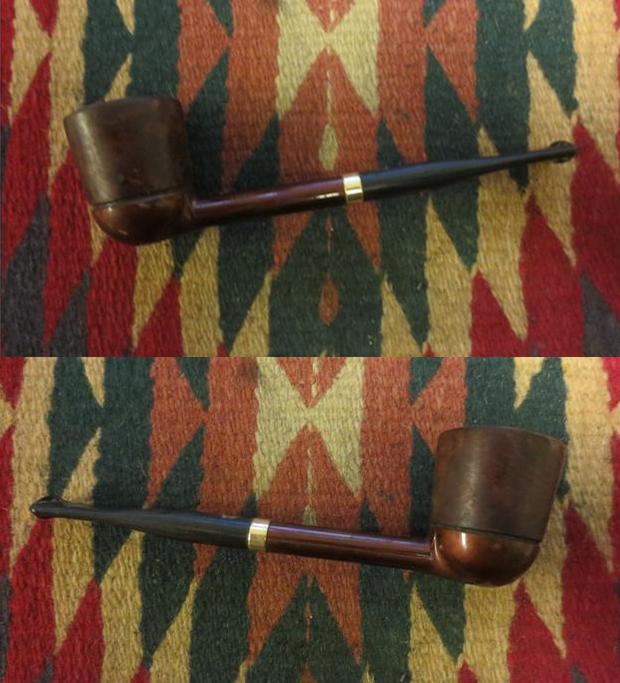
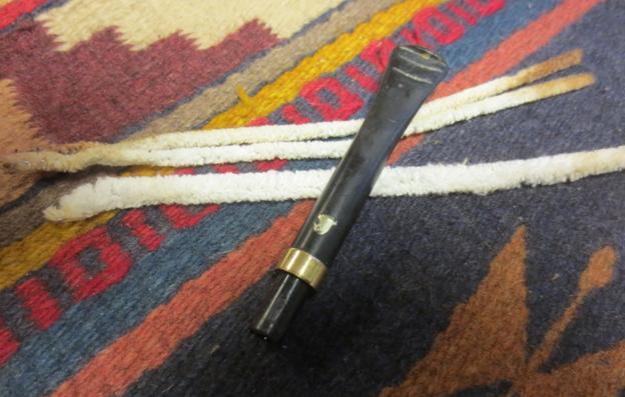
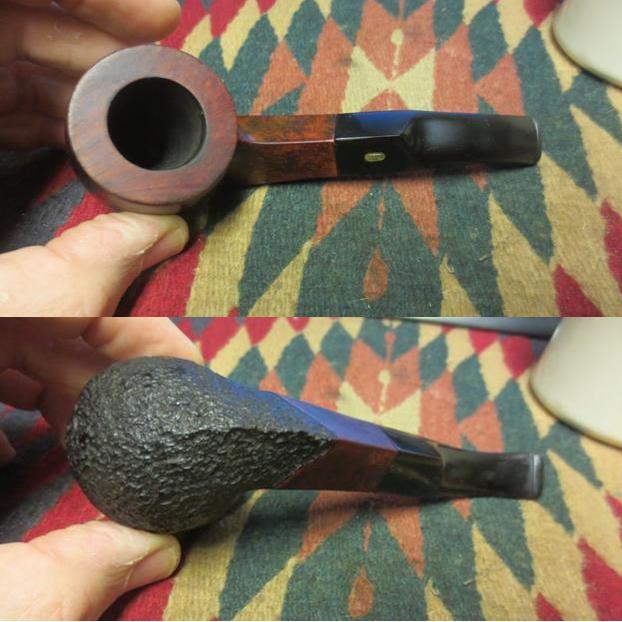
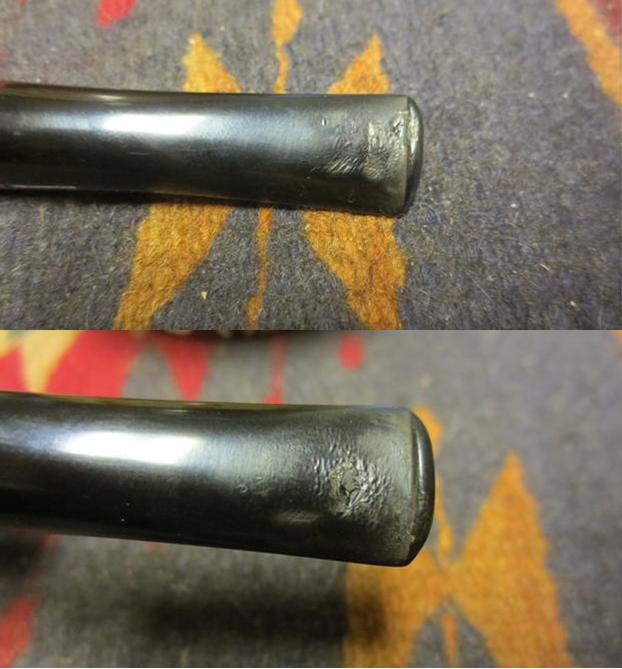
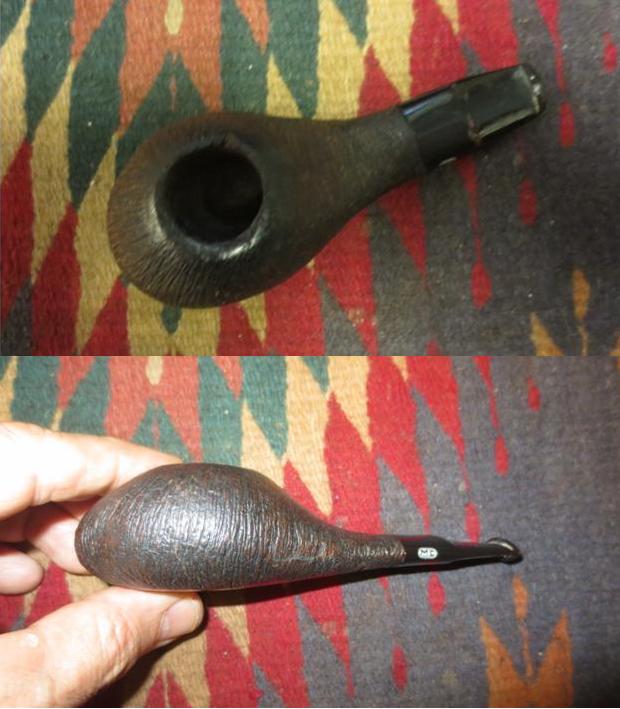
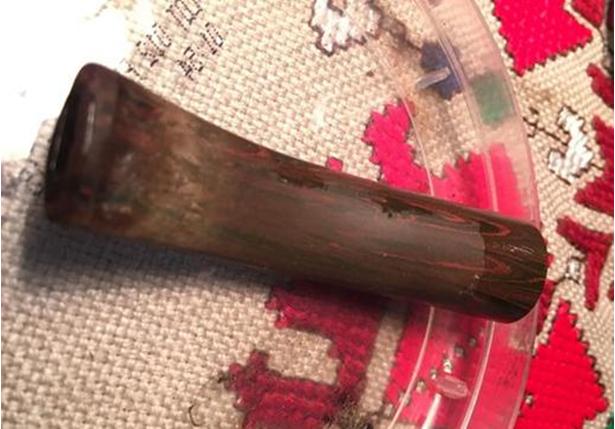
 I took a few close-up photos of the rim and the stem. The first shows the buildup on the rim top and the cake in the bowl. The second and third show the stem with the tooth marks right next to the button edge.
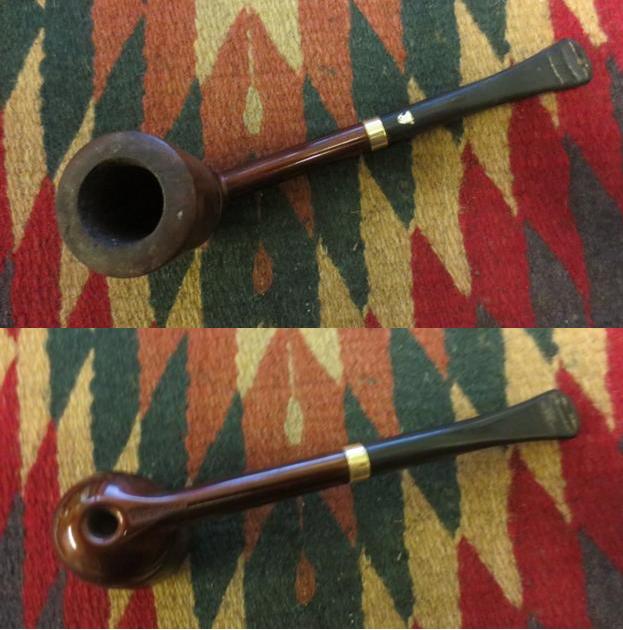
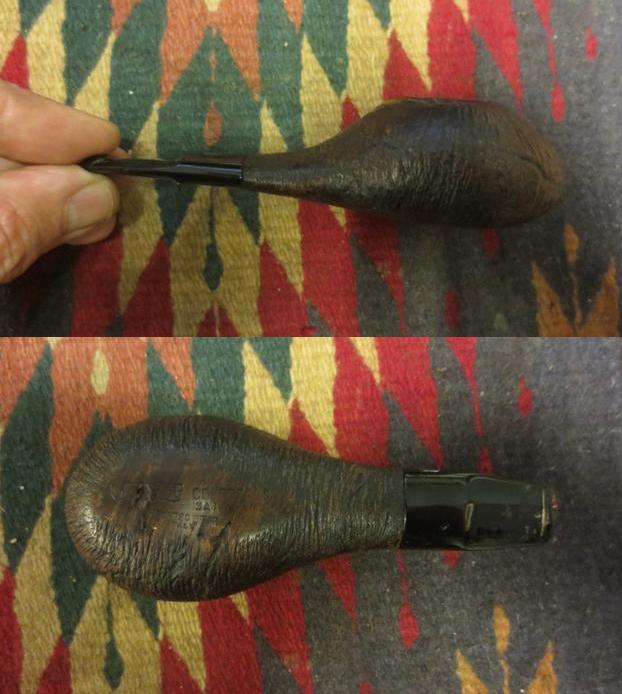
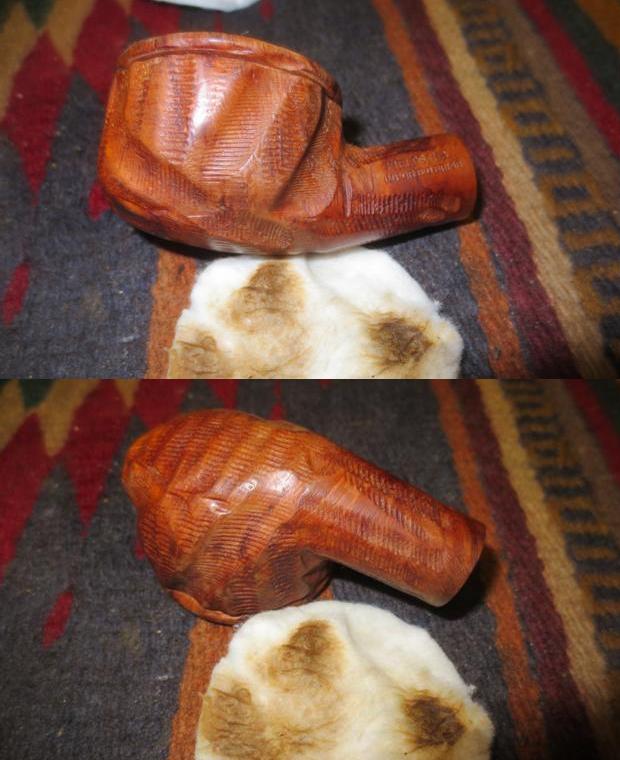
 I scrubbed the bowl with a tooth brush and Murphy’s Oil Soap, used a brass bristle brush on the rim top and rinsed it under running water. I dried it off and took these photos.
 I scrubbed the top of the rim to remove the darkening using acetone and cotton pads. I was able to remove most of the darkening. I wiped down the rest of the bowl with acetone as well to remove the wax and any debris that remained.
 I cleaned up the inner edge of the bowl with a folded piece of 220 grit sandpaper to smooth out the nicks and dings on the edge.
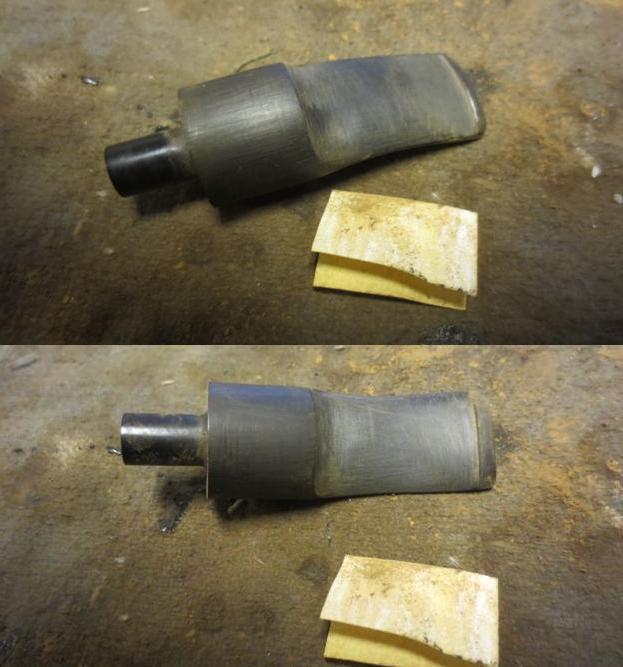
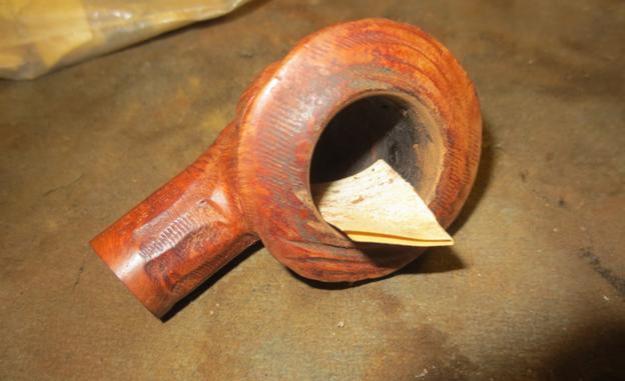 I sanded the stem with 220 grit sandpaper to remove the oxidation and cleaned the airway with pipe cleaners, cotton swabs and alcohol.
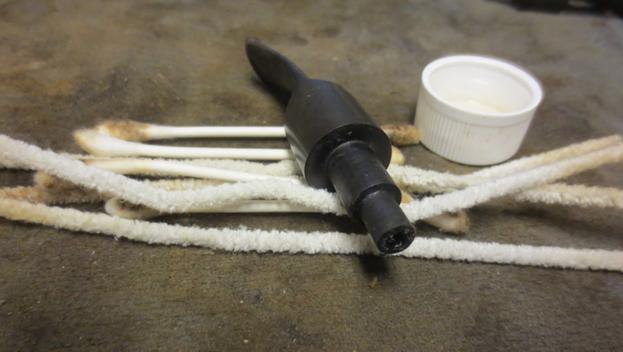 I used alcohol and wiped off the damaged areas next to the underside of the button where the worst of the tooth marks remained after sanding. I filled in the tooth marks with black super glue and sprayed it with an accelerator to speed the drying time.
 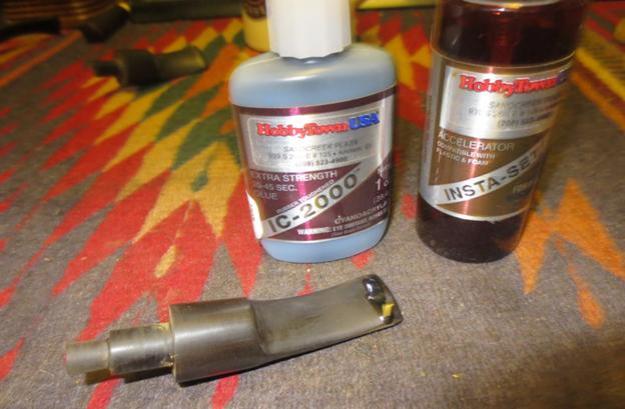 I cleaned up the edge of the button and smoothed out the repair with a needle file. I wanted a clean, sharp edge on the button.
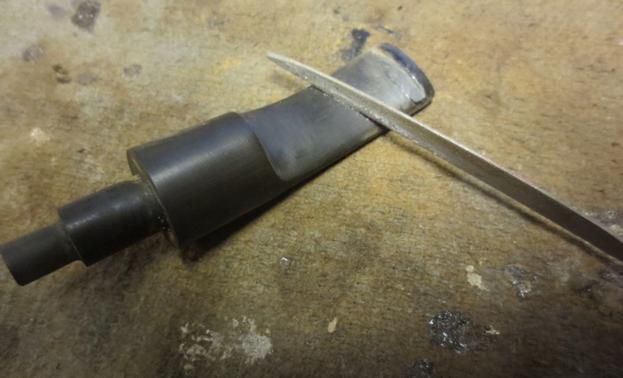 I sanded the patch with 220 grit sandpaper to blend it into the surface of the stem and remove the file marks.
 I stuffed a cotton ball into the bowl and filled it with alcohol to pull the tars and oils out of the bowl and shank. I let it sit for several hours while I worked on the stem.
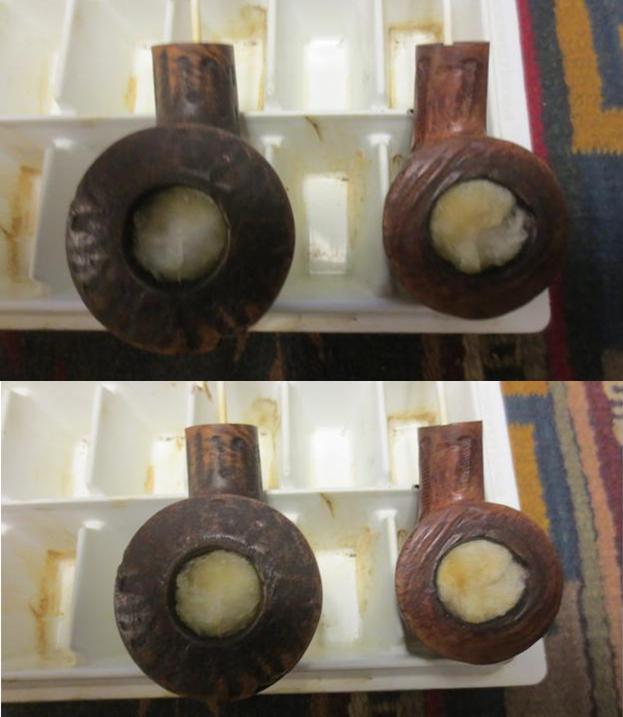 I took the cotton ball out of the bowl and cleaned out the shank and bowl with pipe cleaners and cotton swabs to clean up the last of the alcohol. I let the bowl dry and turned to the stem. I wet sanded the stem with 1500-2400 grit micromesh sanding pads and rubbed it down with Obsidian Oil. I dry sanded with 3200-4000 grit pads and gave it another coat of oil. I finished sanding it with 6000-12000 grit pads, gave it a final rubdown of Obsidian Oil and set it aside to dry.
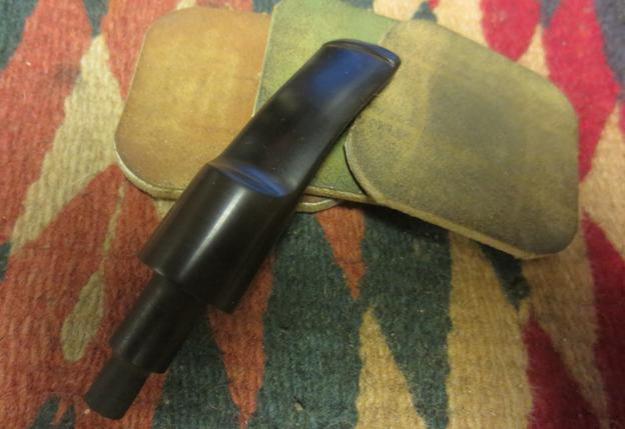

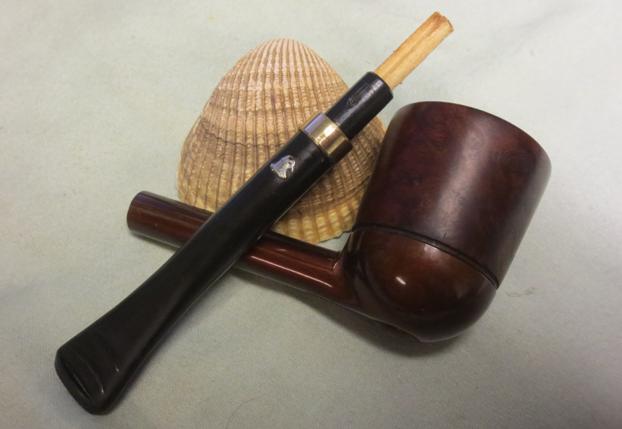
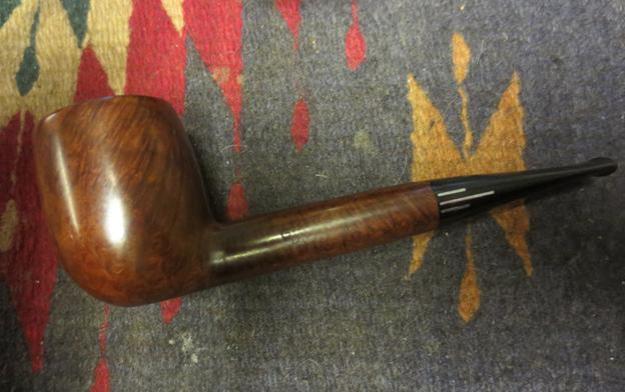
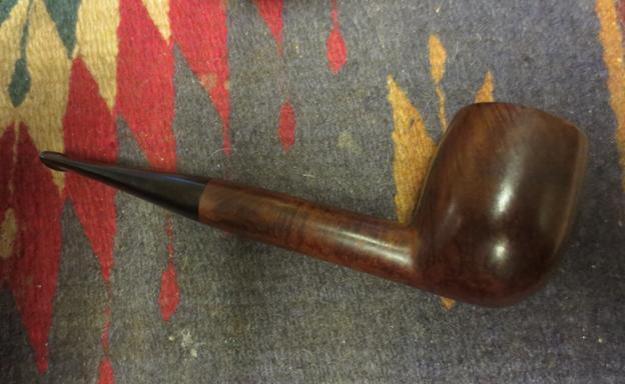
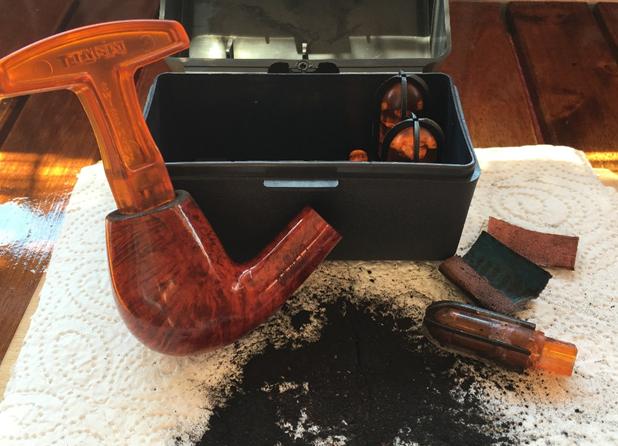
 I buffed the pipe with Blue Diamond on the buffing wheel and gave the stem several coats of carnauba wax. I hand waxed the bowl with Conservator’s Wax and buffed the pipe with a clean buffing pad to raise the shine. I hand buffed the pipe with a microfibre cloth. This one joins the Tom Howard as they wait for Theo to stop by and pick them both up. They are cleaned, polished and smelling great! If you read this blog, they are both ready for you Theo. Thanks for looking.