Blog by Paresh Deshpande
Since the time I completed the pipes selected by Karthik, last of the lot was a lattice design meer (Refurbishing Karthik’s Second Selection – A Stacked Lattice Design Meerschaum | rebornpipes), I have completed another 13 odd pipes that had reached me for repairs and restoration. Each had its own set of challenges which were relatively easy to overcome. What was difficult, however, was dealing with the owner’s instructions as to how I should carry out the repairs, which were very frustrating. Just imagine, a beautiful Brakner that required a tenon replacement to maintain its originality and value and the owner wanted me to replace the stem as it would be cheaper and faster!! Of course, the heart of a restorer won over the mind of repairman and I did a tenon replacement.
Moving on, the next pipe that I chose to work on came to me from Steve!! SURPRISED? Well, the truth is that I was on a lookout for a Savinelli Dry System pipe as I was keen to try one and experience the difference between the Pete System pipe and the Savinelli System pipe. Steve and Jeff had been on a road cum pipe hunting trip and had come up with a rich haul of some cool pipes. We worked out a mutually beneficial deal and just when Steve was to send the parcel, COVID happened….. A wait of more than a year and the parcel with selected pipes reached me when I was under shifting to present location. Another wait of settling down period and the pipe finally made its way to my work table.
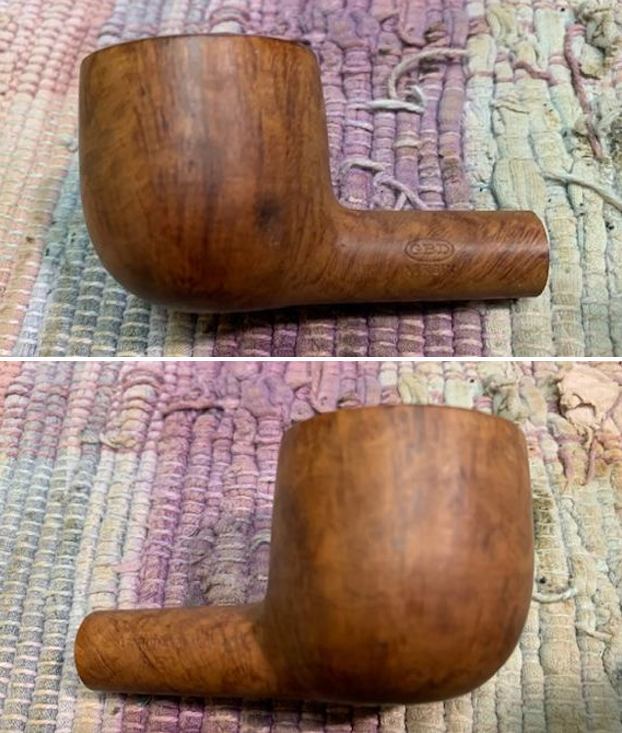
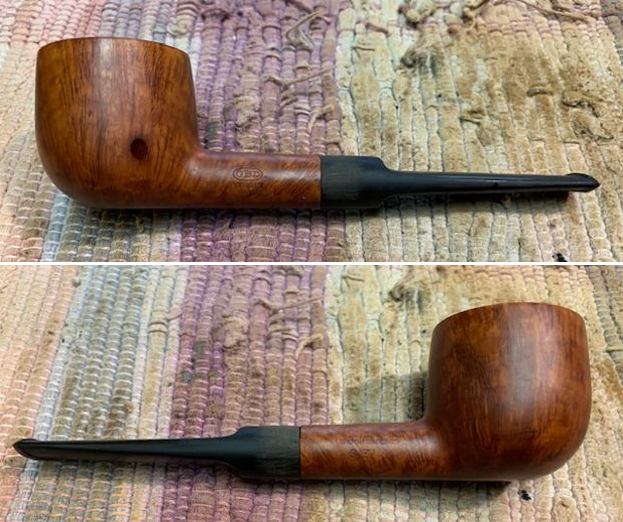
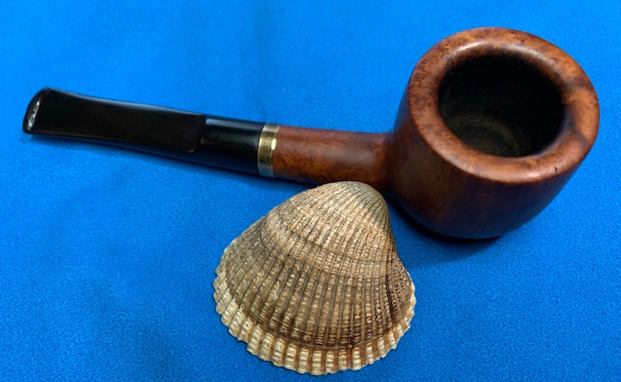
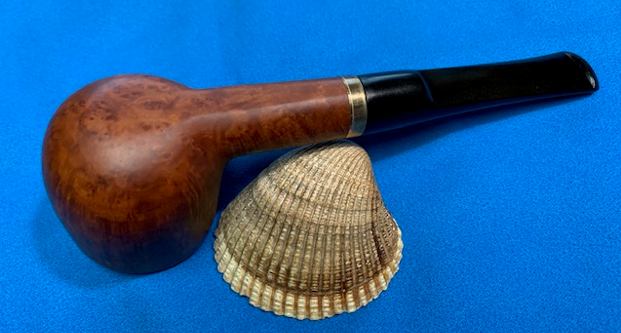
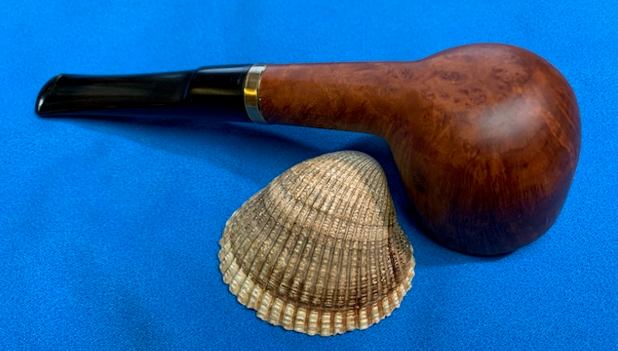
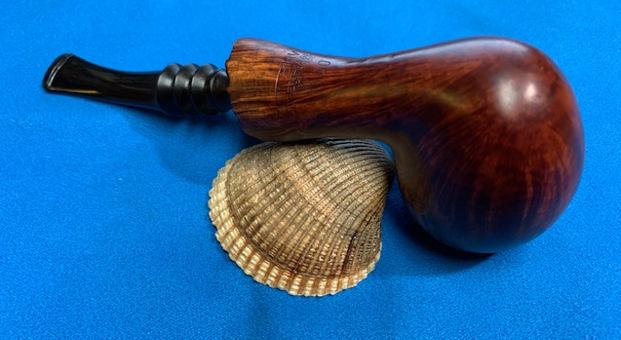
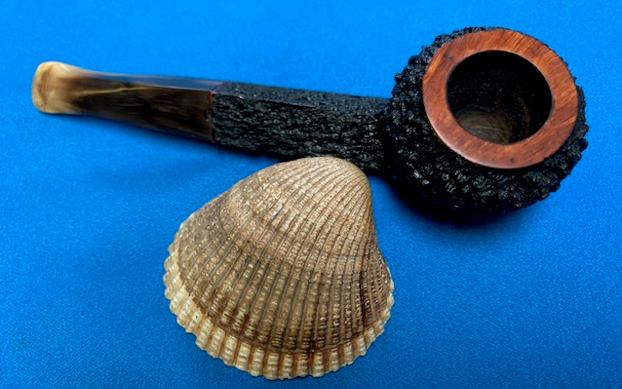
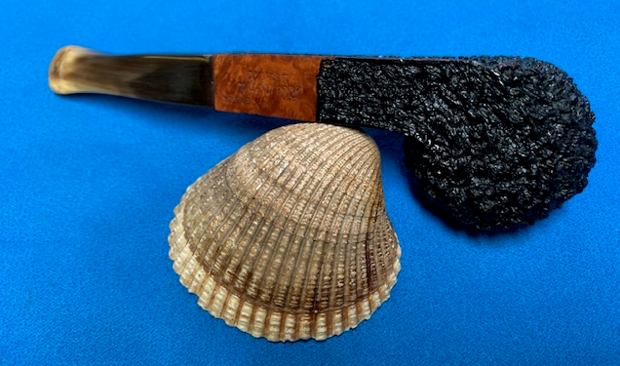
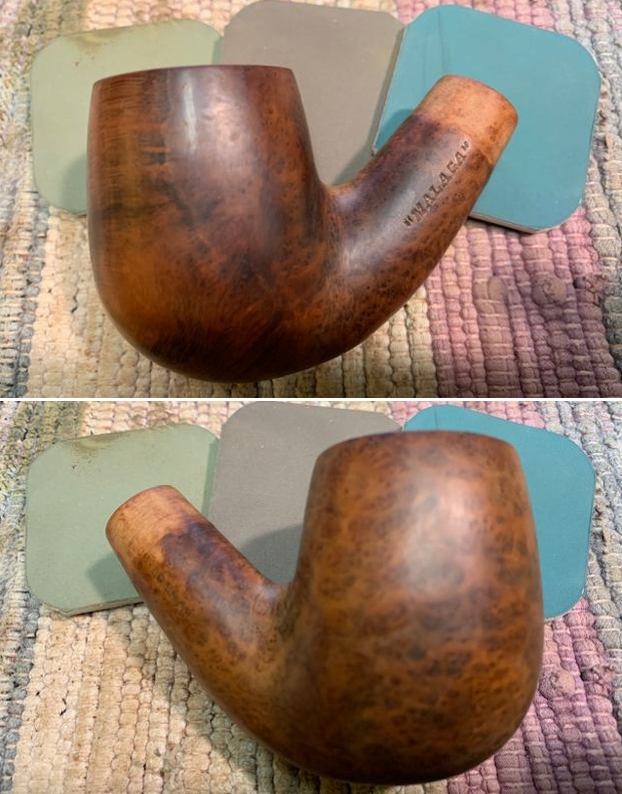
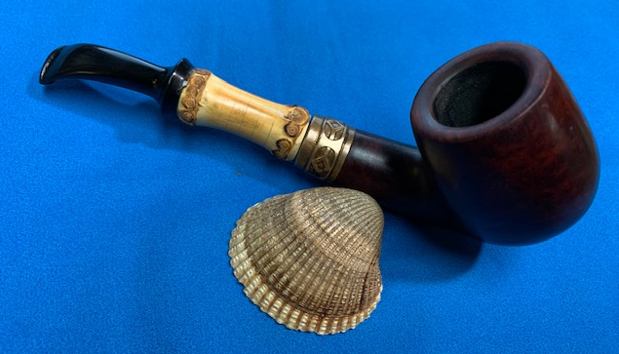
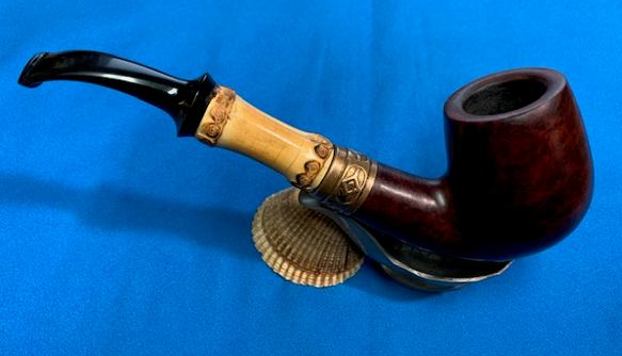
I love classic shaped pipes and this one has a classic Billiard shape with a substantial sized chamber and thick walls. Save for a bald patch that is seen at the lower half over the right side of the stummel, the stummel boasts of plenty of Bird’s eye and cross grain across the surface. It is stamped on the left side over the shank as arched “SAVINELLI” over “DRY” over reverse arched “SYSTEM” forming the shape of a rugby ball. The right side of the shank bears the shape code # 2101 over the COM stamp “ITALY” towards the bowl while the Savinelli trademark “S” in shield is to the left of the shape code towards the ferrule end. The nickel ferrule is stamped on the left as “SAVINELLI” in capital letters. Letter “S” adorns the top face of the saddle of the vulcanite stem. The stampings are all crisp and easily discernible.
 I searched rebornpipes to see if I could find any information on this pipe, as I invariably always do, to save time in digging out information about the brand. And true enough, my friend Dal Stanton, aka The Pipe Steward, had worked on a Dry System pipe from Savinelli, albeit a sandblasted one. The research done by Dal is always very detailed and comprehensive to an extent that there is hardly any information that he has missed out. To avoid the proverbial reinvention of the wheel, I have included the link here for those interested in knowing more about this offering from Savinelli (and a big thank you to Dal goes without saying!)
Recommissioning a Smart Savinelli Dry System 3621 Bent Dublin | rebornpipes
With a better understanding of this line from Savinelli, I move ahead with my visual inspection of the pipe.
Initial Visual Inspection
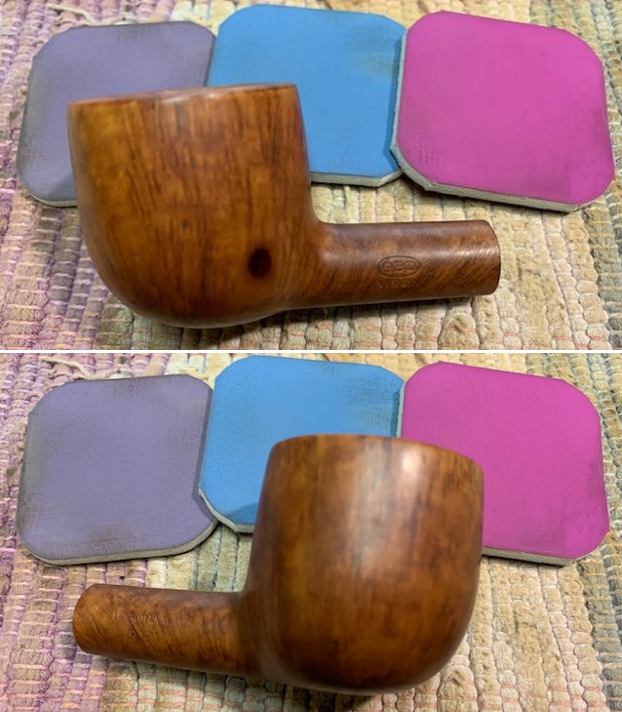
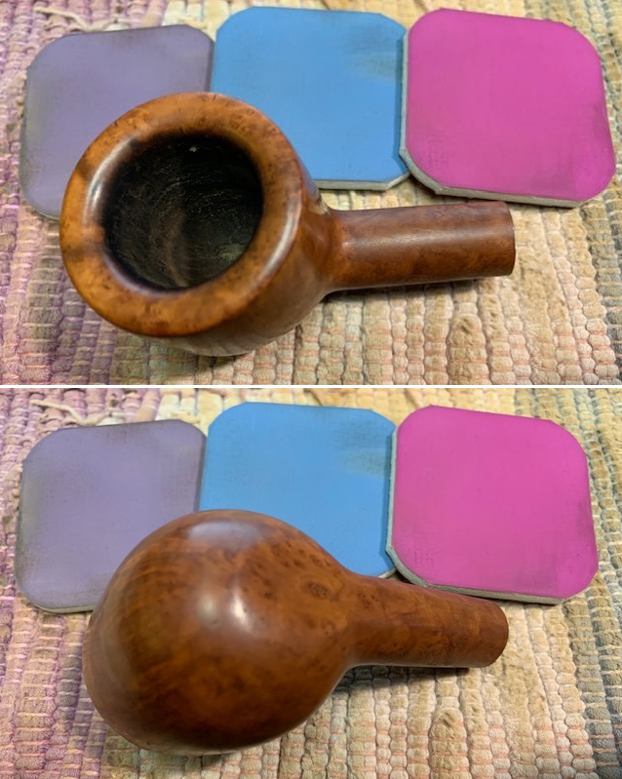
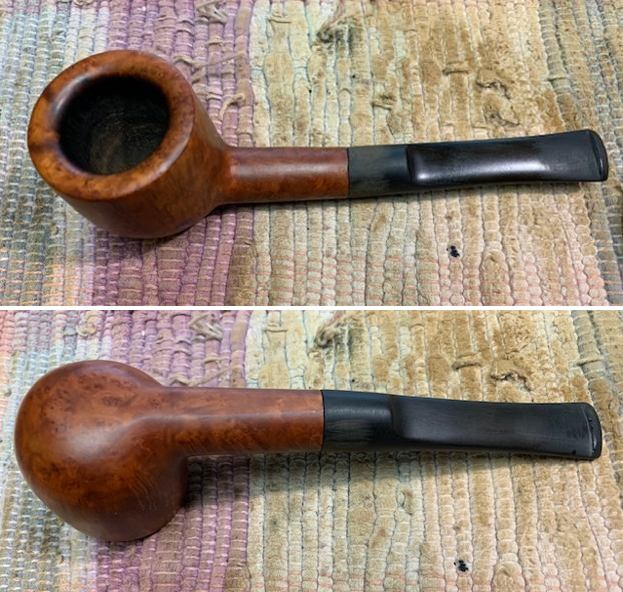
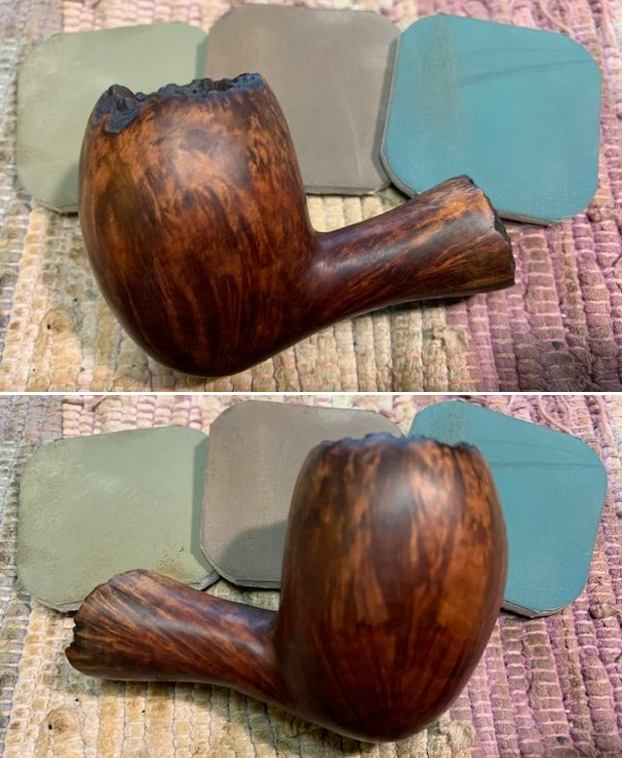
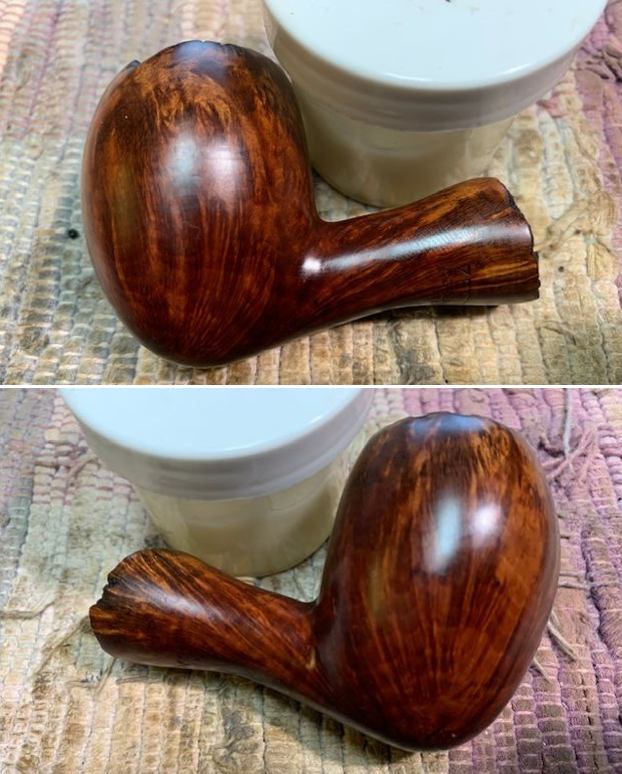
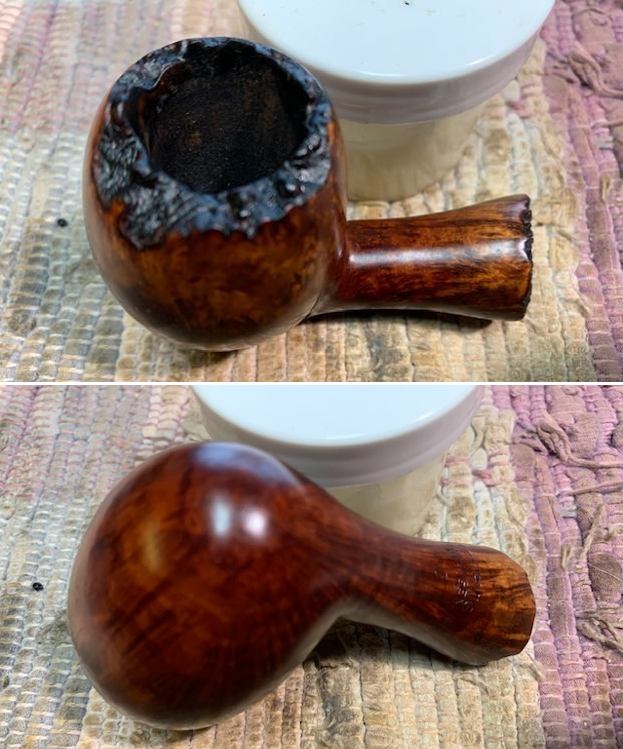
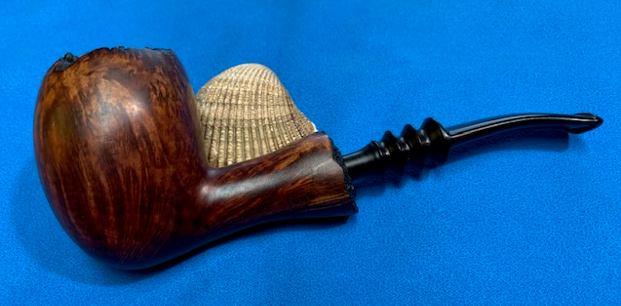
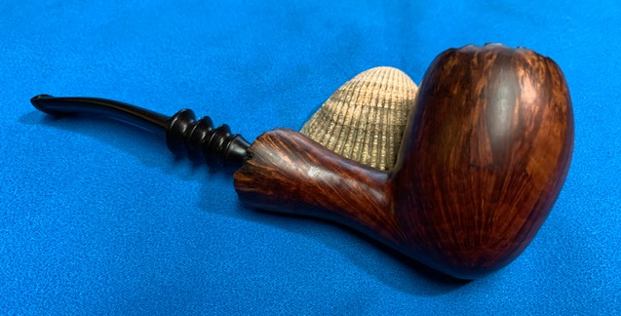
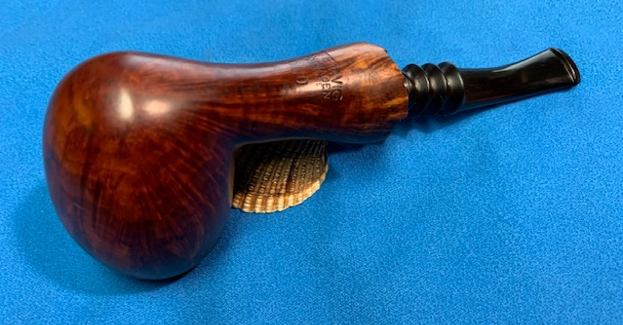
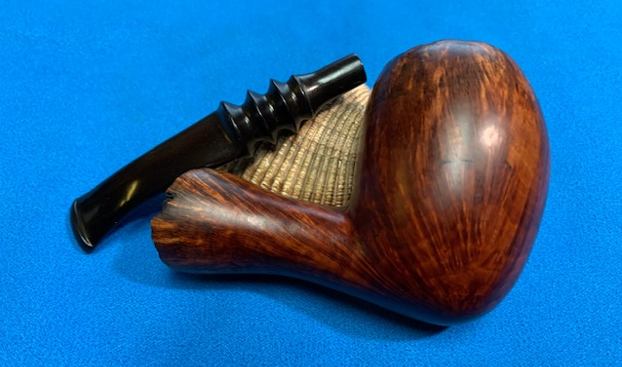
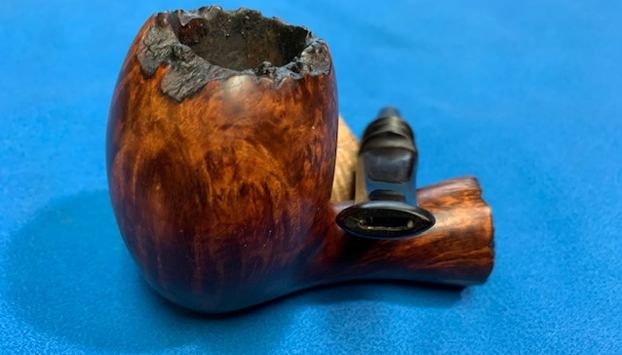
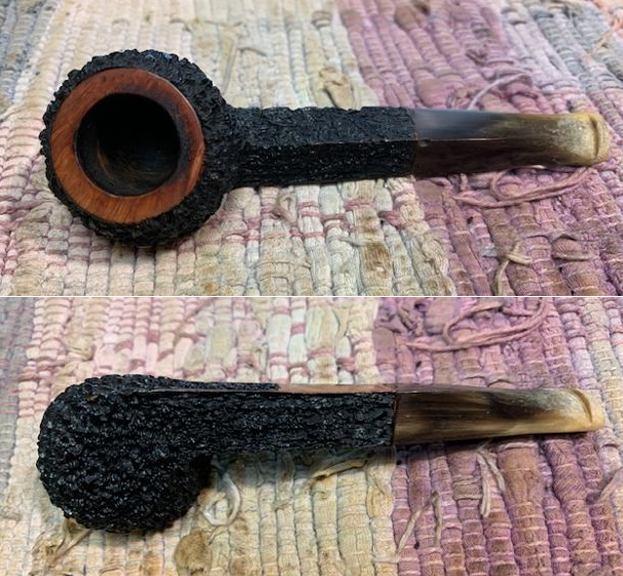
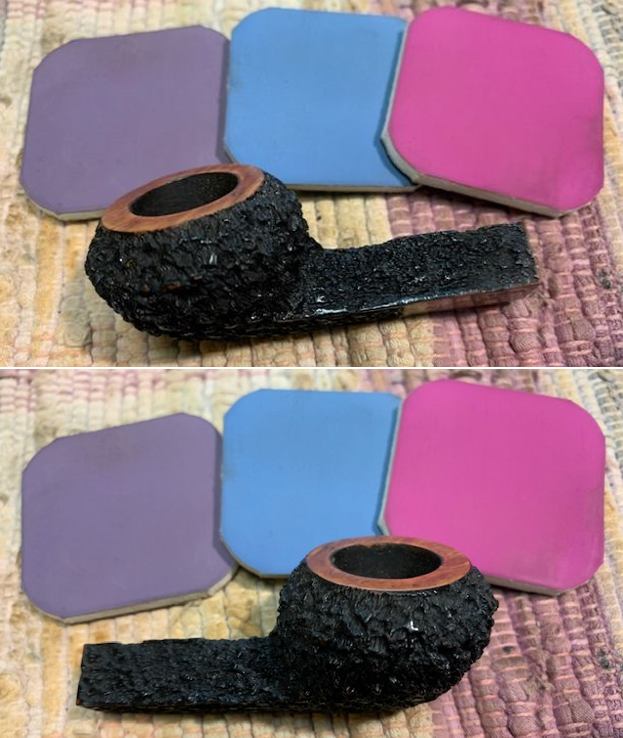
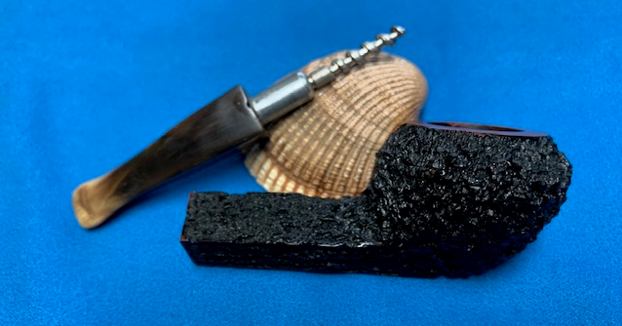
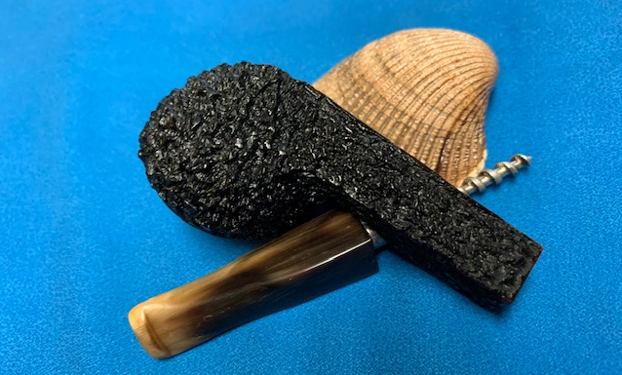
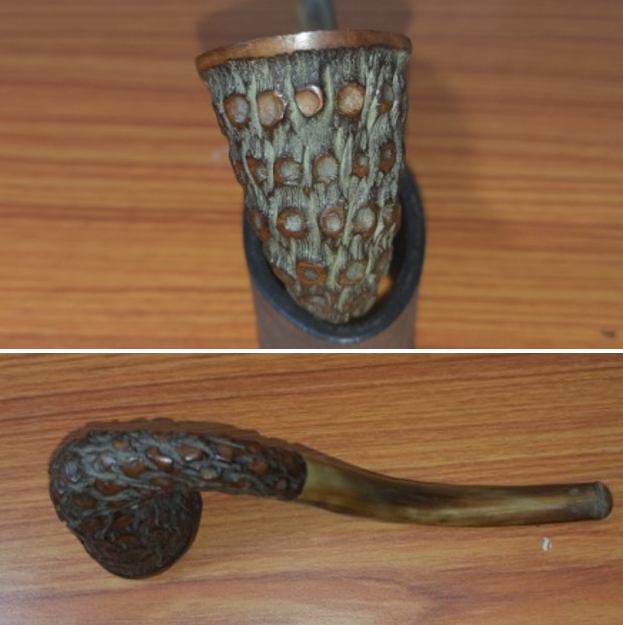
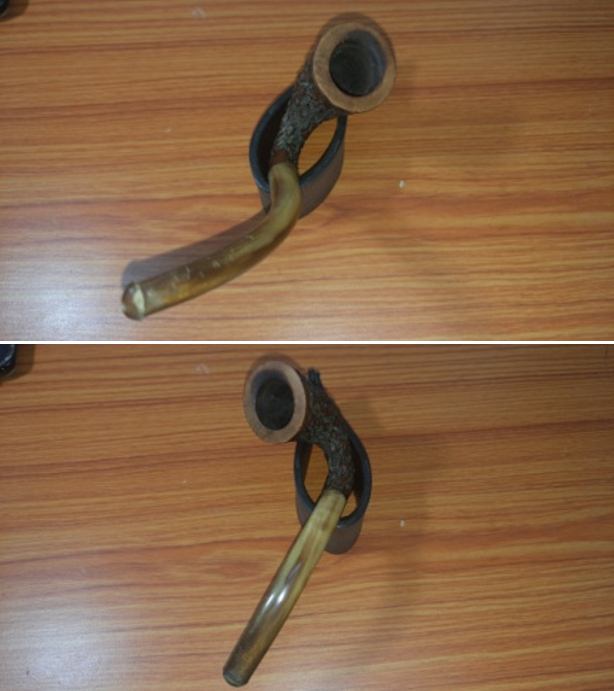
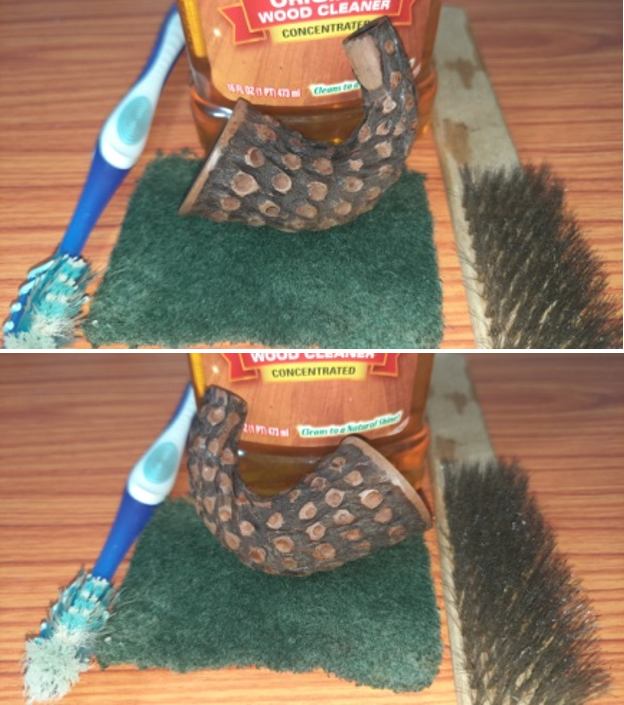
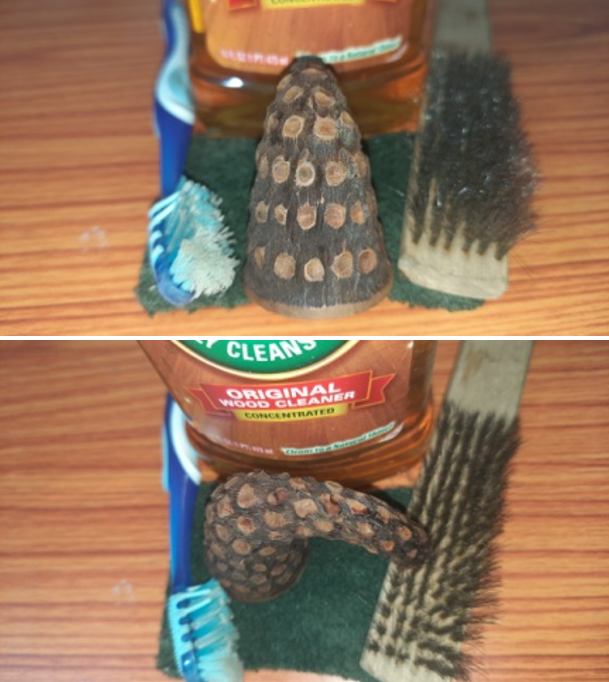
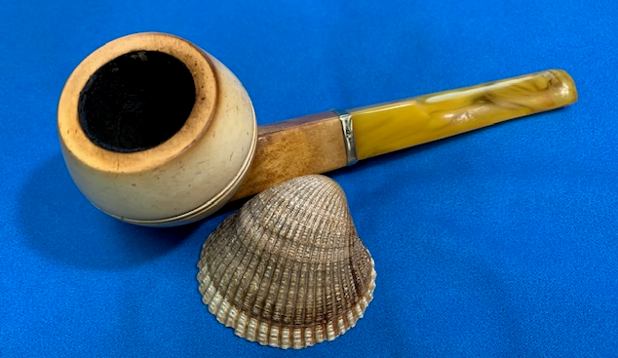
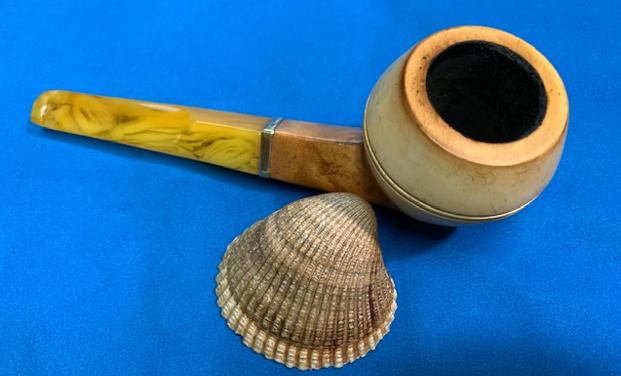
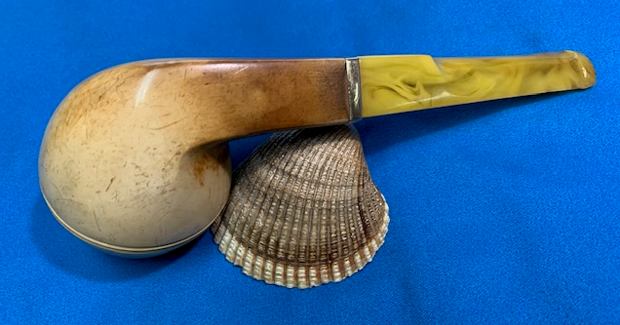
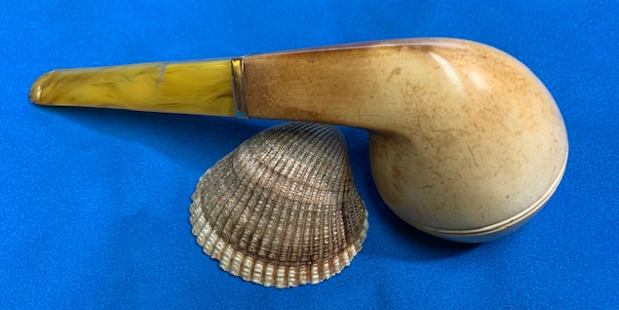
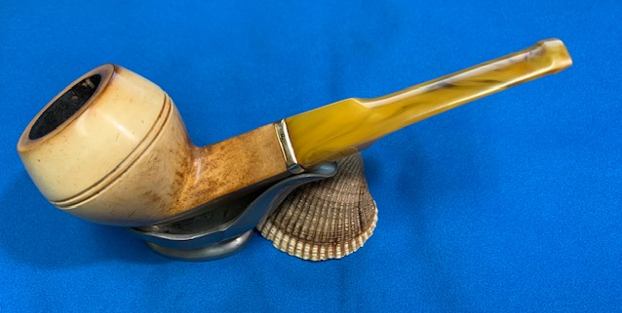
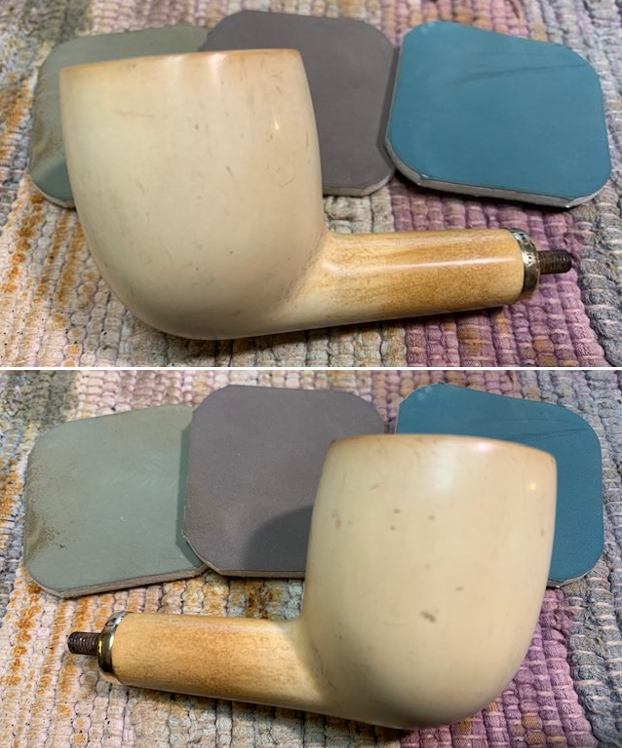
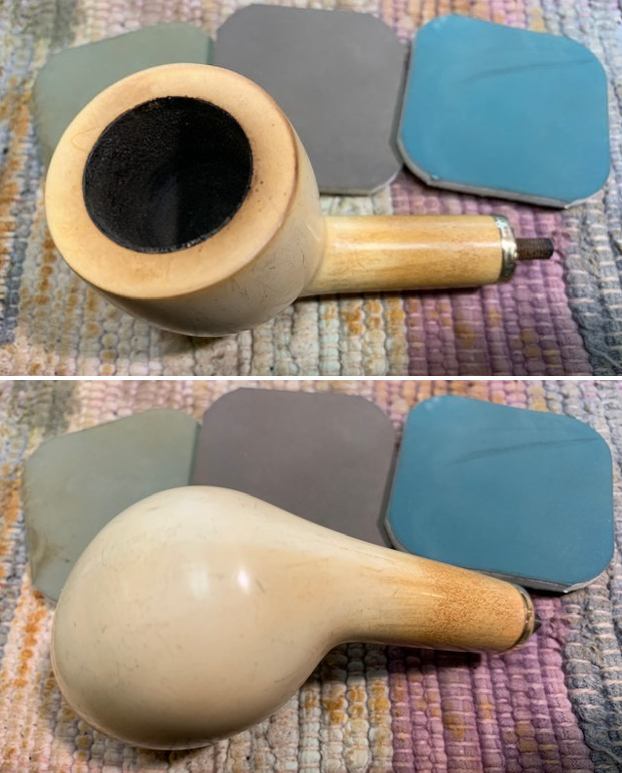
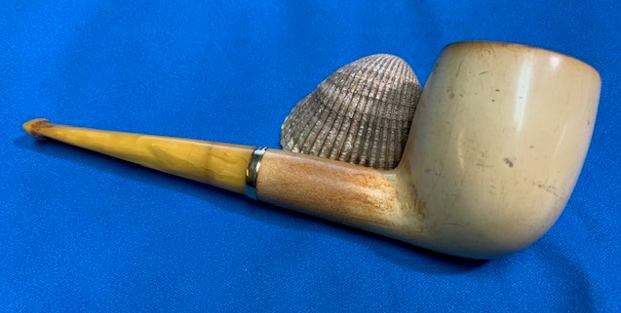
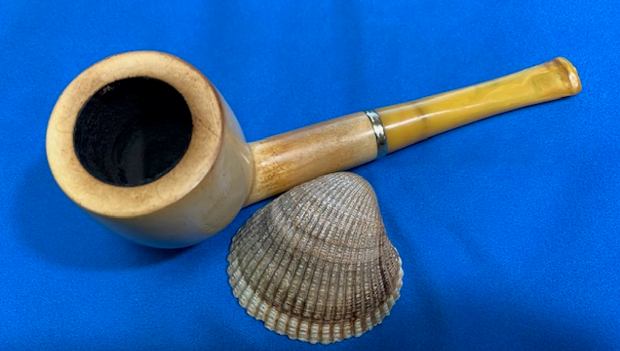
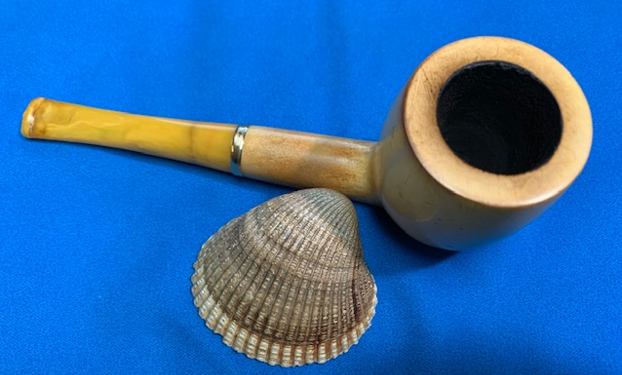
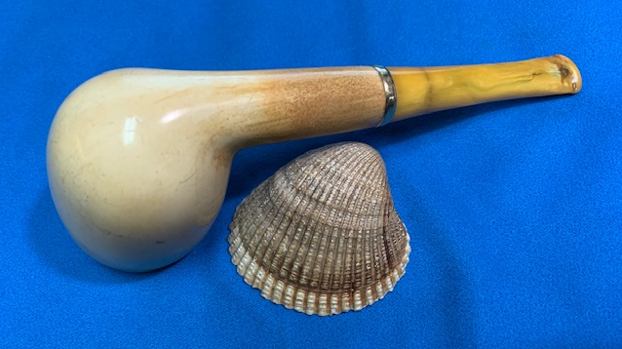
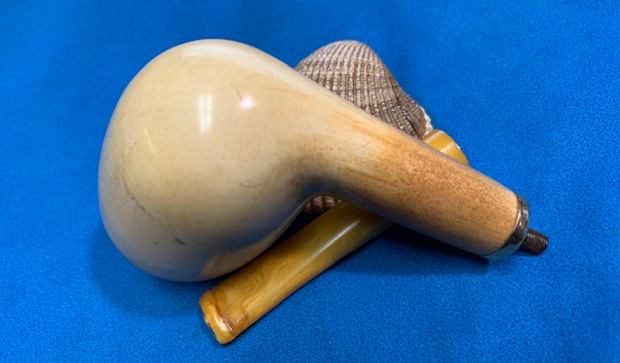
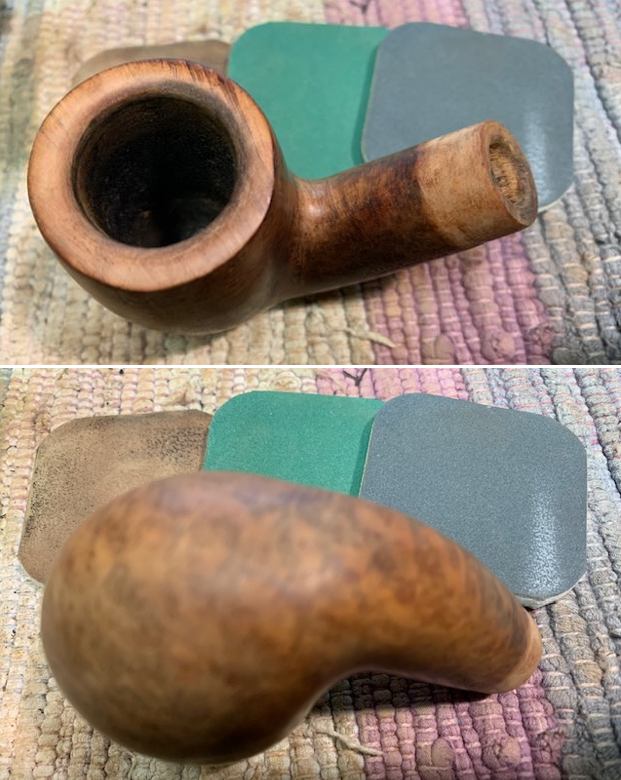
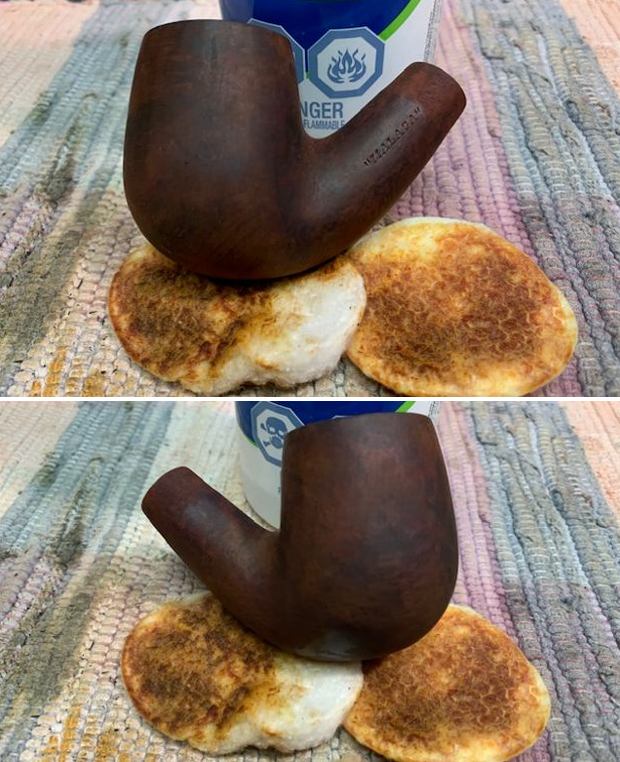
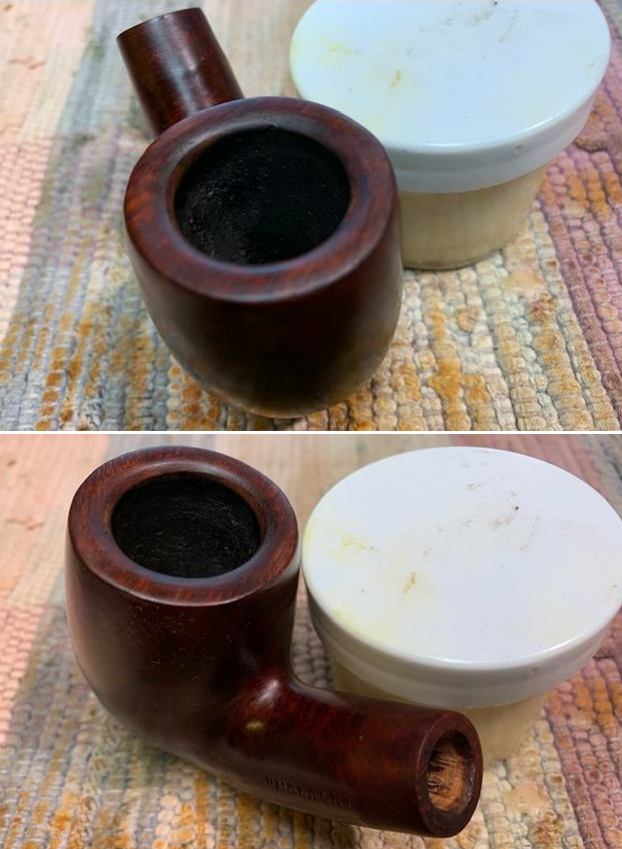
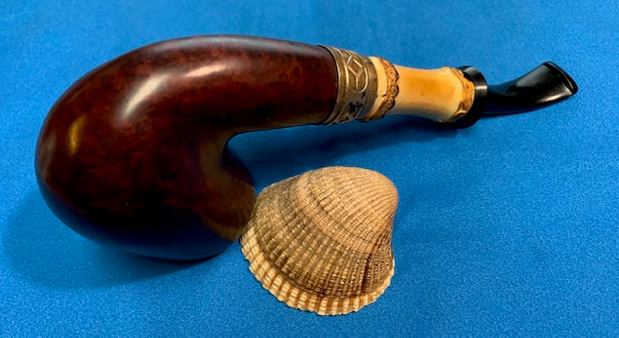
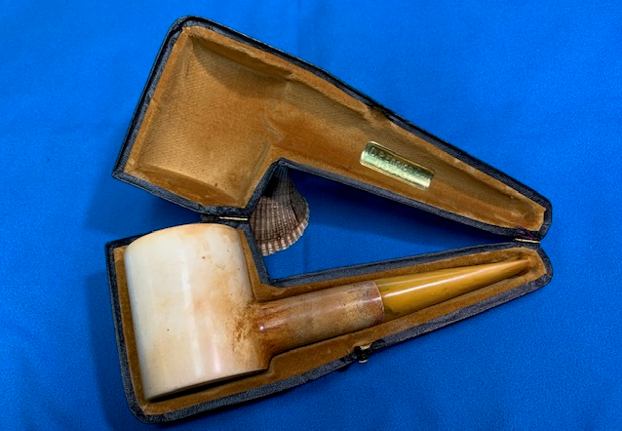
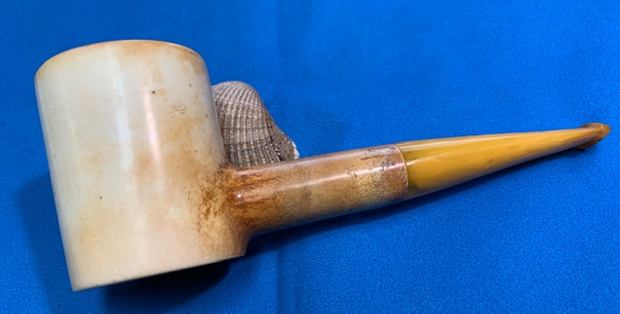
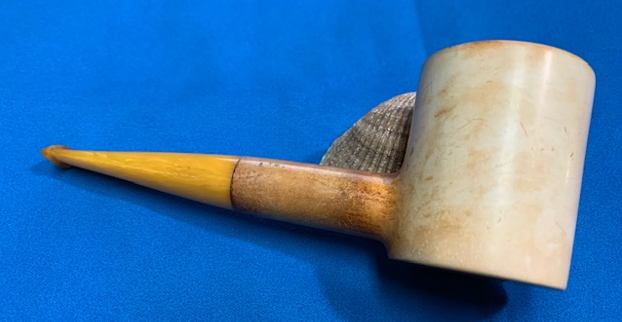
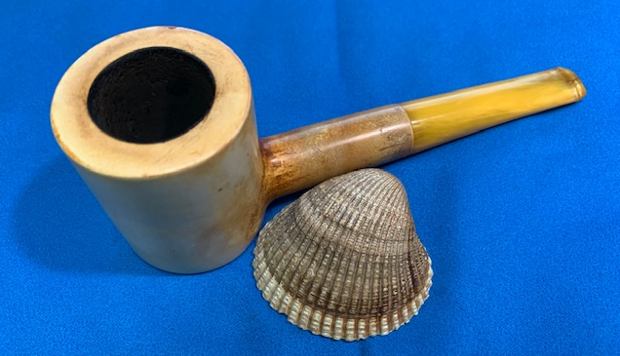
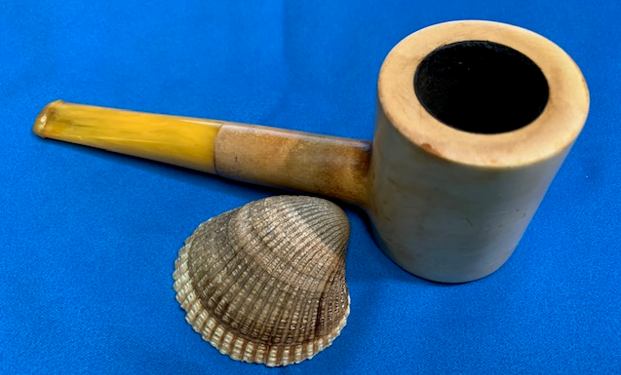
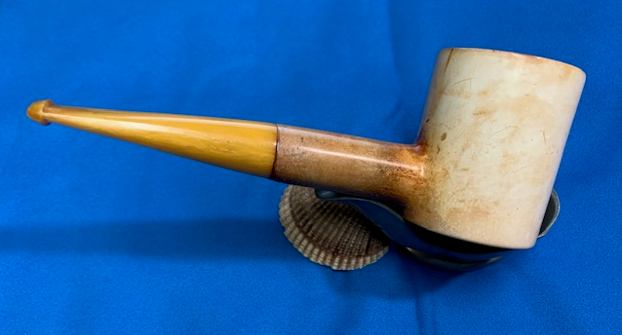
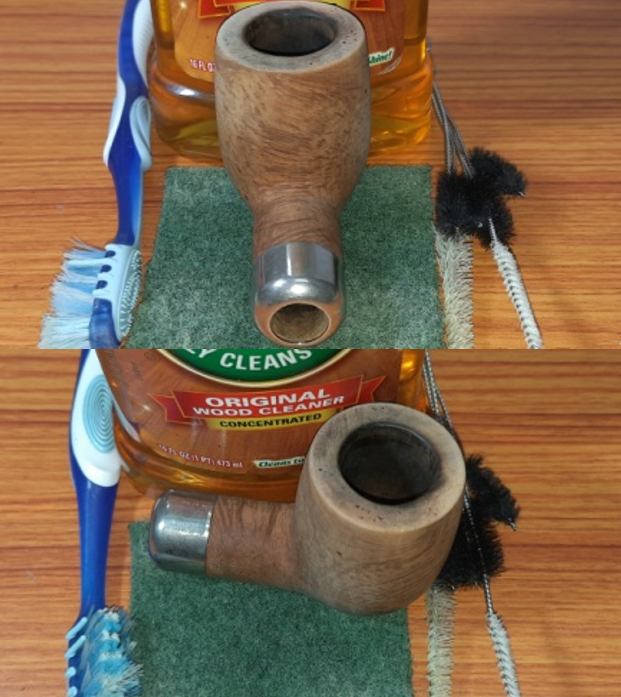
The first thing that you notice is the size and heft of the pipe in hand; it’s a lot of pipe for sure! The chamber walls are nice and thick with a thin layer of cake in the chamber. The rim top surface has thick layer of lava overflow, which given the layer of cake in the chamber is mystifying. The flow of air through the pipe is not very smooth and full. The interestingly grained stummel surface is covered in dirt, dust and grime with a number of dents and dings signifying extensive and uncared for usage. The vulcanite saddle stem is heavily oxidized with damage to the button and in the bite zone. The following pictures will give the readers a rough idea to the general condition of the pipe.

 Dimensions Of The Pipe
(a) Overall length of the pipe: – 6 inches.
(b) Bowl height: – 1.9 inches.
(c) Inner diameter of chamber: – 0.7 inches
(d) Outer diameter of chamber: – 1.3 inches
Detailed Inspection Of The Pipe And Observations
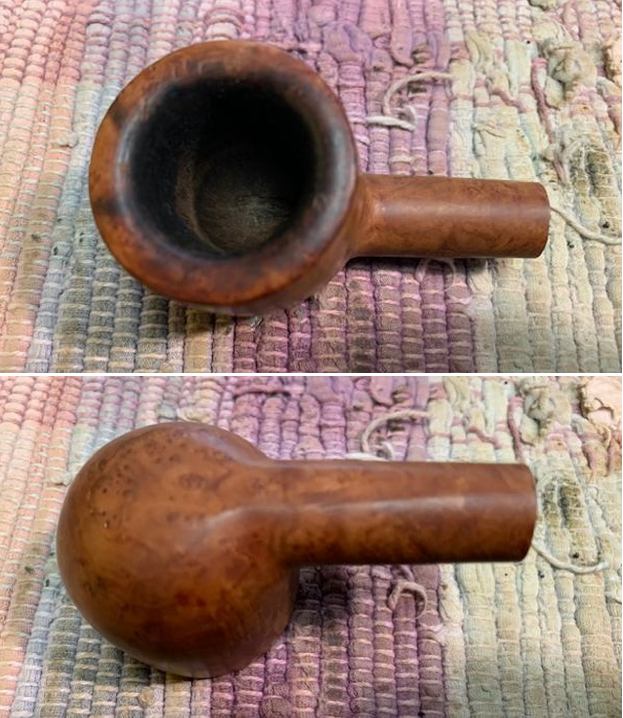
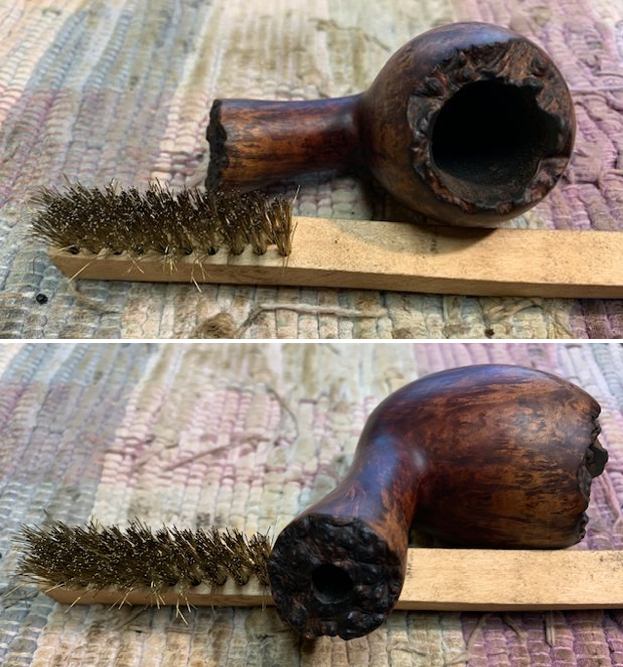
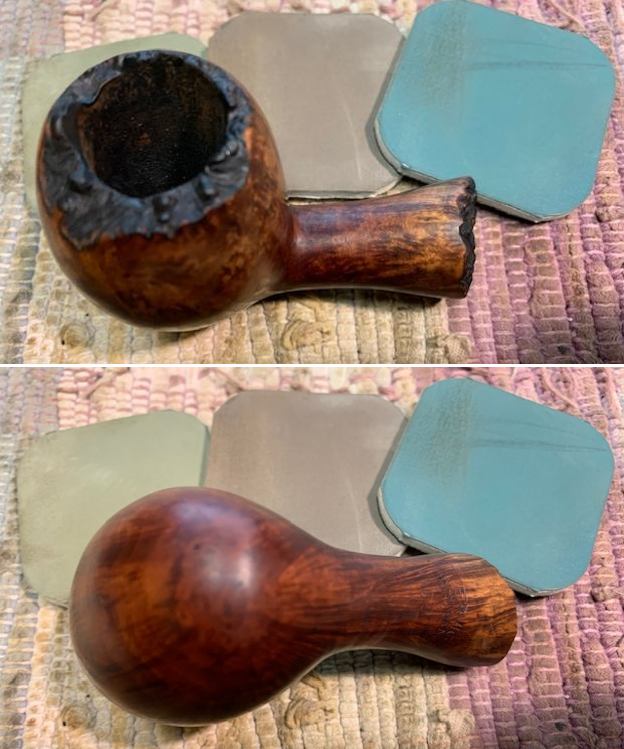
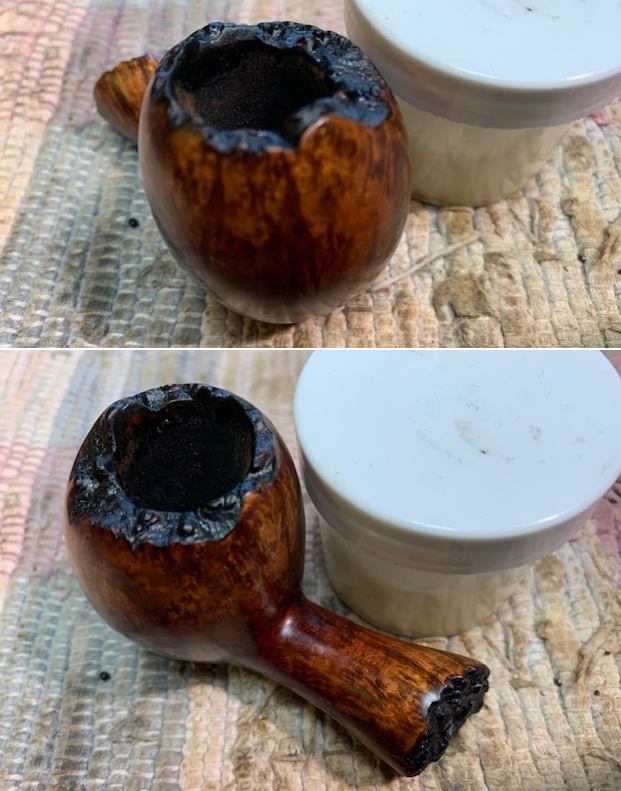
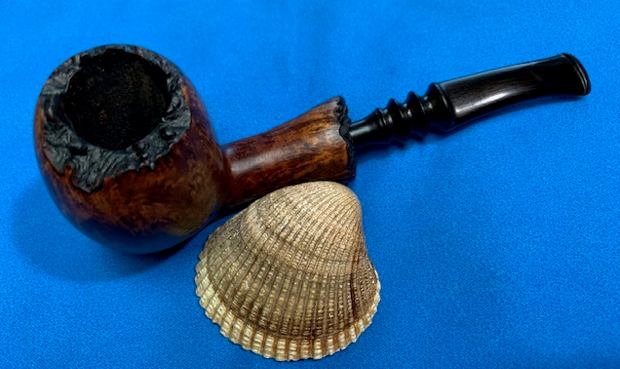
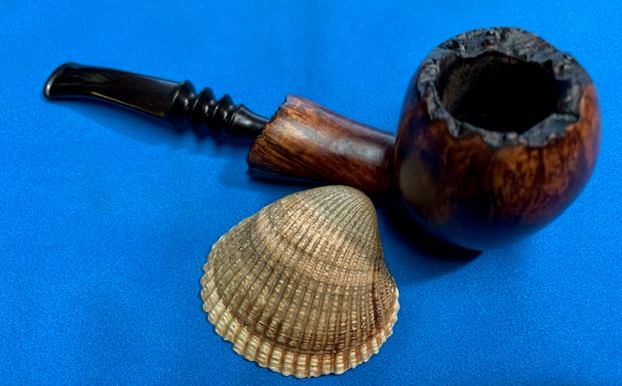
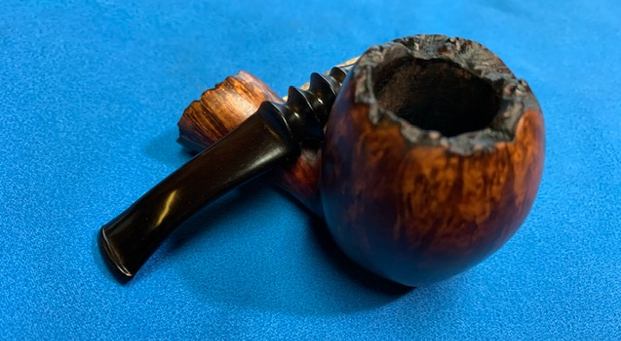
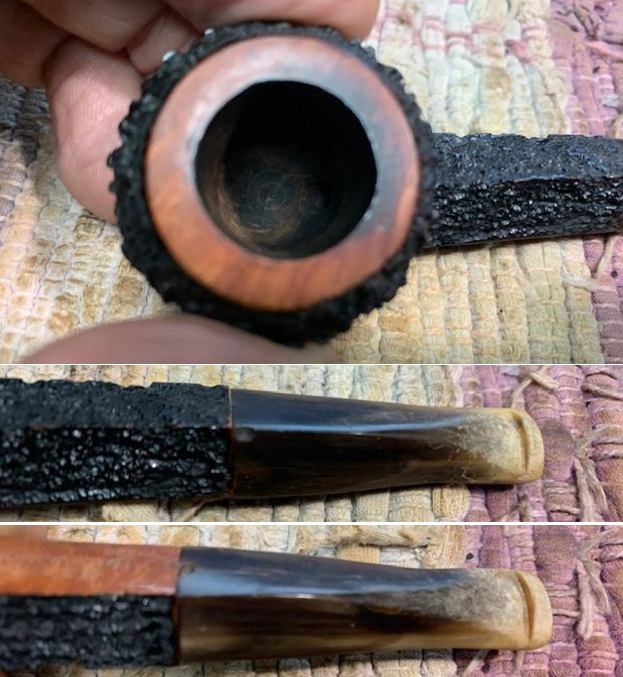
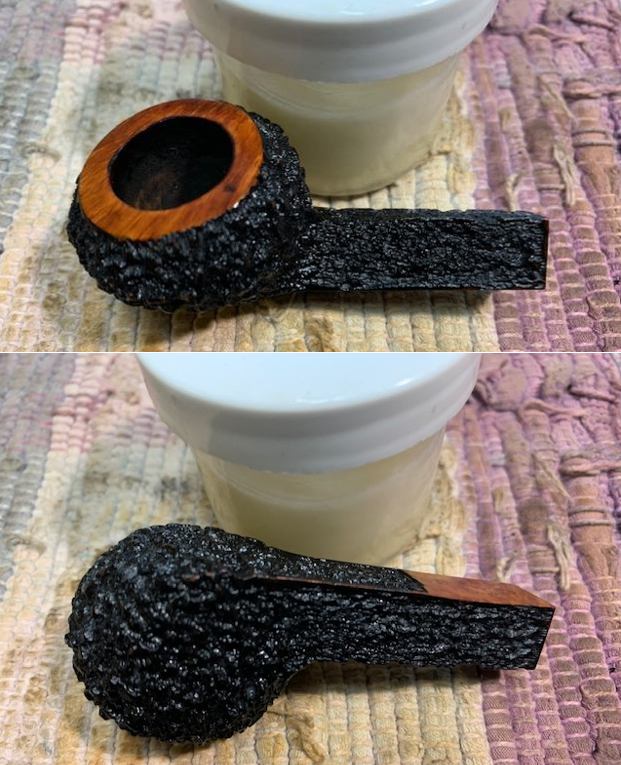
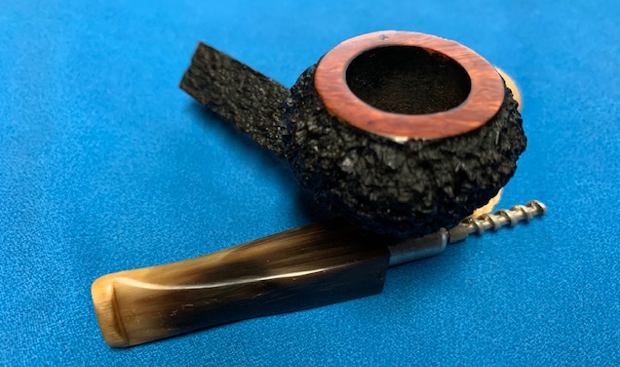
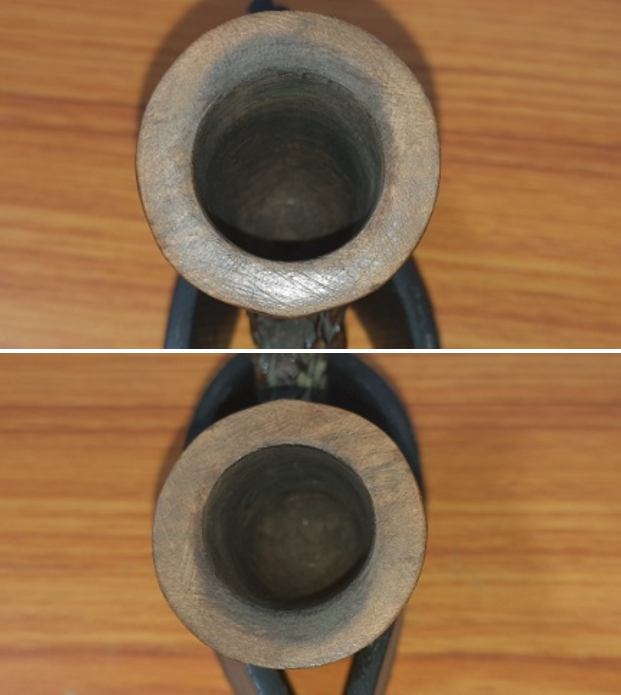
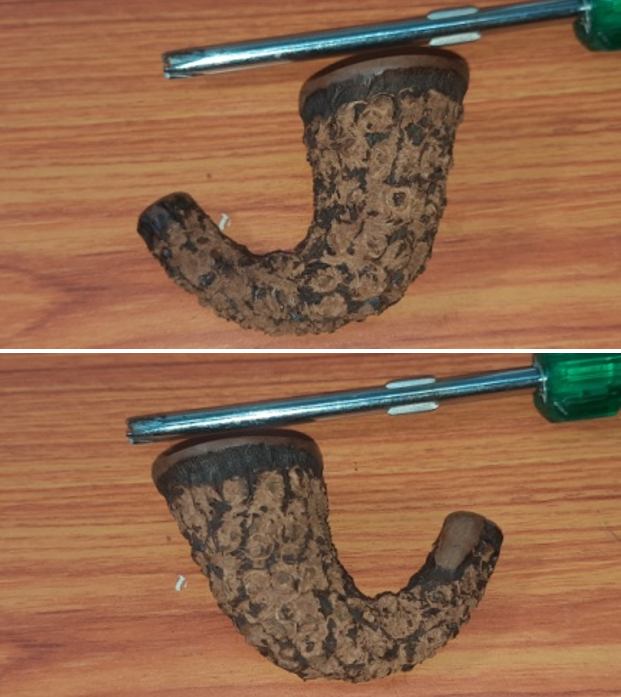
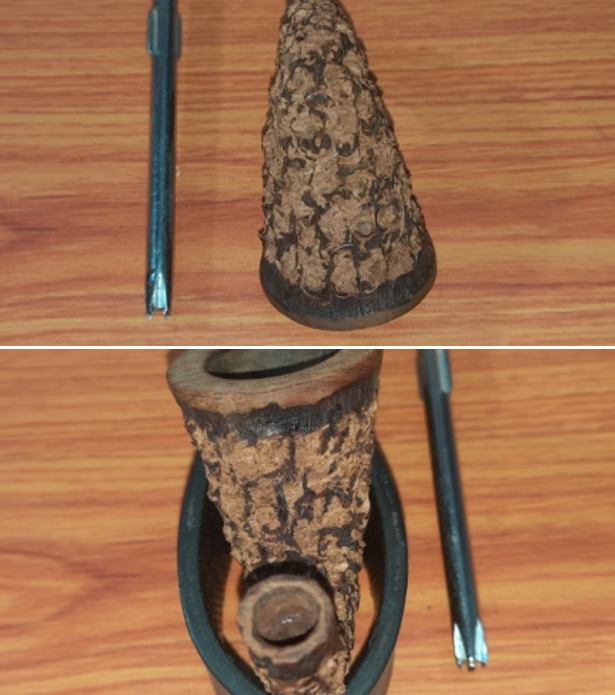
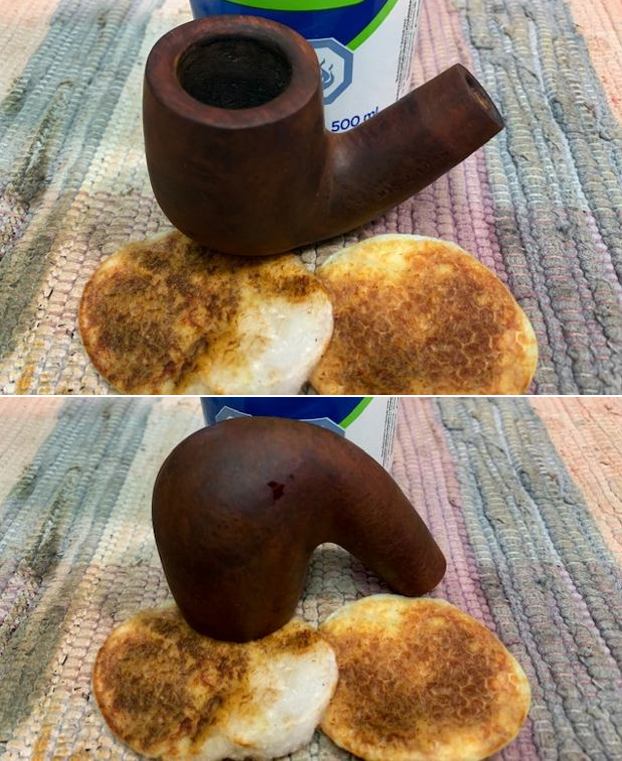
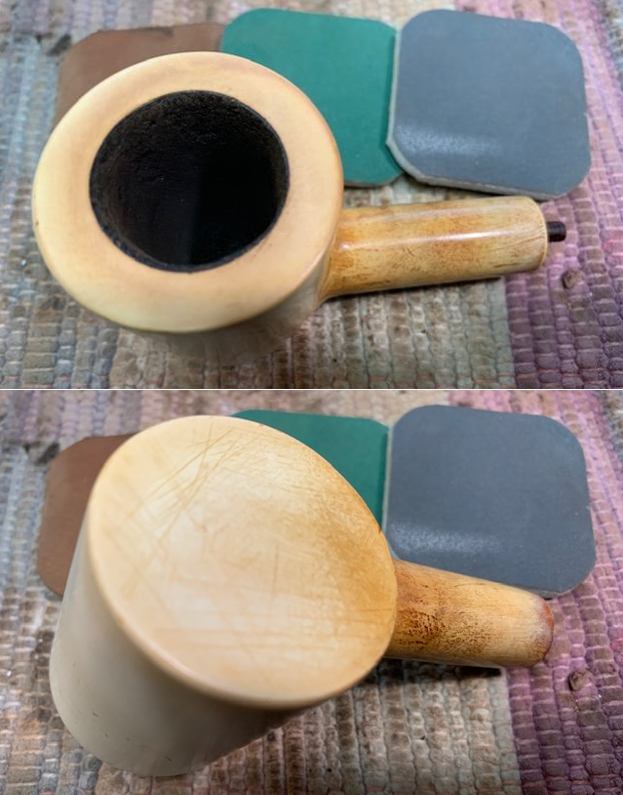
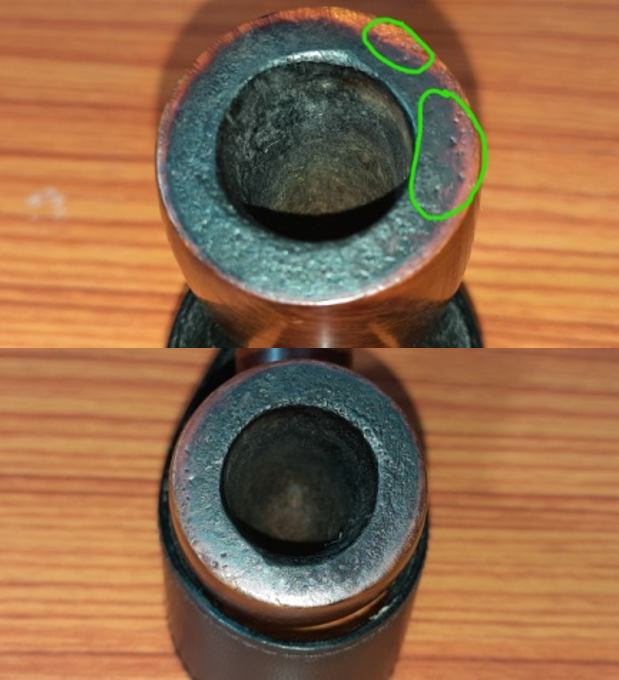
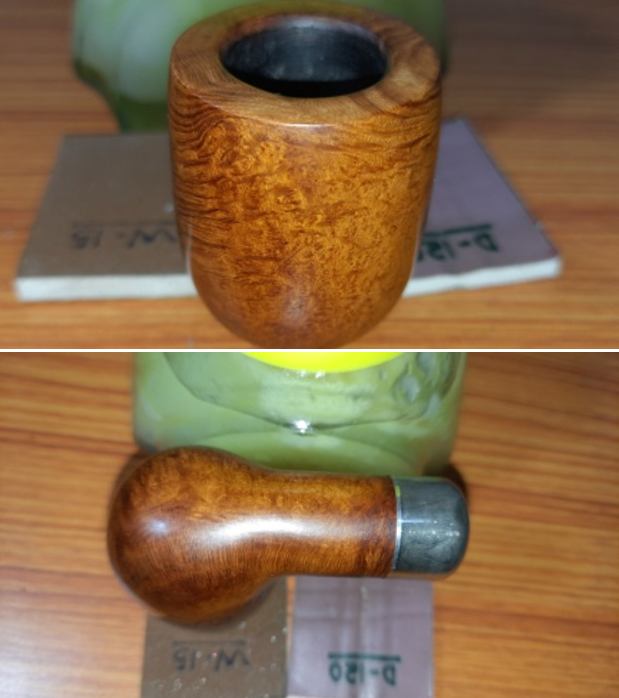
The chamber has a thin crust of carbon over the chamber walls suggesting that the chamber had been reamed in the recent past. The chamber walls are sans any damage and has years of smoke left in it. However, the thick layer of lava crust over the rim top surface has me surprised as it is an indicator of heavy usage while the chamber is neatly reamed! Through the lava crust, suspected charring to the inner rim edge is observed in the 12 and 6 o’clock direction (encircled in yellow). A number of dents are visible over the rim top surface (encircled in green), probably a result of knocking against a hard surface edge. The exact extent of damage and the condition of the rim surface will be apparent once the lava crust is completely eliminated from the top surface. The geometry of the pipe is spot on with the draught aperture in dead center and at the bottom of the chamber and that makes me believe that it should smoke smoothly. The ghost smells of the previous tobacco is not very strong and should be completely eliminated once the cake has been removed and the shank internals are thoroughly cleaned.
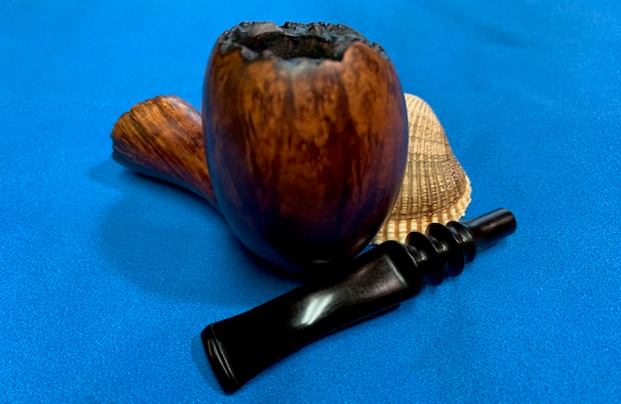
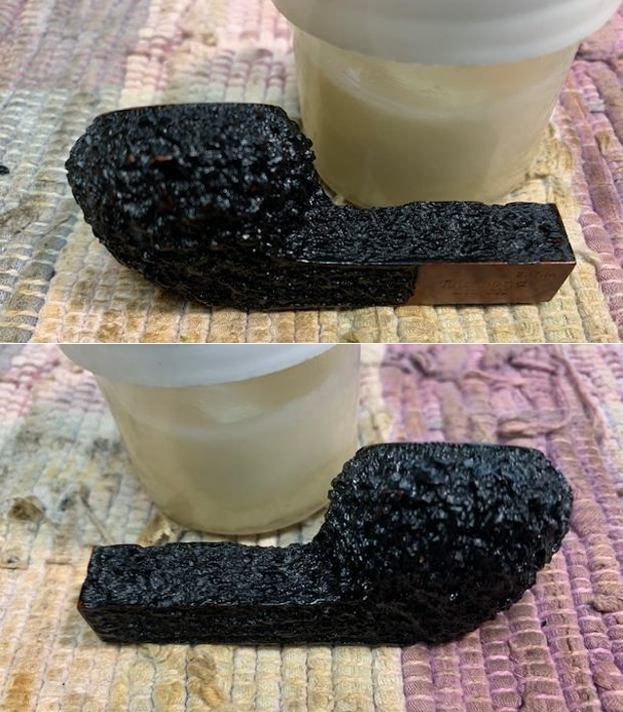
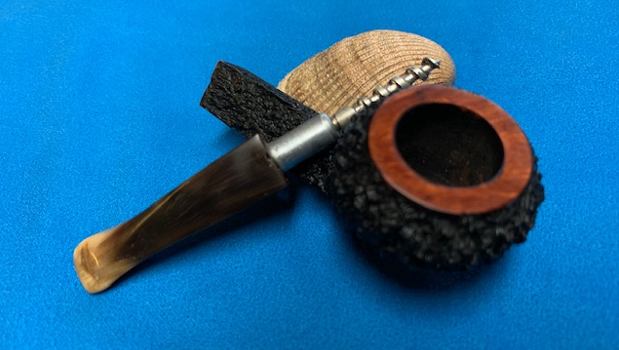
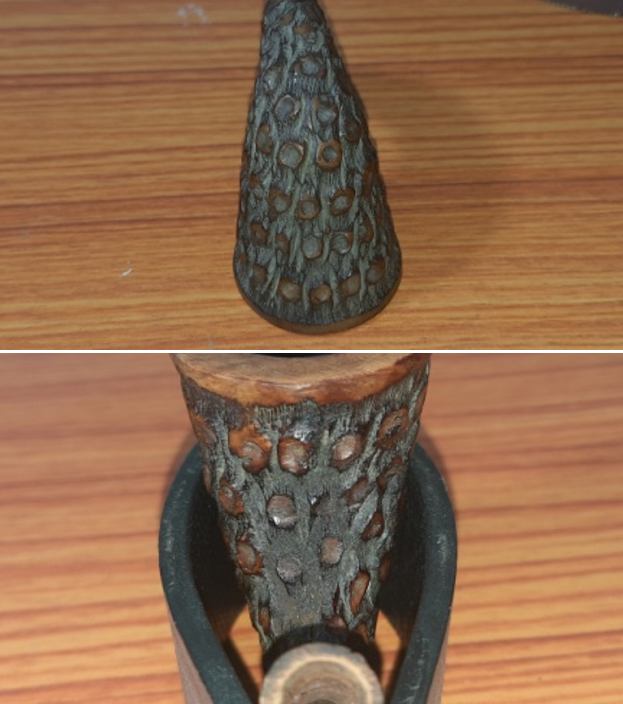
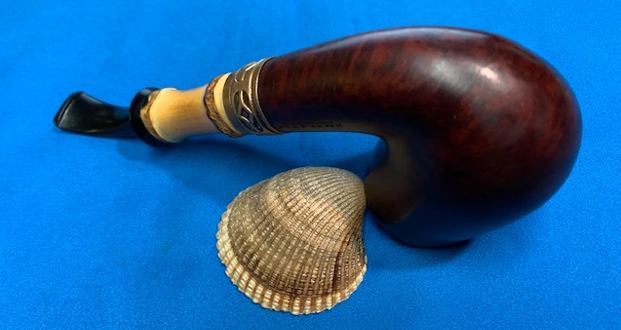
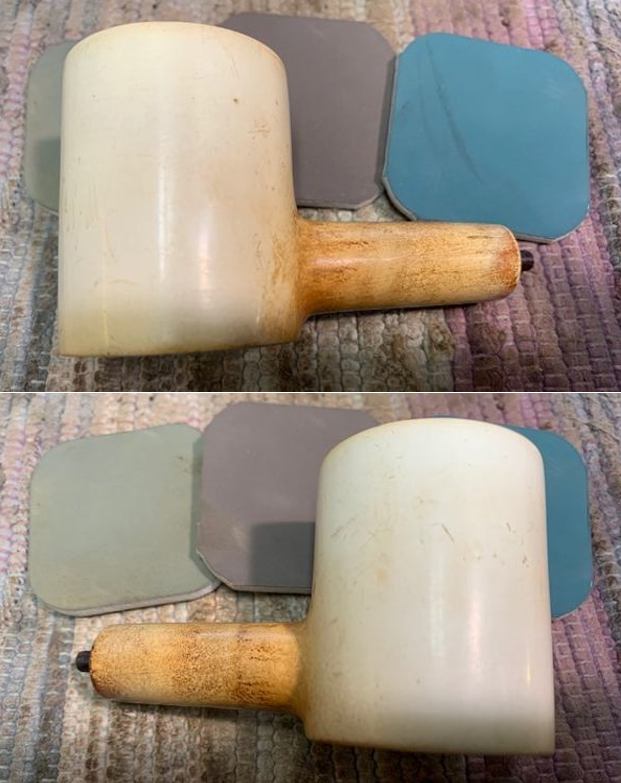
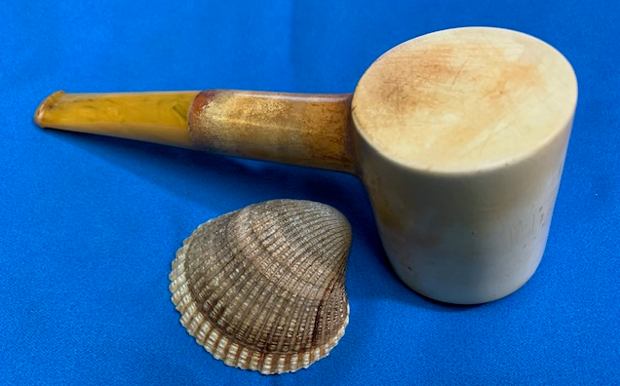
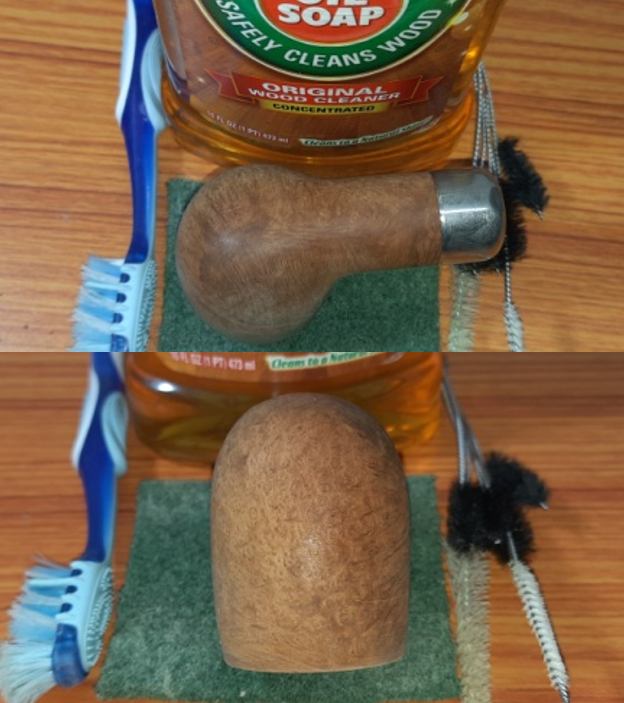
 The substantial briar estate is sans any fills and boasts of beautiful Bird’s eye grain to the sides and cross grain to the front and aft of the stummel. The only sore spot over the entire stummel surface is the bald patch that is seen to the right bottom portion. There are numerous dents/ dings over the surface (encircled in pastel blue); a testimony of all the falls this pipe has endured during its existence. The surface is mired in grime and dirt and appears dull and lackluster. The well and mortise is not very dirty and should clean up easily. The nickel ferrule has absolutely no damage but is oxidized with age. This should clean up nicely.
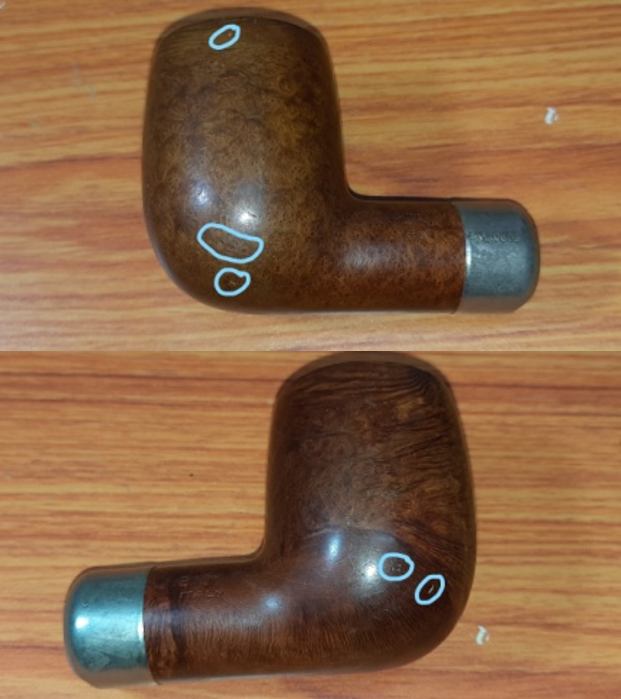

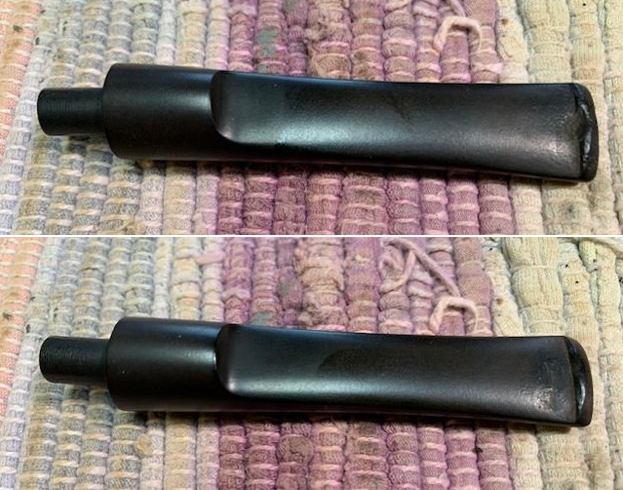
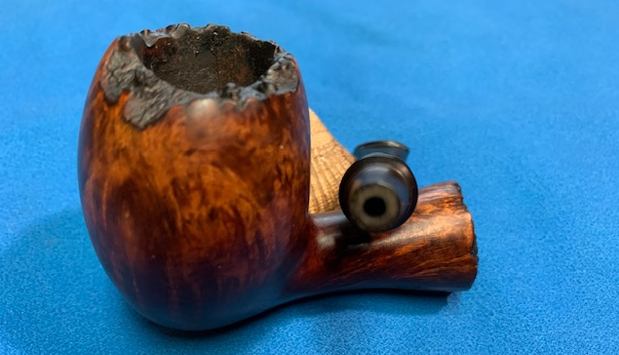
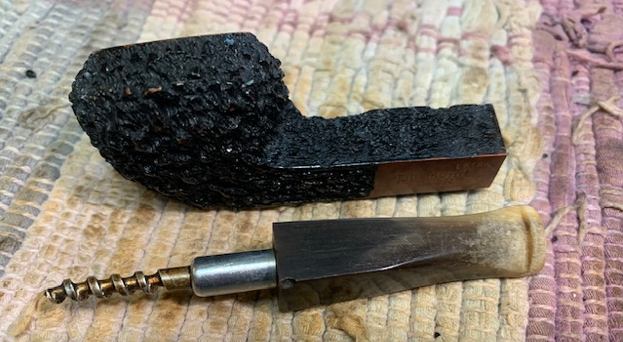
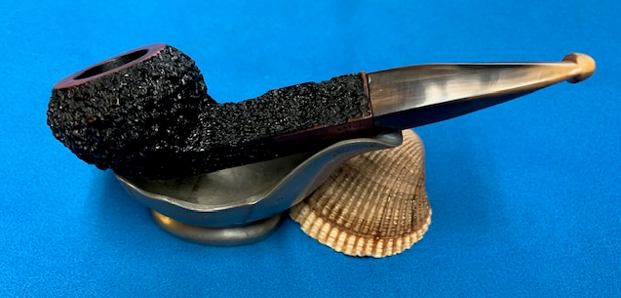
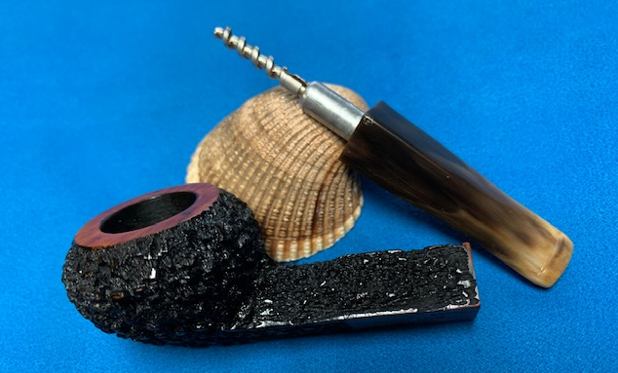
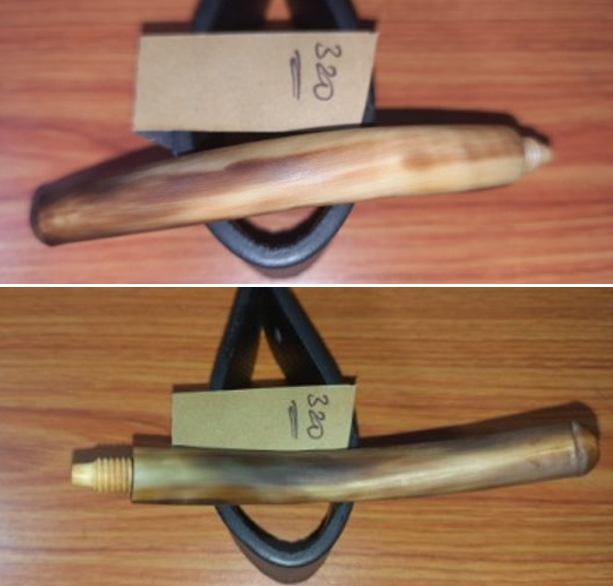
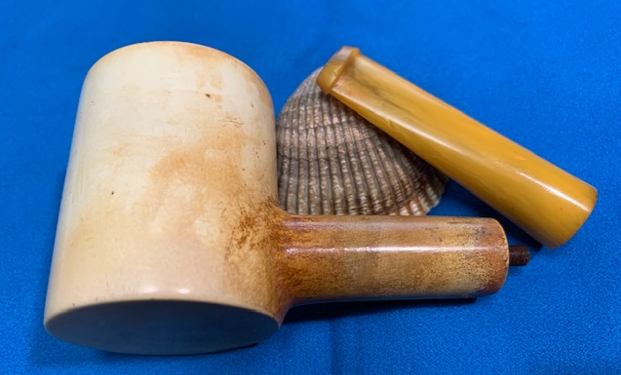
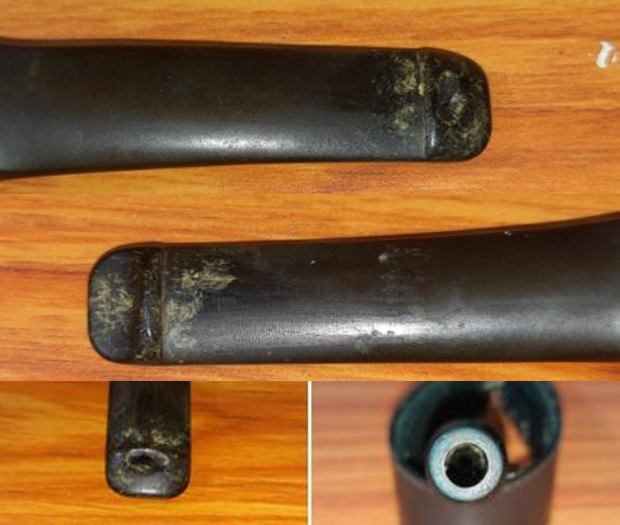
 The high quality vulcanite stem is so heavily oxidized that it appears dirty green in color! Some minor tooth chatter and deep bite marks are seen on either surfaces of the stem in the bite zone. This issue should not be a major headache to address. The upper surface edge of the large horizontal slot appears damaged, extent of which can be ascertained after the clogged slot has been cleaned up. The lip edge on both sides has bite marks and would need to be reconstructed and reshaped. The wide tenon that houses a 6mm Balsa filter has accumulated oils and tars that have dried out on the inside. The bite zone has calcium deposits which will have to be cleaned.
 The Process
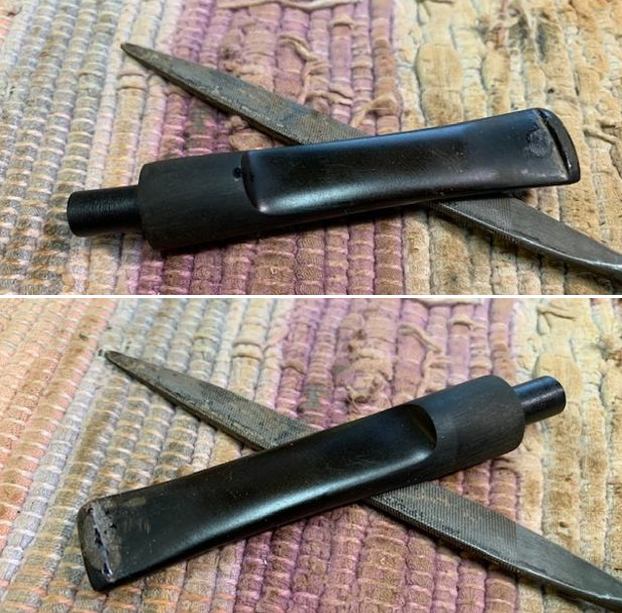
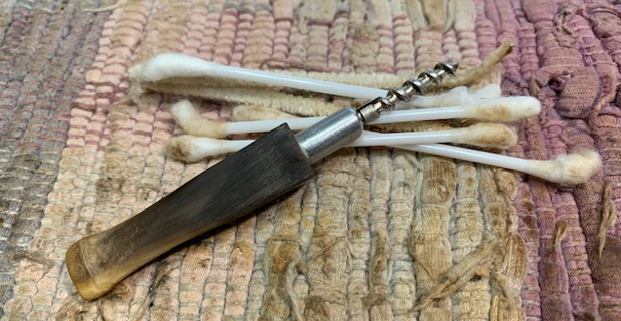
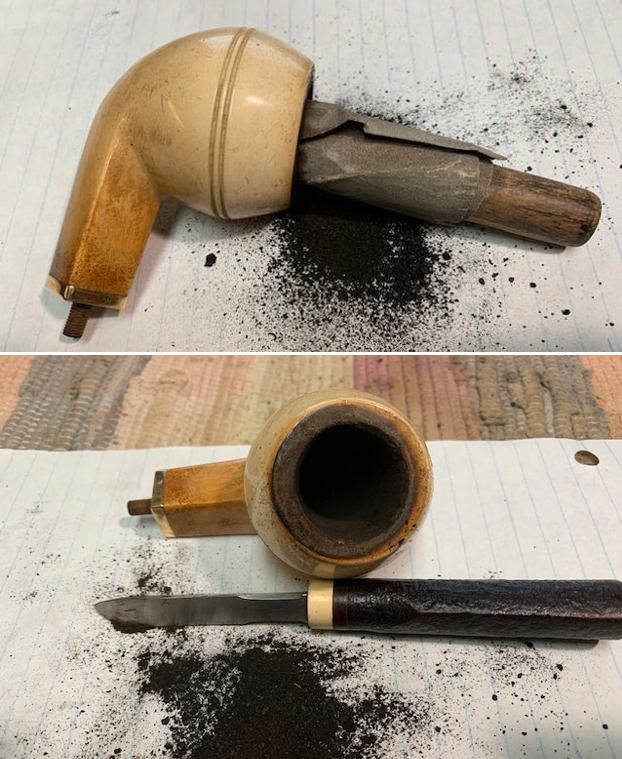
I started the restoration of this pipe by first reaming the chamber with size 2 head of a PipNet reamer followed by scraping with my fabricated knife to remove the carbon deposits. I scraped off the crusted lava from the rim surface with the fabricated knife. Once the cake was scraped back to the bare briar, I used a 220 grit sand paper to remove all the traces of remaining cake and also to smooth out the inner walls of the chamber surface. Finally, to remove the residual carbon dust, I wiped the chamber with a cotton pad wetted with 99.9% pure isopropyl alcohol. The chamber walls are in pristine condition. The char to the inner rim edge in the 12 o’clock direction is severe and would need to be addressed. The smells from the chamber have greatly reduced. The walls are nice and stout and should provide a cool smoke. The dents/ dings to the rim surface are now amply evident and the best way to address this would be to top the surface.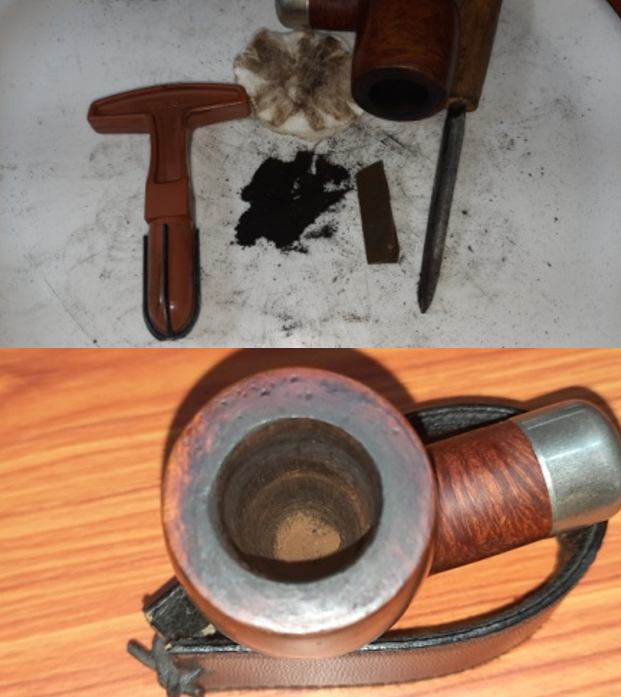 This was followed by cleaning the mortise with pipe cleaners and q-tips dipped in isopropyl alcohol. I scraped the walls of the mortise with my dental tool to remove the dried oils and tars. The mortise needs further cleaning with anti-oil dish washing detergent and shank brush and will be done once the external surface of the stummel is cleaned. This helps me in saving a heap of pipe cleaners, which is a very precious commodity here in India.
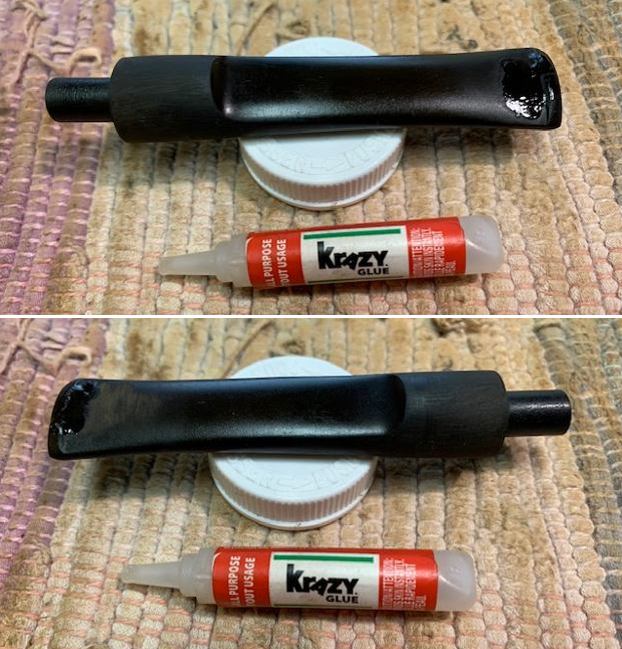
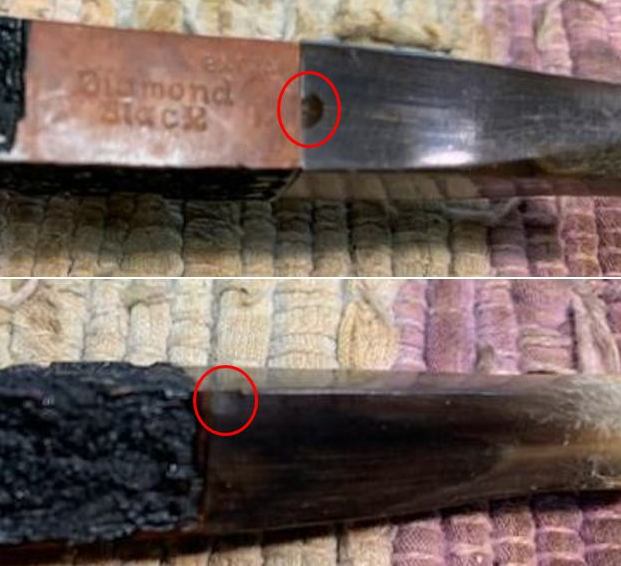
 Next, I cleaned out the stem internals. I ran a couple of pipe cleaners dipped in isopropyl alcohol through the stem air way. Unfortunately the pipe cleaner couldn’t pass through completely. I realized that the large slot on the upper surface was clogged and the airway compressed due to tooth indentation. Using a dental tool, I tried prying out the blockage from the slot and realized that there was broken edge of the slot that was glued back and the reason for the blockage. With a bit of effort and lots of care, the broken piece was removed. I would now have to rebuild the top surface of the large horizontal slot. I would later try to open the airway by heating and thus expanding the compressed area with the flame of a lighter.
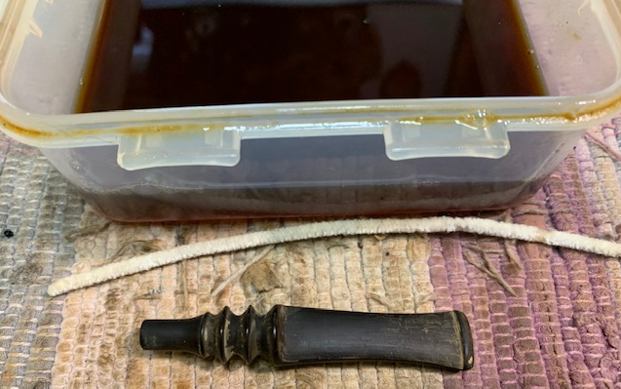
 I sanded the entire stem surface with a 220 grit sand paper in preparation for subjecting it to the deoxidizer solution treatment. It has been our experience that the deoxidizer solution works most efficiently in removing oxidation when a stem has been sanded prior to immersion in the solution. I immersed the stem in the deoxidizer solution developed by Mark and set it aside overnight for the solution to do its intended job.
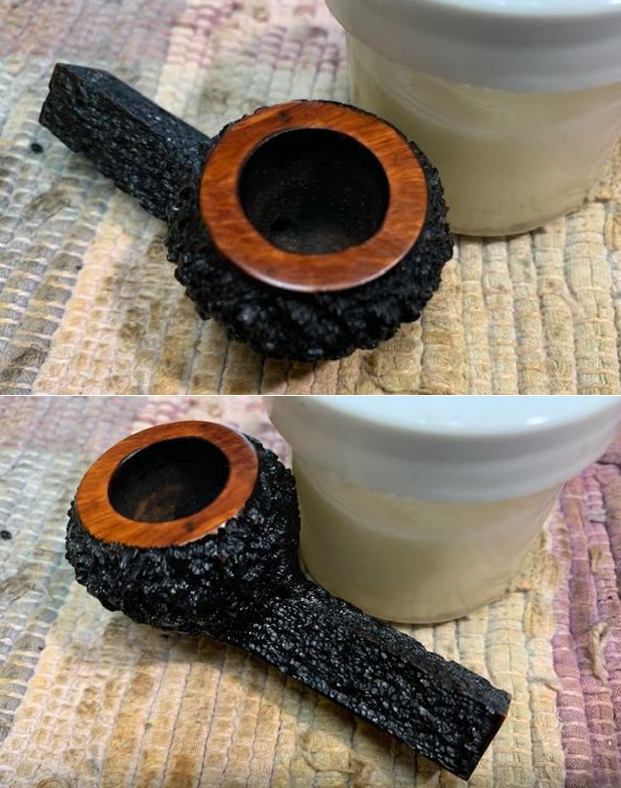
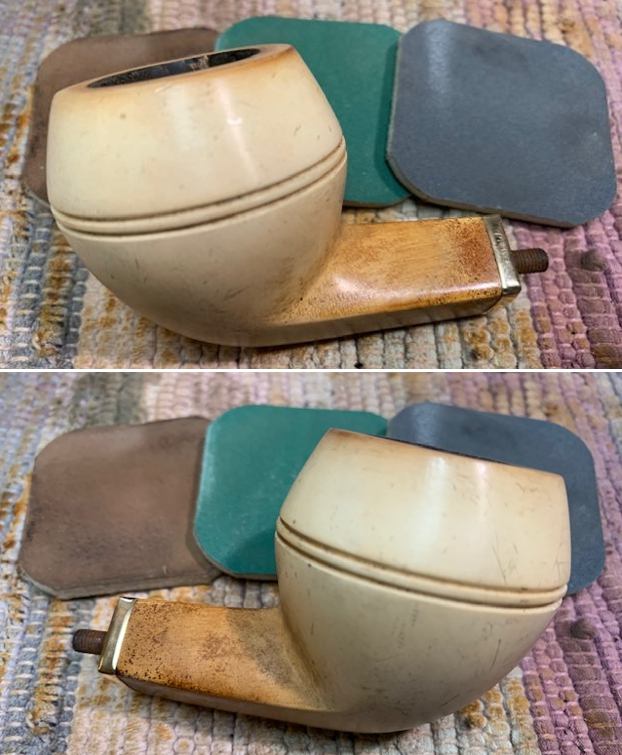
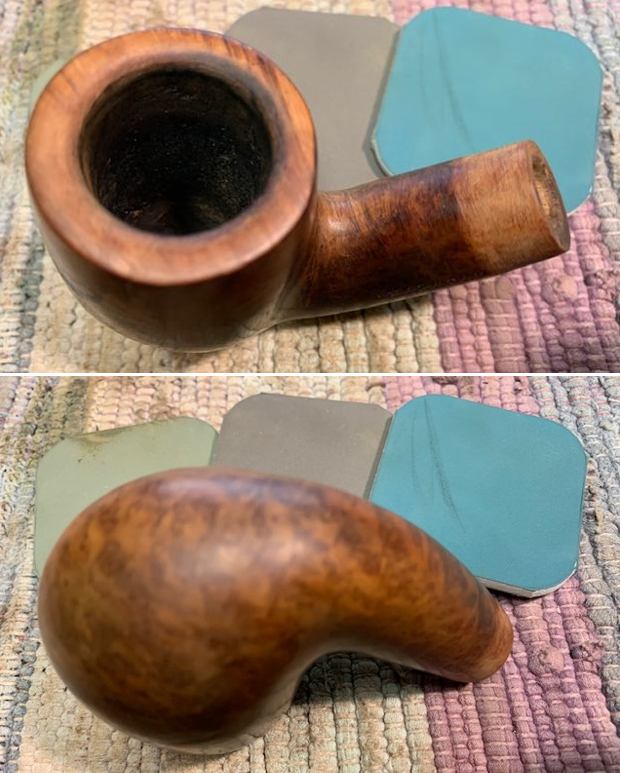
 The next step was to clean the exterior surface of the stummel. I generously applied Murphy’s oil soap with a hard bristled tooth brush and scrubbed the stummel and rim top with the soap. I washed the stummel under running warm water with anti oil dish washing detergent till the stummel surface was clean and dried it using paper towels and a soft cotton cloth. I deliberately cleaned the rim top with a piece of Scotch Brite pad and set the stummel aside to dry out naturally. The stummel surface has cleaned up nicely with the intricate grain patterns on full display. The brown hues of the rest of the stummel contrast beautifully with the black of the briar grains. These contrasting hues will be further accentuated once the briar is rehydrated and rejuvenated using the balm and subsequent wax polishing.
 I simultaneously cleaned the shank internals with the detergent and hard bristled shank brush. The ghosting is completely eliminated and the pipe now smells fresh and clean.
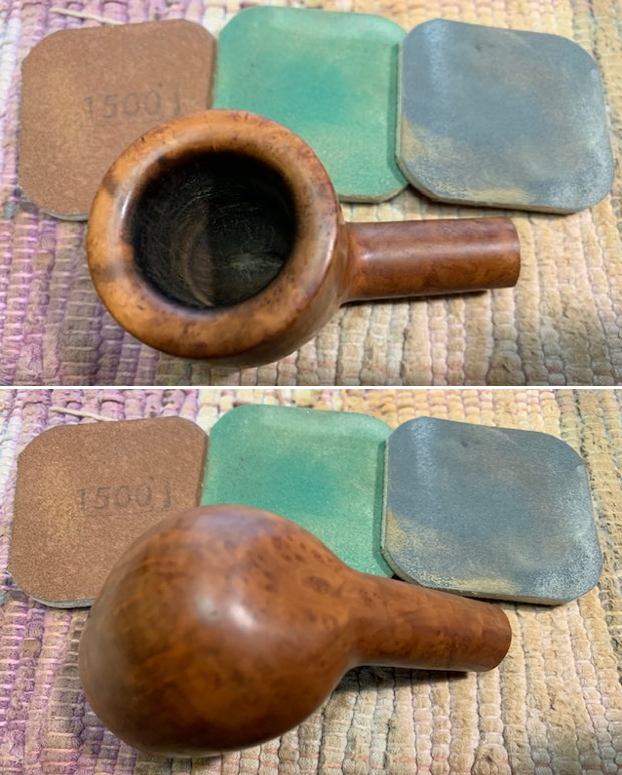
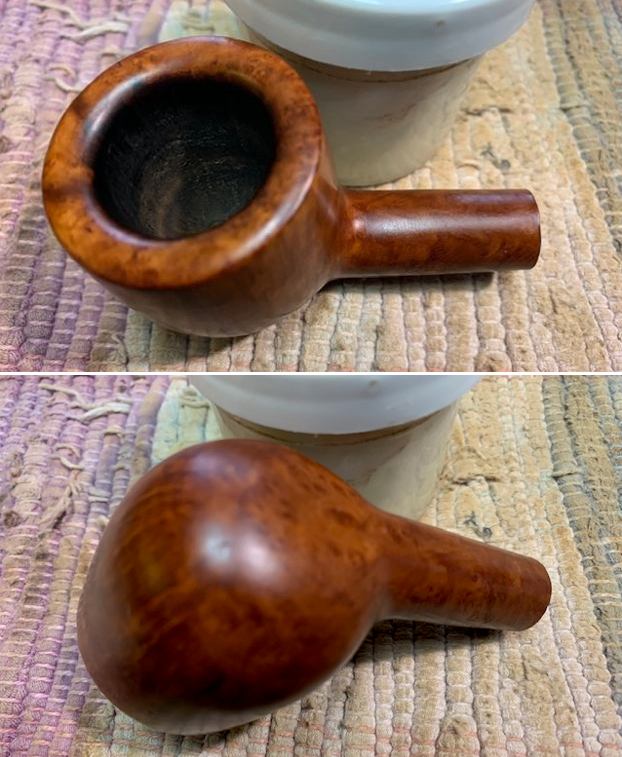
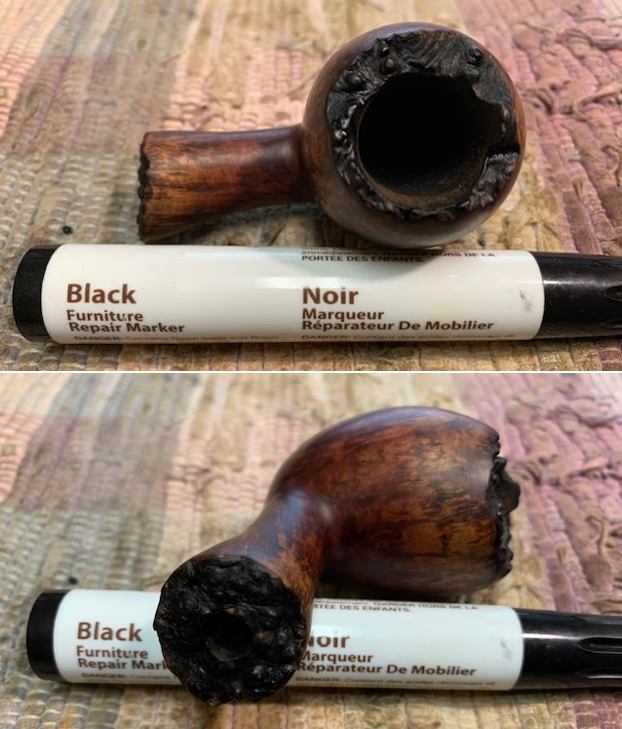
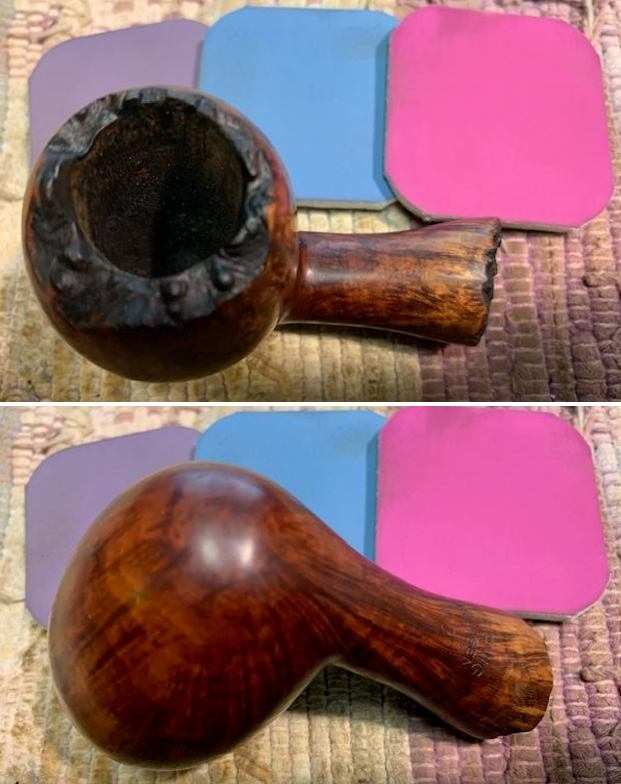
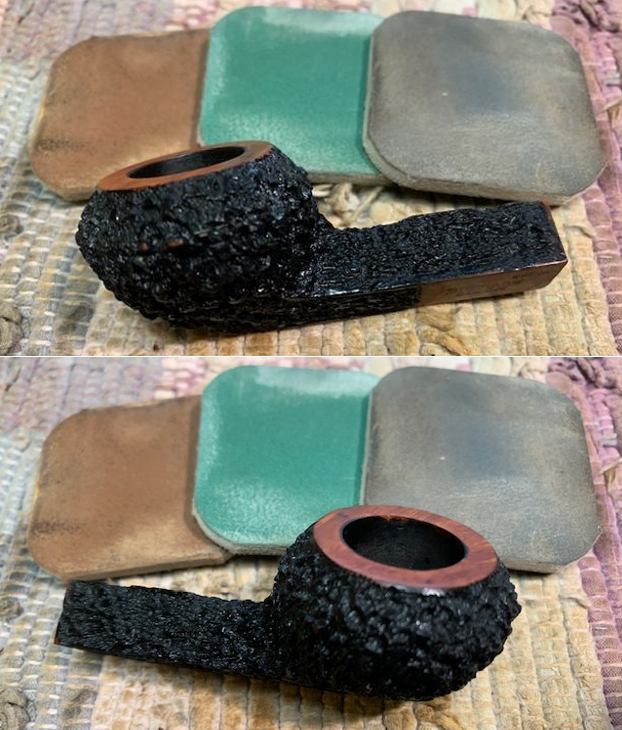
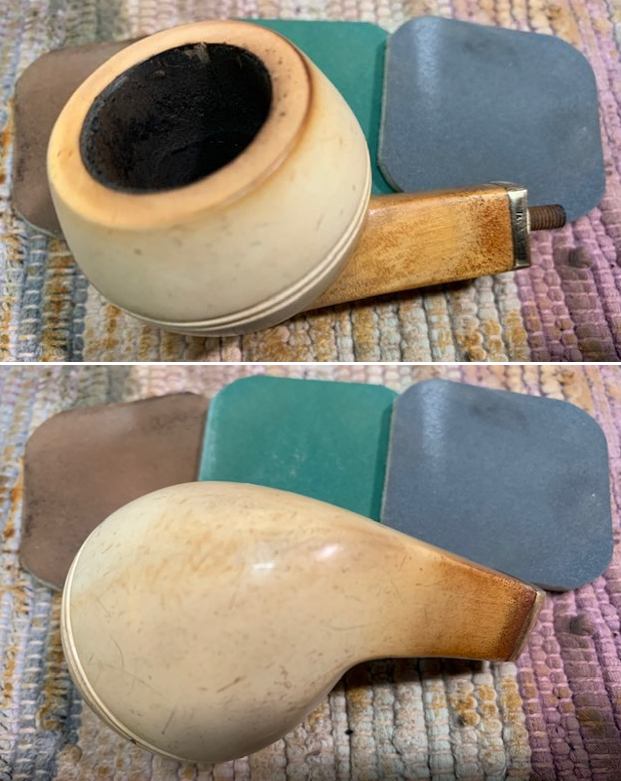
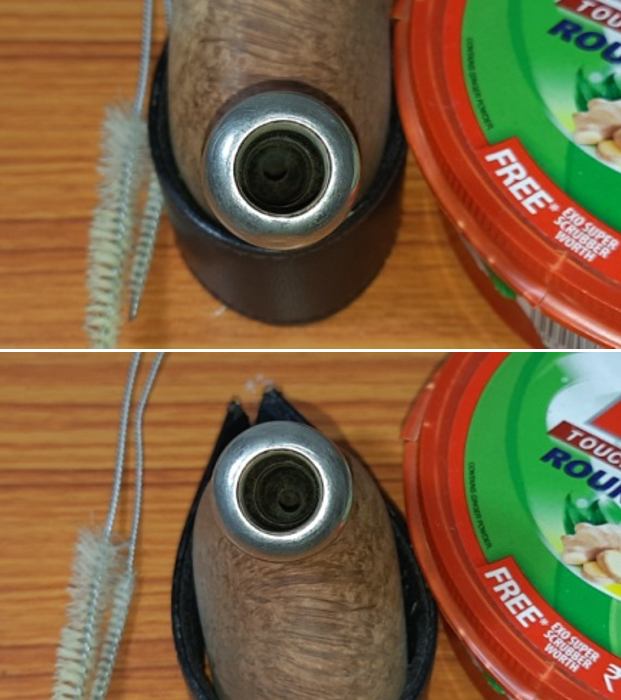 Staying with the stummel, I decided to address the issues with the rim top surface. The first issue to be addressed was the numerous dents and dings over the rim top. I rotated the rim top on a piece of 220 grit sand paper, checking ever so frequently for the progress being made. Once, I was satisfied that the rim top was an even and smooth surface, I stopped. This topping also helped in reducing the charred surface over the inner rim edge. Here is how the rim top appeared at this stage in restoration.
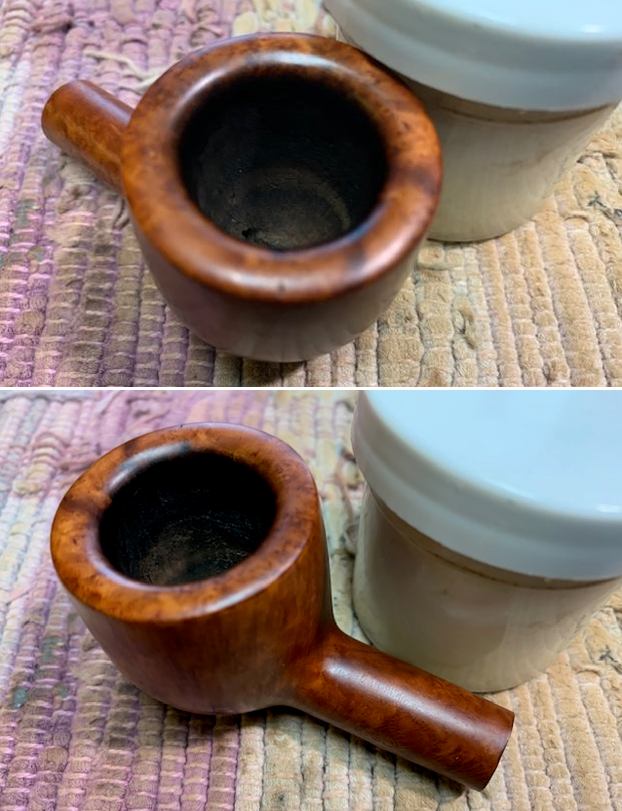
 The charring to the inner rim in 12 o’clock direction was still evident, albeit greatly reduced and lent the chamber an out of round appearance. To correct this, I created a bevel to the inner edge with a 220 grit sand paper.
 The third issue with the stummel was that of the numerous dents and dings over the surface which I have marked over the stummel. I steamed out all these dents and dings by heating my fabricated knife on a candle and placing it on a wet towel covering the dents. The generated steam expands the wood fibers and fills the dents up to, or as close as possible to the surface.
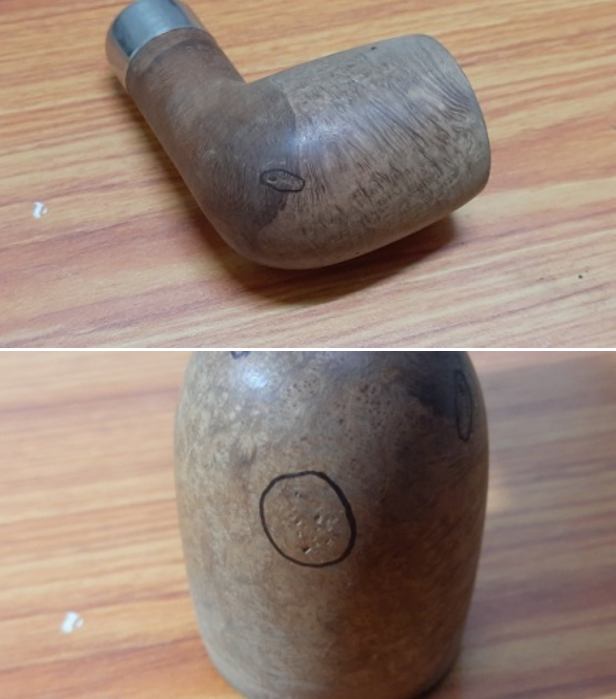
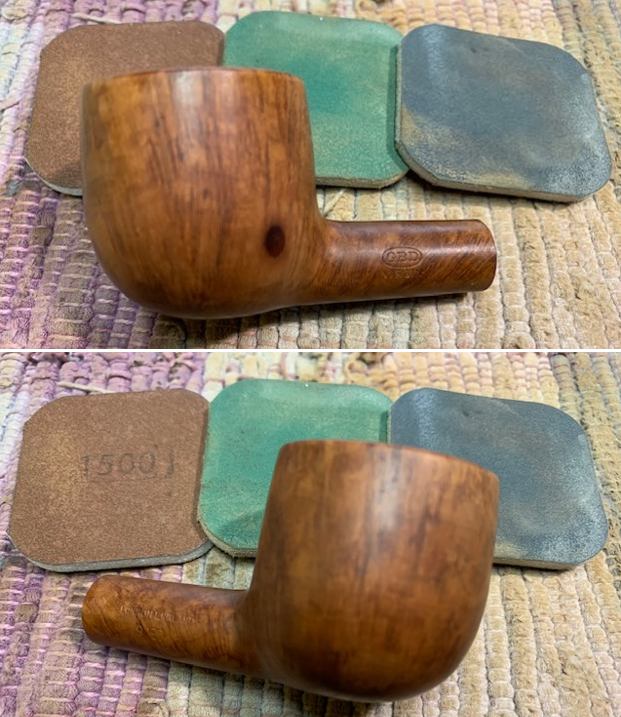
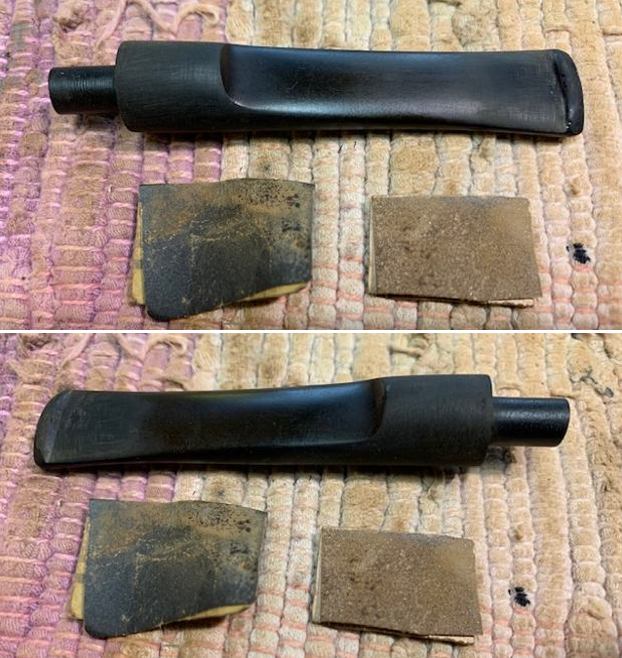
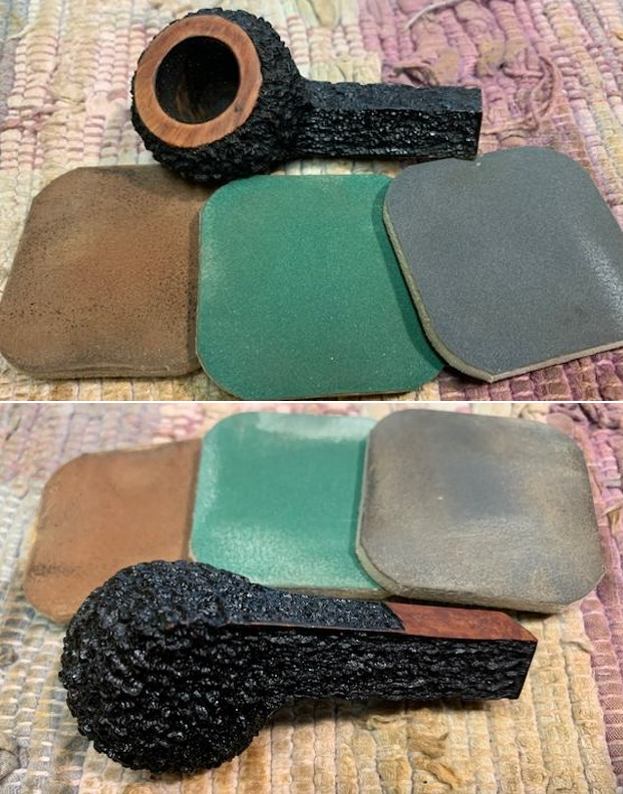
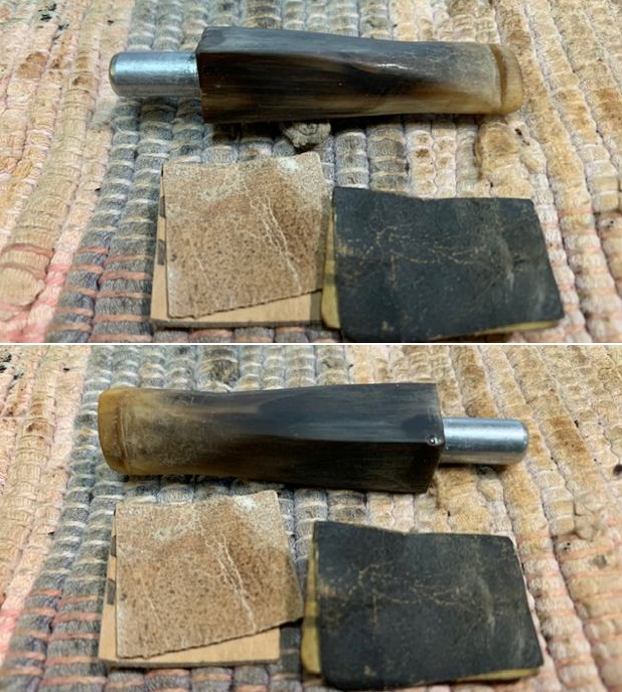
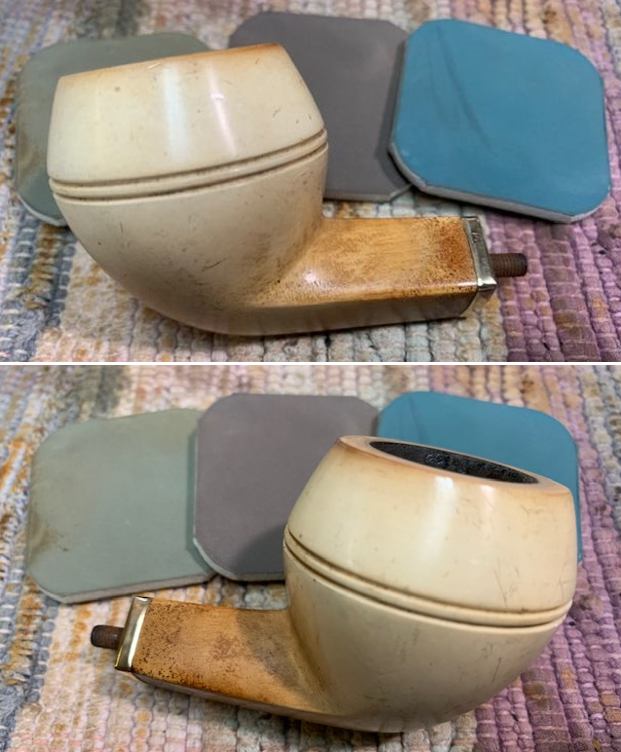
 The steam leaves behind a discolored surface as compared to the rest of the stummel surface. To address this issue and also to even out and match the raised dings with the rest of the surface, I sanded the entire stummel with a folded piece of 220 grit sandpaper. This also evened out the other minor scratches and dings from the surface.
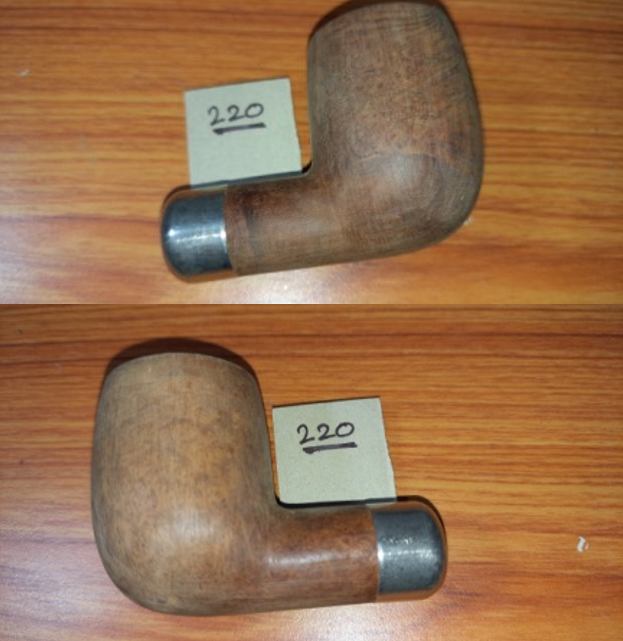
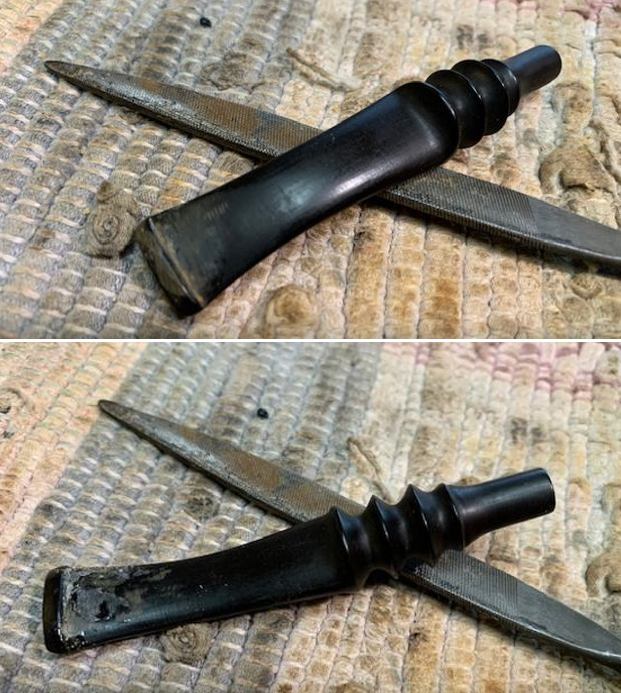
 I set the stummel aside and turned to address the stem repairs. I removed the stem from the deoxidizer solution and scrubbed it with a Scotch Brite pad followed by a 0000 grade steel wool scrub. This helps to remove the oxidation that is raised to the surface by the solution. Patches of deep seated oxidation over the stem surface could still be seen as dirty brownish green color and would be addressed by subjecting the stem to further sanding by progressively higher grit sand papers.
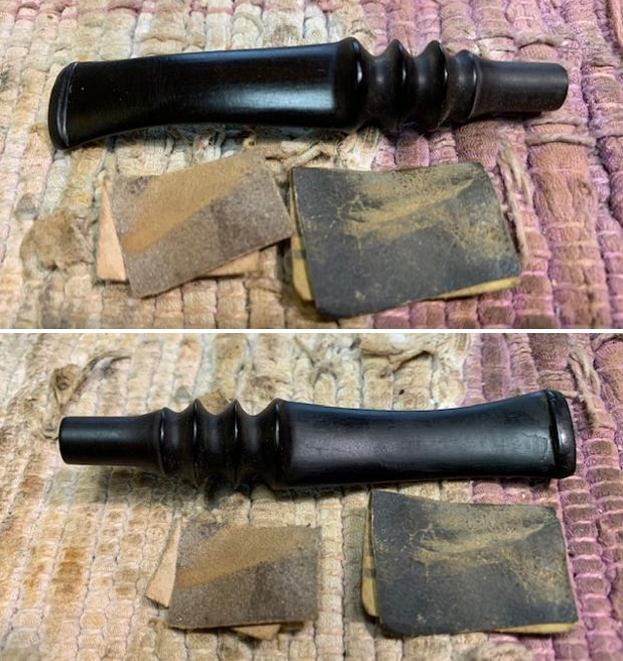
 Next, I used a 220 grit sand paper to sand the stem and removed all the oxidation from the surface. Using a lighter, I flamed the surface of the stem. This helped in raising some of the tooth chatter and bite compression from the slot to the surface as vulcanite has a property to regain its original shape on heating. I wiped the stem with Murphy’s Oil soap on a cotton swab. This cleaned up the stem surface while removing the loosened oxidation.
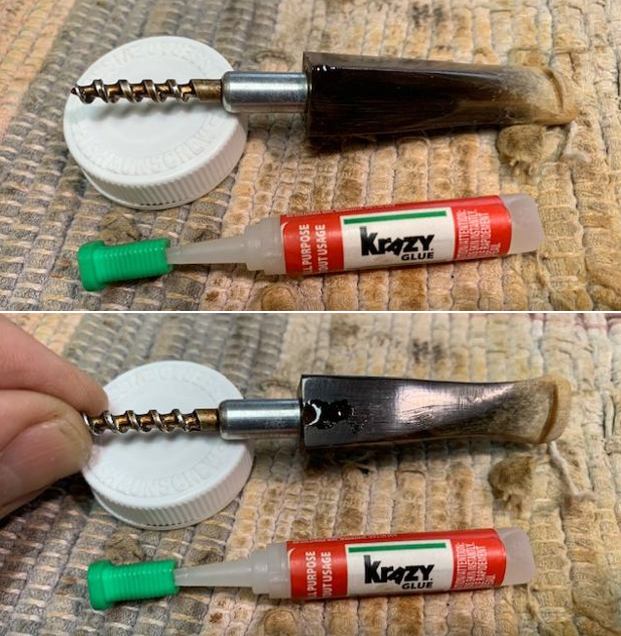
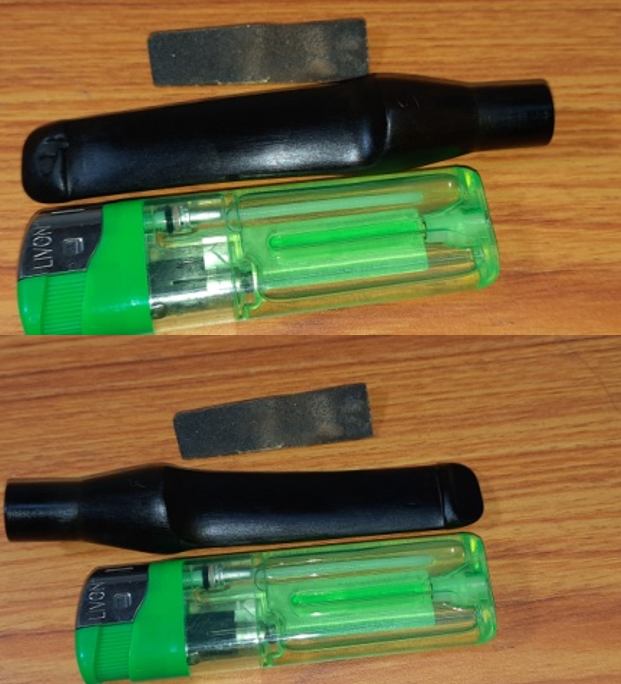 I reconstructed the broken slot end with a filling of CA superglue and activated charcoal after I had inserted a folded plastic coated visiting card. This prevented the fill from seeping in to the air way and clogging it once it had cured. I set the stem aside for the fill to harden before I could proceed with the sanding, shaping and polishing of the stem.
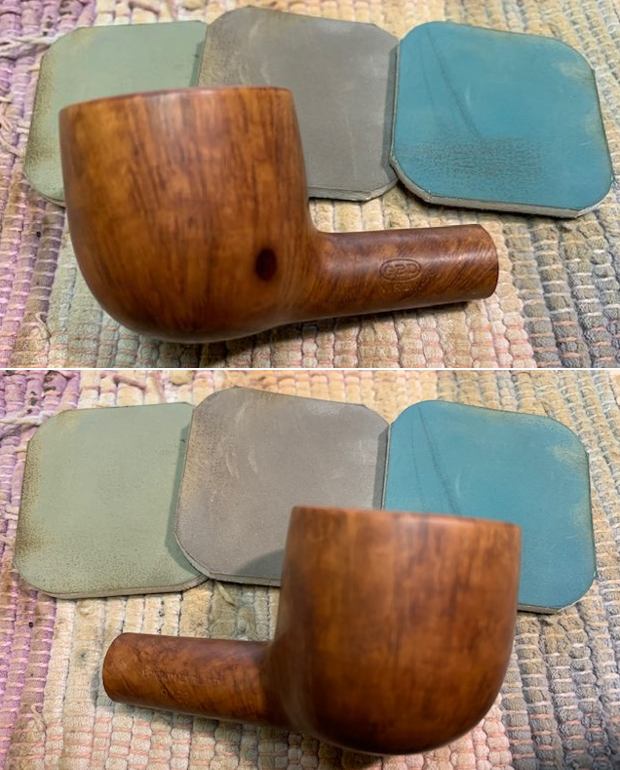
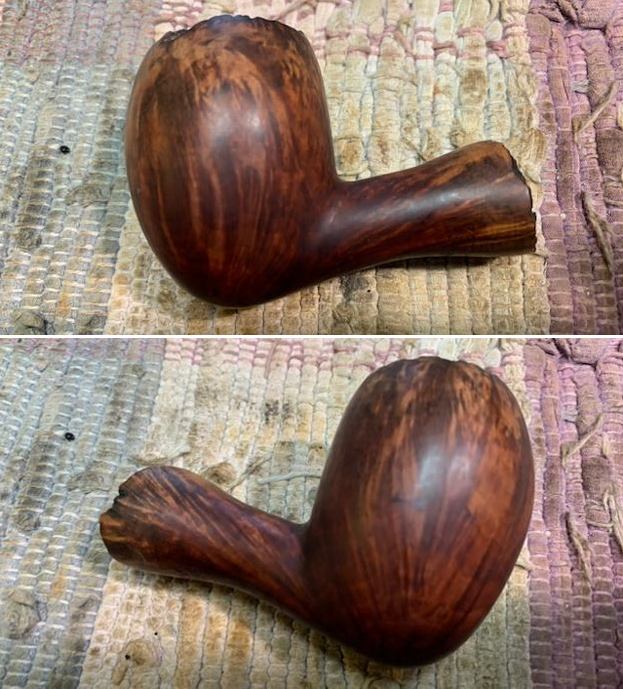
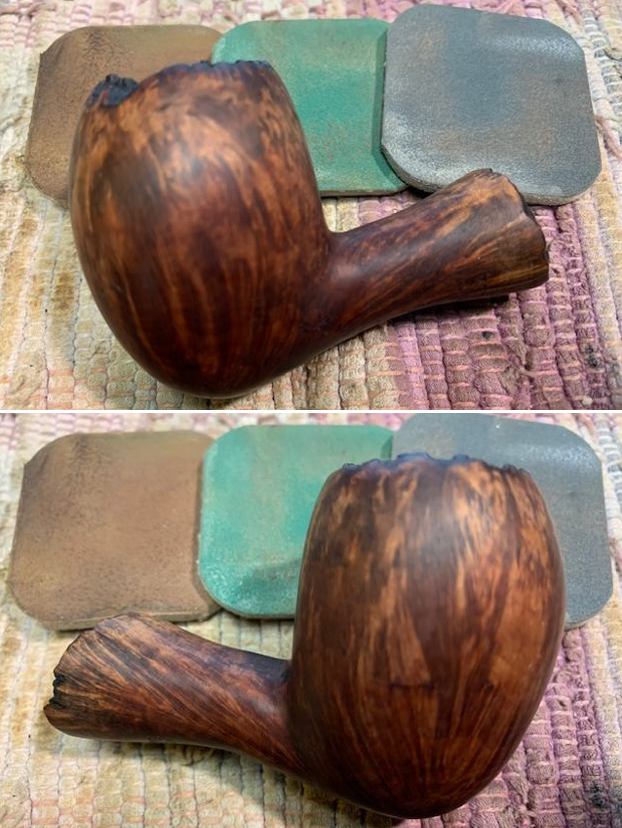
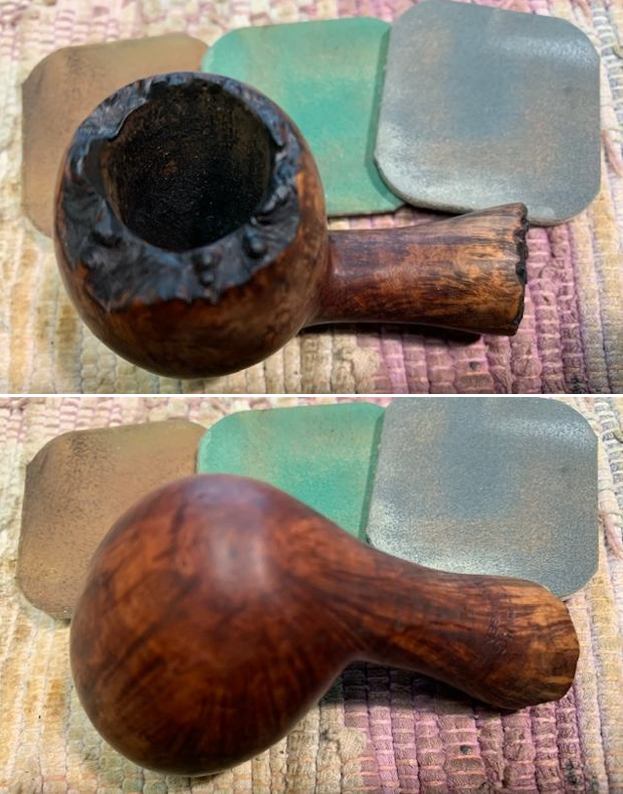
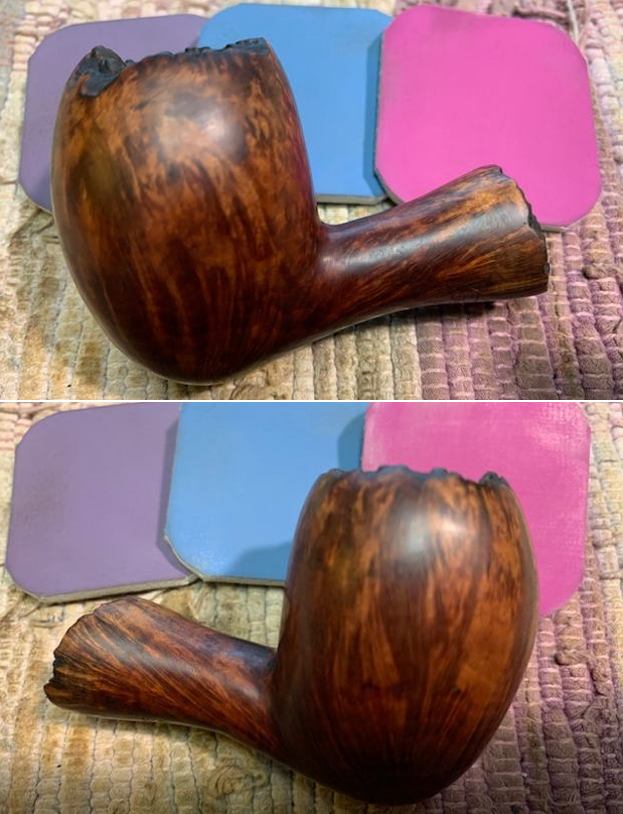
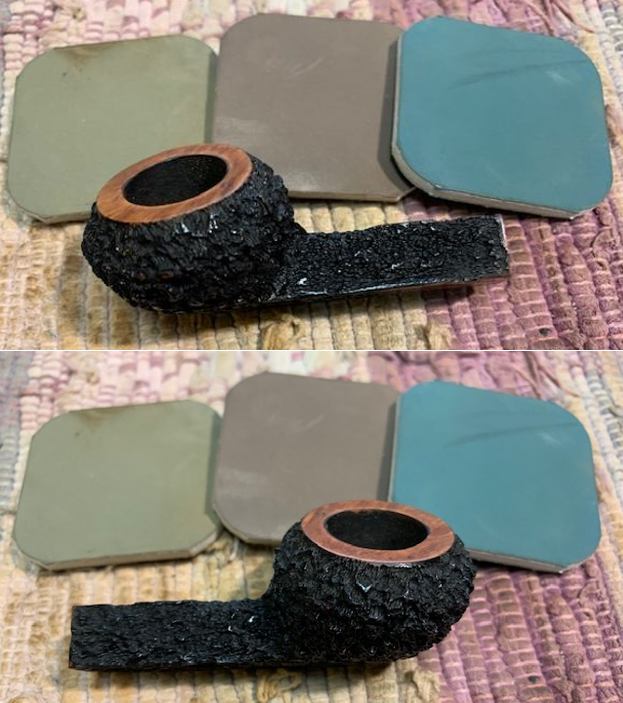
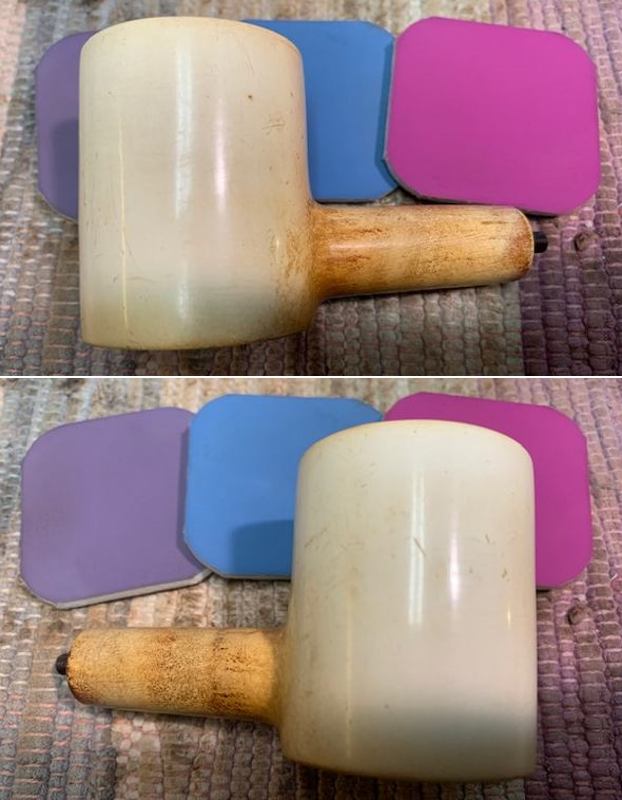
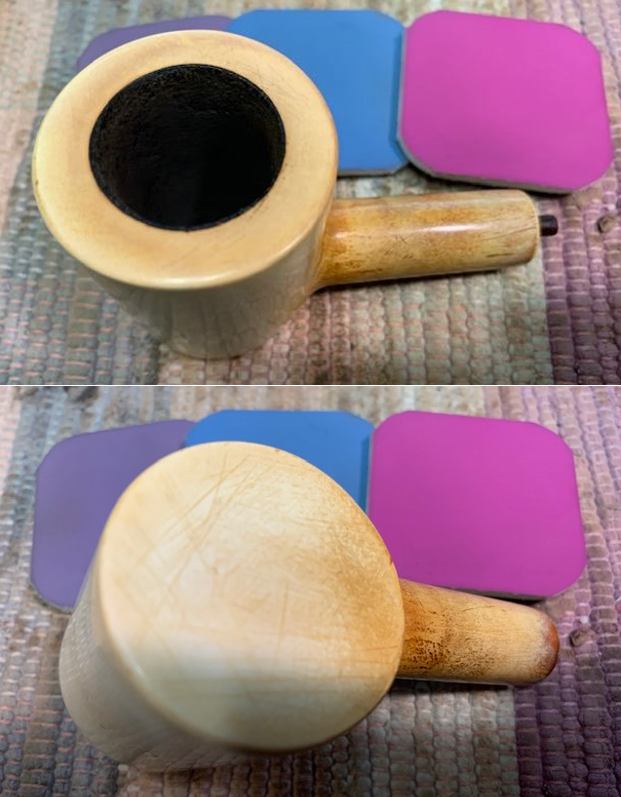
 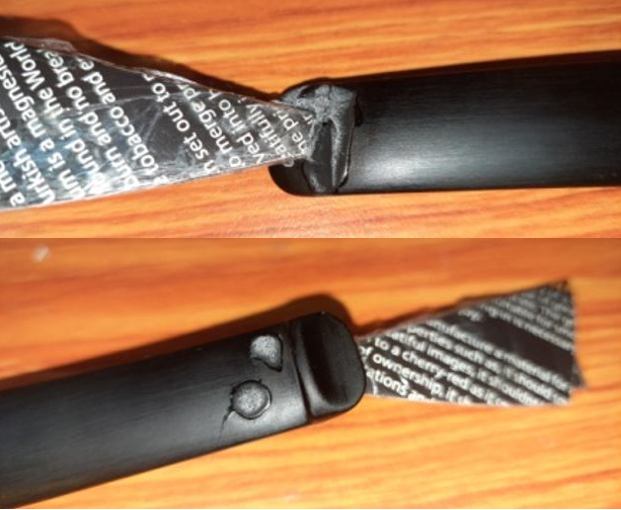 While I worked the stem, Abha polished the stummel with micromesh pads, wet sanding with 1500 to 12000 pads. She polished the freshly topped rim surface to a nice luster, wiping the surface with a soft cloth at the end of the micromesh cycle. The stummel looks amazing with a deep shine and beautiful grains popping over the stummel surface. She massaged a small quantity of “Before and After Restoration Balm” with her fingers into the briar. The immediate and incredible transformation that takes place is a worthy reward for all the efforts!!! She let the balm sit on the surface to be absorbed in to the briar for about 20 minutes. The bowl now looks fresh and attractive with the grains popping out any which way you look at the briar. She polished off the balm with a soft cloth to a lovely shine. I am surprised that the rim top surface has the same deep brown coloration as the rest of the stummel surface and that the use of a stain pen was not required.
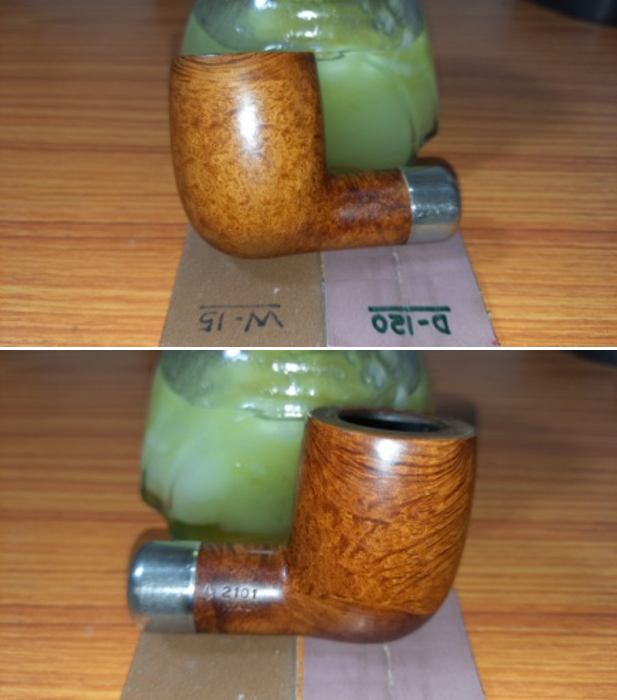

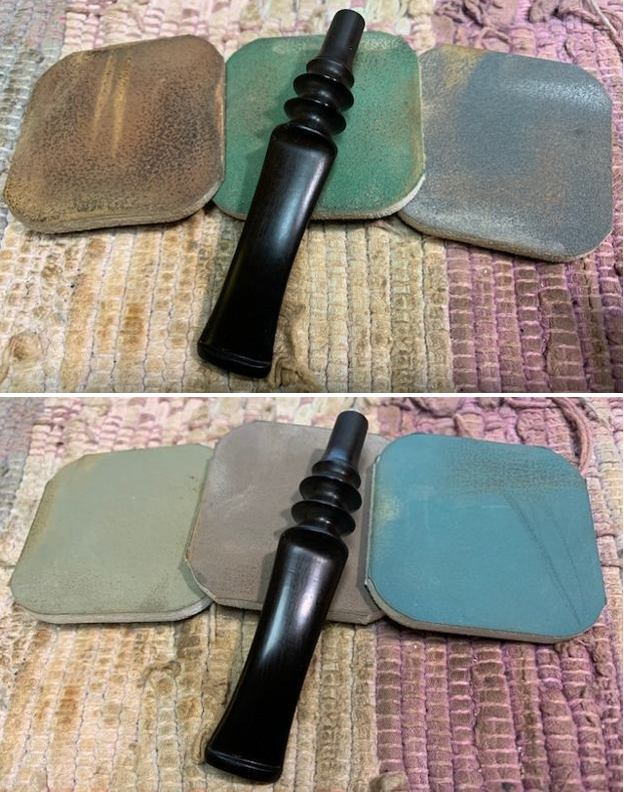
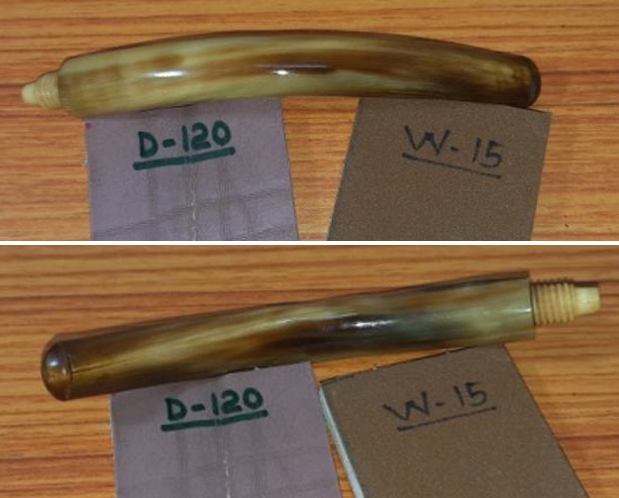
 With the stummel rejuvenation almost complete, save for the final wax polish, I worked the stem. The fills had cured and with a flat head needle file, I worked on the fill till I had achieved a rough match with the surrounding surface and had sufficiently sharpened the button edges. For a better blending, I further sand the entire stem with 220 followed by 400, 600, 800 and 1000 grit sand paper. This helps to reduce the scratch marks left behind by the more abrasive 220 grit paper. Even the best of my efforts at the repairs, these did not blend in to the rest of the stem surface and can be noticed with a keen eye. There are stems which do not take to repairs easily and seamlessly and this definitely is one of those.
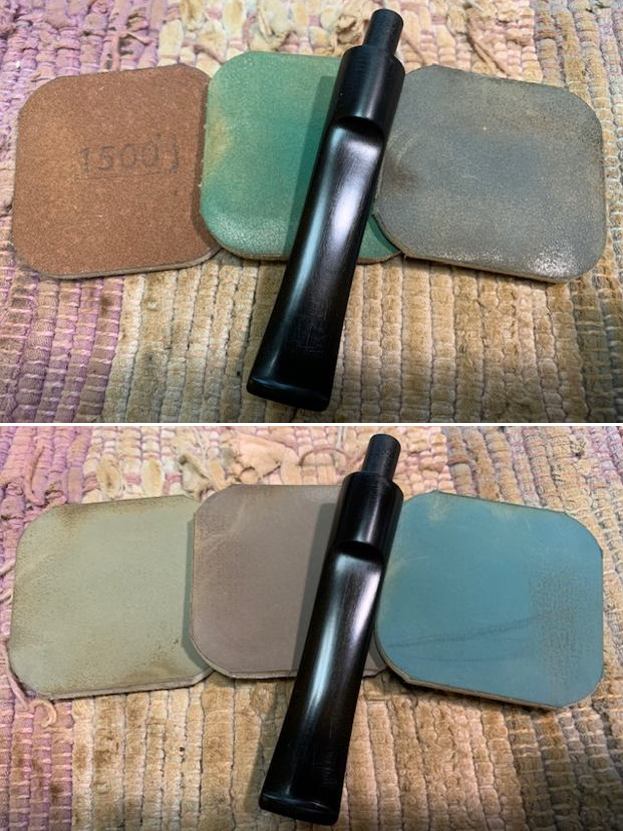
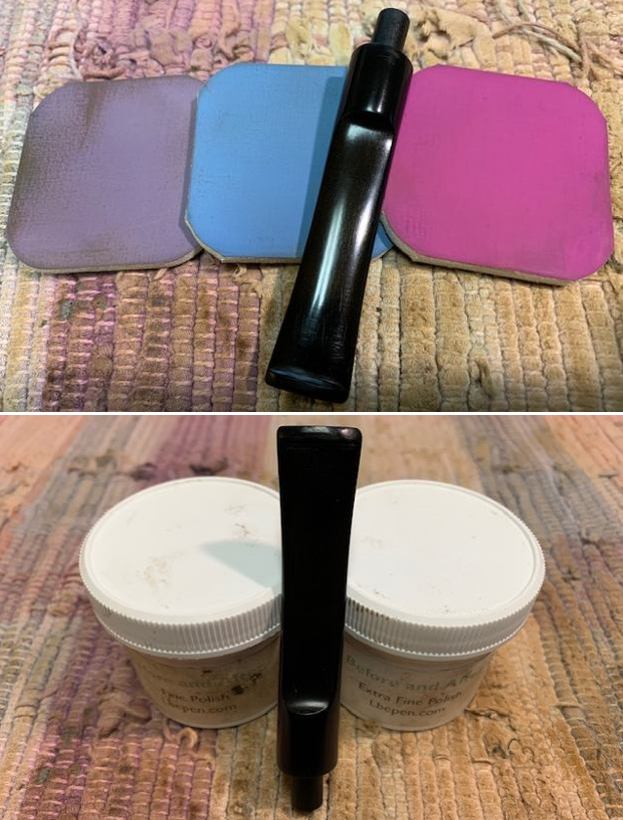
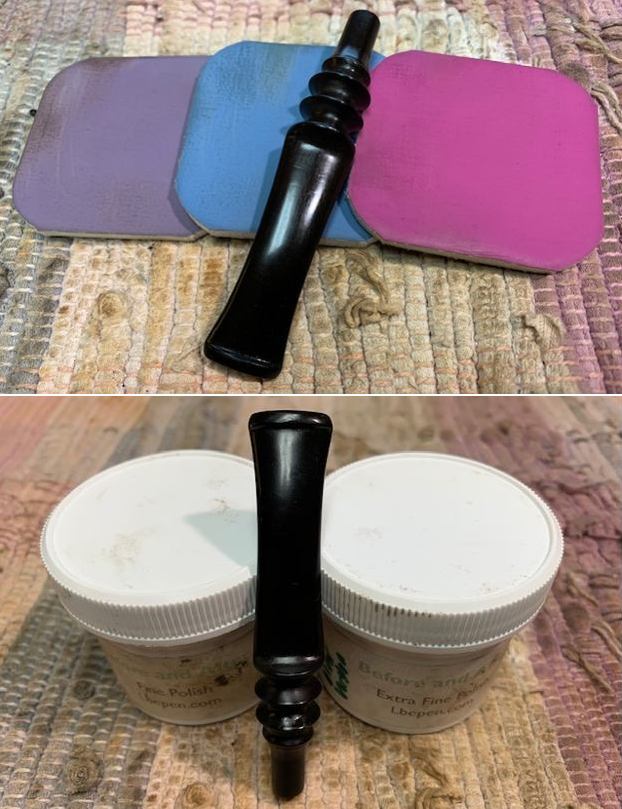
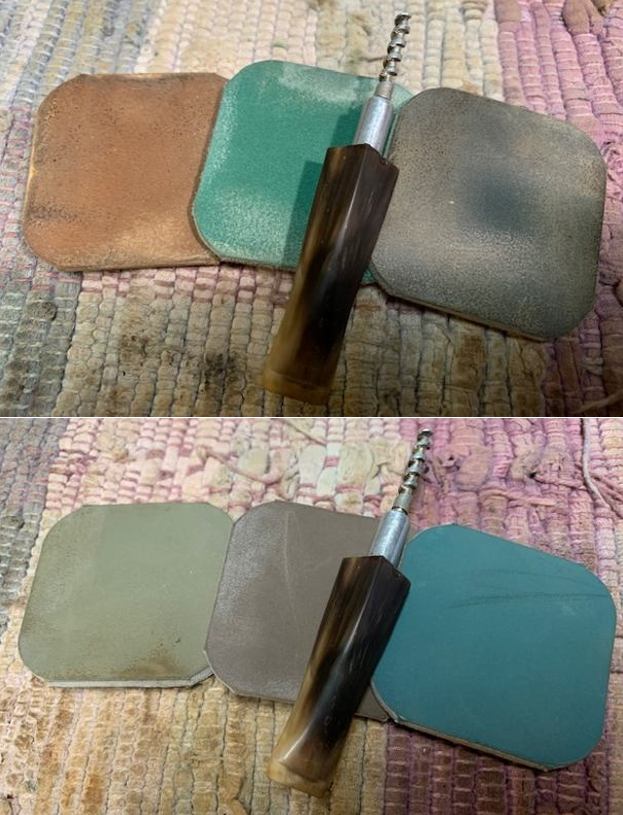
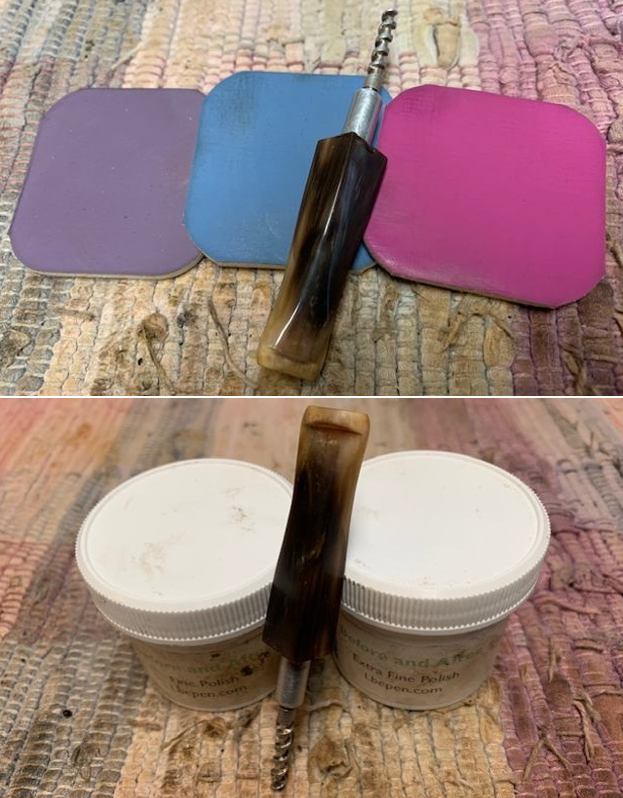
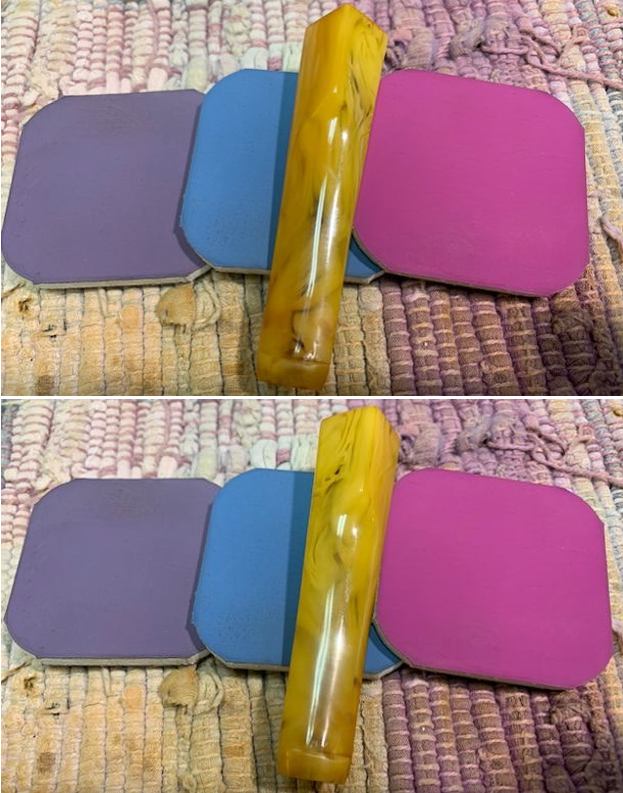
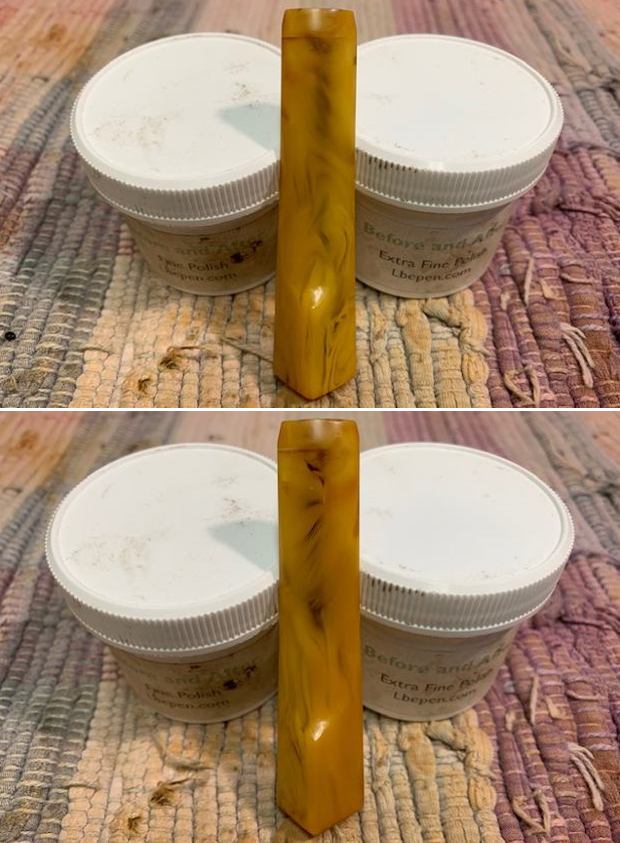
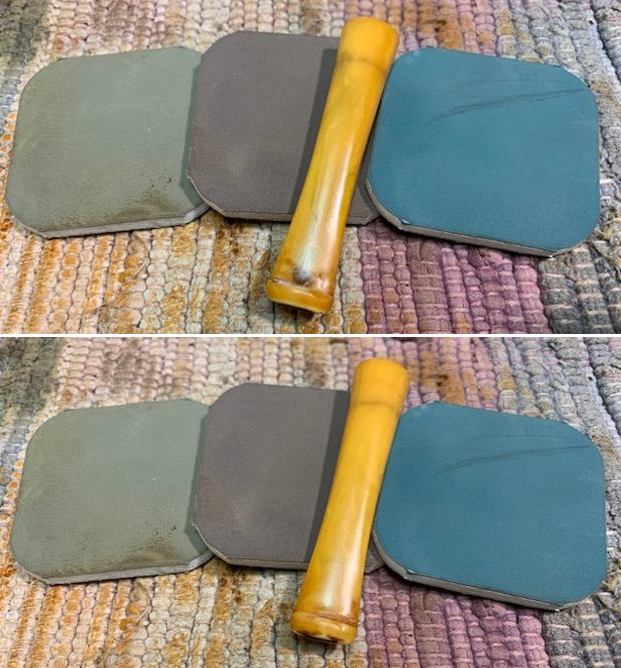
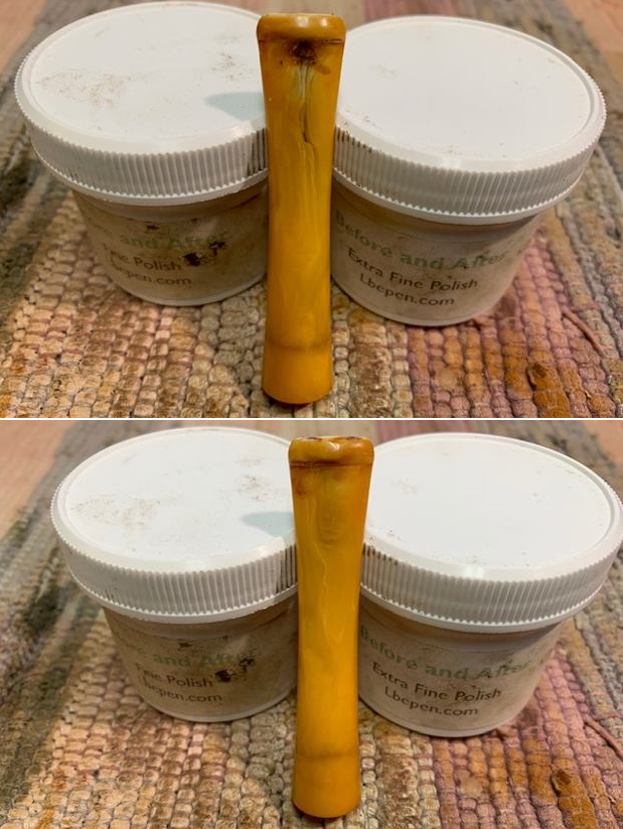
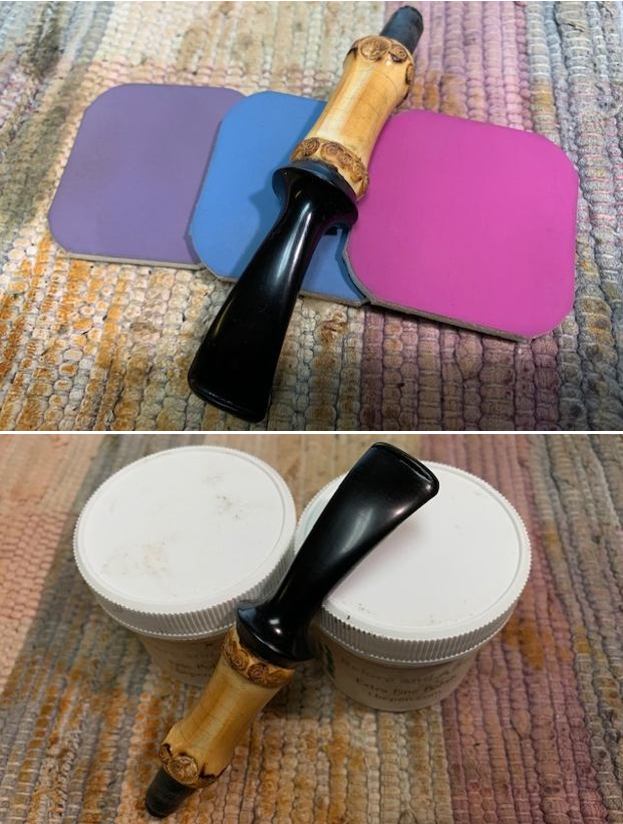
 To bring a deep shine to the vulcanite stem, I went through the complete set of micromesh pads, wet sanding with 1500 to 2000 grit sandpapers and dry sanding with 3200 to 12000 grit pads. At the end of micromesh cycle, I polished the stem with “Before and After Fine & Extra Fine” paste. The finished stem is shown below.
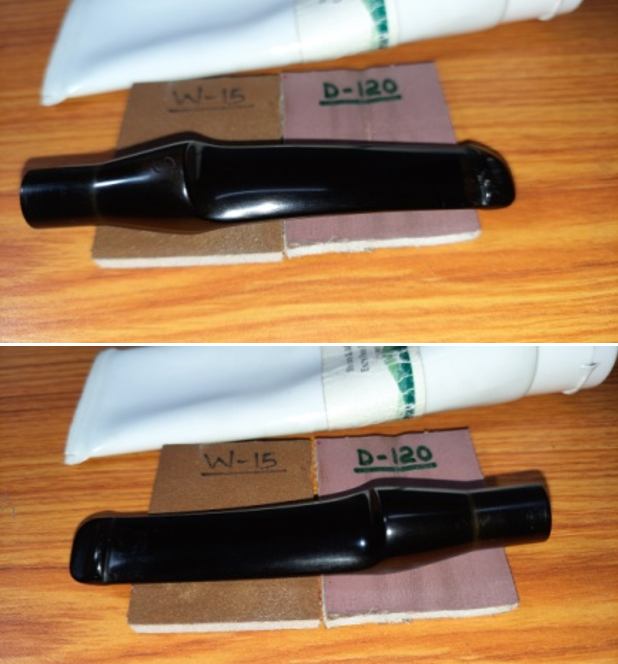 This now gets me to that part of the process where I get to savor the fruits of our labor until this point. The final polishing with Blue Diamond and Carnauba wax!
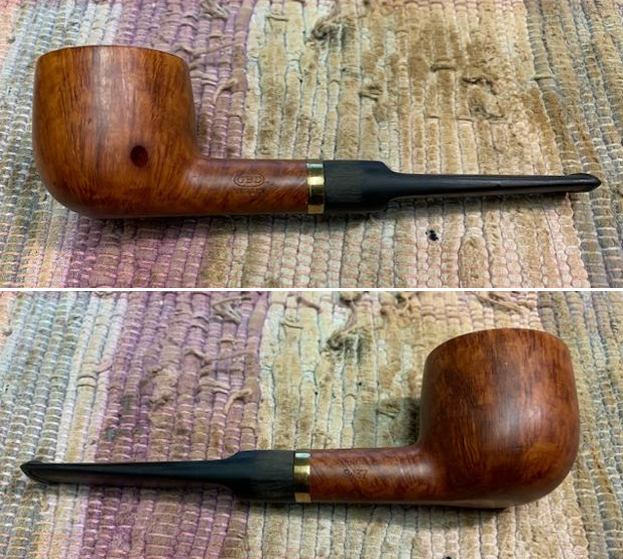
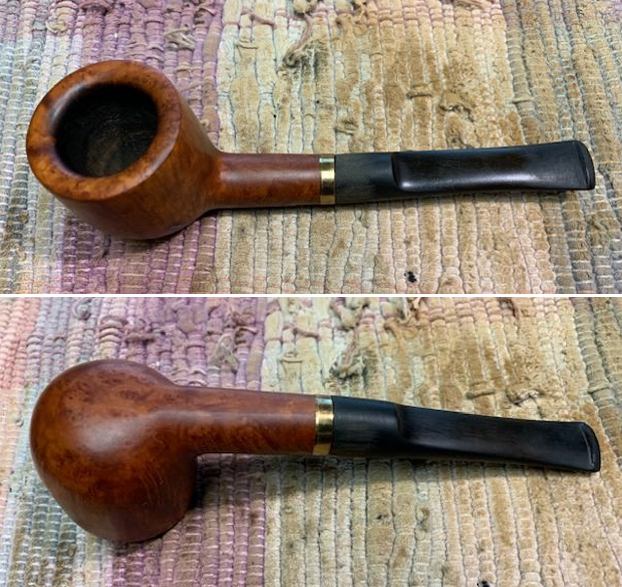
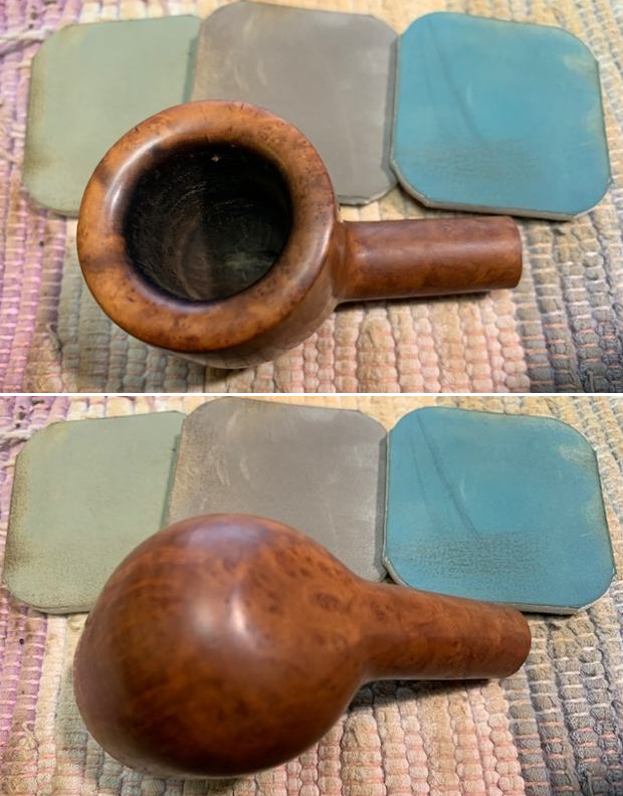
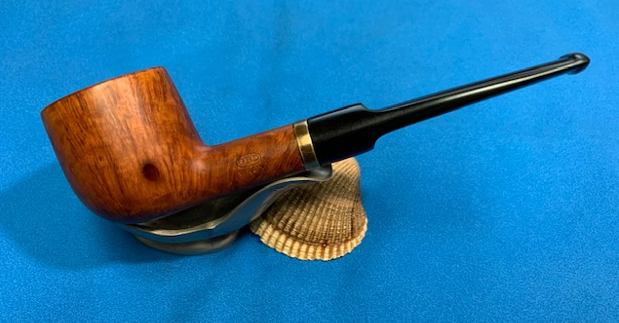
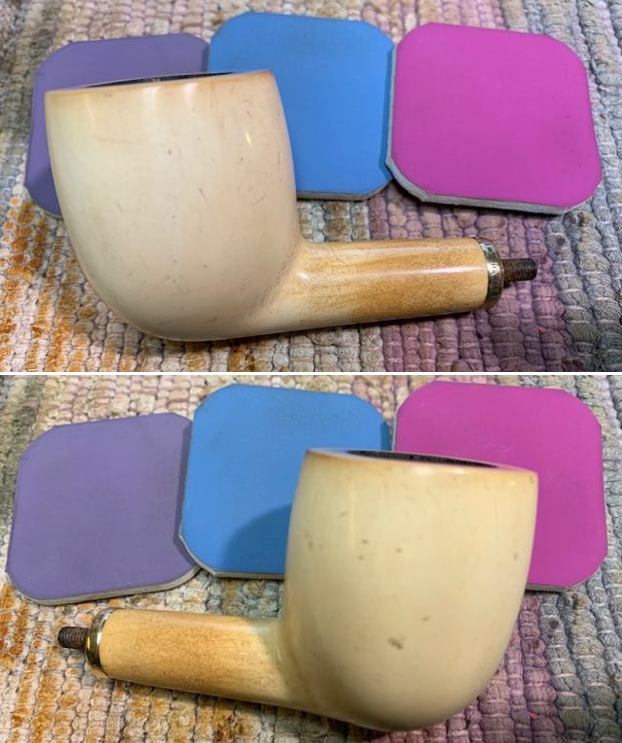
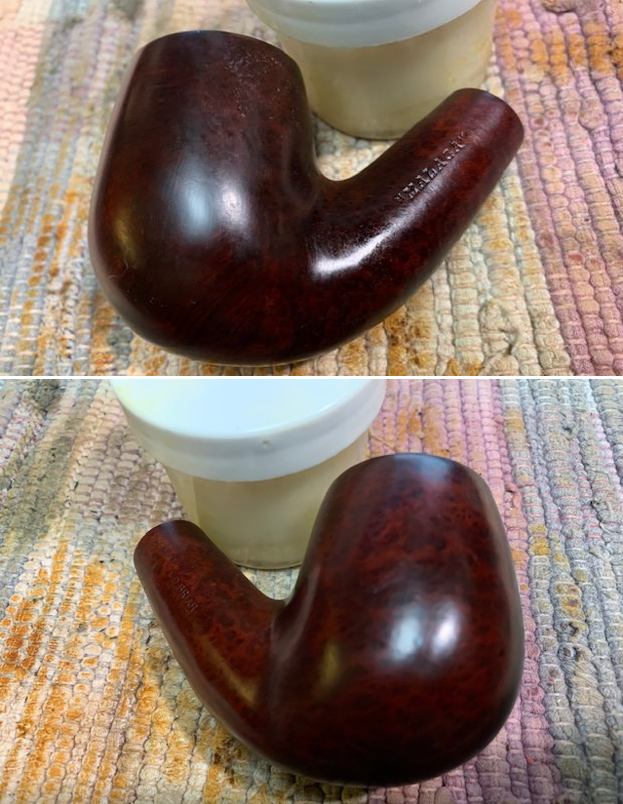
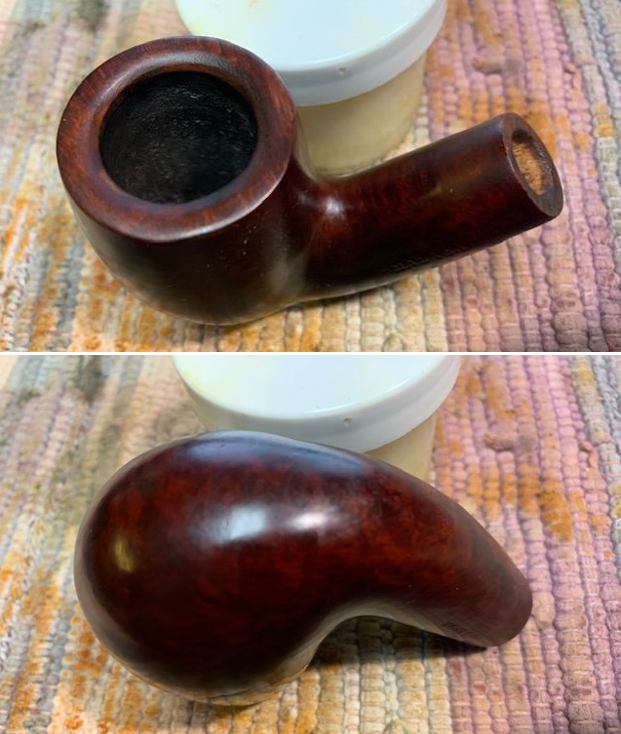
I began the final polishing cycle by mounting a cotton cloth buffing wheel on to my hand held rotary tool and applied a coat of Blue Diamond to the stummel and the stem to polish out the minor scratches. With a cotton buffing wheel that I use for carnauba wax, I applied a coat of carnauba wax and continued to work on it till the complete coat of wax had been polished out. I mounted a clean cotton cloth buffing wheel and gave the pipe a once over buff. I finished the restoration by giving the entire pipe a rigorous hand buff using a microfiber cloth to raise the shine further. The finished pipe is as shown below 🙂
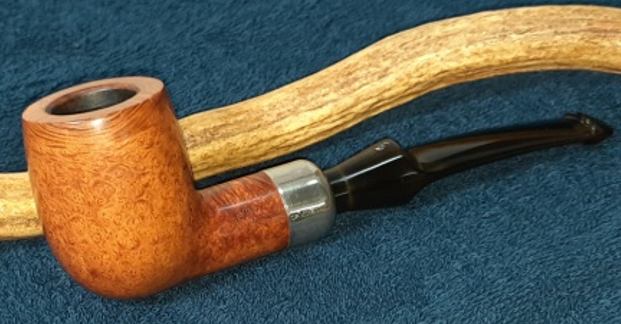


 P.S. I enjoyed working on this pipe alongside my wife, Abha. Her expertise and dedication in polishing the stummel and stem lends a finish that I always seek in all my restorations. And not to forget her editing of the write up to eliminate all the spelling and grammatical errors!
Well, as for this handsome pipe, I am not very sure if I want to hold on to it as since receiving this Savinelli System pipe from Steve, I have acquired another similar pipe with a Cumberland stem. Do let me know if this pipe interests you and we can take it further from thereon.
I wish to thank each one for sparing their valuable time to read through this write up while also praying for the health and safety of entire mankind. Stay home…stay safe!!
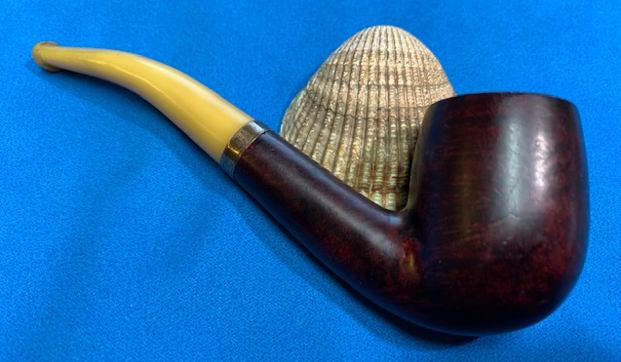
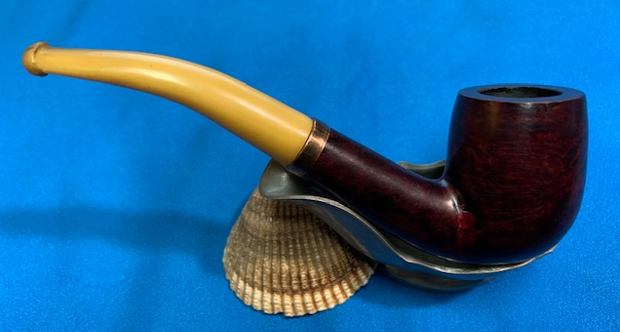
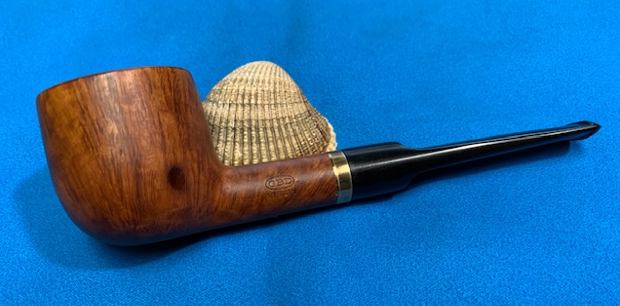
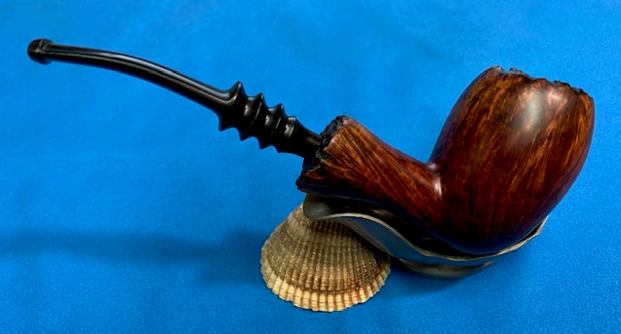
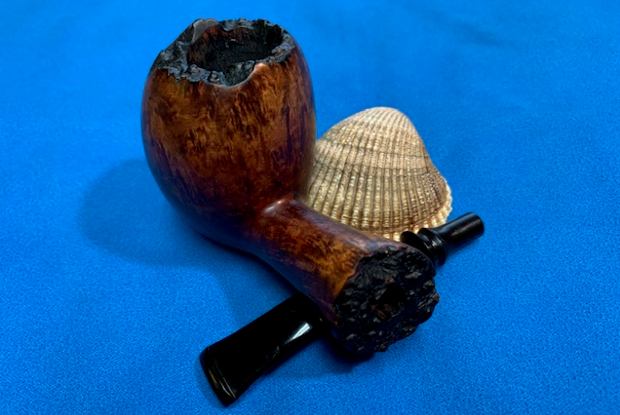
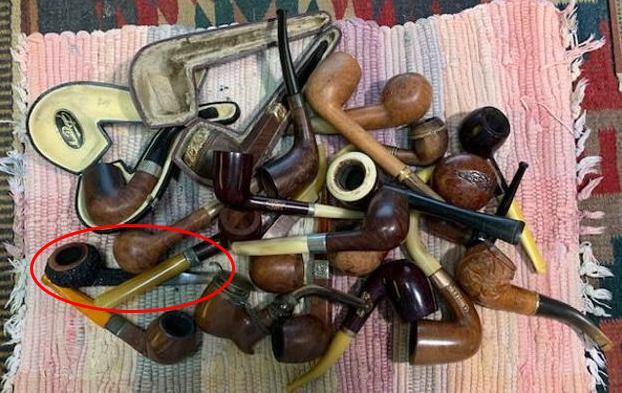
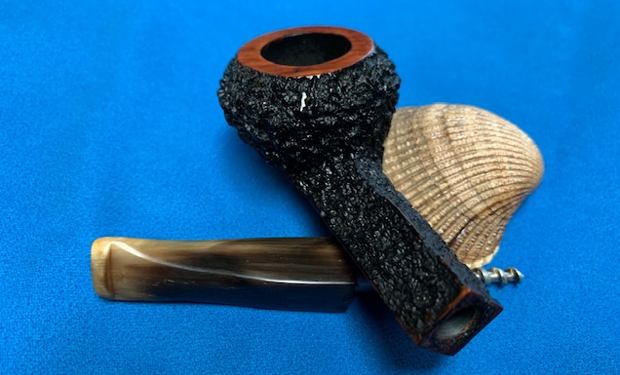
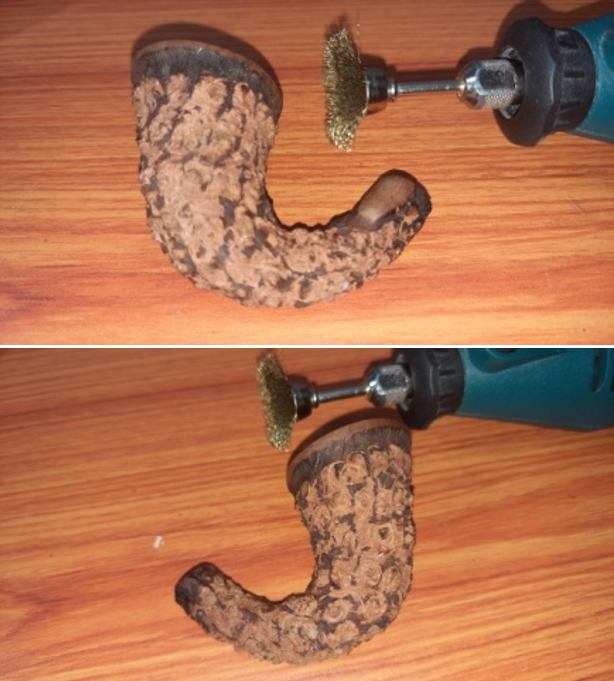
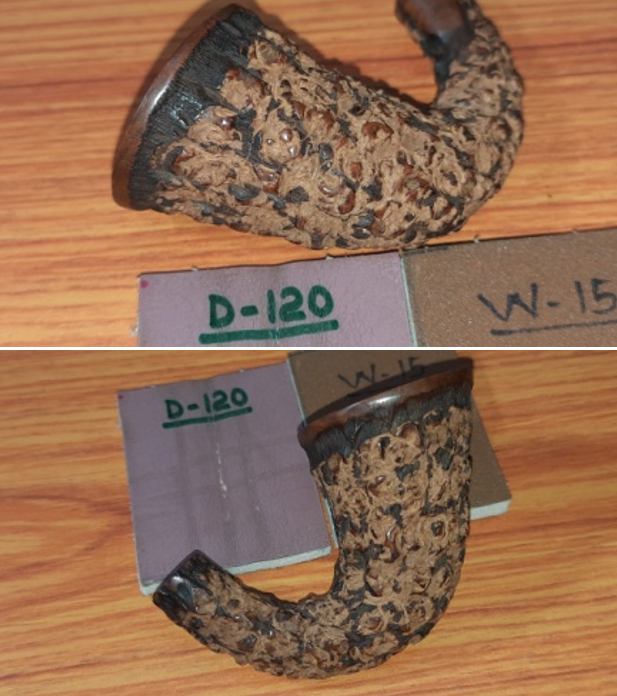
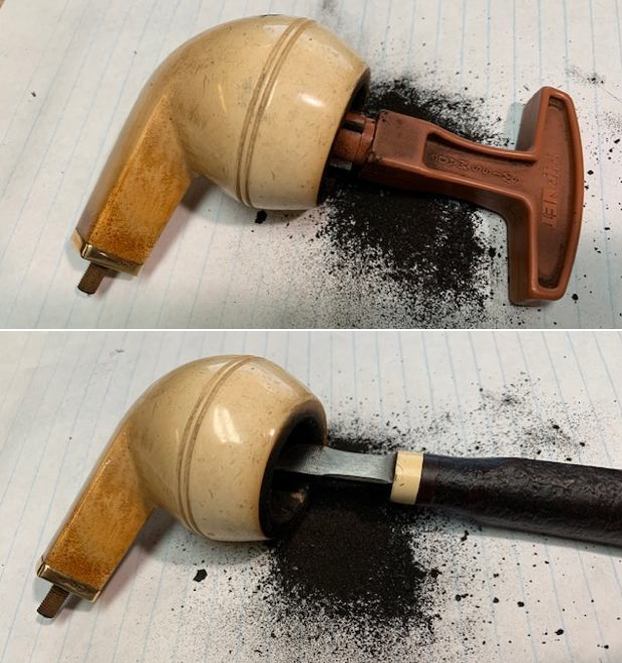
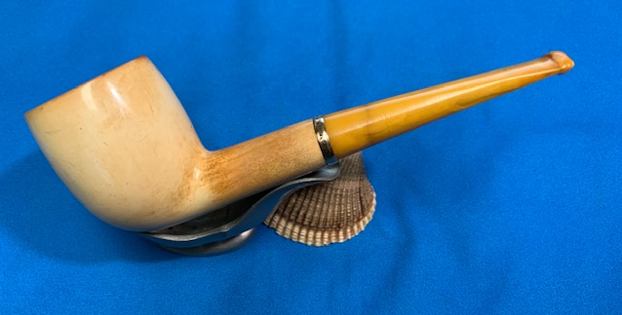
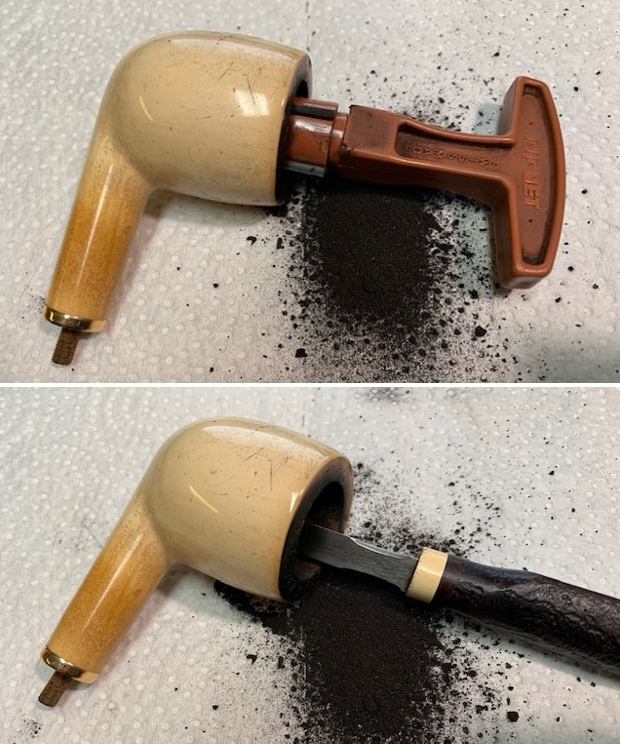
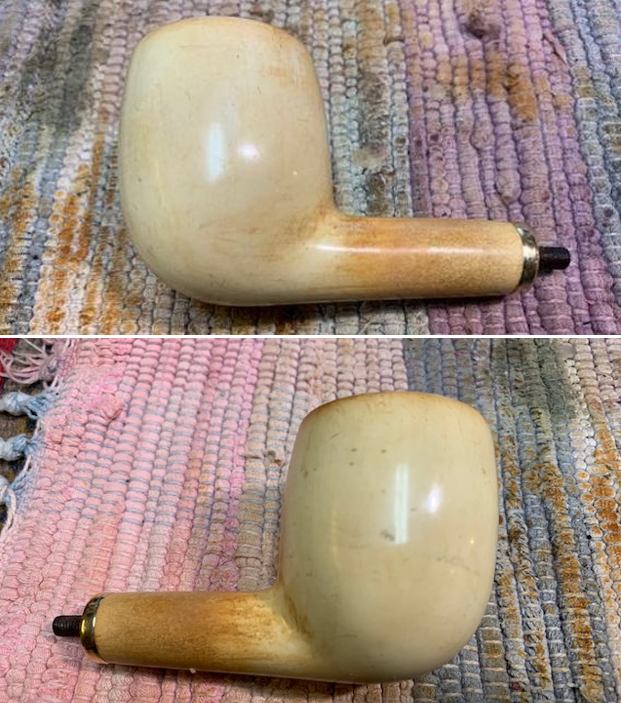
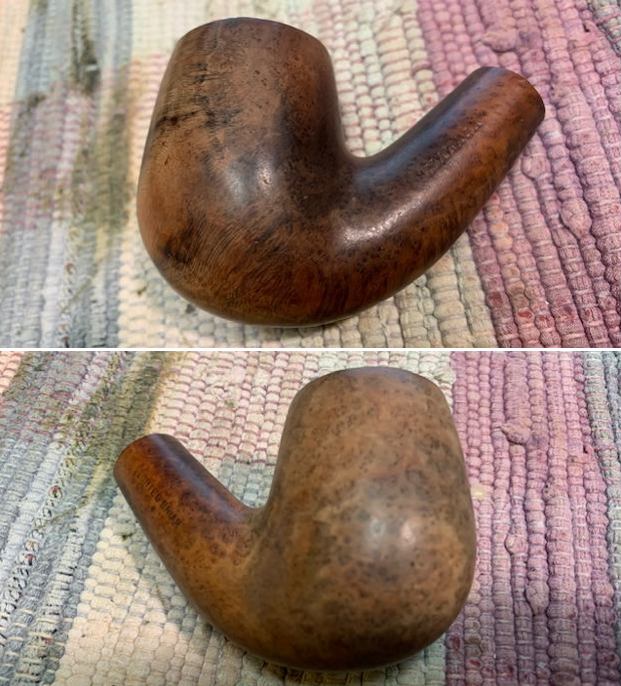
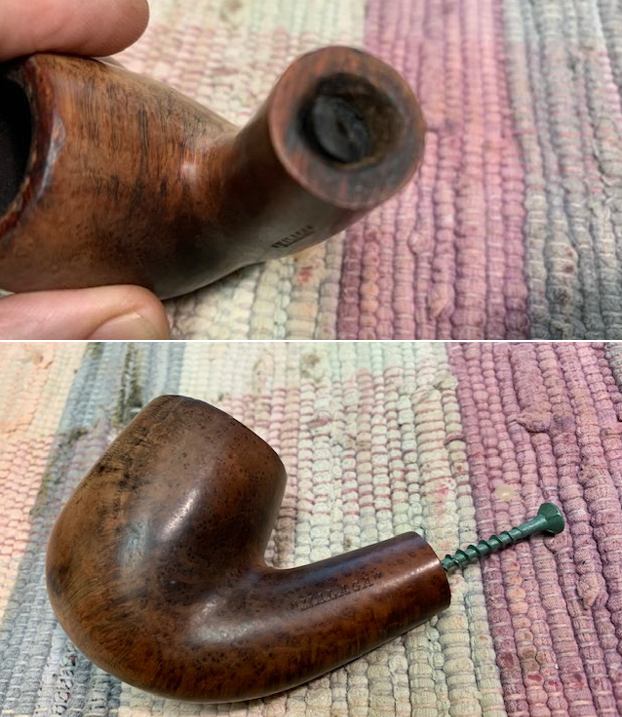
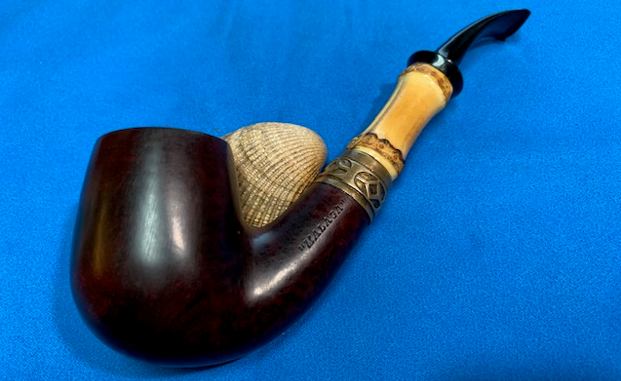
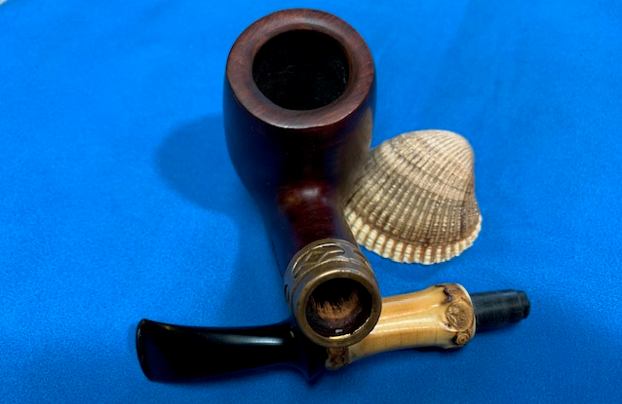
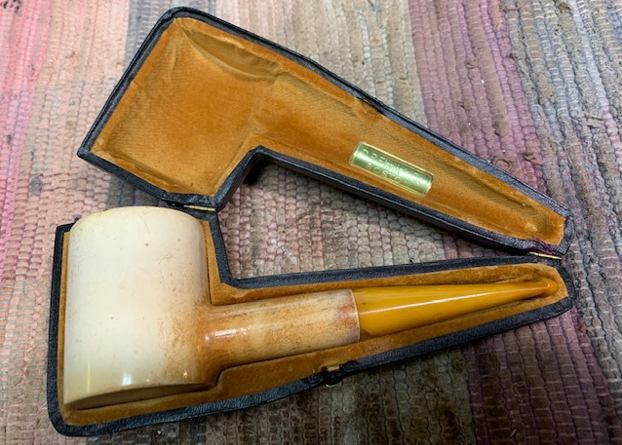
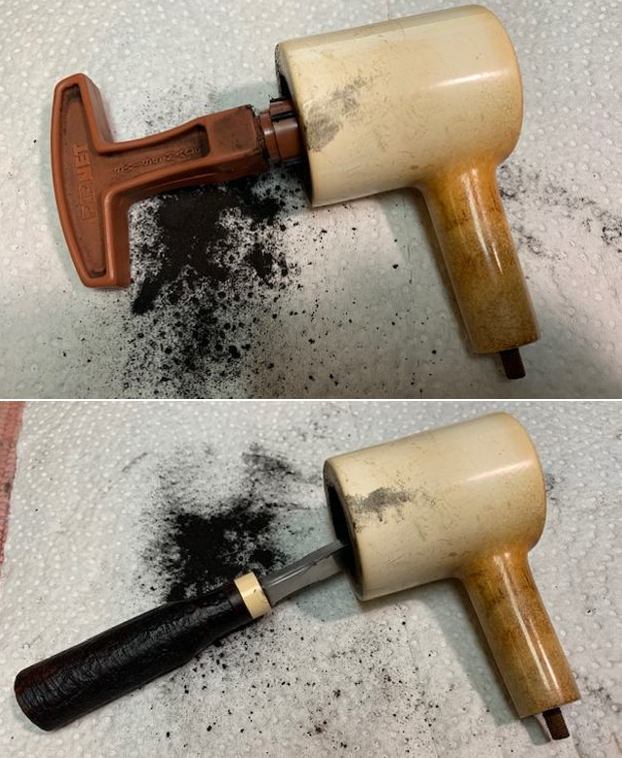
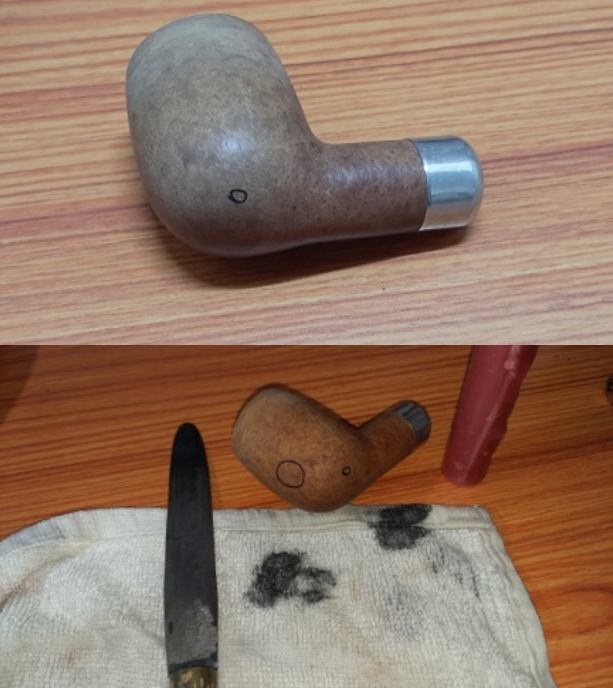
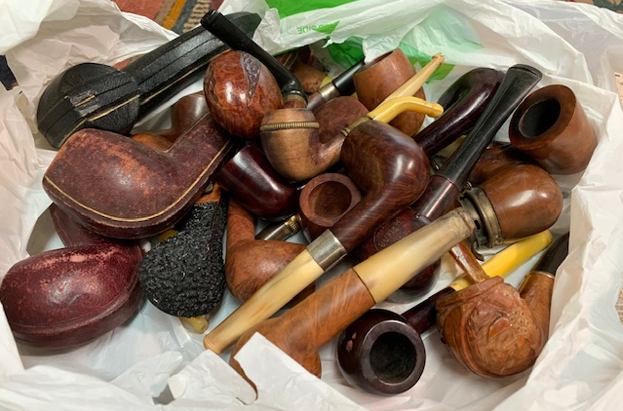 In the photo of the poured out bag on my desk top I have circled the pipe that is next on the table. This was a lightly smoked Bent Billiard shaped pipe with a smooth finish that was dirty. The rim top had some light lava but there was minimal cake in the bowl. This little Bent Billiard really intrigued me, so it was next.
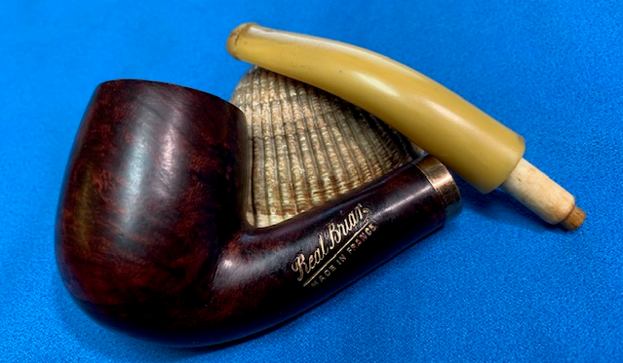
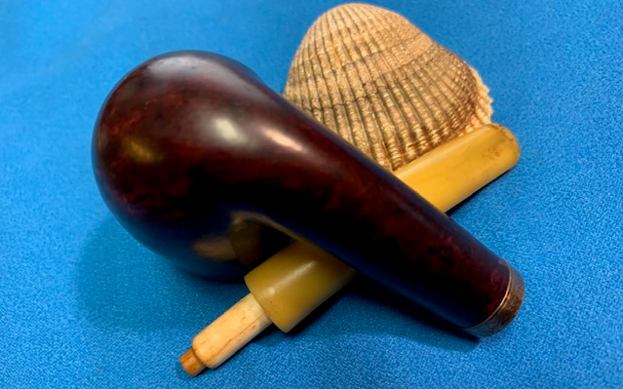
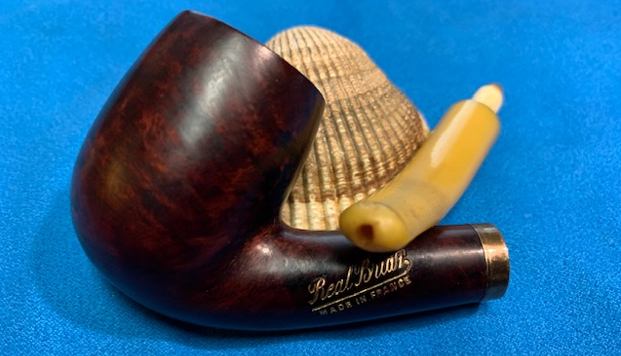
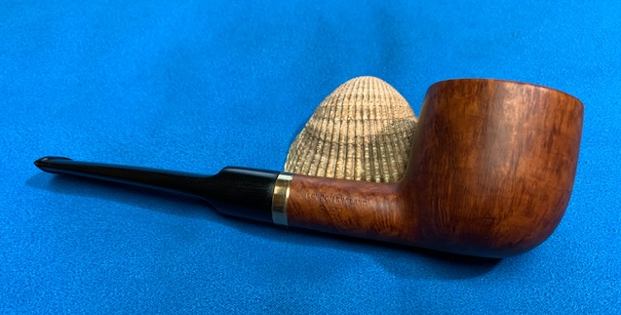
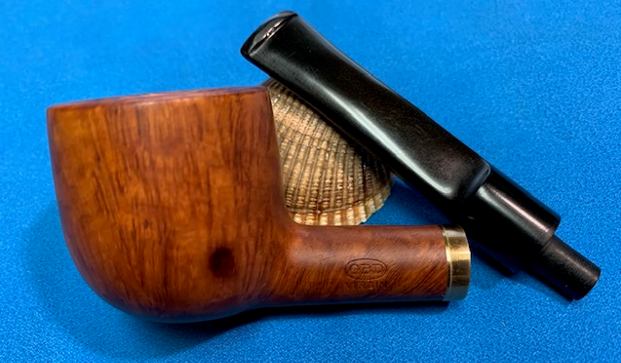
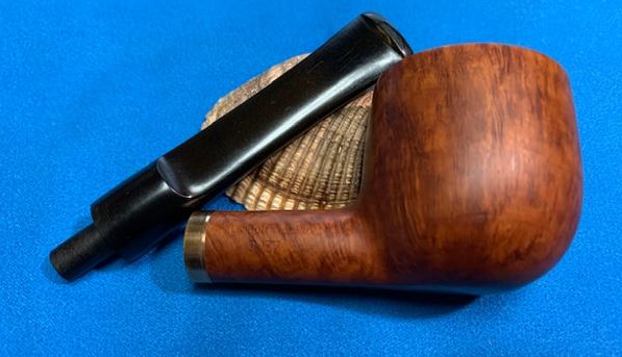
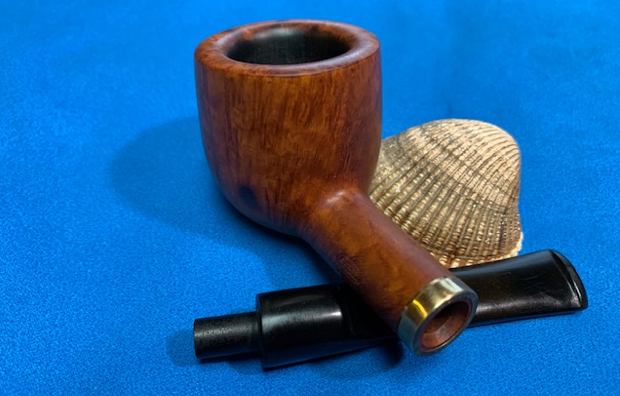
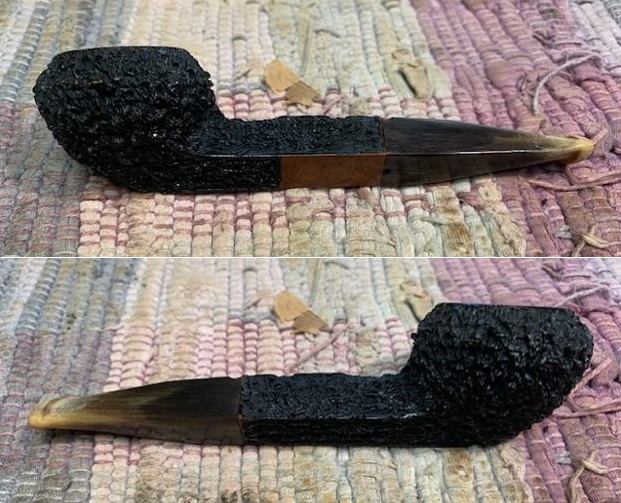
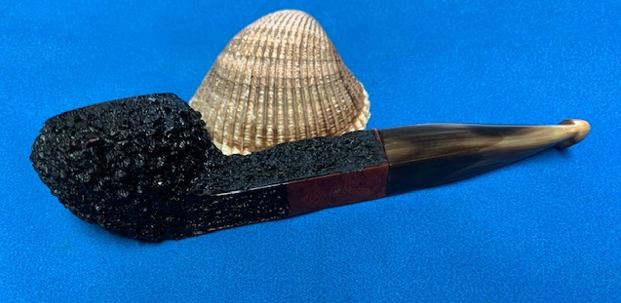
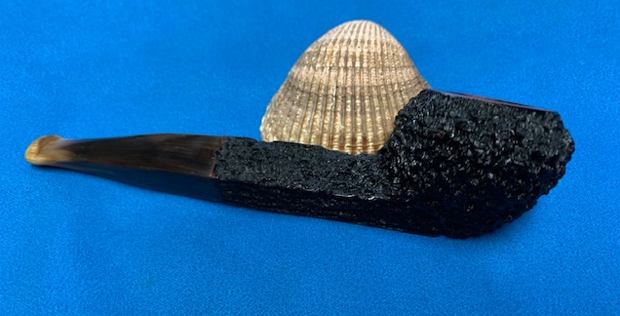
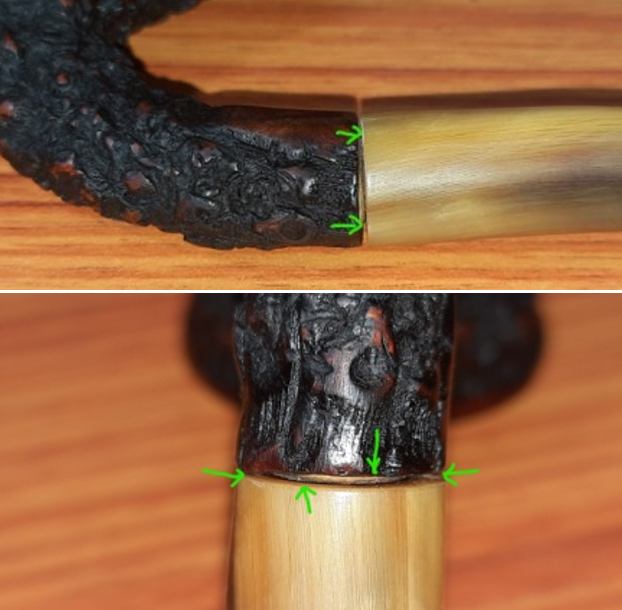
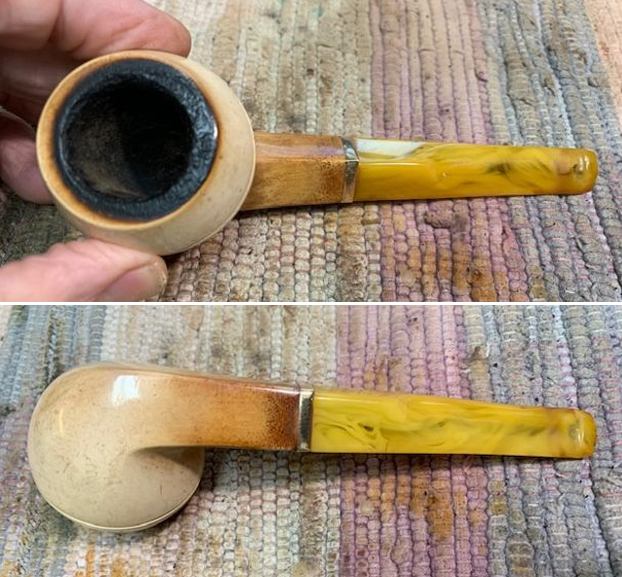
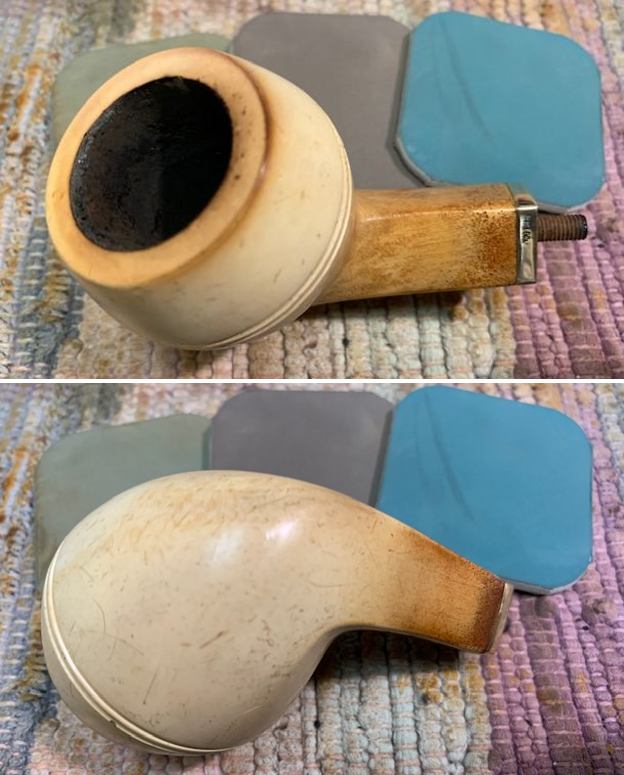
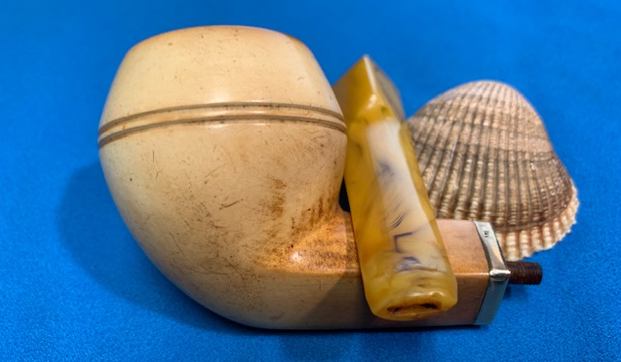
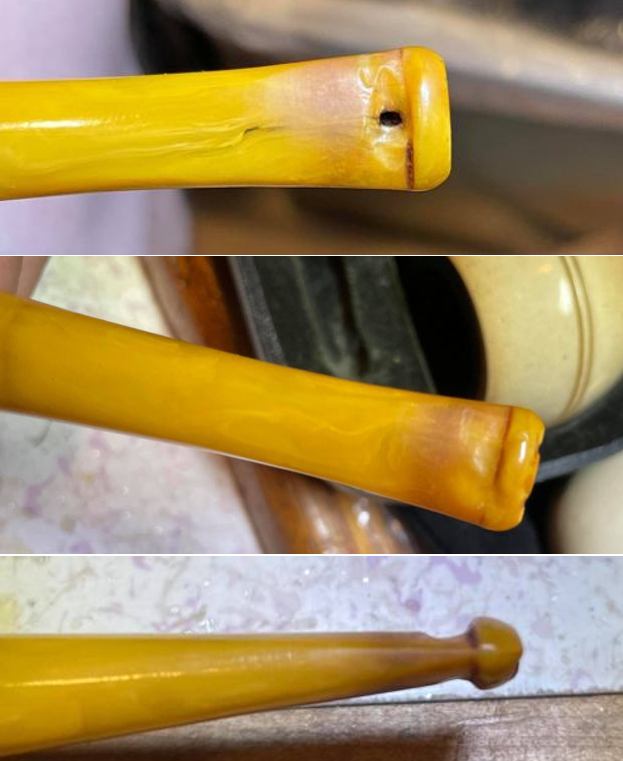
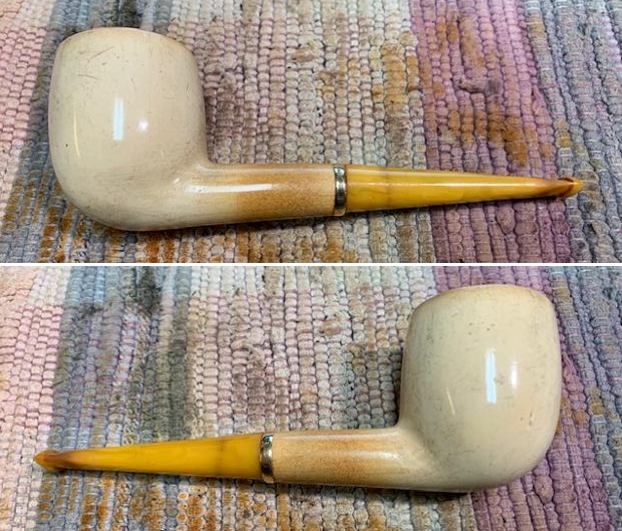
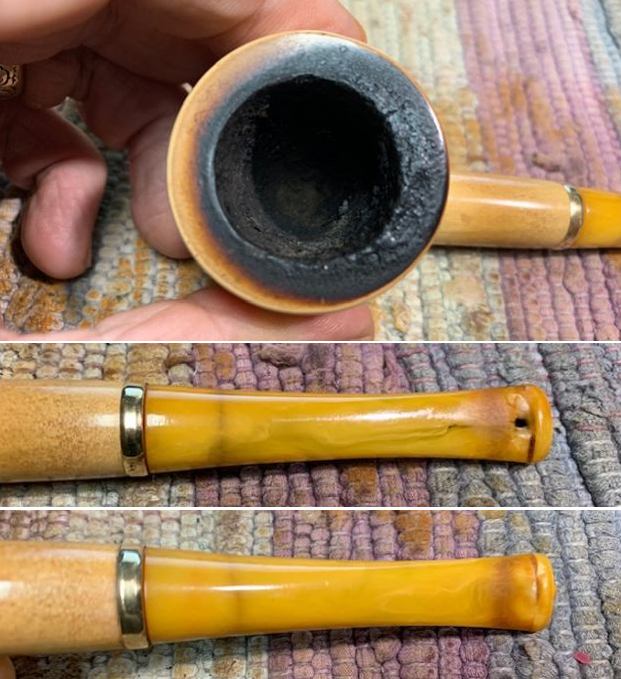
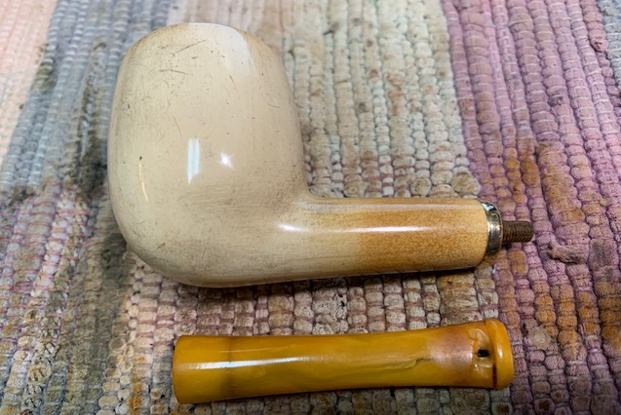
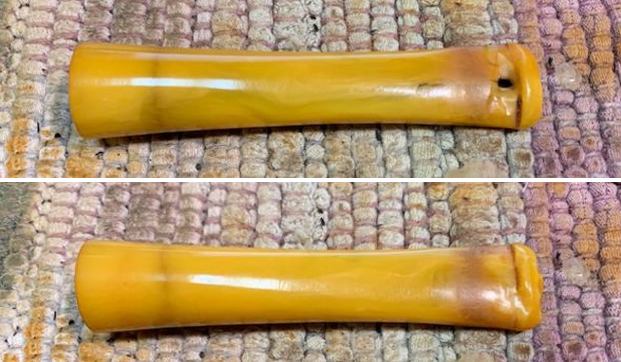
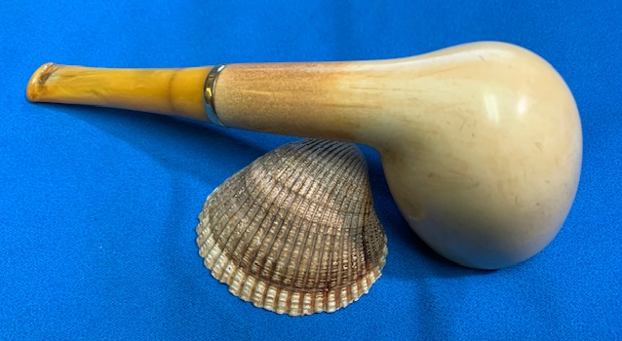
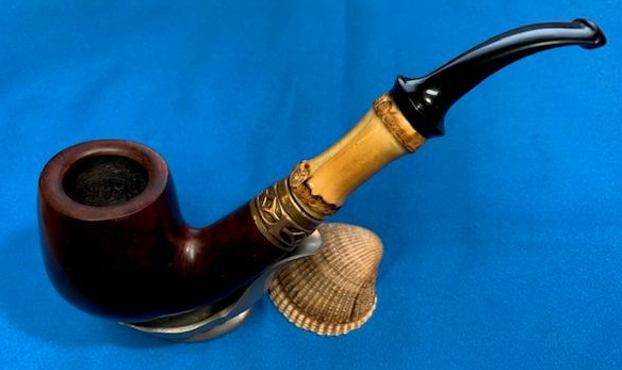
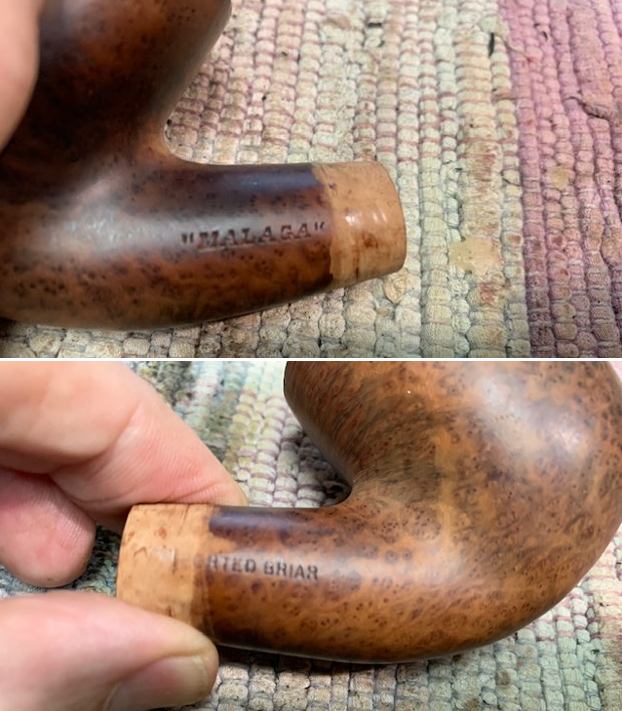
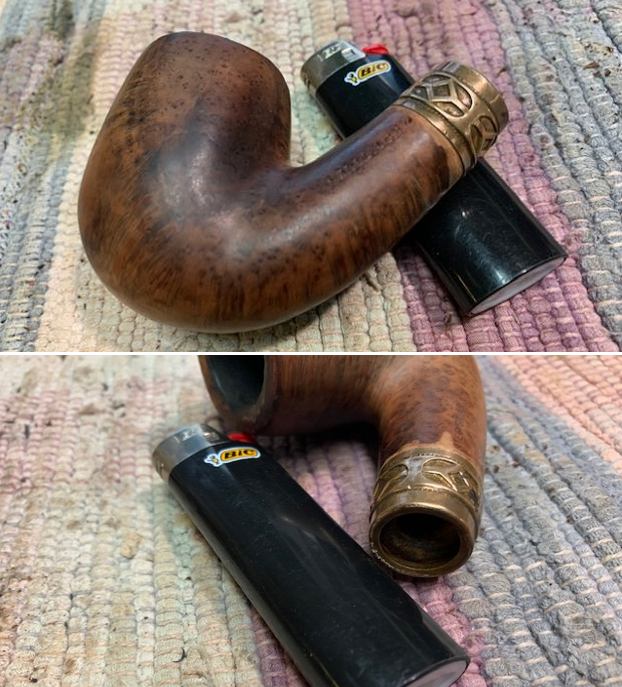
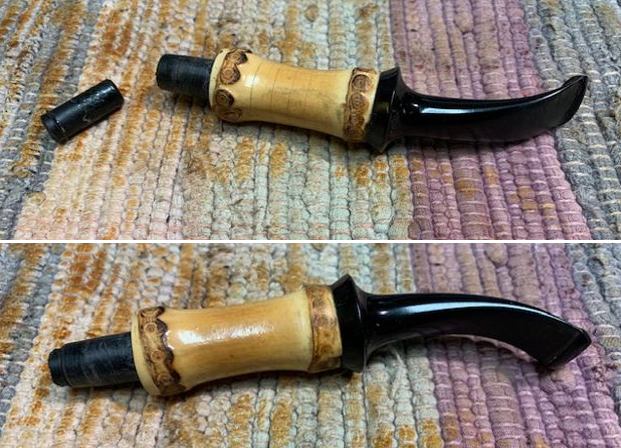
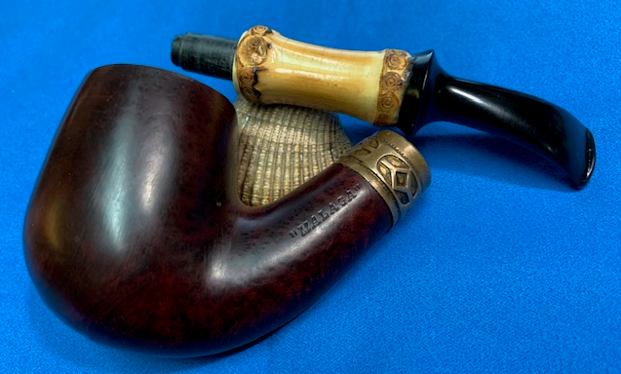
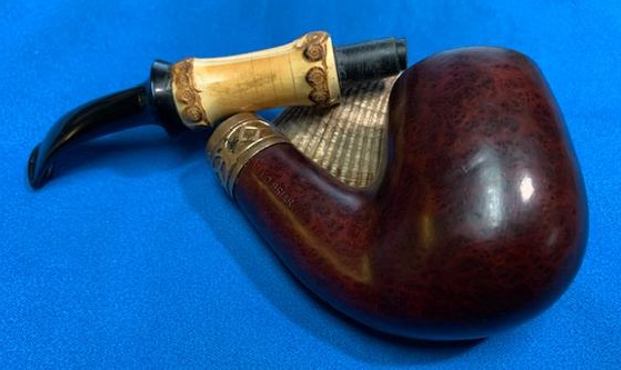
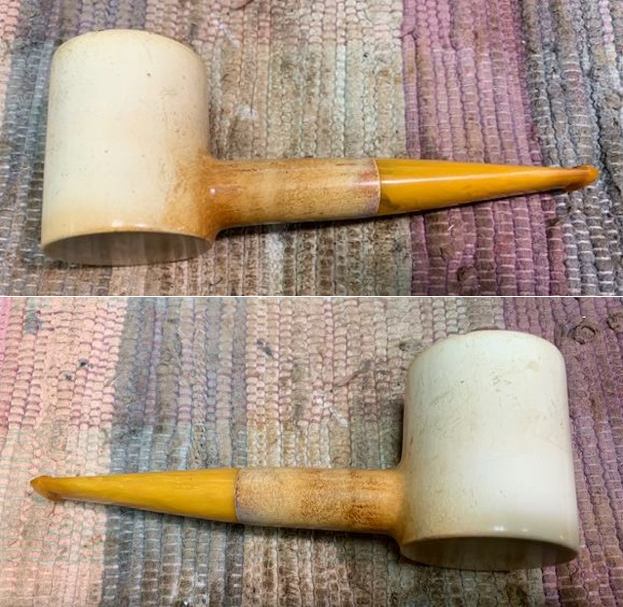
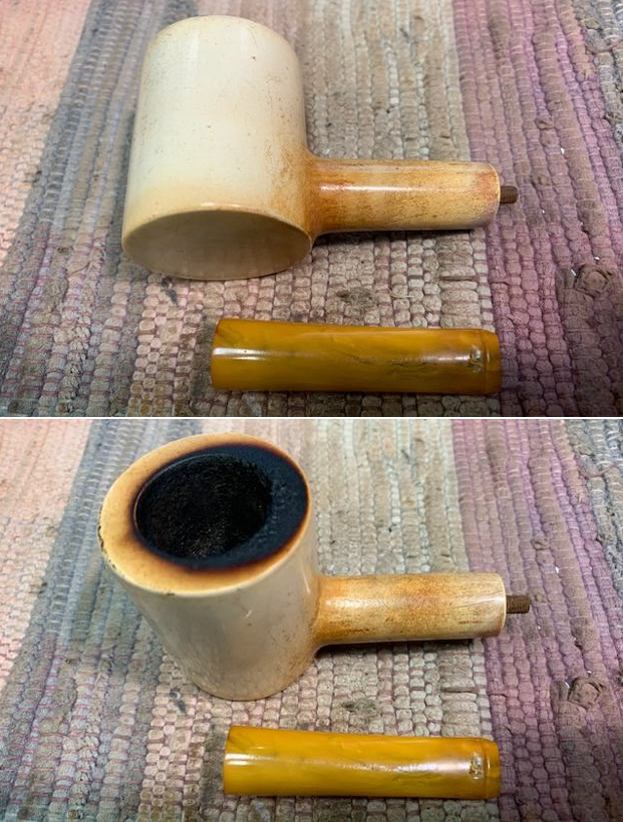
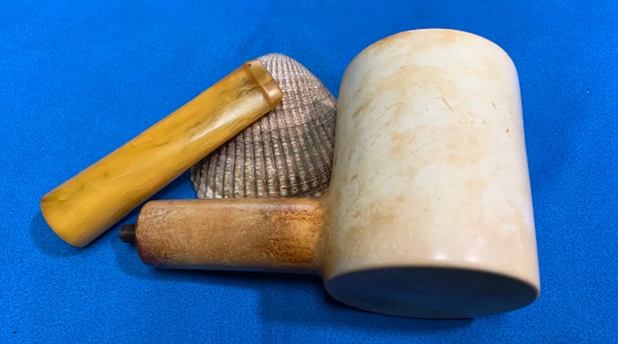
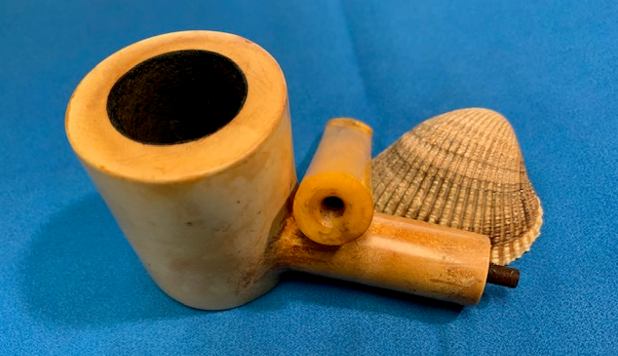
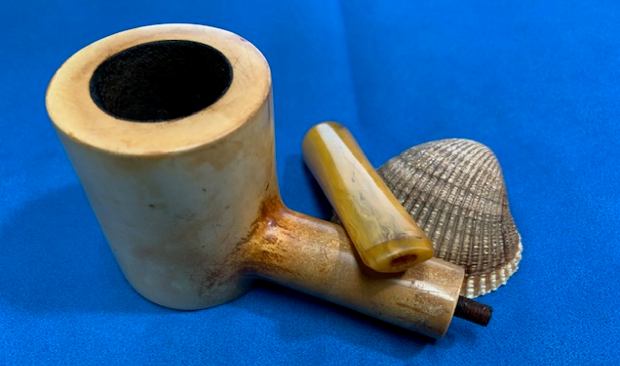
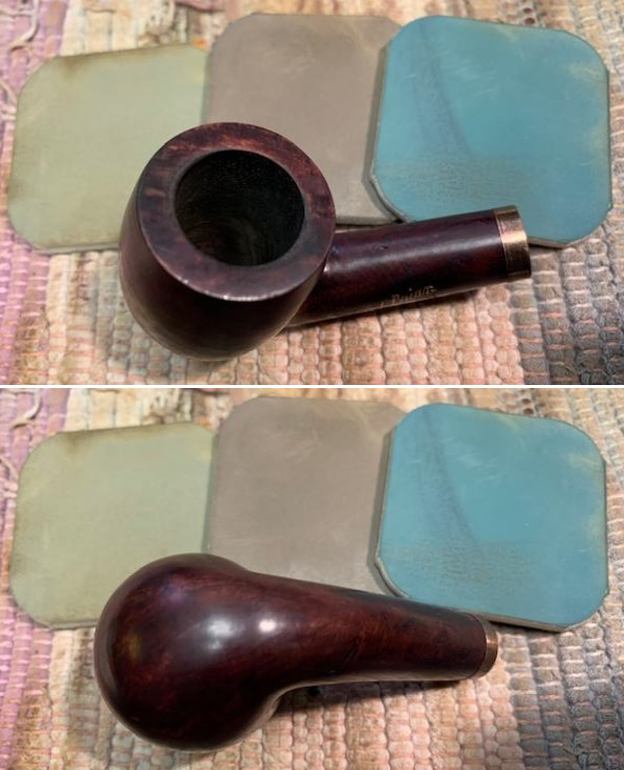
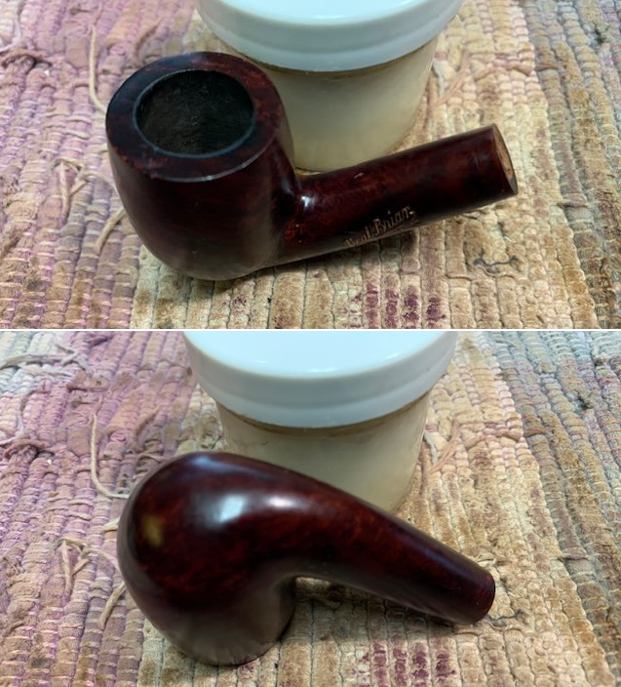
 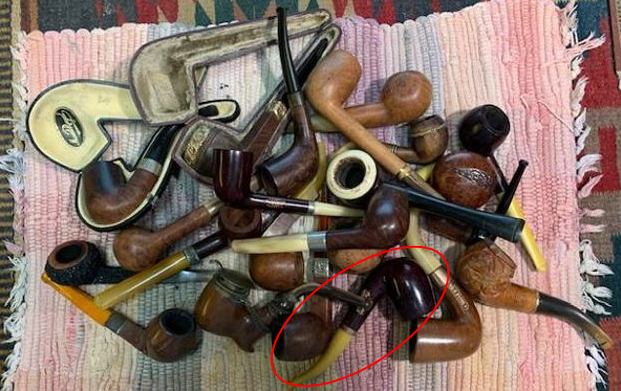 The Bent Billiard was stamped in gold on the left side of the shank and read Real Briar [at an angle over] Made in France. The brass/nickel shank band was oxidized but still in decent condition. The bowl was lightly smoked and dusty but there was no cake. There was light lava on rim top toward the backside. The inner and outer edges looked good. The finish was dirty and the varnish top coat was spotty and peeling. The pipe had a Bakelite or Amberoid stem that was in good condition. There was one chip on the top near the shank joint. There were some light tooth marks and chatter on the stem. The button was orific – a round hole in the button end. The button had some wear and darkening but was in good condition. It has a push tenon that appears to be a synthetic material as well. Here are a few photos of the pipe before I did anything to it.
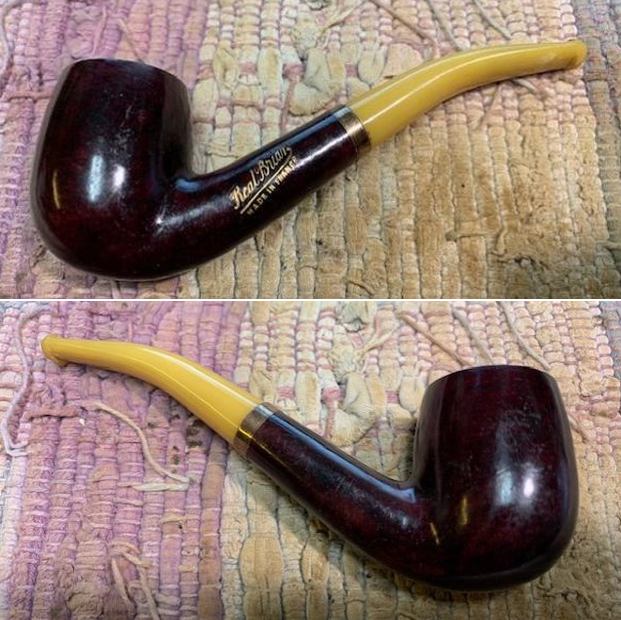
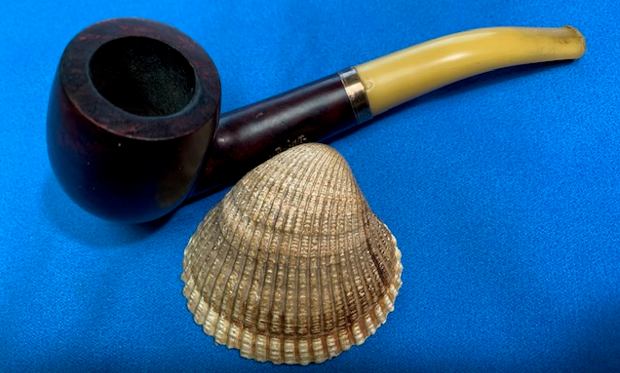
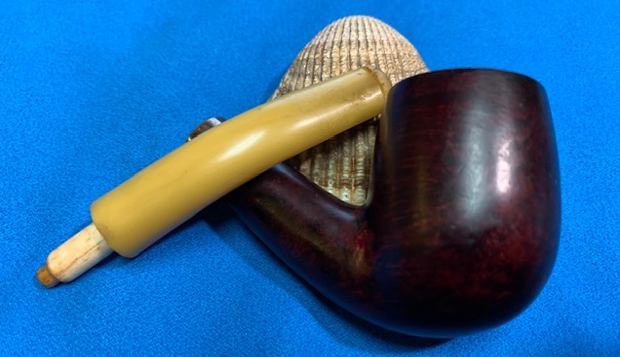
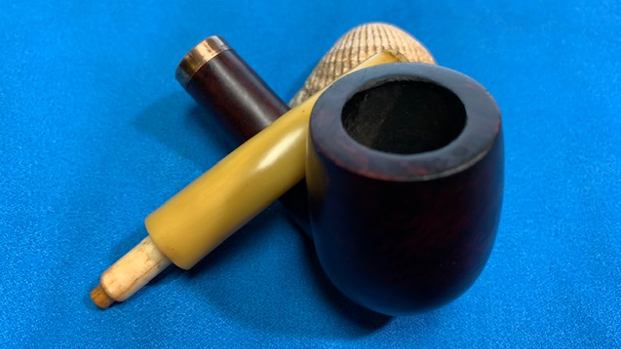
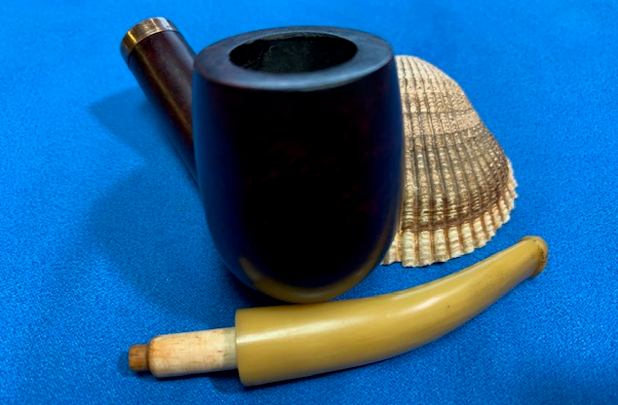
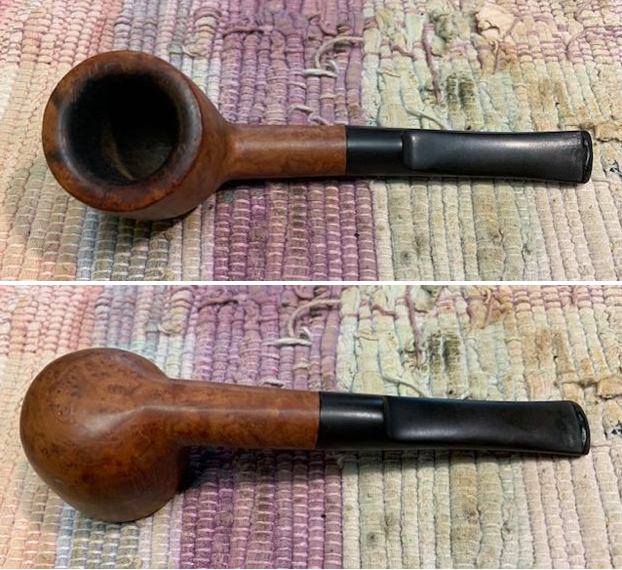
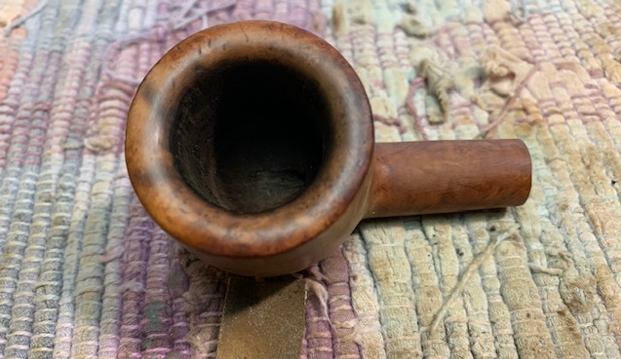
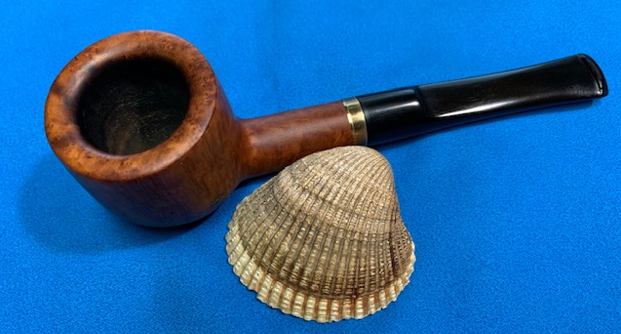
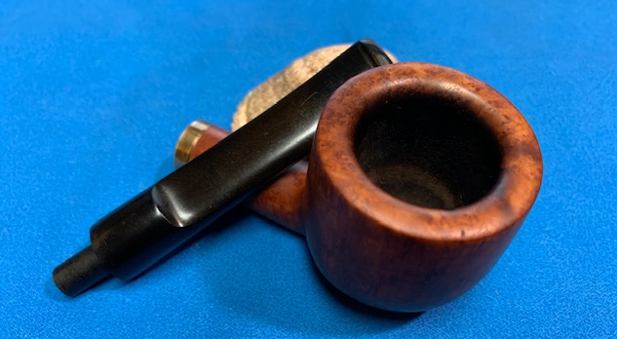
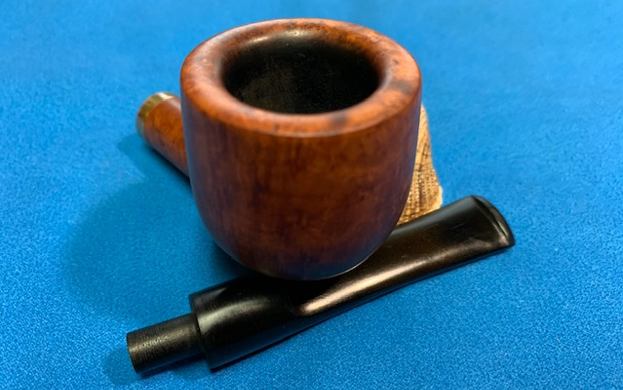
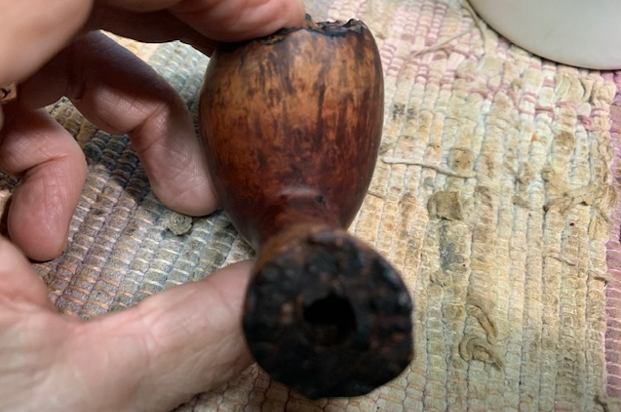
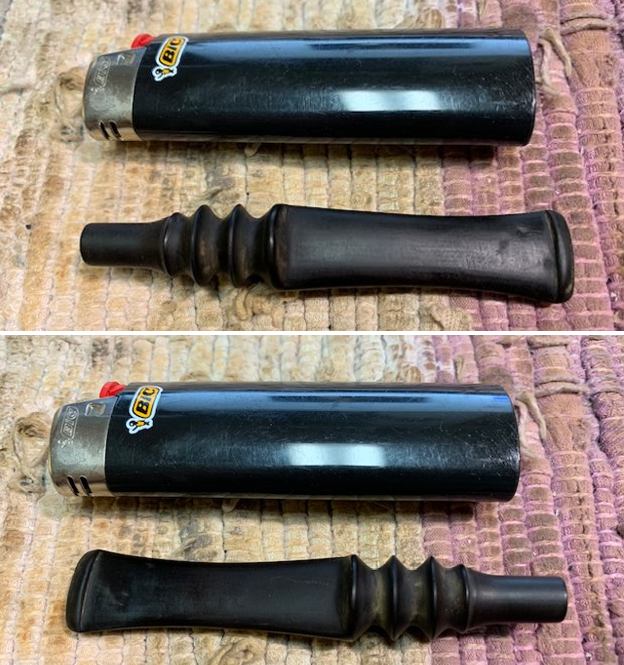
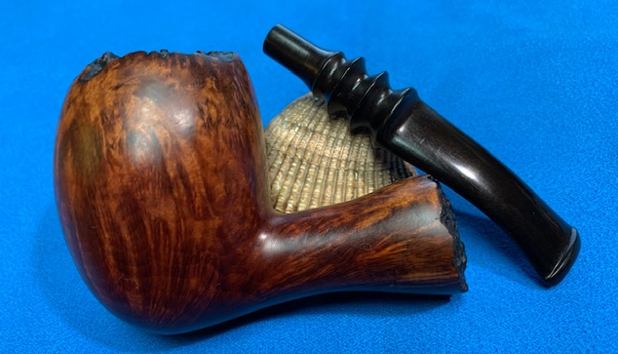
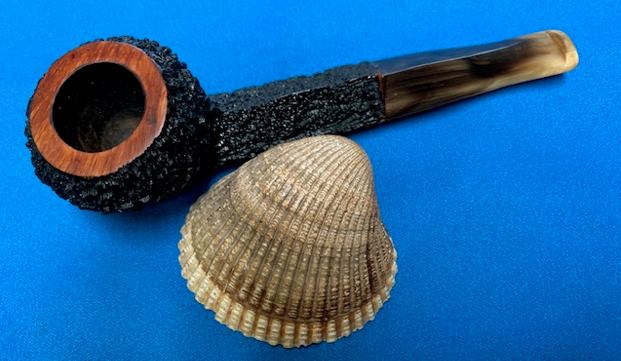
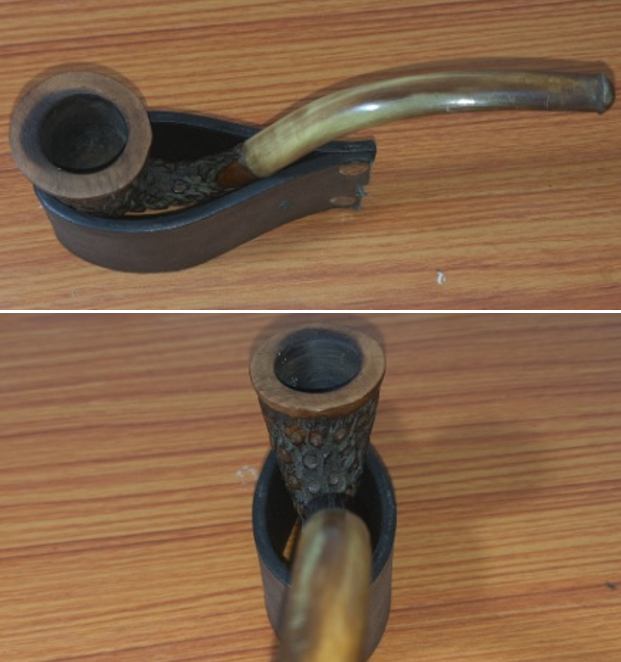
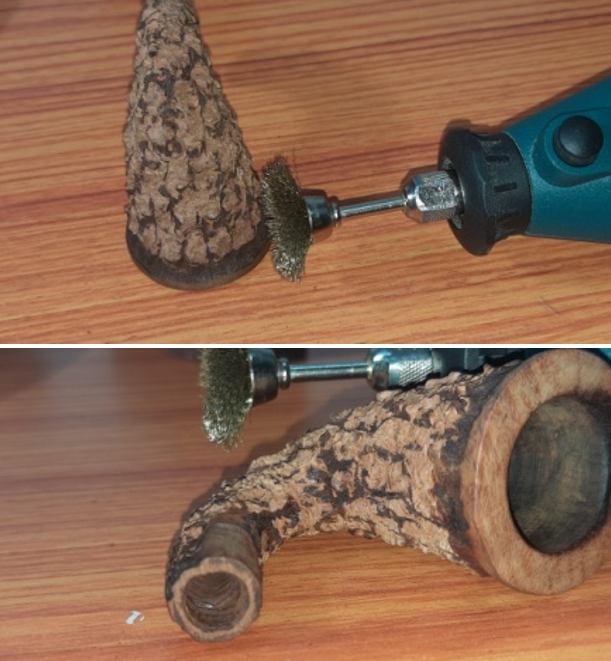
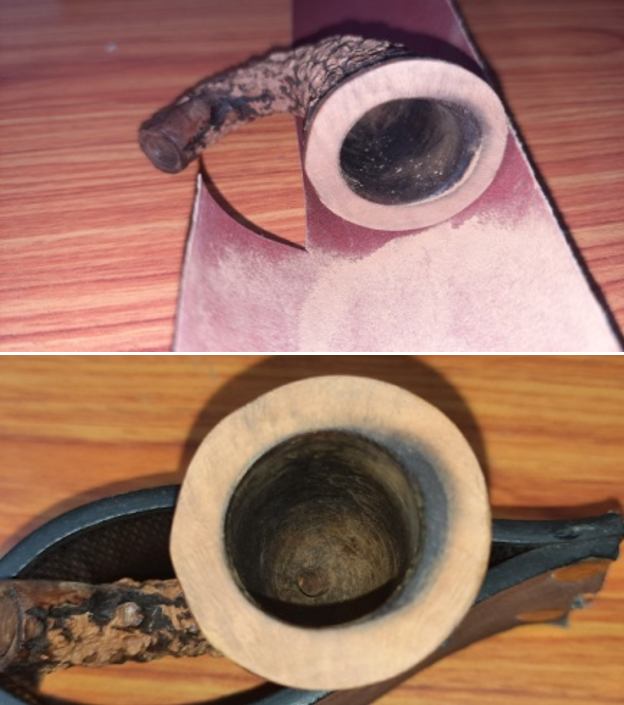
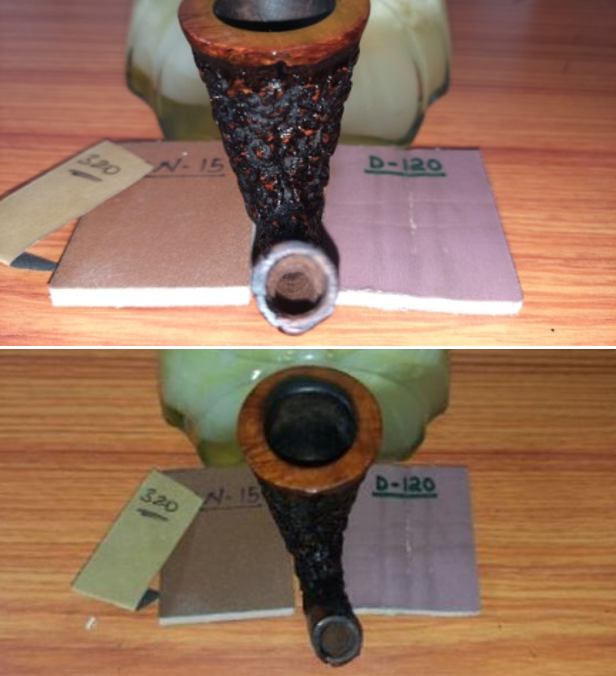
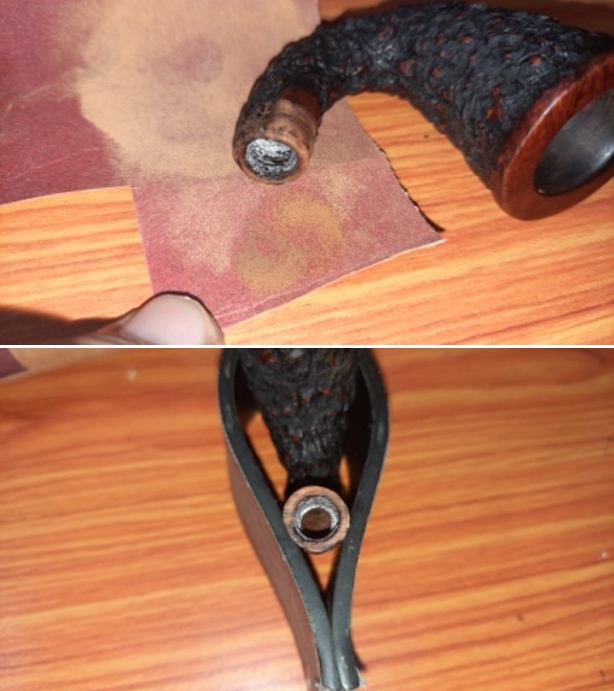
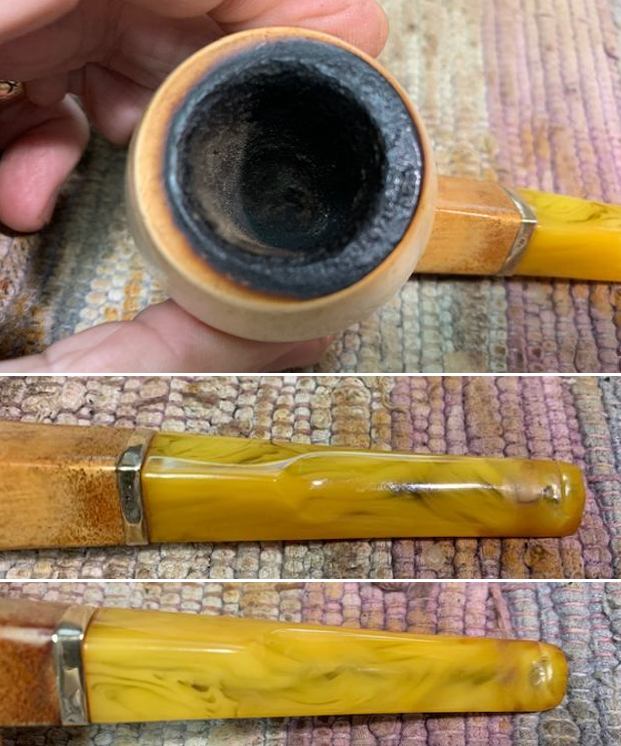
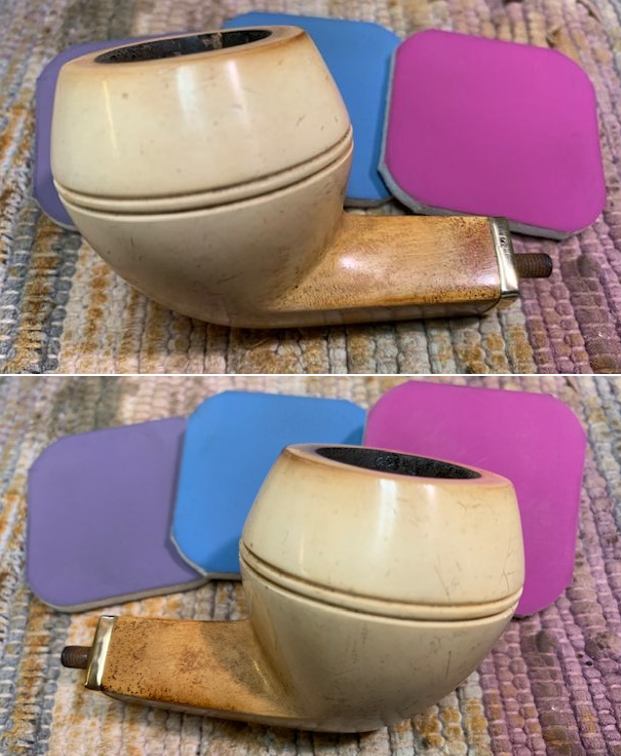
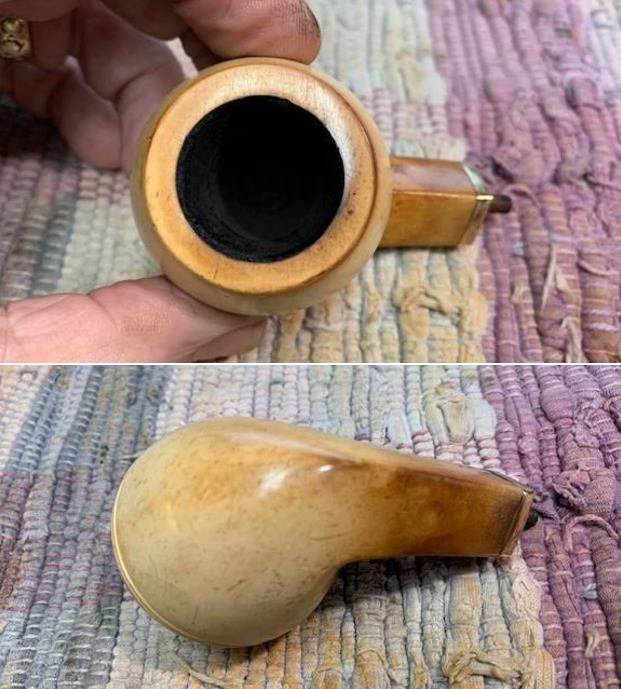
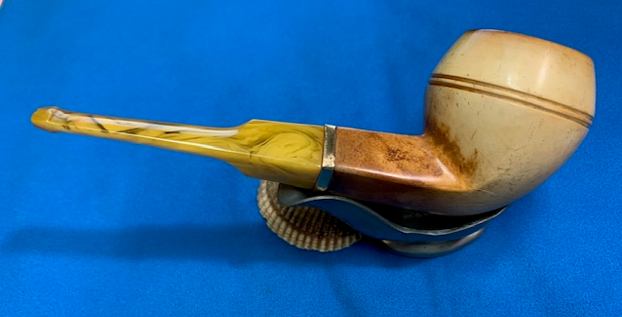
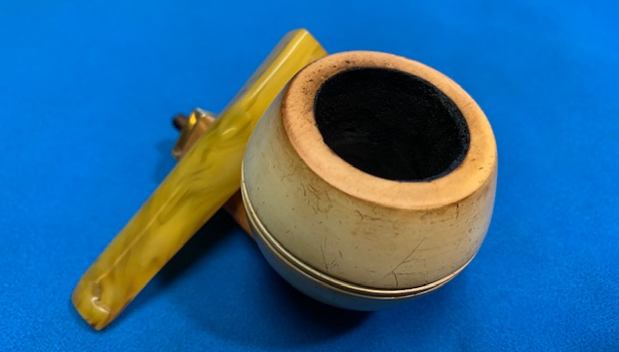
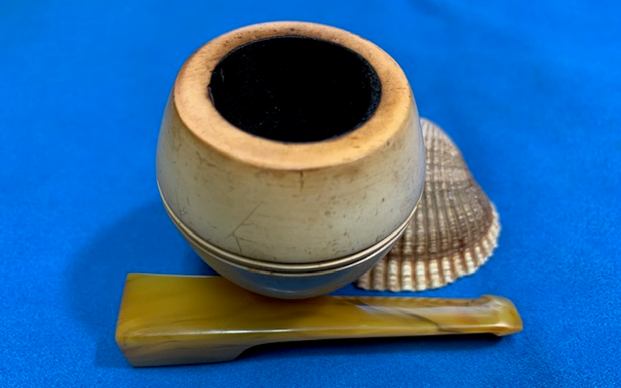
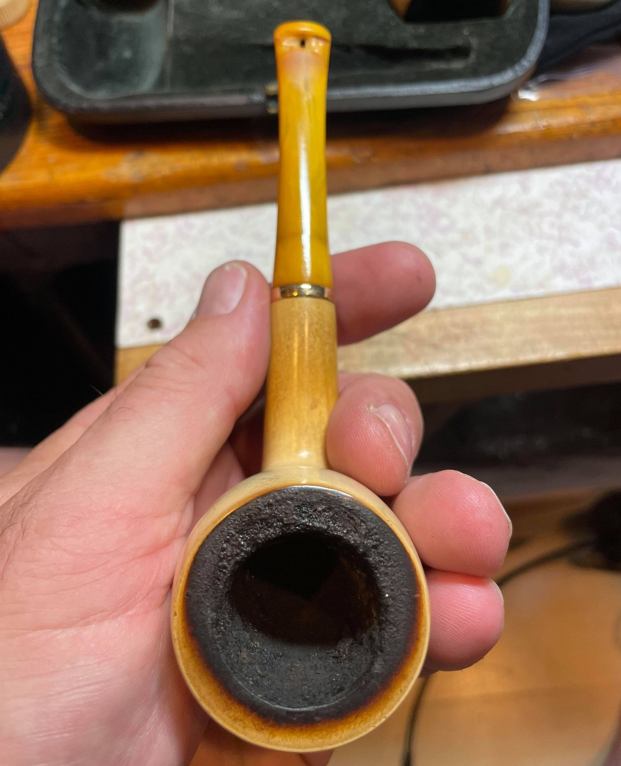
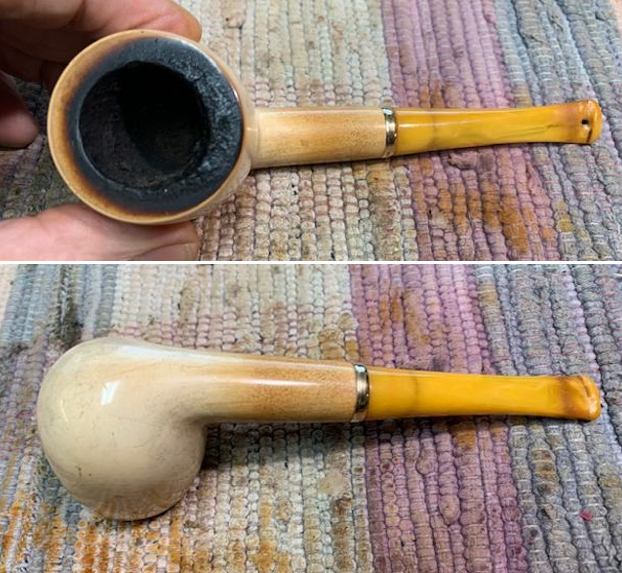
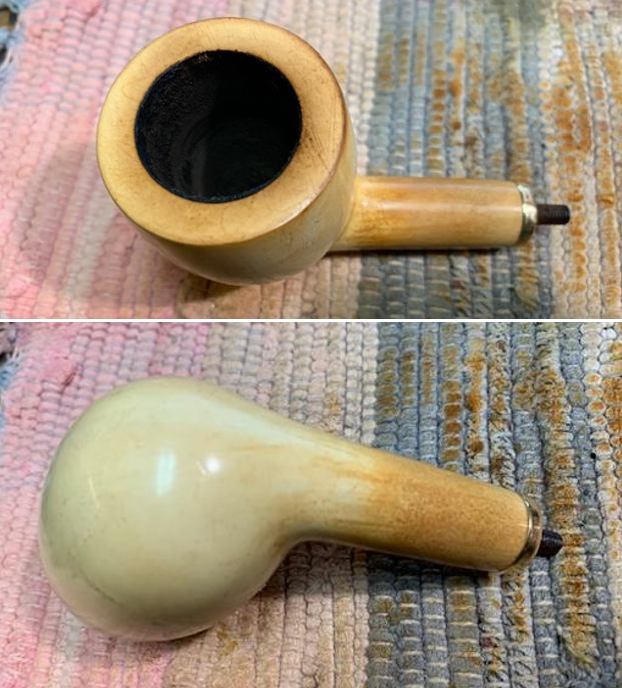
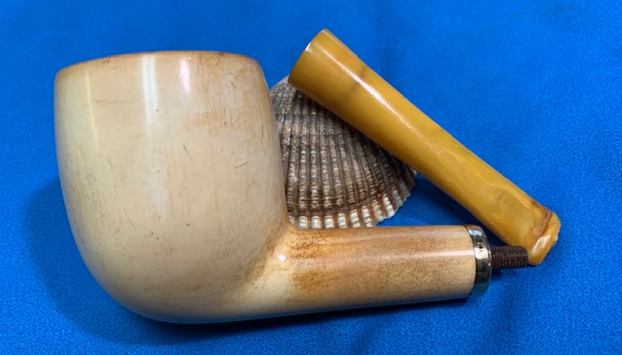
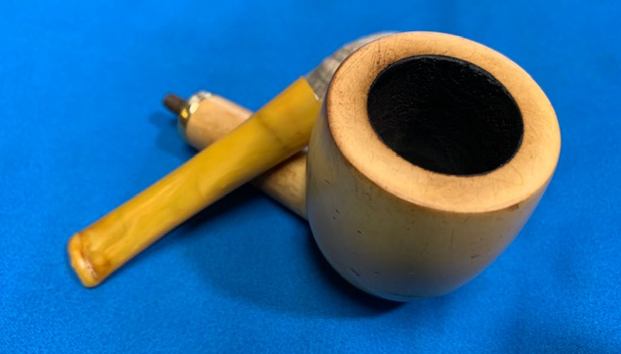
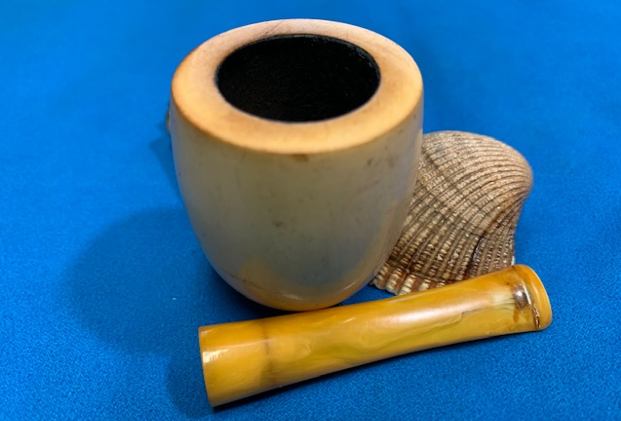
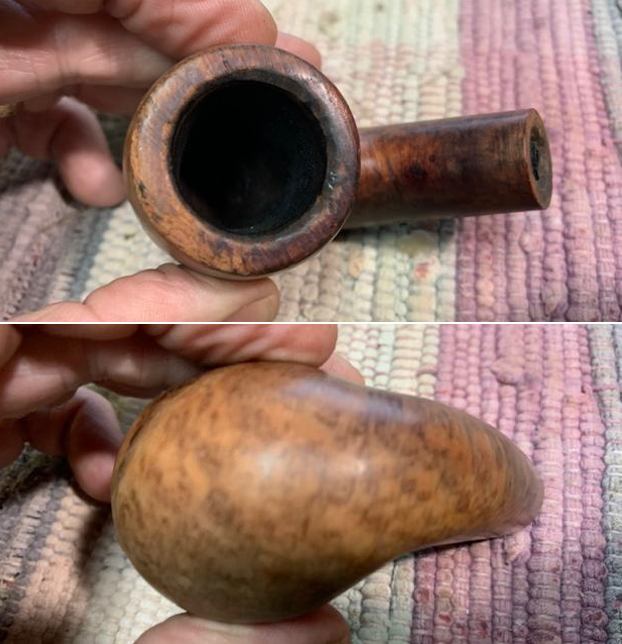
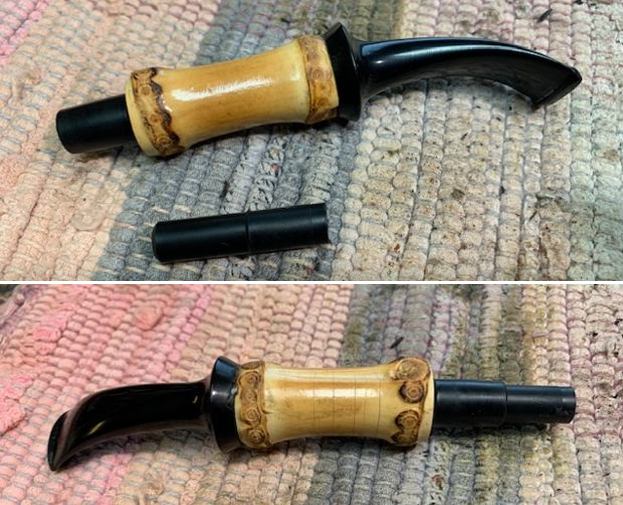
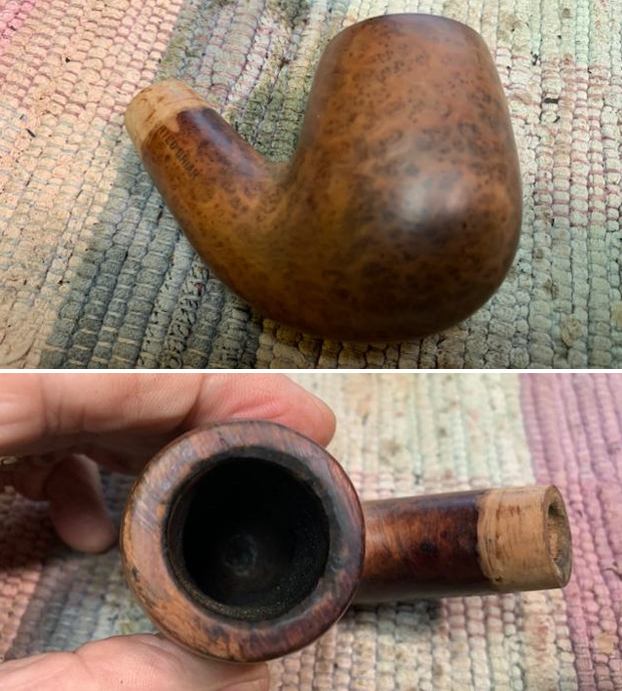
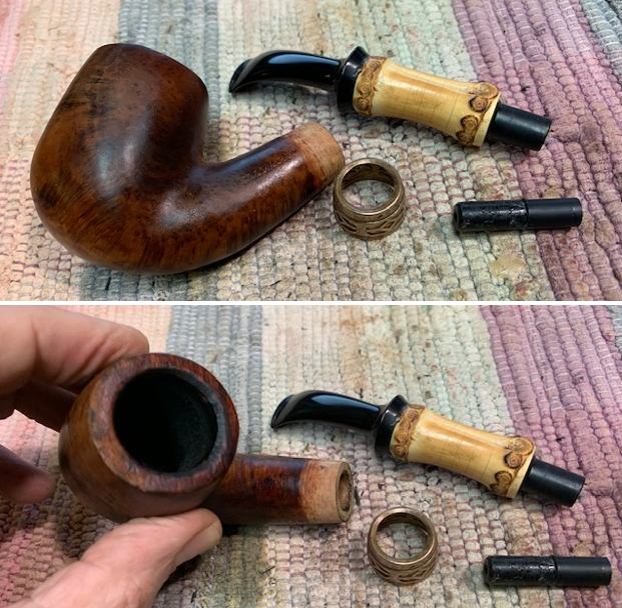
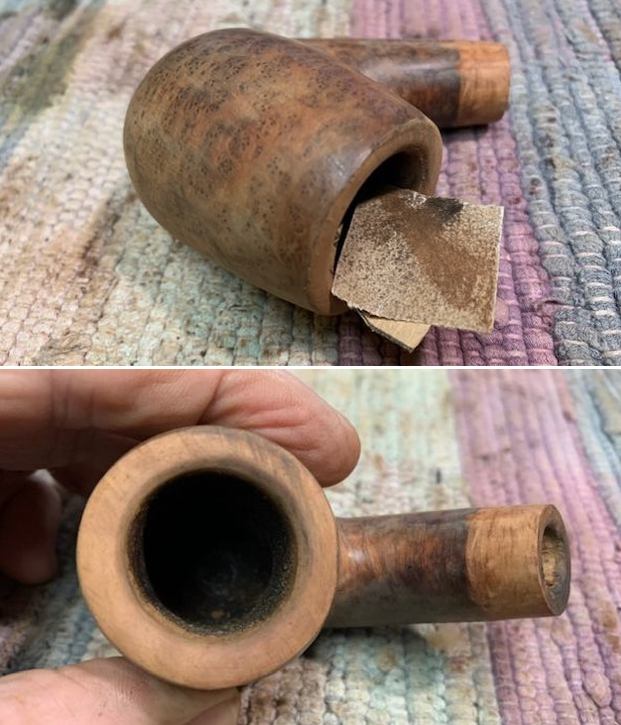
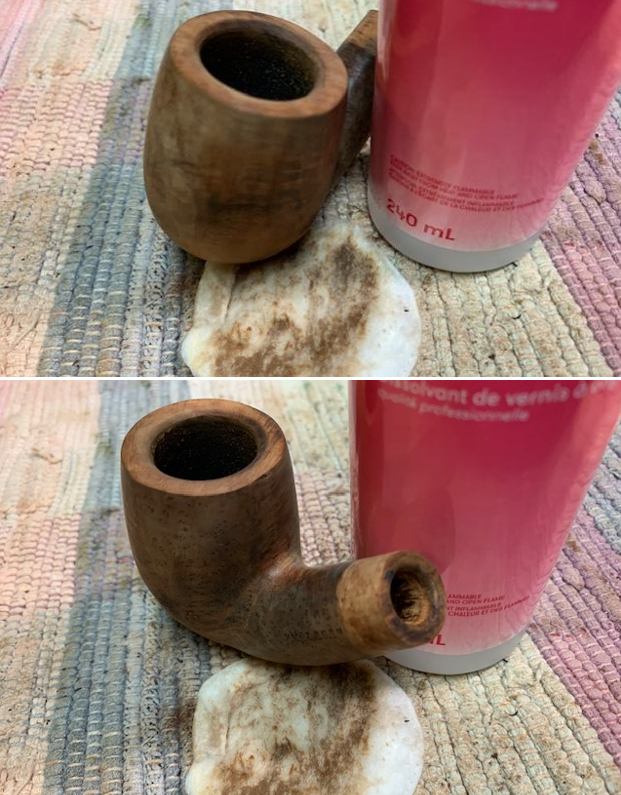
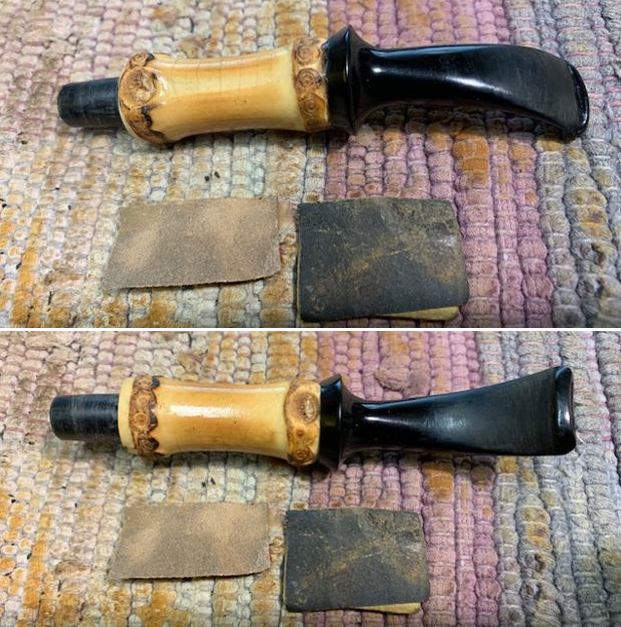
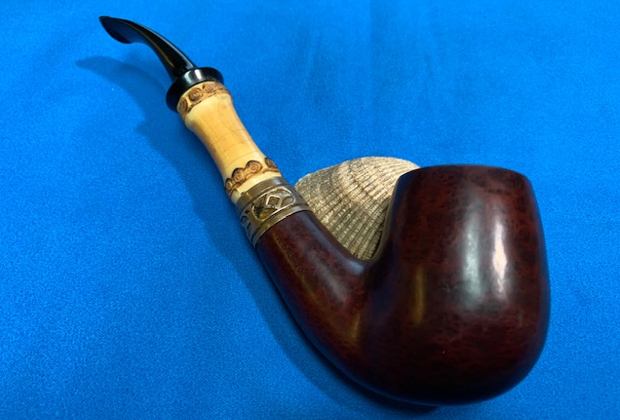
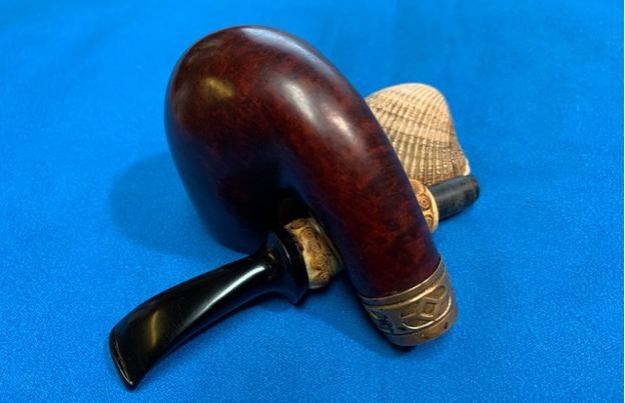
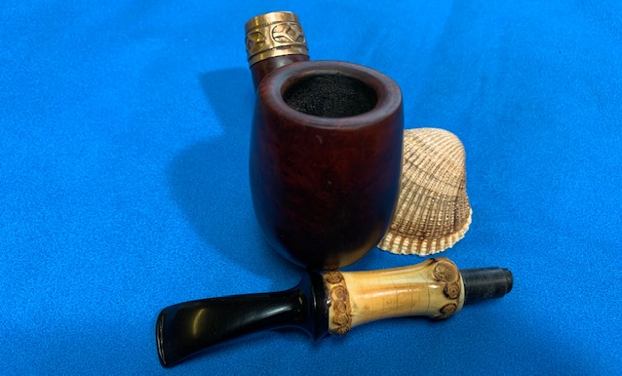
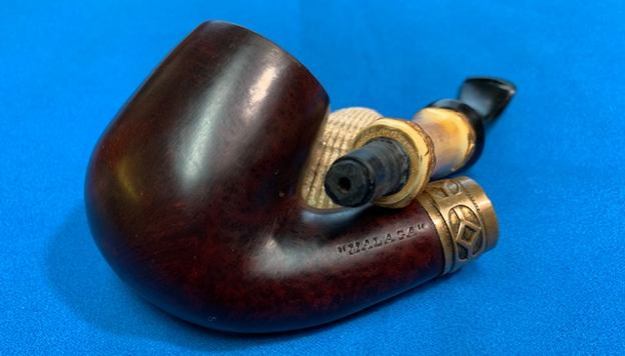
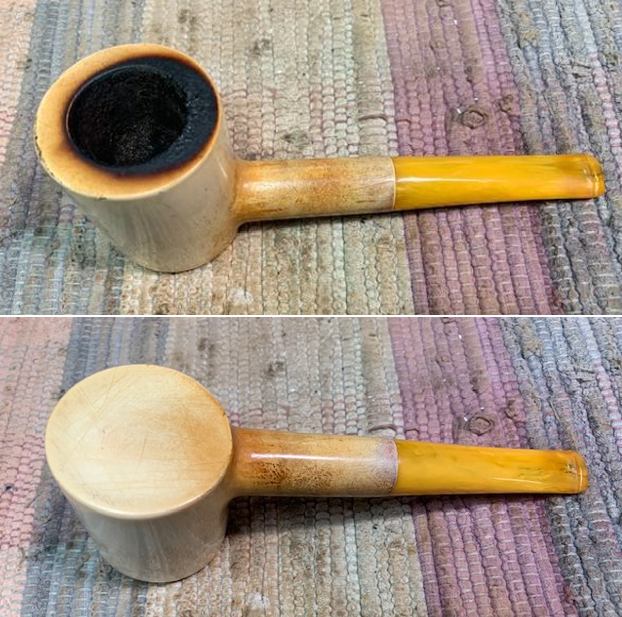
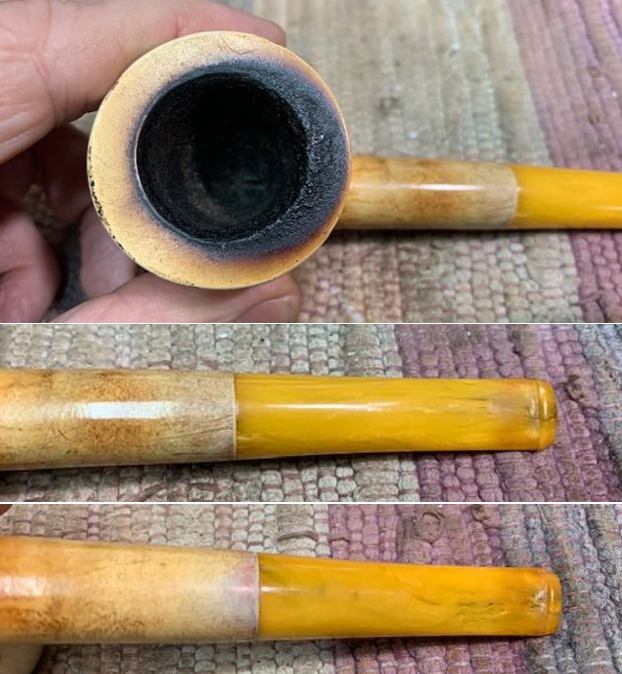
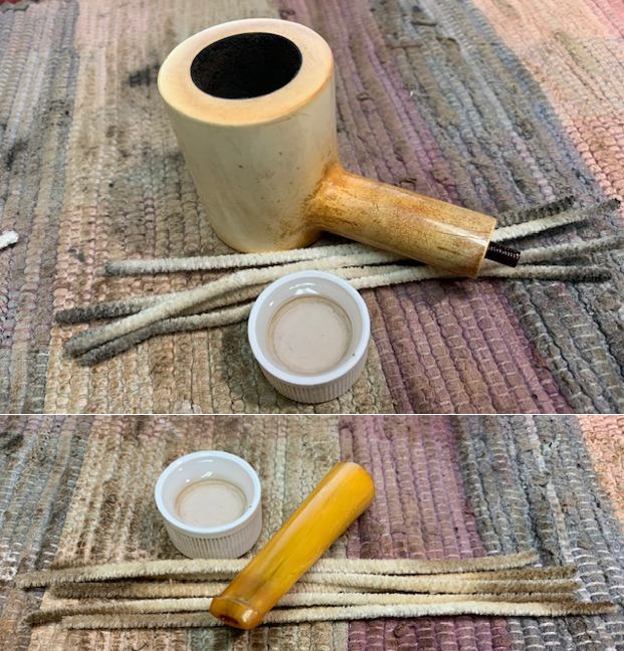
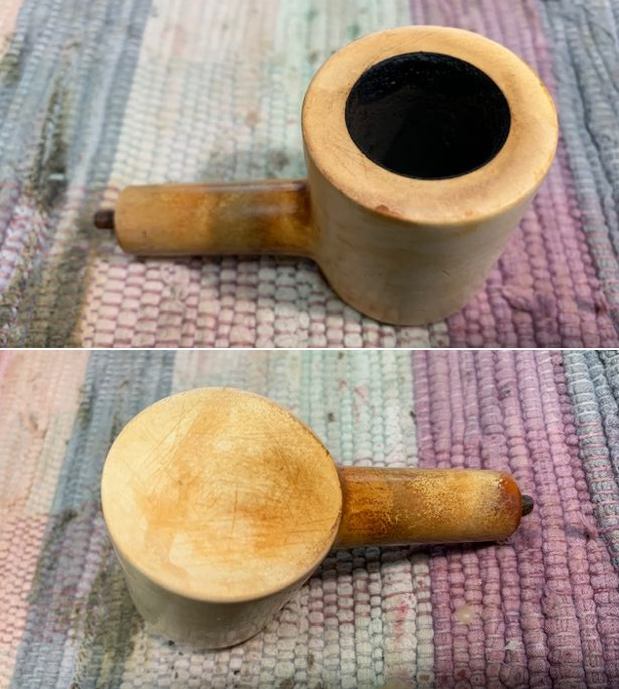
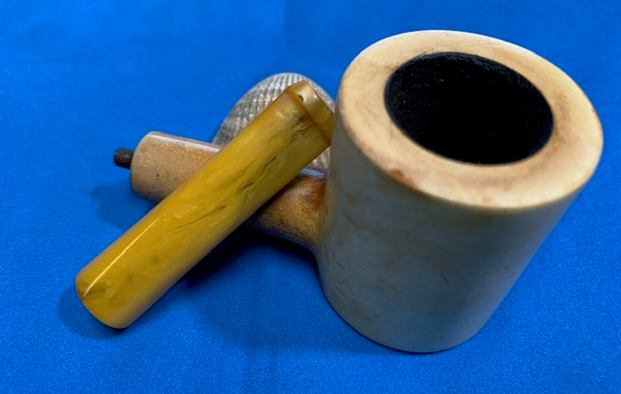
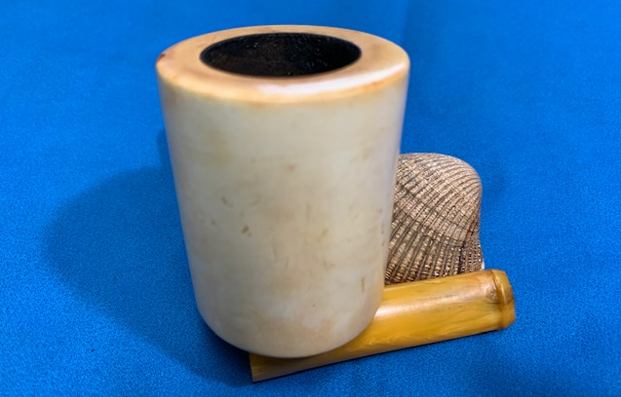
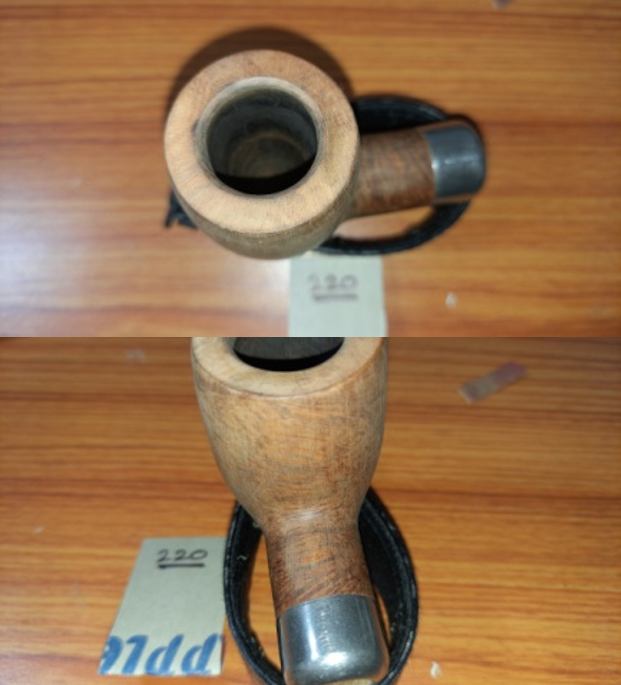
 I took photos of the bowl and stem. You can see the condition of the bowl. It is lightly cake and there is slight lava coat on the rim top. The edges look to be in good condition. The drilling is centered in the bottom of the bowl. It is a good sized bowl. The interior walls of the pipe are smooth and do not have drilling marks or checks or chips. The Bakelite/Amberoid stem is in good condition and has a push tenon and an orific button. There is a small chip in the Bakelite stem near the shank band and there are tooth marks on both sides near the button.
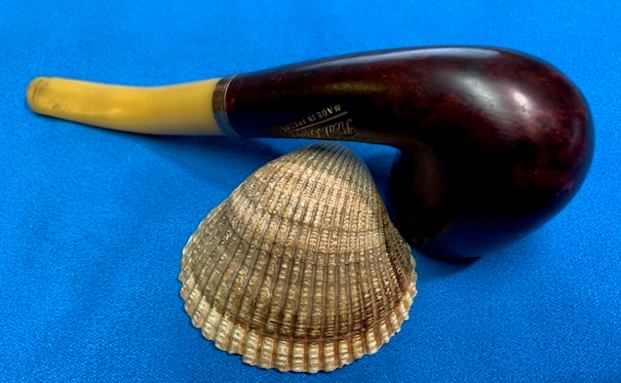
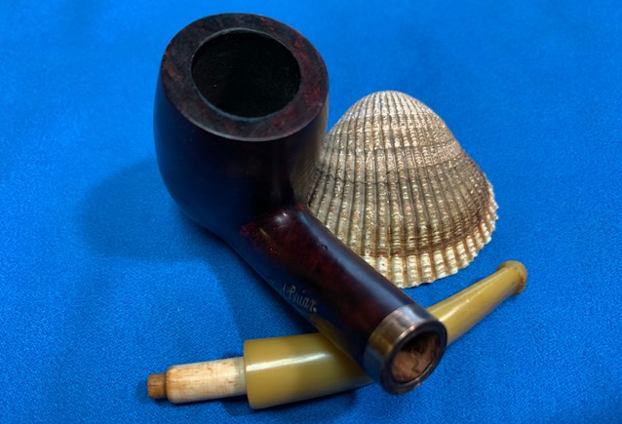
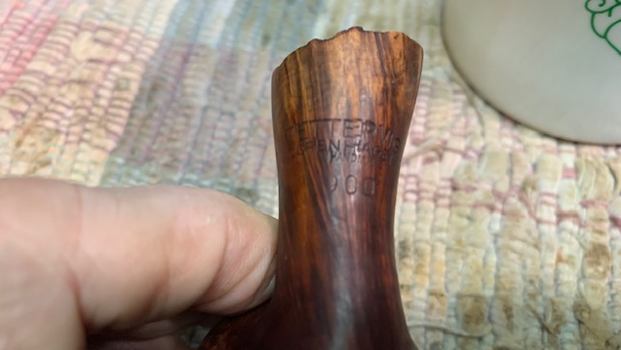
 I took a photo of the stamping on the left side of the shank. It reads as noted above.
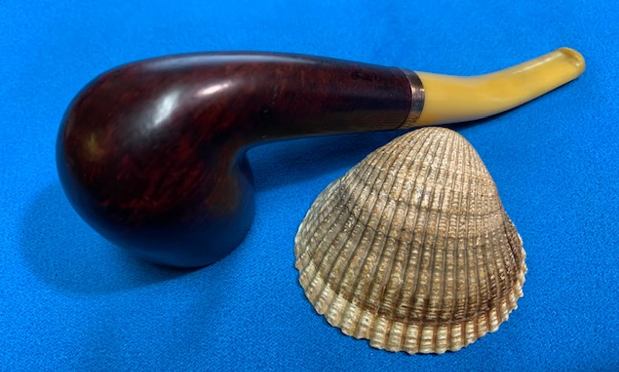
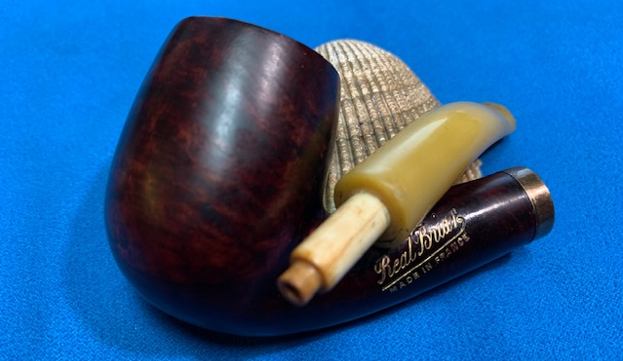
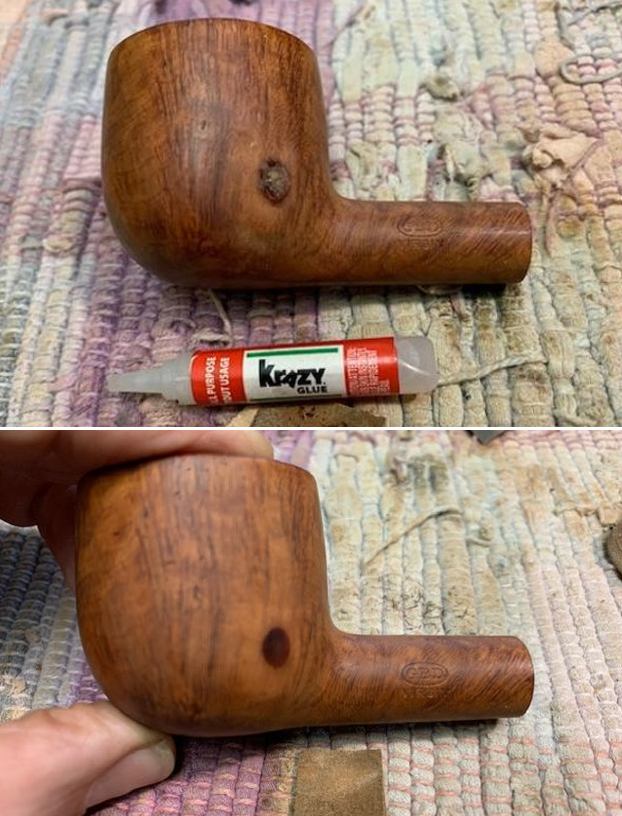
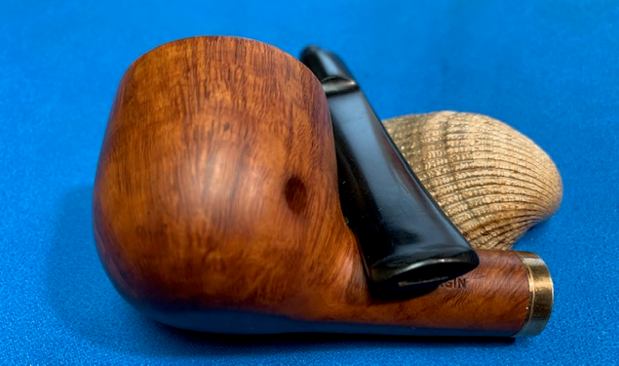
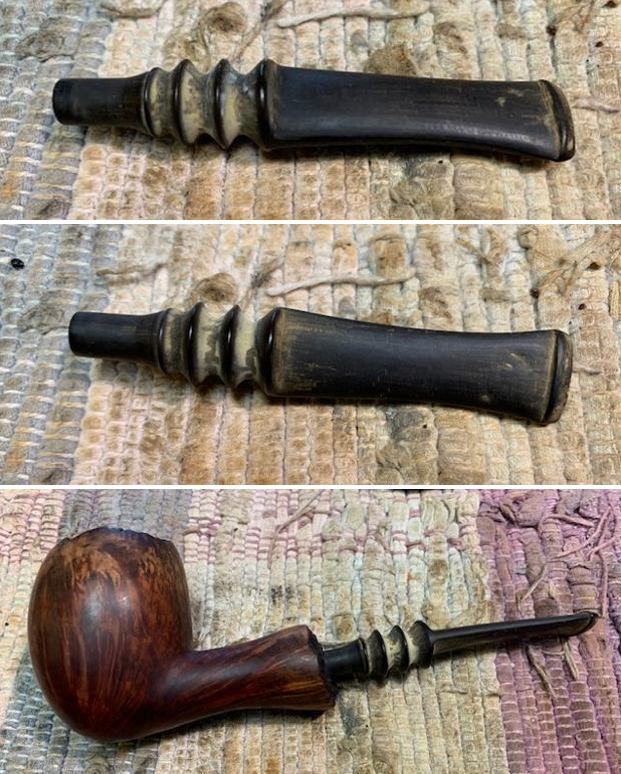
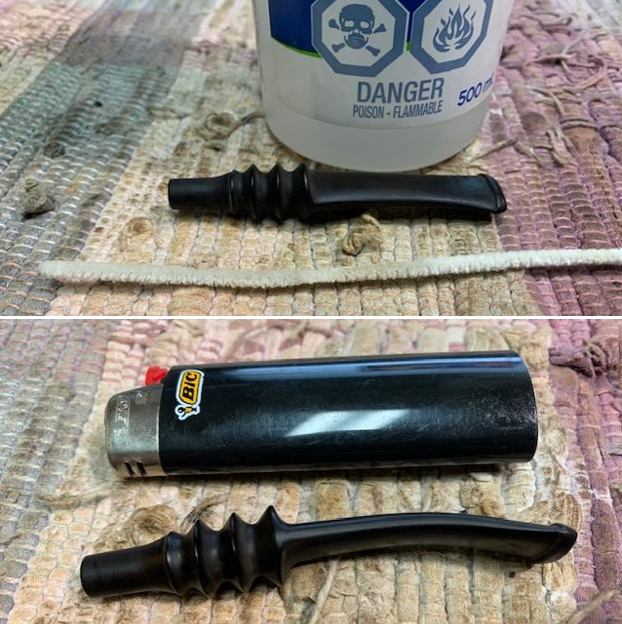
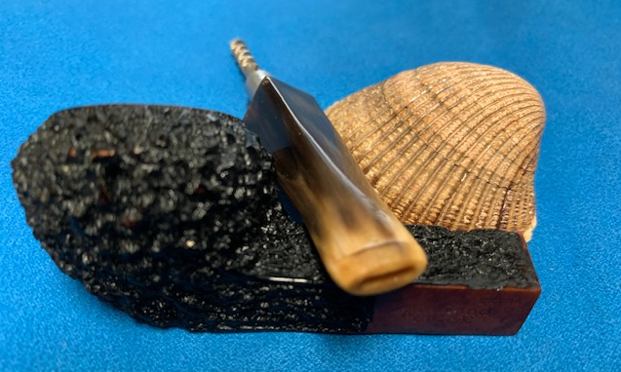
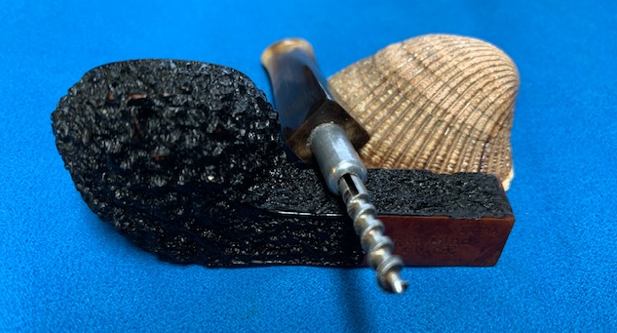
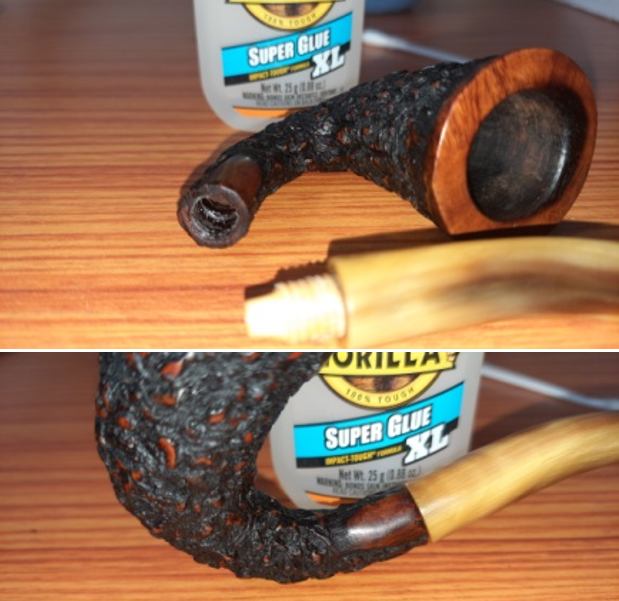
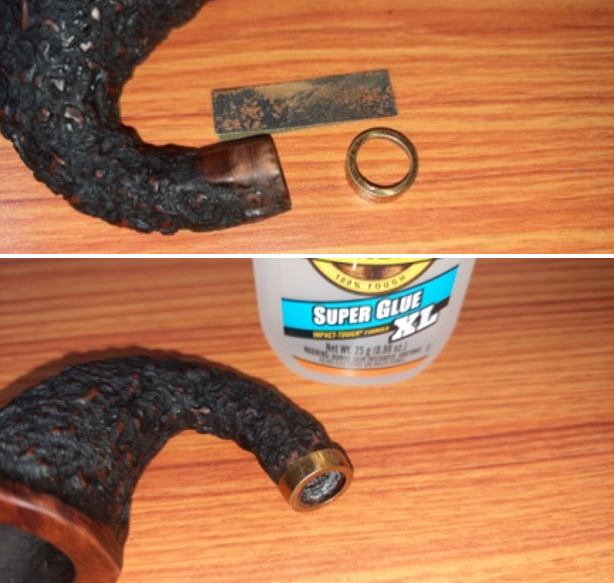
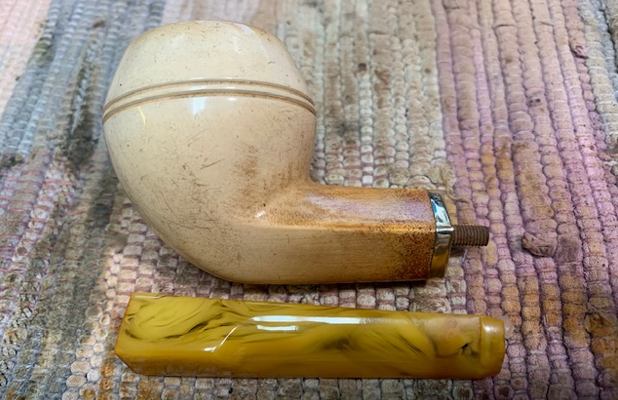
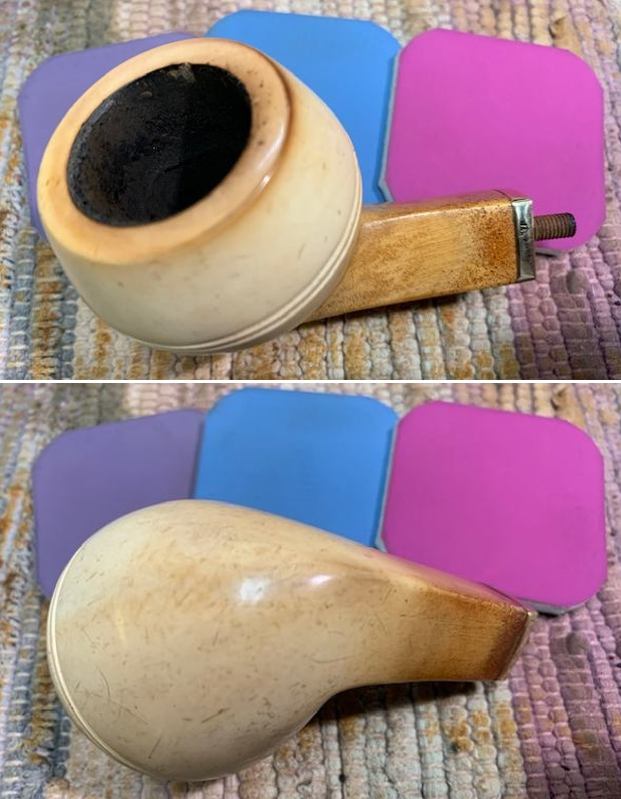
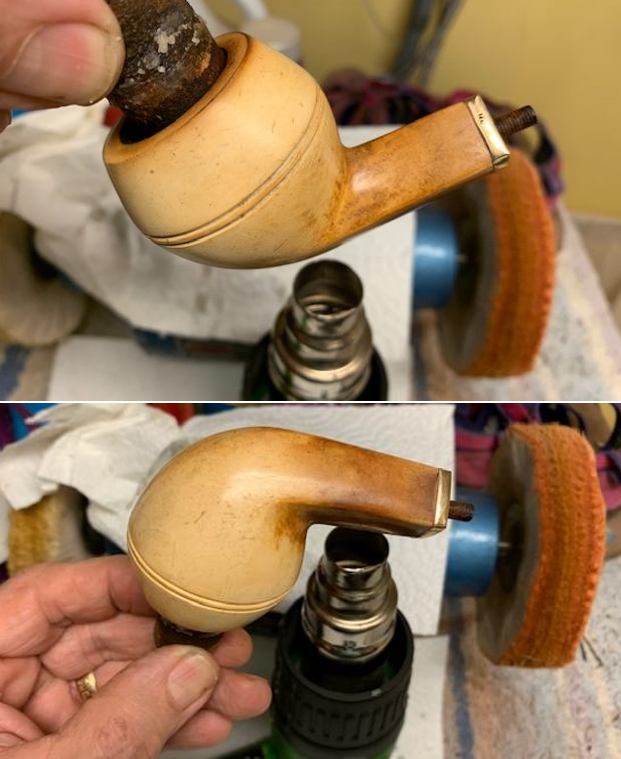
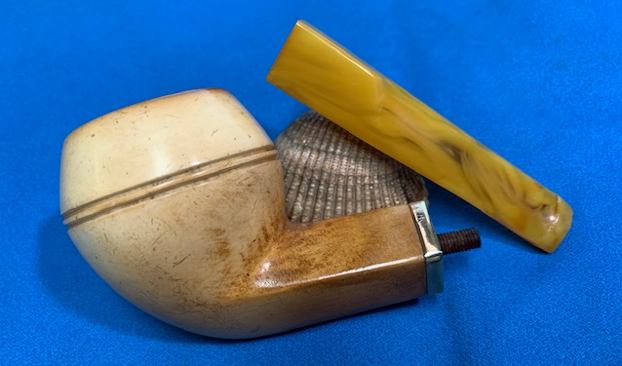
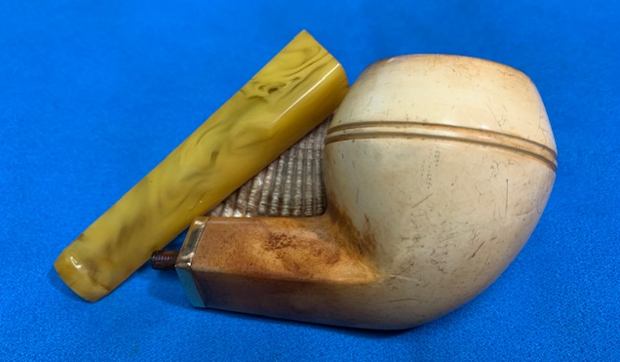
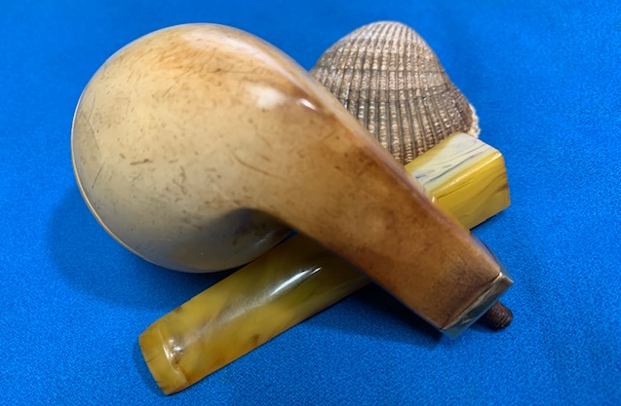
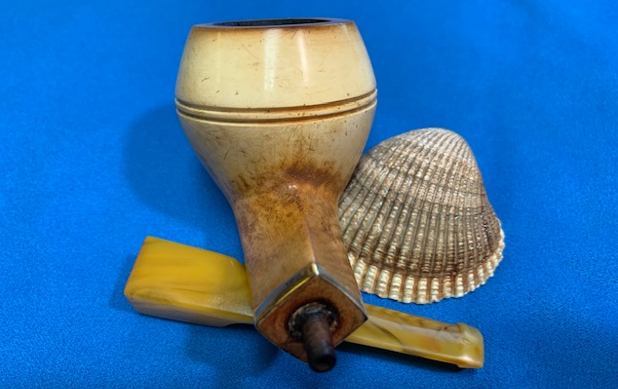
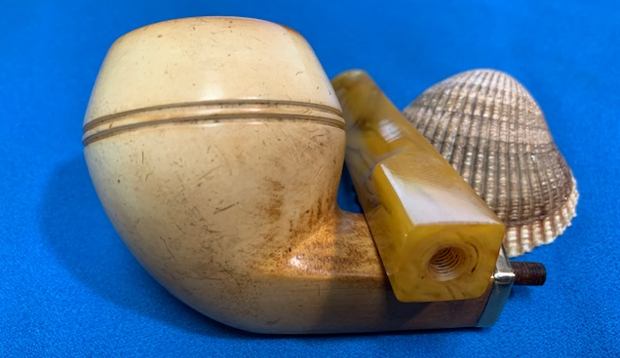
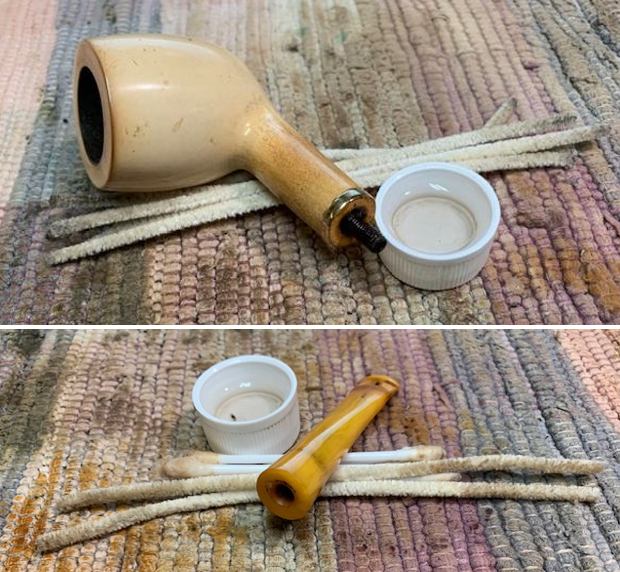
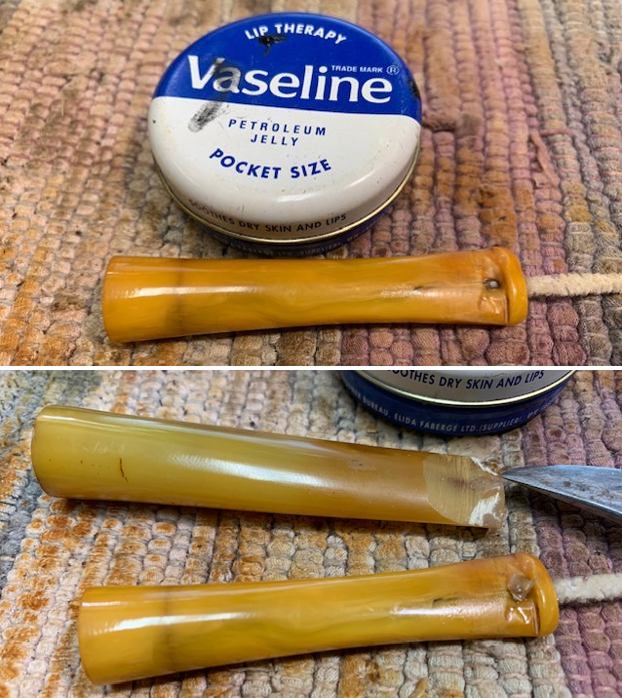
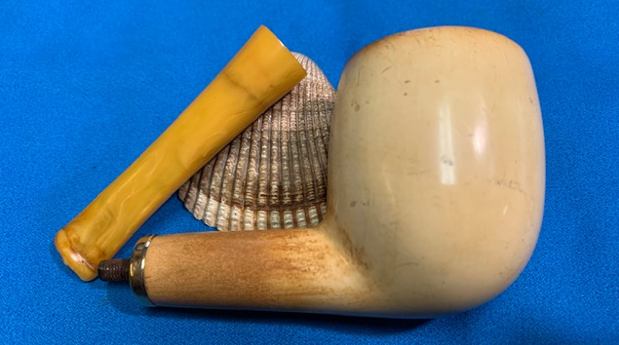
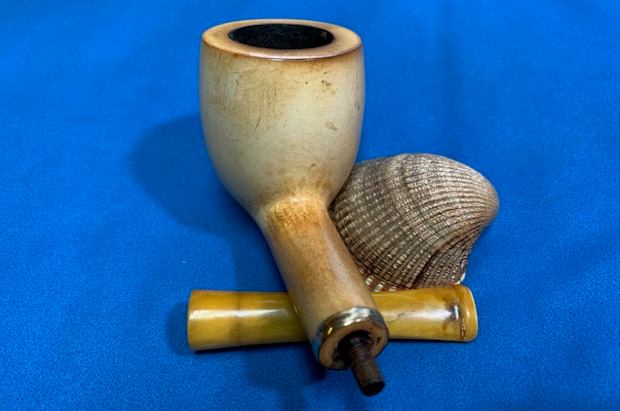
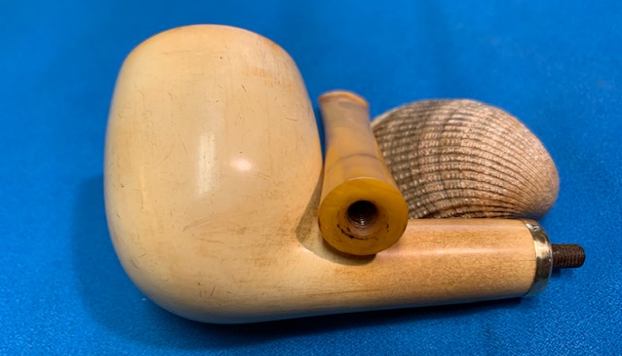
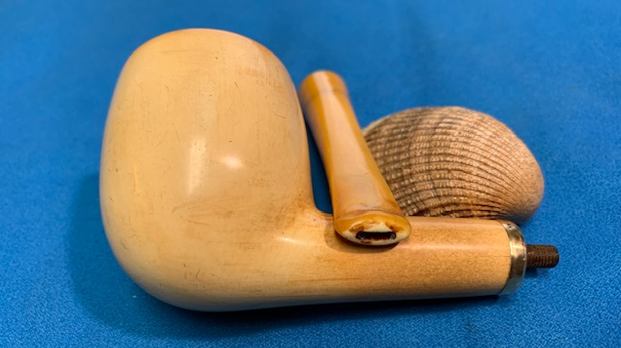
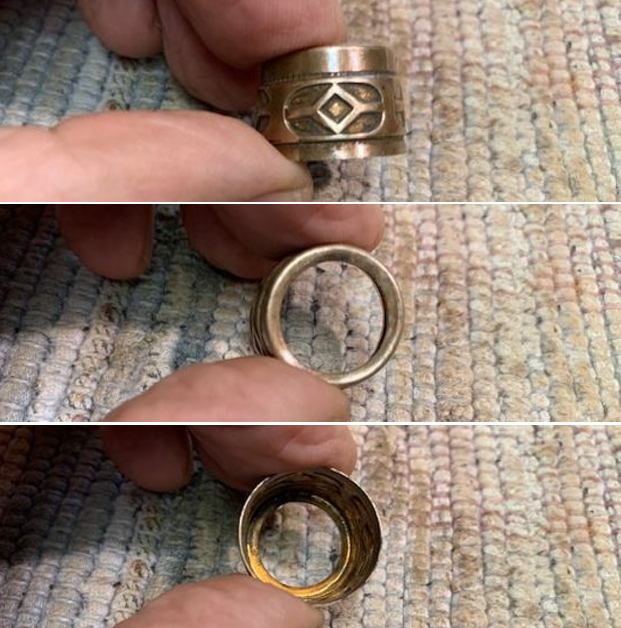
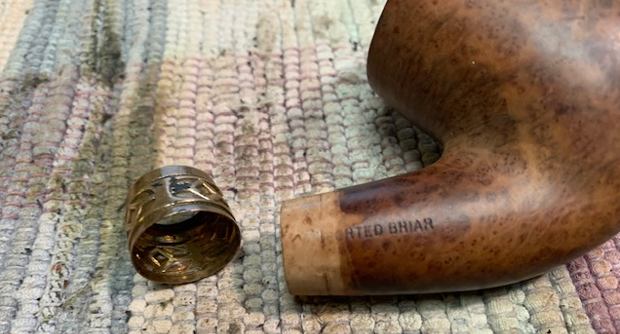
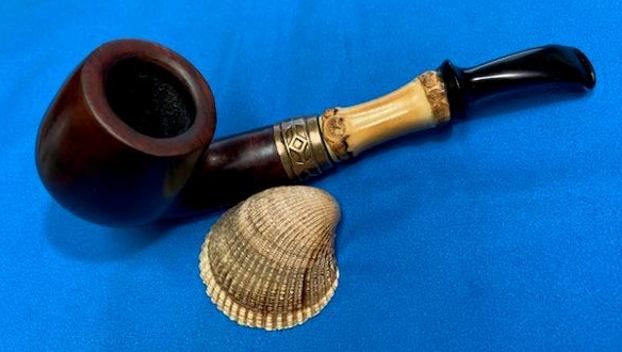
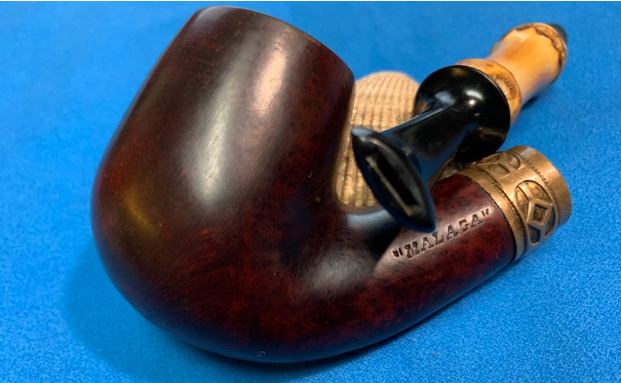
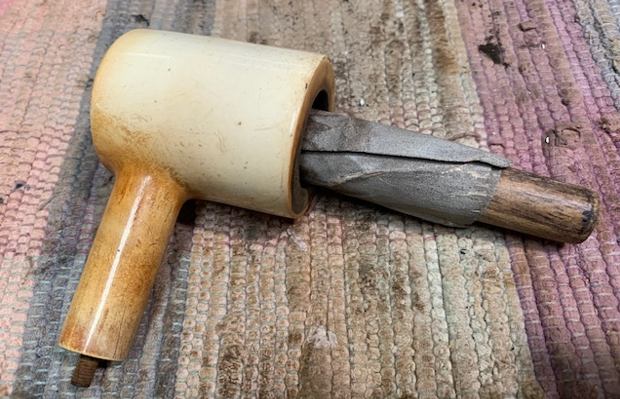
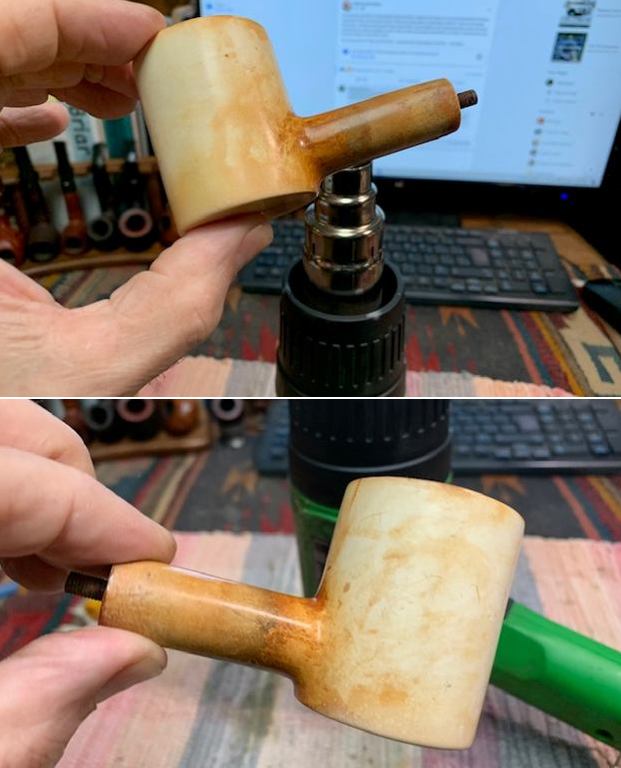
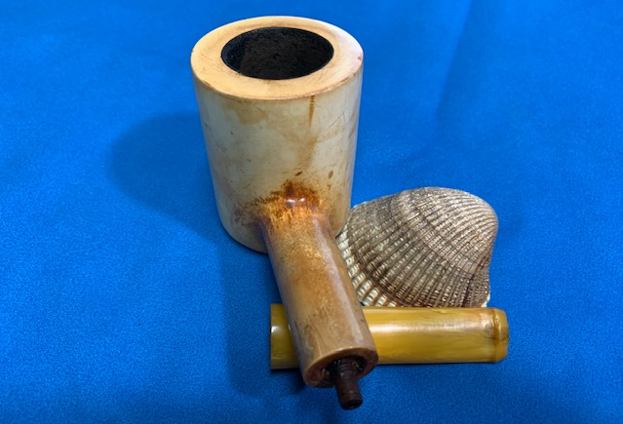
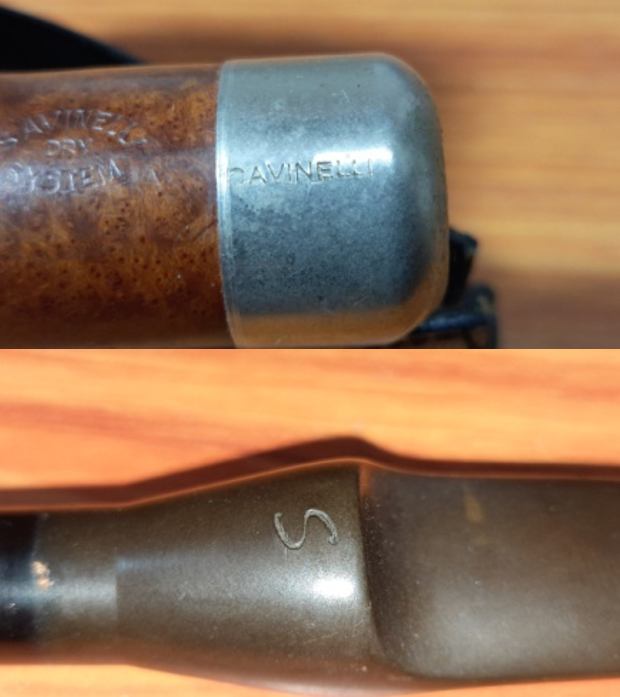
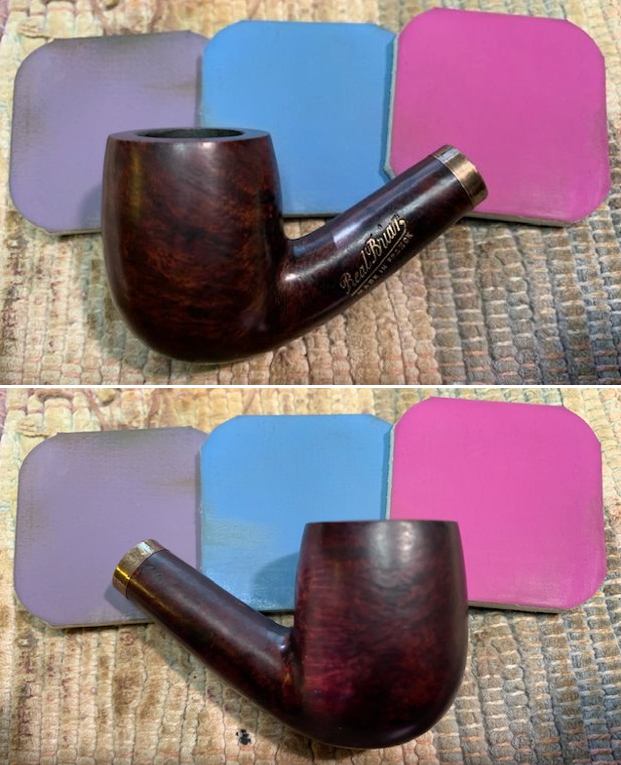
 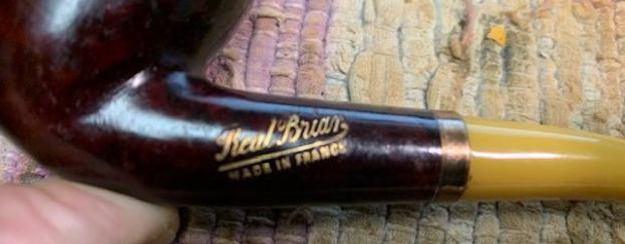 I removed the stem from the shank. You can see the brand new threaded bone tenon in the photo below. The proportions of this pipe are well done. The grain around the bowl is very nice.
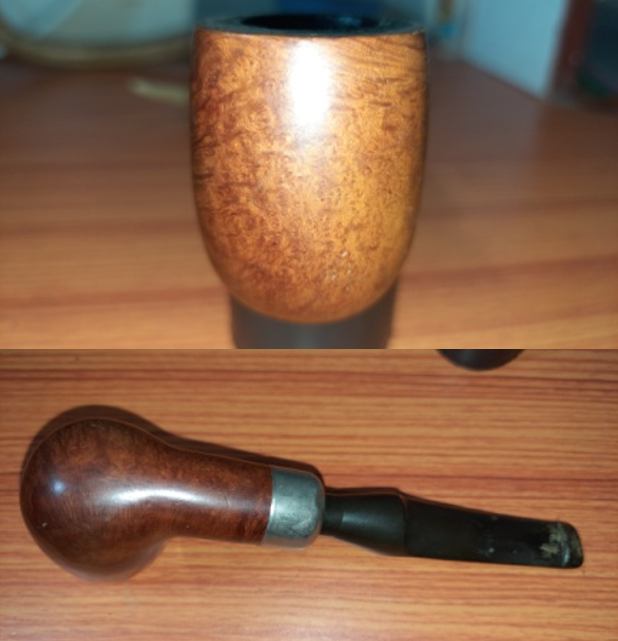
 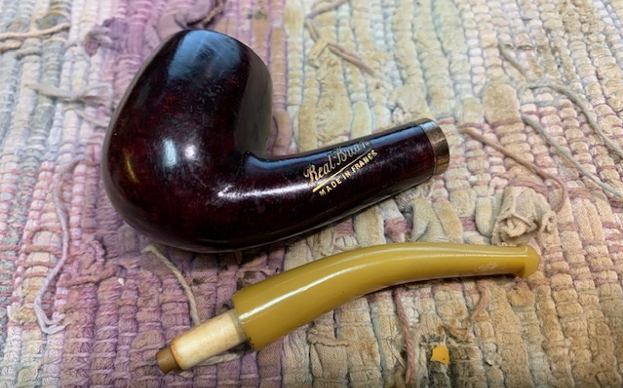 I knew from work on other older pipes that had the same stamp as this- Real Briar Made in France that there was not any clear cut information on that stamping on any of the usual sites. I also knew that the C.P.F. (Colossus Pipe Factory) that I had worked on bore this same stamp. My guess is that the pipe may have been made by them but I could not be sure.
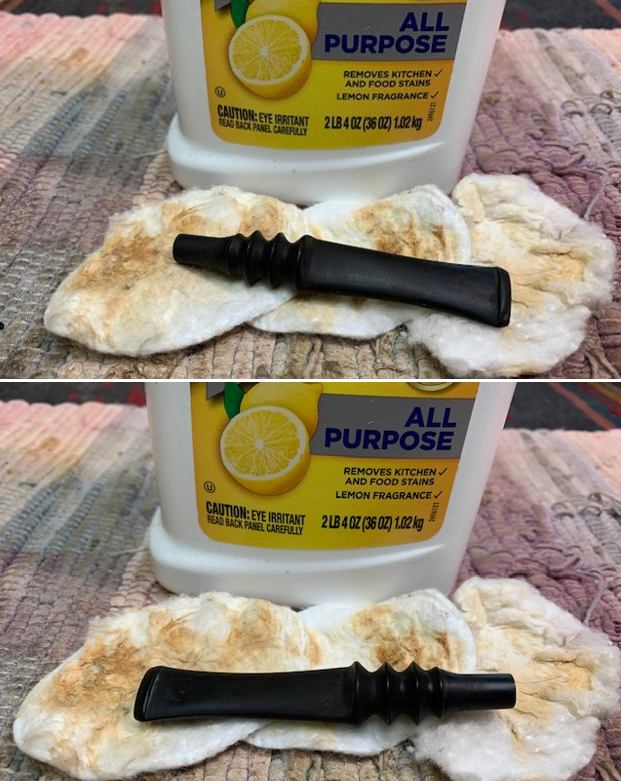
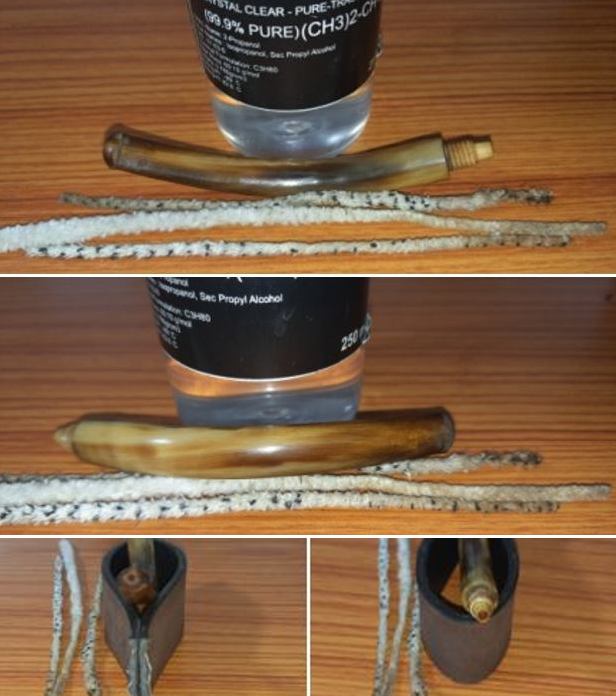
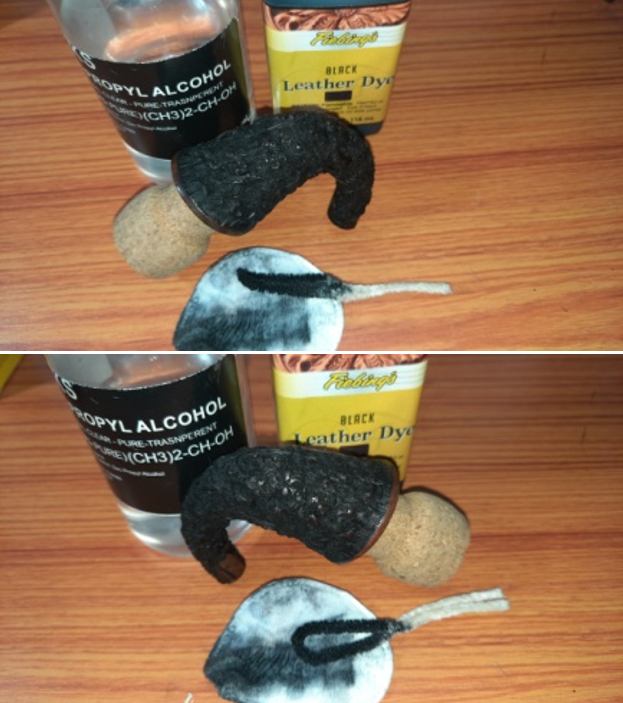
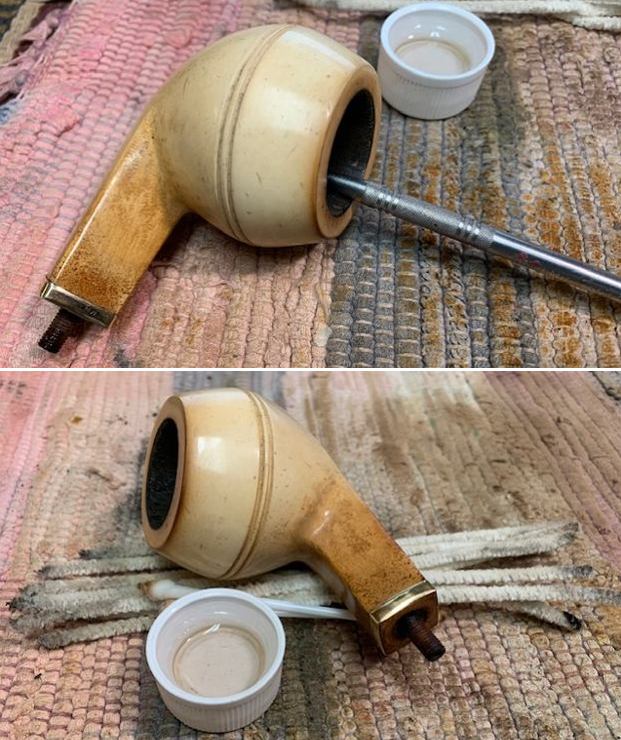
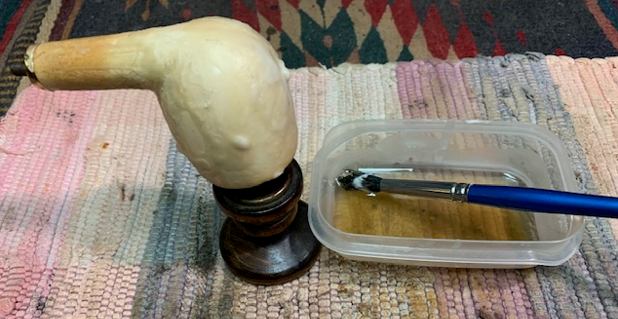
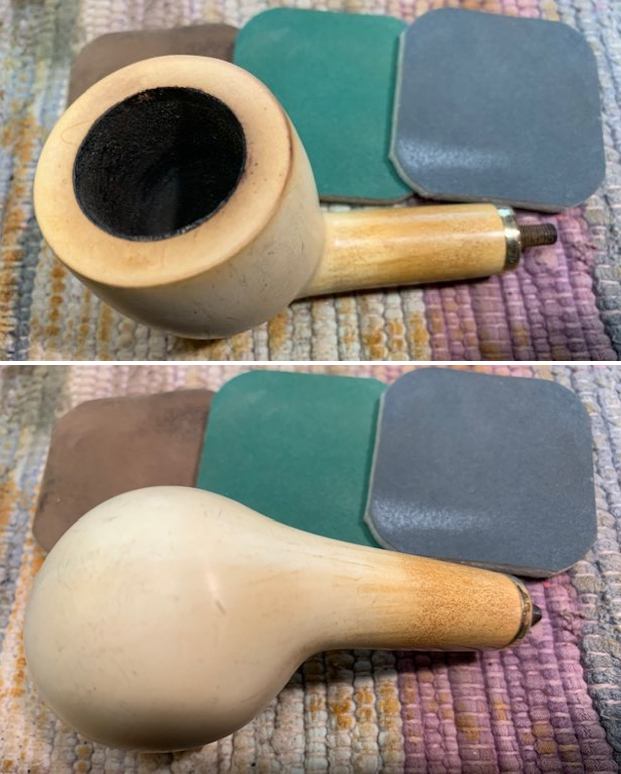
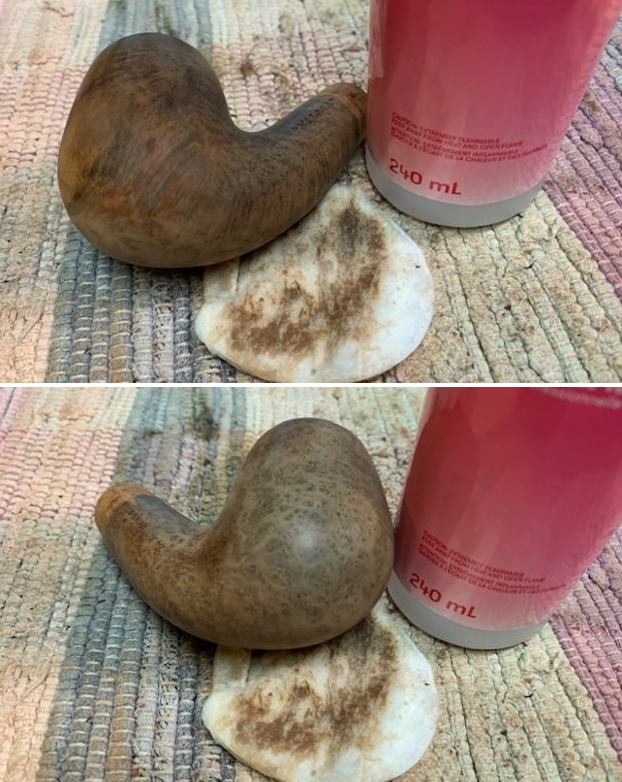
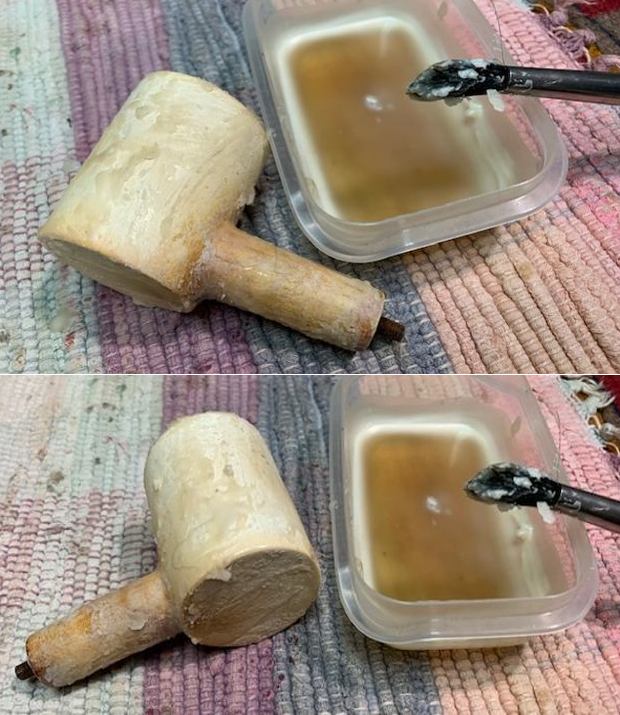
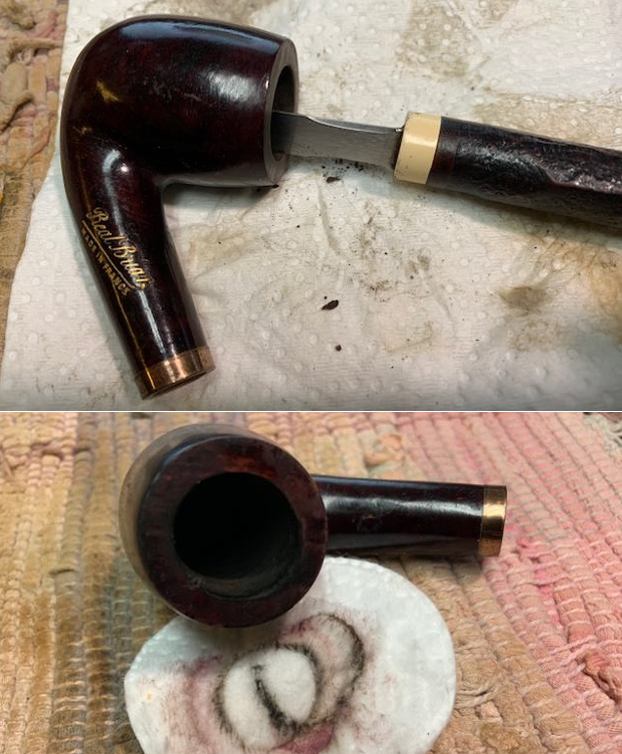 I wiped down the bowl with 99% Isopropyl alcohol on a cotton pad to remove the peeling varnish coat and grime on the finish of the bowl sides. Wiping it down revealed some great grain around the bowl and shank sides.
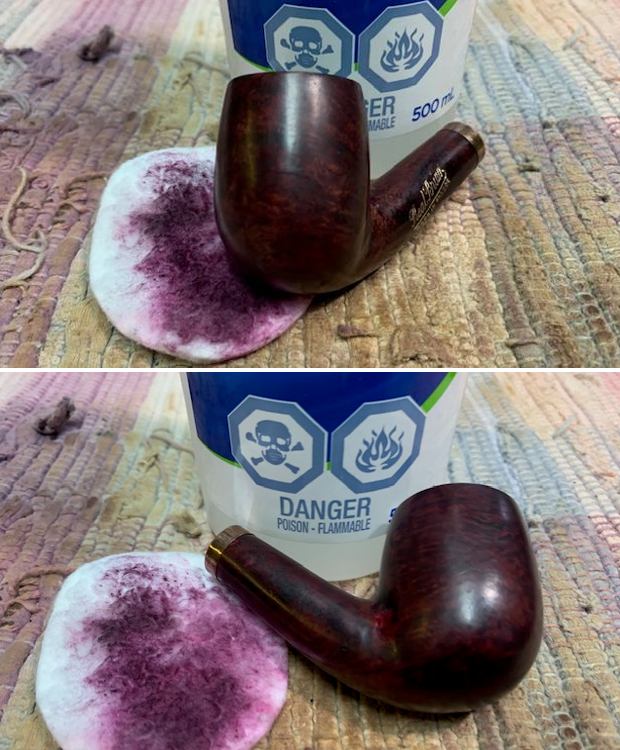
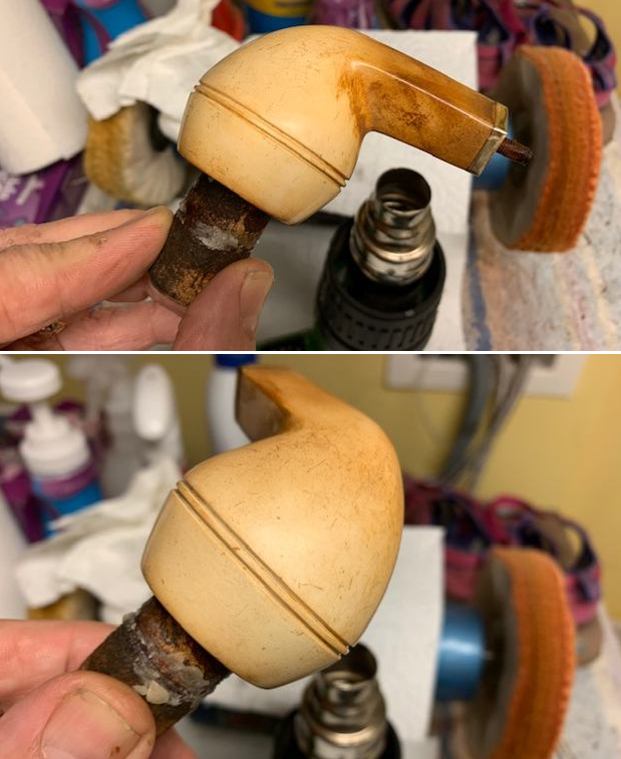
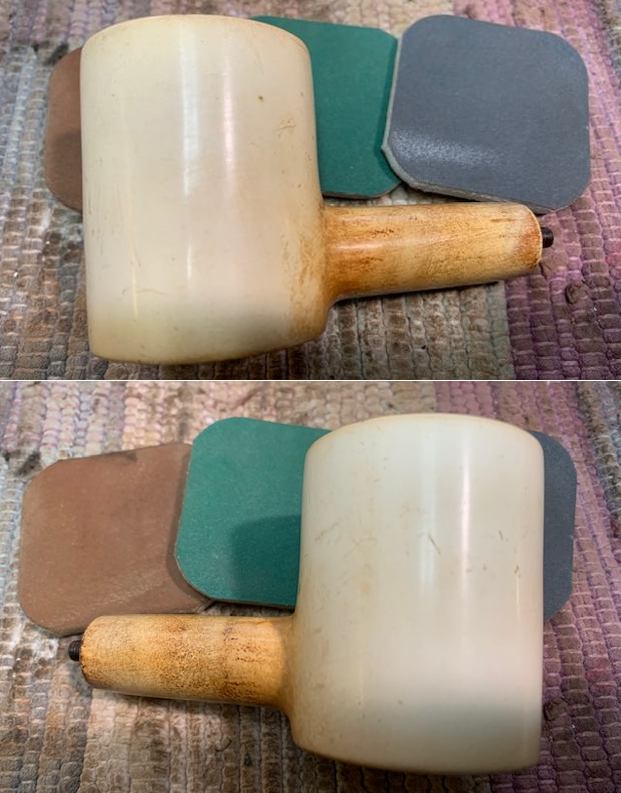
 I polished the briar and the nickel plated band with micromesh sanding pads. I dry sanded with 1500-12000 grit pads and wiped the bowl down with a damp cloth after each sanding pad. The briar began to really come alive.
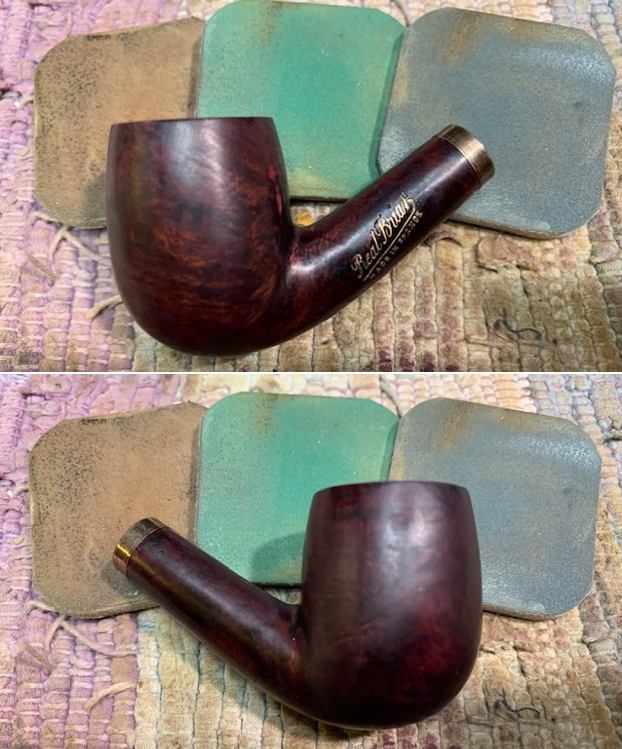

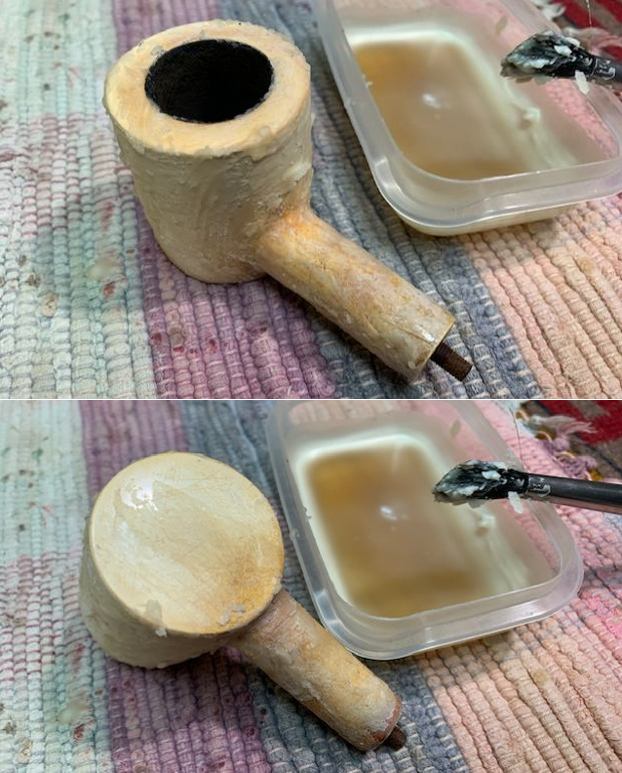
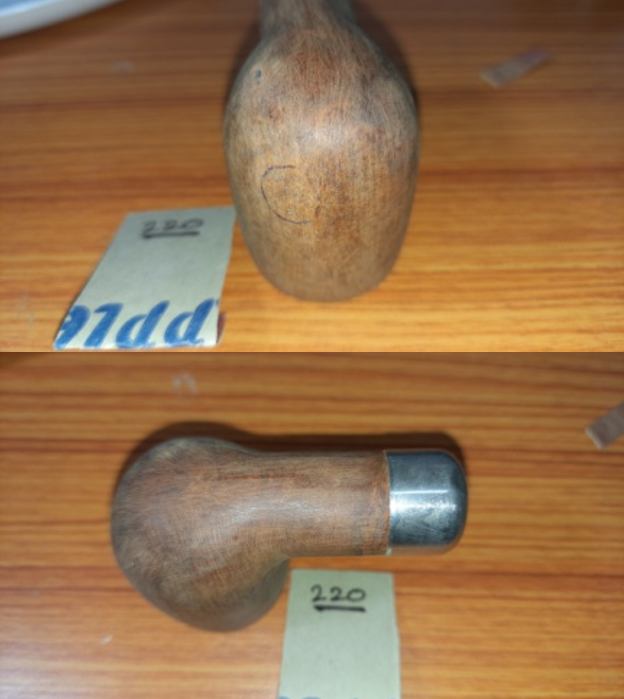
 I touched up the stain on the rim top using a Mahogany stain pen and used a Black Sharpie Pen on the fills that became evident on the back of the bowl. I was able to blend the stain and pen into the surrounding briar and it looked very good.
 I used alcohol and cotton swabs to clean out the shank of any debris that may have gotten in from the reaming of the bowl. It was still quite clean.
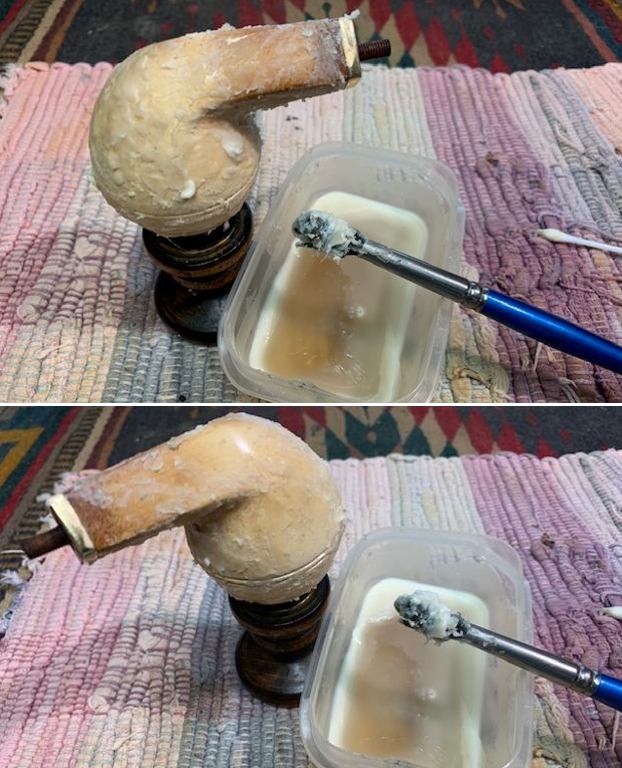
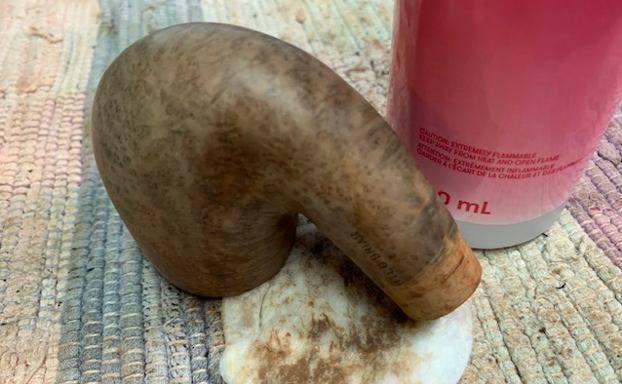
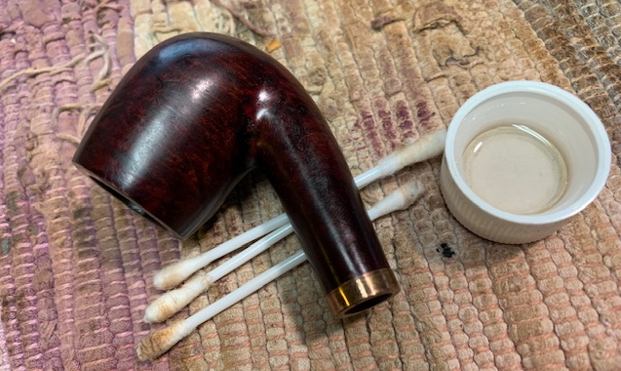 I rubbed the briar down with Before & After Restoration Balm. I worked it into the finish with my fingertips. The product works to clean, enliven and protect briar finished. I let it sit for 10 minutes then buffed it off with a cotton cloth. The grain on the bowl really came alive with the buffing. It is really a beautiful pipe.
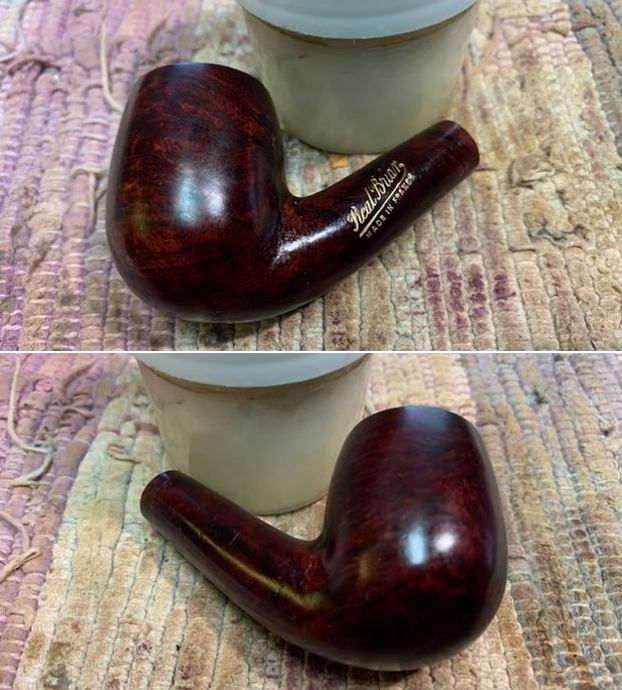
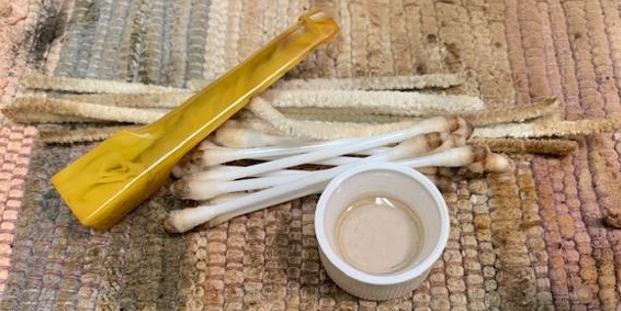
 While working on the bowl the band came off the shank. It was loose so while it was off I polished it with a jewelers cloth to remove the oxidation and protect the finish on it. I used a tooth pick to put all purpose glue on the inside of the band and pressed it back in place on the shank.
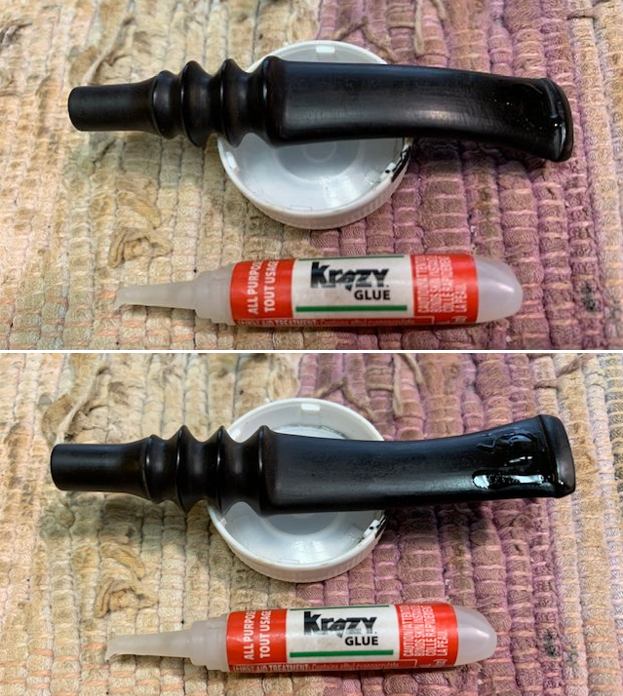
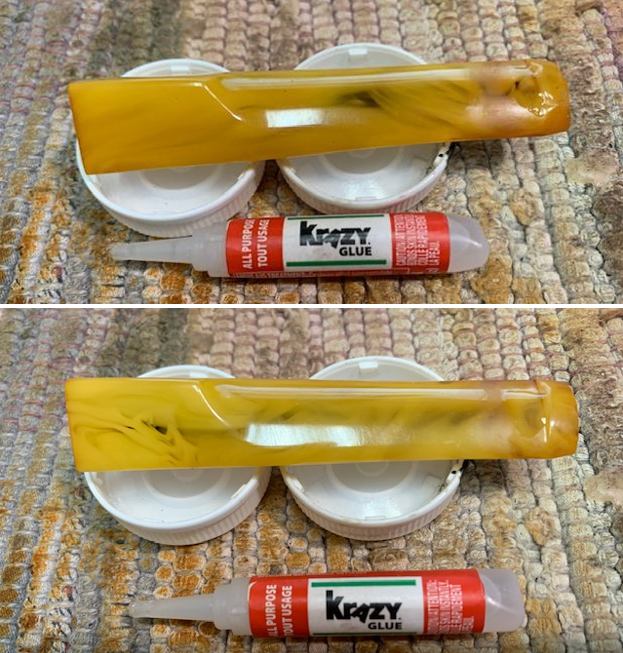
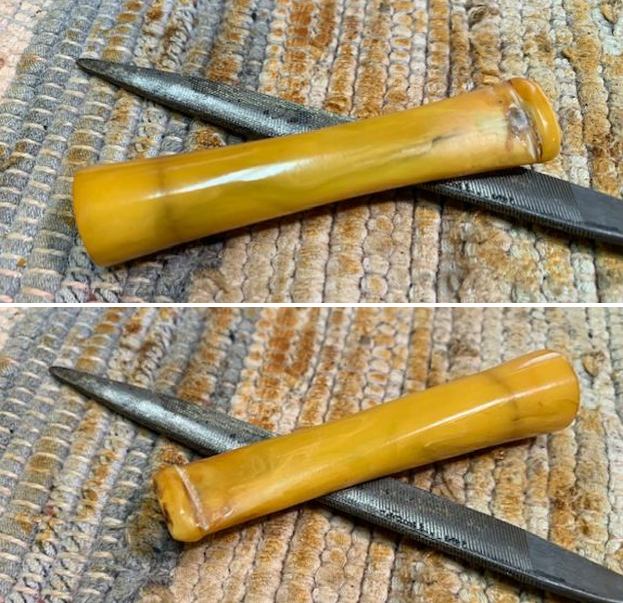
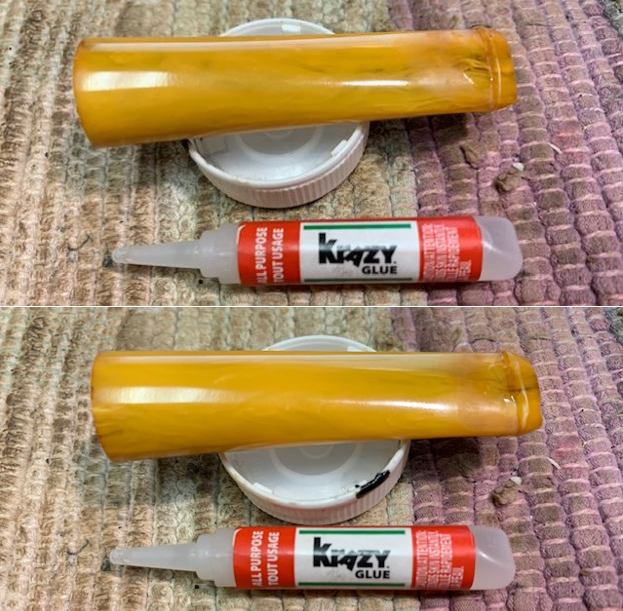
 I set the bowl aside and filled in the chip on the top shank end edge and the tooth mark on the top and underside of the stem near the button. I used clear CA glue. Once it cured I polished it with micromesh sanding pads.
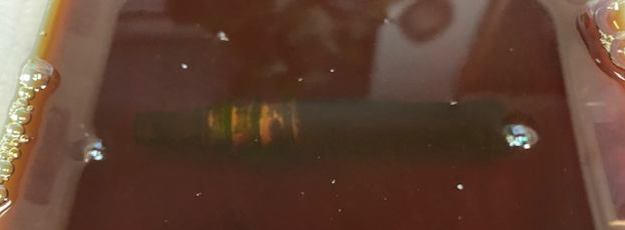
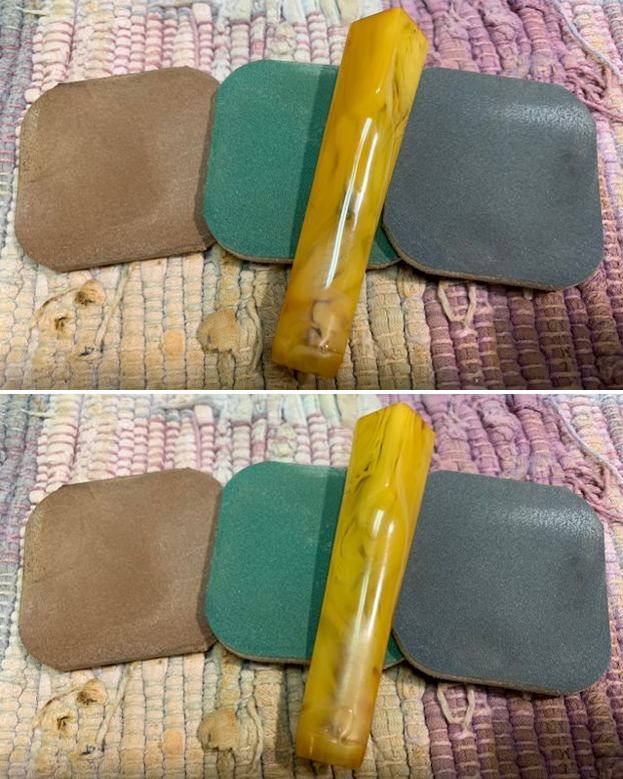
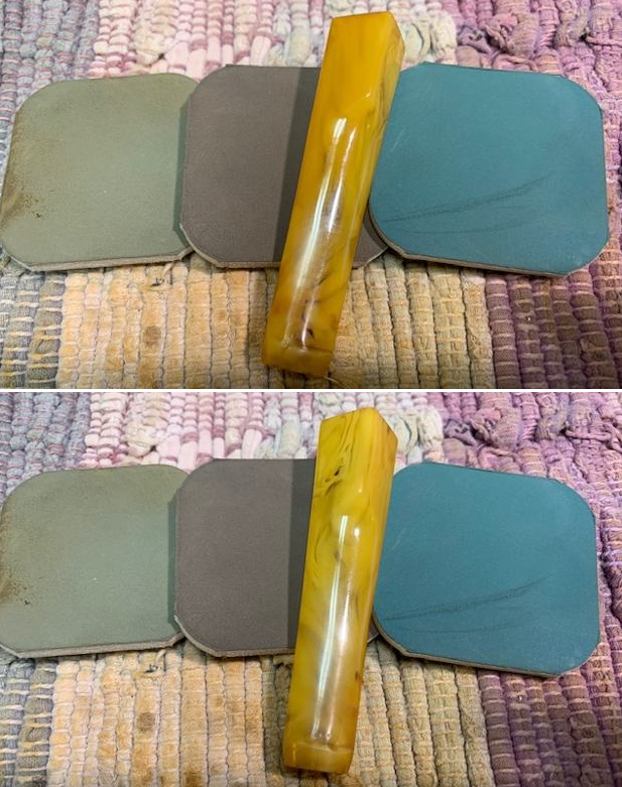
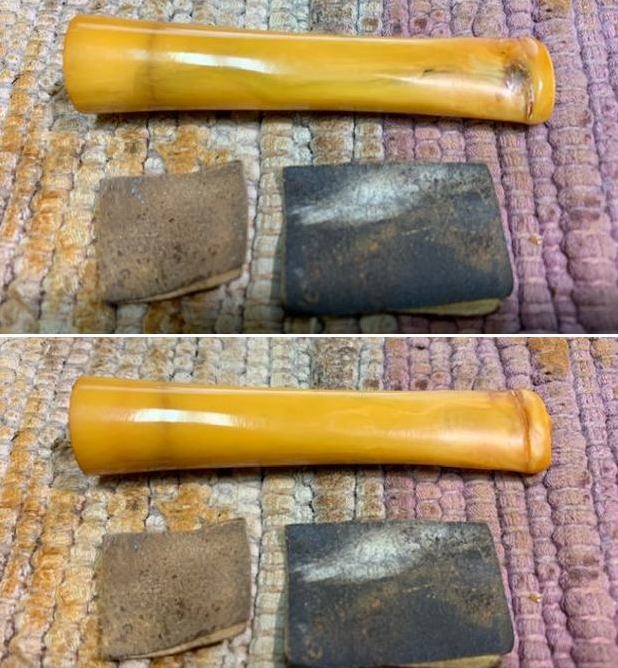
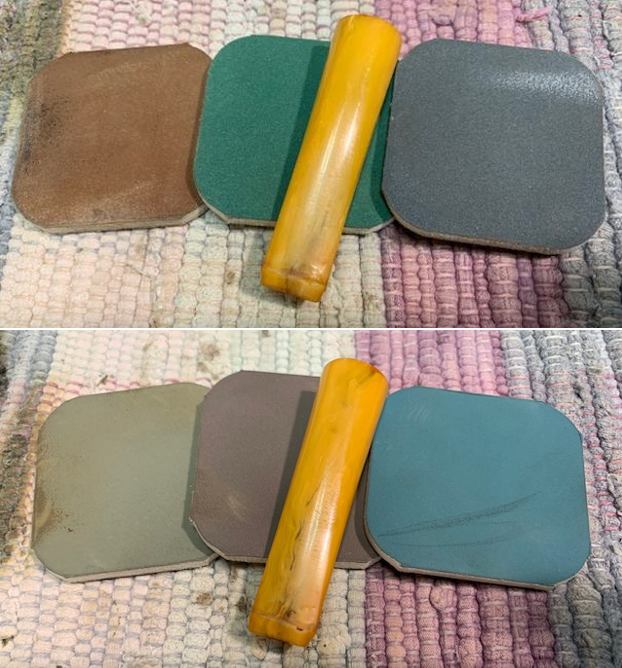
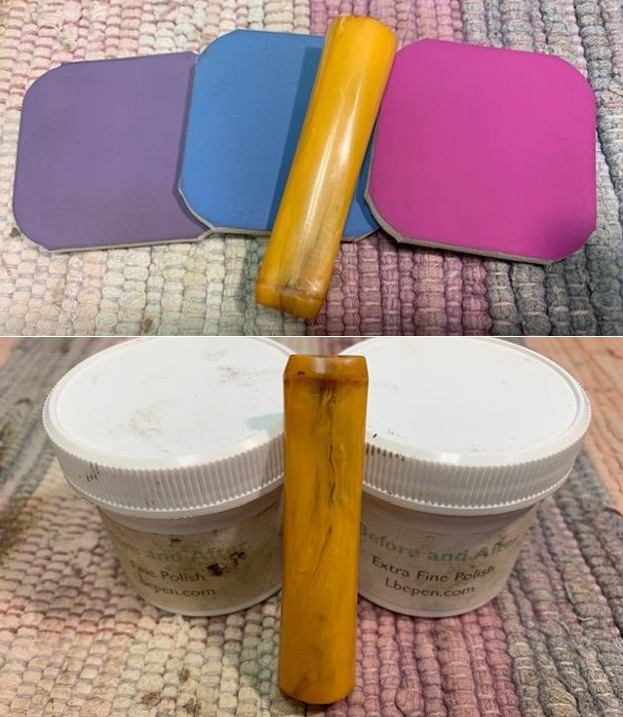
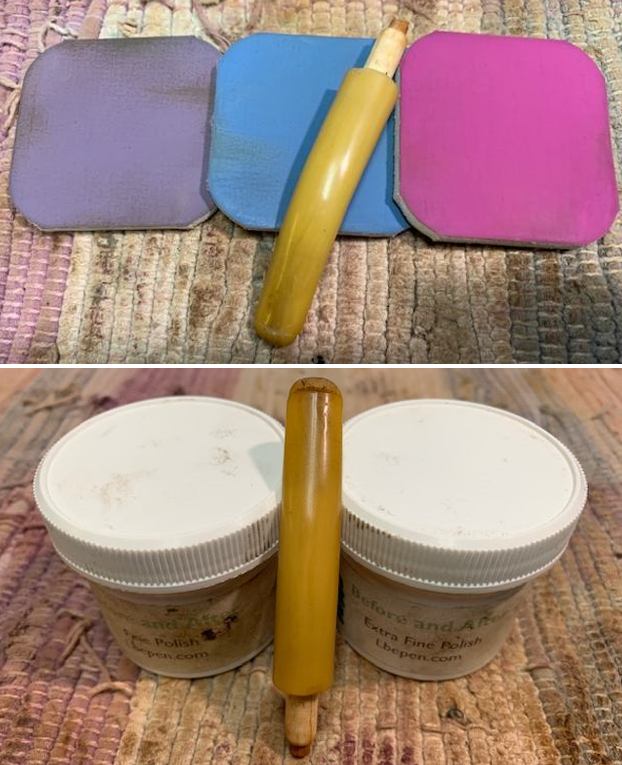
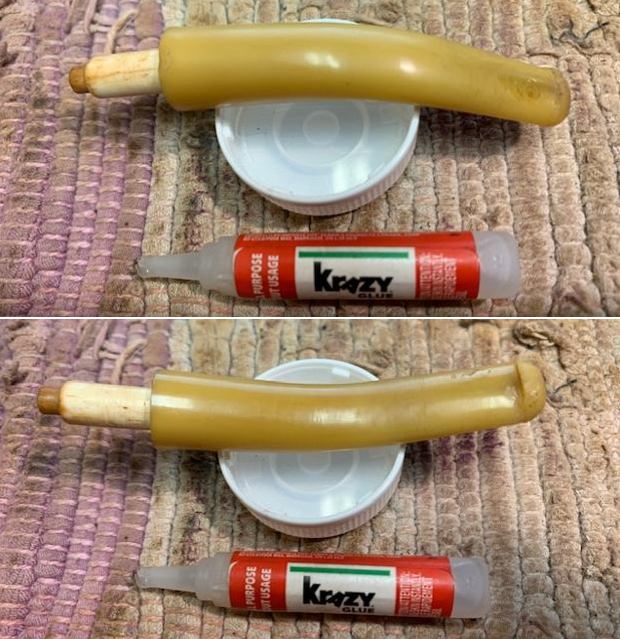 I polished the vulcanite stem with micromesh sanding pads – 1500-12000 grit pads. I wiped the stem down after each pad with Obsidian Oil to protect and enliven the stem. I finished the polishing with Before & After Pipe Stem polish – both Fine and Extra Fine. I gave it a final coat of Obsidian Oil and set it aside to dry.
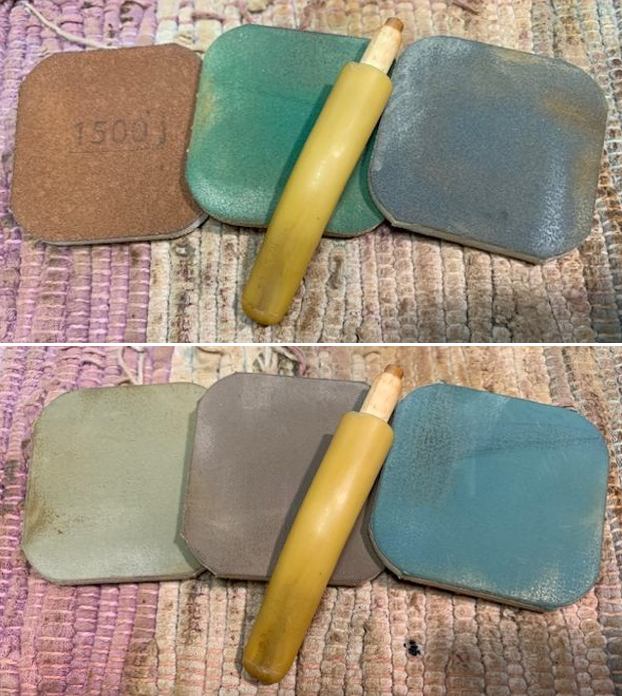
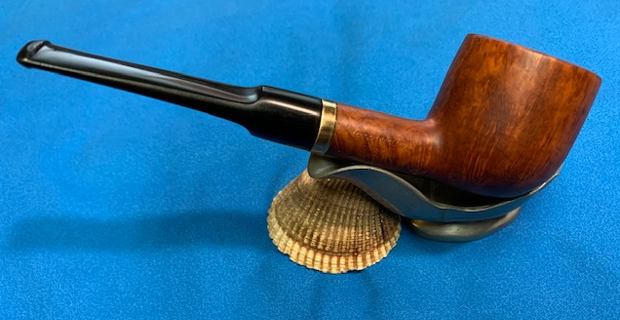
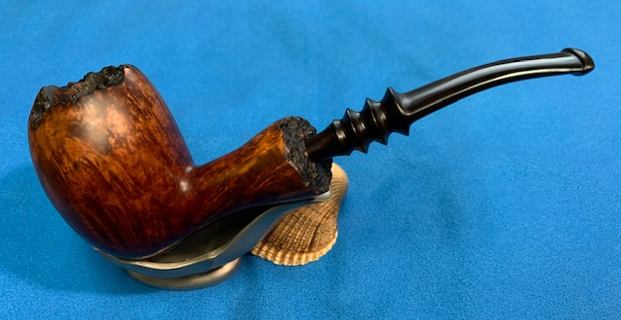
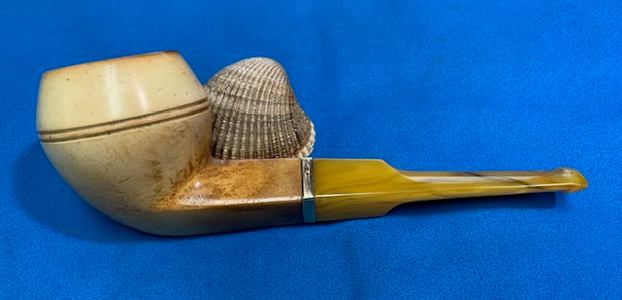
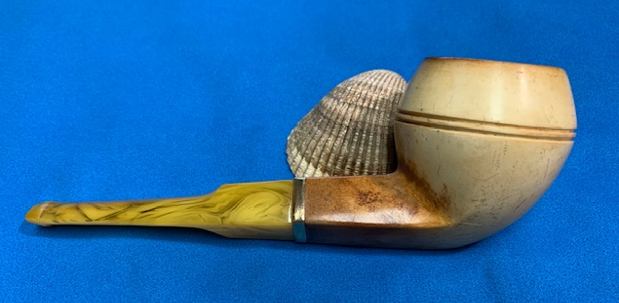
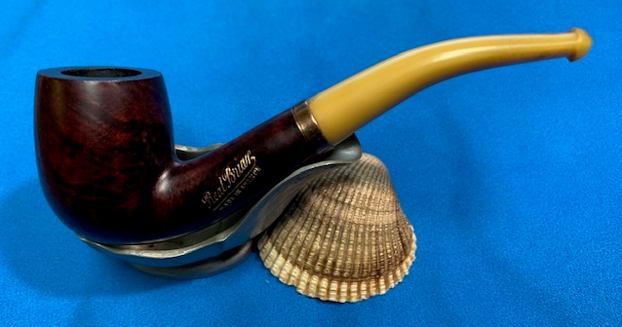
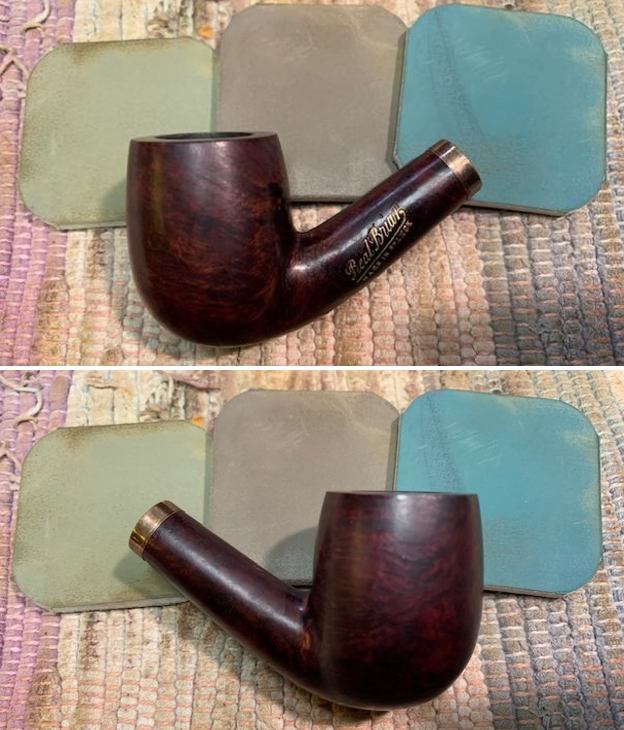
 This another interesting older pipe – Real Briar Made in France Bent Billiard turned out really well and it is a great looking pipe with a great shape to it. Once the varnish coat was removed the grain on the briar and the sheen on the stem really popped when the pipe was buffed with blue diamond on the buffing wheel. The brass/nickel band also took on a sheen. I gave the bowl and stem multiple coats of carnauba wax and buffed it with a clean buffing pad. I hand buffed the pipe with a microfiber cloth to deepen the shine. The finished French Made Real Briar Bent Billiard is comfortable to hold and is quite distinguished looking. Give the finished pipe a look in the photos below. The dimensions of the pipe are Length: 5 inches, Height: 1 ¾ inches, Outside diameter of the bowl: 1 inches, Chamber diameter: 5/8 of an inch. The weight of the pipe is 34 grams/1.20 ounces. It is a really beautiful pipe that I will be putting on the rebornpipes store in the French Pipe Makers section if you want to add it to your collection. Thanks for reading this blog and my reflections on the pipe while I worked on it. Keep an eye out on the blog as I have several other older pipes that I will be working on.