Tag Archives: BBB pipes

A Unique BBB Tigergrain Bulldog


Blog by Steve Laug

This unique pipe has become a favourite of mine. I have not seen one like it since I picked this one up. It is stamped on the left side with the BBB logo (three B’s in a Diamond) and under that TIGERGRAIN. There is a small nick in the shank just below the stamping. On the right side it is stamped London England over the shape number 420. The stem is a translucent blue green almost like some of the glass pieces that my grandmother had in her sideboard. It has the brass BBB logo in a diamond inserted. When it came to me it was dirty. The bowl had a thick cake and needed to be reamed. The stem was darkened with brown stains in the airway. The rim was tarred and had some dents that were quite deep. The finish was in pretty good shape other than the deep set grit and grime. The bands around the bowl were filled in with grit as well. Underneath it all I knew there was a uniquely beautiful pipe.

I reamed the bowl back to the briar. I like to start with a clean pipe, as I find I can exorcise previous ghosts more easily that way. I wiped down the surface with Murphy’s Oil Soap, undiluted, and scrubbed the rim with a soft bristle tooth brush. Once I had the grime and grit removed I buffed it with White Diamond on the buffing wheel and then steamed out the dents on the bowl and rim. I do this with a damp cloth and a hot table knife. I heat the knife over the gas flame on my cook stove and then put the damp cloth on the dent and apply the hot knife. The hiss and the steam released seem to raise the dents in the briar. I then buffed the pipe yet again and polished it with carnauba. The grain has a striped look to it which is the reason for the tigergrain stamping I suppose. I love the look of the grain and the patina on the old pipe.

I then turned my attention to the stem. I used some goop hand cleaner on a pipe cleaner and scoured the airway on the stem. It took quite a few pipe cleaners and patience to get the brown stains and oils out of the translucent stem. Once that was done I also needed to deal with the tooth chatter on the stem. I used heat on the stem first – a quick pass over the heat gun did the trick. Care had to be exercised so as not to heat the stem too much and straighten the bend or melt it. I used micromesh pads 1500-6000 grits to polish the stem after that. Once I was satisfied that the marks were smooth I reinserted the stem on the bowl and gave the entirety a final buff with White Diamond and then several applications of carnauba wax. I finished by buffing the pipe with a clean flannel buff.

ImageImageImageImage

It is a comfortable pipe in hand and mouth. It measures just under 6 inches long. The bowl is ¾ inch in diameter. It smokes very well and has proved to be a great Virginia Flake pipe. I find the colour of the stem is a cool and relaxing bonus to the smoke.

Image

New Life for a BBB Ultima Thule Pocket Billiard


Blog by Steve Laug

I picked up this little BBB in the same lot as the little BBB bulldog that I posted about recently. It is a similar pocket size (4 and ½ inches) and needed a bit of work. It is stamped BBB in the standard diamond and over that Ultima Thule. (According to Wikipedia the name refers to any distant place beyond the known world.) Under the diamond it is stamped Own Make. The first two pictures are the EBay seller’s photos. When the pipe arrived I can honestly say that the seller did a great job on taking honest photos. The pipe was solid but in rough shape. The rim was slanted toward the front and round all the way around with many nicks and dents in it from tamping the pipe out. It was still round on the inner edge which is pretty amazing on these old timers. This was a pretty well cared for pipe other than the tamping. The finish was dirty and spotty – lighter in some places than others – with a mottled look to it. The stem was oxidized and the edge/ shoulder at the shank junction was rounded and no longer a good smooth fit. There were no bite marks on the stem and the surface was smooth under the oxidation. This would not be a bad clean up.
ult1

I separated the stem and bowl and reamed the bowl. I wiped the exterior with acetone to remove the remaining finish and the grime. Then I placed the bowl in the alcohol bath to soak while I worked on the stem.

The stem actually was relatively easy to clean up. I wiped it down with a damp magic eraser and removed the majority of oxidation. Then I sanded it with 400 and 600 grit wet dry sandpaper followed by 1200-6000 grit micromesh sanding pads. I gave it a coating of Obsidian Oil and set it aside to dry. Once the bowl was finished I would buff them together. I did not want to chance rounding the edges even more. I also did not want to lose any more of the button on the pipe stem by over buffing.

I removed the bowl from the alcohol bath after 1 hour of soaking. I dried it off and cleaned out the shank with pipe cleaners, shank brush and cotton swabs soaked in isopropyl alcohol. I worked those until they came out clean. I used sandpaper on the interior of the bowl to smooth out the remaining cake and clean the surface. I wiped it down with cotton swabs and isopropyl afterwards. I used the sanding board and paper to top the bowl and bring it back to a flat and even condition. I did not have to remove very much of the top but I wanted it to be straight and not slanted toward the front. I used my normal variety of sandpapers (280, 400 and 600) to do this and finished it with micromesh sanding pads 1200-6000 to remove the remaining scratches. I wiped down the bowl with a cotton pad dampened with acetone to remove any sanding dust and remnants of the topping process. I restained this bowl with an oxblood stain thinned with isopropyl to arrive at the original colour. I flamed the stain and when dry took it to the buffer and gave it a buff with White Diamond.

I reinserted the stem and the gap and roundness of the shoulders on the stem made a smooth fit impossible to attain. I decided to use an old BBB band that I had in my box and heated it and pressure fit it to the shank. I liked the finished look of the pipe. I gave the entirety several coats of carnauba wax and a polishing buff with a clean flannel buffing pad. The pictures below show the finished product.
ult2

ult3

New Life for a BBB Short Dog


I picked up this little BBB Bulldog on EBay and knew it would take some work. In the photo below you can see the cut in the stem – a groove or channel that served as a dental grip for the pipe. It is just in front of the button. There was some minor oxidation on the stem as well. The button had an orific opening (round hole in the button) rather than a slot. The rim and sides of the bowl were dirty and there was some darkening around the edges. The bowl was caked with a thick cake that would need to be reamed. The photo below is the one that was on EBay.
BBB1

When the pipe arrived it was smaller than I had imagined. No problem there as I like these pocket sized pipes. The stamping on the shank only had the BBB logo in the diamond. No name or other identifying marks were on either side of the shank. The stem did not have the BBB stamp or roundel. The finish was not too bad. The majority of work would need to be done on the rim and the top edges of the bulldog bowl. The stem was going to take some work to get rid of the trough that had been cut in it by a previous owner as a kind of dental bit. The bowl was not as caked as it had appeared in the original picture but had been over reamed and was out of round. The walls at the top appeared to be thinner than normal on a pipe of this shape.
bbb2

bbb3

You can see the size of the pipe from the photos above with the ruler. It is four inches long and delicate in the hands. I went to work on the stem first with my needle files and sandpaper to remove the trough on the top of the stem and the underside of the stem. This took some work as it could have radically changed the slope of the stem. I worked to keep the angle looking right from the saddle to the button. It took quite a bit of time to remove the excess vulcanite and reshape the blade of the stem. I sanded the stem smooth and then progressed through the micromesh grits 1500 through 12000. I put it back on the pipe and took it to the buffer and buffed it with White Diamond until it shone. Then I removed the stem and set it aside while I worked on the bowl.

The bowl needed most of the work on the area of the rim and the edges following down the bowl. There was lava and also darkening. I worked on the rim and the darkening with acetone on a soft cloth. It removed the majority of the darkening and grime. I decided to top the bowl minimally to smooth out the surface. I chamferred the inner rim with a folded piece of sandpaper to minimize the chatter from the over reaming. The pipe was given a coat of medium brown aniline stain, flamed and then buffed gently with White Diamond. The entirety was given multiple coats of carnauba wax and buffed with a soft clean flannel buff. The final picture below has a Canadian penny included to give an idea of size. This will be helpful to those who are familiar with US and Canadian money. To others who are not you can refer to the photos above with a ruler. This is a nice little pipe that smokes very well. It also fits nicely into a coat pocket or shirt pocket!
bbb4

bbb5

bbb6

bbb7

Restoration of an old BBB Own Make 622


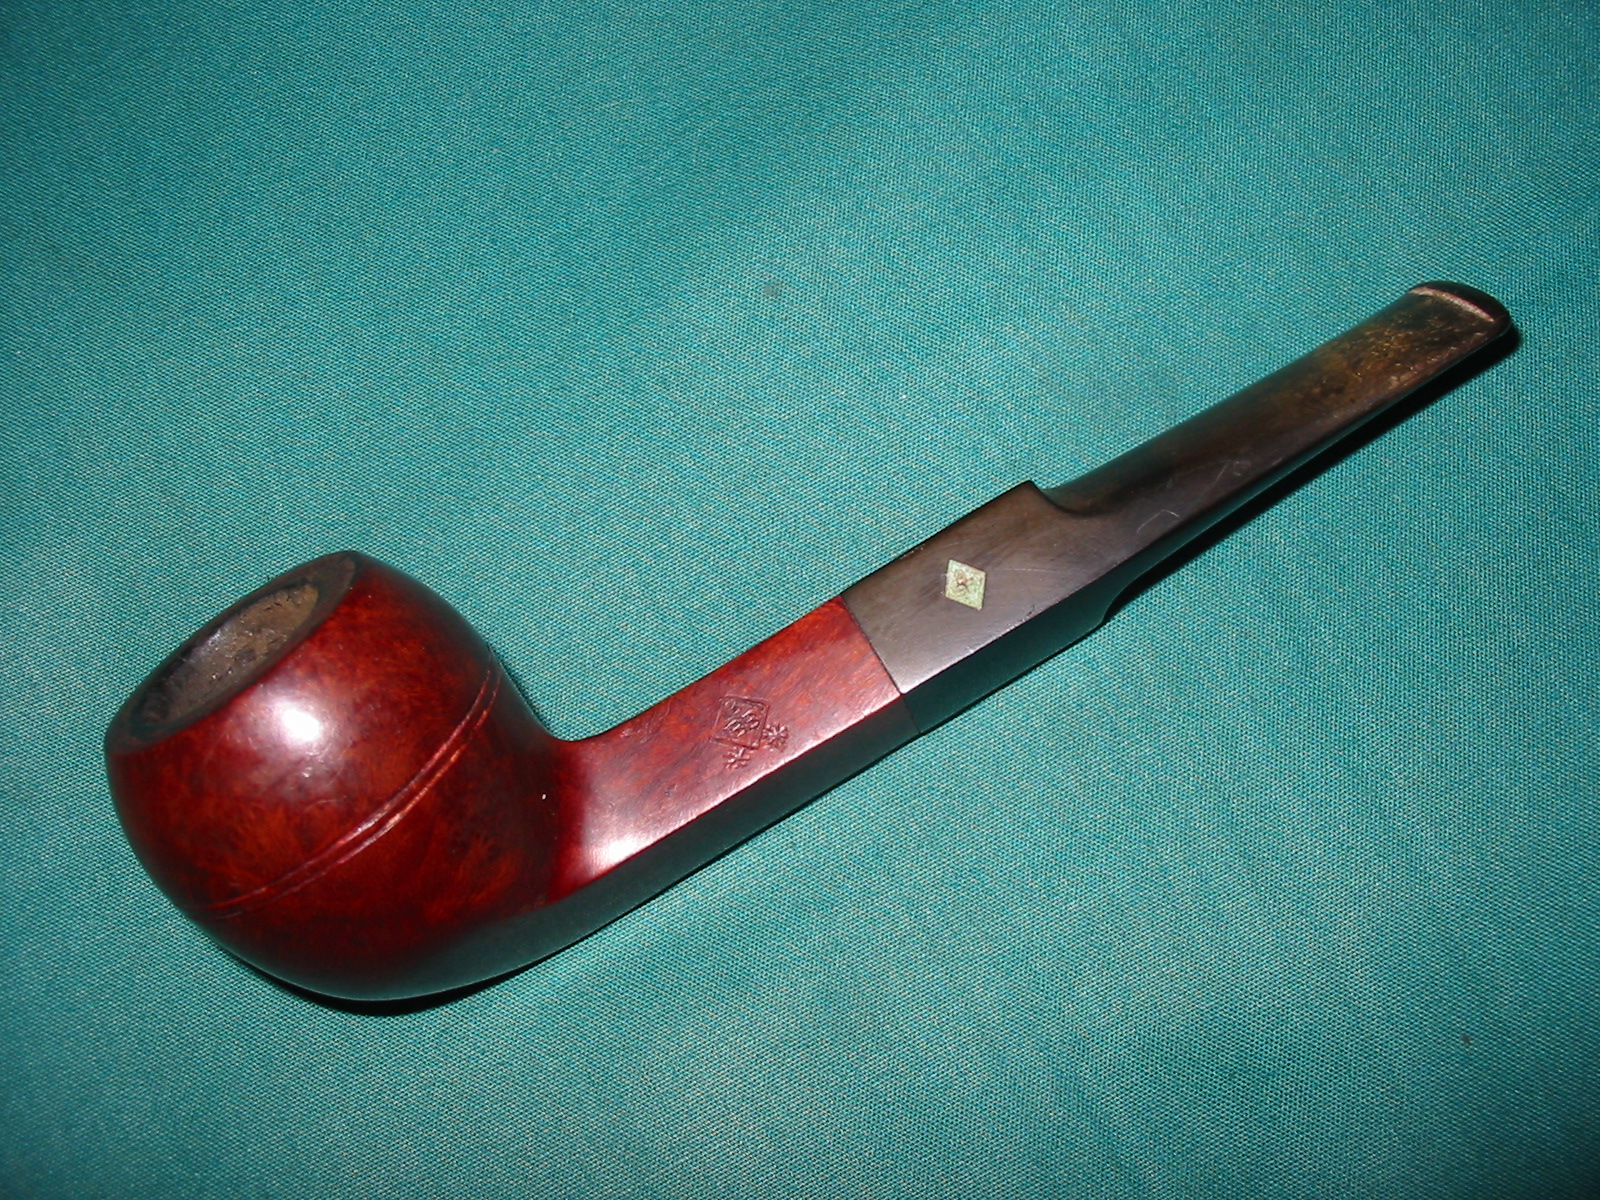
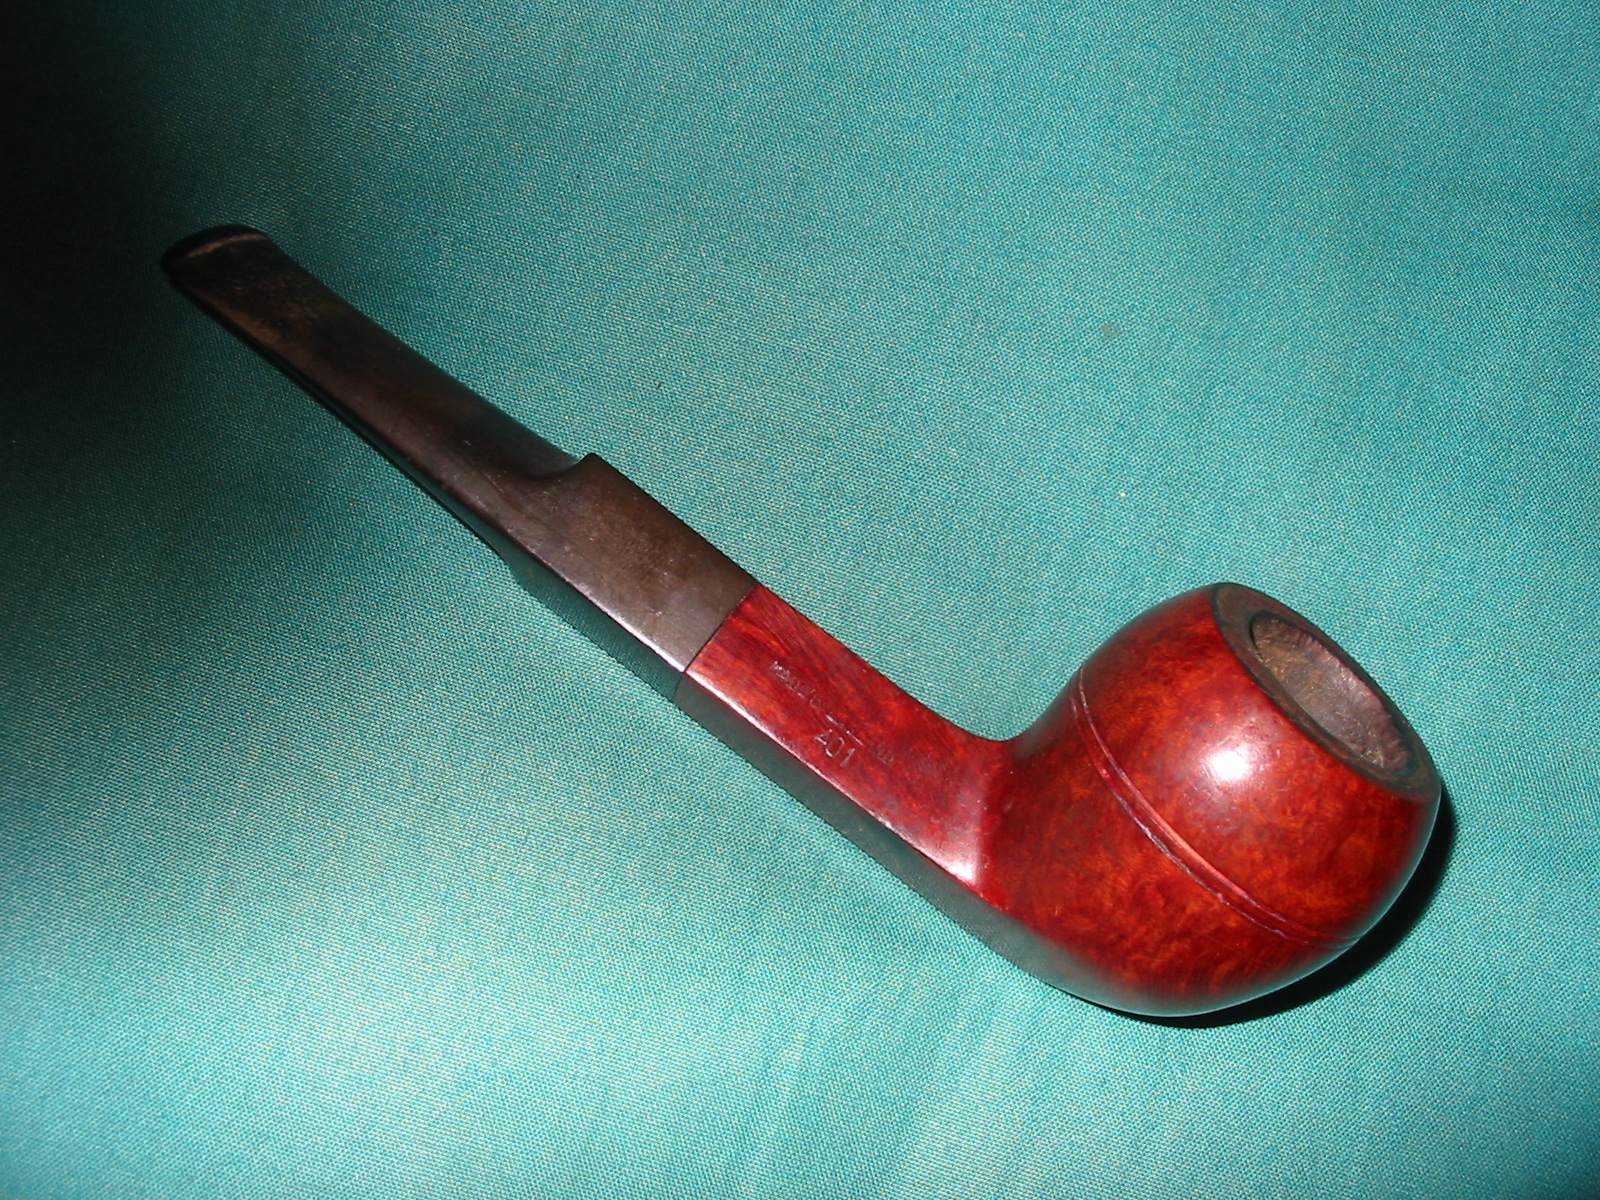
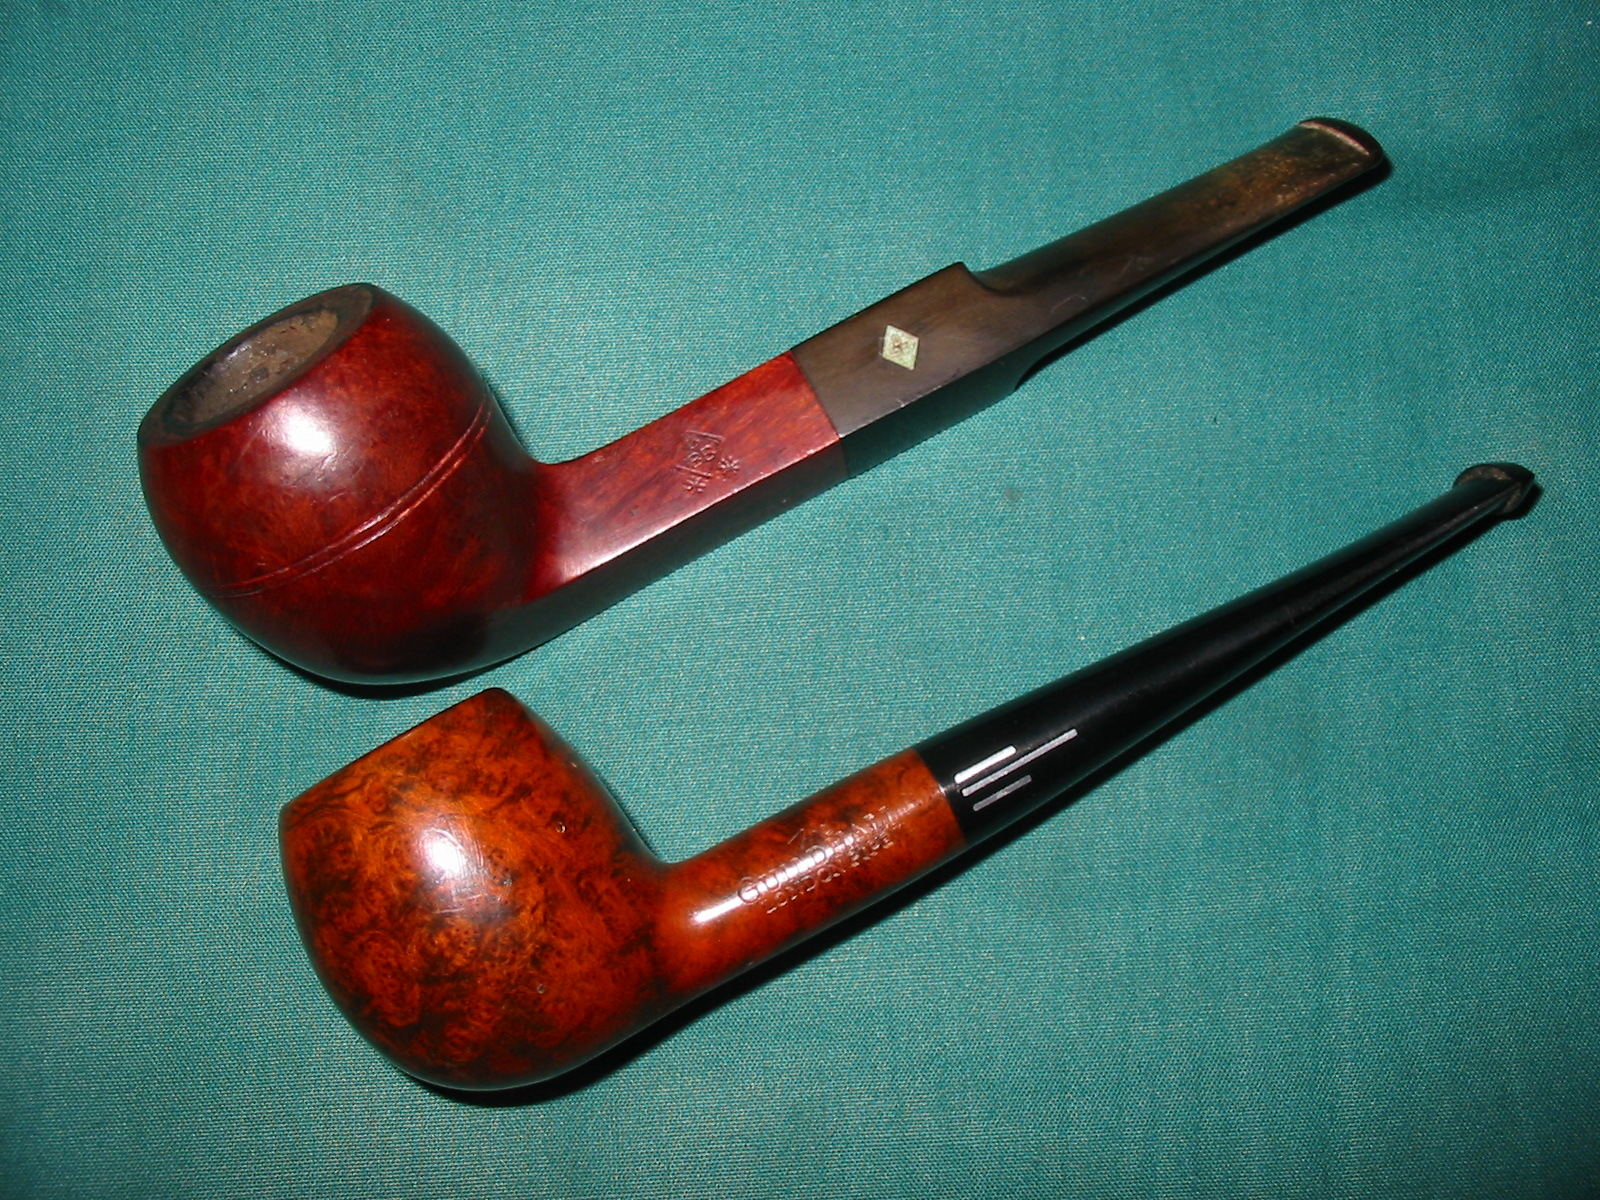
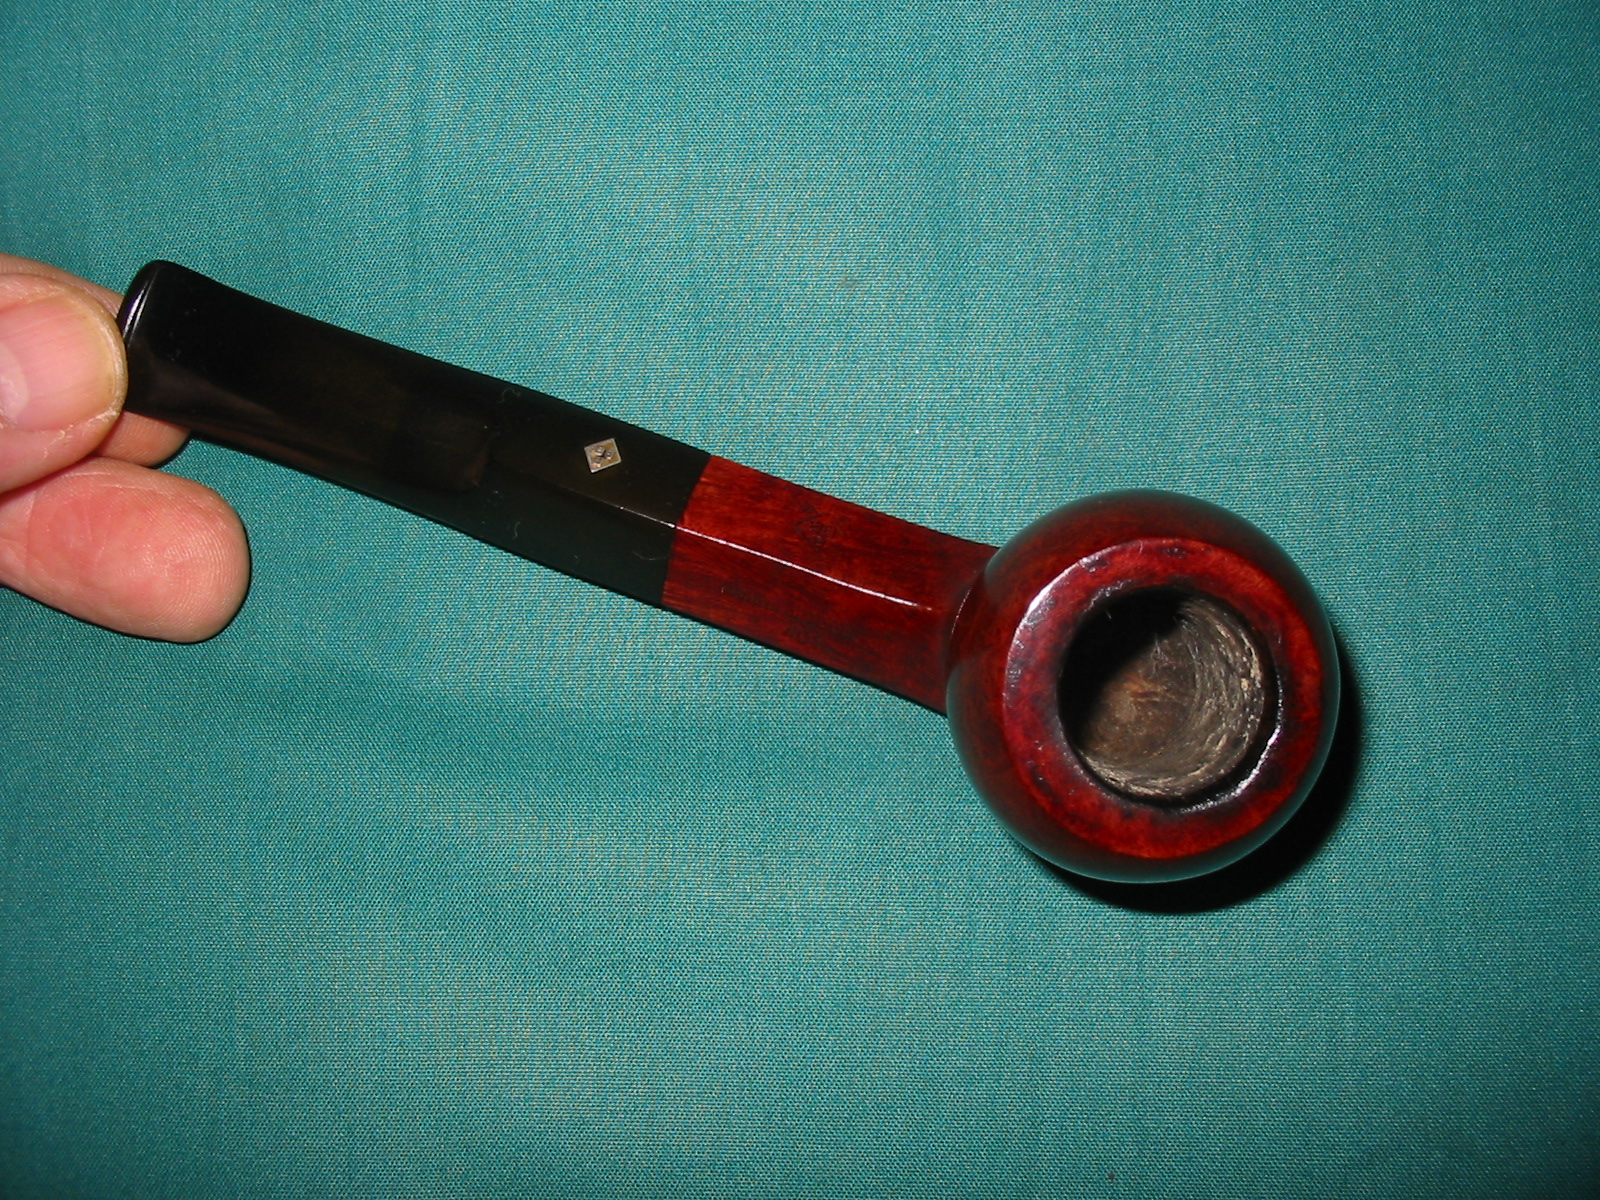
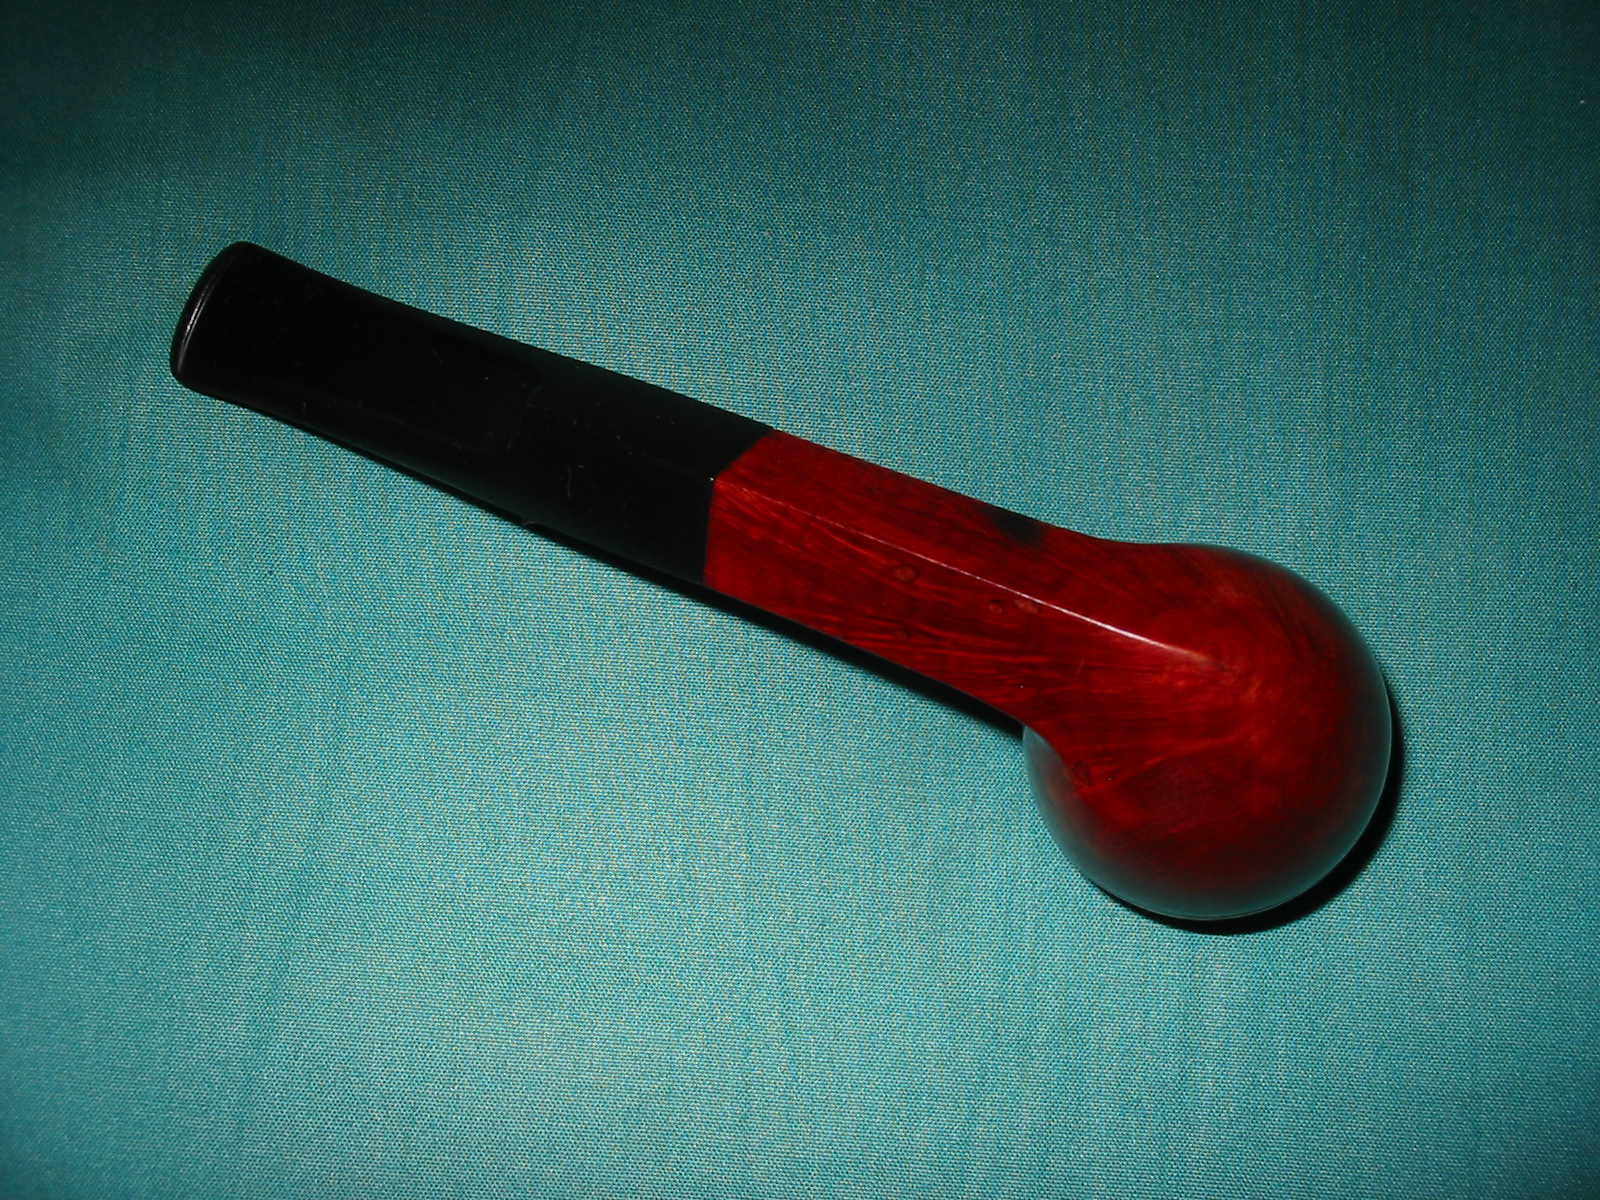
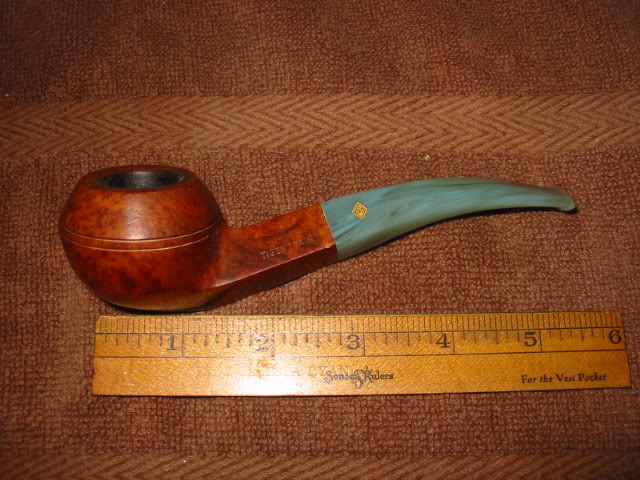
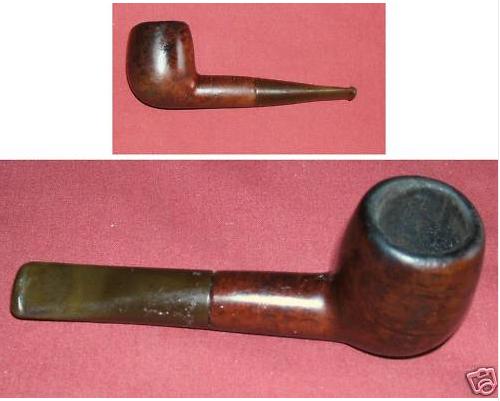
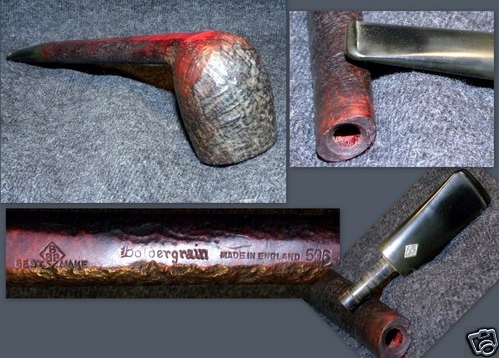
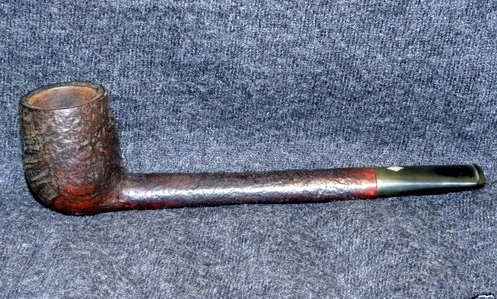
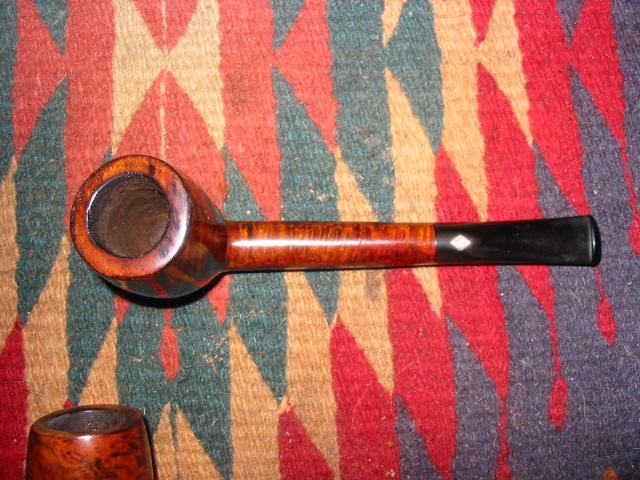
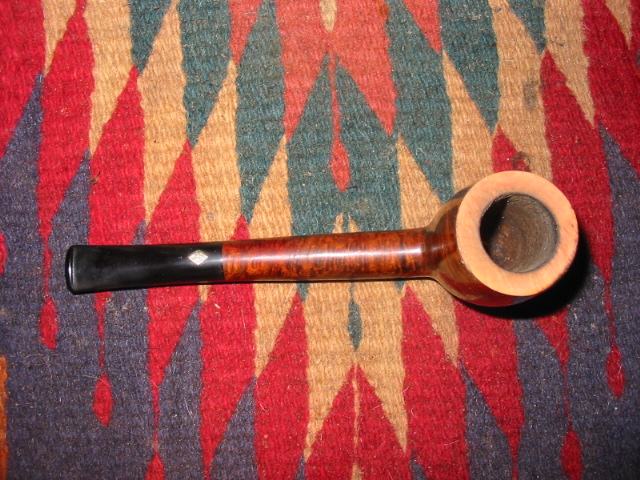
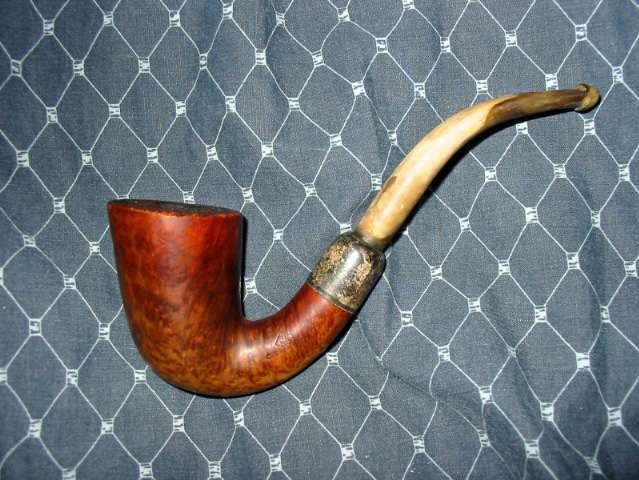
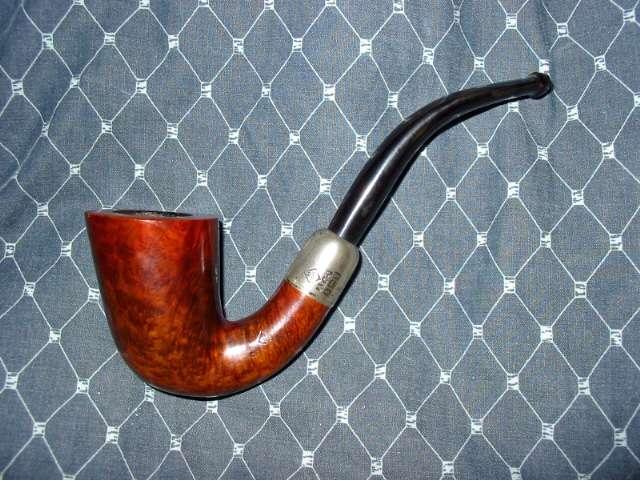
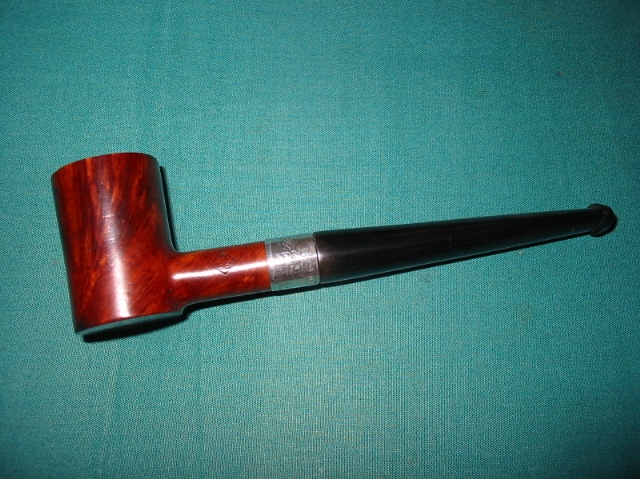
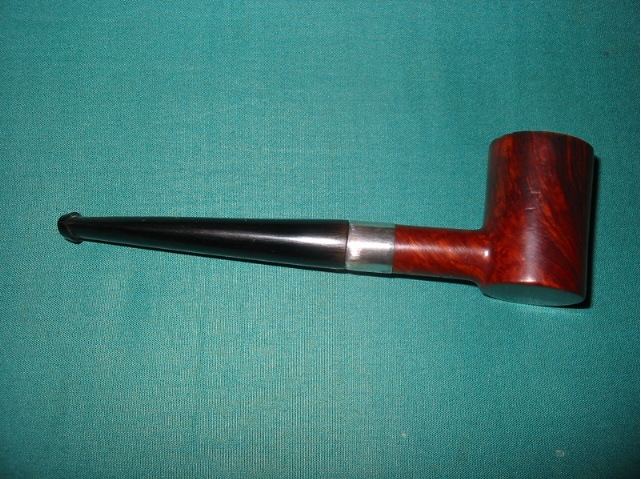
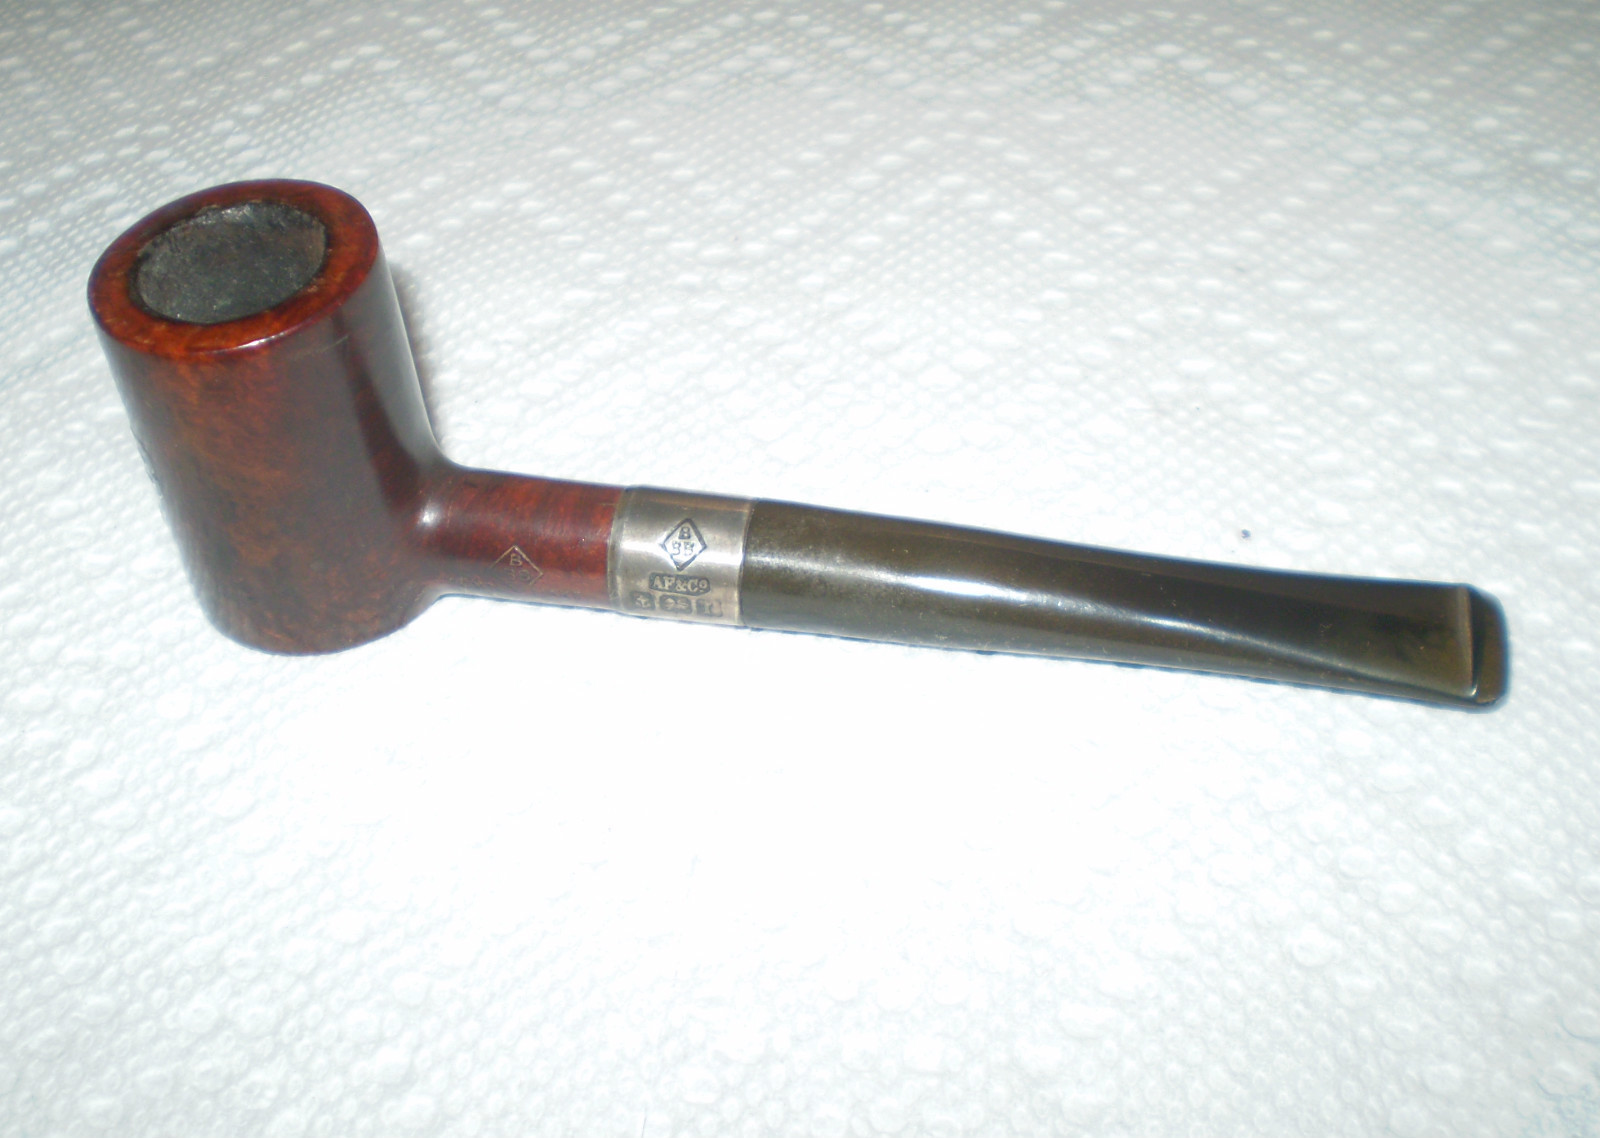
When I saw this one on EBay it grabbed my attention. I have always loved BBB pipes and found that they are great smokers and often fly under the radar. This one is stamped BBB Own Make on the left side of the shank and Made in London England 622 on the right side of the shank. The stem was an obvious replacement stem from the pictures. The band is a factory original stamped BBB and Sterling Silver. The grain showed promise and the bowl looked to be in good shape under the grime. I would know more once it arrived.


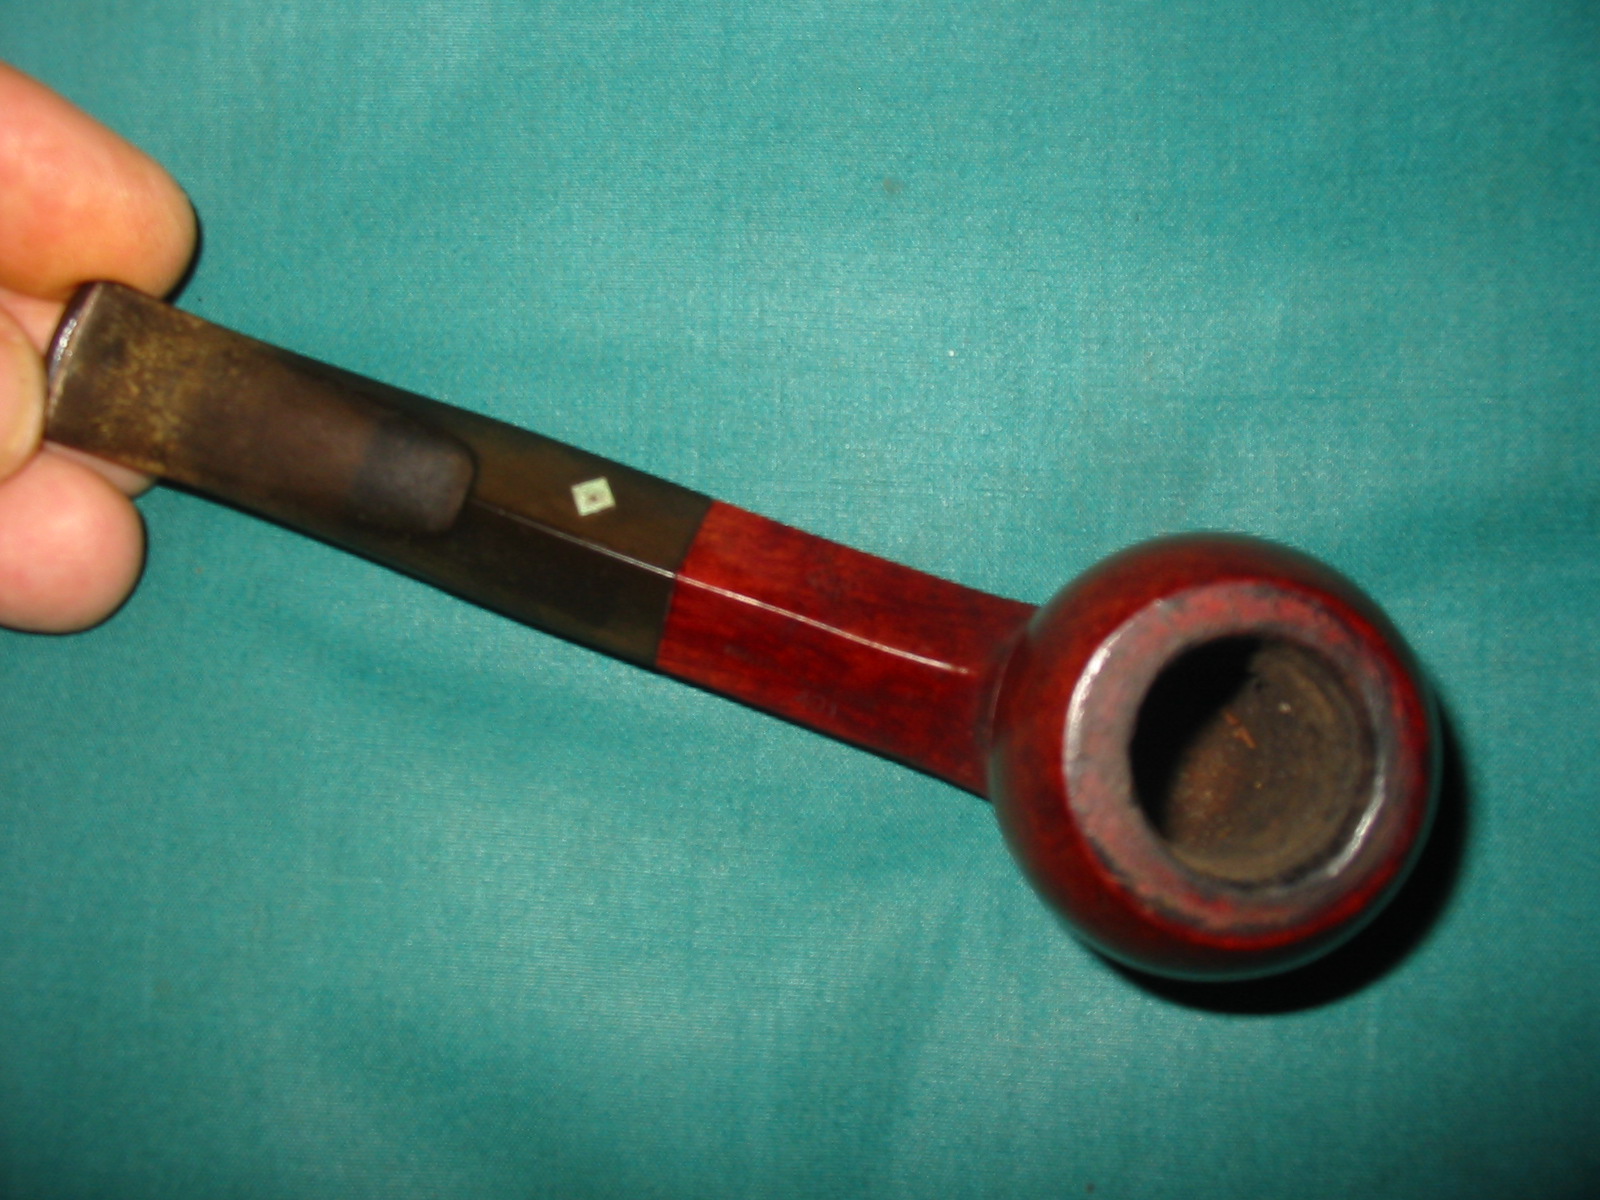
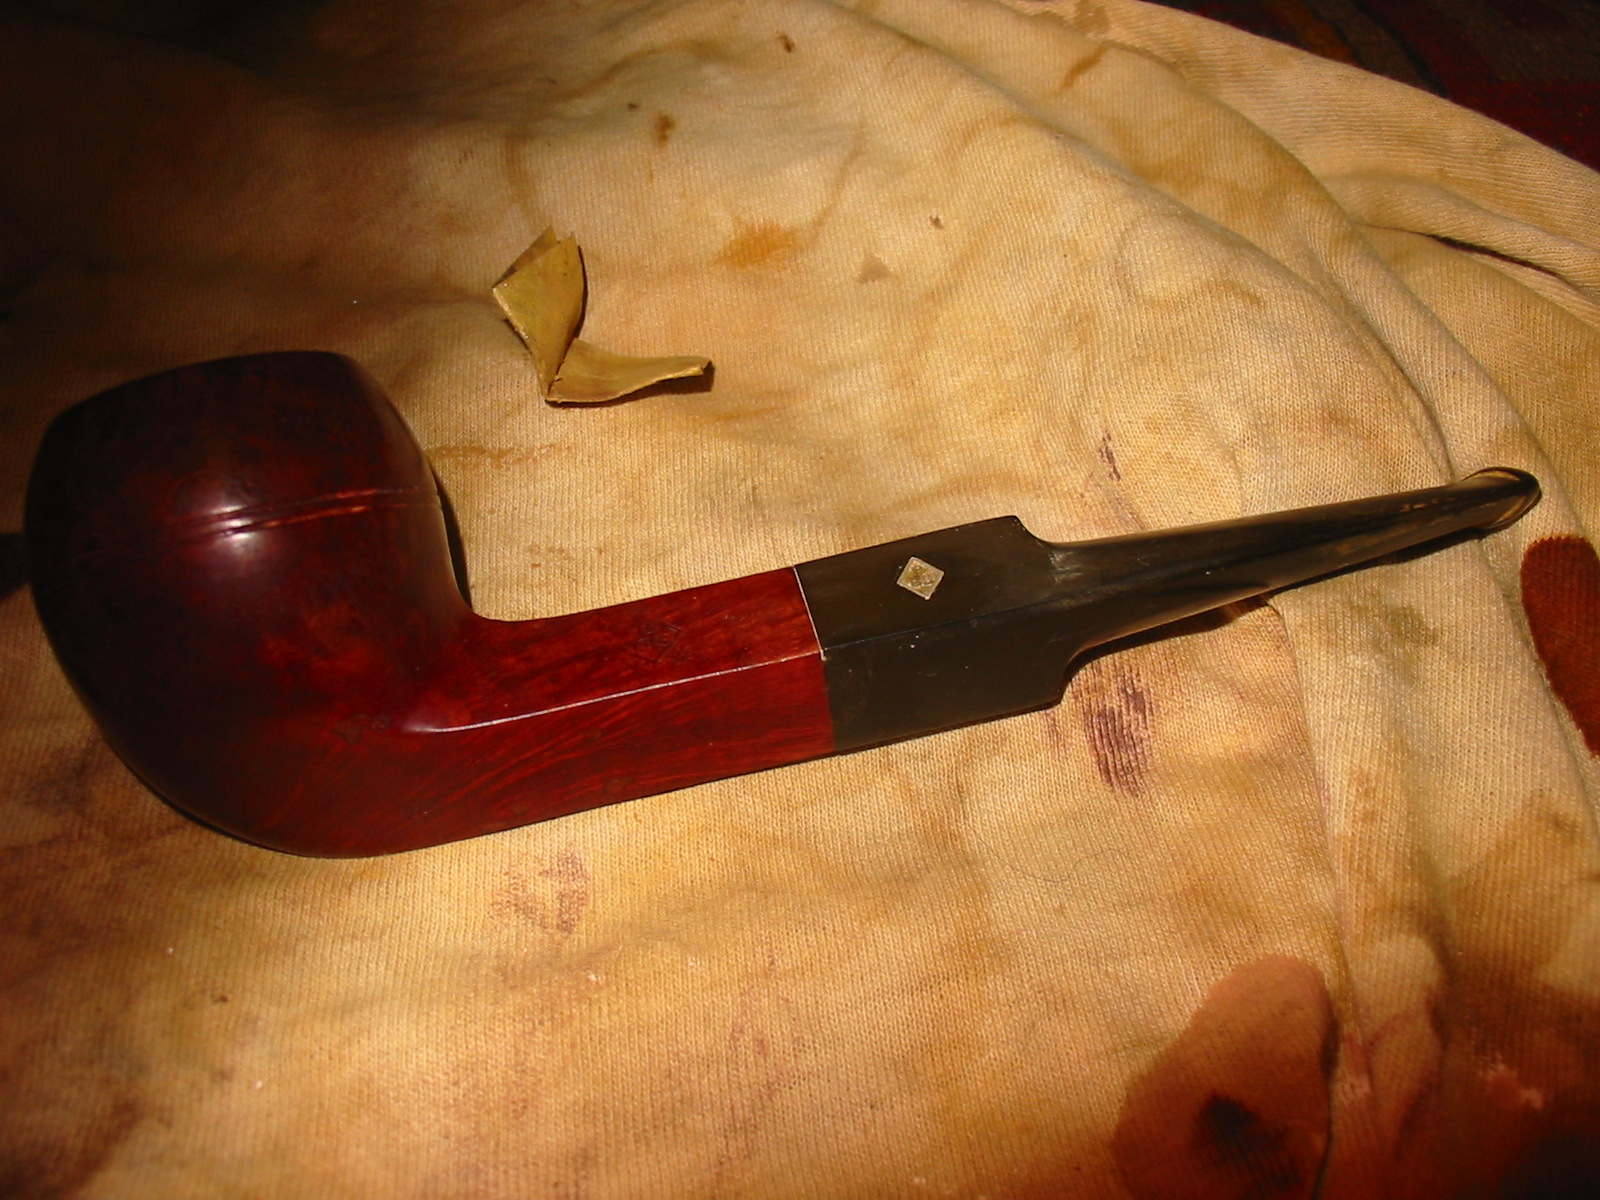
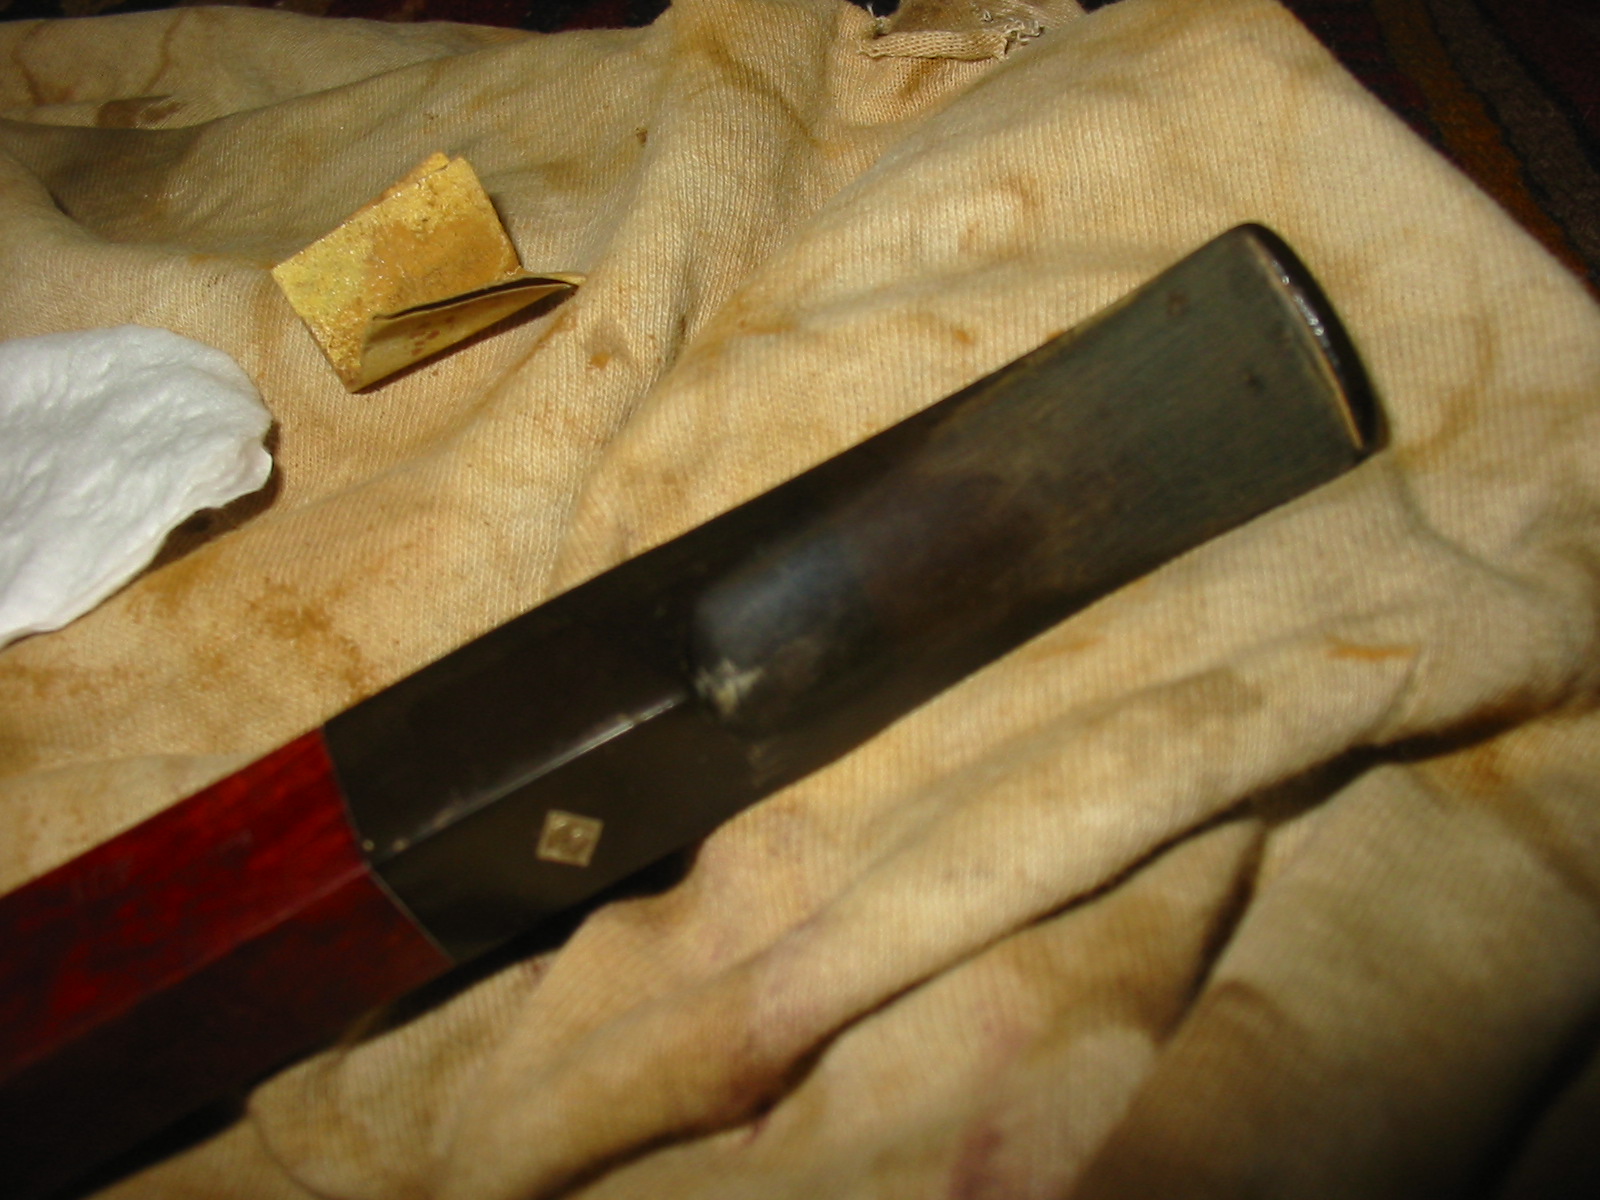
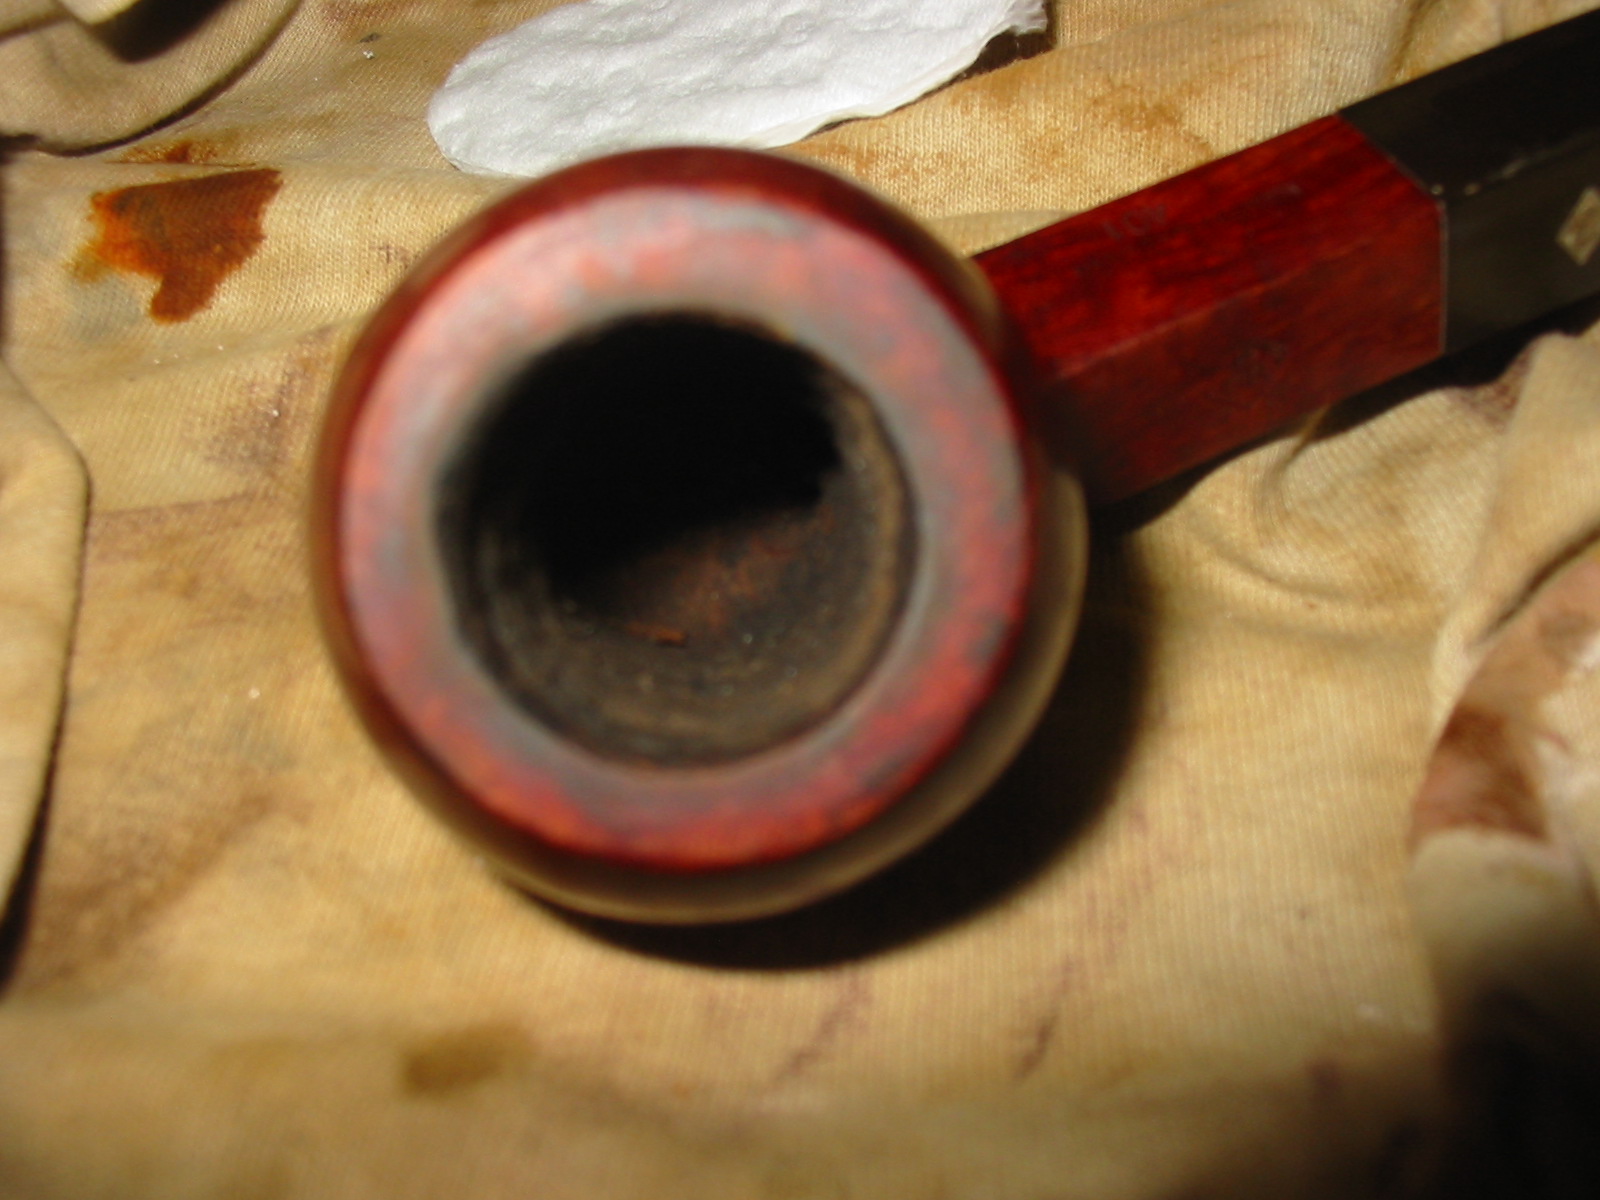
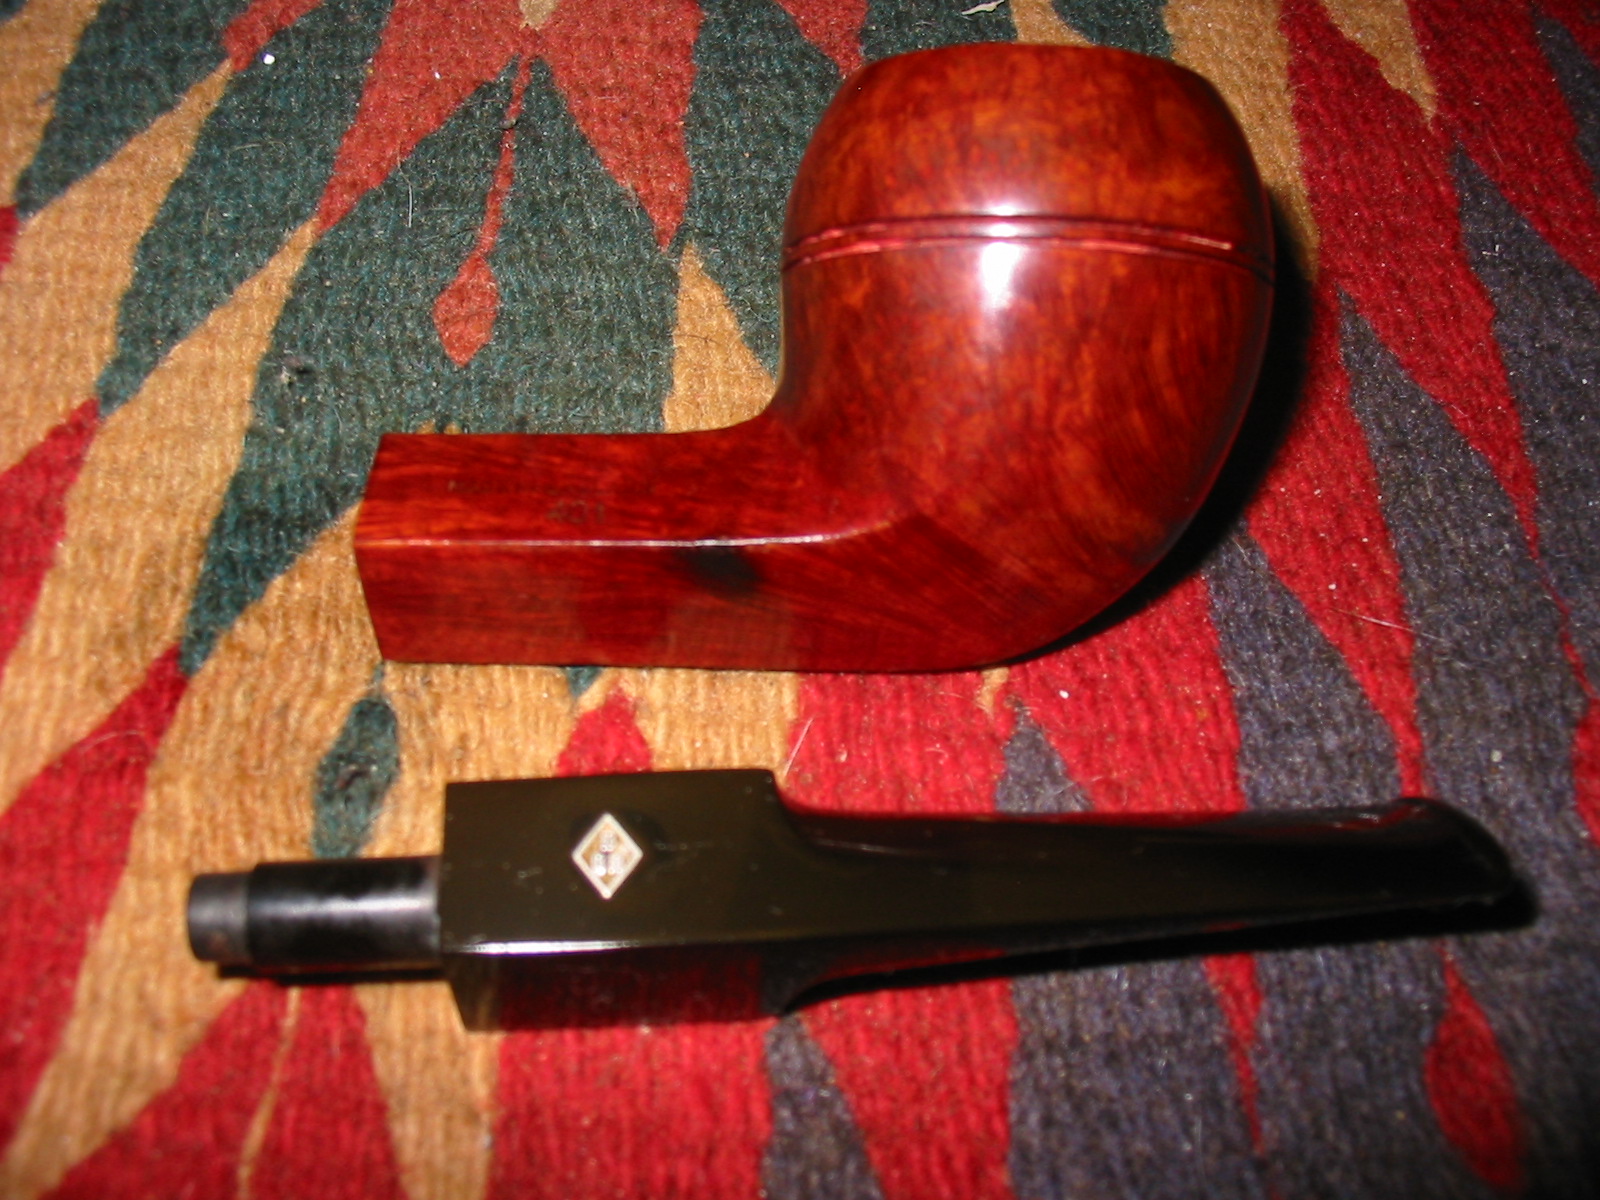
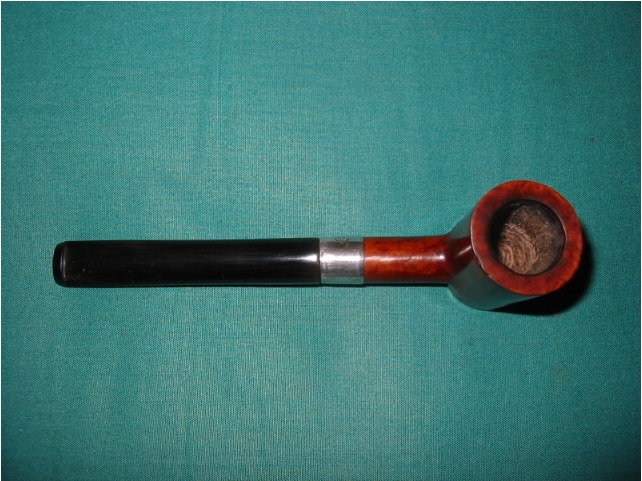
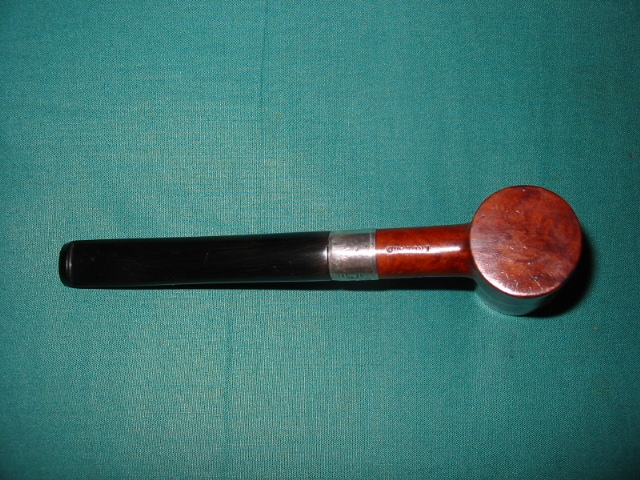
Once it arrived I took time to look it over. The bowl indeed had some great looking grain under the grime. The rim was covered with a thick coat of tar and carbon. The bowl looked to be unmarked by reaming and was still round. The cake on the inside was crumbly and sticky. The entire shank was caked with the sticky grime as was the stem. Definitely a goopy aromatic had been smoked in this old timer. The sterling silver BBB band had dents in it but was unbroken and uncracked. It was definitely an original band as when the stem was removed the shank was not cracked or damaged. The stem was indeed a replacement. It was a standard blank that still had some of the edge marks from the casting on it. It also short in terms of the length of the original pipe as I have found it on pictures on the web and in the catalogues. I was unable to find the 622 with a saddle stem like this one. It did not have the BBB diamond logo or a stamping of BBB on the stem either.

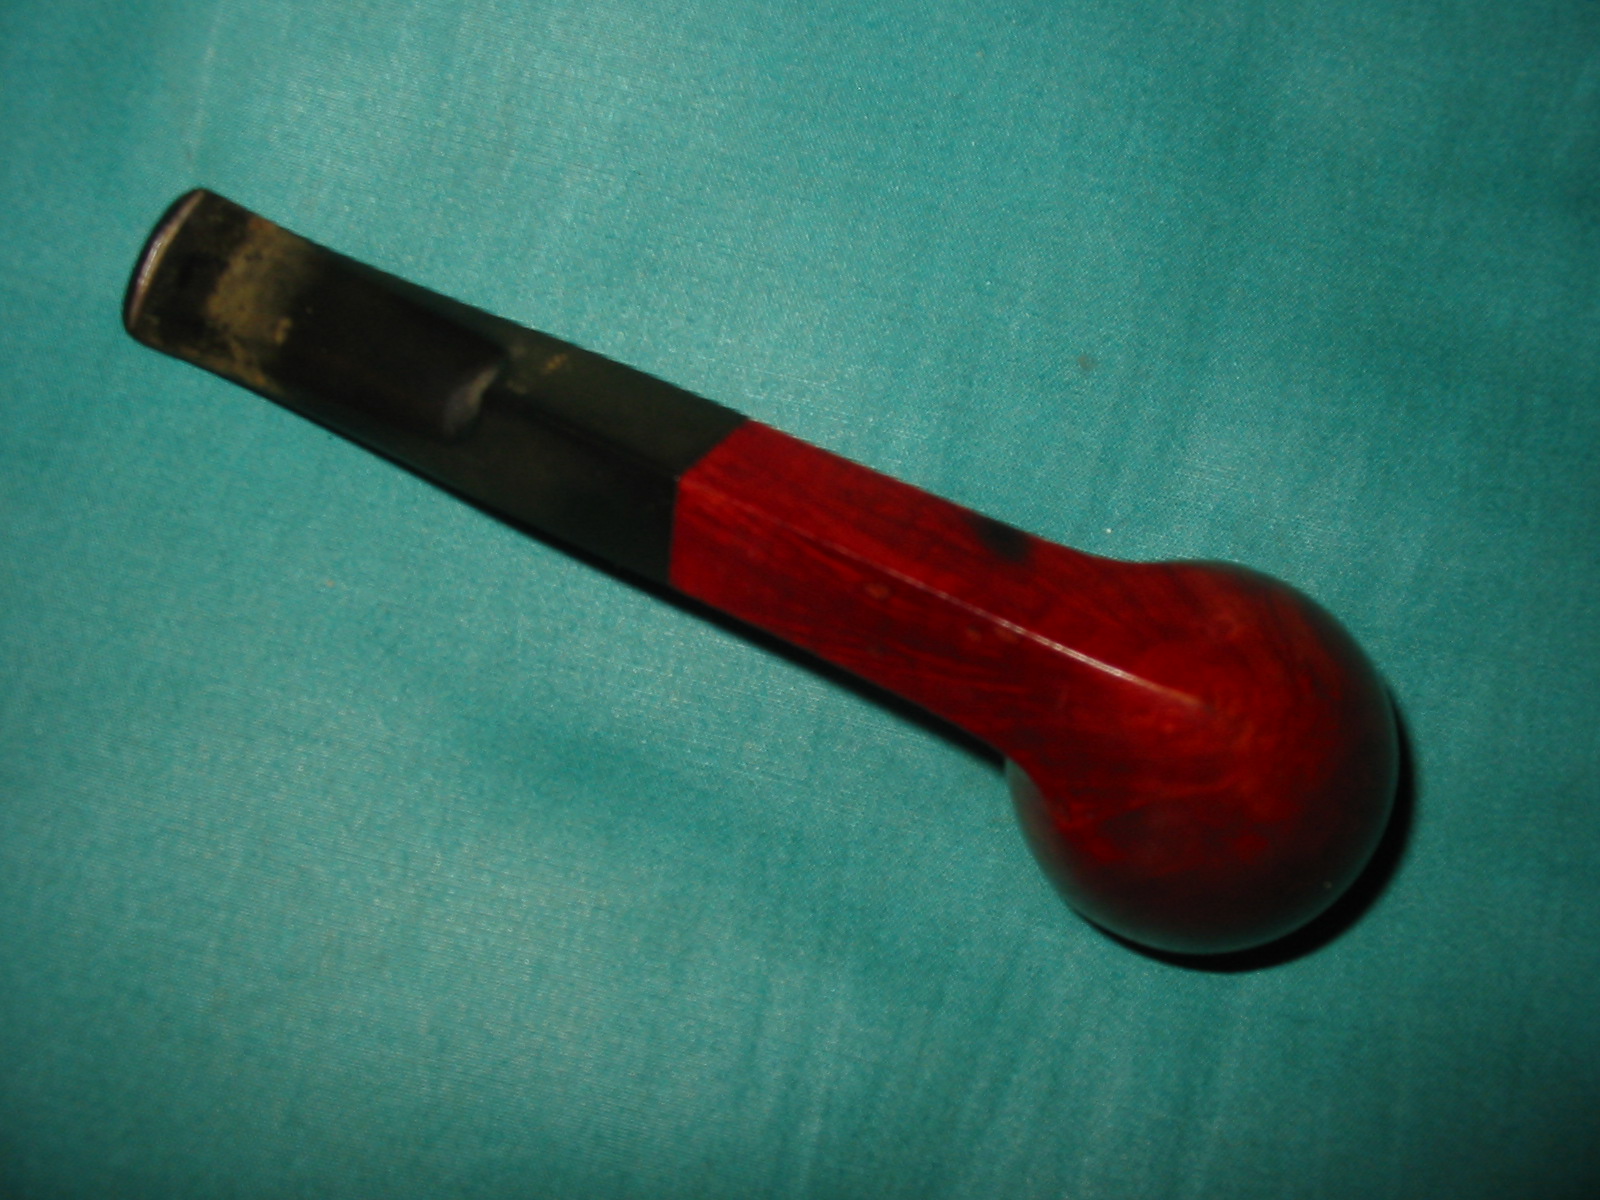
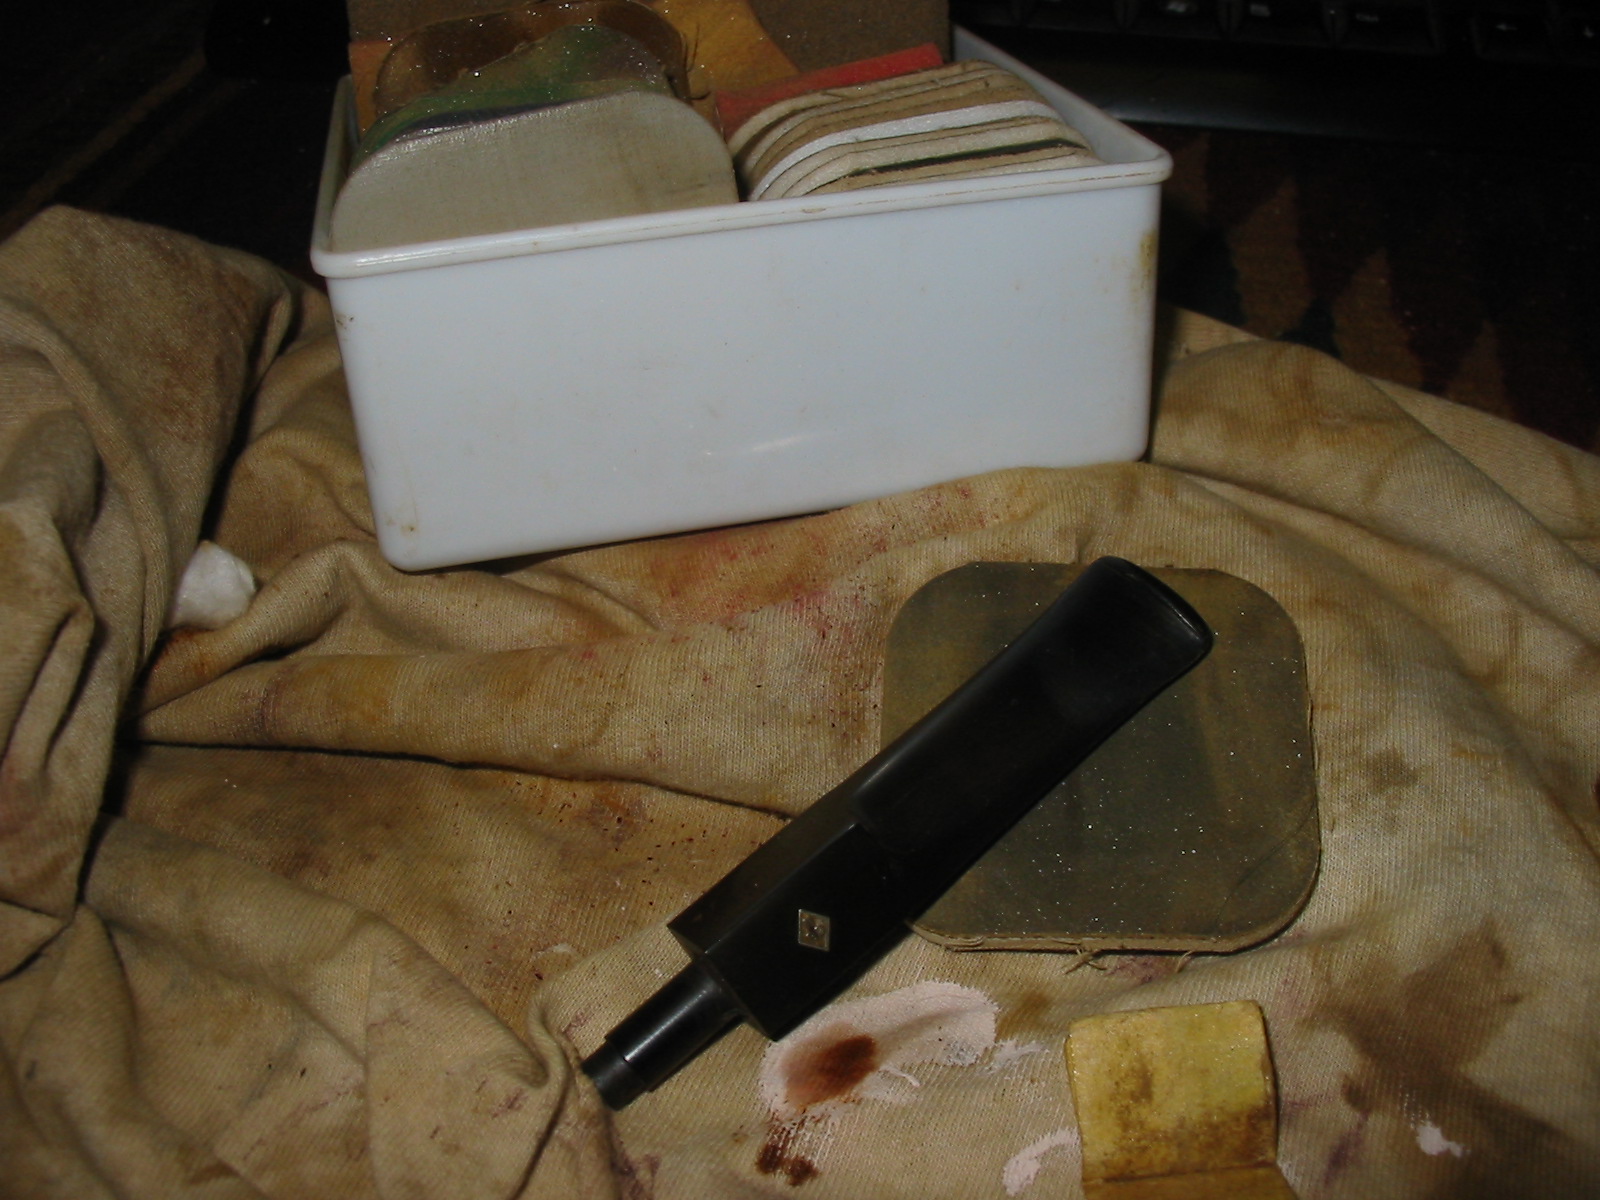
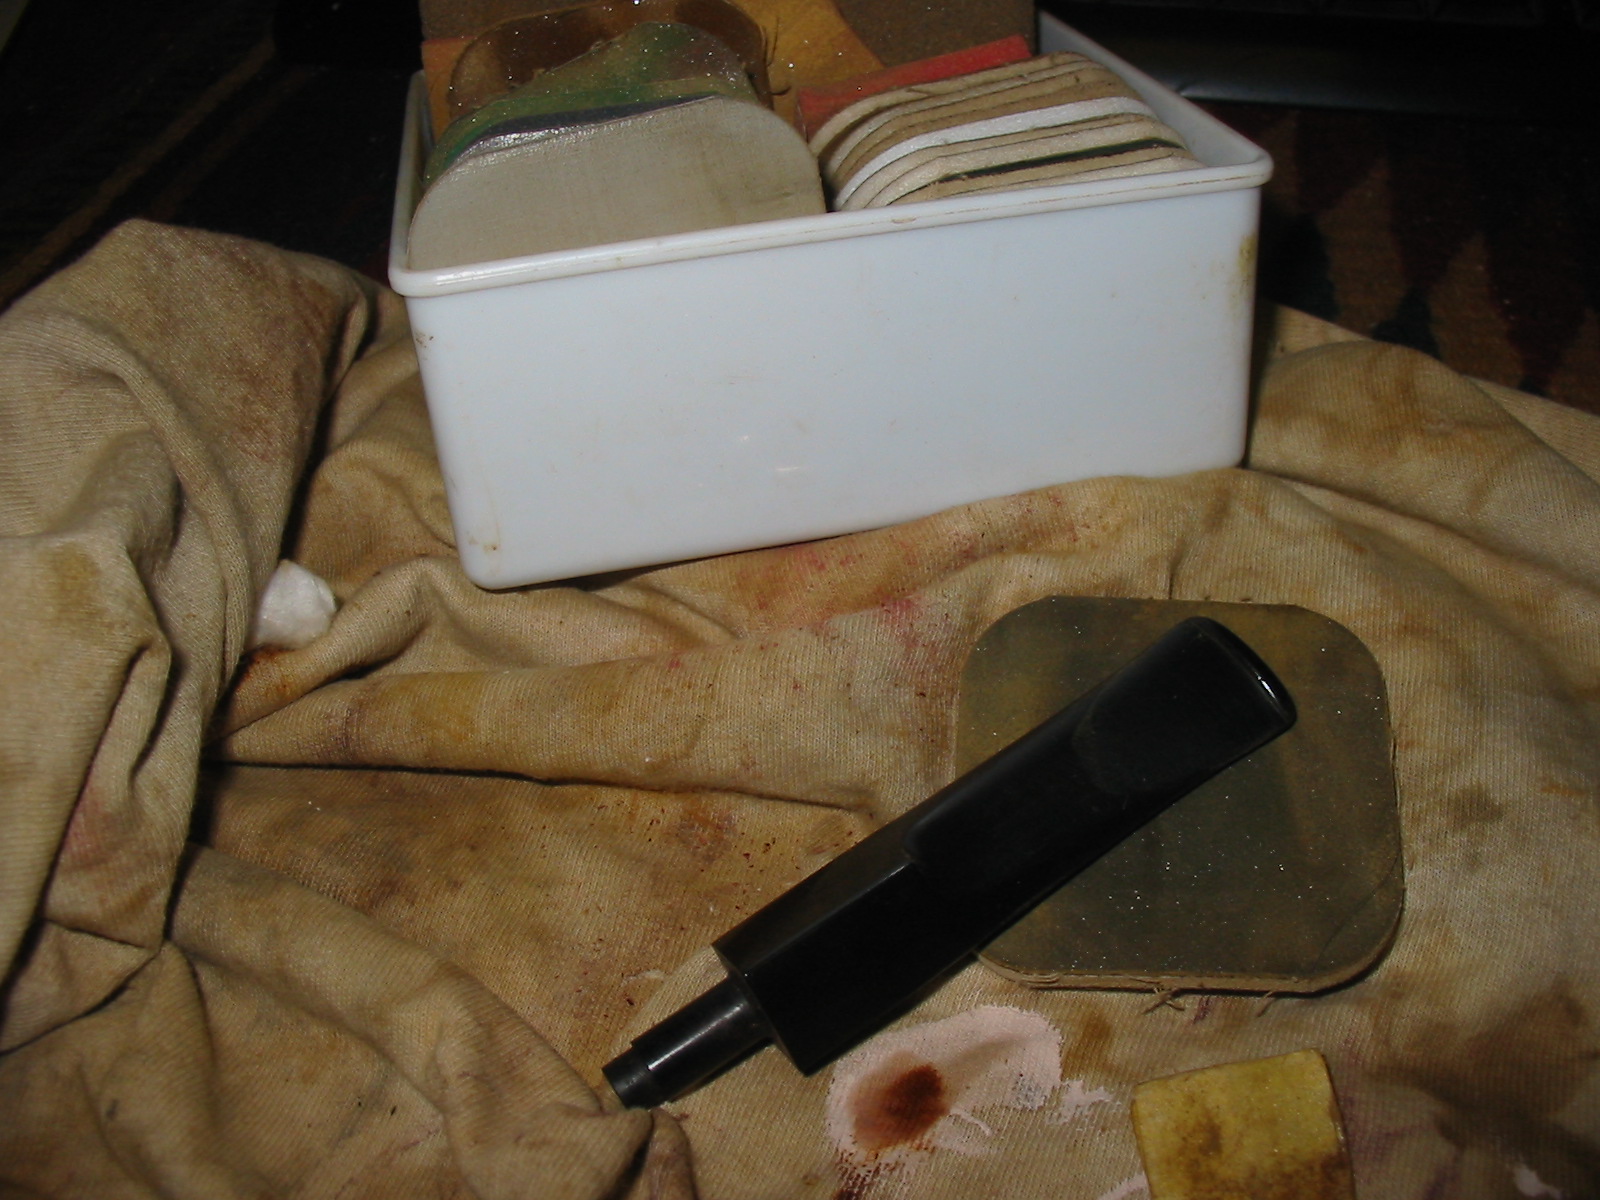
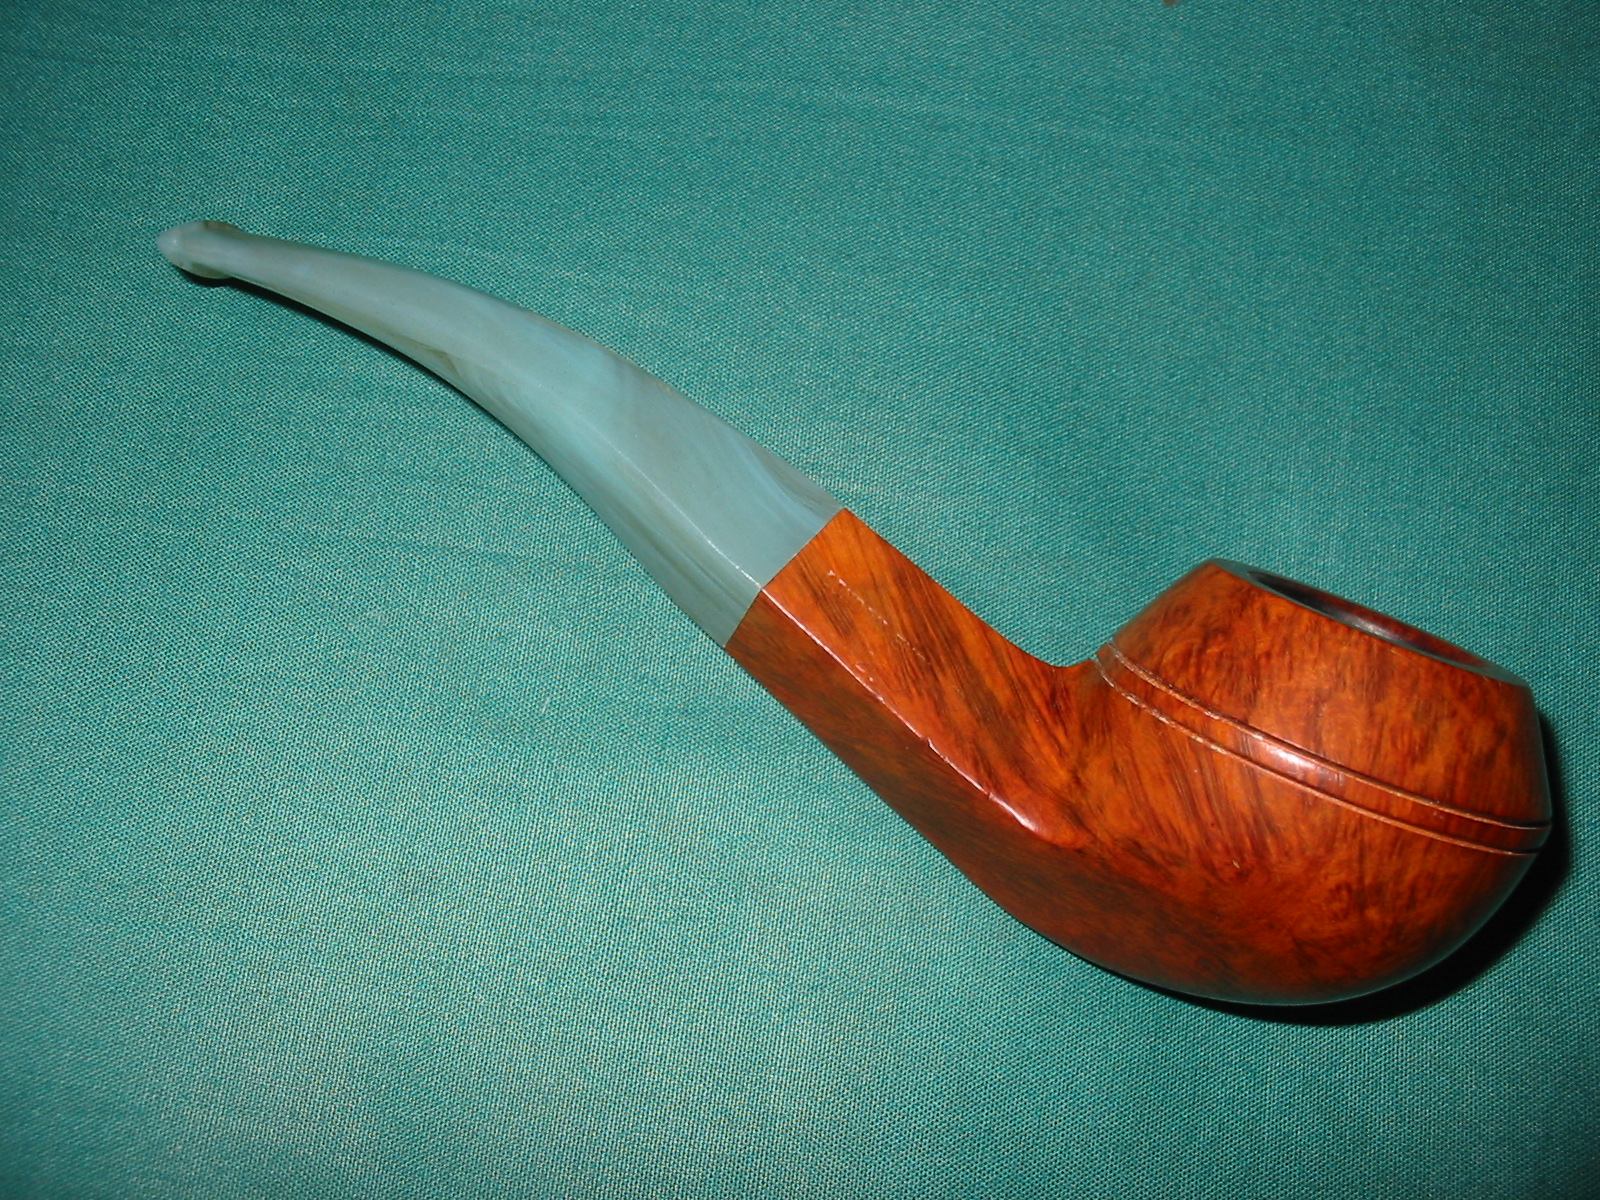
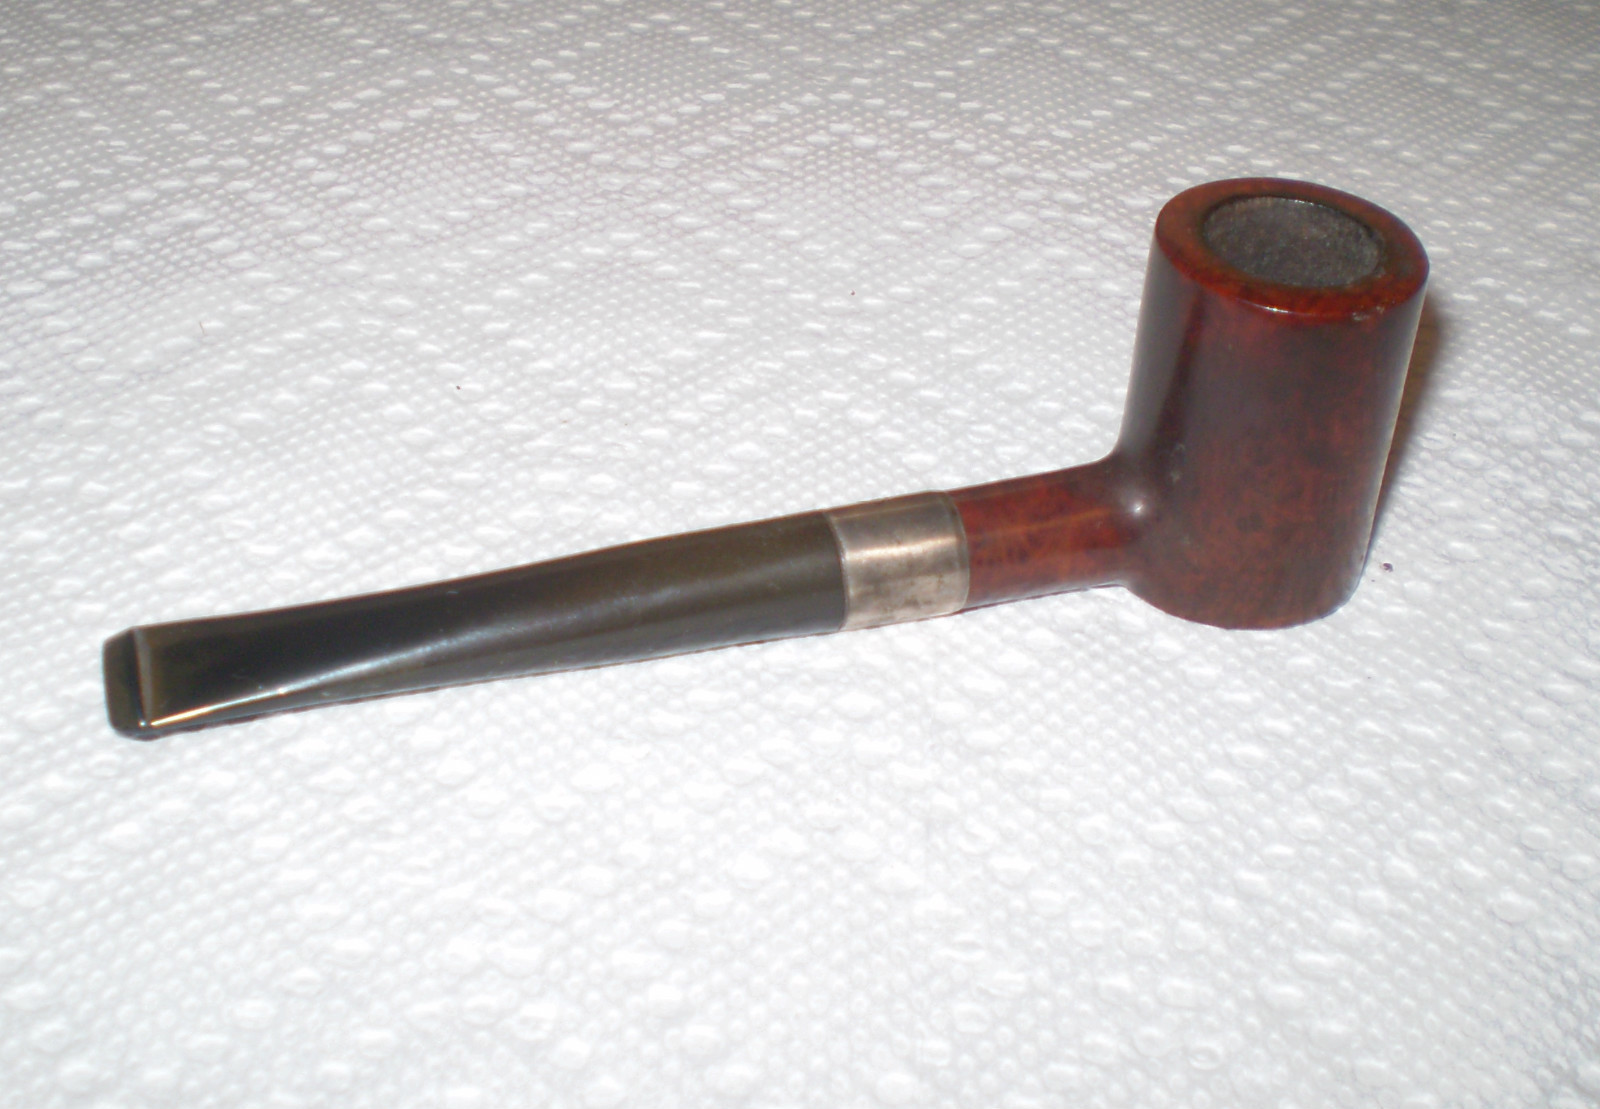
One of the reasons I bid on the pipe was that I had a BBB taper stem in my can of stems that looked like it would be a perfect fit for the pipe. Once I had it out of the box and on my work table I took out the old stem and sanded the tenon a little to make it fit correctly and slid it into place. The diameter of the stem was a perfect match to the shank and the tapered stem fit well with the pot shape. The two looked like they belonged together. Once the fit was smooth and well seated I put the replacement saddle stem into my can of stems to be used one day on a pipe that needed to be restemmed.

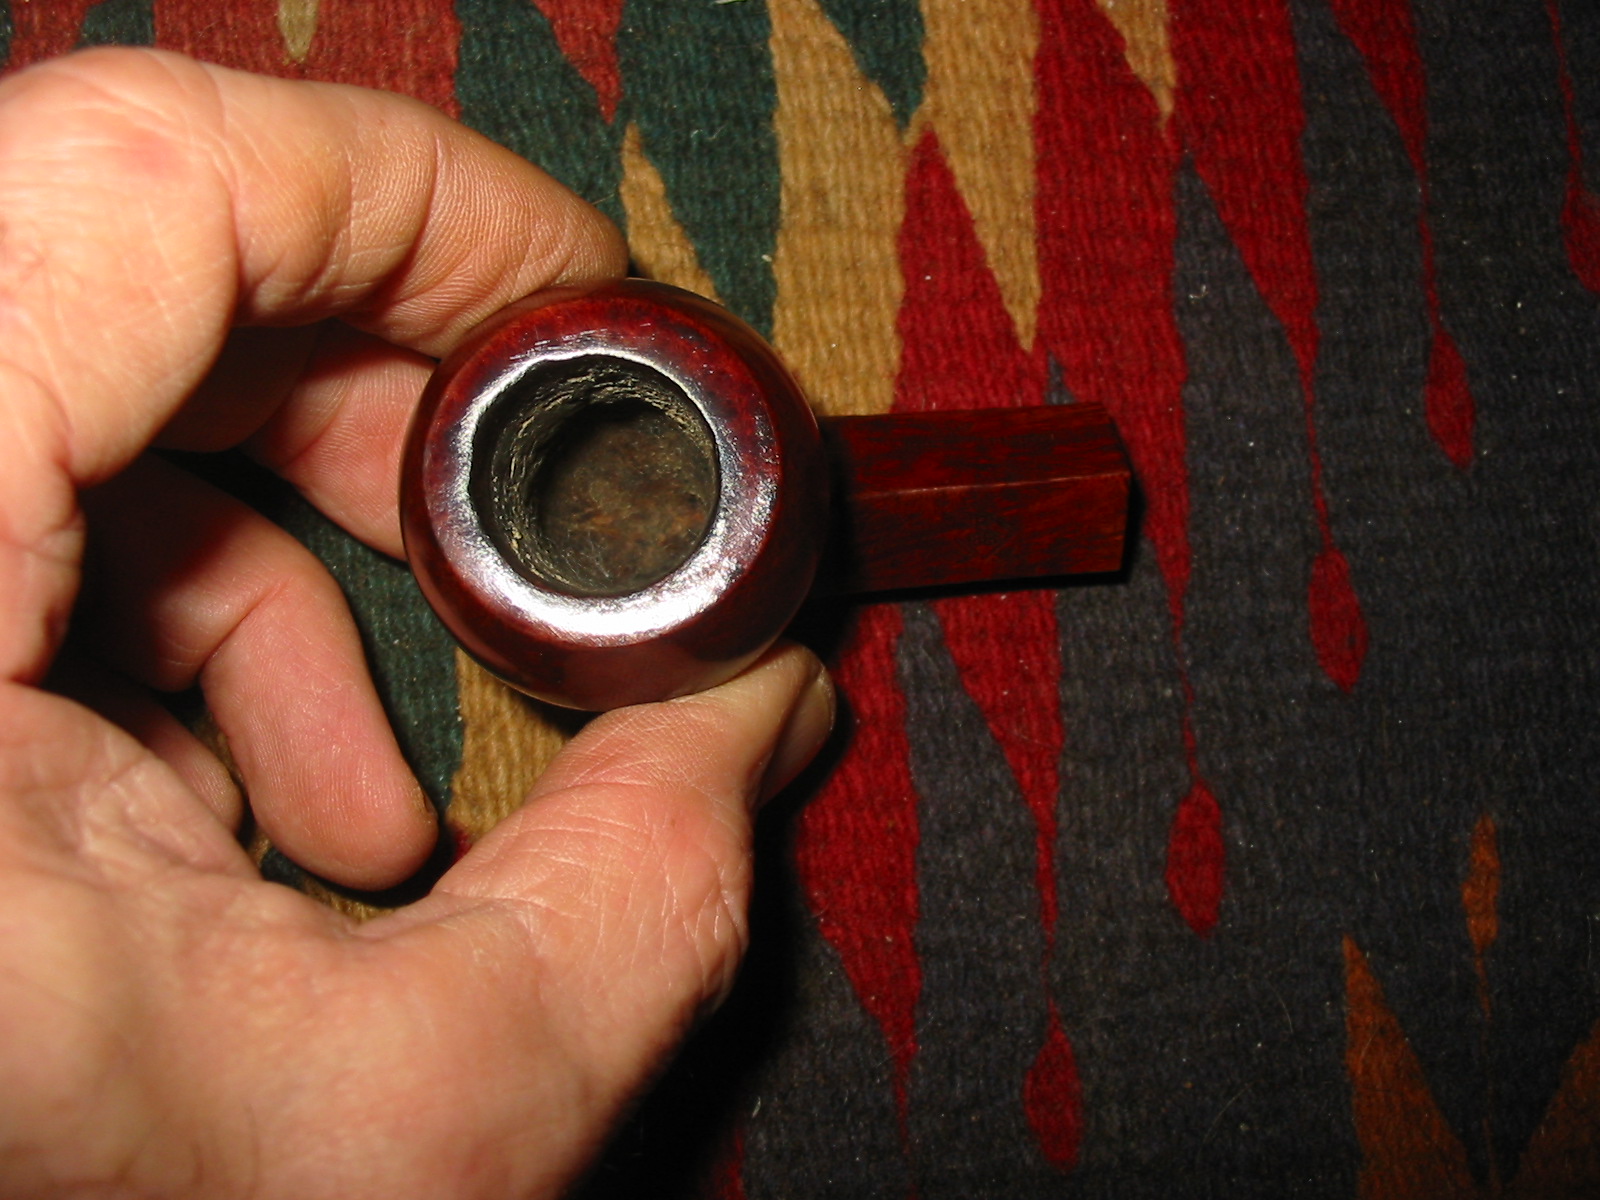
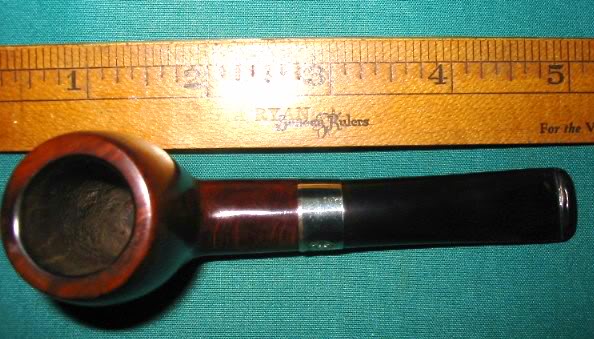
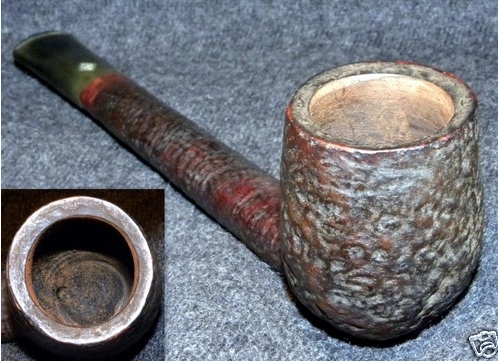
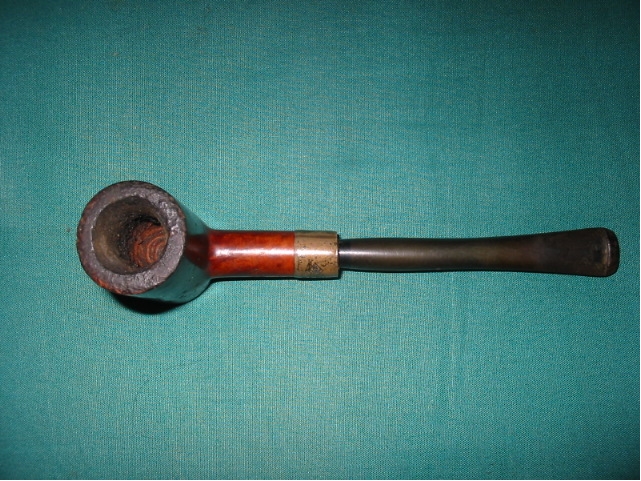
I put the bowl into the alcohol bath for about a half hour while I worked on removing the oxidation from the stem. I placed the stem in a bath of Oxyclean and hot water to soak when I took the bowl out of the alcohol bath. The Oxyclean softens the oxidation and makes it easier to work with than the hard unsoftened oxidation. The bowl was a real mess and I wanted to get the grime and remnants of the old finish removed so I could start fresh with the bowl and restain it. When I took the bowl out of the bath it looked like is shown in next three pictures. The finish was gone but for a few grey spots at the bowl shank junction and around the rim. The top of the bowl was seriously covered with goopy tars and black sludge that would take some work to remove. You notice in the first picture that on the right side of the bowl near the front were two fills that needed to be addressed as the putty had shrunken and they were divots.

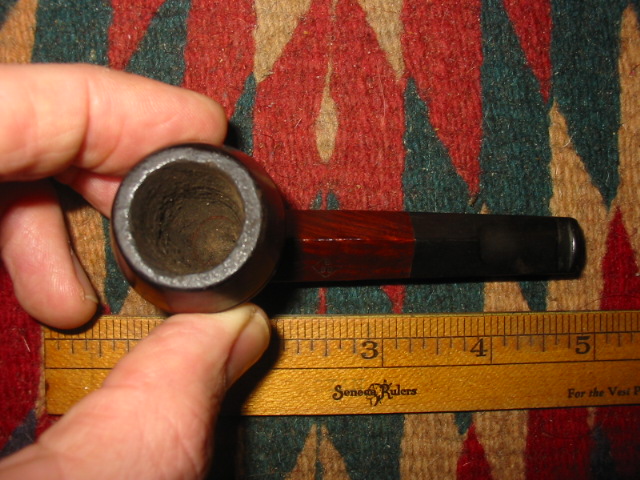
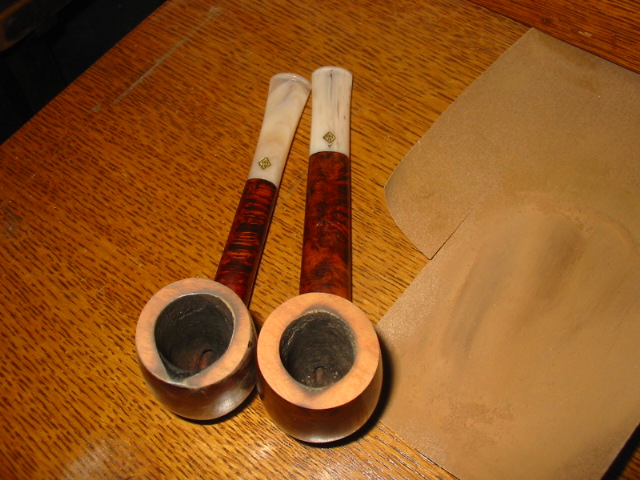
I reamed the bowl to remove the internal grime and get back to the wood. I find that a soak in the alcohol bath softens the cake making removal much easier. It does not chip or break around the rim. I also cleaned the shank with pipe cleaners, a shank brush and alcohol to clear out the tars. I also used a drill bit that I had turned into the shank to clean out the hardened tars. Once I had it clean I used some emery cloth and turned the bowl top into the cloth to remove the chunks of tar and carbon build up. The next series of three pictures show the pipe during and after using the emery cloth. The last picture shows clearly the extent of the grime and tar build up even after sanding the top of the bowl.

Once the bowl was at the point in the photo above I then reamed the bowl a second time to clean up the remaining build up and then wiped the bowl down with acetone on cotton pads. The next series of five pictures show the pipe after the repeated wipe down with acetone. The briar is clean and ready for some work on the fills and some work to remove some of the damage to the inner side of the rim – you will notice in the last photo in the series.

I picked out the putty fills and wiped the bowl down one last time with acetone before dripping super glue and briar dust into the sandpits. The briar dust and superglue makes a far nicer looking fill in my opinion than the pink putty ever will. Once the glue had dried I sanded it with 240 grit sandpaper to see if there were any dents or dimples in the patch and refilled until the surface was smooth. I sanded repeatedly with the 240 grit until the patch blended into the surface and the glue was off of the surround clean briar.

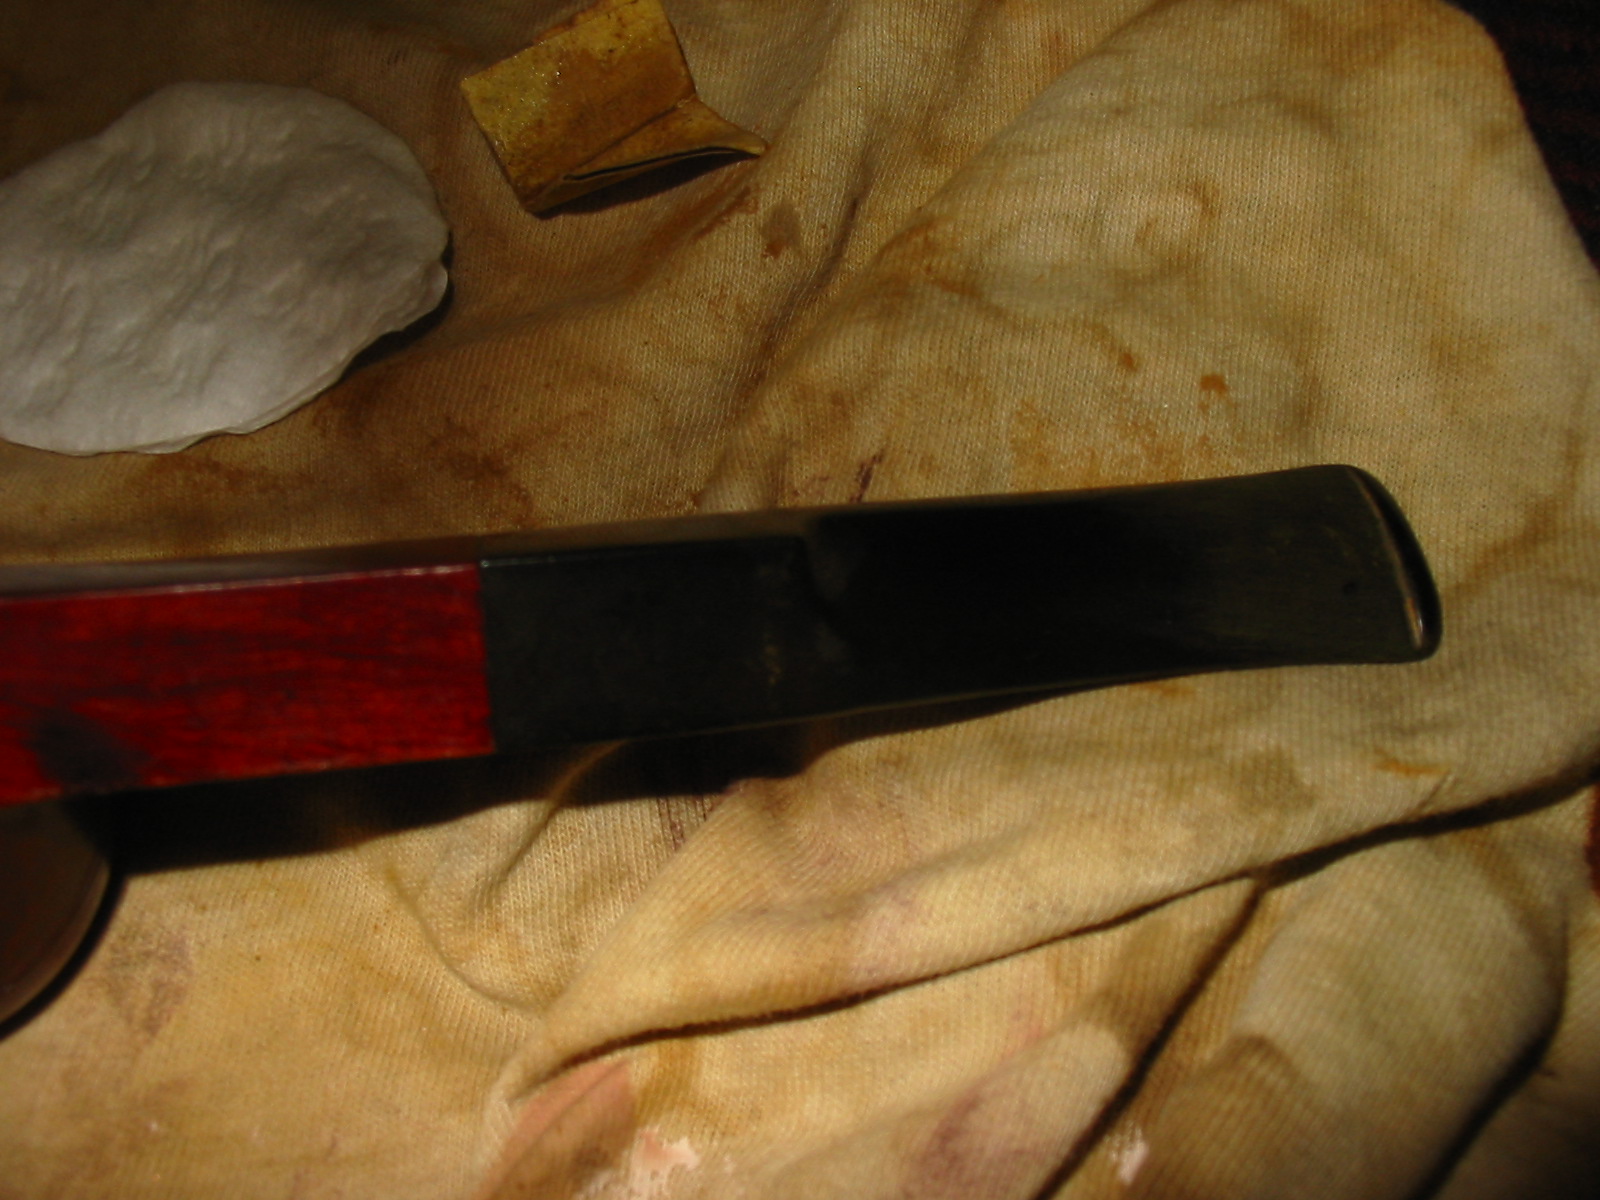
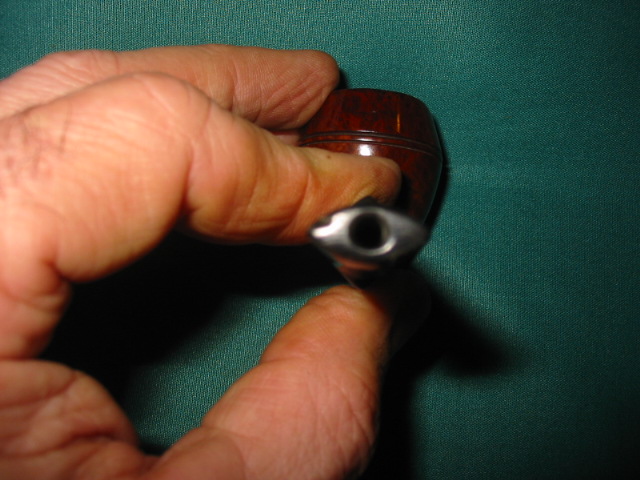
I then used a piece of sandpaper to bevel the inner edge of the rim into the bowl to lessen the effect of the burned area. I aim for an even bevel all the way around the bowl rim and thus the effect of the burn will disappear with the stain coat. I took the stem out of the Oxyclean bath and wiped it down with a cotton cloth to remove the softened oxidation. I then reinserted it into the pipe to check for a good fit. You can see in the first picture below the beveled rim and the fit of the stem. The stem is almost back to a clean black finish. The oxidation is virtually gone and only needs to be polished and sanded with micromesh pads to bring back the shine. This particular stem also had two deep tooth marks on the top and bottom of the stem near the button. I decided to deal with them after I had finished cleaning and polishing the stem and staining and polishing the bowl.

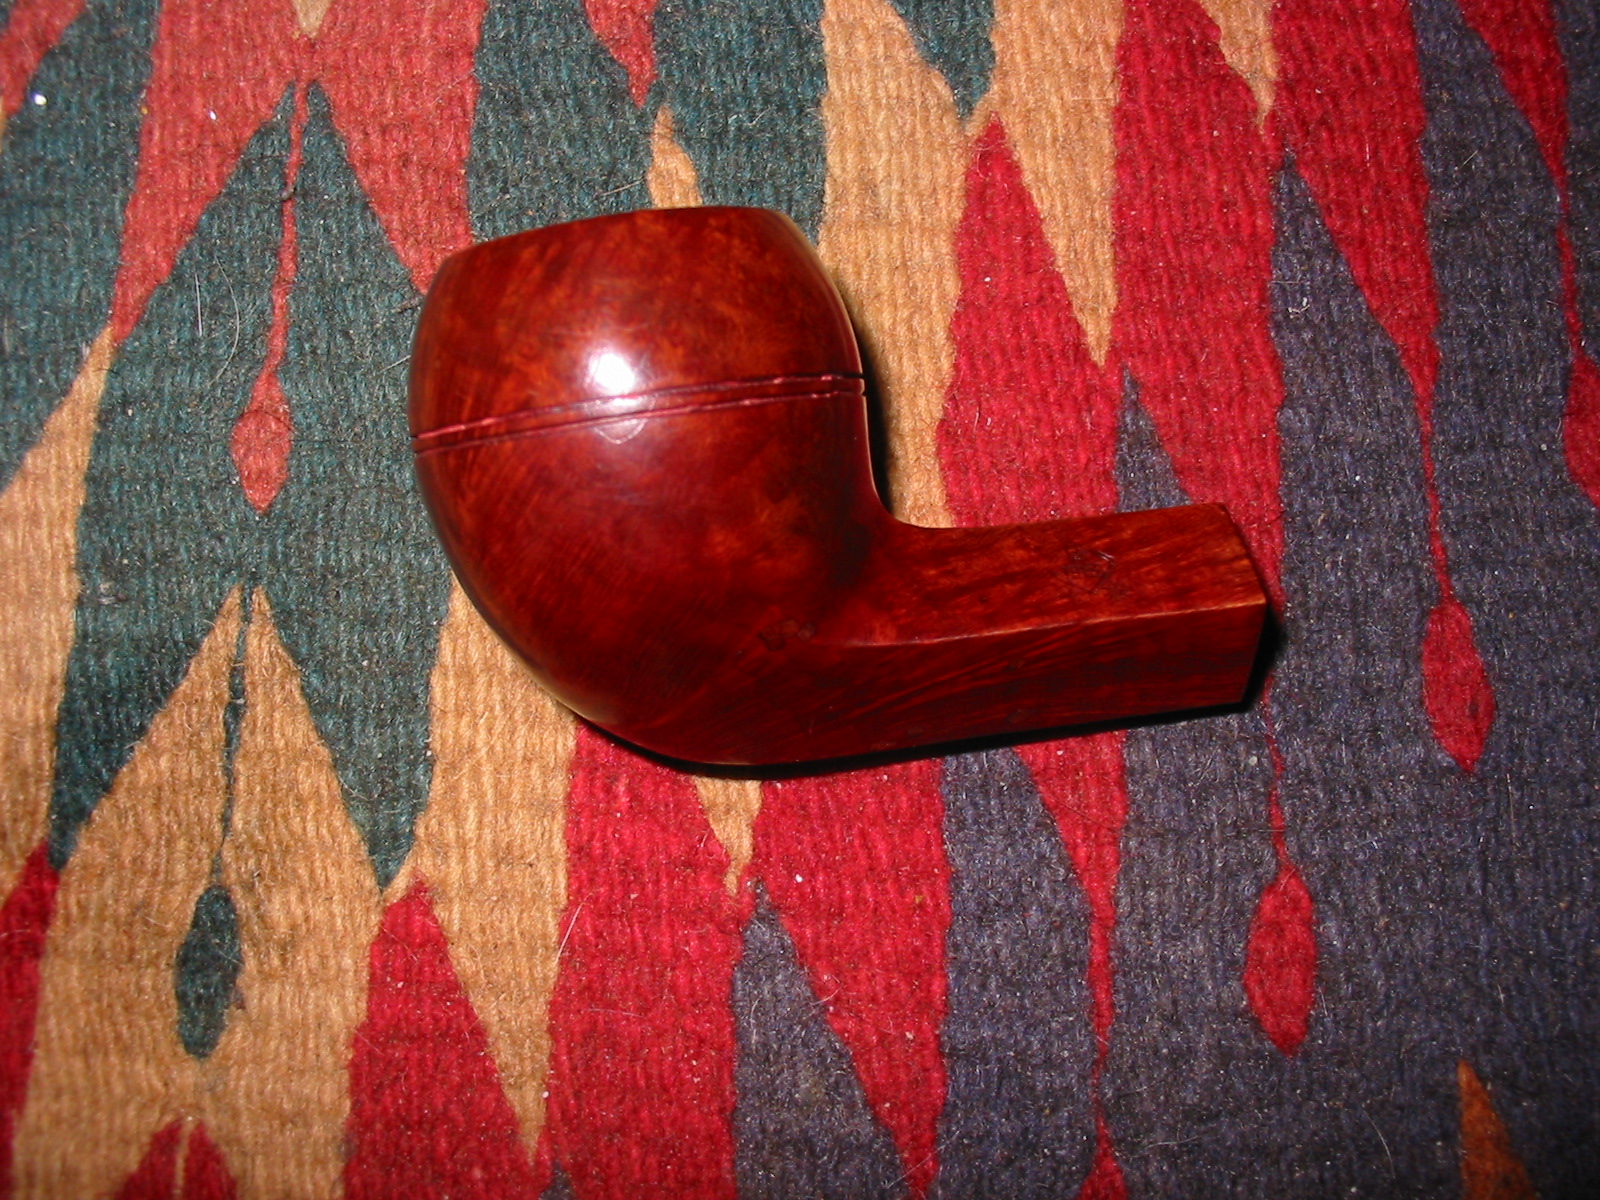
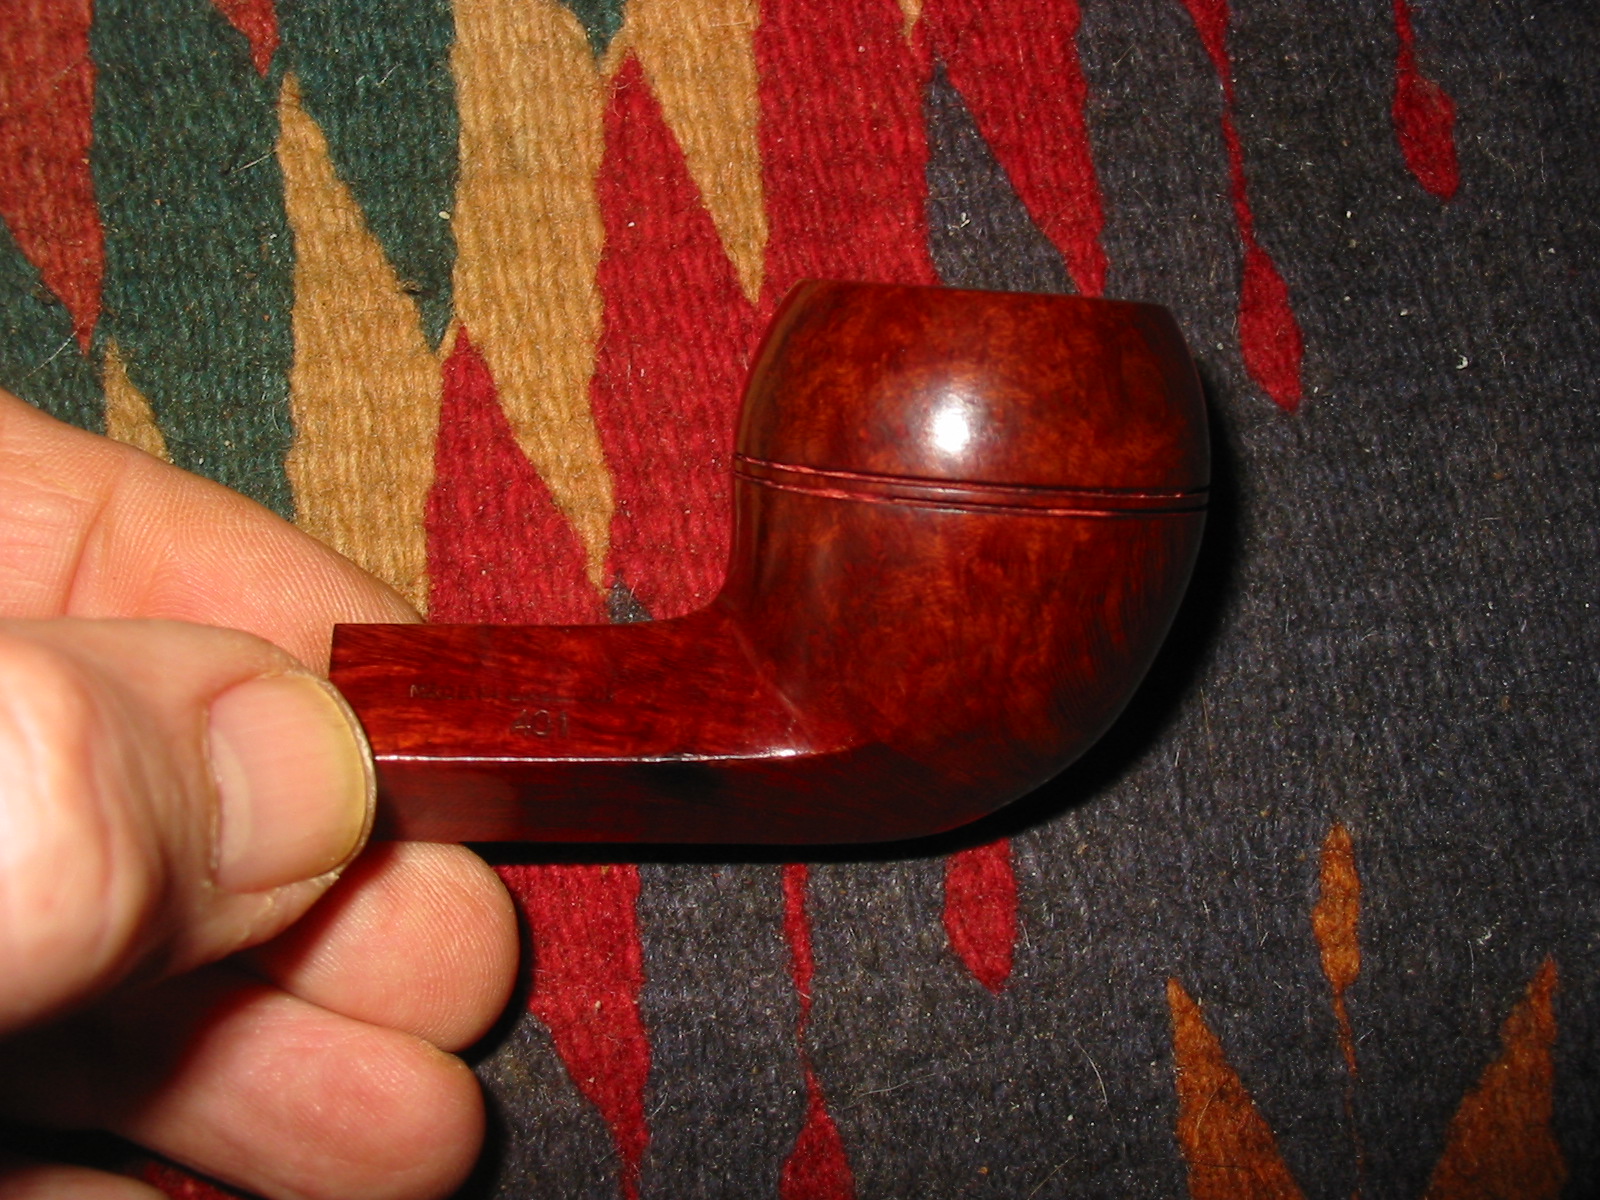
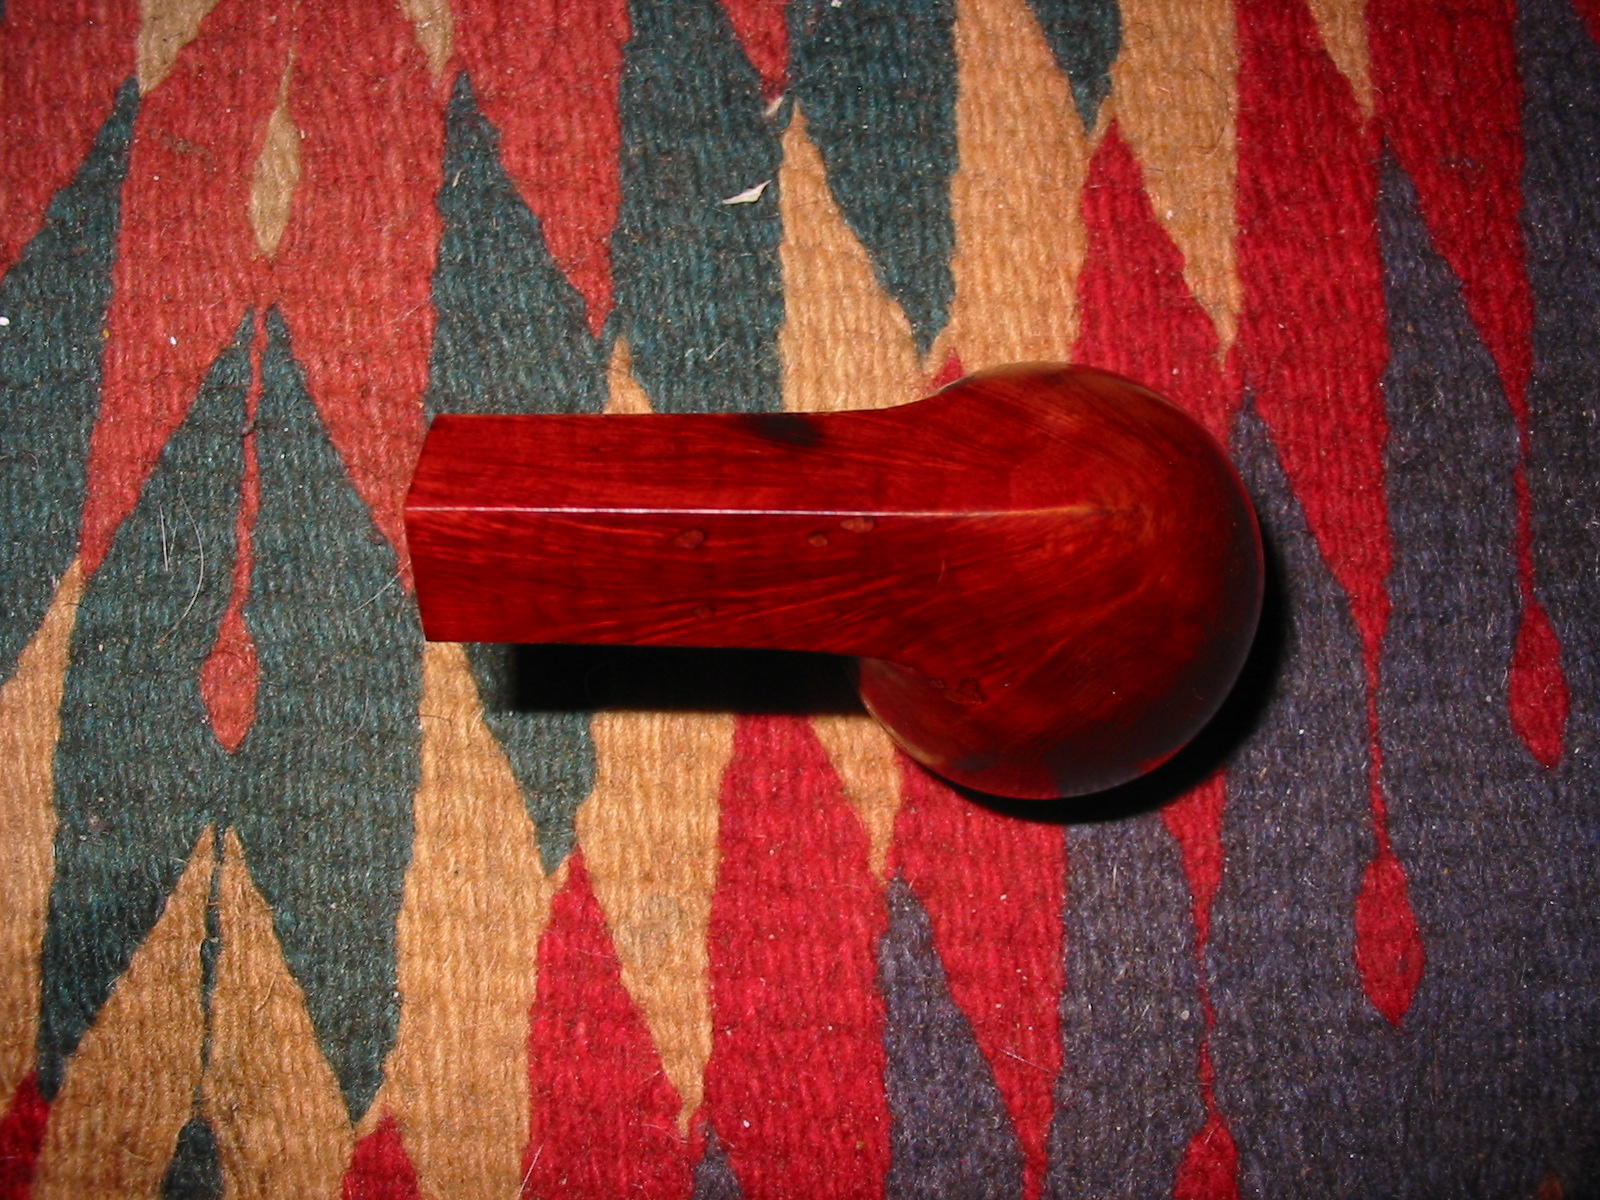
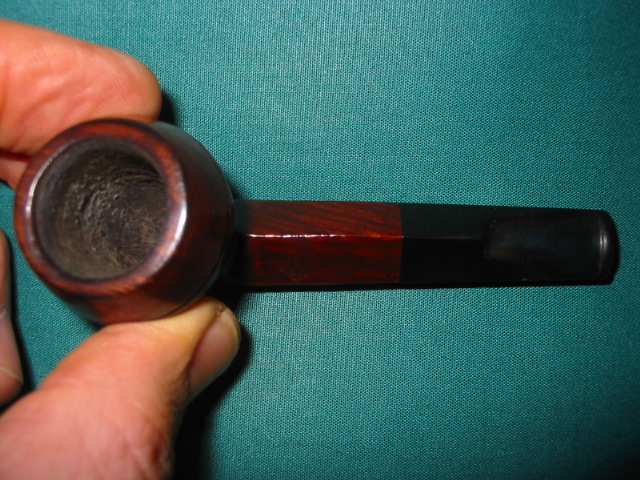
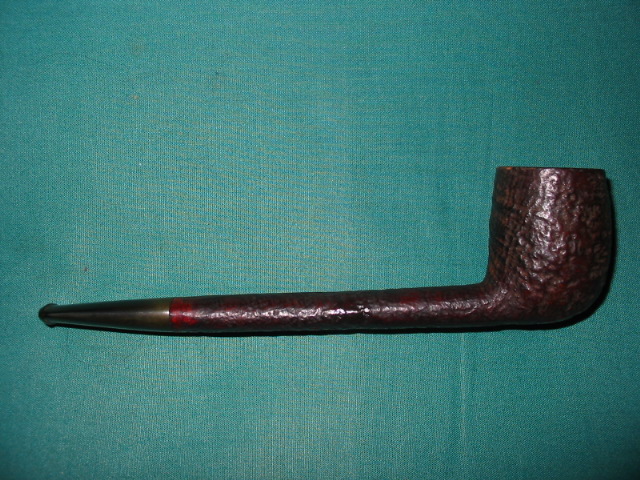
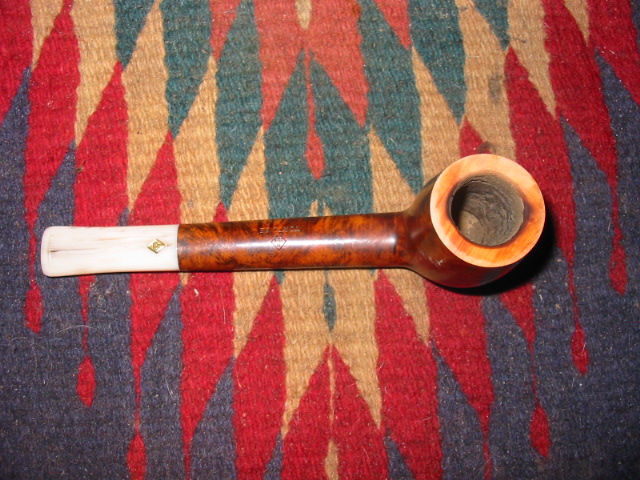
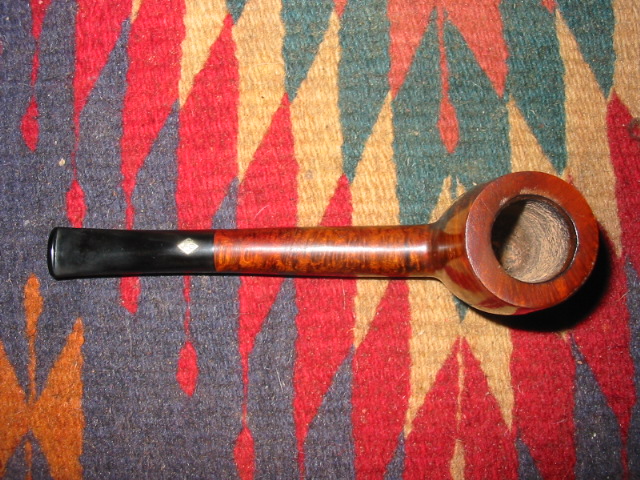
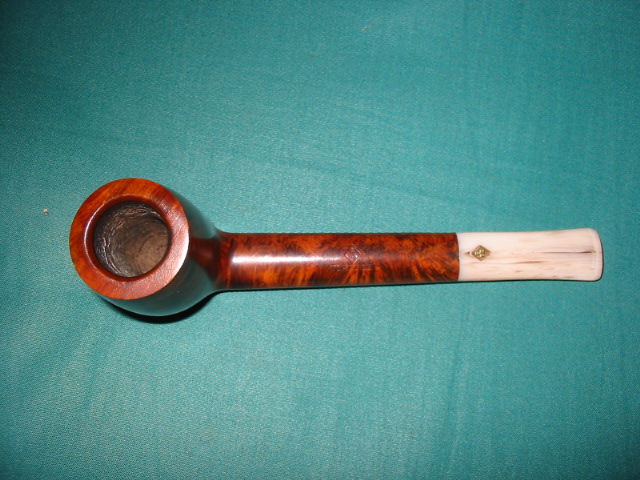
I gave the pipe a first coat of oxblood stain, flamed it and buffed it off with Tripoli. You can see that it gave a fairly good coverage but was a bit too opaque to my liking. I wanted the grain to be more visible so I washed the pipe down with acetone to remove some of the depth of colour and highlight the grain. In the photos below you can see the pipe after I wiped it down with the acetone and buffed it with White Diamond. It still was not the finish I was looking for so I sanded the bowl with 1500 and 1800 grit micromesh to smooth the surface and then heated the bowl with my heat gun to open the grain of the wood before giving it a second coat of oxblood stain.

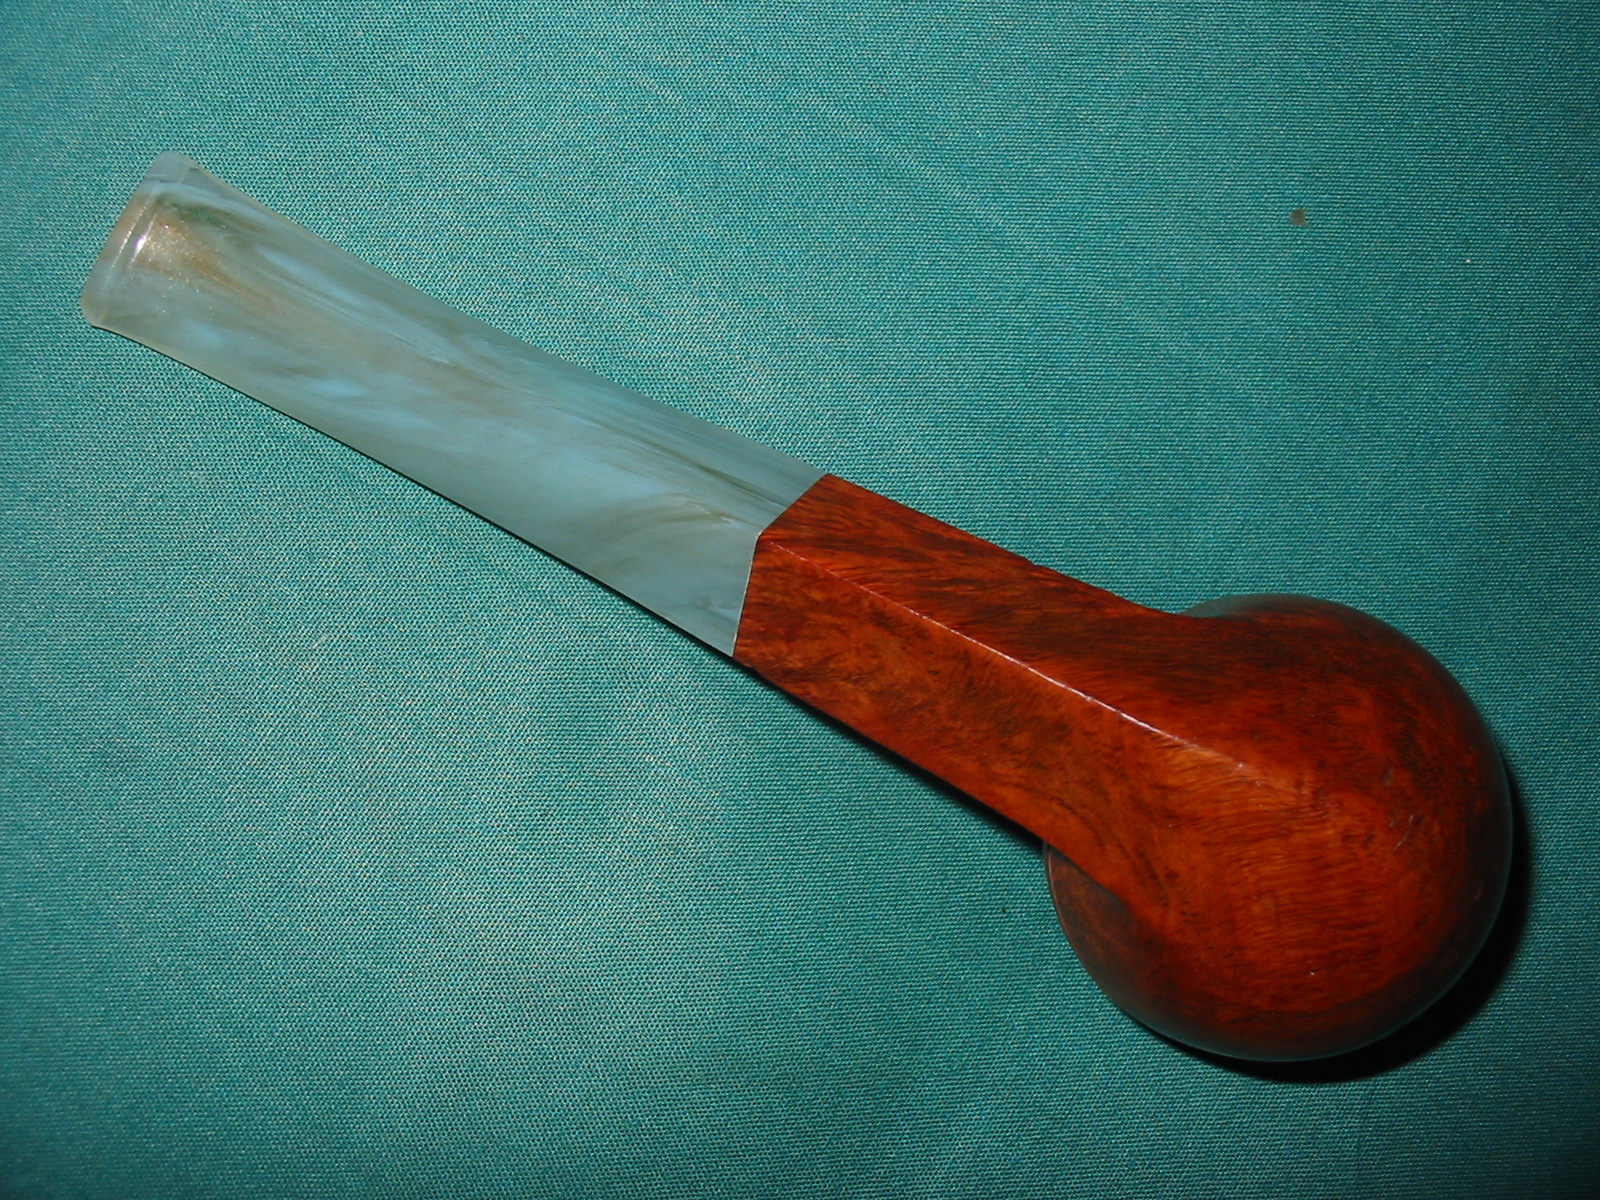
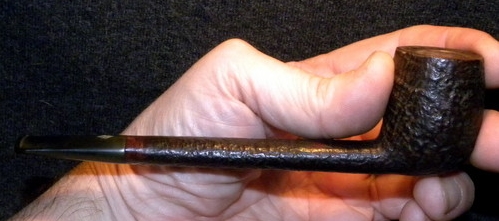
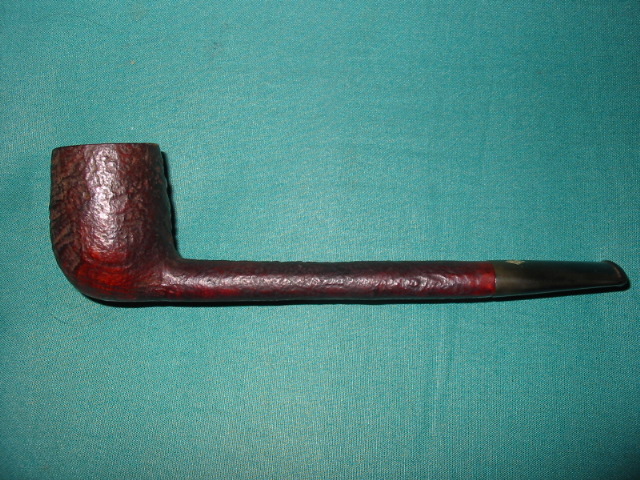
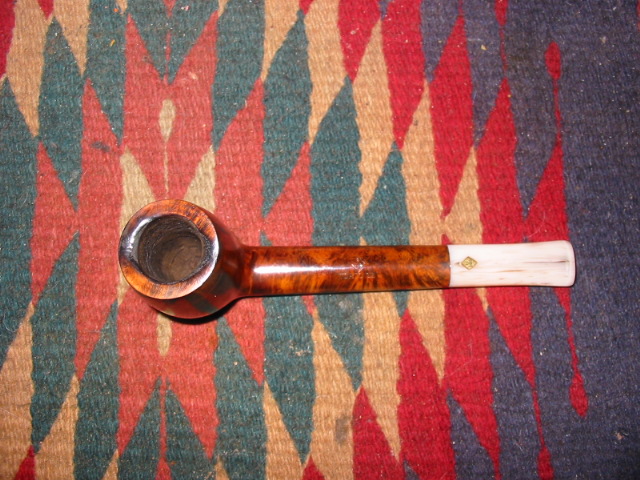
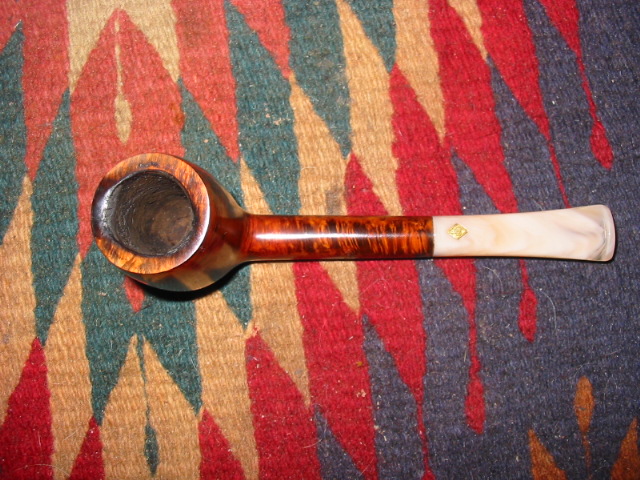
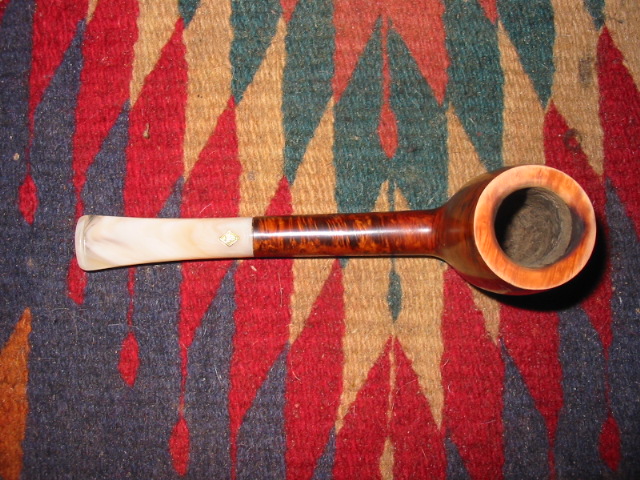
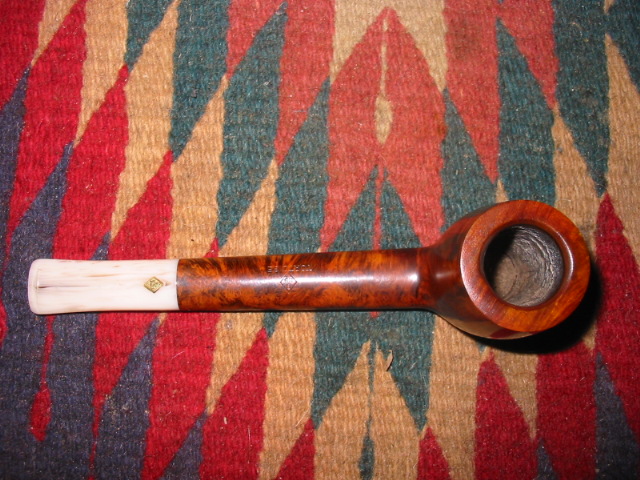
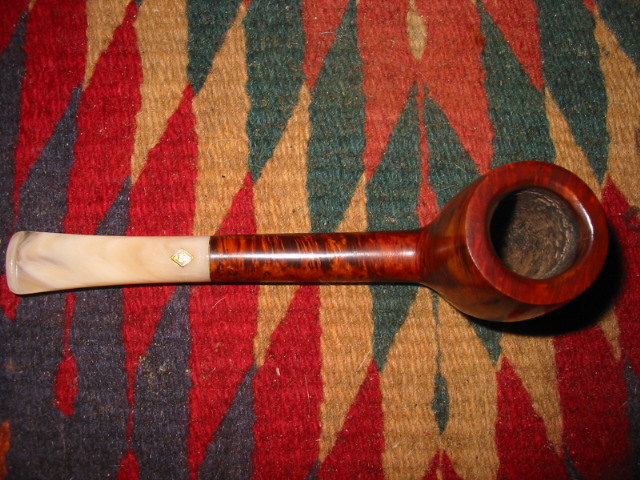
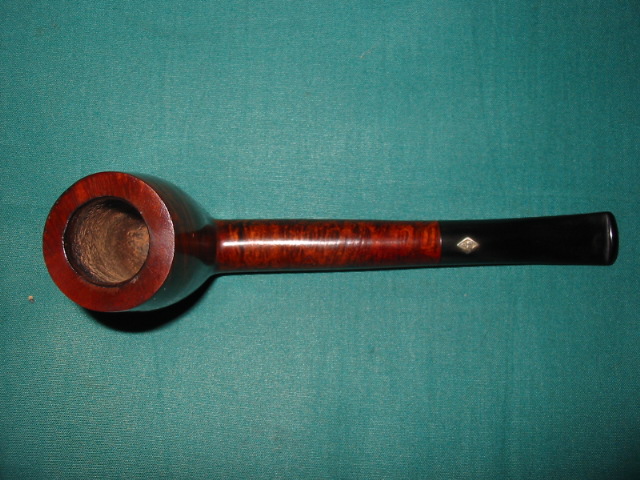
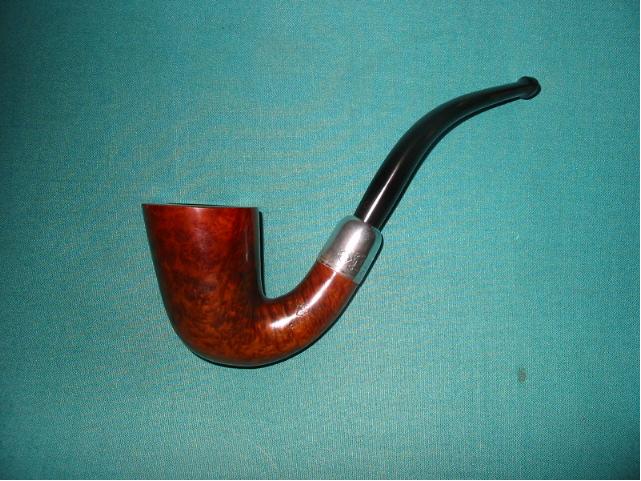
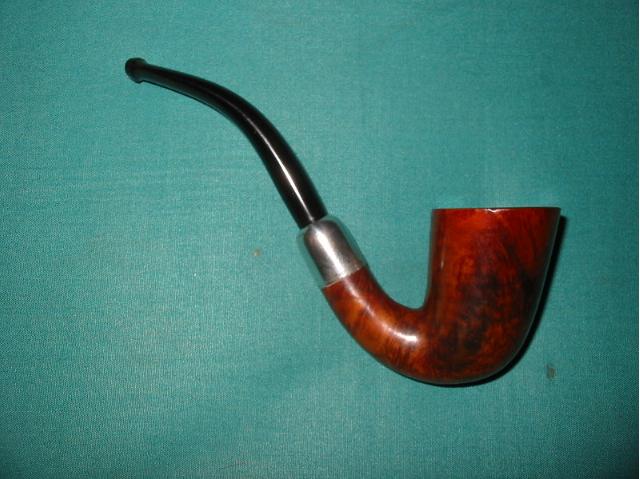
The next series of four pictures show the finish that I was looking for. The grain shows through clearly and the bevel and stain on the rim minimize the effect of the burn marks. The stem is also cleaned and polished but the bite marks still remain in the pictures below. After staining and flaming the pipe I buffed it with White Diamond and then waxed it with several coats of carnauba before buffing with a soft clean flannel buff.

At that point last evening I set the pipe aside to be finished today. When I came home from work this evening I used the heat gun to raise the dents in the stem on the top and underside. The first two photos show the effect of the heat gun in raising the dents. Once I have the dents raised as far as I can lift them I used 240 grit sandpaper to level the surface of the stem and I have found that the combination of the heat and the sanding takes care of most dents in the surface of the stem as long as they are just dents and not cut marks. I finished sanding those areas of the stem with micromesh pads from 1500-12,000 grit until the stem had its own inner shine. When I was finished I coated the stem with Obsidian Oil and once dry, buffed it with carnauba wax and a soft flannel buff. To finish off the pipe I gave it several more coats of wax and buffed it by hand with a soft cotton cloth.

A surprise awaited me when I opened the package and looked at this BBB Boldergrain Canadian


Blog by Steve Laug

When I saw this one show up on EBay I had to have it. Multiple reasons made it one that I wanted to own. The first is that I love the older BBB pipes. I like the way they look and smoke. I like the classic shapes and the old patinas that grace them. Then of course for me was the fact that in my reading and buying estates I had not come across this line of BBB pipes. It was new to me. So I placed a bid on it and won it – it turns out that I was the only bidder so no surprise really.

The first series of four pictures show the pipe as it appeared on EBay. The finish looked to be very worn, the stem oxidized but it did look promising to me. It looked like it would need a bit of work to bring it back to life. The stain would probably have to be redone. The stem cleaned and polished and who knows what the inside would be like. The second picture gave me a bit of hope that maybe the pictures were not quite the whole story. The final picture of the bowl looked like it may have been over reamed and I wondered if there was not a crack in the bowl. But I would know more when it arrived.

Image

ImageImageImage

When the box arrived from England I opened it to see what would await me in terms of cleanup and restoration. You can imagine my expectations and what went through my mind as I cut the tape and the wrapping paper to open the box. When I took the bubble wrap off of the pipe and stem I was amazed at the pipe. It did not even look like the one in the pictures above. The three pictures below show the pipe just after I took it out of the box. The stem was slightly oxidized but the finish was actually not too bad at all. It was nothing that a good buff with some carnauba could not take care of.

ImageImageImage

The next series of photos show what the pipe looked like once it was buffed and the stem polished and the oxidation removed. This probably took the least amount of effort to clean of any of my EBay purchases. Even the inside was very clean. The shank and bowl were clean. I ran a few pipe cleaners through to check it out and they came out spotless. There was no old tobacco smell to the pipe at all – it smelled new. I loaded it up and smoked some older Three Nuns that I had around and enjoyed what appeared to be a very clean pipe. The first smoke was clean and flavourful with no hints of ghosts or residual flavours that I have come to expect from old estate pipes. This one was like smoking a well broken in pipe that had been thoroughly cleansed and exorcised of previous ghosts. It has since become a favourite of mine!

ImageImage

A Trio of BBB’s in need of topping!


Blog by Steve Laug

Tonight I went to work on a trio of BBB’s I just purchased. Two of them, those stamped BBB Tortoise (with the ivory stem) looked to have come from the same pipe smoker wielding the same torch lighter. He had in essence cut a trough across the top of the rim from front right to back middle. In the three photos below you can see the damages to the rims. The top photo shows the oval shank Canadian and the second shows the round shank Liverpool. The third one is a BBB Silver Grain and it looked to have been used as a hammer. The outer edges of the rim were rough and beaten and the rim itself was marred with dents. Besides the damage to the rim the Tortoise Liverpool had a cracked shank that I needed to repair. That repair will be the subject of another blog post.  

ImageImageImage

I have a board on my desk that I attach a piece of 220 grit sandpaper to and use that to top the bowls. In the picture below it is to the right of the two Tortoise pipes. I hold the bowl flat against the sandpaper and rotate it to remove the damaged portions of the briar. It is important to keep the bowl perfectly flat against the board and paper so that the top remains flat. It is very easy to sand an angle to the bowl if you are not careful with this process. In the picture the two bowls have been sanded to remove the finish and the top layers of the darkening. Both bowls have a slight trench burned into the surface that moves from the front right to the rear centre. The topping will need to be deep enough to remove the damage yet not too deep to change the profile of the two pipes.

Image

In the next series of two pictures you can begin to see that the rims are returning to a normal and the troughs are disappearing under the sanding. The top photo is of the Canadian and it is pretty close to being finished in this photo. The second photo shows that the trough in the Liverpool is also disappearing though it will take a bit more sanding.

ImageImage

The Silver Grain Liverpool also was topped using the same process to remove the damage to the outer rim and the top of the rim. The nicks and dents on the tops and the damage to the edges made it necessary to top this bowl as well. It was a much simpler process as the rim did not have a deep trough across it but rather rough edges on the outer edge of the rim. The picture below shows the final result of the topping on that pipe. Once it was topped with the 220 grit sandpaper I moved to a fine grit sanding block – 400 grit and then on to the micromesh pads to polish the sanding marks out of the rim. I finished the sanding by buffing it with Tripoli and White Diamond to remove any remnant of the sanding marks.

Image

I then used a small one inch square piece of sandpaper folded in half and held at an angle to sand a slight bevel into the inner rim of the two Tortoise pipes. This took care of the inner damage that remained after topping the bowl. I then sanded the two pipes in the same manner as described for the Silver Grain above. Finishing with 6000 grit micromesh and then buffing with Tripoli and White diamond. I stained the trio with a medium brown aniline stain applied to the surface with a dauber. It took two coats to cover the fresh briar of the repairs. The stain was wiped off and the pipes were taken to the buffer when dry.

Image

The three pictures below of the three pipes show the buffed rims before waxing. The stain matched exceptionally well. The inner bevel took care of the inner rim damage and the topping took care of the trough that went across the bowl. In both of the Tortoise pipes below the damage is virtually removed and the rim surface and edges look new. The rim on the Silver Grain also came out very well and is smooth and looks as good as new. The outer rim damage and the nicks on the top of the rim are gone and a smooth shiny surface is what remains.

Image

ImageImage

The final three pictures show the rims after they have been given several coats of carnauba wax and buffed to a sheen. The pipes are ready to smoke and look renewed and reborn. You can see from the process that is spelled out above that it is not difficult to do and the results are worth the effort. Take your time and proceed with caution, checking to make sure that enough of the damage surface has been removed but not too much. Once that is done it is a simple matter of sanding, staining and polishing.

ImageImageImage

BBB Diamond shank billiard


Blog by Steve Laug

This older BBB Diamond Shank billiard was a pleasure to bring back to life. I love the older BBBs and this one has a place in my collection. It is only stamped BBB in the diamond on both the shank and the stem. There are no shape numbers of other features. I have no idea on what its age is but love the shape. The diamond shank and the way it flows into the bowl make it a unique among my BBB billiards. It is stained in a rich oxblood colour and it is a clean little pipe. When I picked it up off EBay it appeared to be pretty clean other than a bit of oxidation on the stem. Sure enough, when it arrived it was very clean. The bowl only needed a slight ream to be ready to smoke. I wiped down the outside of the bowl with a damp soft cloth dipped in Murphy’s Oil soap lightly so as not to disturb the finish but remove the grime. The top had some darkening and tar that came off easily with the Murphy’s Soap. I coated the bowl with several coats of carnauba wax and set it aside.

To deal with the oxidation on the stem I sanded it with 400 and 600 grit wet dry sandpaper dipped in water to give it a bite. I finished that with micromesh pads – 1500, 1800, 2400, 4000 and then I took it to the buffer for Tripoli and a bit of White Diamond before giving it several coats of carnauba wax. It has a wide open bowl and draw.

ImageImageImage

One of my favourite refurbs – 1919 BBB Bent Calabash


I was going through some old pictures on my hard drive the other day and found this one that I bought on EBay for a very reasonable price early in 2008. I finished refurbishing it in March of 2008. It was and is one of my favourites. You can see from the picture below what kind of shape it was in when I got it. In the pictures on EBay it looked worse than it does in the picture below. I opened the box when it arrive expecting far worse. I bid on it because I liked the shape of the pipe and I figured it would be a challenge.

The stem was oxidized to the brown white coloration that appears below. It almost appeared to be a horn stem – but it was not. When I removed it from the shank – which took a bit as it was stuck by the goop in the shank and the oxidation that portion was black. I put it in the freezer for a short period of time to cause some expansion and contraction in the stem that would loosen it from the shank. When I took it out of the freezer it was easily removed. I went to work on the inside of the stem with shank brushes and pipe cleaners, both bristle and fluffy dipped in alcohol. I worked on the stem until the cleaners came out white and clean.

I then mixed a batch Oxyclean and soaked it in the solution overnight to soften the oxidation. I find that the Oxyclean solution (warm water and a half scoop of Oxy in a pint jar) works wonders in softening the oxidation. It does not remove it but it made it easier to remove. Once I took it out of the solution the next morning to work on it I used 240 grit sandpaper to remove the oxidation. It worked well to take off the brownish white coating on the stem. Once that was finished it was a dull brown and I continued to work on it with the 400 grit wet dry sandpaper until it was a dull black. I then progressed to 600 grit wet dry sandpaper to further remove the grime. I used both of these sandpapers with water as I find it gives the grit more bite on the stem. I had not discovered micromesh at this time so I used 800 and 1000 grit sand paper and continued to sand the stem clean. By the time I used the 1200 grit wet dry sandpaper the stem was looking like new. I took it to my buffer and used the Tripoli and White Diamond to finish the job.

While the stem was soaking in the oxy I reamed and cleaned the pipe bowl and shank. I worked on it until the pipe cleaners came out clean. It took many bristle cleaners and many fluffy one to get it clean. I also used cotton swabs in the shank to remove the tars and build up there. I scrubbed the outside of the bowl and rim with Murphy’s Oil Soap to remove the grime and deep seated dirt on the bowl. After I finished the scrub and clean I put the bowl in a bath of Isopropyl alcohol to remove any remaining dirt and grime and the badly damaged finish on the bowl. That was the first night of my working on the pipe. I went to bed that evening with both the bowl and the stem soaking in their separate baths.

Image

The next morning I finished up the stem and set it aside as I described above. I turned my attention to the pipe bowl. I removed it from the alcohol bath and dried it off. I used a wet cloth and a butter knife heated over a flame to raise the dents in the outer rim of the pipe and the sides of the bowl. The process is quite simple. You wet a cloth, wring it out so it is not dripping wet yet still wet. Then fold it and put it over a dent. Heat the knife (I use our gas stove to do it but have also used an alcohol lamp). I then lay the flat blade of the knife on the dent. You will hear a hiss as the heat causes steam to rise from around the blade. The steam causes the dent to rise. I applied the blade repeatedly until the dents were minimized. Then I took it to my work table and used a flat board and a piece of sandpaper to top the pipe just enough to remove the remaining dents and damage. I do that on a flat surface to maintain the flatness of the rim without changing the angle. When that was finished I wiped down both the bowl and rim with an alcohol damp cloth to remove any residual sanding dust.

I then used an aniline stain, in this case medium brown as I had researched and found that the colour matched the colour of the pipe when it was new. I used the dauber that came with the stain and applied it to the rim and the body of the pipe. I started at the bottom of the bowl and worked my way up to the rim. The rim always the last part I do. Once it was completely covered with stain I ignited it with my lighter to set the stain. The process is called flaming the stain (at least that is what I call it.) I let it dry while I put a coat of wax on the stem.

When the stain was dry I took the bowl to my buffer and gave it a buff with Tripoli and White Diamond to remove the top coat of the stain and the opacity of the stain. The result can be seen in the picture below. I also used some silver polishing compound applied with a soft cloth to remove the tarnish on the end cap. I finished that process with a silver polishing cloth to give it a good shine. When that was completed I gave the bowl and cap a good buff with carnauba wax then reinserted the stem and gave the entire pipe an extra coat of wax for a finish.

Image

I still smoke it today and it delivers proudly! The last two pictures below show what the pipe looks like today after 4 years of use. It has developed a deep patina to the bowl and the warmth of the medium brown stain has mellowed into a richness that is really nice. Repeated waxings over the years have helped mellow the finish and also deepen the black of the vulcanite stem. This is one of my favourite old pipes. It truly is a reborn pipe. In 7 years it will be 100 years old. Some days I wish it could talk because I can’t even begin to imagine the stories it could tell.

ImageImage

The 1912 BBB Poker


Blog by Steve Laug

I picked up this old 1912 BBB Poker on EBay not long ago. It is stamped BBB in a diamond on the shank and on the underside England. The silver is hallmarked Birmingham 1912. It is a smaller group 1 or 2 sized pipe. In the pictures the military stick bit looked like it belonged. It looked like it was shipped that way from the factory. The grime on the silver and on the shank as well as the oxidation on the stem made it appear to be that style of pipe. When it arrived with the other 5 pipes that I bought with it I examined it a bit more closely. In the picture below you can see the roughness of the stem. It is definitely poorly cut. The closer I looked the more I realized that it was a poor replication of an older stem. A BBB pipe of this age came with a different style of military stem and it had an orifice button rather than a slot like this one. The stick bit was not original as it was a slotted bit and was not finished smoothly. There were lots of file marks on both sides of the stem. When I removed the stem I was even more certain that it was a poor copy. The one thing I was still thinking was that it was definitely spigot or military bit pipe.

ImageImage

Then I began to work on the shank and the band. Someone had darkened the end of the shank to make it look almost black like the tarnished silver band. Once I cleaned the silver and cleaned the shank I could see that it was not a silver end cap at all but a very typical BBB silver band. In the picture below you can clearly see the end of the shank showing as it sits inside the silver band. I used a 1500 micromesh pad to clean off the end of the shank and return it to wood. When I re-stained the pipe I would also re-stain the shank end to match. It was clear that I would need to do a bit of research on what kind of stem was originally on this poker style pipe if I was to restore it to its original glory.

Image

I have a copy of the BBB Catalogue reprint from Gary Shrier so I got it out and went to work researching the look of the missing original stem. It became clear rather quickly that the pipe shape I had originally came with a taper stem with an orific button. In the catalogue is the exact shape in the exact size. I could not believe it. I laid the bowl on the page and then traced out the shape and size of the stem. A part of my hobby refurbishing is collecting old stems. I buy them wherever and whenever I find them and stockpile them in an old coffee can in my office. I went and got the can and emptied it on my desk to sort through what I had. I have yet to organize them by size so it is a matter of dumping the can out and digging through them. Well, I found one in my can of stems that had the right orifice button and the correct taper so I turned the tenon and fit the stem to the pipe. I used my Dremel to remove excess diameter from the stem so that it was the same diameter as the shank and band.

I also had to clean up the bowl of the pipe as the top was pretty beat up and the inside rim had been chipped and cut as if it had been carelessly reamed with a knife. I steamed the dents from the rim and carefully did a minor topping on the bowl to bring the top back to smooth and the inner and outer rim to smooth. I also chamfered or beveled the inner rim to bring it back into round. There were also dents on both sides of the bowl so I steamed those out as well. I use a wet cloth and a hot butter knife (heated over a flame) to raise the dents. I finished the work on the pipe by re-staining the top to match the bowl then buffed it and gave it a final polishing with White Diamond and then several coats of carnauba wax.

Here are pictures of the finished pipe. Other than being in colour it is a perfect match to the one in the catalogue.

ImageImageImageImage

Edit – 24 Feb. 2013 – I just came across an old BBB poker on eBay that is similar to the one above. I did some research on the stem on the one above and restemmed it. The one in the eBay photos is a newer version of the same pipe number. I have attached two photos below for sake of comparison.

BBB Poker BBB Poker 2

Refurb on an old Morell Mackenzie Bent


Blog by Steve Laug

Yes a Morell Mackenzie. That is how the pipe is stamped and I had no idea what I was dealing with. I have a thing for collecting late 1800 and early 1900 pipes so when this one came up on EBay I just naturally hit the bid button. When it arrived I decided to do a bit of research on it and uncovered the following information. This is taken from a paper on BBB pipes by Jacques Cole:

“Probably one of the first filter pipes (paper filter) was the BBB “Sir Morell Mackenzie‘. That this pipe was made before 1900 is shown by a letter dated August 27, 1891 from Sir Morell Mackenzie regarding these models with longer mouthpieces. The brand survived into the 1960s.”

That is pretty clear information and fascinating as well. I had no idea of the time frame of the introduction of the paper filter in pipes. But this is a nice little pipe. It has the orific button on the mouthpiece (the round hole instead of the slotted airway). It is also a military mount stem. Inside there is a reservoir for the paper filter to sit in. It has a sterling silver shank cap and is stamped Morell Mackenzie. The briar is a nice flame grain and the bowl is well done and well drilled.

I cleaned out the reservoir and the airway to the bowl. Took a bit as I had to work a paper clip through the airway and then a shank brush and finally bristle and fluffy pipe cleaners. The shank and reservoir are now clean!! The stem was an interesting proposition. It was pretty clean as it is built to hold the other end of the paper filter. I cleaned and swabbed it out. The stem needed to be sanded to remove tooth chatter and oxidation. Then I sanded with micromesh pads and buff with Tripoli, white diamond and finally carnauba.

Here are pictures of the pipe before the cleanup:

ImageImage

Here it is after the refurbishing

ImageImageImage