Tag Archives: banding

Kaywoodie Drinkless Apple Repurposed and Refurbished


Blog by Steve Laug

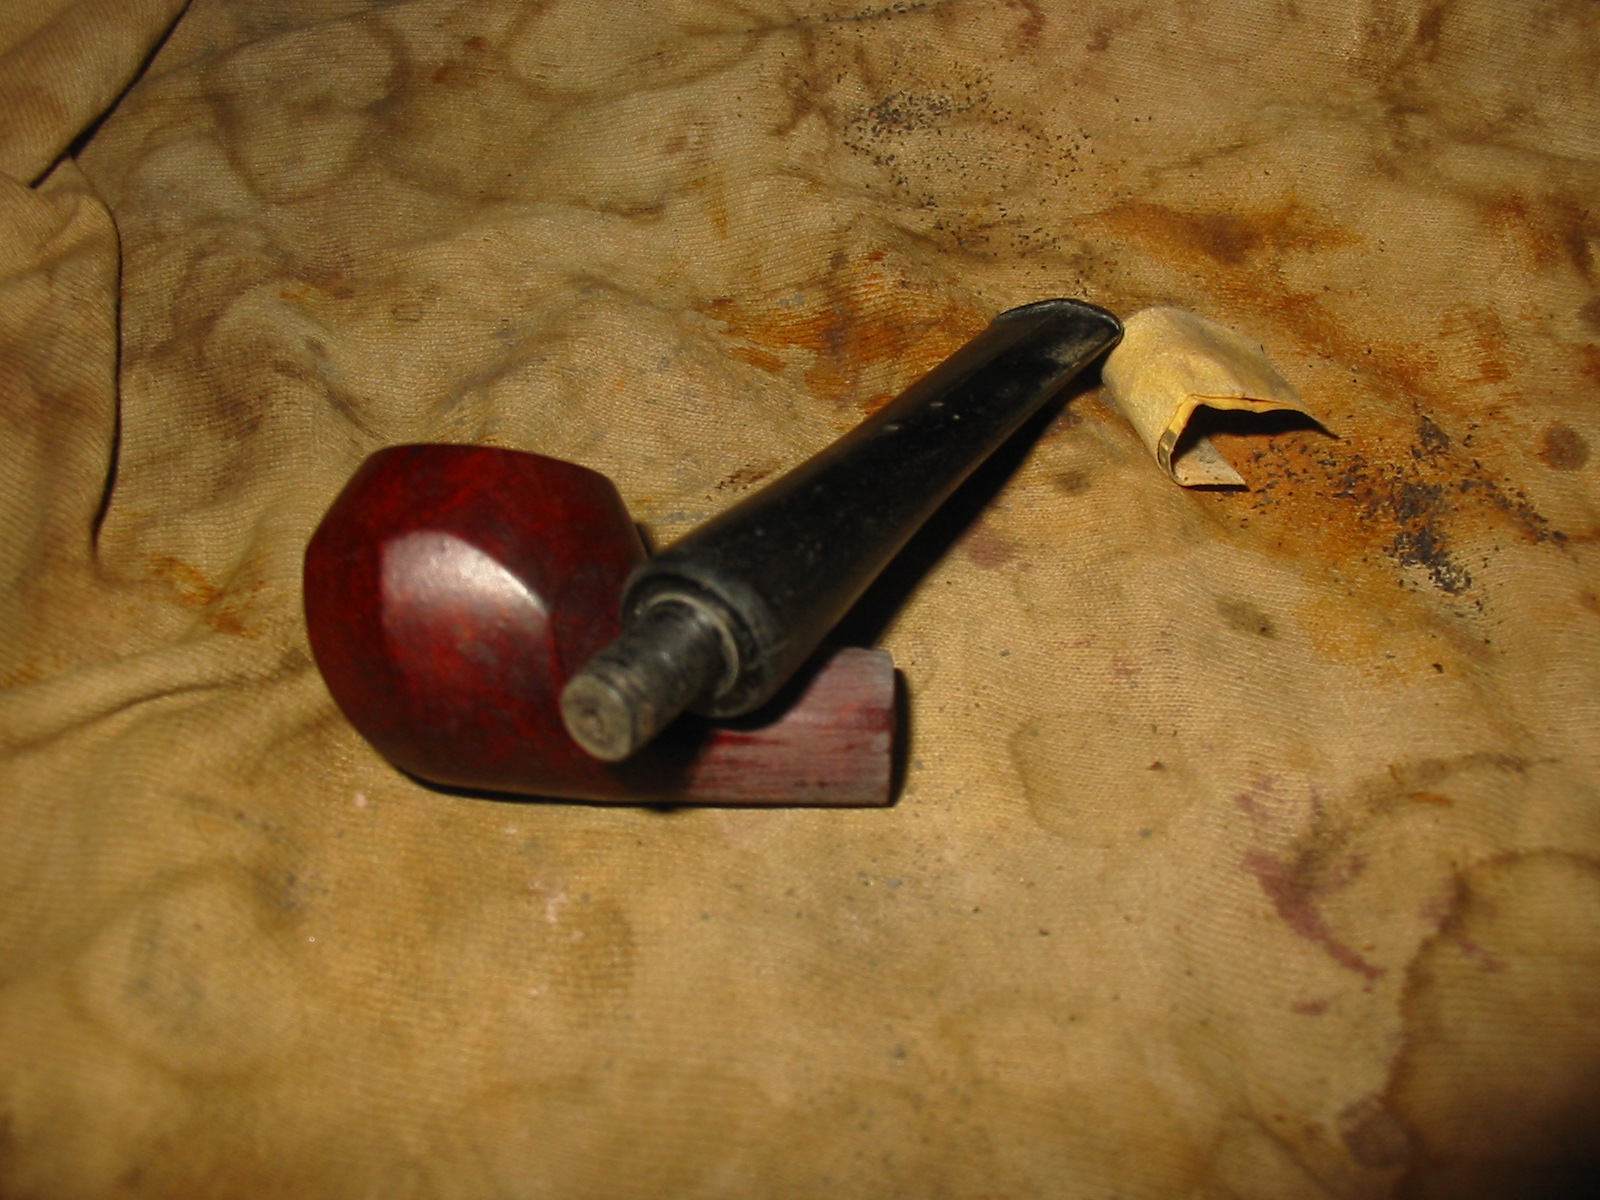
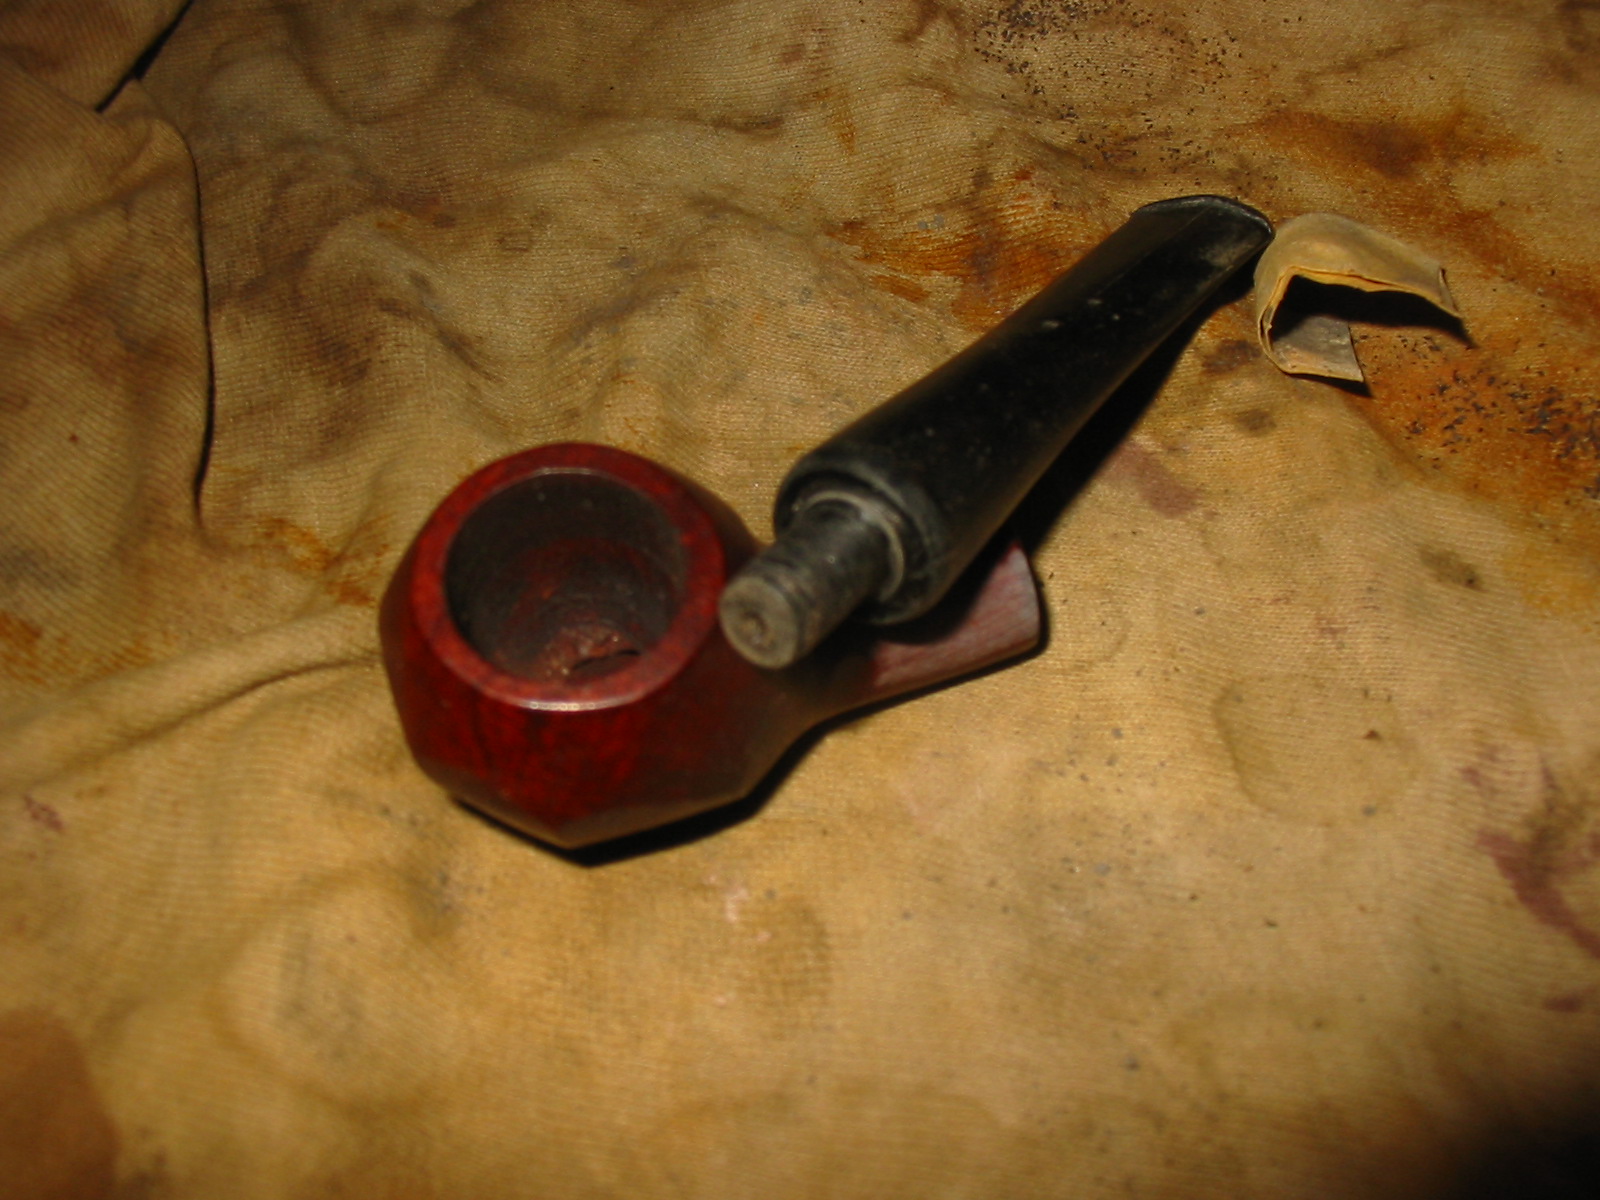
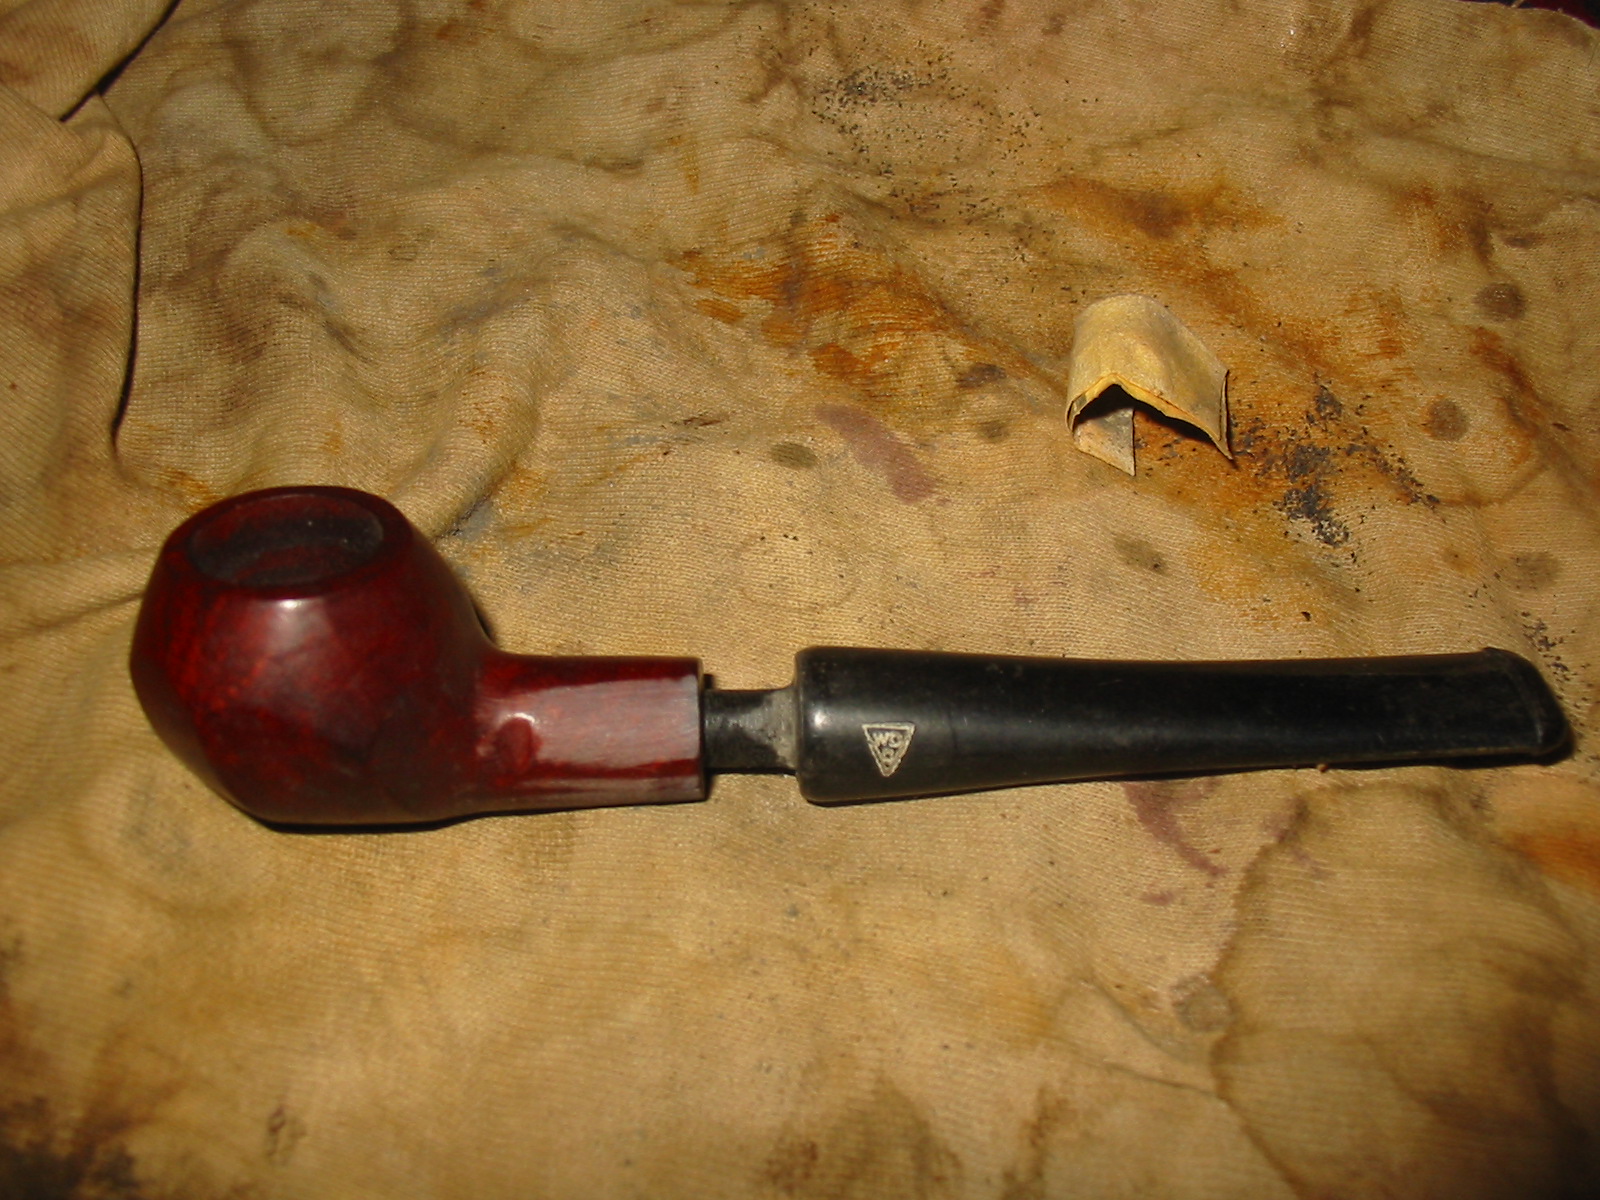
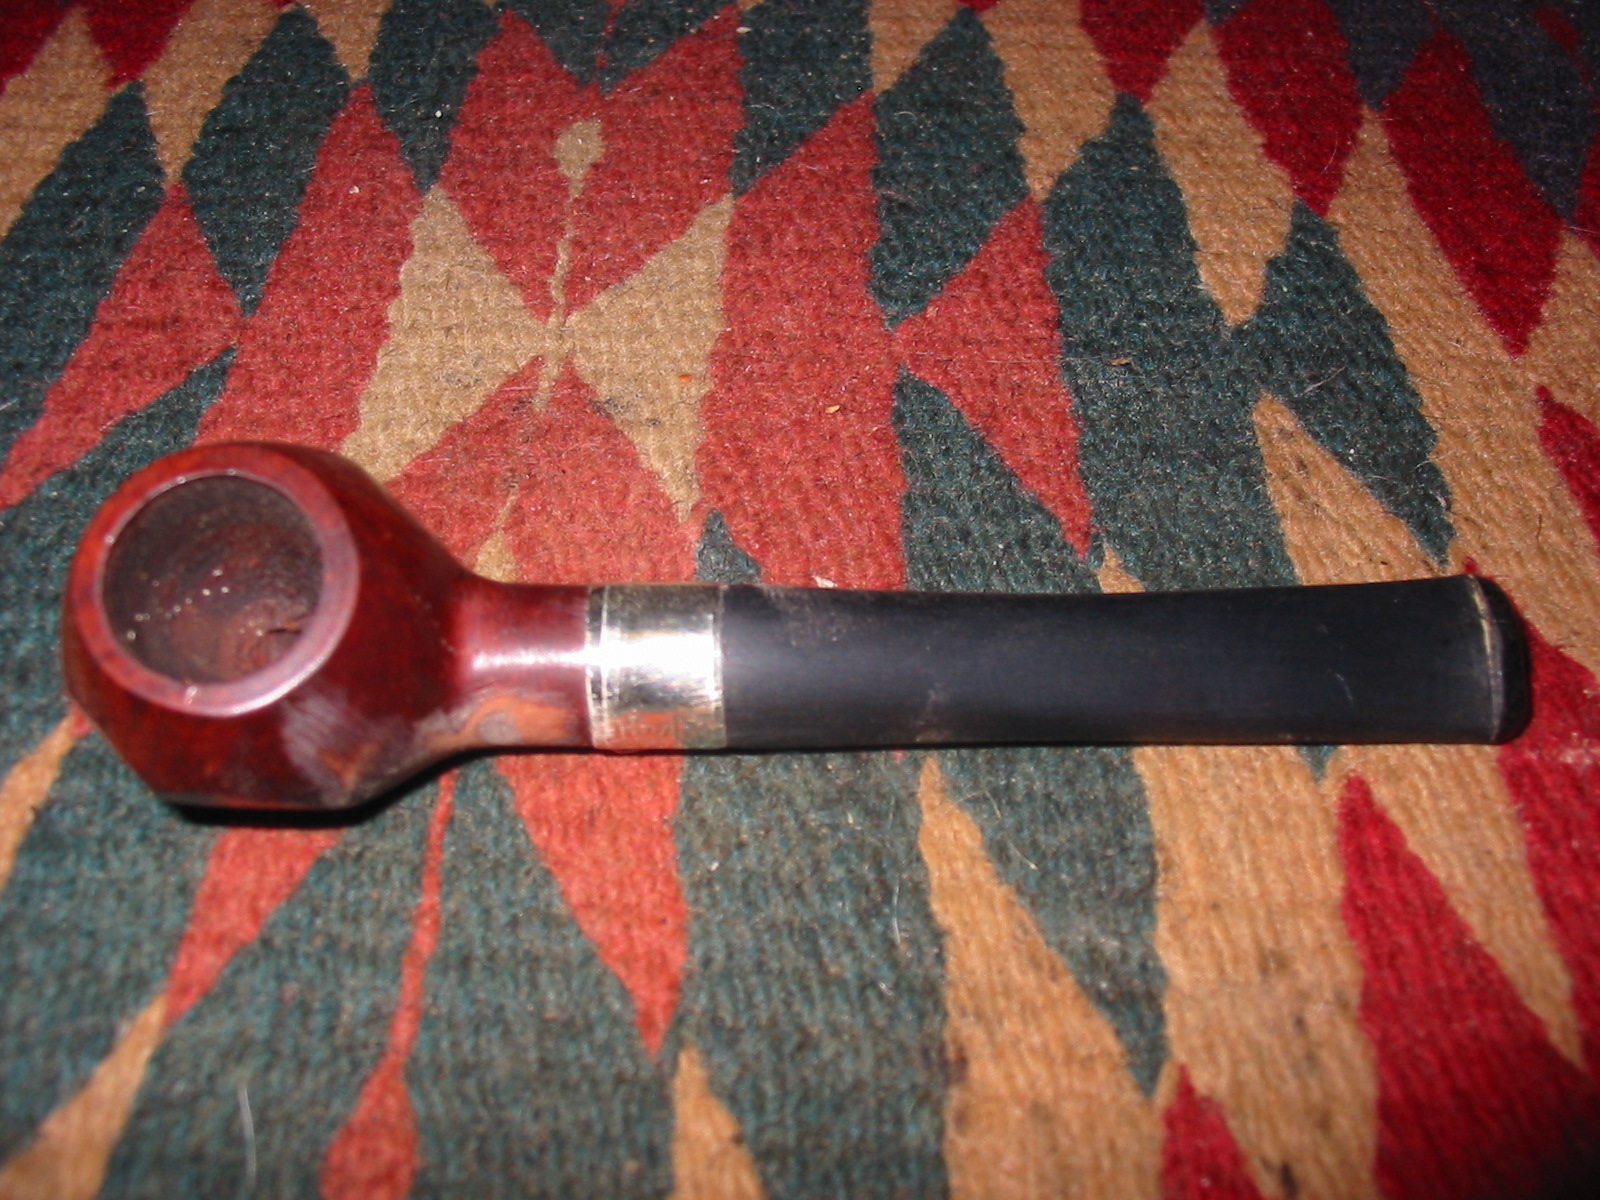
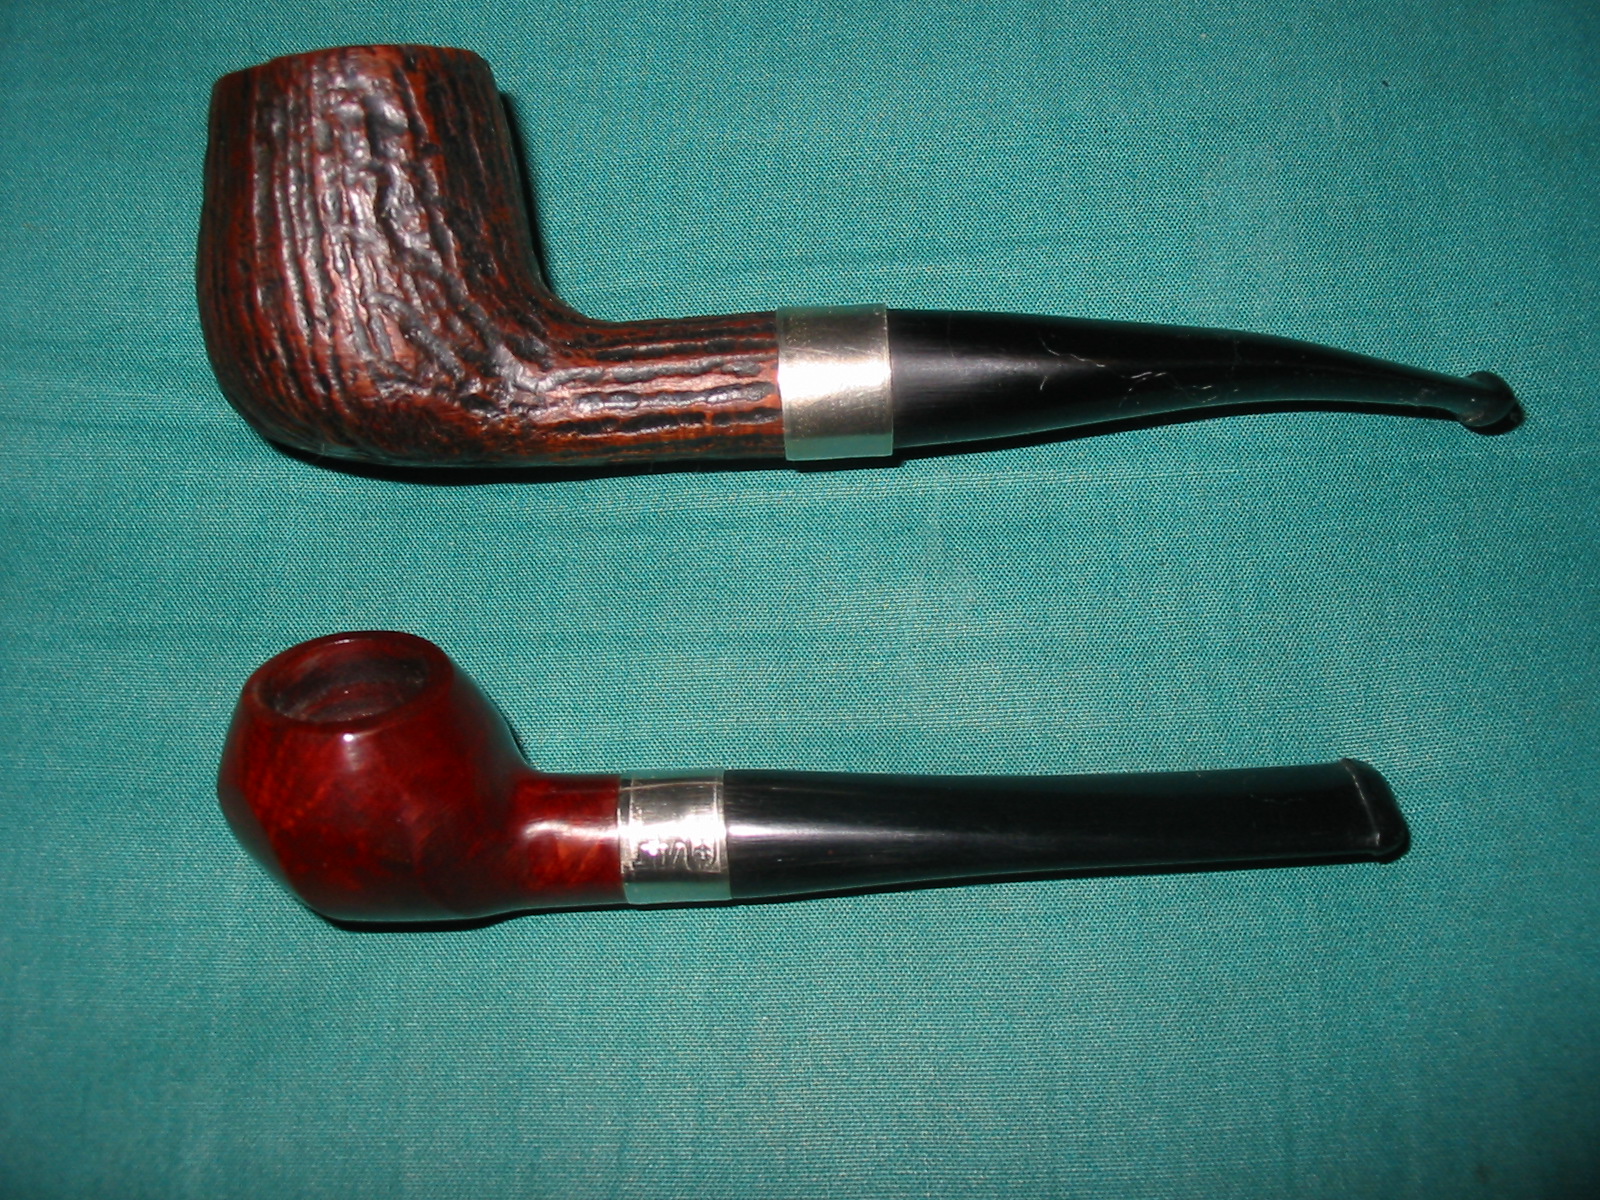
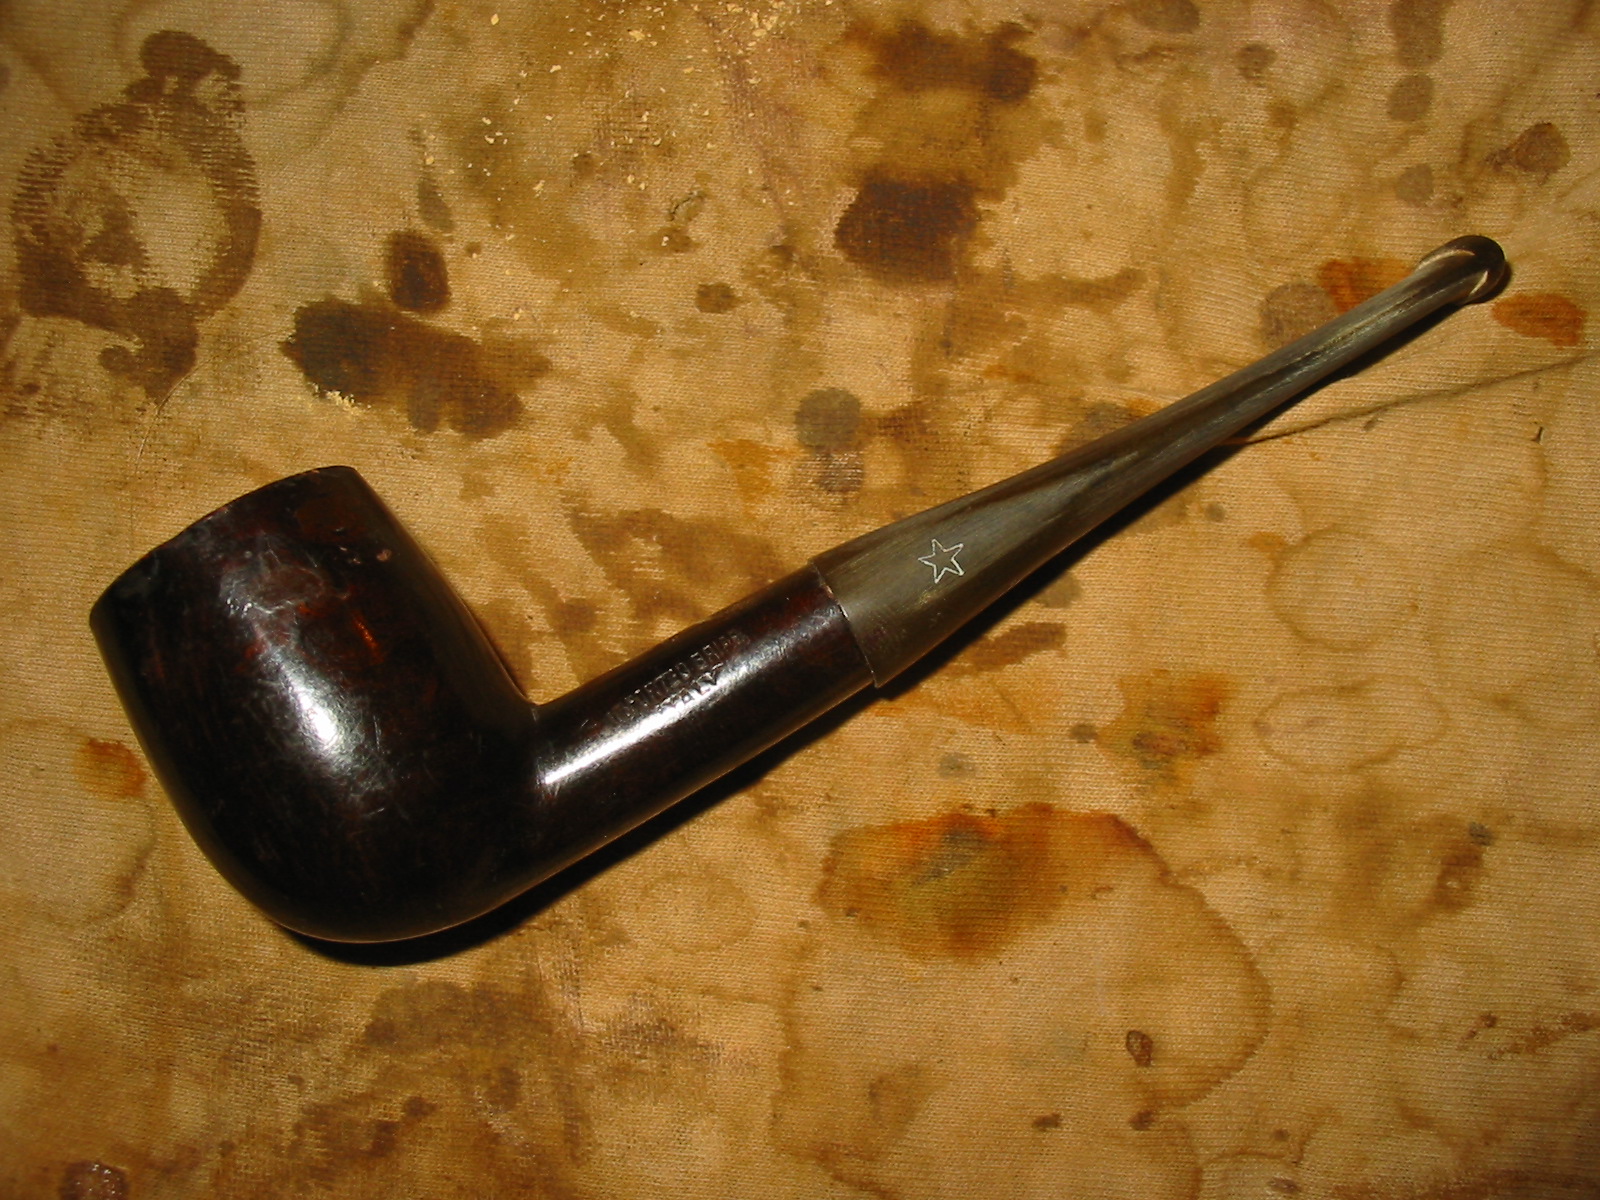
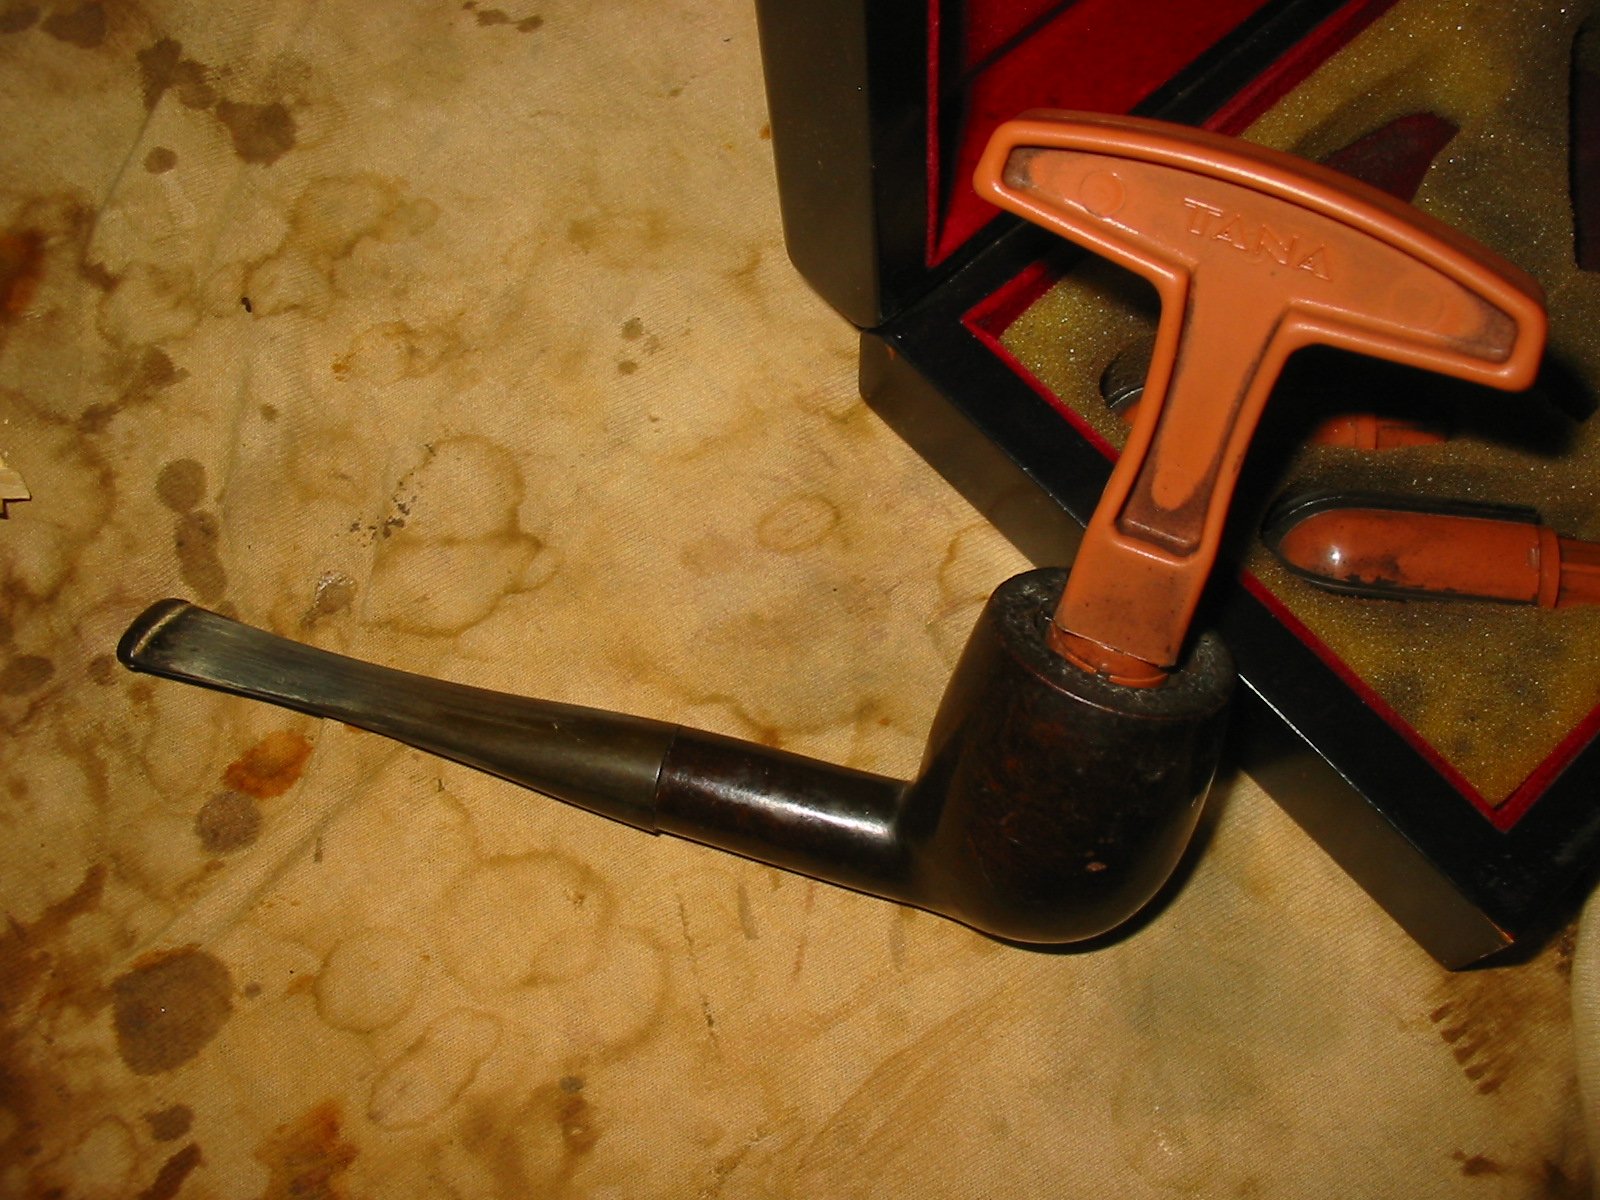
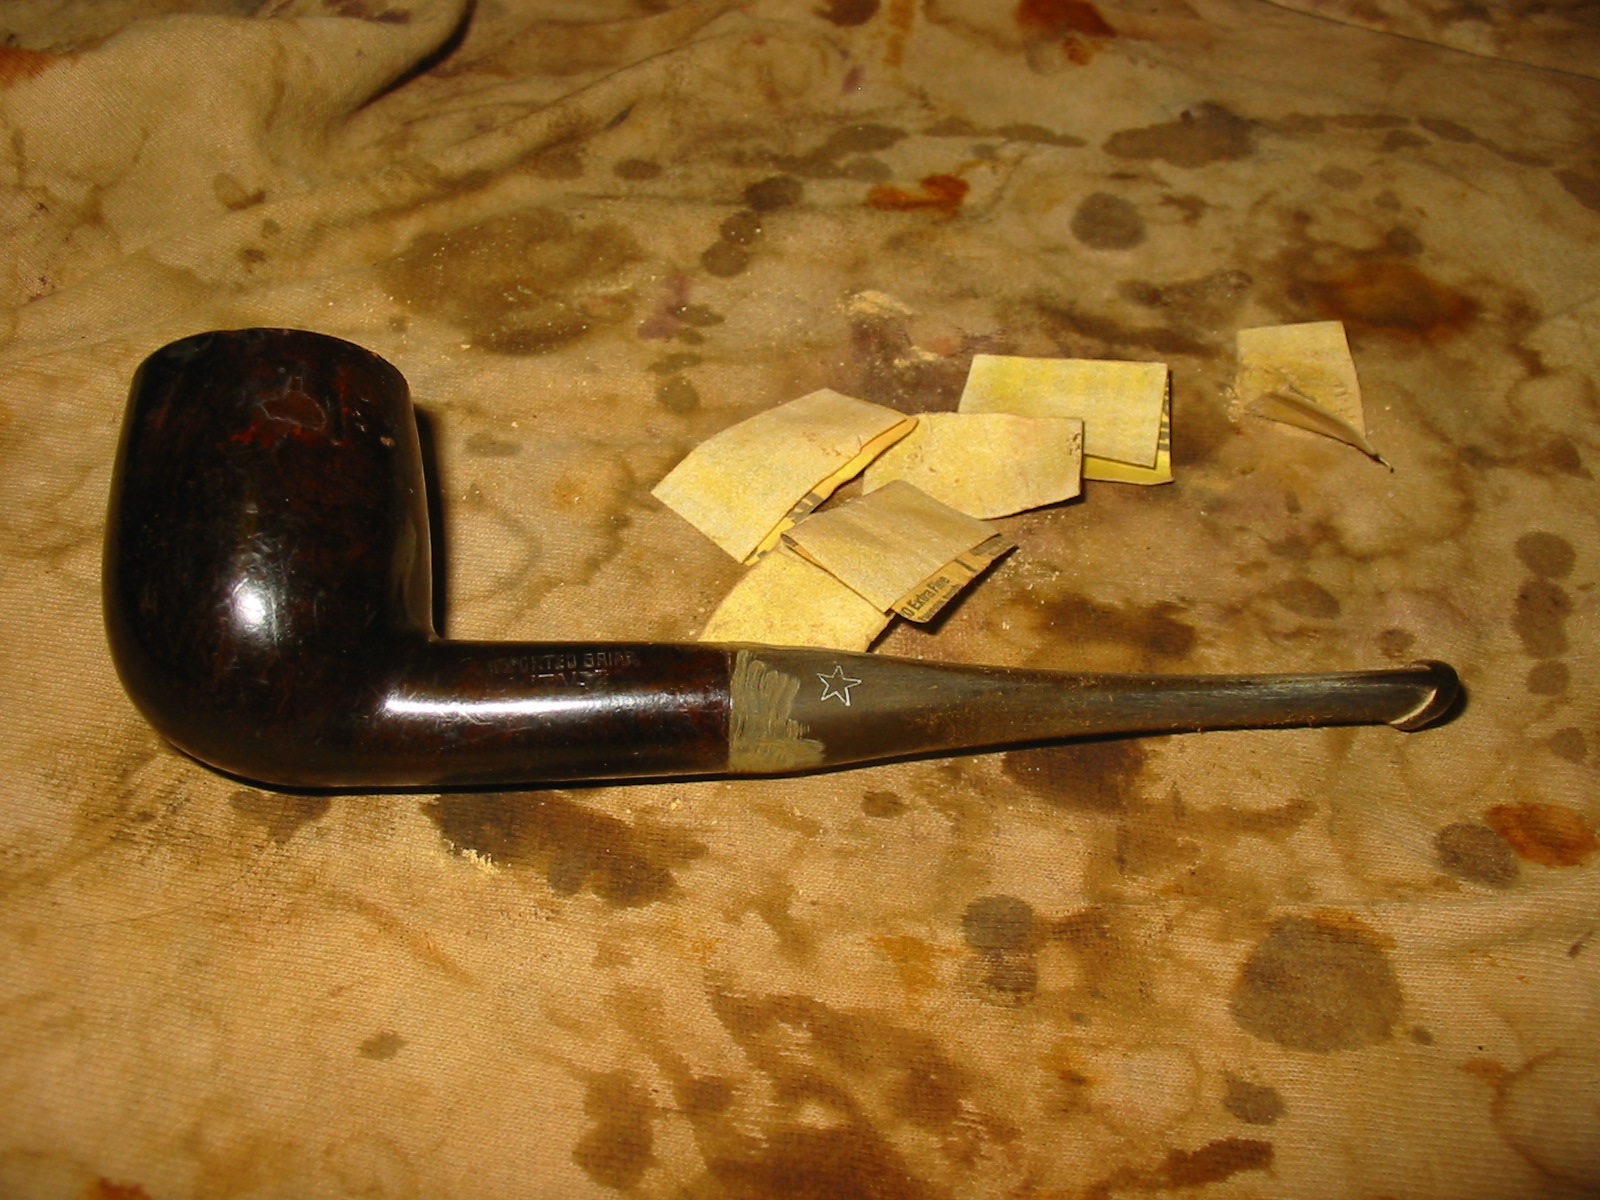
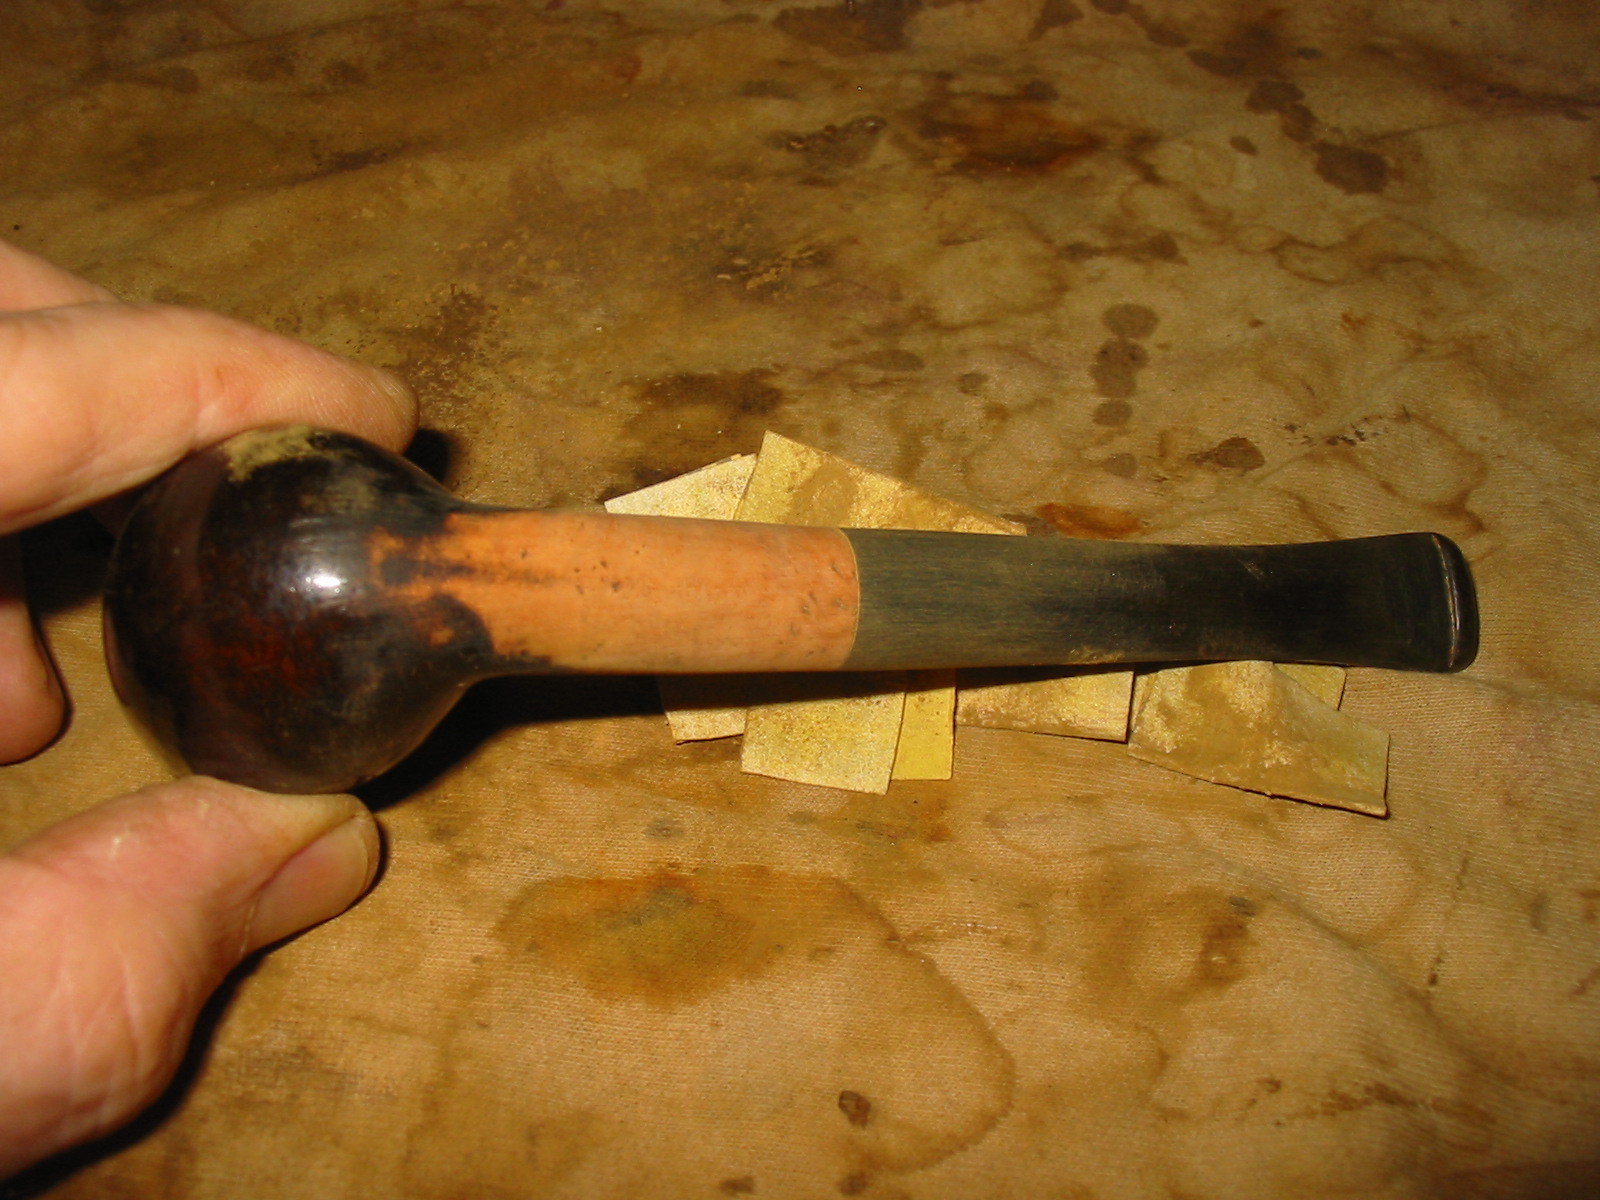
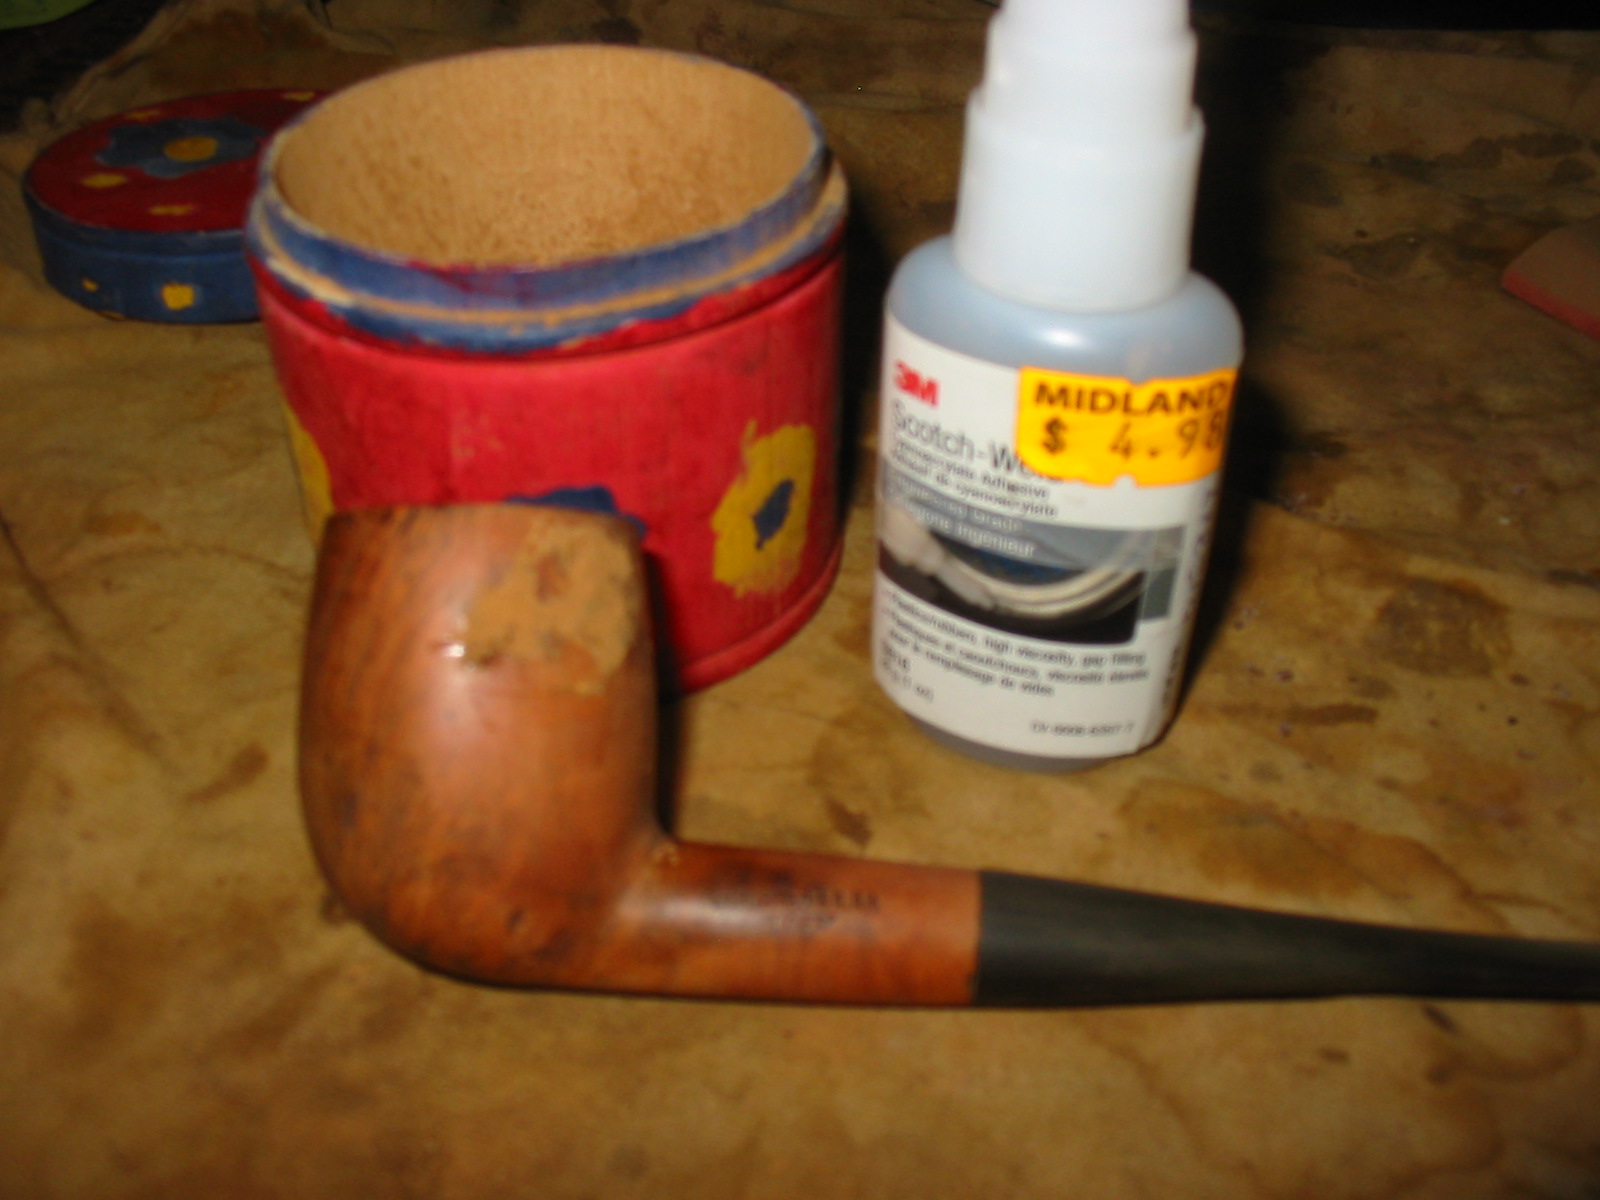
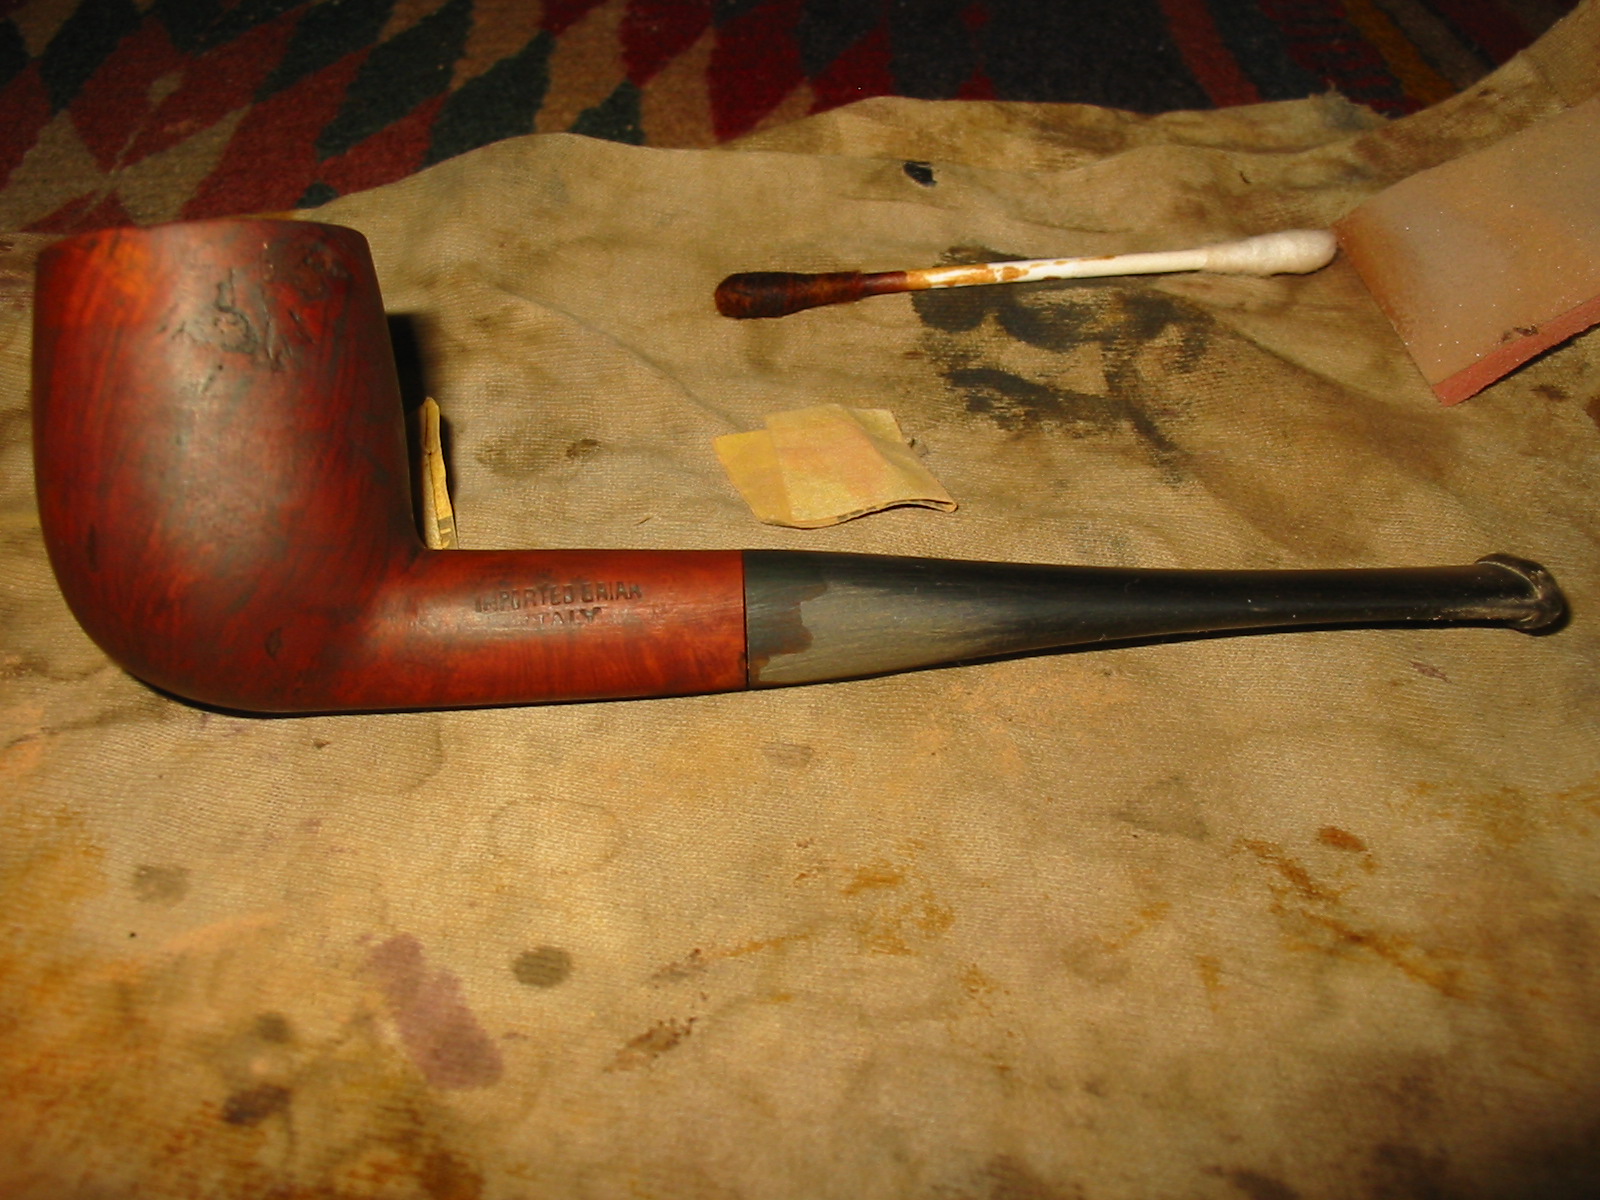
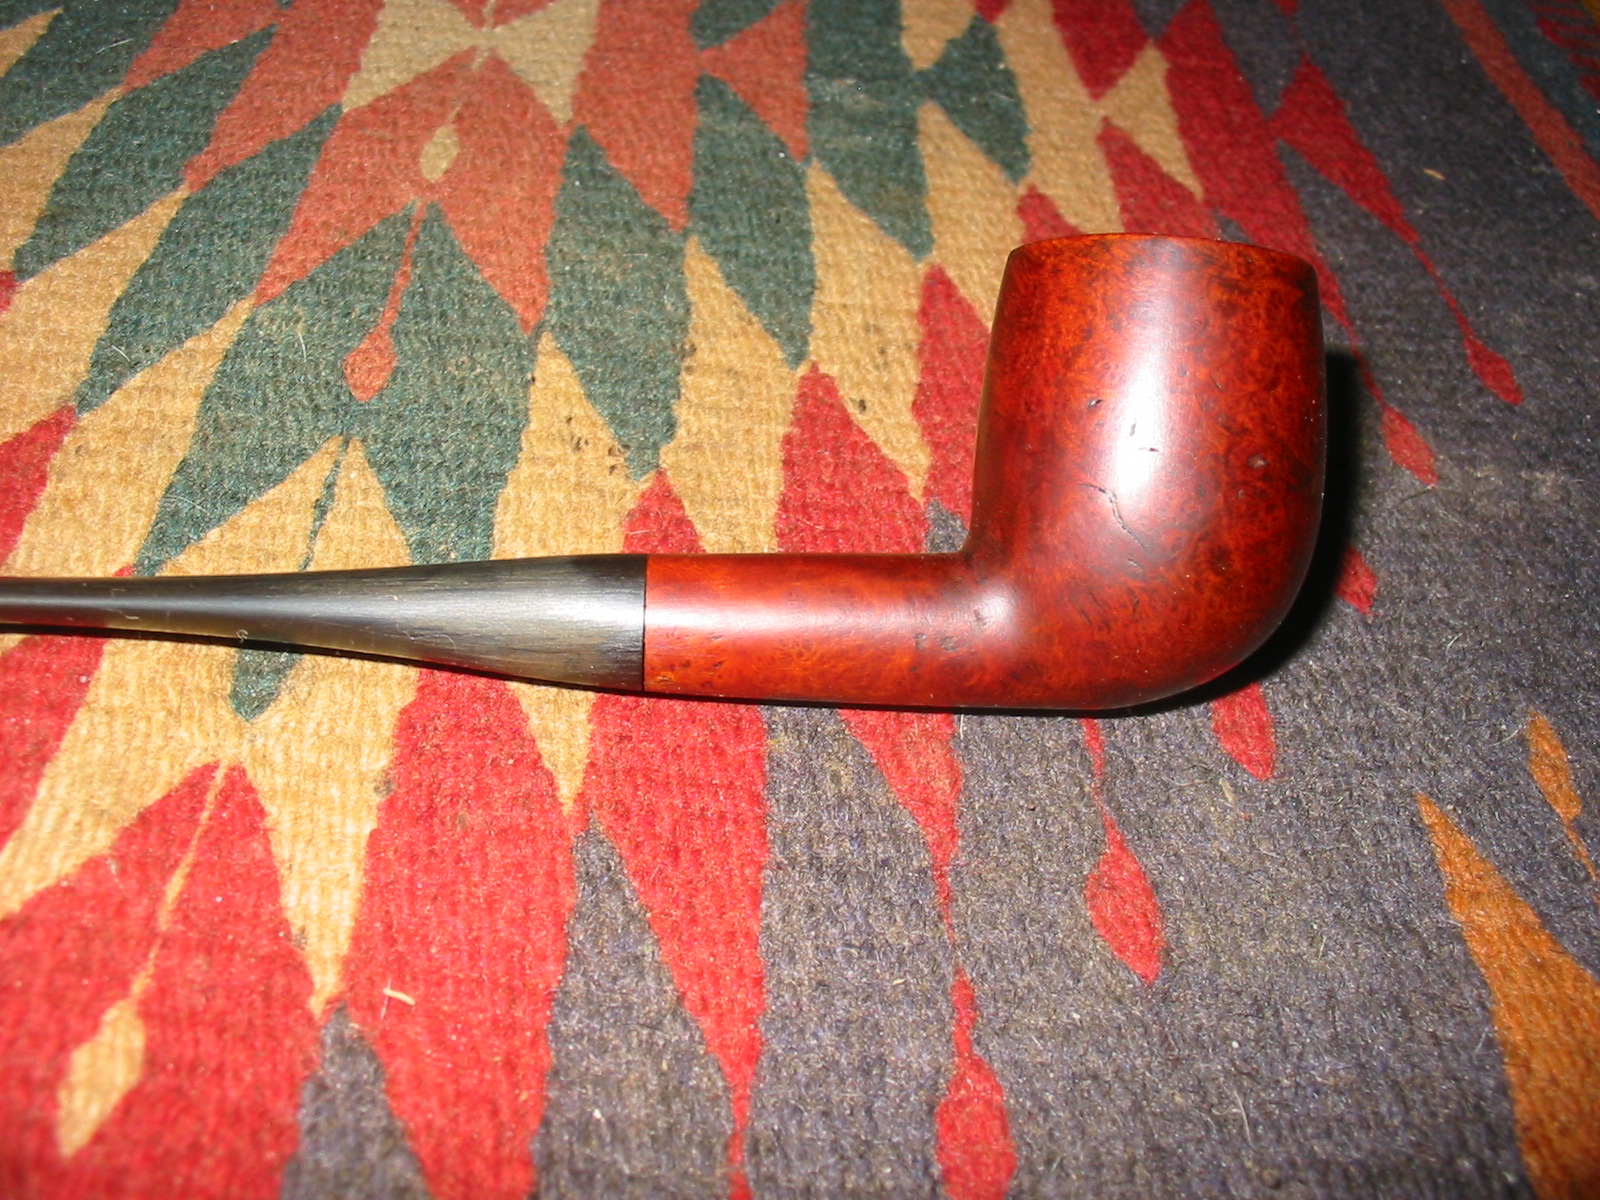
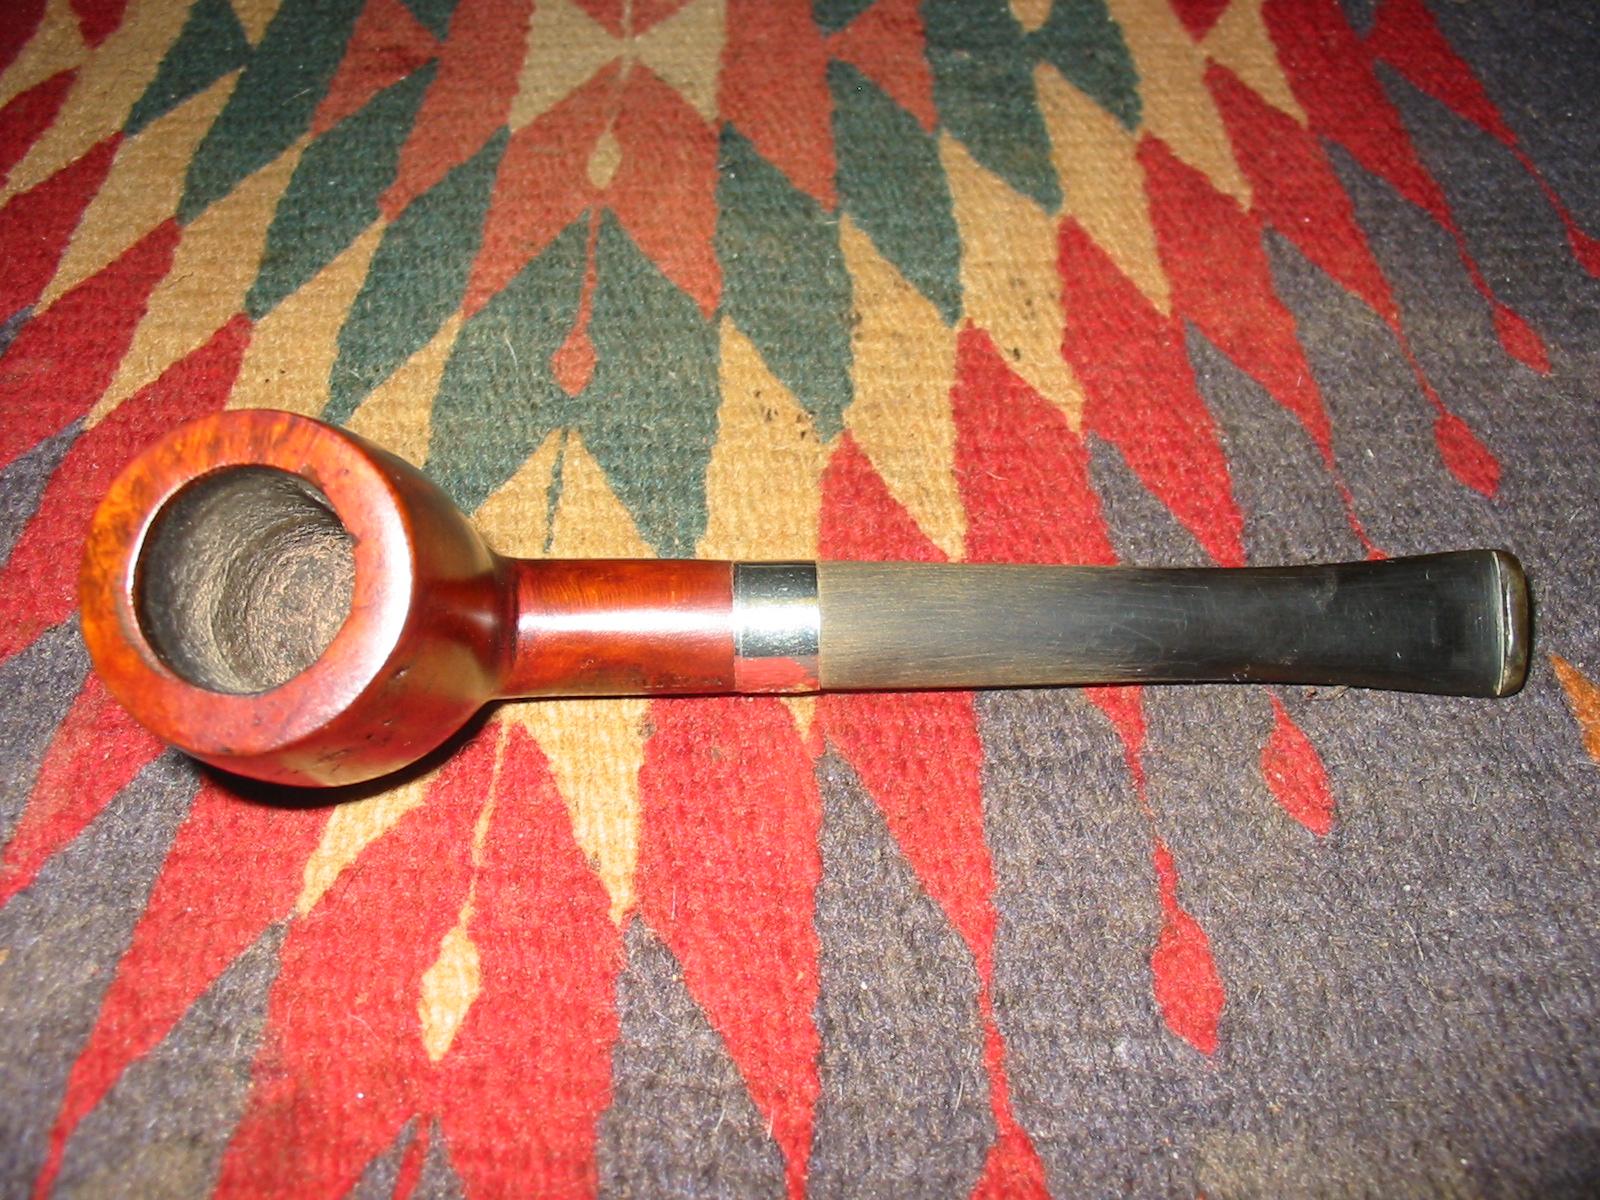
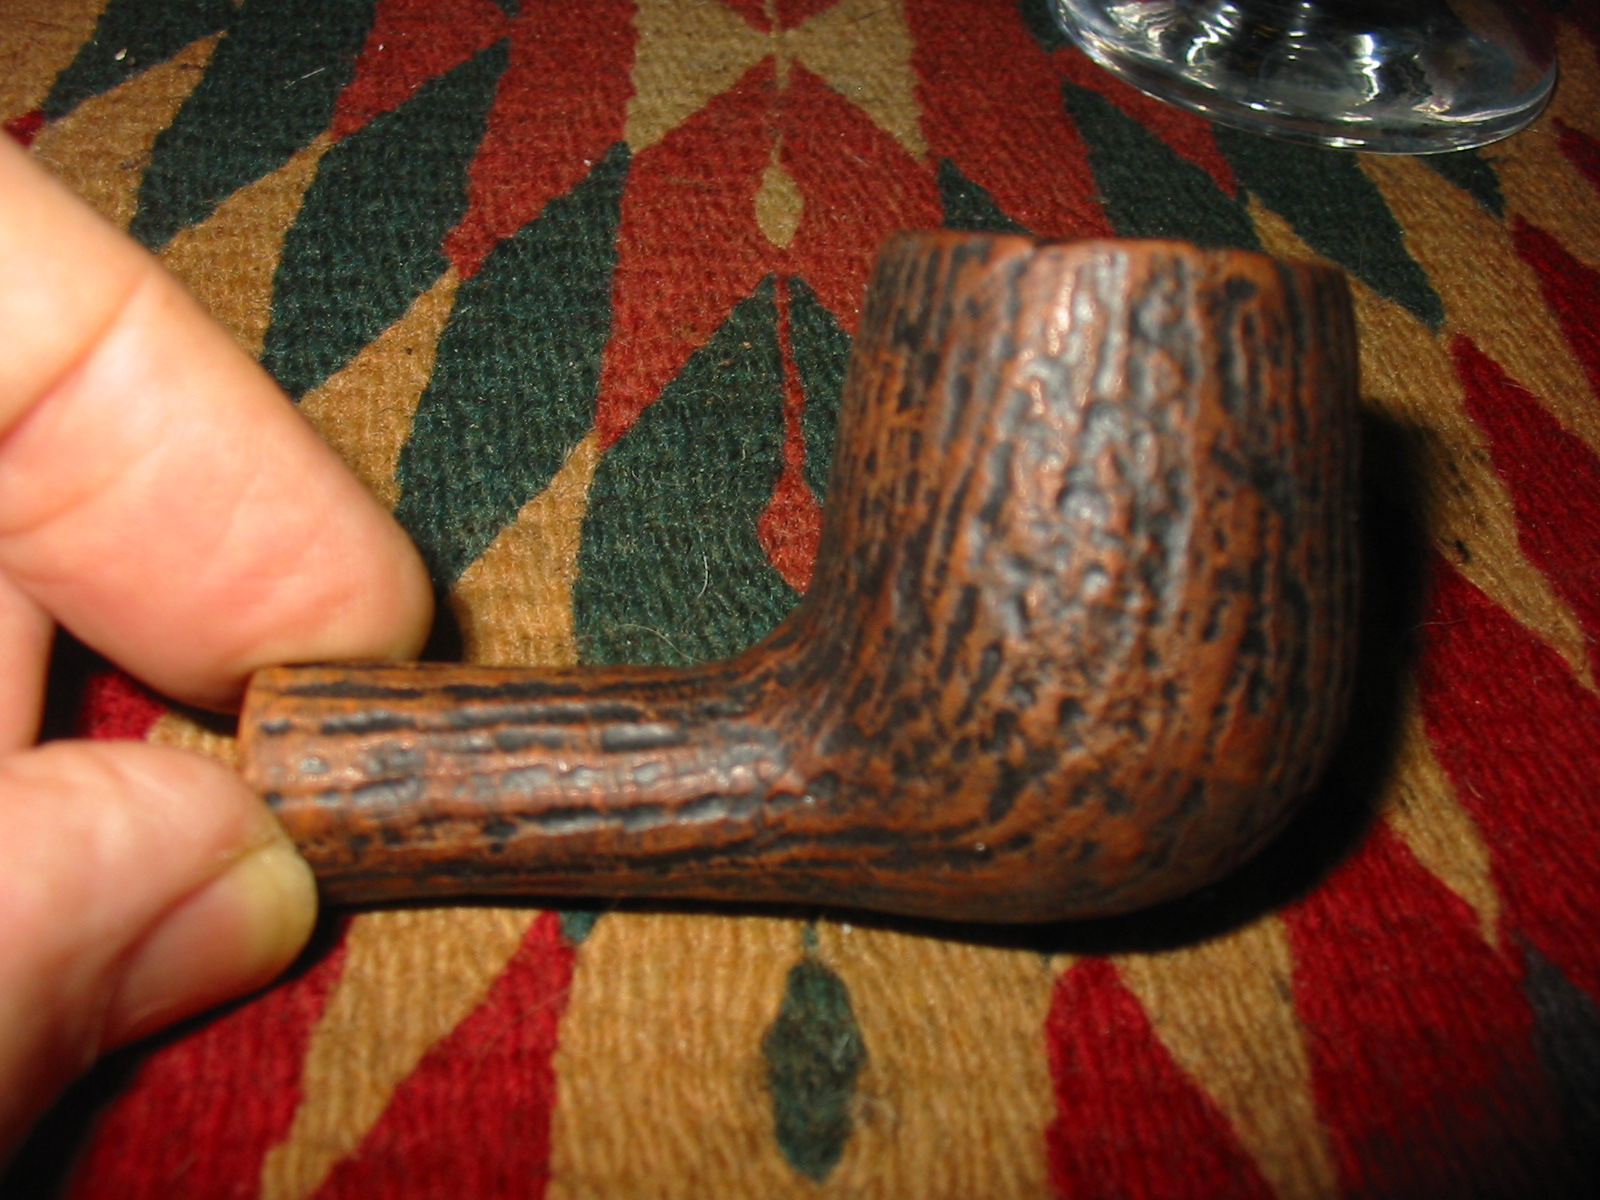
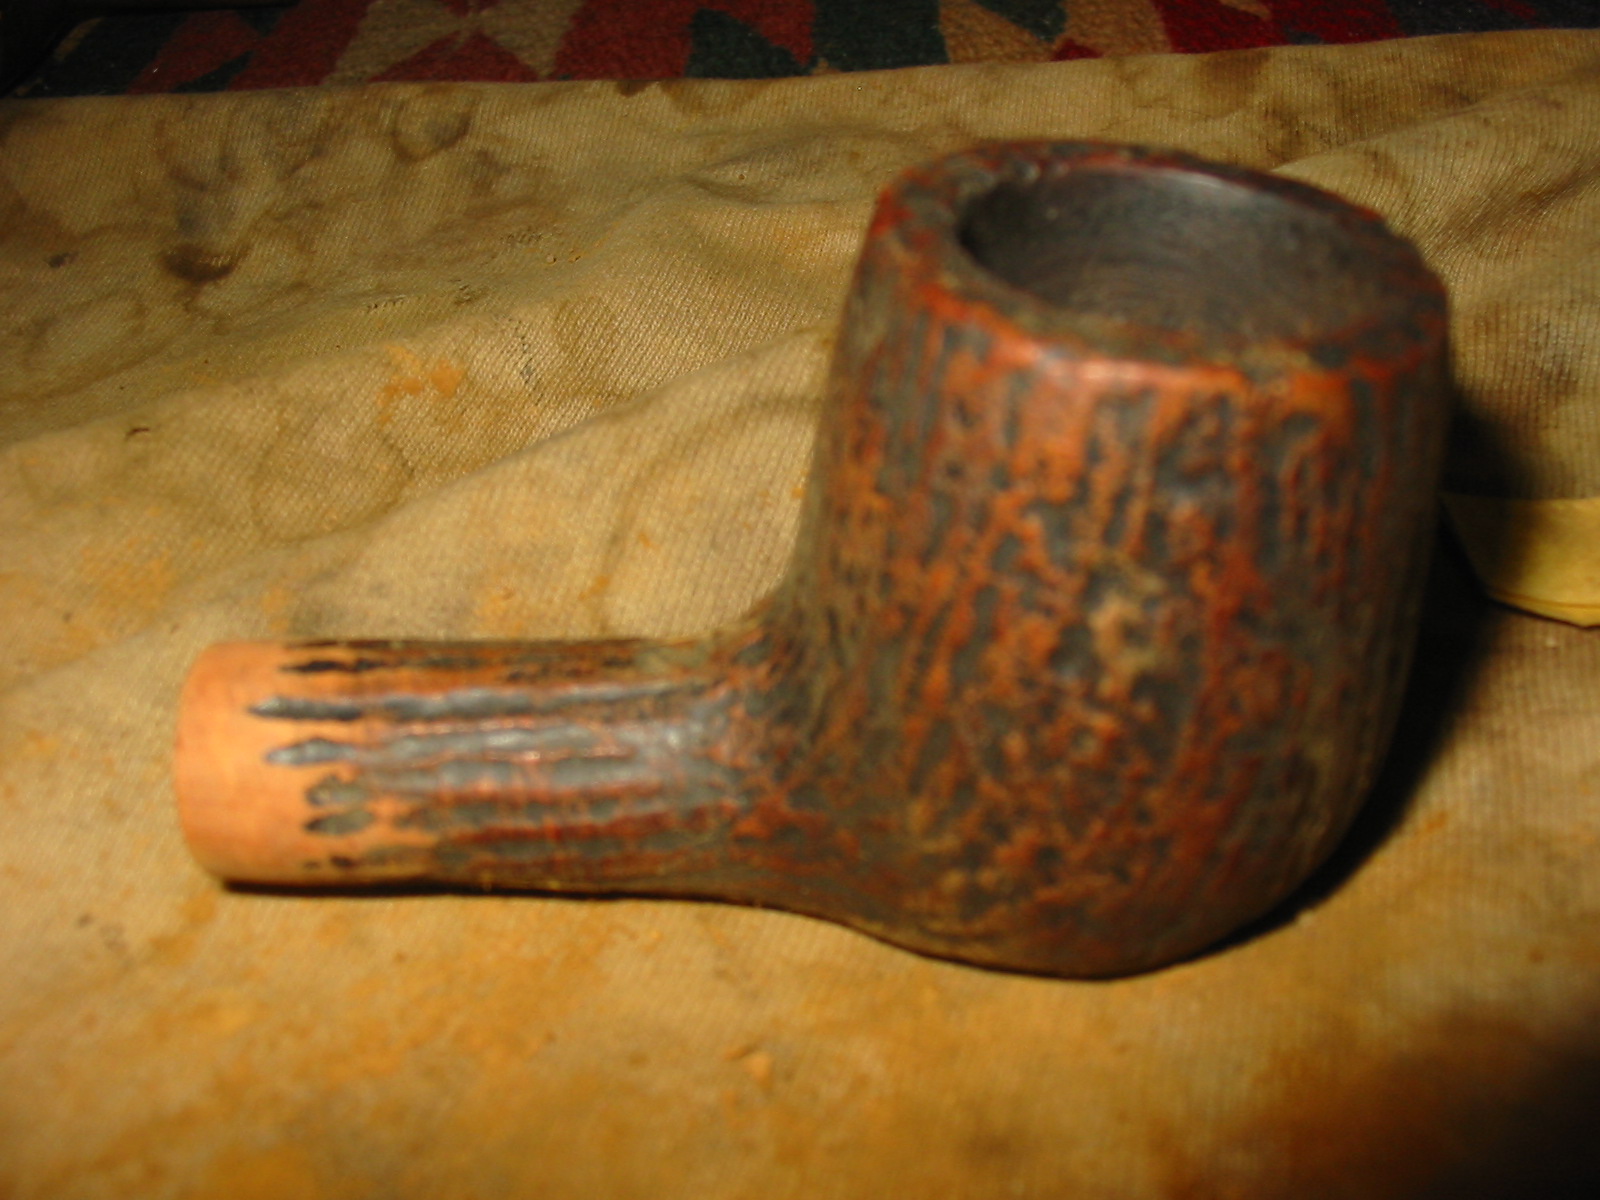
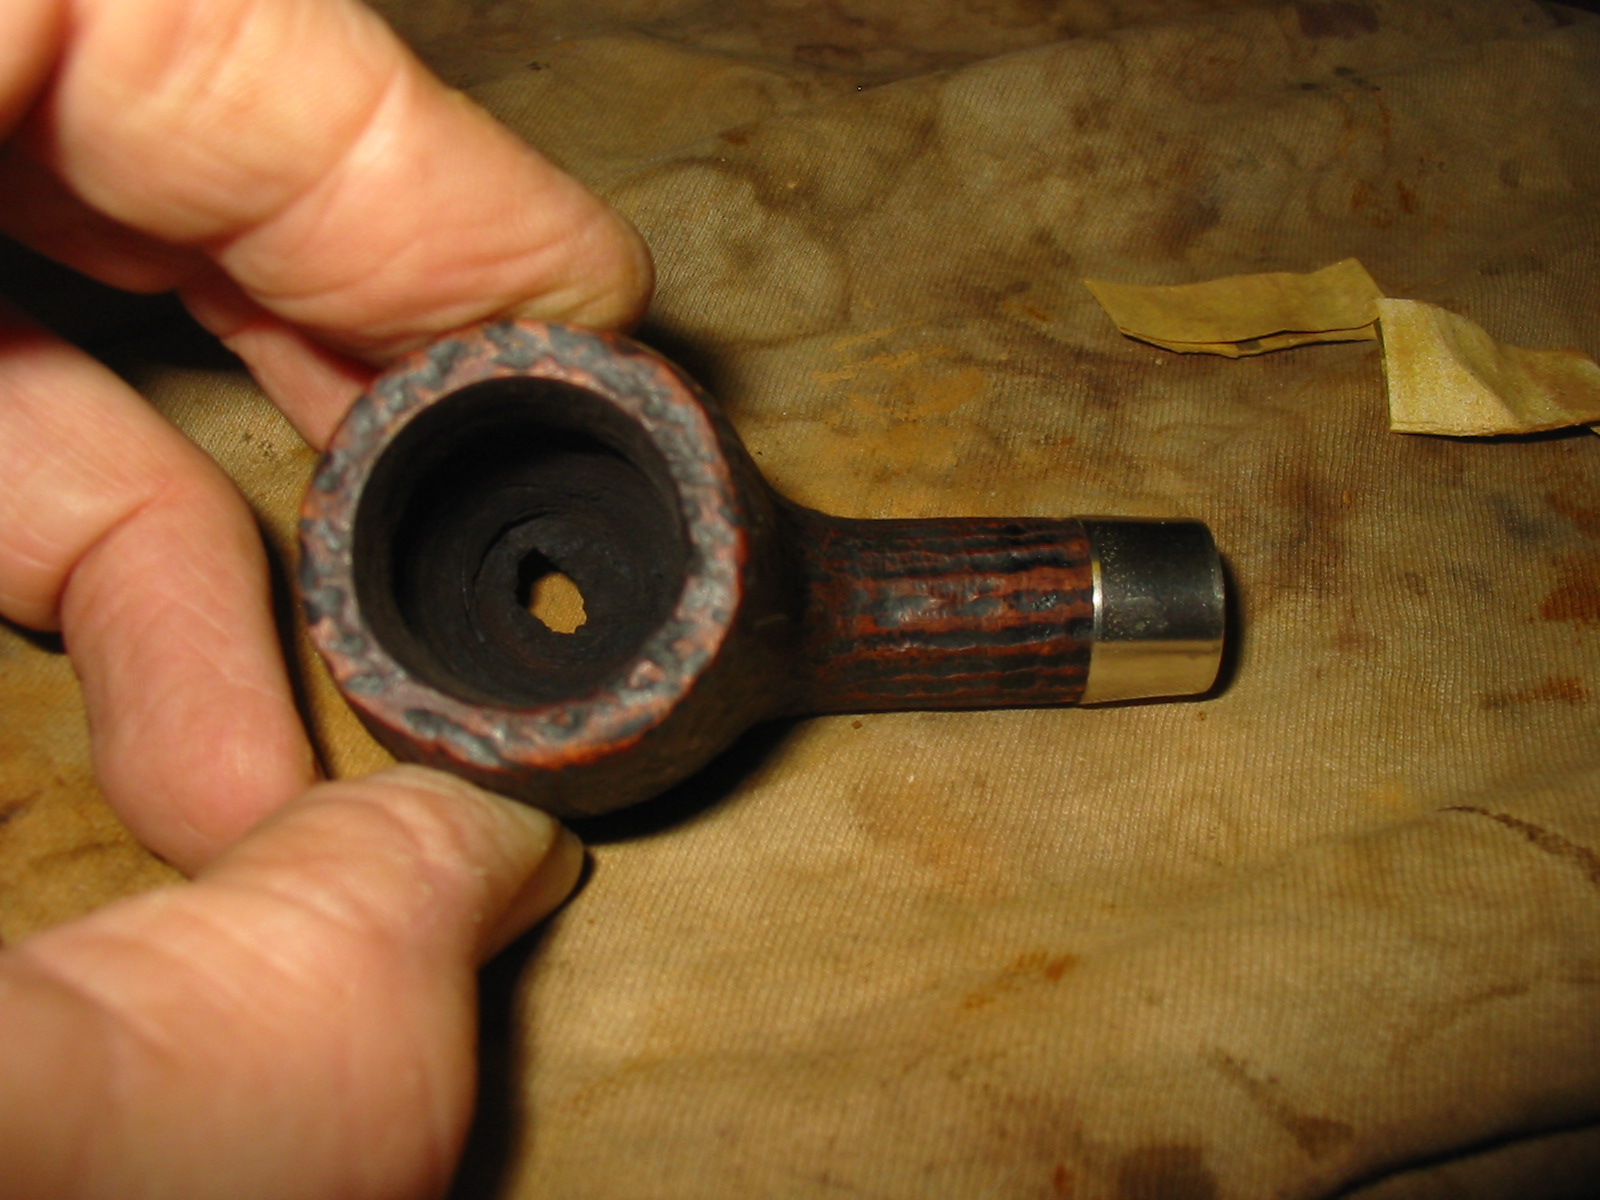
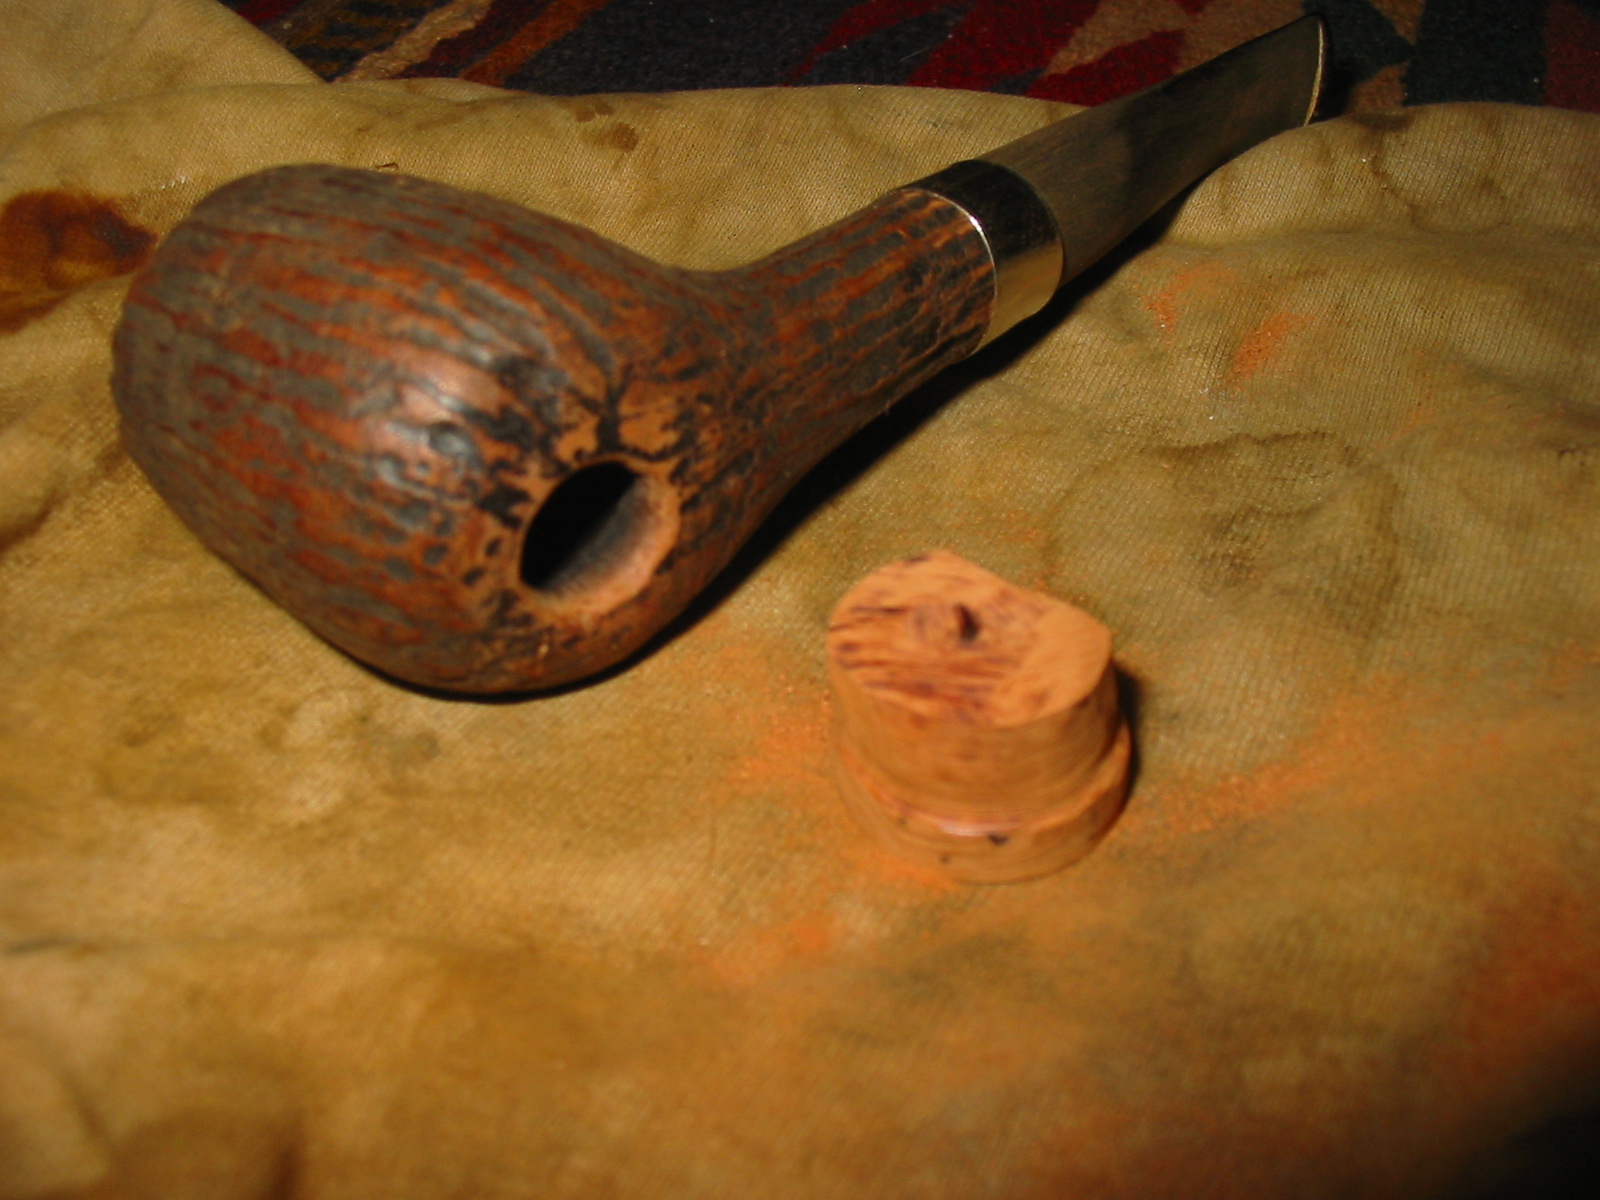
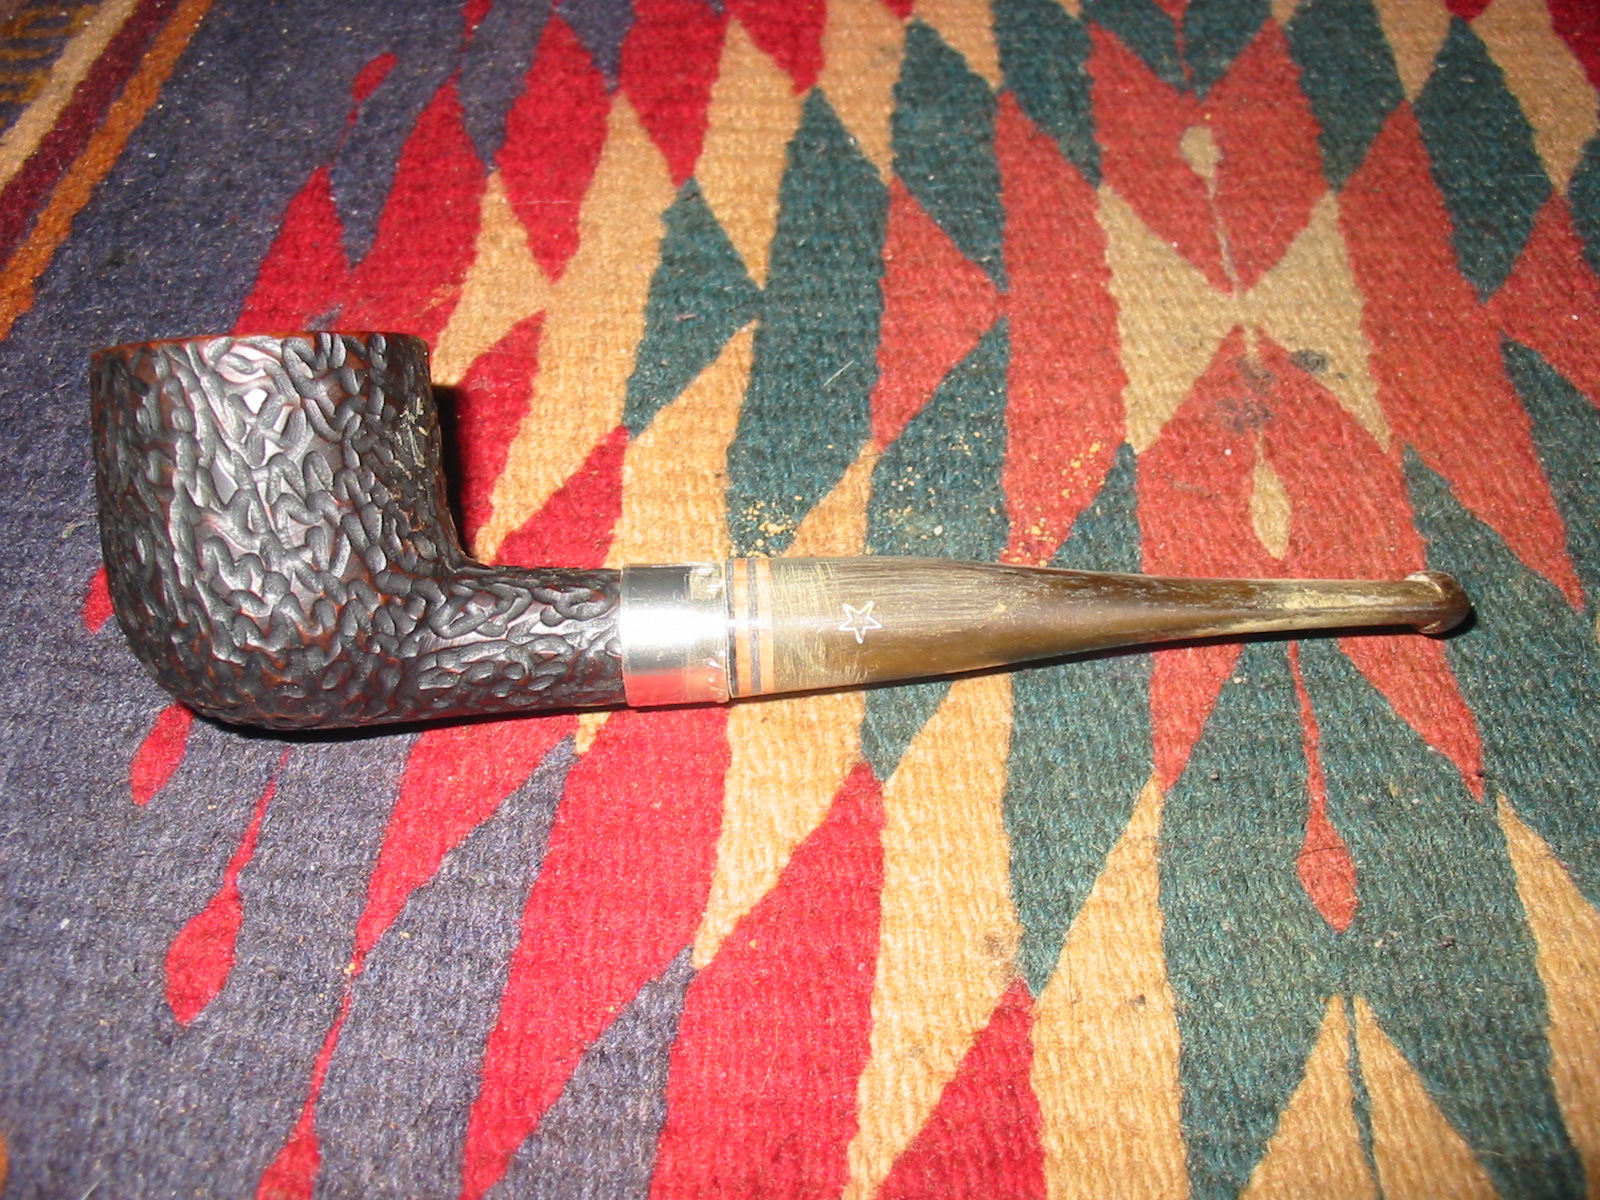
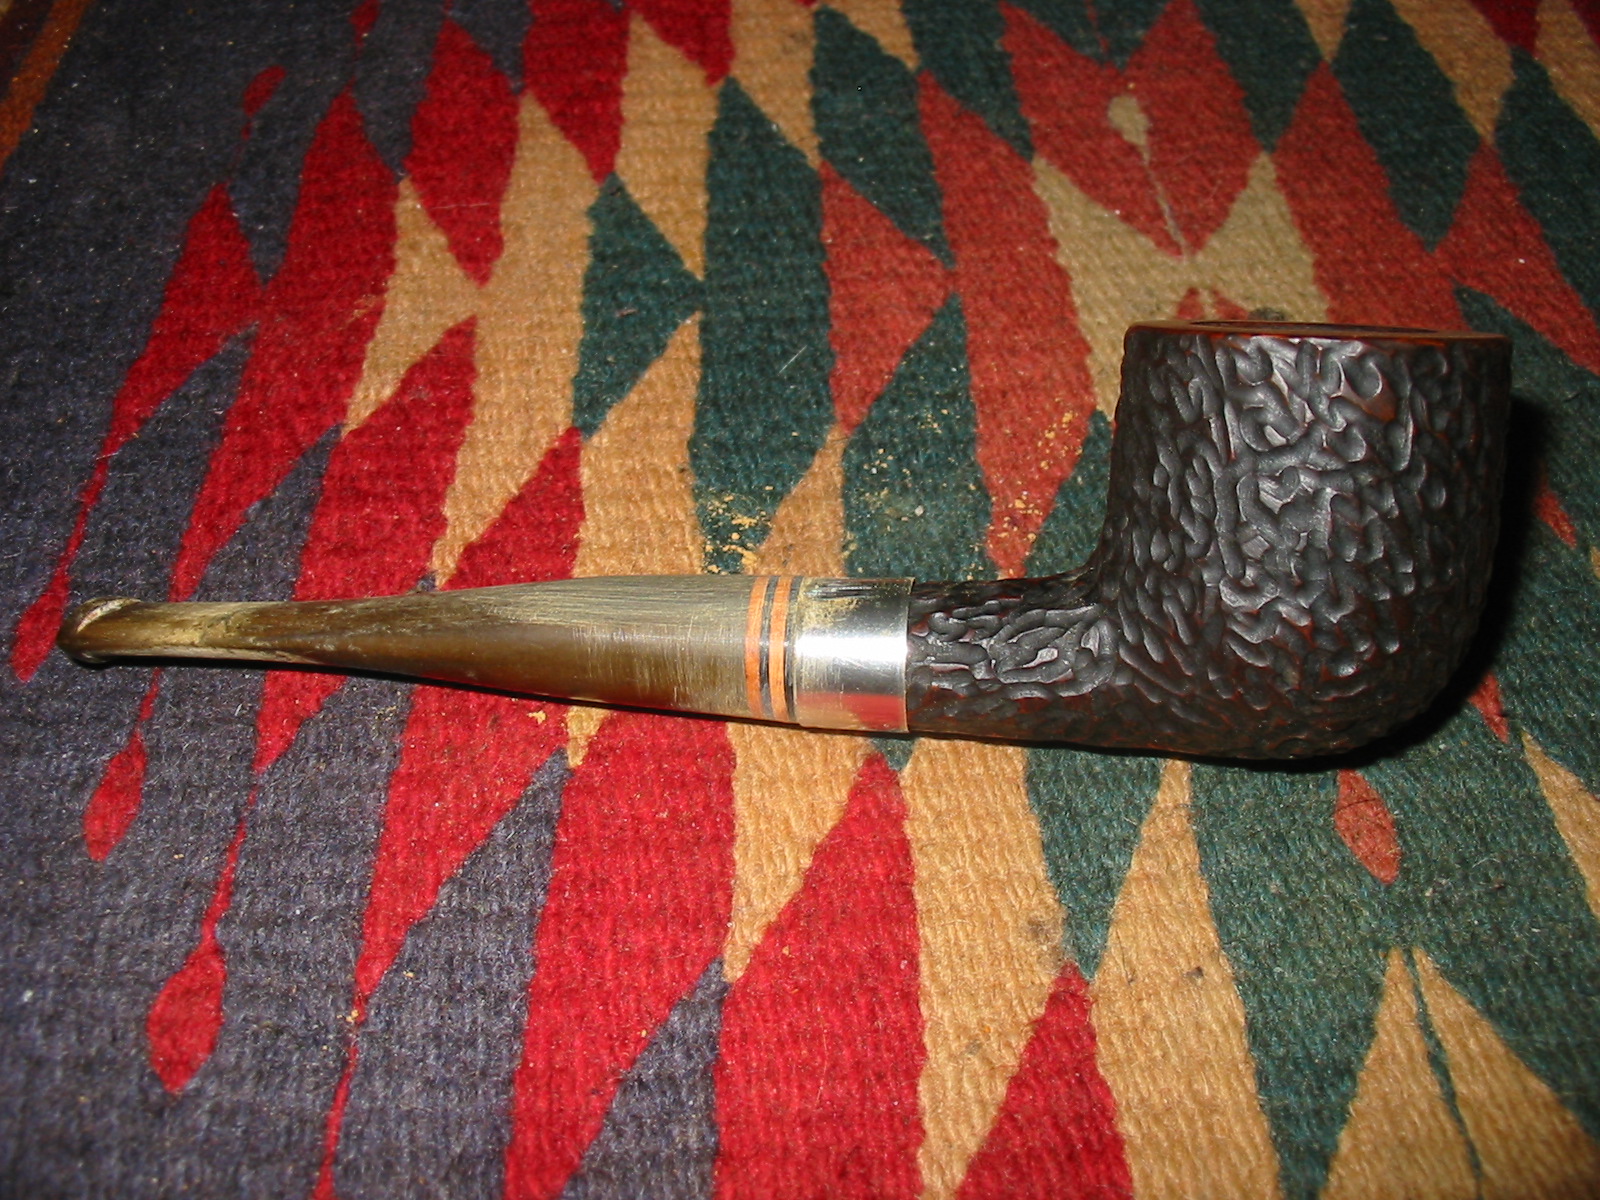
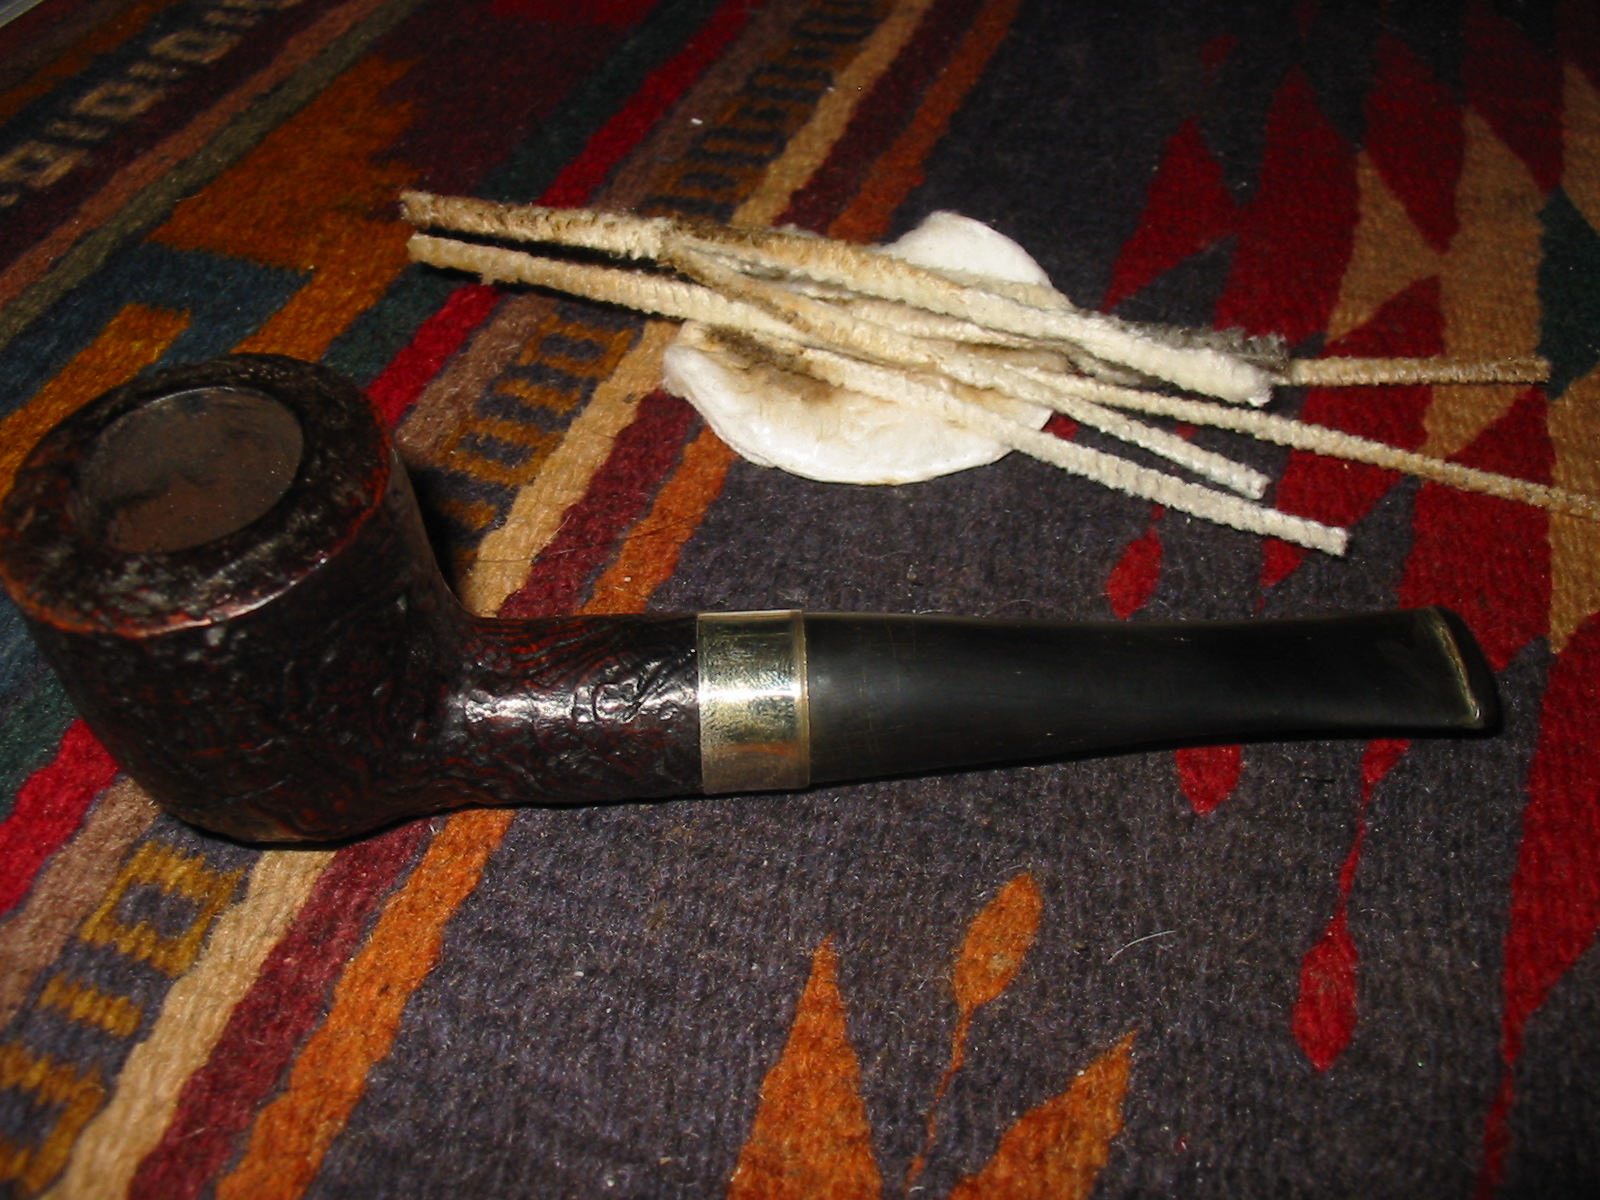
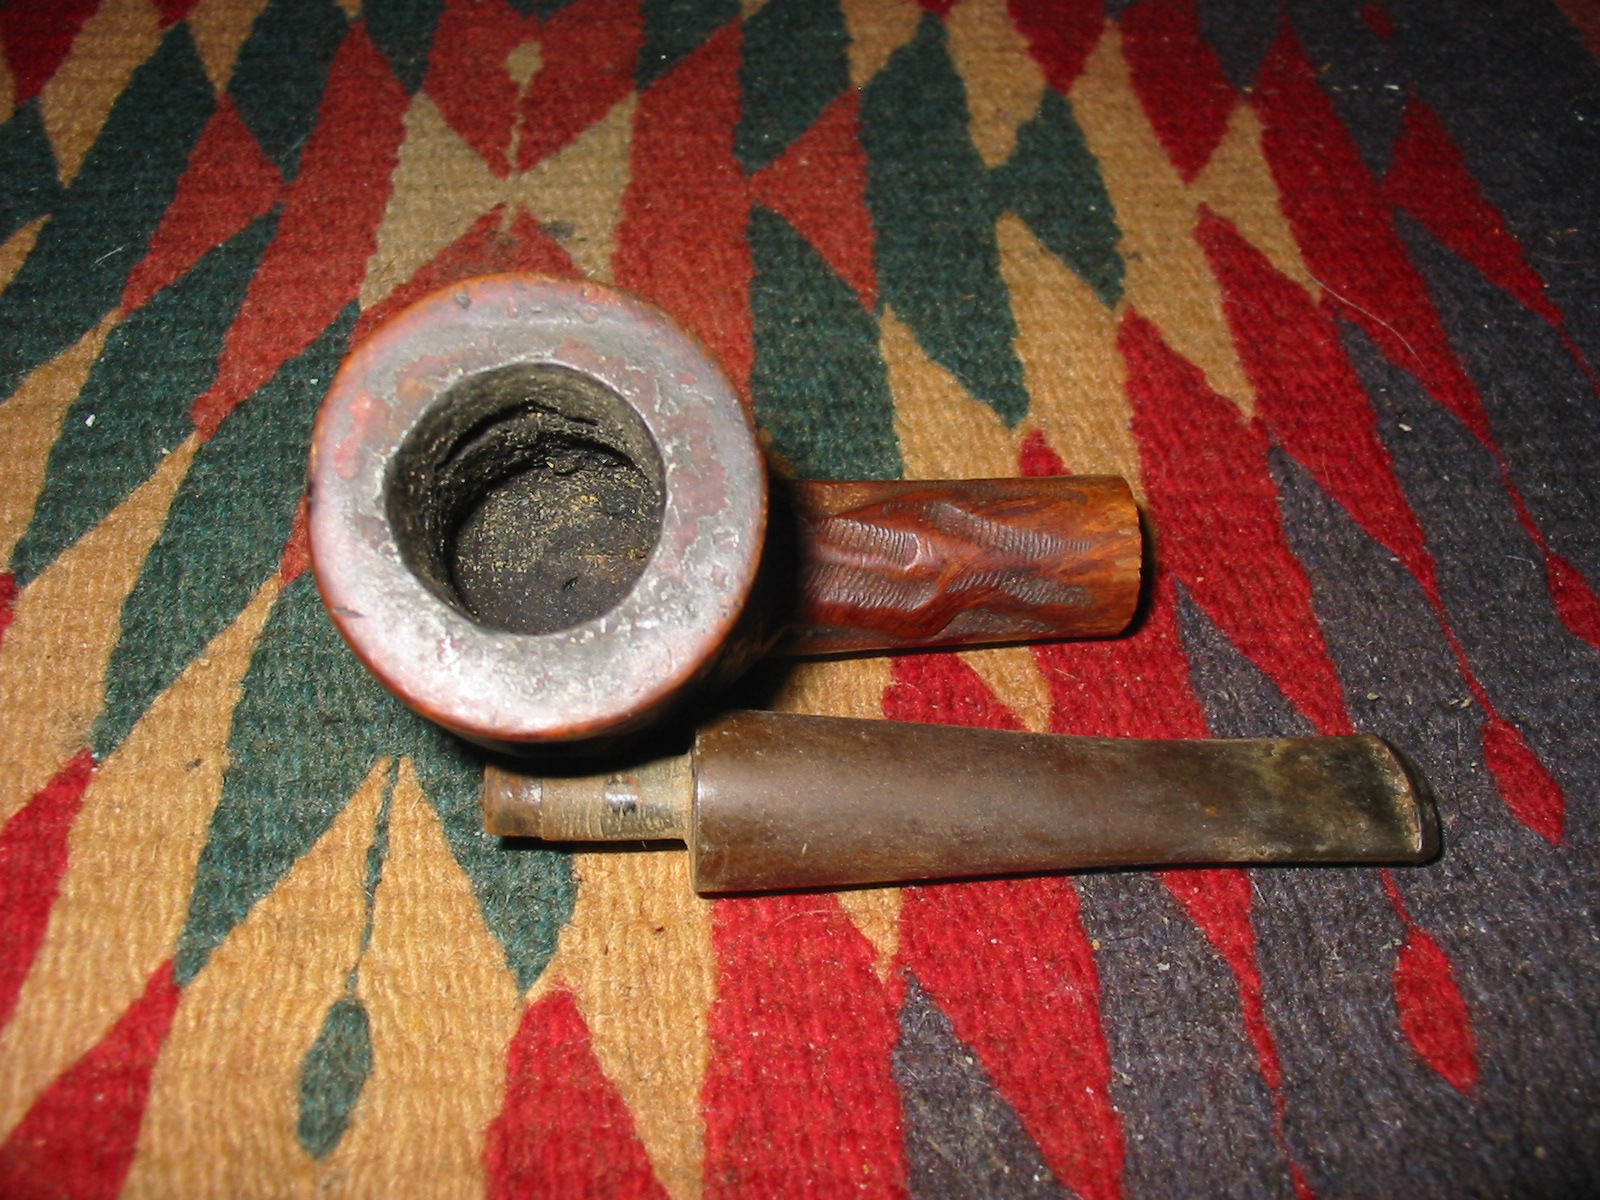
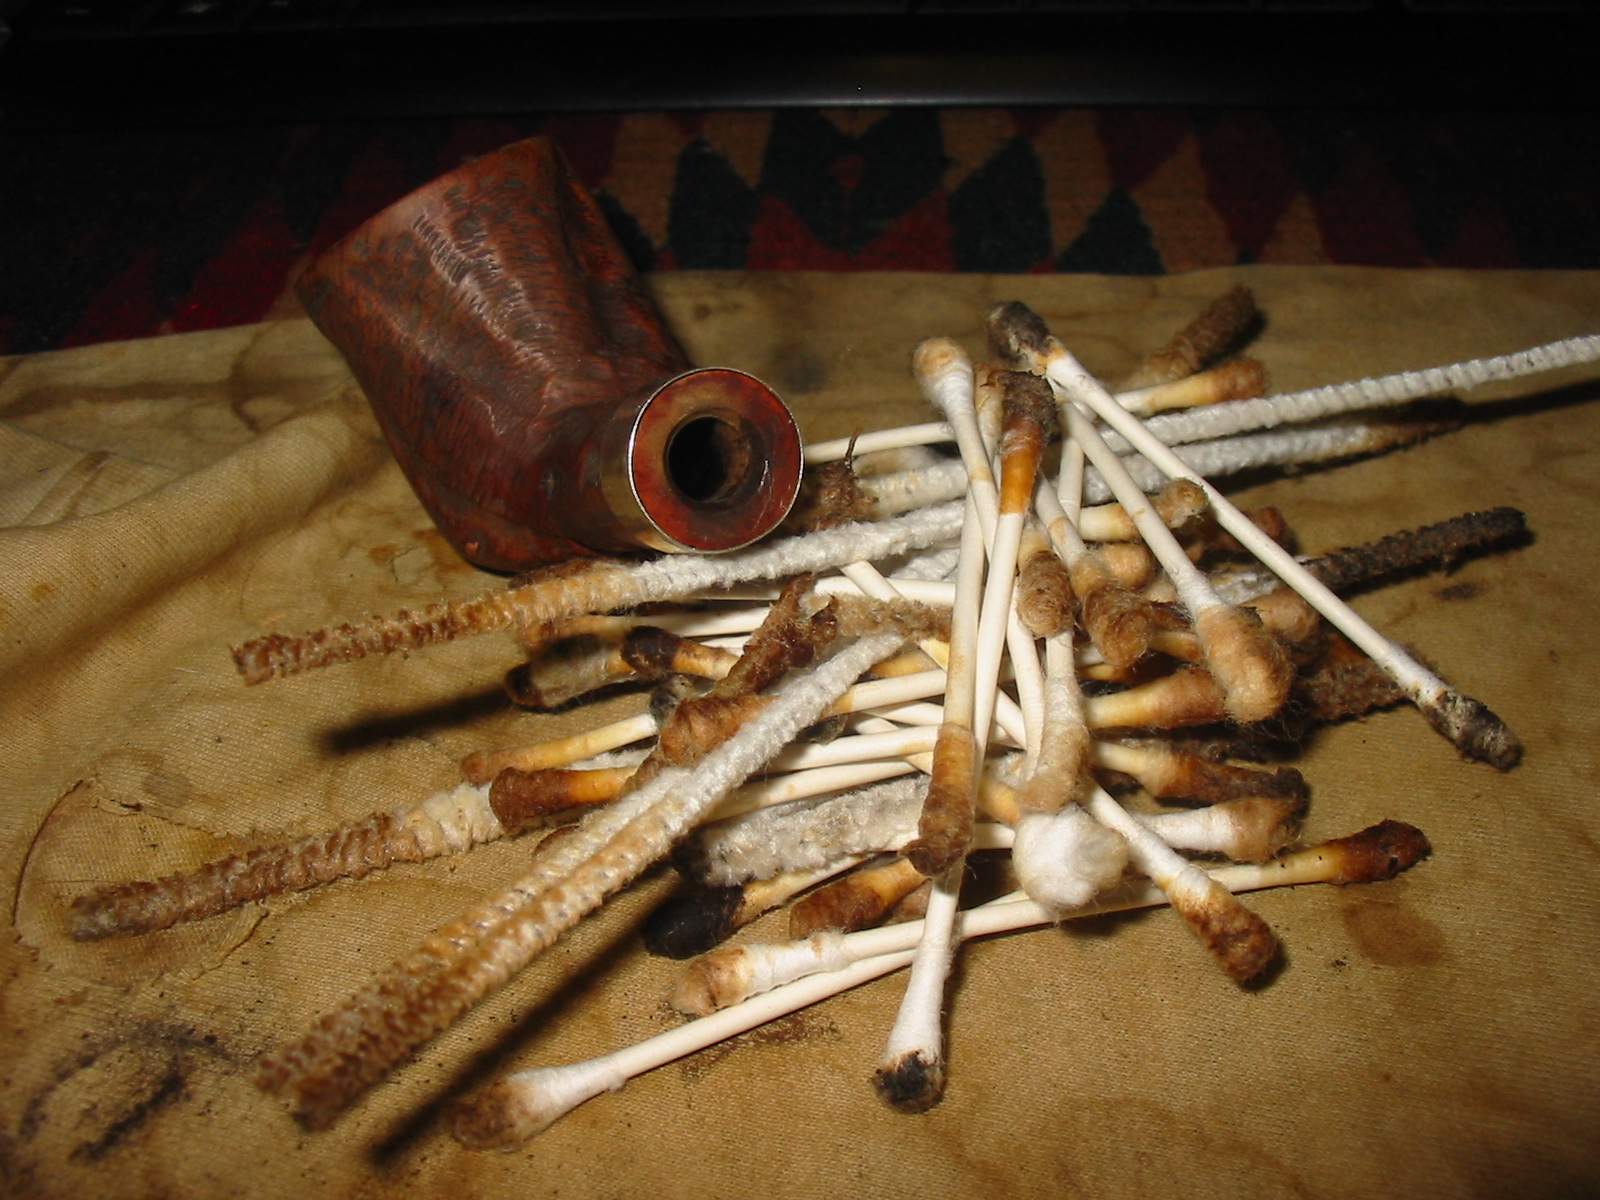
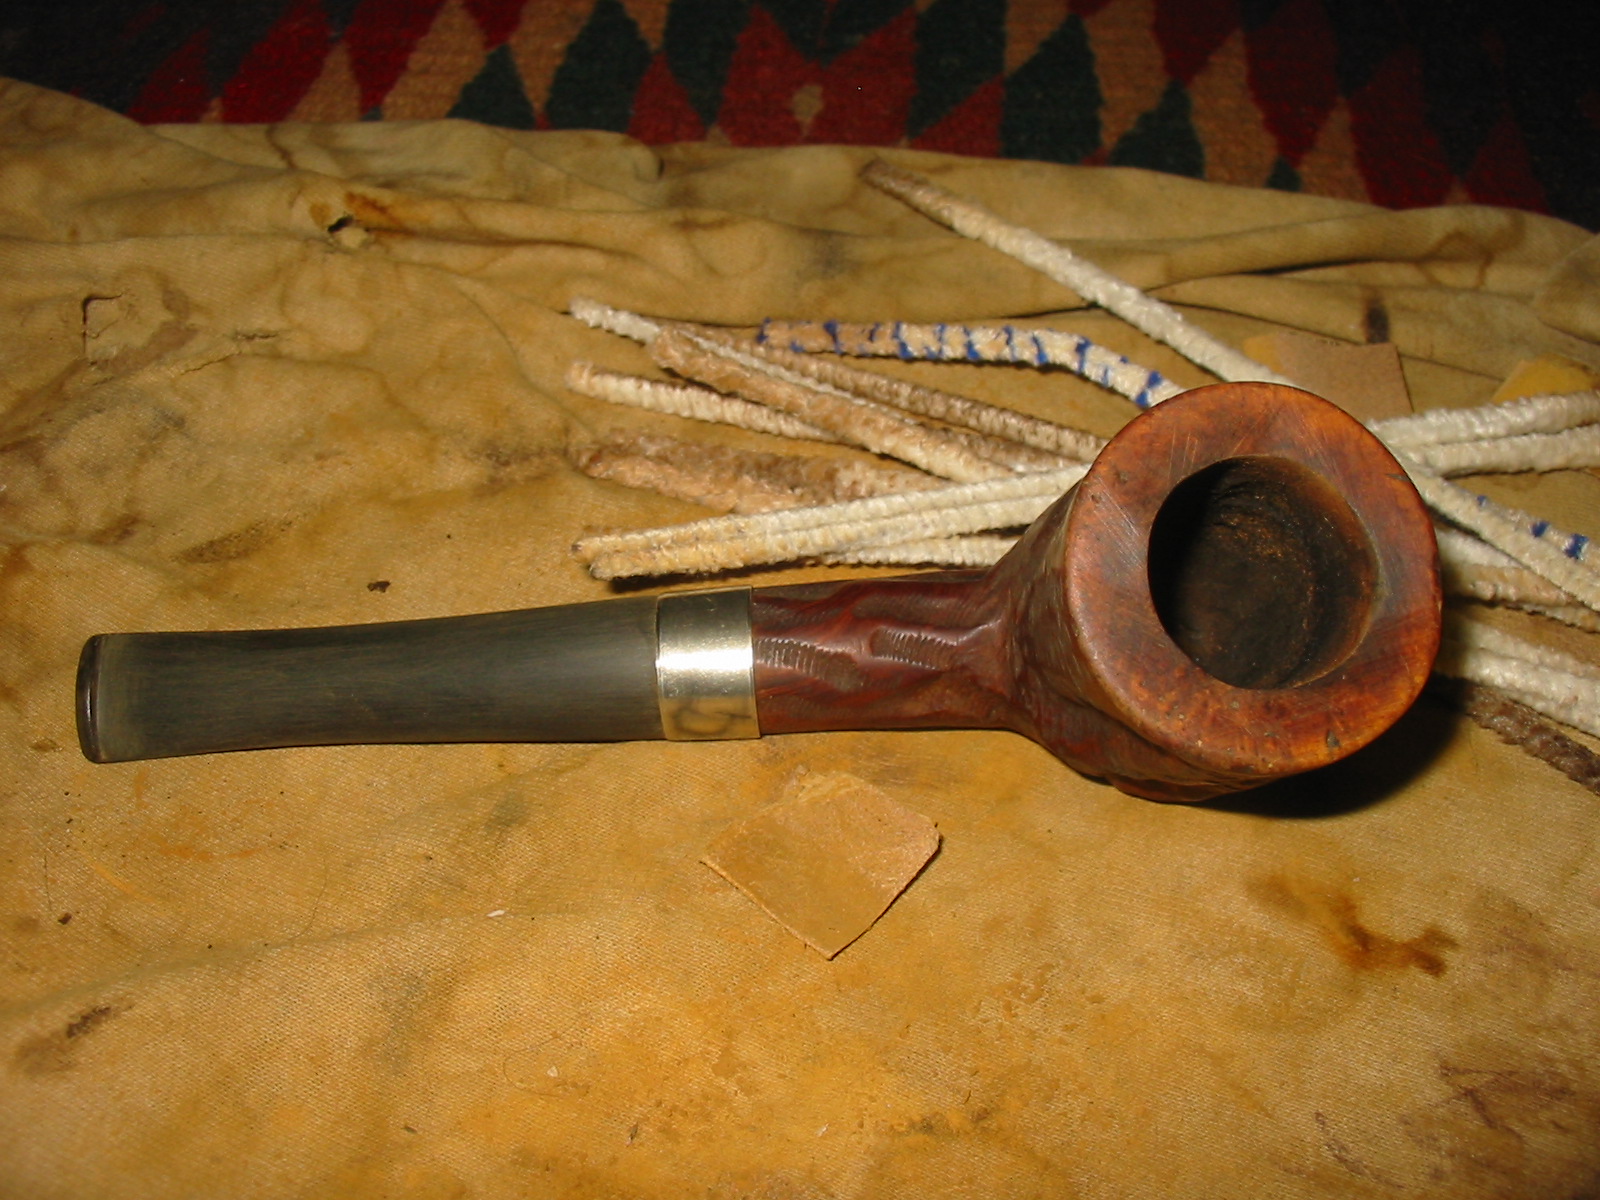
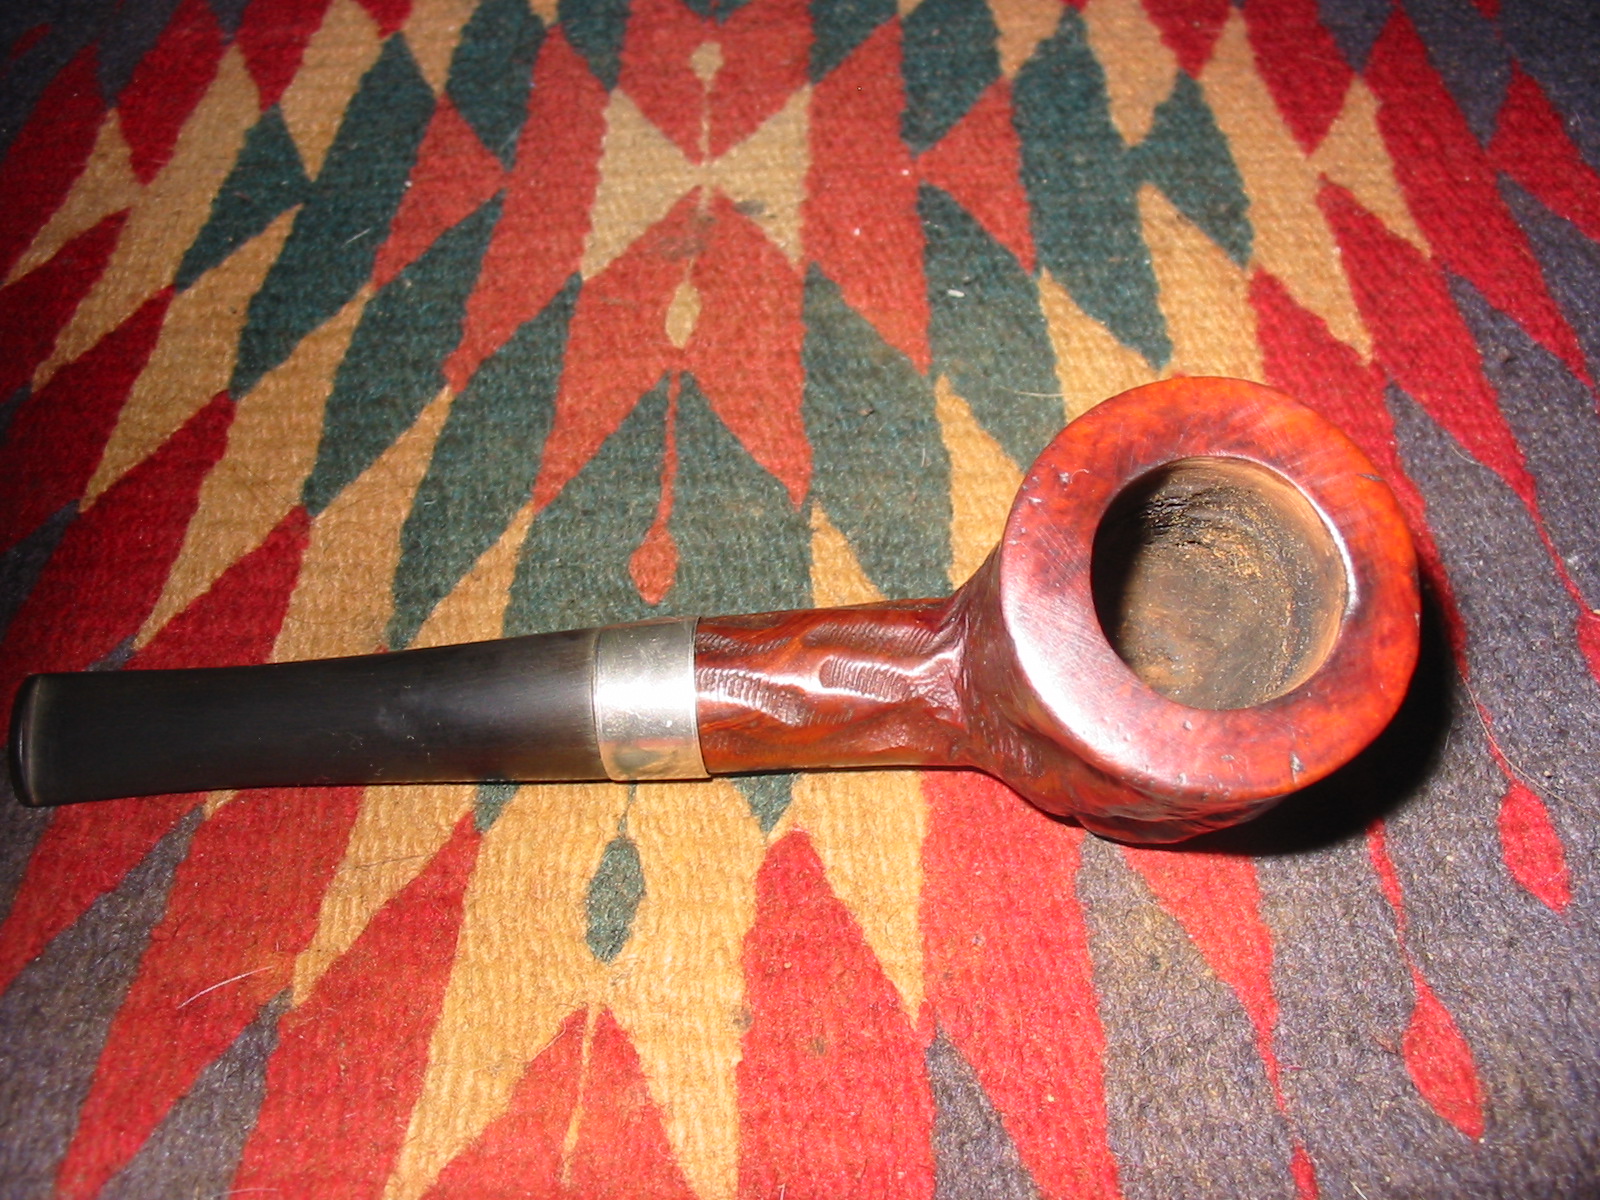
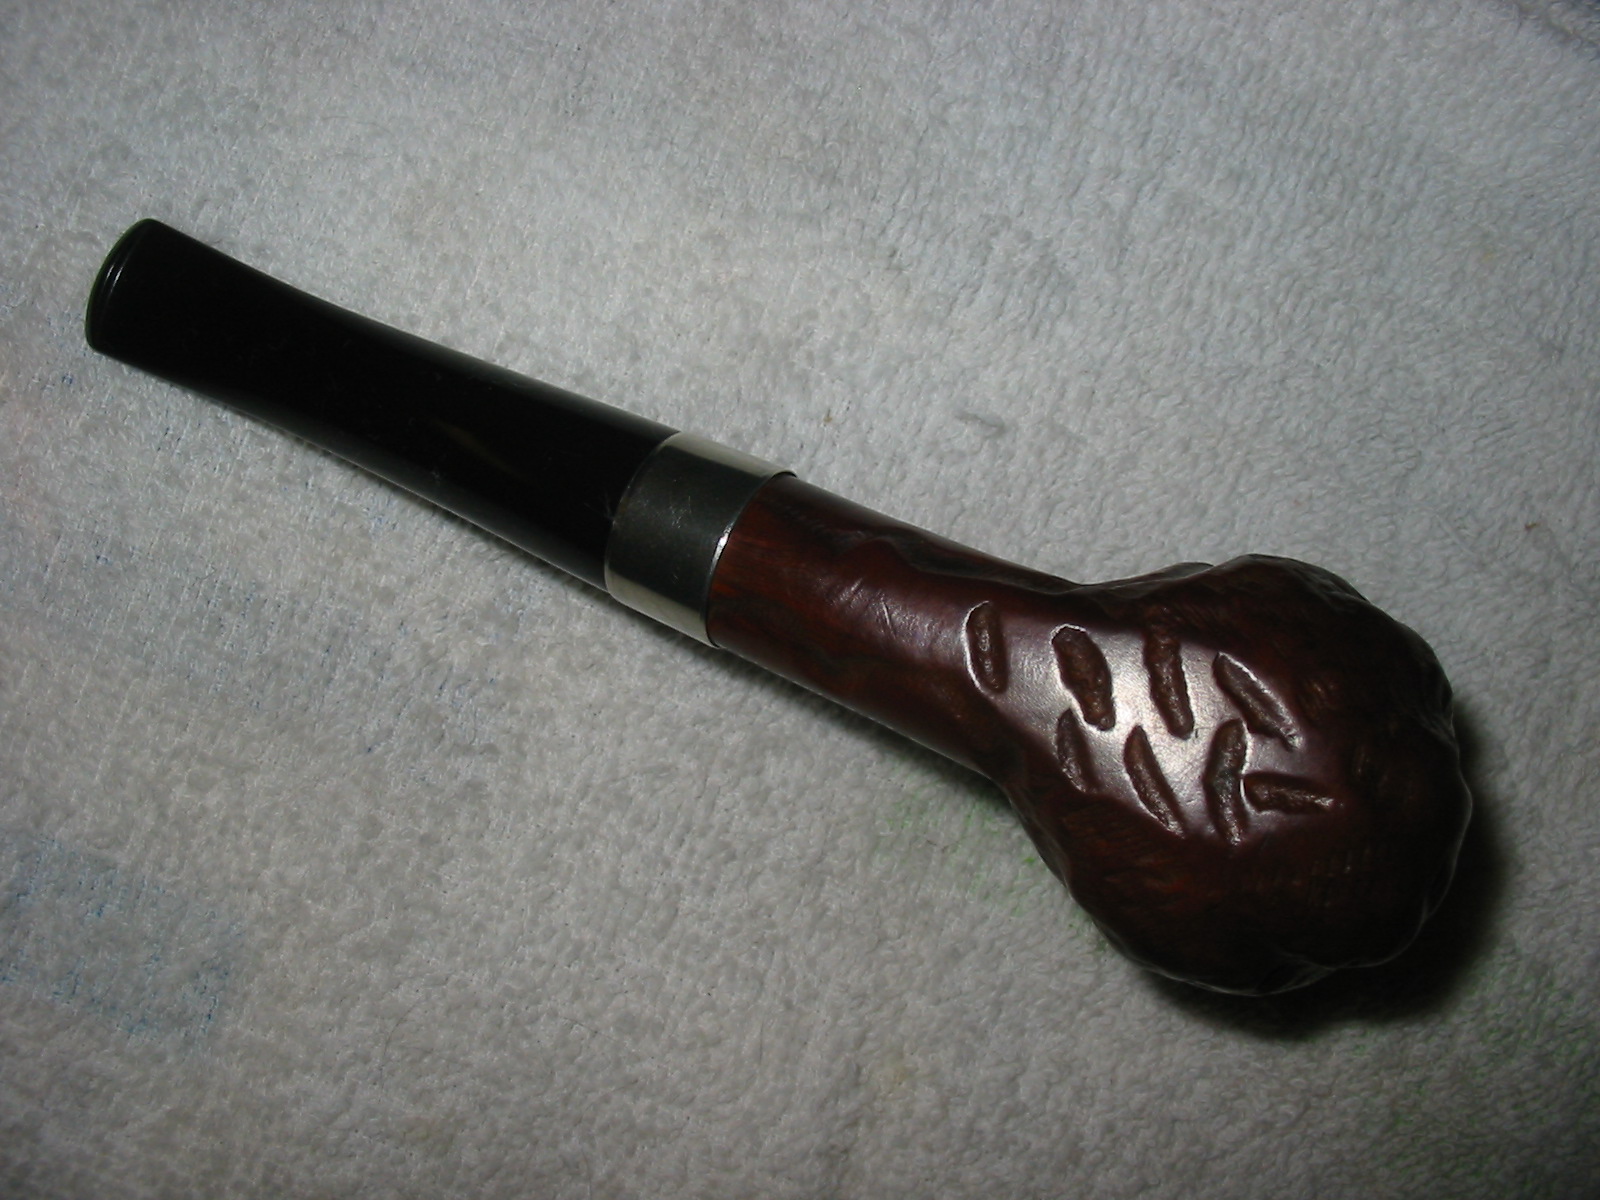
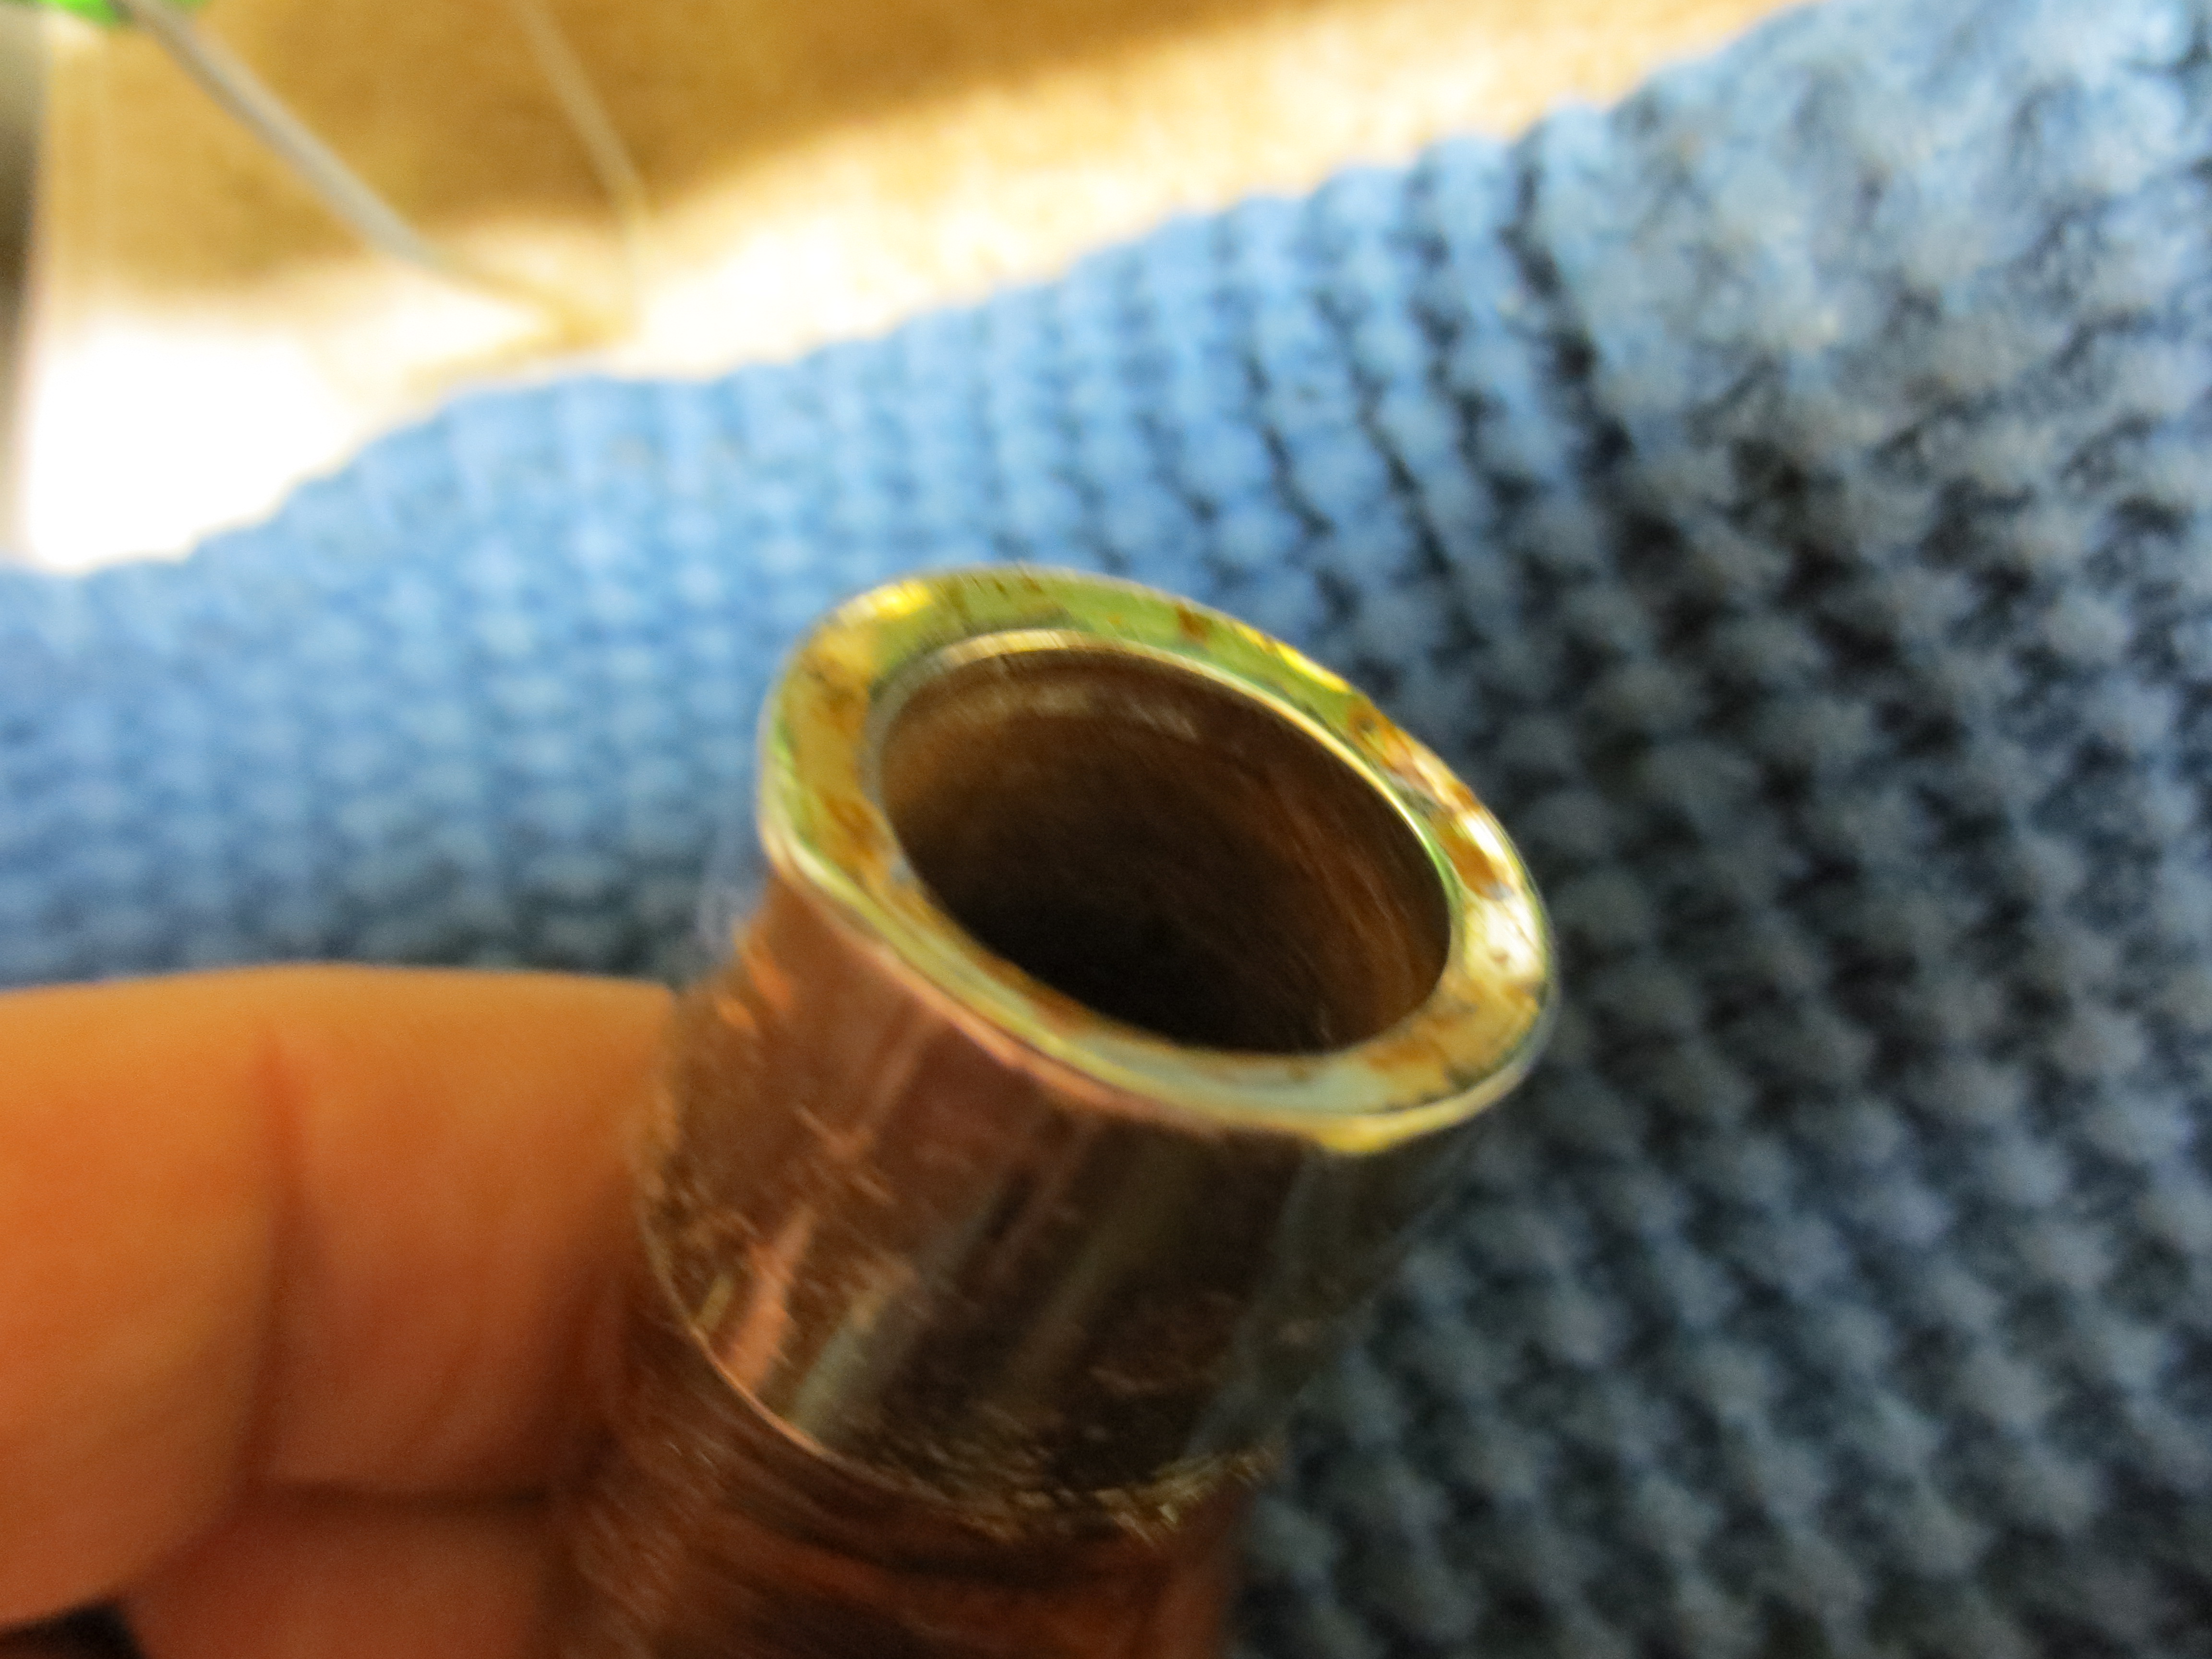
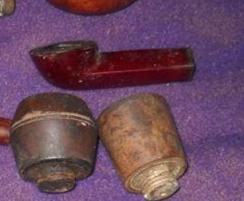
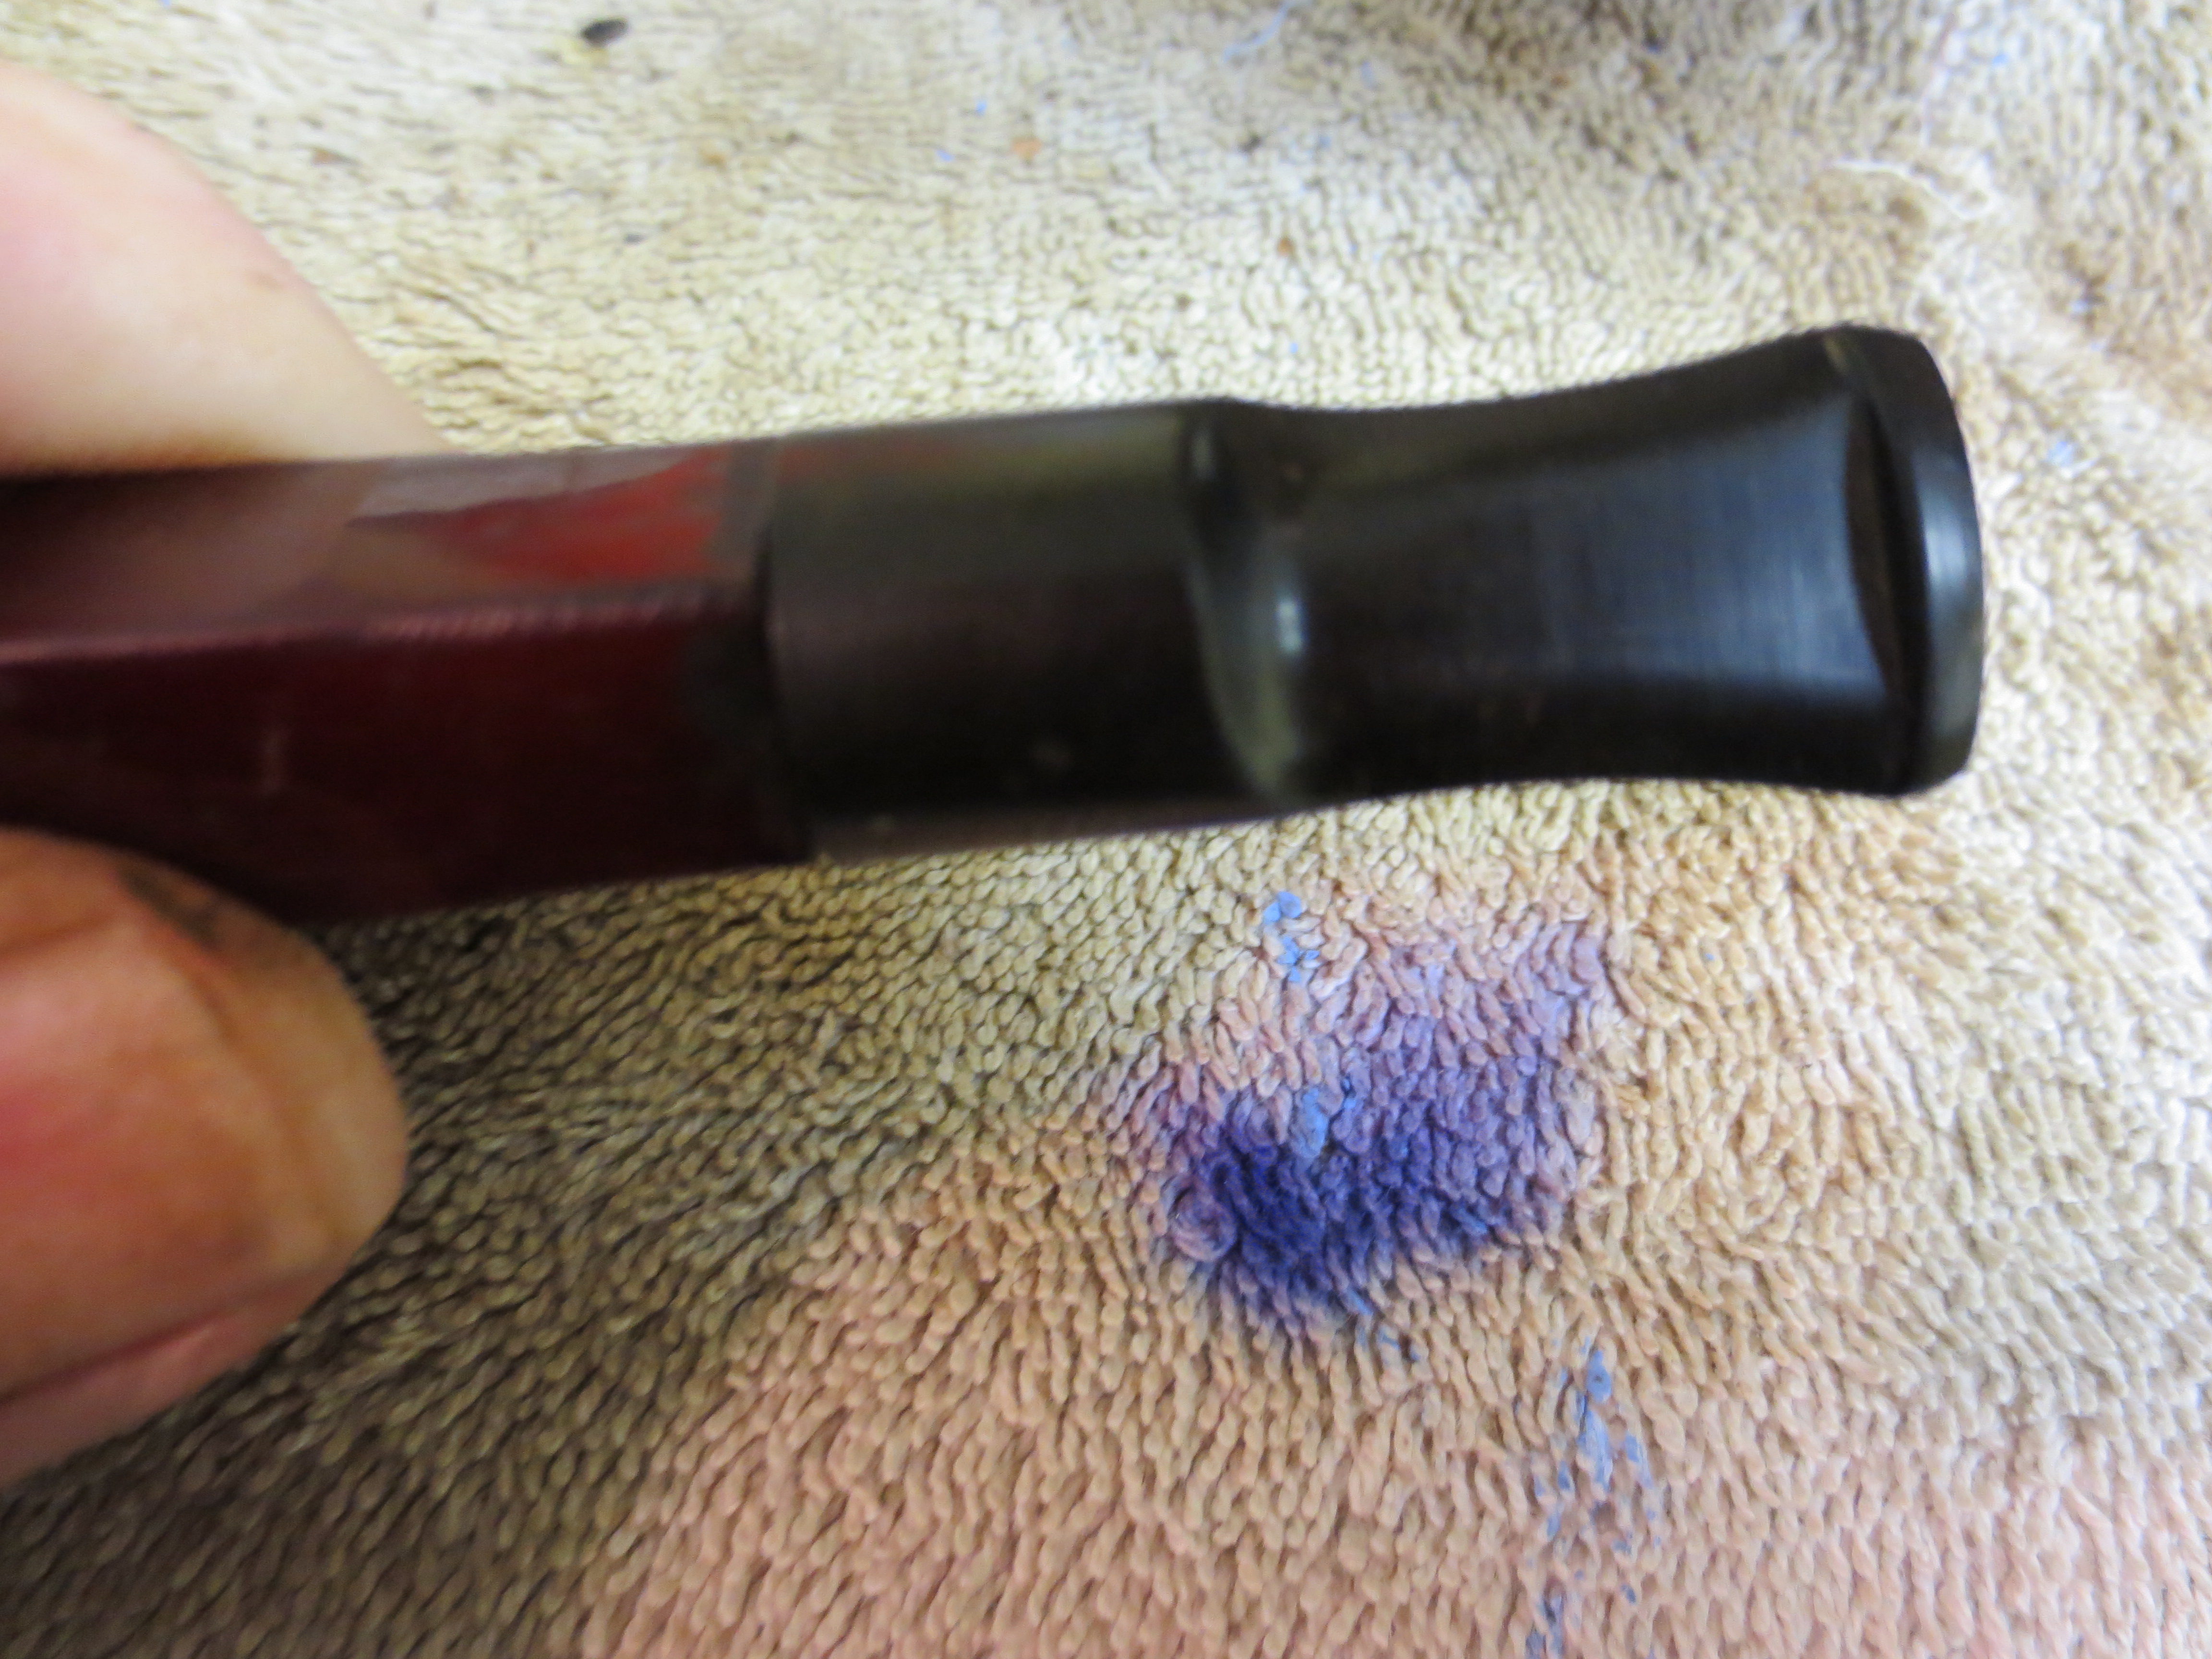
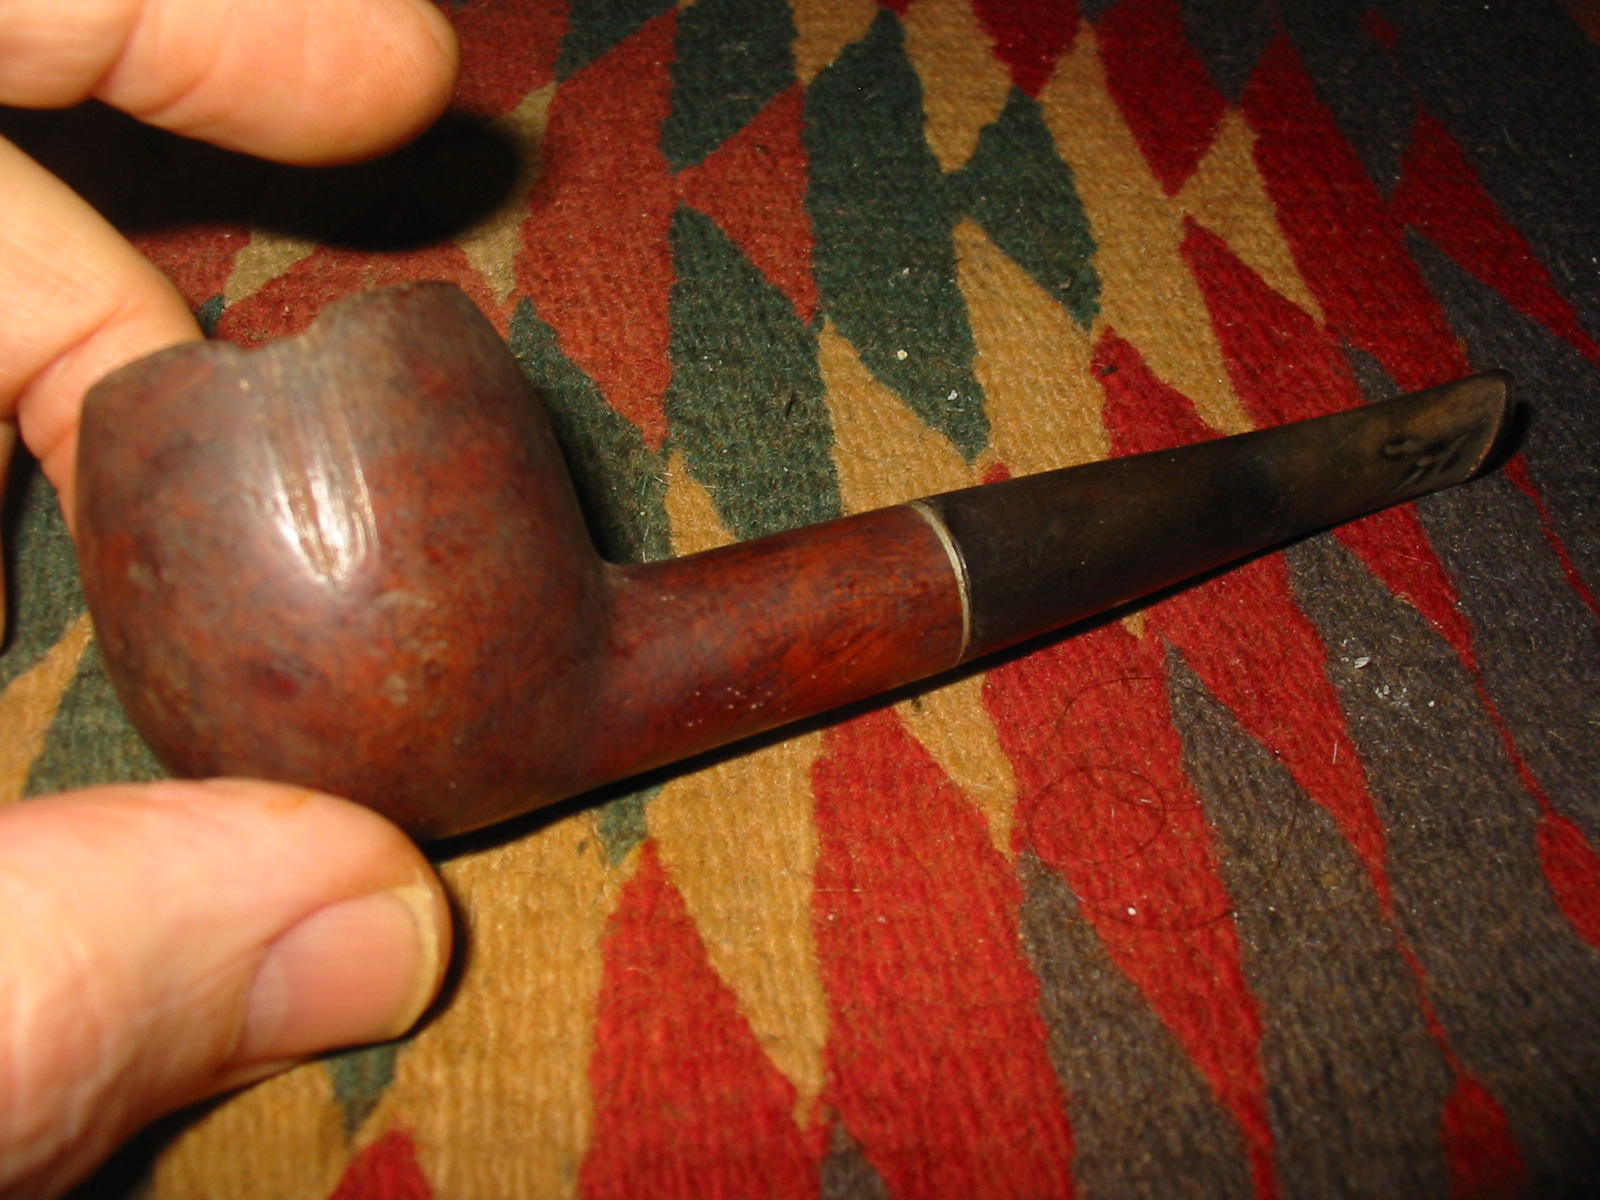
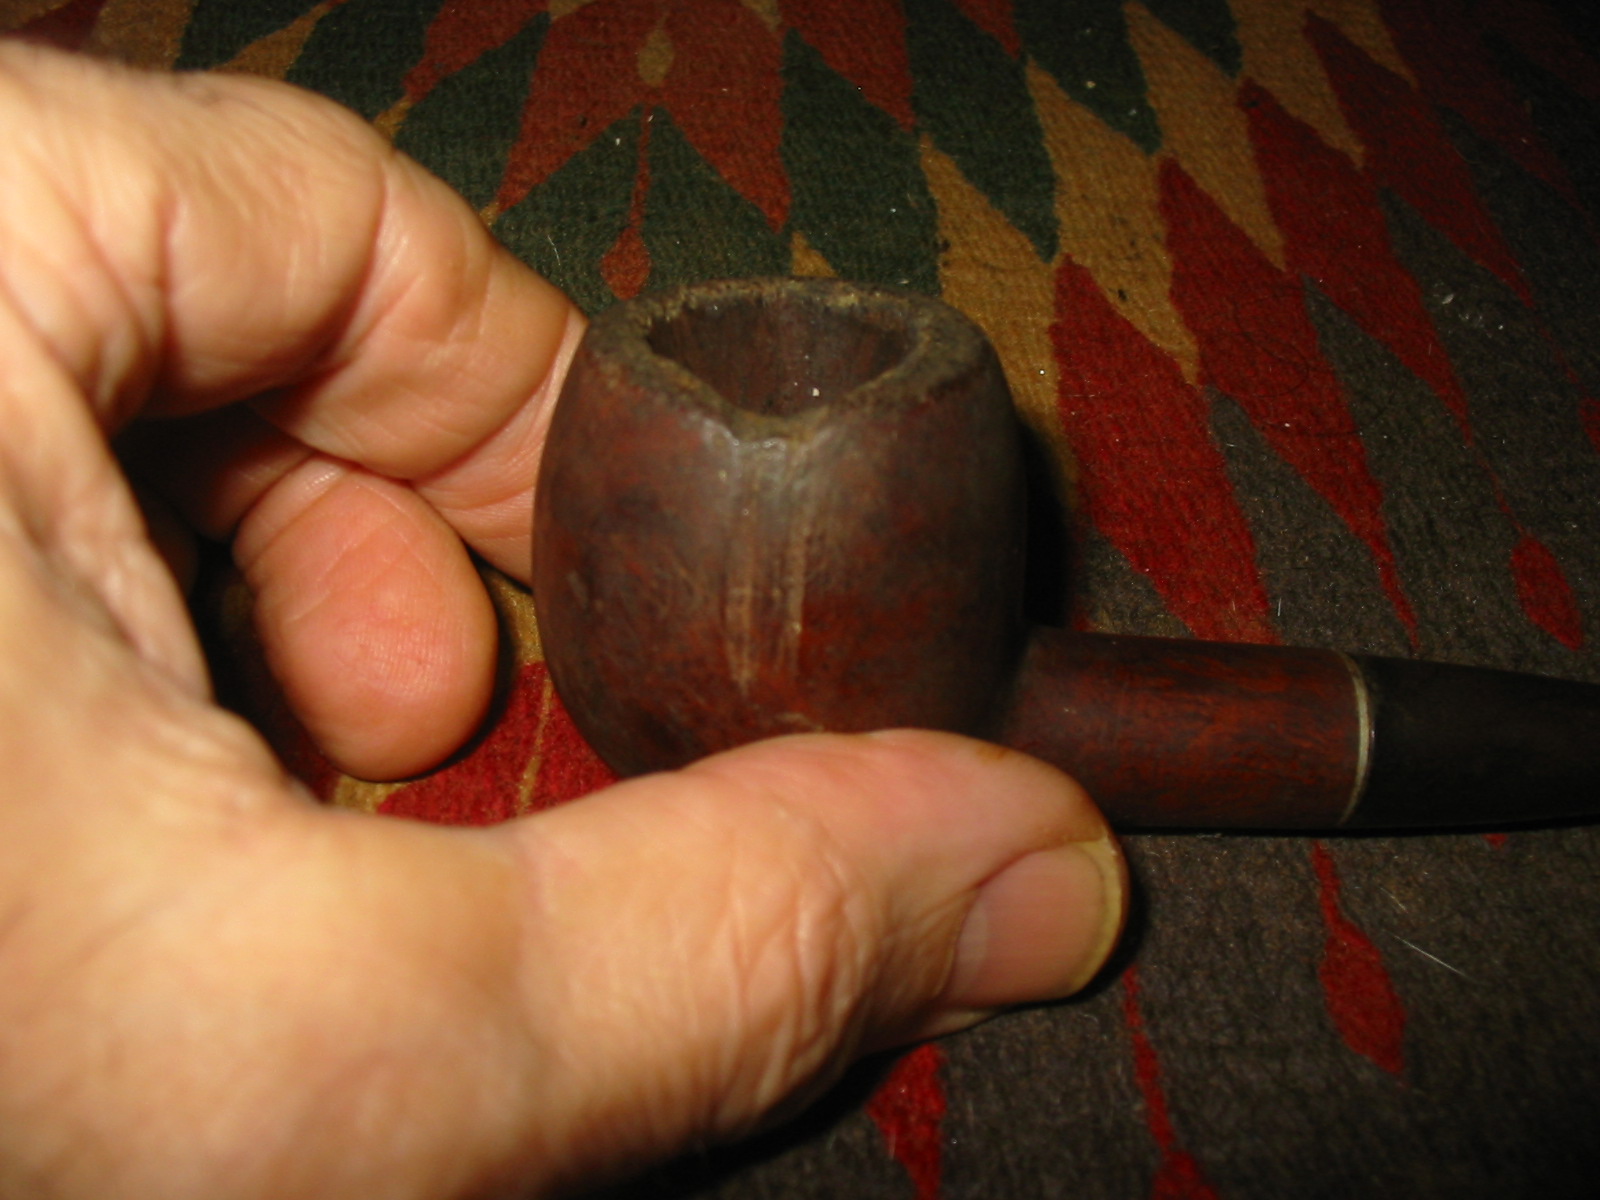
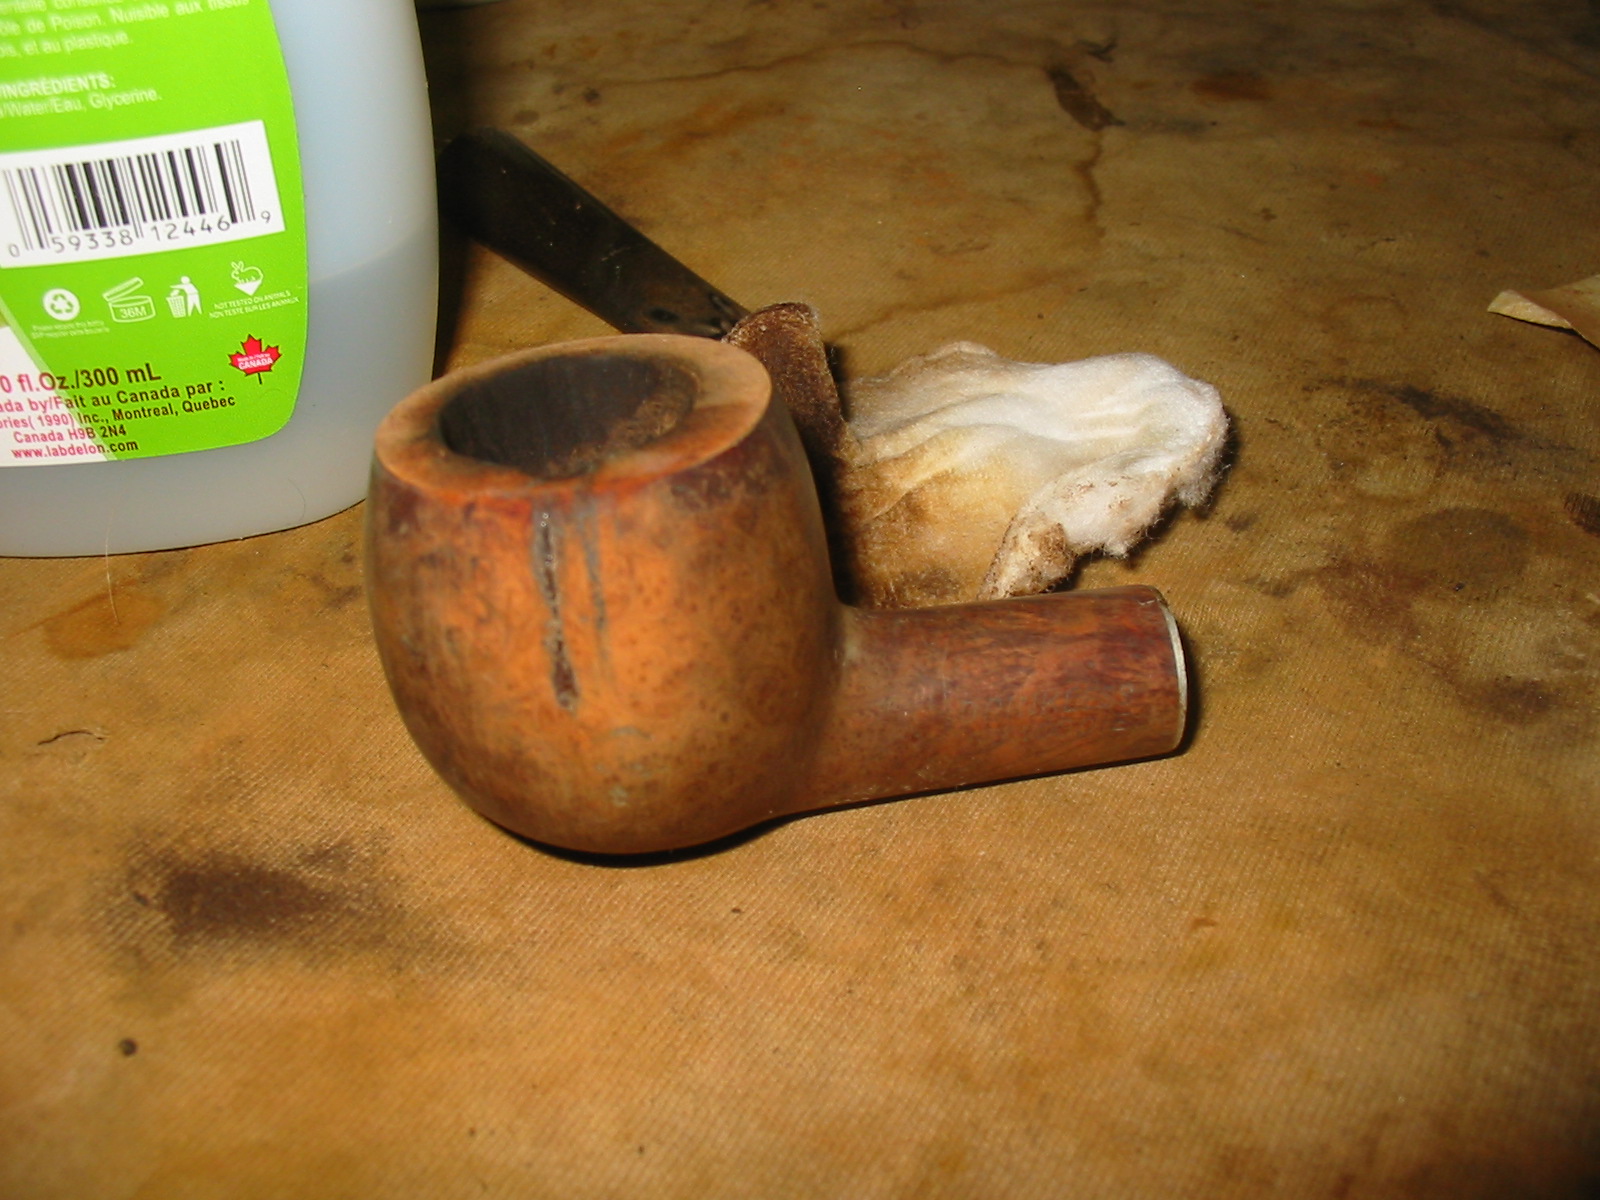
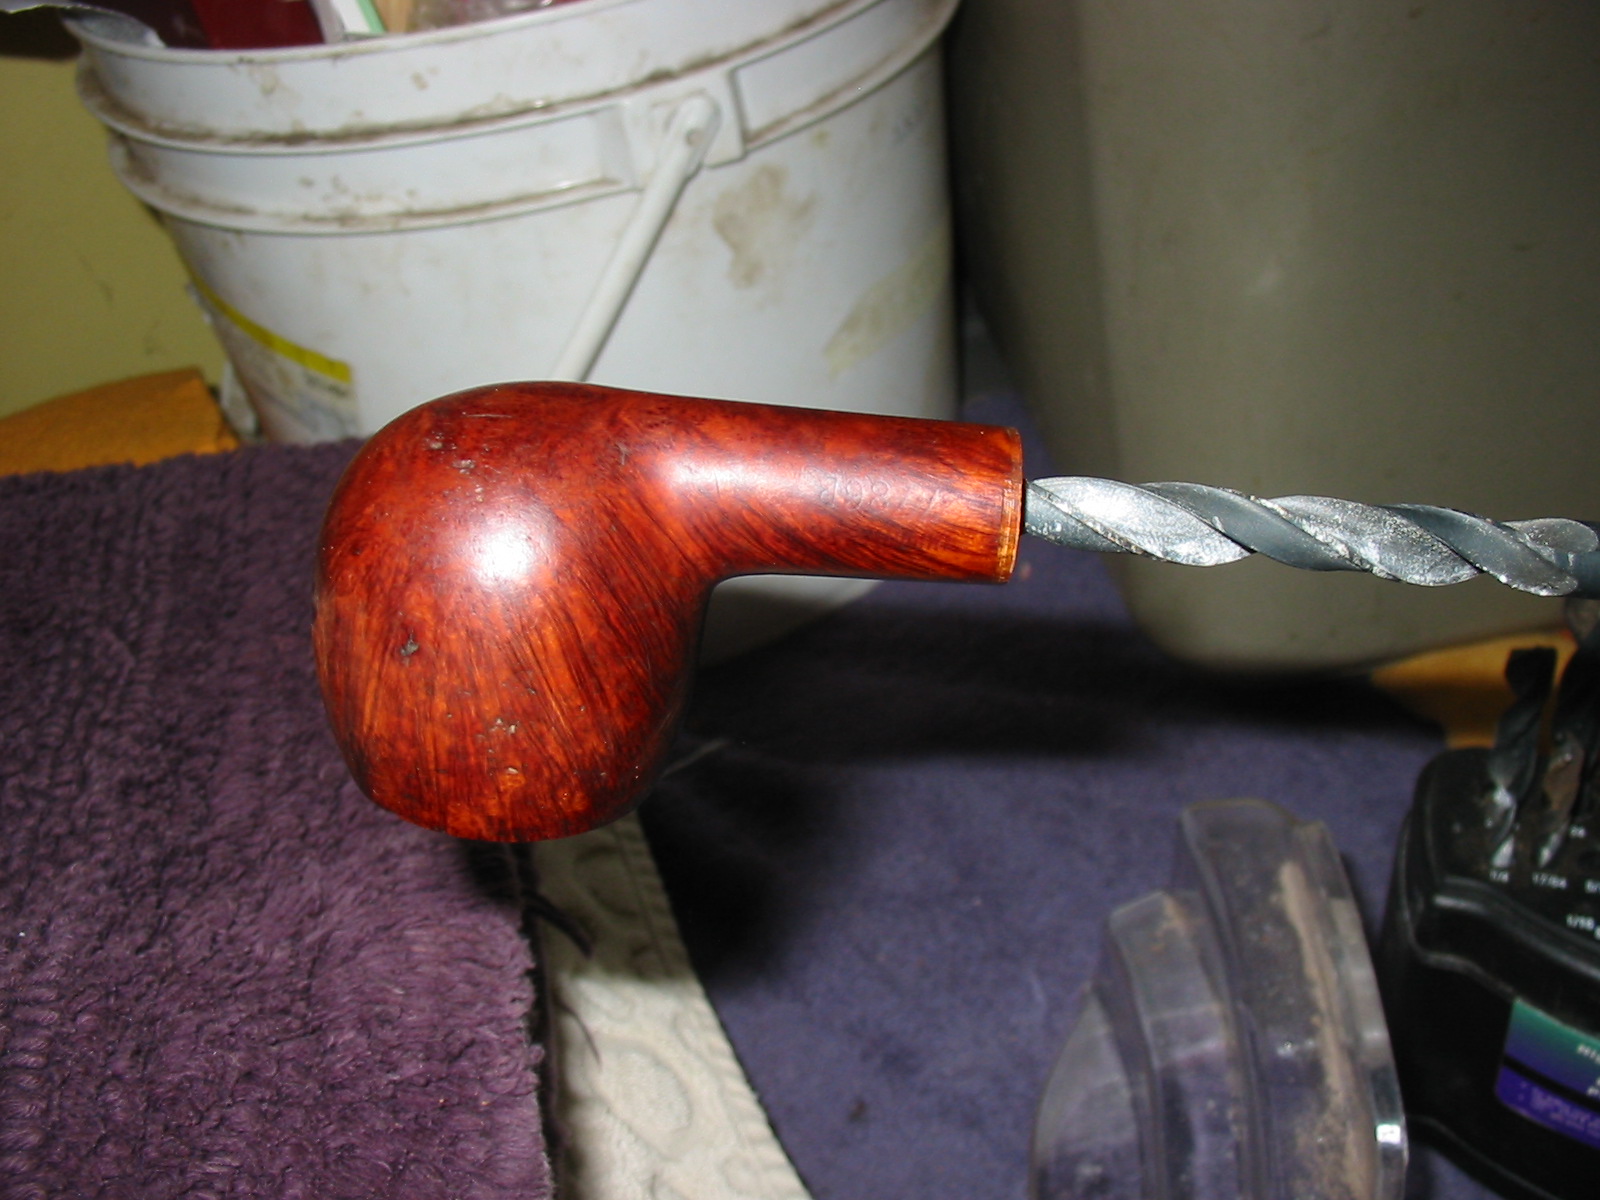
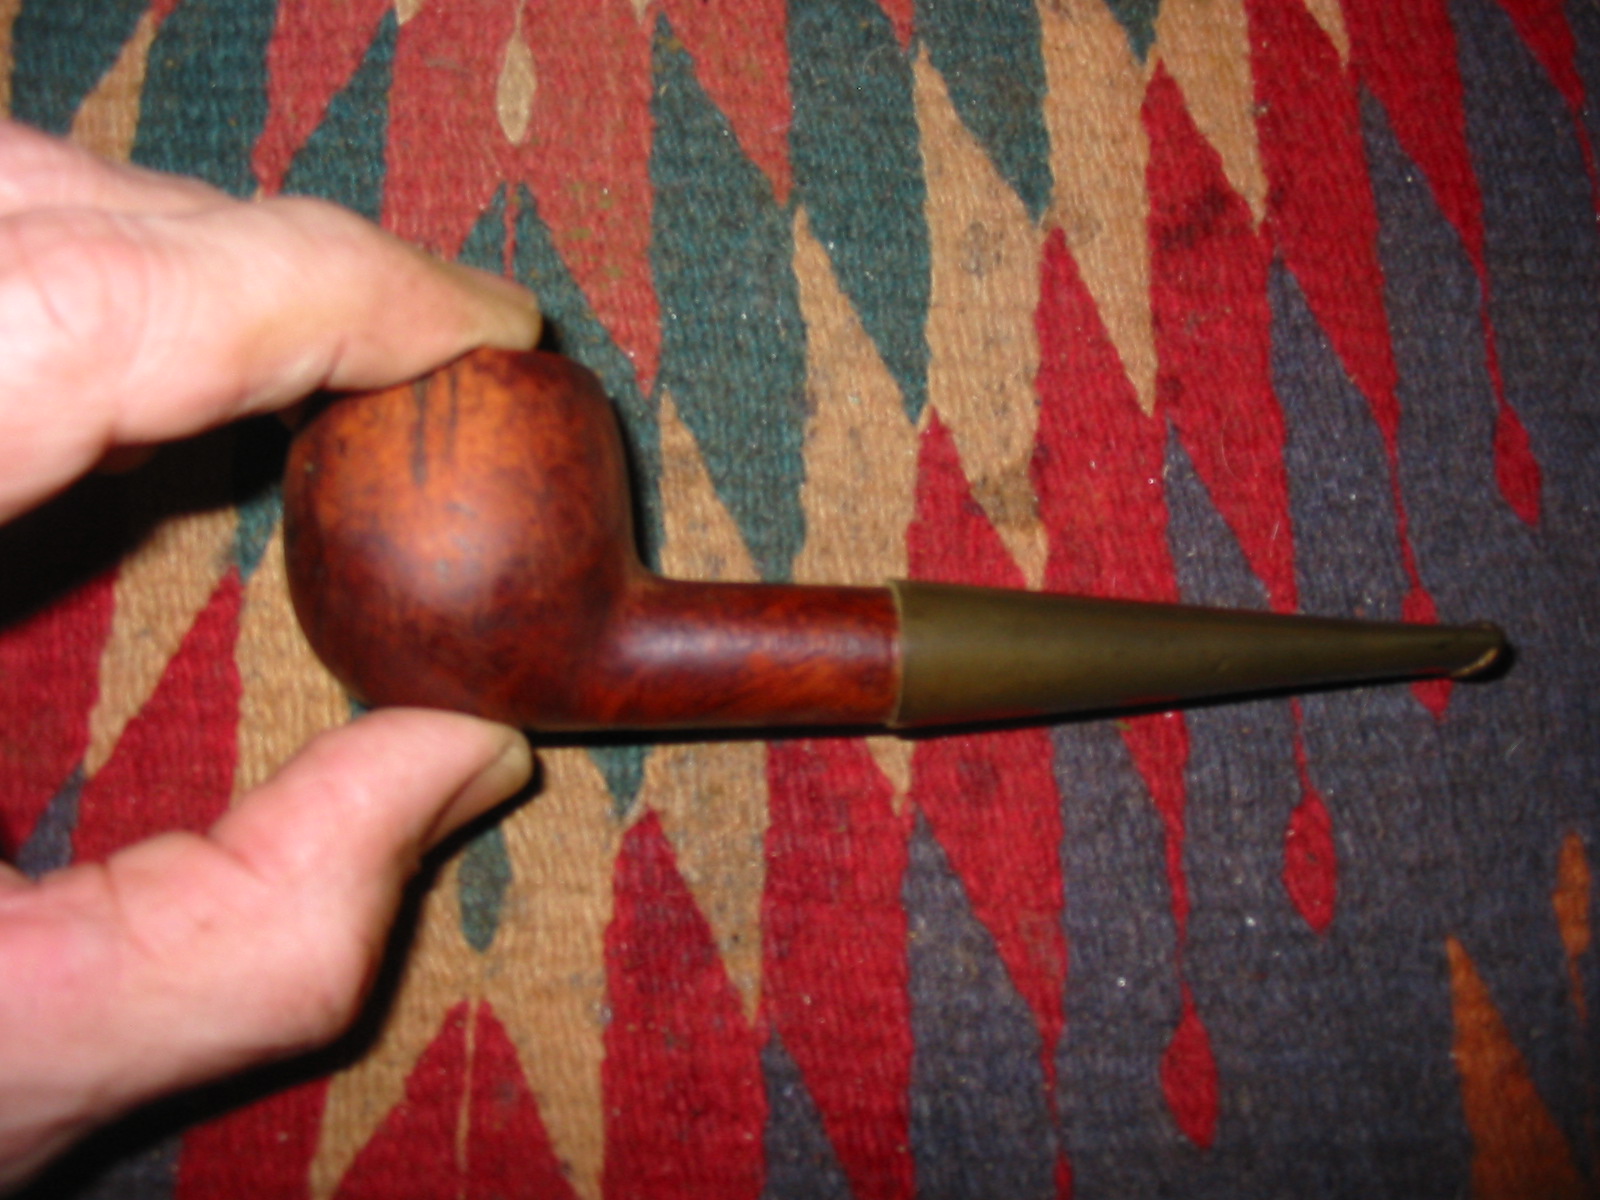
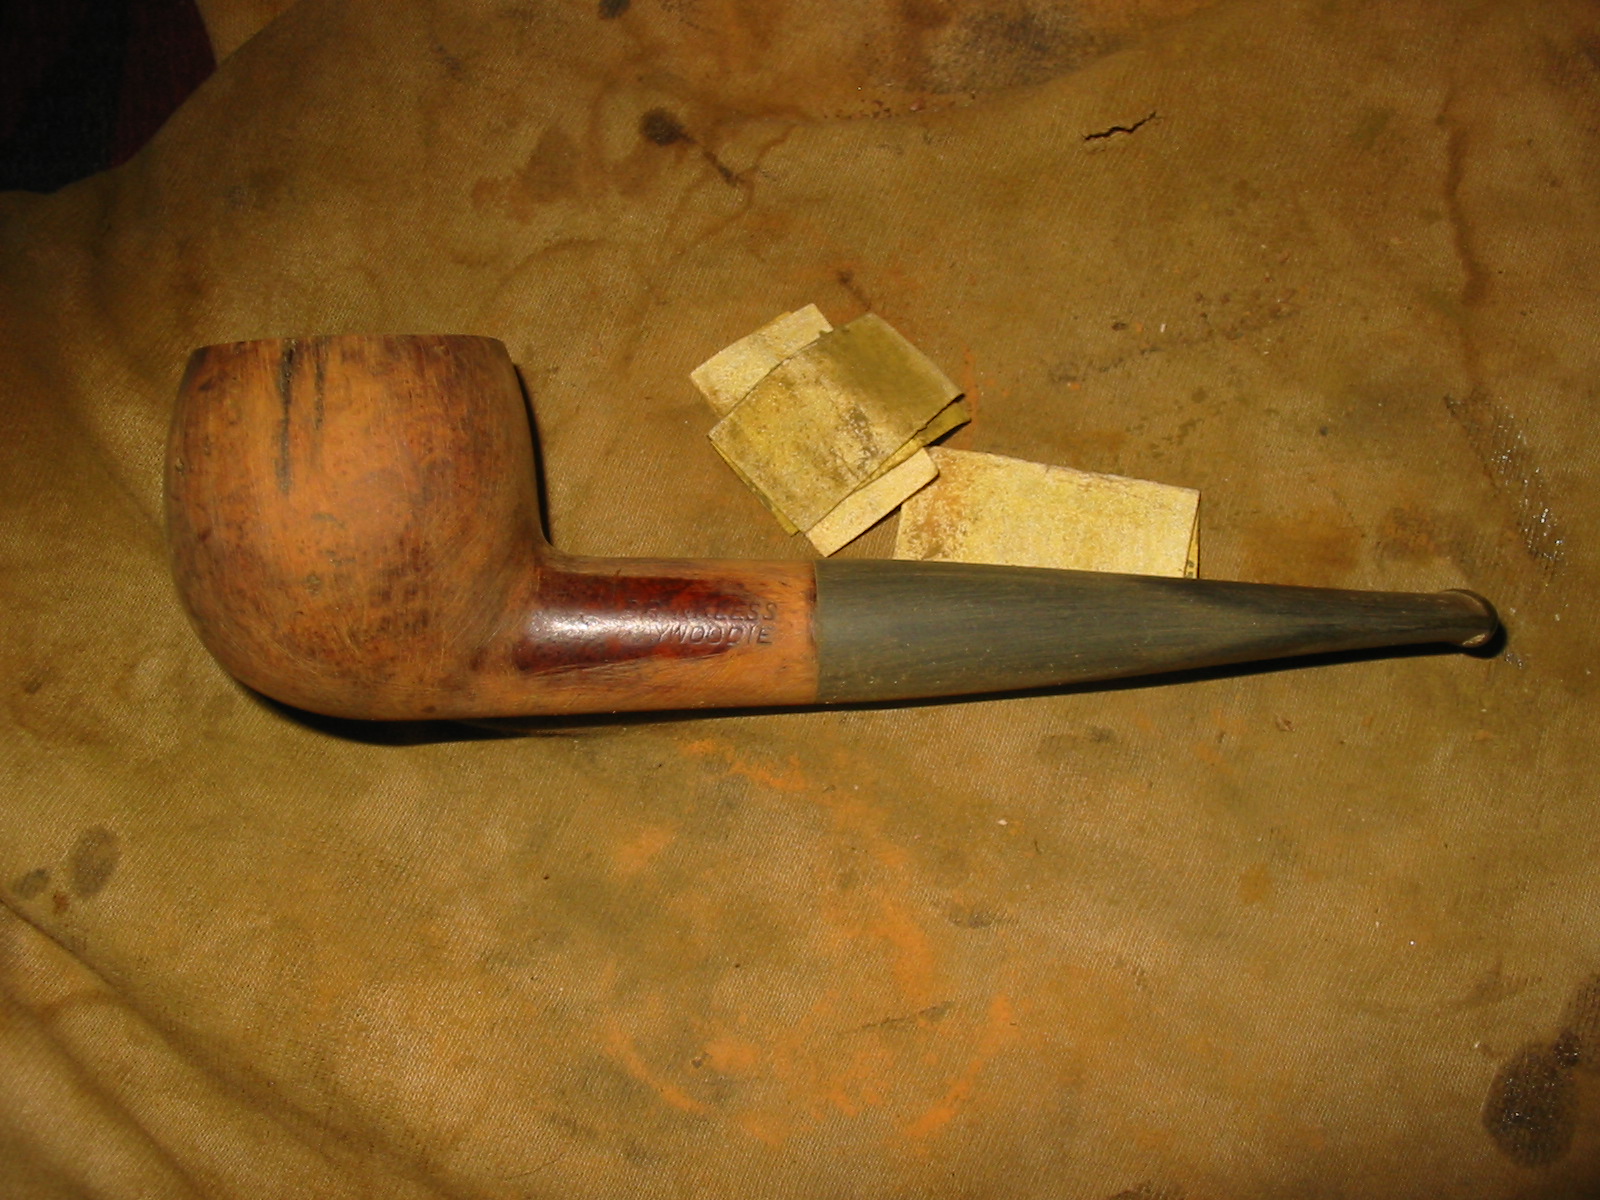
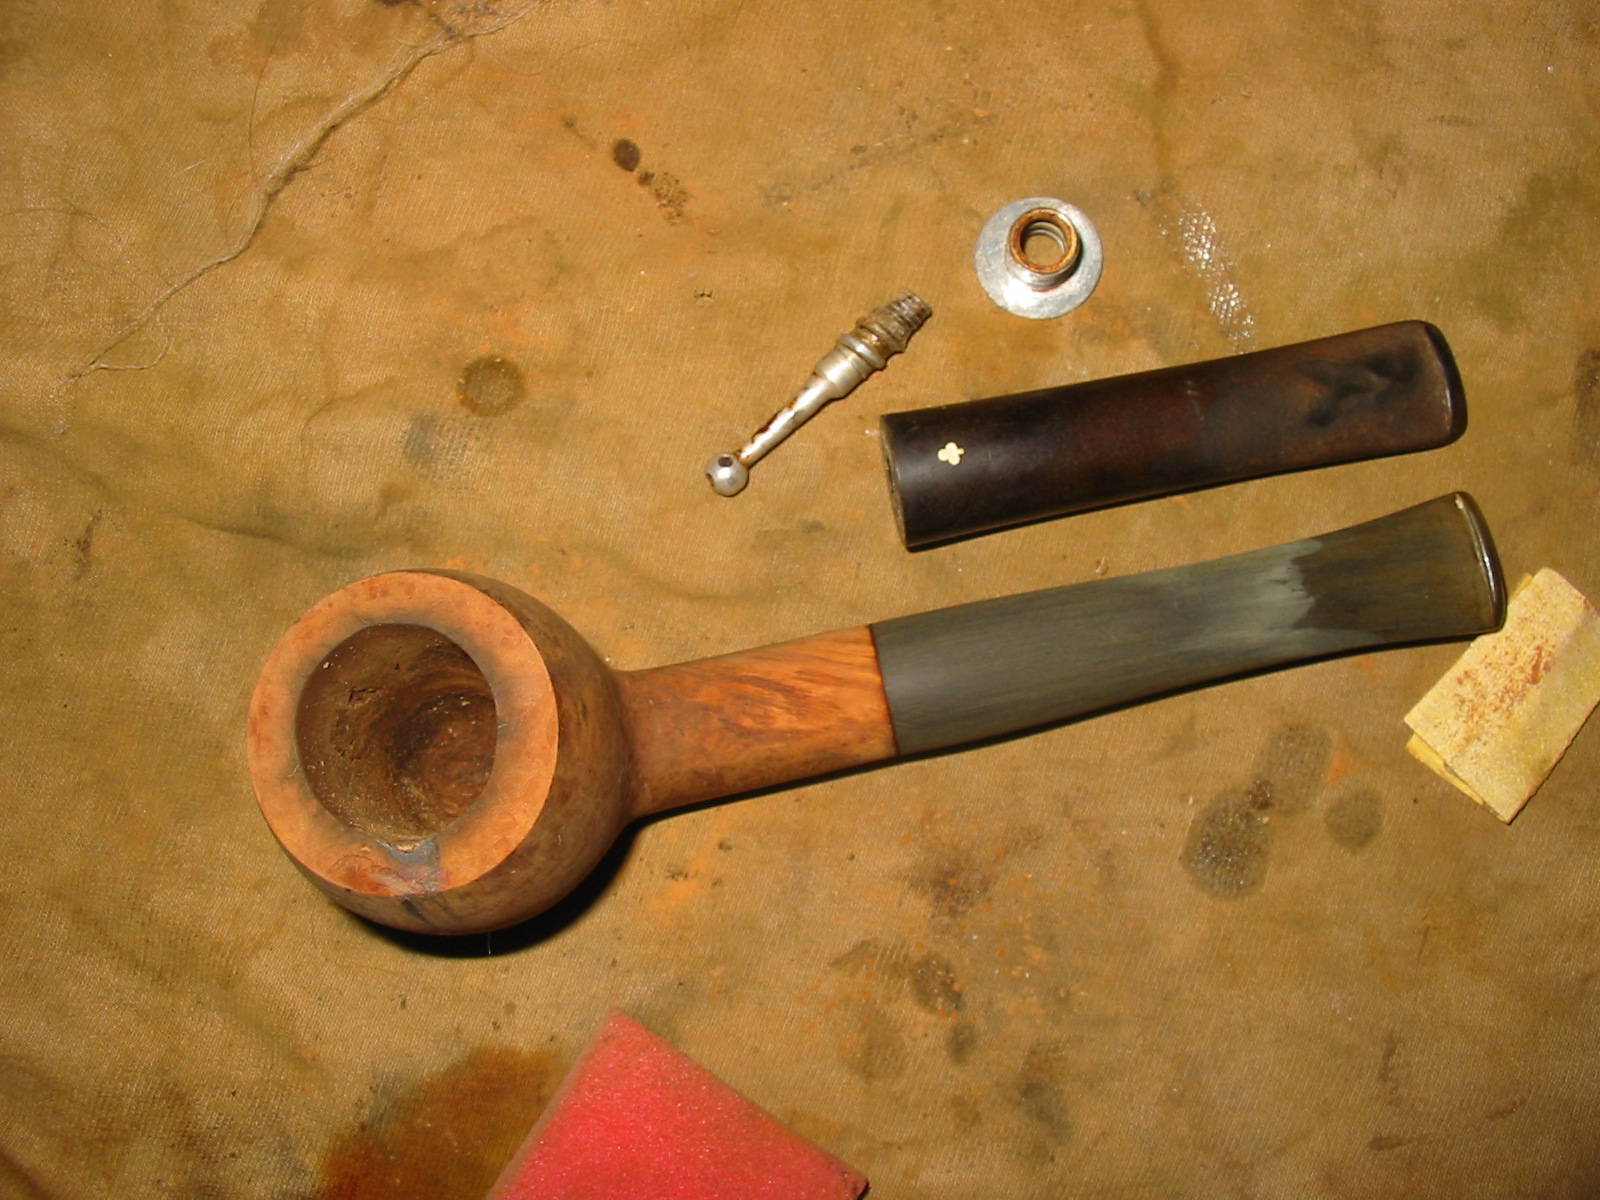
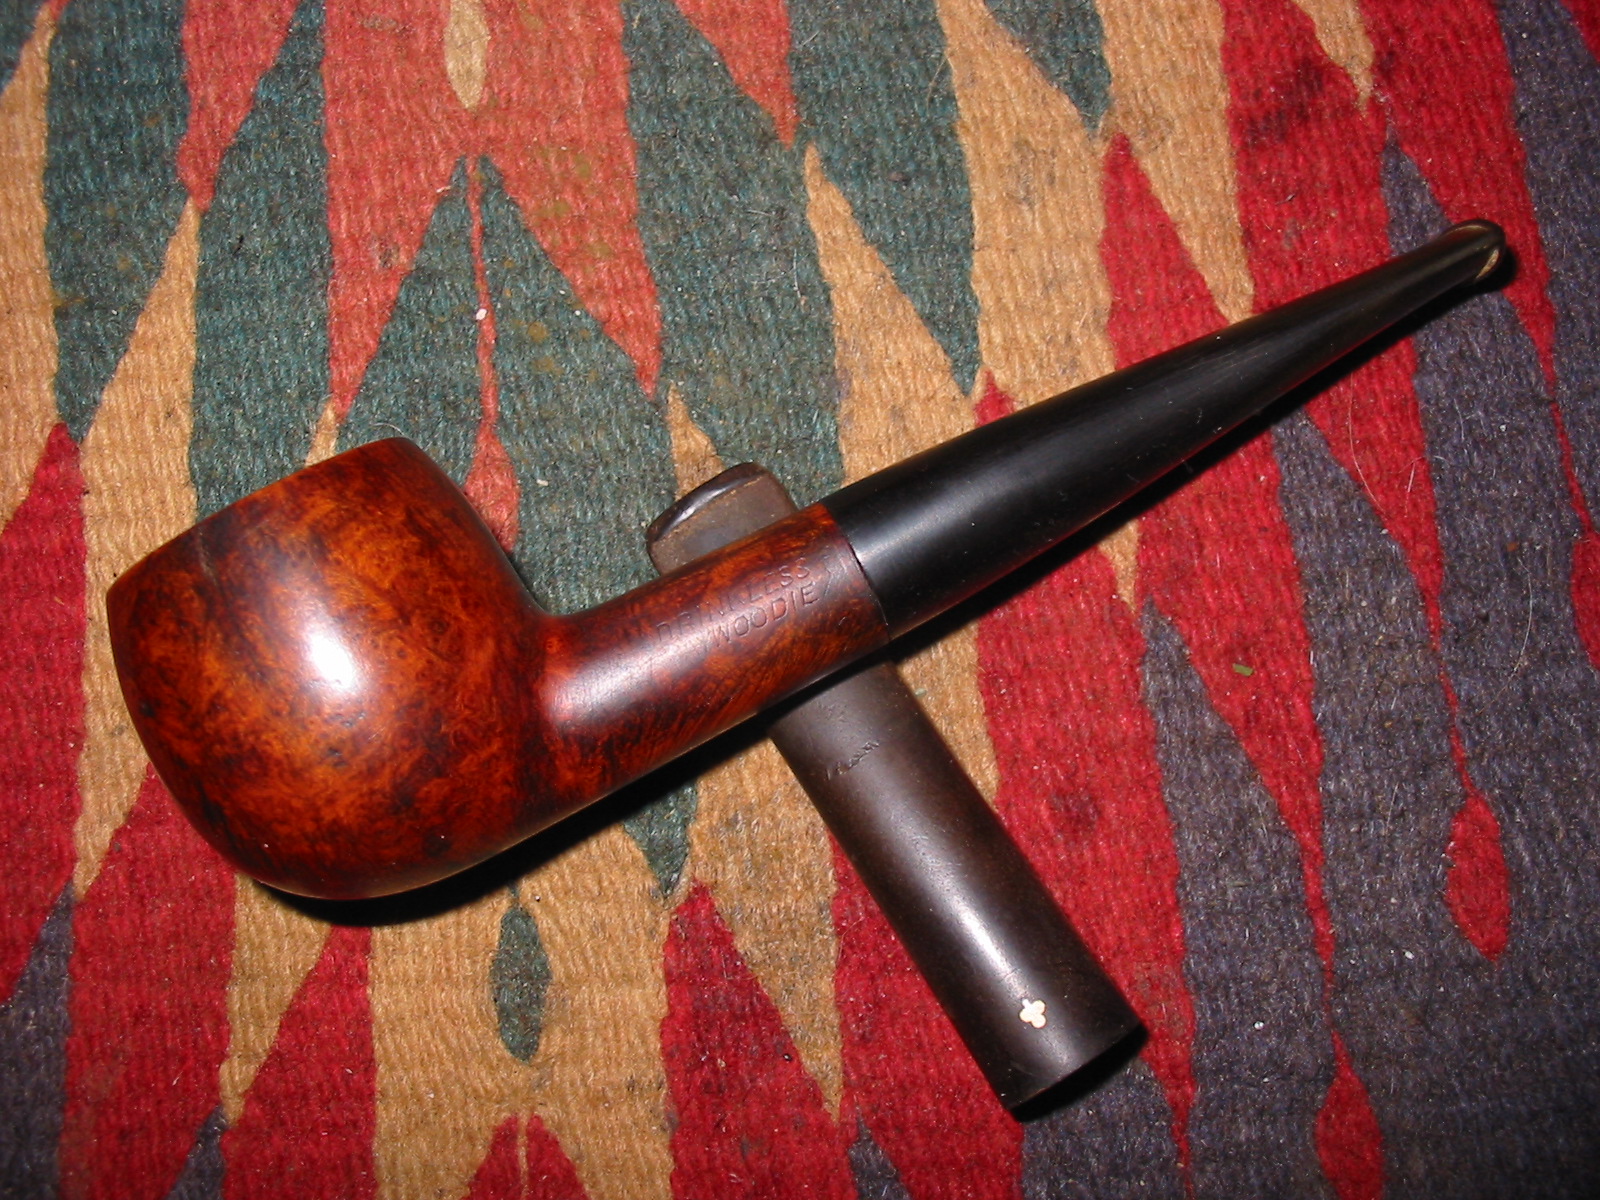
I was gifted this old Kaywoodie Apple in an exchange recently. It is the last of the box of pipes that I have to refurbish. I left it to last as it had some serious problems. The stem was overturned and had deep tooth marks at the button. The bowl had some deep scoring on the left side of the bowl. Those issues might not seem too serious at first glance but they were more so than I had expected. I inspected the stinger apparatus and saw that it had been reglued in the stem. I heated the stinger with a heat gun and turned it back into the shank of the pipe. As I turned it carefully the stem fell off in my hand. I looked and saw that it was corroded through and the heat had softened the glue and the piece literally fell out of the stem. I tried to epoxy it back into the stem and connect the two pieces but it would not stay. Each time I put it back into the shank it fell out – no matter how much curing time I gave it. That was the first issue. In looking at the tooth marks they were repairable but with the broken stinger and threaded tenon I wondered whether it was worth fixing it. The grooves on the bowl and the dip in the rim above them could be repaired and would be a simple fix if I decided to keep the pipe. Those were the issues that caused me to lay the pipe aside for a bit and work on other pipes. That is why it is the last pipe in the bottom of the box.
IMG_3047

IMG_3048

IMG_3049

IMG_3050

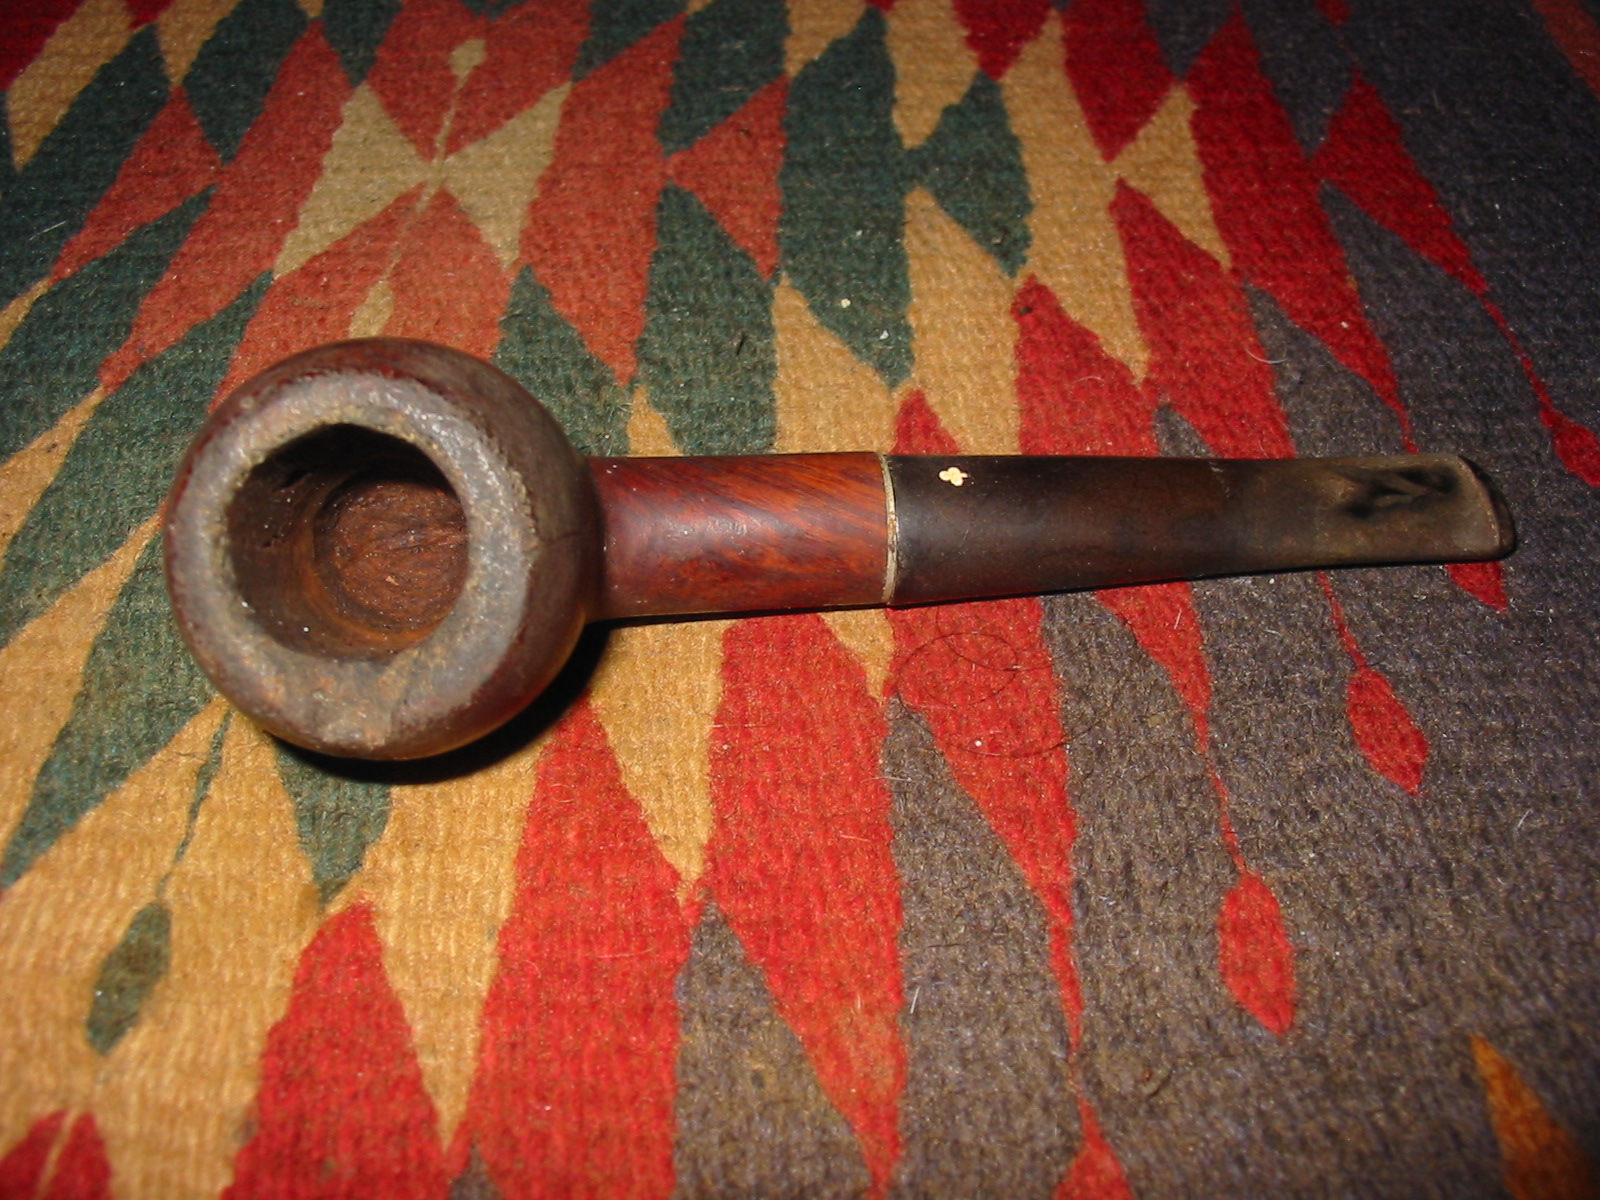
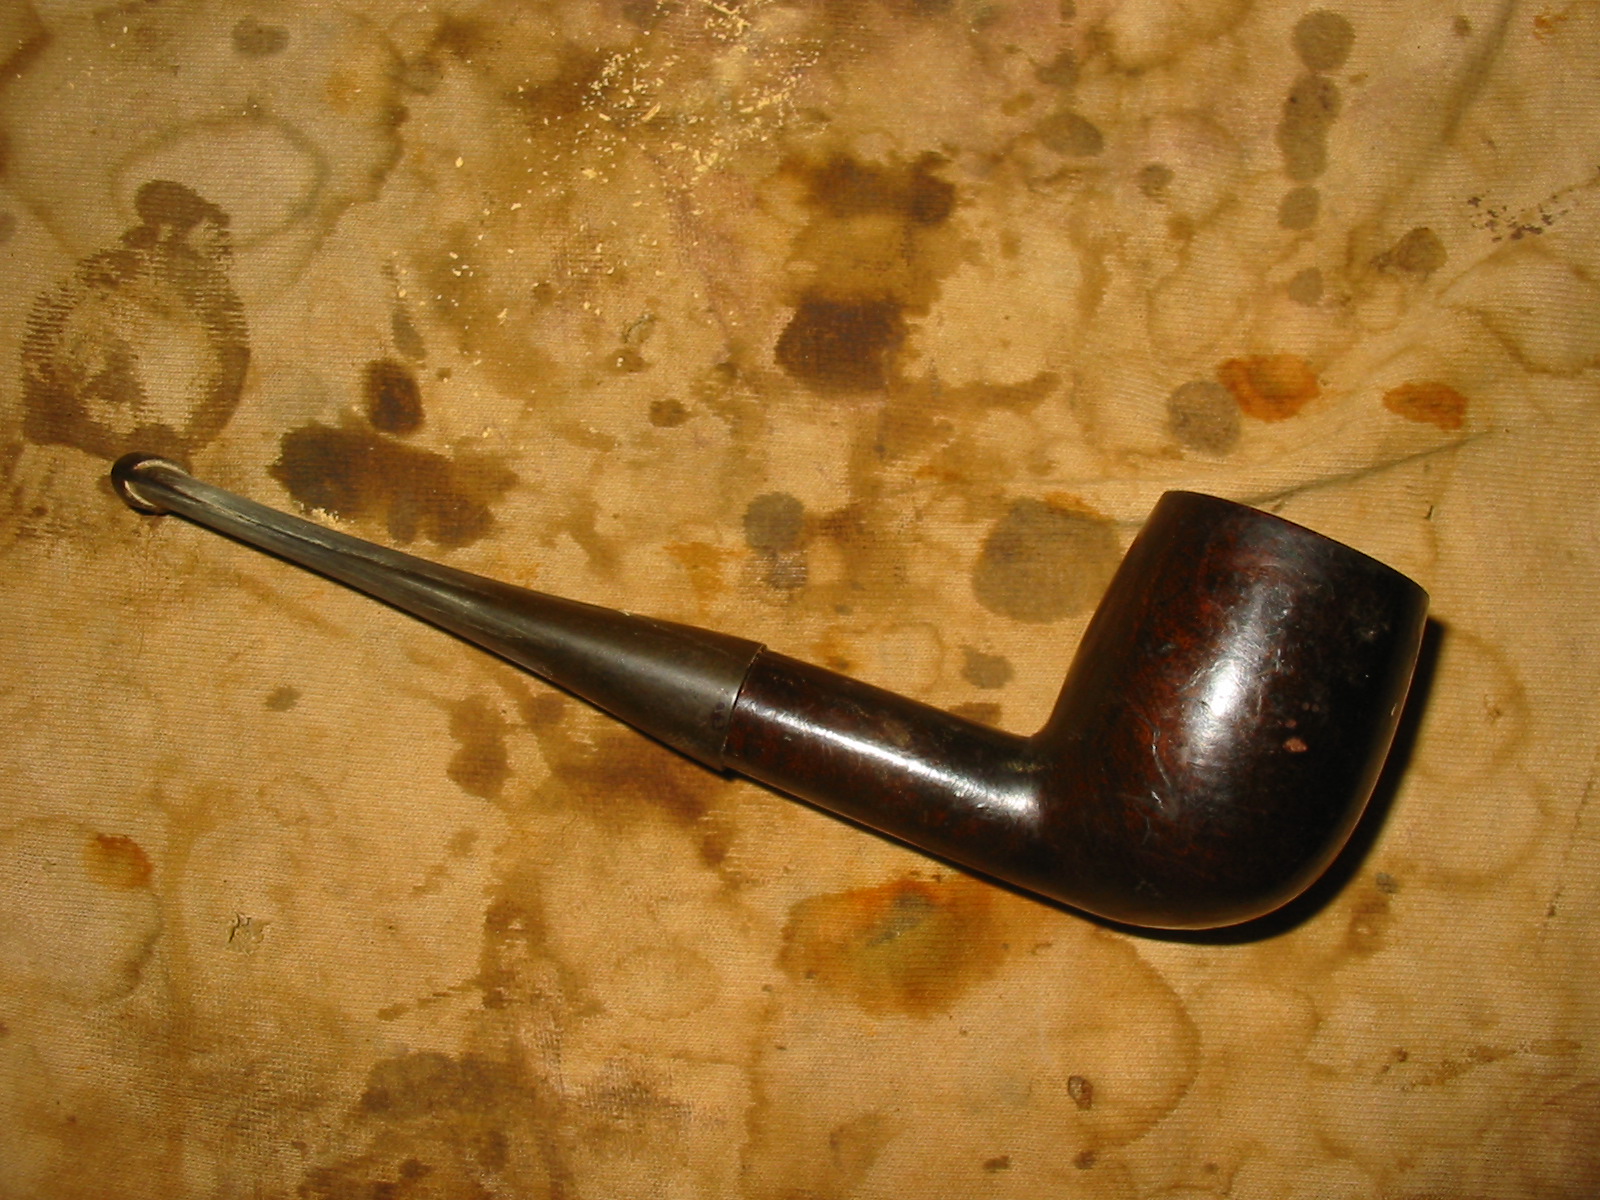
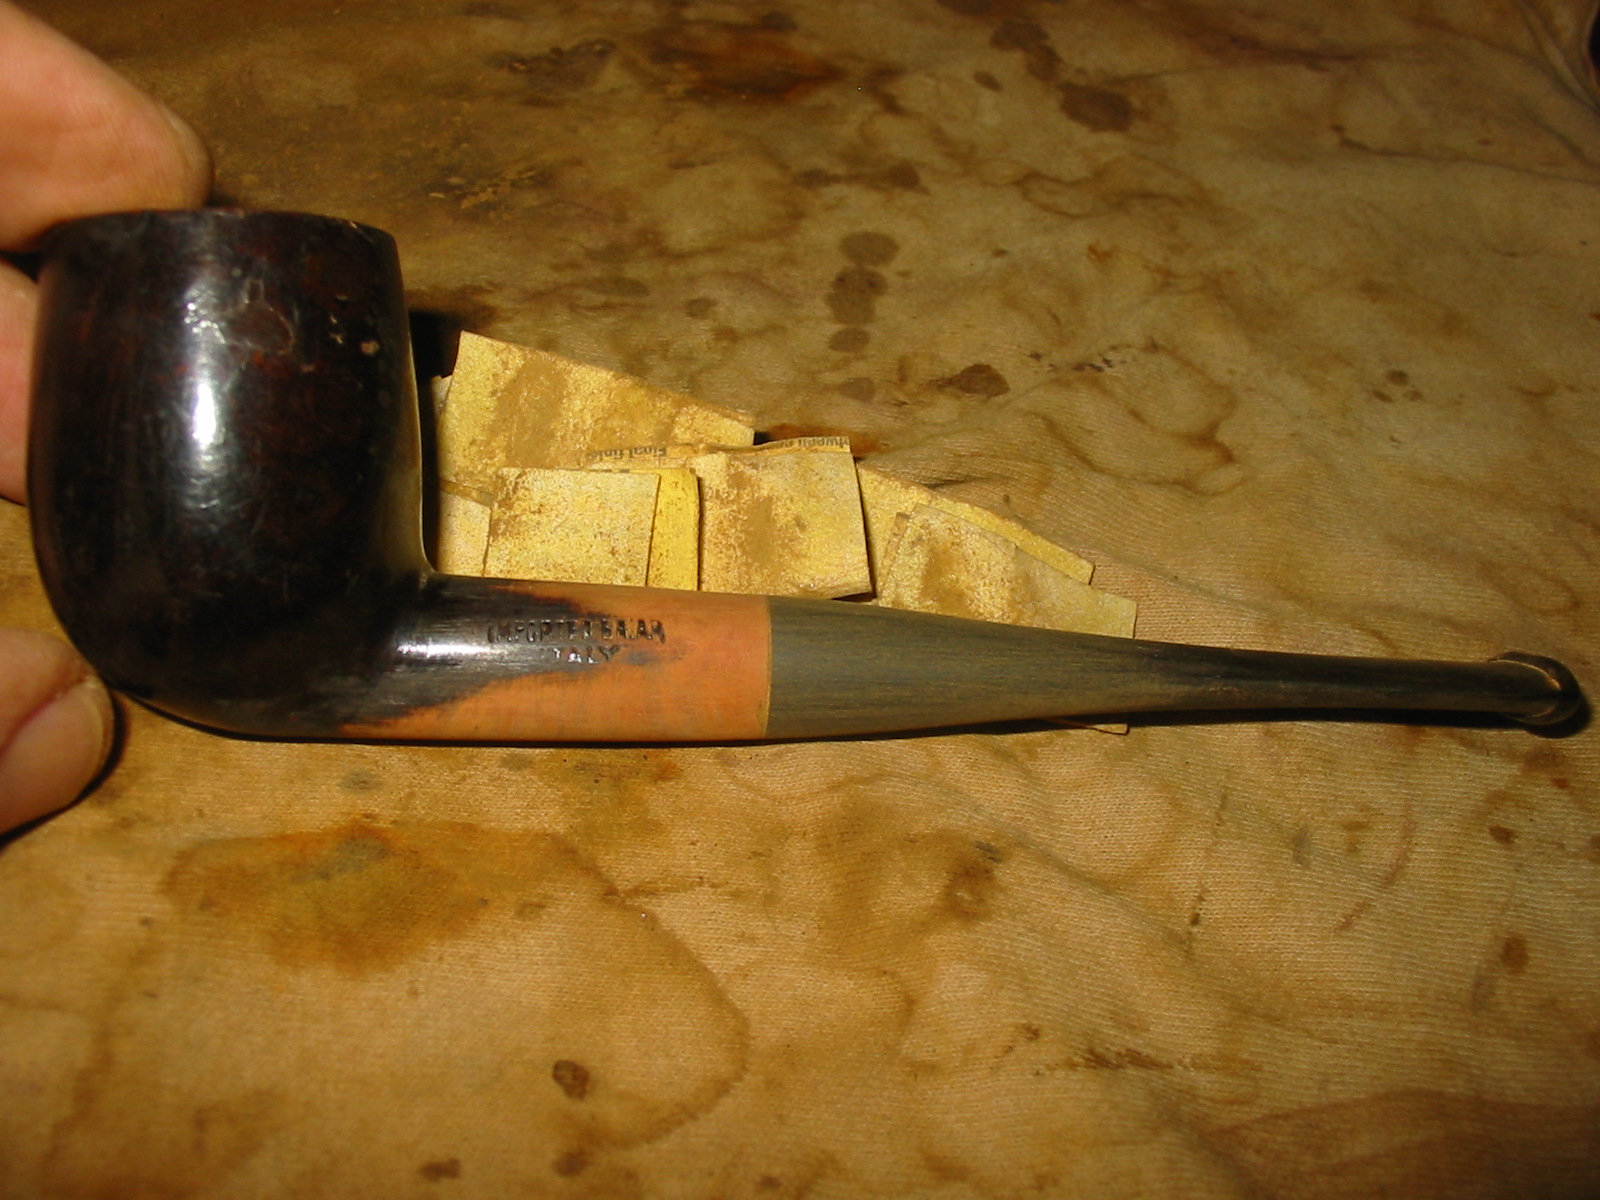
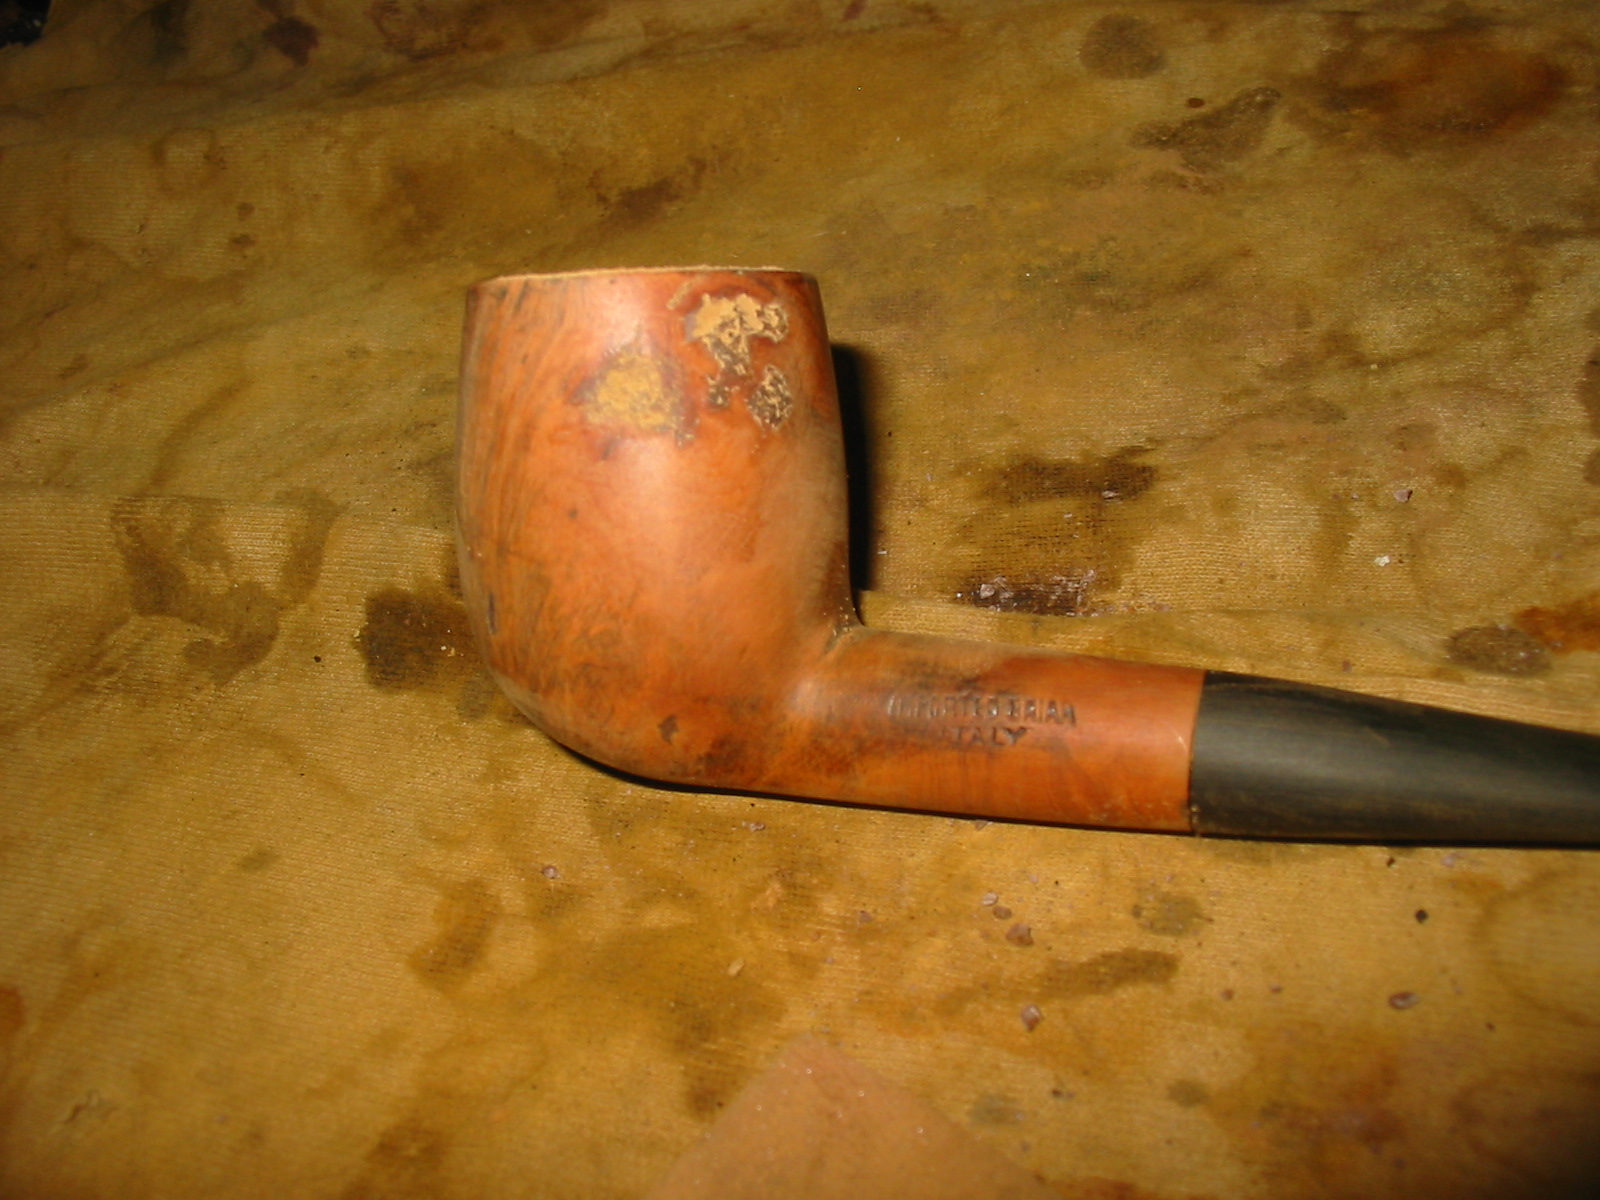
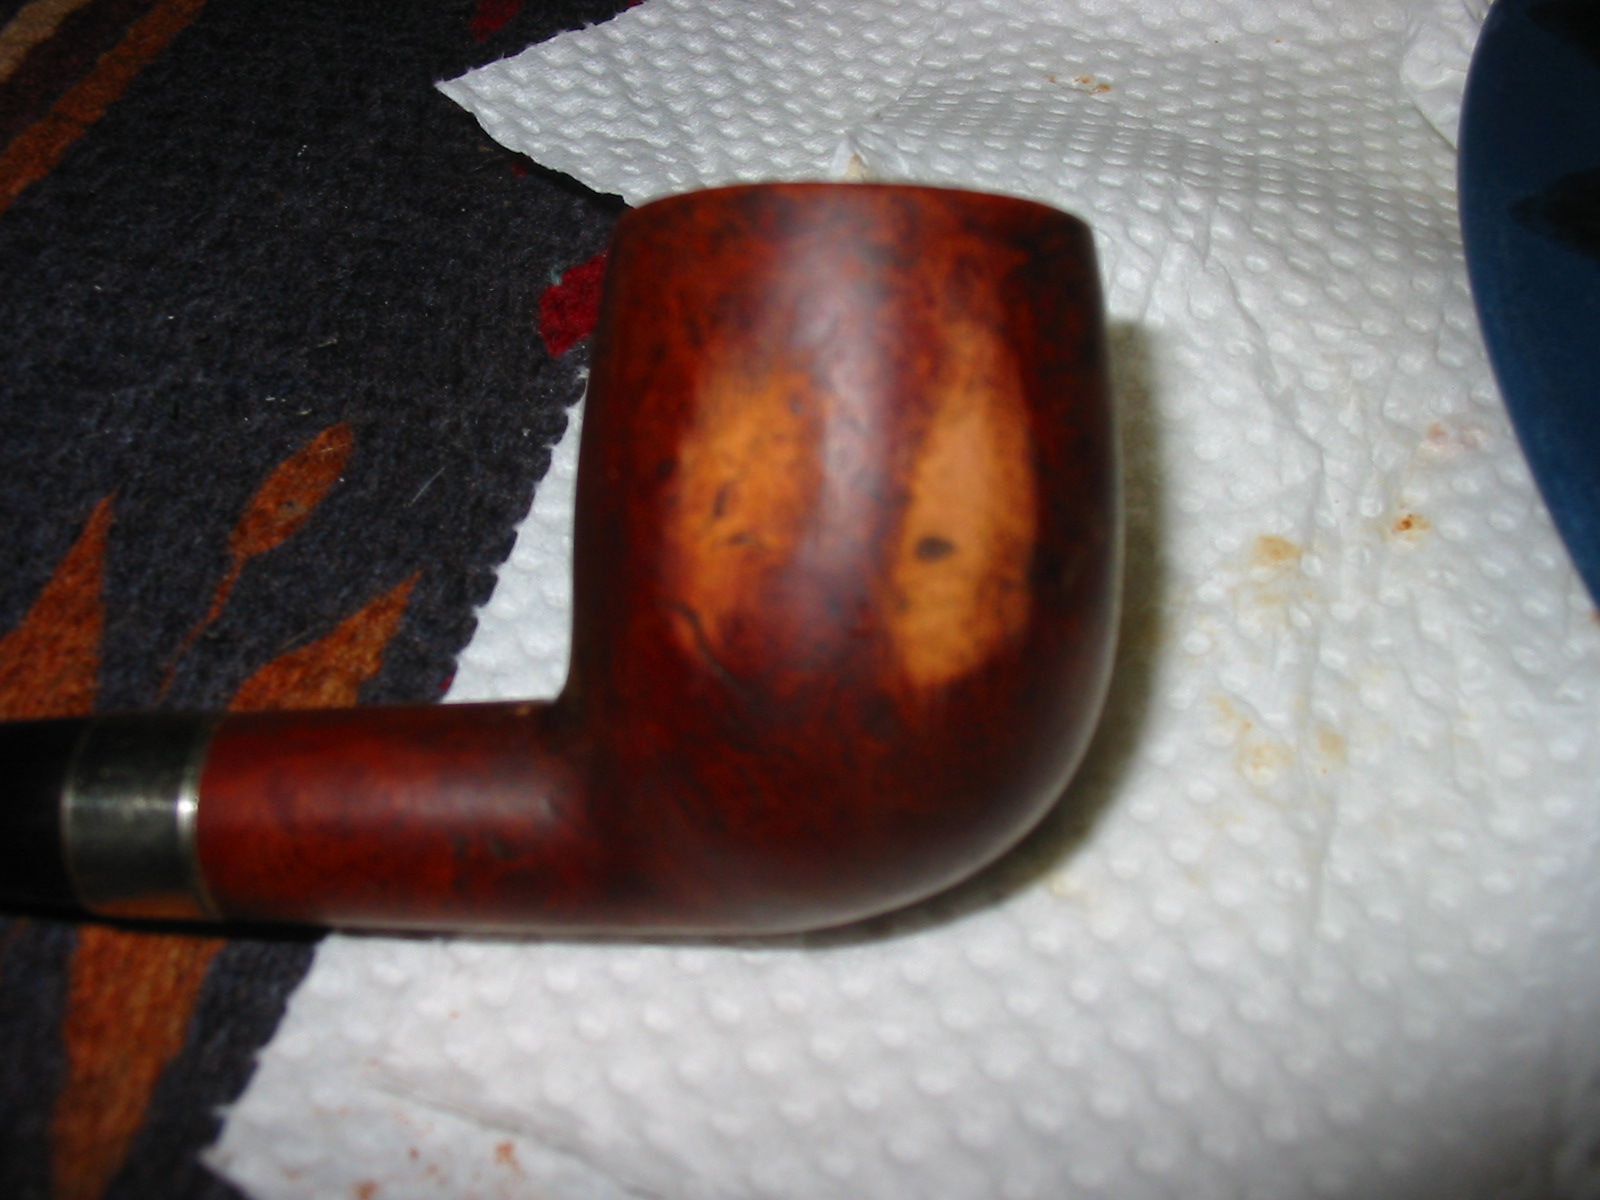
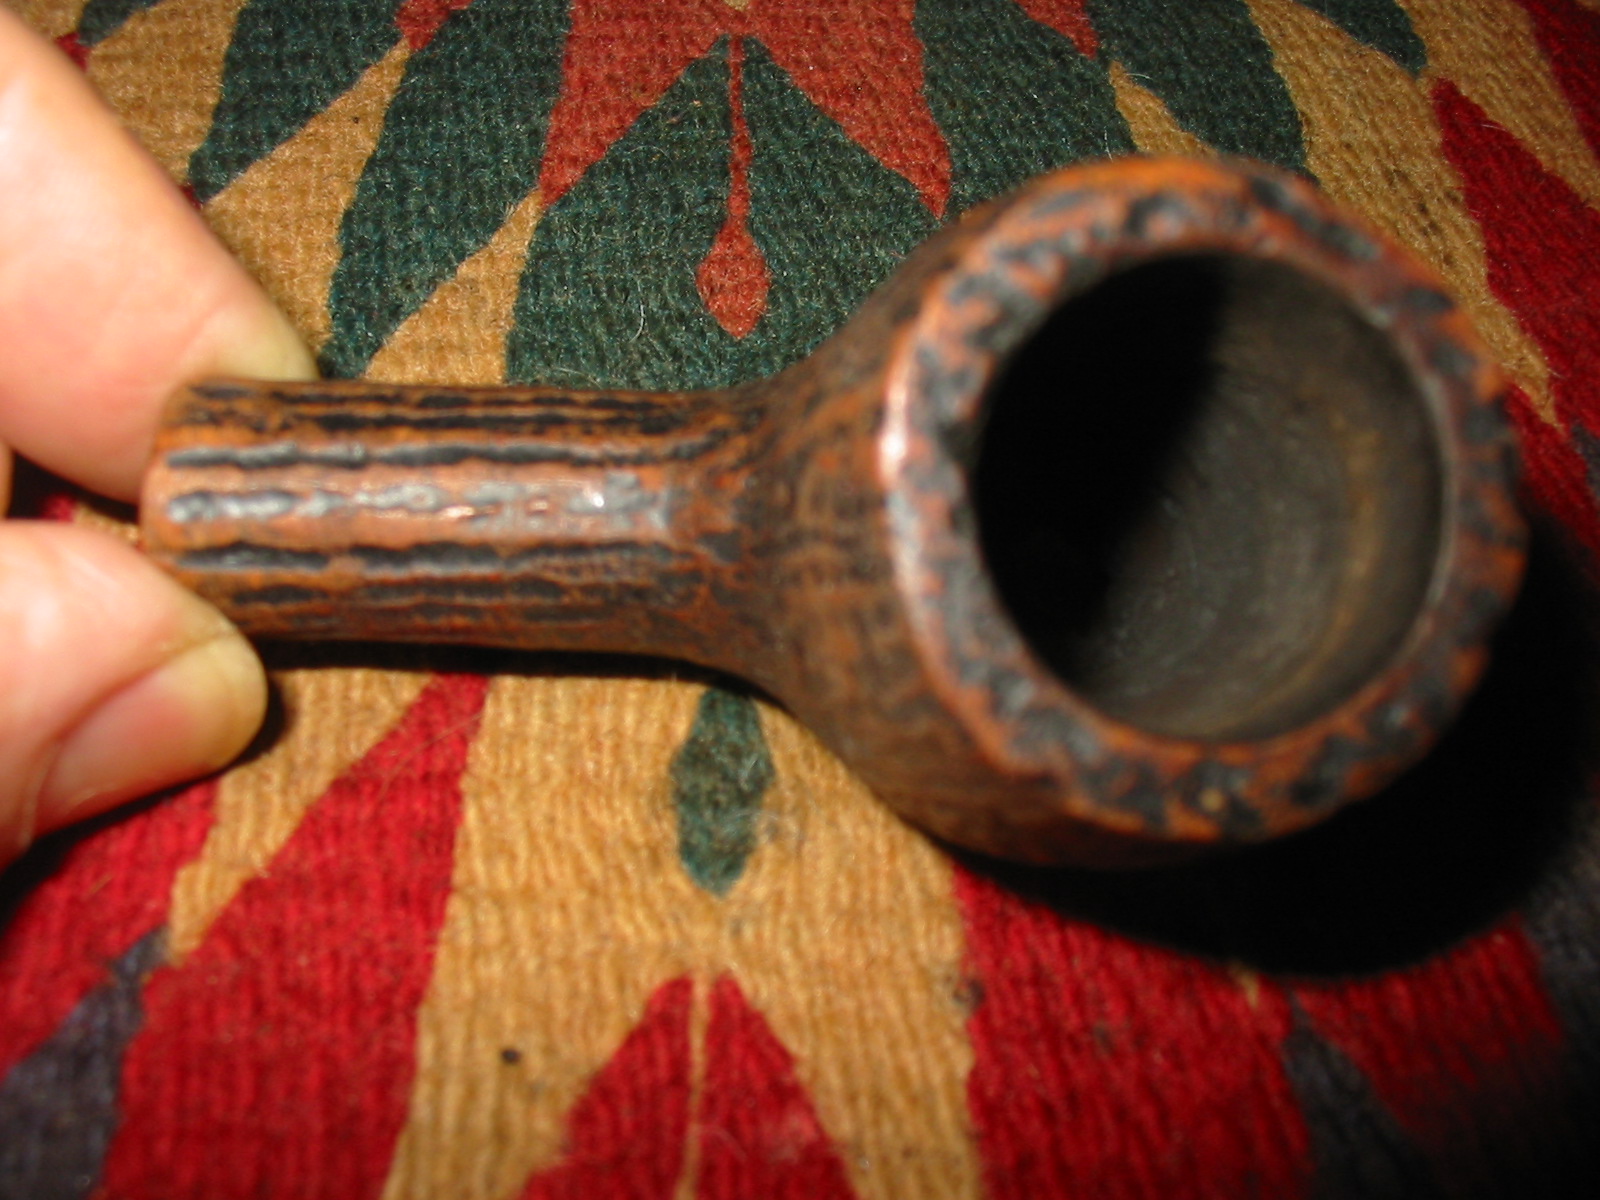
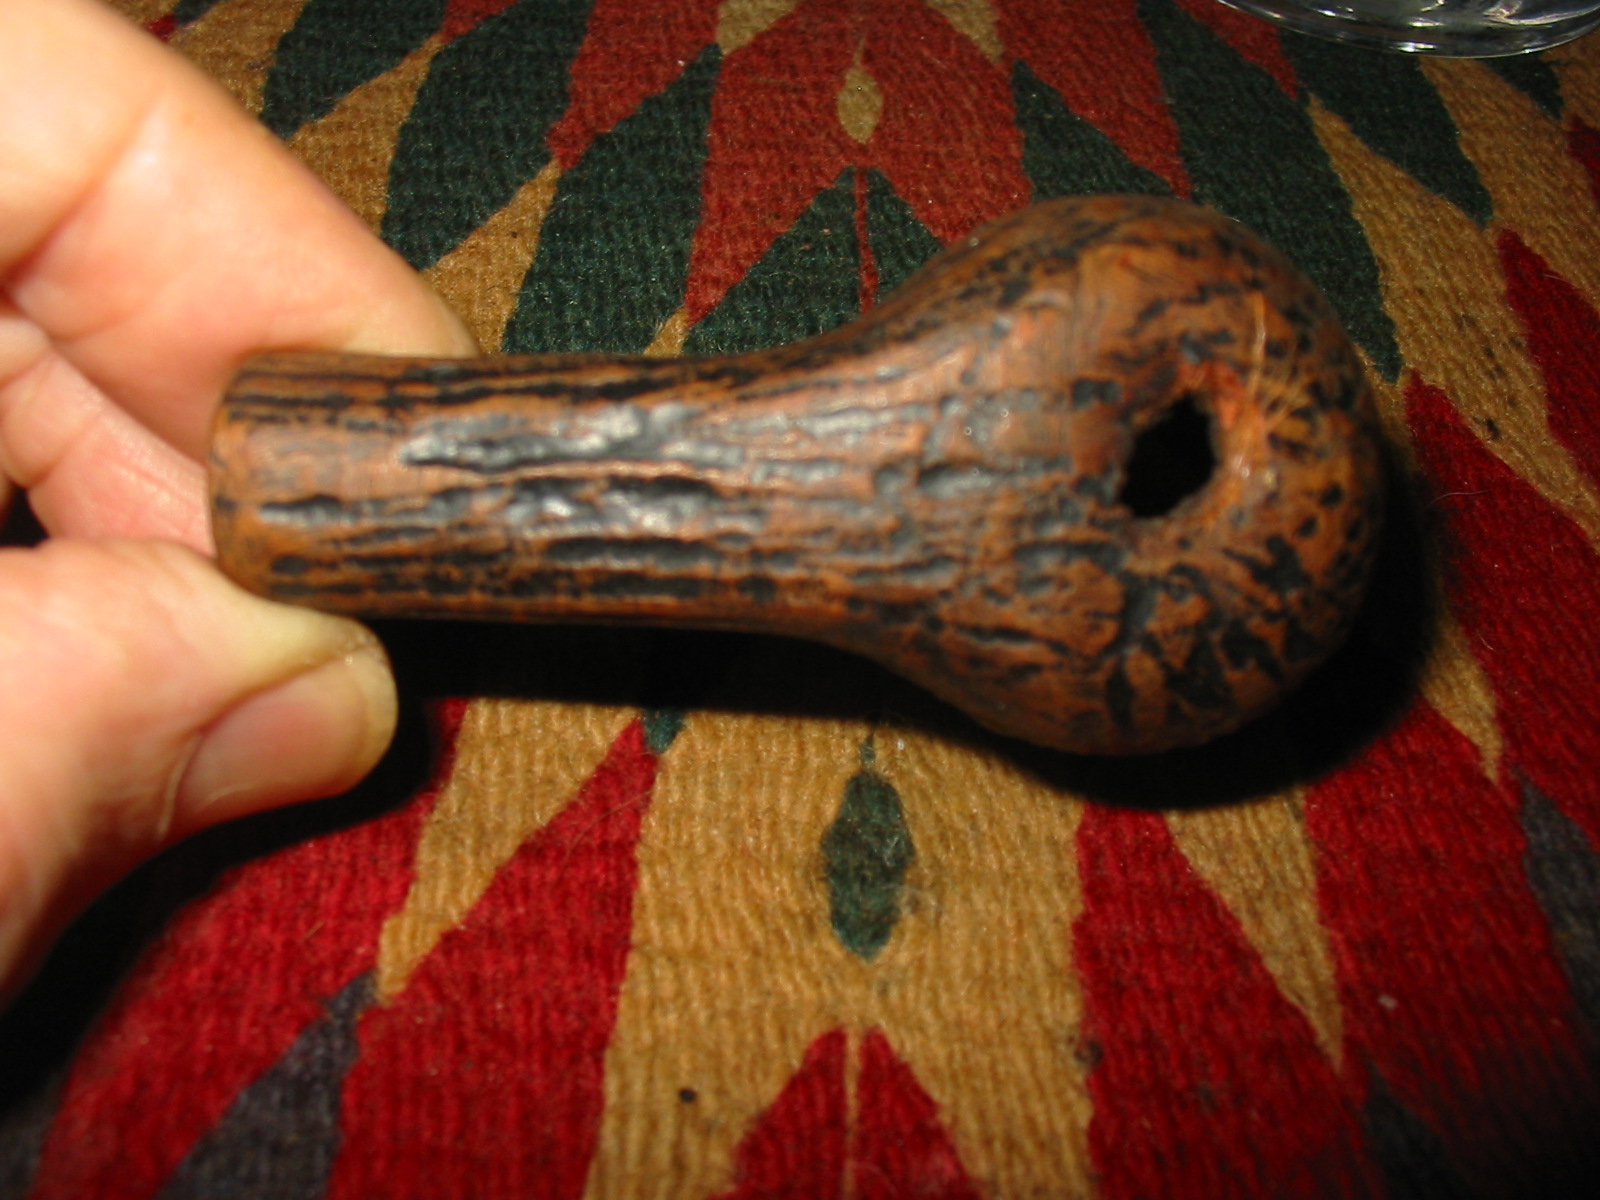
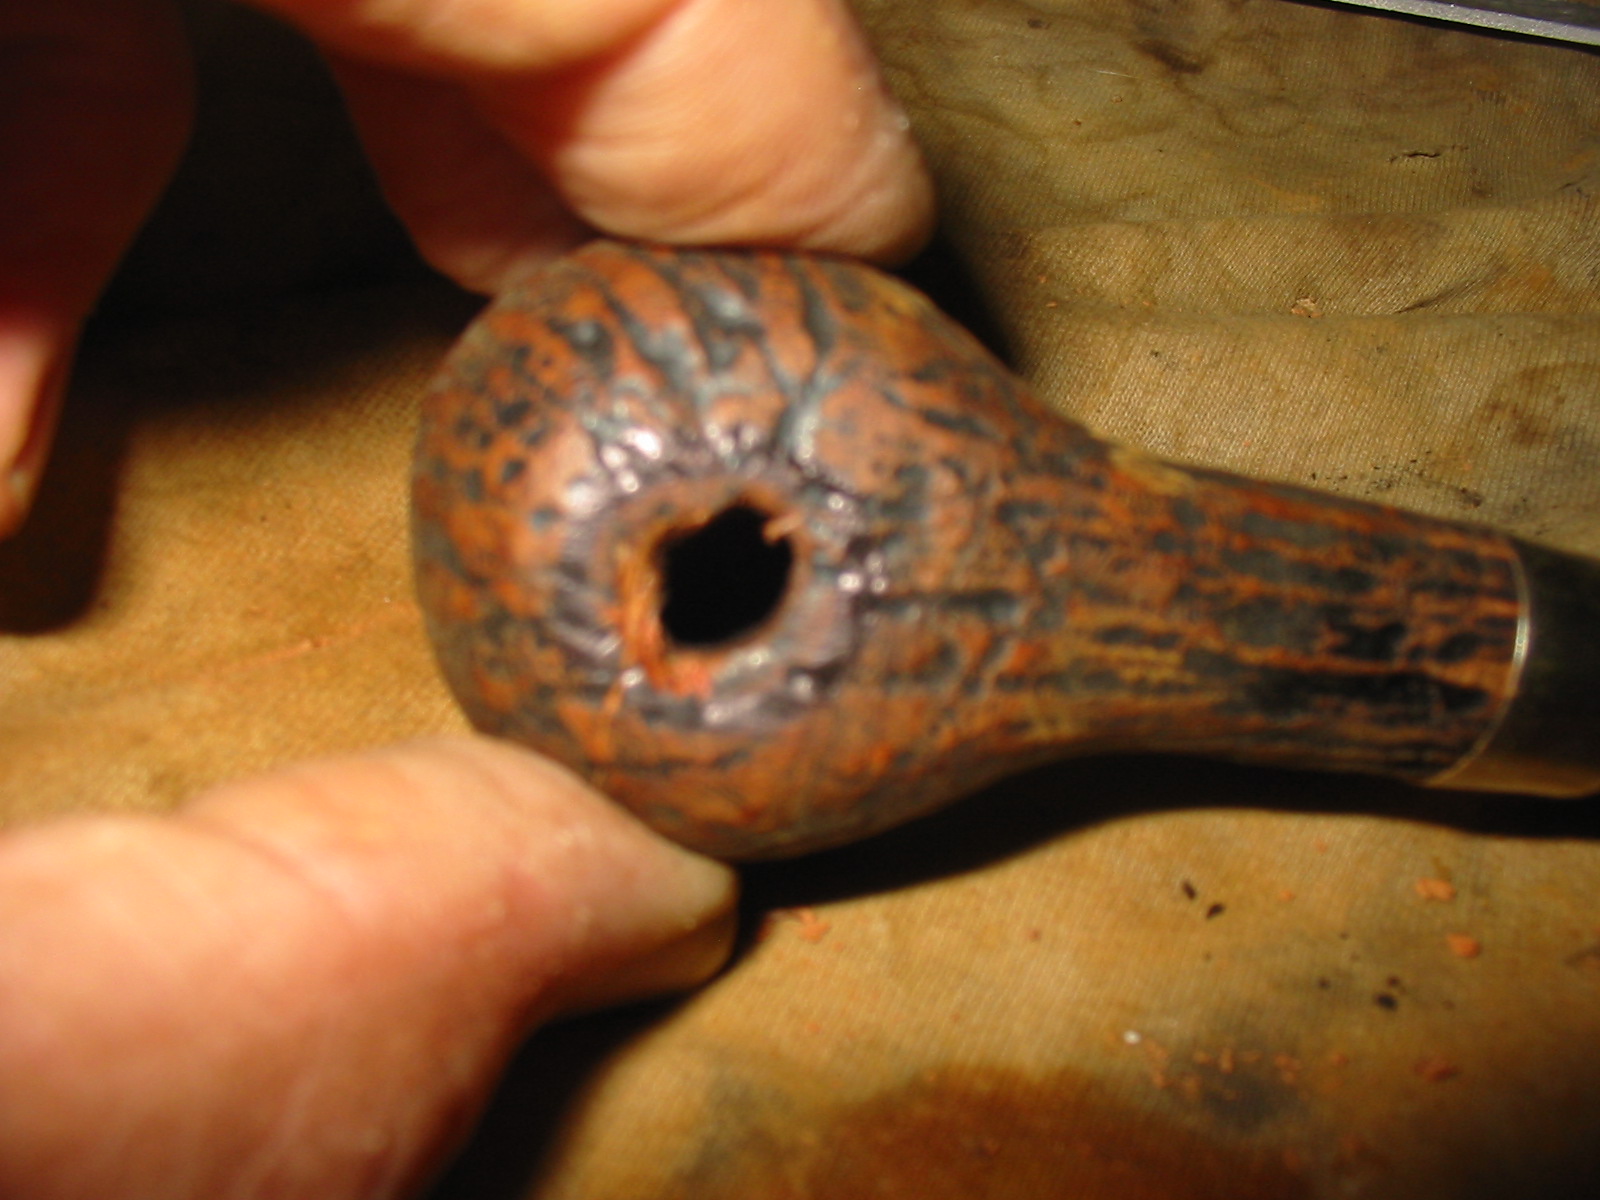
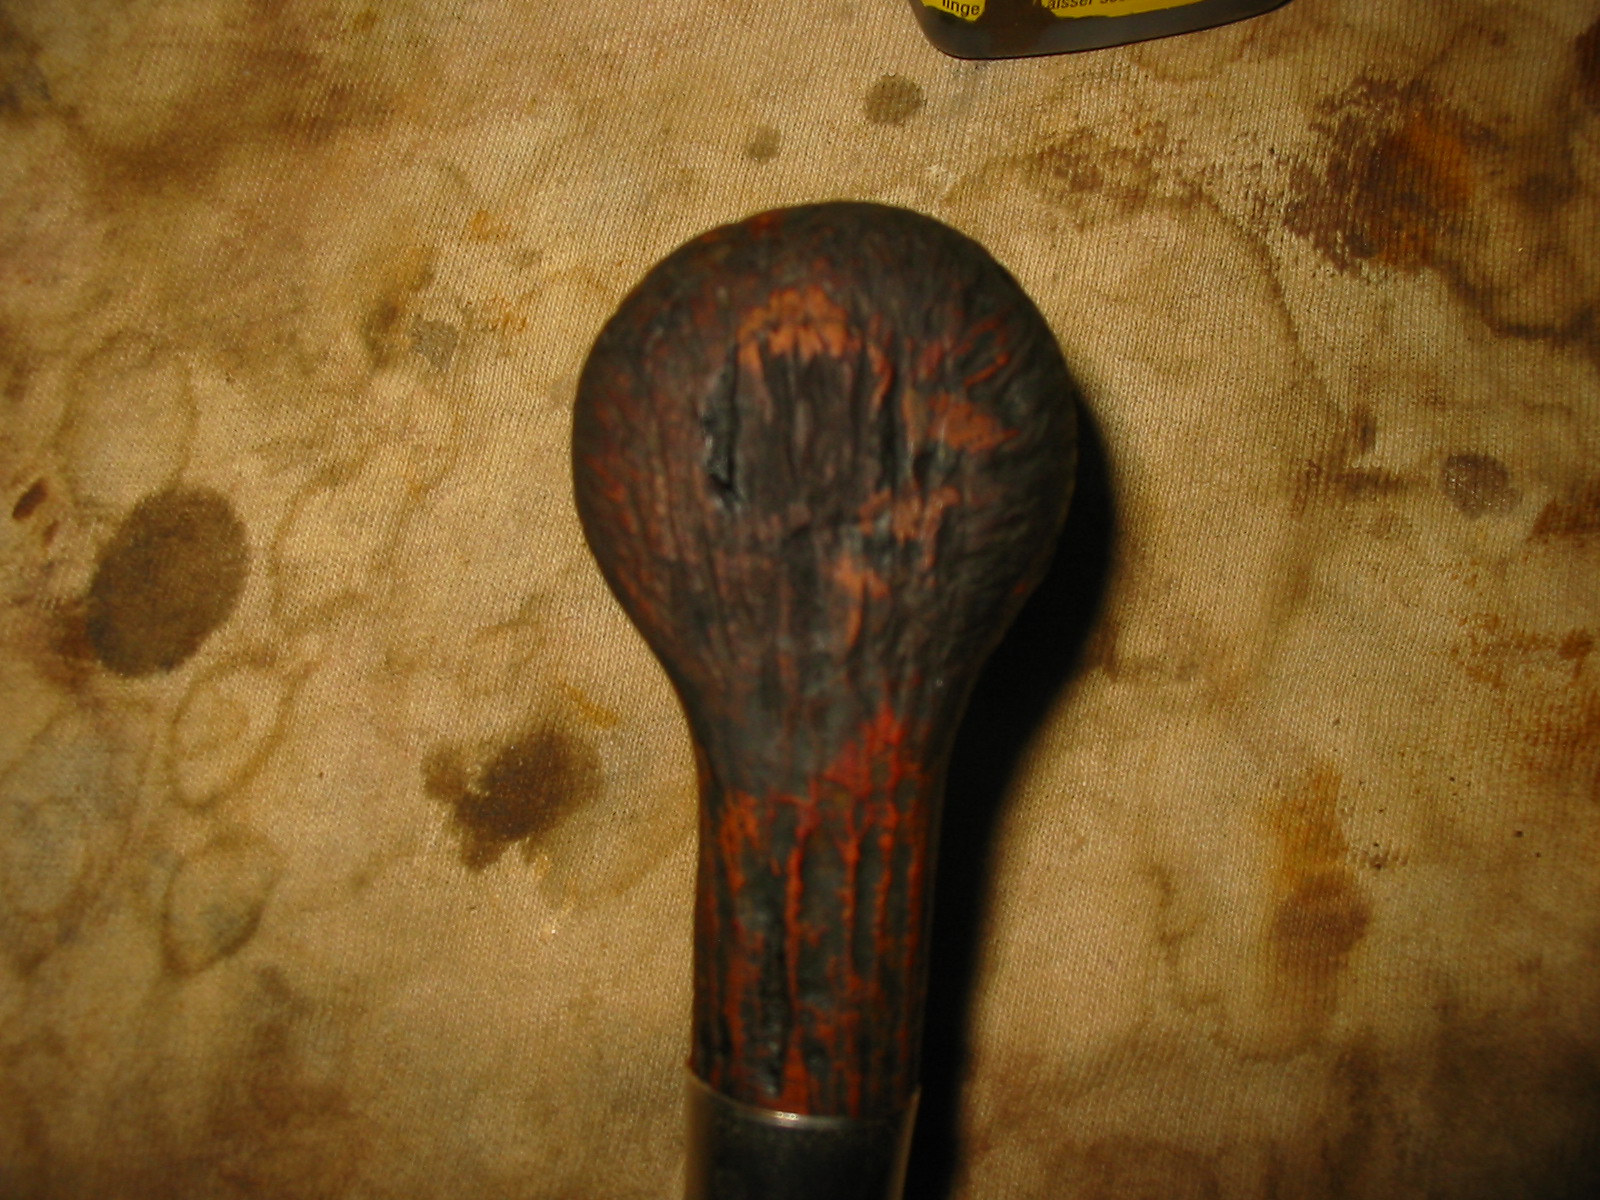
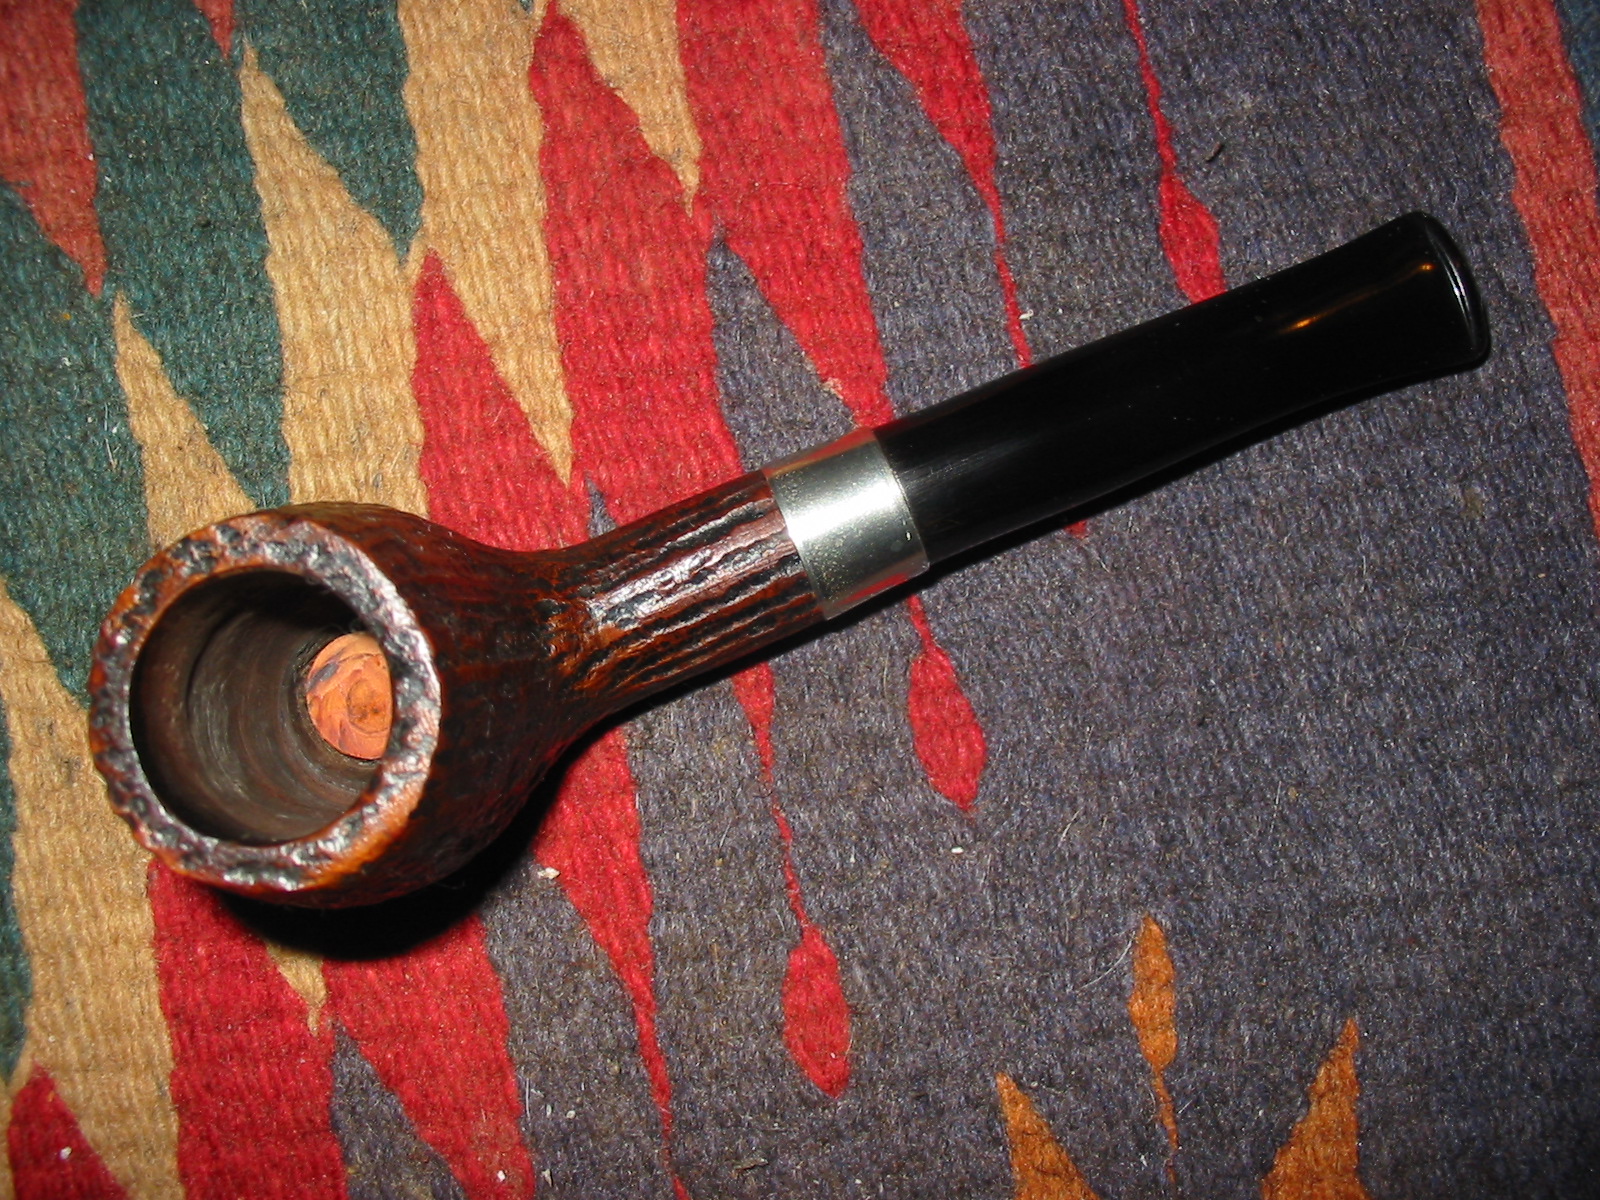
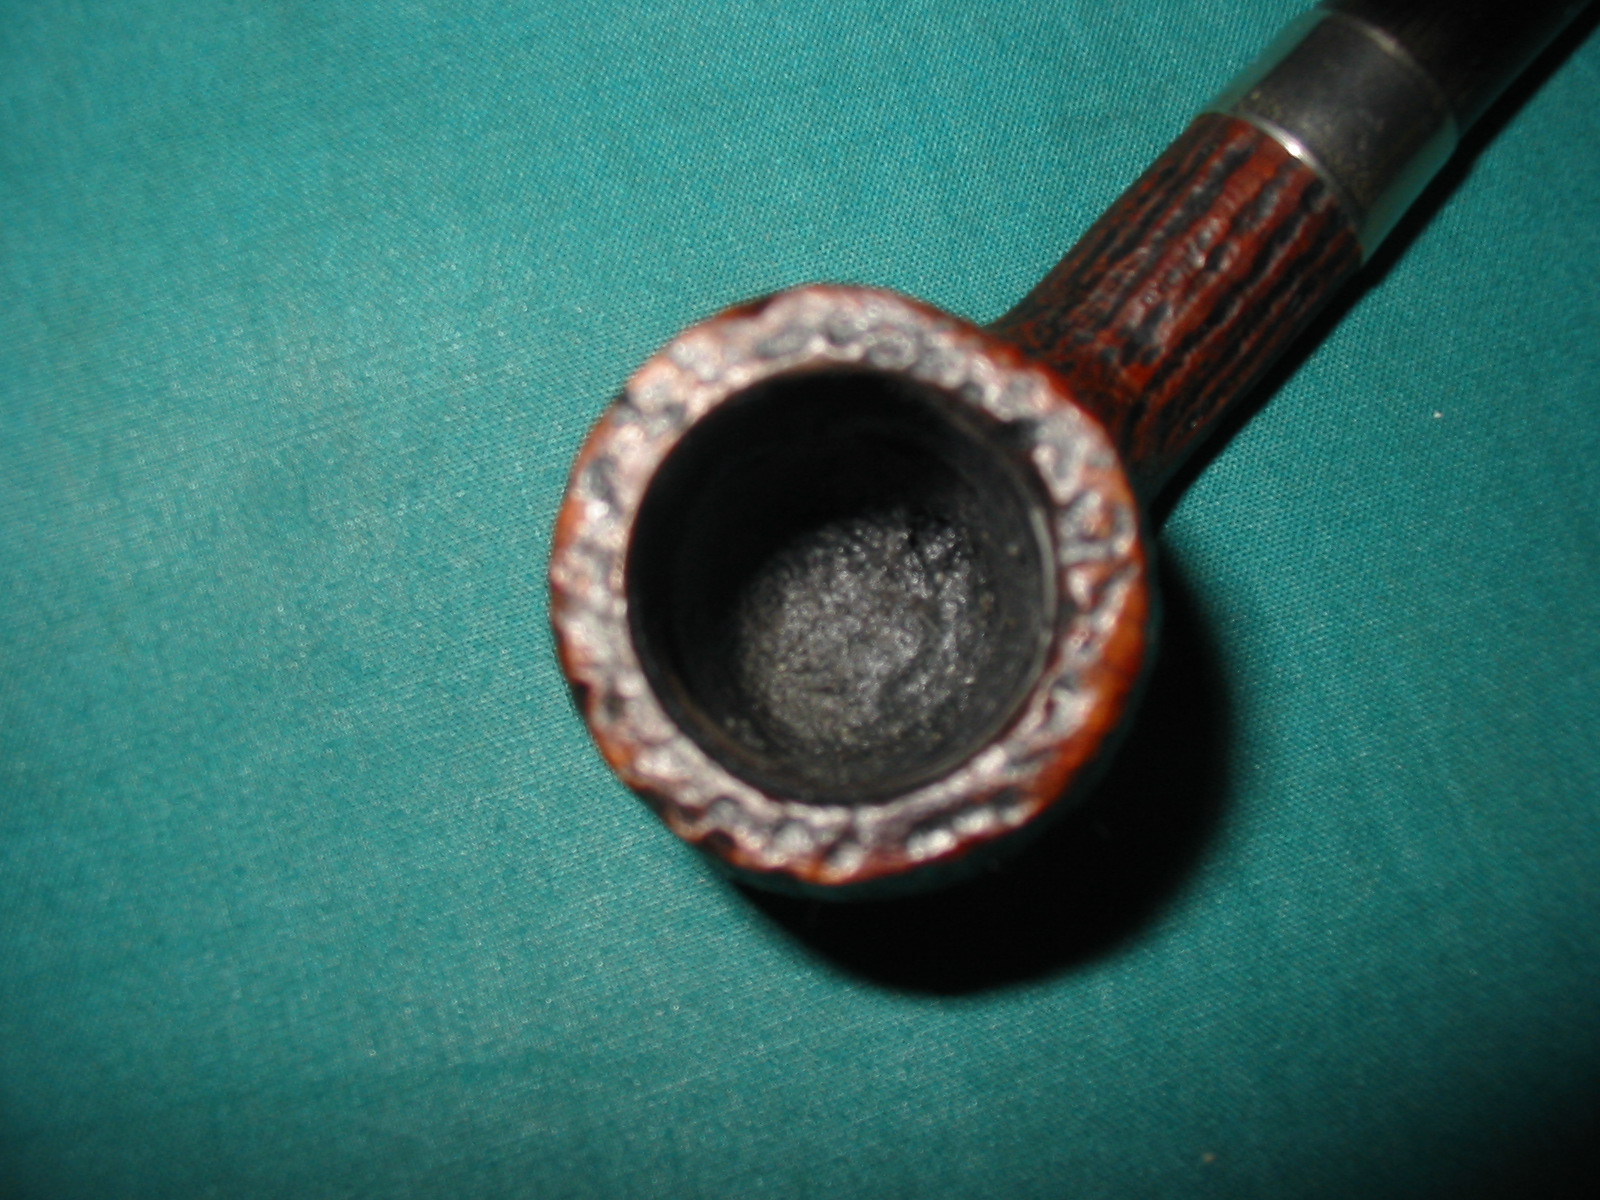
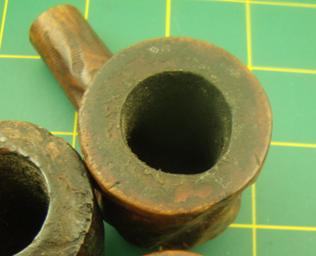
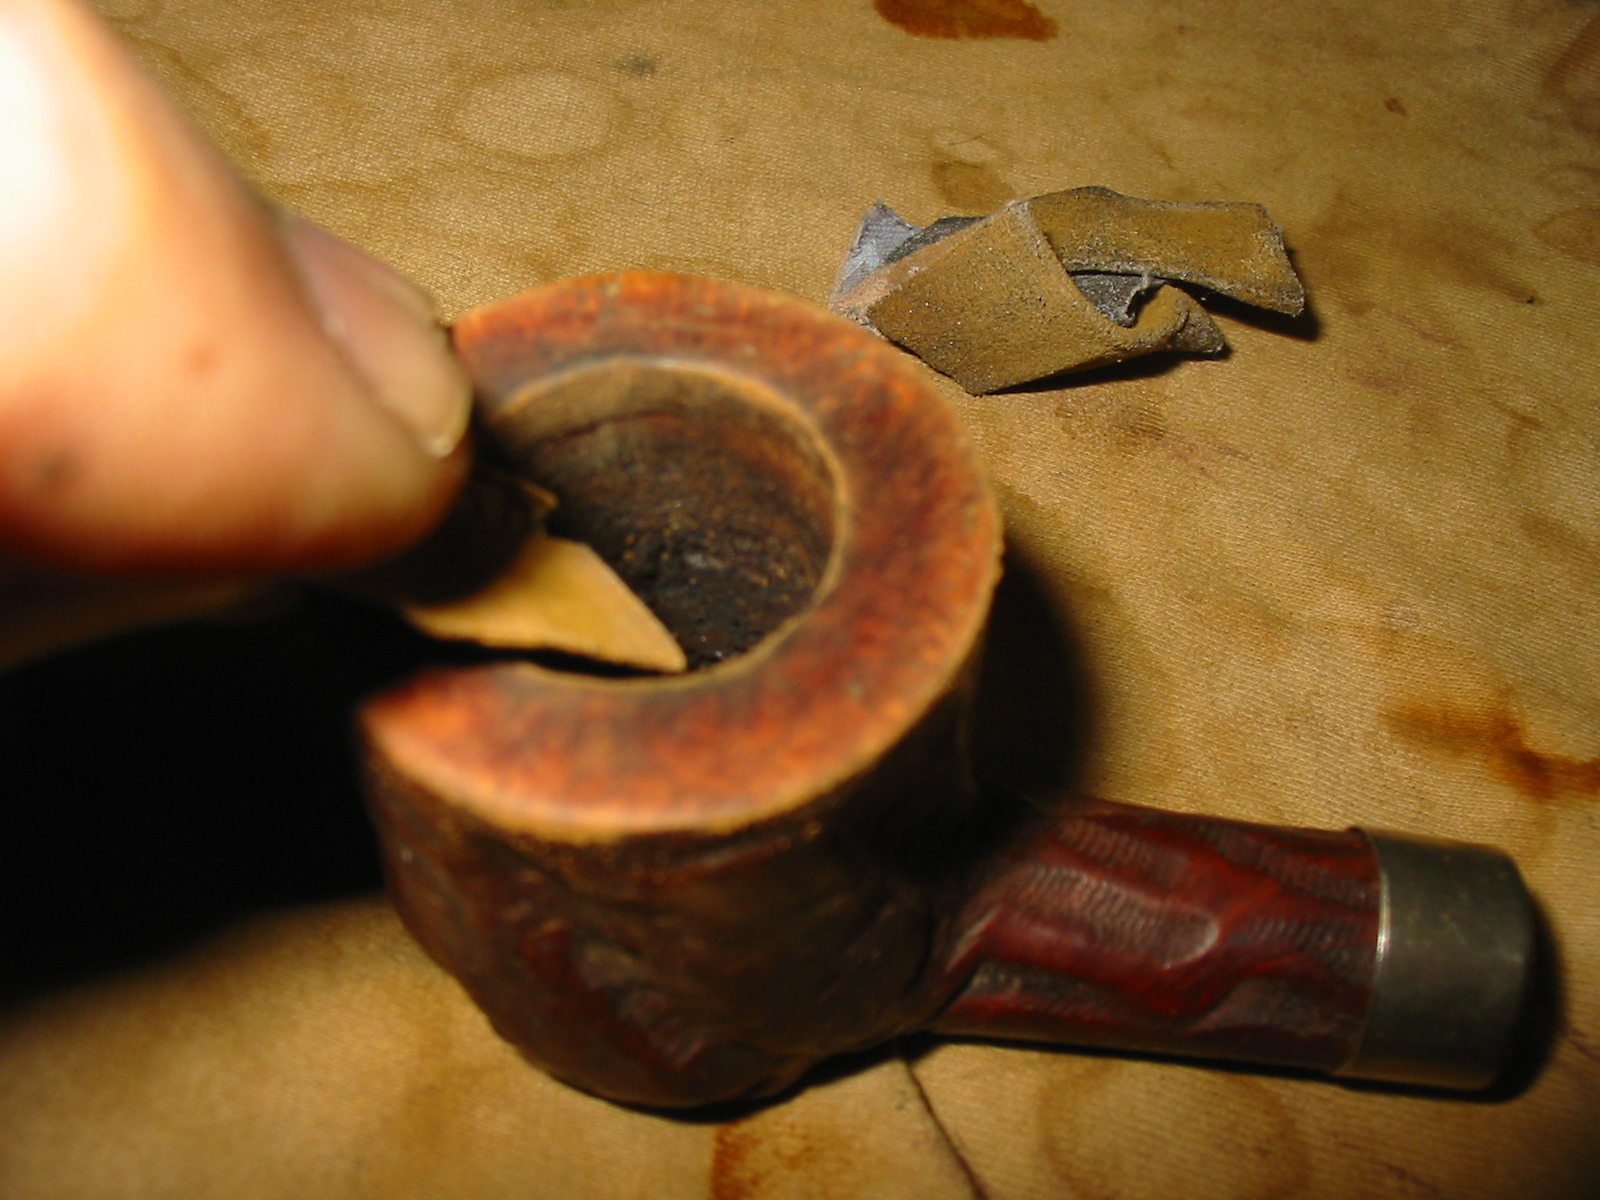
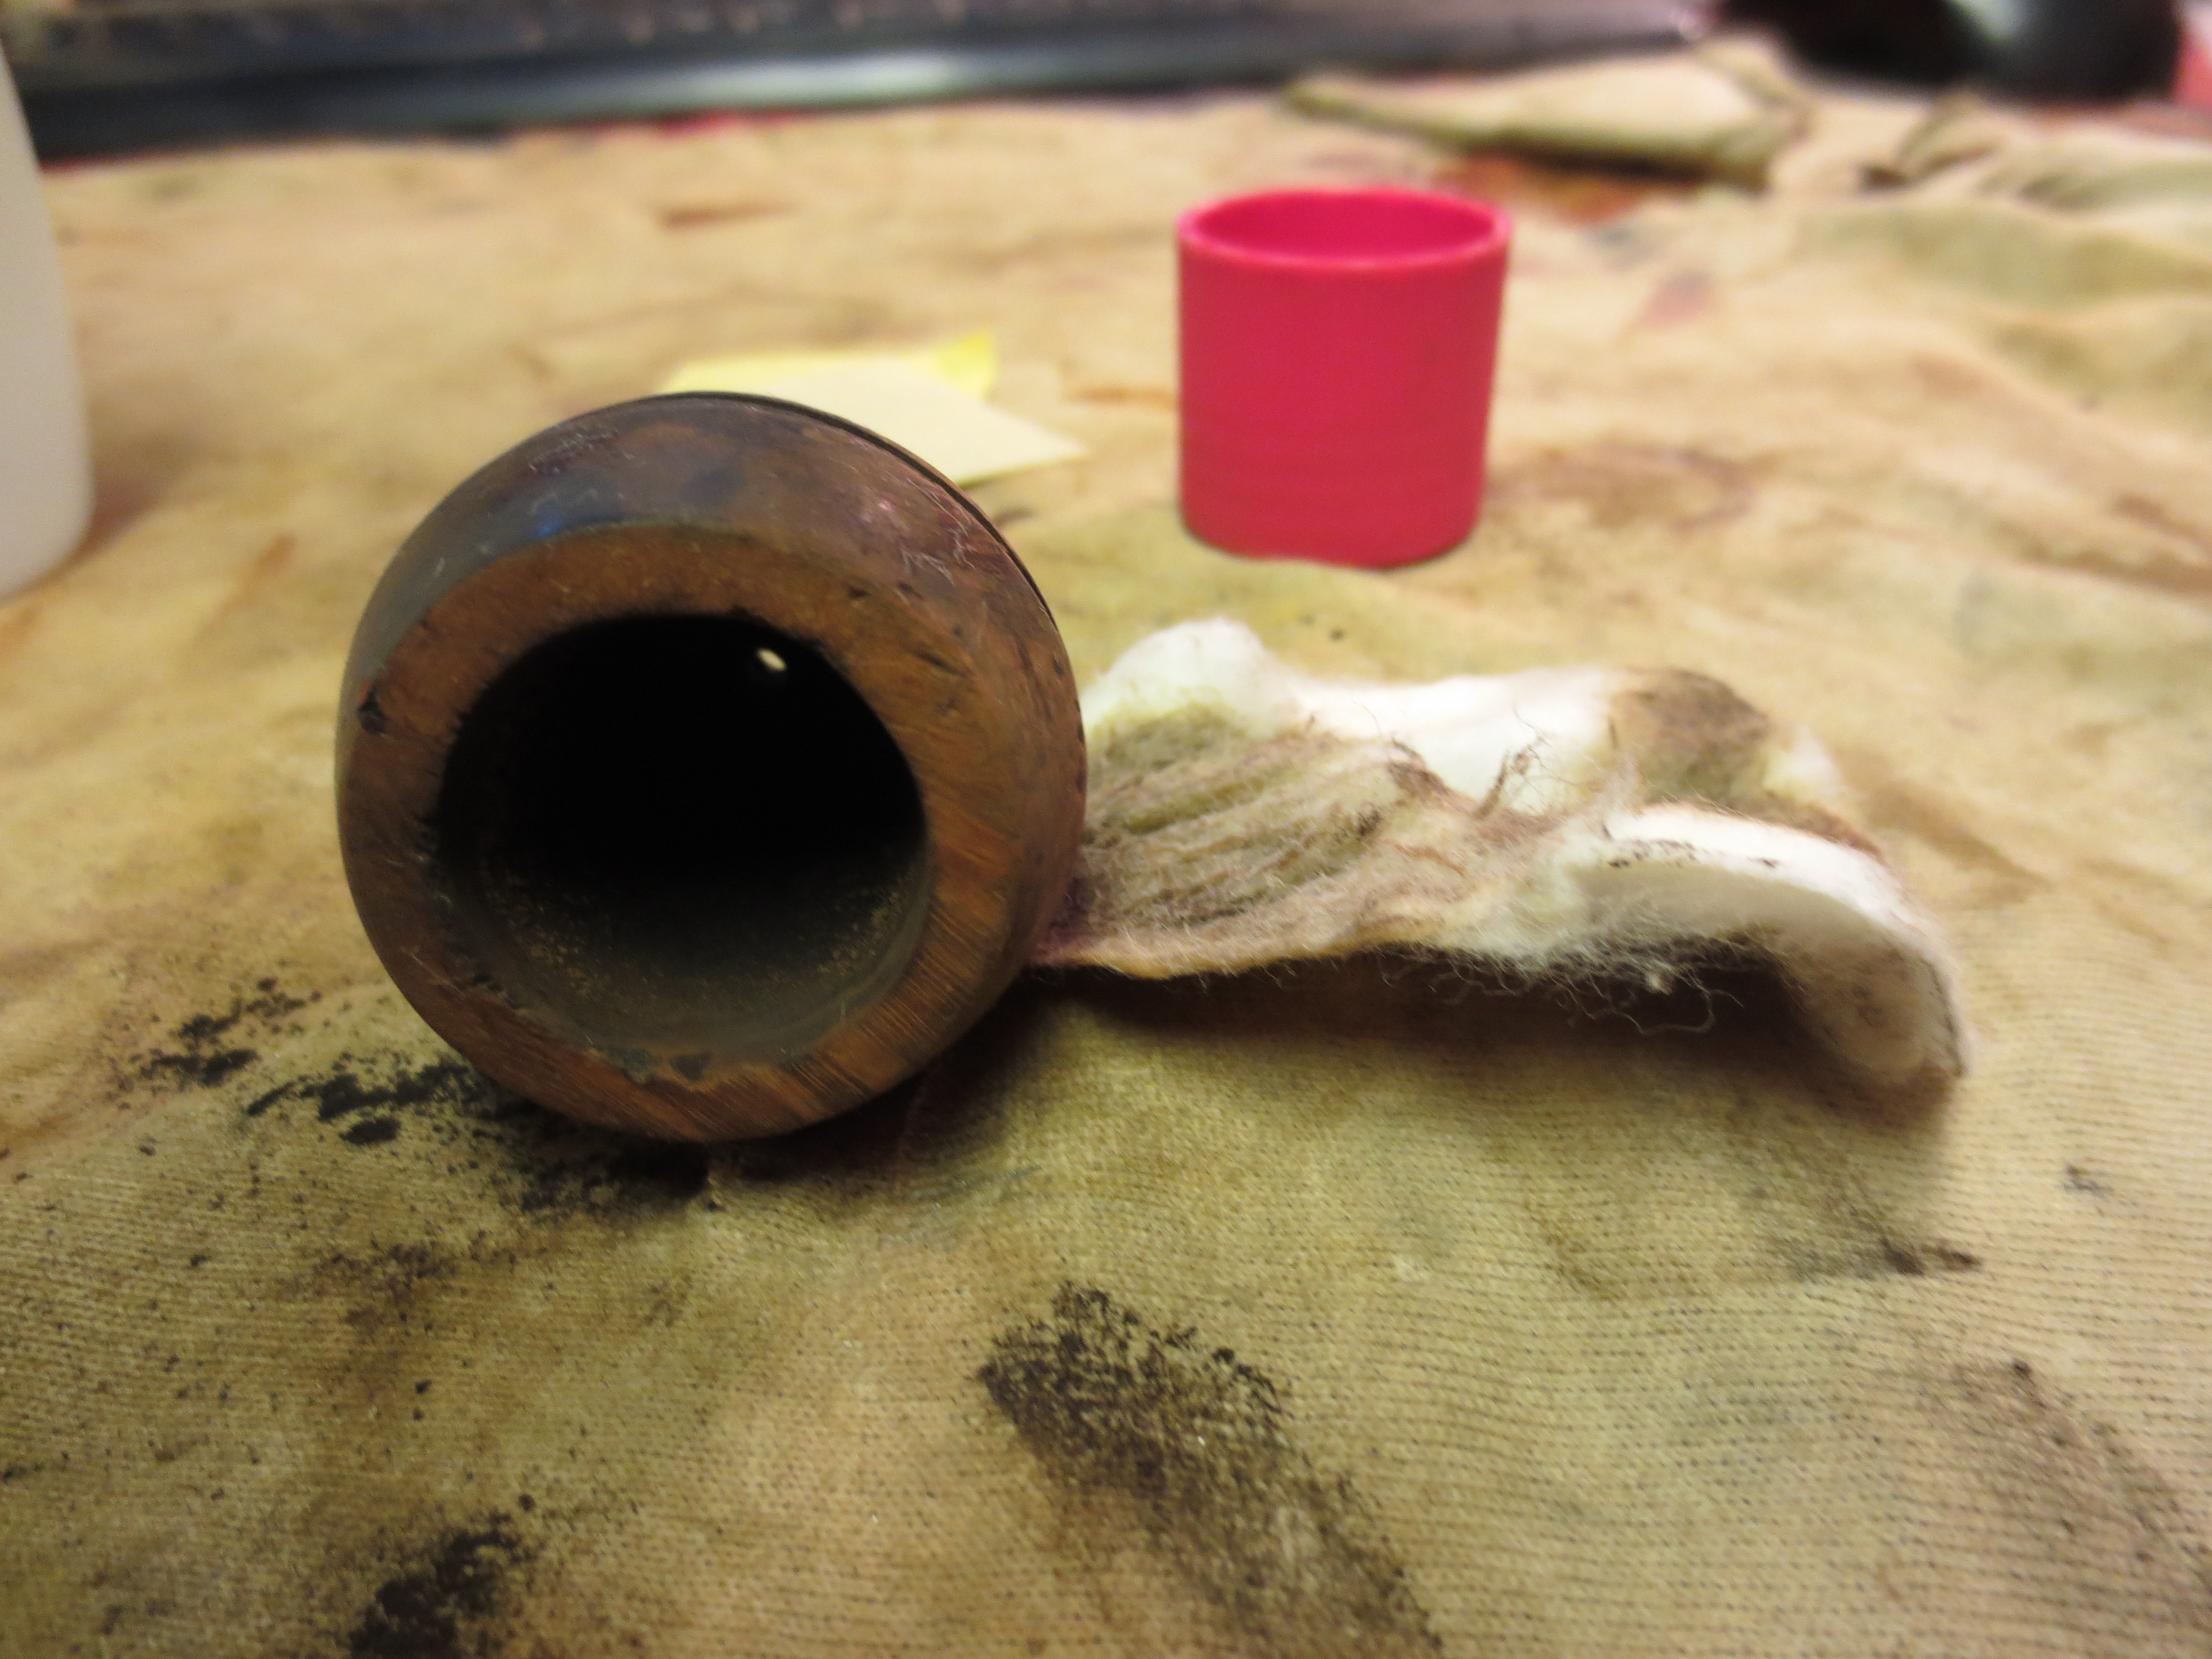
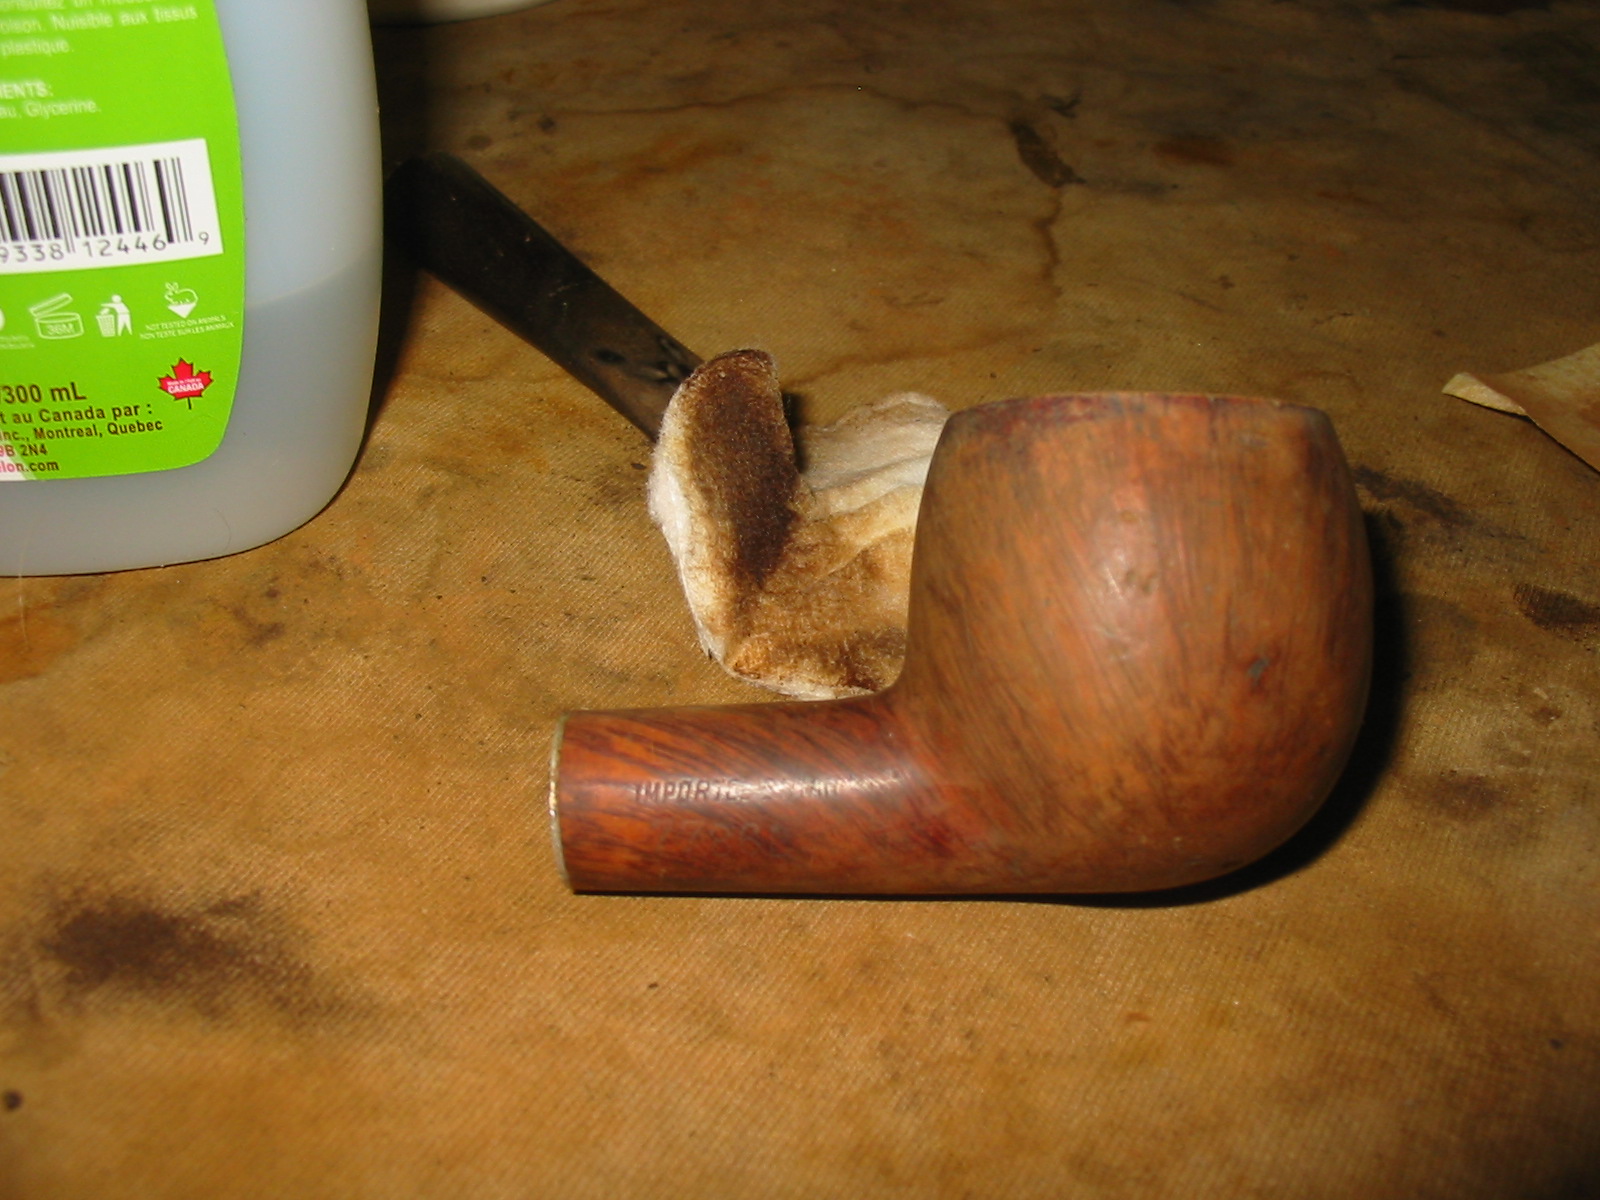
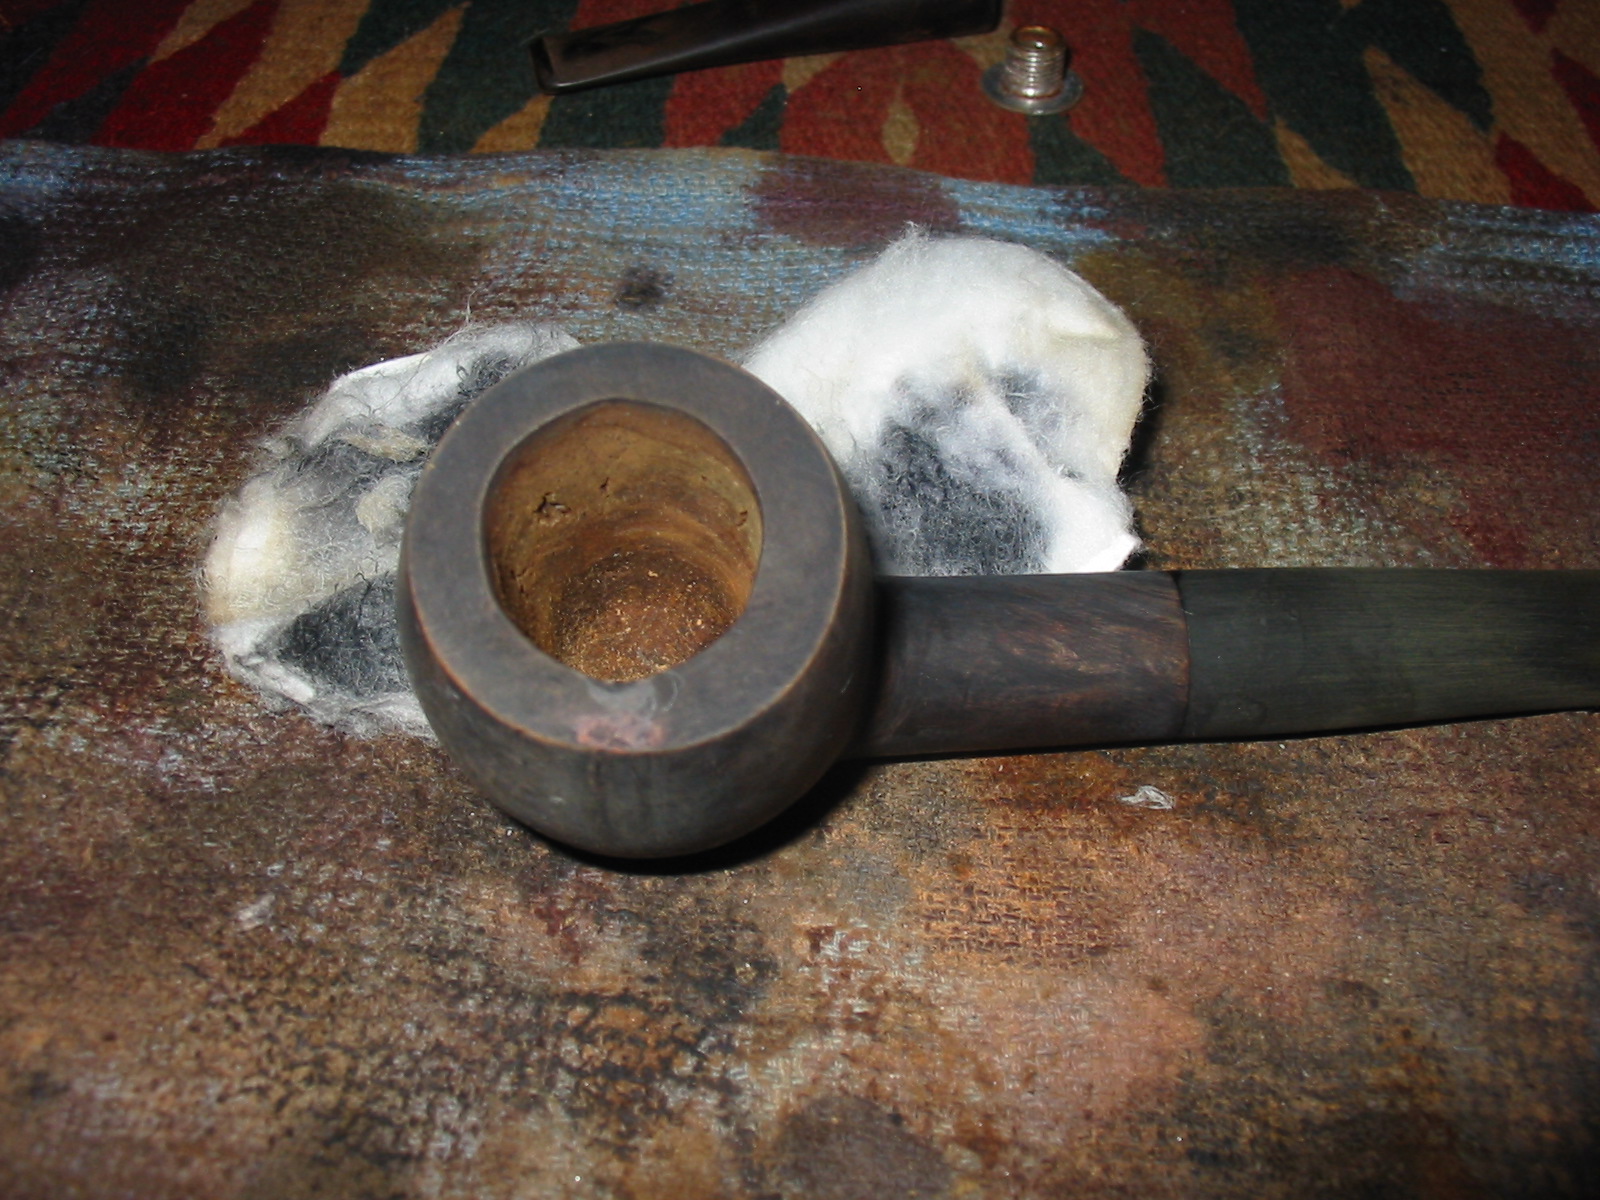
Because of the extent of damage to this pipe it was unlikely that it would ever be truly collectible again. Though to some my next decisions will appear to have desecrated an older Kaywoodie I decided to use this pipe to experiment with a few repair ideas. I topped the bowl with my usual method to remove the rim damage. I removed the damaged portion of the bowl and flattened the rim against the sandpaper. When I was finished topping the bowl the rim was flat again however the inner edge of the rim needed to be repaired. It was missing a large chunk of briar.
IMG_3051

IMG_3052

IMG_3053

IMG_3054

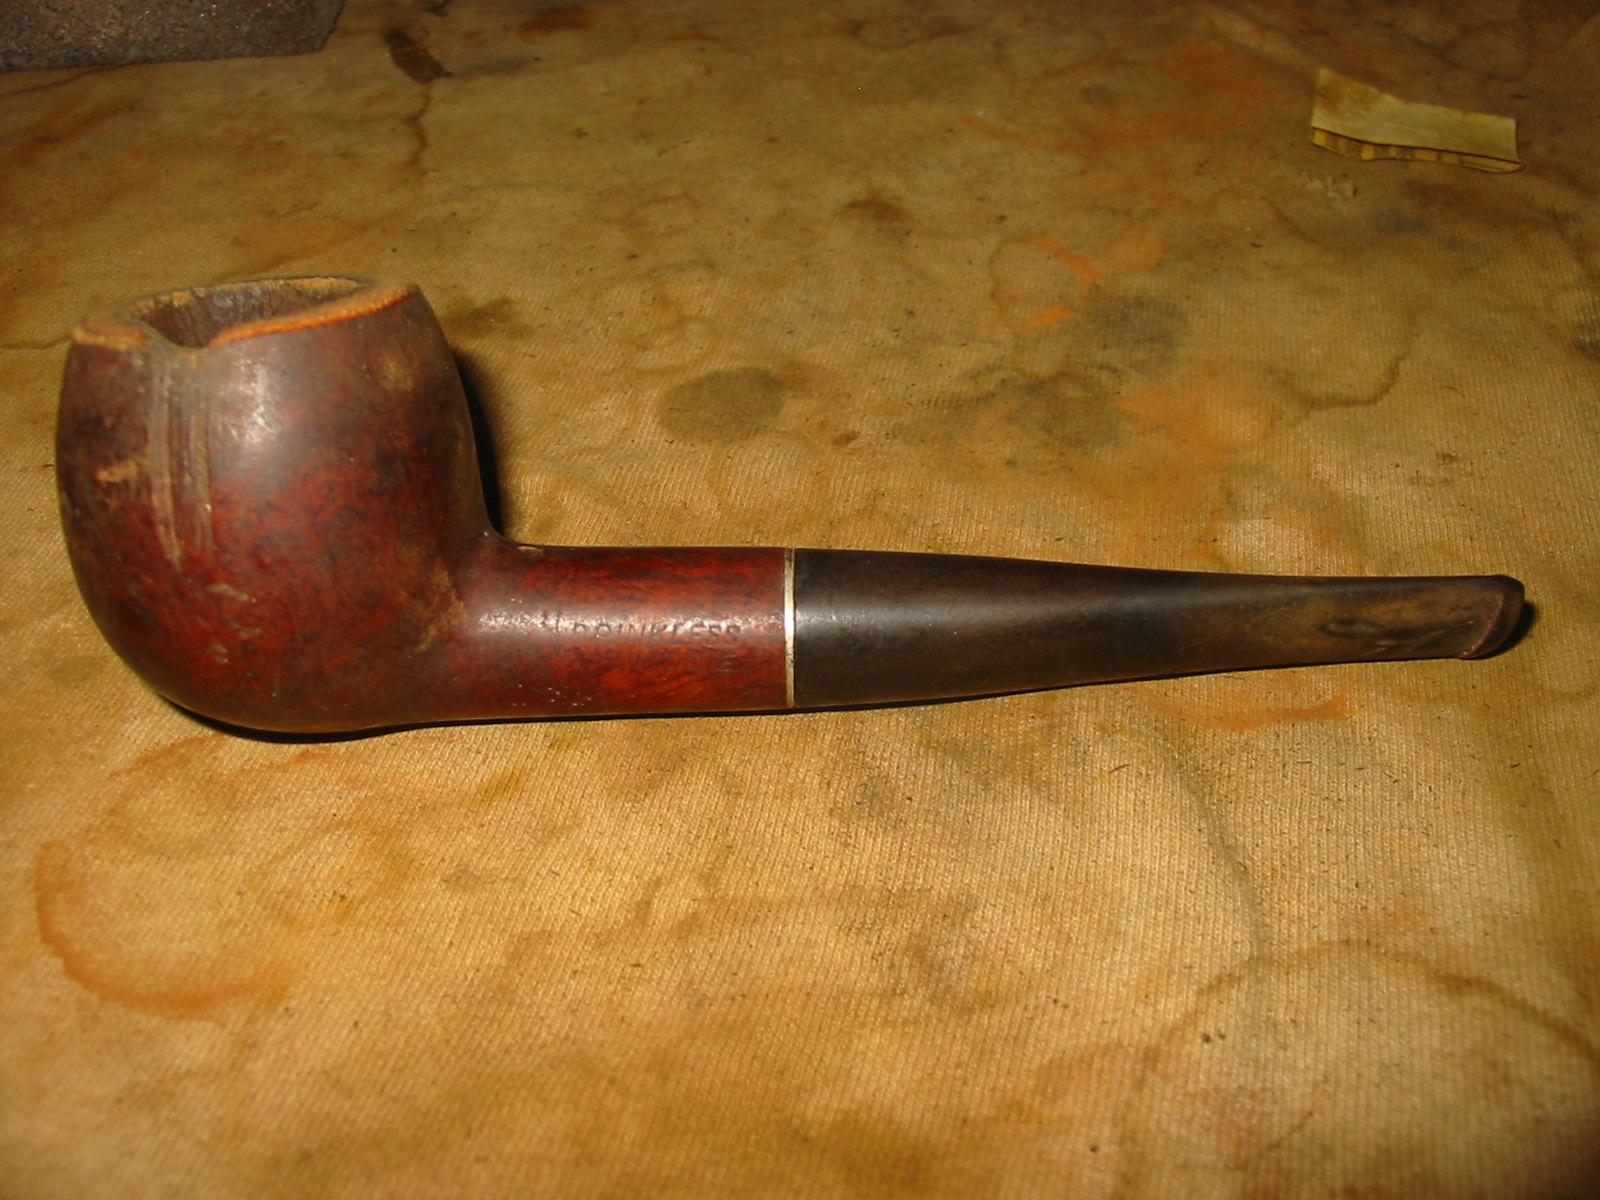
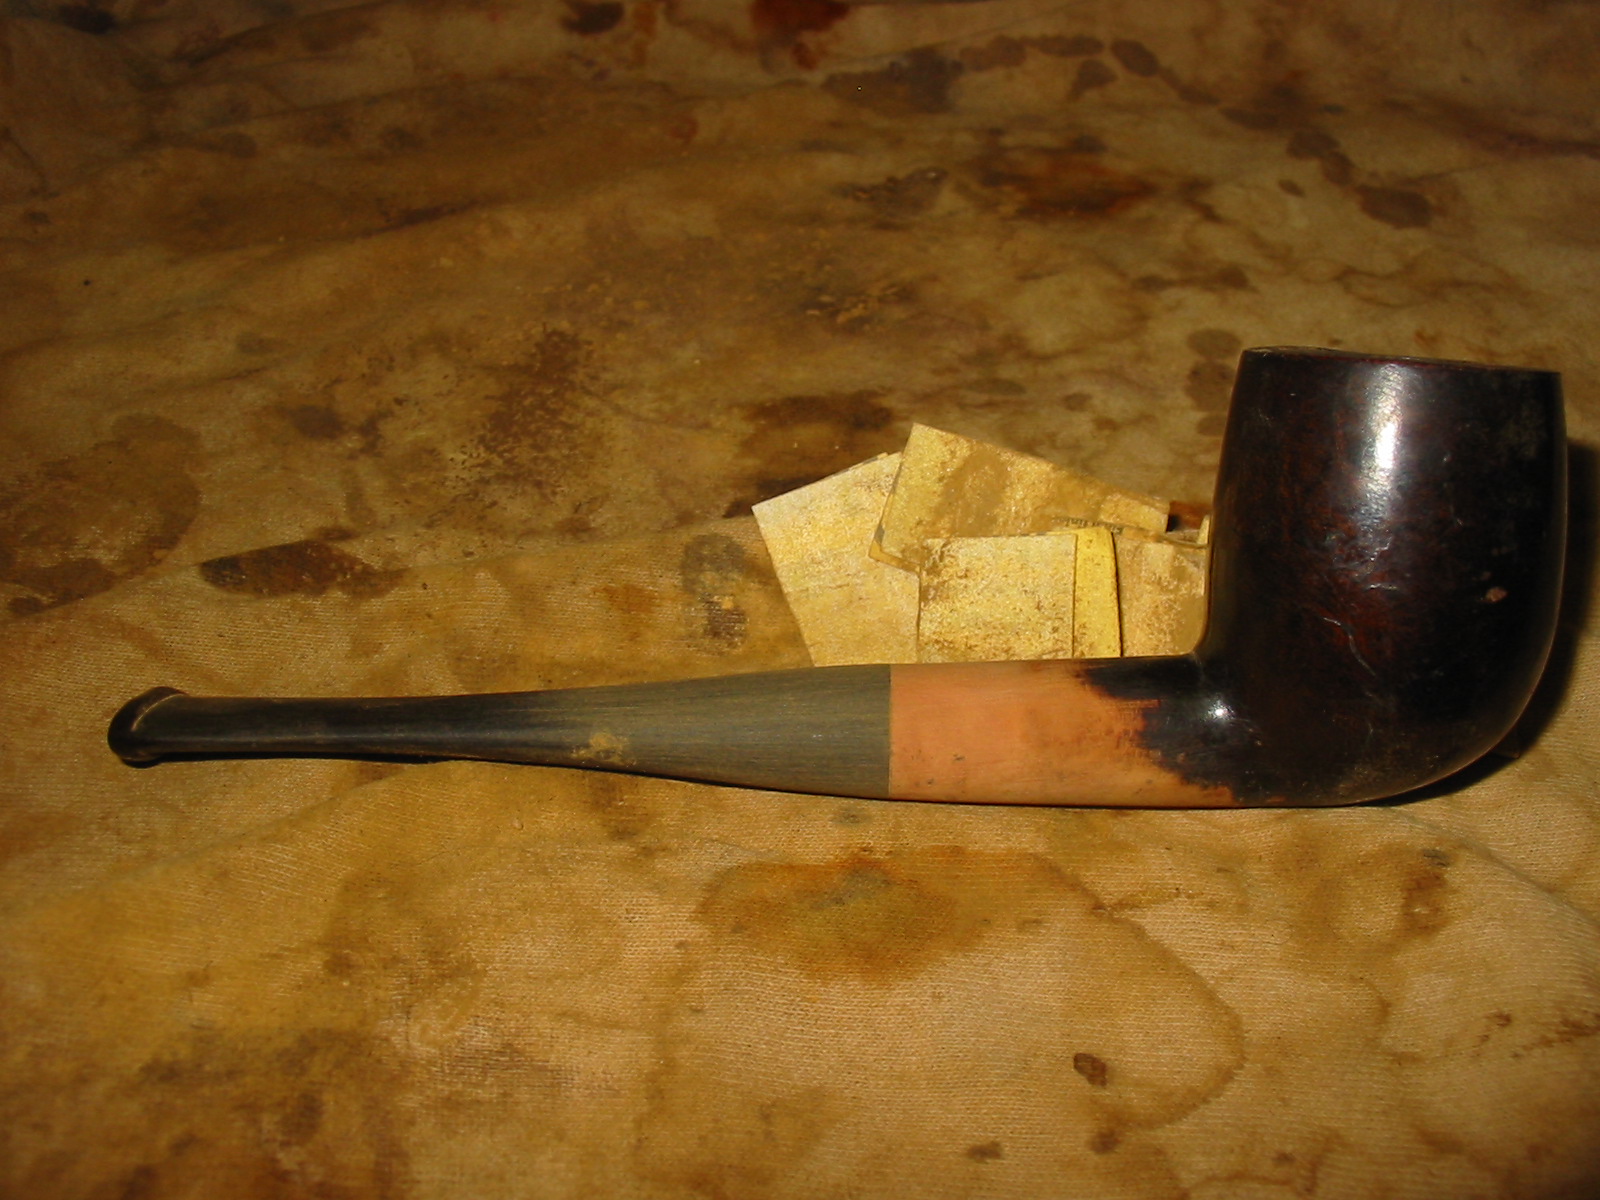
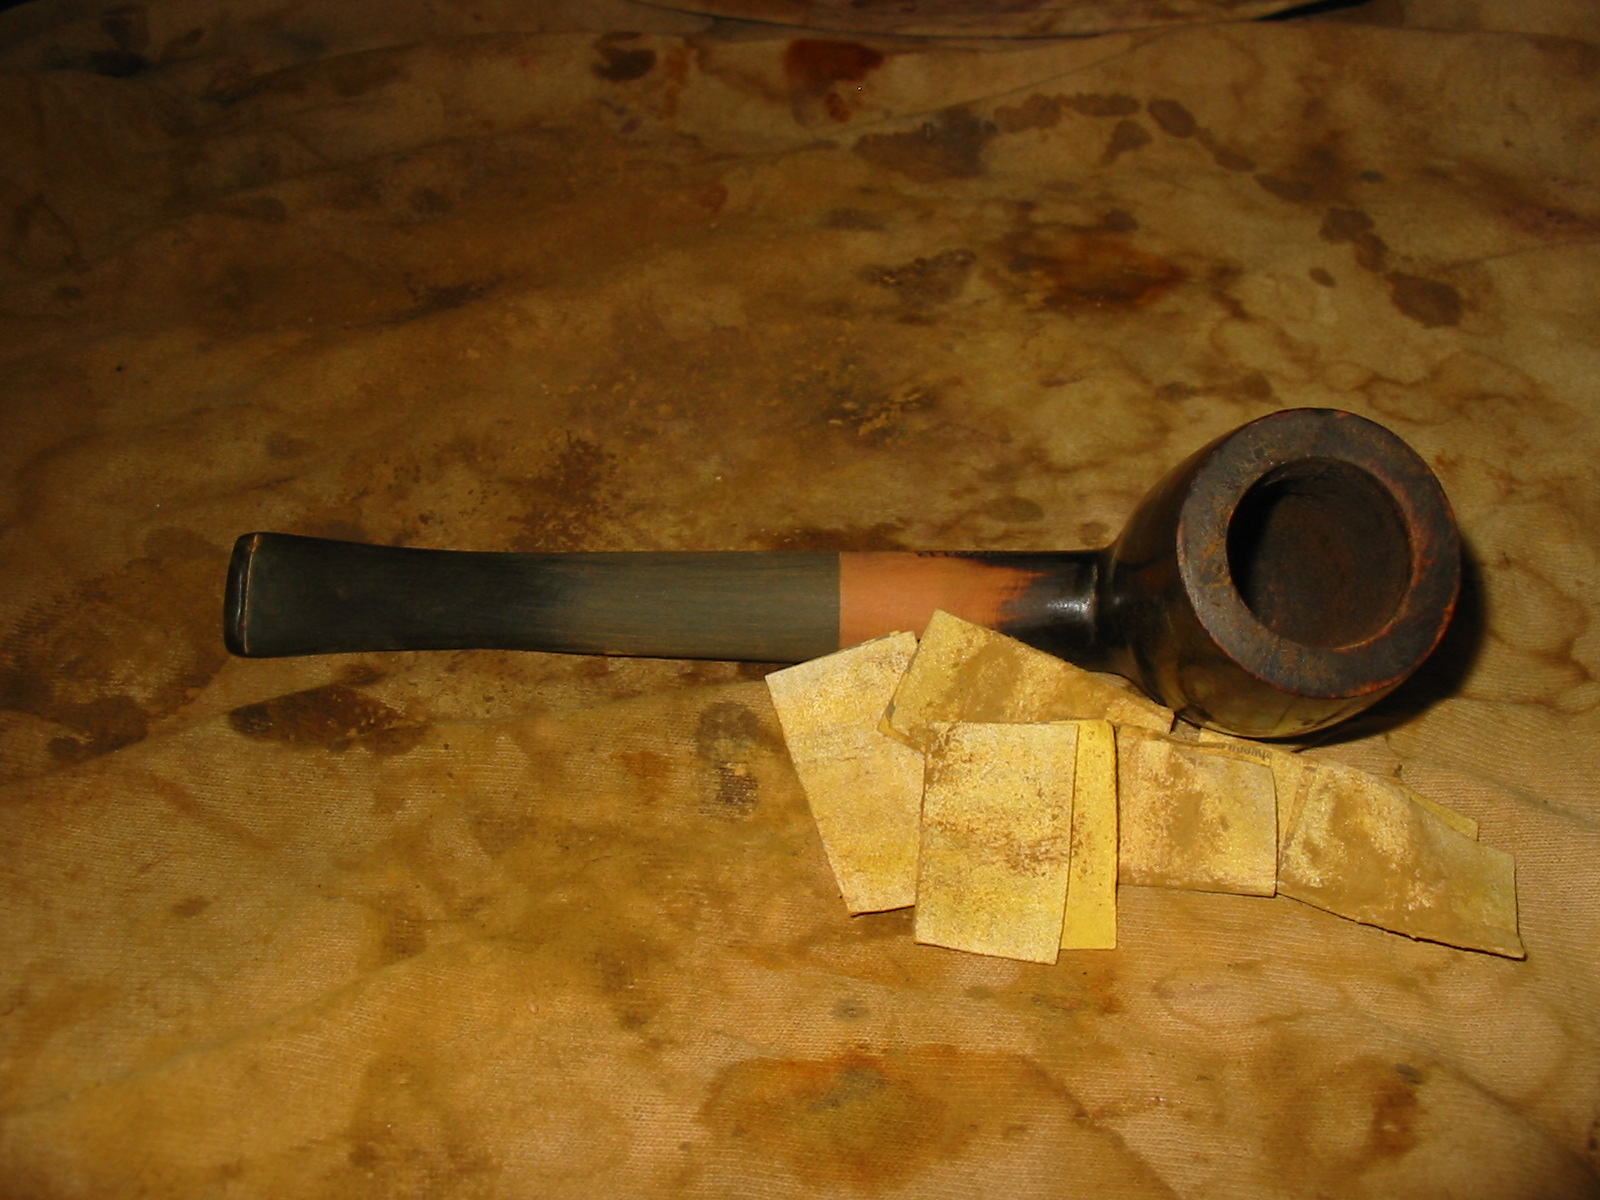
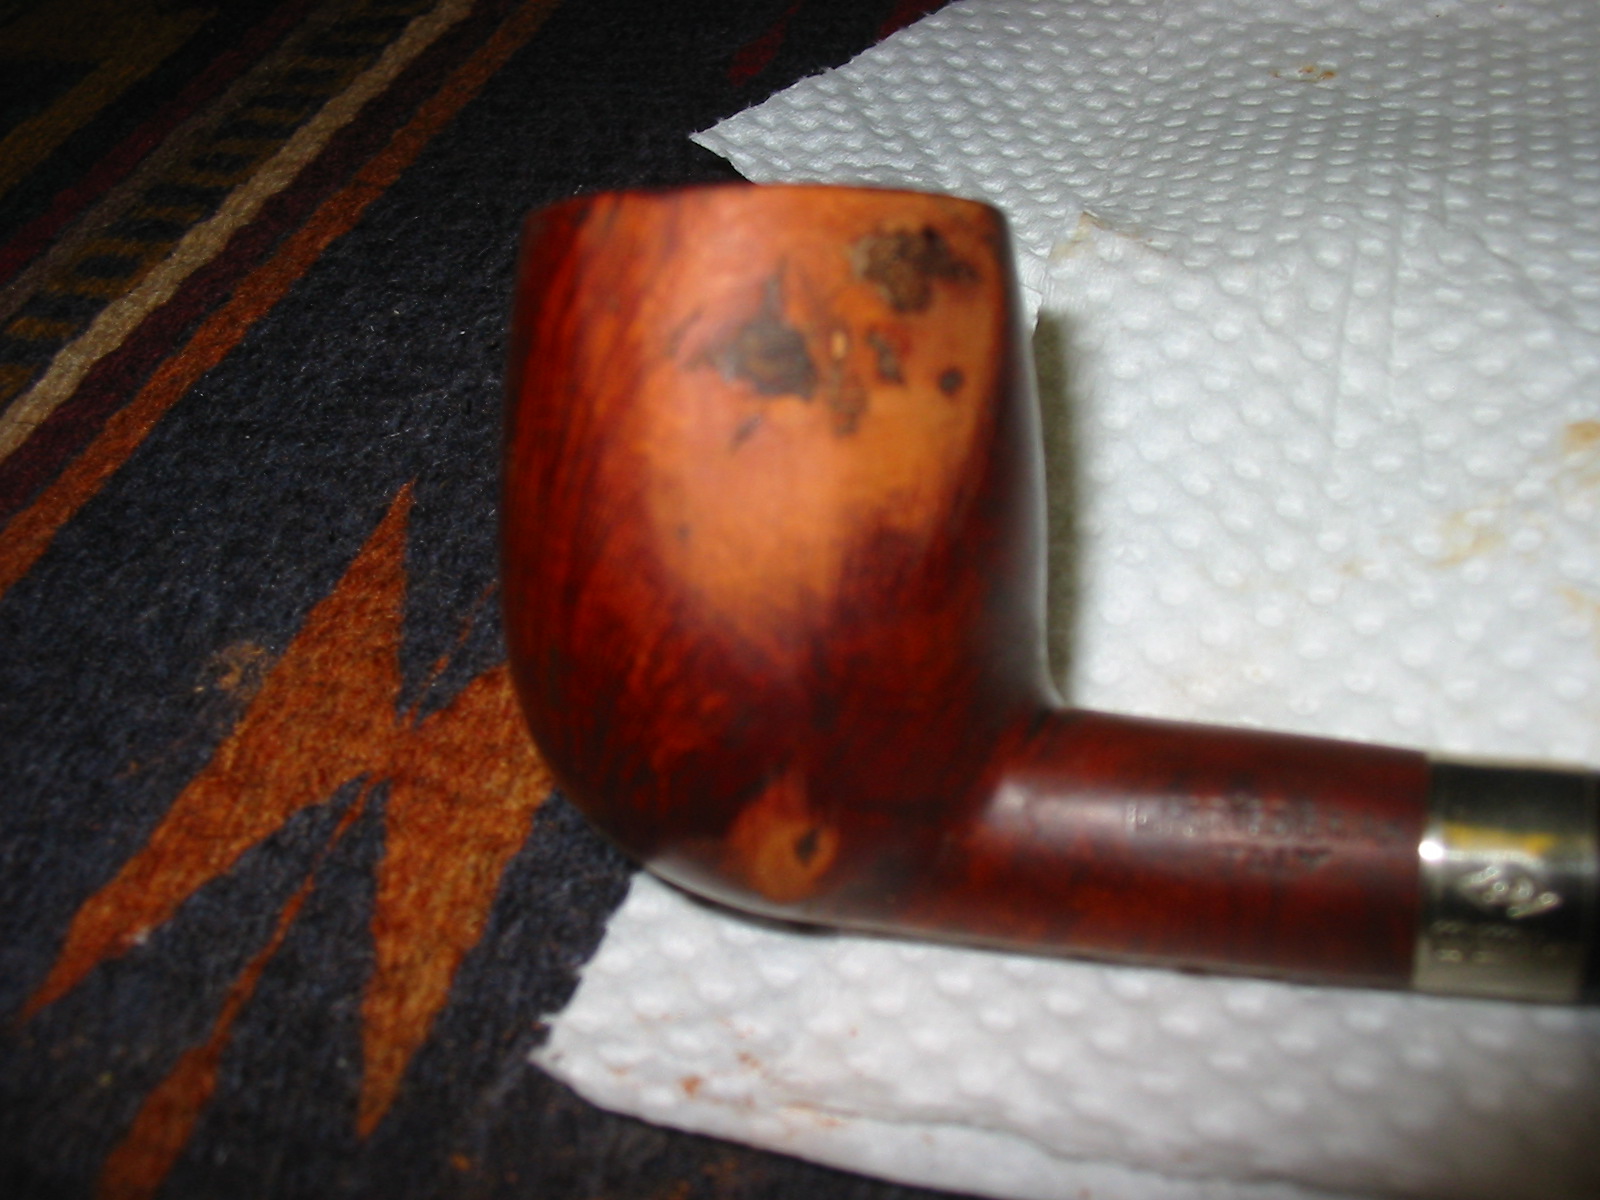
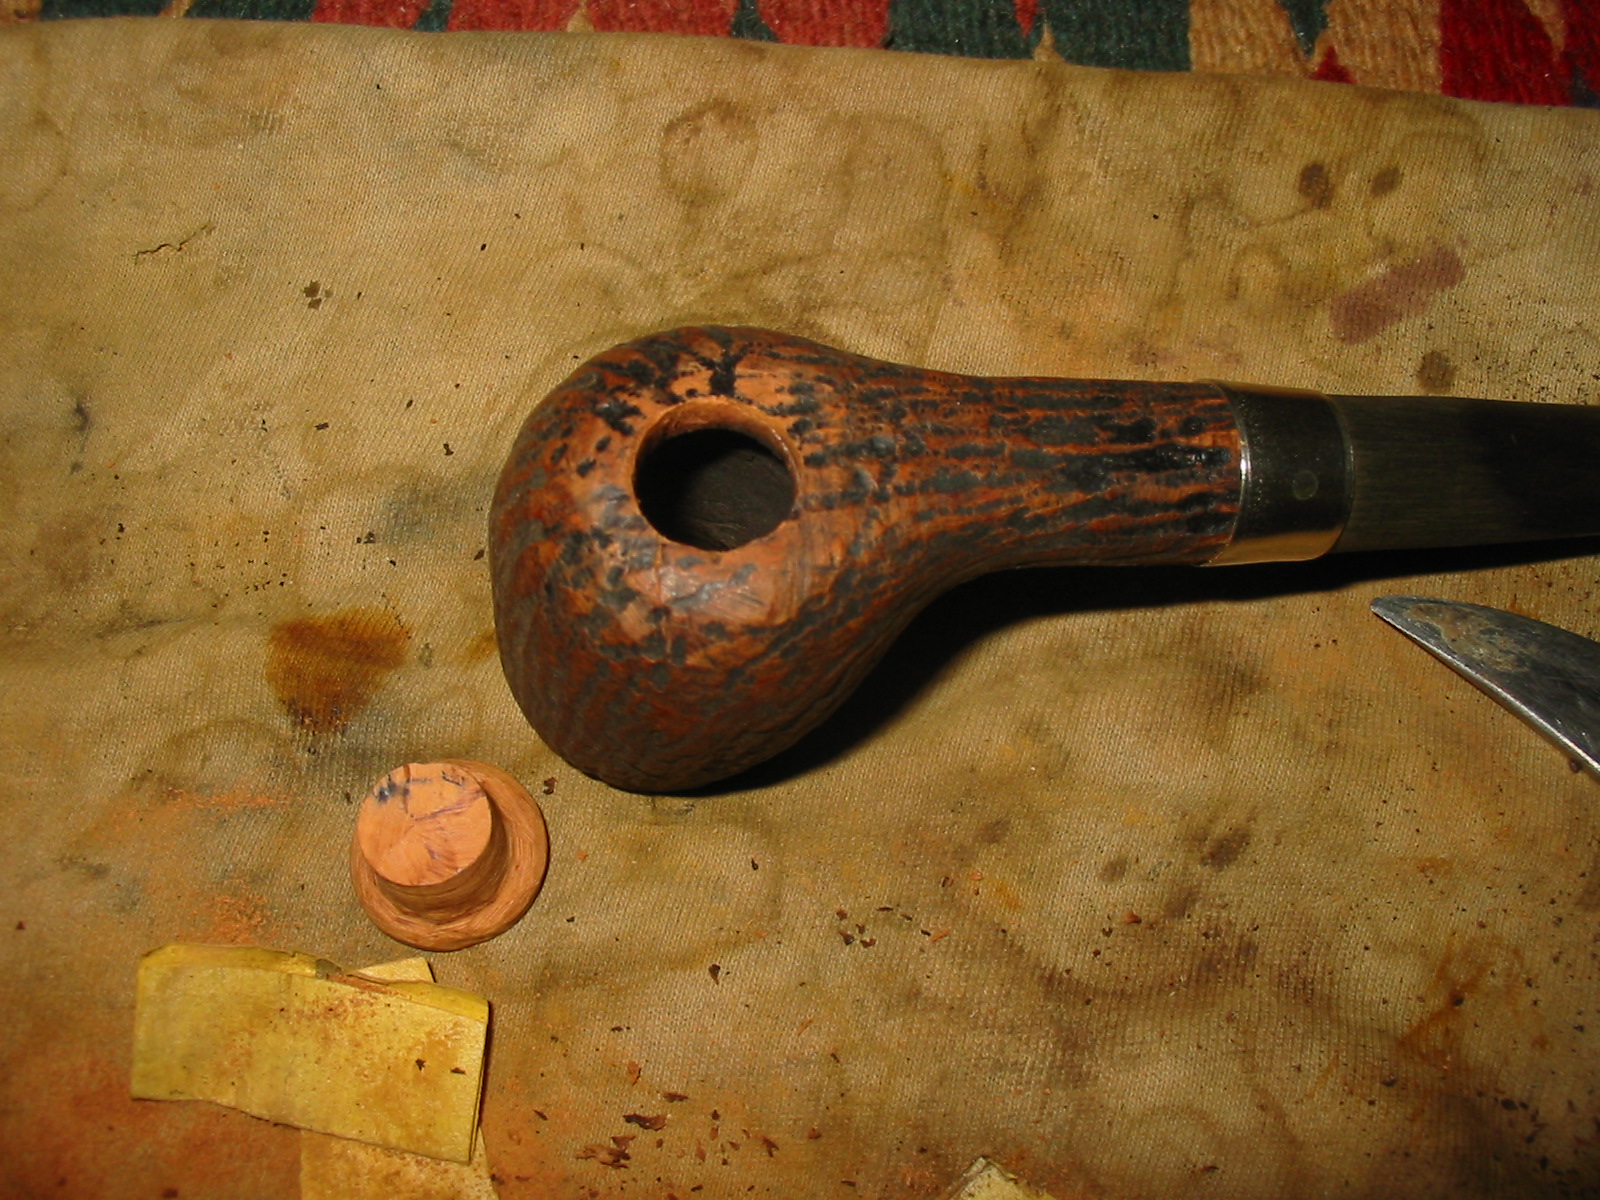
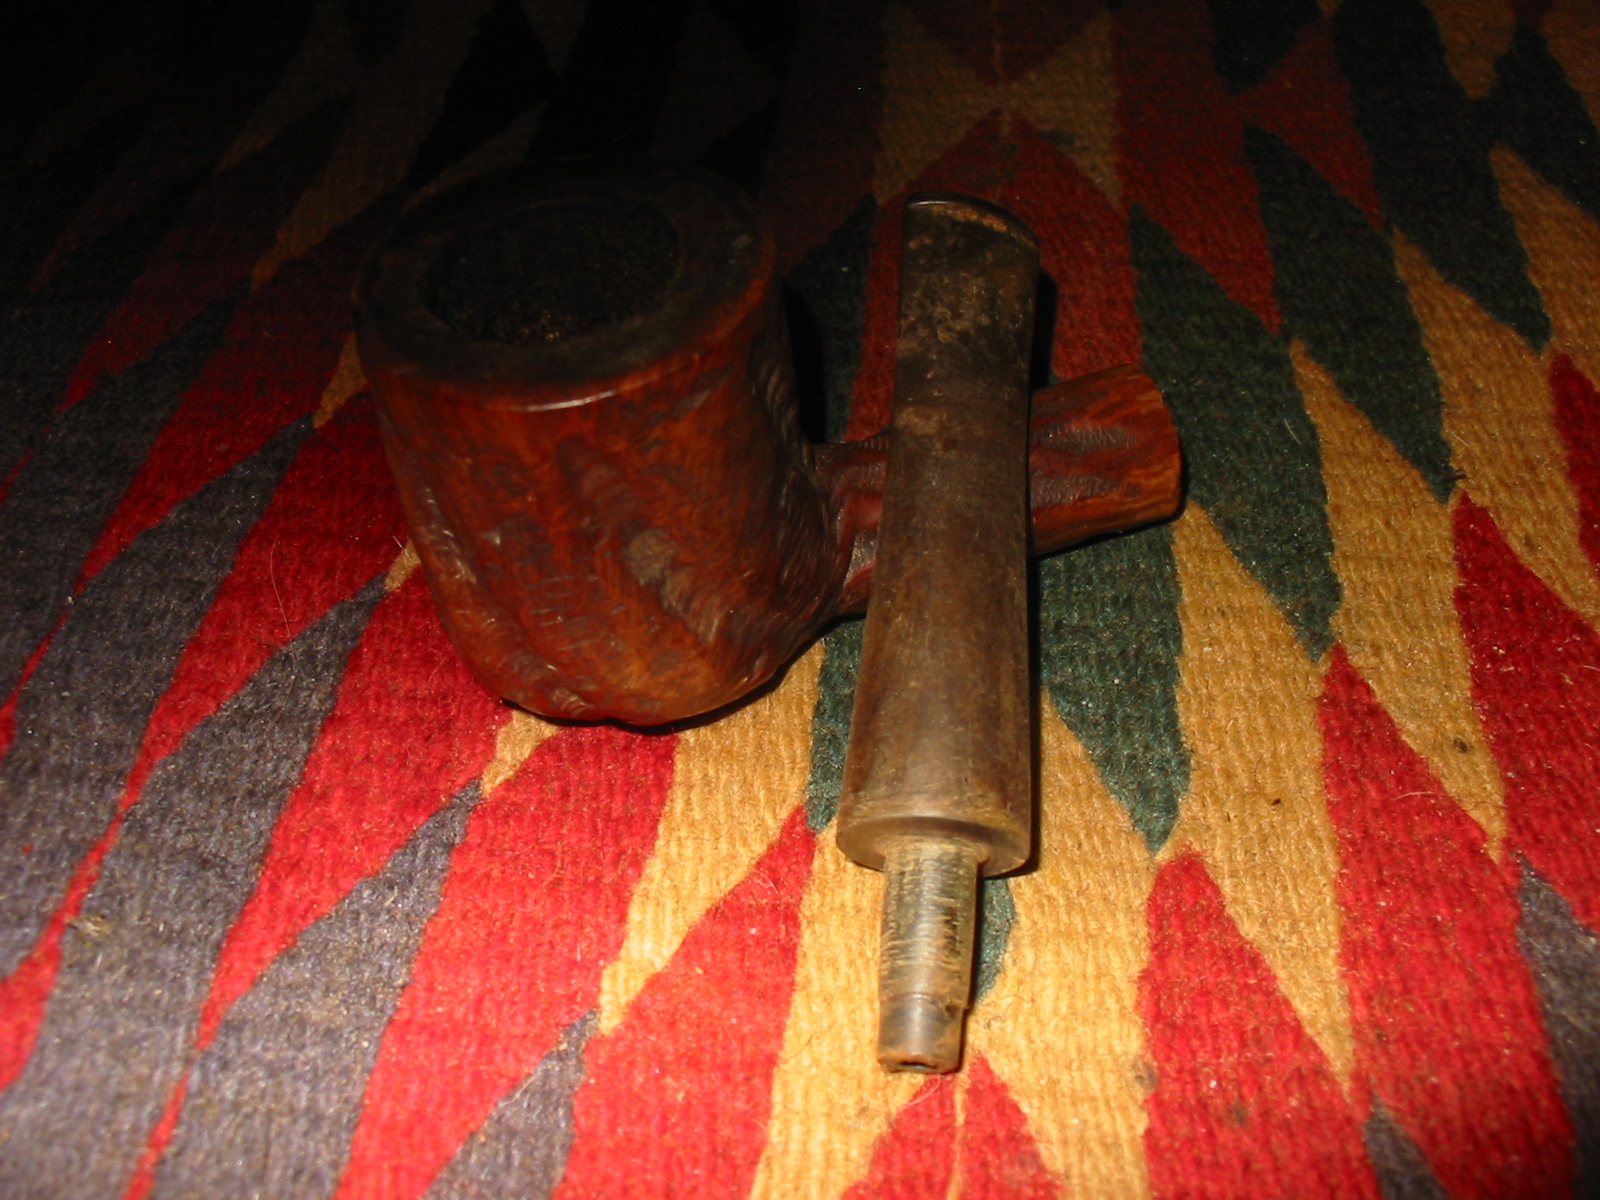
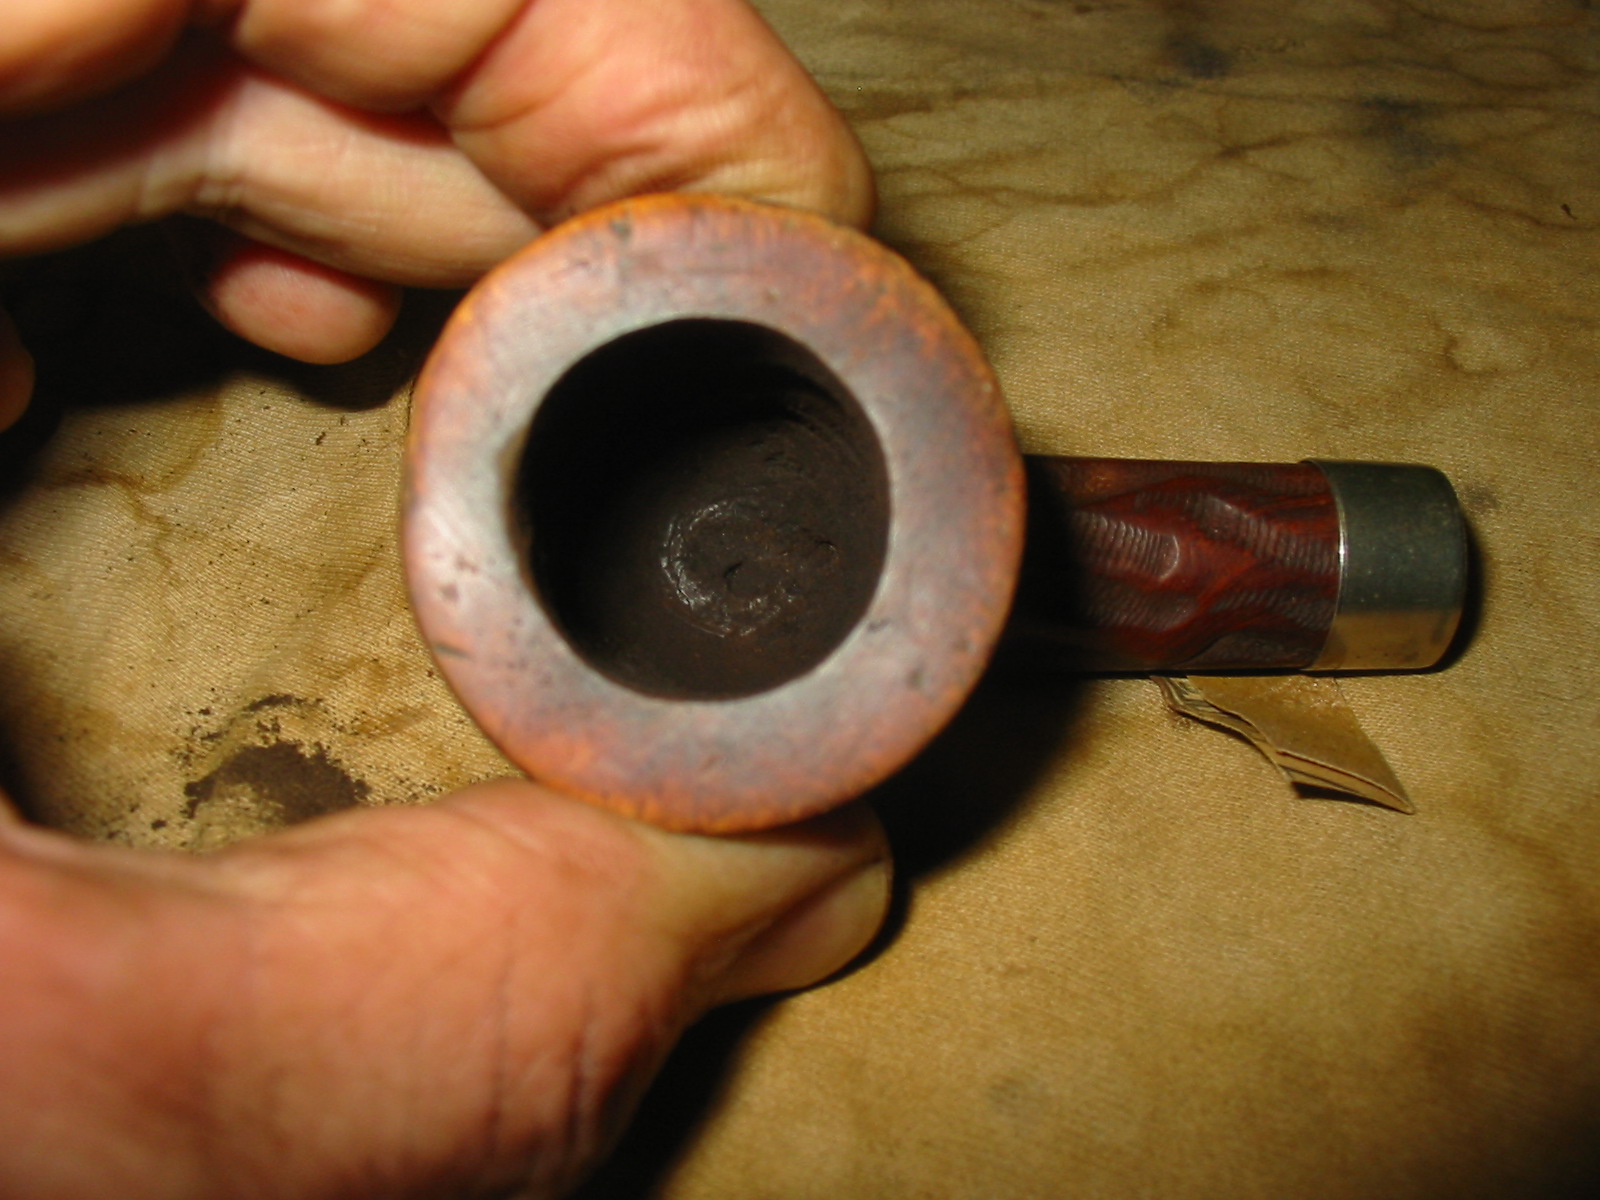
The missing chunk matched the twin scoring marks on the outside of the bowl and made me wonder how the previous pipeman had caused that kind of damage to the bowl. The divot on the rim was not a burn mark but a divot that had been caused in the same moment the scoring occurred on the outside of the bowl. I sanded down the scored areas and cleaned the bowl with acetone. I then patched the score marks with superglue and briar dust. I also built up the top of the rim in the divot area with the same mixture. I kept the mix on the top of the rim as much as possible with very little of it on the inside edge. I did not want to use it inside the bowl.
IMG_3055

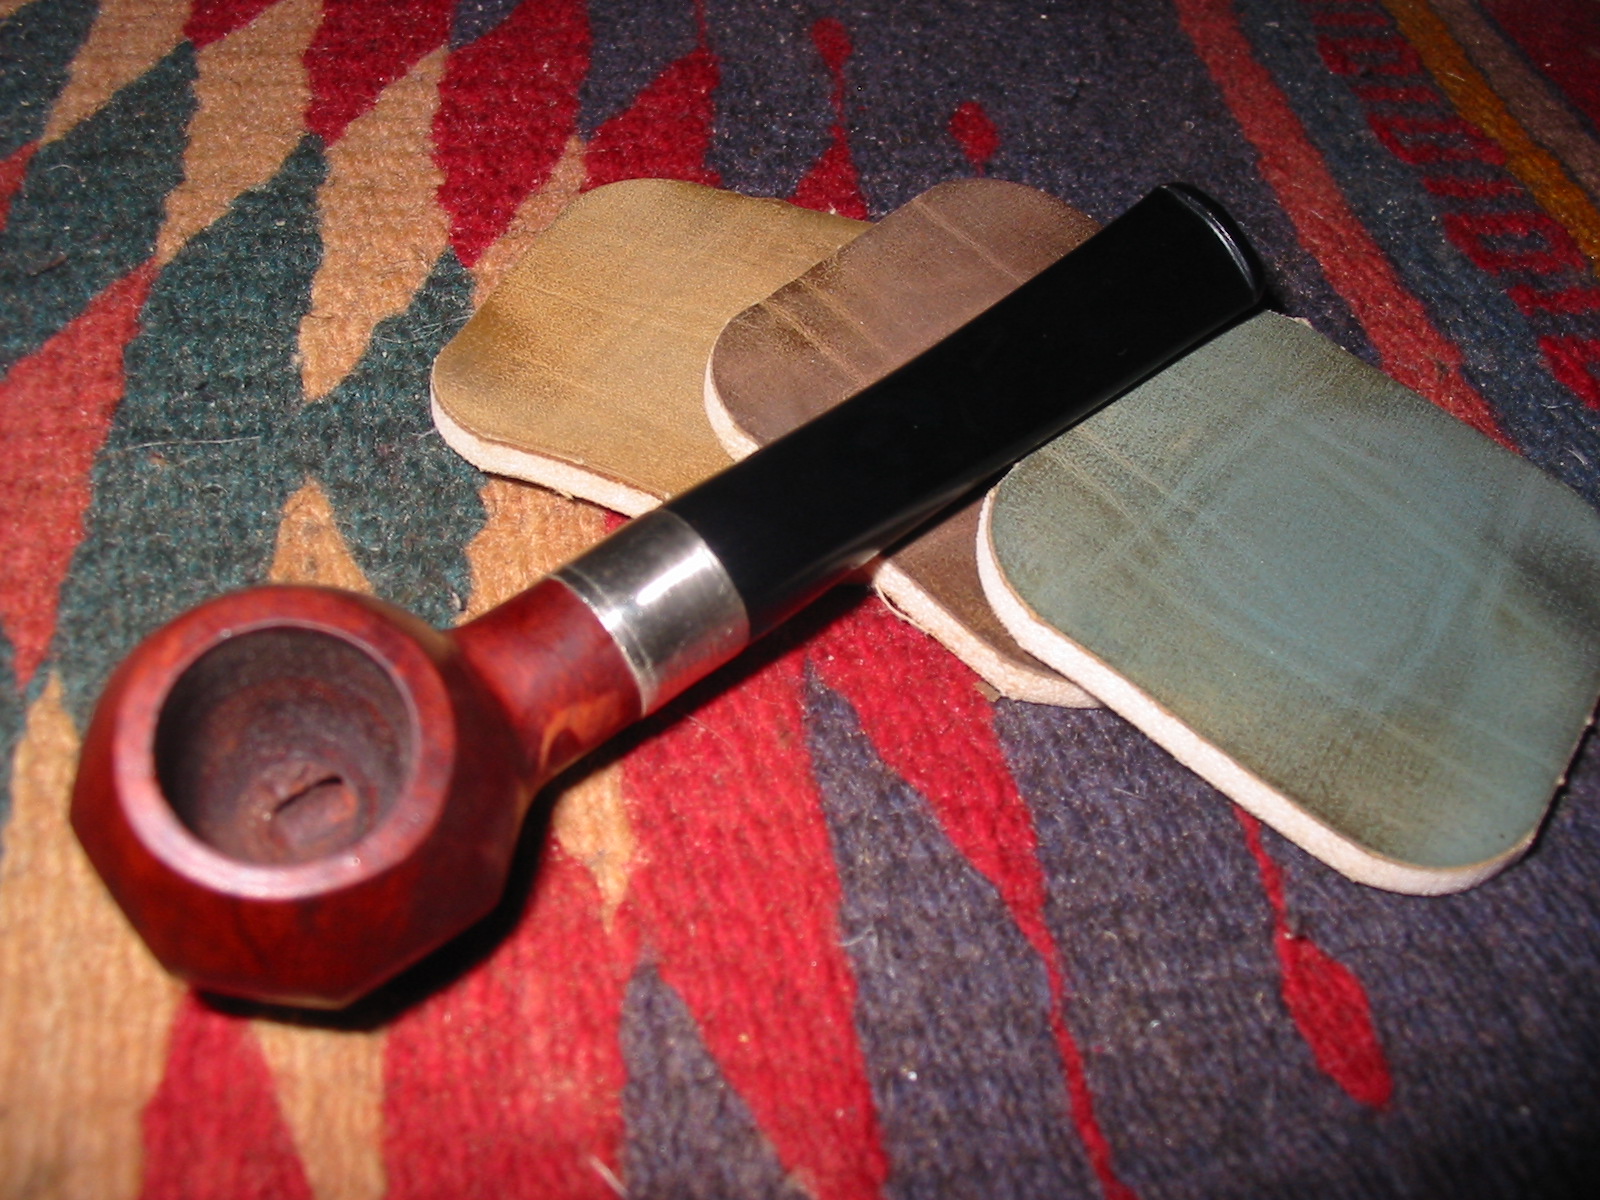
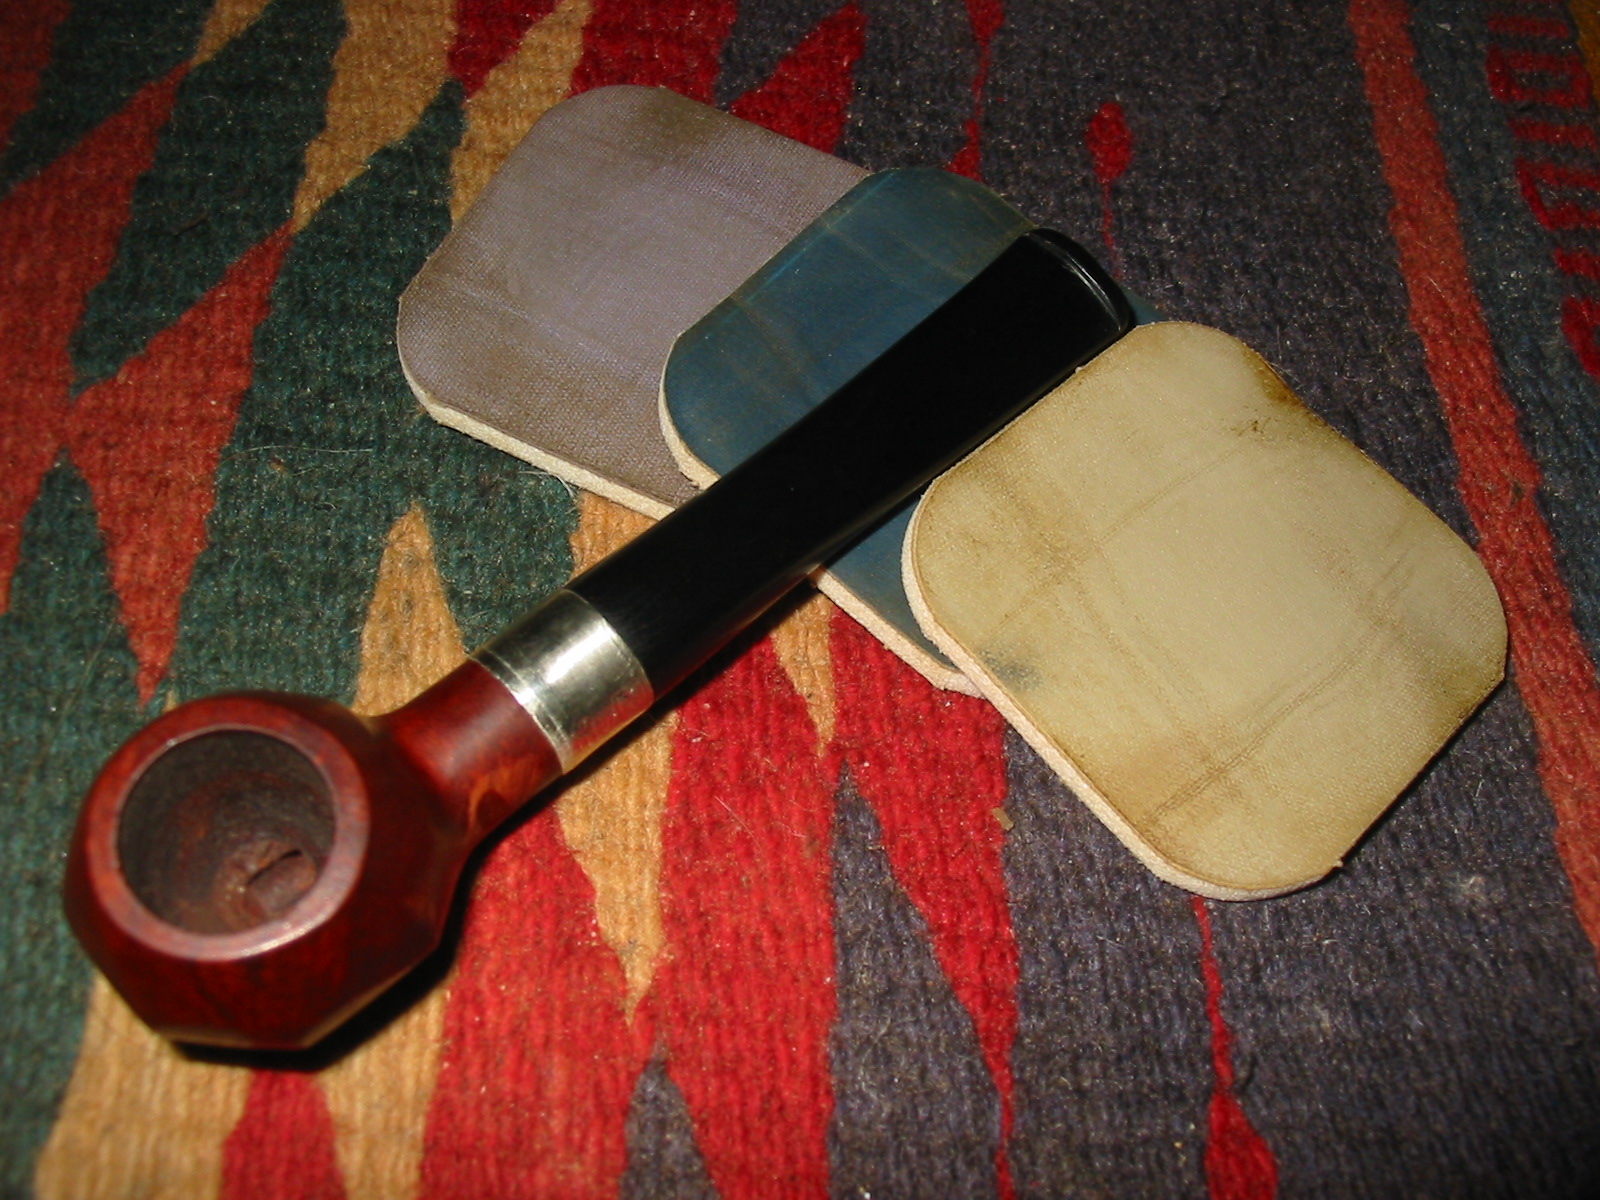
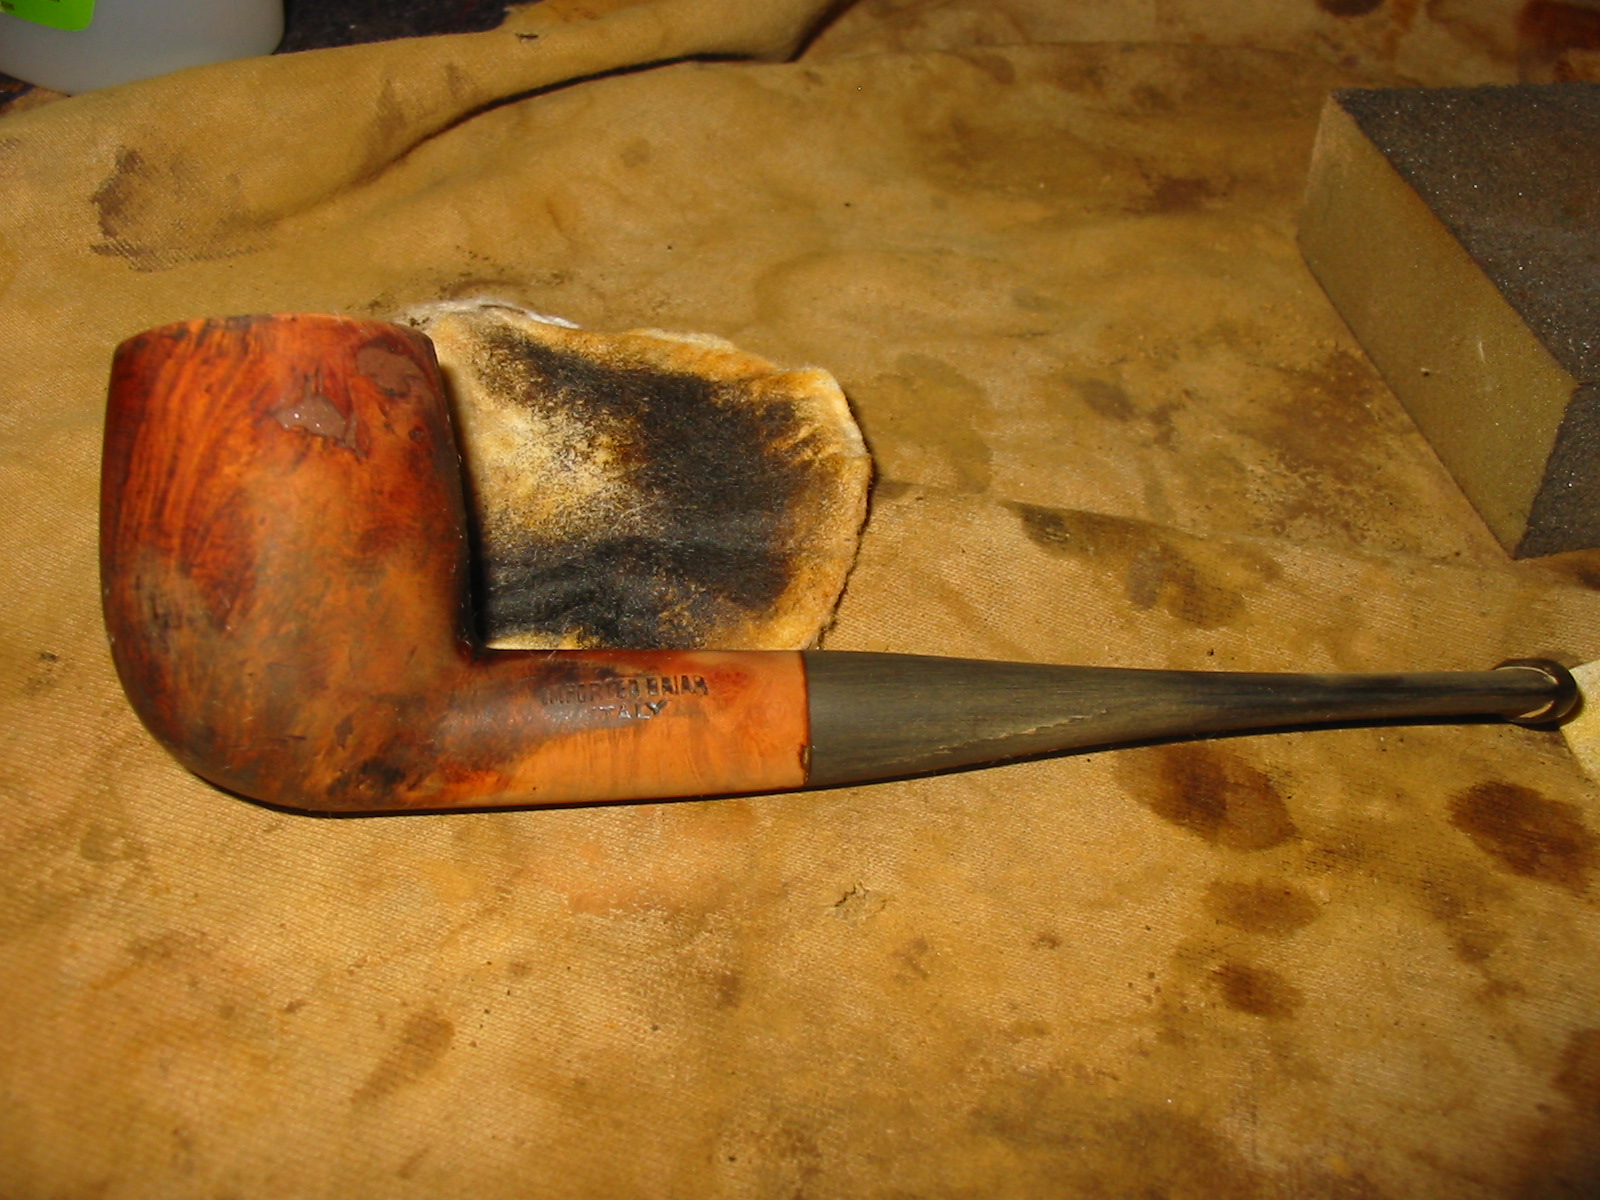
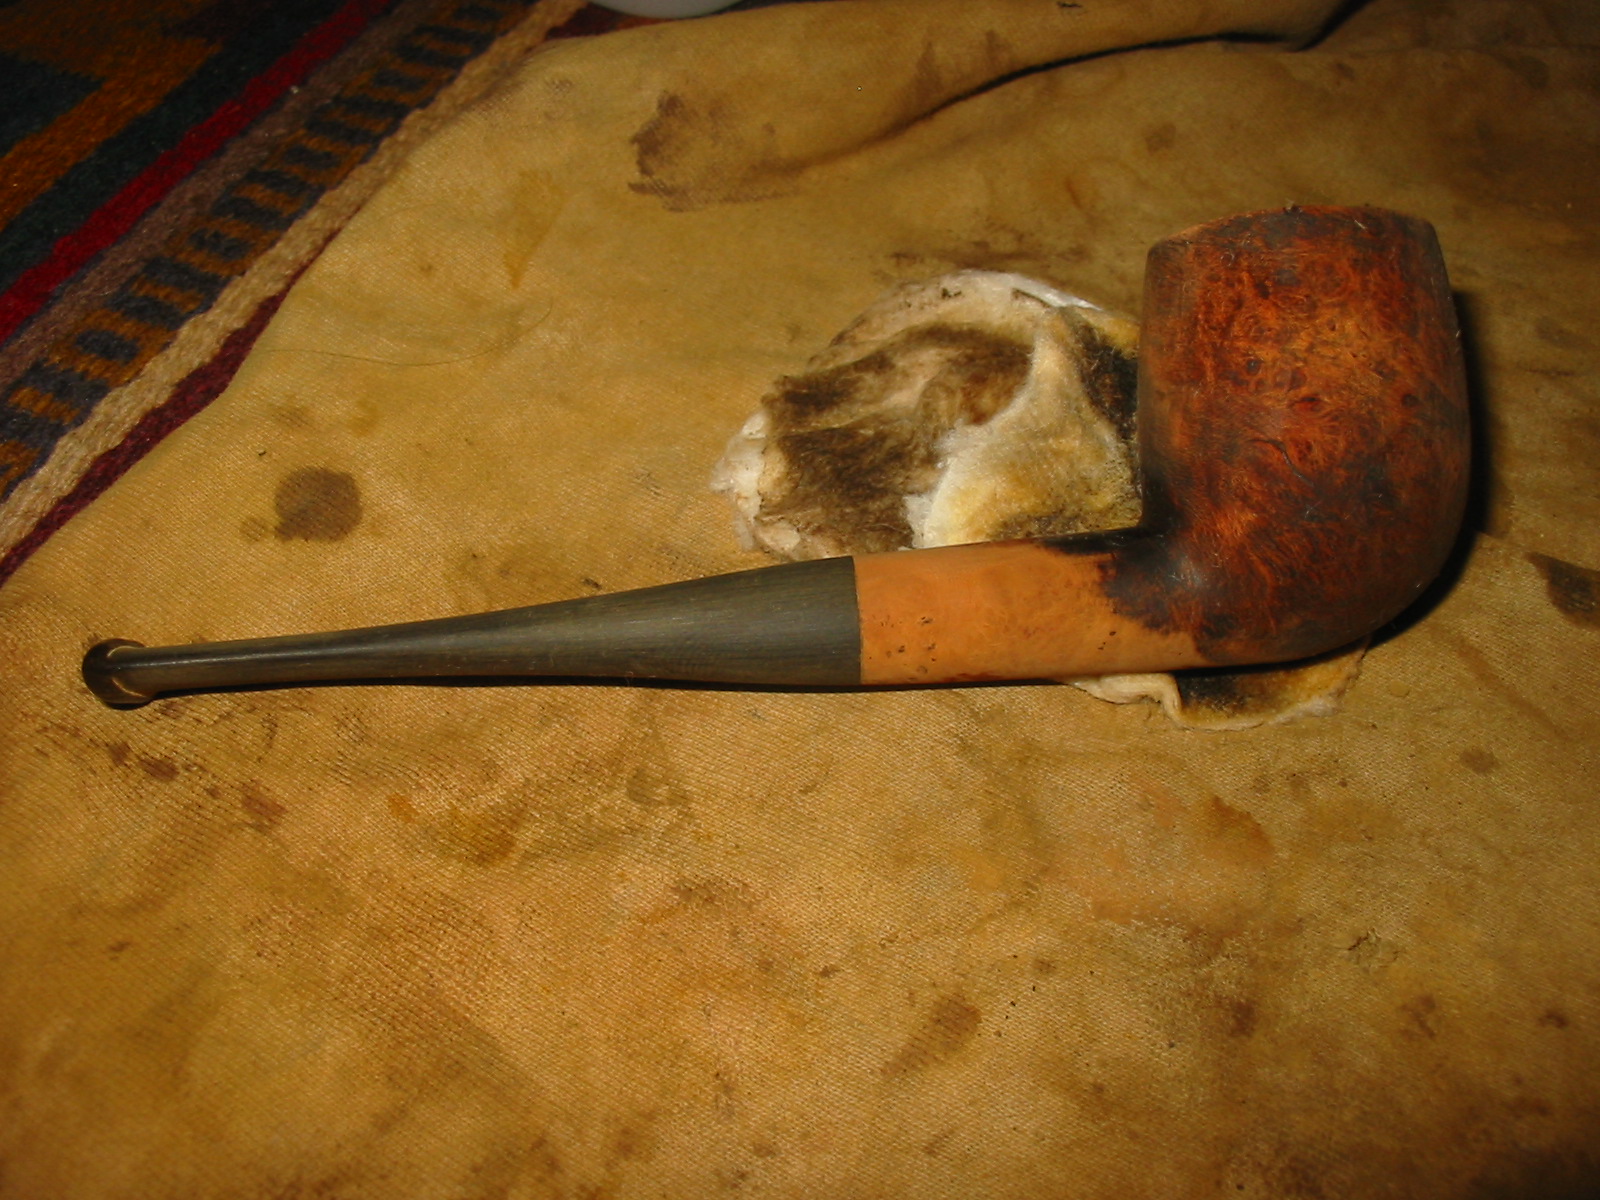
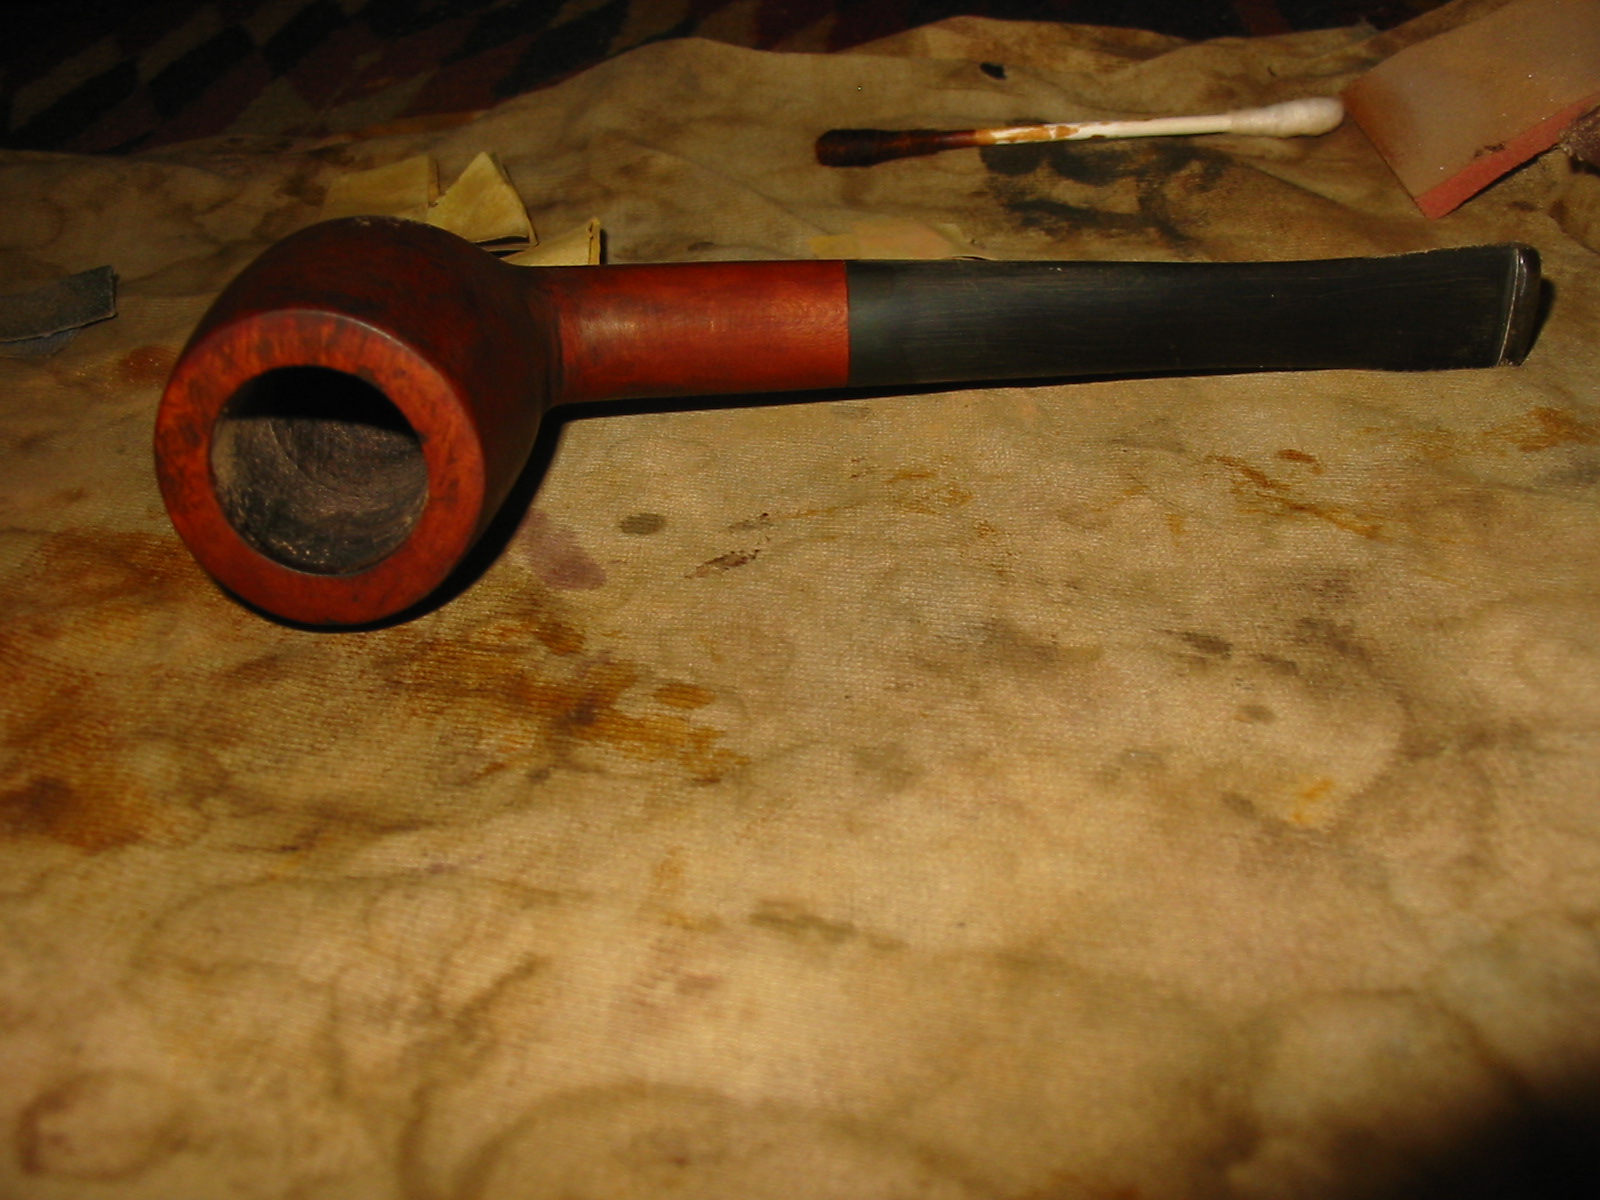
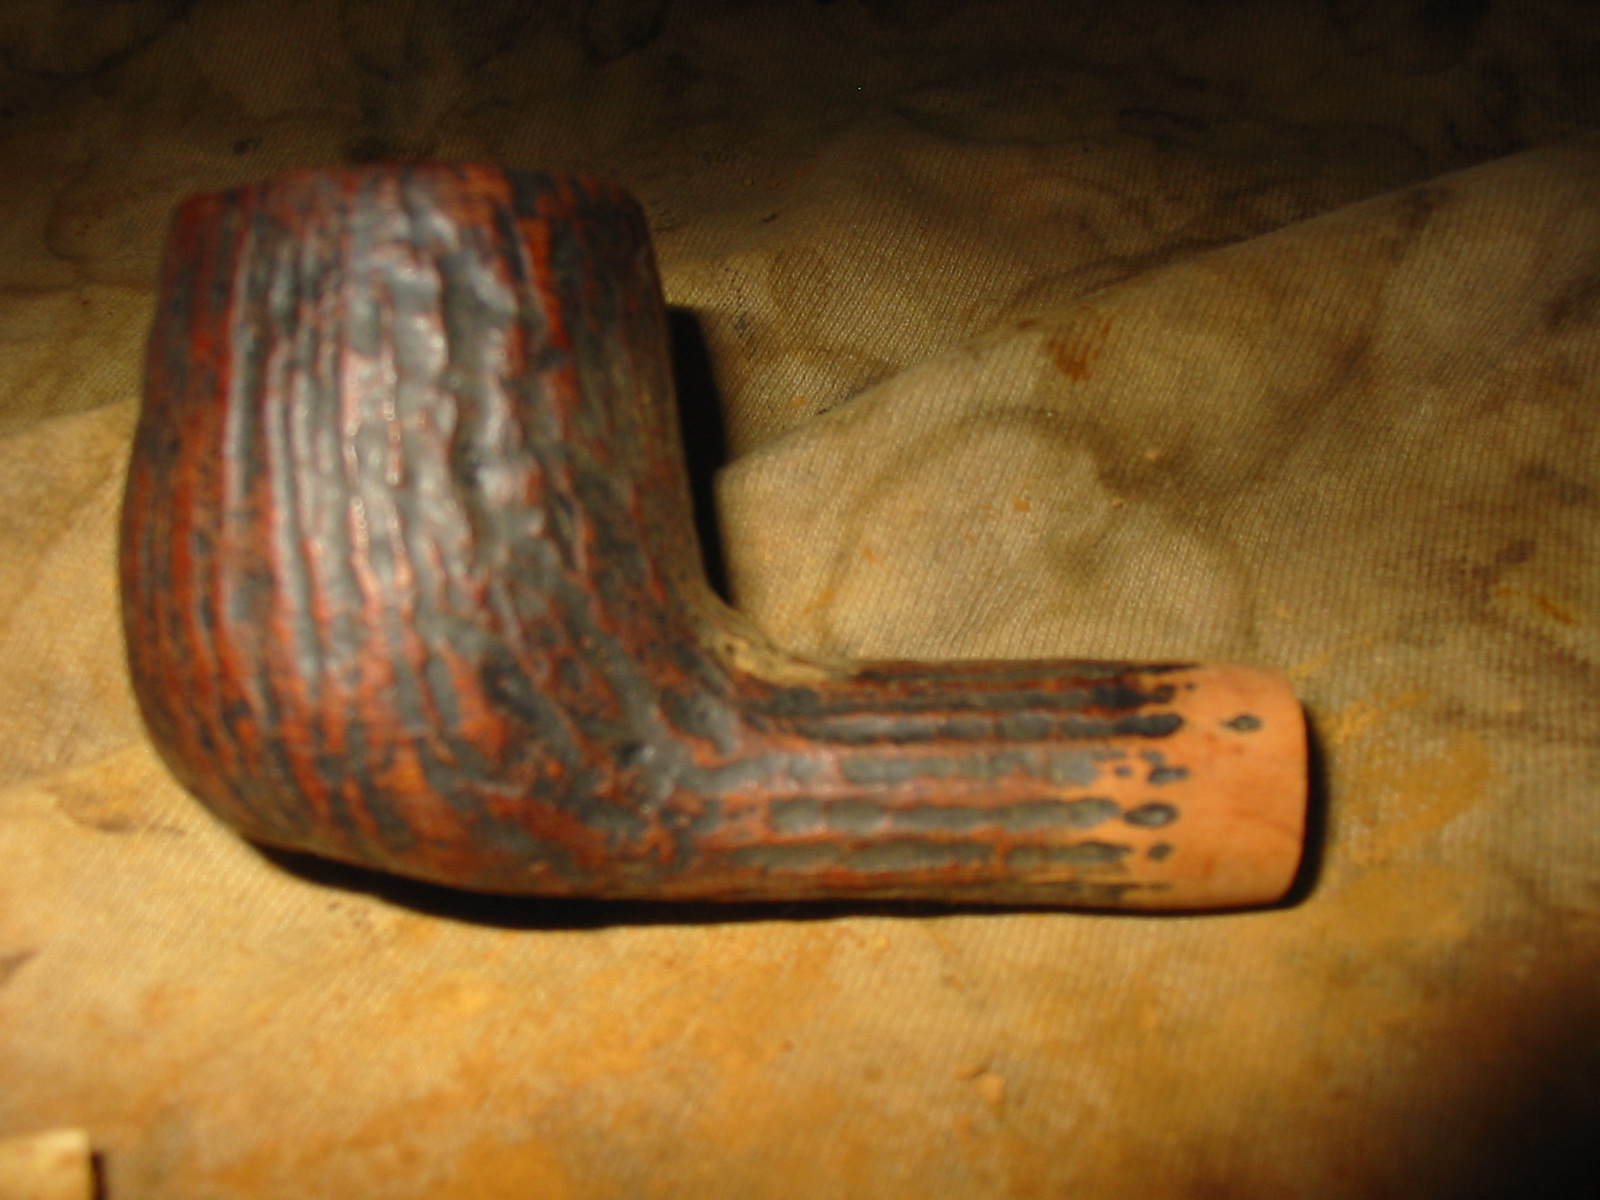
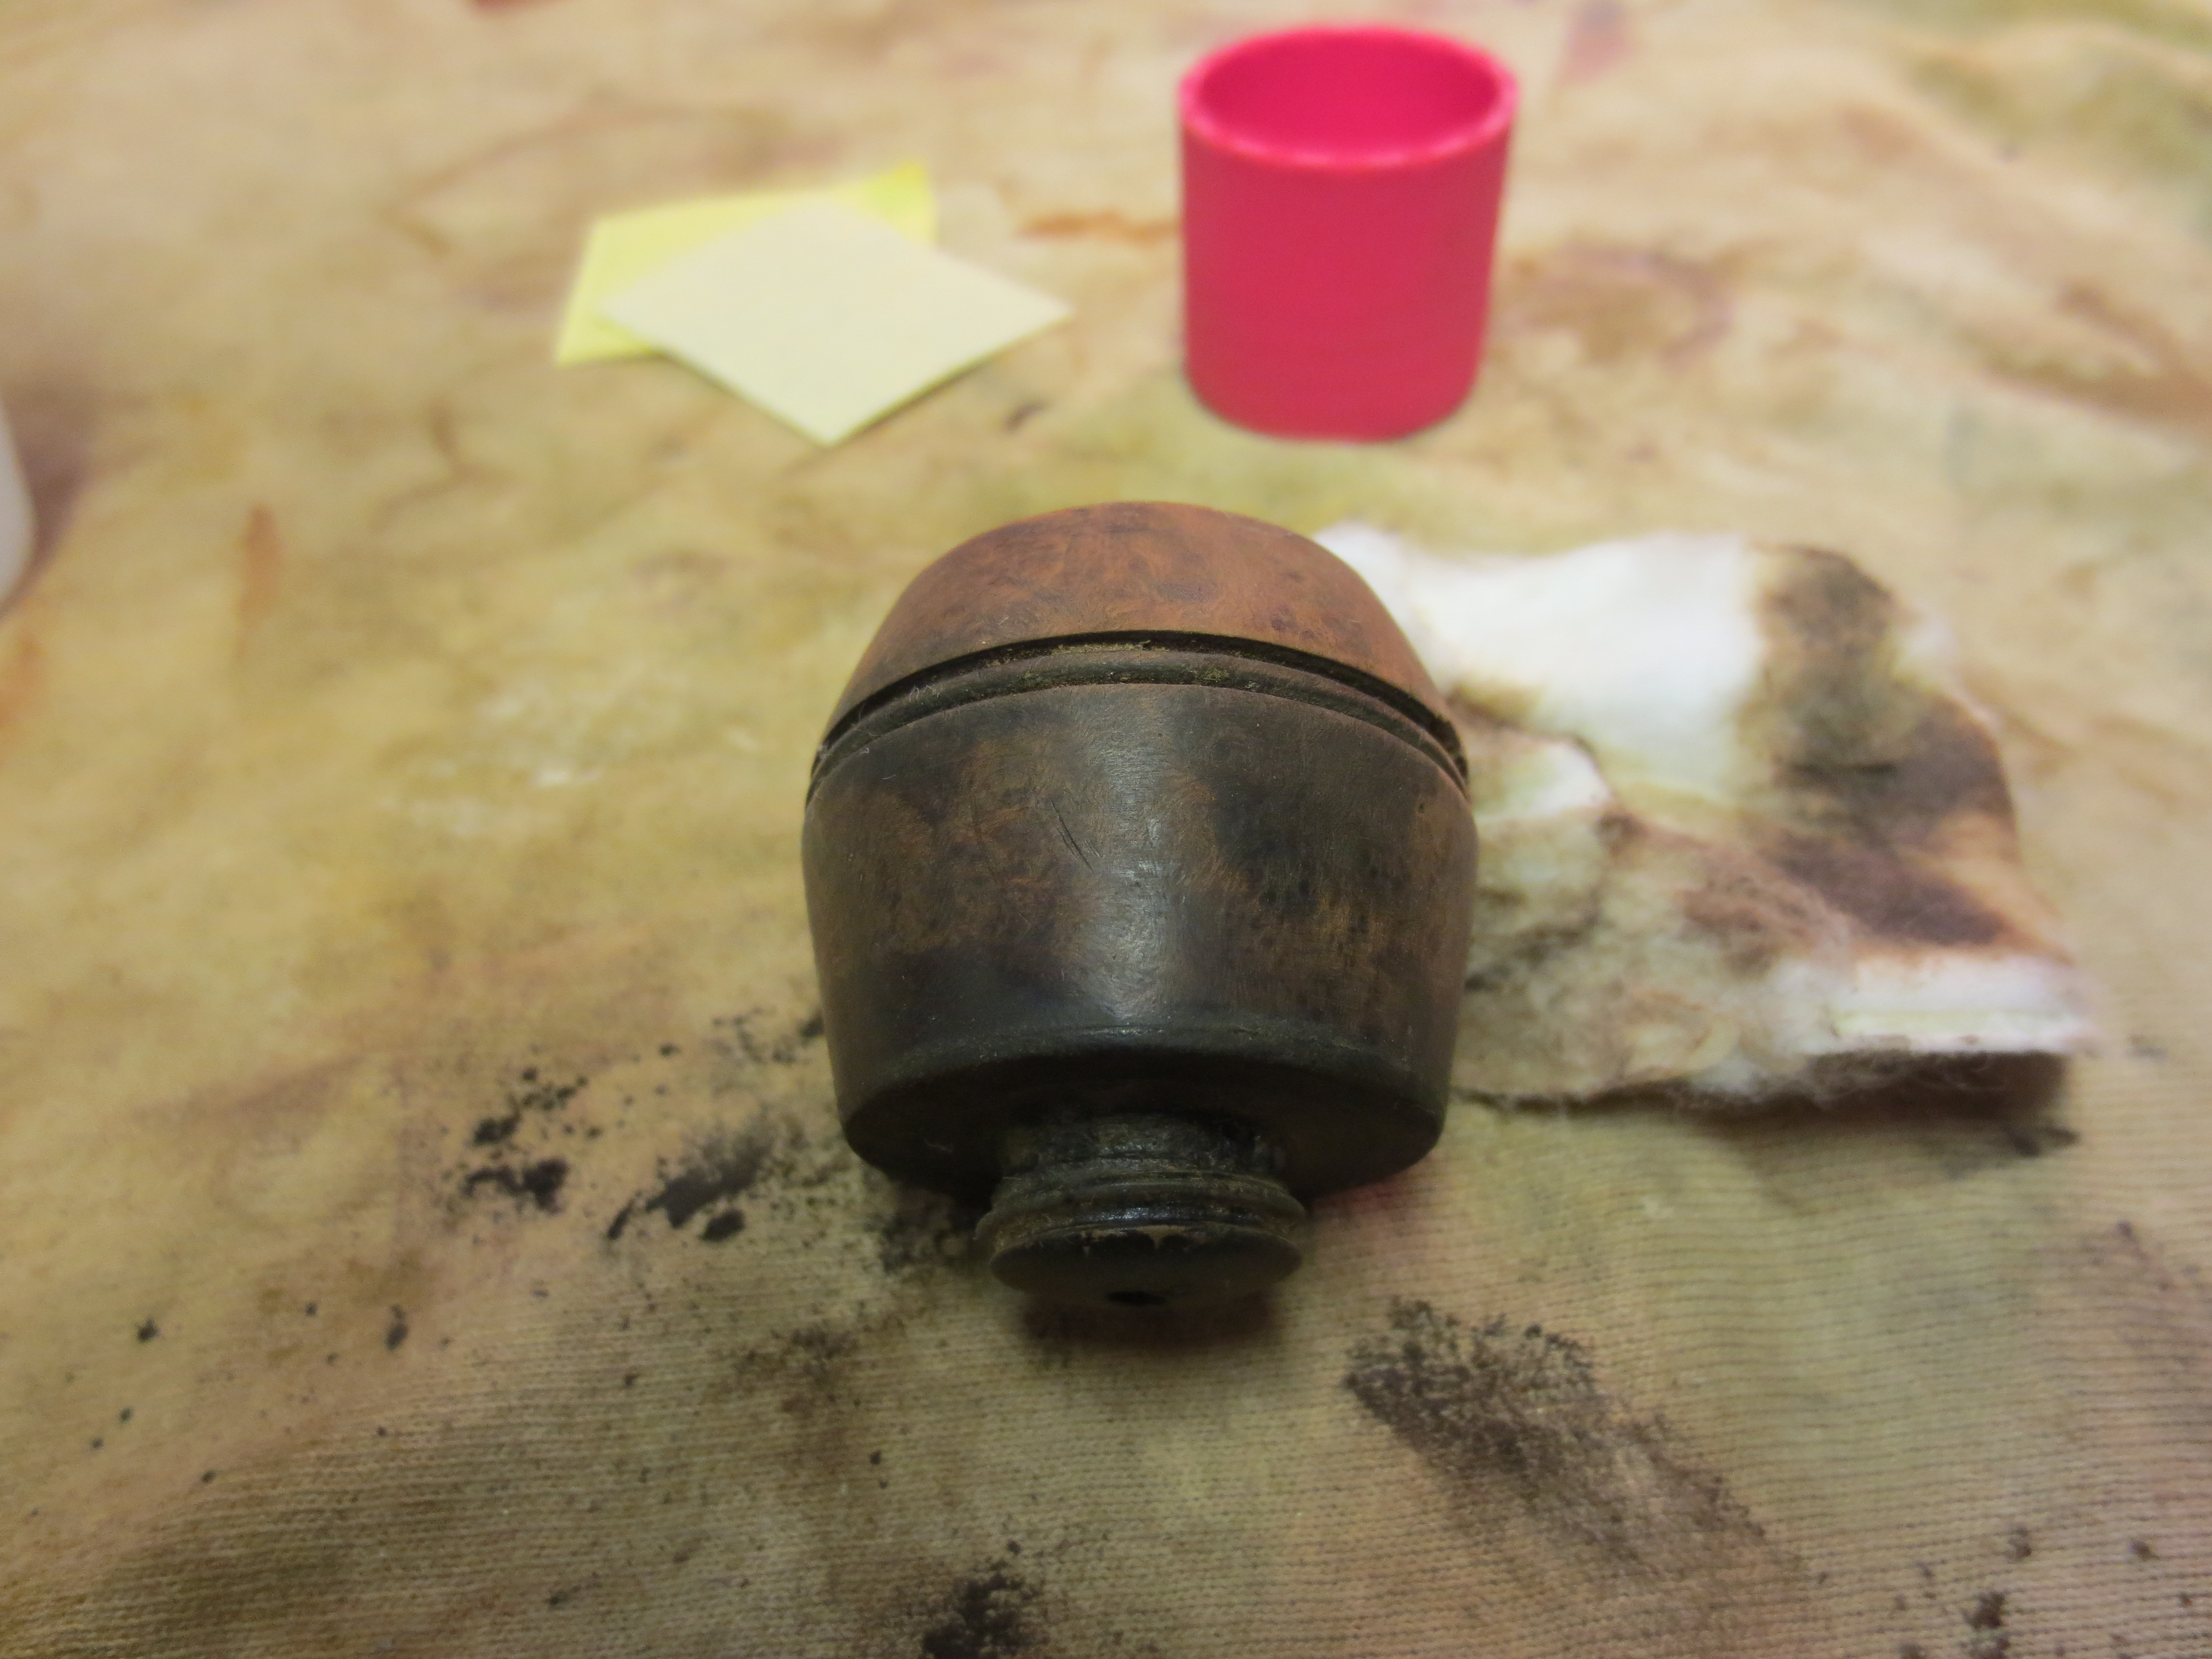
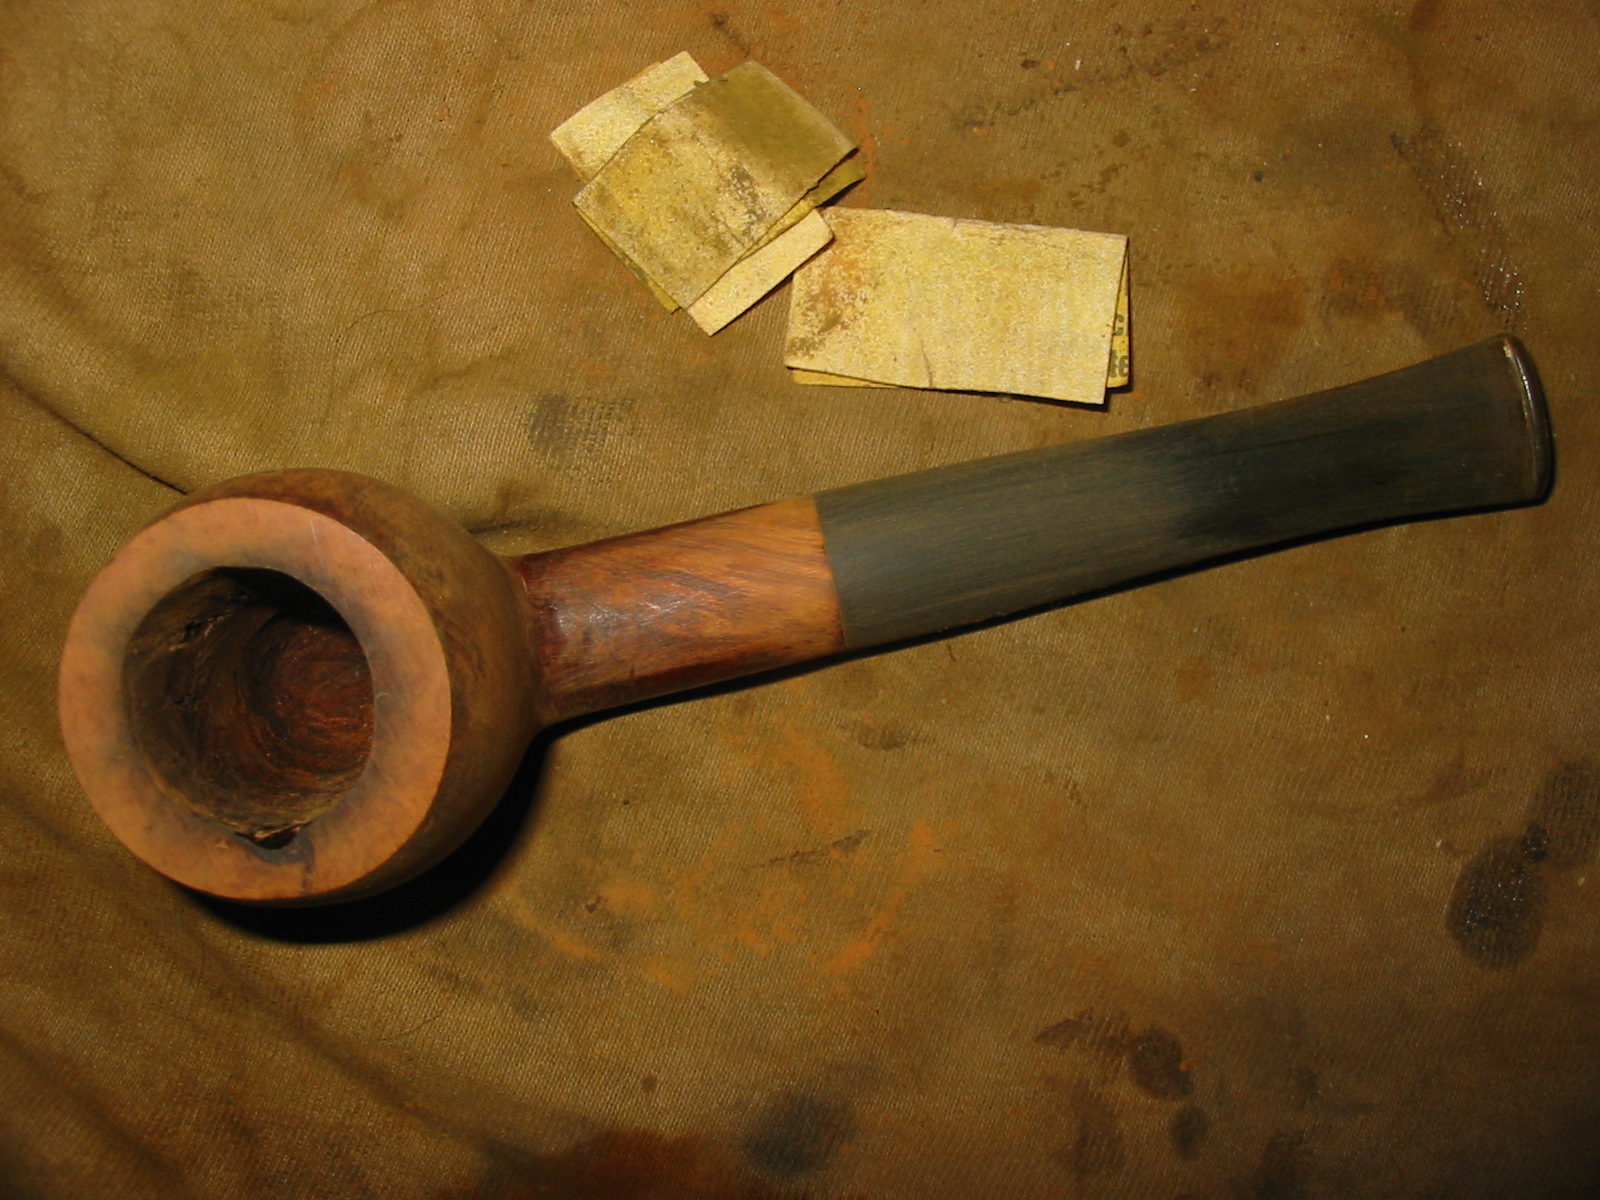
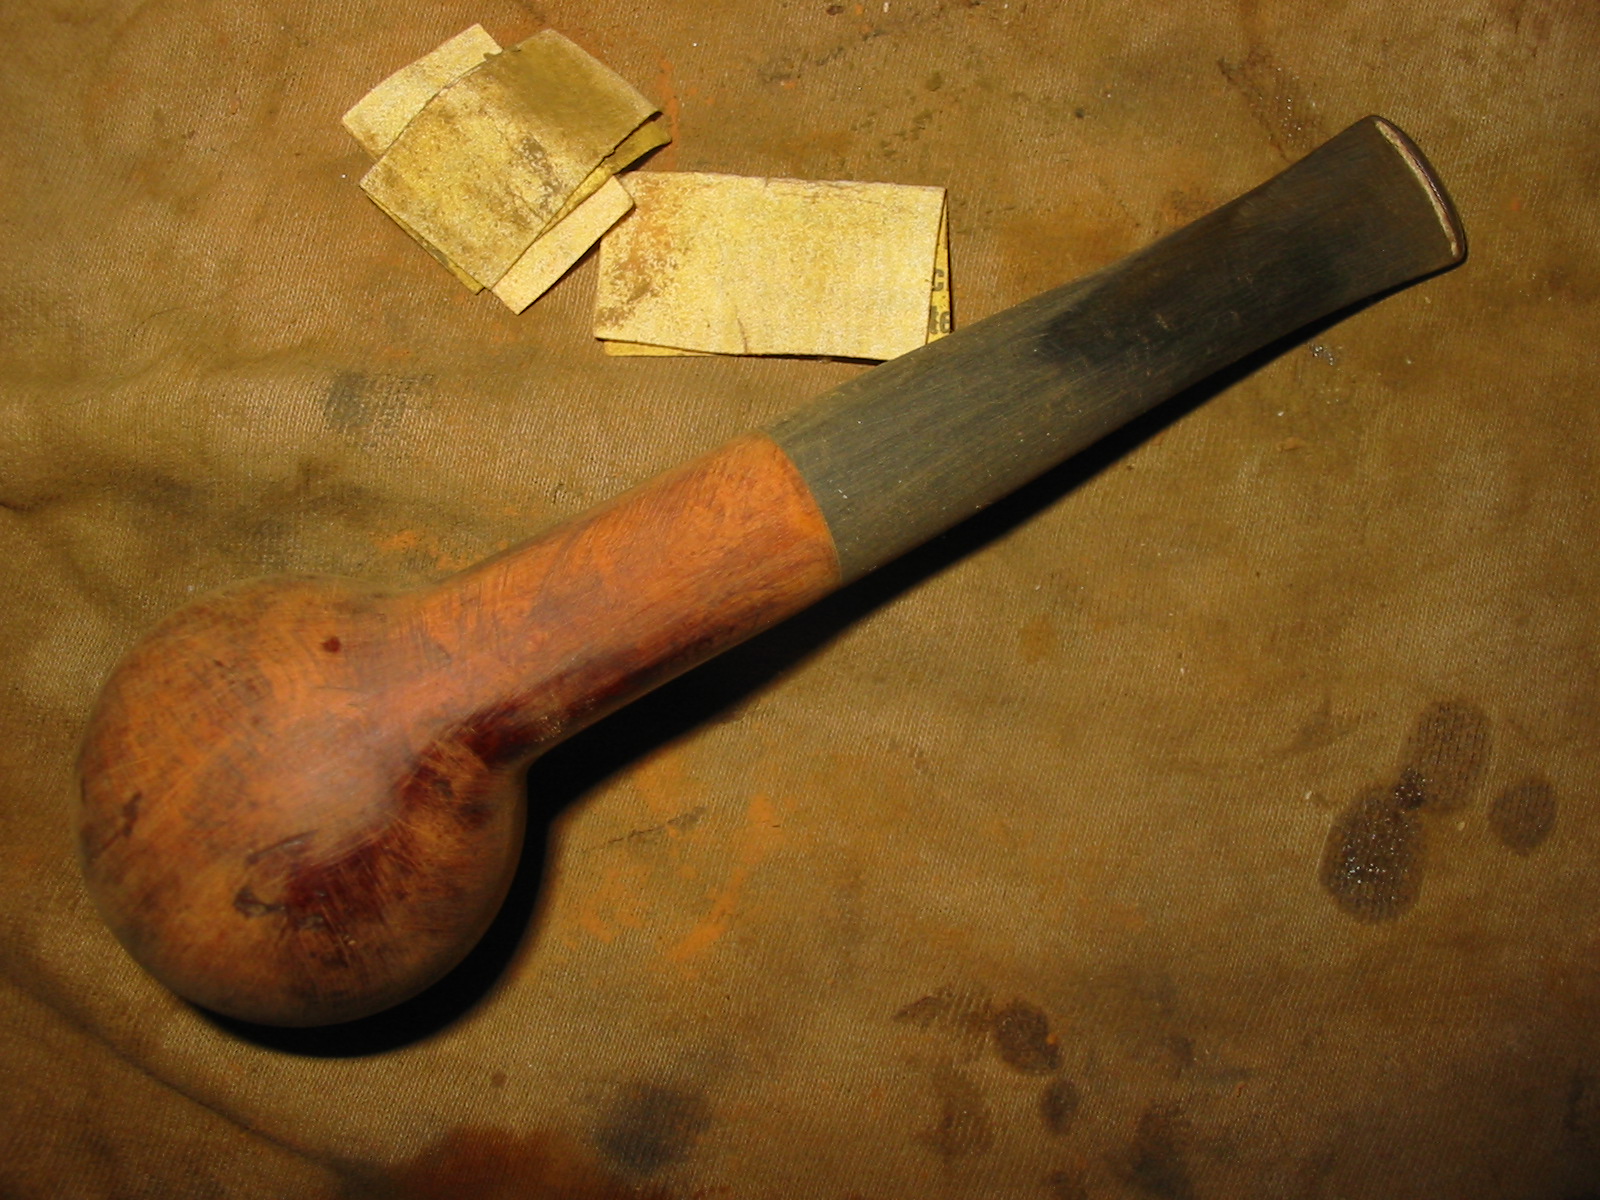
I sanded the bowl to remove the excess of the glue and briar dust mix and then wiped the entire bowl down with acetone on cotton pads. The three photos below show the state of the bowl and the repairs down with the briar dust and superglue. The third photo shows the top patch.
IMG_3056

IMG_3057

IMG_3058

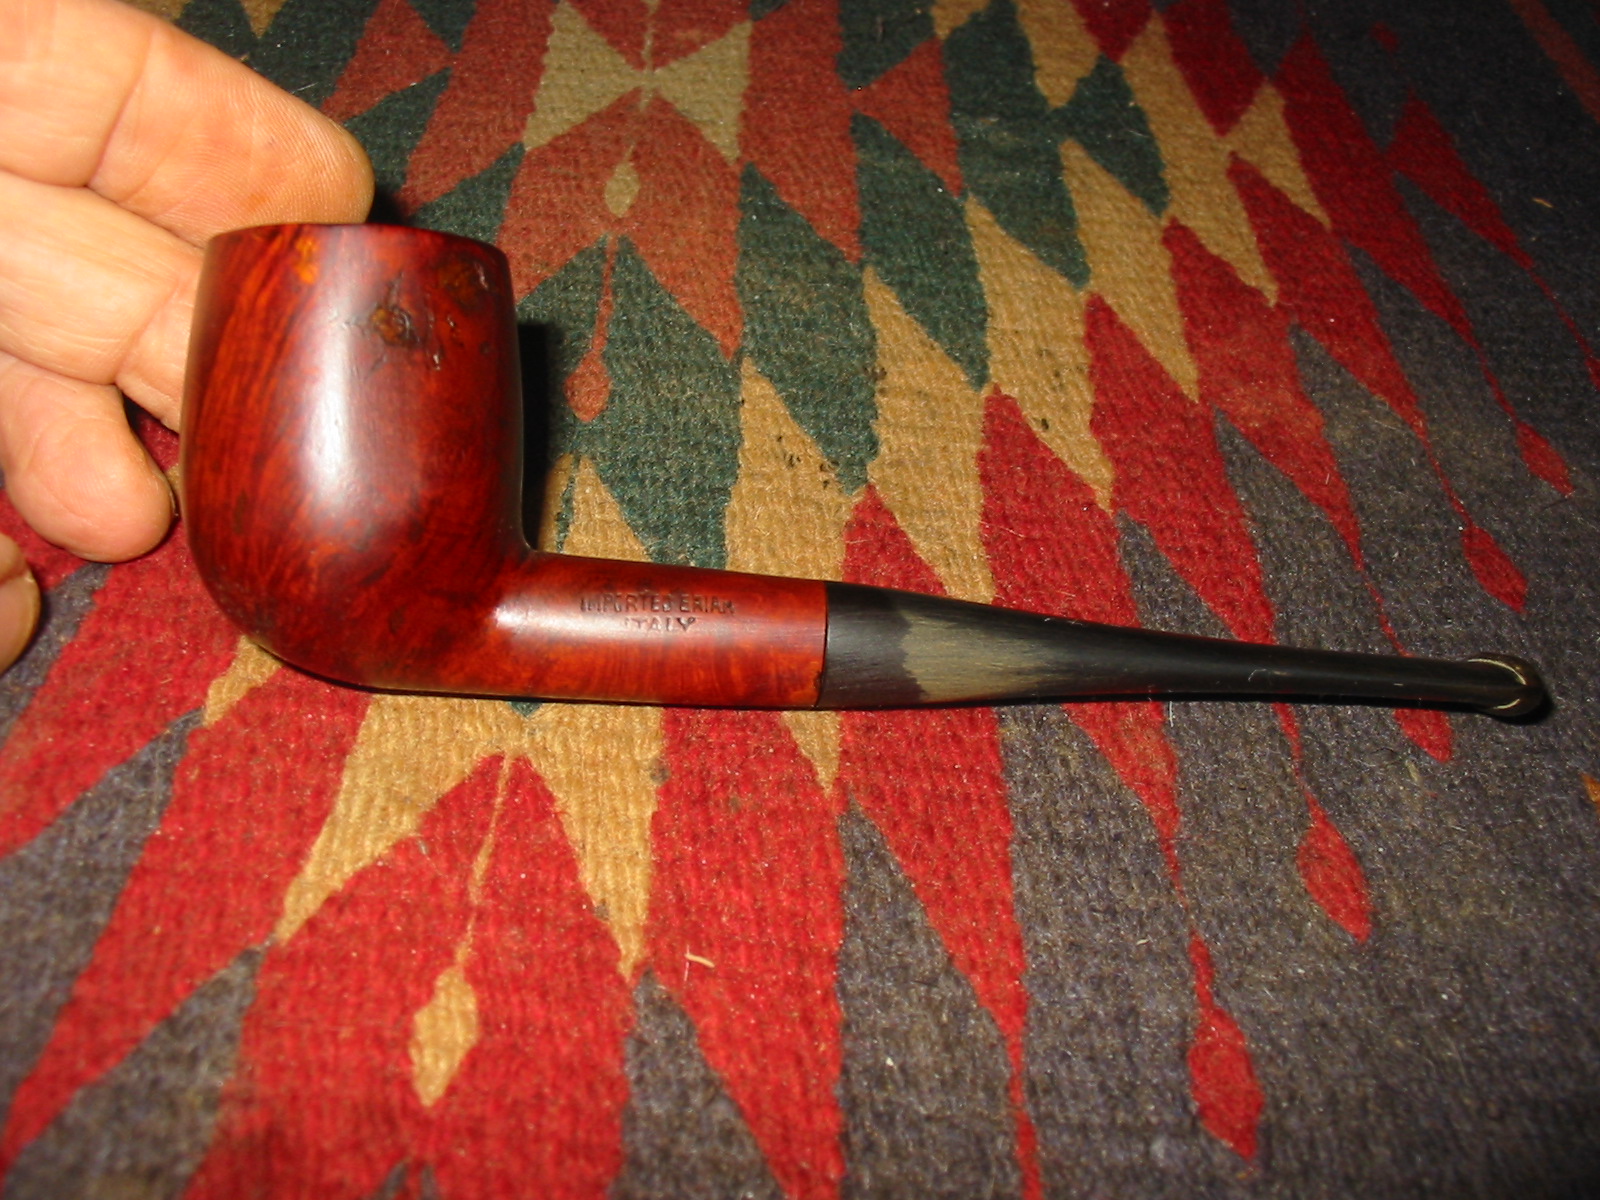
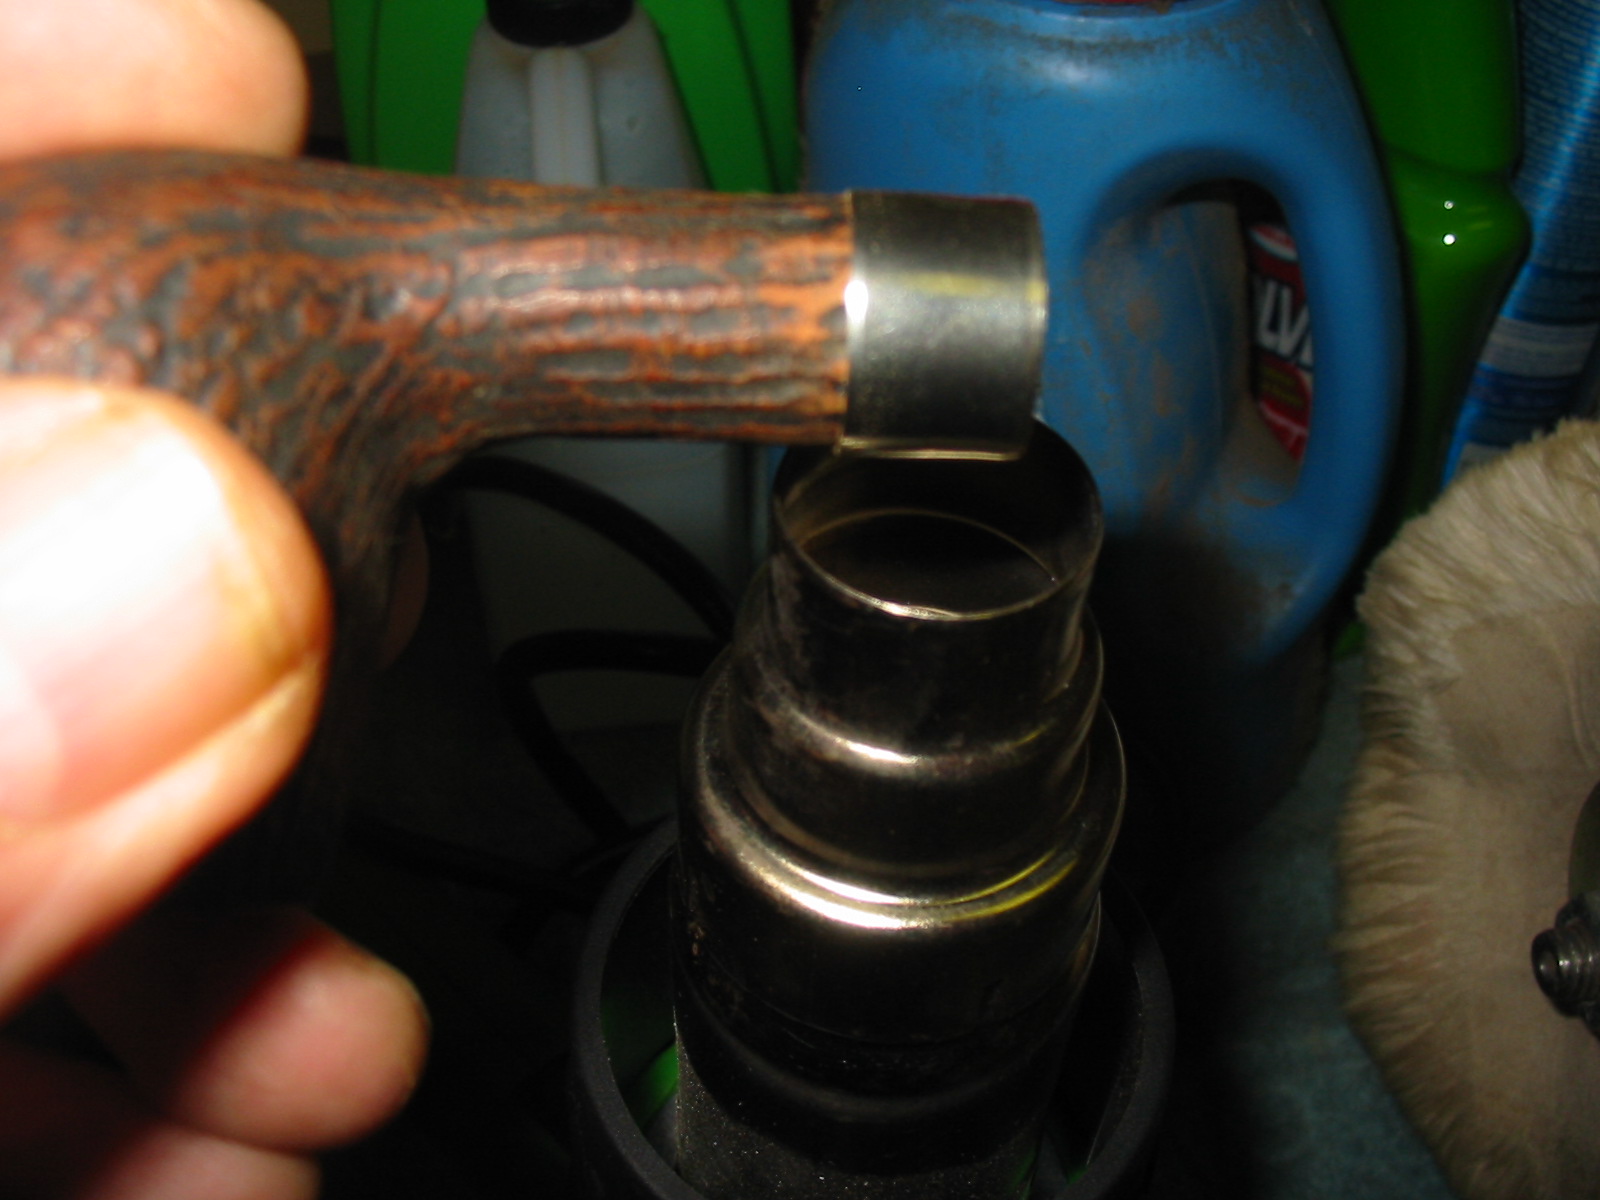
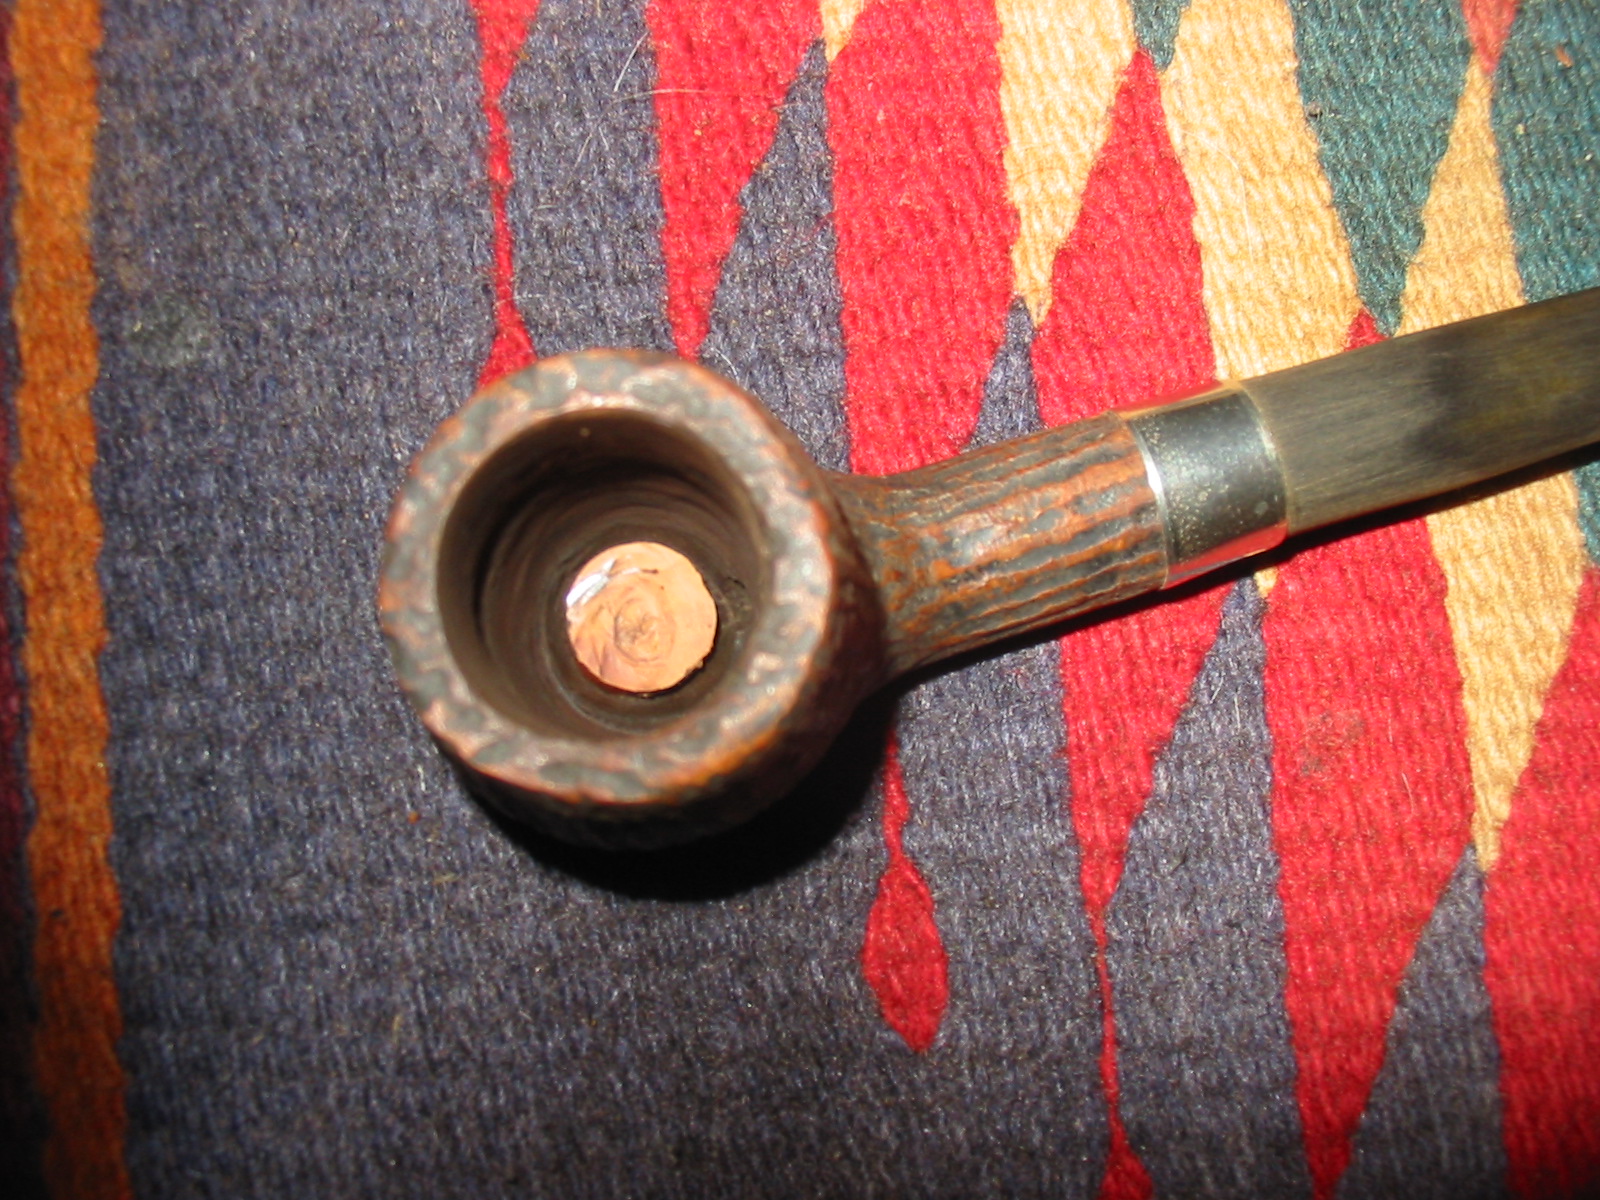
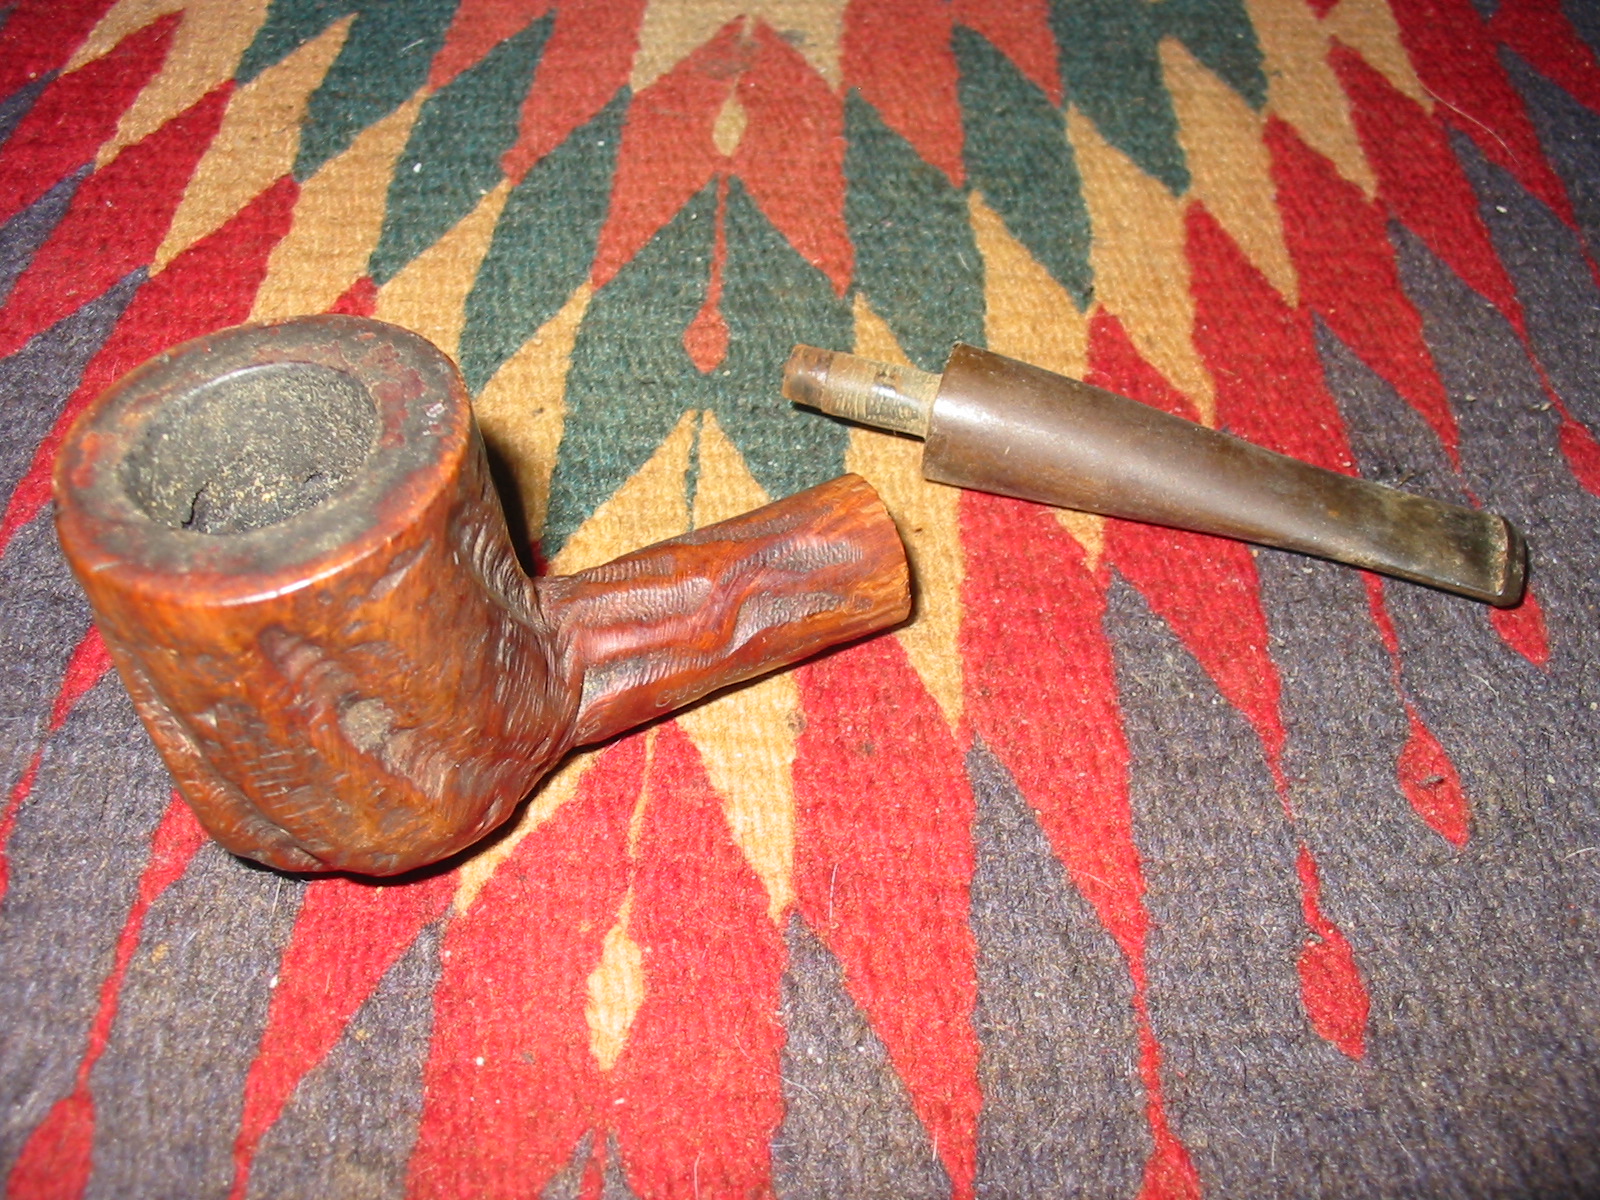
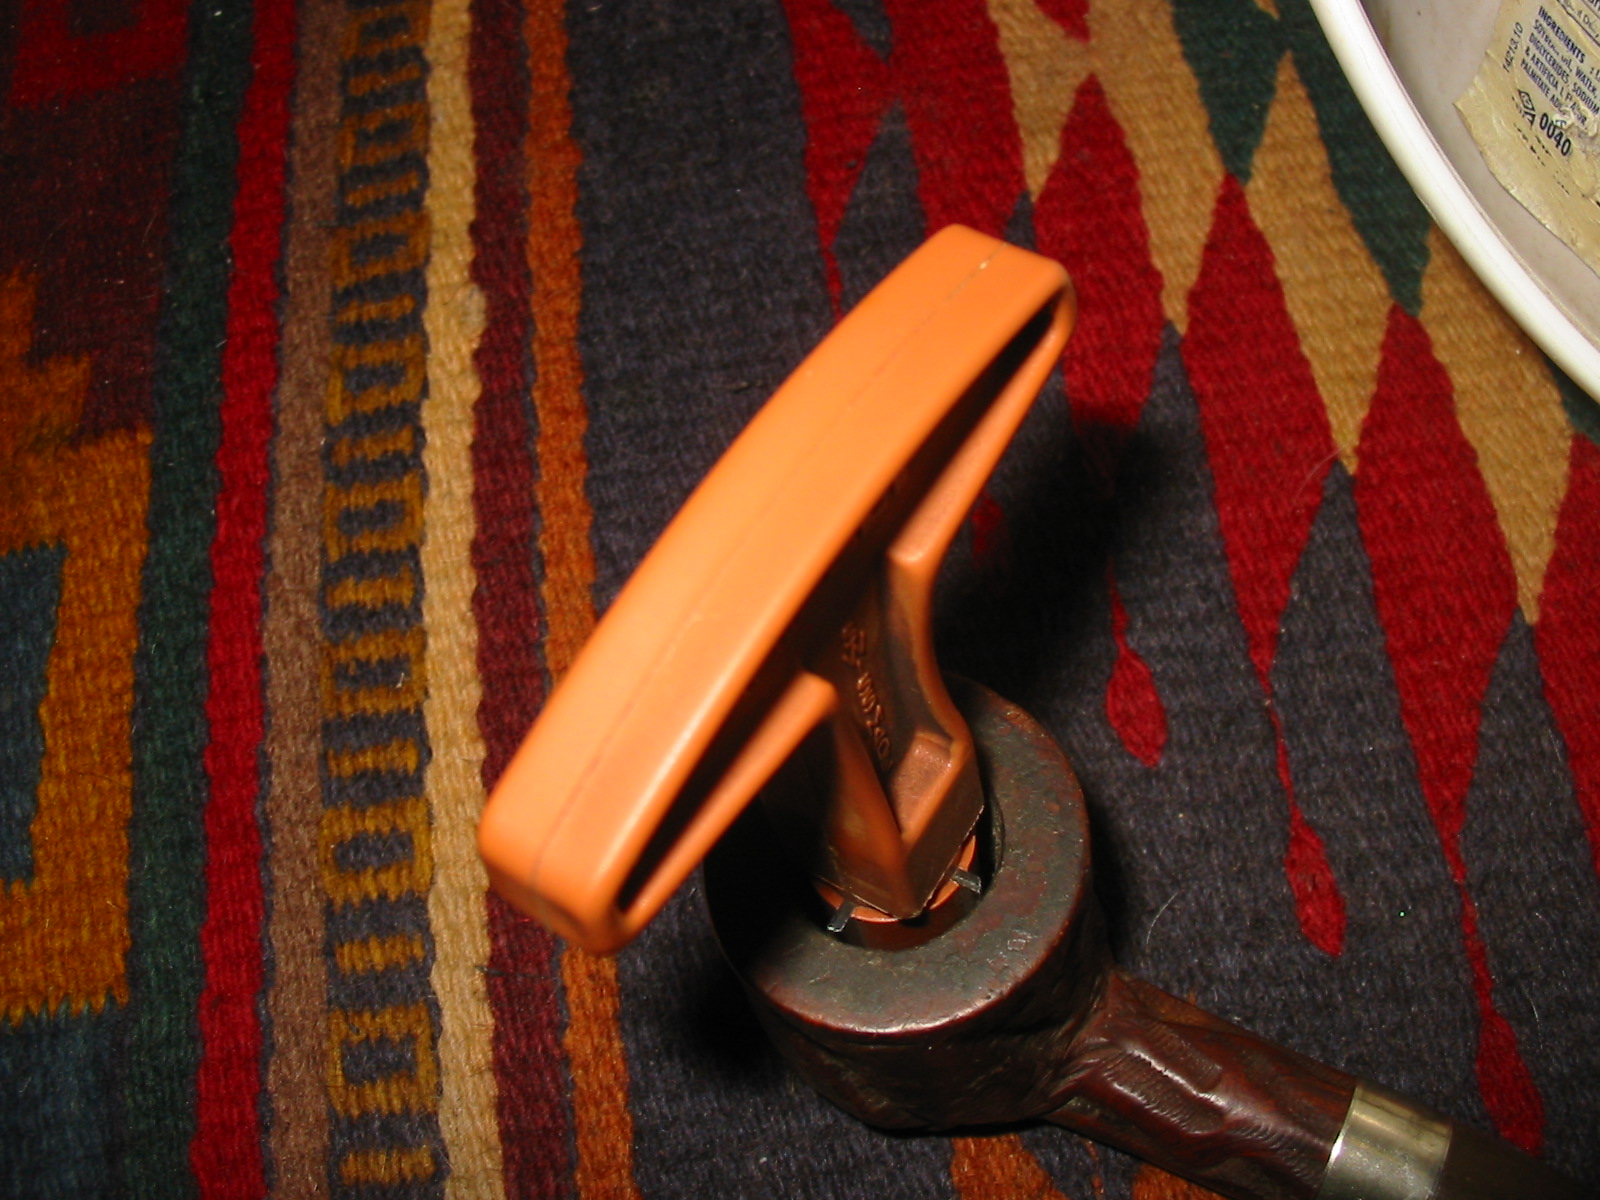
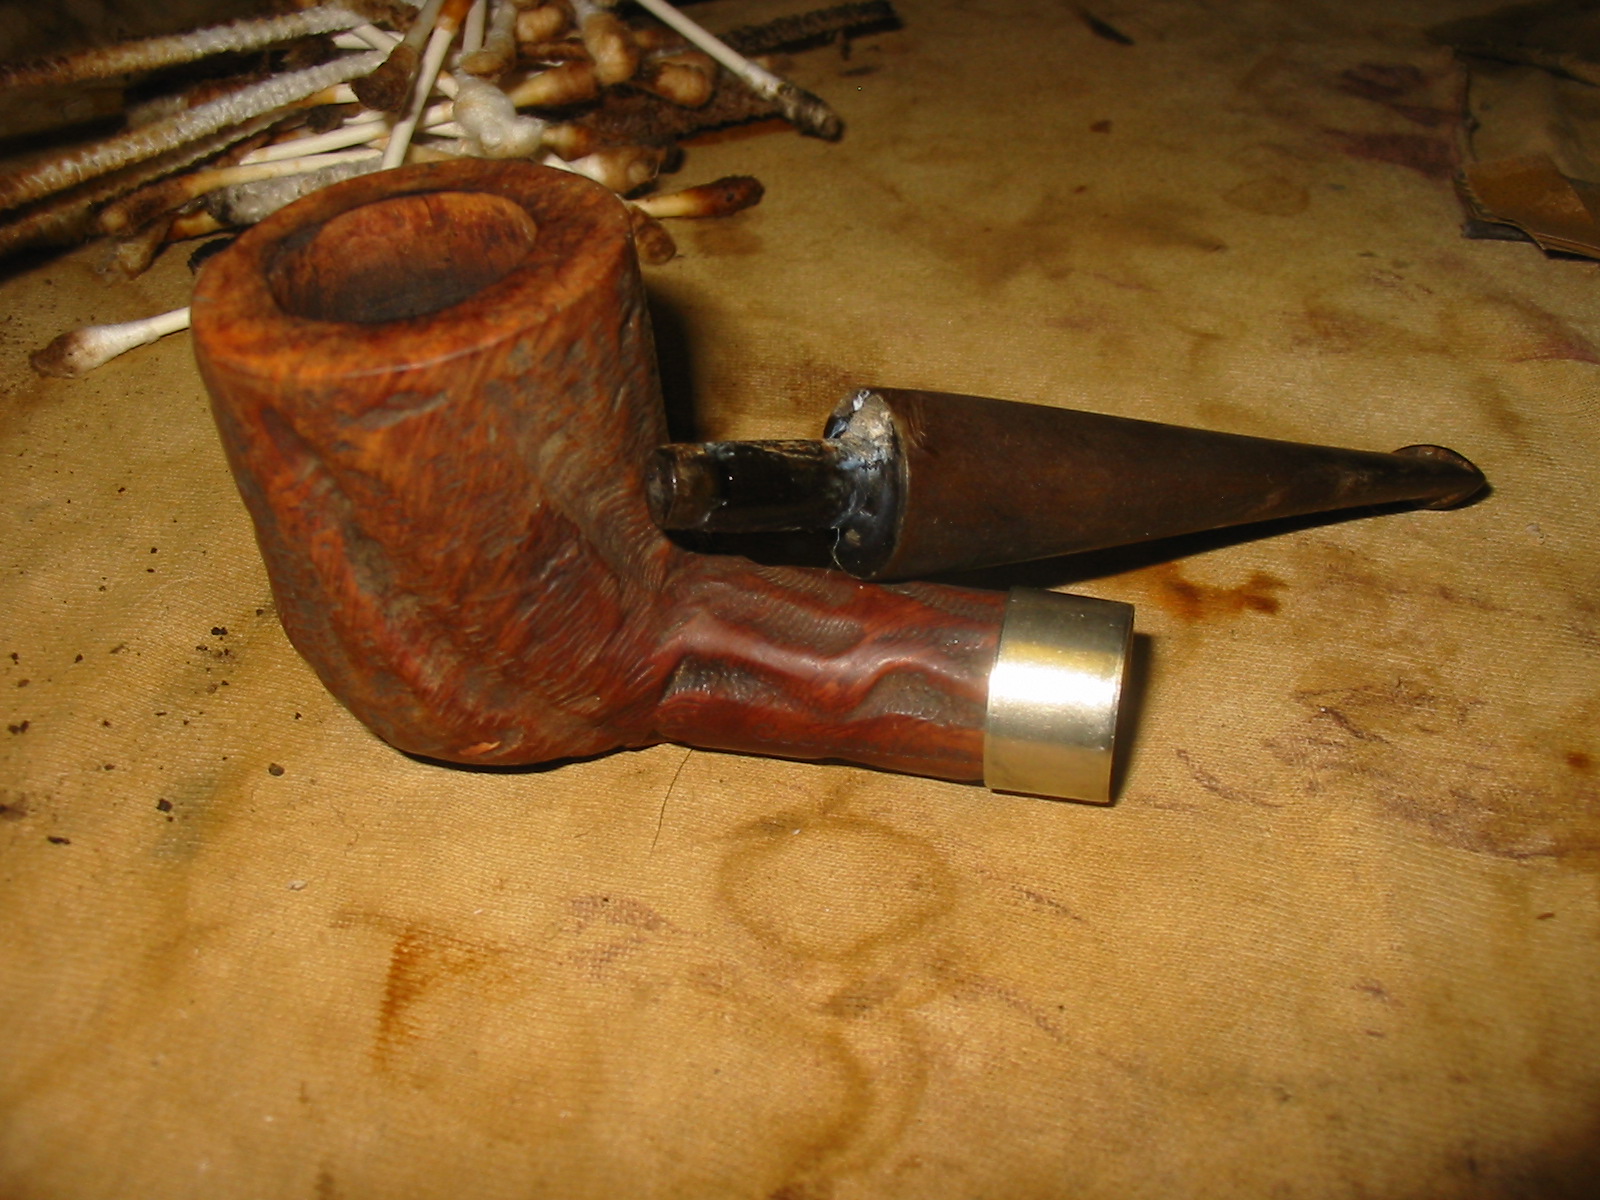
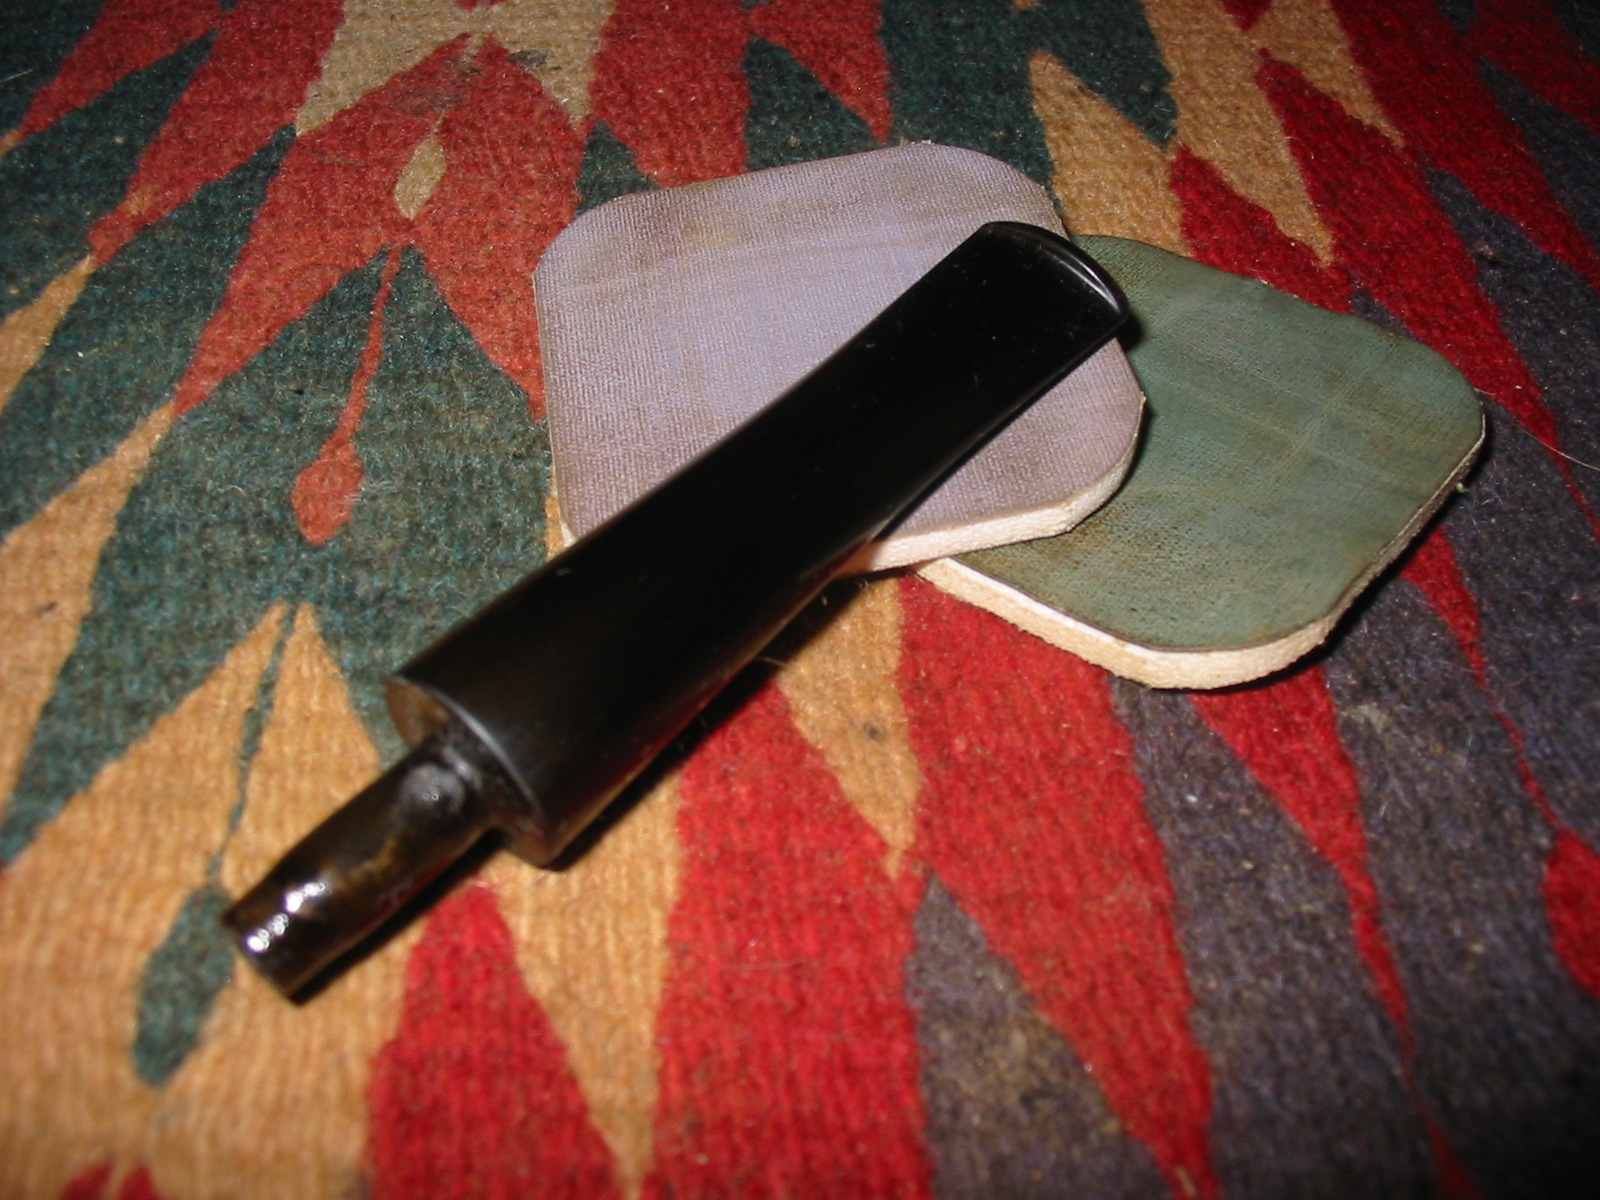
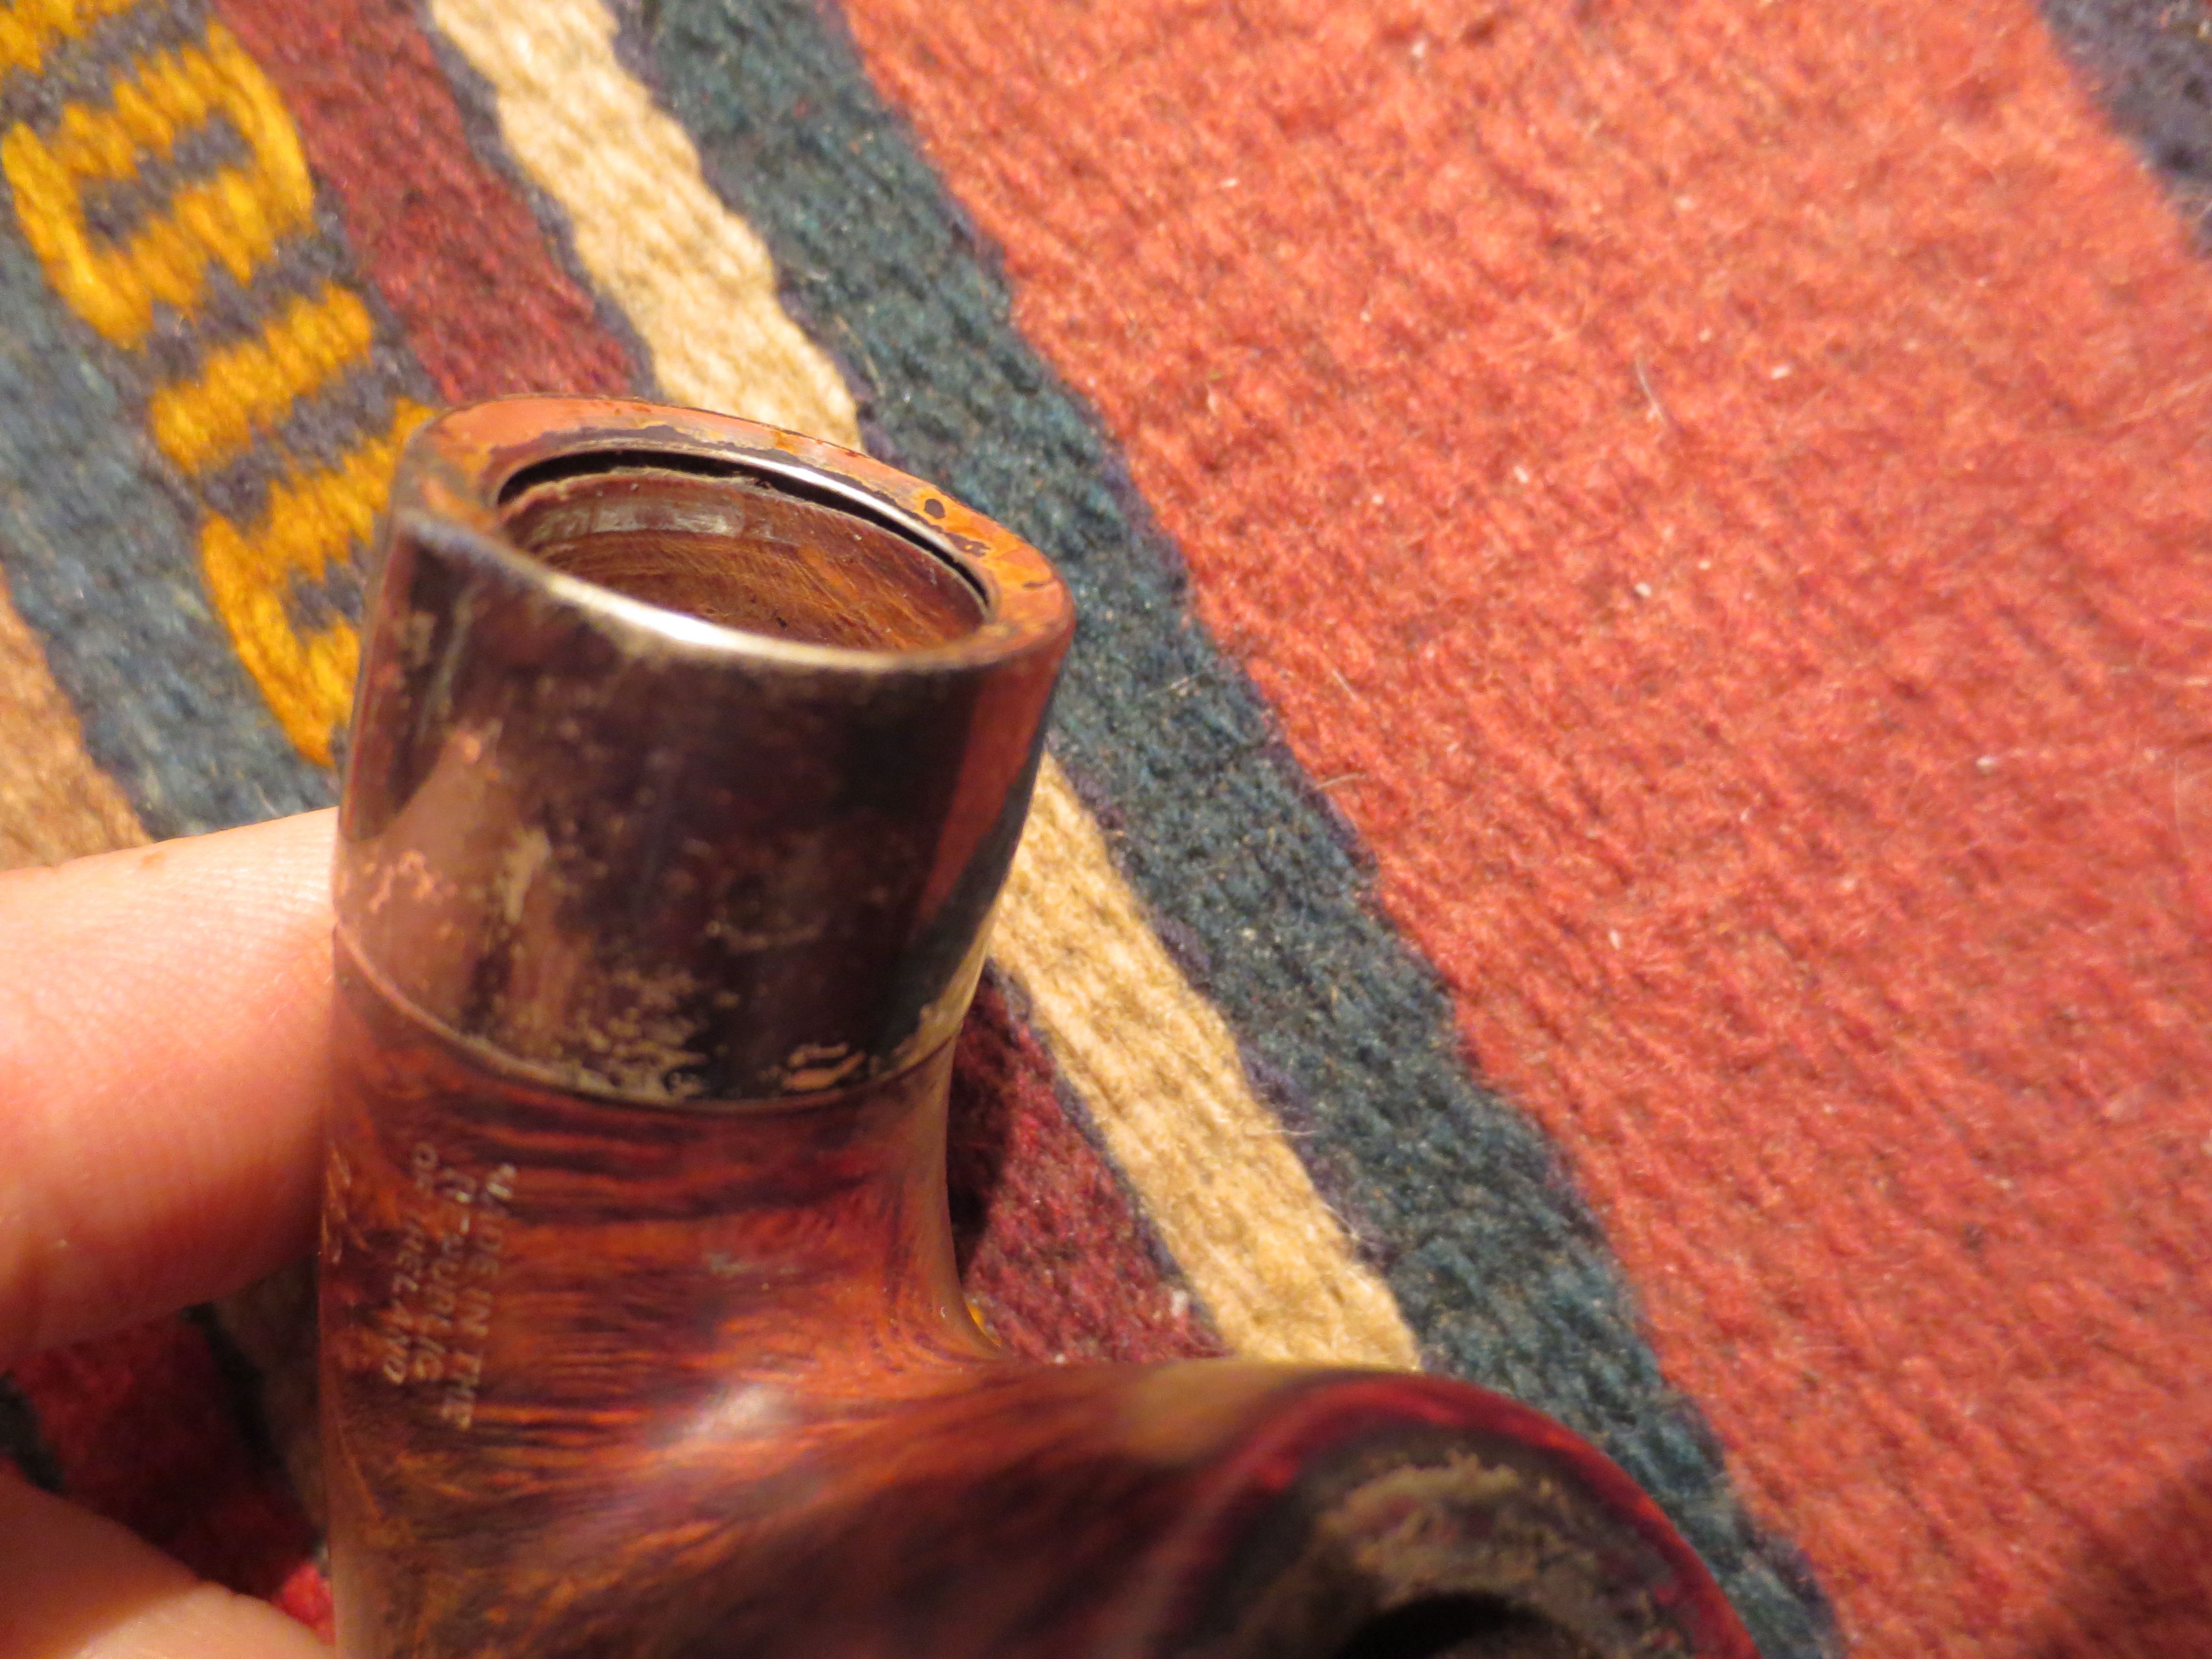
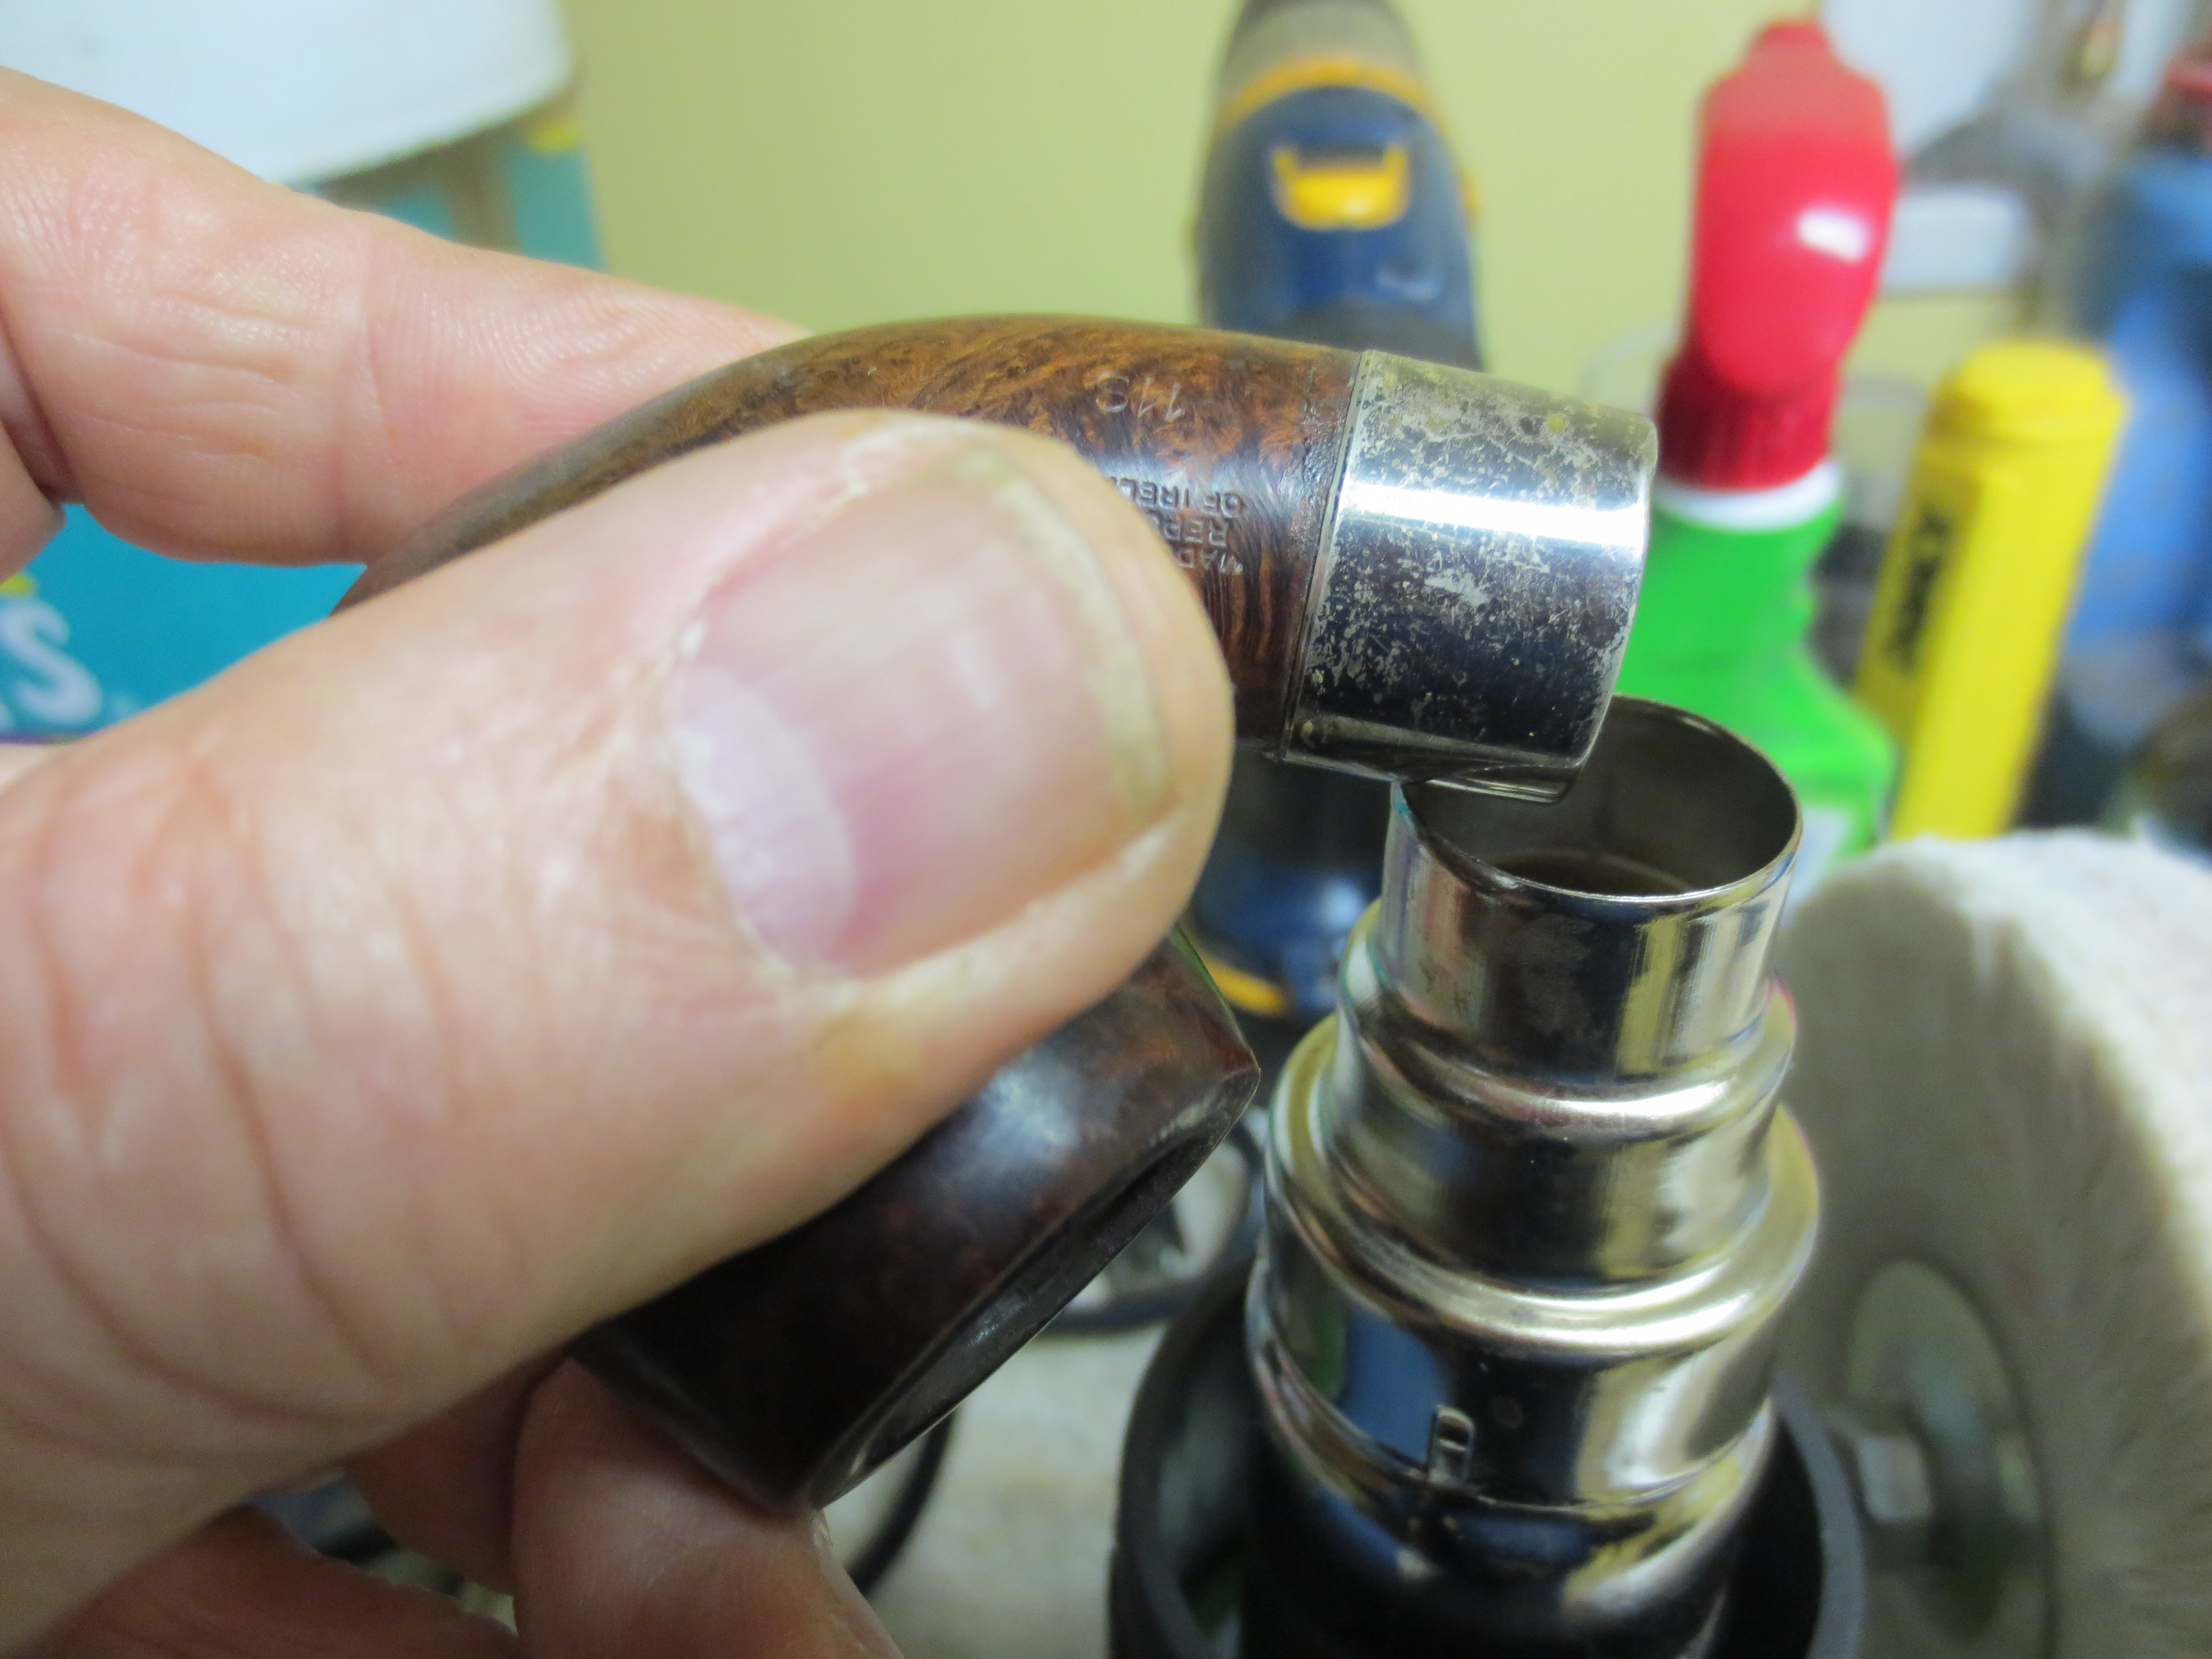
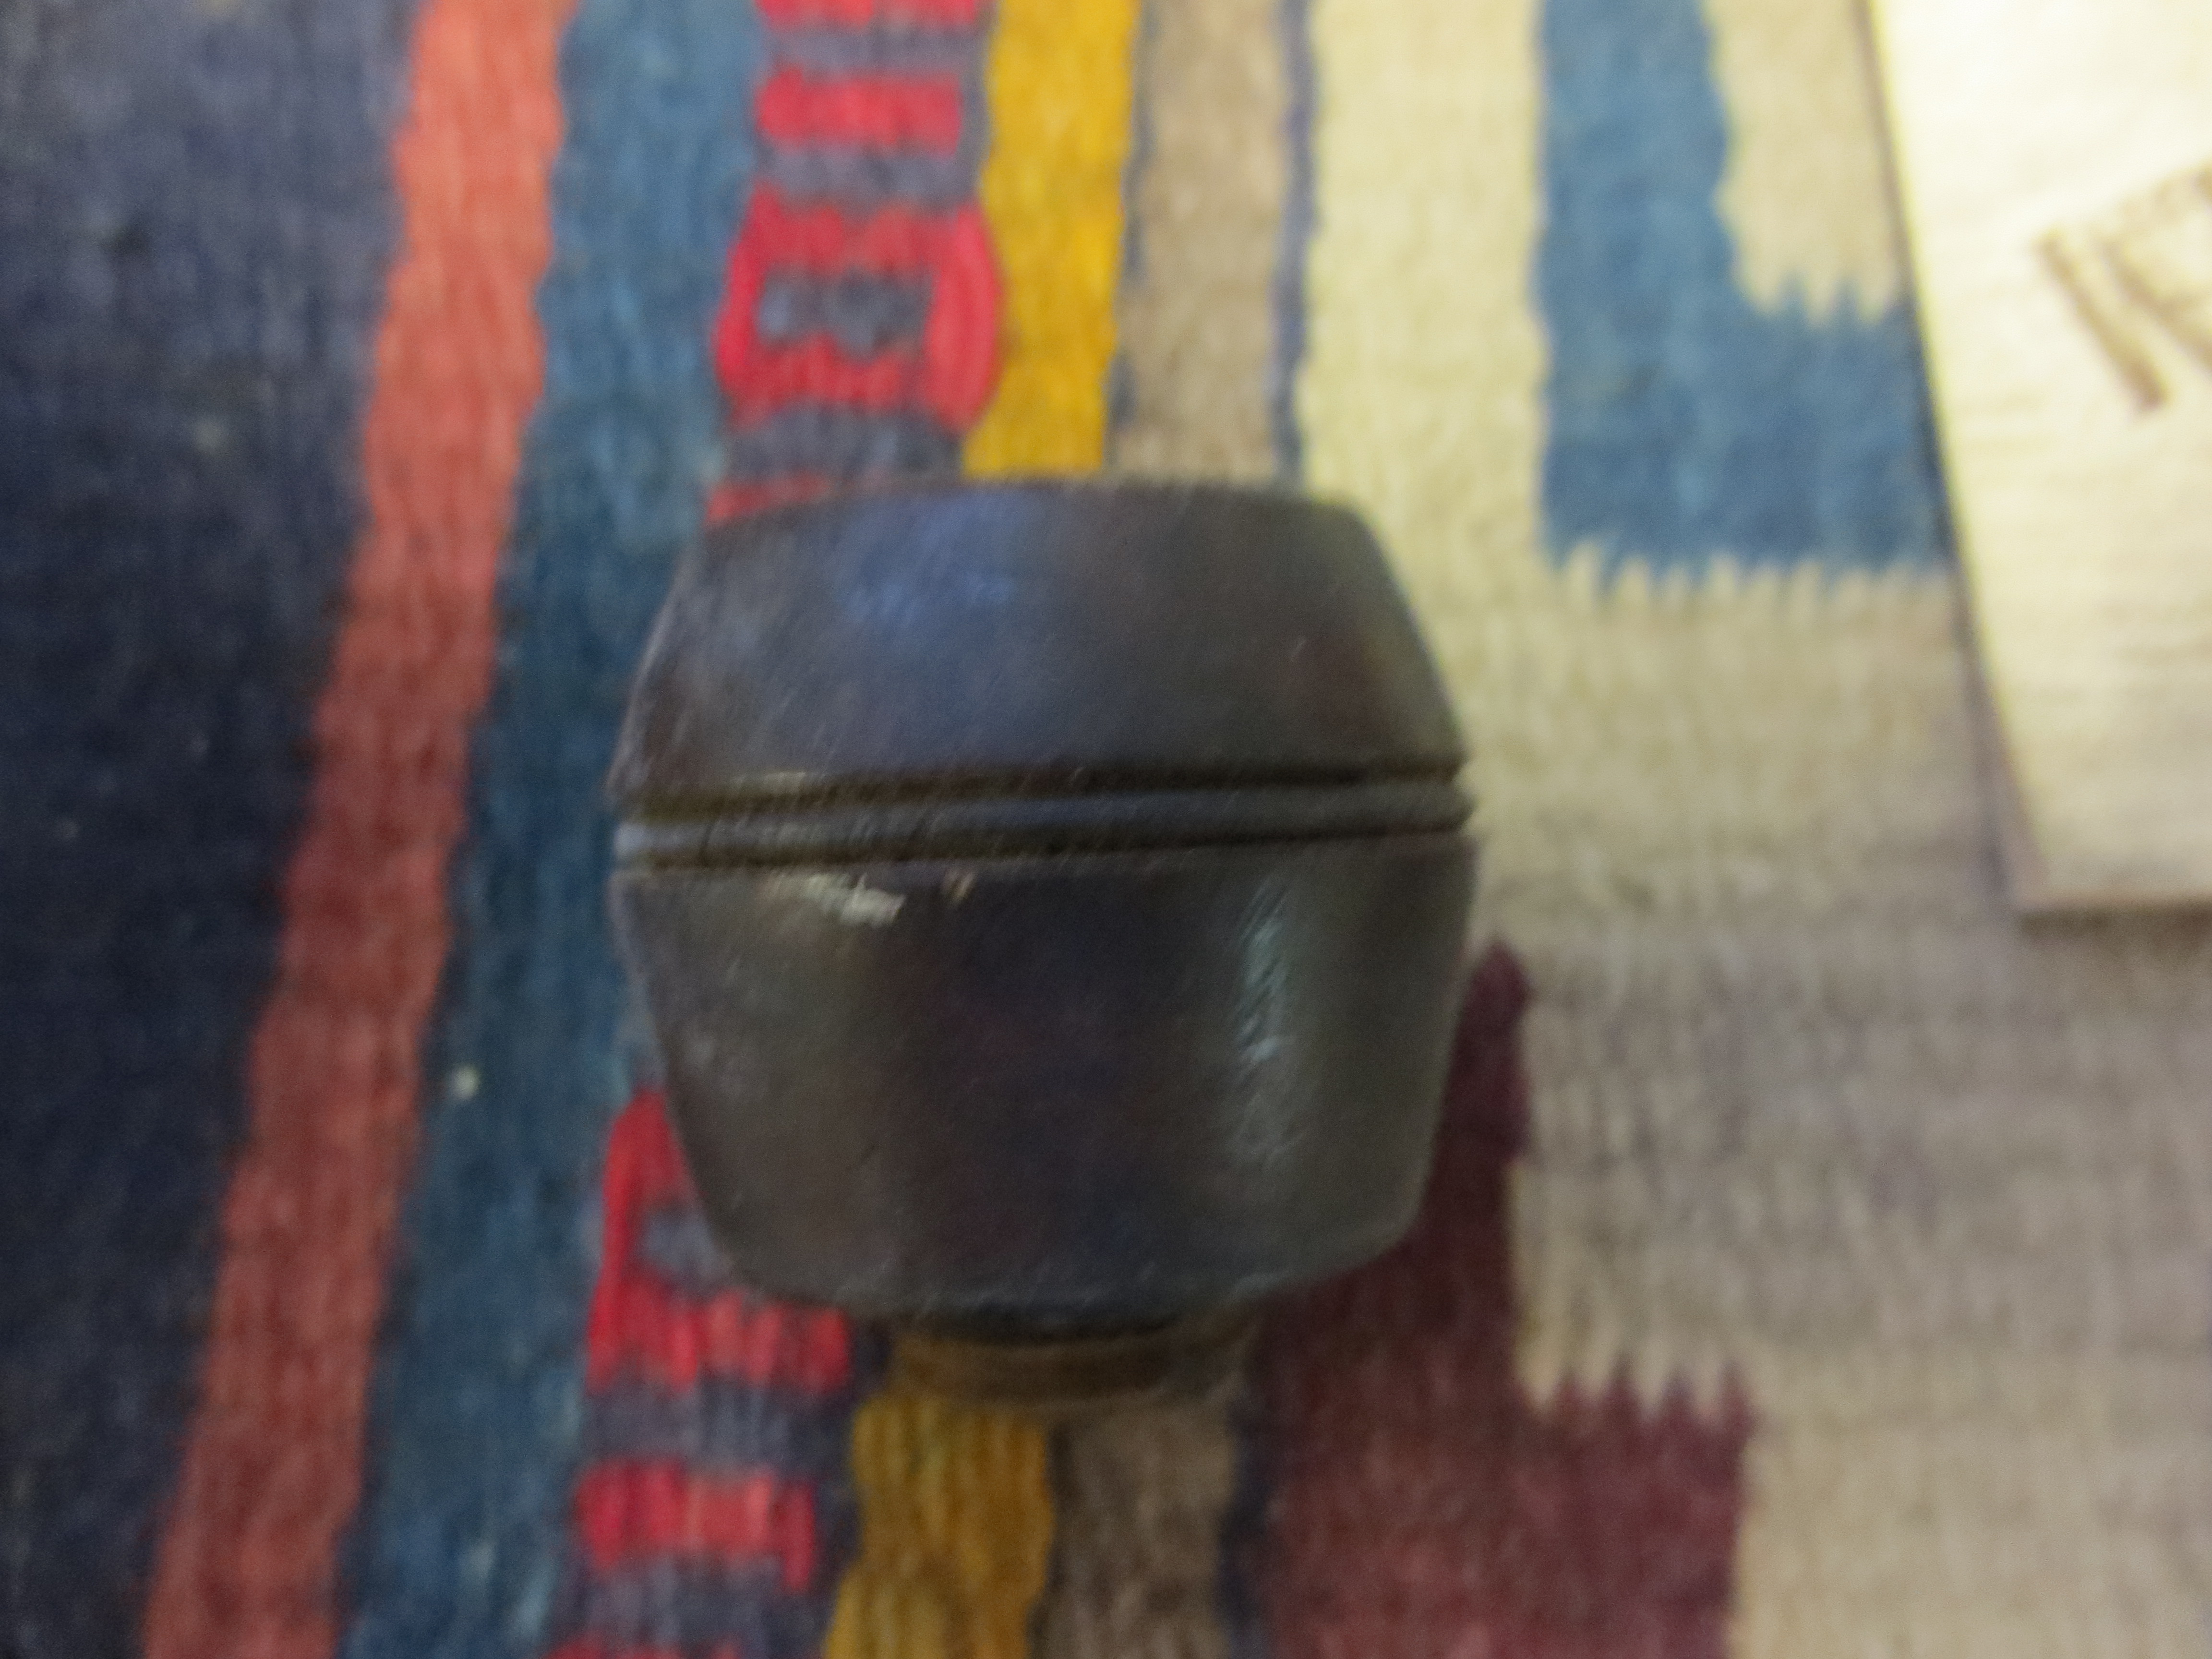
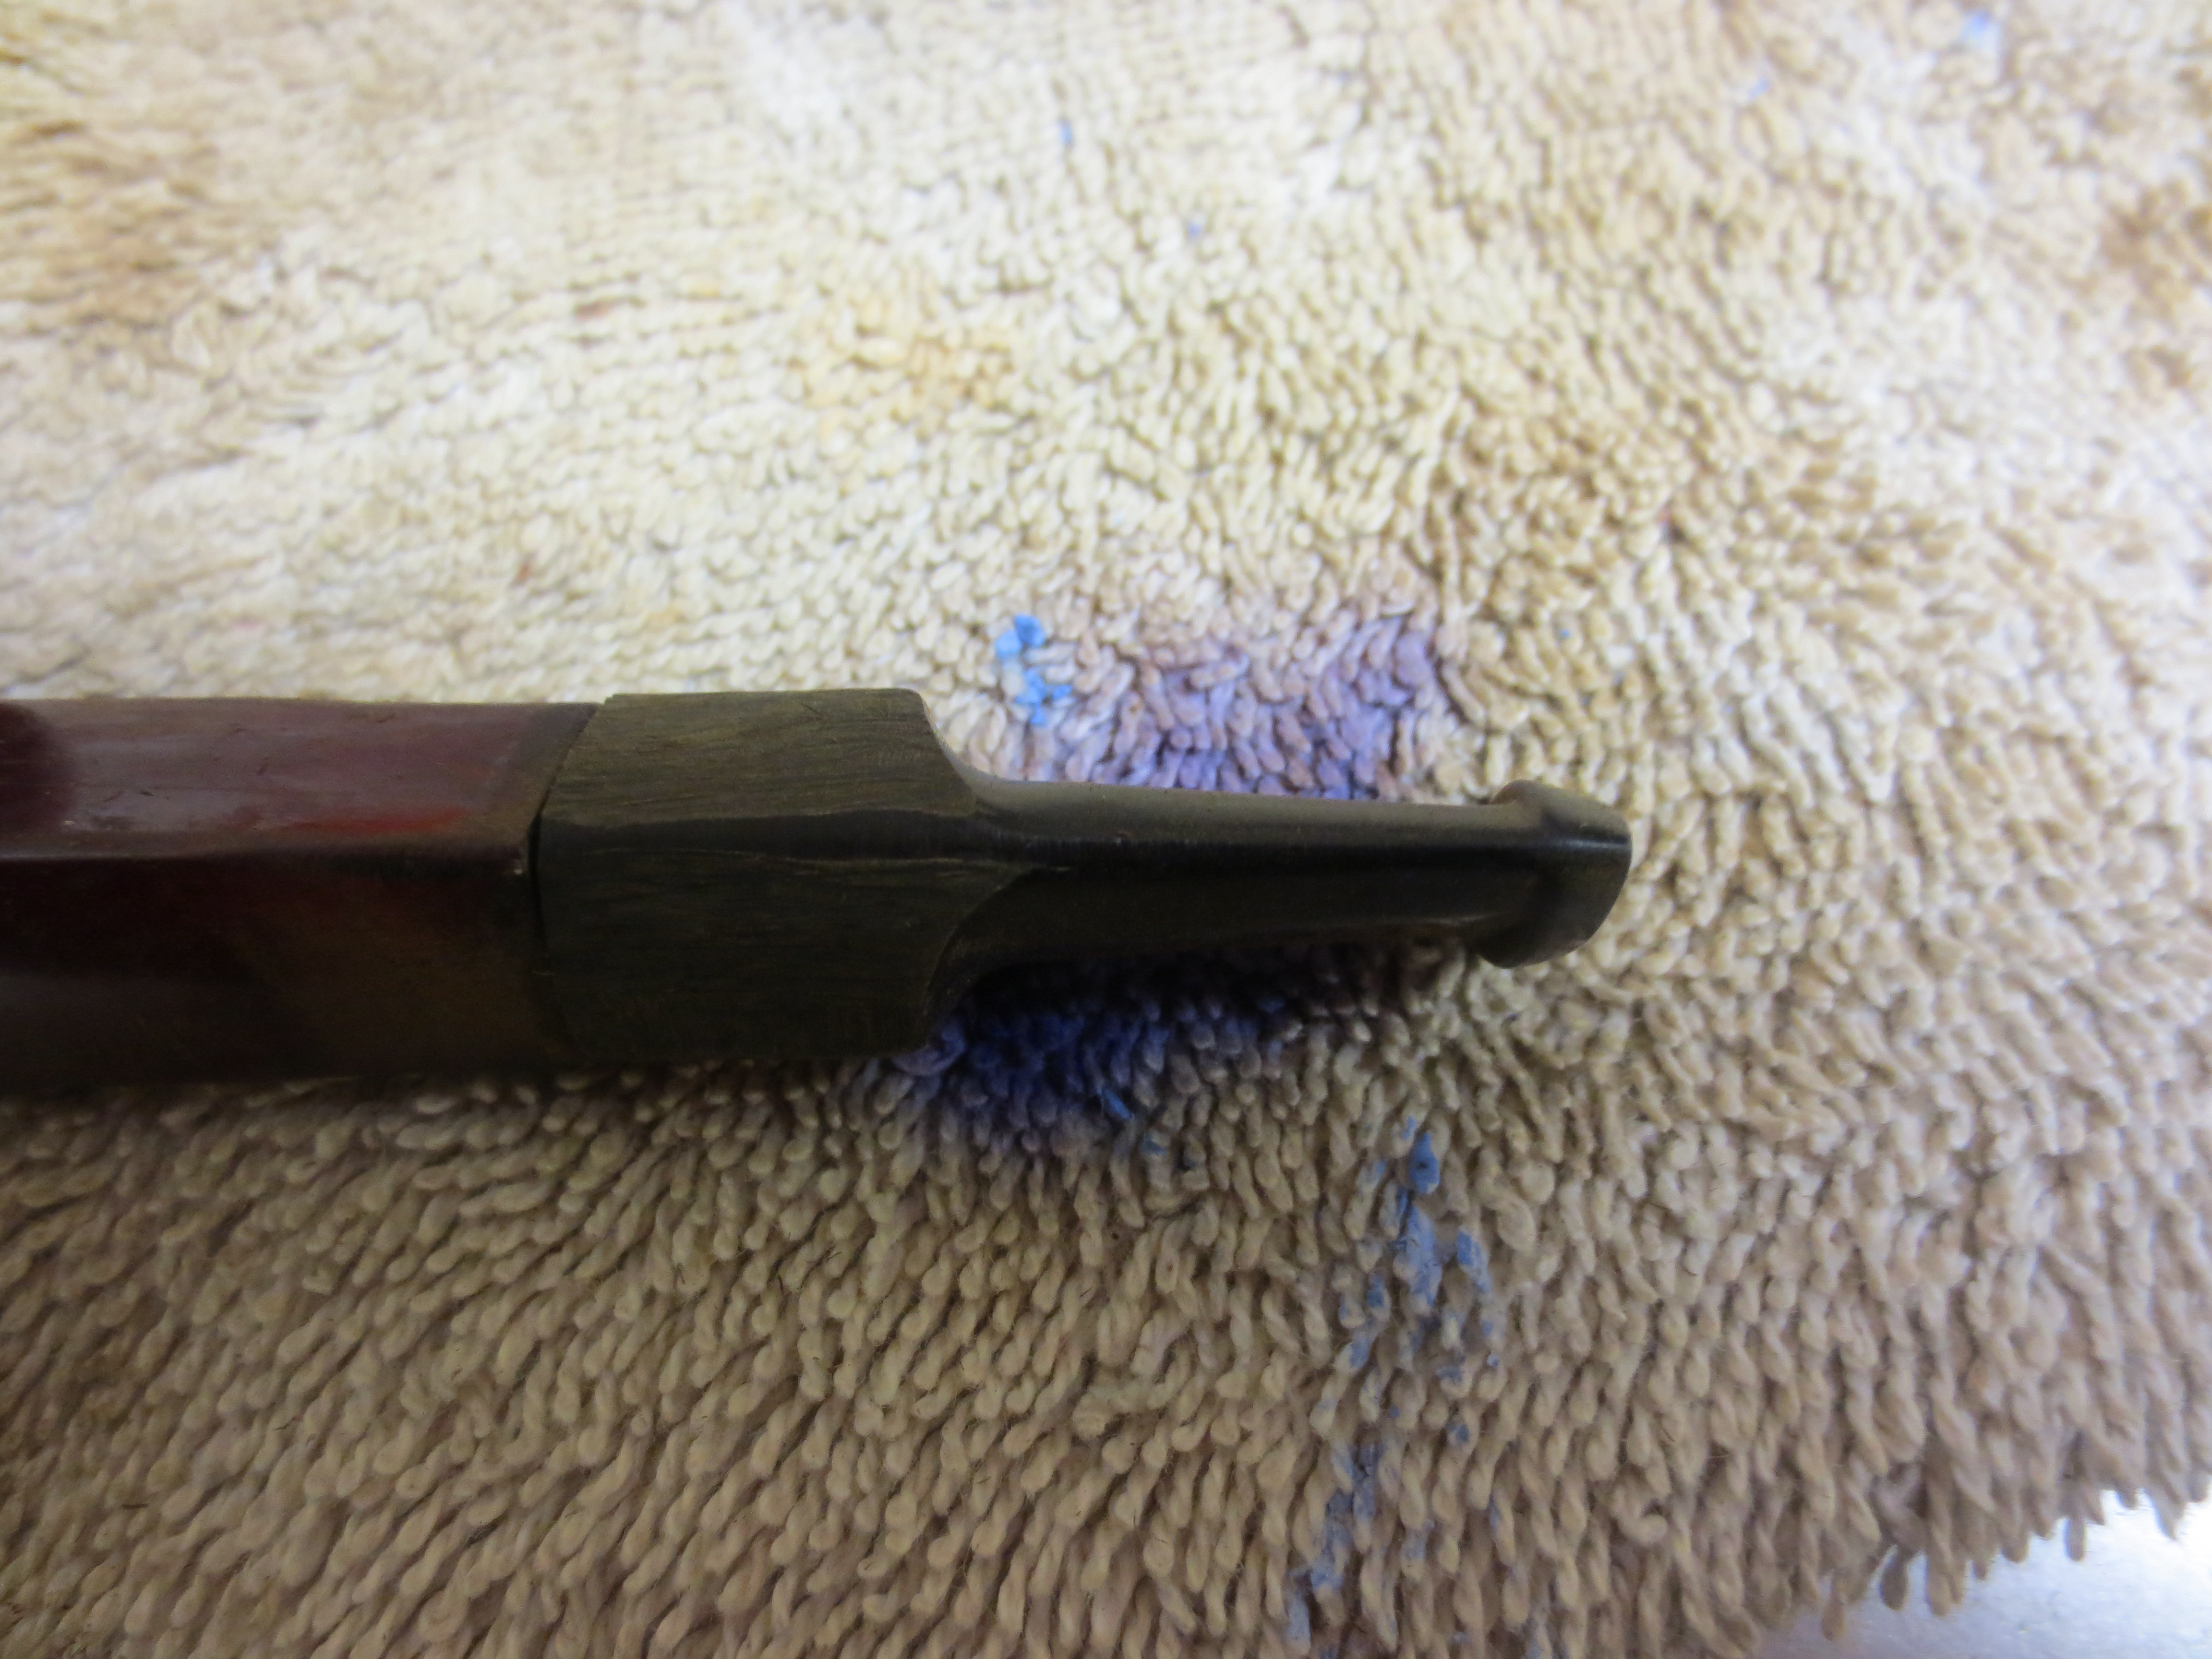
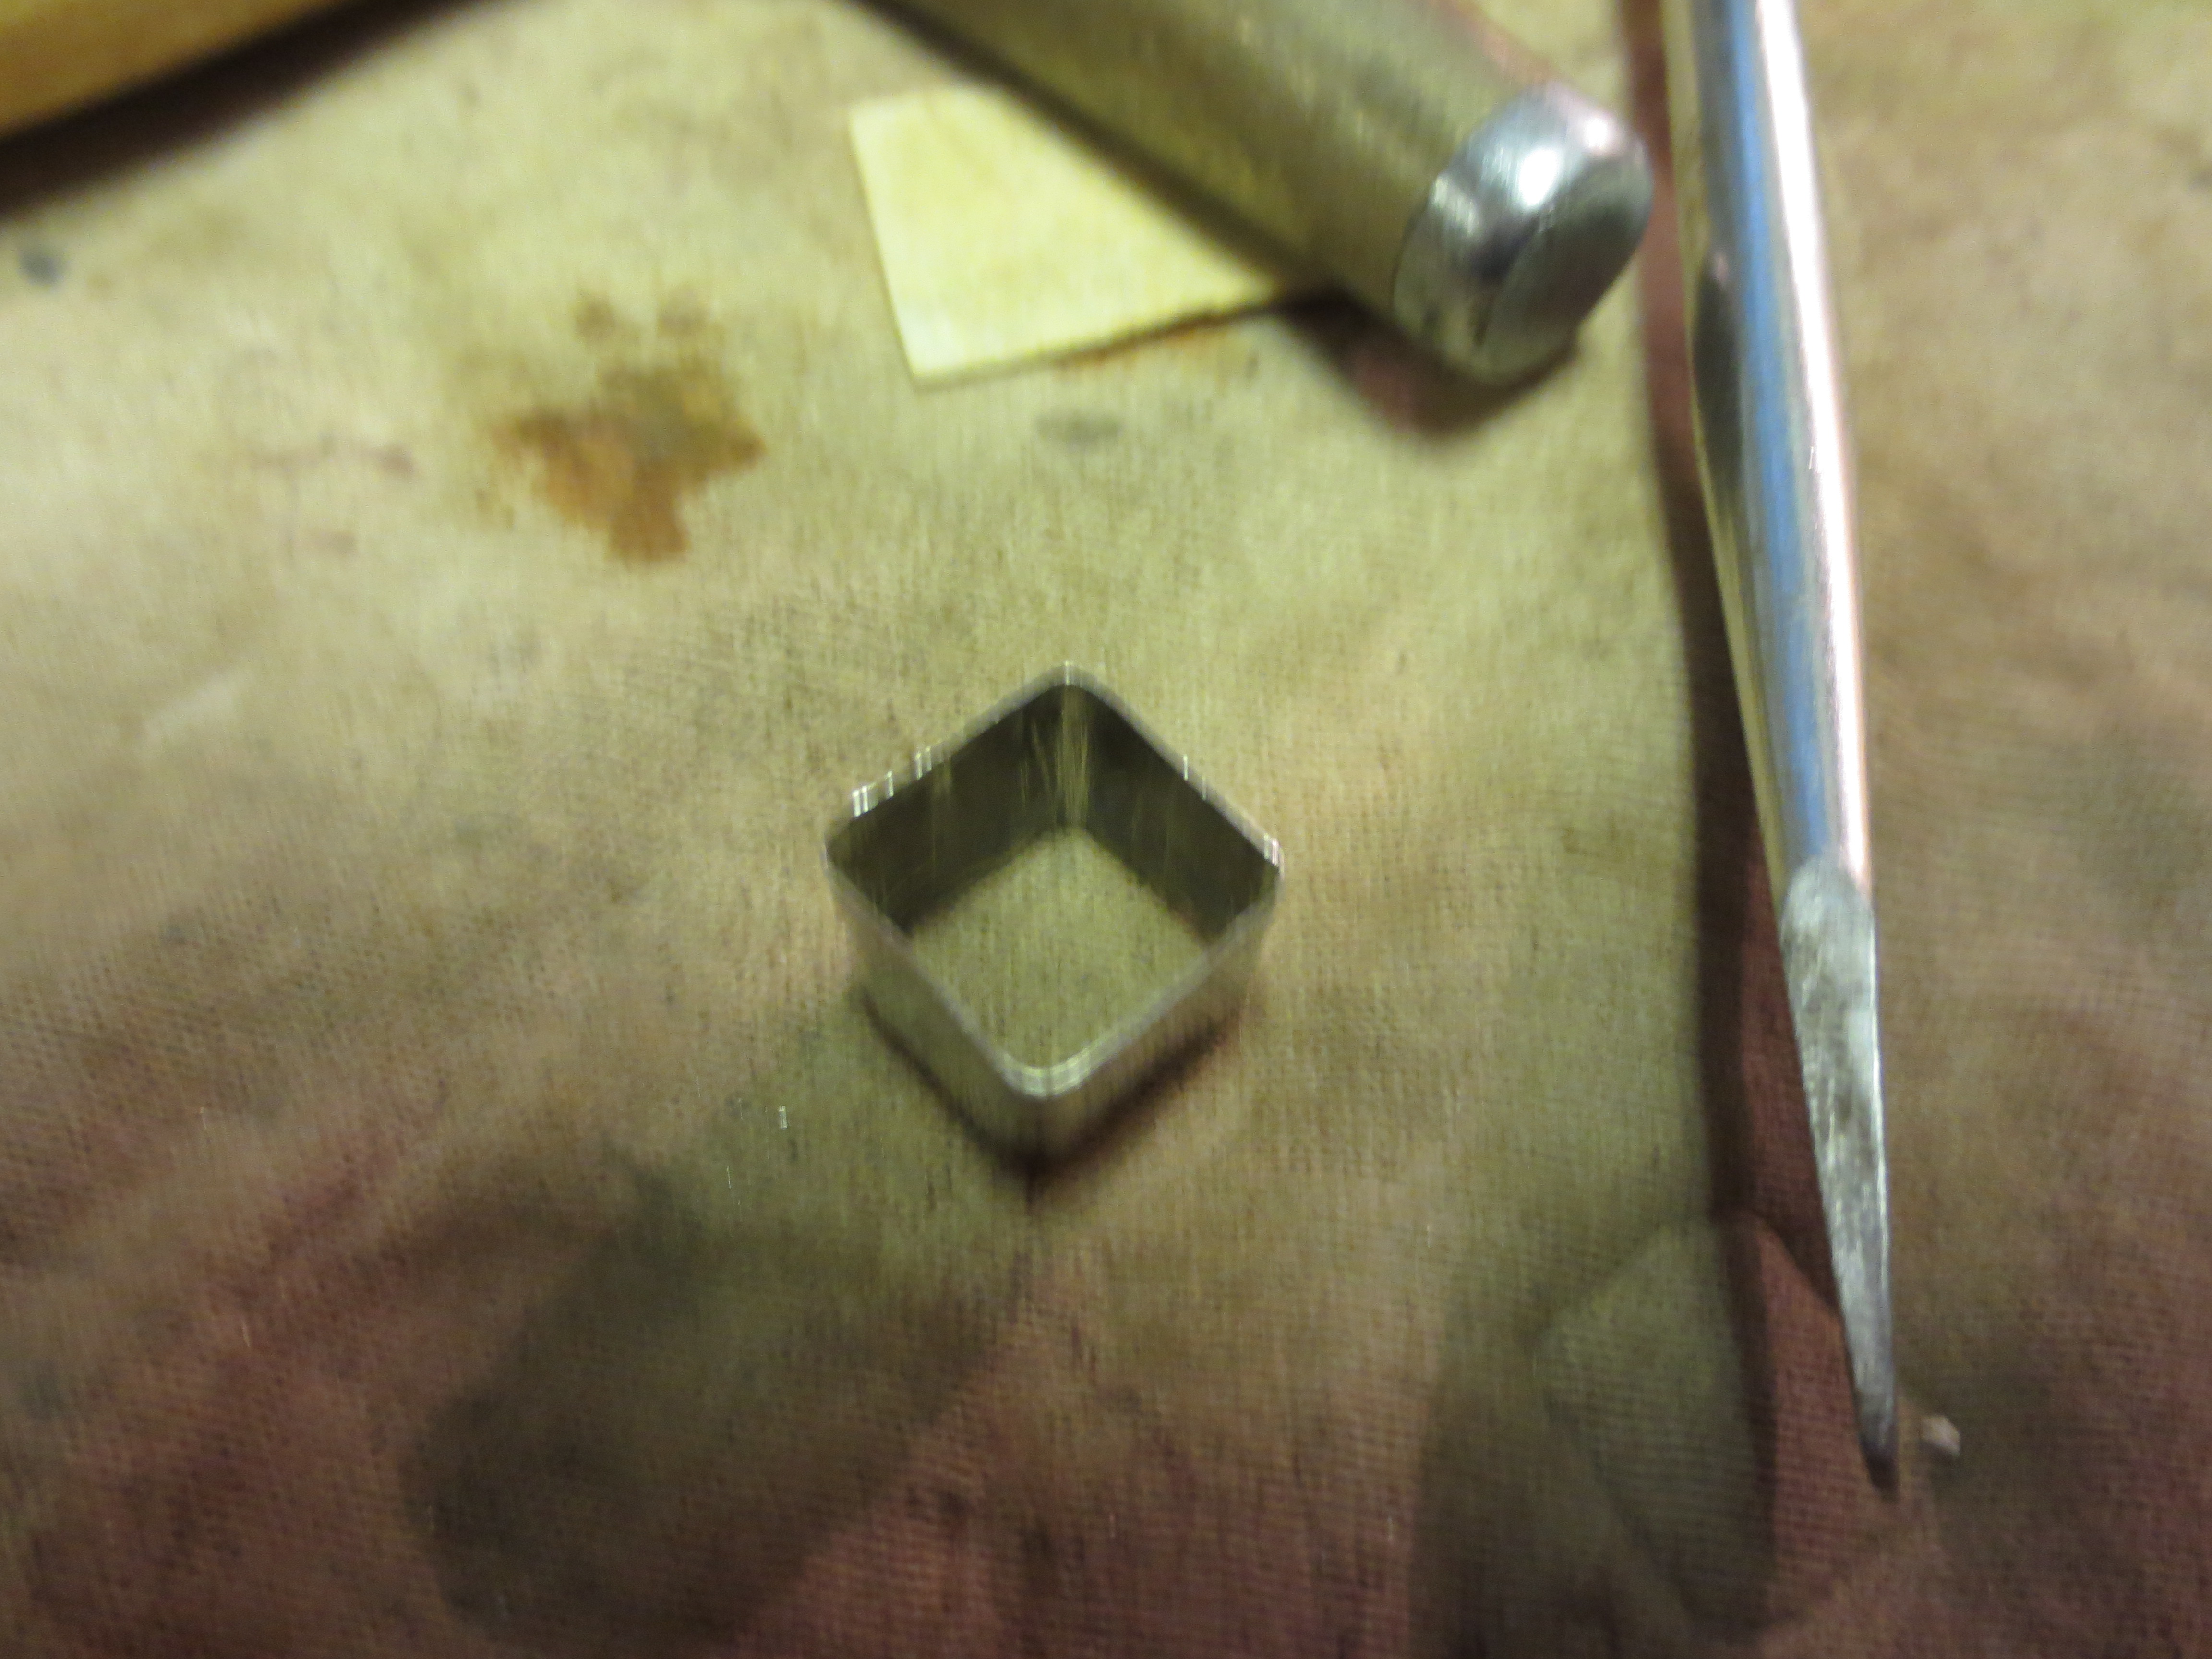
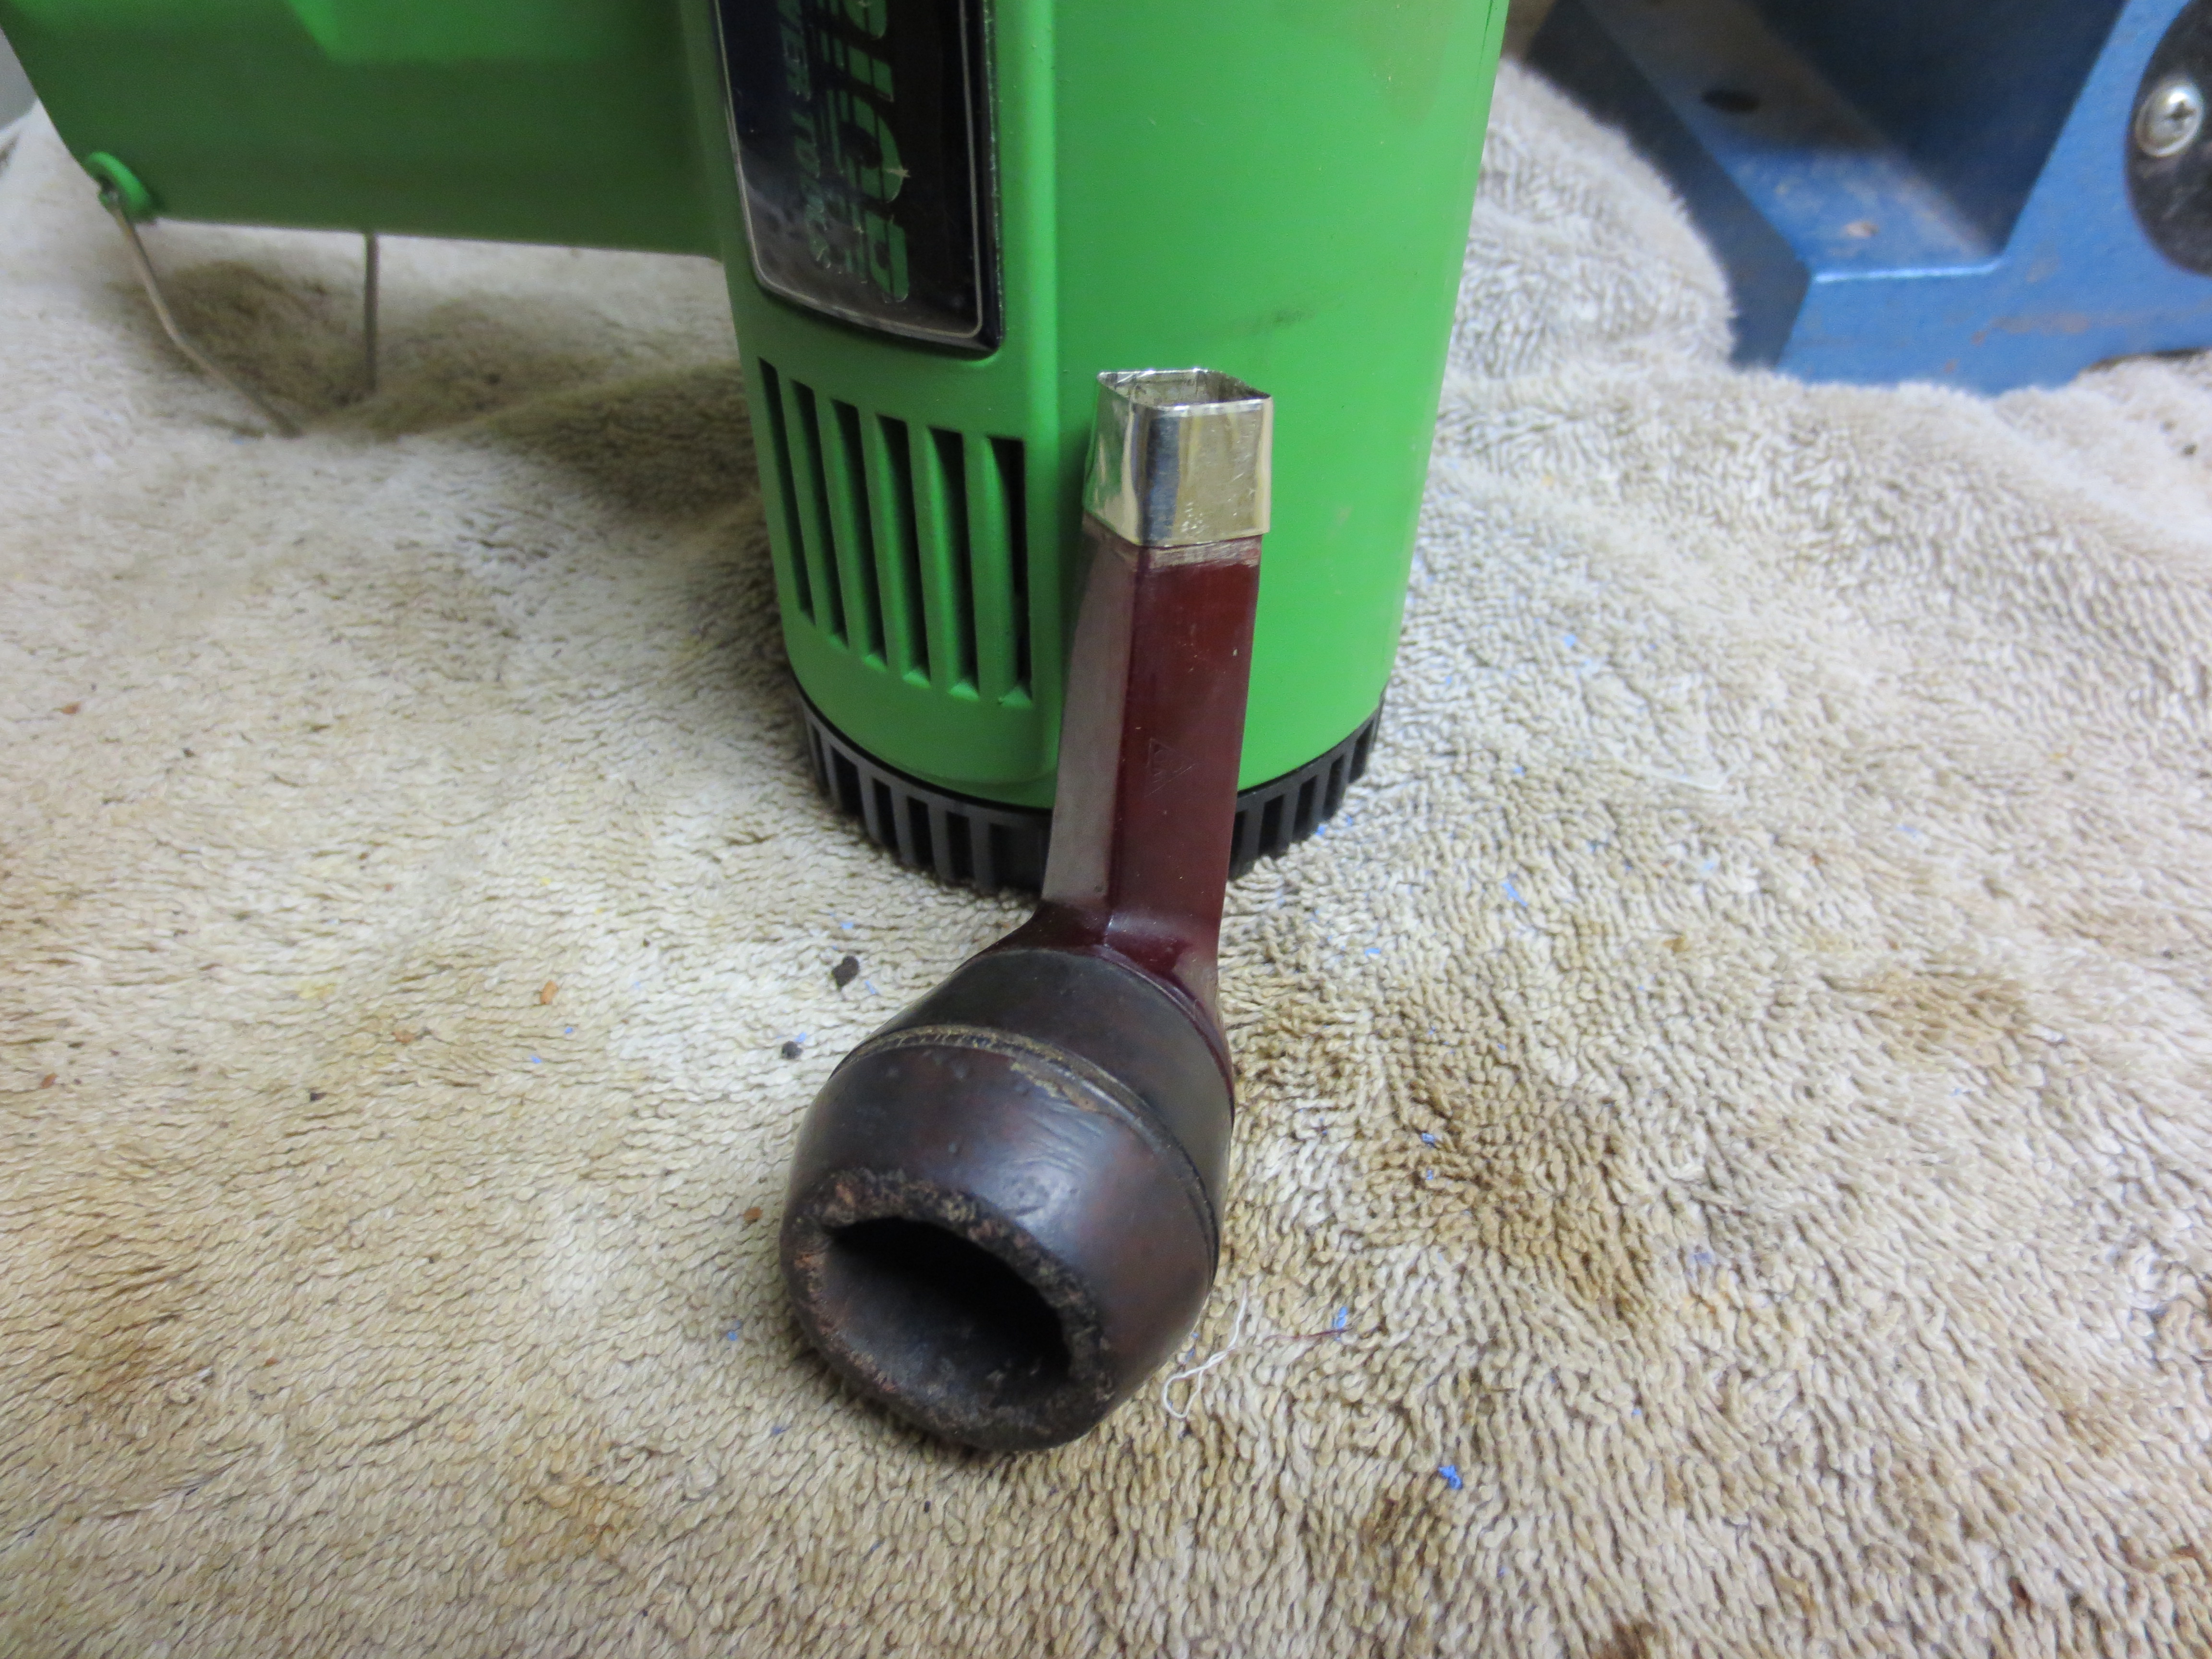
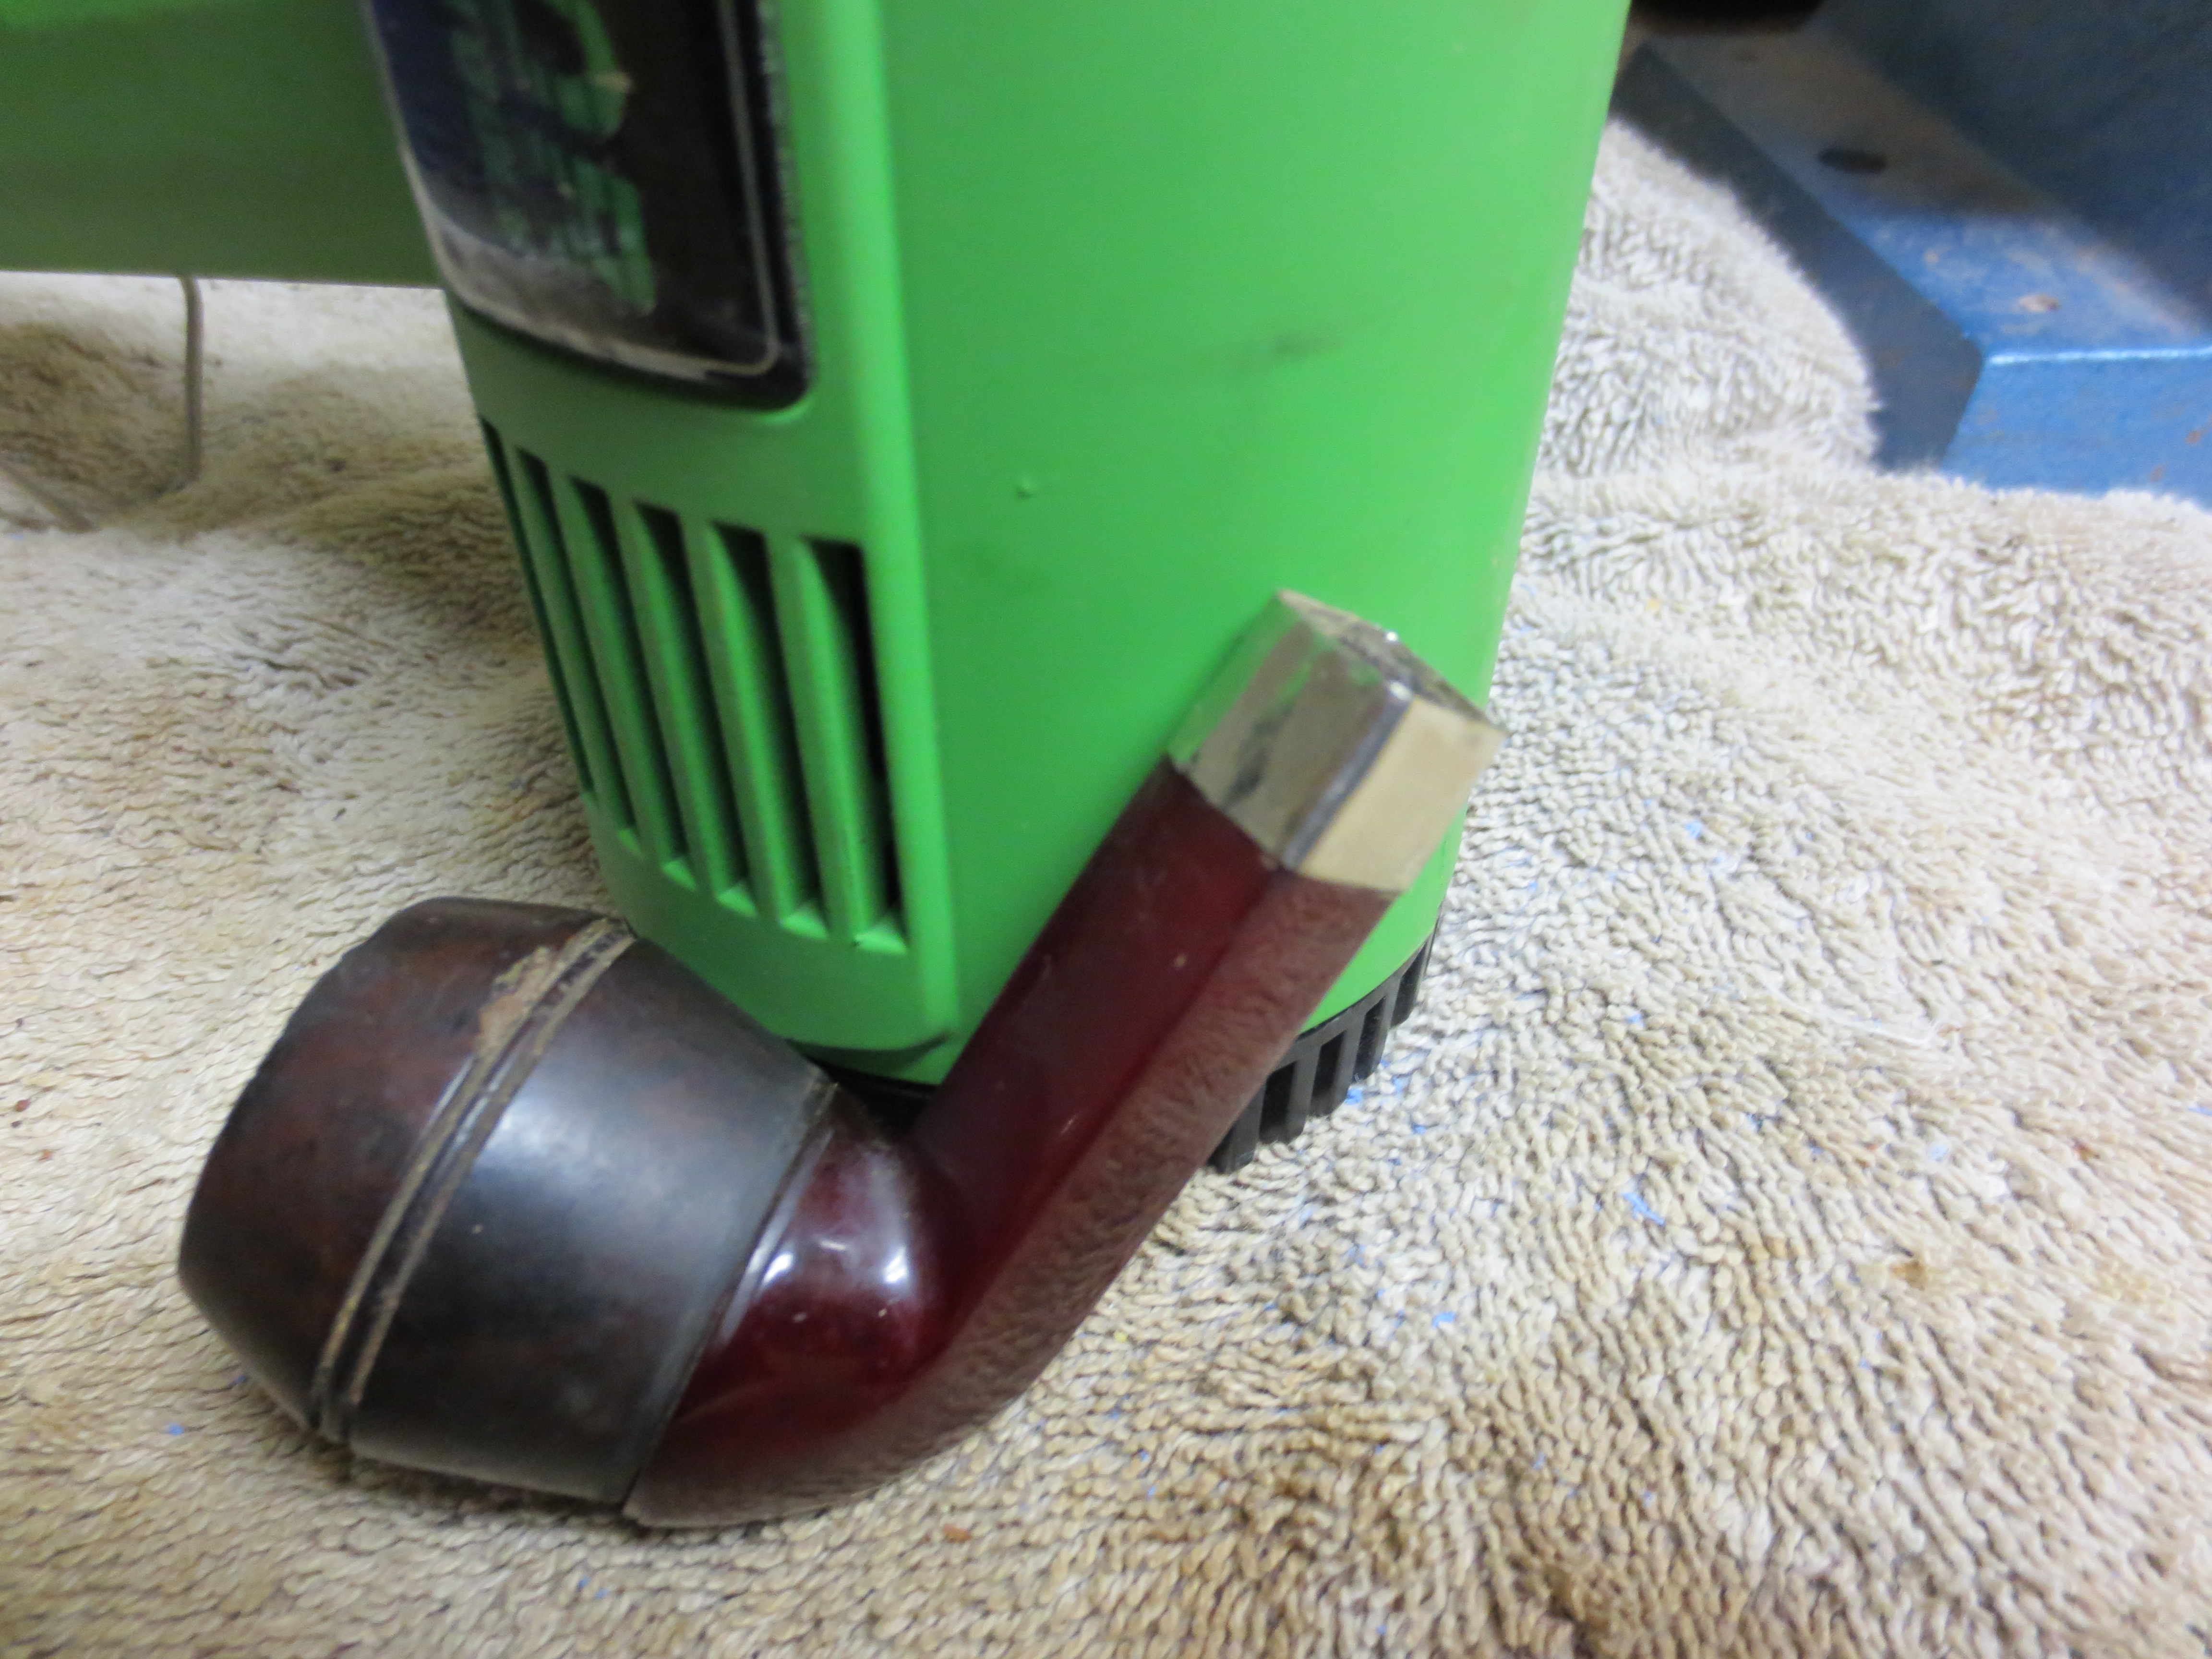
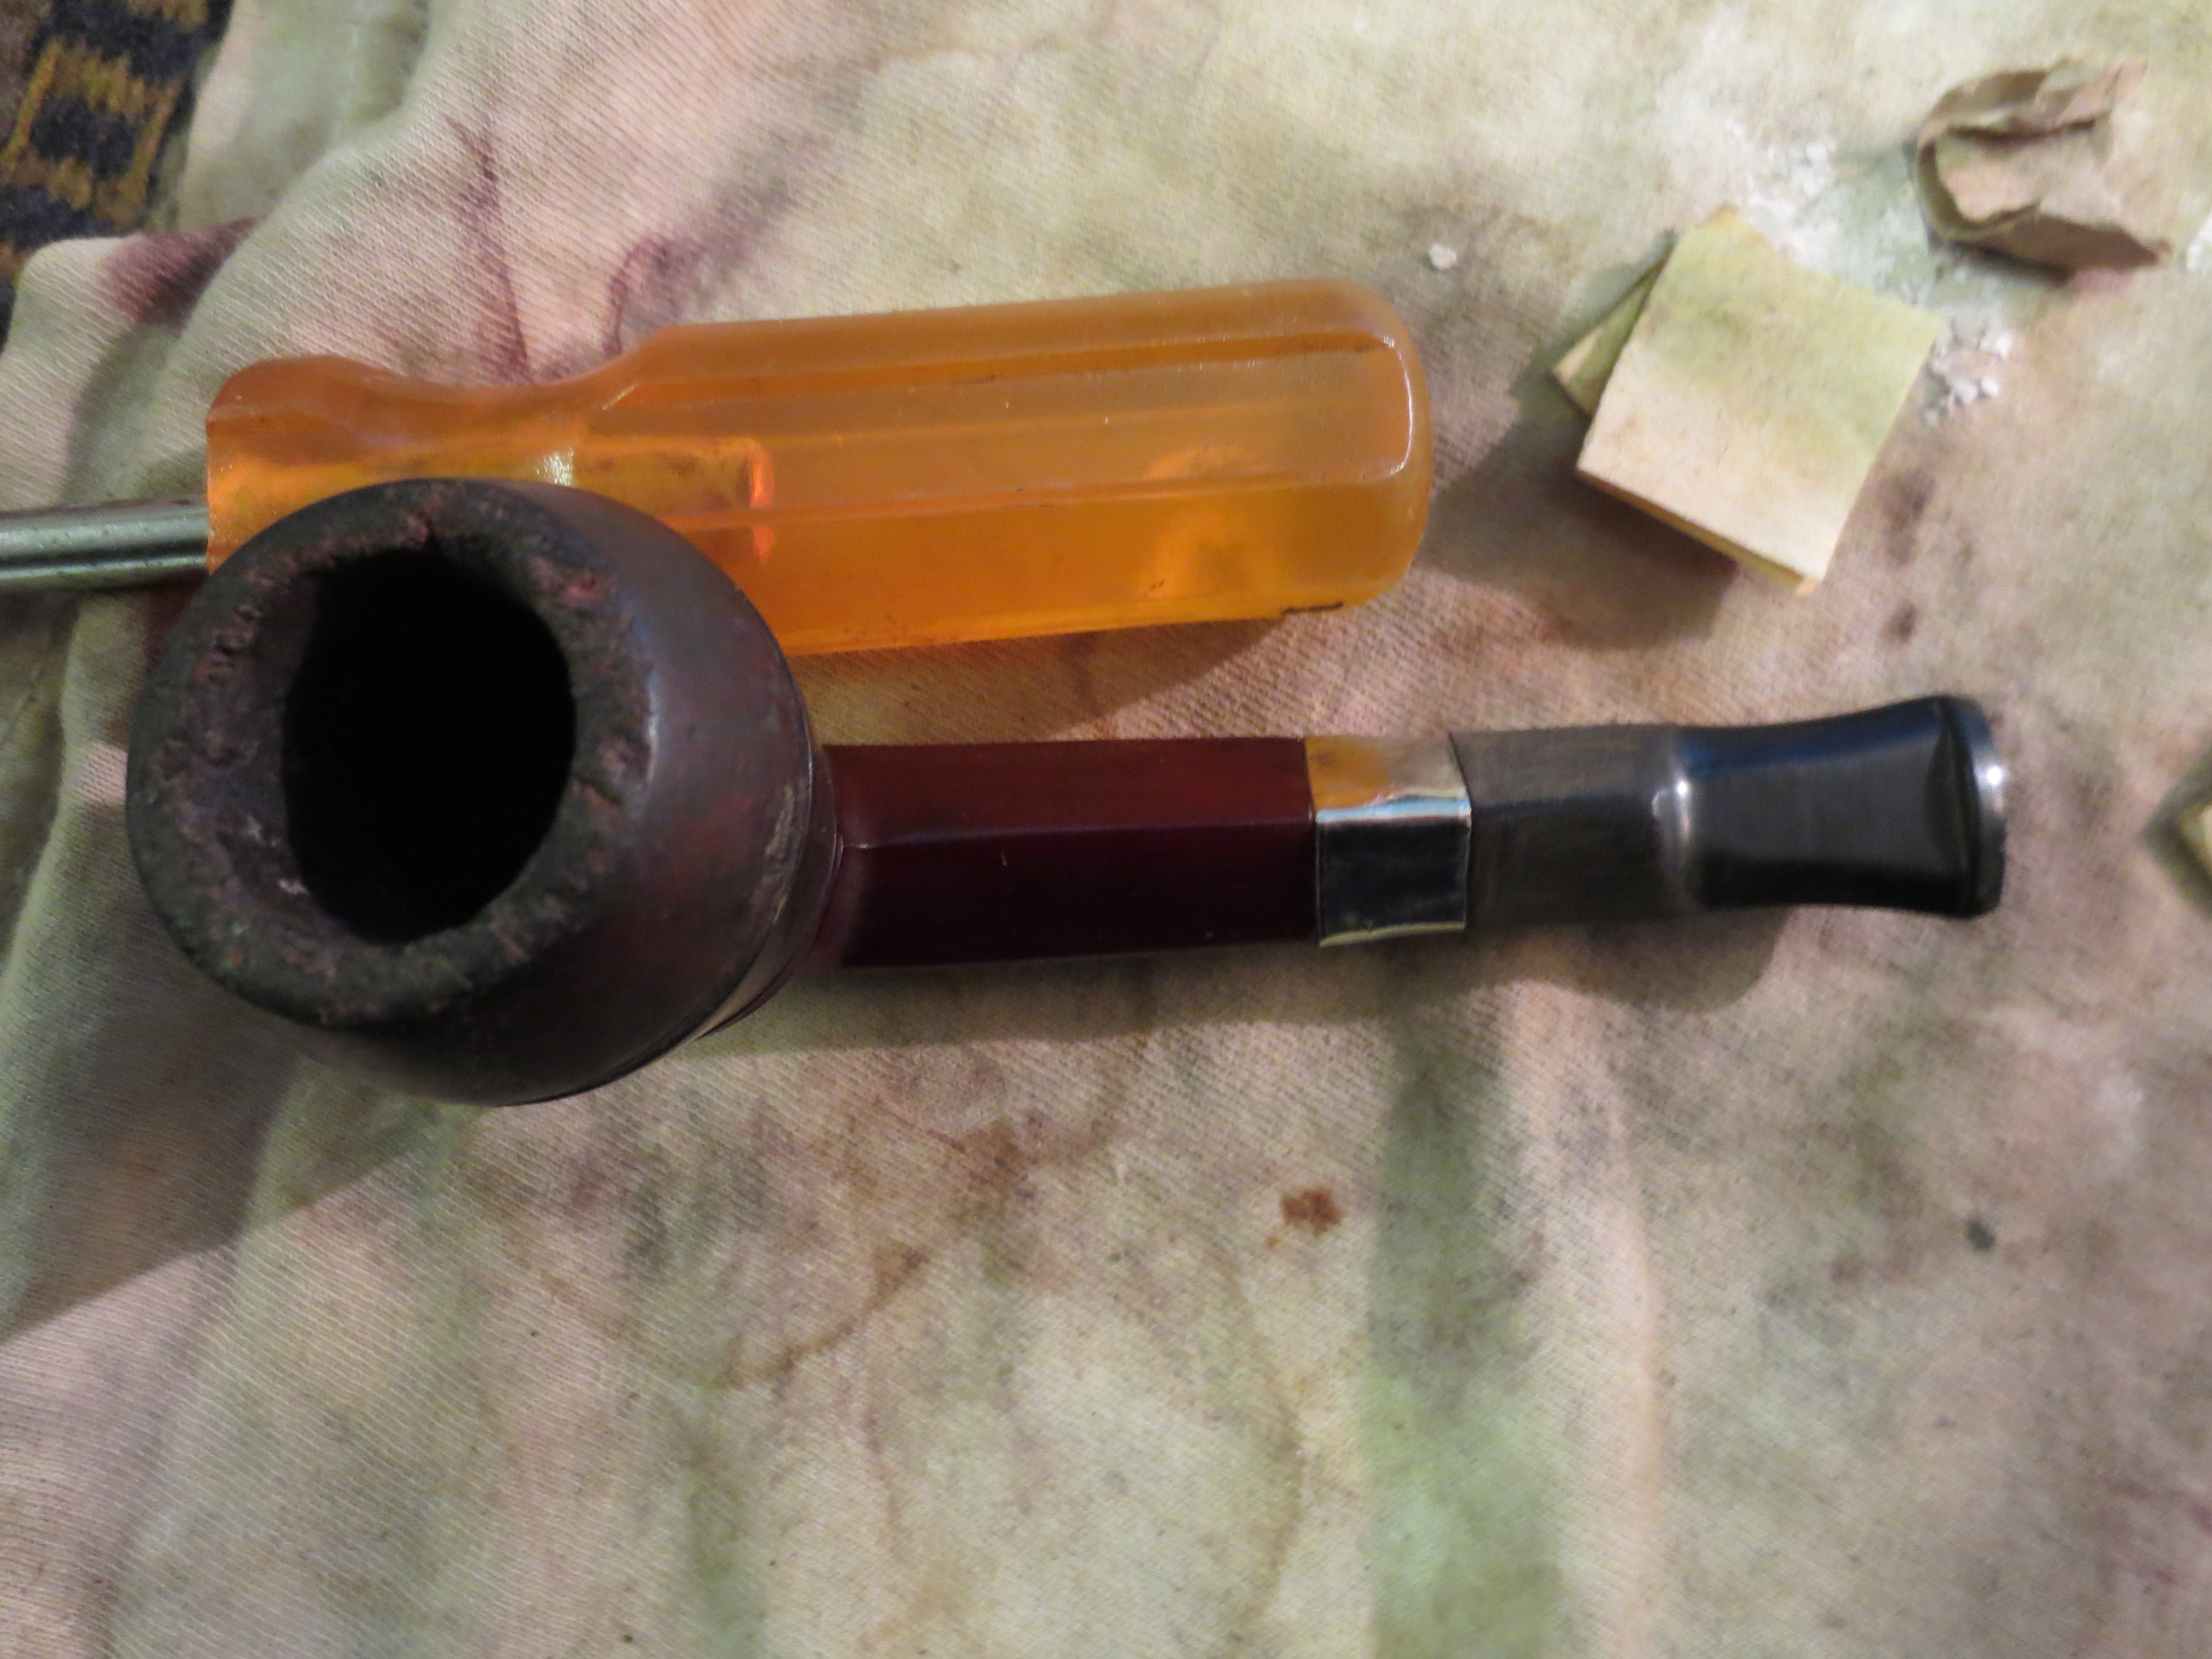
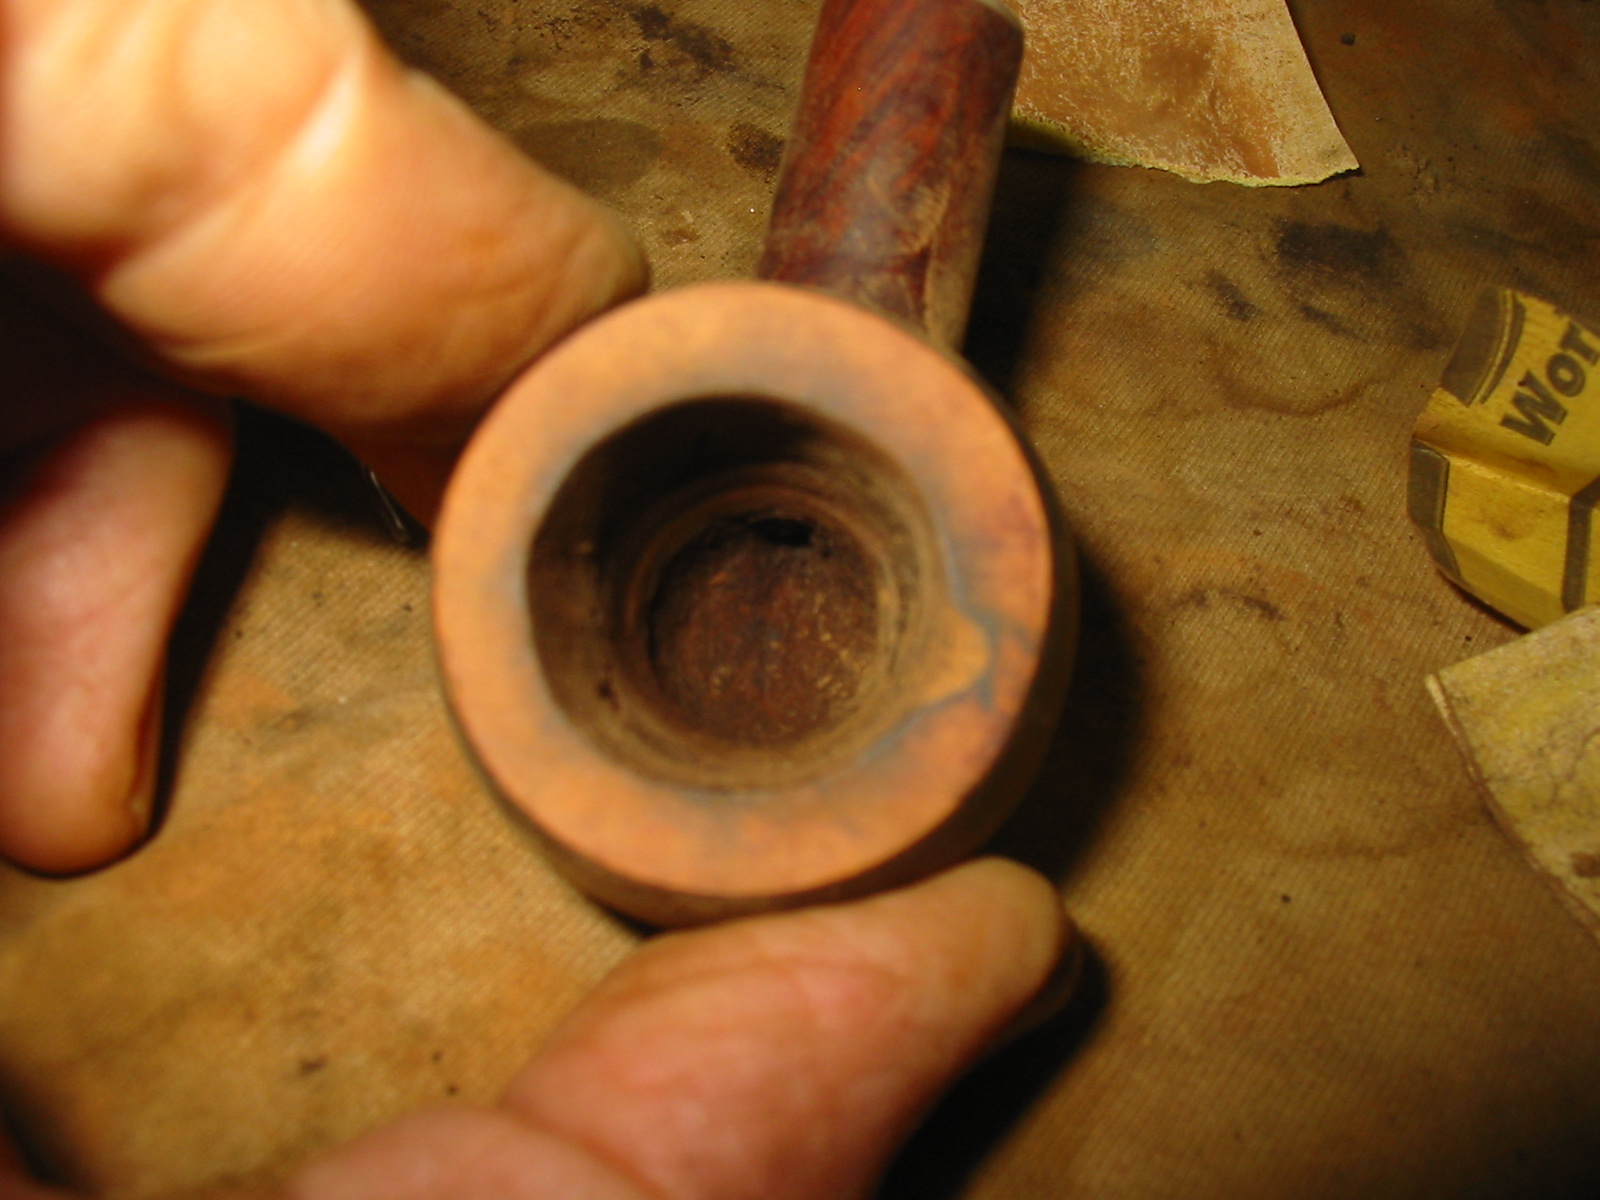
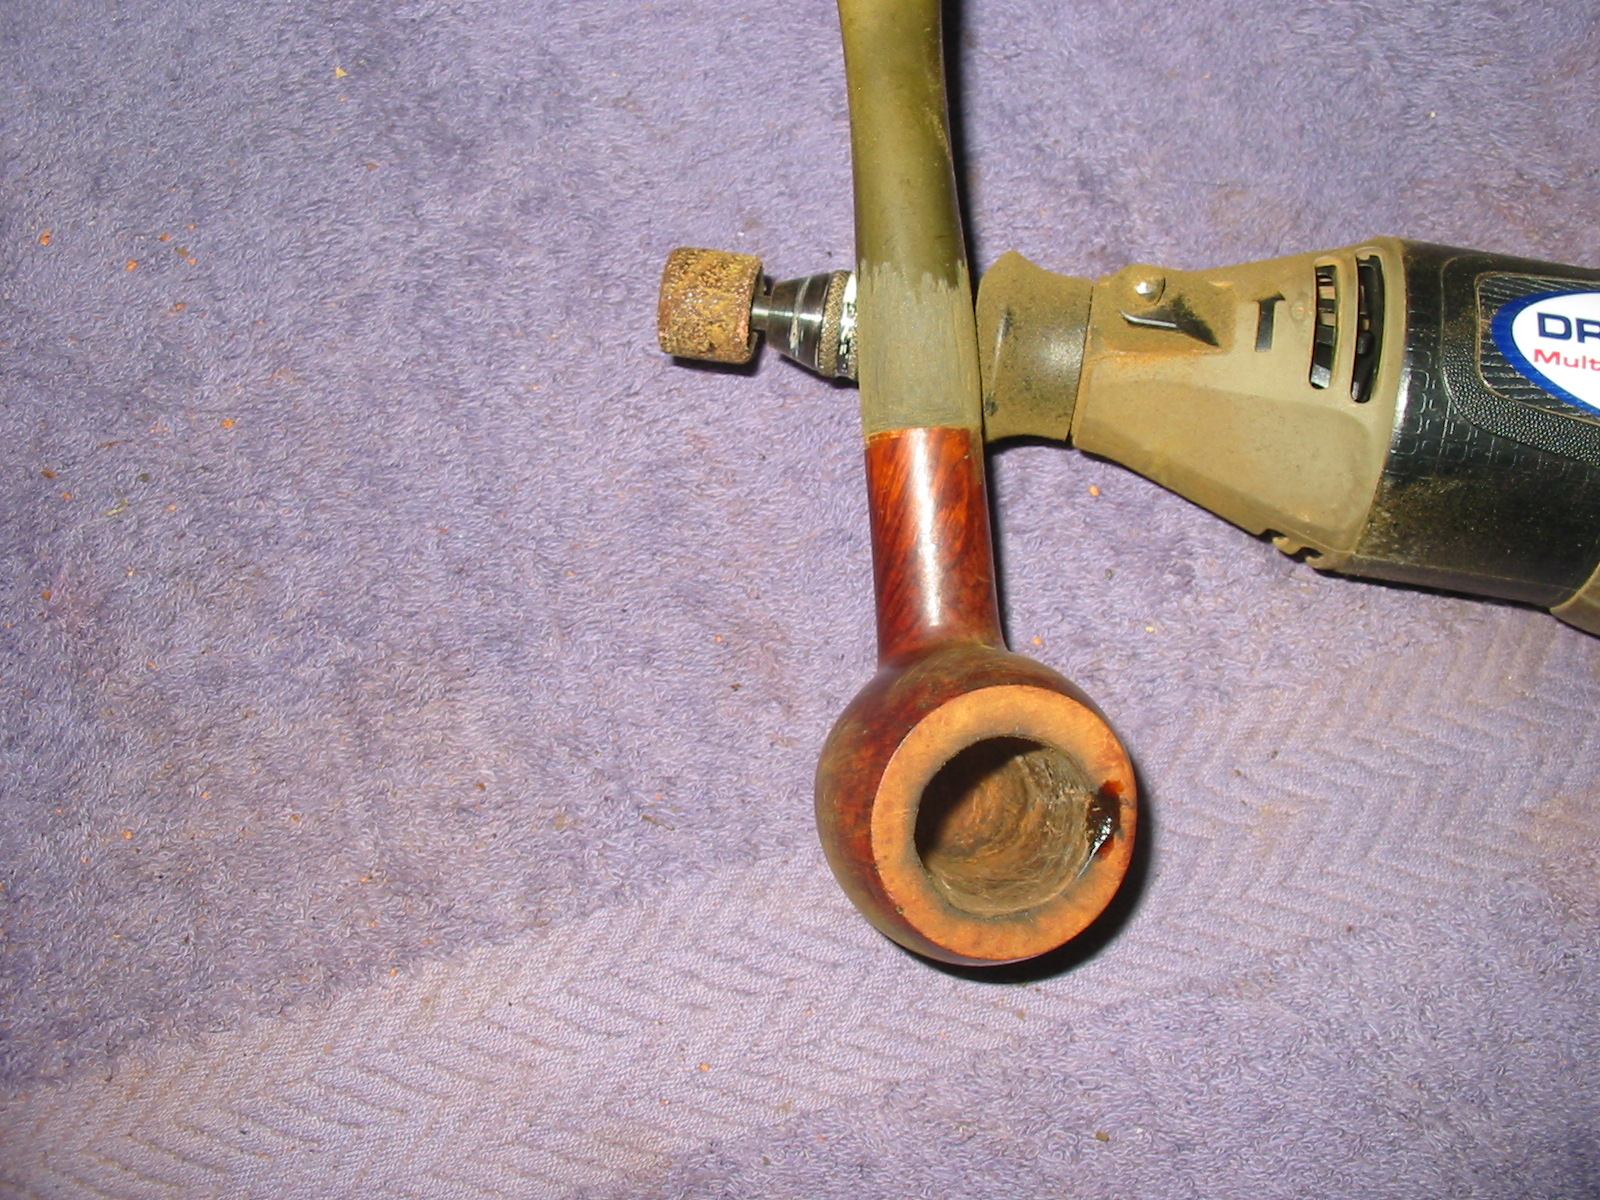
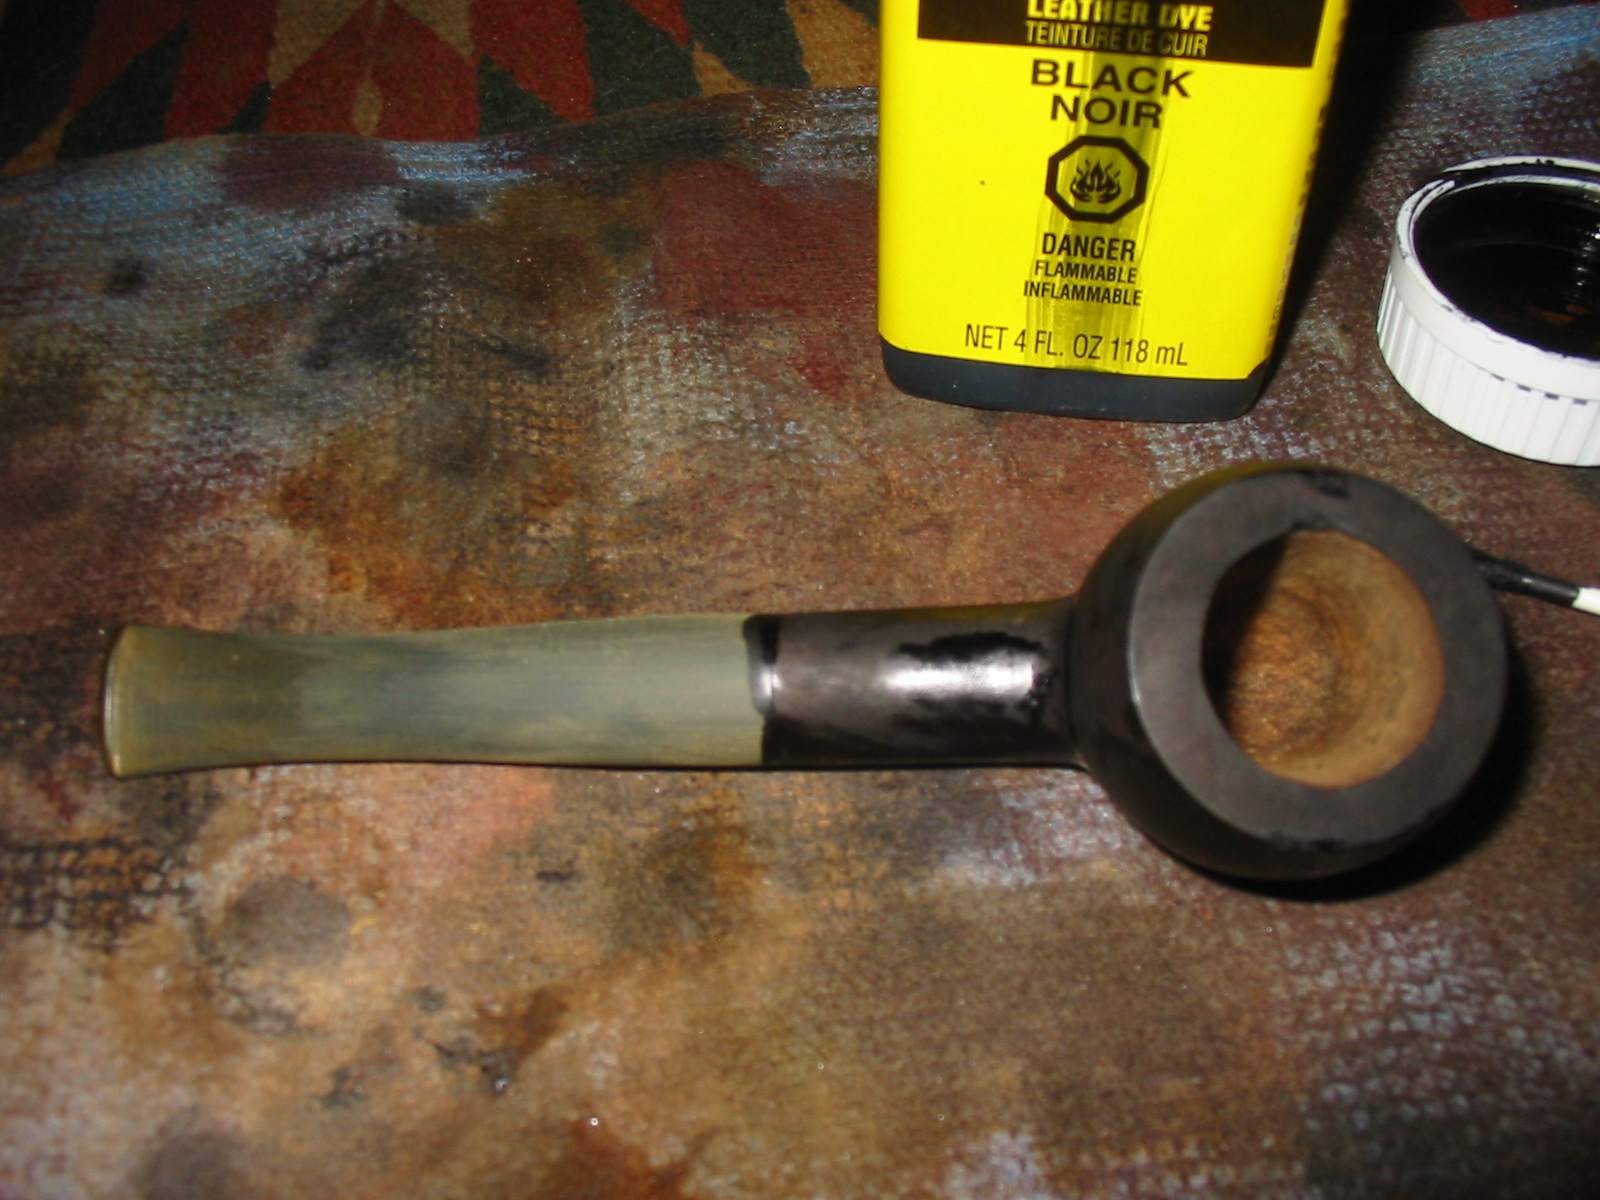
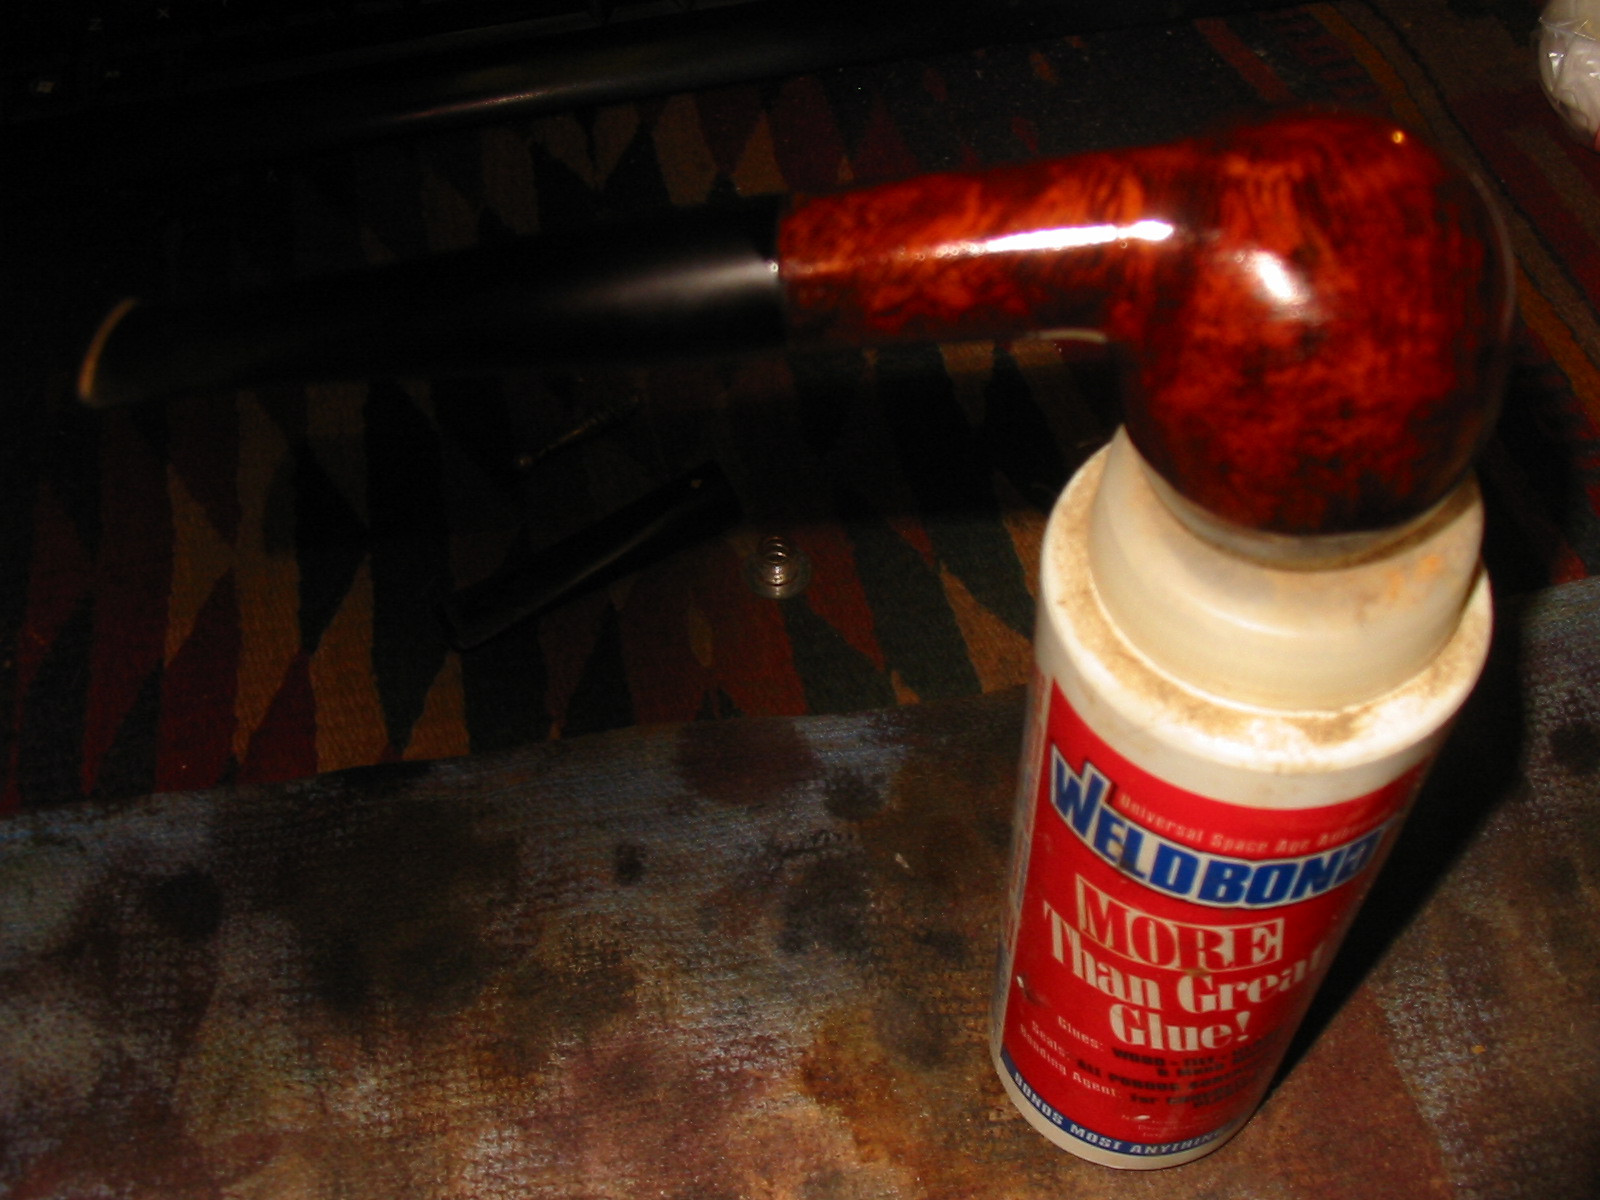
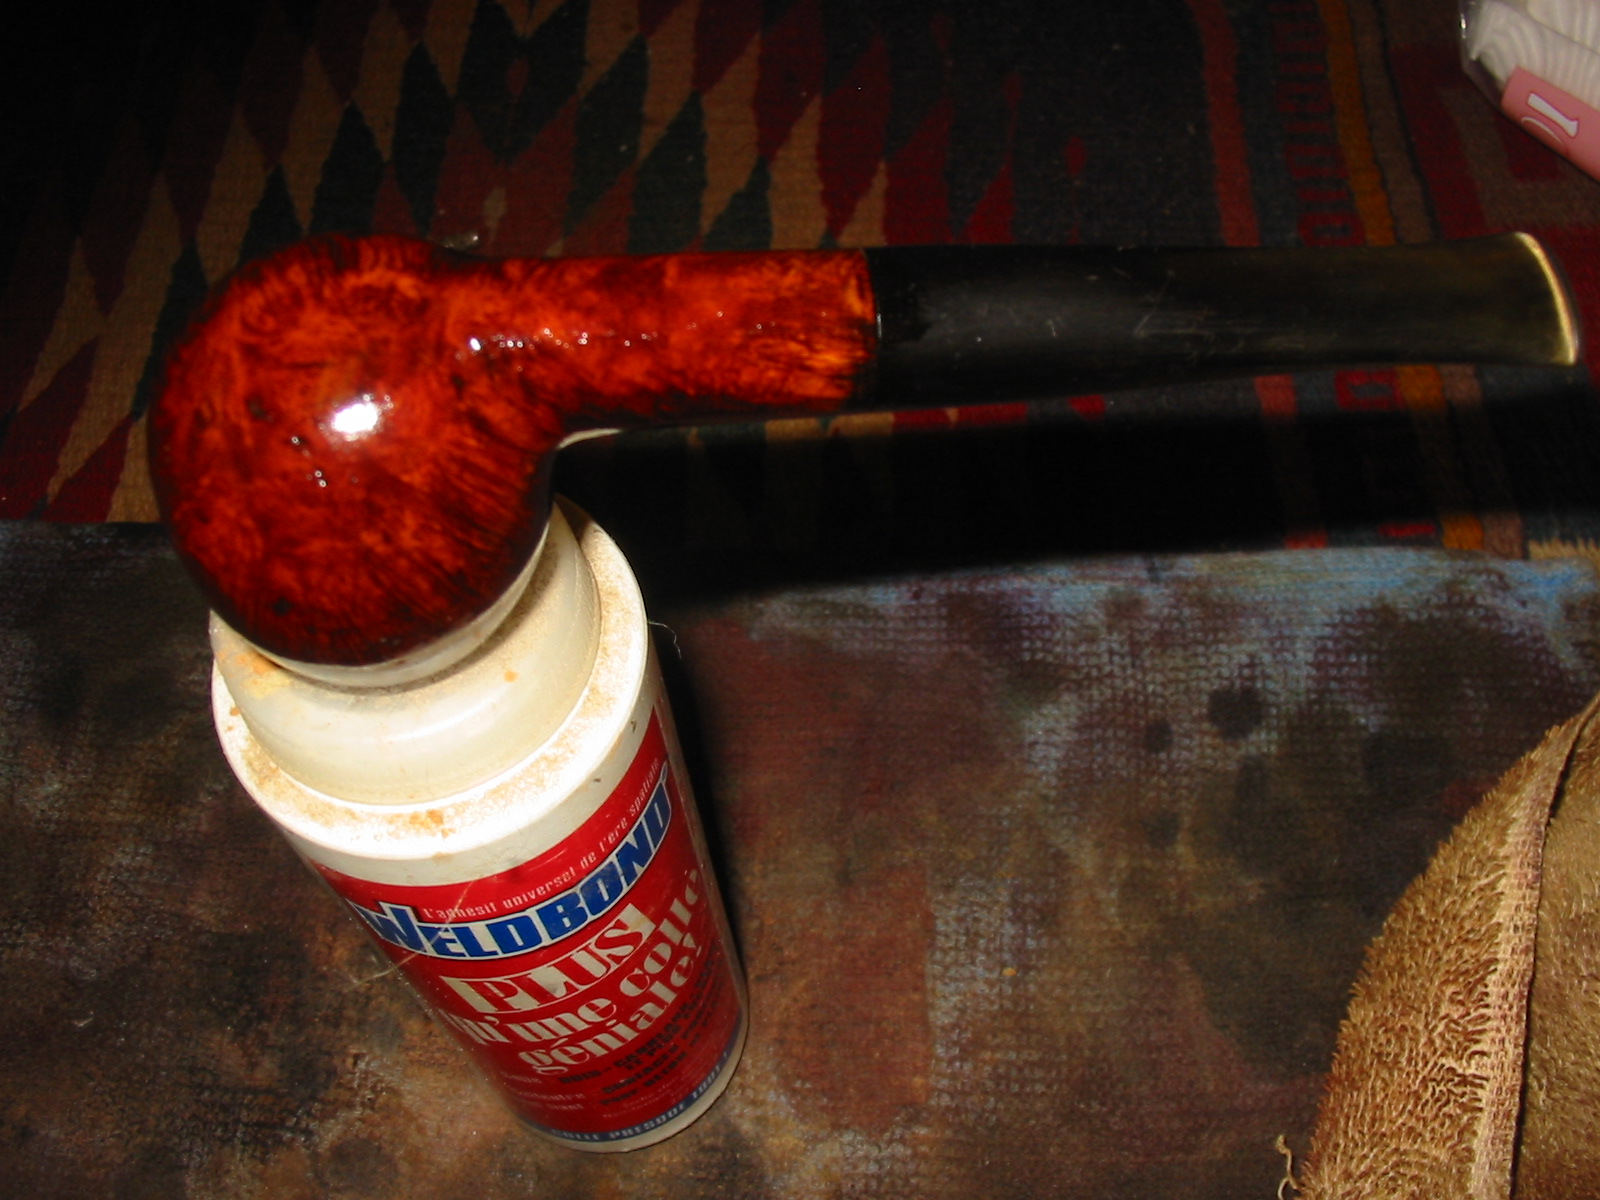
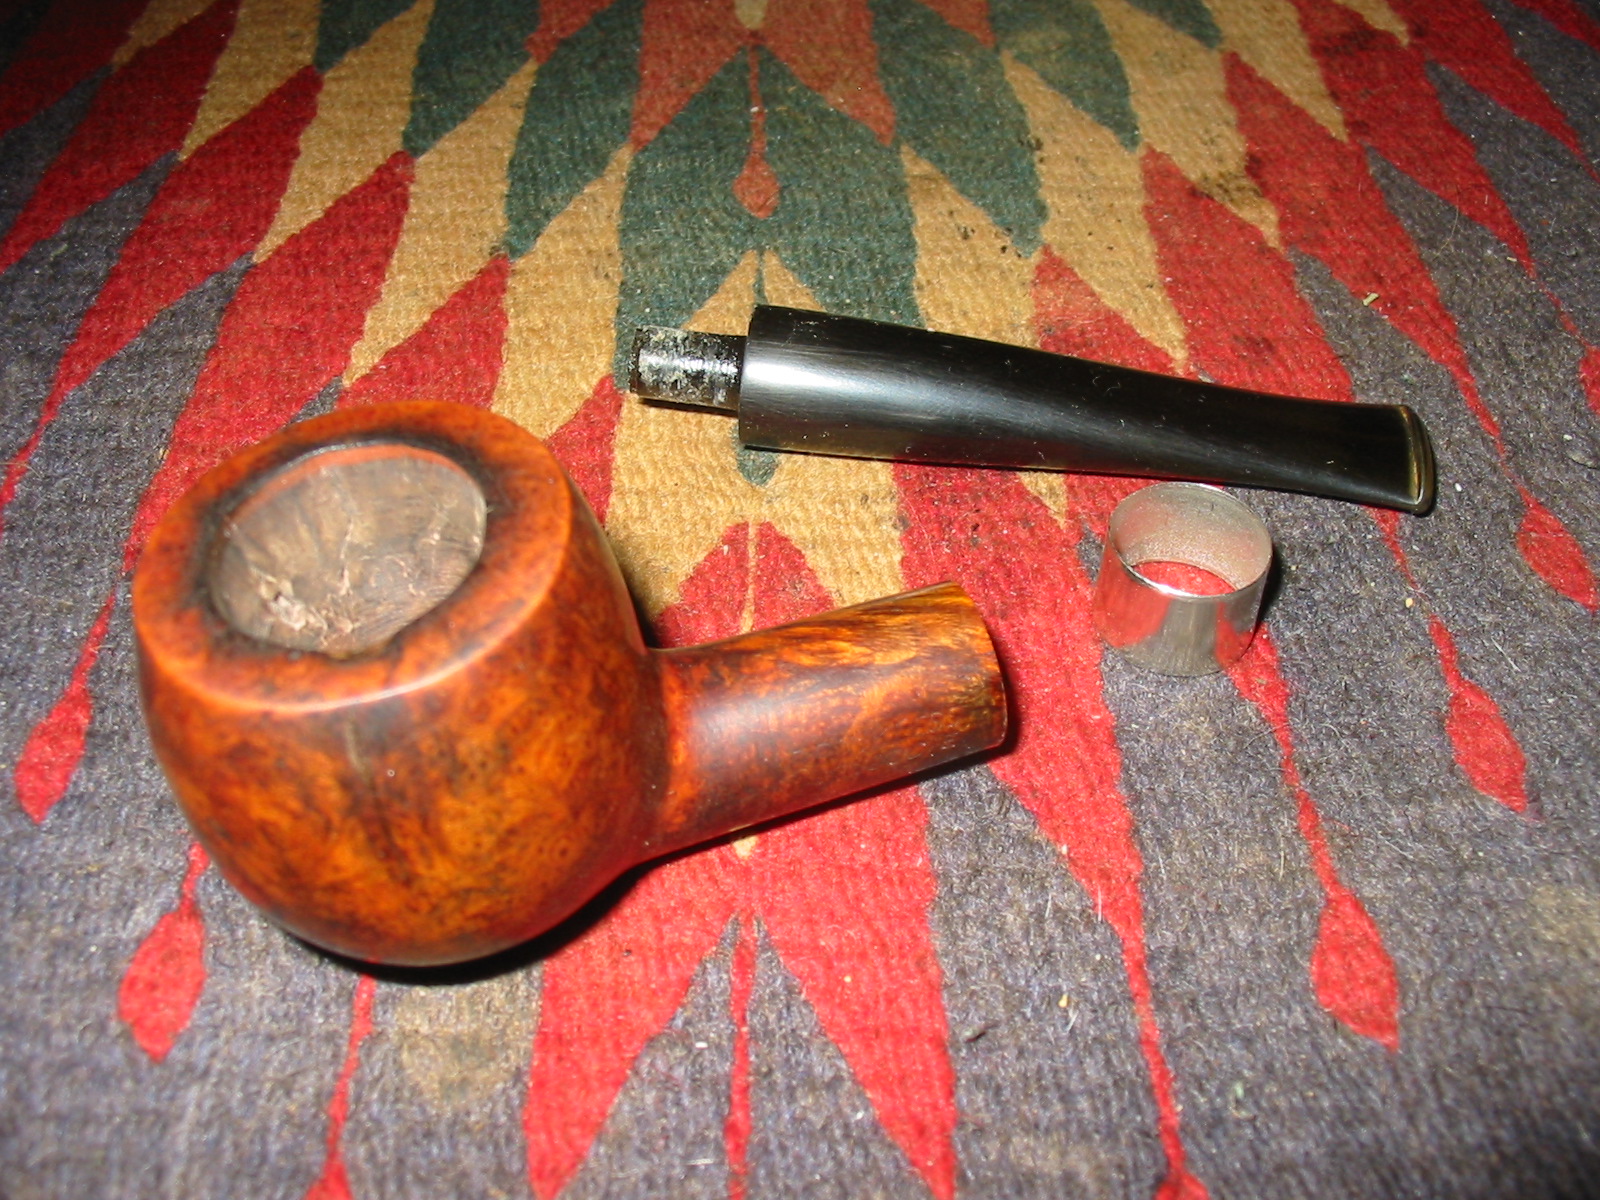
Because the stem was not functional I had a decision to make. I could drill out the disintegrated end of the stinger and put a new replacement tenon in place or I could remove the metal shank insert and make a new push stem for the pipe. The faintness of the stamping on the shank and the extent of damage that I had repaired on the bowl made me take the second choice. I removed the metal shank insert from the shank. This is not as hard as it sounds. I have heard of others drilling it out and leaving it in place. I have opted to remove it. It is threaded and can be unscrewed from the shank with a small pair of needle nose pliers. The next two photos show the process. I sorted through my stem can and found a stem that could be repurposed to fit this shank and then be adapted to fit the diameter of the shank.
IMG_3355

IMG_3354

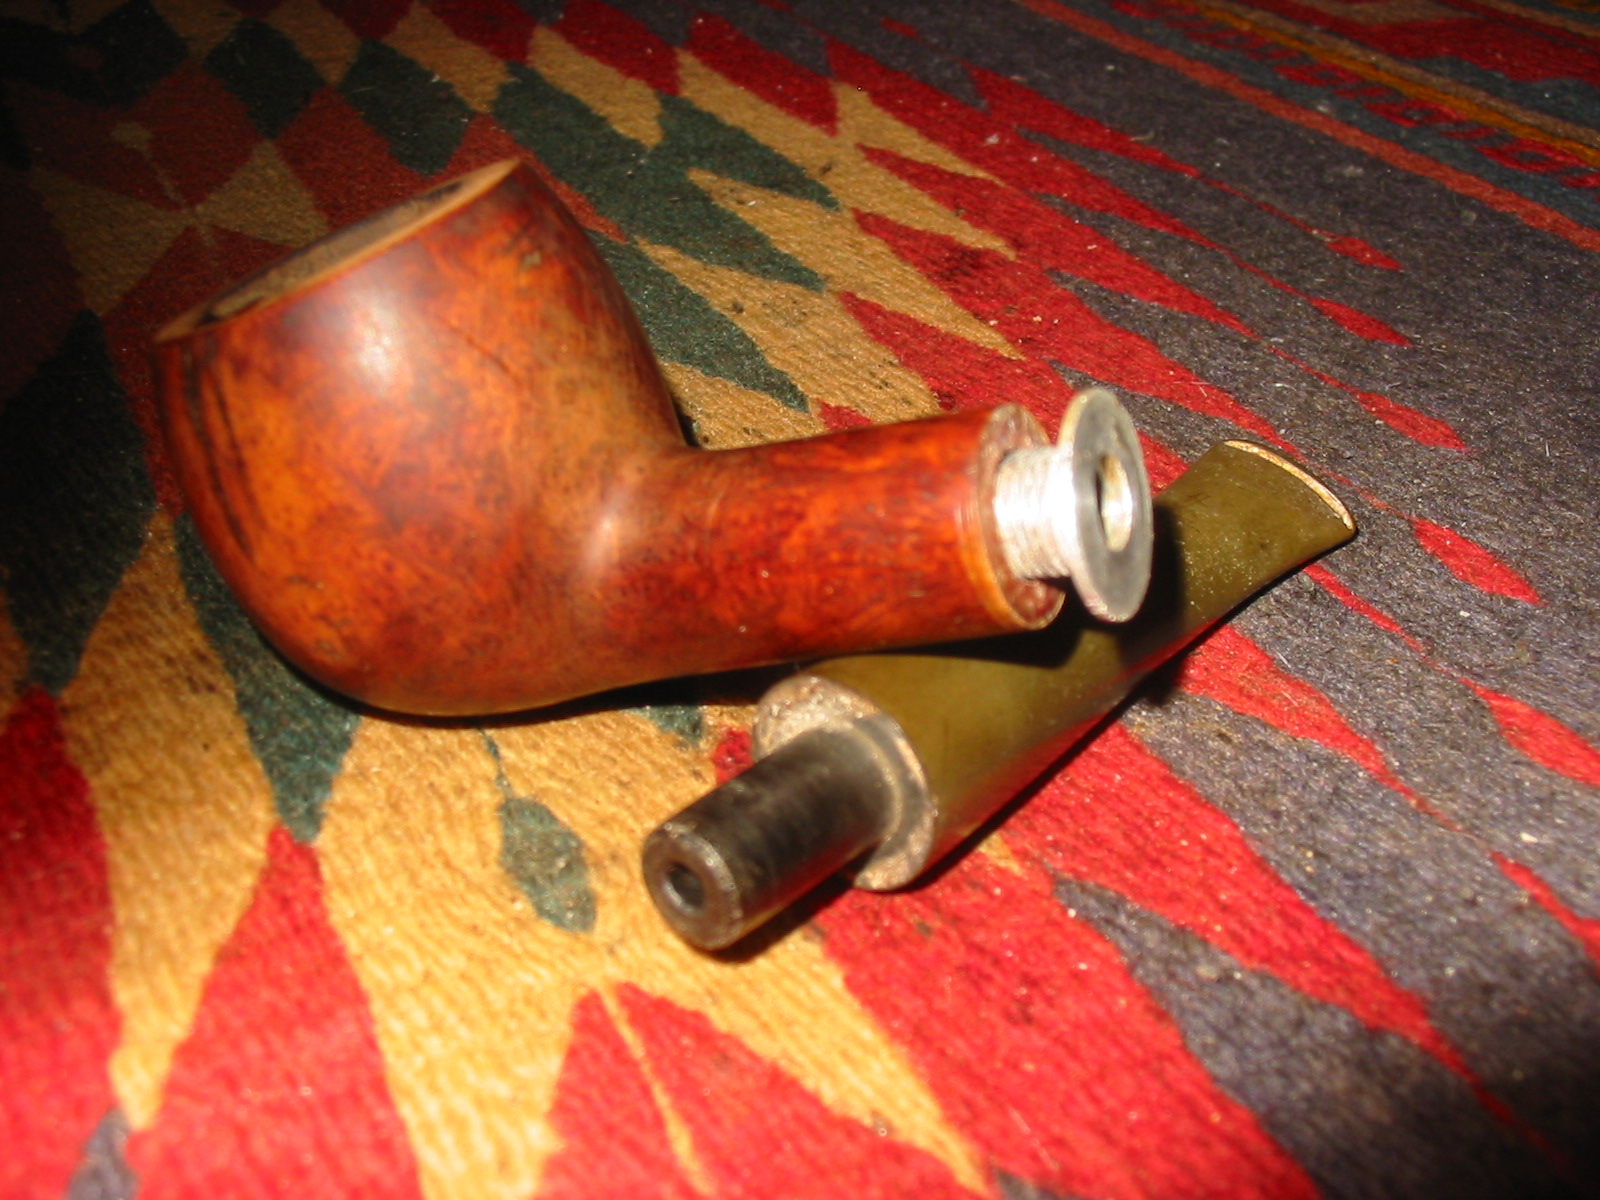
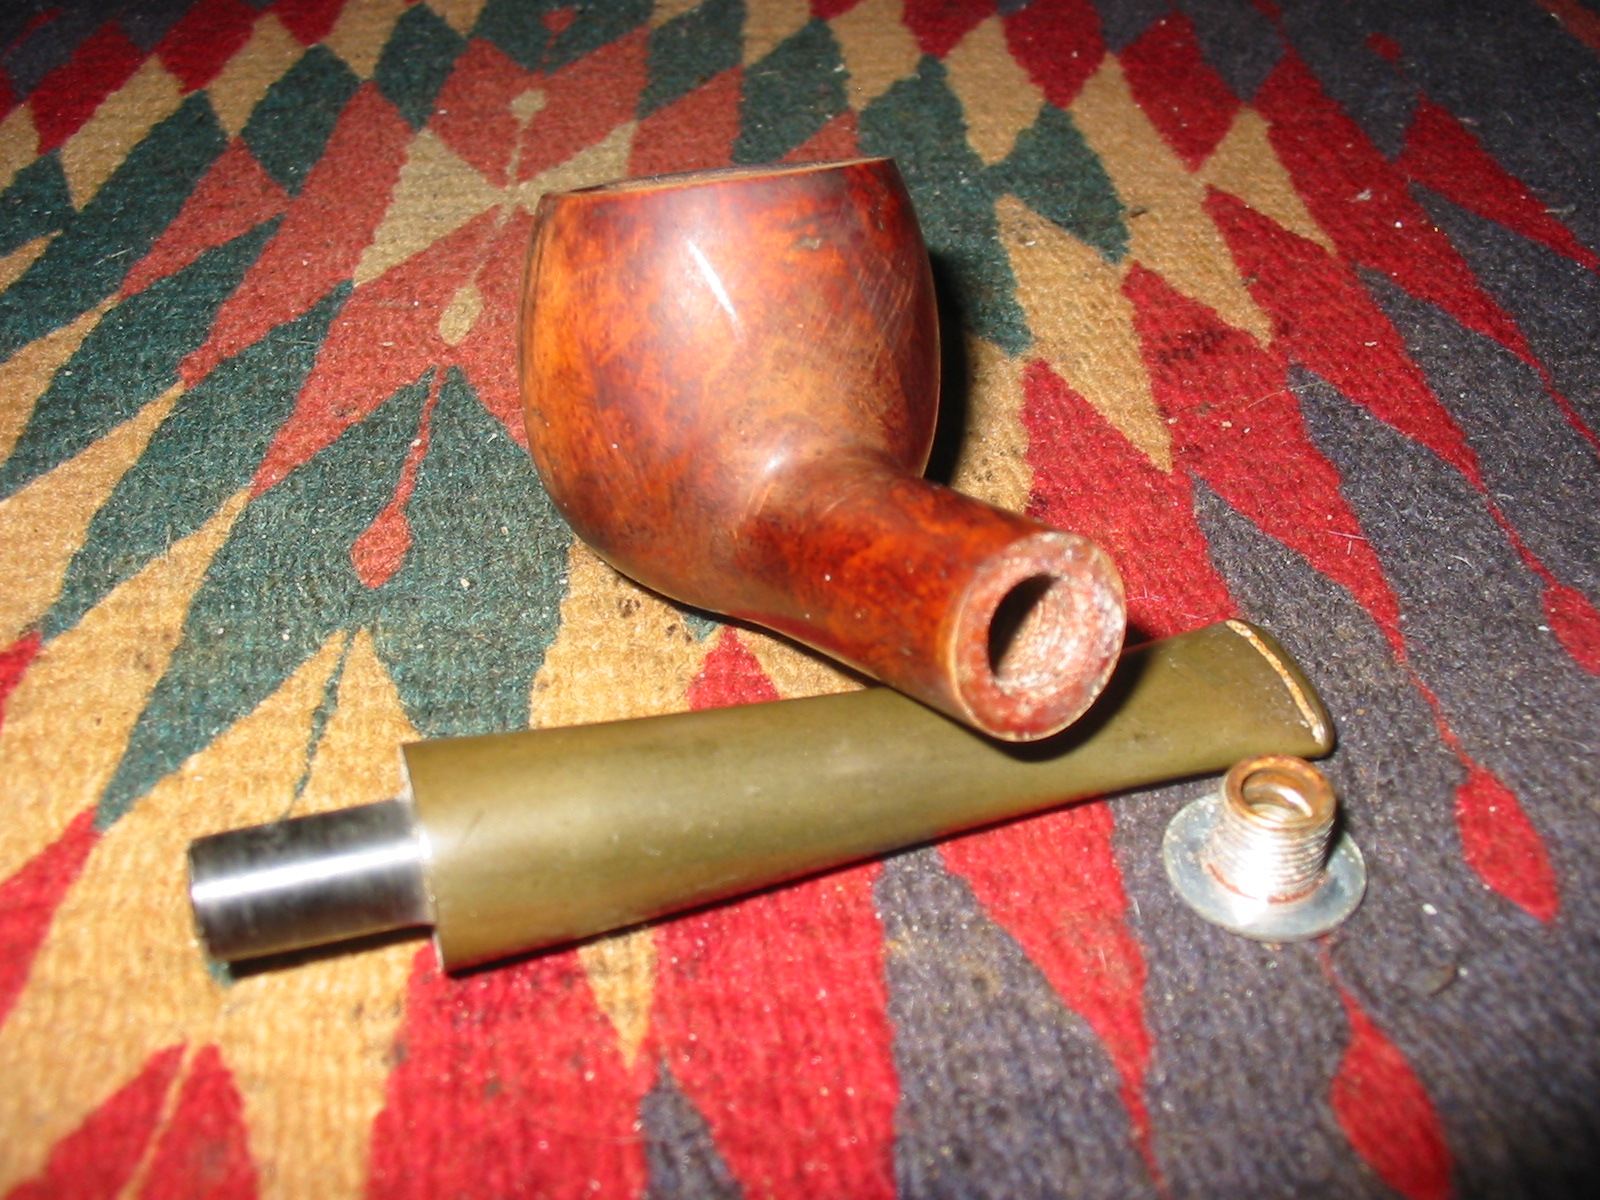
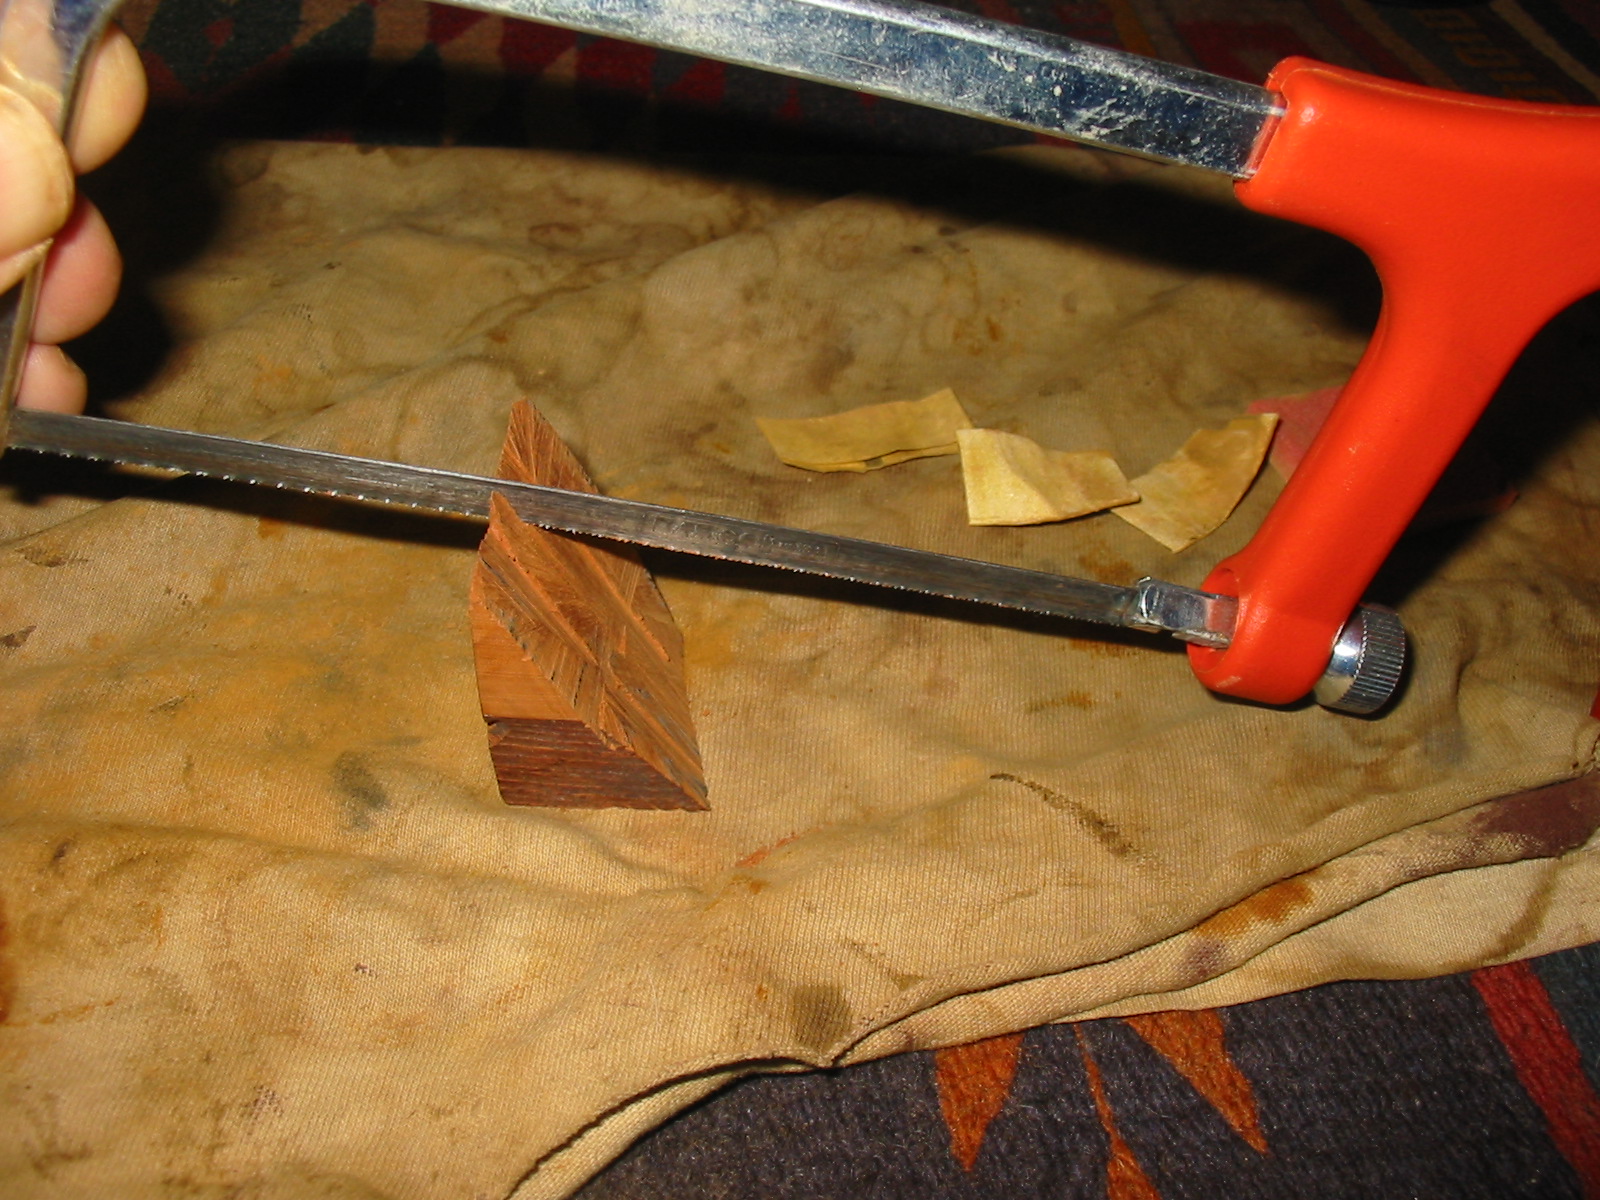
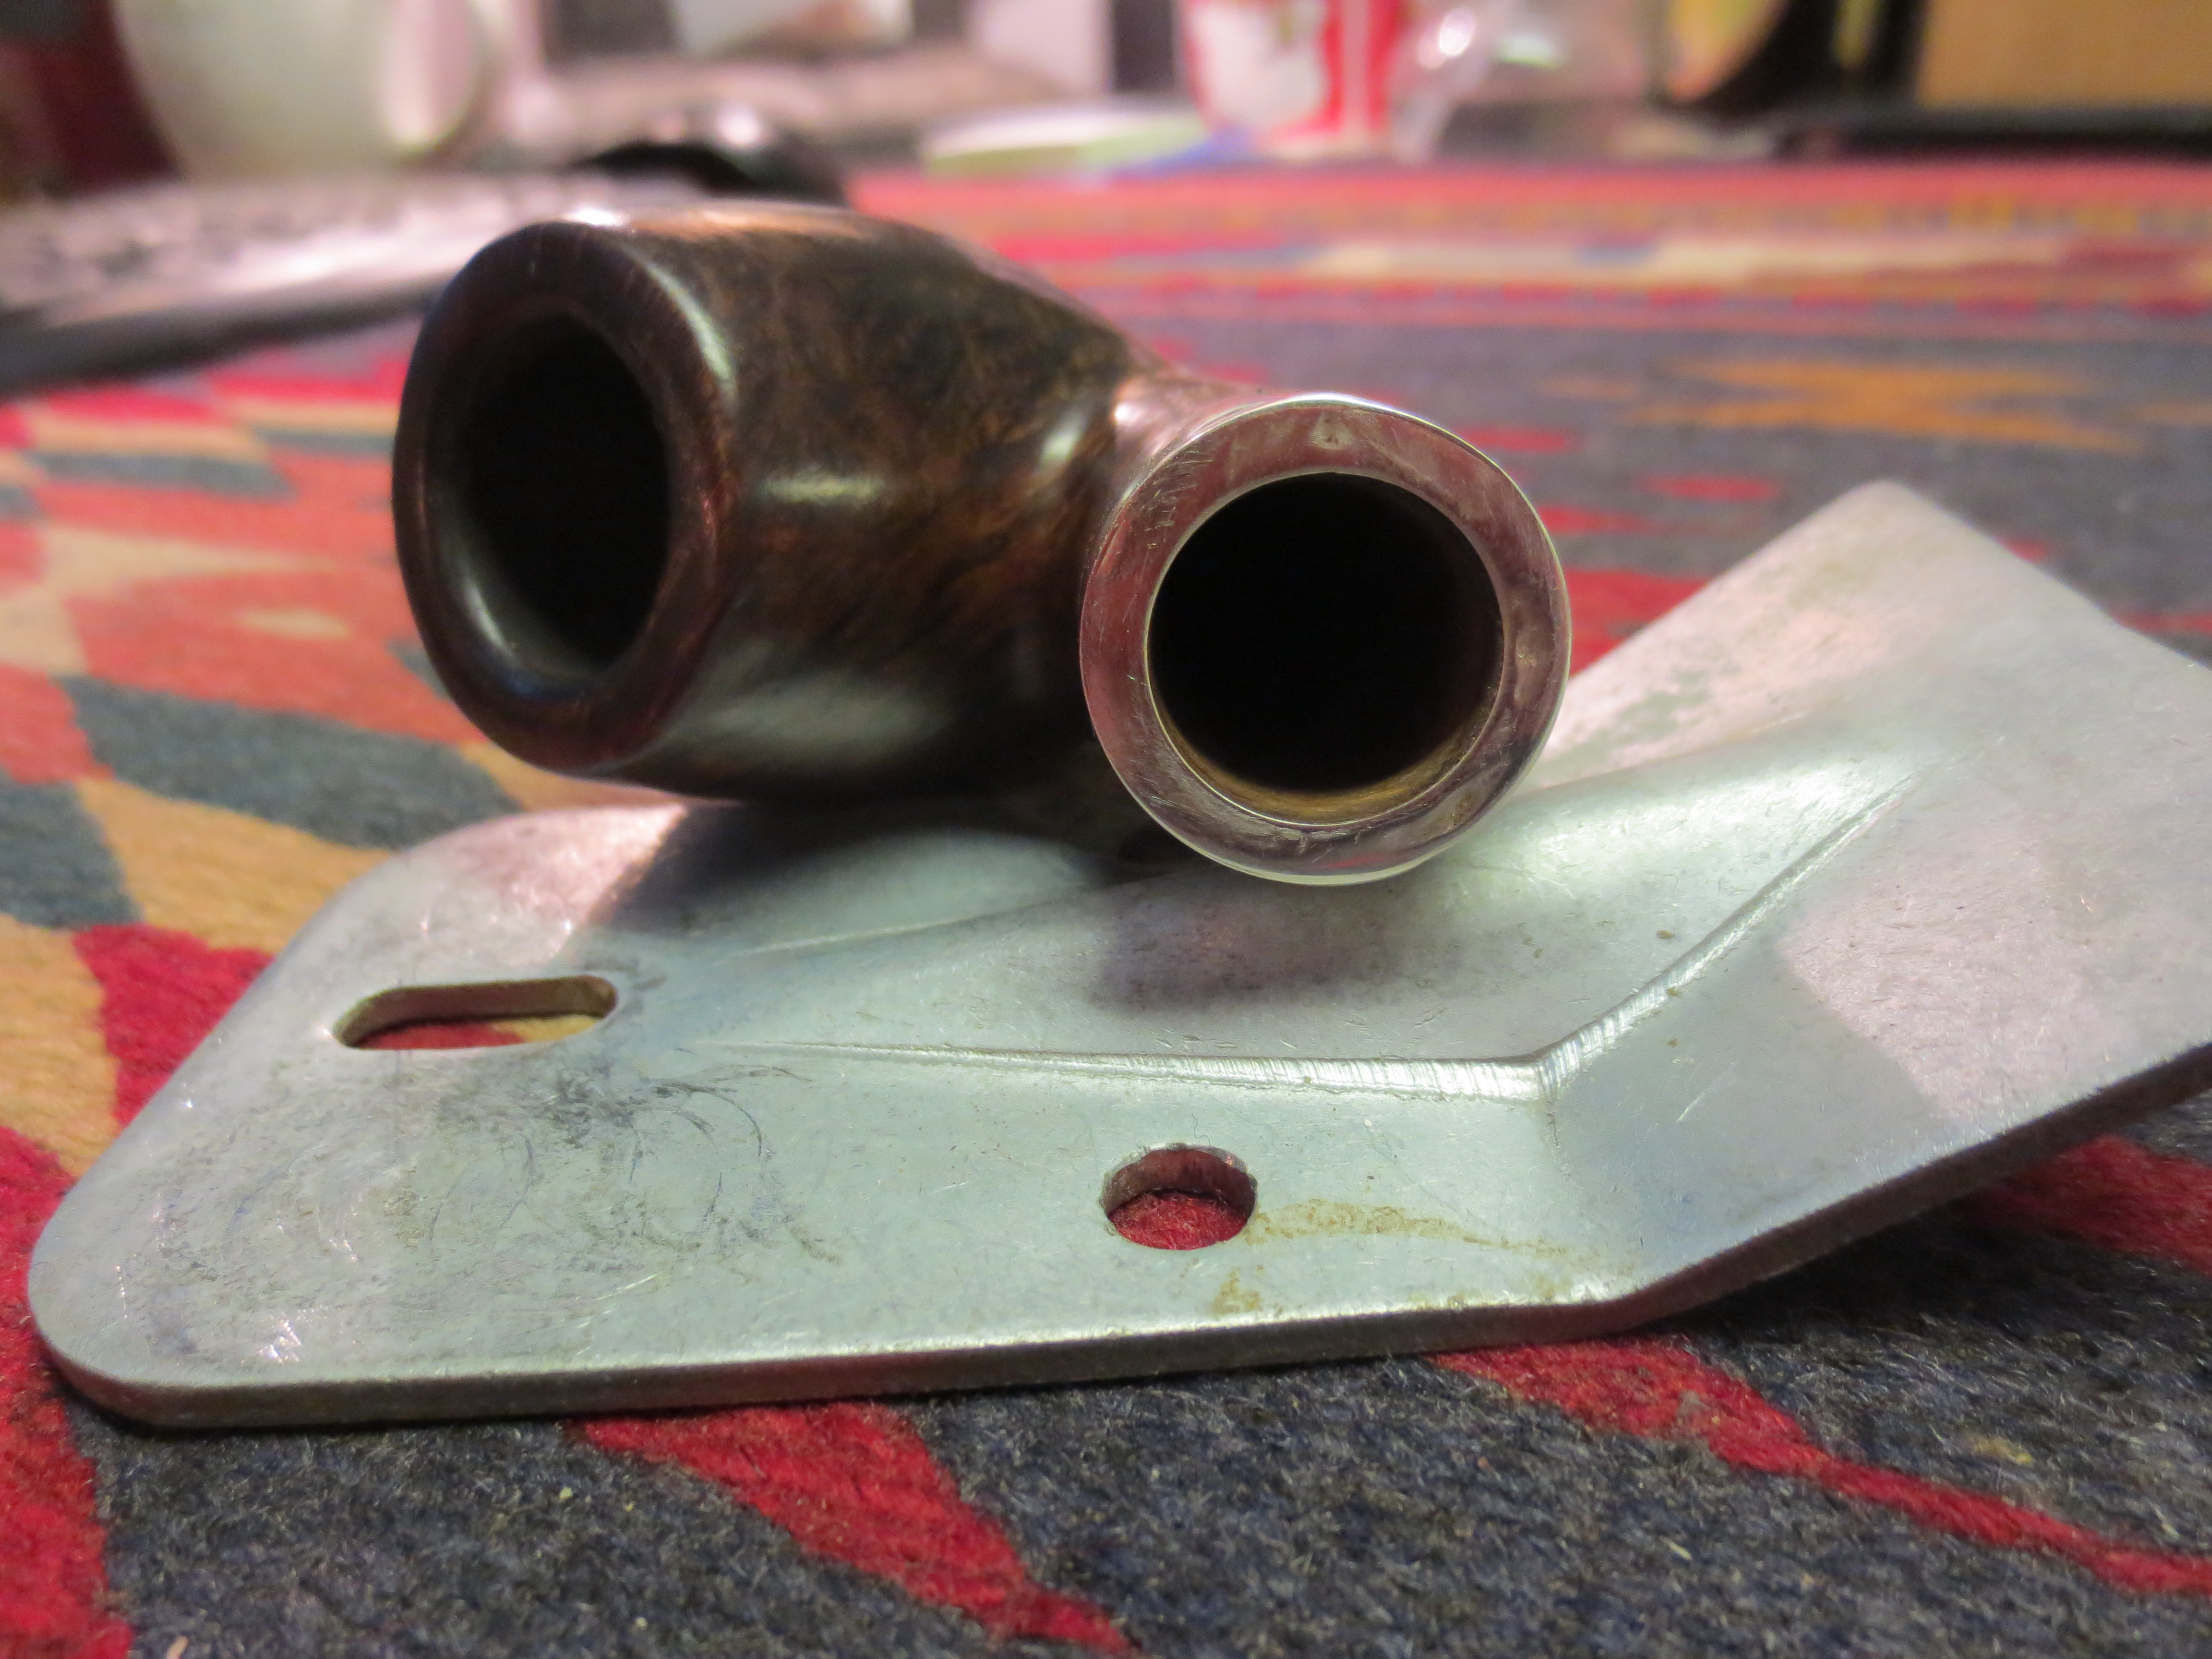
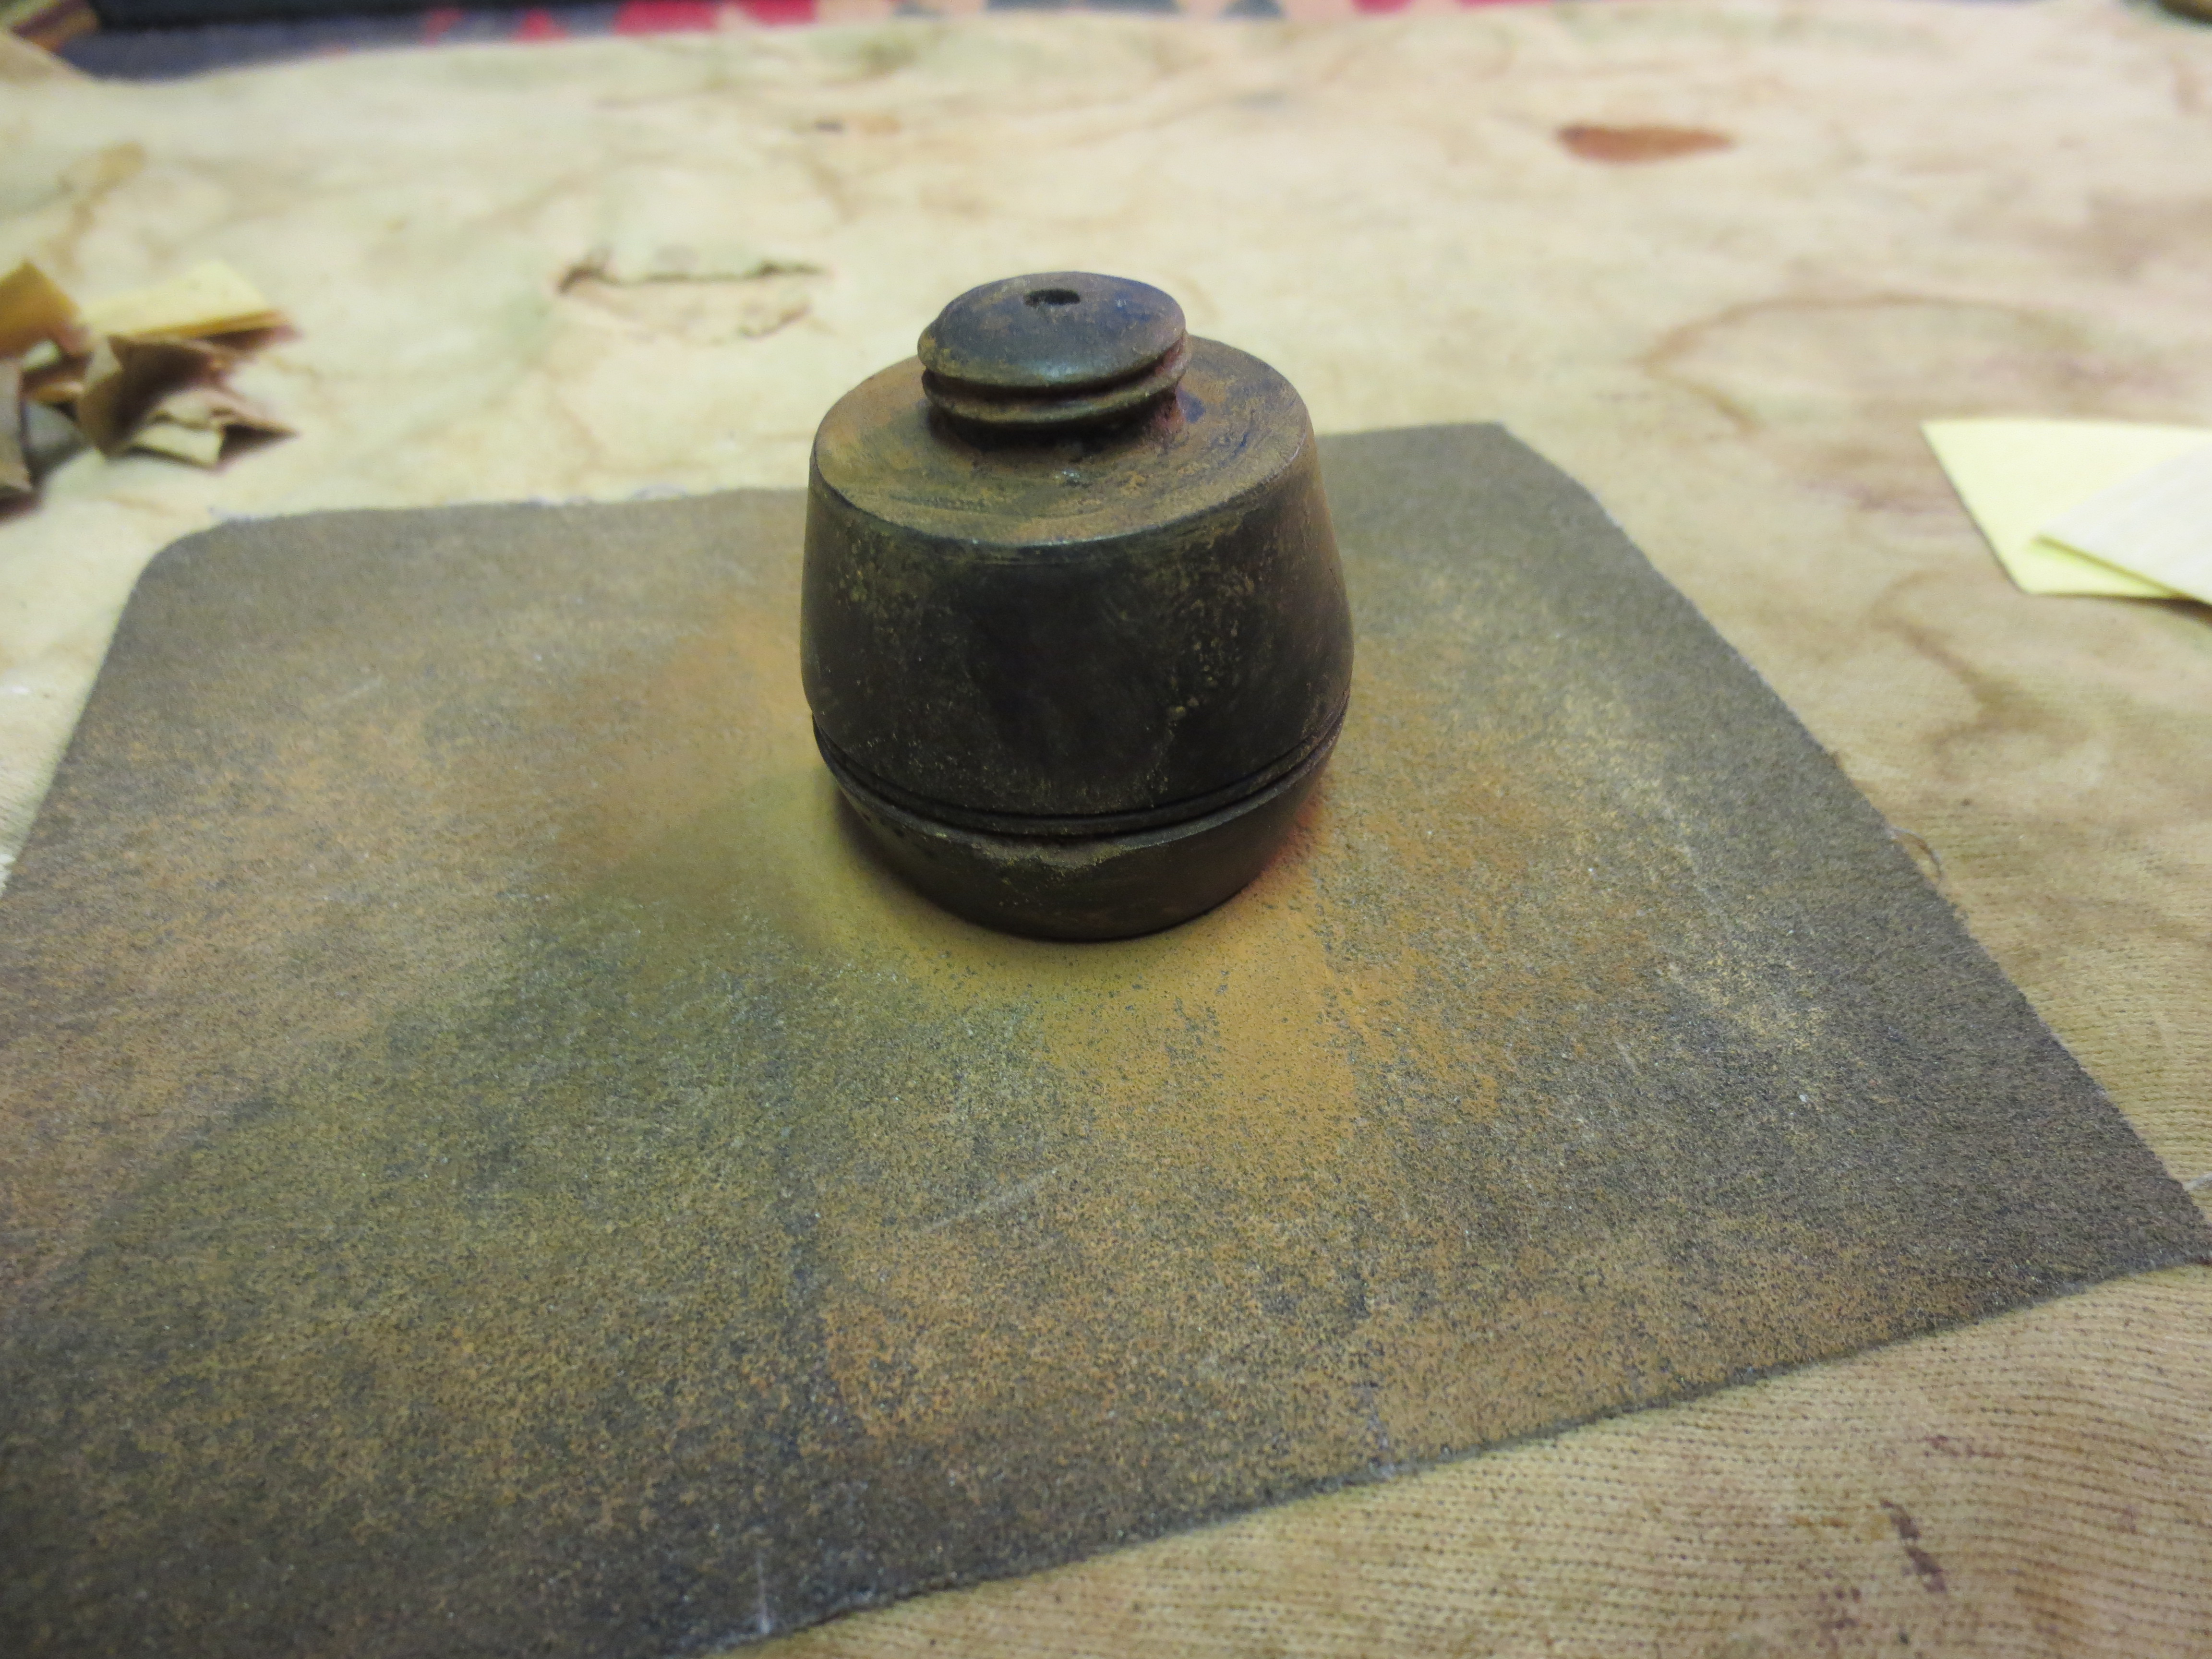
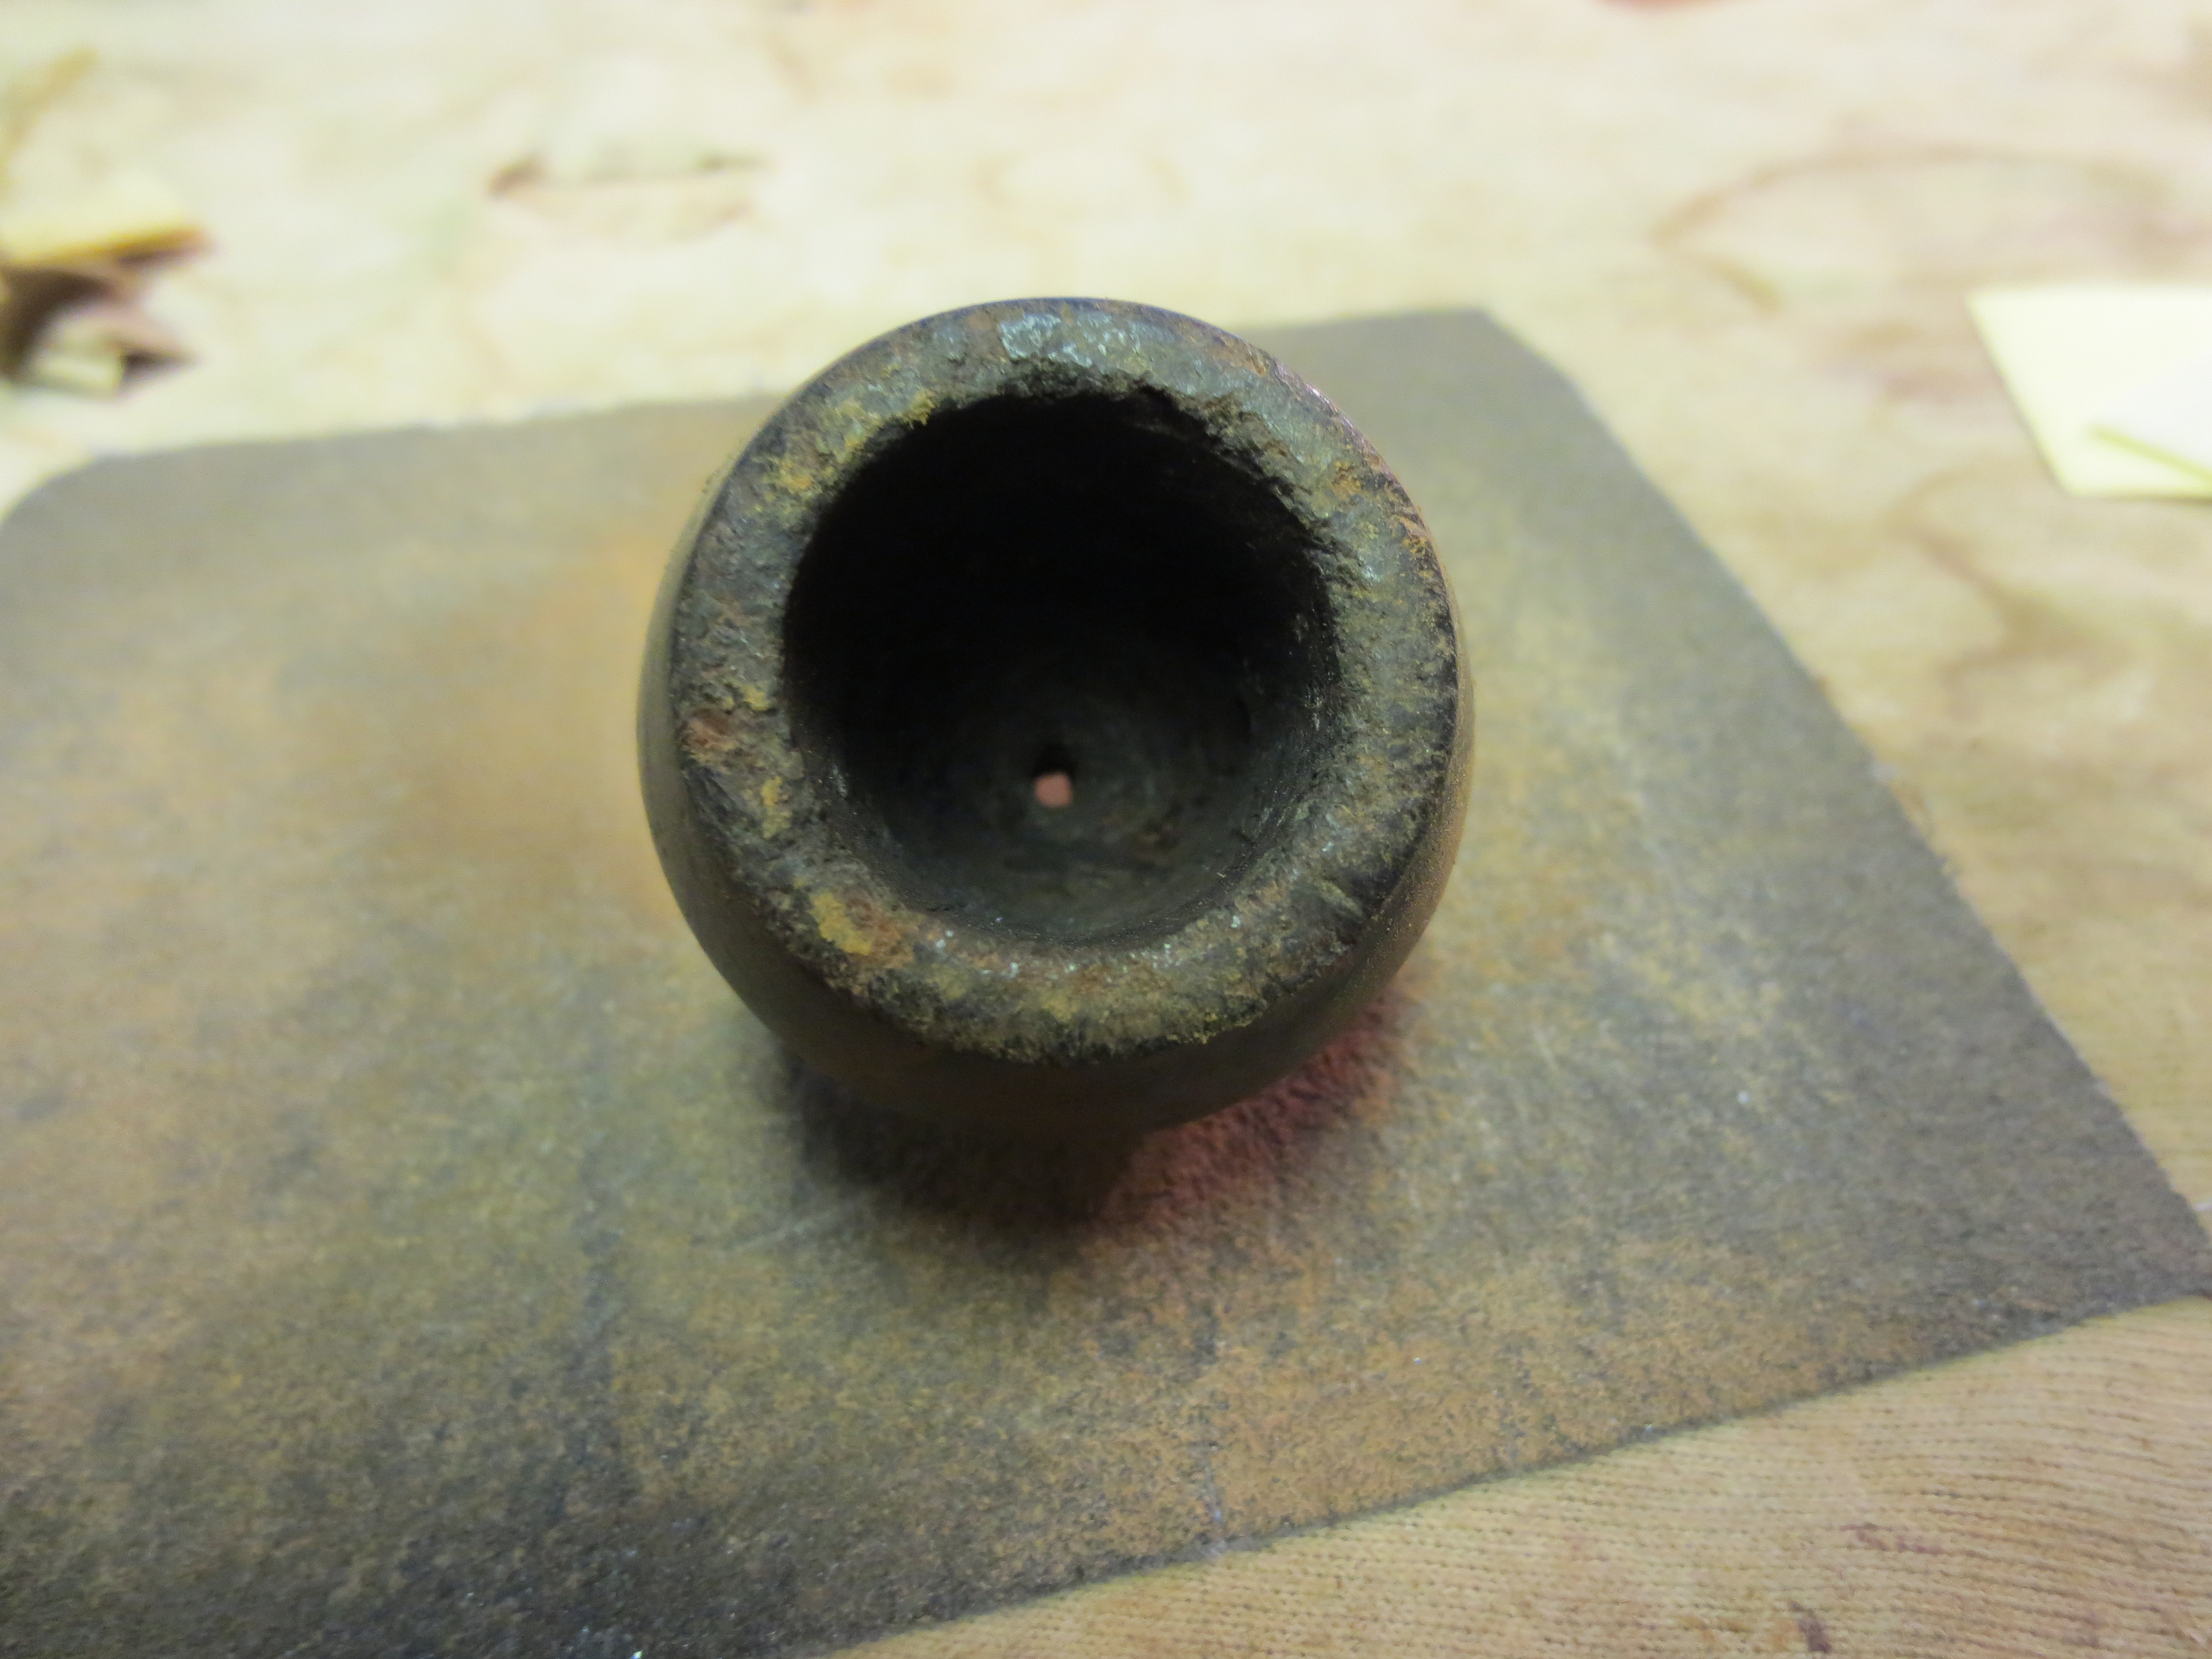
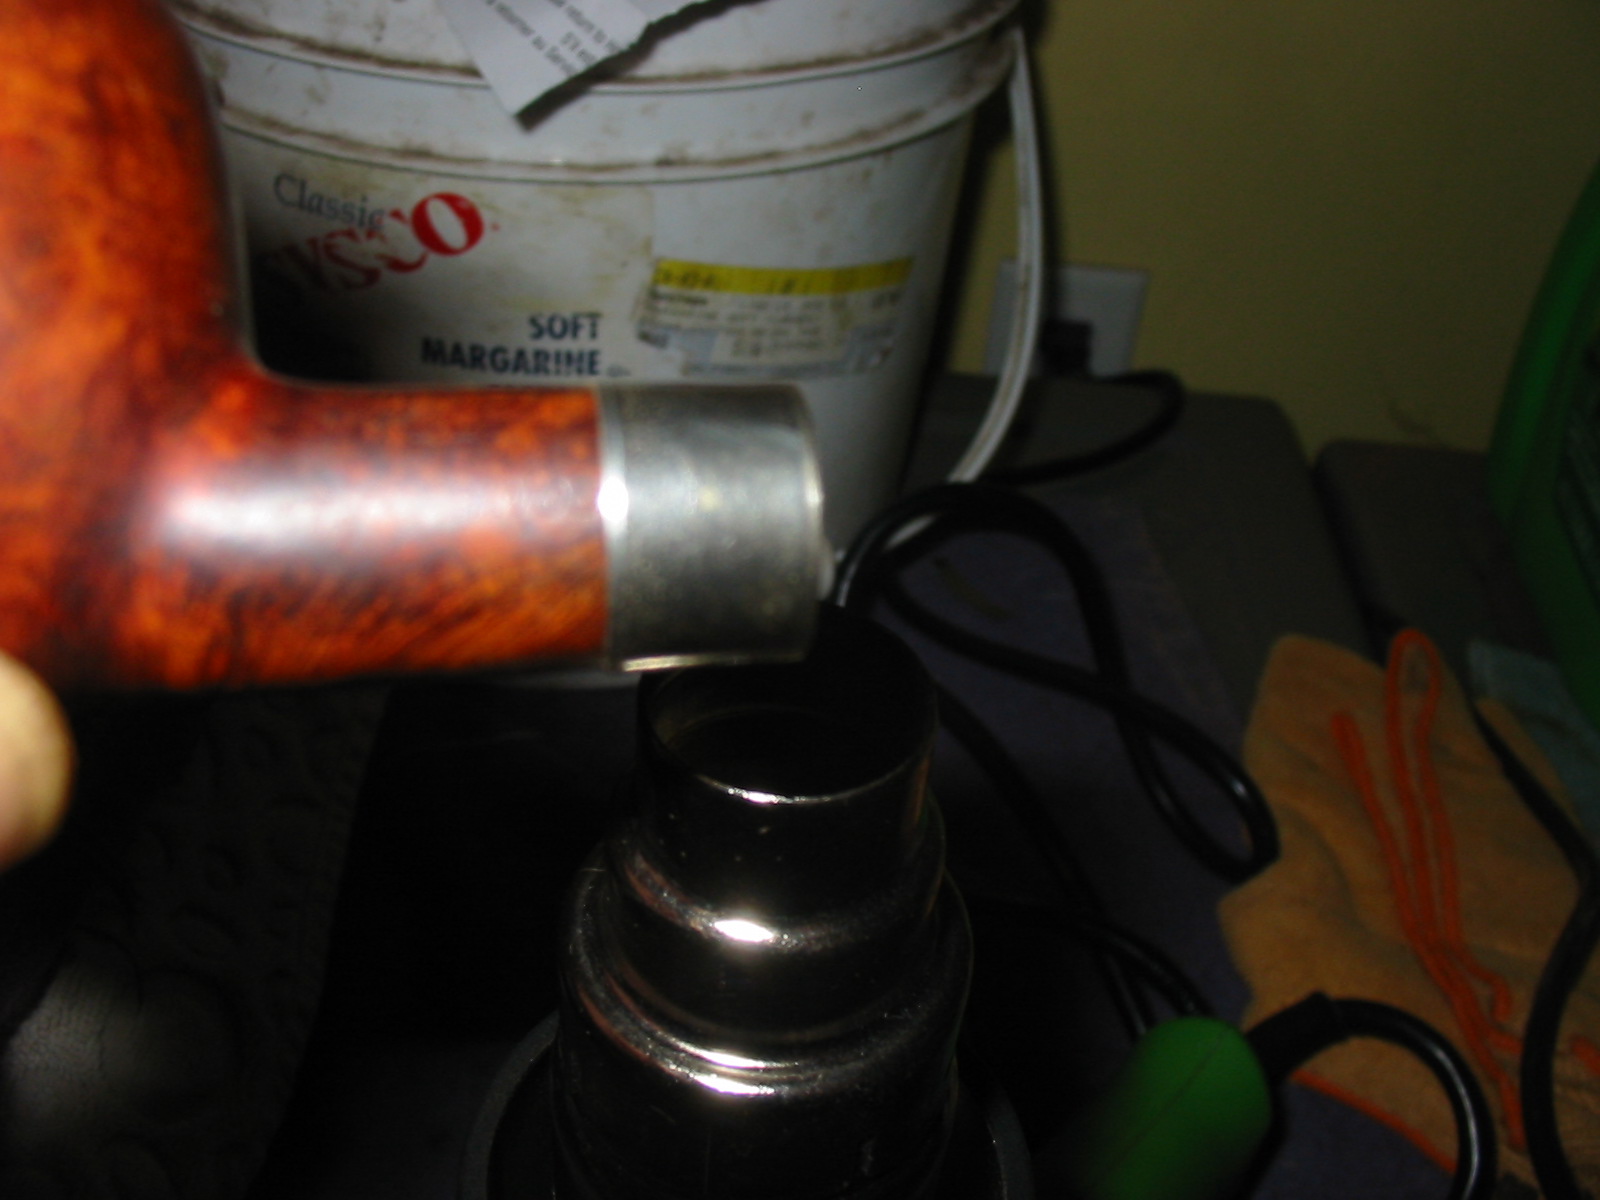
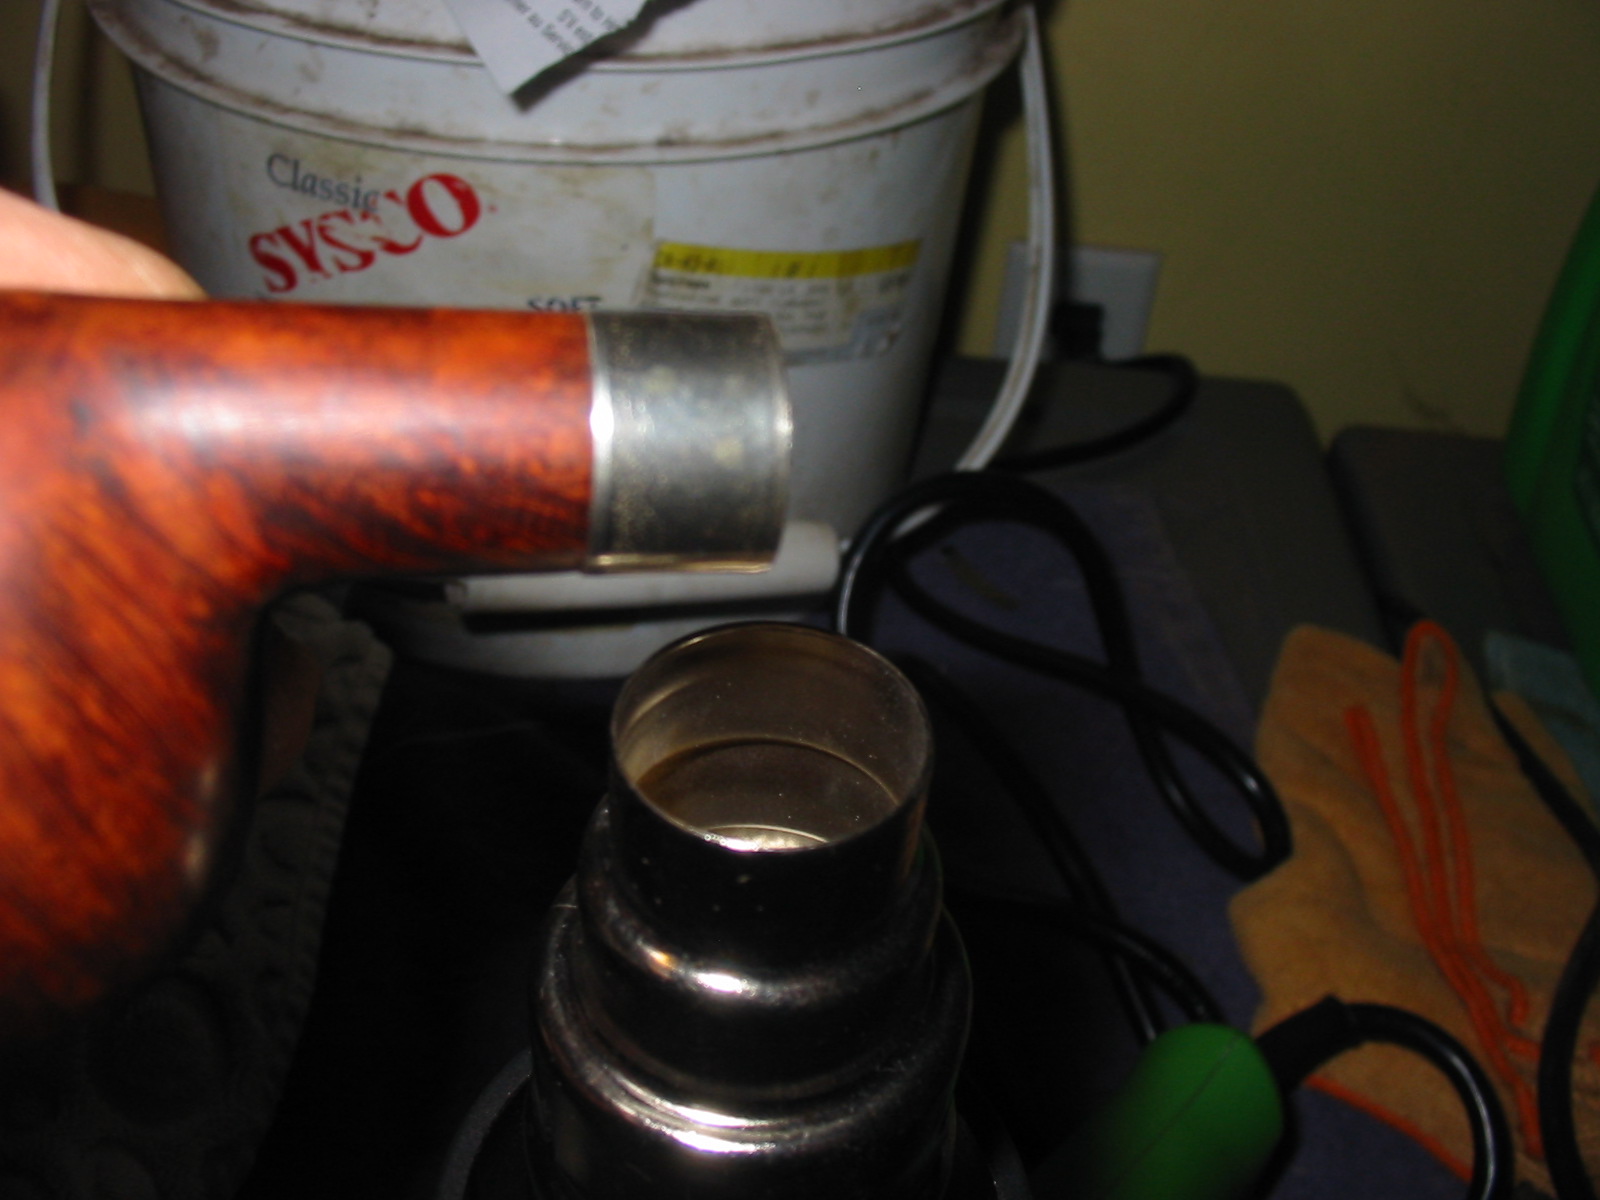
Before I could properly fit the tenon in the shank I needed to drill the mortise deeper. The current depth of the mortise was the same length as the threaded portion of the metal shank attachment in the photo. I wanted the tenon to be longer so I drilled out the mortise to double the length of the current depth. I would need to remove some of the tenon length on the stem to make a good fit but that is a simple task.
IMG_3356

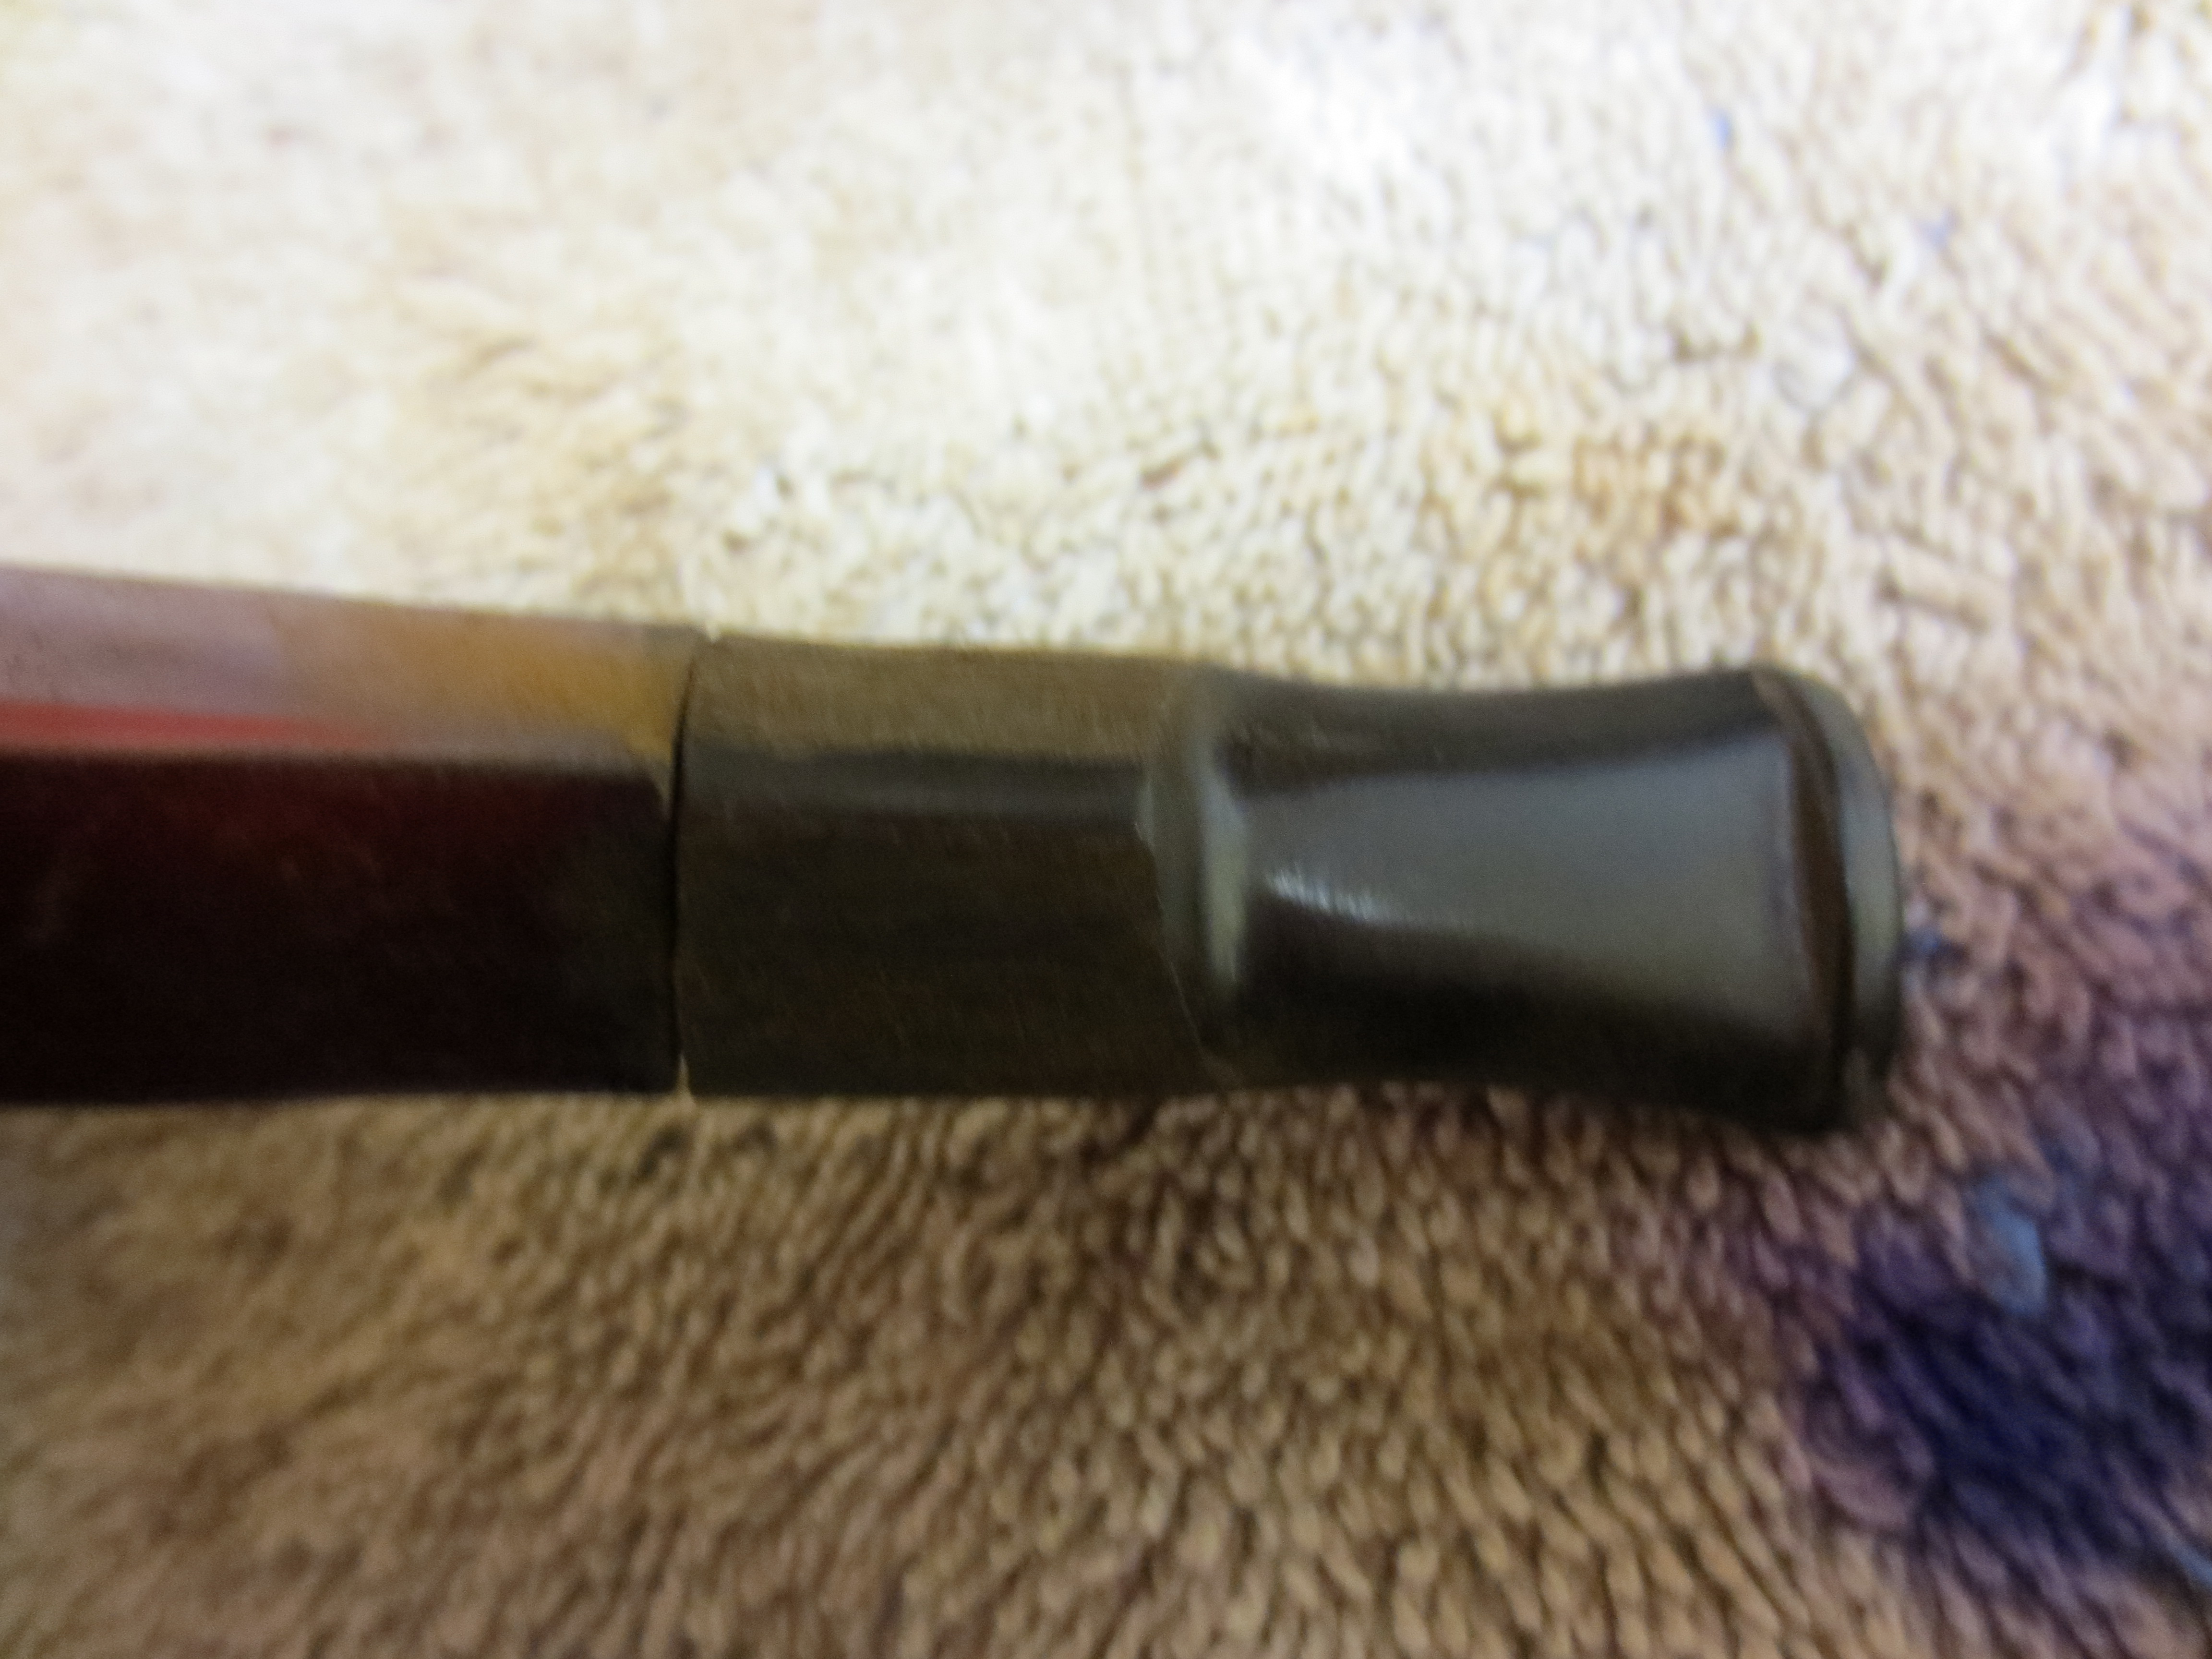
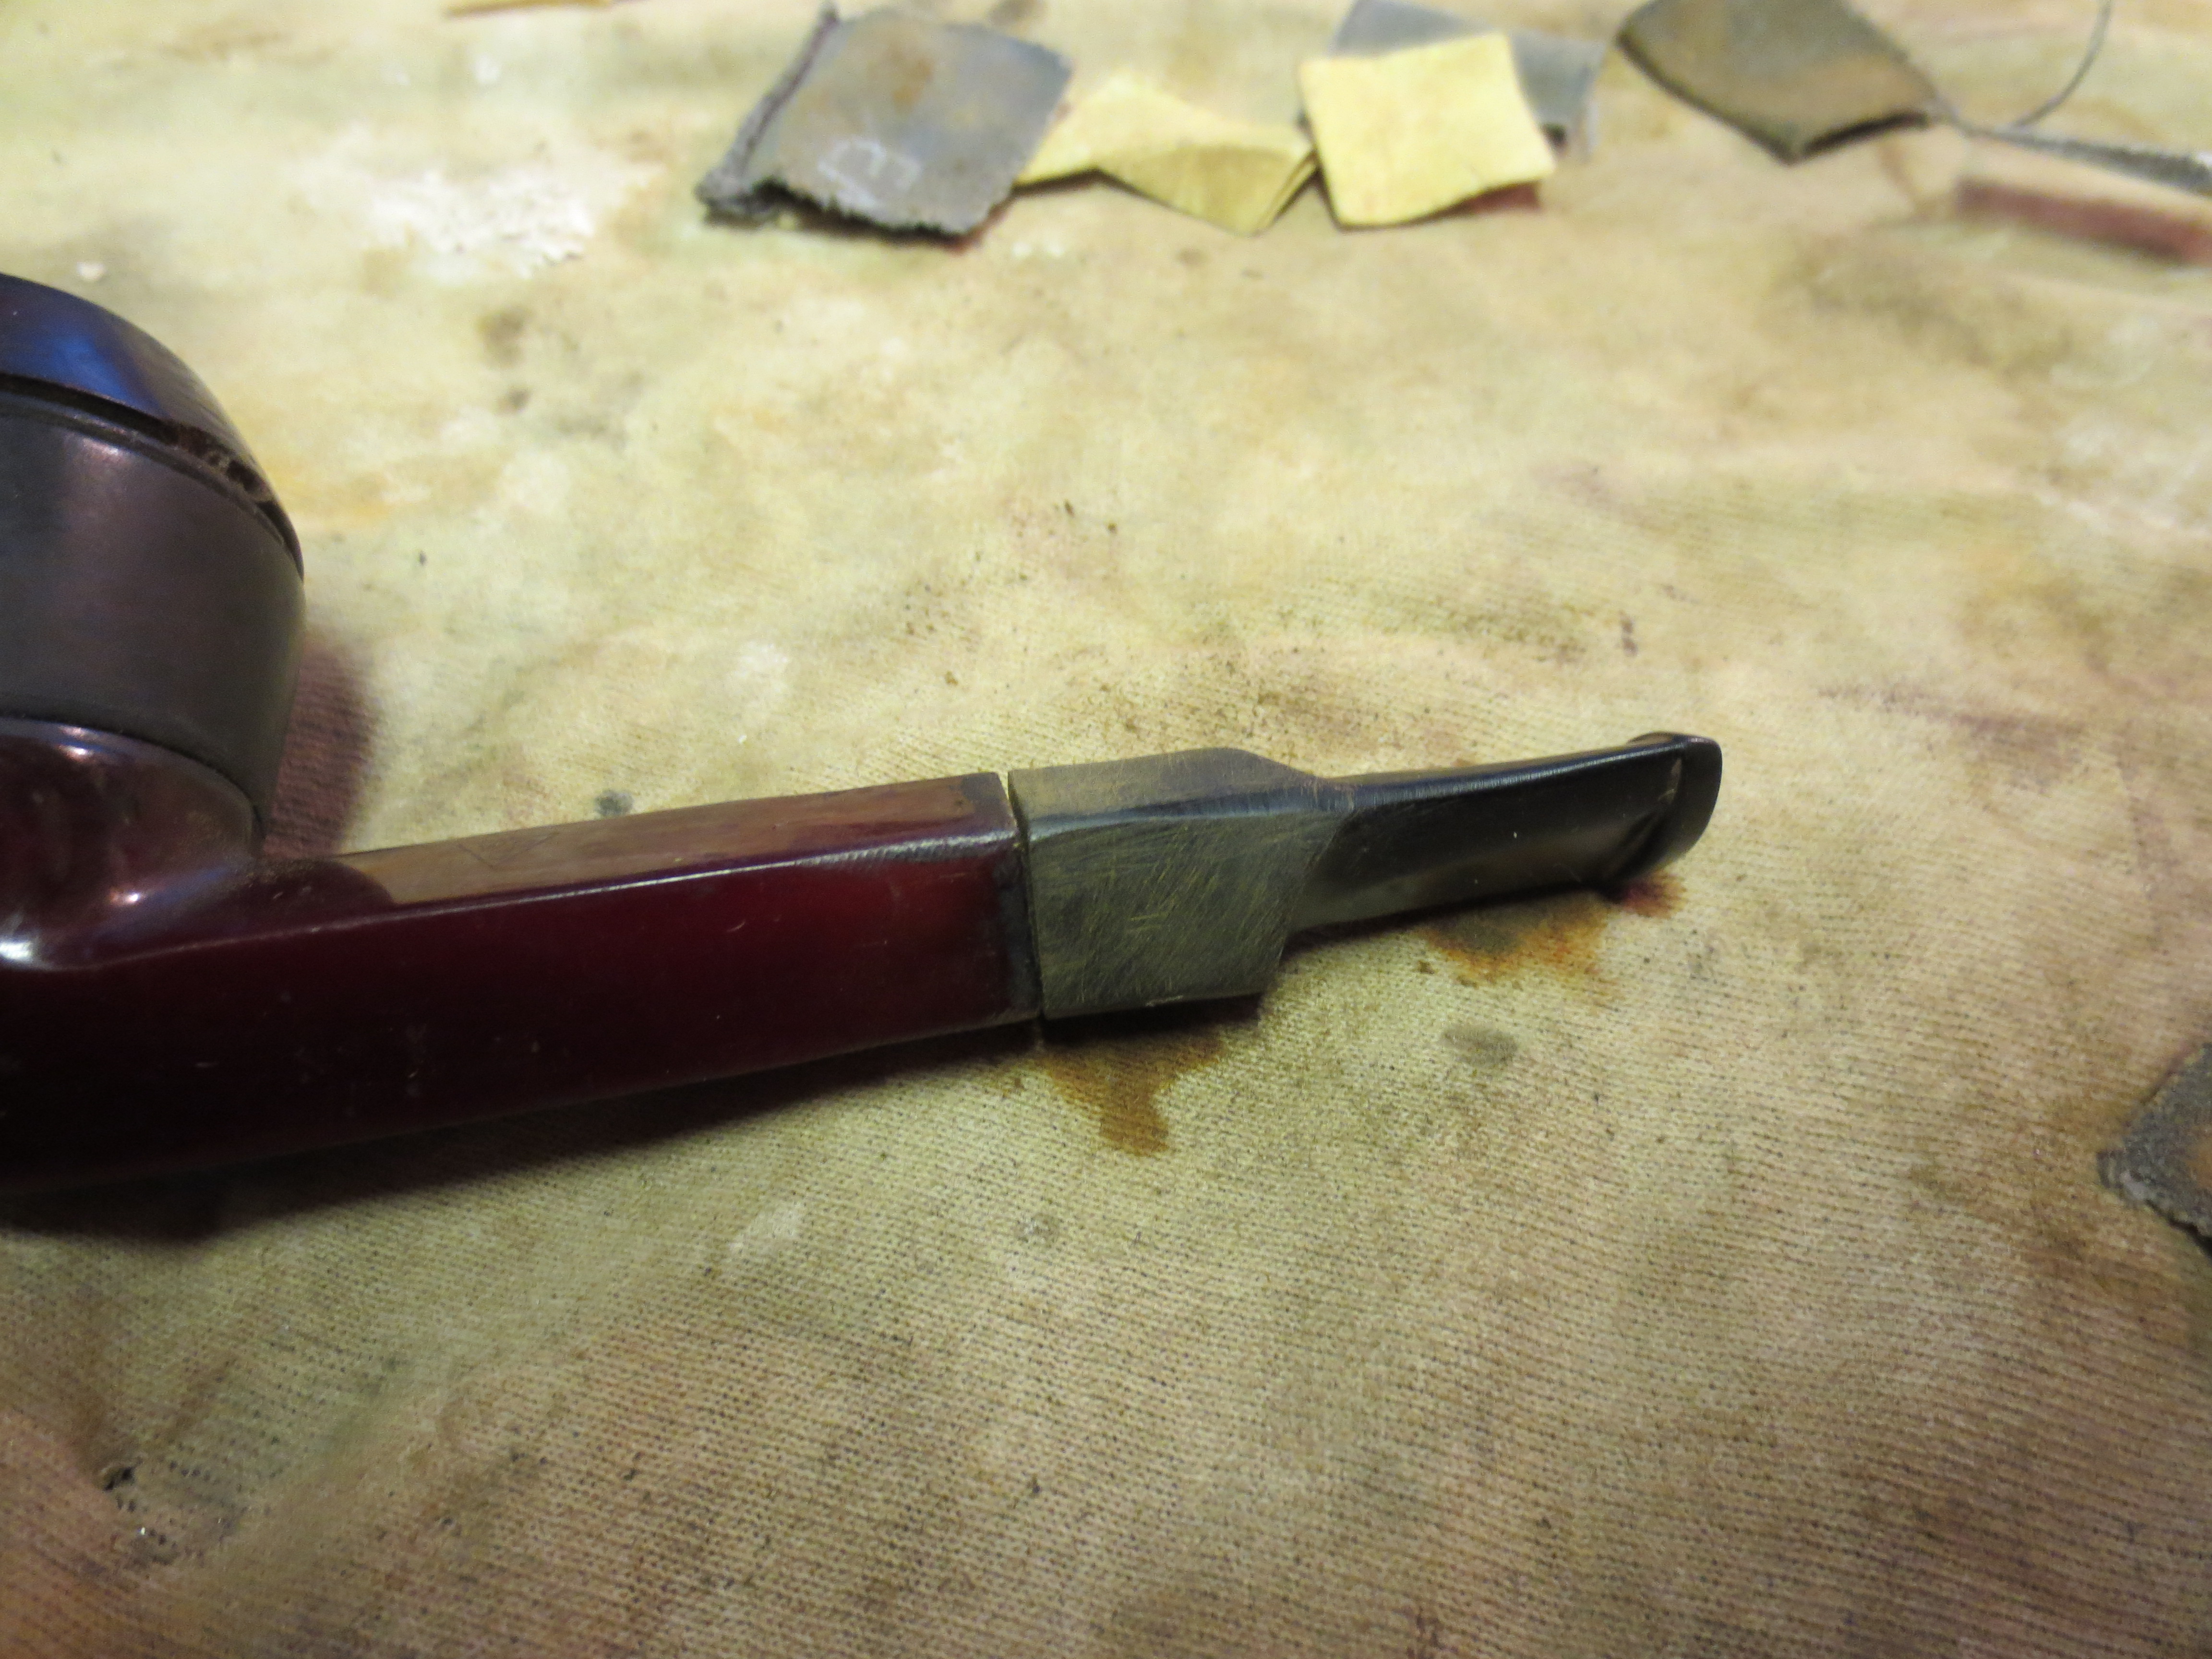
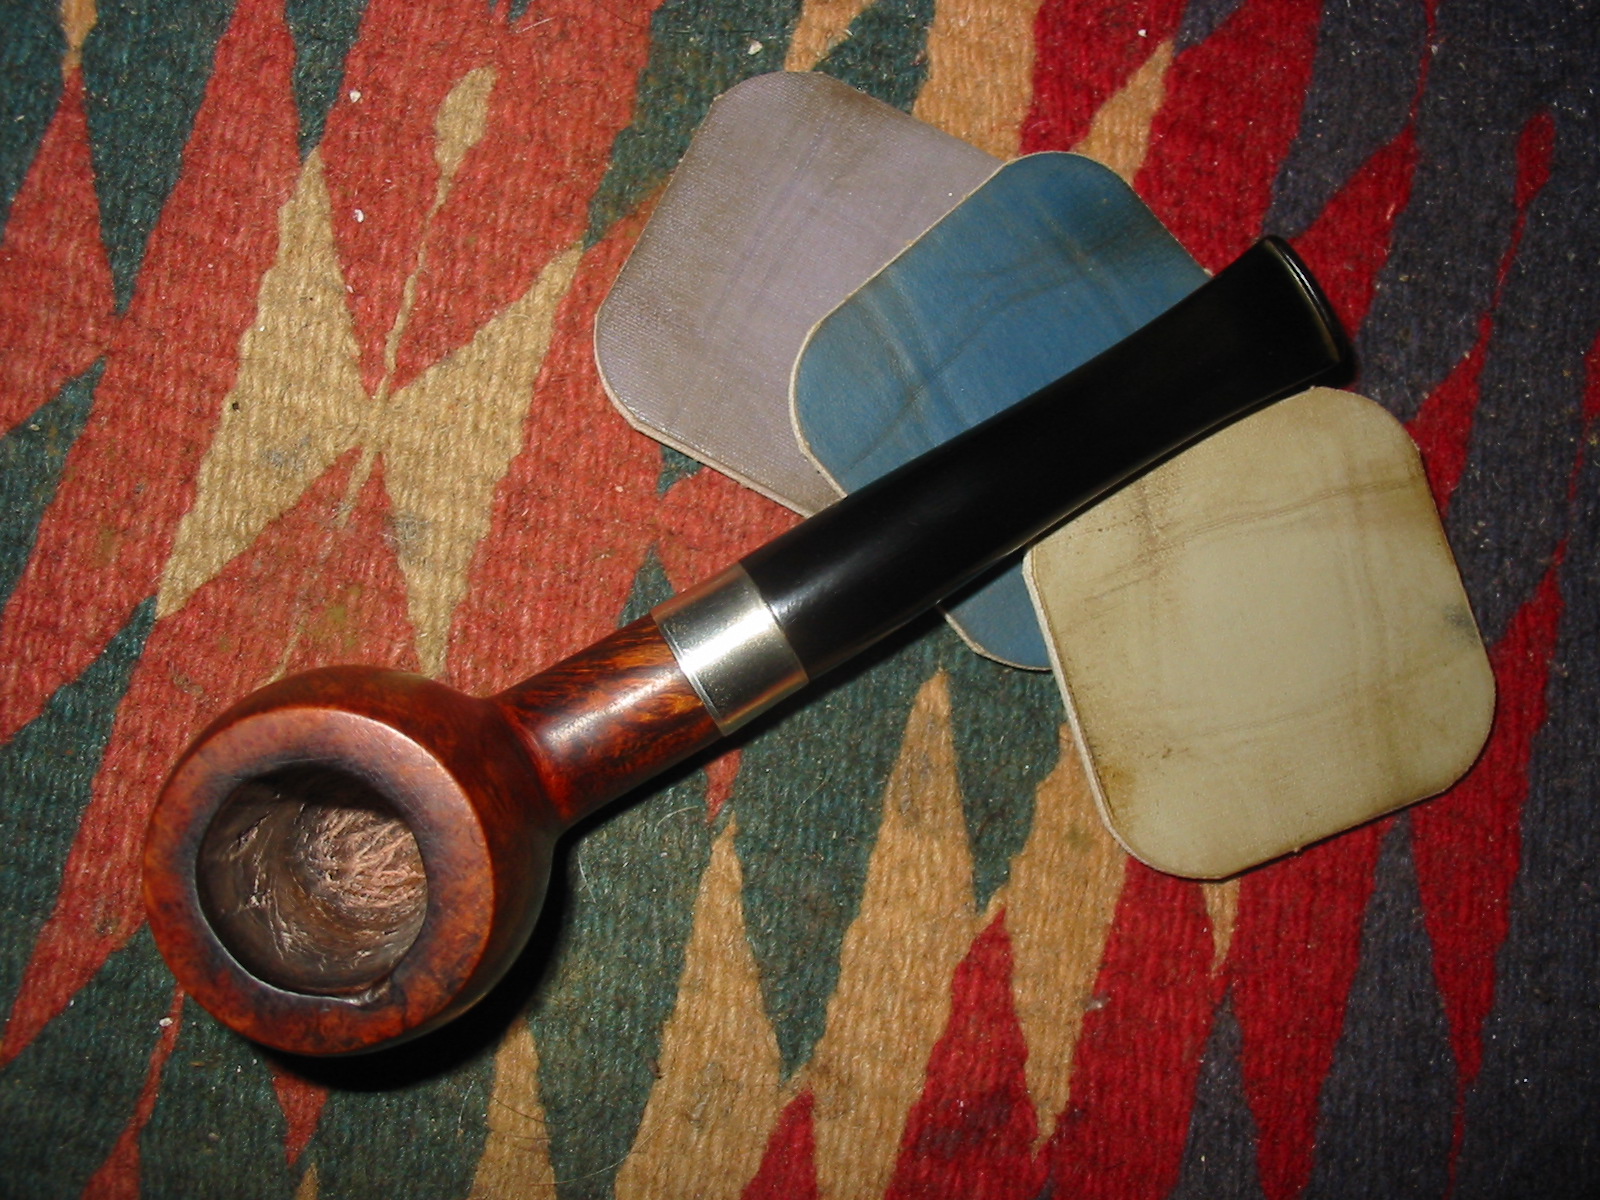
With the drilling done, I used the PIMO Tenon Turning Tool to remove some of the excess diameter of the tenon and also shortened the tenon slightly to get a good tight fit in the shank and clean joint at the tenon shank union. The larger diameter of the stem is visible in the photo below.
IMG_3357

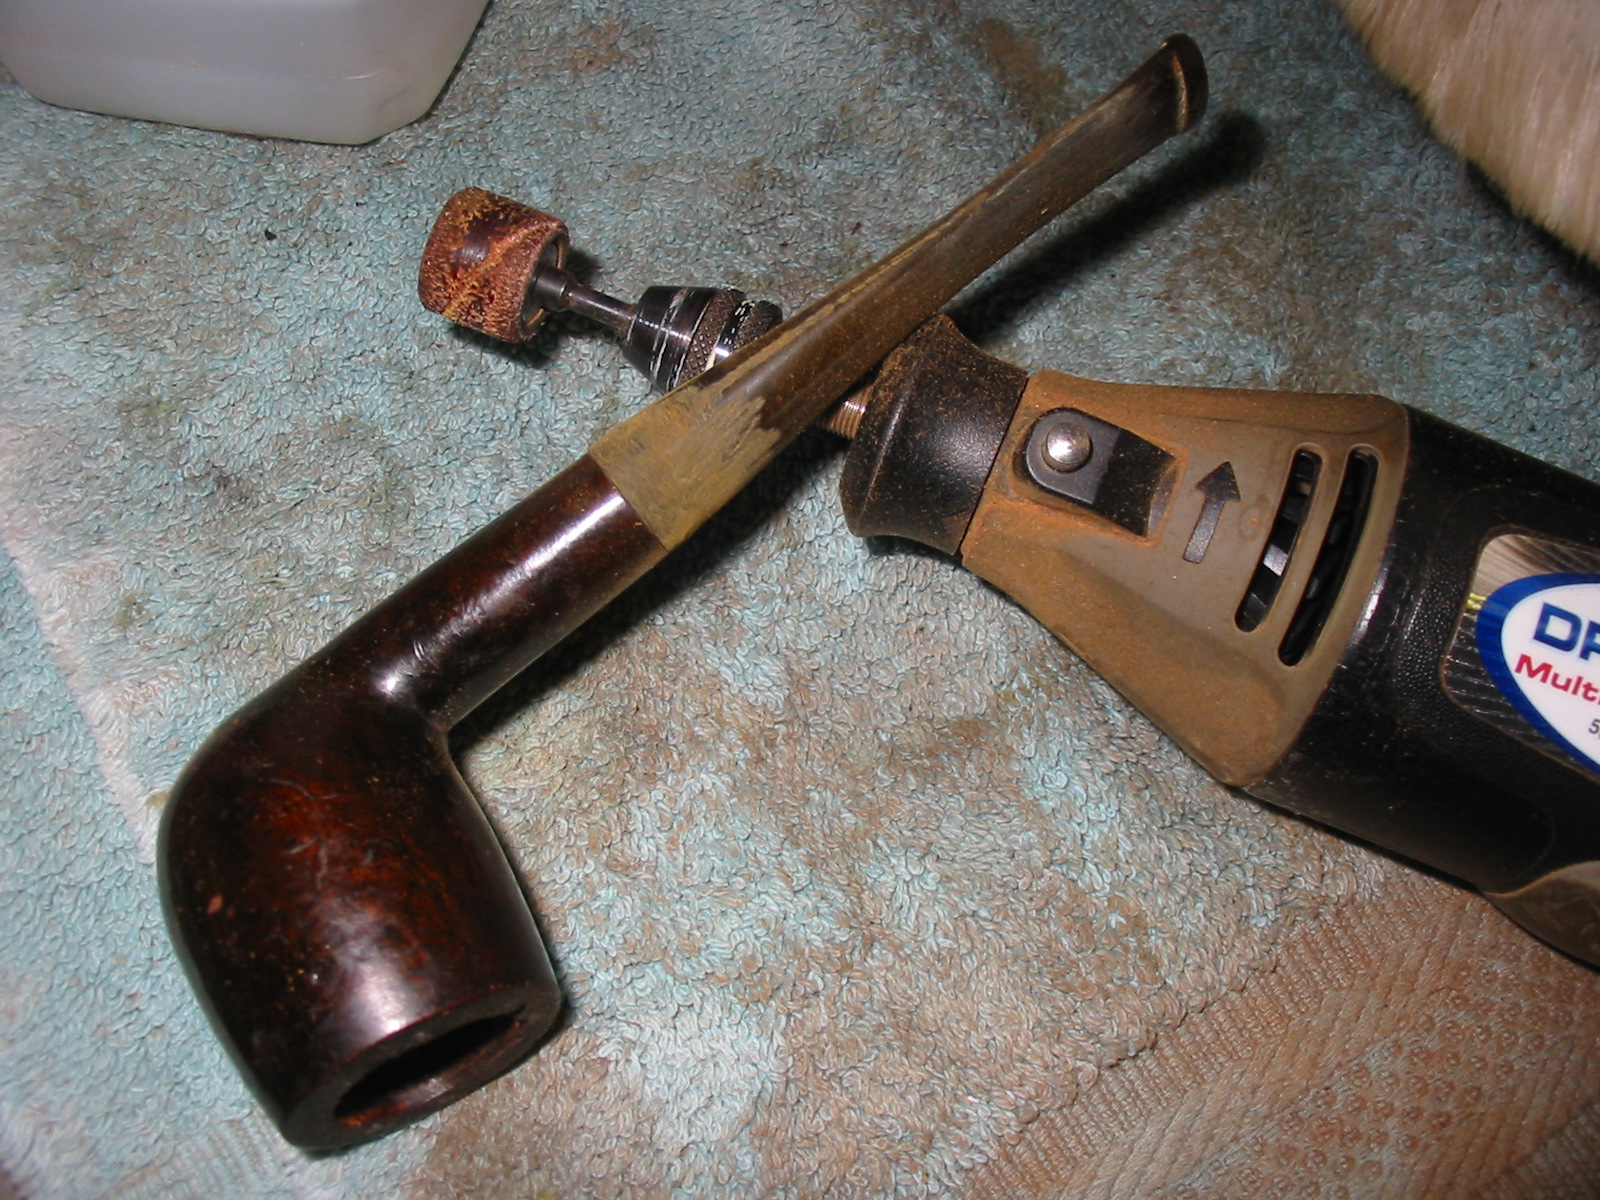
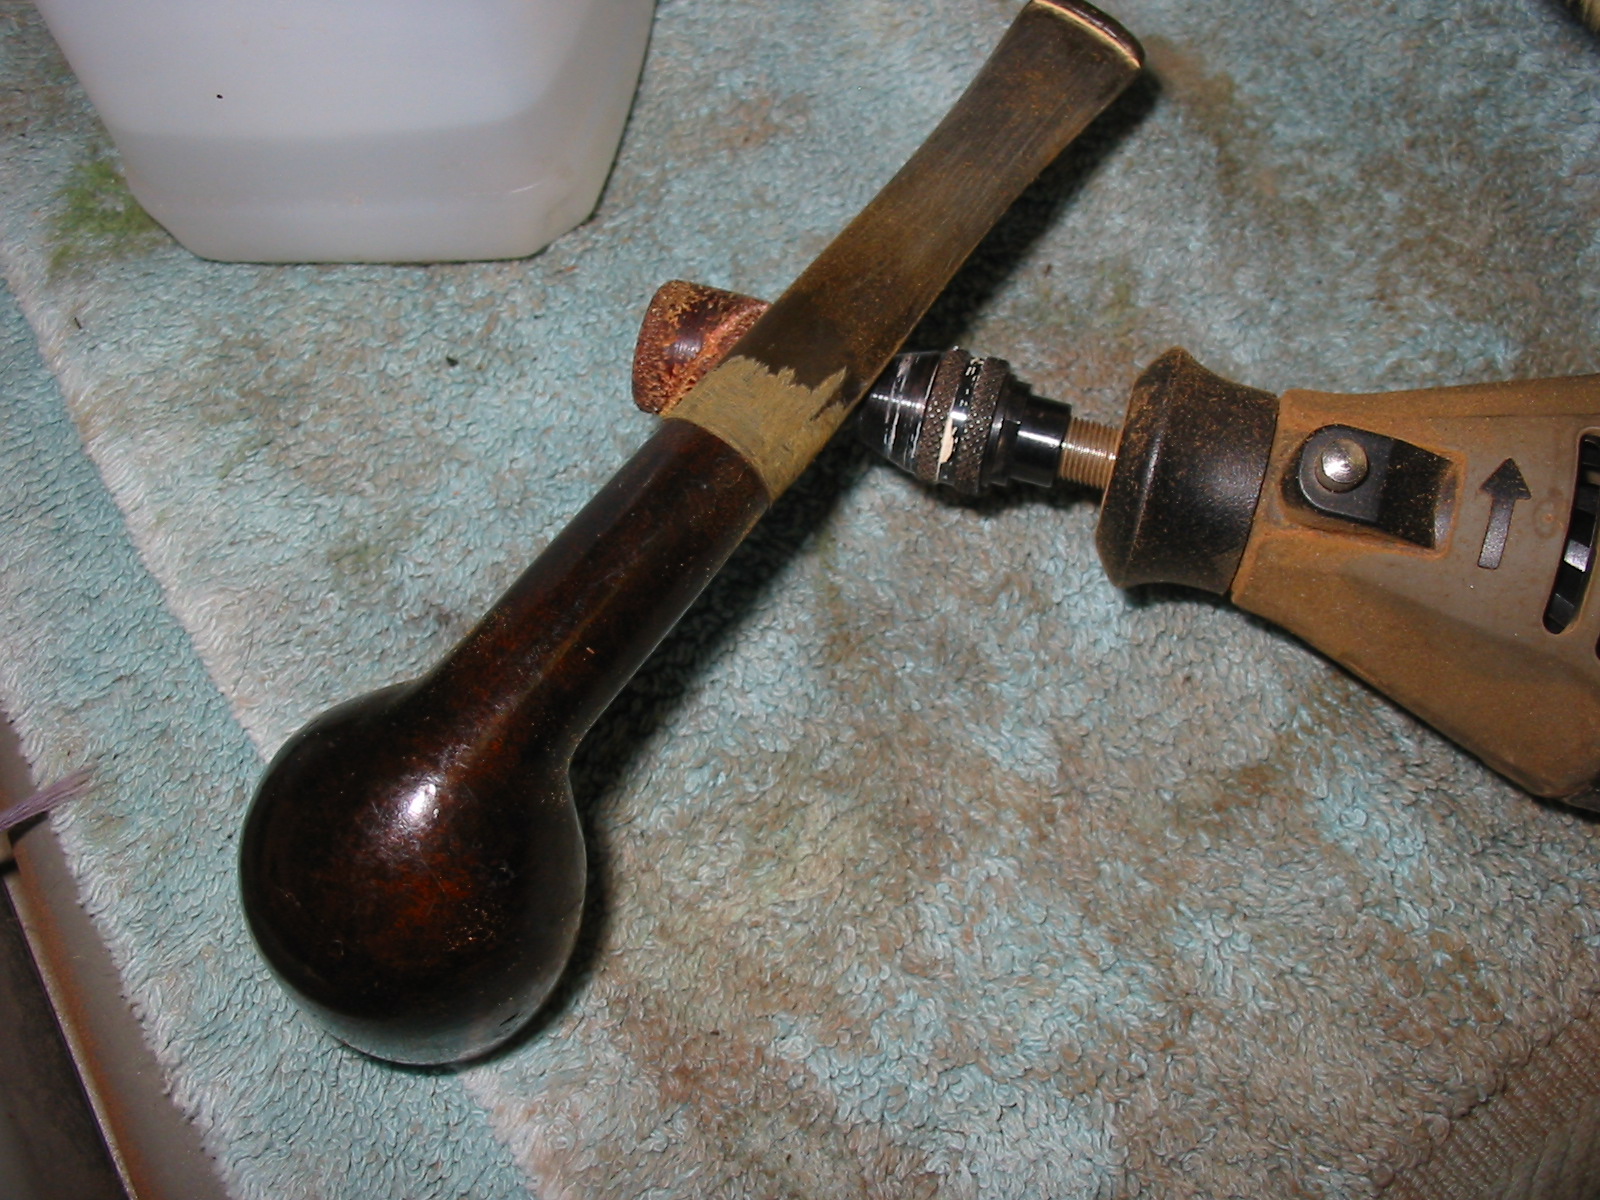
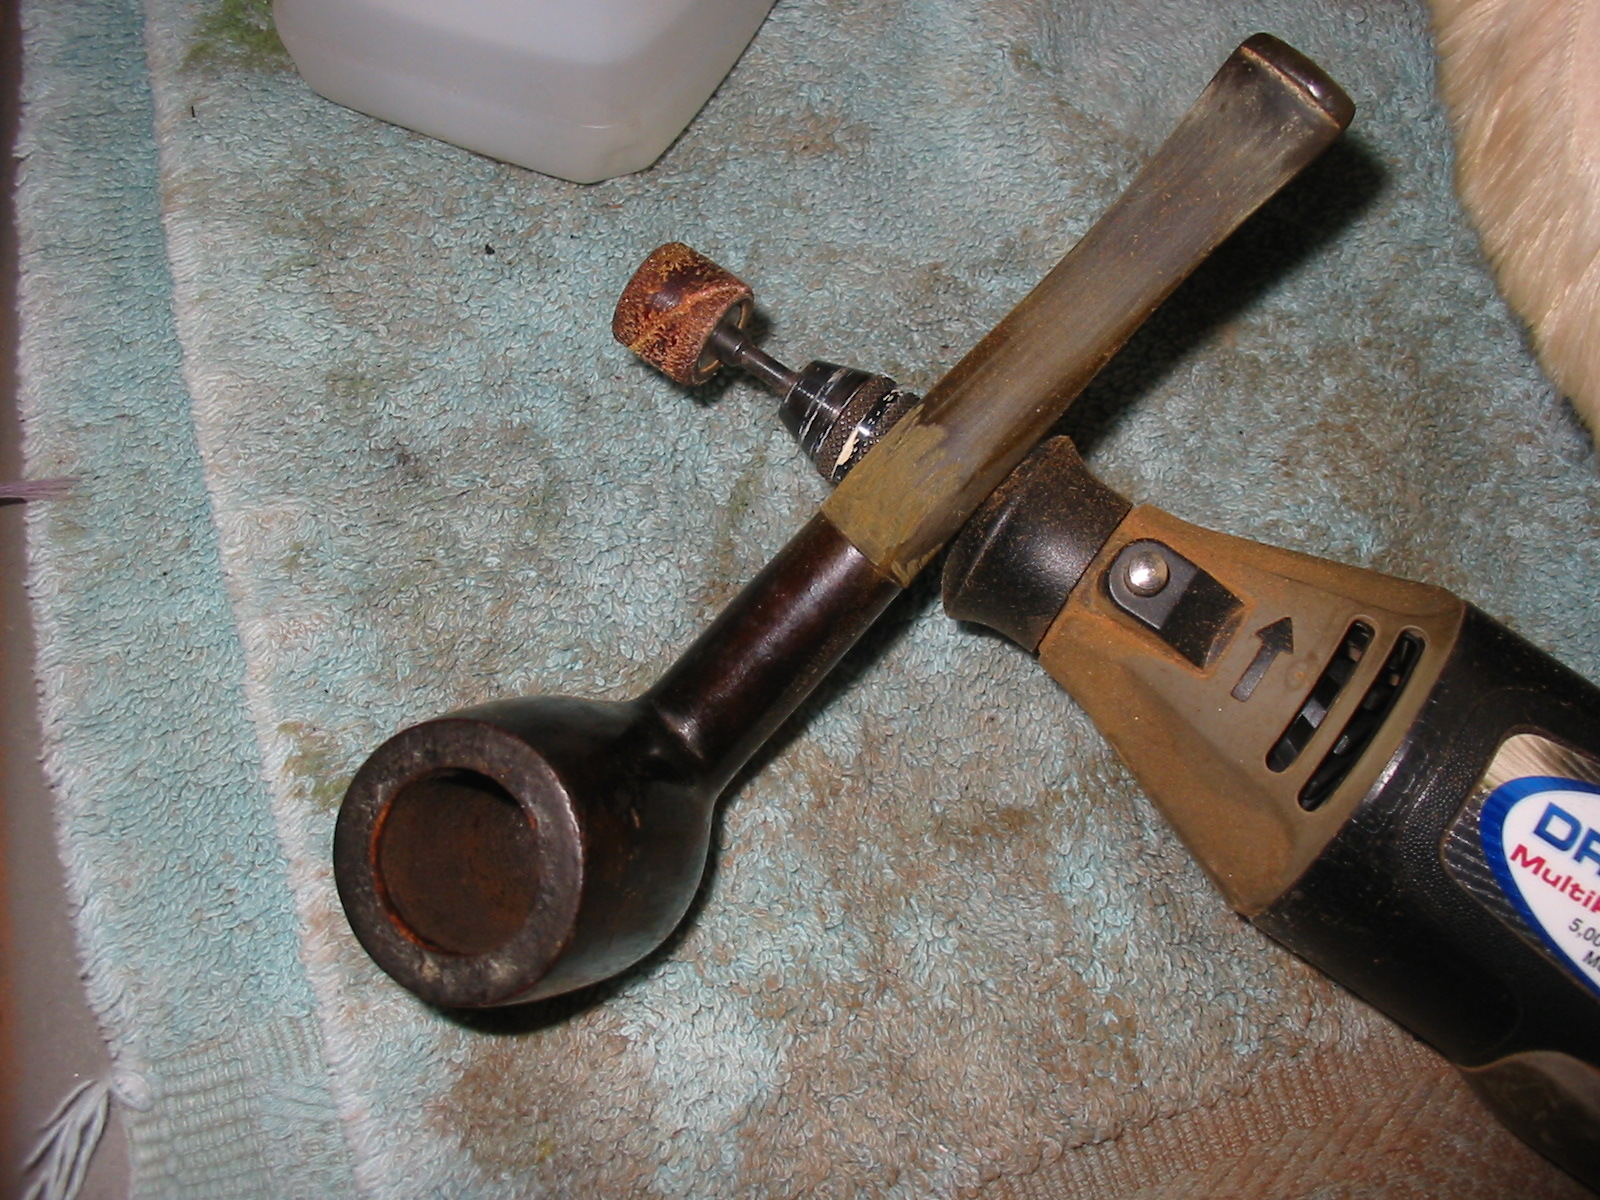
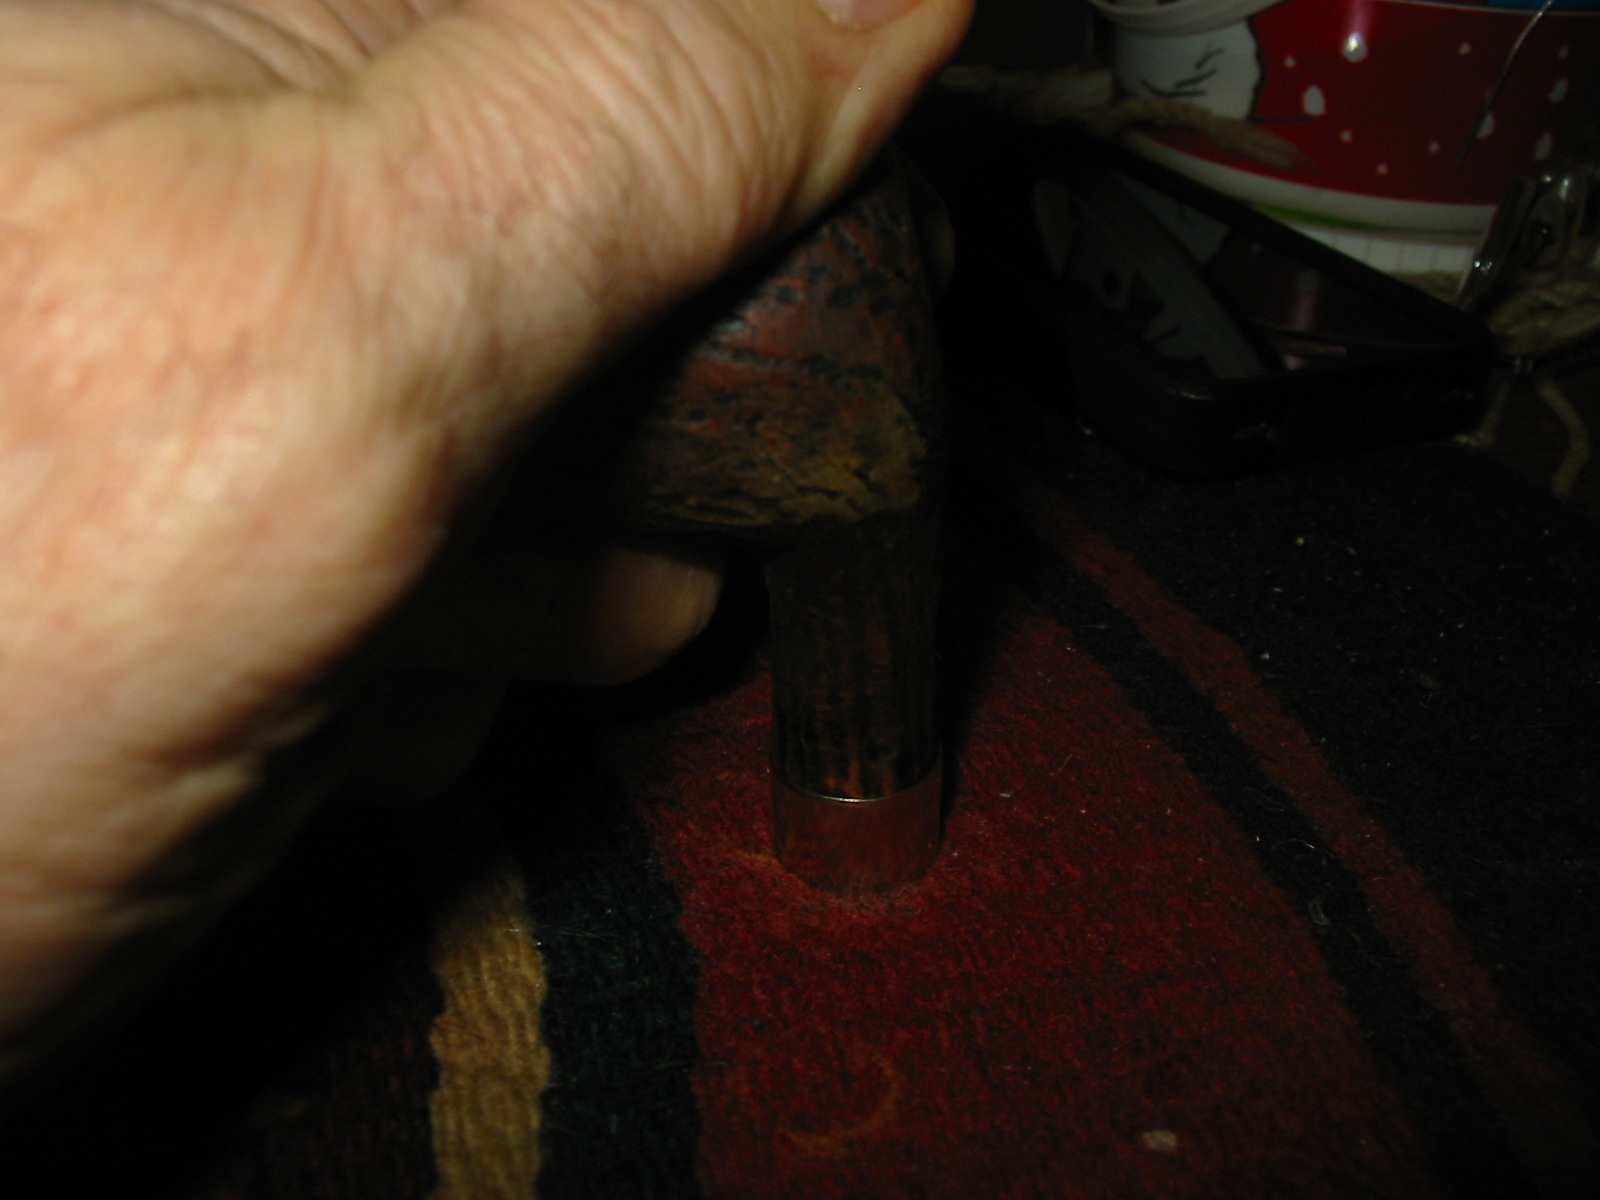
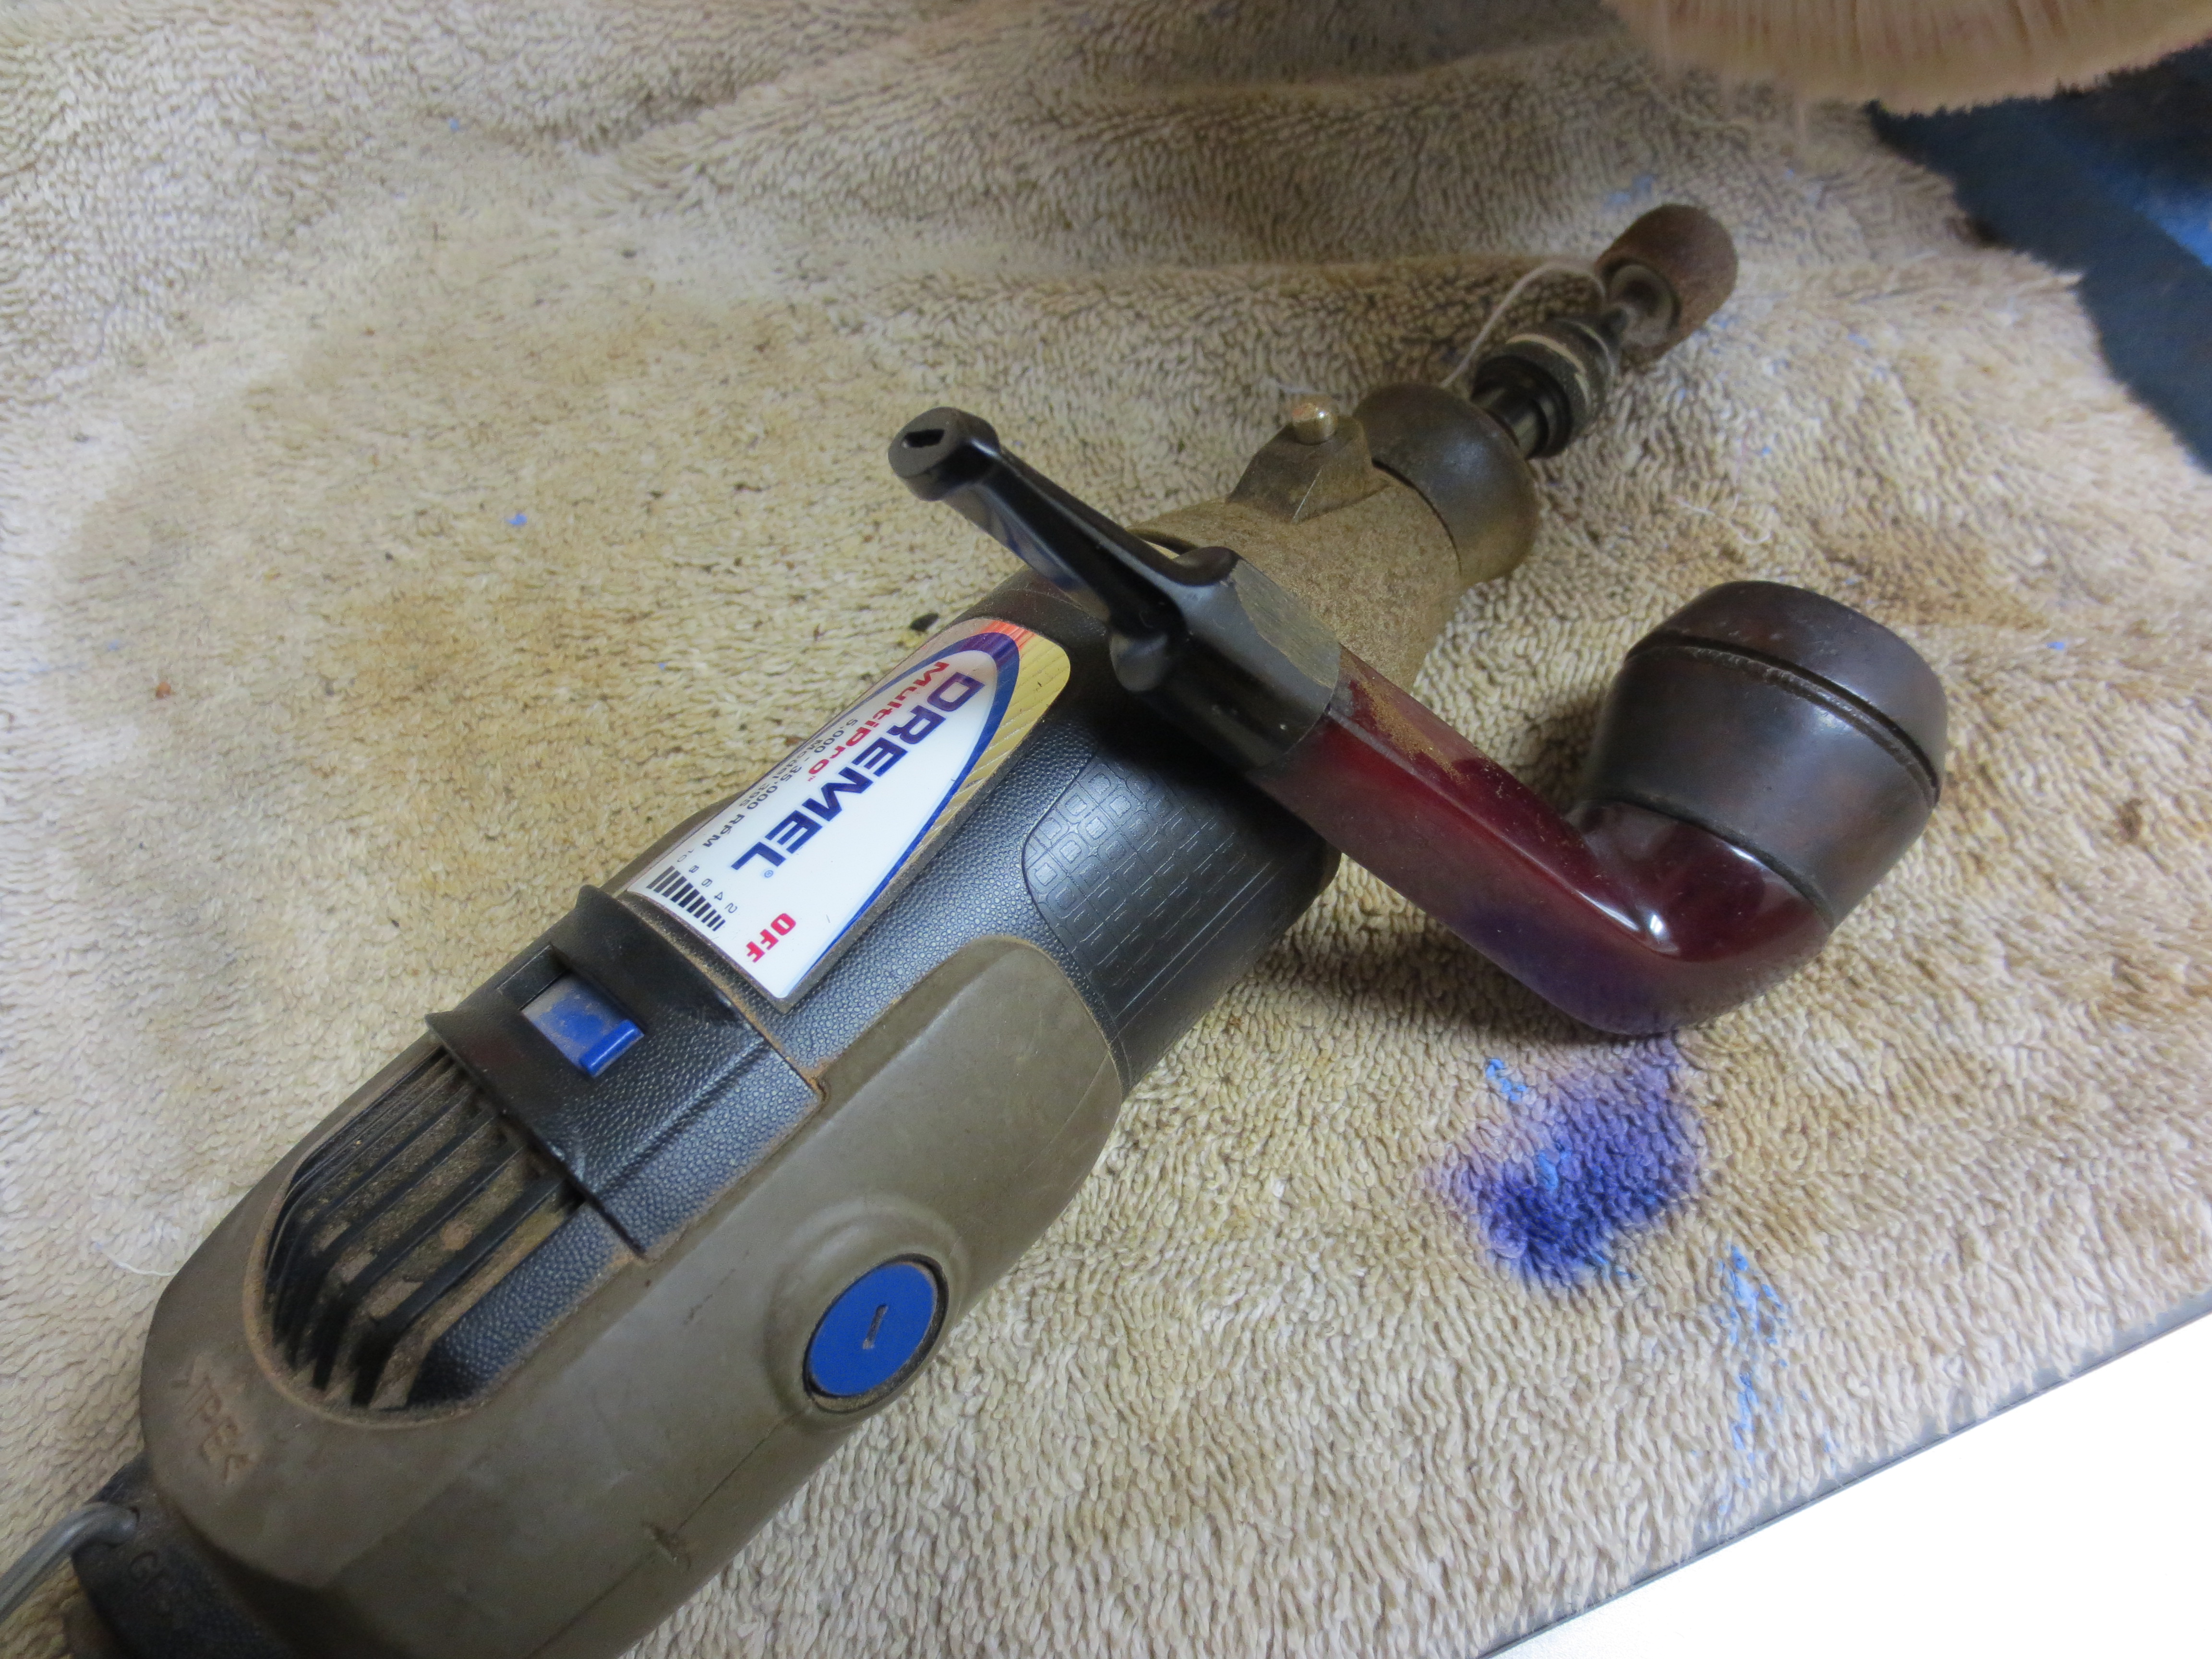
I used the Dremel with the sanding drum and carefully reduced the diameter of the stem while it was in place on the shank. I run the Dremel at a speed that allows me to carefully and steadily control it as I work close to the shank of the pipe.
IMG_3359

IMG_3360

IMG_3361

IMG_3362

IMG_3363

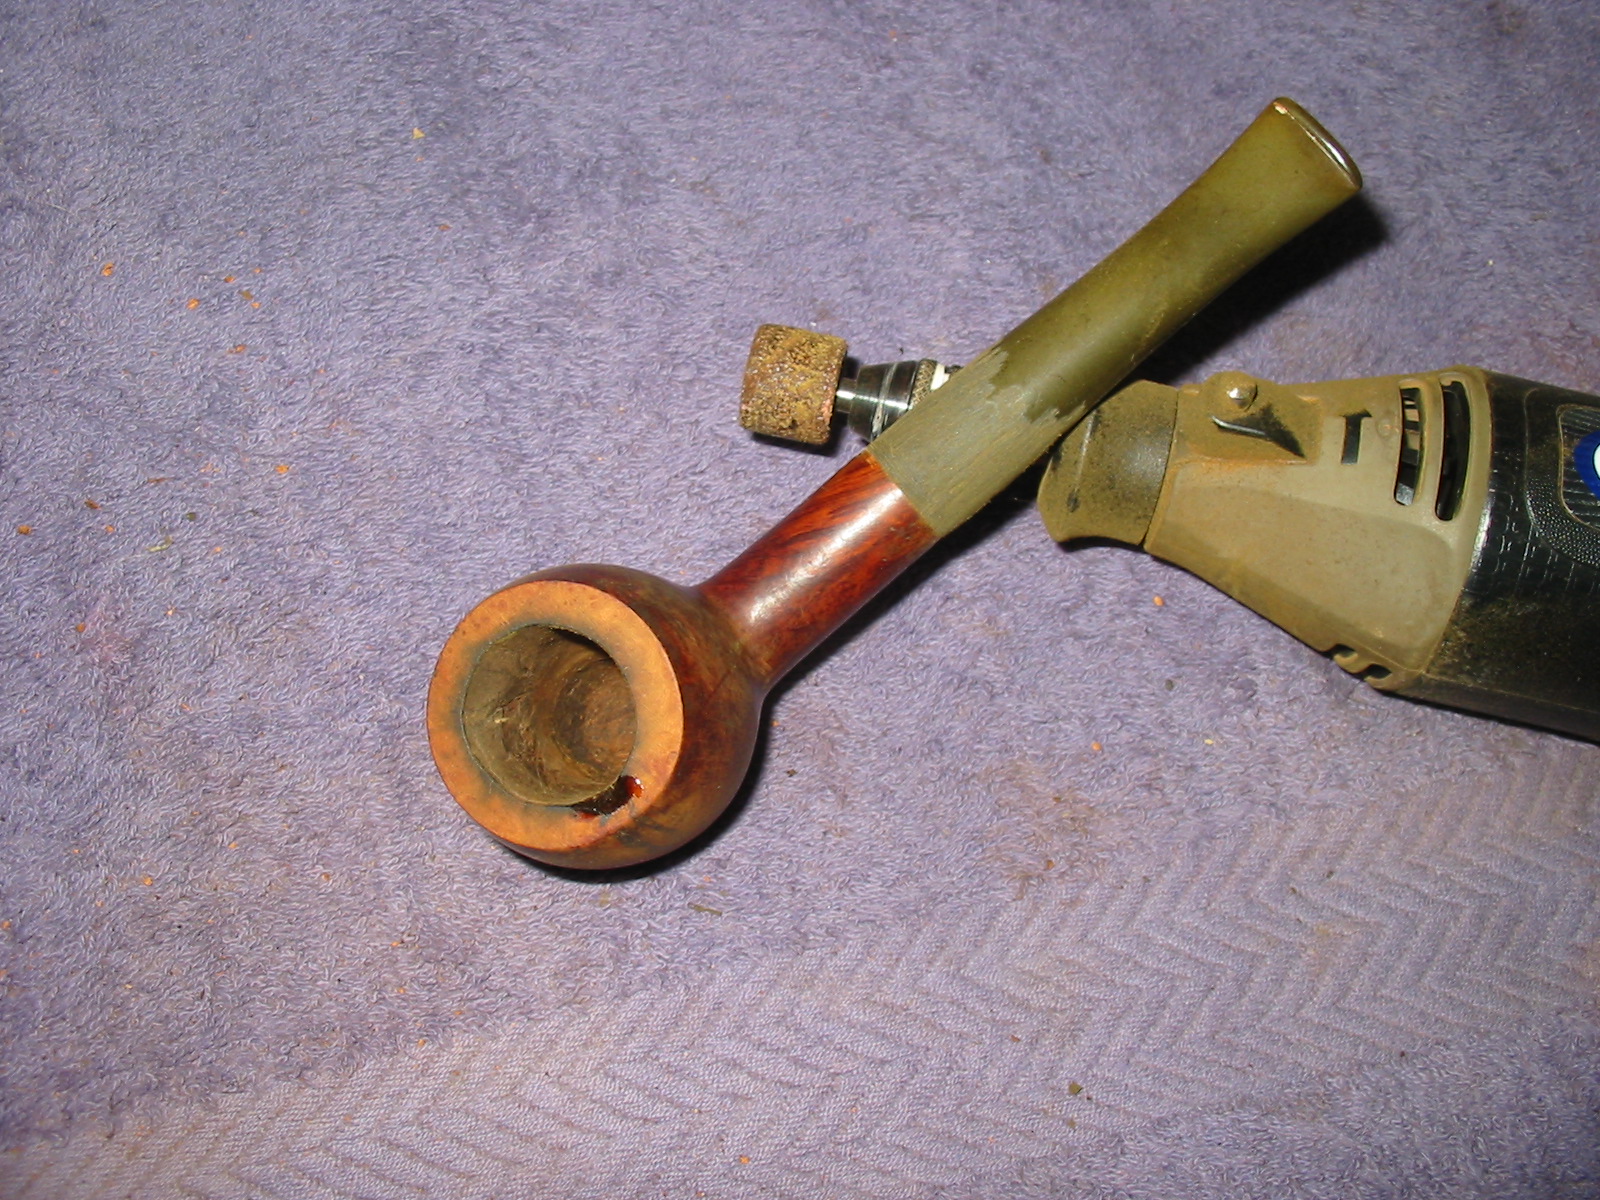
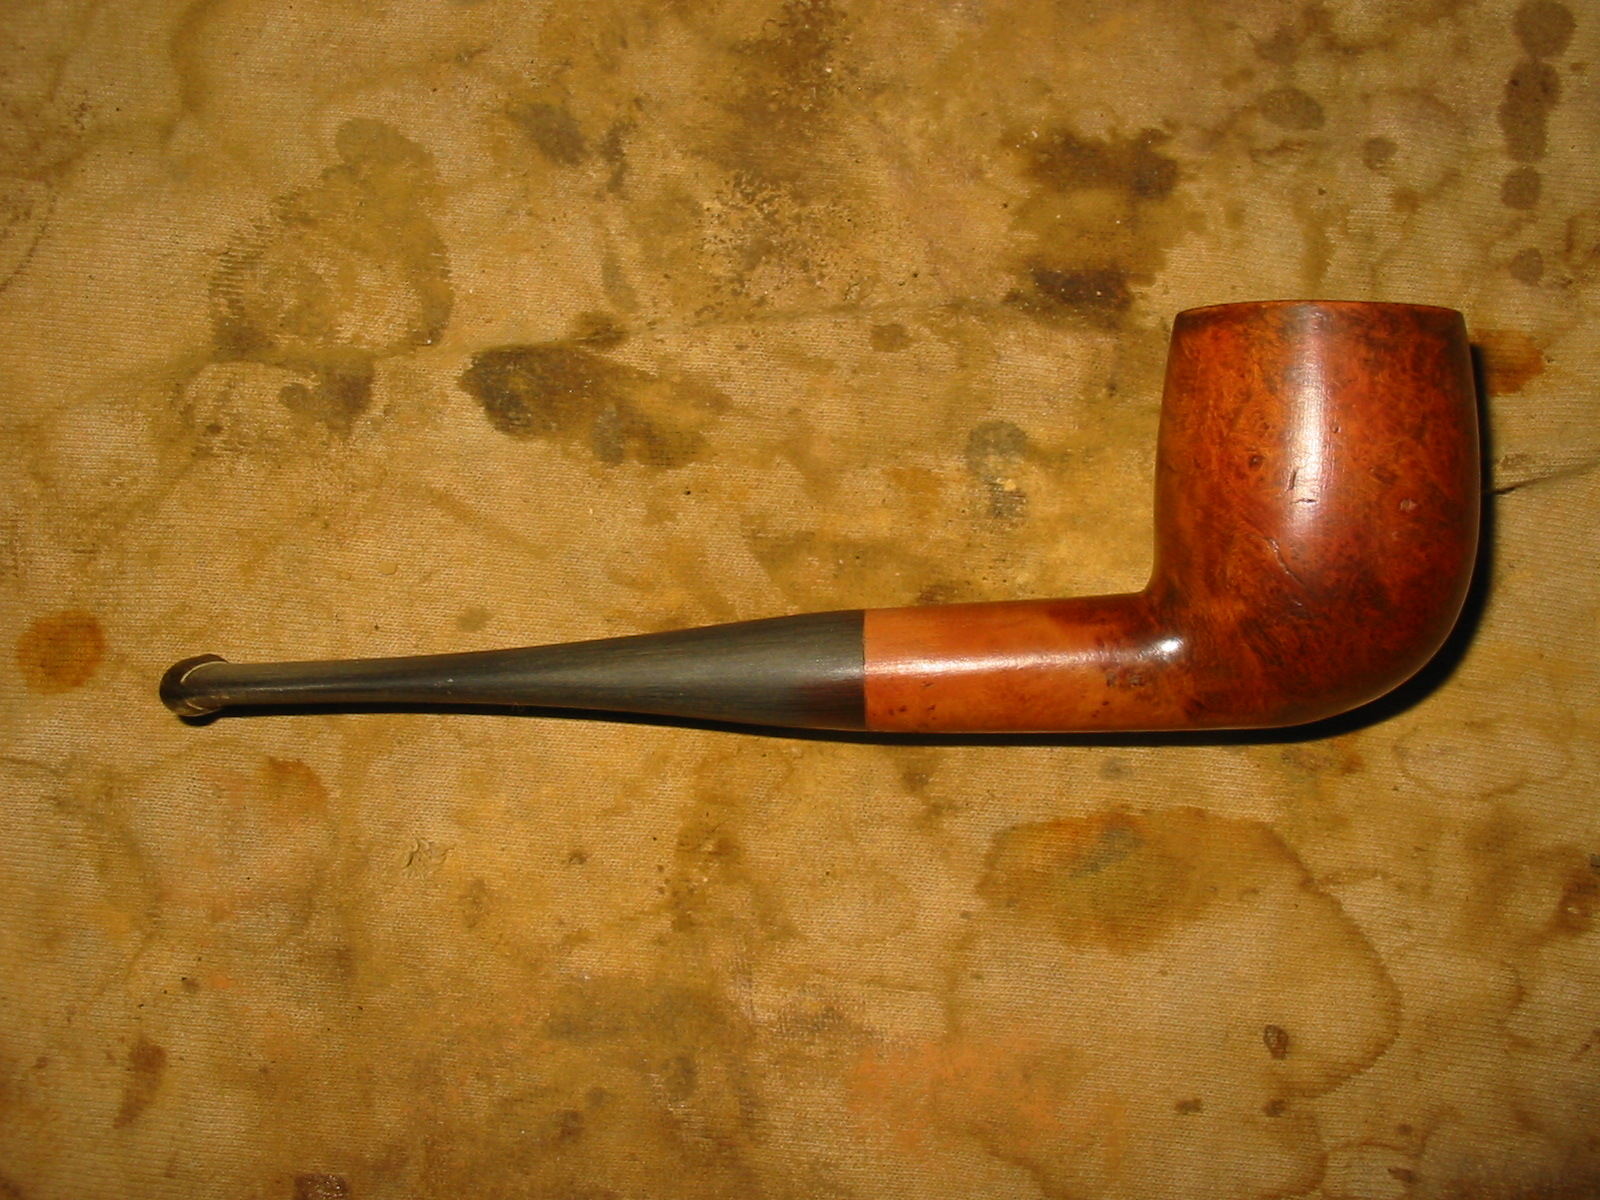
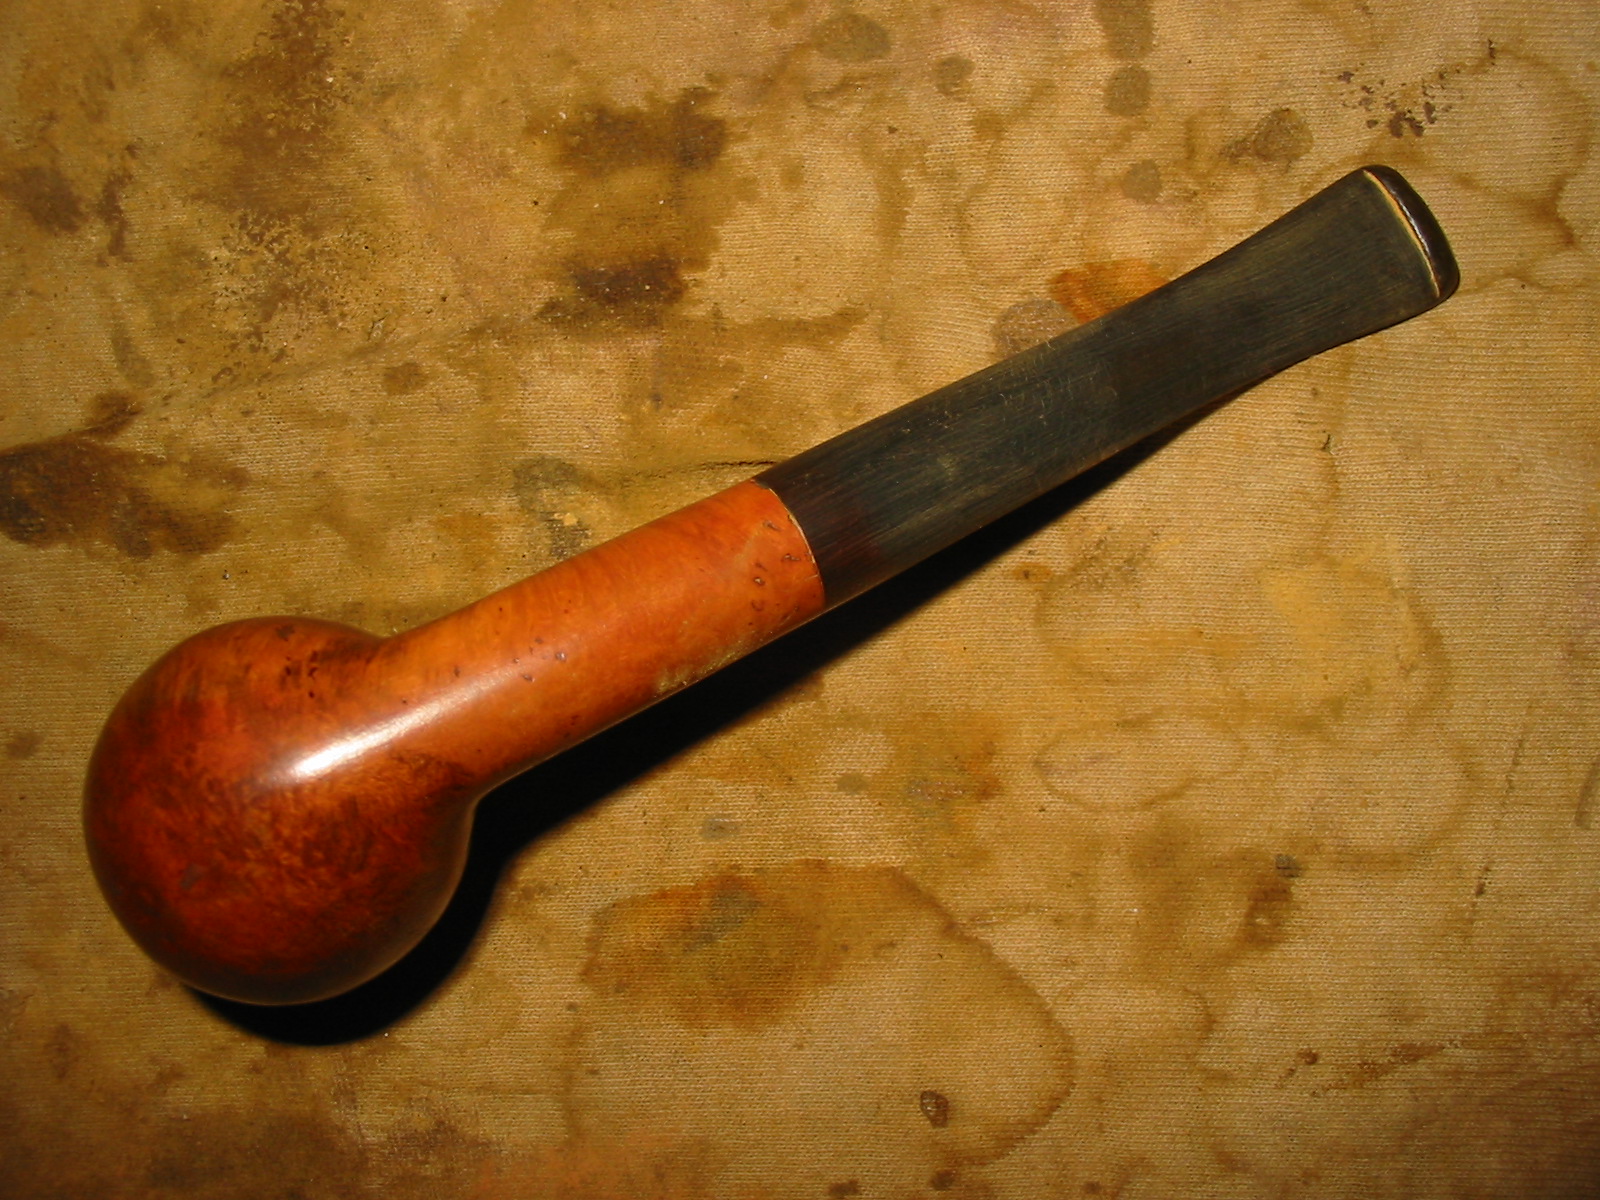
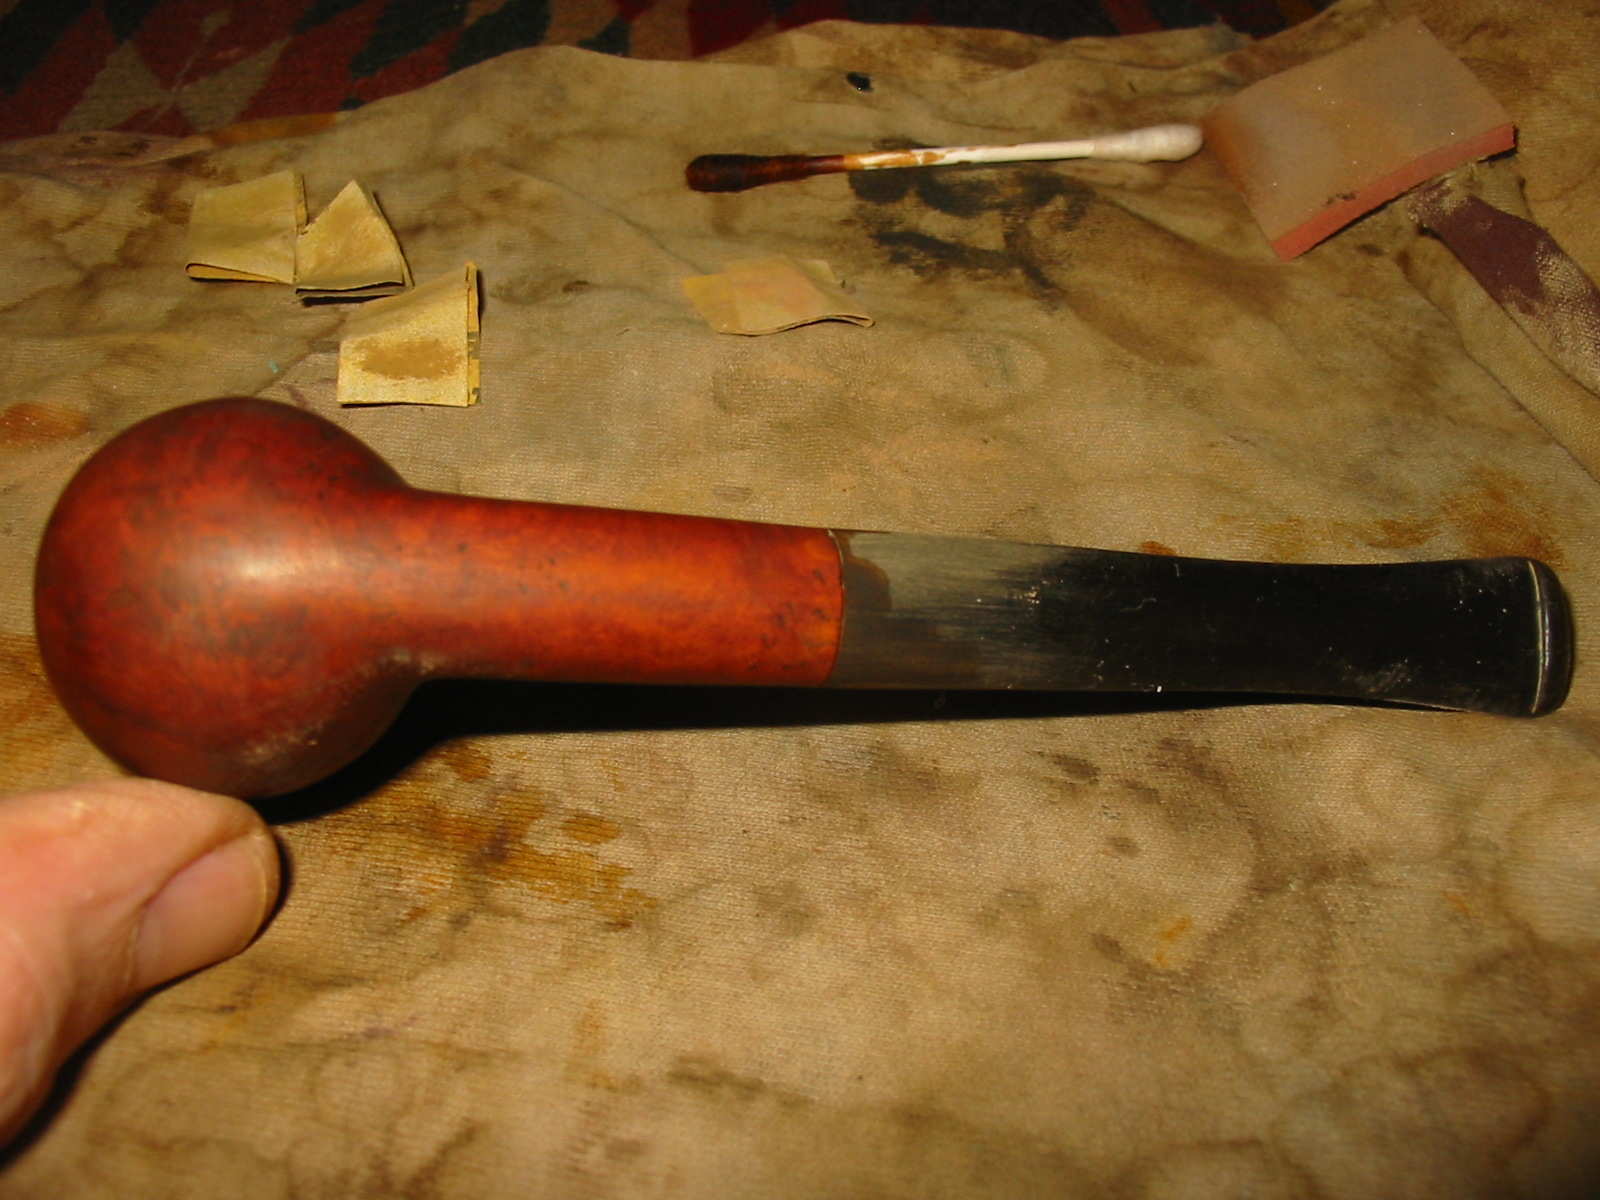
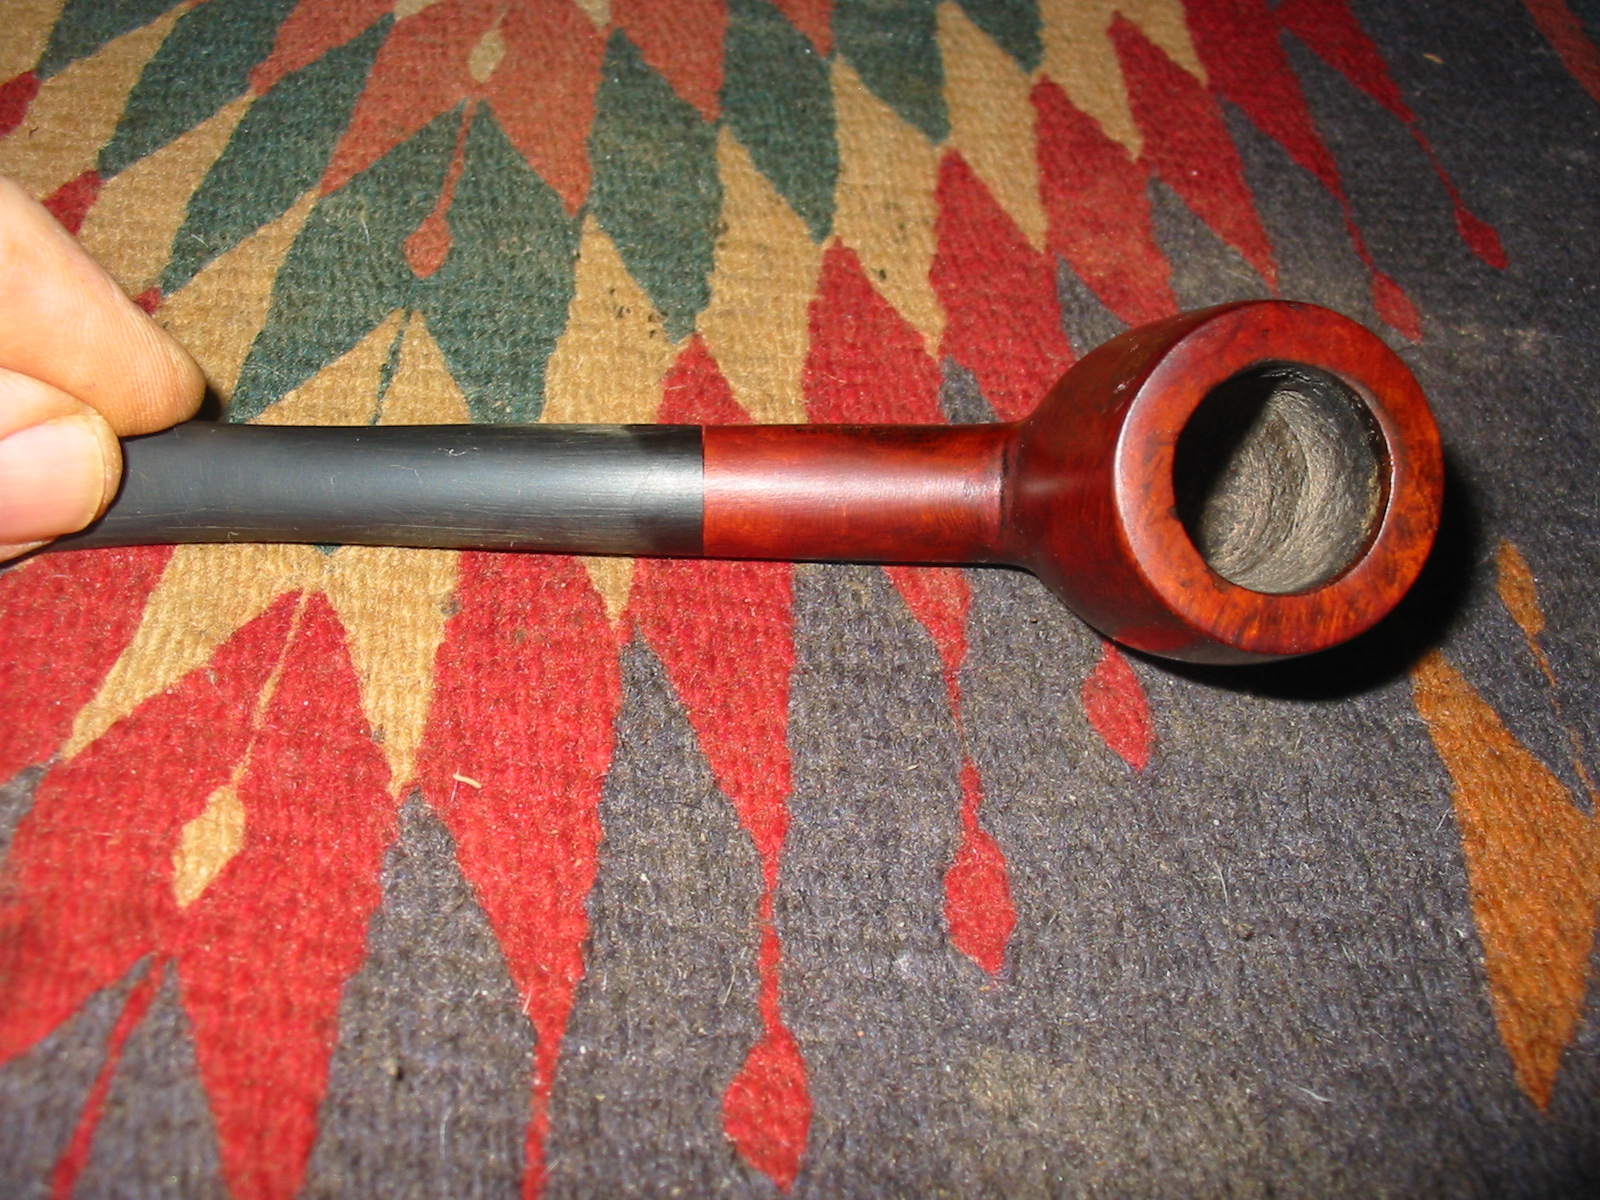
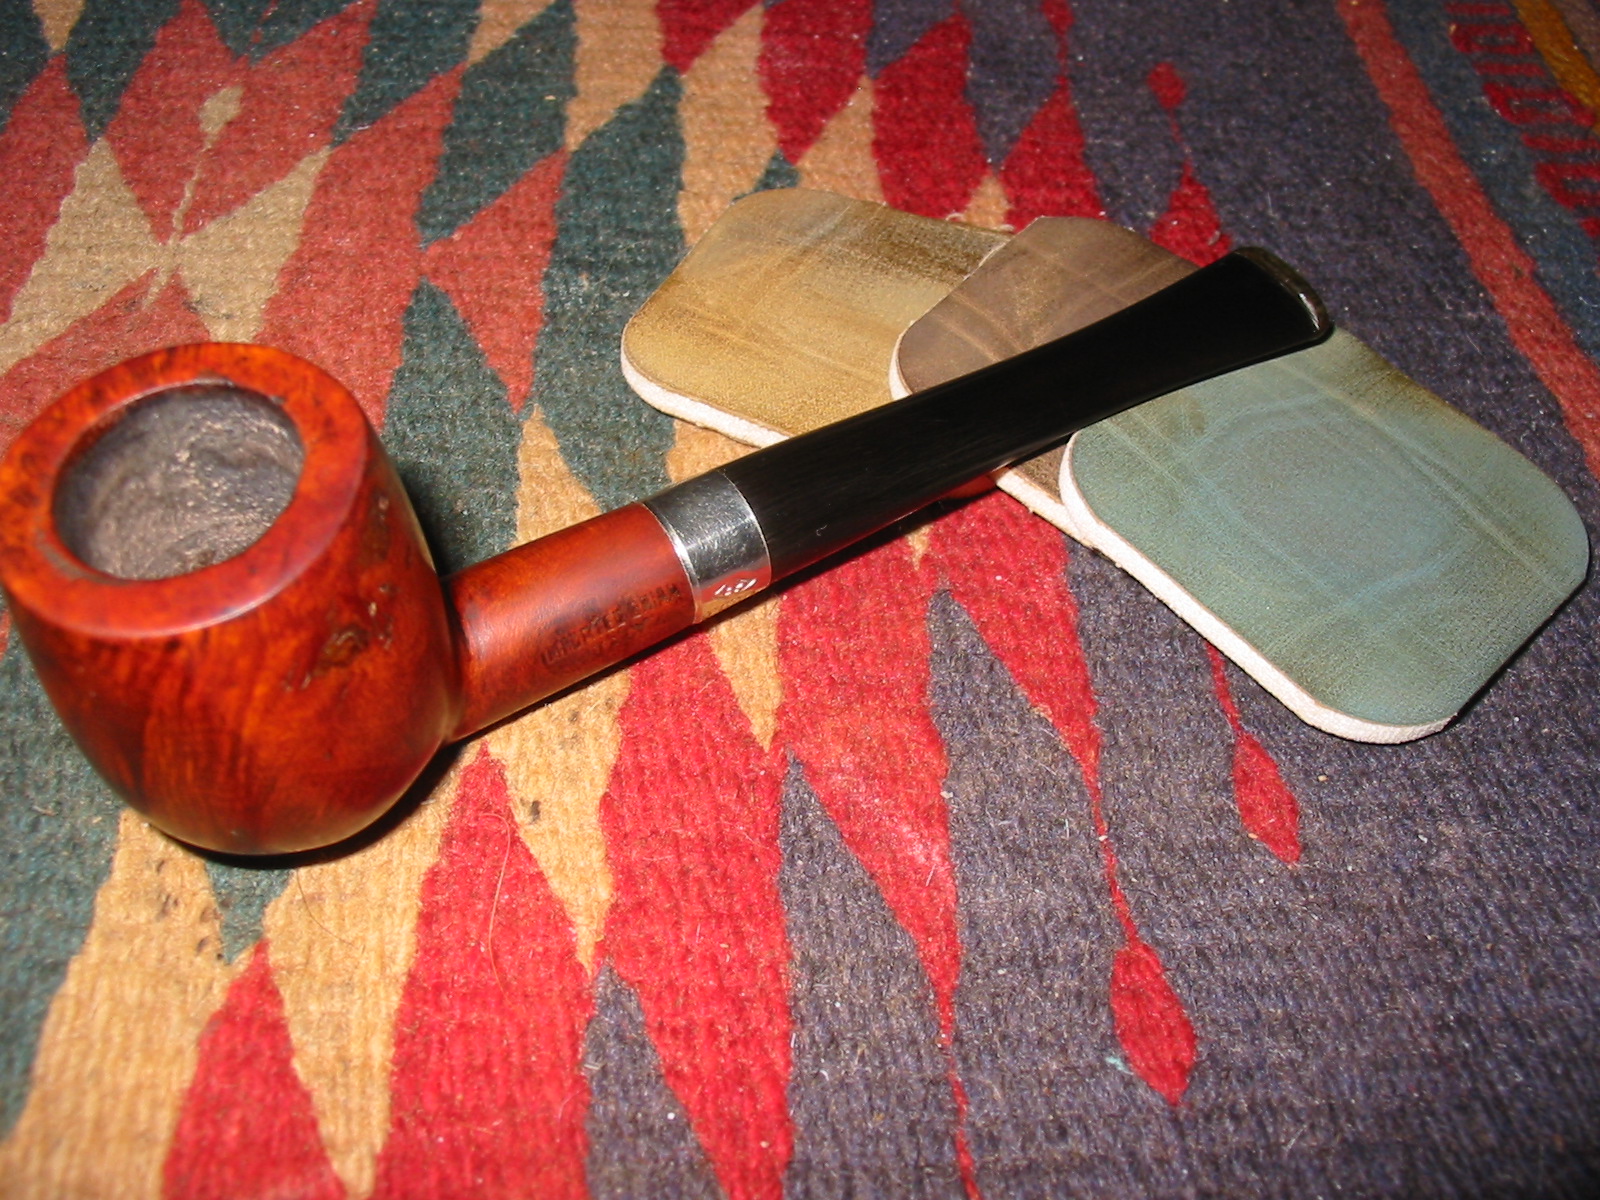
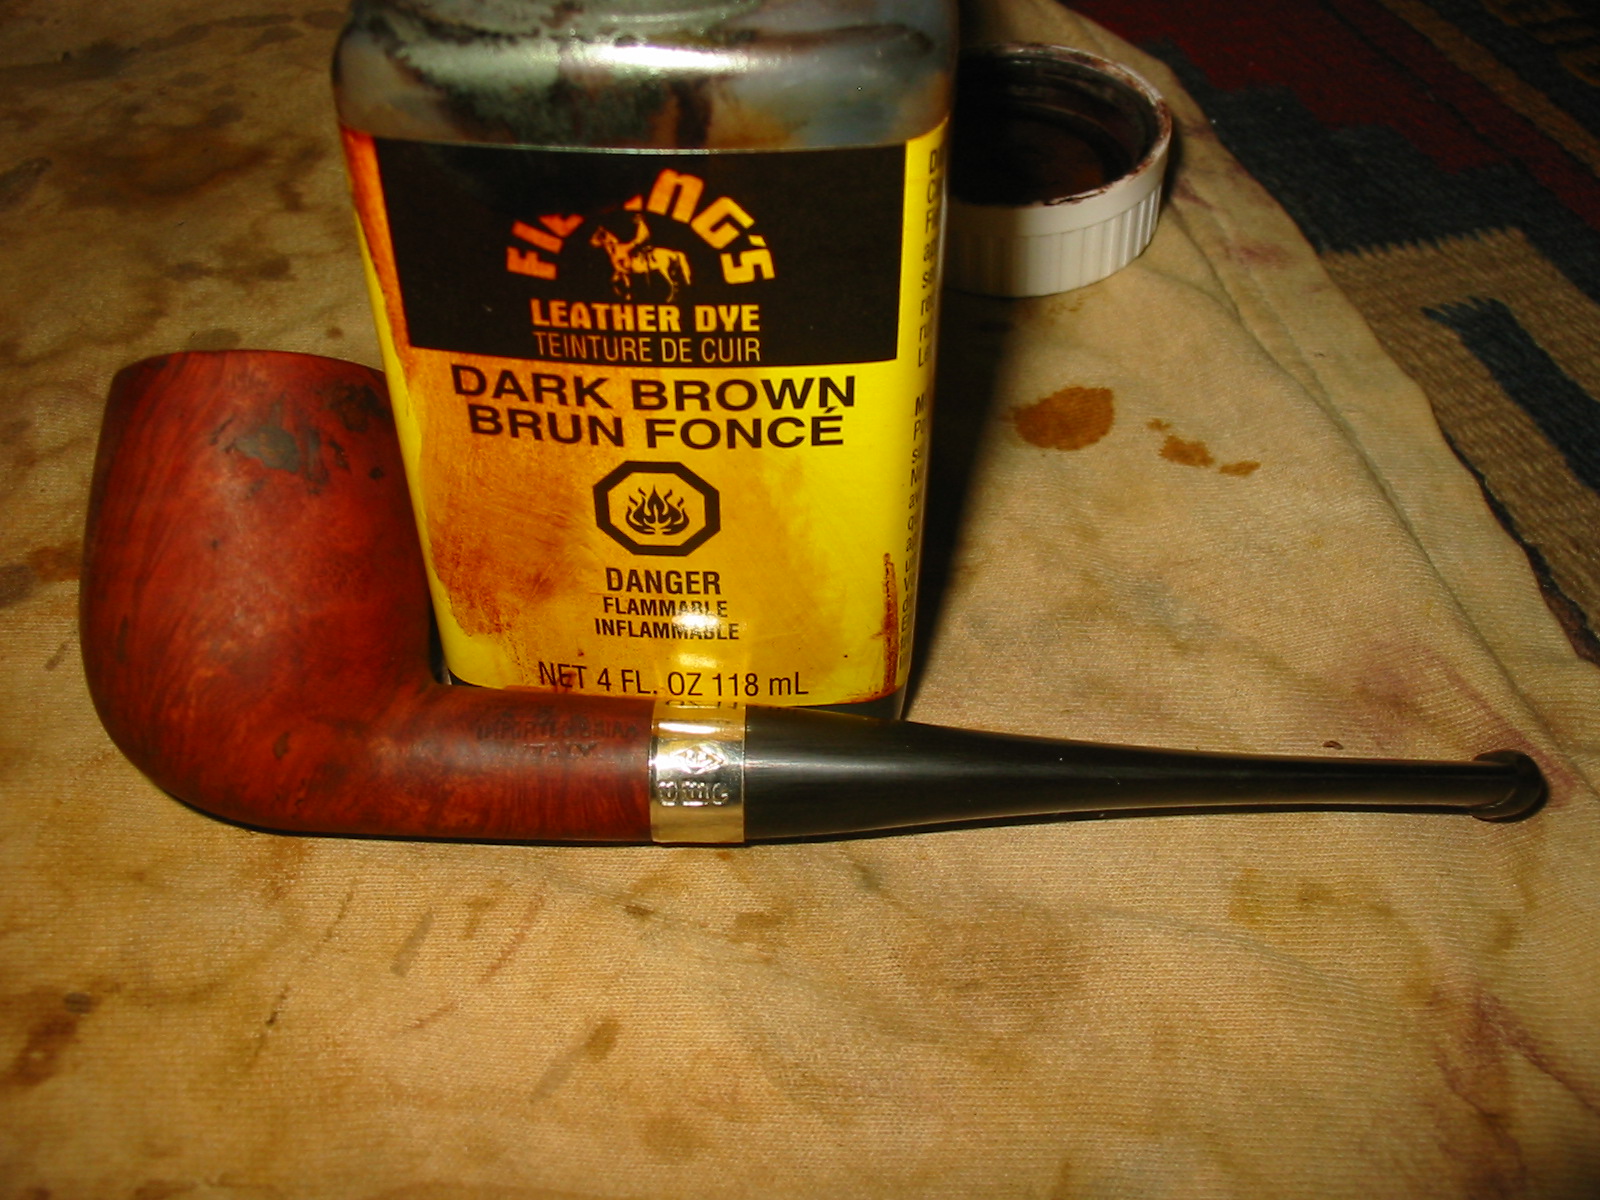
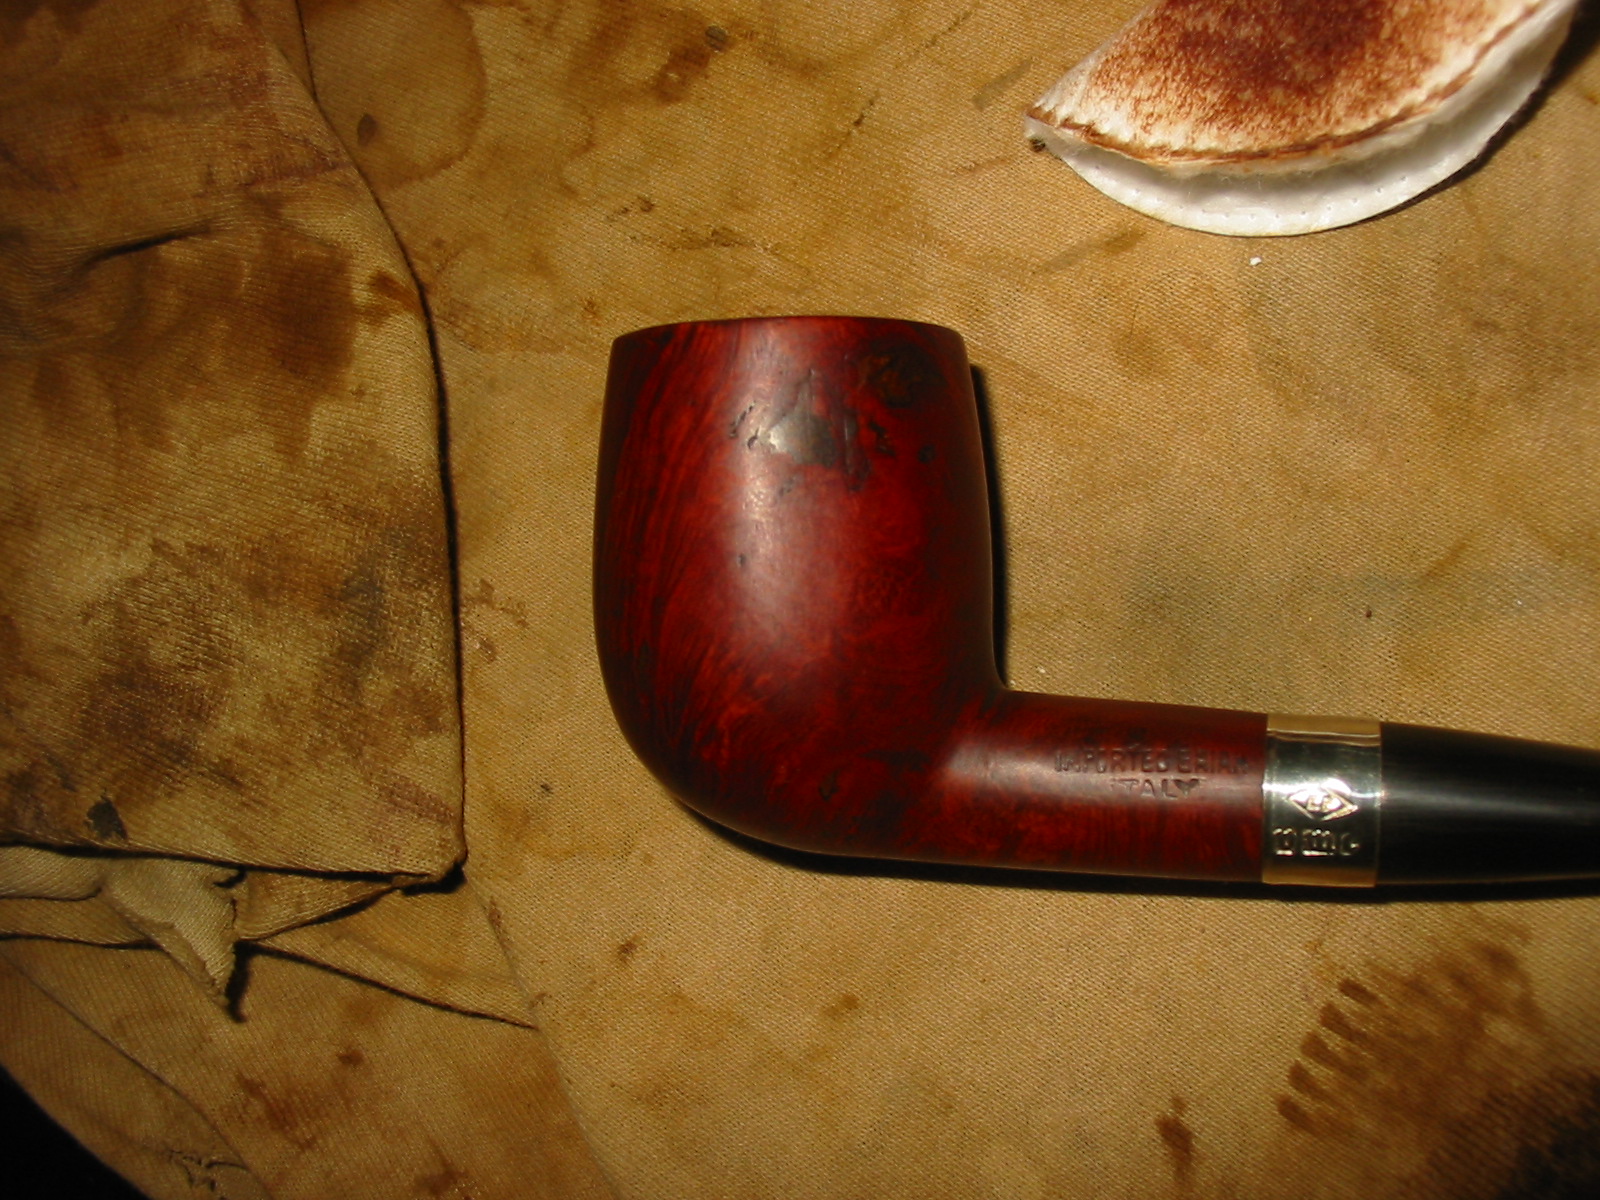
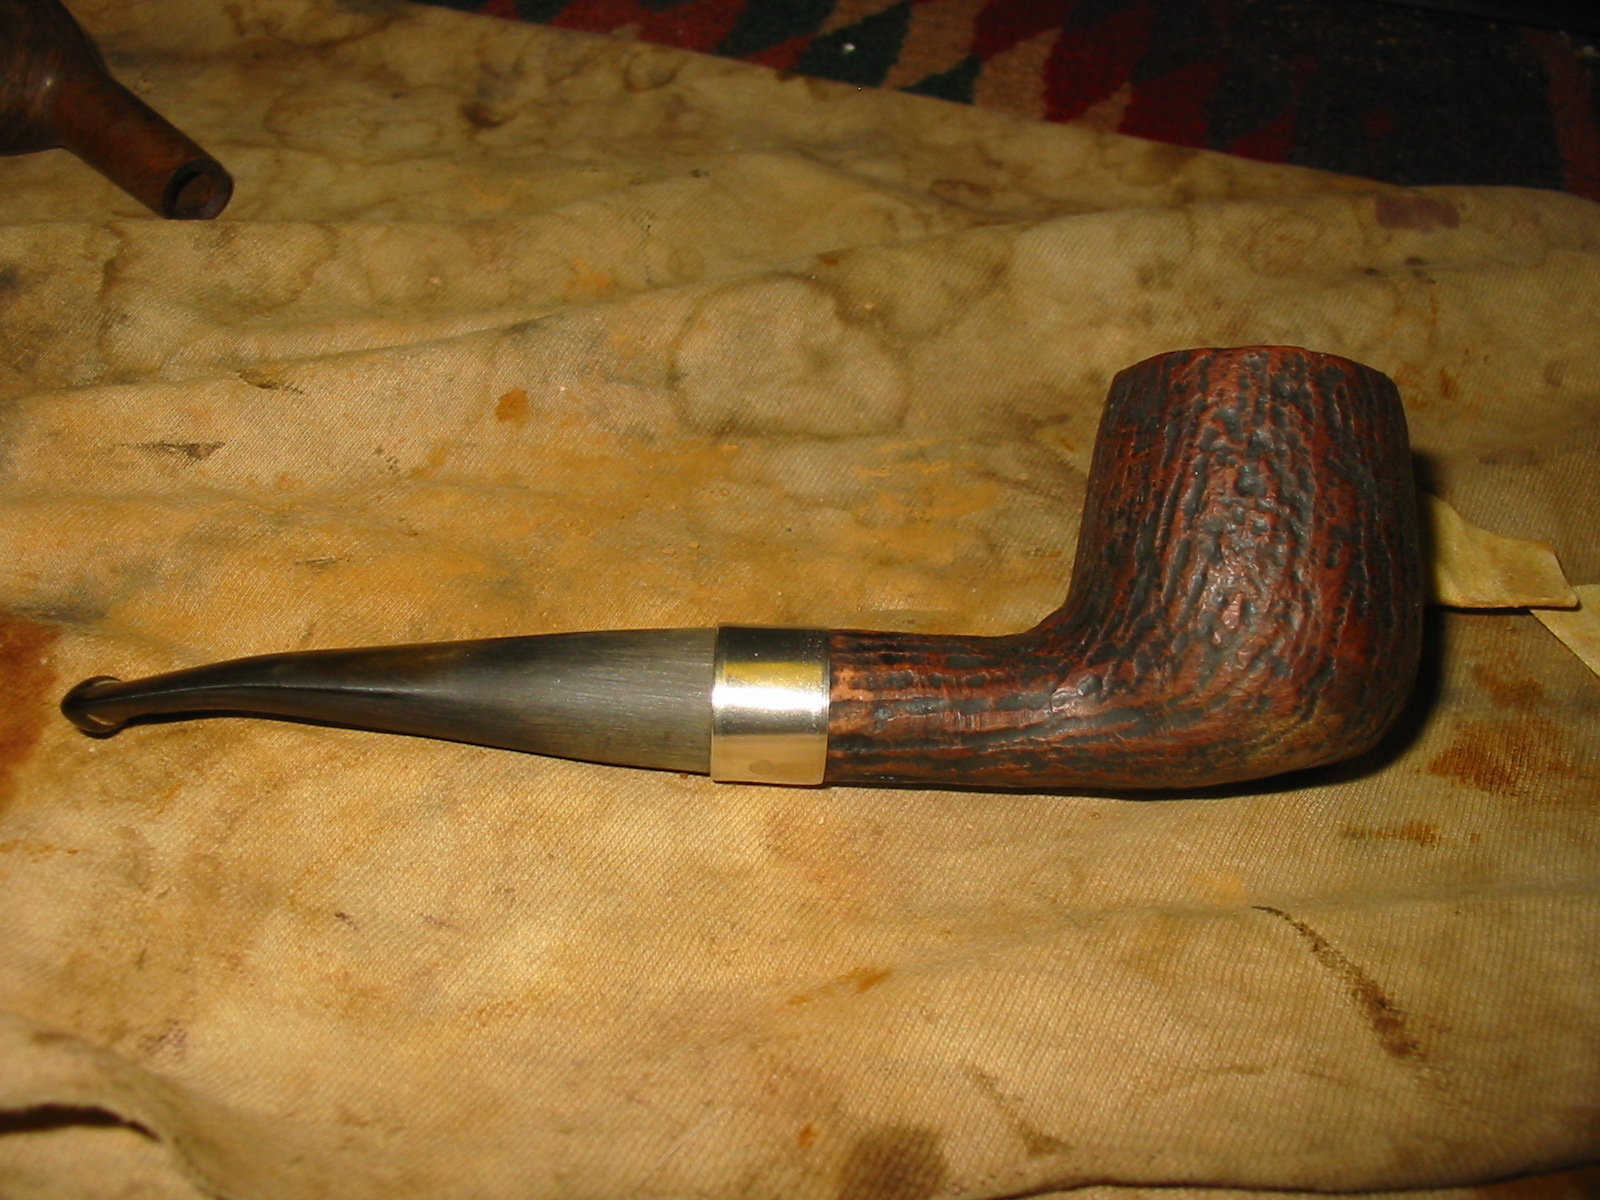
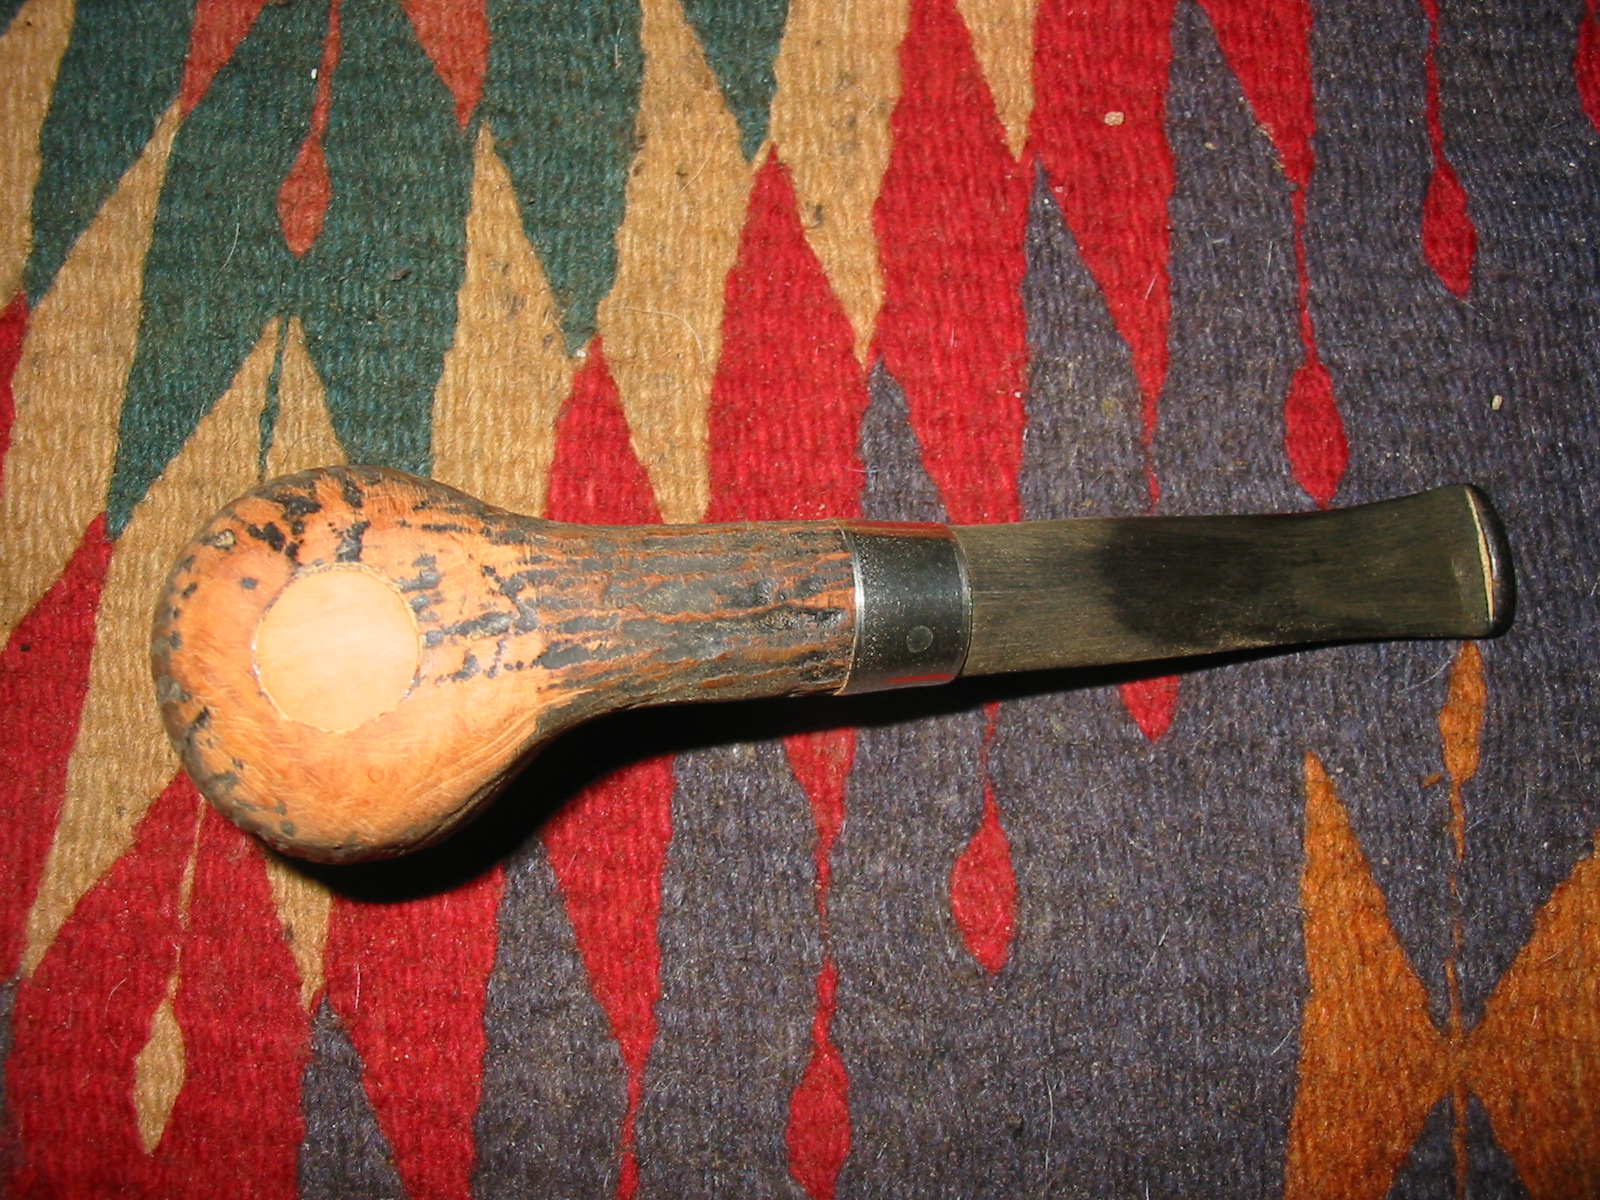
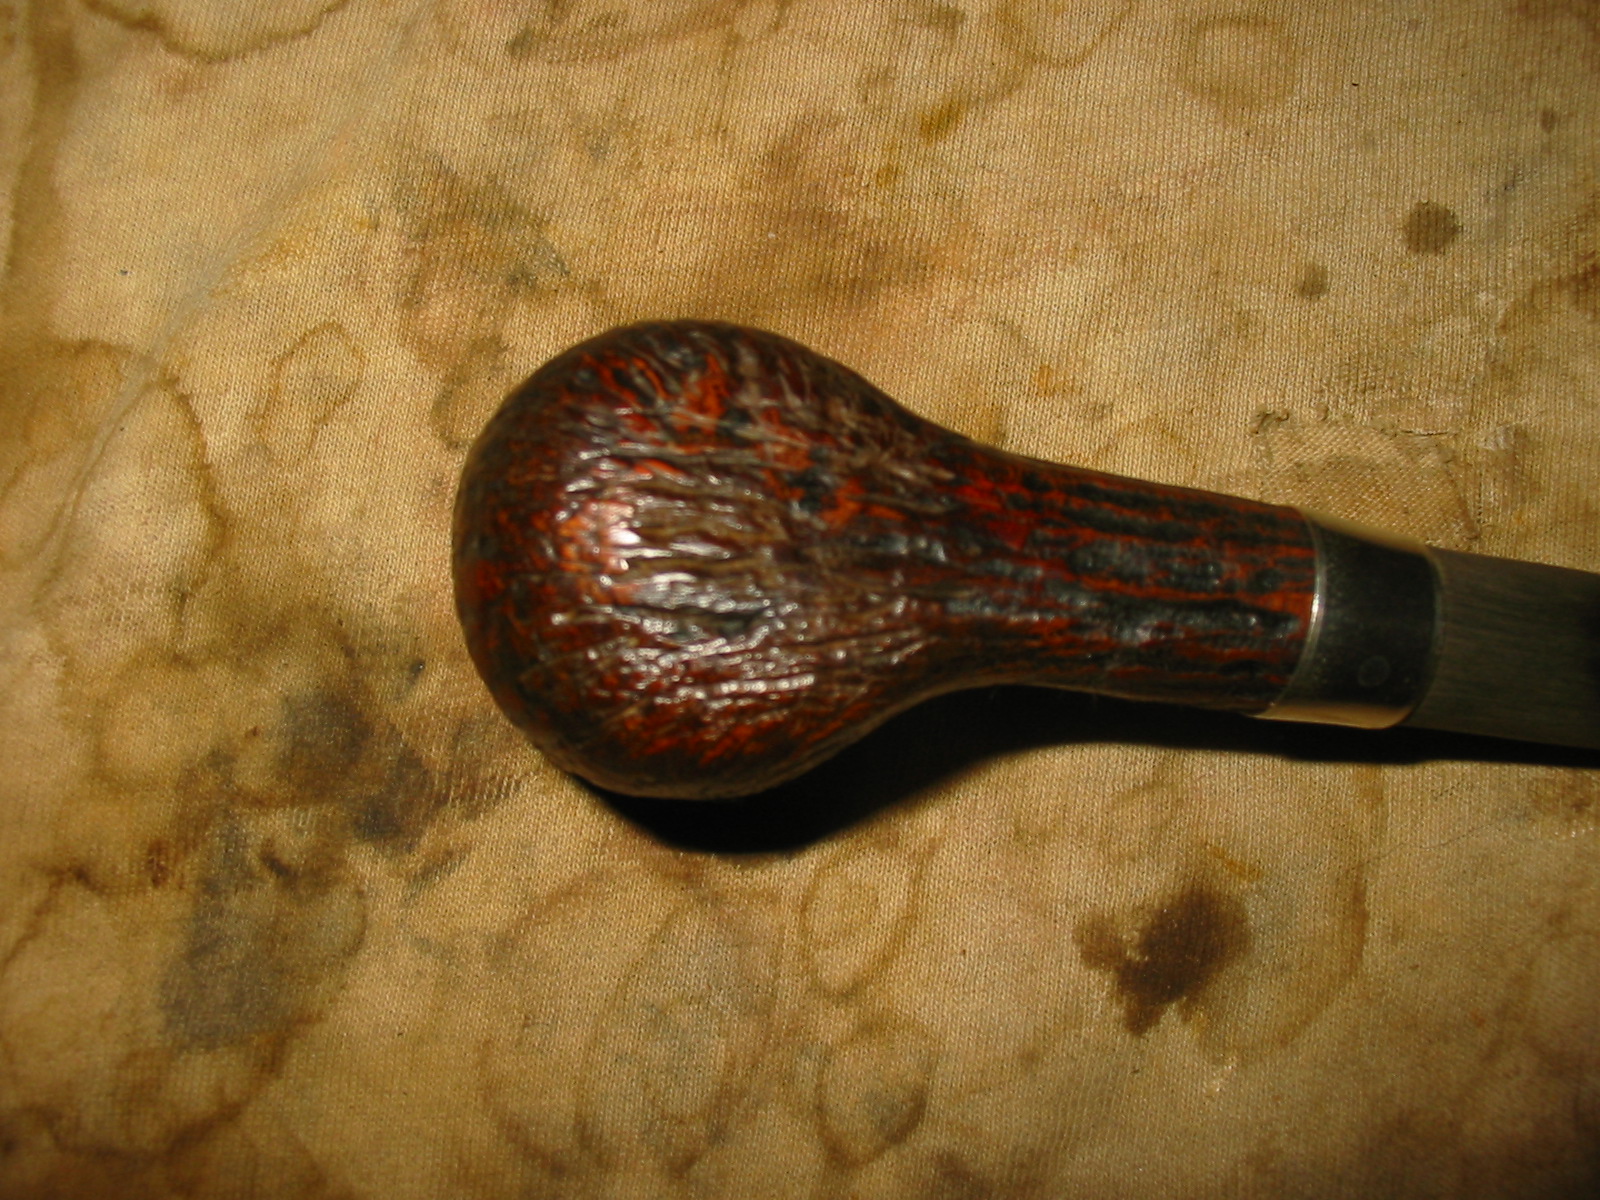
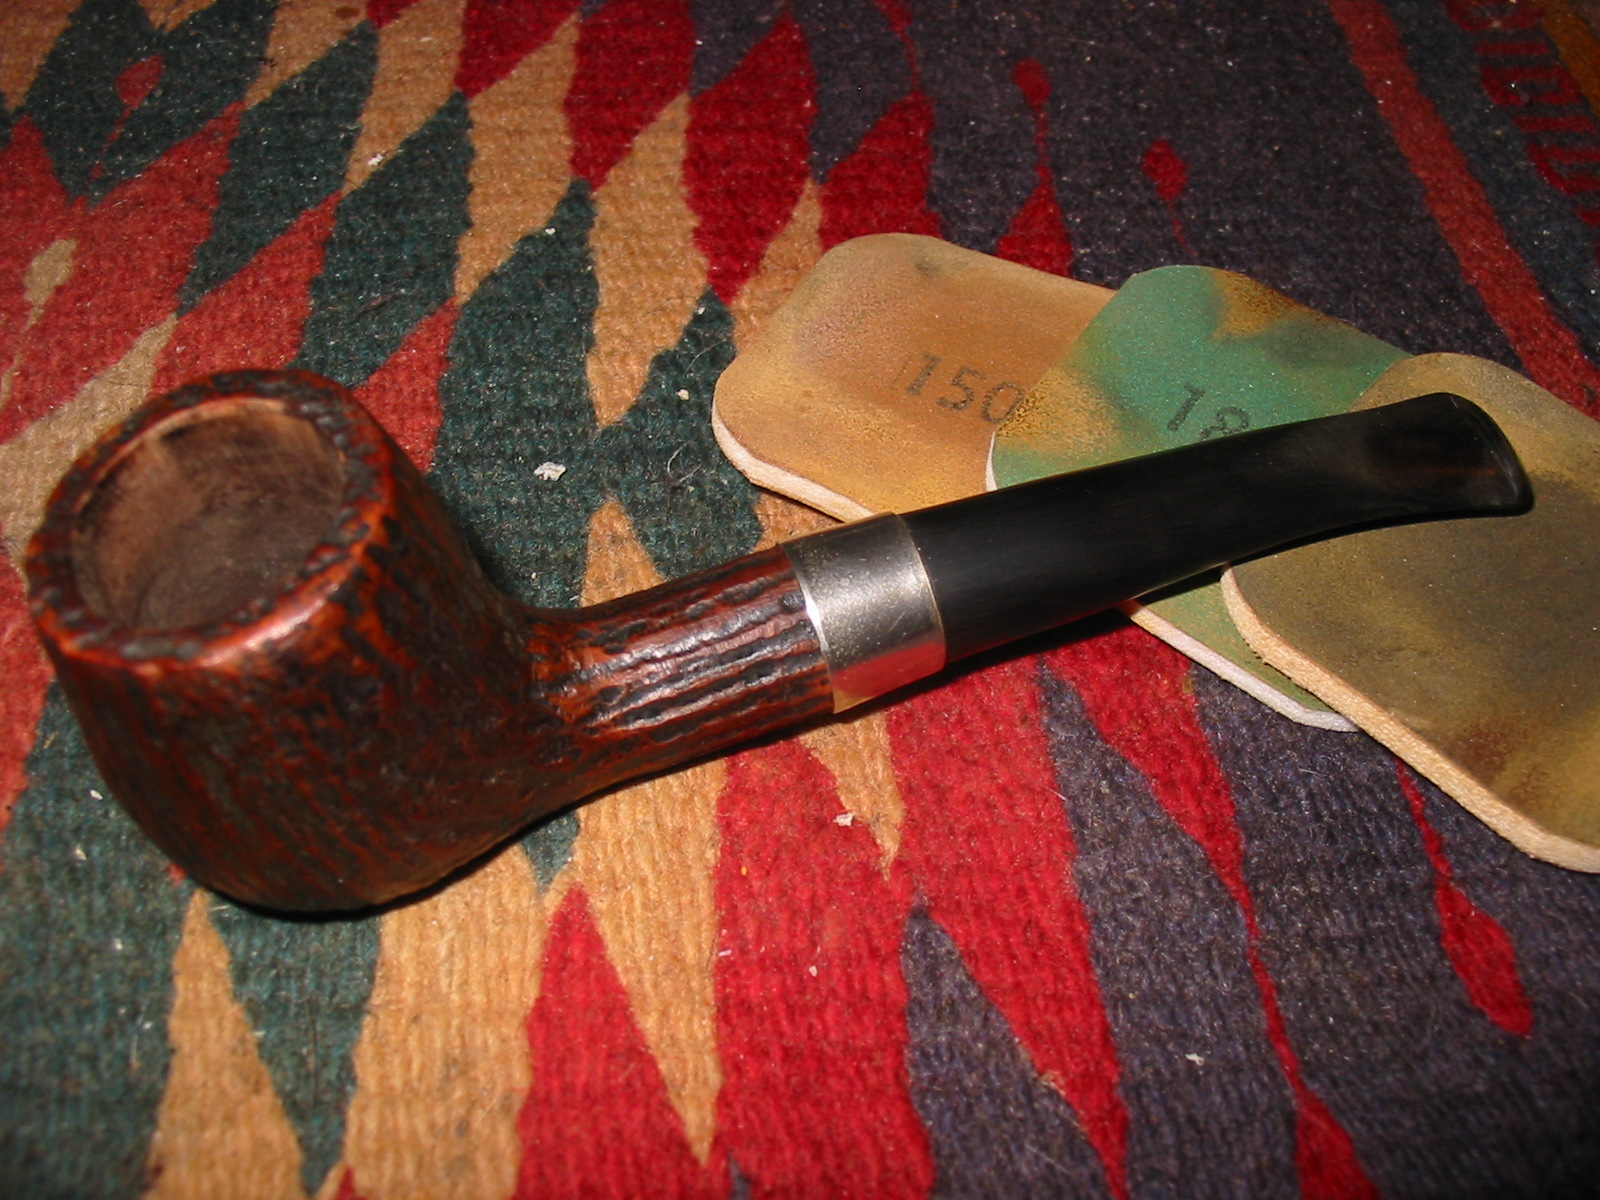
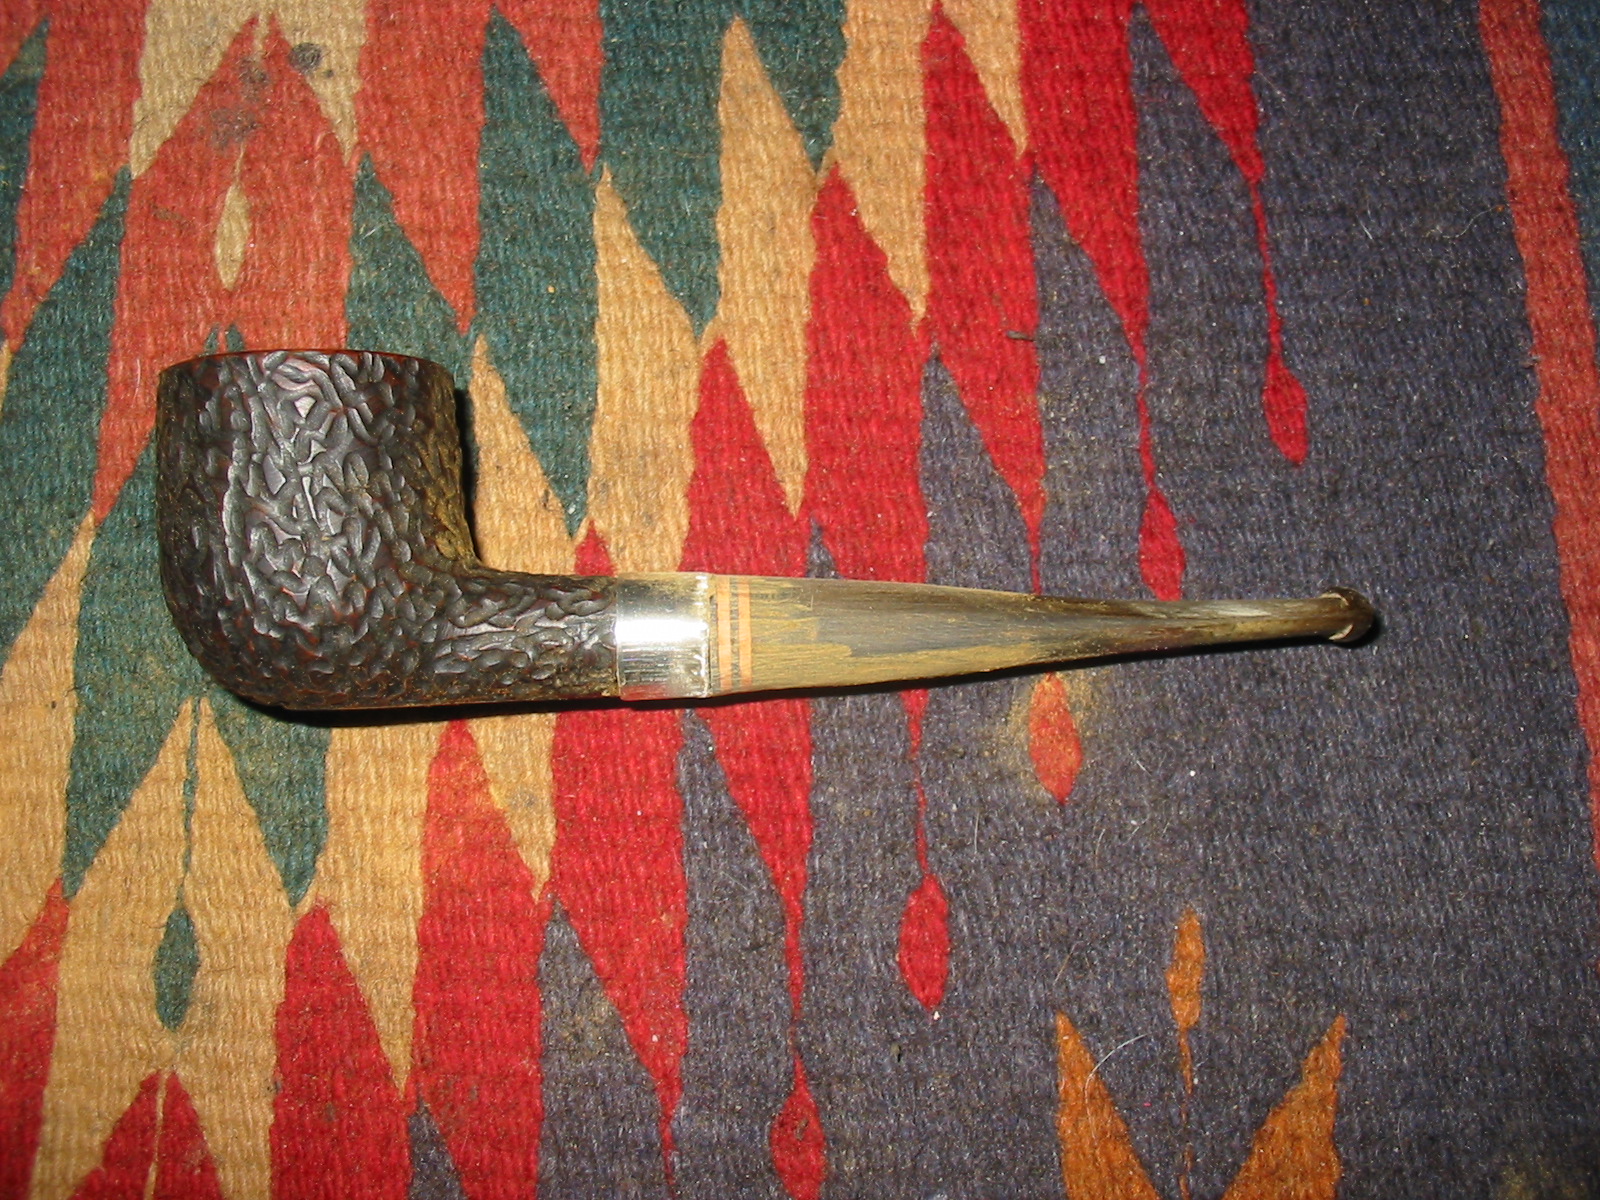
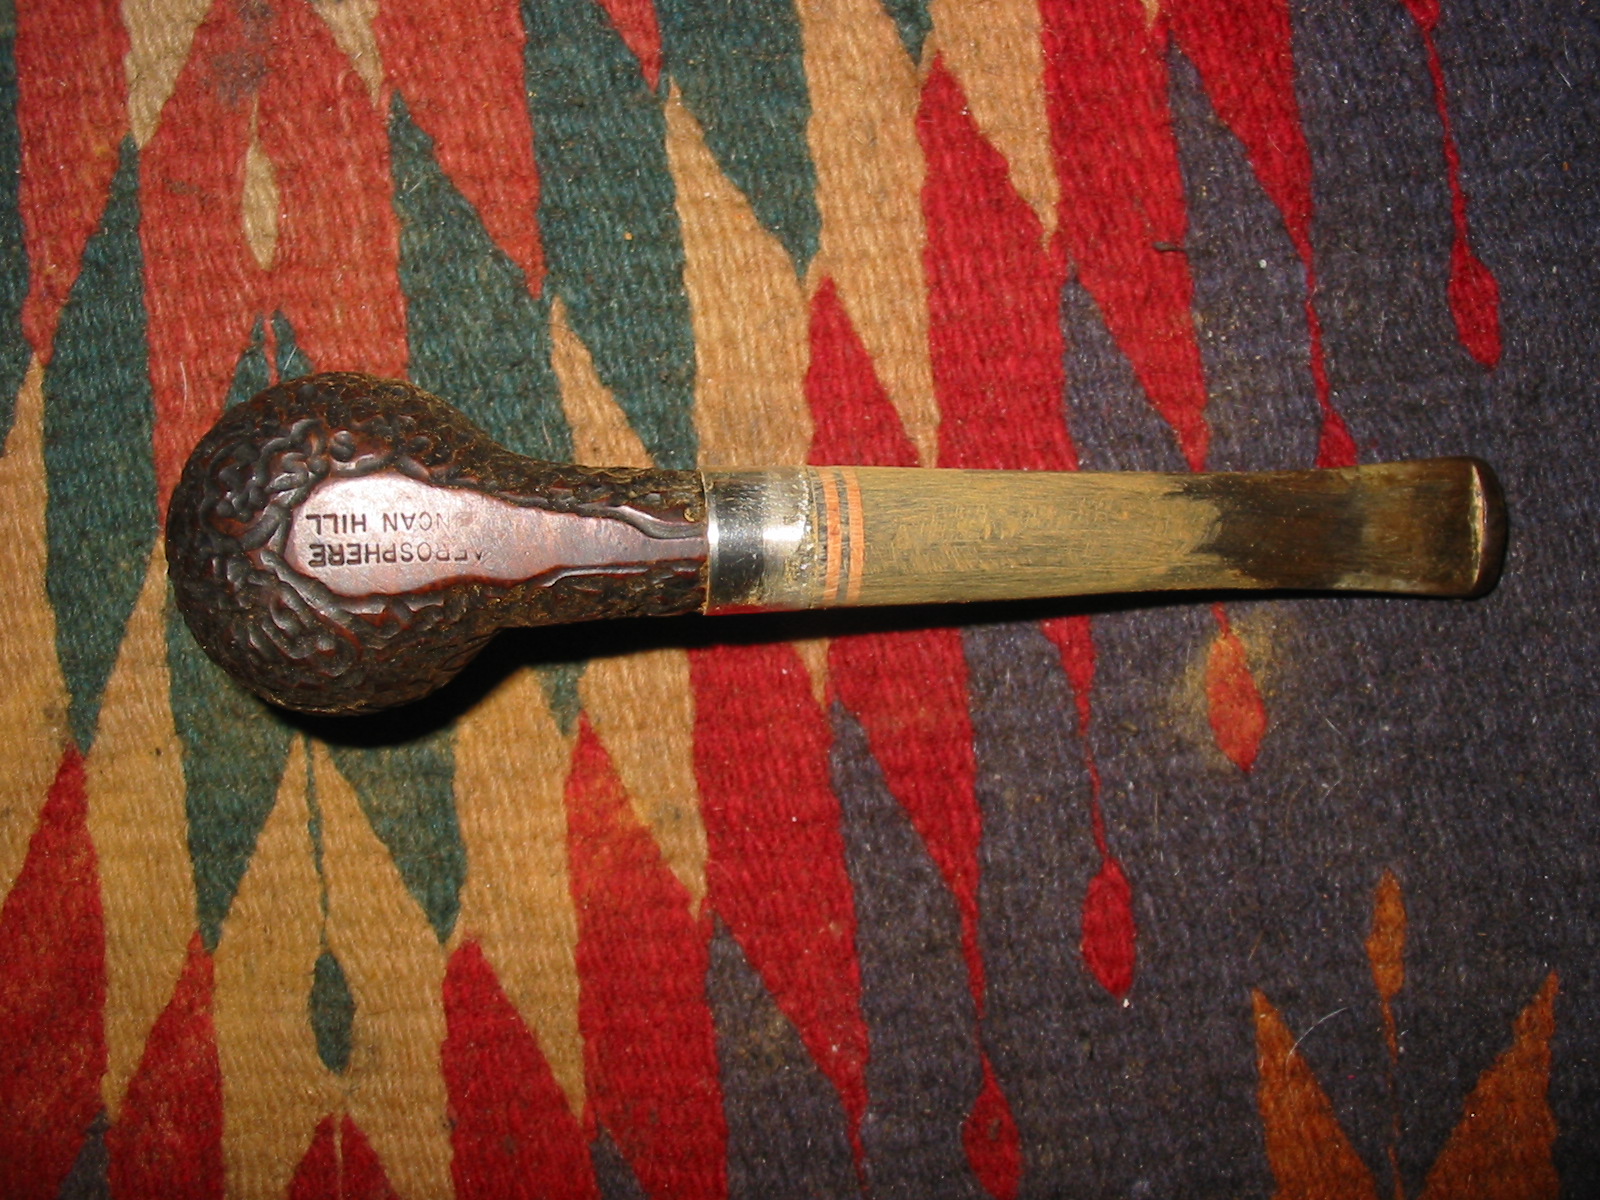
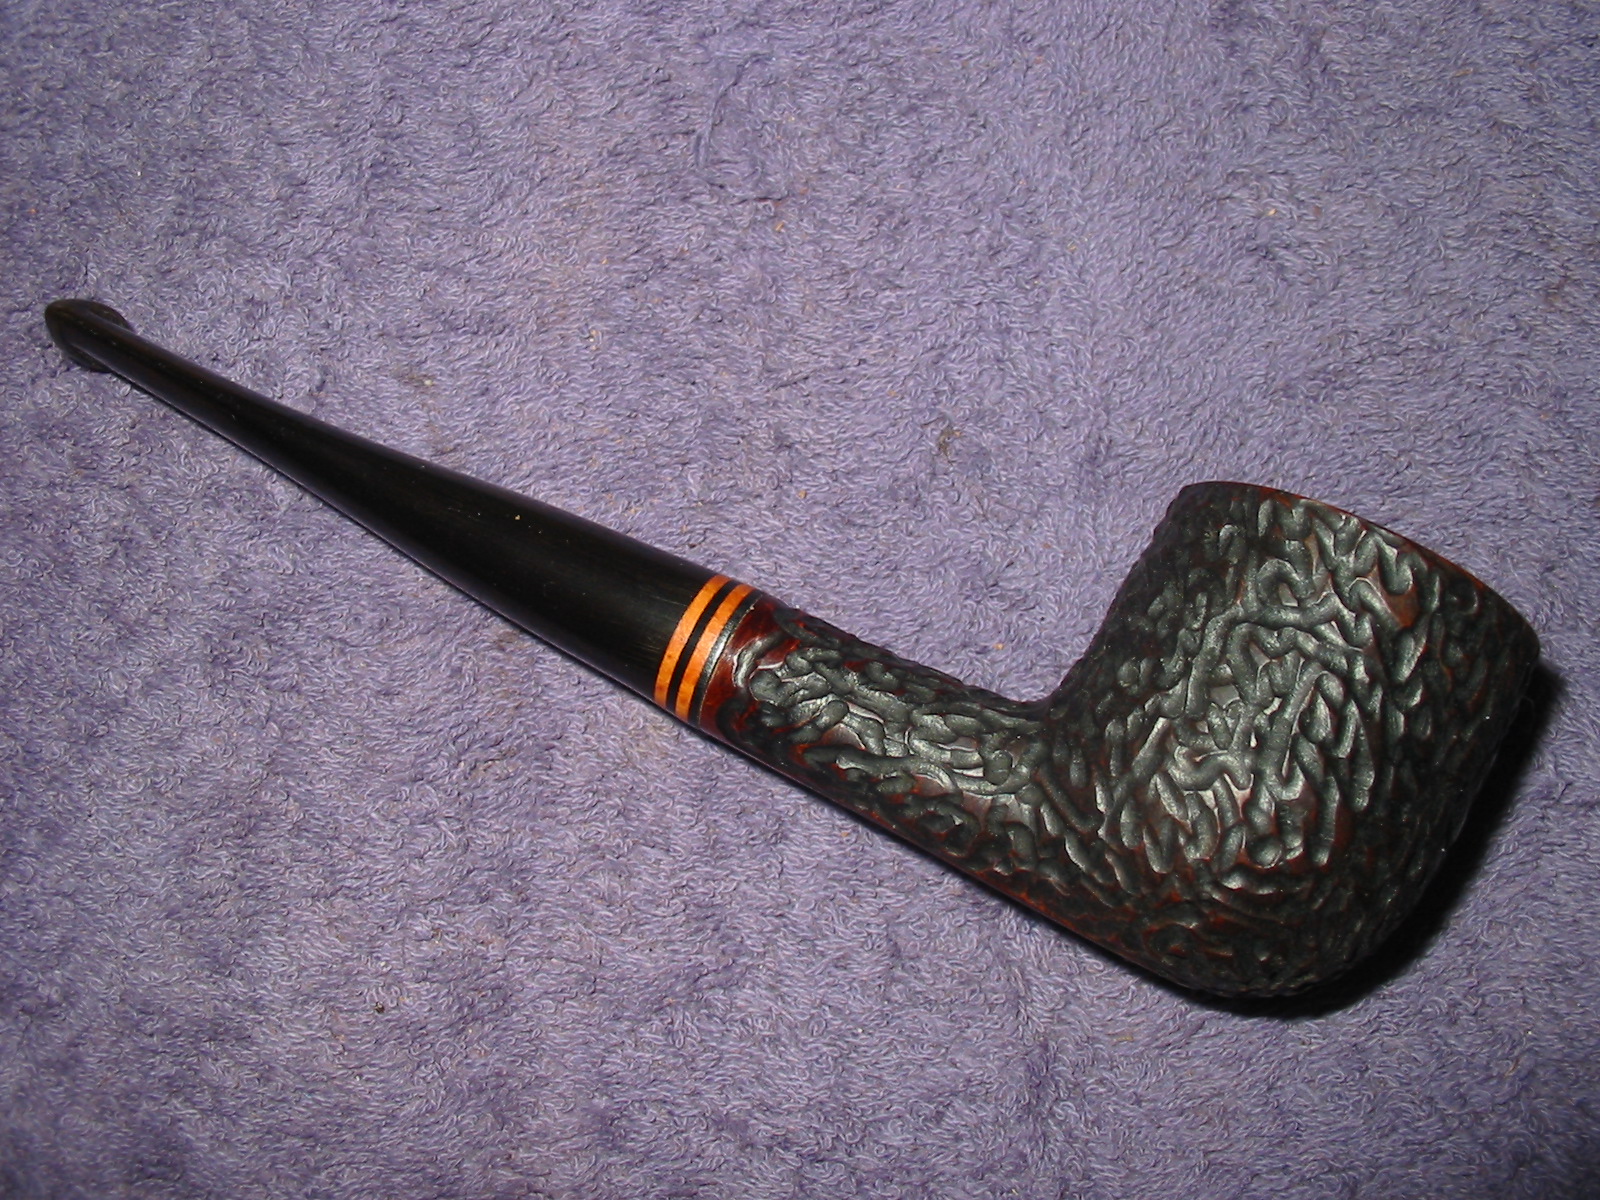
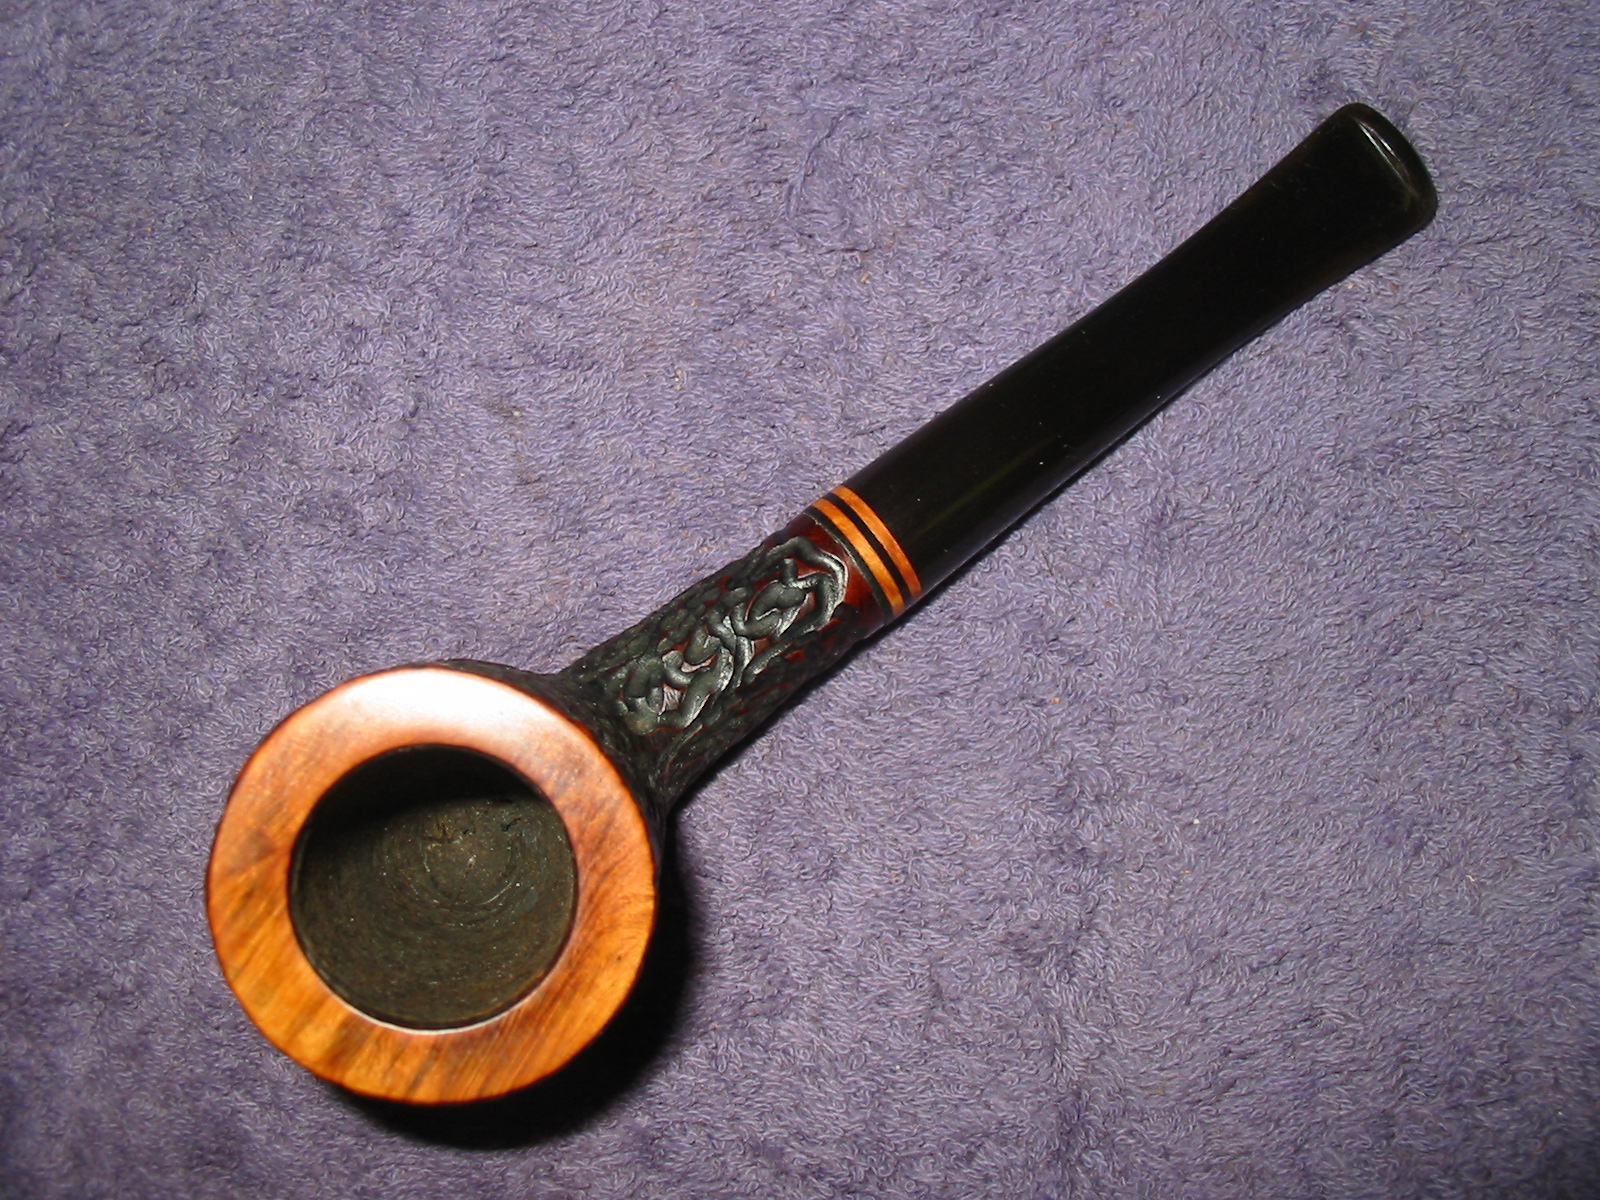
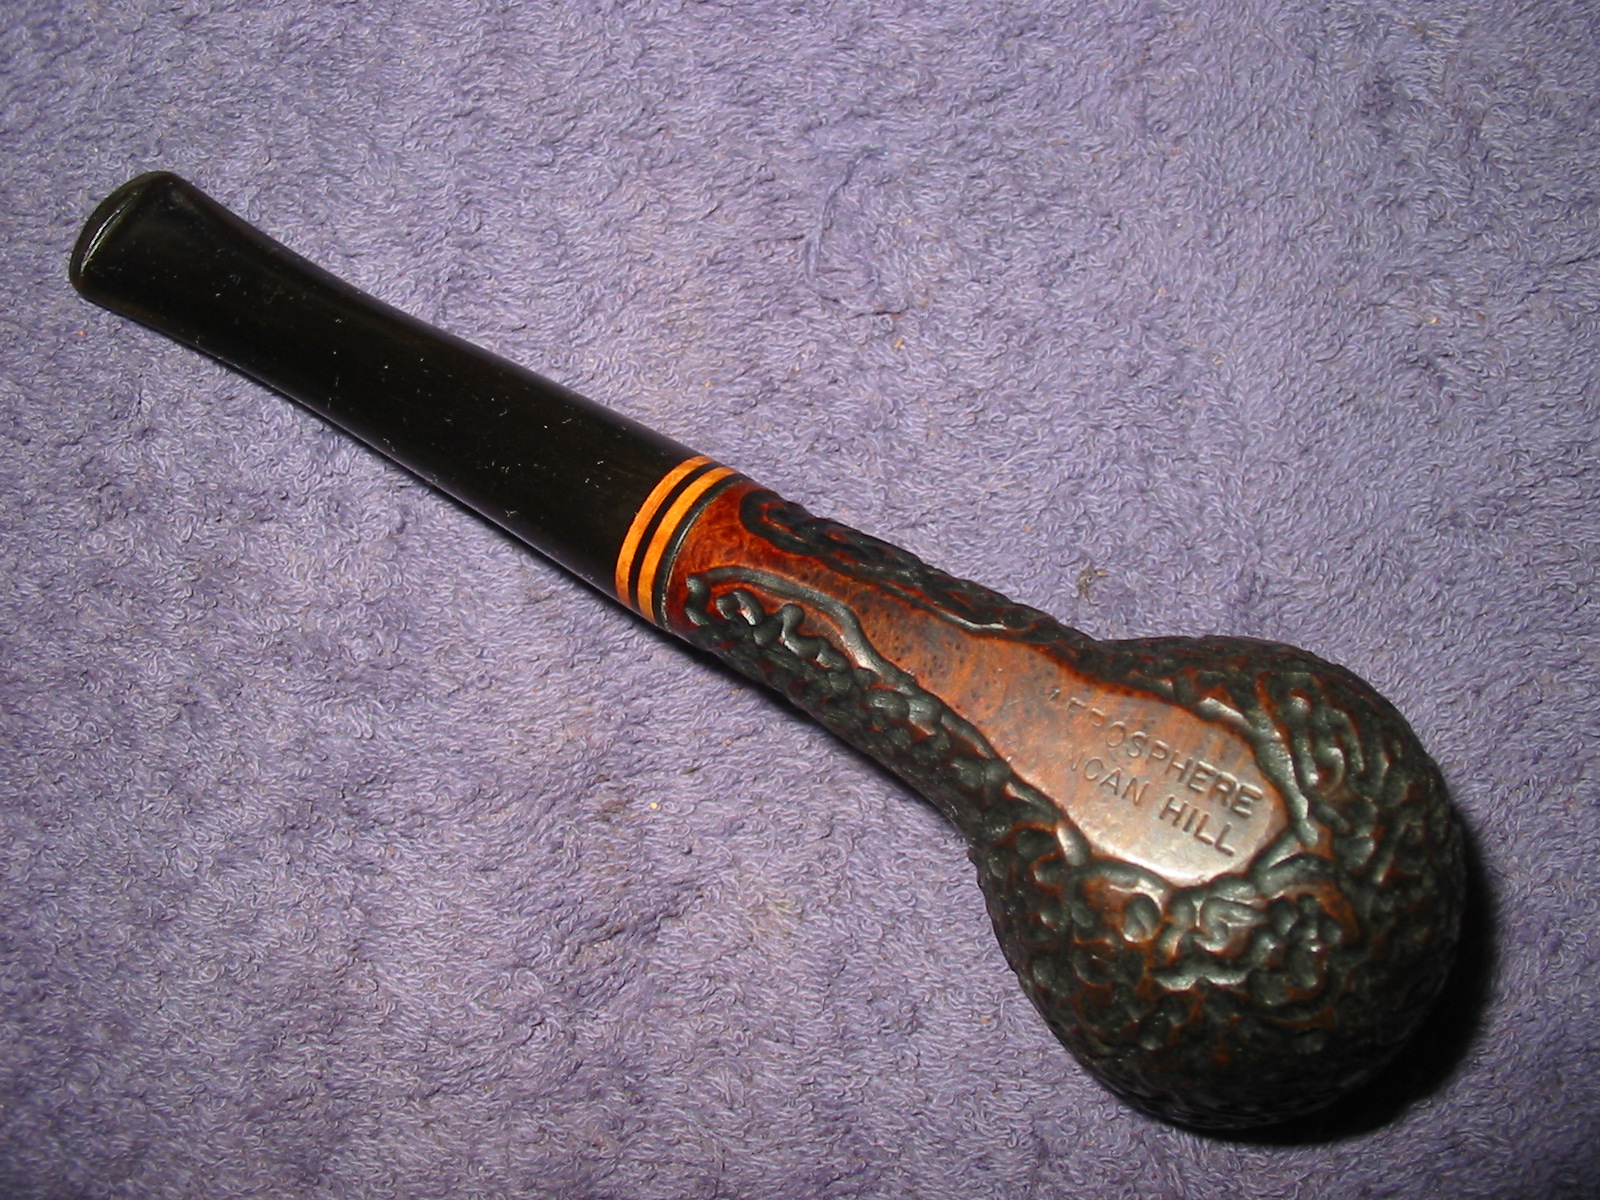
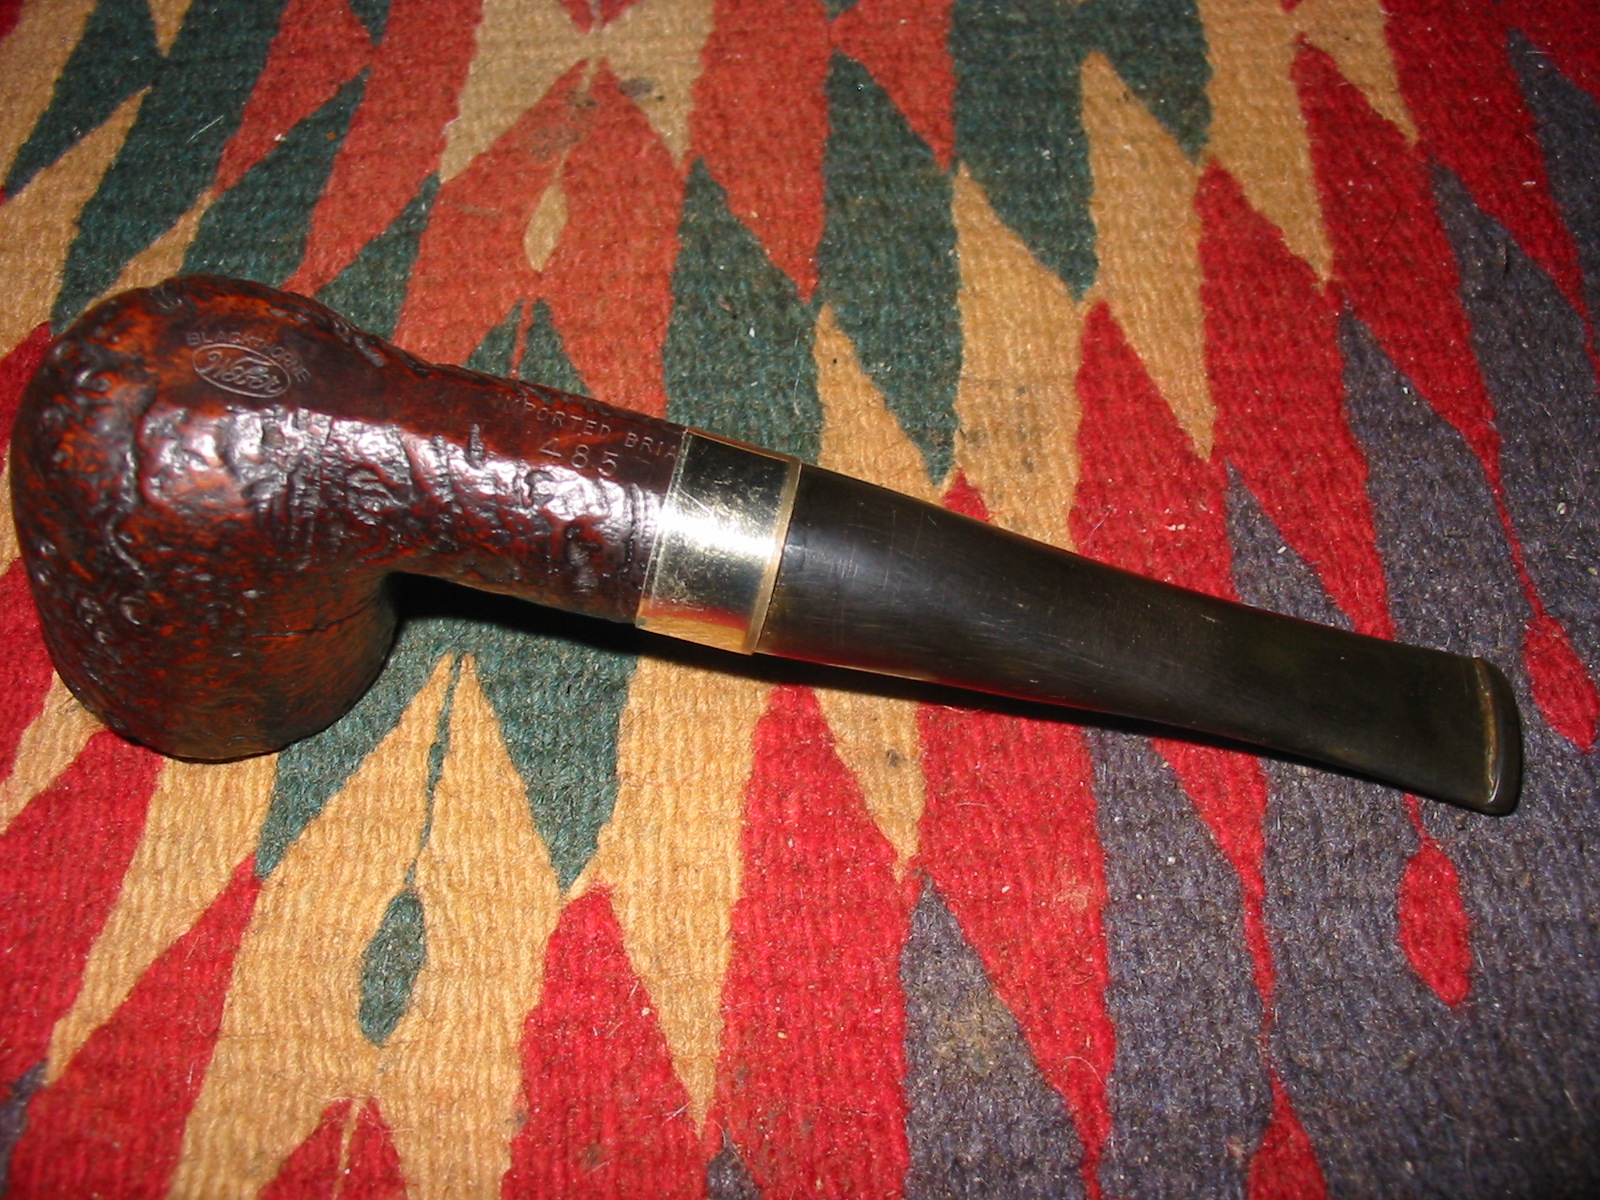
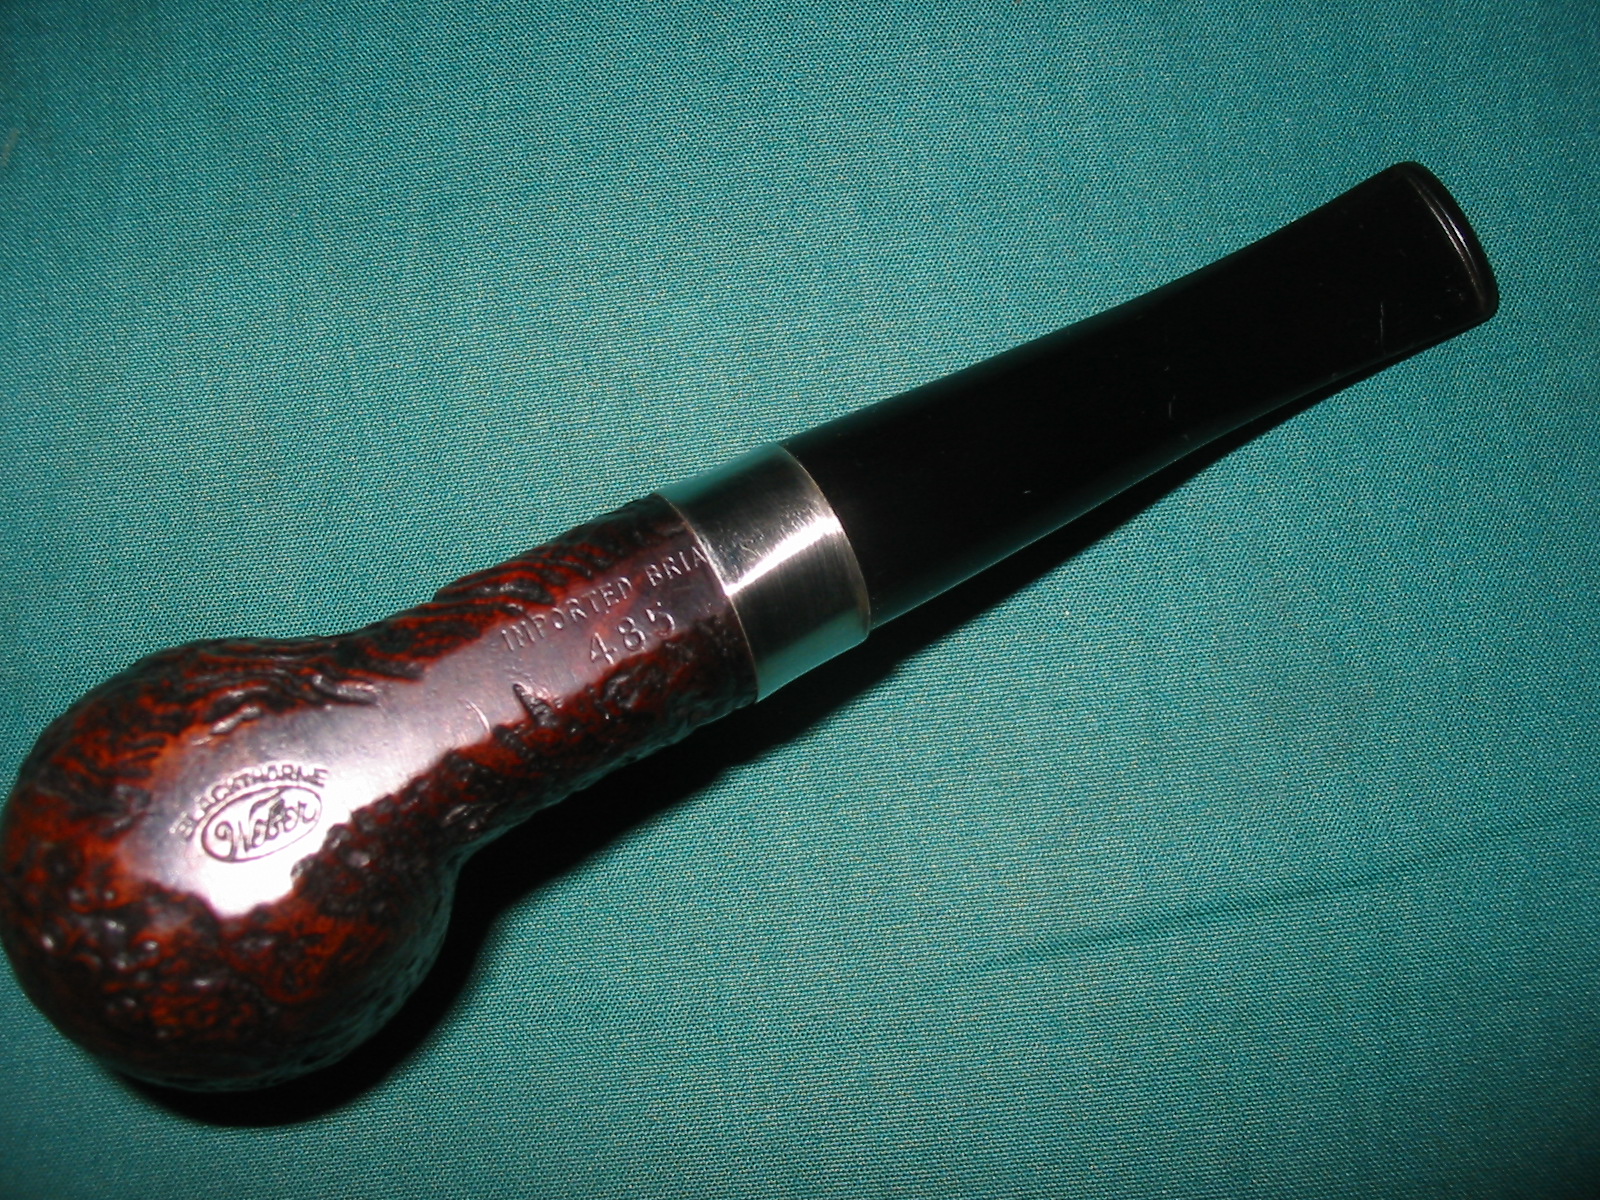
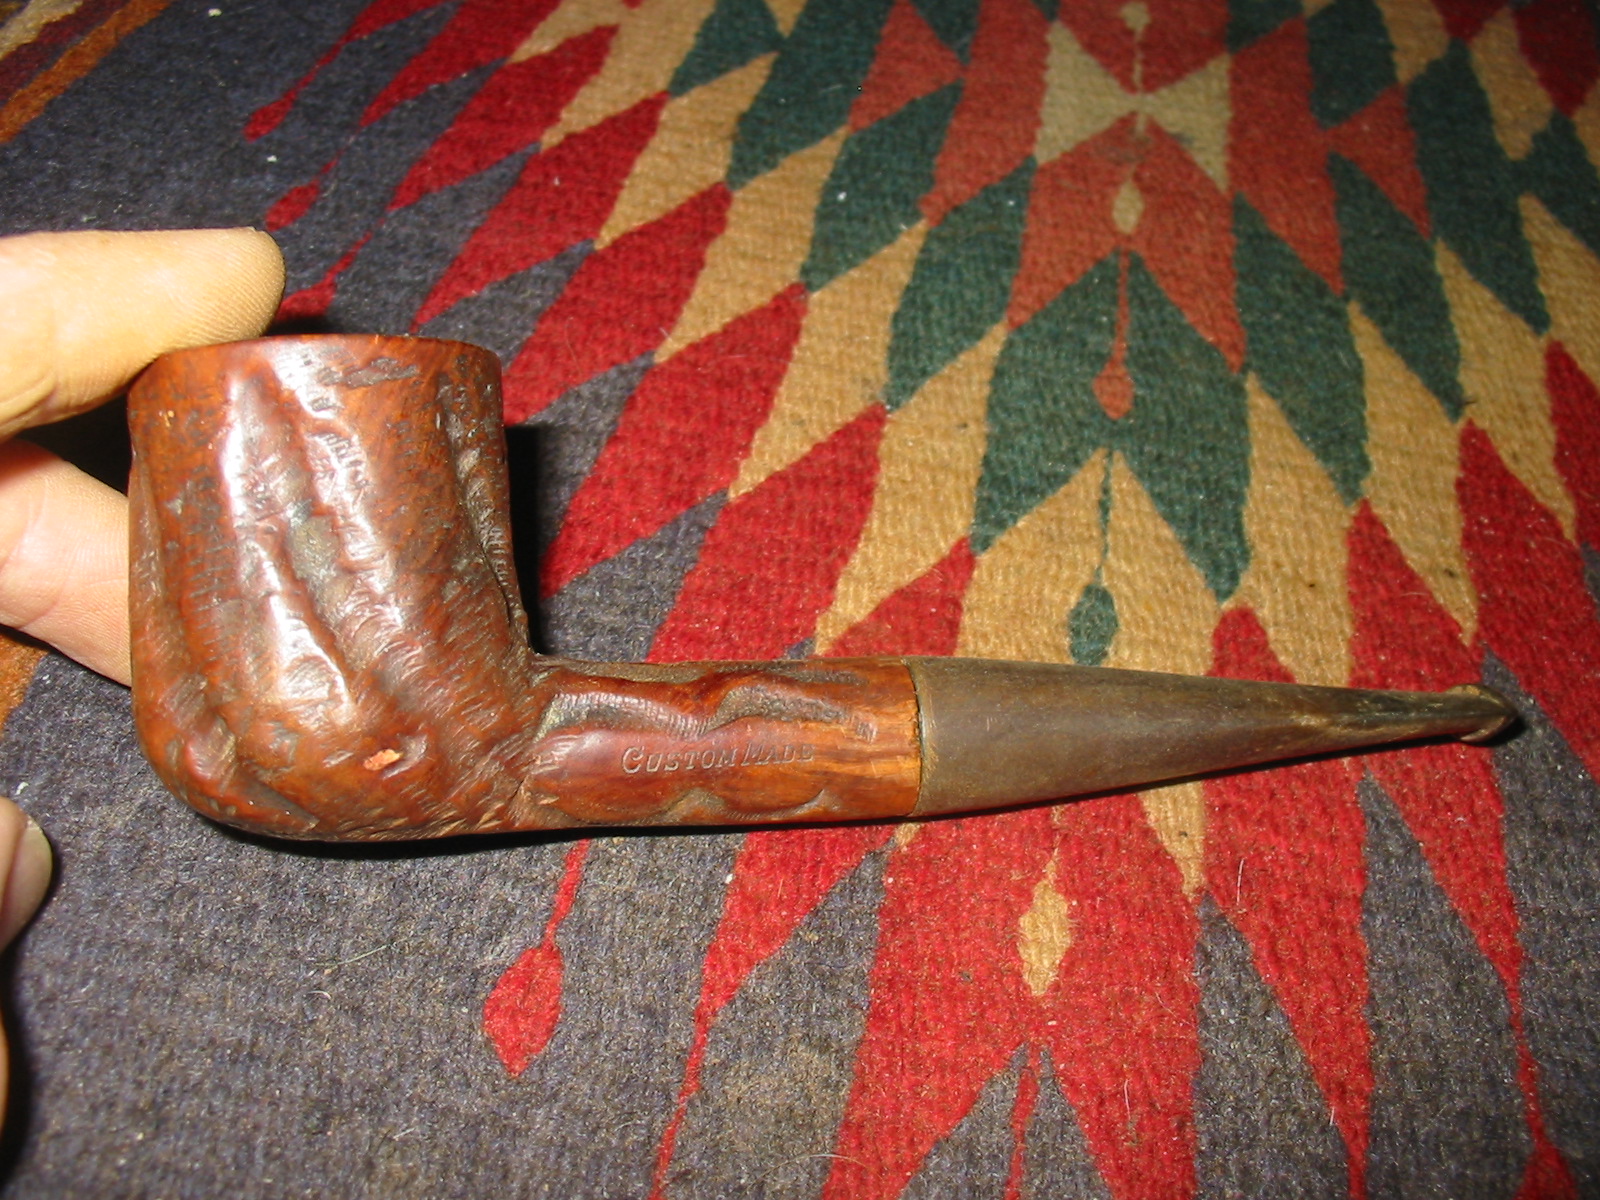
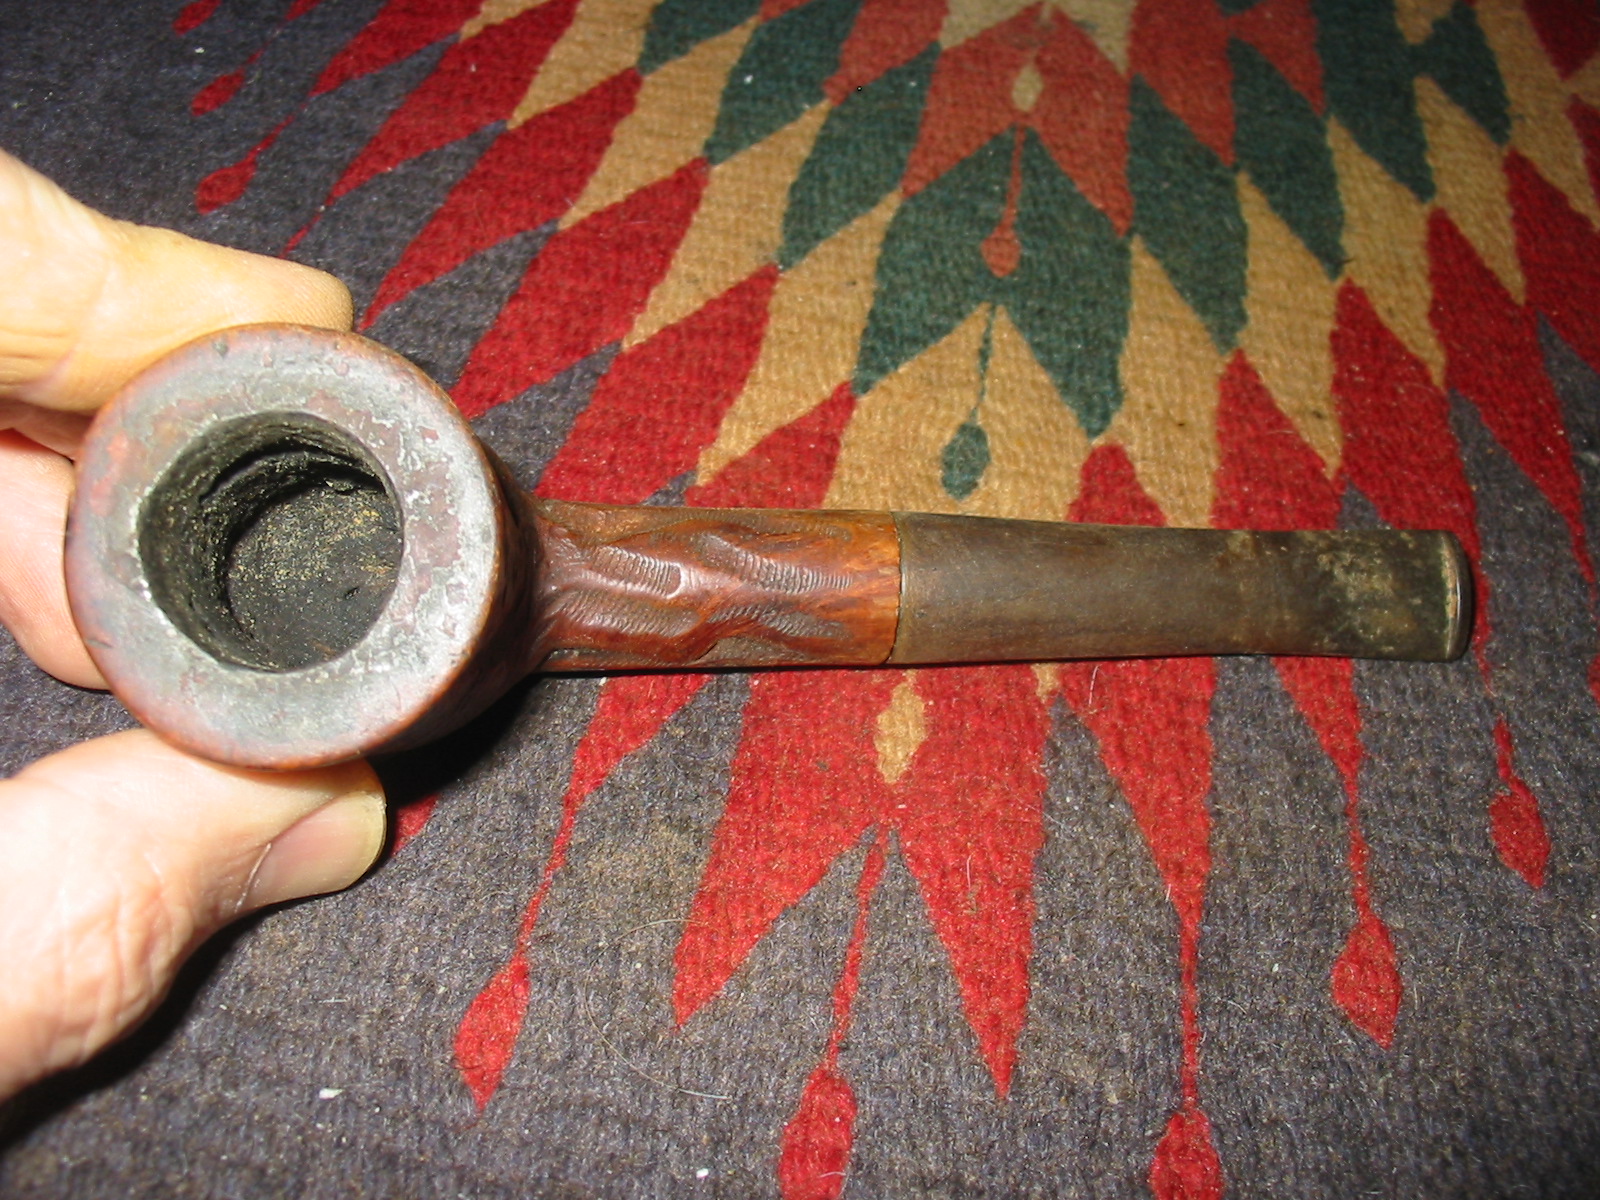
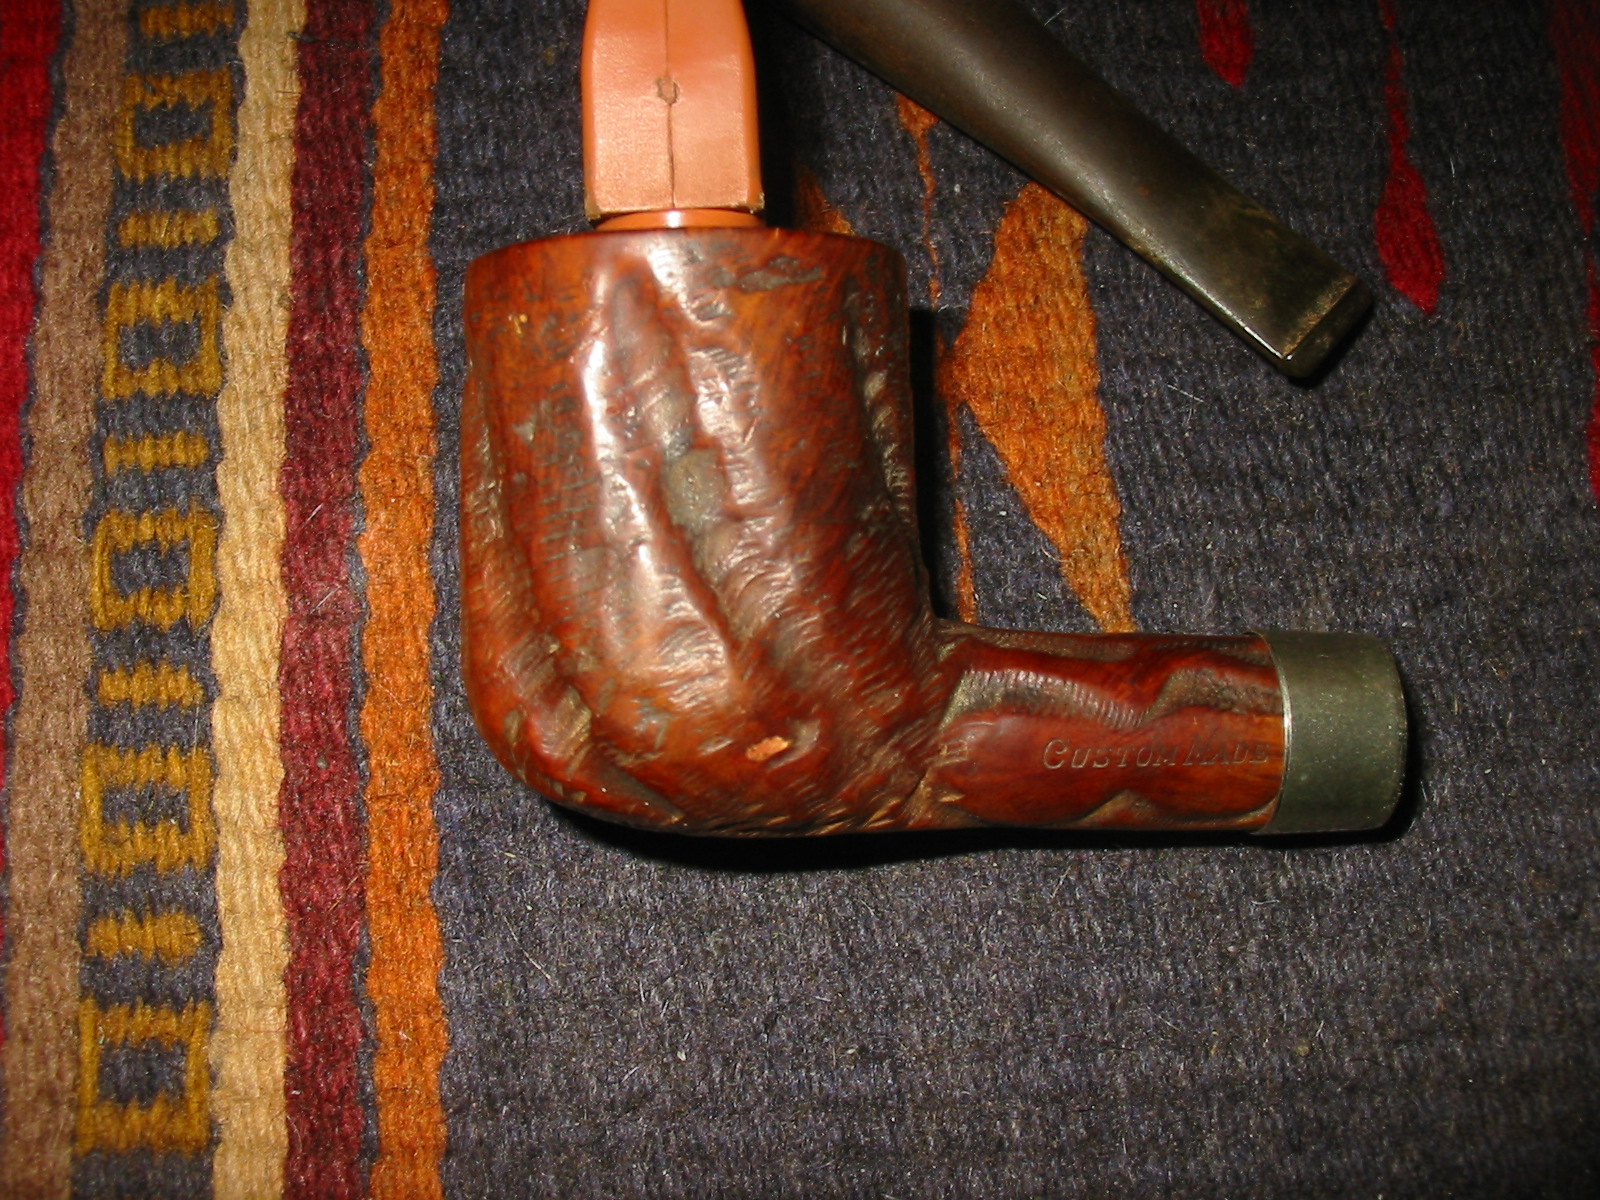
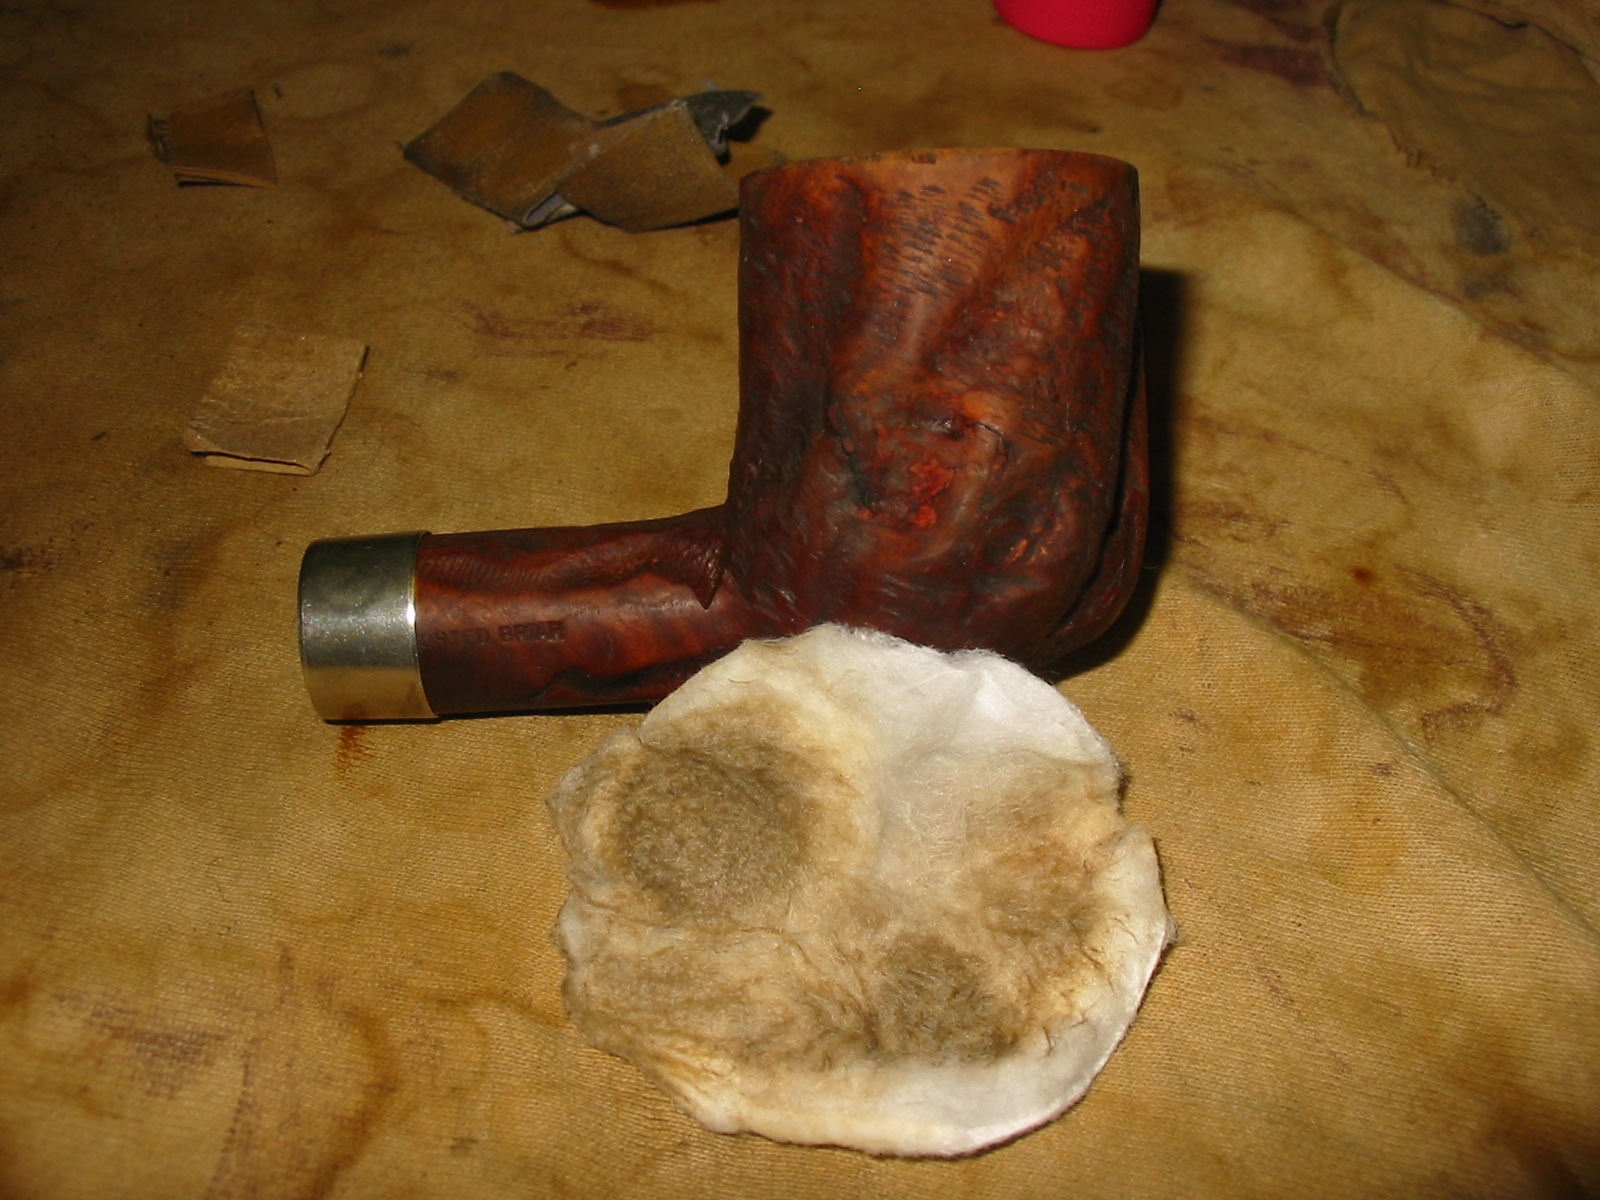
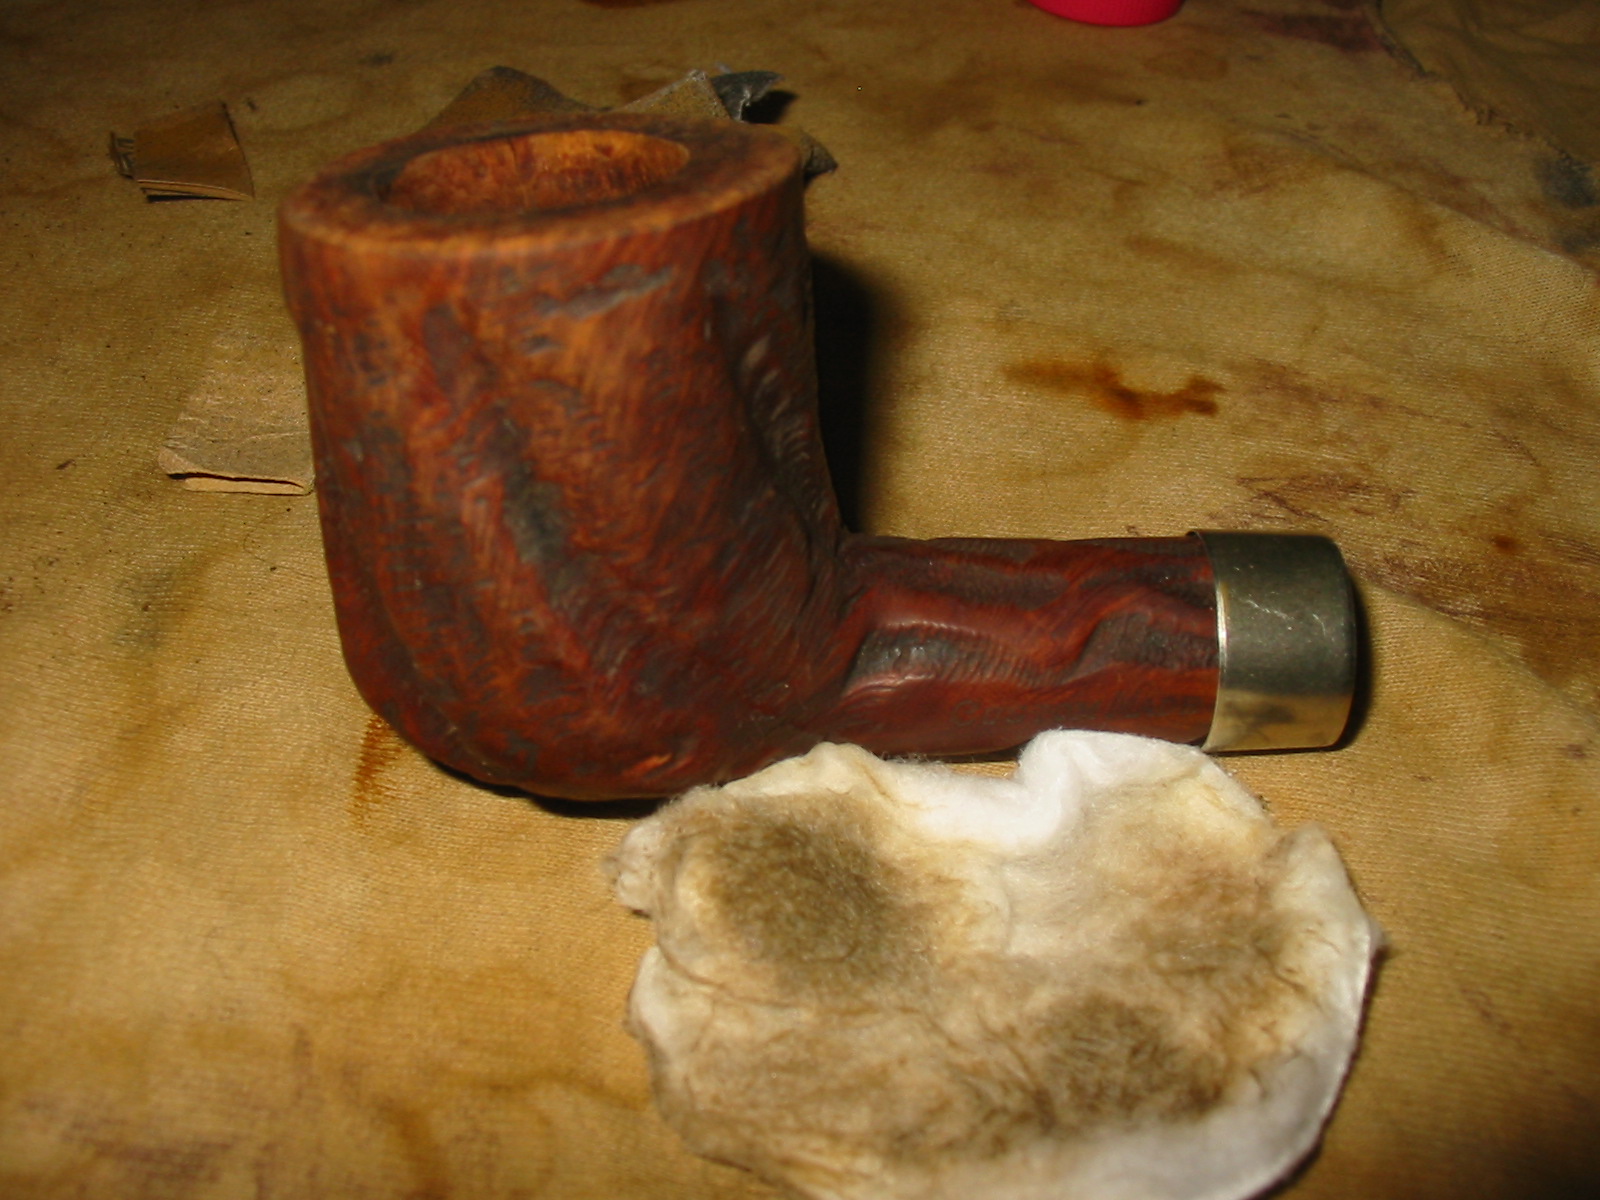
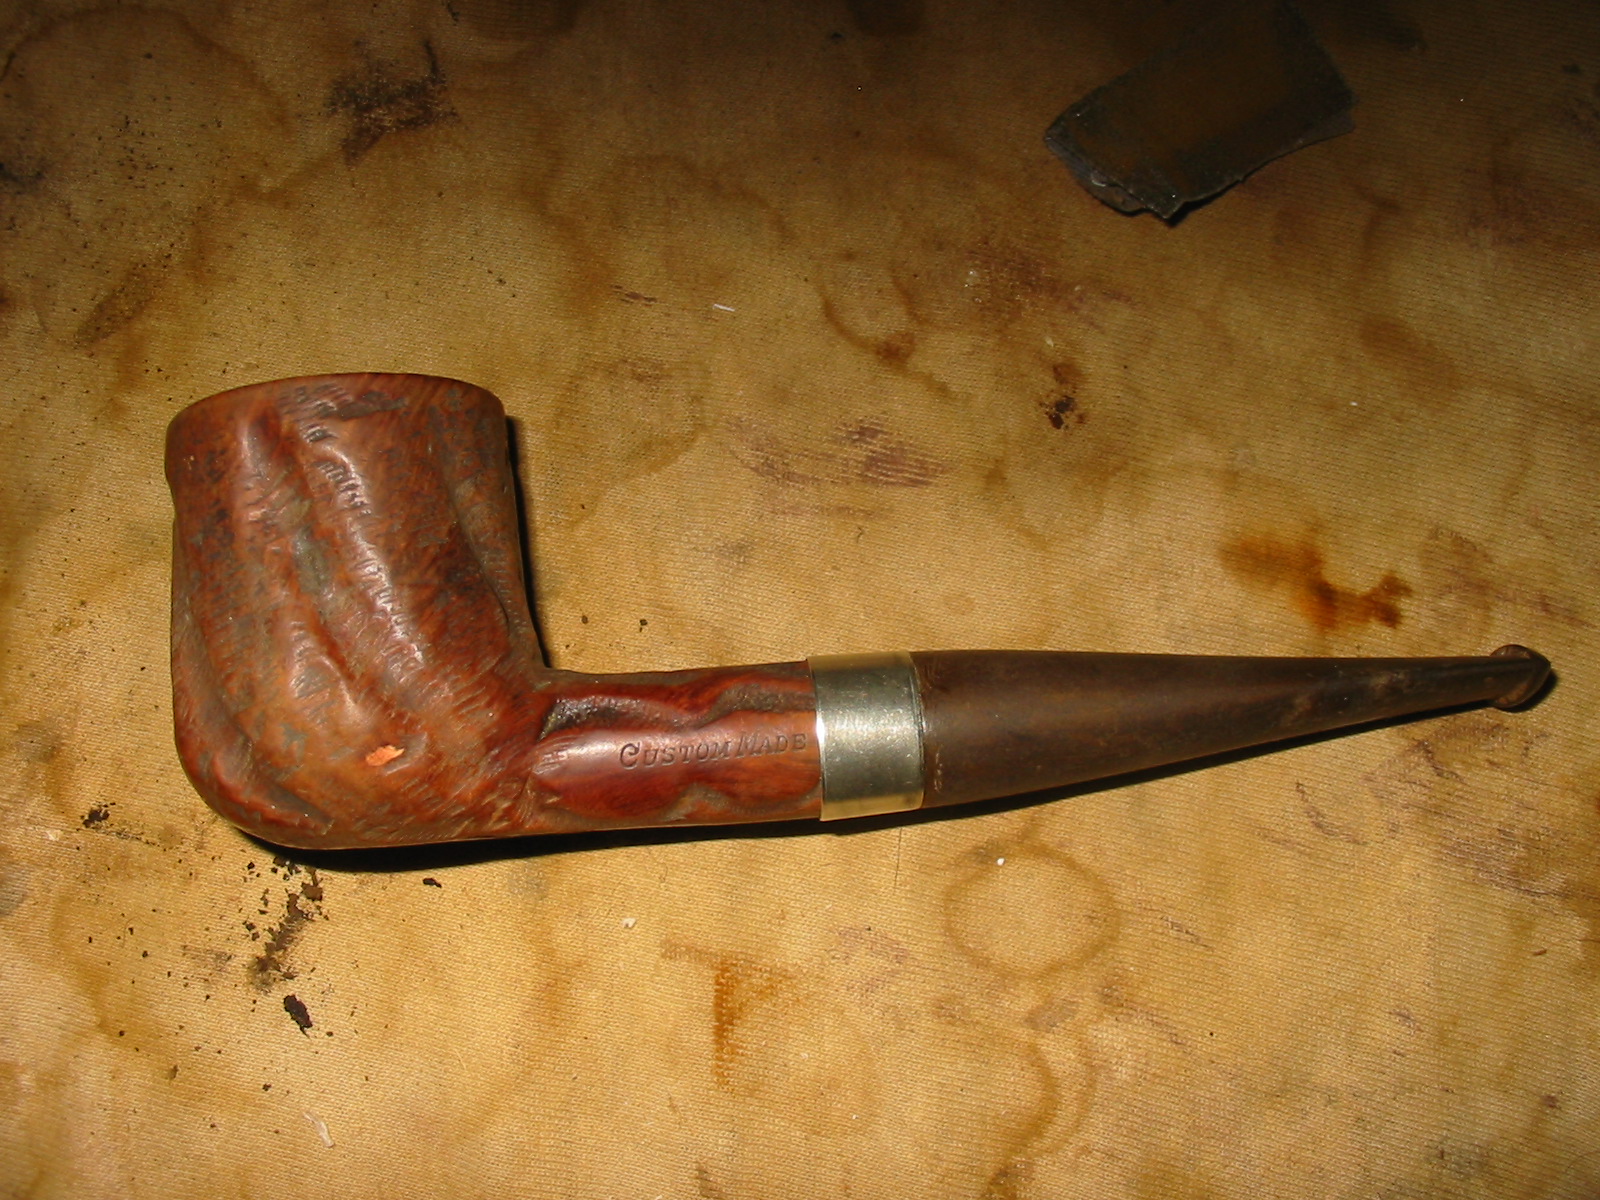
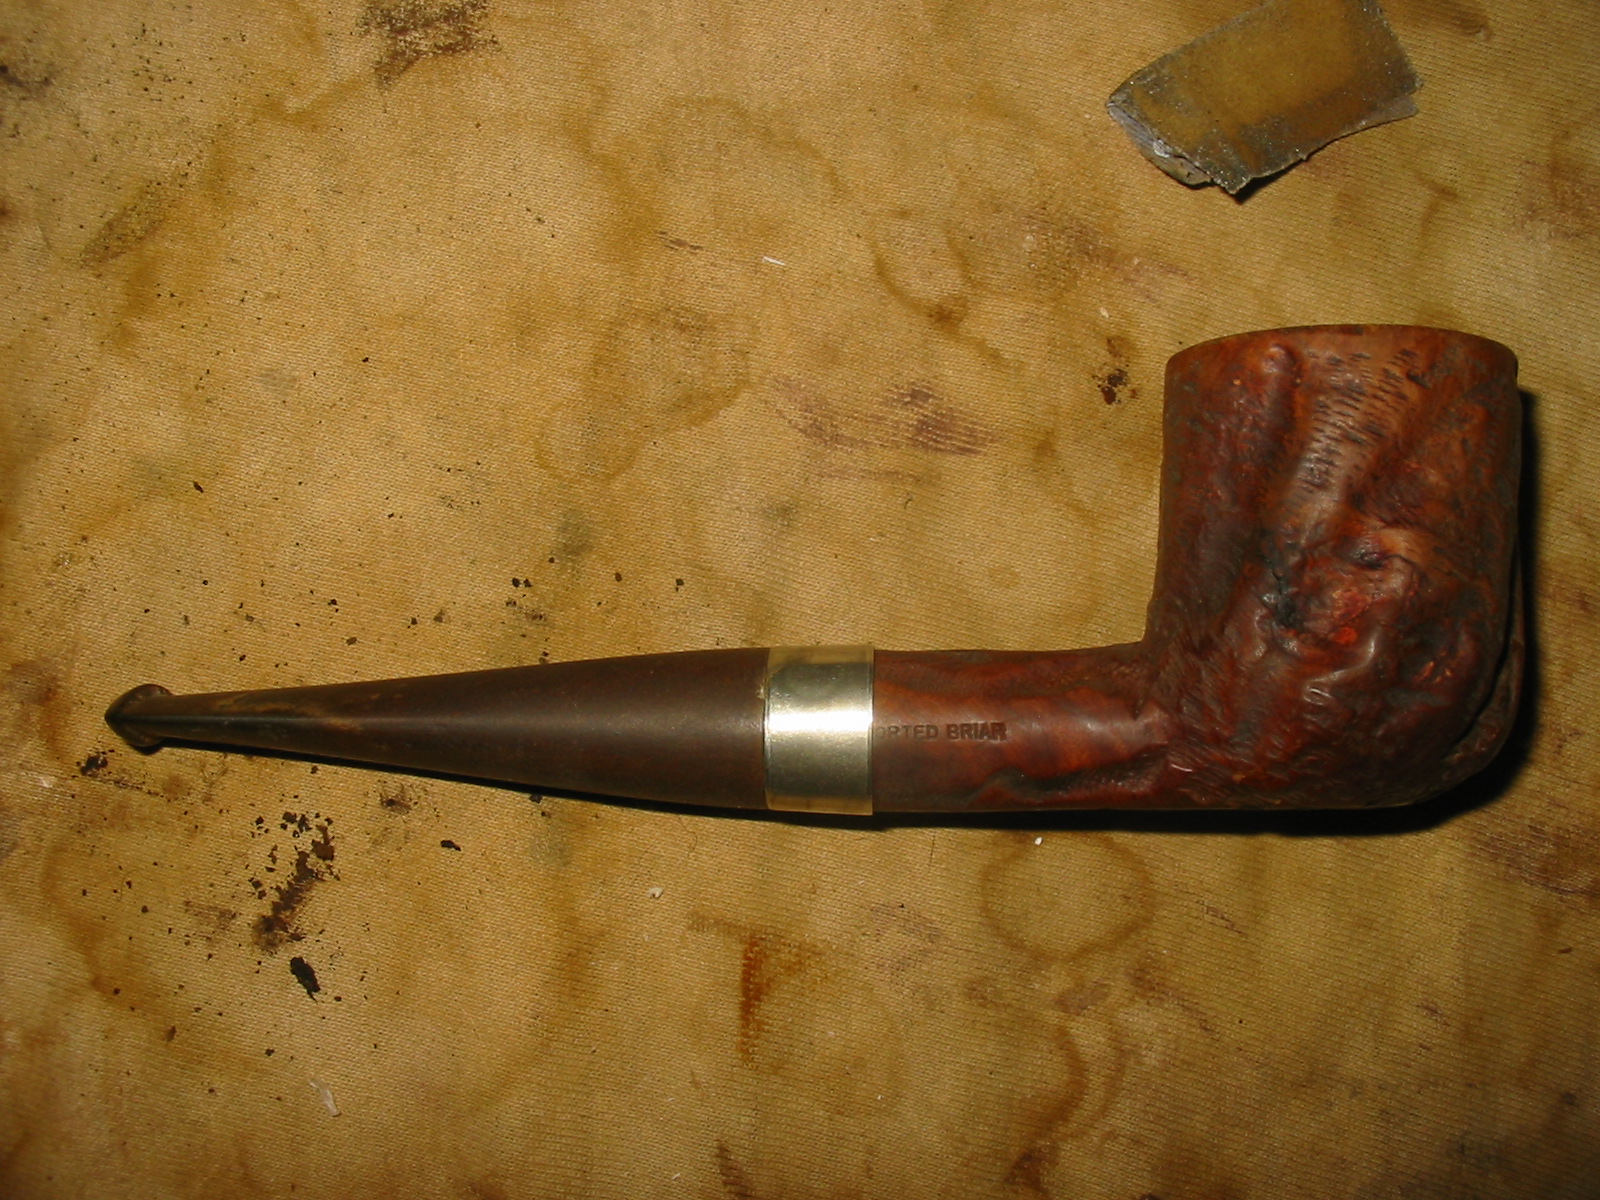
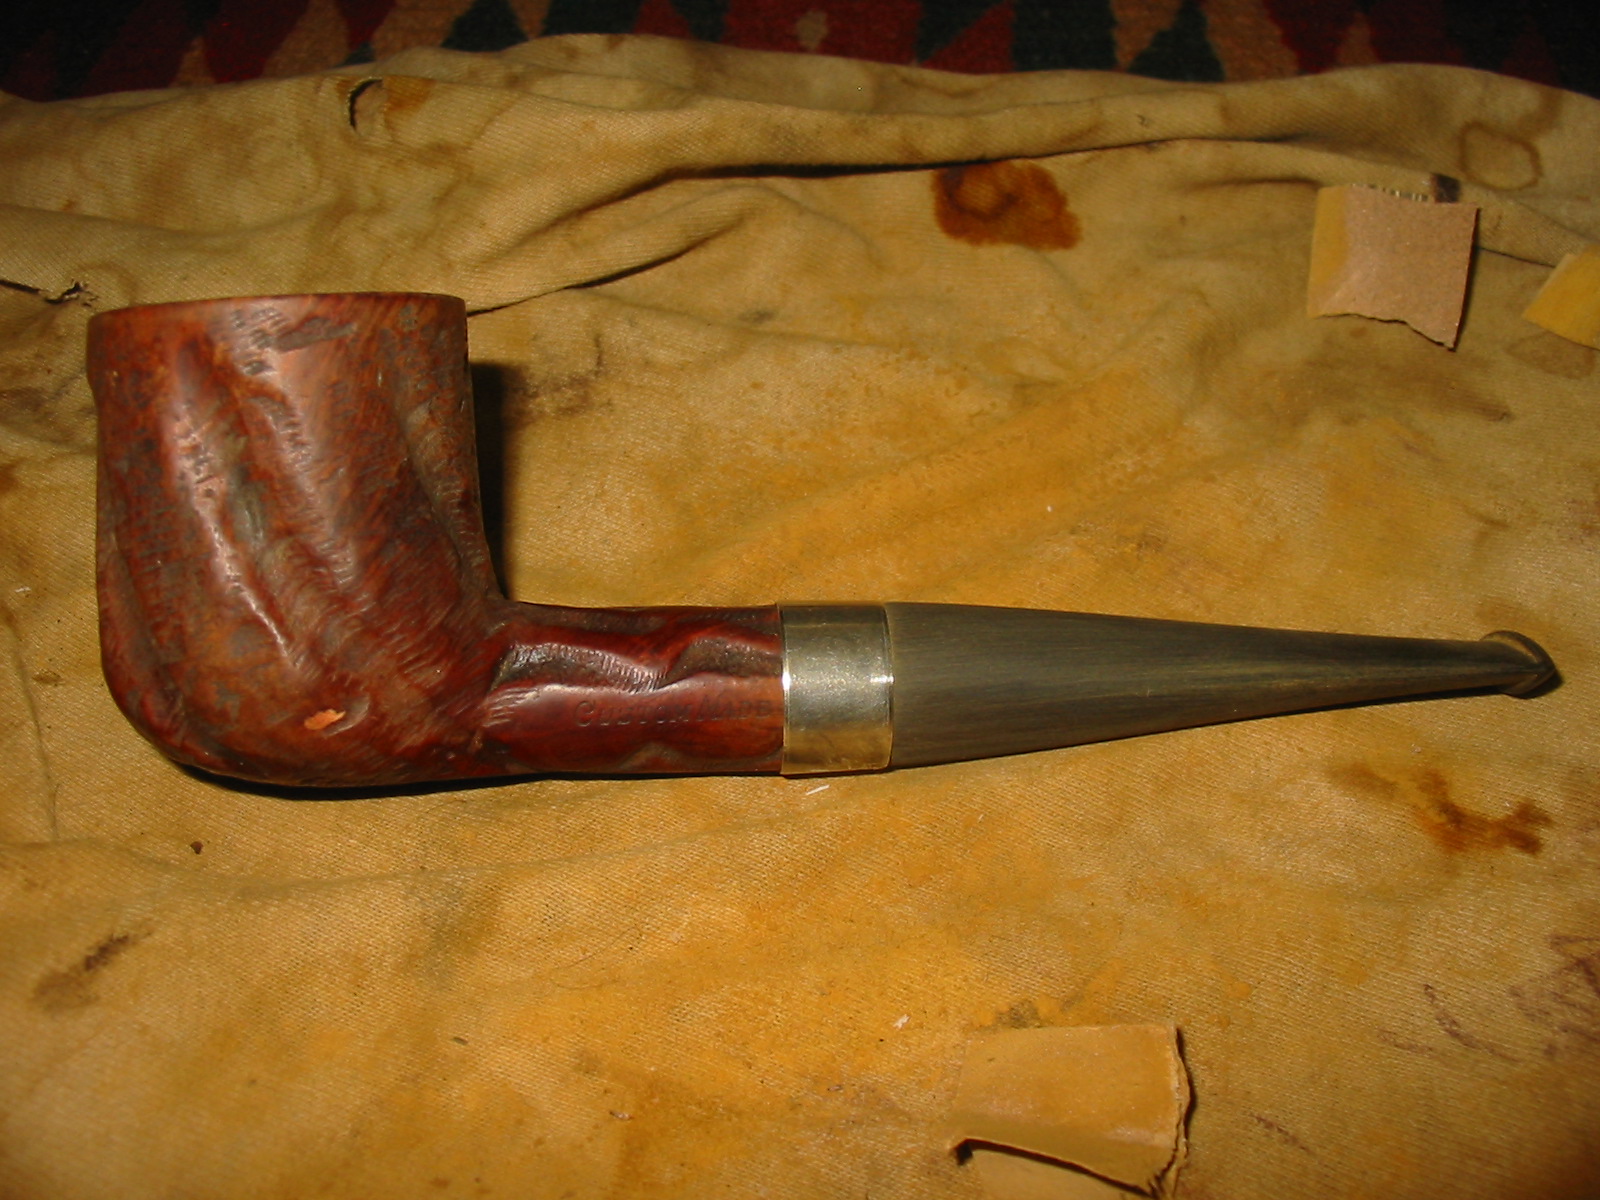
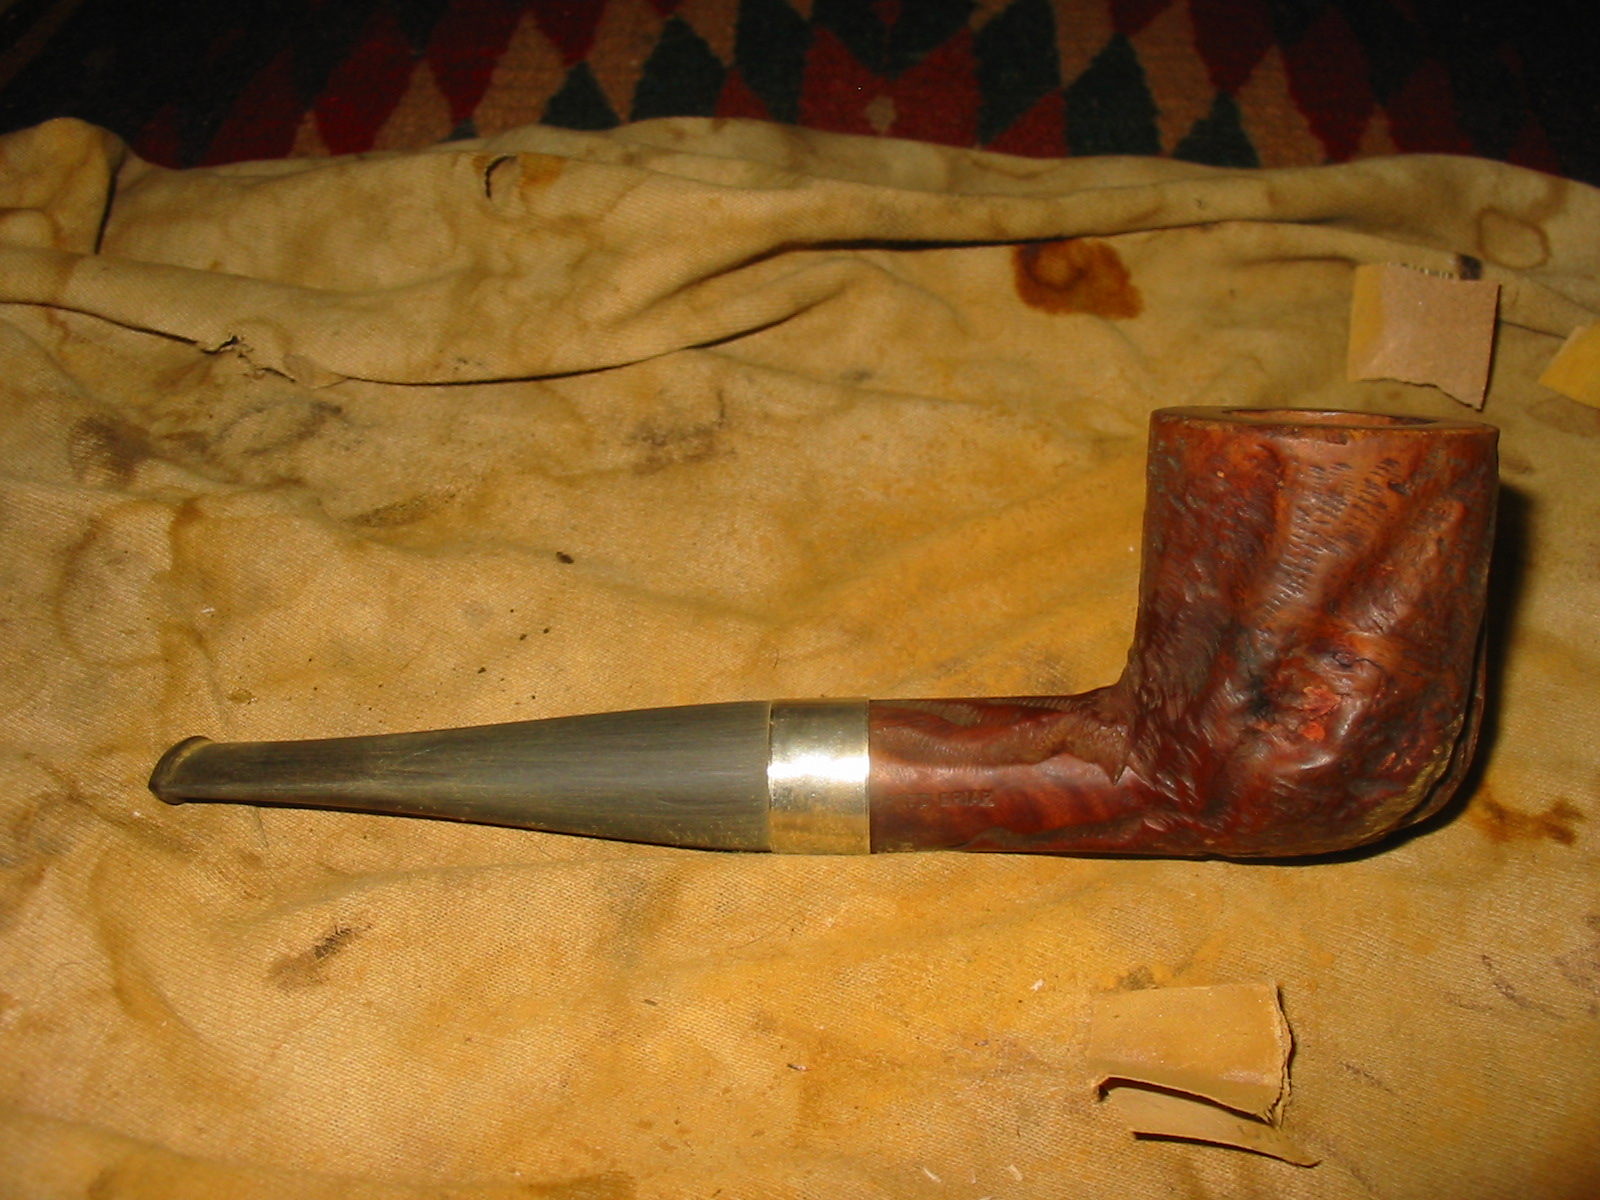
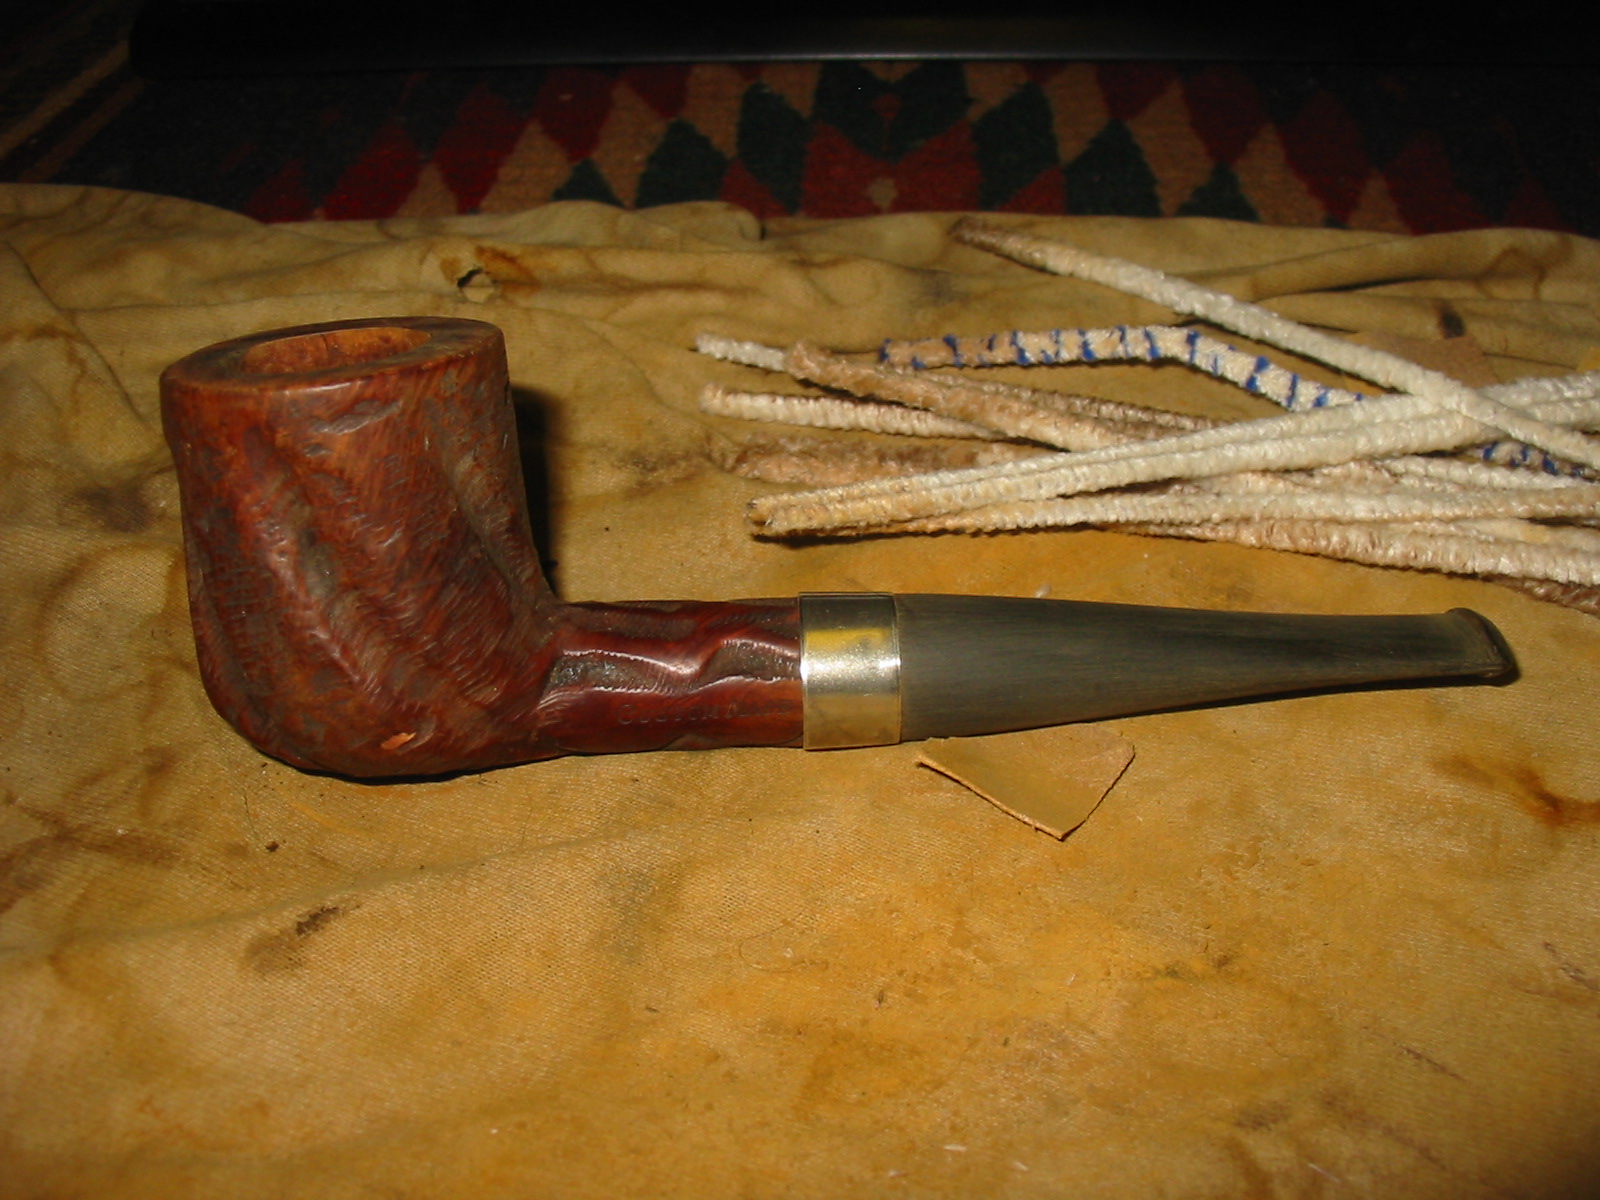
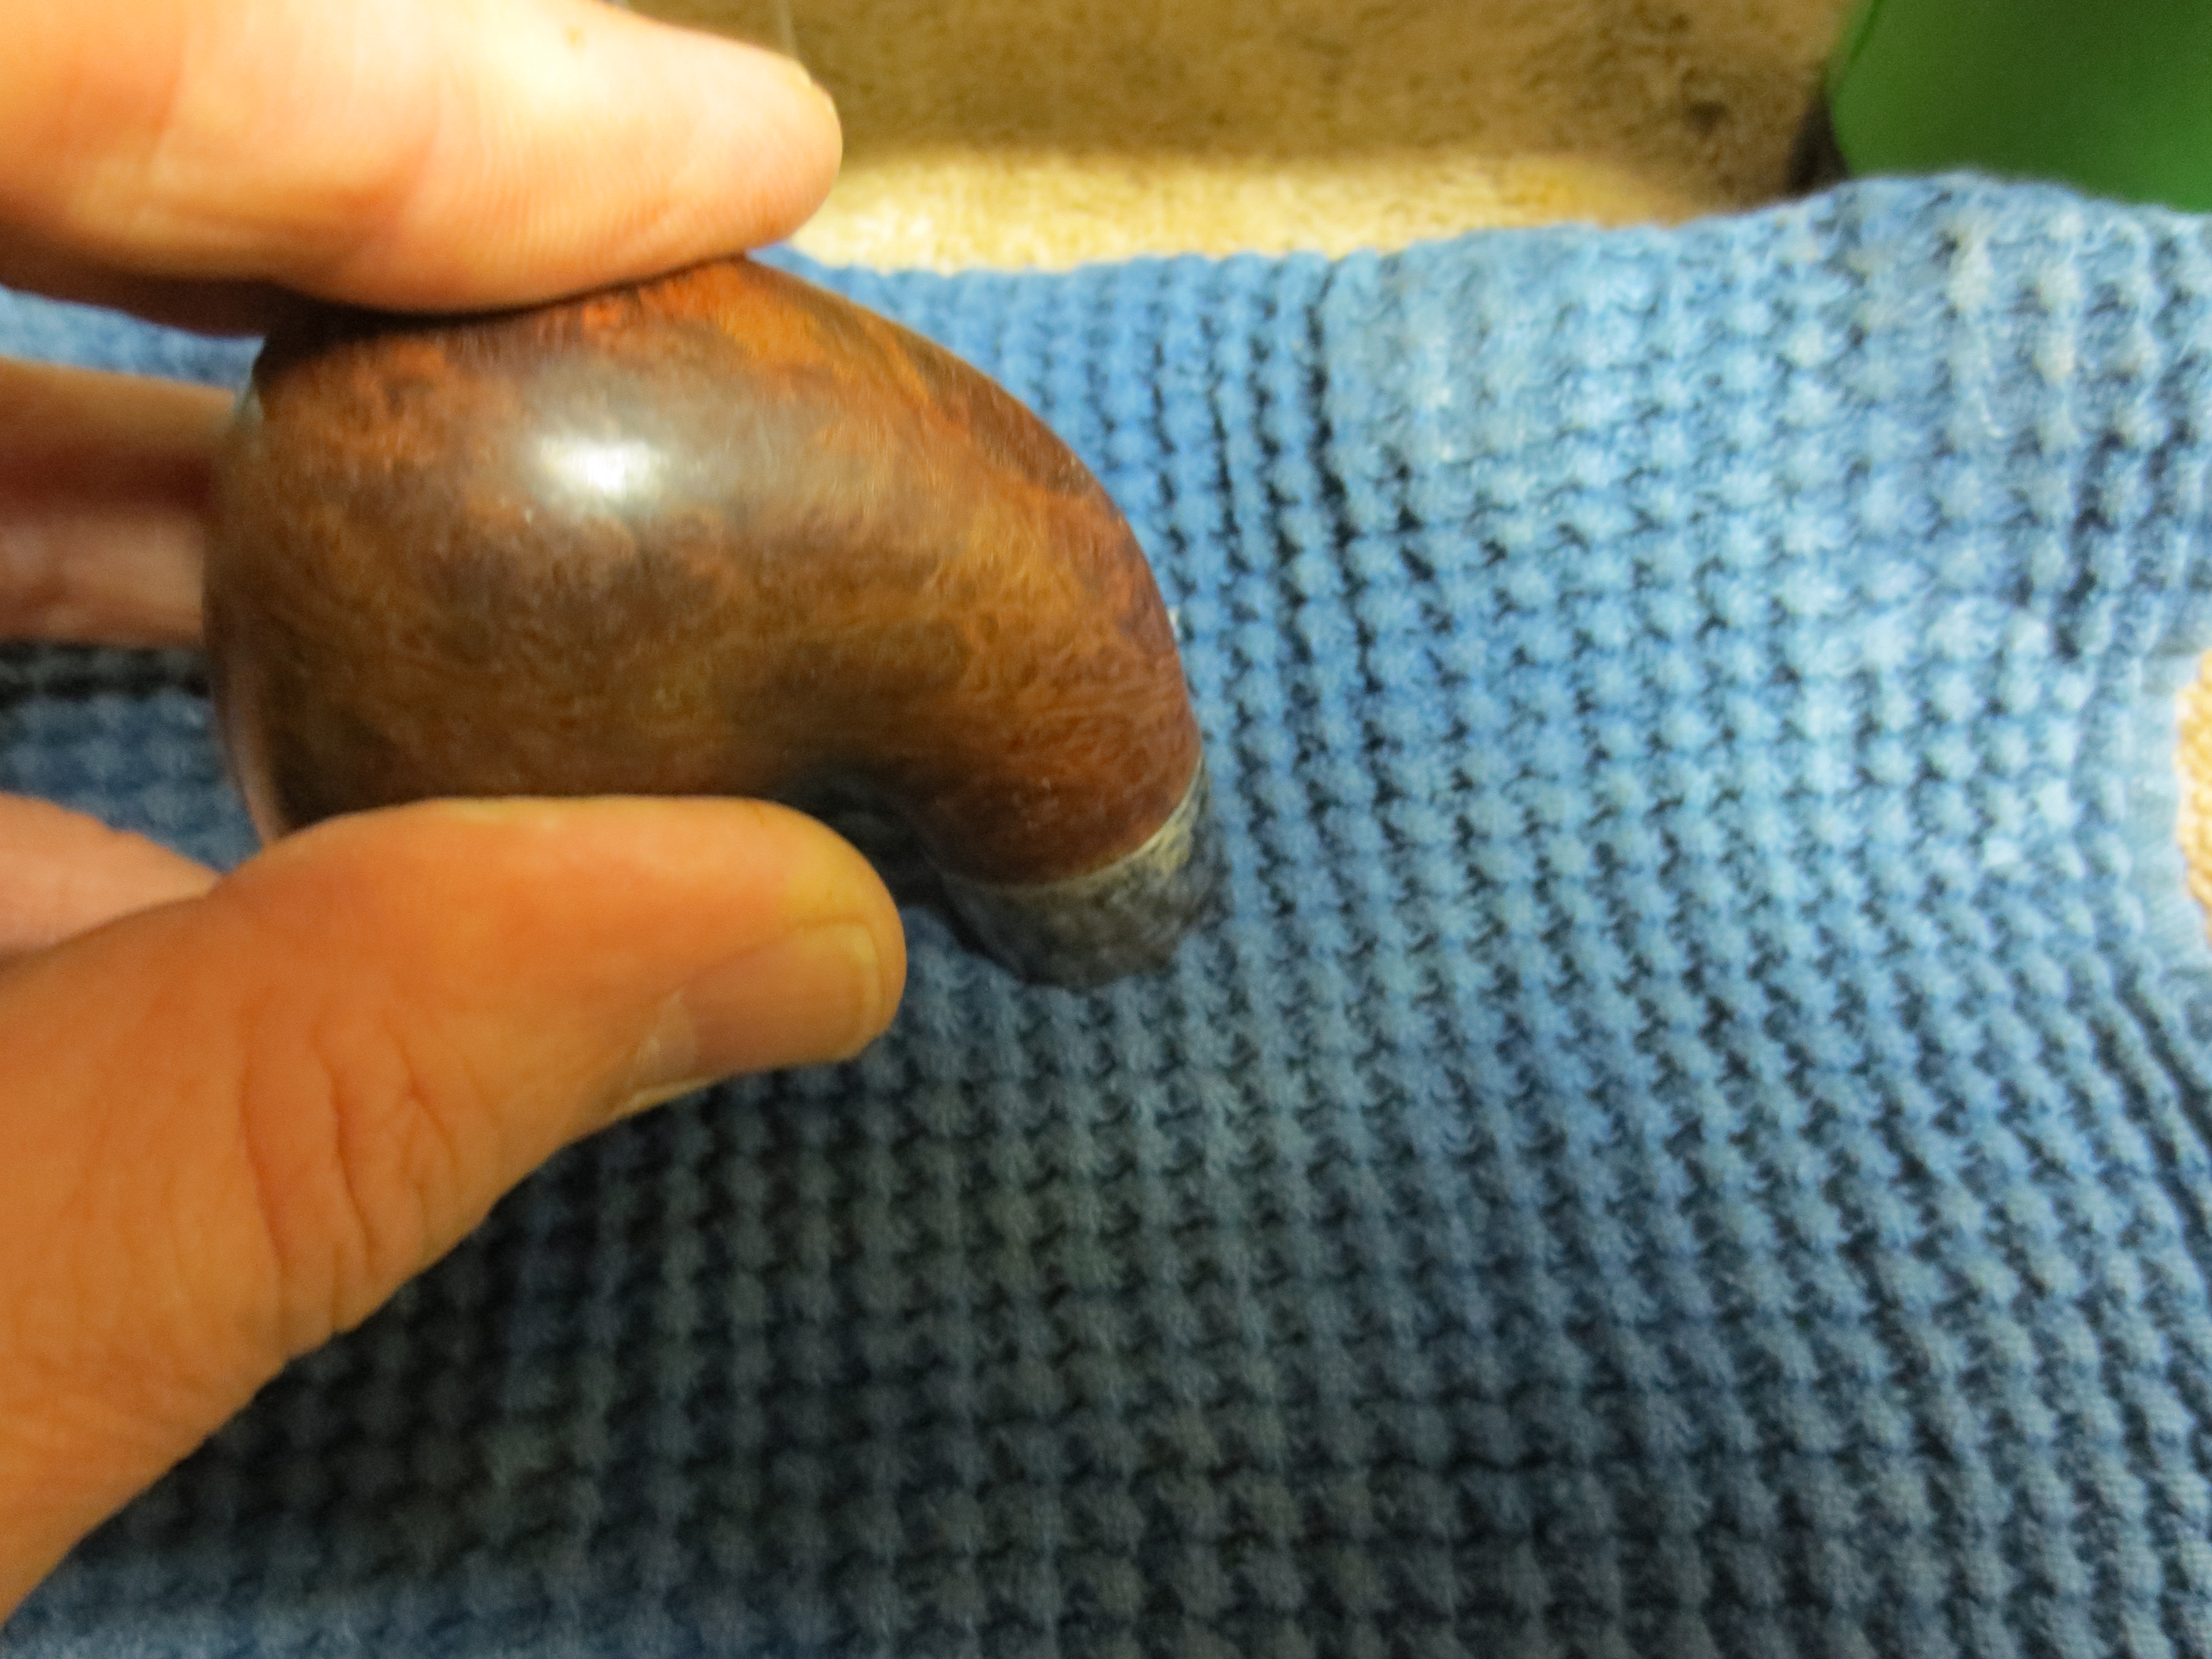
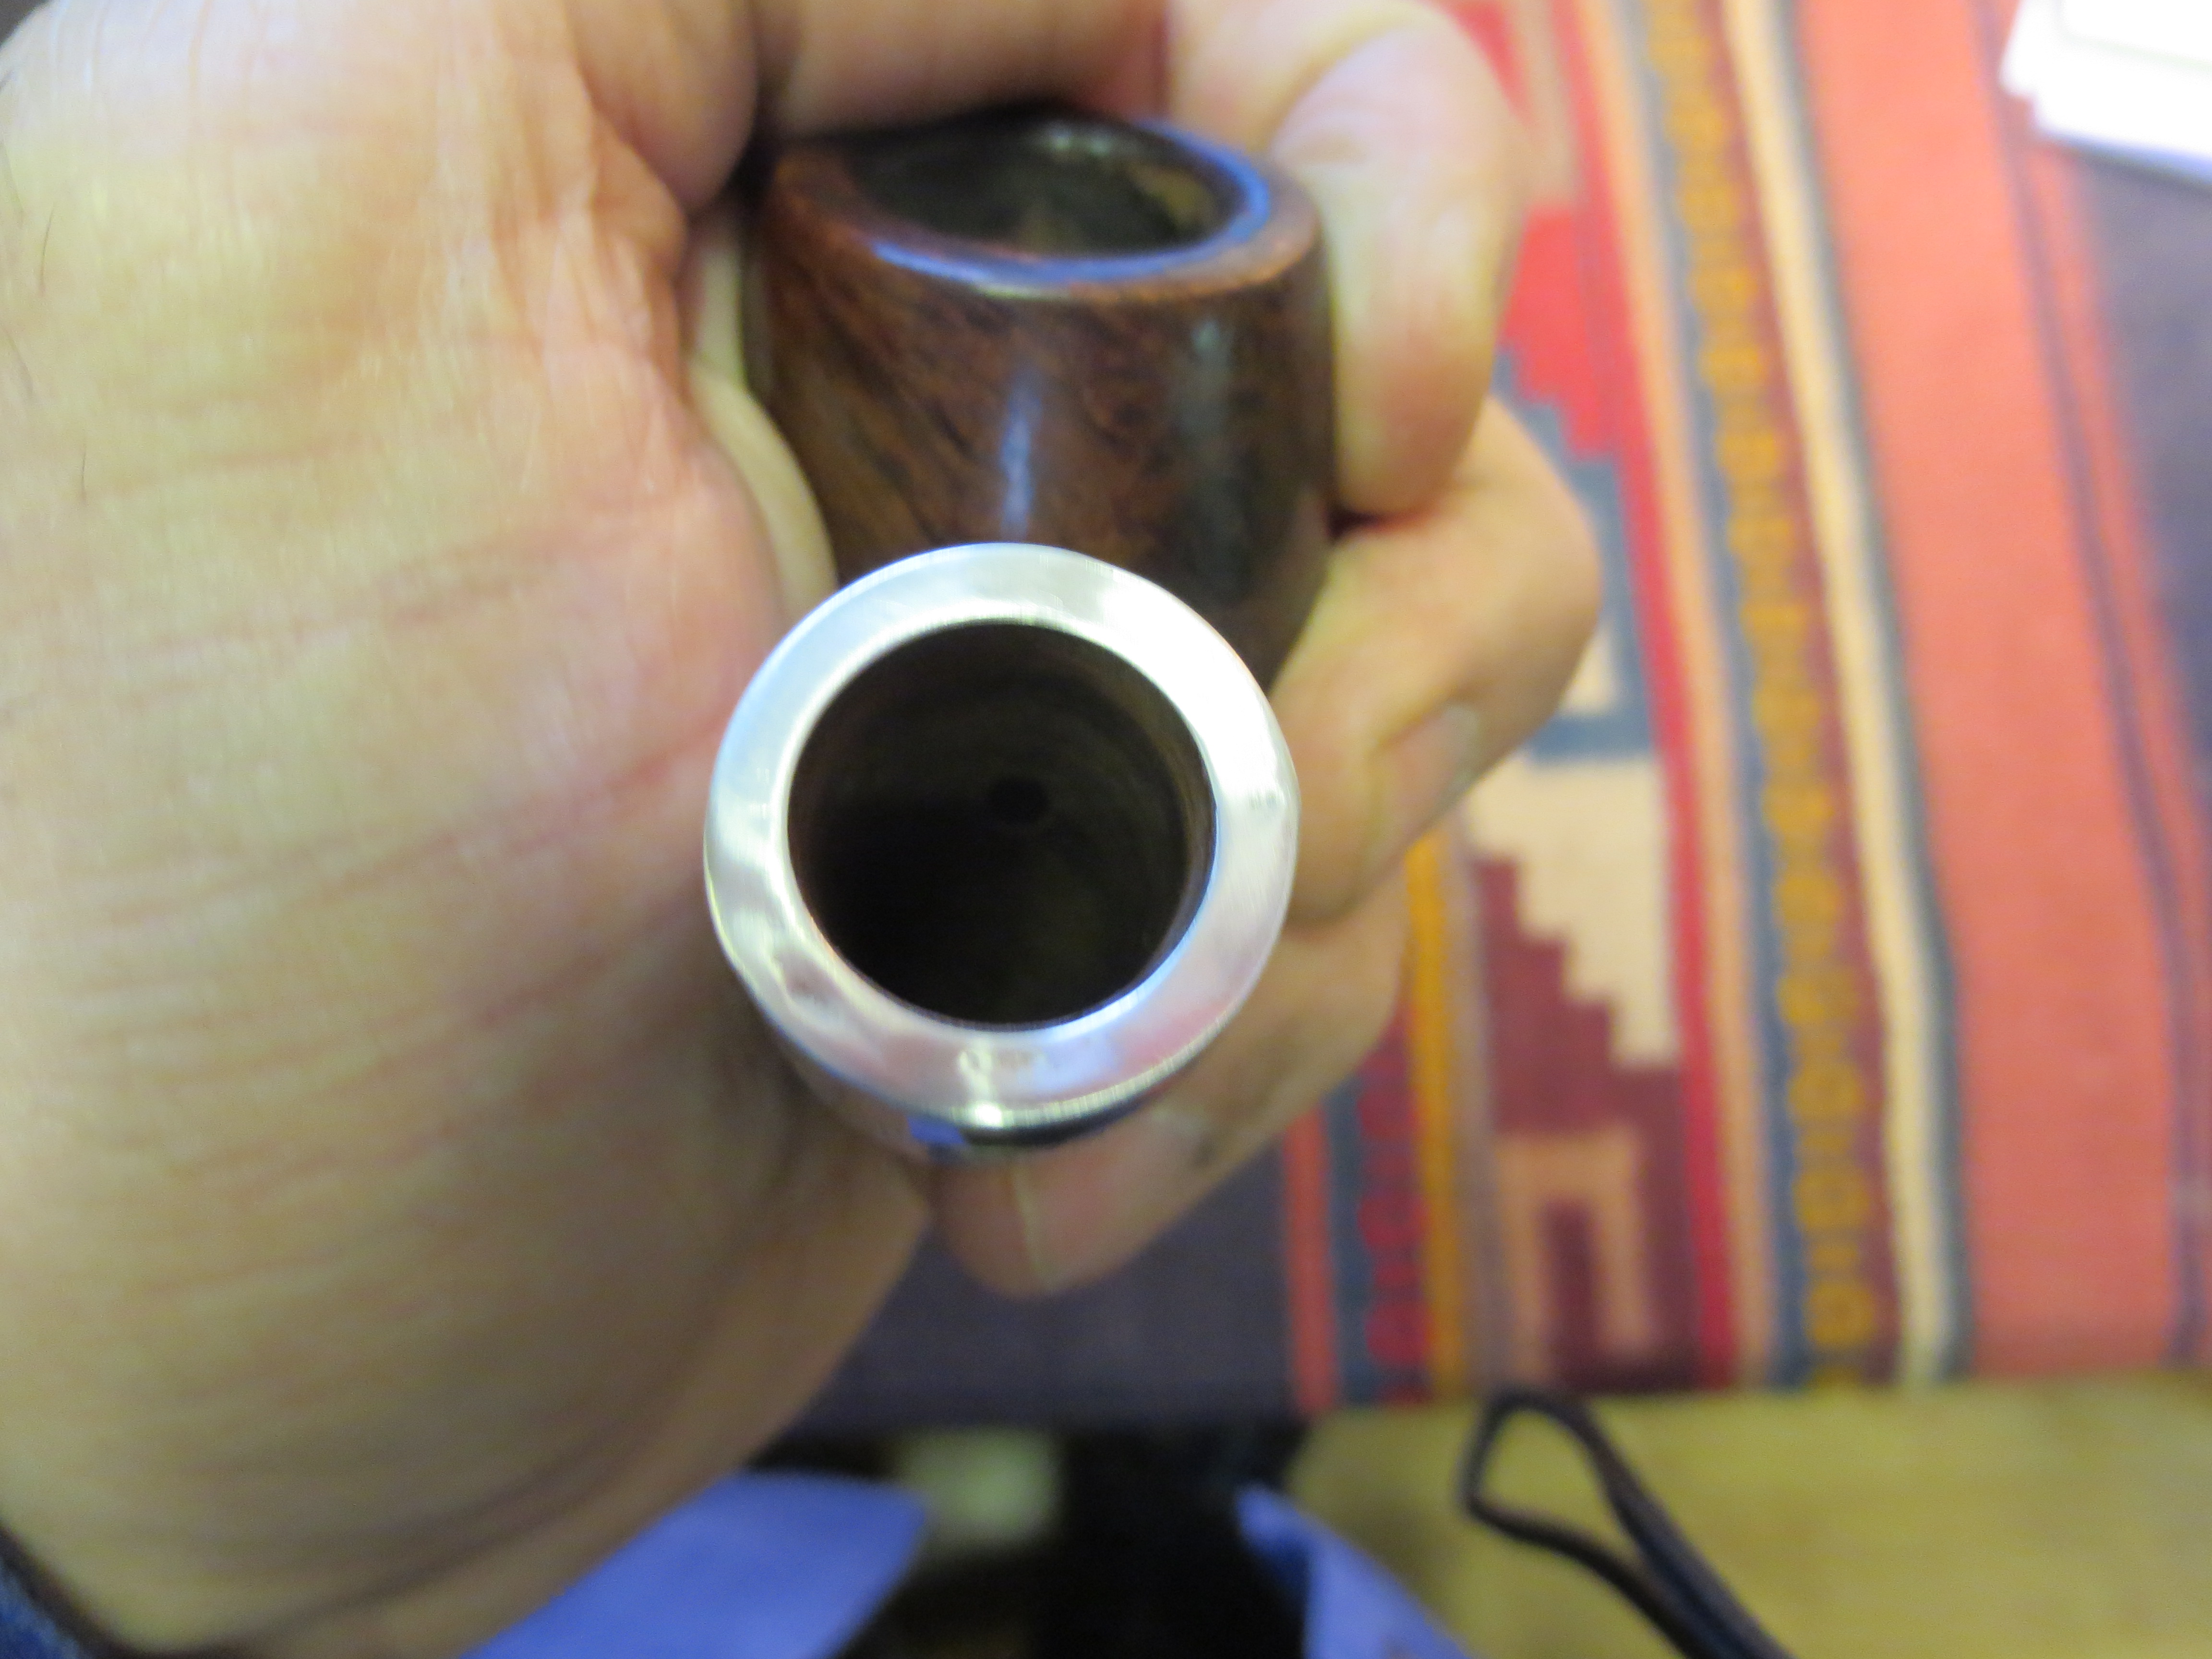
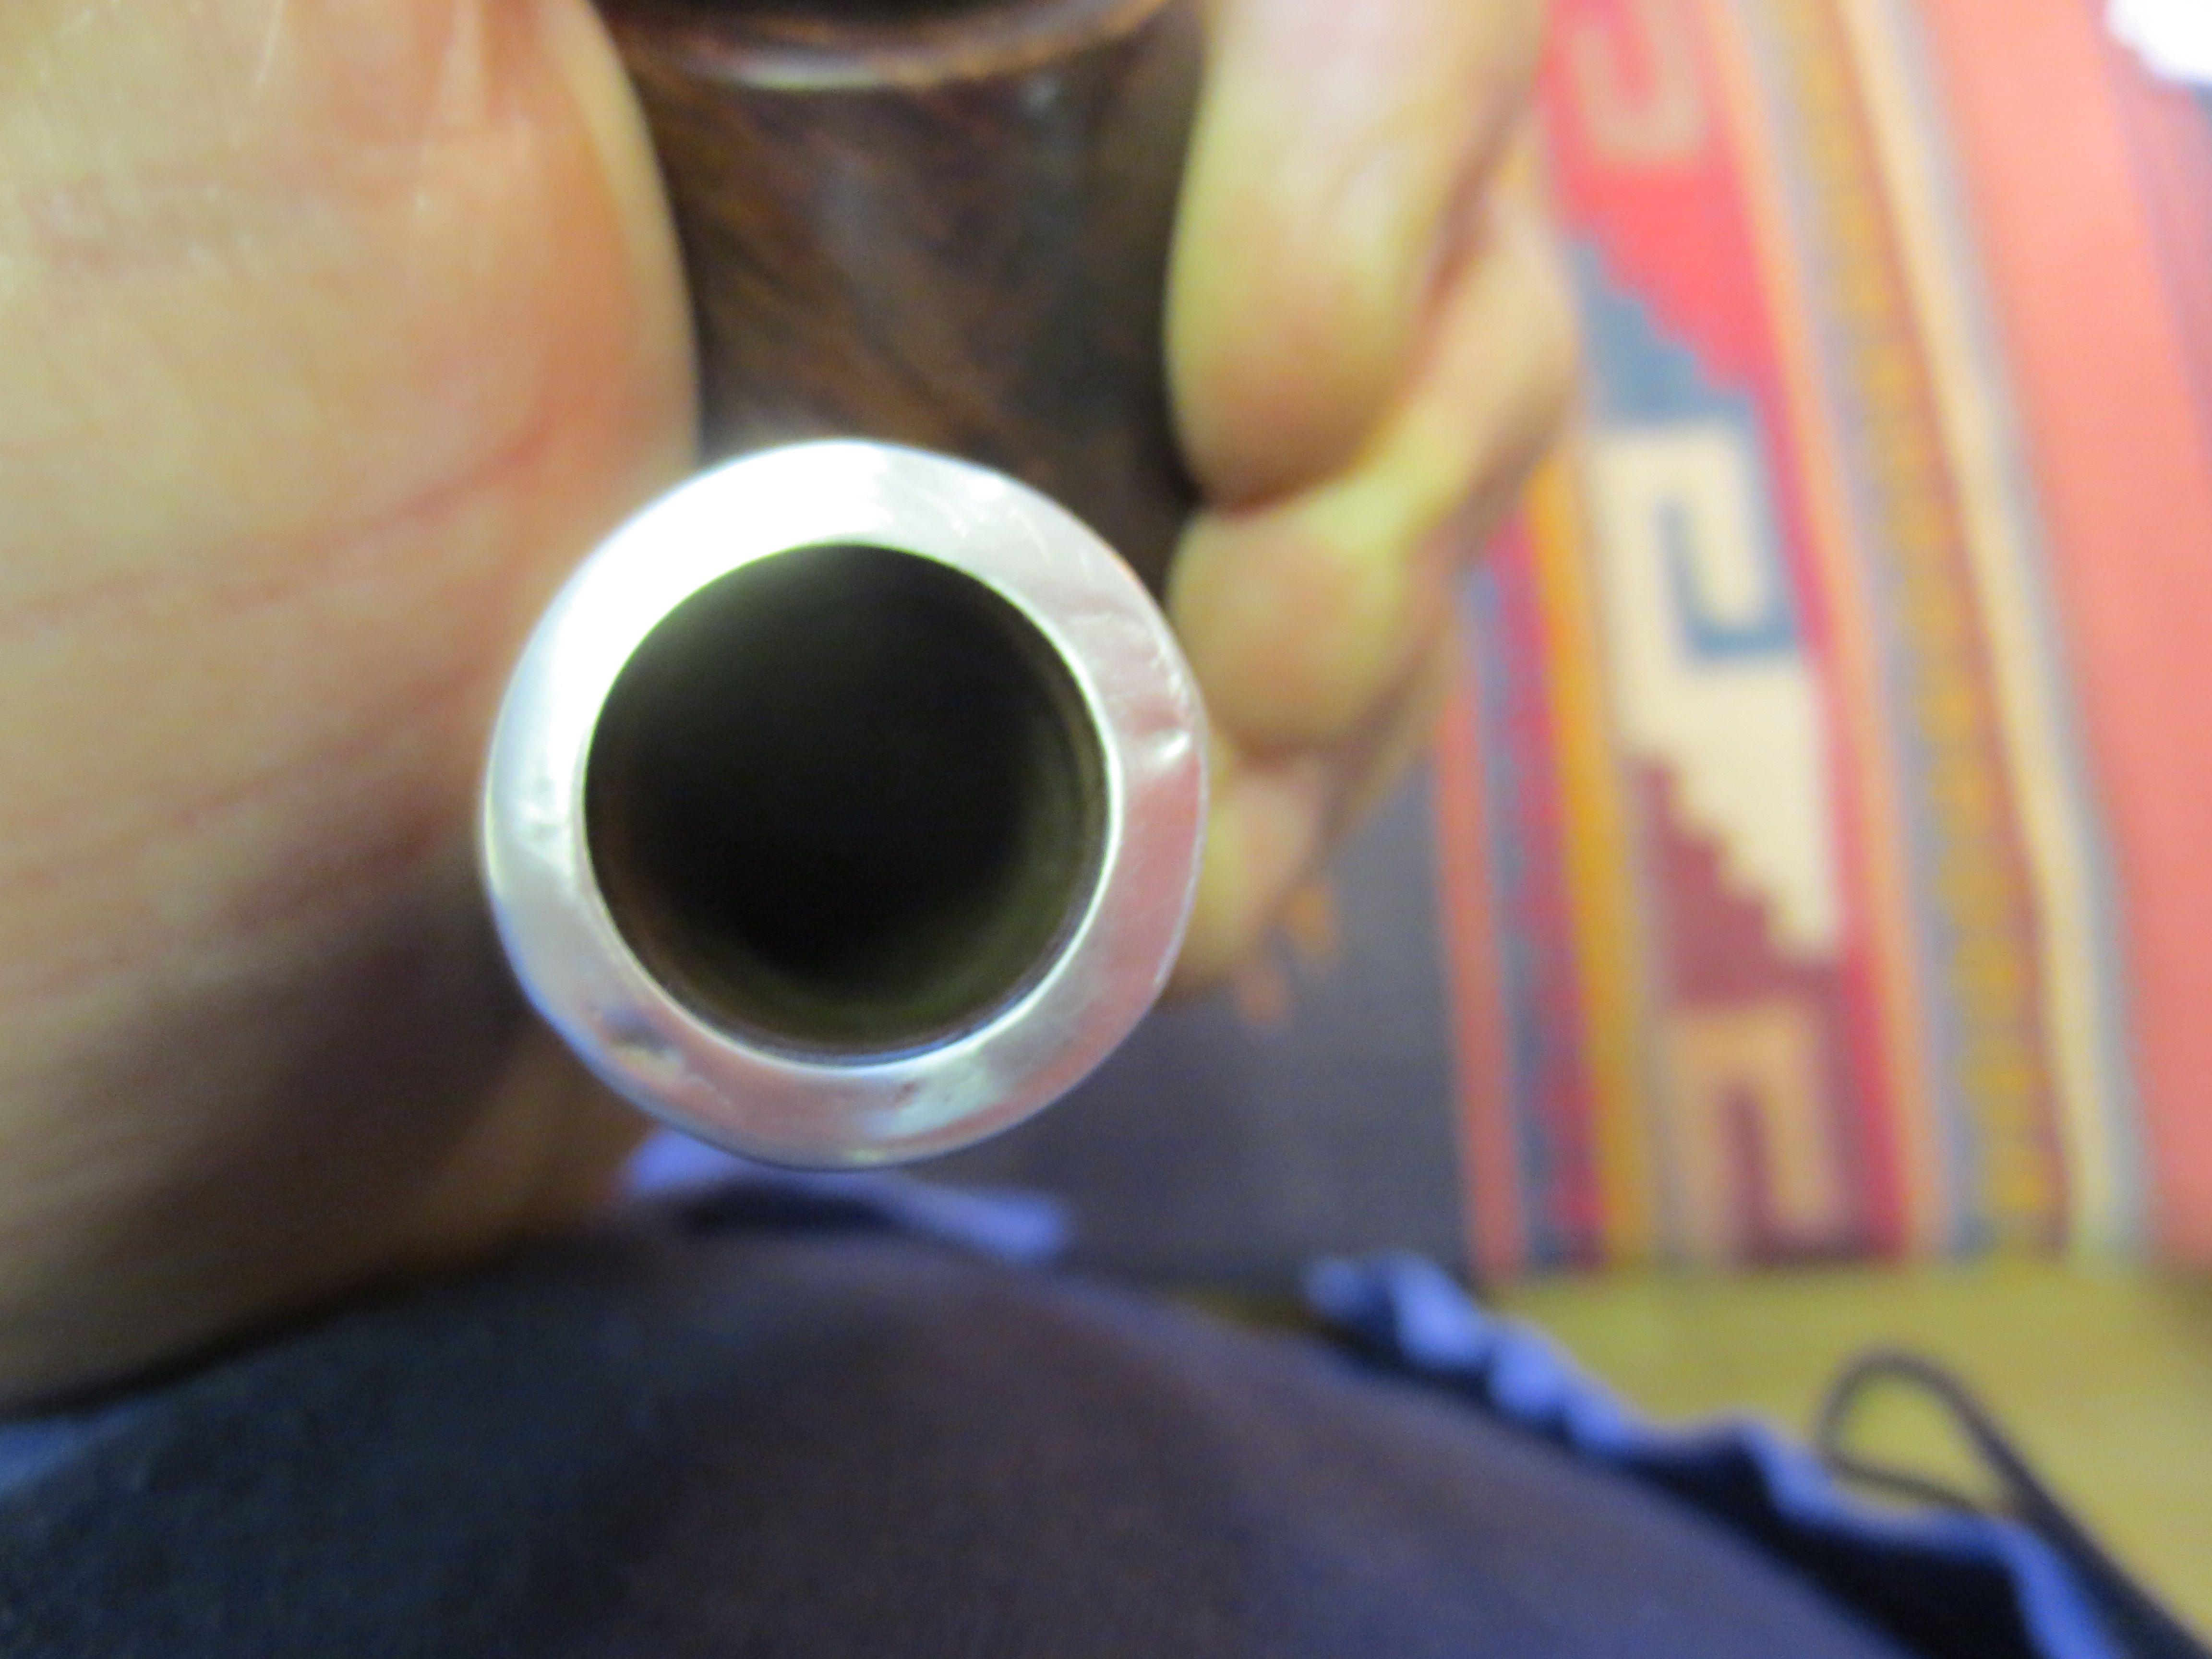
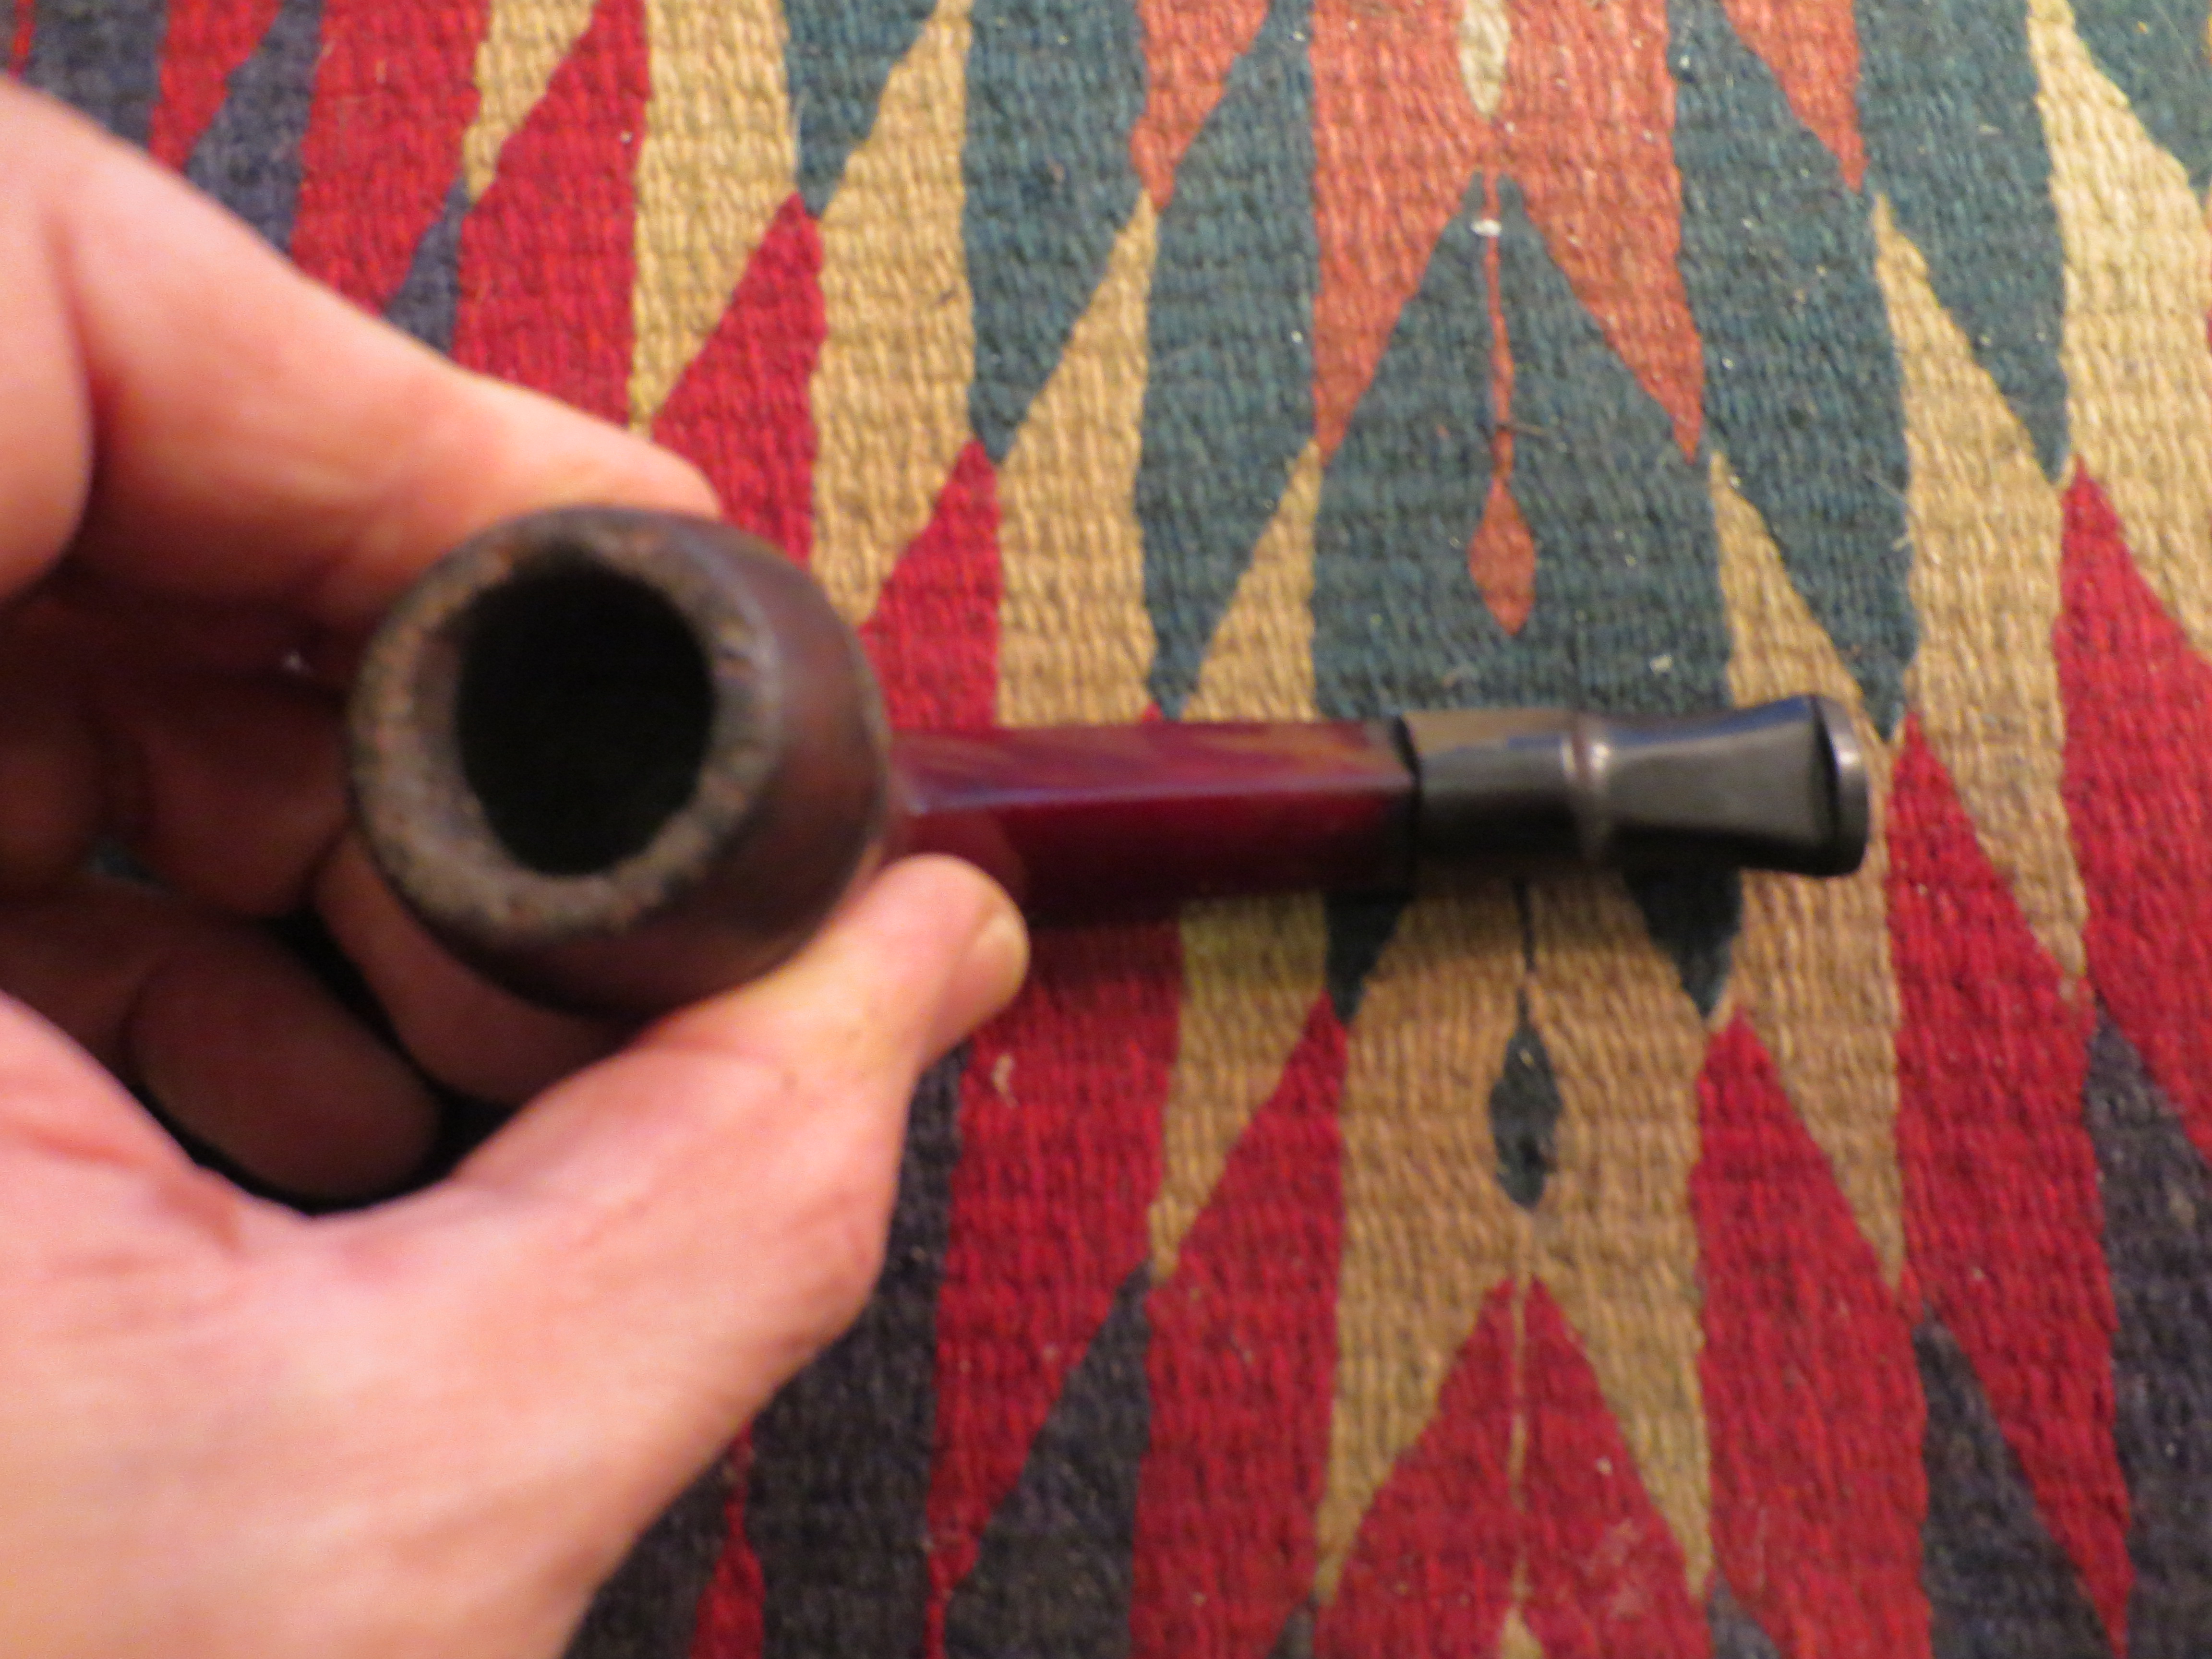
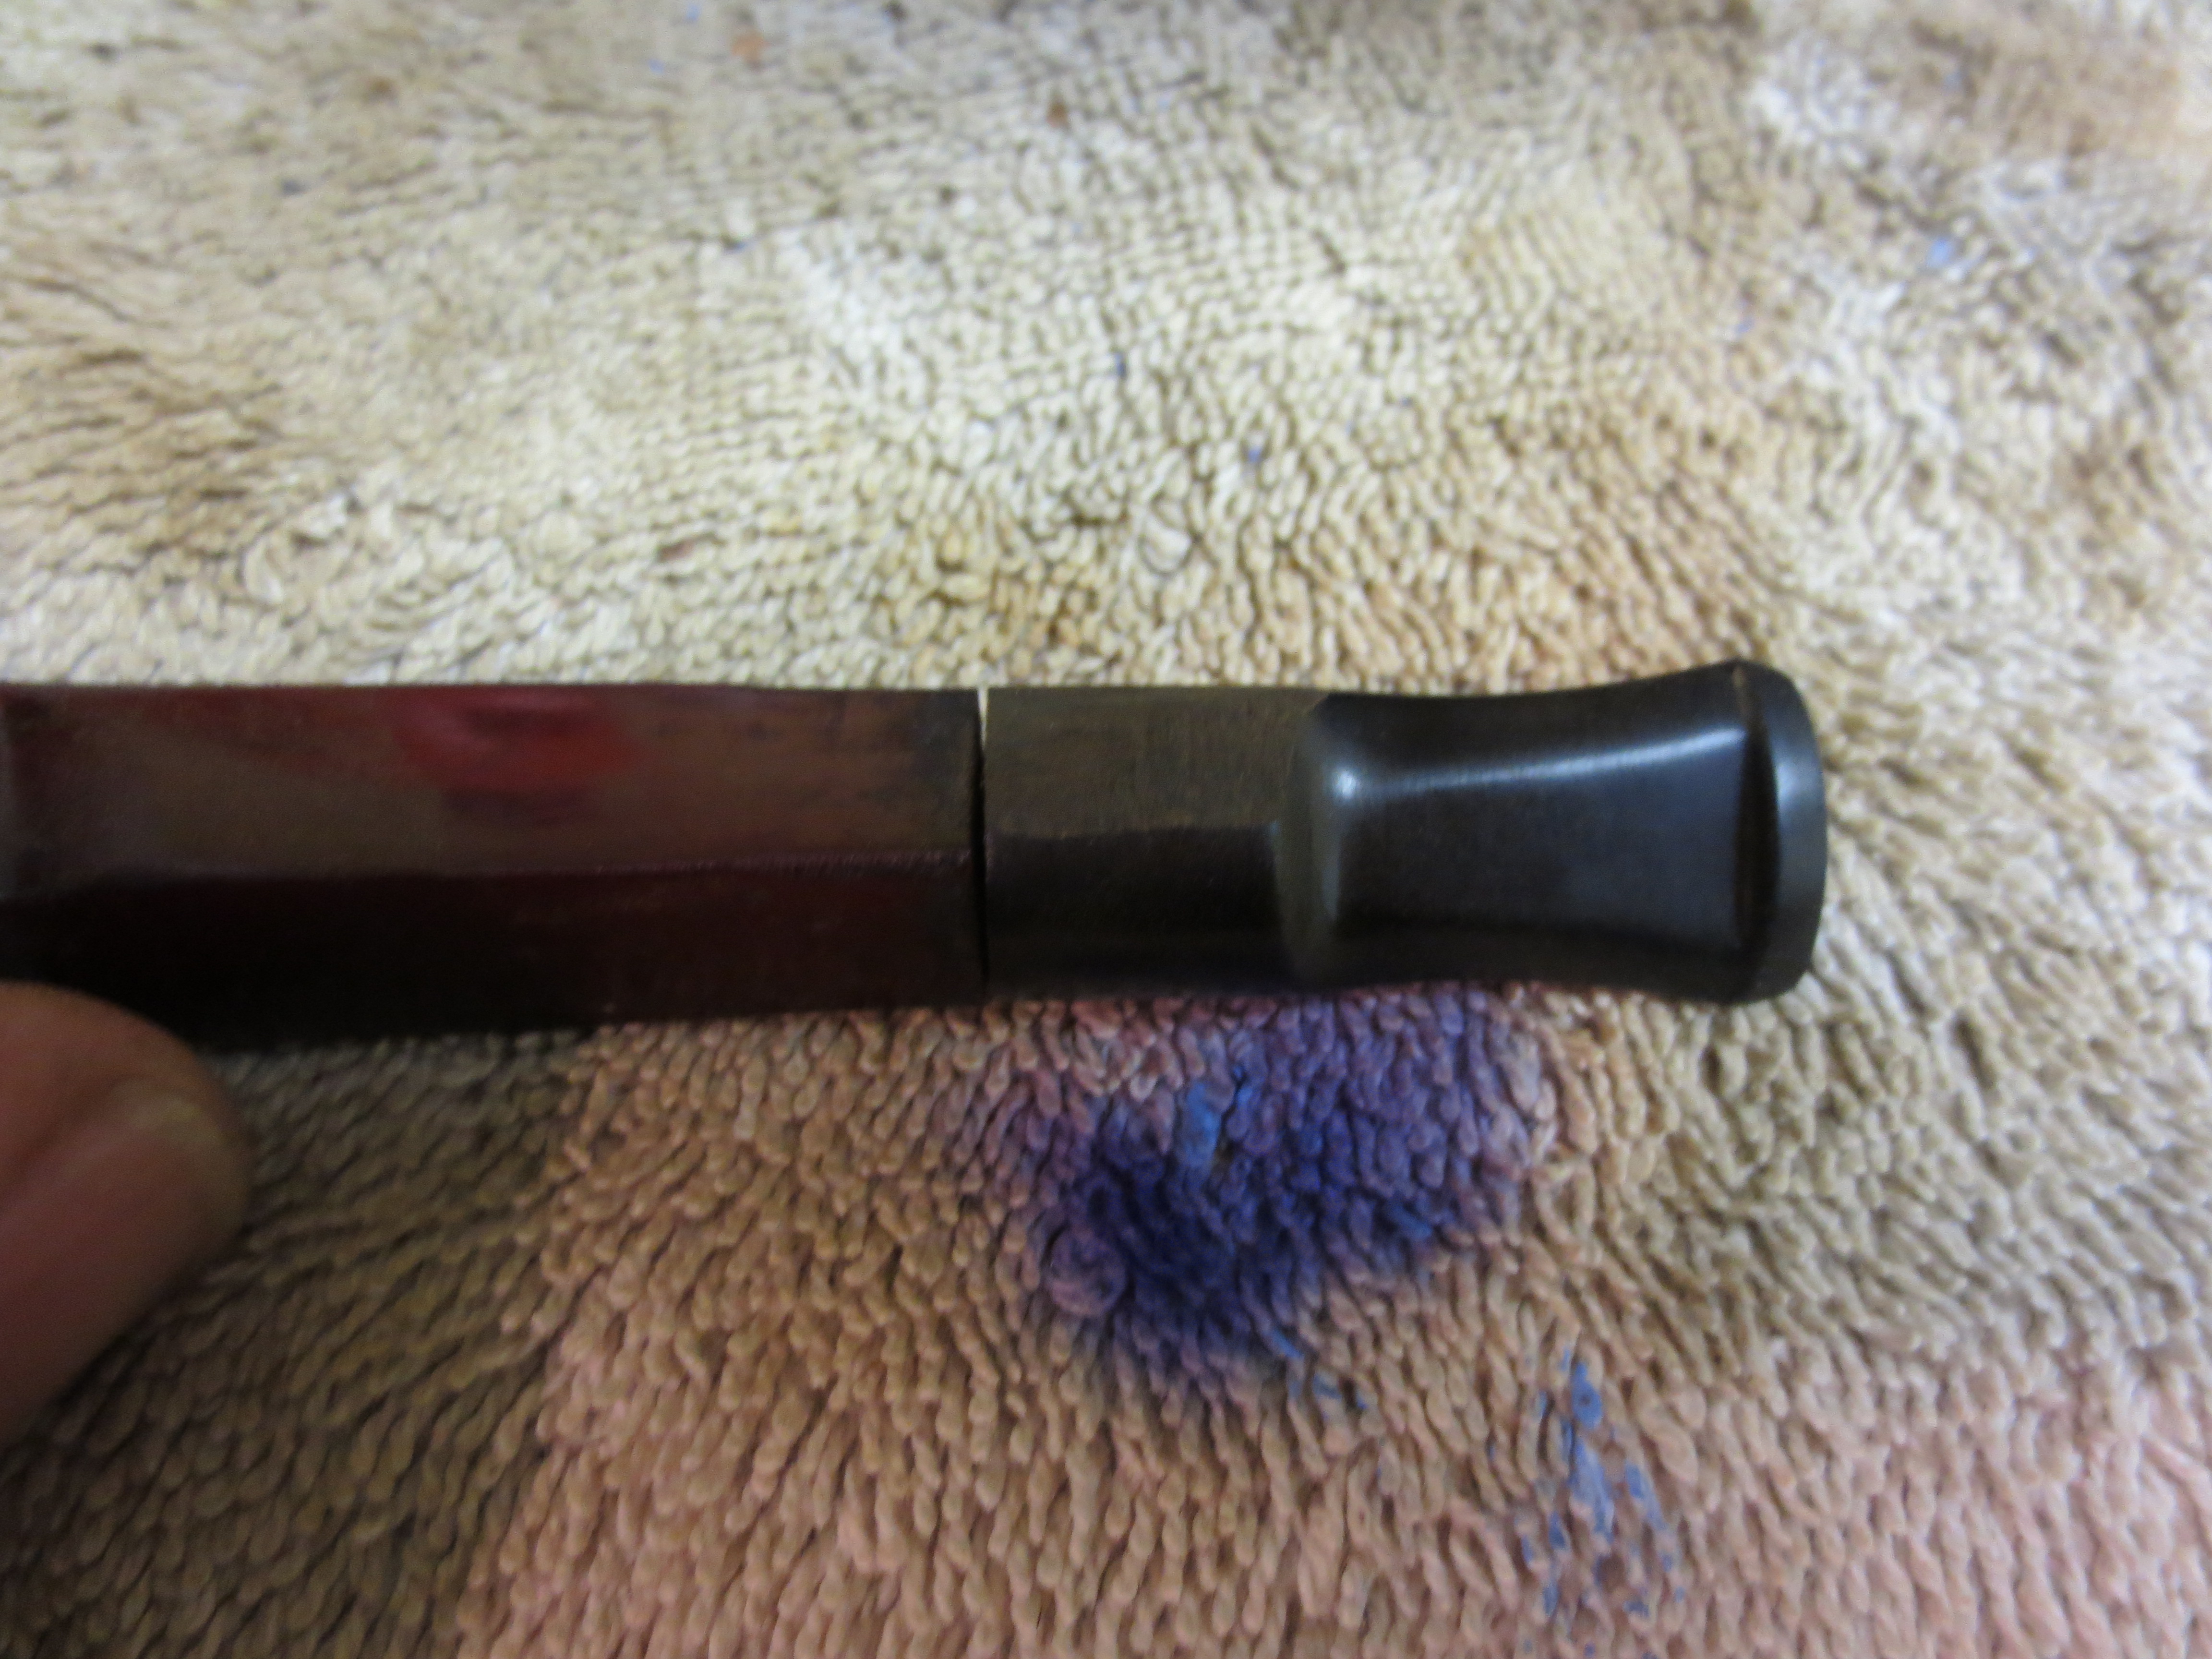
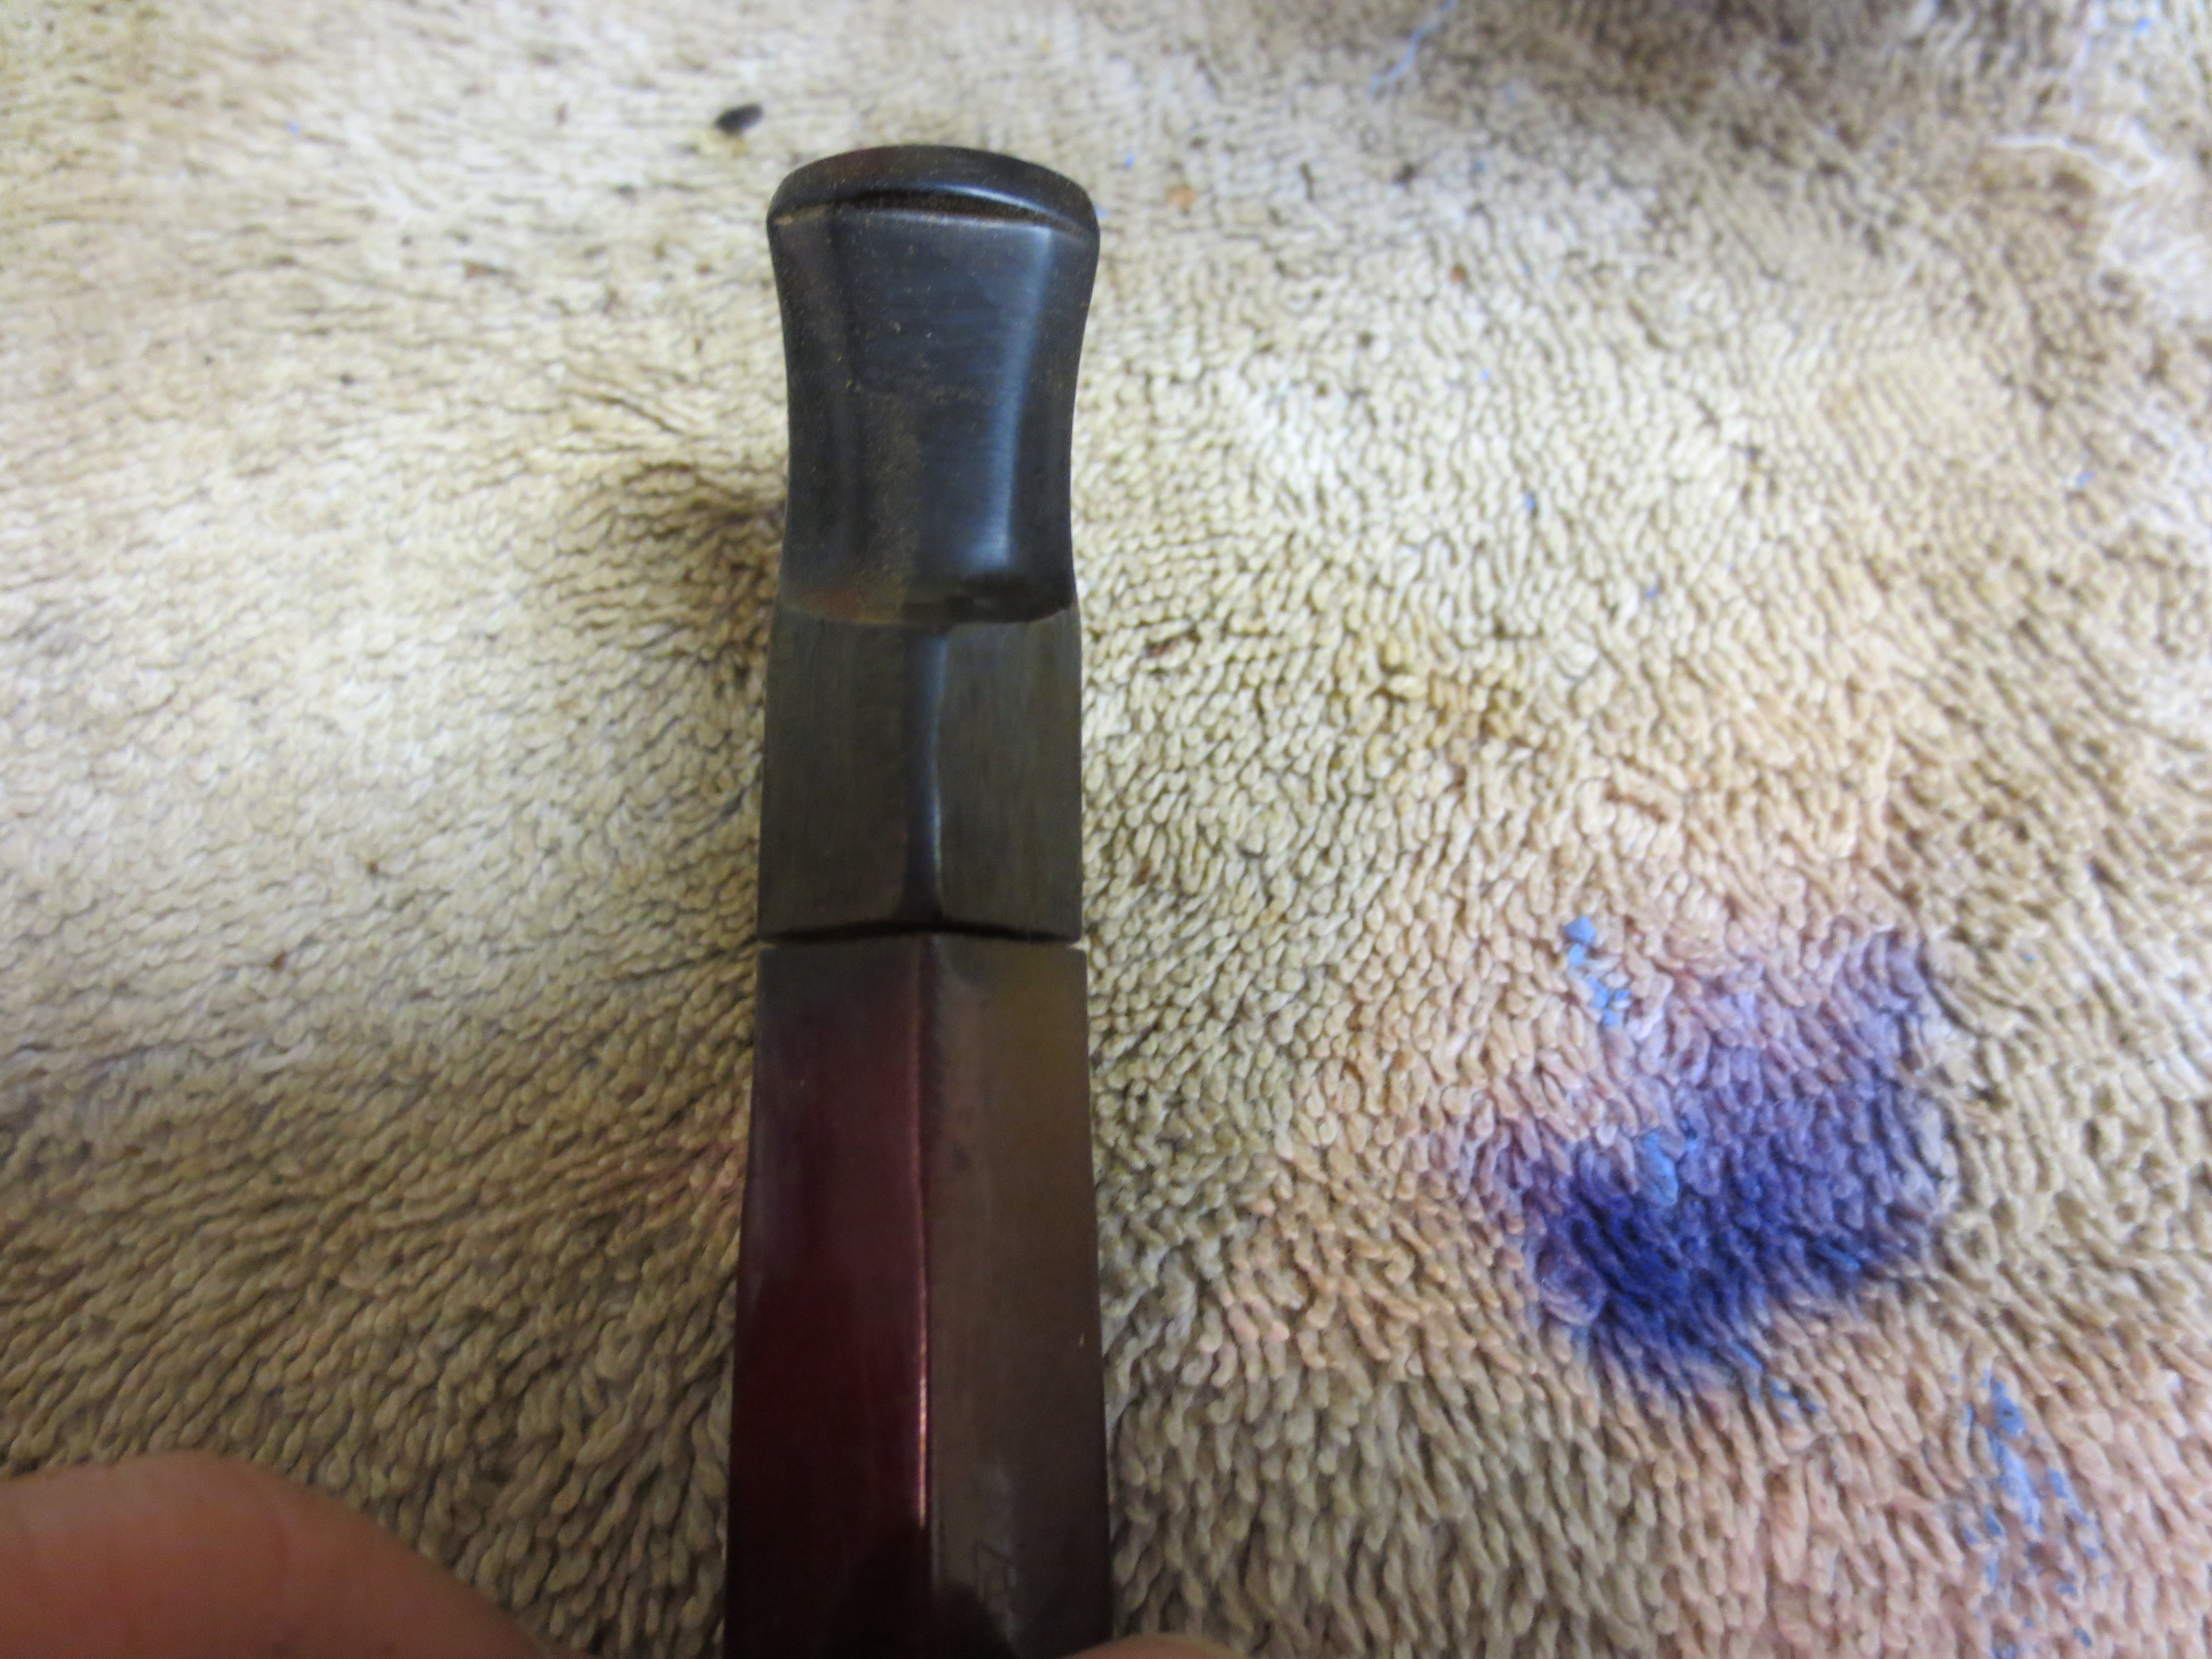
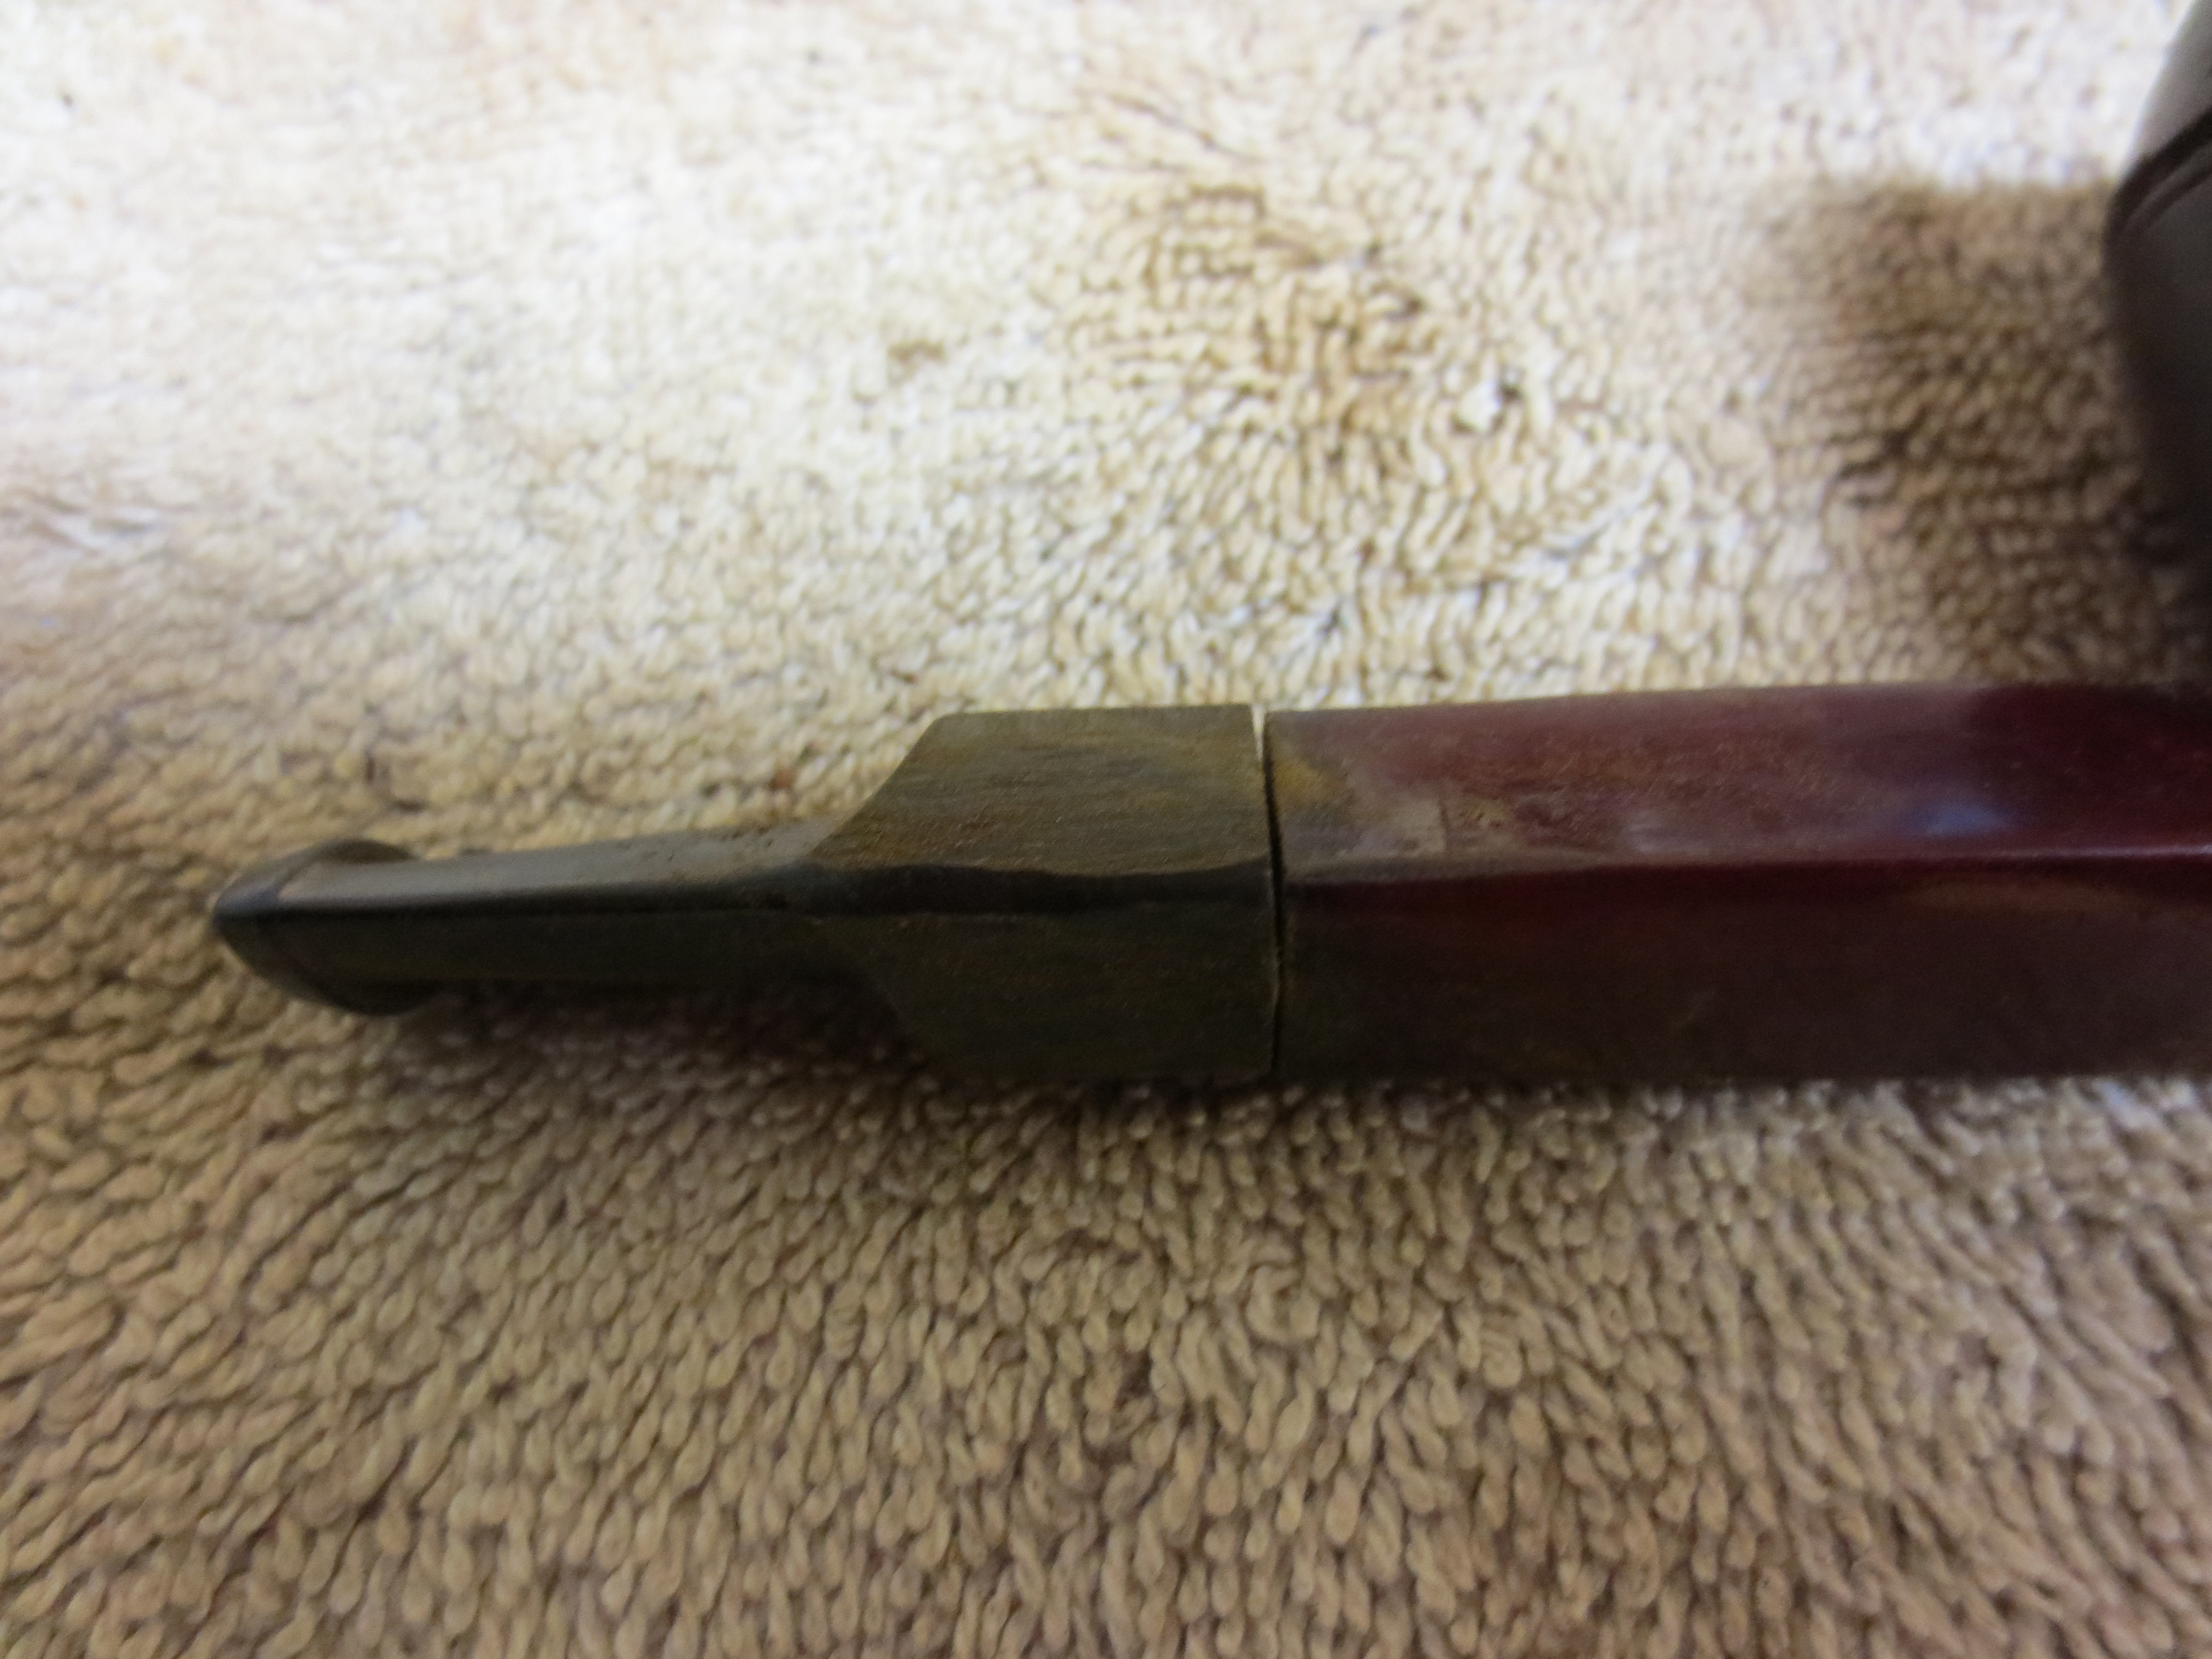
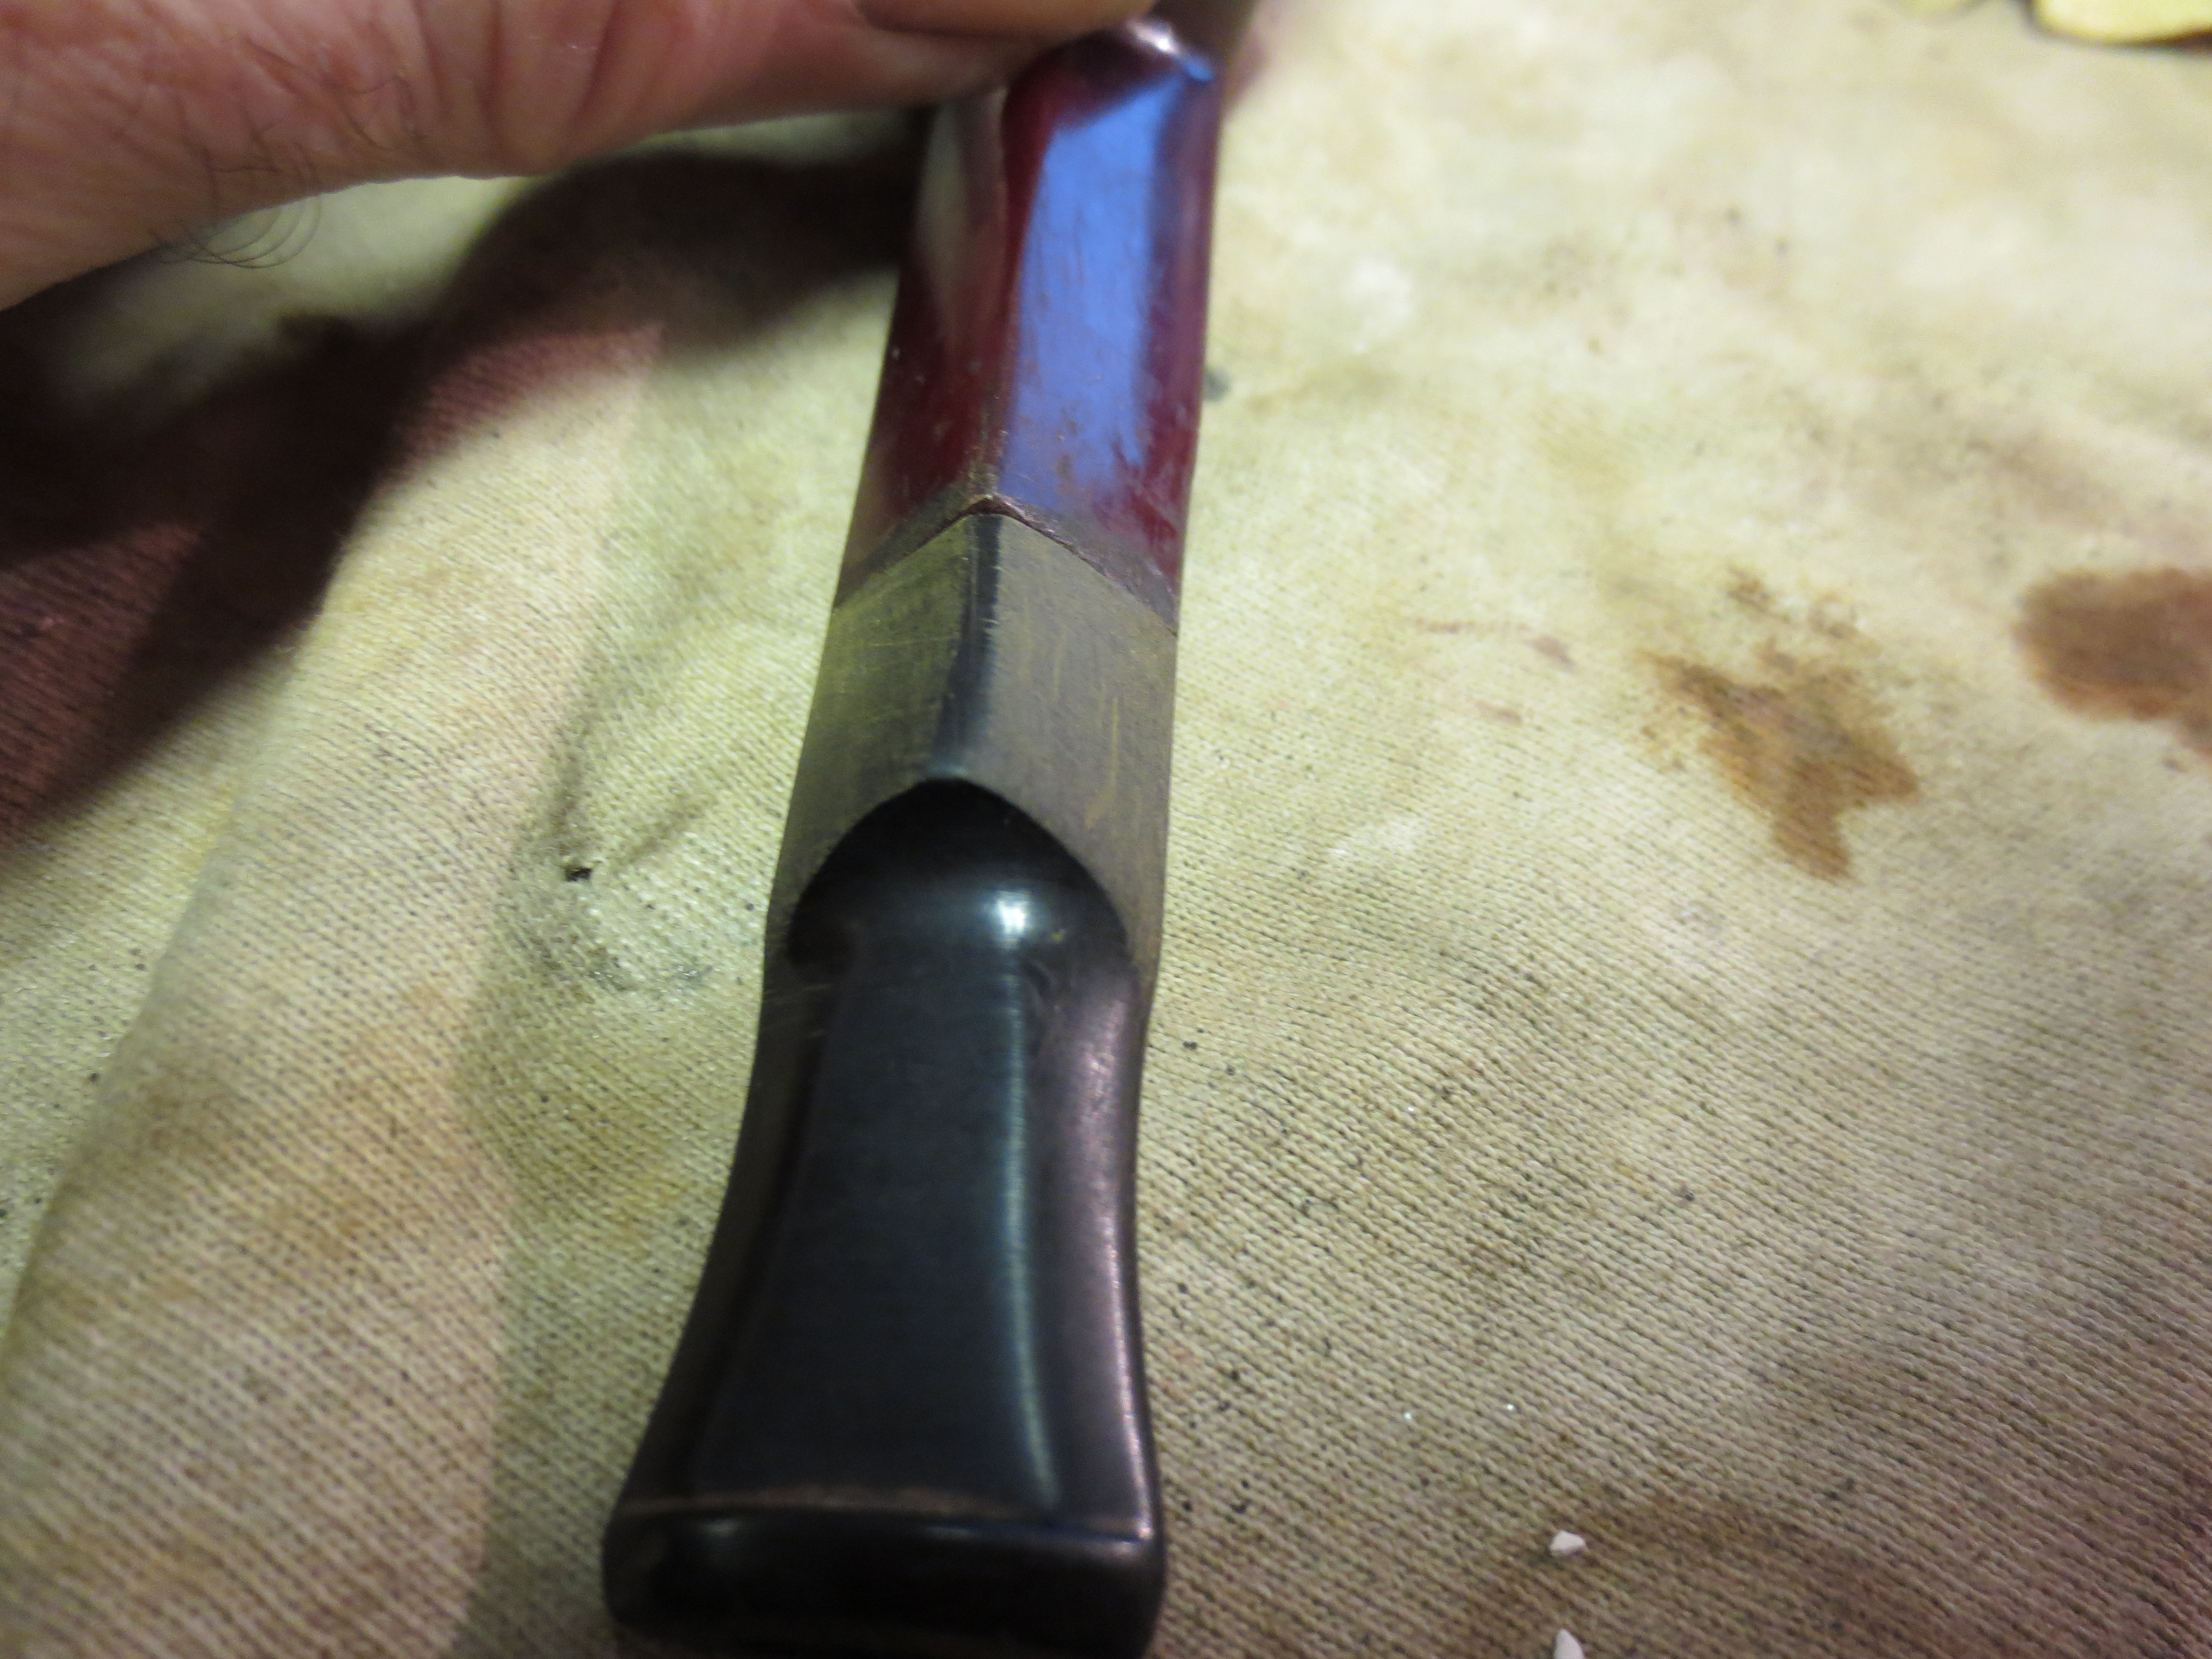
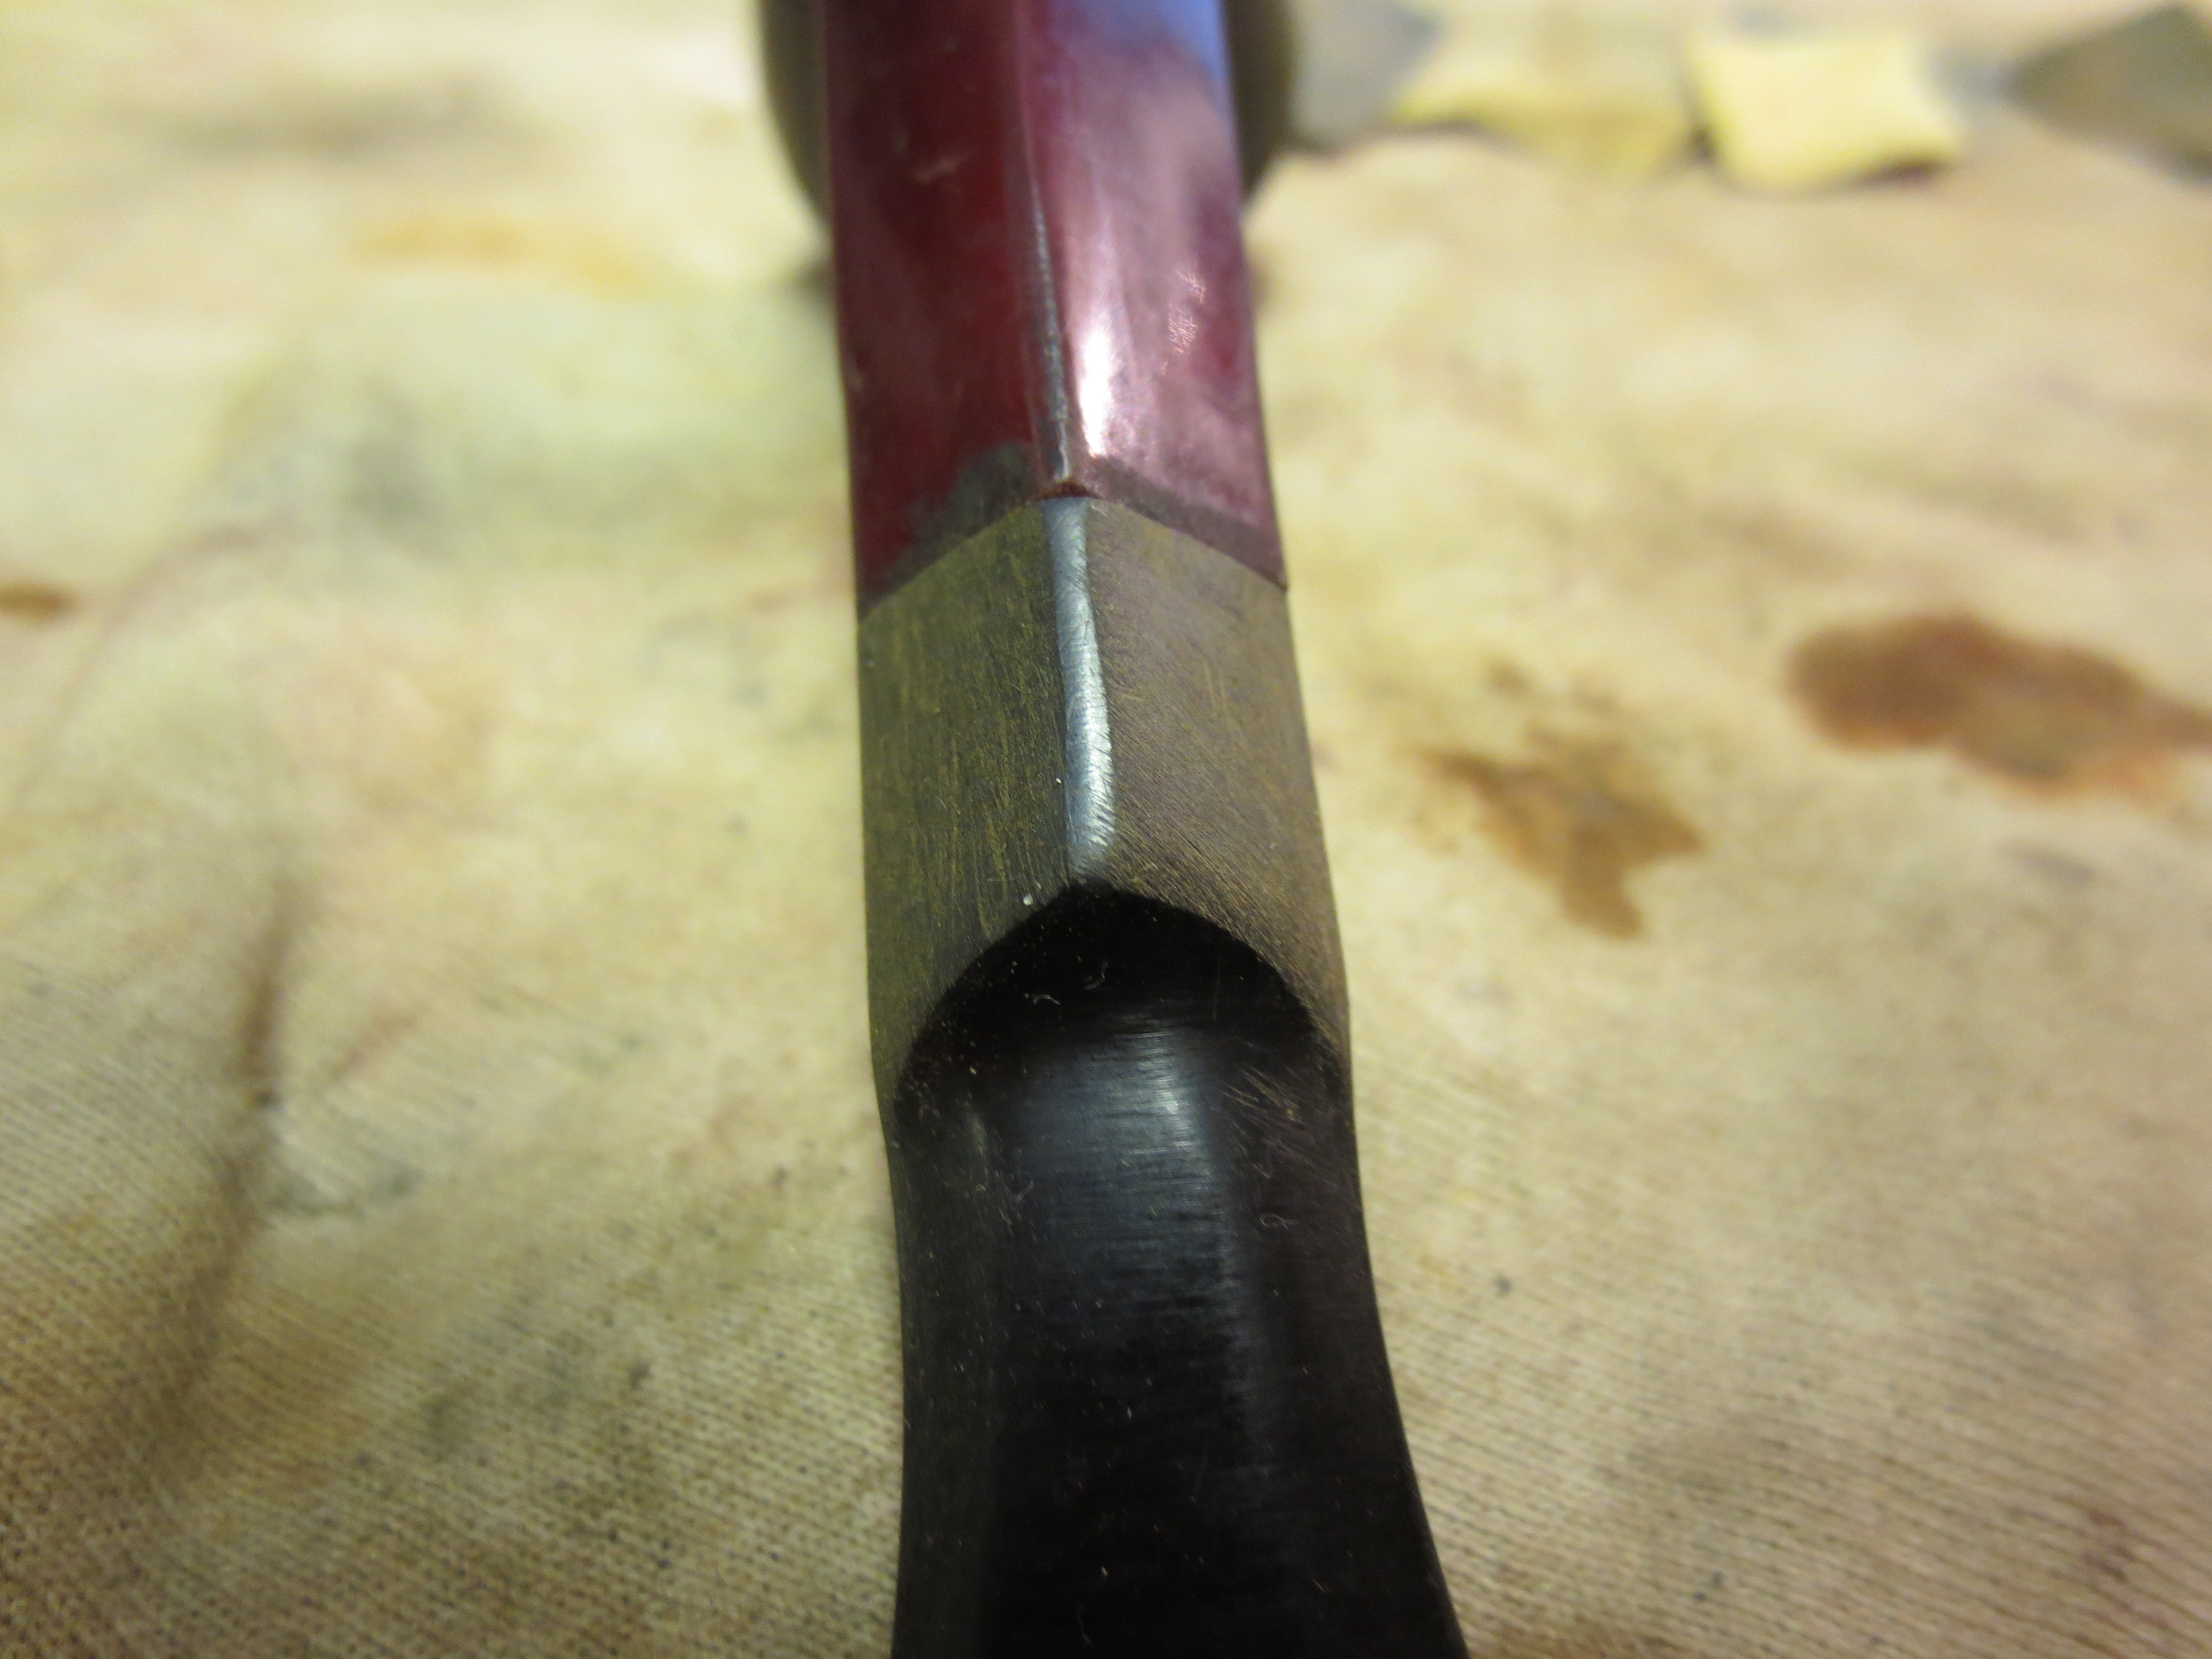
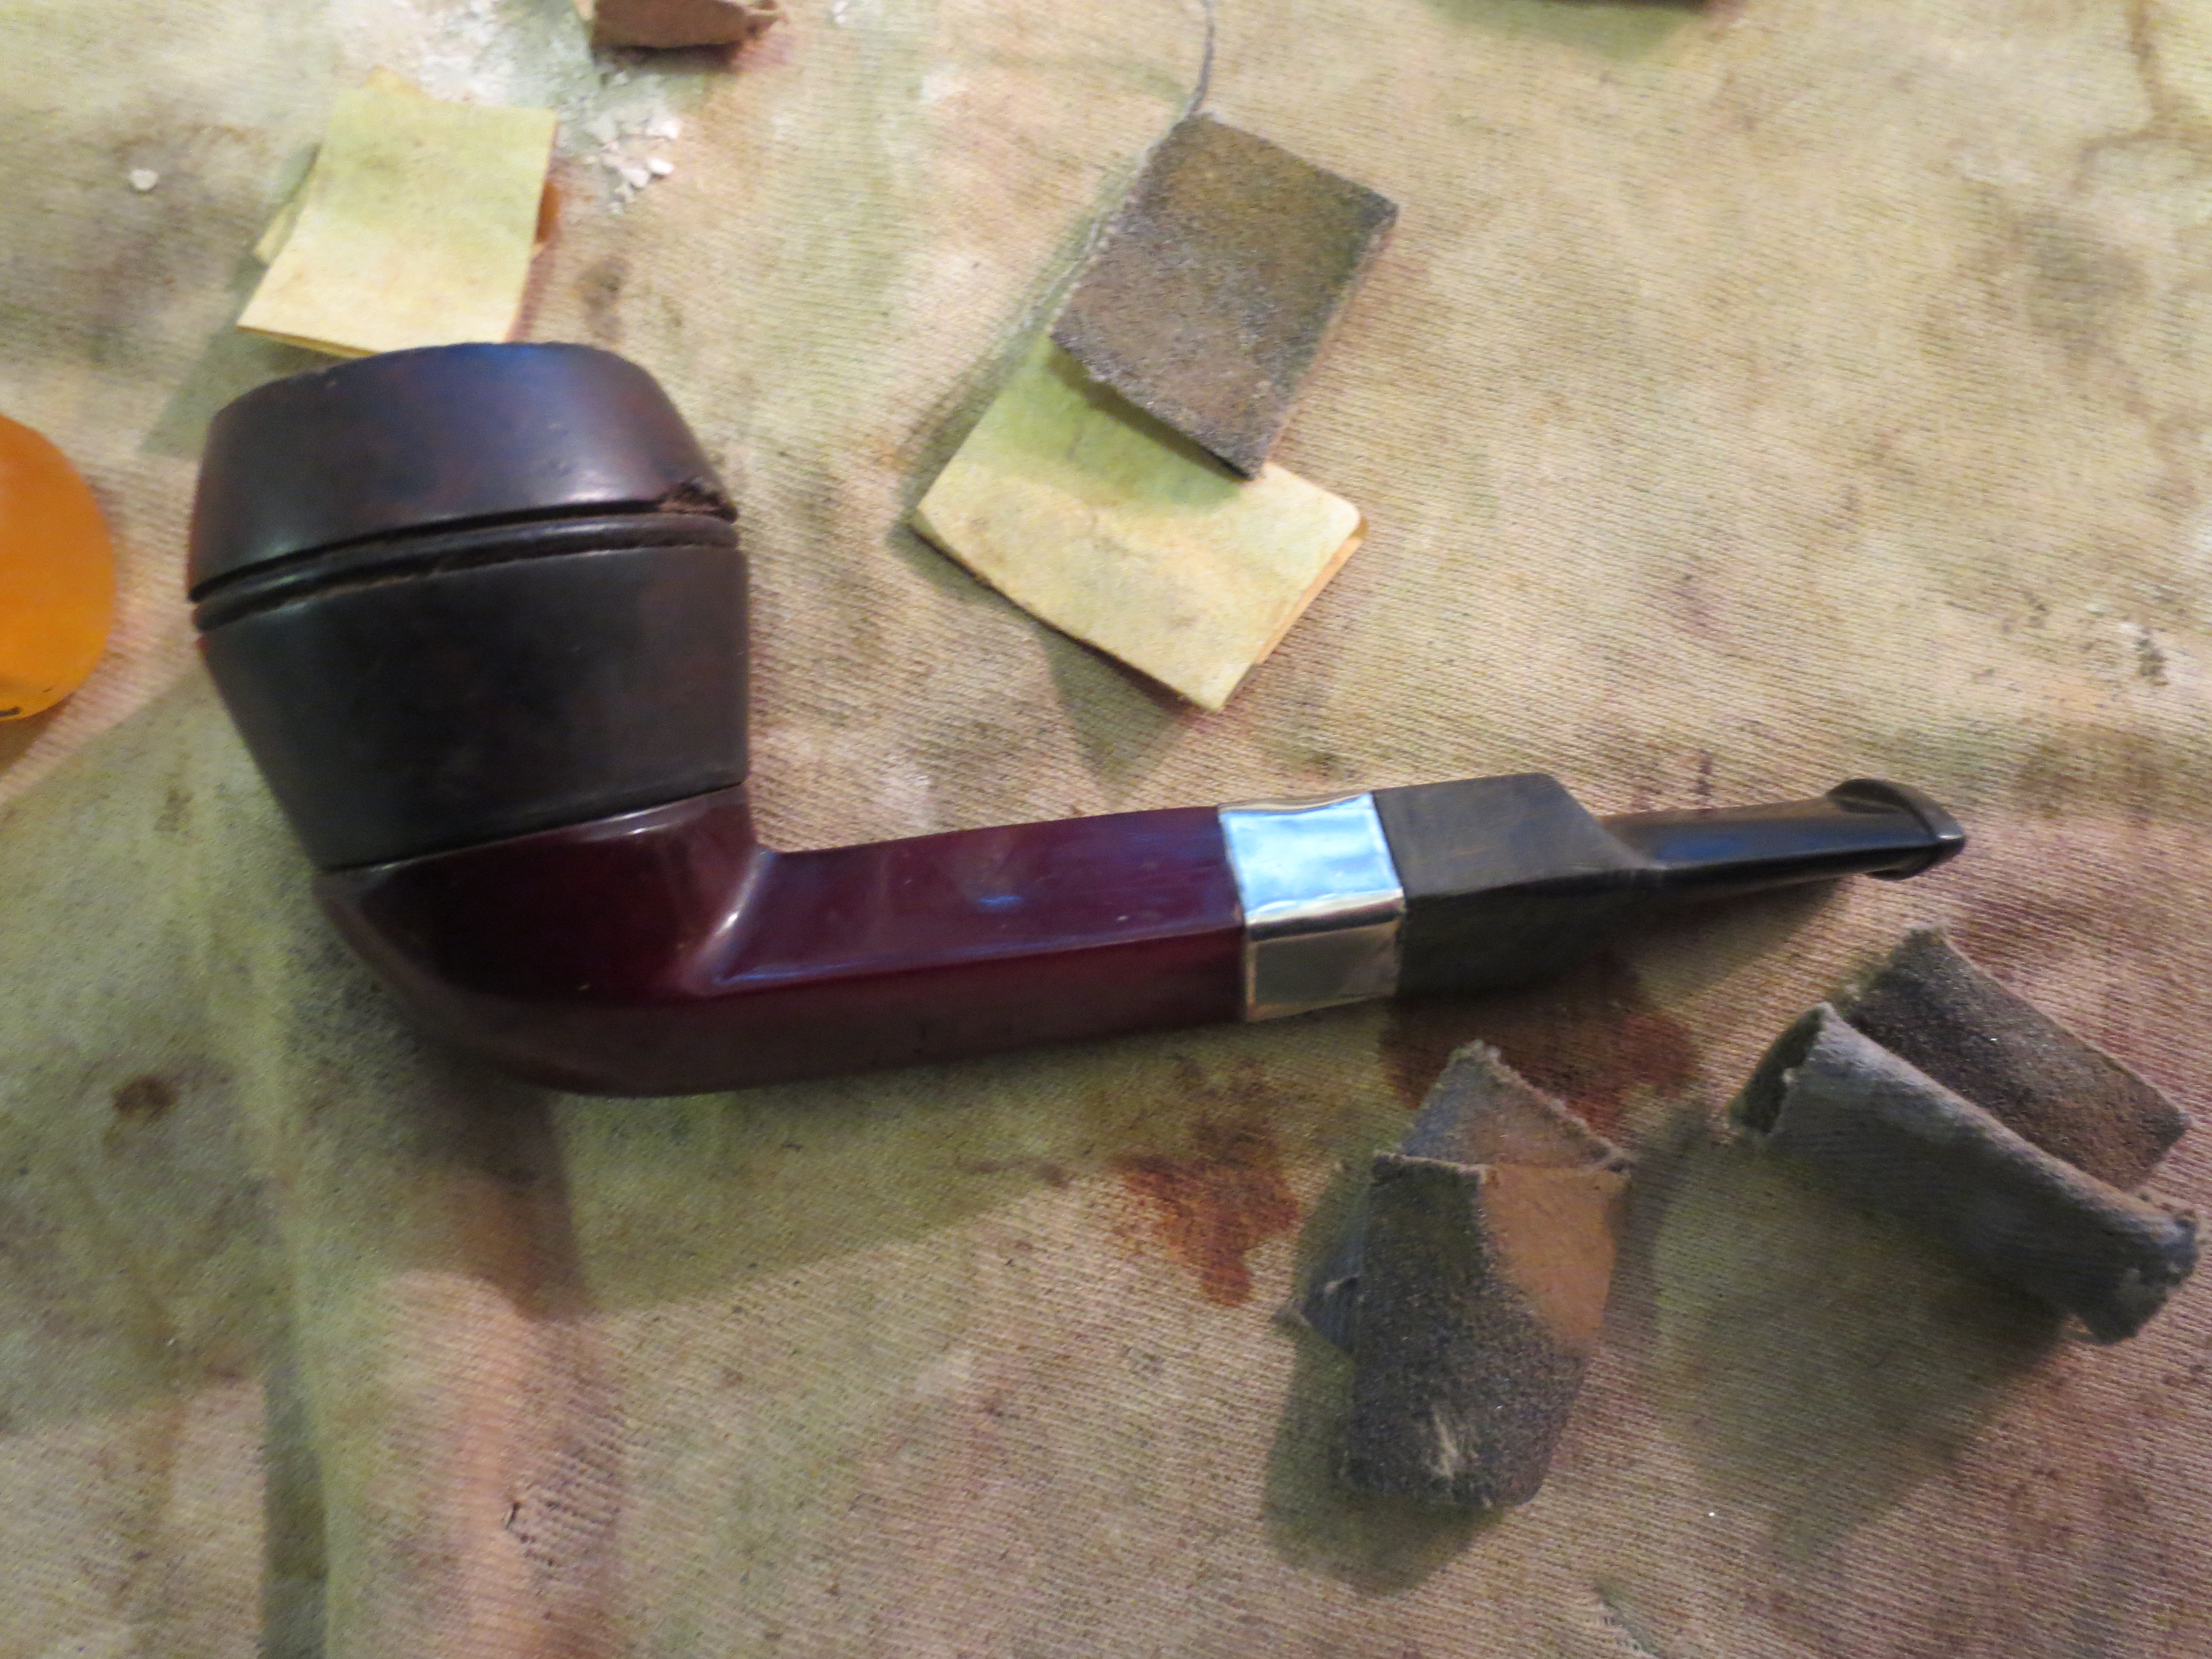
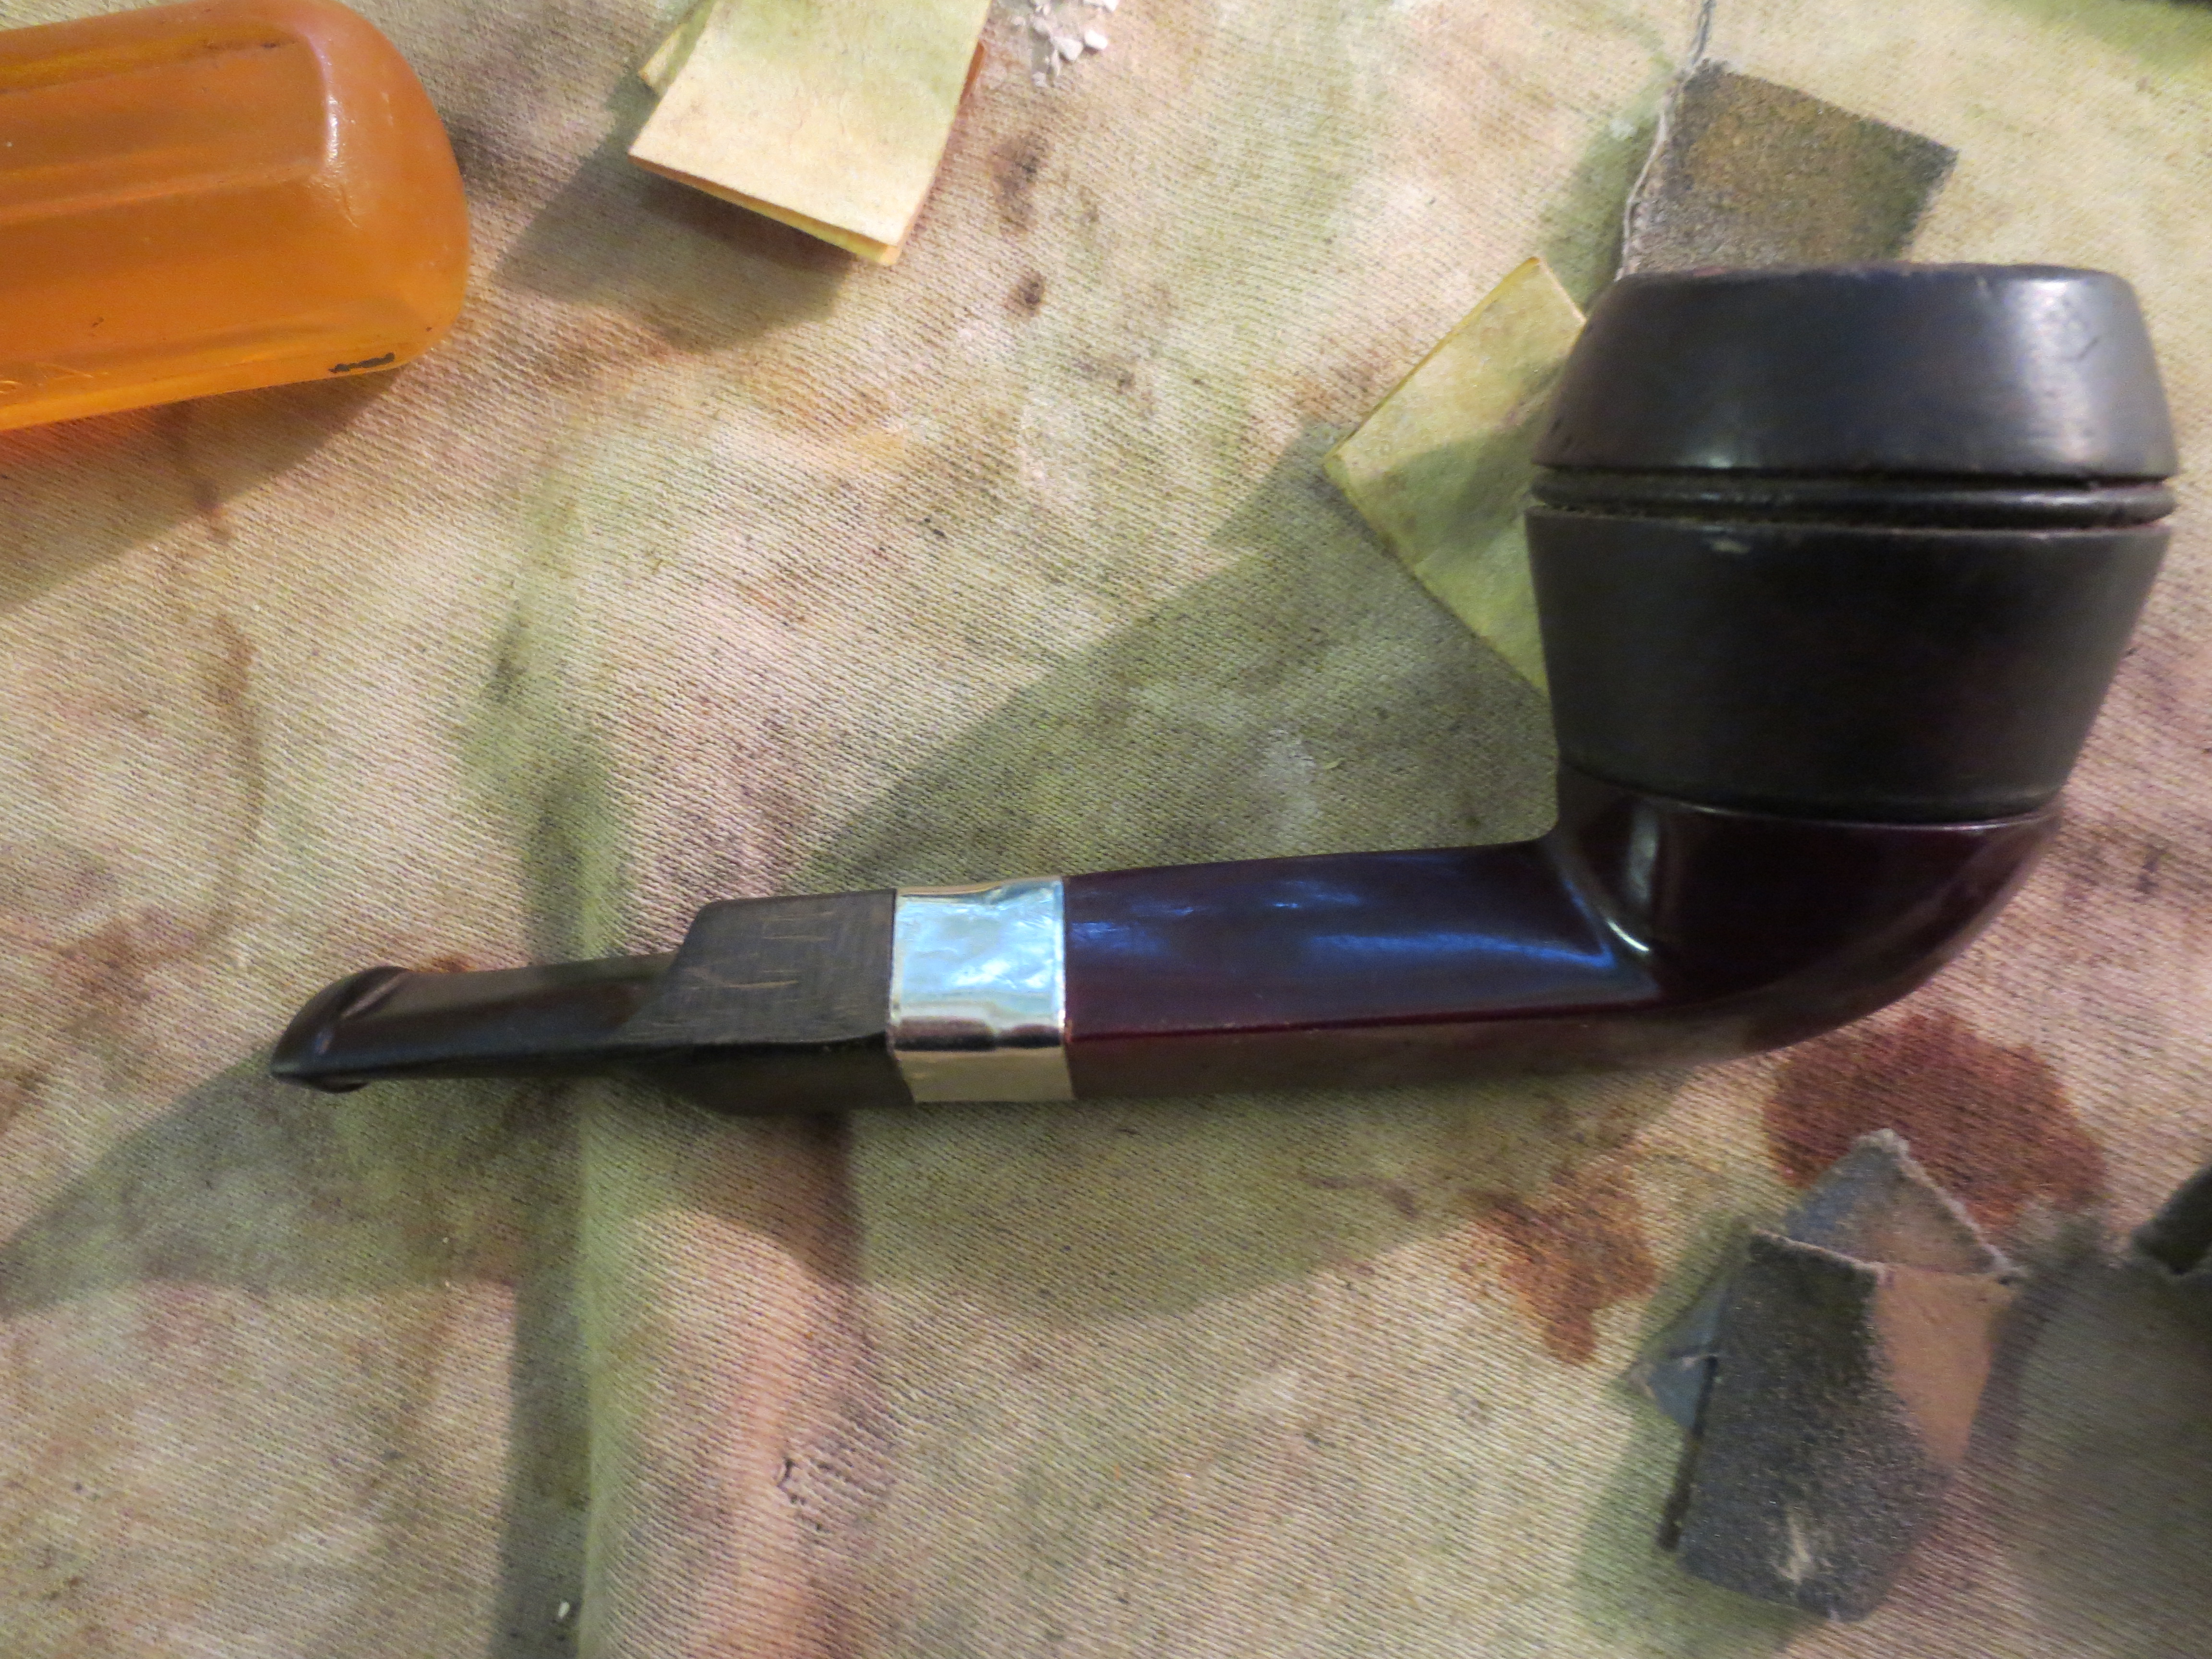
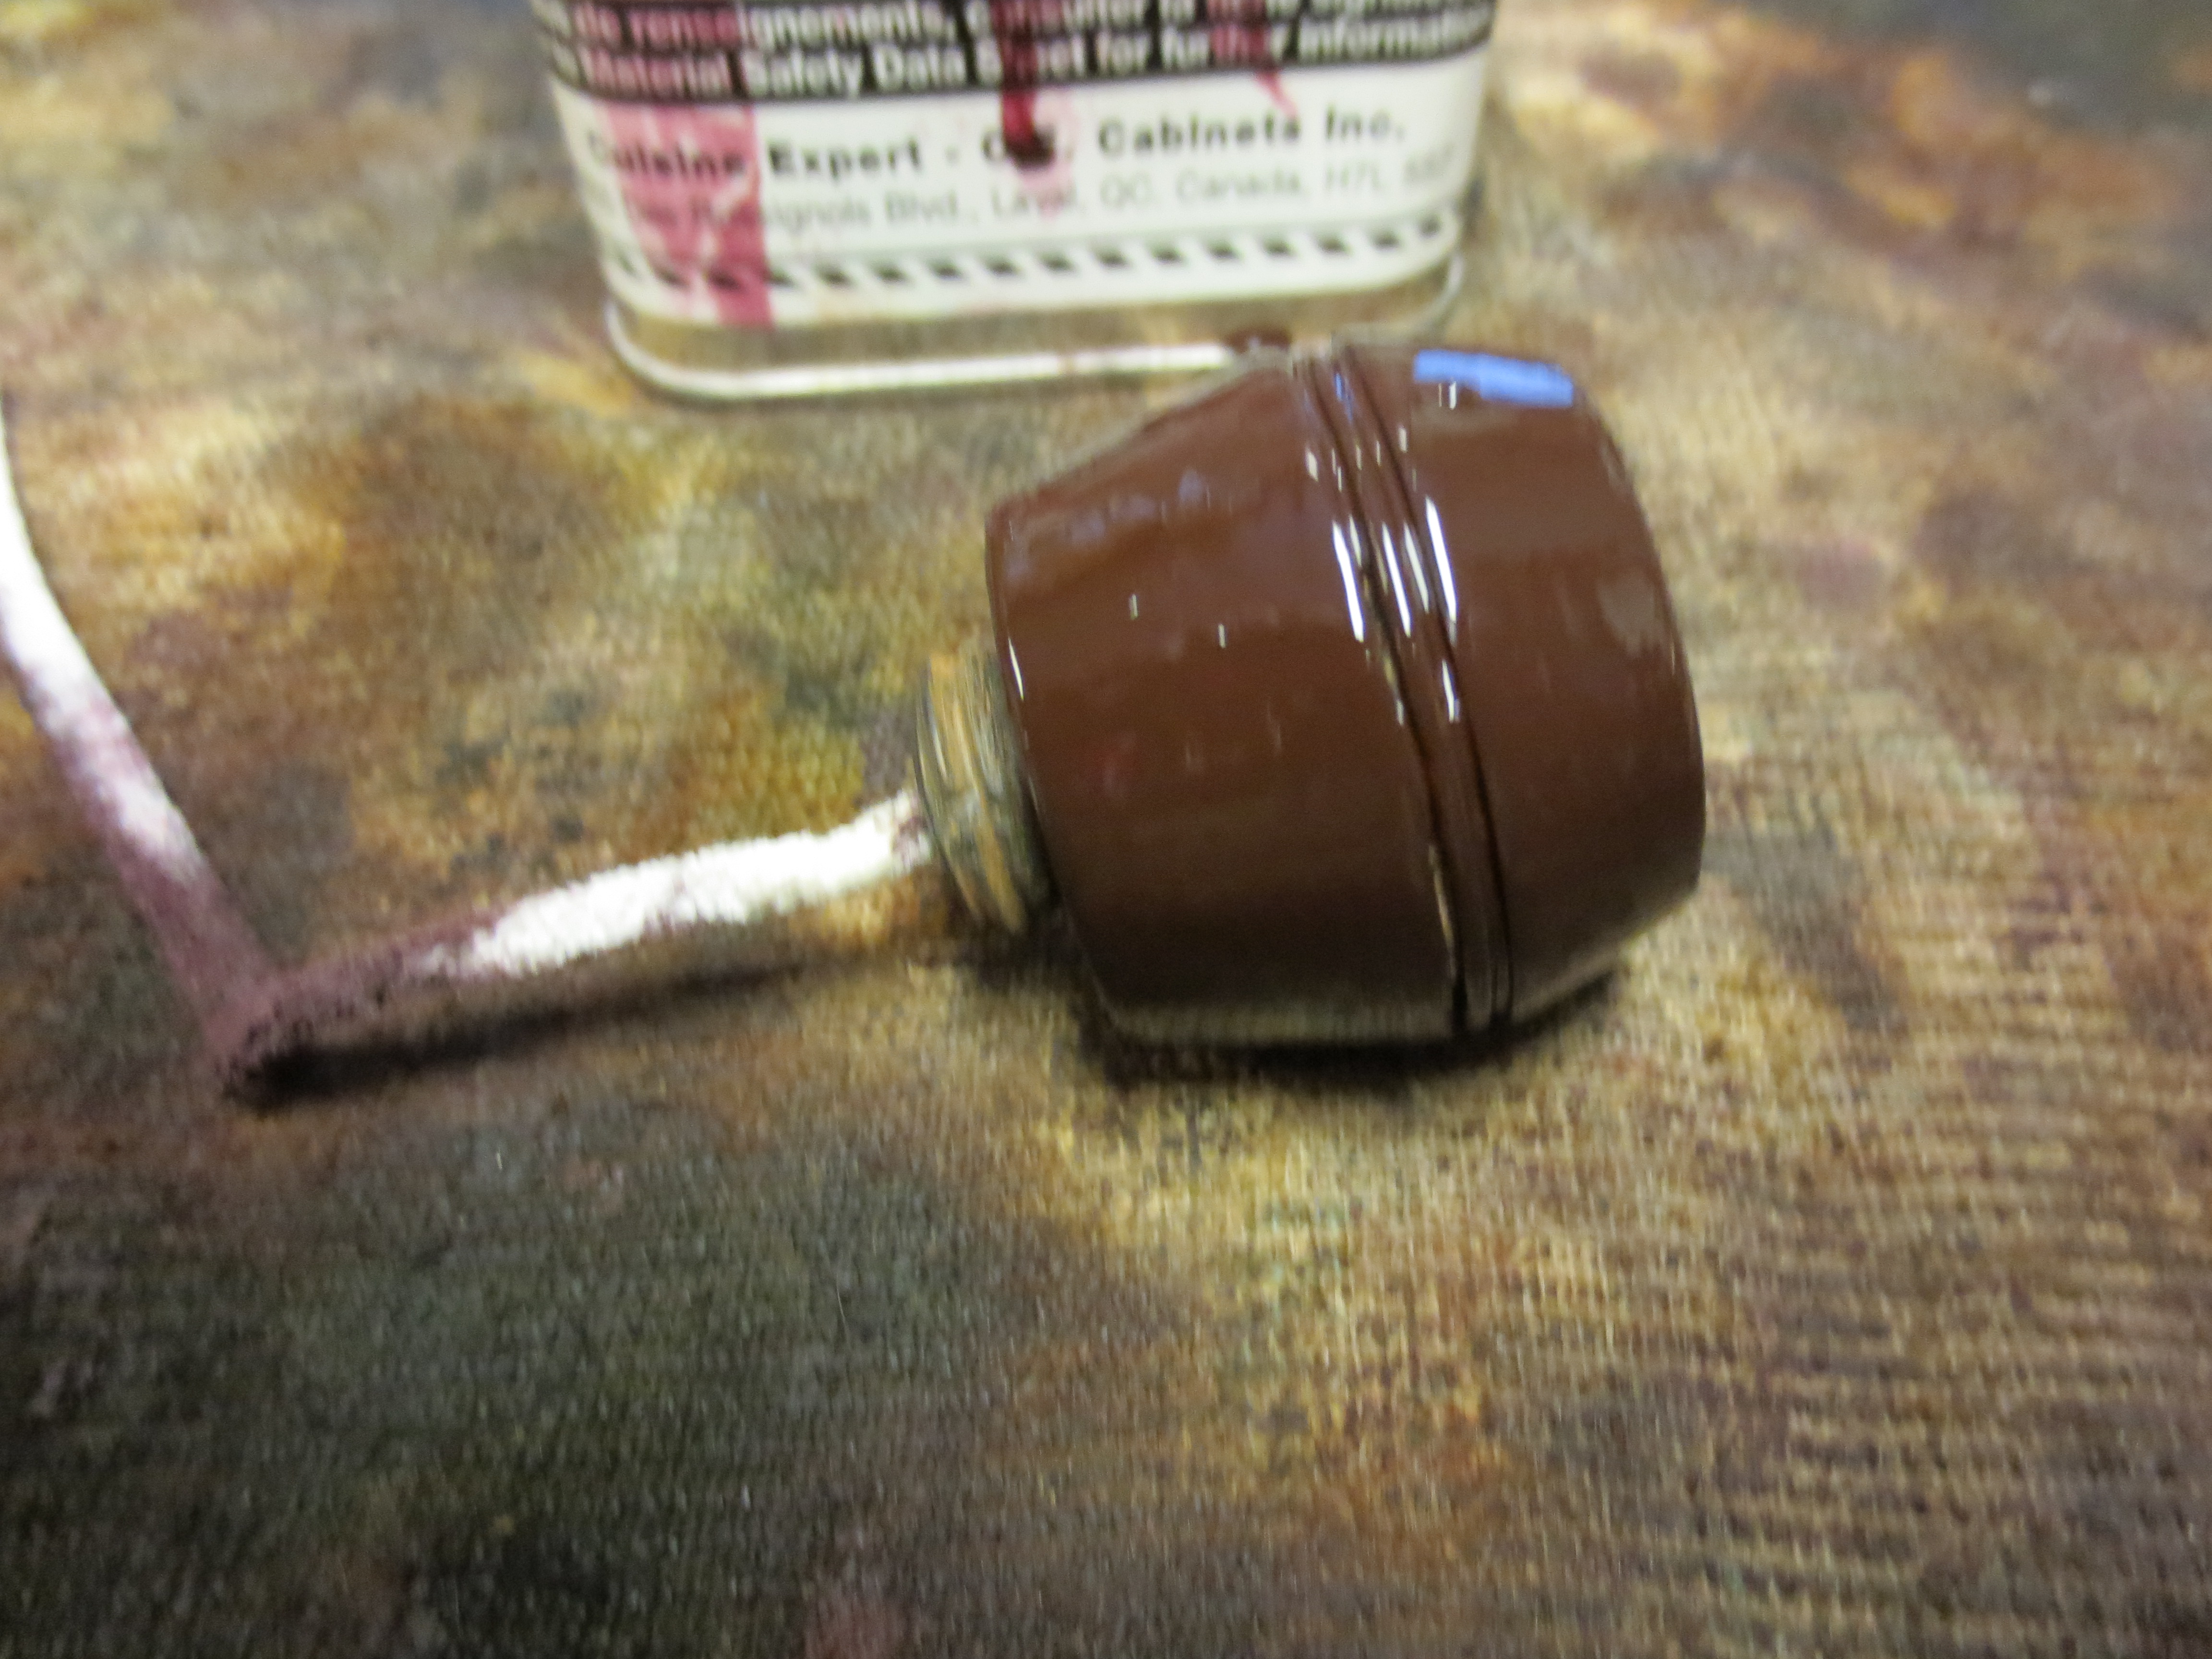
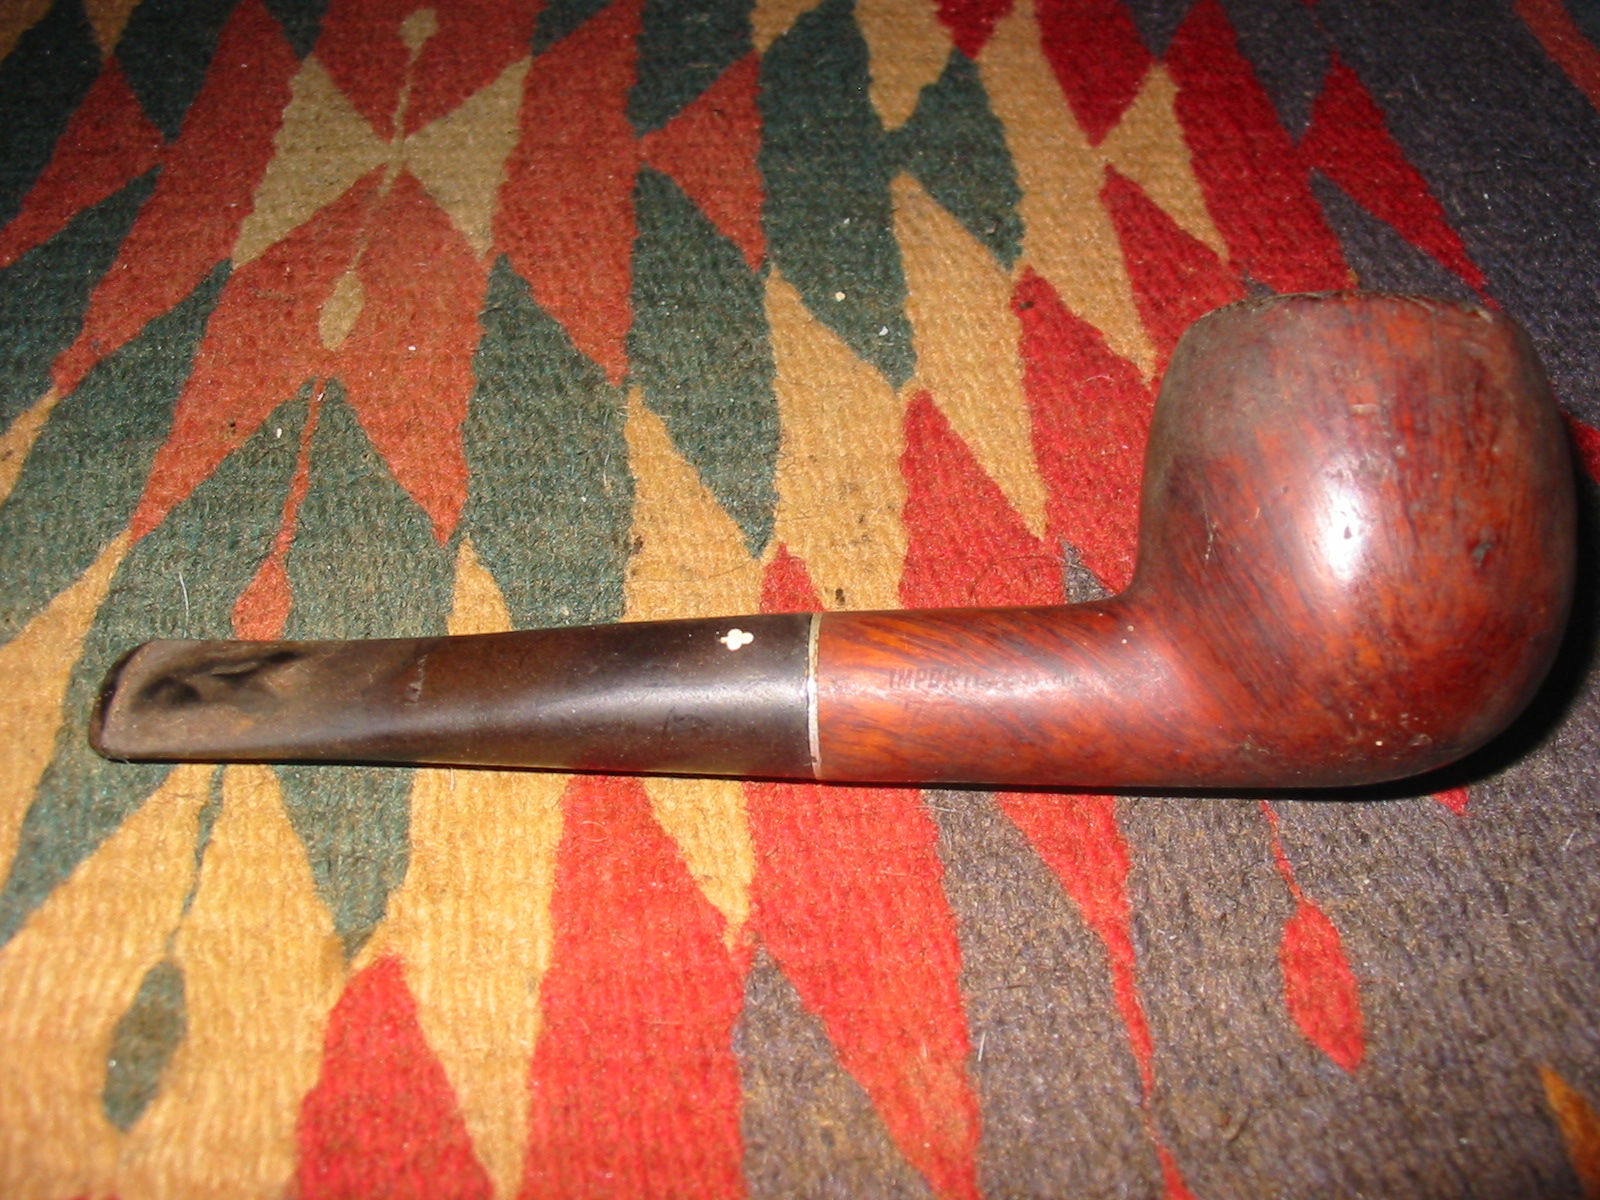
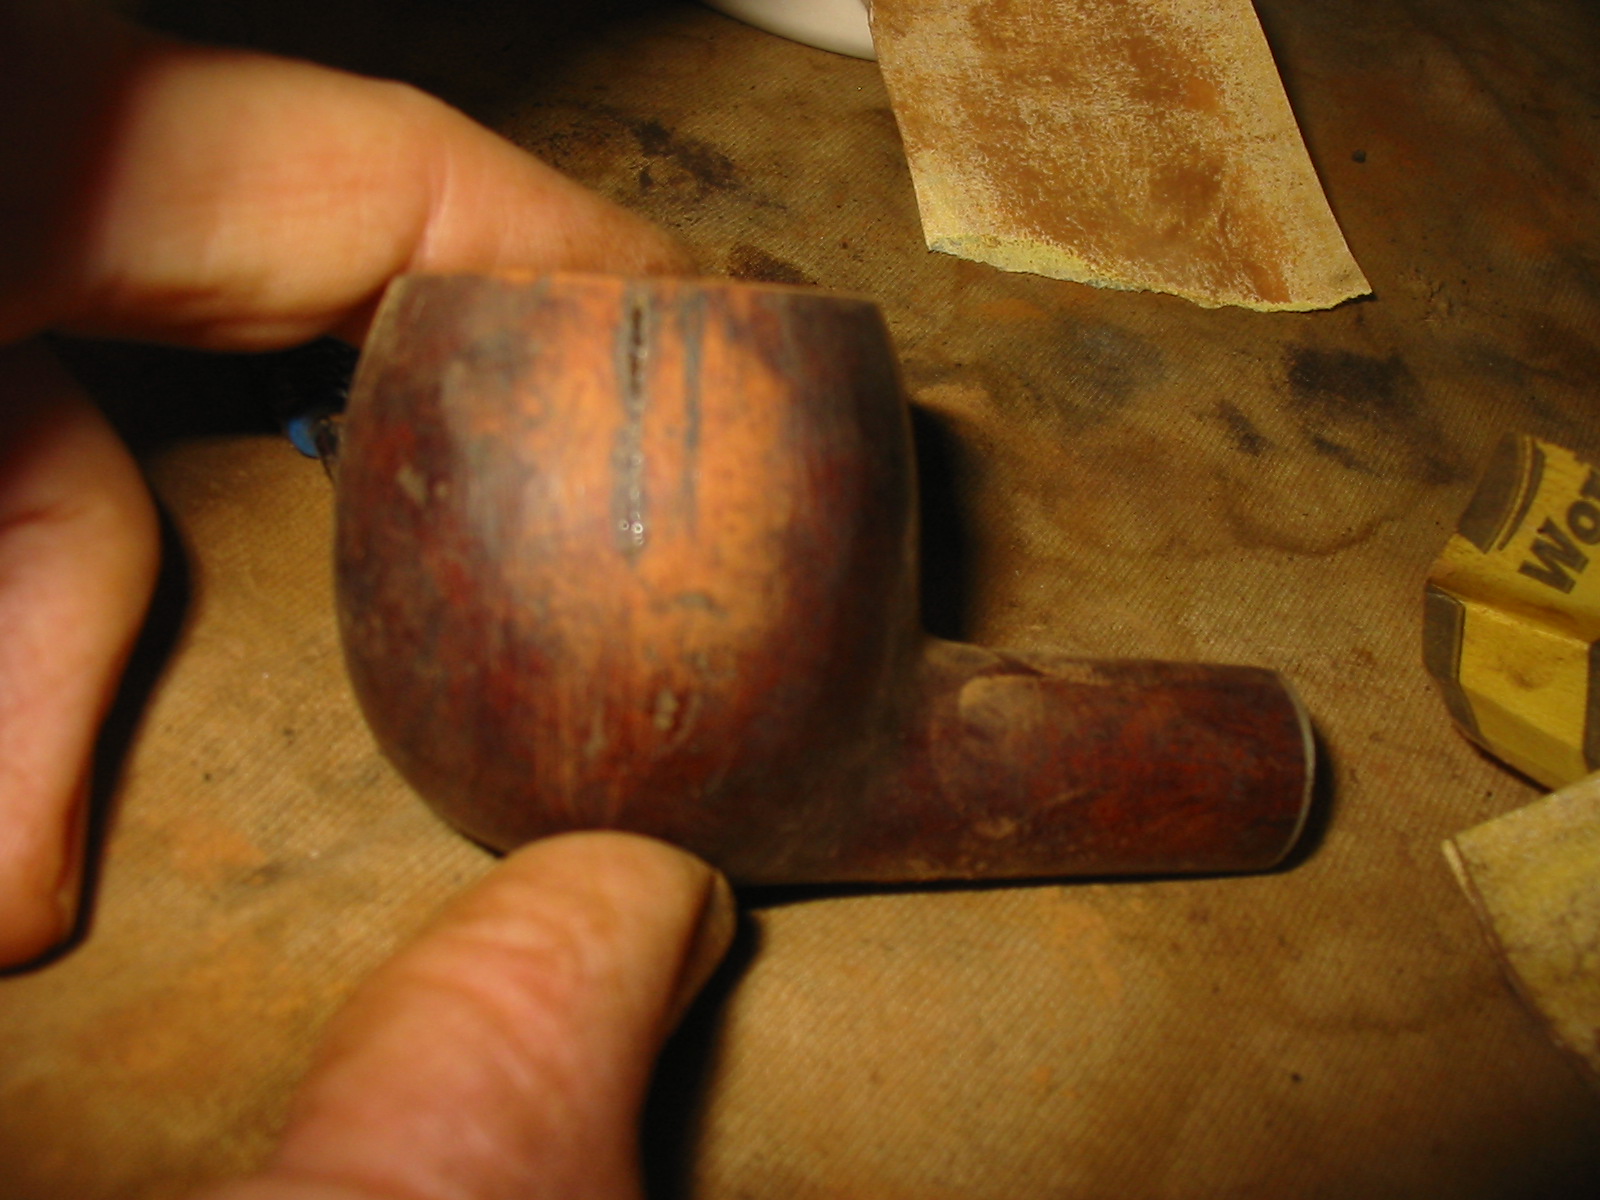
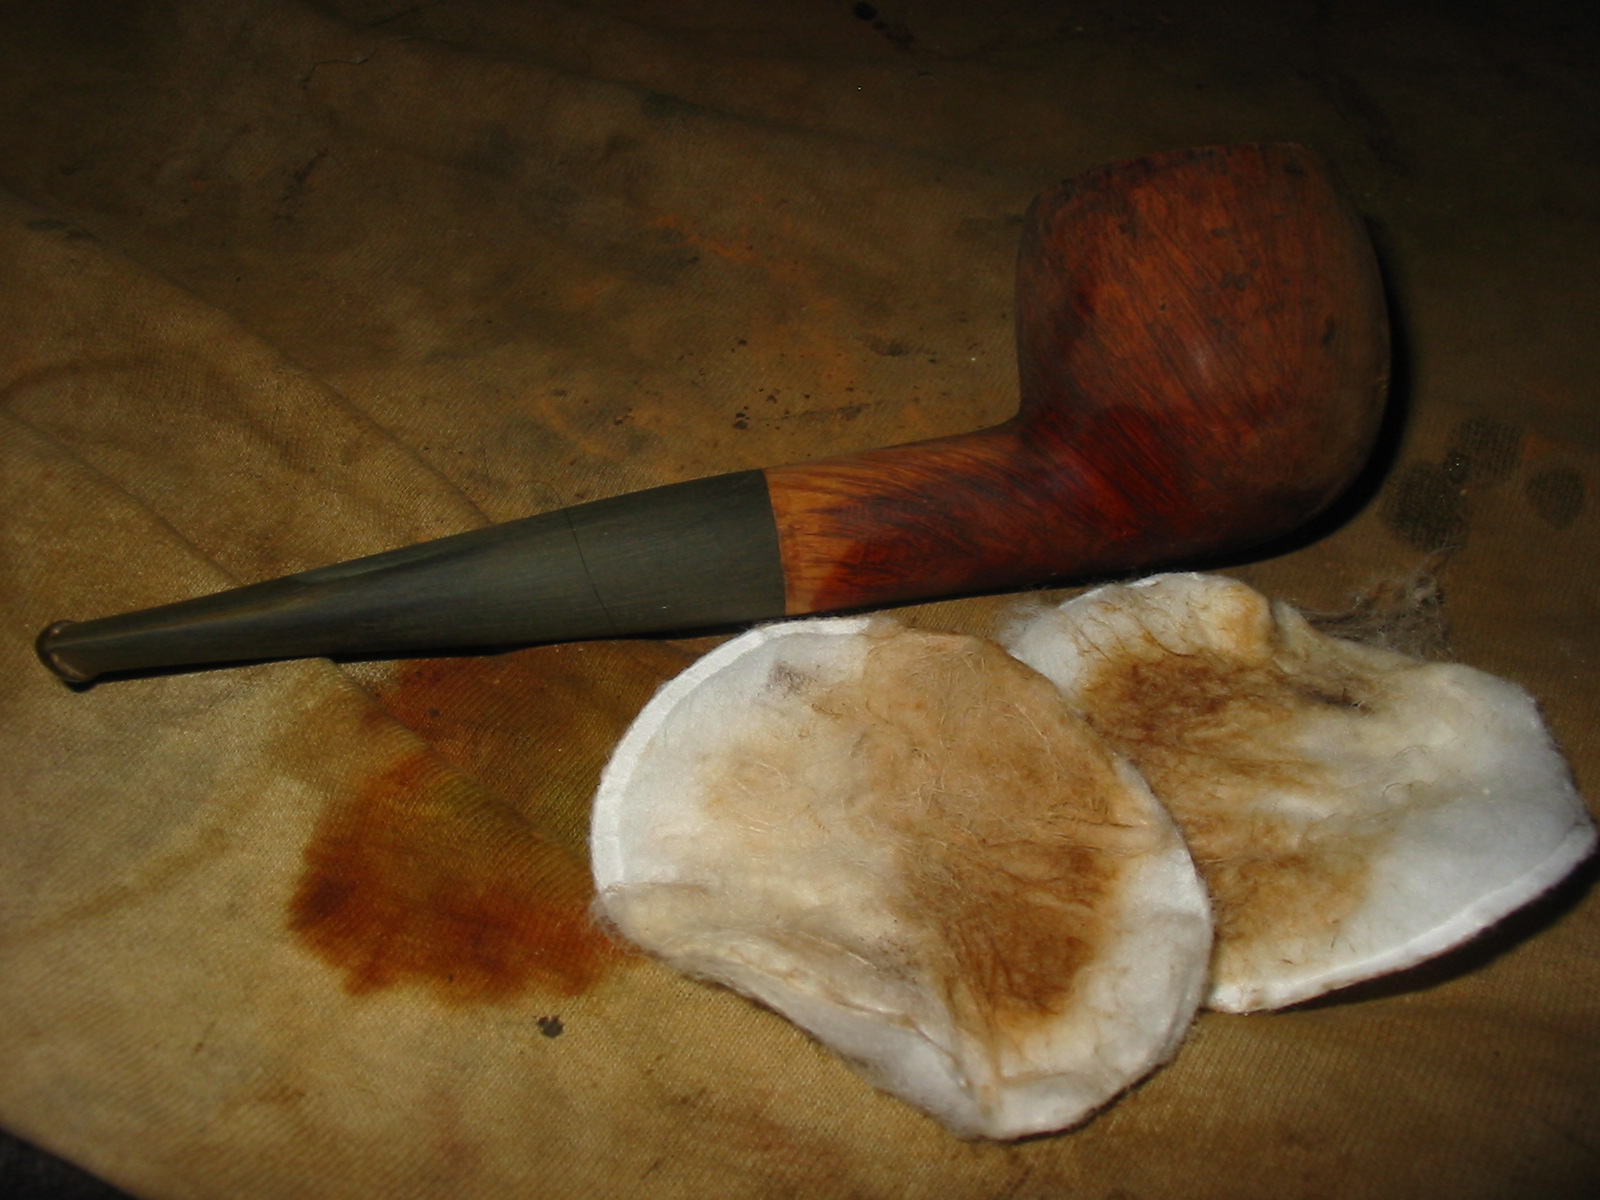
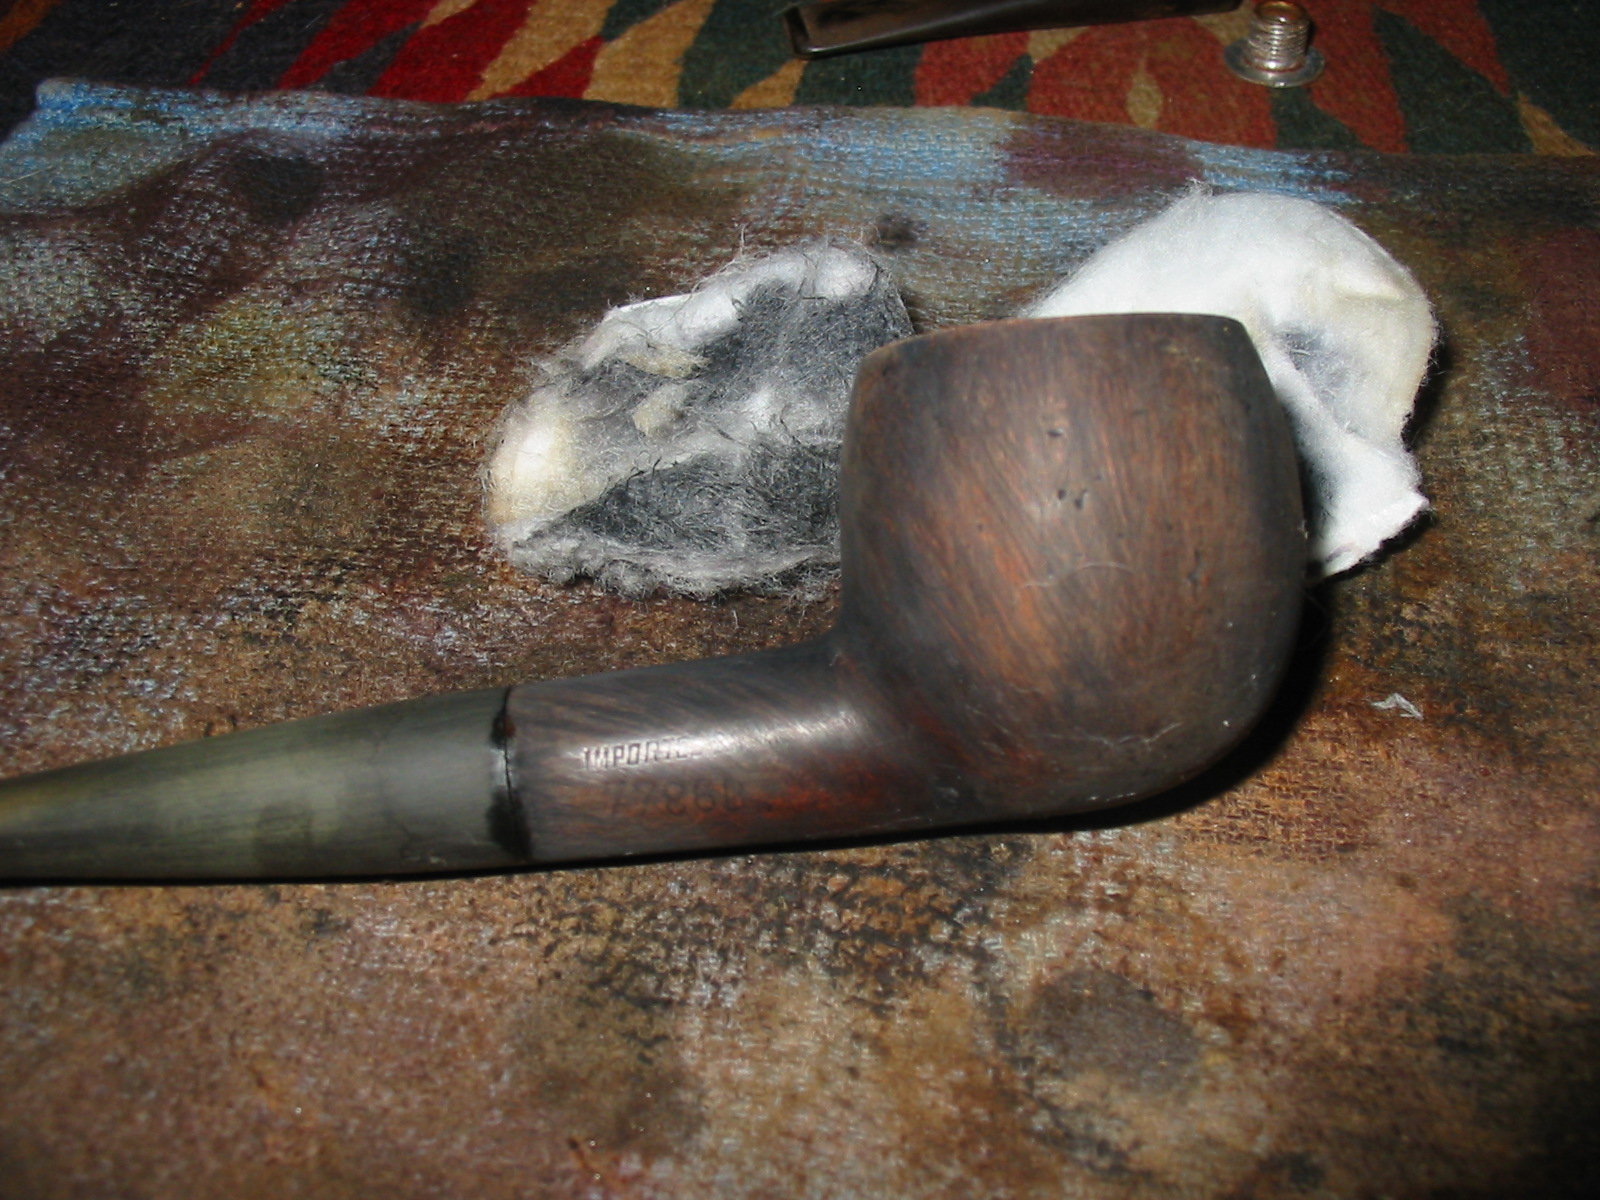
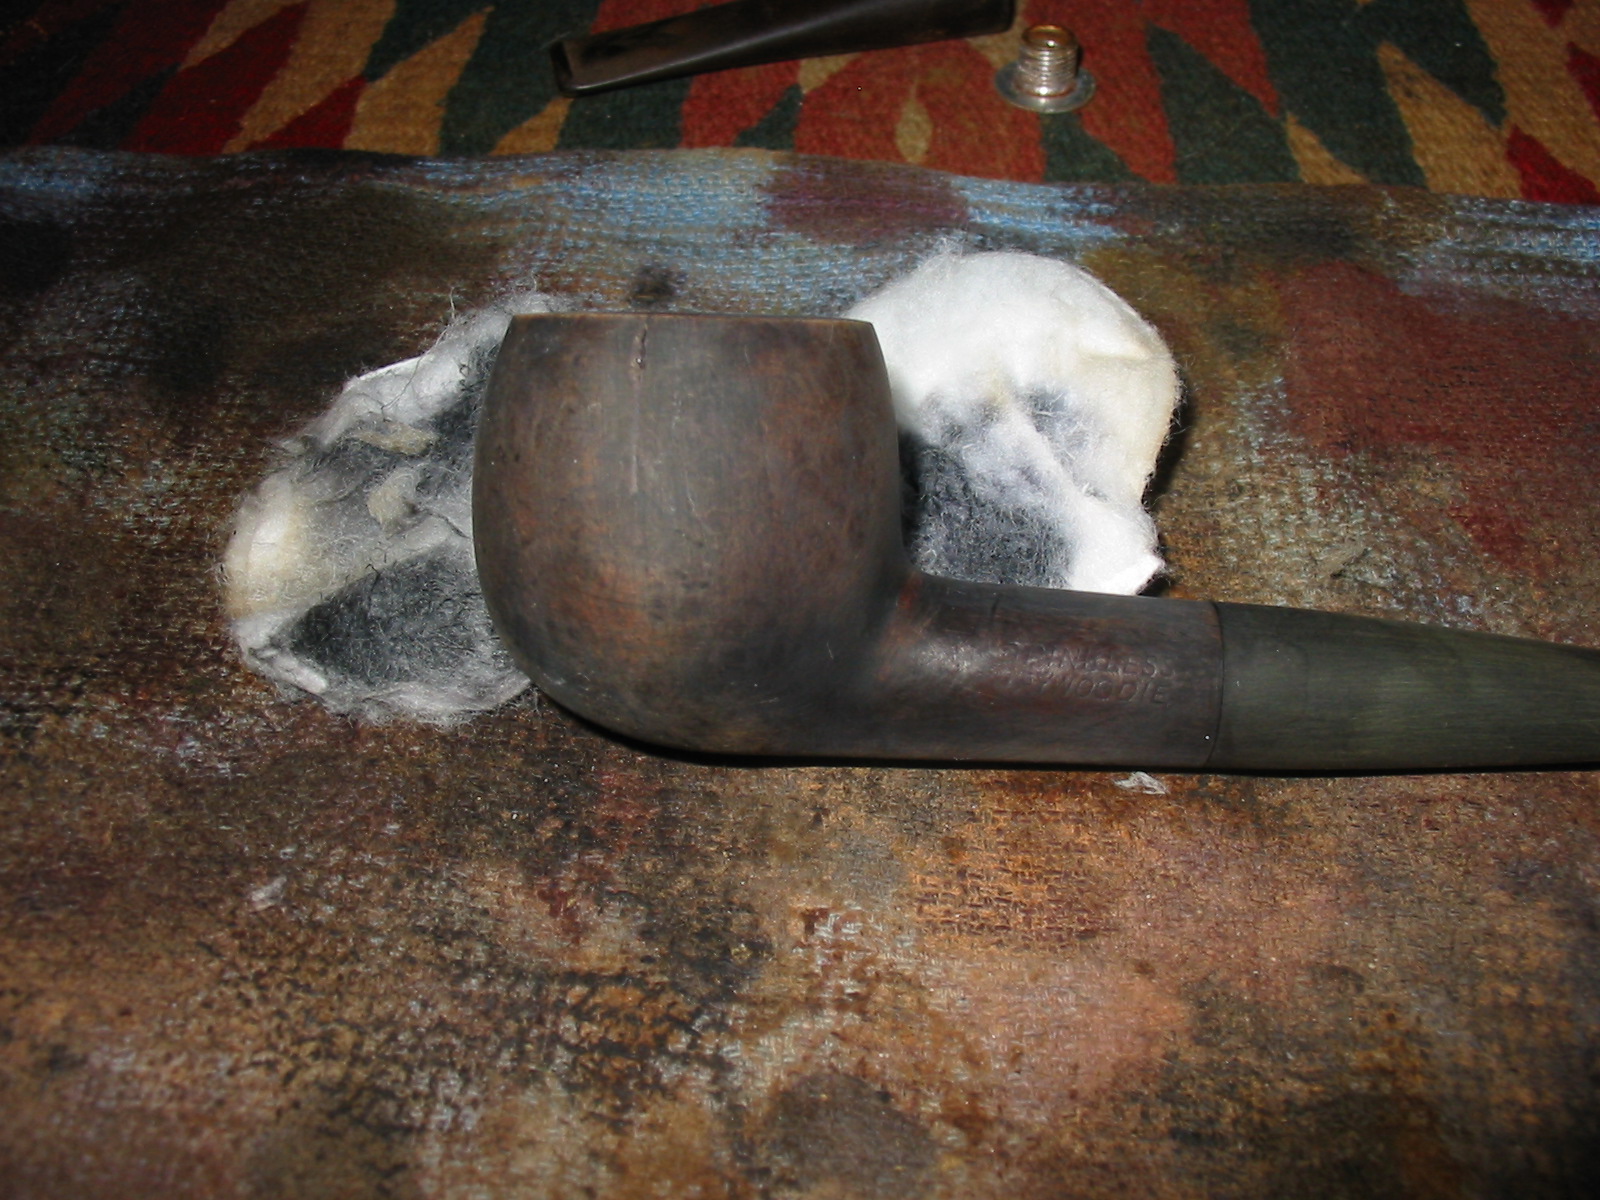
Once I had it roughed in to fit with the Dremel it was time to take it back to the work table and do the hand work with sandpaper to make the fit seamless. Since I was going to restain the pipe anyway I sanded the shank as I sanded the stem to make the transition smooth. In the first two photos the stamping is visible in the light of the flash. In real life it is quite a bit fainter and shallow. I also use some superglue and briar dust to repair some of the deeper dings and marks on the bowl to ready it for staining. I sanded it with 220 grit sandpaper and then with a medium grit sanding sponge to smooth out the surface and remove the scratches left behind by the sandpaper.
IMG_3364

IMG_3365

IMG_3366

IMG_3367

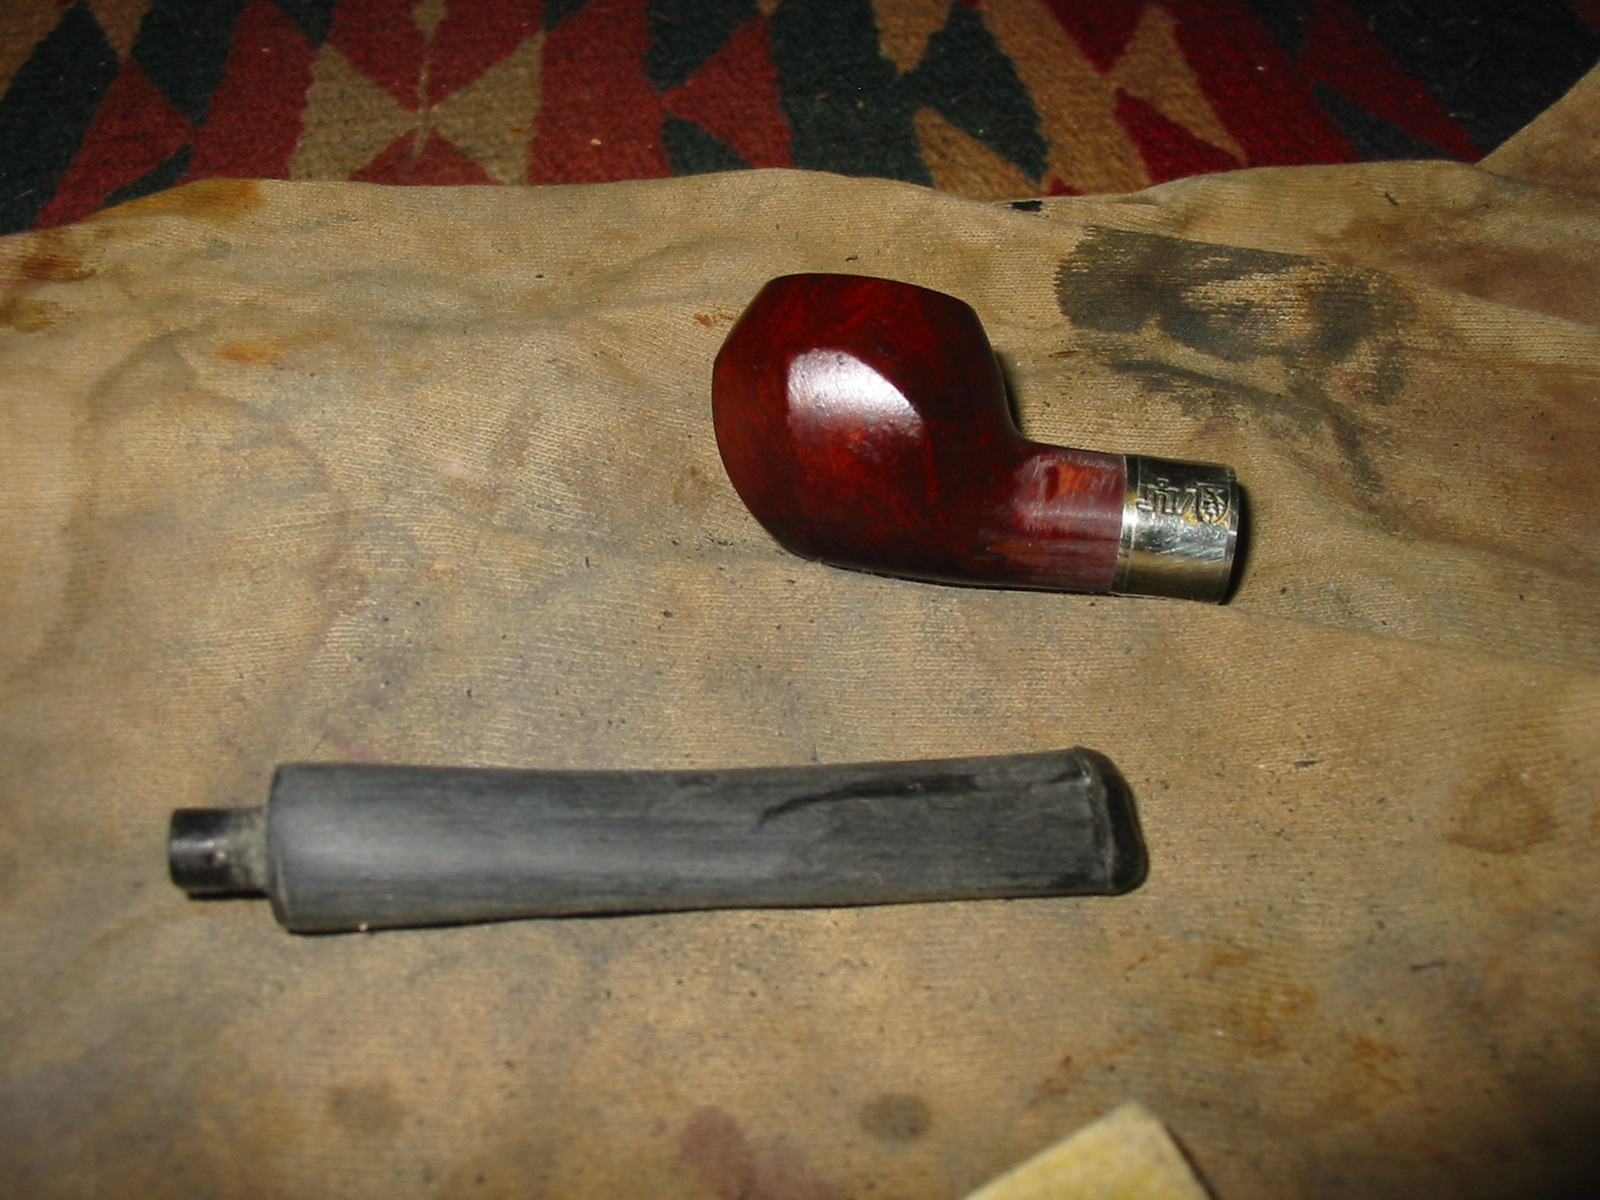
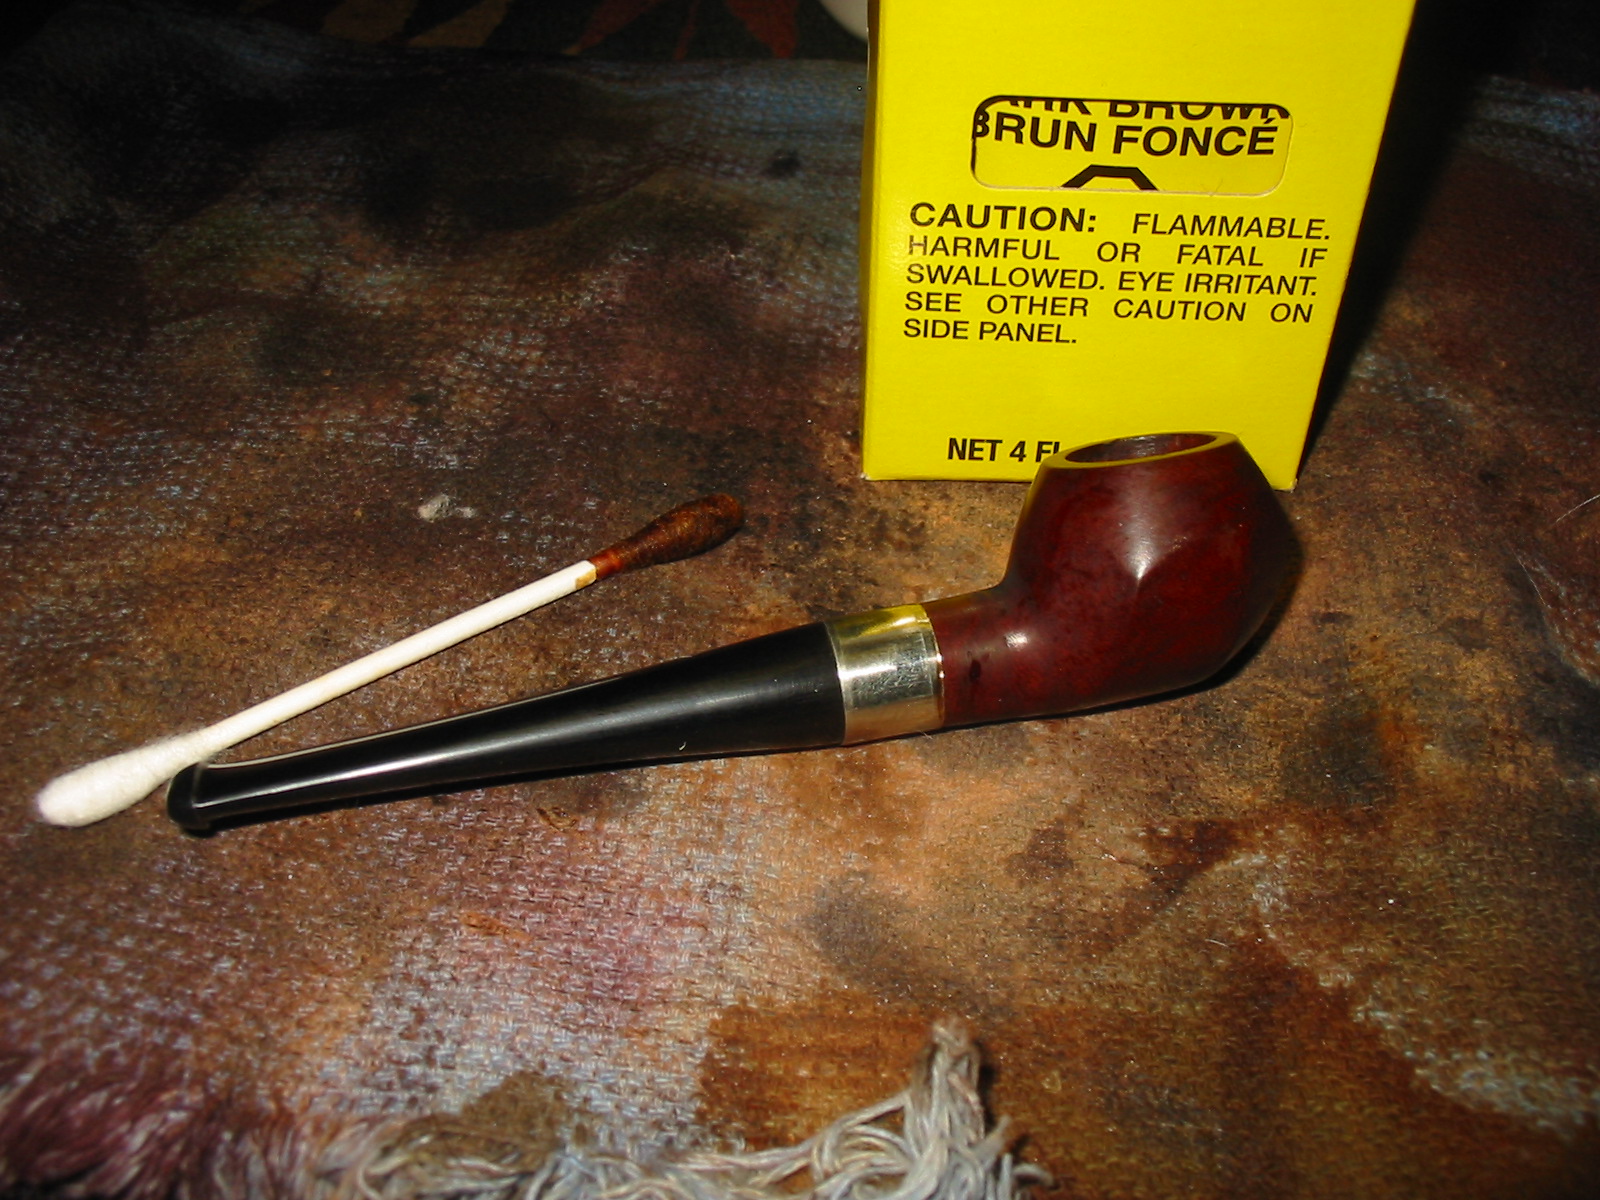
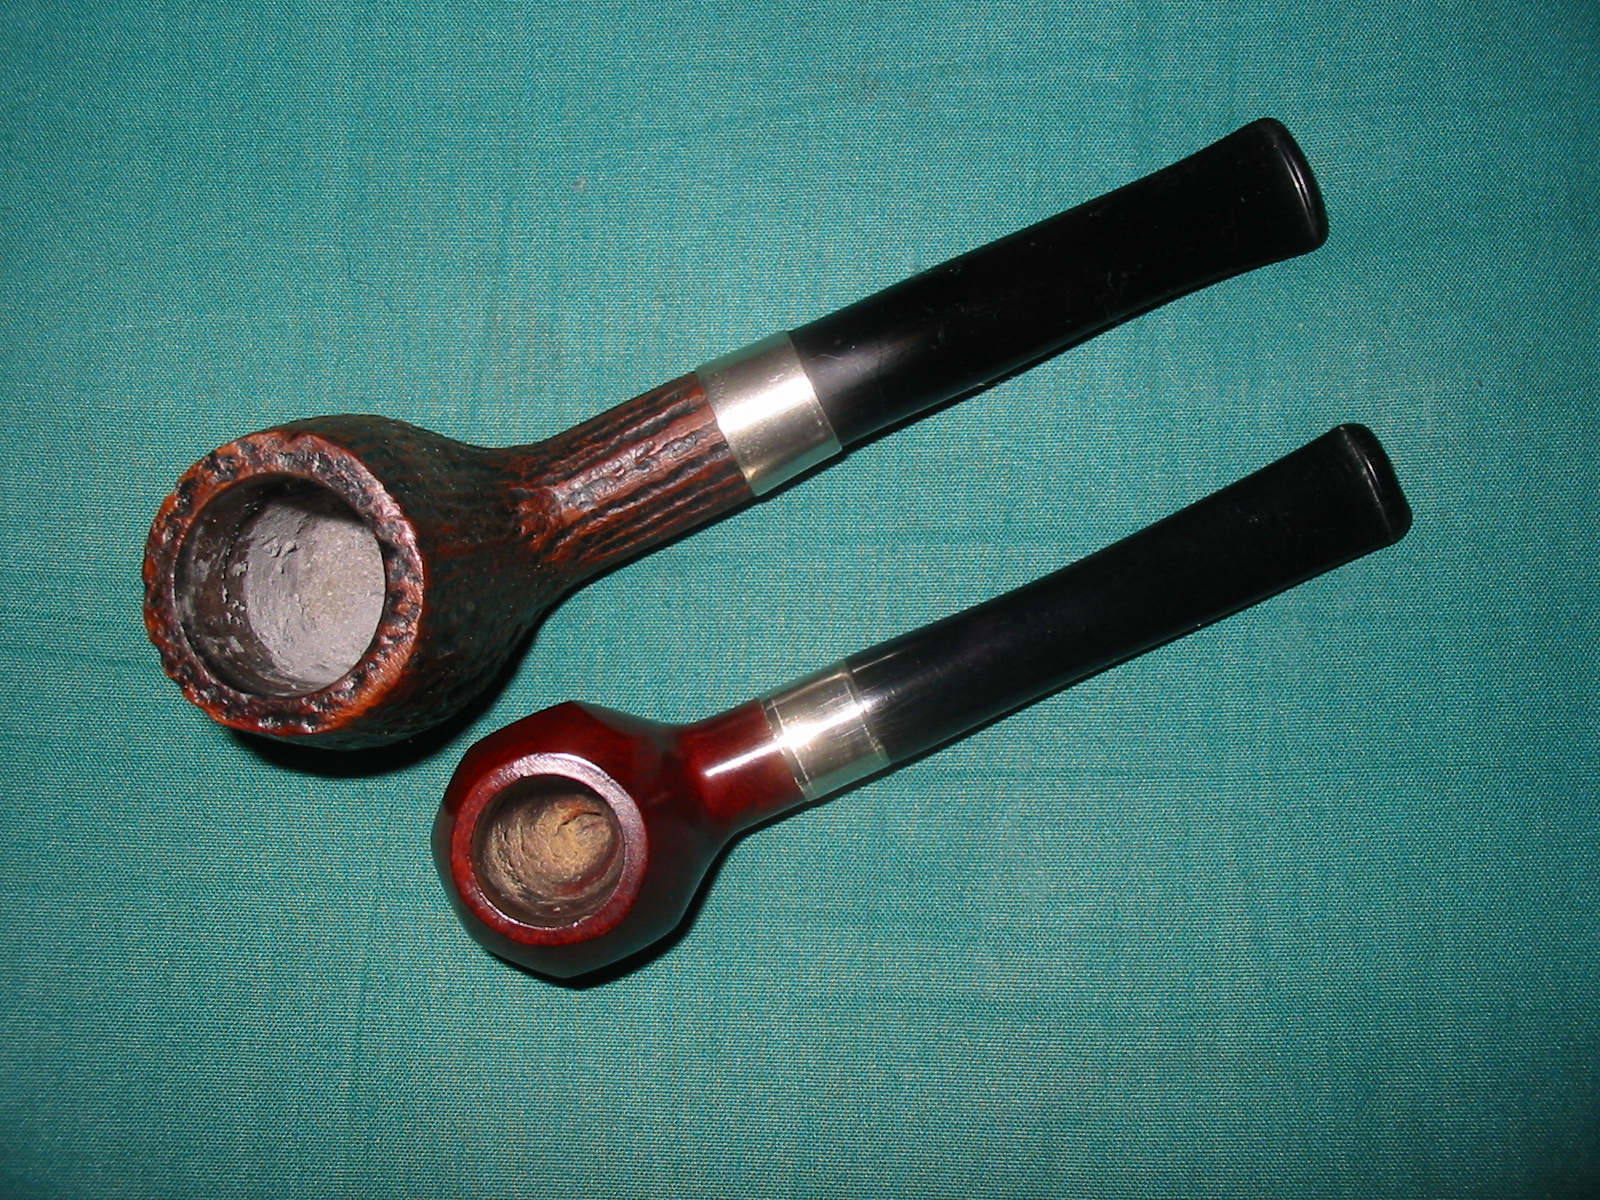
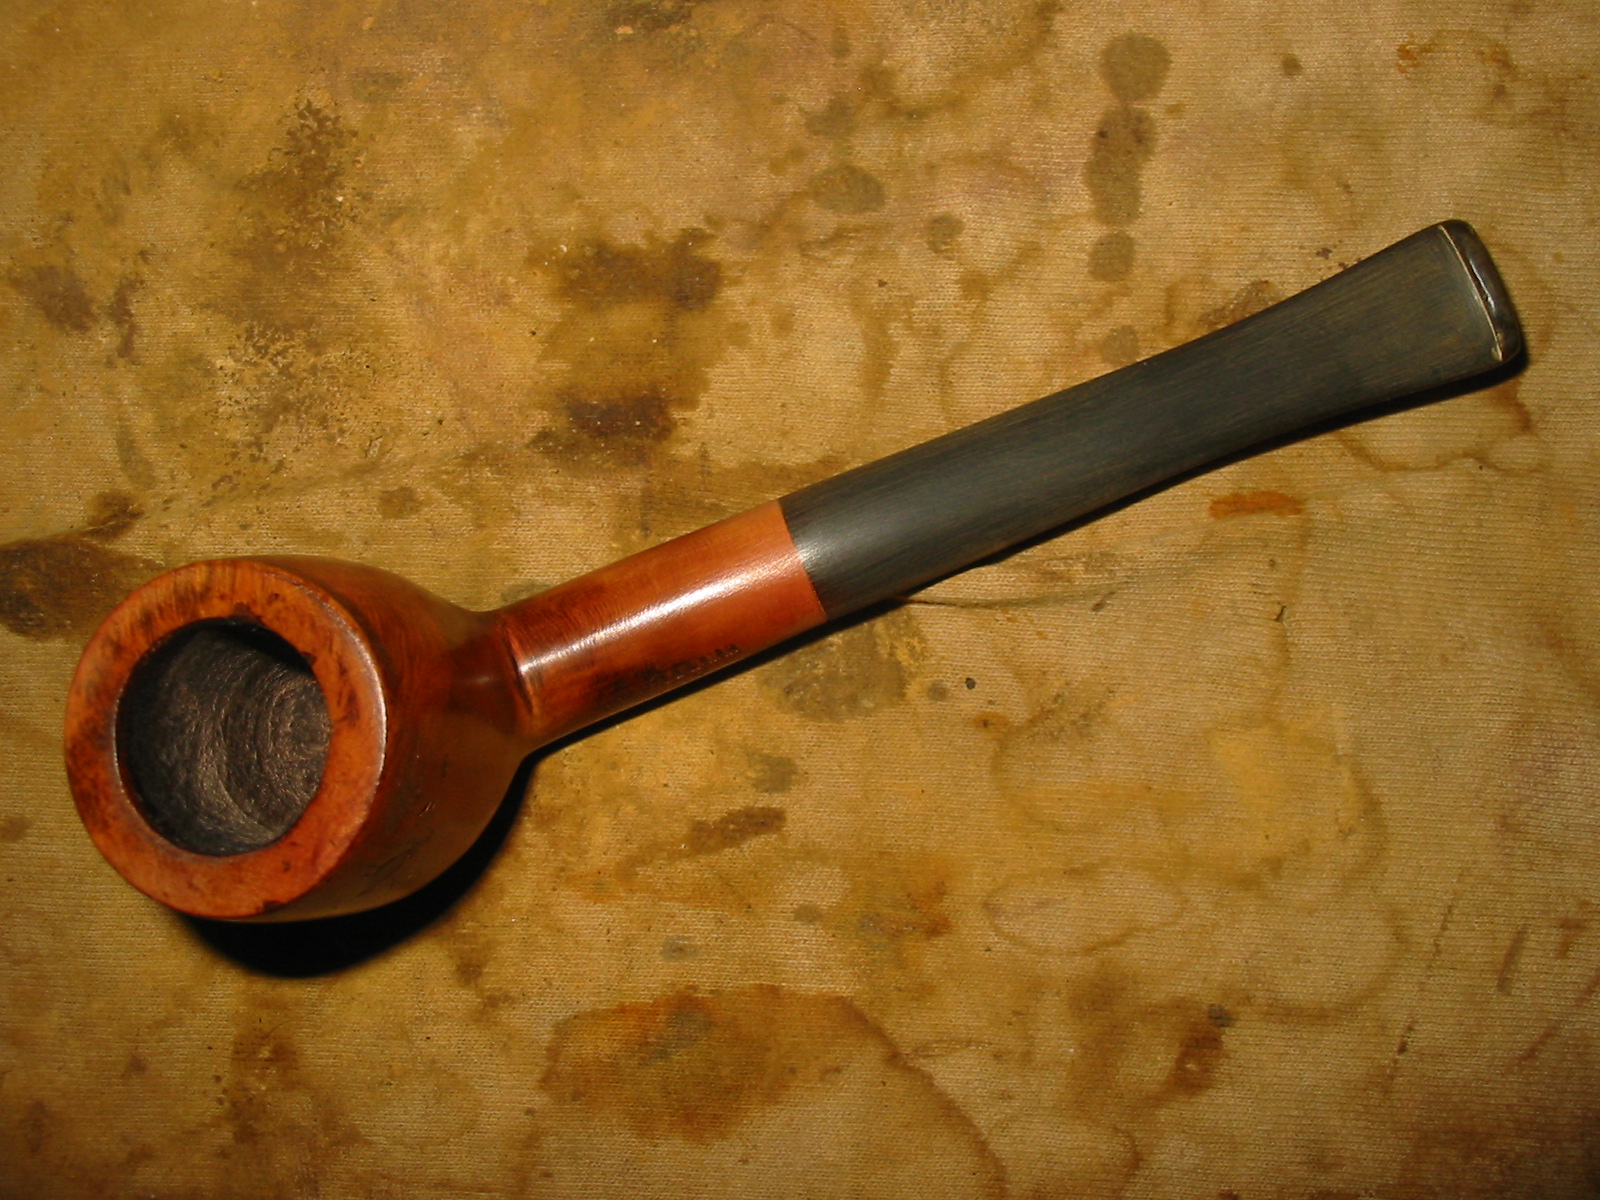
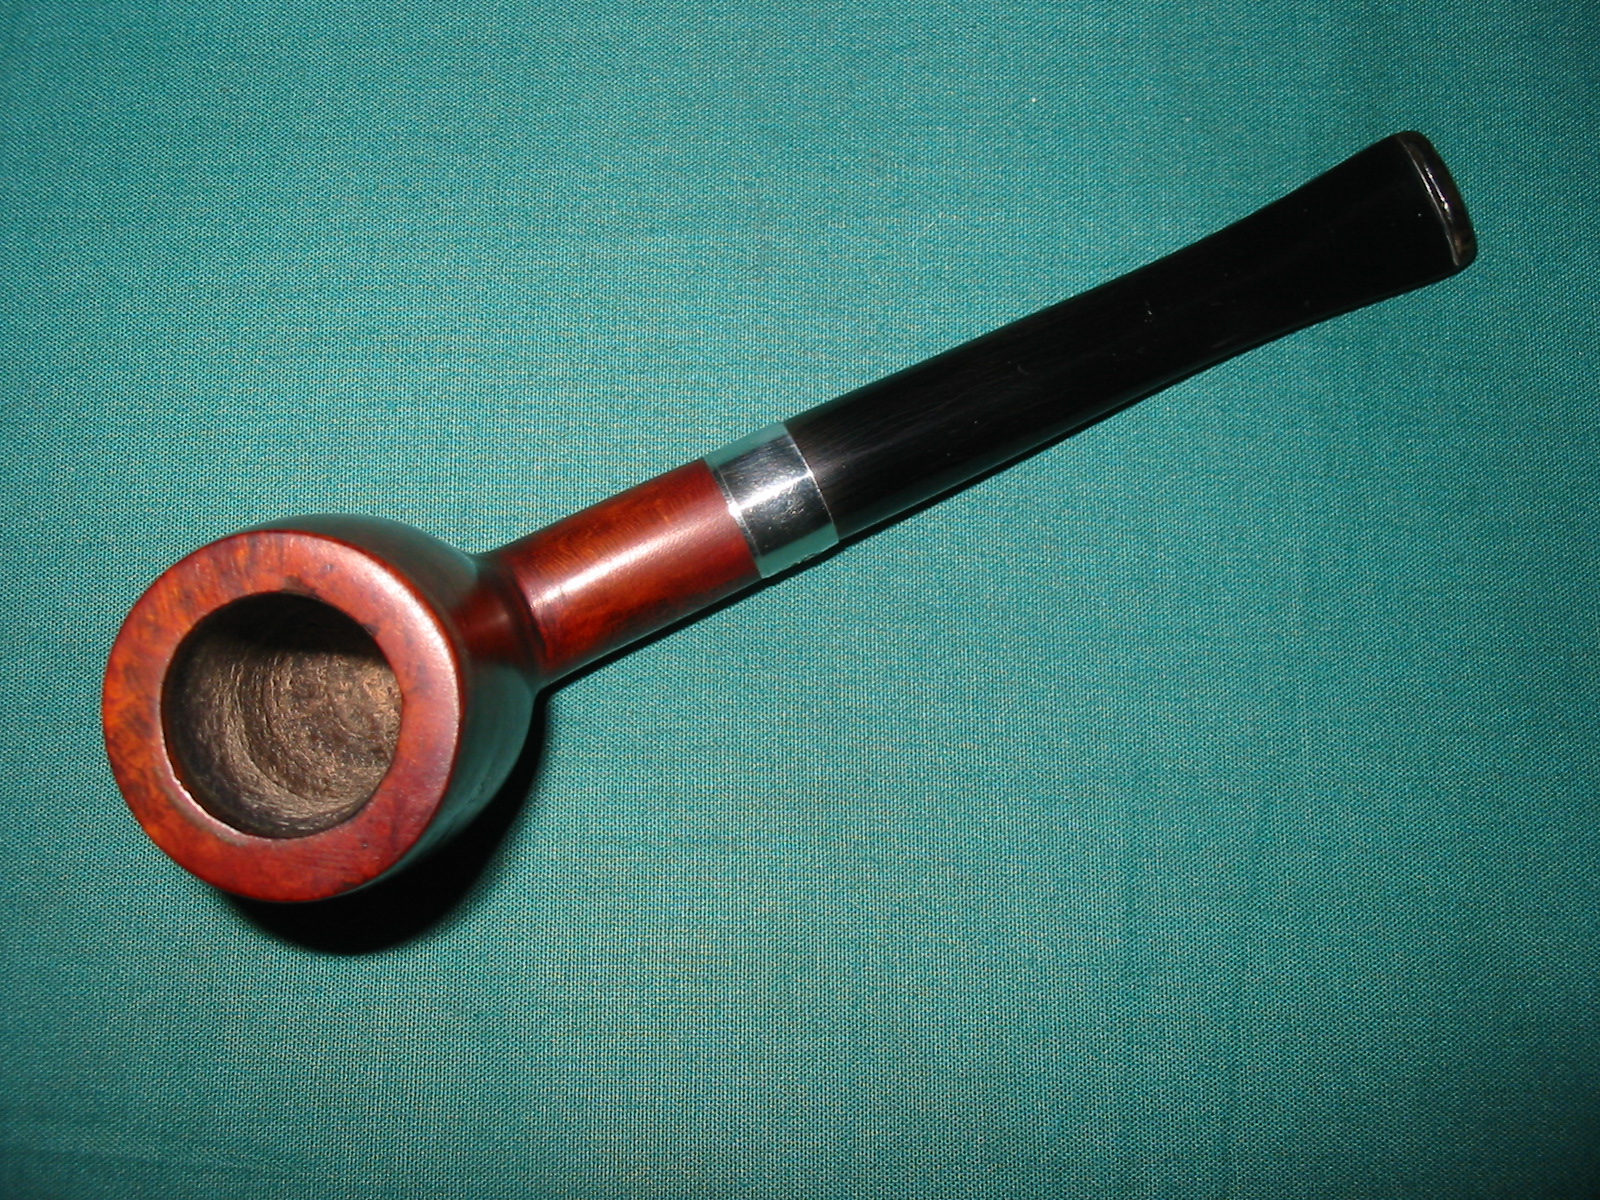
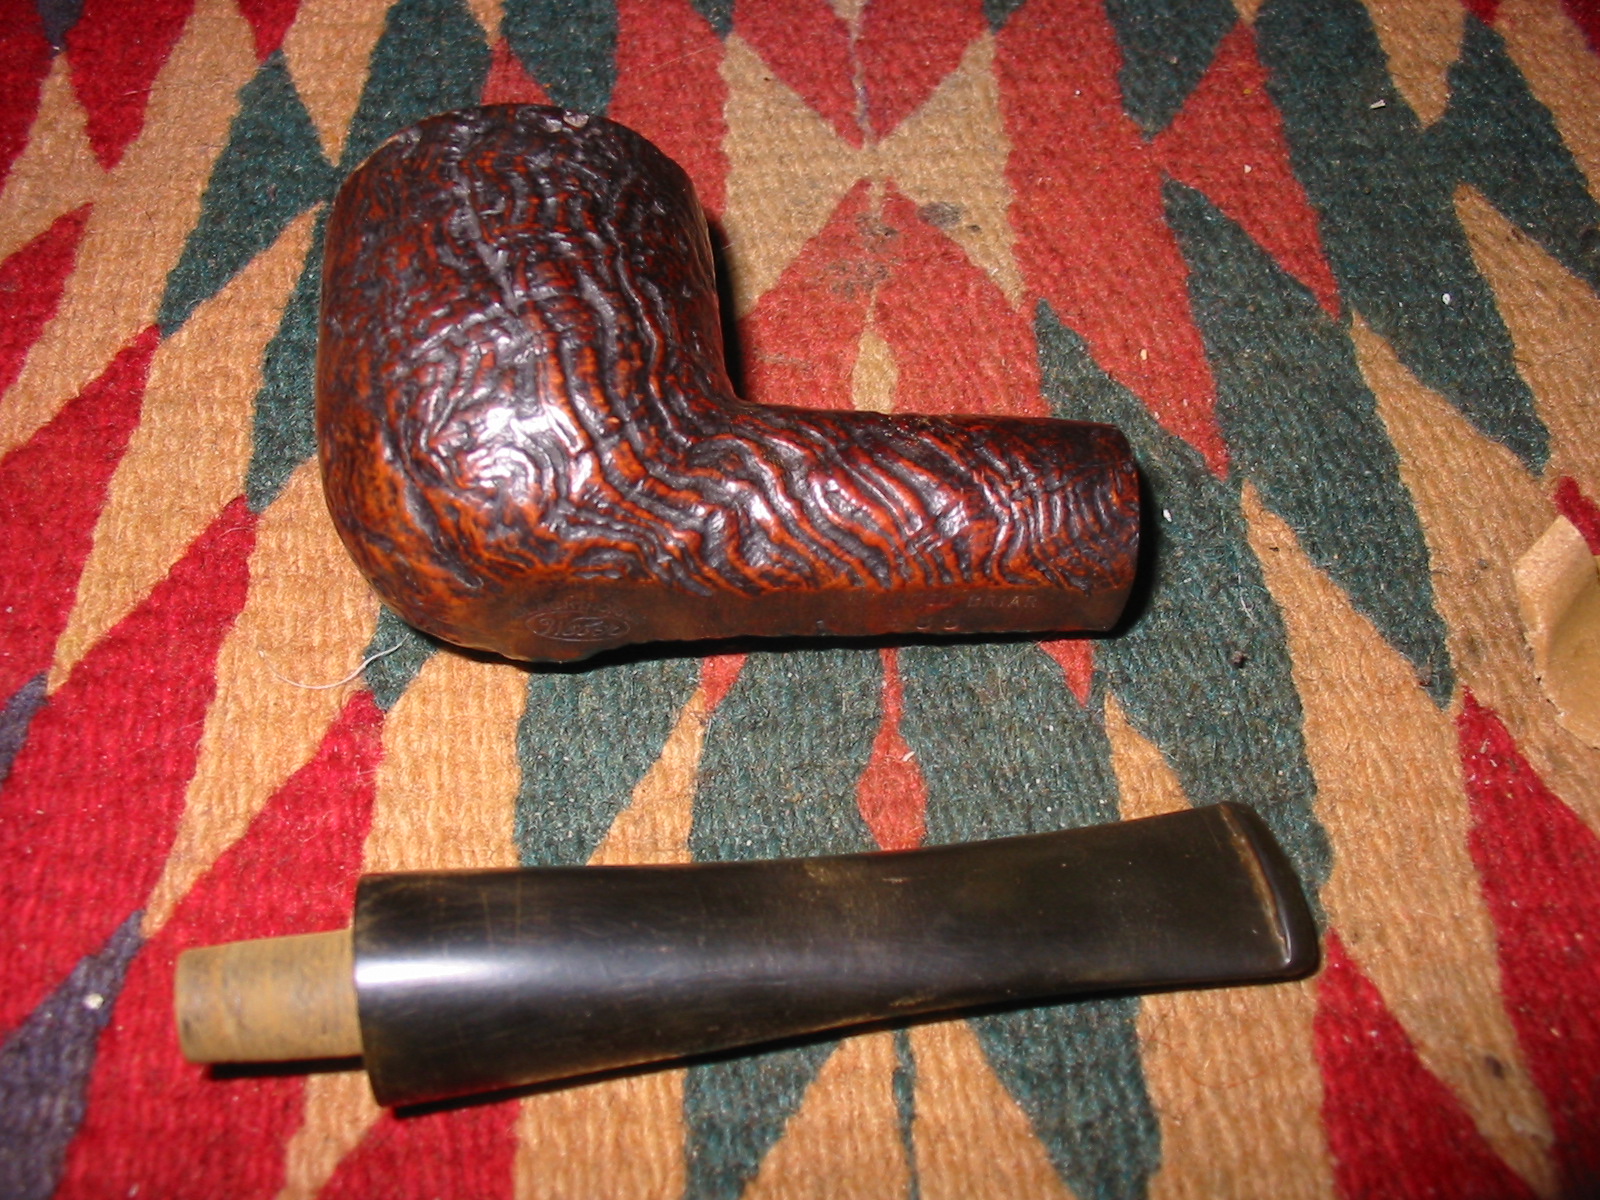
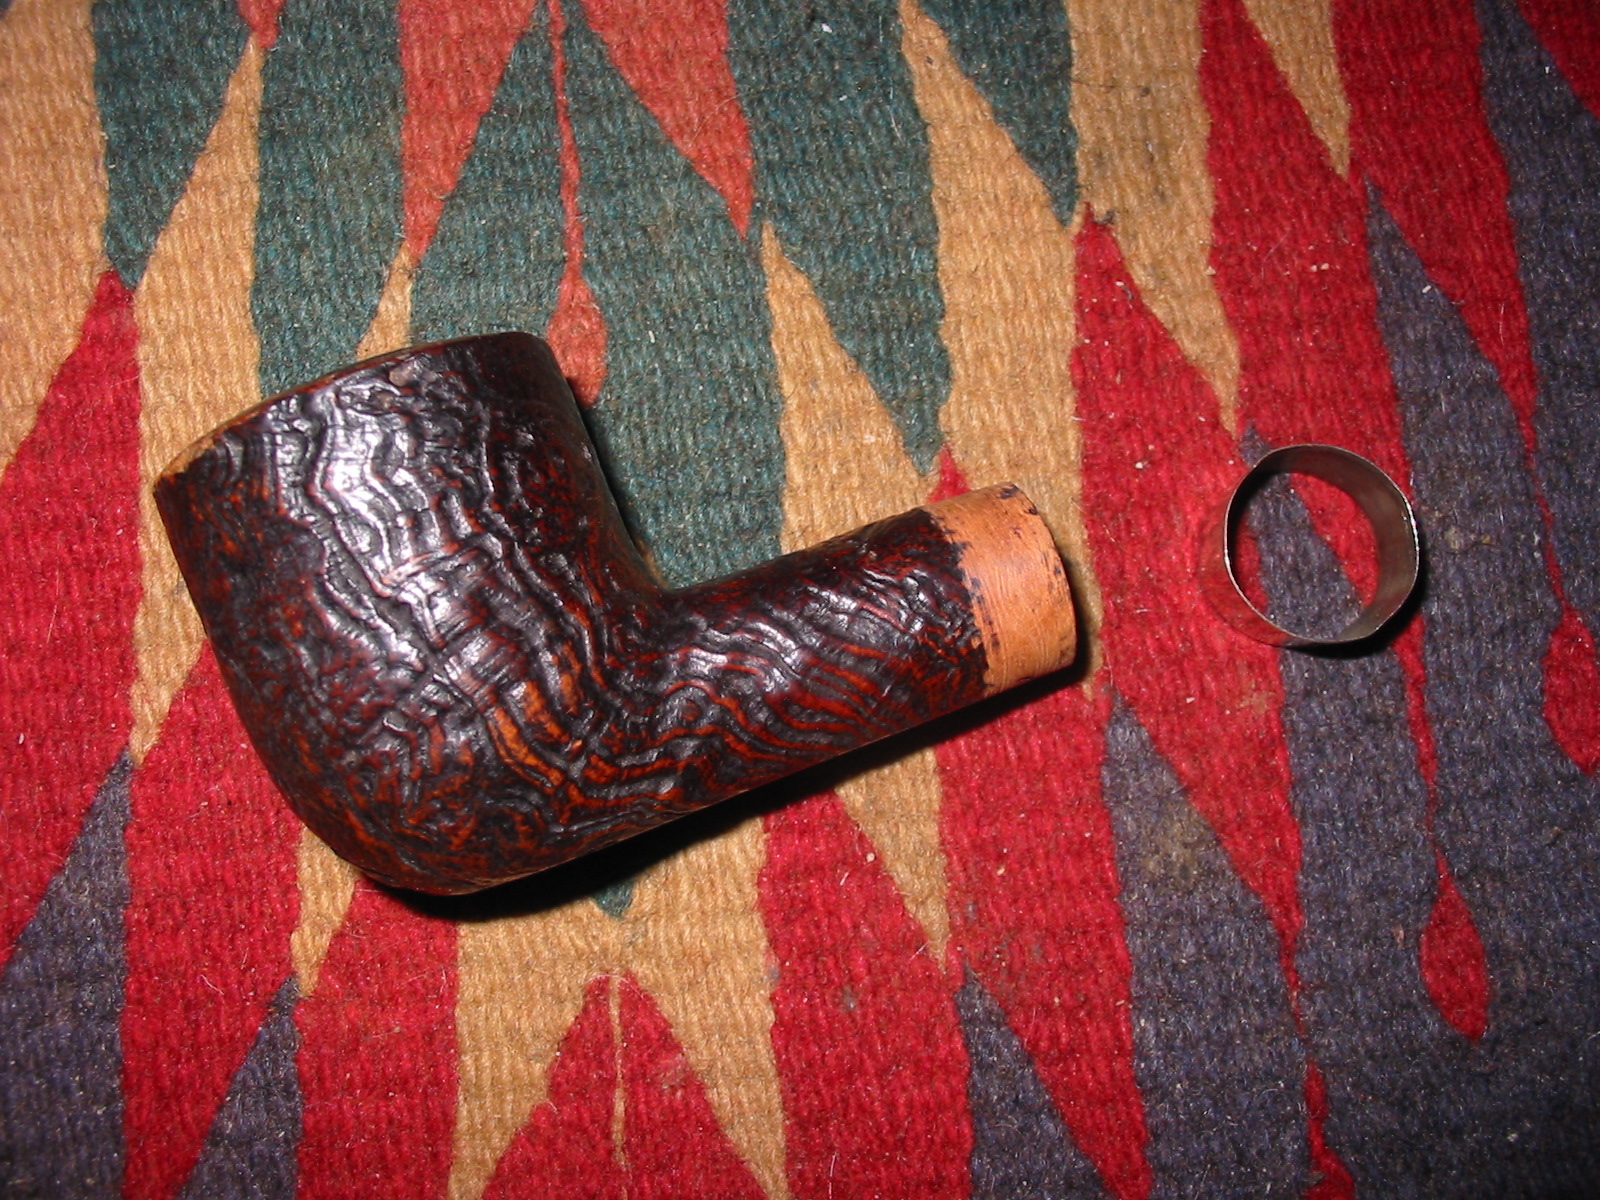
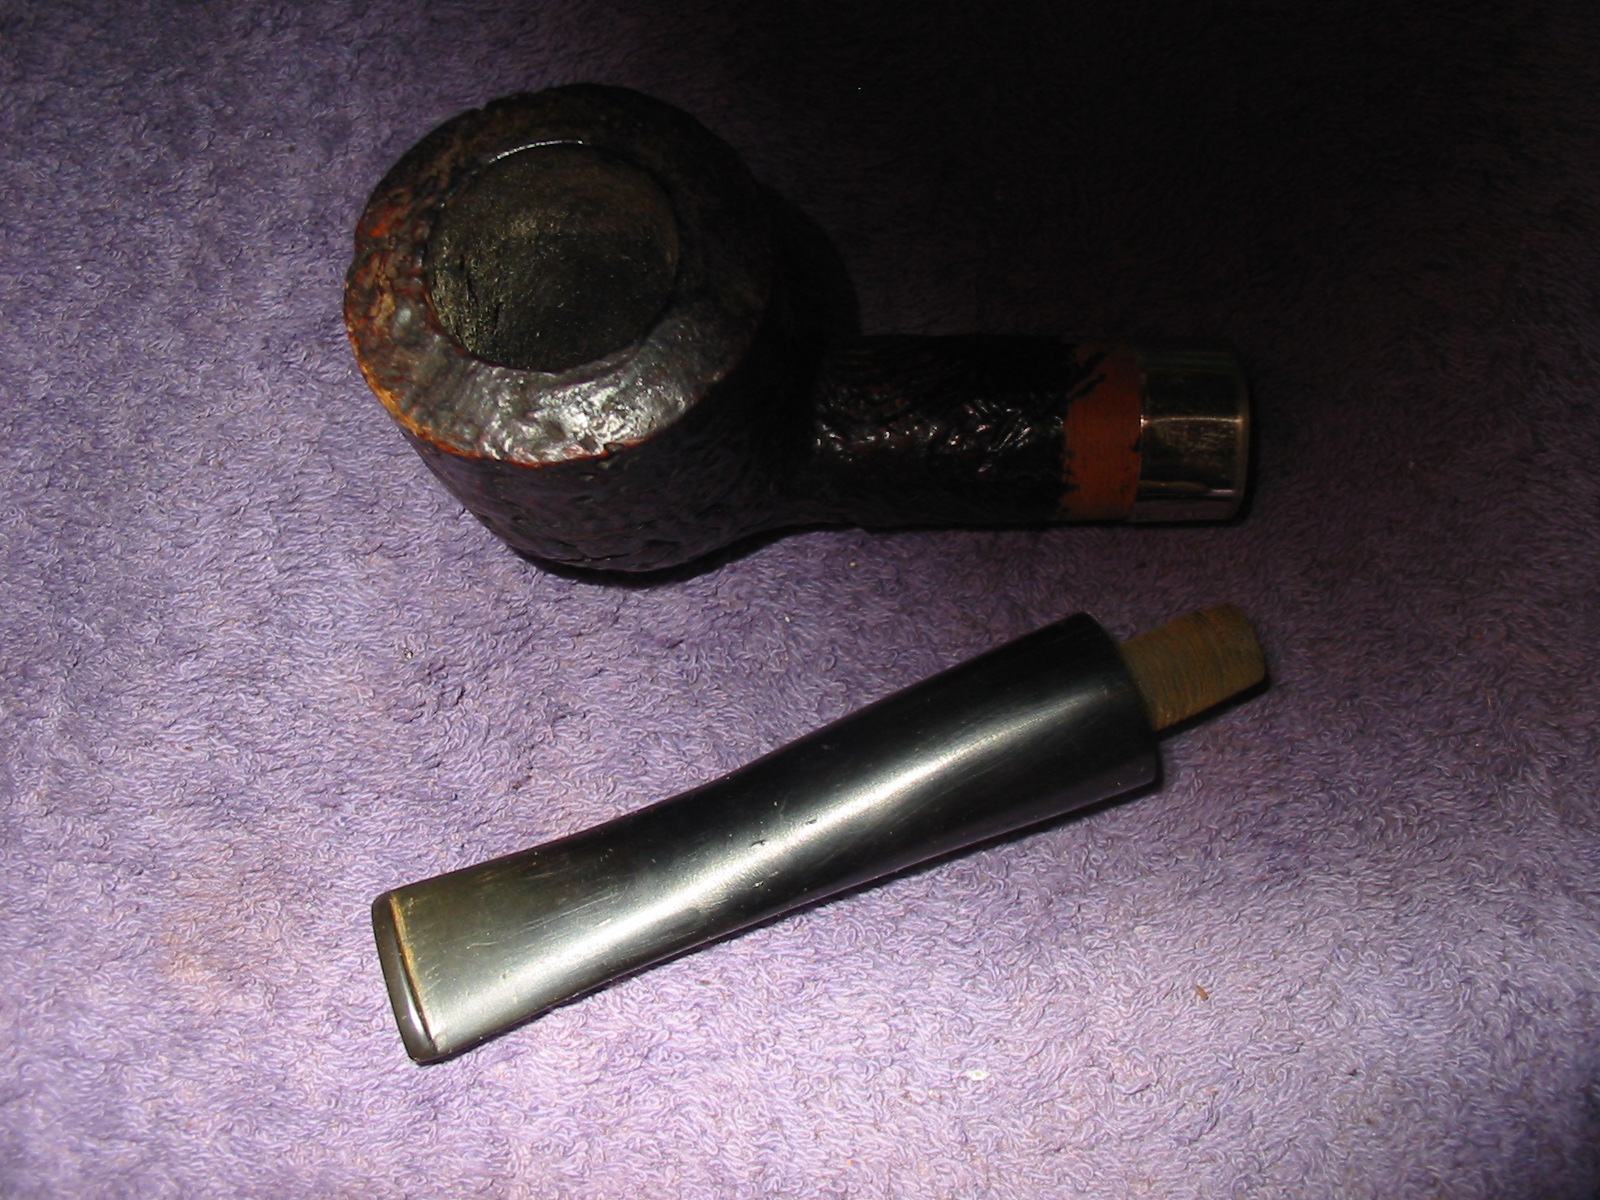
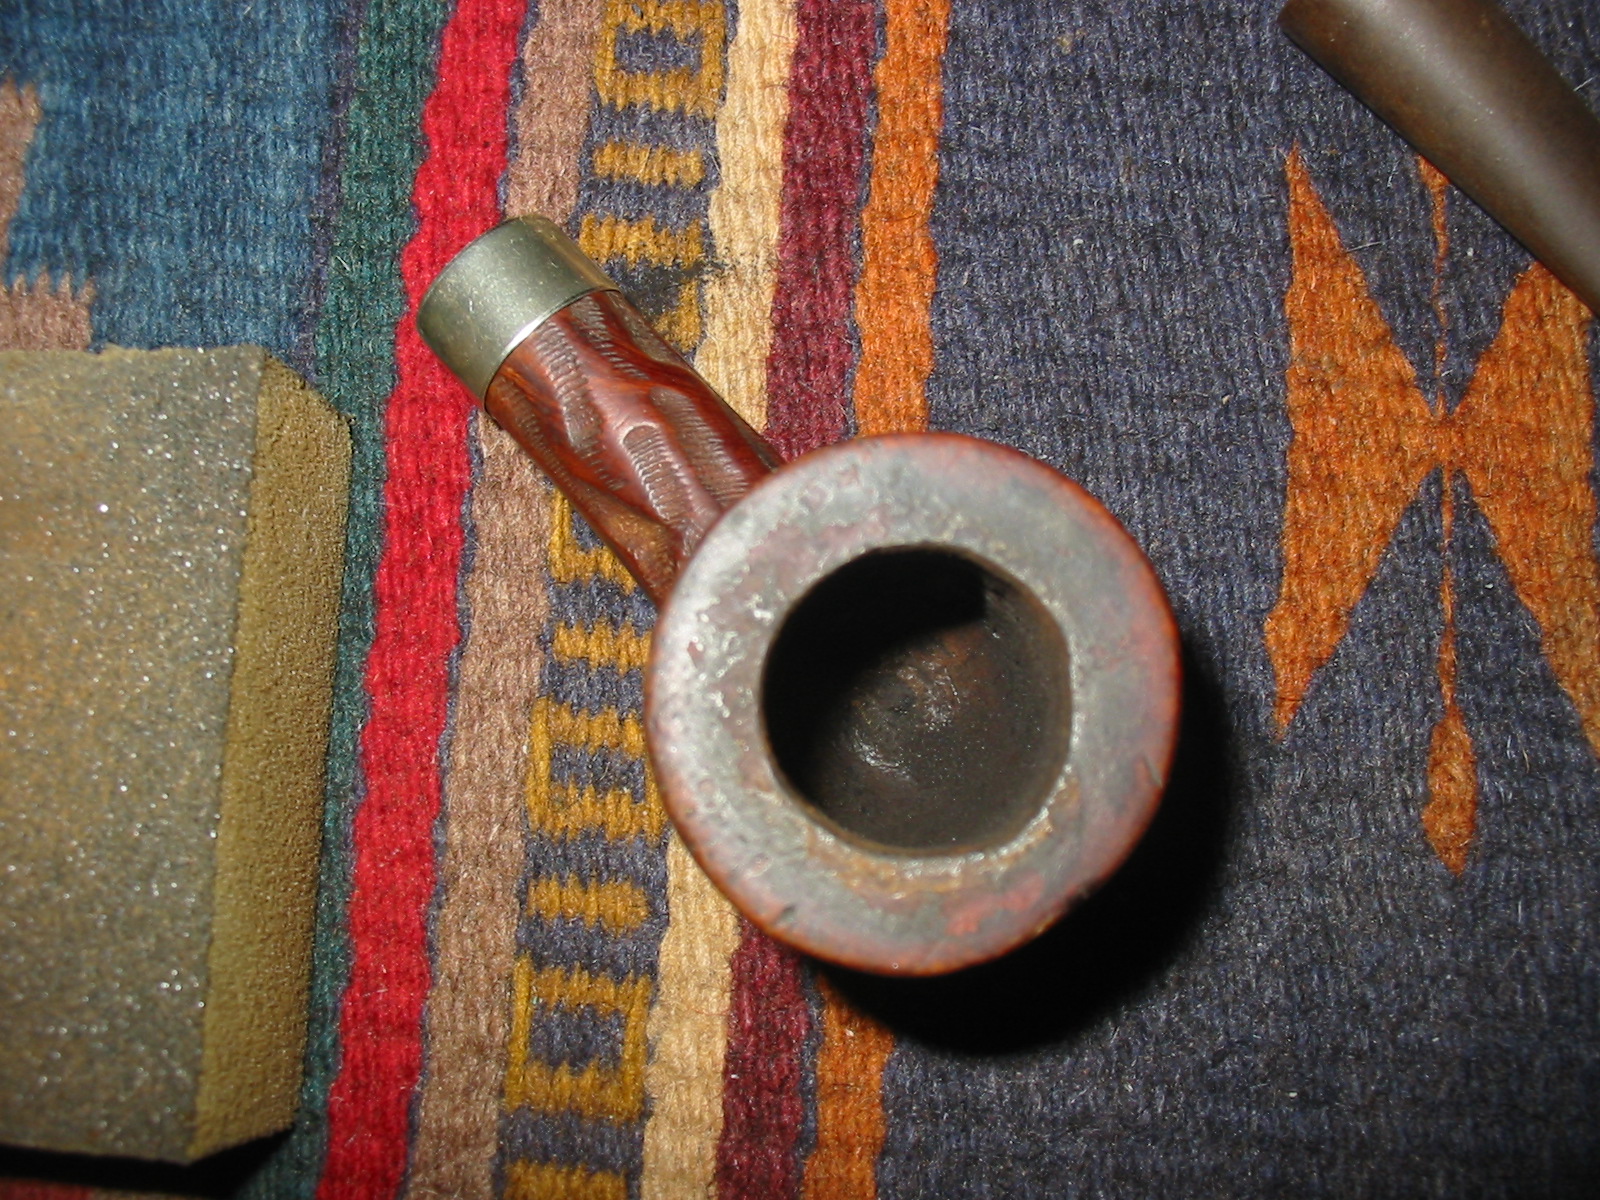
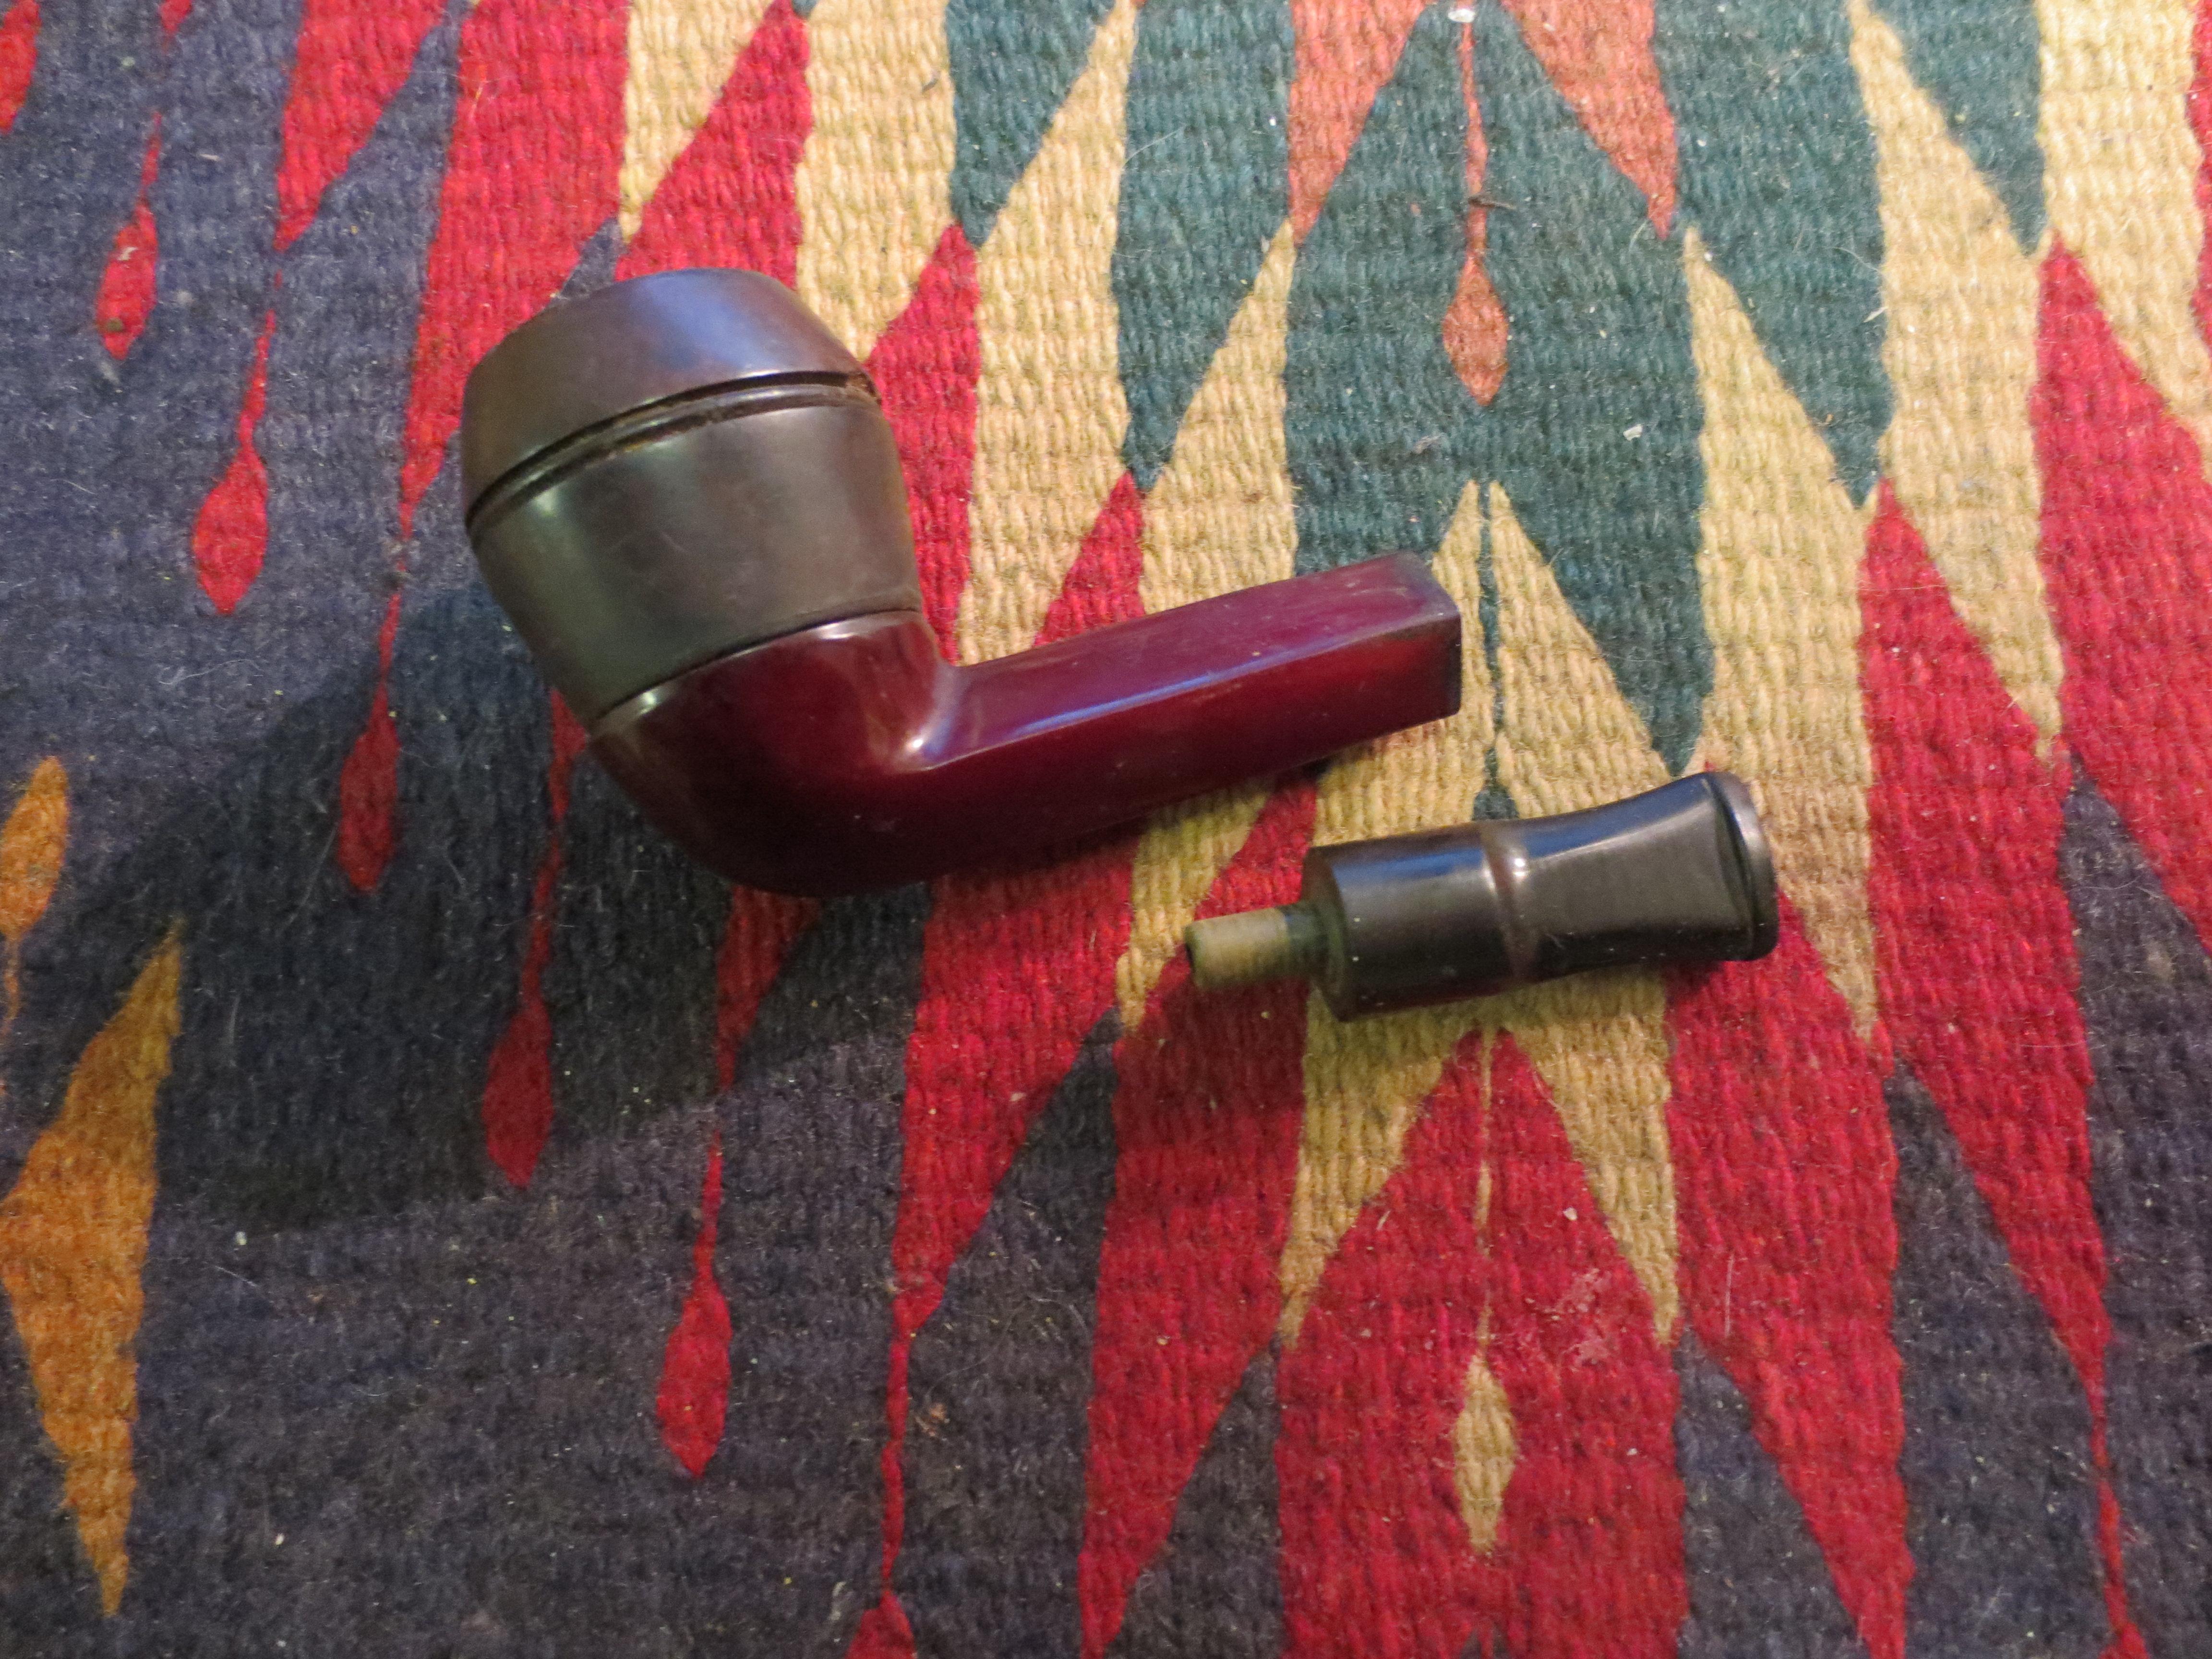
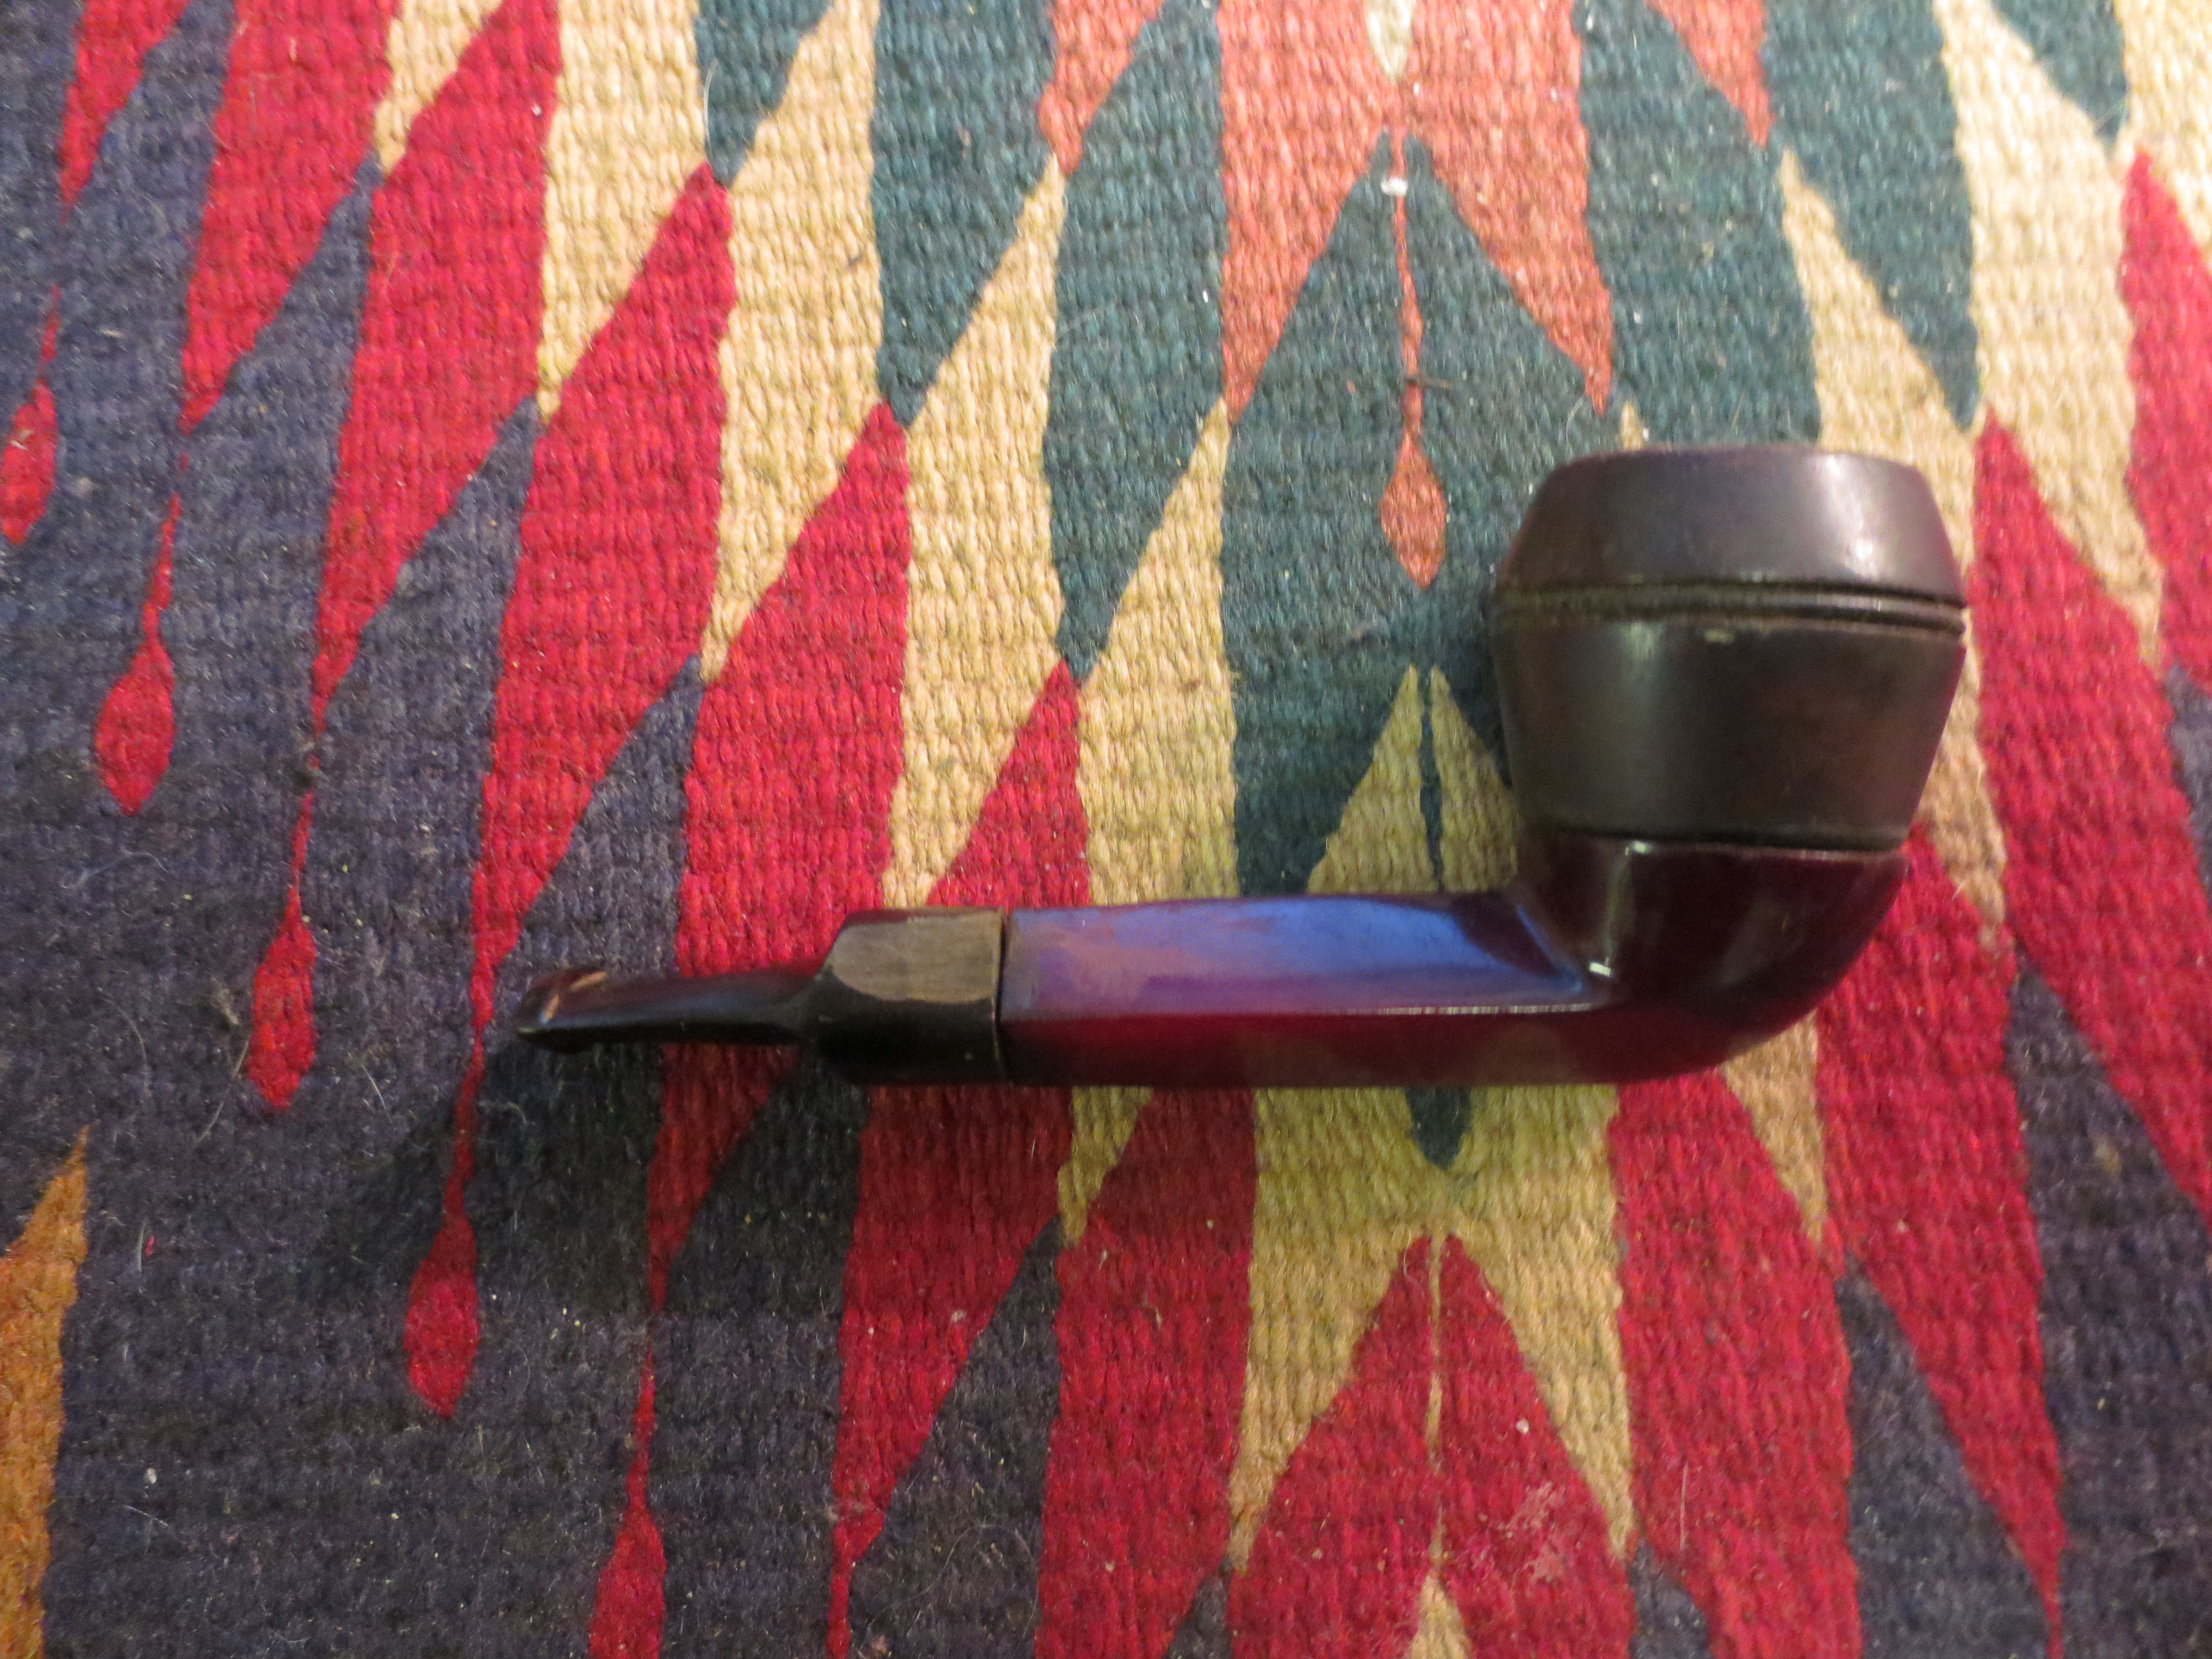
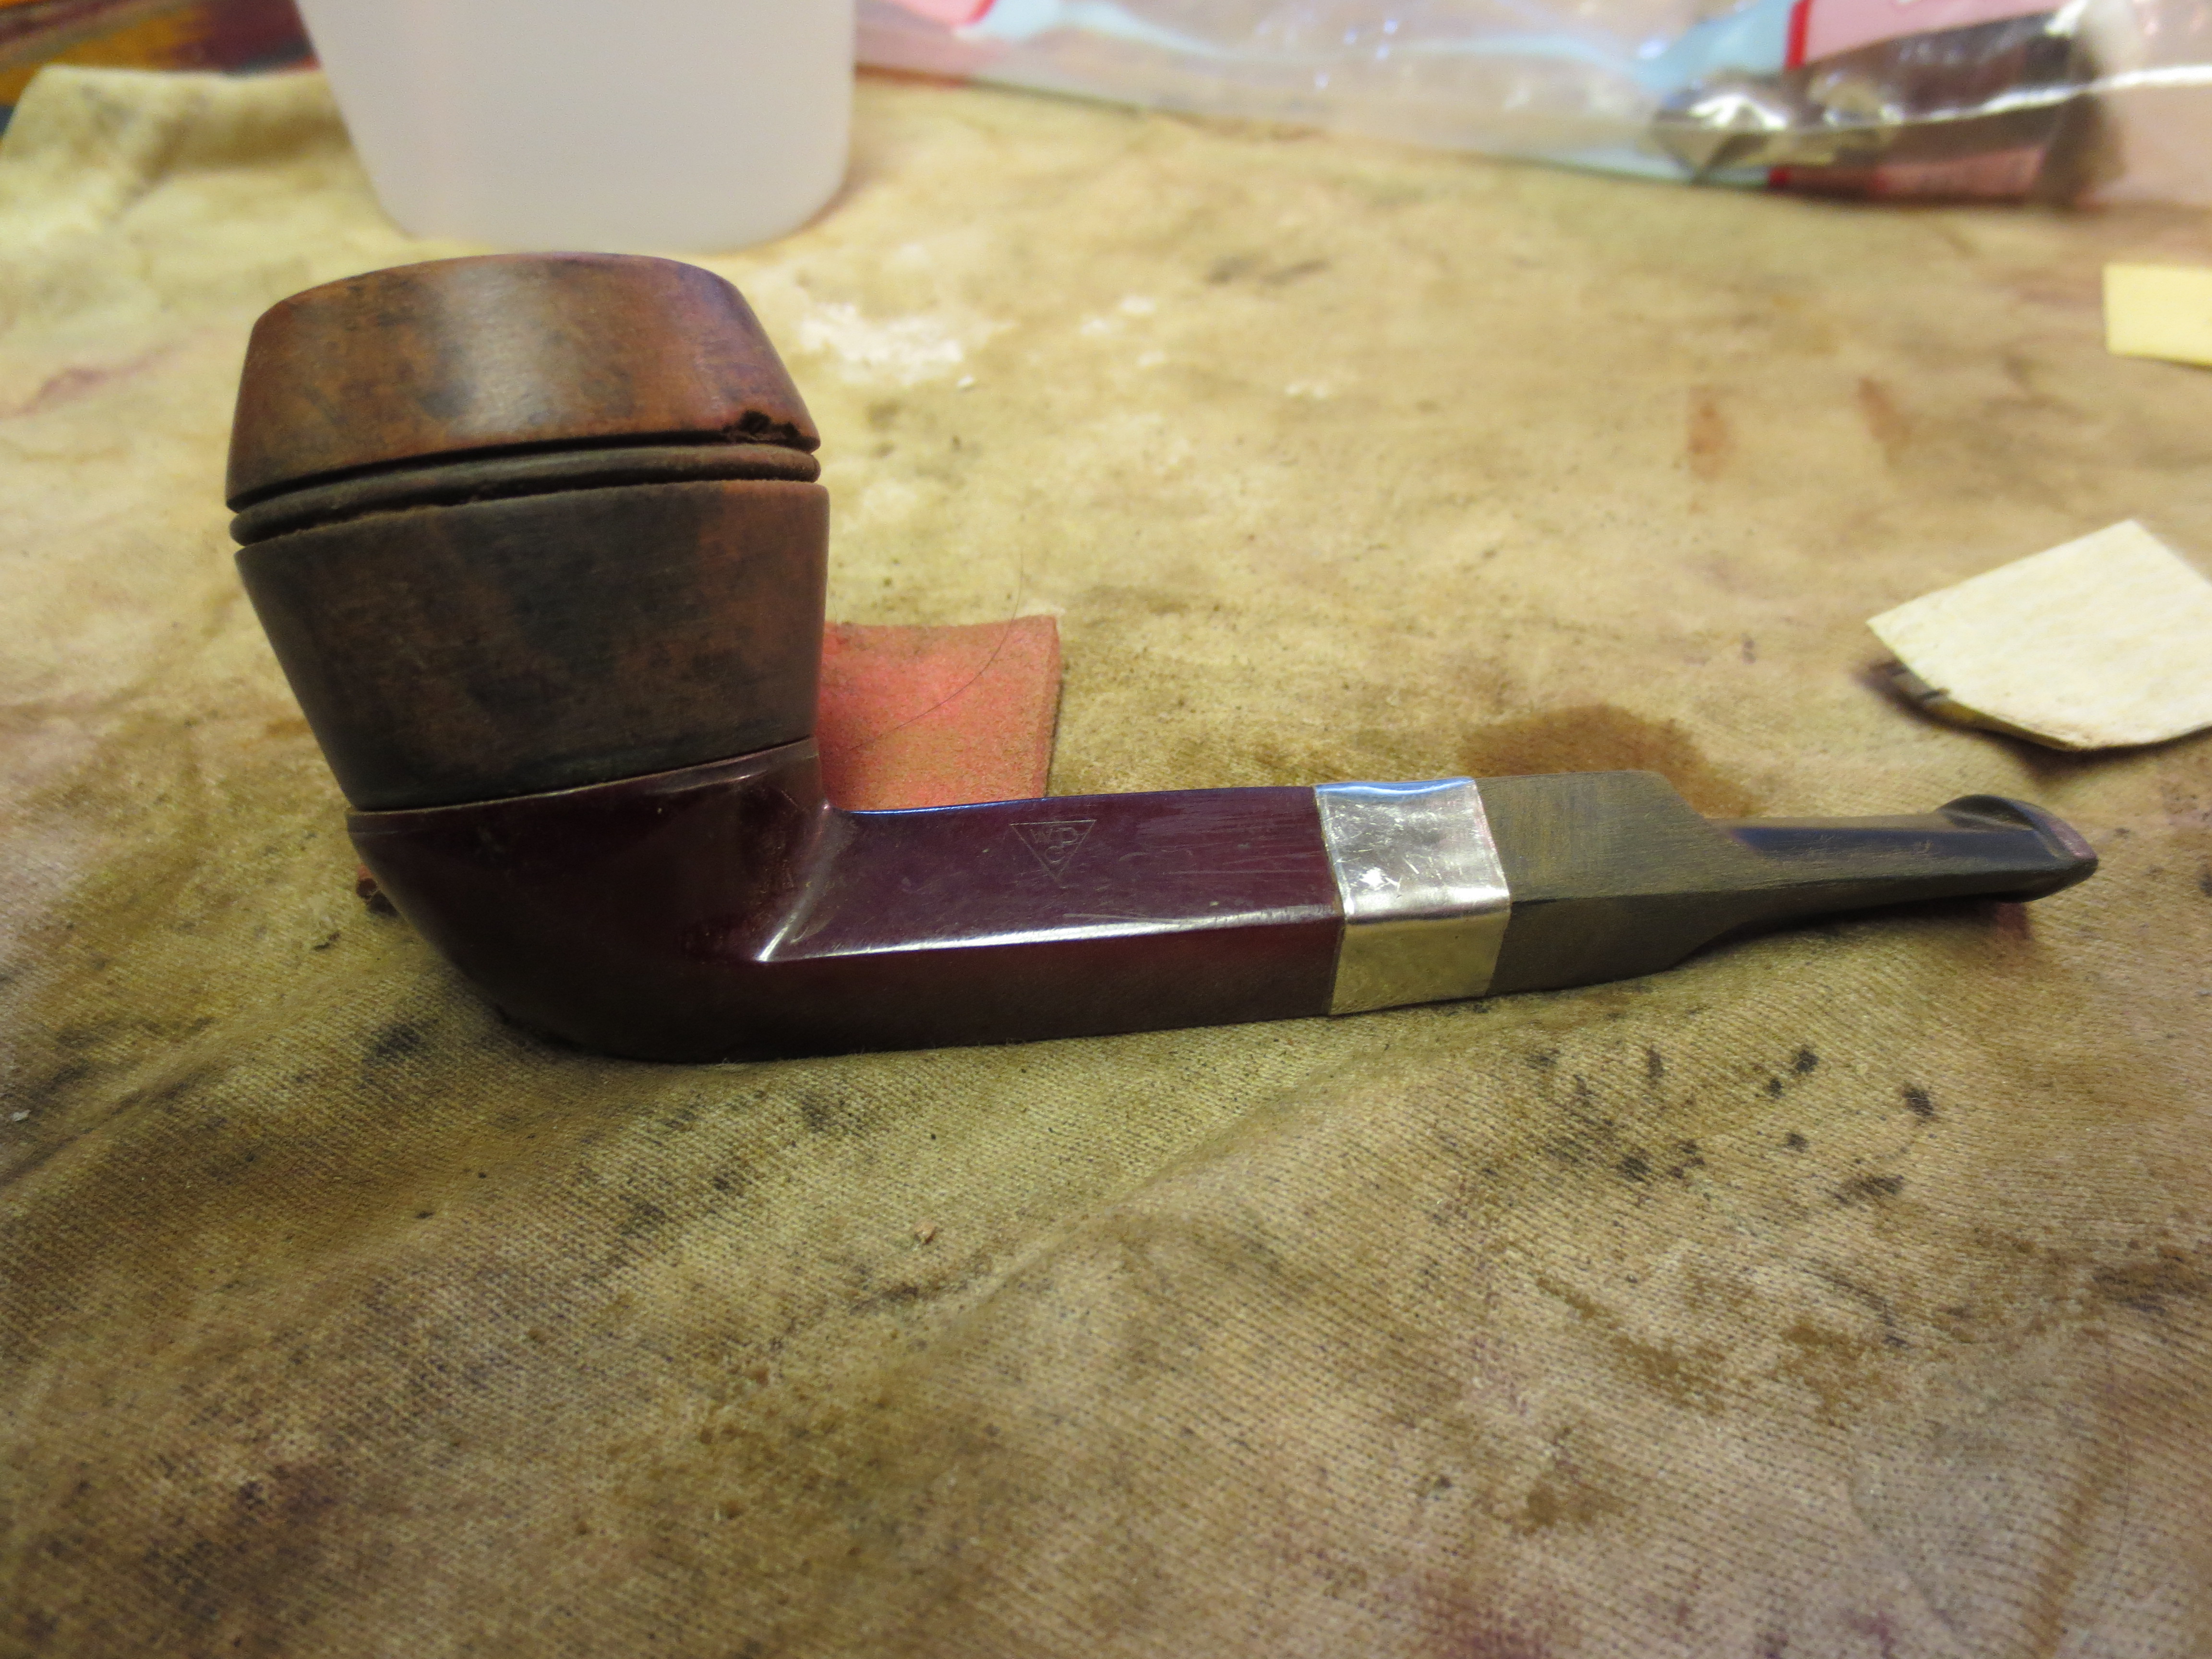
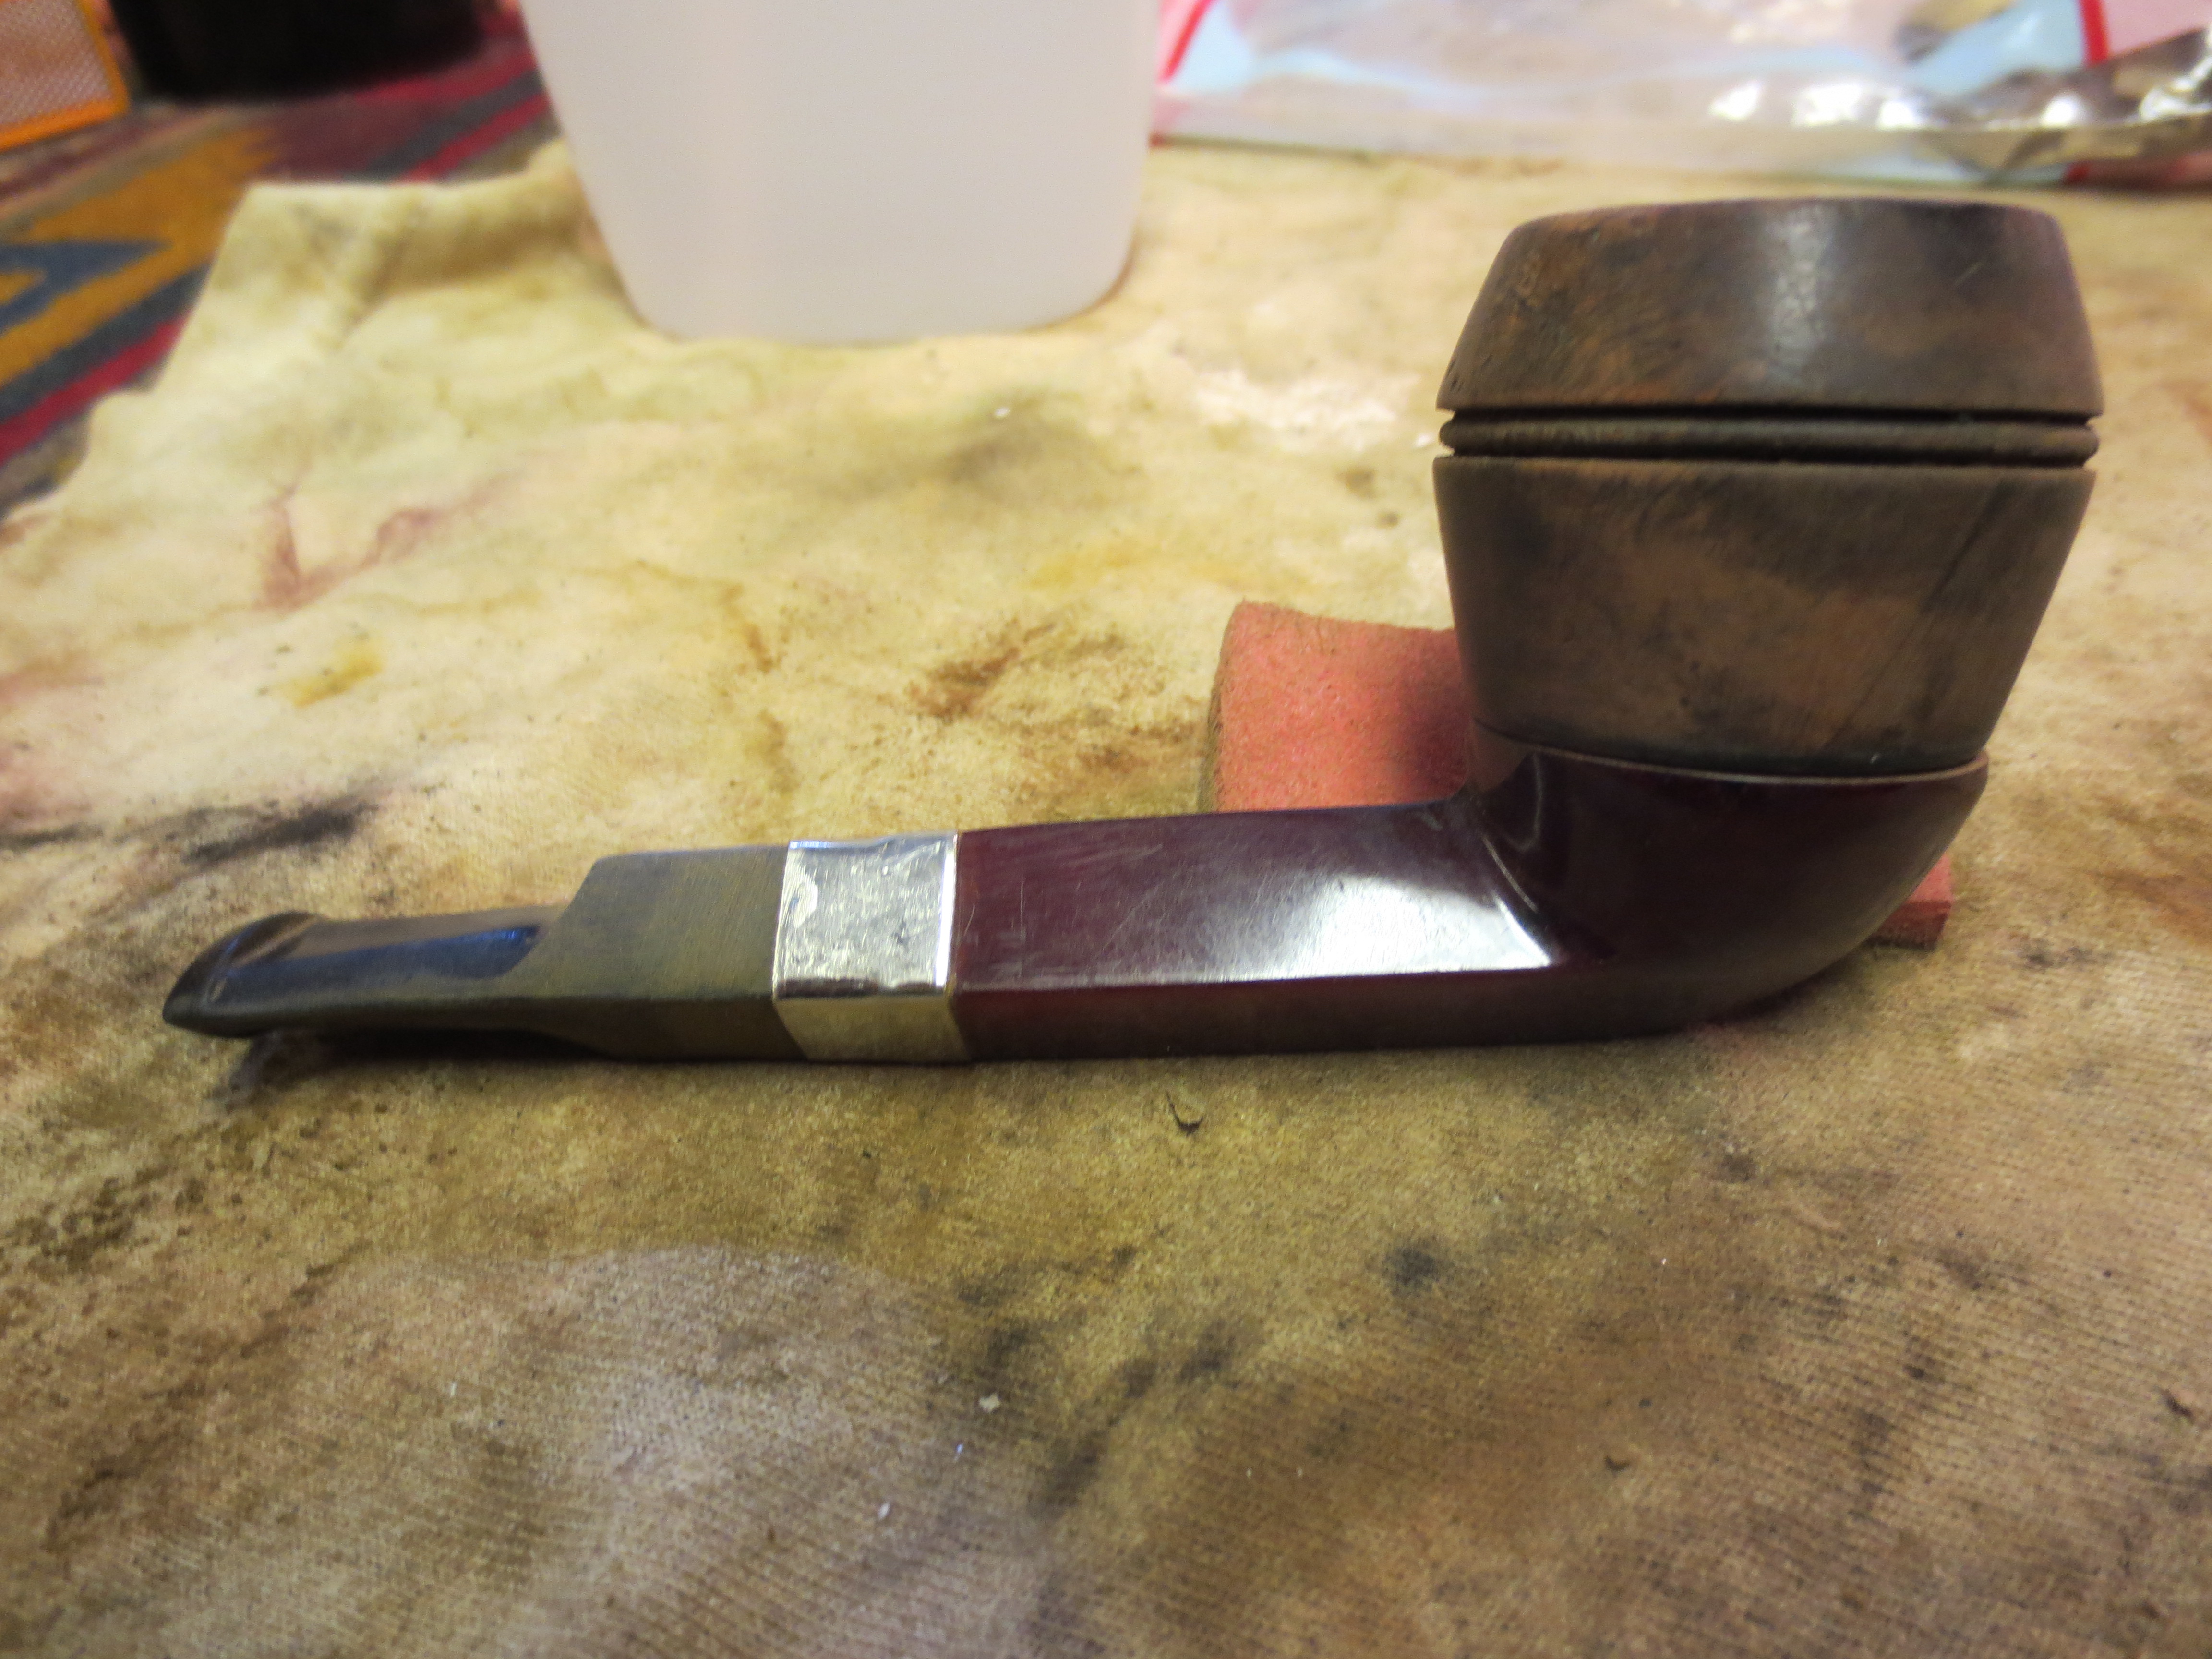
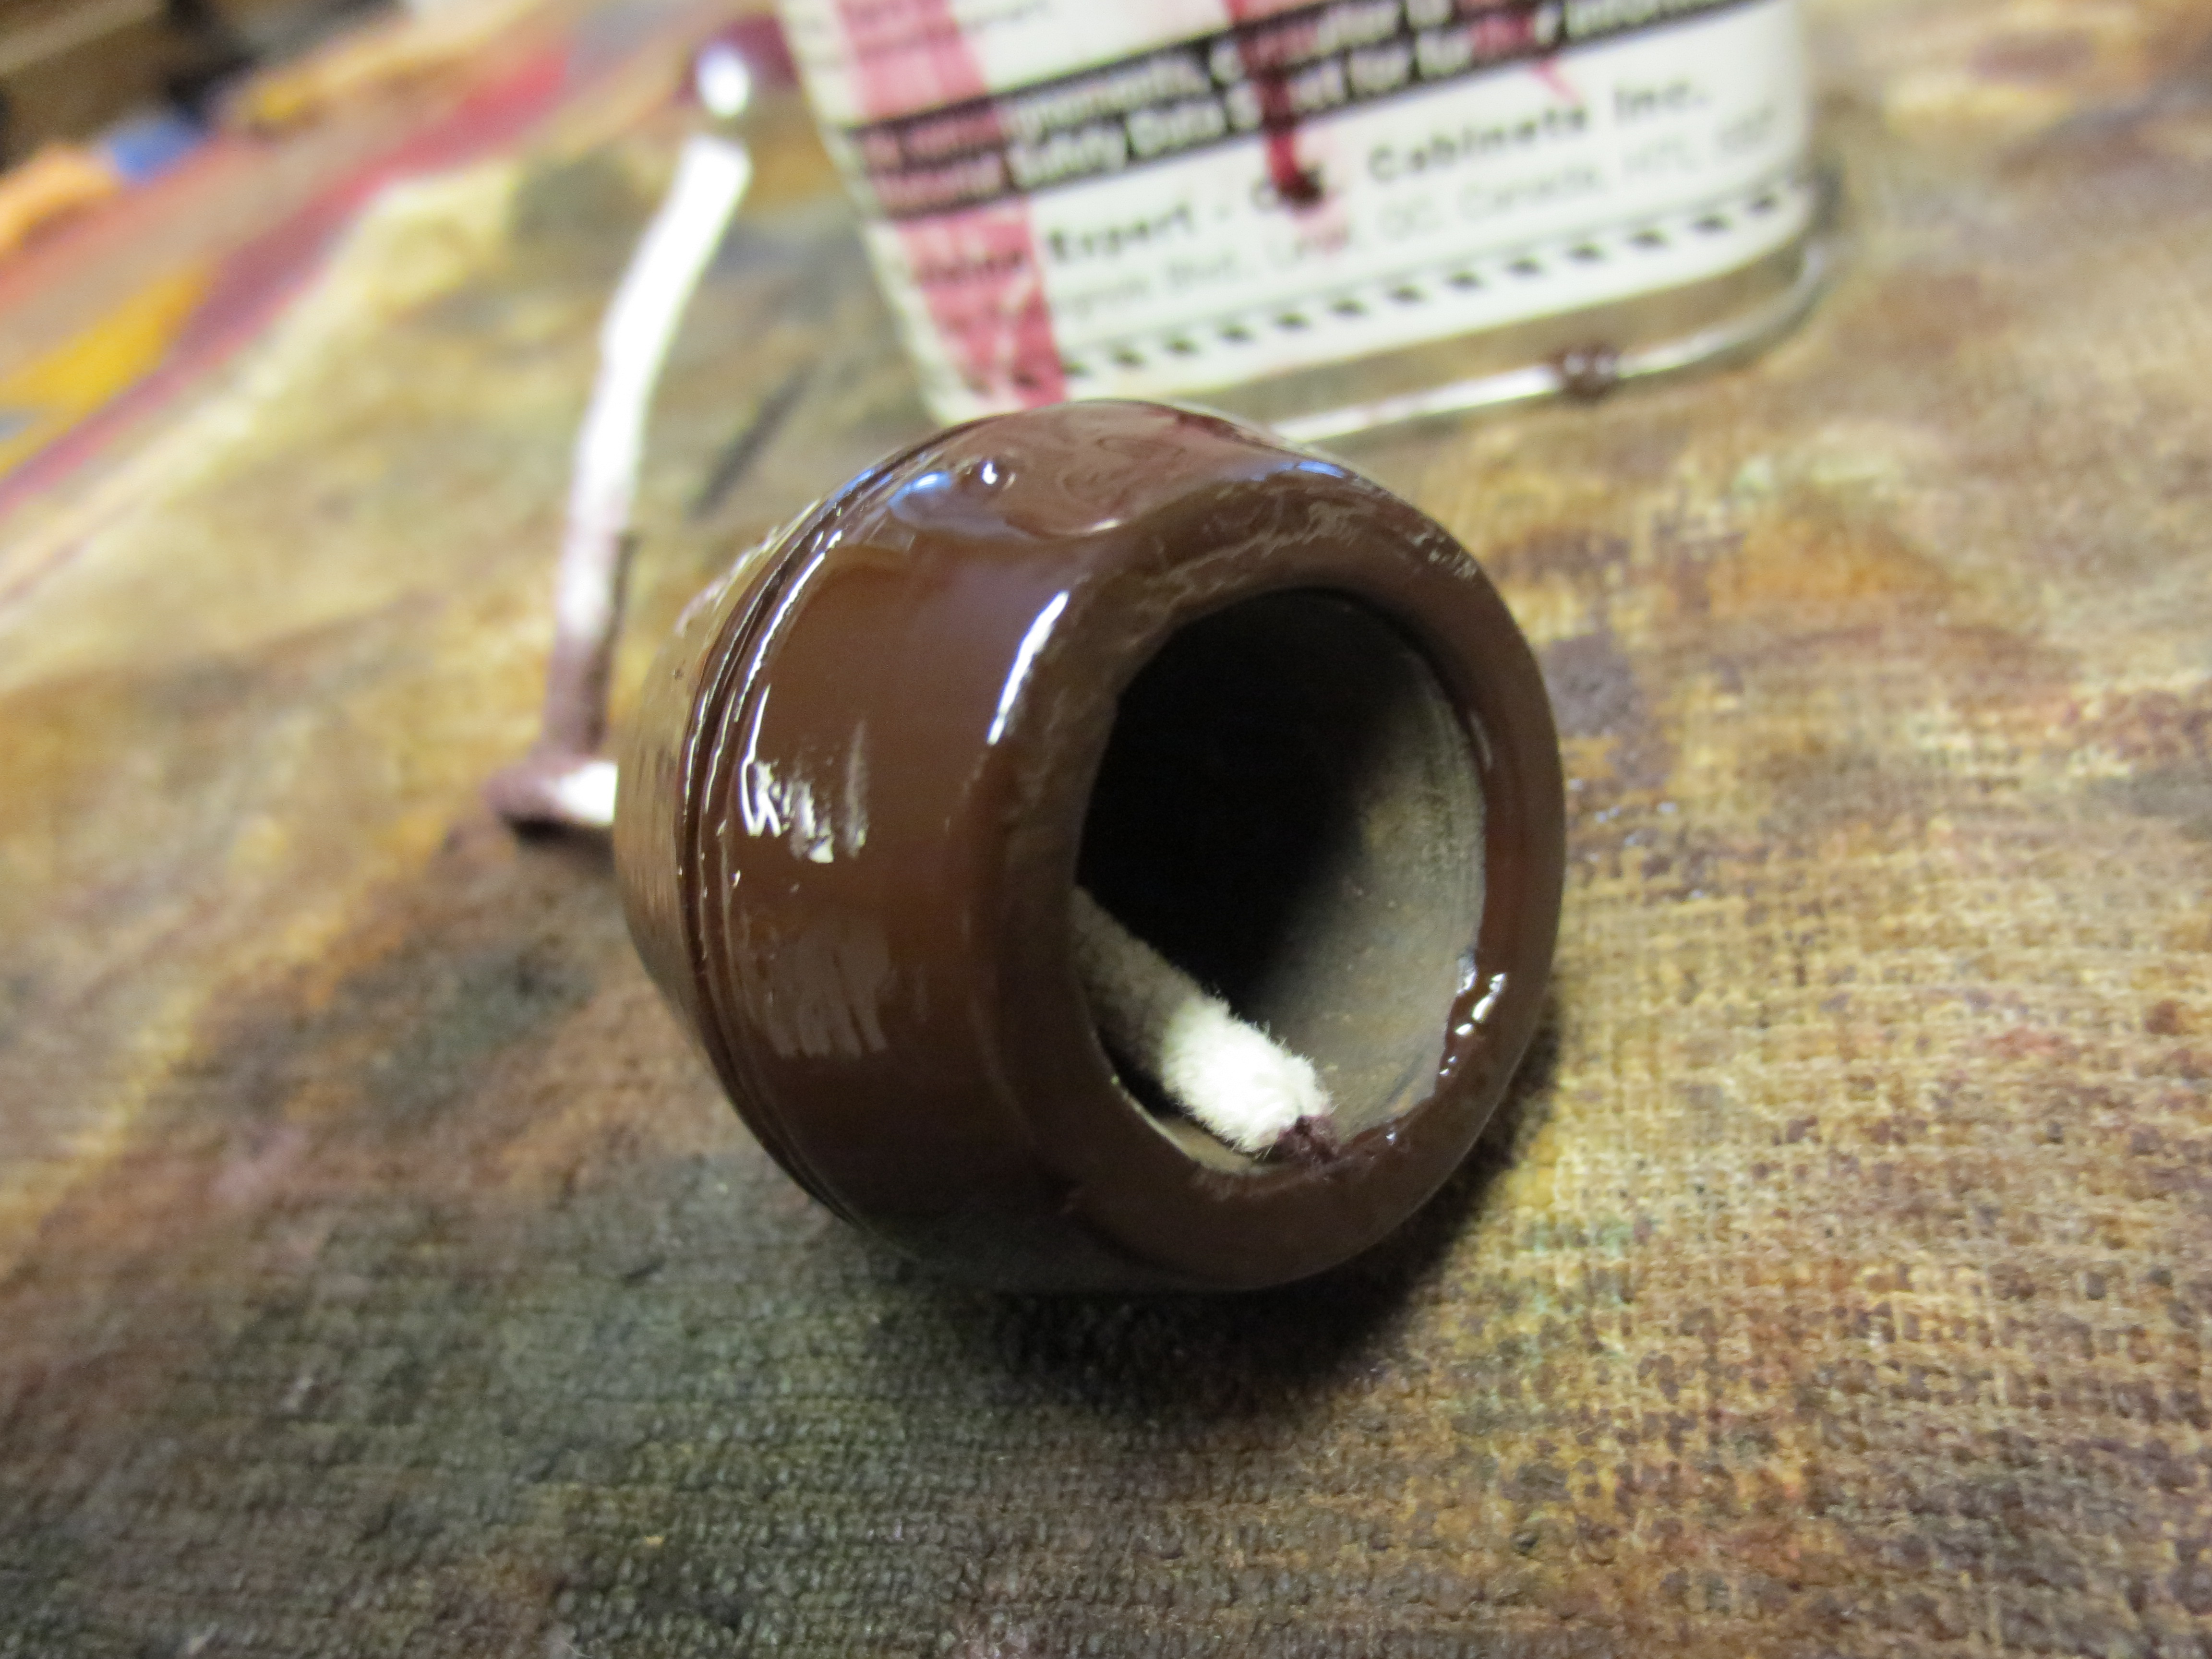
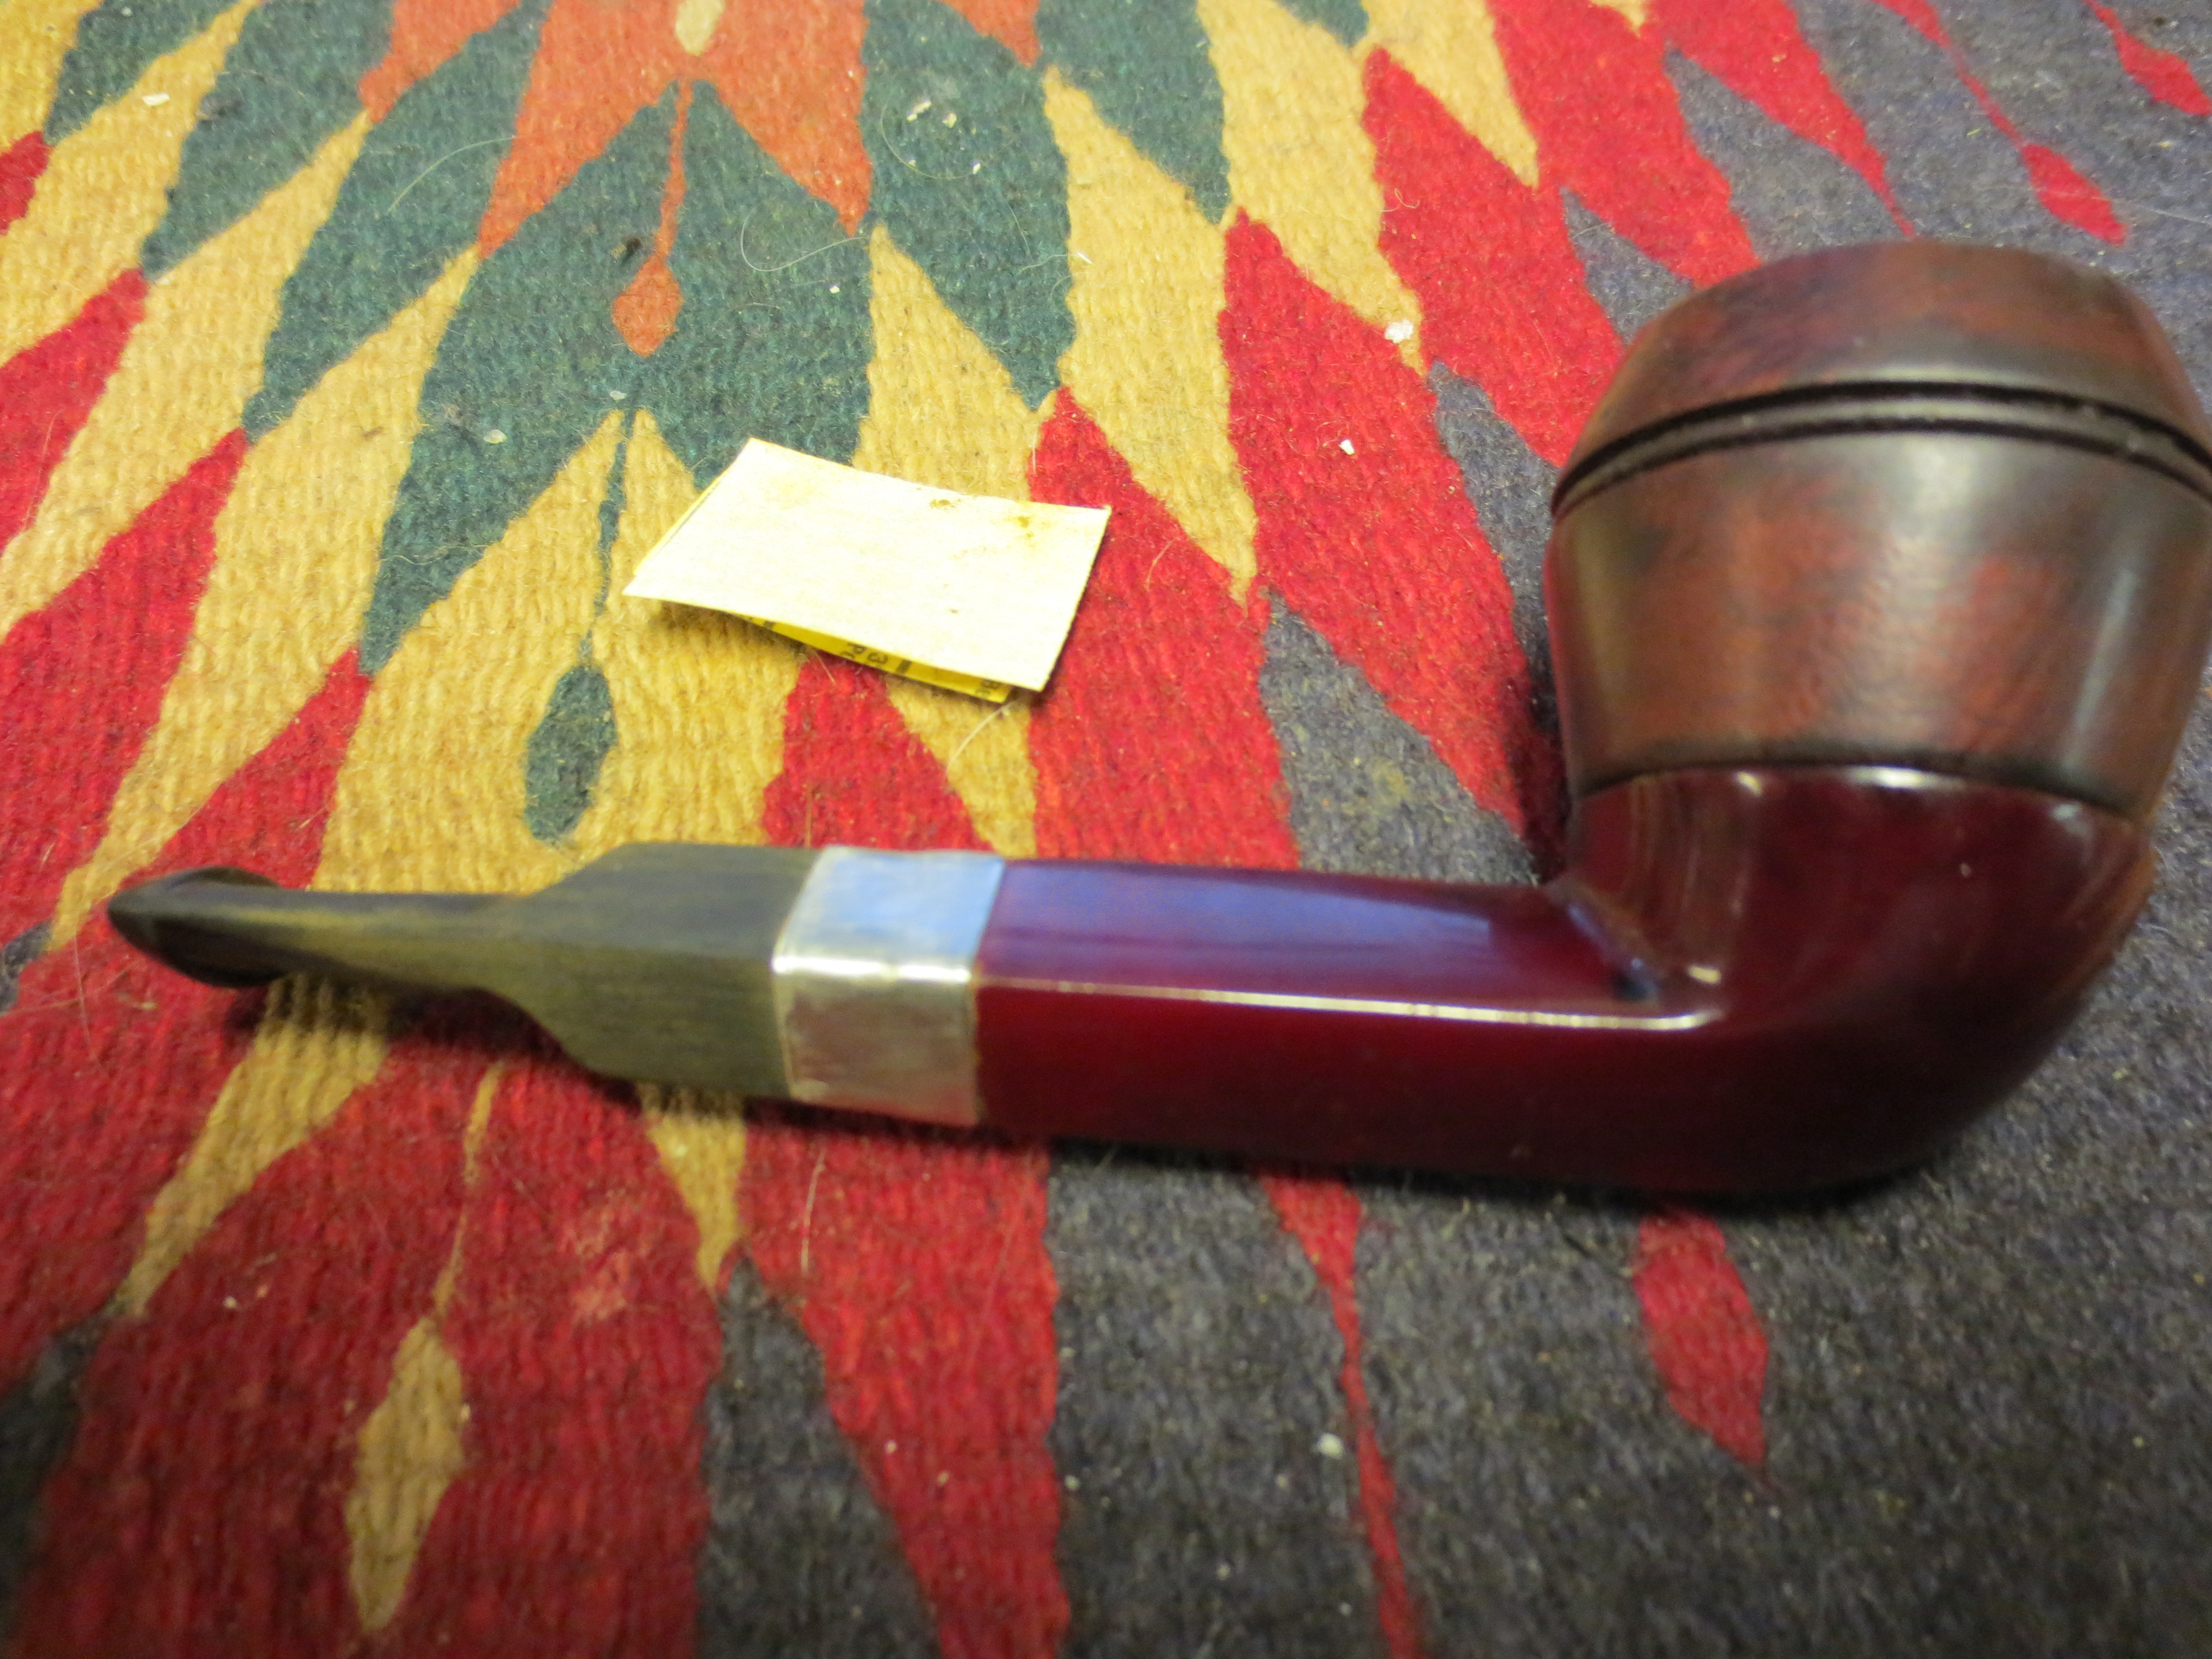
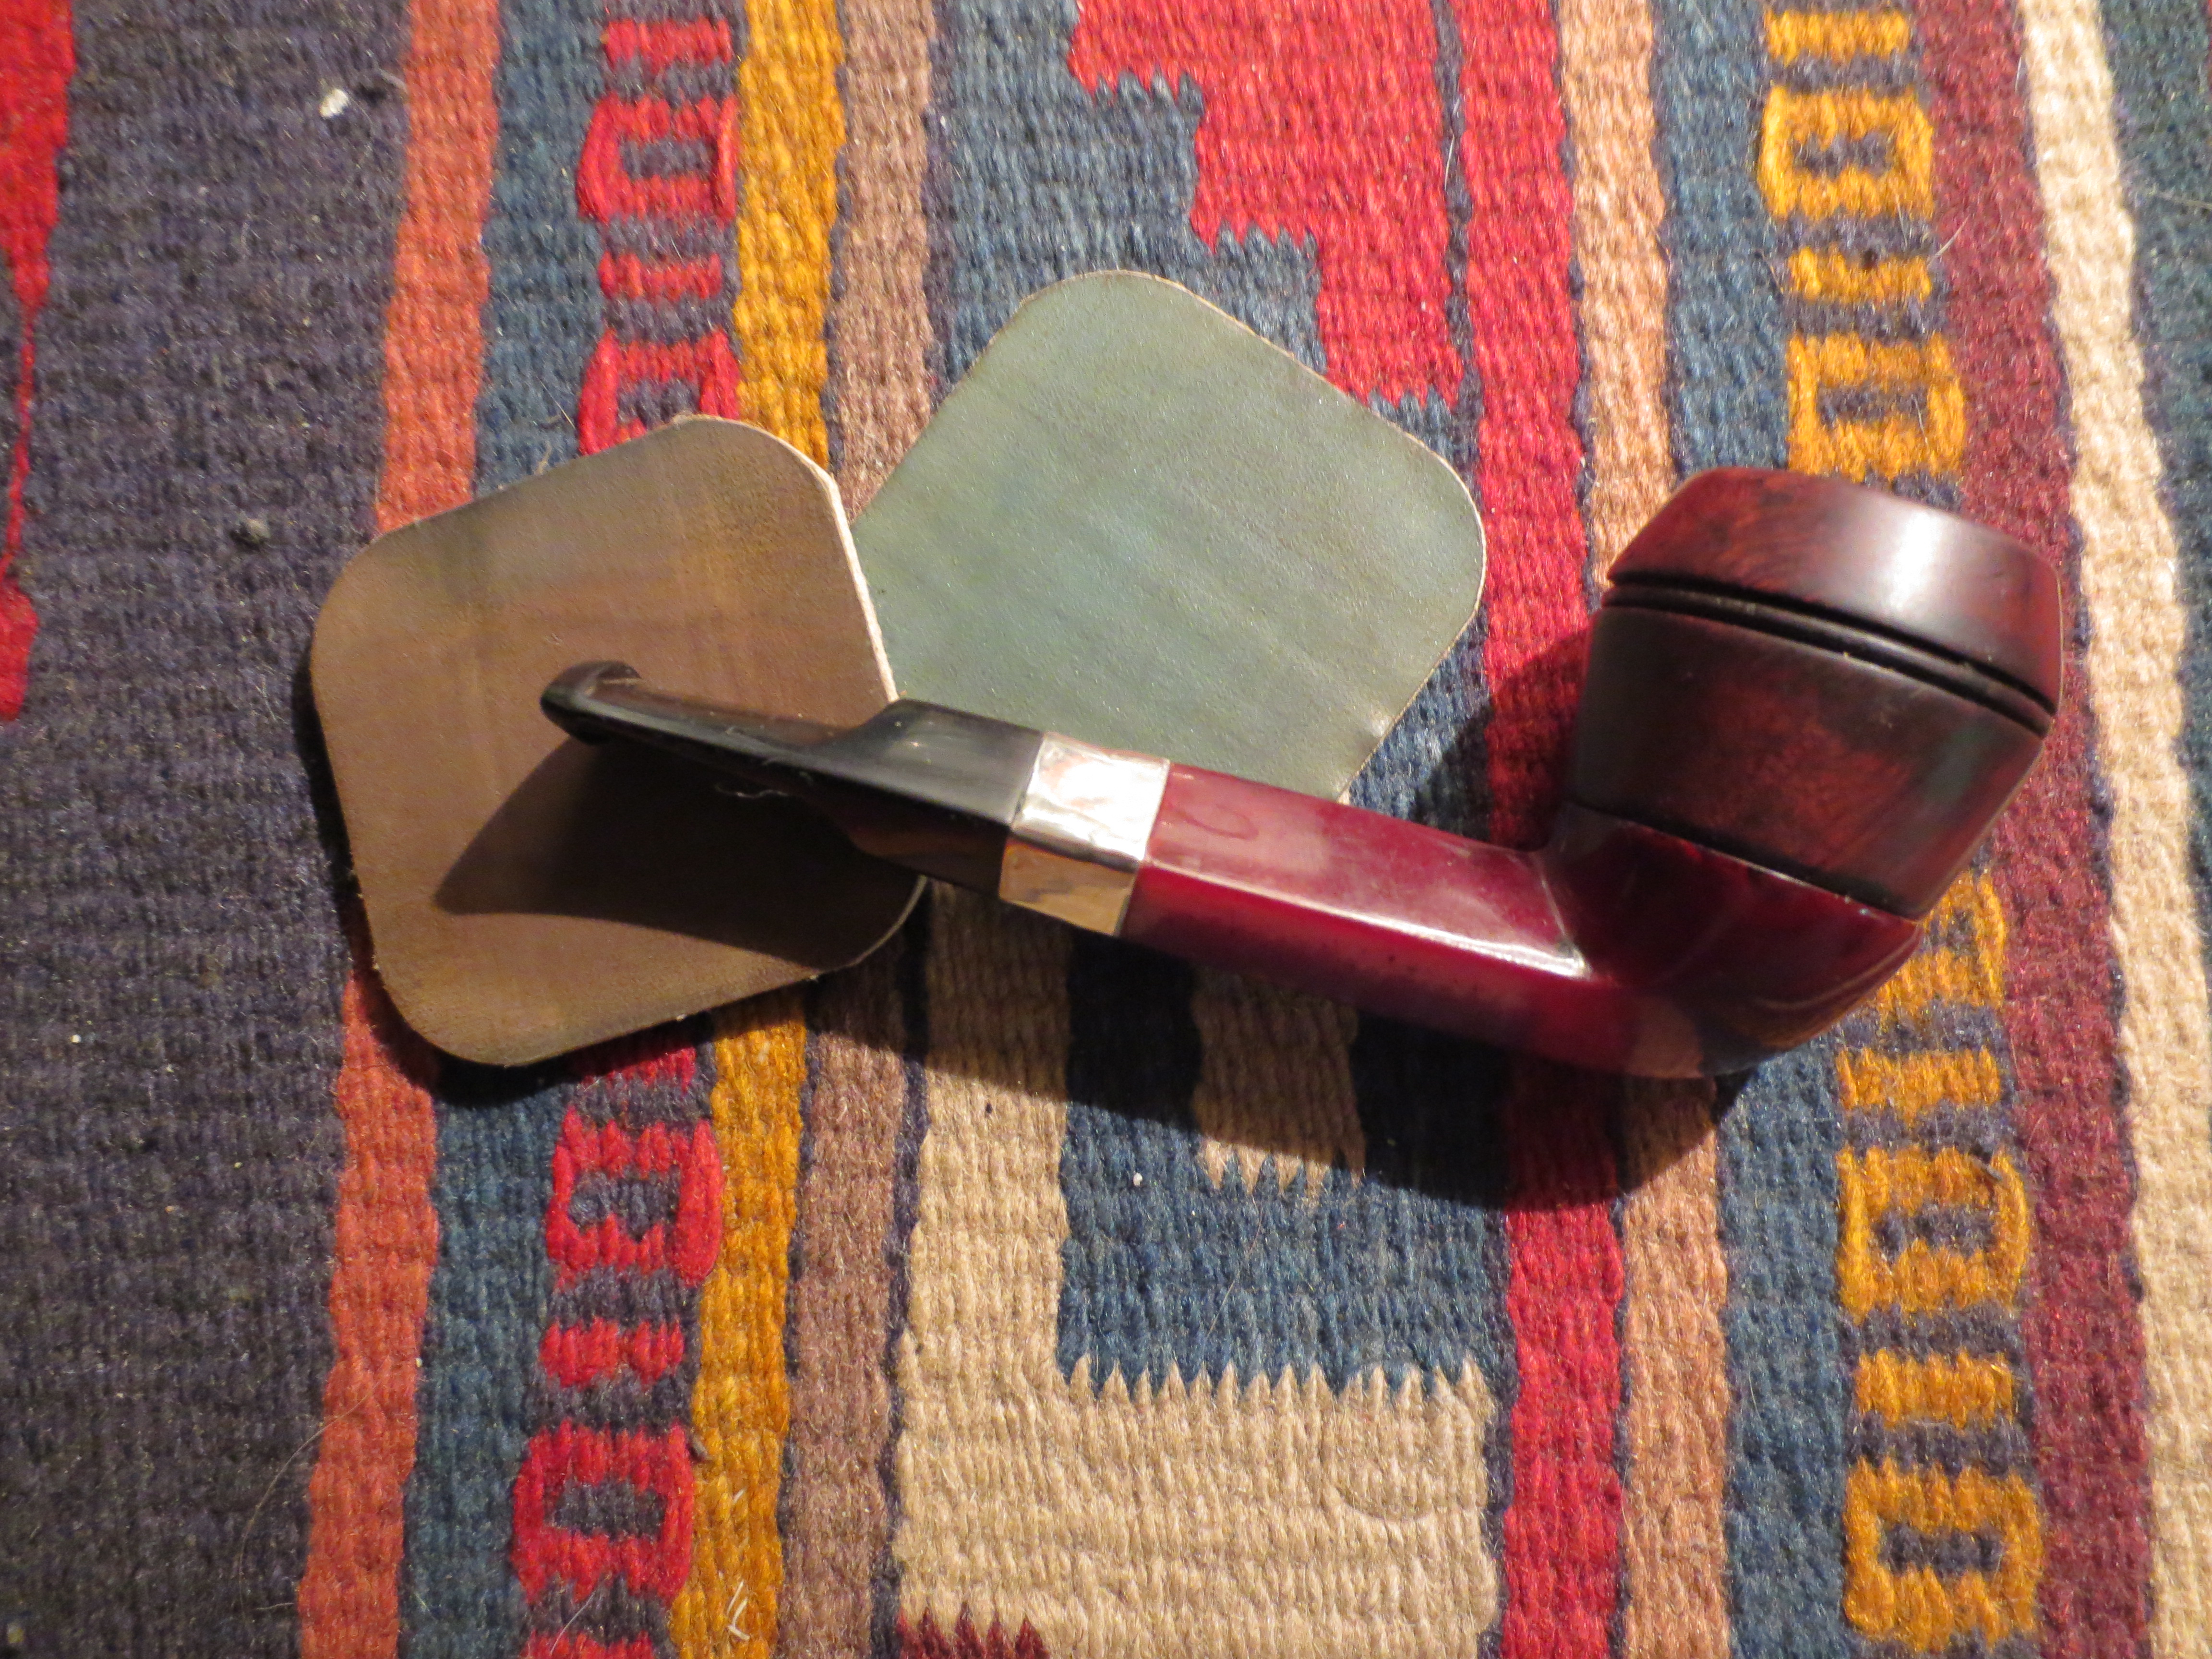
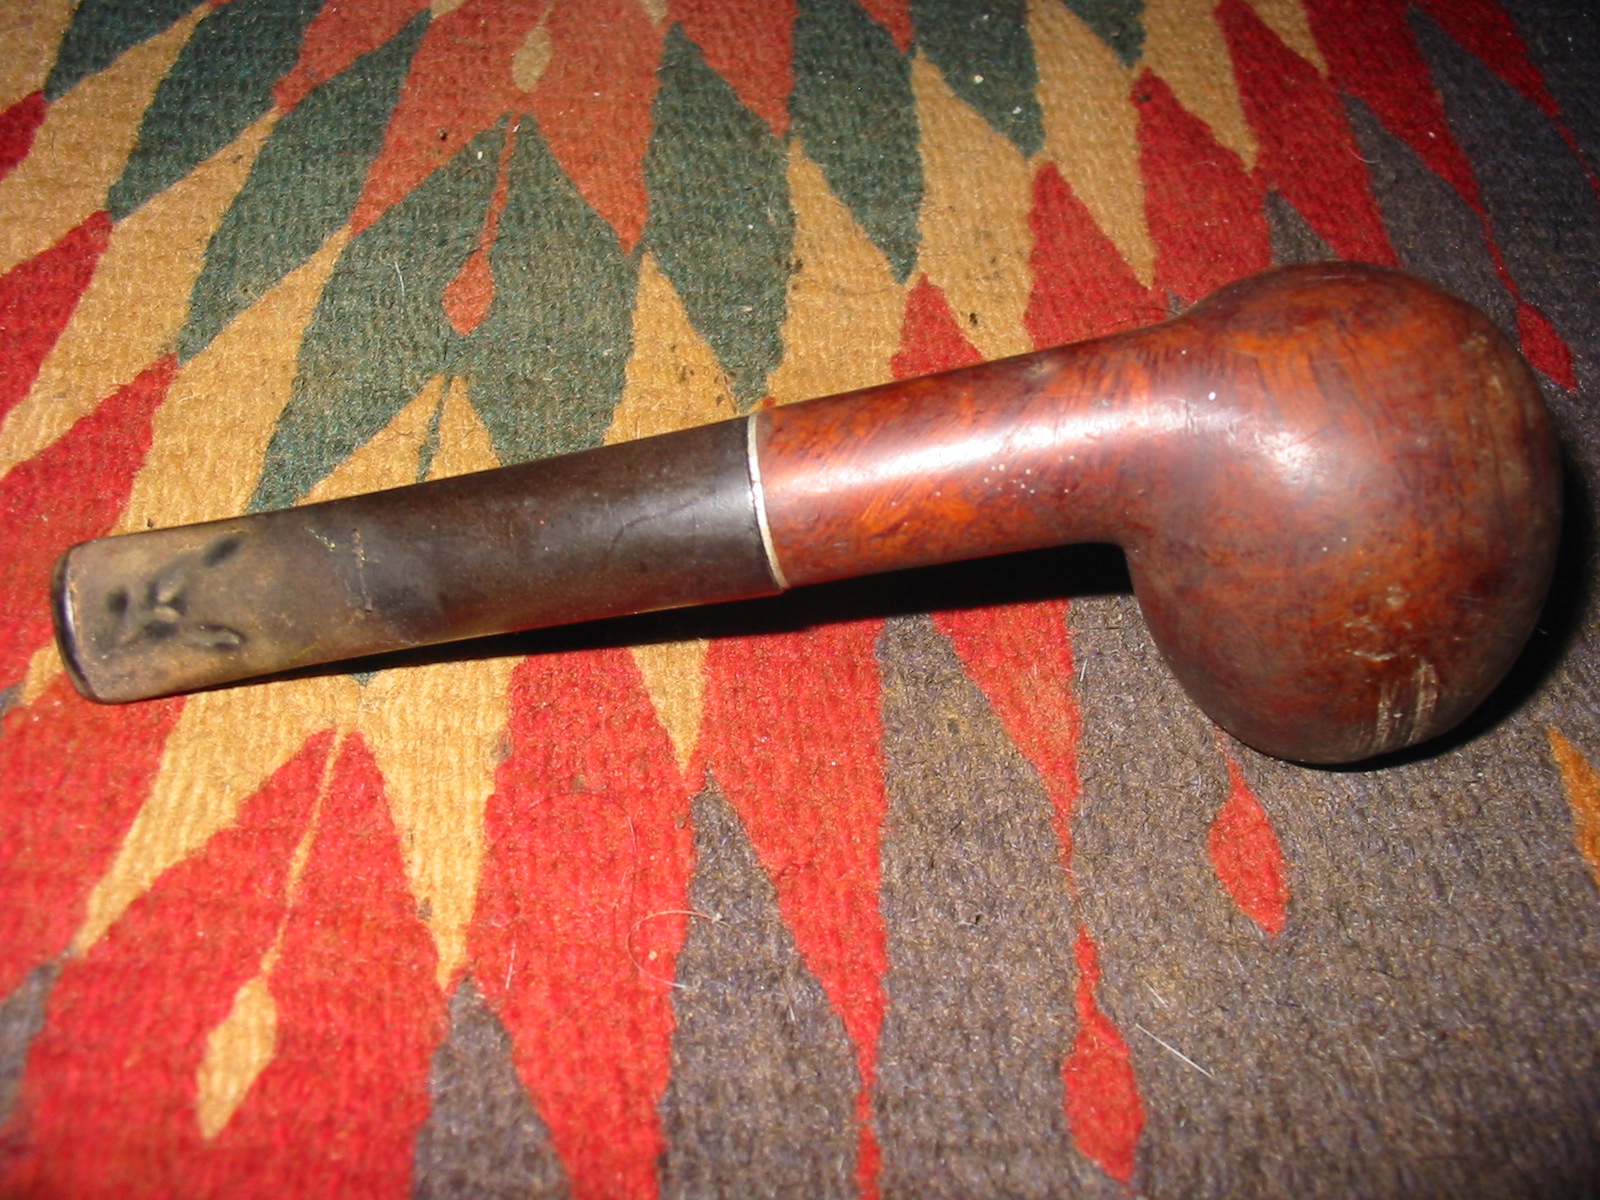
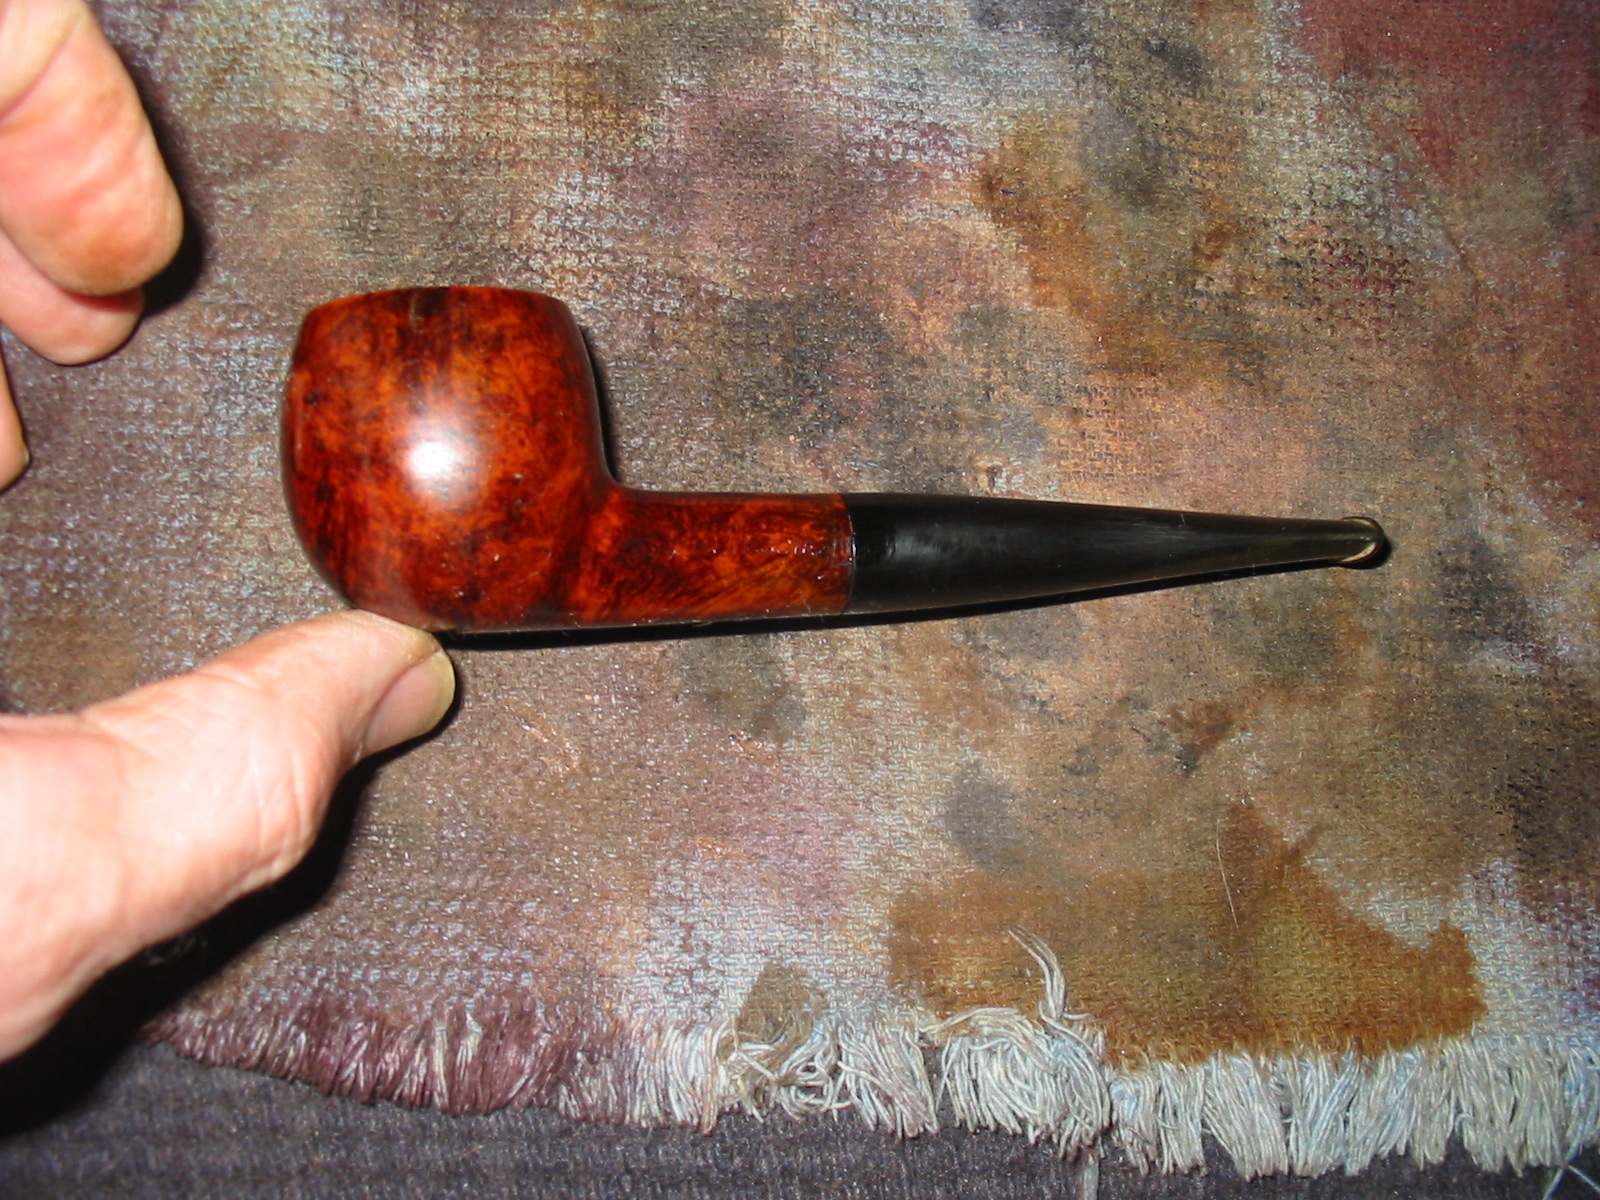
I wiped the bowl down with Everclear to remove the sanding dust and give it a last cleaning before I started giving it a new stain coat. I have also included two photos of the new stem with the older KW stem and broken parts for comparison sake. I really like the way the new stem fit the shank and the look of the pipe after the repairs.
IMG_3368

IMG_3369

IMG_3370

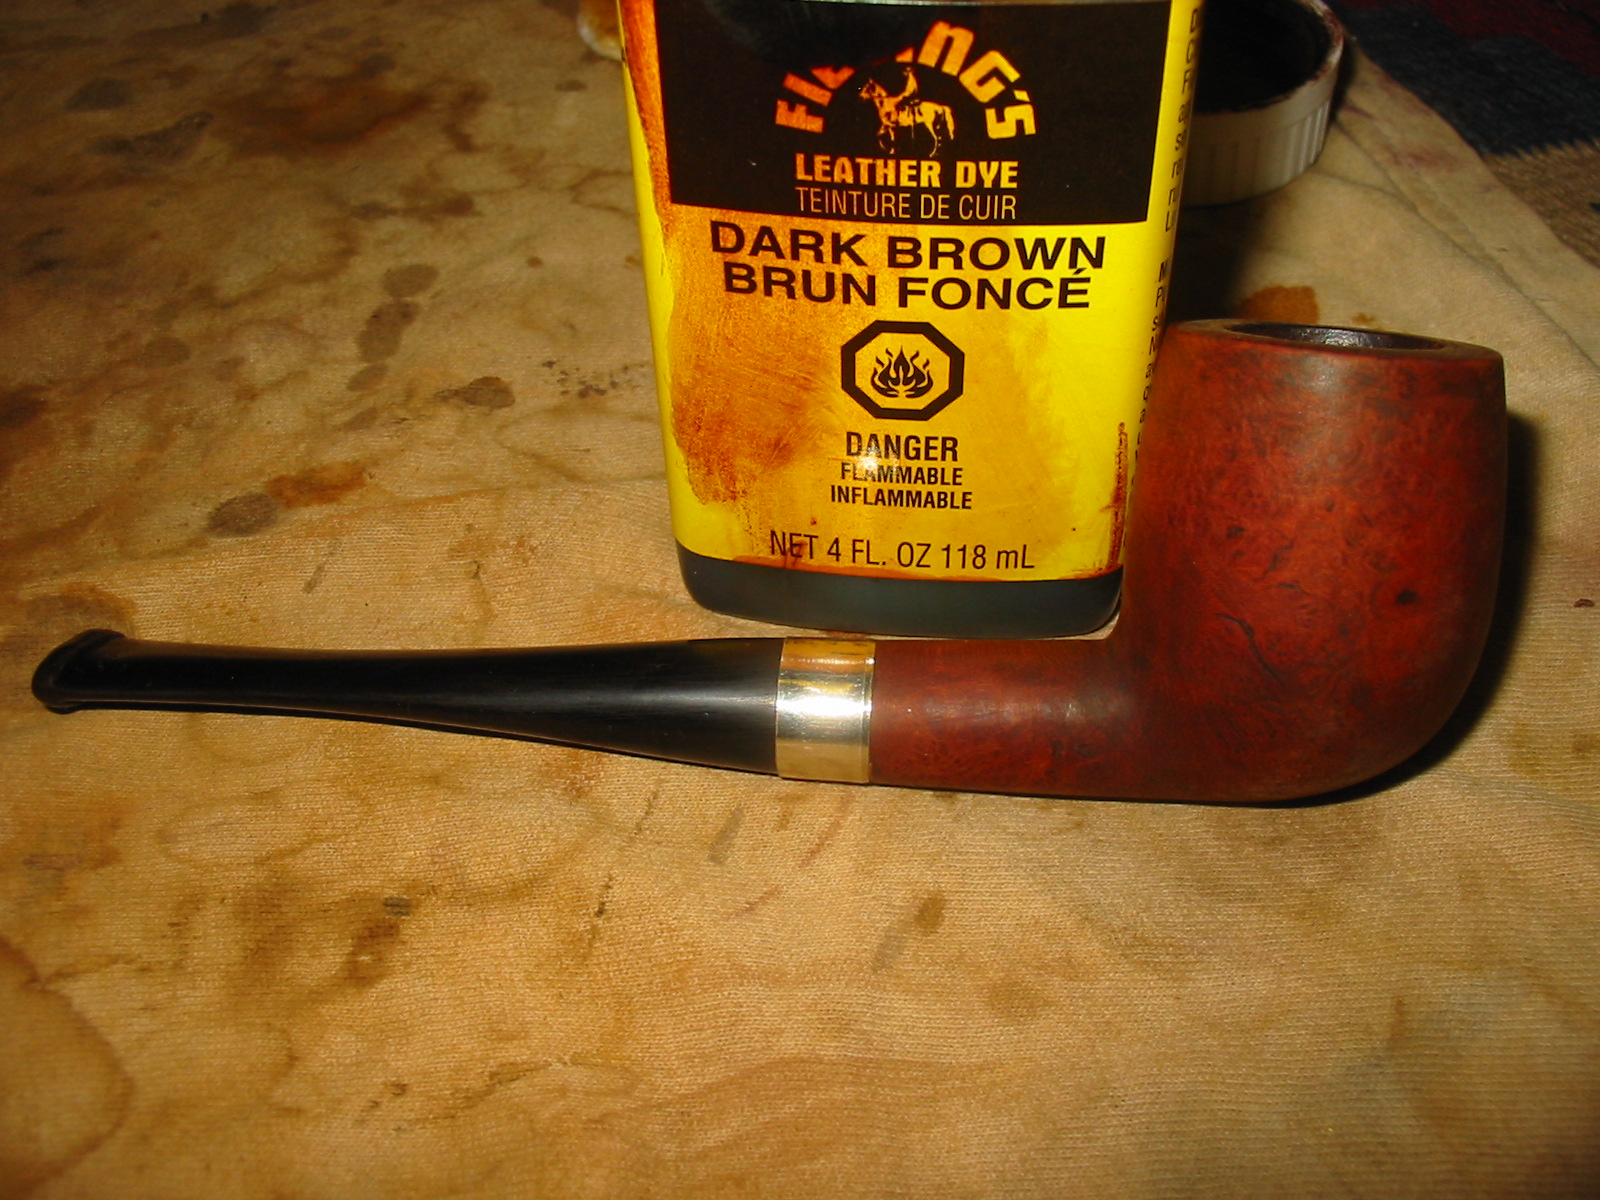
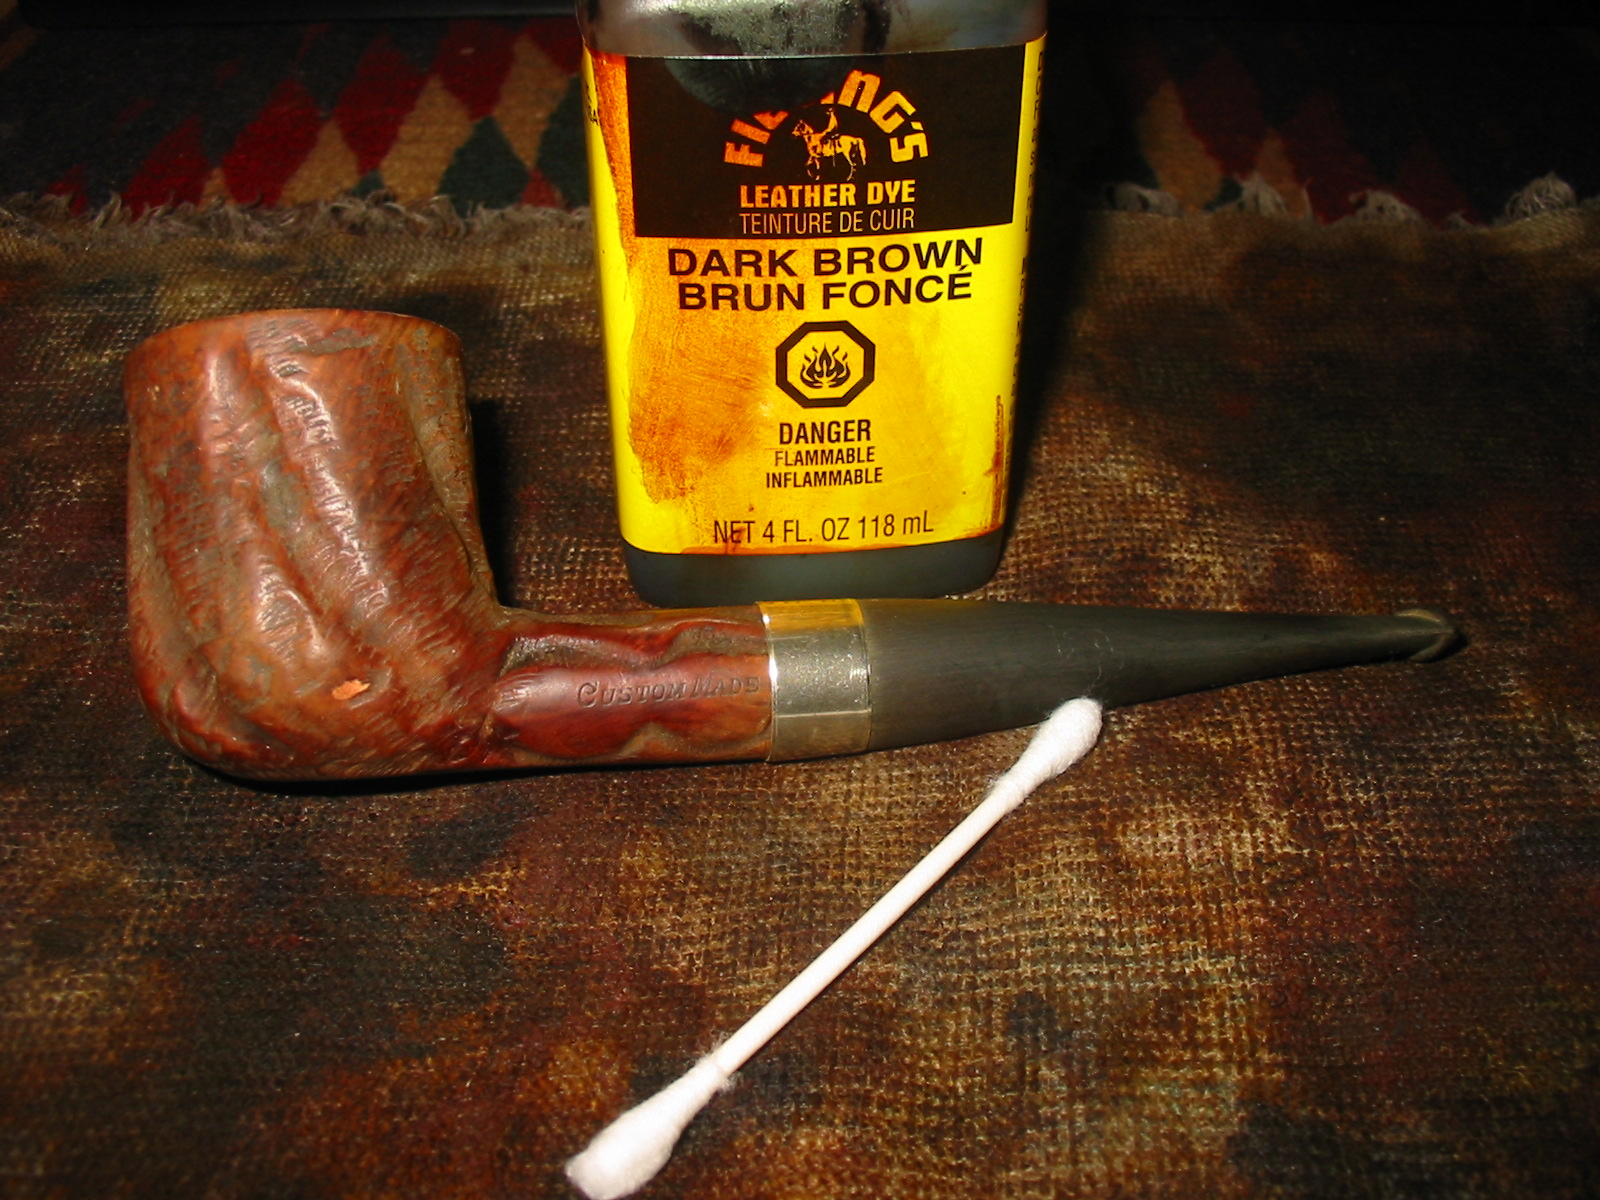
I wanted to continue to experiment with contrast staining so I gave the pipe a first coat of stain with black aniline stain. I applied the stain and flamed it and repeated the process until the coverage was even. I then heated the entire bowl by passing over it with the flame of a Bic lighter to warm the briar and set the stain.
IMG_3371

IMG_3372

IMG_3373

IMG_3374

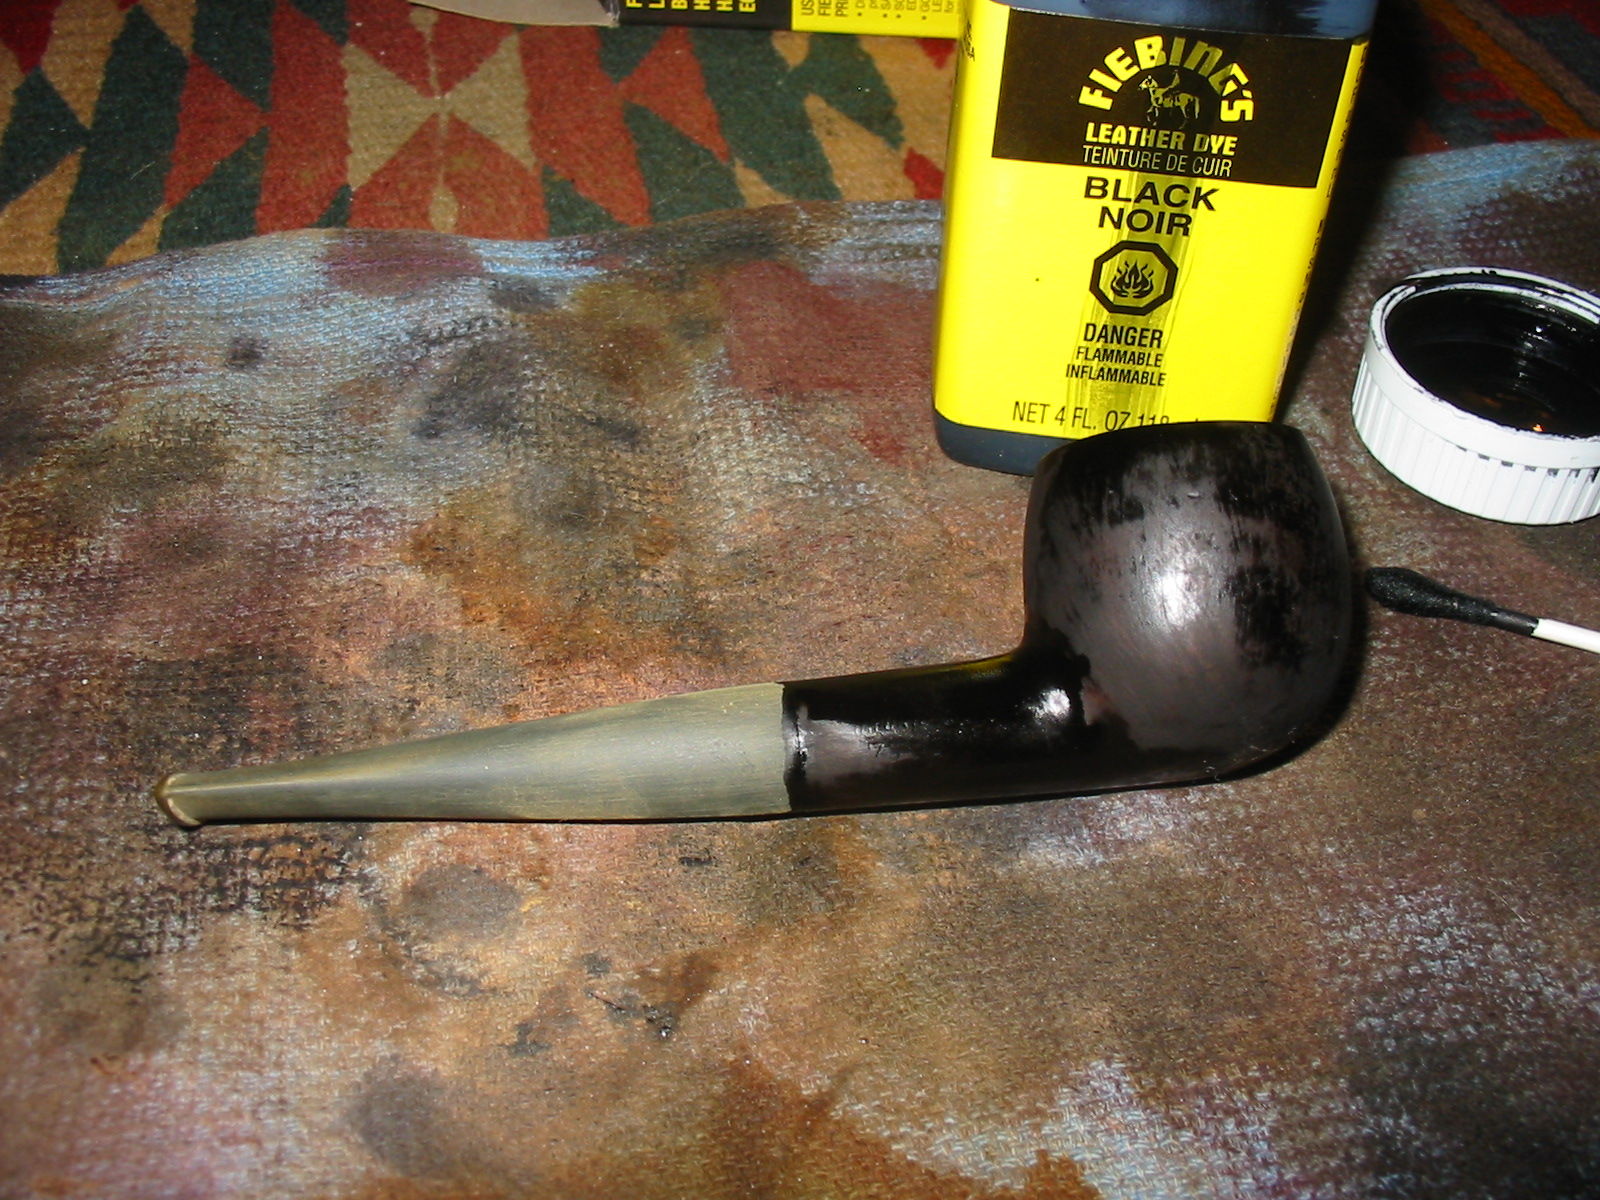
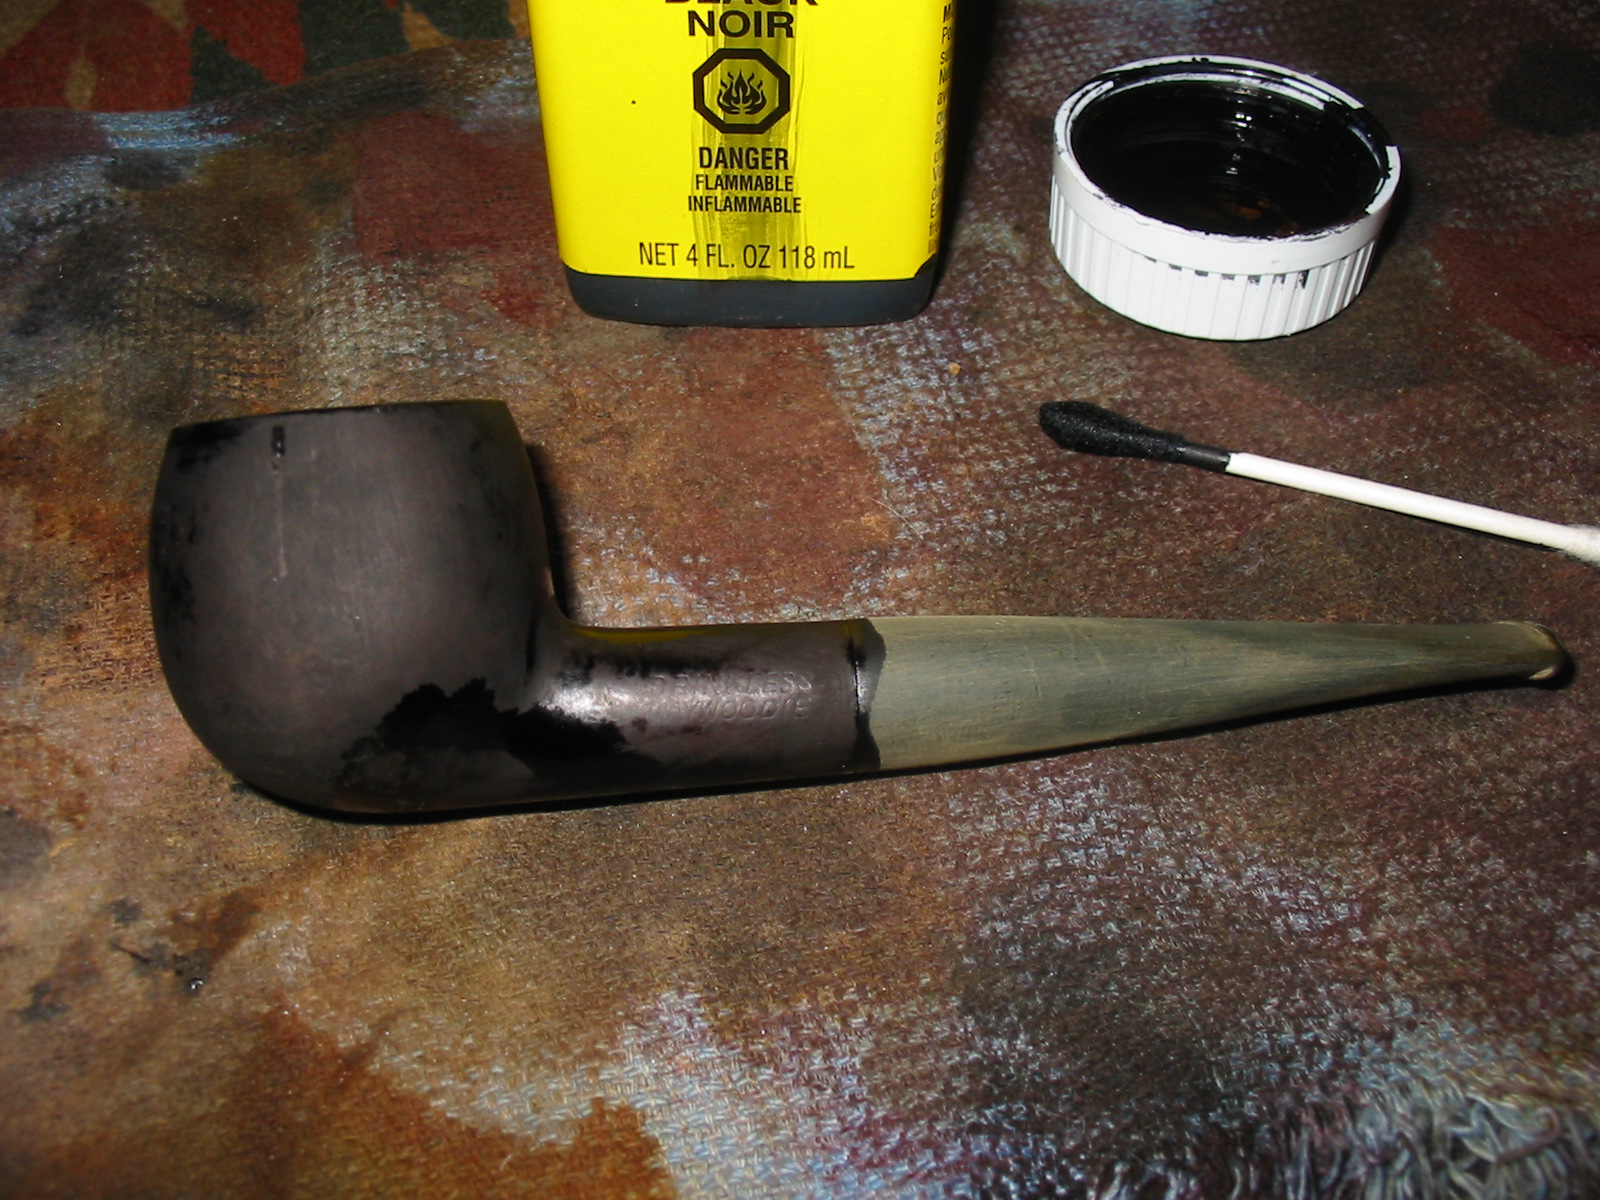
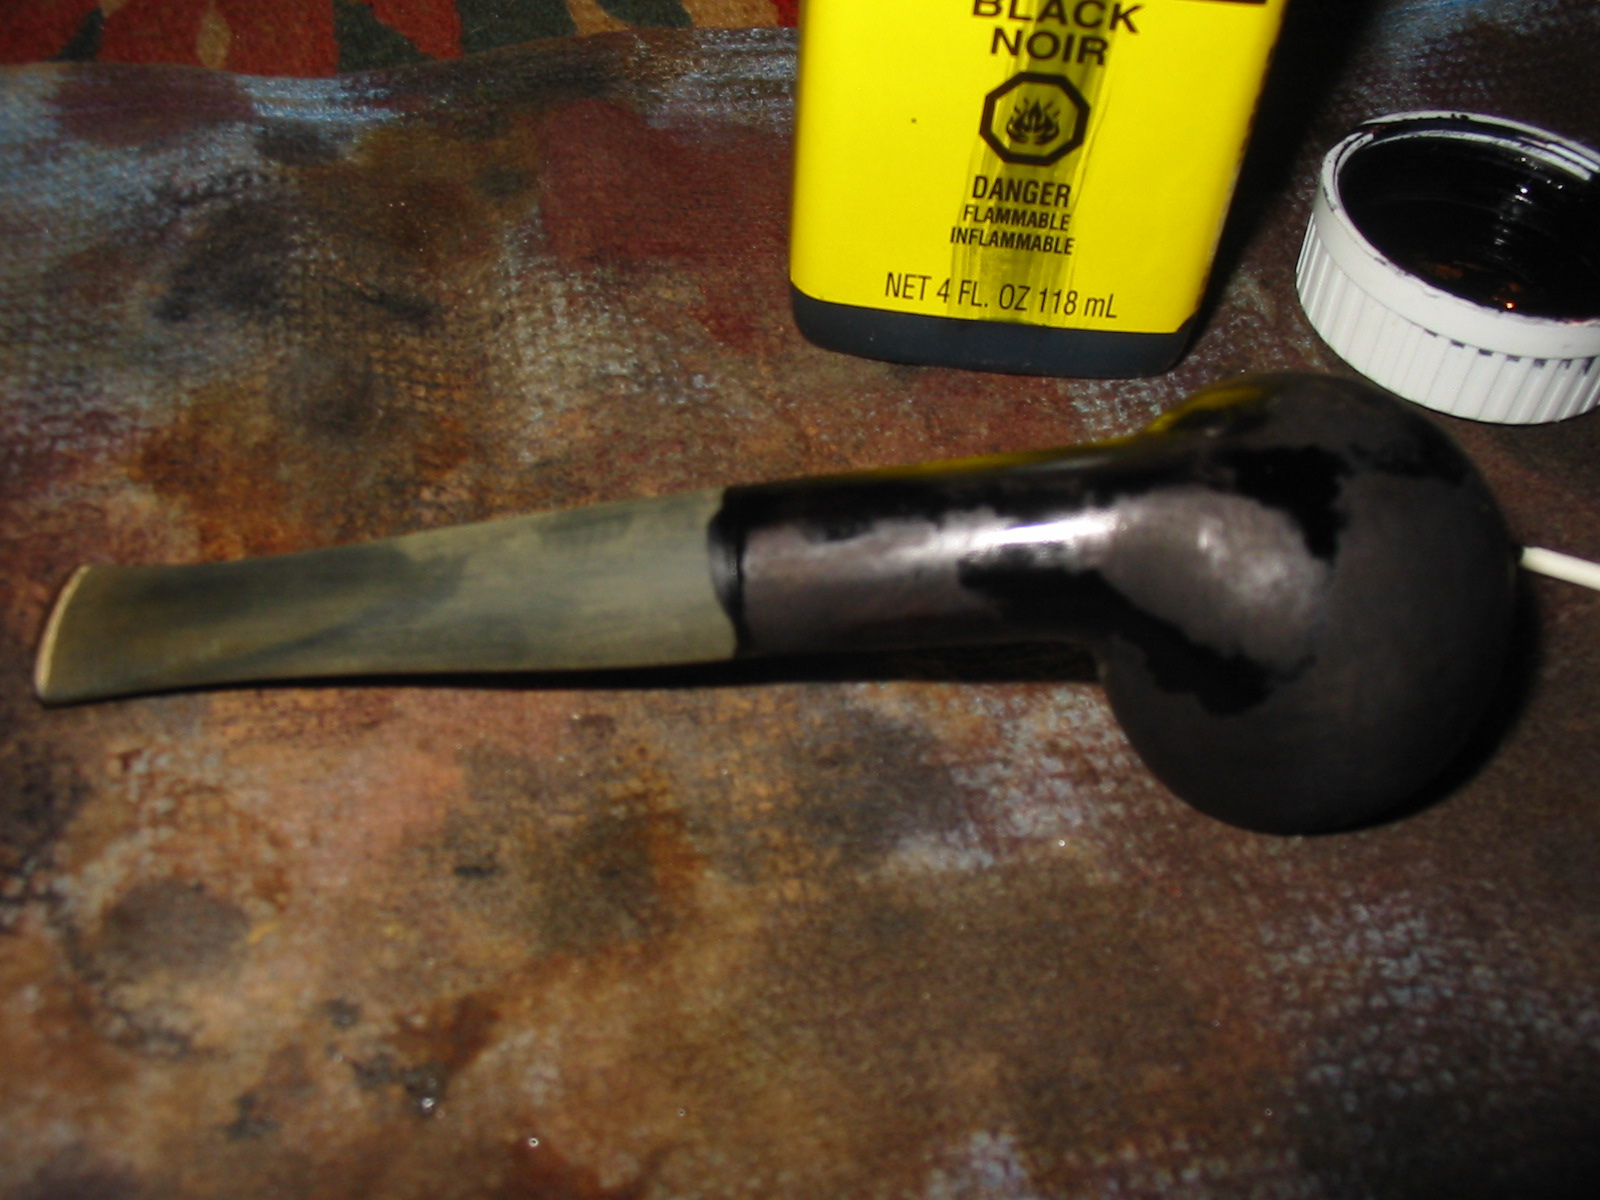
The black aniline stain is transparent enough that the brown of the briar actually makes the stain appear to be a dark brown. It also covers the repairs on the bowl and blends them into the grain in way that makes them less visible. This was especially important with the repair I had made to the two deep scoring marks on the left side of the bowl. Once the stain dried I wiped it down with acetone to remove the top coat and leave only the grain darkened with the black. After doing that the bowl was still do dark for my liking. Though the grain patterns are very visible I wanted it to be lighter so that when I put the contrast stain coat on it would really pop to the surface.
IMG_3375

IMG_3376

IMG_3377

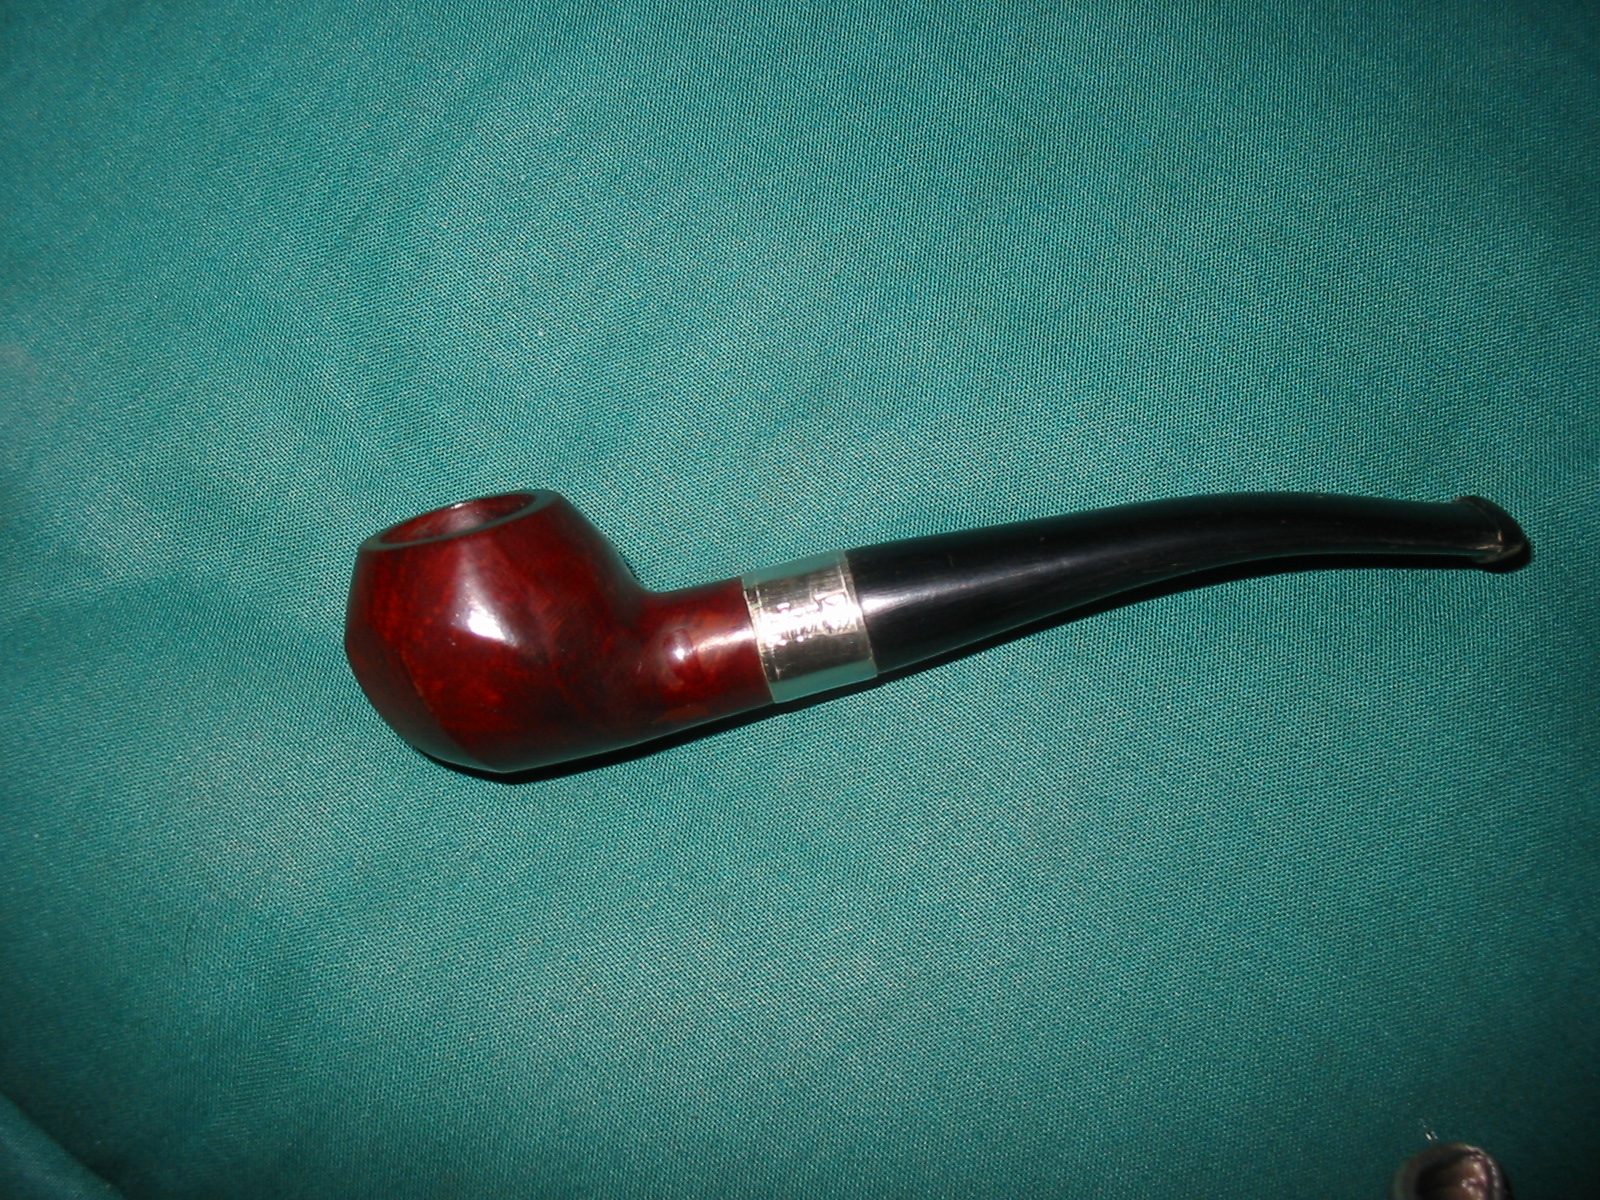
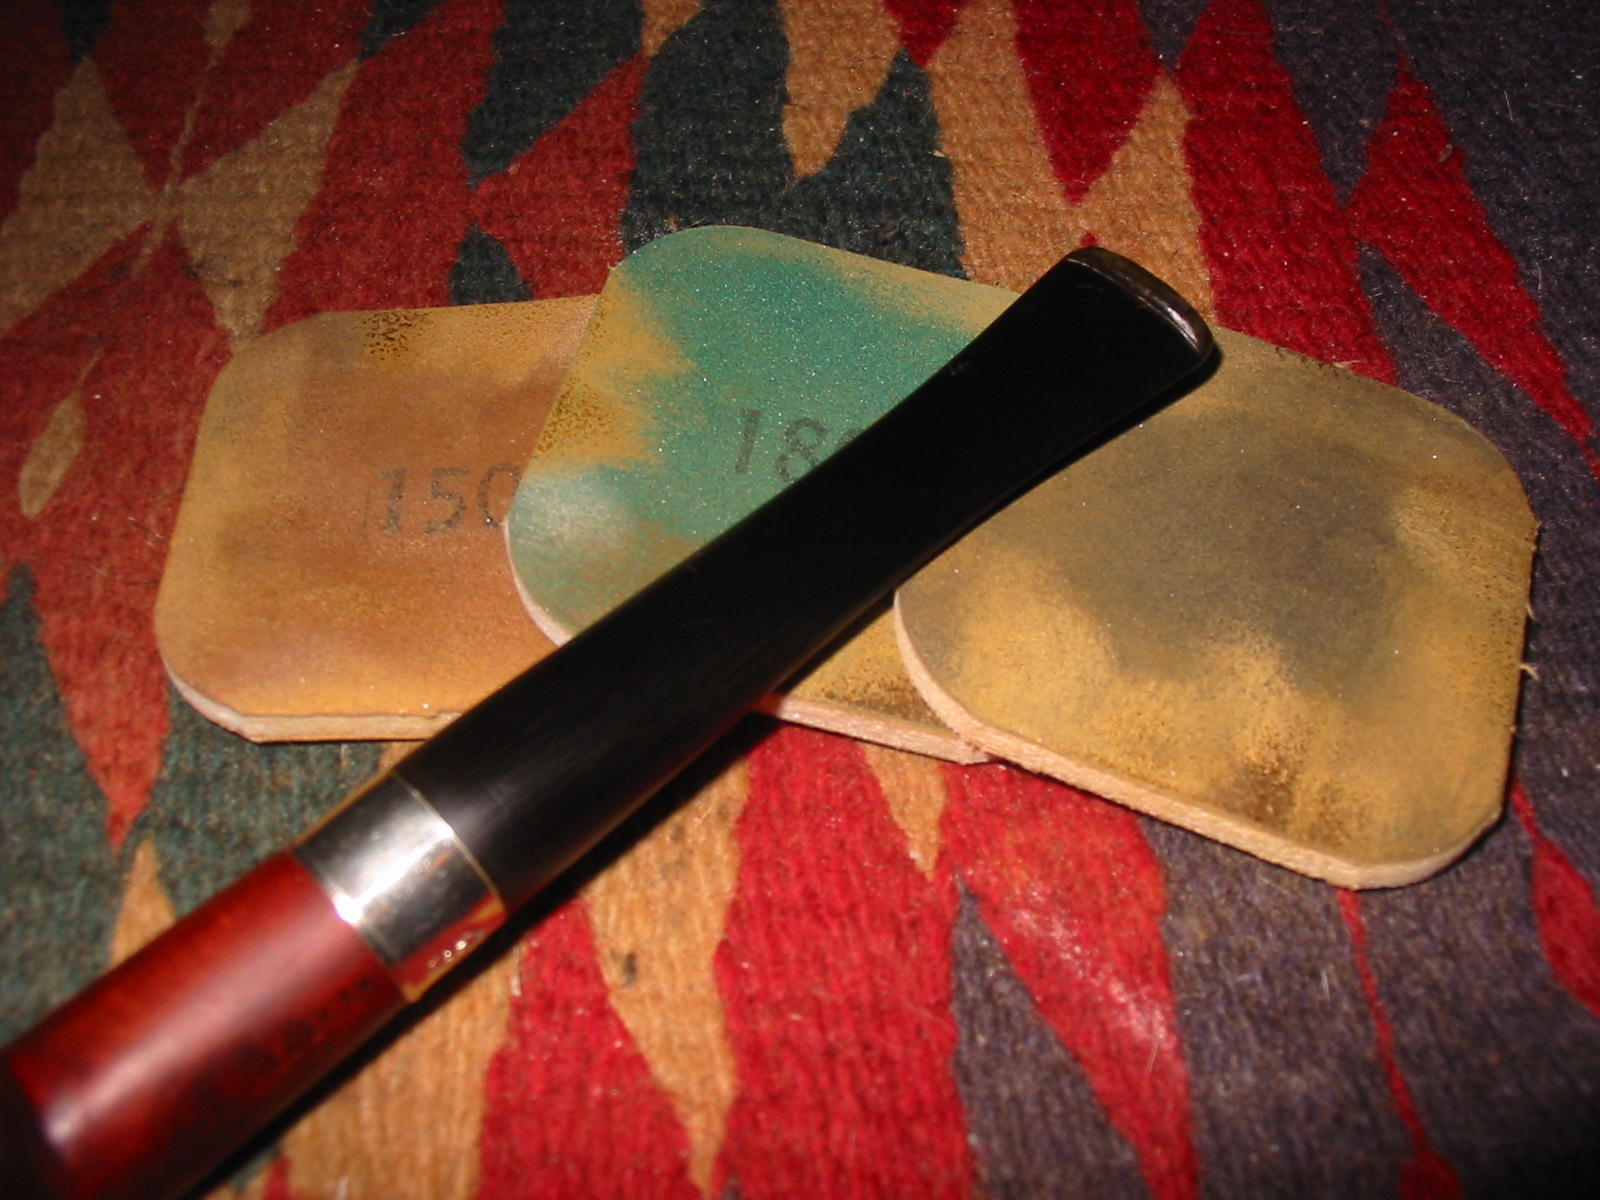
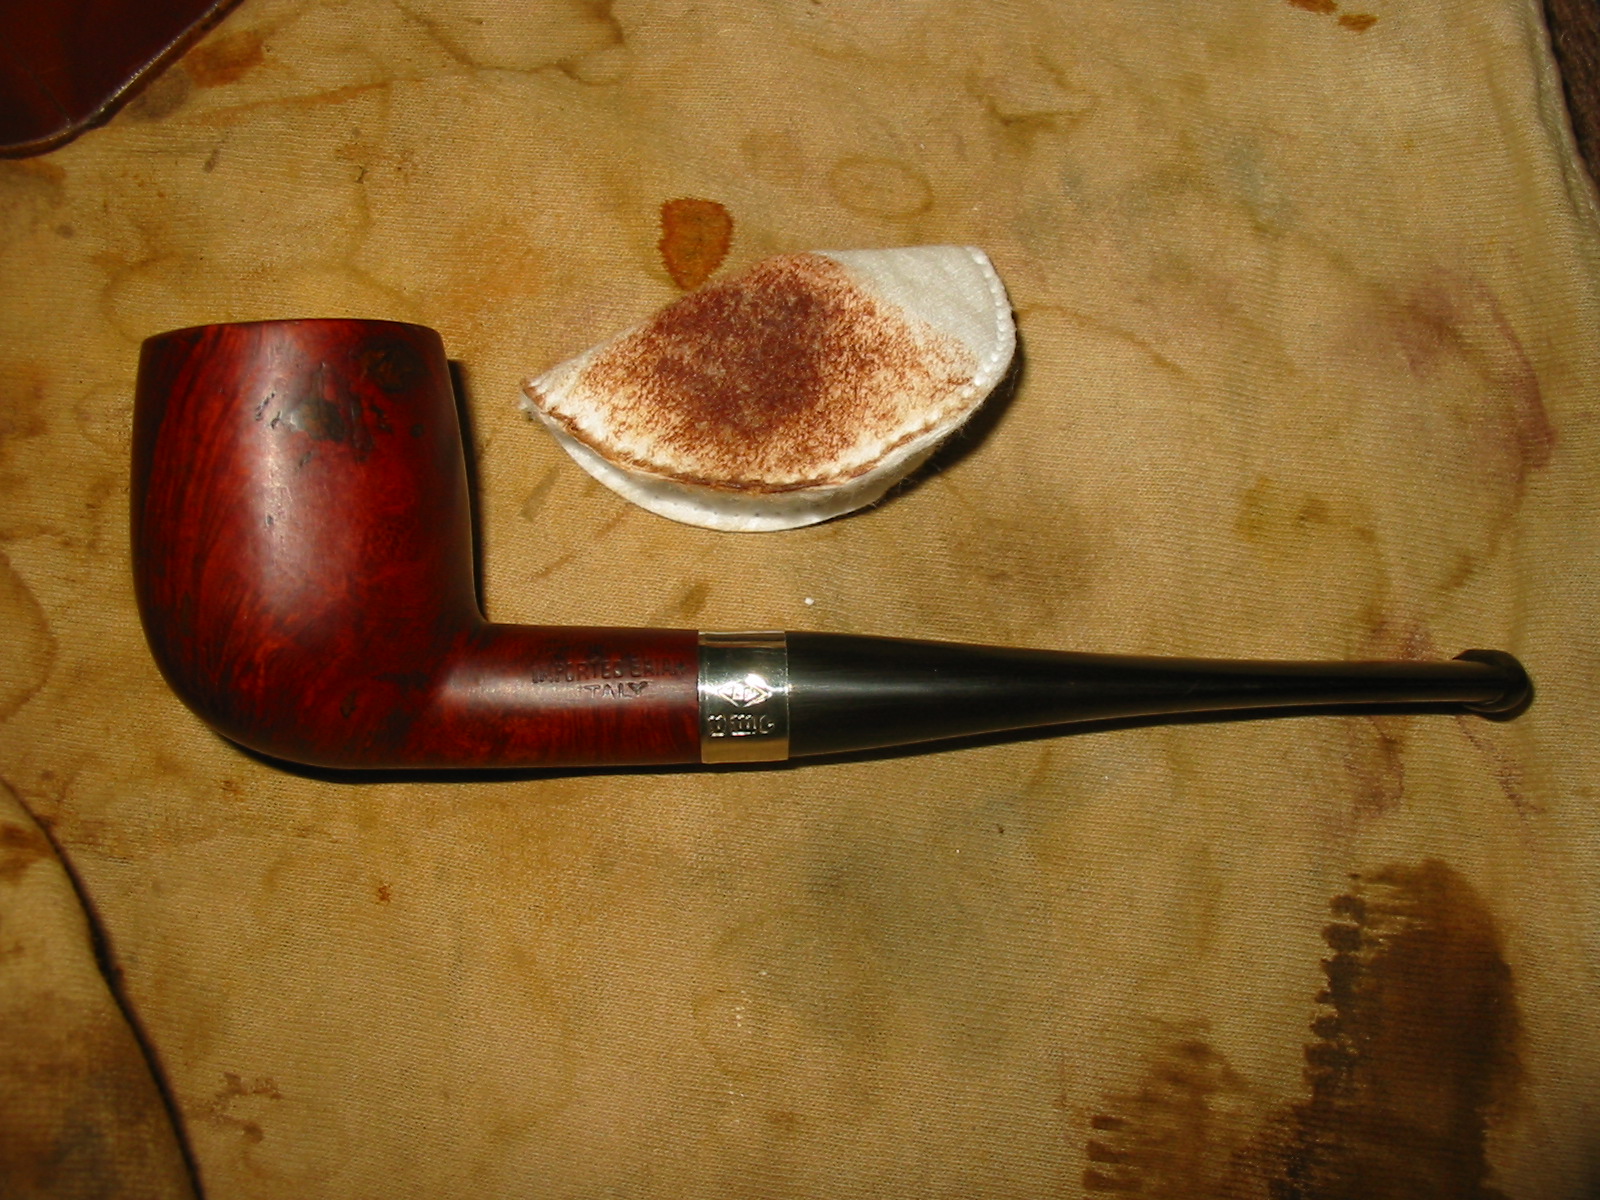
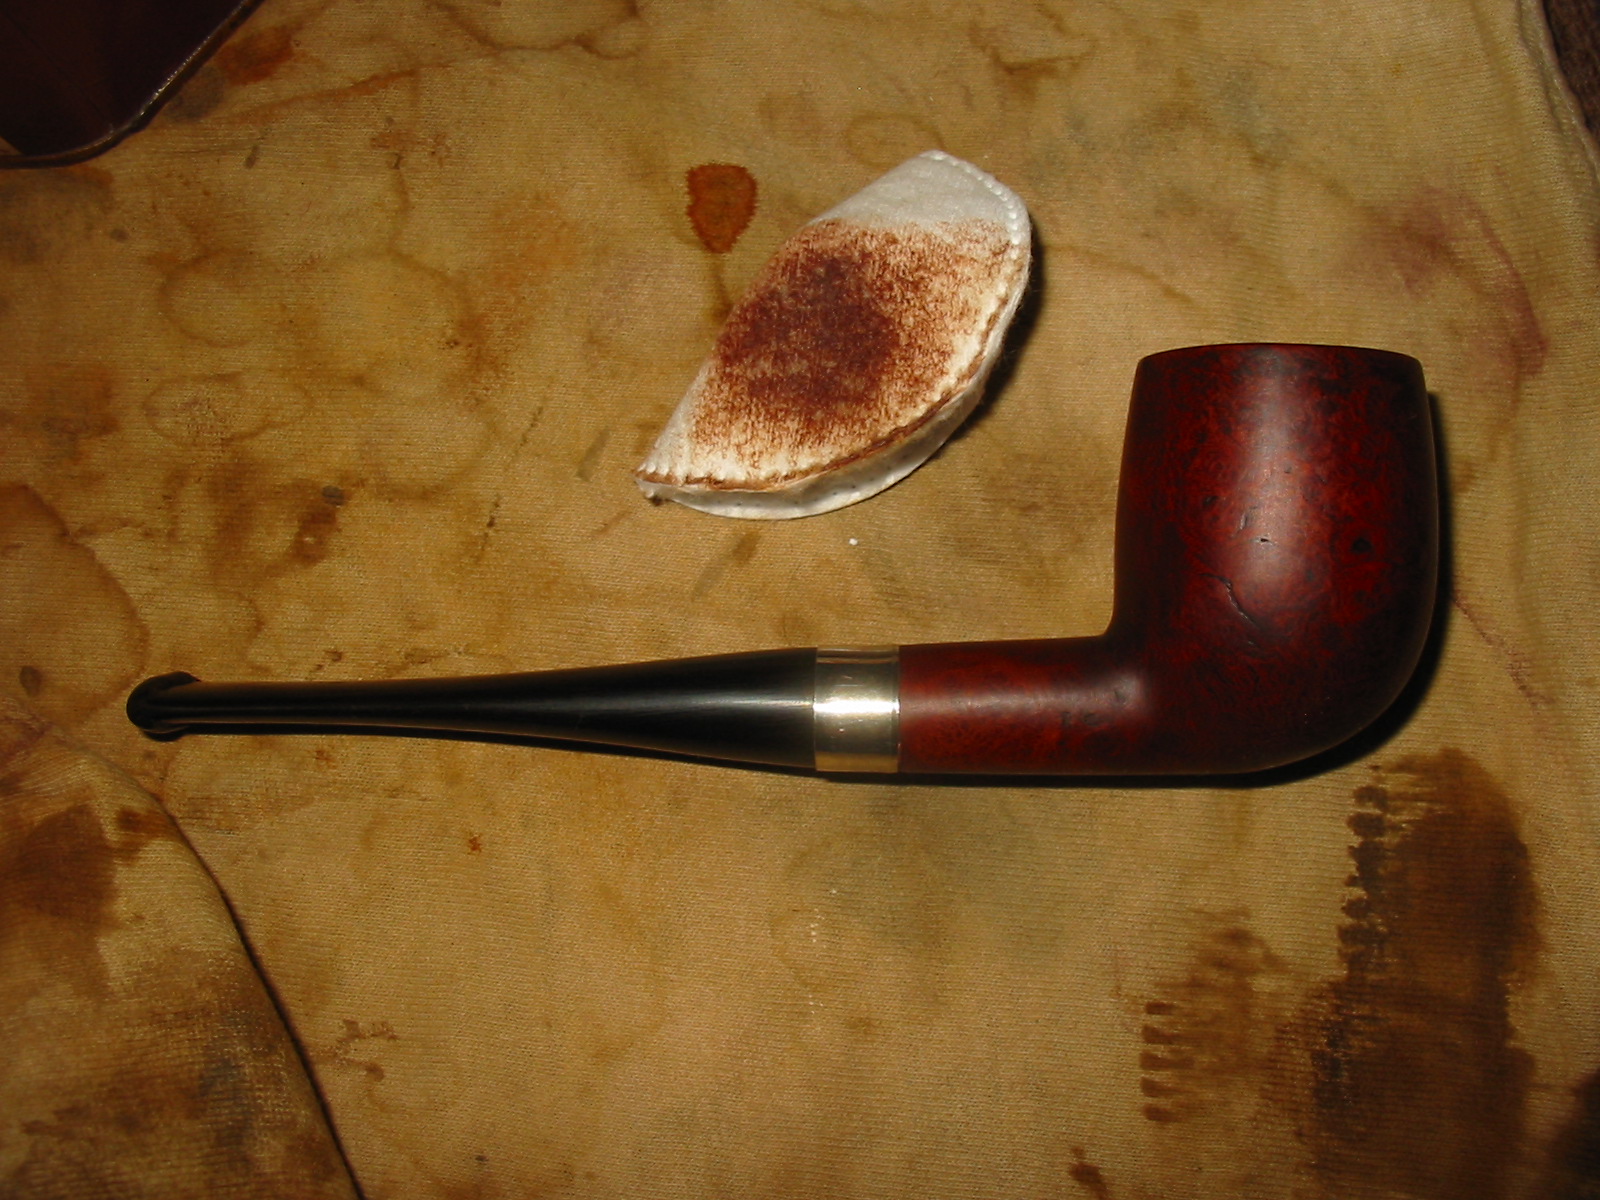
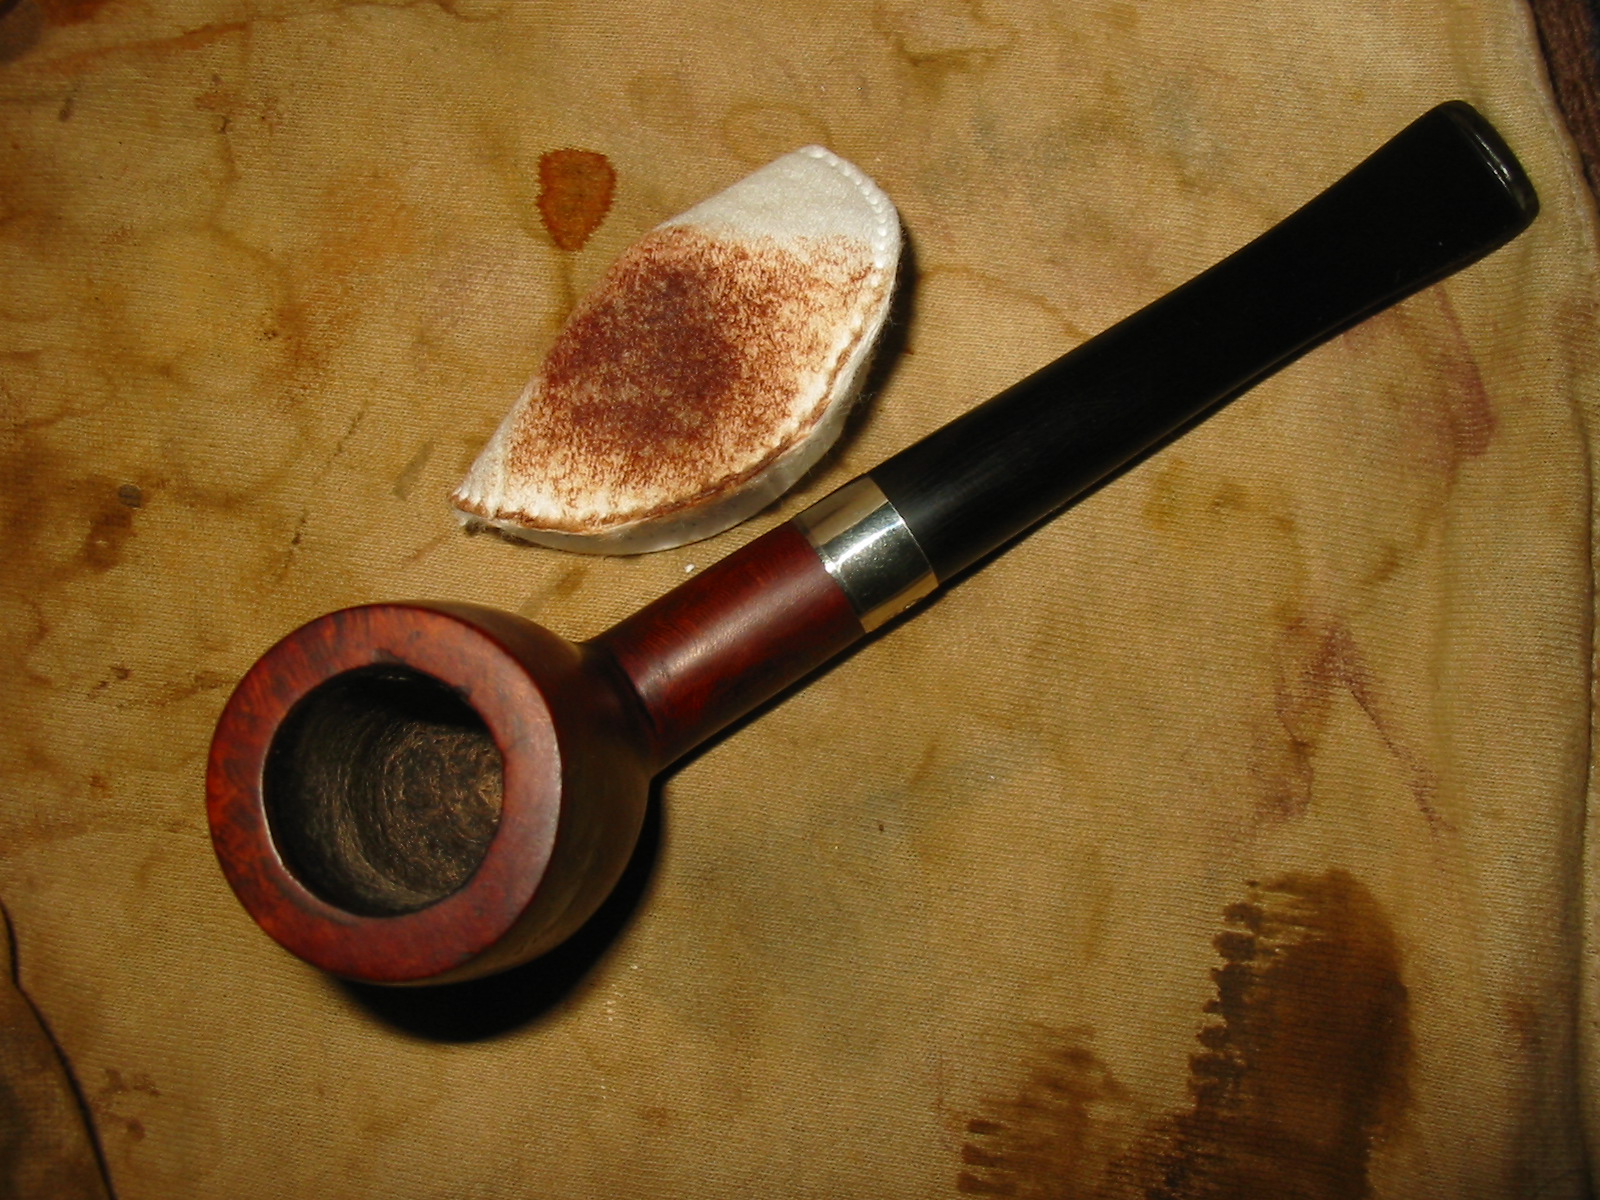
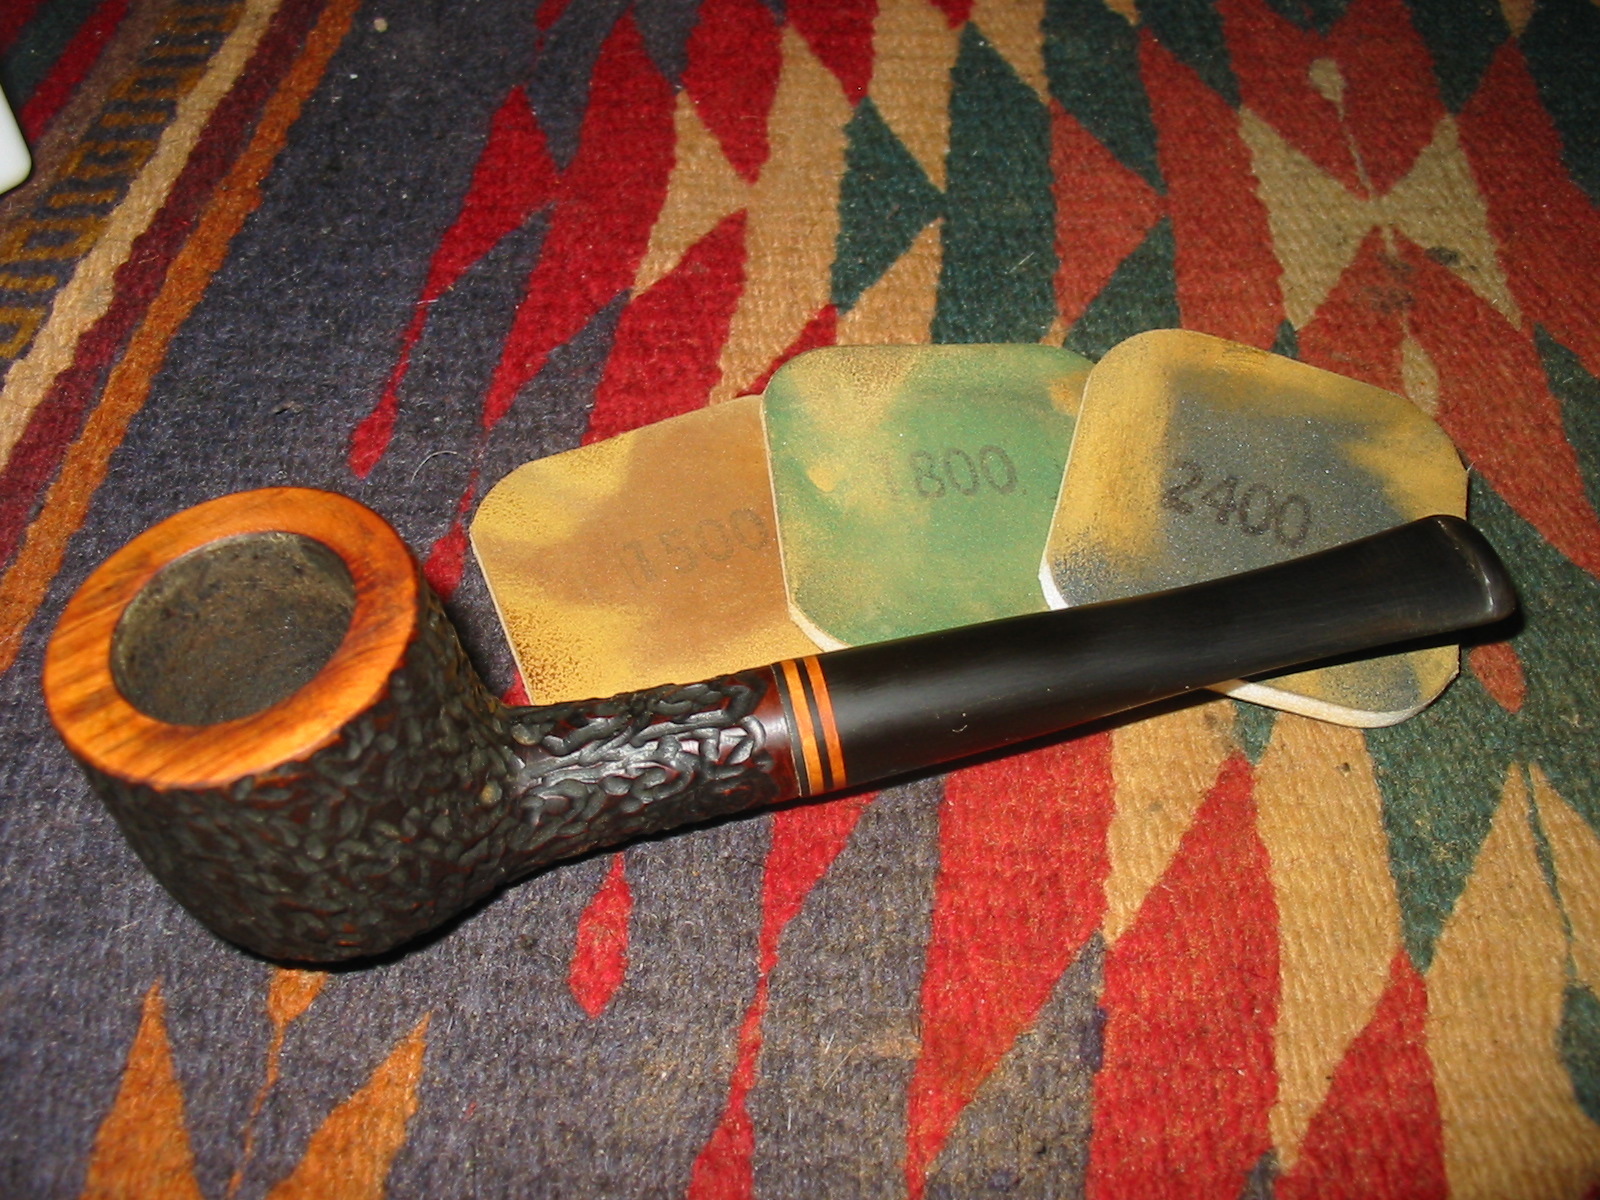
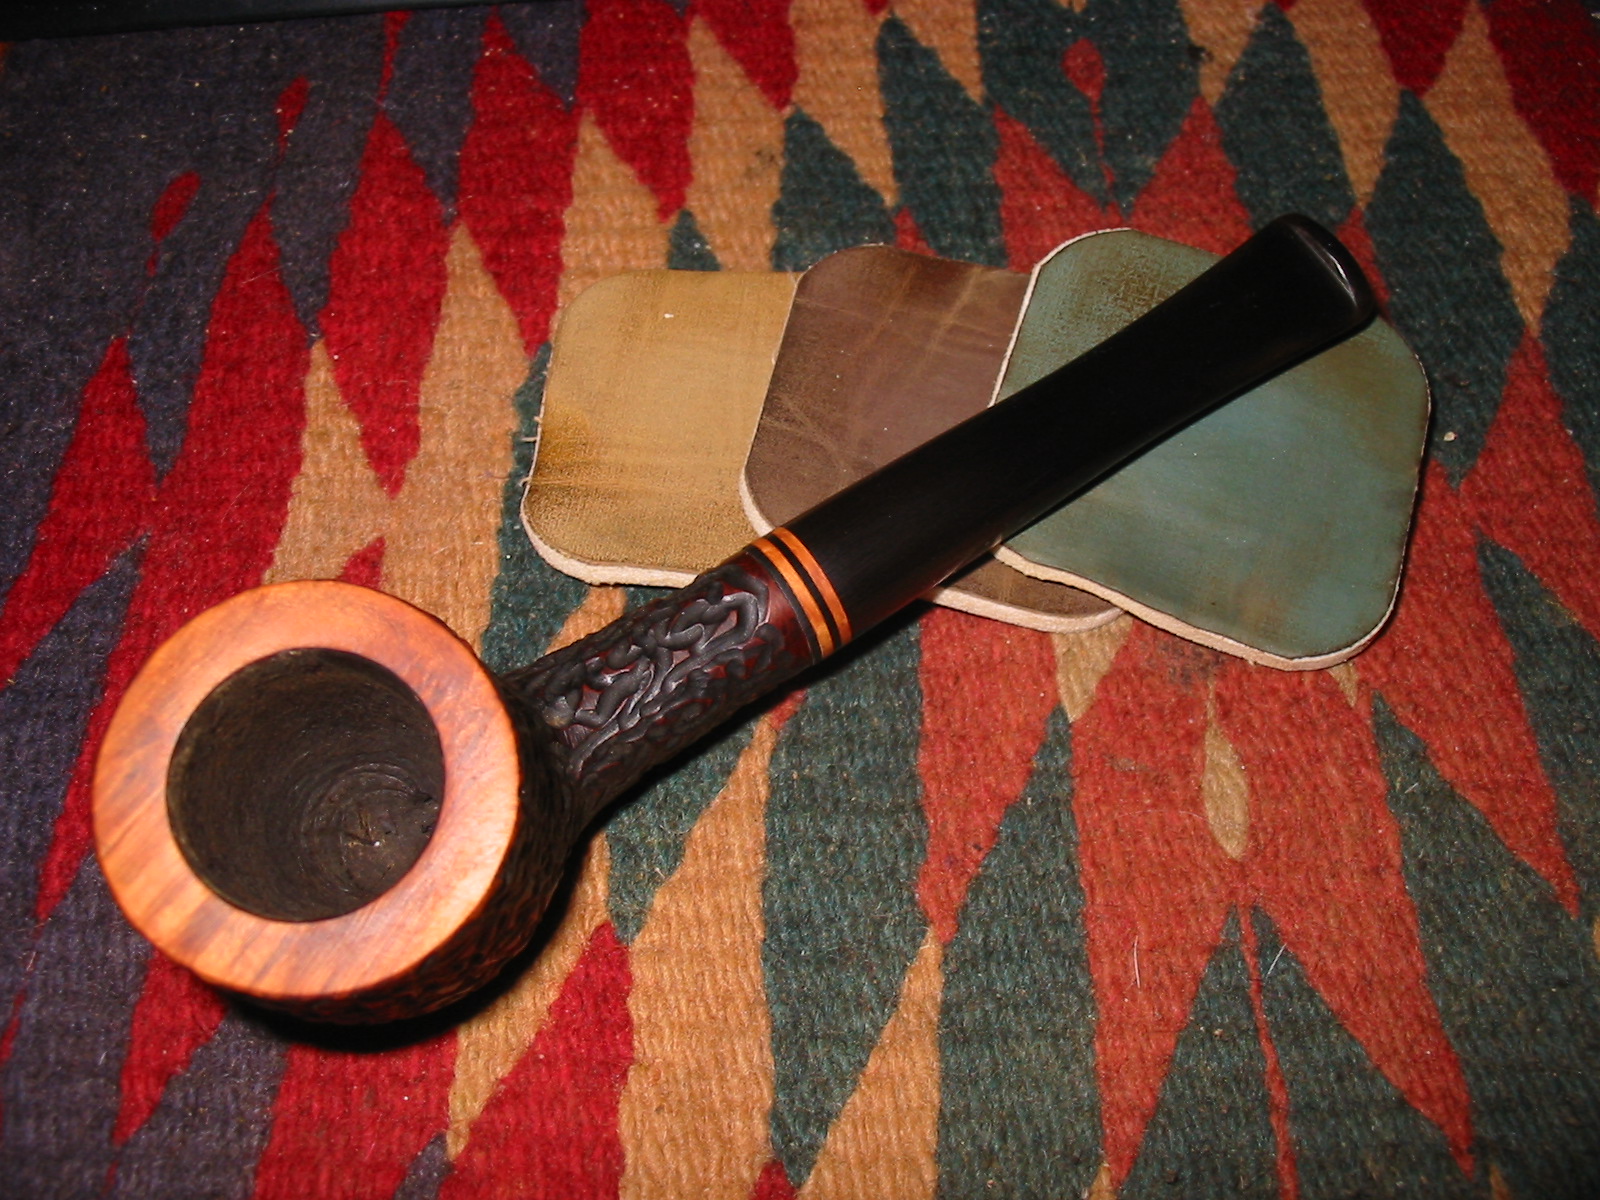
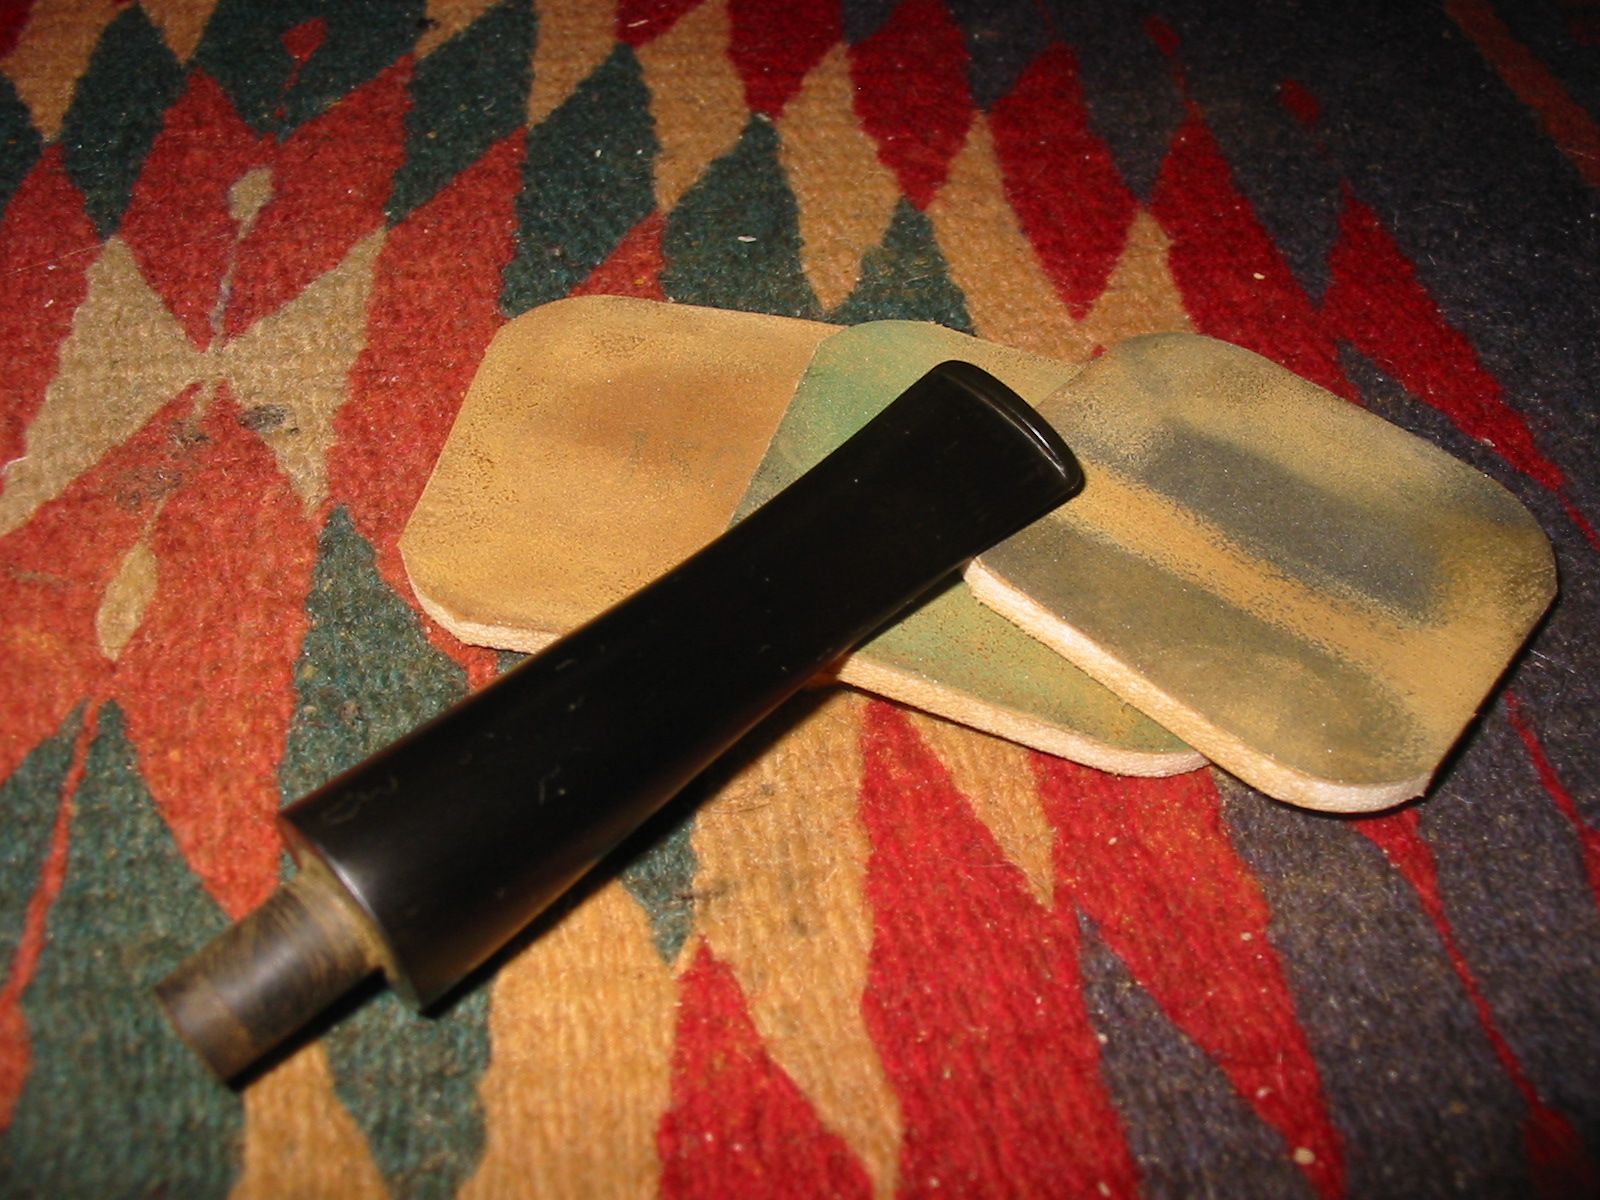
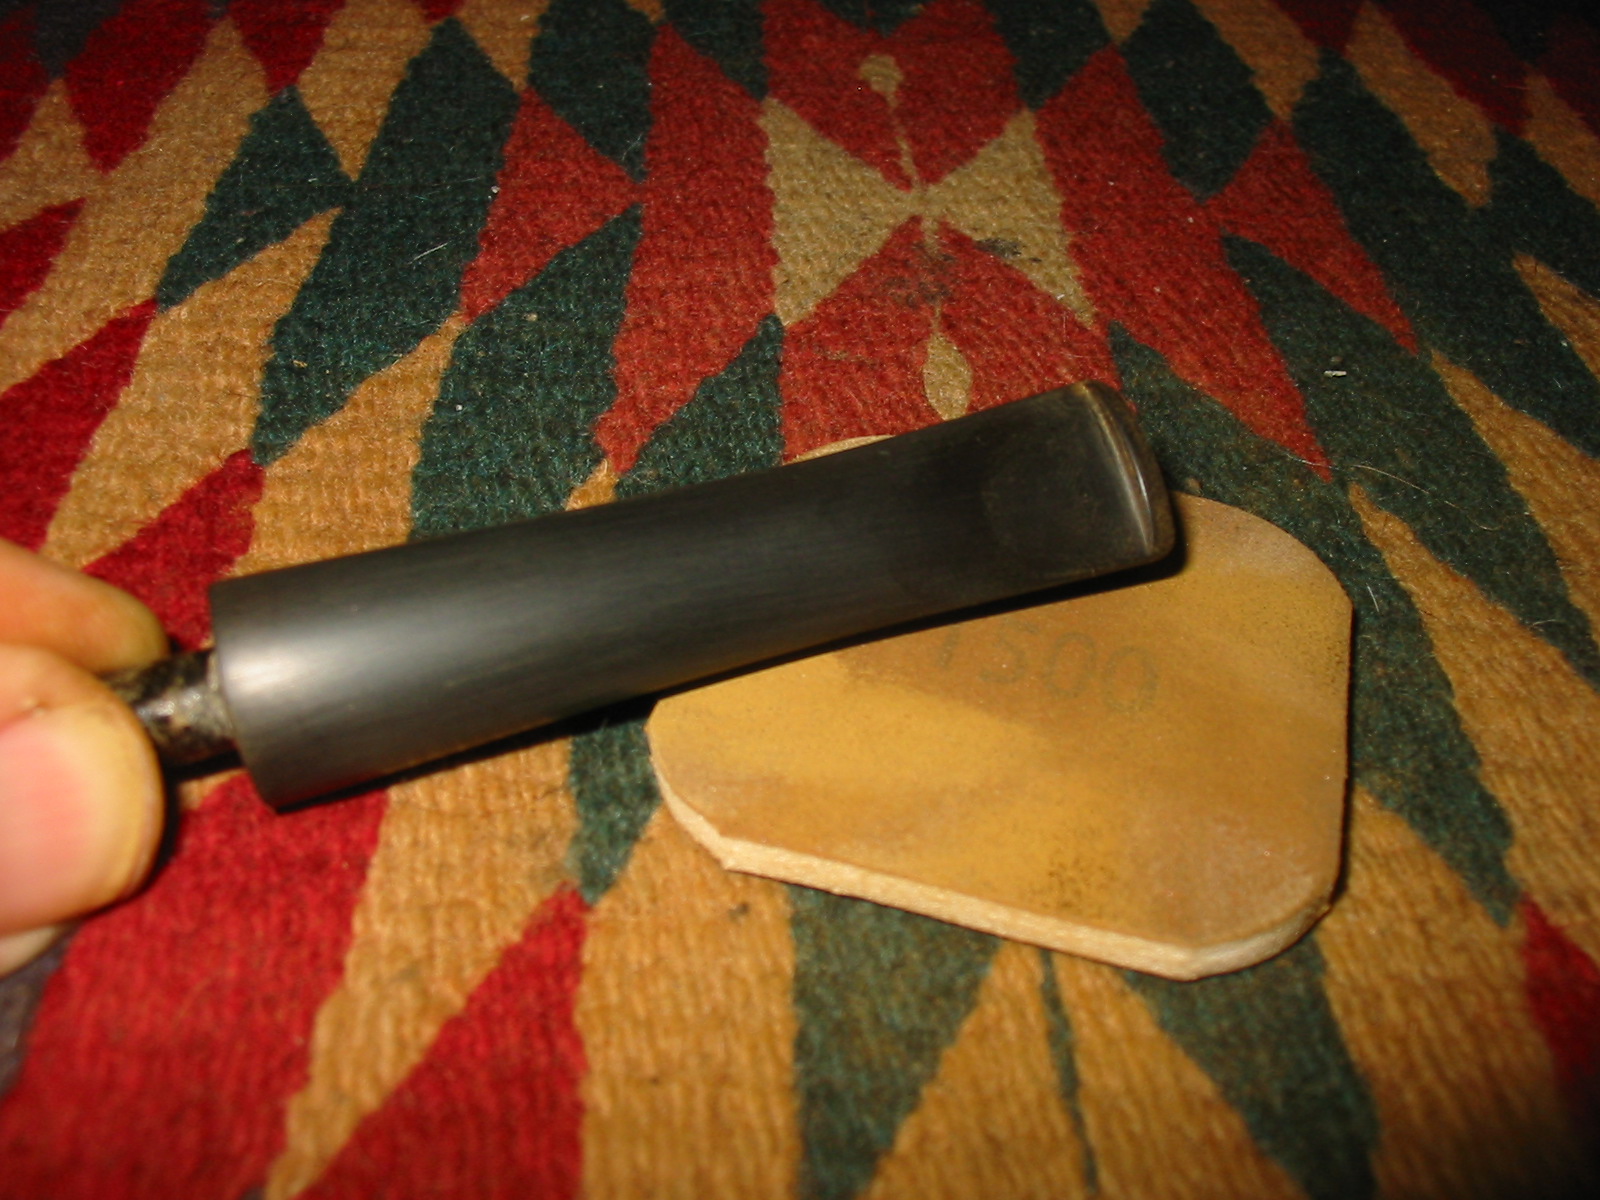
I sanded the bowl with 220 grit sandpaper and then with a medium grit sanding sponge to further remove the black stain. I finished the sanding by wet sanding the bowl with 1500-2400 grit micromesh sanding pads. Sanding with the micromesh pads removed the scratching left behind by the other sandpapers and prepared it for the next coat of stain that I wanted to give it. I stained the bowl a second time with a coat of Minwax Water based stain. I chose a red mahogany stain for this coat. I like the contrast the reddish colour of the mahogany with the black undercoat. I applied the stain and then wiped it off with a soft cotton cloth.
IMG_3378

IMG_3379

IMG_3380

IMG_3381

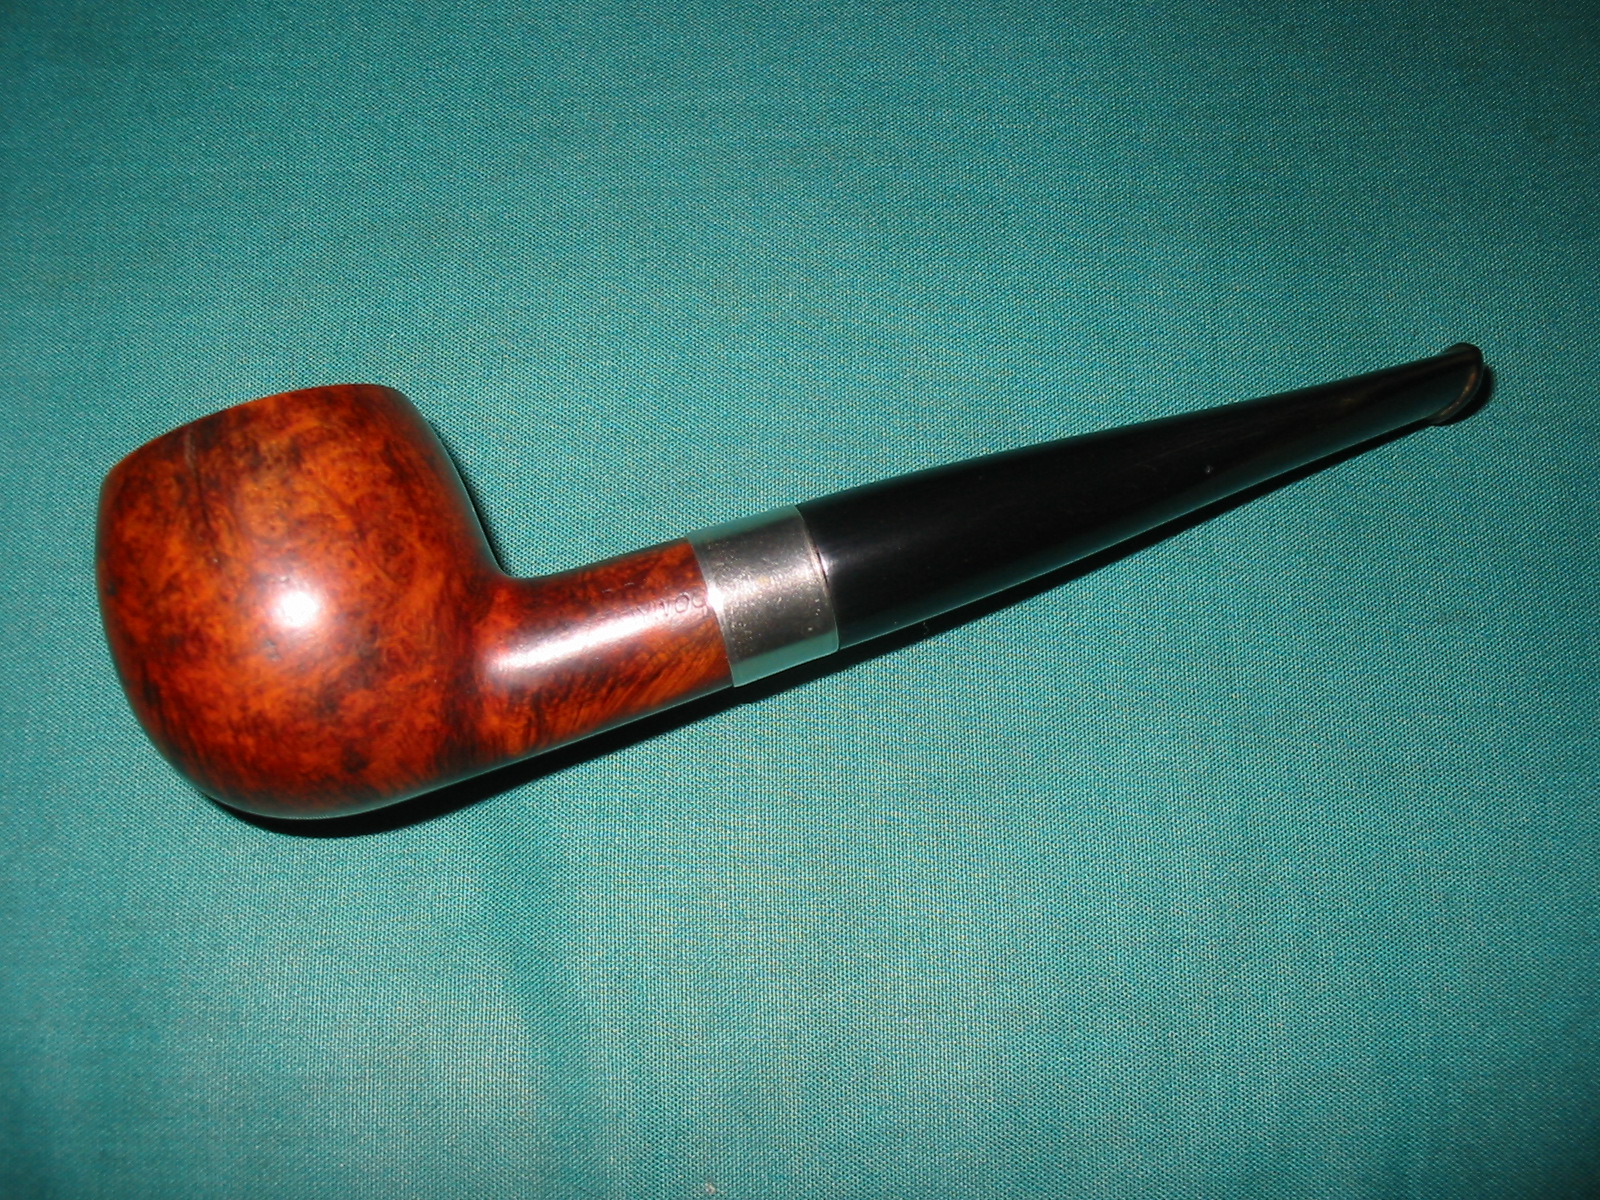
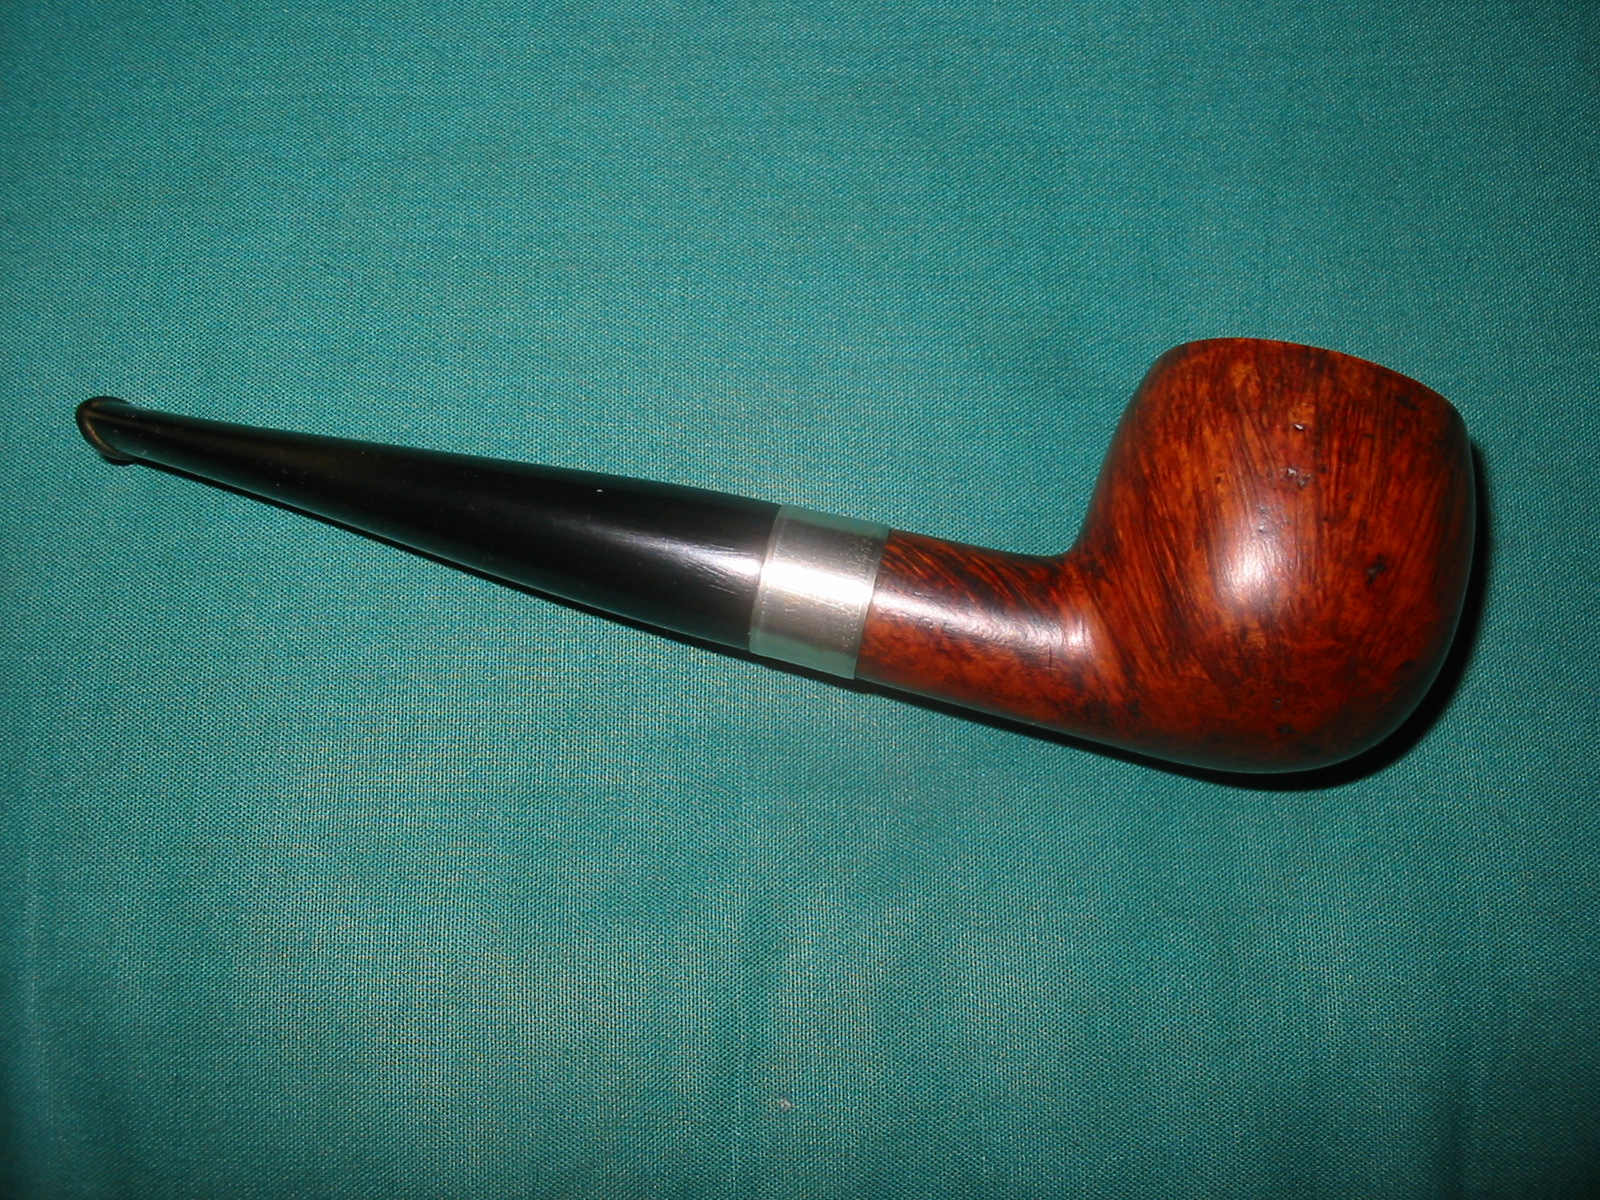
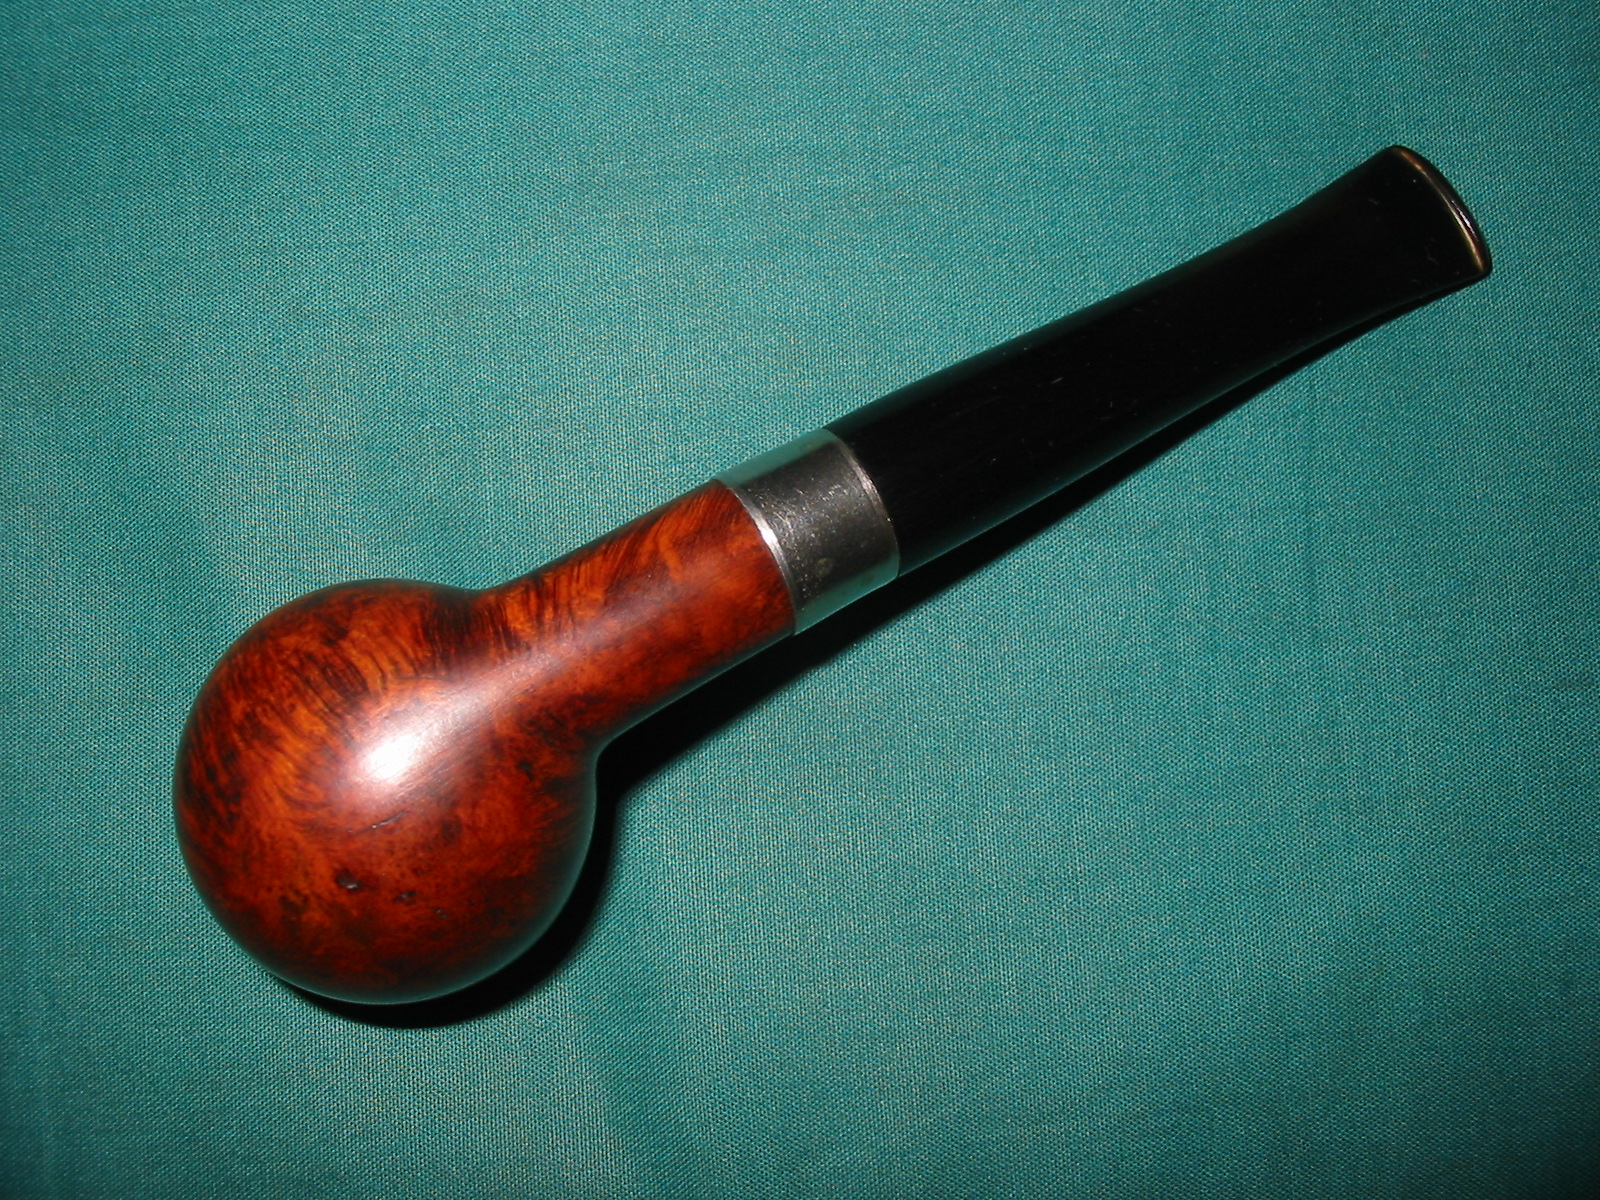
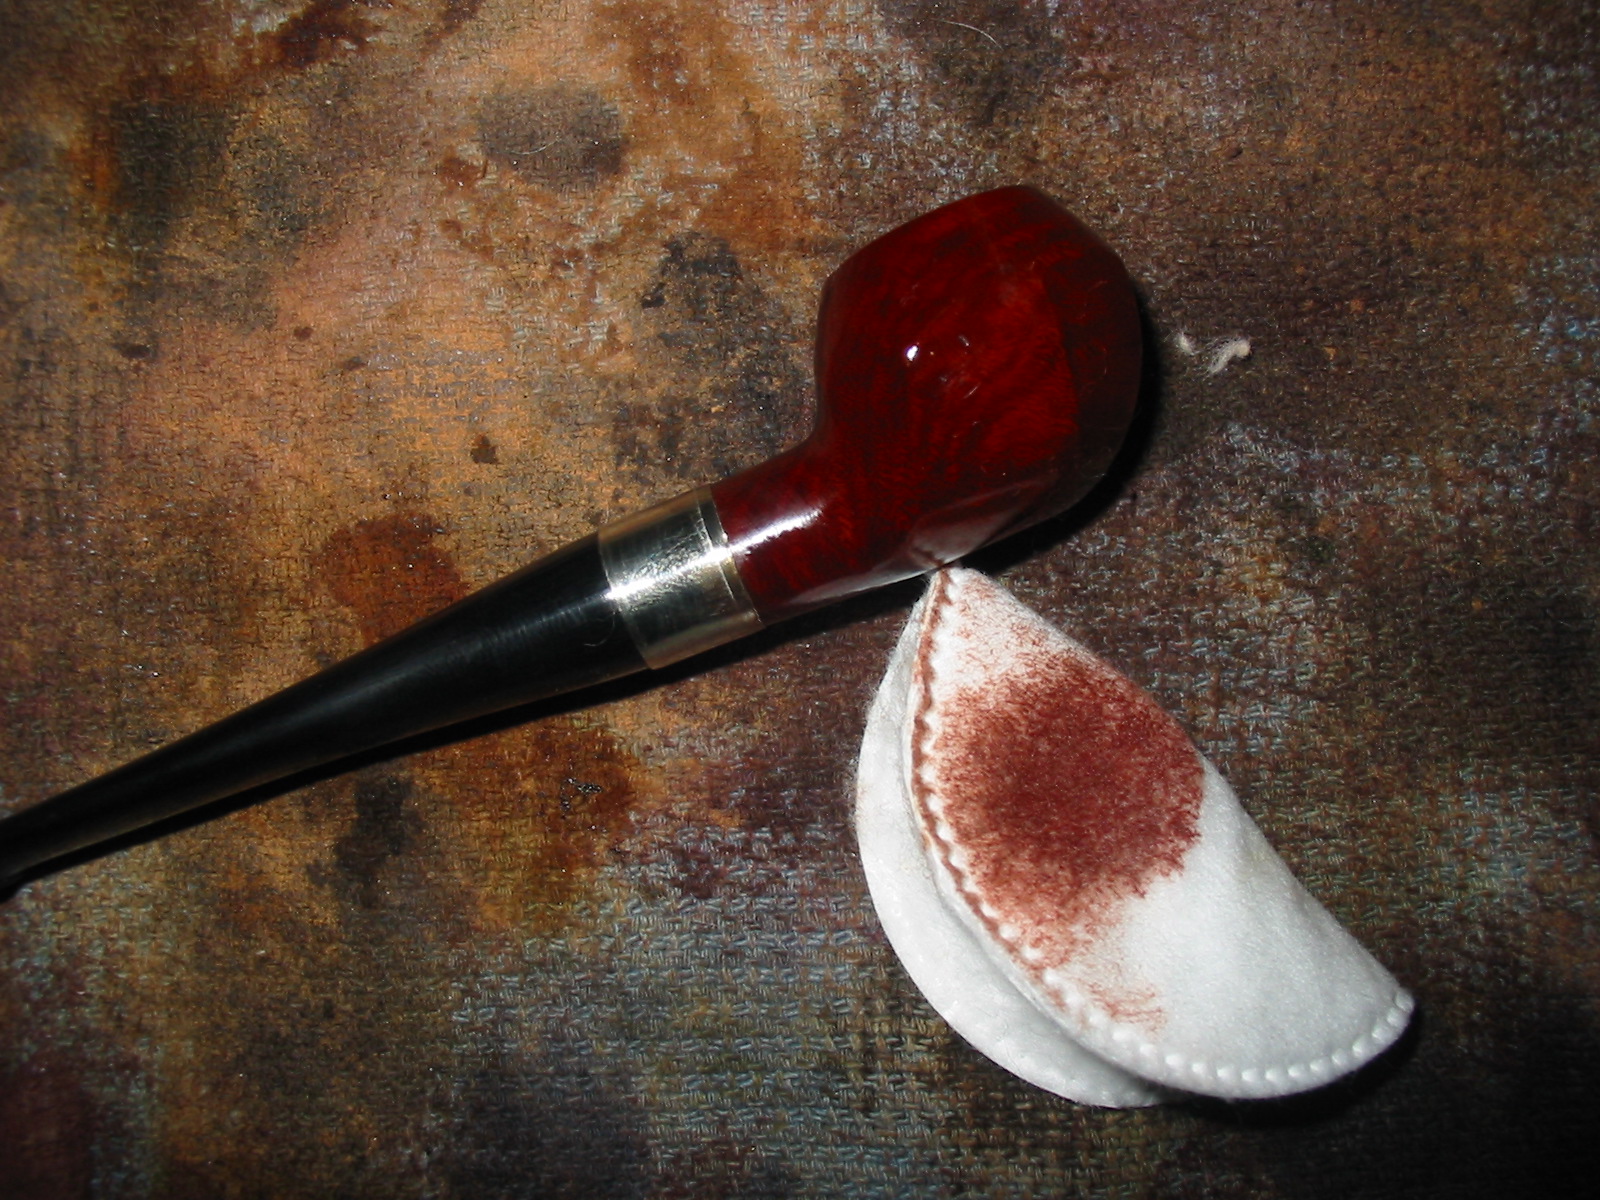
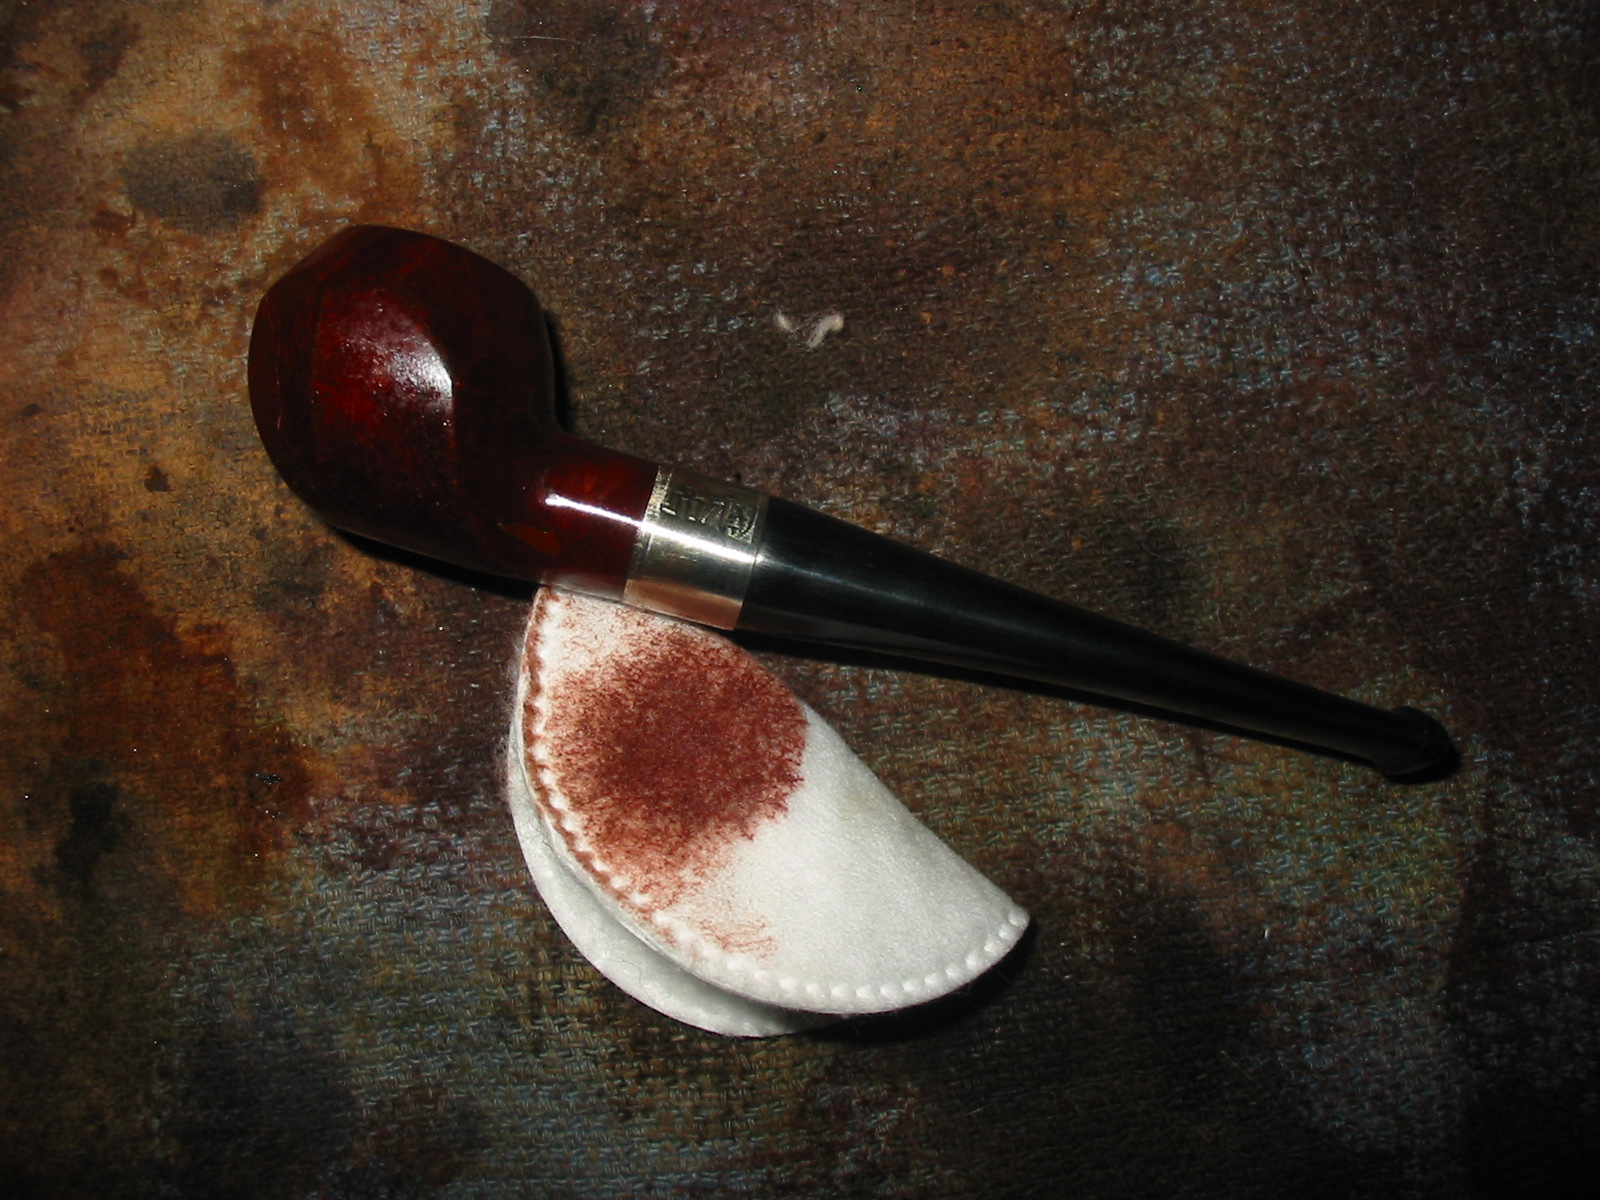
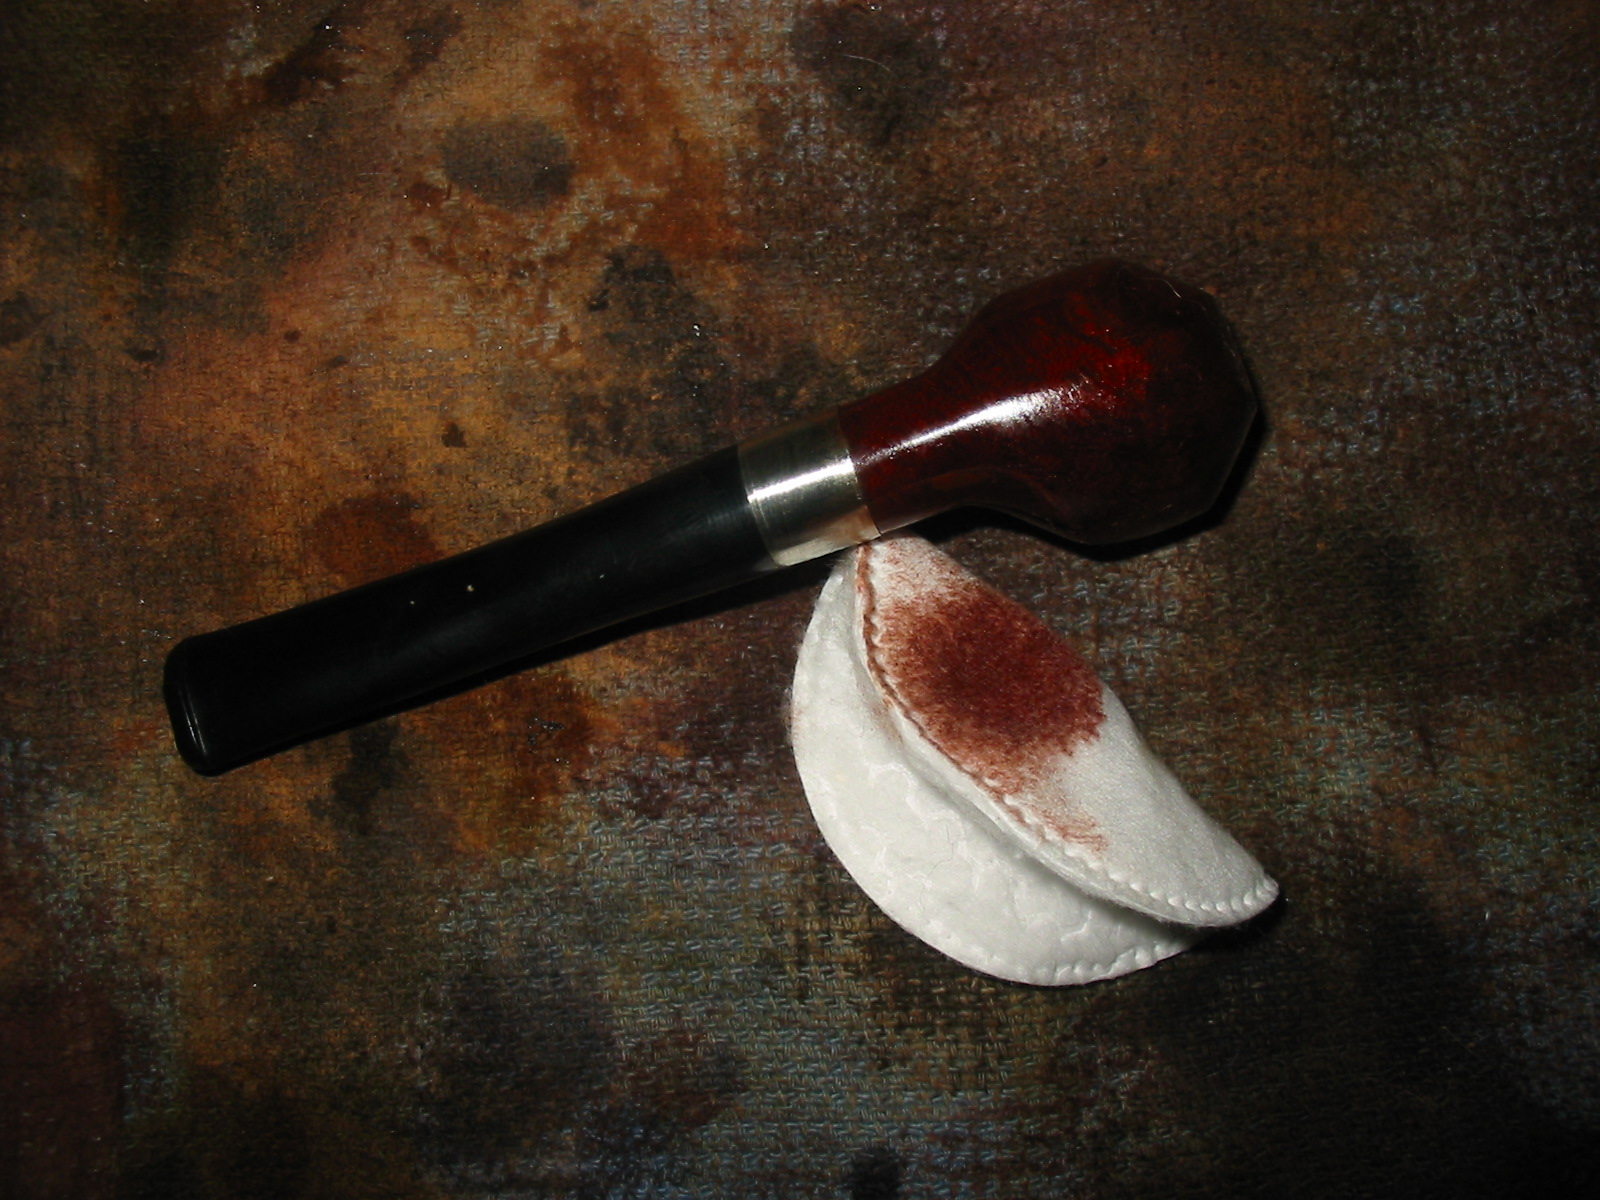
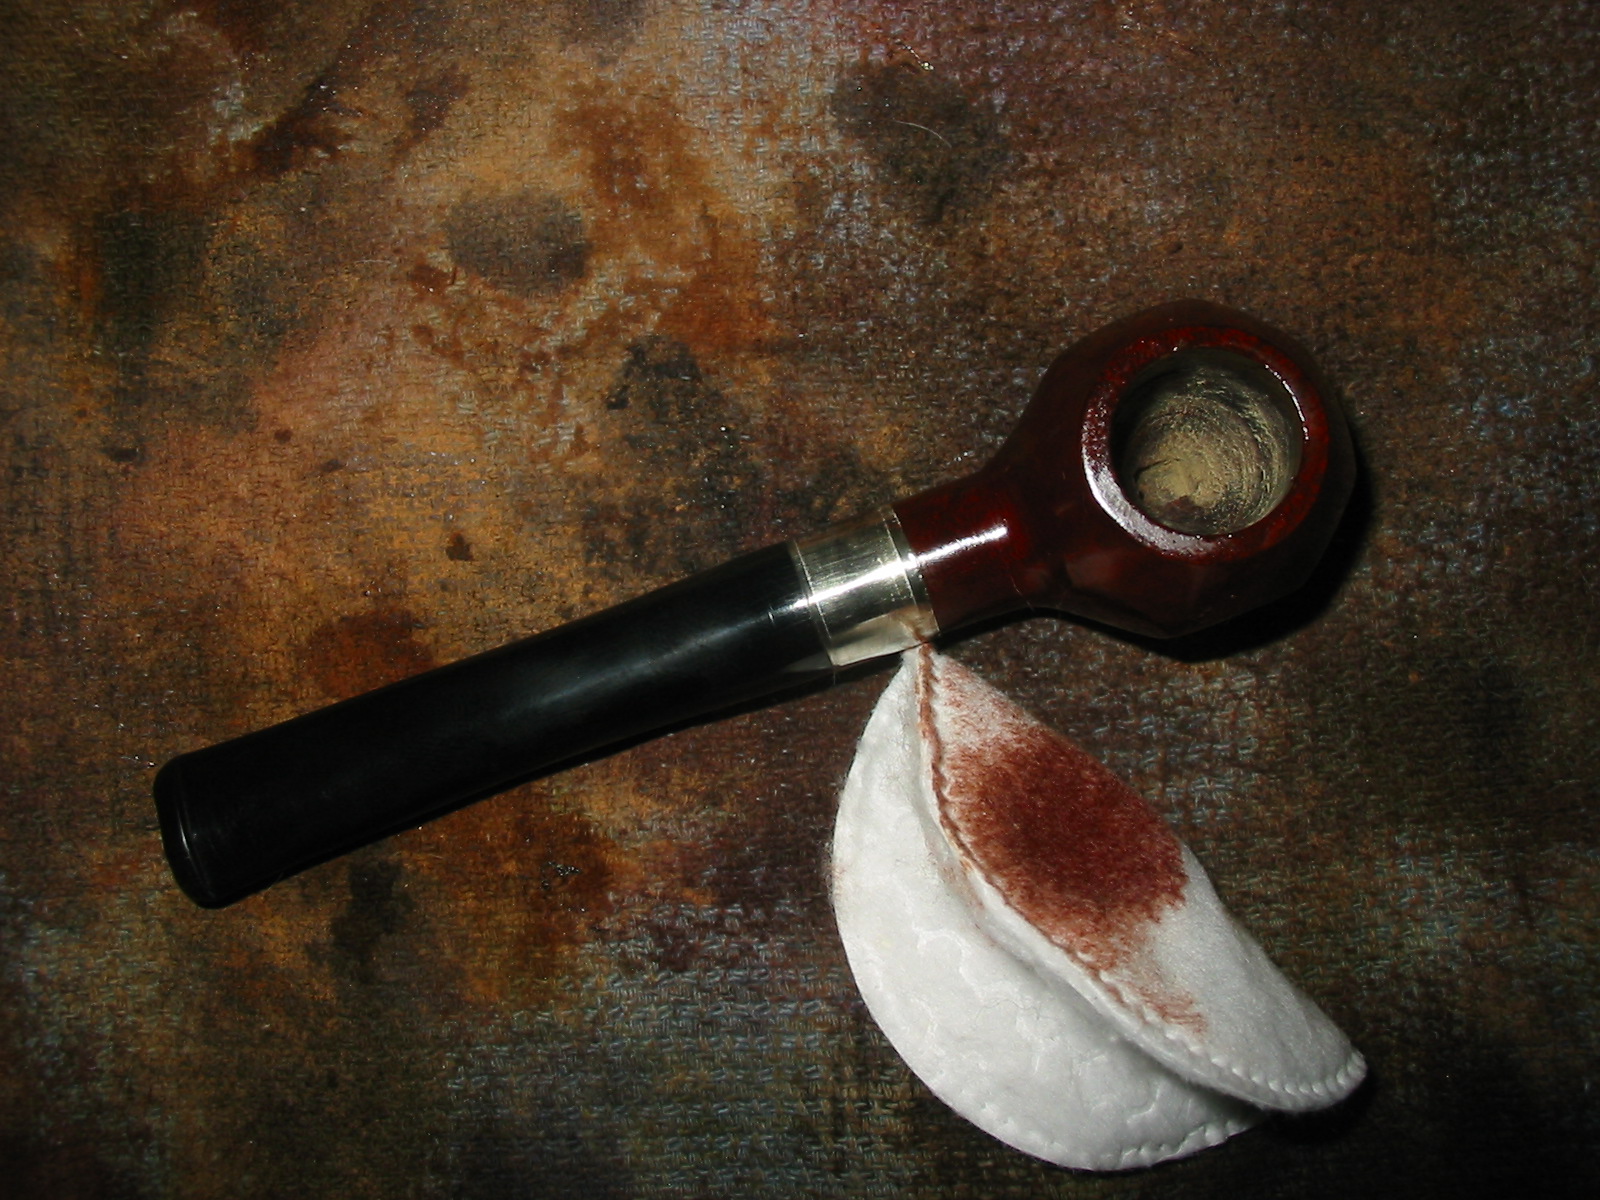
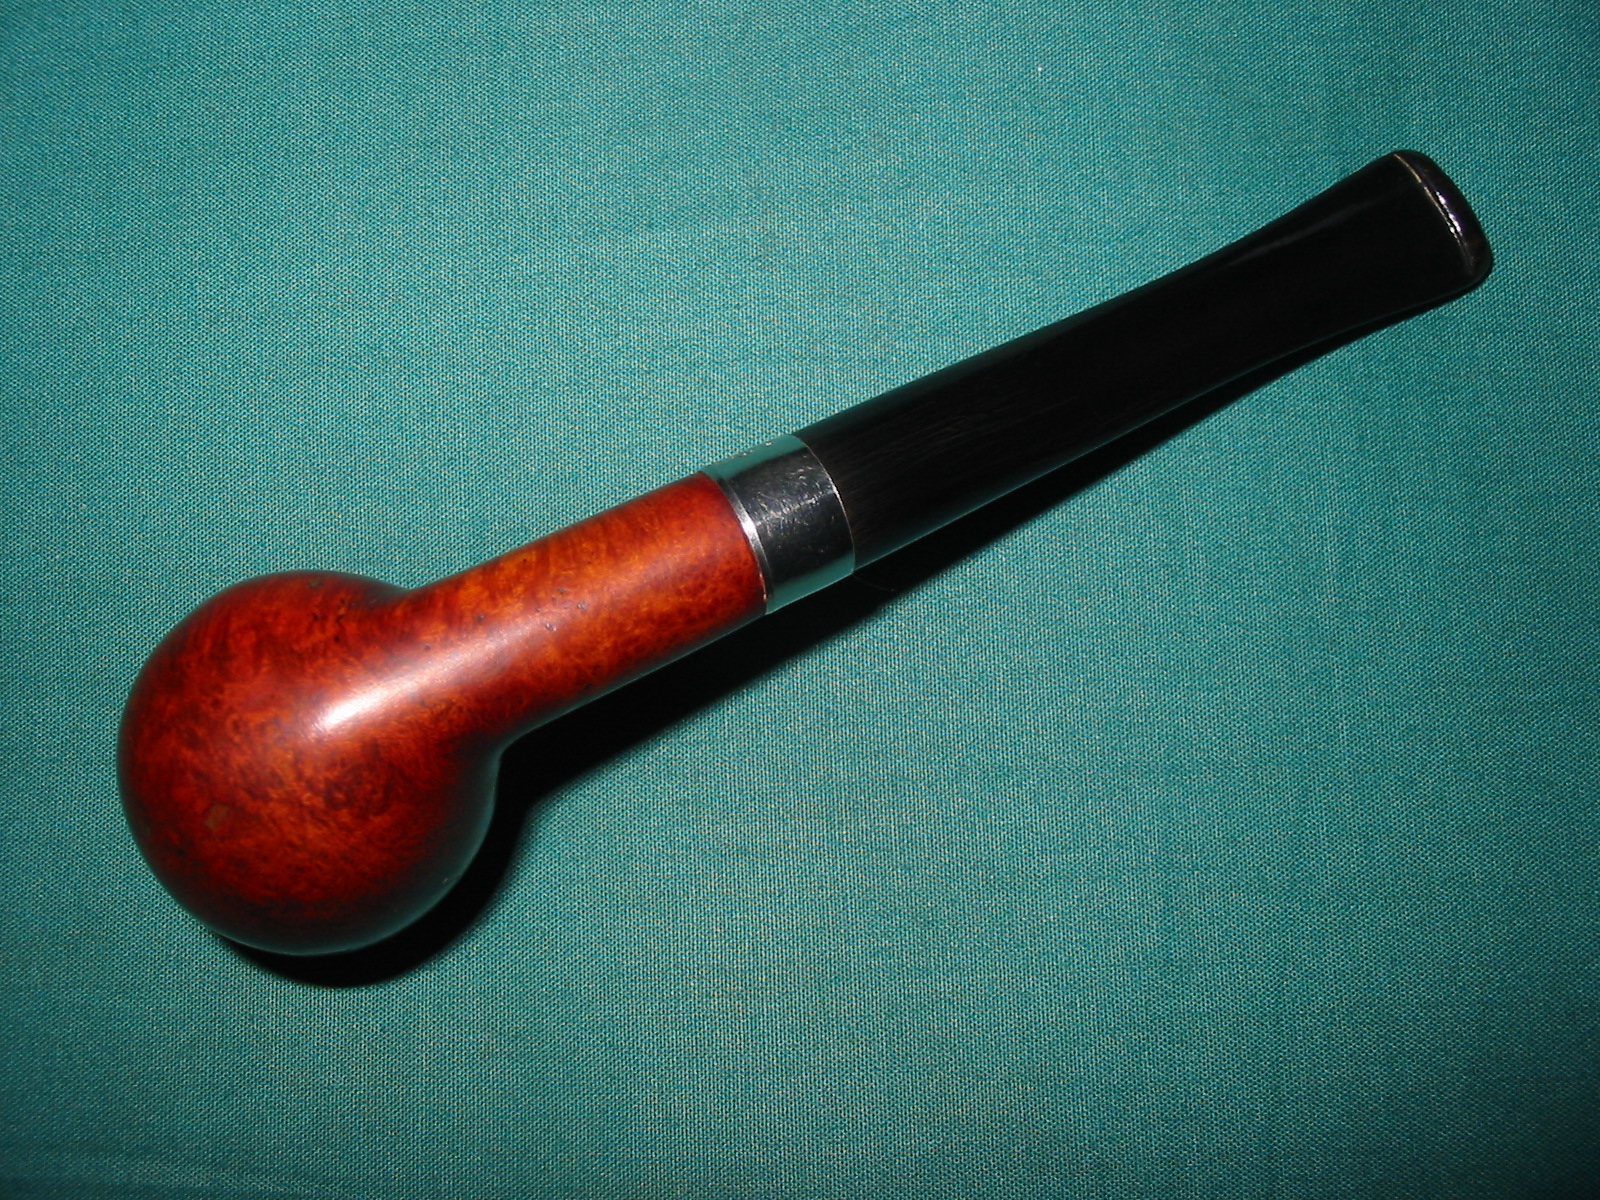
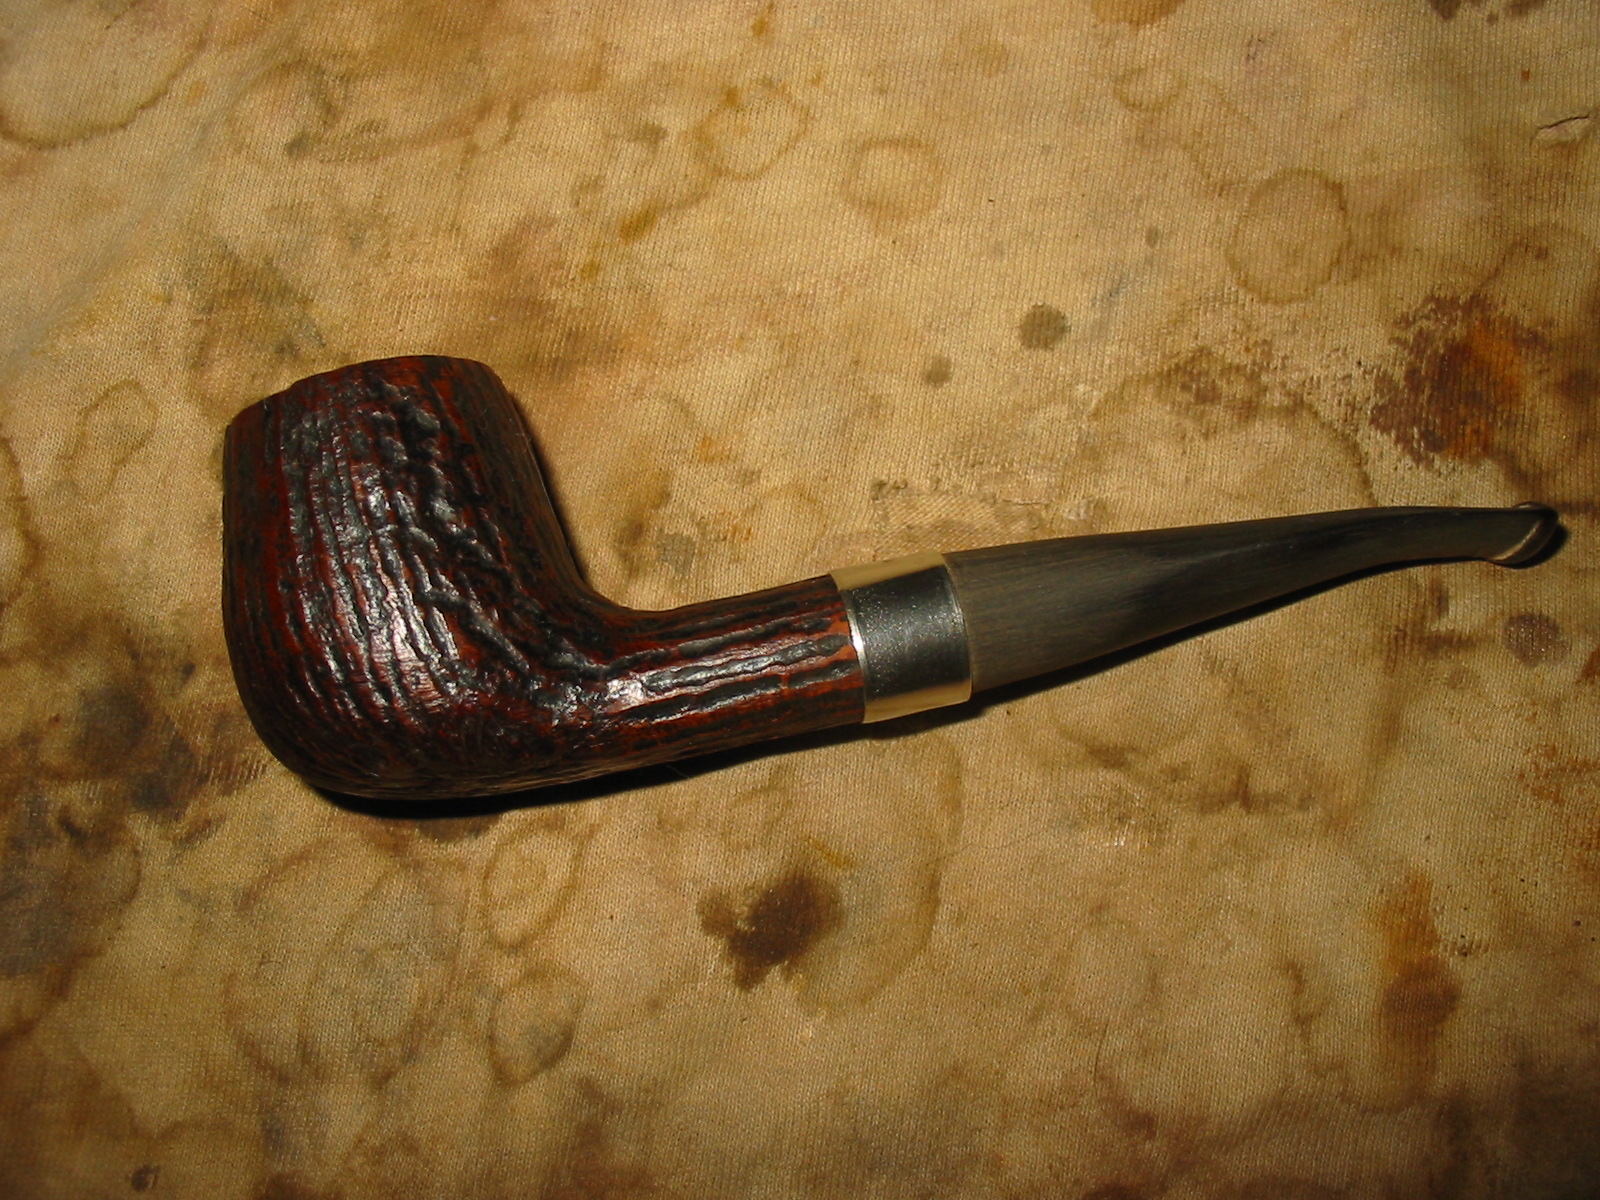
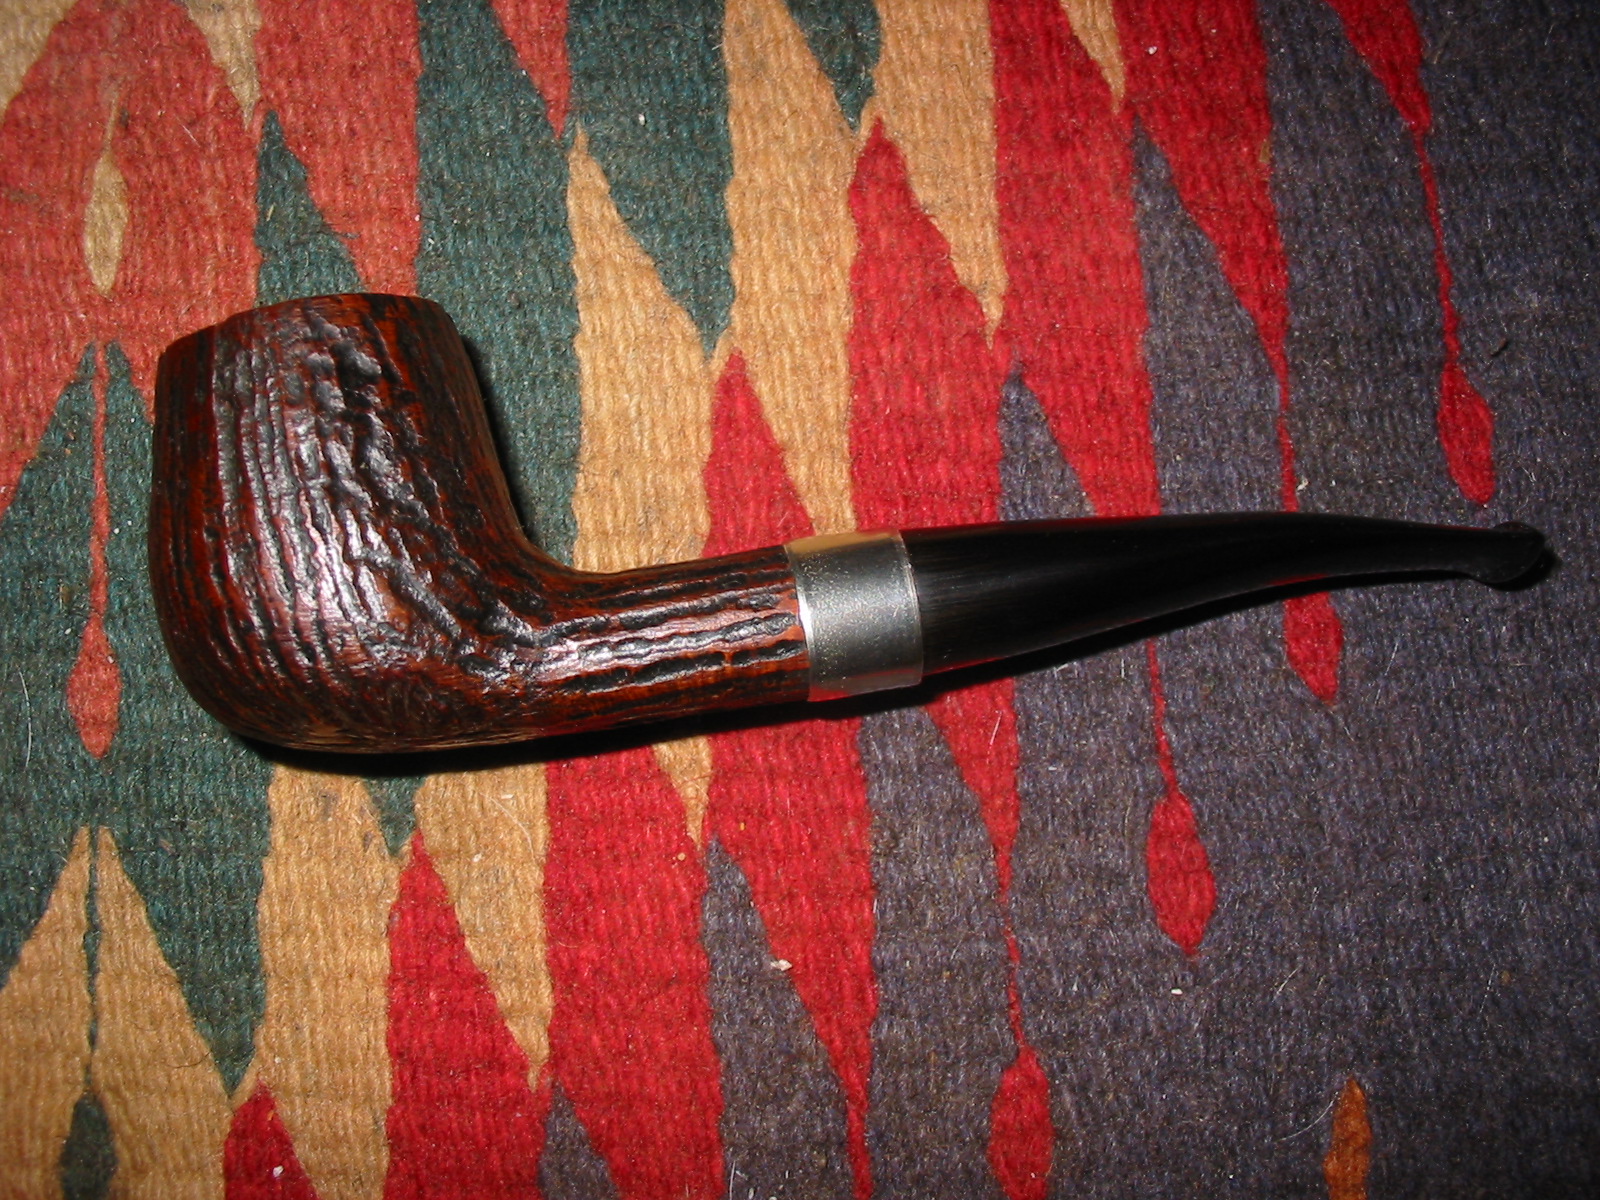
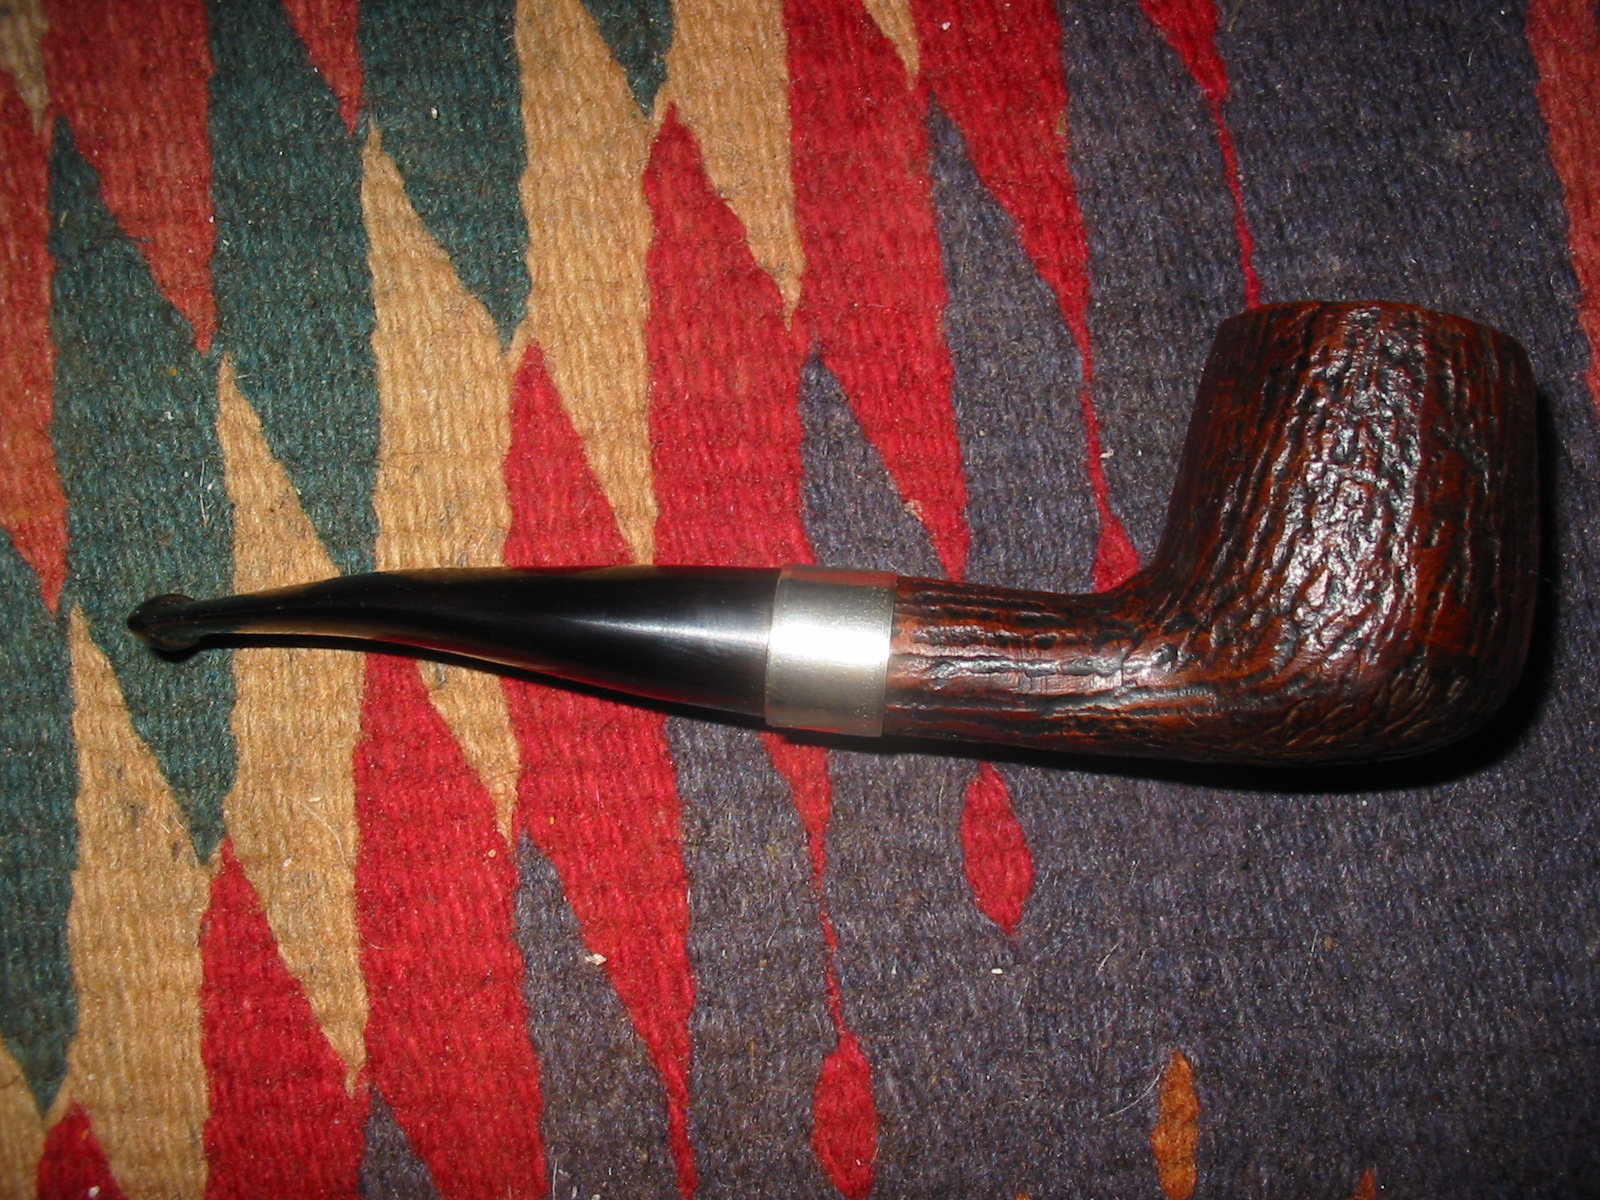
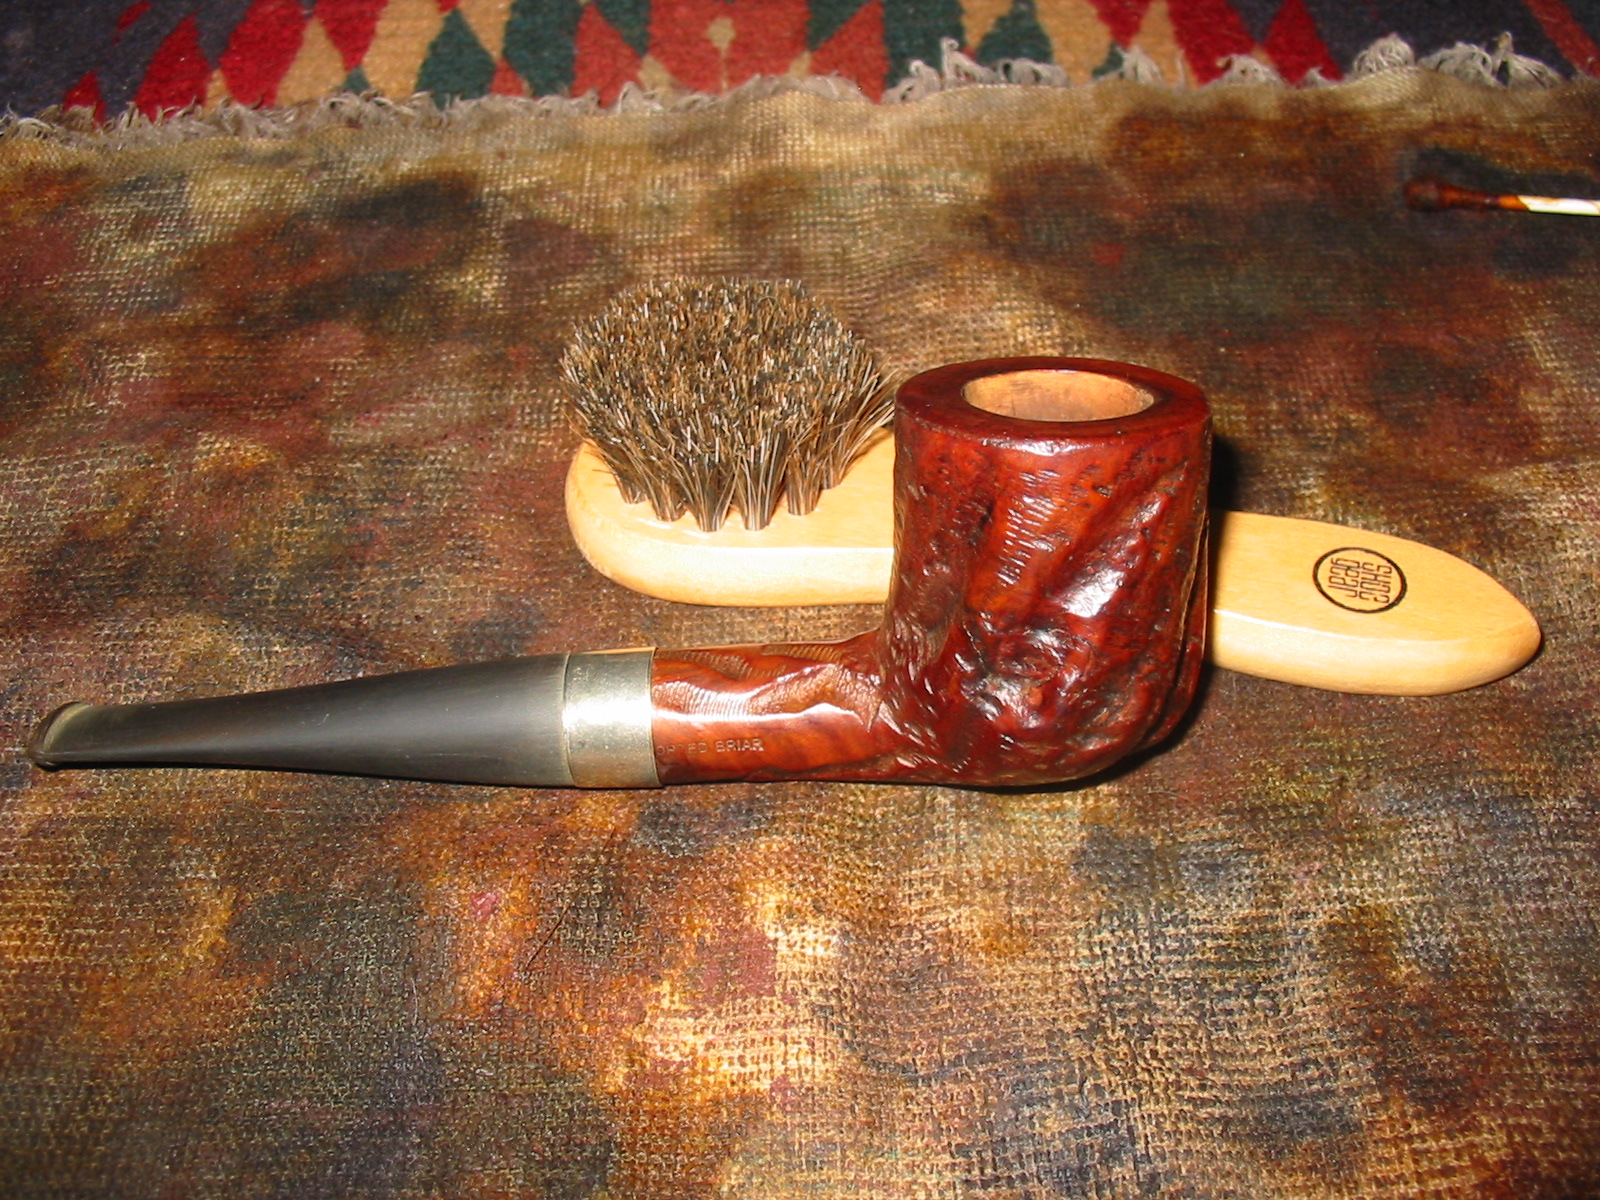
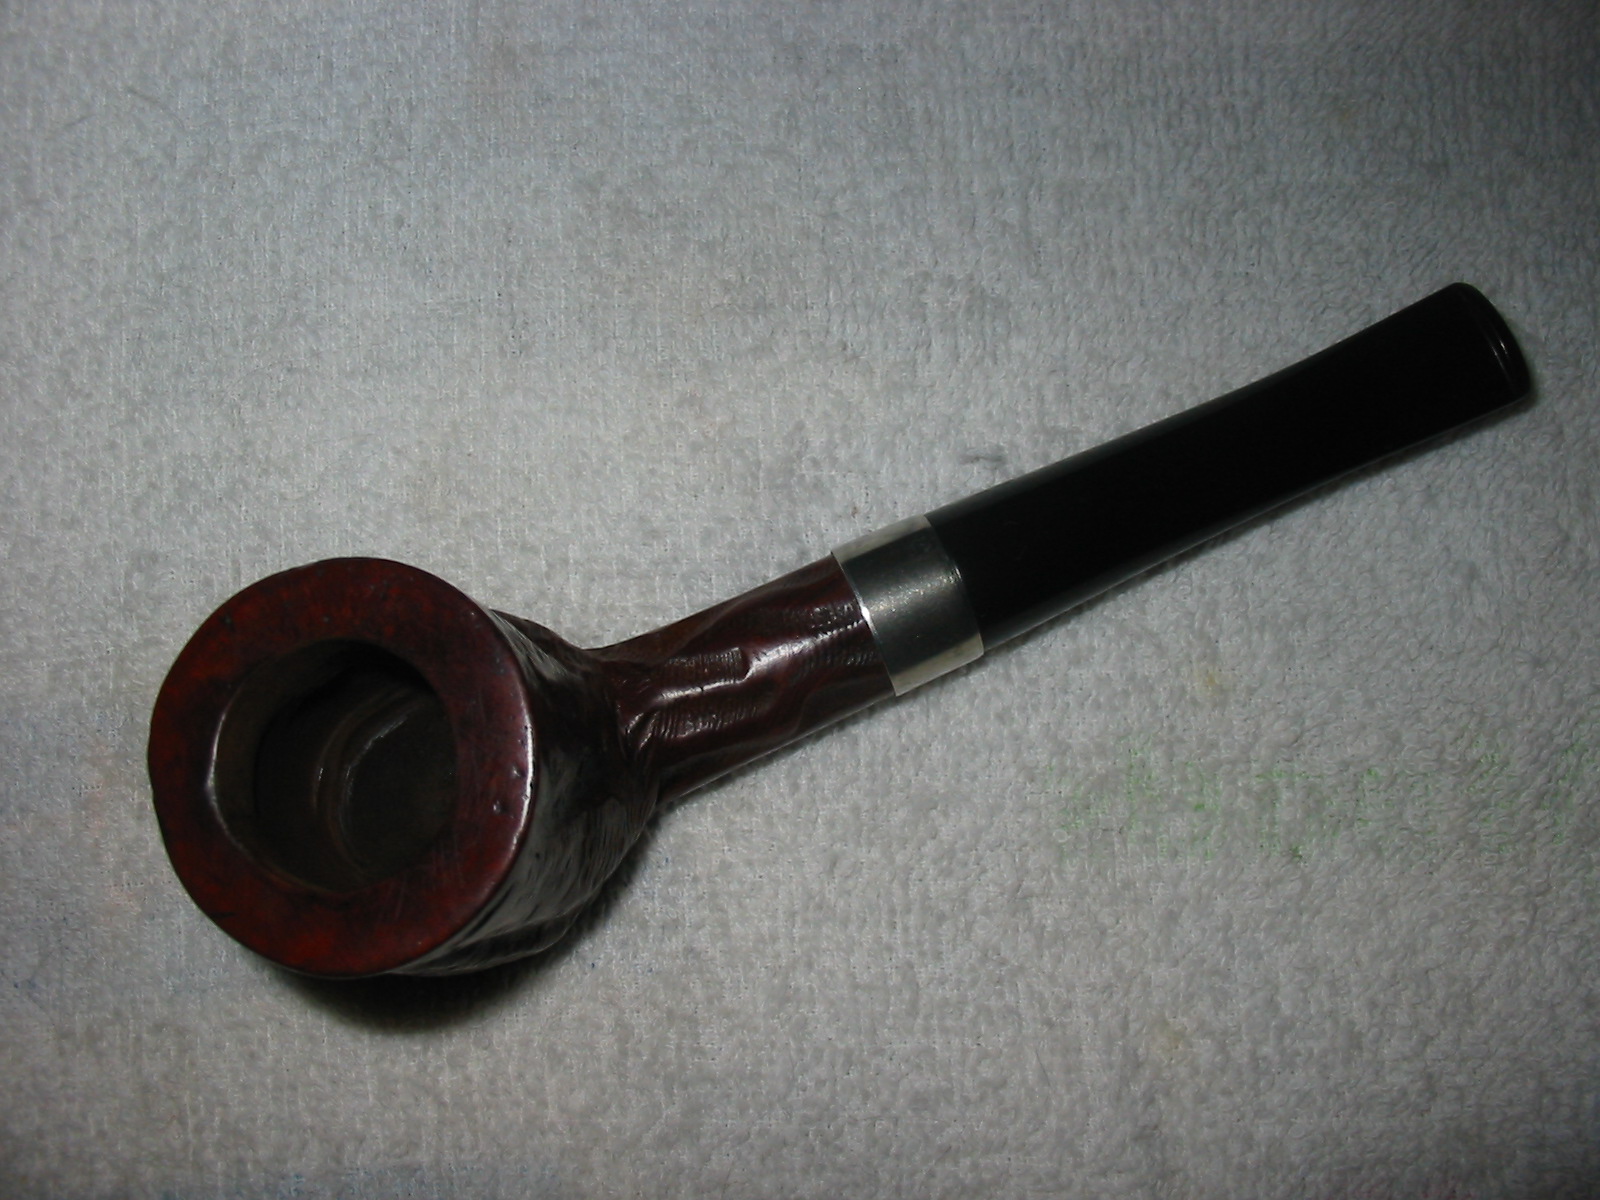
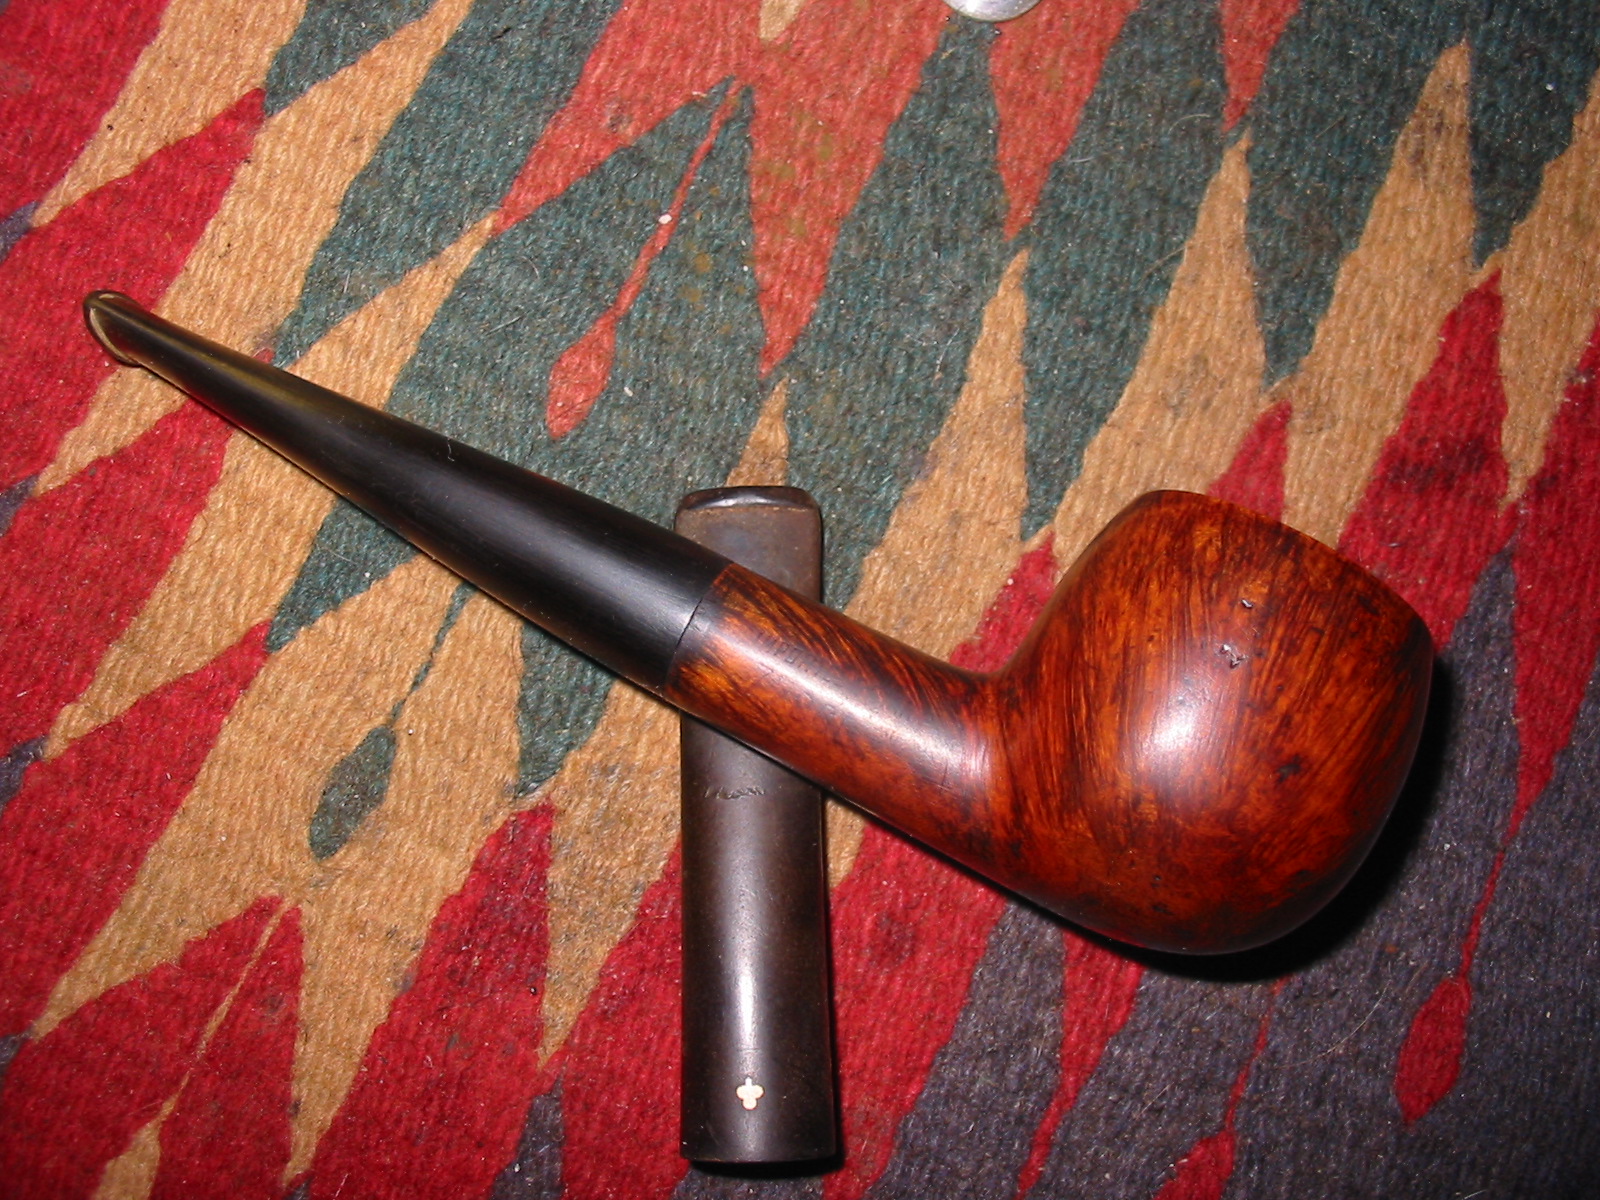
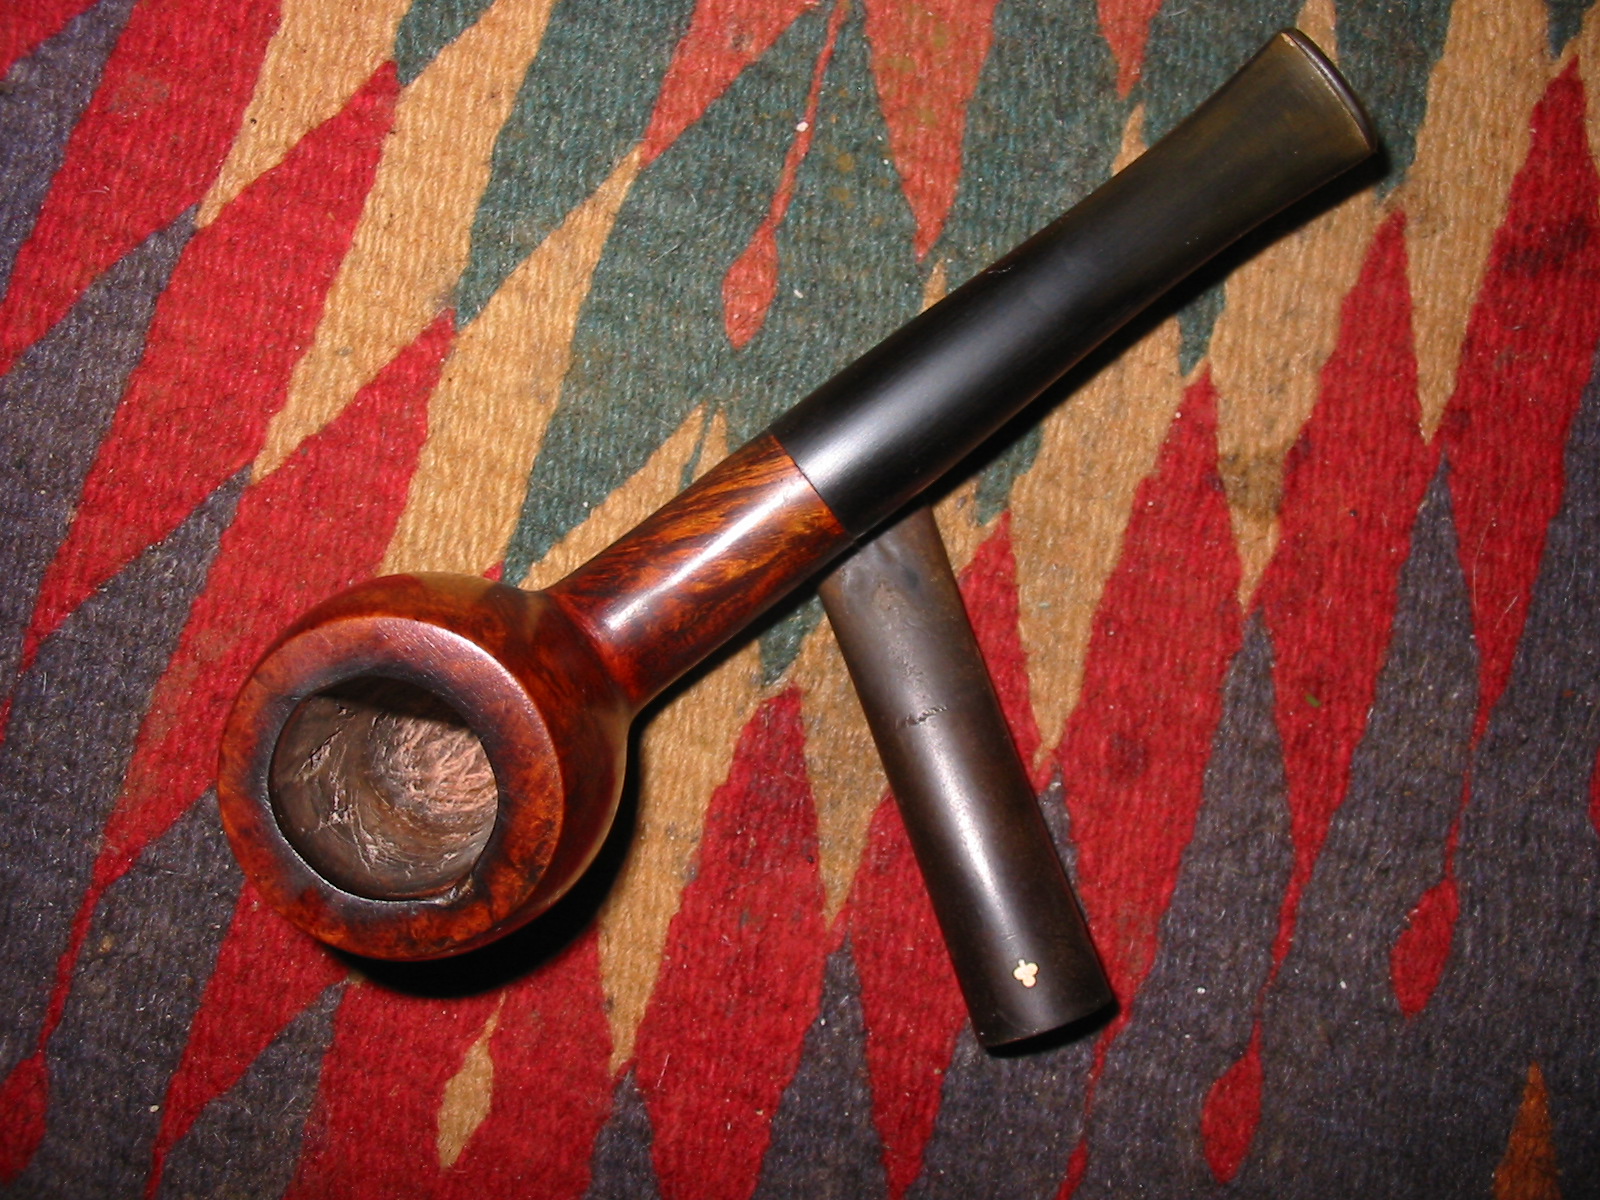
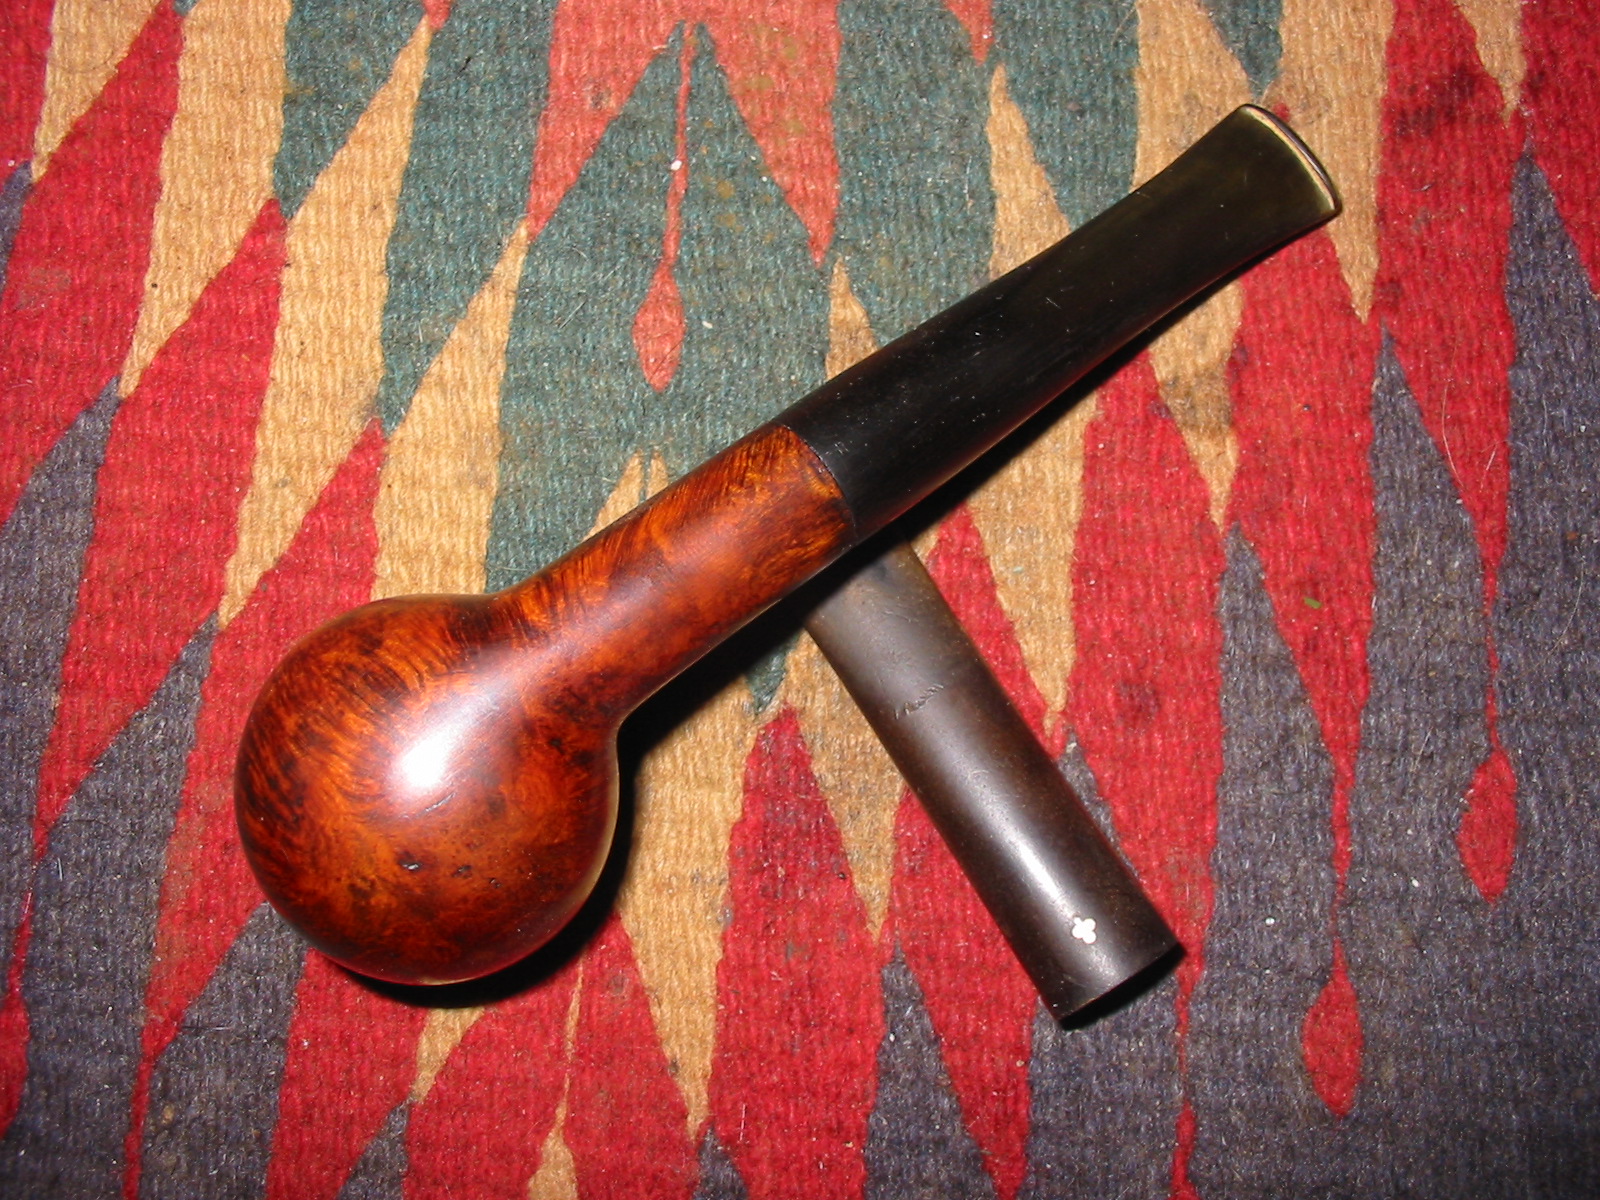
I finished the contrast staining with a third colour – a Minwax medium walnut stain for the finish coat. I applied the stain and wiped it down using a soft cotton cloth and then hand buffed it with a shoe shine brush. The next series of four photos show the finish after the application of the three stains and a hand buffing. I really like the contrast finish that the three stains gave the pipe.
IMG_3382

IMG_3383

IMG_3384

IMG_3385

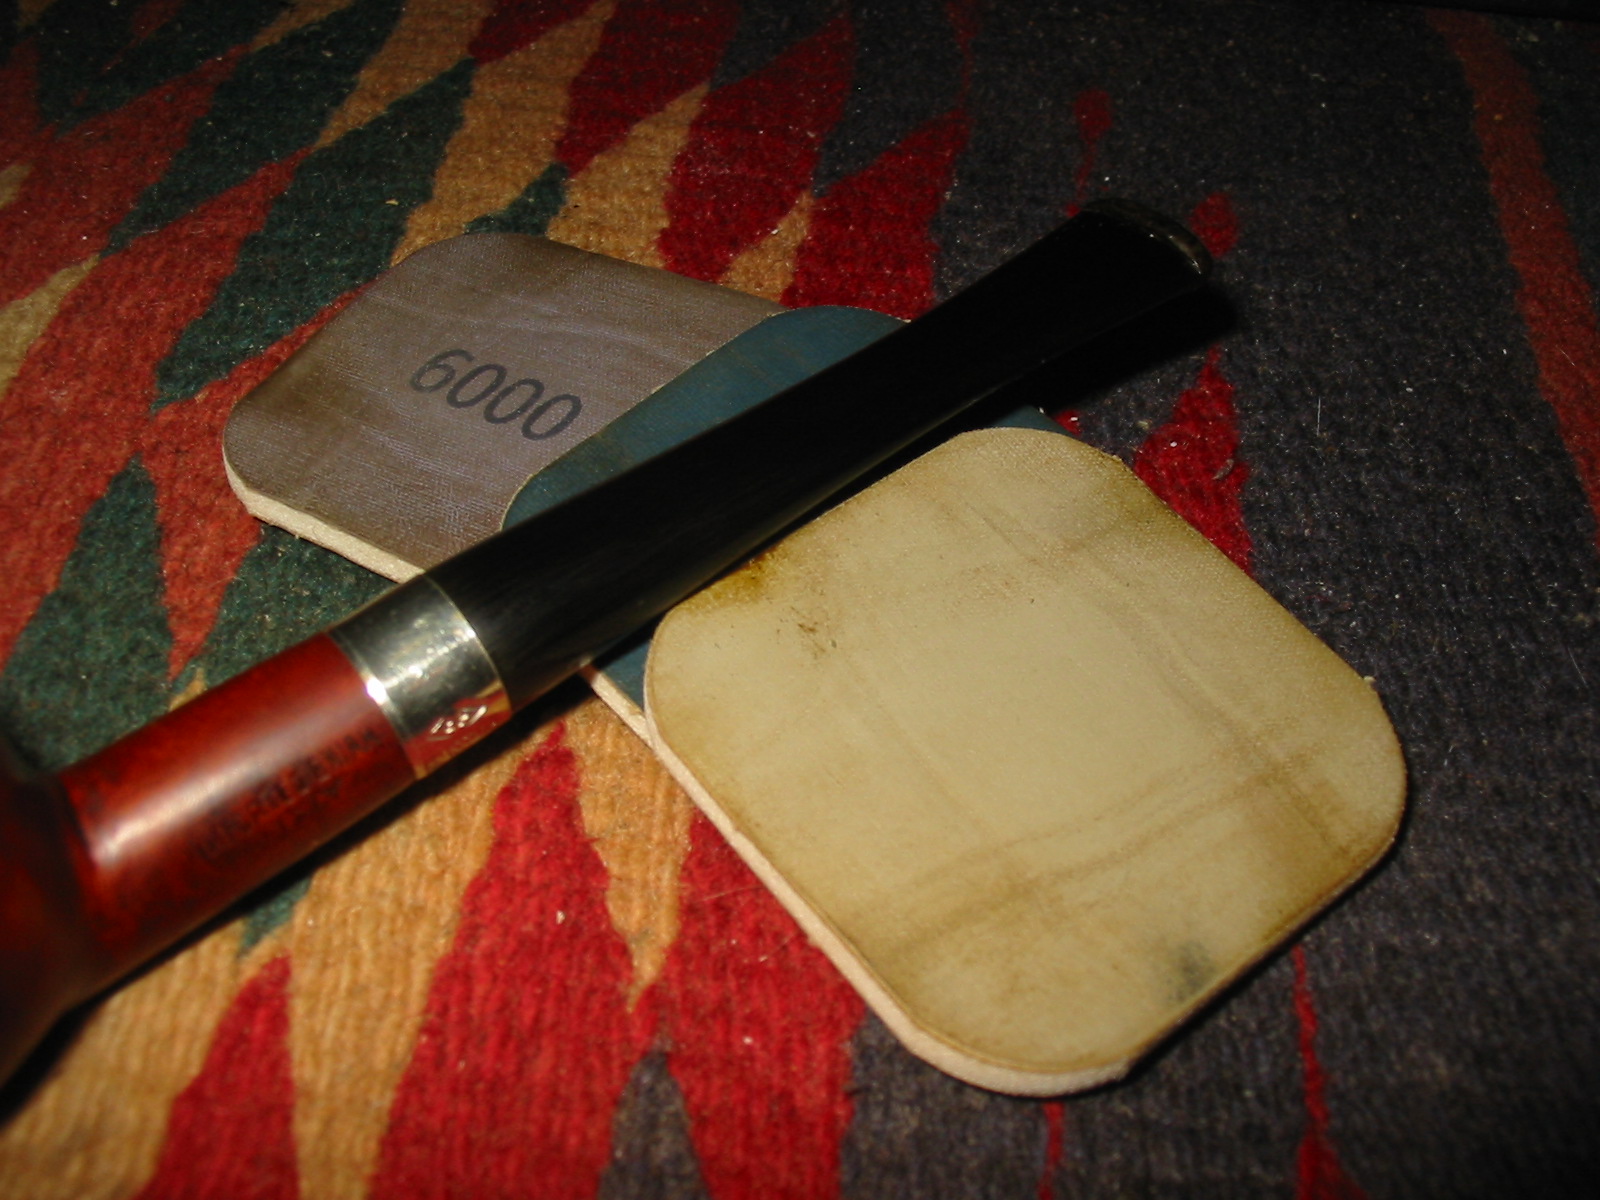
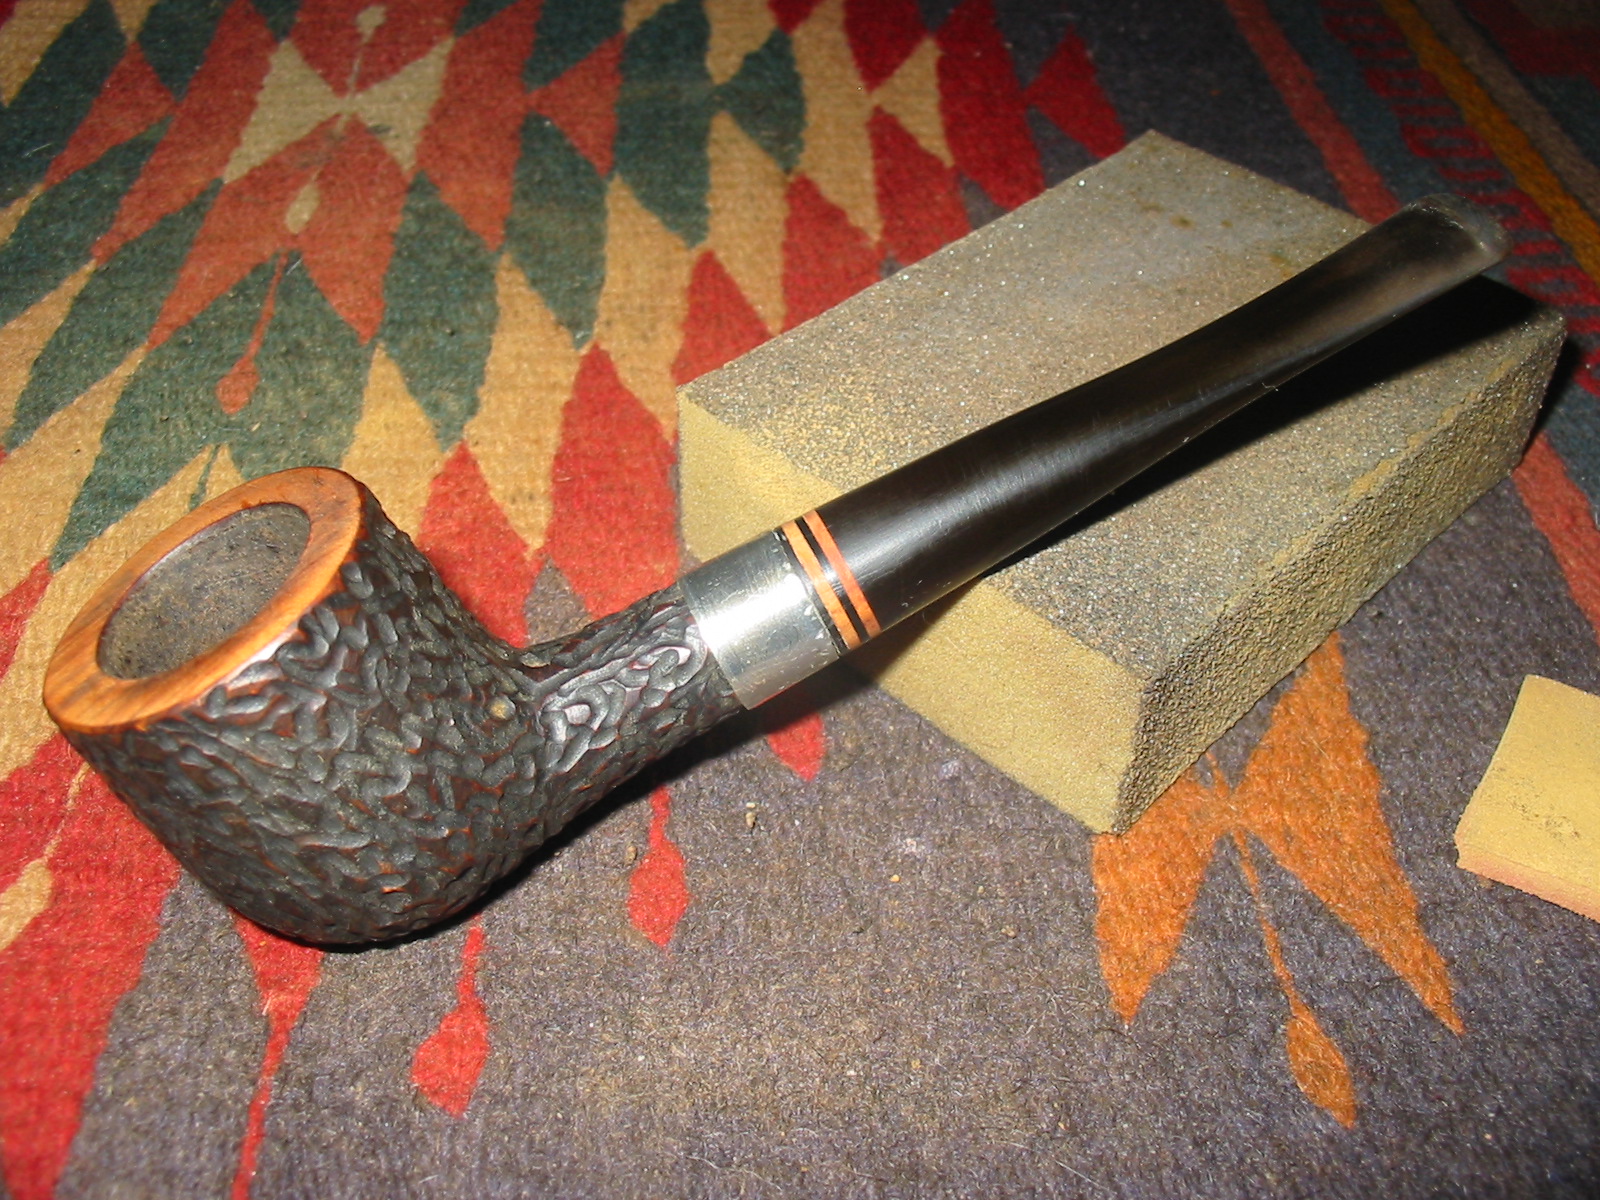
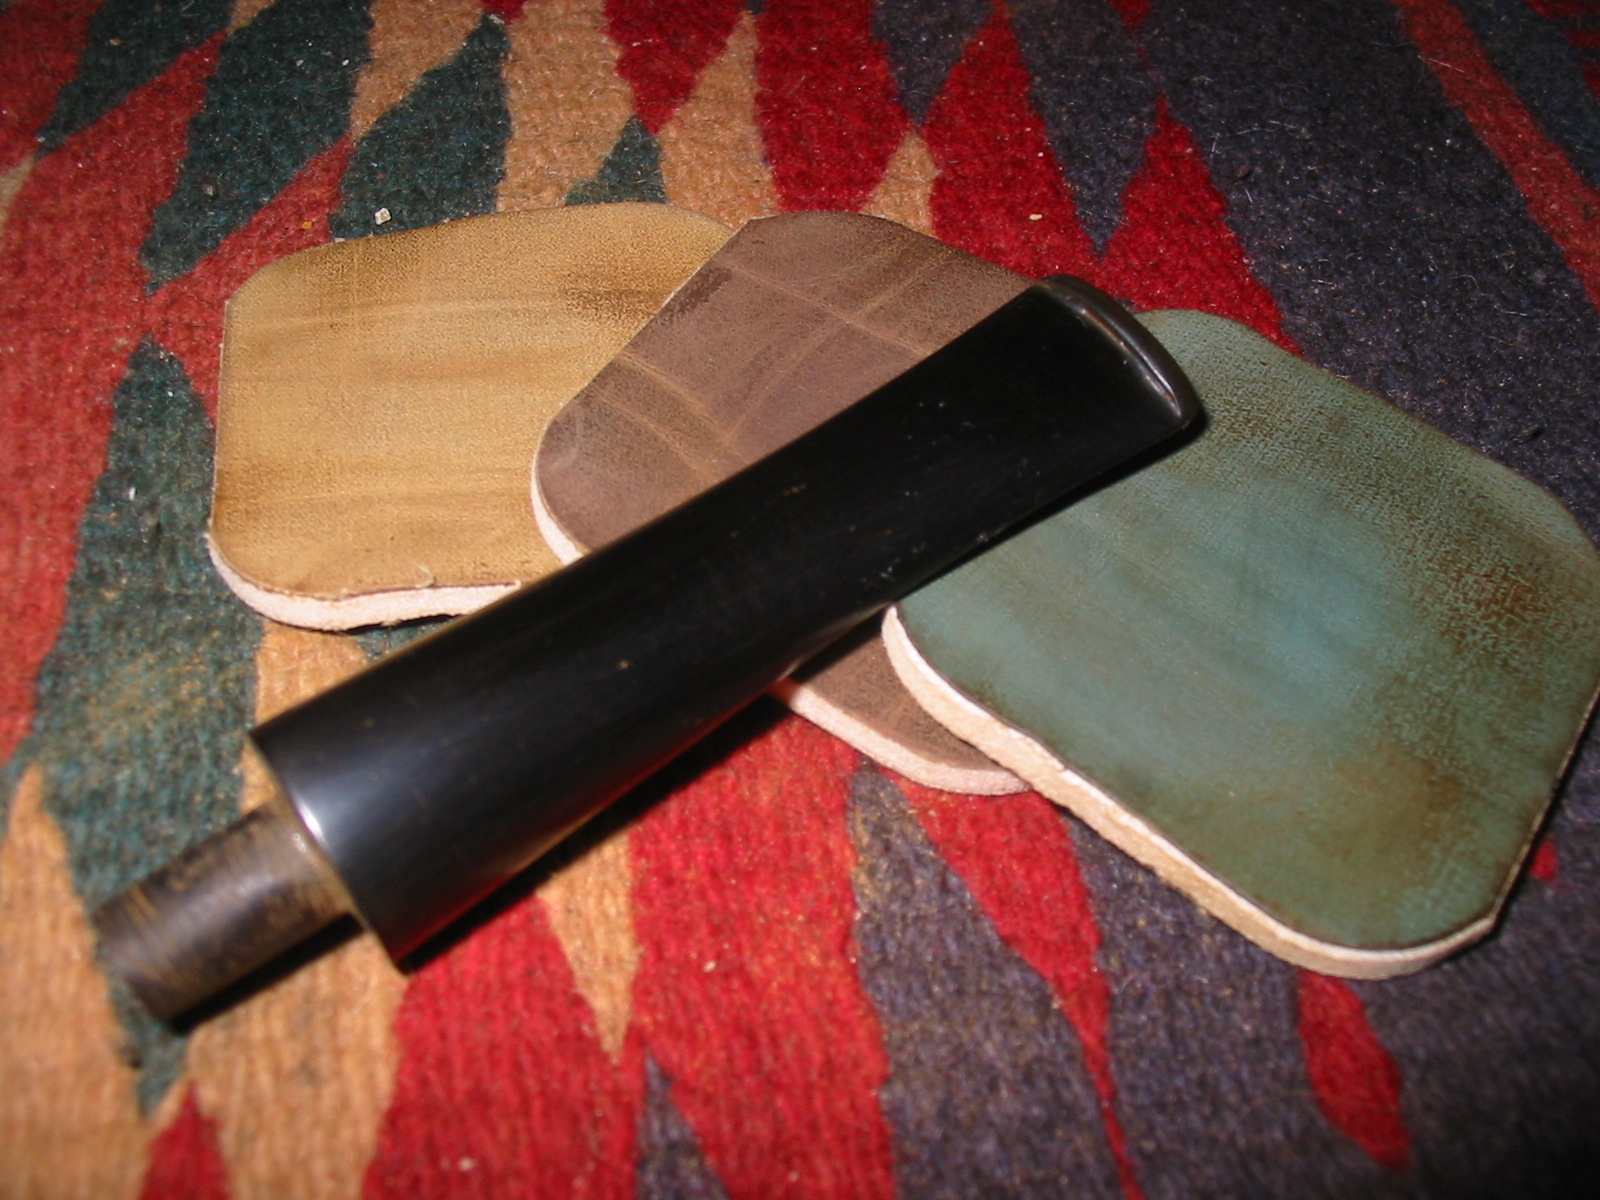
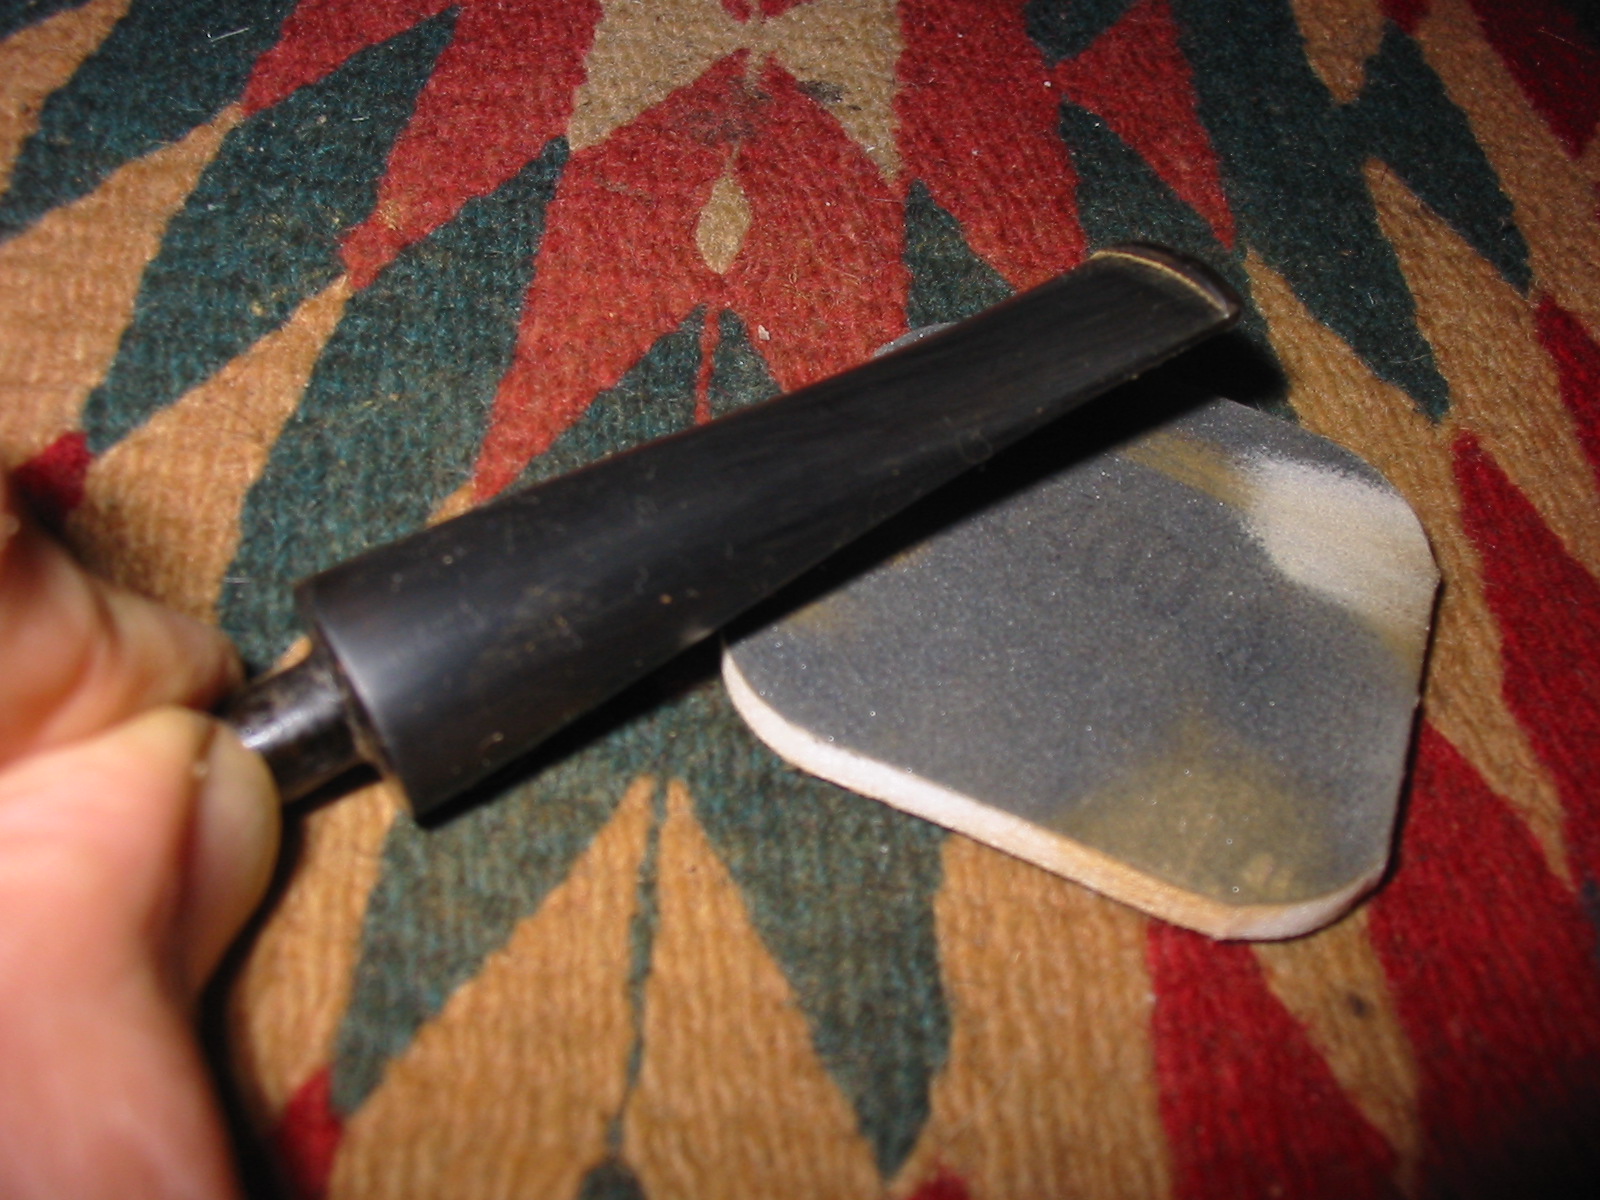
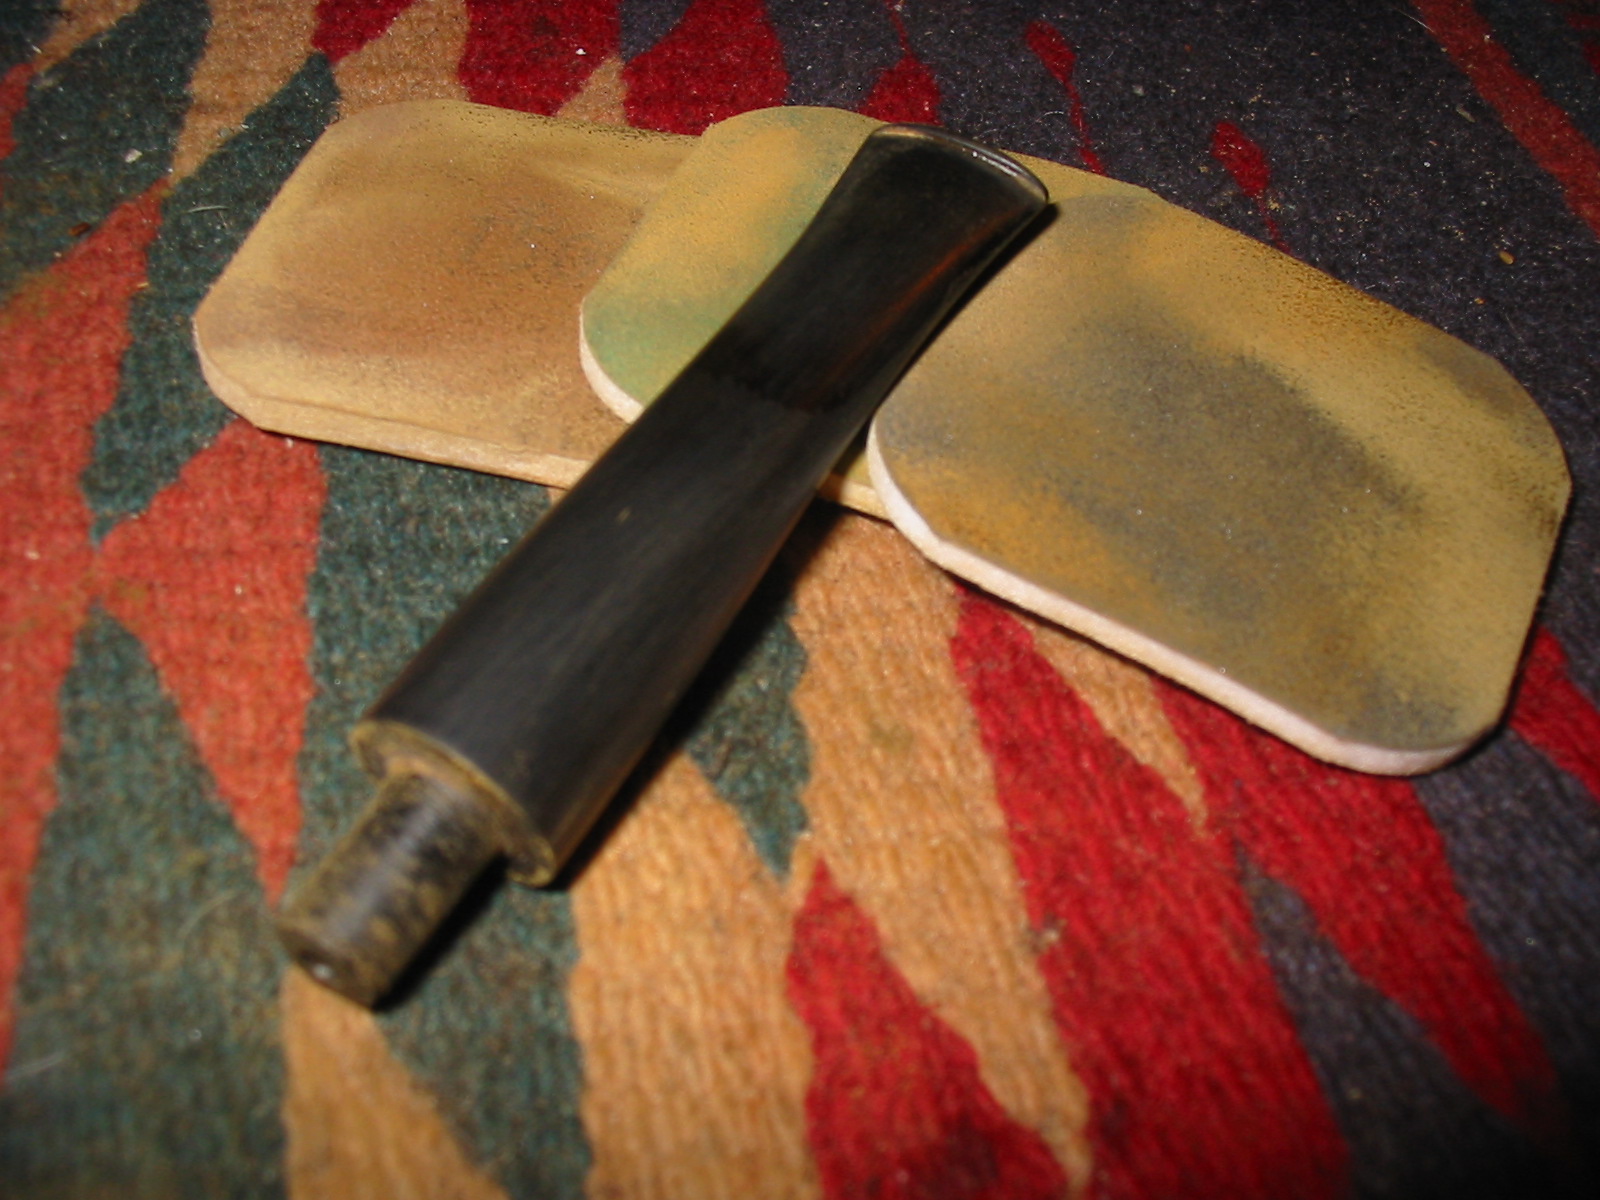
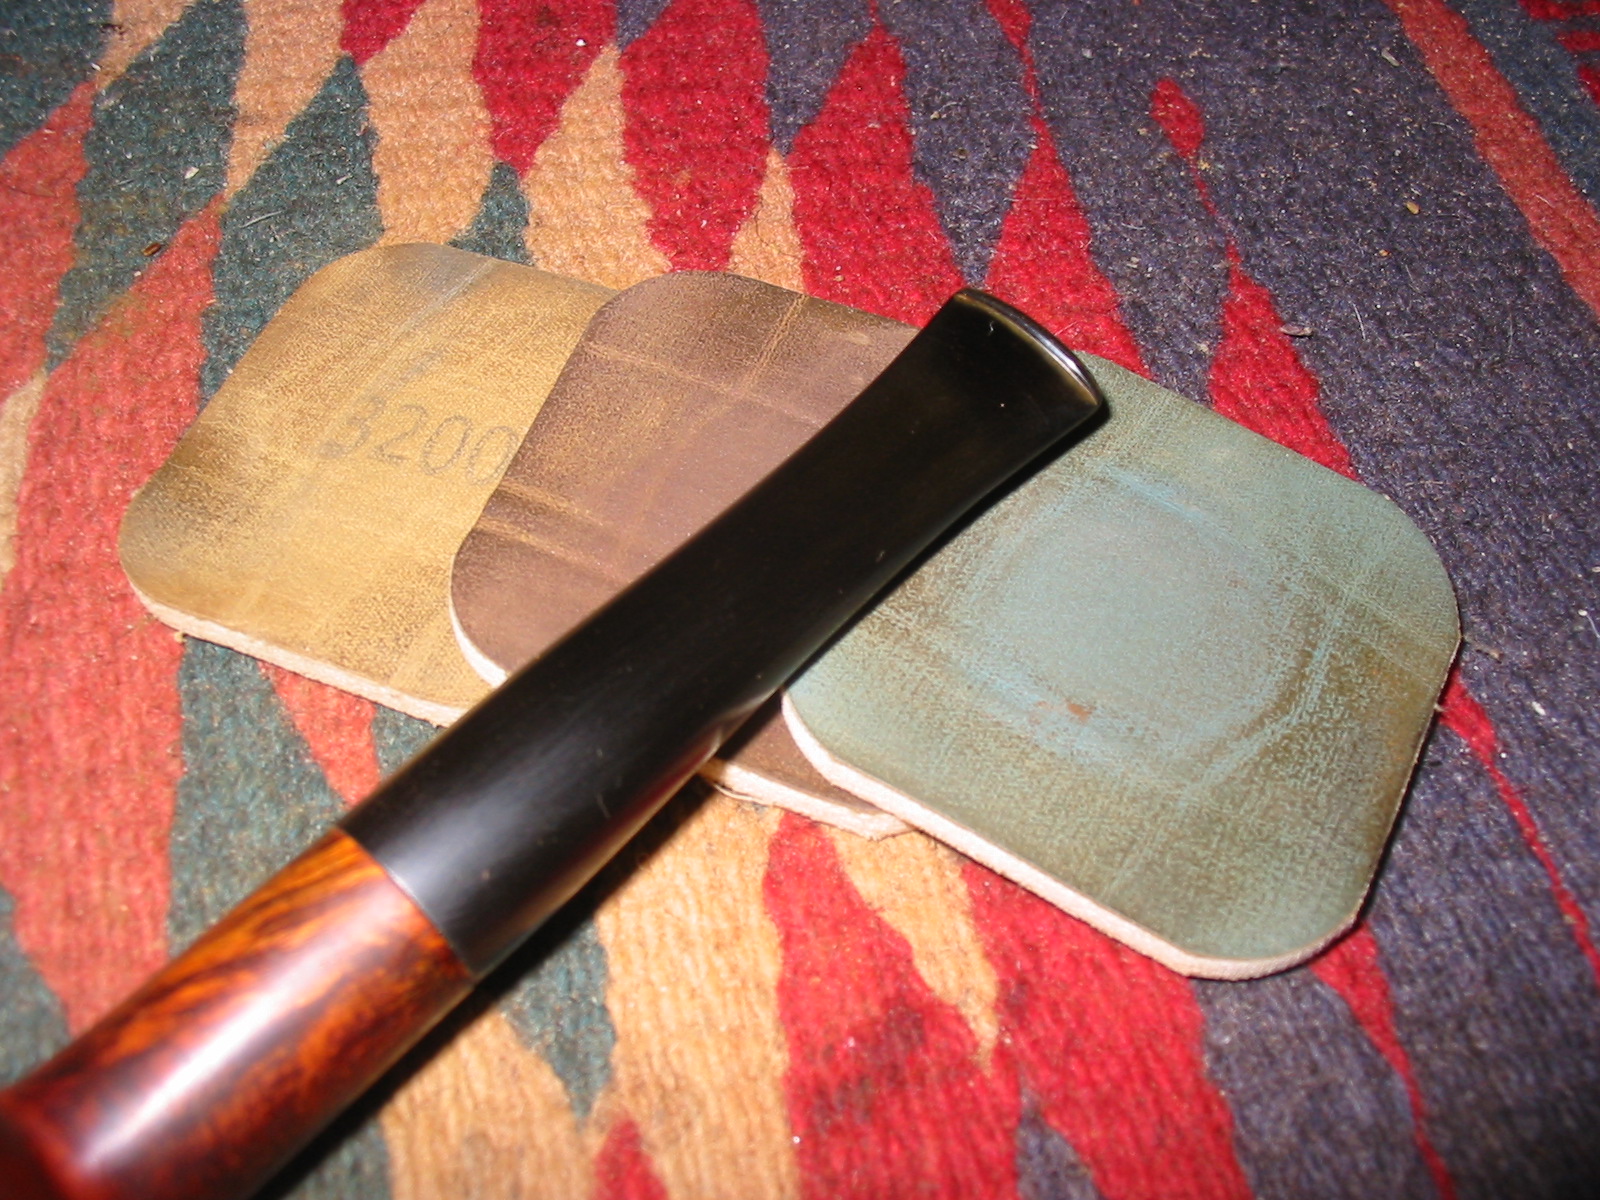
I sanded the bowl and stem with micromesh sanding pads to bring out the shine. I wet sanded the stem with 1500-2400 grit pads and then dry sanded the bowl and stem with 3200- 4,000 grit pads. At that point I made a decision that some will like and others will hate.
IMG_3387

IMG_3388

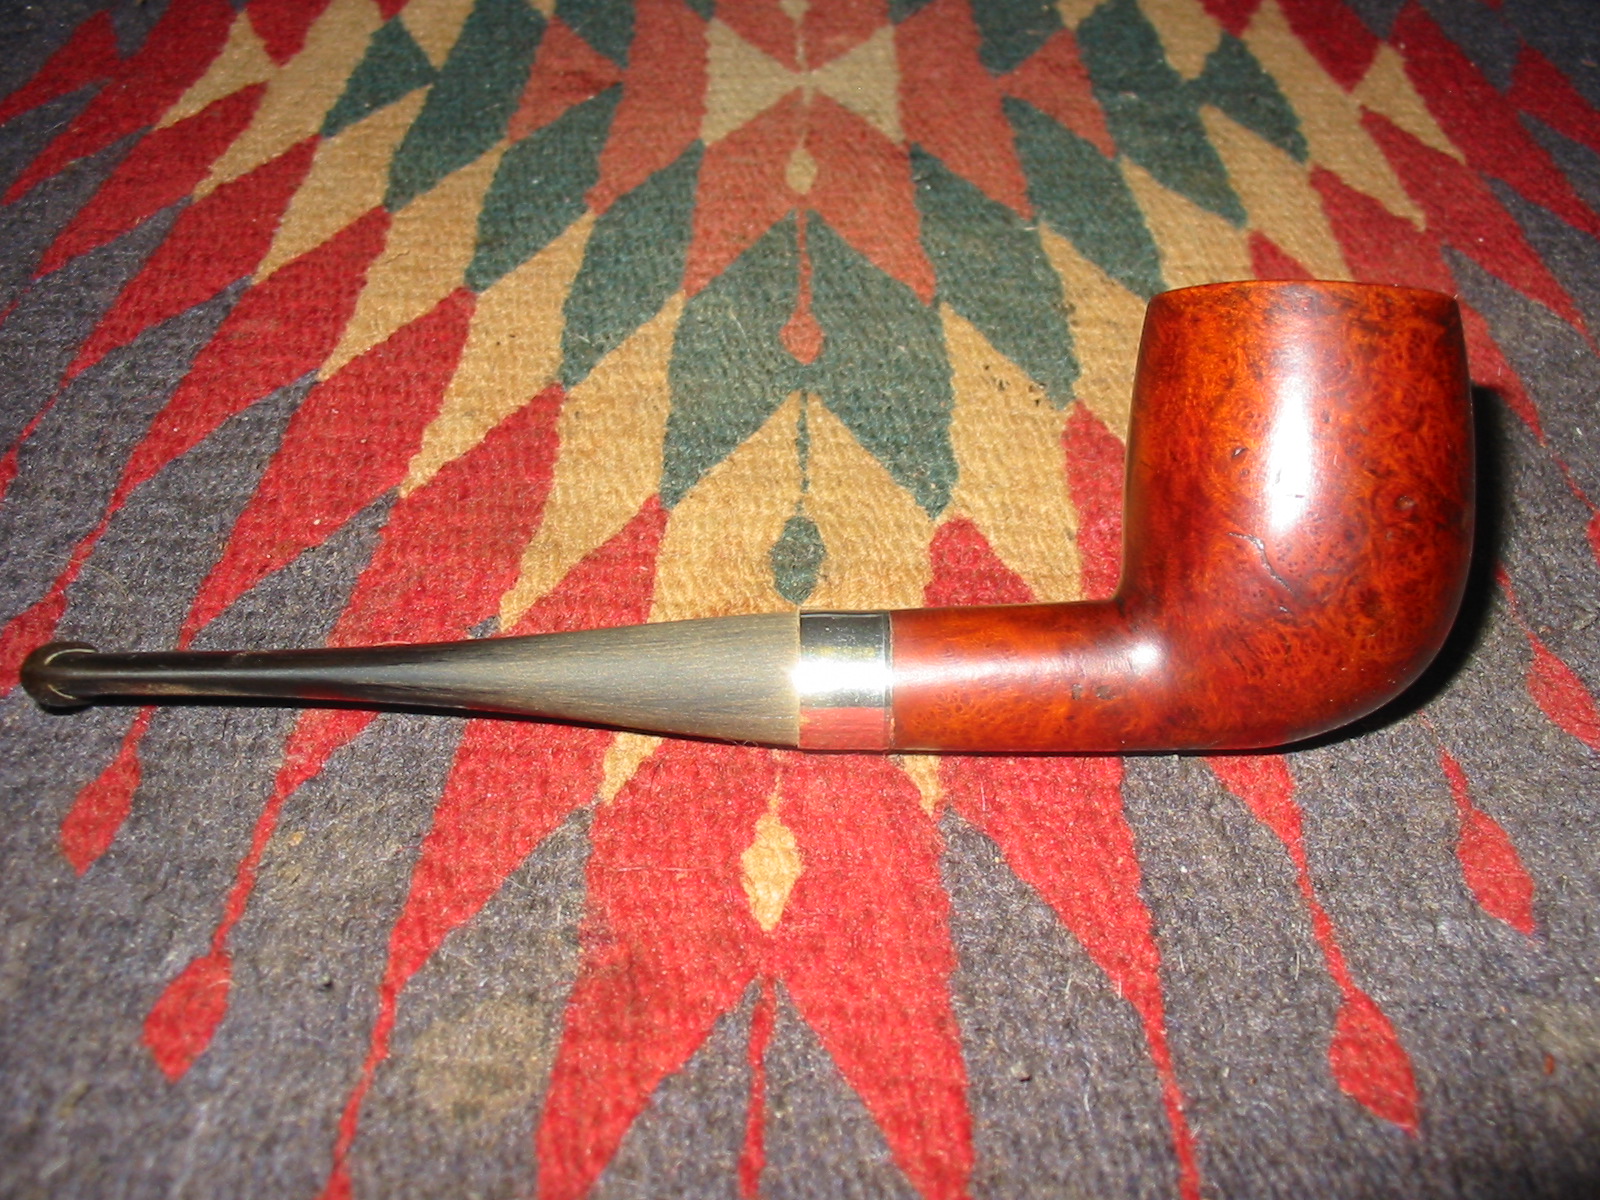
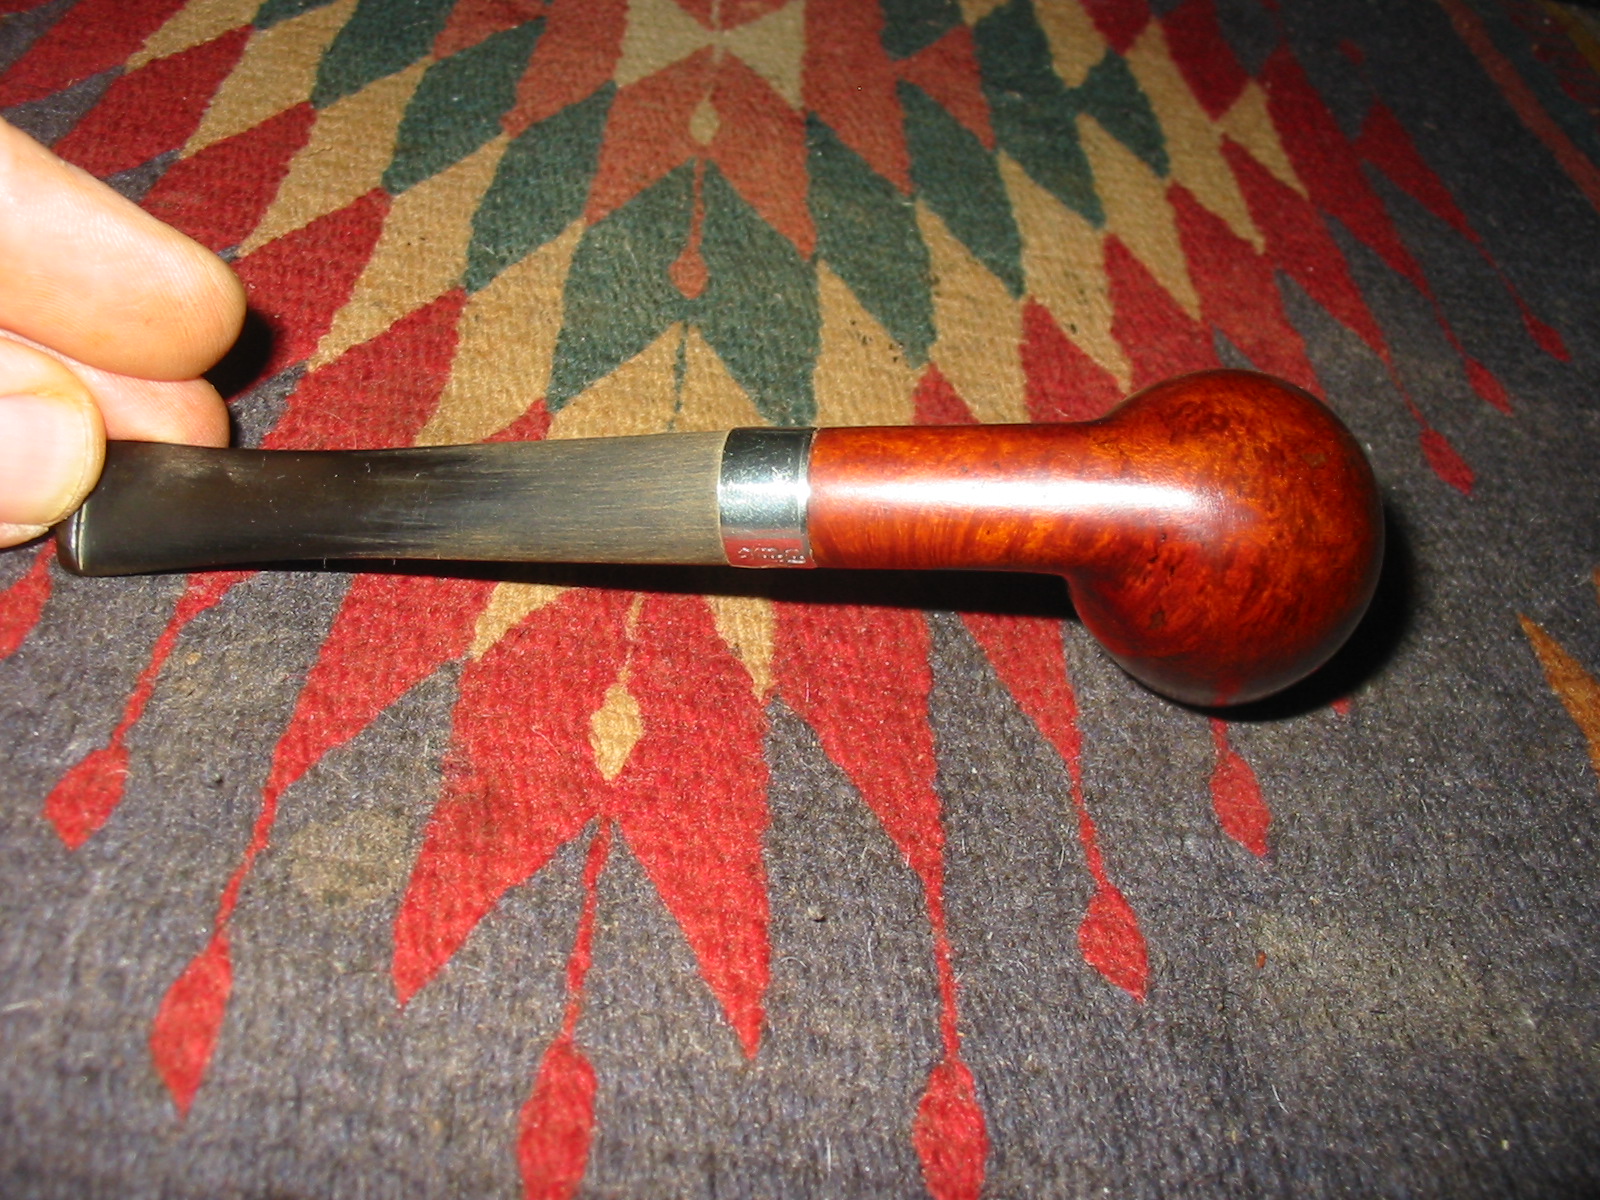
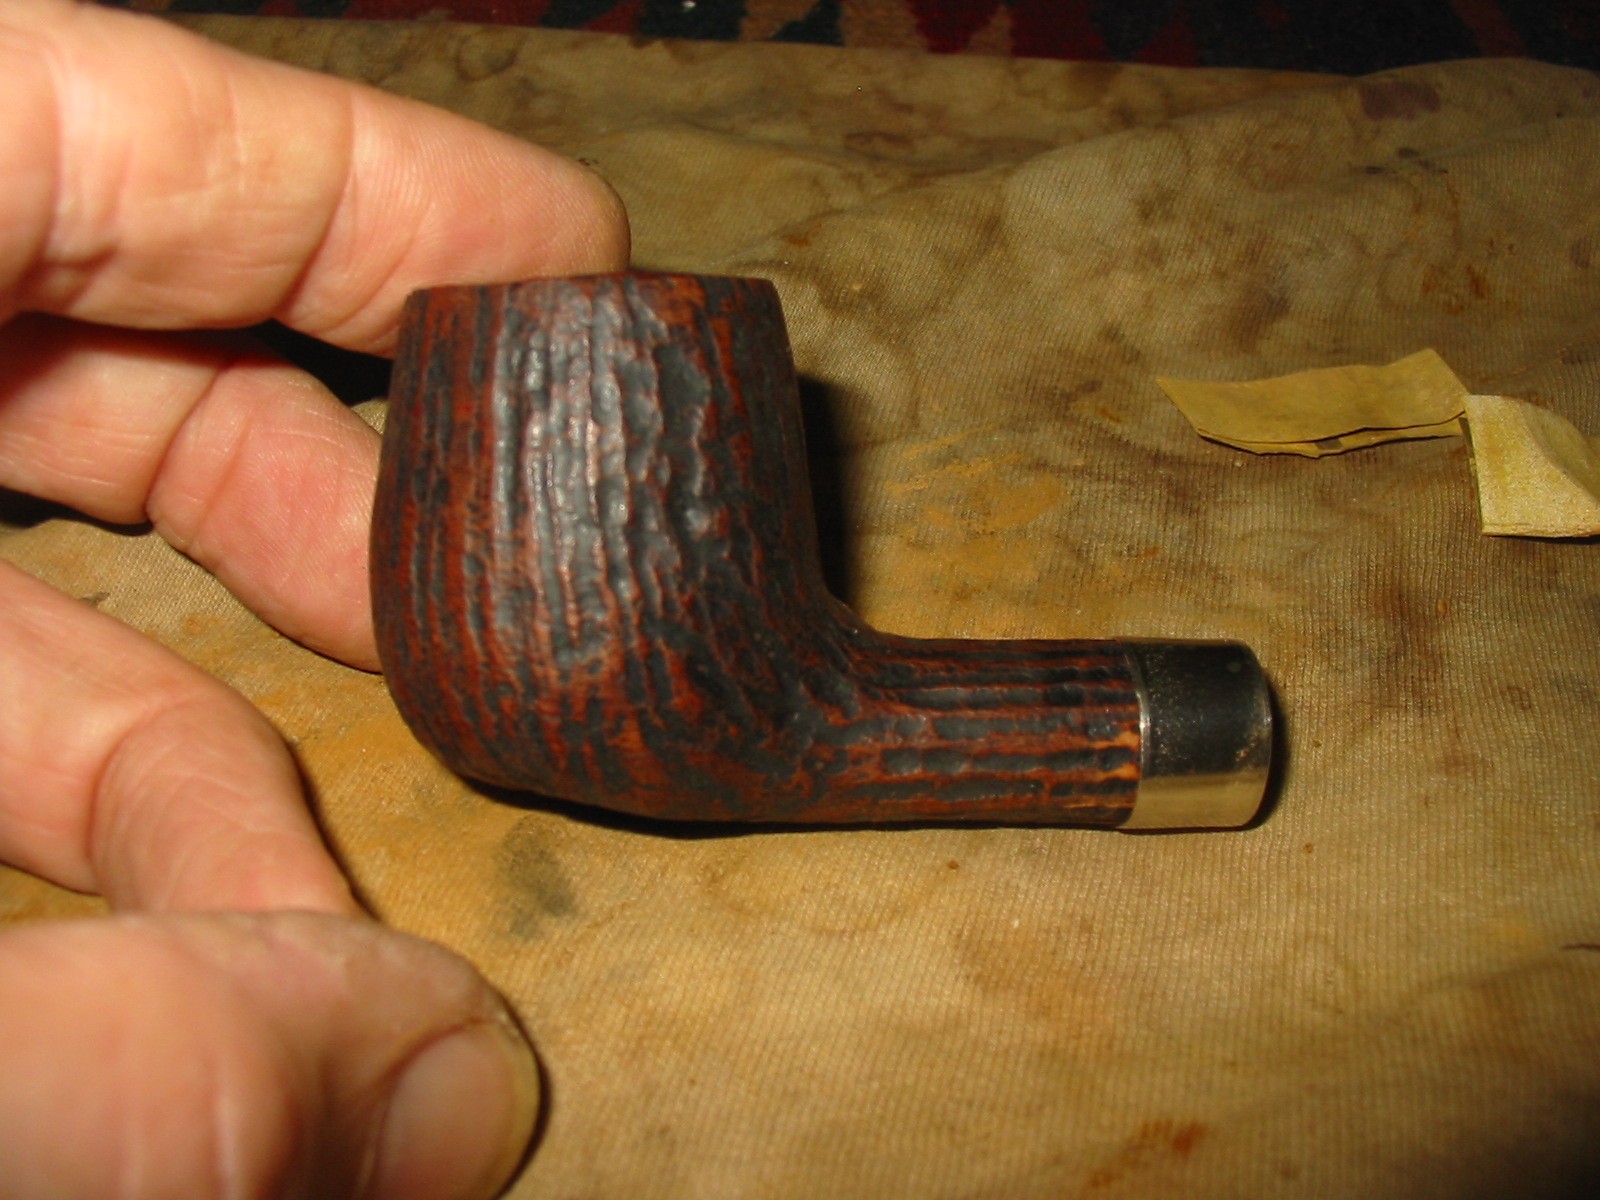
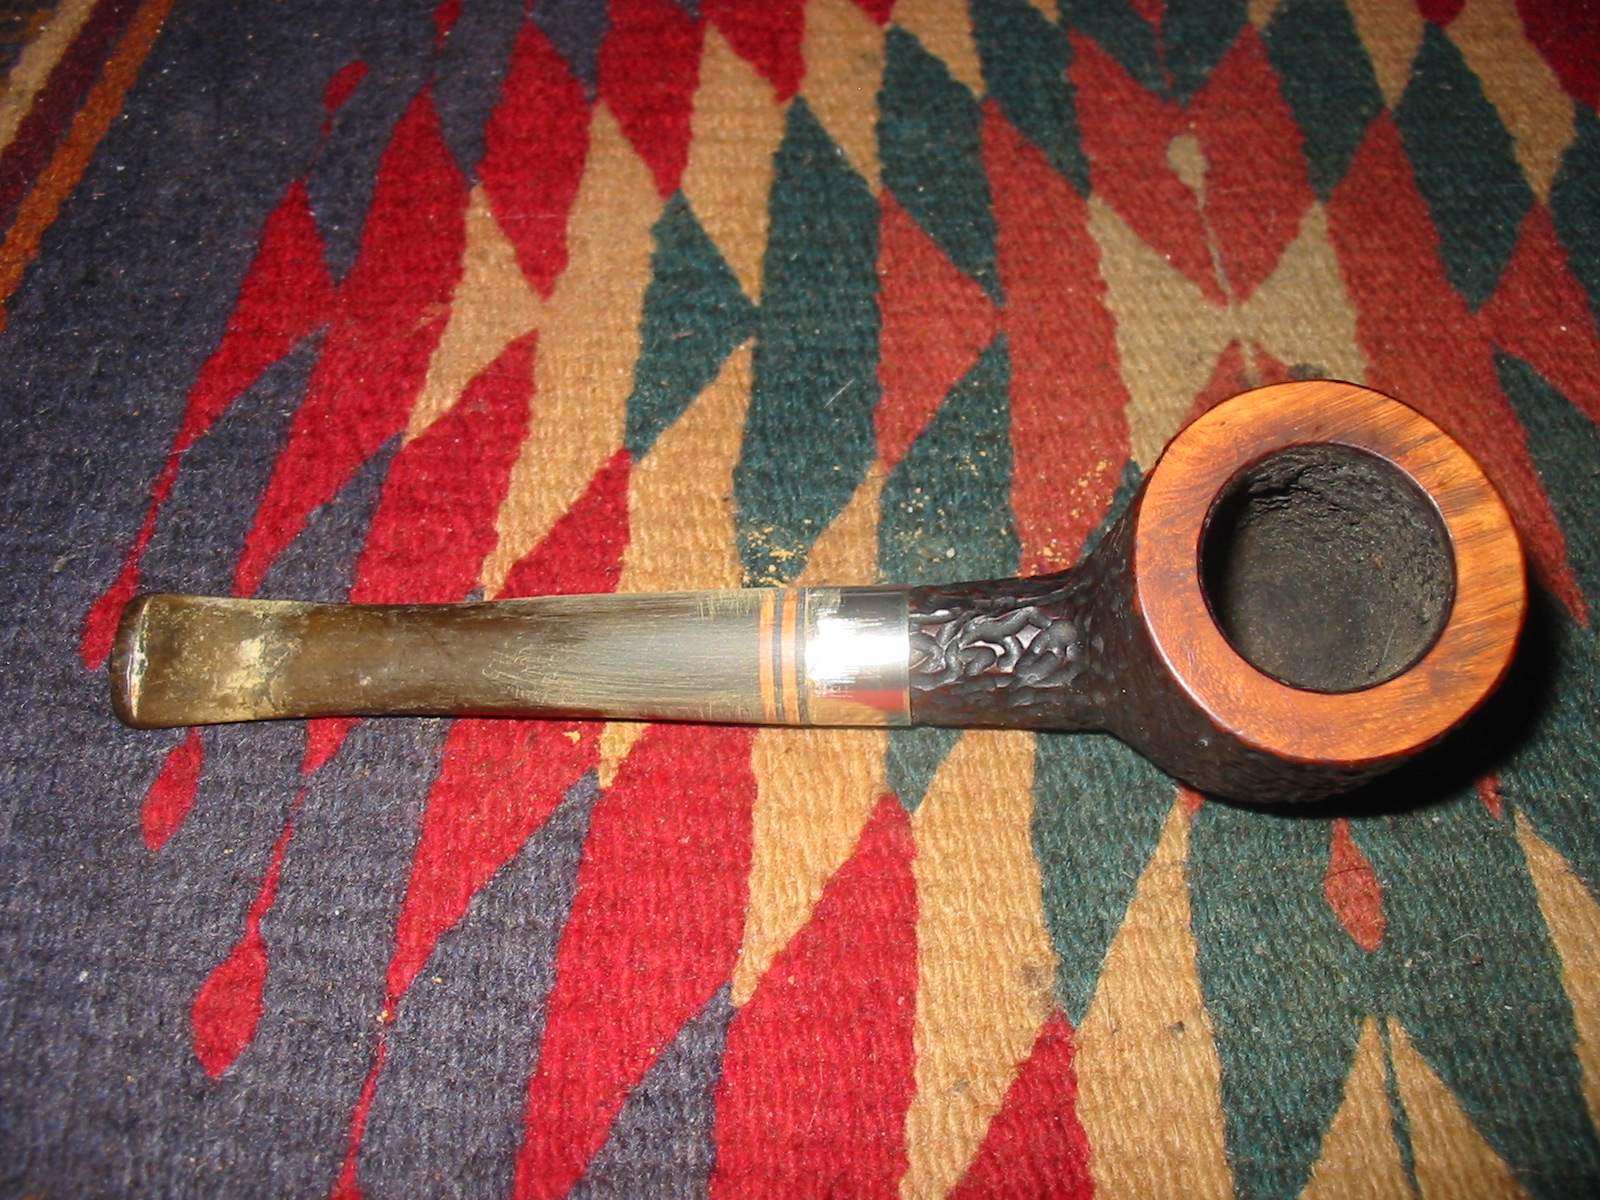
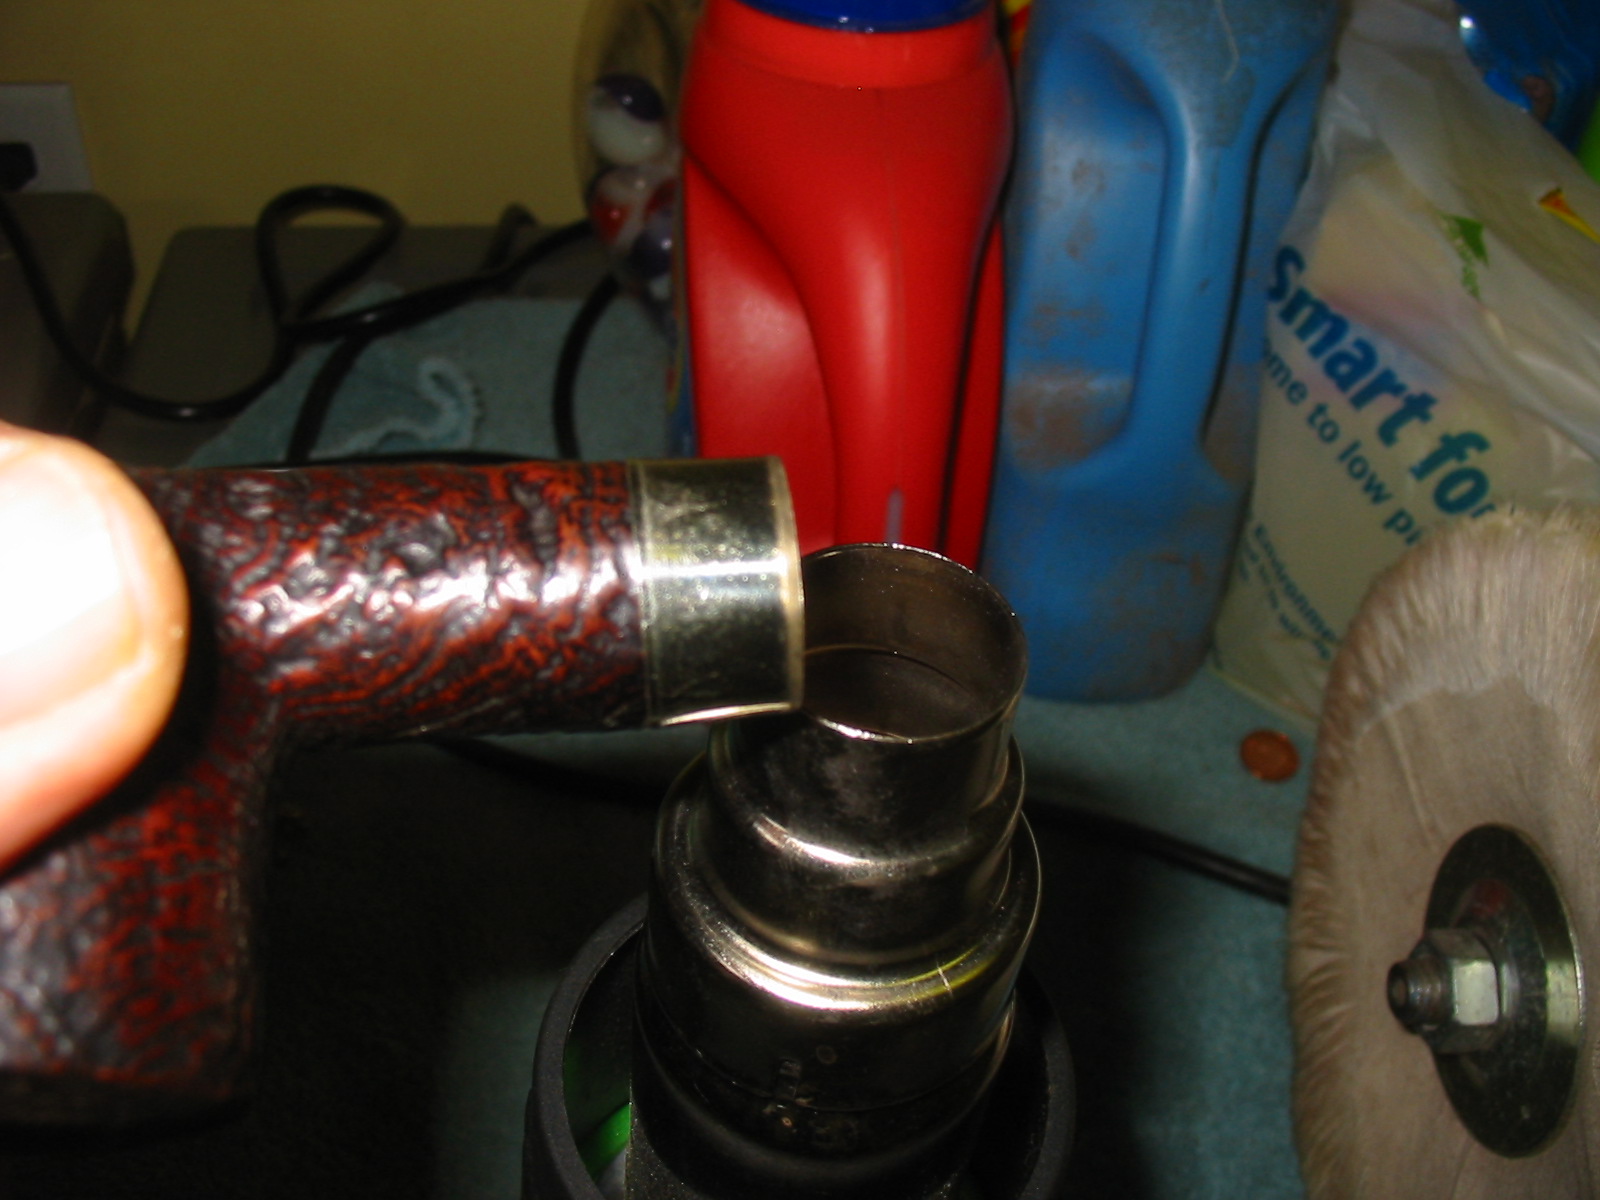
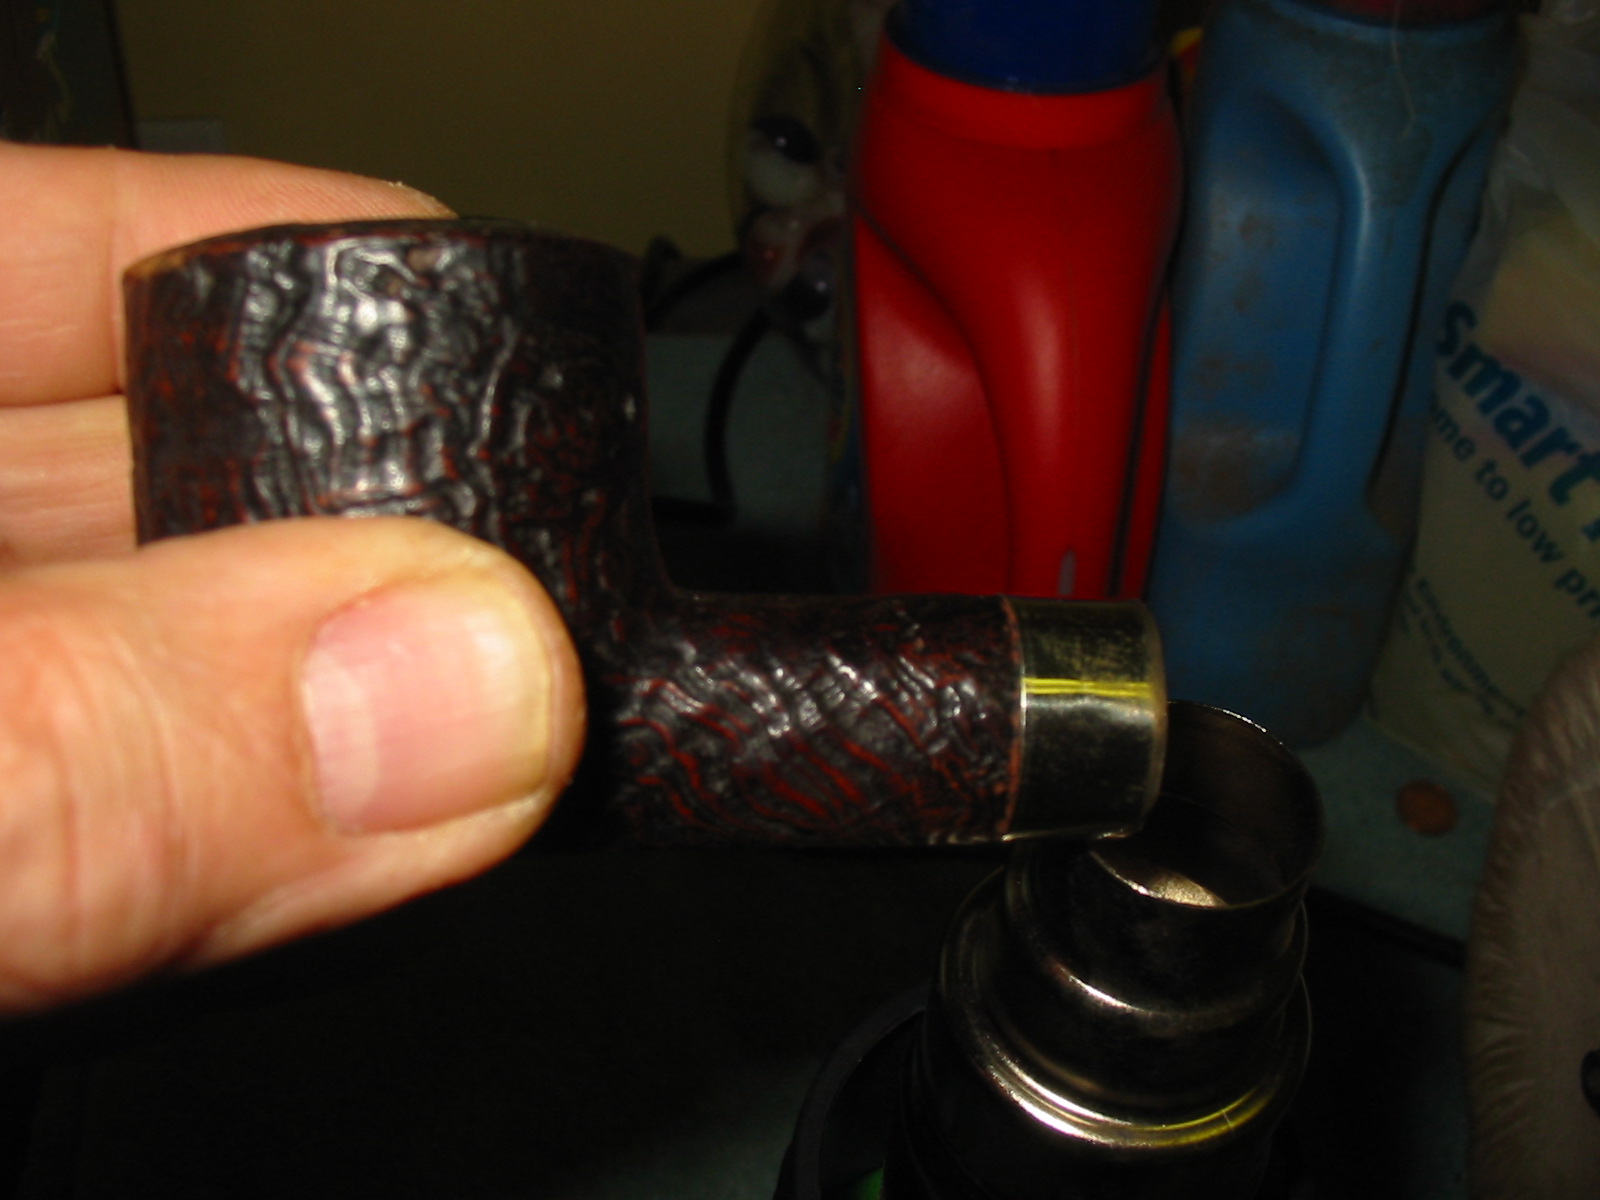
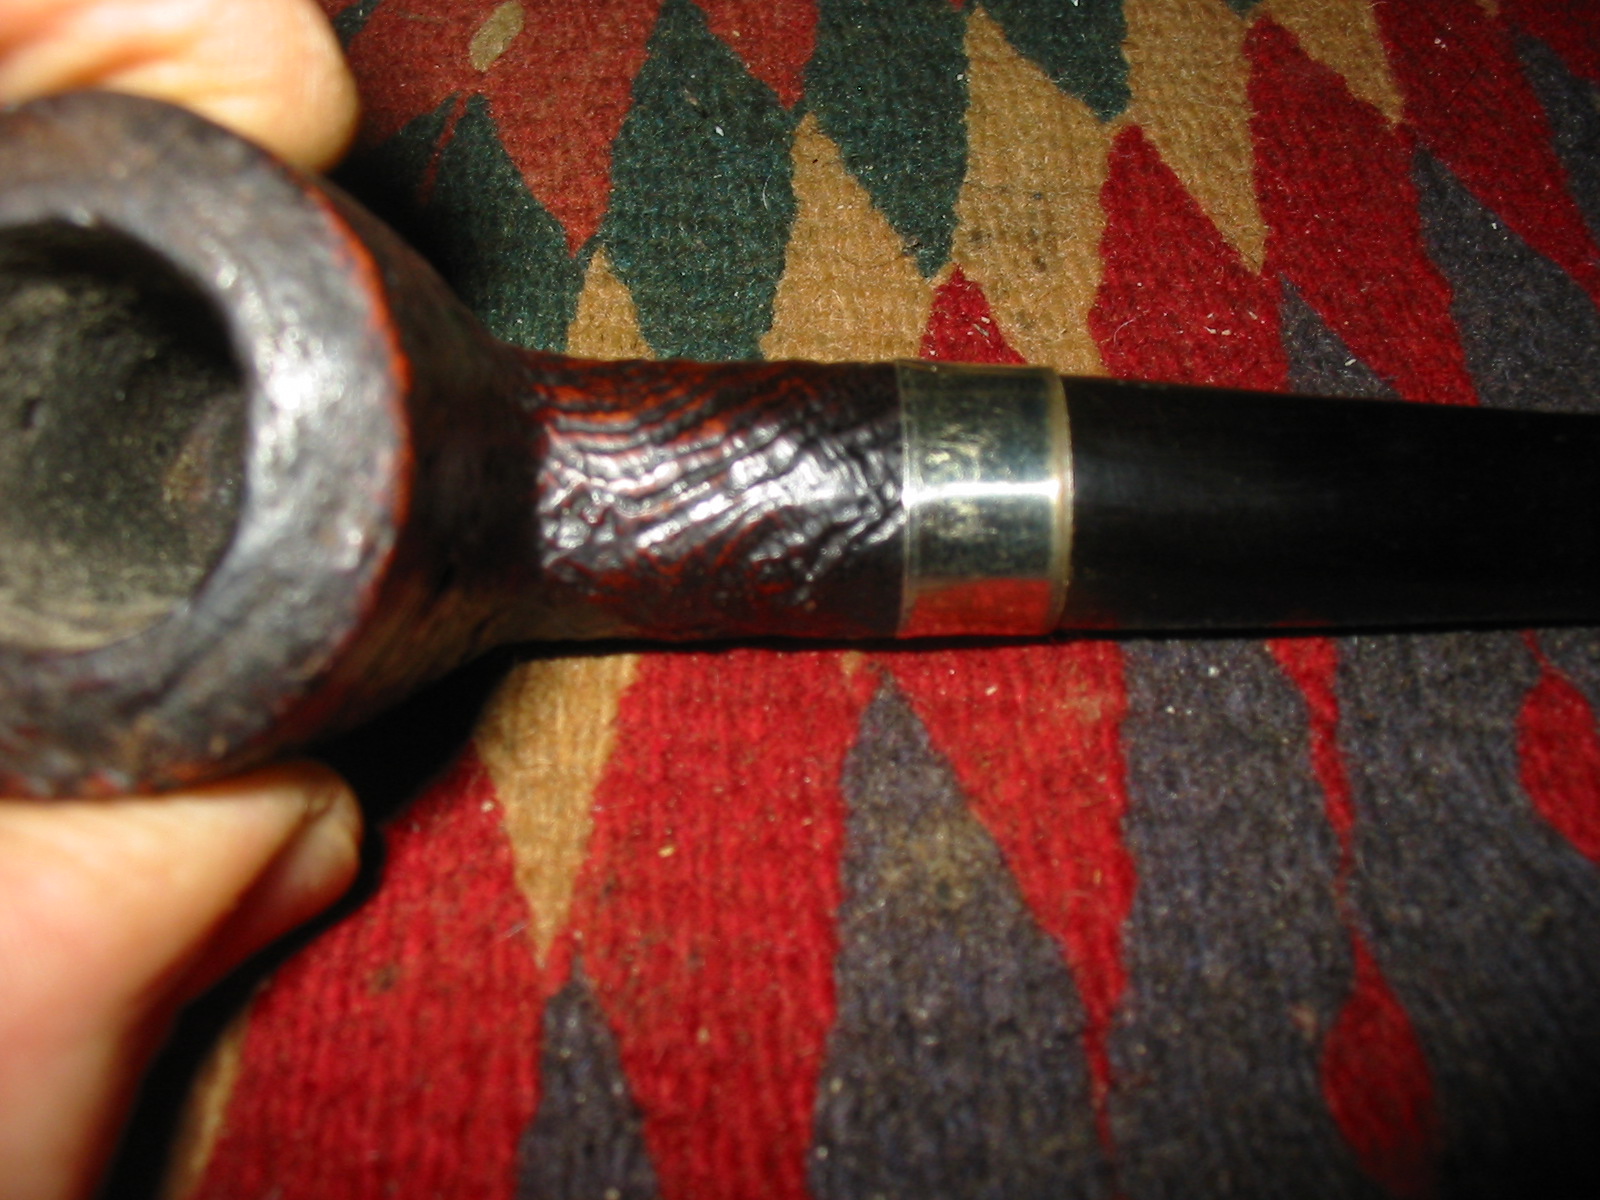
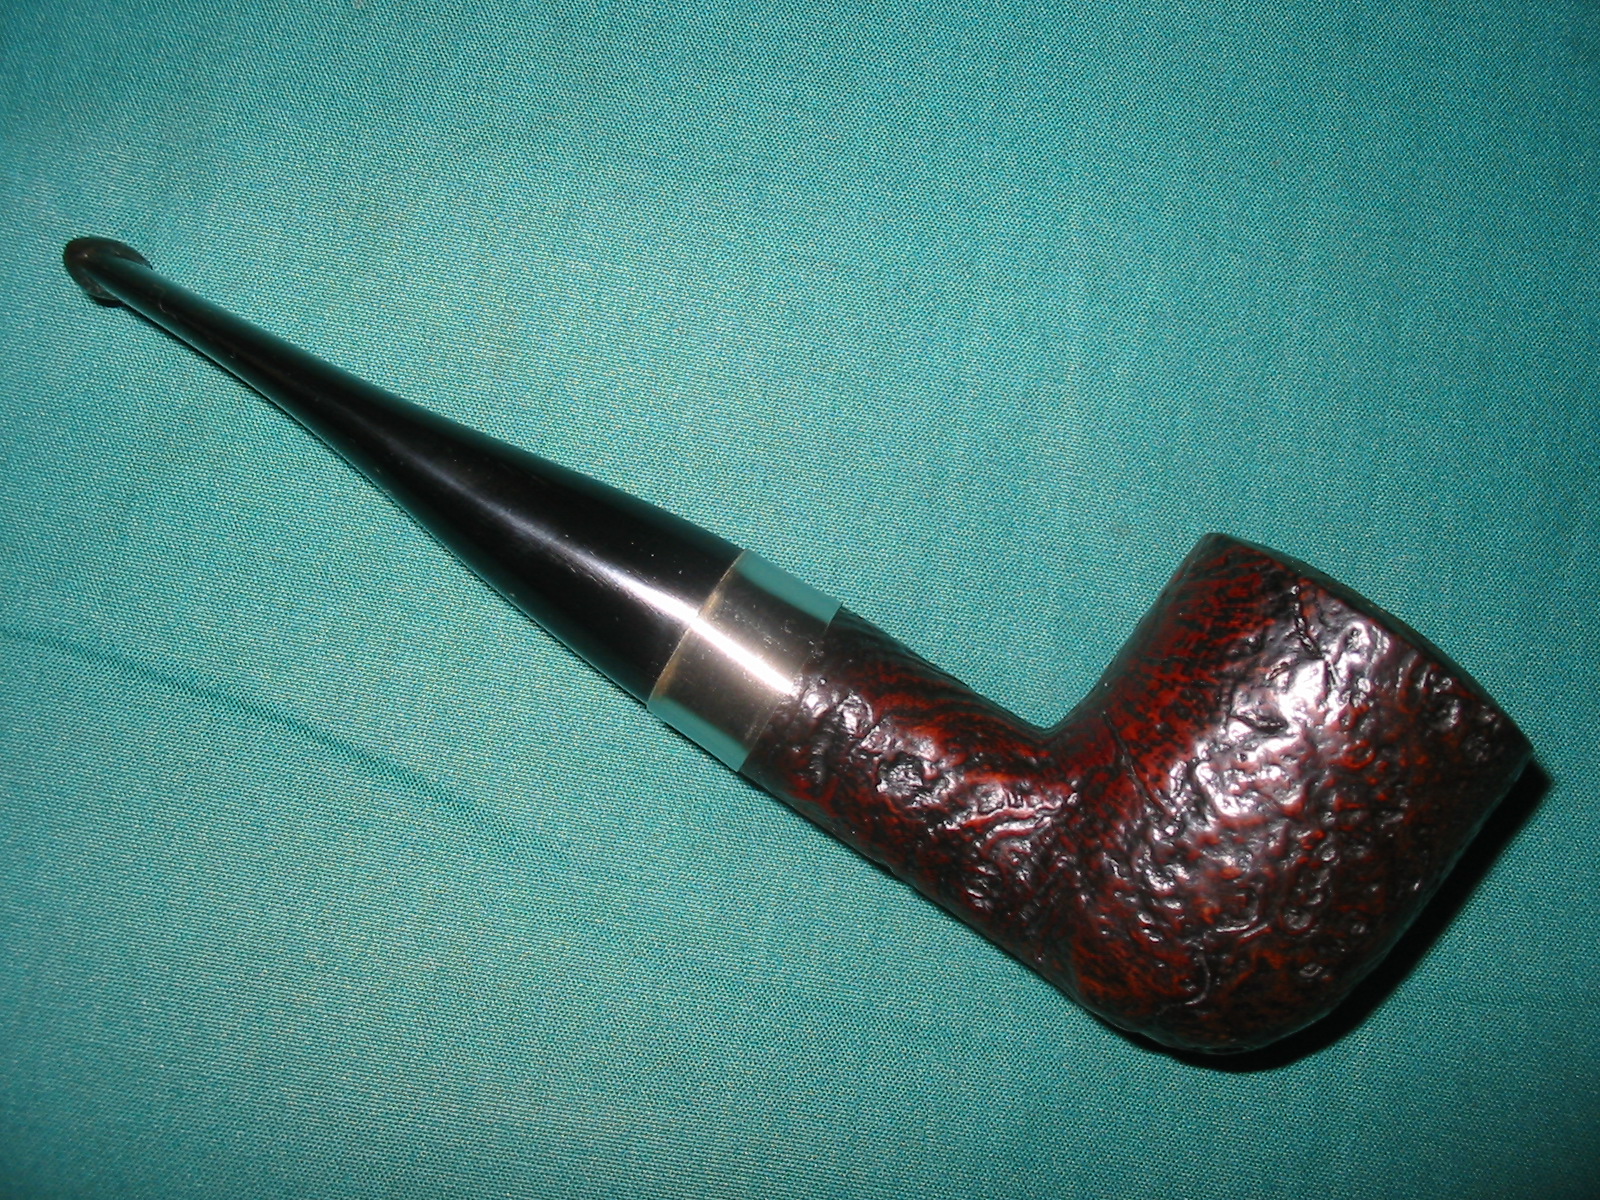
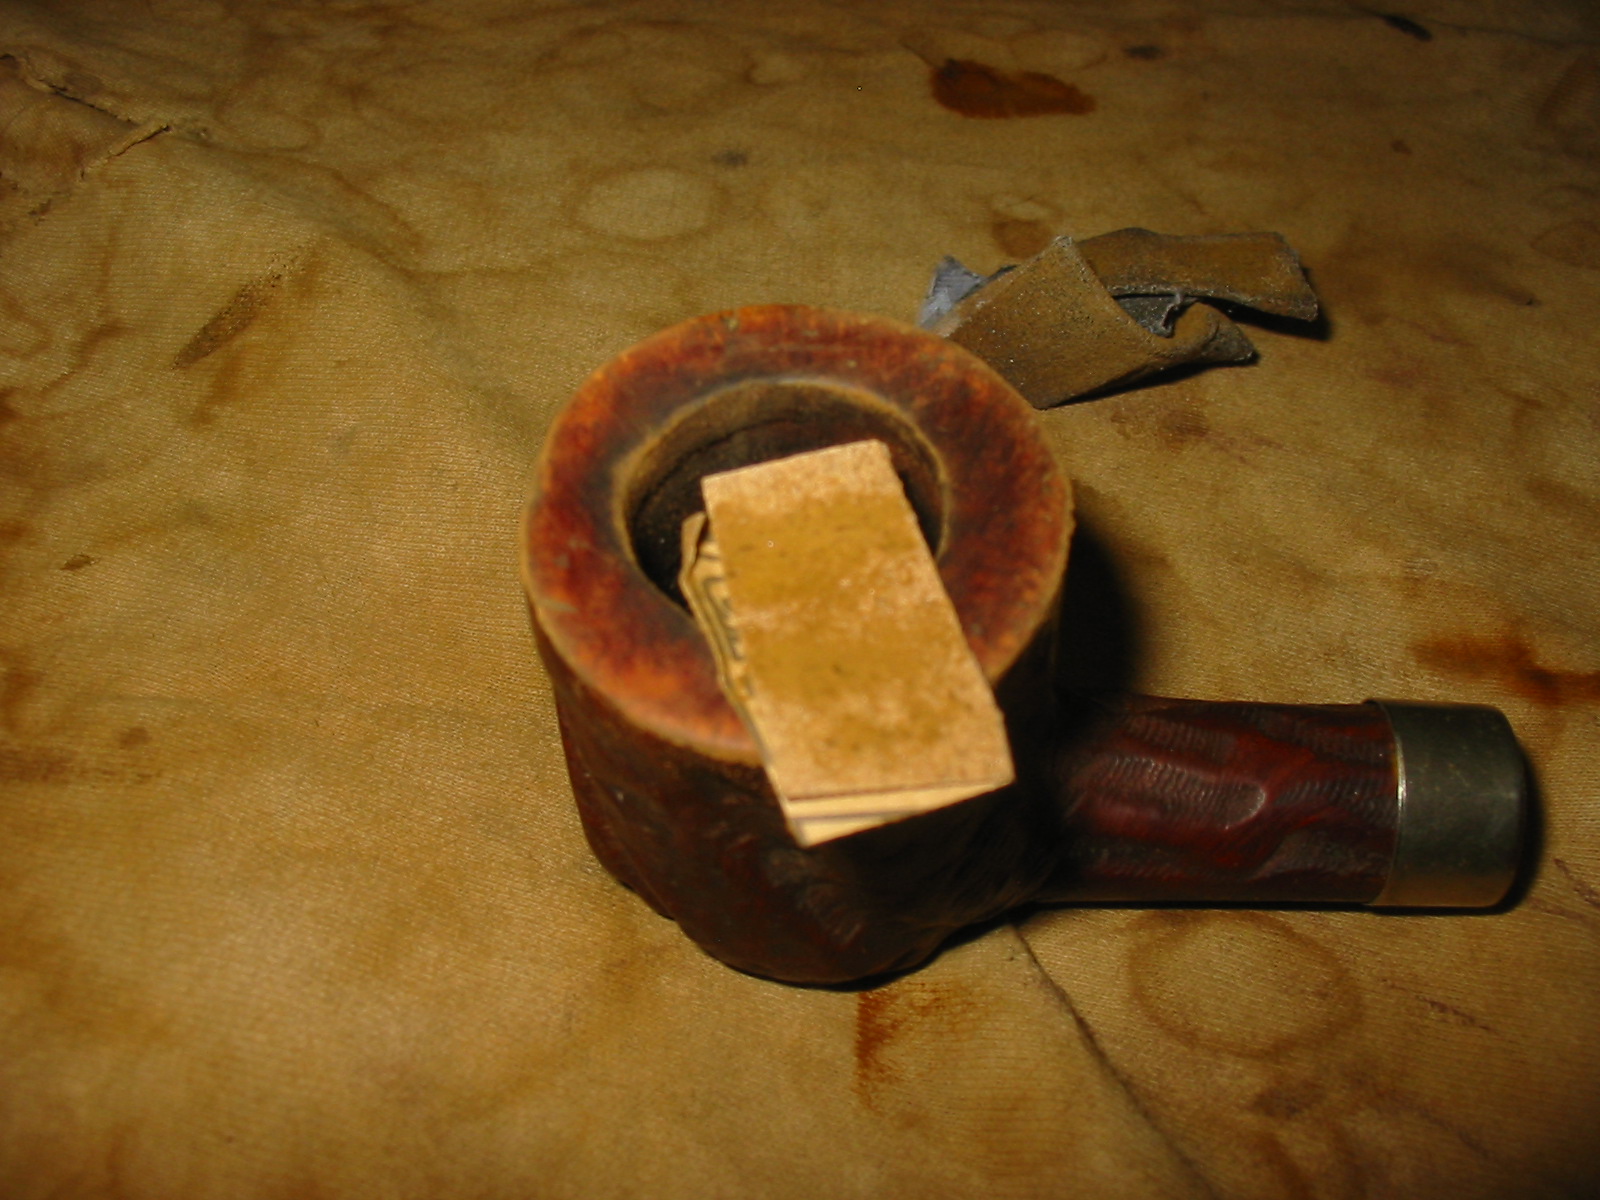
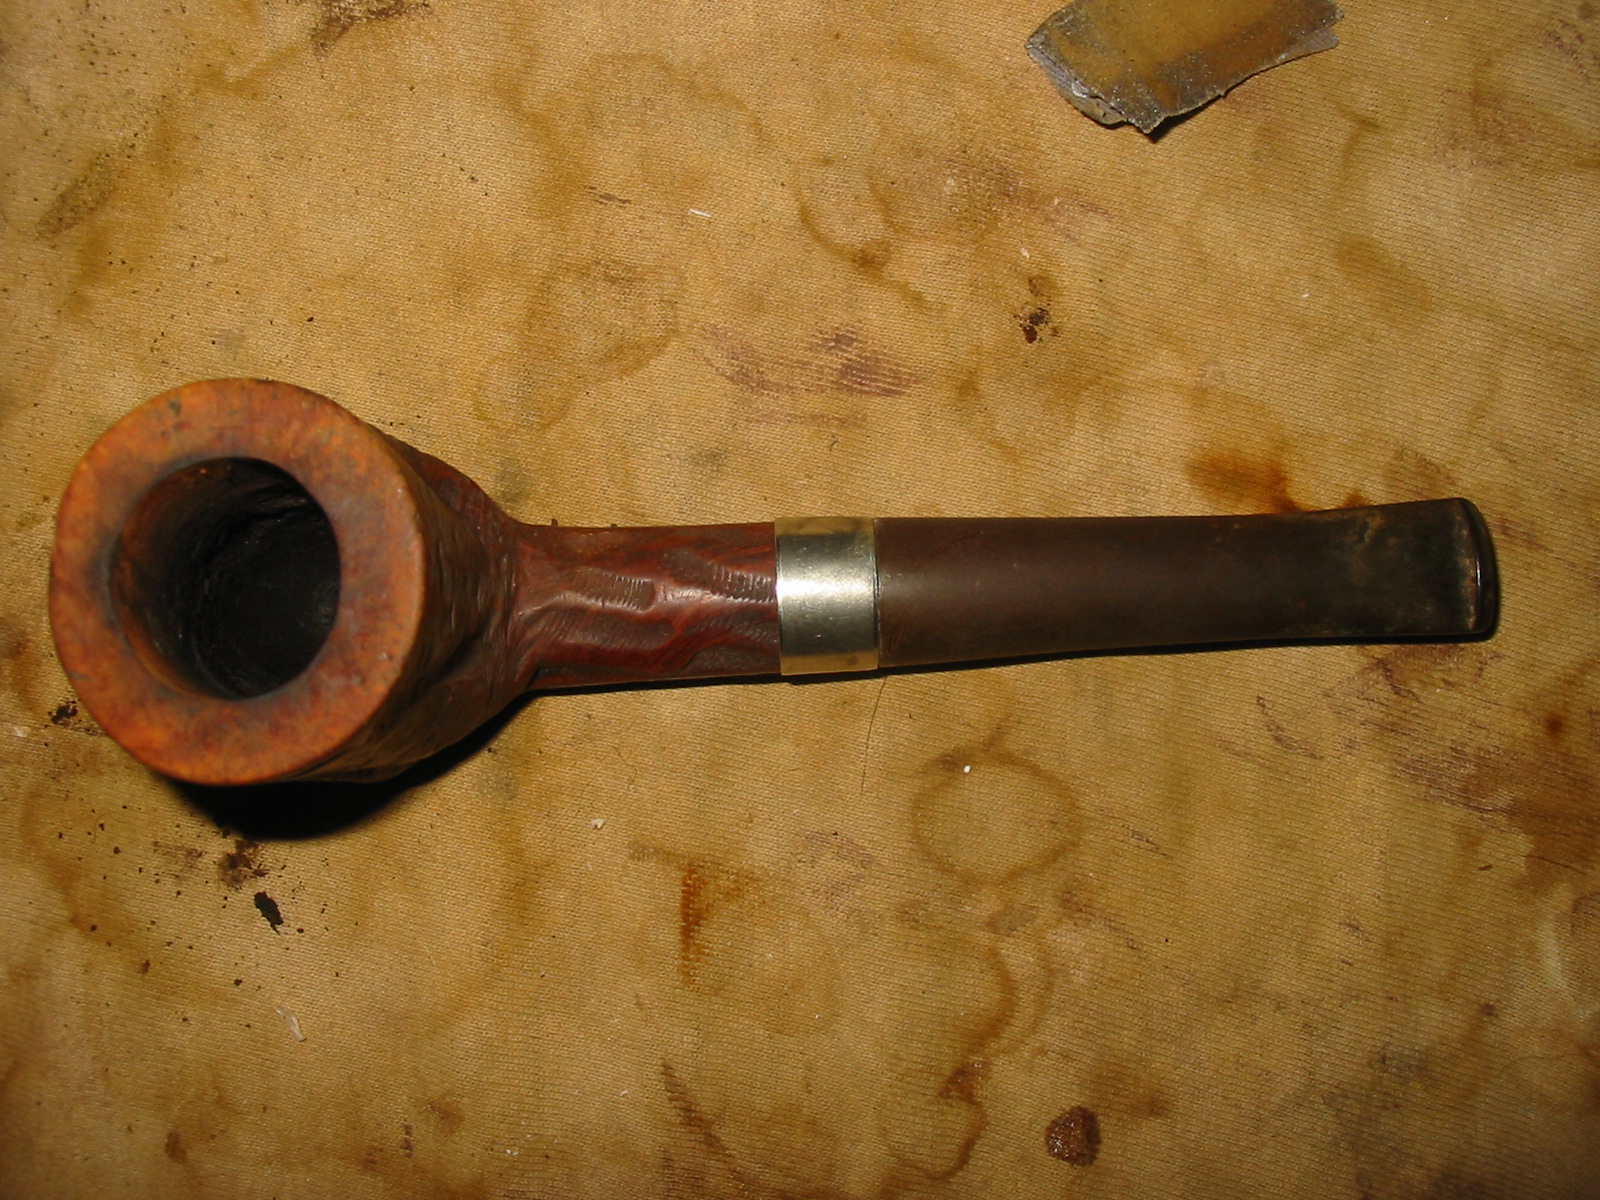
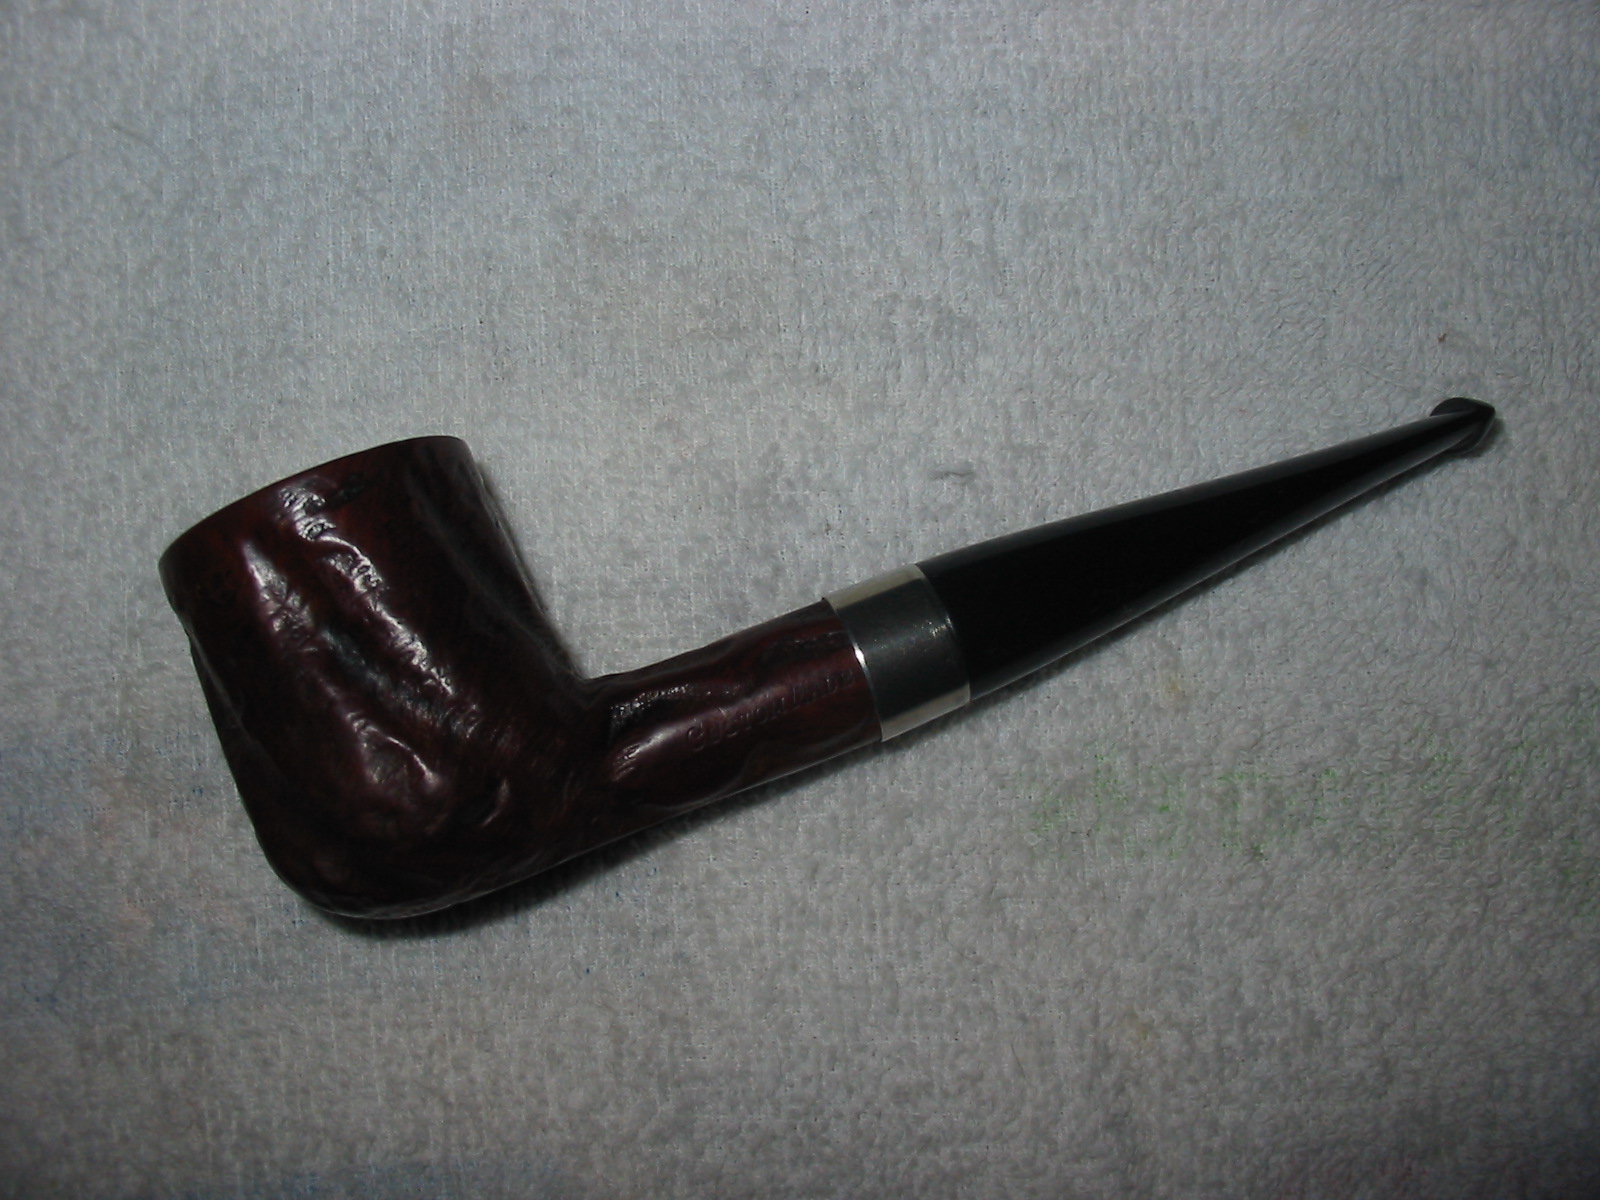
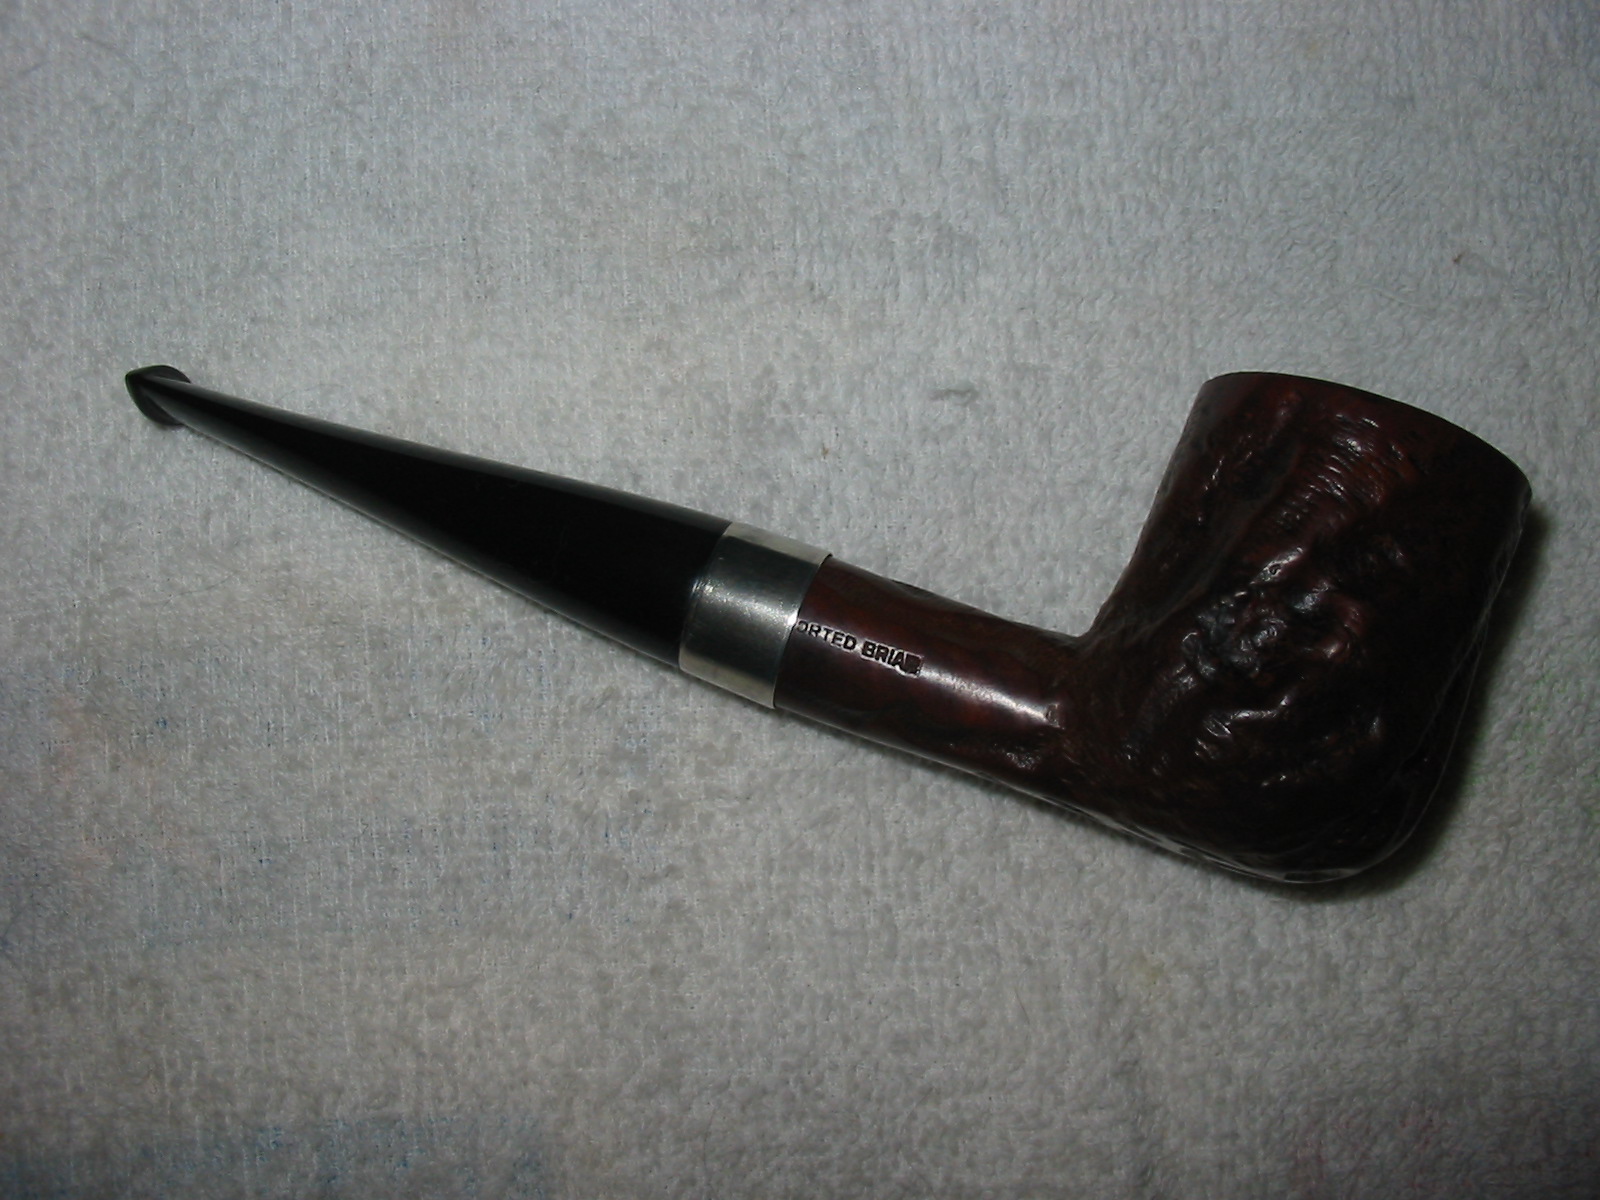
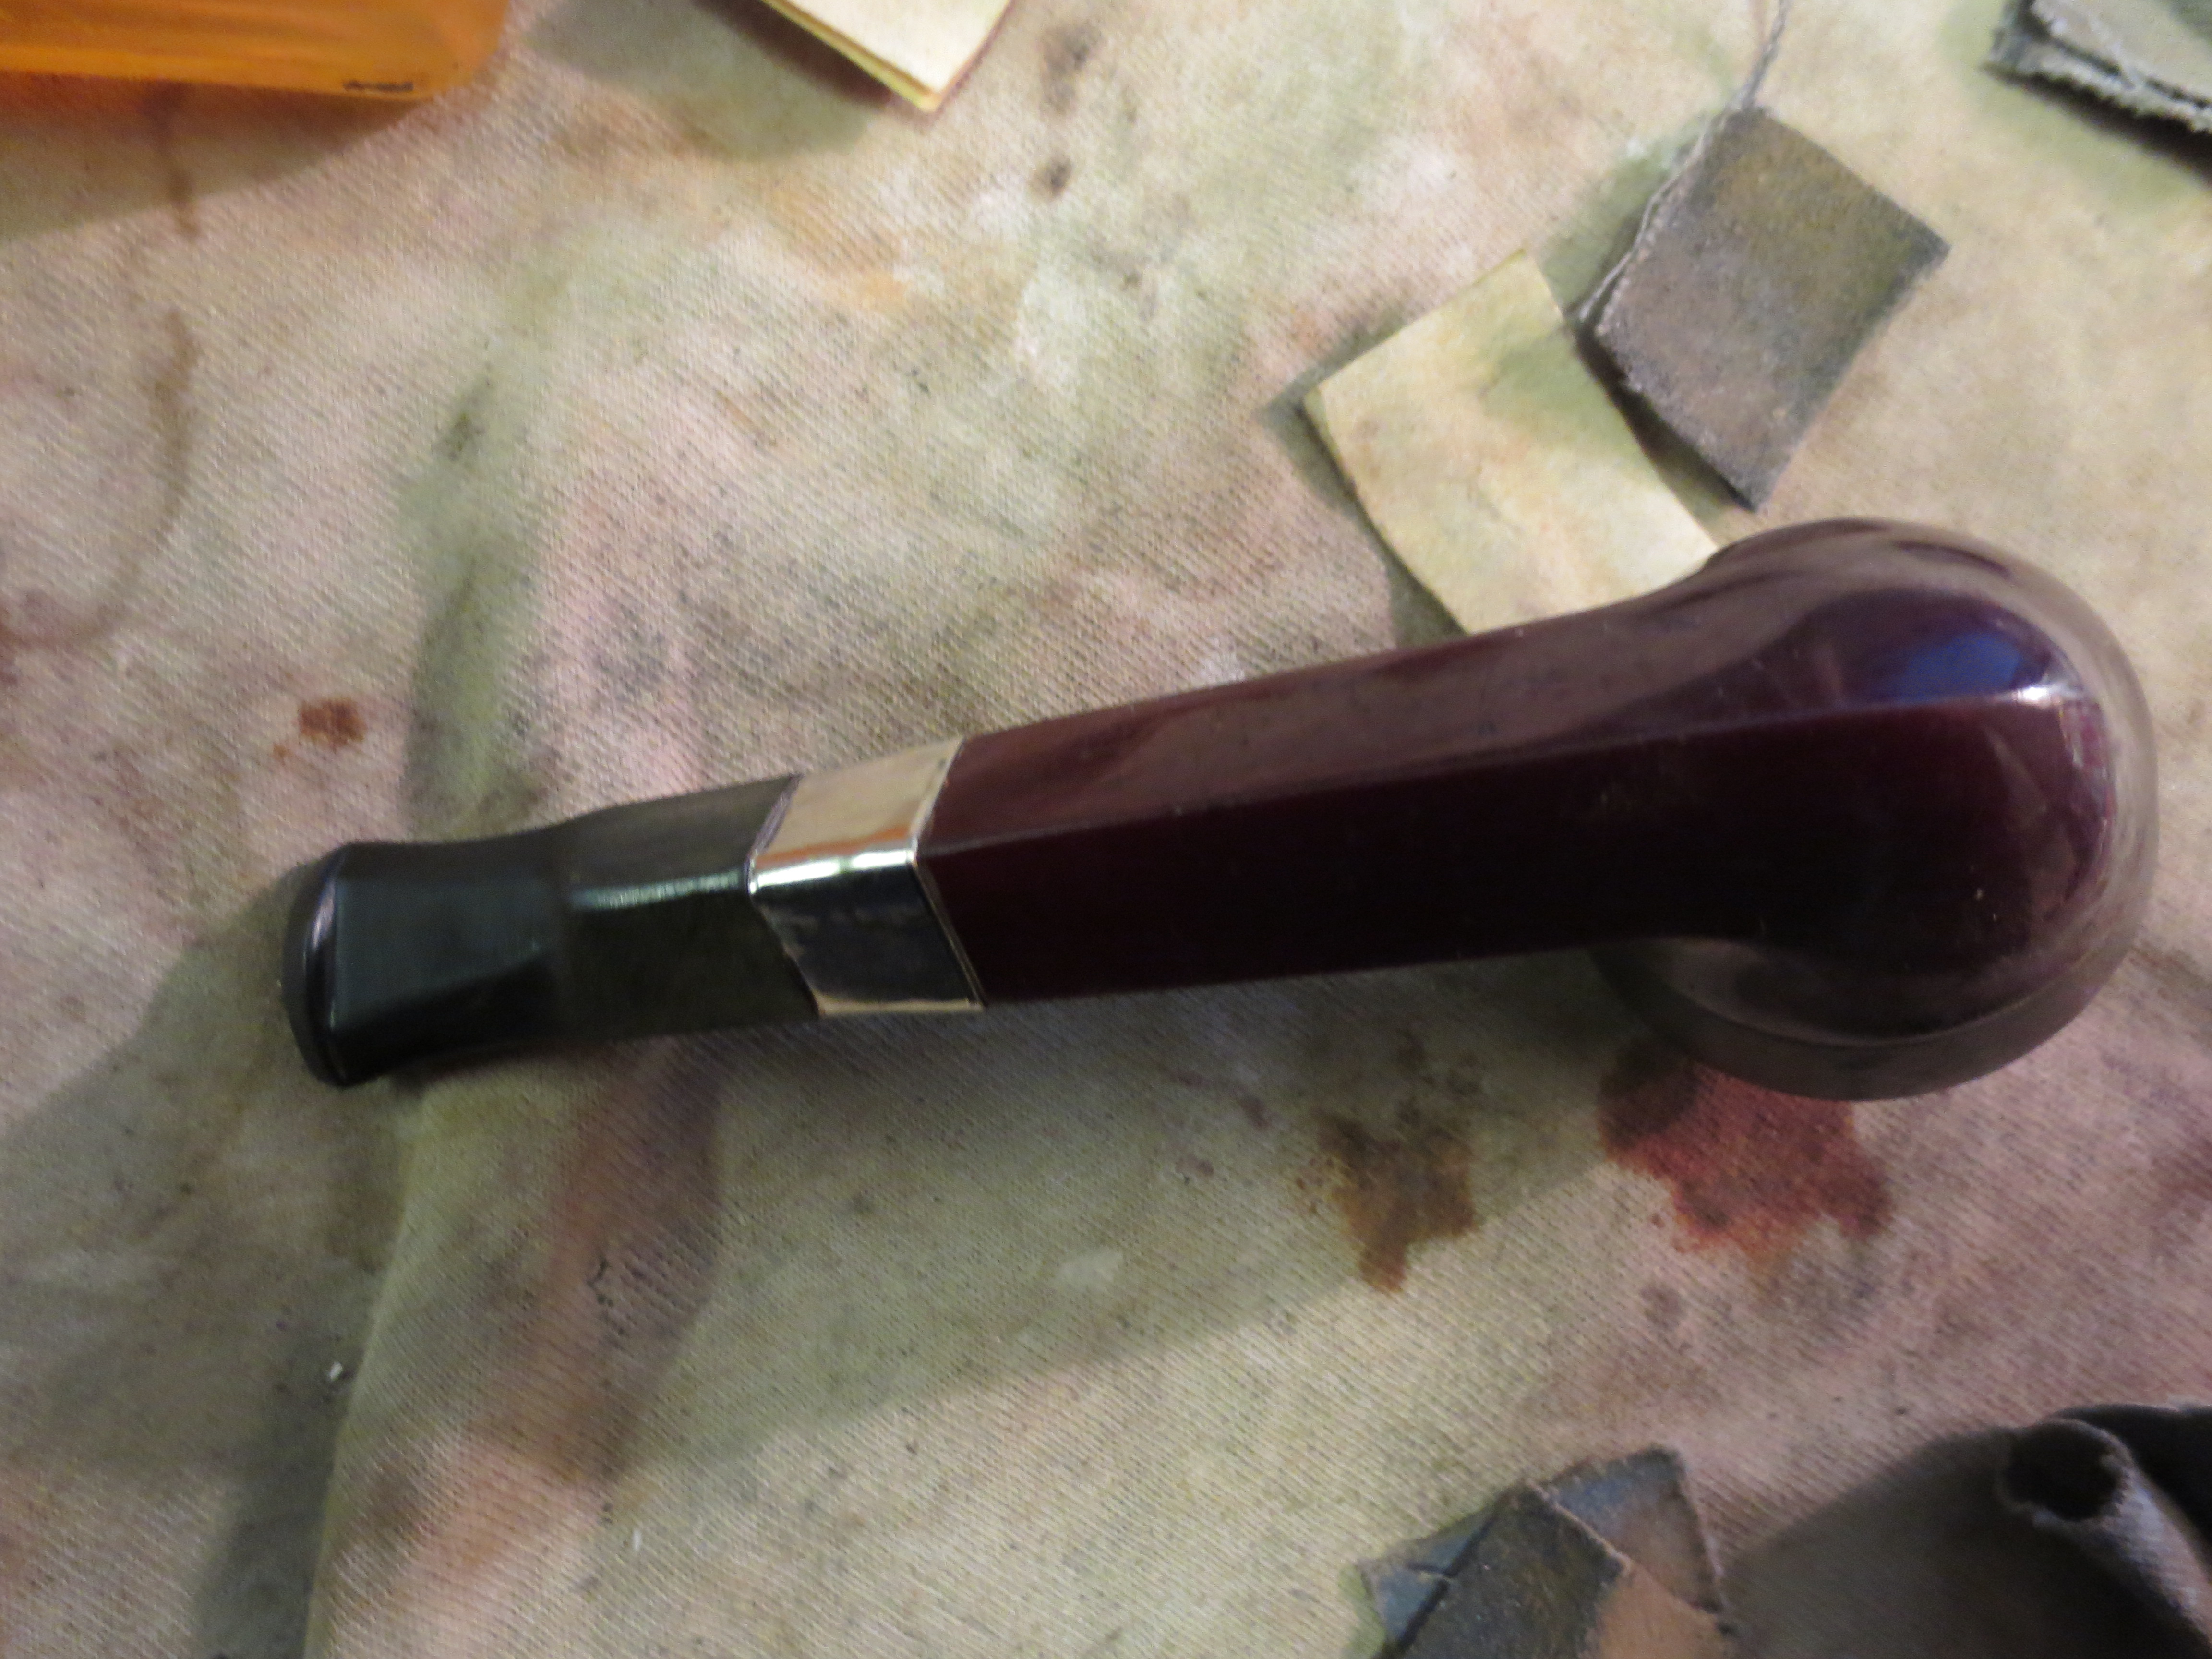
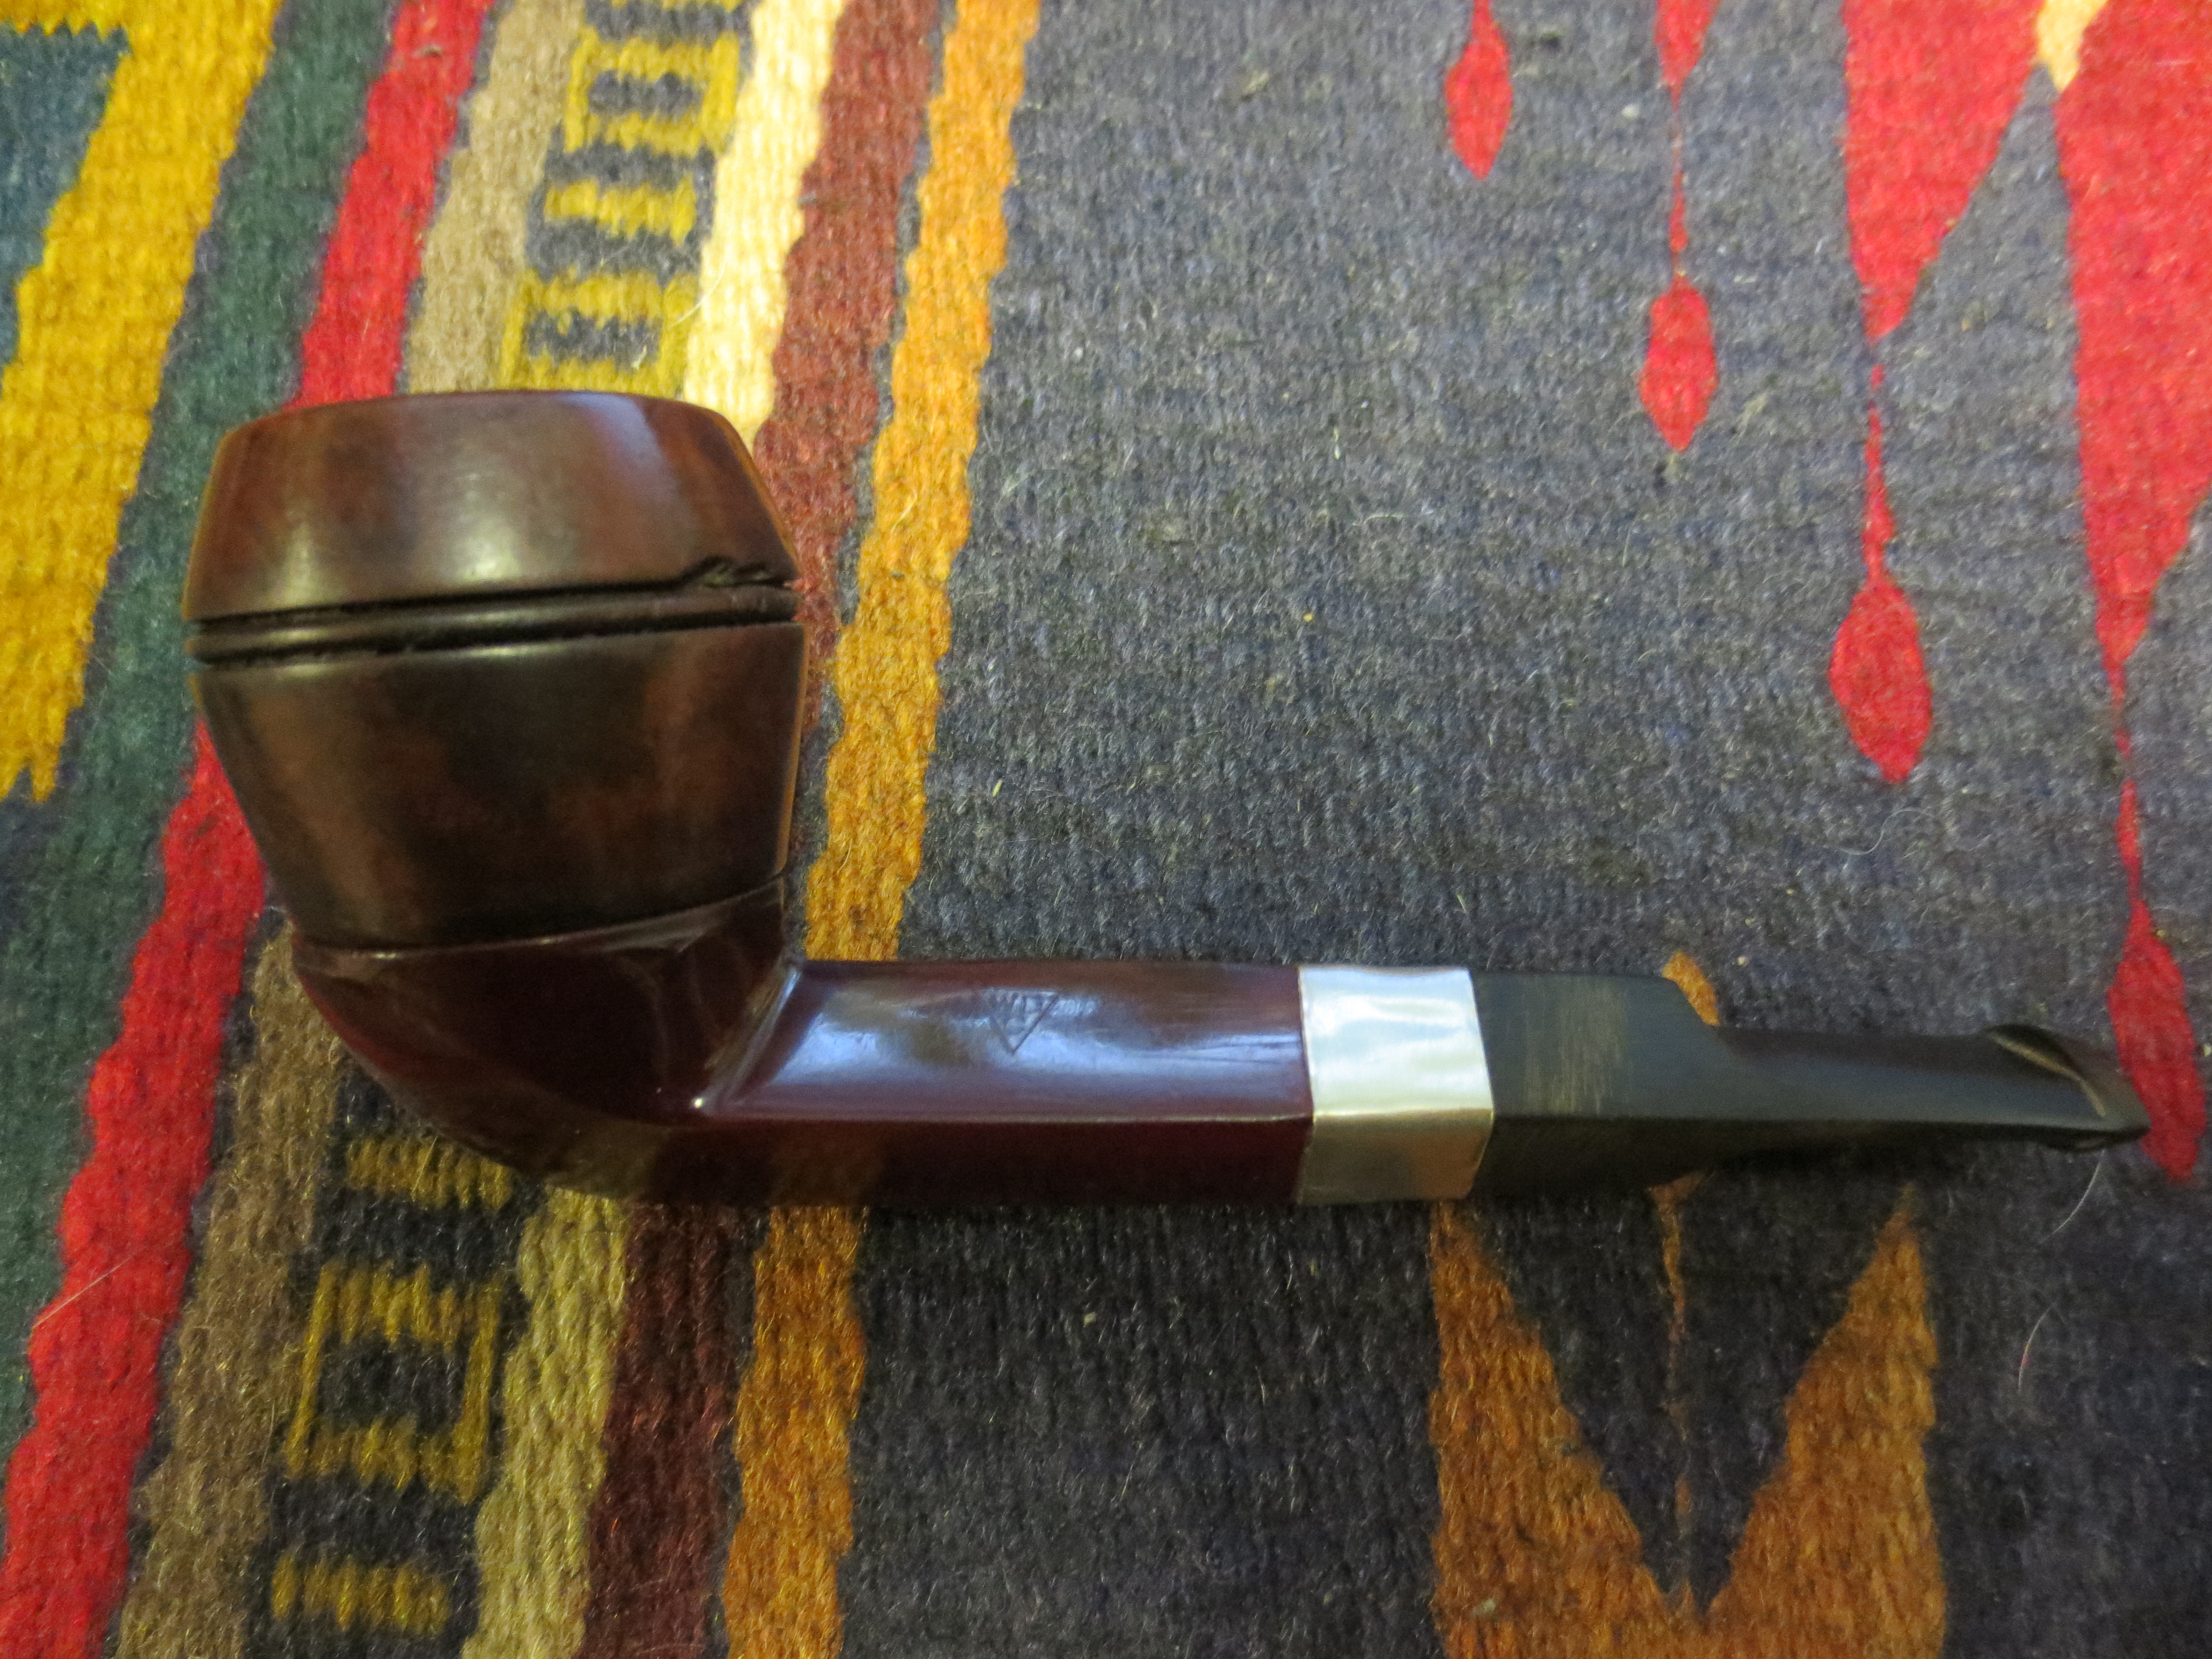
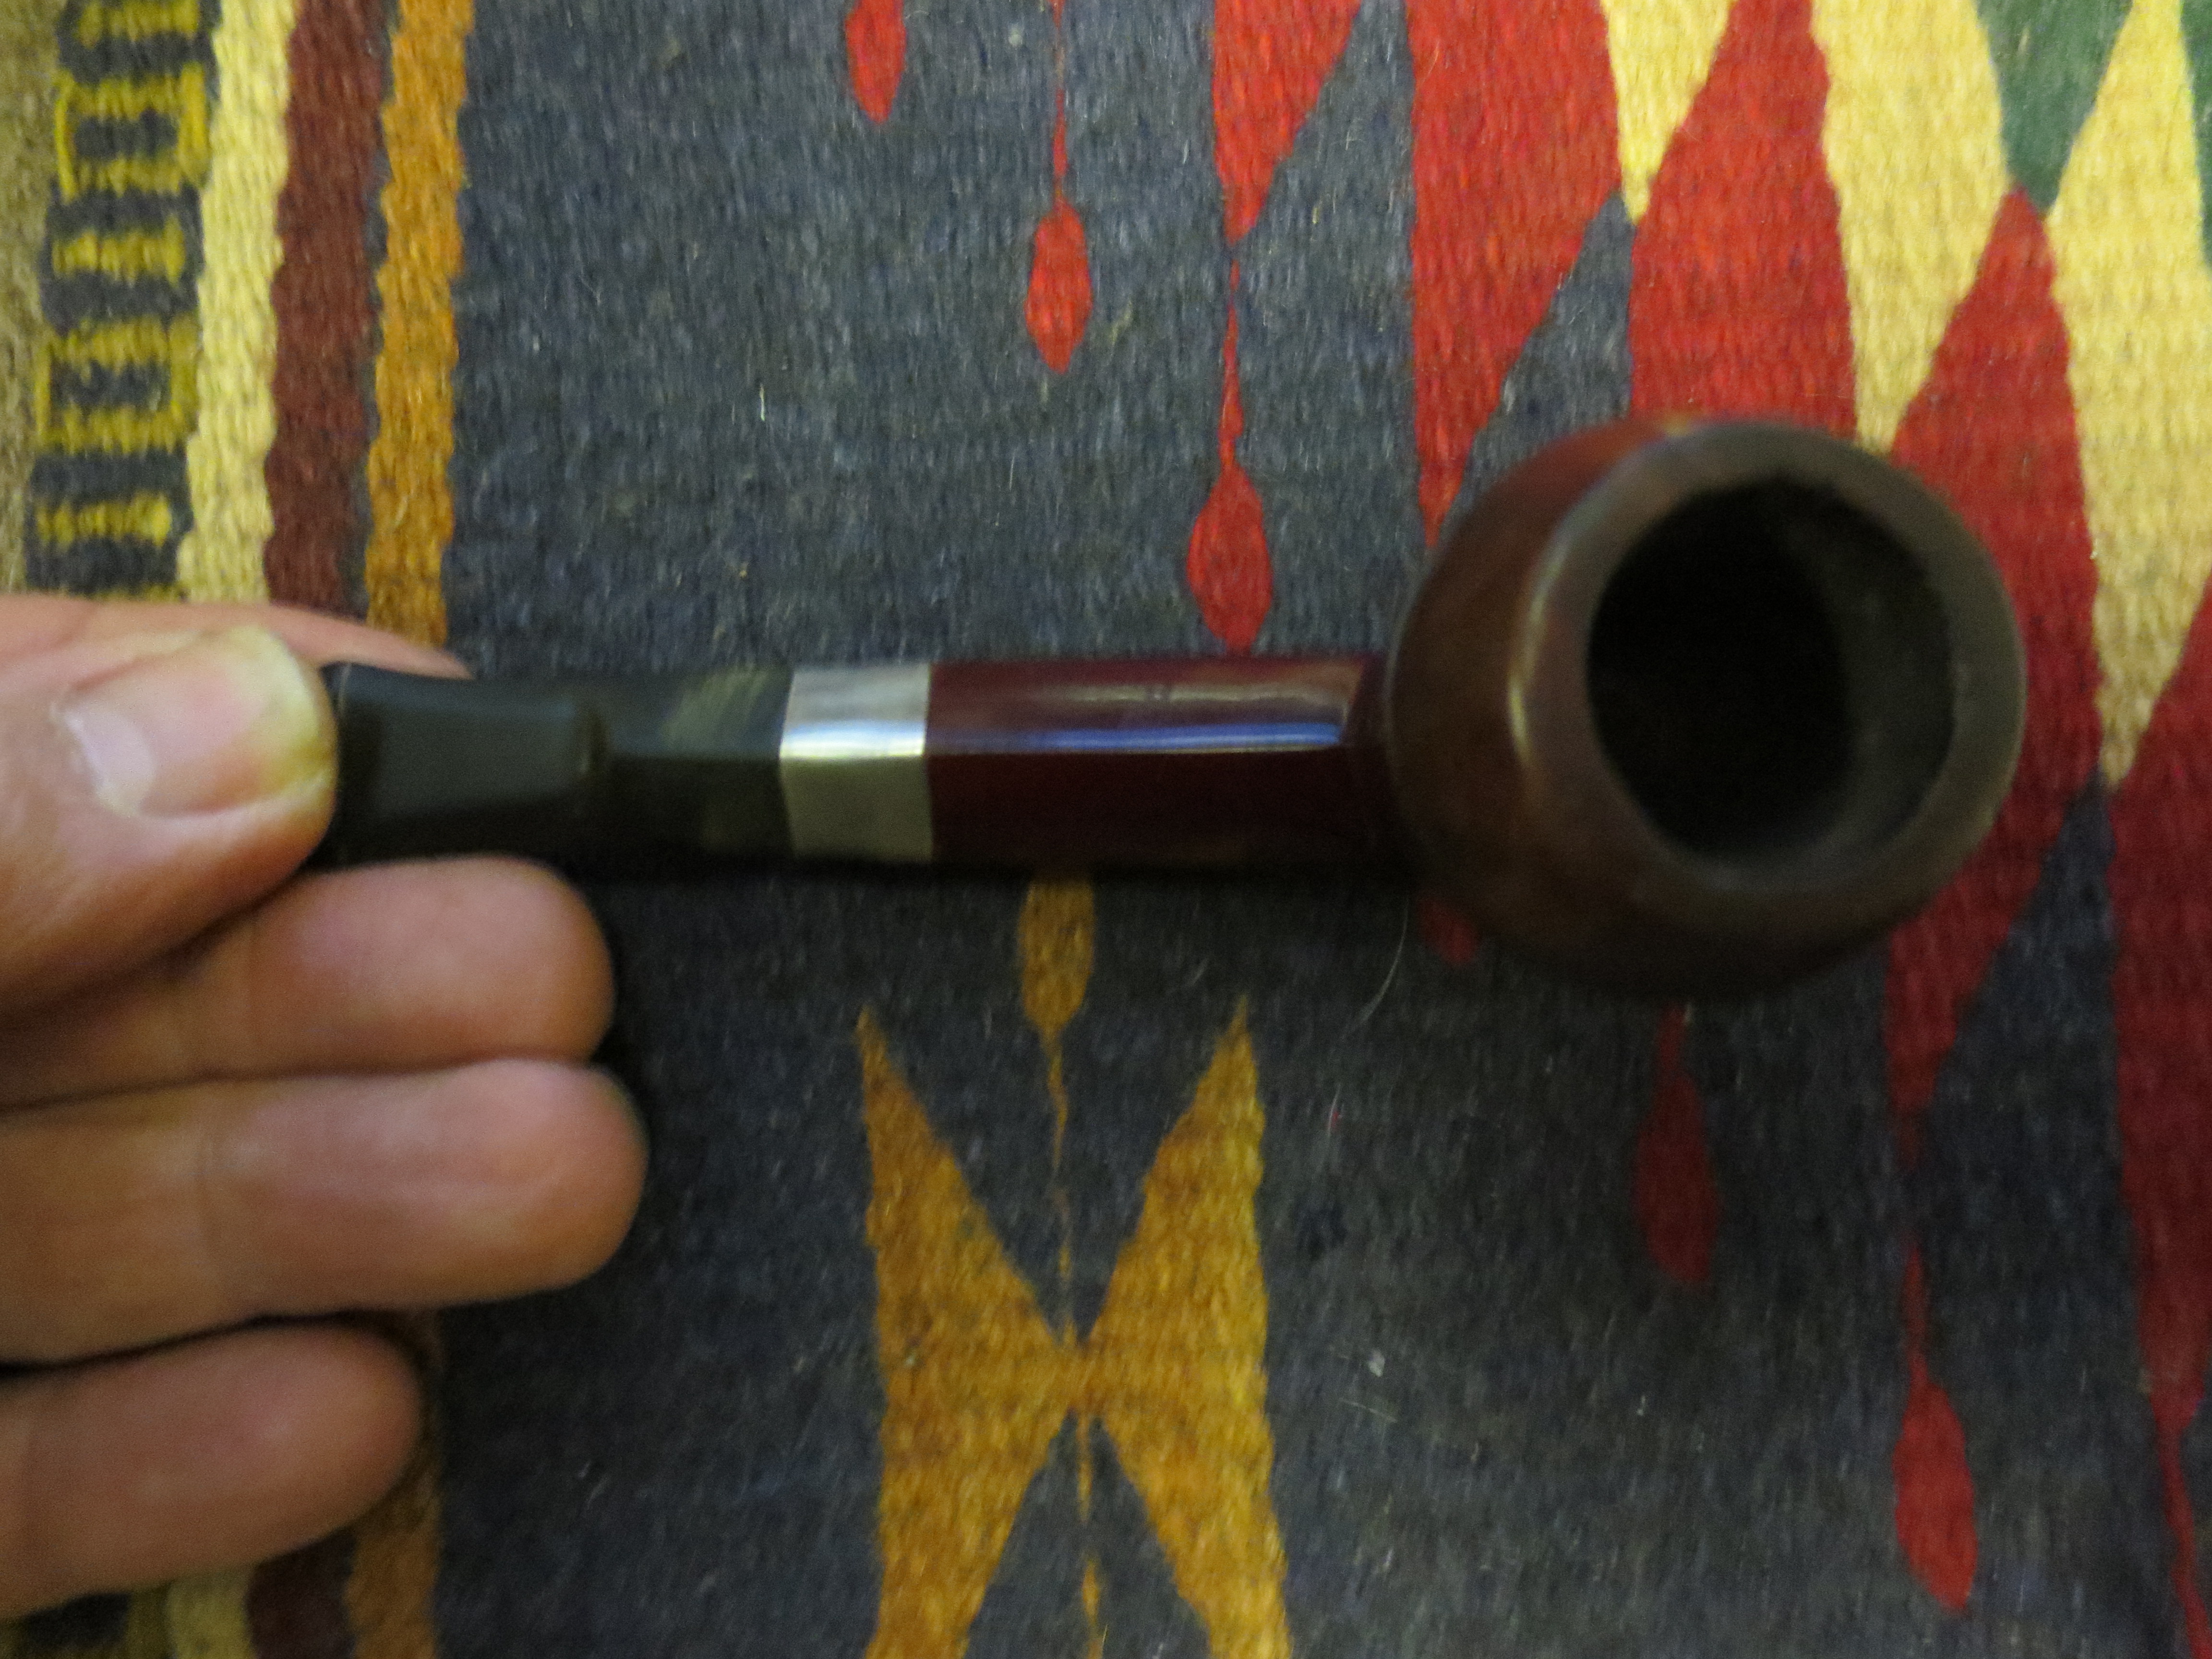
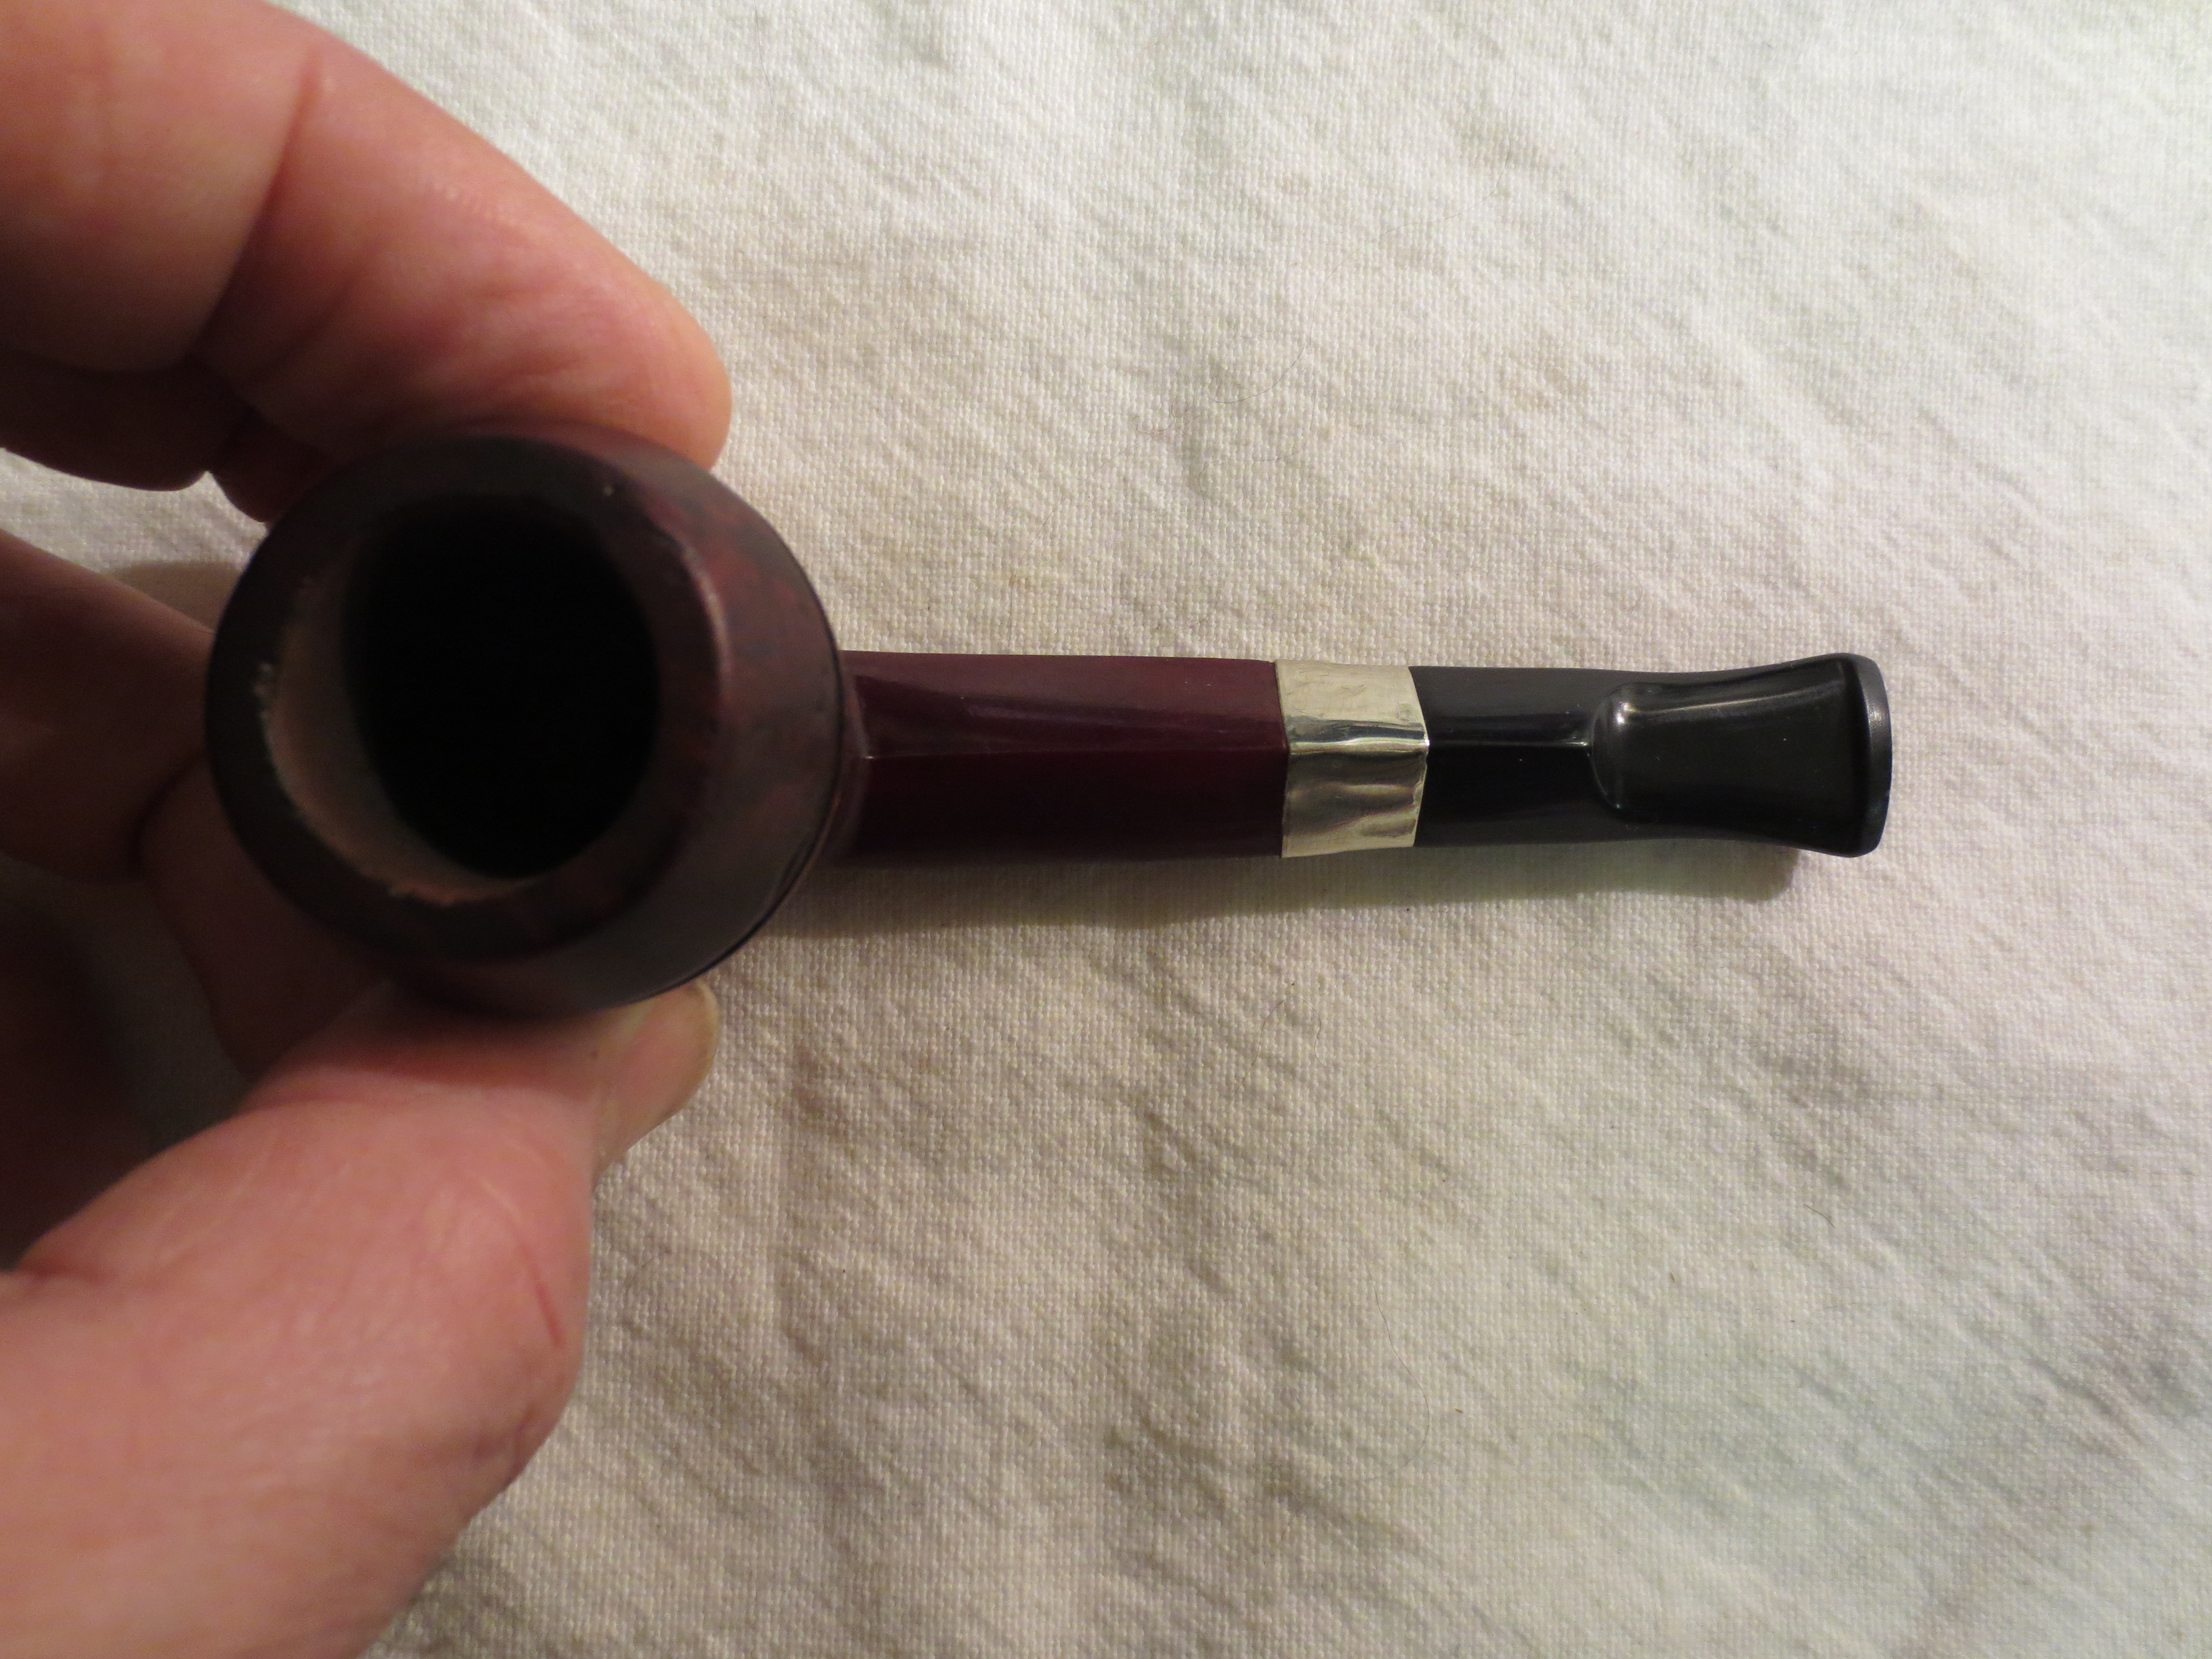
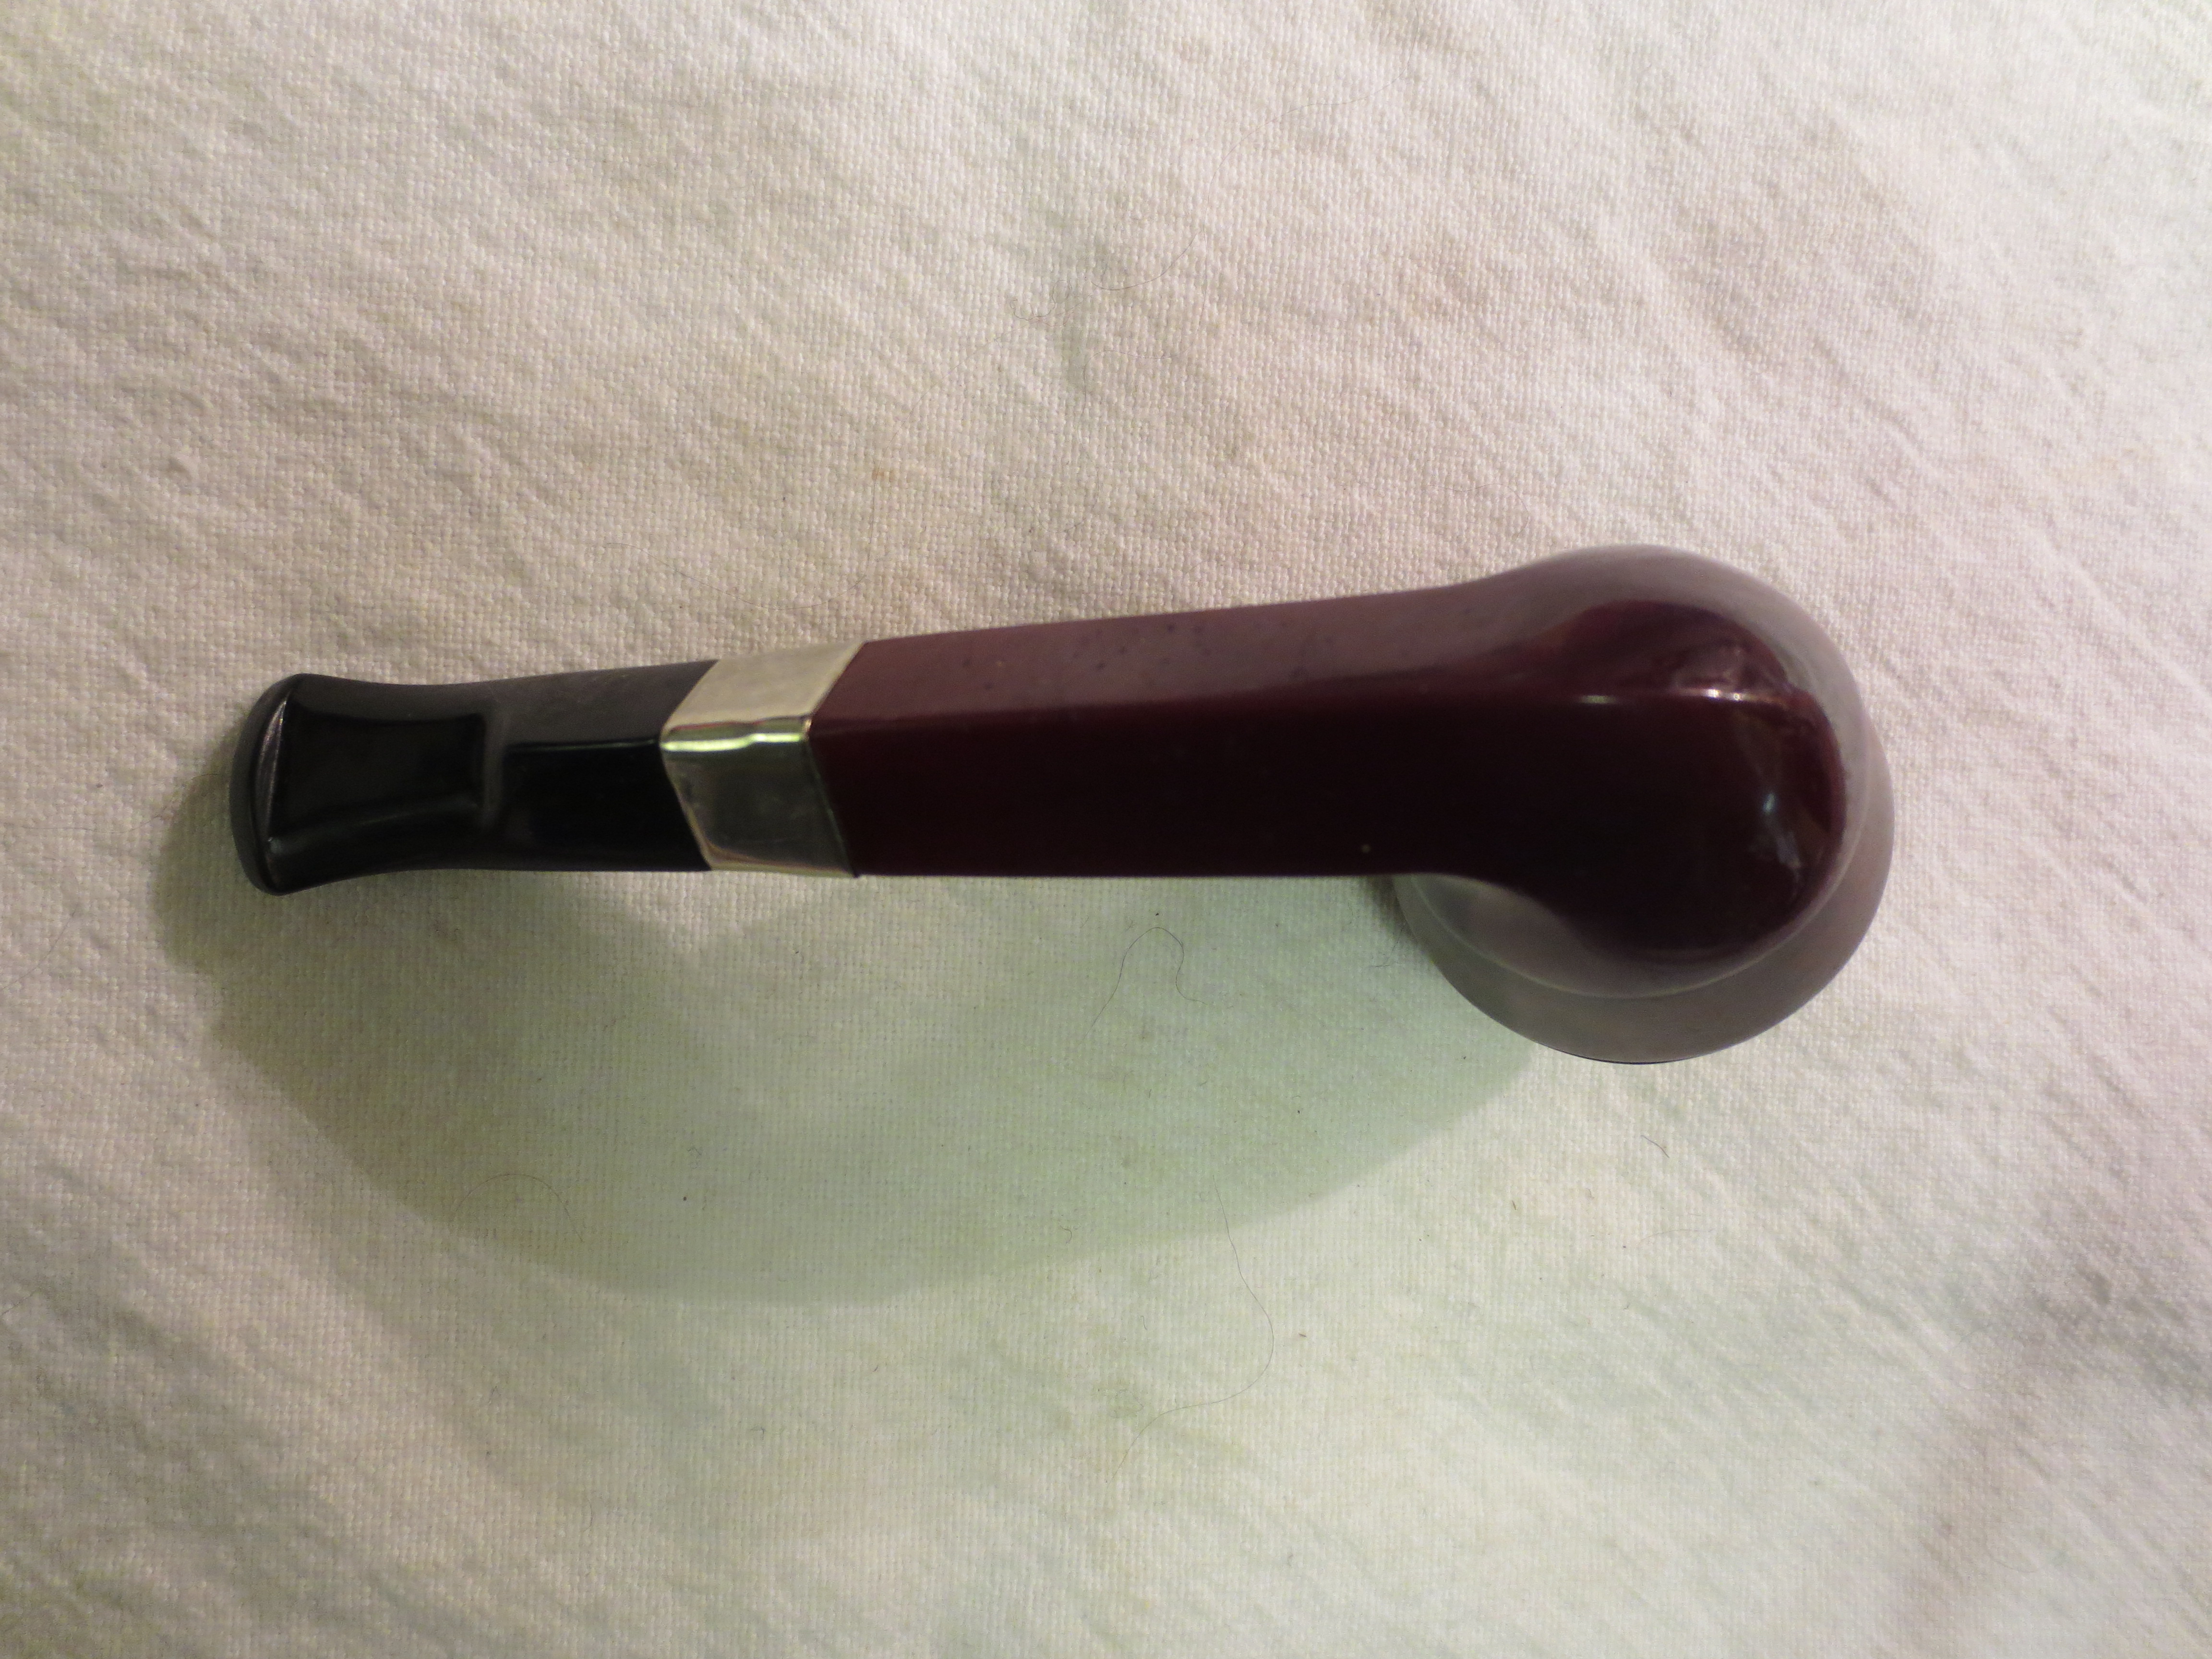
I took out my box of nickel bands and found one that would fit the shank. I took the photo below with the band next to the pipe to symbolize the thinking process that went into this decision. I put the band against the shank and the stem next to it to see how it looked. I looked at the faint stamping and the fact that is was a non-collectible pipe anyway due to my stem modifications and decided to give it a go.
IMG_3389

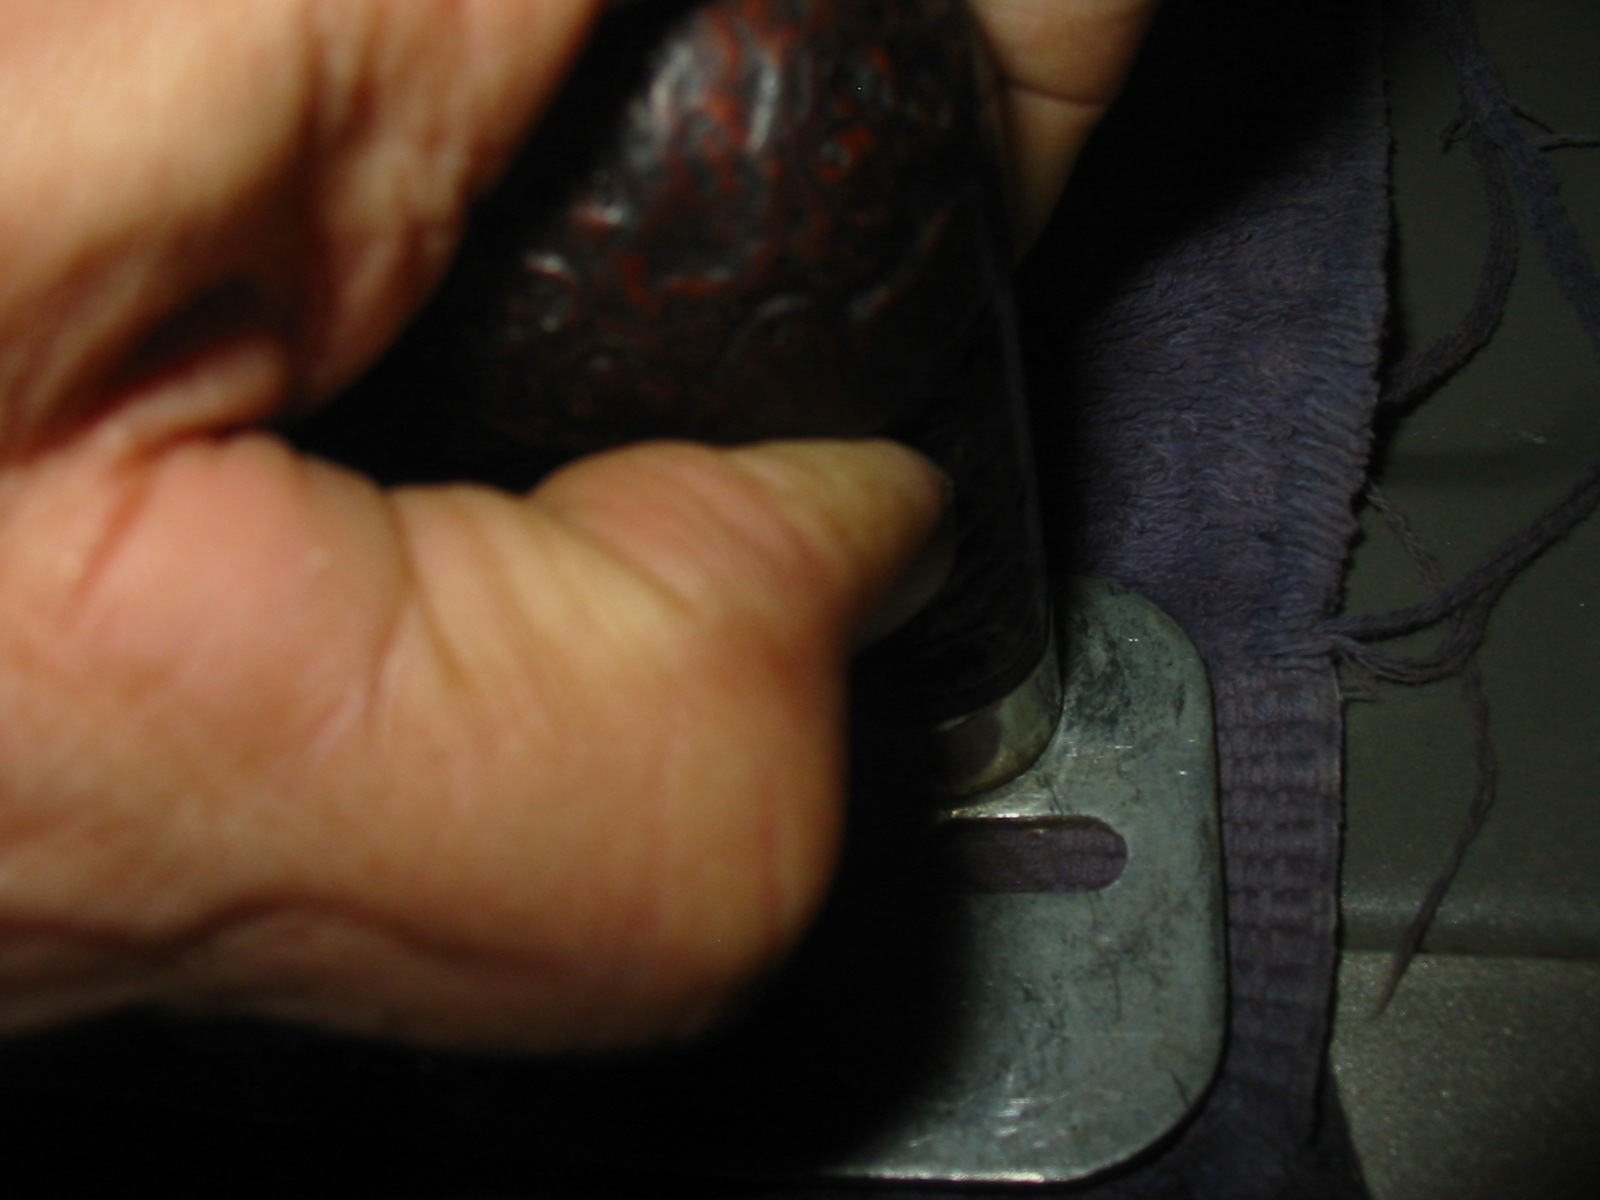
I put the band on the end of the shank. For those banding a pipe shank pay attention to the diameter of the band – the end that goes on the shank is slightly larger than the end the faces the stem. I took the pipe and heated the band with a heat gun and then pressed it into place on the shank.
IMG_3390

IMG_3391

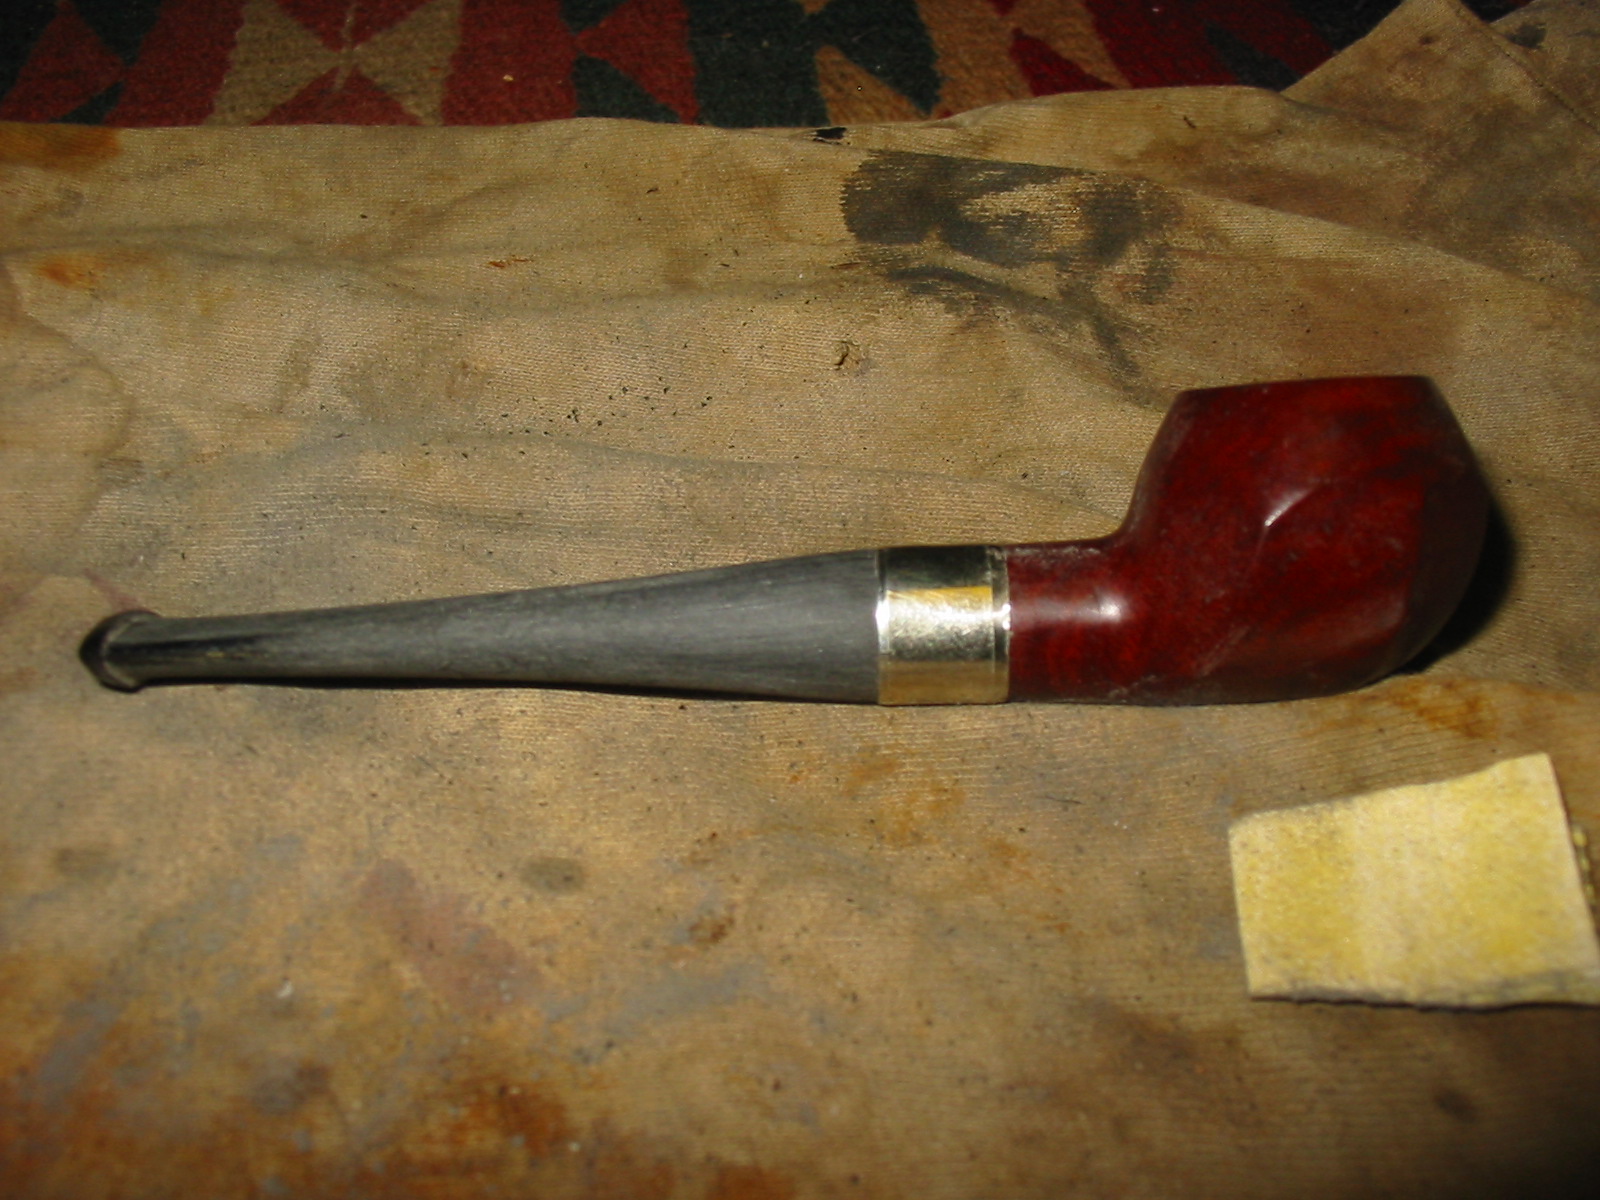
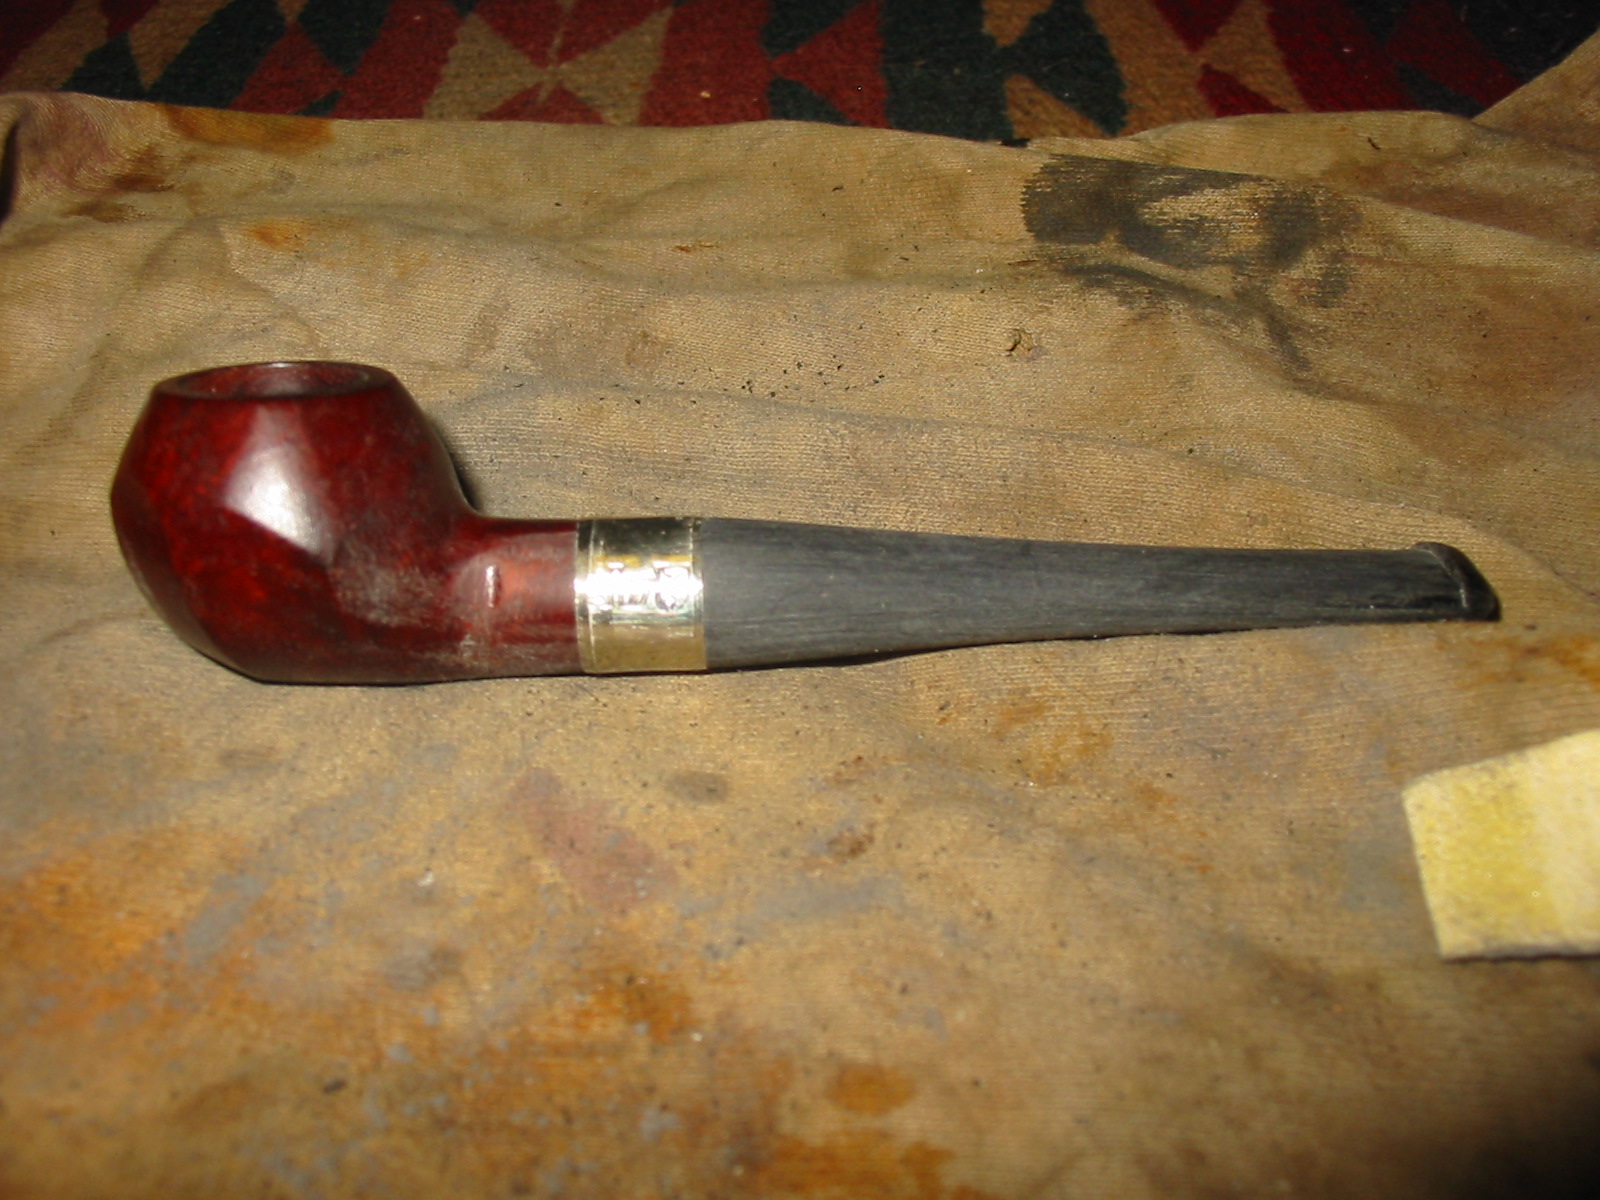
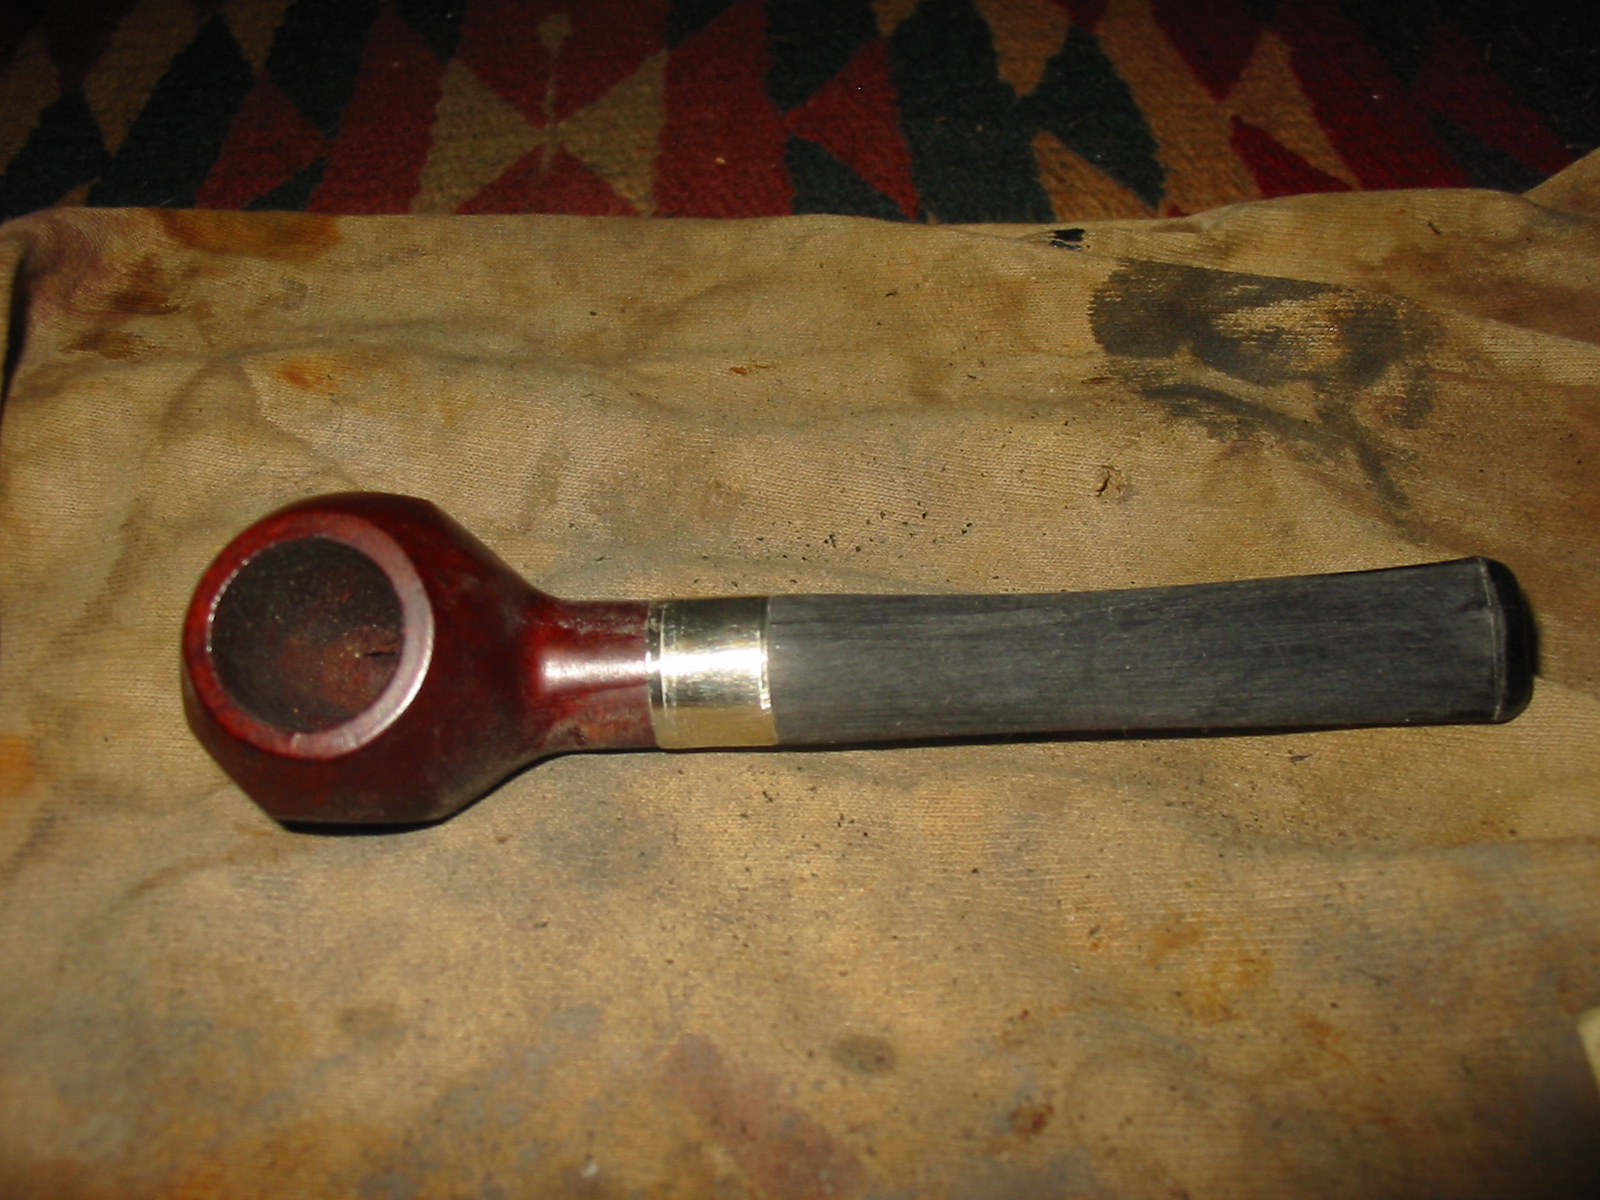
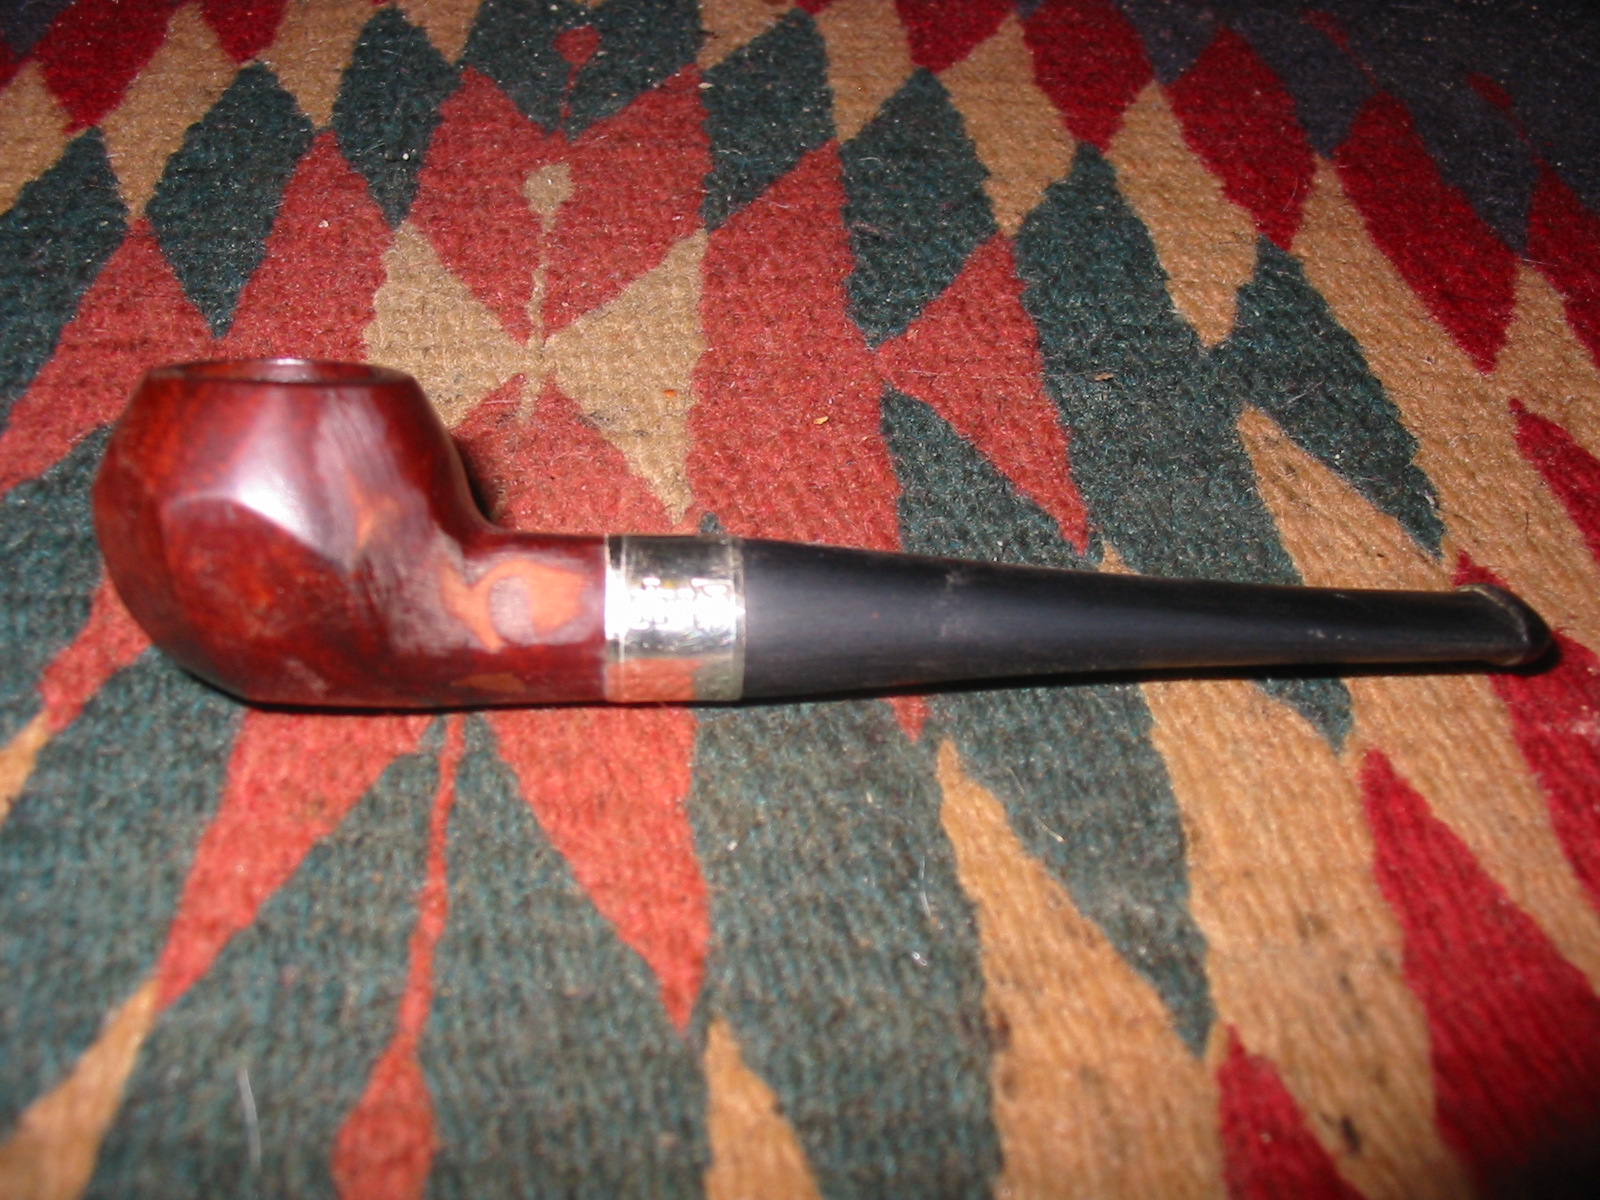
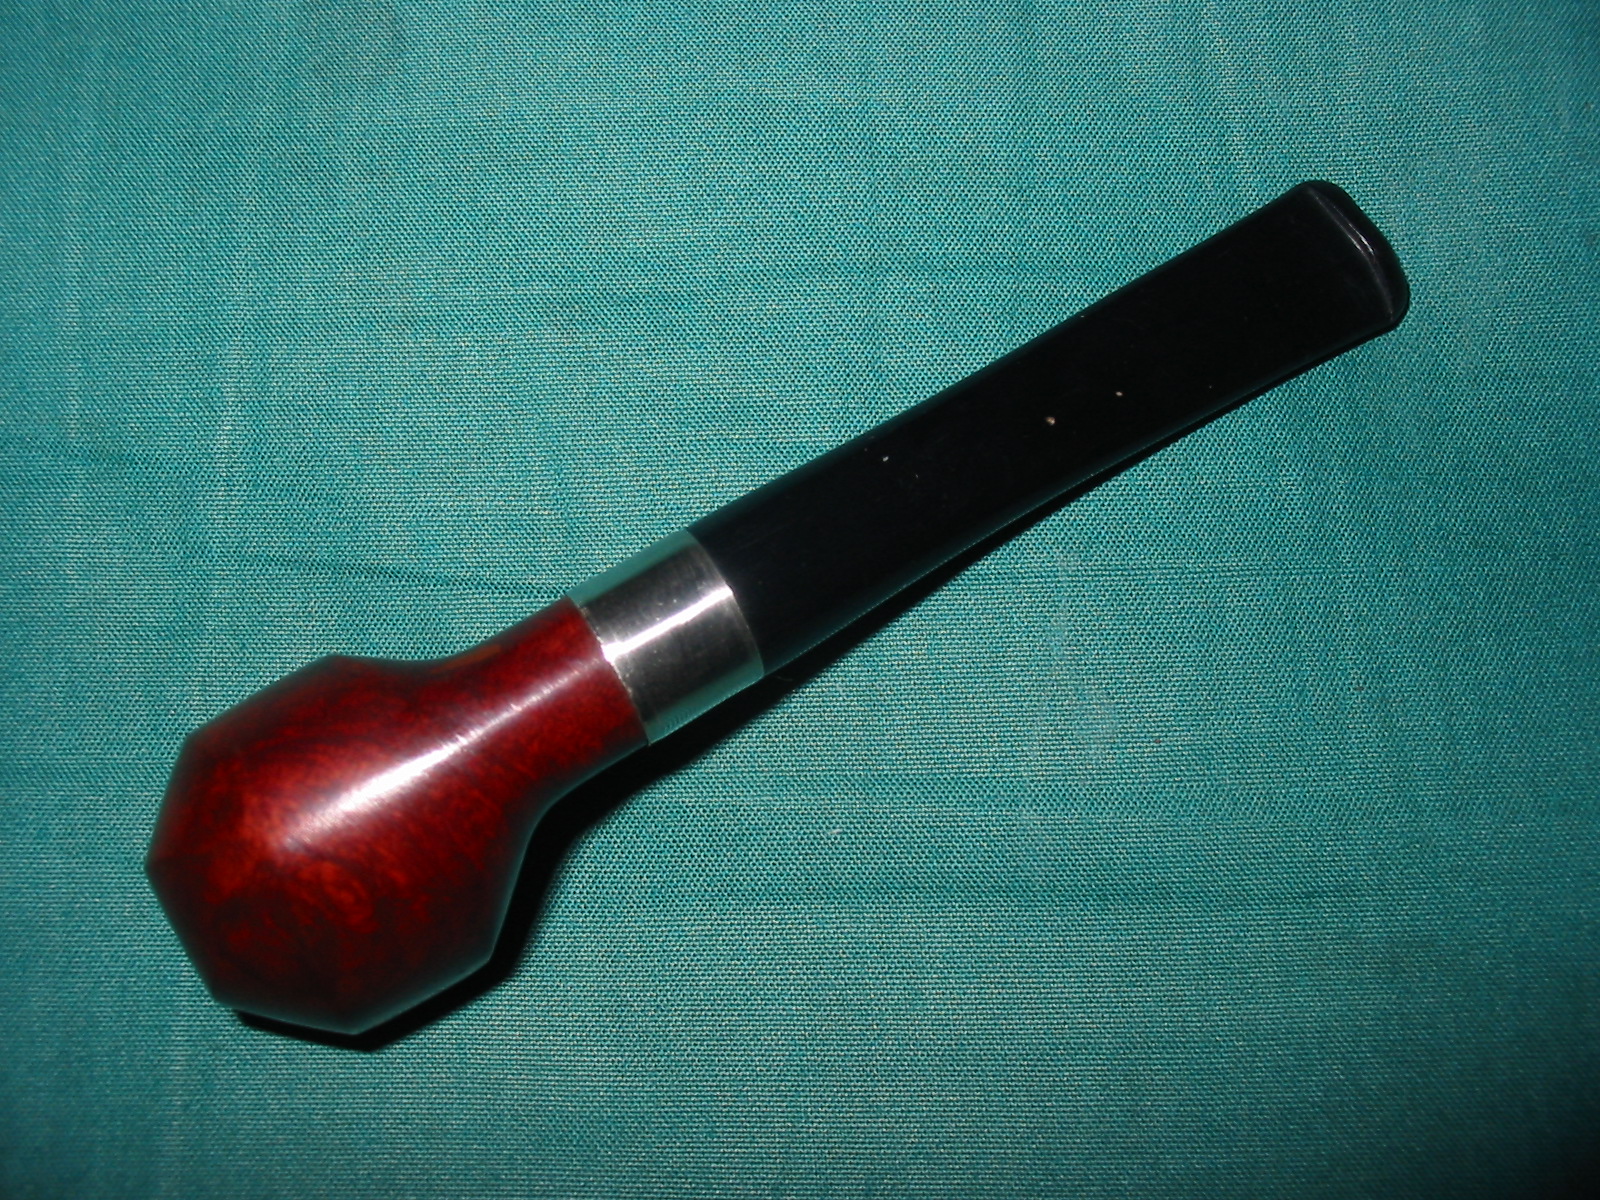
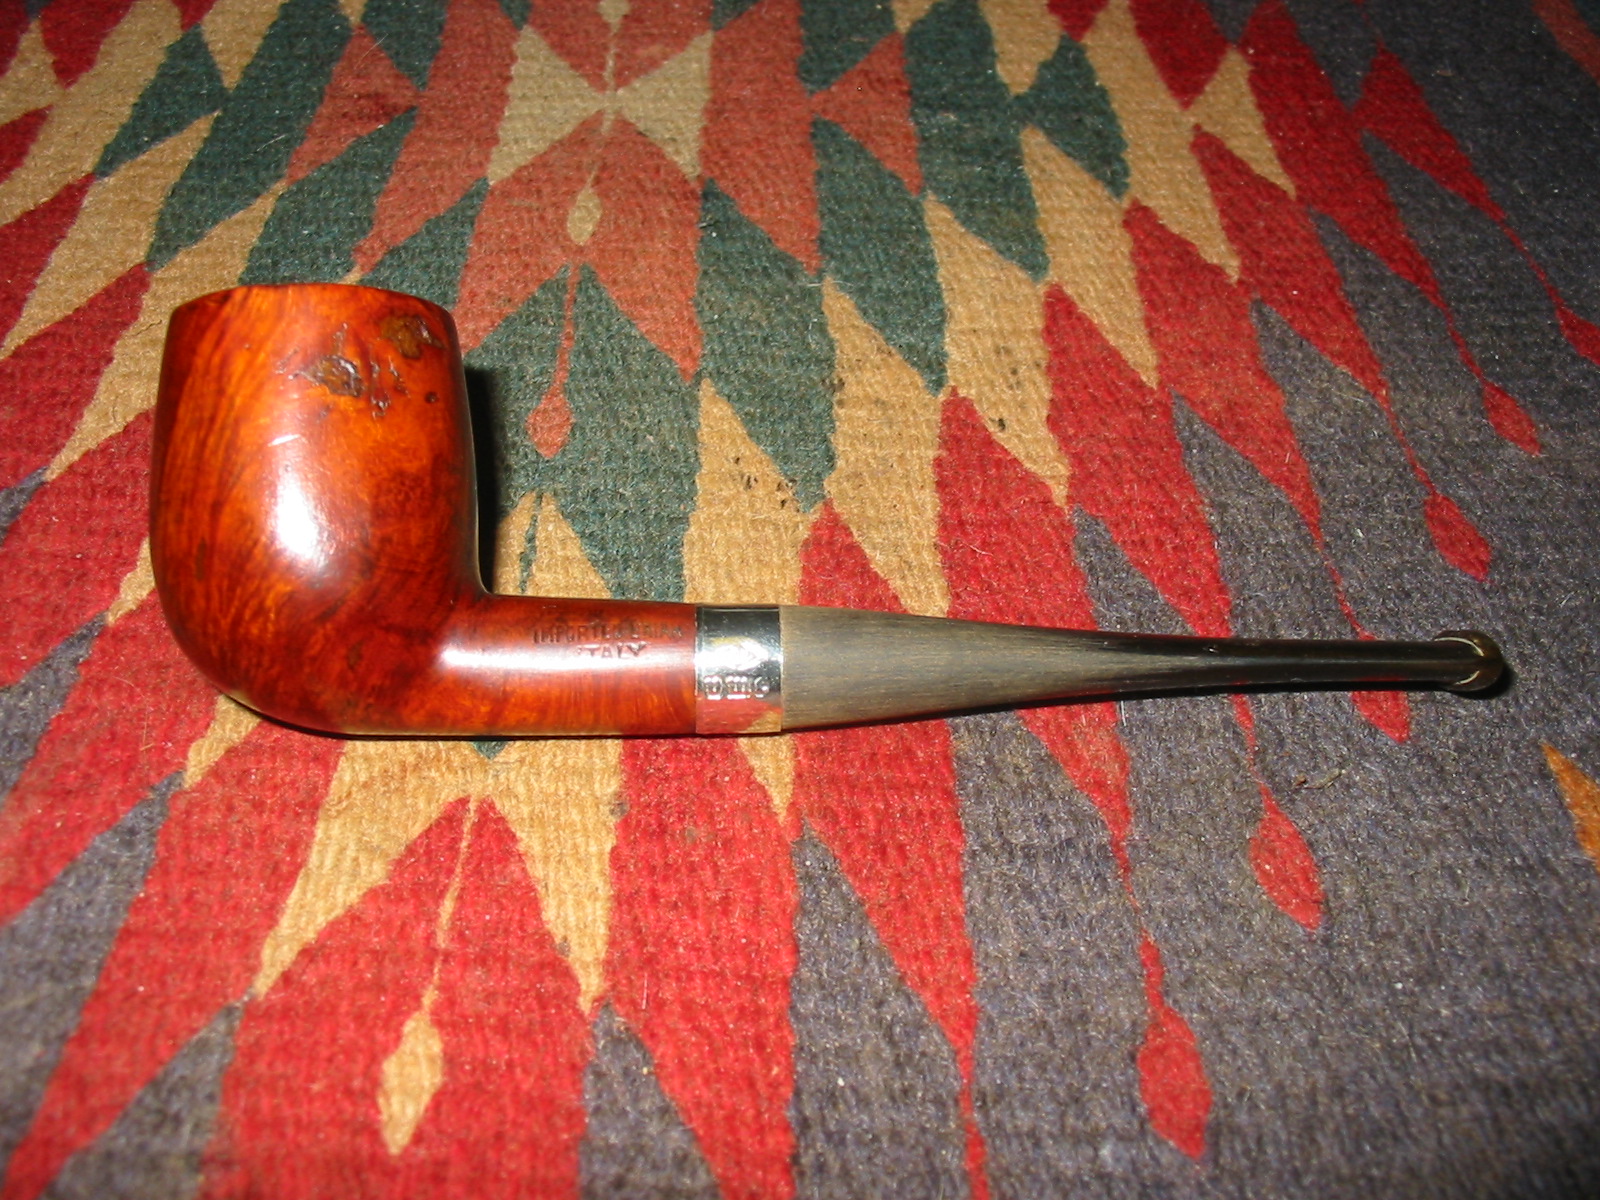
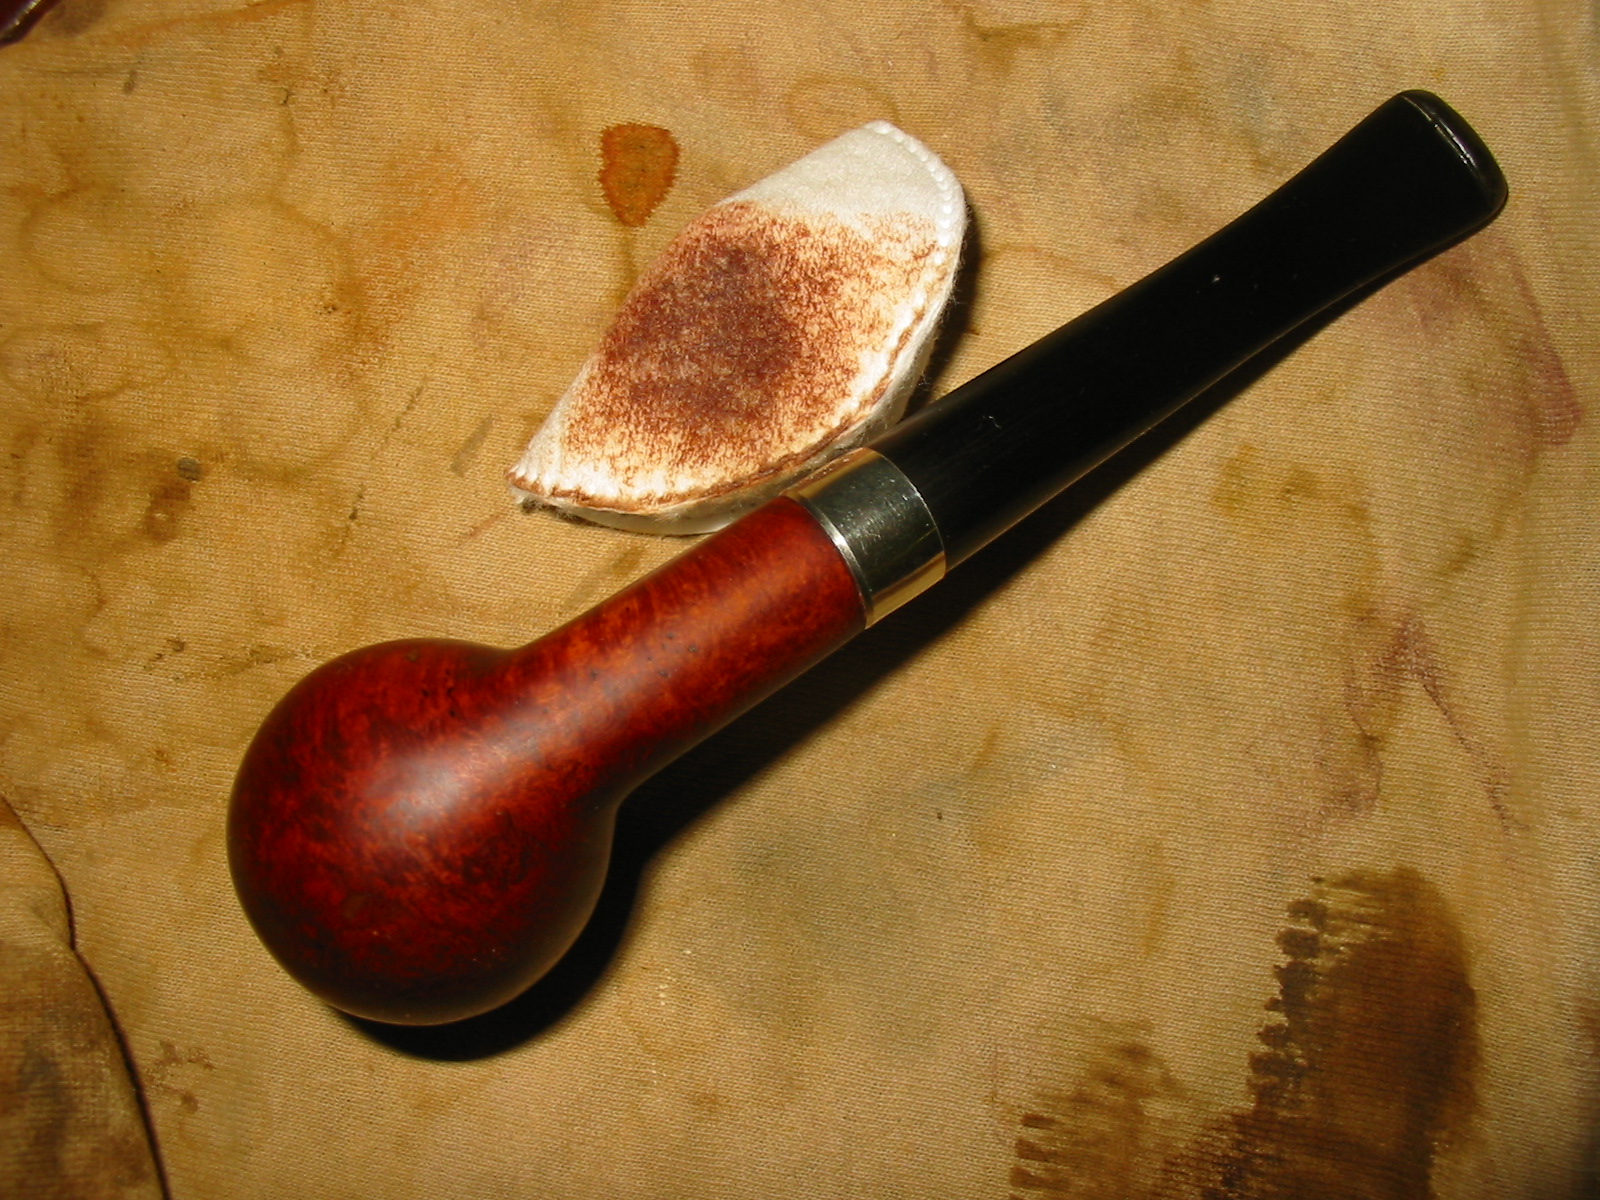
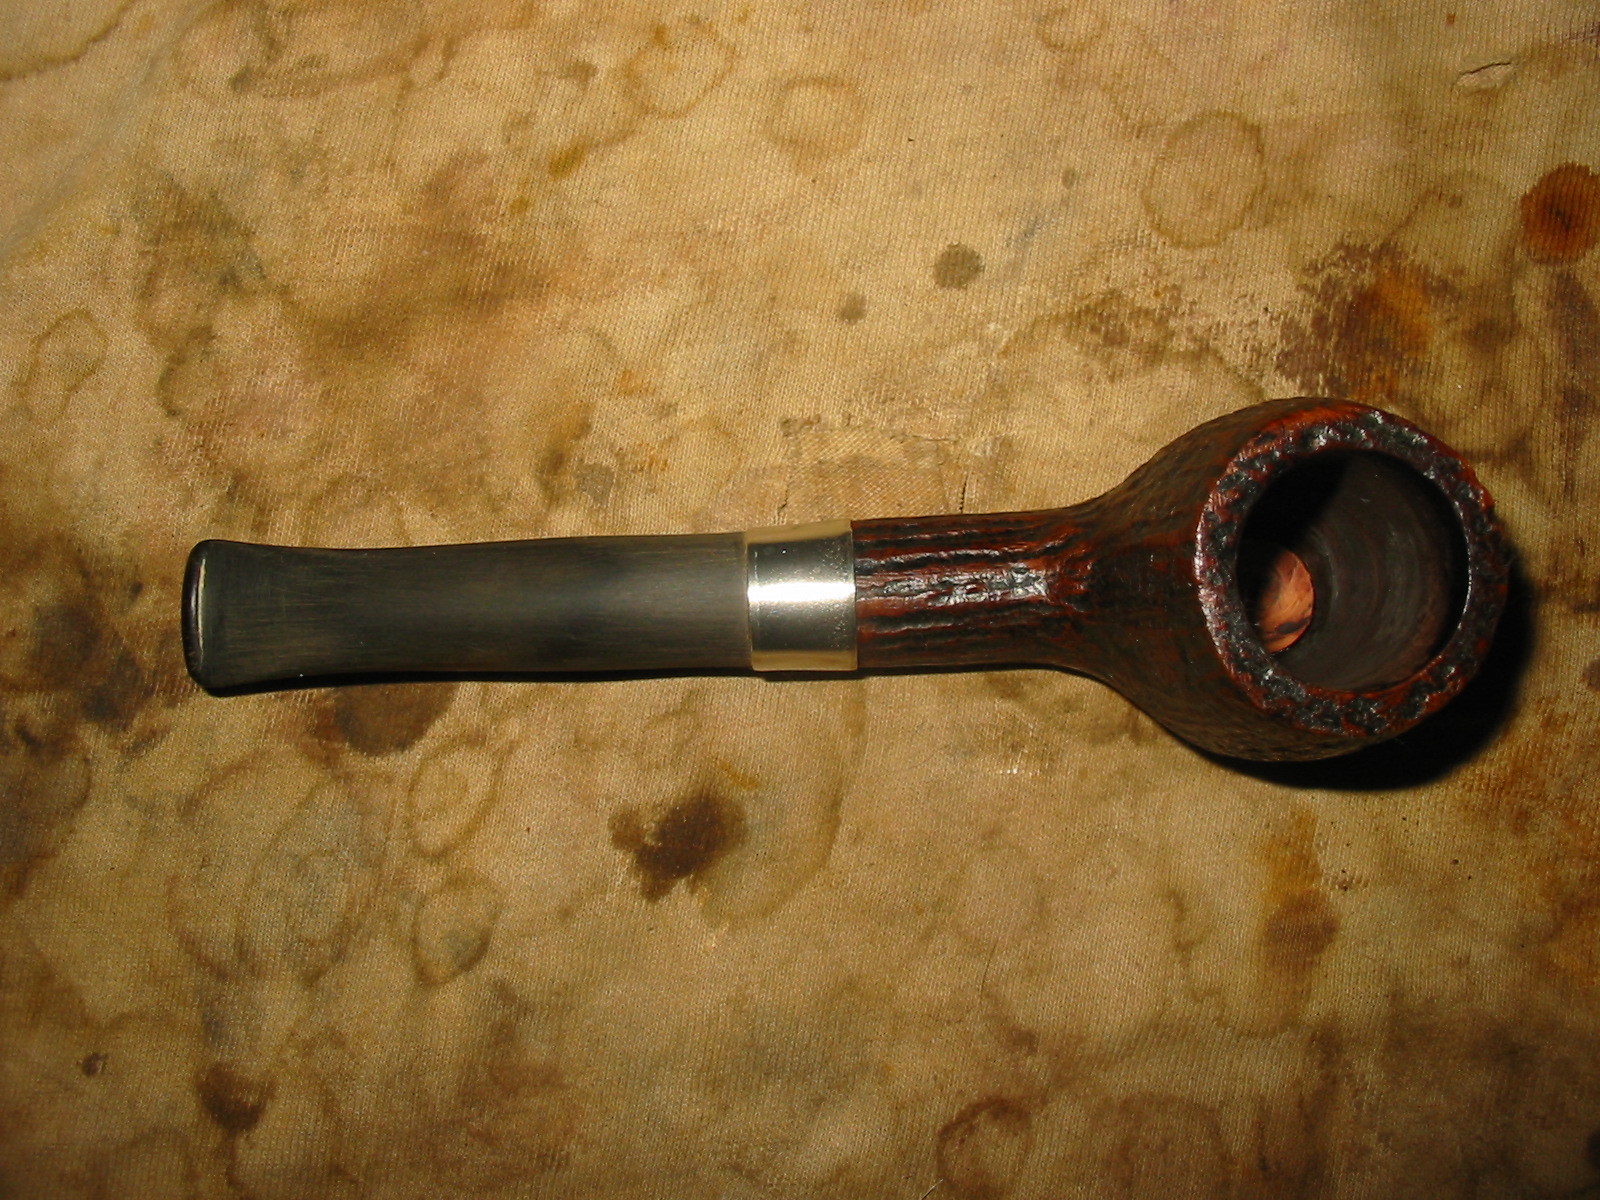
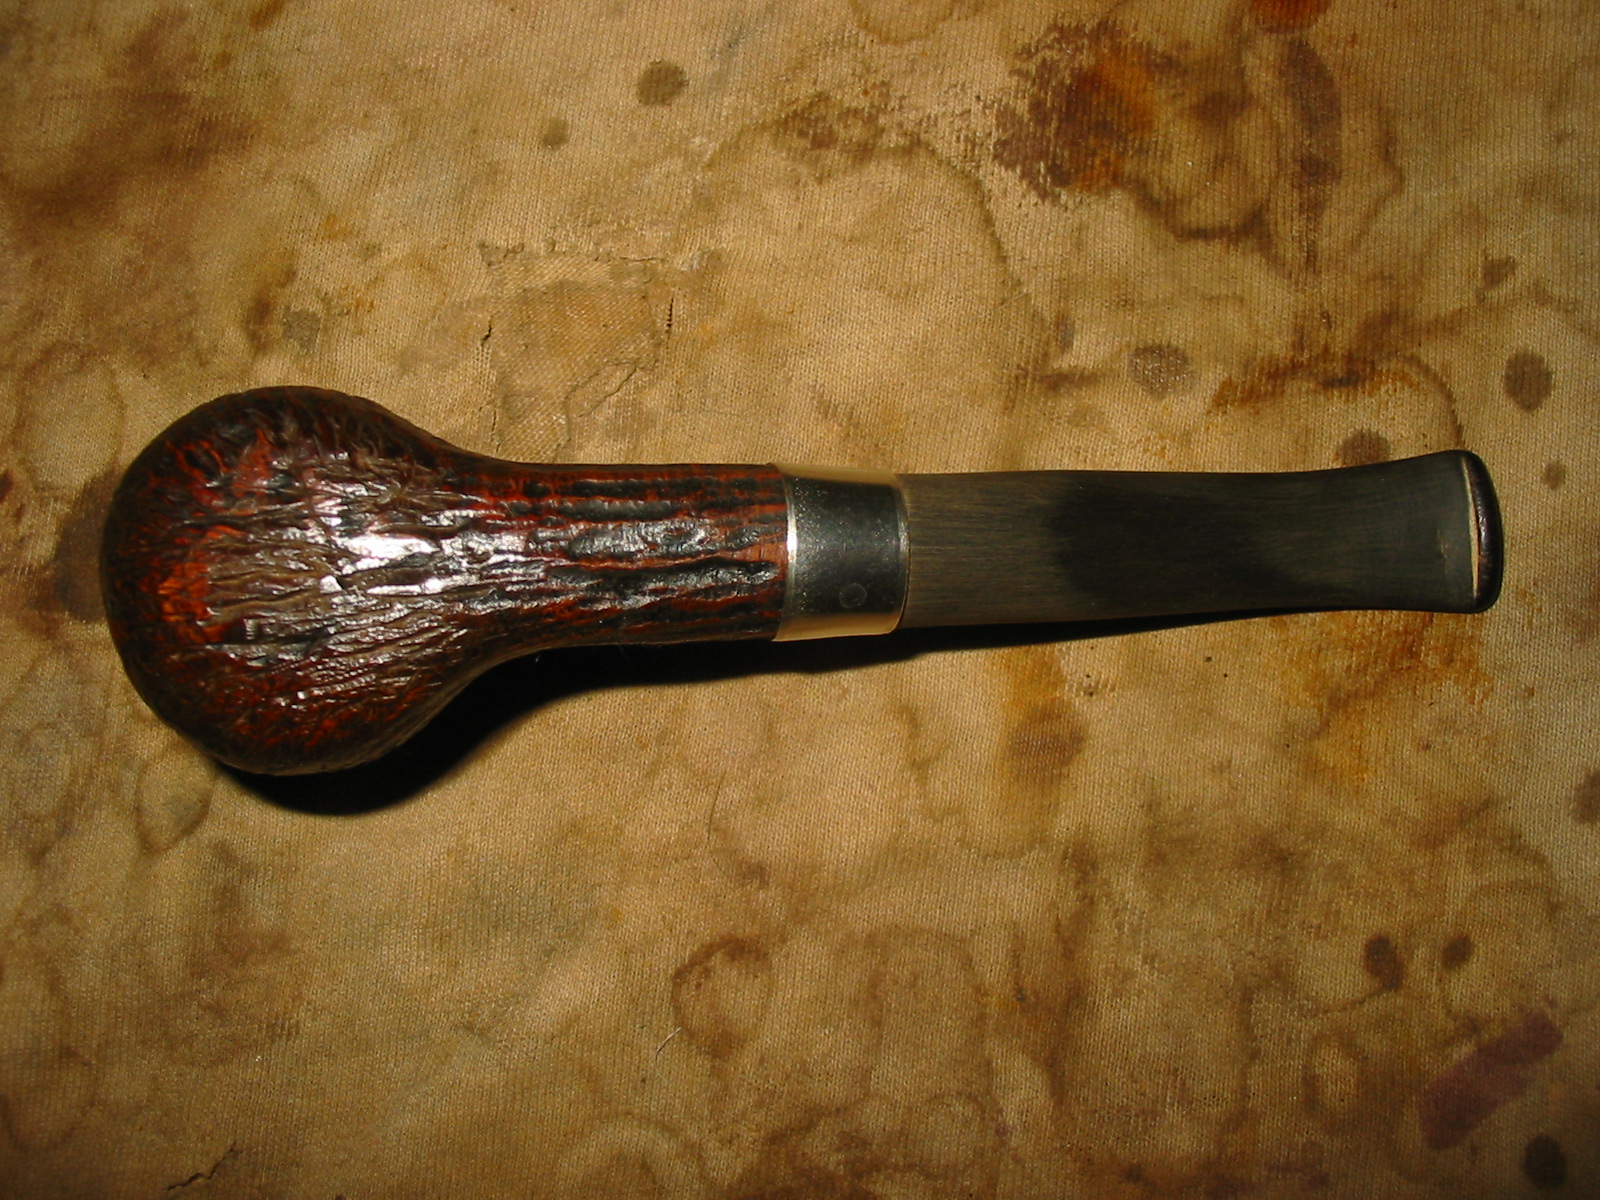
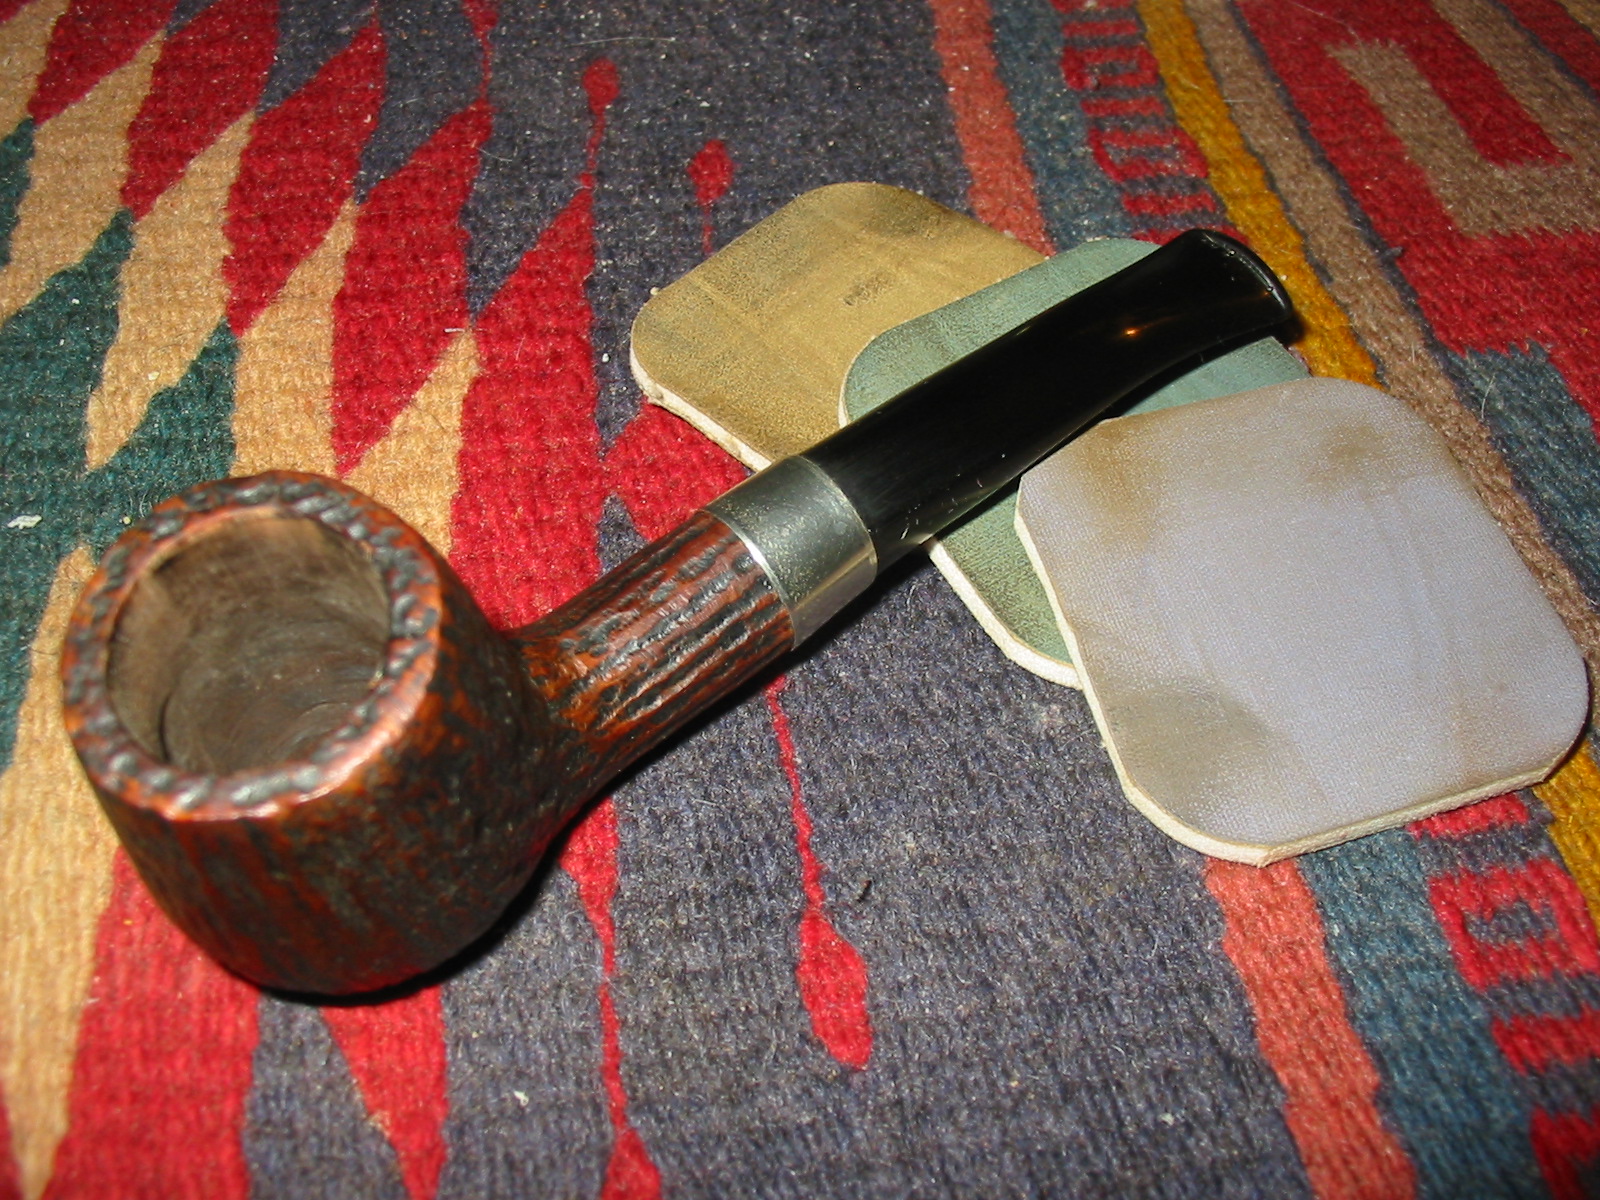
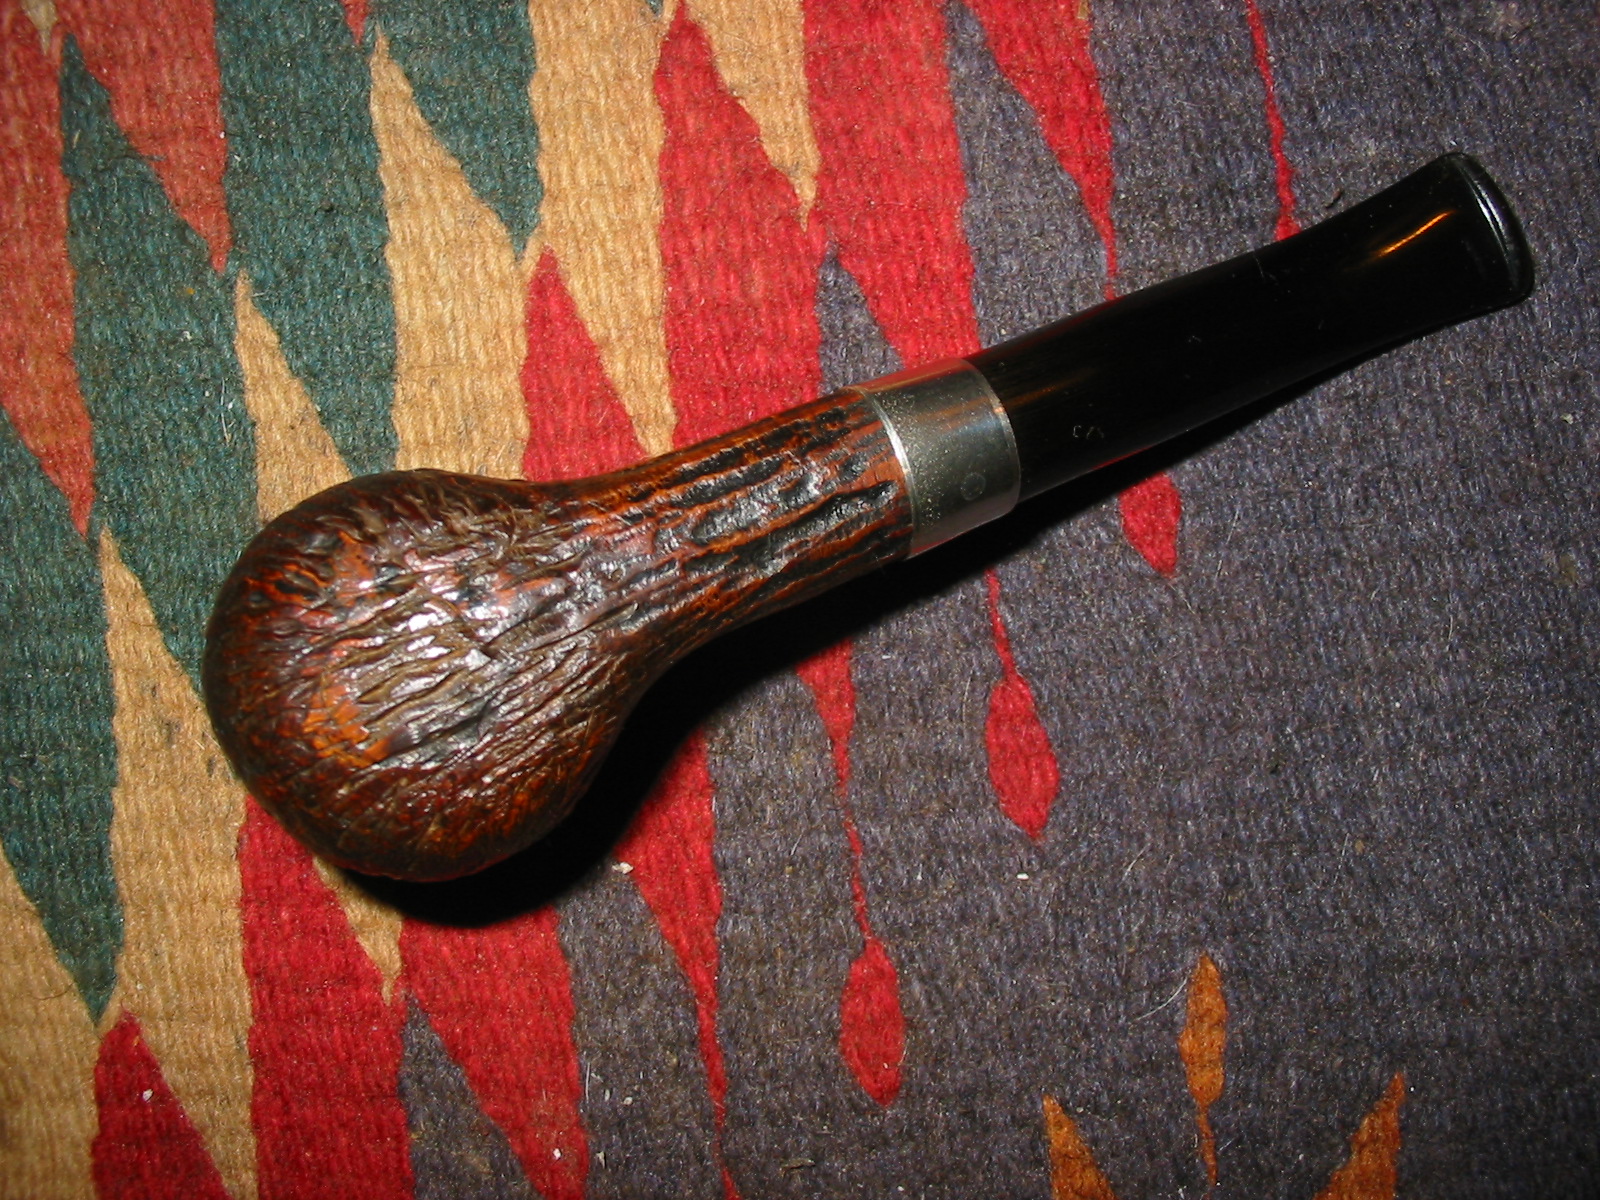
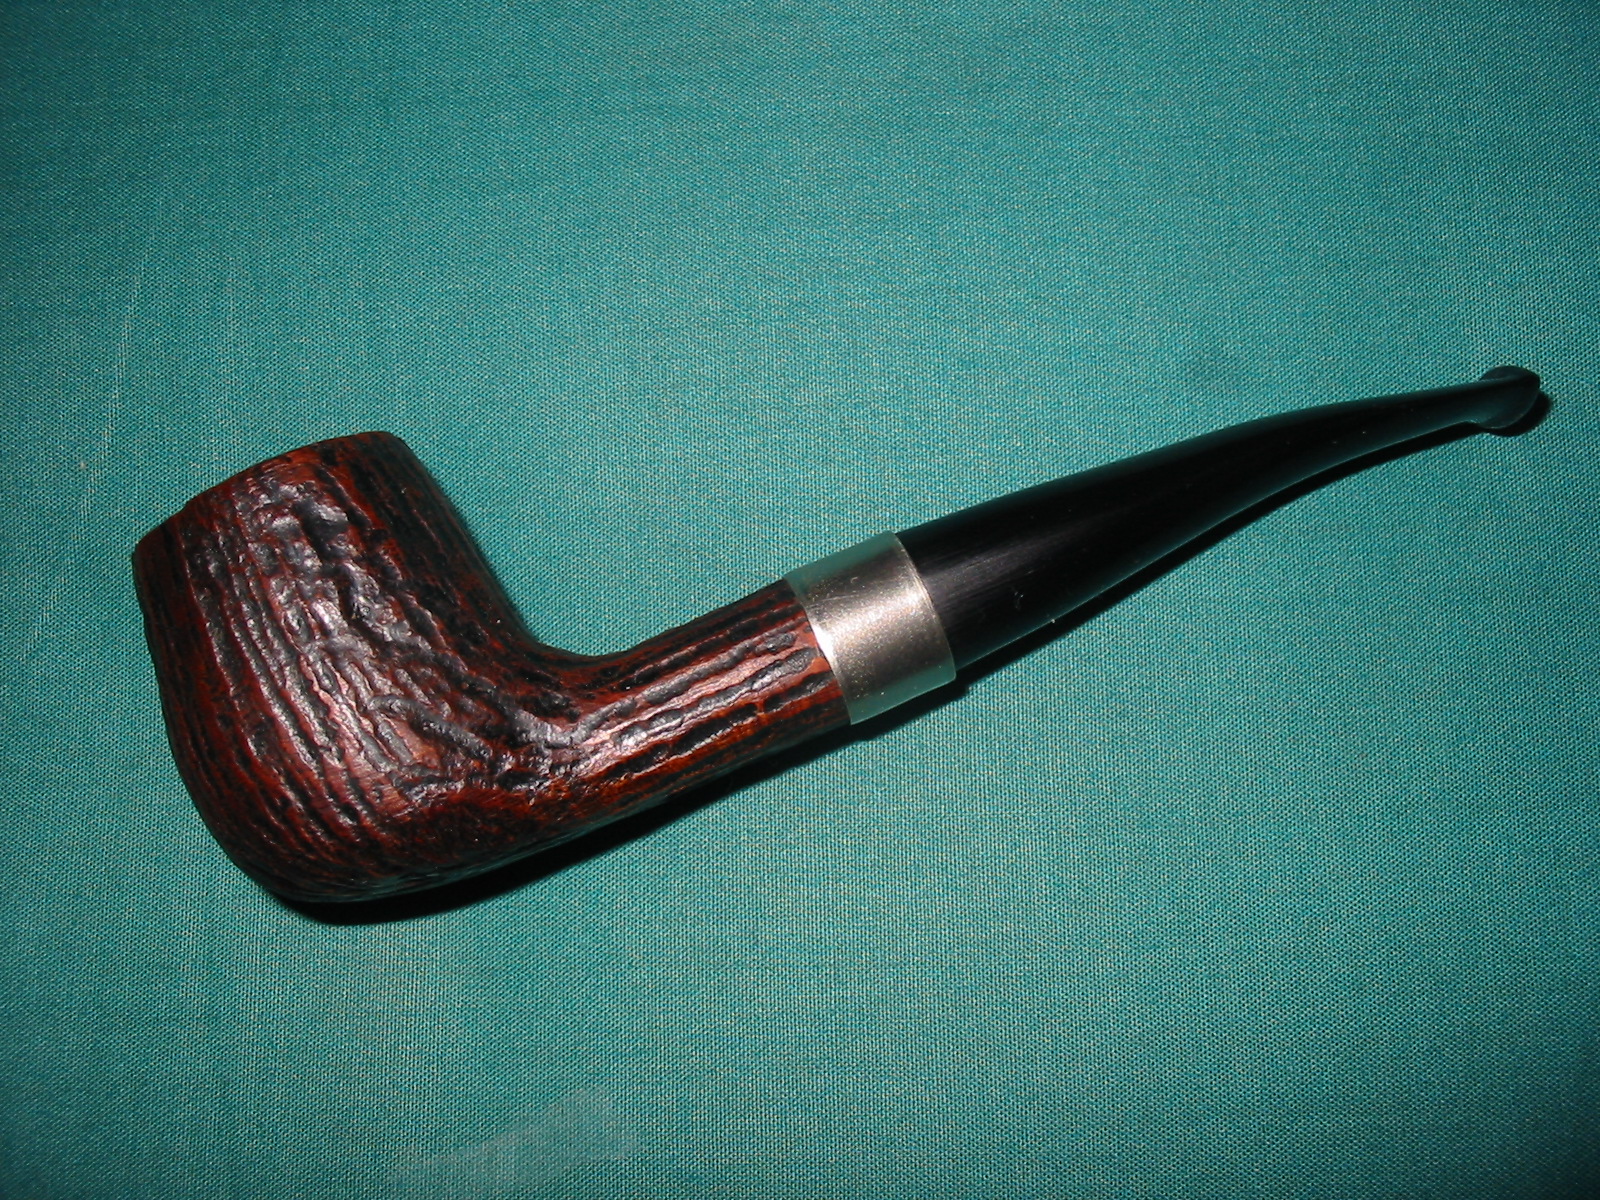
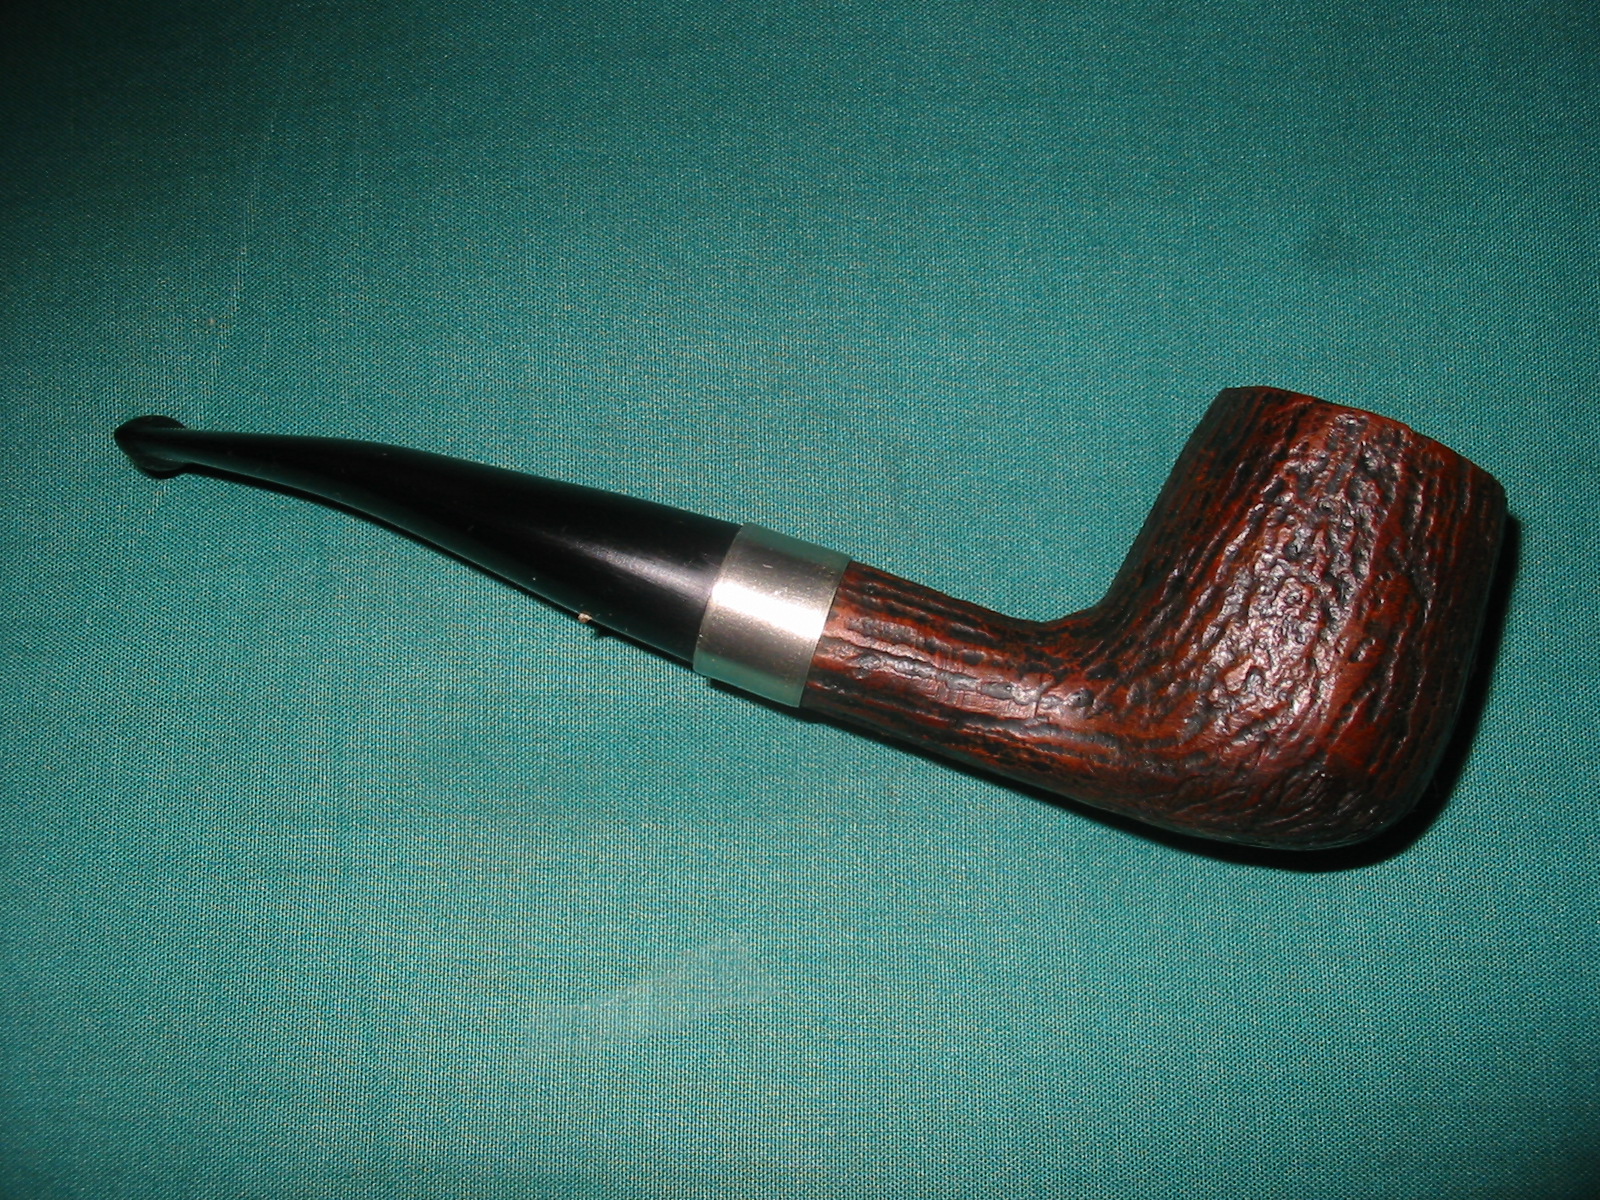
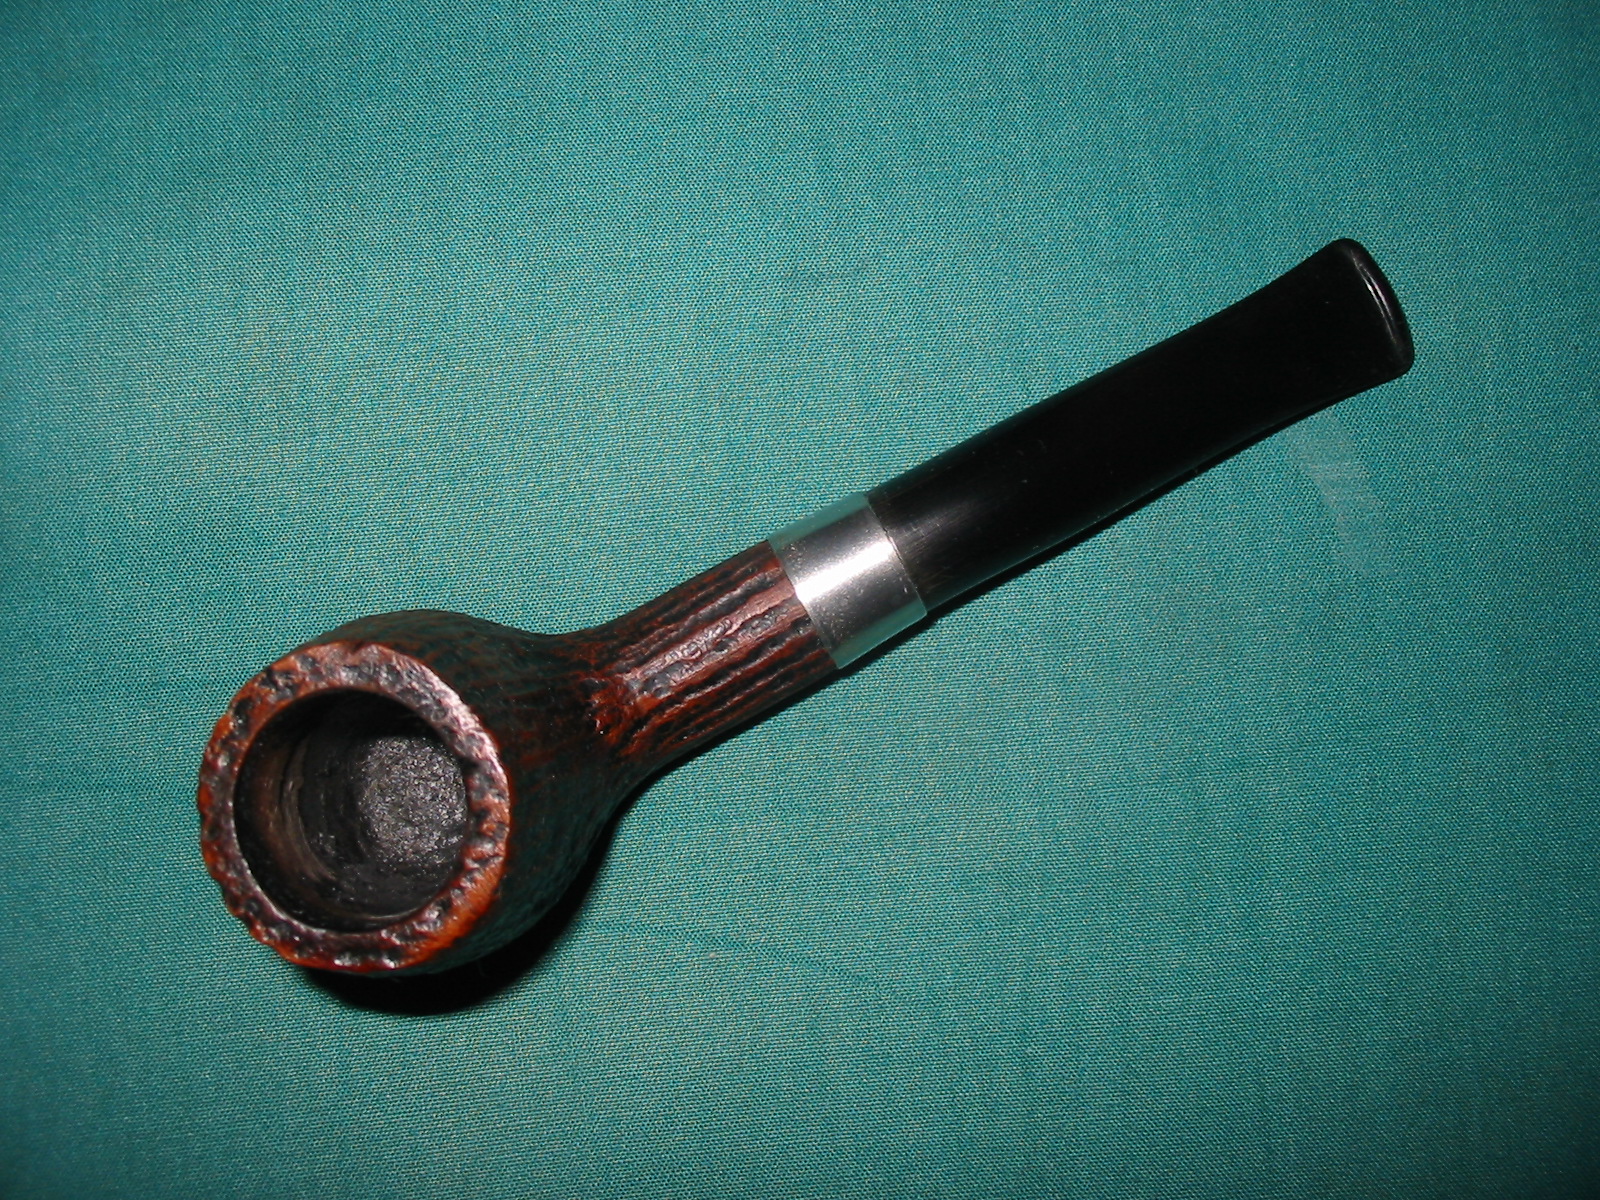
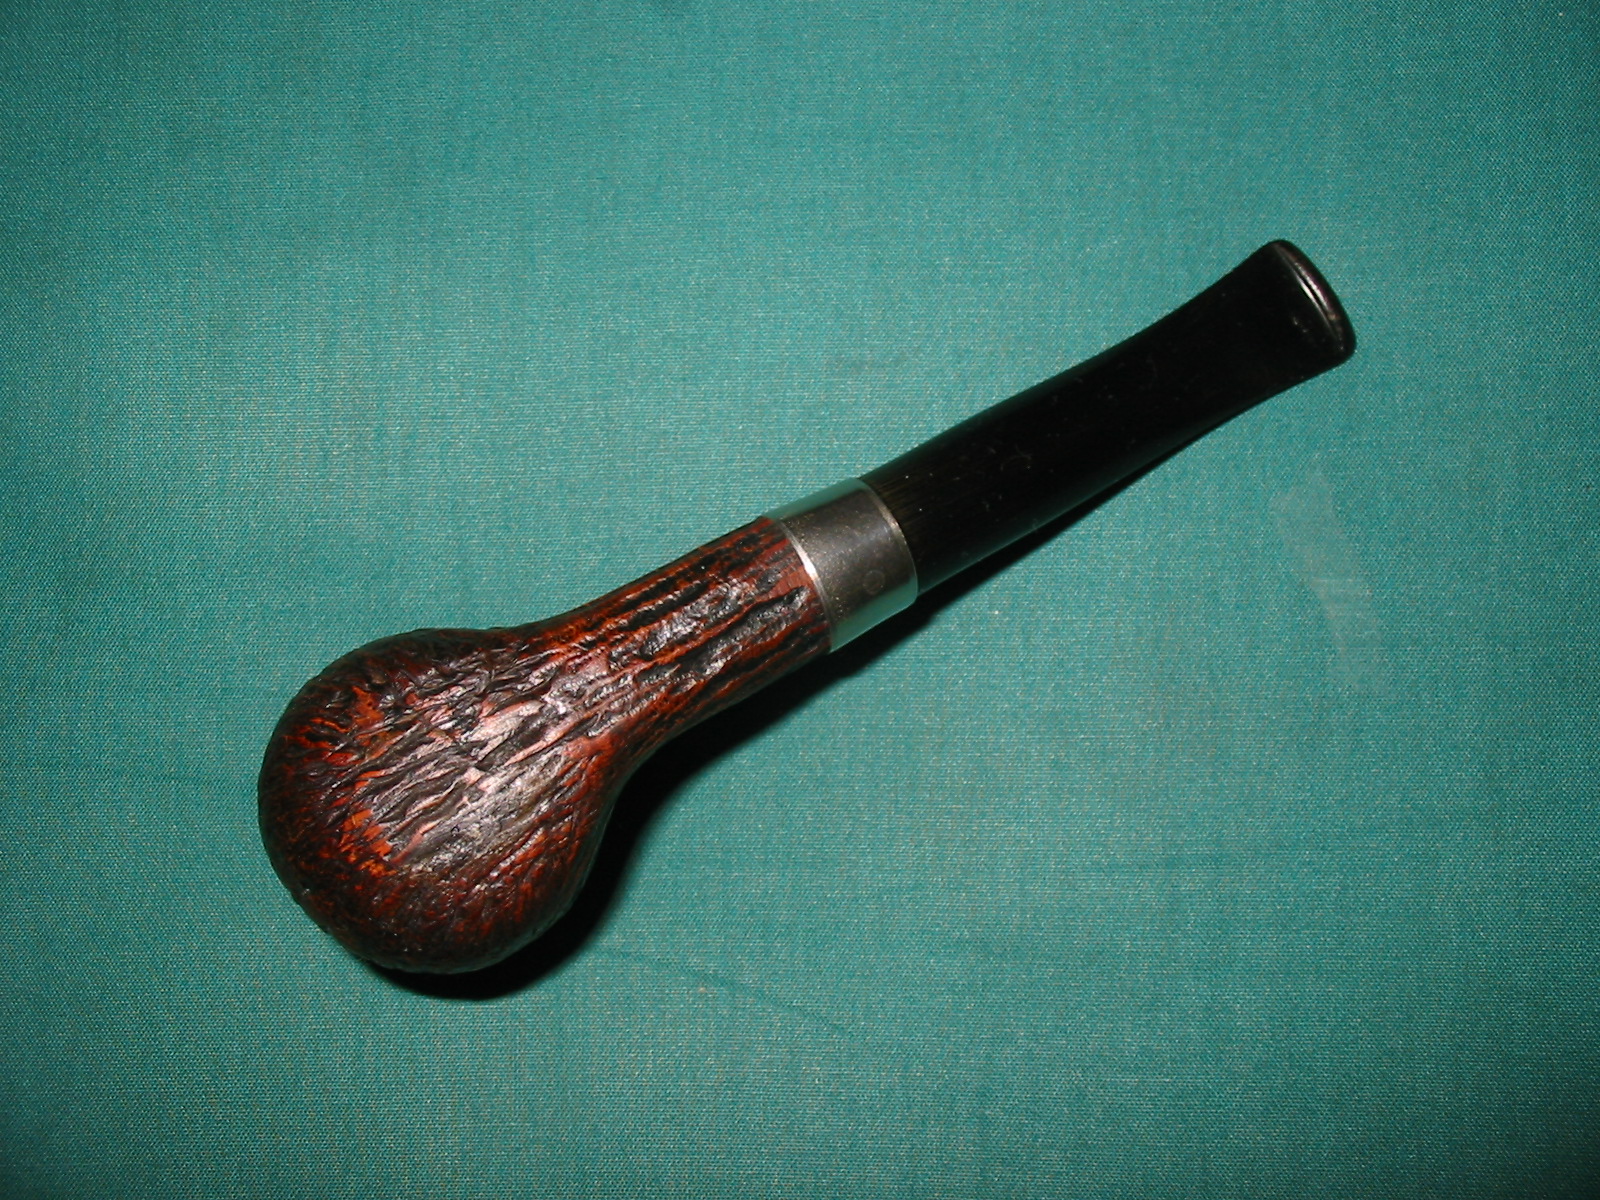
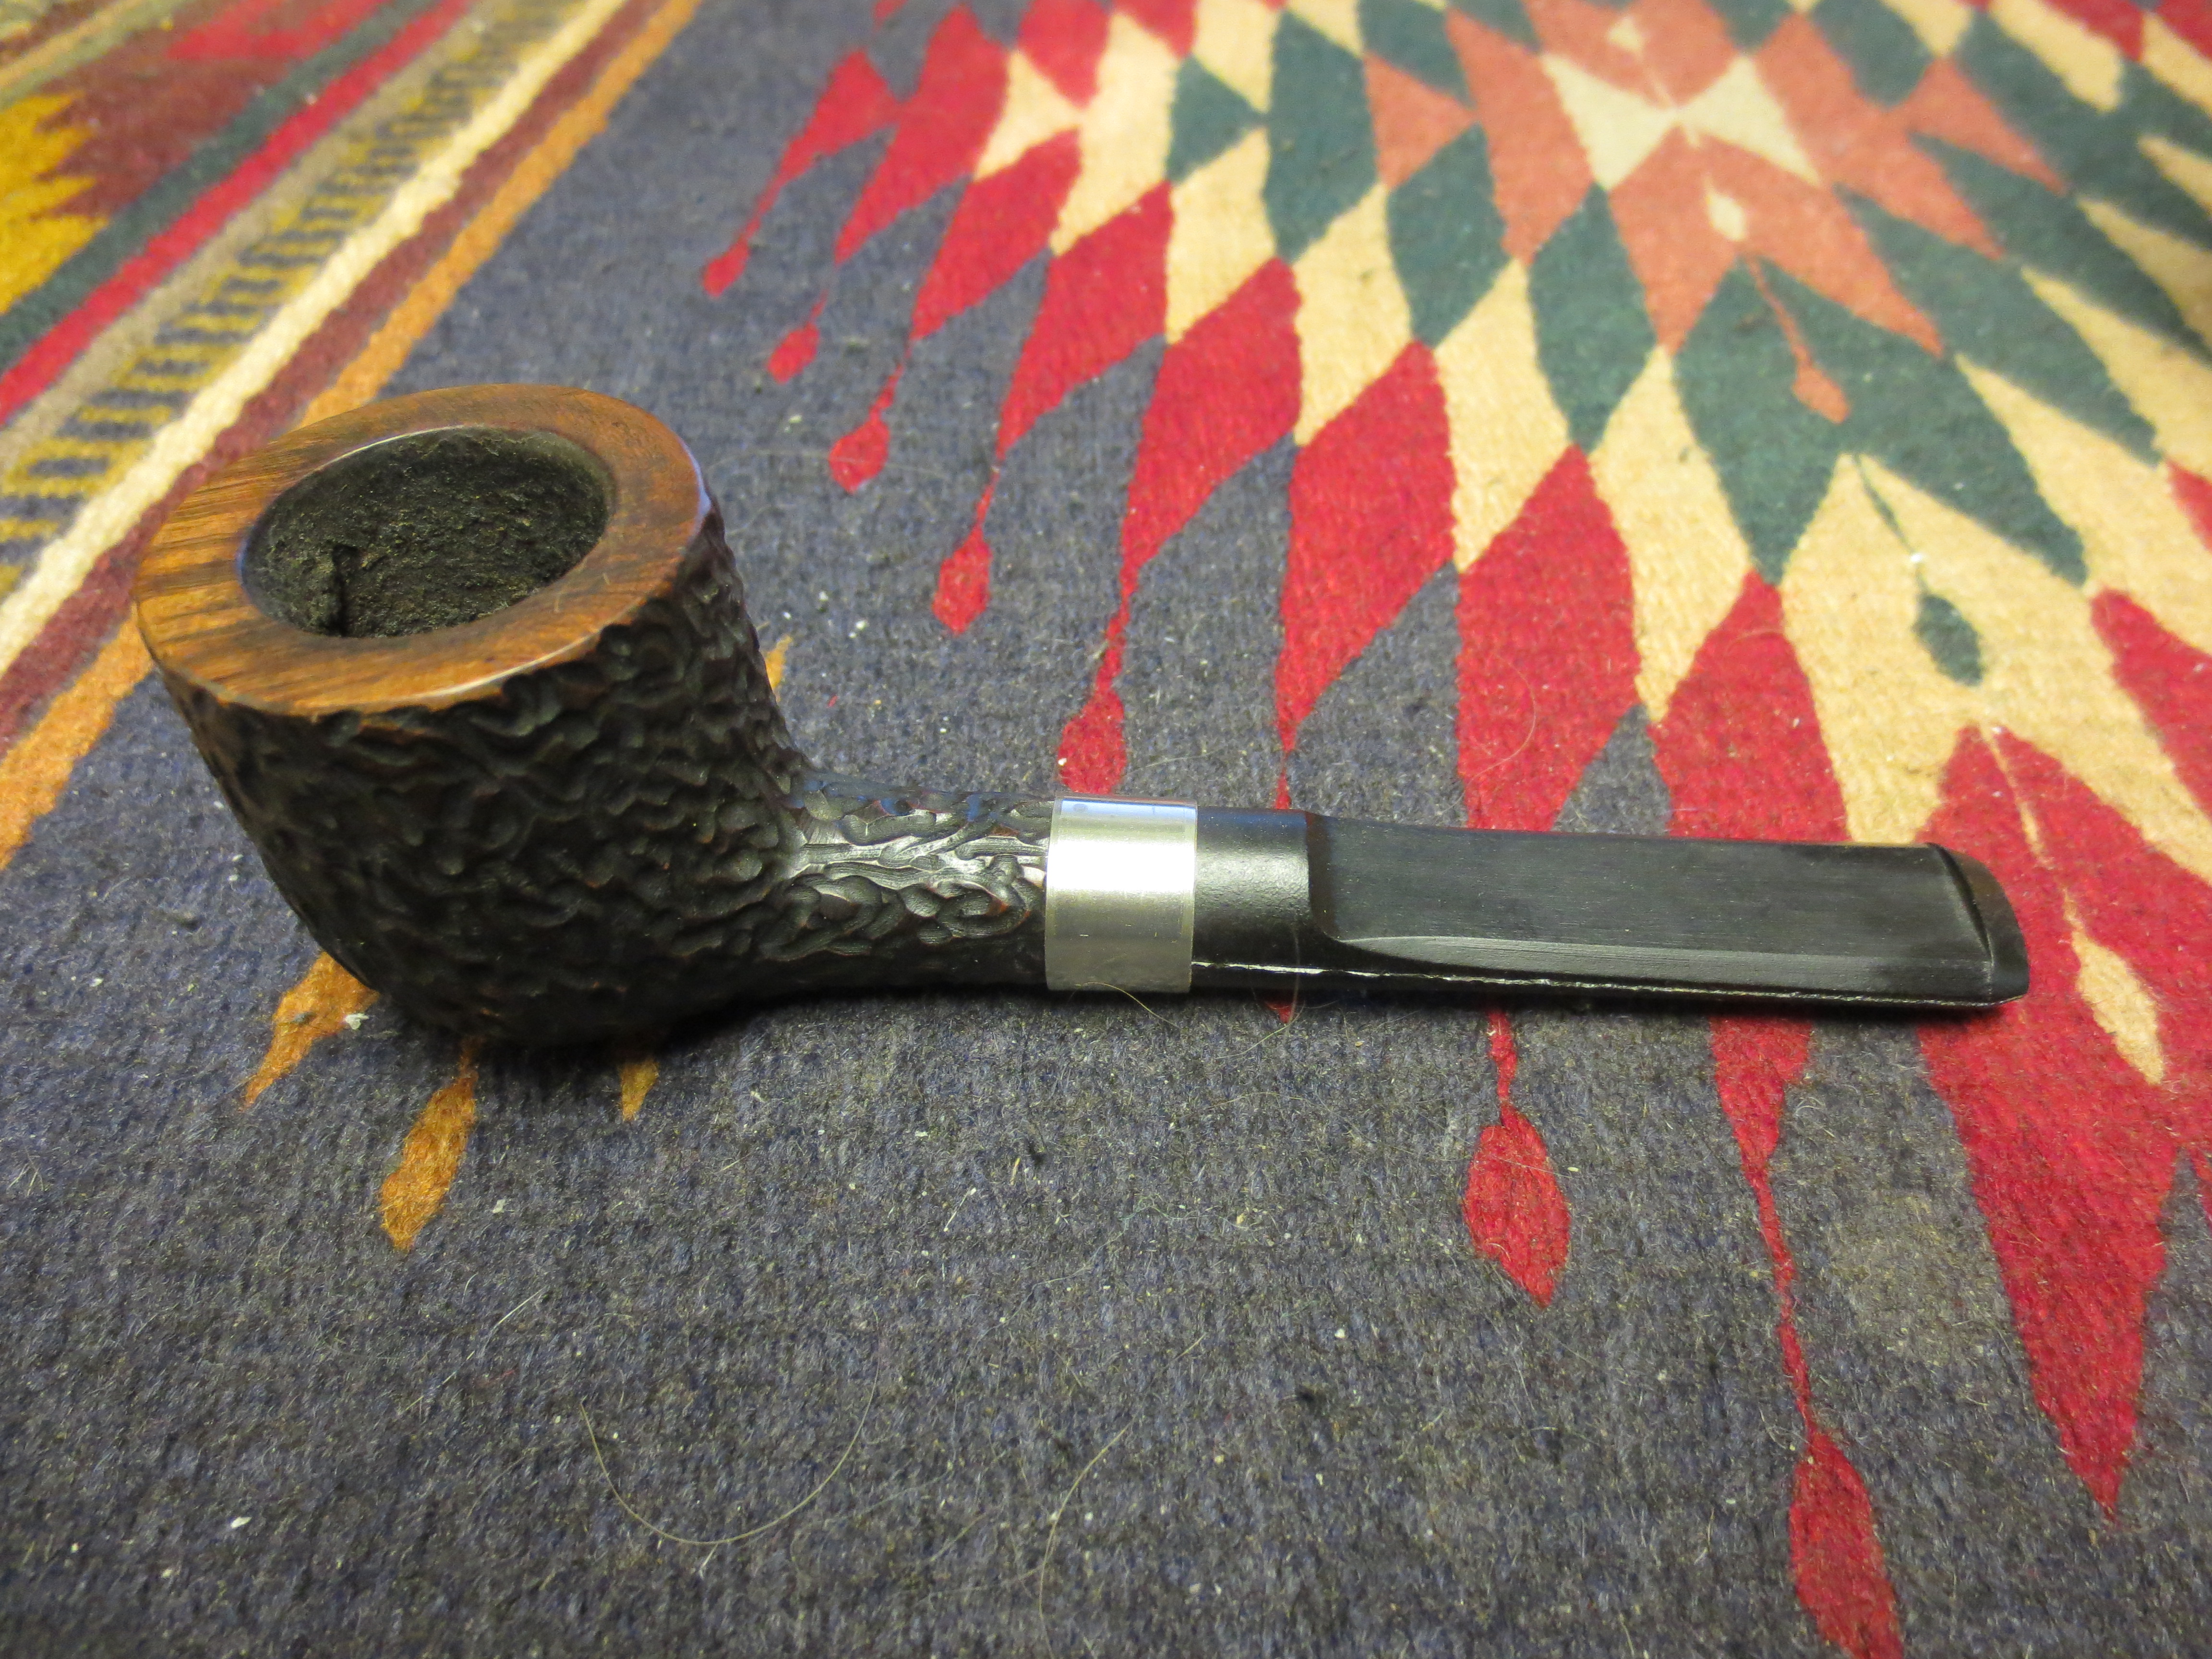
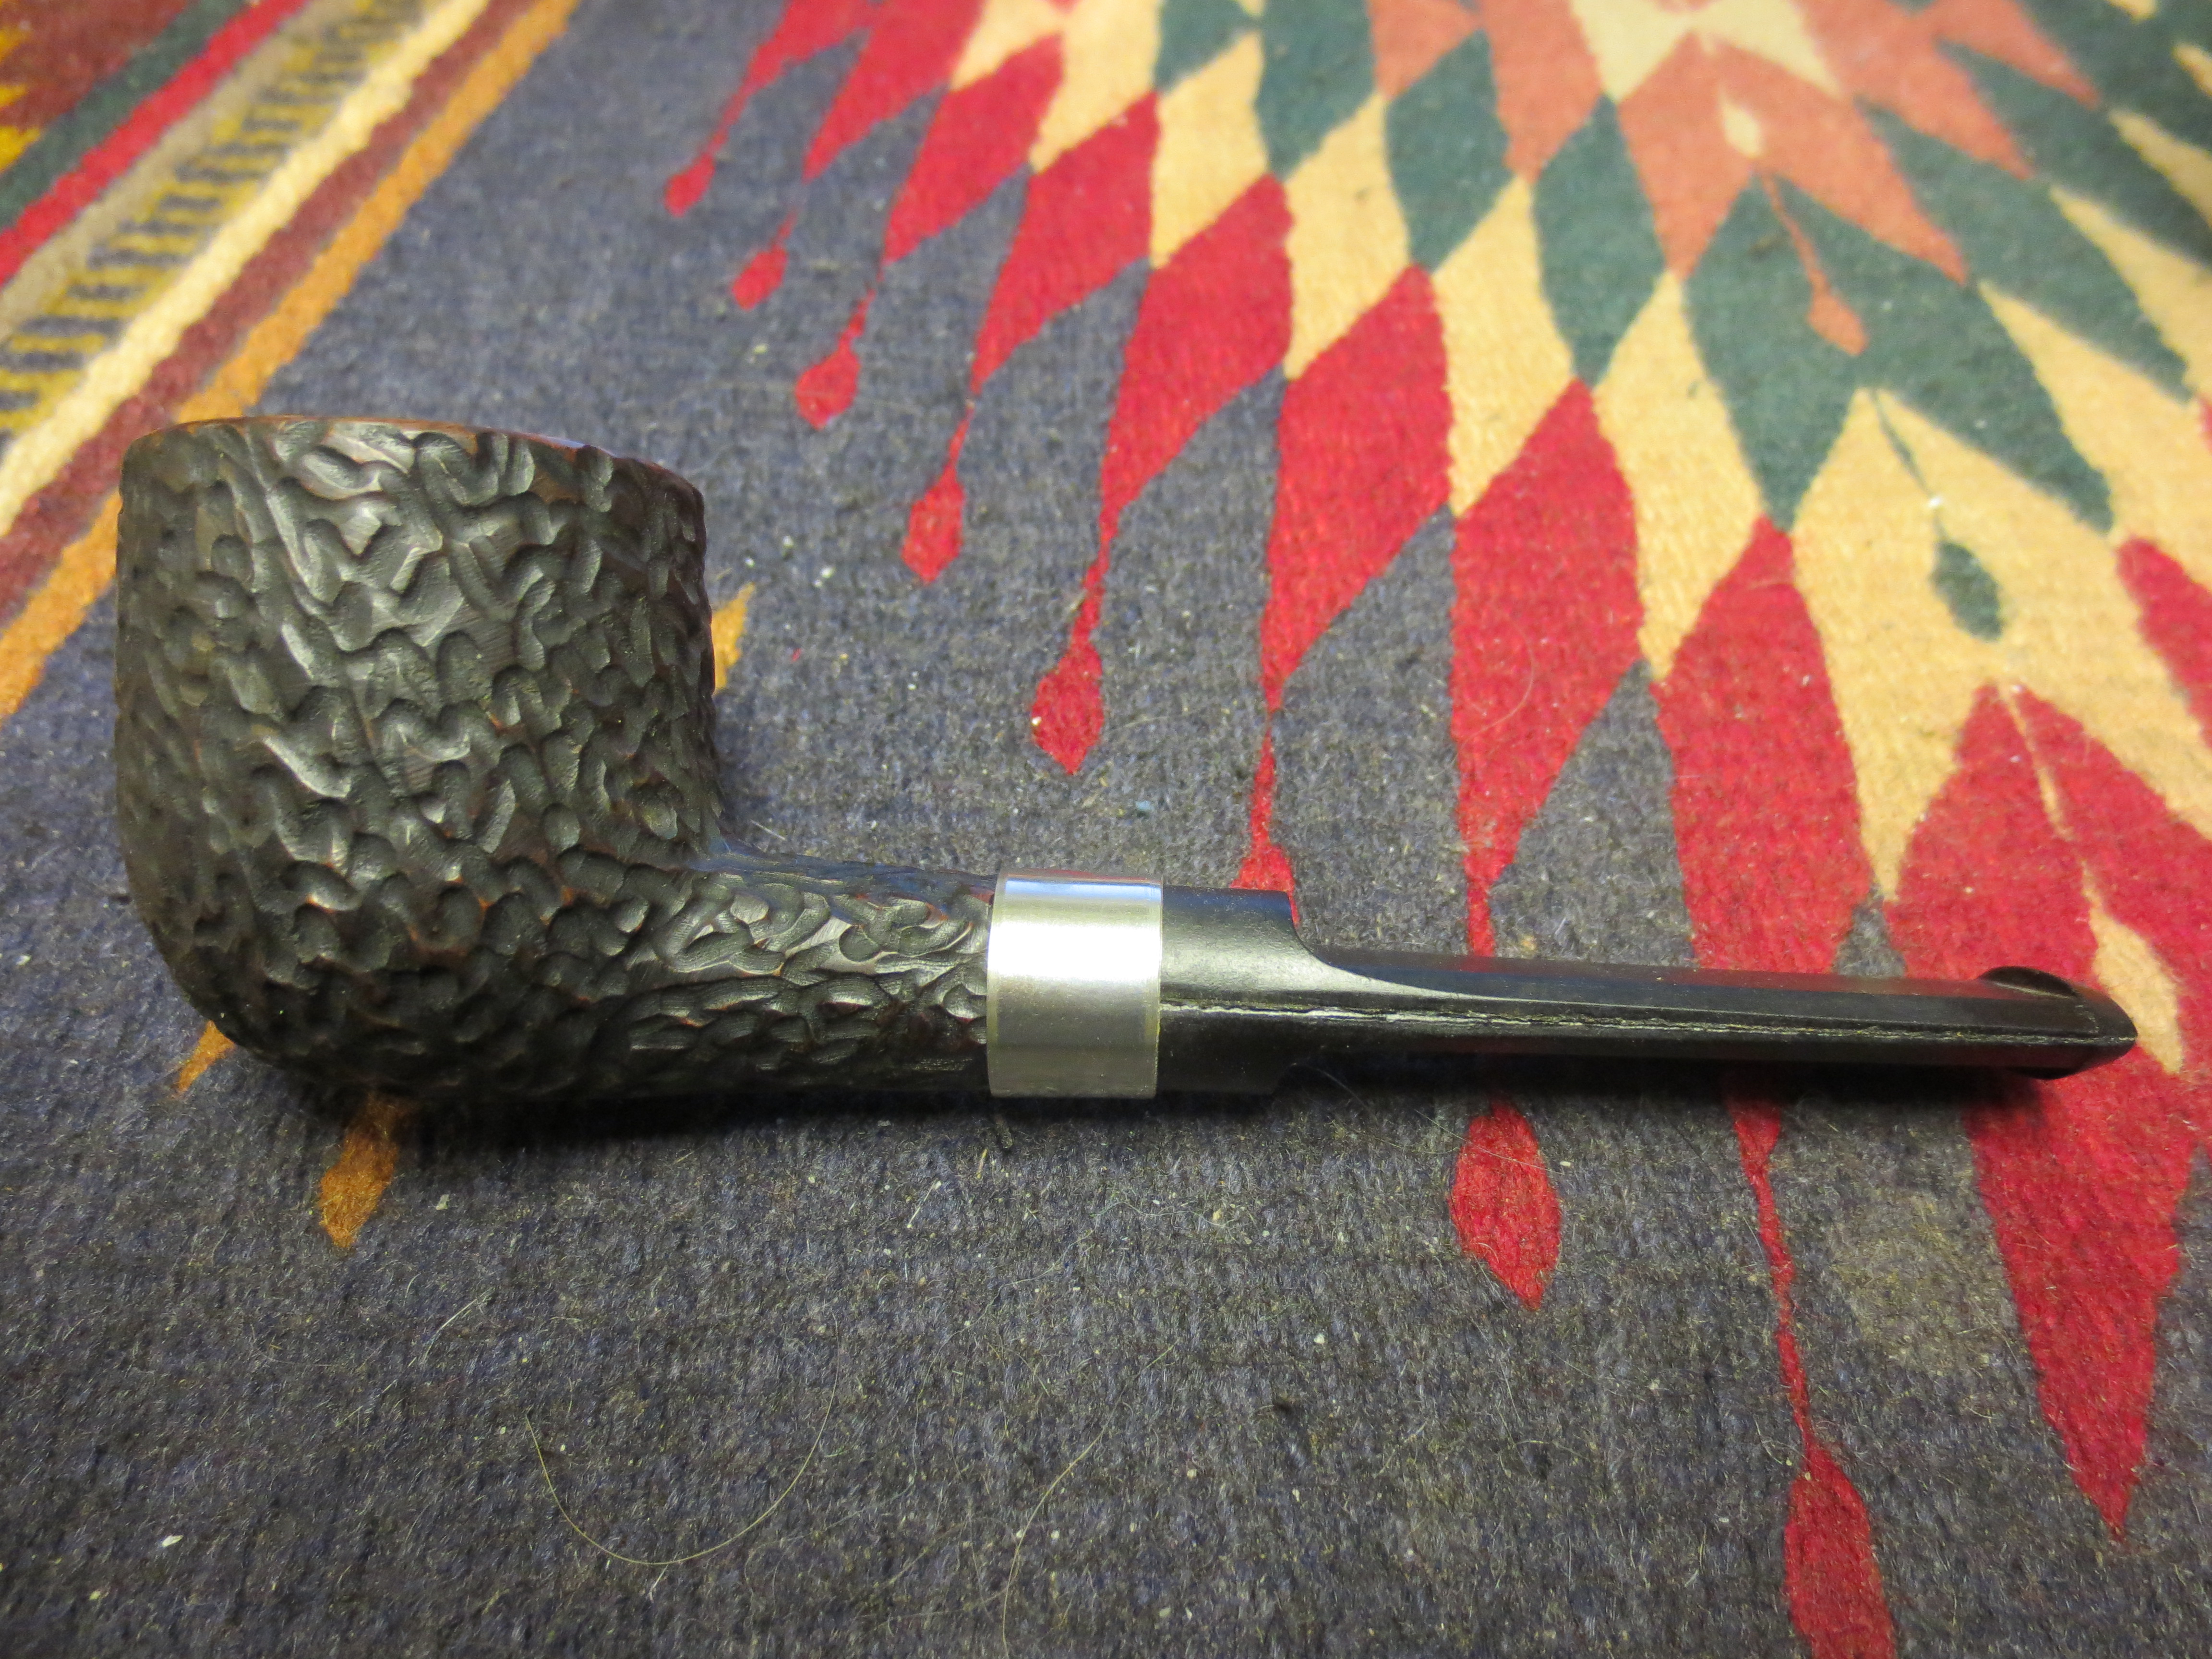
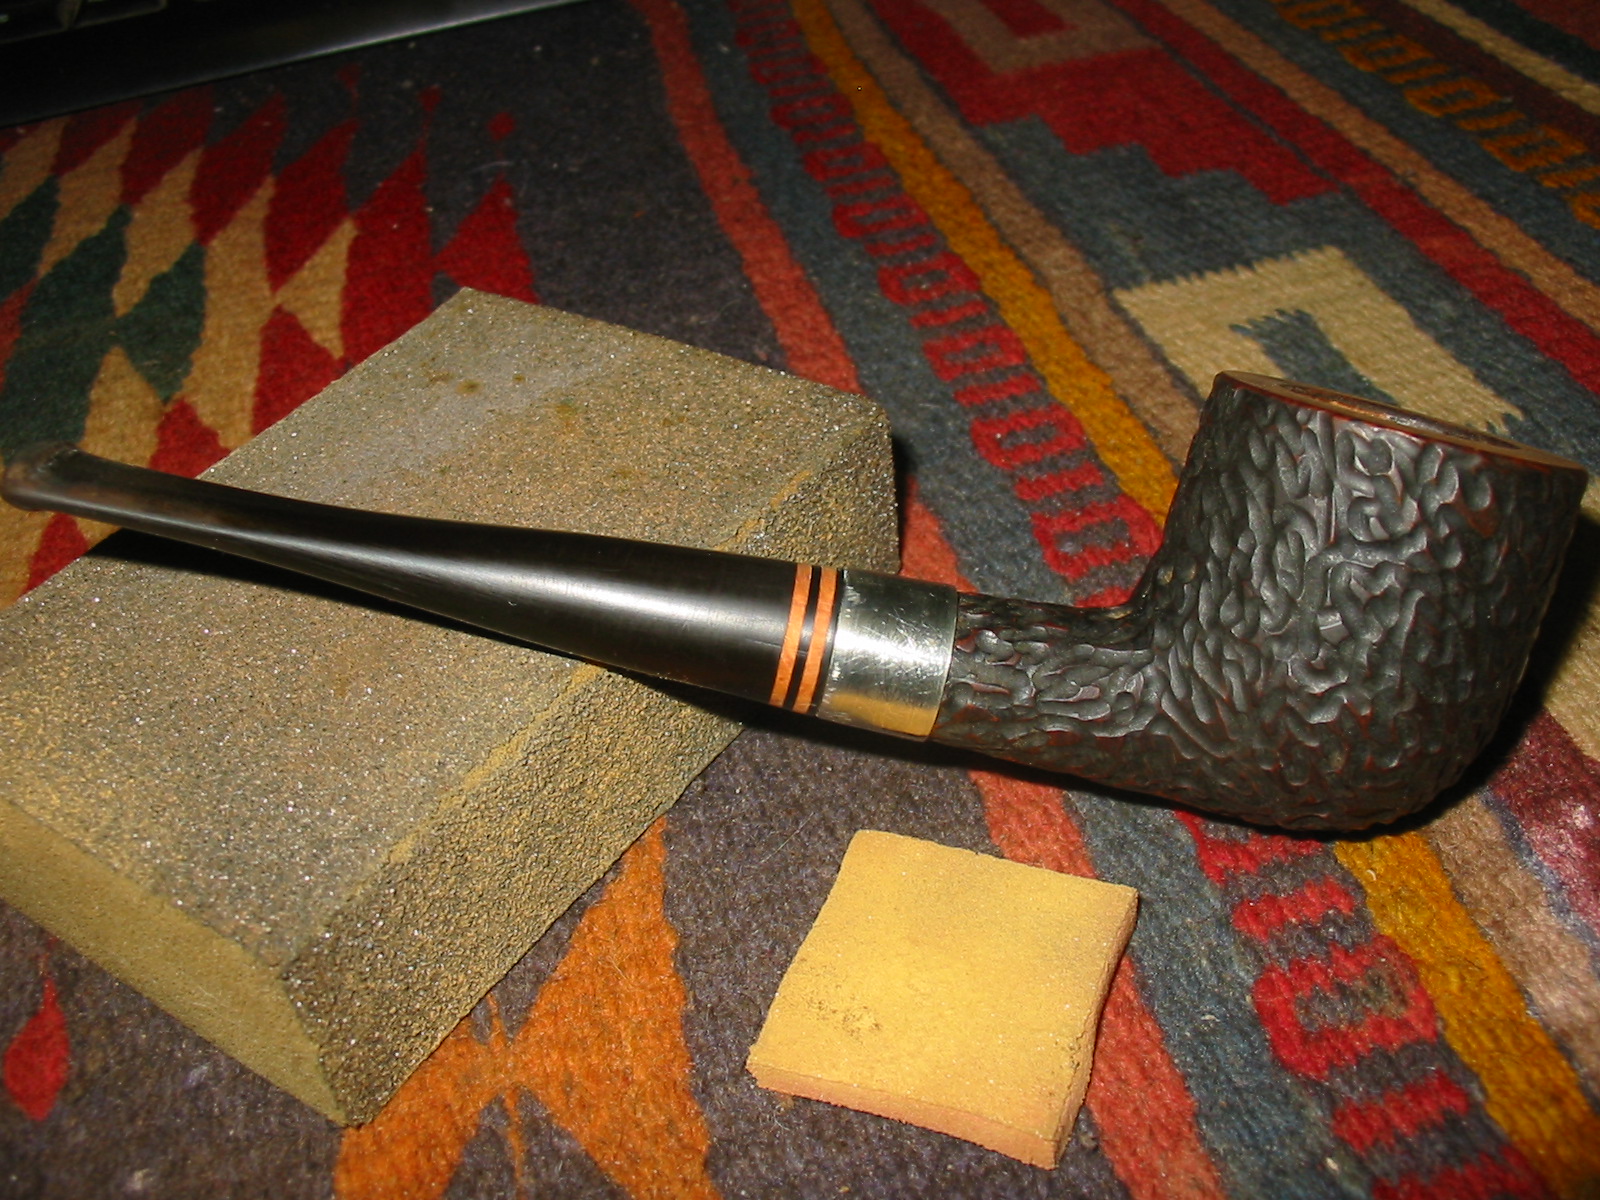
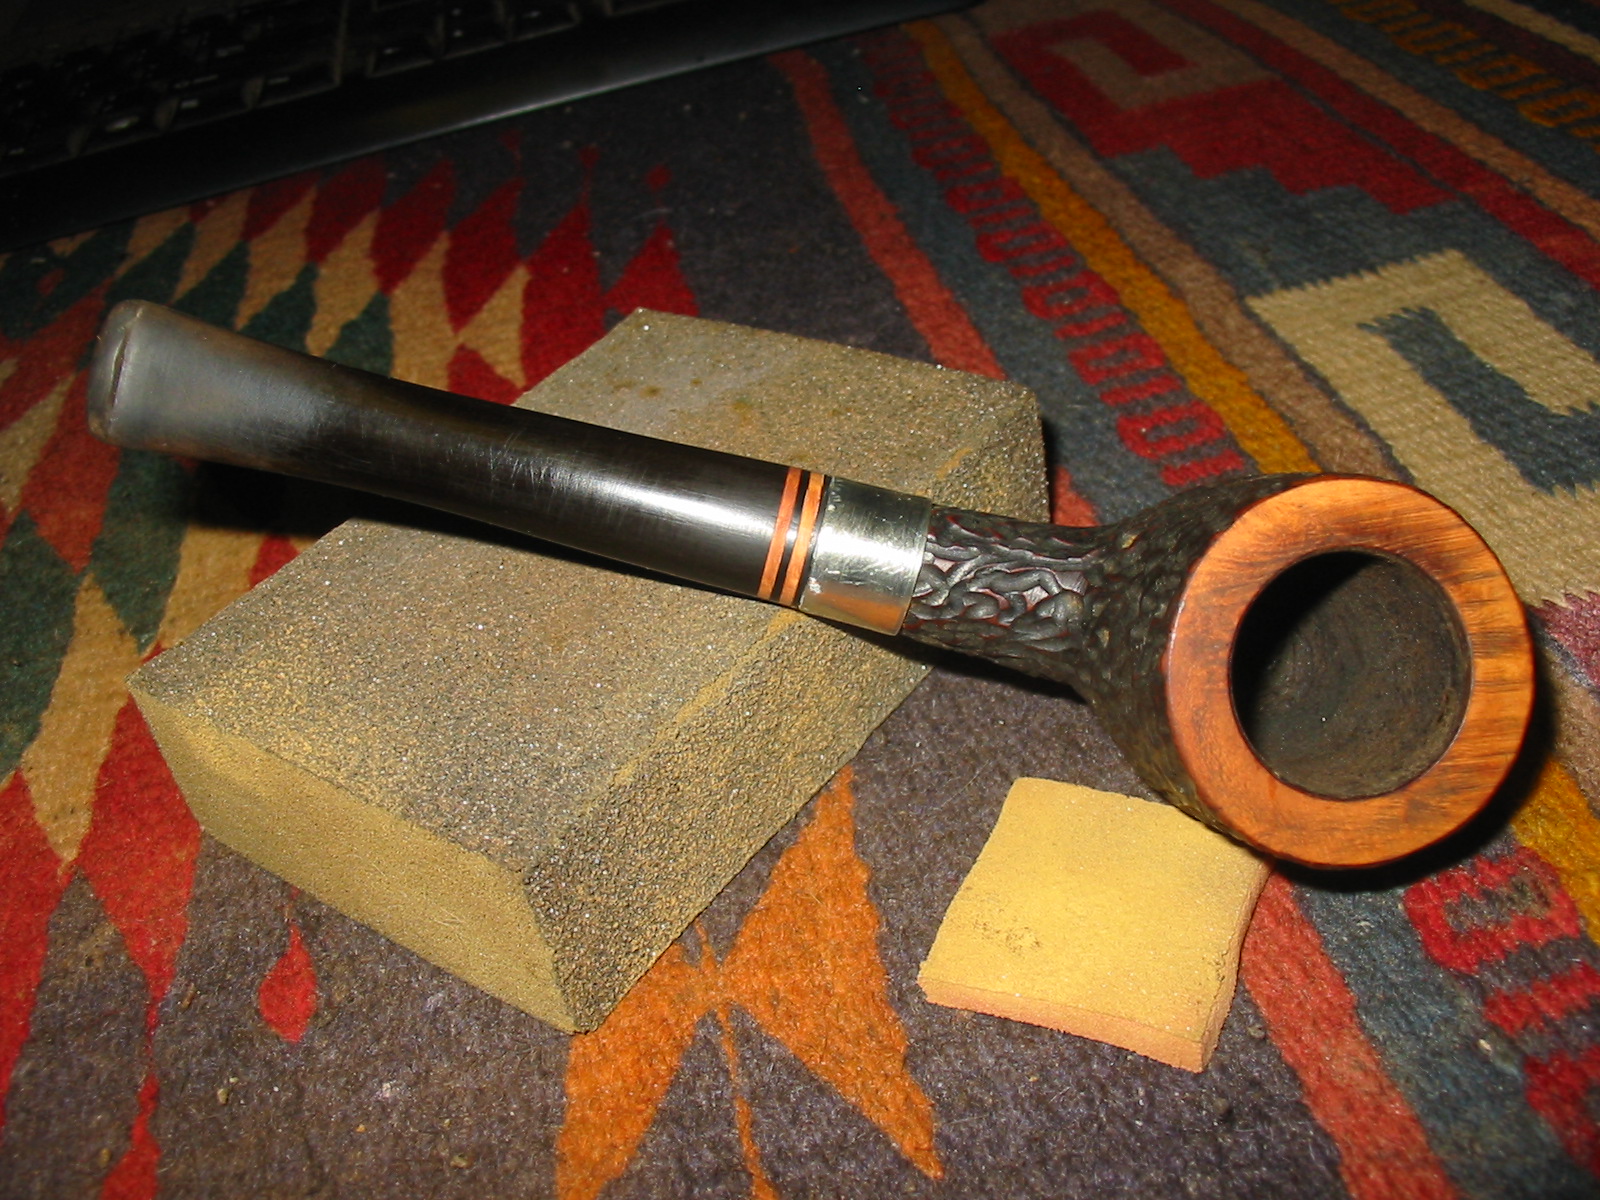
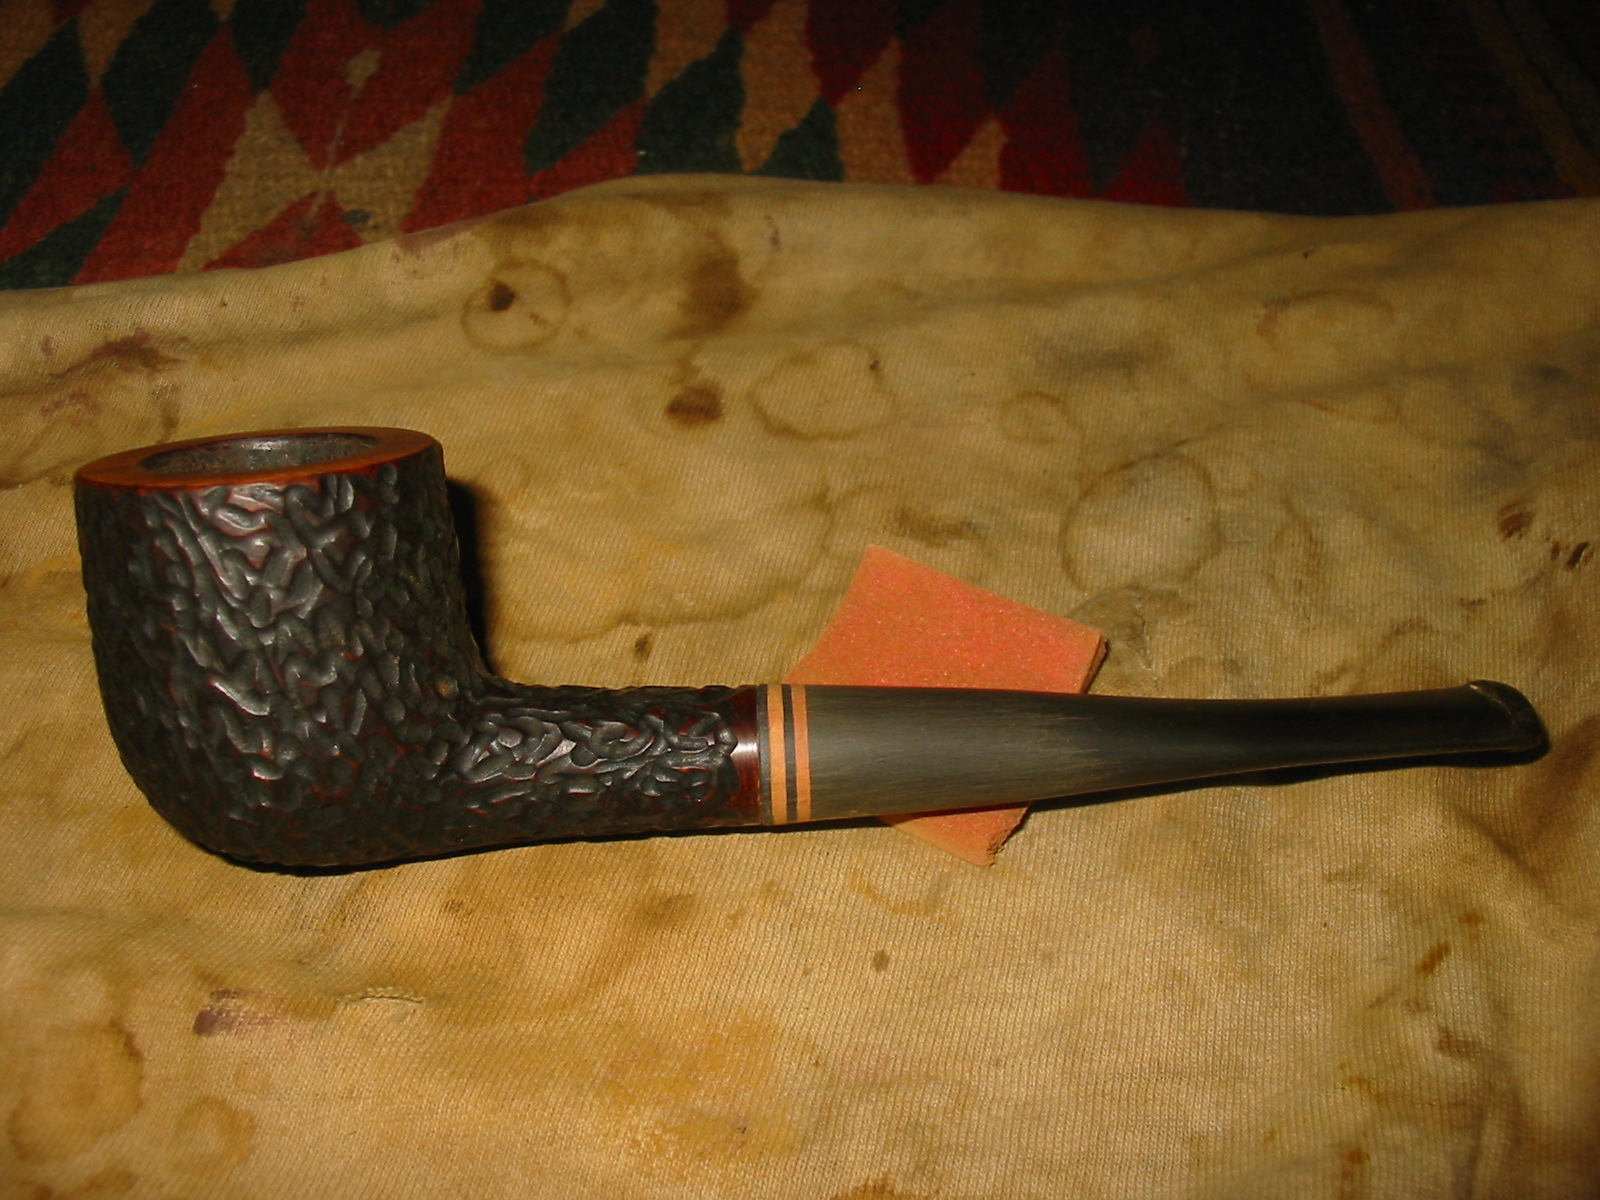
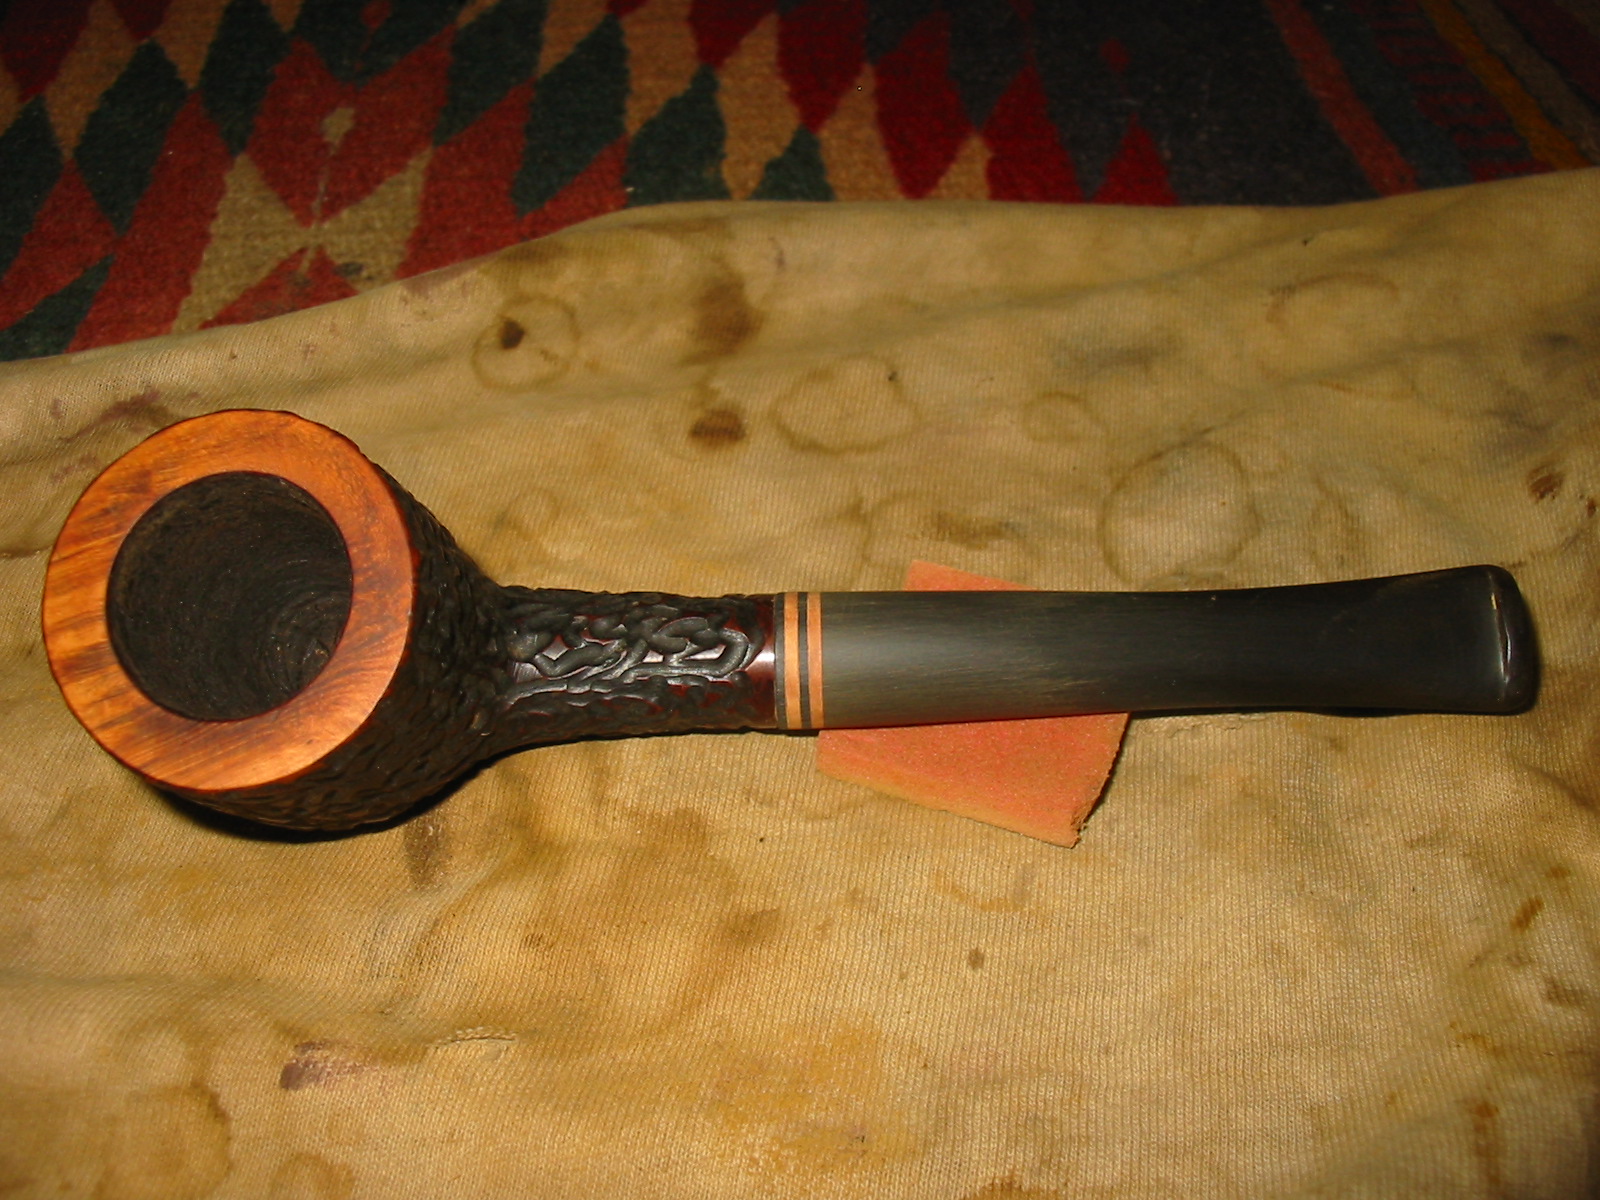
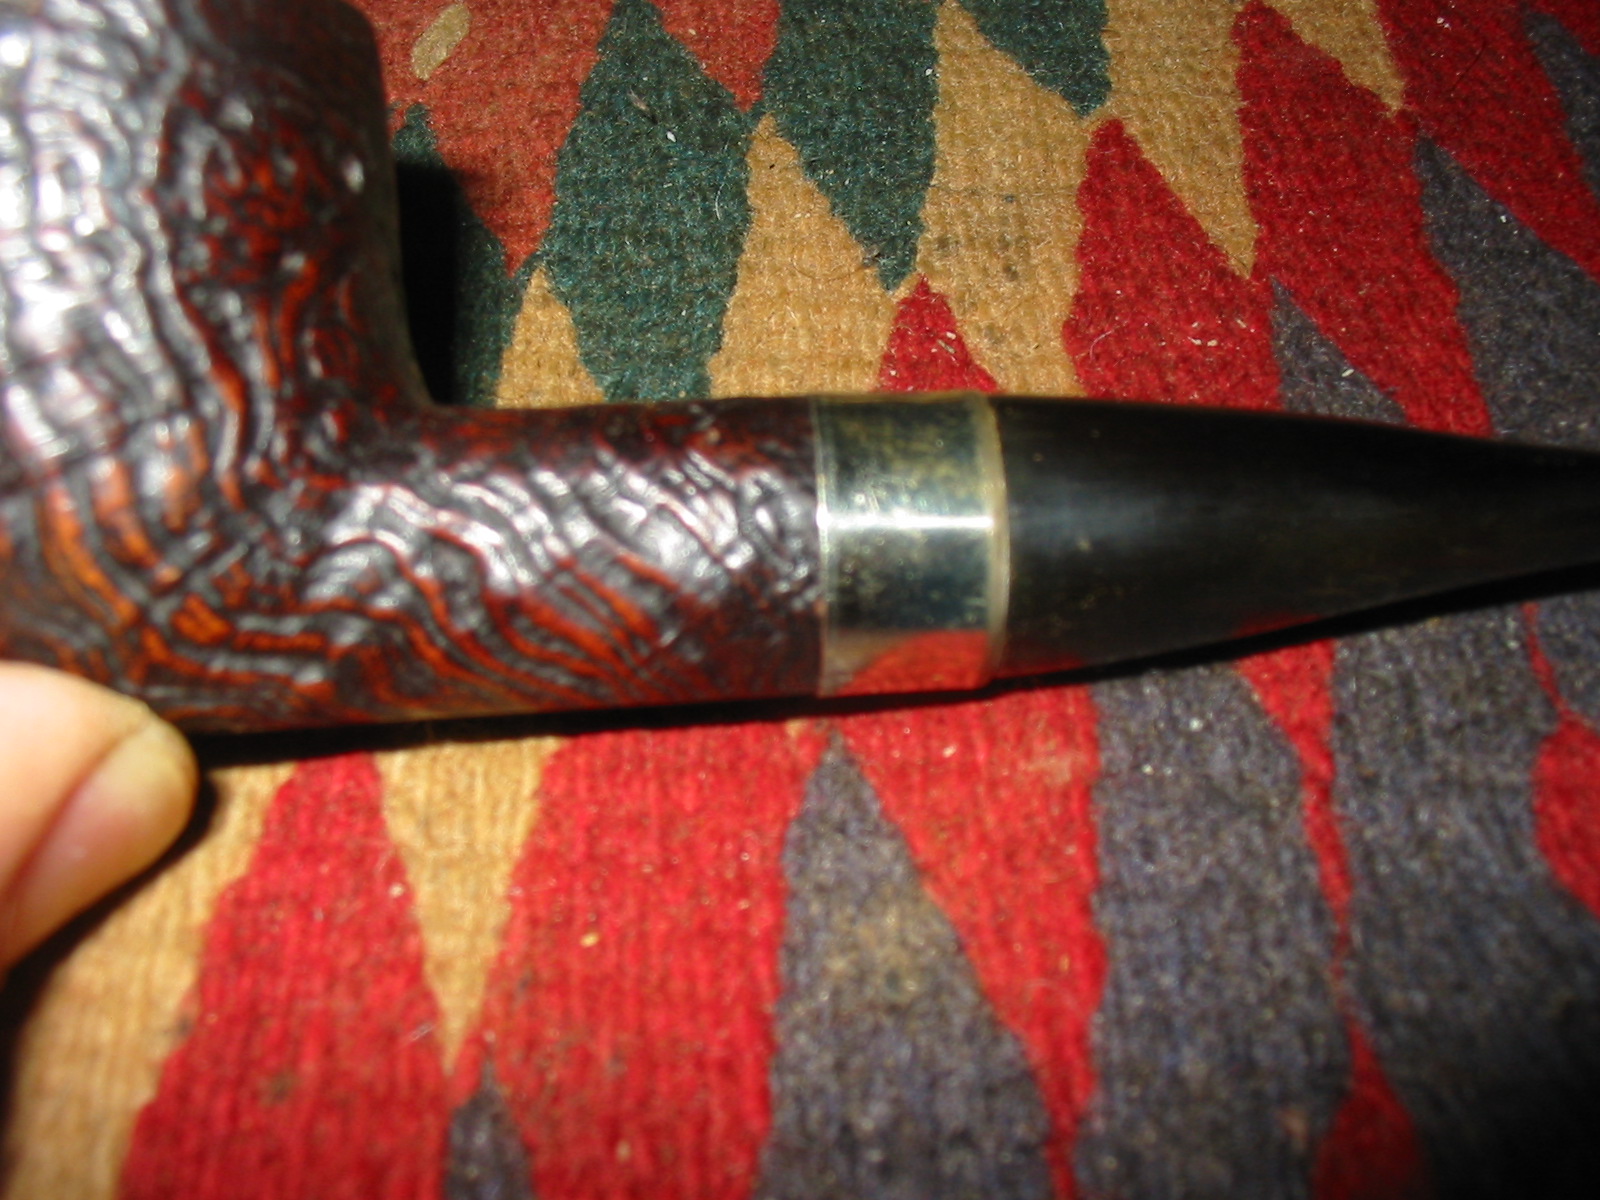
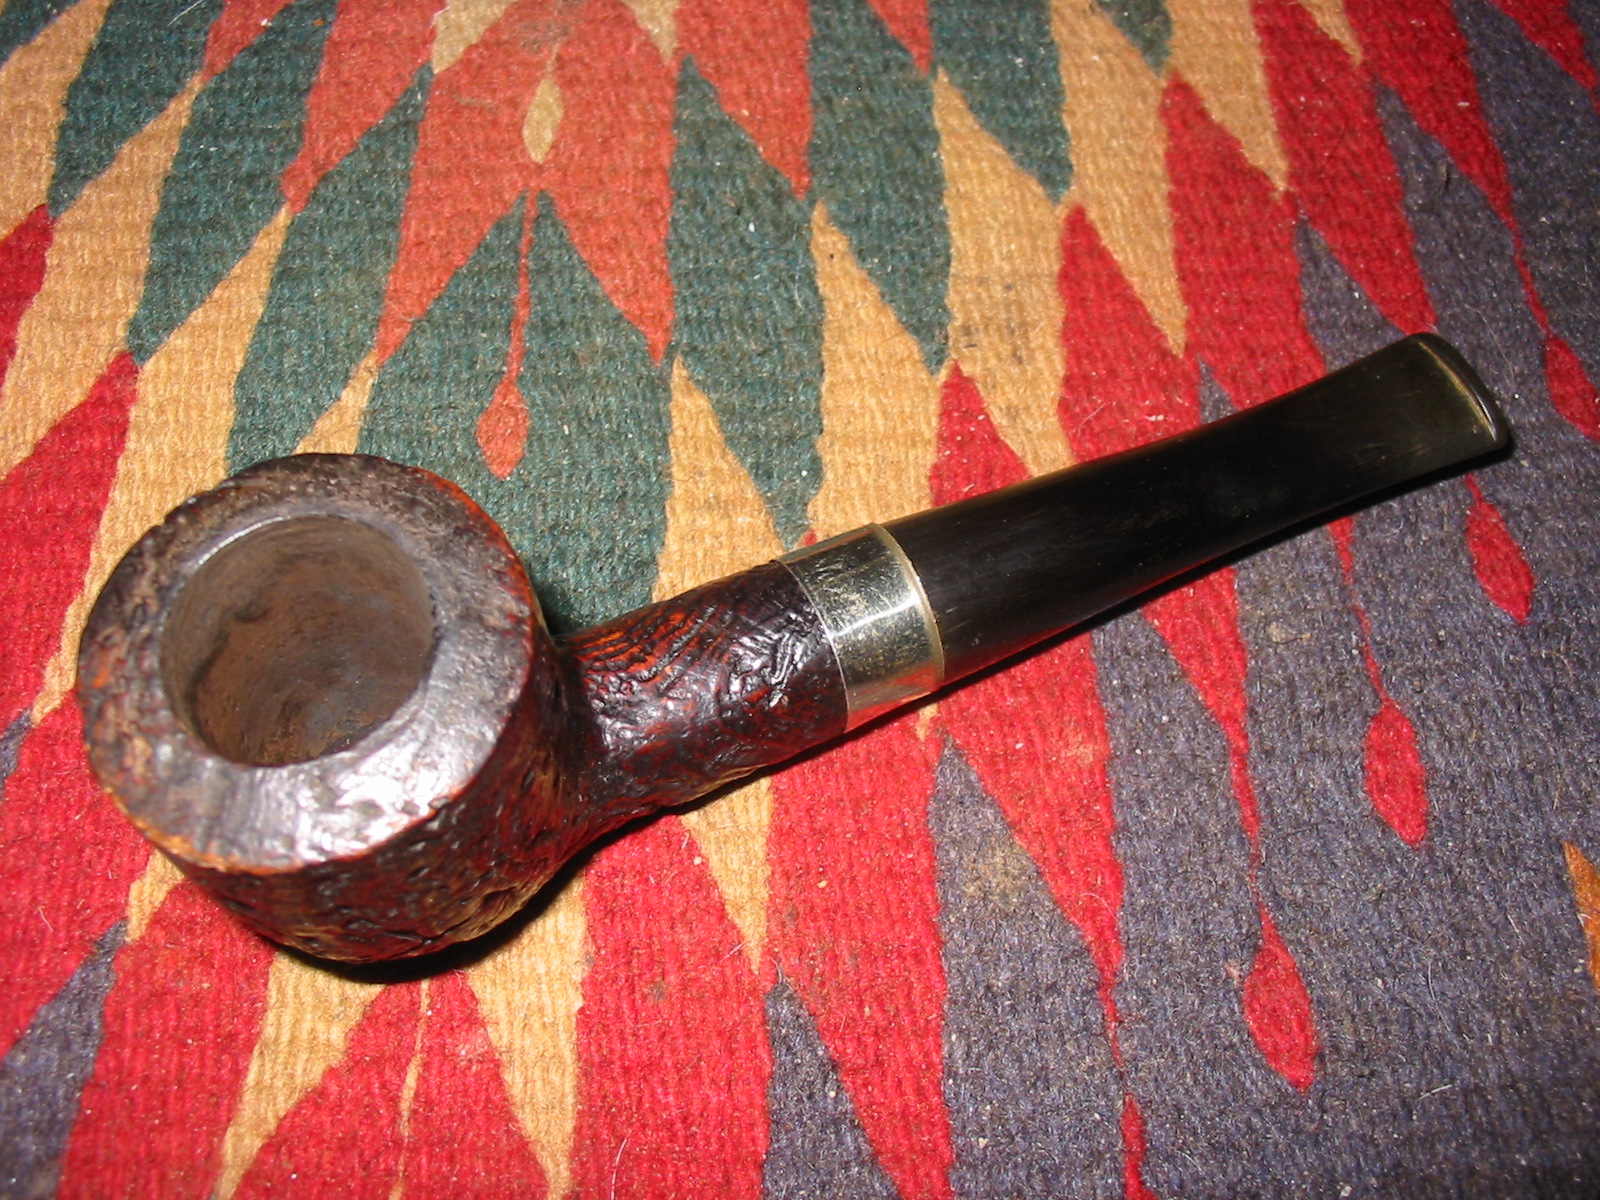
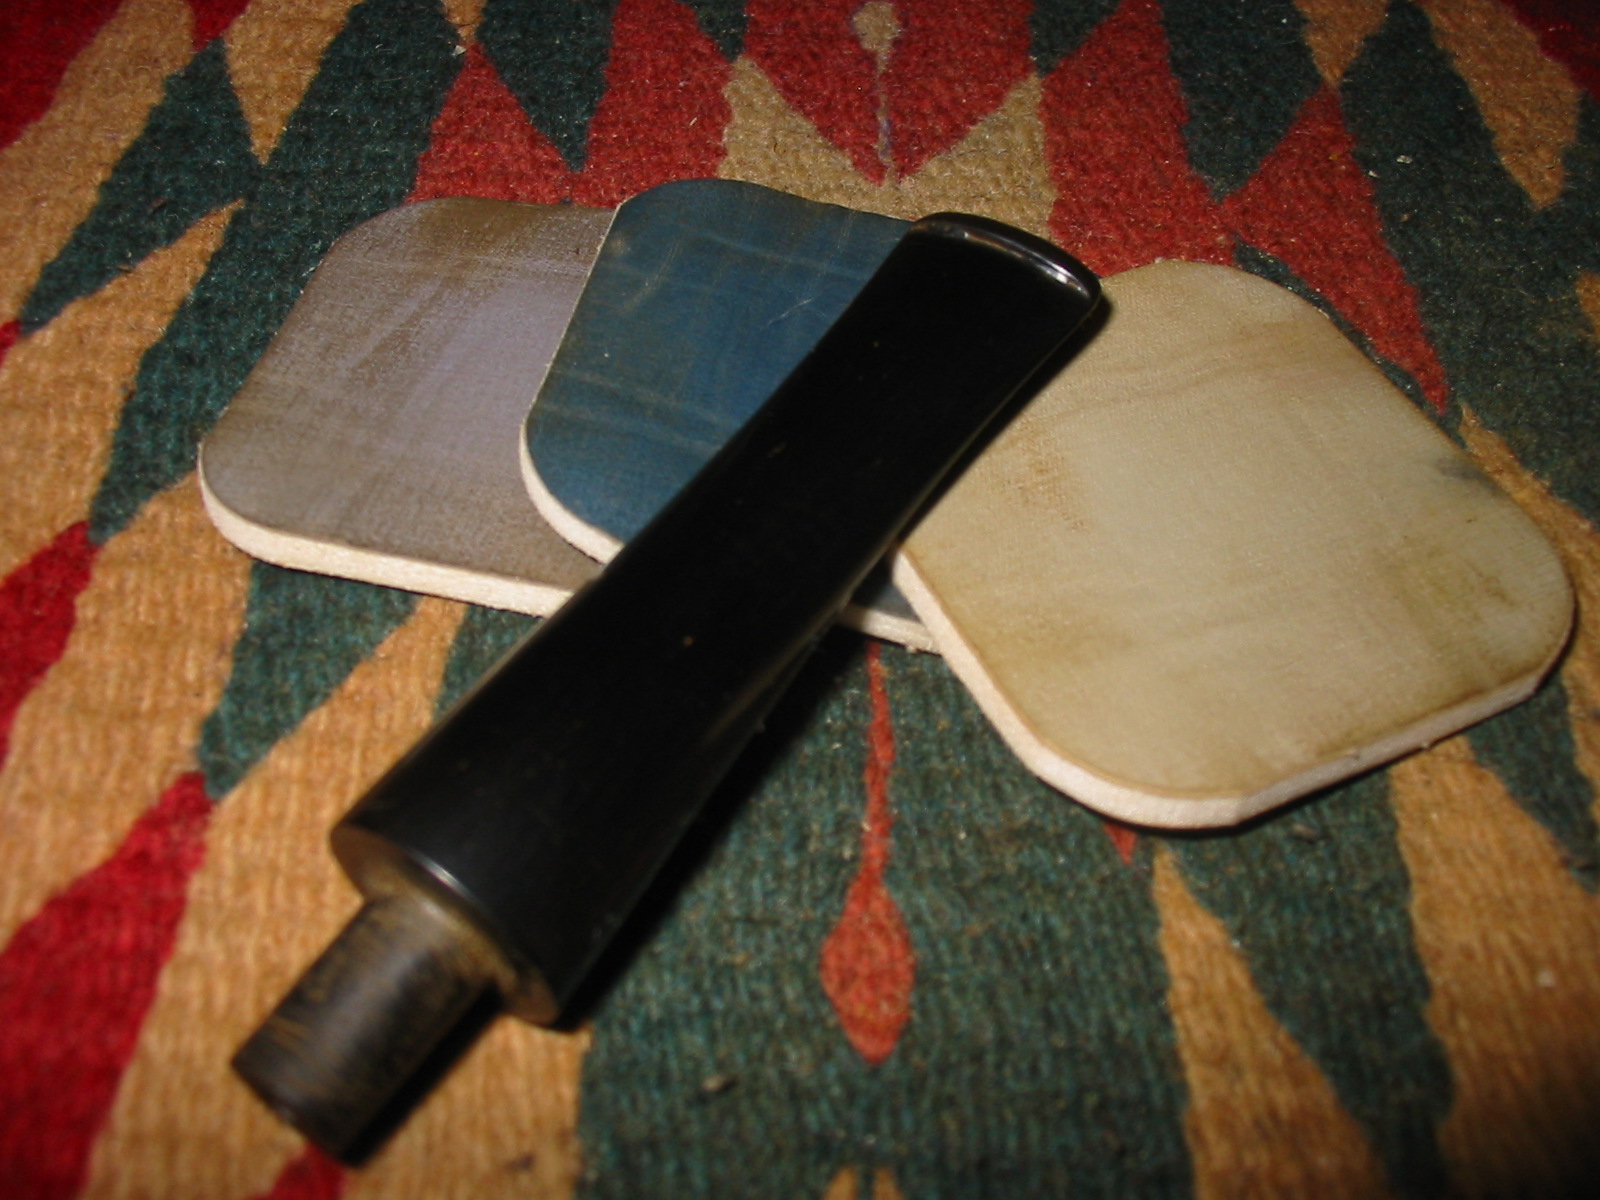
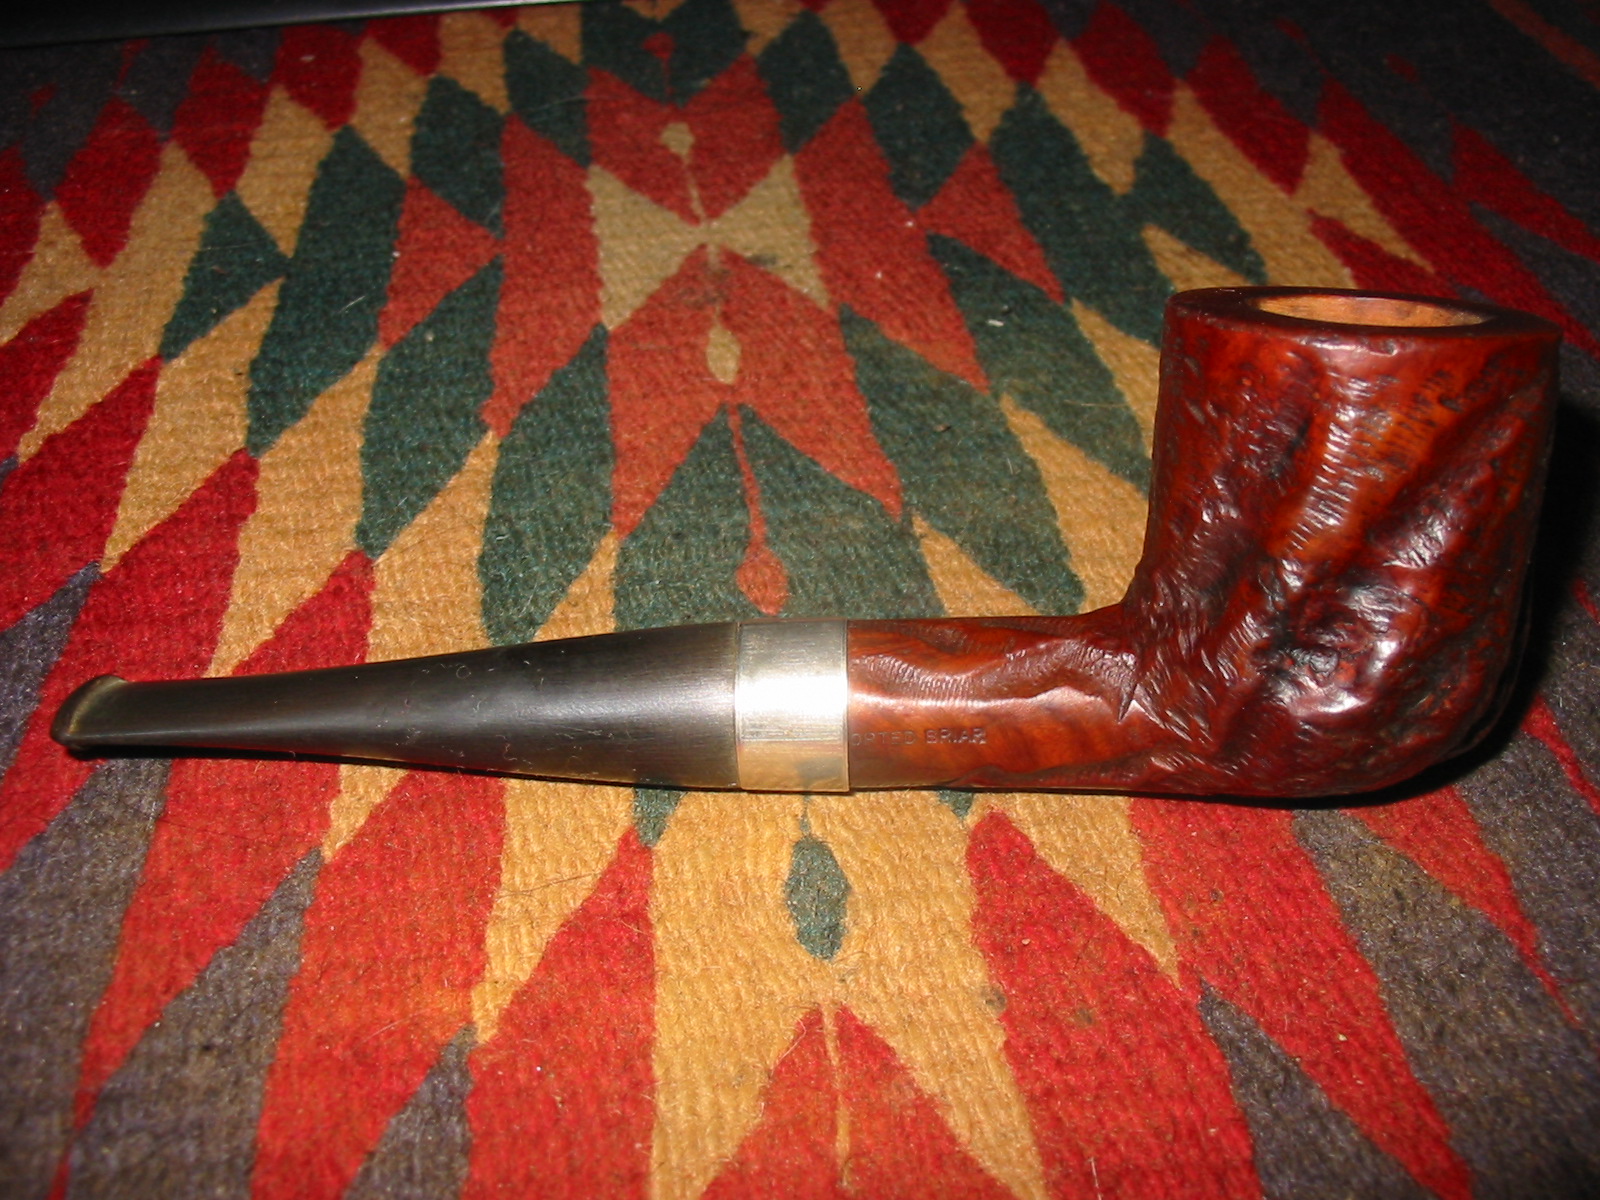
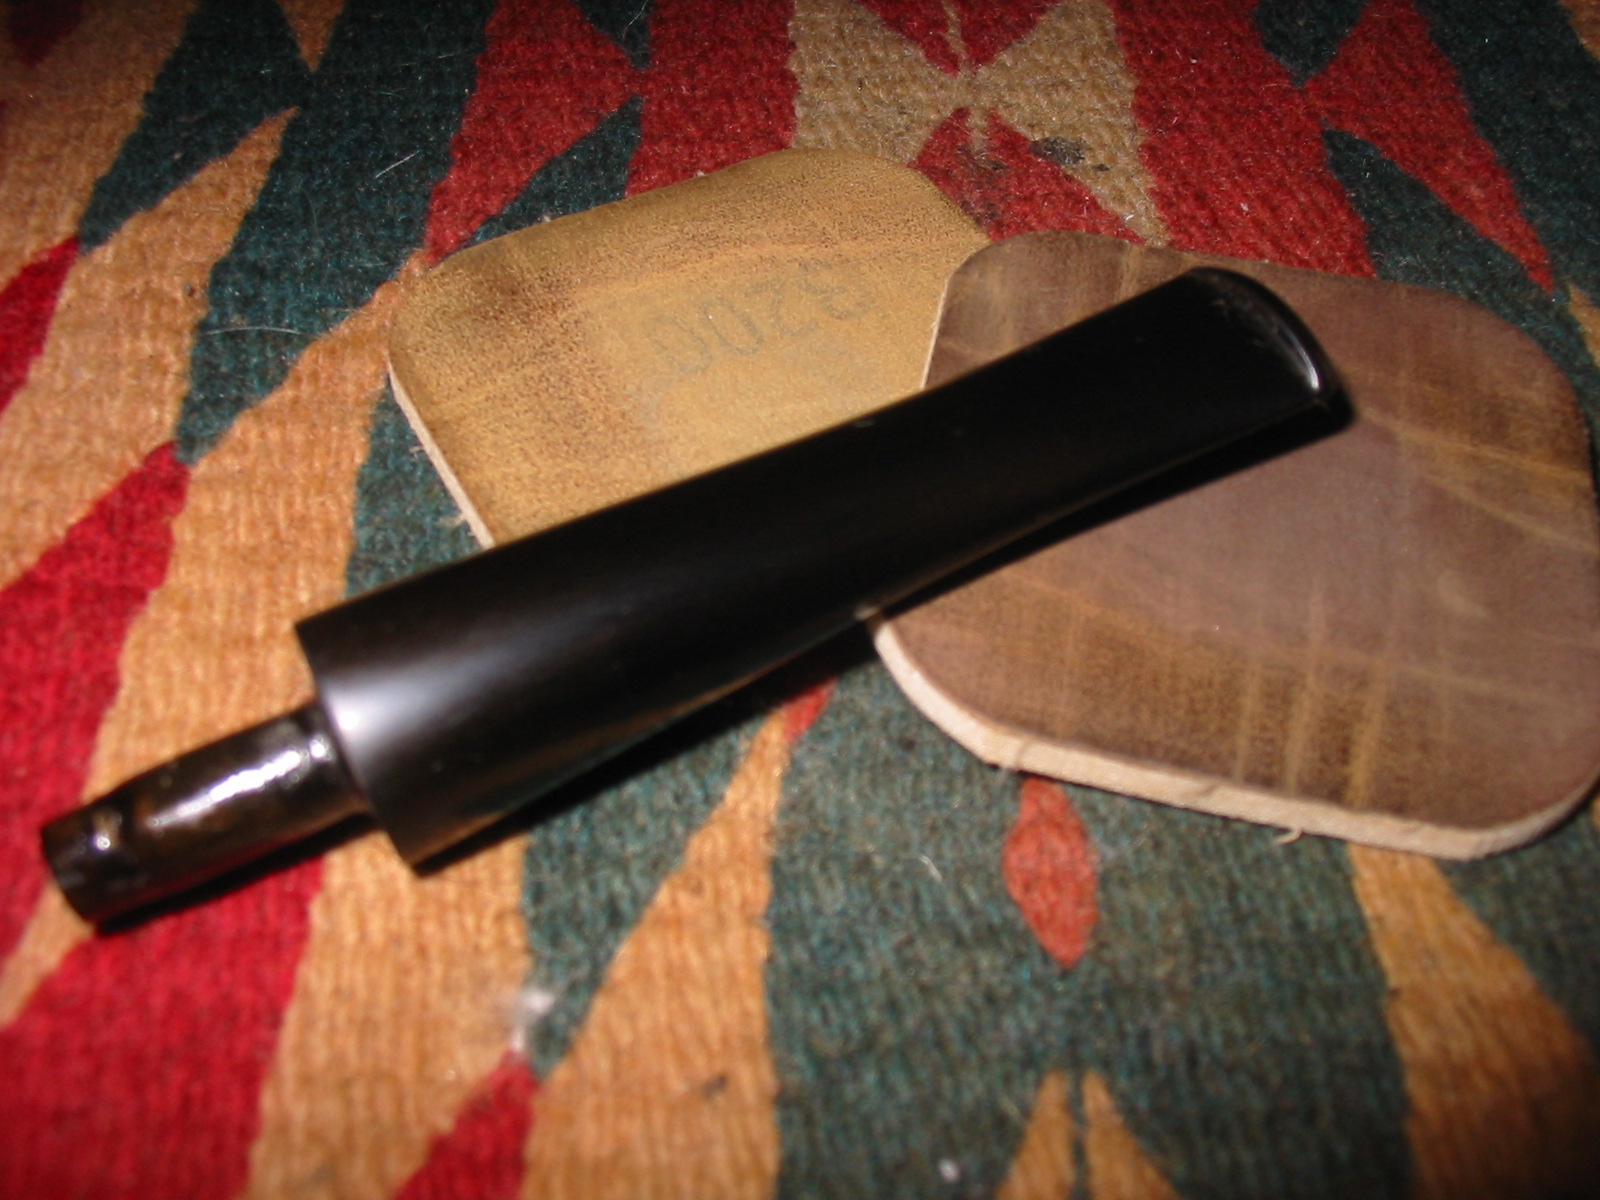
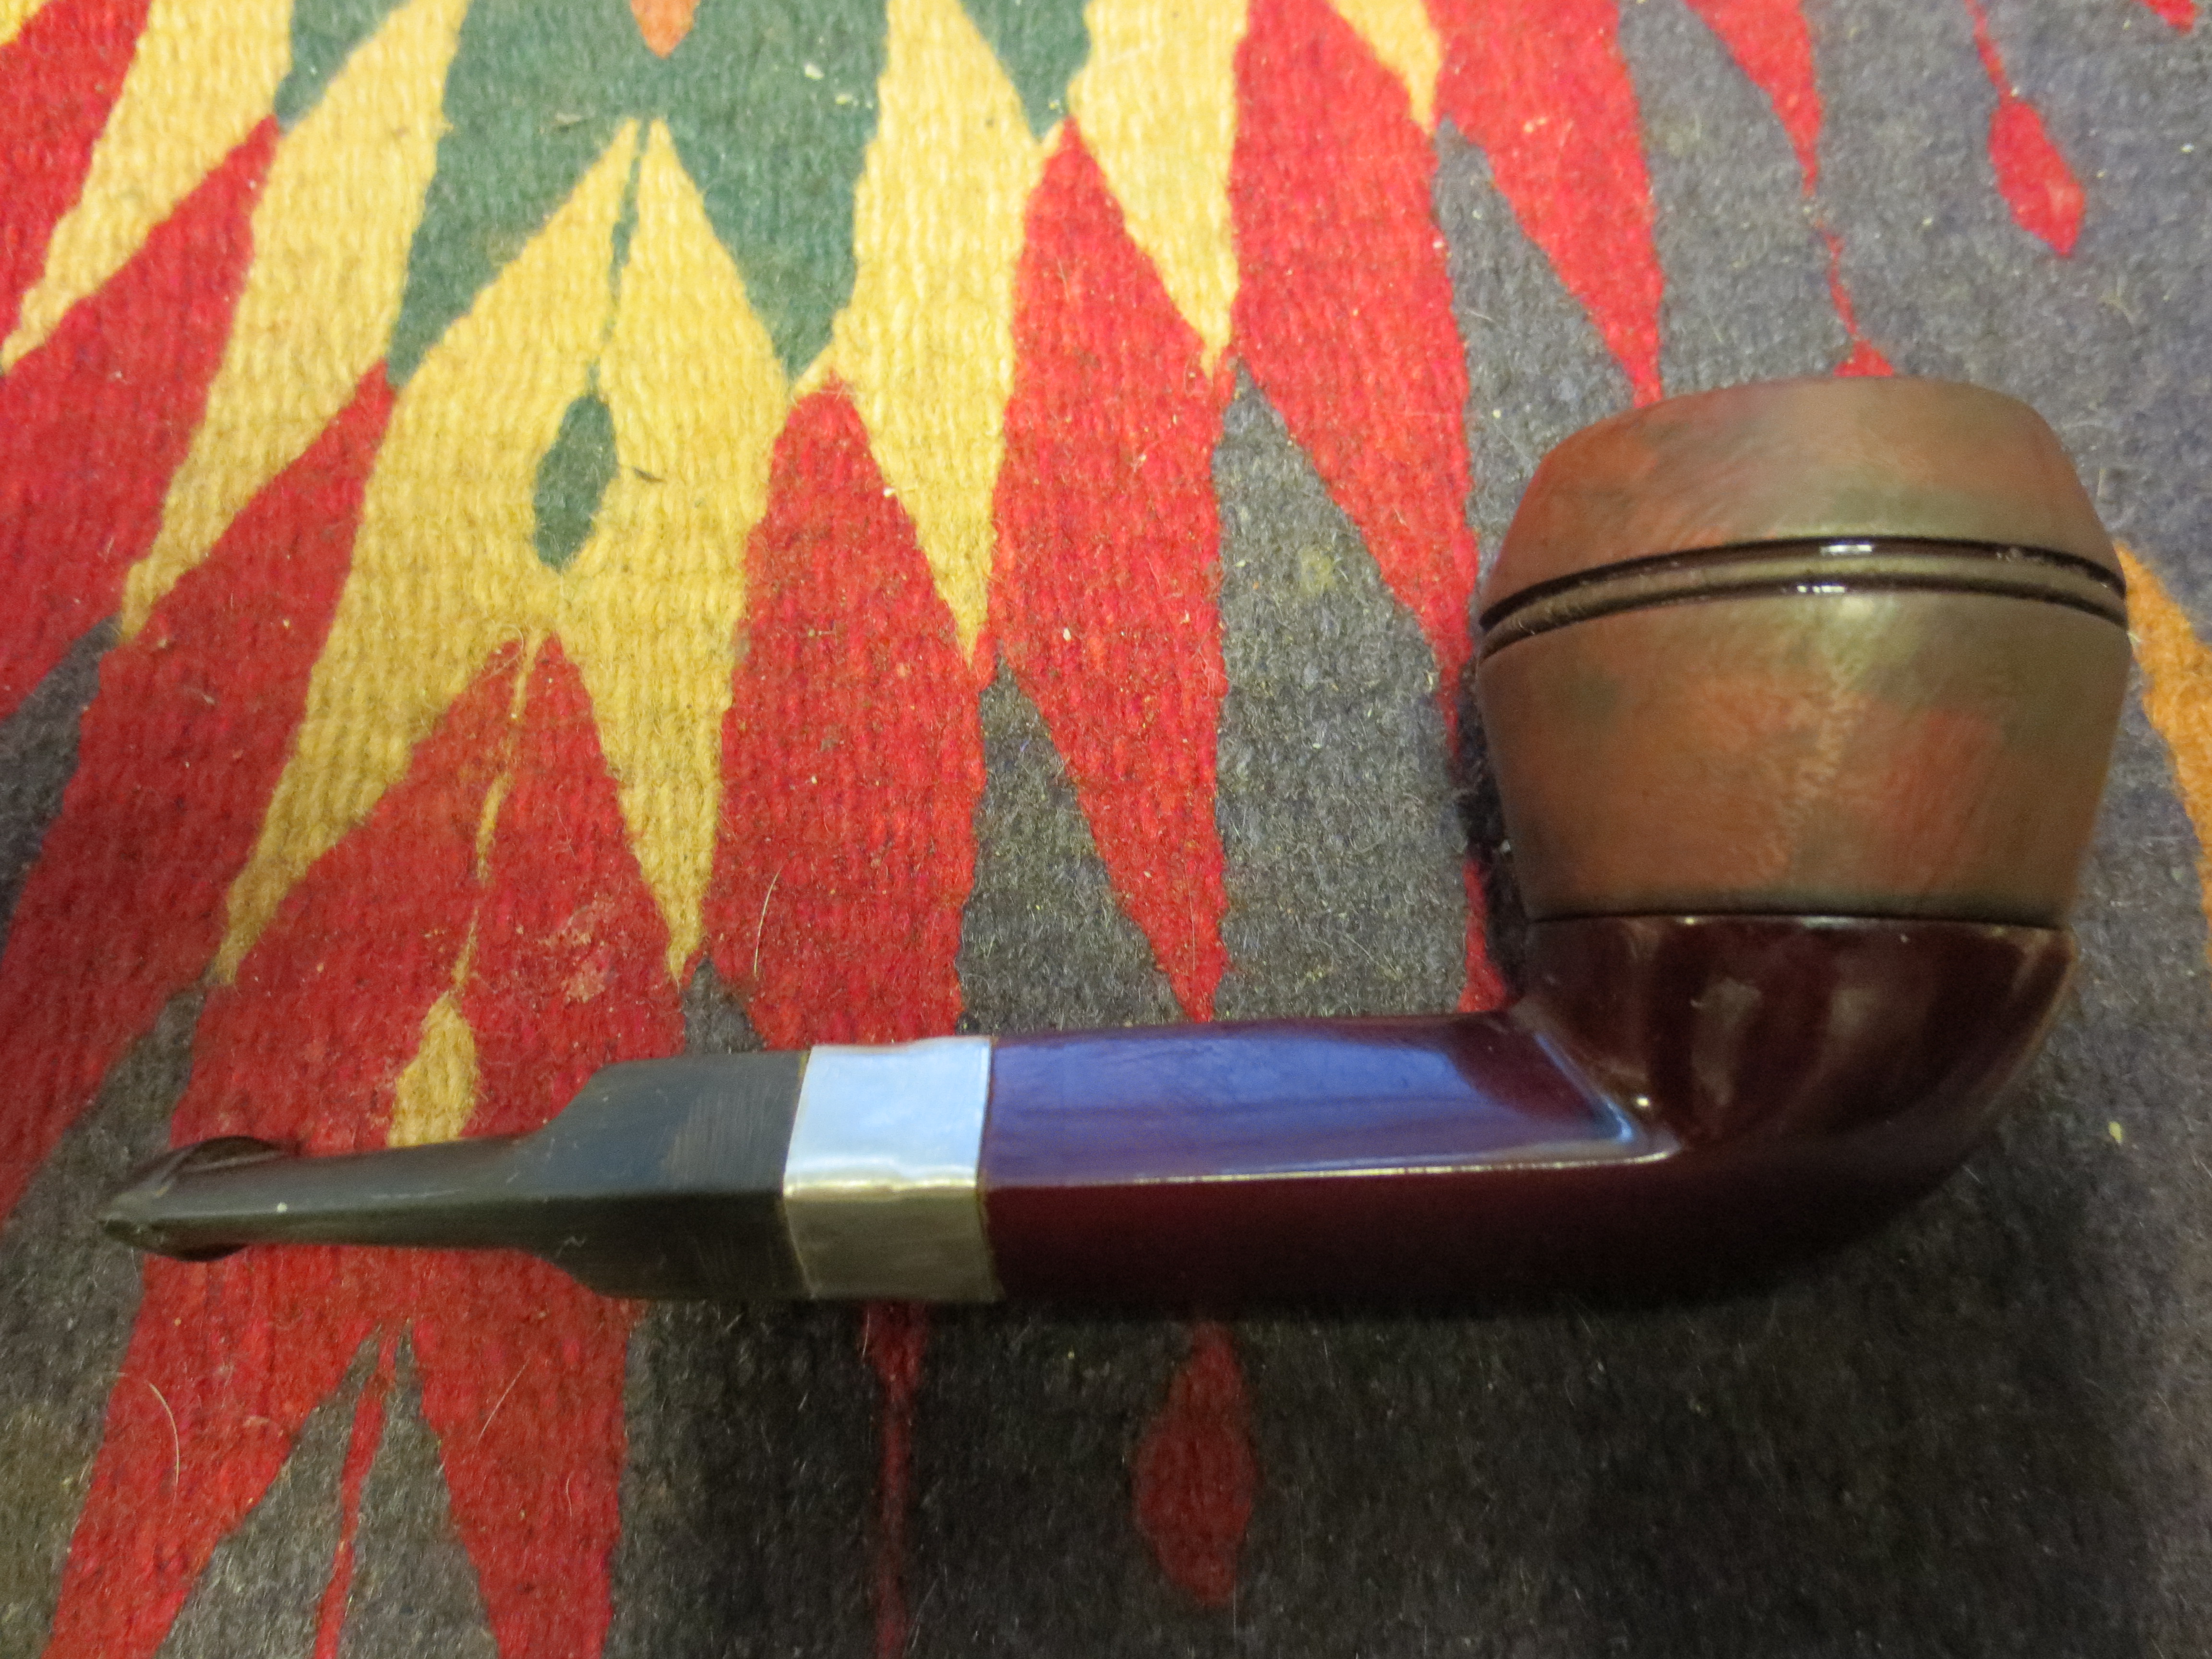
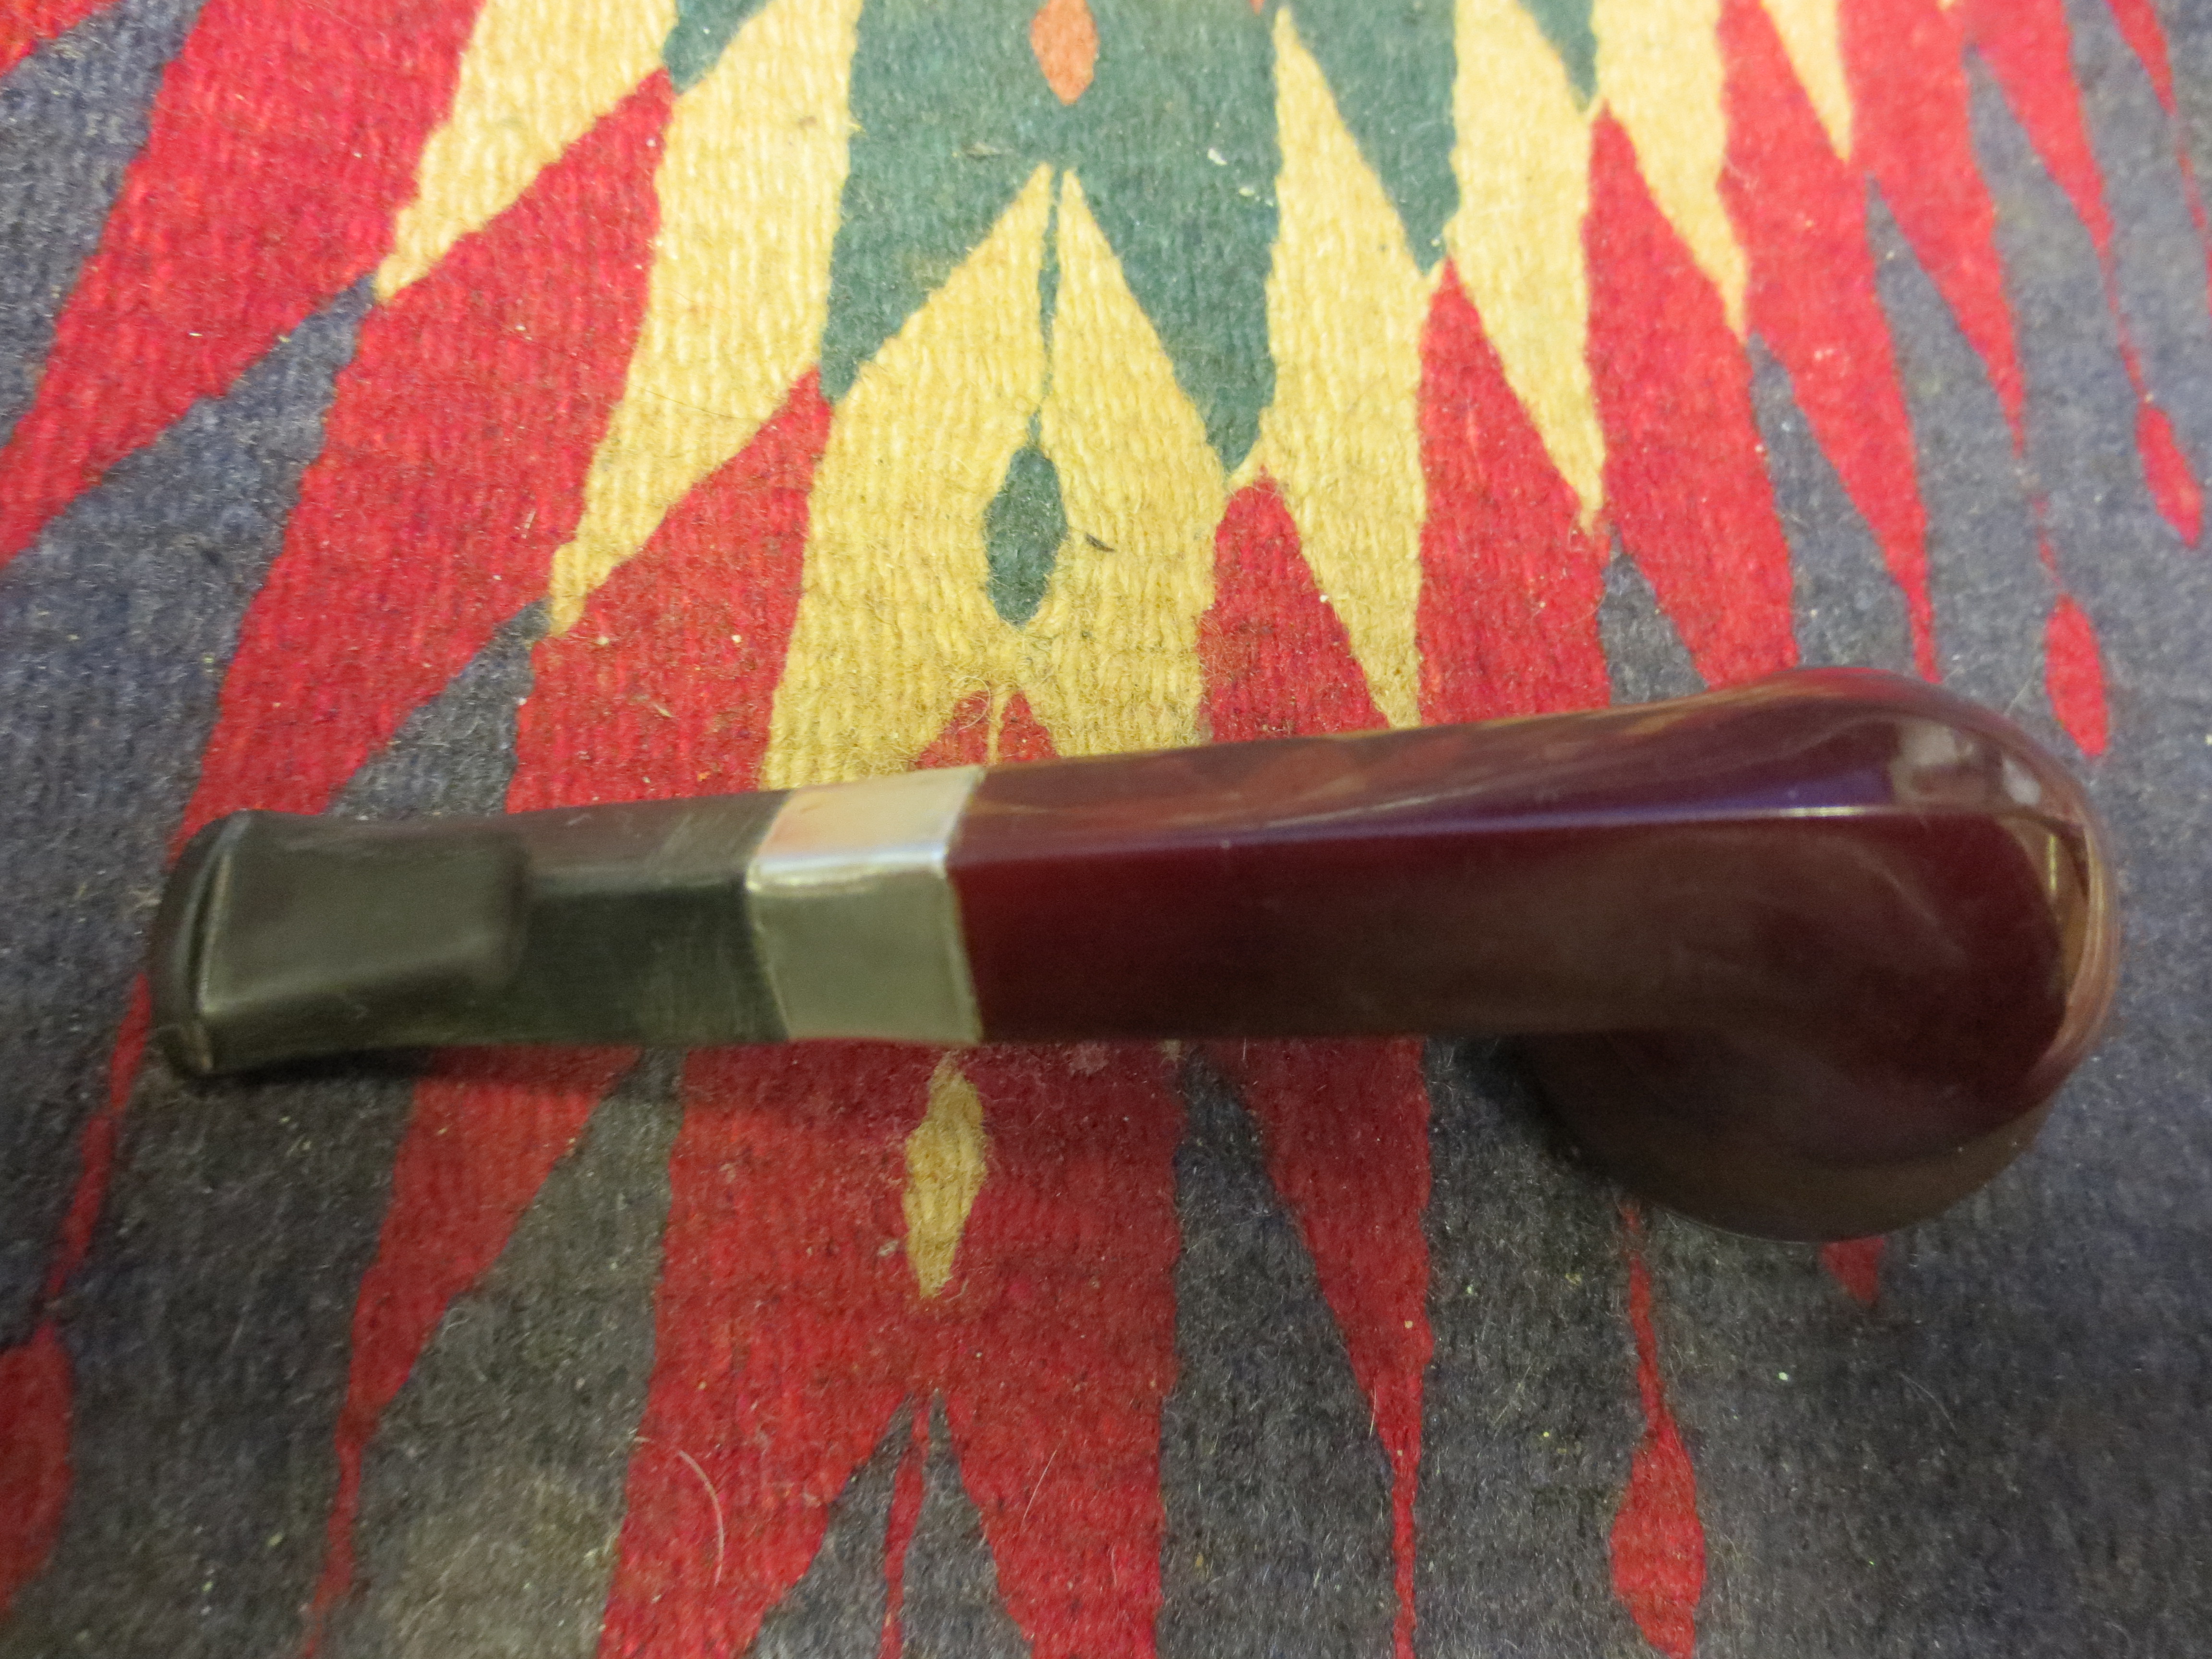
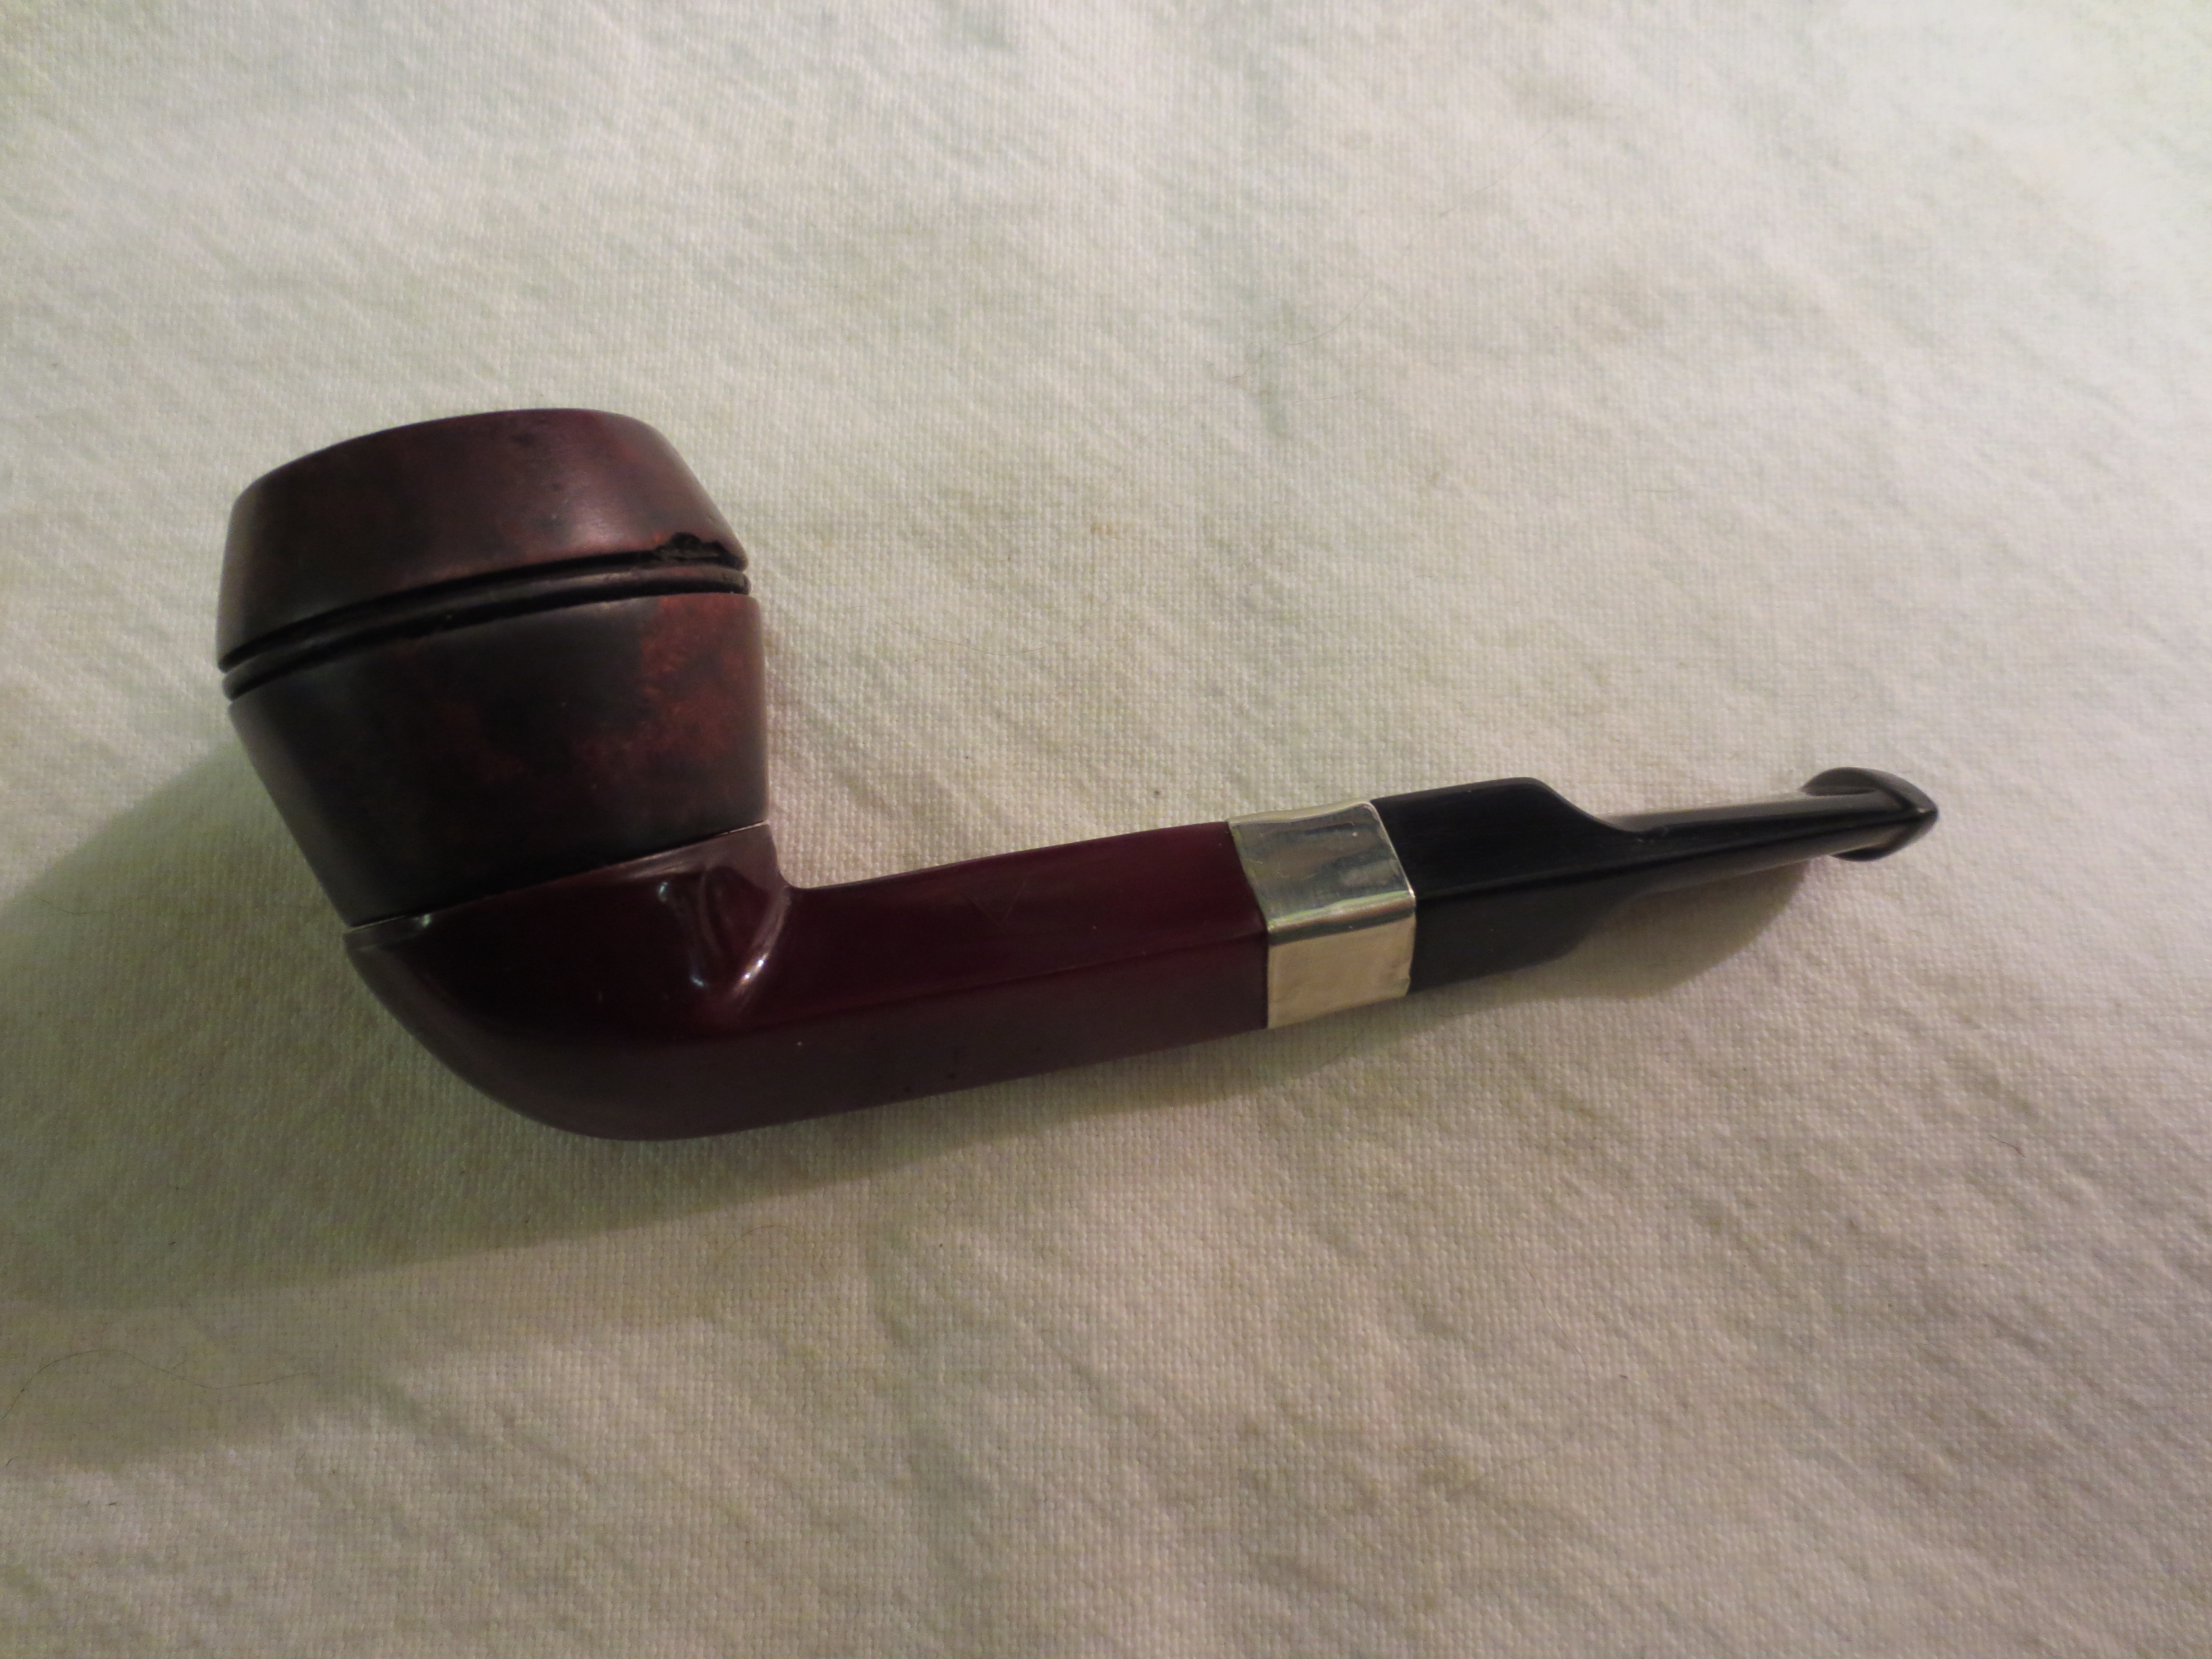
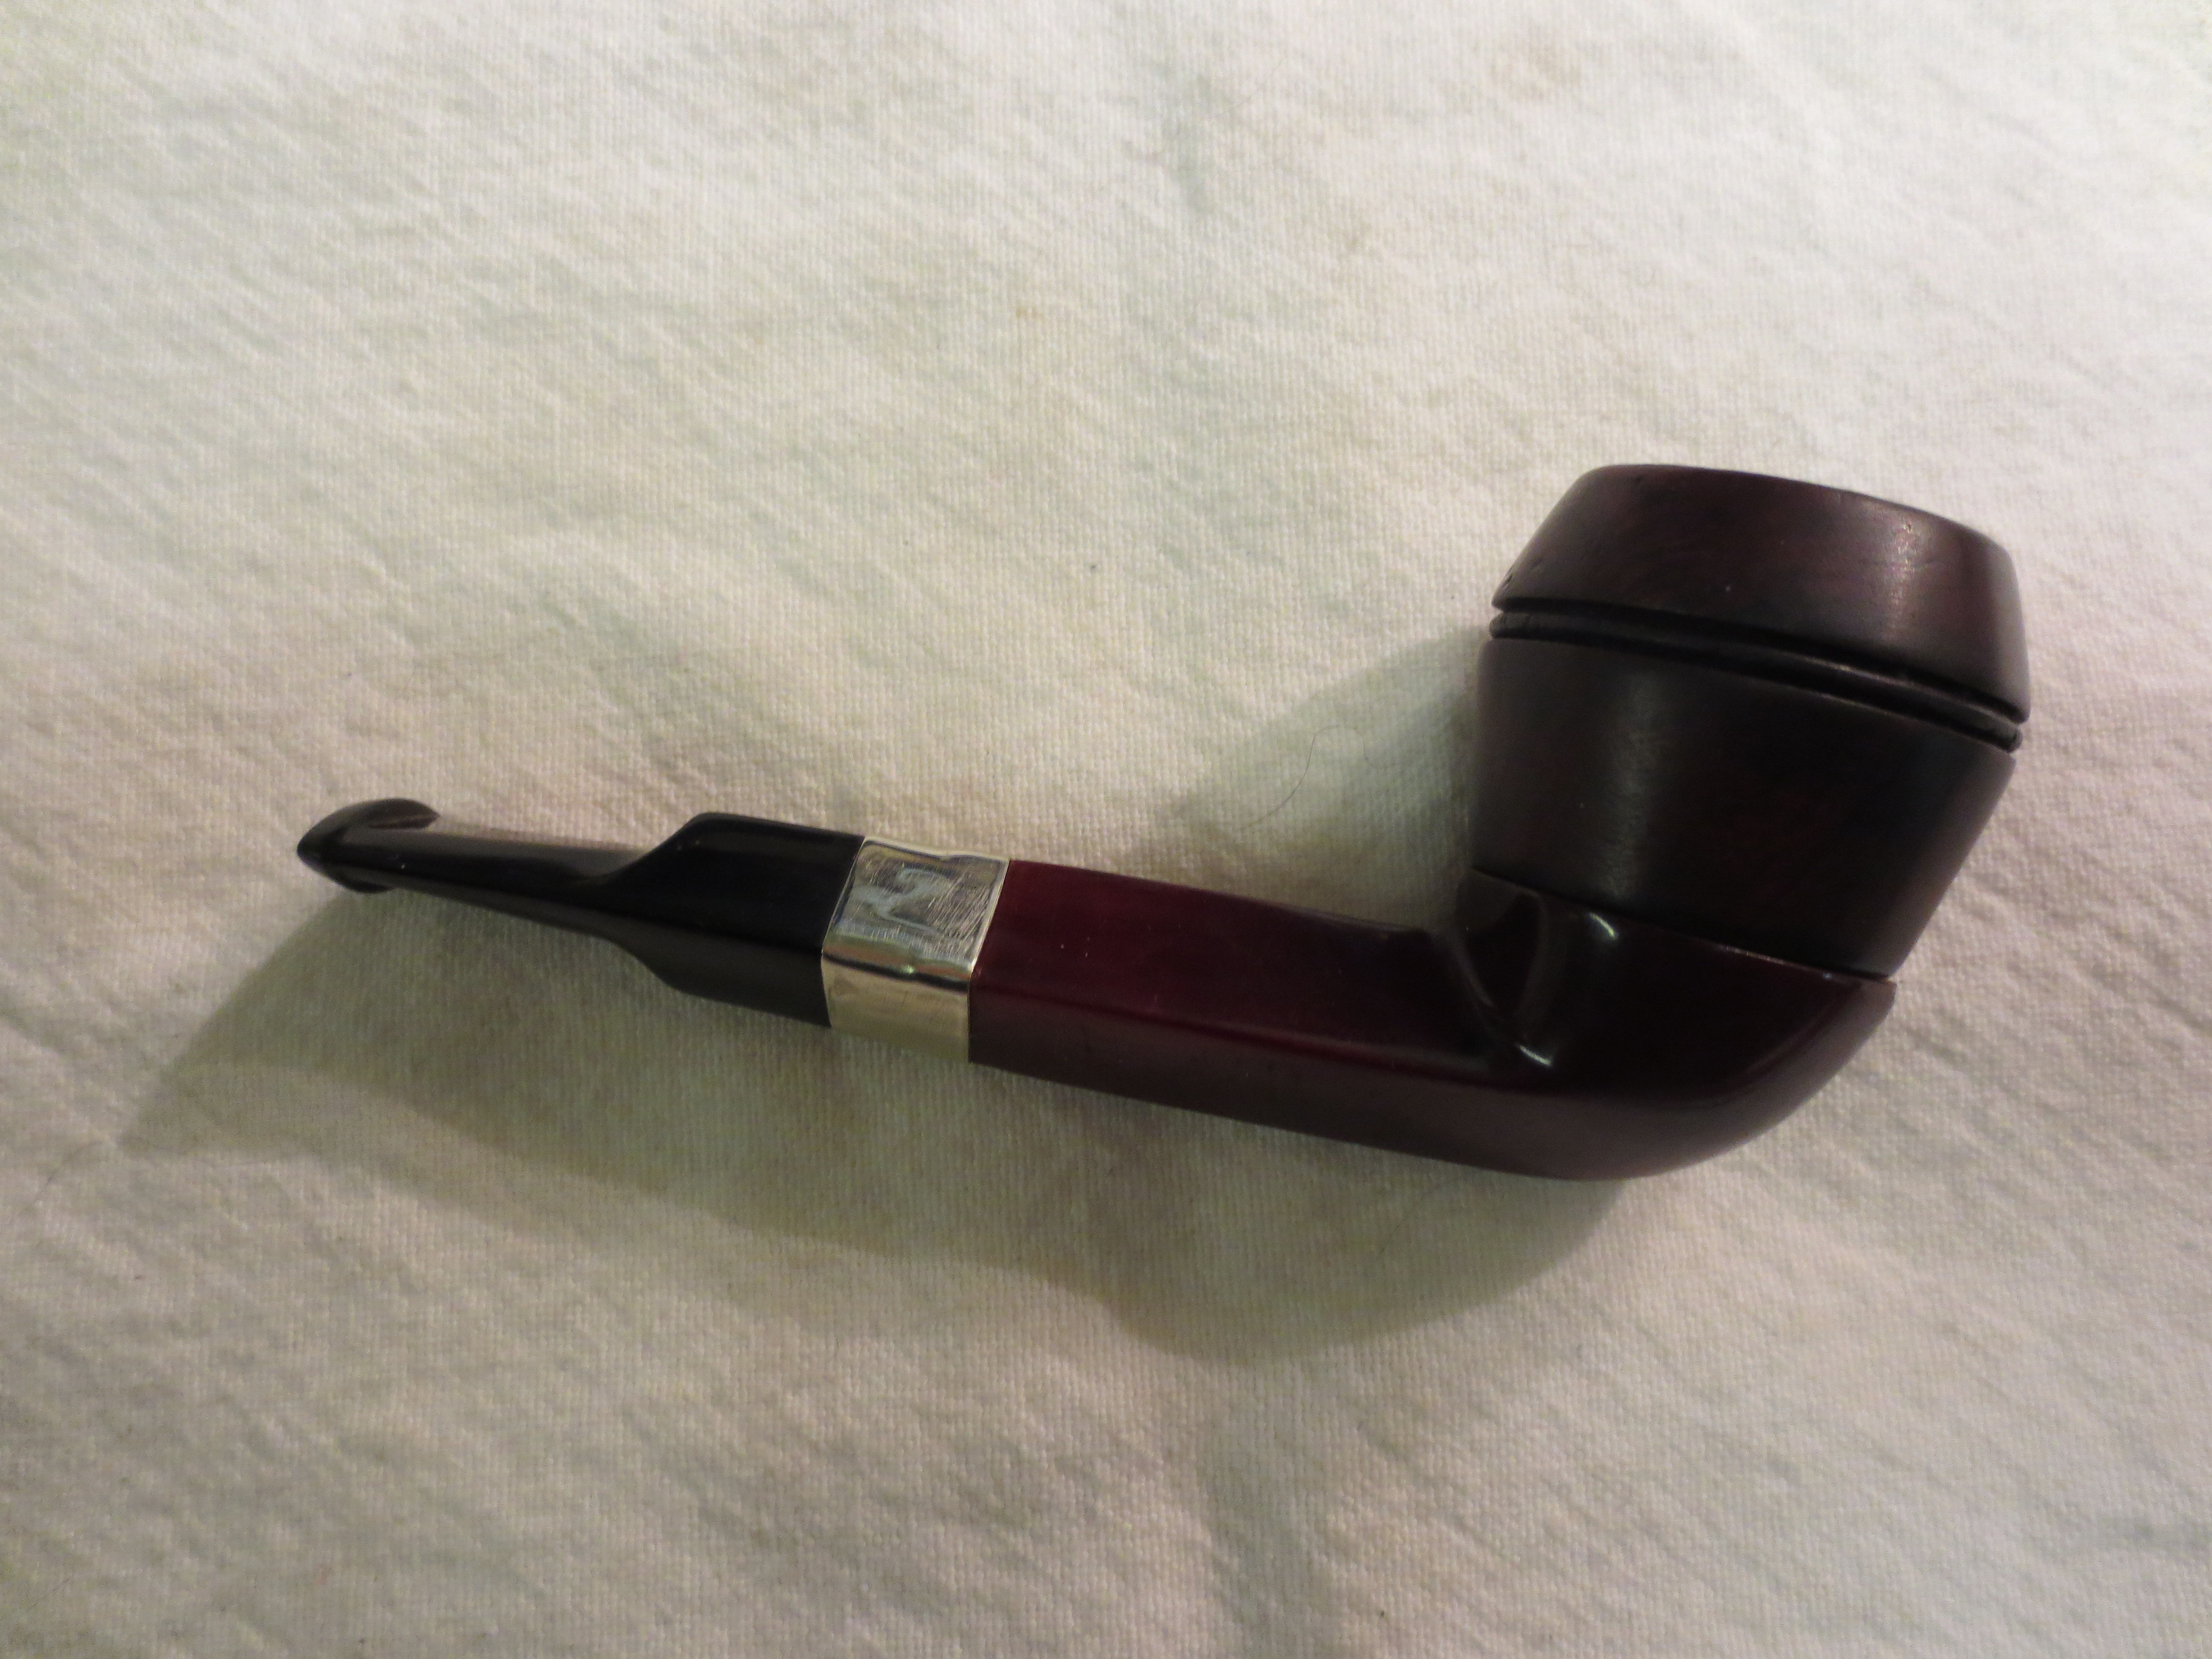
I took it back to the work table and finished sanding the stem and bowl with 6,000, 8,000 and 12,000 grit micromesh sanding pads. In the photo below the newly banded shank is visible. The band is solely cosmetic as the shank was not cracked and the fit of the stem was perfect. I liked the added bling on this pipe quite a bit.
IMG_3393

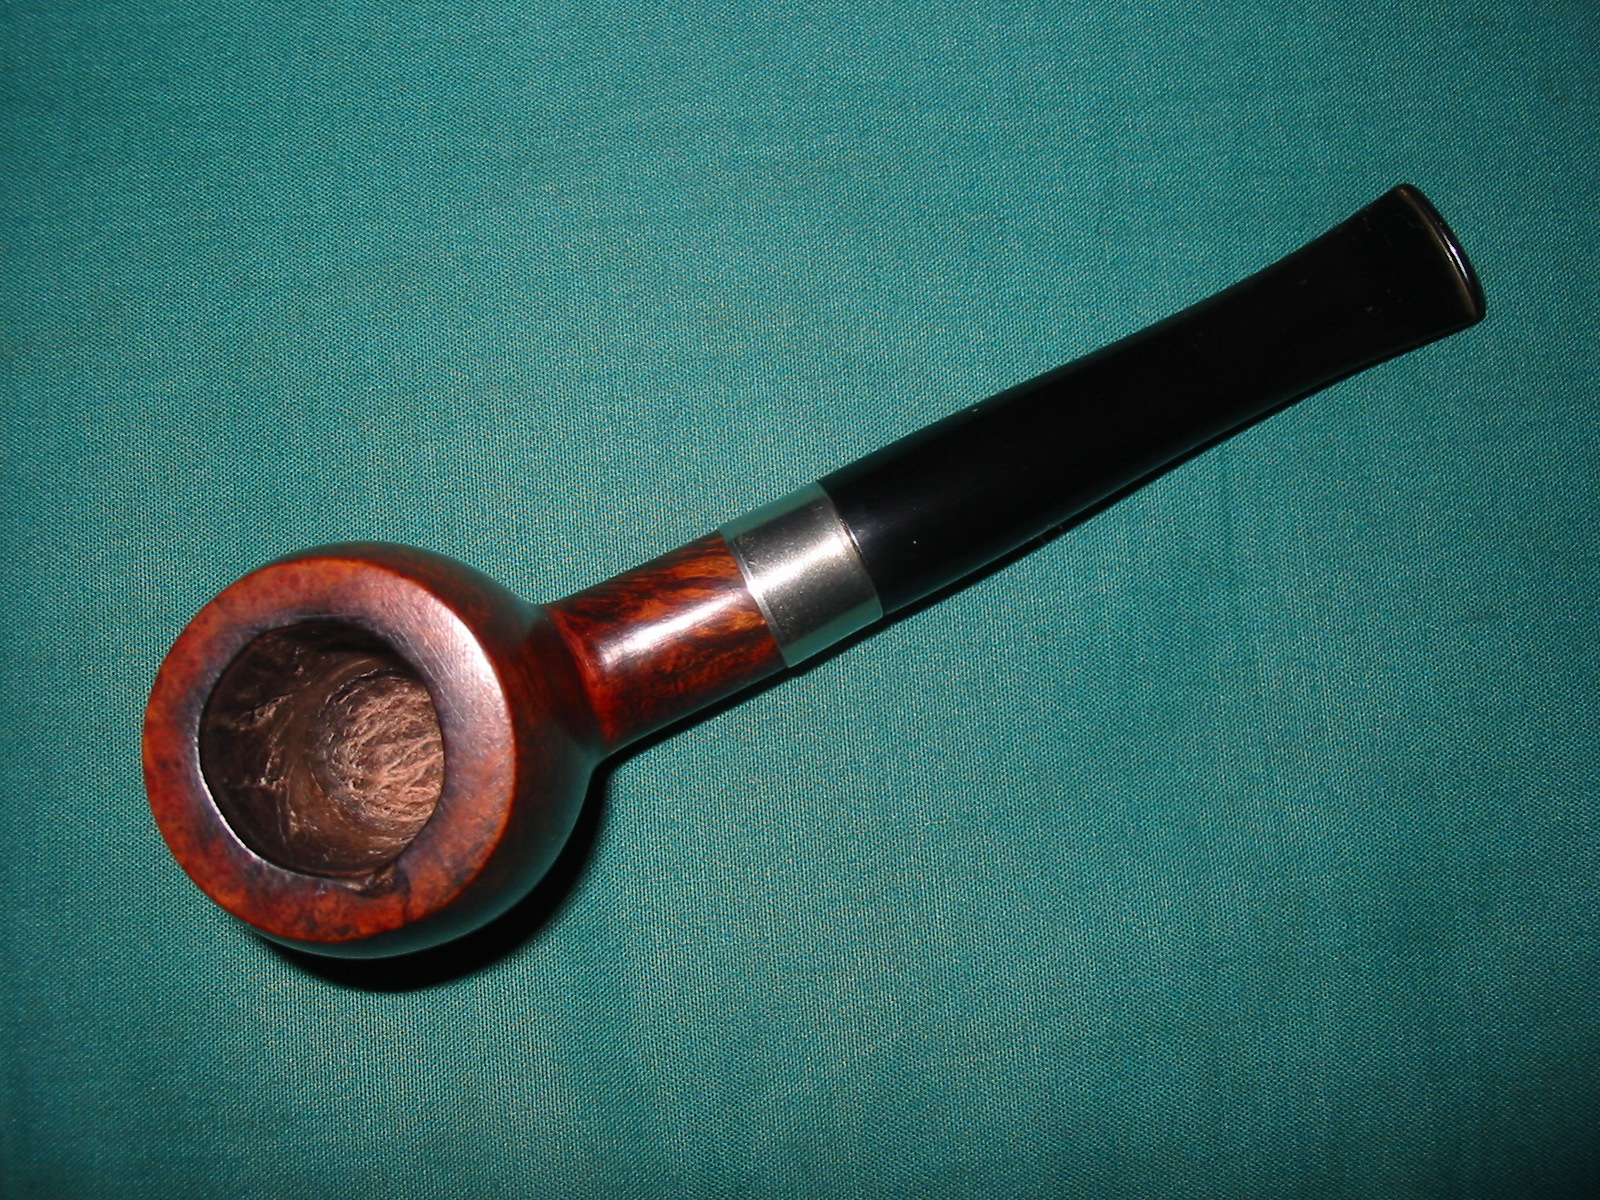
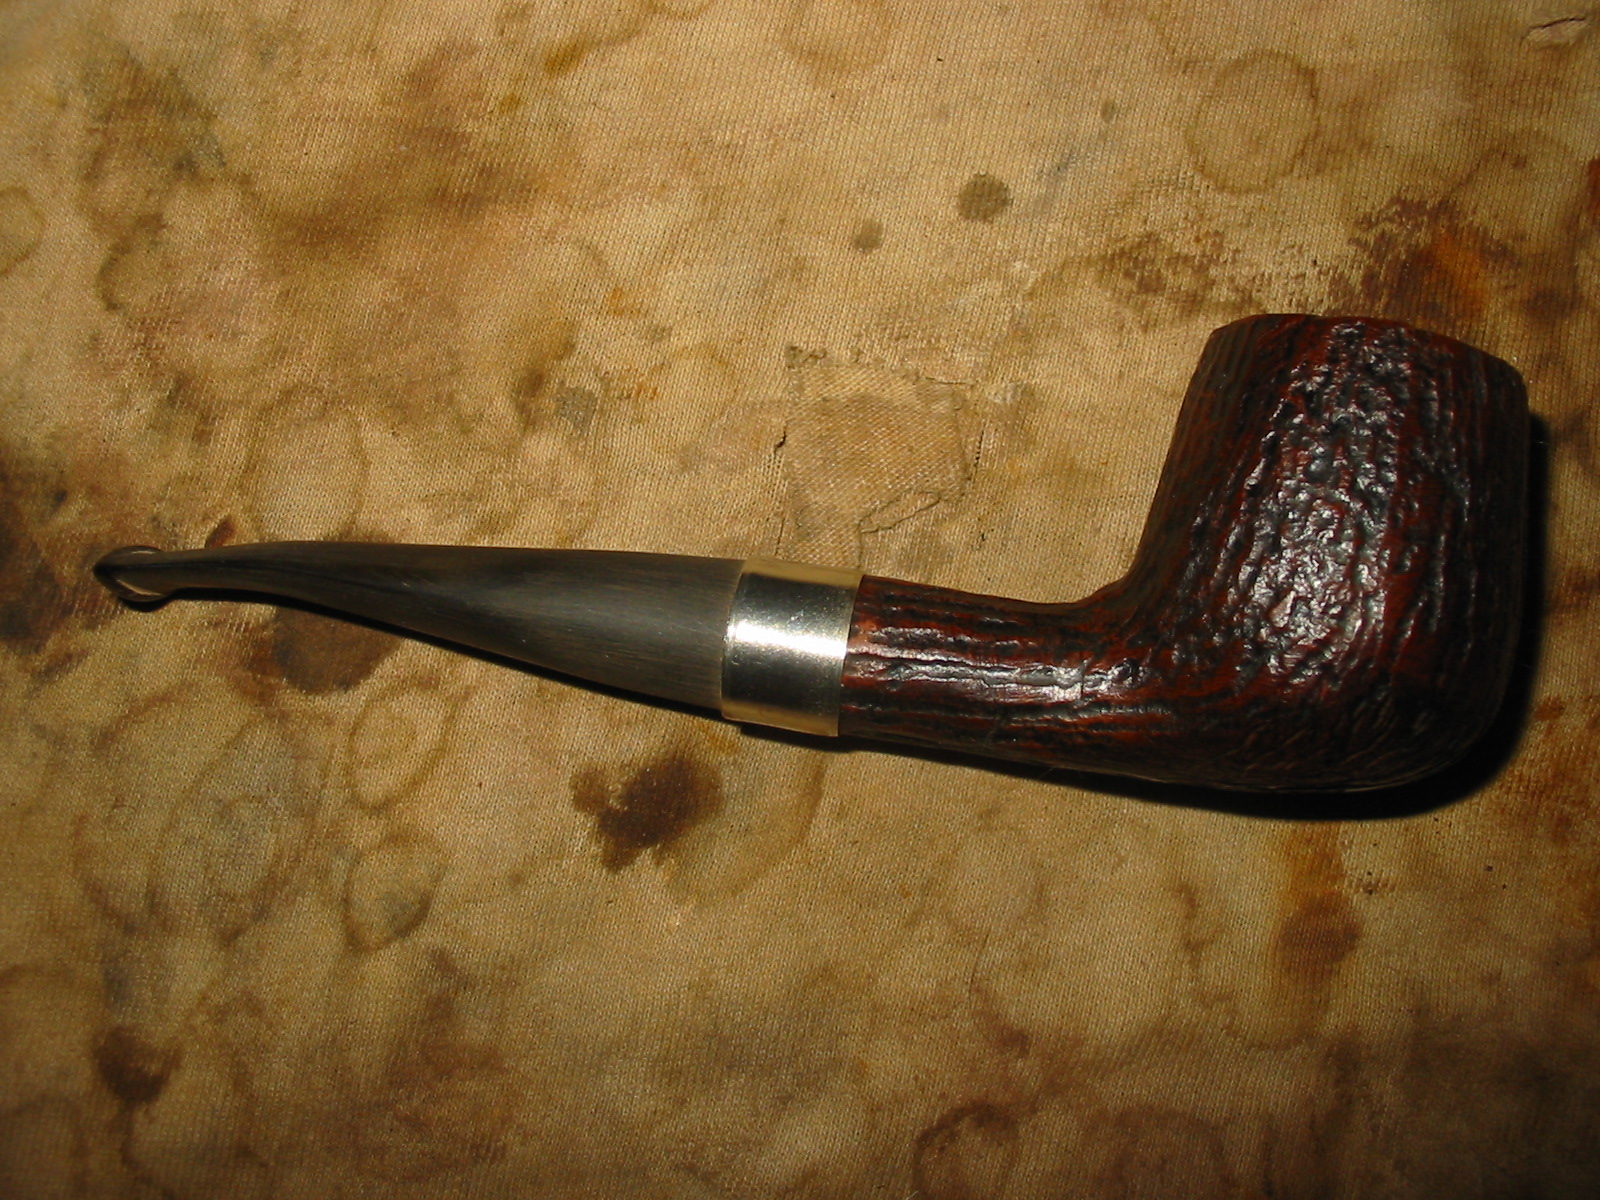
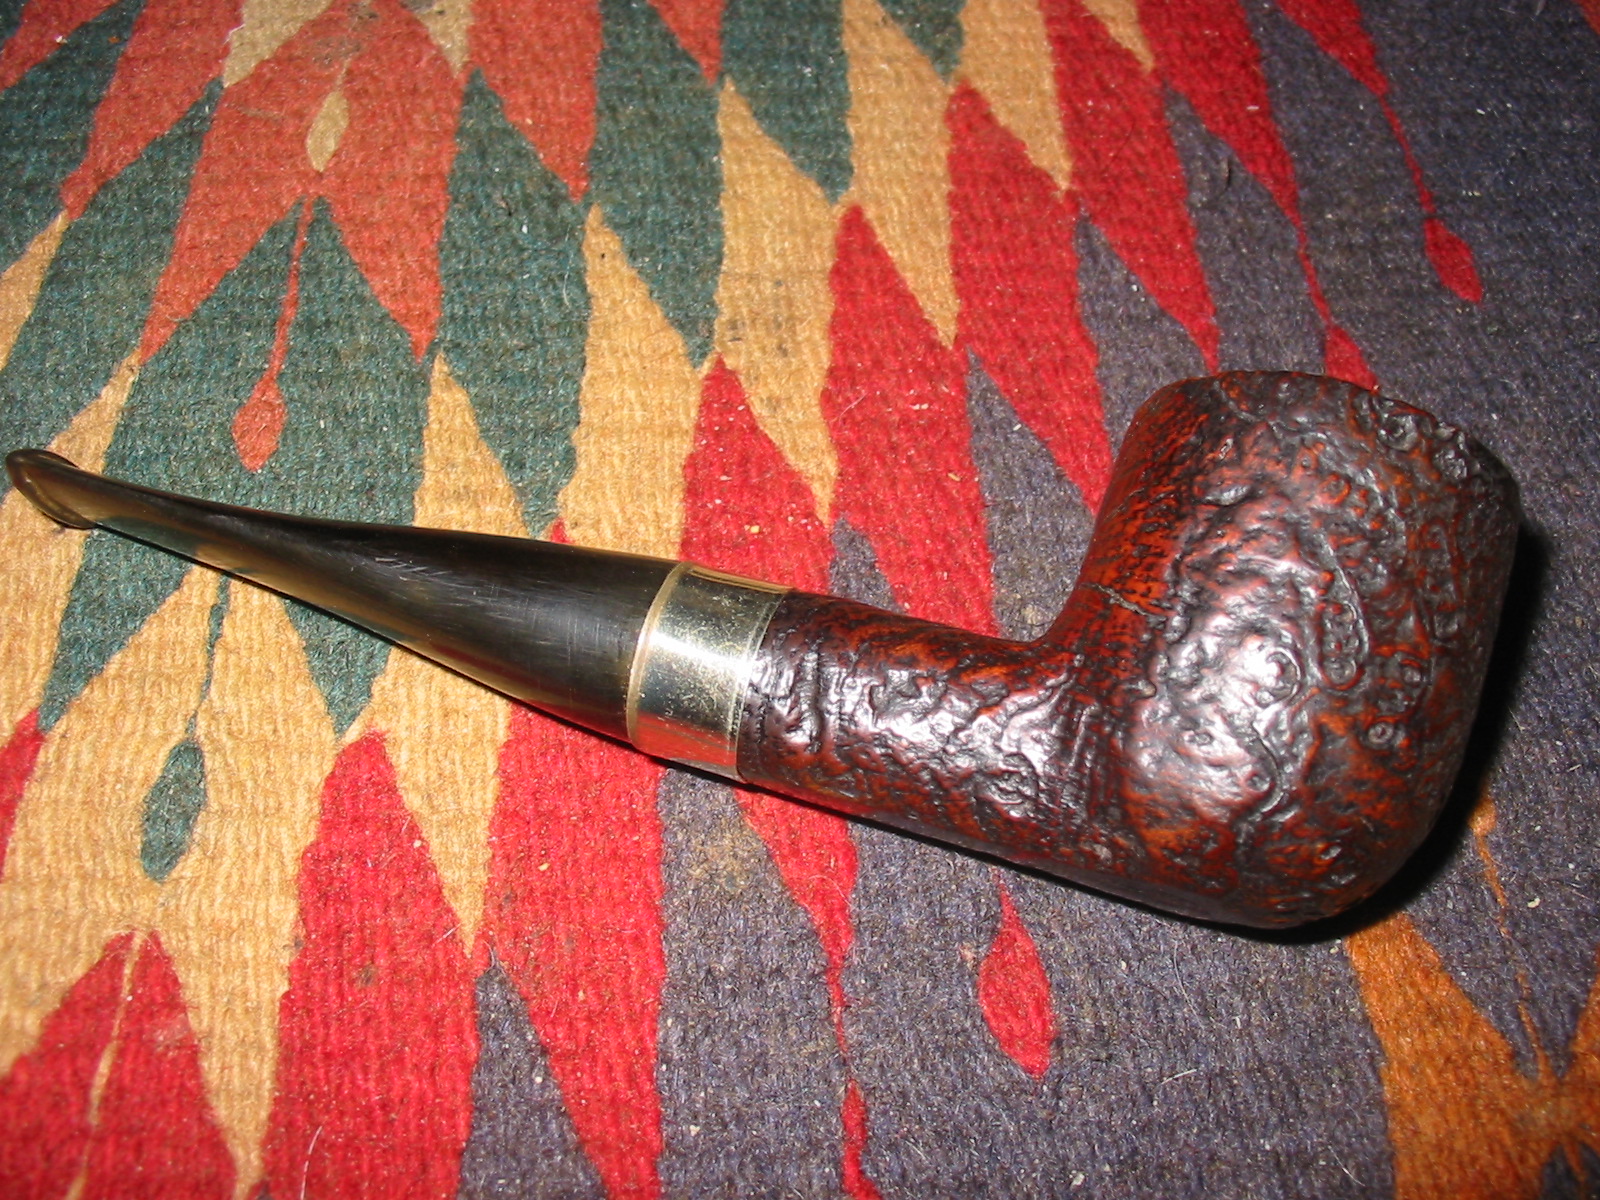
I wiped the stem down with Obsidian Oil and rubbed it into the surface of the vulcanite and then buffed the pipe with White Diamond. I avoid buffing the band as much as possible because it discolors the stem and the shank with the black residue caused by buffing the nickel. I then buffed the pipe with multiple coats of carnauba wax to protect and give a rich finish to the pipe. The finished pipe is shown below in the last four photos. The contrast stain worked well on this pipe. The flaws are there and visible but do not detract from the finish. The stem has a good glow with the lines of the pipe and the nickel band gives a nice polished look to the old pipe. Overall this experiment in repairs ended well. I like the finished look of the pipe and I learned a few new tricks along the way.
IMG_3398

IMG_3399

IMG_3400

IMG_3401

A Tiny Rhodesian Restored and Restemmed


Here is another pipe from the bottom of the refurbishment box. It is a little Rhodesian that I had ignored for a while. It measures 4 3/8 inches long stem included. The bowl is 1 ¾ inches long and 1 inch tall. The inner diameter of the bowl is ½ inch and the bowl depth is ¾ inch. The bowl was in pretty decent shape and was unsmoked. There was a fill on the left side of the bowl and a slight divot on the shank next to the bowl. The end of the shank had some pretty deep nicks in it and would make a tight fit between stem and shank impossible. Half the battle in restemming these small pipes is finding a stem that will work and then turning the tenon to fit the small mortise. This one was no exception. I had a stem that would work it was 2 5/8 inches long and was made out of nylon. It was an old WDC pipe stem. The shoulders were well rounded and the tenon was short.
IMG_2894

IMG_2895

I reduced the diameter of the tenon with a sanding drum on a Dremel. I laid the sanding drum against the surface of the tenon and let it ride around the tenon until the diameter was close. Then I sanded it until the fit was snug. The mortise was not that deep due to the size of the pipe so I needed to shorten the tenon to the same depth as the mortise. I used the Dremel and sanding drum to achieve that as well.
IMG_2896

Once I had a good tight fit on the stem I sanded down the bowl and wiped it down with acetone on a cotton pad to remove the finish. I pressure fit a small nickel band on the shank to provide a smooth transition between the bowl and stem and to cover the deep nicks or gouges on the end of the shank. I sanded the stem with 220 grit sandpaper to remove the excess material on the diameter and make a good fit against the end of the tenon.
IMG_2897

IMG_2898

IMG_2899

IMG_2900

IMG_2901

I sanded the area around the divot in the shank and cleaned it with acetone. I then filled the divot with clear superglue and sanded it again once the glue had dried. I wanted to have a smooth transition between the bowl and shank without the divot showing. I sanded it with 220 grit sandpaper and then with a medium grit sanding sponge. I also sanded the stem at the same time and then wiped the entirety down with acetone.
IMG_2902

IMG_2903

I sanded the bowl and the stem with micromesh sanding pads. I wet sanded with 1500-2400 grit pads and dry sanded with the 3200-12,000 grit pads. When finished I rubbed it down with Obsidian Oil and then took it to the buffer and lightly buffed the stem with White Diamond. I say lightly because I have learned that a heavy hand on the buffer will make a mess out of a nylon stem and you will have to start over with the sanding process.
IMG_2904

IMG_2905

IMG_2906

I took the pipe back to the worktable and stained it with a dark brown aniline stain. I applied the stain and flamed the pipe several times until I had an even coverage on the sanded areas and they blended in well with the rest of the pipe.
IMG_2907

IMG_2908

I buffed it with White Diamond and then gave it a top coat of oxblood stain. I have found that the combination of the two stains helps hide the fills that were present as well as the repairs that had been done with superglue.
IMG_2909

IMG_2910

IMG_2911

IMG_2912

I buffed the entire pipe again with White Diamond and then gave it multiple coats of carnauba wax to bring the shine out on the pipe. In order to help you appreciate the small size of the pipe I have included the next two photos. The top pipe in the photos is group 4 sized. In contrast, the tiny Rhodesian is a group 1.
IMG_2921

IMG_2922

The finished pipe is pictured below and I think it will be a nice little flake pipe for the Virginia smokers in the lot.
IMG_2913

IMG_2914

IMG_2915

IMG_2916

I received two comments below about giving the stem a slight bend so this morning I did just that. Below is a photo of the new look! Thanks Greg and Chiz.
IMG_2930

A New Look for an Italian Made Billiard – Restemmed and Reworked


This is yet another bowl from the bottom of the box of pipes for refurbishing. This one is an Italian made no name basket pipe. The stamping merely says Imported Briar Italy. The finish was spotty and peeling from the bowl. It almost looked like a dark brown opaque stain coat and then a thick varnish coat over that. The bowl was badly caked, the shank was filthy and the rim caked and peeling. There were some large fills on the left side of the bowl that were coming out of the holes and were peeling around the edges. The bowl did not have a stem so I found one in my box of stems that fit with a little adjustment to the tenon.
IMG_2826

IMG_2827

IMG_2828

IMG_2830

I reamed the bowl with a PipNet reamer to take the cake back to bare briar. The bowl and shank smelled heavily of aromatics with a fruity overtone and I wanted to remove that so that the new owner could form a cake of his/her own choice.
IMG_2831

The stem was too large in diameter at the stem shank junction. So I sanded it back with a sanding drum on a Dremel. I have found that a Dremel run a medium speed can be carefully used to take back the diameter of a stem to almost match the shank with the stem in the shank. Care must be exercised so as not to nick the briar of the shank with the sanding drum.
IMG_2832

IMG_2833

IMG_2834

IMG_2835

I took the pipe back to the work table and sanded it until it fit well with 220 grit sandpaper. I also decided to sand the shank with the sandpaper as well to achieve a good flow from shank to stem. I also wanted to remove the heavy black/brown finish on the pipe so removing it from the shank was not problematic.
IMG_2837

IMG_2838

IMG_2839

IMG_2840

IMG_2841

Once I had sanded the transition smooth I wiped the bowl down with acetone on a cotton pad to remove the remainder of the finish on the bowl.
IMG_2842

IMG_2843

IMG_2844

After wiping it down I gave it a buff with red Tripoli on the buffing wheel to remove the remainder of the finish and give me an idea of what would still need to be done with the bowl.
IMG_2845

IMG_2846

IMG_2847

IMG_2848

I sanded the bowl with a medium grit sanding sponge and then picked out the large broken fills on the left side of the bowl. I wiped it with acetone to clean it one more time before packing the fills with briar dust. I packed in the briar dust with a dental pick and then tamped it down with flat head tamper to make sure the pack was good and tight. I dripped some superglue gel into the briar dust and then more briar dust on top of the glue. I tamped it another time to get a good solid fill. I sanded the excess briar dust superglue mixture with 220 grit sandpaper and then a medium grit sanding sponge.
IMG_2849

IMG_2852

IMG_2854

I stained the pipe with a dark brown aniline stain thinned 2:1 with isopropyl alcohol as the undercoat on the pipe. I stained and flamed the stain repeatedly until the coverage was even and solid over the entire pipe. The patch on the side is still visible but in no longer flaking and falling out the fill. The surface remains slightly rough but I will continue to sand it before giving it another coat of stain.
IMG_2855

IMG_2856

IMG_2857

IMG_2858

I buffed the bowl with Red Tripoli and then with White Diamond in preparation for the next coat of stain. I sanded the fill area with a fine grit sanding sponge and then sanded the bowl with micromesh sanding pads 1500-2400 grit. I then restained the bowl with a oxblood stain as the second coat on the bowl. I applied it and flamed it until the coverage was even. Then buffed it with White Diamond.
IMG_2859

IMG_2860

IMG_2861

IMG_2862

During this second staining I removed the stem and examined the end of the shank and saw small hairline cracks in several places. They did not go through to the surface of the shank but they were troublesome enough to me that I decided to band the pipe. There were also several nicks in the outer edge of the shank that made a tight fit relatively impossible to attain. I heated a nickel band with a heat gun and pressure fit it in place on the shank. I had to reduce the tenon slightly to get a good fit on the stem. I also sanded the stem around the junction so that it would fit properly against the banded shank.
IMG_2863

IMG_2865

IMG_2866

IMG_2867

The fills still needed more work but for the time being I worked on the stem some more. I sanded it with micromesh sanding pads. I wet sanded with 1500-2400 grit pads and dry sanded with 3200-12,000 grit pads. I rubbed the stem down with Obsidian Oil and I took it to the buffer and buffed it with White Diamond and gave it multiple coats of carnauba wax.
IMG_2868

IMG_2869

IMG_2870

I decided to do some more work on the areas of the fills. I sanded the areas of the fills down with 220 grit sandpaper and then a medium grit sanding sponge. I then sanded the entire bowl and shank with a fine grit sanding sponge to remove the finish. I wiped it down with a cotton pad and Everclear to remove the last of the finish and also the sanding grit. I used superglue to refill the fills and even out the surface and dips that still remained after the first reworking. I then sanded the spots with 220 grit sandpaper, a medium grit and a fine grit sanding sponge to remove the scratches and blend the fills into the surface of the bowl.
IMG_2876

IMG_2877

IMG_2878

I stained the bowl with a 2:1 mixture of aniline dark brown stain and isopropyl alcohol. I applied the stain with a cotton swab and flamed it. I reapplied and reflamed it several times until I had a good even coverage on the bowl and shank.
IMG_2879

IMG_2880

I buffed the pipe with White Diamond to smooth out the surface of the bowl and then gave it a top coat of oxblood stain. I wiped the stain on with a cotton pad and flamed it repeating the process until I was happy with the coverage on the bowl. I was much happier now with the fills as they were smooth to the touch and there were no more pits or divots in them.
IMG_2881

IMG_2882

IMG_2883

IMG_2884

IMG_2885

I took the pipe to the buffer and buffed the bowl and stem with White Diamond one more time. It brought a deep rich shine to the bowl and the stem. I then gave the bowl and stem multiple coats of carnauba wax to protect and polish the pipe. The four photos below show the finished pipe. It is ready for someone to load it and fire it up. It should provide a reliable and lightweight pipe for someone’s rack.
IMG_2890

IMG_2891

IMG_2892

IMG_2893

Repairing a Burned Through Bowl


Blog by Steve Laug

There are many times I take on the challenge of repairing a pipe totally for the learning experience. When I begin working on it there is nothing of redeeming value in the pipe itself. It is not beautiful or worthy of keeping. Rather it provides a unique learning opportunity for me to work on a skill in my refurbishing hobby. The pipe below is exactly that kind of pipe. Mark Domigues sent it to me along with other bowls when I was working on the shank repair on his old Peterson pipe. It is a no name pipe with a rustication pattern that I did find particularly attractive. In fact I put off working on it as it just did not appeal to me. I can’t tell you how many times I picked the bowl up and carried it to the recycle bin (a bin I used for briar parts) and then carried it back to the “to be refurbished” box.
pipemud1

pipemud2

pipemud3

Finally, Monday the challenge called me. I took the bowl out of my box and looked it over. As I looked at it, the shape kind of grew on me. It is a brandy glass shape and the shank actually has a flare to it as well. The rustication is a bit striated but as I cleaned up the exterior it is a lot like tree bark. The stain is a contrast stain – a black undercoat in the grooves and a brown top coat. It was worn but could be salvaged. The shank stem junction was also worn but a band would clean up that part of the pipe. The interior bowl sides were clean and solid. The rim was in good shape. But the glaring problem is visible in the photo below – a large, ½ inch diameter burnout on the flat bottom of the pipe. The surrounding briar was solid. The burnout was very focused. The burn did not extend into the rest of the bottom of the pipe. In fact the wood around the edges of the hole was clean and solid. There was none of the darkening around edges of the burnout or on the bottom of the bowl. It looked like it might be a great candidate for practicing a repair. I have done one other repair on a burn out which involved inserting a briar plug and this looked like it was another candidate for that repair. The difference in this one was the solidness of the briar around the hole.
pipemud4

As I worked up the chutzpah to tackle this repair I decided to work on the shank. I sanded the shank smooth in preparation for the band. I like to have a smooth surface under the band rather than a rusticated pattern. I find it gives a good smooth fit to the band. I sanded out the rustication to the width of a nickel band. Once it was sanded smooth, I heated a band over a heat gun and then pressed it into place. I liked the finished look of the band.
pipemud5

pipemud6

pipemud7

pipemud8

pipemud9

pipemud10

I am sure that you can tell at this point that I am procrastinating in addressing the main issue of the bowl with all of the other random work on the pipe but that went on a little longer. I found a stem in my stem box that fit the shank quite well. The mortise had originally had a screw in fitment so it was threaded. The threads were well worn so I decided to use a regular style push stem. I sanded the tenon to get a good tight fit on the stem and then sanded the stem to get a good fit against the shank and band. The slight bend in the stem looked good but it was a bit crooked so I would address that issue later. The finished look of the stem and band with the bowl was quite nice…maybe there was something redeemable about the bowl after all.
pipemud11

pipemud12

I have a few pieces of scrap briar that I have scavenged from pipe maker friends that I had put away for this kind of repair. So I found one that had enough briar left that I could carve it into a plug for the bottom of the bowl. I trimmed it with a hack saw to reduce the size of the plug.
pipemud13

In the first photo below you can see what the hole looked like after I had cleaned it up with a pick and Everclear. I had also reamed the inside of the bowl to remove all of the cake from the sides and the bottom of the bowl. The second photo shows the hole after I had drilled it out. I used a cordless drill with a ½ inch drill bit to round out the damage area and remove any further damage around the burnout. I chose the ½ inch bit as that was the diameter of the hole at the widest part of the hole.
pipemud14

pipemud15

I shaped the briar plug with a Dremel and sanding drum. The next series of photos show the progress of the shaping. I took the rough briar from a wedge to a circular plug and then shortened it to a round plug. I shaped a cap on the plug to the inner diameter of the bowl. Also originally I envisioned pushing the plug through from the inside of the bowl and then cutting off the portion that extended beyond the bottom of the bowl. I would then redrill the airway to finish the repair.
pipemud16

pipemud17

pipemud18

pipemud19

I continued to reduce the diameter of the plug until it was the same size as the hole in the bowl. The inside bowl bottom was hard to match with the cap of the plug. I continued to shape it until it was cup shaped. It seemed no matter how I shaped it however, it would not fit in the bowl bottom as the burnout was not centered in the bowl bottom. It was toward the front of the bowl bottom. I finally decided to use a different tact. I would forgo inserting it from the inside and go the other direction. I would insert it from the outside in. I measured the thickness of the bowl bottom (which was actually in good shape other than the burned portion). I then shortened the plug until it was relatively flush with the bottom of the airway. I coated the plug with superglue gel which gives me a bit more time before it sets and pushed it into the drilled hole. I pressed it against the table top to get the plug in place solidly.
pipemud20

pipemud21

Once the glue set I sanded away the excess briar with a Dremel to match the surface of the bowl. I was not worried about the rustication as I would duplicate that after I finished working the plug into place. The next two photos show the plug and the bowl surface are smooth and the plug is tightly in place.
pipemud22

pipemud23

The next photo shows the interior of the bowl. The plug is even with the entrance of the airway. There is difference in bowl depth around the left edge. I plan to give the bottom of the bowl a thick coating of pipe mud to both protect the new plug and to even out the slight trough on the left front edge of the plug.
pipemud24

I rusticated the bottom of the bowl with the Dremel to match the tree bark look of the rustication on the bowl (Photo 1 below). I stained it with a dark brown aniline stain and then also gave the bottom of the bowl a second coat with black stain to emulate the effect of the stain coat on the rest of the bowl (Photos 2 and 3 below).
pipemud25

pipemud26

pipemud27

I stained the rest of the bowl with the dark brown stain to freshen it up and blend in the stain on the bottom of the bowl. I buffed it with red Tripoli and White Diamond to raise a shine and then gave it several coats of carnauba wax on the buffer. The finished exterior is visible in the first close up below and the following four photos of the pipe.
pipemud28

pipemud29

pipemud30

pipemud31

pipemud32

With the repair finished on the exterior of the pipe I worked on the stem. I sanded it with 220 grit sandpaper and then with a medium grit sanding sponge to clean up the oxidation and scratches on the vulcanite. I heated the stem with a heat gun to straighten it and then rebent it over a rolling-pin to give it a slight bend. I set the bend under cool water and then gave the stem a quick buff with Tripoli before taking it back to the work table to further sand the stem.
pipemud33

pipemud34

I continued to sand the stem with micromesh sanding pads from 1500-12,000 grit to bring a shine to the vulcanite. I wet sanded with 1500-2400 grit pads and dry sanded with 3200-12,000 grit sanding pads. When I finished sanding with the pads I rubbed the stem down with Obsidian Oil and let it dry then buffed it with White Diamond and gave it multiple coats of carnauba wax.
pipemud35

pipemud36

pipemud37

pipemud38

pipemud39

pipemud40

pipemud41

With the externals repaired and finished it was time to make up some pipe mud to coat the bottom of the bowl and give a protective coat over the bowl plug. I sacrificed a nice little Cohiba Cuban cigar for the purpose of making the mud of the ash. When the cigar was finished I had a nice bowl of clean ash.
pipemud42

I mixed the ash with a small amount of water to make a paste. I inserted a pipe cleaner into the airway and then applied it to the bottom of the bowl, tamping it into the crevices around the plug and building up the bowl bottom. As the pipe mud dried I added additional layers of mud to the bottom of the bowl and around the lower sides of the bowl. The next series of three photos show the progressive build up of the mud in the bottom of the bowl.
pipemud43

pipemud44

pipemud45

When the mud had dried to touch I buffed the pipe a final time with White Diamond and then gave the entire pipe several coats of carnauba wax to protect and give it a shine. I then used a clean flannel buff for the final buffing. The restored pipe is pictured below. I will let the pipe mud cure and harden for a few days before loading up the pipe and smoking the inaugural bowl.
pipemud46

pipemud47

pipemud48

pipemud49

A New Look for a Duncan Hill Aerosphere


Blog by Steve Laug

Over the years I have owned and sold several Duncan Hill Aerosphere pipes. The system on the pipes and the thinness of the bit always made the airway too tight for me and the draught sluggish at best. I have repaired several of them over the years as well and never found one that really worked well for me. Then in one of the lots I picked up on Ebay that needed new stems there was a Duncan Hill Aerosphere bowl without a stem. It had a wide open airway and was in decent shape. The bowl had a light cake and the rim was tarred but not damage. The bowl was still round and obviously the pipe had not been smoked very much. I figured it was an opportunity to restem it with a standard stem and see what I could get from it.

I tried two different stems on the pipe. The first was a flat blade saddle stem blank. I turned the tenon with a PIMO tenon turning tool and fit it to the pipe. I decided to put a nickel band on the shank for cosmetic purposes as I thought it would look good with the saddle stem. There were two problems with this fitting. The rustication pattern on the Duncan Hill made a smooth fit of the band virtually impossible and the gap around the shank did not work for me. The second issue was that the stem itself was just a few millimeters’ smaller in diameter than the shank. It was not noticeable except with the band it was accentuated. I removed the band and tried the stem without the band and it did not work well. I abandoned that option and went back to my can of stems to see what else I could find that might work in terms of both diameter and length.

IMG_0730

IMG_0731

IMG_0732

For the second stem I found an older “pre-used” stem that worked in terms of length and diameter. I cleaned up the tenon and shortened it slightly and the fit was quite good. I left the band in place and tried to rusticate the band to match the bowl rustication. I heated it and used a scribing tool to carve it up to get the bowl finish look. I stopped that rustication process and worked on the stem fit. For some reason the stem taper on top and bottom did not match. With the fitting on the Duncan Hill bowl the angles at the top did not match the bottom. Reversing the stem made the stem fit even worse. The diameter needed slight adjustments to repair the taper and fit it well against the band.

IMG_1690

IMG_1691

IMG_1692

I used a Dremel to take off material on the stem to adjust the taper to match on both the top and the bottom. I also used the Dremel to clean up the fit at the shank/band. I tried to mark the band with the Dremel in the process as well. I used a scribing tip and still did not get much more of finish than I had with the hand scribing tip. I did not like the look so I took the stem back to the worktable and sanded it to remove the scratches left behind by the sanding drum.

IMG_1693

IMG_1694

IMG_1695

I sanded the stem with 220 grit sandpaper, a medium grit sanding sponge and a fine grit sanding block to clean up the fit and also remove the scratches. The more I looked at it the less I liked the band. The area around the stem shank union looked terrible and the scribing merely looked like scratches. It was awful looking. I decided at this point to remove the band from the shank. I heated the band and slipped it off the shank. I cleaned up the light marks left by the band on the shank with micromesh sanding pads.

IMG_1696

IMG_1697

IMG_1698

With the band off the pipe the tenon was too long for the stem to seat properly. This was not visible to me with the band in place. It felt tight but without the band there was a gap at the junction. I measured the tenon and found that I needed to remove some of the length on the tenon and also needed to countersink the mortise slightly. The countersink on the mortise is a slight bevel inward. I used a knife to bevel the inner edge of the mortise. Once the mortise was prepared and the tenon shortened to measure the stem fit tightly against the shank. I used 220 grit sandpaper and a medium grit sanding sponge to remove a little more of the diameter of the stem to clean up the junction. The two bands on the stem appear to be briar but are actually Cumberland/brindle inserts. I sanded the top of the bowl/rim and the colour matched the twin bands on the stem.

IMG_1699

IMG_1700

I sanded the stem with micromesh sanding pads from 1500-12,000 grit to remove the scratches on the vulcanite and polish the stem. I wet sanded with 1500-2400 grit micromesh pads and dry sanded with the remaining grits. Between 3600 and 4000 grit pads I polished the stem with Maguiars Scratch X2.0. It polished the stem considerably. I then finished sanding with the micromesh pads. While I sanded the stem with the micromesh I also sanded the rim to polish it. With each successive change of grit the rim and the twin bands on the stem began to truly match. The combination looked like it was factory designed to be a combination. I wiped the stem down with Obsidian Oil and set it aside for the evening. In the morning I rubbed the stem down and then waxed it with carnauba.

IMG_1701

IMG_1702

IMG_1703

I gave the bowl a several coats of Halcyon II wax and buffed it with a shoe brush to raise the shine. I buffed the stem with carnauba several time to raise the shine as well. I then buffed the pipe with a soft flannel buffing pad. The finished pipe is pictured below. The look of the Duncan Hill with the banded stem that matches the rim is a great combination. The improved draught of the pipe is exactly what I was aiming for. The Duncan Hill Aerosphere pipe re-enters life with a new level of service to the pipeman who ends up with it in their collection.

IMG_1708

IMG_1709

IMG_1710

IMG_1711

Banding and Restemming a Weber Blackthorne 485


I just finished refurbishing the last of the EBay lot, the second pipe down in the centre column of the photo below. It is stamped Blackthorne over Weber in an oval and Imported Briar 485 on the underside of the shank. The Weber was probably the easiest pipe of the lot to restem and clean up. The bowl was lightly caked and the rim had a light buildup of tars on it. The blast is quite nice on the bowl and when I first saw it thought it might be a GBD Prehistoric. The rim is crowned upward from the bowl and also sandblasted. The bowl is stained with a dark brown and black contrast stain which leaves much of the black stain in the crevices of the bowl and the brown on the higher portions. The shank had some darkening from the end toward the bowl for about a ½ inch – like it had had a band on it at one point. There were no cracks in the shank so the band must have been cosmetic in function. The shank was thick and gave the pipe a chubby look. I am not sure whether to call the shape a chubby billiard or a pot. The inside of the shank was not terribly dirty would take little to clean up the pipe and ready it for a smoke.

bowls1

Weber

I searched through my box of stem and found one of a suitable diameter to fit the pipe. I had the perfect match but it was a bent so I heated it with the heat gun and straightened it out. I used the PIMO tenon turning tool to clean up the tenon and make it straight. In the picture below the tenon appears to have a slight conical shape to it. After turning it the tenon was a cylinder that fit well in the shank.

IMG_1513

I took out a nickel band that would fit the shank and then used the Dremel to smooth out the portion of the shank that would have the band. I find that a band seats much better when the surface that it is pressed onto is smooth rather than blasted or rusticated. I slipped the band lightly on the end of the shank and heated it with the heat gun to expand the metal and make the band simpler to fit on the shank. I pressed it into place on a metal plate that I use for a flat surface to press bands.

IMG_1514

IMG_1515

IMG_1517

IMG_1518

IMG_1519

With the band in place on the shank the tenon needed a slight adjustment with sandpaper to fit well against the shank.

IMG_1520

IMG_1521

I reamed the pipe with a PipNet reamer and took the cake down to the briar. I scrubbed the top of the bowl with a cotton pad and Murphy’s Oil Soap to remove the buildup of tars. I gently wiped down the exterior of the bowl with the Oil Soap as well to remove the grime in the grooves and crevices of the finish.

IMG_1522

IMG_1523

IMG_1524

IMG_1525

I polished the bowl with Halcyon II wax and buffed it with a shoe brush. I cleaned out the shank and the bowl with pipe cleaners and Everclear and put the stem in place for the photo below. Once finished this will be a handsome pipe. I sanded the stem with micromesh sanding pads from 1500-12,000 grit to polish and remove any scratches left by the heating and straightening. I took the pipe to the buffer afterwards and buffed the stem with White Diamond and Blue polish to give it a shine.

IMG_1526

IMG_1527

IMG_1528

IMG_1529

I polished the nickel band with a silver tarnish polishing cloth and then waxed the stem with several coats of carnauba wax. I touched up the areas of the rim and the rim outer edge with a black permanent marker to cover some of the scratches in the finish of the bowl in those places. I buffed the pipe lightly on the buffer with White Diamond and gave the stem another coat of wax. The finished pipe is pictured below.

IMG_1534

IMG_1535

IMG_1536

IMG_1537

Custom Made Billiard Back into Service


The next pipe in the lot that I refurbished was the top pipe in the centre column in the photo below. It was a Custom Bilt like billiard. It is stamped on the left side of the shank Custom Made and on the right side of the shank Imported Briar. That stamping tells me that it is an American Made Pipe. I cannot find any information on the stamping on the internet but will continue to look and see what I can find.

bowls1

Custombilt The pipe was dirty. The bowl was badly caked – meaning that the cake was very crumbly and uneven. The bowl was out of round as can be seen in the photo below. I would need to ream it out completely to reshape the bowl. The finish was dirty in all of the worm trail carving that is found in these old rustic pipes. It looks a lot like a Mincer Custombilt but I am not sure. The rim surface is tarry with build up and the front inner edge of the bowl is burned. The shank looks good in these photos but there is a divot out of the briar on the left side where it will meet the stem. It did not have a stem when I picked it up on Ebay. I will need to make some decisions about what to do with the new stem and the match at the shank.

I went through my box of stems to find one that would fit the shank with little adjustment. I had just the stem there. The fit would be great as it was the same diameter as the shank. The stem was oxidized and dirty inside but there were no tooth marks. There was also a calcification on the stem near the button that would have to be dealt with when I got the stem fit to the shank. The next five photos show the “new” stem. I had to hand sand the tenon to get it to fit snugly in the mortise. The third photo below shows the sanded tenon. I used emery paper to sand the tenon back until it fit in the shank. The fourth and fifth pictures show the fit of the stem to the shank. The divot is visible in the fourth photo. It is mid shank on the left side of the pipe. No amount of fitting the stem would make that disappear. I could sand down the shank at that point to make a cleaner fit but I was not sure that is what I wanted to do. To do the sanding would change the chunky appearance of the pipe. So I decided not to sand the shank. I went on and cleaned the inside of the pipe before I made the final decision on the shank.

IMG_1330

IMG_1331

IMG_1332

IMG_1333

IMG_1334

While I was prepping to ream the bowl I took out a nickel band to see what it would look like on the shank. I liked the overall look. I left it on the shank while I reamed the bowl. I used a PipNet reamer – a T handle with various cutting heads to ream the bowl. I started with the one that fit the easiest and then worked up to the third head which was the same diameter as the bowl. I reamed it back to bare wood (Photos 1 and 2). I then heated the band with the heat gun and pressed on the shank to give me a smooth transition between the stem and the shank (Photos 3 and 4).

IMG_1337

IMG_1338

IMG_1339

IMG_1340

I worked on the inner rim with a folded piece of 220 grit sandpaper. I sanded the top of the bowl with the same sandpaper and the fine grit sanding sponge to remove the build up on the rim (Photos 1 and 2). The third photo below shows the inner edge of the rim after the sanding with the 220 grit sandpaper. I was able to get the bowl close to round. I also used the sanding drum on the Dremel to even things out so the third photo shows the finished repair to the inner rim edge.

IMG_1341

IMG_1342

IMG_1343

I wiped the exterior of the bowl down with acetone on cotton pads. I wanted to clean out the buildup in the crevices of the trails on the bowl. The dirt and finish that came off is visible in the two photos below. Two obvious fills also showed up in the bowl. These would need to be taken care of to hide them under the new stain once I was finished.

IMG_1344

IMG_1345

With the finish removed it was time to clean out the shank and airway of the pipe. I used pipe cleaners, cotton swabs and also the drill bit from the KleenReem Pipe reamer to remove the tars and oils that had built up in the shank. I probably could have used a retort but the shank did not smell sour or rank. It smelled like Virginia tobaccos had been smoked in this so I just used a lot of pipe cleaners and cotton swabs dipped in Everclear until they came out spotless. I wiped down the tenon on the “new” stem as well with the Everclear.

IMG_1346

IMG_1347

Once the insides were clean I inserted the stem in the shank to see if I still had a snug fit. Sometimes when the grime is removed the fit is not as good as it was before cleaning. I have learned the hard way to leave the stem tight and when it is cleaned the fit will be perfect. I sanded the stem with fine grit emery paper to remove the calcified buildup and the oxidation on the stem. The next three photos show the stem after the sanding with the emery paper.

IMG_1348

IMG_1349

IMG_1350

I then sanded the stem with 220 grit sandpaper to remove more of the oxidation and also the scratches left behind by the emery paper. The next series of three photos show the stem after sanding with the sandpaper.

IMG_1351

IMG_1352

IMG_1353

I went back and cleaned the stem with pipe cleaners and Everclear. I should have done that when I was cleaning the shank but honestly I forgot to do so. Never too late however so I did it next. The next four photos show the pile of pipe cleaners that it took to clean the stem. I also wiped the bowl and shank down with Everclear on a cotton pad to prepare it for staining.

IMG_1354

IMG_1355

IMG_1356

IMG_1357

I restained the pipe with a dark brown aniline stain. I thinned the stain with 1 part alcohol to 2 parts stain to get the brown I wanted for a colour. I wanted it dark enough that the fills would blend into the finish but also transparent enough to show the grain through the stain. I used a black permanent marker, called a Sharpie here in Canada to give the fills a dark top coat before applying the stain. I have learned that this method makes the fills blend into the bowl better on these rusticated bowls. I applied the stain with a cotton swab, flamed it with my lighter and reapplied it and flamed it again. It took three applications of the stain to give good coverage to the bowl. The next three photos show the unstained pipe (Photo 1) and the newly stained pipe (Photos 2 and 3).

IMG_1358

IMG_1359

IMG_1360

Once the stain was dry I hand buffed it with a shoe brush to see if I needed to add any more stain to some of the spots on the bowl and rim (Photo 1). The next three photos show the buffed bowl and the finished colour. The coverage was good so I buffed it by hand and then went back to work on the stem.

IMG_1361

IMG_1362

IMG_1363

IMG_1364

The next series of six photos show the progressive polishing of the stem with micromesh sanding pads from 1500-12,000 grit.

IMG_1365

IMG_1366

IMG_1367

IMG_1368

IMG_1369

IMG_1370

I took the pipe to the buffer and buffed the stem with White Diamond and then rubbed it down with Obsidian Oil to preserve it. I gave the bowl a coat of Halcyon II wax and the stem several coats of carnauba wax to prevent oxidation. I buffed the entire pipe lightly with a soft flannel buff. The finished pipe is pictured in the last four photos.

IMG_1371

IMG_1372

IMG_1373

IMG_1374

Restemming and Reclaiming an Old, Unsmoked Rex Bulldog


This is the second of the old unsmoked pipe bowls I picked up on EBay. It is one that I can find absolutely no information on anywhere. Some have thought it was a Barclay Rex but I can find nothing that would link it to that shop in NYC. It is stamped Rex in cursive script on the right side of the shank and also stamped Rex over Sterling on the band. It has the look and feel of an older English-made pipe. But I am not sure. The seller said it was from the late 1800’s but all attempts to contact them on the source of that information have remained unanswered. So it remains a bit of a mystery to me. It is one though that I will continue to hunt down until I can come up with something. This shape is what is called in some of the older catalogues a Bulldog. I personally am not sure what to call it. It has the shape of a bulldog on the bowl and the double ring separating the bottom of the bowl from the cap. The shank however, is oval. It has a factory installed band on it that is also stamped Rex. The script on the shank is in gold leaf. The bowl is very clean. There was a small crack in the shank on the shank at about one o’clock looking toward the bowl. This may have been the reason for the band or the band may have been decorative. There was no stem with this pipe so I was not sure of the length of the stem to make for it. The drilling is very interesting. It is drilled like some of the calabash bowls or bowls that were screwed onto Bakelite shank and bases in the late 1800s. It is directly in the bottom of the bowl and seems to have a small hollow chamber under the hole. The airway meets it directly underneath. I have not seen this drilling on briar pipes of newer eras. The bowl is smooth inside and almost polished. The briar is quite nice and sports mixed grains from cross grain to birdseye to flame around the bowl. The double cut rings are clean and are not clogged with wax or dirt. There appears to be a thin coat of shellac on the outside of the bowl to give it a shine as it shines with or without the application of wax. The silver band is interestingly shaped as well. It is somewhat conical – wider toward the bowl side and narrower on the stem side. There is also a stepped down lip on both sides of the band. Where it is on the bowl is stepped down to a small ring around the shank. On the stem side it is also stepped down. This would make fitting a stem to the shank a challenge. It was not too badly oxidized so it would clean up very easily. The first series of five photos are those taken by the Ebay seller and give a good idea of the look and condition of the pipe. The one thing not clear to me was the size of the pipe. I took a chance on it as the apparent age and the assumed age stated by the seller made the likelihood of it being smaller was very high. When it arrived it was indeed quite small. The bowl and shank are roughly 3 inches long without the stem. The height of the bowl is 1 5/8 inches. The inside diameter of the bowl is ¾ inches and the outside diameter is 1 ¼ inches.

Rex1

Rex2

Rex3

Rex4

Rex5

Once I started working on it the first decision that needed to be made was on the type and length of the stem to be used. I fitted several oval stems to the bowl – a standard length billiard type stem, a thicker and a thinner oval Canadian stem and a Lovat style saddle stem. The longer stem did not work well with the longer shank on the pipe. The thicker Canadian stem also made the stem look quite chunky and large as did the saddle stem of the Lovat. The stem I settled on was the thinner Canadian oval. Even this one would require considerable thinning to make for a proper fit against the bevel of the band. The first photo below shows the two Canadian taper style oval stems. I chose the bottom stem in the photo.

IMG_0968

I used the PIMO tenon turning tool to turn the tenon so that it would fit in the shank. The next three photos show the initial fit of the stem. You will note in the photos the gap where the bevel of the band lies. I had to make a decision to either leave the gap or work on the stem size so that it fit against the bevel and thus was slightly thinner than the shank prior to the band.

IMG_0969

IMG_0970

IMG_0971

I decided to thin the stem to fit against the bevel. I used the Dremel with a sanding drum to bring it close to the finished size. I then sanded it with medium grit emery paper to smooth out the scratches and grooves from the Dremel. Once I had most of the scratches removed I sanded it with a medium grit sanding sponge to further shape the stem and remove excess material. The next series of three photos show the fit of the stem after it was sanded with the sanding sponge (pink square in the photos).

IMG_0997

IMG_0998

IMG_0999

At this point in the process I had to take it back and sand off some more material with 340 grit sandpaper. It still was too thick to fit well. I also had to finesse the fit against the band with needle files as in some places it was not quite straight. When I had it fitting well I moved on to sanding with a 1500 grit micromesh sanding pad (the next two photos). I also did a small repair on the crack in the top of the shank. I pried it open slightly and dripped some clear super glue into the crack. It did not go all the way through into the shank which was interesting. It seemed to be a surface crack. The repair worked well. I polished that portion of the shank with the 1500 grit micromesh sanding pad as well to remove the slight excess of glue left behind (third photo below).

IMG_1000

IMG_1001

IMG_1002

After the repair I continued sanding and polishing the stem with 1800-12,000 grit micromesh sanding pads. The next four photos highlight the sanding/polishing process. Notice the slight hip on the stem at the band edge. In the photos this appears to be more drastic than it is in actual life. The fit is more of a pinched look.

IMG_1003

IMG_1004

IMG_1005

IMG_1006

The final series of four photos show the finished pipe. I buffed it with White Diamond and then gave it multiple coats of carnauba wax. I really like the stem and fit against this long shanked “Bulldog” bowl. The pipe glows with an age and patina that calls out to be smoked. This is yet another who will soon fulfill the purpose for which it was made.

IMG_1297

IMG_1298

IMG_1299

IMG_1300

Repairing and Repositioning a Sterling Silver Band on a Peterson Deluxe


I received this older Peterson Deluxe 11S to refurbish for a project that I am involved in and in the process of going over the pipe noting the things that needed to be repaired. I got to the shank end and noted the 1/8 inch gap between the chamfered edge of the band and the end of the shank (Photo 1). From the marks on the shank it was obvious that the band had been removed and glued with the gap. It then had been chamfered inward toward the shank to give it a dish effect and allowing the stem on the Deluxe to sit closer to the shank. It was not too badly done though it obviously had been modified and there were some dents in the surface of the edge.

IMG_1201

I decided to return it to its original position on the shank. I cleaned off the band with silver cleaner and cleaned out the shank (Photo 2). I wanted the surface to be smooth so that when I heated it I could press it into place on the shank. To return it to that place would be a two-step process, if I was to do it without damaging the surface of the band. The first step in the repair was to bring the band back to a position where the gap was gone. The second step would be to press down on the chamfered edge and flatten it into place.

Photo 2 Side view of the chamfered top of the band

Photo 2 Side view of the chamfered top of the band

I heated the band with my heat gun to warm the glue and also the band (Photos 3 – 4). The heat would loosen the glue and allow me to adjust the band on the shank so that the stamping was in place and I could easily press it into place. For this first stage in the process I was only interested in getting the gap between the band and the top of the shank closed (Photos 5 – 6).

Photo 3 Heating the band

Photo 3 Heating the band

Photo 4 Heating the band

Photo 4 Heating the band

Photo 5 Pressing the band into place

Photo 5 Pressing the band into place

Photo 6 Closer view of the chamfered band pressed into the shank

Photo 6 Closer view of the chamferred band pressed into the shank

To flatten the chamfered surface of the band would take a slightly different approach. I reheated the end of the shank band with my heat gun. I used the lower heat setting as I was holding the bowl with the shank down over the heat and did not want to get burned. I heated it for as long as I could hold it in place and then took it to the work table. Once there I pressed it down onto a metal plate that I use for pressure fitting bands on shanks. I repeated this process until I had pressed the band flat and removed the chamfering (Photos 7 – 8).

After it was pressed flat I used the micromesh sanding pads from 1500-12,000 grit to repolish the silver end cap. I pressed it downward into the pad and twisted it and also ran it across the pad to remove the scratches from the metal plate. With that finished the end is flush against the shank and there are just three small dents that I was unable to remove. The band is in place as it was when it left Peterson’s Factory (Photo 9).

Photo 7 Heating the band to flatten the chamfering

Photo 7 Heating the band to flatten the chamferring

Photo 8 Pressing the face of the band onto a flat metal plate

Photo 8 Pressing the face of the band onto a flat metal plate

Photo 9 The face of the band after flattening

Photo 9 The face of the band after flattening

To finish the band after sanding it, I wiped the entire band down with a jeweler’s cloth and polished it until it shined like new (Photos 10 – 12). The band was back in its correct place and ready for the stem once it was repaired.

Photo 10 Sanding the flattened surface with micromesh sanding pads

Photo 10 Sanding the flattened surface with micromesh sanding pads

Photo 11 After sanding

Photo 11 After sanding

Photo 12 After polishing

Photo 12 After polishing

A Renewed WDC Bakelite and Briar Pipe Restemmed


I received the Bakelite bowl base in a lot that I picked up on EBay. At first glance I figured I would trash it and not worry about working on it at all. However, I tend to be drawn to working on things that others would throw away so I decided to see what I could do with it. The two bowls pictured below are threaded and both fit the base. The Dublin like bowl, once on the base, was too narrow for the base but the bulldog bowl fit well. It was packed with a cake and there were chips out of the double line band around the bowl. The bowl rim was damaged and the finish was absolutely shot with dark black stains in the briar all around the bowl where the thumb and fingers held the bowl. The Bakelite shank had the WDC in a diamond stamped on it. The ornate band that usually adorned the shank as well as the metal washer like band on the top of the bowl base was missing. The shank had a broken metal tenon stuck deep within it. The surface had scratches in it but none of them were too deep.

Bakelite bowl base and two potential bowls before beginning the process of refurbishing.

Bakelite bowl base and two potential bowls before beginning the process of refurbishing.


The bowl is pictured below. You can see the thickness of the cake and the rough surface of the rim where a previous owner had damaged it when emptying the bowl. The second photo shows the exterior damage and the finish on the pipe. I reamed the bowl to clean out the cake. I decided to take it back to bare wood and start over with the cake. I checked the bowl for cracks and damage but surprisingly there were none to be found. Eventually I would top the bowl.
SIde view of the bowl before refurbishing.

SIde view of the bowl before refurbishing.

Top view of the unreamed pipe bowl showing its condition before cleaning

Top view of the unreamed pipe bowl showing its condition before cleaning


I wiped the bowl down with acetone on a cotton pad, used a dental pick to clean out the grooves and screwed bowl on the base to get an idea how the pipe would look. I also wiped down the bowl base with Everclear to clean off the grime and buildup on that surface. I went through my can of stems in search of a diamond shaped stem that would finish out the look of the pipe. I came up empty-handed so I chose a round stem of the right diameter and length that I could shape to fit the shank. I drilled out the shank to remove the metal tenon and also to open the diameter of the mortise. The original stem had been a screw on one and the metal mortise and the metal tenon were firmly welded together so the drill was the only way to remove it. I opened it as wide as possible while still leaving enough material on the shank to maintain strength. I turned the tenon with the PIMO tenon turning tool and then a Dremel to bring it to the correct size for the new shank. The next two photos show the stem and the fit of the stem to the shank.
WDC base in need of a diamond shaped stem. Necessity is the mother of invention. I used a round Lovat stem.

WDC base in need of a diamond shaped stem. Necessity is the mother of invention. I used a round Lovat stem.


I turned the tenon to fit the mortise and then inserted the stem against the shank.

I turned the tenon to fit the mortise and then inserted the stem against the shank.


Now I needed to shape the stem and remove material to transform the round saddle bit to a diamond saddle bit. I used a Dremel to cut the basic shape in the stem. I proceeded from side to side with the stem on the shank to make sure to match the angles of the shank. I wrote a post on the process for the blog and posted that earlier. You can read about the details of that process on this link https://rebornpipes.wordpress.com/2013/04/15/shaping-a-diamond-shaped-stem-from-a-round-one/ The next eleven photos give a quick look at the shaping work on the stem. It took time and I had to be careful to not damage the shank when I was using the Dremel and sanding drum on the stem.
Figure 3 I used a Dremel to shape the stem to match the diamond angles of the shank. I worked on one side at a time.

Figure 3 I used a Dremel to shape the stem to match the diamond angles of the shank. I worked on one side at a time.

Figure 4 Pipe resting against the Dremel with a sanding drum. Shaping progressed quite quickly. This picture shows one side beginning to take shape.

Figure 4 Pipe resting against the Dremel with a sanding drum. Shaping progressed quite quickly. This picture shows one side beginning to take shape.

5 Top view of the shank. Both sides of the round stem are beginning to take on the shape of the shank.

5 Top view of the shank. Both sides of the round stem are beginning to take on the shape of the shank.

Figure 6 Top view after more shaping with the Dremel.

Figure 6 Top view after more shaping with the Dremel.

Figure 7 Bottom view before the Dremel did its work.

Figure 7 Bottom view before the Dremel did its work.

Figure 8 Left side view after the first side has begun to take shape.

Figure 8 Left side view after the first side has begun to take shape.

Figure 9 Bottom view after both sides have begun to take shape.

Figure 9 Bottom view after both sides have begun to take shape.

Figure 10 Right side view of the stem after it began to take shape.

Figure 10 Right side view of the stem after it began to take shape.

Figure 11 Back to the worktable and the hand sanding.

Figure 11 Back to the worktable and the hand sanding.

Figure 12 Hand sanding continues.

Figure 12 Hand sanding continues.

Figure 13 Hand sanding continues.

Figure 13 Hand sanding continues.


The original shank had sported an ornate band and the stain in the Bakelite showed the marks of the band. I did not have any ornate bands in my collection of bands so I chose instead to band it with a nickel band. I shaped the band to fit, beginning with a round band. This took a bit of fussing to get the shape and fit correct. I have written that process up in detail in a previous blog post as well. You can read about the process at this link https://rebornpipes.wordpress.com/2013/04/15/shaping-a-round-metal-band-to-fit-a-square-or-diamond-shank/ Once the band was shaped correctly I heated it with a heat gun until it was pliable and then pressure fit it on the shank of the pipe. The next series of five photos show the process I used to pressure fit the band on the shank. Once it was in place I carefully used my furniture hammer to flatten the band against the shank.
The square is done

The square is done

Fitting a nickel band on the shank

Fitting a nickel band on the shank

Fitting a nickel band on the shank

Fitting a nickel band on the shank

Nickel band fitted on the shank

Nickel band fitted on the shank

Nickel band fitted on the shank

Nickel band fitted on the shank


The next series of four photos show the newly shaped stem in place on the banded pipe. There was still a lot of work to do on the pipe including cleaning the internals and reworking the bowl and rim but the overall look of the “new” pipe is intriguing.
New band and stem in place.

New band and stem in place.

New band and stem in place

New band and stem in place

Bottom view of the newly banded and stemmed pipe

Bottom view of the newly banded and stemmed pipe

Top view of the new band and stem

Top view of the new band and stem


I have included one photo below to give you an idea of the shape of the new stem. I remove a lot of vulcanite to get it from its original round shape to the diamond shape pictured below. The fit and the angles match the shank perfectly. These older pipes are tricky to fit a diamond stem on because none of the sides of the diamond are the same dimensions. Each one is just slightly different so you have to do the fitting work with the stem in place on the shank.
View from the tenon end of the diamond stem at this point in the process.

View from the tenon end of the diamond stem at this point in the process.


With the stem fitting correctly it was time to tackle the bowl. I set up my board and emery paper so that I could top the bowl. The first photo shows the set up. The second photo shows the state of the bowl rim when I started the process.
Set up for topping the bowl

Set up for topping the bowl

Reamed and ready to top

Reamed and ready to top


Once I had it topped I decided to wipe it down with acetone on a cotton pad to remove the finish and the grime from the topping. The next three photos show the clean bowl and the topped bowl. The finish work would take some time but the bowl was ready to move on to the next stage of rejuvenation.
Wiping down the bowl with acetone

Wiping down the bowl with acetone

Wiping down the newly topped rim with acetone

Wiping down the newly topped rim with acetone

Wiping down the bowl with acetone

Wiping down the bowl with acetone


I sanded the bowl with 240 and 320 grit sandpaper and finished sanding with a fine grit sanding sponge. The next two photos show the cleaned and prepped bowl ready for staining. The dark oil stains on the sides of the bowl would not come out. I wiped the bowl down with repeated washings of acetone and the surface was clean. I also sanded the stem with the sanding sponge while I worked on the bowl.
Bowl sanded, in place and ready to stain.

Bowl sanded, in place and ready to stain.

Bowl in place, sanded and ready to stain.

Bowl in place, sanded and ready to stain.


I decided to restain this old timer with an opaque oxblood aniline based stain. I wanted the opacity so that the dark stains would be minimized beneath the new stain and would eventually be blended in through smoking the pipe. I applied the stain and then flamed it. After flaming I hand buffed it to remove the excess stain. I also used a cotton pad and a dental pick to clean out the grooves on the bowl.
Stained with oxblood stain.

Stained with oxblood stain.

Stained with oxblood stain.

Stained with oxblood stain.


The next series of four photos shows the hand buffed bowl in place on the pipe base. The finish was matte at this point and still needed to be taken to the buffer to raise the shine. The third photo shows the rim. The surface is smooth but there is still damage to the inner edge of the rim. I chose to leave that without reworking it too much. I did not want to change the roundness of the inner bowl and decided that I could live with the nicks in the inner edge.
Left side of the pipe with a hand buff on the newly stained bowl.

Left side of the pipe with a hand buff on the newly stained bowl.

Right side of the newly stained bowl with a hand buffed surface.

Right side of the newly stained bowl with a hand buffed surface.

Top view of the hand buffed newly stained bowl.

Top view of the hand buffed newly stained bowl.

View of the underside of the bowl and Bakelite bowl base.

View of the underside of the bowl and Bakelite bowl base.


The next three photos show the pipe after I had buffed it with White Diamond. The bowl shines and the dark marks around the bowl show faintly beneath the finish but add a flair of character to the old pipe.
Buffed with White Diamond

Buffed with White Diamond

Buffed with White Diamond

Buffed with White Diamond

Buffed with White Diamond

Buffed with White Diamond


The next series of three photos are included to give an idea of the polishing process that went into bringing the stem work to completion. Again I invite you to read the post mentioned above on the transformation of a round saddle stem to a diamond shaped one to understand the full work that the shaping took to bring it to this place.
Stem sanded with 320 grit sandpaper

Stem sanded with 320 grit sandpaper

IMG_1021

Stem sanded with 320 grit sandpaper

IMG_1022

Stem sanded with micromesh sanding pads


Once I had finished polishing the stem with the various grades of micromesh from 1500-12,000 grit I took the pipe to the buffer once again and buffer the entirety with White Diamond and then gave it multiple coats of carnauba wax to protect it and to give it a deep shine. The next series of four photos show the finished pipe. It is ready to load up with a favourite tobacco and be gently sipped in the solitude of an afternoon on the porch.

IMG_1032

IMG_1033

IMG_1034

IMG_1035