Blog by Paresh Deshpande
There a quite a few WDCs that I have inherited from my old man and the one on my table now is “WDC BAKELITE” in its original case. I loved the deep red color of the Bakelite shank and the fiery transparent red of the stem. Thus, no surprise here that I chose to work on this WDC Bakelite Dublin shaped pipe!!
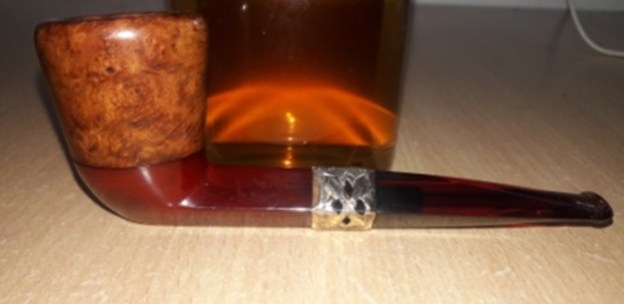
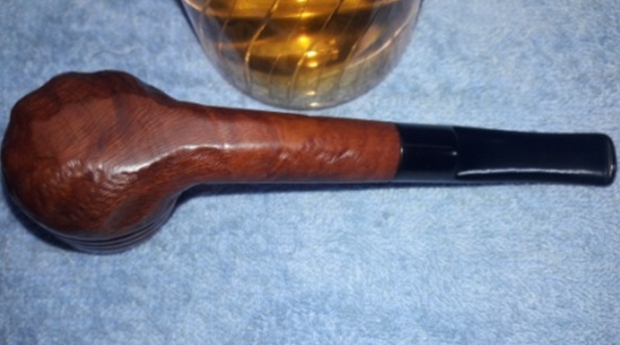
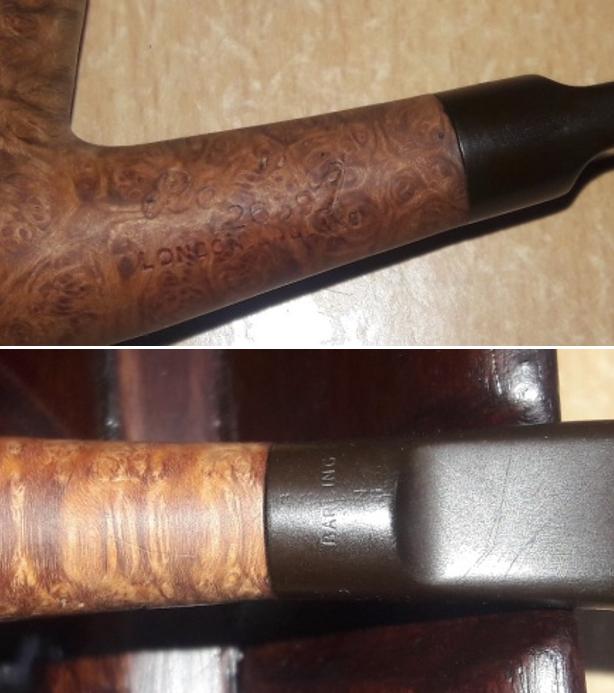
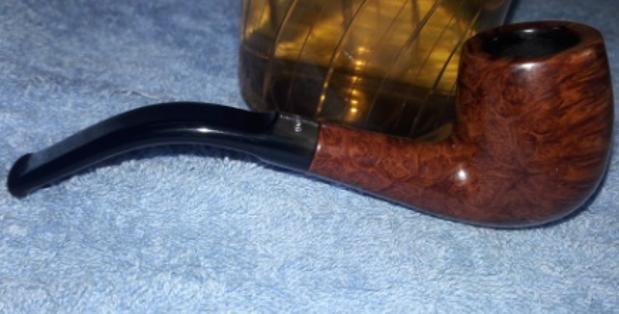
This is the third WDC from my grandfather’s collection, WDC Bakelite in an impressive Dublin shape. The dark brown briar bowl, Bakelite base and translucent Bakelite stem looks attractive. The gold filigree at the shank end adds a classy bling, breaking the red monotony of the stem and shank. I dare say that this pipe does not boast of only beautiful bird’s eye or cross or straight grains but nevertheless distinct swirls of grains can be seen which are eye-catching to say the least!! The shank and stem is devoid of any stamping, however, the only stamping to identify this pipe to be a WDC is seen on the top lid of the leather covered case. The case is internally lined with a soft silky felt cloth in light green color and bears the trademark inverted equilateral triangle in red with letters “WDC” over “BAKELITE” in gold. Gold ribbons flow from either sides of the triangle and bears the words “FRENCH” on the left ribbon and “BRIAR” on the right. The quality of the case, its felt lining and the stamping simply shouts QUALITY!!  I searched pipedia.com for more information on this pipe and attempt at estimating the vintage of this pipe. Though I could not find any information about this pipe in particular or a connection between WDC and Bakelite material, here is what I have found on pipedia.org about the brand:
William Demuth. (Wilhelm C. Demuth, 1835-1911), a native of Germany, entered the United States at the age of 16 as a penniless immigrant. After a series of odd jobs he found work as a clerk in the import business of a tobacco tradesman in New York City. In 1862 William established his own company. The William Demuth Company specialized in pipes, smoker’s requisites, cigar-store figures, canes and other carved objects.
The Demuth Company is probably well known for the famous trademark, WDC in an inverted equilateral triangle. William commissioned the figurative meerschaum Presidential series, 29 precision-carved likenesses of John Adams, the second president of the United States (1797-1801) to Herbert Hoover, the 30th president (1929-1933), and “Columbus Landing in America,” a 32-inch-long centennial meerschaum masterpiece that took two years to complete and was exhibited at the World’s Columbian Exposition in Chicago in 1893.
The Presidential series was the result of Demuth’s friendship with President James A. Garfield, a connoisseur of meerschaum pipes. Demuth presented two pipes to Garfield at his inauguration in 1881, one in his likeness, the other in the likeness of the President’s wife. Later, Demuth arranged for another figurative matching the others to be added to the collection as each new president acceded to the White House, terminating with President Hoover.
In early 1937, the City of New York notified S.M. Frank & Co. of their intent to take by eminent domain, part of the land on which the companies pipe factory was located. This was being done to widen two of the adjacent streets. As a result of this, Frank entered into negotiations to purchase the Wm. Demuth Co.’s pipe factory in the Richmond Hill section of Queens. It was agreed upon that Demuth would become a subsidiary of S.M. Frank and all pipe production of the two companies would be moved to DeMuth factory. New Corporate offices were located at 133 Fifth Avenue, NYC.
Demuth pipes continued to be made at the Richmond Hill plant till December 31. 1972. Then the Wm. Demuth Company met its official end as a subsidiary company by liquidation.
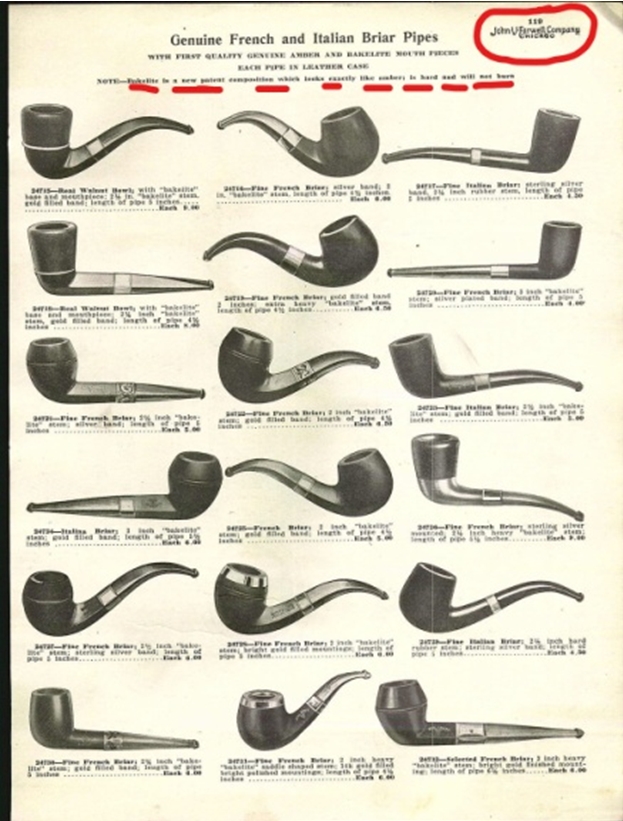
I came across an interesting catalog on the same page on pipedia.org which shows the exact same pipe that I am now working on. It is the same pipe as the first pipe on the left in second row. A close scrutiny of the picture confirms the following:
(a) Bakelite material was being newly introduced by WDC as WDC Bakelite line. This can be inferred from the Note on the flyer “BAKELITE IS A NEW PATENT COMPOSITION……….NOT BURN”.
(b) The pipe before me is model number 24718 and was at the time their second most expensive of all the pipes advertised in the flyer, retailing at $8!!
(c) The catalog was published by “John V Farwell Company, Chicago”. John V. Farwell & Co. was a department store in Chicago, Illinois, United States. The store’s history traces back to 1836, when the Wadsworth brothers came to Chicago to sell goods. John V. Farwell & Co. was the most successful store in the city until the 1871 Great Chicago Fire. The store continued to operate after the fire, but faced stiff competition from former partners Marshall Field and Levi Leiter. It was purchased by Carson, Pirie & Co. in 1926. (https://en.wikipedia.org/wiki/John_V._Farwell_%26_Co.)
 I visited rebornpipes.com and came across an interesting article on materials used in pipe making (https://rebornpipes.com/2014/08/09/hard-rubber-and-other-early-plastic-used-in-pipes-ronald-j-de-haan/)
It is here that I found the following information on “BAKELITE”:
These qualities made Bakelite the most successful synthetic material in the first half of the 20th century. From 1928 it was also produced as molded resin. Both the pressed and the molded forms were suitable for the pipe making industry. Pipes were made from Bakelite and molded phenol-resin. Complete pipes of Bakelite are very rare because of its lack of heat resistance. Phenol-resin however was frequently used for pipe mouthpieces and cigarette holders because it imitated amber.
From the above gleaned information, it is safe to conclude that the pipe now on my worktable is of 1920s and early 1930 vintage and at that point in time was WDC’s new offering retailing at $ 8!!
INITIAL VISUAL INSPECTION
The leather covered case in which the pipe was safely ensconced for many years has borne the maximum brunt of uncared for storage. The leather has weathered while being exposed to the extreme climate and has cracked at a number of places. However, the hinges and the lock mechanisms are intact and function smoothly. I shall just be giving a nice wipe with a moist cloth and applying a neutral shoe polish coat which is rich in wax content. The lining within has stained near the bowl/ Bakelite base joint and near the rim top. This needs to be cleaned up.

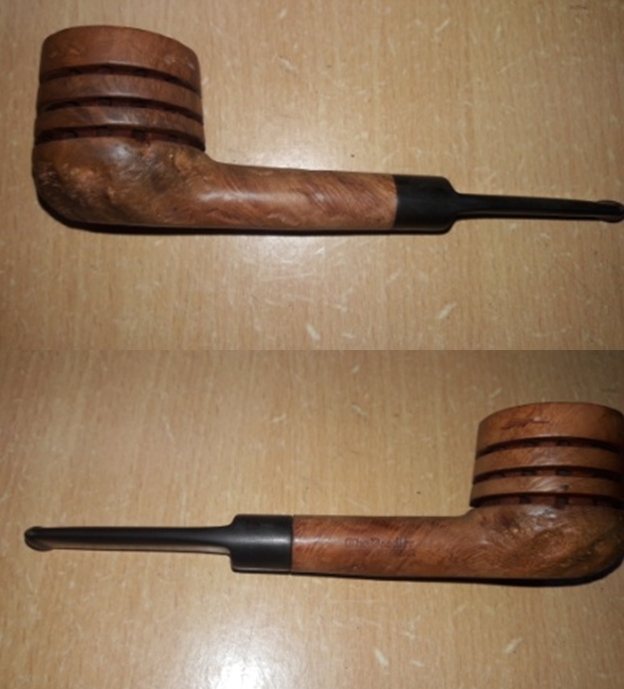
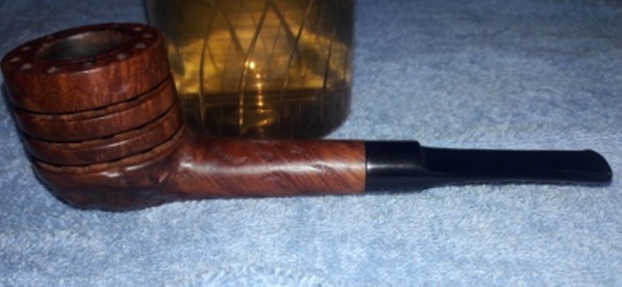
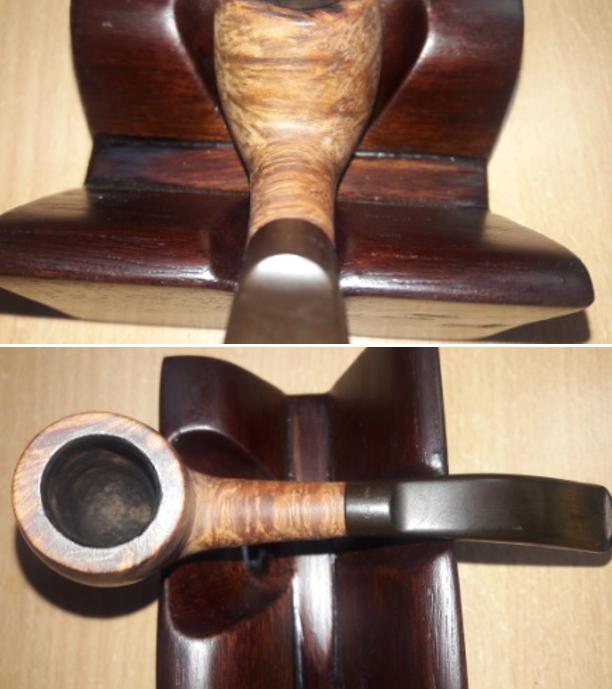
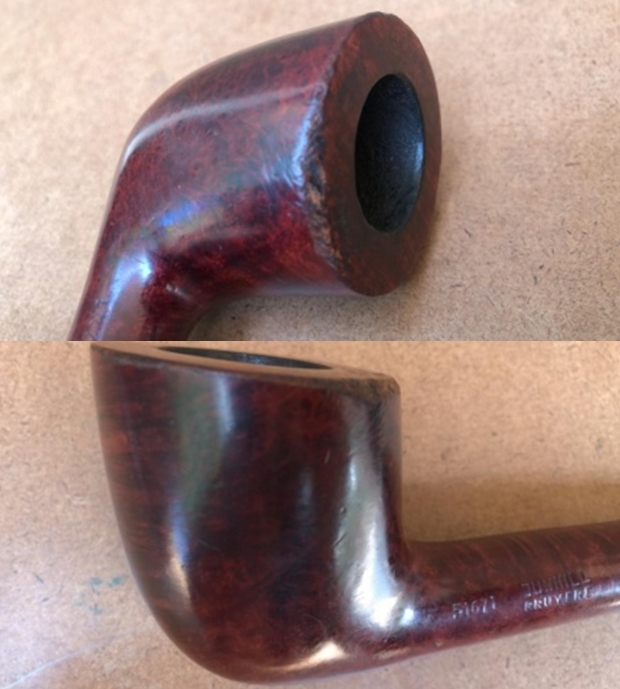
 Age definitely shows on the stummel surface!! The briar is dull and lifeless and has taken on a layer of aged patina, through which one can make out the beautiful grain patterns all around. There is a heavy overflow of lava all over the entire stummel surface. The bowl is covered in oils, tars and grime accumulated over the years of storage and is sticky to the touch. To be honest, the stummel is filthy to say the least. A thorough cleaning of the stummel followed by polish should accentuate the beautiful mixed grain pattern seen on the stummel through all the dirt. The Bakelite base of the stummel is dirty and sticky. Few scratches are also seen on close observation.
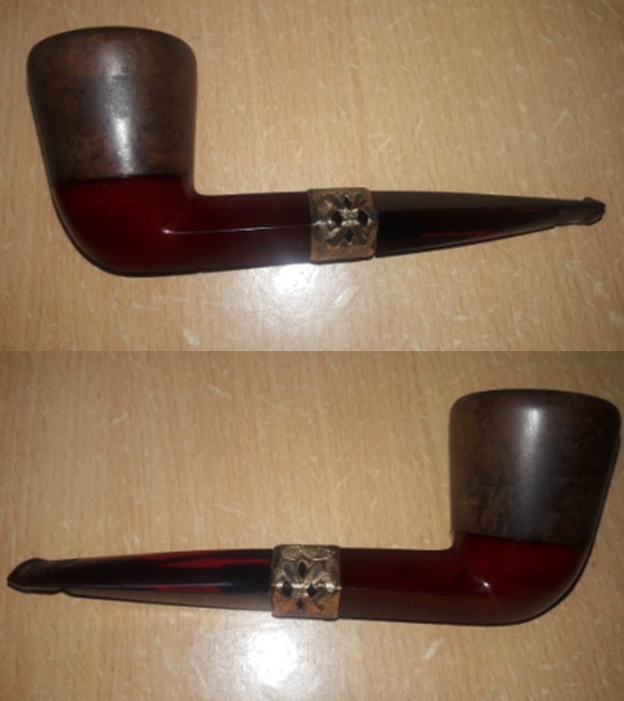
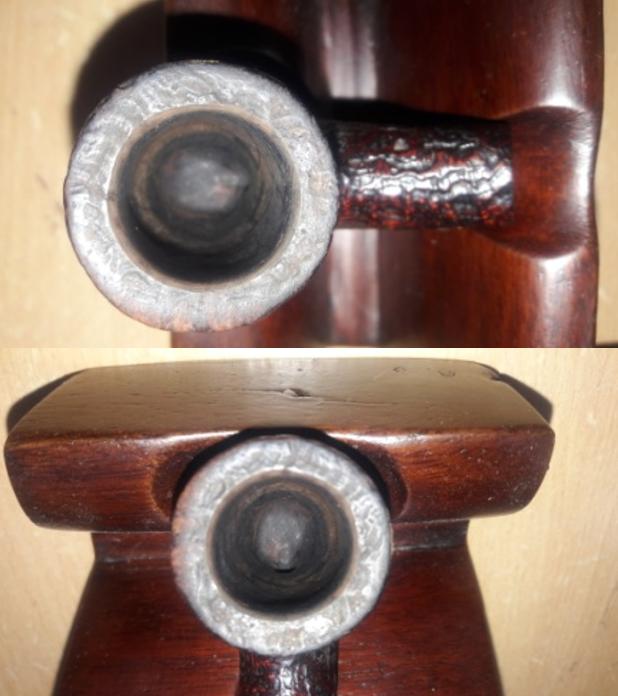
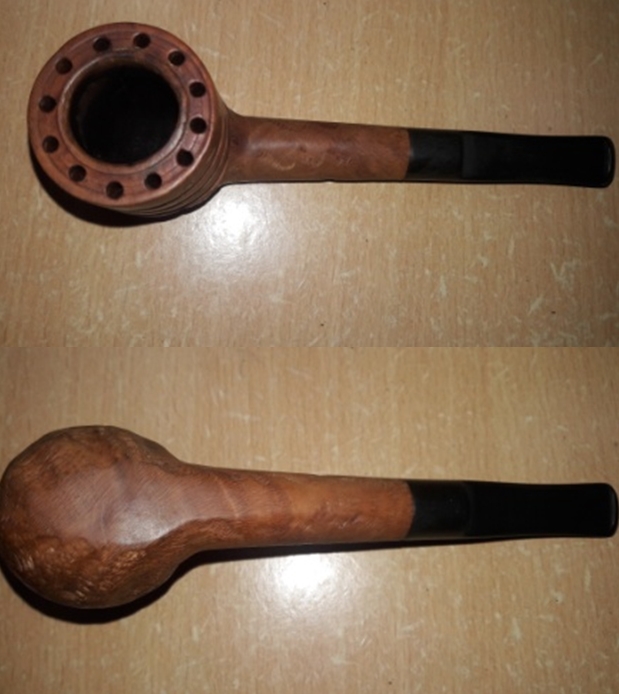
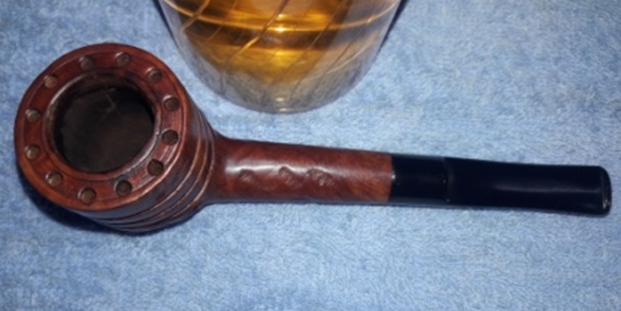
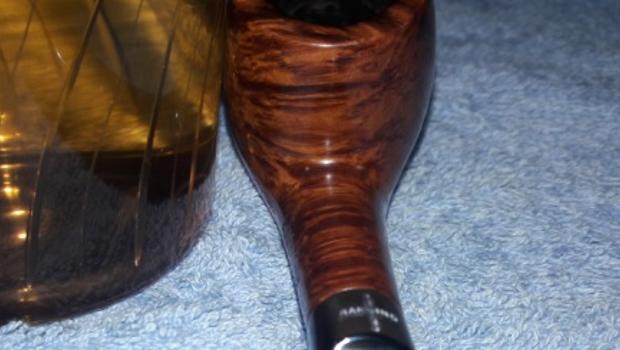
 The bowl (‘Real Walnut Bowl’ as specified in the flyer above!!) screws-in directly on to the Bakelite base. There is no brass or any metal separator between the bowl and the base, which is surprising. The threads on the bowl and the Bakelite base are covered in oils, tars and gunk. The bowl has one small hole at the heel through which the smoke passes in to the shank. The heel of the Bakelite base shows traces of old oils and tars. This will need a thorough cleaning.
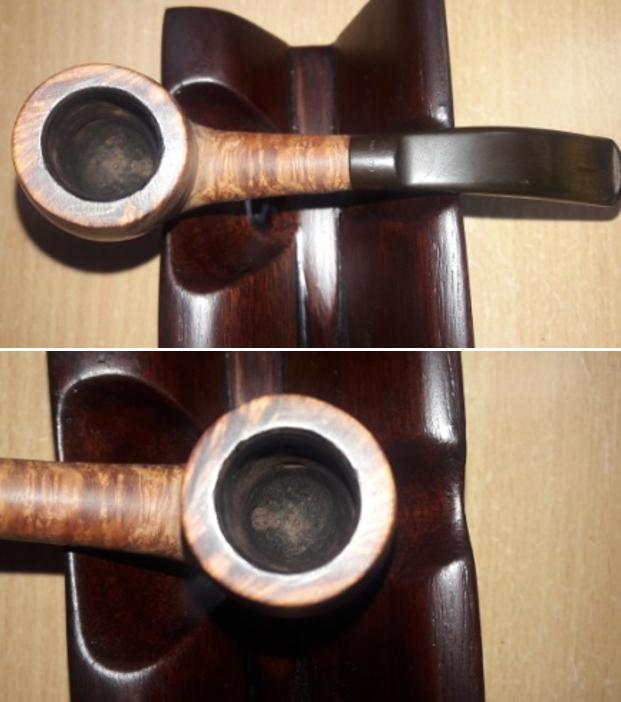
 There is heavy buildup of cake with a thick layer in the chamber. The condition of the inner walls of the chamber can be ascertained only after the cake has been removed completely and taken down to bare briar. The bowl however, feels robust and solid to the touch from the outside. The rim top has a thick layer of overflowing lava. The condition of the smooth rounded inner and outer edge and rim top can be commented upon once the overflow of lava is removed and the chamber is reamed. The shank end of the pipe is clean. These issues should be a breeze to address, unless some hidden gremlins present themselves!!
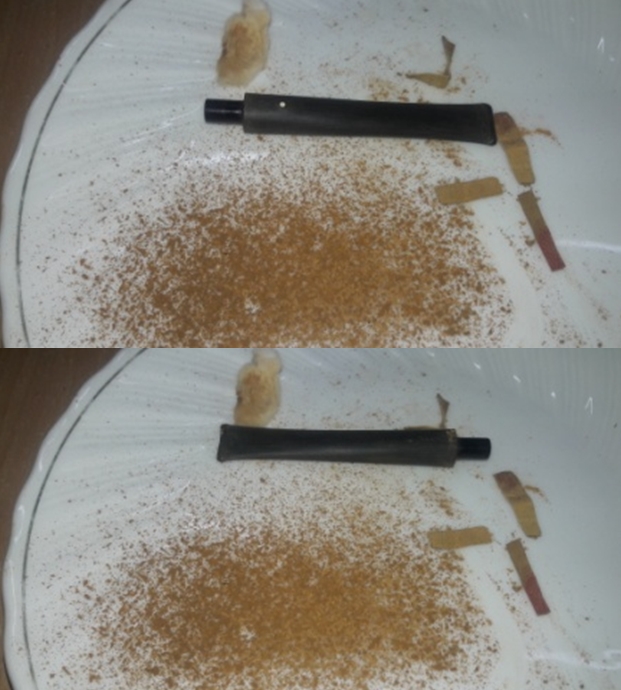
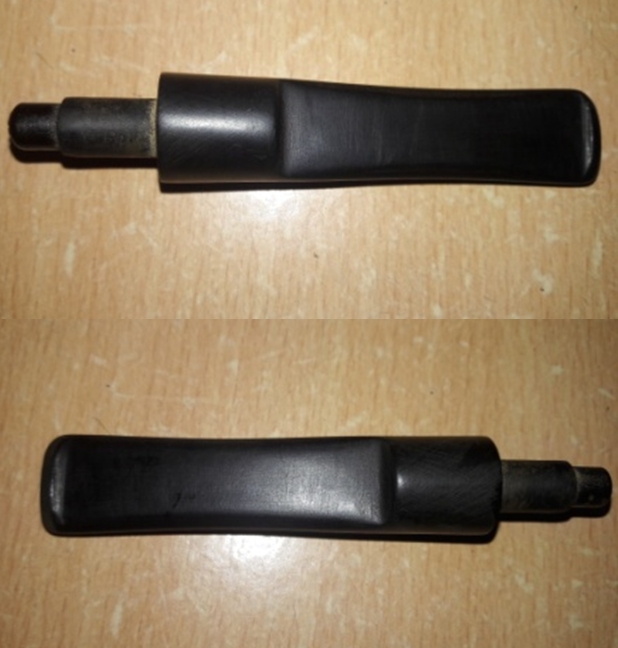
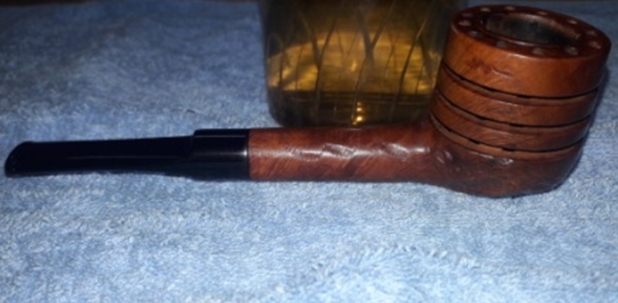
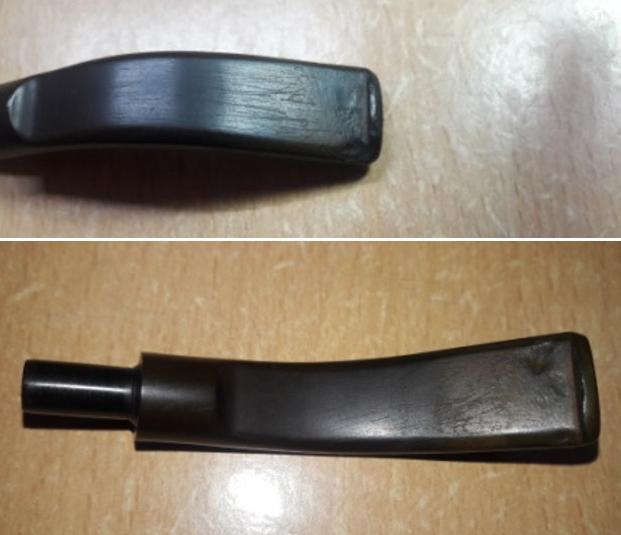
 The diamond Bakelite stem has a rounded orifice which also points to its vintage. It is a rich reddish color that is translucent and the light really plays through. I cannot wait to see the stem clean up. Deep tooth indentations and minor tooth chatter is seen on the upper and lower surface. The pointed corner edge of the lip on the left is broken and will either have to be reconstructed or filed away to a straight profile. The lip edges have also been chewed off and greatly deformed. The screw-in tenon appears to be a Delrin tenon (or is it bone?) and is covered with dried oils and tars. The fit of the stem in to the mortise is very loose and the alignment is overturned. This will be a first for me as I have corrected metal threaded stingers, but never a Delrin or bone. The mortise does show signs of accumulated dried oils, tars and remnants of ash, greatly restricting the air flow.
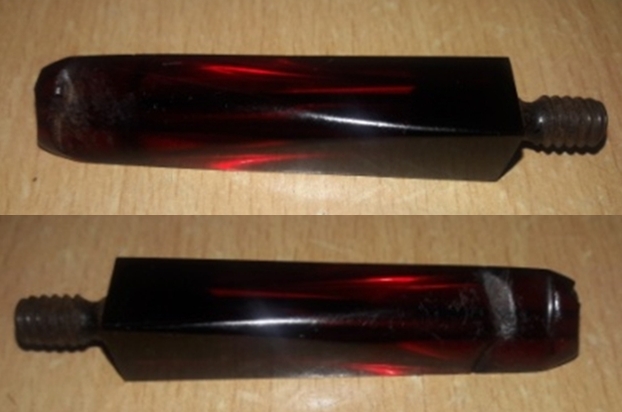
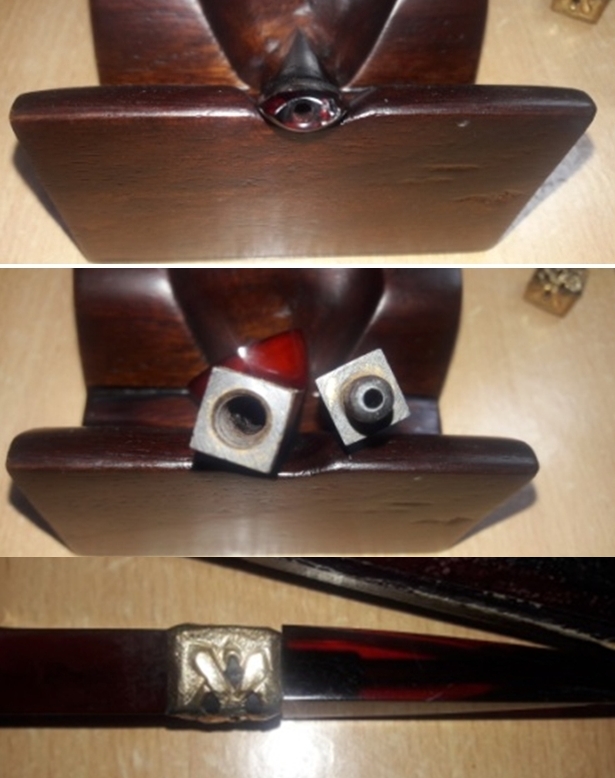 As I was dismantling the pipe, the gold filigree band also separated from the diamond squared Bakelite shank.
 The overall condition of the pipe, with the thick build-up of cake in the chamber, clogged mortises, overflowing of lava covering the entire stummel and the deep bite marks to the stem makes me believe that this would have been one of my grandfather’s favorite pipes.
THE PROCESS
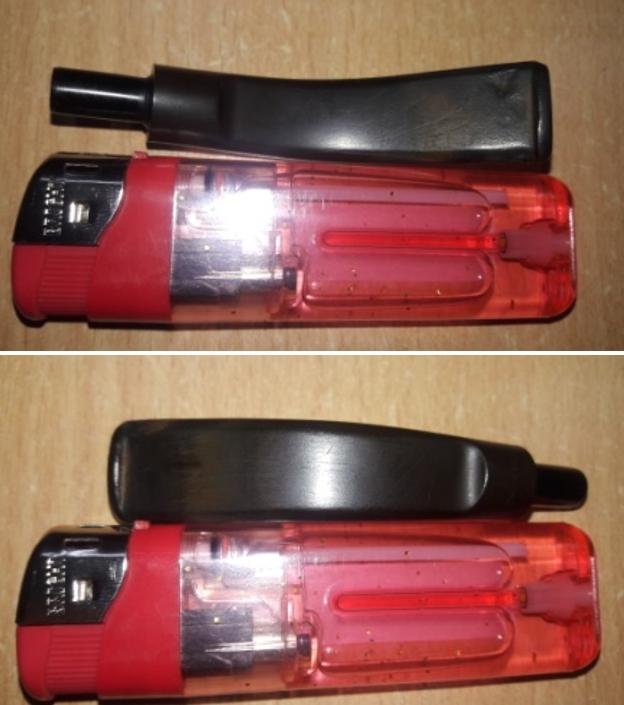
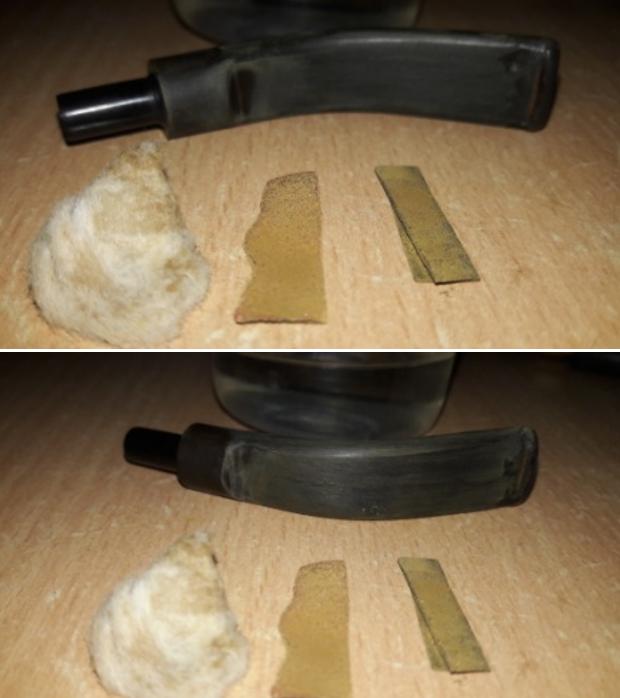
As is always the case, I prefer to start my restoration with part that has the most significant damage. In this case it was the stem. I first cleaned out the internals of the airway with pipe cleaners dipped in alcohol. This was followed by cleaning the surface and the deep tooth marks with cotton pads dipped in alcohol. This helps to remove all the dirt, oils and grime from the surface before proceeding with fills. Since the tooth indentations are deep, I shall resort to the layering technique for the fills. Having cleaned the bite marks and the stem surface, I fill these with clear superglue and set it aside to dry. The fills had shrunk once the glue had cured, exposing the damage. I gave a second layer of superglue fill and set it aside to cure.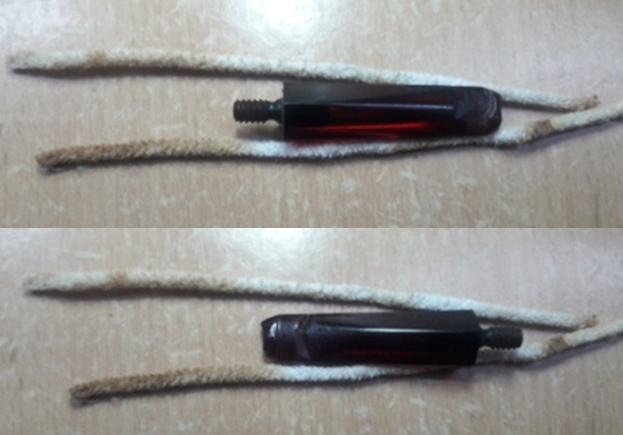


 I had decided to address the issue of broken corner of the lip edge by reconstructing it afresh using superglue (God, why can’t I simply straighten the edges which would have been way simpler than reconstructing the concave shaped lip edges!!). I went about this task by placing a big drop of superglue and holding the stem such that a droplet was formed at the broken edge. Once this was done, it was all about twisting, turning and blowing so that the droplet does not fall to the ground while remaining at the broken edge. After the droplet has hardened, I repeated the process till I had more than enough well cured and hardened large edge which then could be filed and shaped as required.
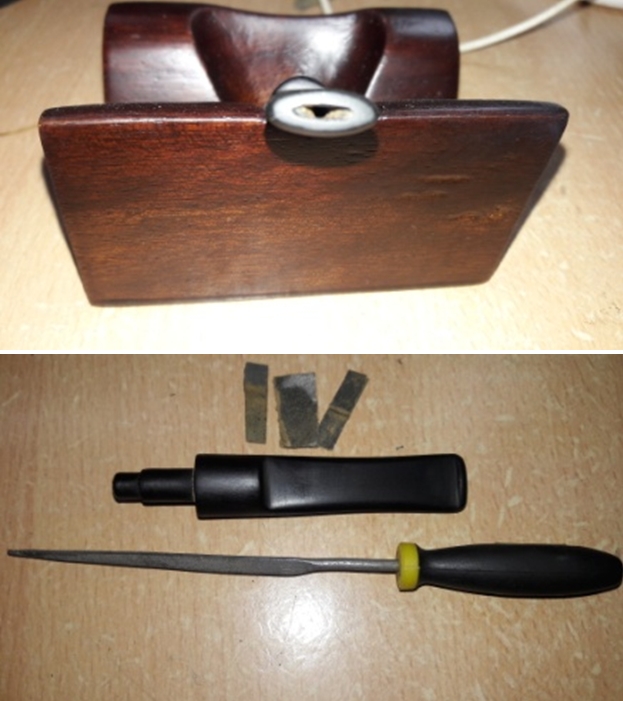
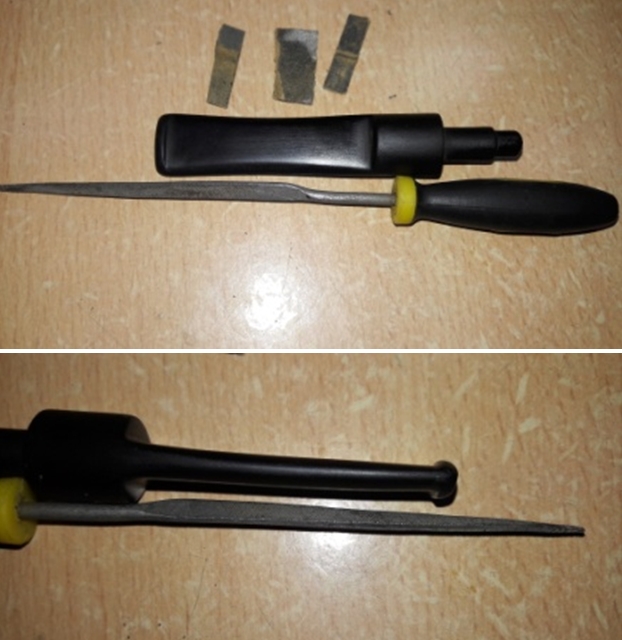
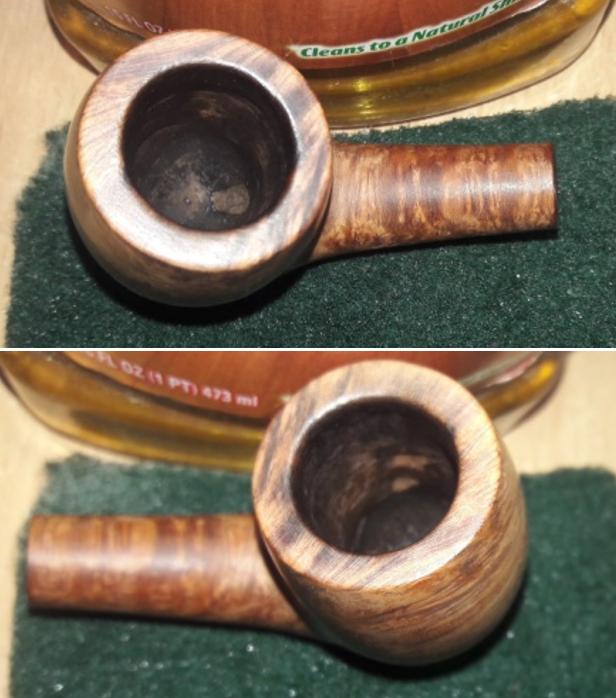
 While the stem fills were curing, I addressed the thick cake in the chamber. I started by reaming the chamber with size 2 and followed it up with size 3 and 4 head of PipNet reamer. I used a 220 grit sand paper, pinched between my thumb and forefinger, to sand the inner walls of the chamber of the pipe. Once I had reached the bare briar, I wiped the chamber with a cotton pad dipped in isopropyl alcohol. This removed all the residual carbon dust from the chamber. The walls of the chamber are nice and solid with no signs of heat fissures or cracks. I scrapped out the overflowing lava from the rim top with my fabricated knife. The inner and outer rim edges are pristine and that was a big relief.
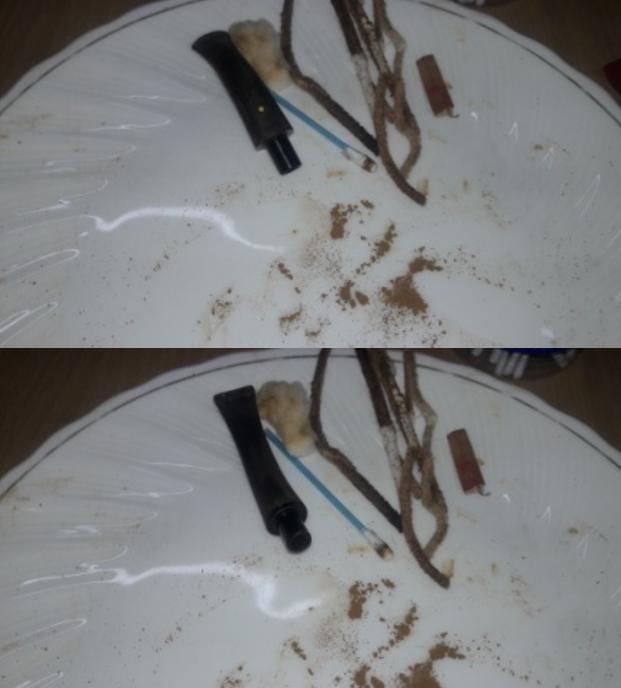
 I cleaned the threads and the heel of the Bakelite base with cotton and alcohol. This was followed by cleaning the mortise and air way of the pipe using hard bristled and regular pipe cleaners, q-tips dipped in alcohol. The mortise and the draught hole were given a final clean with shank brushes dipped in alcohol. I dried the mortise with a rolled paper napkin. The shank internals and the draught hole are now nice and clean with an open and full draw.
 Using a hard bristled tooth brush dipped in undiluted Murphy’s oil soap and brass wire brush, I scrubbed the stummel, cleaning the surface thoroughly. I was very deliberate on the surface areas which were covered in overflowed lava over which dirt and grime had accumulated over the years. I rinsed the stummel under tap water, taking care that water does not enter the mortise or the chamber. I dried the stummel using cotton cloth and paper napkins. On close inspection, I observed a couple of minor dents and ding on the front portion of the stummel. These would need to be addressed. I also cleaned and removed the entire accumulated and now moistened gunk from the threads and base if the bowl with my fabricated dental spatula and the brass wired brush. The stummel is now clean and devoid of any grime and dirt. It is really surprising that the rim top, round edges and the stummel is in such pristine condition after so many years of storage and without a single fill. Speaks volumes about the quality of this line of pipes from WDC!!
 To further clean and highlight the grains, I sand the stummel with a folded piece of 220 grit sand paper followed by 600 grit sand paper. For a deeper shine and to remove the scratches left behind by the coarse grit papers, I followed it up by sanding with the micromesh pads, wet sanding with 1500 to 2400 grit pads and dry sanding with 3200 to 12000 grit pads. I wiped the stummel after each wet pad with a moist cloth to remove the resulting dust.


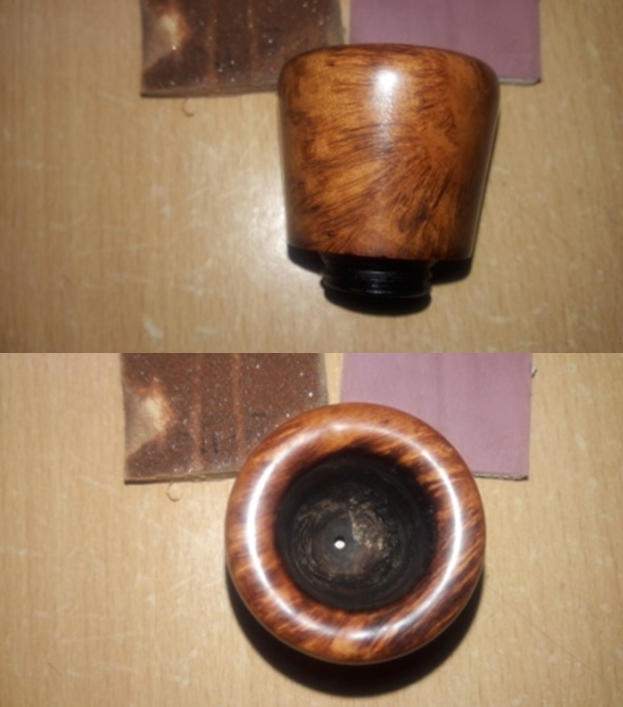 I rub a small quantity of “Before and After Restoration Balm” in to briar and let it rest for a few minutes. The balm almost immediately works its magic and the briar now has a nice vibrant appearance. I further buff it with a horse hair shoe brush. The pipe now looks lovely with beautiful grains showing off their beauty in all glory!!

 While the bowl was absorbing the balm, I worked the Bakelite base. I cleaned the surface with a cotton pad dipped in acetone and with horror I realized that I could see some swirls like marks on the shank. This got me worried and I immediately conferred with Mr. Steve, my mentor. He informed me that the Bakelite needs to be cleaned only with soap water!! Ah, well, what’s done is done. He suggested that I use the balm and see if it helps and it did but not to the full extent. I bashed on regardless, going through the complete micromesh pad cycle. It was then that I realized that the so called spots were from within and not external! Whew, what a relief. The Bakelite base looks absolutely stunning with a deep red color.


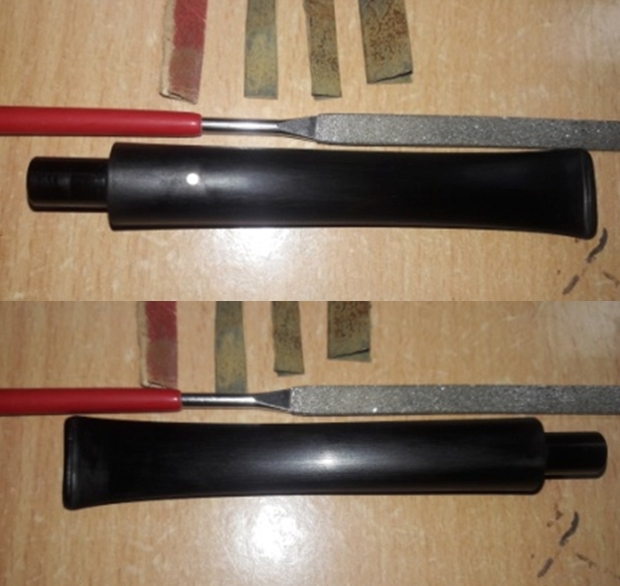
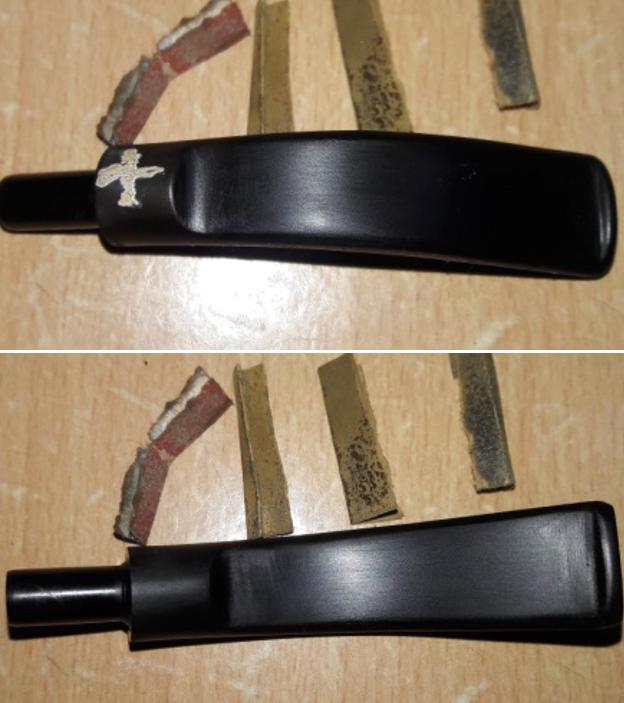
 With the bowl and Bakelite base now nice and clean and attractive, I worked the stem of the WDC. Just to let the readers know, that all the while that I was working the bowl and base, I was simultaneously adding layers of superglue to the tooth indentations and chatter and the broken corner edge of the lip. Once I was satisfied with the thickness of the fill (I prefer over filling which can be evened out during sanding), I began by sanding the fills with a flat heat needle to achieve a rough match with the surrounding stem surface. I sharpened the lip edges using a needle file and sand the entire stem with 220 followed by 400, 800 and 1000 grit sand paper to perfectly blend the filled surface with the rest of the stem surface. This helps to reduce the sanding marks left behind by the more abrasive 220 grit paper. By mere sanding itself, the minor tooth marks seen on stem surfaces were completely addressed. I was especially careful while shaping the broken corner edge of the lip. Finally, after long hours at the table, I was able to achieve a satisfactory reconstruction of the lip along with the proper concave around the orifice. To bring a deep shine to the Bakelite stem, I went through the complete set of micromesh pads, wet sanding with 1500 to 2400 grit pads and dry sanding with 3200 to 12000 grit pads.

 The only part begging for attention was also the most attractive and costly item on this pipe; the gold filigree band!! This band was easily detached from the shank end and this made the cleaning job very easy. I use Colgate tooth powder to clean all the silver and gold bands and embellishments on pipes, a trick I learned from Abha, my wife. Some readers may find it surprising, but believe you me gentlemen, please at least give a try to see if it suits you. The band cleaned up nicely. I carefully applied a very small quantity of superglue along the shank end edges and stuck the band firmly over the shank end.
 Before moving on to polishing and buffing, the only issue that remained to be addressed was that of the overturned tenon. I discussed with Mr. Steve who suggested that I should try using clear nail polish coat over the threaded tenon and once the nail polish had completely dried, I should try the fit. I did just that and, viola!! The fit and alignment of the stem and shank was perfect!!
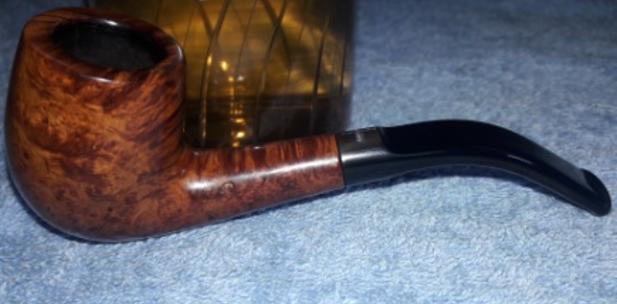
To finish, I re-assembled the entire pipe. I mount a cotton cloth buffing wheel on to my local machine which is similar to a Dremel. I set the speed at about half of the full power and polished the entire pipe with White Diamond compound. I wiped/ buffed the pipe with a soft cotton cloth to clear it of any leftover compound dust. I then mounted another cotton cloth wheel on to the polishing machine and applied several coats of carnauba wax over the bowl, Bakelite base and the Bakelite stem. I finished the restoration by giving the pipe a rigorous hand buffing using a microfiber cloth to raise the shine further.
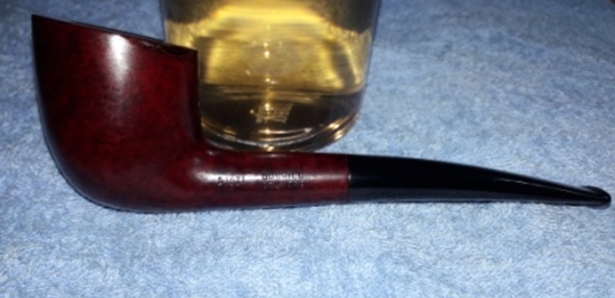
 The completed pipe, with the dark brown hues of the grains on the bowl contrasting with the shining deep red Bakelite base and the translucent Bakelite stem, looks lovely, fresh and vibrant; the photographs speak for themselves. The leather covered case was cleaned and polished with wax rich neutral shoe polish. If only the pipe could tell some of my grand Old man’s stories and recount incidents witnessed while being smoked.…………… Cheers!!


 I am grateful to all the readers for their valuable time spent in reading this write up and joining me on this part of the journey in to the world of pipe restoration while I attempt to preserve a heritage and past memories which eternally shall remain a part of me.


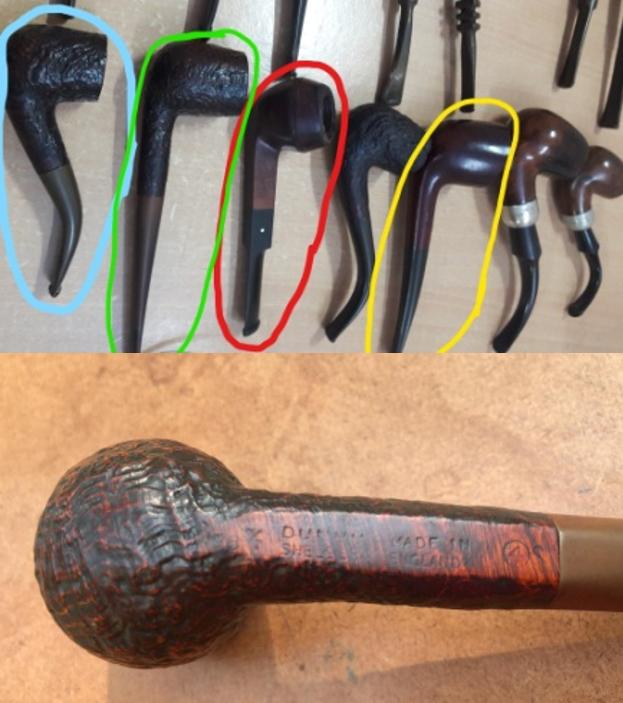
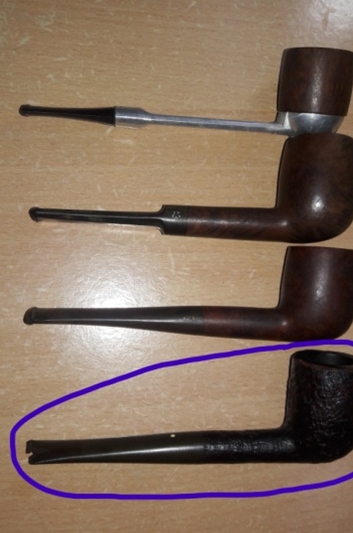
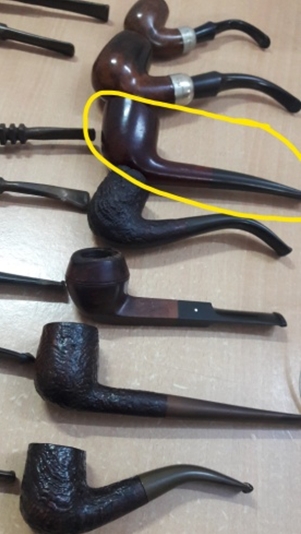
 This lot contains some very nice collectible pipes, a few well known brands and some mediocre brands. Overall, with seven Dunhills, a Preben Holm #1, a couple of “Made in England” Pete System pipes, Charatan’s, Custom-Bilt, Stanwell and other assorted pipes, I would say that I had hit a huge jack pot!! Hence, I like to call this find the “Mumbai Bonanza”.
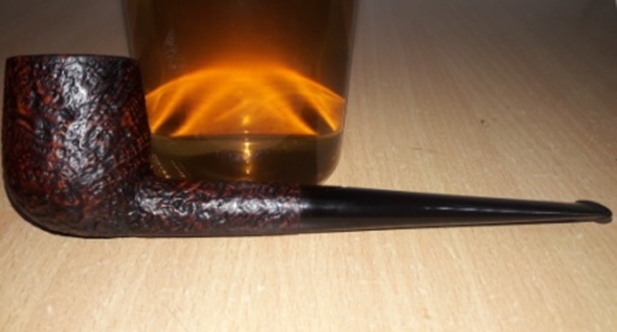
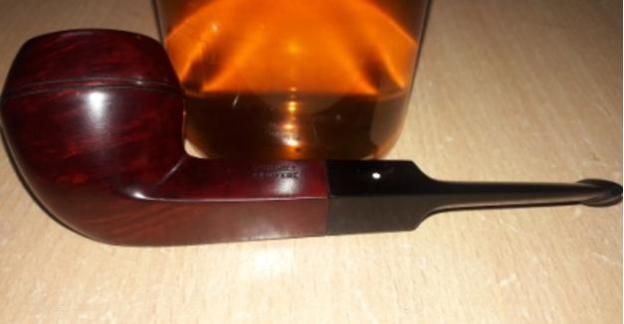
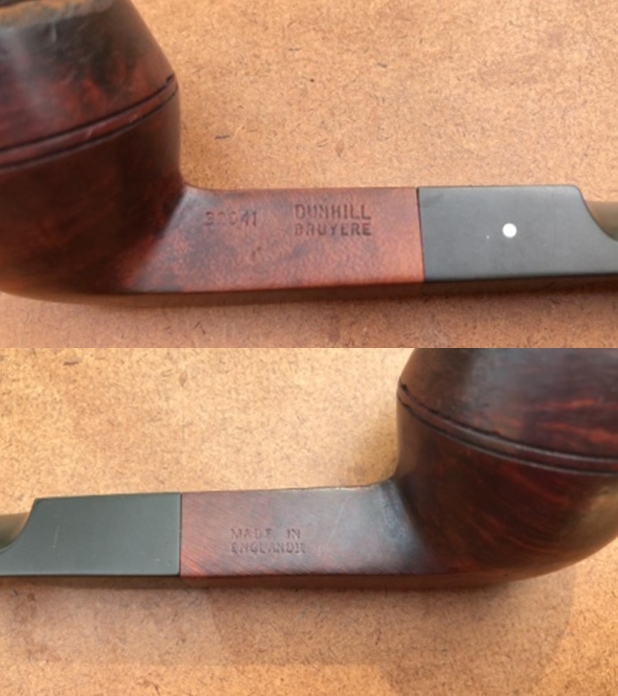
 In this short journey of mine in to the world of pipe refurbishing, this particular pipe has one of the deepest and beautiful sandblast patterns that I have come across. The sandblast on this pipe speaks volumes about the skills of the pipe carver. With this thought, I move ahead with the restoration of this beautiful medium sized sandblasted Dunhill bent billiard and restore it to its glory.
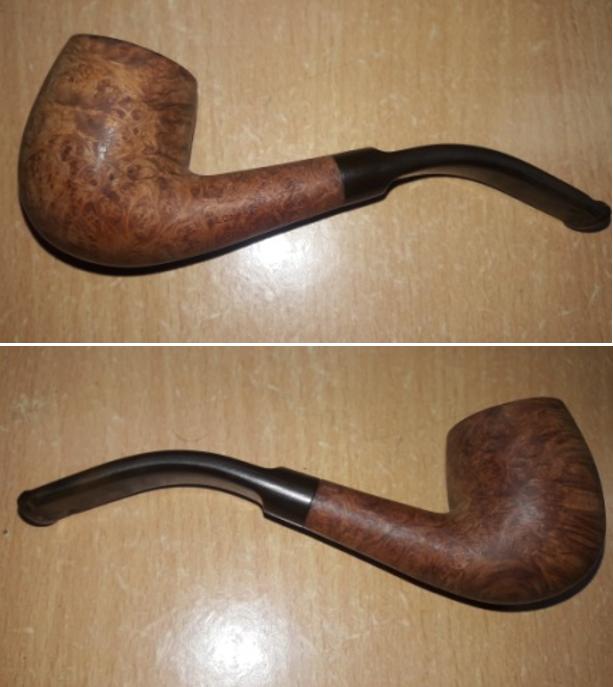
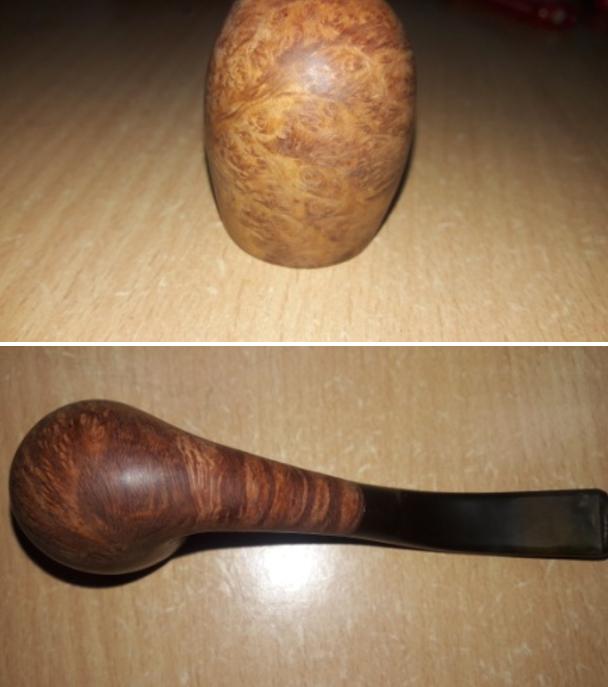
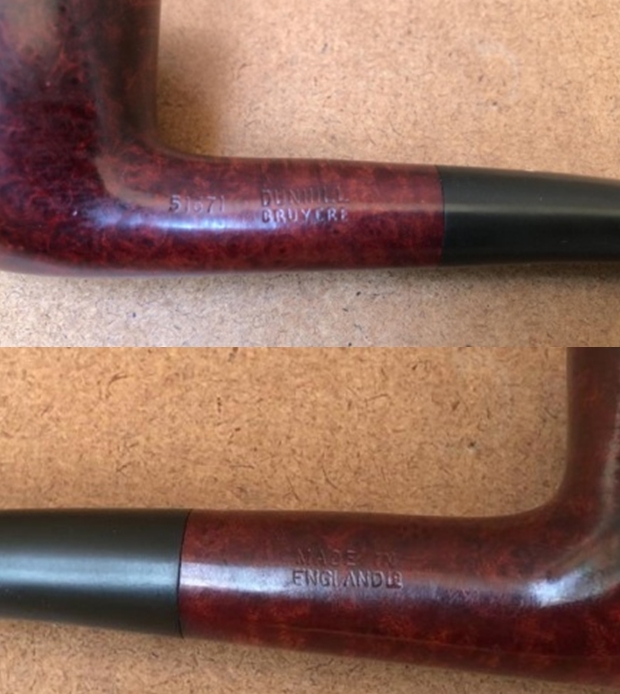
 The stummel boasts of some beautiful sandblast pattern of mix of straight and cross grain all around. It is dirty with grime, oils and tars filling in much of the craggy finish. The briar looks lifeless and dull. The mortise shows minor accumulation of dried tars mixed with ash and remnants of tobacco. This will have to be cleaned and refreshed.
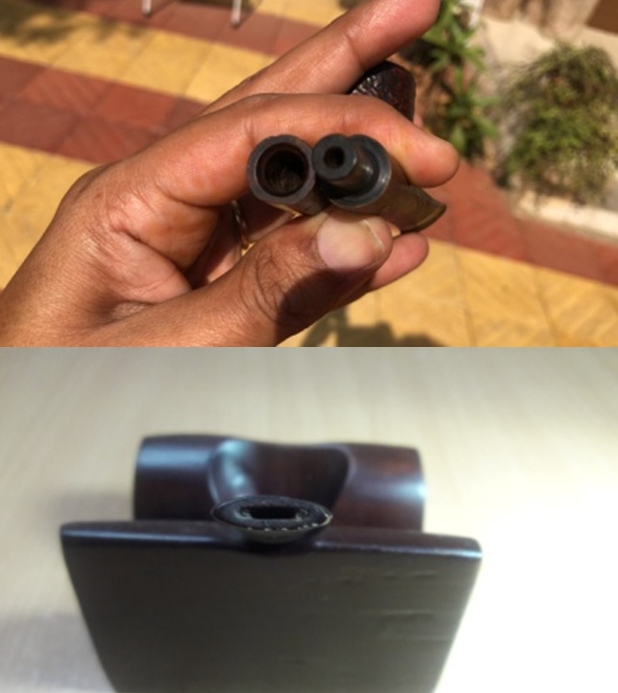
 The vulcanite stem shows a minor damage to the button end with minor chatter on the lower surface. The lip edges have a few bite marks and will have to be reshaped and made crisp. The stem is oxidized; however, the quality of vulcanite is good. The white dot on the upper surface has faded in some places but is still distinctly visible. This cannot be helped and status quo has to be accepted.
 There are no major issues to address here on this pipe; just a little TLC and the pipe should be good to go…nah, find a place of pride on my rack!!
 I prepared a mix of CA superglue and activated charcoal and carefully applied it over the damaged lip and set it aside for curing over night. Before moving ahead, I would like to mention here that I had applied this mix in sufficient thickness which would help during the filing and sanding while shaping the button and achieving the correct lip edge profile.
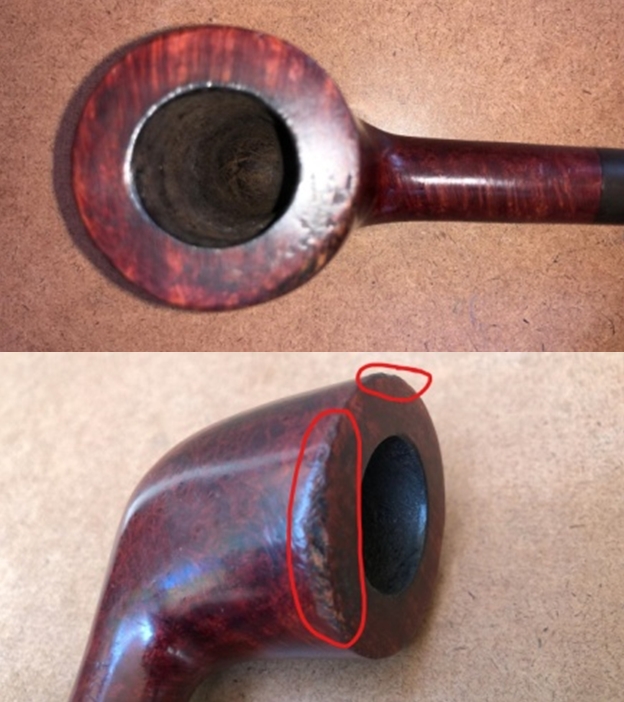
 While the stem repair was set aside to cure, I moved ahead to deal with the stummel cleaning. With size 3 head of a PipNet reamer, I took the cake down to bare briar. Using a folded piece of 180 grit sand paper, I sand out the last traces of cake and expose the walls of the chamber to ascertain that there are no cracks/ heat fissures. I wiped the chamber with a cotton pad dipped in isopropyl alcohol to remove the carbon dust left behind by all the reaming and sanding process. The walls of the chamber were solid with no damage. This was followed by cleaning the mortise by scraping away at the dried gunk with my fabricated spatula and followed it up with further cleaning using cue tips, pipe cleaners and shank brush dipped in isopropyl alcohol. This eliminated all traces of old smells from previous usage.
 I followed up the internal cleaning with external. Using a soft brass wired brush I gently scraped away the thick lava coat in the blast of the rim. With a hard bristled tooth brush and dipped in undiluted Murphy’s oil soap, I very deliberately scrubbed the sandblast finish on the stummel and the rim top. The stummel and rim top was dried using paper napkins and soft cotton cloth and set it aside to dry out naturally. The stummel looks fresh and clean.

 Next, I rub a small quantity of “Before and After Restoration Balm” in to the briar with my finger tips and let it rest for a few minutes. The balm almost immediately works its magic and the briar now has a nice vibrant appearance with the beautiful contrasting hues colors that are unique to this sandblast pipe, on full display. I further buff it with a horse hair shoe brush.

 I set the stummel aside and turned my attention to the stem repair. The fill had cured nicely and I moved ahead and began the process of filing and shaping the button end with a flat head needle file. For a better blending, I further sand the entire stem with 220 followed by 400, 600 and 800 grit sand paper. This helps to reduce the sanding marks left behind by the more abrasive 220 grit paper. To bring a deep shine to the vulcanite stem, I went through the complete set of micromesh pads, wet sanding with 1500 to 2400 grit pads and dry sanding with 3200 to 12000 grit pads. I wiped the stem with alcohol after each pad and rubbed it down with Extra Virgin Olive oil to rehydrate the vulcanite. The repairs have blended in very well and the stem now looks shiny black and beautiful. The internals of the stem was once again cleaned out using alcohol and pipe cleaners to clear the airway of all the debris resulting due to the sanding. The finished stem is shown below.
 To finish, I re-attach the stem with the stummel. I mounted a cotton cloth buffing wheel to my local machine which is similar to the Dremel. I set the speed at about half of the full power and applied White Diamond compound to the entire pipe. I wiped/ buffed the pipe with a soft cotton cloth to clear it of any leftover compound dust. I then mounted another cotton cloth wheel on to the polishing machine and applied several coats of carnauba wax. I finished the restoration by giving the entire pipe a rigorous hand buffing using a microfiber cloth to raise the shine further.
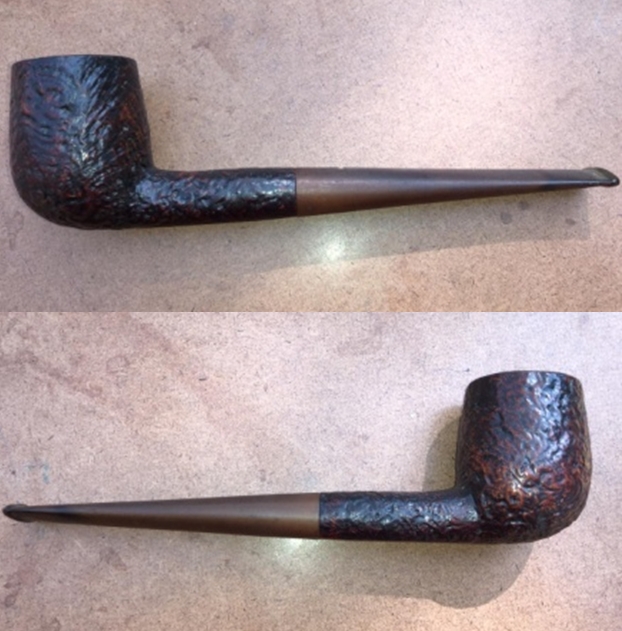
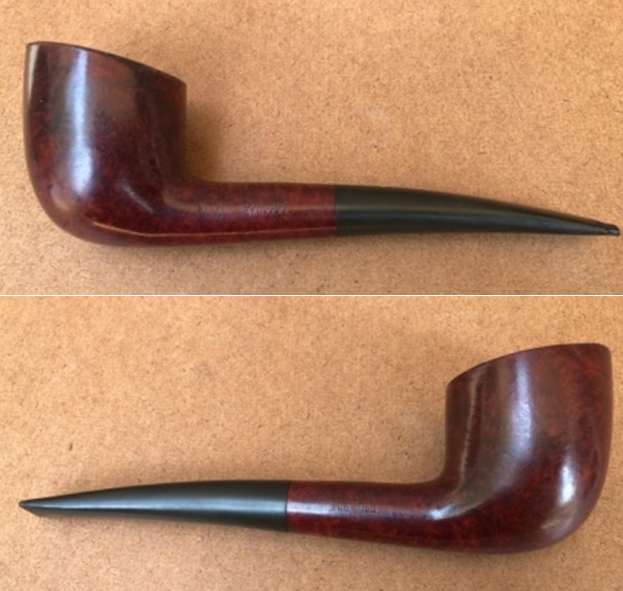
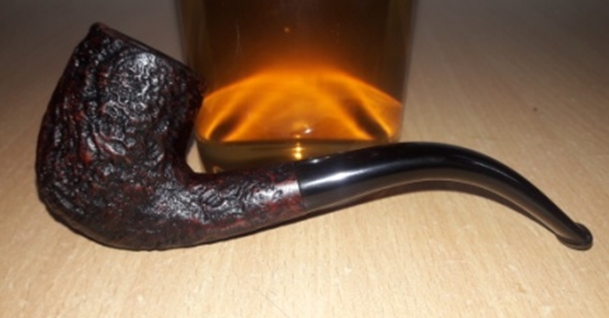
 The completed pipe looks lovely, fresh and vibrant; the pictures speak for themselves. I really enjoyed working on this pipe and hope that readers too enjoyed walking with me through this restoration. If only this old warrior could share its past life with all of us…if only!! Cheers.