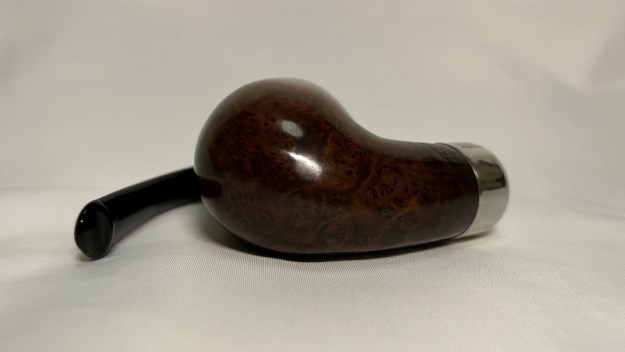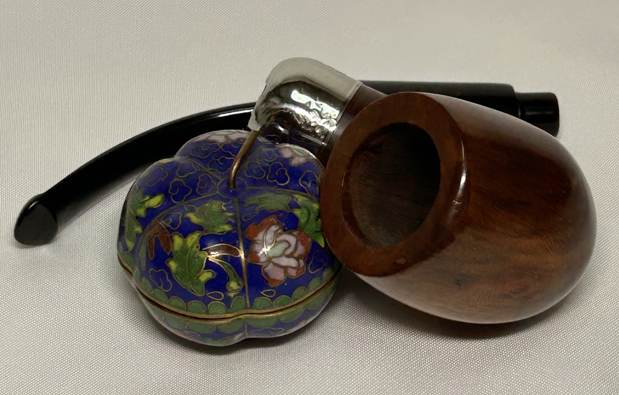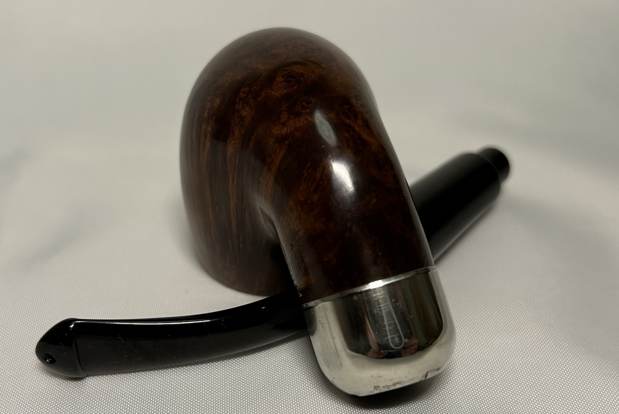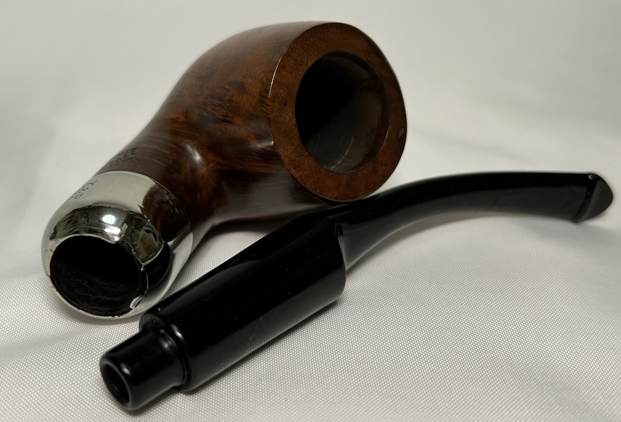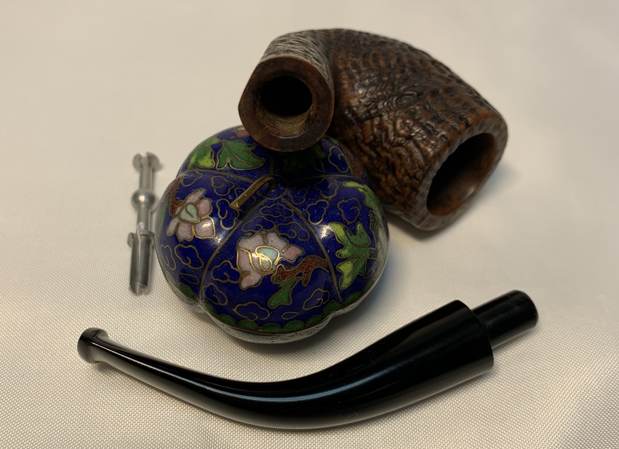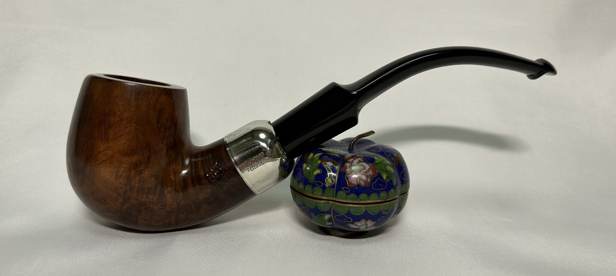
Tag Archives: article by Kenneth Lieblich

Writing Straight with Crooked Lines


By Kenneth Lieblich

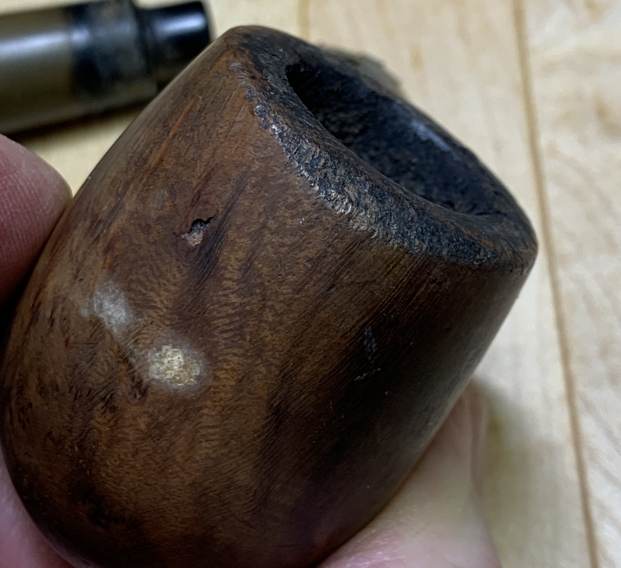
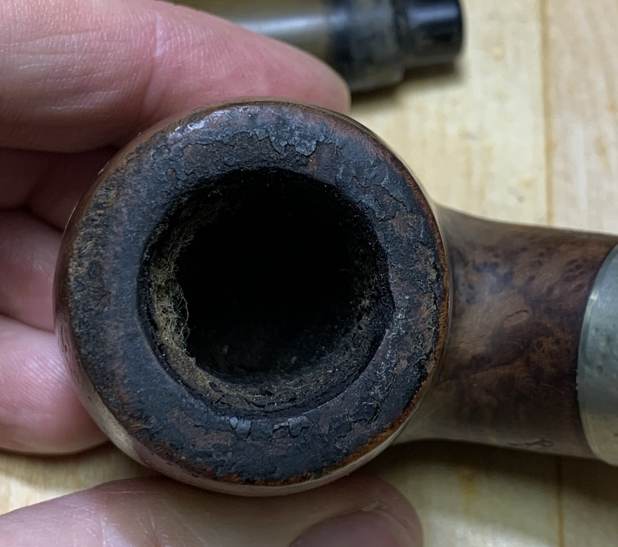
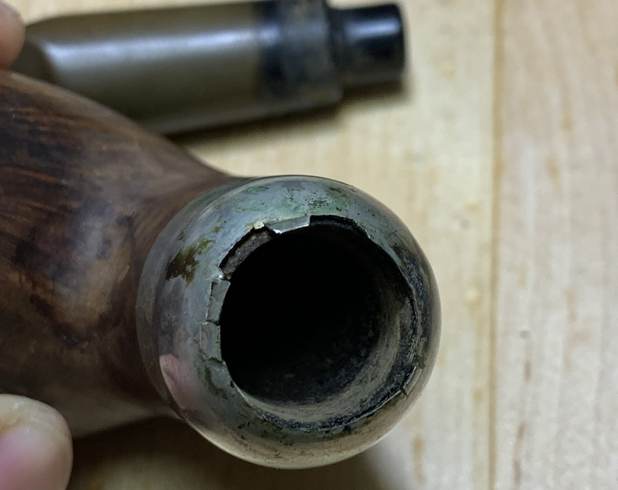
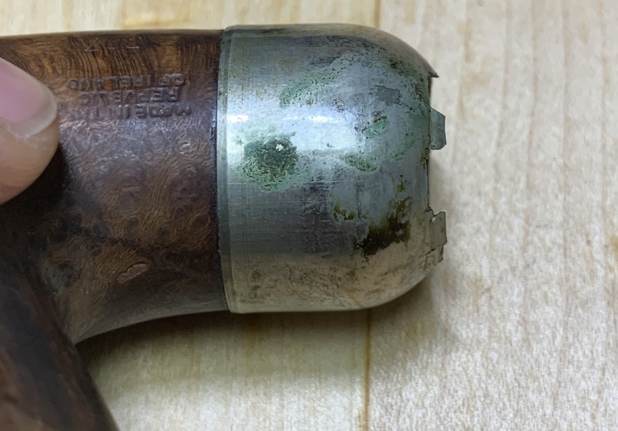
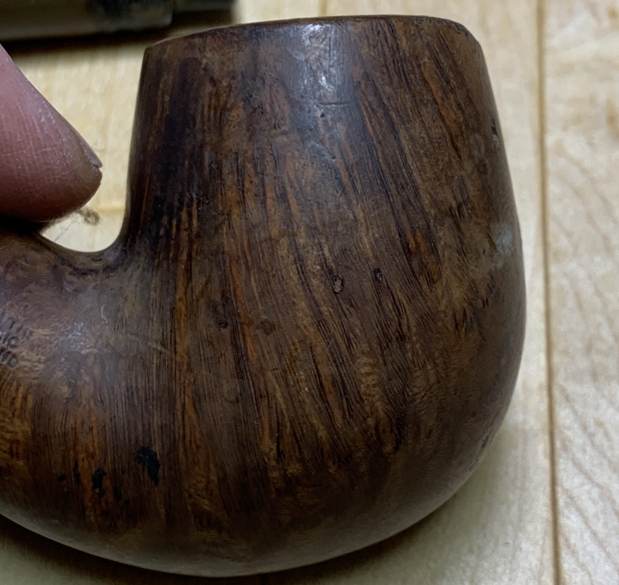
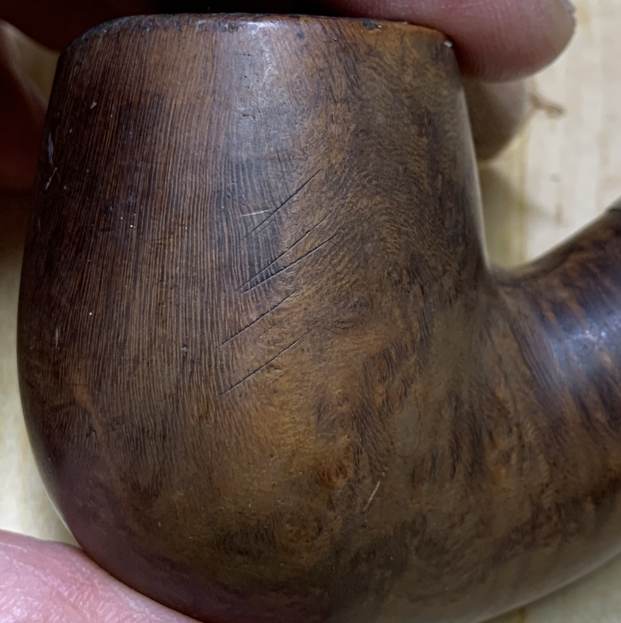
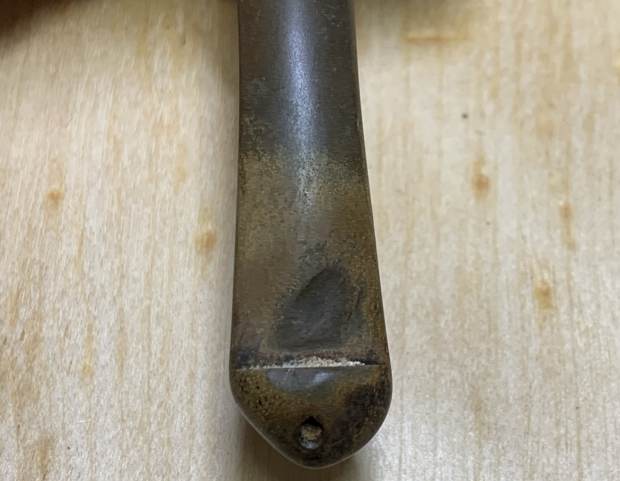
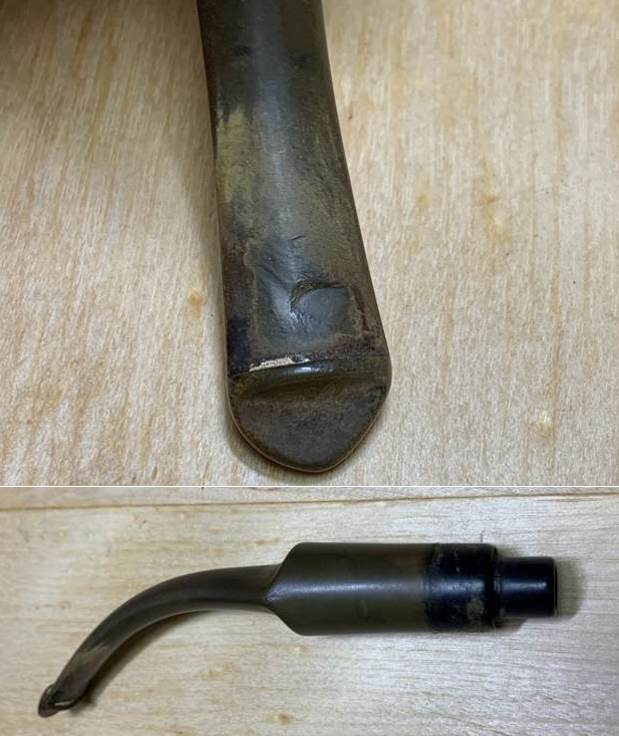
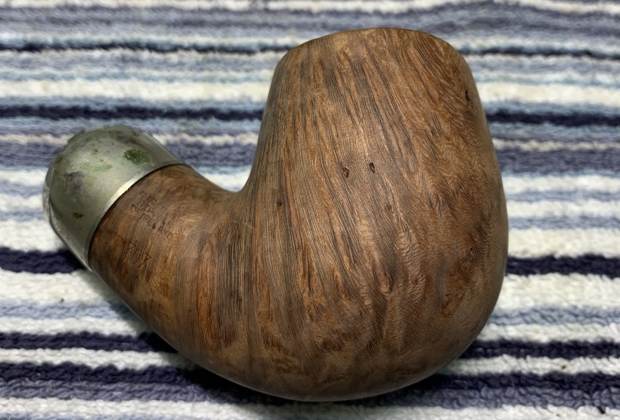
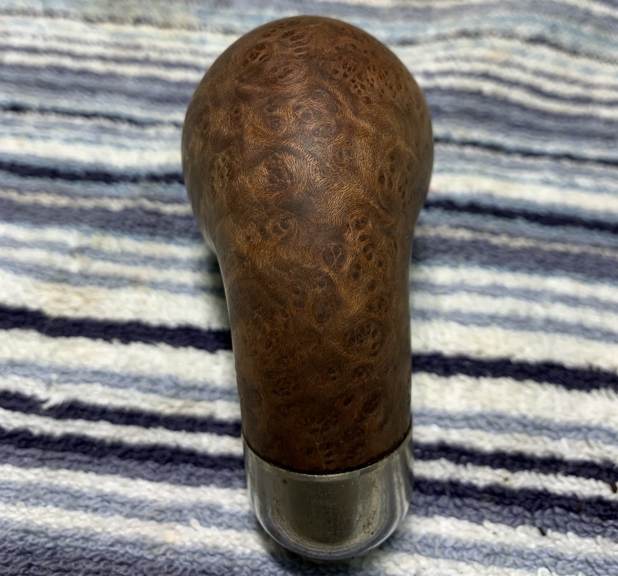
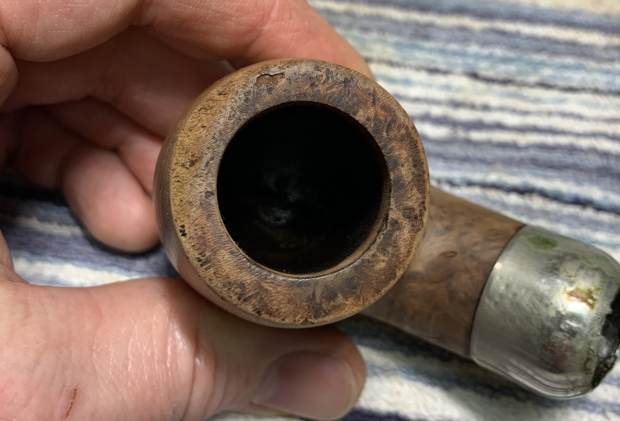
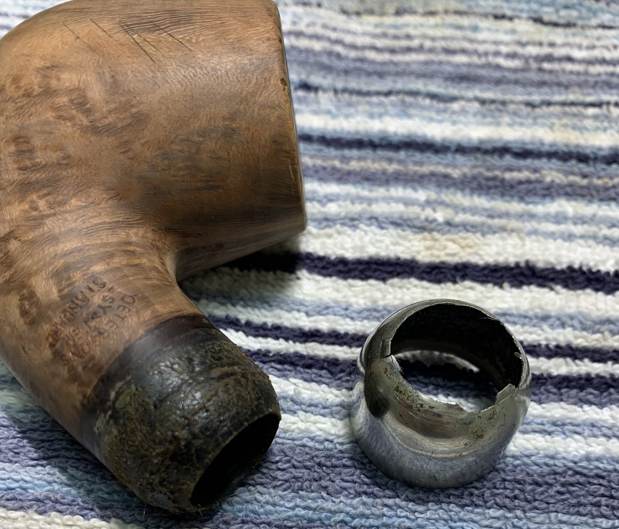
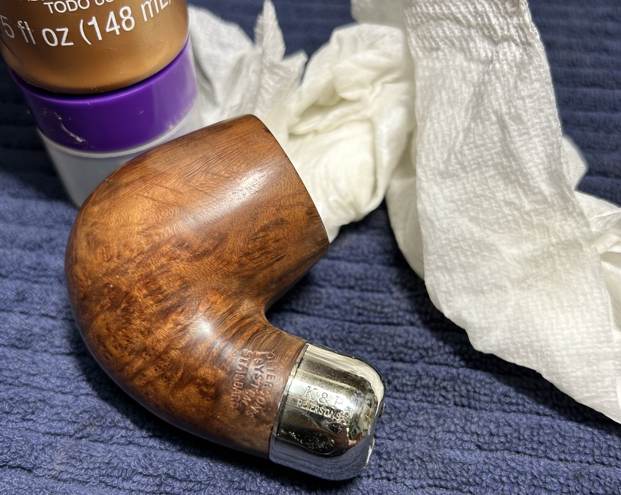
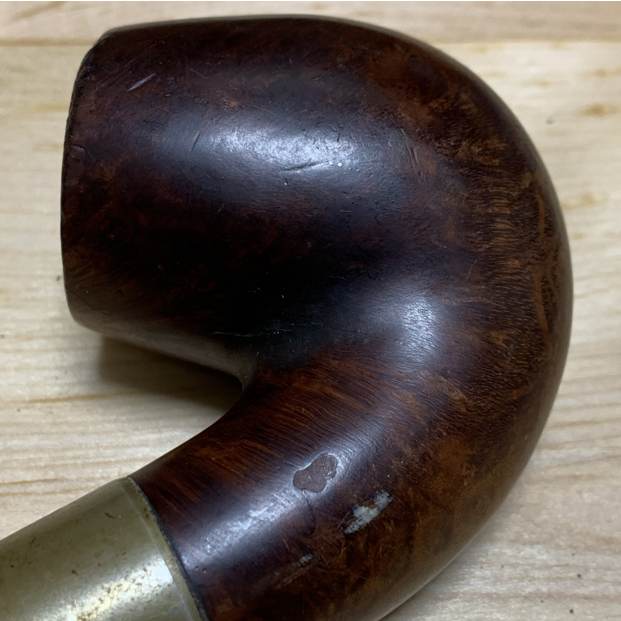
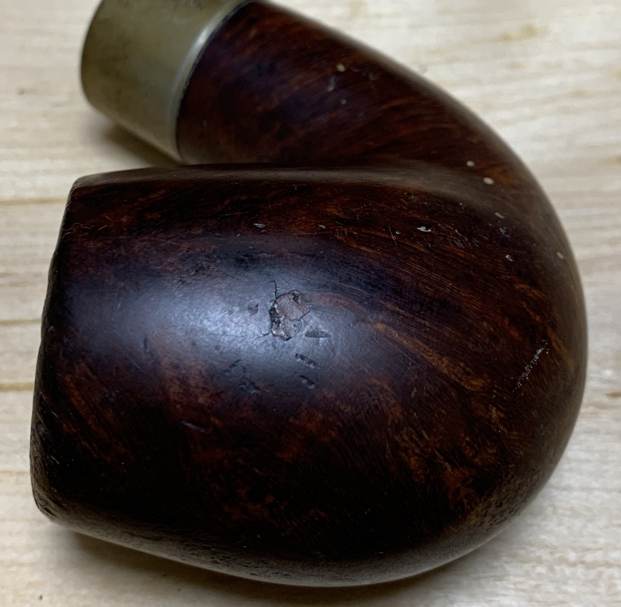
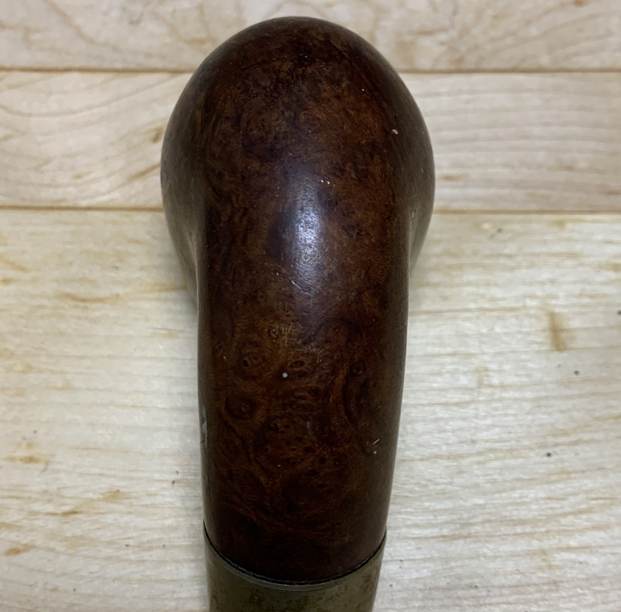
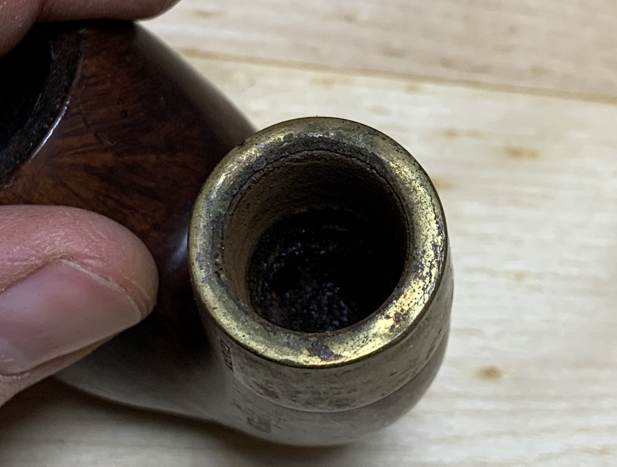
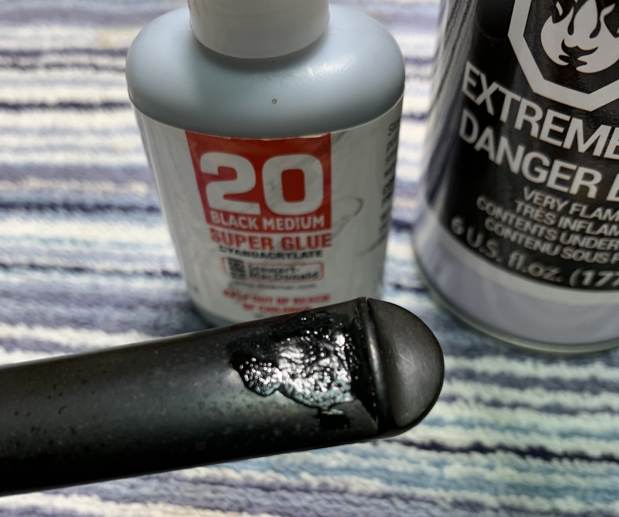
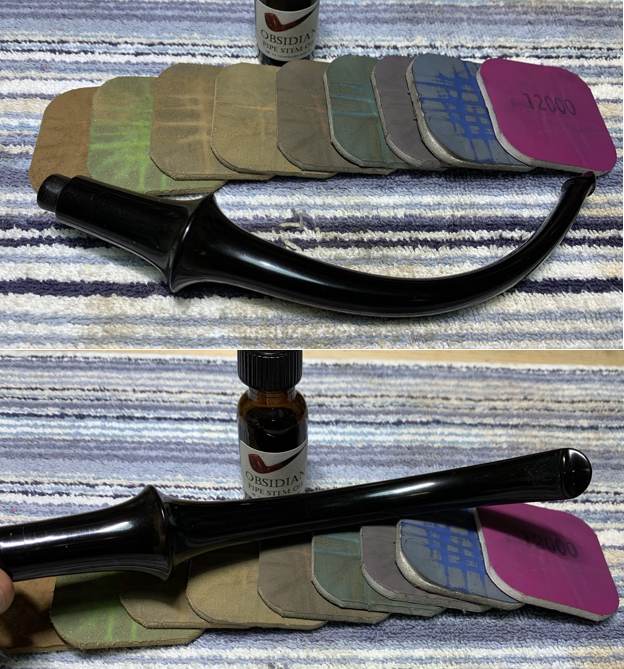
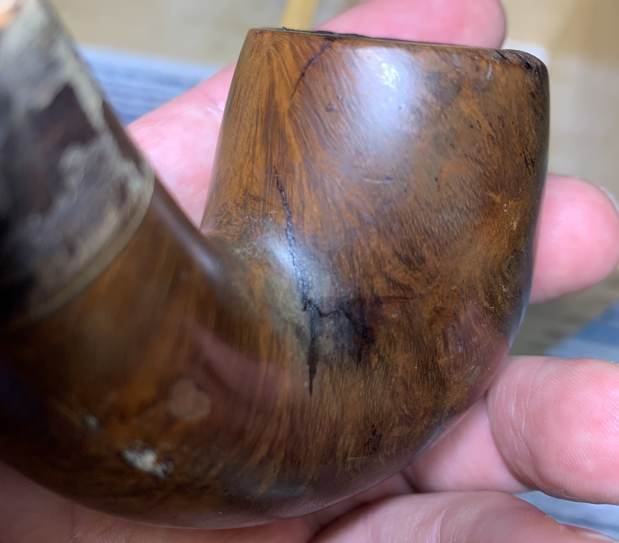
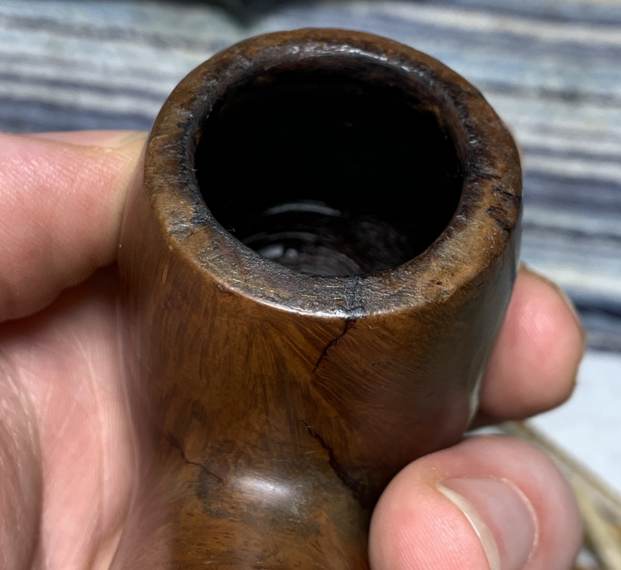
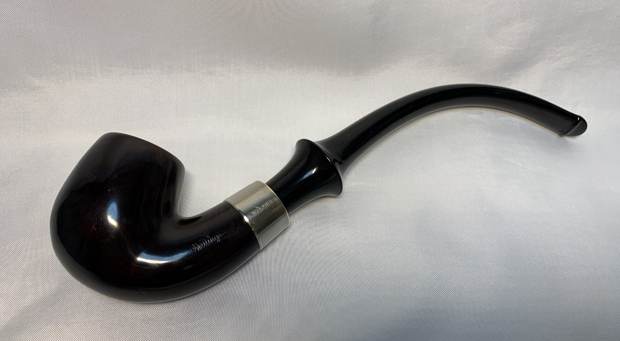
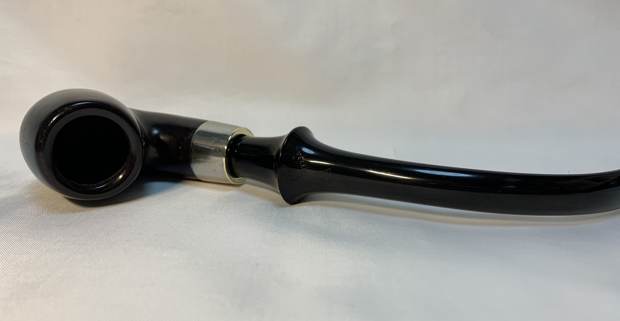
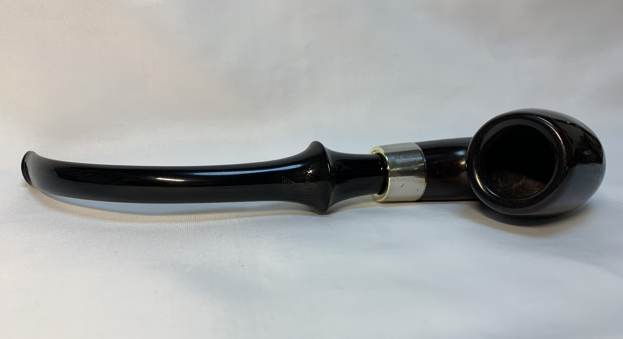
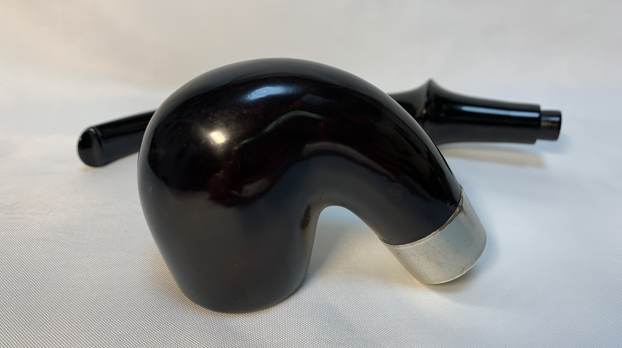
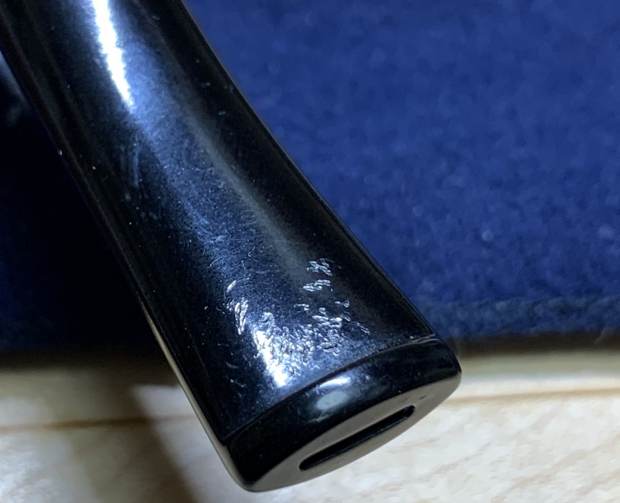
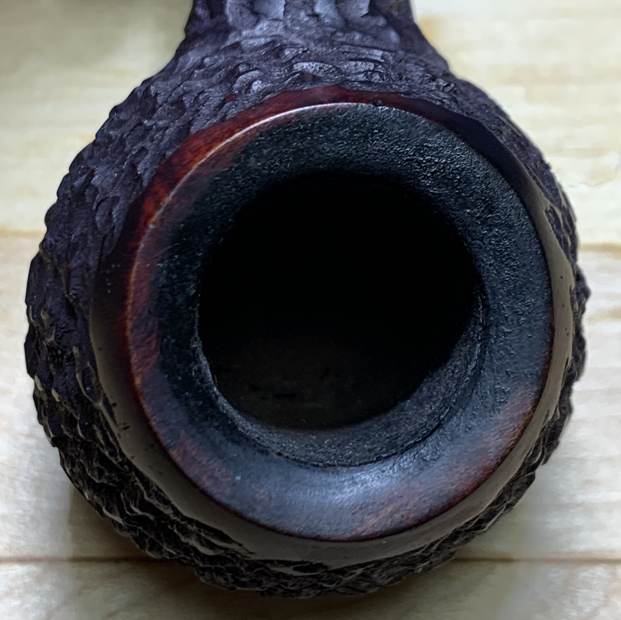
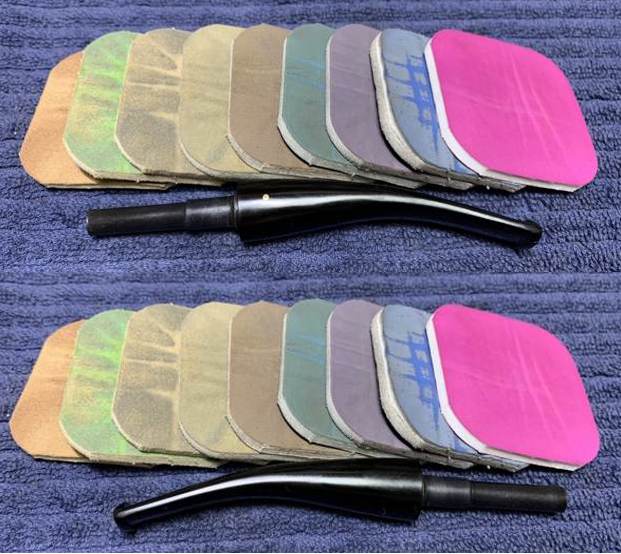
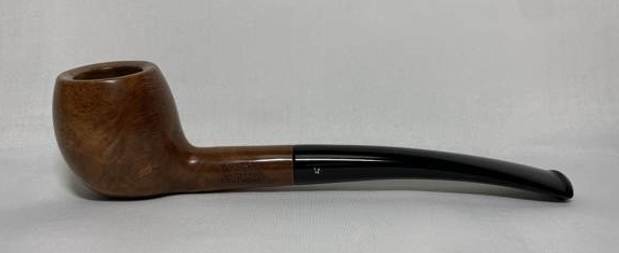
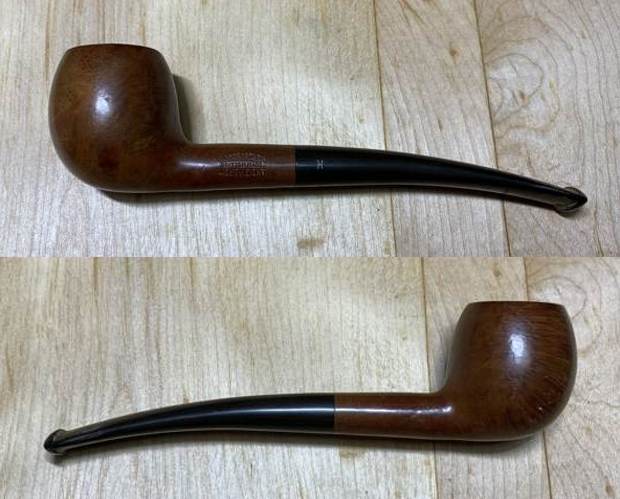
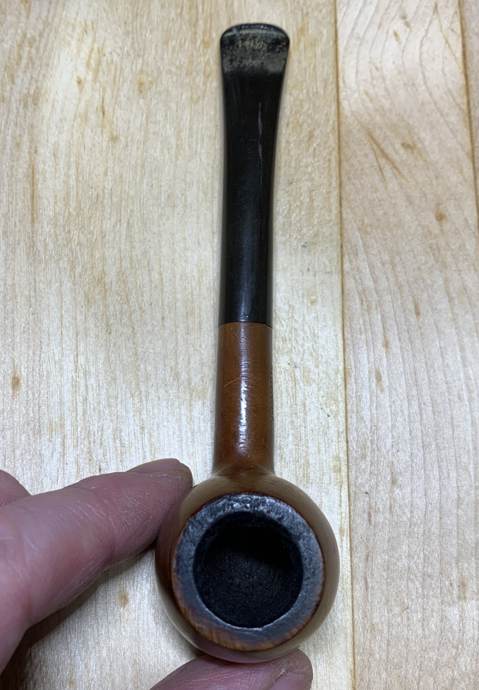
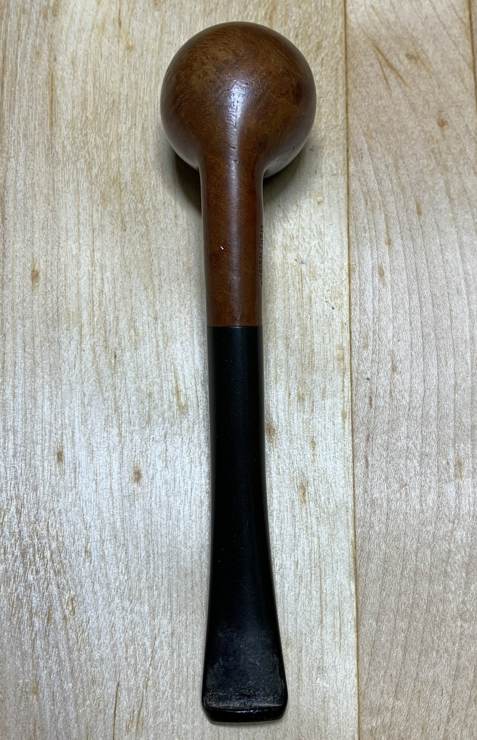
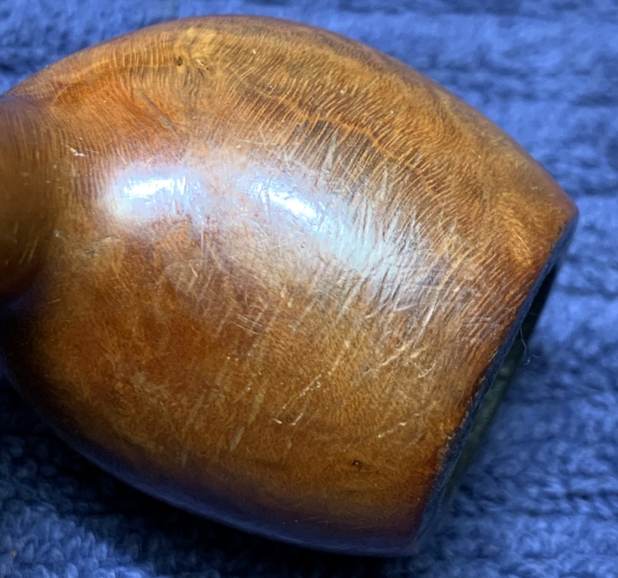
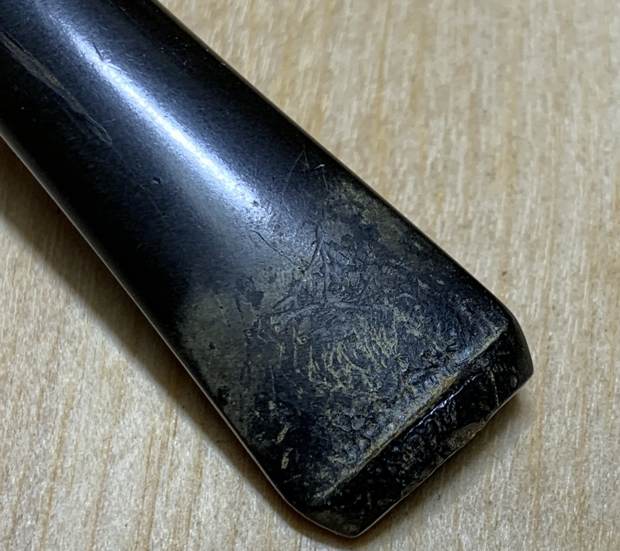
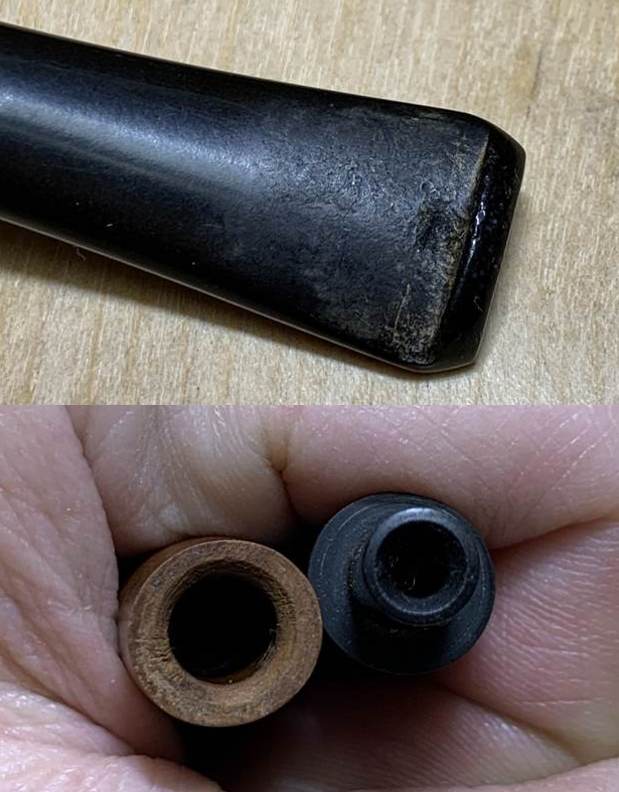
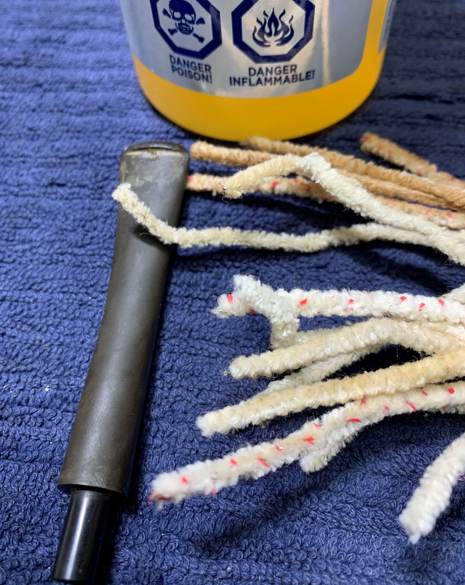
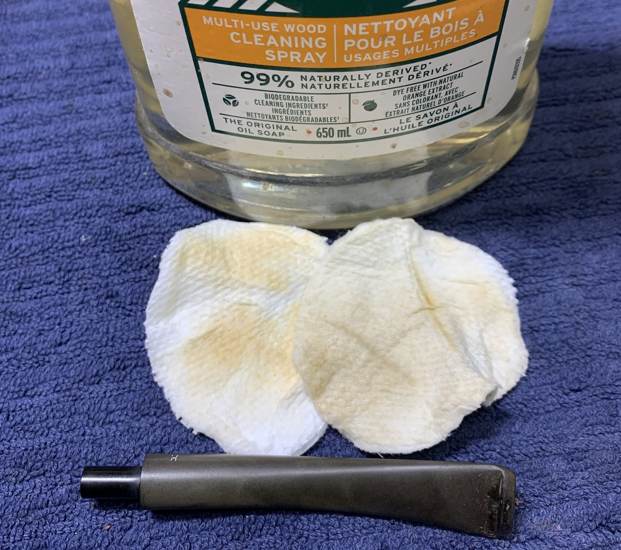
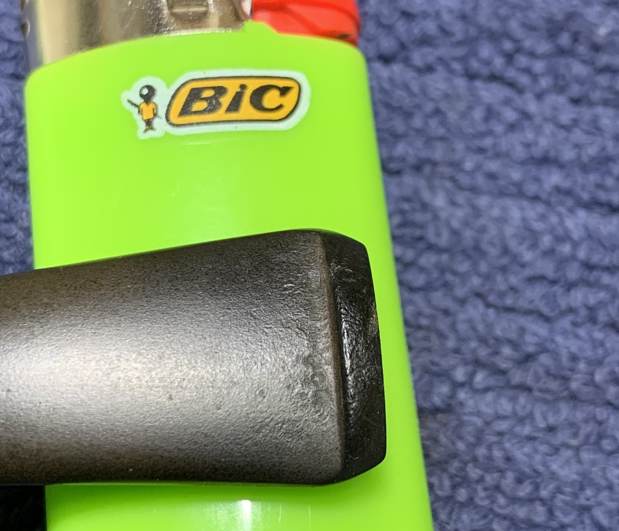
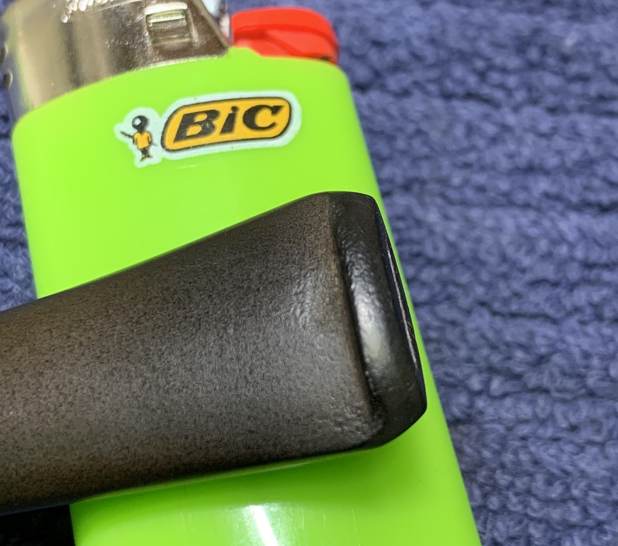
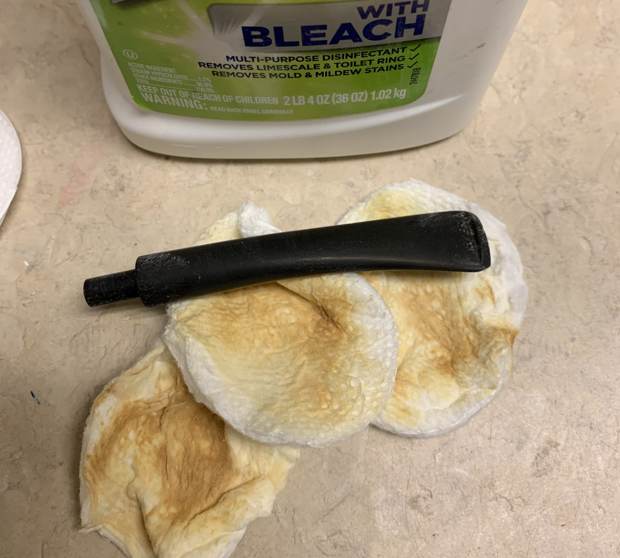
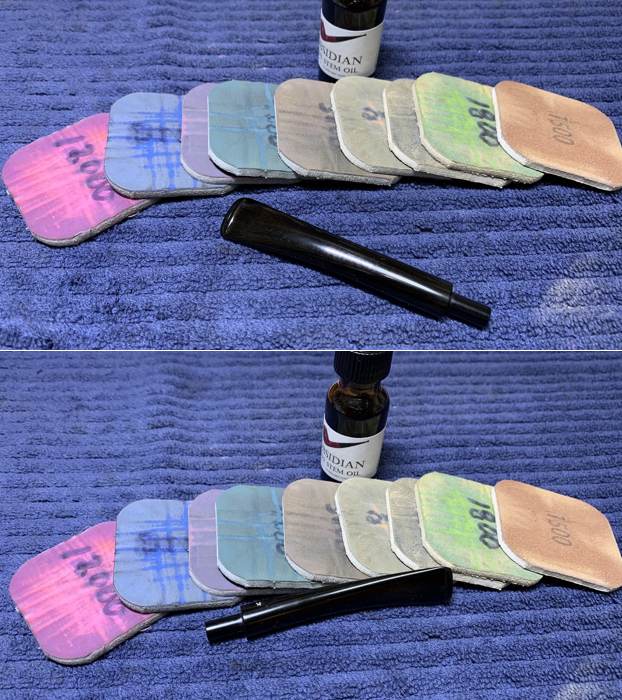
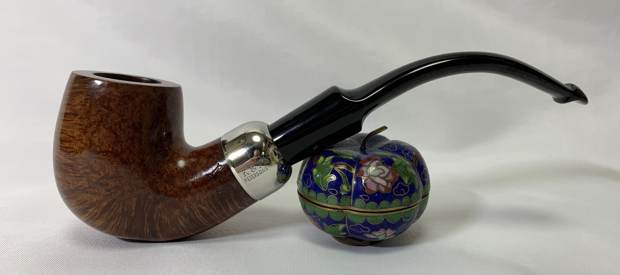
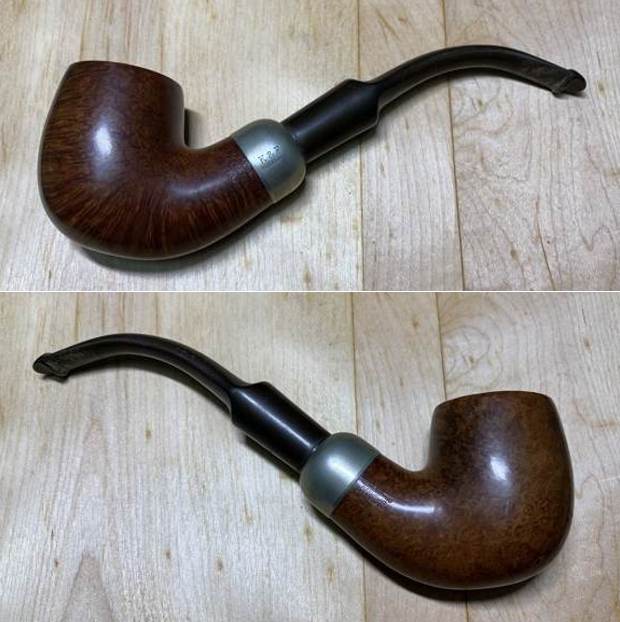
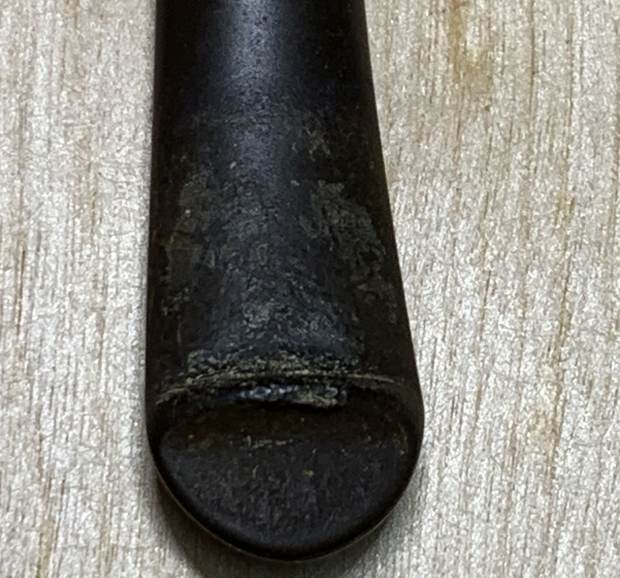
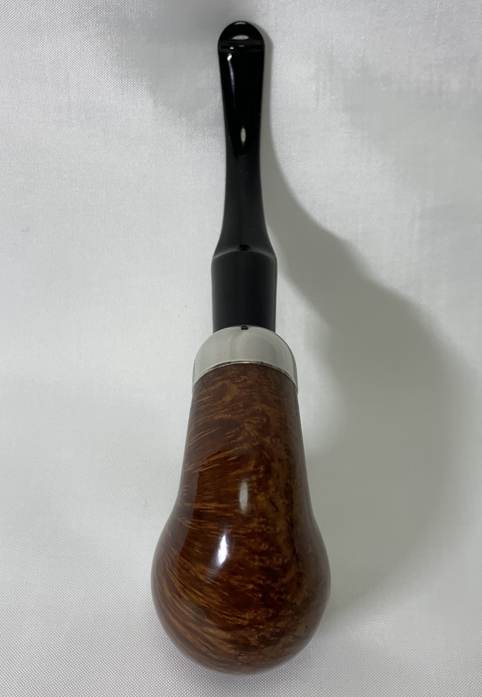
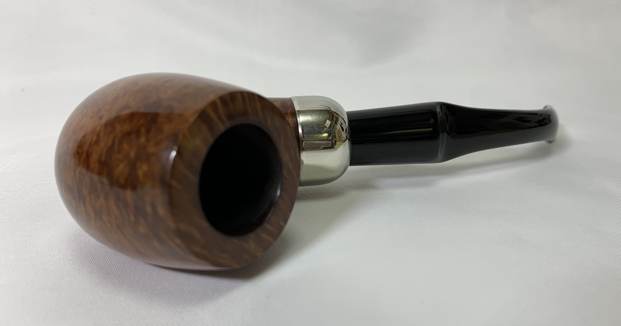
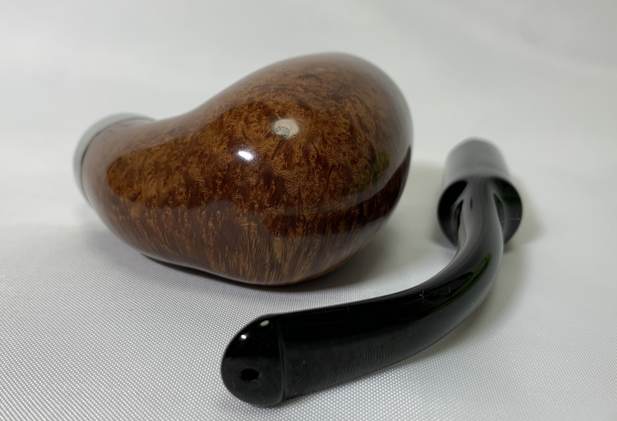
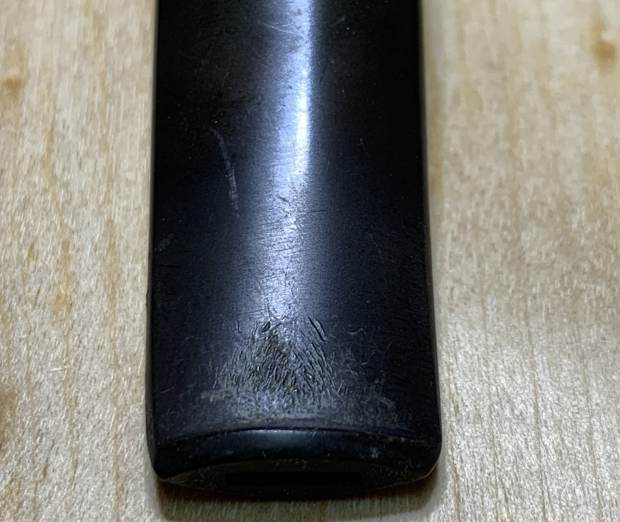
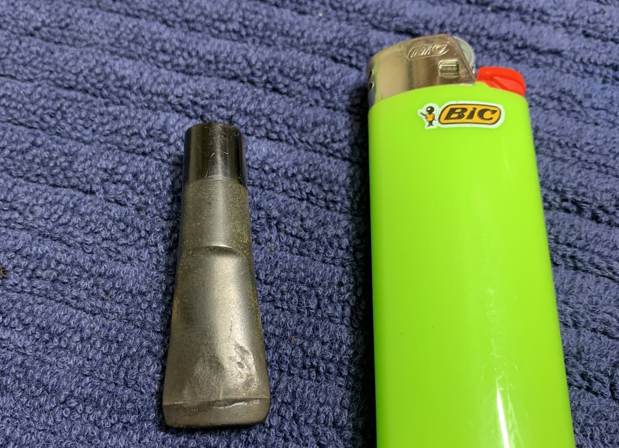
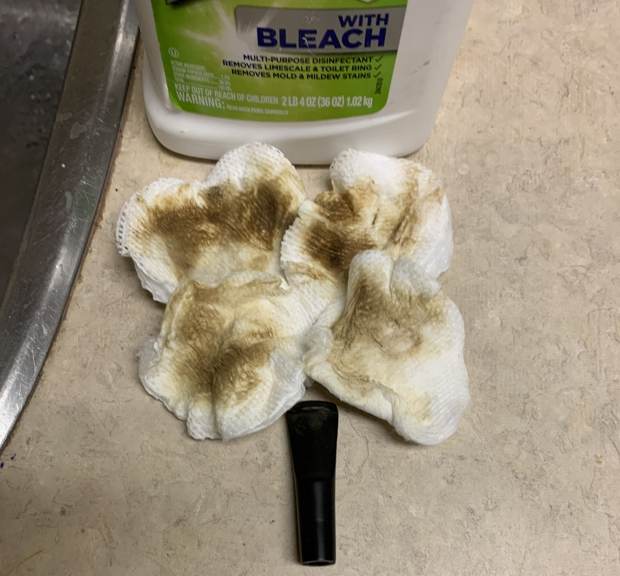
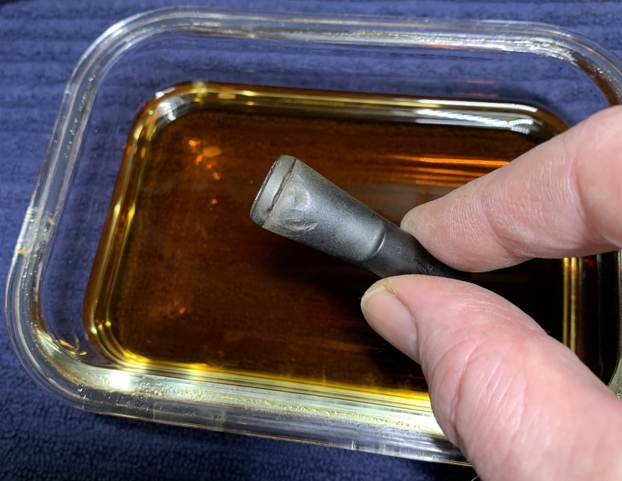
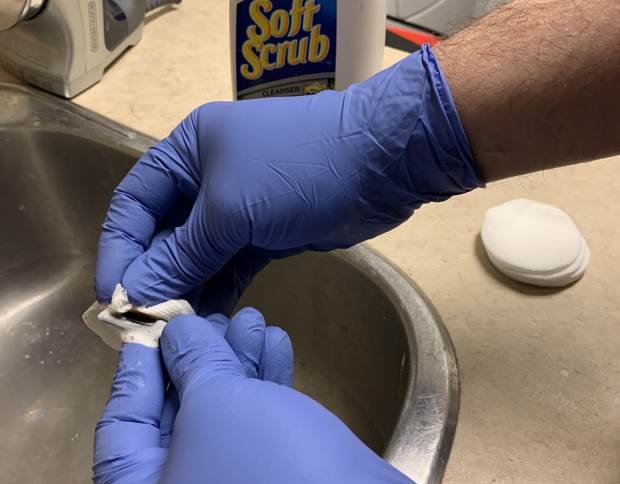
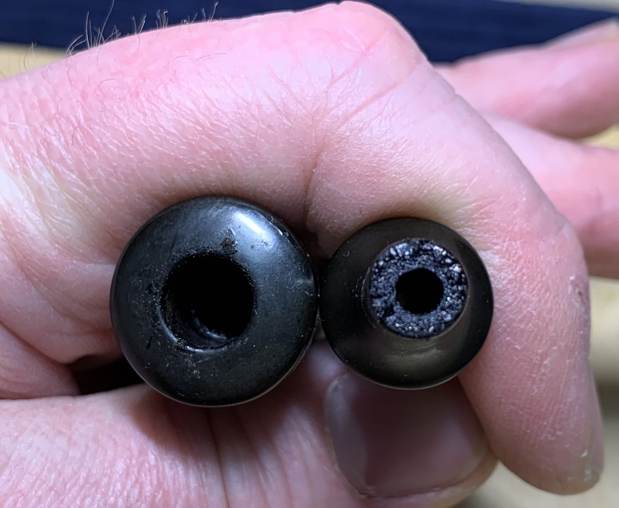
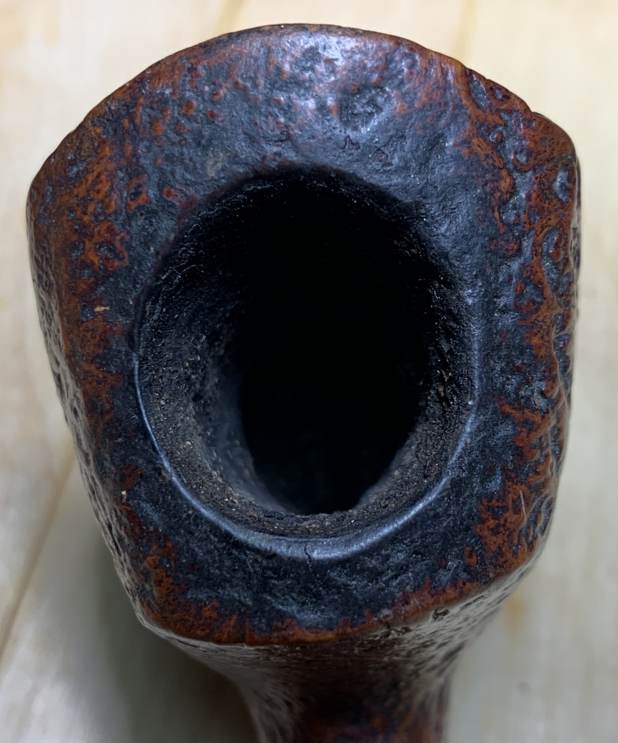
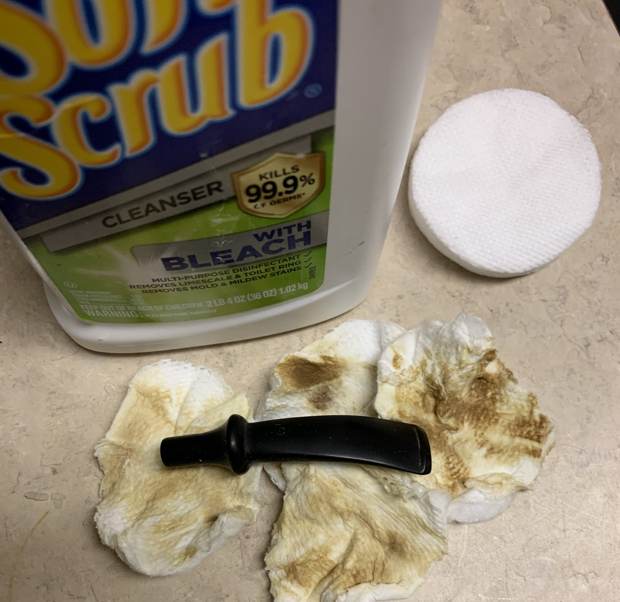
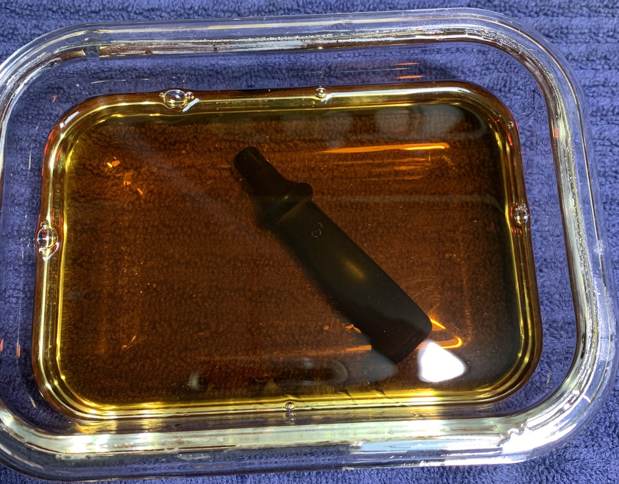
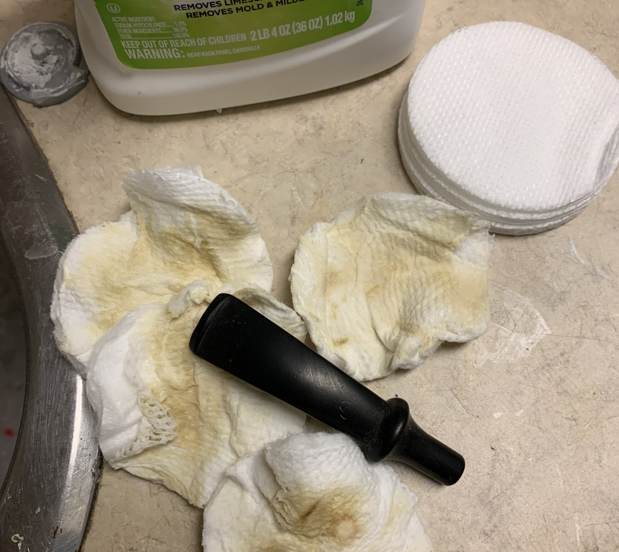
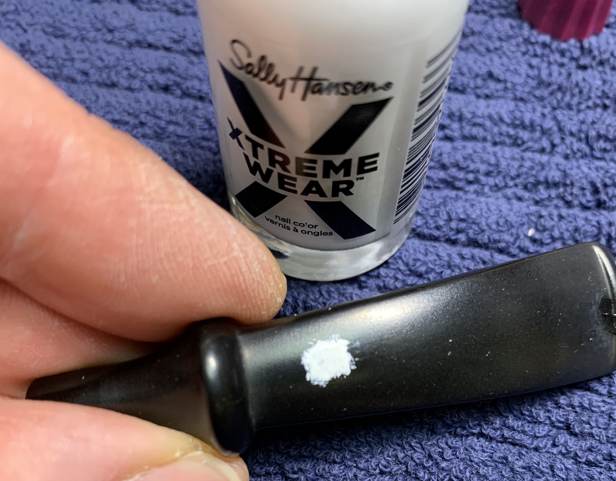
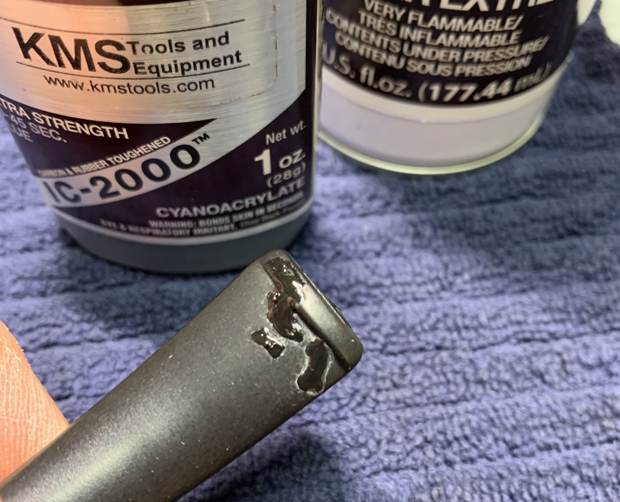
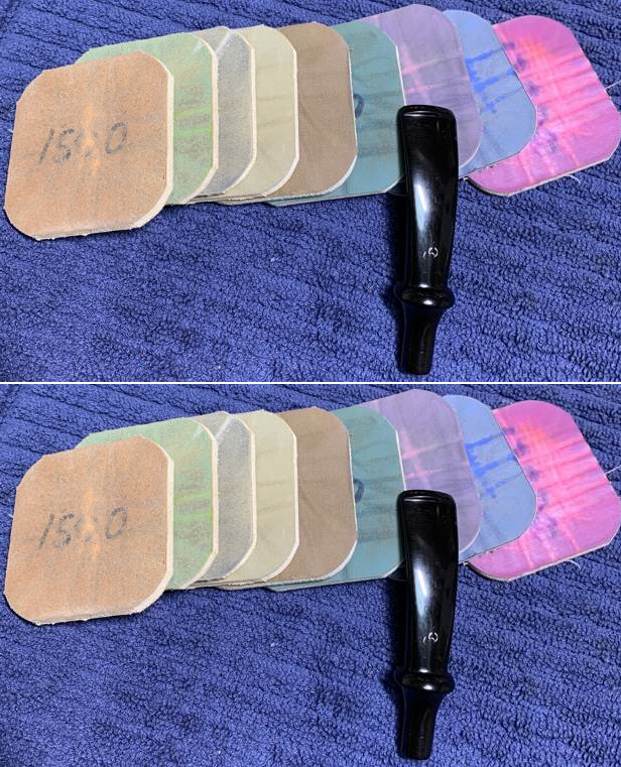
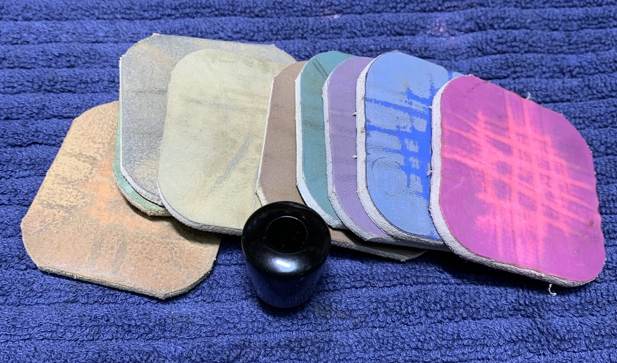
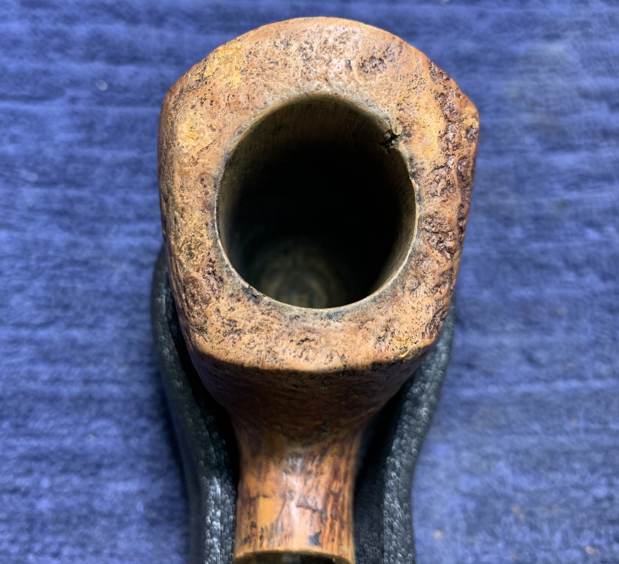
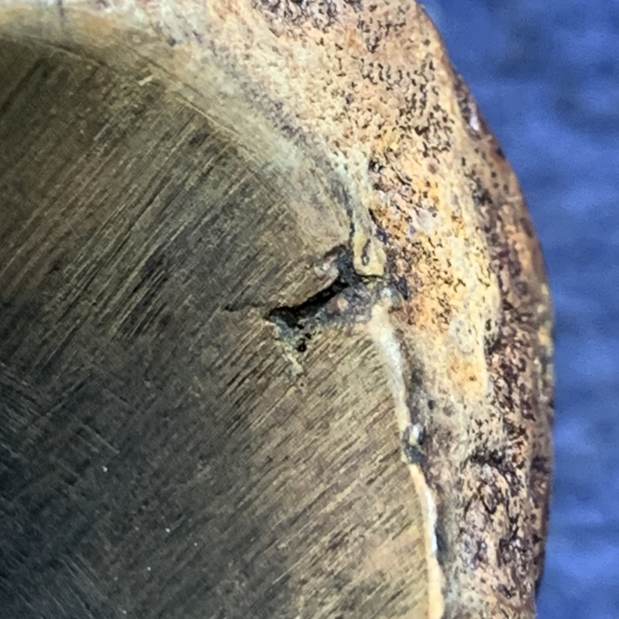
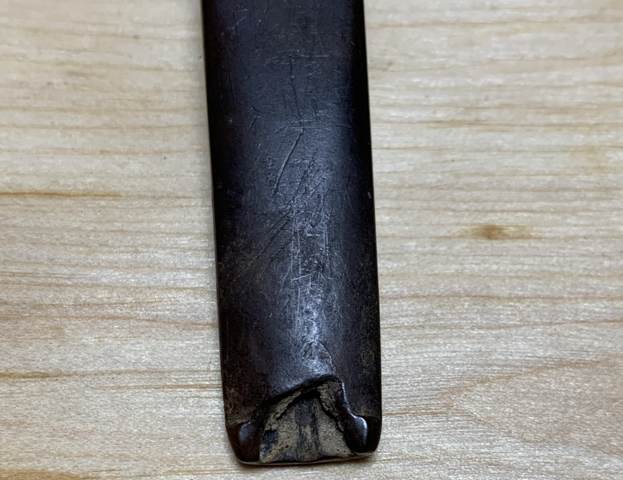
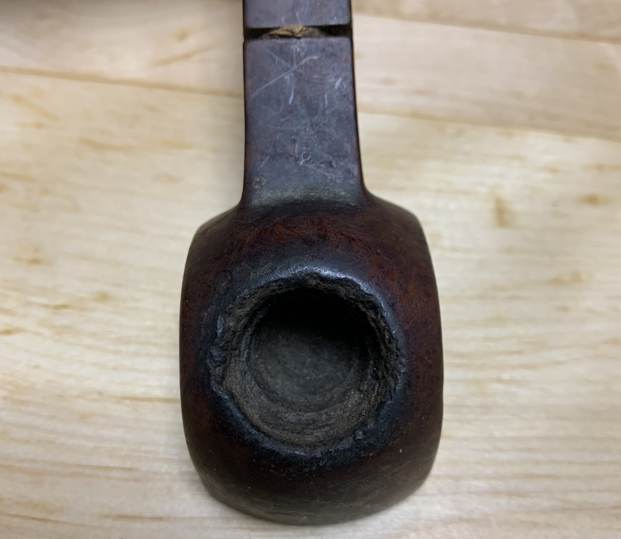
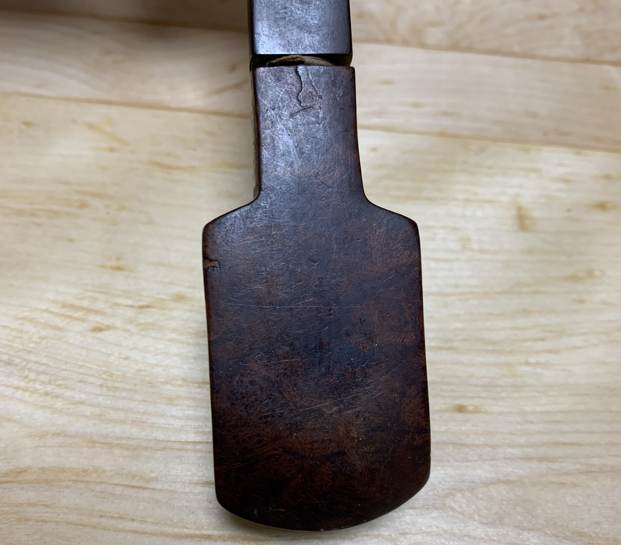
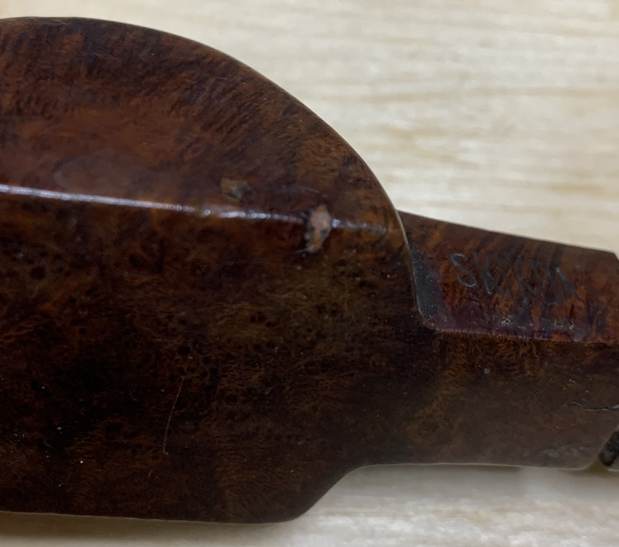
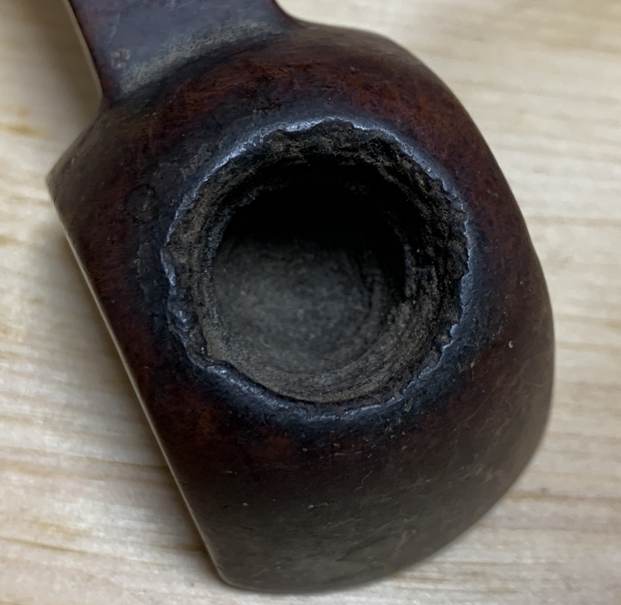
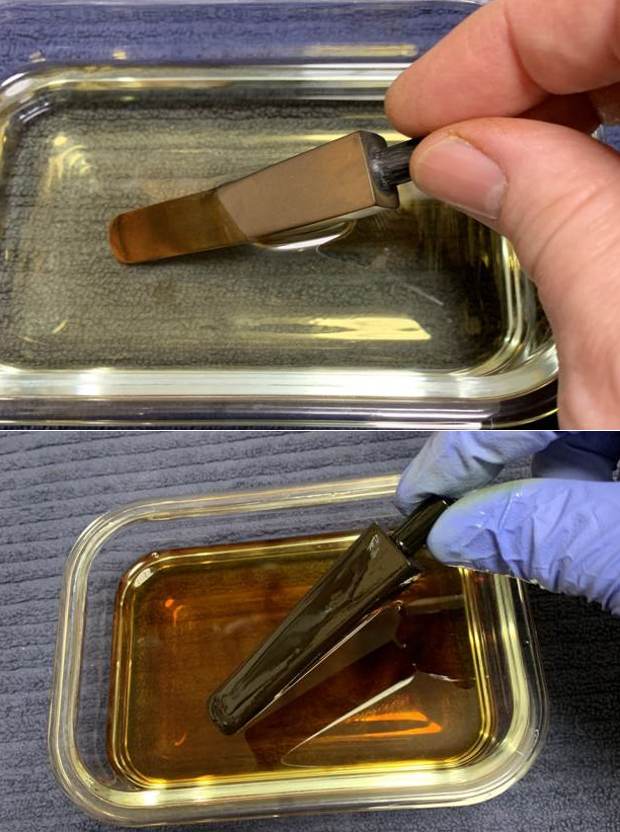
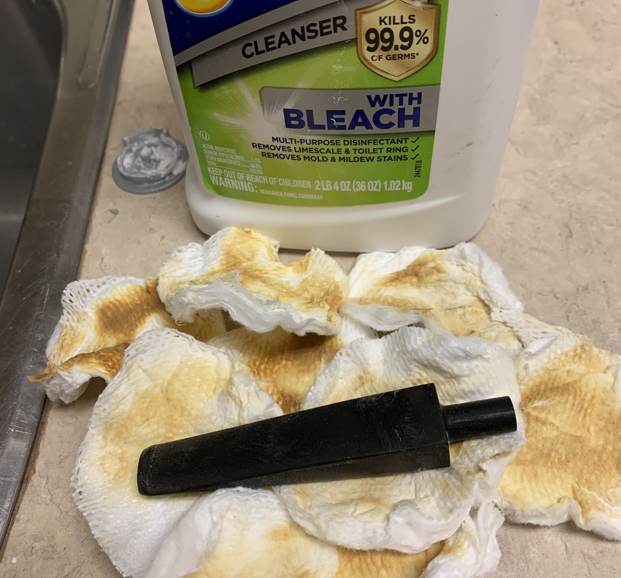
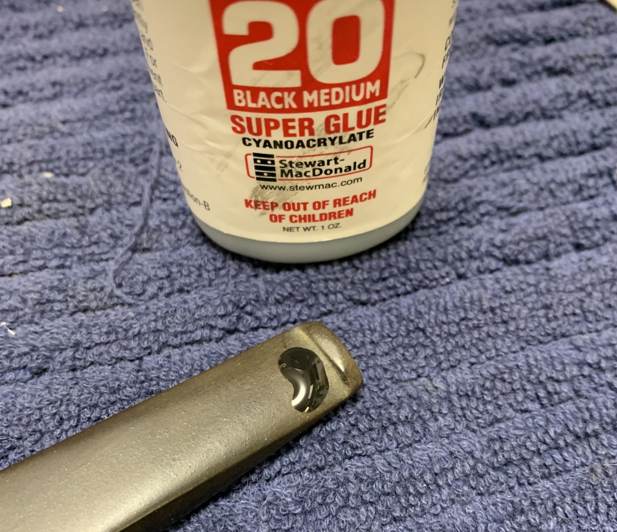
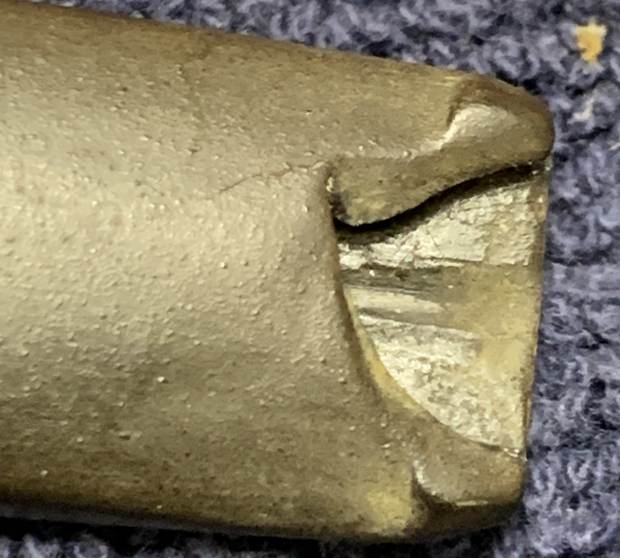
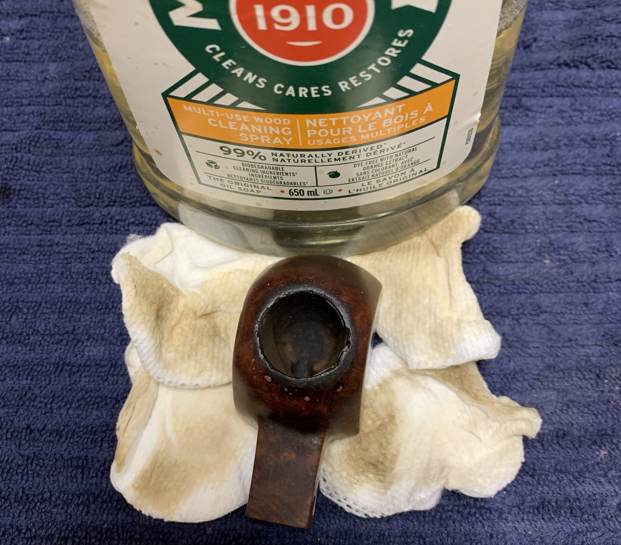
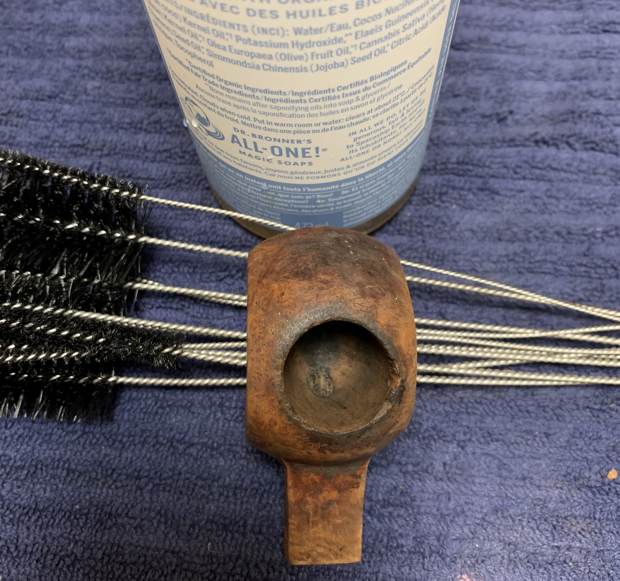
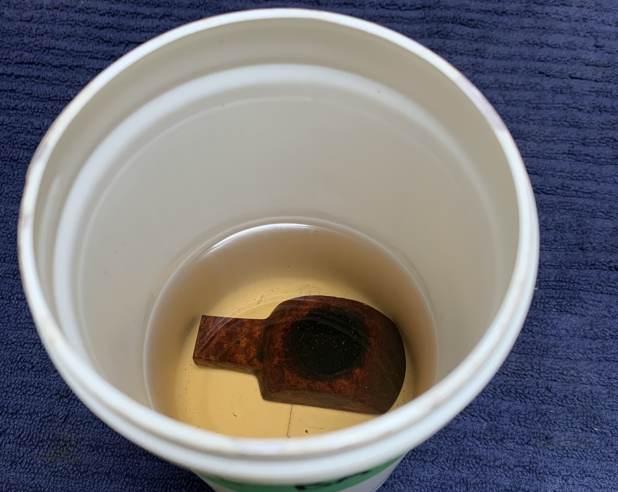
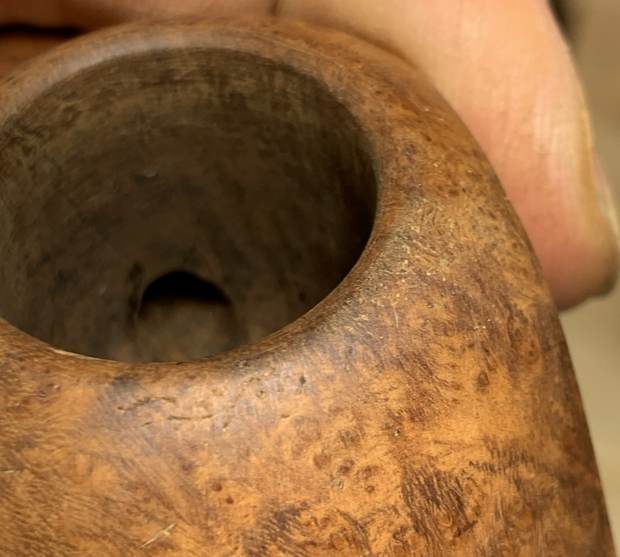
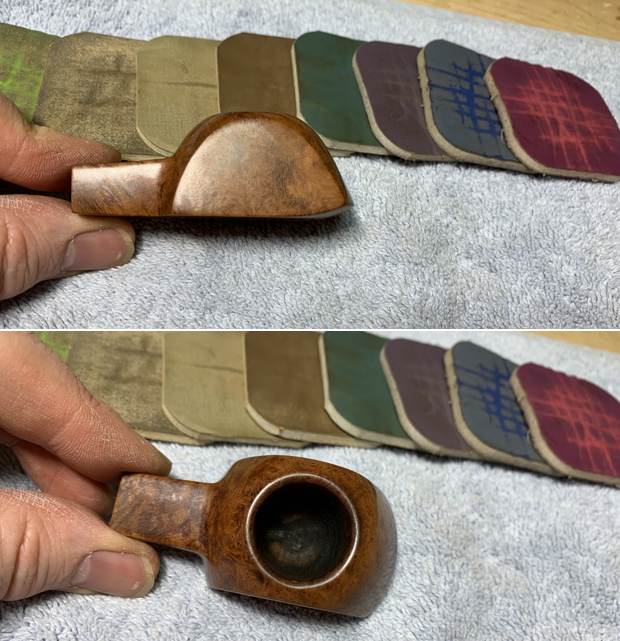
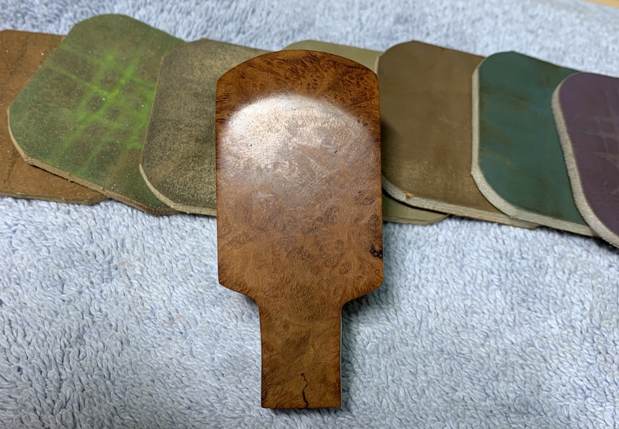
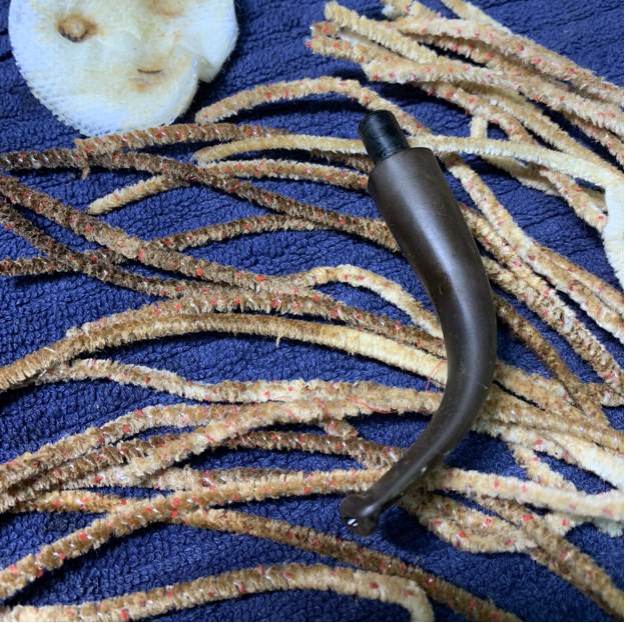
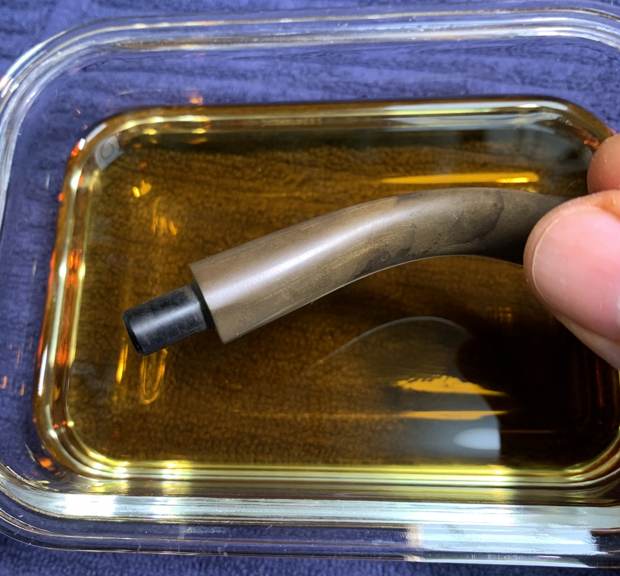
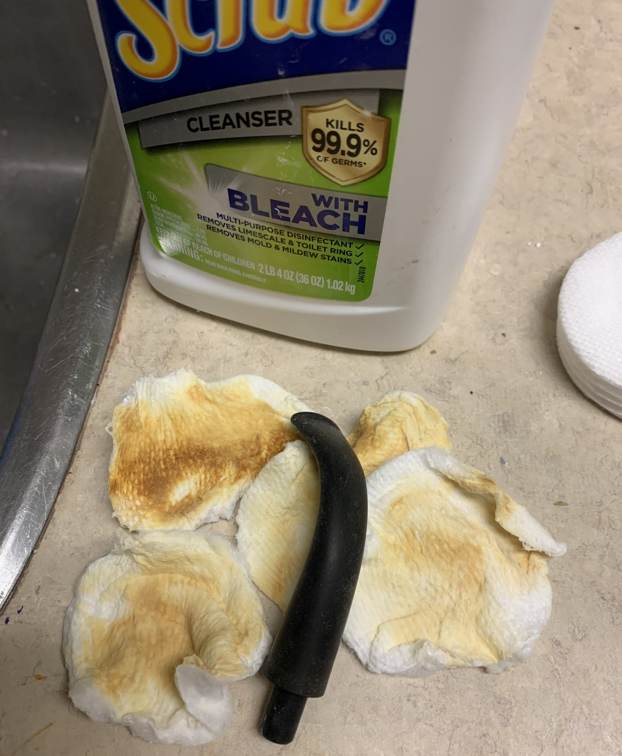
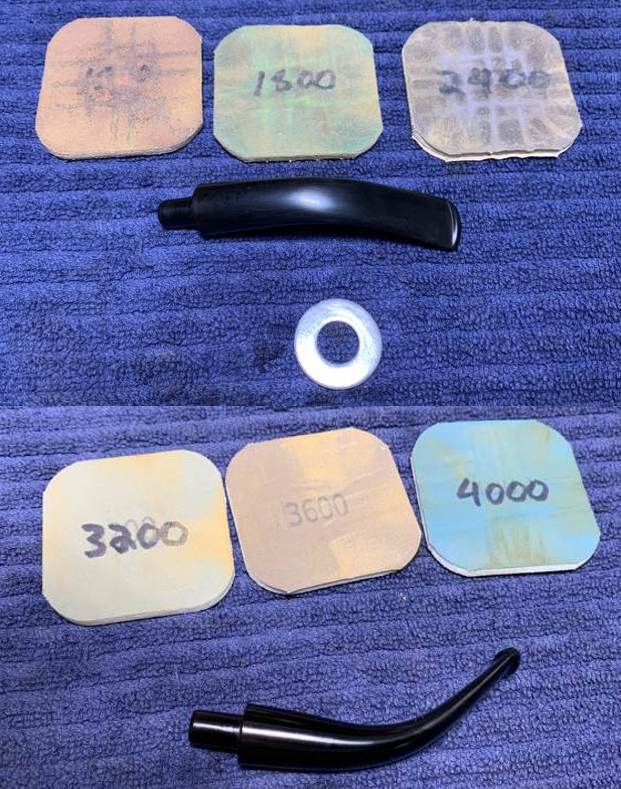
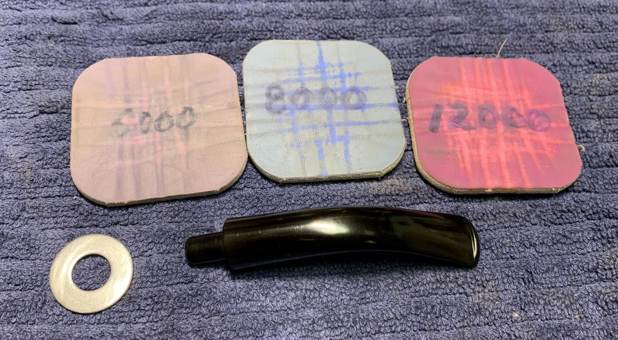
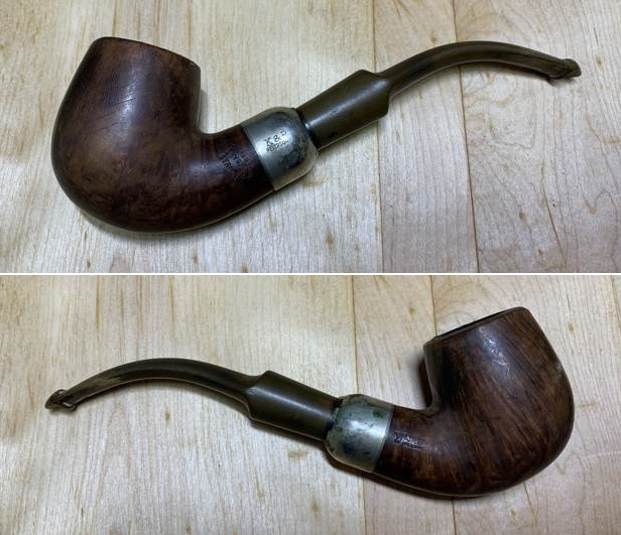
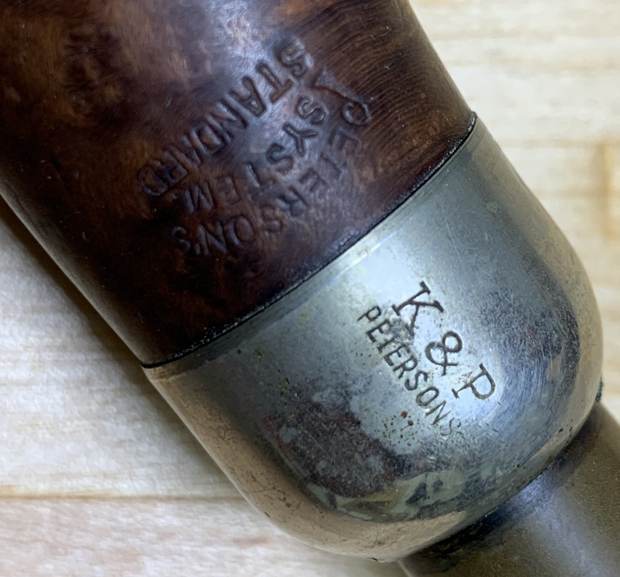
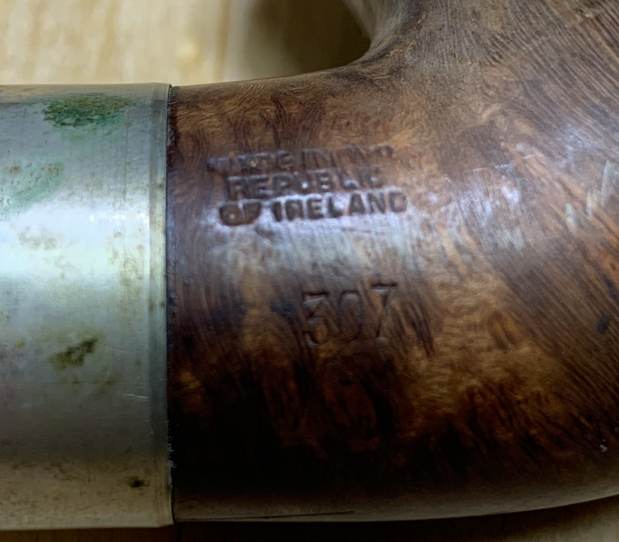
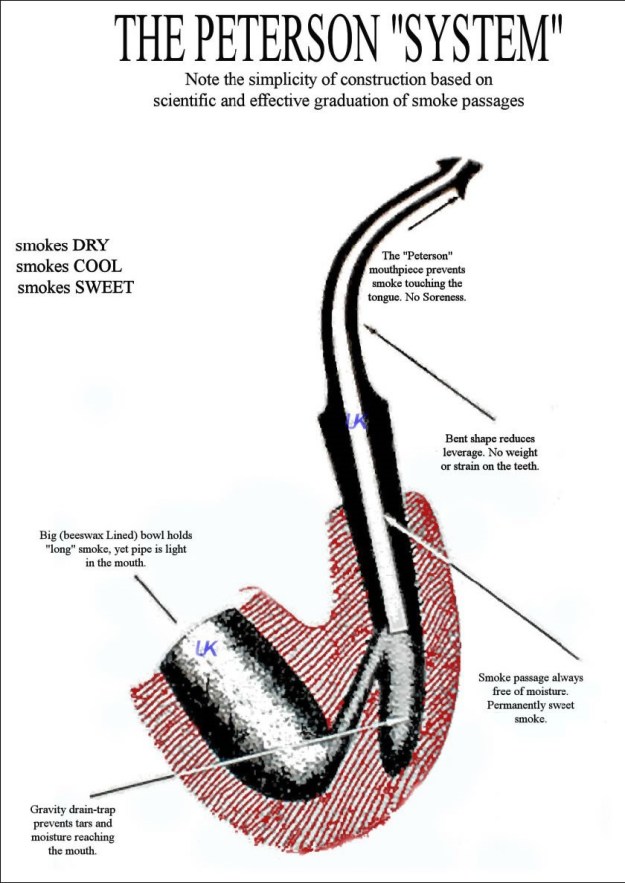
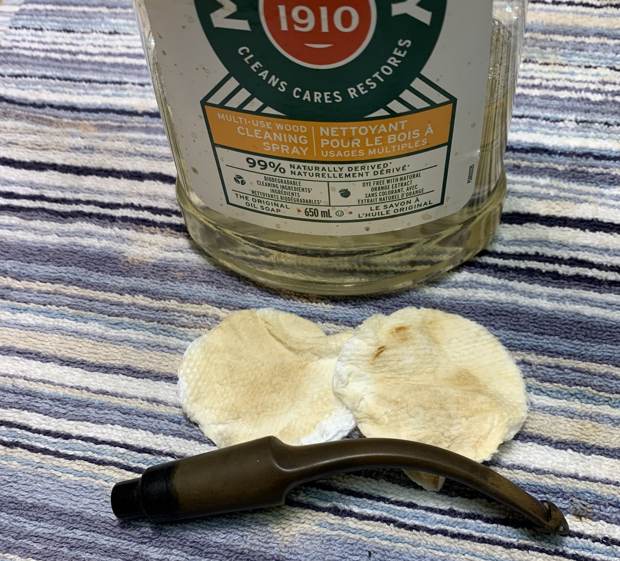
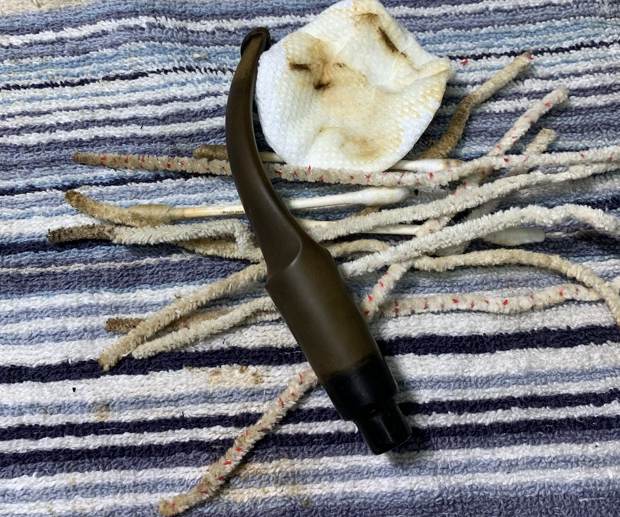
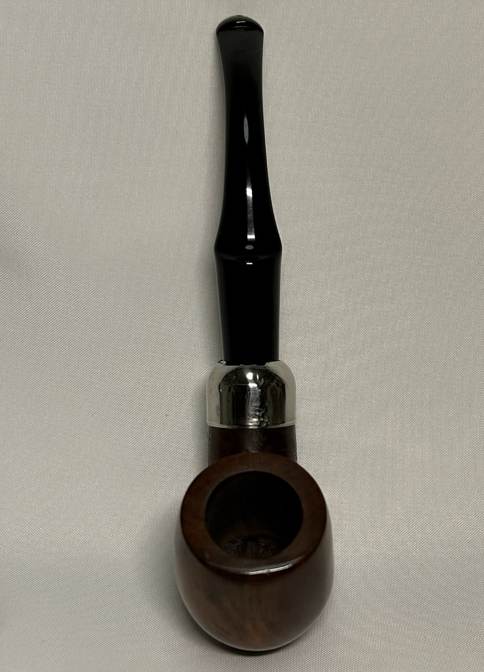
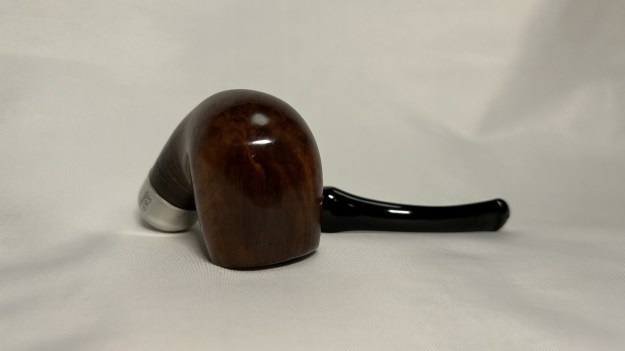
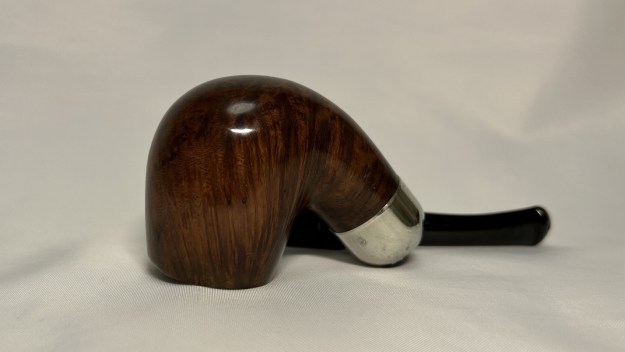
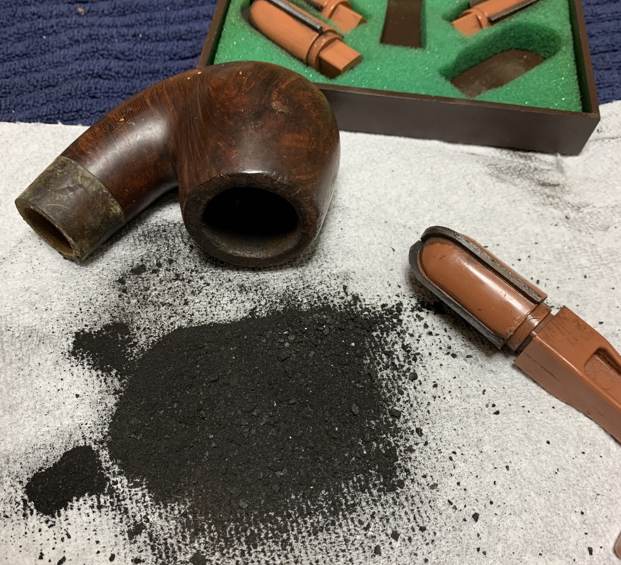
A few weeks ago, I posted a blog about a Peterson Standard System 307. That pipe sold quite quickly and a kind gentlemen contacted me to say that if I came across another, he would be interested. As it happened, I did have another 307 in my pile of pipes, so I was only too happy to get working on that one. The 307 is a good-sized pipe and the look of it gives one a feeling of confidence. It is satisfying and comfortable in the hand. This particular pipe had some serious issues, but I was confident that I could still make it beautiful again. I guess I was trying to make virtues out of vices (or something like that) – hence writing straight with crooked lines.Let’s have a closer look. This Peterson 307 pipe has the classic “System” look: bent shape, nickel mount, and tapered, army-style stem. Of course, it also had the traditional Peterson P-lip stem. The markings on the left side of the shank are Peterson’s [over] System [over] Standard. The right side of the shank showed Made in the [over] Republic [over] of Ireland [over] 307. The nickel mount on the shank had K&P [over] Petersons. There were no markings on the stem. The Peterson System pipes are well-storied among Peterson collectors/admirers. I took the opportunity to read the article on Pipedia, specifically about the System pipes, by Jim Lilley. There is lots of good information there and I encourage you to read it: https://pipedia.org/wiki/A_closer_look_at_the_famous_Peterson_Standard_System_Pipe On to the pipe itself: it was in rough shape – very dirty and harshly treated. The stem was thoroughly calcified and oxidized. It also had some major dents: one on the top and one on the bottom. Most notably, however, there was some significant wear to the side of the P-lip. The bowl was very dirty and had quite a bit of lava and plenty of cake. The front edge of the rim had been heavily bashed in – presumably from banging out dottle etc. The outside of the bowl had some small fills and some very deep scratches – much deeper than the photos convey. The nickel mount was in rough shape – stained, corroded, and heavily chipped along the top edge. To work! The stem was first on my list. I wiped the outside down with Murphy’s Oil Soap on some cotton pads. I also took a BIC lighter and ‘painted’ the stem with its flame to lift the bite marks. Sadly, however, this did not do much, as the dents were much too deep. Then I cleaned out the inside with pipe cleaners and isopropyl alcohol. I used some SoftScrub on the outside of the stem to remove some oxidation. Then, the stem went for an overnight soak in the Pipe Stem Oxidation Remover. The following day, I cleaned the de-oxidizing mess off with alcohol, pipe cleaners, et cetera. The oxidation had migrated to the surface and would be fairly straightforward to remove. I scrubbed again with SoftScrub on some cotton pads to remove the leftover oxidation. I built up the dents on the stem with black cyanoacrylate adhesive and let them cure. I then sanded the adhesive down with 220- and 400-grit sandpapers to meld seamlessly into the stem. I then used all nine Micromesh pads (1,500 through 12,000 grit) to polish it and highlight the black lustre on the stem. I also used Obsidian Pipe Stem Oil in between each pad scrubbing. What about the worn side of the P-lip? I decided to leave that as it was. I did not have a spare Peterson stem to replace this one and I always like to use original parts whenever possible. The stem shows that wear, but it is part of the history of the pipe and so it shall stay.
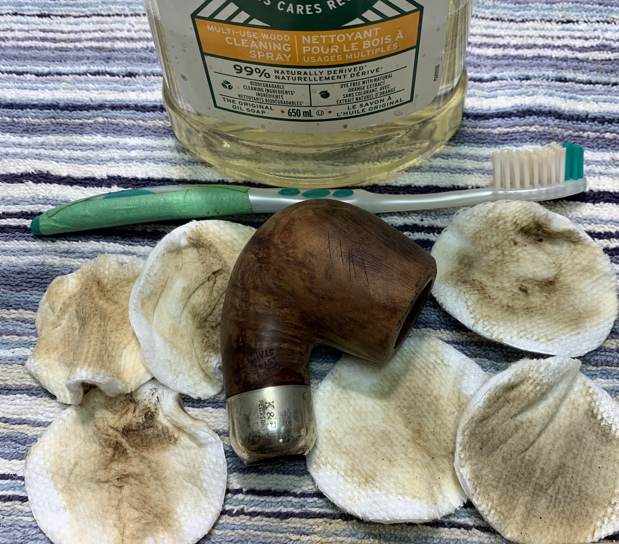
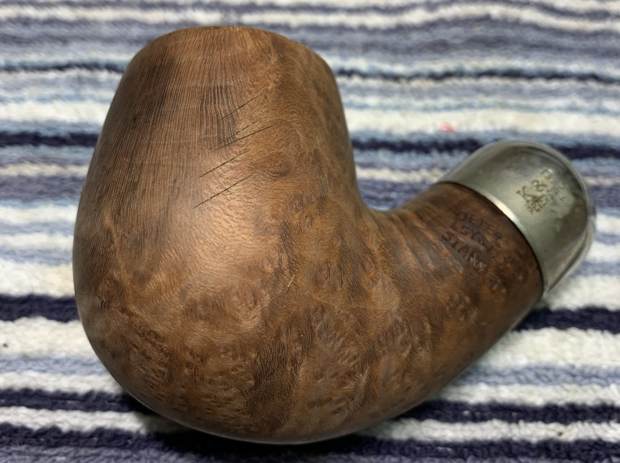
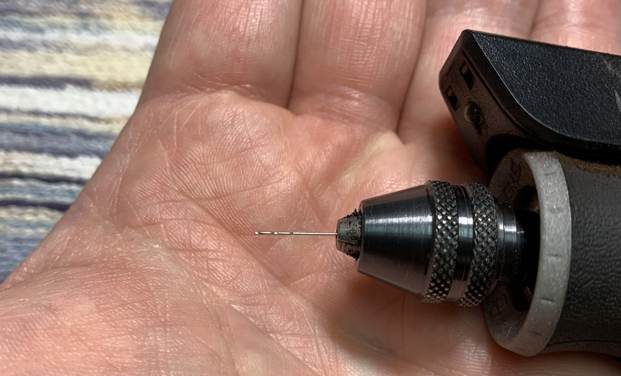
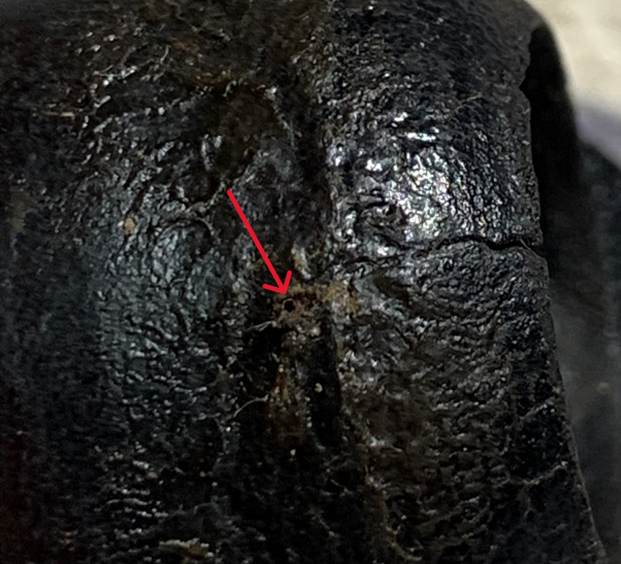
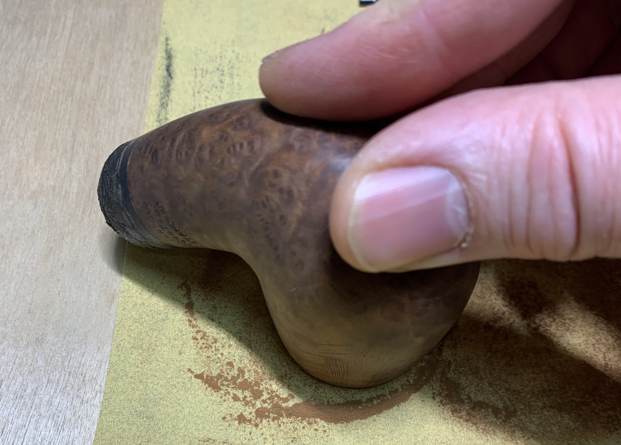
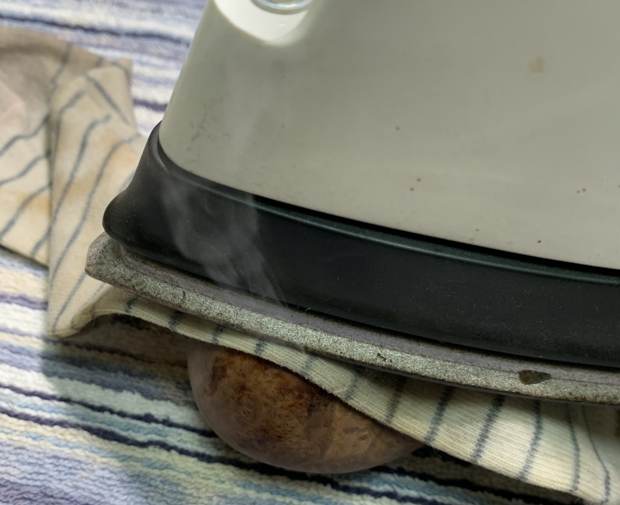
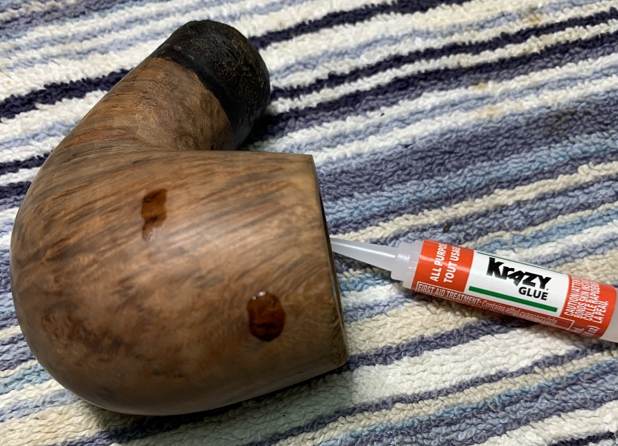
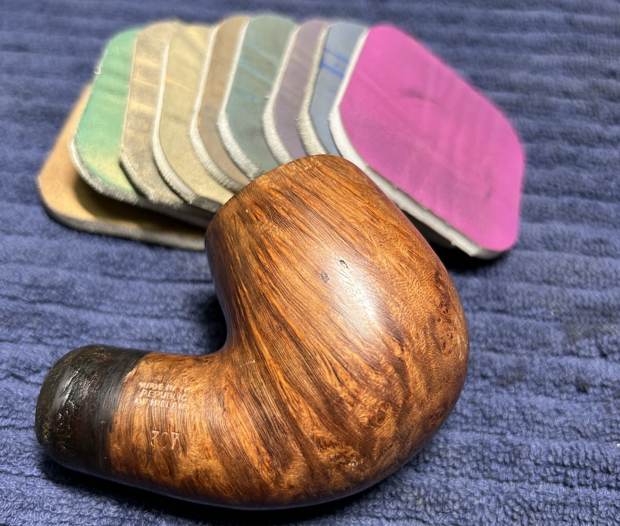
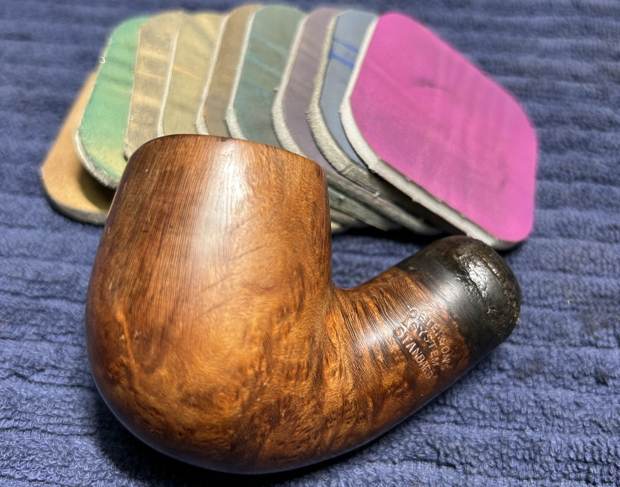
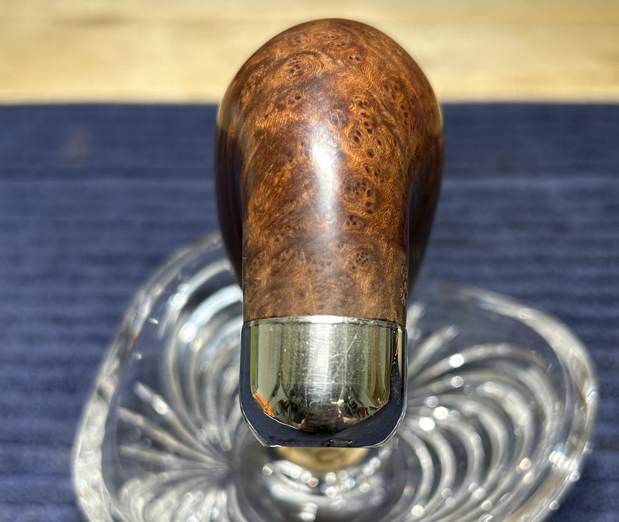
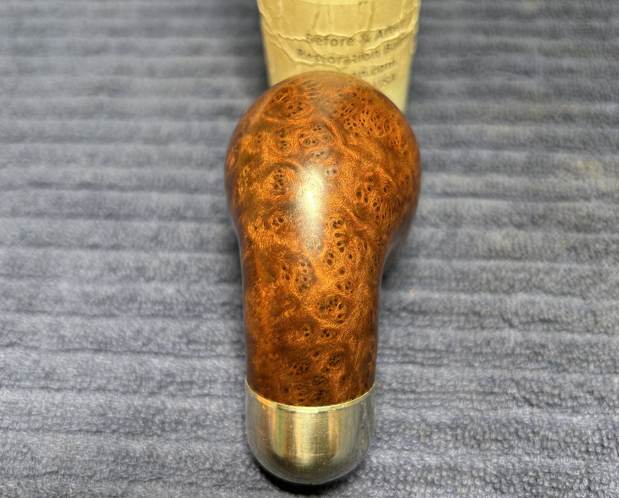
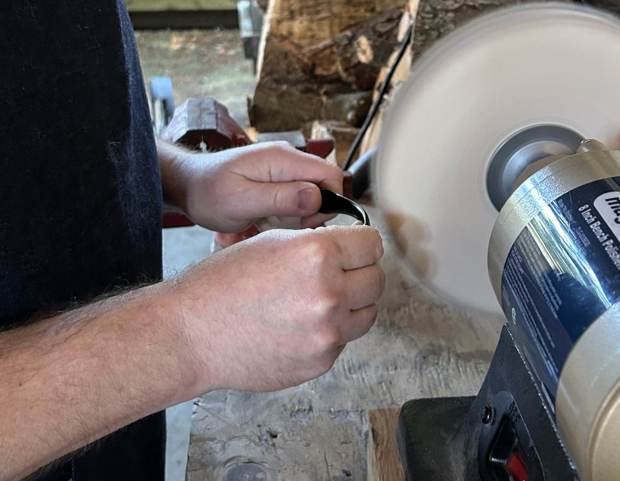
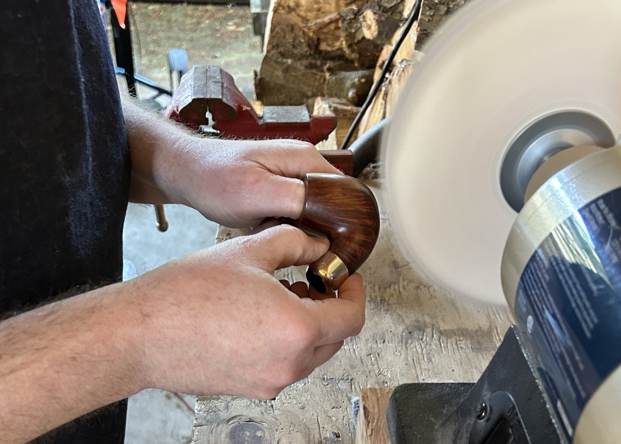
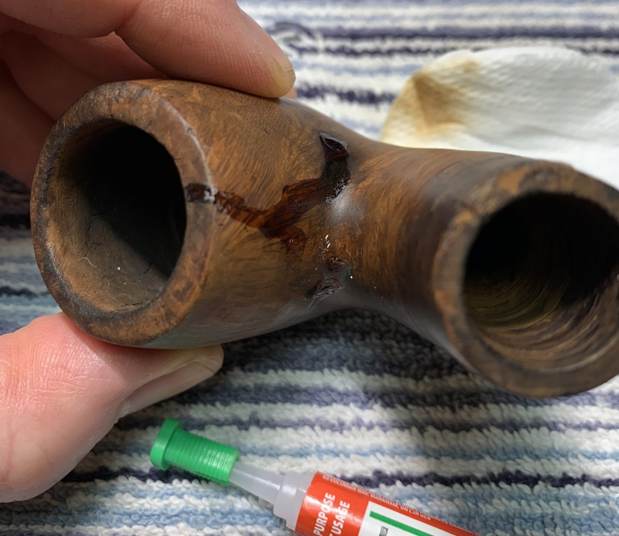
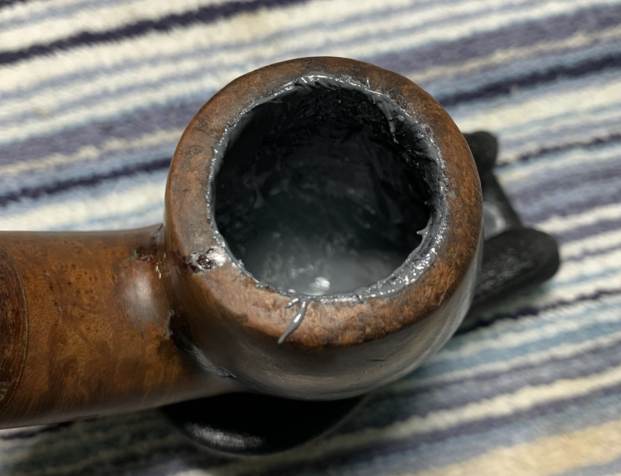
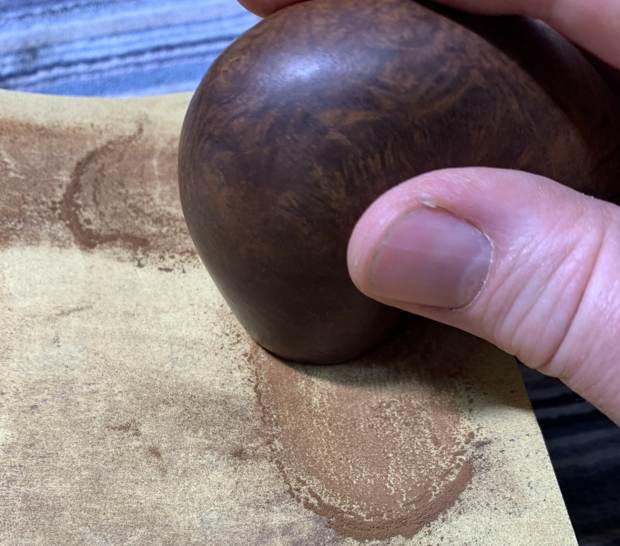
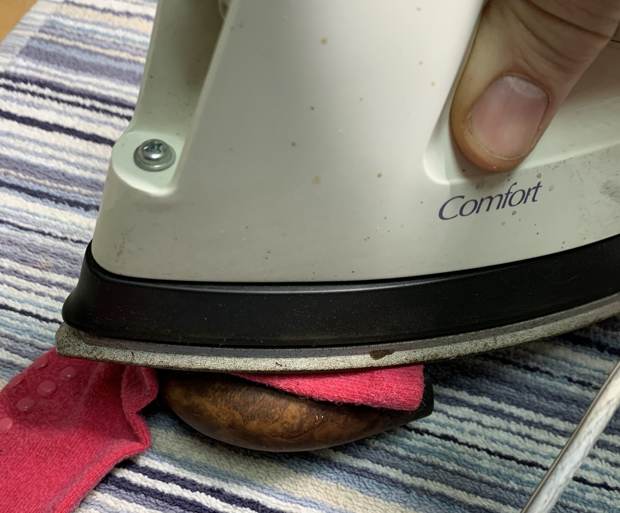
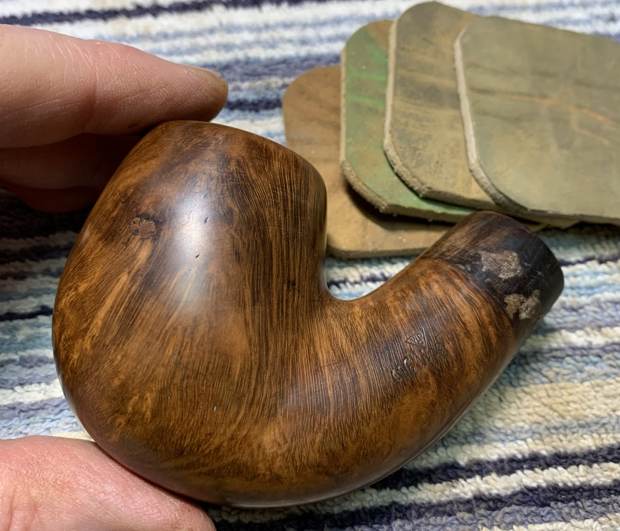
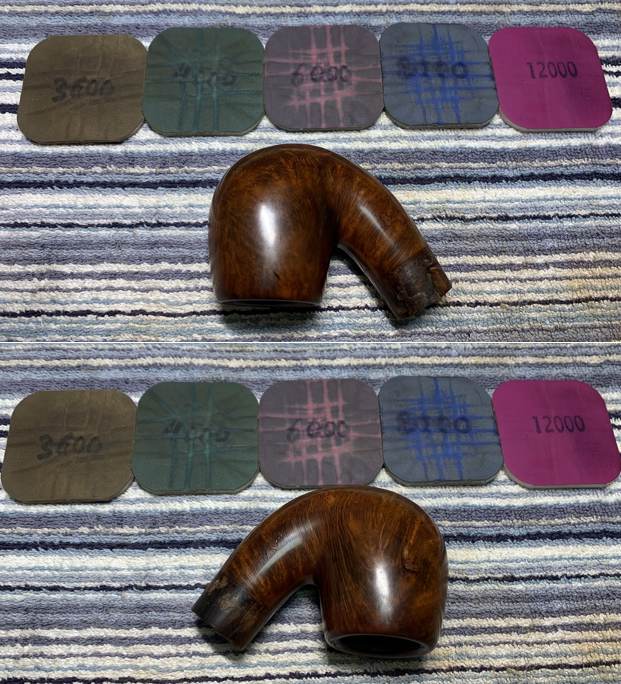
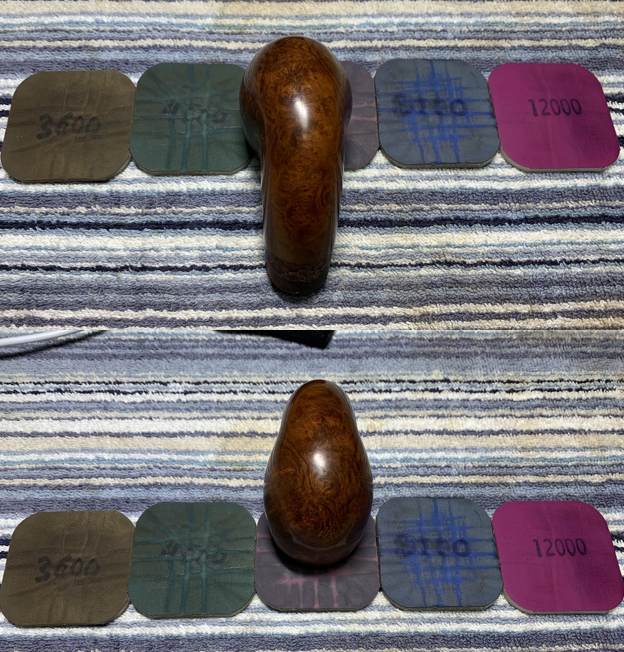
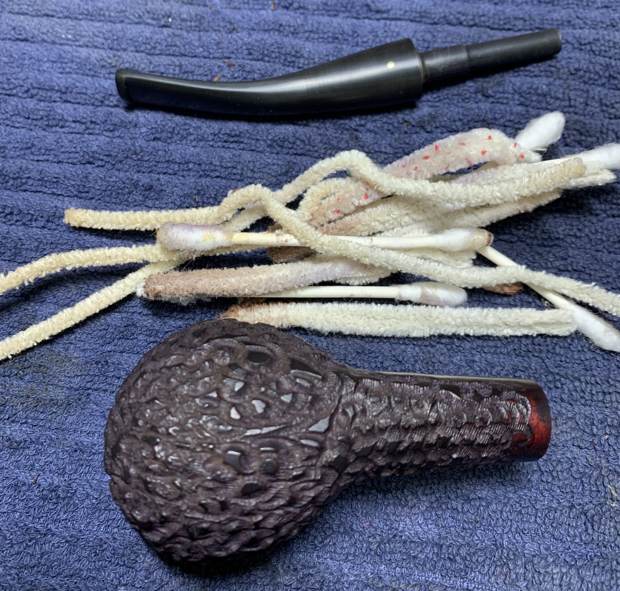
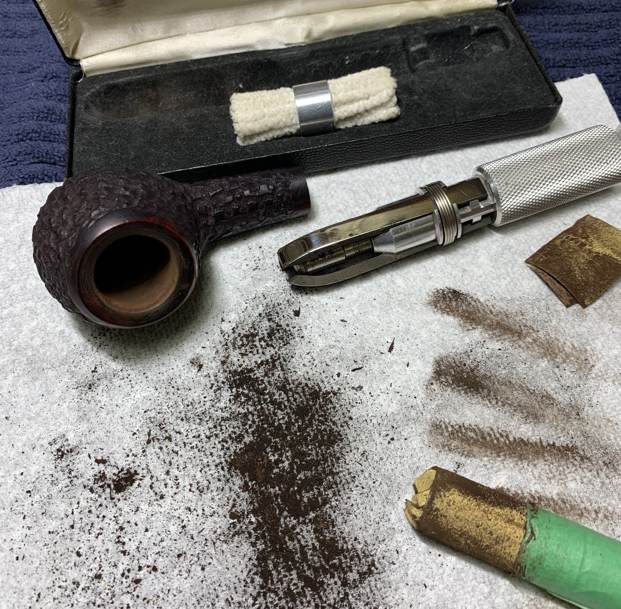
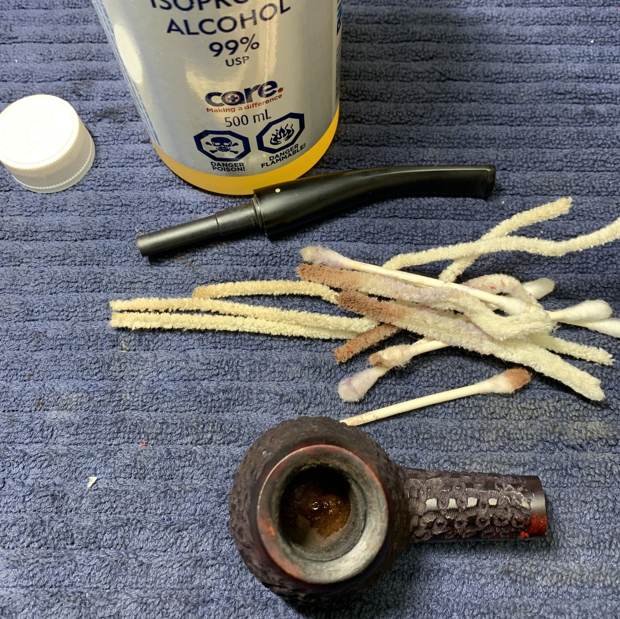
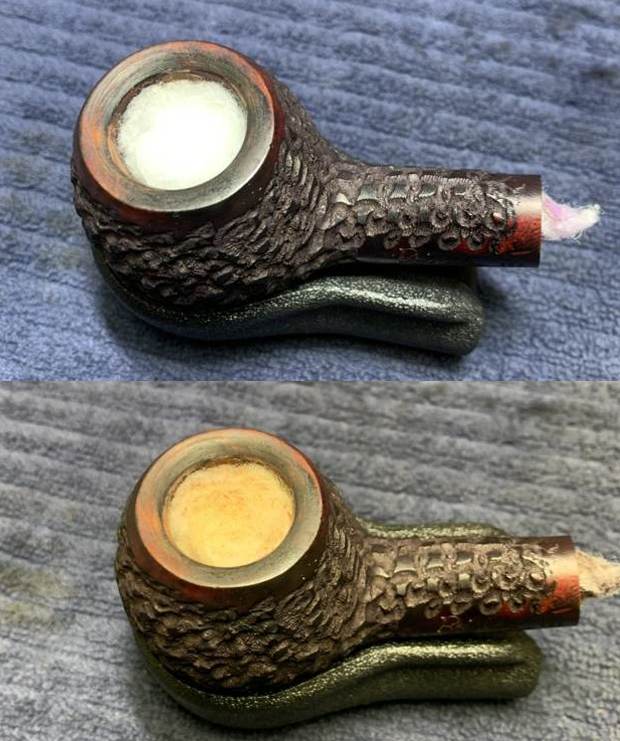
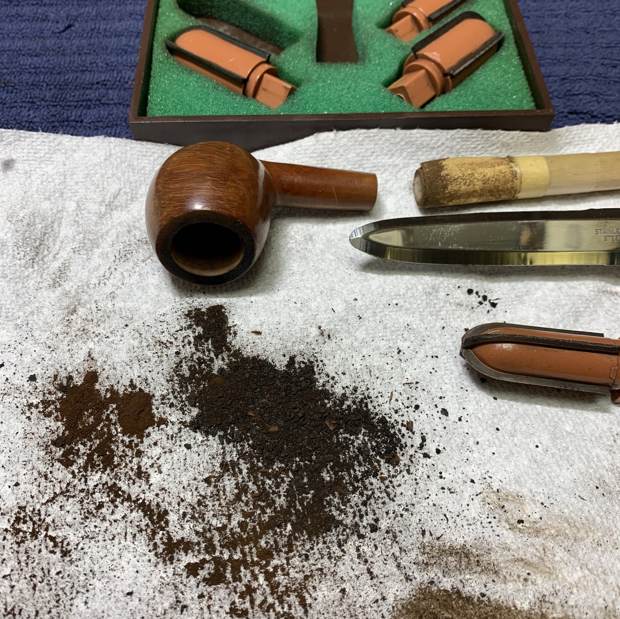
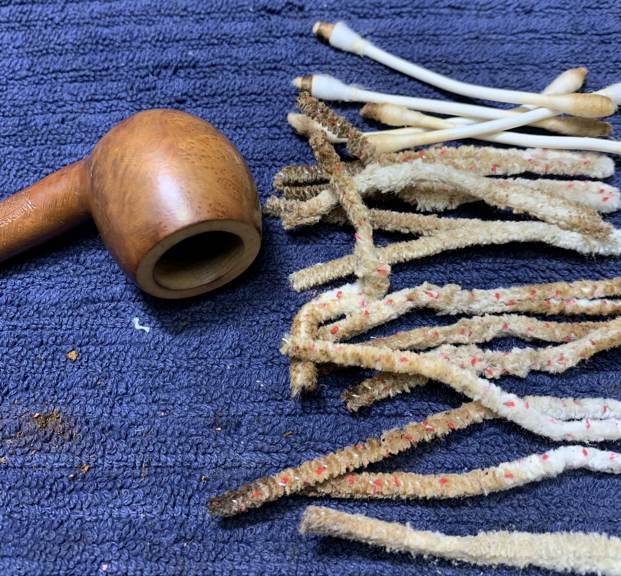
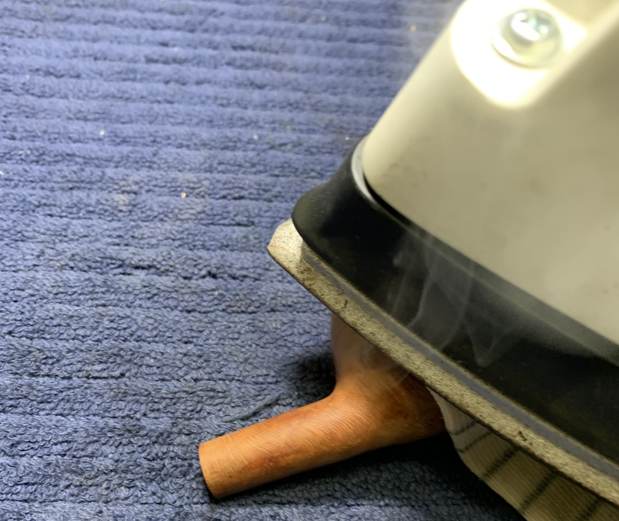
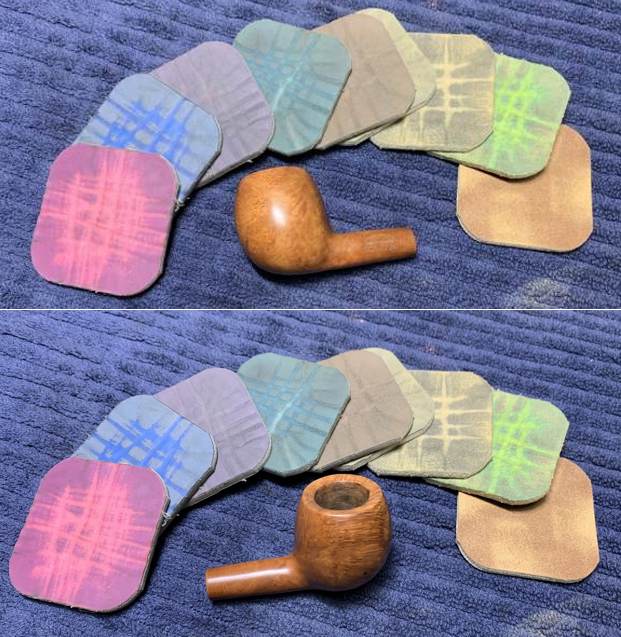
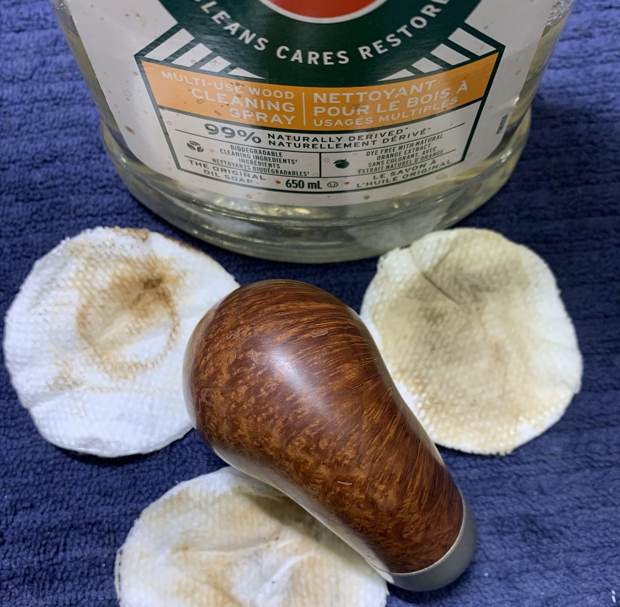
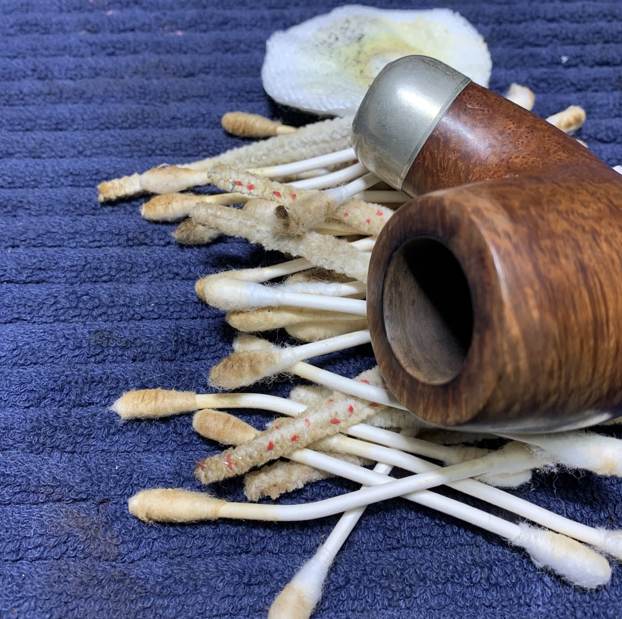
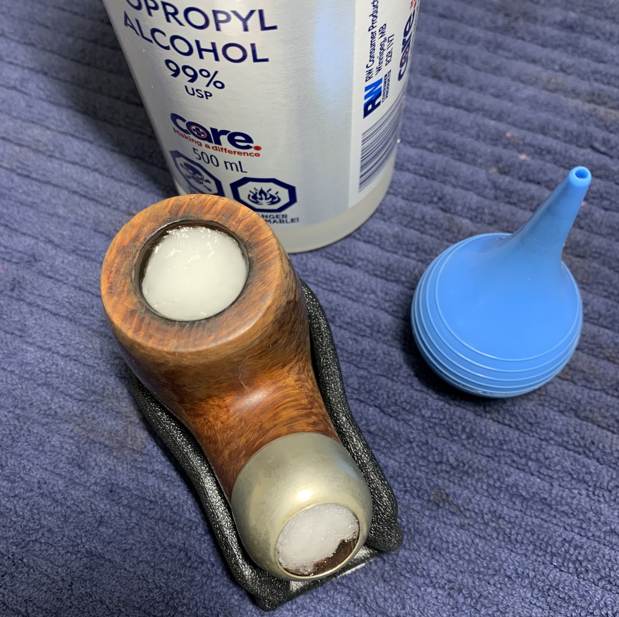
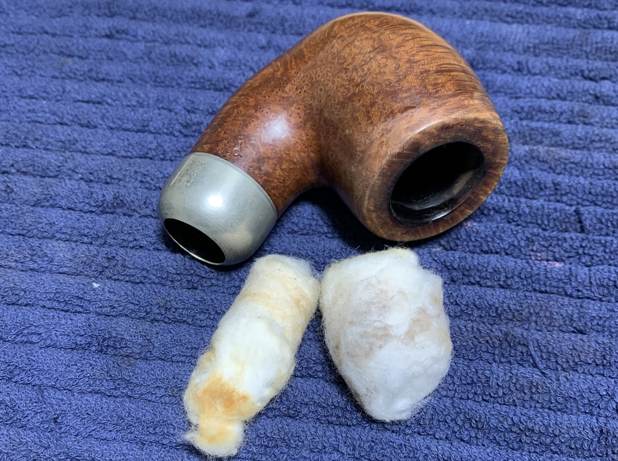
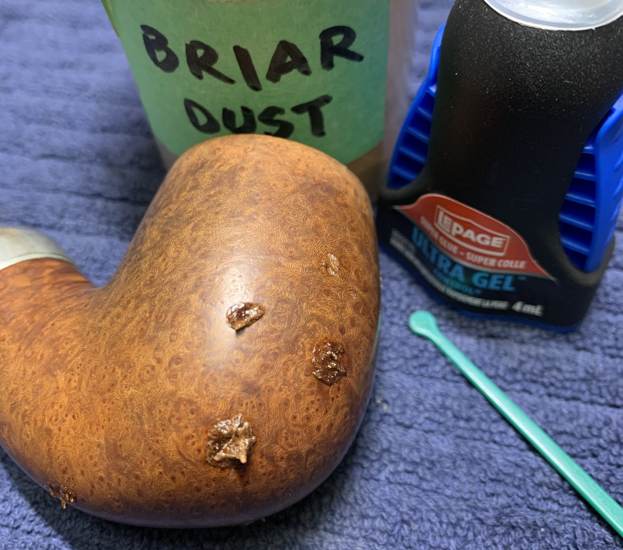
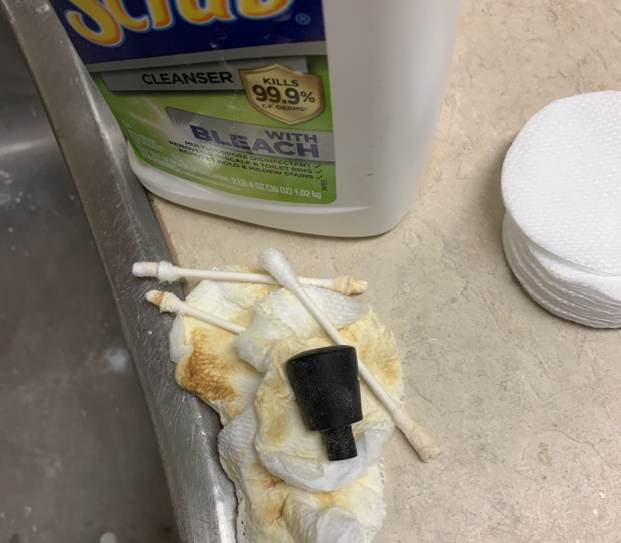
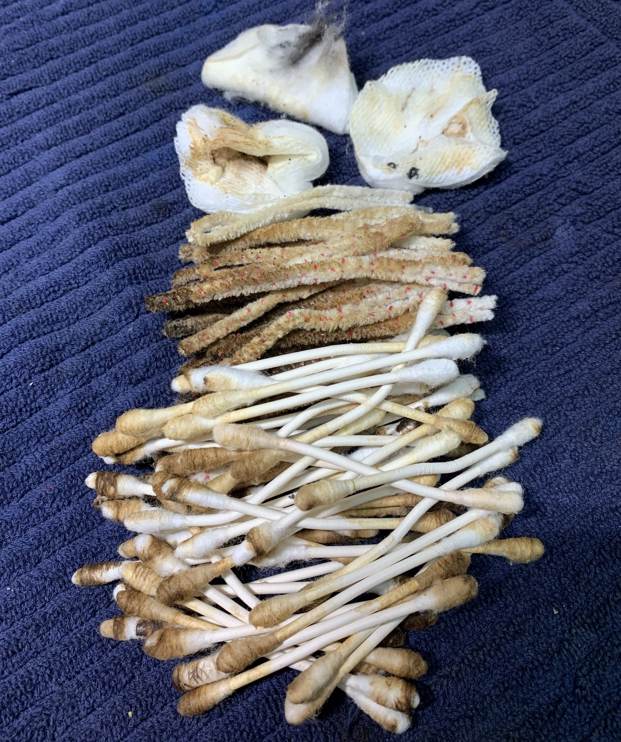
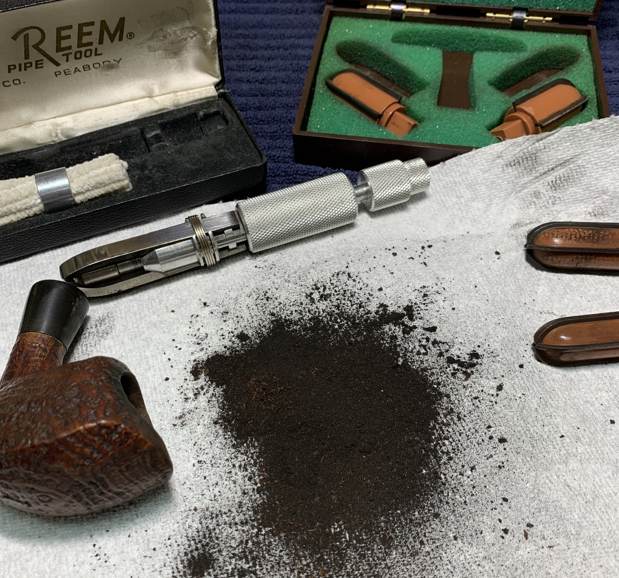
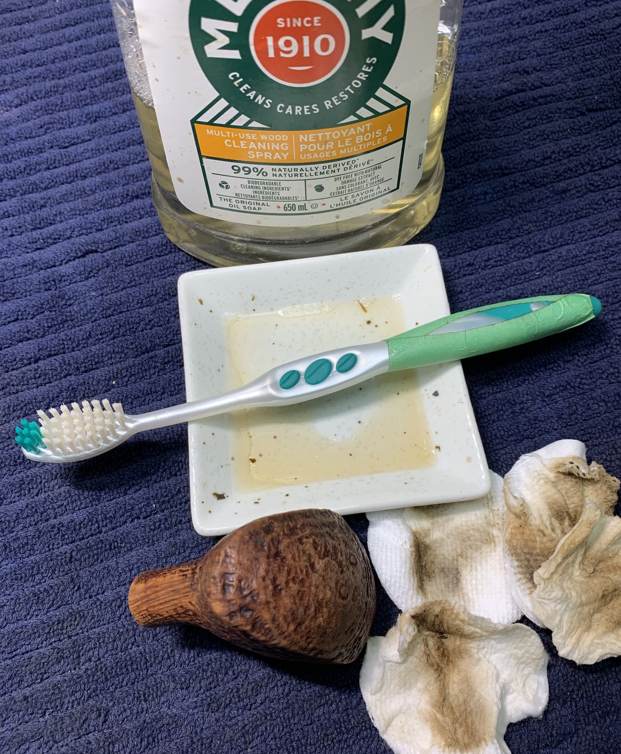
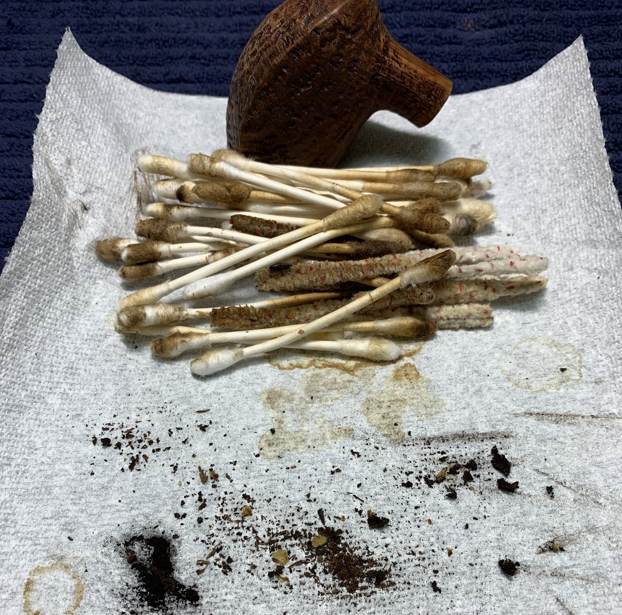
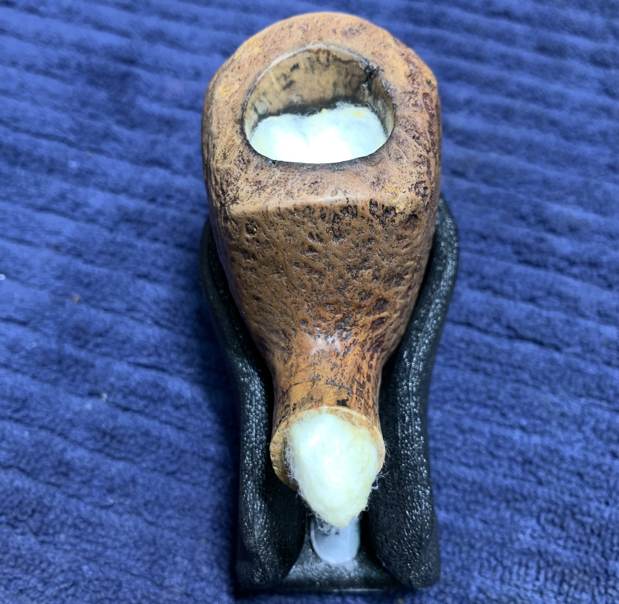
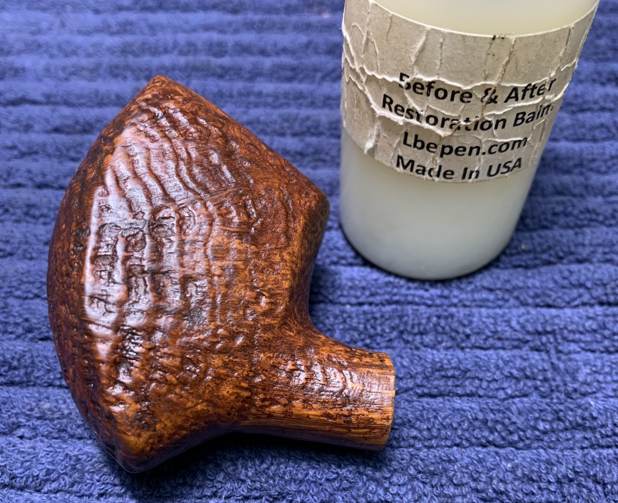
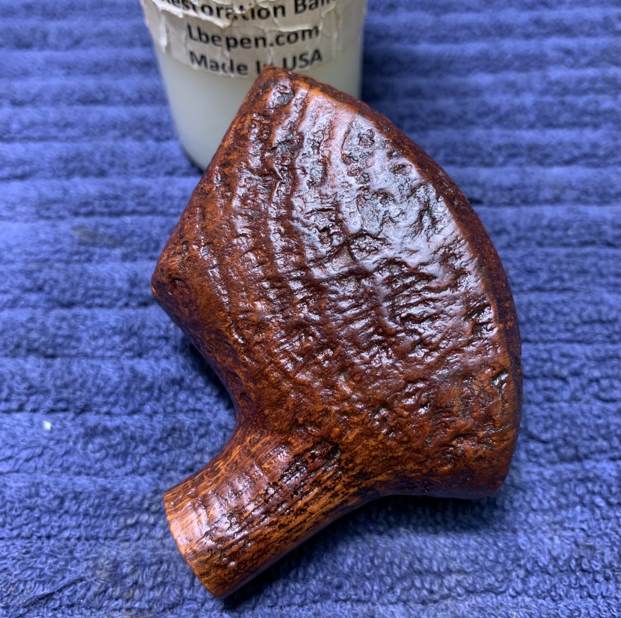
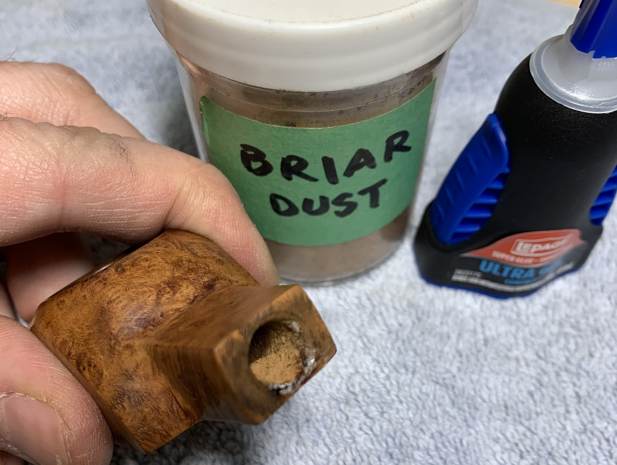
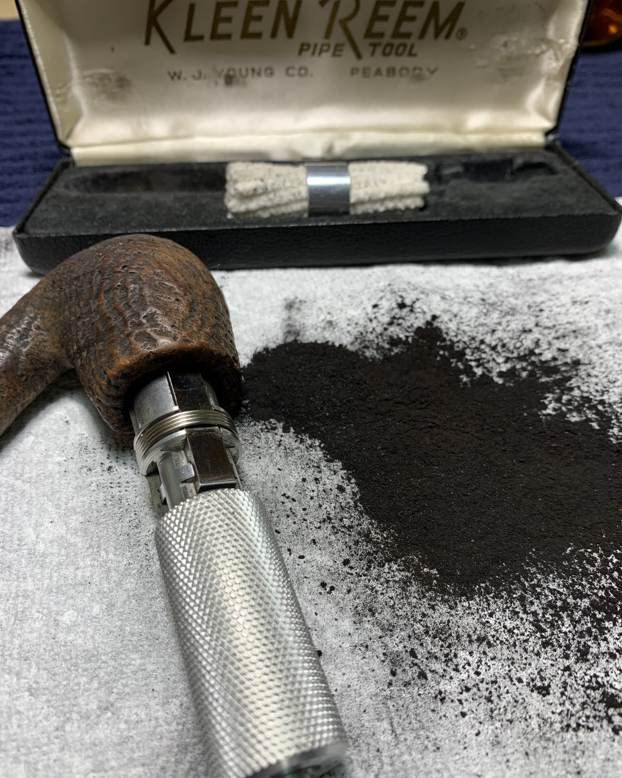
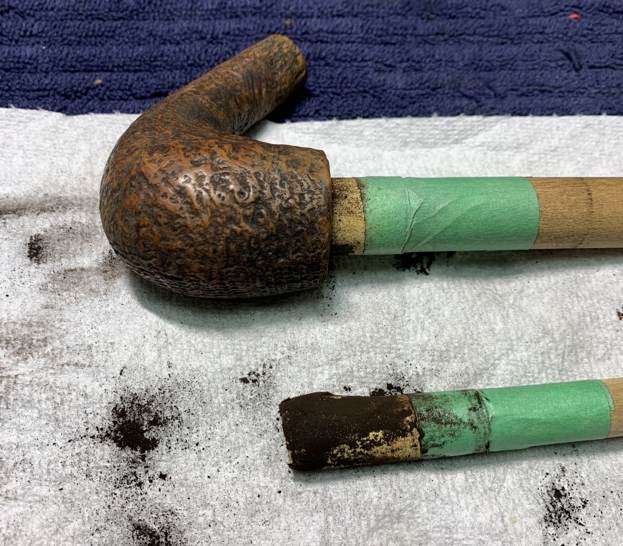
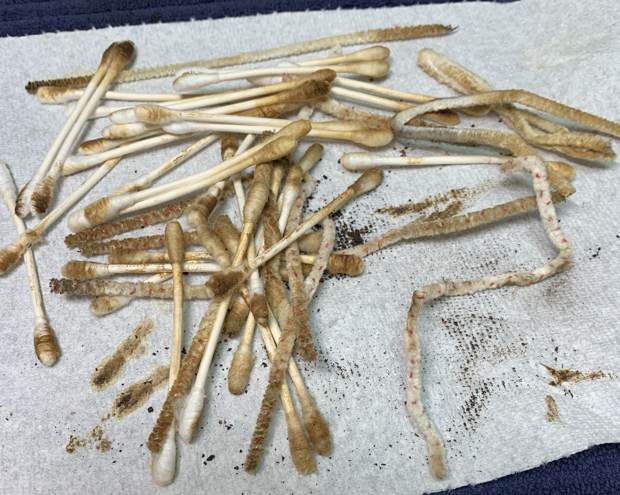
Moving on to the stummel, I first decided to ream out the bowl. I used both the PipNet Reamer and the KleenReem to remove the built-up cake and followed that with 220-grit sandpaper taped to a dowel to eliminate as much as possible. I took the chamber down to bare briar to ensure there were no hidden flaws in the wall. Fortunately, there were none.I proceeded to clean out the insides of the shank with Q-tips, pipe cleaners, and lemon-infused isopropyl alcohol. There was quite a bit of filth inside this stummel, and it took a fair amount of cotton to get it clean. I followed that up by cleaning the insides with some dish soap and tube brushes.I then used cotton rounds and some Murphy’s Oil Soap to scrub the outside of the stummel and a toothbrush with Murphy’s for the lava on the pipe’s rim. At this point, I opted to remove the nickel mount before moving on. It wasn’t well attached to the stummel anyway. It would need some special work, as there was a crack in the edge of the shank – hidden by the mount. The first step in dealing with this was to ensure that the crack would not continue to creep after I had repaired it. To that end, I took a micro-drill bit, inserted it in my Dremel, and very carefully drilled a hole right through the wall of the shank, into the mortise. I then needed to apply cyanoacrylate adhesive in order to seal and repair it. I carefully applied a tiny bead of adhesive to the hole and the length of the crack. Finally, I clamped it shut and let it cure. This was a great success and the mount would hide the repair going forward. I decided to de-ghost the pipe in order to remove any lingering smells of the past. I thrust cotton balls into the bowl and the shank and saturated them with 99% isopropyl alcohol. I let the stummel sit overnight. This caused any remaining oils, tars and smells to leach out into the cotton. The bowl was nice and clean after this. Now I could address the roughness on the rim. I “topped” the pipe – that is, I gently and evenly sanded the rim on a piece of 220-grit sandpaper. This effectively removed the damage without altering the look of the pipe.Then I was able to address the small nicks on the rim and the bowl. I dug out my iron and a damp cloth to try to raise the nicks. The hot and moist steam can often cause the wood to swell slightly and return to shape. This worked very well and many of the scratches were corrected with this method.Now it was time to address the remaining fills on the bowl. I repaired them with a mixture of briar dust and cyanoacrylate adhesive. This ensures a strong repair and one that looks similar to the surrounding wood. I sanded the repairs down with 200- and 400-grit sandpaper until they were level with the surrounding briar.Then, I used all nine Micromesh pads (1,500 through 12,000 grit) on the stummel to finish it off. I opted to turn the bashed-in front edge of the rim into a rounded front edge. This was possibly an odd choice, but I am very pleased how it turned out in the end. However, the deep, parallel scratches on the side of the stummel were not going anywhere. Unfortunately, they were too deep to be sanded out and too narrow to be filled with briar and glue. The scratches were sanded with the Micromesh pads, and looked much improved. The nickel mount also needed serious help. I wanted to keep as much of the metal as possible, but didn’t want to leave a purely jagged edge. I sanded this edge to ensure a proper balance between keeping the maximum amount of metal and taking away a possible hazard. Then, I used some SoftScrub on cotton rounds to clean the metal and remove some corrosion. I used some of my MicroMesh pads (only 3,600-12,000) to eliminate some of the minor scratches on the metal. It also gave a nice shine. I used a jewelry cloth to give the final polish to the nickel. This mount would always retain some small dents etc. from its hard life, but it looks much improved. I used some white glue to reattach it to the stummel. At this point, I rubbed some Before & After Restoration Balm into the briar and left it to sit for 15 minutes or so. I brushed it with a microfibre cloth. The B&ARB does wonderful things to the wood, and I really like the natural colour of the briar. Off to the bench polisher to put the final touches on this pipe. I first gave it a thorough going-over with White Diamond compound. Following that, several coats of carnauba wax created a beautiful, glossy seal on the pipe. This Peterson Standard System 307 looks fantastic again and I know that the new owner will enjoy smoking it for many years to come. The approximate dimensions of the pipe are as follows: length 6¼ in. (158 mm); height 2 in. (51 mm); bowl diameter 1⅝ in. (41 mm); chamber diameter ¾ in. (20 mm). The weight of the pipe is 2¼ oz. (66 g). I hope you enjoyed reading the story of this pipe as much I as I did restoring it. If you are interested in more of my work, please follow me here on Steve’s website or email me directly at kenneth@knightsofthepipe.com. Thank you very much for reading and, as always, I welcome and encourage your comments.

Major Repairs to a WDC Wellington Jumbo


Blog by Kenneth Lieblich

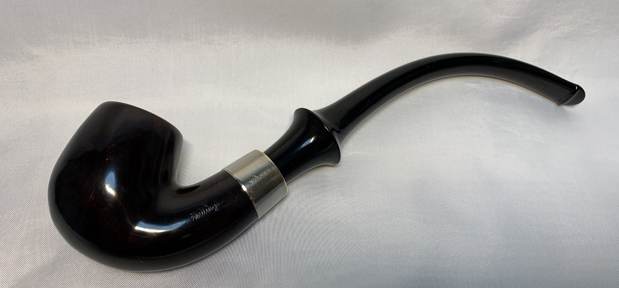
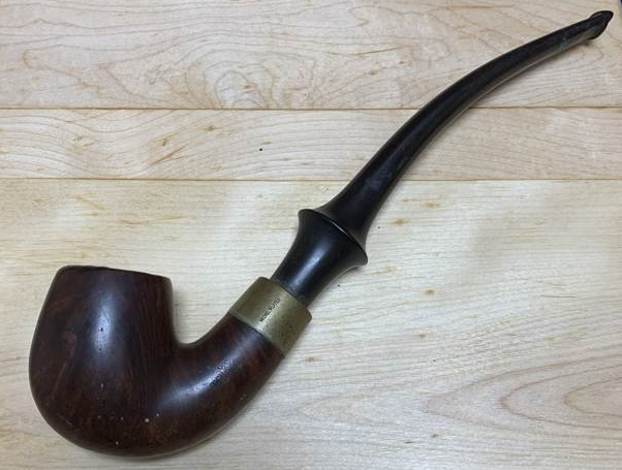
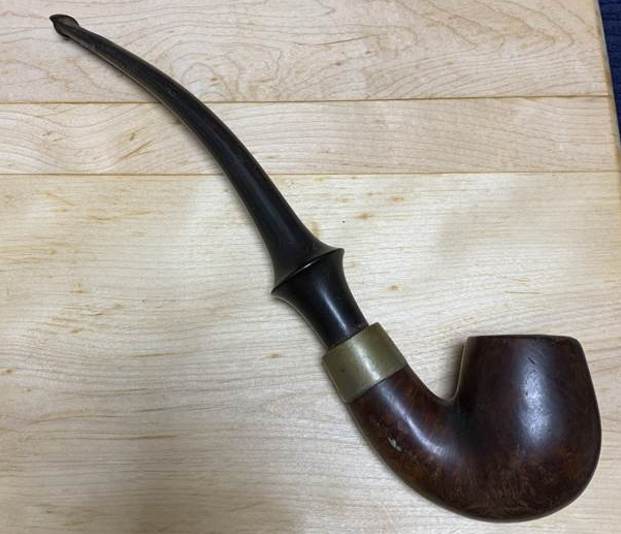
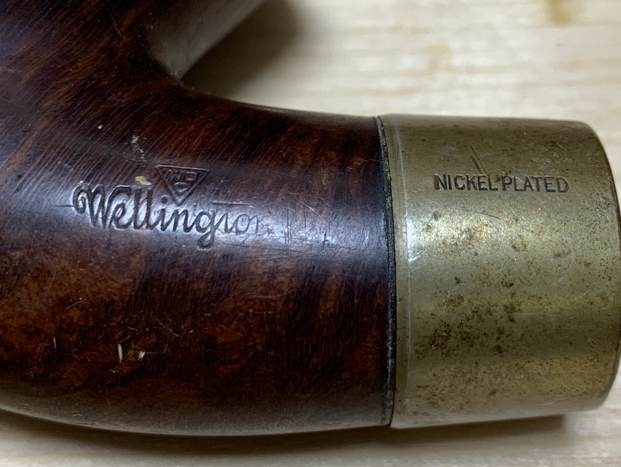
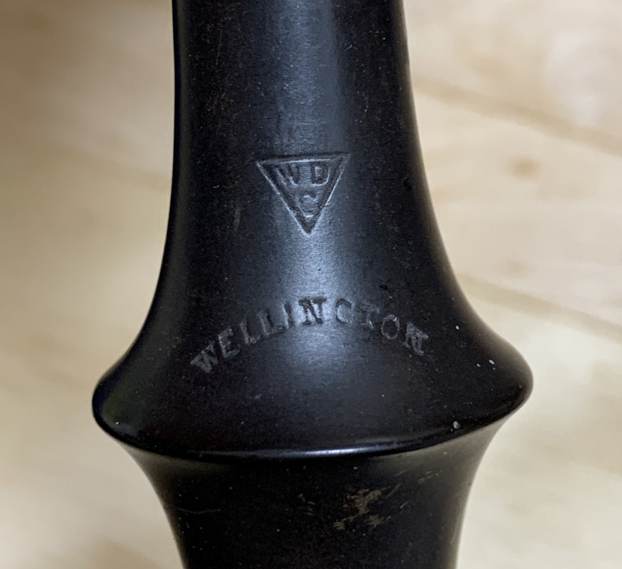
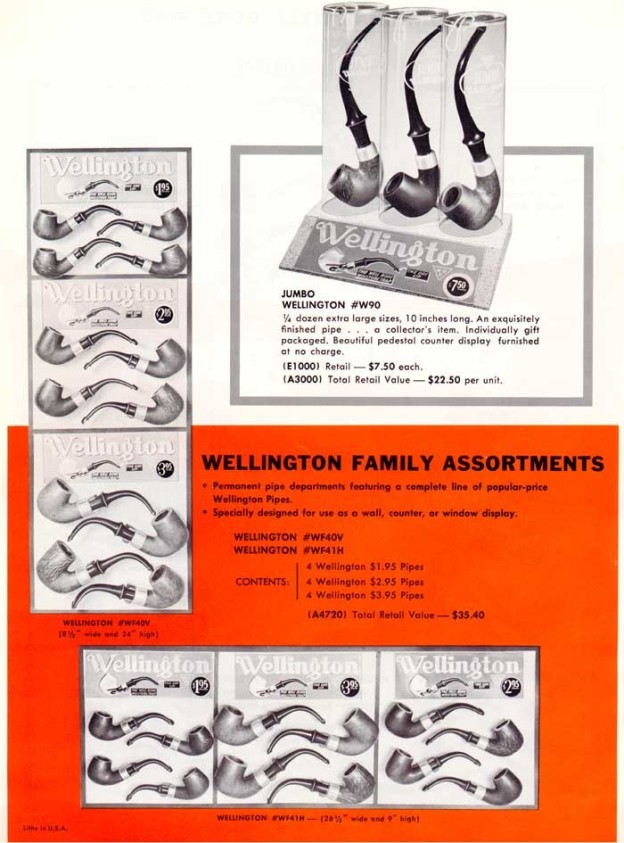
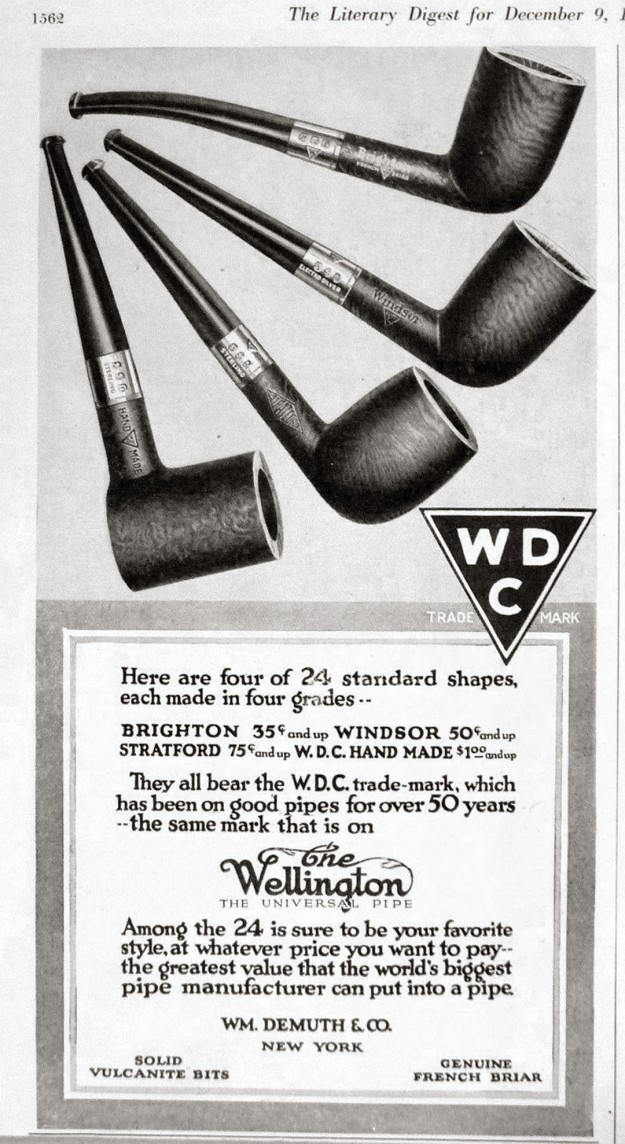
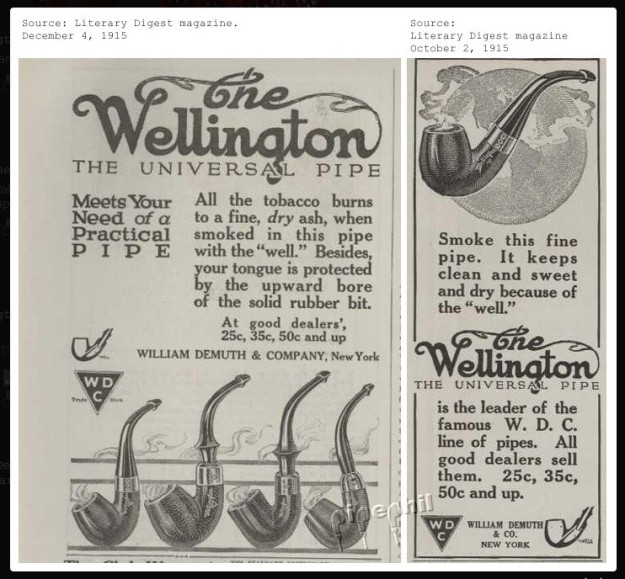
There are some pipes that are so rough that they are an entire pipe-restoration course in and of themselves. This is one of those pipes. It is a WDC Wellington Jumbo and it came to me in a lot of pipes from the USA. Recently, a customer of mine commissioned me to restore this pipe I readily agreed – because I didn’t know what I was getting myself into! The story of this pipe’s repair is a long one and it includes so many different elements that one can learn a lot just by reading. This pipe also reminded me that sometimes the wear-and-tear of the years needs to remain on a pipe as part of its story. I managed to bring great beauty back to this pipe, but it would always retain signs of its harsh past. This is one Wellington that did NOT win at Waterloo. The pipe in question was made by the William Demuth Company of New York (hence, WDC). I read a blog Steve wrote on a Wellington Jumbo back in 2020 to learn more about the pipe’s background. I was directed to the Pipedia page on WDC and it has a lot of good information, including a great flyer which had a photo of some of the Jumbos.From Pipedia is a Wellington ad and another from 1915, courtesy of Pipephil: The Wellington is a charming pipe, but it had a number of significant issues. It might be most clear for you, dear reader, if I enumerate the issues, one-by-one, and we can address them in due course. There was a tremendous amount of work to do on this pipe, so I got to it. I divided up the problems into three categories: the stem, the ferrule/band, and the stummel.

1.  I began by cleaning some of the filth on the outside of the stem with some Murphy’s Oil Soap on cotton rounds. This removed some of the surface staining.
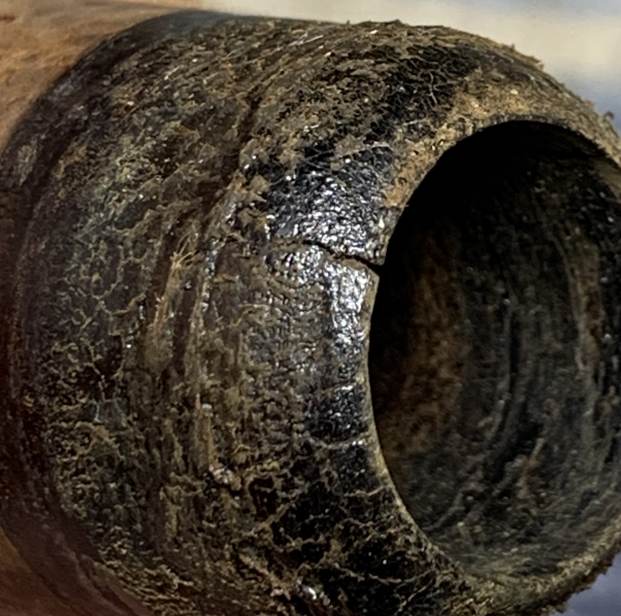
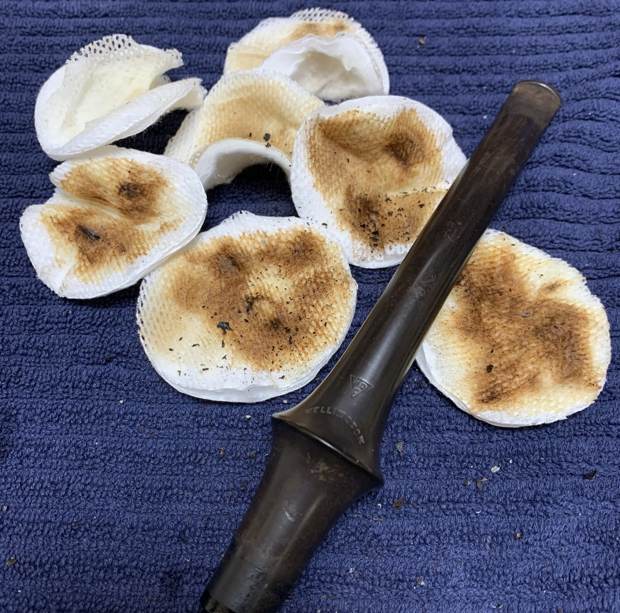
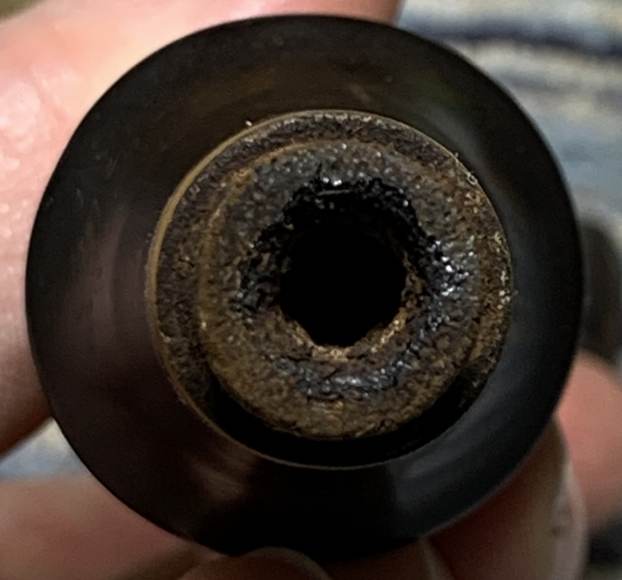
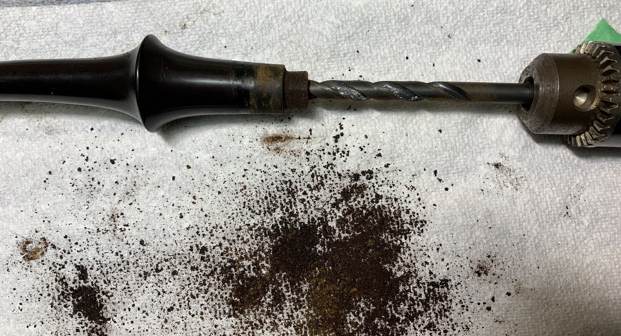
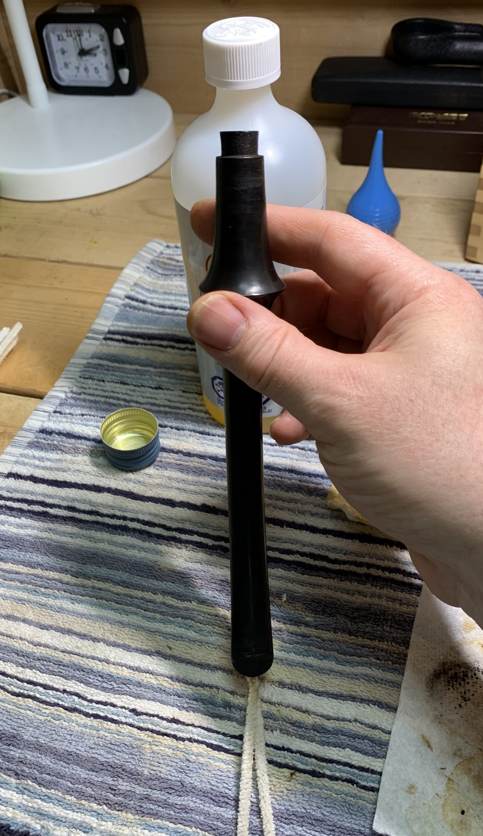
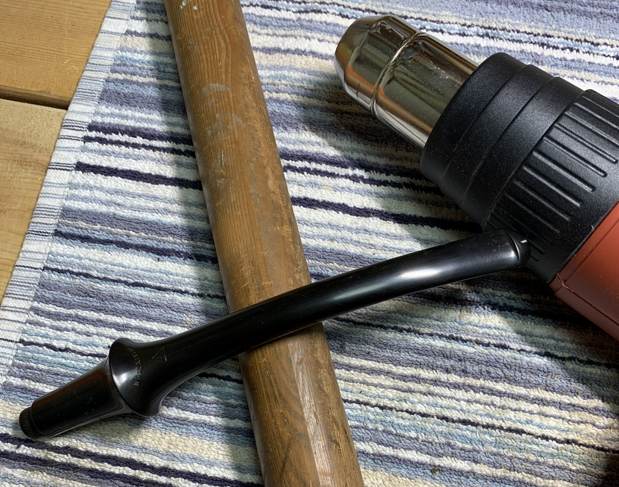
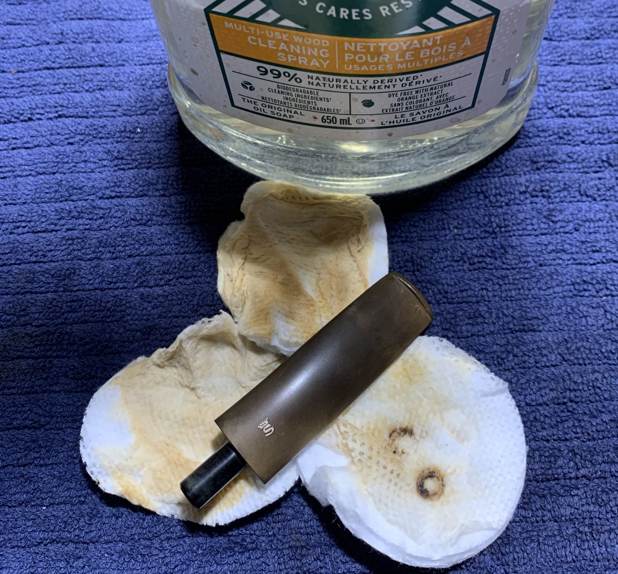
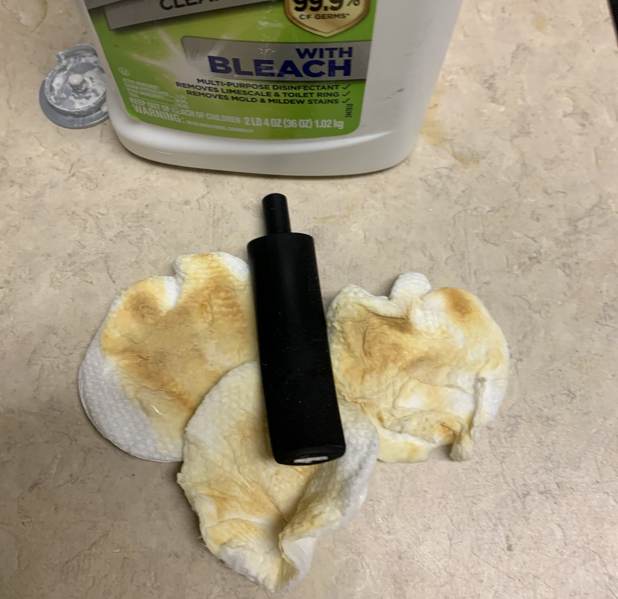
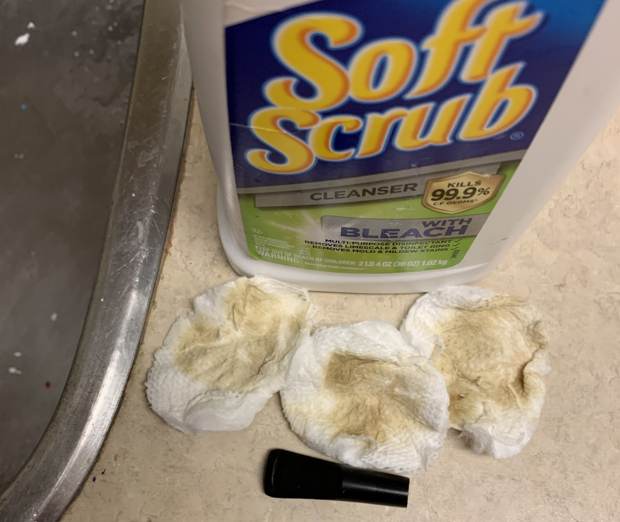
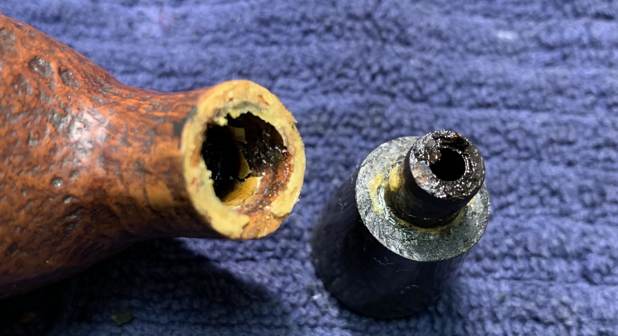
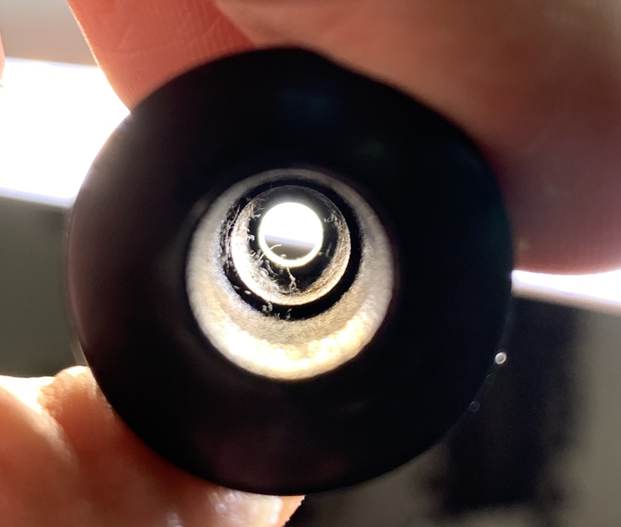
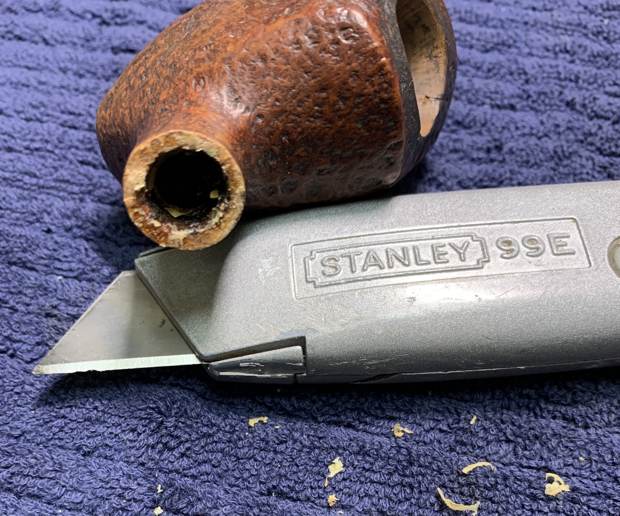
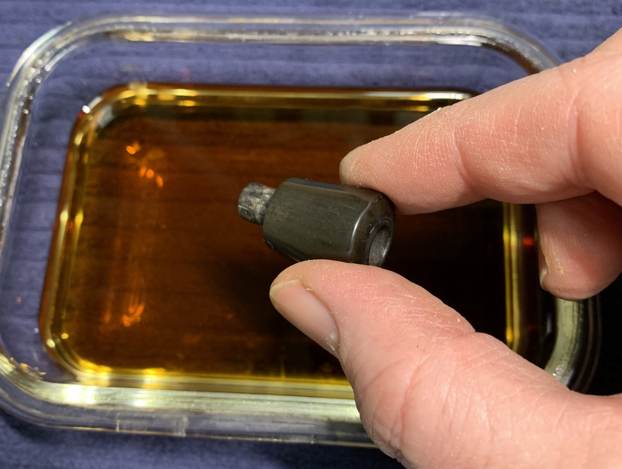
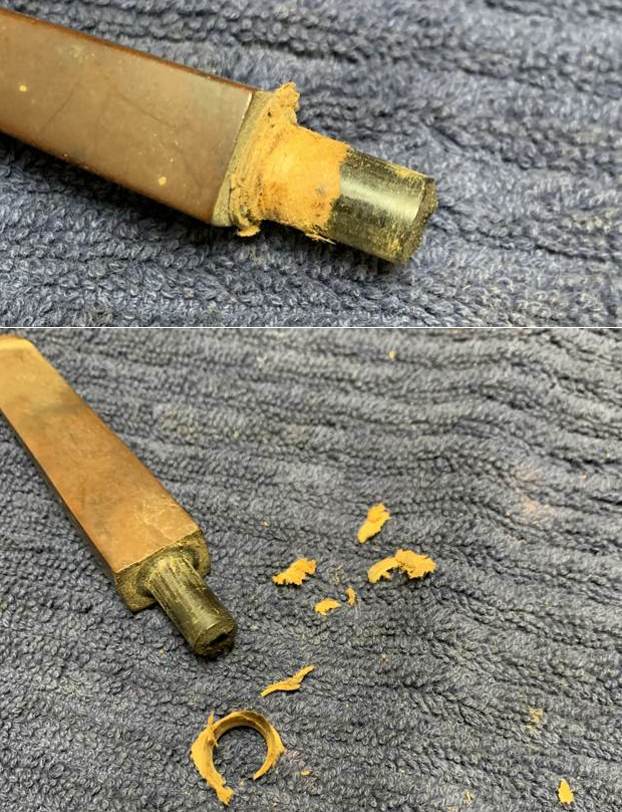
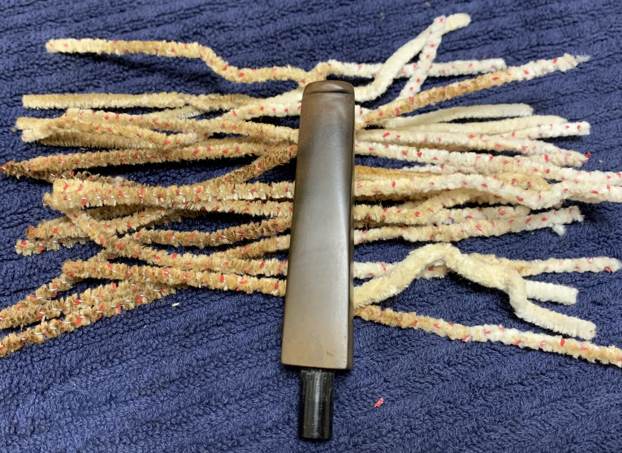
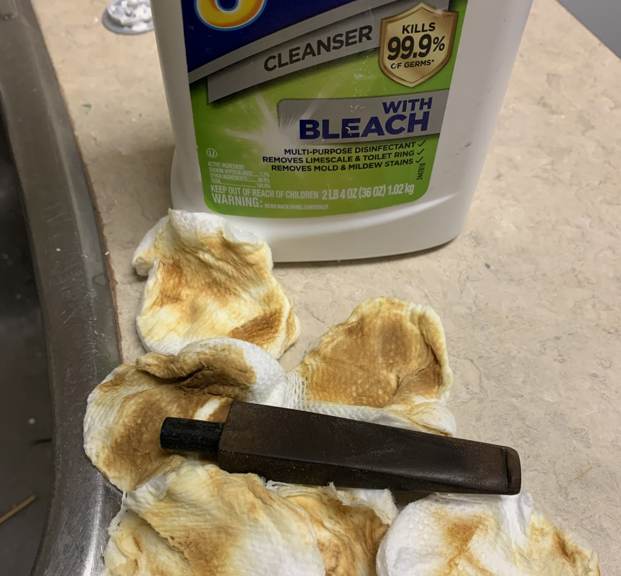
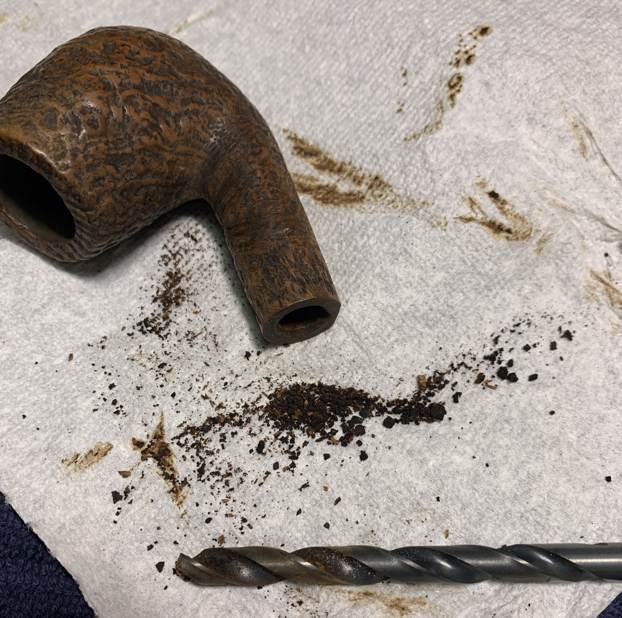
2. The stem’s insides were absolutely clogged with filth. Steve told me that the Wellingtons are notorious for this, and I learned the hard way just how true that was. I actually used a drill bit (by hand) to break into the encrusted gunk in the stem. Then, I started cleaning the inside with isopropyl alcohol, Q-tips, and pipe cleaners. This took a long while. The inside was terribly dirty and it took an awful lot of cotton. 3. Due to the size of the stem, I had to use churchwarden-size pipe cleaners, but this was just not doing enough to progress the process. I decided to plug up the bore-end, filled the stem with alcohol, and let it sit for a while – in the hope that it would loosen some of the gunk. This was mildly successful but insufficient. So, I then opted to use my tube brushes with alcohol and this worked quite well, dislodging some of the filth I couldn’t otherwise get to. It was clear that the pipe would require a retort, but that would have to wait until later. 4. The tenon end was burnt to a crisp from overuse and, more specifically, overheating. I sanded this down in order to even it out. I didn’t want to over-sand it, but I couldn’t just leave it as it was. 5. There was considerable oxidation, but the stem was too large to fit in my deoxidation fluid container. As a result, I had to do this by hand. I used SoftScrub with some cotton rounds and, as you can see, lots of revolting colour came off the stem. As expected, this took a lot of elbow grease, but I got it to a reasonable state.6. The area of the stem just above the button was chomped as badly as I’ve ever seen and the vulcanite had actually ruptured at some point. Also, the bore hole was damaged. I used a BIC lighter to try and lift some of those dents, but very little (if anything) was lifted. I brought out my cyanoacrylate adhesive and I applied it liberally to the affected areas – including the bore. I used some accelerant to get the glue going, and then moved on. 7. I began the lengthy process of sanding and shaping the cyanoacrylate repairs. I used small files and both 220- and 400-grit sandpapers to remove the excess adhesive. Once I had shaped it the way I wanted it, I then used all nine Micromesh pads (1,500 through 12,000 grit) to bring out the lovely black lustre on the stem. I also used Obsidian Pipe Stem Oil in between each pad scrubbing. Hey –we’re finally making some progress!8. Halfway through the MicroMesh process, I paused to fix yet another problem with the stem: it had straightened over time and needed to be bent back into its correct shape. Essentially, I wanted the end of the stem to be close to parallel with the rim of the bowl. I brought out my heat gun and heated the vulcanite stem in order to make it malleable. The heat gun is very powerful – it does not take long! When it was soft, I gently curved the stem over a wooden dowel. The dowel provides a firm surface and a proper curve. Once I had the bend I wanted, I left the stem to cool and set itself in place.9. On to the ferrule – which was thoroughly corroded and discoloured from years of mistreatment. Somewhat to my surprise, the ferrule came off very easily and required no special effort. I began by cleaning the metal with some SoftScrub on cotton rounds. This was quite good at removing the unsightly bits.10. I sanded the inside of the ferrule with 220-grit sandpaper in order to remove the old glue and debris that came from the shank. This would provide a better surface for re-gluing later.

11. I used some of my MicroMesh pads (only 3,600-12,000) to eliminate some of the minor scratches on the metal. It also gave a nice shine which clearly hadn’t been seen for decades.

12. I used a jewelry cloth to give the final polish to the nickel. This ferrule would always retain some small dents etc. from its hard life, but it looks much improved.

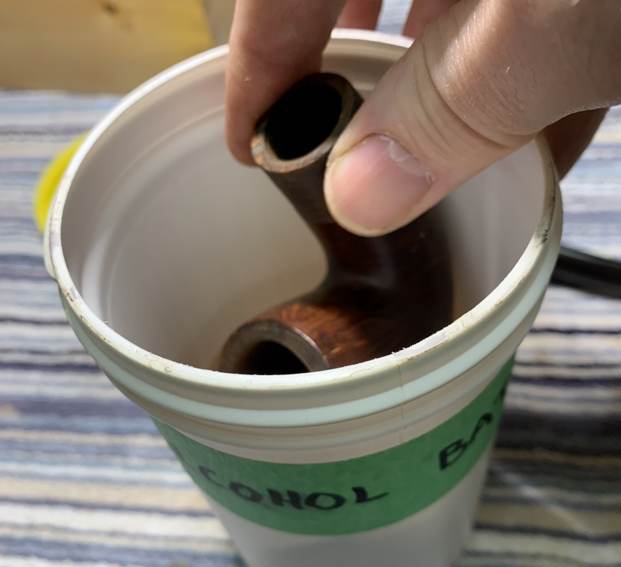
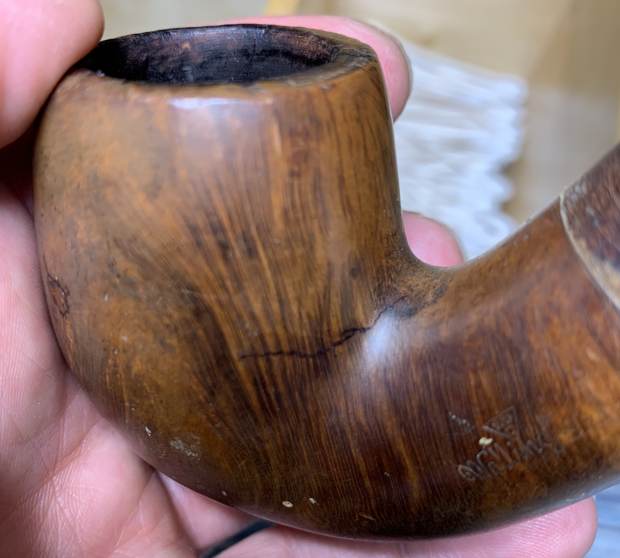
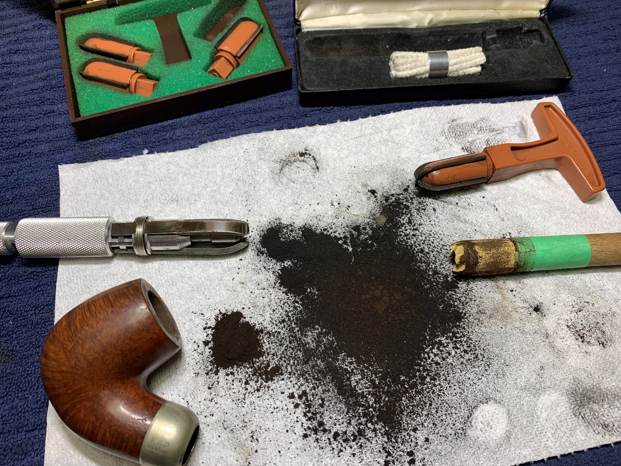
13. On to the stummel – this is where the lion’s share of the work was. The insides (both bowl and shank) were overwhelmed with cake and tar and anything else you’d care to mention. The bowl really needed to be reamed, so I used the KleenReem too to scrape off as much built-up cake. Sadly, this just wasn’t sufficient – I had to go to the next step to get things moving.14. I threw the stummel in my alcohol bath in the hope that it would loosen some of the incredibly hard residue inside the bowl. After 24 hours, this worked a bit, but not enough. It was time for the nuclear option.15. I put a sanding drum (and a couple of other bits) on my Dremel and carefully began removing the old stuff. This is not an option that I use regularly. The risk of oversanding is high and that can be an even bigger problem. However, I worked slowly and cautiously. Generally, I prefer to sand the chamber down to bare briar. When restoring, it is important to ensure that there is no damage to the briar under the cake. There are a few situations when I might leave some cake in the bowl, but not today. Sadly, there were definitely some hidden flaws to the briar on this pipe. I’ll come back to that later.16. Just like the bowl, the shank was absolutely disgusting. It had never been cleaned – or, not for many decades. I started cleaning the inside with isopropyl alcohol, Q-tips, and pipe cleaners. This took a while. The inside was very dirty and required and extraordinary number of Q-tips and pipe cleaners. Eventually some cleanliness came to it.

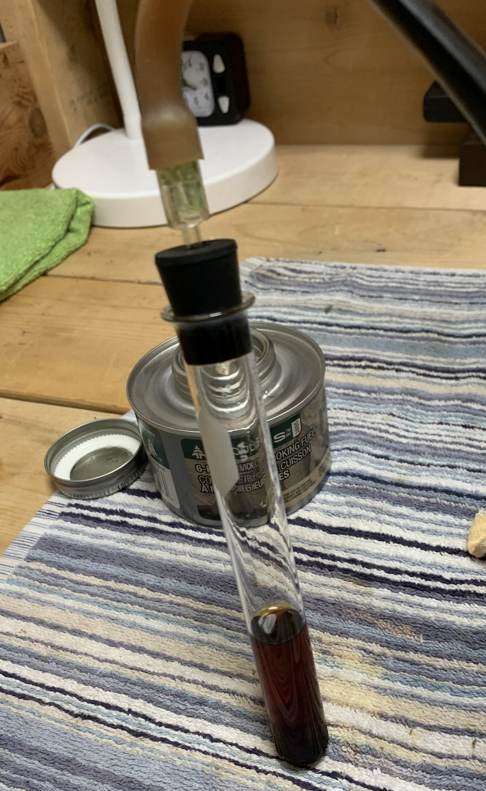
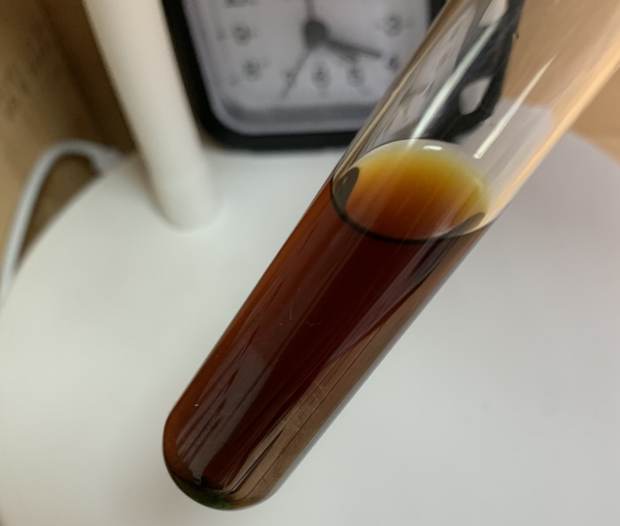
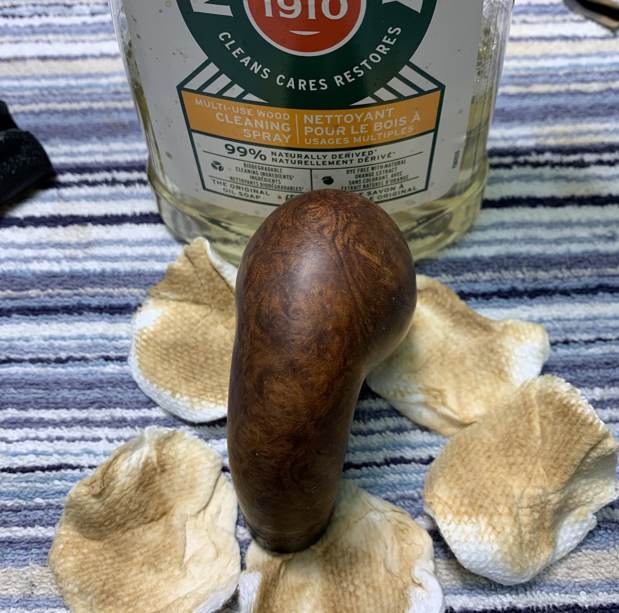
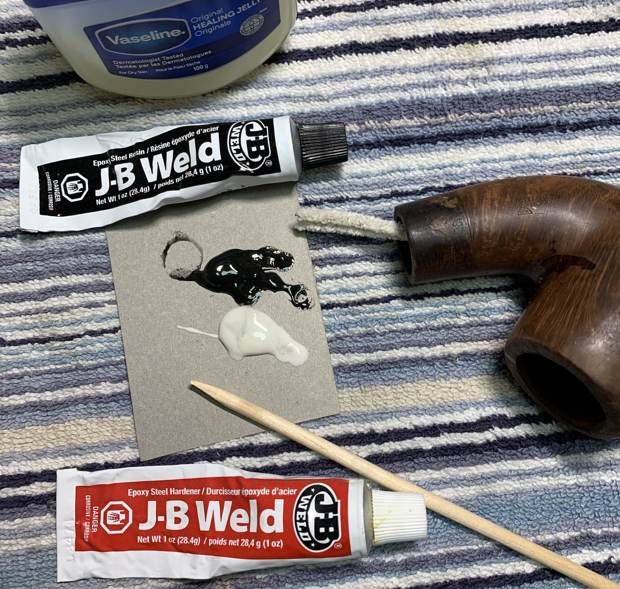
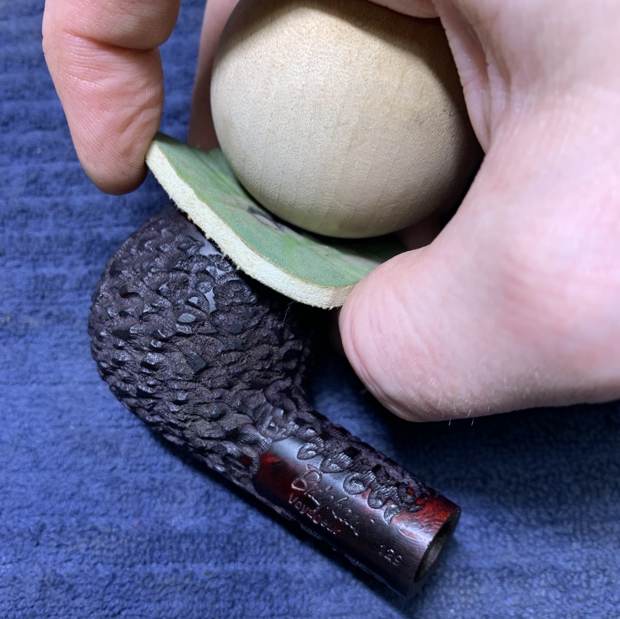
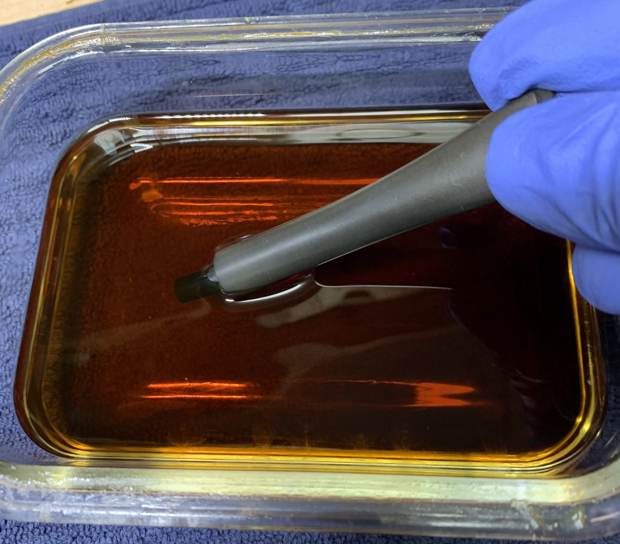
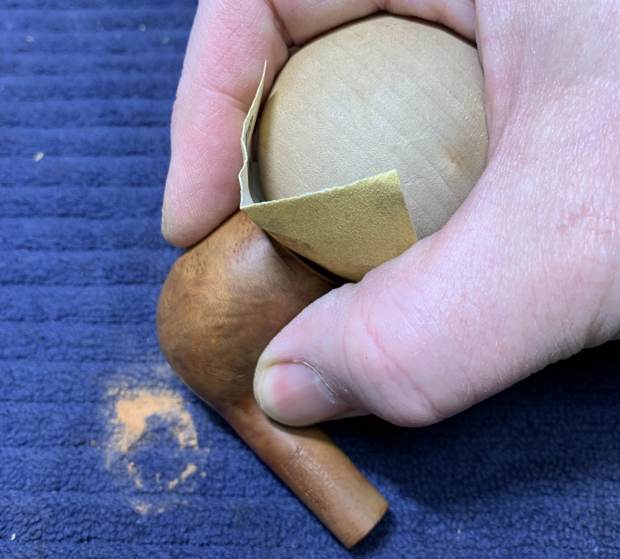
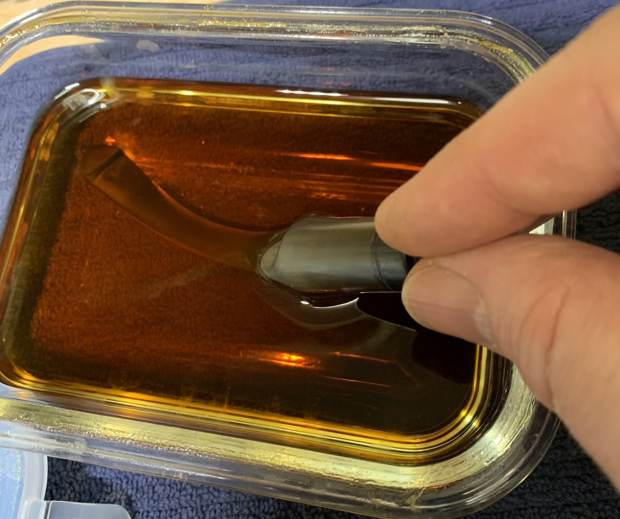
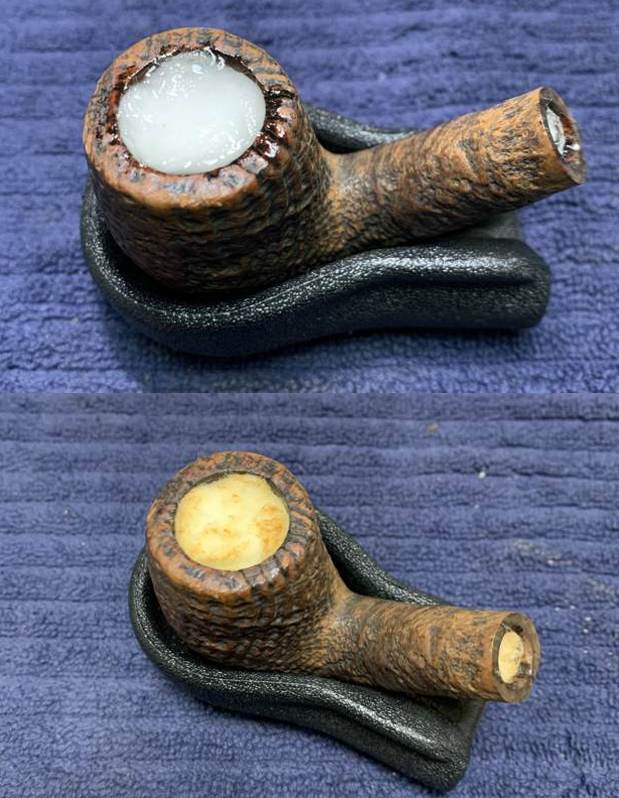
17. I decided to de-ghost the pipe in order to remove any lingering smells and dirt of the past. I thrust cotton balls into the bowl and the shank and saturated them with 99% isopropyl alcohol. I let the stummel sit overnight. This caused oils, tars and smells to leach out into the cotton. The bowl was supposed to be nice and clean after this, but this was no ordinary pipe.18.  At this point, it seemed sensible to set up a retort and further clean this whole pipe out. I put the stem and stummel back together and used my pipe retort system. This system uses boiling isopropyl alcohol and a vacuum (a void, not the household appliance) to clean the interior of a pipe. As you can see by the brownish colour of the alcohol, the retort worked well – although it took many changes of alcohol to get it clean. I managed to extract lots of otherwise inaccessible filth from inside the pipe. 19. Now that the pipe was clean, I wanted to have a closer look at the state of the briar, inside and out. For this, I scrubbed the outside of the stummel with Murphy’s Oil Soap on some cotton pads. That removed any latent dirt that blighted the wood. No surprise: there was lots.20. Several tiny cracks appeared on the outside of the stummel and I needed to address them. The first step in dealing with this was to ensure that the crack would not continue to creep after I had repaired it. To that end, I took a micro-drill bit, inserted it in my Dremel, and very carefully drilled a hole at the ends of the cracks. Since the cracks were not deep and did not go right through the wood, I did not drill all the way through. I then repaired the cracks by allowing cyanoacrylate adhesive to seep into them and then letting the glue cure. 21. Alas, there were also cracks inside the bowl. But beyond that, significant gouges were there from some prehistoric reaming tool. Removing the cake in the bowl did feel like an archaeological dig, so there were bound to be some surprises in the briar. The solution to this problem is always a tricky one: epoxy. I prepared some J.B. Weld epoxy and filled the cracks and gouges, ensuring that the epoxy was evenly spread throughout the bowl. Of course, I did plug the draught hole with a folded pipe cleaner (coated in Vaseline) to make sure none of the epoxy made its way up there. Once done, a good 24 hours was needed to ensure that the epoxy was properly set. 22. Burn marks and an uneven surface blighted the rim of the pipe and it needed to be redone. There was a lot of damage to the rim and the front edge had been bashed in, presumably from banging out dottle over the years. In order to remove the damage, I “topped” the pipe – that is to say, I gently and evenly sanded down the rim on a piece of 220-grit sandpaper. This is always a tricky business – I want to find the balance between removing old burns and maintaining as much of the pipe as possible.23. The rim needed some more help since the bowl opening was badly out of round. To fix this, I took a solid wooden sphere, wrapped some 220-grit sandpaper around it, and sanded the inner edge of the rim. In addition to this, I also sanded down the outside of the bowl, near the rim, so as to minimize the visual effect of the bashed edge. I sand all the way around to ensure that the pipe retains its look.24. As mentioned earlier, there were a few dents in the briar. I dug out my iron and a damp cloth to try to raise the nicks. The hot and moist steam can often cause the wood to swell slightly and return to shape. There was some movement in the wood, which was good. The repair was not perfect, but the remaining wounds would be improved by sanding.25. There were two significant fills on the bowl. They were large enough that I would not be able to make them disappear entirely, but I wanted to make them solid and smooth, and meld into the rest of the wood. I fixed them up with a mixture of cyanoacrylate adhesive and briar dust.

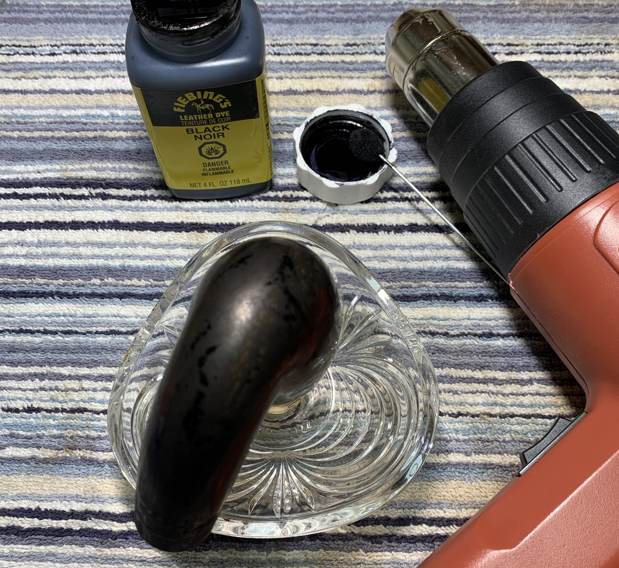
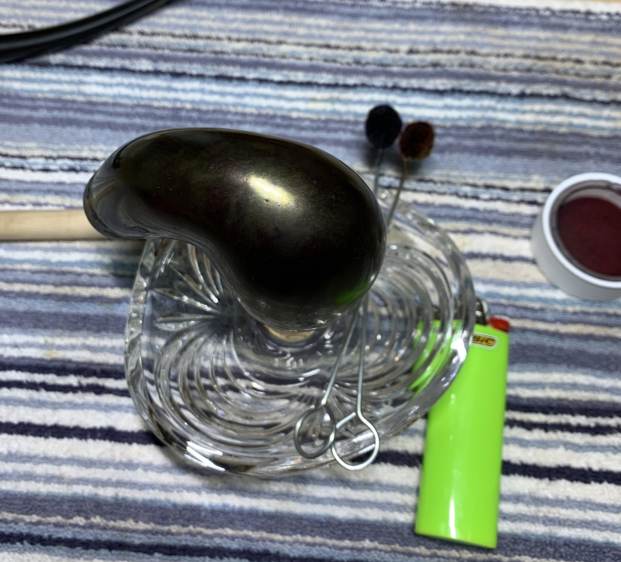
26. Next, I used all nine Micromesh pads (1,500 through 12,000 grit) all over the stummel to make it lovely and smooth. 27. Having completed that, it was time for staining. My customer wanted a deep, dark burgundy colour. First, I brought out my heat gun and spent a couple of minutes thoroughly heating the wood, so it would be as receptive as possible to the stain, to give the best results. I applied Fiebing’s Black Leather Dye with a cotton dauber. I flamed it with my BIC lighter and let it set. This dye is alcohol-based, so I used isopropyl alcohol to wipe down the pipe and remove excess stain. I coated it again with Fiebing’s Oxblood Leather Dye, flamed it again, and let that set too. I stained and flamed the pipe another two times (once with black, once with oxblood), always making sure I warmed the pipe with my heat gun first. 28. Now that the epoxy had fully cured, I gently sanded the inside of the bowl to provide a rough surface for what was to come next. I coated the entire inside of the bowl with a mixture of activated charcoal and my wife’s homemade yogurt. Once hardened, this provided a good, slightly rough surface for a new cake to build. 29. At long last, I was off to my bench buffer to put the final touches on this pipe. I first gave it a thorough going-over with White Diamond compound. Following that, several coats of carnauba wax created a beautiful, glossy seal on the pipe and some closure to this long and involved repair. The lovely shine made the wood look beautiful! I know that the new owner will enjoy smoking it for many years to come. I hope you enjoyed reading the story of this pipe as much I as I did restoring it. The approximate dimensions of the pipe are as follows: length 9½ in. (240 mm); height 6½ in. (165 mm); bowl diameter 1⅝ in. (41 mm); chamber diameter 1 in. (25 mm). The weight of the pipe is 3 oz. (86 g). If you are interested in more of my work, please follow me here on Steve’s website or email me directly at kenneth@knightsofthepipe.com. Thank you very much for reading and, as always, I welcome and encourage your comments.

Making a Brigham Voyageur Just a Bit Spiffier


Blog by Kenneth Lieblich

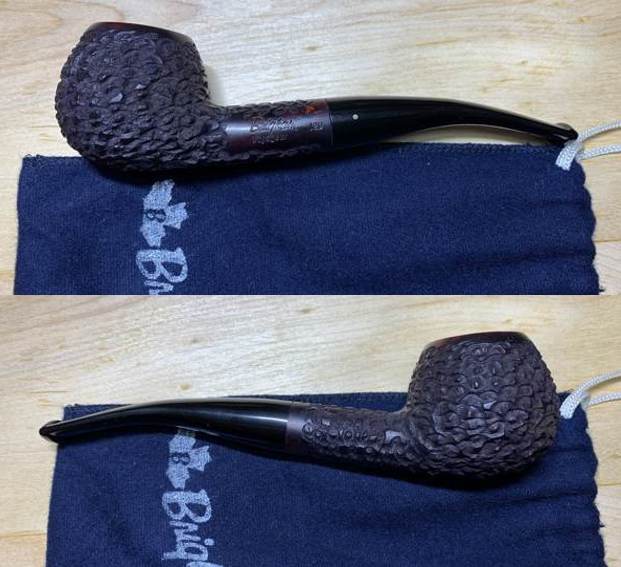
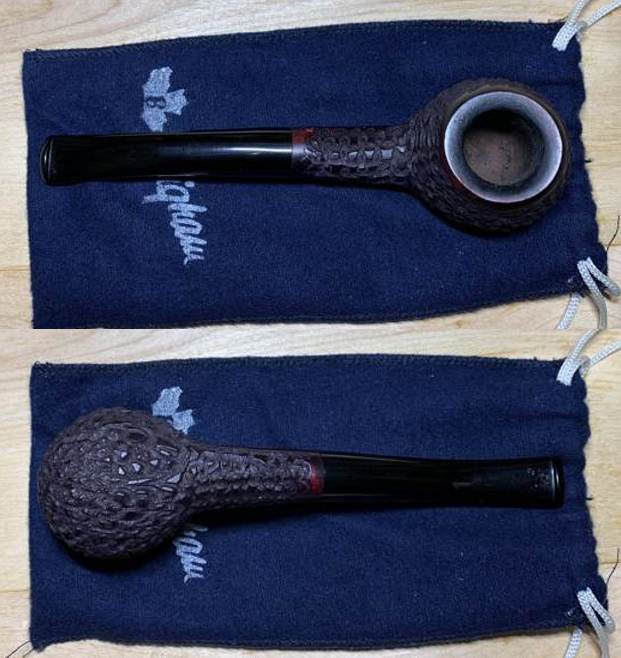
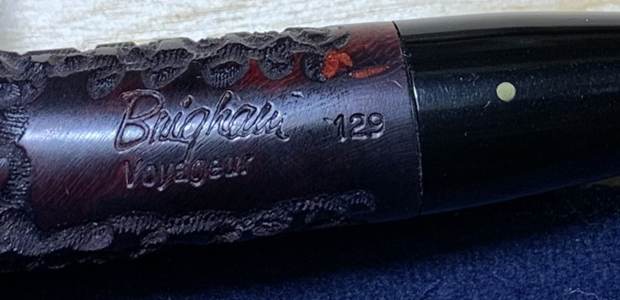
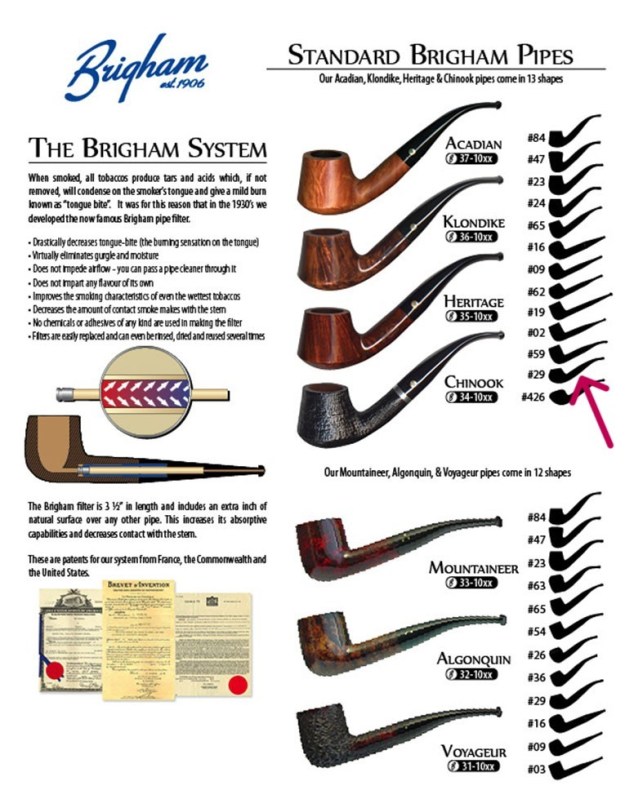
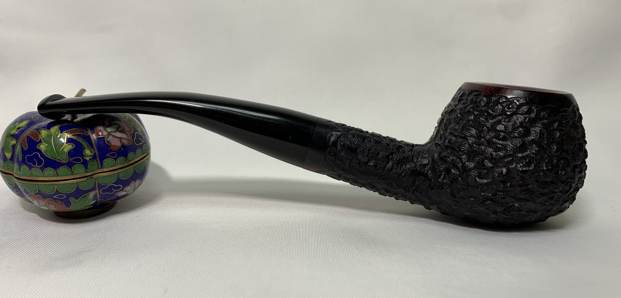
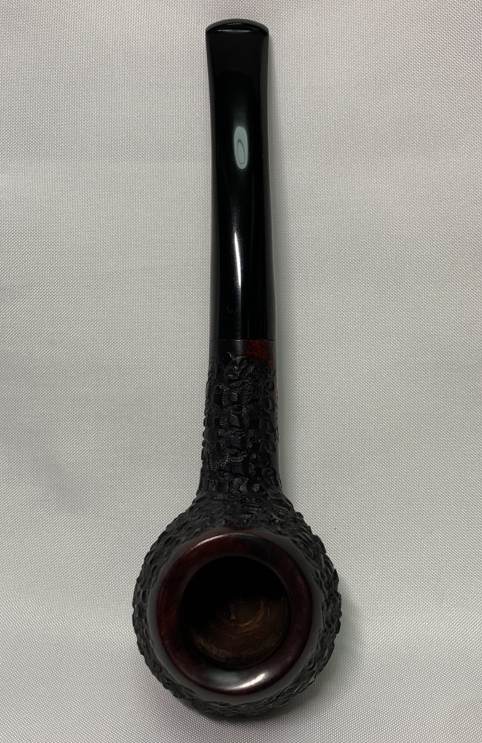
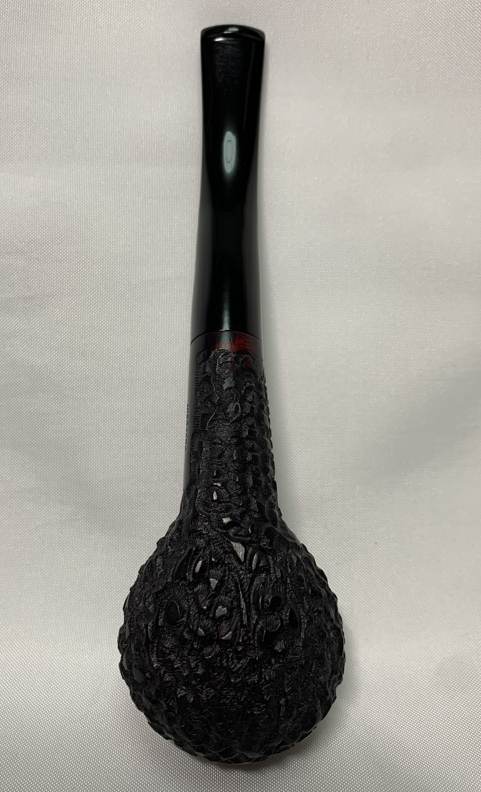
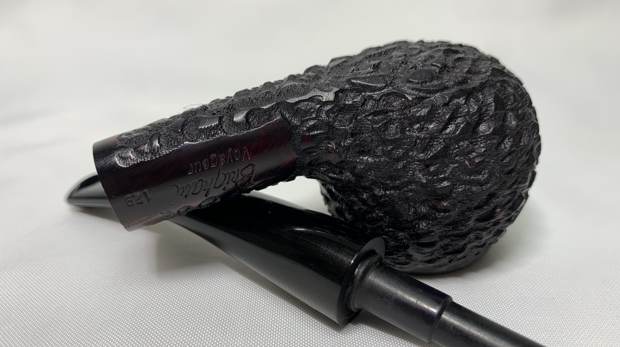
Next on the chopping block is a good-looking 1-dot Brigham Voyageur. I acquired it (with some other stuff) from a local gentleman and, subsequently, a friend of mine said he wanted me to clean it up for him. No problem – the pipe was in good shape to begin with. This pipe really feels good in the hand. It has that look – no one could mistake it for anything but a Brigham. This is one of the newer Brigham system pipes – one can tell it’s newer because of the Delrin tenon (the old ones were aluminum). The markings on the pipe are as follows: on the left side of the shank are the words Brigham [over] Voyageur. Beside that is the shape number: 129. Also, on the left side of the stem is the classic dot of the Brigham company.I read through the article on Pipedia on Brigham Pipes. You can read it here. It’s a good article and contains lots of helpful information. I have included the chart below from the site as it shows the Standard (1 Dot) pipes and includes the Voyageur and the shape number, 29. The one dot pipes identify the pipe as part of the 100 series and the series shape is #29. Therefore, the shape number stamping is 129.As Steve has done in his restorations of Brighams, I am including information below from Charles Lemon’s website on the dating etc. of Brigham pipes. Check it out here. I quote from both Charles’ article below:

The Transition Era (2001 – 2006). The biggest change to hit Brigham since the advent of the Rock Maple filter occurred in 2001 when Brigham moved production from Toronto to Italy. The product lineup was, not surprisingly, heavily impacted, with the most obvious change a sharp decrease in the number of pipe shapes available.

Daniel More, President of Brigham Enterprises Inc. explains the move to the EU: Admittedly the hardest decision we ever needed to make. With an aging skilled work force we were losing the skills required at an alarming rate. We made attempts to bring in new people but we were not effective in staving off the atrophy. We were fortunate though to be able to move by increments allowing us control and comfort throughout the process. For example, instead of turning our own bowls we began to purchase turned bowls; then we had stems added with sanding at 100-grit ; then sanding to finer degrees; then staining and so on. The last bit of control was grading.

 I still visit the manufacturing facility in the EU at least once a year to discuss QC and pick shapes and designs. The shift [to the EU] resulted in fewer shapes. However, one of the biggest benefits was access to a wider variety of finishes. We had never been able to offer a sandblasted pipe and the access to accessories like rings and different colours, I think, allowed us to make the line more interesting

Coincidental with shifting production to the EU was the move from the original aluminum tenon/filter holder to one made of a composite material. Daniel More provides insight into the switch:

Principally there were two catalysts for the change. We were using a very specific OD for our Aluminum Tenons. In fact, we were one of only two companies in North America using this OD, the other being an aircraft manufacturer in California. When this aircraft company shifted to an alternative, it left us and us alone purchasing this specific size. To stay with Aluminum, our only alternative was to purchase an oversized OD and tool this down to our requirements results in significant expense due to the wasted material costs.

We had, for many years, experimented with a number of composite materials for both the tenons and Distillator Tips. The issue was always heat resistance. Technology having advanced as it did by the 1990’s presented us with a selection of alternatives. We tested 10 different compositions before landing on the formula we still use today.

Cost saving aside, the Composite Tenon virtually eliminated the breaking of shanks. That is, when a pipe shank would break due to leverage (think, in the pocket and sitting down), we could not repair this. The Composite Tenon would now break away rather than the shank allowing for an inexpensive repair versus having to throw out “an old friend”. Without a doubt, there were many cries about the inferior Composite Tenon breaking but with our offer to provide no cost tenon repairs we assuaged this concern. We still offer to this day no charge repairs for broken Composite Tenons – no questions asked.

During the Transition Era, the 100 – 300 series pipes looked very similar to Canadian-made pipes and continued to be recognized by their traditional brass pin patterns. These lower series pipes were offered in 9 shapes. The 400 series disappeared temporarily, while the 500 to 700 series pipes, available in only 8 shapes, lost their brass pins and were identified only by their 3-digit shape numbers.On the whole, the pipe was in very nice shape. It didn’t appear to have been smoked too much.
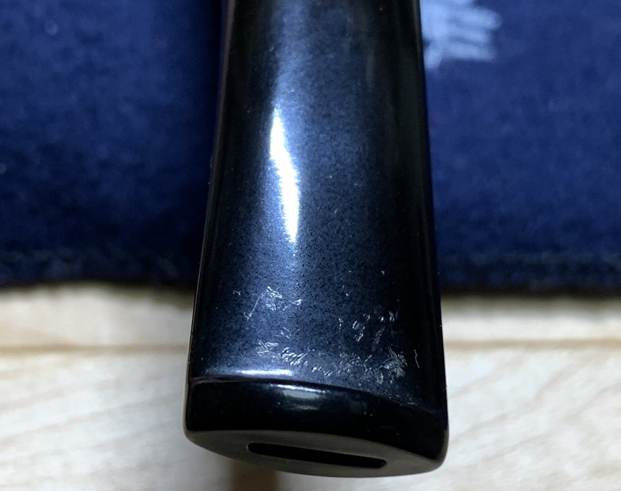
The stem had a few tooth marks/scratches – nothing too serious. The stummel had some lava on the rim, small marks on the rim, and some light caking in the bowl.
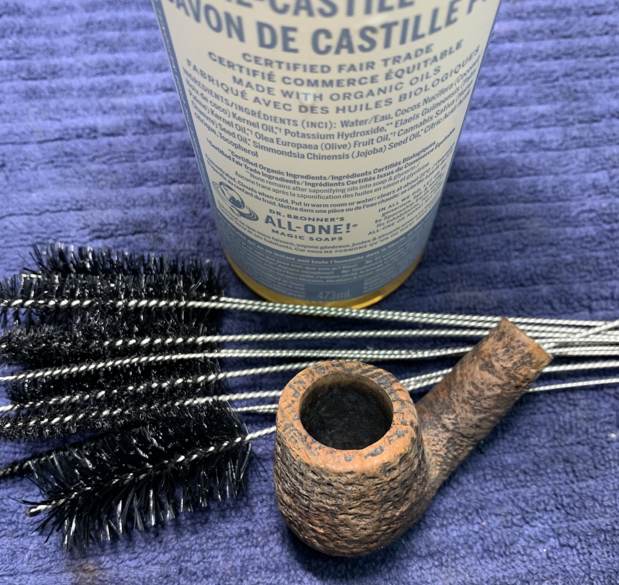
I began by wiping the outside down with Murphy’s Oil Soap on some cotton pads. I then took some lemon-infused isopropyl alcohol and pipe cleaners, and cleaned out the internals. Fortunately, the pipe had been well-maintained, so this wasn’t too dirty.I managed to address the tooth scratches with some 220- and 400-grit sandpaper. I then used all nine Micromesh pads (1,500 through 12,000 grit) to bring out the lovely black lustre on the stem. I also used Obsidian Pipe Stem Oil in between each pad scrubbing. Then to the stummel. Firstly, I decided to ream out the bowl. I used the KleenReem to remove the built-up cake and followed that with 220-grit sandpaper taped to a dowel to eliminate as much as I could. I took the chamber down to bare briar, as I wanted to ensure there were no hidden flaws in the wall. Fortunately, there were none. I then proceeded to clean out the insides of the shank with Q-tips, pipe cleaners, and lemon-infused isopropyl alcohol. There was a bit of filth inside this stummel and it took some cotton to get it clean. I followed that up by cleaning the insides with some dish soap and tube brushes.
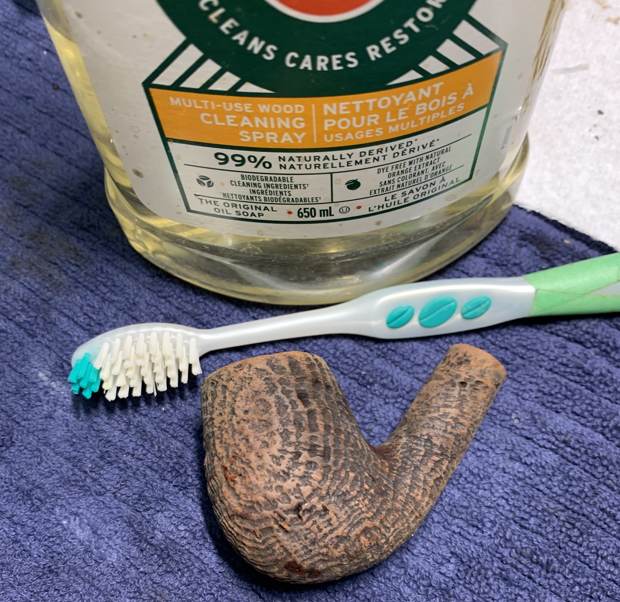
I used cotton rounds and some Murphy’s Oil Soap to scrub the outside of the stummel and a toothbrush with Murphy’s for the lava on the rim of the pipe.
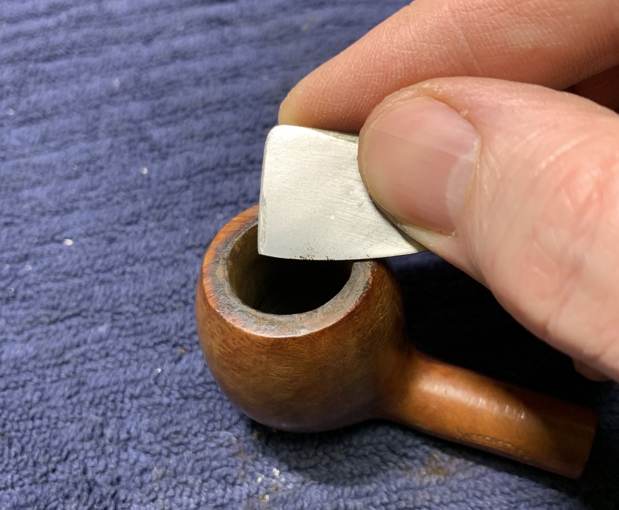
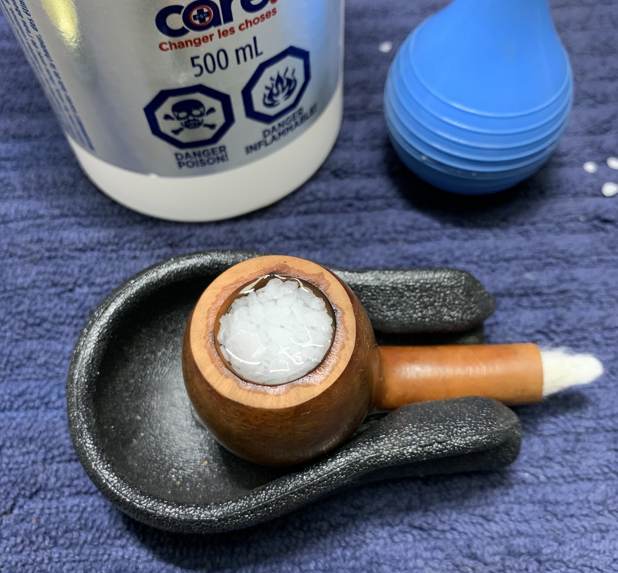
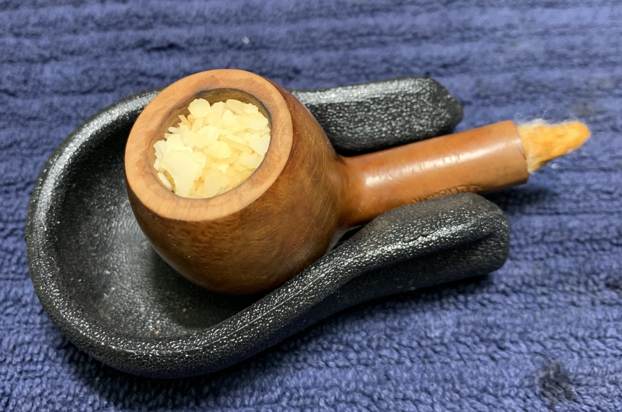
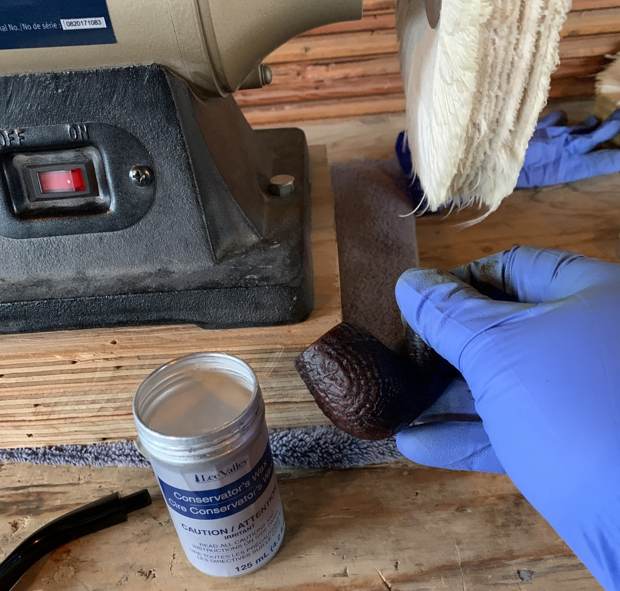
I decided to de-ghost the pipe in order to remove any lingering smells of the past. I thrust cotton balls into the bowl and the shank and saturated them with 99% isopropyl alcohol. I let the stummel sit overnight. This caused any remaining oils, tars and smells to leach out into the cotton. The bowl was nice and clean after this.Having completed that, I was able to address the lava and small nicks on the rim and the bowl. I used a piece of tool steel to gently scrape away the burn residue. I then took a solid wooden sphere, wrapped a piece of 220-grit sandpaper around it, and sanded the inner side of the chamber. This removed the lava on the inner edge of the rim, smoothed out the nicks.I then sanded the smooth parts of the stummel with all nine Micromesh pads. Naturally, I added a light application of Before & After Restoration Balm. This made the wood shine beautifully. I let it sit for about fifteen minutes and then buffed it with a microfibre cloth. In sanding the rim, some of the lovely burgundy colour was removed, so I next set about correcting that. I opted for two aniline dyes: Fiebing’s Black and Fiebing’s Oxblood. I had to approach this mix carefully, to ensure that it matched the pre-existing colour. As usual, I applied flame from a BIC lighter in order to set the colour. What a difference that made! It looked so much better with a fresh coat of stain.I applied some more Before & After Restoration Balm and then it was off for a trip to the buffer. A very precise use of White Diamond and a few coats of Conservator’s Wax made all the difference. The lovely shine made the wood very attractive. This is a very handsome pipe and will provide many years of smoking pleasure for my friend. I hope you enjoyed reading the story of this pipe as much I as I did restoring it. If you are interested in more of my work, please follow me here on Steve’s website or email me directly at kenneth@knightsofthepipe.com. Thank you very much for reading and, as always, I welcome and encourage your comments.

Fixing Up a Hardcastle Apple


Blog by Kenneth Lieblich

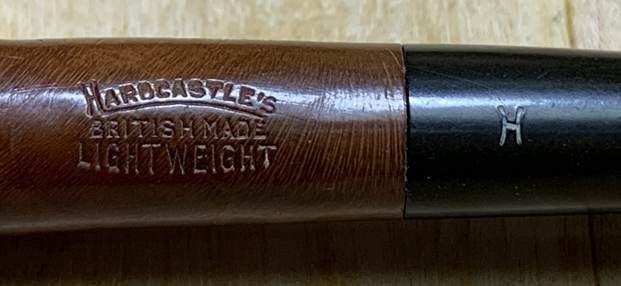
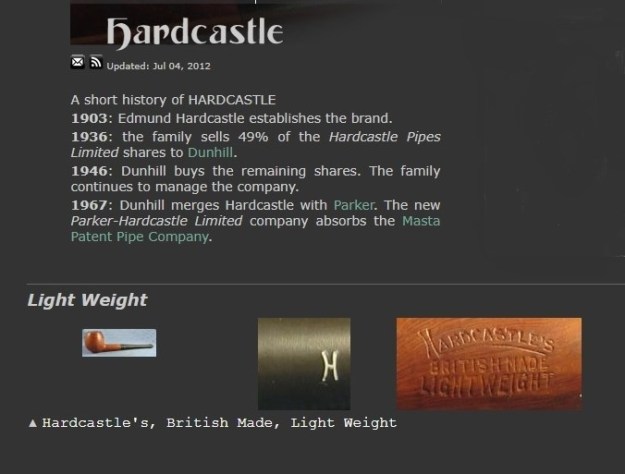
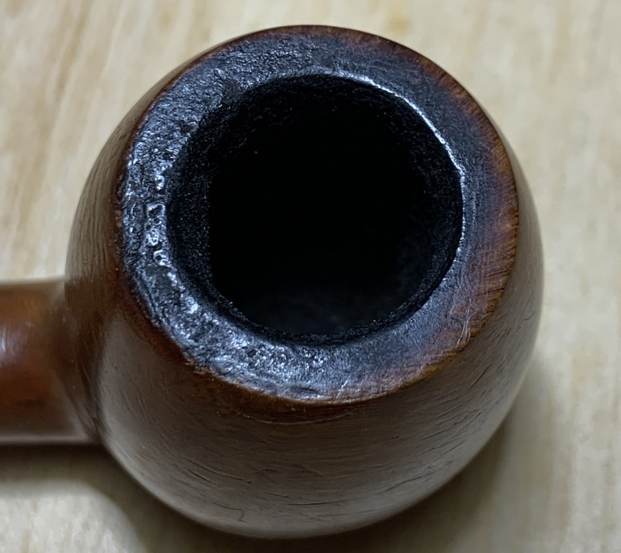
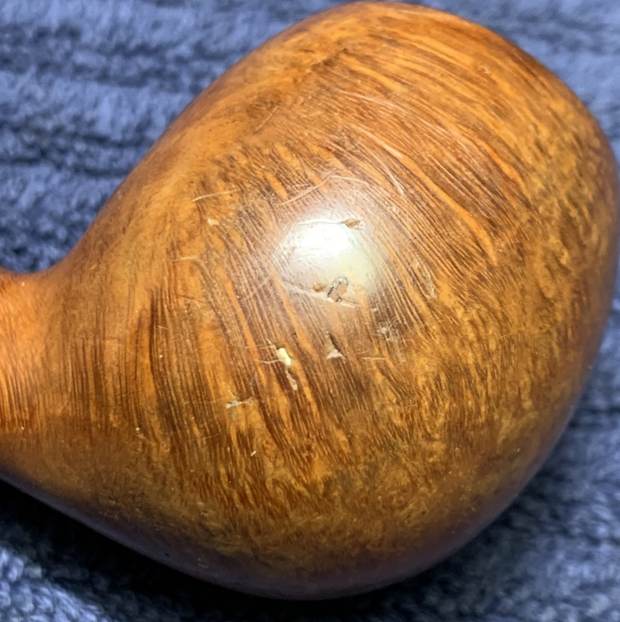
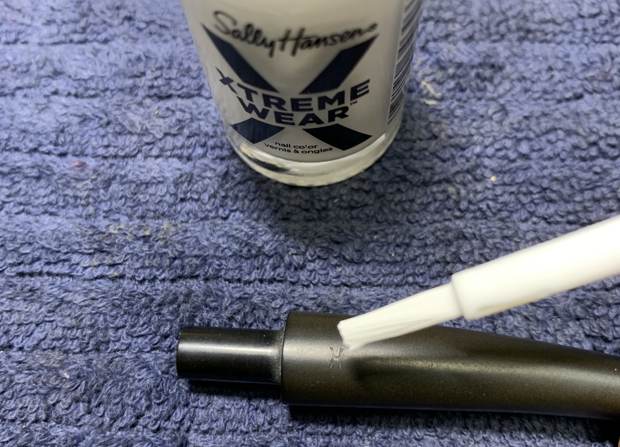
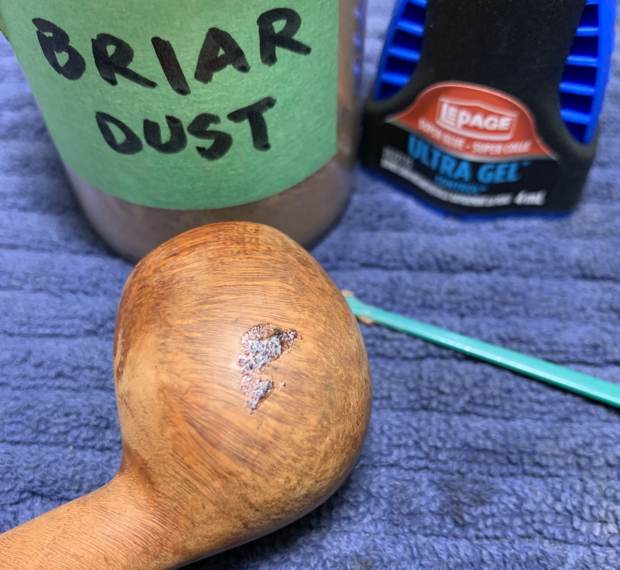
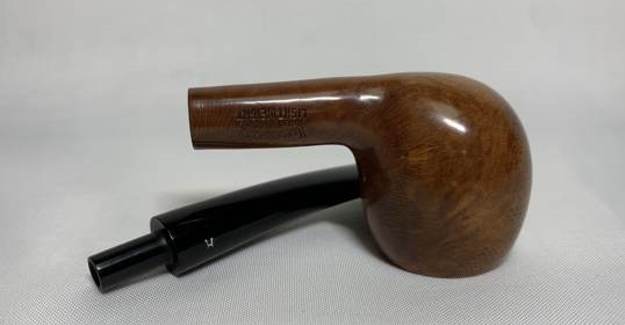
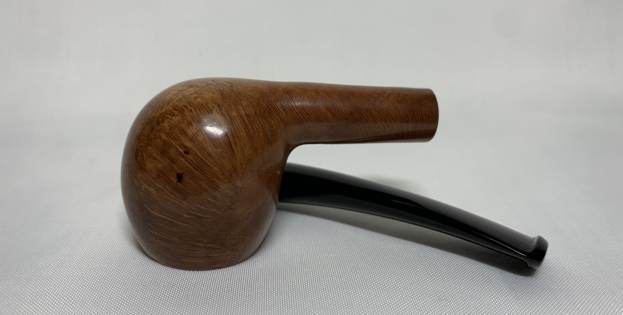
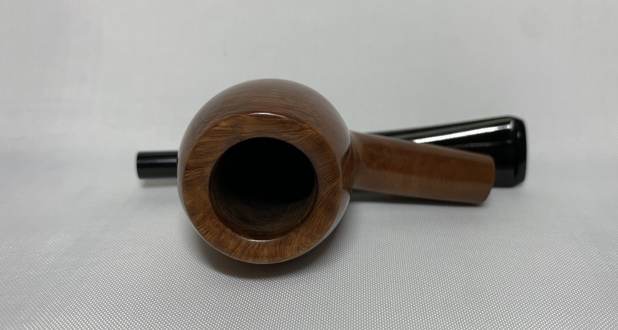
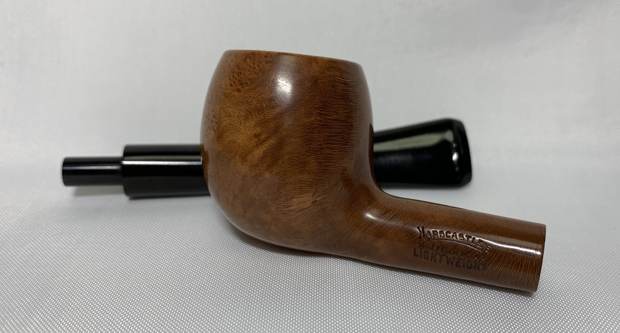
Next on the chopping block is a handsome and gently-bent Hardcastle Lightweight apple, acquired from a local gentleman who’d sadly given up the hobby. It was well used, but it had a certain charm and I felt I could tease out its beauty from under the grime. The markings read as follows. On the left side of the shank: Hardcastle’s [over] British Made [over] Lightweight. On the left of the stem is the stylized “H”, of the Hardcastle company.The Hardcastle name has been around for 120 years and has an interesting history. As usual, I went to Pipedia and Pipephil to see more. Pipepedia has a good article, which I recommend you read here. Meanwhile, Pipephil provided the following information:On to the pipe. There was plenty of cake and lava on the stummel, and the opening of the bowl was slightly out of round, possibly due to bad reaming. The outside of the bowl had a couple of fills, and numerous scratches and nicks. It’s clearly been roughly manhandled during its life. The stem was in far worse shape than the photographs show – the mouthpiece had calcification and some oxidation, and there were many tooth marks and scratches, a deep tooth dent on the underside, and the bit was also badly dented. Time to get this pipe cleaned up. The stem was first on my list. I cleaned out the inside with pipe cleaners and isopropyl alcohol. It was fairly dirty but didn’t take too long to clean out. Then I wiped the outside down with Murphy’s Oil Soap on some cotton pads. I also took a BIC lighter and “painted” the stem with its flame to lift the few bite marks and dents. This was moderately successful in raising some of the damage. I then wiped down the stem with SoftScrub cleaner to remove surface oxidation. Once this process was done, the stem went for an overnight soak in the Pipe Stem Oxidation Remover. The next day, I used SoftScrub again with some cotton rounds. After this, I used some nail polish to restore the logo on the stem. I painted the area carefully and let it fully set before proceeding. I also built up the dents on the stem with black cyanoacrylate adhesive and let them fully cure. Forgot to snap a picture of that.I then sanded the adhesive down with 220- and 400-grit sandpapers and used all nine Micromesh pads (1,500 through 12,000 grit) to bring out the lovely black lustre on the stem. I also used Obsidian Pipe Stem Oil in between each pad scrubbing. This stem has had a hard life, and the result was not perfect – but it is a vast improvement on its condition when I got it.Now for the stummel. Firstly, I decided to ream out the bowl. I used the PipNet Reamer and the KleenReem to remove the built-up cake and followed that with 220-grit sandpaper taped to a dowel to eliminate as much as I could. I took the chamber down to bare briar, as I wanted to ensure there were no hidden flaws in the wall. Fortunately, there were none. I then proceeded to clean out the insides of the shank with Q-tips, pipe cleaners, and lemon-infused isopropyl alcohol. There was a bit of filth inside this stummel and it took a fair amount of cotton to get it clean. I followed that up by cleaning the insides with some dish soap and tube brushes. I used cotton rounds and some Murphy’s Oil Soap to scrub the outside of the stummel and a toothbrush with Murphy’s for the lava on the rim of the pipe. Having completed that, I was able to address the small nicks on the rim and the bowl. I dug out my iron and a damp cloth to try to raise the nicks. The hot and moist steam can often cause the wood to swell slightly and return to shape. This worked very well and many of the scratches were corrected with this method.Now I could tackle the burn on the rim. I used a piece of tool steel to gently scrape away the burn residue, but the burns were more serious than I’d hoped. So, I “topped” the pipe – that is, I gently and evenly sanded the rim on a piece of 220-grit sandpaper. This effectively removed the damage without altering the look of the pipe.Due to the burning on the rim of the pipe, I used my wood sphere, wrapped in 220-grit sandpaper, to create a beautiful, chamfered edge on the rim. This also helped return the opening of the bowl to round.  I think the results turned out very nicely. Unaccountably, I ran out of cotton balls with which to ghost the pipe. So, in a pinch, I used the old trick of replacing it with salt (in this case, pickling salt). Long ago, Steve had told me that he much preferred cotton balls to salt, and I simply took him at his word, not knowing any better. Having now used salt myself, I am wholeheartedly in agreement with Steve. What a pain in the gluteus maximus! Oh, it works just fine, but it’s a mess and the salt can (potentially) damage the wood. Now it was time to repair the tiny fills on the bowl. I repaired them with a mixture of briar dust and cyanoacrylate adhesive. This ensures a strong repair and one that looks similar to the surrounding wood. As you can see, I made a mess, to begin with, but I sanded the repair down with 200- and 400-grit sandpaper until it was level with the surrounding briar. Then, I used all nine Micromesh pads (1,500 through 12,000 grit) on the stummel to finish it off. Much improved. I applied some Before & After Restoration Balm to moisturize the wood and draw out its beauty. Finally, I took it to my bench buffer. A dose of White Diamond and a few coats of carnauba wax were just what this pipe needed. This Hardcastle much improved and is ready to be enjoyed again by the next owner. I am pleased to announce that this pipe is for sale! If you are interested in acquiring it for your collection, please have a look in the British pipe section of the store here on Steve’s website. You can also email me directly at kenneth@knightsofthepipe.com. The approximate dimensions of the pipe are as follows: length 5⅜ in. (137 mm); height 1⅜ in. (35 mm); bowl diameter 1¼ in. (32 mm); chamber diameter ⅝ in. (16 mm). The weight of the pipe is ⅝ oz. (20 g). I hope you enjoyed reading the story of this pipe’s restoration as much as I did restoring it. If you are interested in more of my work, please follow me here on Steve’s website or send me an email. Thank you very much for reading and, as always, I welcome and encourage your comments.

Having Fun with a Peterson System Pipe


Blog by Kenneth Lieblich

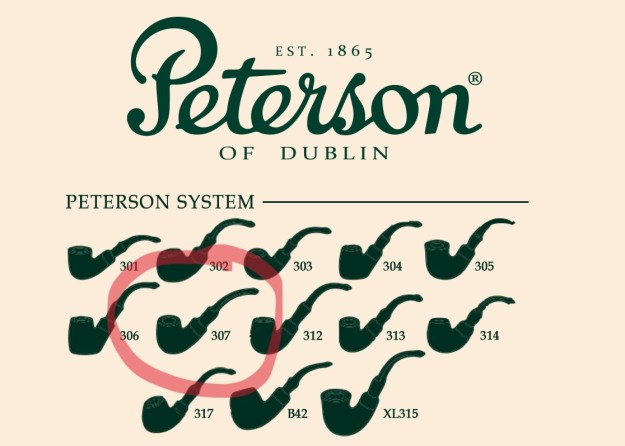
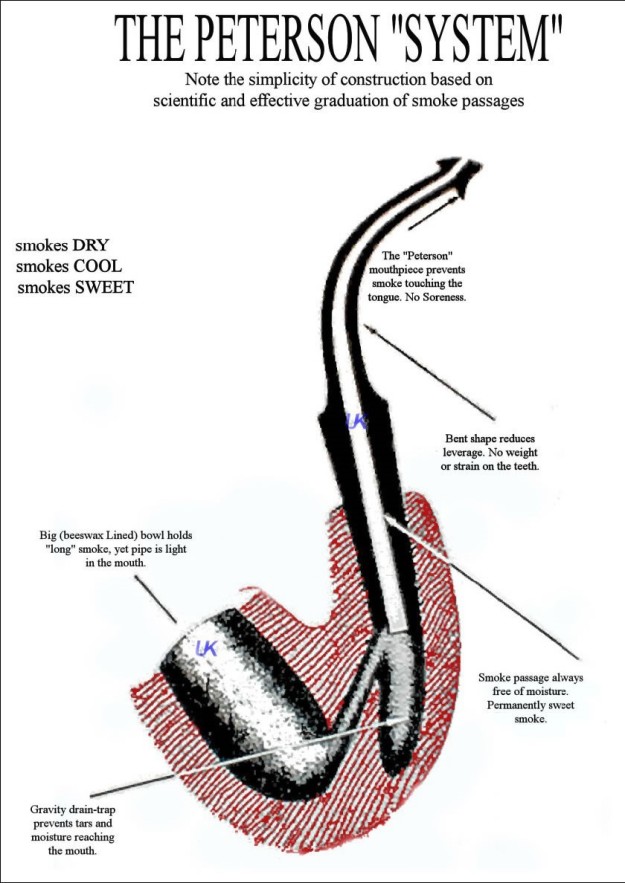
What a handsome pipe! I found this republic-era Peterson Standard System 307 at a local antique fair and I was charmed by it right away. It’s quite a large pipe and the look of it gives one a feeling of confidence. It is satisfying and comfortable in the hand. Despite its rather shabby appearance when I found it, the pipe held great promise – and I was sure that I could tease out its beauty with a little TLC. Let’s have a closer look. This Peterson 307 pipe has the classic “System” look: bent shape, nickel mount, and tapered, army-style stem. Of course, it also had the traditional Peterson P-lip stem. The markings on the left side of the shank are Peterson’s [over] System [over] Standard. The right side of the shank showed Made in the [over] Republic [over] of Ireland [over] 307. The nickel mount on the shank had K&P [over] Petersons. There were no markings on the stem. The Peterson System pipes are well-storied among Peterson collectors/admirers. I took the opportunity to read the article on Pipedia, specifically about the System pipes, by Jim Lilley. There is lots of good information there and I encourage you to read it: https://pipedia.org/wiki/A_closer_look_at_the_famous_Peterson_Standard_System_PipeOn to the pipe itself: the stem was in average condition – not especially dirty, but it had been well used. It had some notable dents, though. There was some damage to the top side of the P-lip and a tooth dent on the underside of the mouthpiece. I also noticed (but failed to photograph) that there were significant scratches at the shank-end of the stem, where I assume the stem had rubbed against the nickel mount on the shank. The bowl was moderately dirty and had quite a bit of lava which concealed some burn marks, and there was plenty of cake. Aside from some small fills, the outside of the bowl was fine. The nickel mount was in good shape – no dents or scratches of note – but it was dull and needed some polishing. To work! The stem was first on my list. I wiped the outside down with Murphy’s Oil Soap on some cotton pads. I also took a BIC lighter and ‘painted’ the stem with its flame to lift the few bite marks and dents. Sadly, however, this did not do much. Then I cleaned out the inside with pipe cleaners and isopropyl alcohol. I used some SoftScrub on the outside of the stem to remove some oxidation. Then, the stem went for an overnight soak in the Pipe Stem Oxidation Remover. The following day, I cleaned the de-oxidizing mess off with alcohol, pipe cleaners, et cetera. The oxidation had migrated to the surface and would be fairly straightforward to remove. I scrubbed again with SoftScrub on some cotton pads to remove the leftover oxidation. I built up the dents on the stem with black cyanoacrylate adhesive and let them cure. I then sanded the adhesive down – first with a small file – then with 220-, 400-, and 600-grit sandpapers to meld seamlessly into the stem. I then used all nine Micromesh pads (1,500 through 12,000 grit) to polish it and highlight the black lustre on the stem. I also used Obsidian Pipe Stem Oil in between each pad scrubbing. Moving on to the stummel, I first decided to ream out the bowl. I used both the PipNet Reamer and the KleenReem to remove the built-up cake and followed that with 220-grit sandpaper taped to a dowel to eliminate as much as possible. I took the chamber down to bare briar to ensure there were no hidden flaws in the wall. Fortunately, there were none. I used cotton rounds and some Murphy’s Oil Soap to scrub the outside of the stummel and a toothbrush with Murphy’s for the lava on the pipe’s rim.I then proceeded to clean out the insides of the shank with Q-tips, pipe cleaners, and lemon-infused isopropyl alcohol. There was quite a bit of filth inside this stummel, and it took a fair amount of cotton to get it clean. I followed that up by cleaning the insides with some dish soap and tube brushes. Now I could address the burn on the rim. I used a piece of tool steel to gently scrape away the burn residue, but I didn’t get the results I hoped for. So, I “topped” the pipe – that is, I gently and evenly sanded the rim on a piece of 220-grit sandpaper. This effectively removed the damage without altering the look of the pipe. I decided to de-ghost the pipe in order to remove any lingering smells of the past. I thrust cotton balls into the bowl and the shank and saturated them with 99% isopropyl alcohol. I let the stummel sit overnight. This caused any remaining oils, tars and smells to leach out into the cotton. The bowl was nice and clean after this. Now it was time to address the tiny fills on the bowl. I repaired them with a mixture of briar dust and cyanoacrylate adhesive. This ensures a strong repair and one that looks similar to the surrounding wood. As you can see, I made a mess to begin with, but I sanded the repair down with a file and 200- and 400-grit sandpaper until it was level with the surrounding briar. Then, I used all nine Micromesh pads (1,500 through 12,000 grit) on the stummel to finish it off. This included buffing up the nickel mount to a beautiful shine! Off to the bench polisher! A dose of White Diamond and a few coats of carnauba wax were just what this pipe needed. Boy-oh-boy, this is one good-looking pipe! I’m pleased with the results.This Peterson Standard System 307 looks fantastic again and is ready to be enjoyed by its next owner. I am pleased to announce that this pipe is for sale! If you are interested in acquiring it for your collection, please have a look in the Ireland pipe section of the store here on Steve’s website. You can also email me directly at kenneth@knightsofthepipe.com. The approximate dimensions of the pipe are as follows: length 6¼ in. (158 mm); height 2 in. (51 mm); bowl diameter 1⅝ in. (41 mm); chamber diameter ¾ in. (20 mm). The weight of the pipe is 2½ oz. (72 g). I hope you enjoyed reading the story of this pipe’s restoration as much as I did restoring it. If you are interested in more of my work, please follow me here on Steve’s website or send me an email. Thank you very much for reading and, as always, I welcome and encourage your comments.
Reviving a Lovely Stanwell Freehand Volcano Designed by Sixten Ivarsson


Blog by Kenneth Lieblich

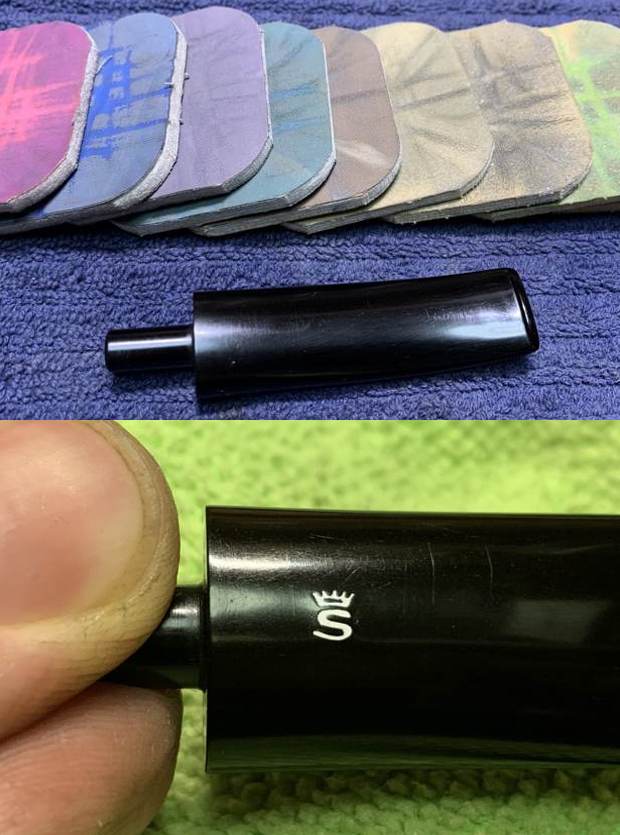
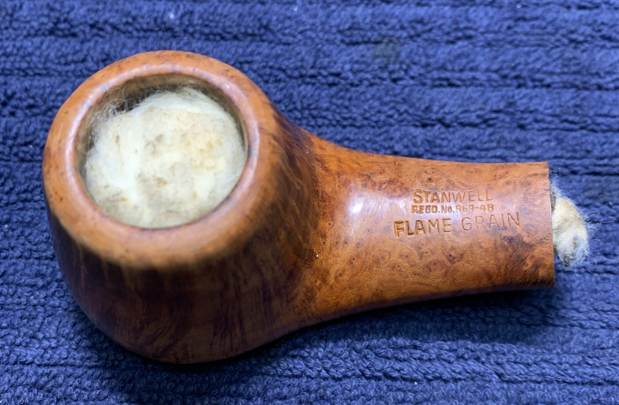
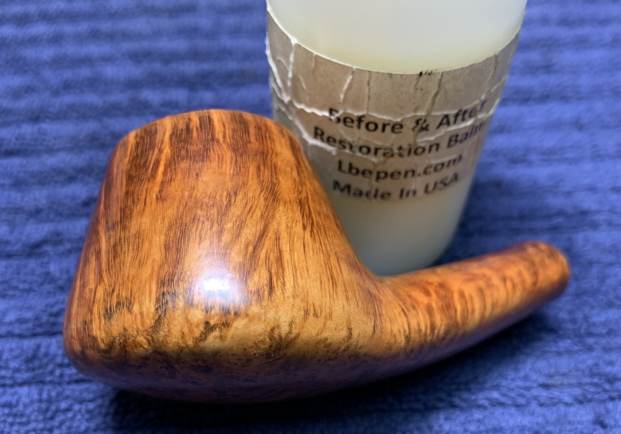
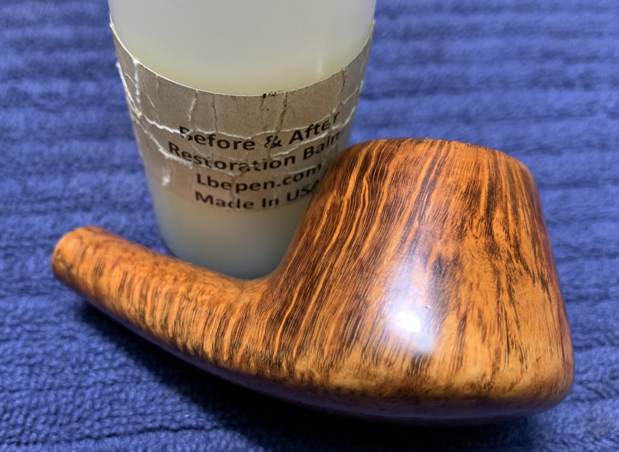
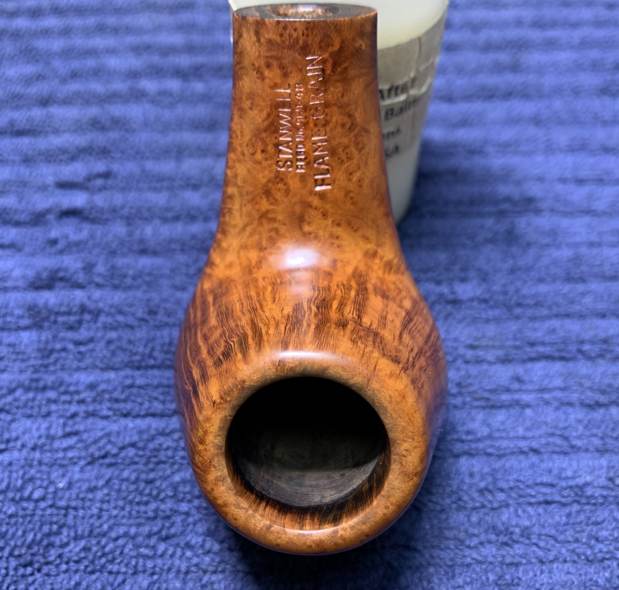
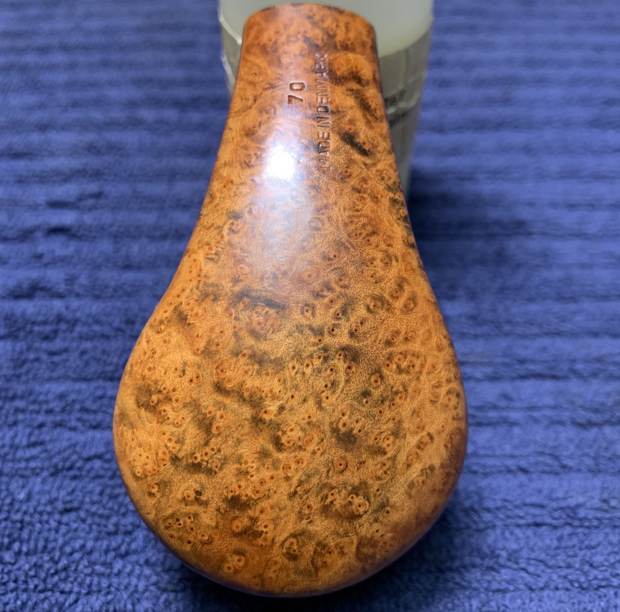
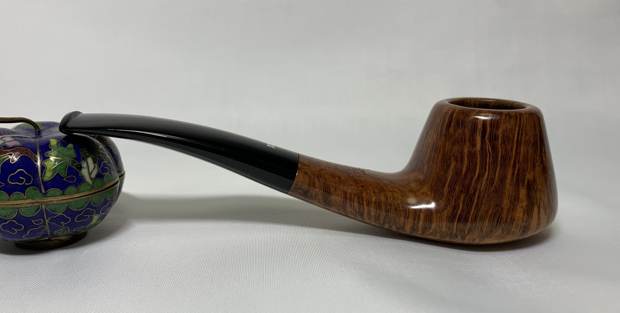
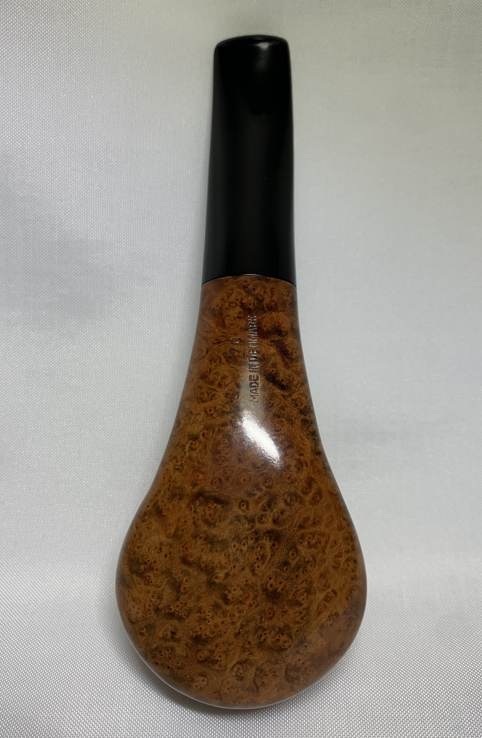
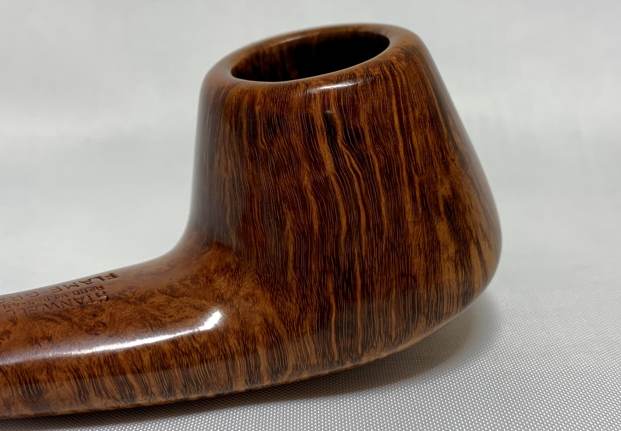
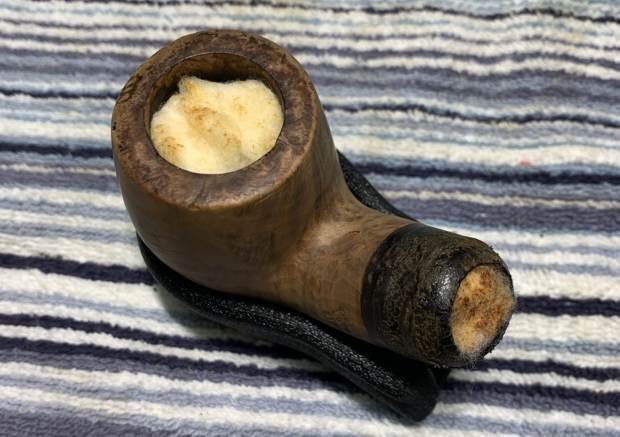
Next on the chopping block is a beautiful Danish pipe from the fine pipemaking firm, Stanwell. The shape of this pipe is a freehand volcano. I acquired it locally from the estate of an old fellow who kept a lovely collection of pipes. As I mentioned, this is a Stanwell Flame Grain 70. It has gorgeous briar from the bowl all the way down the shank. I think this is going to be a beauty when I’m done. The top side of the shank reads Stanwell [over] Regd. No. 969-48 [over] Flame Grain. The underside of the shank reads 70 [over] Made in Denmark. Finally, the stem’s top side also has the trademark S of the Stanwell company.Of course, 70 refers to the model number, and I went to check the list of Stanwell shapes here on rebornpipes. Interesting. Under shape number 70, we find the following:

  1. Two versions of this shape number
  2. a) Freehand, slightly bent, sitter, oval stem and mouthpiece, by Sixten Ivarsson – 1967.
  3. b) Canted Billiard with pencil shank.

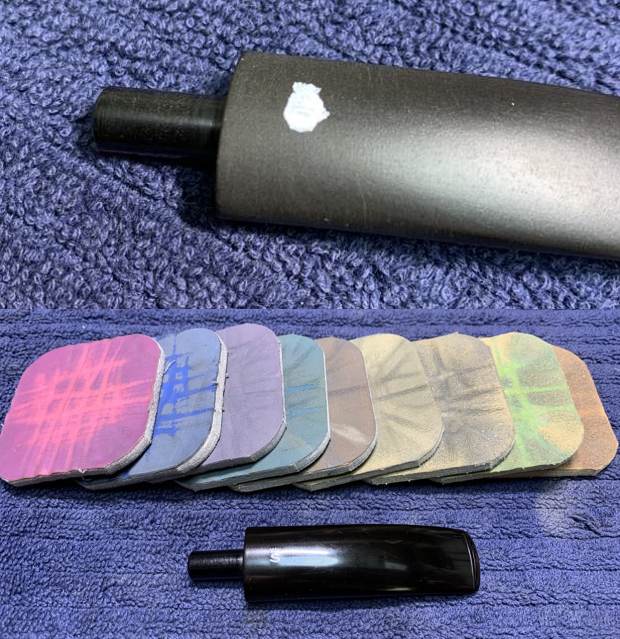
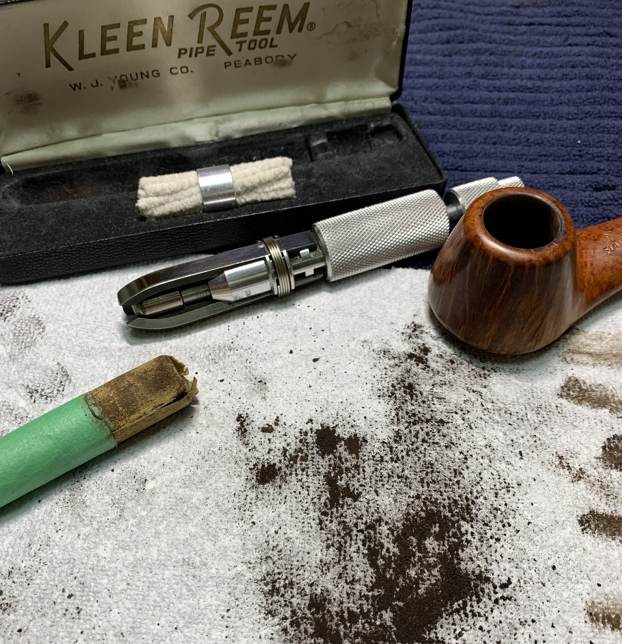
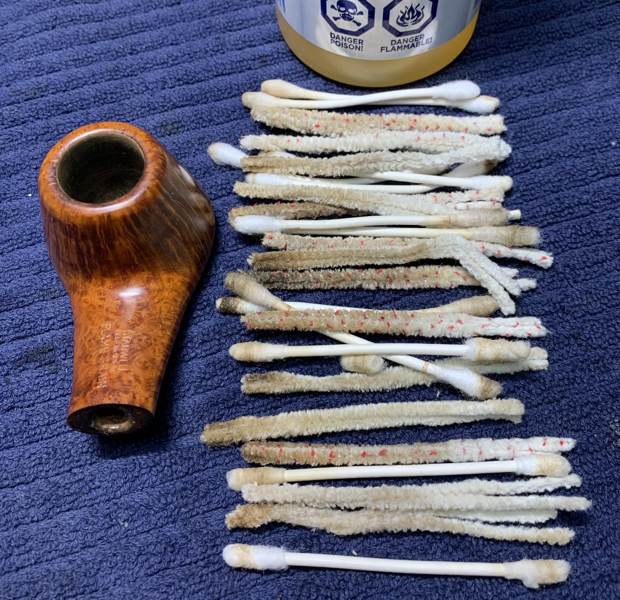
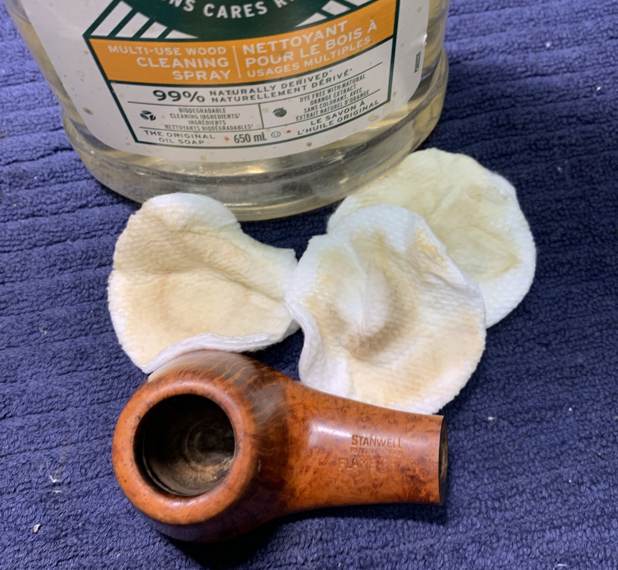
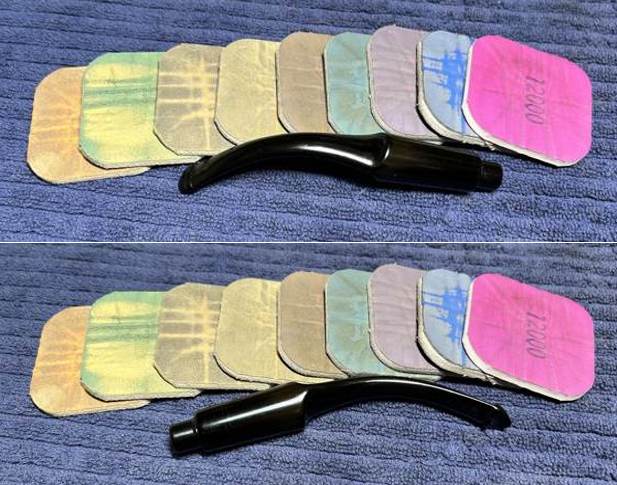
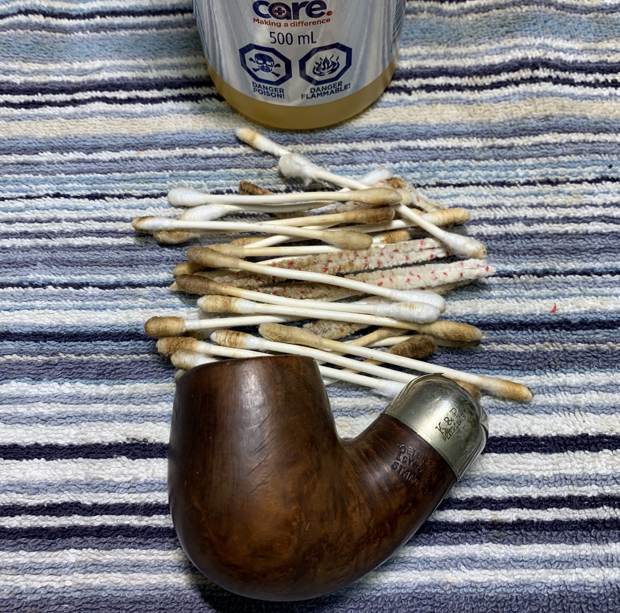
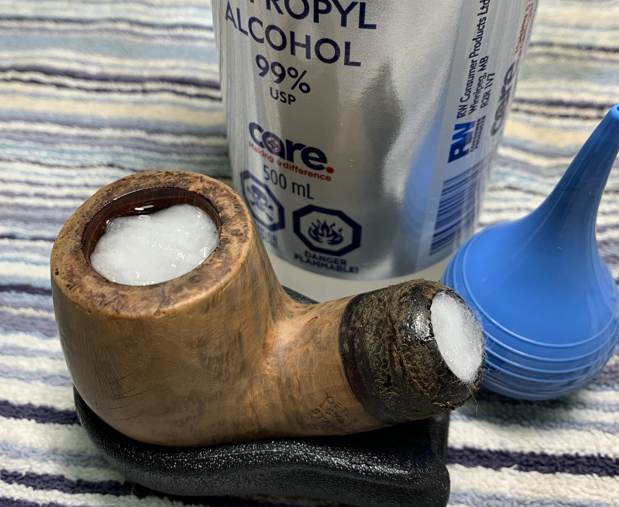
My pipe is obviously not “b”, but what about “a”? Freehand? Check!  Slightly bent? Check! Sitter? Check! Oval stem? Check! Oval mouthpiece? Check! Then this must be it – and designed by the man, the legend: Sixten Ivarsson!I did find some images from an old Stanwell catalogue from 1970. The image below for shape 70 matches mine perfectly. I know from information at Pipephil that the pipe I have is certainly more than 50 years old – and this corresponds to the catalogue above. My pipe has both the “Regd. No.” and the S logo with a crown. The screen capture below explains that clearly. Meanwhile, Pipedia has a good amount of information on the Stanwell brand and its history. I certainly recommend looking it over: https://pipedia.org/wiki/Stanwell.Anyway, this is a great-looking pipe. No major issues to resolve – just a few minor ones. The stem was dirty, though not too beat up. There were some scratch/tooth marks on the stem – a little on the top and quite a bit on the underside, and some oxidation and calcification on the vulcanite. The rim on the stummel had some very light charring. The insides were fairly dirty and would need a little work to clean out. In addition, there was also some weird white sticky goo on the outside. The stem was first on my list. I wiped down the outside of the stem with Murphy’s Oil Soap on some cotton pads. Then, I cleaned out the inside with pipe cleaners and isopropyl alcohol. It wasn’t too dirty and only required a few pipe cleaners. I then wiped down the stem with SoftScrub cleaner to remove surface oxidation. Once this process was done, the stem went for an overnight soak in the Pipe Stem Oxidation Remover. This allows me to clean the oxidation off in a couple of ways: by applying a mild cleaner to the surface and sanding the stem. The next day, I used SoftScrub again with some cotton rounds. Some of the more pronounced scratches had to be dealt with, so I whipped out my black cyanoacrylate adhesive to fill those in and let them fully cure. After curing, I used some nail polish to restore the letter S on the stem. I painted the area carefully and let it fully set before proceeding. For sanding the adhesive, I used 220- and 400-grit sandpapers to meld seamlessly into the stem. Then I used a set of nine Micromesh pads (1,500 through 12,000 grit) which gradually erased the ravages of time and brought out the stem’s lovely black lustre. For the last five pads, I also lightly coated the stem with Obsidian Pipe Stem Oil in between each scrubbing. The restored logo came out very nicely. At last, I set the finished stem aside. Off to work on the stummel! The bowl needed a bit of reaming, so I used the Kleen Reem to scrape off the built-up cake, and I followed that with 220-grit sandpaper taped to a dowel to eliminate as much as possible. Generally, I prefer to sand the chamber down to bare briar. When restoring, it is important to ensure that there is no damage to the briar in the bowl under the cake. Fortunately, there were no hidden flaws in the briar on this pipe.I then proceeded to clean out the insides of the shank with Q-tips, pipe cleaners, and lemon-infused isopropyl alcohol. I also used some more Murphy’s here. There wasn’t too much filth in this one, fortunately. I followed that up by cleaning the insides with some dish soap and tube brushes. I decided to de-ghost the pipe in order to remove any lingering smells of the past. I thrust cotton balls into the bowl and the shank and saturated them with 99% isopropyl alcohol. I let the stummel sit overnight. This caused any remaining oils, tars and smells to leach out into the cotton. The bowl was nice and clean after this. I used all nine Micromesh pads (1,500 through 12,000 grit) on the stummel to make it lovely and smooth. At this point, I rubbed some Before & After Restoration Balm into the briar and left it to sit for 15 minutes or so. I brushed it with a microfibre cloth. The B&ARB does wonderful things to the wood, and I really like the natural colour of the briar. Finally, it was off for a trip to the bench polisher. A dose of White Diamond and a few coats of carnauba wax perfectly complemented the briar. The lovely shine made the wood look absolutely beautiful. This pipe is elegant, light, and incredibly comfortable to hold.I thoroughly enjoyed bringing this Stanwell Flame Grain 70 Freehand Volcano back to life, and I am pleased to announce that this pipe is for sale! If you are interested in acquiring it for your collection, please have a look in the “Danish” pipe section of the store here on Steve’s website. You can also email me directly at kenneth@knightsofthepipe.com. The approximate dimensions of the Stanwell are as follows: length 5½ in. (140 mm); height 1½ in. (38 mm); bowl diameter 1¾ in. (44 mm); chamber diameter ¾ in. (19 mm). The weight of the pipe is 1⅜ oz. (42 g). I hope you enjoyed reading the story of this restoration as much as I enjoyed restoring it. If you are interested in more of my work, please follow me here on Steve’s website or send me an email. Thank you very much for reading and, as always, I welcome and encourage your comments.
Bringing a Thoro-Kleen back from the dead


Blog by Kenneth Lieblich

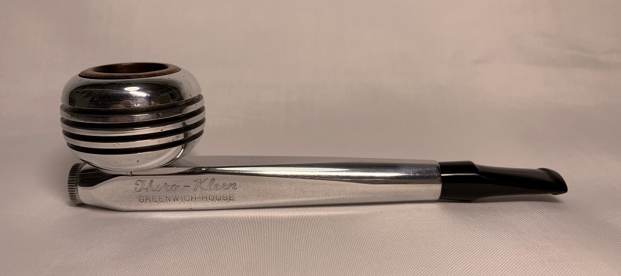
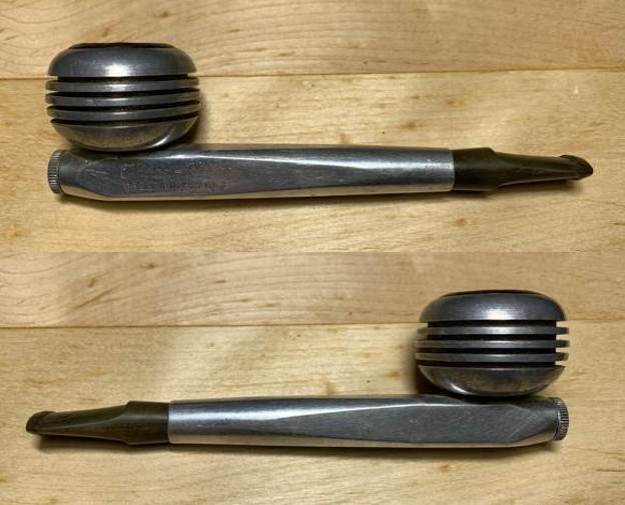
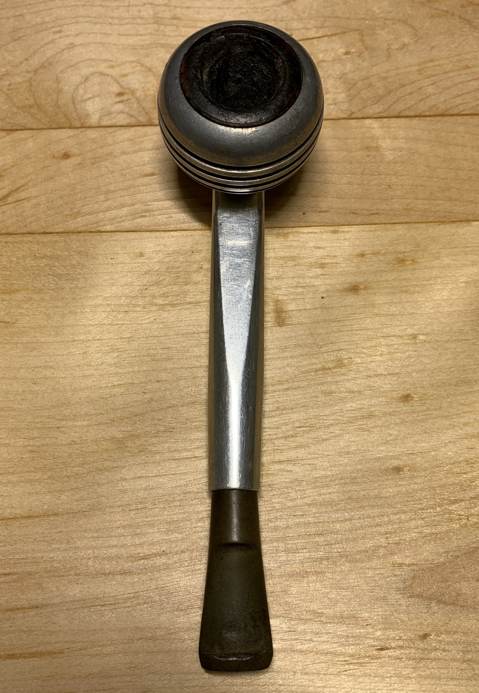
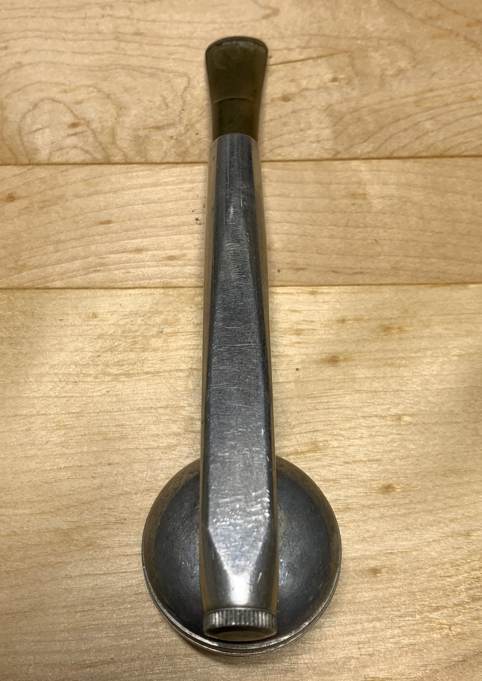
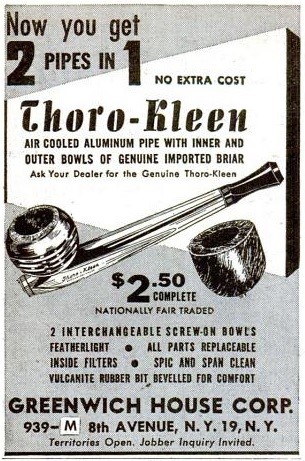
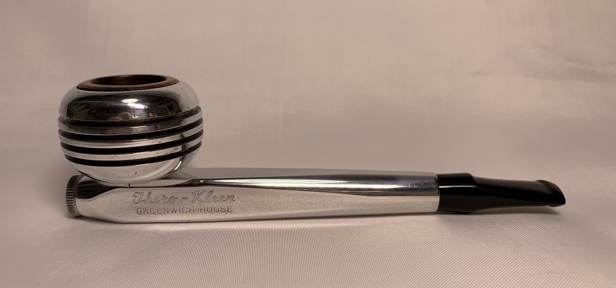
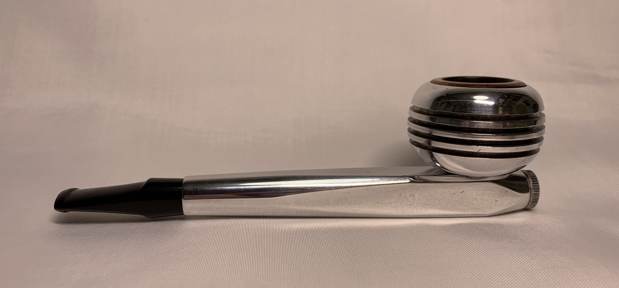
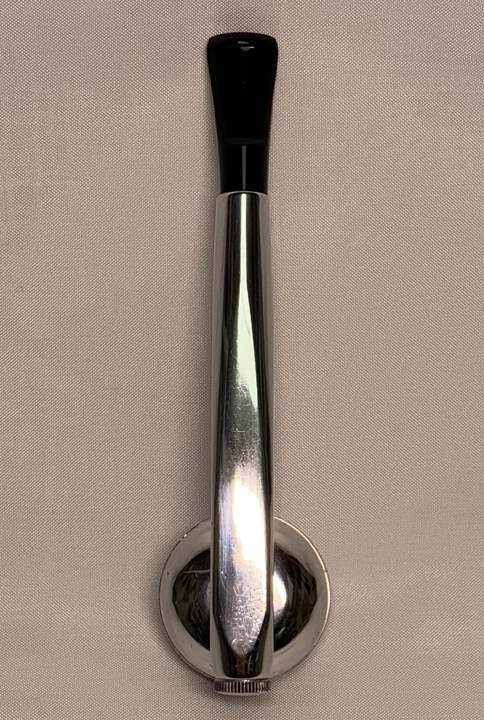
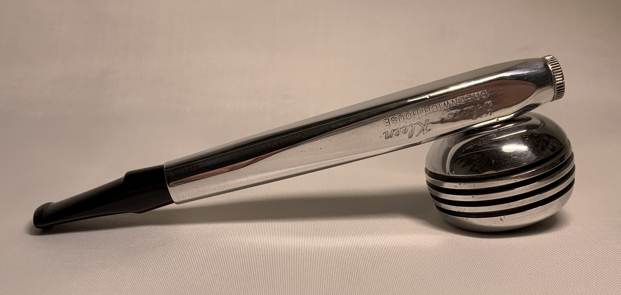
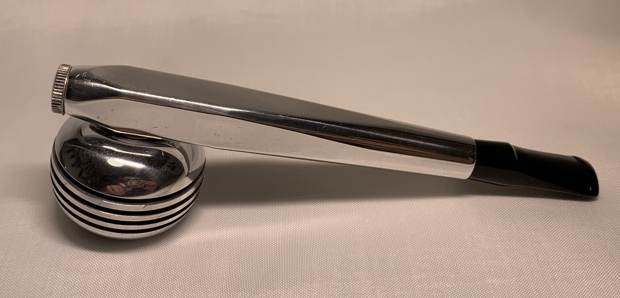
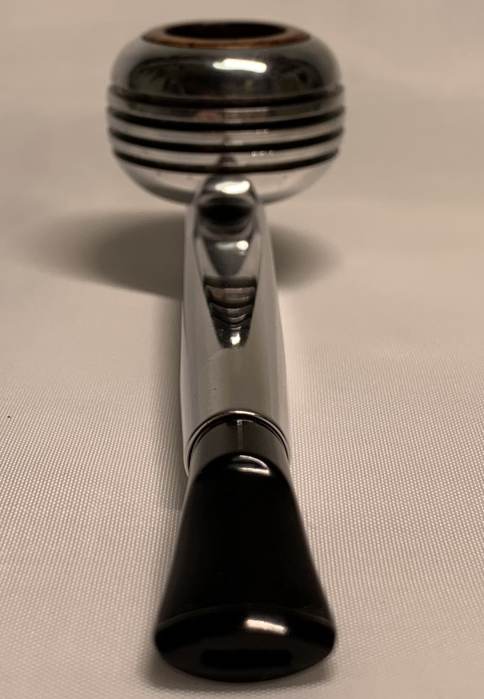
Next on the chopping block is one of those pipes that makes you raise an eyebrow and wonder. It is the Thoro-Kleen made by the Greenwich House Corporation of New York. I acquired it from a lady who found a shoebox of pipes in her late-grandfather’s closet, so we can presume this pipe to be his. When Steve last restored one of these, more than seven years ago, he described it as reminding him of the Jetsons from Saturday morning cartoons! It certainly does have a futuristic, out-of-this-world look. To me, it is a striking example of mid-twentieth-century design. The only markings on the pipe were on the left side of the shank. They read: ‘Thoro-Kleen [over] Greenwich-House’.Our friends at Pipedia have a brief writeup on the Thoro-Kleen, which I copy here in its entirety:

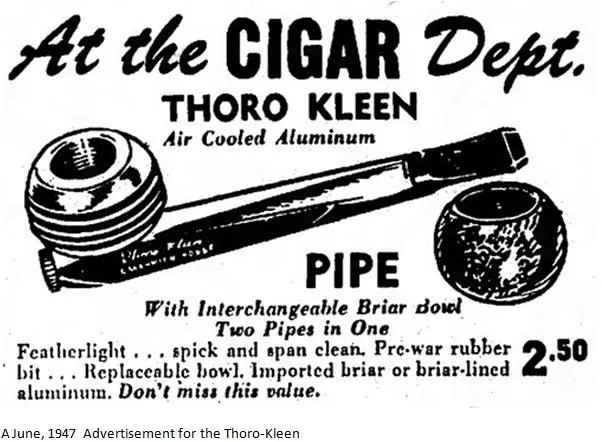
The Greenwich House Thoro-Kleen was a metal pipe system sold with both a metal outer bowl with a briar insert and a full briar bowl. They are from the same family as the Roybrooke, Comet, and Original Gridiron pipes, and parts from all are believed to be interchangeable. The pipes were sold by the Greenwich House Corporation, located in 1947 at 939-M 8th Avenue, N.Y. 19, N.Y. The pipe set sold for $2.50 in 1947.Similarly, Smoking Metal (a website dedicated to metal pipes) also has a short writeup:

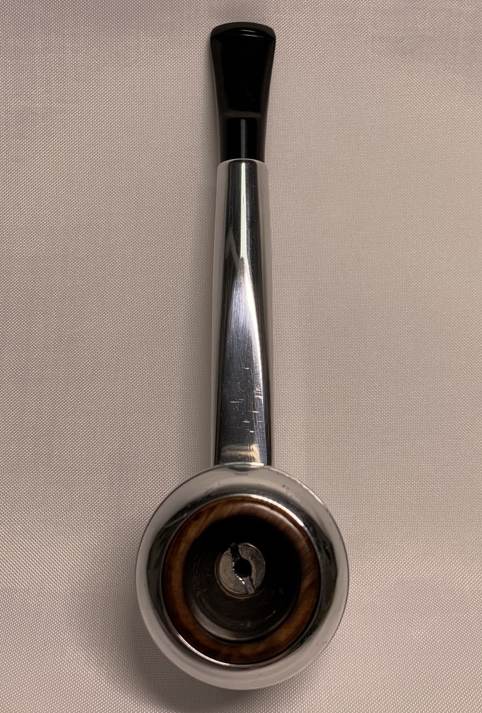
This family of pipes have been seen as Knowles Air Lite (believed to be Canadian version), Roybrooke, Comet, Original Gridiron and the Greenwich House Thorokleen. Seemingly sold in sets that comprised a normal briar bowl as well as the metal outer with a briar insert. The body of the pipe can be hexagonal, square (Thoro Kleen only seen this shape) or circular in cross section. Regardless of variant all parts are interchangeable. The unmarked version tends to be regarded as the COMET, all the others being stamped with a name.Some instances of this pipe appeared with an entirely-briar bowl, and some came with a metal bowl and briar insert. Some sources indicate that the pipes came with both bowls, and you could take your pick, but the one I have pipe has only the metal bowl and briar insert.

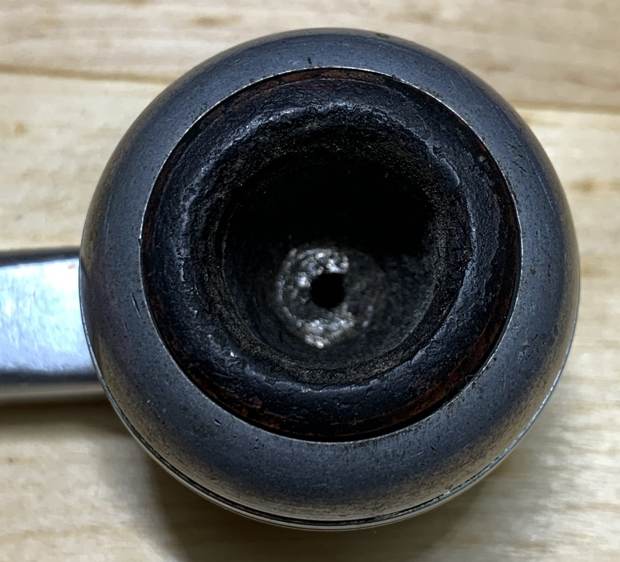
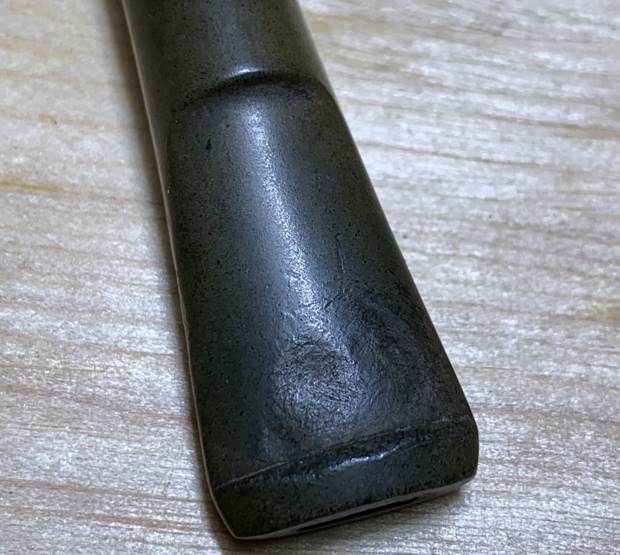
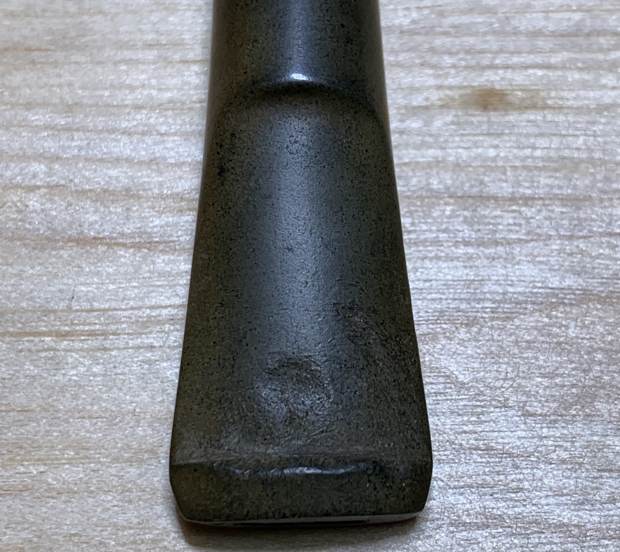
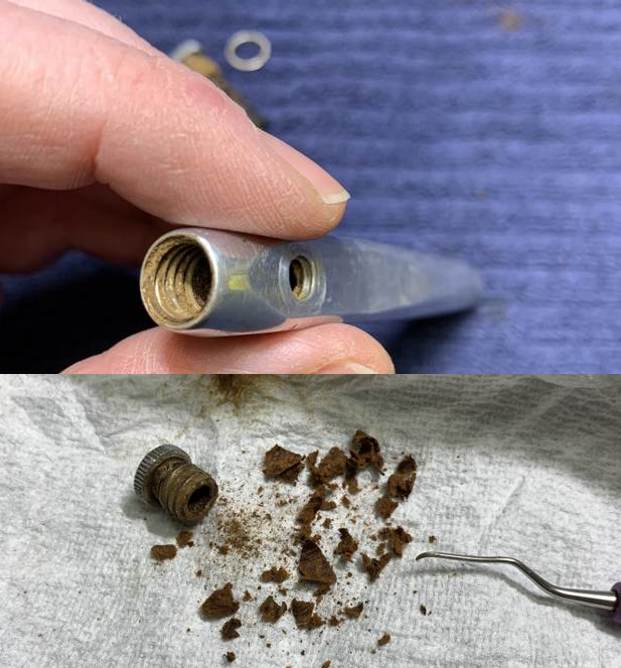
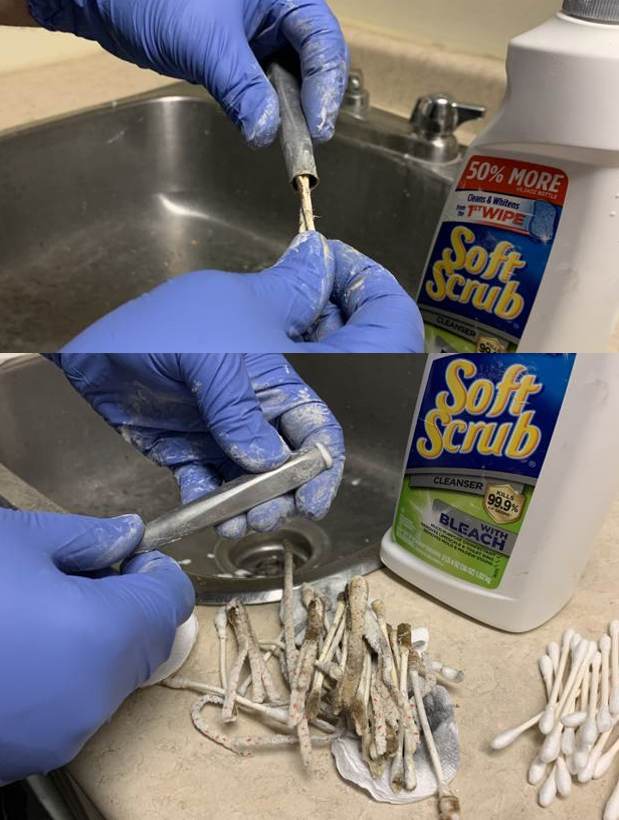
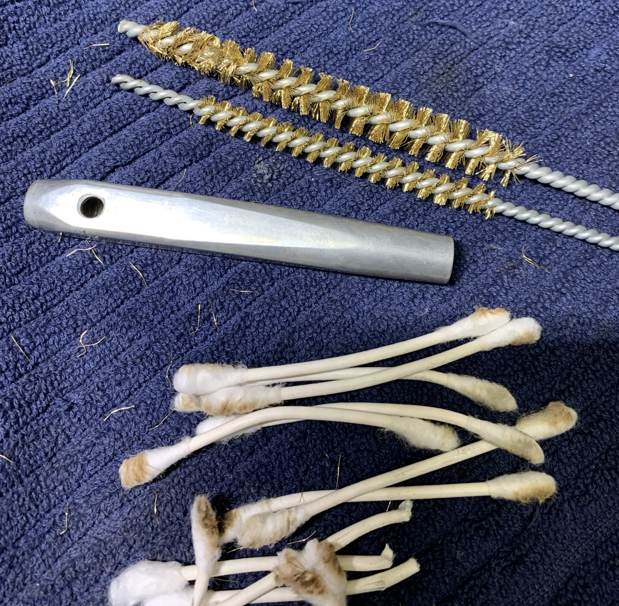
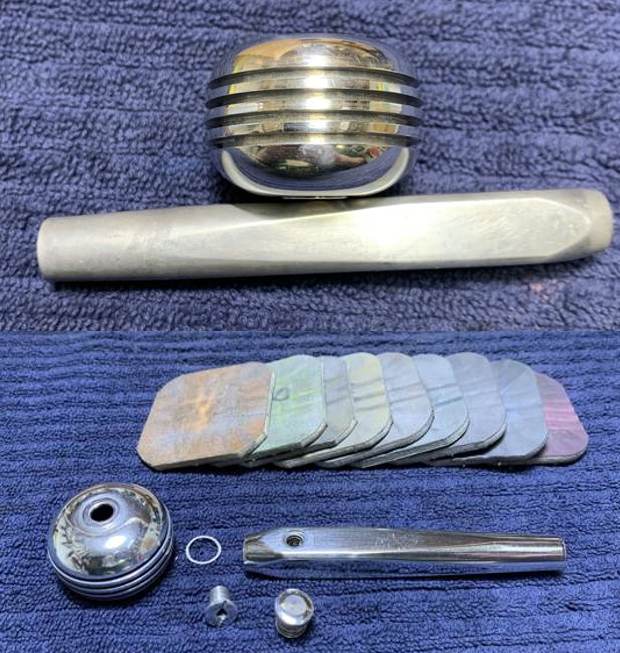
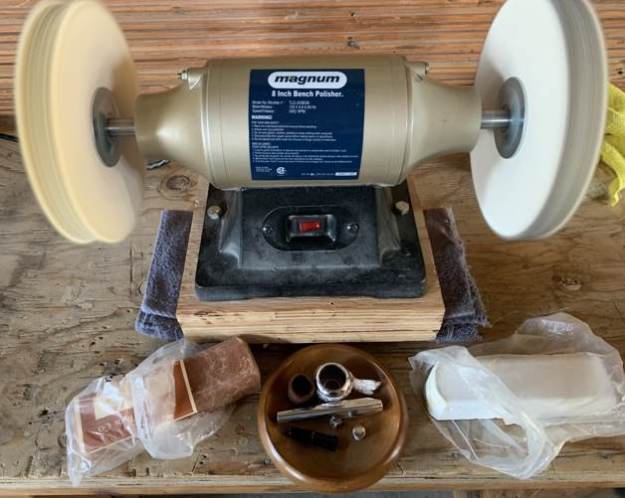
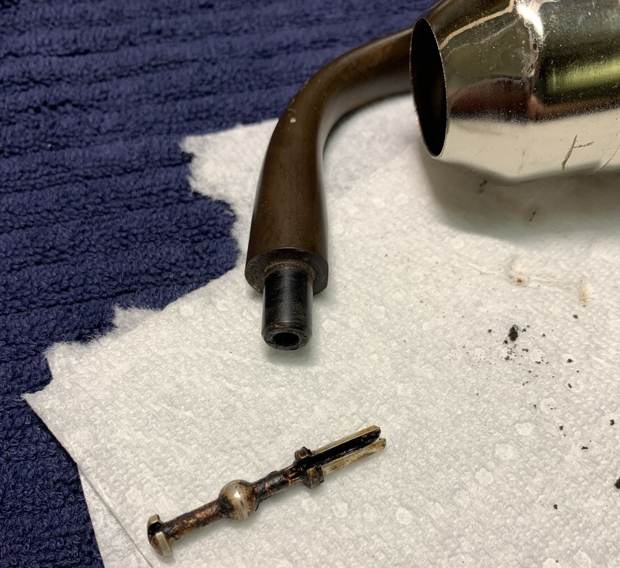
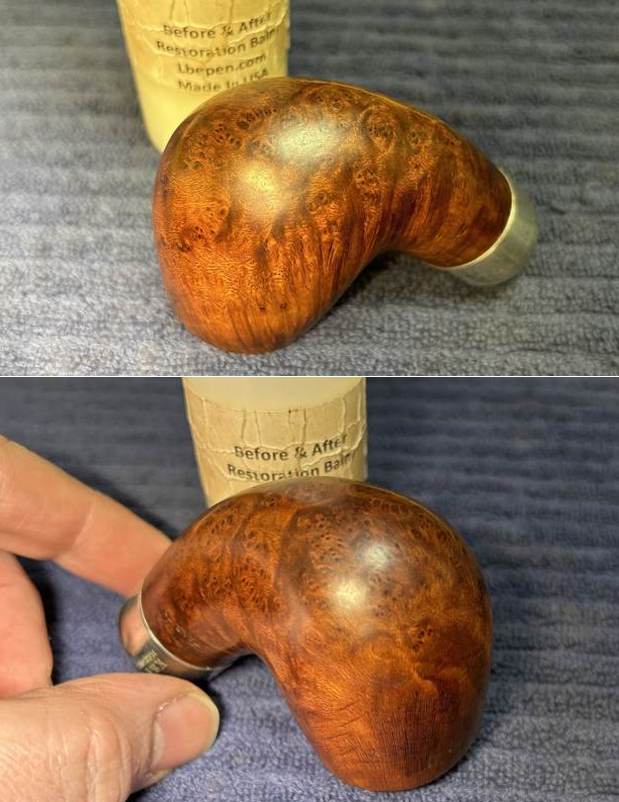
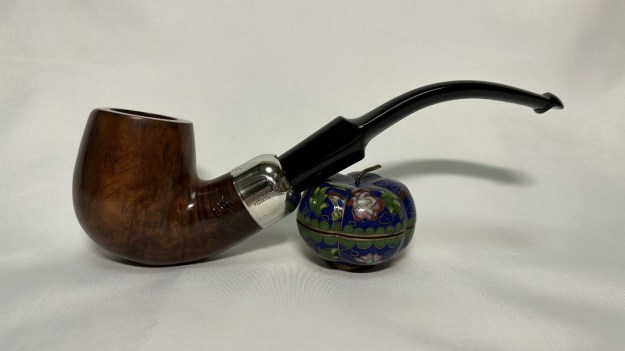
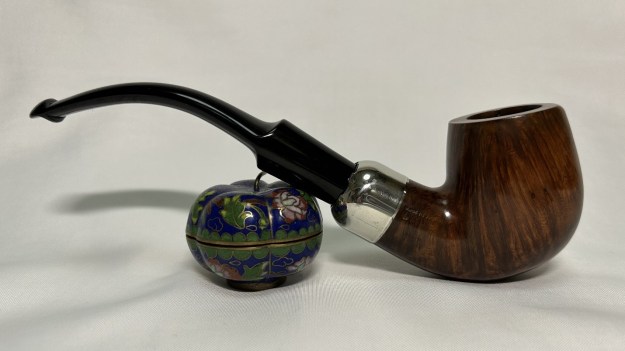
Time to get to work. This pipe was a mess from every perspective. The stem had some serious dents in it. The metal was dirty and dull, and the insides were filthy. In the following picture, you can see the pipe as I disassembled it; there are seven pieces: the stem, the shank (or main section of the pipe), the metal outer bowl, the briar inner bowl, a screw that attached the bowls to the main part of the pipe, a valve screw at the far end, and a washer to go along with it. I don’t think this pipe had ever seen a cleaning! There was crud everywhere.  The stem was first on my list. As usual, I wiped the outside down with Murphy’s Oil Soap on some cotton pads. I also took a BIC lighter and ‘painted’ the stem with its flame to lift the bite marks and dents. This did help, but the dents were so substantial it would need much more than just waving a flame around. Then I cleaned out the inside with pipe cleaners and isopropyl alcohol. It was pretty darn dirty. Next, the stem went for an overnight soak in the Pipe Stem Oxidation Remover. The following day, I cleaned the de-oxidizing mess off with alcohol, pipe cleaners, et cetera. The oxidation had migrated to the surface and would be pretty straightforward to remove. I scrubbed with SoftScrub on some cotton pads to remove the leftover oxidation. I built up the dents on the stem with black cyanoacrylate adhesive and let them fully cure. I then sanded the adhesive with some needle files, then 220-, 400-, and 600-grit sandpapers to meld seamlessly into the stem. I then used all nine Micromesh pads (1,500 through 12,000 grit) to smooth everything and highlight the lovely black lustre on the stem. I also used Obsidian Pipe Stem Oil in between each pad scrubbing. Since most of the pipe was made of aluminum, the cleaning procedures were different than usual. The inside of the shank was much more ‘cavernous’ than normal, too. I started with pipe cleaners and Q-tips for the inside, but that only worked so well. I ended up using SoftScrub to clean the metal shank, including the interior – and I made extensive use of some metal tubes brushes because the gunk was really tough. Since there was so much grime, it created a foul-smelling and foul-looking paste, which was revolting but satisfying to remove from the pipe. The metal bowl was also cleaned with SoftScrub, but it wasn’t so bad, as it hadn’t been in contact with the burning tobacco. I used my Micromesh pads to polish up the metal. This worked splendidly to shine it, but it’s important to note that the metal had received some battle wounds over the years, which wouldn’t be removed by the pads. They were to be left as part of this pipe’s life story. I also sanded and polished the two screws and the metal bowl. Below, you can the difference between the MicroMeshed bowl and the unworked shank.Now for the briar insert. This is more standard fare, since I’m working with wood again. I took a small wedge of machine metal and, holding it at a 45-degree angle, gently scraped the lava and carbon off the rim. I reamed it with the KleenReem, and 220-grit sandpaper taped to a dowel to eliminate as much build-up as possible. I took the chamber down to bare briar to ensure there were no hidden flaws in the wall. Fortunately, there were none. Then I used cotton rounds and some Murphy’s Oil Soap to scrub the outside. The underside of the insert had some small cracks in the wood, presumably from overtightening of the screw, which attached it to the rest of the pipe. I repaired this by applying some cyanoacrylate adhesive to the cracks, letting it cure and sanding it down. I also used the Micromesh pads on the rim and bottom but not on the sides, as I thought they were fine as they were. Obviously, I didn’t apply the Before & After Restoration Balm on the metal, but I did for the briar insert. The buffing procedure was different because of the metal. I used Red Tripoli, but before I started down that path, I decided to protect the grooves on the side of the bowl from being filled with polishing compound. I wrapped four pipe cleaners around the bowl, in the grooves, which did the trick.I used Red Tripoli and White Diamond to polish the metal nicely. I then took a microfiber cloth to wipe off the remaining compound and finished the metal parts of the pipe with a jewelry cloth to make it shine and sing!This Thoro-Kleen looks fantastic again and is ready to be enjoyed by the next owner! I am pleased to announce that this pipe is for sale! If you are interested in acquiring it for your collection, please have a look in the ‘American’ pipe section of the store here on Steve’s website. You can also email me directly at kenneth@knightsofthepipe.com. The approximate dimensions of the pipe are as follows: length 5⅜ in. (137 mm); height 1½ in. (38 mm); bowl diameter 1⅜ in. (35 mm); chamber diameter ⅝ in. (16 mm). The weight of the pipe is 1⅝ oz. (48 g). I hope you enjoyed reading the story of this pipe’s restoration as much as I did restoring it. If you are interested in more of my work, please follow me here on Steve’s website or send me an email. Thank you very much for reading, and, as always, I welcome and encourage your comments.
Restoring a Lovely Danish Pickaxe


Blog by Kenneth Lieblich

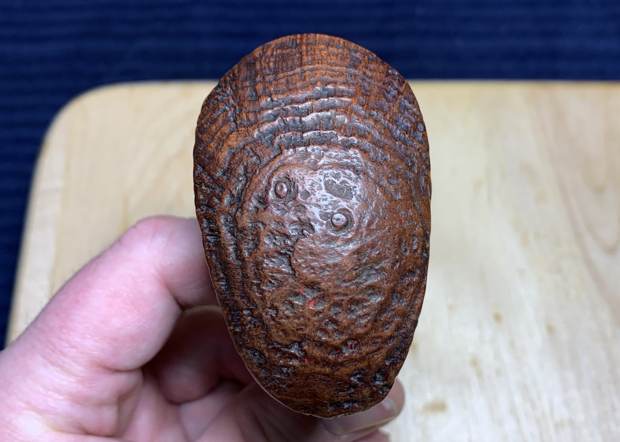
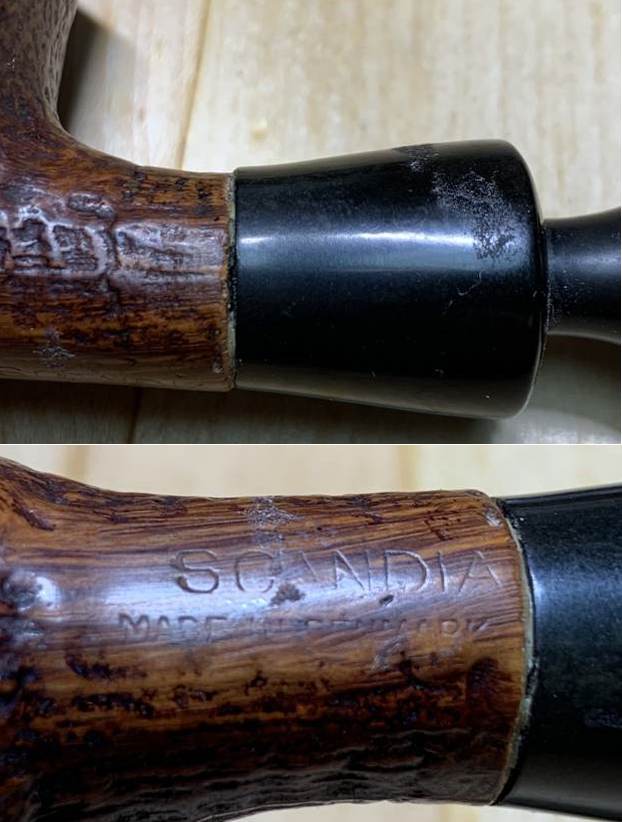
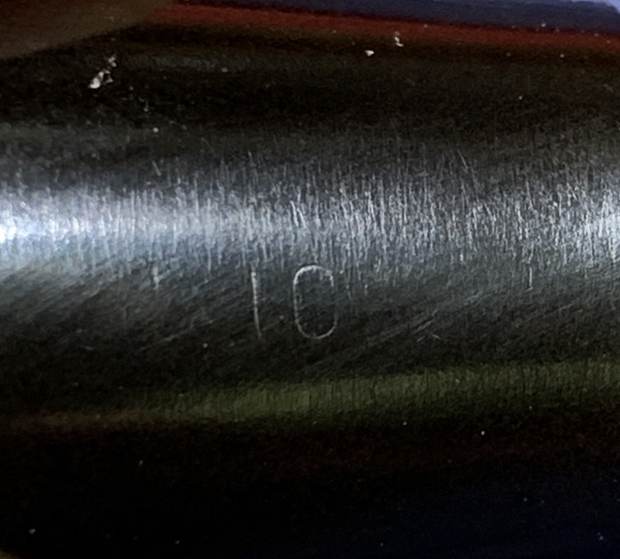
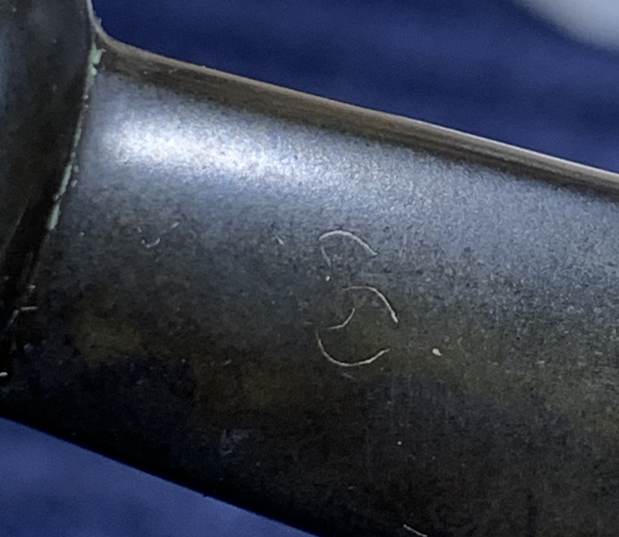
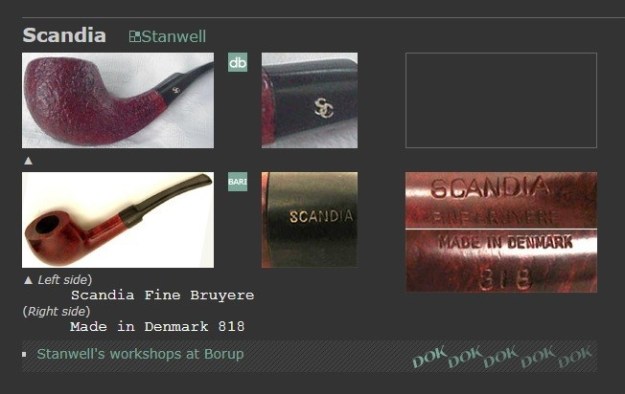
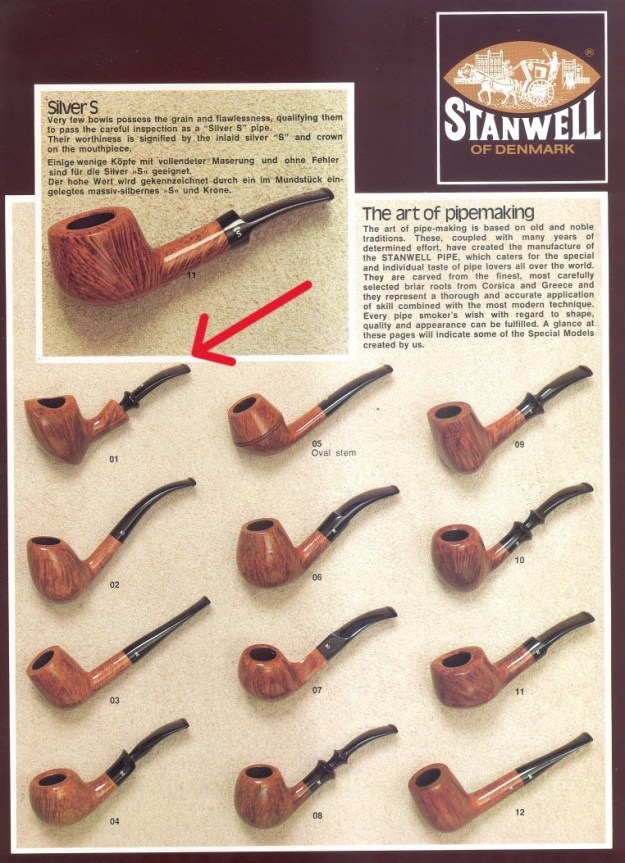
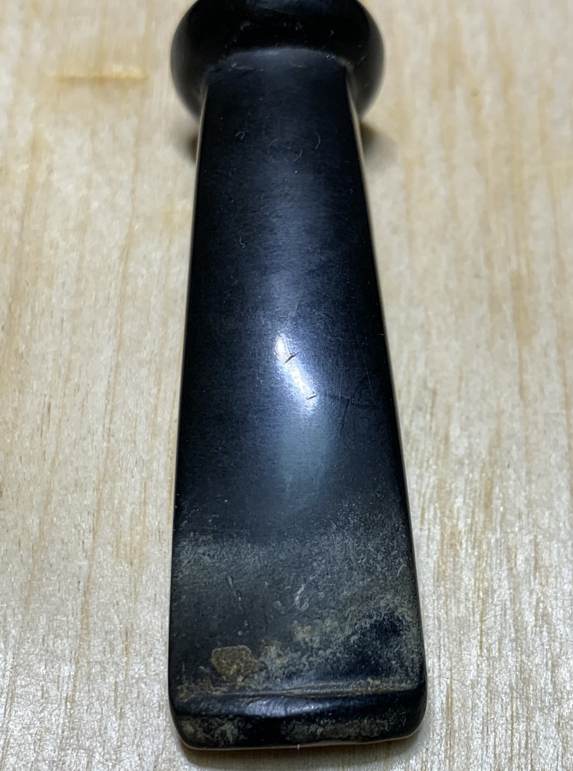
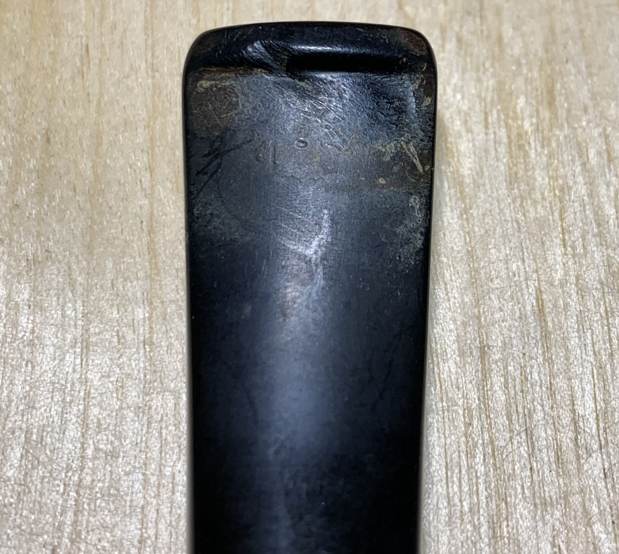
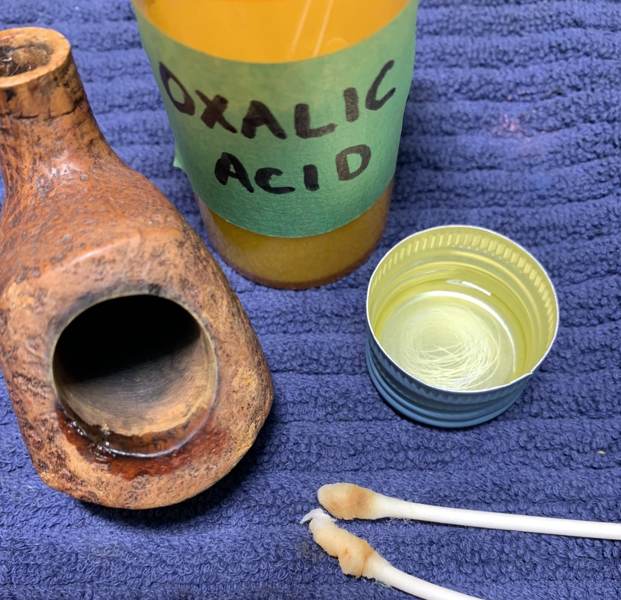
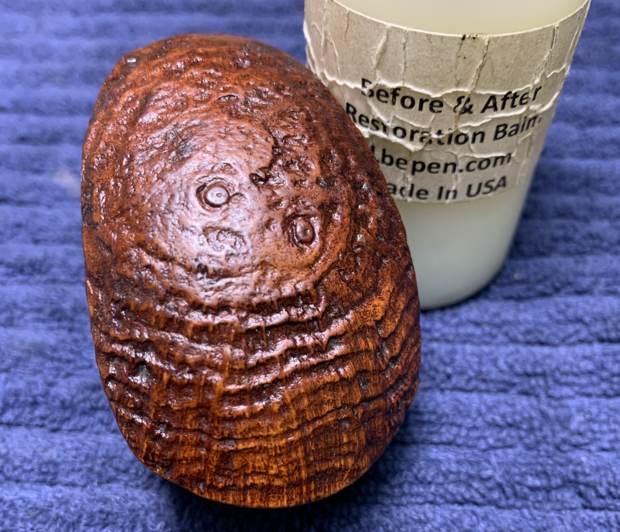
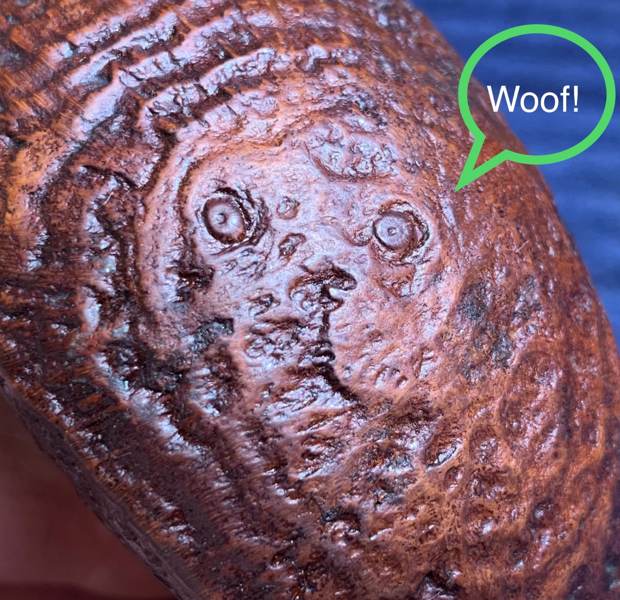
Next on the chopping block is a beautiful Danish pipe from Scandia. This terrific pipe came to me from an antique shop in the Fraser Valley (an area to the east of Vancouver). The price was reasonable, so I had to have it. The pipe is beautiful and a great example of Danish pipe-making. The pipe is a Danish pickaxe pipe by Scandia, produced from the esteemed pipemaker, Stanwell. The pickaxe is a very attractive shape and this one is no exception. It really makes an impression. It has beautiful, sandblasted briar from the bowl, down the shank and transitions into the vulcanite ferrule. It also has a fantastic push stem. The underside of the shank reads Scandia [over] Made in Denmark. There is a faint marking on the ferrule, which appears to show “10” or possibly “1C”. I don’t think this is a shape number, for reasons I will explain momentarily. Finally, the stem’s top also has the SC, indicating the Scandia make. Both Pipedia and Pipephil list Scandia as being a Stanwell sub-brand or second (and not much else), as per the photo below.Meanwhile, Pipedia has a good amount of information on the Stanwell brand and its history. I certainly recommend looking it over: https://pipedia.org/wiki/Stanwell.Despite the (possible) number 10 on the ferrule, I went to check the list of Stanwell shapes, here on Reborn Pipes, and I found that this definitely did not match. However, I did find something that was a match! Shape 1b is listed as “Freehand, Pick Ax, push mouthpiece, by Sixten Ivarsson. (1975)”. To further confirm this, here is a page from an old 70s or 80s Stanwell catalogue which clearly shows the same shape of pipe with the matching shape number. I think we can safely assume that this is a pickaxe, designed by the legendary Sixten Ivarsson.Anyway, this really is a good-looking pipe. No major issues to resolve – just a few minor ones. The stem was dirty, and some small scratches. There were a couple of significant bite marks, as well as some oxidation and calcification on the vulcanite. The rim on the stummel was blackened and burnt – that would need to be addressed. The insides were fairly dirty and would need some work to clean out. There was also a small nick along the inside edge of the rim. The stem was first on my list. I wiped down the outside of the stem with Murphy’s Oil Soap on some cotton pads. I also took a BIC lighter and ‘painted’ the stem with its flame in order to lift the bite marks and dents. Unfortunately, this didn’t really work, but I have ways of sorting this out. Then, I cleaned out the insides of the stem with pipe cleaners and isopropyl alcohol.Once this process was done, I used SoftScrub and cotton pads to wipe down the stem before throwing it in the Pipe Stem Oxidation Remover overnight. The following day, I cleaned all of the de-oxidizing mess and again scrubbed with SoftScrub on some cotton pads to remove the leftover oxidation. This worked well. I used some nail polish to restore the letters SC on the stem. I painted the area carefully and let it fully set before proceeding. These letters were too worn to be fully restored, but they definitely looked better after I worked on them.Before I moved on to the Micromesh pads, I built up the dents on the stem with cyanoacrylate adhesive and let them fully cure.I used my miniature files to ensure that the repairs keep the shape and look like they should. I then sanded the stem down with 220-, 400-, and 600-grit sandpapers to meld seamlessly into the stem. I did the same to the remaining tooth marks. I then used all nine Micromesh pads (1,500 through 12,000 grit) to bring out the lovely black lustre on the stem. I also used Obsidian Pipe Stem Oil in between each pad scrubbing.I repeated all of the above procedures for the vulcanite ferule, which only came off the stummel after applying heat and some gentle force. On to the stummel, and the usual cleaning procedures were in order for this pipe. I used both the PipNet Reamer and the KleenReem to remove the built-up cake and take the bowl down to bare briar, as I wanted to ensure there were no hidden flaws in the walls of the bowl. Fortunately, there were none.I then proceeded to clean out the insides of the shank with Q-tips, pipe cleaners, and isopropyl alcohol. There was lots of filth inside this stummel, and it took a good number of pipe cleaners etc. to sort that out. I followed that up by cleaning the insides with some dish soap and tube brushes. I then moved on to cleaning the outside of the stummel with Murphy’s Oil Soap and some cotton pads. That removed any latent dirt. I decided to de-ghost the pipe in order to remove any lingering smells of the past. I thrust cotton balls into the bowl and the shank and saturated them with 99% isopropyl alcohol. I let the stummel sit overnight. This caused any remaining oils, tars and smells to leach out into the cotton. The bowl was nice and clean after this.As I mentioned earlier, there were some small burn marks on the rim of the stummel that also needed to be addressed. Some of this was removed by the Murphy’s. For the burns that remained, I took some oxalic acid on a Q-tip and rubbed and rubbed. As you will see, the treatment worked reasonably well and the rim was improved. Some would remain, but that is part of the history of this pipe. I completed this step by gently sanding the interior rim edge to remove any remnants that remained. Then I addressed the nick on the rim by filling it with cyanoacrylate adhesive and briar dust. I sanded it down and made it look great. After this, the entire stummel was treated to a rub-down with all nine Micromesh pads (1,500 through 12,000 grit). A light application of Before & After Restoration Balm brought out the best in the stummel’s sandblast. There is some beautiful wood on this Danish pipe! In fact, as I was working, my youngest child came to watch me for a bit and said, “Is that a doggy?” I wasn’t sure what she meant, but she grabbed the stummel and pointed this out. That’s pretty funny!I glued the ferrule back I place and then it was off for a trip to the buffer. A dose of White Diamond and a few coats of conservator’s wax were just what this pipe needed. I had to be especially careful with the bench polisher, since the edges had a tendency to catch on the buffing wheels. This pipe was a delight from the start and its beauty only increased through the restoration process. This pipe is elegant, light, and incredibly comfortable to hold. Finally, I am pleased to announce that this pipe is for sale! If you are interested in acquiring it for your collection, please have a look in the ‘Danish’ pipe section of the store here on Steve’s website. You can also email me directly at kenneth@knightsofthepipe.com. The approximate dimensions of the Stanwell are as follows: length 5½ in. (140 mm); height 2½ in. (64 mm); bowl diameter 1⅝ in. (41 mm); chamber diameter ¾ in. (19 mm). The weight of the pipe is 1⅝ oz. (47 g). I hope you enjoyed reading the story of this restoration as much as I enjoyed restoring it. If you are interested in more of my work, please follow me here on Steve’s website or send me an email. Thank you very much for reading and, as always, I welcome and encourage your comments.
An Igloo in Algeria


Blog by Kenneth Lieblich

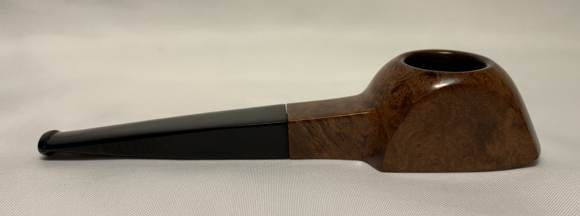
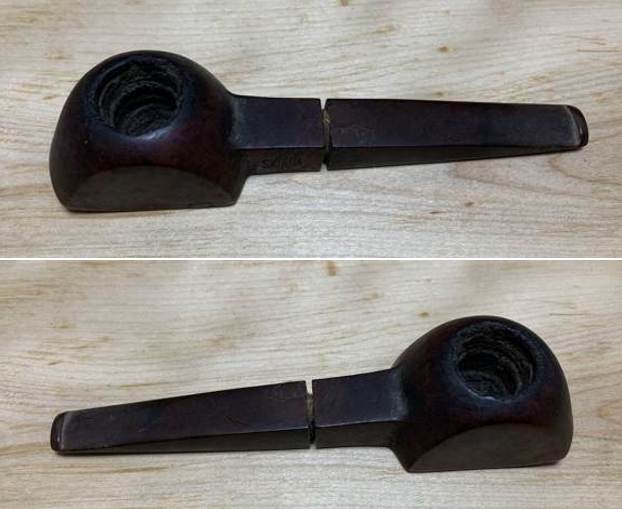
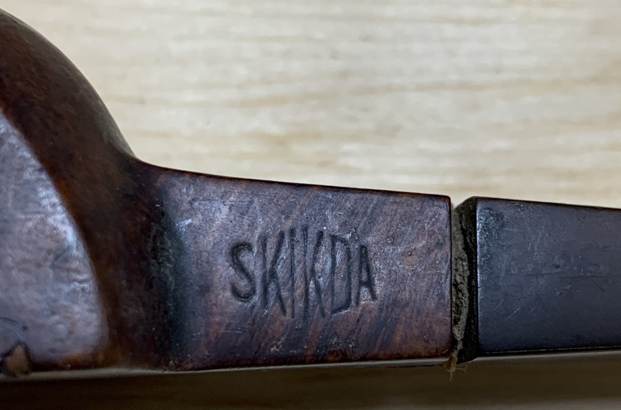
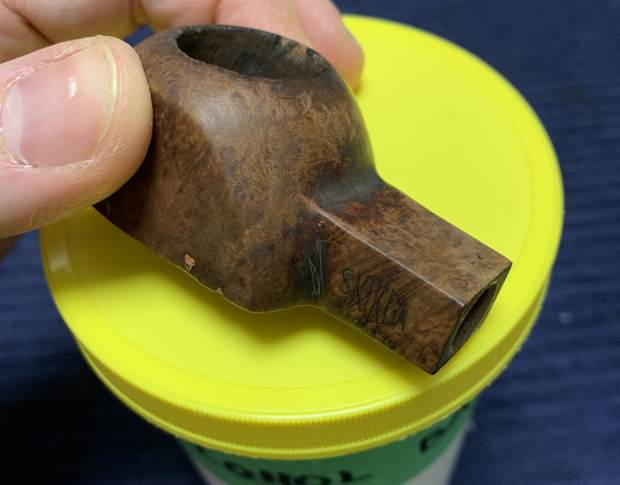
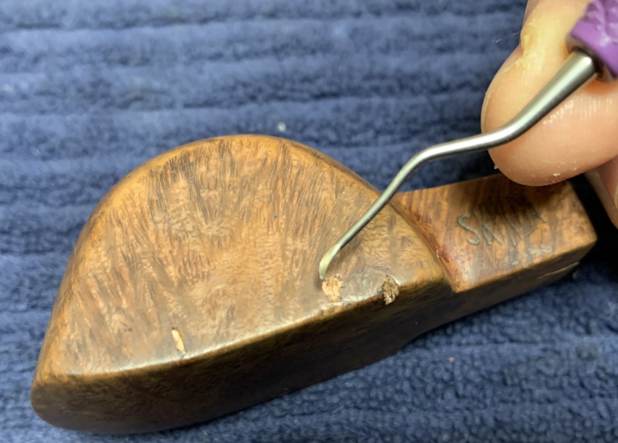
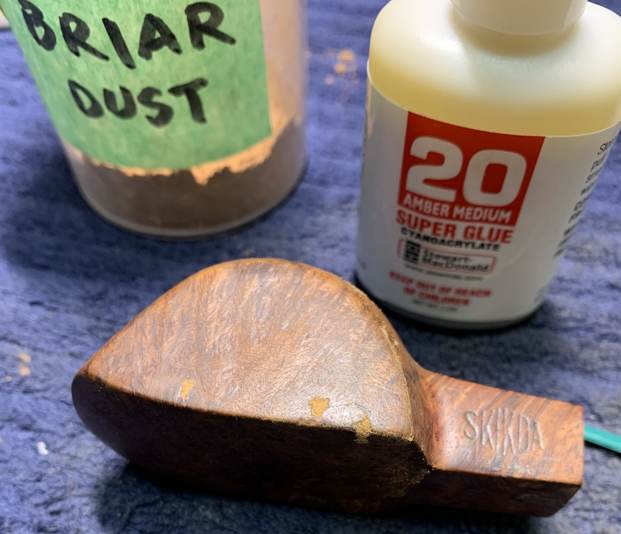
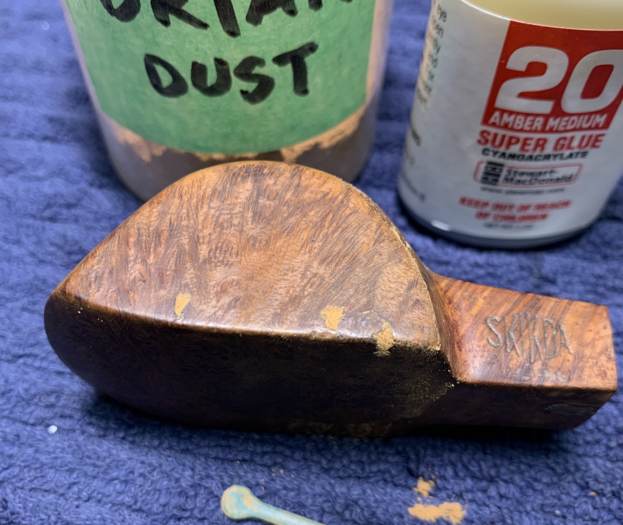
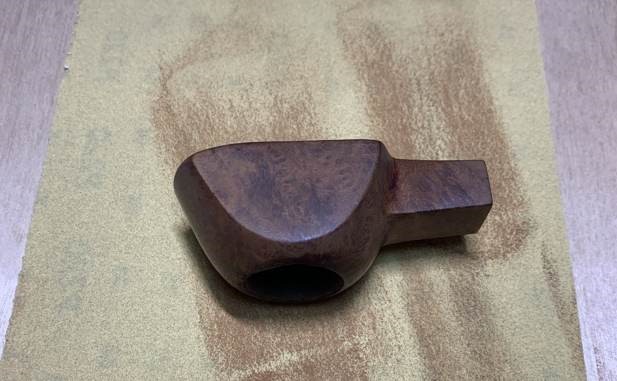
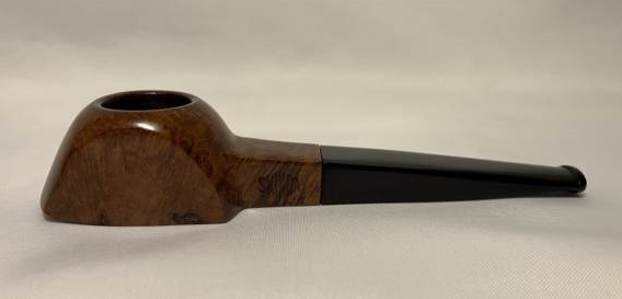
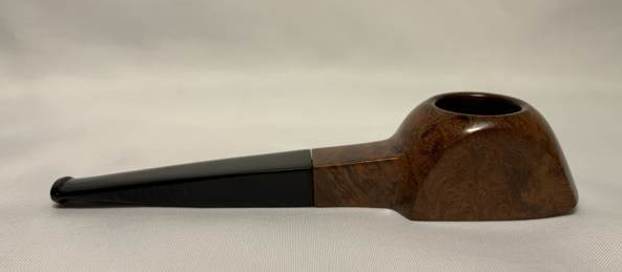
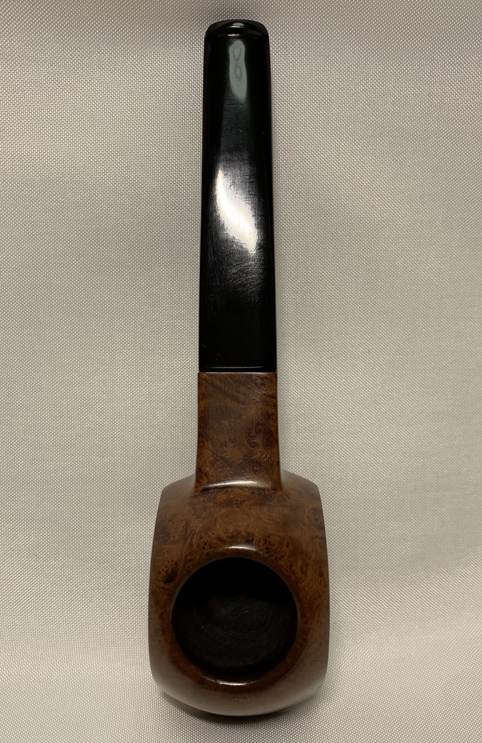
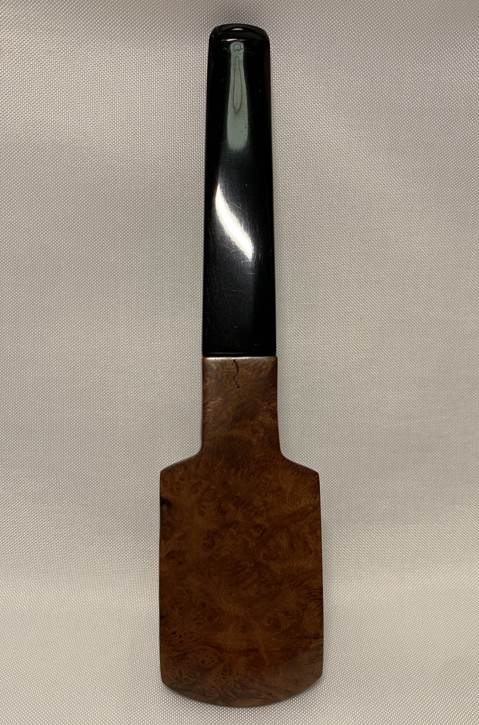
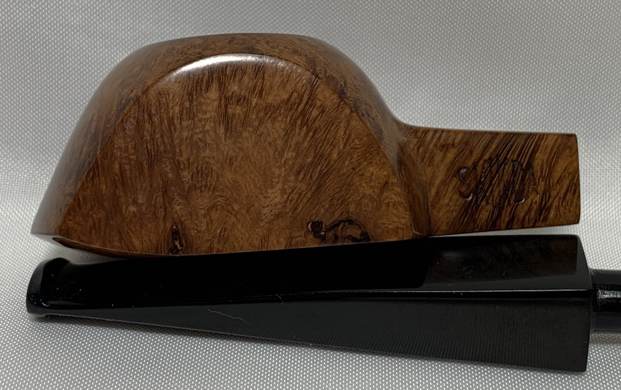
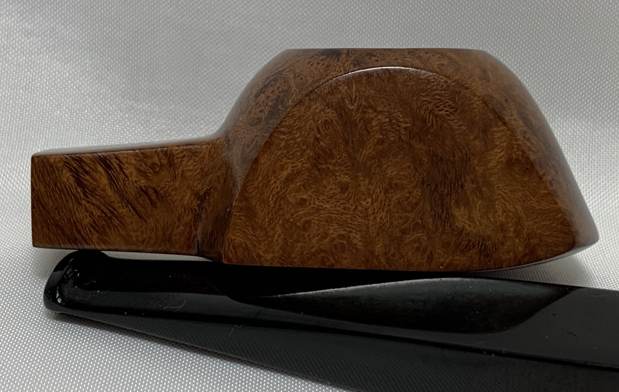
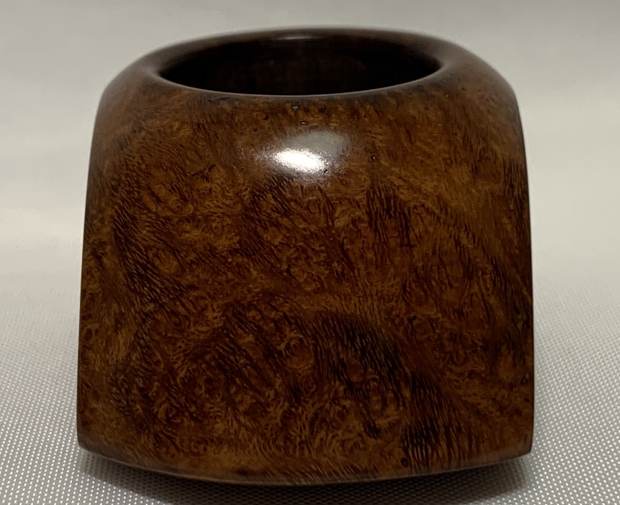
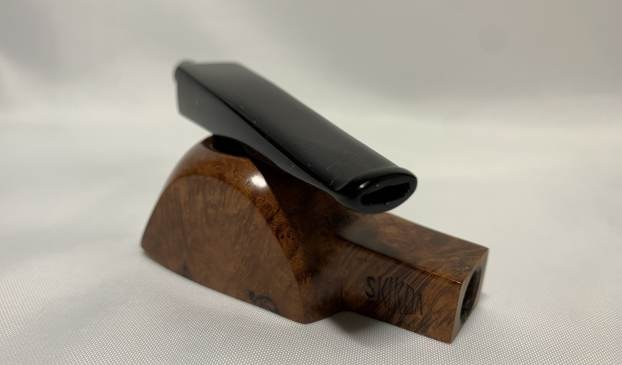
Pull up a chair and light your pipe – let me tell you the tale of an involved pipe restoration. This pipe arrived from France in a large lot. It certainly caught my eye with its idiosyncratic name and shape. I don’t know anything about the previous smoker of this pipe, but it certainly has travelled the world. Many things about this pipe are unusual, but most unusual of all is the shape! What would you call it? From the side it looks a bit like an igloo. It’s not a freehand, it’s not a classic shape – what on earth is it? I’m not sure, but I do have a soft spot for it so I’m going to call it an igloo.This is a Skikda pipe, made in Algeria. The only marking on the pipe was on the left of the square shank, which simply had the word ‘Skikda’. Igloo shape or not, it has a squared, tapered stem. As you can see, the stem of the pipe is made of vulcanite and the width of the stem narrows to the button. This indicates that the pipe is likely pre-war. My educated guess is that the pipe was made between 1932 and the beginning of World War II. Why 1923? Read on… As is often the case with pipes from the early 20th century, the information I have on Skikda Pipes is slim indeed. What does the word “Skikda” mean or refer to? Skikda is a region and a town in northeastern Algeria. Between the 1830s and 1960s (when Algeria was under French rule), the town was known as Philippeville, after the French king at the time the town was founded. Pipephil had no information at all under the name, Skikda, and Pipedia had a mere three short sentences – but the sentences were significant in their own way:

“It seems likely that Skikda pipes are connected to the Amiel brand founded (1923) [sic – this should read 1932] by Raoul Amiel in Philippeville (Skikda, Algeria). The factory employed about 30 persons in the early 1960s when it closed down. It is the only known pipe producer to have been headquartered in Skikda.”

This was significant because I had independently come to the same conclusion about Skikda and Amiel, before reading the Pipedia article. In other words, I was pleased that someone else had made the connection between Skikda and Amiel.

Pipedia also has an article on Amiel Pipes, with information gleaned from an email of Jacques Le Moigne, great-grandson of Justine Amiel, Raoul Amiel ‘s sister. I quote some (but not all) of that information:

The factory of Raoul Amiel near Philippeville in Algeria is the result of the briar industry there. By 1900 the French and Italian sources of briarwood in the Mediterranean are becoming rarer. The pipe industry had grown in a short period of time and a gigantic demand for this special rootwood was there. In 1905 rich fields of briar were discovered in Algeria, at that time still part of France. Within some years Algeria became an important exporter of so-called ebauchons that were exported world-wide. About eighty percent of the briar used in the pipe industry of that time originated from Algeria. We had previously indicated that French undertakers together with English investors were considering to set up the industry of pipe making in Algeria. The raw material was sufficient available, moreover cheap labour was easy to get. The Amiel family reports the factory was originally financed by the Wassas Family. Unfortunately things changed after 1929. The Amiel family was a traditional pipe family. They had their origins in Nancy, France, which they left in 1870 during the German invasion. They first moved to Florence Italy before moving to Philippeville in French Algeria. Raoul was a gifted engineer and designed and built the factory, which was very modern for the time. In 1932 the first pipe factory in Algeria opened its doors under the name Raoul Amiel. A mysterious factory of which little history is known. Certainly the techniques for making the pipes came over from Saint-Claude so that the pipes are hard to distinguish from the French counterparts. The factory named Amiel is heading with success. The product soon reached a high grade of perfection and soon competed with the French products. Even so, Amiel was selling a greater deal of his products in Saint-Claude, where the pipes received a French mark to be exported world-wide. Despite of the large production and the excellent trade the success of the factory is unclear to us now. After the founding the factory worked till the late 1950’s. Possibly the mark thereafter was sold and the production moved to another place. Anyhow, pipes under the name Amiel were kept alive till they disappeared from the marked somewhere around 1980. Certainly that fact is related to the declining interest in the tobacco pipe in general.

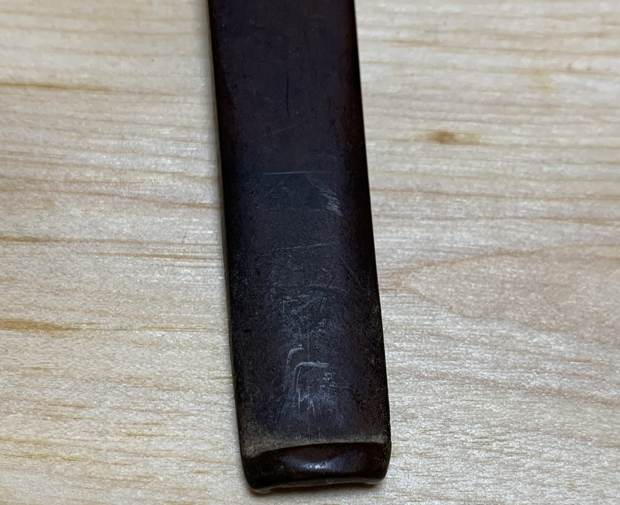
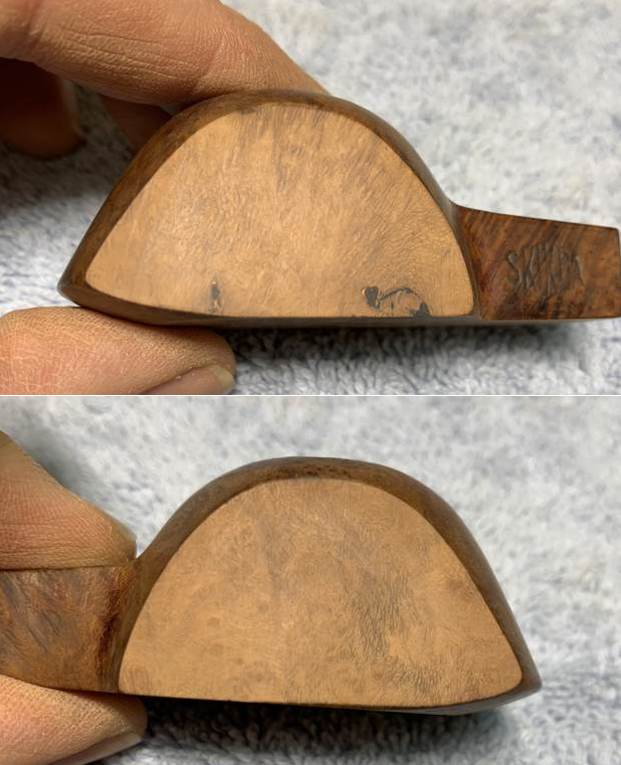
On to the pipe — and it was a bit of a nightmare. This stem may be the most badly oxidized stem I’ve ever worked on. The brownish-greenish-yellowish colour was oppressive and it was unclear whether it could be fully returned to its original glossy black. Inside the stem was quite dirty but not unusually so. The surface of the stem had scratches, marks, and dents as would be expected of a pipe this old, but worst of all — as the photos show — a big chunk of vulcanite was missing on the underside. As for the stummel, it was no better. It was nasty, grungy and dull. The left side had a couple of significant nicks, the underside of the shank had a crack, and the rim of the pipe was badly damaged by burns and was damaged enough to look like a meteor crater. Clearly, it had had a long, hard life. This turned out to be a more challenging restoration than I had anticipated. Part of the difficulty was as a direct result of my own inexperience; I had to redo some of the steps more than once to achieve the desired result.

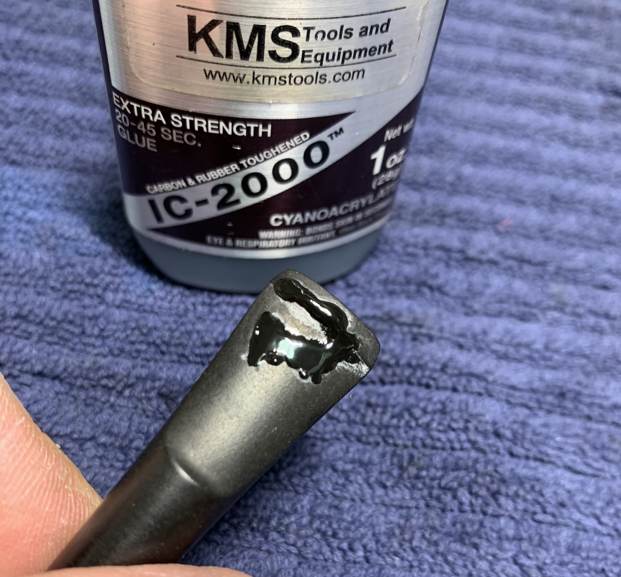
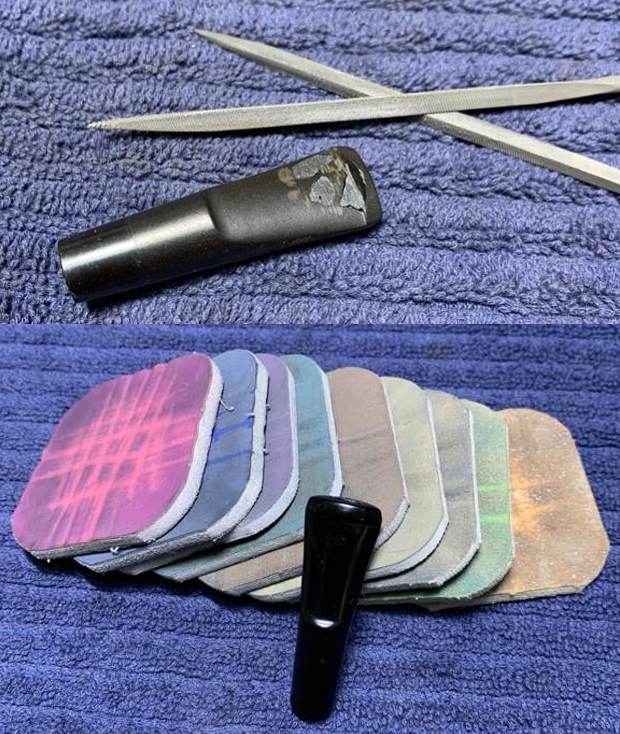
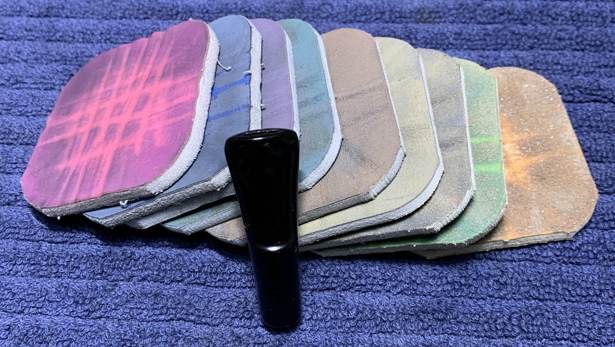
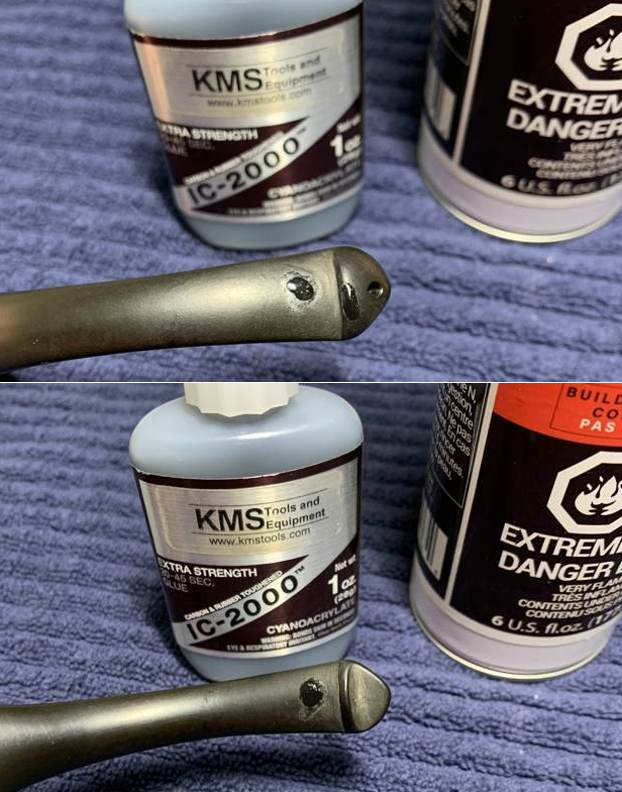
It was time to fix this pipe! First up — the stem. There was some paper mush (or something similar) on (and adjacent to) the tenon. I later found out that this was to repair yet another problem in the stummel, but I digress. I removed all of that paper debris before proceeding with the usual procedures. I wiped the outside down with Murphy’s Oil Soap on some cotton pads. I also took a BIC lighter and ‘painted’ the stem with its flame in order to lift the bite marks and dents. Then I cleaned out the inside with pipe cleaners and isopropyl alcohol. Because of the extreme oxidation, I used SoftScrub and cotton pads to wipe down the stem before throwing it in the Pipe Stem Oxidation Remover. The following day, I cleaned all of the de-oxidizing mess and again scrubbed with SoftScrub on some cotton pads to remove the leftover oxidation. This worked quite well. I built up the smaller dents on the stem and button with black cyanoacrylate adhesive and let them fully cure.The major gouge would need far more work. I made a patch out of a new-to-me product — a type of cyanoacrylate adhesive strengthened with carbon and rubber (I also mixed a little activated charcoal in). I’d heard good things about this product and wanted to try it out for myself (Spoiler alert: it worked very well!) This repair was a perfect opportunity to test drive this adhesive. I first plugged up the stem’s draught hole with a folded pipe cleaner coated in petroleum jelly. This ensured that any of the CA glue would not accidentally plug up the air passage in the stem. This was a tricky business and it took some real patience and effort to make it work. As the photos show, after I applied the cyanoacrylate, it looked pretty darn ugly, but I was expecting that. After the curing, I ended up sanding down the end of the stem to reduce some of the excess material. To carry this process on, I used some miniature files to further shape the button and make it suitable for sanding. I used another file on the inside to ensure there were no rough edges in the bore.I then sanded the stem down with 220-, 400-, and 600-grit sandpapers to meld seamlessly into the stem. This ensures that it keeps its shape and looks like it should. I then used all nine Micromesh pads (1,500 through 12,000 grit) to bring out the lovely black lustre on the stem. I also used Obsidian Pipe Stem Oil in between each pad scrubbing. It is worth noting that a repair this big on a stem will never be completely invisible, but I was pleased with how I managed to make it look reasonably good.

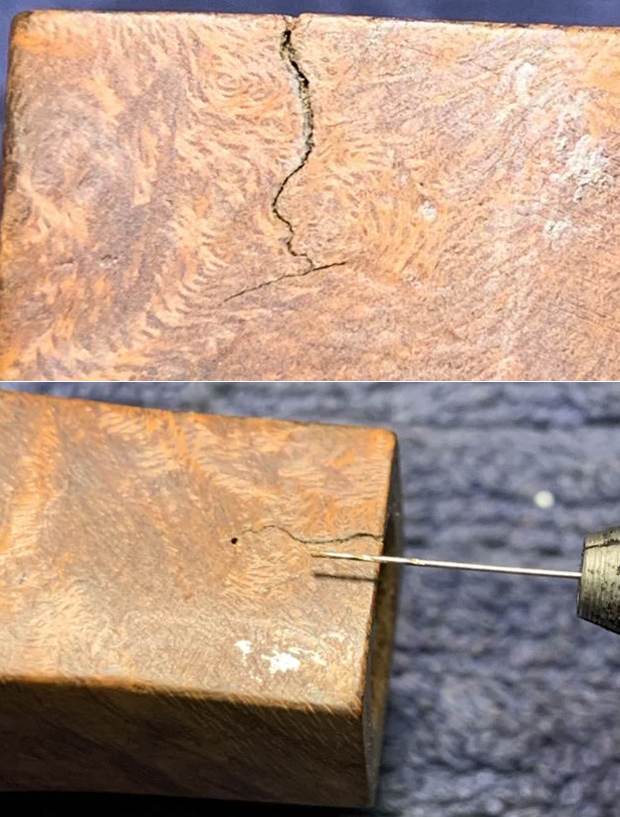
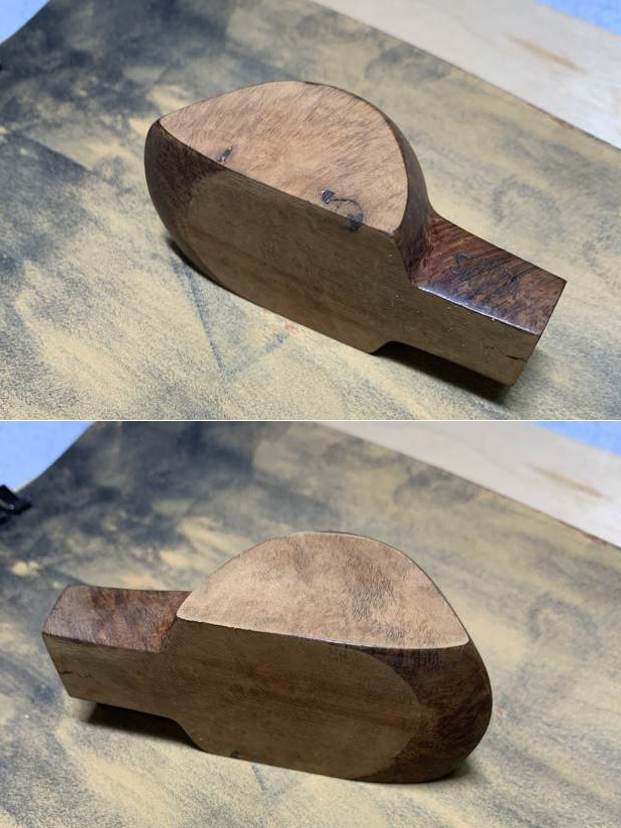
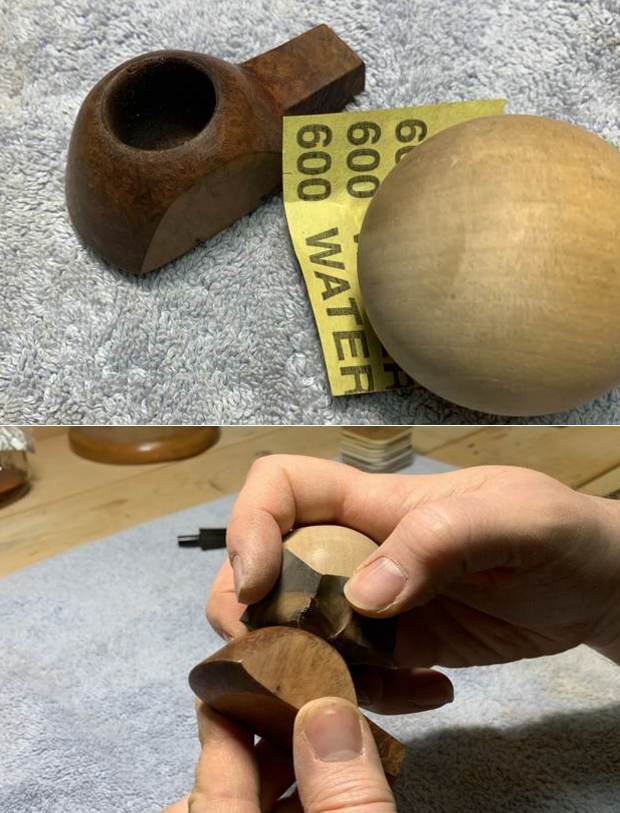
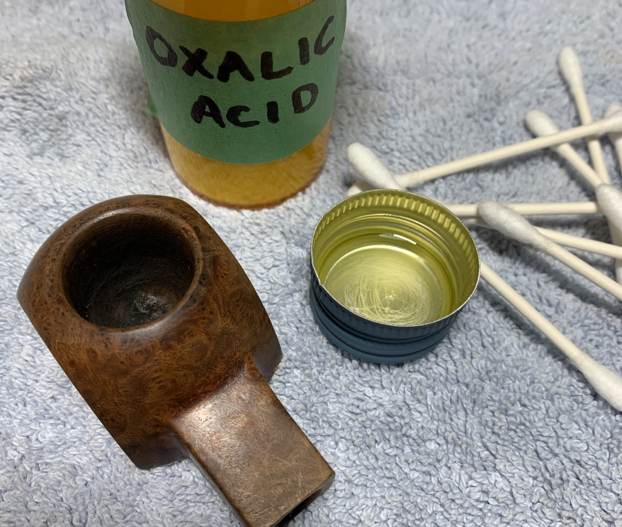
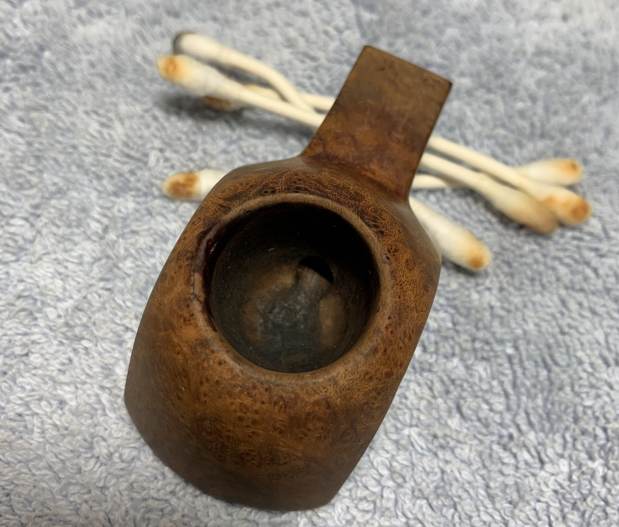
After all of that, it was time to work on the stummel. First, I reamed out the bowl. I used the KleenReem to remove the built-up cake and followed that with 220-grit sandpaper taped to a dowel to eliminate as much as I could. I took the chamber down to bare briar, as I wanted to ensure there were no hidden flaws in the wall. Fortunately, there were none. One thing to note is that this stem has an unusually wide draught hole and I’m not sure whether it was originally constructed that way, or if it was widened later. Either way, that (coupled with the crack in the shank) is why the stem’s tenon had that paper stuff on it – to ensure that the pipe fit together properly.Since the draught hole was unusually wide, I used some drill bits to help remove the detritus inside. Just to be clear: I did NOT use these drill bits in a drill! I used them with my hands. Using a drill here would be catastrophic for the pipe.I then proceeded to clean out the insides of the shank with Q-tips, pipe cleaners, and lemon-infused isopropyl alcohol. It was fairly dirty, but not extraordinarily so. I used cotton rounds and some Murphy’s Oil Soap to scrub the outside of the stummel and a toothbrush with Murphy’s for the lava on the rim of the pipe. I followed that up by cleaning the insides with some dish soap and tube brushes. Because this pipe was so filthy, I decided to bypass the usual “ghosting” altogether, and go straight to a bath! I opted to soak the stummel in isopropyl alcohol overnight. This will usually remove the sort of goo, grunge, and ghosts I was faced with. Next day, I took it out of the bath and left it to dry. As you can see in the post-bath photos, some filth remained in the recesses of the pipe, so I took a bit of acetone on some Q-tips and rubbed. This worked like a charm!Having completed that, I could move on to fixing up the wounds on the stummel; there were three significant ones on the left side. They were large enough that I would not be able to make them disappear entirely, but I wanted to make them solid and smooth, and meld into the rest of the wood. I used a dental tool to dig out the remaining fill-material and replaced it with a mixture of cyanoacrylate adhesive and briar dust. These would get sanded down later. I then moved on to the crack on the underside of the shank. The first step in dealing with this was to ensure that the crack would not continue to creep after I had repaired it. To that end, I took a micro-drill bit, inserted it in my Dremel, and very carefully drilled a hole right through the wall of the shank, into the mortise. I then needed to apply cyanoacrylate adhesive in order to seal and repair it. First, however, I used a Q-tip and a folded pipe cleaner to coat the inside of the shank with petroleum jelly. This would prevent the adhesive from dripping inside the shank and creating further problems. That done, I carefully applied a tiny bead of adhesive to the hole and the length of the crack. Finally, I clamped it shut and let it cure. This was a great success – obviously, the crack would always be visible, but I was really pleased with how the repair looked. I took out my topping board and sanded the three planes of the pipe to both flatten the repairs and also level out the surface. I also wanted to resharpen the edges and corners a little. Next was to work on that meteor crater of a rim. I actually argued with myself for some time about this damaged rim. I seriously considered the idea of leaving the damage as it was (as part of the pipe’s history) because I was adamant about not changing the profile of the rim by sanding it. However, I felt that I couldn’t just leave the pipe as it was. It needed some help. I took some 600-grit sandpaper, wrapped it around my wooden sphere and gingerly sanded the rim. The circular shape and motion of the sphere gradually smoothed and returned the edge to a perfect circle. I think I managed to achieve a good balance between removing the damage but still keeping the original look.I took some oxalic acid, used several Q-tips, and rubbed, but this did not do much towards removing the burn. So, I brought out the big guns and used acetone, which achieved better results. Then I used all of my Micromesh pads over the entire stummel, including the rim.But just when I thought I was done the stummel — I wasn’t. I was reminded that there was that awful paper stuff on the tenon of the stem because it didn’t fit correctly, so I needed to rectify this too. I built up the bottom part of the mortise of the shank with CA glue and briar dust. After letting it cure, I sanded it down with my needle files, made it look good and, most importantly, ensured it fit well with the tenon. Finally, I gave the pipe a light application of Before & After Restoration Balm and let it sit for 15 minutes or so. I then buffed it with a microfibre cloth. After that, I took it to my bench polisher and polished it with white diamond and carnauba wax. This brought out the best in the stummel’s grain. The Skikda igloo with a long, hard life has been brought back from the dead! It an unusual and uncommon piece of Algerian and French pipemaking. It looks so much better than when I started and is ready to be enjoyed again by the next owner! I am pleased to announce that this pipe is for sale! If you are interested in acquiring it for your collection, please have a look in the ‘French’ pipe section of the store here on Steve’s website. You can also email me directly at kenneth@knightsofthepipe.com. The approximate dimensions of the pipe are as follows: length 5½ in. (140 mm); height 1 in. (25 mm); bowl diameter 1¼ in. (32 mm); chamber diameter ⅝ in. (16 mm). The weight of the pipe is 1⅛ oz. (33 g). I hope you enjoyed reading the story of this pipe’s restoration as much as I did restoring it. If you are interested in more of my work, please follow me here on Steve’s website or send me an email. Thank you very much for reading and, as always, I welcome and encourage your comments.
Giving Life to an Old Smokewel of Mysterious Origin


Blog by Kenneth Lieblich

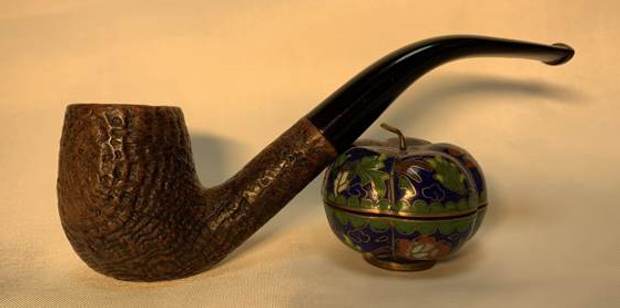
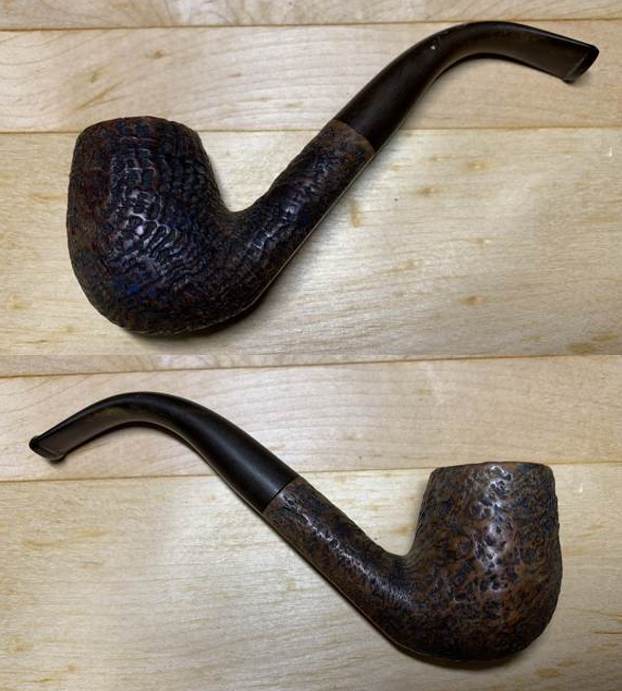
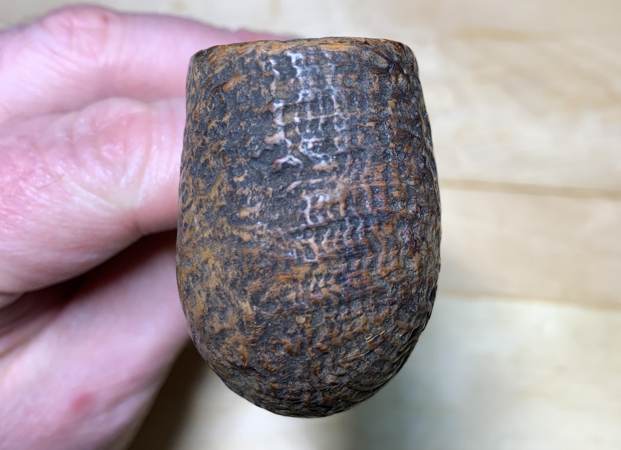
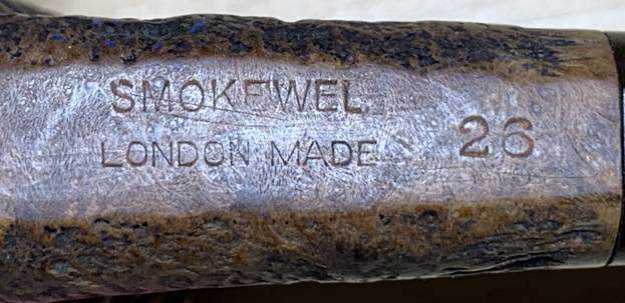
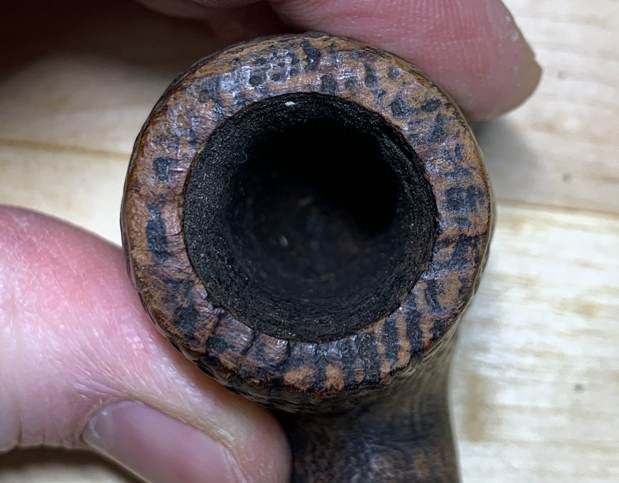
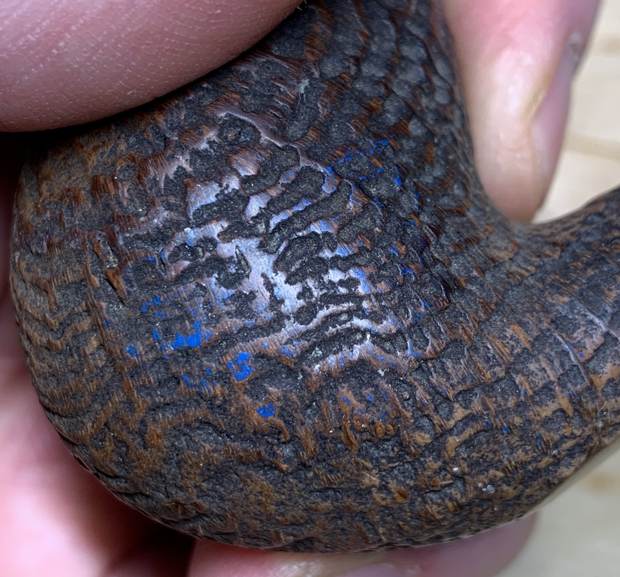
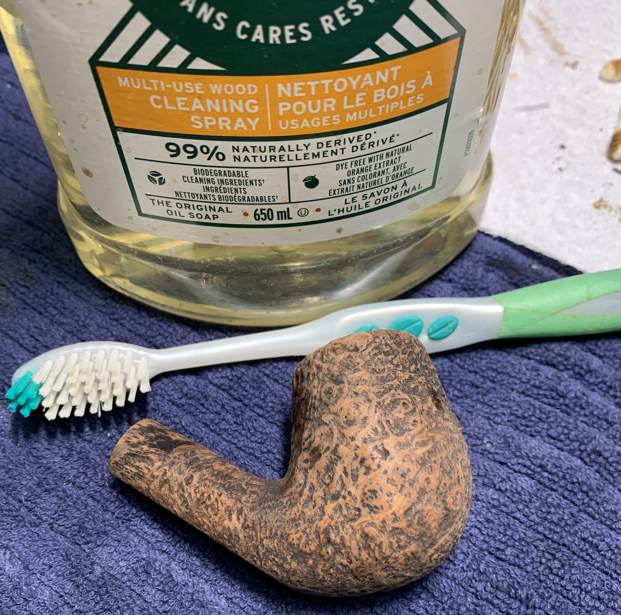
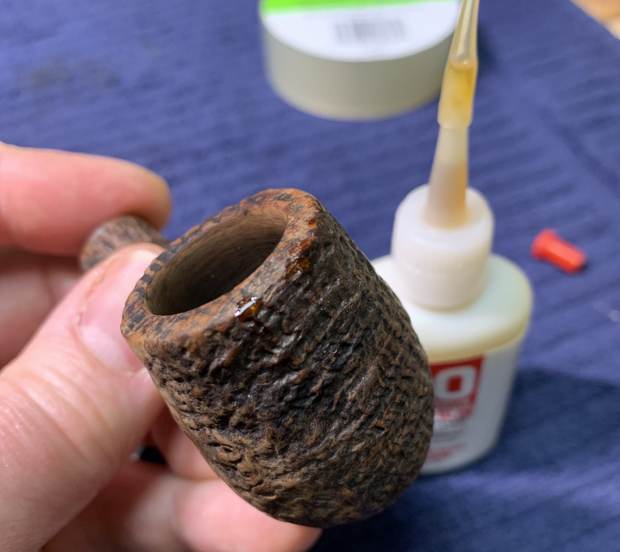
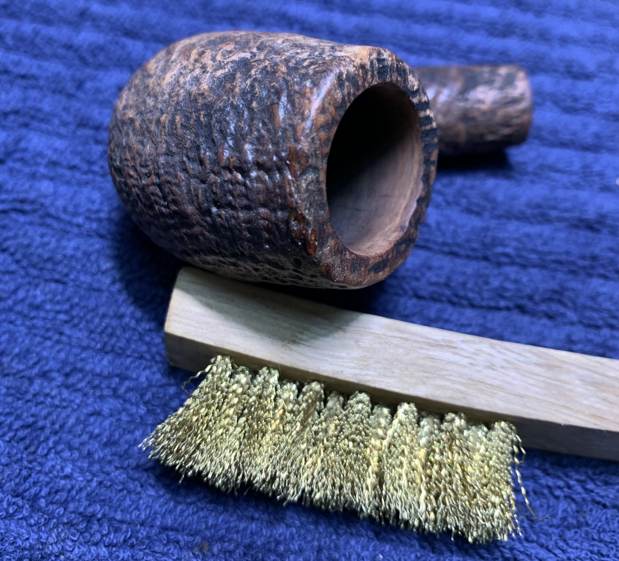
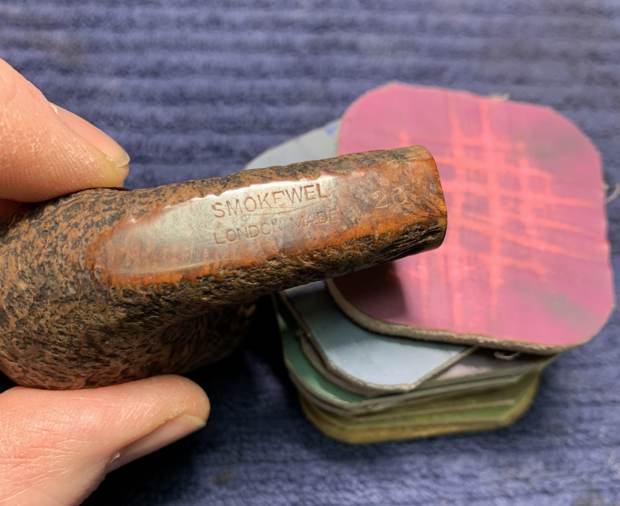
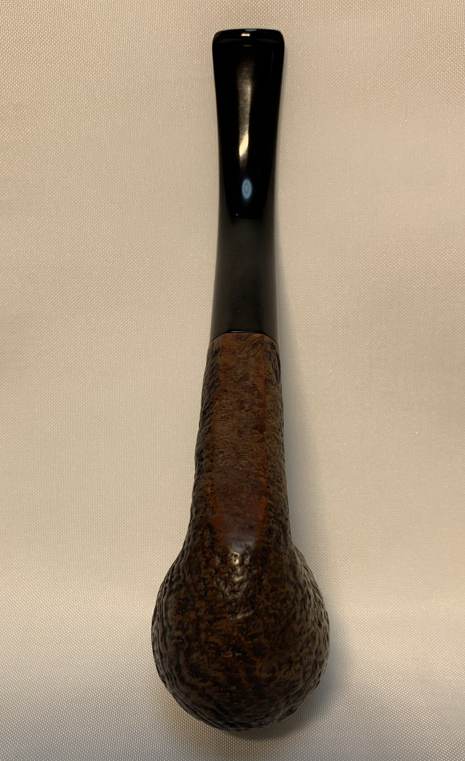
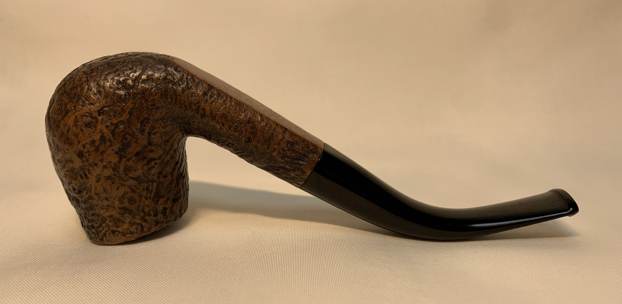
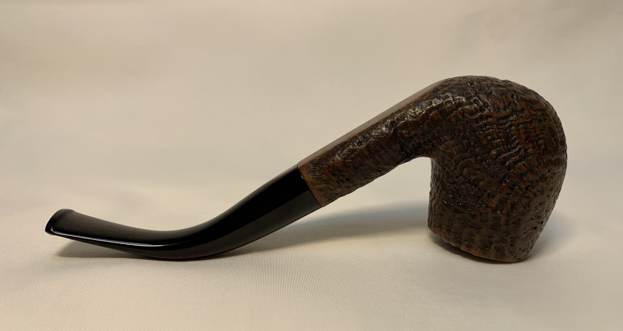
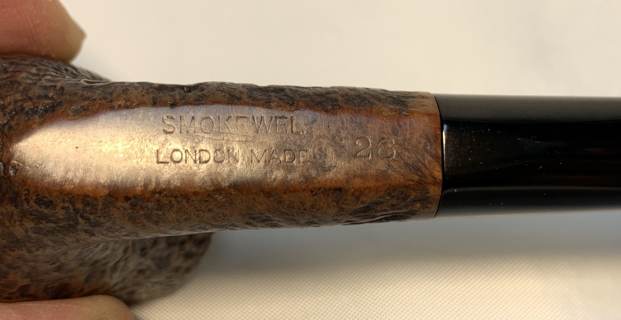
Next on the chopping block is a bent billiard sandblast Smokewel (one “L”), which I acquired in a lot of pipes from a gentleman living on Vancouver Island. He had quite an assortment of pipes and they ranged from utterly horrible to surprisingly beautiful – fortunately, this was of the beautiful variety. The pipe is very well made: the proportions are right, the drilling is accurate, and it just oozes competence. This is a sandblasted bent billiard, with a tapered, vulcanite stem. And what a wonderful, rugged blast on this one! On the underside of the shank, the markings read ‘Smokewel [over] London Made’, and, off to the right, the shape number ’26’. This pipe had been well-loved and well-smoked, as it arrived with some marks and general wear, and the stem was pretty nasty. There were also beautiful indications of “hand erosion” on the right-hand side, where the previous owner’s hand had lovingly rubbed the pipe over the years. There were also a couple of tiny nicks, but, fortunately, nothing overly complicated.
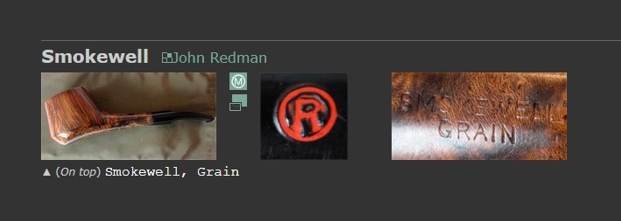
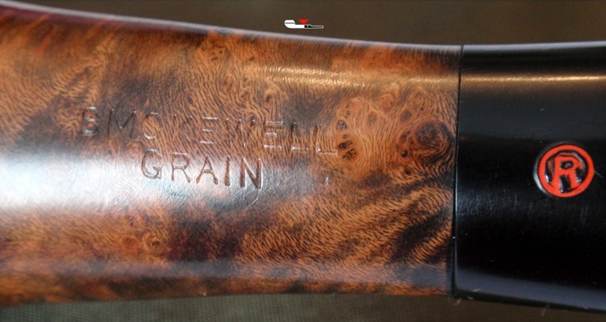
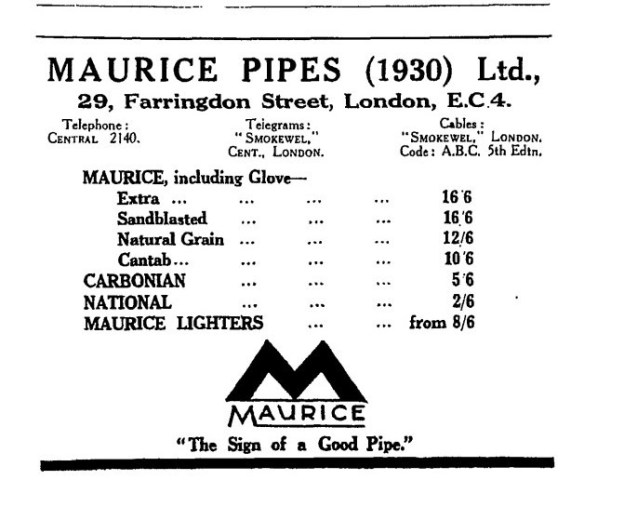
Identifying exactly what a “Smokewel” pipe is turned out to be a typical pipe-history morass. There are a few twists and turns in this story, so join me in wading through this mess. As you’ve seen in the photos, the pipe clearly says “Smokewel” – not “Smokewell”. I initially thought that perhaps the terminal “L” had been rubbed off, but, looking closely, one can see that “Smokewel” is perfectly centred over “London Made”, which suggests this odd spelling was not the victim of rubbing. In other words, there is no missing “L”.
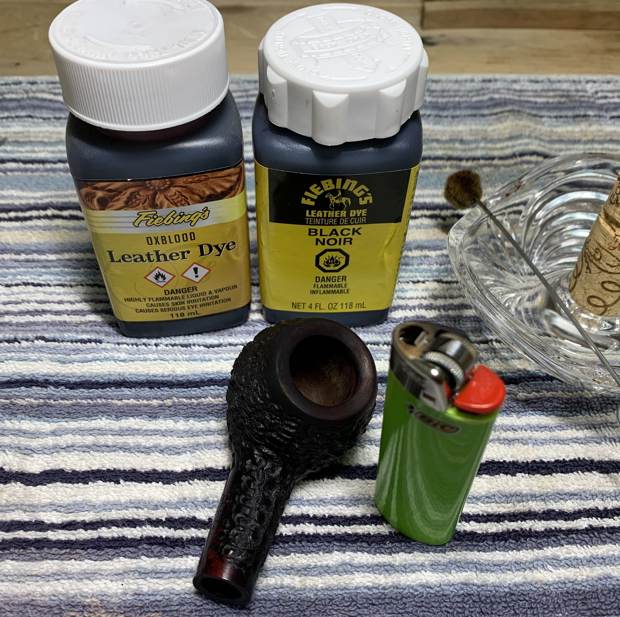
There is scant information to be had on both “Smokewel” and “Smokewell” – and none of it could be linked definitively to this pipe. There is this entry on Pipephil for “Smokewell”:As you can see, it is a line of pipes from the John Redman firm of London. There are some examples of these pipes that can be found online, and I have included a photo of the markings of Redman’s “Smokewell” line: This might be significant because I have studied the letters of the markings from my pipe and Redman’s pipe, and they are the same. In addition, a John Redman catalog (supposedly) from the 1960s, lists “Smokewell” as one of their “London Made Briars” (note the wording). I have clipped the specific passage here:All of this is persuasive evidence, but not definitive. The missing “L” on my pipe causes me to pause, if only briefly, before declaring it to be a John Redman pipe. Also, the various iterations of Redman pipe usually had markings on the stem – this one has none and I don’t think it’s a replacement stem. I am aware that Wilczak and Colwell’s Who Made That Pipe? lists “Smokewell” under John Redman – but there is more.

Wilczak and Colwell also list “Smokewell” under a company called Maurice Pipes. The second “L” here could be an error from Wilczak and Colwell – the book is full of them. I also found an old advertisement for Maurice Pipes. Based in London, this firm supposedly produced very fine pipes. Superficially, this ad seems to have nothing to do with our pipe, except that it instructs the reader to use the word “Smokewel” (one “L”) in telegram and cable correspondence with the firm. The word obviously had significance to Maurice Pipes.On the PipesMagazine forums online, I read a thread about early sandblasts and one comment stuck out to me: “The mysterious Maurice was listing blast pipes in the 20’s and as a pipe company they are totally in the dusty shadows, but I’d reckon they were a fine maker, mostly because of their prices – they sold their Sandblast alongside their topline Extra for the very same price, at 16/6 and that’s a fairly high price comparatively.”

The connection between Maurice Pipes and “Smokewel” is tenuous at best, but it was my only connection to the single-L “Smokewell”. If you have information about any of the research above, I would love to hear from you. The stinger is a bit odd – does it ring any bells for you?

And speaking of the stinger, let’s clean it. I heated the stem and stinger with my heat gun and this provided just enough softening of the internal goo to allow me to pull it out. It then went for a soak in some lemon-infused isopropyl alcohol. I let it sit for several hours and then cleaned it off and it looked much improved.I wiped the outside of the stem down with Murphy’s Oil Soap on some cotton pads. Though dirty, the outside of the stem was in decent condition and the oxidation wasn’t too bad. On the other hand, the inside was another kettle of fish! I used up a good chunk of the world’s supply of pipe cleaners to clean it out – the pictures only show a fraction of what I used. Next, the stem went for an overnight soak in the Pipe Stem Oxidation Remover. The following day, I cleaned all of the de-oxidizing mess off. The oxidation had migrated to the surface and would be fairly straightforward to remove. I scrubbed with SoftScrub on some cotton pads to remove the leftover oxidation and leave the stem in a dull black colour. Finally, I used all nine Micromesh pads (1,500 through 12,000 grit) to bring out the lovely black lustre on the stem. I also used Obsidian Pipe Stem Oil in between each pad scrubbing. Now for the stummel. It was nicked on the front edge of the rim, and the rim itself had lava and general filth, so, time to work on it! I started with the KleenReem to remove the built-up cake and followed that with 220-grit sandpaper taped to a dowel to eliminate as much as I could. I took the chamber down to bare briar, as I wanted to ensure there were no hidden flaws in the wall. Fortunately, there were none. I then proceeded to clean out the insides of the shank with Q-tips, pipe cleaners, and lemon-infused isopropyl alcohol. There was an extraordinary amount of filth inside this stummel and it took an enormous amount of cotton to get it clean. I only have a photo of a small number of pipe cleaners. I can’t imagine that this pipe had ever been cleaned – or, at least, not in many decades. Because the filth in the shank was well-encrusted, I used a couple of drill bits held in a chuck, by hand (not in a drill), to try and loosen up the debris. This worked quite well. I decided to de-ghost the pipe to remove any lingering smells of the past. I thrust cotton balls into the bowl and the shank and saturated them with 99% isopropyl alcohol. I let the stummel sit overnight. This caused oils, tars and smells to leach out into the cotton.In fact, the pipe was dirty enough that I then used my pipe retort system on it. I neglected to take photos of that, but it certainly helped clean the pipe. I followed that up by cleaning the insides with some dish soap and tube brushes. I used some Murphy’s Oil Soap and a toothbrush to scrub the outside of the stummel and the lava on the rim of the pipe. I didn’t scrub too hard – I wanted to keep the nice colour on the wood. Having completed that, I was able to address the small nicks on the rim and the bowl. I used some tiny drops of cyanoacrylate adhesive to fill the nicks, and a metal brush to camouflage the repairs in the wood. Finally, I used only the last three MicroMesh pads to polish the stummel, but I was careful not to damage the sandblast. After that, a light application of Before & After Restoration Balm brought out the best in the stummel’s grain. Then off to the buffer! A tiny dose of White Diamond and a few coats of conservator’s wax were just what this pipe needed. This Smokewel looks fantastic again. It is elegant and handsome, and is ready to be enjoyed by the next owner. I am pleased to announce that this pipe is for sale! If you are interested in acquiring it for your collection, please have a look in the British pipe section of the store here on Steve’s website. You can also email me directly at kenneth@knightsofthepipe.com. The approximate dimensions of the pipe are as follows: length 5¼ in. (133 mm); height 2¾ in. (70 mm); bowl diameter 1¼ in. (32 mm); chamber diameter ¾ in. (19 mm). The weight of the pipe is 1⅛ oz. (35 g). I hope you enjoyed reading the story of this pipe’s restoration as much as I did restoring it. If you are interested in more of my work, please follow me here on Steve’s website or send me an email. Thank you very much for reading and, as always, I welcome and encourage your comments.