Refurb on a Gourd Calabash


This one needed a bit of work. The Meer bowl came out easily. The cork gasket was dry so I greased it with Vaseline to soften it. While it softened I cleaned out the gourd with a pic and wipes. It had some hard tars in it. The bottom of the bowl was black so I cleaned it as well. The rim was tarred and dark so I wiped it clean and then sanded with micromesh pads to get the grime off and give it a sheen. I set it aside and went to work on the outside of the gourd. It had lost its shine. I cleaned it with Murphy’s Oil Soap and once clean sanded with the micromesh pads. Once done I buffed it with White Diamond and Carnuba. Then I went to work on the stem. It is amber. In the case a piece of the stem was chipped and lying loose. I used super glue and repaired the chip. The silver band was loose on the gourd so I removed it and cleaned it with silver polish. I refastened it with superglue. Once the entire pipe was cleaned and the stem was cleaned and dry I reassembled the pipe and gave the cork another coat of Vaseline before putting the bowl back in. It is stamped with hallmarks that are hard to see as they are worn. It looks like the reclining lion (sterling silver) the other two are worn. The makers mark is MSNF in a rectangle. Not sure who that is? Anyone know??

Here is the finished product. Thanks for looking.

ImageImage

Image

I wrote to Gary Schrier regarding the Calabash via email and he replied as follows:

… Your pipe was made in the London area, and hallmarked at Goldsmith’s Hall, London, because of what sounds like a leopard’s head, that hall’s guild mark. The maker’s mark, “MSNF,” is unknown to me. Chances are likely it belongs to the “mounter” or silversmith who did the work (but not necessarily the maker of the actual pipe). It’s an insignificant brand, though; this does not detract from the pipe. It was probably made around 1907 thru 1911. I hope you enjoy it.

Refurb on a 3 part horn


Just finished up this unique piece. It is three part horn. The bowl screws off the shank and has a briar thread connection. The stem is also a screw on with a metal connection into briar. The stem is also an orific button. There is no stamping on this old timer. I really like the uniqueness of it.

I reamed and clean the bowl. I took apart the three parts and cleaned each on separately. The outside was wiped down with alcohol to get off the grime. The insides were scrubbed with a bristle pipe brush and pipe cleaners and alcohol. The stem was oxidized so it was sanded with 400, 600, wet dry sandpaper and 1800, 2400, 4000 micromesh pads and then hit with red tripoli and white diamond before being given a coat of carnuba. I sanded and restained the bowl with a cherry stain and then buffed and waxed it as well. This one will be a fun one to smoke!

Before shots:

ImageImageImage

and after shots:

ImageImage

Bruyere Deluxe Horn Stem refurb


Blog by Steve Laug

The two pipes that had what looked like horn stems arrived yesterday. They indeed were horn stems. One of them the little 4 1/2 inch bulldog need some work on the stem as it had some tooth marks. The bowl itself was rough. The varnish (?) was crackling and the lava had overflowed the top of the bowl and stained the wood around it. Fortunately it was not charred at all! I reamed and cleaned the bowl. It was a mess. Then I sent it to the alcohol soak and it lifted some of the tars and stain as well as the varnish. I then reworked the bowl with sand paper and with micro mesh pads. It then was re-stained with a black under stain and then a cherry over stain. I then buffed and polished it.

For the horn stem I heated a knife and used a damp cloth and the hot knife to lift the tooth marks. Thanks to Nigel and others (Chris/Caskwith) who gave that bit of advice. It is the same process that is used to lift dents in the briar. I repeated this process until they were gone and the stem was smooth to touch. I then used micro mesh to sand and polish the stem. Finally I gave it a buff with white diamond and carnuba wax.

Here are the before shots:

ImageImage

The front rim was solid but the tars seemed to have permanently stained the briar. I did not want to take much off as it would change the panel shape of the bowl so I cleaned the wood as deeply as I could and was able to get it so that I can see grain through the dark stain. I may give the entire bowl a dark stain to further hide the top but still considering that…

ImageImage

Image


An Interesting Wellington Straight Billiard


Just finished researching a bit on WDC Wellington Pipes. Yet in all of the research I cannot find the one that I picked up. It is a straight billiard. It is chunky and 5 1/2 inches long. It is a system pipe like the Wellington Bent pictured below but it is a standard P-lip stem with a regular tenon. The band is sterling silver and has the WDC triangle and hallmarks stamped in it – an anchor, a five point star, and an eagle. The shank is also stamped WDC in a triangle under a script Wellington. The stem is stamped the same way. The bowl is U shaped with draft hole at the shank side as usual. From there it drops down into the shank where there is a chamber – a bit different than the well in the picture below. It is more of a wide open chamber that tapers a bit to receive the end of the tenon. Very interesting design.

It was rough so I reamed and cleaned the bowl. Cleared out the reservoir and the shank with pipe cleaners folded in half and then gave the bowl an alcohol bath. I left it in for about a 1/2 hour and then took it out and cleaned it again. It did not need to be re-stained as it retained its colour. I buffed it with White Diamond and then gave it a coat of carnauba wax. The stem needed a buff as well. It was a bit oxidized. The stem is unique as well in that the tenon end is very open and tapering back to the whole in the Plip. Here are the after pics.

ImageImageImage

I have also included a couple of adverts that I came on that are interesting bits of history of the brand.

ImageImageImageImage

Had fun with this one – GBD International


I just finished this beauty – a GBD International. It is a beautiful little pipe. The shape #9456 says it is a bent apple – I suppose that is so. I did some work on what they originally looked like. They had a plateau (Faux?? not sure) top that was stained black and the bowl was a medium warm brown.

This one was pretty well stained with dirt and grit. The finish was blown and the bowl was caked and dirty. The stem was brown and it was a pretty gross mess. It was one I was going to put off but today I decided to work on it. I am glad I did as it was actually quite fun to work on.

I cleaned the stem as usual. It was tough and still shows some oxidation under the flash of the camera. I will do a bit more in brighter light. But it looks good to the natural eye. The bowl was reamed and cleaned and put in the alcohol bath. I removed any of the bits of left over stain left. Then I used a pipe cleaner and stained the plateau black. Once I did that I had the notion to stain the whole pipe black as well. I then wiped off the stain on the bowl and washed it with a damp alcohol rag to get it to the tone of brown I was looking for. I am really pleased with the stain and how it came out. I love the contrasts of the brown undertones and the black overstain. The wipe and then sanding with micromesh really worked to highlight the birdseye and grain in it.

Thanks for looking.

ImageImageImage

Image

Here is a final picture to give you an idea of the size.


A New Rustication Method


Blog by Steve Laug

I finished cleaning up a pipe bowl, turned the tenon and fit the stem on it this afternoon, but then I was stuck. The pipe is stamped D in a circle and next to that Dover Cliff, it had a pleasing shape but was almost entirely without grain. I know this sounds impossible to most of us, but truly there was very little grain even visible on the bowl or shank. Rather, it was a piece of briar that was made up of bald spots connected by a few straight grains. It also had three significant burn marks – on the bottom of the shank, the top of the shank and on the rim. Added to that problem, there were probably 20 or more fills per side of the pipe that looked like scratches but were actually filled with black putty. They are visible in the sanded and clean bowl pictured below. The front and the back of the bowl also had fills. Interestingly, the rim was without fills as was the shank. The rim was chamfered inward toward the bowl but had burn marks all around the bowl as if it had been lit with a torch. My question was what to do with the finish on this pipe. I knew from experience that a coat of stain would only highlight the many flaws rather than hide them. The burn marks were significant enough that even sanded, they had permanently coloured the wood. No amount of stain would hide the burns on the shank and the rim. I could give it a solid stain of black or brown but I was not interested in using a solid body stain. That left me with two options – put it back in the box for another day or rusticate it. I decided to rusticate it and then stain it.

ImageImageImageImage

I took out my rustication tools and looked them over – the fistful of nails and the florist frog, (I have shown these both in a separate post on rusticating) and decided it was time to try something different. I took out my Dremel and put on the cutting/grinding wheel and took a Philips screwdriver and ground the tip off of it. Once I had ground the point off I used the grinding tool to cut a trench both ways across the remaining + to create what I was looking for. Once that was done the screwdriver was left with four points on the head of the shaft. These four points were sharp teeth. I polished the steel with my buffer and my new tool finished. The great thing was that it even had a comfortable handle which would allow me a bit of creature comfort as I pushed it into the briar and twisted it to rusticate the wood. It also would provide a very different rustication pattern in the briar than my other tools. It would produce a very rough rustication pattern that should be interesting on this particular pipe.

ImageImageImage

I decided to take my time and document the process as I worked on the pipe. As I worked on each step of the rustication I took photographs and wrote down what I had done. The tool worked very well and was a good fit in the hand. The sharp teeth cut deeply into the briar and left a rough finish to the surface of the briar. The process went quickly. It took me about a half hour to complete what turned out to be the first level of rustication. I left the rim of the pipe smooth and left a smooth rectangular area on the shank where the stamping remains. I decided to also leave a smooth band around the shank where it joins the stem. I find that it makes it much easier to match a stem to the smooth surface than to a rusticated chipped surface. All of these smooth spots stand out nicely. To protect the shank and create a band near the stem I wrapped the shank with cello tape up the shank about ¼ inches. The tape would protect it from the points of the tool and provide a straight edge for me to work against. I also put a strip of tape over the area where there was stamping on the shank to protect it. I avoided the rim as I rusticated the pipe so there was no need to tape it off. One of the great features of this new tool is the small tip size that allows me to rusticate very closely to the shank/bowl junction and up to the top edge of the bowl. It also was very easy to work near the band that I was creating at the stem/shank junction. The ease of control  made this a great tool to use.

Image

Image

I worked my way down the sides of the pipe from top to bottom. From there I moved to the shank sides from the bowl to the stem and the top of the shank from the stem to the bowl. I used the same pattern on the other side of the shank around the stamping and then on the underside of the shank and bowl. Once I had it completed it that far I took a few pictures and then proceeded to rusticate the remaining side of the pipe and back end at the shank/bowl junction. I finished the rustication with working on the front of the pipe. Once the pipe was fully rusticated the burn marks were pretty much obliterated and were definitely less visible. The many fills in the bowl were hidden under the rustication. I used a wire brush on the pipe bowl to knock of the loose chips of wood before I gave it an initial coat of dark brown stain.  I flamed the stain to set it deeply in the briar. It burned with the signature blue flame for quite awhile setting the stain in the deep grooves. Once it was dry I laid it aside for a bit and then took it to the buffer and gave it a light buff with red Tripoli. The finished pipe still needed more work in my opinion before it would be acceptable.

ImageImageImageImage

I took time to look over the pipe and handle it to get a feel for the rustication. I like a random look to the rustication rather than a repeated pattern. To me it looks more natural once it is finished. After this inspection I decided to give it a second level of rustication with the tool to make it even more rustic and more random in its look. This second rustication was much easier to do and took less time. One of the benefits of having the brown stain on the bowl is that the new places I rusticated were raw and stood out clearly. I could easily see where I needed to do more work on the bowl.  I worked my way around the bowl and shank again. I checked to see if it was in keeping with the look I wanted it to have and gave it a few more twists of the tool. Now it was ready for the finish stain.

ImageImageImage

Before I stained the pipe I needed to do some work on the rim. To address the burned areas on the rim the best decision was to top the bowl. It was not only burned but also worn around the inside edge of the rim and that needed to be addressed. I sanded in a slight bevel on the inner rim to restore the roundness of the bowl and give it a finished look. I re-stained the rim with the dark brown and let it dry before I re-stained the whole pipe with oxblood stain applied with the wool dauber that came with the stain. The pipe soaked up the stain nicely. I stained the top of the bowl and the smooth portions on the side of the shank and the band around the shank near the stem. I let it dry for several hours before I polished the smooth portions.  This drying also revealed some places on the bowl that needed a bit more stain to adequately cover them. So I re-stained those portions that showed bare wood in the crevices.

ImageImageImageImage

I used the micromesh sanding pads (1500 through 6000 grit) on the smooth parts of the pipe to polish them.  Once that was done I waxed the smooth portions. Then I buffed them with a soft cloth to give them a bit of contrast to the rusticated portions. I decided to leave the rusticated part with a matte finish. The pipe is finished in terms of the rustication and the staining. I will need to let the oxblood stain dry overnight before it is thoroughly dry.  The bowl feels amazingly good in the hand. The tactile nature of the rustication really gives it a rough yet pleasant feel.

ImageImageImage

The bowl is finished and ready for the stem. The above pictures give you the idea of what it looked like once it was finished. The contrast on the rim and on the smooth parts of the shank added a nice touch and highlighted the rustication. In person the pipe is a deep rich oxblood/cordovan colour that is not captured in the pictures above. The pits and crevices actually show the red and give depth to the rusticated surface. I gave the pipe one more once over under a bright light and touched up spots on the finish that did not get a good coat of the stain. I then went over the smooth surfaces with another coat of wax and hand buffed them before setting the pipe bowl aside for the night.

I then tackled the stem to remove scratches that showed up in the bright light. I used some 240 grit to take out some of the deeper grooves and some tooth dents in the reclaimed and reworked stem. My method is to remove the deeper grooves with the 240 grit and then use the 400 and 600 grit wet dry sandpaper afterwards. I find that if I use those first it seems to only polish the grooves rather than remove them. The 240 grit gives a solid base to work with in the polishing that takes place with the wet dry sandpaper and then the further polishing with the micro-mesh pads. I finished the polishing with 1500, 1800, 2400, 3200, 4000 and 6000 grit micro-mesh that was kept wet in a bowl of water that I kept by the work table. I changed the water between grits to keep it clean and to ensure that I was not polishing the older grime into the stem. The stem came out beautifully and was ready to be put back on the pipe while it rested overnight.

The next morning I polished the stem and the smooth areas of the pipe and rechecked the rustication to make sure that all areas were covered by the stain. I took the pictures below after it had been polished and was ready to smoke. The new rusticated finish creates a far better looking pipe in my opinion and provides a very tactile pipe for the pipe smoker who likes rusticated finishes. The new tool worked so well that I will have to sort through my box of bowls to re-stem to see if there is another pipe that could benefit from this kind of face lift. Thanks for looking.

ImageImageImageImage

Steve Laug

June 04, 2012

You Just Found a Pair of Dad’s Old Pipes?


Blog by Steve Laug

They are both in very rough shape and need help but you want to keep them anyway. There is dried out old tobacco in both and the finish is about shot. The rims and sides of the bowls are both covered with dark grime and the mouth piece, or stem, is covered with bite marks and hard white lime like crust. The rest of the family tells you they are not worth saving and should just be thrown out but something inside you rebels against that. You still have memories of your father smoking those pipes and the associated feelings and smells still linger for you. It is hard to let go of these pieces of history. Something inside you wants to restore them but you just don’t know where to start. If this sounds like your situation, then you have come to the right place.

Image

You have already begun the first step in the process of refurbishing and that is to respect what you hold in your hands. These pipes are a piece of family history that can be passed down through future generations and when cleaned up and maintained, will last longer than any one of you. If they could speak to future generations can you imagine the stories they would tell? But if you listen to the wood, the old tobacco in the bowl, the dents and dings and the smells that still linger in it you will hear it speak. It will tell you what your Dad smoked. It will tell you how much he loved that old pipe and it still held the half smoked bowl of the last tobacco he smoked in it. It will tell you in the decimated finish where his fingers curved around the bowl. As you remember, you will know the stories that give meaning to dents – one from the fishing trip you took, one from the dash on the car when he laid it down and it hit the gear shift before bouncing off to the floor. All those bits and pieces add to the myth that surrounds story of a family. Be sure to take some photos of the old timers before you go to work on it. You will be amazed at the transformation that still respects the history of your Dad’s pipes.

The first step in the process is to do what I call field dressing of the pipe. It starts by laying out some newspaper on a table top where you can work on the pipe. Sit down with the pipe and begin to clean it. Use a small screw driver, ice pick or a dental pick, if you have one, to clean out the remnants of tobacco in the bowl. Put it to the side on the paper. You can purchase a pipe reamer on eBay for reaming the bowl or you can carefully use a knife with a rounded end to scrape out the old carbon. If you use a knife be sure to proceed slowly and carefully to ensure that bowl stays round. Scrape slowly, bit by bit, until you have a thin even cake all around the bowl. Once that is done you can wrap a piece of dowel with some sandpaper and use it to sand the bowl back to smooth. Use a paper towel or a soft cloth and some Isopropyl alcohol to wipe down the surface of the bowl and remove the dirt and oils of the past. This should also help to soften the remaining finish on the bowl. This cleaning will go deeper as we progress through the process but start with a cleaning of the outer surfaces of the bowl and the stem of each pipe. I have learned that it is always more pleasant to work with a clean pipe than one that is oily and tarred.

The stem needs to be separated from the shank. This may sound like an easy thing to do, but sometimes with the amount of tars and use the pipe has seen, the stem will be stuck in the shank. Put the pipe in the freezer. You don’t need to bag it or tag it, just sneak it in when the family is not paying attention and leave it there for an hour or so, long enough to sip a coffee and relax a bit. The different materials in the stem and bowl of the pipe make them contract at different rates and I have found that when I remove it from the freezer the stem is easily removed. If it is still stuck then put it back for another cup of coffee.

ImageImageImage

Once the stem is removed I fill a jar with Isopropyl alcohol and place the pipe bowls in it and let them soak for awhile. The length of time depends on the depth of the grime. I put the lid on the jar and give it a bit of a shake to churn the alcohol through the pipe. I leave it and turn my attention to the stem.

The stem will take a bit of work and will take the better part of a couple of hours to get back into shape. I clean the inside of the stem with pipe cleaners and cotton swabs until they come out clean. I dip them in the Isopropyl and run them through to remove all the grimes from inside the stem. Once I have it clean then fill a bowl with some water and put it in the microwave and set it to boil. I dip the end of the stem with the bite marks in the boiling water repeatedly to lift the bite marks a bit. Vulcanite, which is the material the stem is made of is said to have memory and will return to its original state. This method does wonders in lifting the bite marks. When they have raised as much as they are going to dump the water and take the stem back to your table. Using 240 grit sandpaper, remove the brown oxidation and calcified white stuff that are on the stem. Be careful as you sand to not round the sharp edges on the stem at the mouth end (button) or the pipe end (tenon). You want to leave a good tight fit with sharp clean edges when you are finished. You will find that the sandpaper scratches the surface but do not worry about it as the goal at the moment is to return it to a dull black. Once it is clean of the browns use 400 grit and then 600 grit wet dry sandpaper to smooth out the scratches and remove any remaining oxidation.

The stem should be a dull or flat black once you have finished with this step in the process. Now you have a choice to make. There are several steps that can be taken next depending on what choices you make. You can either use repeatedly higher and finer grades of wet dry sandpaper or you can use micromesh sanding pads – I use 1500, 1800, 2400, 3200, 4000 and 6000 grit pads to finish the stem to a gloss. These pads are readily available at woodworking shops or online – just Google Micro-mesh pads. If you use the sandpaper it works well but is a bit more labour intensive. After you have the stem restored to a gloss you can use a bit of olive oil to polish it – wiping it on and then off or you can use some softened beeswax or carnauba wax. I have even used Kiwi Neutral shoe polish which is a carnauba based wax.

I then set the stem aside and retrieve the bowls from the alcohol bath. Before I take them out I use the alcohol in the bath to scrub the bowls using an old tooth brush as it just gets into the cracks and crevices and gets the dirt out of the surface. Once that is done I dry off the pipe with a soft cloth and get to work on the finish. For the rough surfaced ones like the smaller pipe in the picture I will often use the tooth brush repeatedly to remove all the grime on the pipe. With the smooth pipes like the second pipe in the picture I wipe it down with alcohol dampened cloths until it is clean. I then sand the smooth one with either the 400 and 600 grit sand paper or the Micro-mesh pads to smooth out the finish. If the top is rough you will need to decide what to do with it. I have posted on the blog how I repair those issues so have a look on there for the article on topping a pipe bowl.

When both bowls are clean and free of dirt and tars I wash them down with a fresh alcohol cloth and then they are ready to stain. I use Feibings Shoe Dye for the stain and have found that the Medium Brown dye works well and matches most of the stains on these old pipes. Both pipes in the pictures were stained with the same Dye. I use the dauber that comes with the Dye (the dye is available at most shoe repair shops for about $4-$5). I coat the bowl while holding the stem. As the stain will turn your hands brown, wear rubber gloves for the staining. Once it is stained light the stain on fire with a match to set it. You will think I am nuts in suggesting this and think you will catch things on fire but like the alcohol in Baked Alaska it only burns blue for a short while and really sets the stain into the grain of the wood.

Set the pipe aside over night to let it thoroughly dry. The next day use the 600 or higher grit wet dry sandpaper to remove the excess stain on the exterior of the smooth bowl. Wipe it down regularly with a damp cloth to see what it is looking like. With the rough surfaced pipe I use a piece of flannel fabric and buff the surface until it glows. Once both pipes are finished and look acceptable to you give them a good coat of wax or polish. Some folks use Pledge on the bowls and have done so for years without ill effect. This gives them a rich glow. The only thing left to do is join the family heritage by smoking a bowl of your own tobacco in the pipe. When you are done with that smoke, wipe the pipe down with a soft cloth and clean it inside with a pipe cleaner. With a little care the finish that you have done will last until you own grandchildren need to refinish it once again. But take delight in smoking a piece of the family history and adding another generation’s story to the life of this old pipe. Enjoy.

If you have any questions on the process feel free to post a response or question here.

Here are the same pipes after finishing the process I laid out above.

ImageImageImageImageImageImage

A day in Atlanta


Tuesday, Feb. 27th was a great day for me. I had flown into Atlanta the night before for work and had all day Tuesday to use as I chose. So I planned ahead and emailed my friend John and set up a visit with him. He was able to schedule a day off as well. We made a real day of it! We started the day a bit later than planned as John overslept a bit. He must have been tired but it was his day off!

John picked me up at the Crowne Plaza near the airport at about 11:00 and went straight to the home of Joyce White, of the Tobacco Supermarket. John had spoken of the fact that Joyce stocks more pipe tobacco blends than one can shake a stick (or even a FEW sticks!) at. He was right. I was like a little kid in a candy store. It was overwhelming to look not just at the sheer volume of tobacco but the number of blends that she stocks. There were tobaccos there that I had only heard about and never seen. Not only did she have stocks of tins but another room full of bulk blends from G&H, McClellands, MacBarens, and others. She also carries a full inventory of snuff and both new and estate pipes. I was in overwhelmed heaven. After the first hour I came upstairs and visited with Joyce and John and her new Basset hound puppy. Then I headed to the basement again to pick my choices. I finally settled on about a half a dozen blends, a new tamper, and a lighter.

From Joyce’s we stopped by at John’s house to drop off a few things and smoke a bowl before we went for lunch at a barbeque restaurant just around the corner from John’s house. He had introduced me to the Old South Barbecue the last time I was in Atlanta with him and I really wanted to get back there again. It was just as good as I remembered and we finished off our plates of pulled pork and chopped beef. The green beans and onion rings filled in the gaps and the sweet tea washed it down. I can only agree with John in saying that if you ever happen to visit the Atlanta area you have give the Old South Barbeque a visit.

We headed back to John’s house after a filling lunch for an after lunch smoke. We adjourned to his back patio and a couple of chairs to smoke a cigar. John fired up one of four lovely Cuban Monte Cristos I brought him (two are saved for a special cigar smoke with his dad at a later date) and I fired up a Gurkha John took out of his humidor. They were fine cigars and were a great end to the meal we had just eaten. We talked through a wide range of topics from tobaccos, cigars, books and music. We covered even a bit of politics that was enjoyable as well. It is not often you get to talk with someone who has read the things you read and listened to the things you listen to both music and lectures, and likes the same tobaccos and cigars. We enjoyed the sunshine and watching his four dogs tear around the back yard.

After the cigars we went back in the house. We stopped in the basement shop where John has been turning out some very unique and highly smokeable pipes. We looked over the briar stash he has going and his drill press and saws. It is a great work space and I can see that some great pipes will be coming out of that place. (In fact John writes that he has just finished another pipe – a rusticated and blasted pipe. I am looking forward to seeing pictures). During the drives about town John introduced me to the music of one of his favorite artists, Lucinda Williams. I was immediately taken by the profound poetry and music she creates. We must have listened to several cds as we drove around. So when we got upstairs he popped a DVD of her Austin City Limits performance of a few years ago into the player. As we listened and watched an outstanding performance of hers we smoked our pipes in pleasure.

When the performance was over we made a quick trip to the grocery store to get something to cook for dinner. By the time we were back both of John’s stepsons and his wife had arrived home. We put on some classic rock and roll and John fixed some dinner – sausages, rice and green beans (seems green beans are a real Southern dish). I was still pretty stuffed from the lunch but managed to eat a bit of John’s fare. At some point in the afternoon or early evening John reached in his pipe rack and handed me a very nice Winslow Crown Viking pipe that he wanted me to have. When dinner was over I packed the Winslow and fired up a bowl and made our way to the car. Sadly, it was time to have John drive me back to the Crowne Plaza (it is near the airport, so about an hour from his house).

ImageImageImageImage

I will fondly remember this visit with my friend John and look forward to many more in the years to come. He does not need to worry about me coming to often as I only seem to get to Atlanta about once or twice a year. I thoroughly enjoyed the day with John and tip my hat to his hospitality and southern charm! Here’s to you my friend!

A Few Brief Tobacco Reviews


I am posting a few tobacco reviews that I have put together. I am fully aware that tobacco tastes are as varied as those of us who smoke pipes. However, I thought I would post these anyway as most of them are either mixtures that I have come to like or are some Irish Tobaccos that I can no longer find.

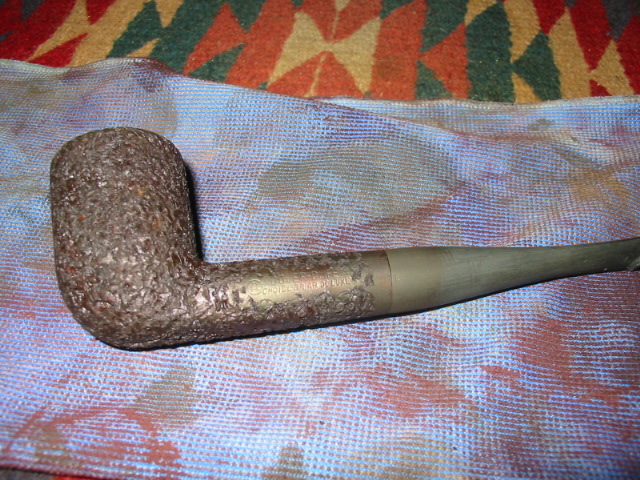
McClellands Dominican Glory + something to rescue it

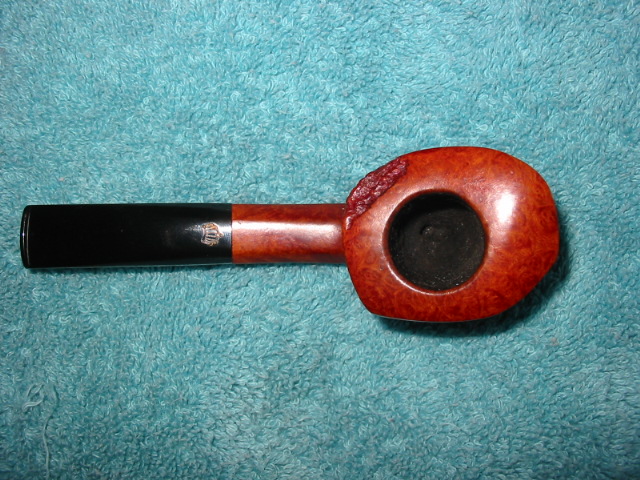
The tin label says – a satisfying blend of Dominican cigar leaf and Virginias. For me this does not say it at all. It is anything but satisfying. It is a very bland blend indeed. Not enough cigar leaf to do anything for me – no taste of the cigar coming through at all. And not enough Virginia flavour to make it sweet and tangy. I just about pitched this tin awhile back. But on a whim I had an old Romeo Y Julieta Cuban Cigar here that was just a bit dry – to dry to my liking. So I crumbled it up in the tin of McClellands Dominican Glory and viola – Cuban Glory! It is a good smoke. It has been aging for almost a year now. I had forgotten about it. I took it out this afternoon and cracked the sealed Mason Jar. The sweet tang of the Virginias came through with the earthy smell of Cuban cigar just over the top of the other smells. It was the perfect moisture. I packed a bowl and lit it – no charring light necessary at all.

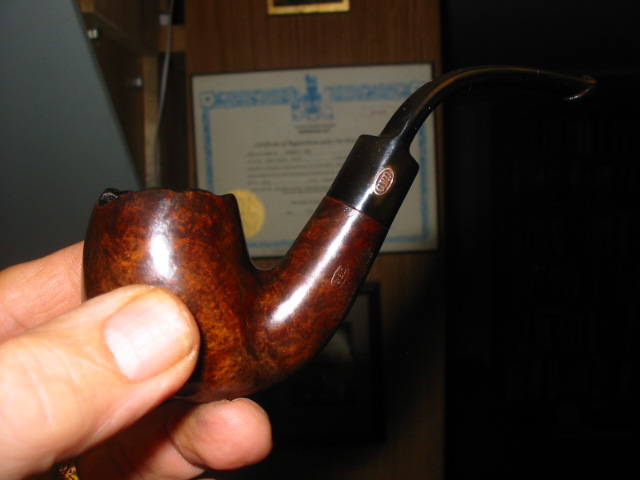
The first smokes in the little Argyle Bulldog were full of flavours. The Virginias came through loud and clear and the cigar leaf was very spicy and earthy throughout the smoke. The flavour seemed to careen from a nice Cuban taste to a good Virginia and back again. Then as the bowl progressed they blended together for a really nice cigary taste. This is really good. I am going to have to get some more and do it again!

Midbowl and to the end the flavours danced back and forth. The residual taste on the lips is a cigar like flavour with just a bit of Virginia Tang coming through. The smoke was good and I was ready to hit the first relight when the bowl seemed light and empty! Smoke over. The ash was a powdery white and gray. Very tasty smoke.

Garry Owen Plug 

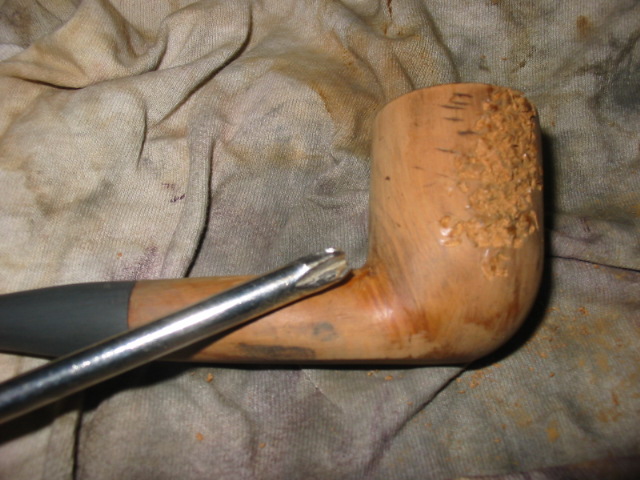
Just finished a bowl of Garry Owen Plug from PJ Carroll of Ireland. Wow what a strong tobacco. It packs a nicotine punch that is pretty strong. Certainly one to be smoked on a full stomach after a meal. The tobacco upon opening the pouch is a cube of tightly packed nature. It is a hard block of tobacco. I scraped a bit off with my pick and filled the bowl of my pipe. The smell of the cube and the scrapings was very nice – a kind of raisiny molasses like smell. I gradually slivered enough tobacco to fill the bowl of my pipe. I was going for a walk in the rain so I fill the bowl about 3/4 full with the mixture. I fired it with a lighter and began my walk. It took two other lights to get a good burn going. The 3/4 bowl was about an hour smoke. The flavour was multidimensional and strong and dark. The vas came through with force and clarity but no bite. The tang and the sweetness of va was dominant. The nicotine sang from the get go. The burn was even and smooth. The ash was greyish white as it worked down the bowl. The taste did not change as it progressed until the bottom 1/4 of the bowl where it had a richness and smoothness that was really nice. For me this was a good smoke. I was glad I had just finished my meal though as I could feel it. No sweats or dizziness (like there could have been) just a pleasant rush. If you can find this one and you like a heavy smoke with a punch give Garry Owen a go. Thanks to Joyce at Tobacco Supermarket for the sample of yet another Irish Tobacco.

McClellands 5100 + Royal Cajun Special

A friend in the Vancouver Pipe Club gave me a small tin of a blend he put together that has as its elements two of my favourite tobaccos. The first is Mc 5100 bulk Red Virginia (very sweet and tangy and a favourite on its own) and the secone Royal Cajun Special. They are mixed 2:1 ratio. The result has been aging for awhile. Upon opening the tin, the aroma is a tangy dark smelling mix of reds and black ribbons of tobacco. The tang and sweetness of both parts is a bit like the smell in a tin of St. James Flake – tang with a bit of spice. It packs nicely in the bowl with no problems. Upon igniting the first bowl, the taste was mild, sweet and tangy. The combination of flavours assaults the tongue and mouth with full taste. I really like the fullness of taste in this one. At the back of the tongue one feels the bite of a perique like taste. That kind of peppery flavour that teases the back of the mouth. The combination of flavours and rich smoke are very good. As the smoke continues to mid bowl the taste does not lessen or reduce in its pungency and flavour. The smoke is clean and dry. The end of the bowl ends the same for me. The fine white/grey ash at the bottom of the bowl is very light and feathery. Good smoke all the way to the bottom of the bowl.

Old Virginia Flake 

Got a sample of Old Virginia Flake from a friend and fired up my first bowl this afternoon. It is a very good tobacco. Kind of reminds me of McClellands Classic Va. or Stokebye’s VA Flake that I got from Old Morris. The tobacco is a broken flake VA. Tin aroma is sweet and tangy with a hint of some kind of topping on it. Not sure what that is – may be just an added sugar topping but it is definitely present in the tin. I did not bother rubbing out the broken flakes – I tend to just stuff and light this kind of baccy. So I filled an old BBB billiard that I have and put the fire to it. I decided to catch some fleeting sunshine here in Vancouver so I sat outside the local coffee shop and smoked the bowl. From the first match the smoke was tasty. Took a few lights to get it going as it seems a bit damp. Once the fire took the smoke was very nice. After the first bit the topping disappeared from the taste and what was there was a tangy and sweet Va. The aroma from the smoke got a few positive comments from passersby. I could even smell it a bit myself and liked the aroma. The flavor was full, sweet and rich. As the smoke progress down the bowl, I was left with the richness of a good Va, no topping taste at all. The bottom half of the bowl was just as flavorful and when it was over I was sad to see it end. The remnant was a fine white ash and no real dottle to speak of.

PJ Carroll’s Maltan Rich Dark Flake

One of the tobaccos that I got in Atlanta from Joyce at the tobacco supermarket was a 25gram pouch of Maltan. It is an Irish Tobacco. The pouch aroma is a bit floral – kind of a Lakeland type scent, oddly like perfume of some sort. Generally I find this off putting, but in this case persevered. The cut is a fine ribbon cut that the package identifies as Ready Rubbed. To me it is just finally cut very similar in cut to G&H Dark Birds Eye. Tobacco Reviews notes the following: A traditional finer cut Irish Virginia ready rubbed flake. A mixture of mahogany leaf selected for richness of flavour and taste. Slowly pressed to harmonise the natural flavours of matured tobacco grades. Cut, steamed and dried to give a long-stranded, soft and warm coloured appearance. Full aroma with a medium burning rate ideal for small bowled pipes.

The description is what made me press on. It packs very easily into the bowl and lights without problems. It burns evenly and cleanly with no clinging goopiness of wetness. The ash left is soft grey and light. Burned to the bottom of the bowl with no problem. For me the test would be to see if that floral lakeland flavour clung to the tobacco all the way through. Thankfully it did not. Within the first few moments of the smoke that was gone and a rich flavourful Virginia taste was in its place. As the tobacco burned down the bowl the taste intensified in its richness and fulness. Steaming process used in this one does what I have found always happens with Vas and that is that the flavorful is deeper and fuller. It is also a bit muddier and melded. The usual multidimensional flavours of Vas. was not as distinguishable. If you can get ahold of some of this go for it. Ignore the floral scent and fire a bowl up. It is quickly gone and you will get a rich tasting virgina!

MacBaren’s HH Vintage Syrian

MacBarens says this about it on the package write up: A little under half of the volume is a smooth, and yet powerful Latakia from Syria. This tobacco gives the blend the overall “smoky” taste. To add a spicy note to the blend, Turkish Oriental has been added. Different Virginia tobaccos from three continents add a sweet natural taste. To complete the taste with depth and body we added some Dark Fired Kentucky from the USA.

The pouch aroma is complex – I can smell the Latakias, the pungent Oriental, and the sweet Virginia. I cannot smell any of the “usual MacBarens topping”. That is good! The blend is the right moisture content and packs very easily. It lights with one burn- no charring light necessary. The flavour from the beginning is a nice mouthful of flavours that all come out through out the taste. The smoke in the room note is not too bad (maybe a Latakia that I can smoke in the house with the women in my life). The flavour is complex and enjoyable. It shifts and changes as the bowl progresses. One minute the Latakia is dominant, then I feel the dry tang of the Oriental come through at the edges of the tongue. The sweet Virginia tang is underneath and the Kentucky burley adds a nuttiness and body to the taste. This is a good smoke.

The last half of the bowl is equally good. The flavours shift back and forth just as they did in the first half of the bowl. I like this one. I think it is one I will go back to again and again. I am primarily a Virginia and Va/Per smoker so this is a great transition blend to me. Pungent yet sweet! I like this far better than the HH Vintage Virgina which I found monochromatic in flavour.

C&D After Hours Flake

Just finished a full bowl of this flake. It is a blend of Red and Bright Virginias pressed with spiced rum and sliced into flakes. The smell is that of sweet Red Virginias and the taste is full and hearty. I smoked it in the new Howell Handmade Acorn which has a great bowl for flakes. It gives a sweet and flavourful smoke to the bottom of the bowl with no dottle. Clean light grey ash. On first light the Va flavour is there and the sweetness hits the lips and tongue. Even after the bowl that sweetness carries on in the mouth. The room note is pleasant and sweet. The flake is not one dimensional but quite varied throughout the bowl. I for one cannot taste the spiced rum (it is different in taste say than a Navy Flake). I usually find C&D tobacs a bit green to my liking but this one is a keeper. It is just enough different from my other usual Vas that it is to my liking.

Bell’s Three Nuns

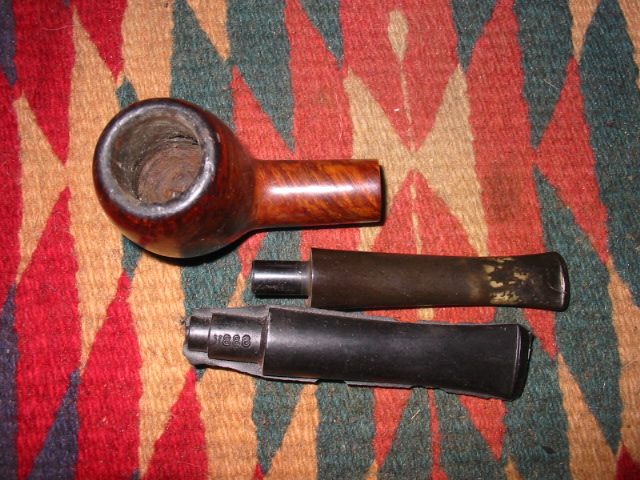
I picked up an old tin of this on one of my roamings through antique shops. It was in nice shape and unopened… or so I thought when I bought it for $10 or so. Well earlier I opened the tin and it was the original coins or tobacco with the perique in the middle. The tobacco was absolutely bone dry. It smelled dry and dusty. In comparison to the sample of this old timer I got to try from a friend, this one looked anemic. I removed it from the tin and slowly rehydrated it over two weeks with distilled water. Today it was absolutely perfect for smoking. The moisture level was perfect and the tobacco had a nice tin aroma once more. Whew — I thought this one was going to be toast.

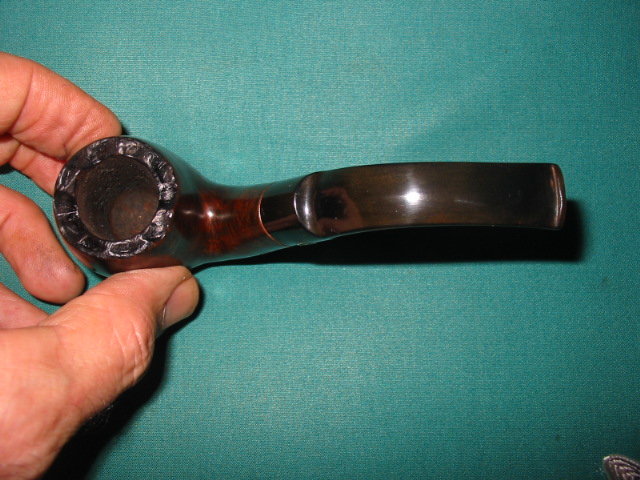
I stuffed a stack of coins in the bowl of the old BBB Own Make 1919 pipe I just finished up. The smell of the tobacco in the tin was good aged Virginia with a bit of perique tang in the nose as I smelled it. It fired quickly and easily and the first tastes of this old tobacco was wonderful. From my guess it is about a 60’s vintage tin. The virginias were mellow and sweet with the characteristic Va tang in the taste. There was absolutely no bite in this one. The peppery overtones of perique hit the back of my mouth with its spice. Very smooth and mellow as the bowl progressed to mid bowl. Very even smoke – tastes the same through the bowl. The flavour deepens and the perique spice becomes a bit more prominent as it moves toward the bottom of the bowl. The room note was also a nice soft Va smell. Though even there you smell a bit of perique. The bowl was smooth to the end. No bite no problems – bowl just came to and end to soon. The ash was light grey and dry. Great smoke.

GLP Key Largo

Key Largo is a blend of Red Virginia, Izmir, Cyprus, Latakia, and Cigar leaf. It is a smokey and spicy smelling tobacco in the bag. It is a flake that by the time the airport security was finished with it at Ohare is now broken flake. I put it to flame and it burned very easily. The smoke was thick and cloudy but tasted good from first light. I can definitely taste the sweetness of the Red Virginia coming out through out the smoke. The Izmir gives an oriental dryness in the mouth (I don’t know how to describe it other than that. Kind of like a bit of tartar on the tongue). The latakia is there and predominant throughout the smoke but tasty and smokey. I am assuming that the latakia is Cyprian. It is a nice smoke. I will have to get some more of this one. The bowl burned clean and dry to the bottom. The ash was a light grey and left no dottle. Very tasty. I smoked in a Jack Howell Acorn.

Reworked Old Apple


Blog by Steve Laug

I had this old apple with very faint stamping that looked like it could have been stamped Edwards but not clear. I decided yesterday to rework it. The old stem had a split in the button and was shot. I decided to fit a new stem for it. I reamed and cleaned the bowl and fit the stem. While I worked on the stem I dropped the bowl in my alcohol bath for an hour. Once it was done I sanded the bowl and cleaned it some more. There were a couple of spots on it where small fills had fallen out so put some briar dust in them and then a spot of super glue. Once dry I sanded them smooth so that the stain would take around and in them. I put the stem on and stained the bowl with an oxblood stain as I figured that would match what was originally on the pipe. Once it was all polished it reminded me of an old timer that I had seen and been hunting for – a straight shanked BBB apple. Well that got me thinking and I dug through my box of bands and sure enough I had an old BBB silver band hallmarked 1909 that fit perfectly. The stem and pipe look older so the band added some more age to it. I really like the final look of this one.

Before pictures:
ImageImage

And the finished pipe:
ImageImageImageImage