A Liverpool stamped Tobacconist Inc.


Blog by Steve Laug

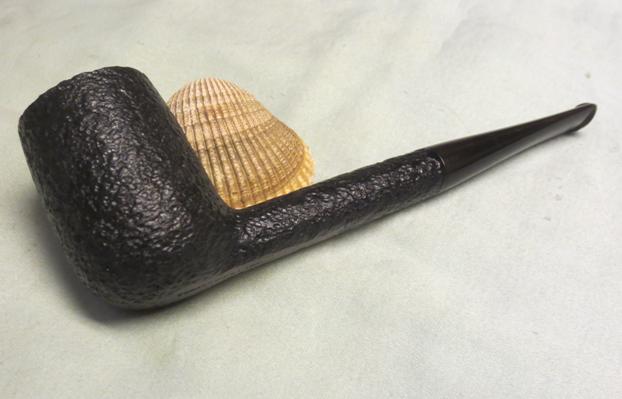
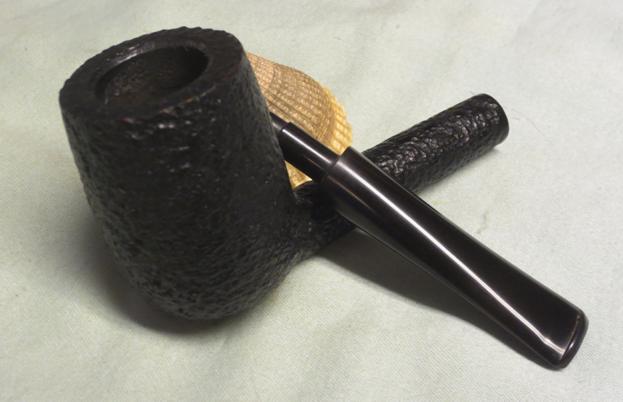
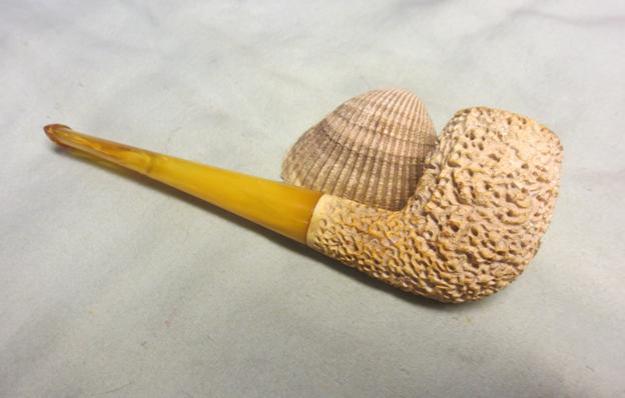
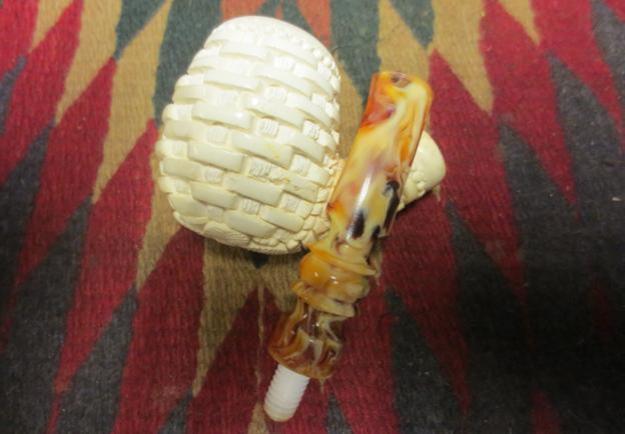
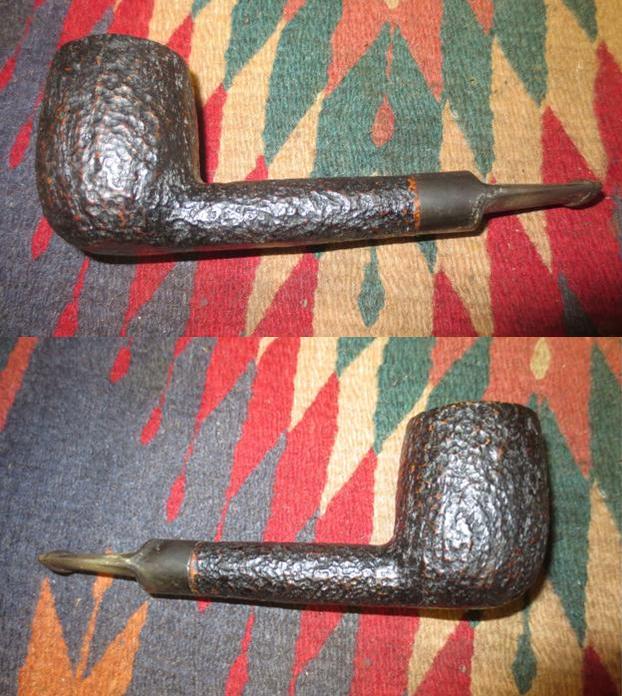
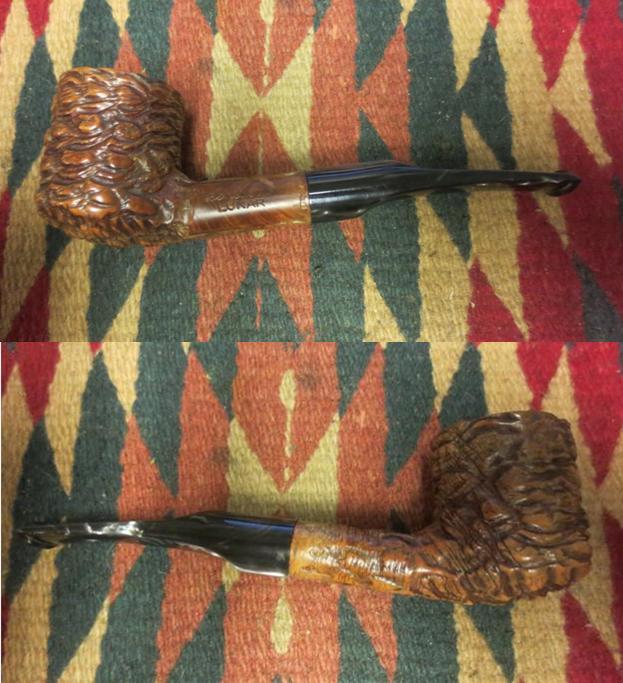
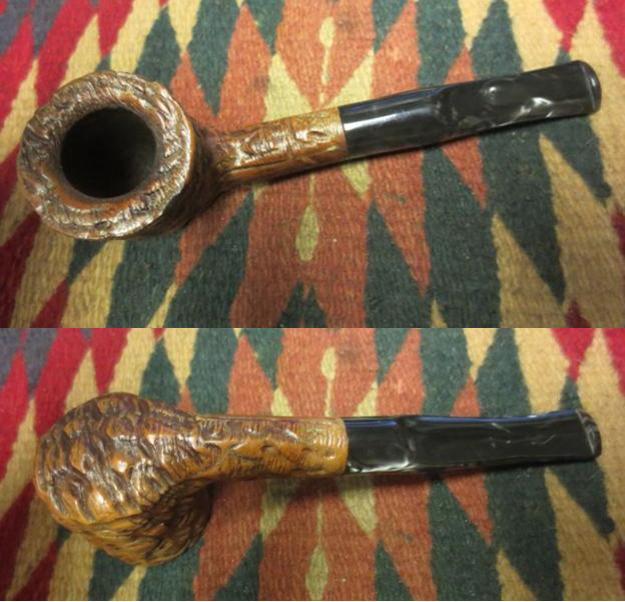
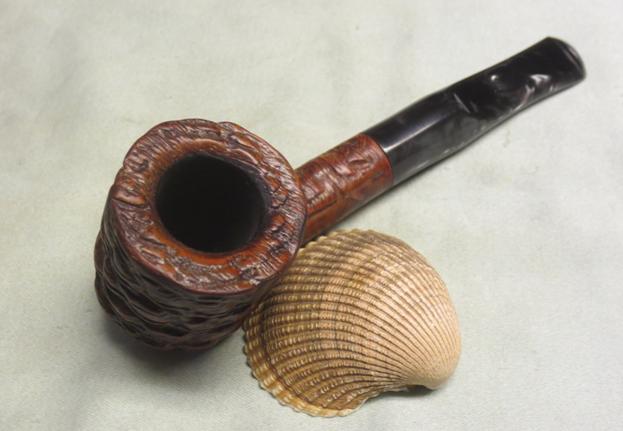
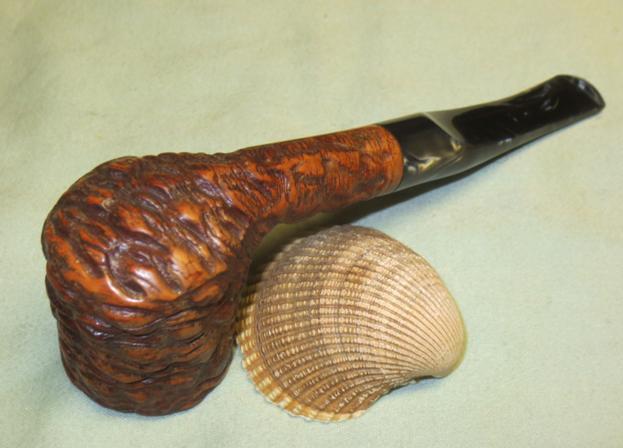
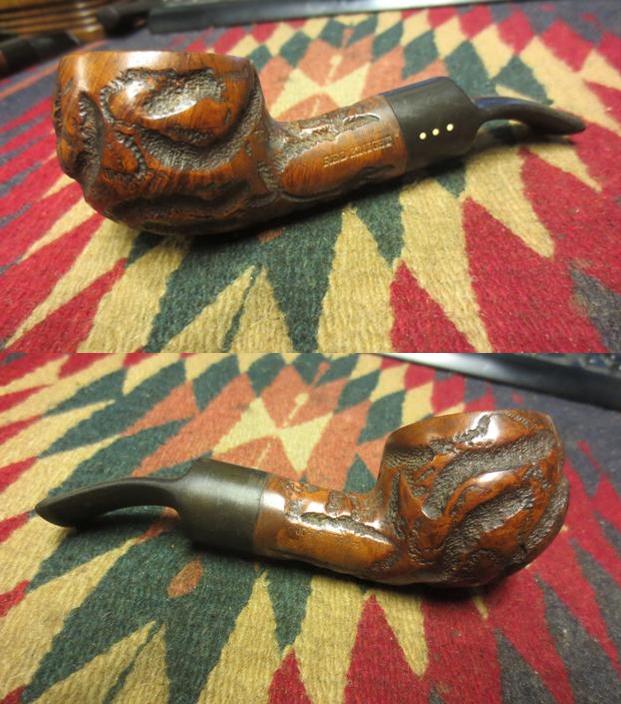
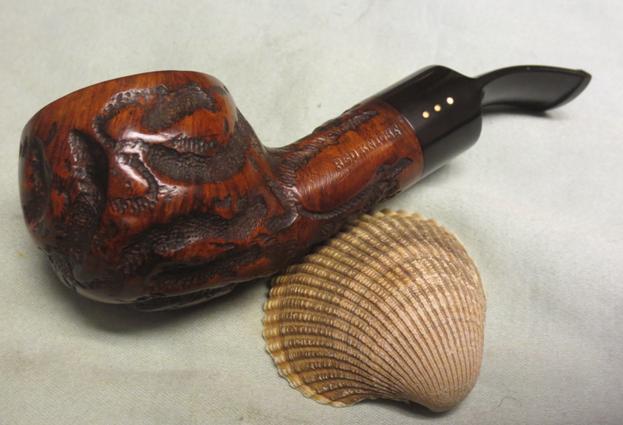
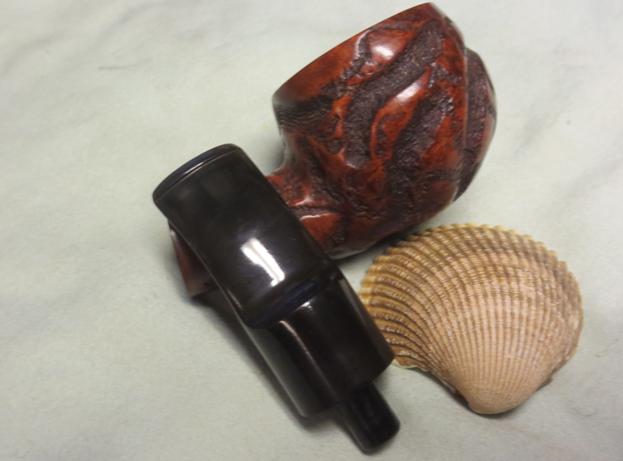
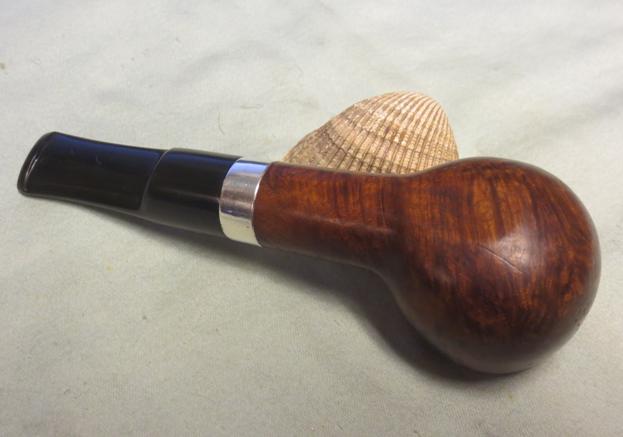
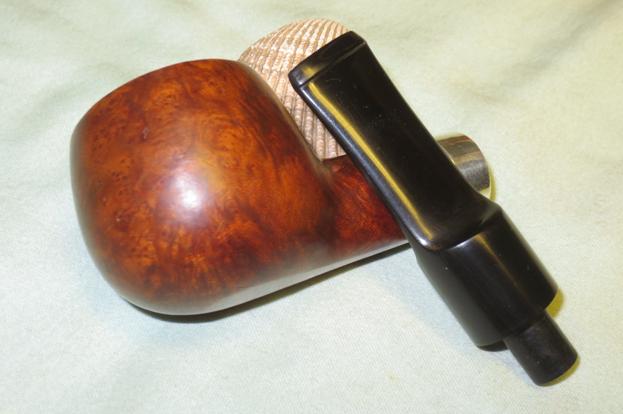
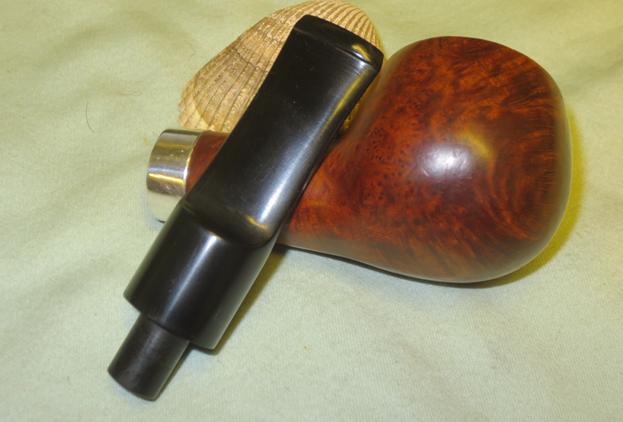
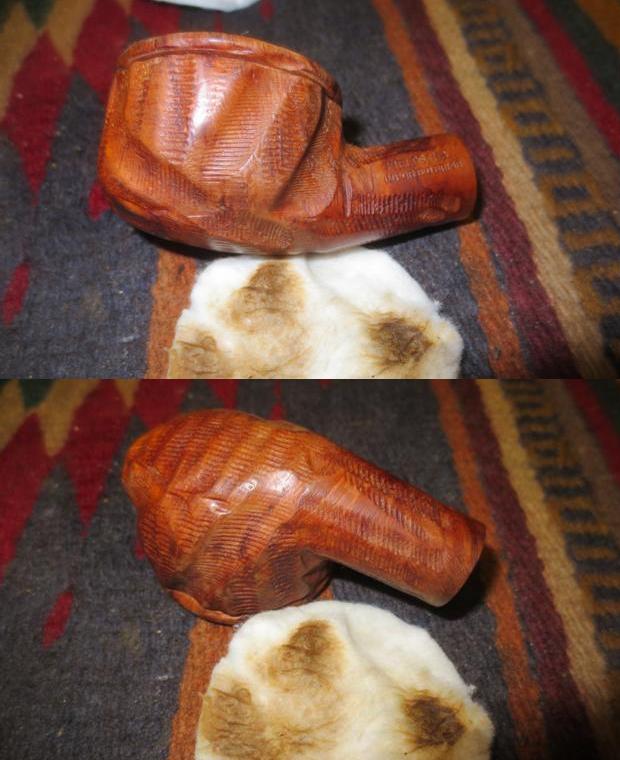
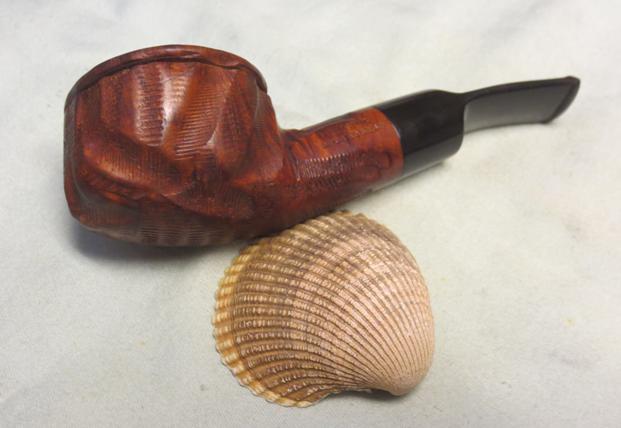
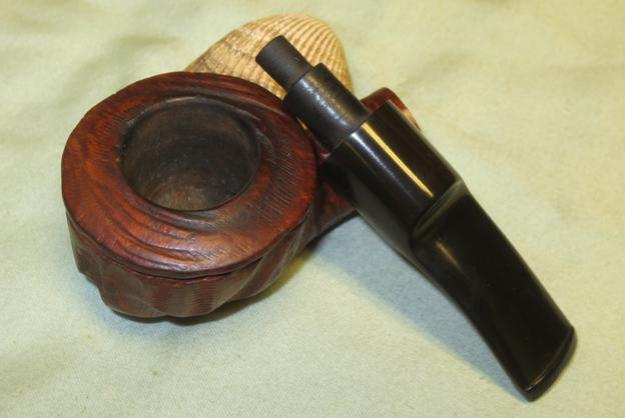
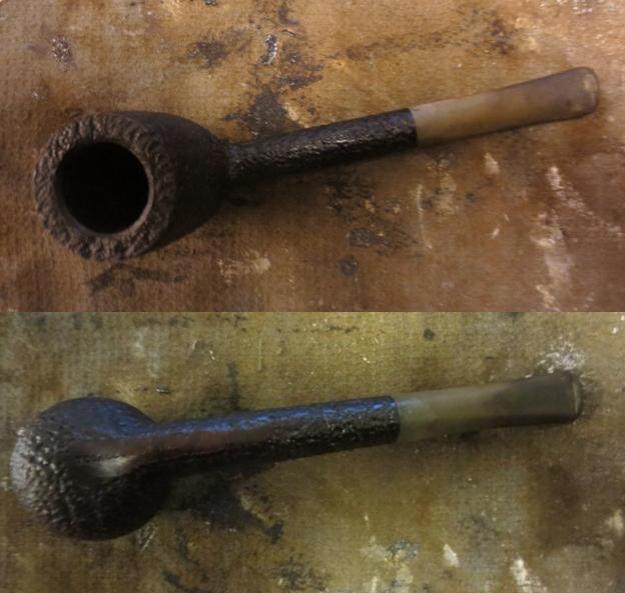
I was looking through the box of pipes that I have to refurbish to see what struck my fancy this time around. It may sound like an easy process but my brother has been filling the box faster than I can clear it out… no complaint there however as he has great tasted in pipes and he has found some amazing pipes. The one that stood out to me this time was a Liverpool that has a rustication that was so tight that it looked like a sandblast. On closer inspection it was clear that it was a rusticated pipe. The bowl and long shank were at dark brown with a flat smooth strip on the bottom of the shank and the bowl where it was stamped Tobacconist Inc. That was a brand I had not heard of but I figured that it must have been a shop pipe for a tobacco shop somewhere. The bowl had a light cake and the beveled inner edge of the rim was flawless. The rim was pretty clean with just a little buildup in the rustication. The stem was oxidized but there were no bite marks or tooth chatter.Tob3 Tob4
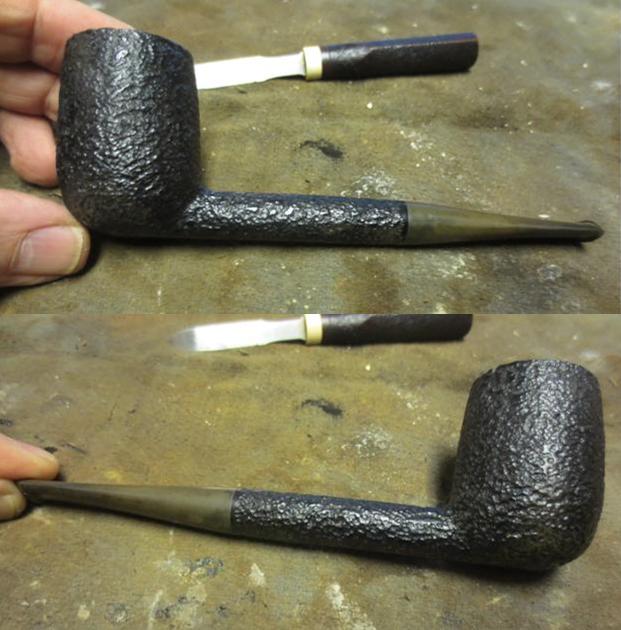
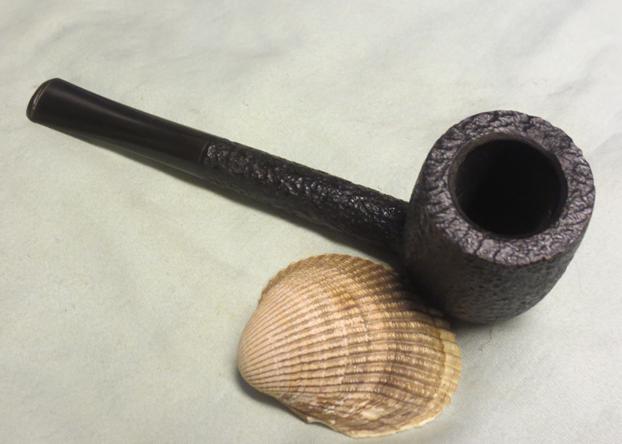
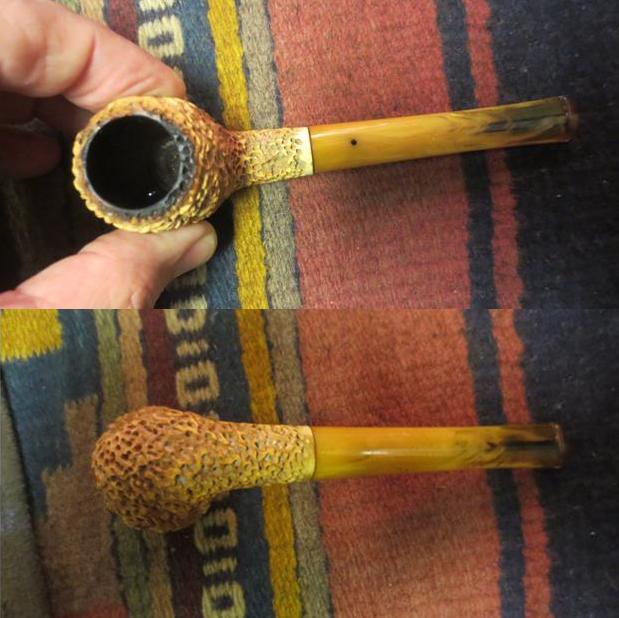
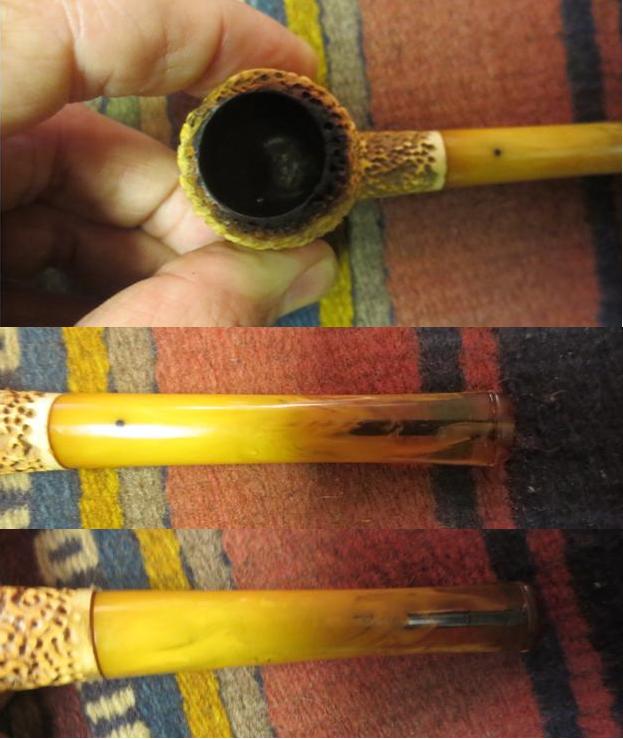
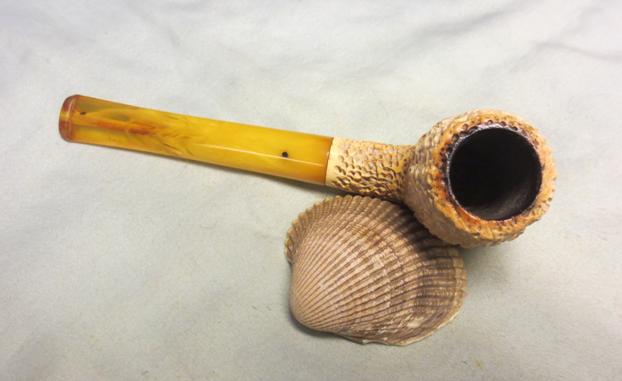
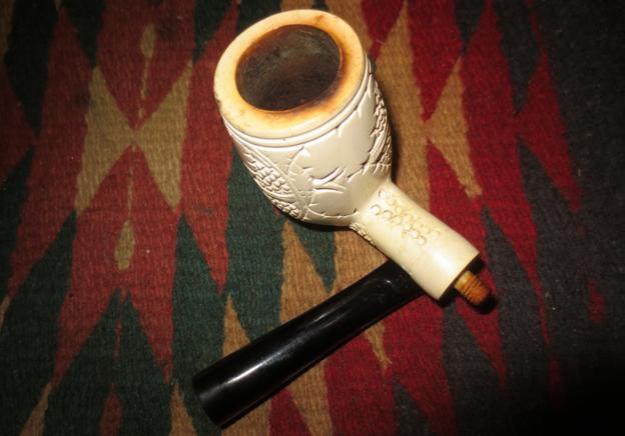
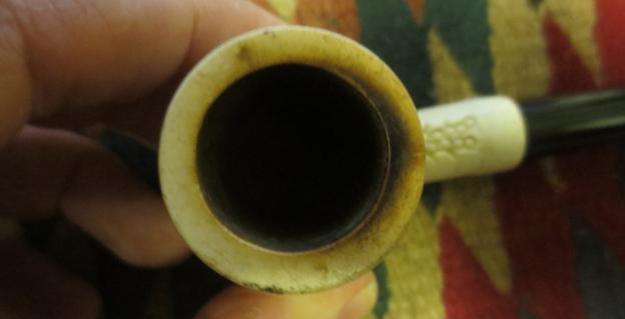
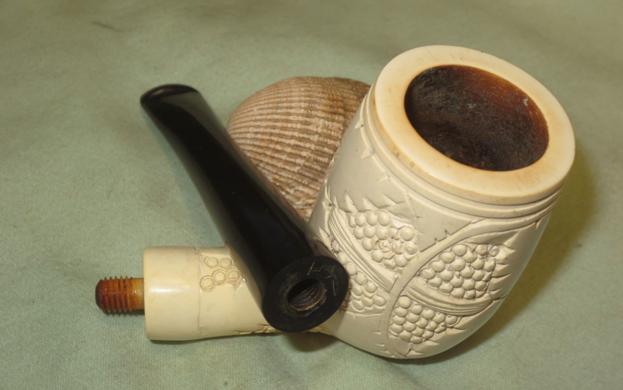
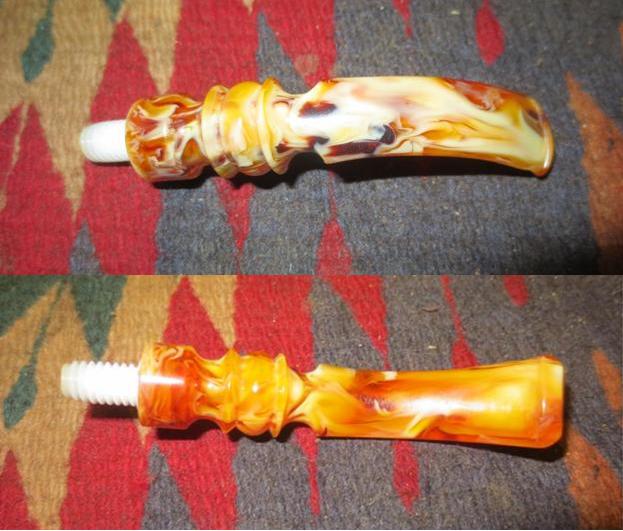
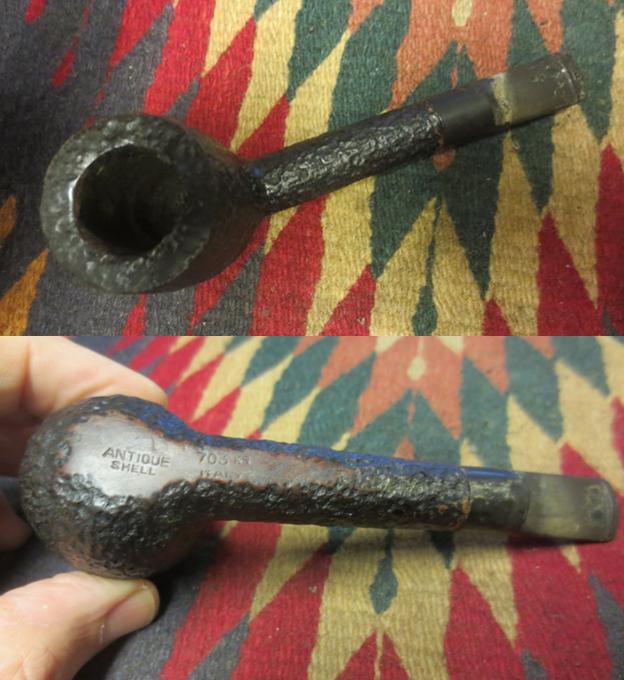
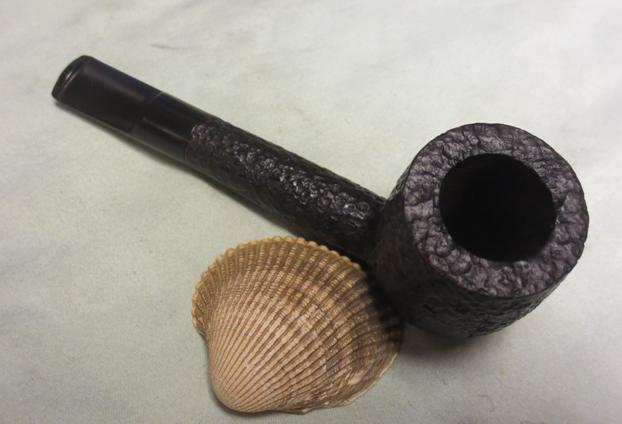
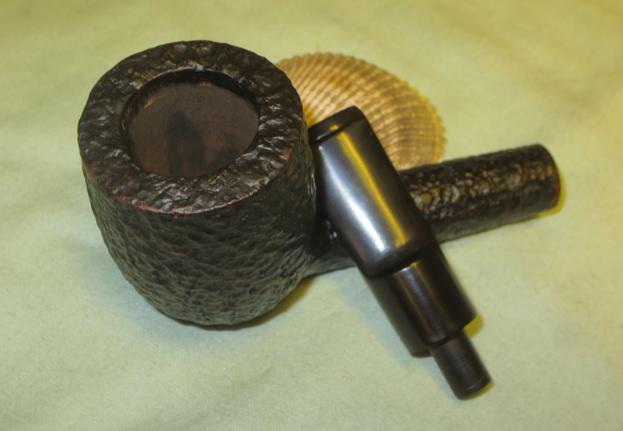
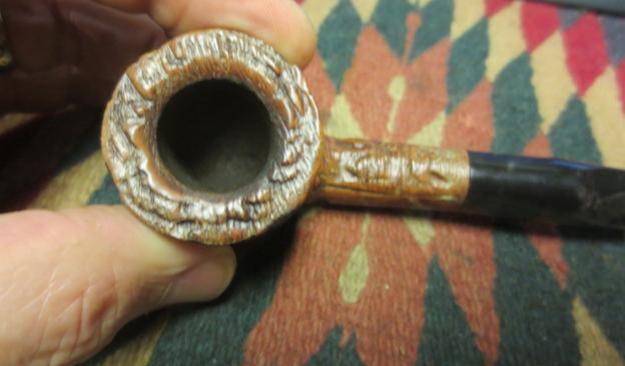
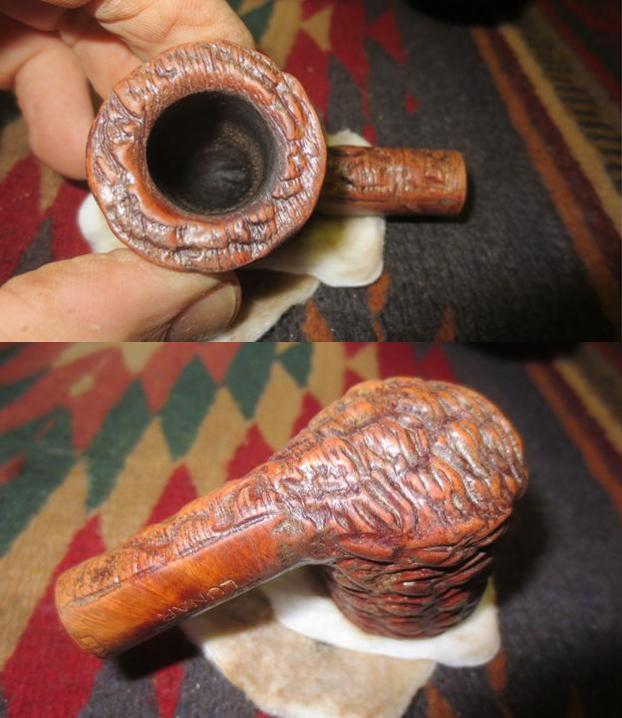
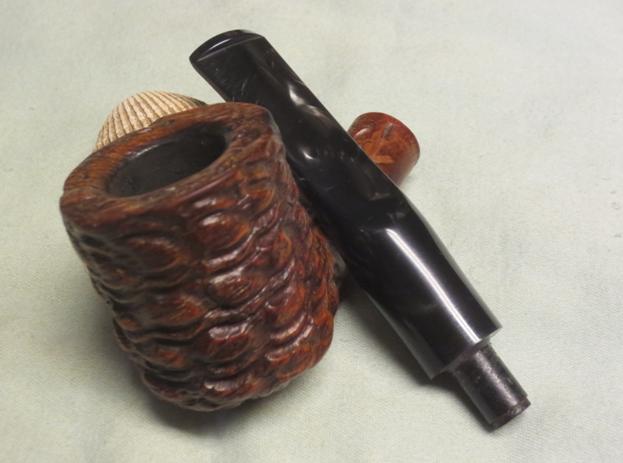
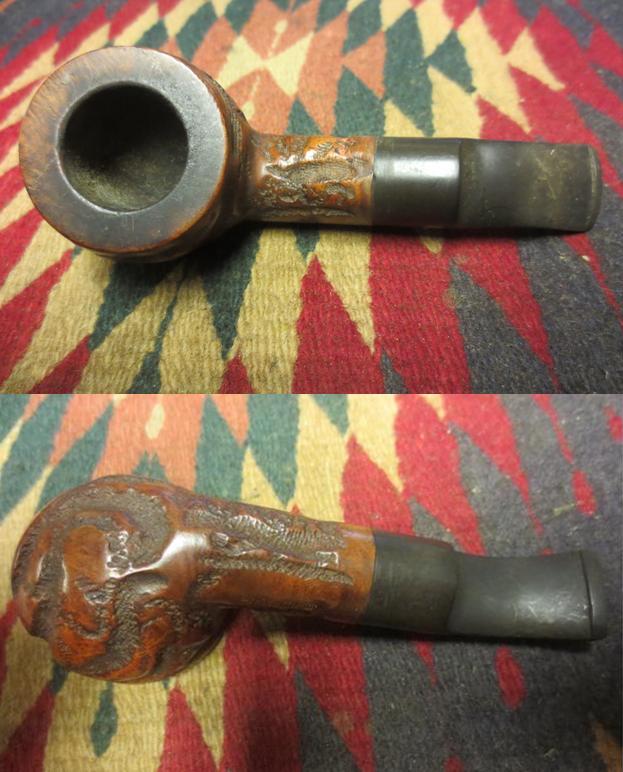
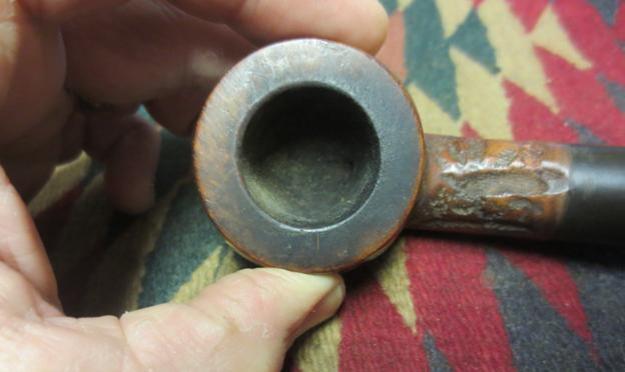
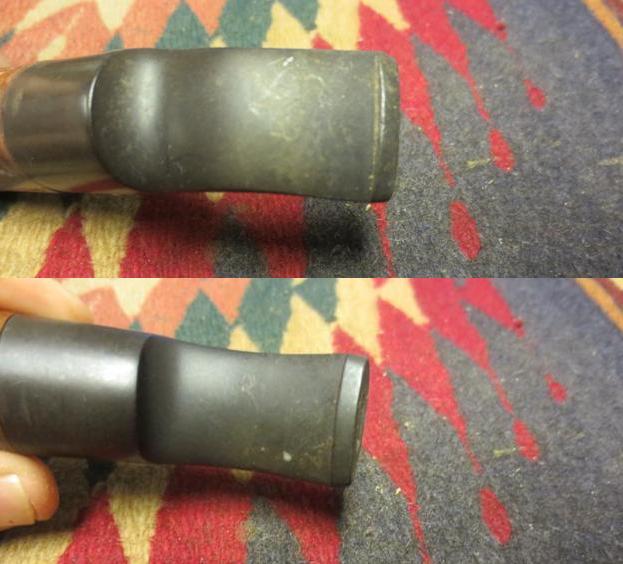
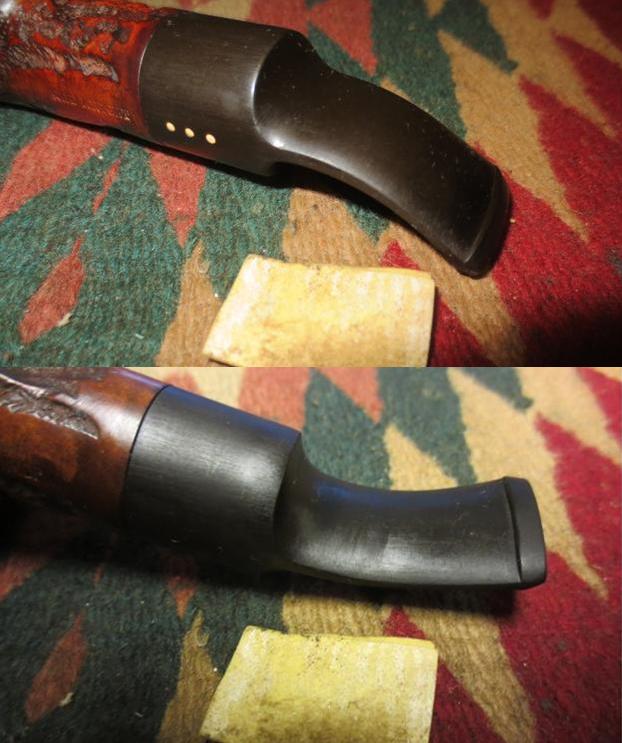
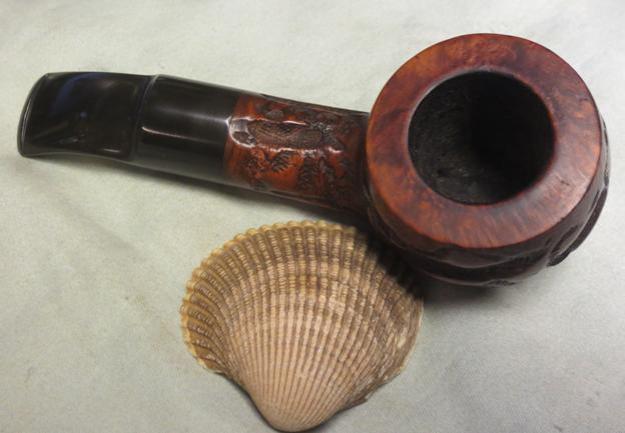
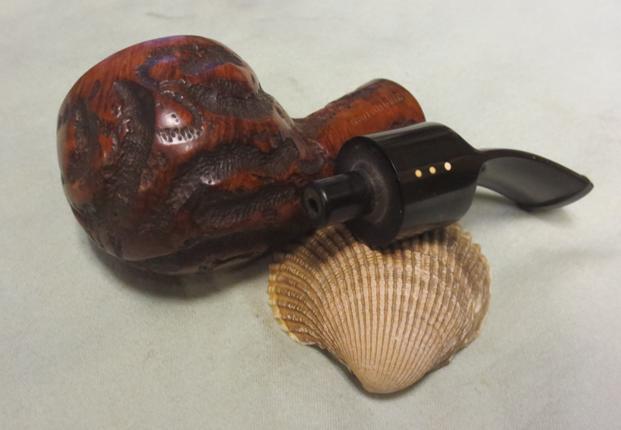
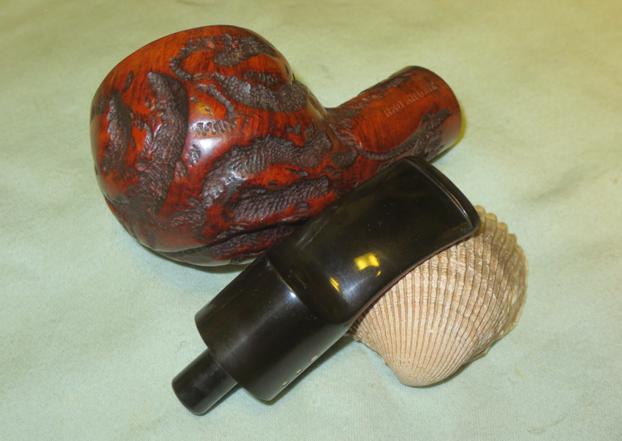
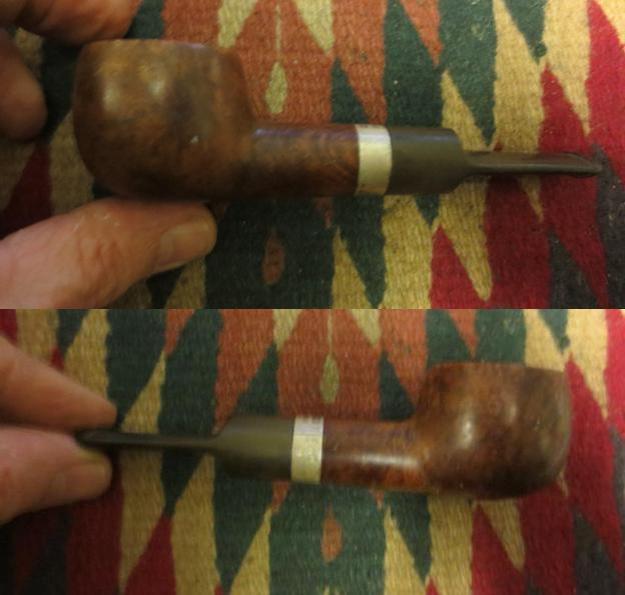
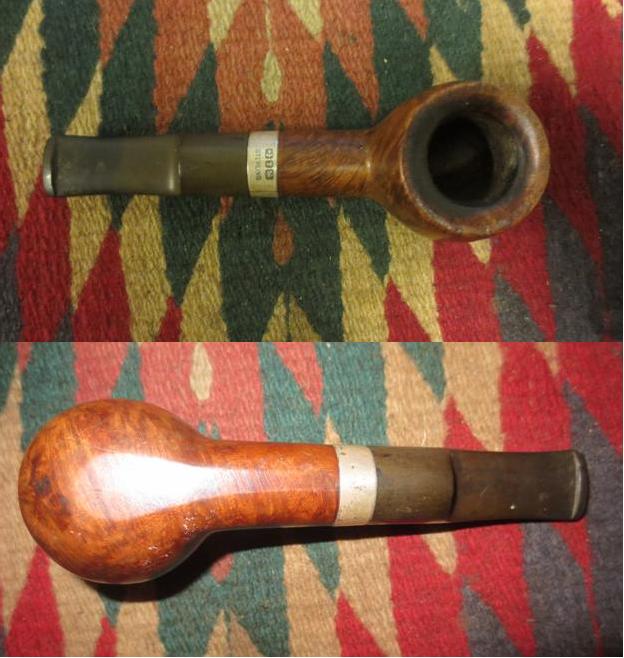
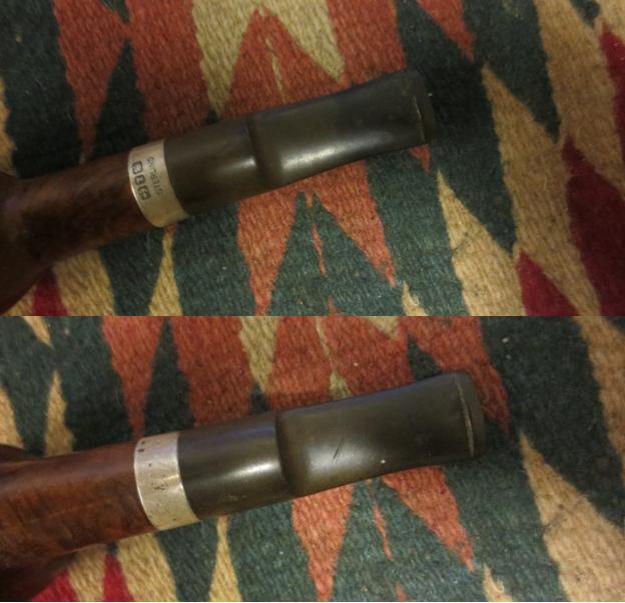
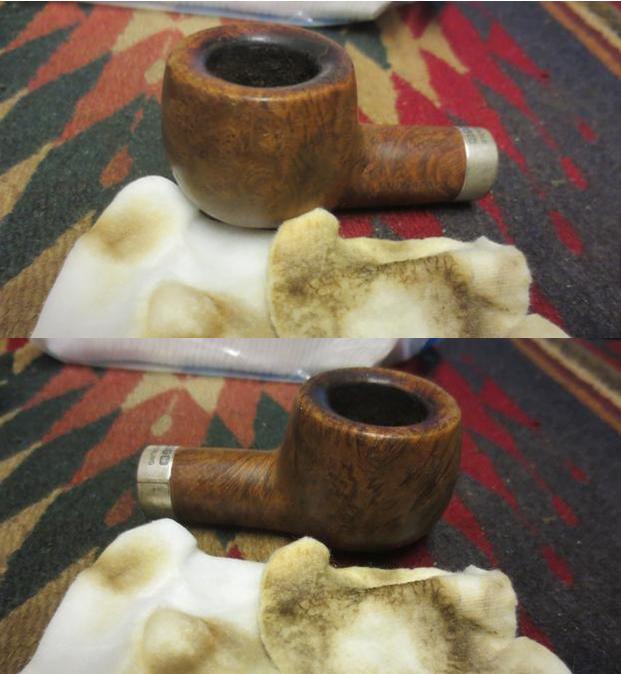
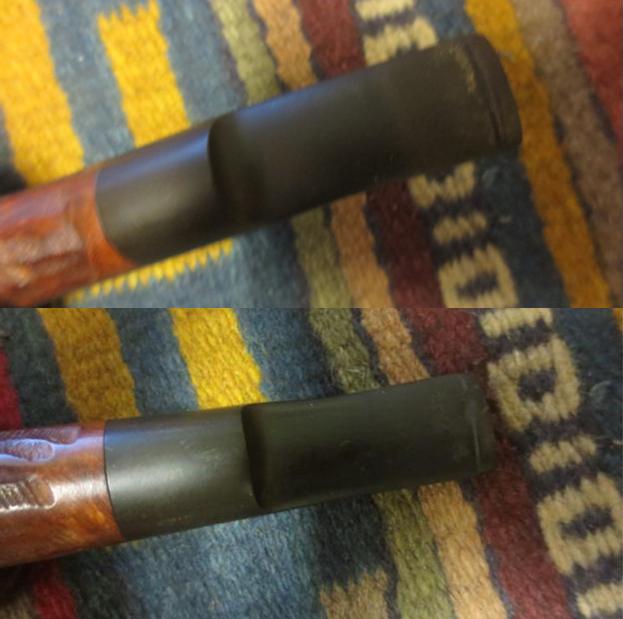
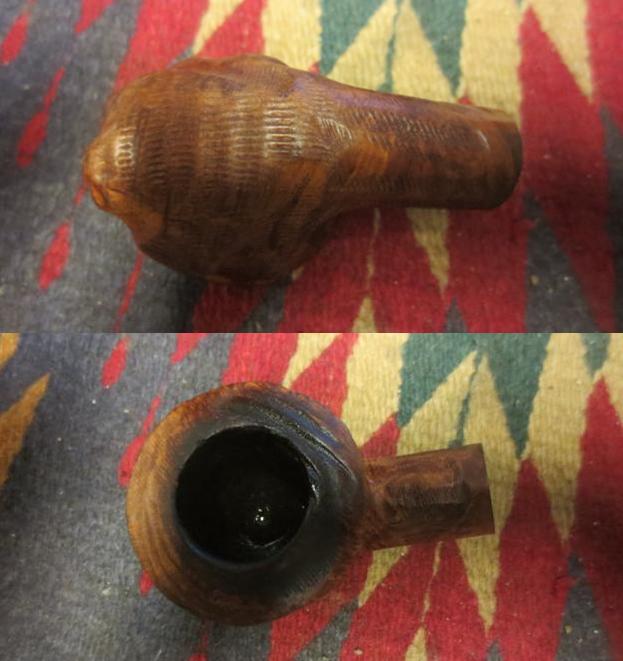
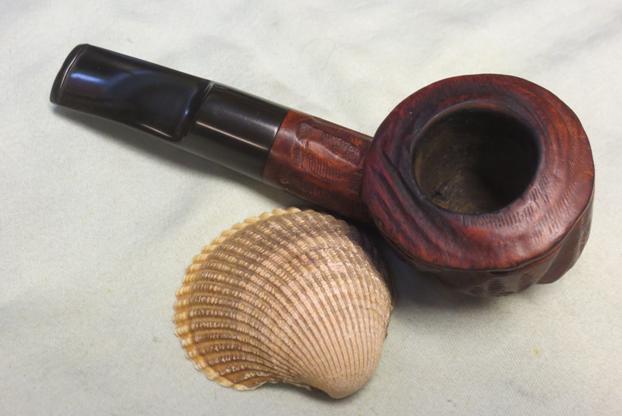
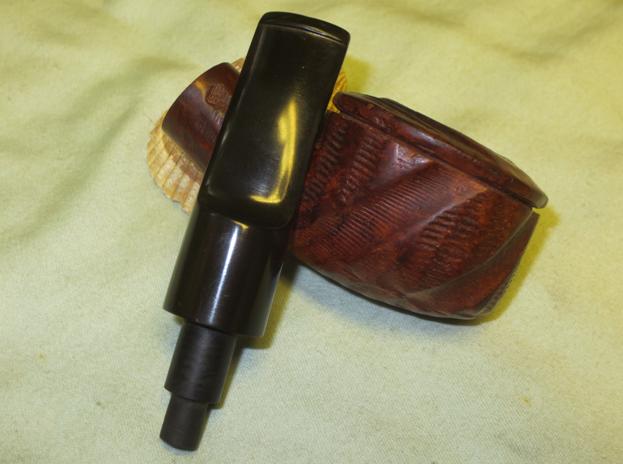
I took a close-up photo of the rim and bowl to show the cake and the condition of the rim surface. It was a pretty clean old pipe. I also took some photos of the stem top and bottom to show the oxidation and lack of damage. I was fortunate with that.Tob5
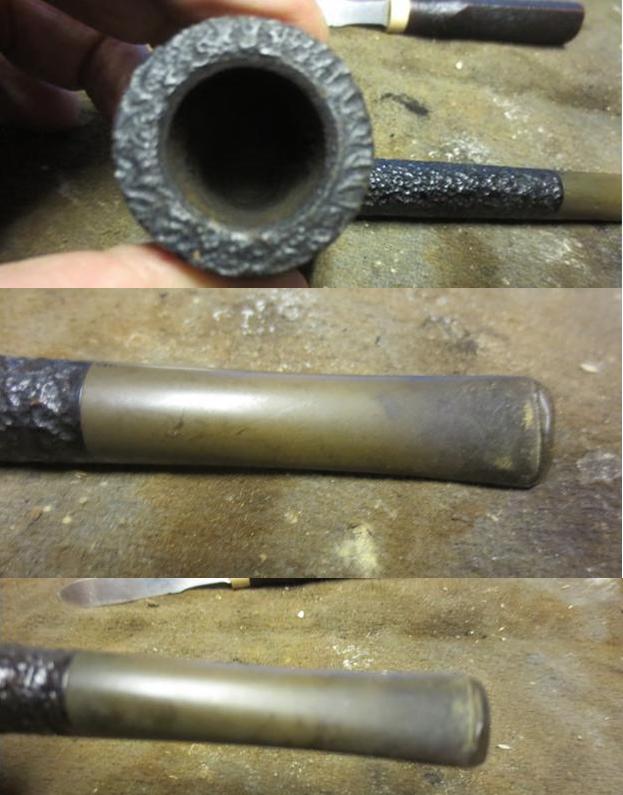
I googled the Tobacconist Inc. stamp to see if I could find any information on the brand. There was no information in Who Made that Pipe and I could find nothing on Pipedia. The name Tobacconist Inc. came up shop a tobacco shop in Chicago. It is called Tobacconist Inc. and is located at 3524 W. Irving Park Rd. Chicago, Illinois. The phone number is 773-463-8468. I have included two photos of the sign and the shop. The sign says the shop has “Everything for the Smoker” and has been in existence since 1946. Sounds like a place I need to visit one day. I may have to call them and see if they have any information about the pipe.Tob2Tob1
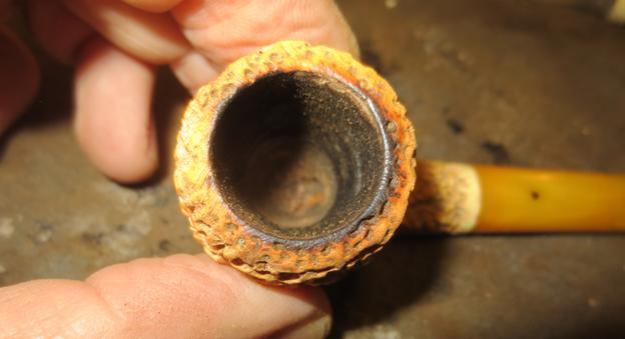
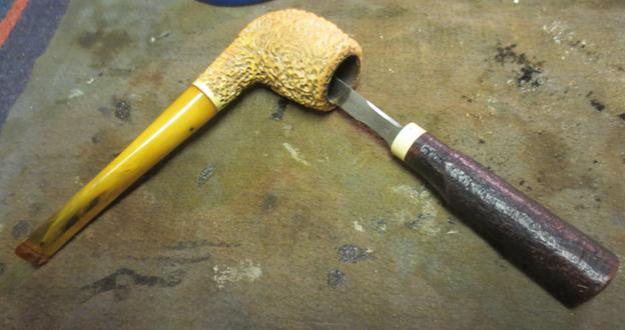
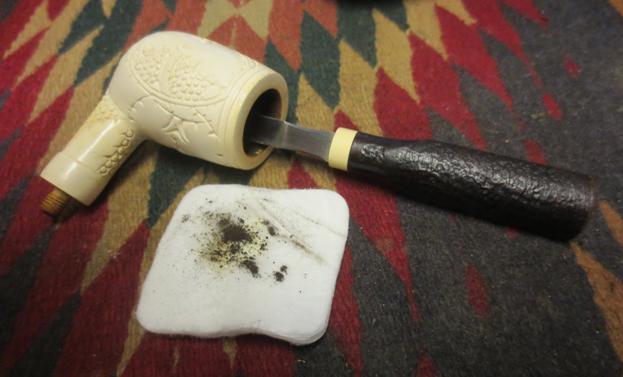
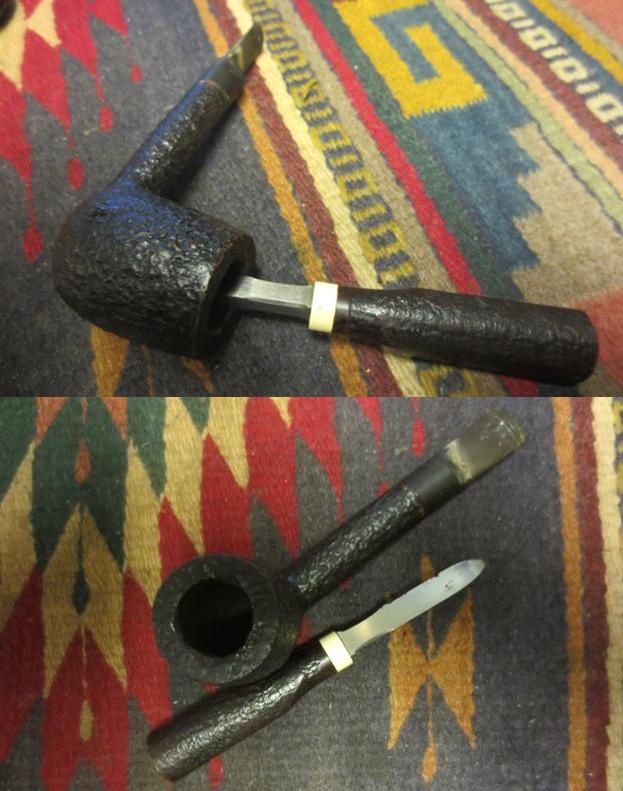
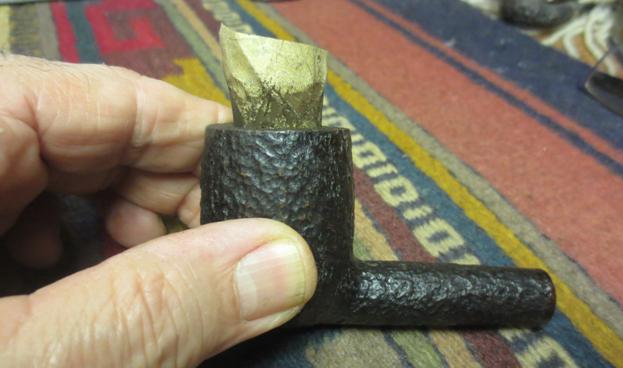
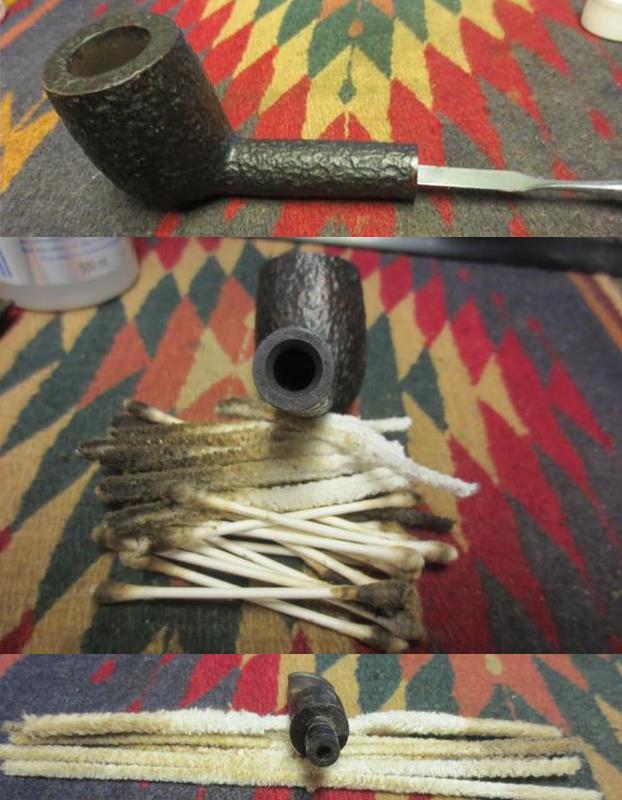
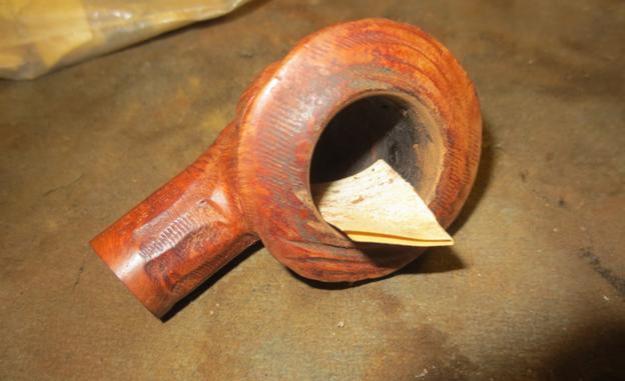
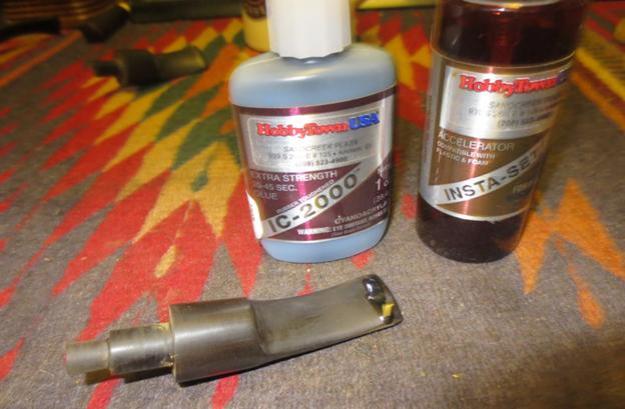
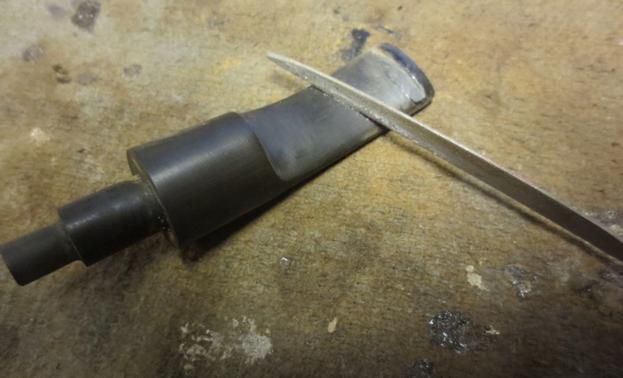
I started working on the pipe by reaming the bowl with the Savinelli Pipe Knife. I took the cake back to bare briar.Tob6
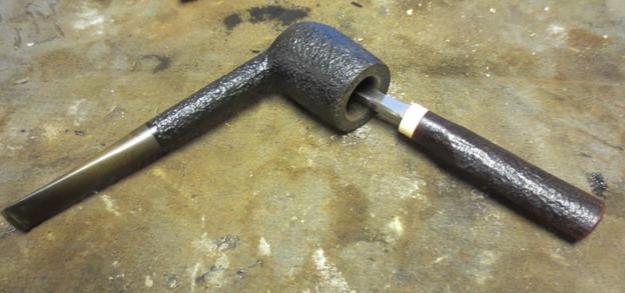
I used a brass bristle brush to clean up the rustication on the top of the rim. It did not take too much work to clean off the tars and dirt.Tob7
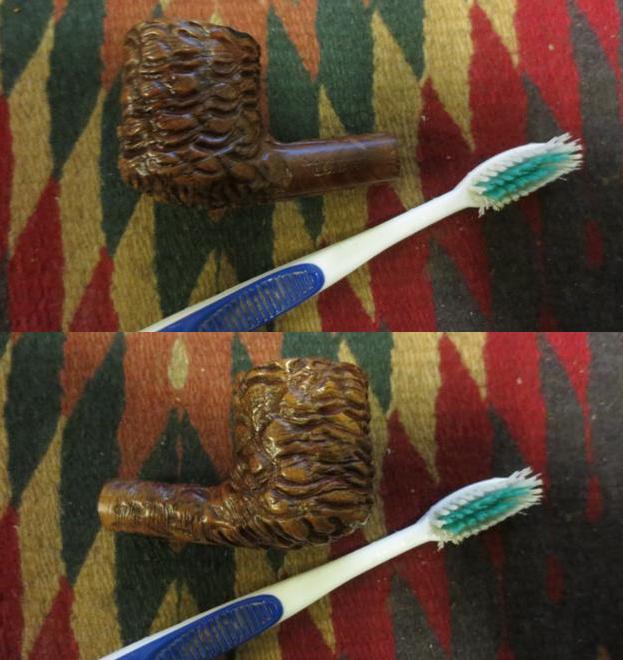
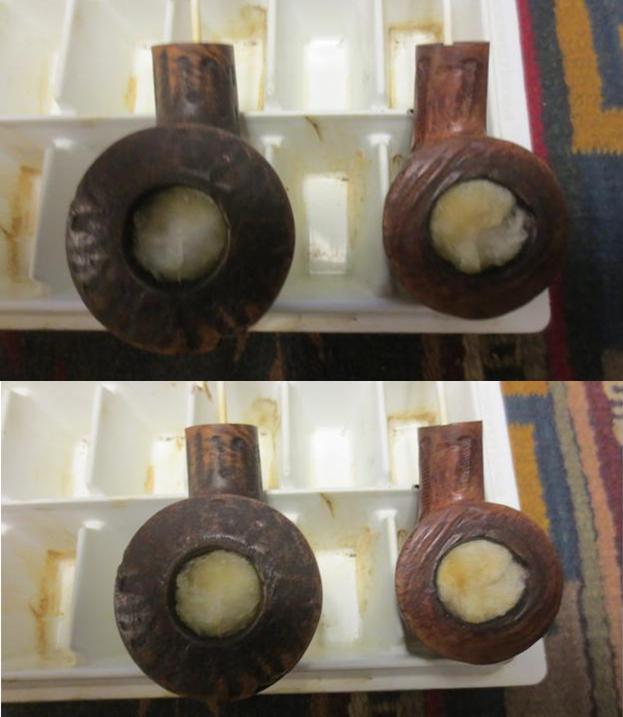
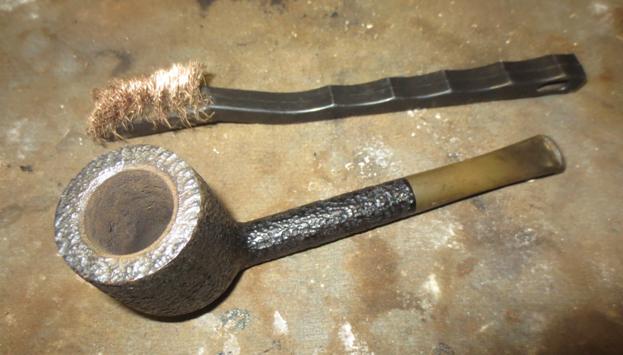
I scrubbed the bowl with Murphy’s Oil Soap and a soft bristle tooth brush to remove all of the dust and debris from the rustication.Tob8
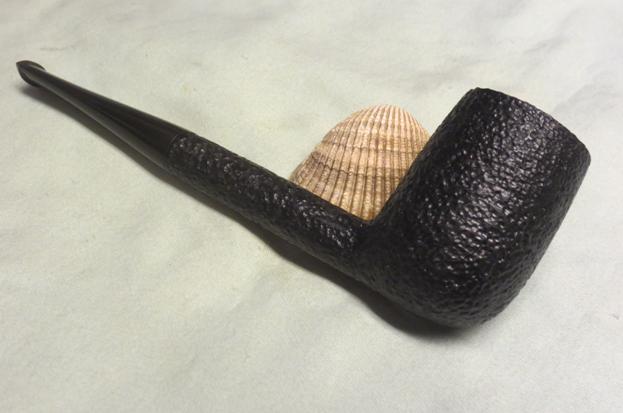
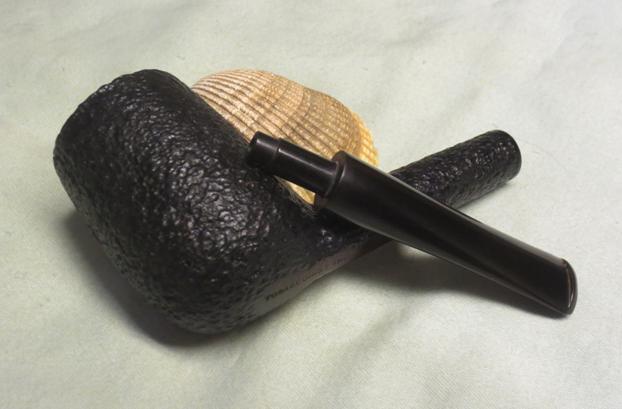
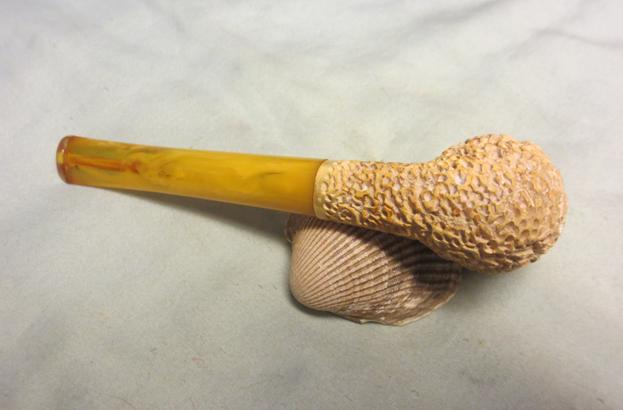
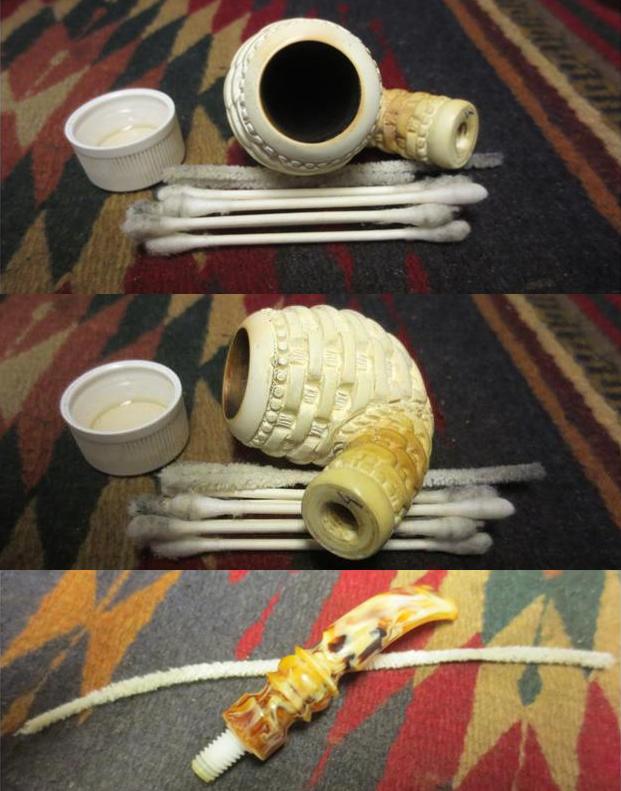
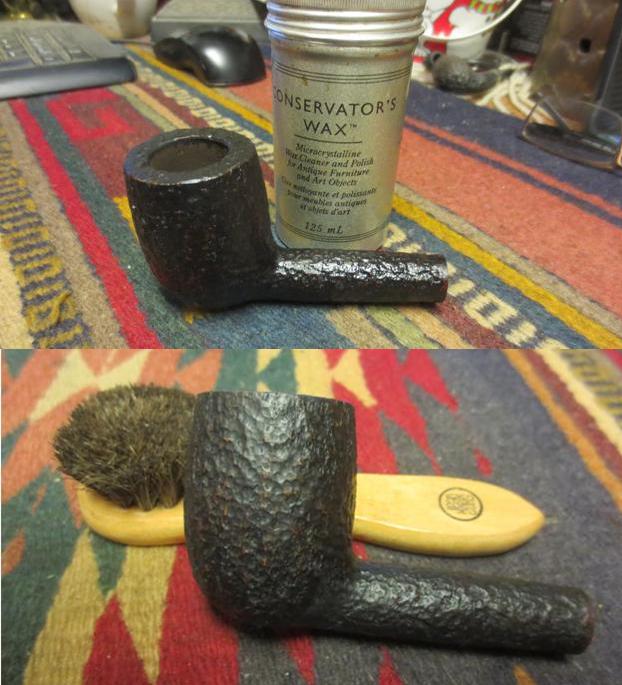
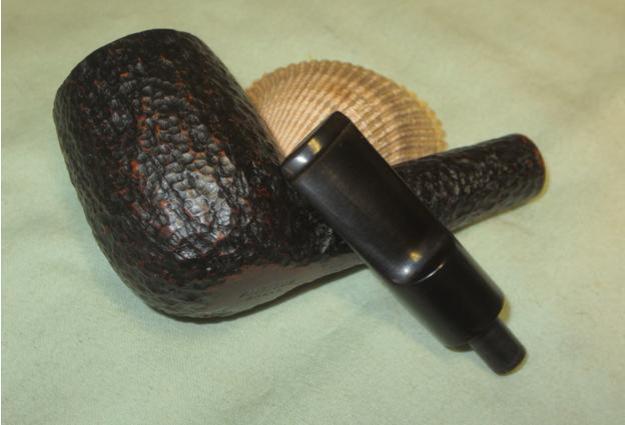
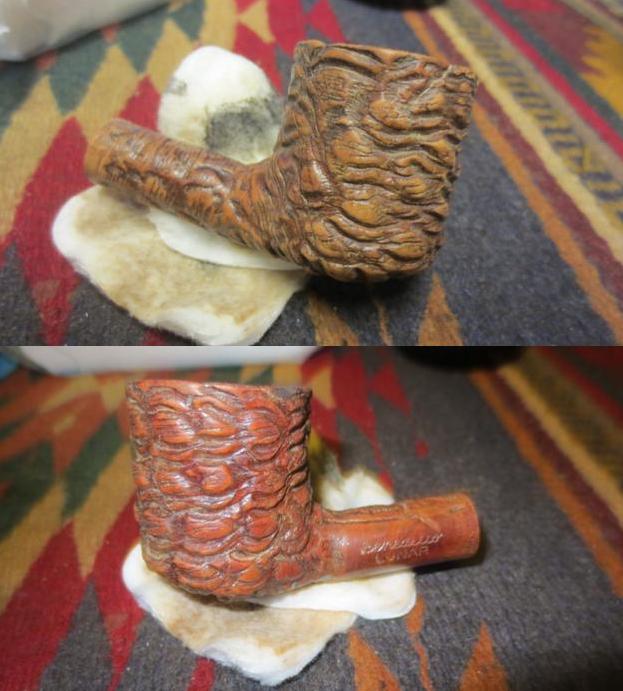
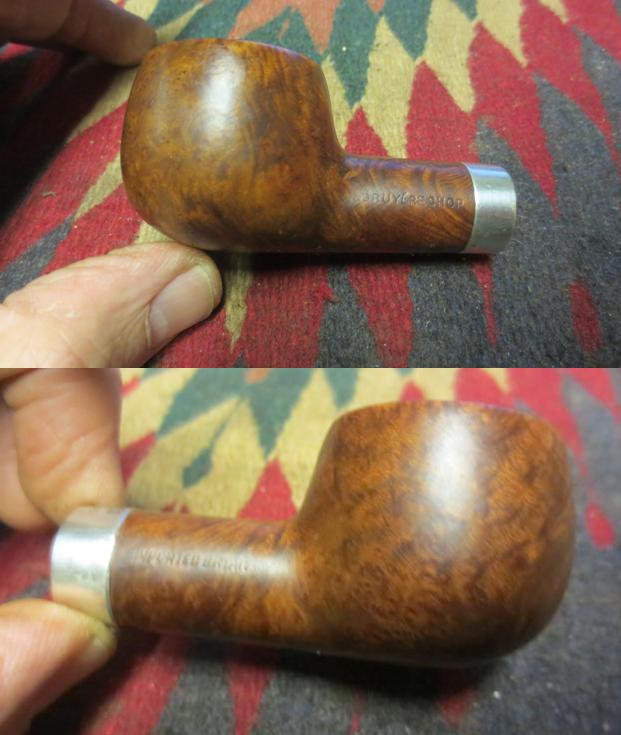
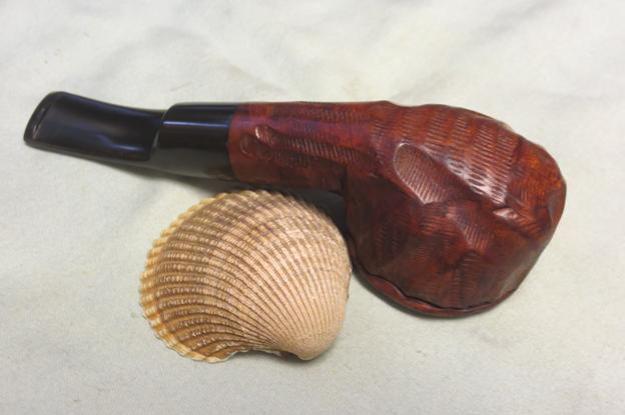
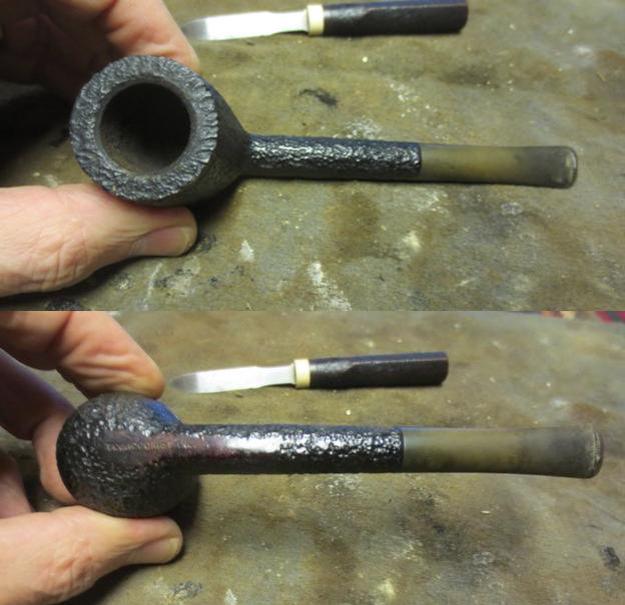
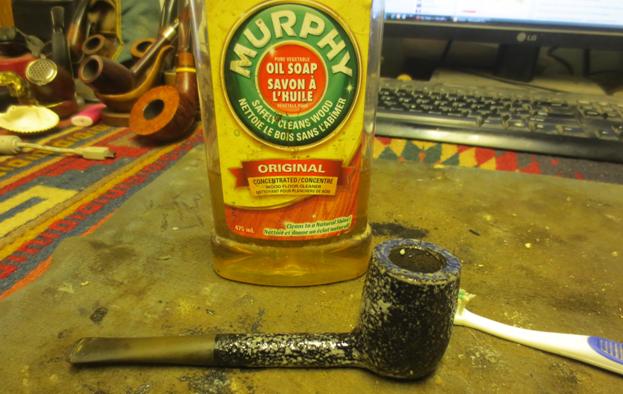
I rinsed the bowl off with running water and dried it off with a soft towel. The clean pipe is shown in the photos below.Tob9 Tob10
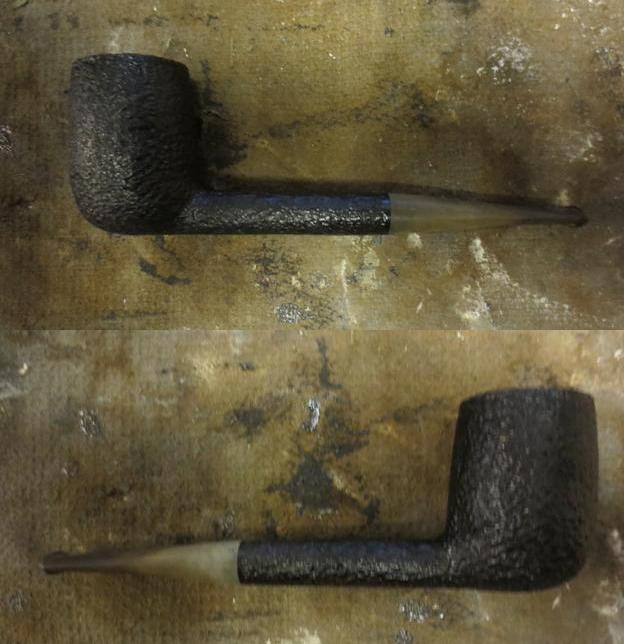
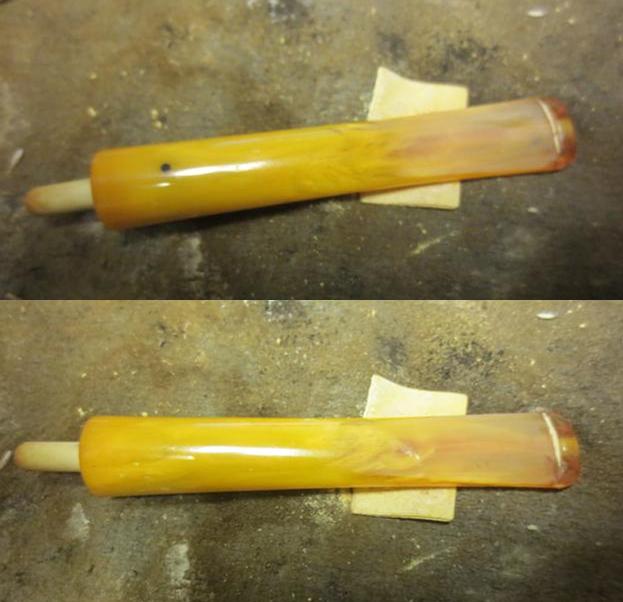
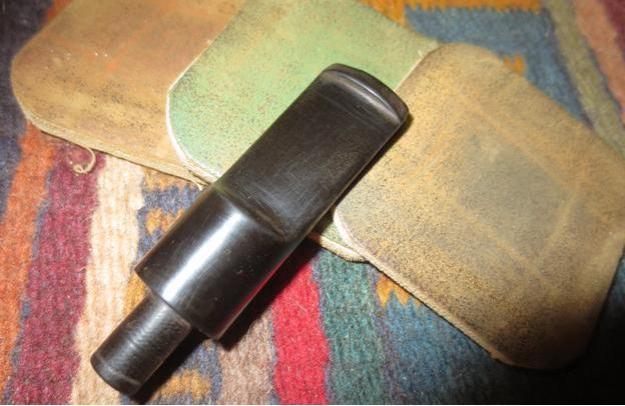
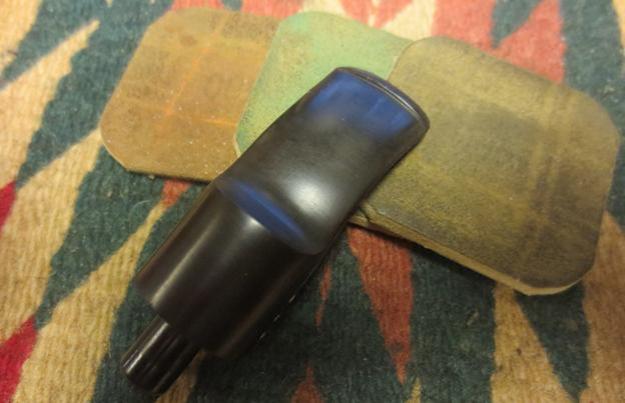
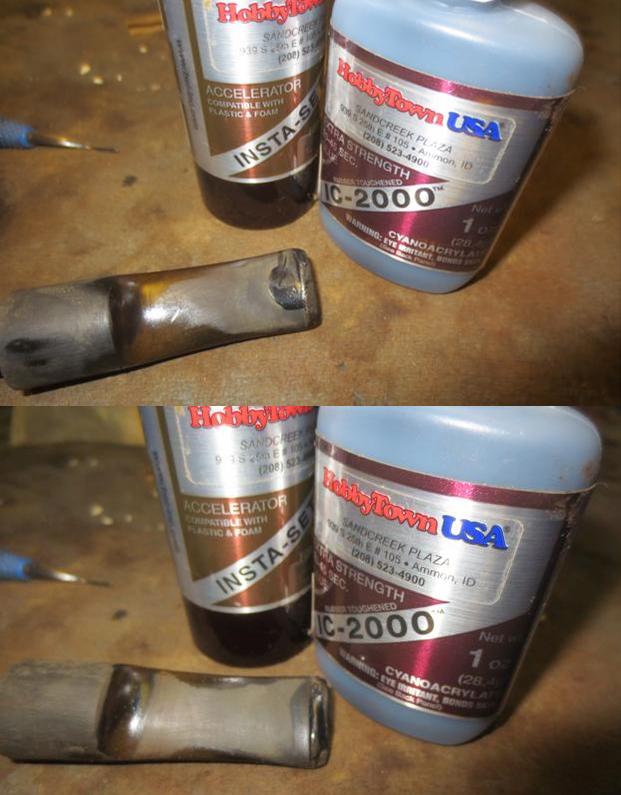
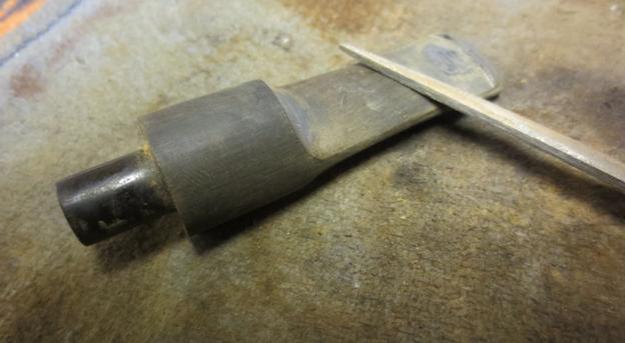
I sanded the stem with 220 grit sandpaper to remove the oxidation on the surface. In the cleanup I found a small tooth mark on the top left side of the stem. I was able to remove the tooth mark with sanding.Tob11
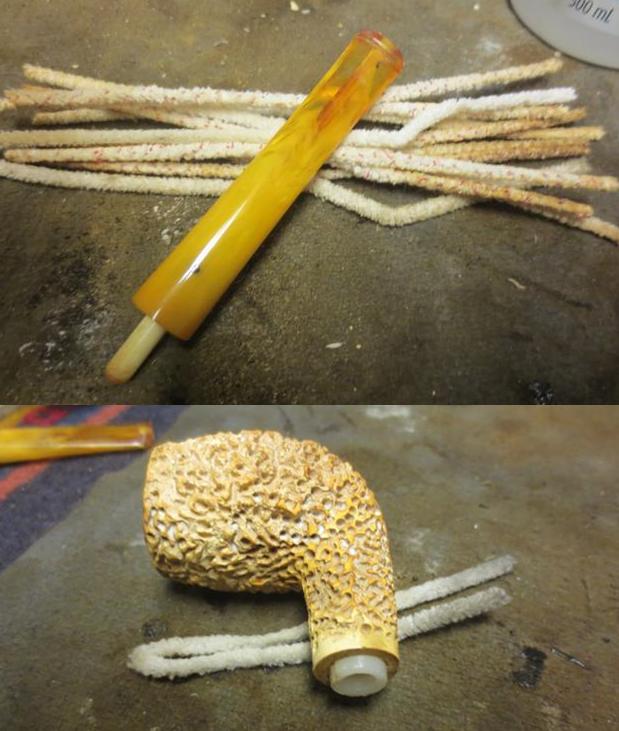
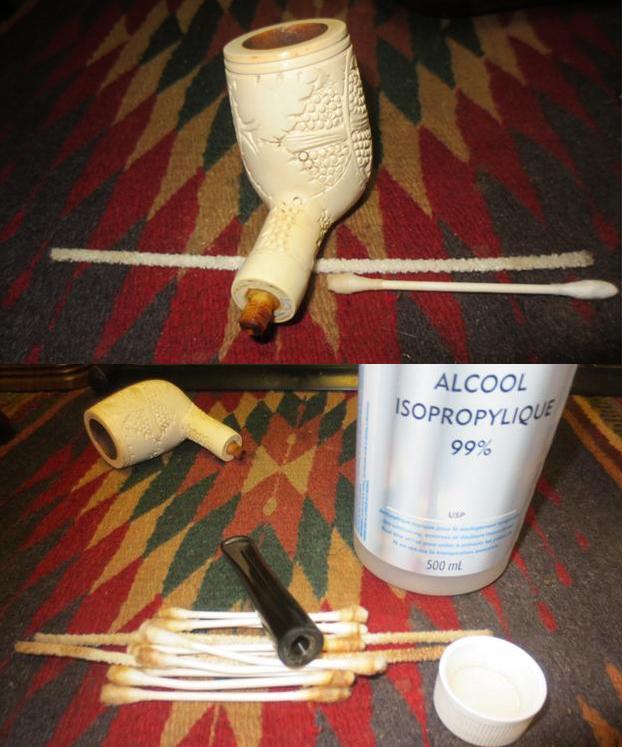
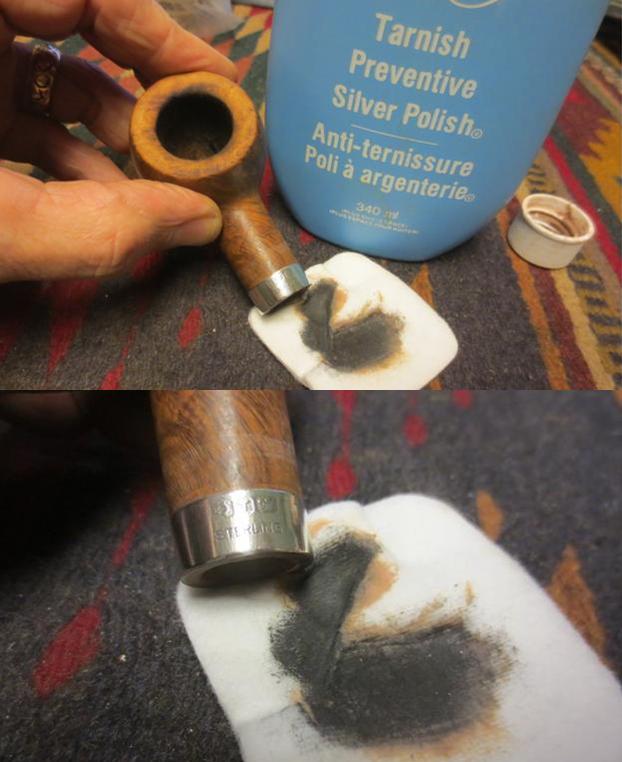
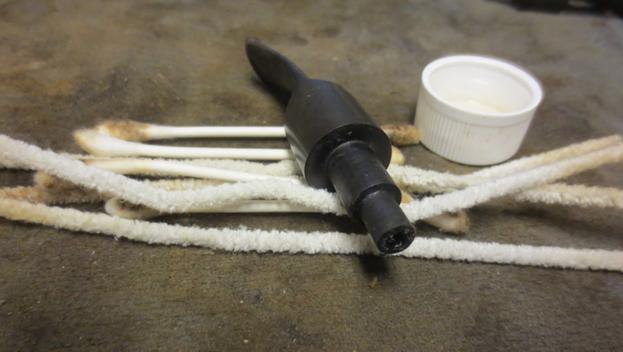
I cleaned the mortise and airway in the shank and stem with pipe cleaners, cotton swabs and alcohol. I was surprised on how clean the pipe was. It did not take too much to clean out the airways.Tob12
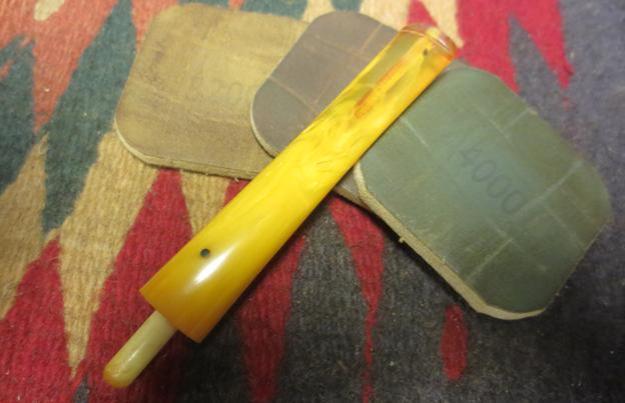
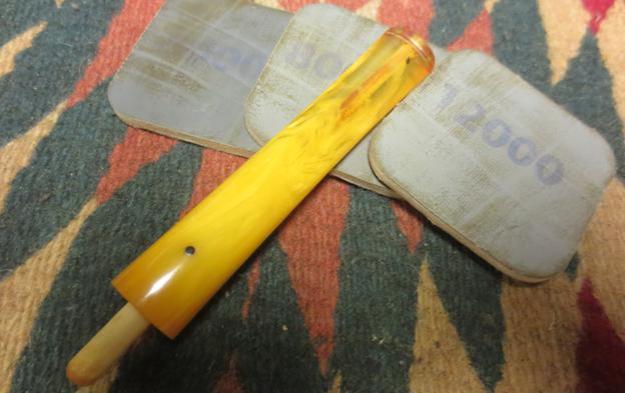
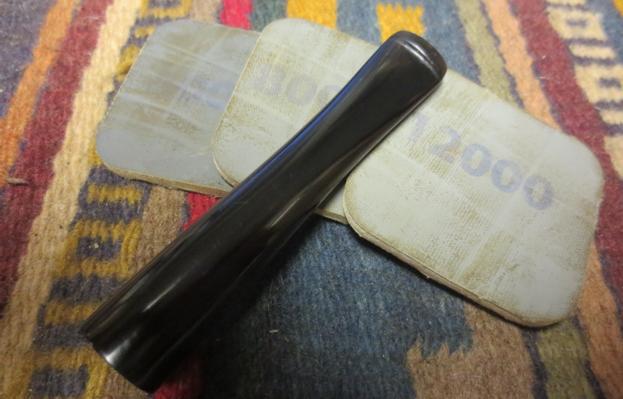
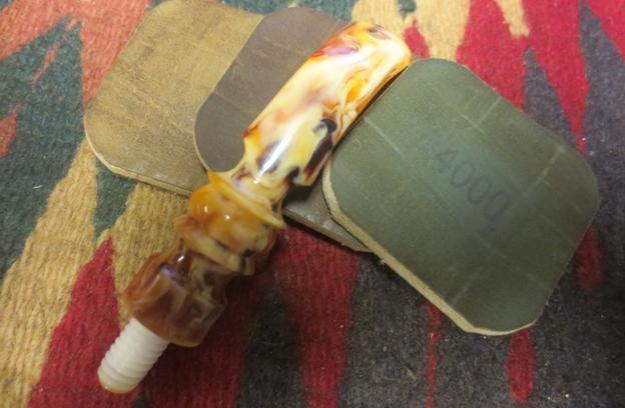
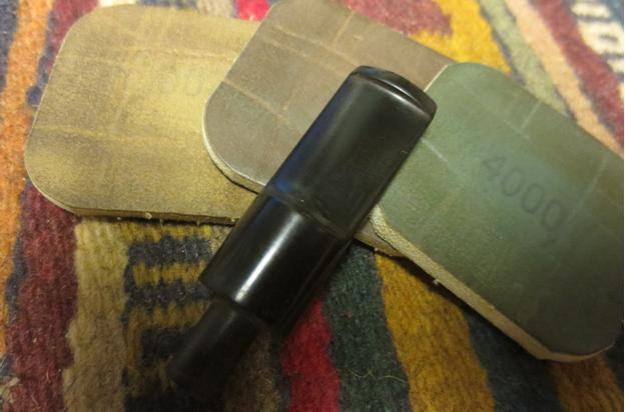
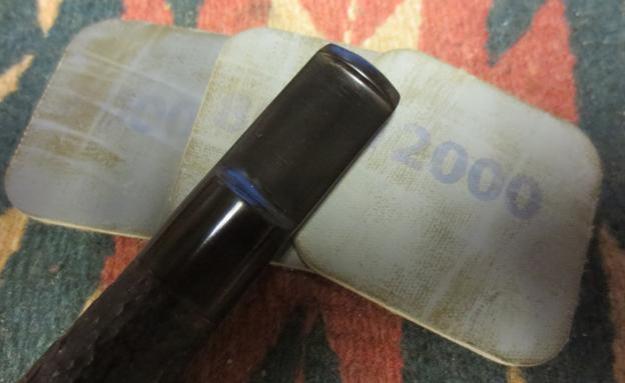
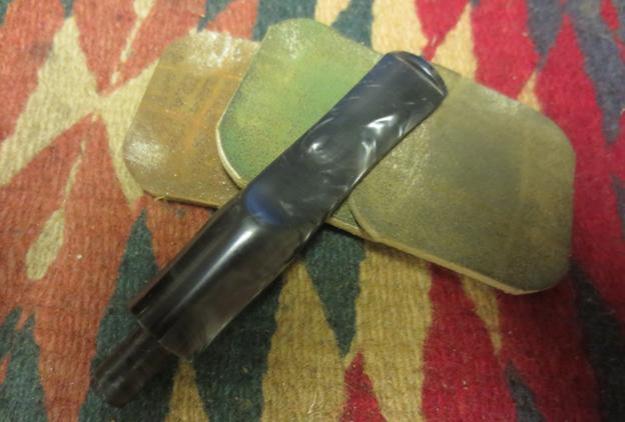
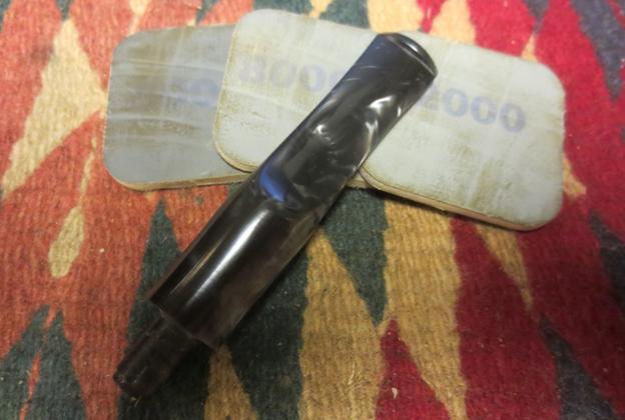
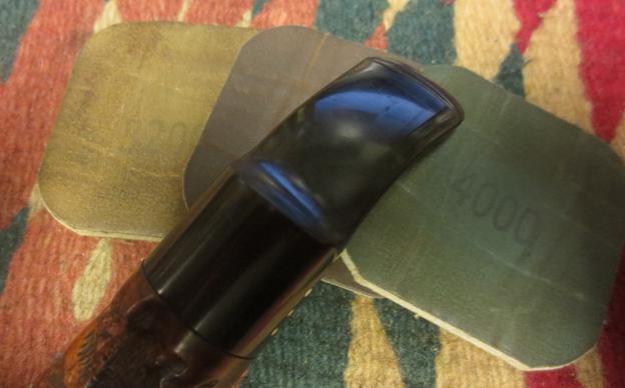
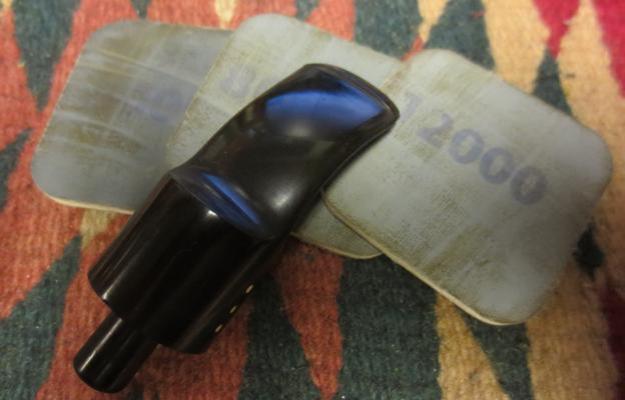
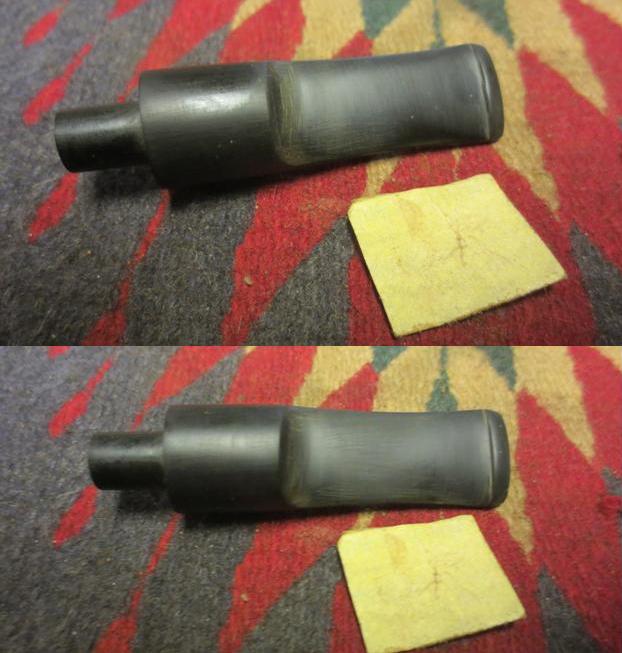
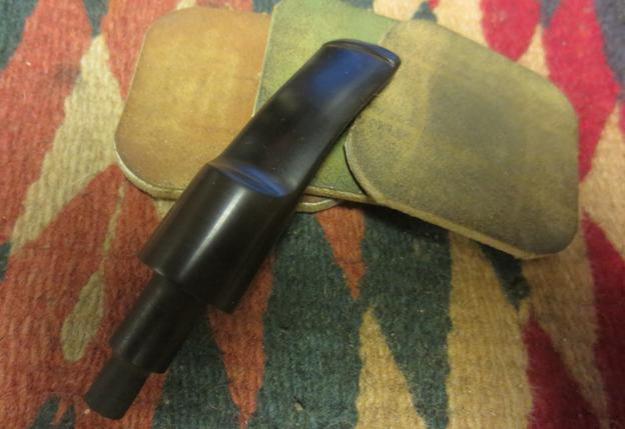
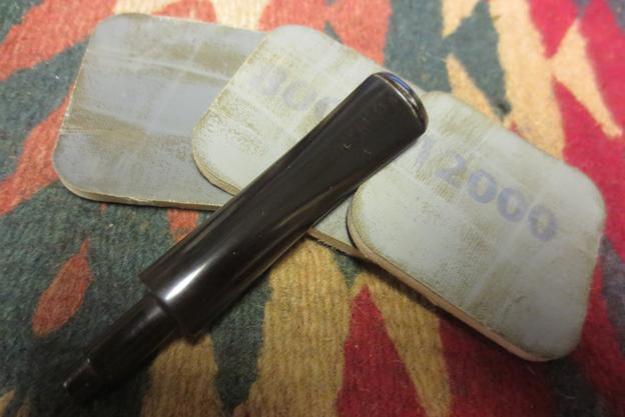
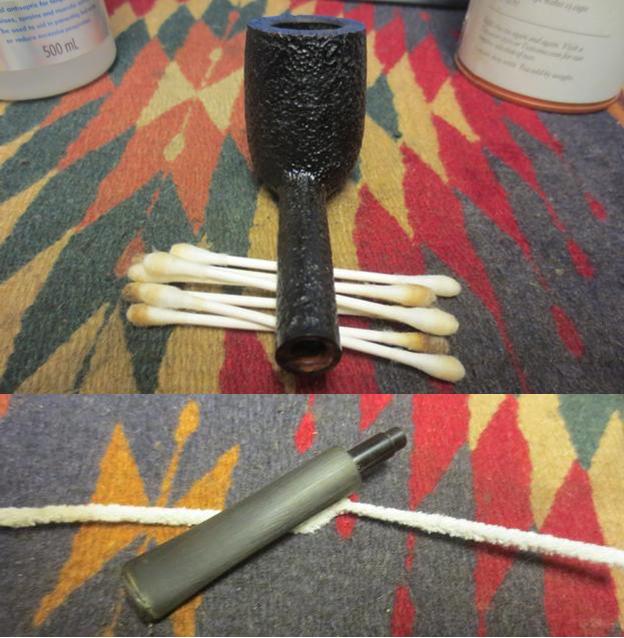
I wet sanded the stem with 1500-2400 grit micromesh sanding pads and followed my usual routine. You can probably recite it by now if you have been a long time reader of the blog. Sand and Obsidian Oil repeated until finished. I dry sanded with 3200-4000 grit pads, gave it another coat of oil and sanded it with 6000-12000 grit pads. I gave it a final coat of Obsidian Oil and set the stem aside to dry.Tob13 Tob14 Tob15
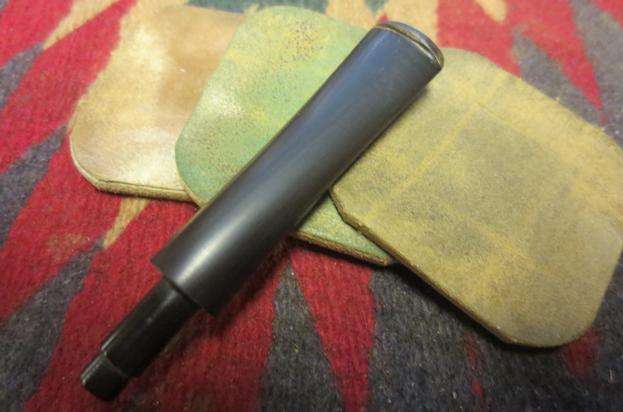
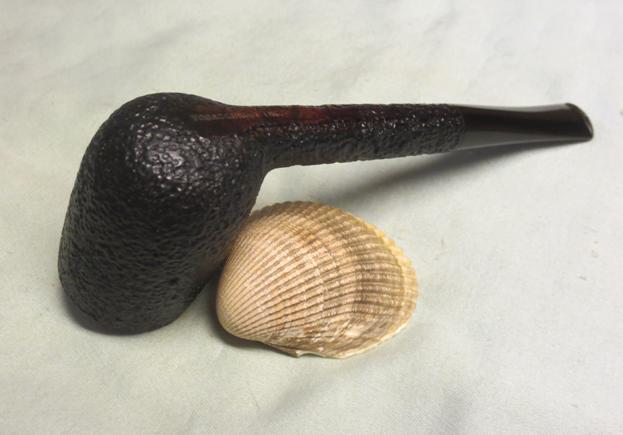
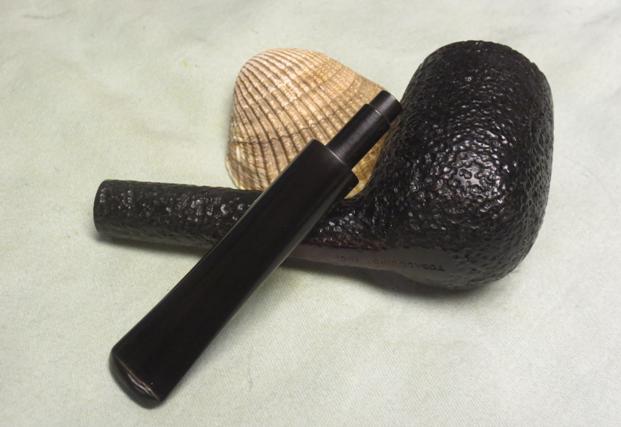
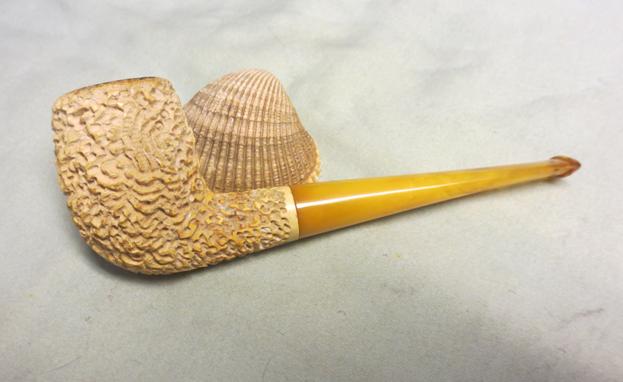
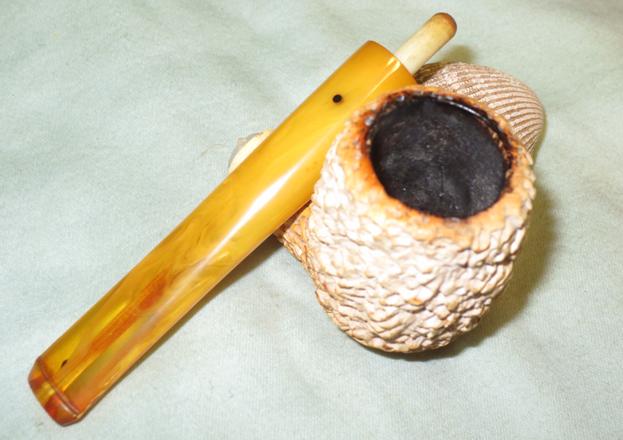
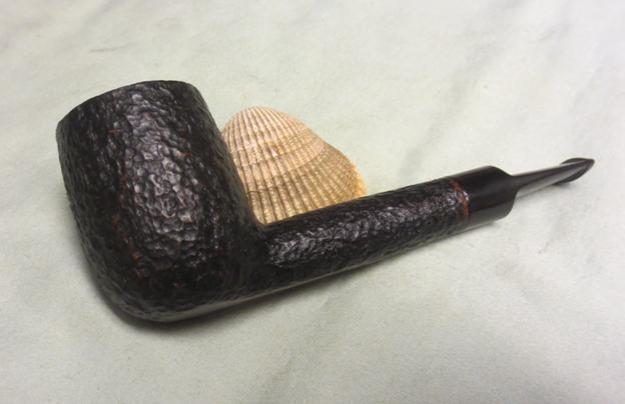
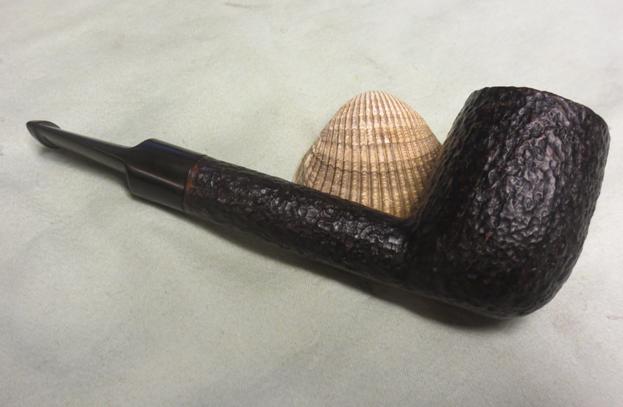
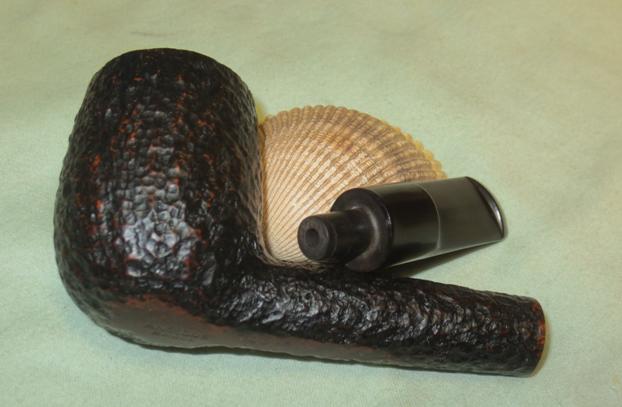
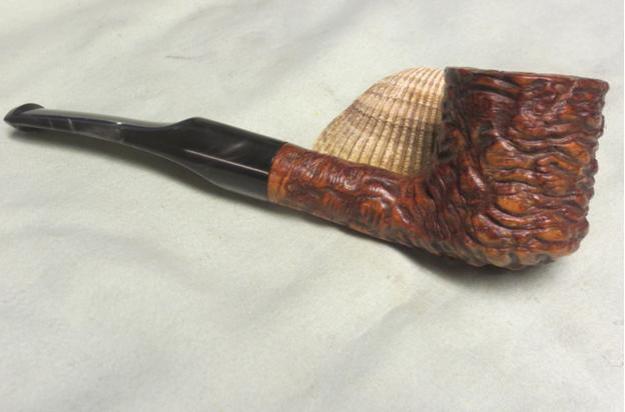
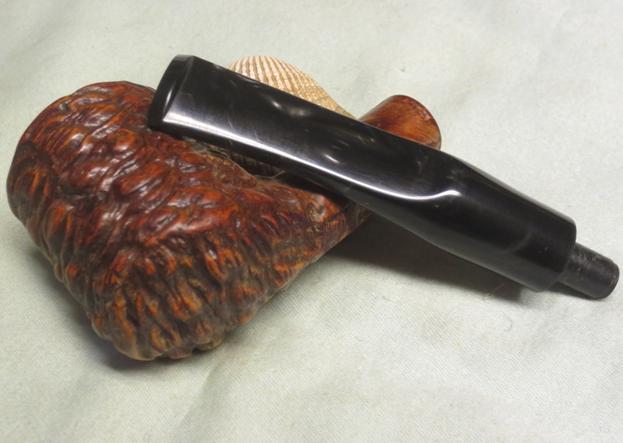
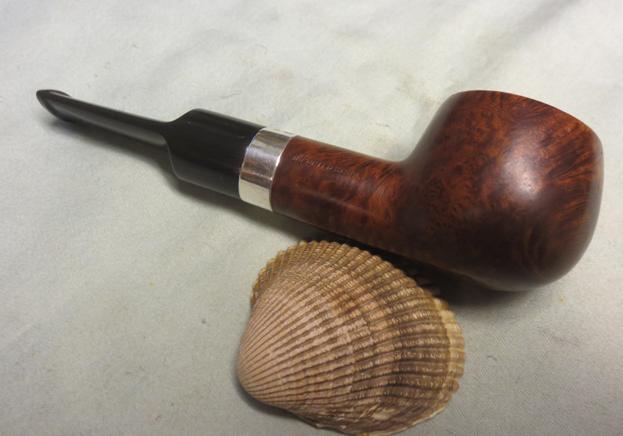
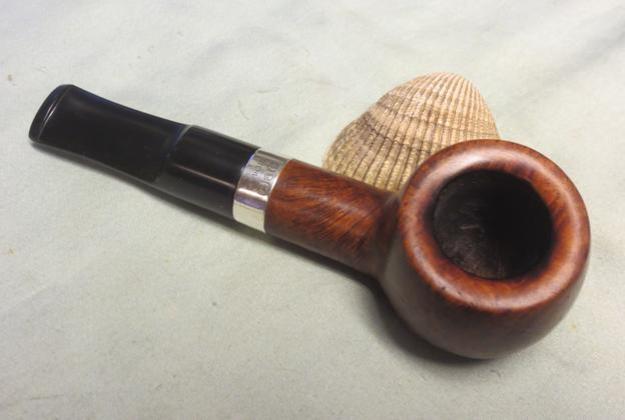
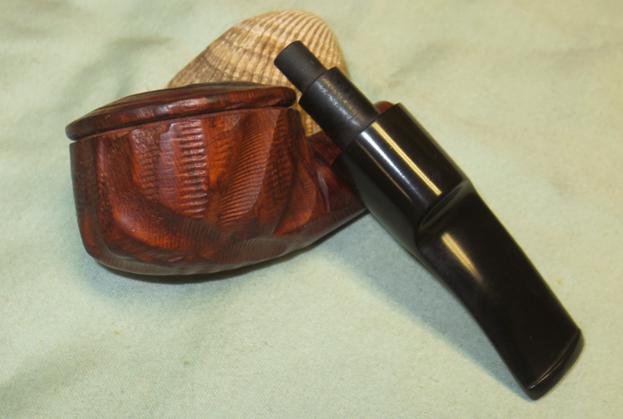
I buffed the pipe with Blue Diamond on the wheel and then gave it multiple coats of carnauba wax. I used a light touch on the bowl so as not to get waxy buildup in the rustication. I buffed it with a clean buffing pad to raise the shine. The final touch I use is a microfibre cloth and a rubdown on the entire pipe to deepen the shine. The finished pipe is shown in the photos below. Thanks for looking.Tob16 Tob17 Tob18 Tob19 Tob20 Tob21 Tob22


Beautiful High Grade B Bjarne Nielsen Handmade Freehand


Blog by Steve Laug

I picked this pipe up from Pocatello, Idaho when my brother and I visited an older pipeman there who was selling some of his collection. It was a beautiful freehand pipe cut to maximize the amazing grain. The flame grain flows up the sides of the bowl and shank with great birdseye on the top and the bottom of the bowl and shank. It has a Cumberland stem with a briar insert centered in the saddle portion of the stem. There is also what appears to be an ivory or faux ivory ring that is integrated at the end of the saddle that sits against the shank when the pipe is inserted. The Cumberland tenon is part of the pipe and is funneled to direct the airflow from the shank to the stem.

The pipe is stamB1ped on the underside of the shank Bjarne Nielsen over Handmade over In Denmark. There is a grade stamp B under the other stamping. The bowl was in very good shape though there was dust and grime over the surface of the bowl that was mixed in with the wax and gave the bowl a waxy almost sticky feel in the hand. The birdseye on the rim was hidden in the grime. There was a light cake in the bowl that I reamed out when I was visiting my brother so when I started working on it today there was nothing in the bowl. The stem was oxidized and also covered with the same waxy stickiness as the bowl. The briar insert was faded and light under the grime. The stem was obviously handmade and very well cut with a thin button. The pipe is amazingly light weight for a pipe this size. B2 B3I have had many Bjarne pipes cross my work table over the years but all had been stamped only Bjarne or Bjarne Handmade. None of them had his full name stamped on it and none had a letter stamp which I assumed indicated the grade of the pipe. I did some research on Pipedia.com and found some helpful information on both the stamping of my pipe and the history of Bjarne Nielsen himself. I am including the link to the full article on Pipedia and also some pertinent sections of the article that I have edited for quick reference. https://pipedia.org/wiki/Bjarne

From the early 1990s Bjarne had seven pipemakers employed and the pipes were sold in no fewer than 32 countries. For more than six months each year, Bjarne traveled around the world to promote his pipes by meeting with dealers and customers. But sadly, it all ended in February 2008 when Bjarne, then 66 years old suffered a fatal heart attack. An unexpected blow fist of all to his family, but also to the pipemakers who had been working for him, and to all lovers of his pipes from around the world. And as no one was willing to take over, the Bjarne pipe died together with its creator.
Among the pipemakers that worked for Bjarne were Johs (for the lower priced high volume pieces), and makers like Ph. Vigen, Ole Bandholm and Tonni Nielsen for high grade pieces. The cheaper line was stamped “Bjarne” while the highest grades were stamped “Bjarne Nielsen” (never with the pipemakers’ name) and graded, from highest to lowest, by the letters: AX, A, B, C, D, E, F, G, H, I, and J.
Now I knew that the pipe I had was made before 2008 and could well have been made by Tonni Nielsen. The B stamping told me it was a fairly high grade pipe – third grade from the top AX grade. That makes sense when I look at the grain and also the way the pipe maker cut the pipe to maximize the lay of the grain on the bowl. I took a few photos of the pipe taken apart to show how the stem was made and to give a good look at the Cumberland under the oxidation. There were no tooth marks or chatter on the stem top or bottom.B4I scrubbed the sticky wax and grime off the bowl surface with Murphy’s Oil Soap on a cotton pad. I was surprised how much grit and grime came off the bowl. Some of what appeared to be nicks or scratches were in the thick wax coat on the bowl and once it was removed so were the marks in the surface. The grain really showed clearly once I rinsed off the soap on the bowl.B5 B6 B7 I cleaned out the mortise and the airway in the shank and the stem with cotton swabs, pipe cleaners and alcohol.B8 The stem was in such good shape under the wax, grime and oxidation that I wiped it down lightly with alcohol on a cotton pad and then went directly to the micromesh sanding pads. I wet sanded the stem with 1500-2400 grit pads and gave the stem a coat of Obsidian Oil. I dry sanded it with 3200-4000 grit pads and gave it another coat of oil. I finished by sanding it with 6000-12000 grit pads and gave it a final coat of Obsidian Oil. I set the stem aside to dry.B9B10B11 I buffed the pipe and stem with Blue Diamond on the buffing wheel being careful to not buff the stamping on the underside of the shank. I gave the bowl and stem several coats of carnauba wax and buffed the pipe with a clean buffing pad. I hand buffed it with a microfibre cloth to deepen the shine. The finished pipe is shown in the photos below. It too will be available soon on the rebornpipes store. Send me a message or a response if you are interested. Thanks for looking.B12B13B14B15B16B17B18B19

Refreshing a Coral Finish Meerschaum Billiard


Blog by Steve Laug

I am on a meerschaum refurbishing binge. I have a few in my box of pipe to be refurbished. This one is a bit unique to me. I have had rusticated meerschaum pipe from Manx Pipes and Nording but I have never had one with what to me looks like this one. I have labeled it a coral finish because it not only looks like it with the carved grooves and pits in the finish but tactilely it also feels like a piece of worn coral. The bowl finish was dirty – more dirty than coloured. The photos below actually make it appear a bit darker than it was when I started. The grooves and pits were lined with dust and debris. The rim had a tarry buildup that was hard and black. The bowl had a light cake forming on the inner walls. The stem is probably made of acrylic or if earlier Bakelite. It has a swirled amber appearance becoming clear in the last third of the stem to the button. There is a single black dot on the top of the stem. The stem has a push tenon and the shank an insert for the tenon. These are either nylon or Delrin. They lead me to believe that the pipe is a bit newer. It does not look like a replacement tenon. The airway in the stem was darkened with tobacco stain. This would give me a chance to use my newly worked out method of cleaning clear stems.c1 C2I took a close-up photo of the rim to show the build up on the back of the top along with darkening to a lesser degree all the way around the top of the bowl. I also took a photo of the top and bottom of the stem. Though they are clear enough they do not show the rippling and tooth marks in the surface. It looked to me like someone had tried to buff out the tooth marks and ended up with a wavy surface on the stem. You can also see the staining of the airway in the clearer portion of the stem.C3I decided to use a gentle soft scrub product to clean the exterior of the meerschaum and the tarry buildup on the rim. I scrubbed it with a tooth brush and rinsed it under running water. I dried it off with a towel. I used a brass bristle brush to work on the rim top. I was able to remove much of the tarry buildup on the rim and rinsed it once again with running water.C4 C5I reamed out the light cake with a Savinelli Pipe Knife and took the cake completely out of the bowl.C6I worked on the inside of the airway with mini-needle files to smooth out the drilling and the slot. It took three different needle files to remove much of the roughness – a round, an oval and a flat oval file.C7I scrubbed the inside of the stem with bristle pipe cleaners and soft scrub cleanser. With repeated scrubbing alternating with the needle files I was able to remove the majority of the staining in the airway. I scrubbed the airway and mortise in the bowl with alcohol and pipe cleaners.C8To remove the waviness of the stem and the tooth marks I sanded it with 220 grit sandpaper and a medium grit block. I was able to remove the wavy lines and the tooth marks and restore the taper of the stem.C9I wet sanded the stem with 1500-2400 micromesh sanding pads and wiped the stem down with a damp cotton pad. I dry sanded it with 3200-4000 grit pads and wiped it down again. I finished sanding it with 6000-12000 grit pads and wiped it down a final time to remove the sanding dust.C10 C11 C12I buffed the bowl and stem lightly with Blue Diamond on the wheel. I gave the stem multiple coats of carnauba wax and buffed the pipe with a clean buffing pad. I hand buffed the stem and bowl with a microfibre cloth. The finished pipe is shown in the photos below. If you are interested in adding this pipe to your collection send me a message on Facebook or respond in the space below the blog. Thanks for looking.C13 C14 C15 C16 C17 C18 C19

Cleaning up a no name Vineyard Meerschaum Billiard


Blog by Steve Laug

I received a second meerschaum pipe in a leatherette or vinyl covered case. This one was a straight billiard. The bowl was lightly carved with grape vines and clusters of grapes all around the bowl. There were two rings carved around the top of the bowl to set off the vines and grapes. The bowl has begun to colour – especially around the shank and on the lower portion of the bowl. The rim had some dark marks and a coat tar that was stuck on the top. The stem is made of a dark acrylic and has some tooth marks and chatter on the top and the bottom sides near the button. The nylon/Delrin threaded tenon has some darkening but is in excellent condition. The stem sits perfectly on the shank. The case is lined with white satin like material.G1 G2 G3 G4I took a close-up photo of the rim top to show the damage. There was darkening and tar but there were also some nicks in the surface that had retained the oil. I also took some photos of the top and bottom side of the stem to show the tooth chatter and tooth marks.G5 G6I wiped down the surface of the meerschaum with soft scrub to remove some of the marks and oils from handling that were on the bowl sides, front and back.G7I scrubbed the bowl top with the soft scrub and wet sanded the rim top with 1500-2400 grit micromesh sanding pads. I followed that up with 3200-4000 grit sanding pads. I wiped the top of the bowl down with the cotton pad. I was able to remove all of the damage and all of the buildup.G8I scraped out the light cake with the Savinelli Pipe Knife. I did not want any cake build up in the bowl. I wiped the bowl down on the inside with a damp cotton pad.G9I scrubbed out the shank and the airway in the tenon and the shank with pipe cleaners and cotton swabs and light alcohol. I was surprised that the internals were not too dirty. I scrubbed out airway in the stem with alcohol, cotton swabs and pipe clean cleaners. I worked on the area that the tenon screwed into in the stem.G10I sanded the tooth marks and tooth chatter with 220 grit sandpaper until they were no longer visible. I wet sanded it with 1500-2400 grit micromesh sanding pads and rubbed it down with Obsidian Oil. I dry sanded it with 3200-4000 grit sanding pads and gave it another coat of oil. I finished sanding it with 6000-12000 grit pads. I gave it a final coat of Obsidian Oil and set it aside to dry.G11 G12 G13I buffed the stem with Blue Diamond and hand buffed bowl. I gave the stem several coats of carnauba wax and buffed it with a clean buffing pad. I hand buffed the entire pipe with a microfibre cloth. The finished pipe is shown in the photos below. This one is also available for anyone who is interested in adding it to their rack. Just send me a message on Facebook or leave a message in the response box below the blog. Thanks for looking.G14 G15 G16 G17 G18 G19 G20 G21

Refreshing a Servi Bent Basket Weave Meerschaum


Blog by Steve Laug

When I got this pipe from my brother, Jeff it was in a case and I did not take time to look at it. Last evening, I was on FaceTime with my brother and he said to have a look at it. So I went to the box, took it out and opened the case. What was inside was a well-cared for basket weave meerschaum with a mixed amber coloured Lucite stem. The tenon was a nylon/Delrin tenon connecting the stem to the shank. The stem was very clean with no tooth chatter or marks. It was dull but would not take much to polish. The connector was also very clean. The exterior of the bowl was beginning to colour but most of the colour was on the shank. The rim had some tar on the topside of the rim at the back. The inner and outer edge of the bowl was in great shape. There was a light cake in the bowl that would need to be removed. The case was in excellent shape. The covering on the outside was a black leatherette with gold hinges and clasp. The lining was gold faux fur with a Servi Block Meerschaum sticker inside the top of the case.Servi1 Servi2I took some photos of the pipe when I took it out of the case to show what I was going to work on in terms of refreshing the pipe.Servi3 Servi4 Servi5I took a close-up photo of the rim and the bowl. You can see the slight buildup of tars on the top back side of the rim and the light cake in the bowl.Servi6The stem was in great shape so I took some photos of it. It is a rare thing these days to find any stems without tooth marks of chatter of some kind. This one had no marks.Servi7I used a 2400 grit micromesh sanding pad to work over the tars on the top of the rim. It did not take too much effort to remove the dark spot and bring the bowl back to fresh look. I used the Savinelli Pipe Knife to scrape out the thin cake in the bowl until it was no longer an issue. I scrubbed out the mortise and the airway in the shank and the stem with pipe cleaners, cotton swabs and alcohol.Servi8I wet sanded the stem with 1500-2400 grit micromesh pads and wiped it down with a damp cotton pad. I dry sanded it with 3200-12000 grit pads and wiped it down between each grit of micromesh and again when I was finished.Servi9 Servi10 Servi11I hand buffed the bowl with a shoe brush and gave the stem a buff with Blue Diamond. I gave the stem several coats of carnauba wax and buffed it with a clean buffing pad. I buffed the bowl with a clean buff as well. The finished pipe is shown in the photos below. It is a beautiful example of a well carved meerschaum and it is in excellent shape. The colouration of the bowl has begun and the shank is showing a rich golden colour. It is ready for the next pipeman to carry on the process of smoking this beauty to enrich the colour on the bowl and shank. If you are interested in adding this one to your rack let me know. It is available.Servi12 Servi13 Servi14 Servi15 Servi16 Servi17 Servi18 Servi19 Servi20 Servi21

Just finished cleaning up a Savinelli Antique Shell Lovat


Blog by Steve Laug

Throughout the past 15 years or more I have cleaned up a lot of Savinelli pipes. I have cleaned a large variety of shapes and sizes but I have never seen one that is a Lovat shape, the 703 KS. I have worked on quite a few of the Antique Shells in the past but still not one of these. I have restemmed and restored any number of fascinating Shells but never a Lovat. This little pipe grabbed my attention when I opened my box of pipes to be refurbished. It is one that my brother picked up either on eBay or in an antique shop somewhere on his journeys. When I started working on this one it was in decent shape. The bowl had a light cake. The rim was really dirty with an overflow of tars and oils. The finish was dirty but there was no damage to the exterior of the pipe. The dark brown and medium brown contrasting stains looked like they would clean up really well. The stem was oxidized and had what looked like the debris left behind when a pipe has been smoked with a rubber softee bit.Shell1 Shell2I took a close up photo of the rim top to show the buildup of tars and oils. They were thick on the rim filling in all of the crevices and grooves in the finish. It was raised and thickened along the back inner edge of the bowl. I also tried to get a couple of photos of the condition of the stem to show the oxidation and the white calcification line where the softee bit must have been. There were not any tooth marks or chatter on either side of the stem.Shell3 Shell4I reamed the bowl with the Savinelli Pipe Knife and took the thin cake back to the walls.Shell5The rim was a mess so I used a brass bristle wire brush and a dental pick to clean up the rim top. It took some work to get all of it off the rim. The picture below shows the process about half finished. I used the dental pick out the debris from the top. I then wire brushed it some more and between the two was able to remove all of the grime.Shell6I scraped the bowl edge one more time with the pipe knife and then used a rolled piece of sandpaper to sand out the inside of the bowl.Shell7I gave the bowl several coats of Conservator’s Wax and hand buffed it with a shoe brush.Shell8I used the dental spatula to clean out the inside of the shank and followed it up with pipe cleaners, cotton swabs and alcohol. I also cleaned out the airway in the stem with pipe cleaners and alcohol.Shell9I sanded the stem with 220 grit sandpaper to remove the oxidation and the calcification on the stem. I wet sanded with 1500-2400 grit micromesh sanding pads and rubbed it down with Obsidian Oil. I dry sanded it with 3200-4000 grit pads and gave it another coat of oil. I finished sanding with 6000-12000 grit pads, gave it a final coat of Obsidian Oil and set it aside to dry.Shell10 Shell11 Shell12I buffed the bowl and stem with Blue Diamond polish on the wheel and then gave the stem several coats of carnauba wax. I gave the bowl several more coats of Conservator’s Wax and buffed the bowl and stem with a clean buffing pad. I hand buffed the pipe with a microfibre cloth to give it a deeper shine. The finished pipe is shown in the photos below. This one will soon be for sale in the store. If you are interested contact me, and this could be yours. Thanks for looking.Shell13 Shell14 Shell15 Shell16 Shell17 Shell18 Shell19 Shell20

Have you ever heard of a Benedetto Luna Billiard?


Blog by Steve Laug

The next pipe on my work table is a rusticated billiard with a fascinating rustication. The pipe is stamped on the left side of the shank, Benedetto Luna from Italy. It has a gnarly rustication and a marbled silver and black Lucite stem.Ben1The bowl seemed to have a coat of urethane that was wearing away. The rim had some darkening and the crevices were dirty. The bowl had a light cake. The stem was in great shape other than being dirty and having minimal tooth chatter. I figured it would be a relatively easy clean up.Ben2 Ben3I took a close-up photo of the rim to show its condition. You can see the light cake in the bowl and the dust in the crevices of the rustication on the rim. The inner and out edges are undamaged and still round. The stem photos show the condition of the top and underside – light chatter but otherwise excellent condition.Ben4 Ben5I scrubbed the bowl with a tooth brush and Murphy’s Oil Soap to remove the dust and grime from the rustication. I scrubbed and rinsed the bowl under running water. I dried it off and took a series of photos to show the clean bowl.Ben6 Ben7 Ben8I decided to try to remove the urethane finish with acetone. It was an exercise in futility but I thought I would try.Ben9I sanded the high spots on the bowl and shank with a medium and fine grit sanding block to break up the urethane on those spots. It worked significantly better than using the acetone by itself. I washed down the bowl with acetone once I finished sanding.Ben10 Ben11I cleaned the mortise and airway in the bowl and the stem with alcohol, cotton swabs and alcohol. It was not particularly dirty in comparison to many of the pipe I have cleaned up.Ben12I sanded the tooth chatter with 220 grit sandpaper to remove it from the top and bottom sides of the stem. I wet sanded with 1500-2400 grit micromesh pads and dry sanded with 3200-12000 grit pads. I wiped the stem down with a damp cotton pad between grits to keep the stem clean of dust.Ben13 Ben14 Ben15I gave the bowl several coats of Conservator’s Wax and hand buffed it with a shoe brush. I gave the stem several coats of carnauba and then buffed the entire pipe with a clean buffing pad. I hand buffed it with a microfibre cloth to deepen the shine. The finished pipe is shown in the photos below. If any of you would like to add this one to your rack let me know. It will be an inexpensive addition to you collection and should smoke extremely well. Just send me an email or a message on Facebook. Thanks for looking.Ben16 Ben17 Ben18 Ben19 Ben20 Ben21 Ben22

Breathing New Life into a John Surrey Ltd. Red Knight


Blog by Steve Laug

It seems like I am currently on a bit of a roll with the rusticated Tracy Mincer like pipes that I have been working on. This one came to me in my brother’s box and it is stamped Red Knight on the left side of the shank and John Surrey Ltd. over Imported Briar on the right side of the shank. red1The straight line of three dots on the left side of the saddle is also characteristic of John Surrey Ltd. pipes. I did some digging on the Pipephil Logos site http://www.pipephil.eu/logos/en/logo-j3.html and read that John Surrey, Ltd., was located at 509 Fifth Avenue New York NYC, NY and made pipes in the late 40s and early 50s. I also looked on Chris’ Pipe Pages and found a catalogue of their line. Here is the link: http://pipepages.com/jsurpage.htm jsur16red2When the pipe arrived it was in decent shape. The rusticated grooves were dirty with grime and dust but there was some nice grain on the smooth portions of the bowl. The rim was very dirty and thick with tars and oils. The inner edge and the outer edge were very clean. The inside of the bowl had a thin cake and the airway and mortise were very dirty. The stem was in good shape with not tooth marks but some chatter on the top and the bottom sides. It was oxidized. The dots on the side of the stem are a light yellow in colour. red3I took a close up photo of the rim top so that I would have a record of what it looked like when I received it. The thin cake on the bowl walls would be easy to clean off. I also took some close up photos of the condition of the stem top and bottom.red4 red5I began the clean up by cleaning the rim top. I scrubbed the rim with saliva on cotton pads to remove the buildup. I also used a 1500 grit micromesh sanding pad to remove what was left behind by the scrubbing and then repeated the scrubbing. It did not take too long to remove the grime on the rim.red6I scrubbed the exterior of the bowl with alcohol and cotton pads to remove the grime in the grooves.red7I scrubbed out the mortise and airway in the bowl and the stem with alcohol, cotton swabs and pipe cleaners.red8I sanded the surface of the stem with 220 grit sandpaper to remove the oxidation and the tooth chatter.red9I wet sanded the stem with 1500-2400 grit micromesh sanding pads and rubbed the stem down with Obsidian Oil. I dry sanded it with 3200-4000 grit pads and gave it another coat of oil. I finished by sanding it with 6000-12000 grit pads and gave it a final coat of Obsidian Oil and set the stem aside to dry.red10 red11 red12I buffed the bowl lightly with Blue Diamond polish on the wheel and buffed the stem normally at the same time. I gave the bowl several coats of Conservator’s Wax and the stem several coats of carnauba wax. I hand buffed the bowl with a shoe brush and then buffed the stem and bowl lightly with a clean buffing pad. I hand buffed it with a microfibre cloth to give it deeper shine. The finished pipe is shown in the photos below. The look and shape of the pipe are quite attractive and the feel of the pipe in the hand and the mouth is excellent. Thanks for looking.red13 red14 red15 red16 red17 red18 red19 red20

Restoring a Chubby Shank Bruyere Shop Apple


Blog by Steve Laug

This one came to me in the box of pipes from my brother, Jeff. It is stamped Bruyere Shop on the left side of the shank and Imported Briar on the right side. It has a sterling silver band that is stamped STERLING and bears three hallmarks – an Anchor, a Lion and a T. The band thus reads Birmingham (the Anchor), .925 Sterling Silver (the Lion) and the letter T which dates the pipe to 1943. The band appears original as there are no cracks that it is banding or repairing. There is no damage to the pipe under the band. The silver band was oxidized and tarnished. It is pressure fit on the shank. The bowl was in decent shape when I got it – dirty and worn. There were paint specks on the briar. The beveled/rounded rim had darkening and heavy coating of tars and oils. The bowl had a cake that cover the sides and bottom. The thick shank was extremely dirty and oily. The stem had tooth marks on the top side and the underside next to the button. It was oxidized and very dirty as well.b1 b2I took a close-up photo of the rim to show the buildup and the cake in the bowl. The second one shows the stamping on the band that I spelled out above.b3The next two photos show the condition of the stem and show the oxidation and the tooth marks next to the button.B4I scrubbed the bowl and rim with acetone on cotton pads to remove the old wax and grime on the finish. I worked on the rim to remove the buildup that had collected there.B5 B6I used the Savinelli Pipe Knife to cut back the cake to bare briar.B7I sanded the inner edge and top of the rim to clean off the tarry buildup and also smooth out the dents and nicks in the rim.B8I scraped out the shank with a dental spatula and scrubbed the shank with pipe cleaners, cotton swabs and alcohol until it was clean.B9I polished the silver band with silver polish to remove the tarnish and oxidation. The bright shine of the sterling silver came through the polish and I could see that it was going to be a beauty once the tarnish was gone.B10I used a light brown stain pen to restain the rim and polished it.B11I buffed the bowl lightly with Blue Diamond to polish the briar. I buffed it until the bowl and rim matched each other.B12 B13I sanded the stem with 220 grit sandpaper to remove the tooth marks on the top side of the stem. I repaired the one on the underside with black super glue. I built up the top of the button on both sides of the stem with black super glue. I sprayed it with an accelerator to dry it quickly.B14I used a needle file to rehape the sharp edge of the button and smooth out the surface of the stem.B15I cleaned out the airway with pipe cleaners and alcohol to remove all of the oils and tars in the stem.B16I sanded the stem with 220 grit sandpaper to remove all of the oxidation. B17I wet sanded the stem with 1500-2400 grit micromesh sanding pads. I gave the stem a coat of Obsidian Oil and dry sanded it with 3200-4000 grit pads. I gave it another coat of oil and sanded it with 6000-12000 grit pads. I gave it a final coat of oil and set it aside to dry.B18 B19 B20I buffed the stem and bowl with Blue Diamond on the buffing wheel to polish it. I gave the bowl and stem multiple coats of carnauba wax and buffed it with a clean buffing pad to raise the shine. I hand buffed it with a microfibre cloth to deepen the shine. The finished pipe is shown in the photos below. If anyone knows anything about the Bruyere Shop please let me know in the response below. Thanks for looking.B21 B22 B23 B24 B25 B26 B27

ADDENDUM

I was doing some reading on the web and found a reference to a pipe shop in Buffalo, N.Y. called the Bruyere Pipe Shop in a May 1953 Popular Mechanics Magazine. I wonder if there is a tie…


Restoring a Fieldstub Bullmoose for a Friend


Blog by Steve Laug

This is the second pipe that my friend dropped by for a restoration and cleaning. The first was the Tom Howard that I wrote about recently https://rebornpipes.com/2016/07/09/restoring-a-tom-howard-rhodesian-scoop/. This one is a Fieldstub imported briar. The most I can find out about it is that is American made in the 30-40s by and unknown factory. It shares a lot of features with pipes made by Tracy Mincer and the Custom-Bilt line but I can find no link. This one was dirty and tired looking. The rim had a lot of darkening and the bowl had a cake. The grooves on the rim were dirty and darkened. The stem was oxidized and had tooth marks at the button on both the top and underside of the stem. The pipe is stamped FIELDSTUB over Imported Briar on the left side of the shank.F1 F2I took a few close-up photos of the rim and the stem. The first shows the buildup on the rim top and the cake in the bowl. The second and third show the stem with the tooth marks right next to the button edge.F3 F4I scrubbed the bowl with a tooth brush and Murphy’s Oil Soap, used a brass bristle brush on the rim top and rinsed it under running water. I dried it off and took these photos.F5 F6I scrubbed the top of the rim to remove the darkening using acetone and cotton pads. I was able to remove most of the darkening. I wiped down the rest of the bowl with acetone as well to remove the wax and any debris that remained.F7 f8I cleaned up the inner edge of the bowl with a folded piece of 220 grit sandpaper to smooth out the nicks and dings on the edge.F9I sanded the stem with 220 grit sandpaper to remove the oxidation and cleaned the airway with pipe cleaners, cotton swabs and alcohol.F10I used alcohol and wiped off the damaged areas next to the underside of the button where the worst of the tooth marks remained after sanding. I filled in the tooth marks with black super glue and sprayed it with an accelerator to speed the drying time. F11I cleaned up the edge of the button and smoothed out the repair with a needle file. I wanted a clean, sharp edge on the button.F12I sanded the patch with 220 grit sandpaper to blend it into the surface of the stem and remove the file marks.F13I stuffed a cotton ball into the bowl and filled it with alcohol to pull the tars and oils out of the bowl and shank. I let it sit for several hours while I worked on the stem.F14I took the cotton ball out of the bowl and cleaned out the shank and bowl with pipe cleaners and cotton swabs to clean up the last of the alcohol. I let the bowl dry and turned to the stem. I wet sanded the stem with 1500-2400 grit micromesh sanding pads and rubbed it down with Obsidian Oil. I dry sanded with 3200-4000 grit pads and gave it another coat of oil. I finished sanding it with 6000-12000 grit pads, gave it a final rubdown of Obsidian Oil and set it aside to dry.F15 F16 F17I buffed the pipe with Blue Diamond on the buffing wheel and gave the stem several coats of carnauba wax. I hand waxed the bowl with Conservator’s Wax and buffed the pipe with a clean buffing pad to raise the shine. I hand buffed the pipe with a microfibre cloth. This one joins the Tom Howard as they wait for Theo to stop by and pick them both up. They are cleaned, polished and smelling great! If you read this blog, they are both ready for you Theo. Thanks for looking.F18 F19 F20 F21 F22 F23 F24