Blog by Dal Stanton
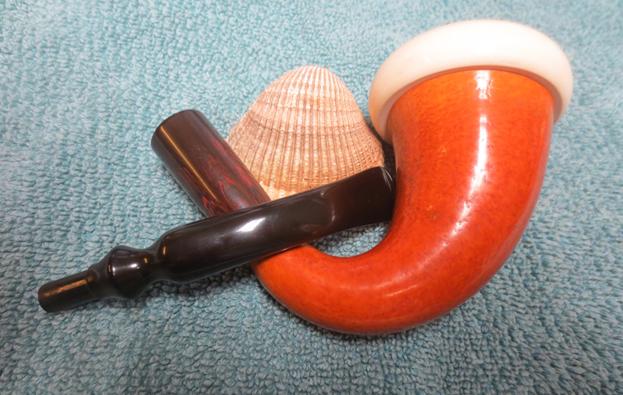
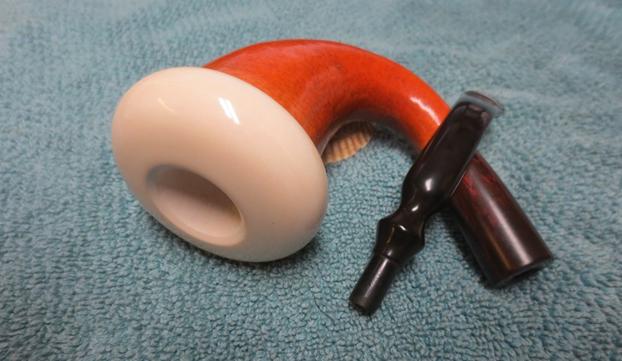
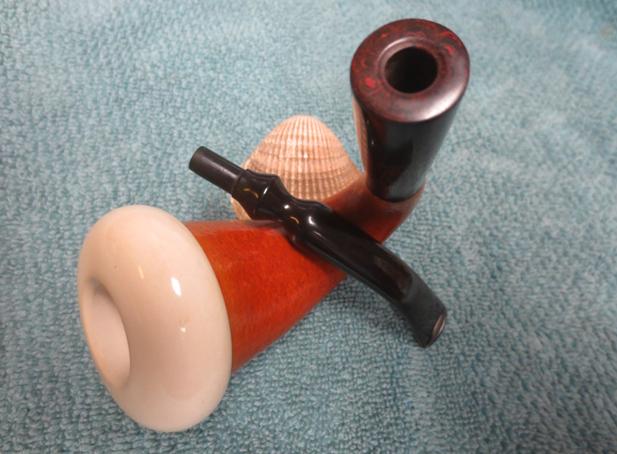
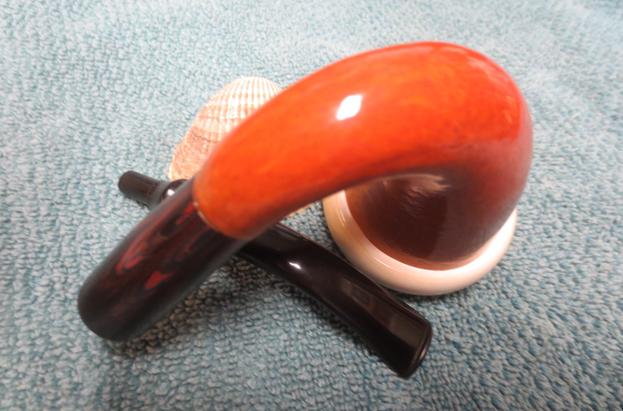
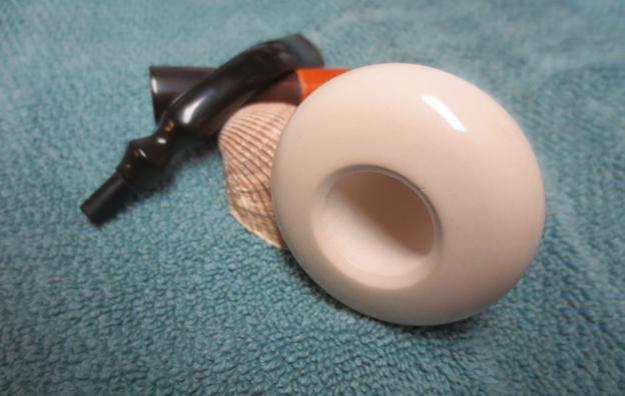
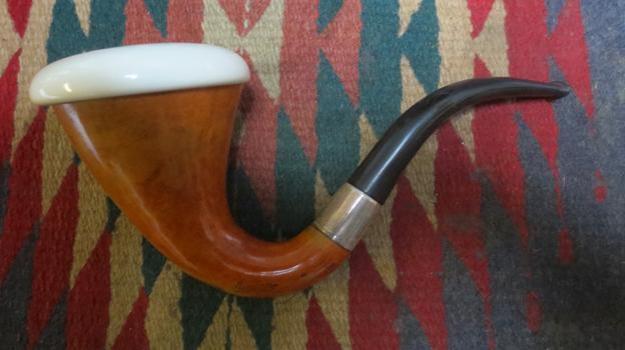
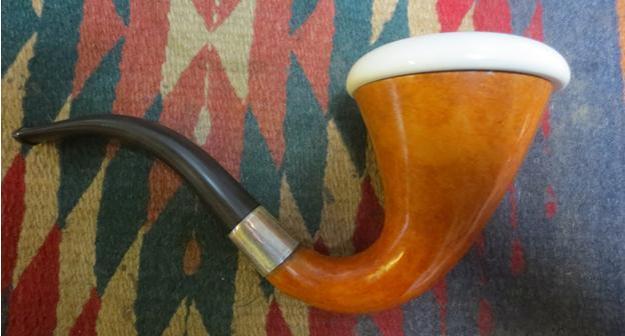
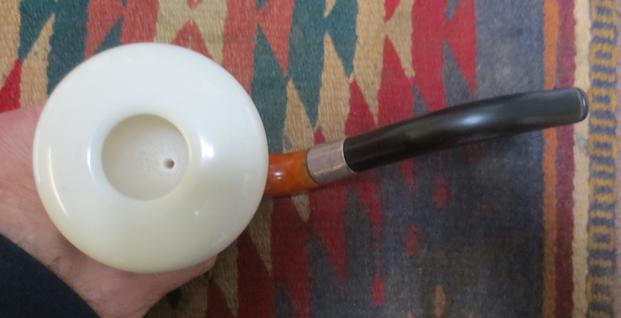
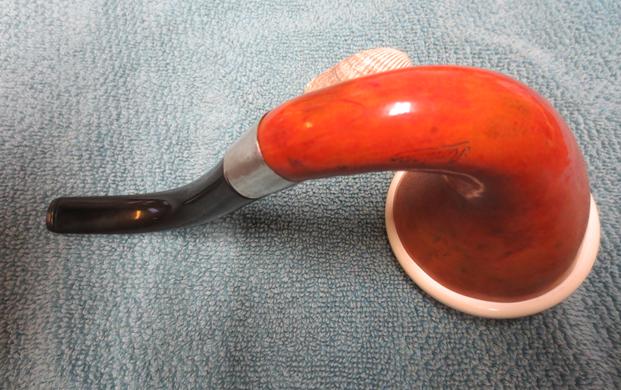
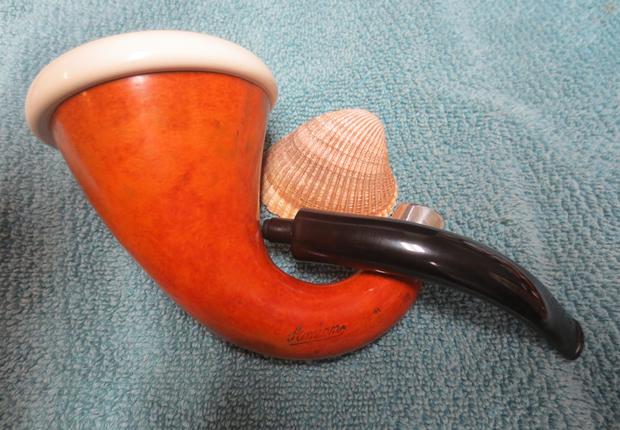
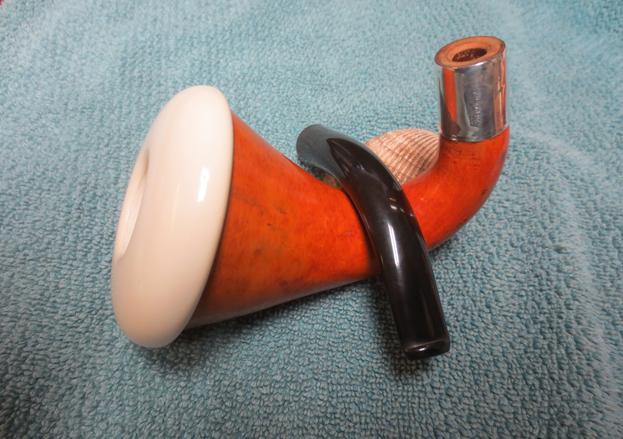
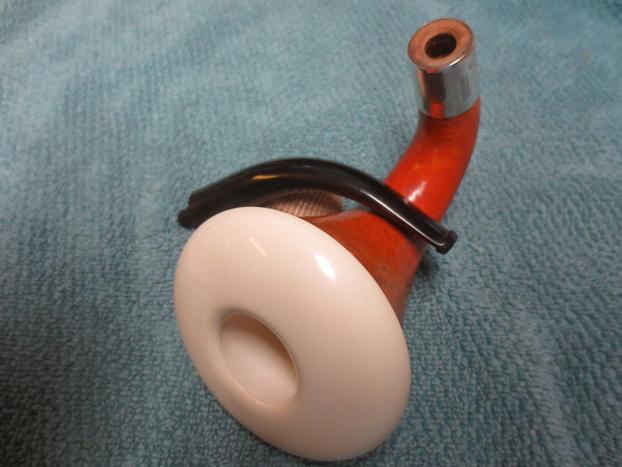
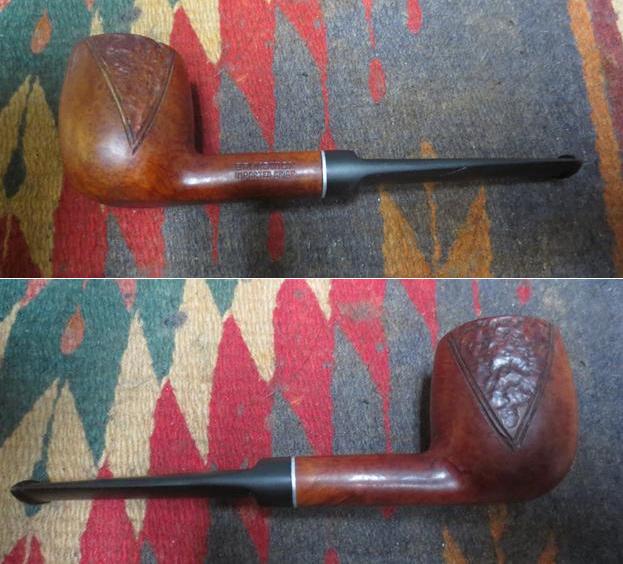
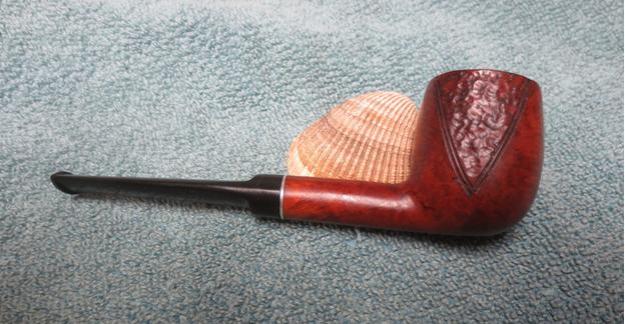
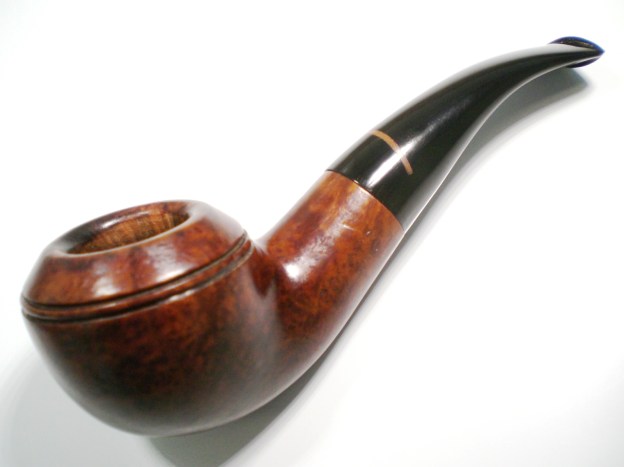
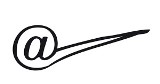
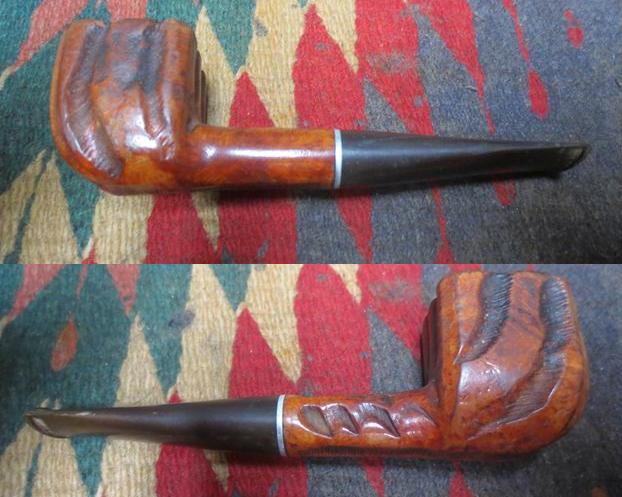
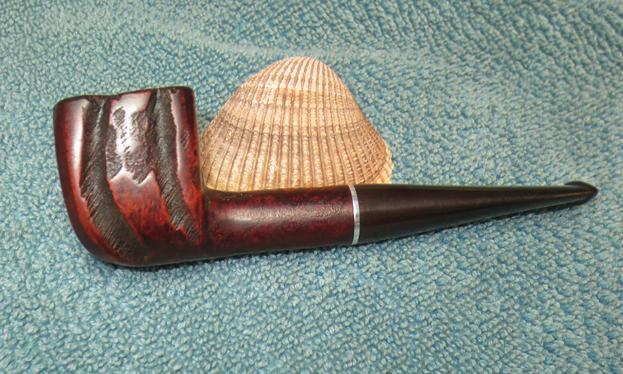
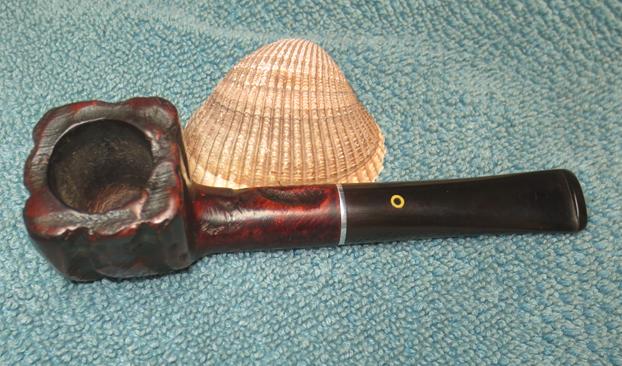
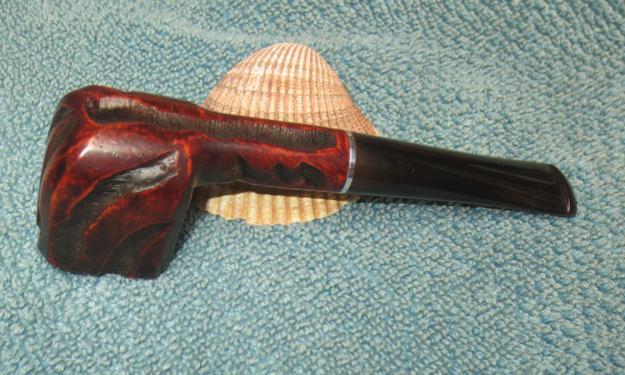
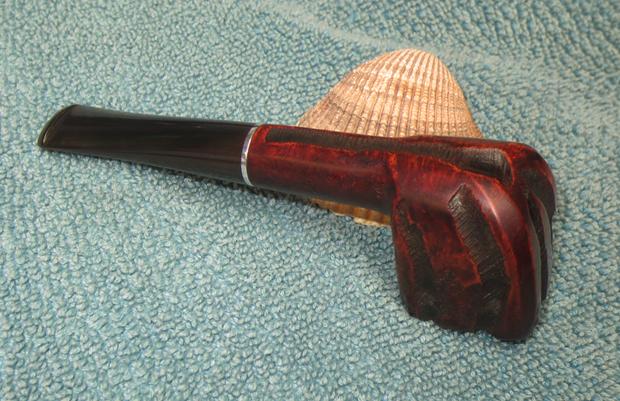
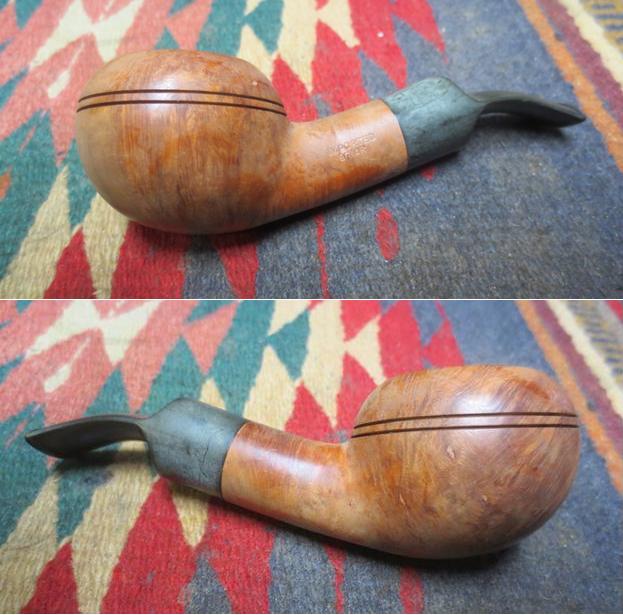
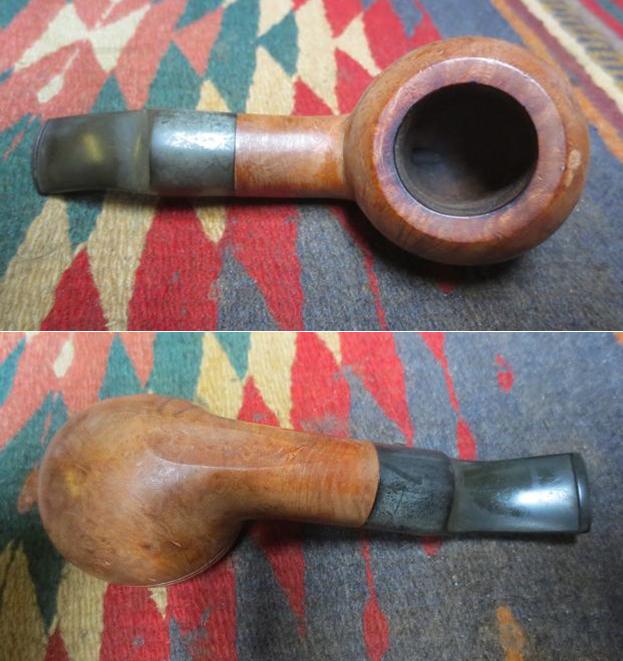
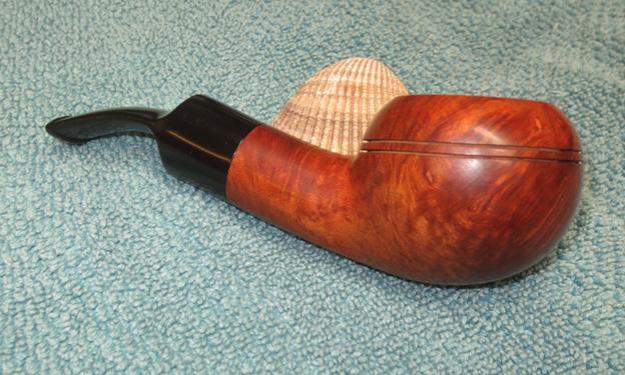
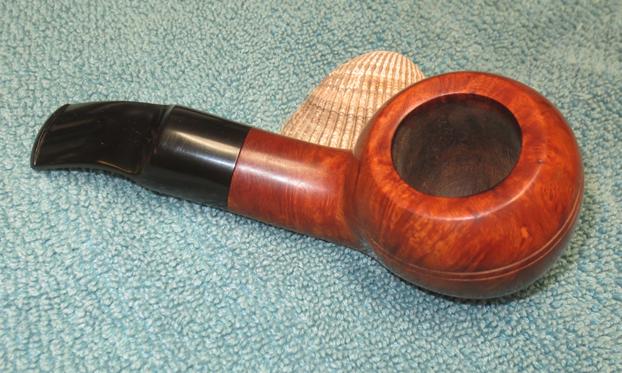
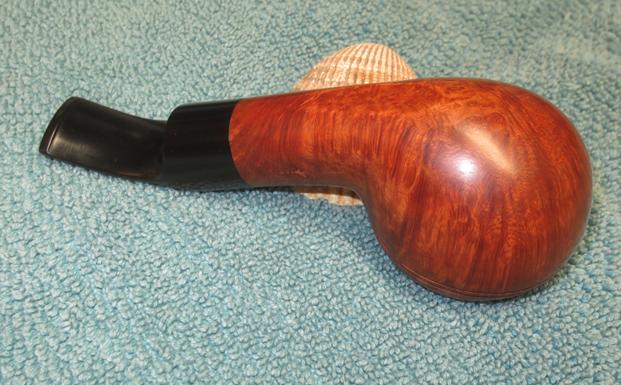
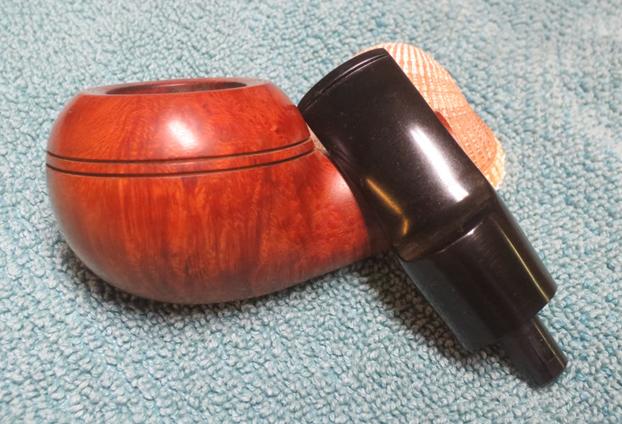
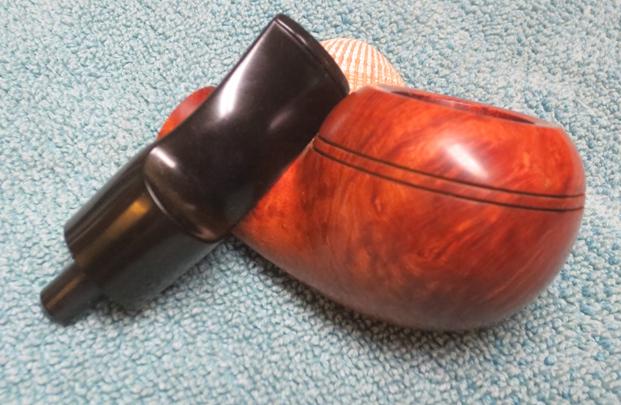
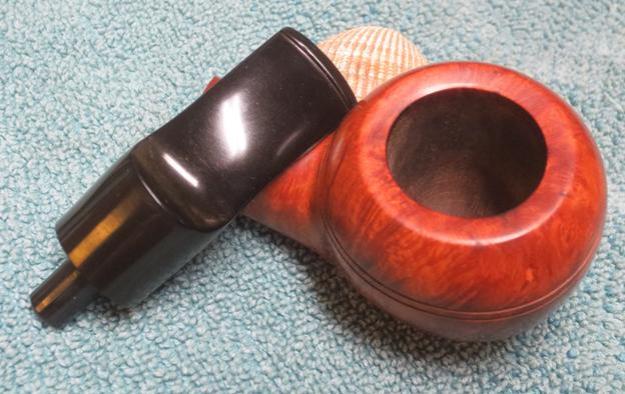
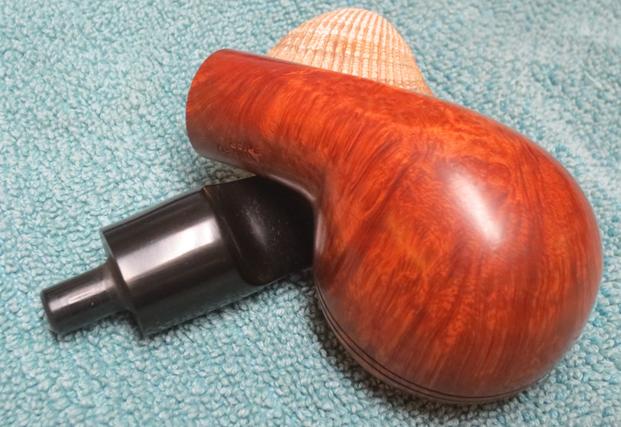
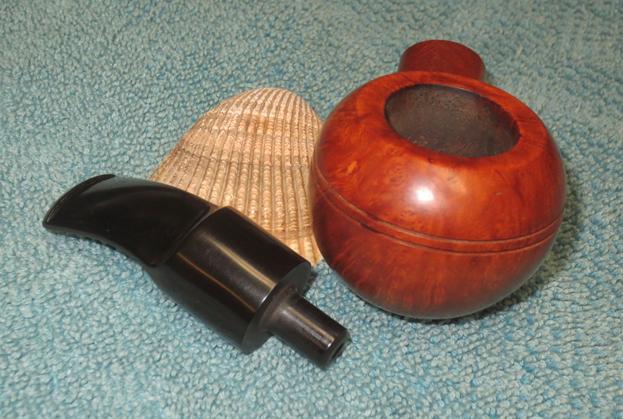
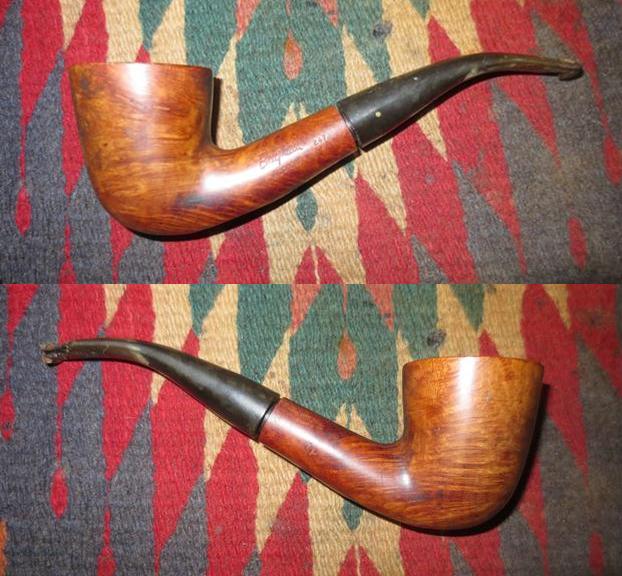
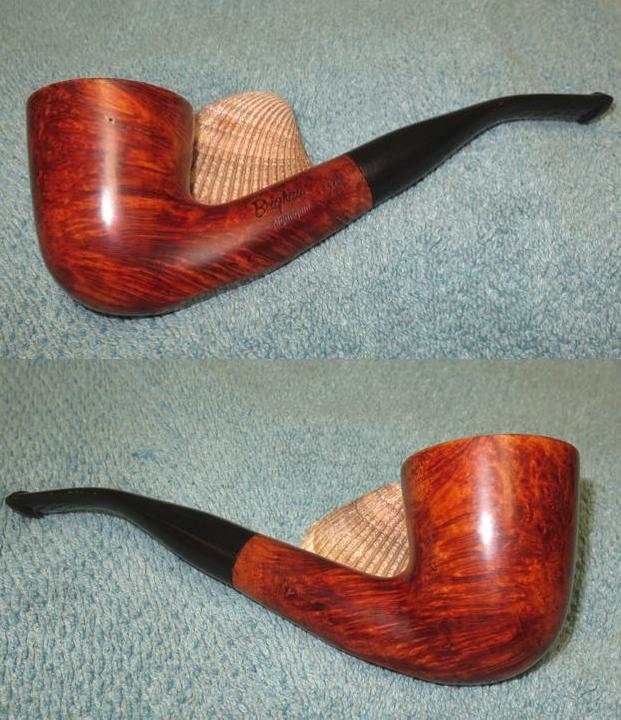
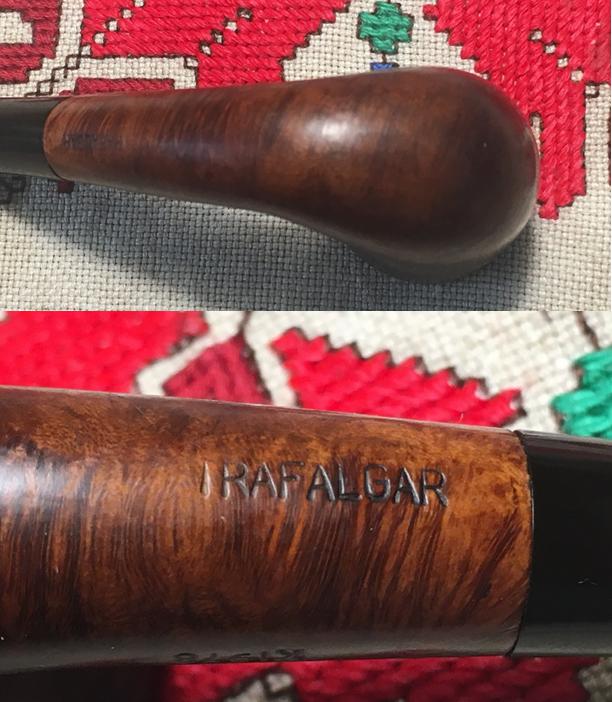
I’m calling this GBD Trafalgar a Calabash shape, and it’s been in my “Help me!” basket for some time. I saw it on the US eBay auction block and I liked the shape and the way the grain was positioned in shaping of the flowing Calabash stummel. From what I could make out from the few pictures the seller provided, the front and back of the bowl revealed horizontal straight grain. These grain veins terminate on each flank with distinctive bird’s eye. I liked it – I bid on it – and I was happy to bring it home to Sofia, Bulgaria, where it’s now on my work table. Here are a few pictures from the seller.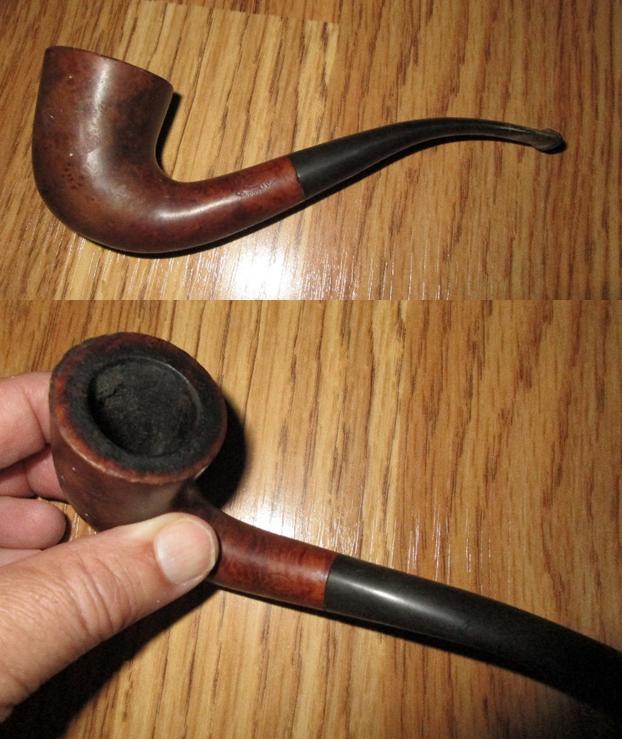
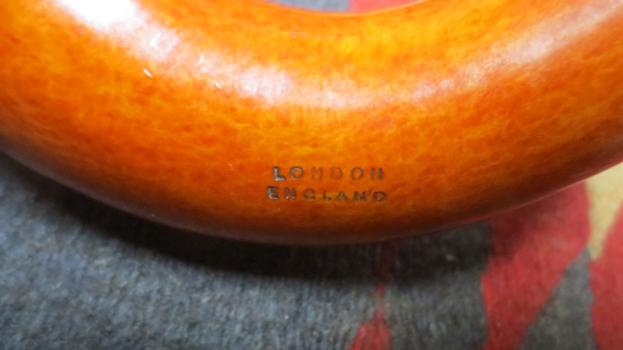
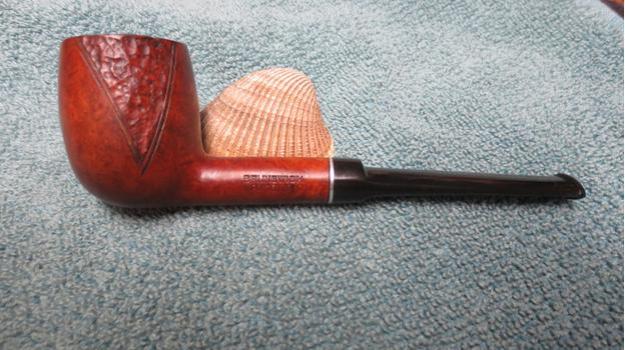
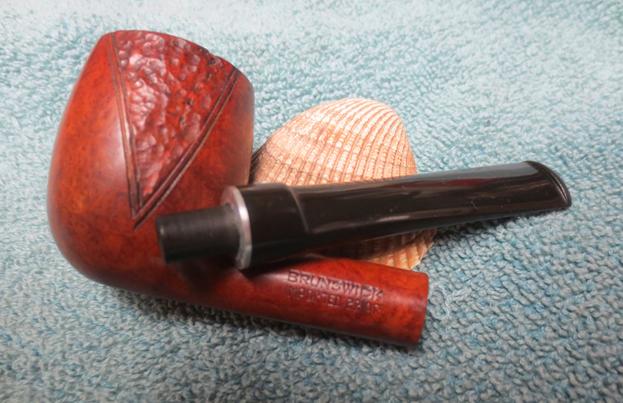
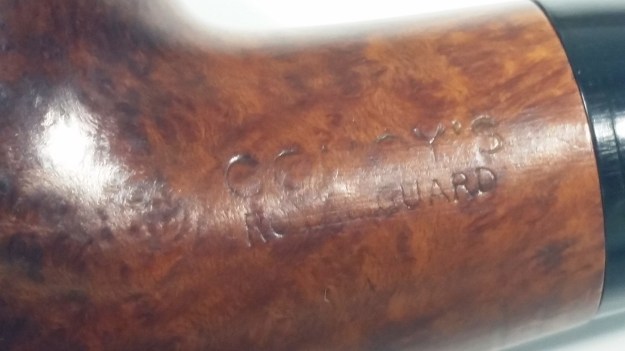
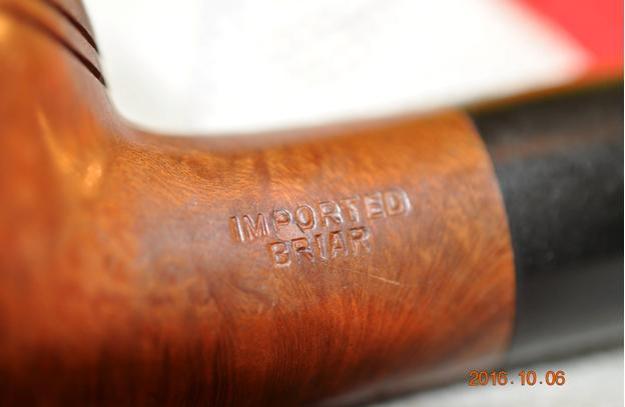
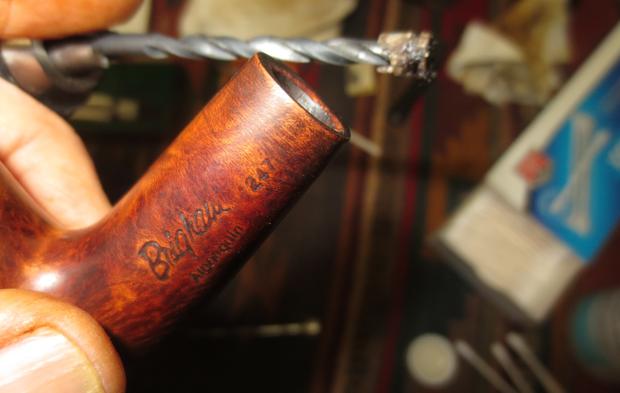
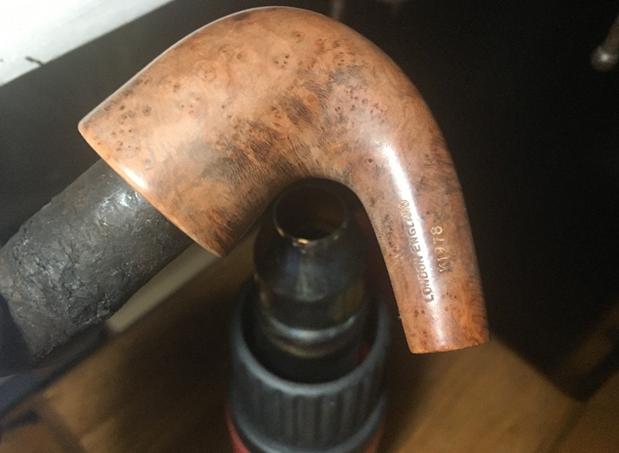
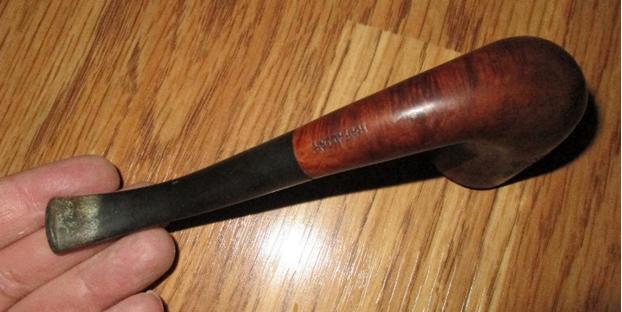 The markings on the Calabash on the left side of the shank show, “GBD” in the oval over “LondonMade” curved up. The right side of the shank shows, “LONDON ENGLAND” over what I’m assuming is the shape number “K1978” only I couldn’t find this shape number listed for GBD pipes. Under the shank is “TRAFALGAR”. GBD (Pipedia’s article on GBD), was the handshake enterprise started by three French ‘Master Pipemakers’, Ganneval, Bondier and Donninger in Paris in 1850 to manufacture Meerschaum pipes, which was the primary material used in manufacturing pipes along with clay, until the discovery of briar in Saint Claude, France, a discovery that changed the pipe manufacturing world. In 1902 Marechal and Ruchon sold GBD to A. Oppenheimer & Co. in London, which began the shift of GBD to being primarily a British enterprise, even though GBD pipes continued to be produced in Paris and Saint Claude, until 1981, with the closing of the French operation when the name, GBD, was merged with the Cadogan Group. I enjoy rehearsing the historical developments of pipe names and companies because they add to the enjoyment and appreciation of restoring pipes.
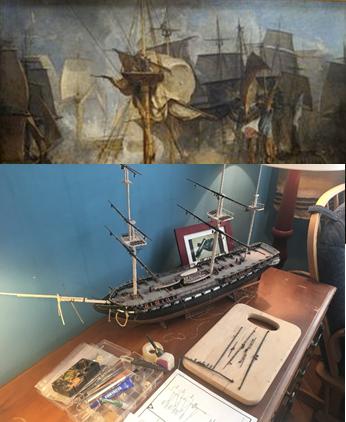 The history of the ‘Trafalgar Campaign’ (see LINK) and what it would suggest I believe, is that this GBD pipe was manufactured and distributed across the channel in England, as the stampings indicate. This is not always the case from my research on GBD. Often, GBD pipes were manufactured in France, shipped to the UK, where they would be stamped “London Made” – or so my reading has indicated. Yet, with the stamping of Trafalgar, my guess is that this GBD was manufactured in UK. In 1805, ‘Trafalgar’ was the final battle engagement between the combined French and Spanish fleets and the Royal Navy to defeat Napoleon’s attempt to gain control of the English Channel, the first phase in his ultimate plan to invade England with his land forces. To the British, Trafalgar will be commemorated as a victory thwarting the French invasion. Fortunately, not too many years later, the economics of pipe manufacturing and the common love of pipe smoking, Brits would smoke French made pipes and the French, London made pipes. Yet, I doubt if one will find this GBD Trafalgar London Made in the rotation of a Frenchman or Frenchwomen today! I was anxious to integrate the Battle of Trafalgar into this restoration because of my love of tall ships. Pictured is another of my hobbies in the same room as my pipe restoration work desk, a long-time project building the USS Constitution, now proudly anchored in Boston Harbor!
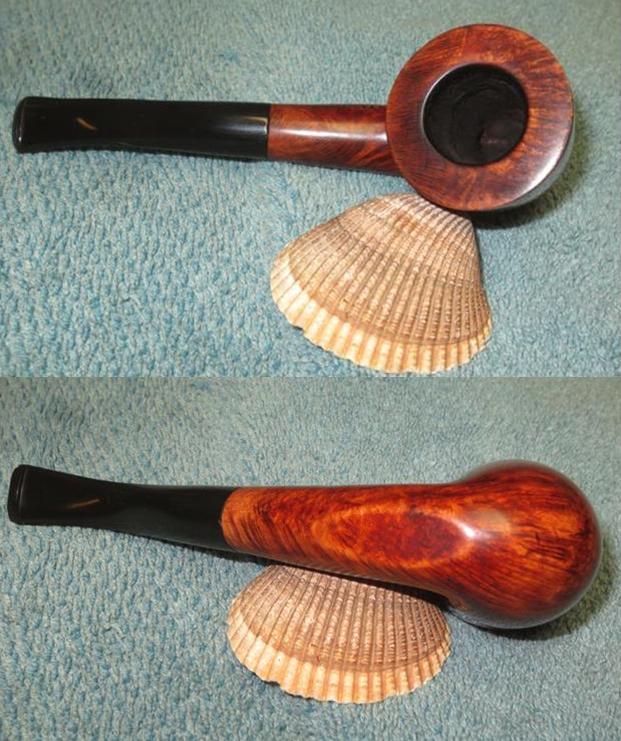
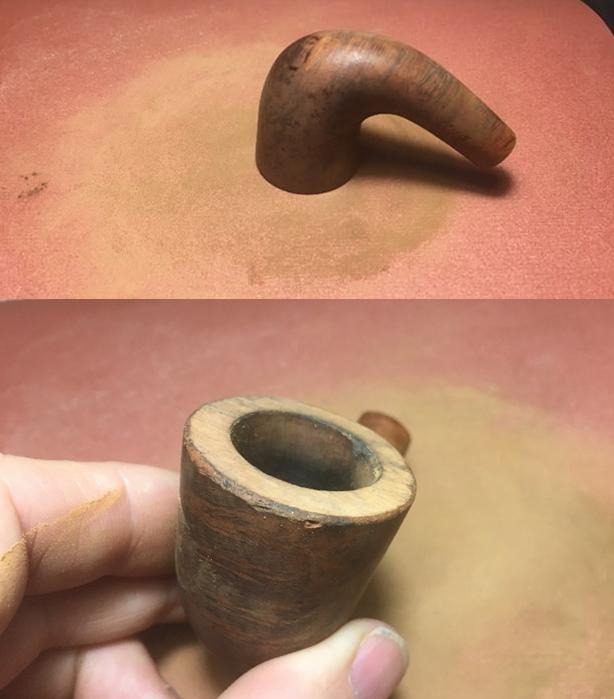
With a greater appreciation of this GBD’s history and name, I look more closely at the pipe itself and take more pictures on my work desk to look more closely and to fill in the gaps.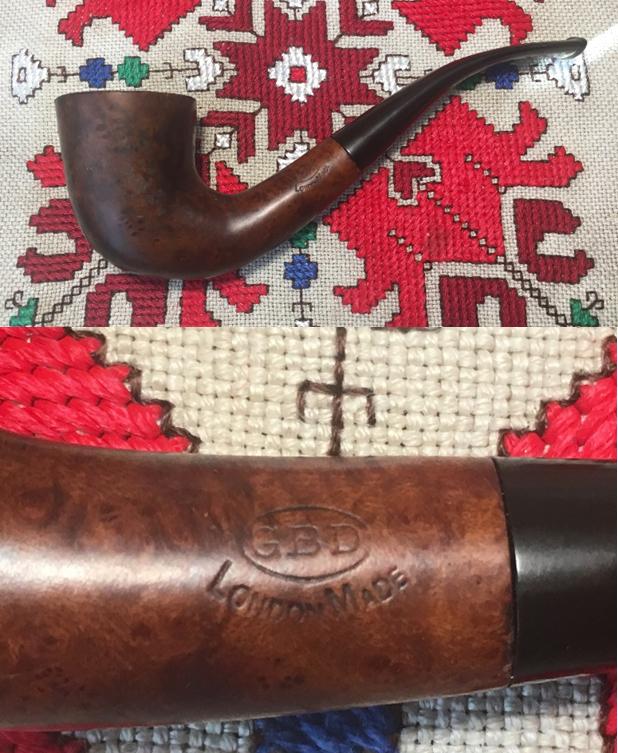

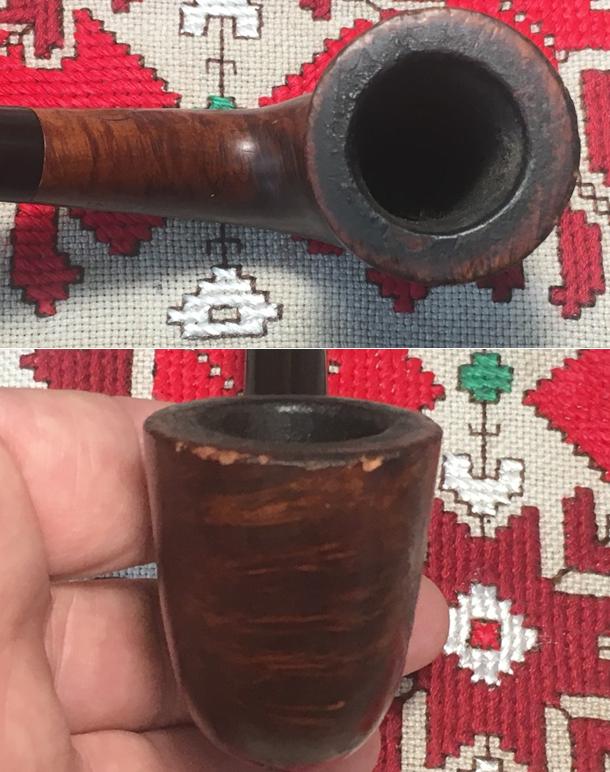
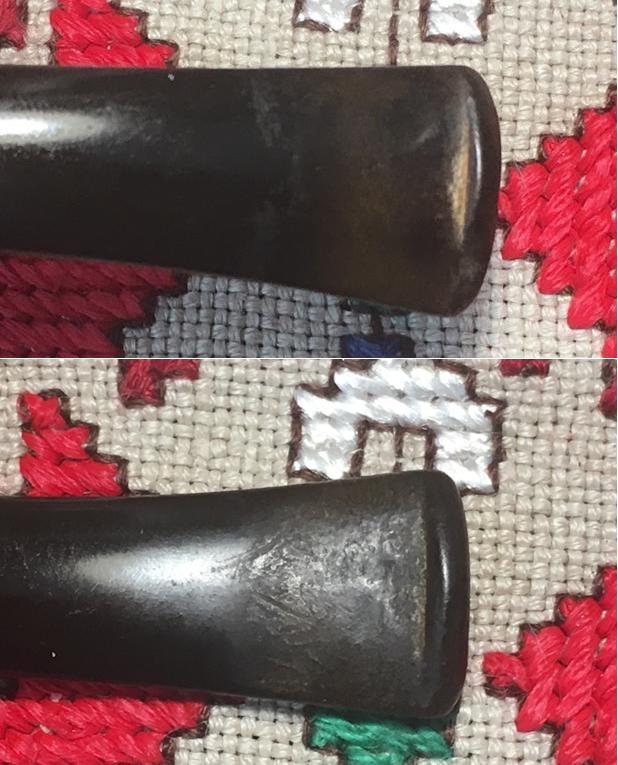
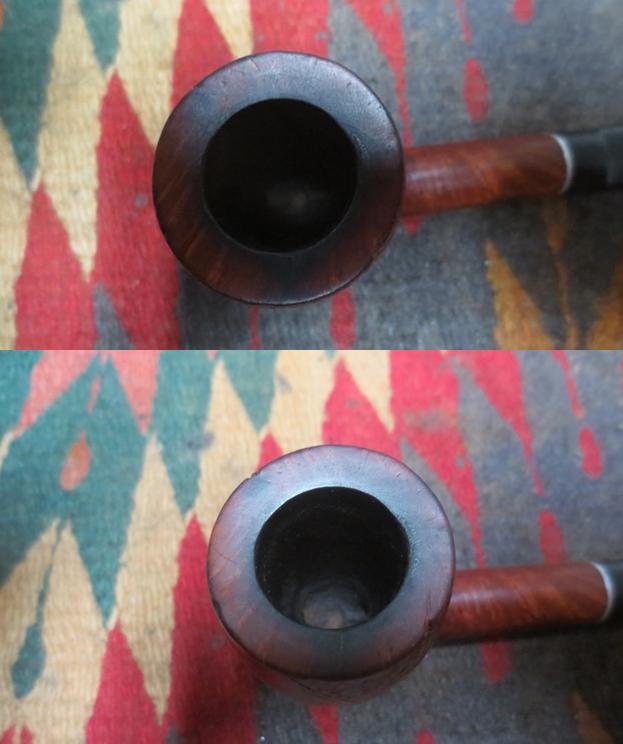
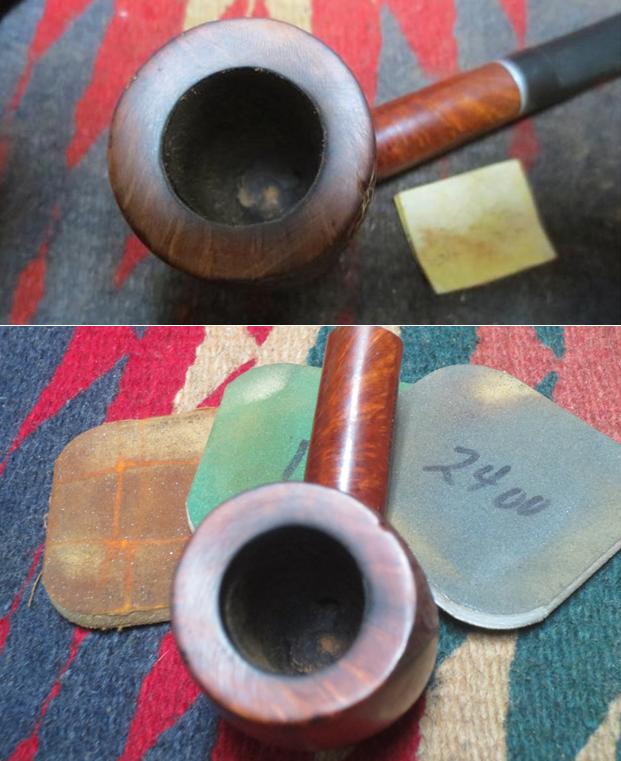
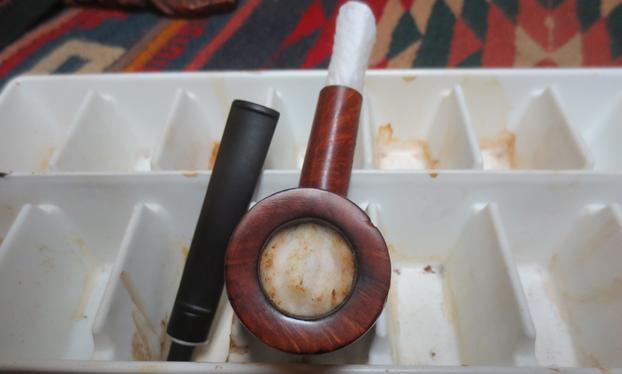
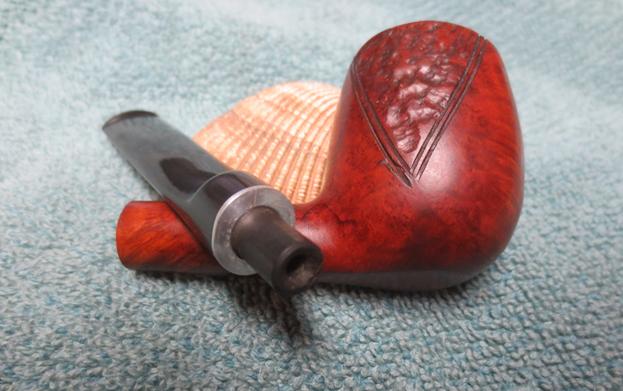
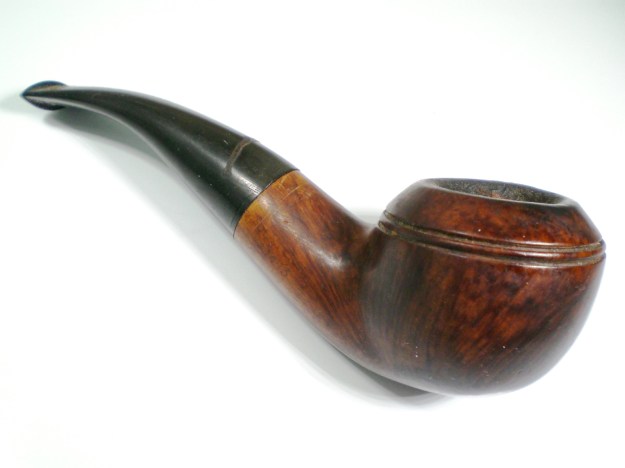
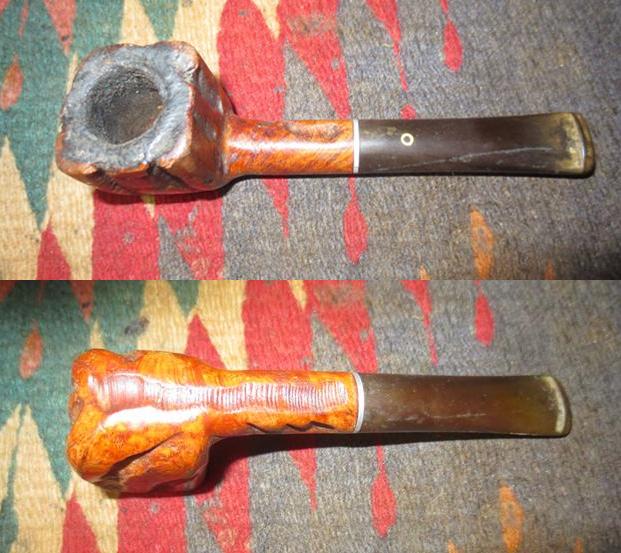
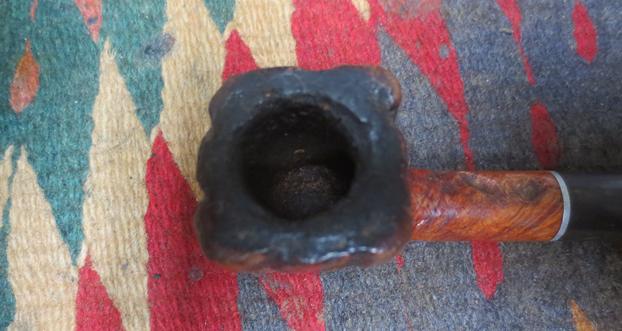
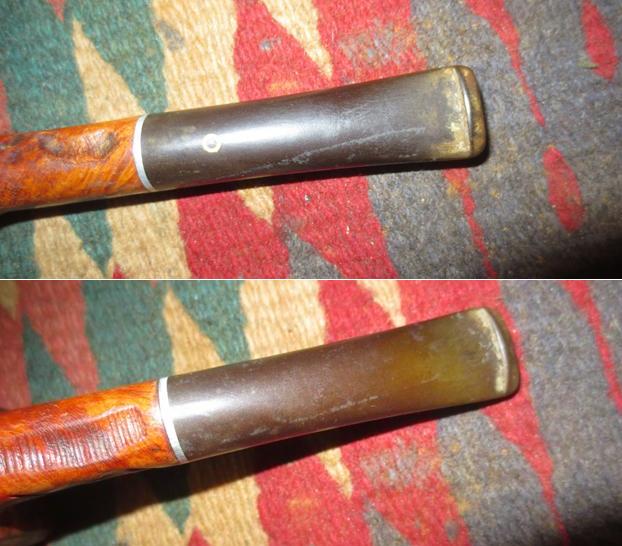
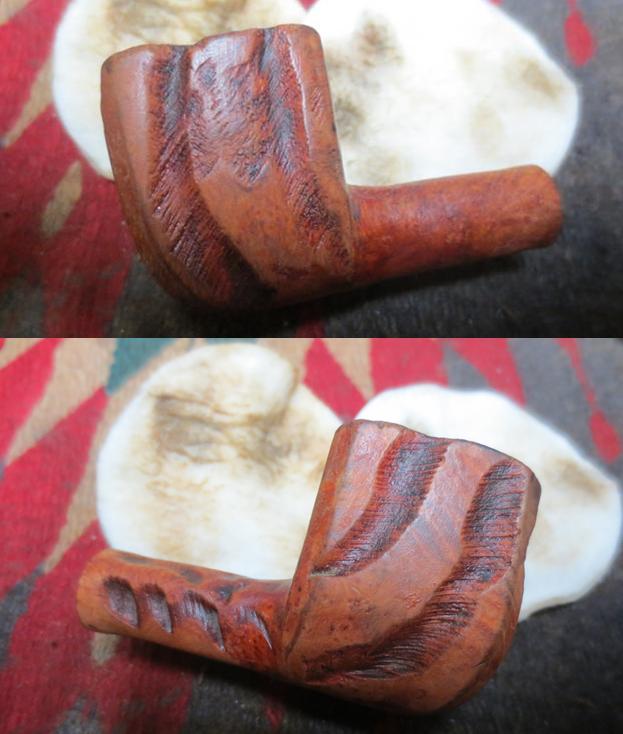
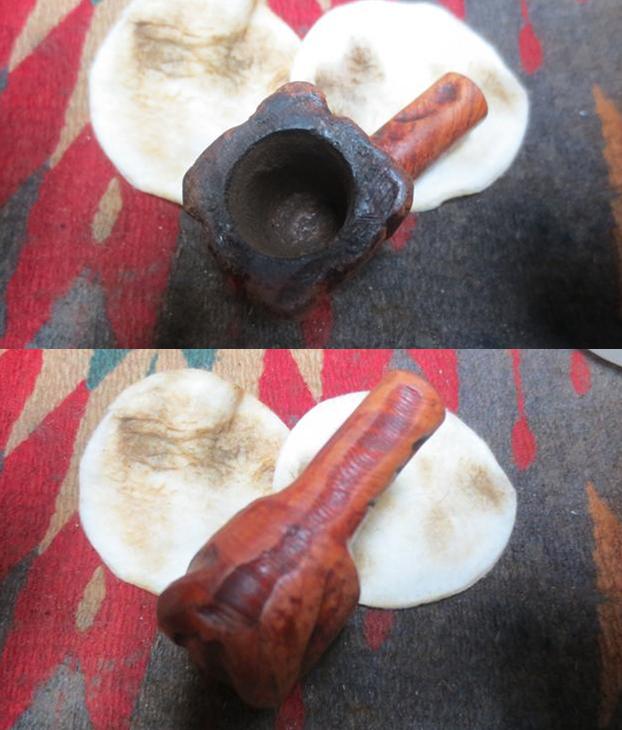
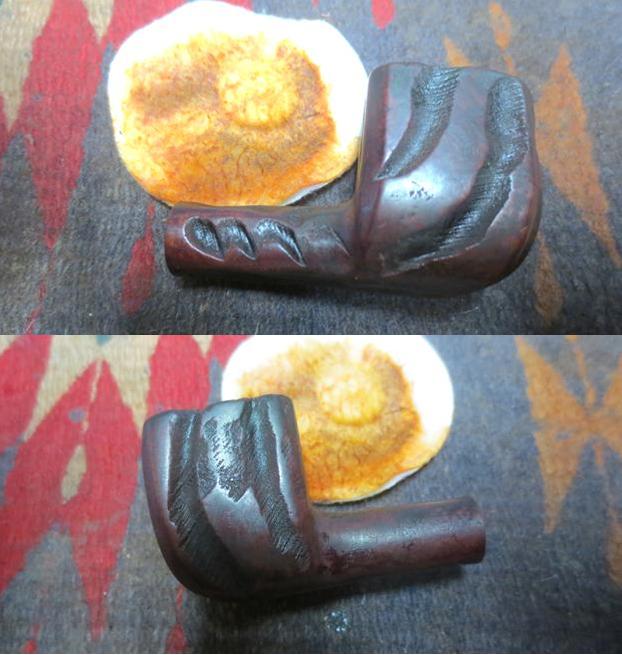
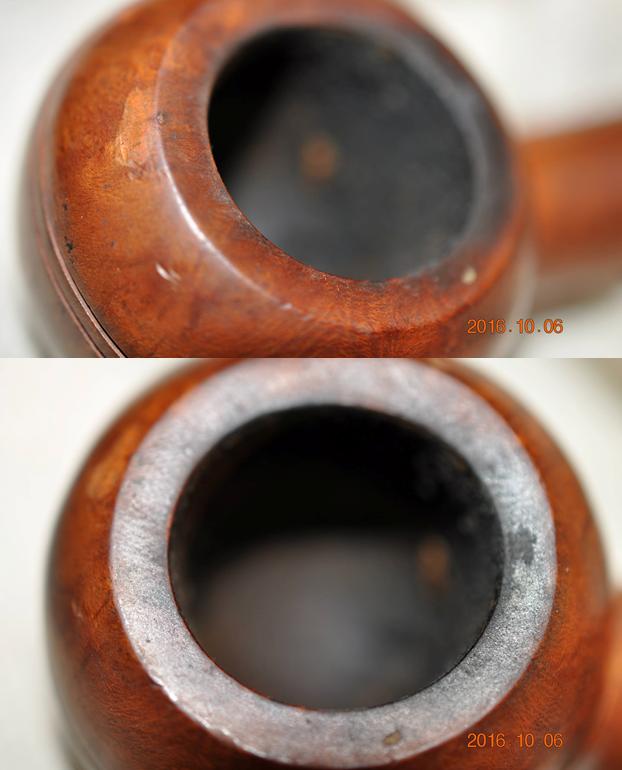
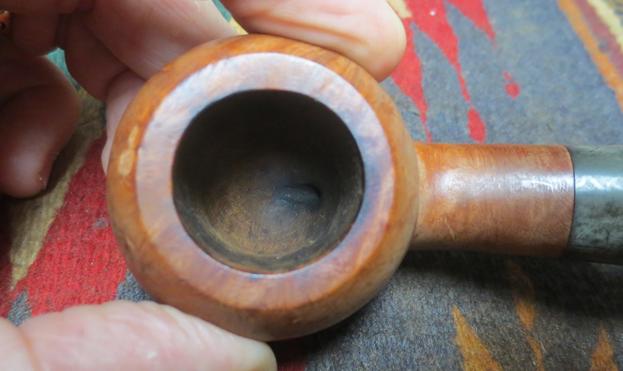
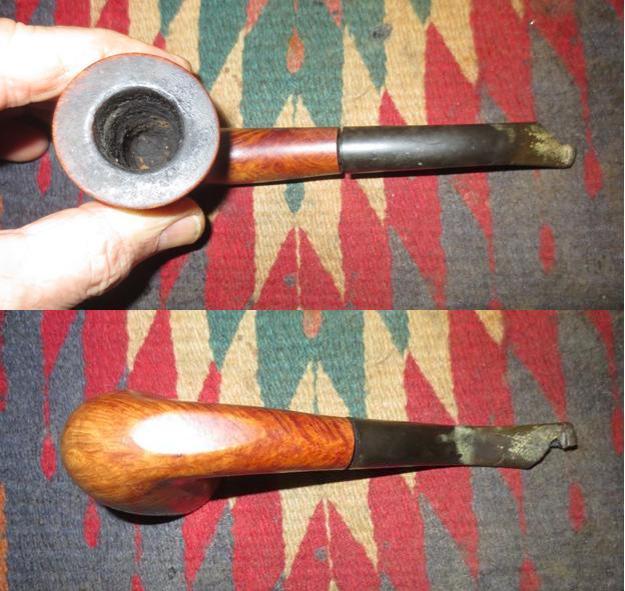
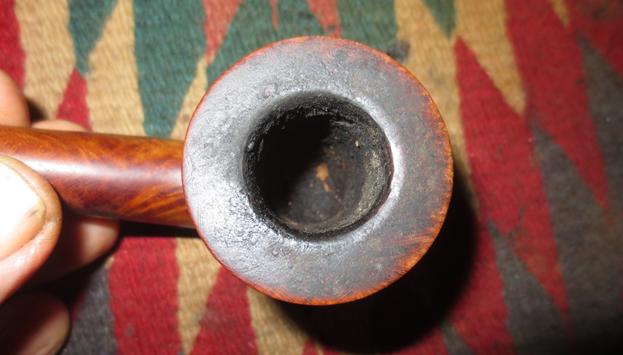
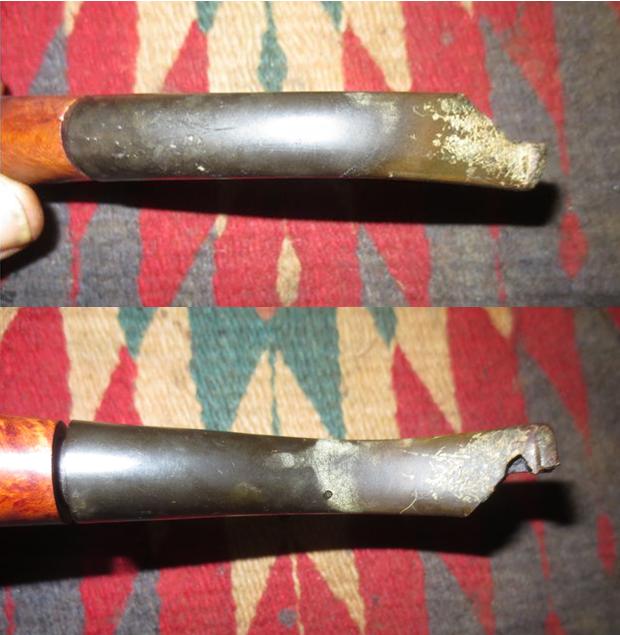
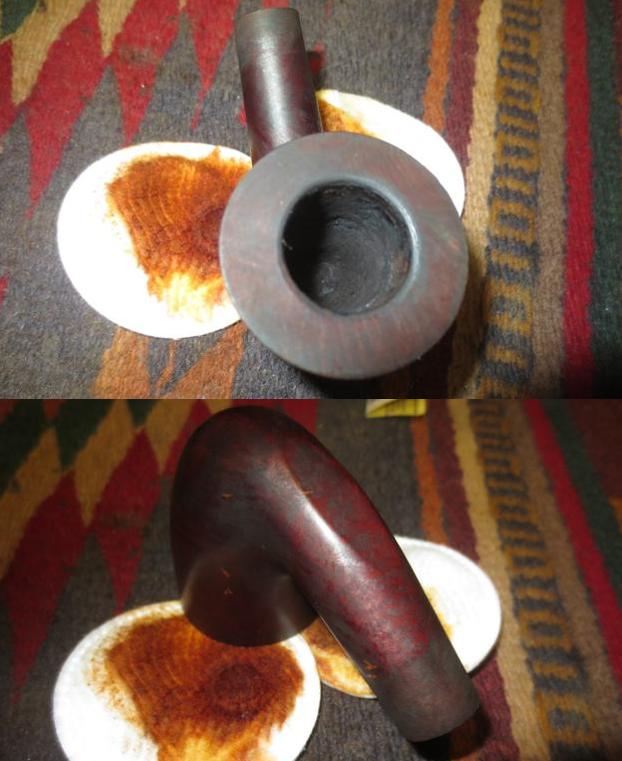
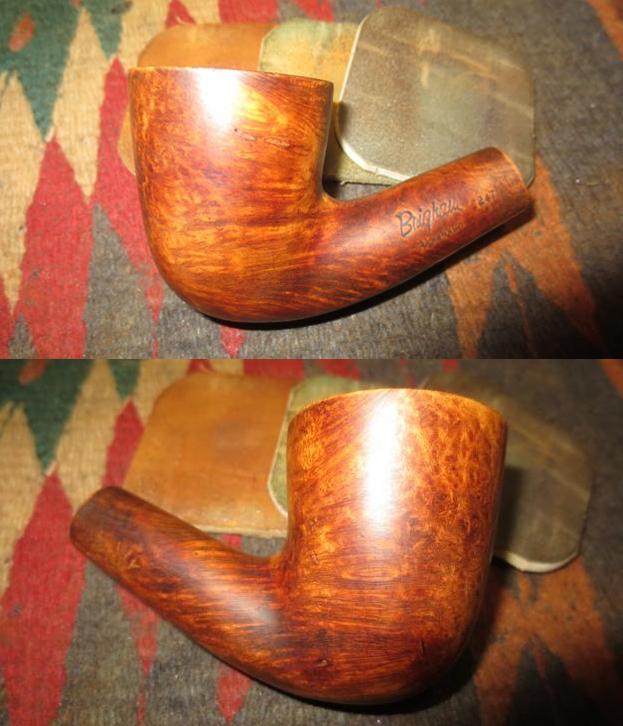
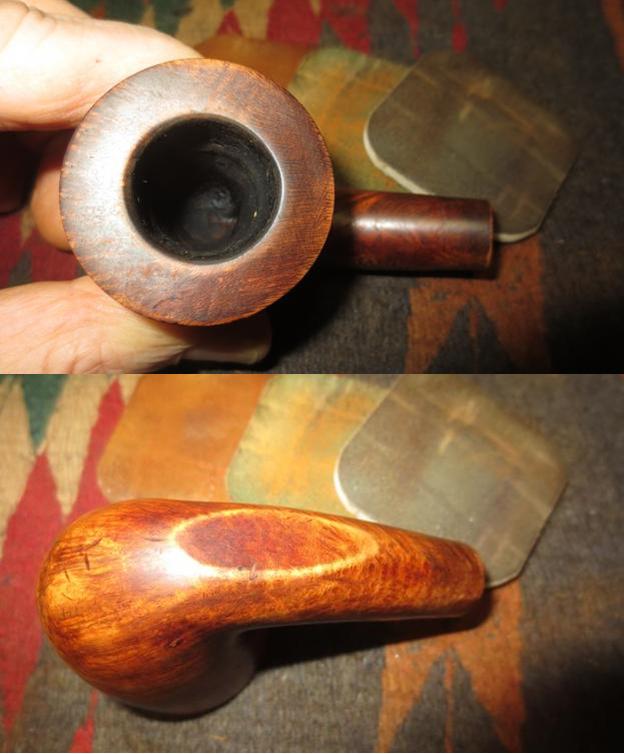
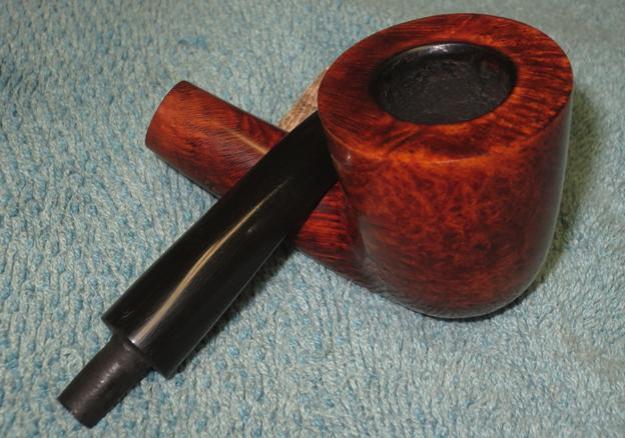
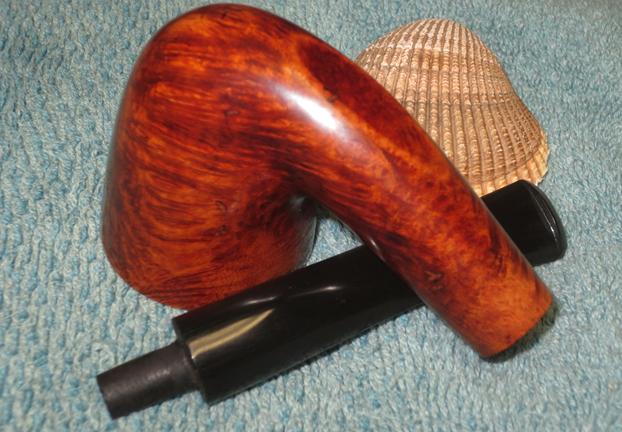
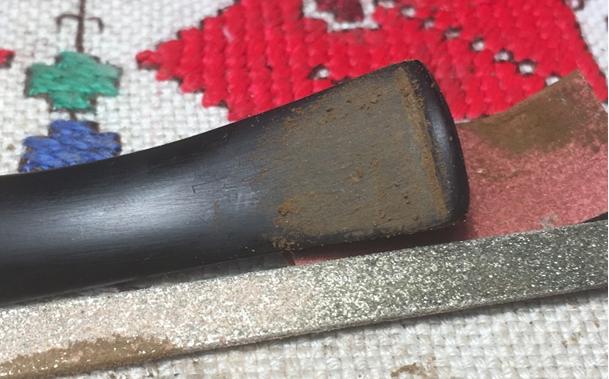
 Looking closer and assessing areas of need, the chamber has a light carbon cake, and the rim is nicked up significantly on the front outer lip and the lava flow of oils and grime need attention. The finish on the stummel is dark and cloudy. Oxidation on the stem is minimal but there are tooth dents on the bit, and the upper button lip has a clenching dent that will need attention. Everything seemed straight-forward until my index finger detected a ridge where there shouldn’t be one. I hadn’t seen it before (and I checked the eBay pictures and it wasn’t shown by the seller 😦 as sometimes is the case), but my index finger revealed what appears to be an impact fracture on the front heel of the stummel. My first reaction is to insert my pinky finger into the chamber to see if I could feel any reciprocating activity on the internal side. I feel nothing. I take pictures to focus in on the fracture from different angles. I use the sheen of the overhead lamp to see more clearly the little disaster now before me. On the last picture below, I circled the only good news I can see at this point. My forensic hypothesis assessing the scene of the crime: This piece of briar surface is what I assume is the impact point on a hard, unsuspecting surface. The curvature of the stummel would have been abruptly flattened upon impact, and the expansion of this piece of impacted briar would have pushed out and then up, much like convergent tectonic plates in the earth’s surface. The good news? This small piece of briar is still attached to the stummel, though it appears the attachment may be tenuous. The last two pictures below I placed arrows pointing to the terminus points of the trauma cracks which will most likely grow without intervention – what I thought would be a fairly slam dunk restore! The pictures show the new challenge and opportunity to expand my skills!

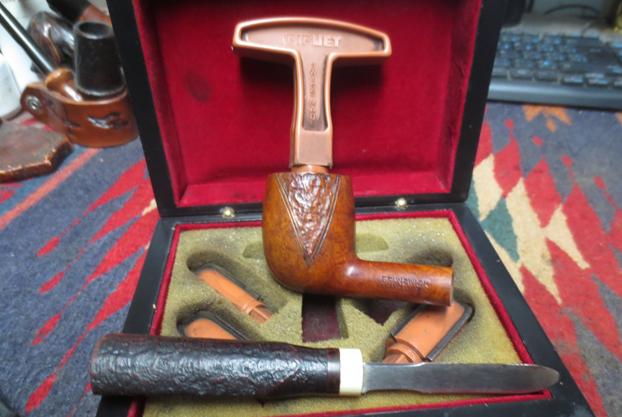
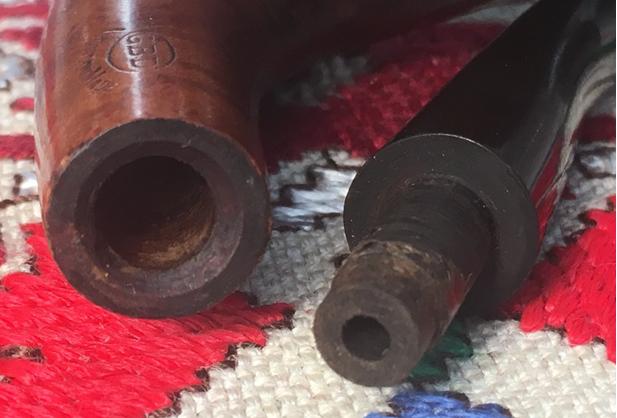
 To recommission this GBD Trafalgar London Made Calabash, after inserting a pipe cleaner in the stem, I plop the stem in the Oxi-Clean bath to address the minor oxidation mainly in the bit area. Cleaning the stummel is the next order of business. Using the Pipnet Reaming Kit, after putting paper down on the work surface, I take out the smallest blade to use, but after eyeballing the angle of the chamber, the Calabash’s conical fire chamber is too tight to allow even the smallest blade to fit down to the lower area.
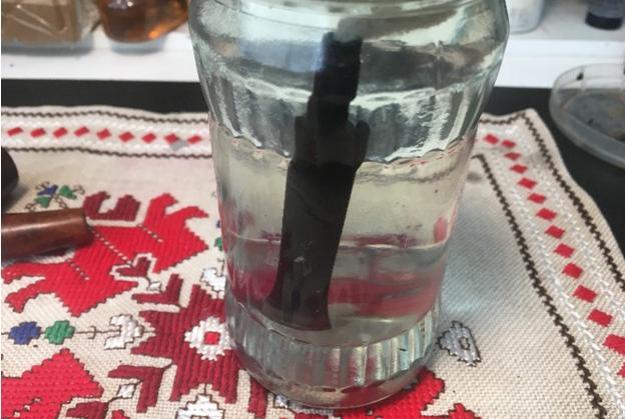
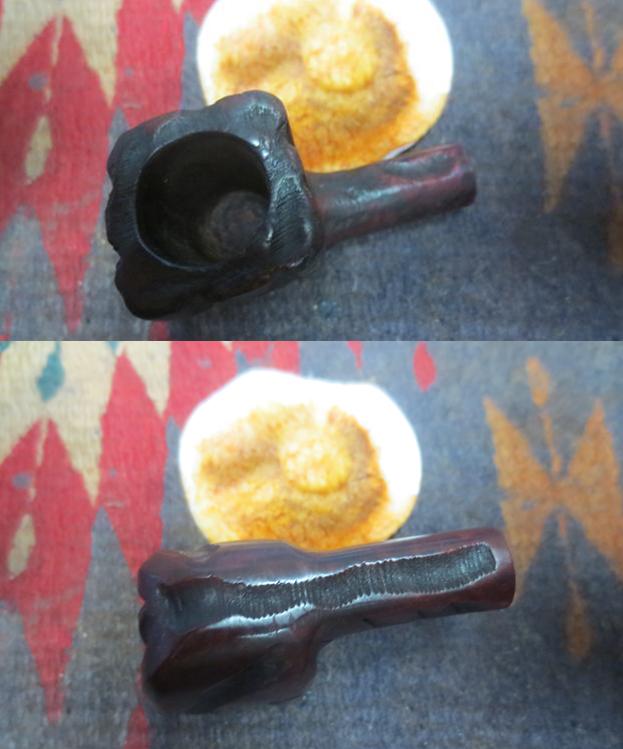
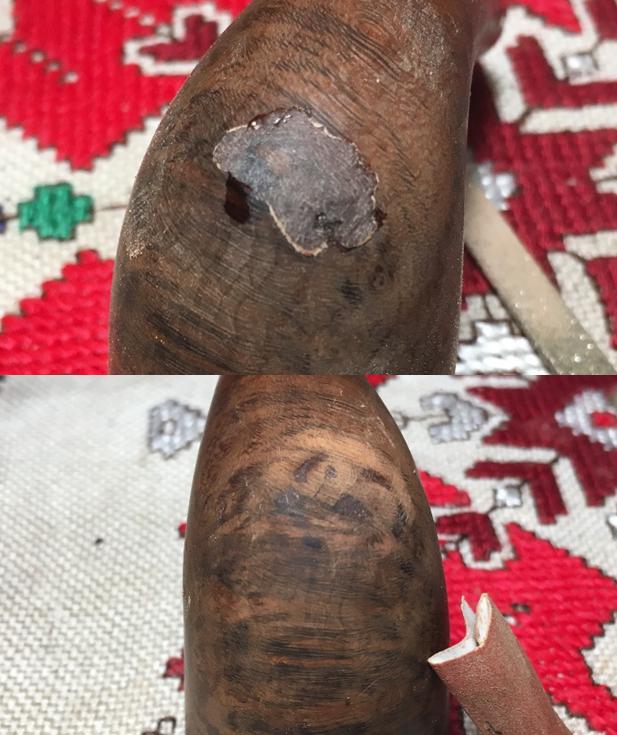
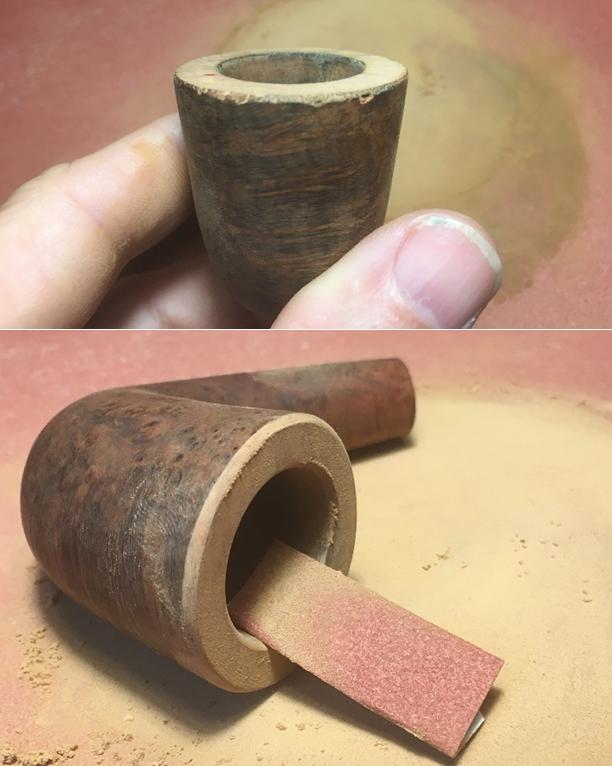
 Switching to the Savinelli Pipe Knife, I remove the light carbon build up down to the briar for a fresh start. As often proves to be the case, as I proceeded with the reaming of the chamber, working the Savinelli Pipe Knife down into the foot of the chamber around the draft hole, the reality of the thinning of the briar was fully revealed. The small piece of briar that was hanging on, on the external side, was dislodged, resulting in a hole through the stummel. Technically, I think this is a burn through, as there is a hint of darkening of the briar indicating the heat. As I’ve seen in other restorations, especially with the narrower drilled fire chambers, the briar at the floor of the chamber wears away with excessive reaming and digging and with time, the briar thins. After I salvage the dislodged piece of briar, not hopeful that it will be part of the solution, I take a couple pictures to record the break-through and continue cleaning the chamber.

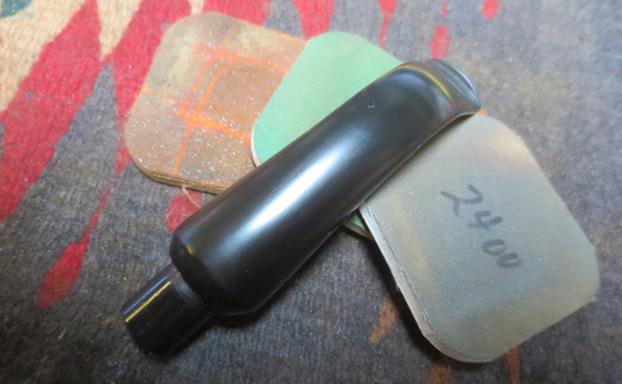
When I finished reaming with the Savinelli knife, I use a coarser, 120 grit paper wrapped around a Sharpie Pen to clean further the carbon, especially the floor of the chamber where repairs will be made. I then follow with 240 grit paper and finally, I wipe the chamber with a cotton pad wetted with alcohol to deal with the residue dust. The pictures show the progress.
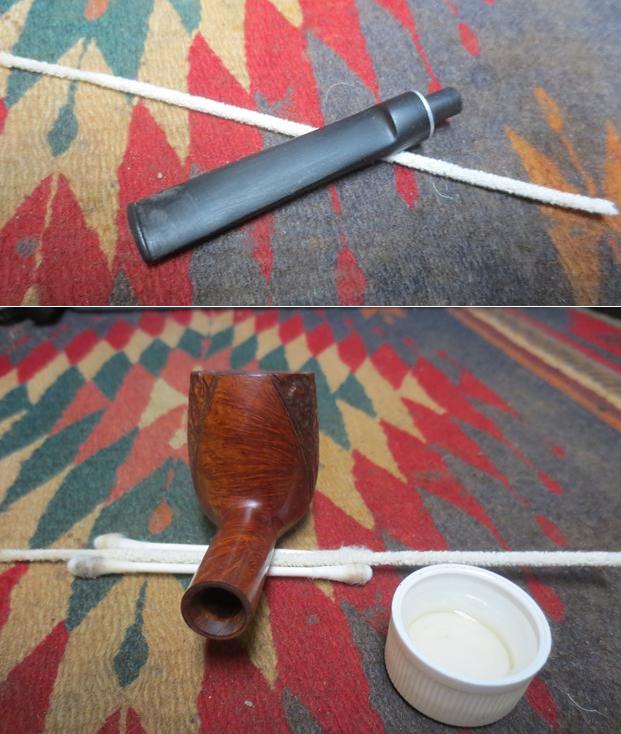
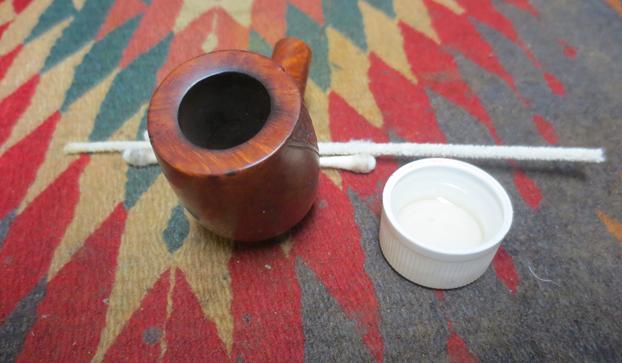
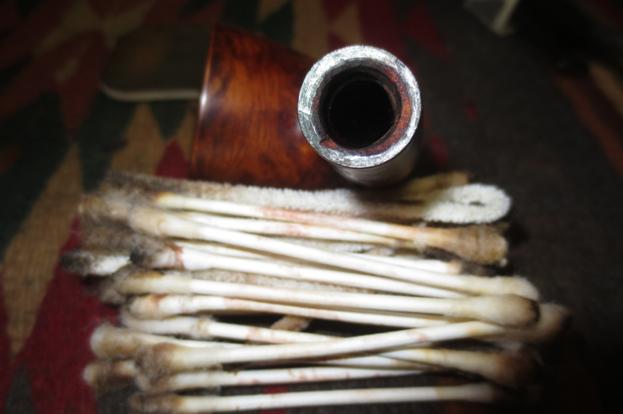
 Continuing the cleaning process, I take pipe cleaners and cotton swabs and work on the internals of the stummel. After some effort, the internals are coming clean.
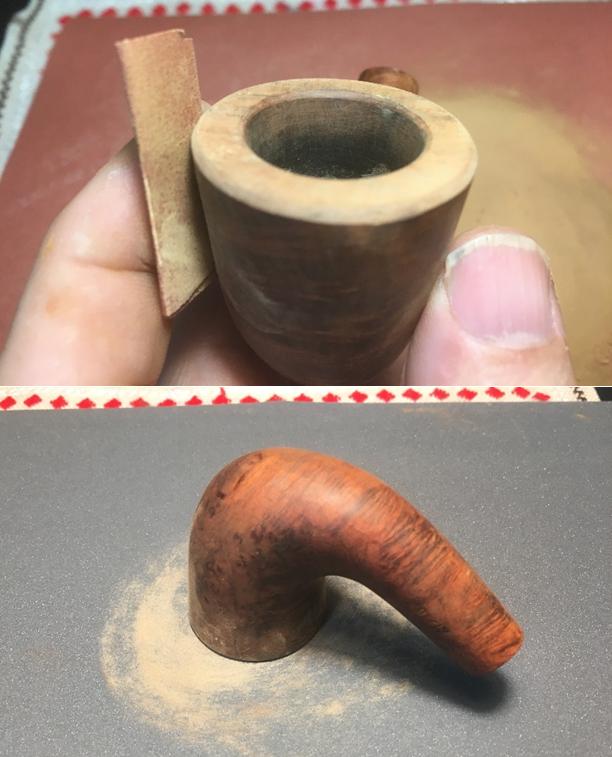
  With the internal cleaning complete, I look to the external surface. To address the grime on the rim and stummel I use undiluted Murphy’s Soap with a cotton pad to scrub the surface. I also use a brass bristled brush to clean the rim and a bristled tooth brush for general stummel cleaning. On the back side of the rim, I also use my straight knife blade to scrape the carbon off the surface. After completing the clean-up of the rim, it is apparent that I will still need to top the stummel a small amount to remove the damage to front ‘bumper’ of the rim. Pictures show the progress.
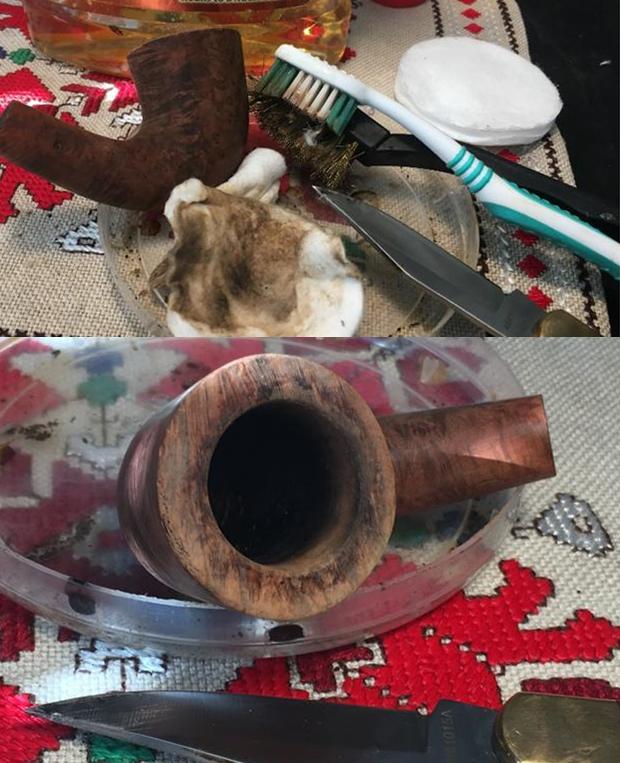
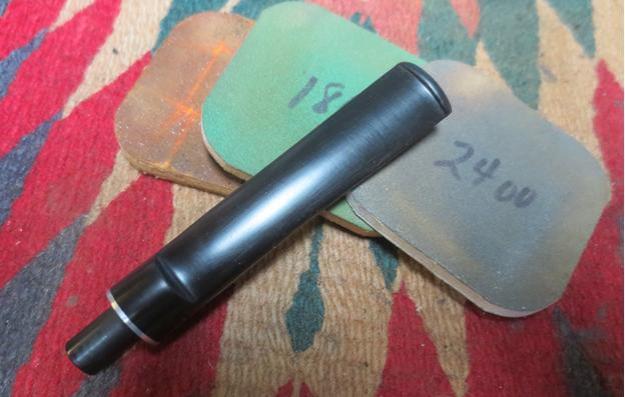
 I’m thinking about the stummel hole repair before me while I methodically move through the normal phases of the restoration until I come to the point of focusing on the needed repair. The plan forming is that I need to build up the floor of the chamber to the entry of the draft hole. This will reinforce the entire base of the stummel for a long time. I’ll use JB Weld to do this build-up, a product and method that I learned from Charles Lemon, at Dad’s Pipes. Yet, before doing the floor buildup, I will do the repairs on the cracks and hole in the stummel. My thinking is that this order of repair is better so that the hole fill, instead of being built on the chamber floor rebuild, will instead be reinforced by it. Or, so my thinking goes! I’ll let the plan cook a little longer and I put the stummel aside and fish the stem out of the Oxi-Clean bath. Using the plastic disc I fabricated to protect against shoulder rounding, I remount the stem and stummel with the disc in between. Using 600 grit paper, I wet sand the stem to remove the oxidation – working on the bit – button area also to remove tooth chatter and dents. Following this, I use 0000 steel wool to buff further the stem and to rid it of oxidation. I move directly to cleaning the internal airway with pipe cleaners dipped in isopropyl 95%. I also use a sharp dental probe to scrape the slot area pulling out some gunk. Without too much resistance, the stem internals are clean. The pictures show the stem progress.
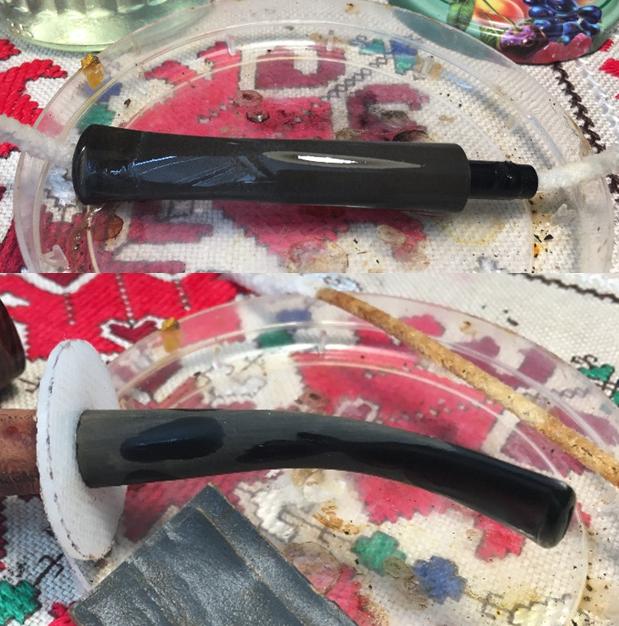
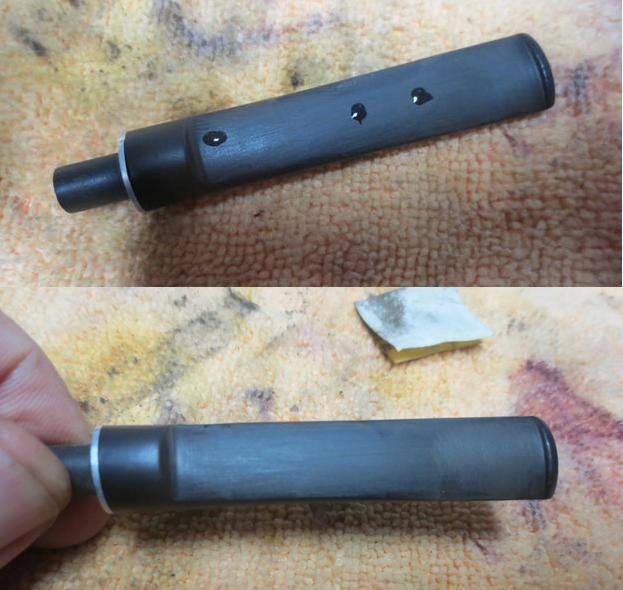
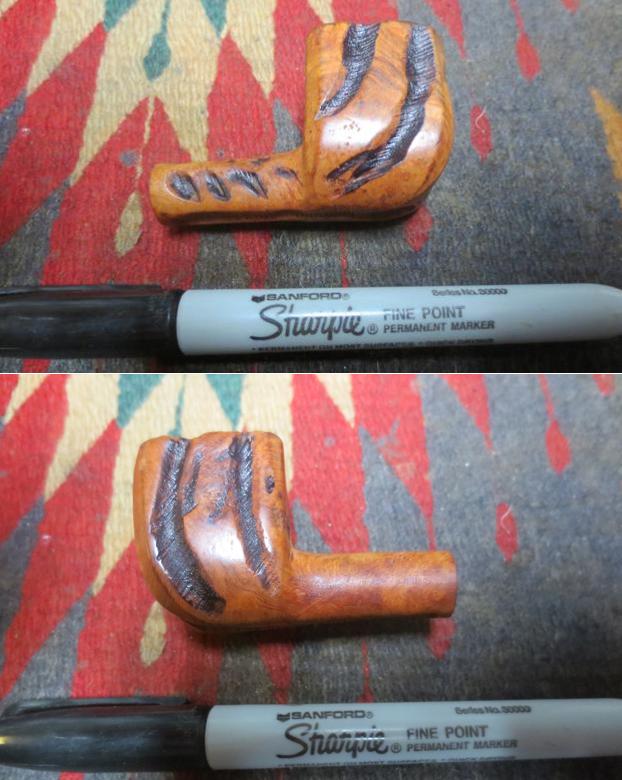
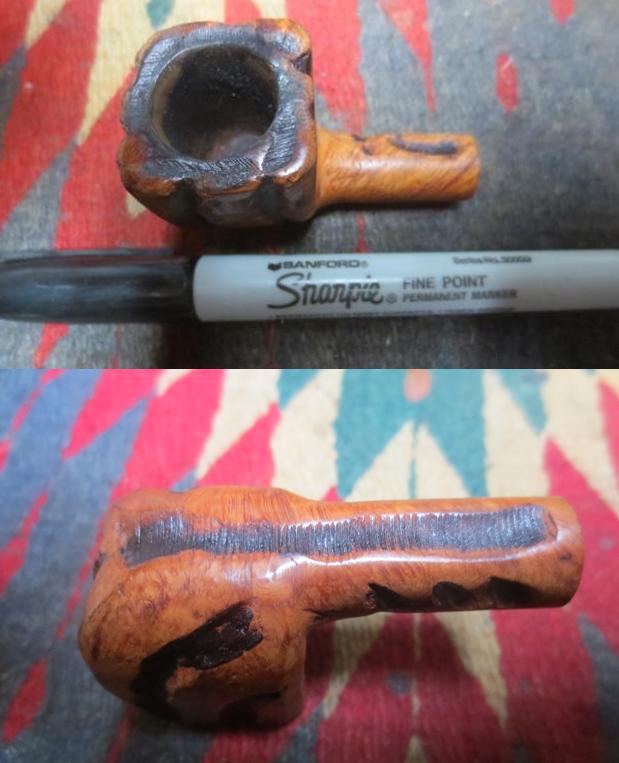
 Again I turn my attention to the stummel arriving at the moment of truth. I need to address the crack repair by drilling small holes at the terminus points of the cracks to keep the cracks from creeping – like a controlled fire set in a forest fire to stop its progress. I take another closeup of the area and with the help of a magnifying glass, I identify where the ends of the two major cracks are with arrows. The second picture, shows where I made a mark – where I will place counter-holes. I add one at the bottom-left because with the laterally grain movement, I can easily imagine a crack spidering out in that direction eventually. I use a 1mm drill bit and drill each hole. The pictures show the progress.
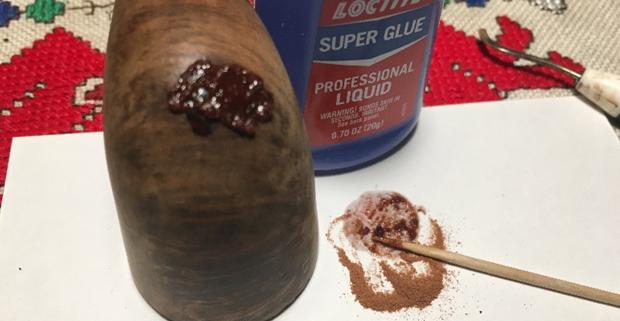
 Now, to patch the hole. I first clean the surface with a cotton pad and alcohol and I make sure the hole is free of debris and dust. I then spot drop thin Hot Stuff CA Glue on the cracks themselves to allow the thin glue to seep into the cracks. Before I mix the briar dust and super glue putty to fill the hole and the control holes I drilled, I need to create a backing on the inside of the chamber so that the putty will not simply push through the hole when applied. To do this I simply put a piece of masking tape inside over the hole as it comes through. I then mix briar dust and superglue with a toothpick to form a putty about the consistency of molasses. Using the toothpick as a trowel, I apply the putty liberally knowing that later, after it cures, I’ll be sanding it down to the surface and blending it. I put the stummel aside to cure overnight and I call it a day. The pictures show the patching process.
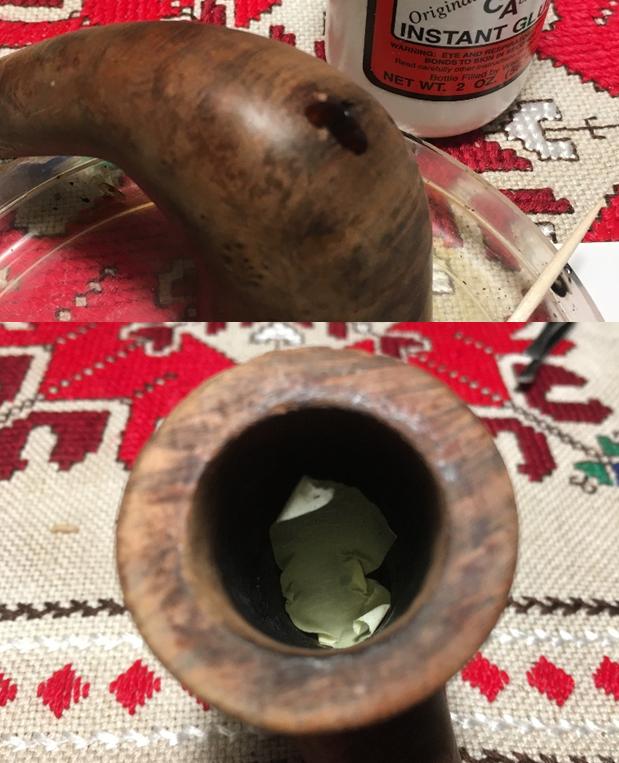
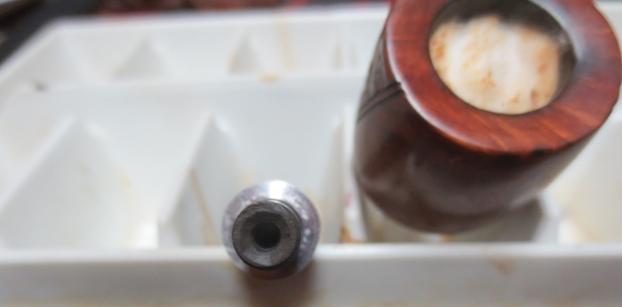
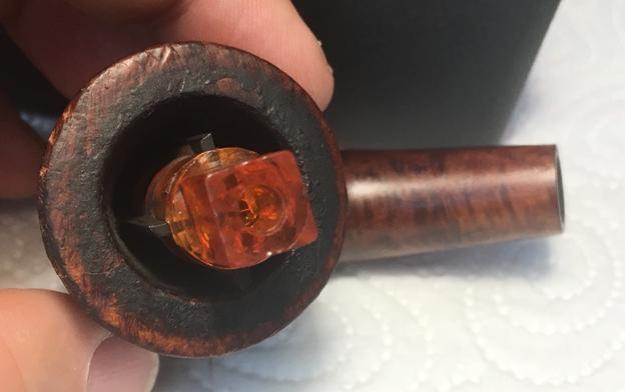
 The next day, I move directly to the chamber floor repair by building it up and reinforcing it with J-B Kwik Weld. This is my second go with JB Weld. The first was repairing a burn through with a petite horn shaped, Short Snorter. As I think about this repair, the challenge in my mind is how to deliver the JB Weld mixture directly to the floor of the chamber without smearing it where it’s not needed. This is where a couple of disposable popsicle sticks would come in handy, if I hand any. The idea that begins to shape up in my mind is to mix the JB Weld on an index card, when I’m ready to ‘pour’, I’ll create a cone with the index card, insert it into the chamber to the floor, and press out the JB Weld with my finger – I’ll put on a latex surgical glove that a medical team visiting us here in Bulgaria left behind. I’ll then shape the mixture evenly around the floor of the chamber. That’s the plan. I insert a pipe cleaner into the mortise and through the draft hole so that the JB Weld does not weld the airway shut. JB Kwik Weld comes in two parts – the ‘Steel’ and the ‘Hardener’ mixtures. The directions say to mix them equally and that one has about 4 minutes before the mixture sets. I take a picture of the setup and of the chamber with patched hole and pipe cleaner visible. I mix JB Weld at 50/50 (as close as I can tell) on an index card, roll it, insert it, and press it out – it was a bit messy, but mission accomplished. I set the stummel in an egg crate with it tilted forward, and let it cure. Pictures show the progress.
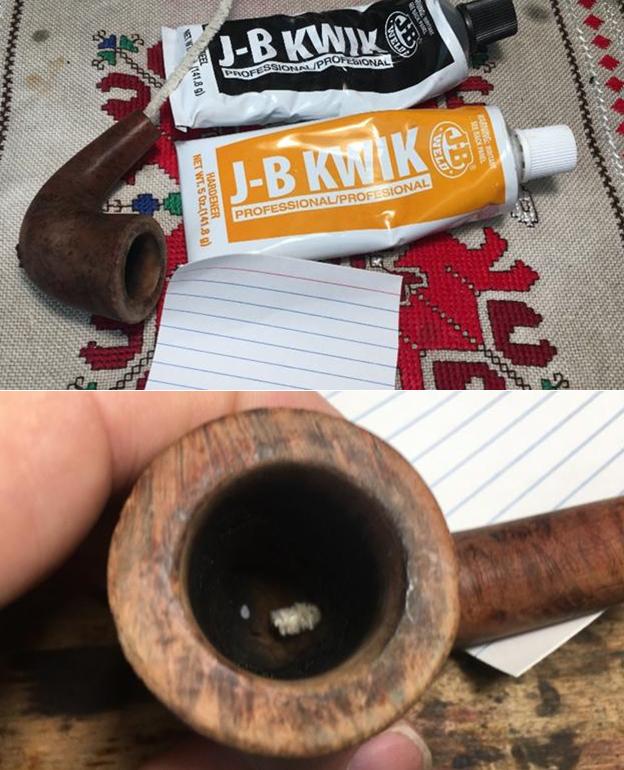
 Home from work, I’m ready to return to the stummel and continue working on the repairs. The internal chamber floor build up using JB Weld looks good and feels good as I put the pinky in and feel the contours. I look now to the external briar dust – superglue patch and I begin the process of removing the excess putty using a flat needle file. When I near being flush with the briar surface, I switch to using 240 grit paper to bring it down to the surface. At this point I gently bring the patch down to briar surface. I allow the paper to do the job without applying much pressure – I want as much briar to remain as possible. After I remove the excess putty, the patch is looking good and will not be difficult to blend with the native briar with a dark stain. I take pictures to show the progress.
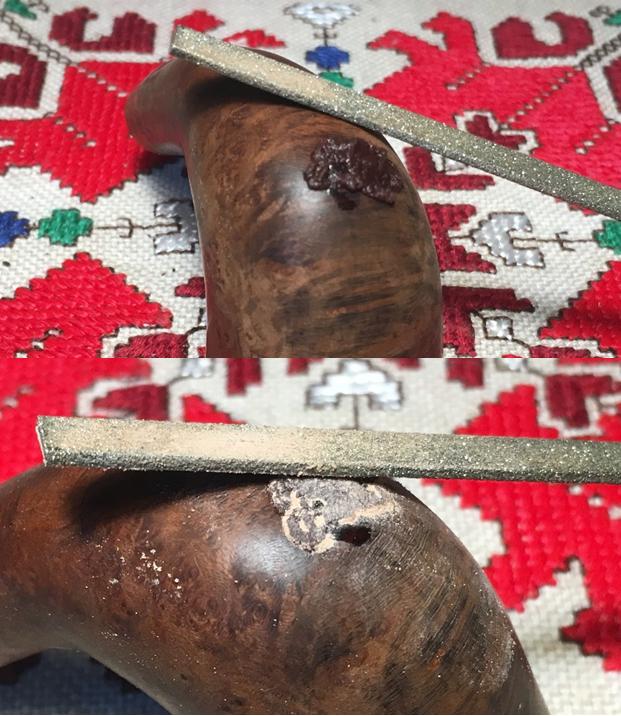
 I turn back to the internal chamber. I use a coarse 120 grit sanding paper wrapped around a Sharpie Pen to sand the chamber wall cleaning it up from JB Weld that adhered to the upper area of the chamber. Following the 120, I use 240 grit paper wrapped around a Sharpie Pen as well. With my finger, I feel the chamber and ridges are gone and it has smoothed nicely. The pictures show the progress.
 Looking more closely at the draft hole (above) I see a pointed hanger left over from JB Weld at the 2 o’clock position. To smooth this future pipe cleaner obstacle, I reach in with a rounded needle file and file off the pointed area and round off the entire draft hole area. The pictures show the before and after.

Before moving to the topping board, I remove all the old finish. I use a cotton cloth pad wetted with acetone and wipe down the stummel. It removes the old finish quickly. Pulling out the chopping board, my topping board, I place a sheet of 240 grit paper on it. I need only to remove enough briar to remove the damage/dents at the nose of the rim. I take a picture to mark the progress. I rotate the stummel evenly in a circle over the board checking the progress often. I take just enough briar off so that I can finish removing the damaged rim lip by introducing a gentle bevel. I do this with a rolled piece of 240 grit paper. This removes the damage and gives the rim a classier, softer look which I like. I do the same with the internal rim edge – I use 240 grit paper and create a gentle bevel. This, again, removes damaged rim and creates the contoured soft look. I follow by doing a very light, brief topping of the stummel on 600 grit paper, then follow with a rolled piece of 600 grit going over the external and internal bevel. It looks good – this briar Calabash is picking up momentum! The pictures show the progress from acetone to bevel.
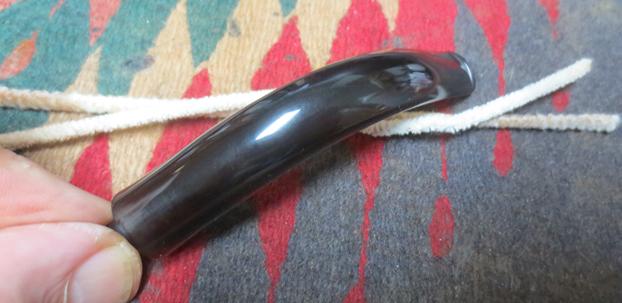
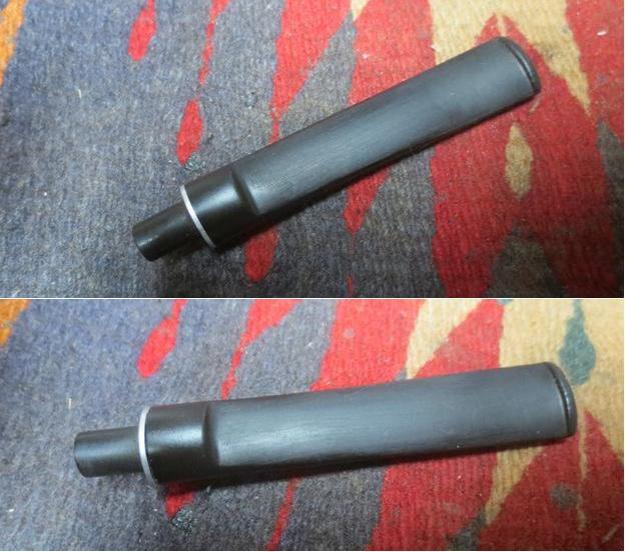
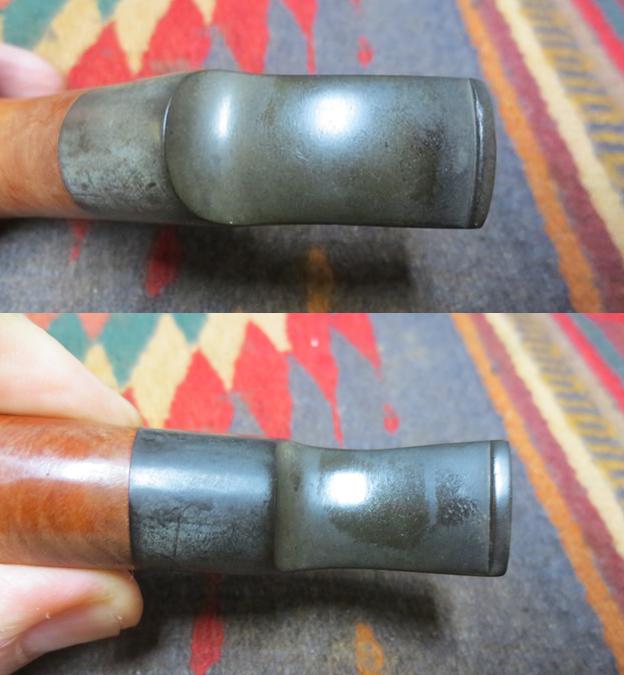
 I put the stummel aside and turn my attention to the stem to do repairs. The button area has tooth dents that I will attempt to raise using a lit candle to heat the vulcanite allowing it to regain its original contour as the heat expands it. The upper button lip has a compression dent needing attention. I take pictures to mark the progress. Using the lit candle, I pass the stem end over the candle back and forth heating the vulcanite. I repeat this on upper and lower areas and the vulcanite expands as hoped. The dents are still visible, but now, will be more easily dispatched using sand paper. I sand the bit area with 240 grit paper and freshen the button lip with the flat edged needle file.
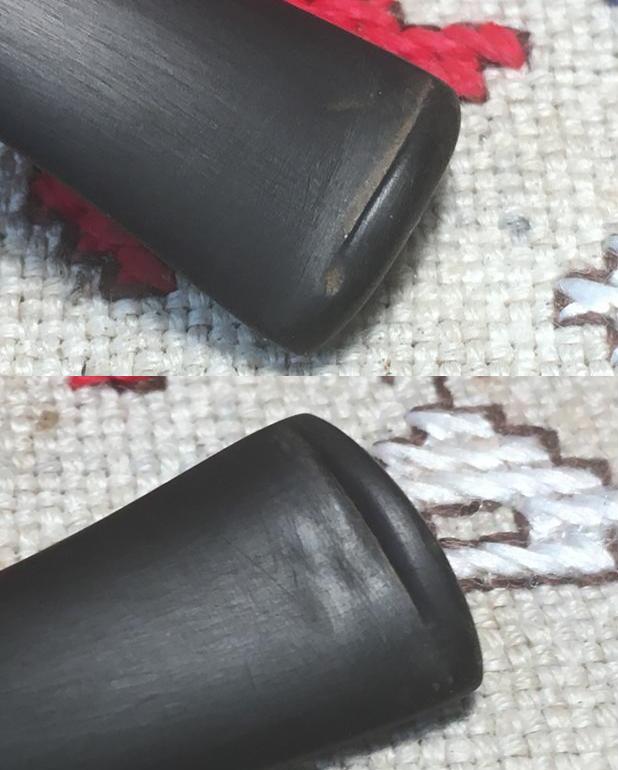

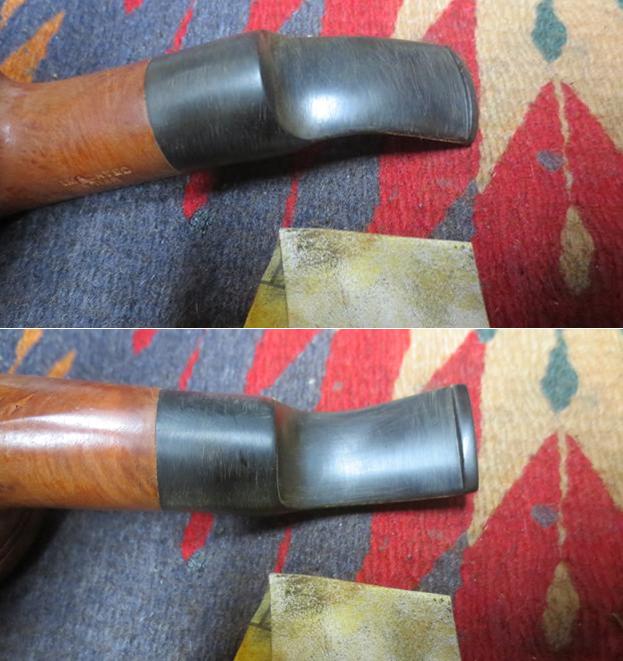
 On the upper button lip, I apply Starbond Black Medium KE-150 CA glue at the dent point as well as on the bit on a remaining tooth impression. I spray the glue with an accelerator that shortens the curing time. I use a flat needle file to remove the excess glue on the button lip and then sand it as well as the small fill with 240 grit paper. I follow with sanding with 600 grit paper then with 0000 steel wool. Button and bit repairs are completed. The pictures show the progress.
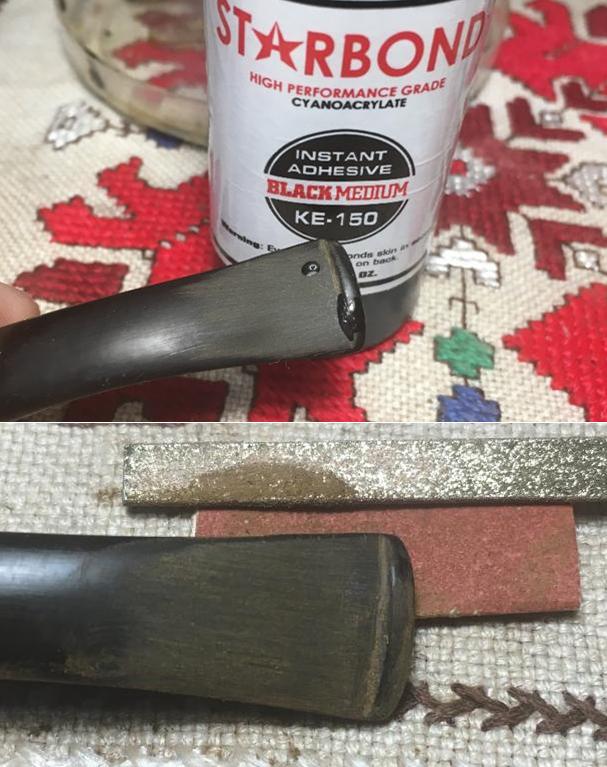
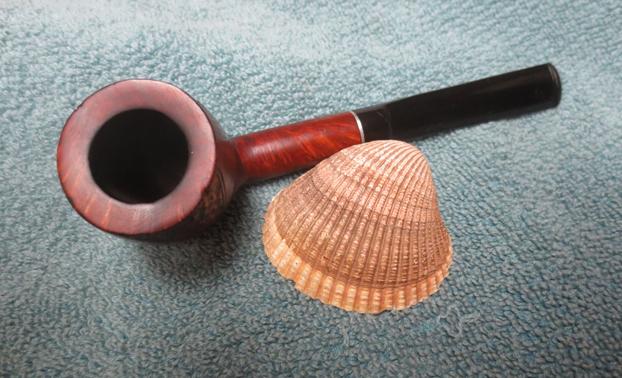
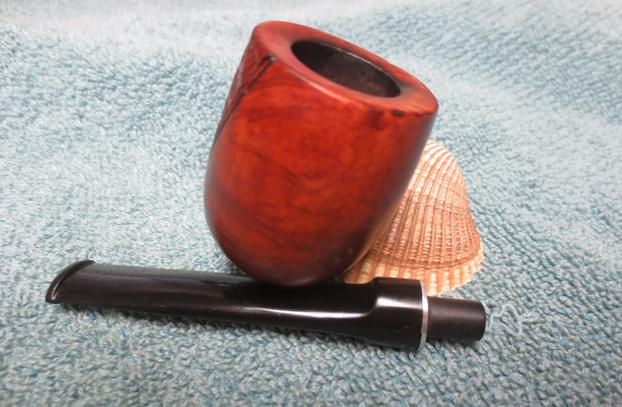
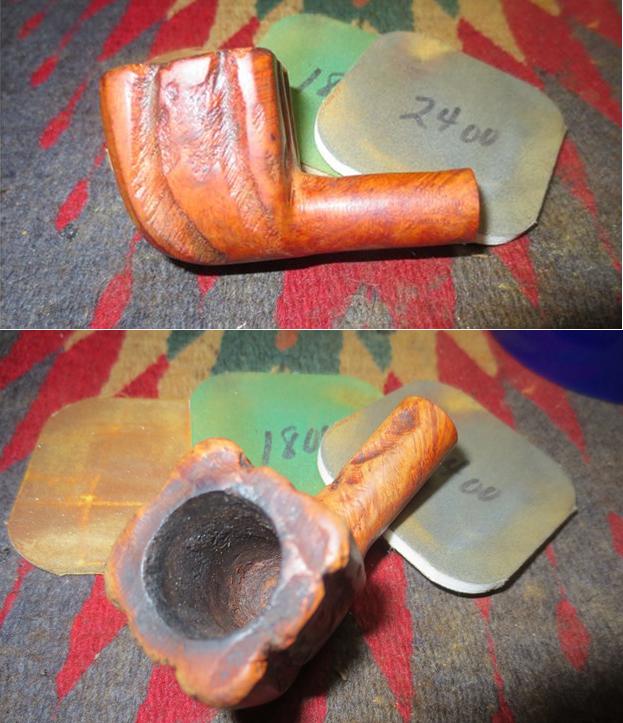
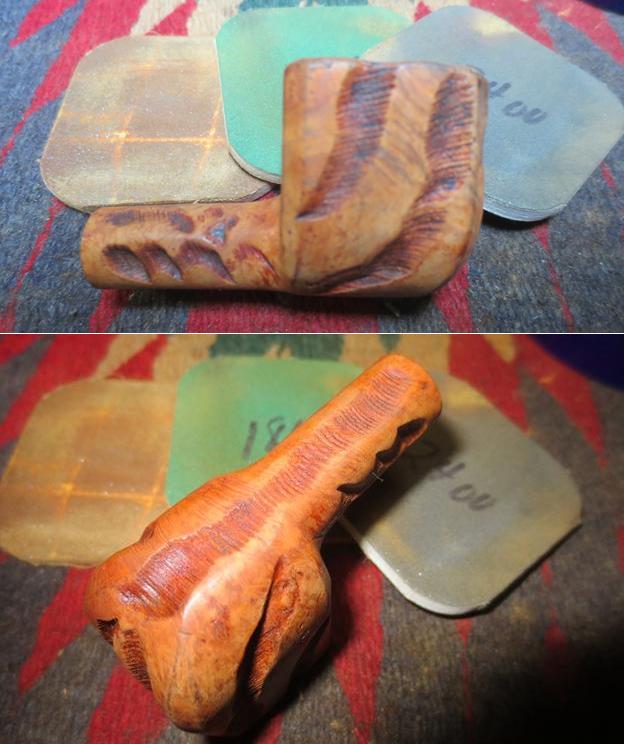
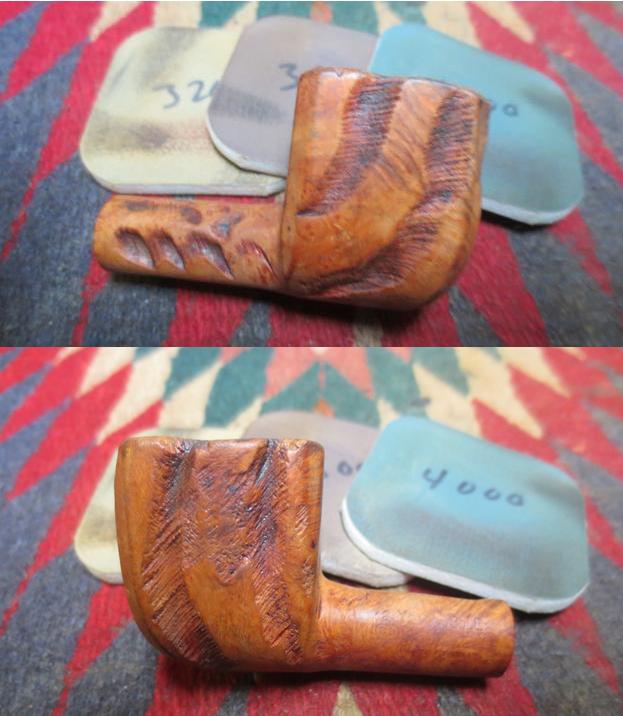
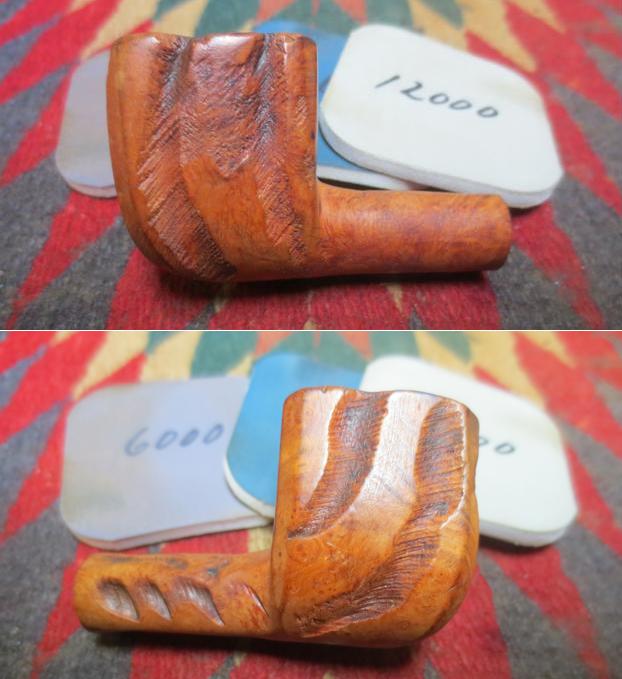
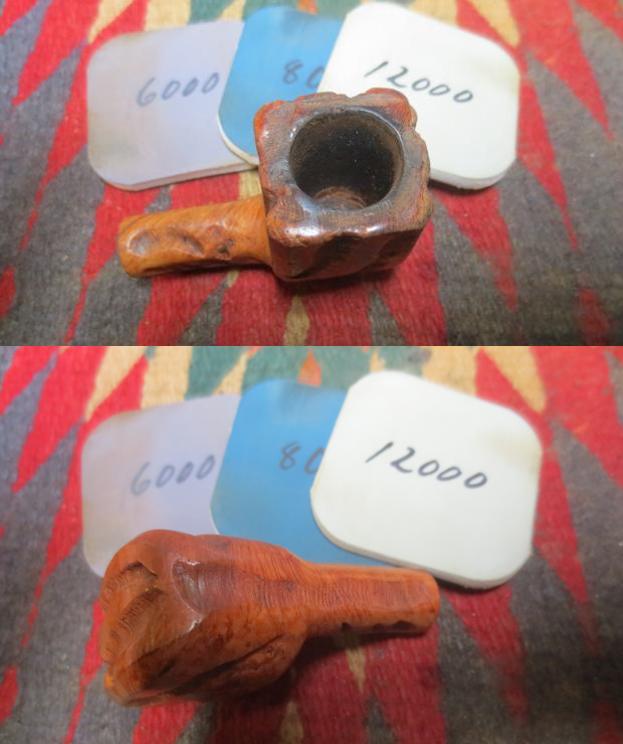
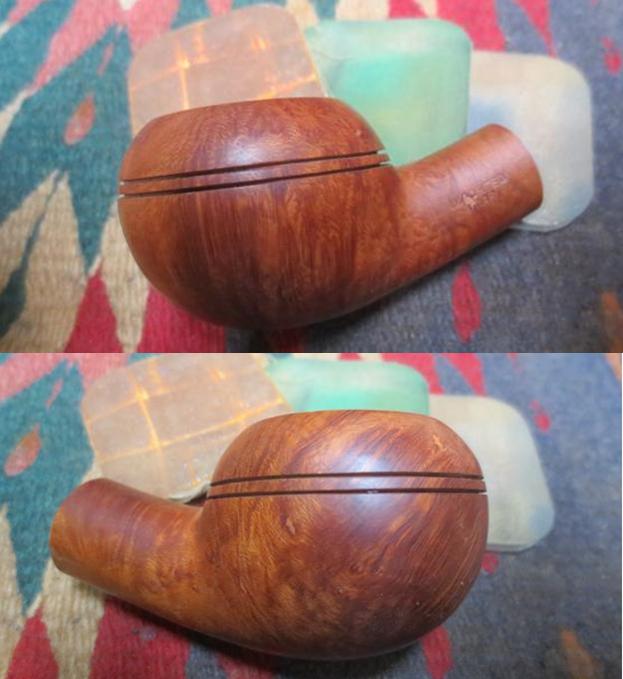
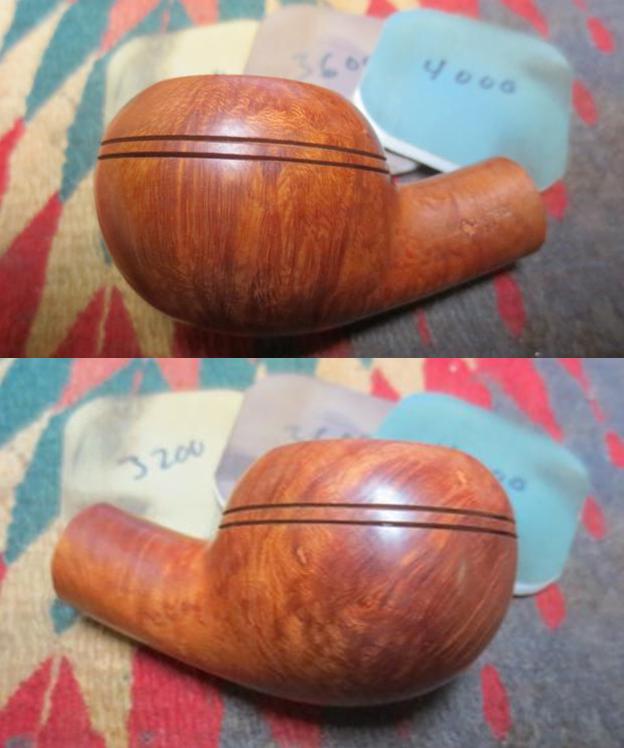
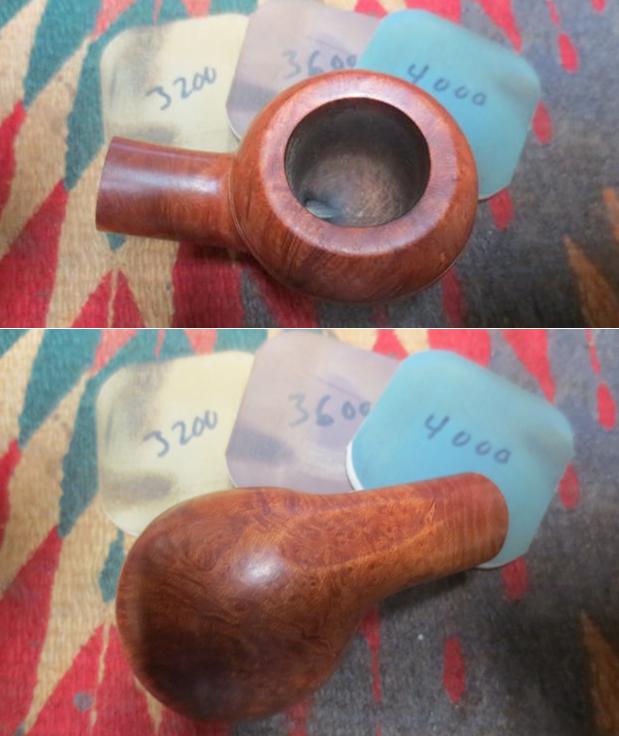
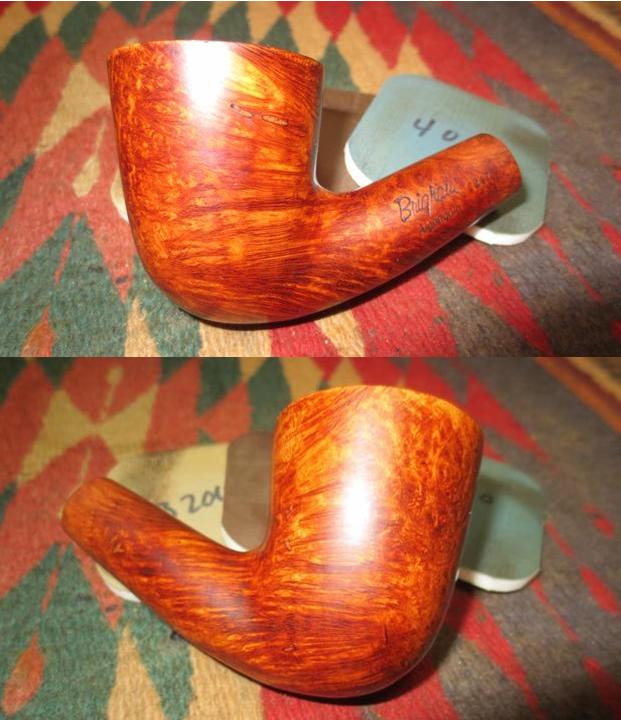
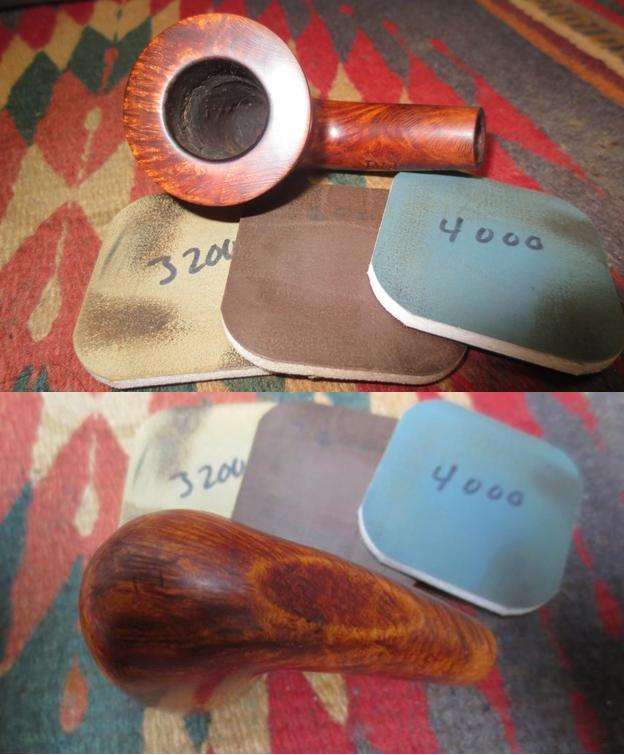
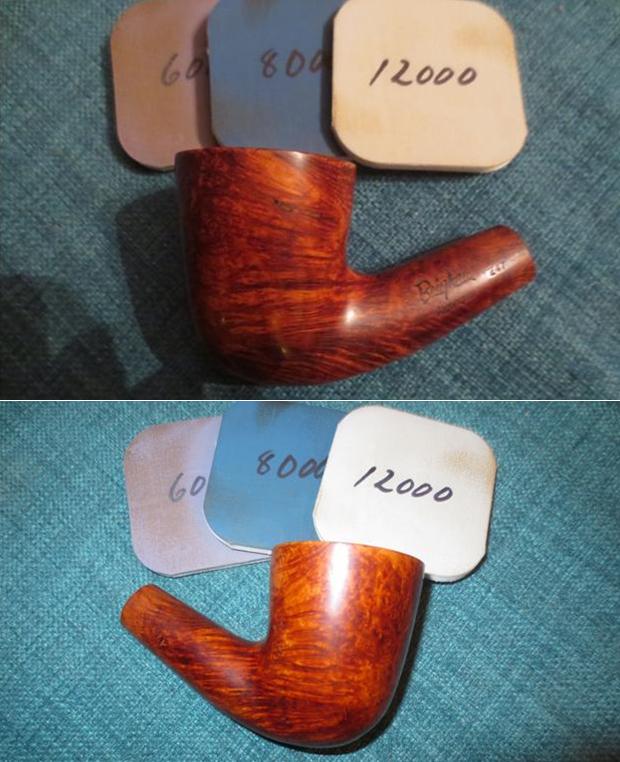
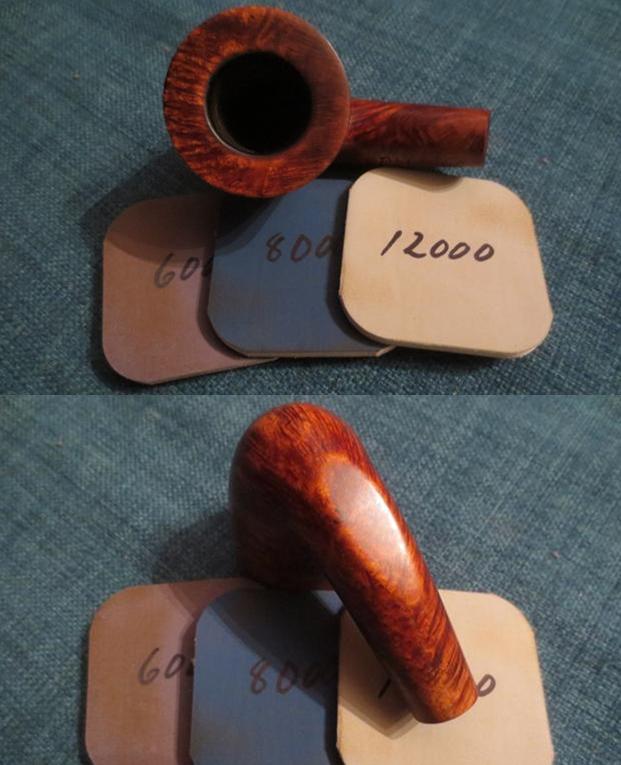
 Turning back to the stummel, I sand with a medium grade sanding sponge followed by a light grade sanding sponge. From here I go directly into the micromesh cycles by first wet sanding with pads 1500 to 2400. I follow by dry sanding with pads 3200 to 4000 and then 6000 to 12000. The grain is looking great! The horizontal straight grain on the front and back of the bowl terminates on each side with bird’s eye perspective. The pictures show the progress.
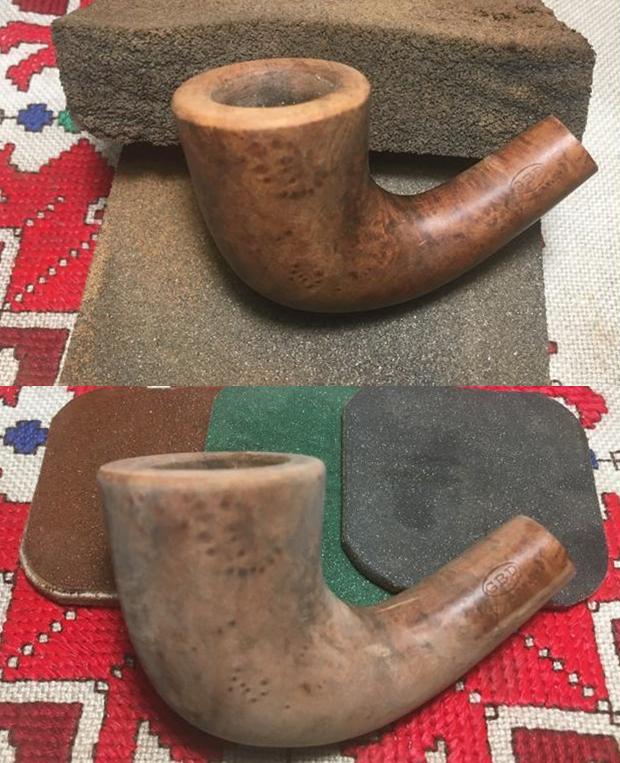
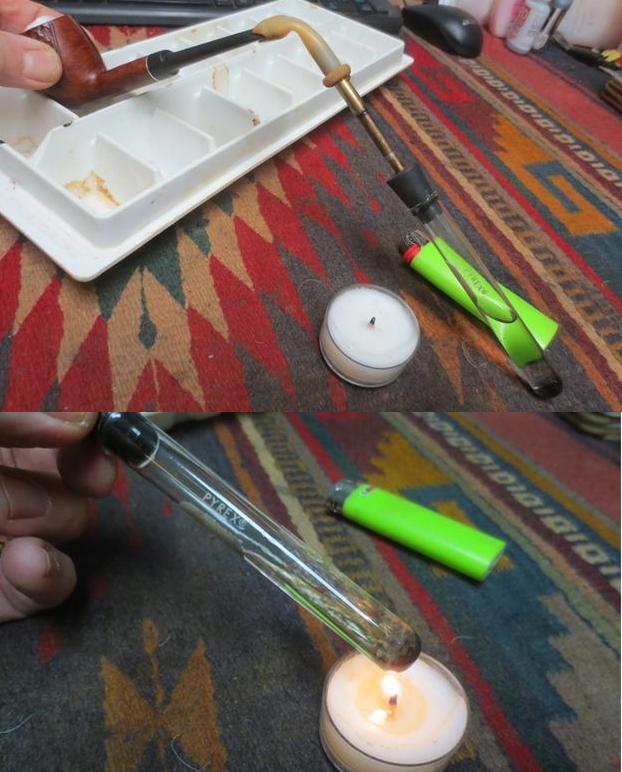
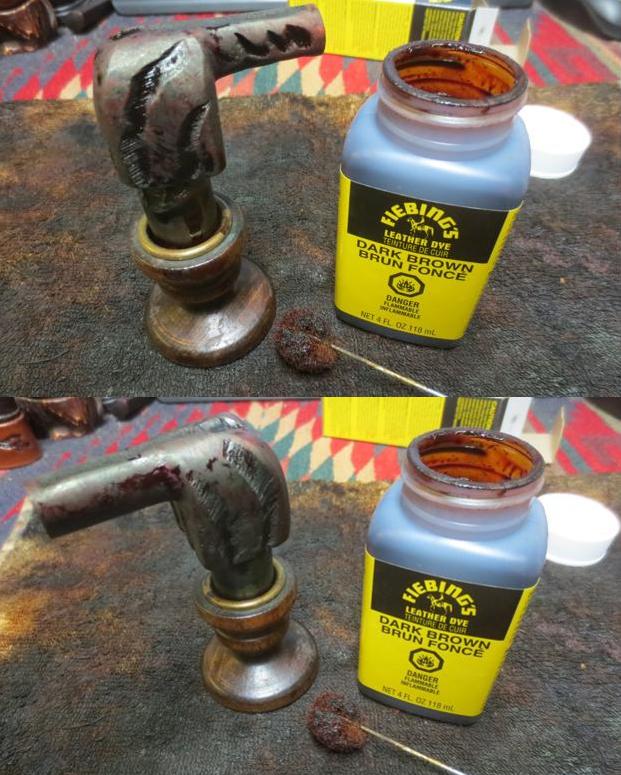
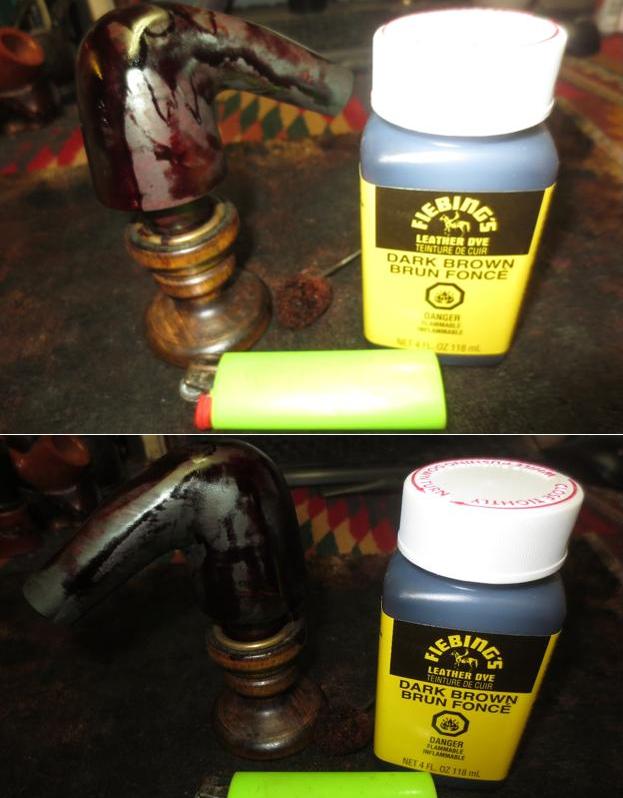
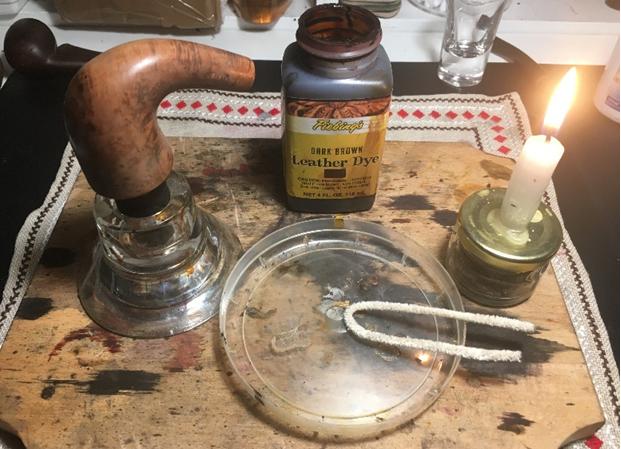
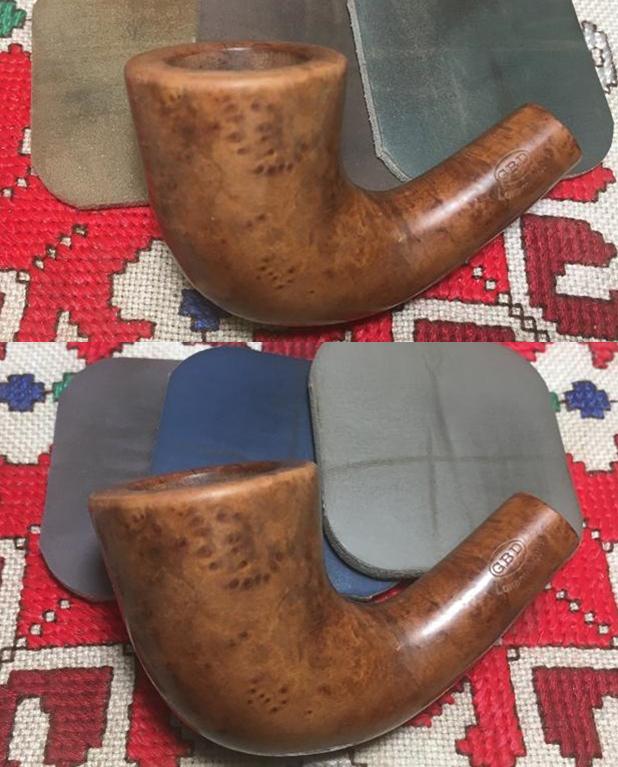 This GBD Trafalgar Calabash’s stummel is looking good and I apply Fiebing’s Dark Brown Leather Dye to the stummel to blend the crack and hole repair patch I did earlier. After the sanding/micromesh pad cycles, the briar is its natural light color. I take a picture of the patch before the stain is applied to do a before and after – to see how well the patch blends. I wipe the stummel with a cotton cloth wetted with isopropyl 95% to clean it. Using a heat gun, I warm the stummel to expand the grain of the briar to more efficiently absorb the dye. After the stummel is warmed, using a doubled over pipe cleaner, I apply the dye liberally to the stummel seeking full coverage. When covered, I flame the aniline dye using a lit candle and the alcohol immediate combusts setting the hue of the dark brown leather dye in the briar. In a few minutes, I repeat the process complete with flaming. I set the stummel aside to rest. The pictures show the staining progress.
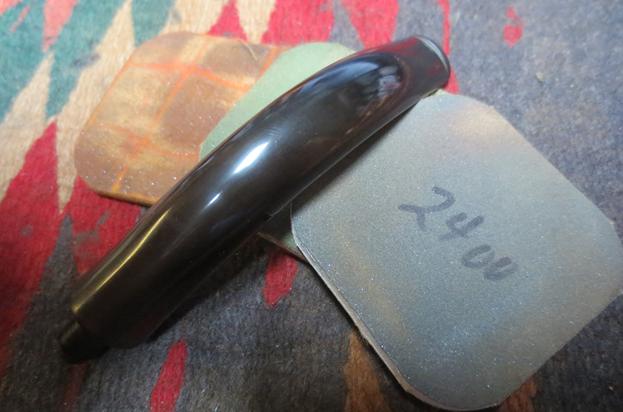
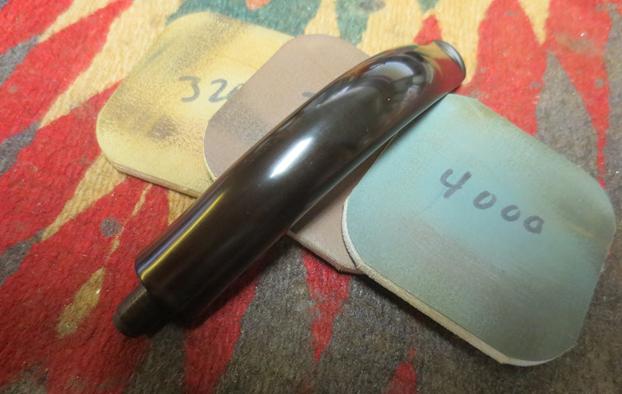
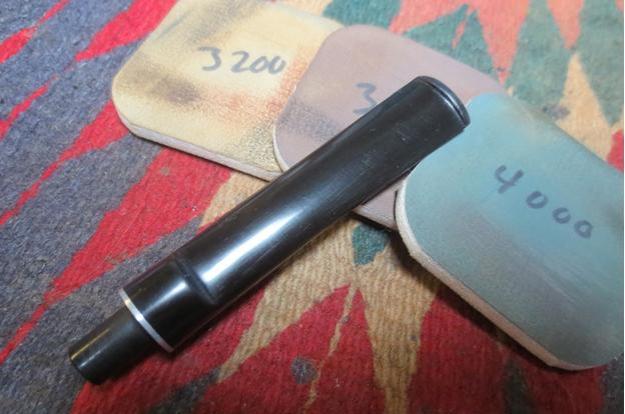
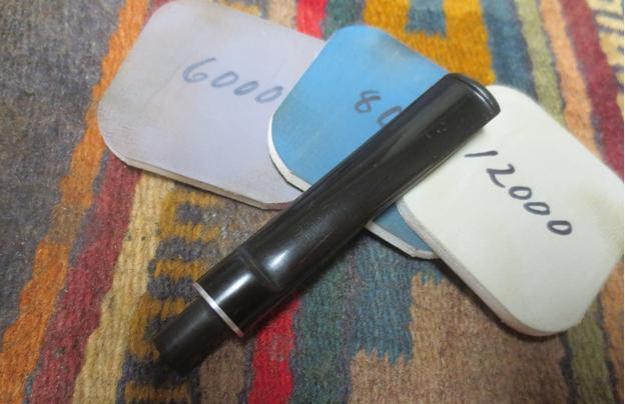
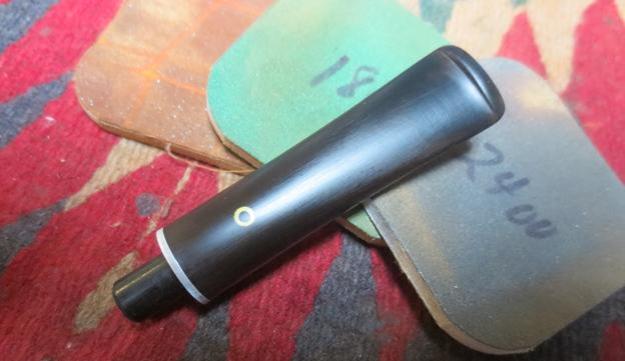
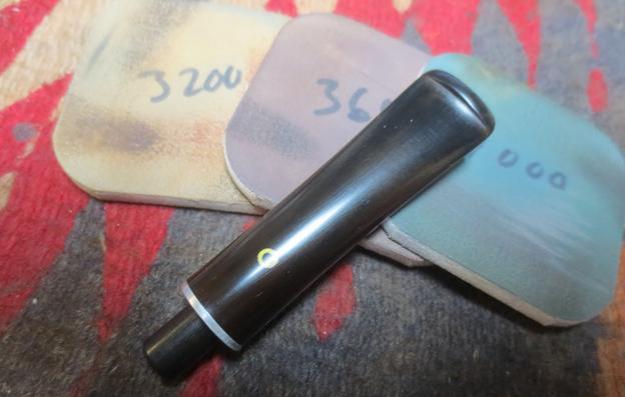
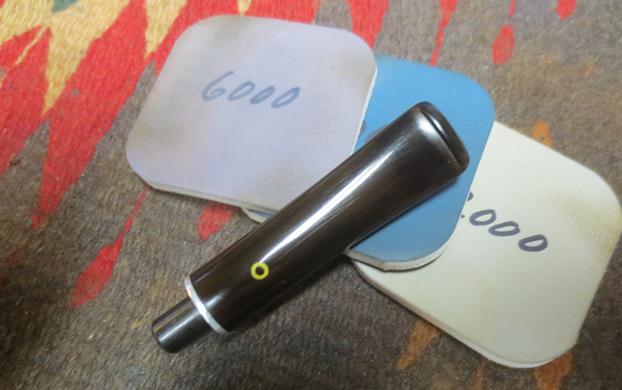
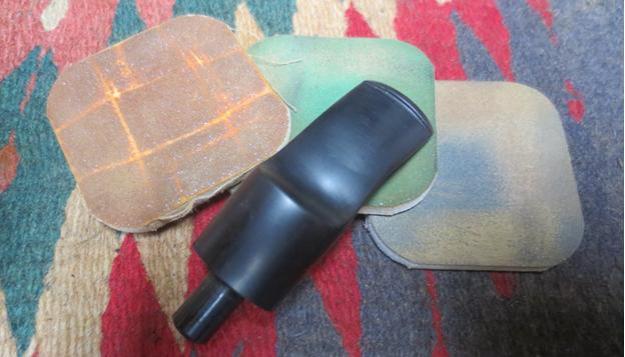
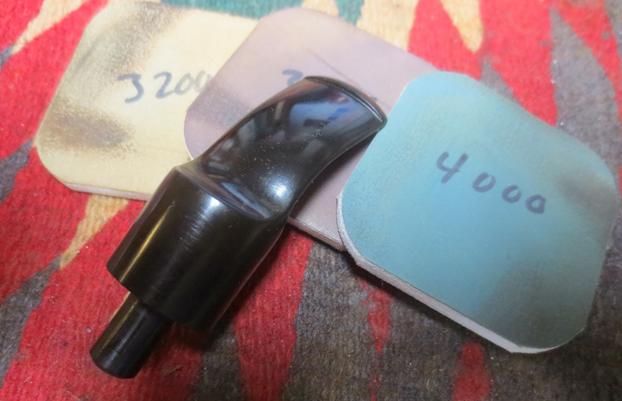
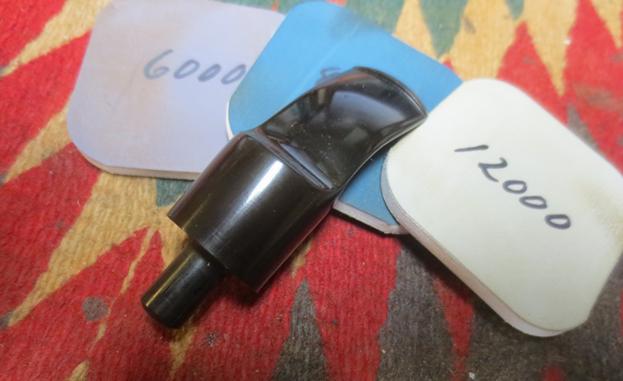
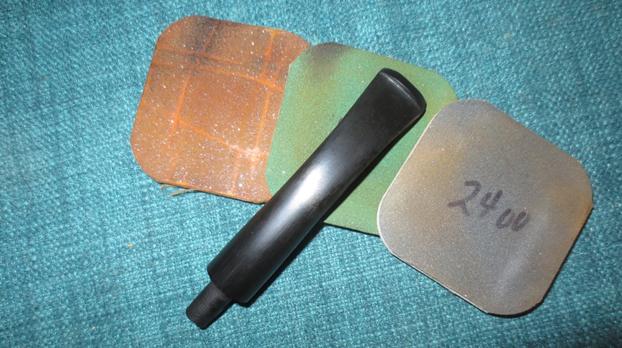
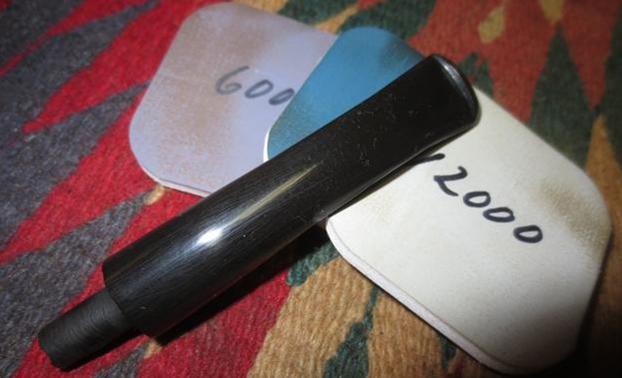
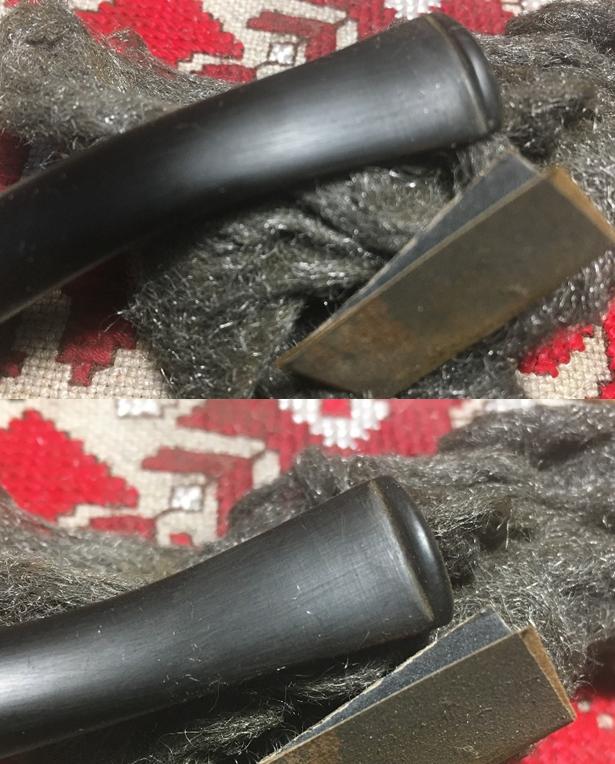
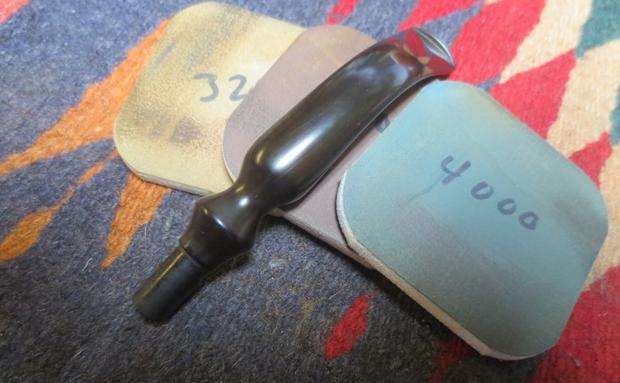
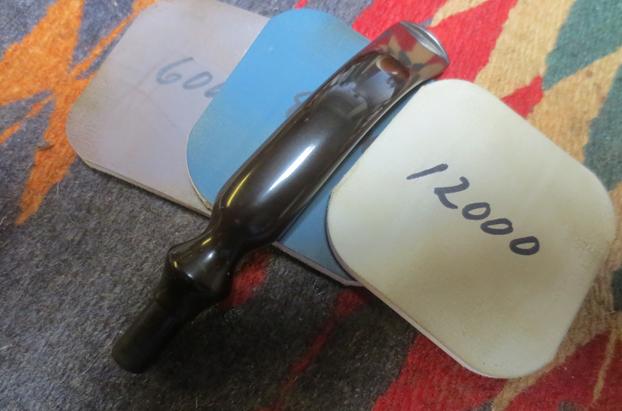
 With the staining process completed and the stummel resting I start the final phase of the stem polish. Using micromesh pads 1500 to 2400 I wet sand the stem. Following this, with pads 3200 to 4000 and then 6000 go 12000 I dry sand the stem. After each cycle of three I apply Obsidian Oil to the stem to revitalize the vulcanite. The stem looks great – the button repairs are fully blended. The pictures show the progress.
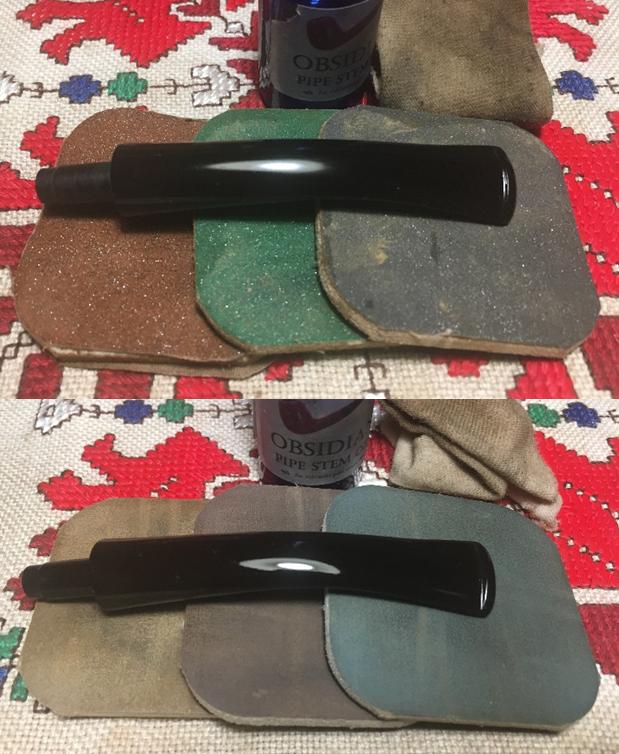
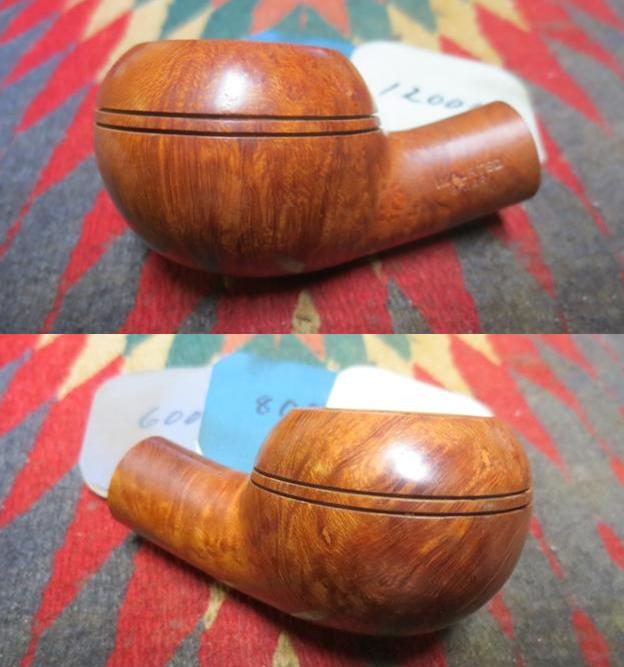
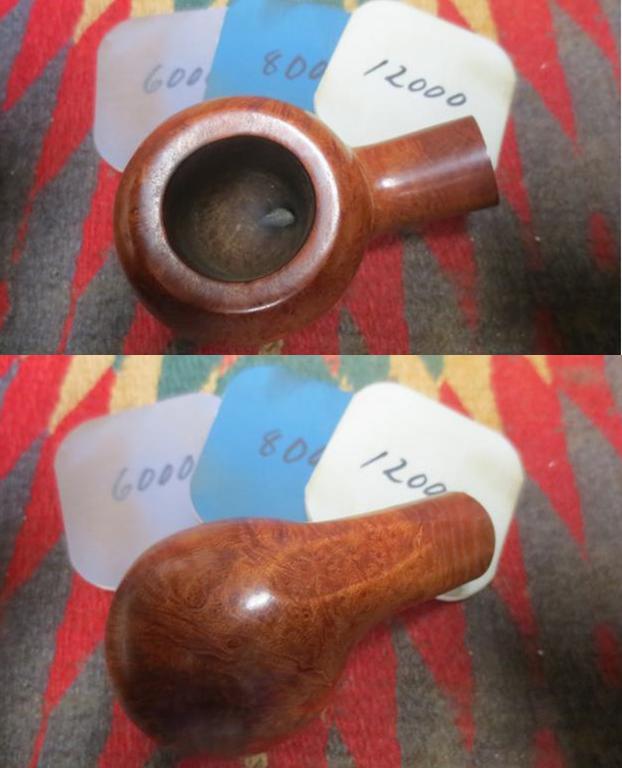
 The next morning, with a cup of coffee in hand, I’m anxious to ‘unwrap’ the stummel from its fire crusting. I mount the Dremel with a felt wheel set at the slowest RPMs, and apply Tripoli compound to remove the crust revealing the surface below. This is one of my favorite parts of restoring pipes. One never knows quite how the briar receives and displays the new dyes. I first purge the felt wheel of old compound by engaging it and applying the sharp edge of the Dremel’s small metal adjustment wrench to the wheel. I then apply Tripoli to the stummel surface in circular motions, not applying too much downward pressure but allowing the RPMs and the compound to do the work for me. After completing the Tripoli cycle, I take a cotton pad wetted with isopropyl 95% and wipe down the stummel. With the dye being aniline, alcohol based, I use the alcohol to lighten the dye and to blend it more fully. I record the alcohol wipe with a picture. After the wipe, the finish clouds up reacting to the alcohol. I then mount a cotton cloth buffing wheel to the Dremel, set at the same slowest speed, and apply Blue Diamond compound to the finish surface. I take a set-up picture to show the Blue Diamond application. Boy, do I like what I’m seeing!! I love briar grain – one of God’s gifts to broken people. After completing the mild abrasion of the Blue Diamond compound, I hand buff the stummel with a flannel cloth not so much to shine it, but to remove compound dust residue from the surface before applying carnauba wax. The pictures show the progress.

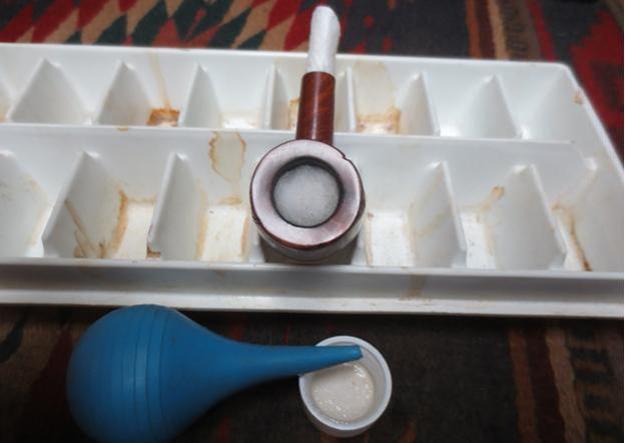
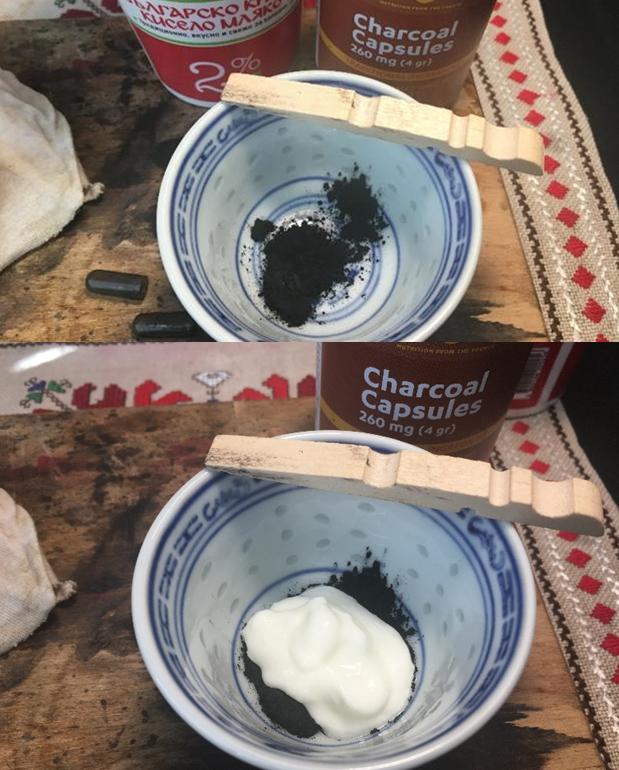
 There was one small light spot on the briar surface that I darkened using a fine-point black Sharpie Pen. Before applying carnauba wax to the stem and stummel, I decide to apply a mixture of sour cream and activated charcoal dust to coat the chamber walls. I do this for two reasons. First, cosmetically, it will cover the lighter J B Weld patching in the chamber by giving the chamber a uniform dark color. Secondly, this layer will aid the creation of a new cake for this GBD Trafalgar Calabash’s new pipe steward. After it sets up and cures, the coating is very hard and sturdy, yet for the initial times of use, no scraping the chamber is allowed! A folded over pipe cleaner is sufficient to clean the chamber, which is in fact, my practice with all my pipes. I empty two capsules of activated charcoal into a dish and add some sour cream (you can use yogurt as well), and mix it with the stick. I insert a pipe cleaner to keep the draft hole free, and apply the mixture throughout the fire chamber. After letting the stummel sit for several hours to cure the final picture in the set below shows the results.
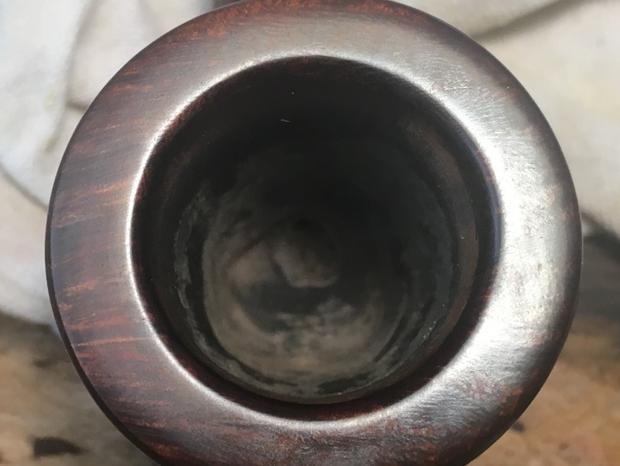

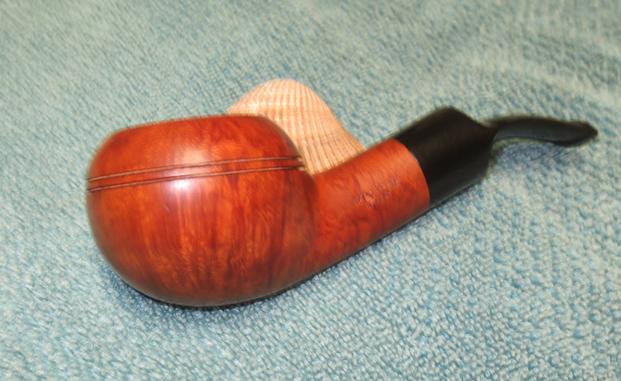
 After reuniting stummel and stem, I mount the cotton cloth buffing wheel on the Dremel, up the speed by one notch and apply carnauba wax in the same manner as with the compounds – not apply much downward pressure, rotating methodically over the surface, allowing the RPMs and wax to do the work. After applying about 3 cycles of carnauba wax to the stem and stummel, I give the pipe a rigorous hand buff with a micromesh cloth.
This GBD Trafalgar London Made Calabash was a bit of a challenge, but I’m very pleased with the results. The hole patch and crack repairs on the stummel are virtually invisible. The floor of the fire chamber is repaired and the pipe is ready for recommissioning. The grain is striking and the Calabash shape is just classy. If you would like to bring this GBD Trafalgar London Made home to add to your collection, he is ready for adoption! Go to my blog site, The Pipe Steward, and leave me a note. As always, profits for the sale of The Pipe Steward restorations benefit the Daughters of Bulgaria – women and their children who have been sexually exploited and trafficked here in Bulgaria and Europe. Thanks for joining me!


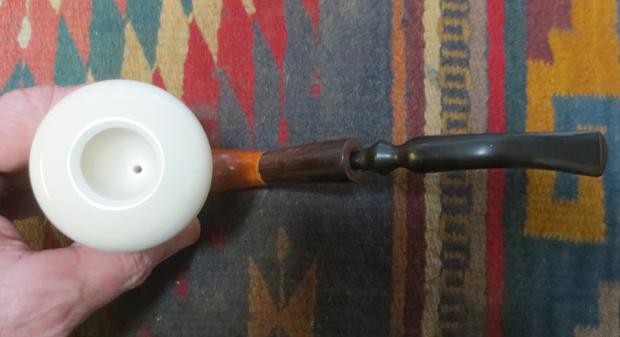
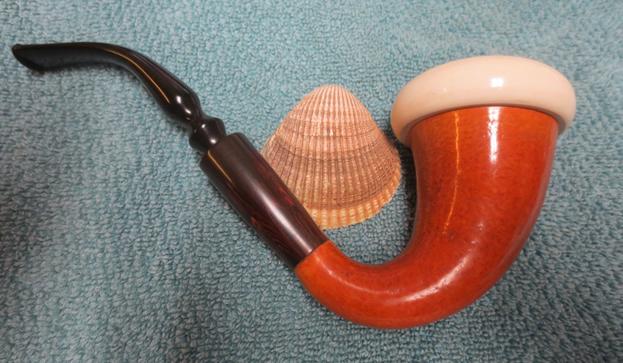
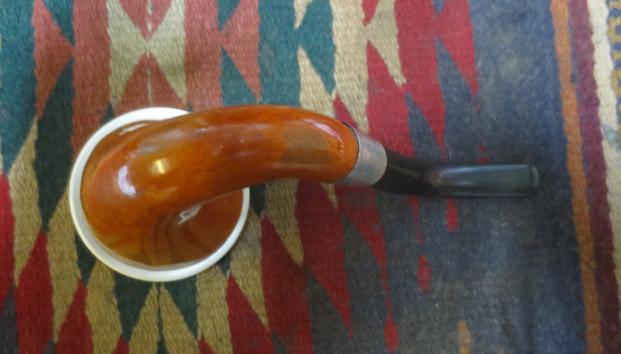
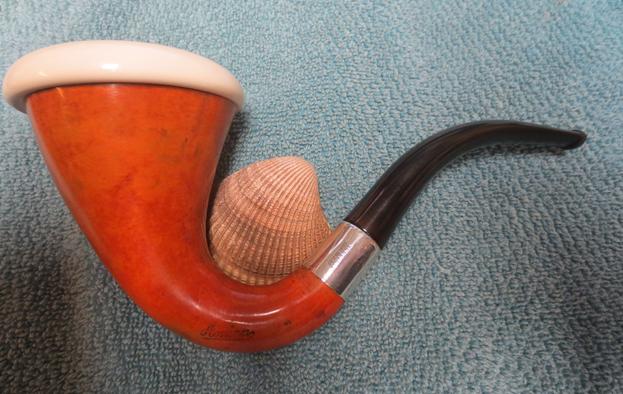
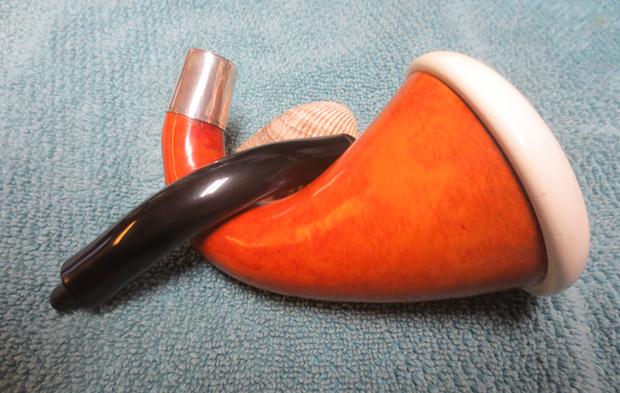
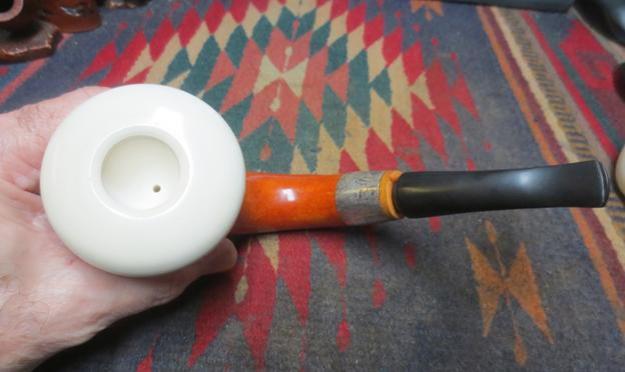
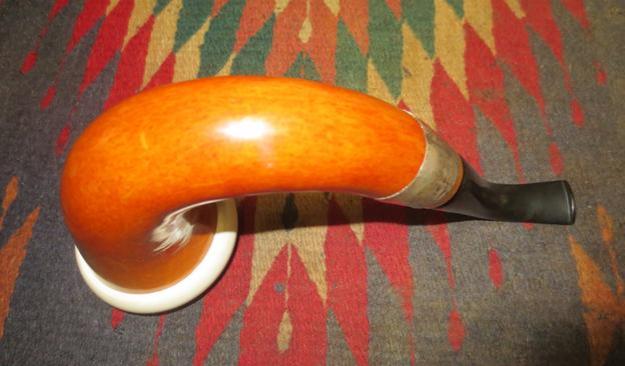
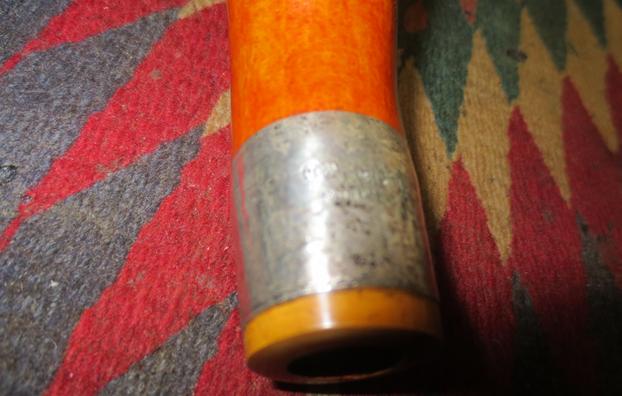
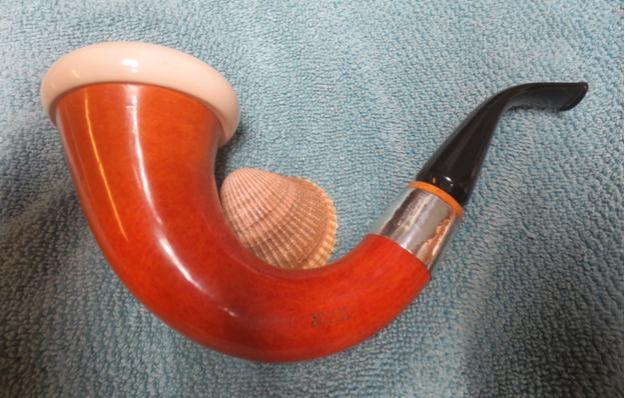
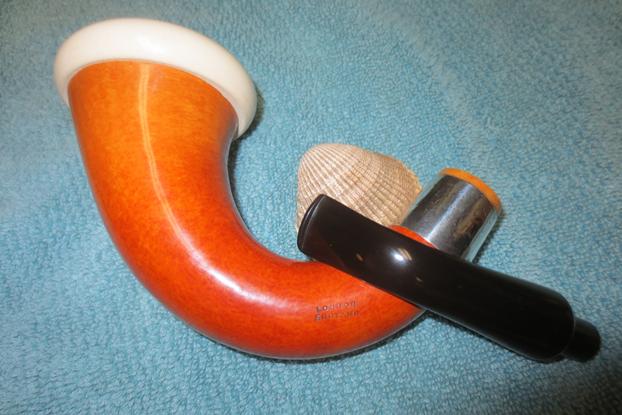
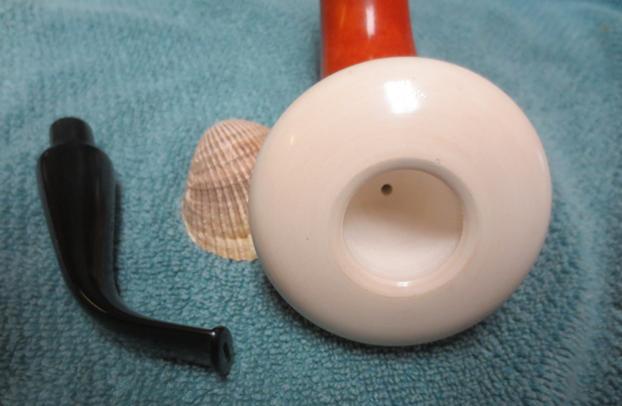
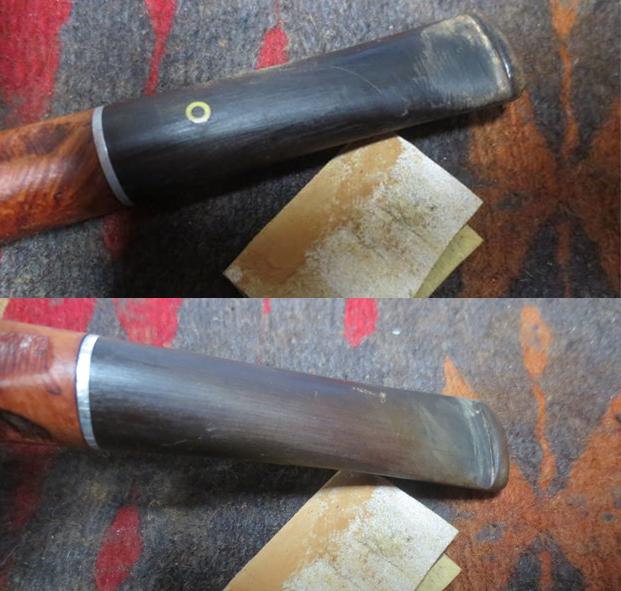
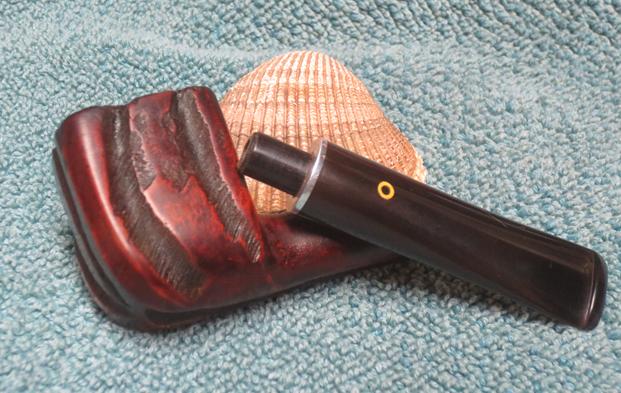
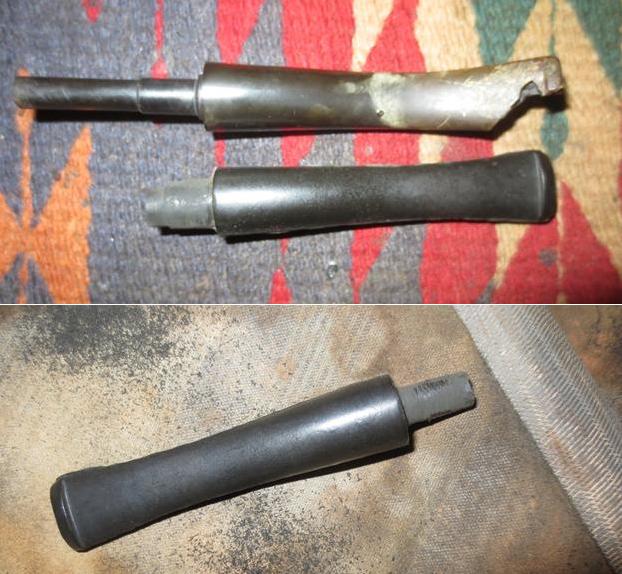
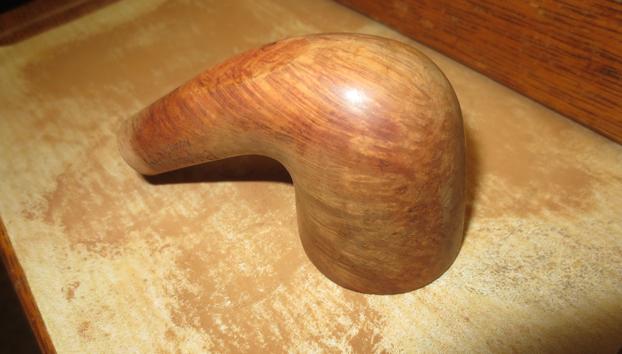
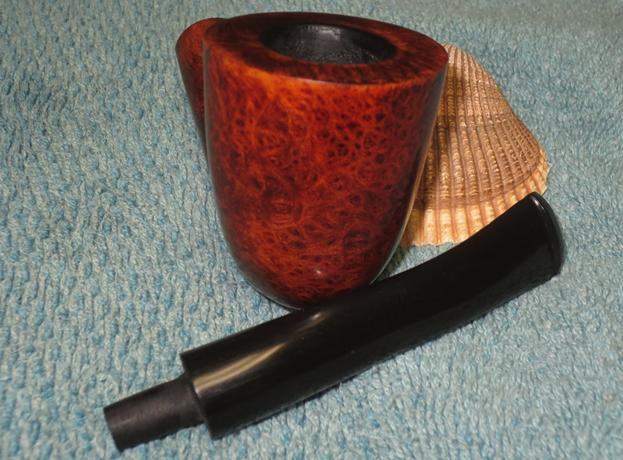
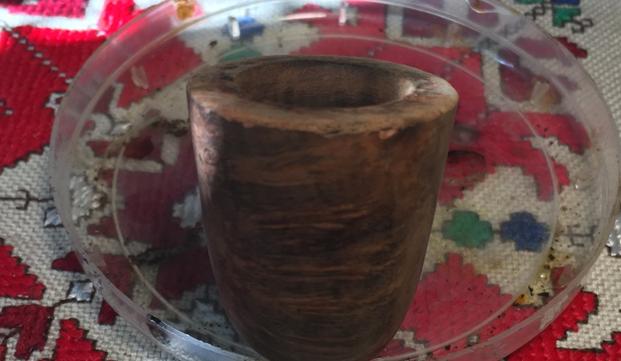
 I took the pipe apart to have a look at the parts. The Cumberland shank extension was oxidized and dull and really did not show the red striations along its length very well. The stem was also oxidized and dirty. It is interesting that the stem was a little dirty on the inside so I am guessing that it was pressed into service on this pipe from a stem can like my own. The internals of the bowl have some darkening and tars on the walls of the gourd but it has been well cleaned. The externals of the gourd are really in great shape and there is a nice patina to the calabash.
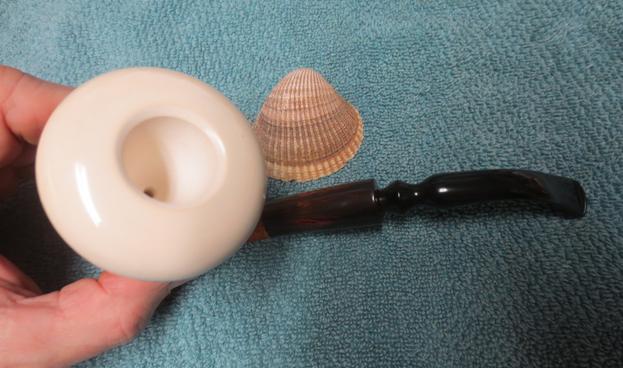
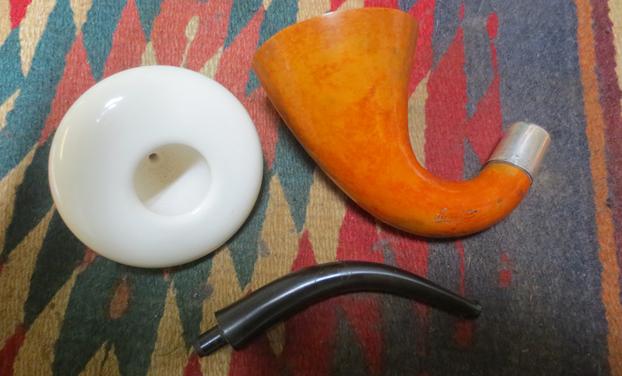
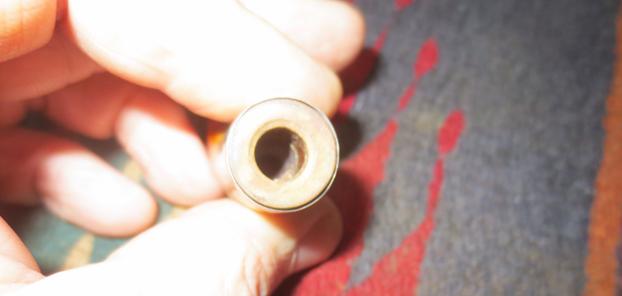
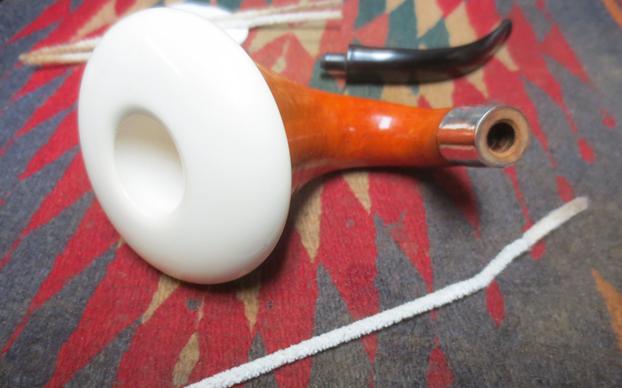
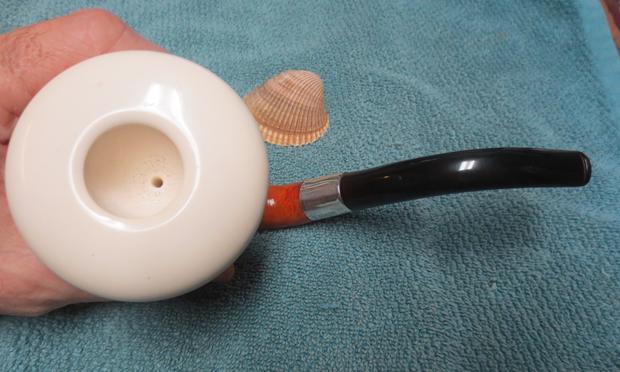
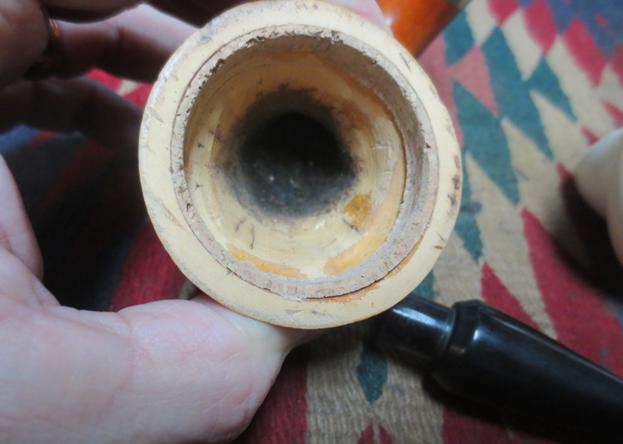
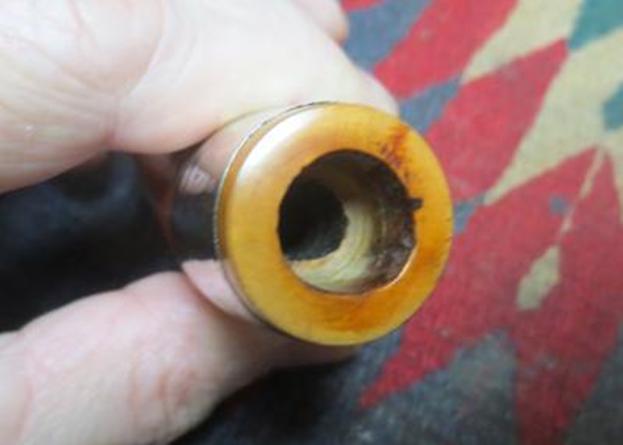
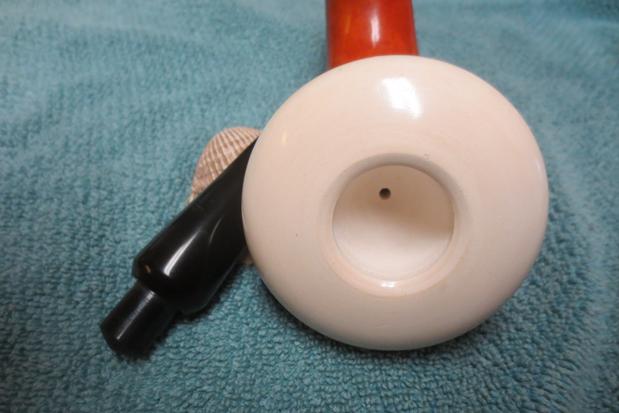
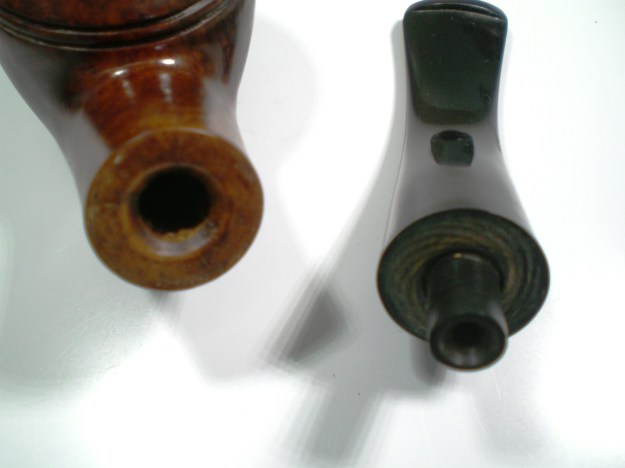
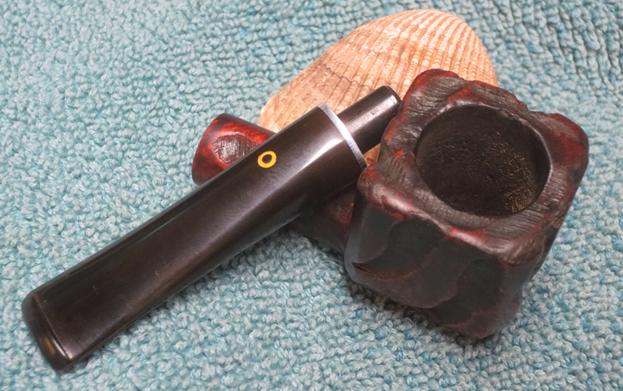
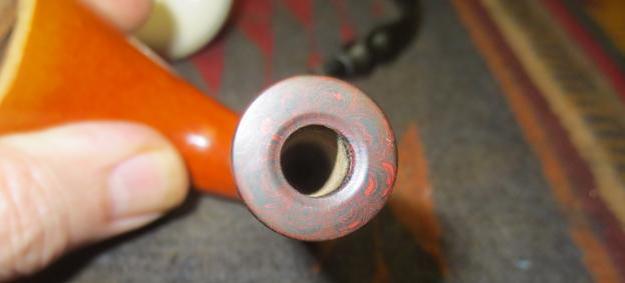
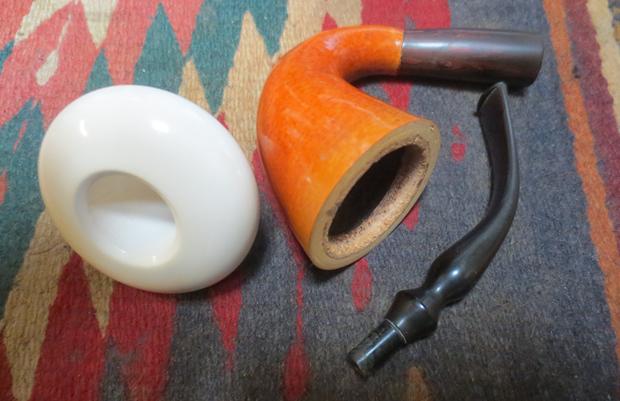 The inside of the gourd bowl is in good shape. There is some darkening but it has been well cleaned out. There is a new cork gasket installed around the inner edge of the rim of the gourd. It is dry but is in good shape. I took a picture of the mortise drilling in the Cumberland as well. It is a great piece of craftsmanship.
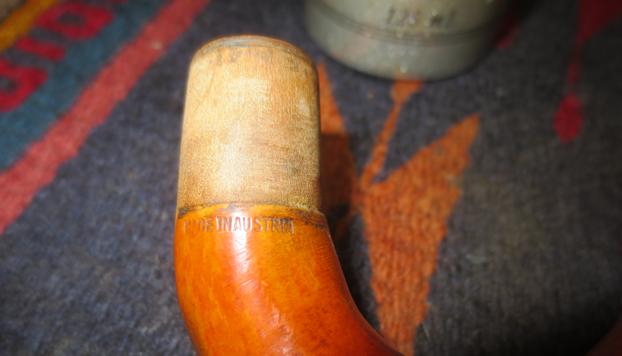
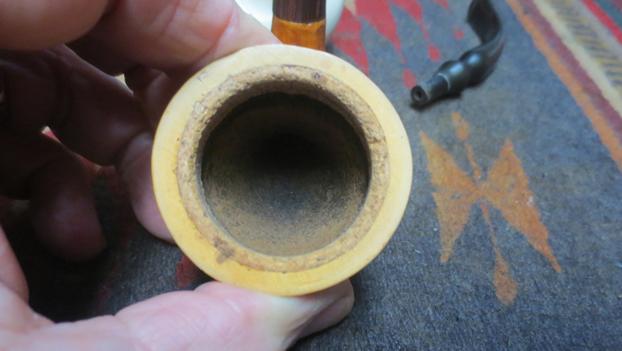
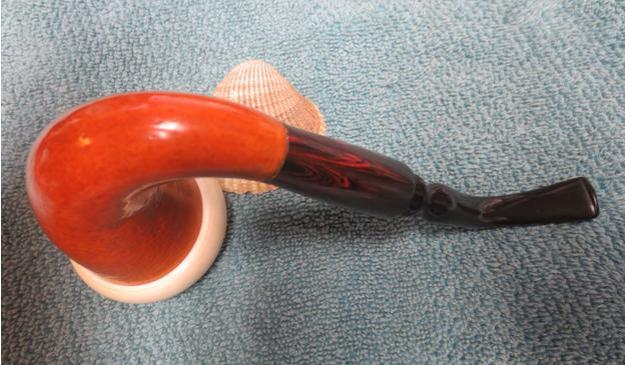
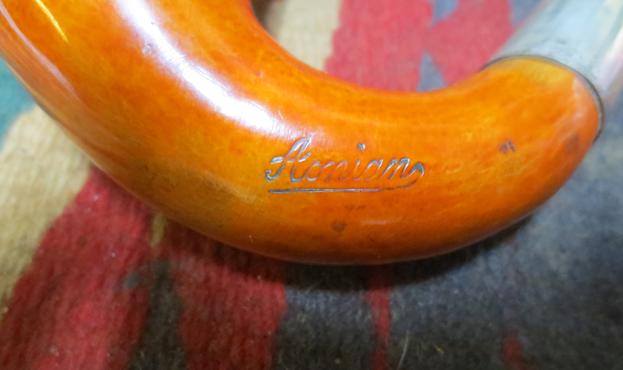
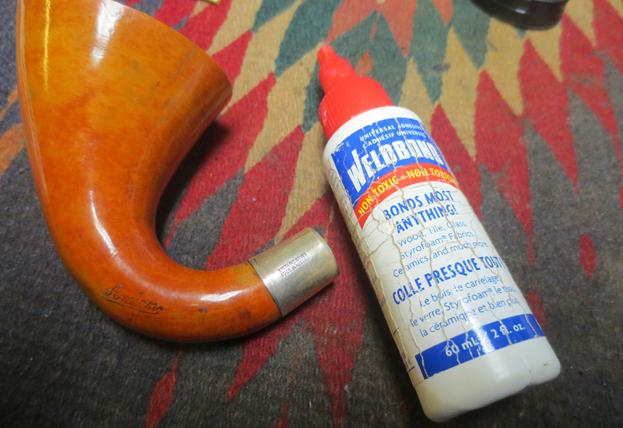
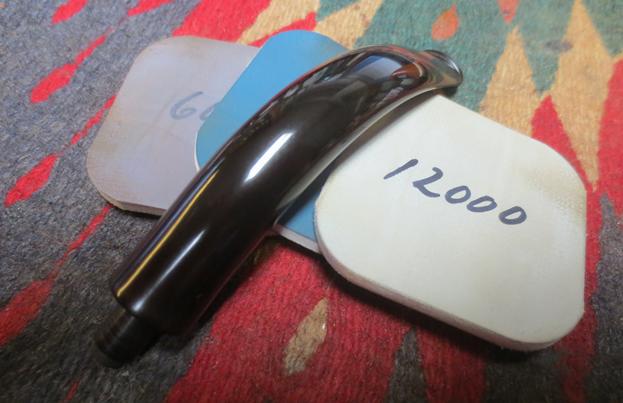
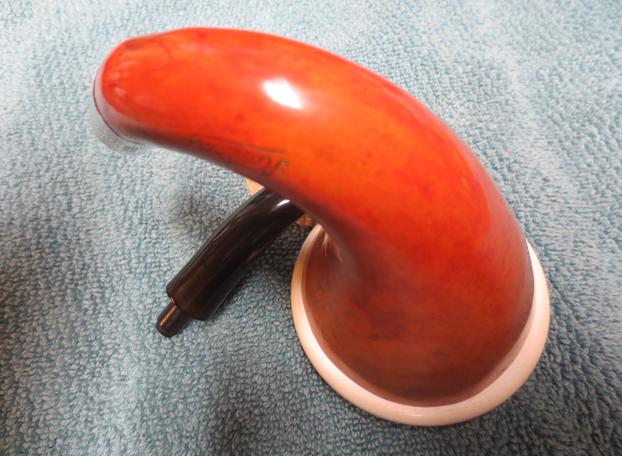
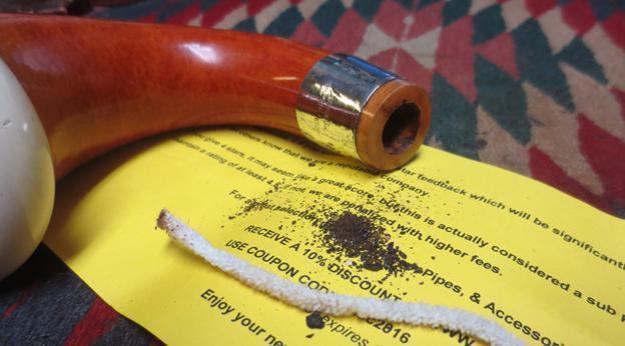
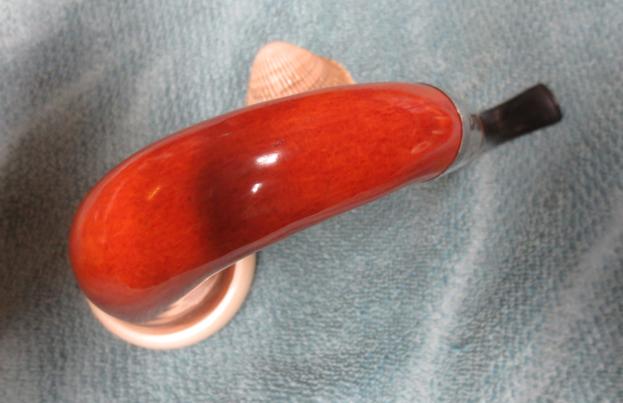
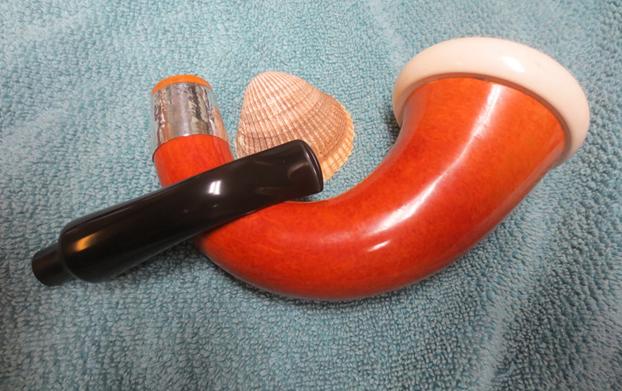
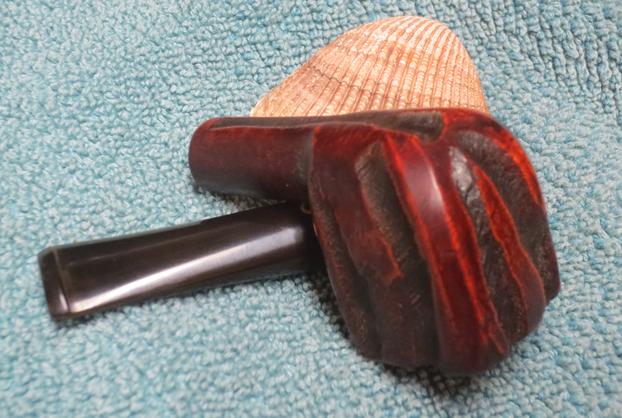
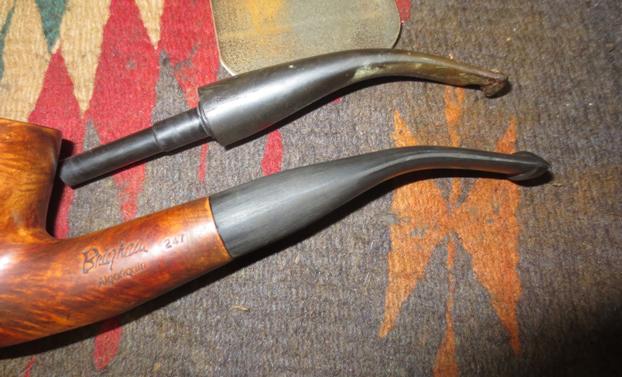
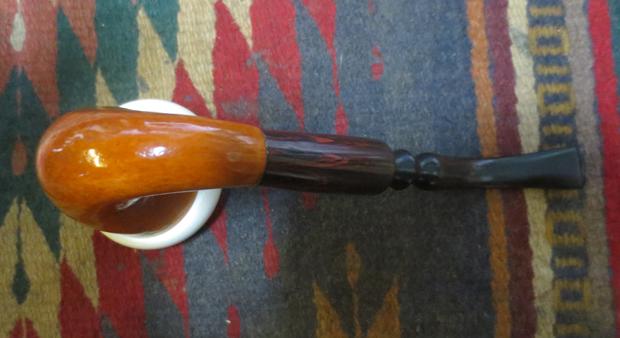
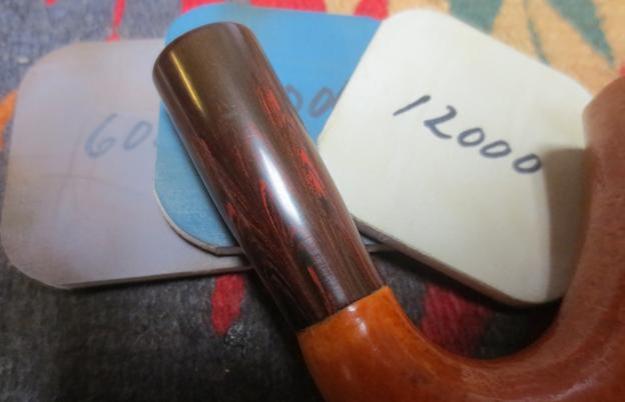
 The next photos show the beautiful striations in the Cumberland that are hiding beneath the oxidation. The repairman who put this shank extension on the gourd made an interesting choice to use Cumberland. Nicely done.
 The old freehand stem was lightly oxidized but was otherwise in great shape. There were not any tooth marks or chatter on the surfaces of the stem. The button and slot were in great shape.
 I started polishing the Cumberland shank extension with micromesh sanding pads – wet sanding with 1500-2400 grit pads and dry sanding with 3200-12000 grit pads. I rubbed the Cumberland down with Obsidian Oil after each set of three pads. After the final pad I gave it a final coat of oil and let it dry.


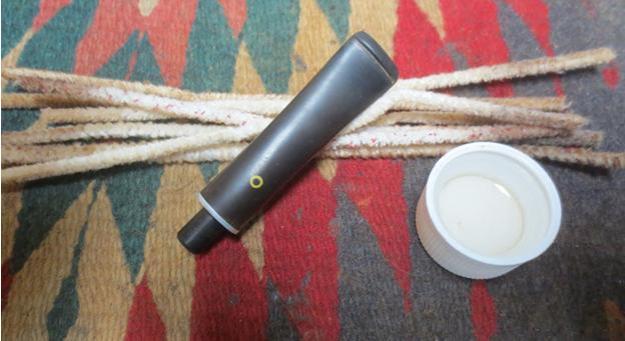
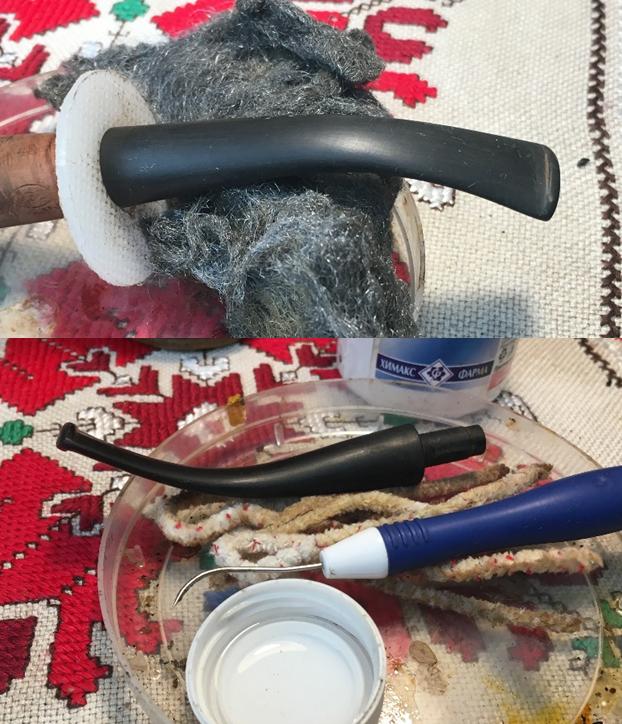
 I ran a pipe cleaner dipped in alcohol through the airway in the shank and the stem. I cleaned out the mortise with cotton swabs and alcohol. The pipe was amazingly clean. The stem had a little debris in it but it was not too bad.
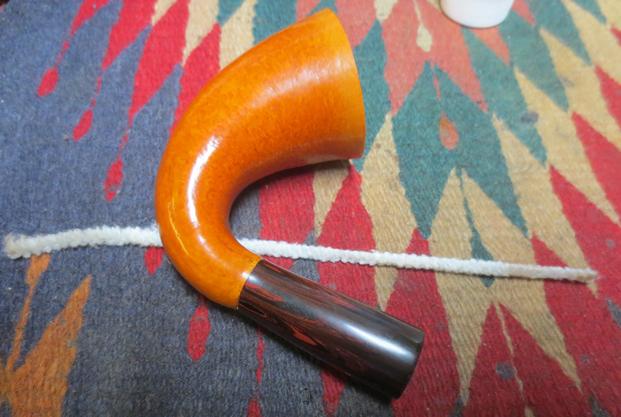
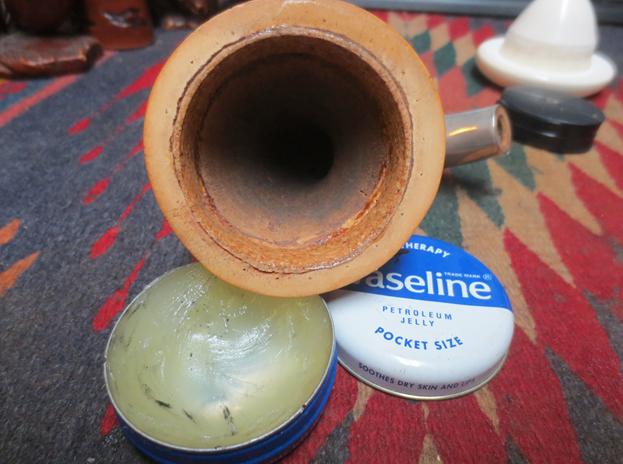
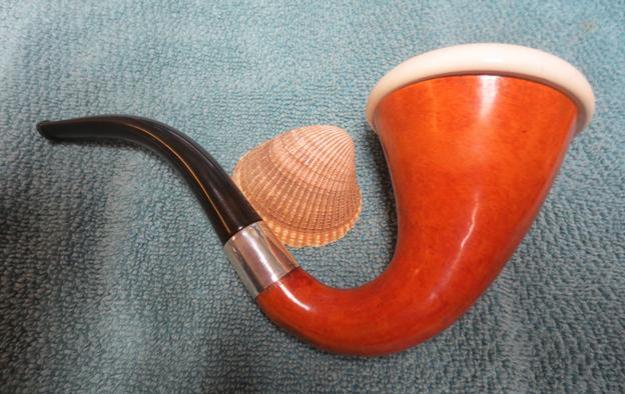
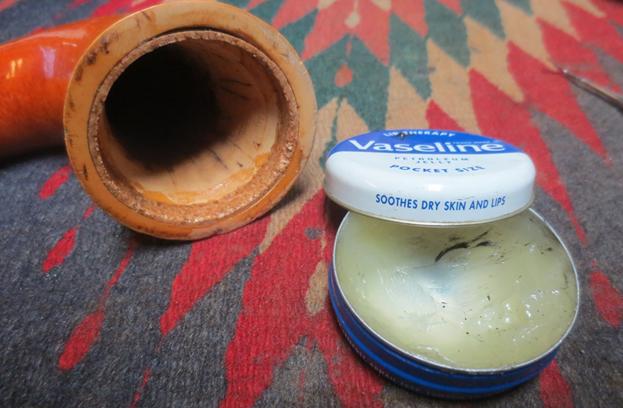
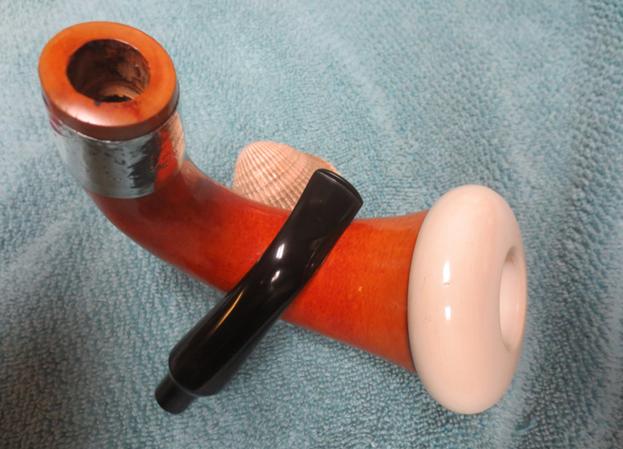
 I rubbed Vaseline into the cork gasket to enliven it and lubricate it. I repeated the rubdown until the cork was soft and pliable again. When the cork had absorbed the grease I pressed the Meerschaum cup into the gasket and it was a smooth, snug fit.
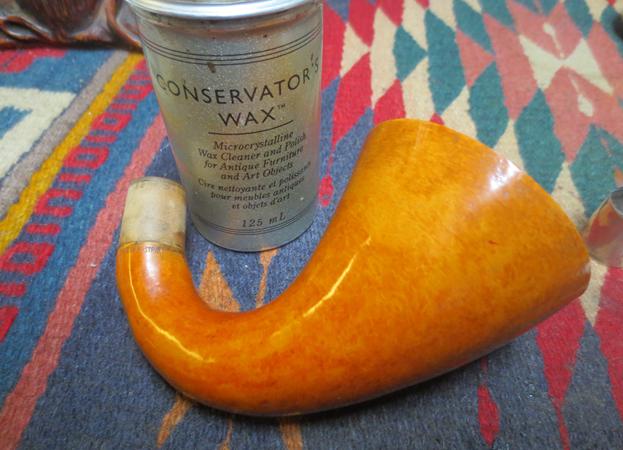
 I gave the gourd several coats of Conservator’s Wax and hand buffed it with a soft cloth and a microfiber cloth. The wax gave the gourd a real shine.
 I set the bowl aside and turned my attention to polishing the stem. I wet sanded it with 1500-2400 grit micromesh sanding pads and dry sanded it with 3200-12000 grit pads. I rubbed it down with Obsidian Oil after each set of three pads and then gave it a final coat of wax after the 12000 grit pad. I set the stem aside to dry.
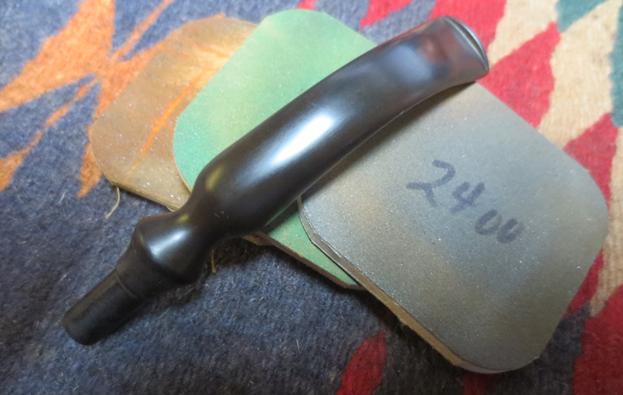
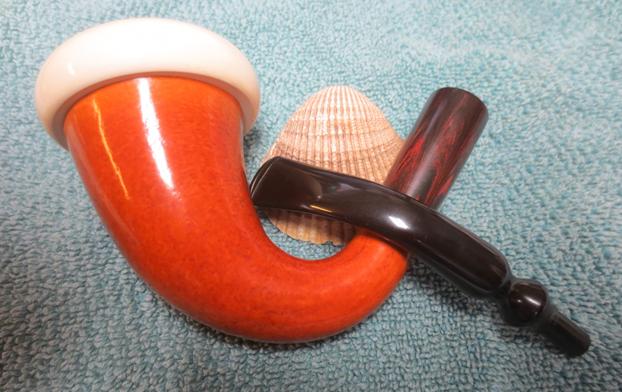
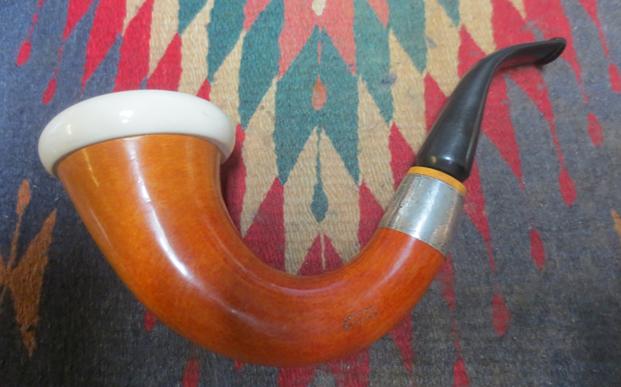
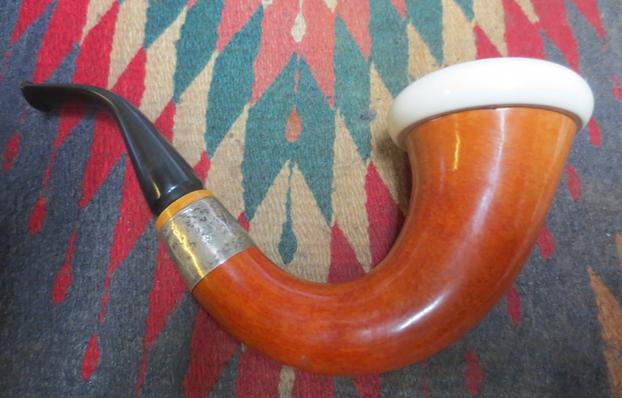
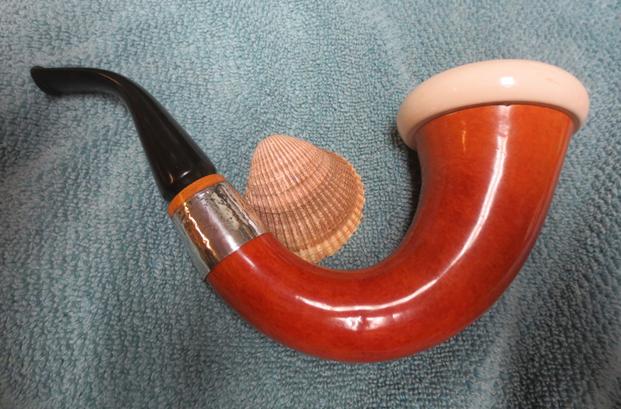
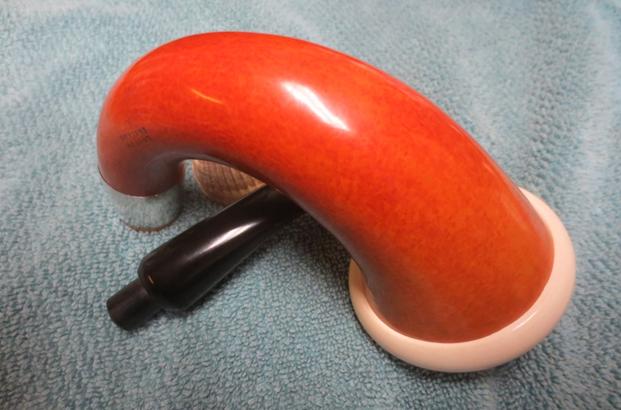
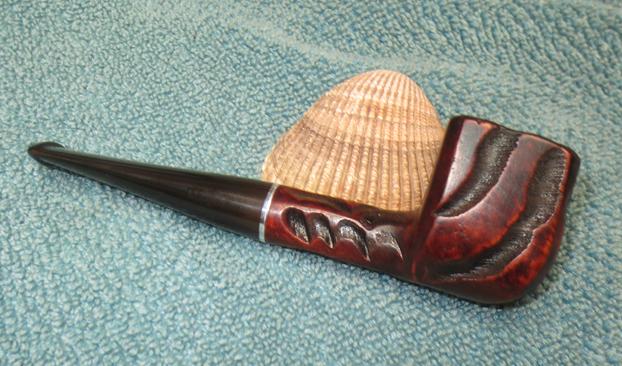
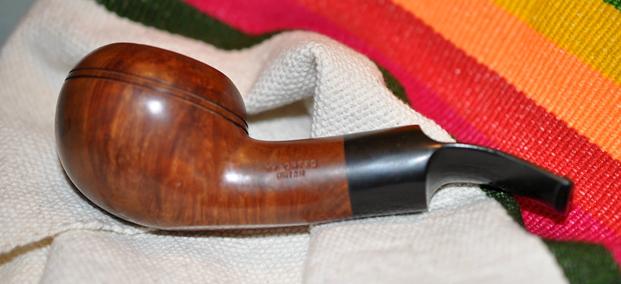
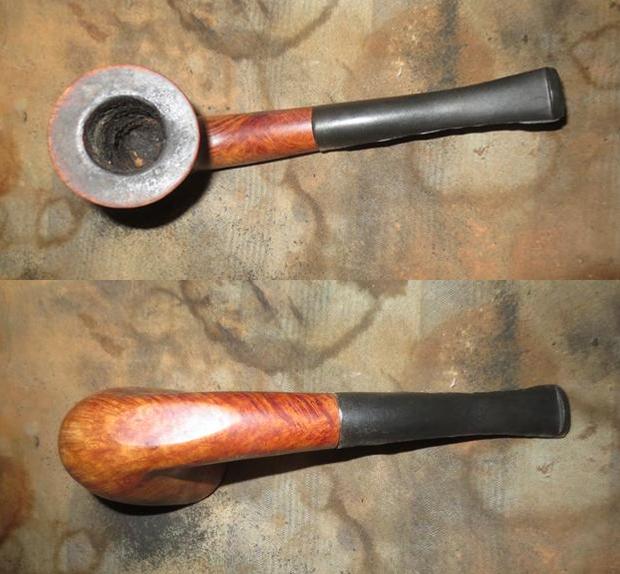
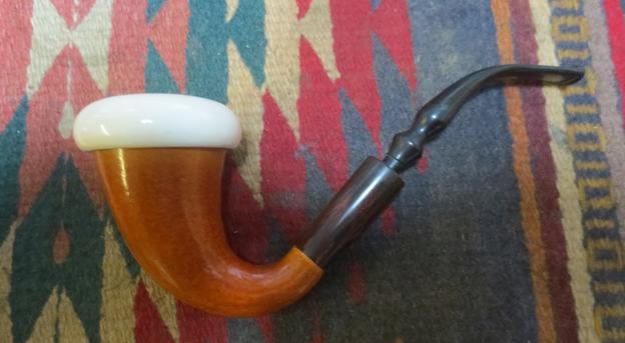
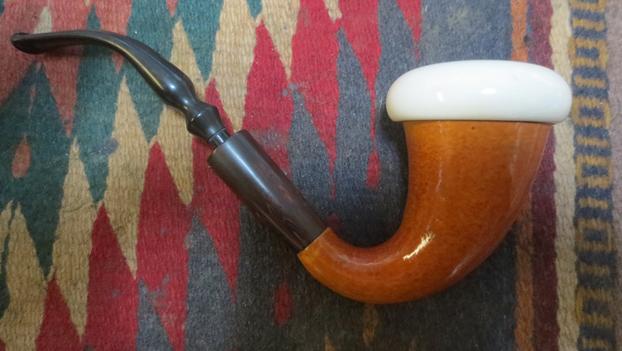
 I buffed the stem with Blue Diamond on the buffing wheel to take out the last bit of oxidation and scratching. I gave the stem multiple coats of carnauba wax and buffed it with a clean buffing pad to give the stem shine. I put it back on the pipe and gave the shank and bowl several more coats of Conservator’s Wax and hand buffed the entire pipe with a microfiber cloth to deepen the shine. The finished pipe is shown in the photos below. The shine of the Cumberland looks really good between the rich golden yellow of the gourd and the black of the stem. It is a beauty. This one will join the previous two Calabashes on the rebornpipes store very soon. You might consider adding this one to your rack. It is a beauty. Thanks for looking.