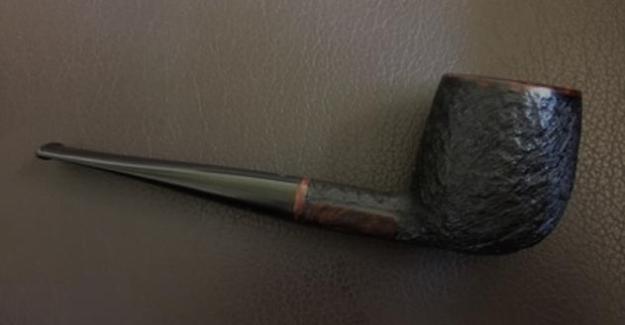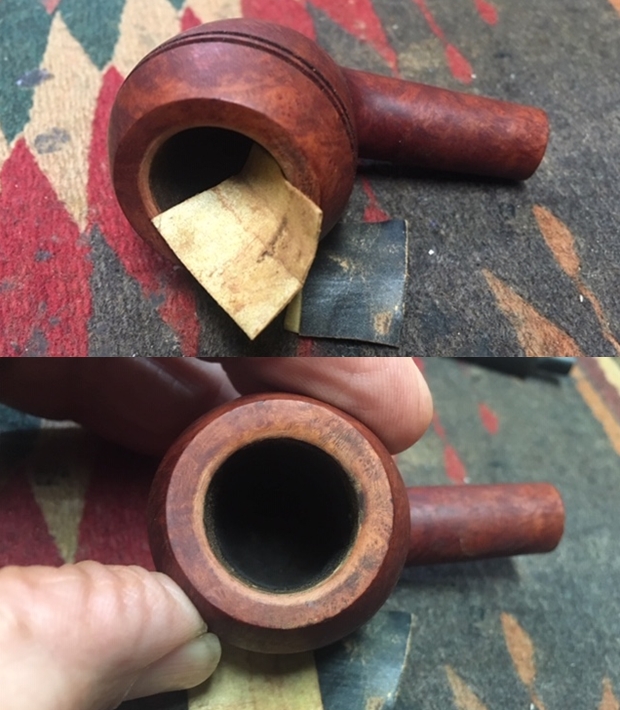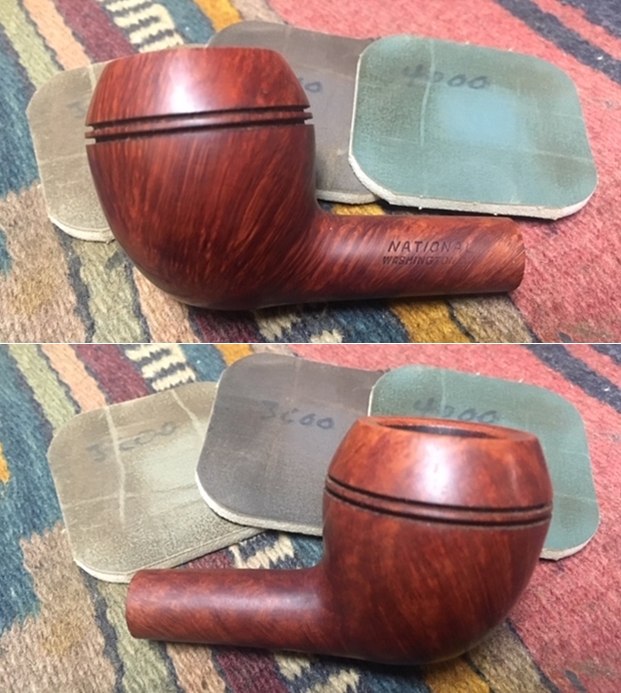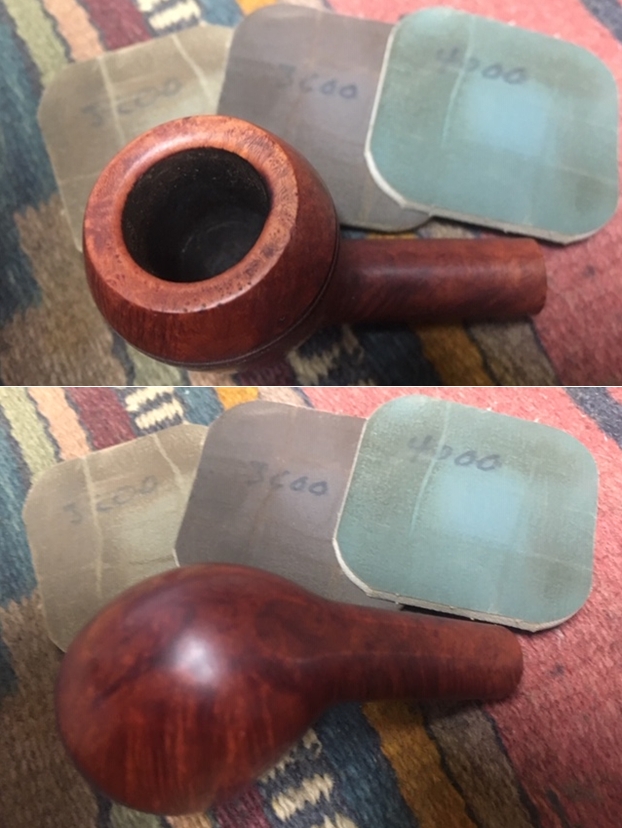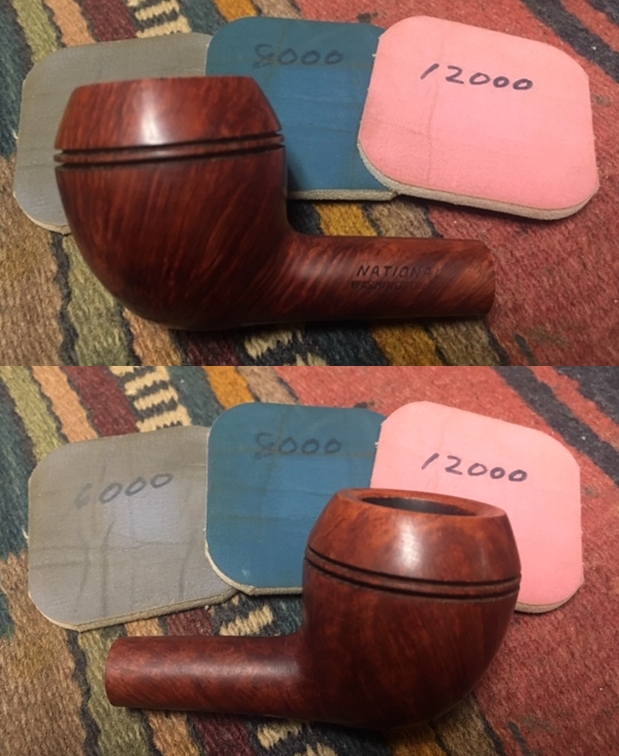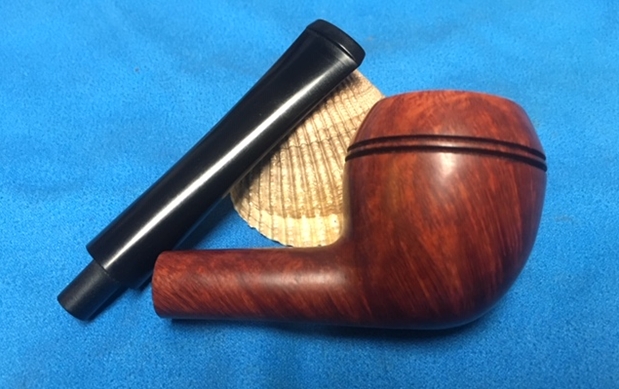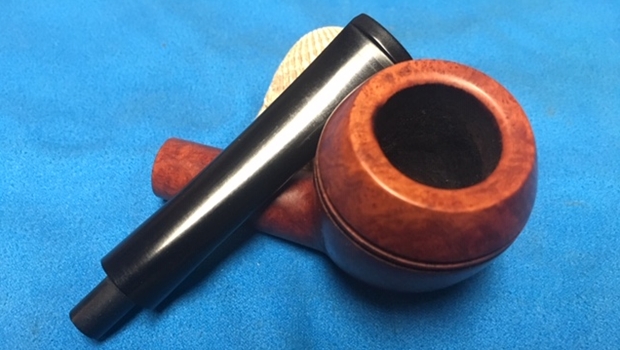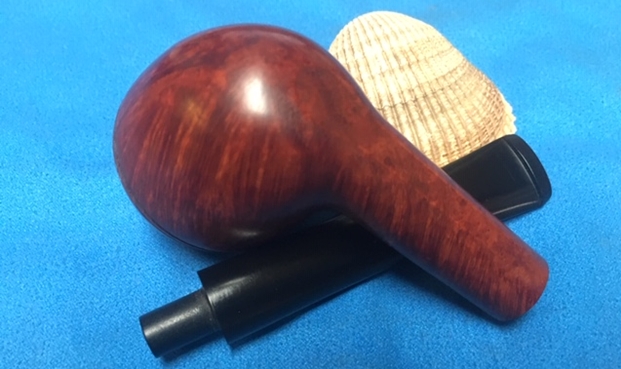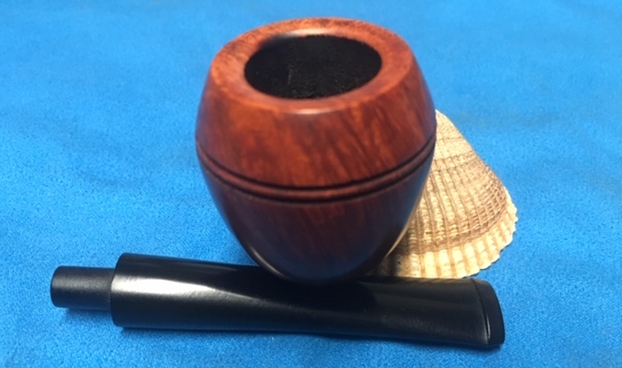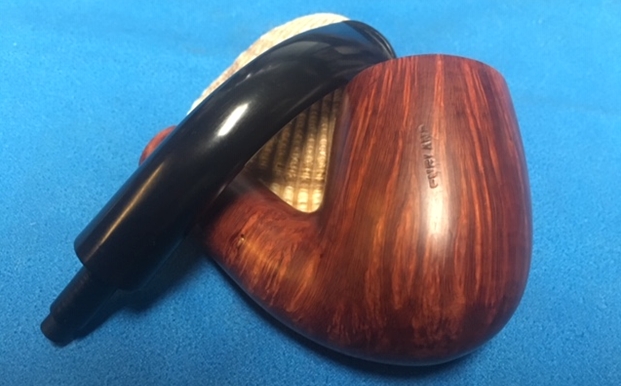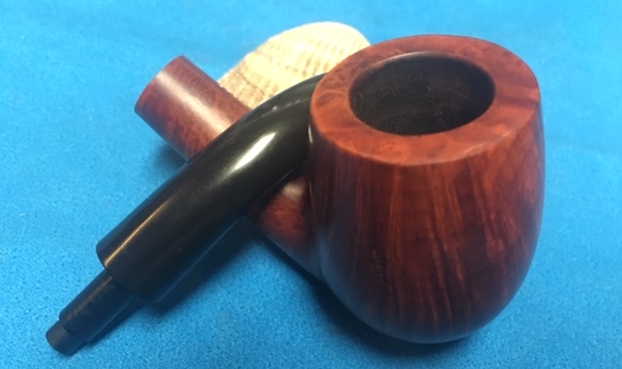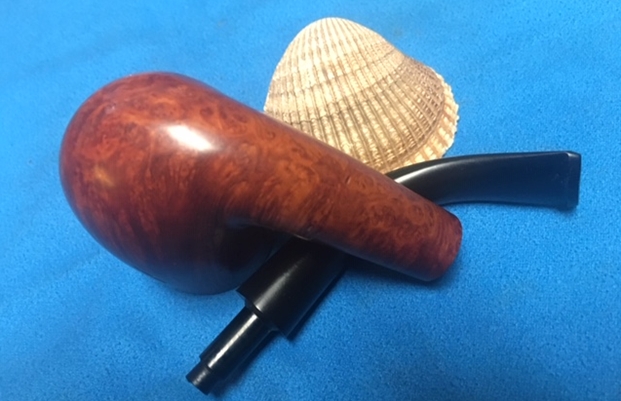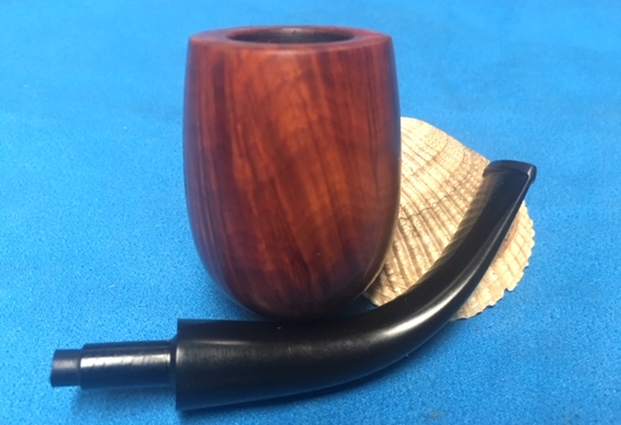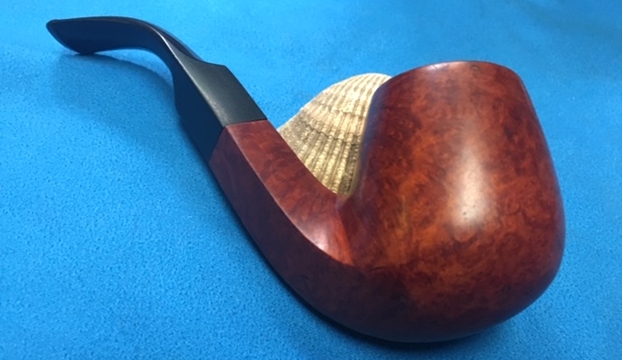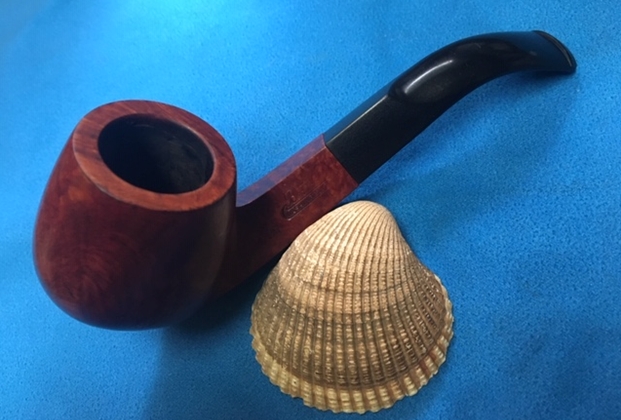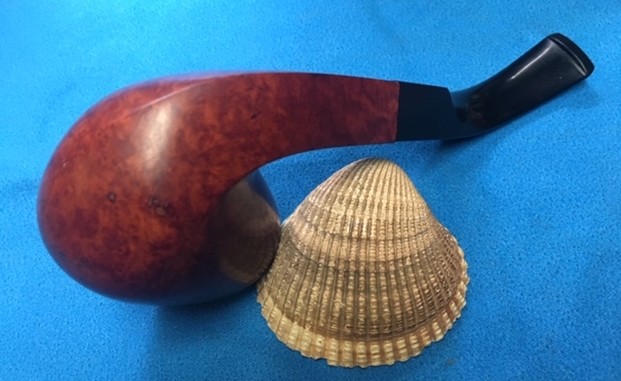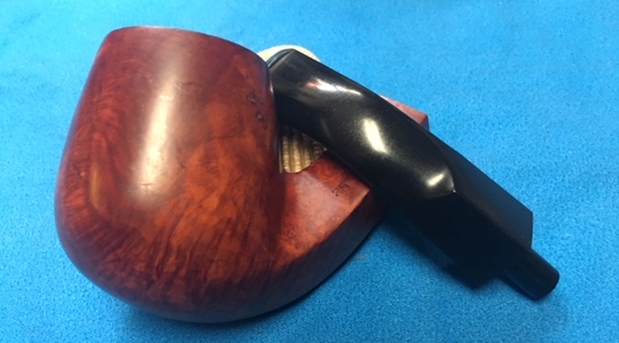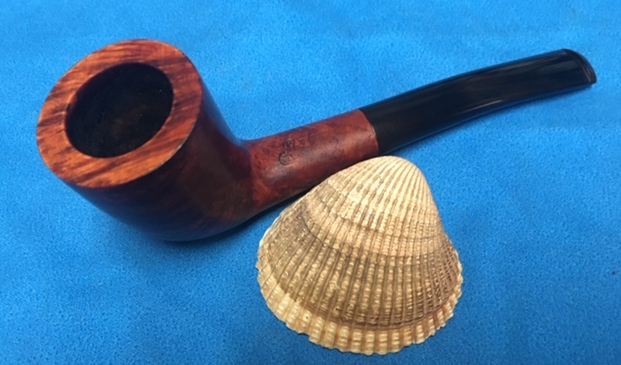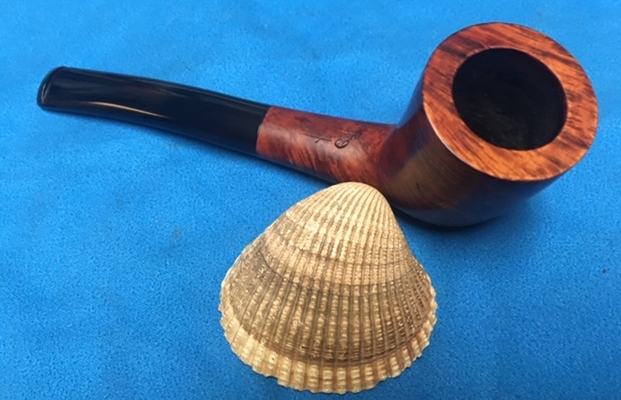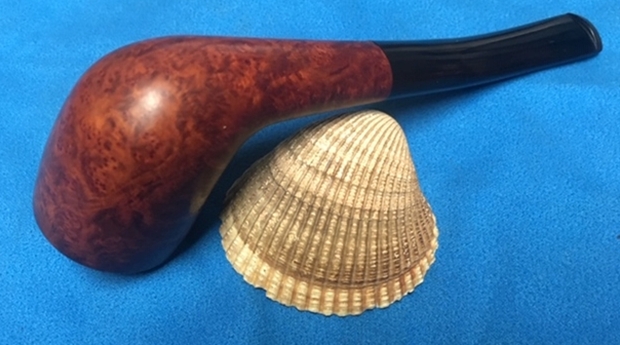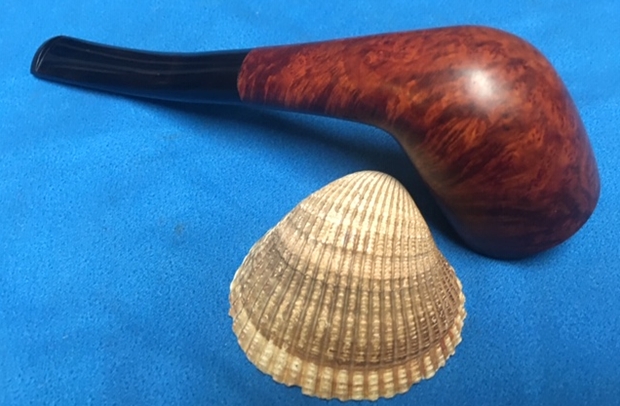
Another CBP Hudson Bay Canadian from the Bertrams Lot


Blog by Steve Laug

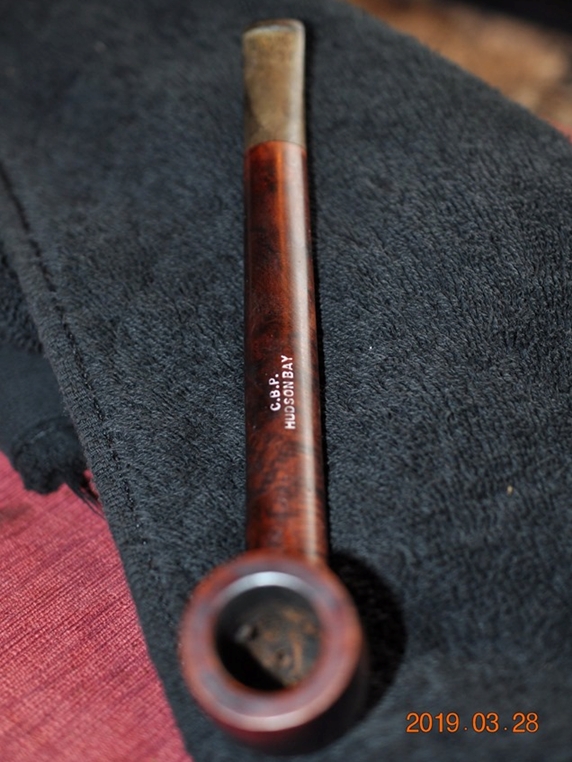
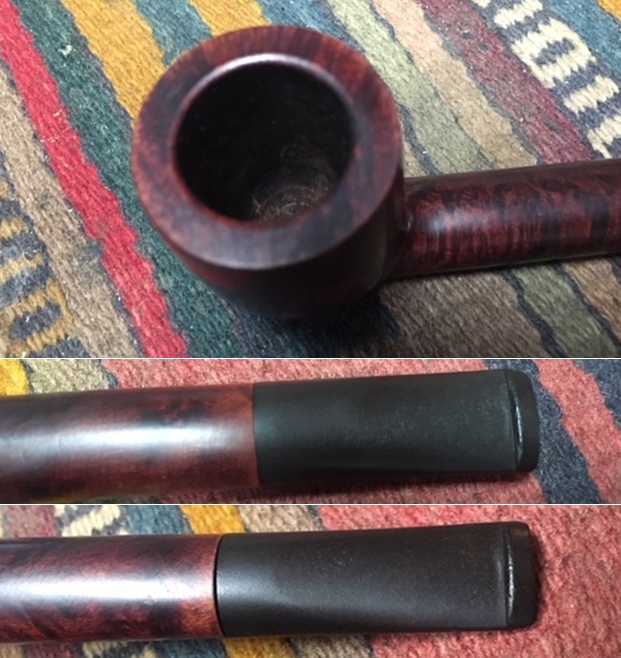
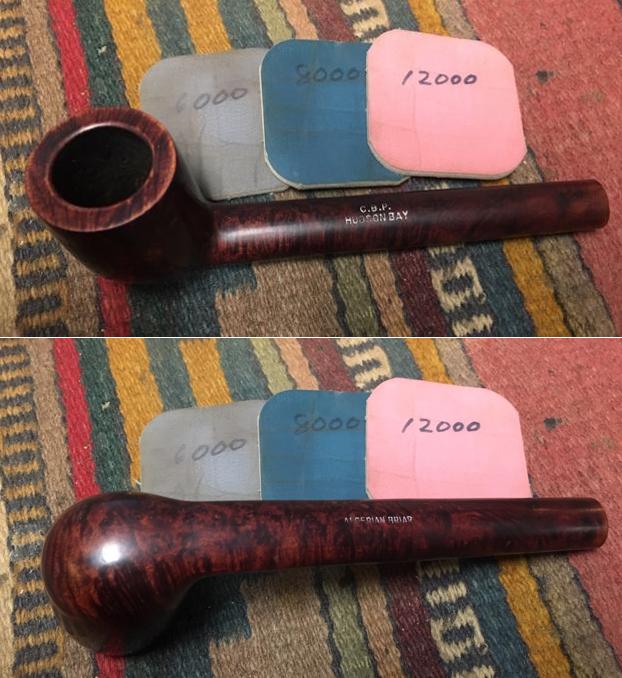
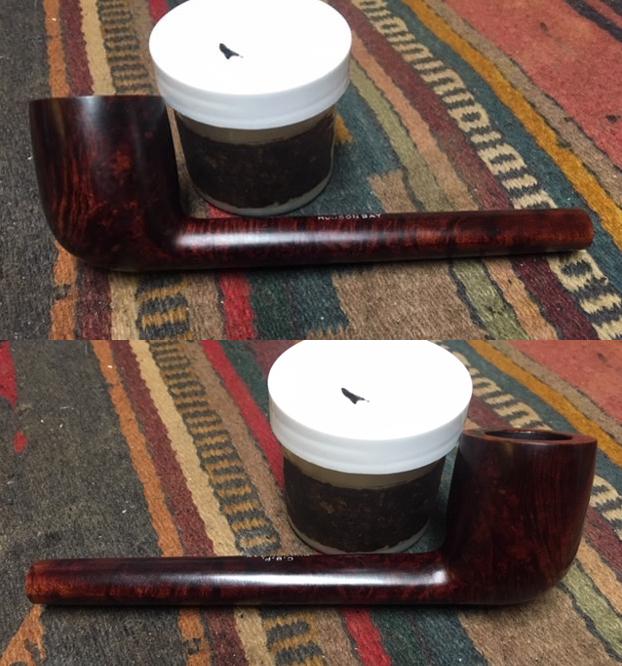
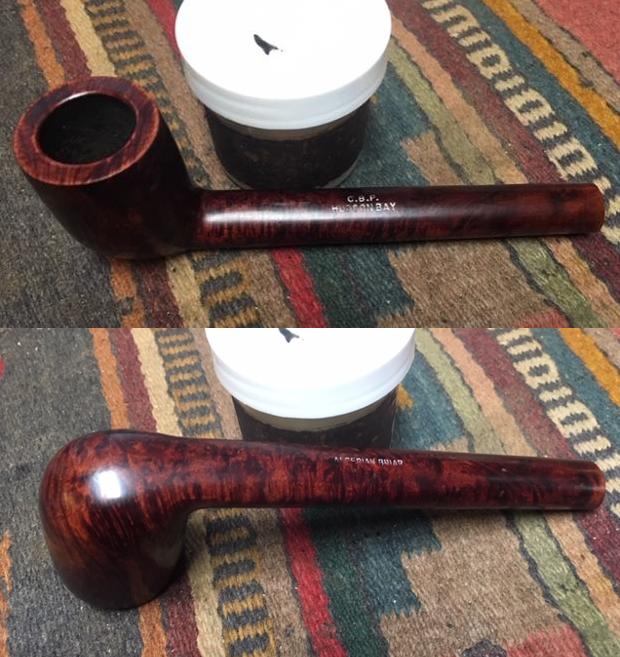
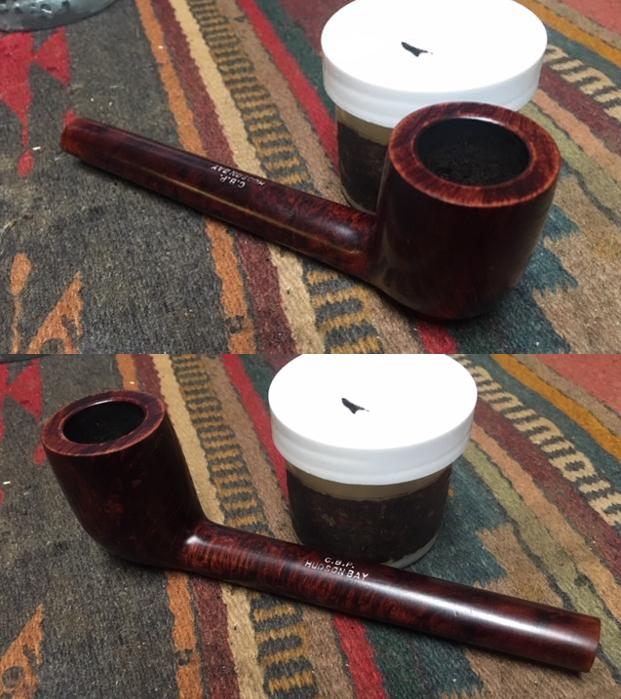
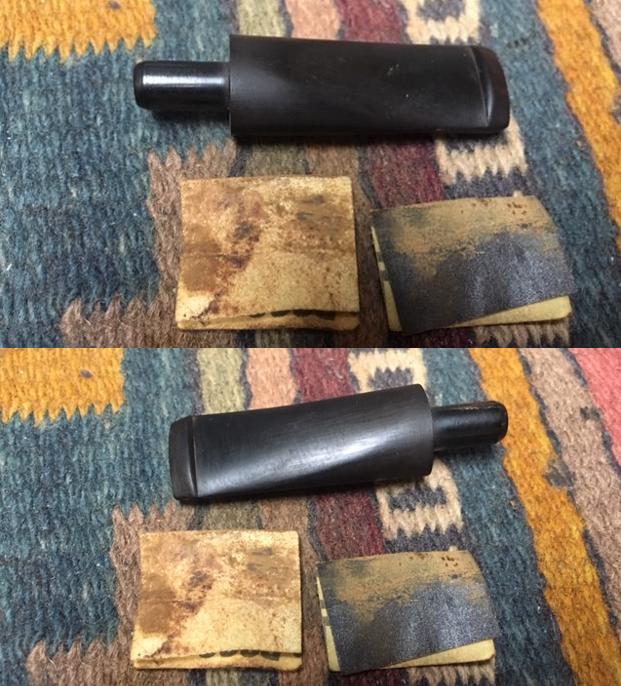
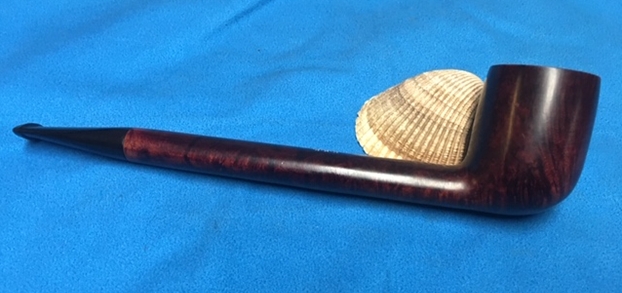
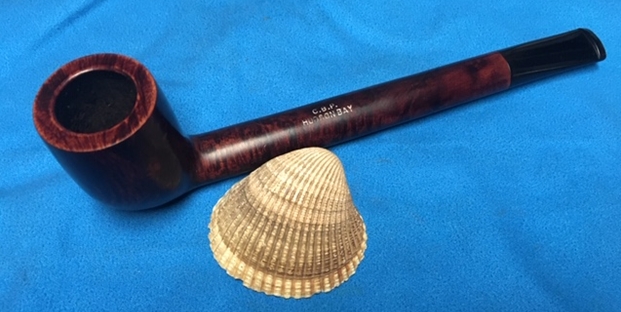
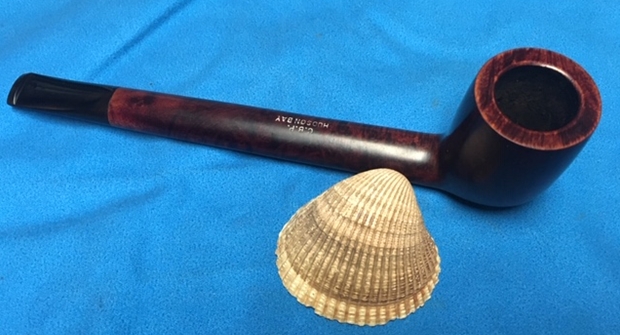
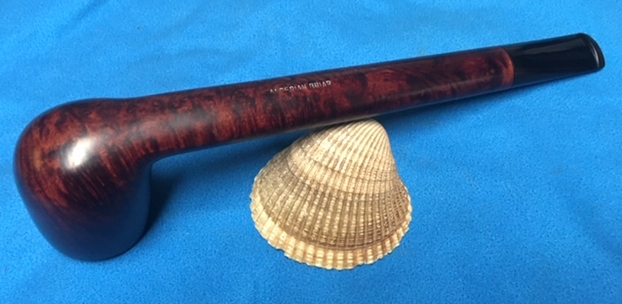
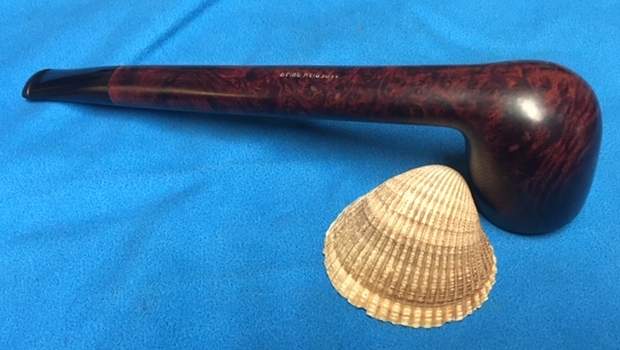
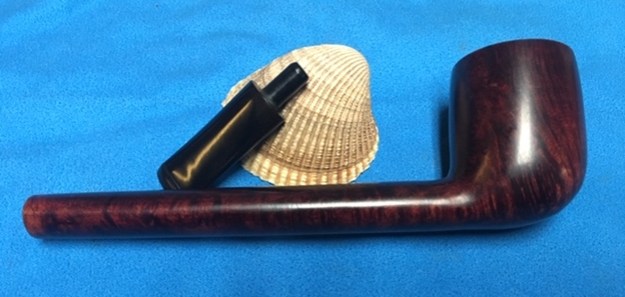
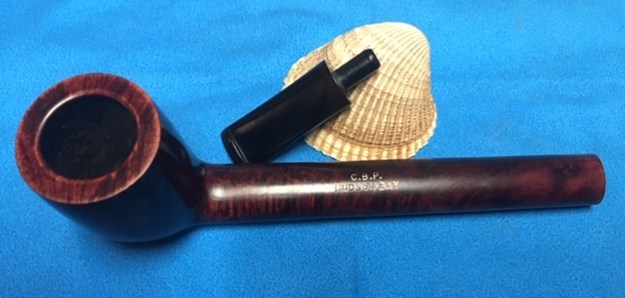
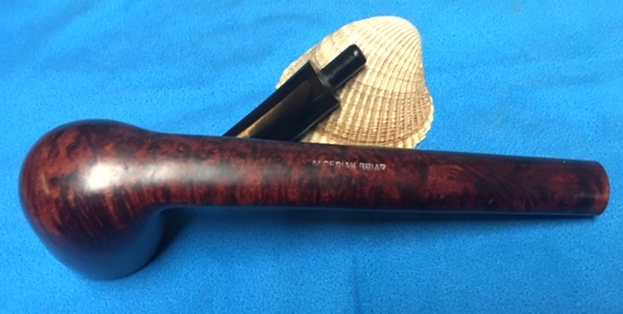
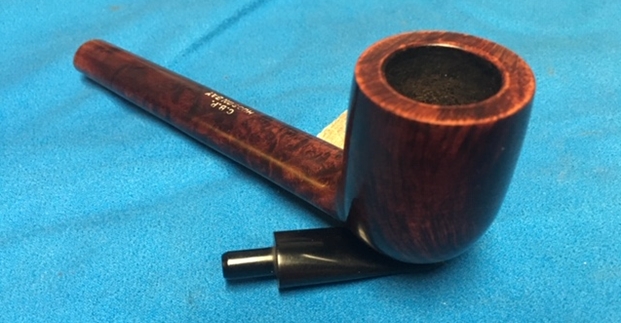
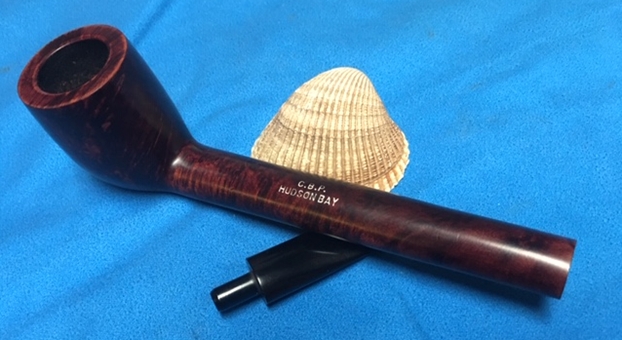
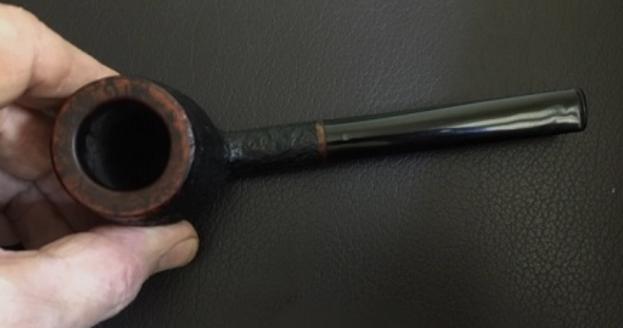
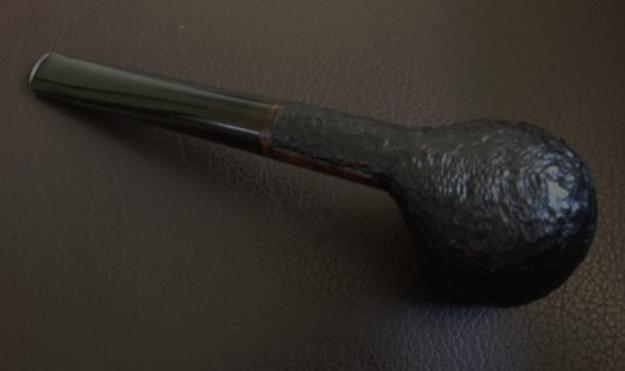
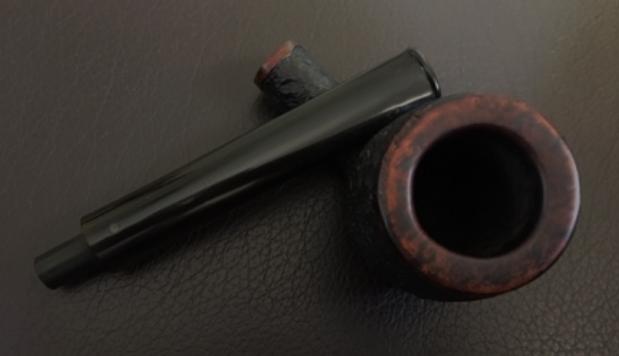
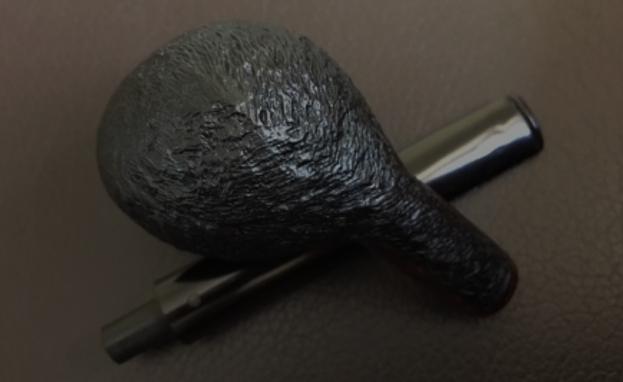
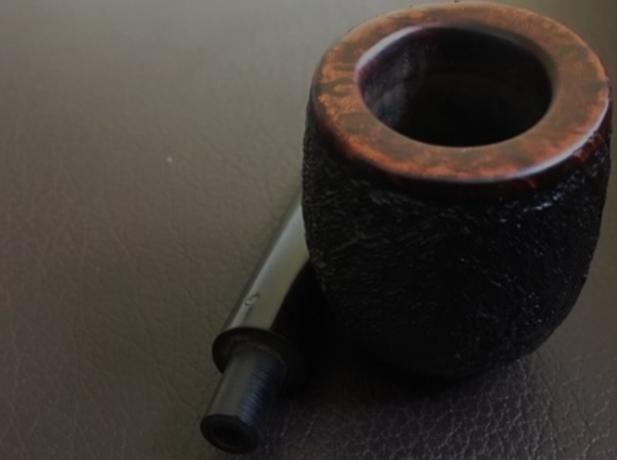
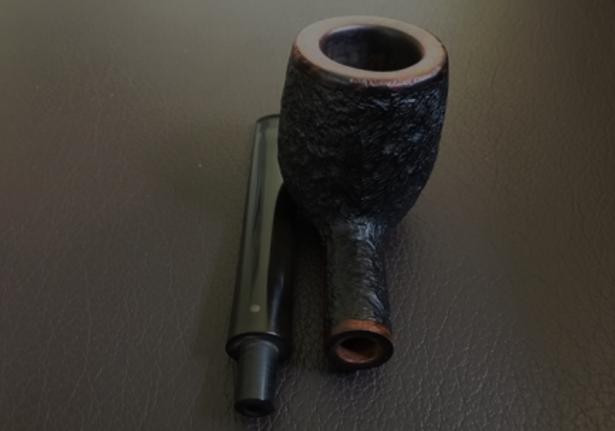
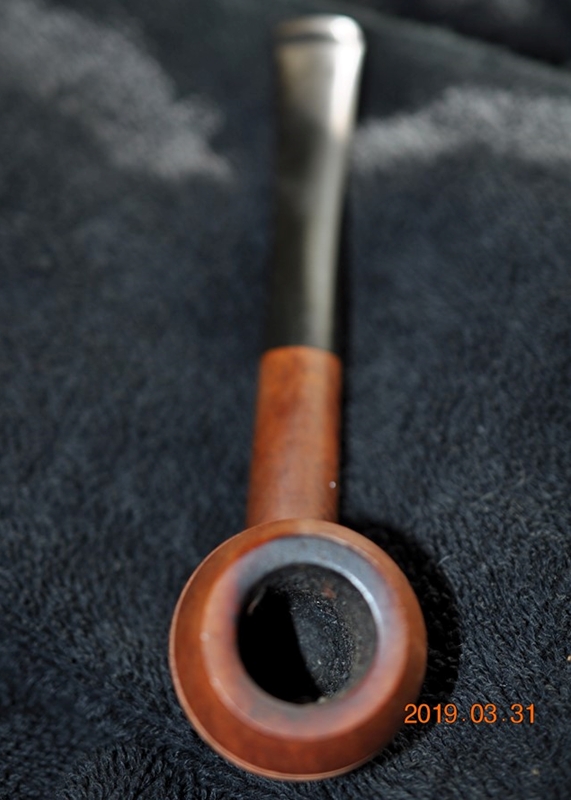
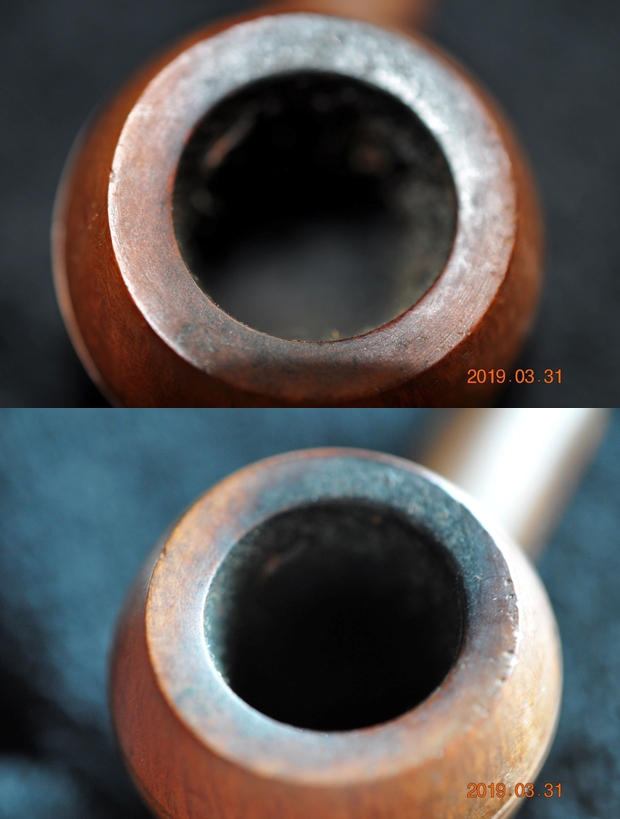
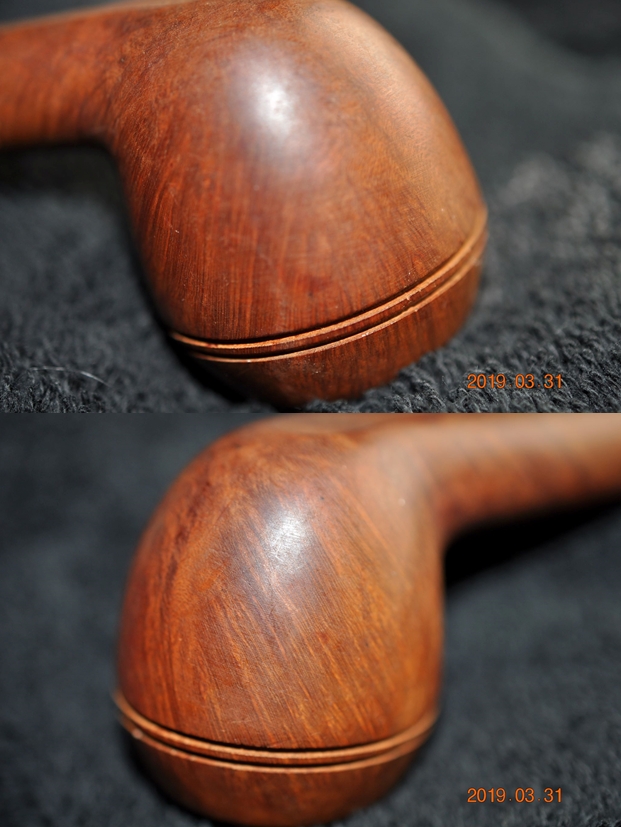
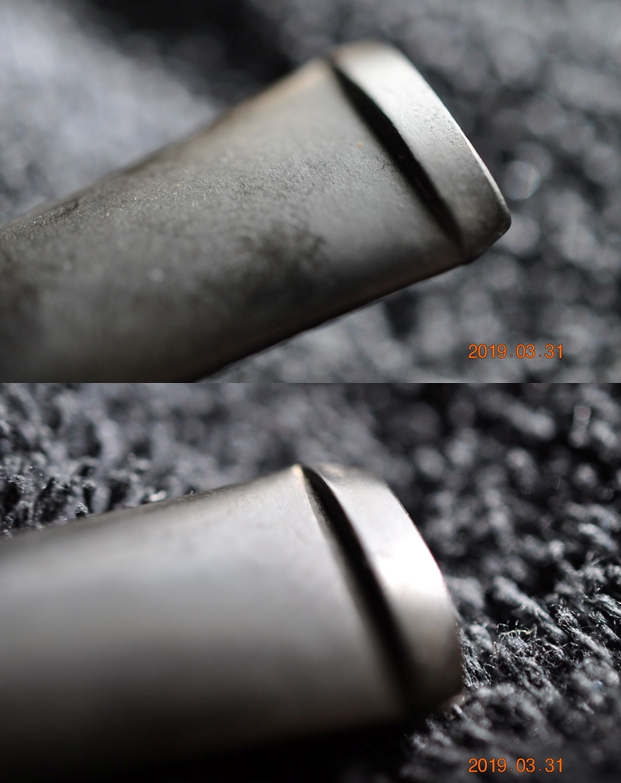
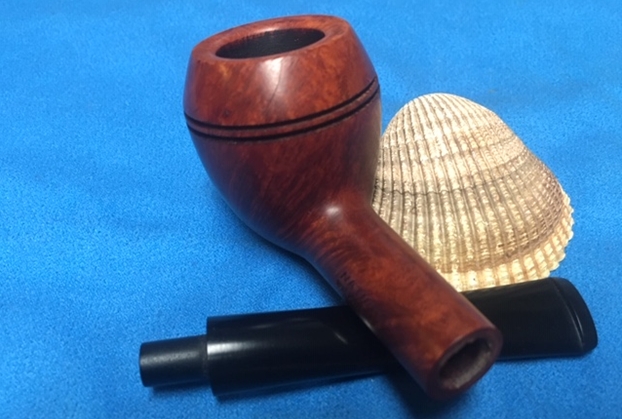
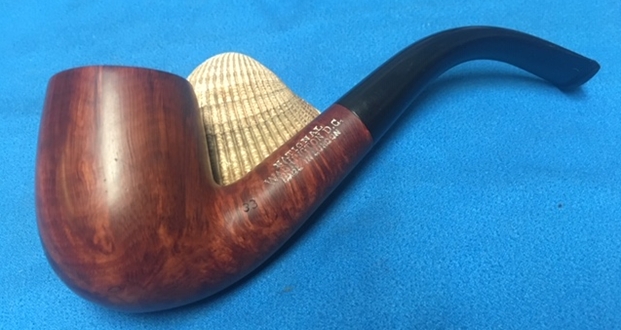
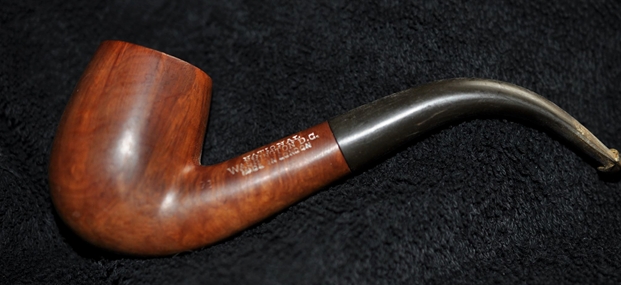
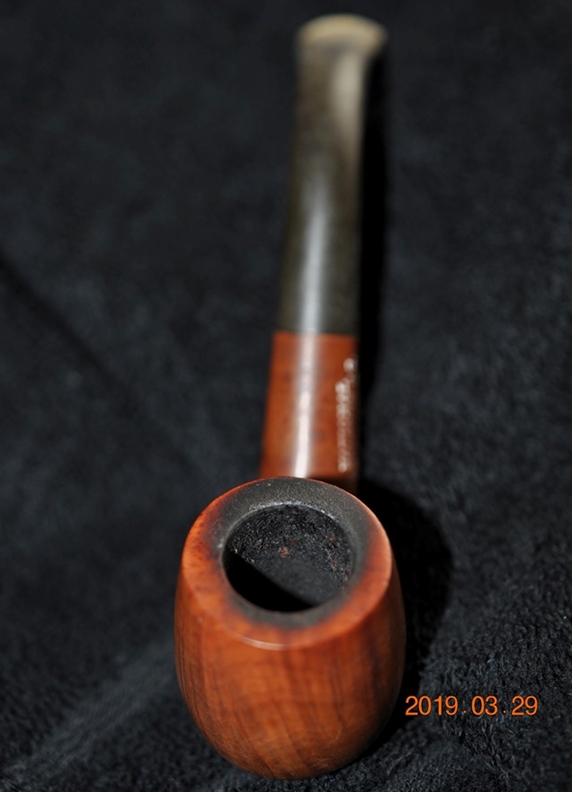
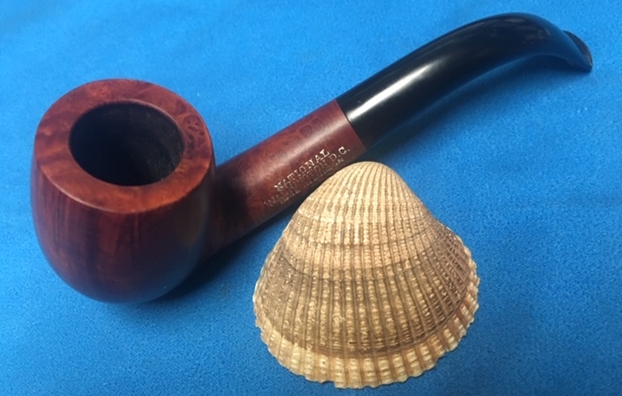
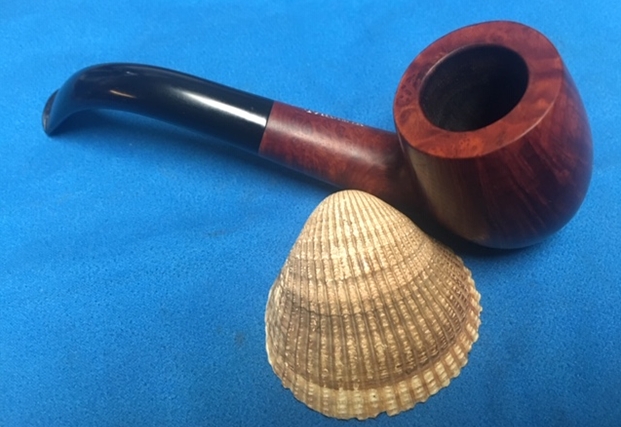
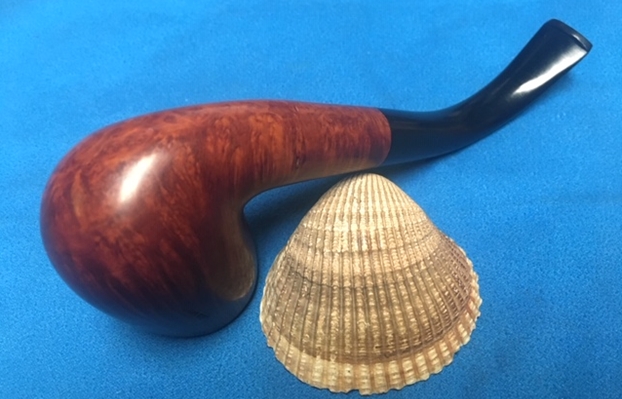
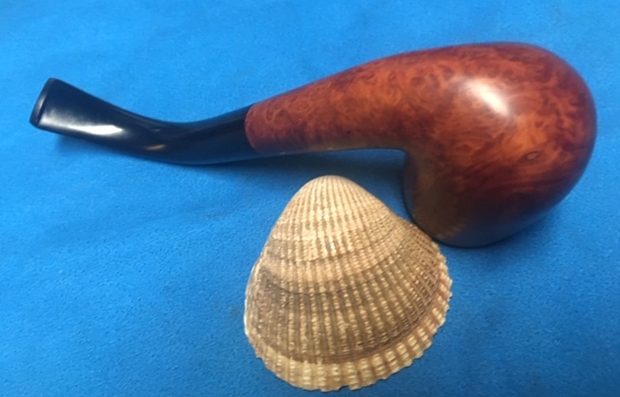
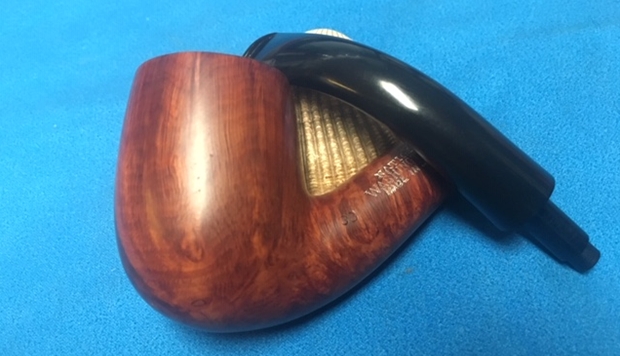
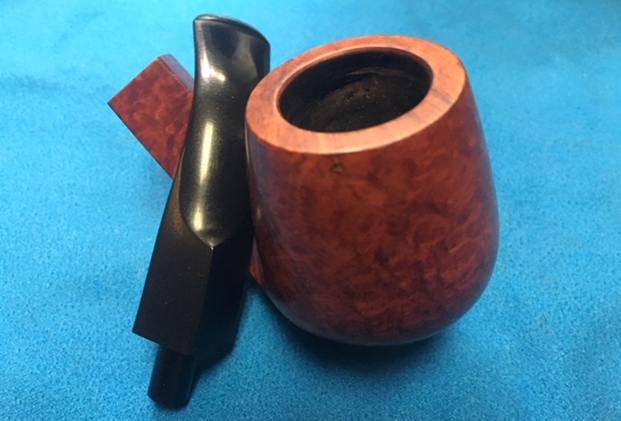
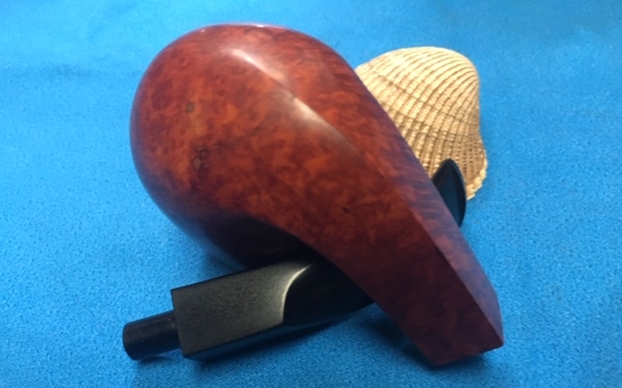
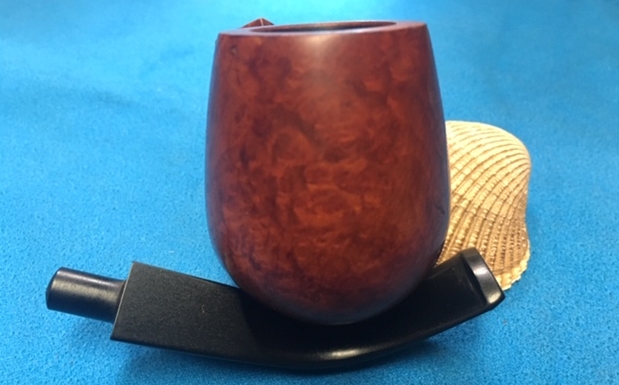
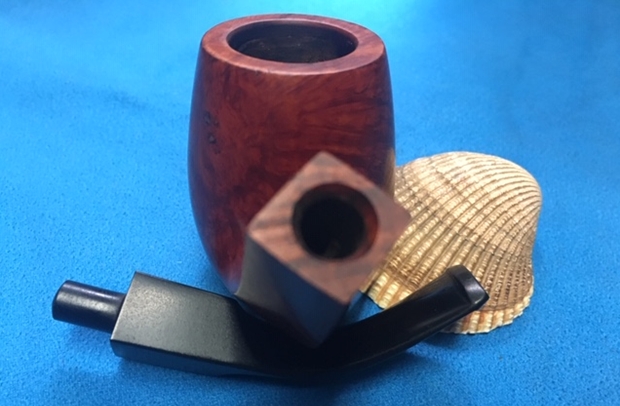
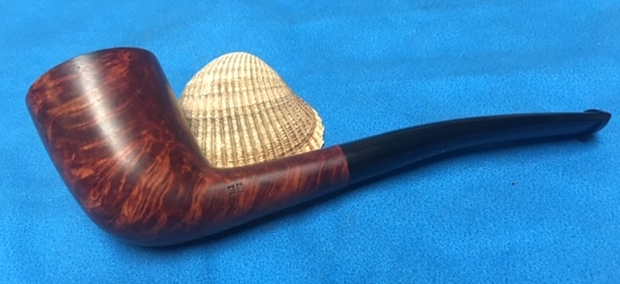
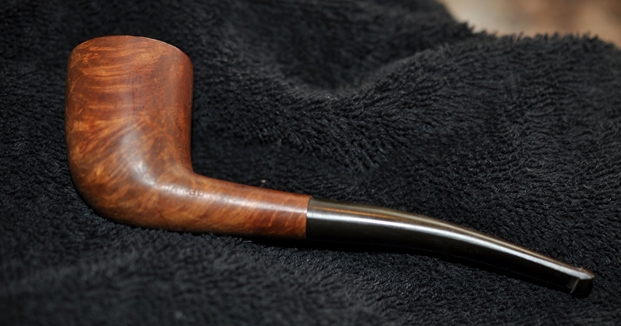
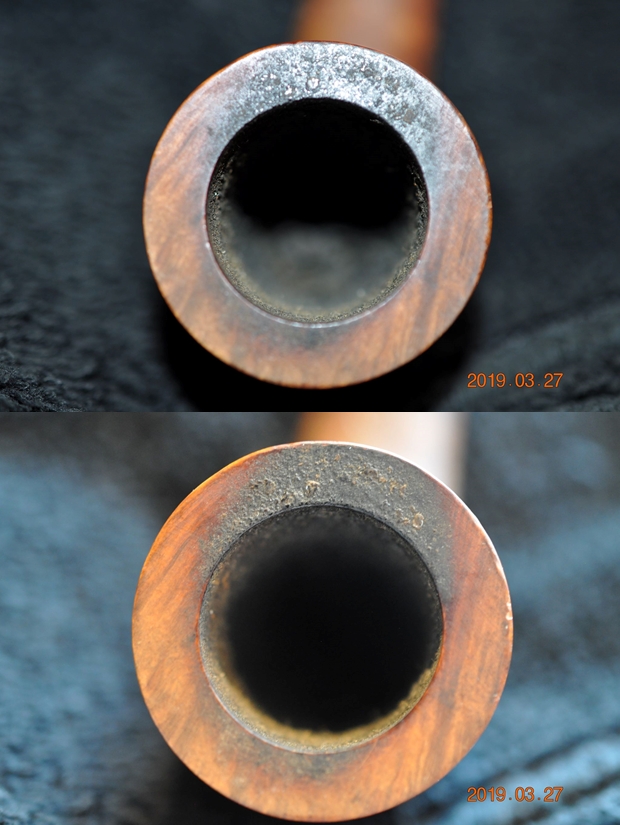
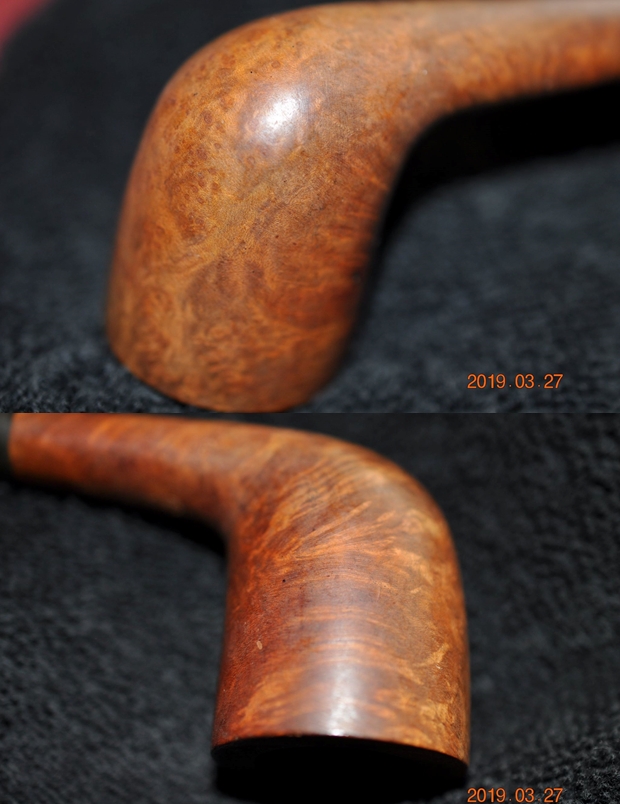
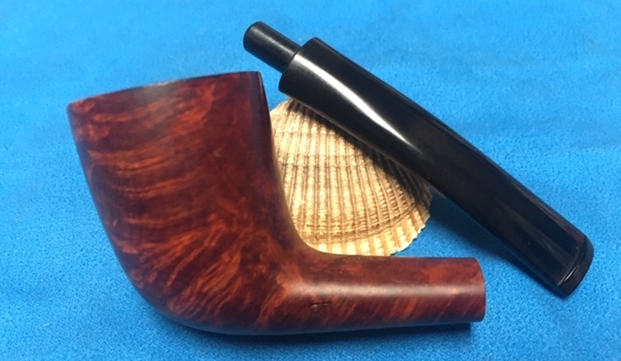
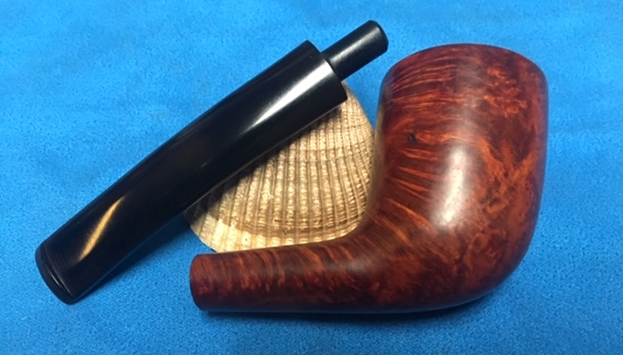
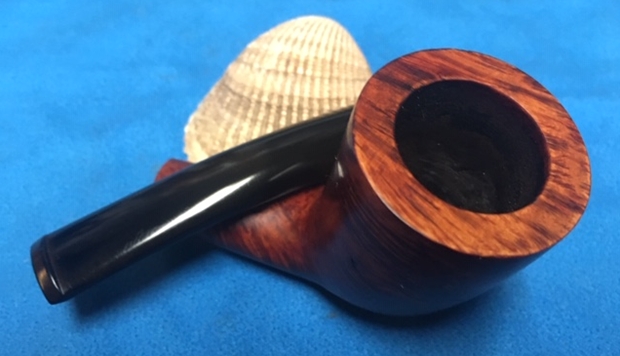
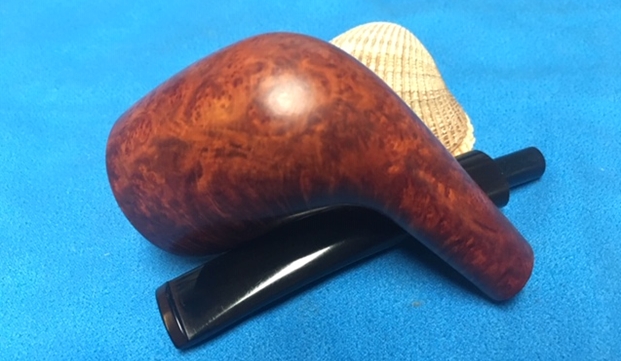
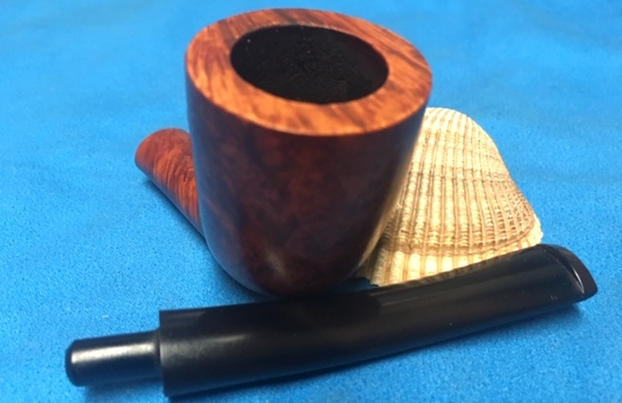
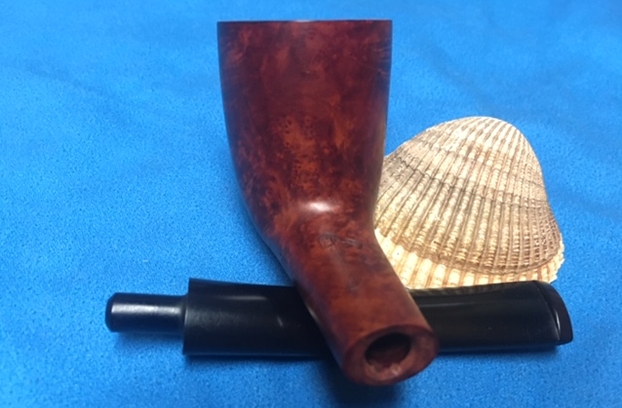
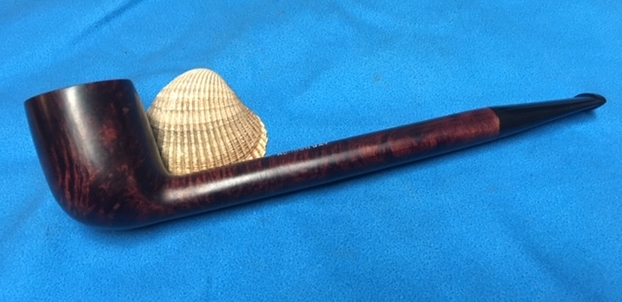
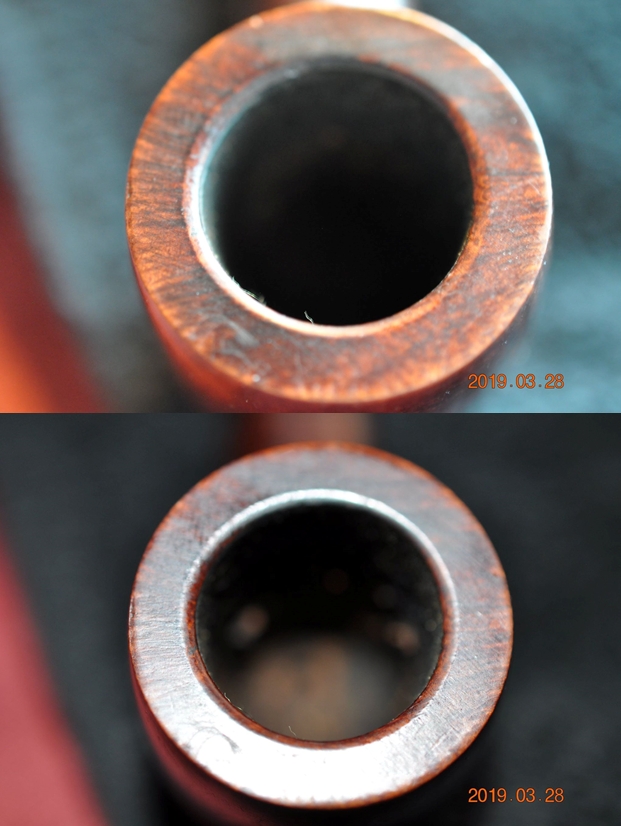
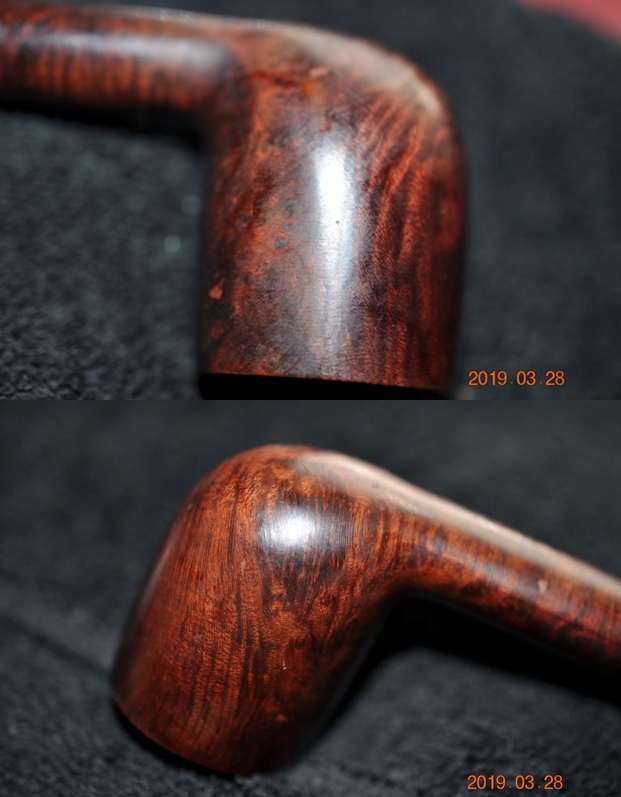
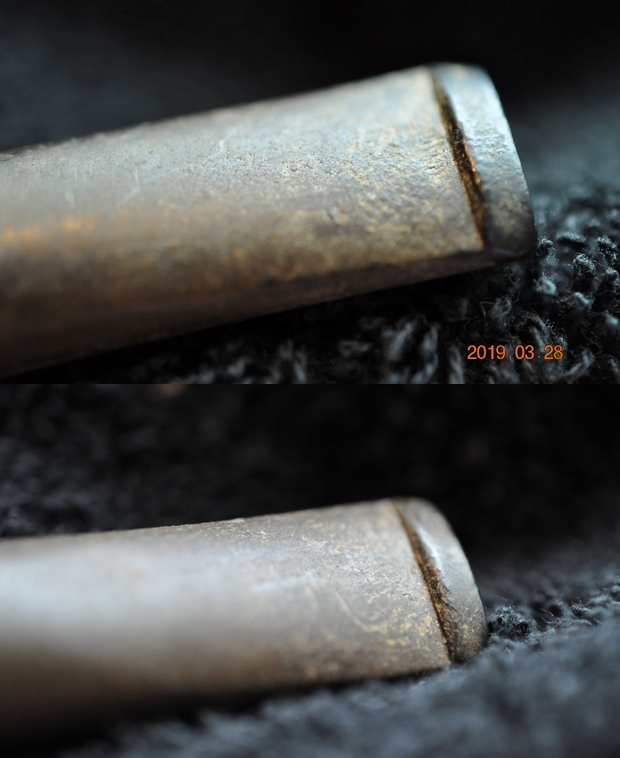
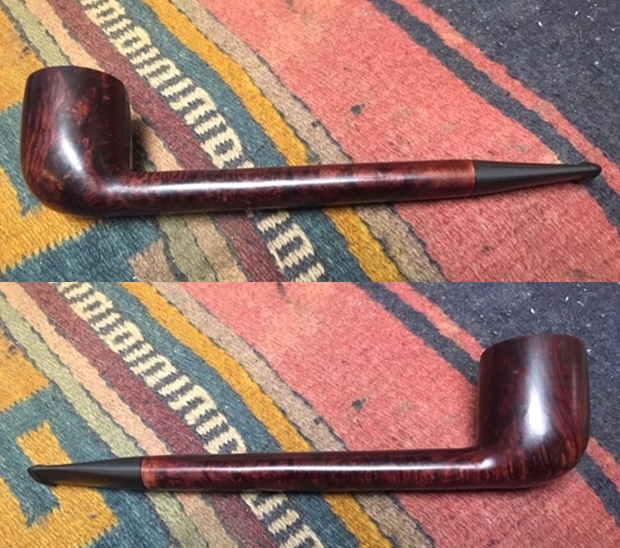
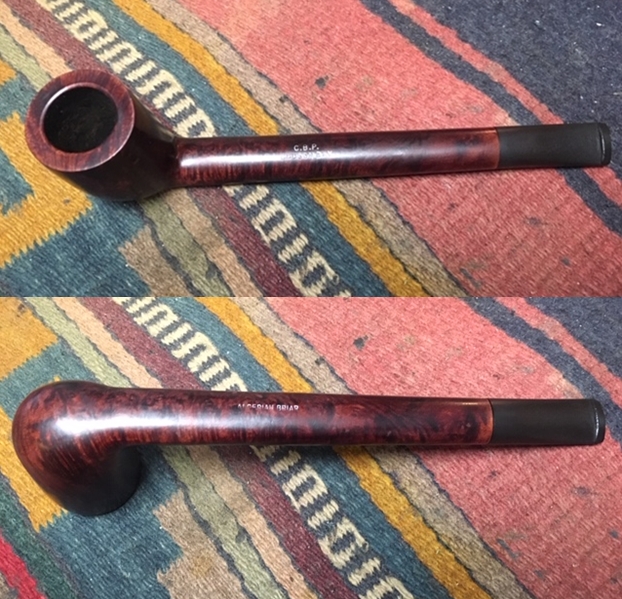
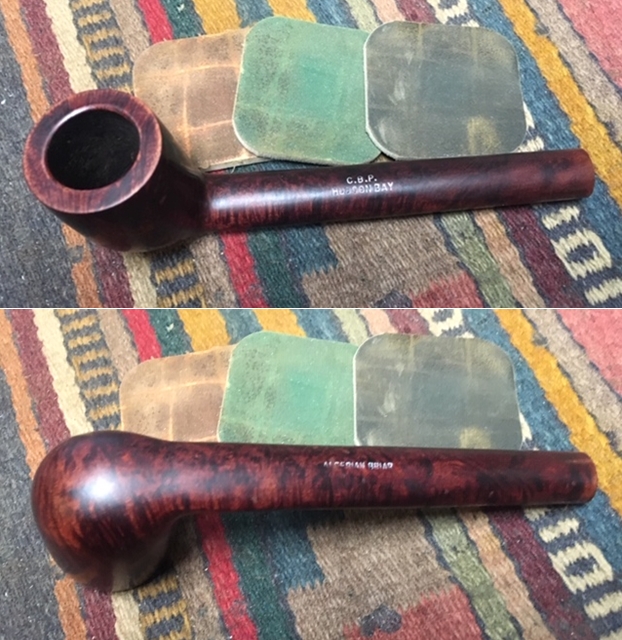
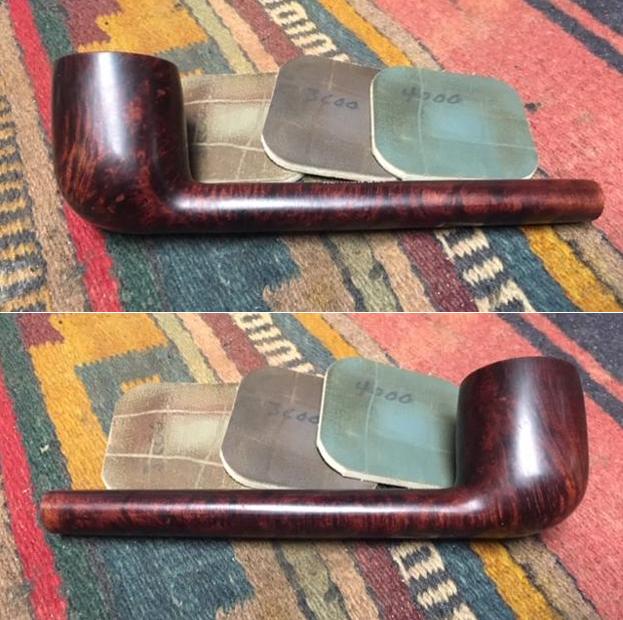
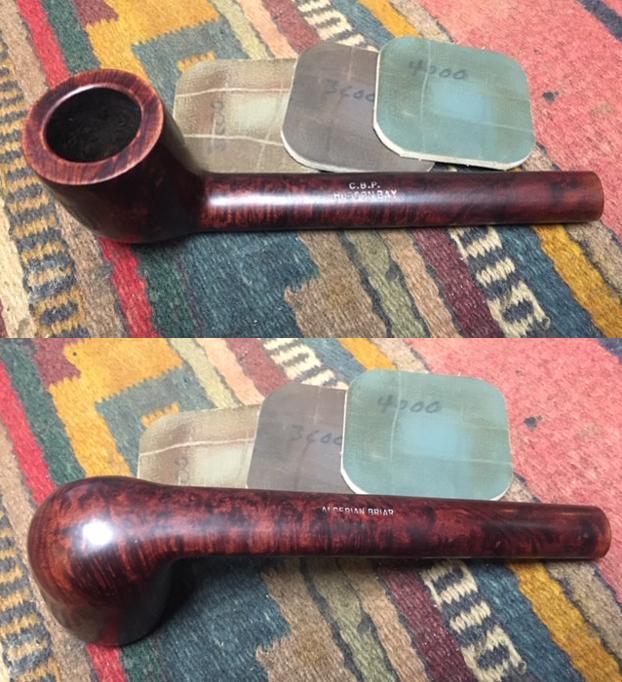
Give the previous blogs a read to have an idea about the Bertram Collection that I am working on these days. I can’t adequately describe how overwhelmed I am when I look at the 200+ pipes that need to be restored but there is only one way to move ahead – 1 pipe at a time. Jeff is doing the major cleanup on the lot as that would be more than I could handle by myself in moving through this many pipes. From his cleaned pipes the next one I chose was a long shank C.B.P. Hudson Bay Canadian. There were two C.B.P. brand pipes in the lot and both were long shank Canadians. Like the first one this one also had a smooth finish that was dirty but the grain shone through showing me that this was a beautiful pipe. It had a long shank and short stem. There was very little cake in the bowl and the rim top looked almost pristine. The stem was oxidized and had some pitting on both sides. Jeff took photos of the pipe to give an idea of its condition before he did his cleanup. Jeff took a close up photo of the bowl and rim to capture the condition of the pipe before he started his cleanup work. The rim top looked really good with a light lava and grime coat. There were some small nicks on the rim top and outer edge but other than that it was very clean. The bowl had a very thin cake and was quite clean.He also took photos of the sides of the bowl and heel to show the interesting grain on the pipe. The finish is very dirty and it looks like there are a few fills in the briar but this is another interesting pipe. Jeff took photos to capture the stamping on the top and underside of the shank. The first photo shows stamping on the top side which read C.B.P. over Hudson Bay. The stamping on the underside read Algerian Briar. All the stamping on the pipe is clear and readable.The next two photos show the stem surface. They show the pitting and oxidation on the surface of both sides of the stem. There are also some nicks on the edge of the button.I had already cleaned another CBP Hudson Bay Canadian and written a blog about it so I turned once again to have a look at the information on the brand that I included on that blog. Here is the link to the previous blog – https://rebornpipes.com/2019/04/06/the-3-pipe-from-a-collection-of-bertrams-and-others-a-cbp-hudson-bay-canadian/. I quote from the information found there and also include the pictures that I had tracked down about the brand.
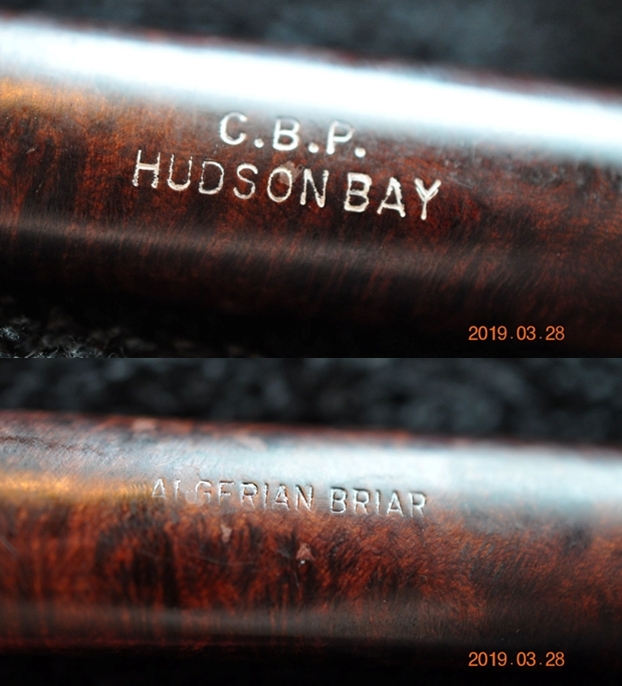
Now it was time to try to unravel the mystery of the stamping on the shank of this pipe. The stamping Algerian Briar was clear but did not tell me who the maker of the pipe was. The clue that I had to work with was the stamping on the top of the shank – C.B.P. Hudson Bay. With that I had two options to check out – would there be a listing anywhere for the C.B.P. brand or would there be anything under Hudson Bay. I turned first to look for anything about the C.B.P. brand. I looked on WMTP (Who Made That Pipe) and there was nothing. I looked on Pipedia and there was nothing. I looked on the PipePhil site and there was nothing. I looked at the same sites for the Hudson Bay stamp. The results were the same. I stopped and paused for a moment and thought about the initials. What brand did I know that fit the C.B.P. logo? There was only one that I could remember – short memory or short list? Your call. That brand was C.B. Perkins. I turned again to PipePhil and Pipedia and I found some help.

First on the PipePhil site (http://www.pipephil.eu/logos/en/logo-c1.html) I found a connection. I have included a screen capture below to show what I saw. Not counting the CBP in an oval logo on the stem what caught my eye was the C.B.P. Heritage stamp on the shank. Now I had the connection I was looking for – C.B.P. was linked to C.B. Perkins. Now I needed to have a look at Pipedia and see what I could find out about the brand.
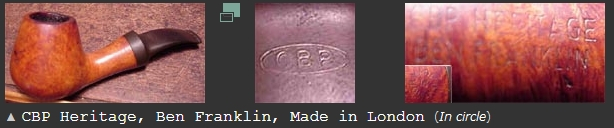
I checked first in the Pipemaker list by country that is on the site and could not find the brand. I then did a quick search on Pipedian and found this link: https://pipedia.org/wiki/C.B._Perkins. I quote from that site in full.

The first C.B. Perkins store opened in Boston in the early 1900’s. Perkins quickly became the leading retail tobacconist in New England, a position it held for over 75 years. In 1986 Perkins management sold their Pennsylvania and New Jersey stores to DES Tobacco Corporation.

DES is a wholly owned subsidiary of the S. Frieder and Sons Company. S. Frieder and Sons had been a cigar manufacturer since 1920. In 1978 S. Frieder sold its manufacturing business to United States Tobacco so it could focus all its assets and energy on the retail tobacco business under the name of DES Tobacco. Thus, the merger of C.B. Perkins and DES represented four generations of tobacco experience.

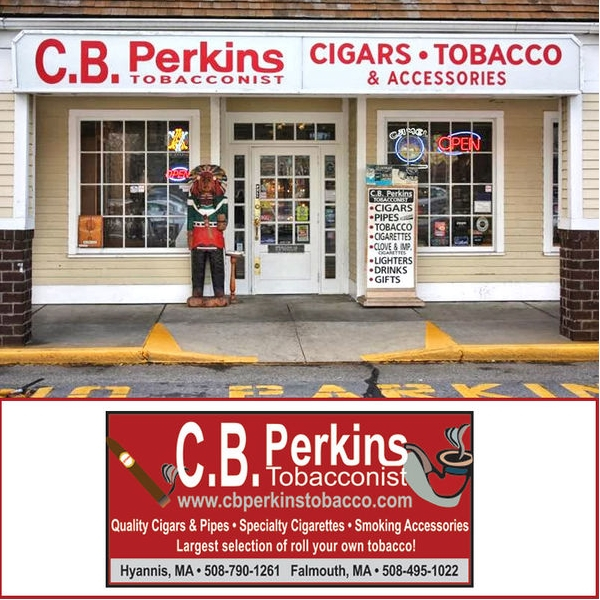
There were also some photos of the shop and business card courtesy of Doug Valitchka. I am including those here as well. Now I knew that I was dealing with a Tobacco Pipe Shop pipe from C.B. Perkins. However they did not make pipes but tended to have pipes made for them by English pipe maker such as Comoys, GBD and others. So that is where the hunt ends. There are no COM stamps on the pipe and no shape numbers to help nail down a maker. The shape reminds me a lot of both of those makers. But at least I know what the C.B.P. stamp means. Now it is time to work on this pipe.
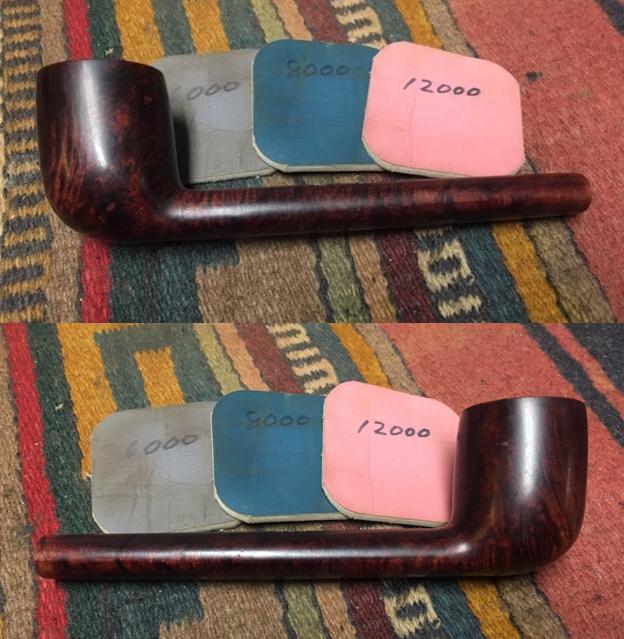
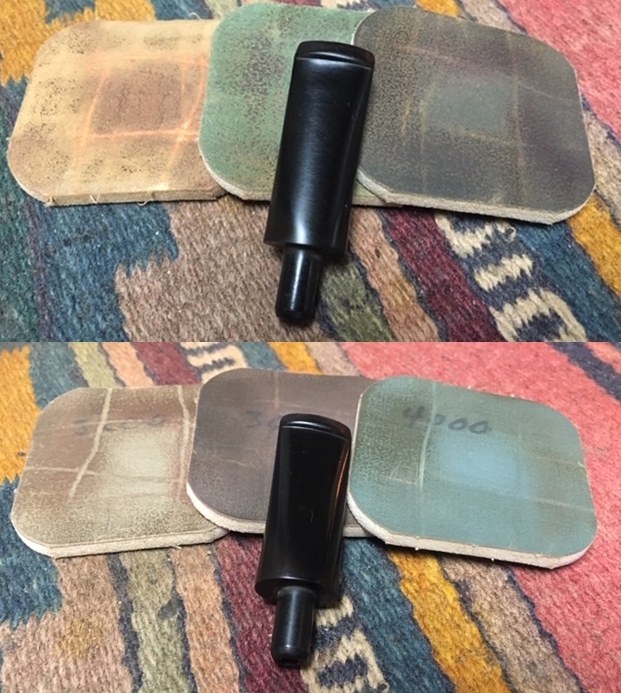
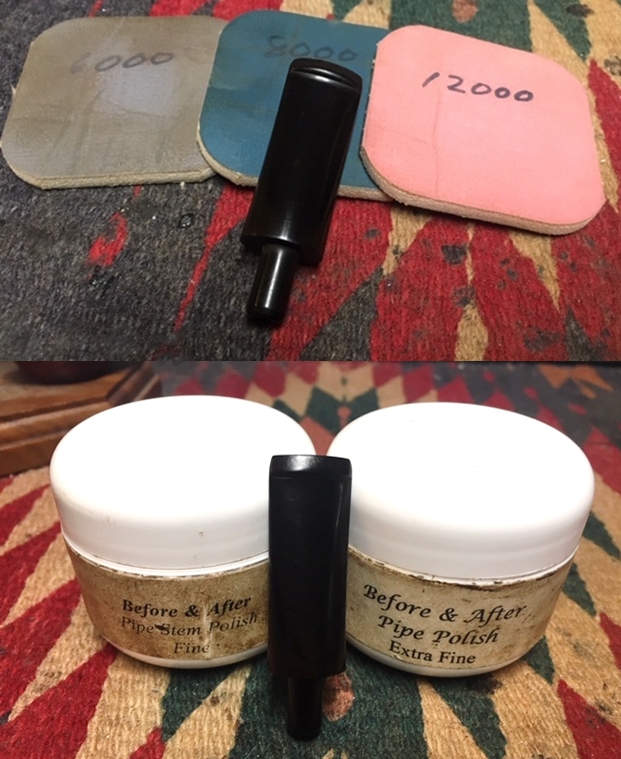
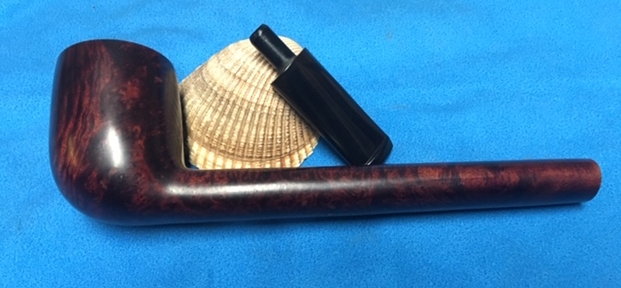
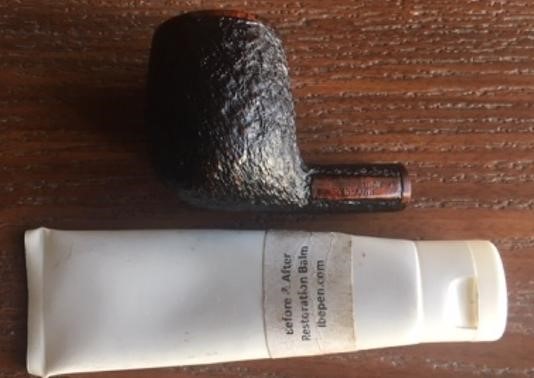
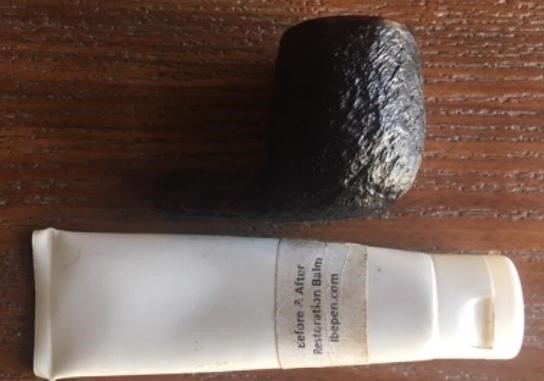
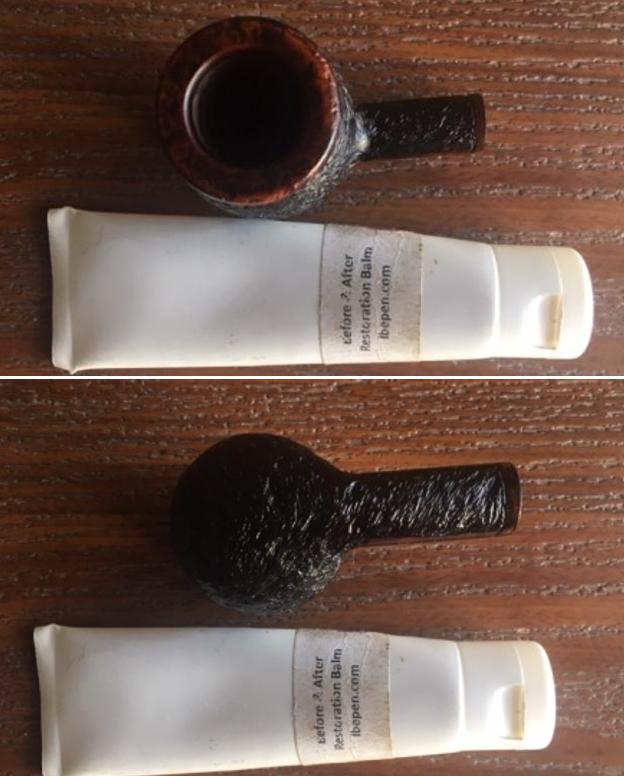
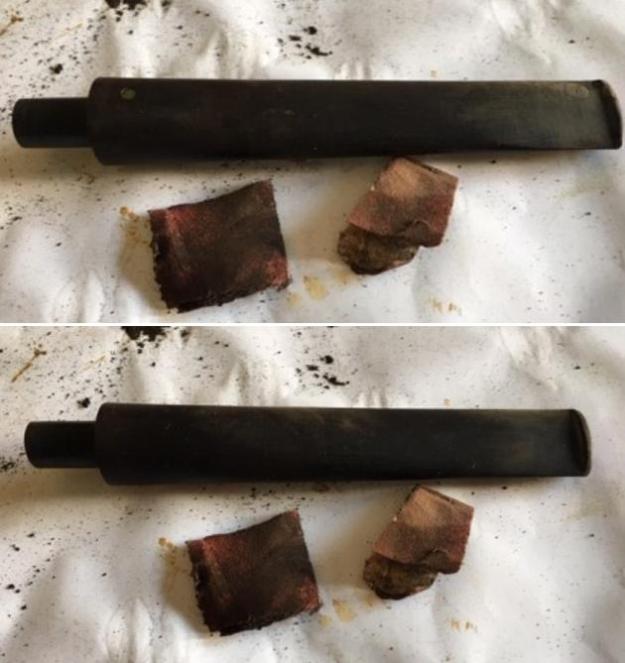
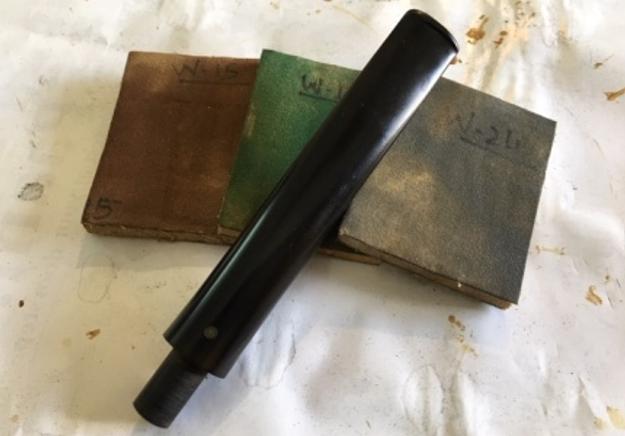
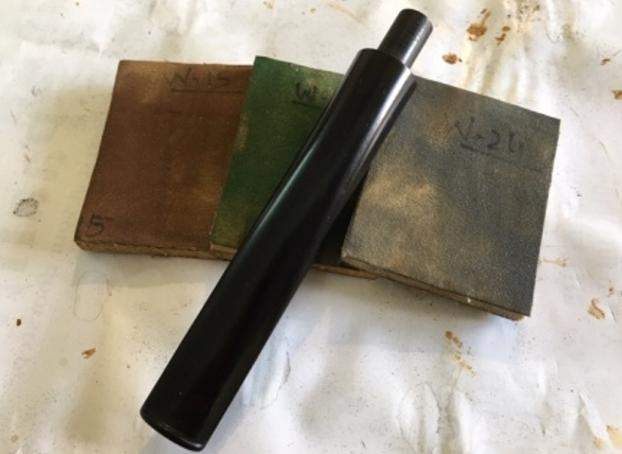
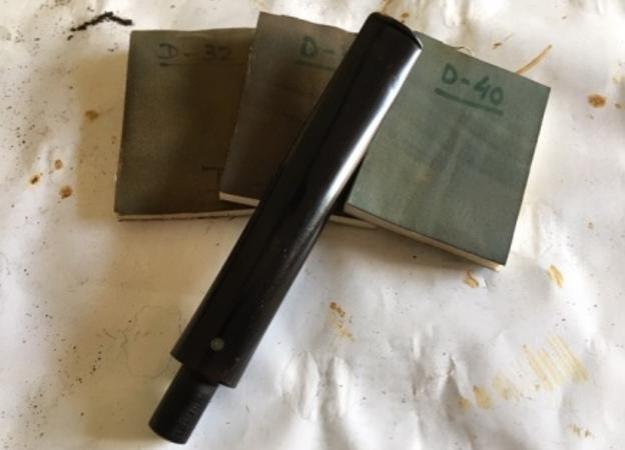
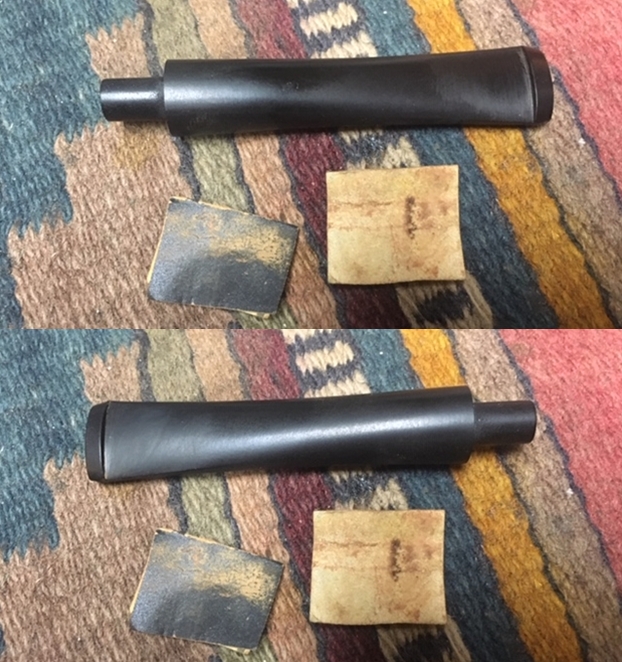
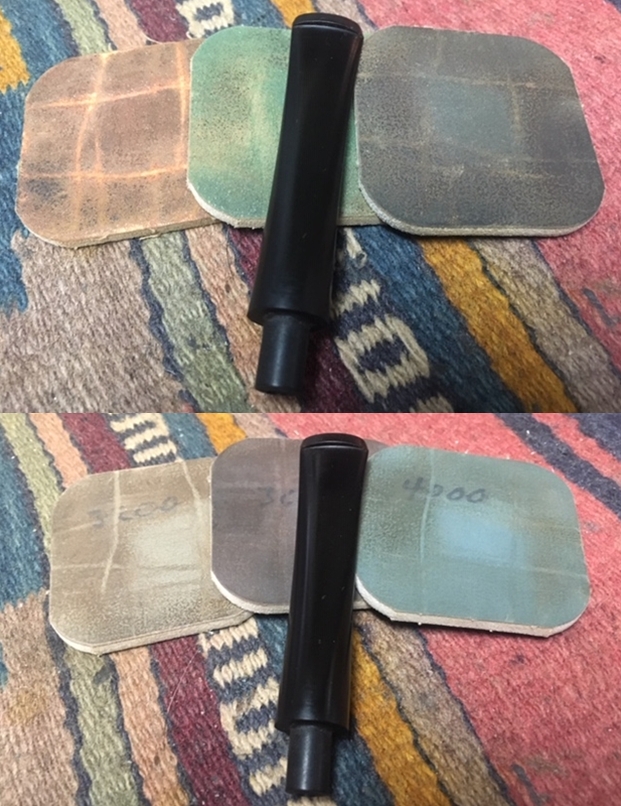
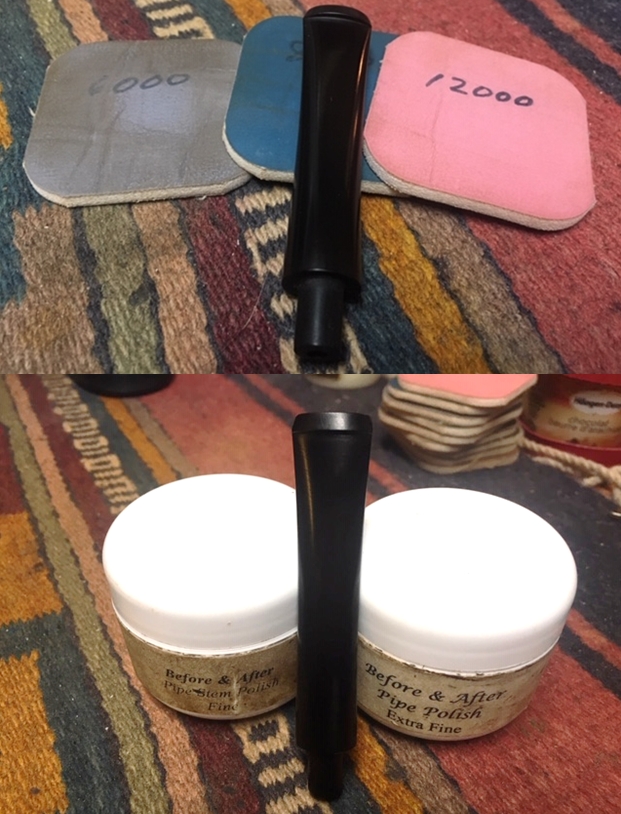
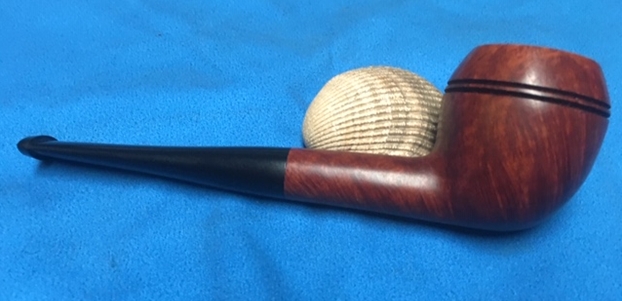
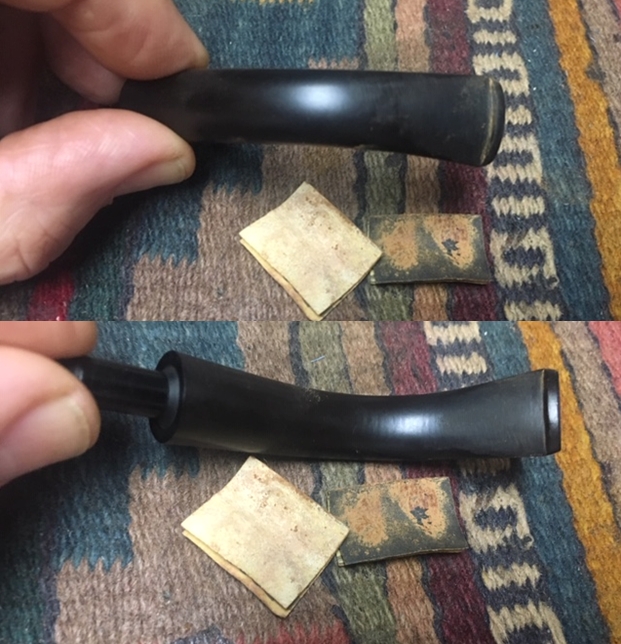
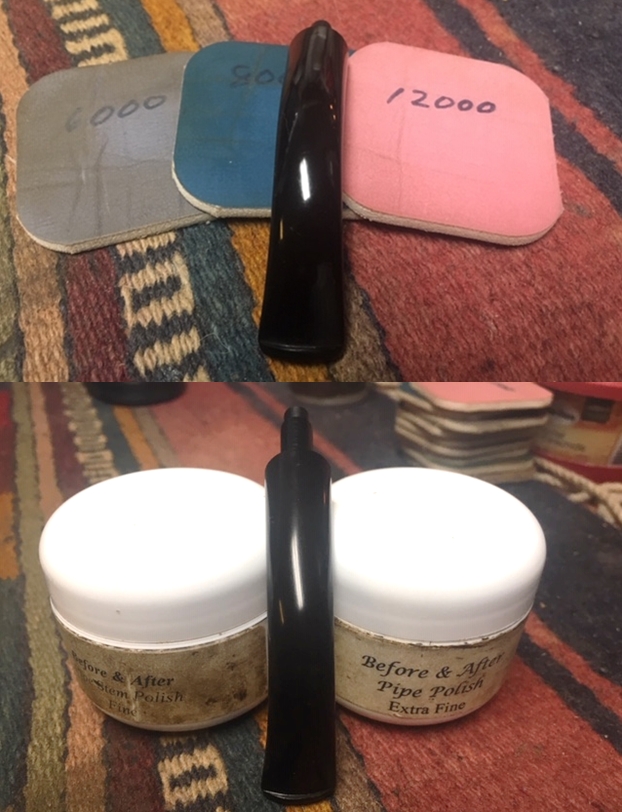
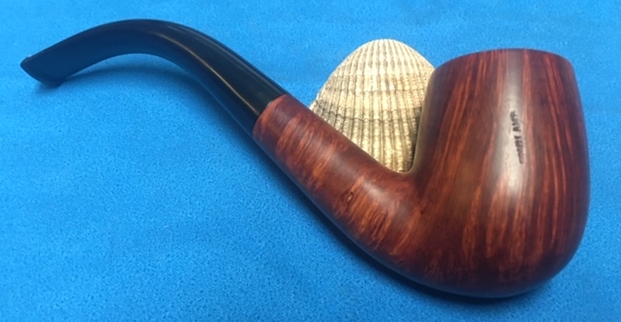
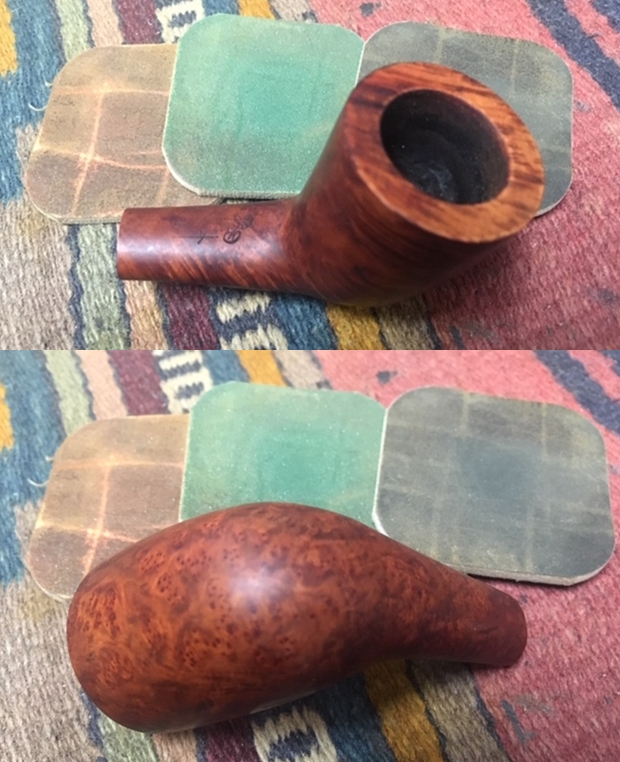
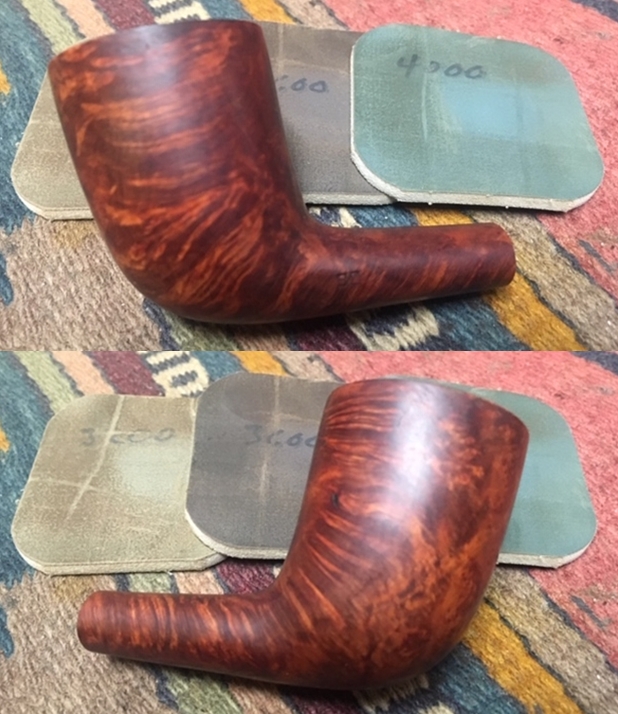
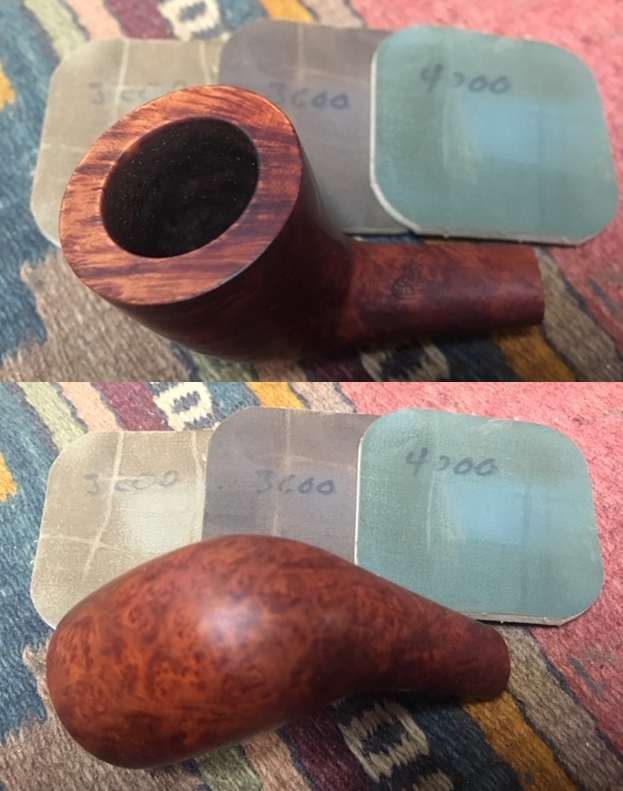
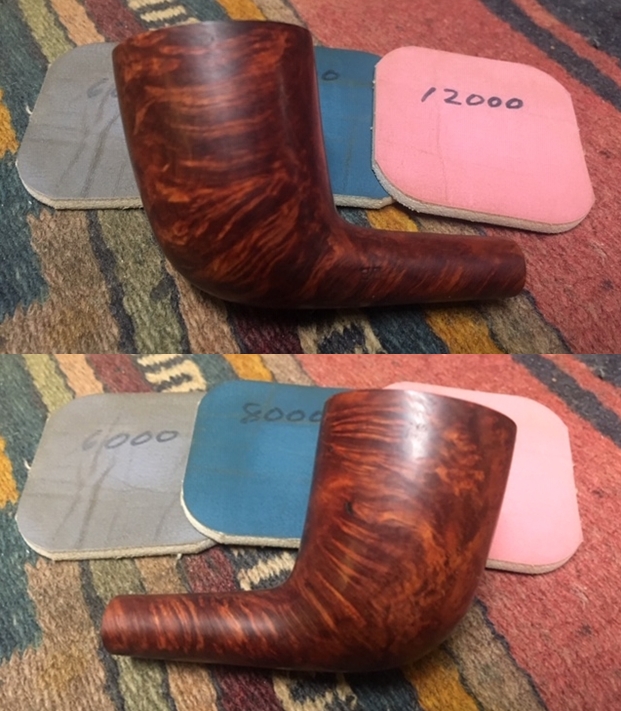
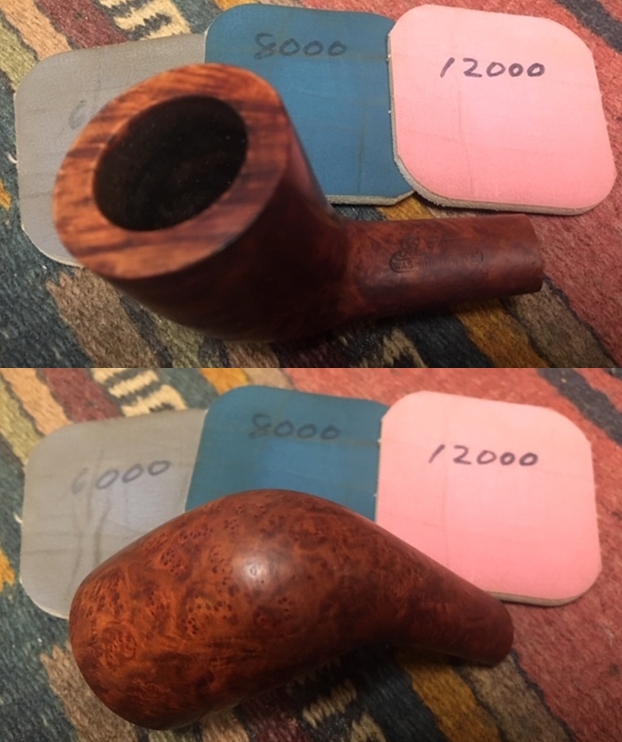
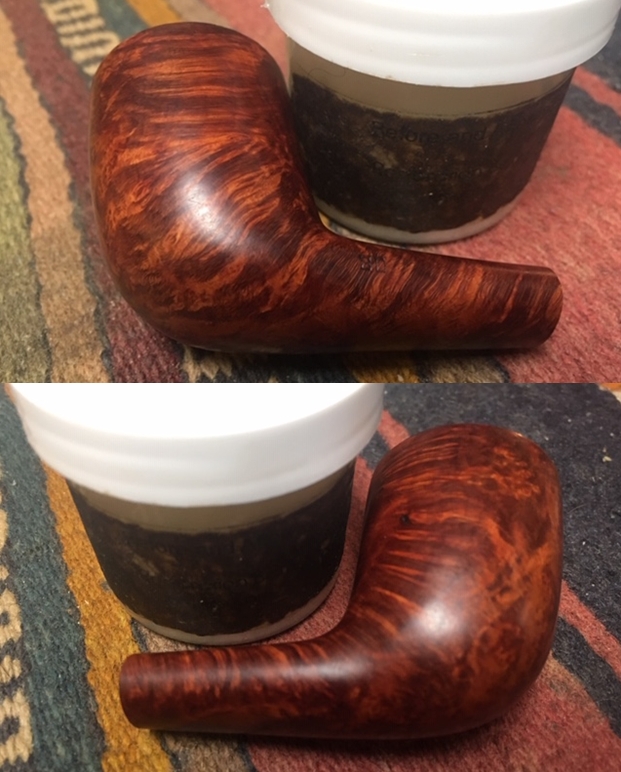
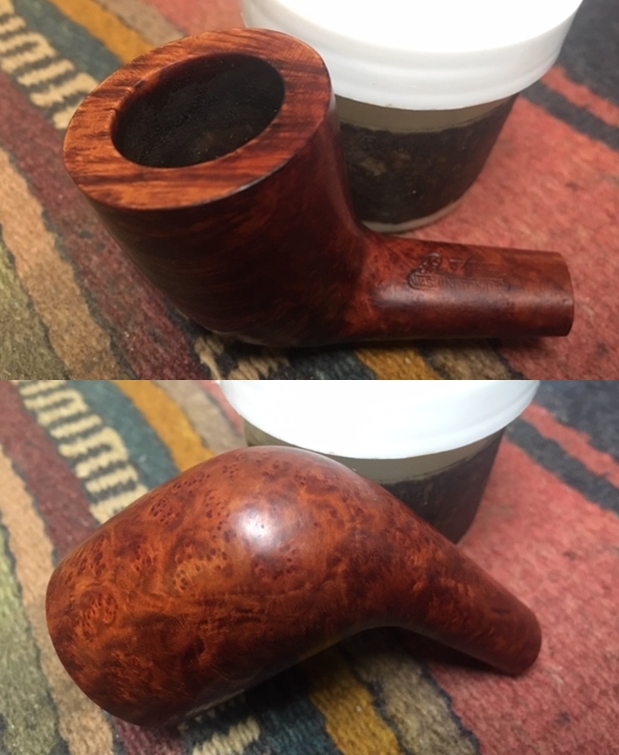
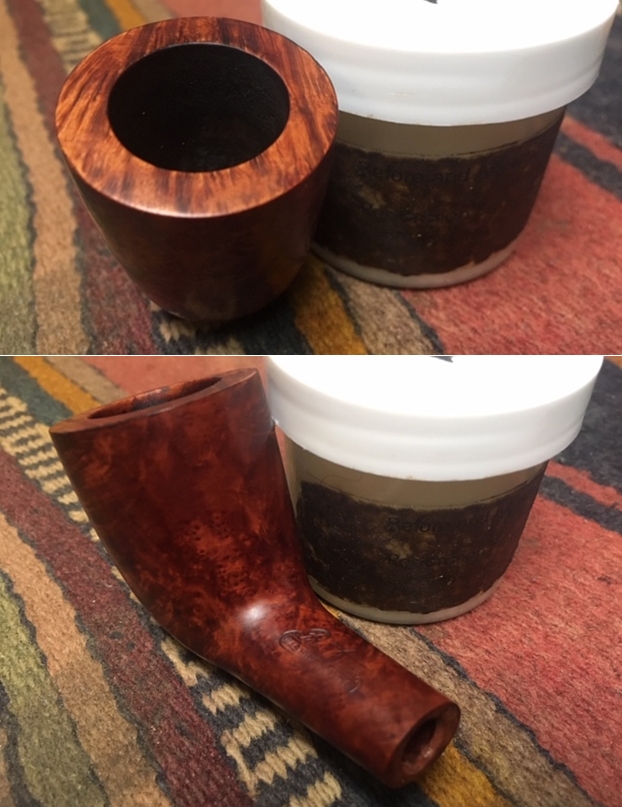
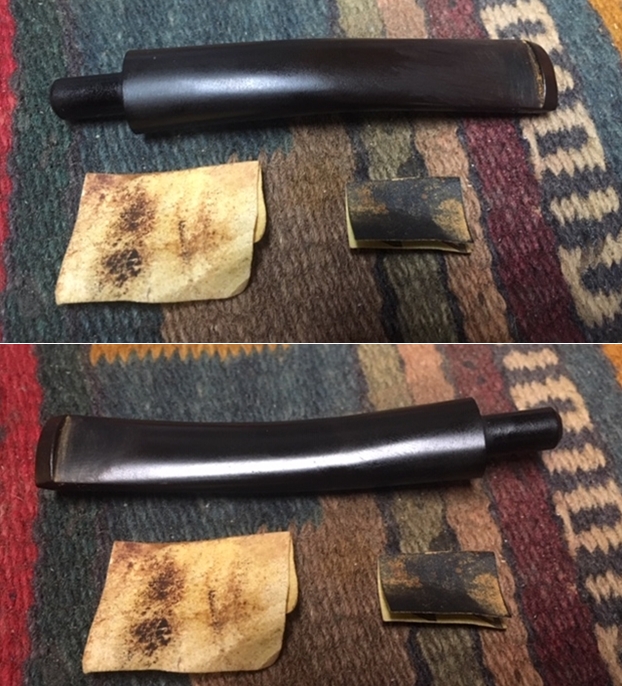
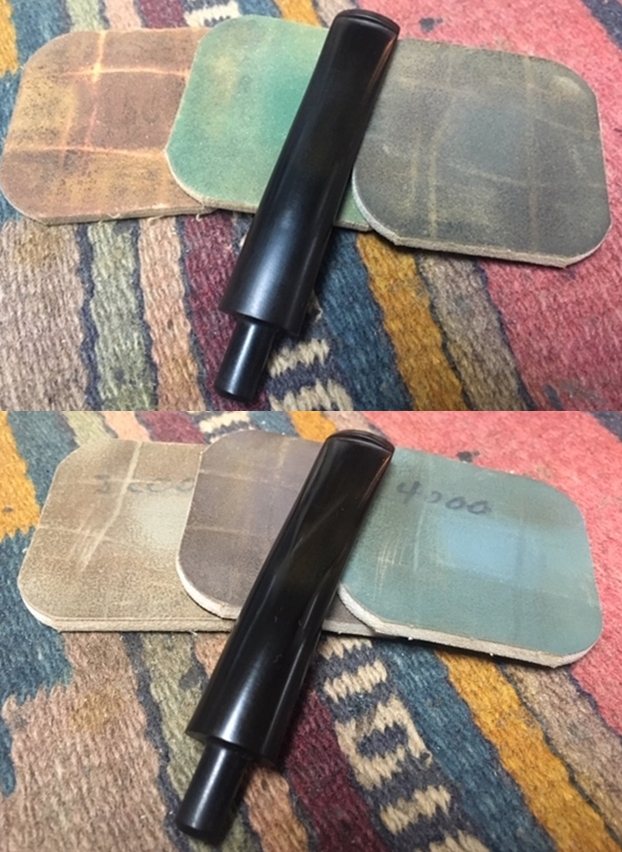
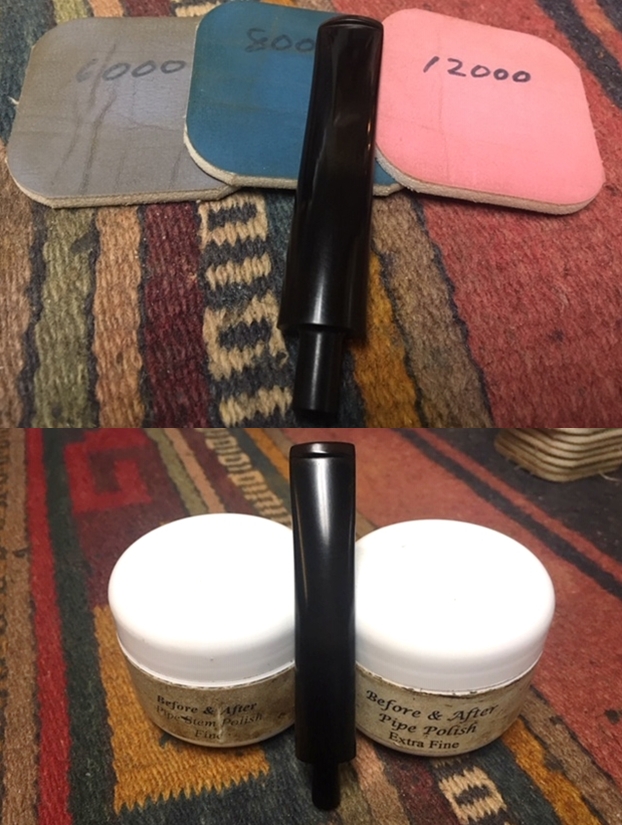
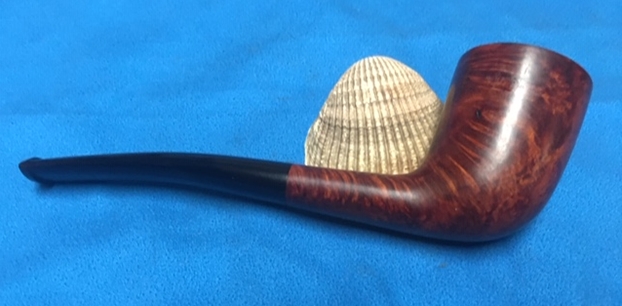
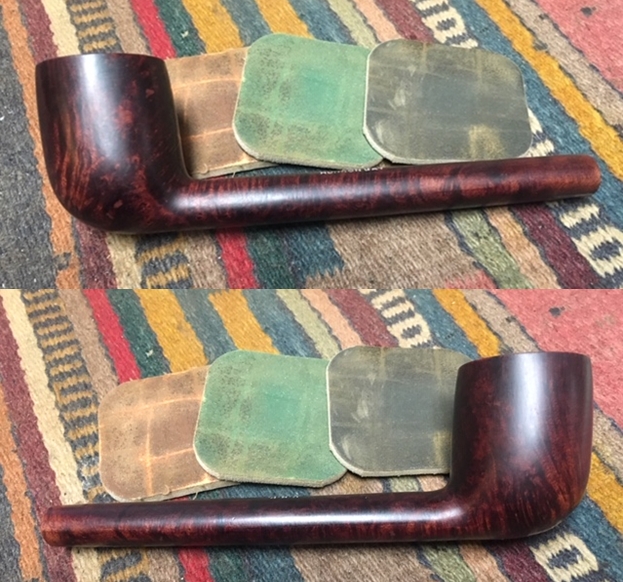
Before I began my part of the restoration I summarize Jeff’s work on the pipe and include photos of what the pipe looked like when I received it in Vancouver. Jeff reamed the bowl with a PipNet pipe reamer and followed up with a Savinelli Fitsall pipe knife to remove the cake. He scrubbed out the mortise and the airway in the shank and the stem with alcohol, cotton swabs and pipe cleaners. He scrubbed the exterior of the bowl, rim, shank and stem with a tooth brush and Murphy’s Oil Soap to remove the grime on the finish of the bowl. He rinsed it under running water. He dried it off with a soft cloth. He soaked the stem in Before & After Deoxidizer to remove the oxidation. I took a close up photo of the rim top to show the general condition of the rim top. Other than minor scratches and nicks it was in great condition. Both the inner edge and the outer edge of the rim look really good. The stem photos show the pitted surface of the vulcanite and some nicks in the button edge on both sides. There were light tooth marks and chatter on this stem.I polished the rim top and the rest of the briar with micromesh sanding pads – wetsanding it with 1500-2400 grit pads and dry sanding it with 3200-12000 grit pads. I wiped the bowl down with a damp cloth after each pad to remove the sanding debris. After the final sanding pad I hand buffed it with a cotton cloth to raise a shine. I worked some Before & After Restoration Balm into finish of the briar with my fingertips to clean, enliven and protect it. I let the balm sit for a little while and then buffed with a cotton cloth to raise the shine. Once again I am surprised by how the Balm really makes the grain stand out. The pipe really looks good at this point and the grain stands out beautifully. I am very happy with the results. I set the bowl aside and turned my attention to the stem. I used a folded piece of 220 grit sandpaper to smooth out the pitting on the surface of the stem. I started polishing the stem with a folded piece of 400 grit sandpaper. I wiped the stem down with Obsidian Oil and took the following photos.I polished the stem with micromesh sanding pads – wetsanding it with 1500-2400 grit pads and dry sanding it with 3200-12000 grit pads. I wiped the stem down with Obsidian Oil after each pad. I polished it with Before & After Pipe Polish – both Fine and Extra Fine and gave it a final coat of Obsidian Oil and set it aside to dry. When I get to this point in the refurbishing or restoration process I get excited to see what the finished pipe will look like. It is time to buff and wax it. I put the stem and bowl back together and buffed the pipe with Blue Diamond on the buffing wheel. I polished the briar and the vulcanite stem until there was a rich shine. The polished briar came alive with buffing and the straight, swirled and flame grain just popped with polishing. The black vulcanite stem developed a rich glow. The finished pipe is a long shank Canadian shaped pipe that really is a comfortable handful of briar. Have a look at it with the photos below. The dimensions are Length: 7 1/2 inches, Height: 1 7/8 inches, Outside diameter of the bowl: 1 3/8 inches, Chamber diameter: ¾ of an inch. I will be putting this one on the rebornpipes store soon. If you are looking for a long shank Canadian from a historic Pipe Shop – C.B. Perkins this might just be what you are looking for. Let me know if you are interested. Thanks for walking through the restoration of this with me it was a pleasure to work on.
Re-Discovering Brigham’s Canuck Line of Pipes and Rehabilitating Two Prototypes – Part I


I love it when Charles finds these historical pieces… it is the kind of thing I love to find myself too. So… I get to enjoy it vicariously! Thanks Charles. Looking forward to the restorations on these lovelies.

Charles Lemon's avatar

Every now and again, a pipe collector comes across something really special. I had one such moment recently which I’m excited to share with all of you.

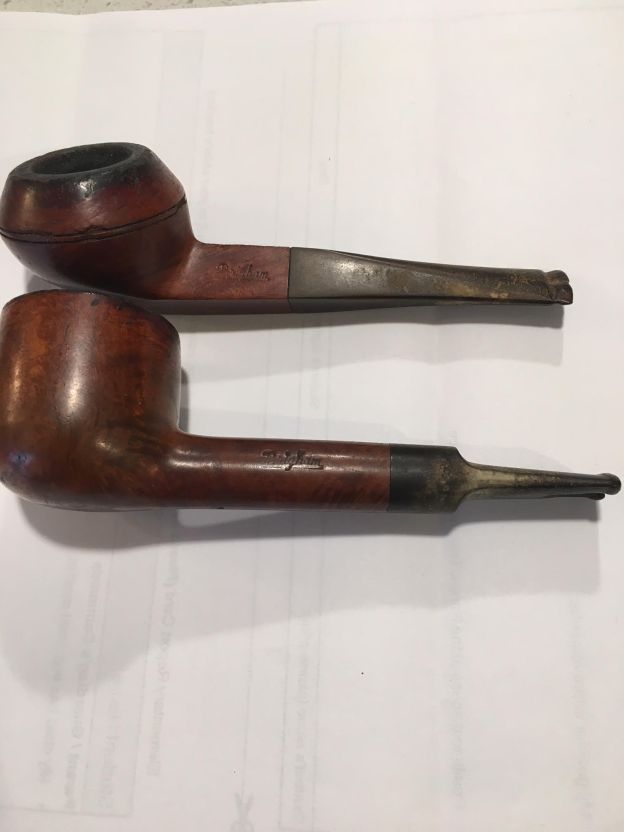
A few months ago, I received an email from a gentleman in Hamilton, Ontario requesting some help in identifying a couple of old Brigham pipes he had acquired. This in itself isn’t that unusual for me – this blog is chock full of posts about Brigham pipes, and I field questions about the brand regularly. This time, however, the pictures attached to the email showed something I don’t usually see – two non-system Brigham pipes – a Bulldog and a Pot.

unnamed

The pipes were in pretty rough shape but the nomenclature was easily read. Both pipes are stamped with the old Brigham script logo, with the tail of the “m” turning back underneath the word. Most often, I see this logo with the Brigham…

View original post 648 more words

Reflections on Turkish Block Acquisition


Blog by Fred Bass

The following was an article that Fred Bass sent me to hold in my files for him. The idea was that he was going to use it some time in the near future for a book he was working on Meerschaum pipes. Sadly that book was not completed to my understanding. It is an interesting short article that also became the base of a discussion on Smoker’s Forum All thing meerschaum group. RIP Fred, you are missed. Give the article a read!

February 1, 2009

This is about general considerations that have served me in decisions about purchases. It’s not an exhaustive guide, but more a line of thought brought by Buyer’s experience in the Meerschaum trades. I buy Pipes to smoke, so I don’t buy antiques.

I’ll start with new Turkish Block Pipes. Going from the starting point of looking at the works of favored Carvers, I’ll look at Pipes until one calls me. The best Carvers use the best block, which is the most important point of judging a Pipe’s quality. High grade Turkish Meerschaum is light in weight, is very porous, has no inclusions or deficits and has a pearl like translucent quality. It does not look like chalk. High grade Block will provide a cool and dry smoke, in addition to coloring well. Lesser grades will produce smoking experiences of less quality…, which is not to say that this is bad since a cheapie Meer will provide a better smoke than many other materials.

You are more likely to encounter Pressed Meerschaum (a composite of Meerschaum chips & epoxy) with No Name Meers and products of disreputable Carvers & Name Brands. High Grade Carver specific Pipes cost more, but you will have a Pipe that the Carver will take care of, should anything go wrong. This is an important consideration since Meerschaum is a product of nature and can possess flaws that become noticed only after the Pipe is smoked. These are Pipes that mean less to the Carver than the importance of his reputation, so you get a Pipe that is the best the Carver can produce. Bad news travels fast and reputation is everything in this cottage industry.

Other considerations, such as size, artistic merit and how well the Pipe fits into your world are worth consideration. The established Carvers will want premium price for their work, but there is never a question of quality. It’s a good idea to confirm that the picture you see is that of the Pipe that you want and whether a Case exists or is yet to be made. If the Pipe & Case are yet to be made, then determine how long it will take to be shipped to you. These same issues are best understood by both Buyer & Seller on commissioned Pipes as well. You can establish the quality of the Block and the color & material of the bit prior to payment.

When I’m evaluating a Pipe from an upcoming Carver, an estate Pipe or from a Retailer that I’ve not dealt with before, I first try to establish dialogue. No dialogue, no deal. If the estate Pipe Seller has little knowledge about his/her Pipe, I’ll still try and get information on the Pipe’s condition, type of connector joint and dimensions. The estate Seller should discuss the Pipe in the pre-sale encounter or I don’t bid. Sometimes, I discover that the Seller doesn’t know that the Pipe is a fraud, which is frequently the case with ‘Andreas Bauer’ and ‘Paul Fischer’ Pipes, in my experience. If you watch the Meerschaum markets, you will find promising Carvers who have yet to become well known. These Carvers will discuss their art with you and the prices can be very reasonable, as many will have just severed ties with Retailers and have started selling direct to Buyers. If there is something that you don’t see, then ask questions. Since I buy Meerschaums from the internet,

I ask a lot of questions. If the photos are poor quality and/or the Seller’s not answering your questions, then don’t put the coin down. I’ve touched on some of the major considerations involved in my own experiences, which are not offered as expert information. Instead, I’ve started this dialogue for all to share and participate in. I know little about the Antique market and just a bit about the African Block Pipes.

Another aspect of purchasing new Meerschaum Pipes, where some real bargains can be found, is the upcoming source of new Carvers. These are artisans that have been selling to Retailers and have established a degree of excellence, that promises to continue improving with time. At some point, they decide to break out on their own and start selling direct. They are trying to create a name for themselves and will use top quality Block as they attempt to establish a reputation with their art. The Pipes that are posted for sale will be the best effort that the Carver can produce and the prices will be lower, as there is no middleman to pay. Customer satisfaction will be the primary concern for these Carvers as they attempt to increase their market. This is a good time to get in on the action, since in time, as their work becomes more widely acknowledged for it’s superior quality, the prices will increase. This market is apparent to those who follow the Meerschaum trades. For the inexperienced, it is best to seek direction from more seasoned Pipesters and those that have access to the current markets. If you know what to look for, you can find some outstanding quality Pipes that appeal to your individual tastes, at very reasonable prices.

The Estate Meerschaum market is related to this in many ways, but there are differences. The first consideration that should be taken into account is the Pipe’s condition, and how much $$ it will cost to bring it into a smokable condition. This is not about Antiques, as they are more for Collectors than they are for those who buy Pipes to smoke. You should consider the cost of repair as the hidden total cost of the Pipe. If repairs have already been done on the Pipe, are they professional quality (?) and are they effective (?) are questions you should find out prior to purchase. Does the Seller know the Pipe’s legacy. Is the Pipe indeed what the brand designation on the case claims it to be, or is it a mediocre Pipe that has been put in a case of known reputation, in order to sell it for a higher price? If your plan is to continue to develop the Pipe’s Patina, does it look like the Pipe has been taken care of or did Uncle Charley use a blow torch to light it? Abused Meerschaums can be brought back to part of their former glory, but this takes time and the Patina is the most difficult to preserve and/or restore.

These are the basics, but by no means are they the whole story of either the Estate market or the newly initiated Carver direct seller. It is a good start on these issues and leaves room for the contributions of others, which is welcome.

Drawn To the Fire


By Fred Bass

In chatting with  a fellow who knew Fred and love the meerschaum pipe as much as Fred I learned that he is no longer living. I have missed the conversations and phone calls that we had in the past. I have not been able to get in touch with him by phone or email so I had figured he was gone but today I learned that what I figured was true. I have a few articles that Fred wrote over the years and will be posting them in the days ahead. Rest in Peace my friend…Steve

Yes, these Meerschaum Pipes have smoking qualities that set them apart from the other choices available to the Pipe smoker. Yes, they present differently in appearance and often in shape than their counterparts of Briar. Beyond the obvious, what is it that leads us to choose Meerschaums to smoke? Is there something about a Meerschaum Pipe smoker that is different from those of the more common smoker of Briar? What is it that brings us to kindle a fire time after time in these stone Pipes?

In the same easy rolling manner as Chuck Berry’s Blues slide guitar on Run Around, this old Paul Fischer OomPaul Meerschaum of mine delivers satisfaction and a deepening desire for more experience with its charms. From before the days of the Meerschaum Pipe smoking Zaporozhian Cossacks, these Pipes have held favor with those fortunate enough to acquire and smoke them… http://en.wikipedia.org/wiki/Reply_of_the_Zaporozhian_Cossacks
Dug from the clay depths of the earth, they draw us to that moment of union of fire and tobacco where words fail. There is a sense of deep contentment that I still have yet to fully understand after these years of smoking blends in these White Pipes. I don’t understand it, but I’m attracted to them.

I’ve been drawn to Meerschaums and have been, for as long I can remember. There are many reasons, some of them I know, but many of them remain a mystery, even to me. The first of these is of a philosophical nature. It is the concept of change. Meerschaums change patterns and hues as we smoke them … just as we evolve as people. So, as we grow and our lives cycle through the good times and the blues, our Meerschaums mark the times with their own evolution in a snapshot of a time and place. Our lives are never static, and our Meerschaums do not stay the same…, like us. As I give them lessons of fire and tobacco, they continue to take me to school, and reward my efforts with sublime experience. Across time and place in the world, I enjoy an esoteric connection with people I will never meet, who’ve shared this same experience in the privacy of the soul. This is the nature of small fires of sacrifice to The White Goddess. She waits for me by the rocking chair on the shores of a sea of life’s complexity. It’s a quiet moment of peace & contentment that I know others have found throughout the centuries of people who smoke these White Pipes. Like the coy maiden, she shares the emergent bloom of her being with a familiarity that time brings. Joaquin Verdanguer expressed it as the “Pipe smoking the Pipe Smoker” in The Art of Pipe Smoking,which is an amusing collection of short essays and thoughts that were likely originally written on the back of a wine list. As history demonstrates, the current generation finds the Meerschaum Pipeman abstract and non-viable. The students who follow after us will learn of the resource we’ve found. Public interest is a capricious event that can skip a generation. There are no traffic jams on the road to knowledge. It’s our fate to be left to accept that we have provided a path for those who will share the fire…, most of whom will seek our counsel after we have turned to dust. Still, I’m happy with the moment when fire kindles tobacco in my Meerschaum. It is sanctuary.

There is the sense of time long past in Meerschaum. It takes ages, measured in geologic time for the Block to be created in the depths of the earth. In the deeper mines, it is the high grade Sepiolite that the miner seeks, using basic tools in the search for these treasures in the clay. These methods are the daily gamble used to find the best Block. Luck plays a big part in these long hours of difficult work under primitive conditions. This is where these Pipes find their beginning. This is the difficult harvest that men have been toiling over for centuries to bring this gift of the earth to the Carvers who create beautiful Meerschaums. I have a deep sense of gratitude for being one of those fortunate enough to enjoy this functional art. It is the inspiration of the Carver that transforms these lumps of raw Block into the array of sizes and shapes of Pipes that make up the Meerschaum world. When I can connect to the passion of the Carver’s craft, I’m drawn to the Pipe. Once this happens it’s only a matter of time before I cave in to the desire that only acquisition can satisfy, with a few reservations for the quality of Block used and the craftsmanship in finish and performance. Because of the paucity of my budget, I buy Meerschaums to smoke and must be content to view the larger works as an admirer instead of a patron. If my budget was larger, then my modest collection would include some of these magnificent display Pipes.

It is a curious thing to me, to find these Pipes of such allure and peaceful charm that emerge from the strife and conflict of that part of the world where opposition is the accepted order. Can it be the message from the earth that peace and harmony is a better way? It is food for thought. These Pipes take the heat of the fire and use it to deliver cool and dry smoking pleasures to me, just as I take what life brings to me and make the best I can of it. There’s a sense of synchronicity to this. A good Meerschaum should and often will have more than one owner in its life of service. Some of the Meerschaums in my collection are over 100 years old and continue to provide functional and visual pleasures. I don’t know the names of the people who smoked these estate Pipes before I acquired them, but I do know the pleasures they enjoyed. These pipes are time travelers that link generations of Pipe smokers and admirers. I enjoy being a part of this. Unsmoked estates are prized, but I have no intention of depriving myself of the pleasure that comes from smoking these Meerschaums, so I smoke all of my Pipes. Just as an unsmoked Meerschaum has no stories to tell, I can only guess at those who deny themselves this pleasure. Why not join me in the pleasures of the White Goddess and have a smoke!


Restoring my Grandfather’s “Brakner” with Steve and Jeff Laug


Blog by Paresh Deshpande

How often does it happen in one’s life that the person/ persons you are very keen to meet do finally meet up for a week or so? This, especially with the background when each of these friends is from across the world, has to cross the seven seas, numerous hurdles of visas and fine tuned itineraries of all the stake holders!! Well, believe you me readers, these remain as the most treasured days.

I recently had this great experience when Mr. Dal Stanton (The Pipe Steward) from Sofia, Bulgaria, Mr. Steve Laug (rebornpipes.com) from Vancouver, Canada and his brother Jeff from Idaho, USA, visited my family. The following week was a flurry of activities, which also included learning the finer nuances of pipe refurbishing while restoring some nice pipes from my grand old man’s collection, it was something like OJT (on the job training). One such pipe that was selected by Steve was this Brakner. This pipe was nowhere in the “To Restore” list of pipes that I had drawn out as I thought it to be some run-of-the-mill pipe, but was cherry picked by Steve with a smile while sifting through the pile of pipes.

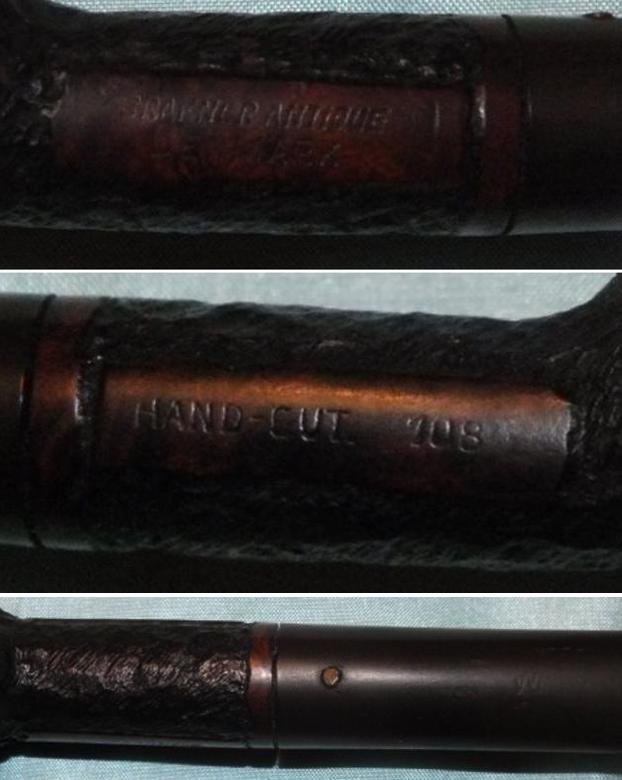
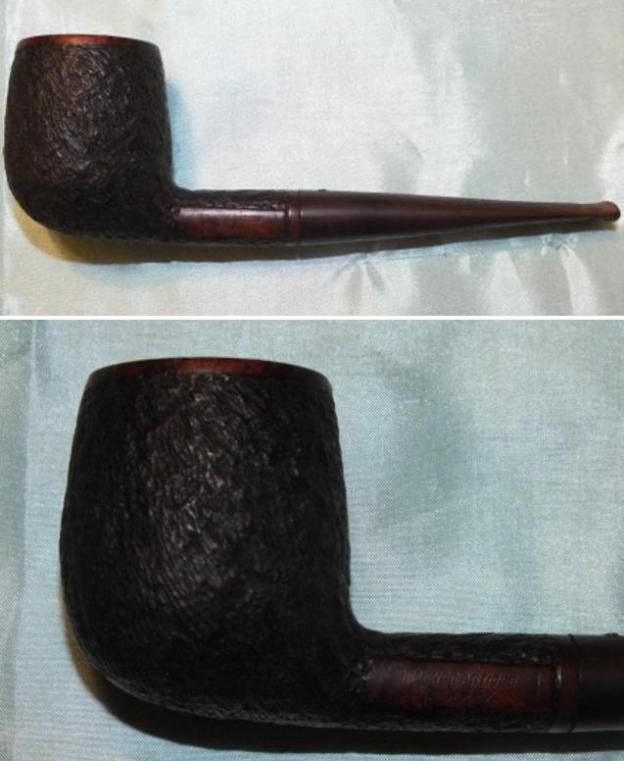
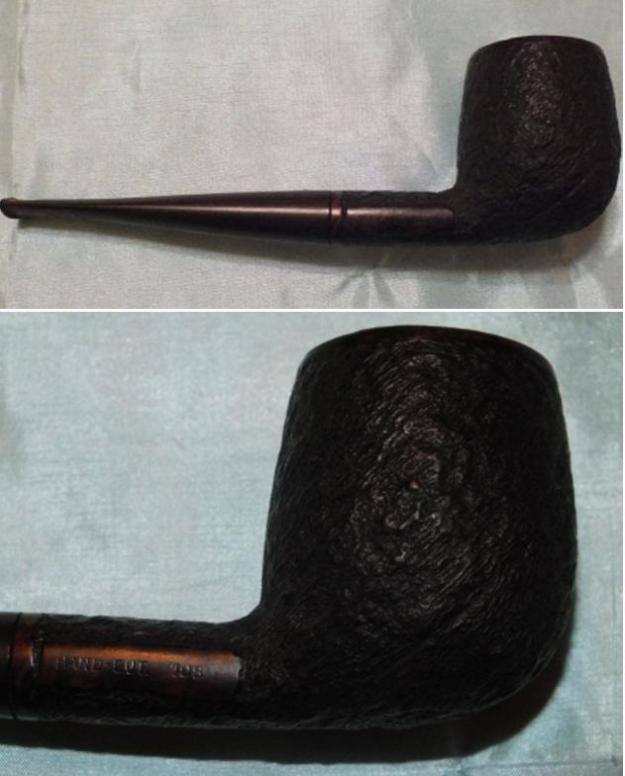
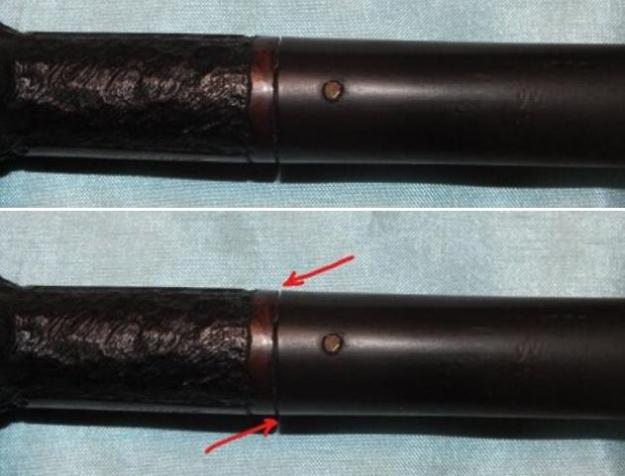
This uniquely rusticated billiard shaped pipe is stamped on the smooth surface on the left side of the shank as “BRAKNER ANTIQUE” over “DENMARK”. The smooth surface on the right side of the shank is stamped as “HAND-CUT” followed by # 108, most likely the shape number. The vulcanite stem is adorned with a green dot (larger than a Dunhill stem logo), which has now faded to a light brown color. There is a smooth band around the end of the shank.I researched this maker and it was then that I realized the uniqueness of this brand and why Mr. Steve had selected it to work on. I visited rebornpipes.com and sure enough, Mr. Steve has worked on a Brakner before and researched the maker/ brand in detail. Here is the link to the write up that he has posted on his web page: https://rebornpipes.com/2018/08/26/breathing-new-life-into-a-brakner-antique-hand-cut-807/

From this write up, I have picked this picture which shows the Brakner design # 108 (ticked in red) that we were working on. The only variation is that my inherited pipe has a smooth band on the stummel below the rim.Having read the detailed account, I now know that I am holding a piece of pipe history and cannot thank my lucky stars for the inheritance and having being introduced to Mr. Steve.

INITIAL VISUAL INSPECTION
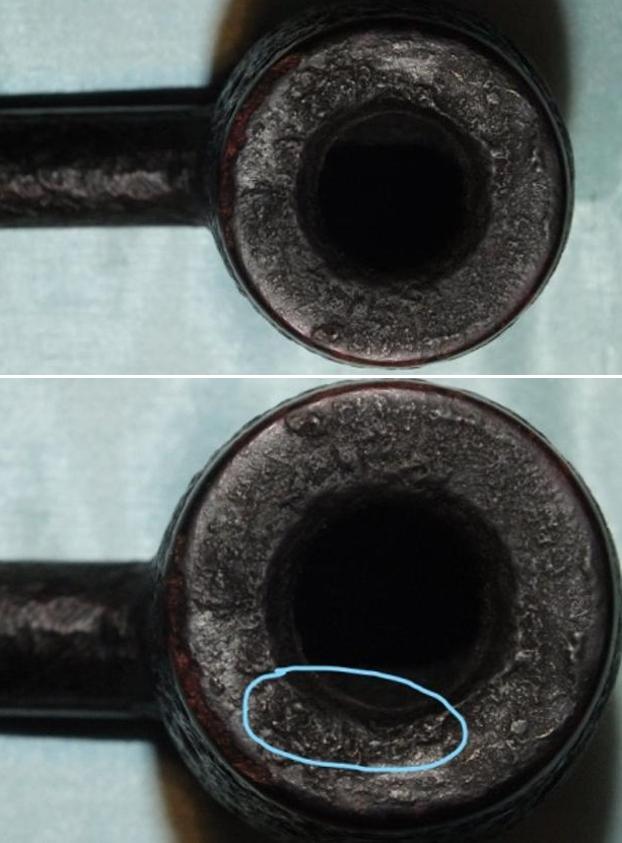
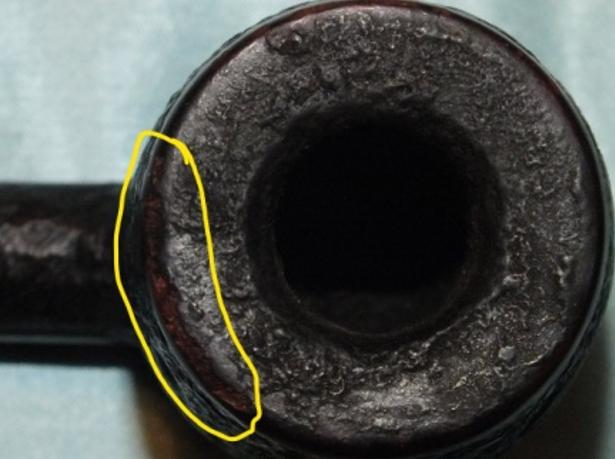
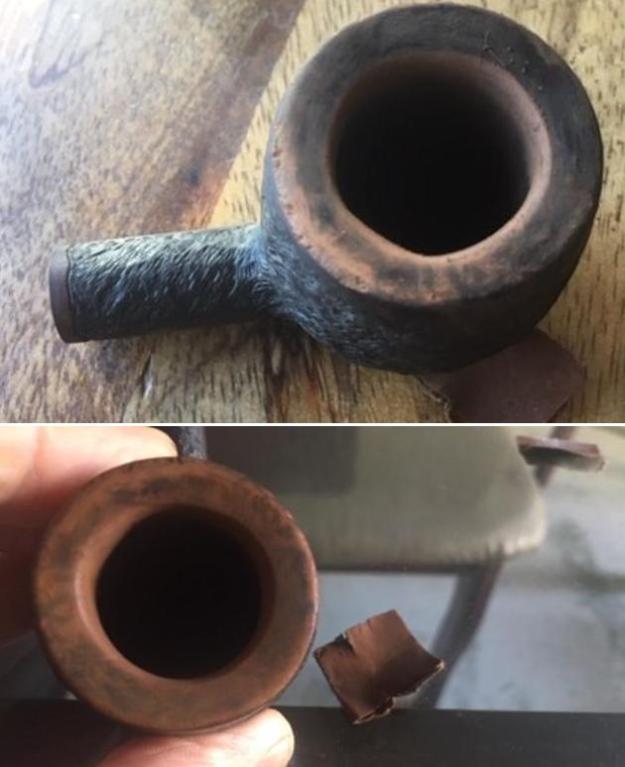
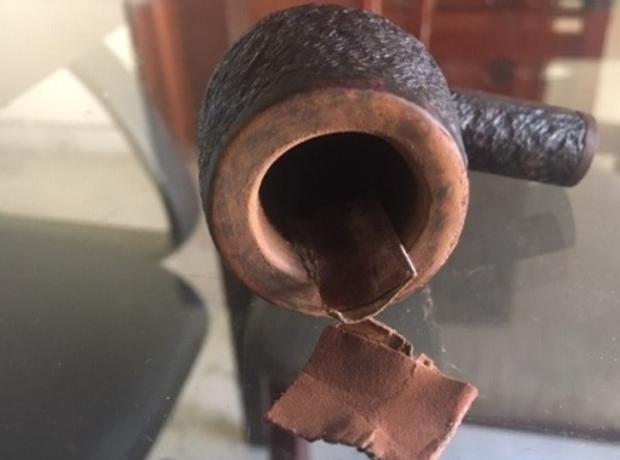
As is generally observed with most of my grandfather’s pipe, the chamber of this pipe too is filled with a thick cake with overflowing lava covering the rim top surface. The thick cake hides the condition of the inner walls of the chamber and will be ascertained only after the cake has been taken down to bare briar. Similarly, the condition of the rim top surface will be commented once the overflowing lava has been scraped off. However, with the inner rim edge, Steve and I suspect charring in the 4 o’clock direction and is highlighted in pastel blue circle. The outer rim edge too shows damage in the 6 o’clock direction and is circled in yellow. There is a thin smooth briar band extending down from the outer rim edge, which too, is covered in overflow of oils, tars and grime. The contrast of dark and medium brown stains on the rim top and the band should highlight the beautiful grain on the briar and will go well with the rusticated finish on the bowl and shank once cleaned up. The mortise and the shank air way are clogged as expected making the air flow restricted and laborious. However, with the draught hole being right at the bottom of the chamber and the perfect alignment of the stem airway, tenon and the shank airway should make this one a fantastic smoker. The excitement of restoration and fun filled involvement of Steve, Jeff, Abha and me, all resulted in none of us taking any pictures of before and detailed pictures of the process. Each one thought that other was taking the pictures and the end result was that none of us took any!! Lol…

The unique rustications on the stummel surface are covered in oils, tars, grime and dust of all these years of use and storage. However, once cleaned up, the dark of the stummel should contrast beautifully with the smooth brown shank end band, the rim top and the band below the rim outer edge. The vulcanite stem is heavily oxidized and showed heavy tooth chatter and deep tooth marks on the upper stem surface. The button on the upper surface has bite marks and will have to be rebuilt and reshaped. The same holds true for the lower stem surface, albeit with less severity. As brought out earlier, the trademark green dot on Brakner pipe stem has turned a shade of brown. The tenon does not seat flush inside the mortise. This issue, in all probability, should get addressed once the mortise is cleaned off the entire accumulated gunk. Sorry again, I did not take sufficient pictures of the stem either!!All in all, judging from the initial examination, we do not envisage any major/ serious issues to present themselves in the course of restoring this beauty, with the exception of charred inner rim edge and damaged outer rim edge.

THE PROCESS
Even before Steve and Jeff had arrived, it was decided that Abha, my wife who helps me in the initial clean up, and Jeff who does it for Steve, would work together on the initial clean up and Steve and I would do the repairs and final finish on these pipes. This would help us understand and learn the techniques and processes involved in restorations. This exactly what we did while working on this pipe, but with a twist, which I shall bring out later.

Abha and Jeff reamed the chamber with Castleford pipe reamer set (one of the many gifts for Abha from Steve and Jeff) followed by cleaning the mortise and shank airway using dental pick, cotton buds/ hard and soft bristled pipe cleaners dipped in isopropyl alcohol. Once the shank internals were cleaned, we called it a day.

And this is where the twist occurs!!

When we met again over breakfast the next day, the Brakner was completed!! In short, what really started as a combined project was eventually completed by Steve and Jeff alone. What follows is the narrated sequence and pictures that Steve and Jeff shared with me over a pot of coffee (perfect brew was demonstrated by these two gentlemen as we are predominantly tea drinkers).

Once the chamber and shank were cleaned, Jeff cleaned the external surface of the stummel and the smooth rim top surface with Murphy’s Oil soap and cotton swabs followed by scrubbing the rusticated surface with a toothbrush and dish washing soap. This rid the stummel rustications of all the accumulated dust, dirt and grime and both the smooth brown bands around the rim and shank now contrasts beautifully with the dark stummel surface. However, the inner and outer rim damage revealed itself in all its ugliness and this is what Steve decided to tackle at this stage in restoration. No pictures available to show the condition of the stummel at this point…sincere apologies!!

Steve began the process of addressing the inner rim damage by creating a bevel to the inner rim edge to mask the blackened rim and address the out-of-round chamber with a folded piece of 220 grit sandpaper. Once satisfied with the repairs, he polished the entire rim top surface with micromesh pads, wet sanding with 1500 to 2400 grit pads and dry sanding with 3200 to 12000 grit pads. The rim top surface now appears amazing and the repairs appear to be almost non-existent. To enliven the briar wood and further enhance the contrast of the bands with the rest of the dark stummel surface, he rubbed a little quantity of “Before and After” balm in to stummel surface and set it aside for 20 minutes for the balm to be absorbed in to the briar. Thereafter he hand buffed it with a microfiber to deepen the shine. The stummel looks nice and vibrant. All this while, Jeff was busy working the stem. He cleaned the internals of the stem using pipe cleaners dipped in isopropyl alcohol. Once the stem internals were clean, he cleaned the stem surface with cotton pads dipped in isopropyl alcohol. This step also helps to remove surface oxidation to some extent. With this, he handed the stem back to Steve to address the tooth chatter and deep bite marks.To address the issue of bite marks and tooth chatter on the stem surfaces, Steve flamed the surface with the flame of a Bic lighter. Vulcanite has the property to return to its original shape when heated and this is exactly what was being done. The tooth chatter and deeper bite marks were raised to the surface to a great extent. The remaining minor tooth indentations were filled with clear super glue and set aside to cure. Once the fill had hardened (and it was pretty quick, thanks to the 43 degrees temperature that was prevalent at that point in time!!), he sanded the fill and the entire stem surfaces with a folded piece of 220 grit sandpaper. This not only ensured a nice blend of the filled areas with the rest of the stem surface, but also removed the oxidation from the surface. He rubbed the stem surface with some Extra Virgin Olive Oile and set it aside to be absorbed in to stem surface. It was at this stage that self, Abha and my kids joined them for breakfast. After a hearty breakfast, I launched a determined assault on the stem, subjecting it to the complete cycle of micromesh polish. The end result is a gorgeous, smooth and shiny looking black of the vulcanite stem. This was followed by the routine regime of polish with carnauba wax using my hand held rotary tool. The Brakner looks unique and oozes quality. Here are a few pictures that should give you a fair idea about the end results… Thank you all for being a part of this journey and all the encouragement and support extended. P.S. – As I mentioned above, the excitement of working and learning from Steve and Jeff coupled with the ambiguity of who is taking pictures and not to mention the chilled Beer and humorous banter, all resulted in a limited number of pictures.

Secondly, those of you who have been following rebornpipes.com regularly, would surely have read the detailed write up on the restoration of an 1846 BBB Amber stem by the master story teller, Dal Stanton (https://rebornpipes.com/2019/05/30/west-meets-east-in-india-to-restore-a-grandsons-treasure-an-1846-bbb/) !! While in one corner of the world, on the 10th floor apartment in Sofia, Bulgaria one of the longest write ups on rebornpipes.com was being shaped, here I was trying to piece all the processes involved in restoration of this unique piece of pipe history from memory and ending up with what could be the shortest write up on rebornpipes.com.

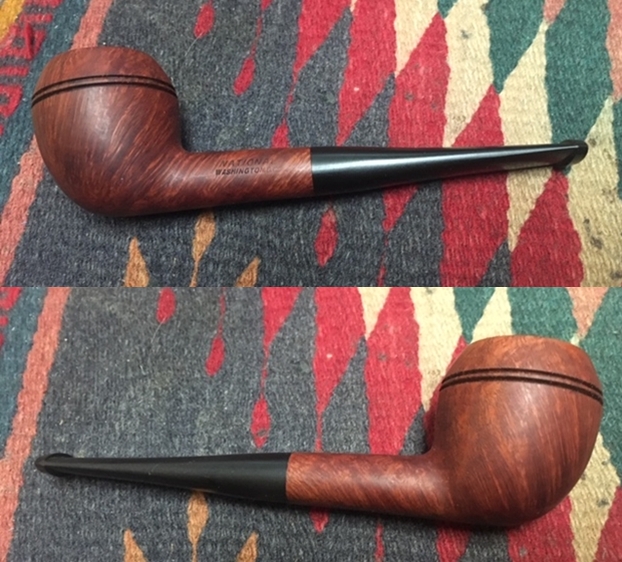
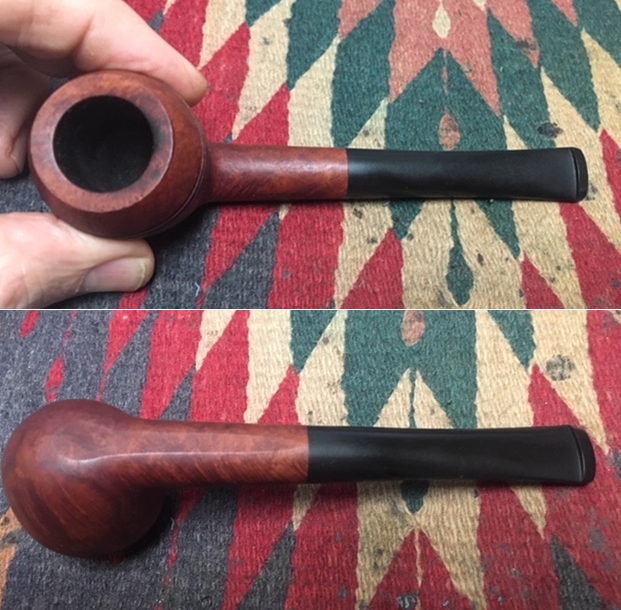
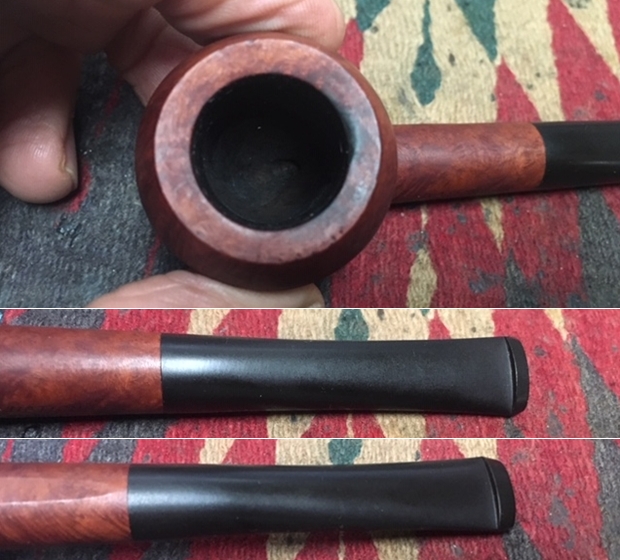
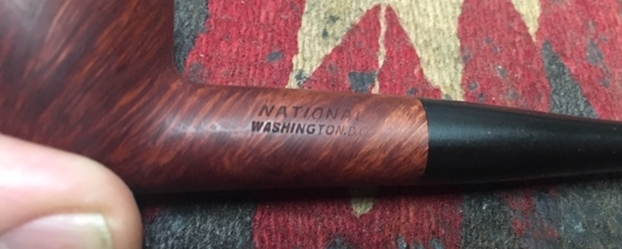
A National Washington, D.C. Straight Rhodesian from the Bertram Collection


Blog by Steve Laug

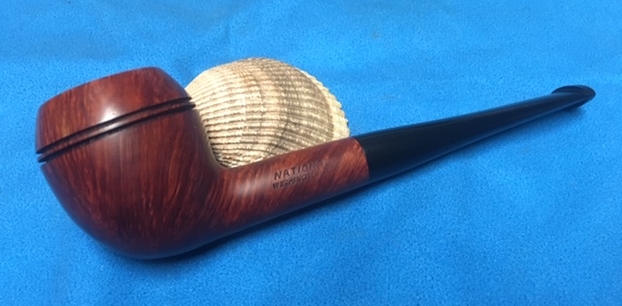
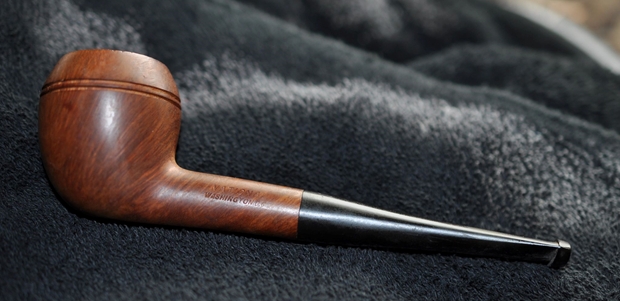
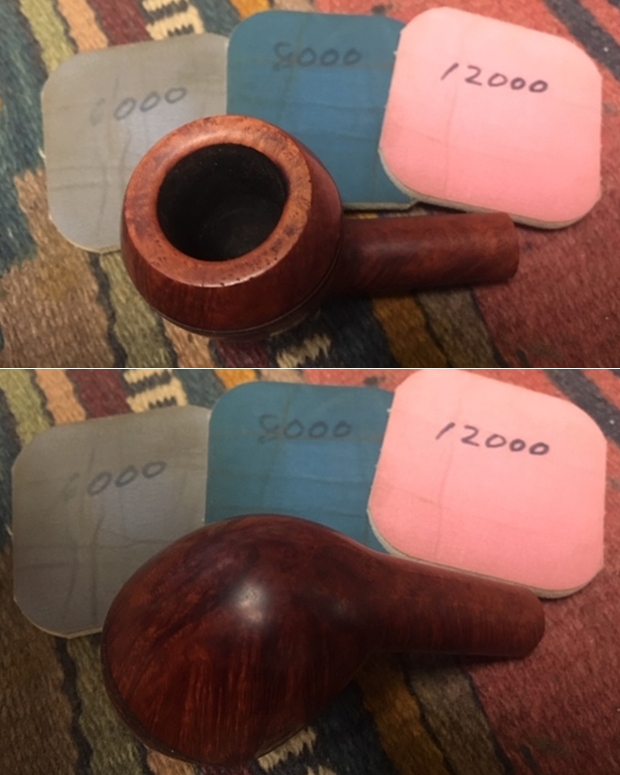
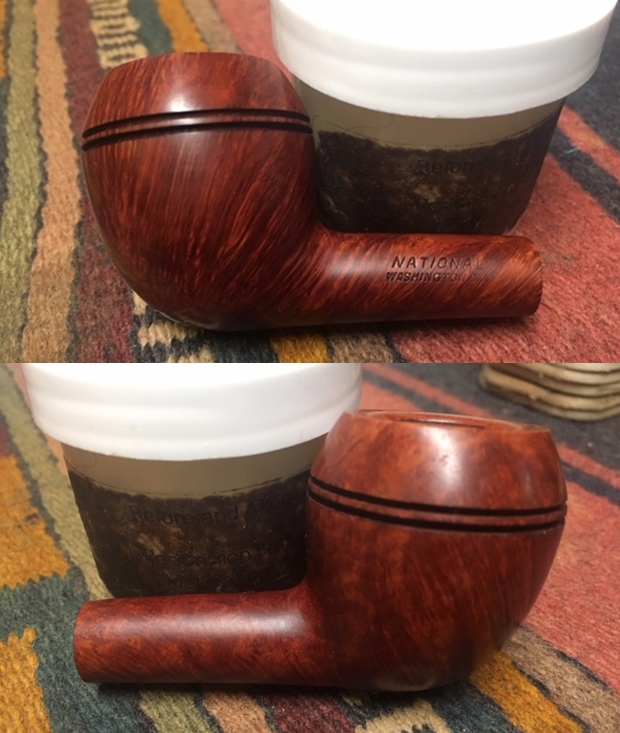
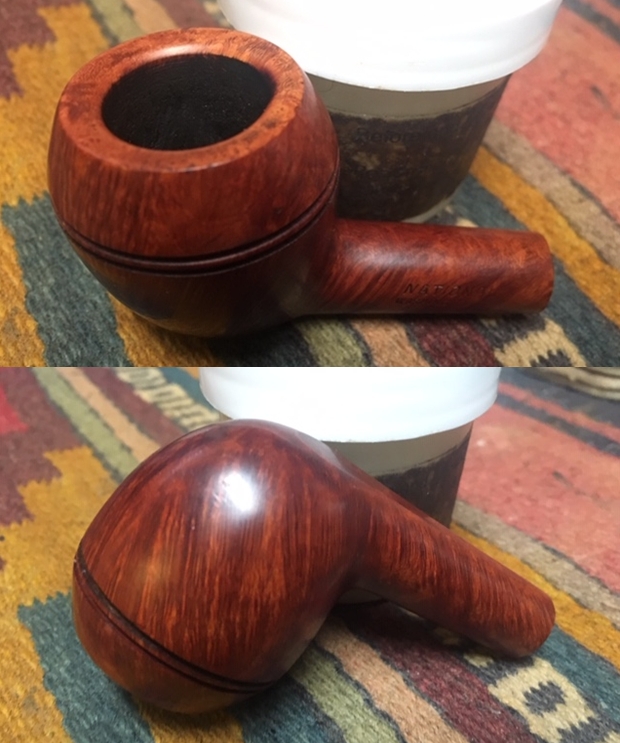
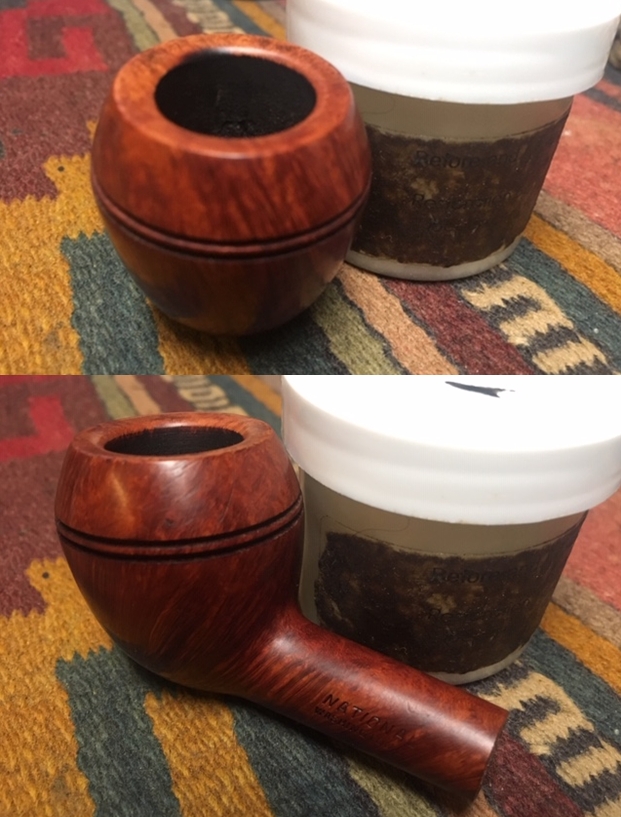
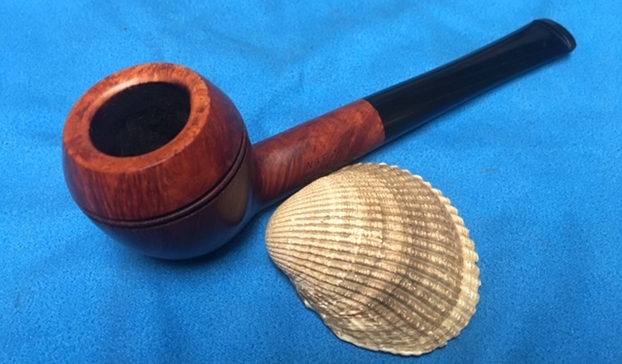
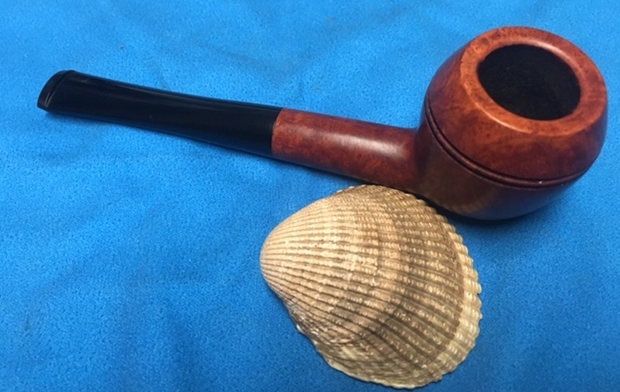
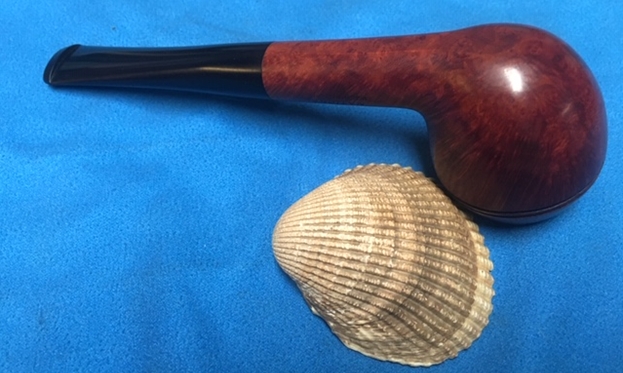
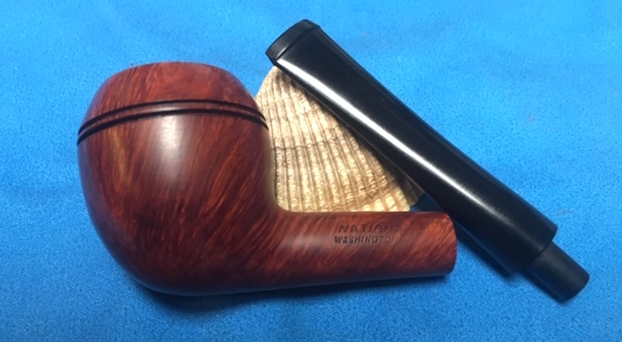
Give the previous blogs a read to have an idea about the Bertram Collection that I am working on these days. I can’t adequately describe how overwhelmed I am when I look at the 200+ pipes that need to be restored but there is only one way to move ahead – 1 pipe at a time. Jeff is doing the major cleanup on the lot as that would be more than I could handle by myself in moving through this many pipes. From his cleaned pipes the next one I chose is a National Washington, D.C. straight Rhodesian to be the next pipe that I would work on. It has some amazing straight grain around the bowl and shank. The bowl had cake in the chamber that was no problem. The rim top had some darkening and lava overflow on the back side. The inner edge of the bowl looked like it might have some burn damage and the outer edge of the bowl appeared to be in good condition but we would know more once the bowl had been reamed and cleaned. The exterior of the briar looked lifeless and was dusty with the grime of years of storage. The stem had some oxidation, tooth chatter and marks near the button on both sides. Jeff took some photos of the pipe before he began his cleanup work on it. Jeff took close-up photos of the bowl and rim to capture the condition of the pipe when it arrived. The rim top had a thick coat of lava and the bowl had a thick cake. It was hard to see what the inner and outer edge looked like with the cake and lava. Jeff took a picture of the bowl side and the heel to show the marvelous grain on the bowl. It really is quite stunning and very dirty!The next photo shows the stamping on the left side of the shank. The left side is stamped with National over Washington, D.C. The stamping on the shank is very readable.The next two photos show the condition of the stem surfaces. The stem was oxidized and had some calcification on the surface as well as tooth marks and chatter on both sides near the button.I have already done the work on one of the National pipes in the Bertram lot so I turned to that to have another look at the history of the brand (https://rebornpipes.com/2019/05/21/doing-some-cosmetic-work-on-a-national-pipes-rhodesian/). I quote in full from that blog.

Before I started my restoration work I wanted to refresh my memory about the brand. I remembered from previous National Pipes that I had worked on that there was a tie to the Bertram Pipe Company in Washington, D.C. I also knew that it was a very different company than the National Briar Pipe Company of Jersey City, New Jersey but that is where all the trails let in terms of Pipedia and Pipephil’s site. I turned back to a previous blog that I had written on the brand when I restored a pipe with the same stampings to review the history and connection of the brand to Bertram. https://rebornpipes.com/tag/national-washington-d-c-pipes/. I knew that the fact that there were several of these included with the large lot of Bertram pipes that Jeff and I purchased was not accidental. Here is the link to that previous blog. I quote in part:

I had a gut feeling that the pipe had some connection to Bertram Pipe Company of Washington DC but only the vaguest memory of that connection. I could not remember where I picked that up but just had the memory. I did some searching on the Internet and found a National Briar Pipe Company of Jersey City, New Jersey with no clear ties to Washington DC on the Pipedia site. This was the company that purchased the Doodler after Tracy Mincer died. I could see that the Jersey City pipes were stamped differently and all had line names stamped on them. On the Pipephil site I found an English version that had very different stamping on the left side of the shank as well as Made in England on the right side of the shank.

Thus I was reminded of the non-connection to the New Jersey Pipe Company. The blog went on to record some information that tied the National Washington, D.C. Company to Bertram more definitively. I quote

I…posted a question on Smokers Forum (SF) and Pipe Smokers Unlimited regarding the brand. I received several responses that gave me information. One of them on SF came from Ed Klang and provided me with some confirmation regarding my memory of the connection with Bertram. I quote him in full, “In the history of the Bertram company, after the fire at the Washington, D.C. facility and the decision was made to discontinue Bertram production a group of employees and a few investors wanted to buy the rights to the Bertram name, which was turned down and it was then proposed that they would rebrand the pipes as National, no mention was made whether anything ever came of that proposal. Supposedly this group did produce pipes for a while but the effort was finally abandoned and I have never been able to reliably confirm this. Just bits and pieces here and there.” Thanks Ed. This is the random memory that I was trying to dig up.

I also received a reply on SF from Radiobob that read as follows: “National Pipe and Tobacco was located on the 1700 block of Pennsylvania Avenue in Washington, D.C., just about a block from where I worked. I still have two Canadians that I bought there, as well as a Comoy’s Patina Apple. In my recollection, it closed down–much to my regret–in the mid to late 1980s.”

Those responses gave me the kind of details that I always find helpful in my restoration work. I will continue to do some digging on the company and see what I can find but that bit confirmed the visual tie to the Bertram Company of DC. Thank you for your help Ed and Bob.

When I received the pipe Jeff had already reamed the bowl with a PipNet pipe reamer and followed up with a Savinelli Fitsall pipe knife to remove the cake. He had scrubbed out the mortise and the airway in the shank and the stem with alcohol, cotton swabs and pipe cleaners. He had scrubbed the exterior of the bowl, rim, shank and stem with a tooth brush and Murphy’s Oil Soap to remove the oils and tars on the rim and the grime on the finish of the bowl. He had rinsed it under running water. He dried it off with a soft cloth. He was able to remove lava build up on the rim top and you could see the great condition of the bowl top and edges of the rim. There was still some damage on the back inner edge and some darkening to the rim top toward the back of the bowl. He soaked the stem in Before & After Deoxidizer to remove the oxidation. I took photos of the pipe before I started my work on it. I took a close up photo of the rim top to show the condition of the bowl and rim after Jeff had cleaned up the grime and lava. You can see the damage on the inner edge of the rim at the back side and the darkening on the rim top. The stem photos show that the oxidation is gone. The surface of the vulcanite looked very good. There were some light tooth marks and chatter on the top and underside of the stem near the button.I also took a photo of the stamping on the left and right side of the shank showing how the stamping was laid out.I worked on the inner edge of the rim and the darkening on the backside of the top with a folded piece of 220 grit sandpaper to smooth out the damage and remove the darkening. I polished it further with 400 grit wet dry sandpaper to smooth out the scratches in the briar.I polished the bowl and rim top with micromesh sanding pads – wet sanding it with 1500-12000 grit pads. I wiped the bowl down with a damp cloth after each pad to remove the sanding debris. After the final sanding pad I hand buffed it with a cotton cloth to raise a shine. (I forgot to take photos of the bowl and rim top after I polished it with 1500-2400 grit micromesh pads.) I worked some Before & After Restoration Balm into finish of the briar with my fingertips to clean, enliven and protect it. I let the balm sit for a little while and then buffed with a cotton cloth to raise the shine. The Restoration Balm really makes the grain stands out beautifully. I set the bowl aside and worked on the stem. I used a folded piece of 220 grit sandpaper to blend the tooth marks and chatter into the surface of the stem. Once the surface was smooth I sanded out the scratch marks and started the polishing of the stem with a folded piece of 400 grit sandpaper. I wiped the stem down with Obsidian Oil.I polished the stem with micromesh sanding pads – wetsanding it with 1500-12000 grit pads. I wiped the stem down with Obsidian Oil after each pad. I polished it with Before & After Pipe Polish – both Fine and Extra Fine and gave it a final coat and set it aside to dry. This is the part of the restoration process that I really look forward to! When all the parts are finished and the pipe is clean then I put the stem and bowl back together and buff the pipe with Blue Diamond on the buffing wheel. I polish the briar and any minute scratches still in the vulcanite of the stem until there is a rich shine. This National Washington, D.C. pipe is a classic straight Rhodesian shape with a natural finish that highlights some amazing straight and flame grain on a proportionally well carved pipe. Buffing the pipe made the briar come alive and the grain popped with polishing. The black vulcanite stem had a rich glow. The finished pipe is a beautifully grained National Straight Rhodesian that feels really good in the hand and sits right in the mouth. Have a look at it with the photos below. The dimensions are Length: 5 ½ inches, Height: 1 3/4 inches, Outside diameter of the bowl: 1 1/4 inches, Chamber diameter: ¾ of an inch. Thanks for walking through the restoration with me as it was a pleasure to work on.
I can’t believe it – rebornpipes is seven years old…


Blog by Steve Laug

One morning toward the end of May I was greeted by an Anniversary message from WordPress stating that rebornpipes was 7 years old. I was surprised that it was that had been that long to be honest. I have long since forgotten the exact year when the blog started and had no real idea of how long it has been going. I know that I started it in May and put up the first posts throughout the month. I had no recollection of the year I had done that. I find that the older I get the more quickly one year slides into the next and I lose track. With all that I am doing with work and home, remembering that kind of thing is not one of my priorities. I explain it to my wife and kids that it is like forgetting addresses but not forgetting locations. You ask me for an address and I typically don’t remember it but ask me how to get there and that is a different story. Ah well, it is good to have computer generated reminders of this kind of thing for folks like me.

After reading this reminder I have been thinking about the seven years that have passed. If I look at just the many pipes have re-entered the smoking rotations of people that alone is amazing. I looked at the stats on the Admin page and was a bit surprised to see that there are over 2800 individual blogs on rebornpipes. That means that we have recorded the restoration or refurbishing of over 2000 pipes from all levels of pipe craftsmanship. There are blogs on high-end pipes and on low end manufactured pipes and everywhere in between. These are solely the pipes belonging to folks who write blogs for rebornpipes or have sent us write-ups of their work. When you think about it in terms of pipes put back in use after being refurbished it is a lot of pipes.

That does not even begin to take into account those who have started their own blogs. Charles Lemon of DadsPipes and Dal Stanton of ThePipeSteward are two that come to mind. Those gentleman are doing great work and are bringing pipes back into service. (I know that Dal submits his work here and then reblogs it on his own site. However, when you consider he also lists pipes that can be commissioned for restoration it adds even more to that number.) I know that there are others who have also started their own blogs and pipe restoration businesses from our number that add to the mix. It is exciting to watch this community expand. The impact of rebornpipes continues to grow and develop and it is hard to know where it will go in the years ahead.

On top of those known individuals within our community are also the unknown ones. I cannot begin to give you numbers for the individuals – male and female who have entered the hobby after reading the blog. I know there are many because of the emails that I receive in thanks and with questions. There is rarely a day that goes by that I do not receive several emails from blog readers who have questions about restoration procedures or brands. This an exciting part of the blog for me because it is the outcome that I had hope for when I started. I remember when I started restoring pipes there was little information available online. I had to reach out to kind and helpful pipemen who answered my questions willingly. I know that rebornpipes fills a niche that has contributed to making pipe restoration and refurbishing accessible to anyone who wants to give it a try.

Another part of the over 2800 blogs is that of making information available on brands and makers. I have scanned dozens of pamphlets, catalogues and brochures that have been sent to me and added them to the information that it available. I have also received many scanned documents as gifts to be added to the blog. The beauty of this is that there is a lot of research that has been done on brands pulling together information from a variety of sources online – Pipedia, pipephil, pipemaker websites and Patent sites. This is easily accessible to anyone searching for information. There is a repository of booklets, brochures and pamphlets that have been made available on a lot of different brands. rebornpipes blogs and materials are often high on the Google searches that folks do and for that I too am thankful. It has been a process to get here but it is also something grand to celebrate as it is also an outcome I had dreamed of when I started.

Finally rebornpipes also includes other pieces of pipe information such as reviews of books, tools, supplies and pipes. These are brief and experiential reviews to enable the readers to peruse them prior to investing in them personally. I have also included some of my own contributions to pipe lore through Father Tom stories, short stories and personal reflections on the art and craft of pipe refurbishing. This was also an outcome I had dreamed of when I started the blog. rebornpipes really does have a broad range of information available to the reader who uses it. Sometimes I forget the breadth of material that is stored on the blog.

As I close these reflections I want to thank each of you readers for faithfully being part of our community and also submitting your work to be included. It is great to be a part of this community of people that really make distance quite irrelevant. I realized that seven years is a remarkable time for a blog to be active and growing. Each year is marked by growth of daily readership and also materials. It surprises me that the readership continues to grow with people following us from around the world. I had no idea when I began of the reach the blog would have nor of the community of refurbishers that would be built. For that I am truly grateful.

Here’s to the next seven years and more….

A National Washington, D.C. Bent Billiard from the Bertram Collection


Blog by Steve Laug

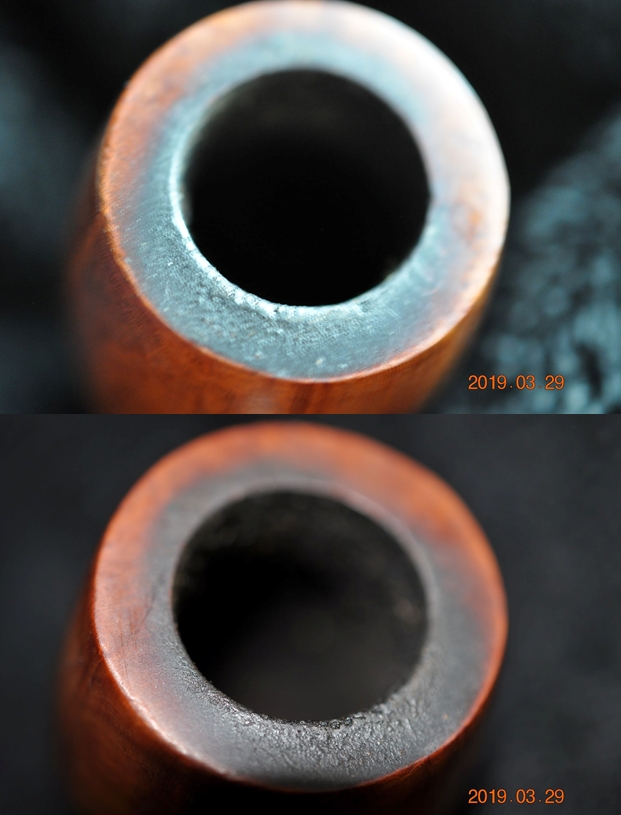
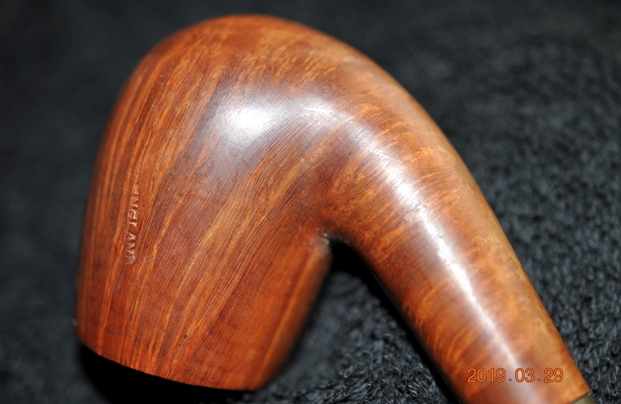
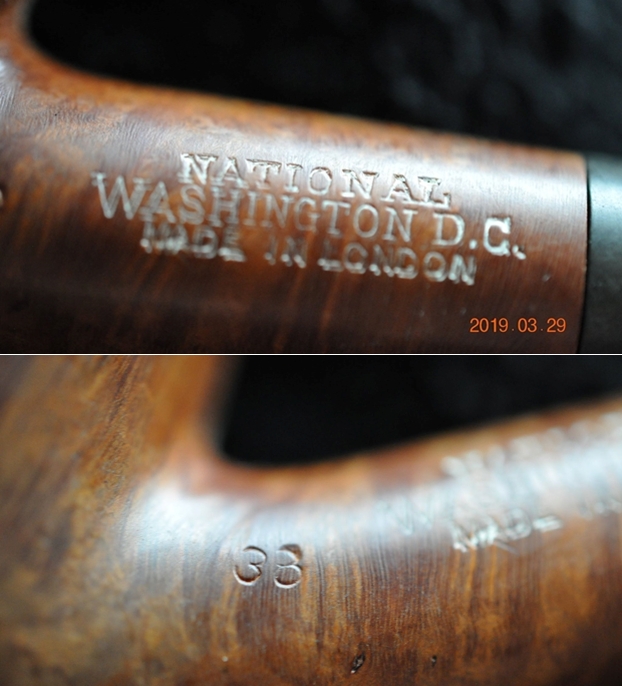
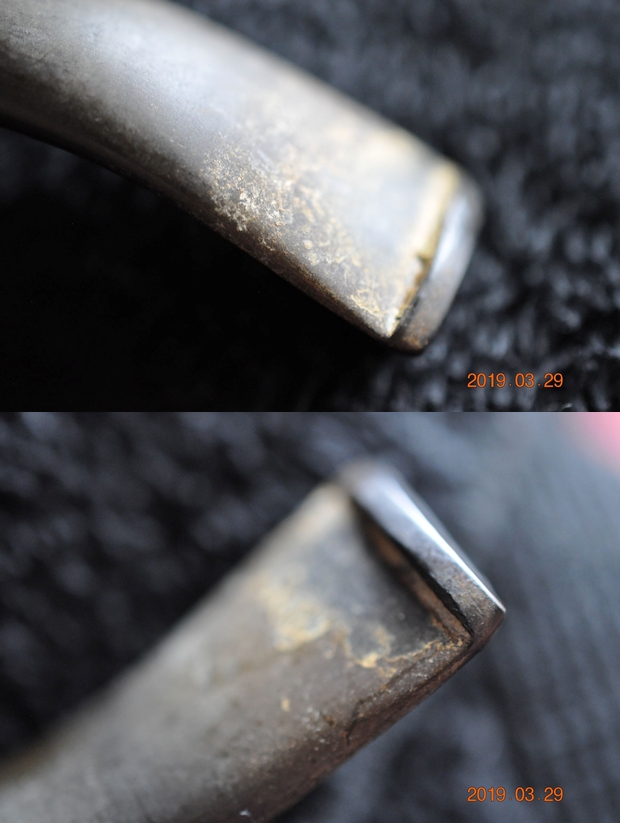
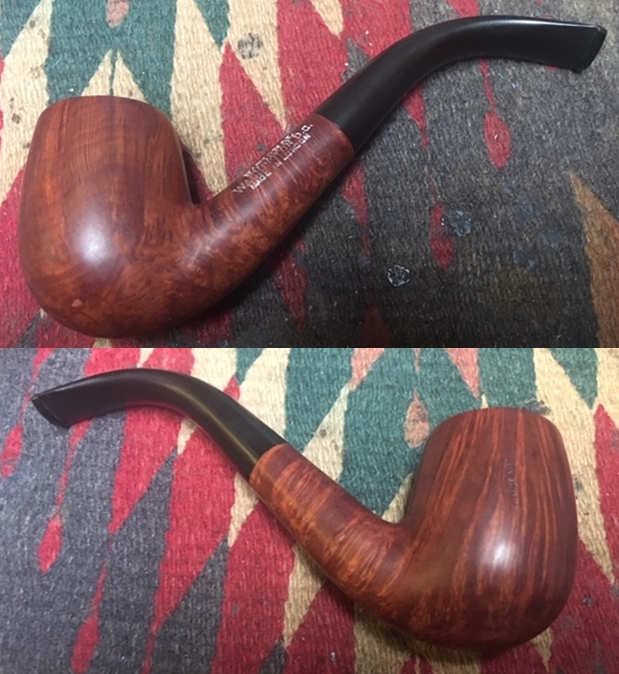
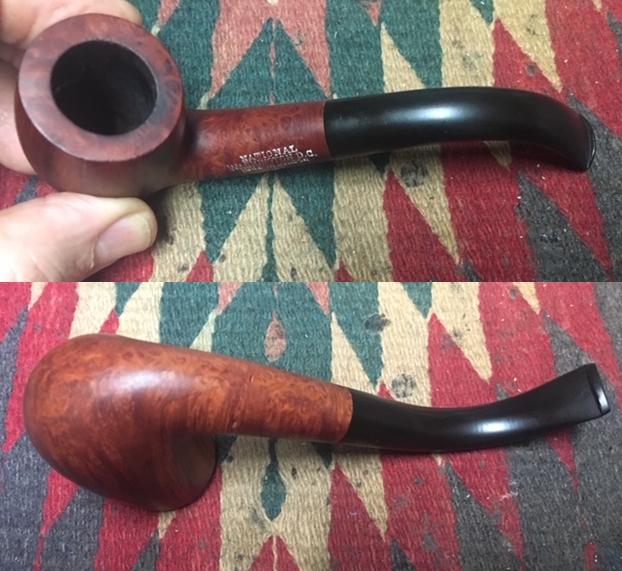
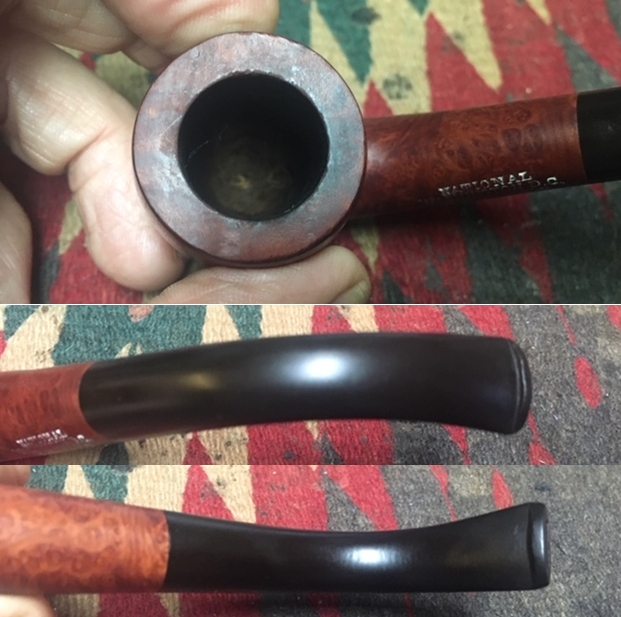
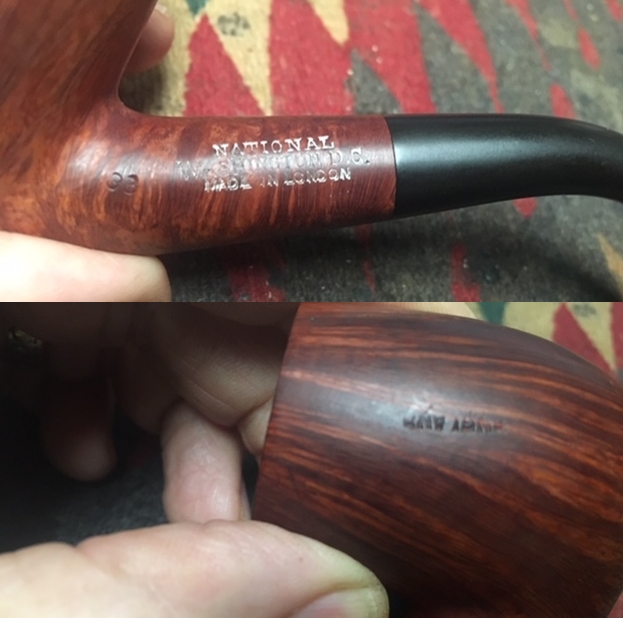
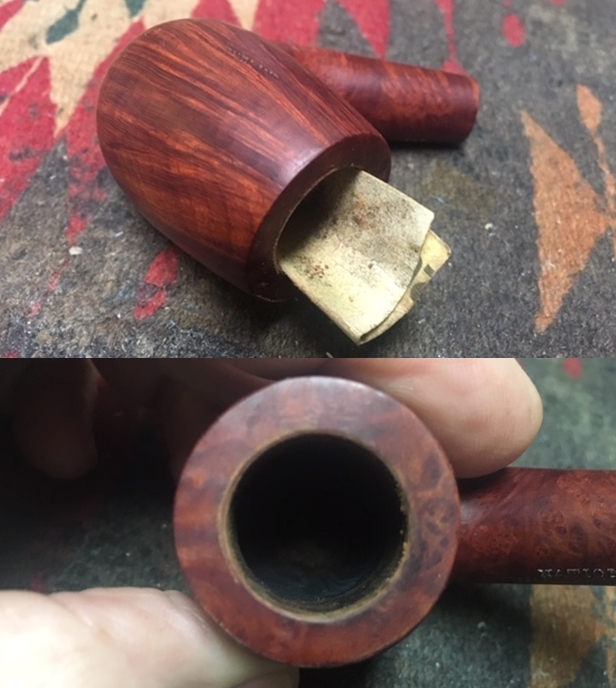
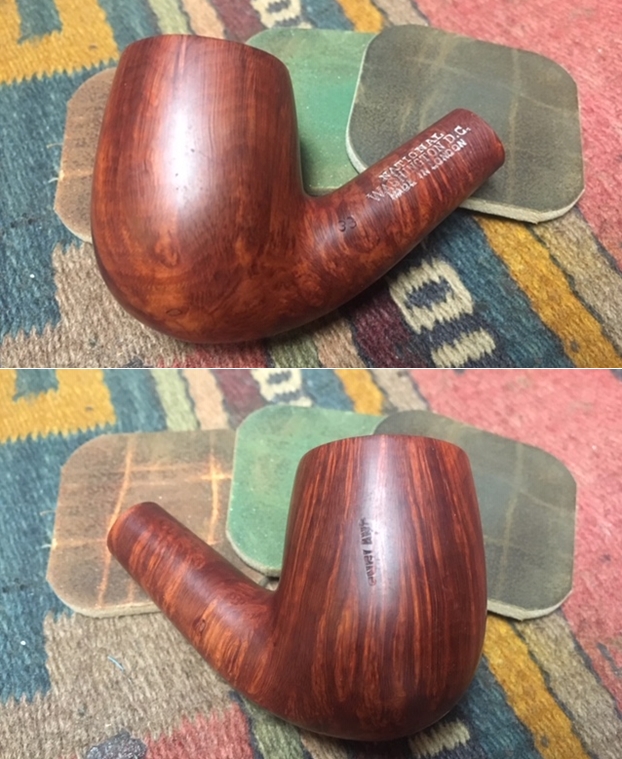
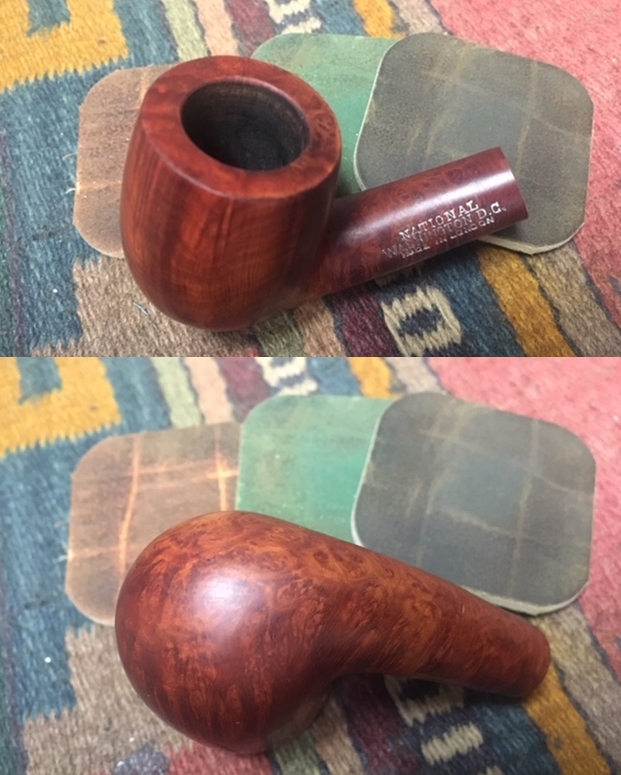
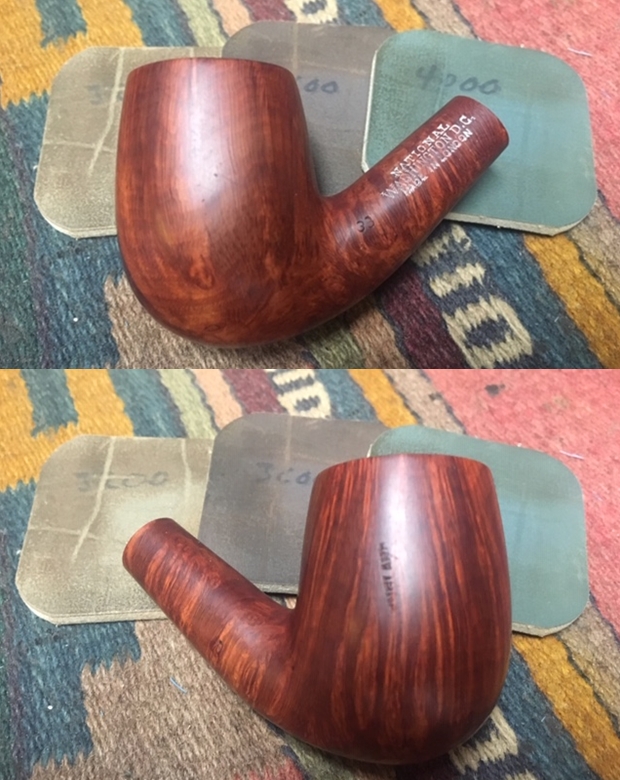
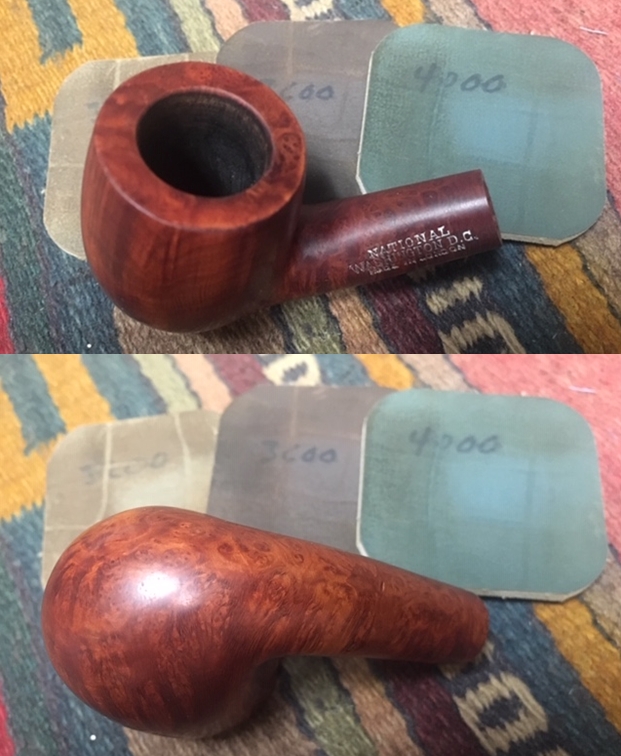
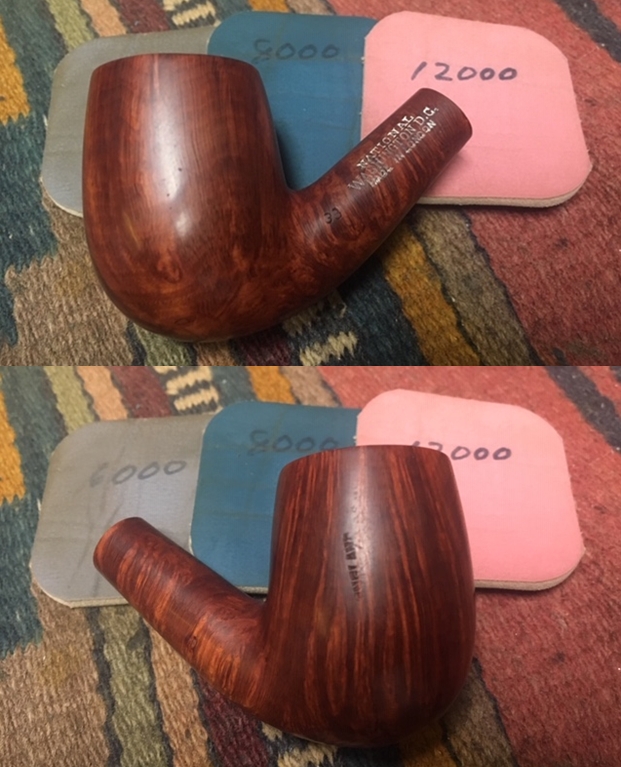
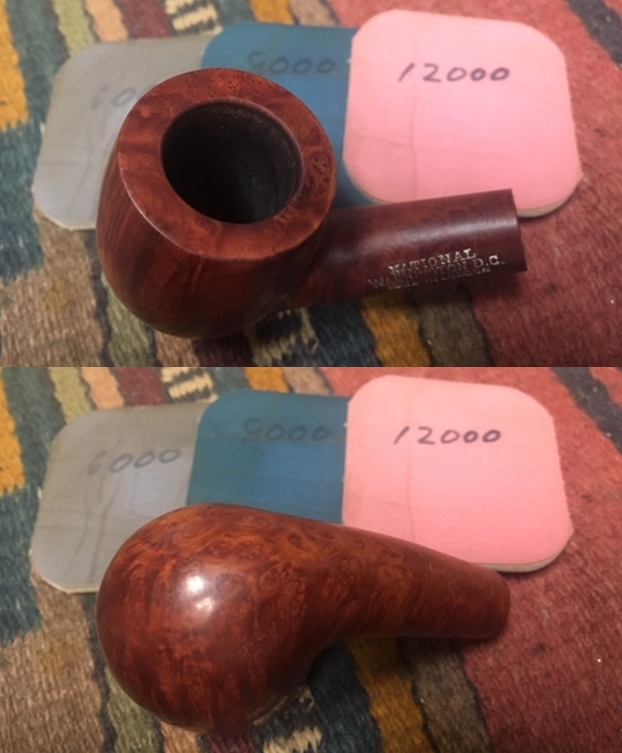
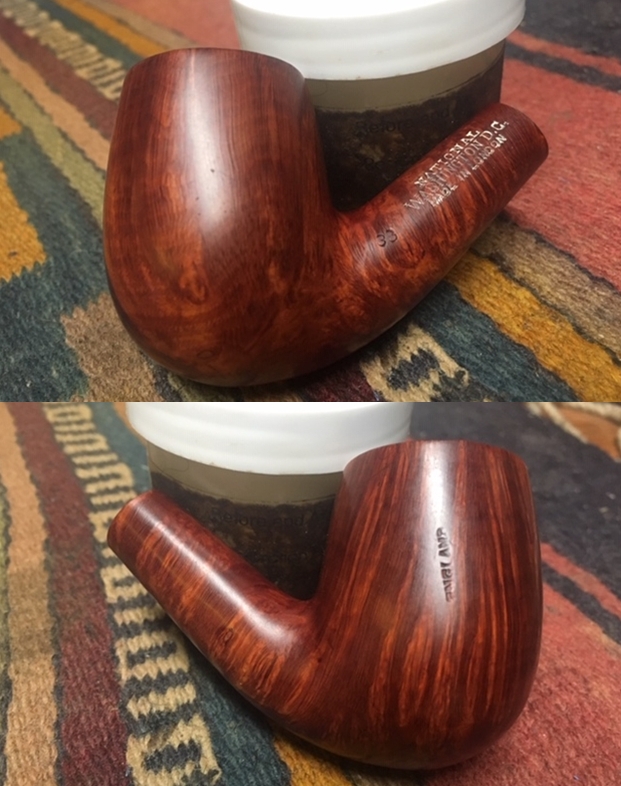
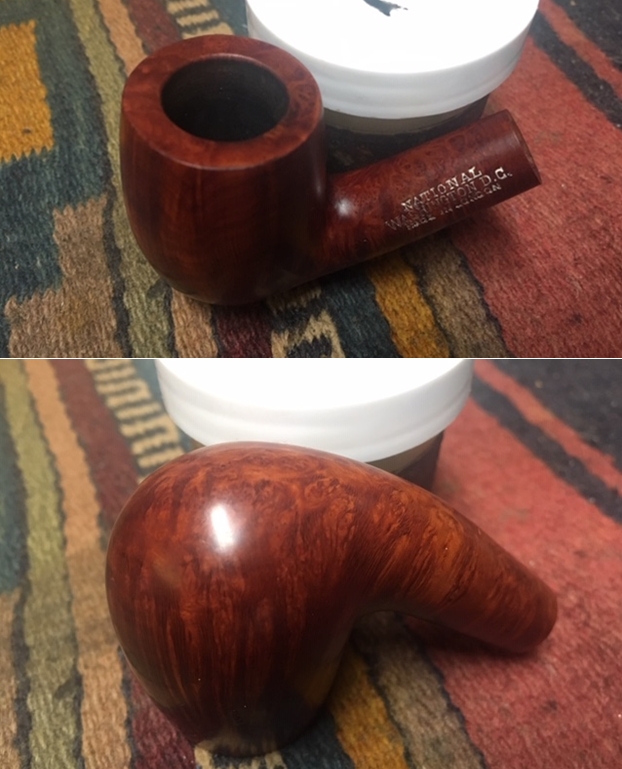
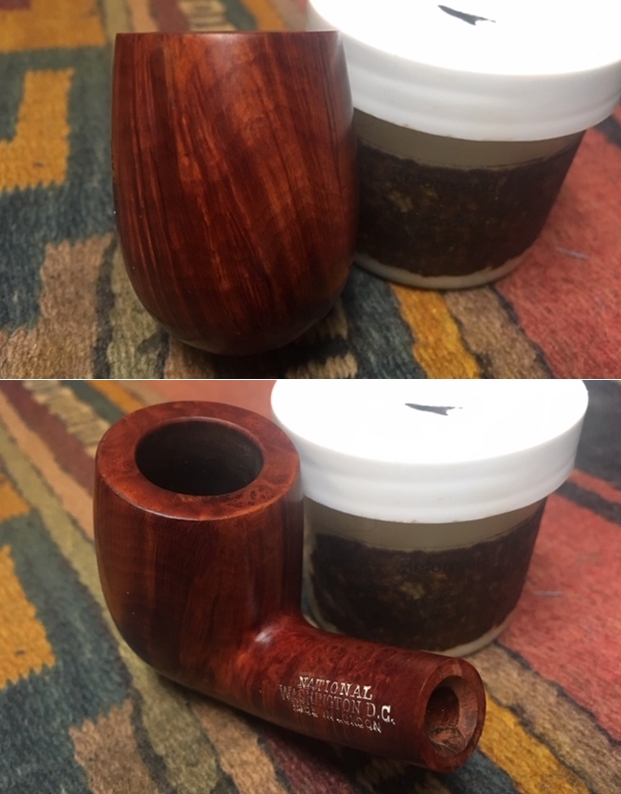
Give the previous blogs a read to have an idea about the Bertram Collection that I am working on these days. I can’t adequately describe how overwhelmed I am when I look at the 200+ pipes that need to be restored but there is only one way to move ahead – 1 pipe at a time. Jeff is doing the major cleanup on the lot as that would be more than I could handle by myself in moving through this many pipes. From his cleaned pipes the next one I chose is a Made in London National Washington, D.C. 33 Bent Billiard to be the next pipe that I would work on. It has some amazing straight grain around the bowl and shank. The bowl had cake in the chamber that was no problem. The rim top had some darkening and lava overflow on the back side. The inner and outer edge of the bowl appeared to be in good condition but we would know more once the bowl had been reamed and cleaned. The exterior of the briar looked lifeless and was dusty with the grime of years of storage. The stem had some oxidation, tooth chatter and marks near the button on both sides. Jeff took some photos of the pipe before he began his cleanup work on it. Jeff took close-up photos of the bowl and rim to capture the condition of the pipe when it arrived. The rim top had a thick coat of lava and the bowl had a thick cake. It was hard to see what the inner and outer edge looked like with the cake and lava.Jeff took a picture of the bowl side and the heel to show the marvelous grain on the bowl. It really is quite stunning and very dirty! There is also something mis-stamped on right side of the bowl. Under a magnifying lens it reads England.The next two photos show the stamping on the sides of the shank. The left side is stamped with National over Washington, D.C.  over Made in London. At the shank/bowl junction it is stamped 33. The stamping on the shank was slightly double stamped and had some white paint in it.The next two photos show the condition of the stem surfaces. The stem was oxidized and had some calcification on the surface as well as tooth marks and chatter on both sides near the button.I have already done the work on one of the National pipes in the Bertram lot so I turned to that to have another look at the history of the brand (https://rebornpipes.com/2019/05/21/doing-some-cosmetic-work-on-a-national-pipes-rhodesian/). I quote in full from that blog.

Before I started my restoration work I wanted to refresh my memory about the brand. I remembered from previous National Pipes that I had worked on that there was a tie to the Bertram Pipe Company in Washington, D.C. I also knew that it was a very different company than the National Briar Pipe Company of Jersey City, New Jersey but that is where all the trails let in terms of Pipedia and Pipephil’s site. I turned back to a previous blog that I had written on the brand when I restored a pipe with the same stampings to review the history and connection of the brand to Bertram. https://rebornpipes.com/tag/national-washington-d-c-pipes/. I knew that the fact that there were several of these included with the large lot of Bertram pipes that Jeff and I purchased was not accidental. Here is the link to that previous blog. I quote in part:

I had a gut feeling that the pipe had some connection to Bertram Pipe Company of Washington DC but only the vaguest memory of that connection. I could not remember where I picked that up but just had the memory. I did some searching on the Internet and found a National Briar Pipe Company of Jersey City, New Jersey with no clear ties to Washington DC on the Pipedia site. This was the company that purchased the Doodler after Tracy Mincer died. I could see that the Jersey City pipes were stamped differently and all had line names stamped on them. On the Pipephil site I found an English version that had very different stamping on the left side of the shank as well as Made in England on the right side of the shank.

Thus I was reminded of the non-connection to the New Jersey Pipe Company. The blog went on to record some information that tied the National Washington, D.C. company to Bertram more definitively. I quote

I…posted a question on Smokers Forum (SF) and Pipe Smokers Unlimited regarding the brand. I received several responses that gave me information. One of them on SF came from Ed Klang and provided me with some confirmation regarding my memory of the connection with Bertram. I quote him in full, “In the history of the Bertram company, after the fire at the Washington, D.C. facility and the decision was made to discontinue Bertram production a group of employees and a few investors wanted to buy the rights to the Bertram name, which was turned down and it was then proposed that they would rebrand the pipes as National, no mention was made whether anything ever came of that proposal. Supposedly this group did produce pipes for a while but the effort was finally abandoned and I have never been able to reliably confirm this. Just bits and pieces here and there.” Thanks Ed. This is the random memory that I was trying to dig up.

I also received a reply on SF from Radiobob that read as follows: “National Pipe and Tobacco was located on the 1700 block of Pennsylvania Avenue in Washington, D.C., just about a block from where I worked. I still have two Canadians that I bought there, as well as a Comoy’s Patina Apple. In my recollection, it closed down–much to my regret–in the mid to late 1980s.”

Those responses gave me the kind of details that I always find helpful in my restoration work. I will continue to do some digging on the company and see what I can find but that bit confirmed the visual tie to the Bertram Company of DC. Thank you for your help Ed and Bob.

Now I have a different one that has the National stamp and also is stamped Made in London. There is also a mistaken stamp on the side of the bowl that says ENGLAND. This is another piece of the puzzle for me. I know National had other pipe companies in Europe make there pipes. This one has a very Barling like look to it. I wonder if it was not made by them for National? On with the cleanup and restoration on this Bent Billiard.

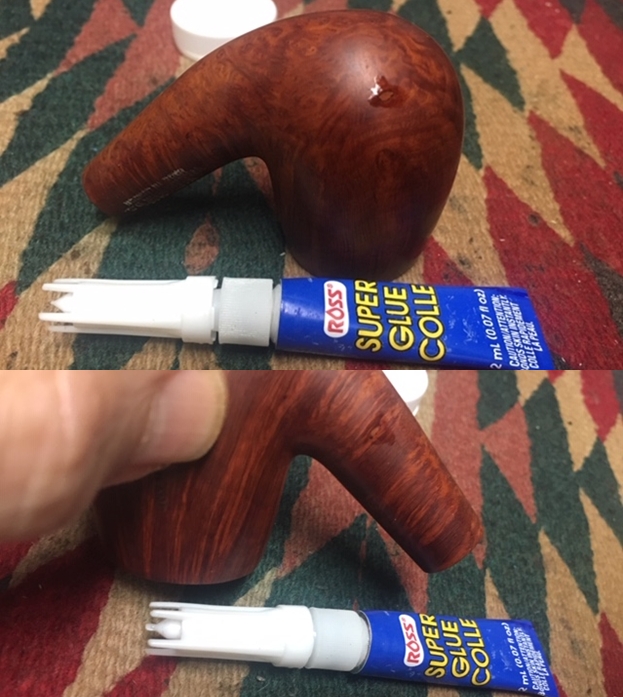
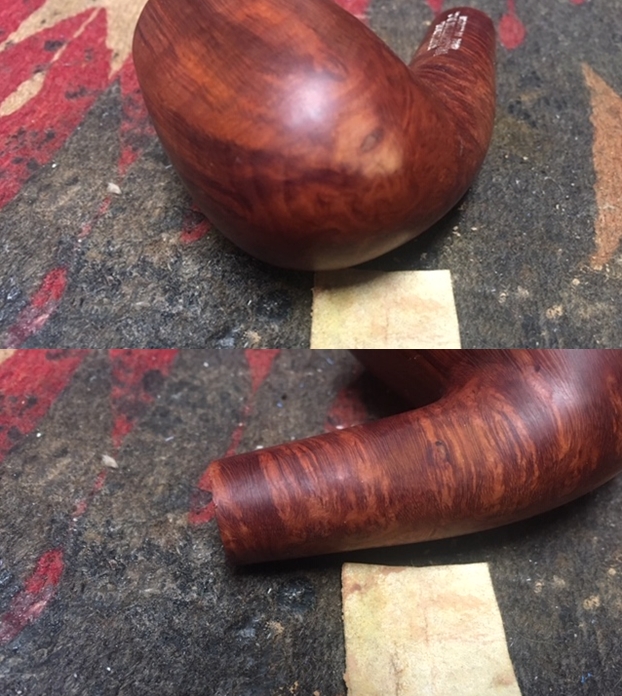
When I received the pipe Jeff had already reamed the bowl with a PipNet pipe reamer and followed up with a Savinelli Fitsall pipe knife to remove the cake. He had scrubbed out the mortise and the airway in the shank and the stem with alcohol, cotton swabs and pipe cleaners. He had scrubbed the exterior of the bowl, rim, shank and stem with a tooth brush and Murphy’s Oil Soap to remove the oils and tars on the rim and the grime on the finish of the bowl. He had rinsed it under running water. He dried it off with a soft cloth. He was able to remove lava build up on the rim top and you could see the great condition of the bowl top and edges of the rim. There was still some darkening to the rim top toward the back of the bowl. He soaked the stem in Before & After Deoxidizer to remove the oxidation. I took photos of the pipe before I started my work on it. I took a close up photo of the rim top to show the condition of the bowl and rim after Jeff had cleaned up the grime and lava. The inner edge of the rim has some damage and nicks on it. The out edge of the rim looks good. There is some rim darkening on the back side of the bowl. The stem photos show that the oxidation is gone. The surface of the vulcanite looked very good. The tooth marks and chatter are near the button on both sides. I also took a photo of the stamping on the left side of the shank showing how the stamping was laid out. It appeared to have been double stamped and the stamping whitened. There was also a strange mistaken stamping on the right side of the bowl – it read ENGLAND.I worked on the inner edge of the rim and the darkening on the backside of the top with a folded piece of 220 grit sandpaper to smooth out the damage and remove the darkening. There were two noticeable divots in the otherwise flawless briar – one on the left side of the heel of the bowl and the other on the right side of the shank. I darkened them with a black Sharpie pen and then filled them in with clear super glue. Once the repair cured I sanded it smooth with 220 grit sandpaper and smoothed further with 400 grit sandpaper. I polished the bowl and rim top with micromesh sanding pads – wet sanding it with 1500-12000 grit pads. I wiped the bowl down with a damp cloth after each pad to remove the sanding debris. After the final sanding pad I hand buffed it with a cotton cloth to raise a shine. I worked some Before & After Restoration Balm into finish of the briar with my fingertips to clean, enliven and protect it. I let the balm sit for a little while and then buffed with a cotton cloth to raise the shine. The Restoration Balm really makes the grain stands out beautifully. Between the polishing with the micromesh pads and the balm I did not have to stain the repaired areas. They blend in very well. I set the bowl aside and worked on the stem. I used a folded piece of 220 grit sandpaper to blend the tooth marks and chatter into the surface of the stem. Once the surface was smooth I sanded out the scratch marks and started the polishing of the stem with a folded piece of 400 grit sandpaper. I wiped the stem down with Obsidian Oil. I polished the stem with micromesh sanding pads – wetsanding it with 1500-12000 grit pads. I wiped the stem down with Obsidian Oil after each pad. I polished it with Before & After Pipe Polish – both Fine and Extra Fine and gave it a final coat and set it aside to dry.  This is the part of the restoration process that I really look forward to! When all the parts are finished and the pipe I clean then I put the stem and bowl back together and buff the pipe with Blue Diamond on the buffing wheel. I polish the briar and any minute scratches still in the vulcanite of the stem until there is a rich shine. This National Washington, D.C. pipe is a classic English looking bent billiard shape with a natural finish that highlights some amazing straight and flame grain on a proportionally well carved pipe. Buffing the pipe made the briar come alive and the grain popped with polishing. The black vulcanite stem had a rich glow. The finished pipe is a beautifully grained English Made National Bent Billiard. The pipe feels really good in the hand and sits right in the mouth. Have a look at it with the photos below. The dimensions are Length: 5 ½ inches, Height: 2 inches, Outside diameter of the bowl: 1 1/4 inches, Chamber diameter: ¾ of an inch. Thanks for walking through the restoration with me as it was a pleasure to work on.
 

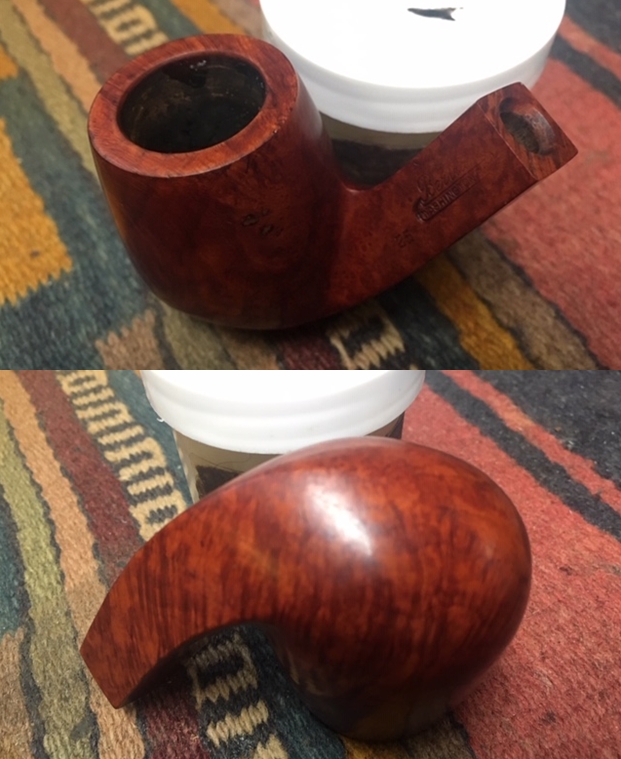
A Bent Diamond Shank Billiard Bertram 25 from the Bertram Collection


Blog by Steve Laug

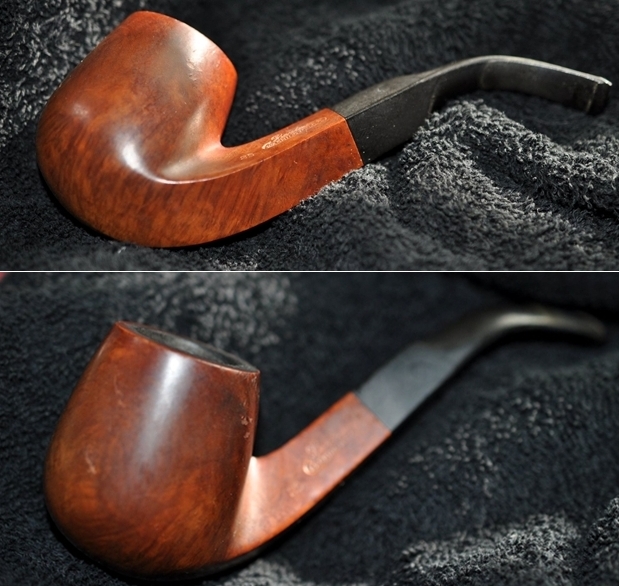
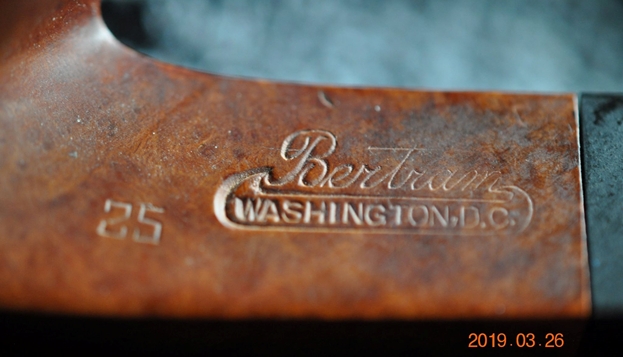
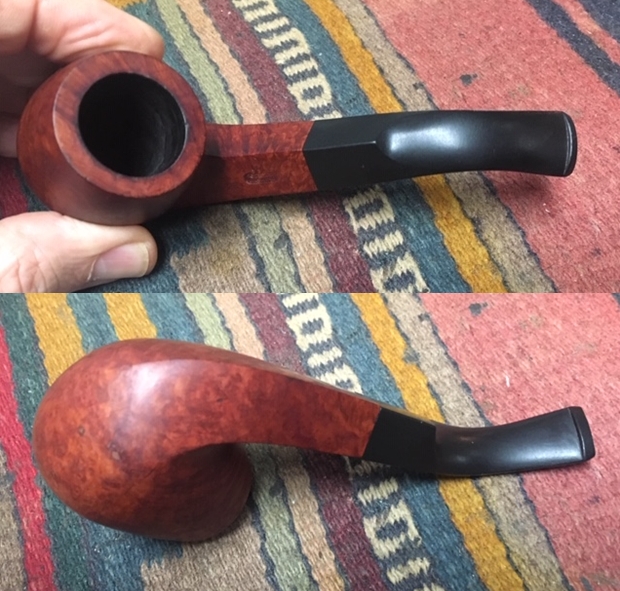
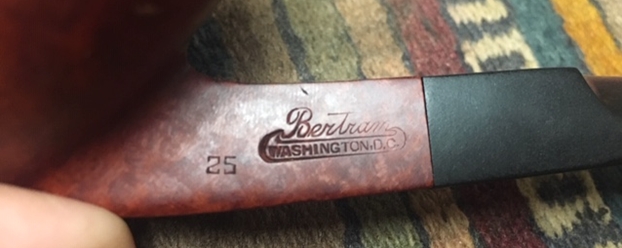
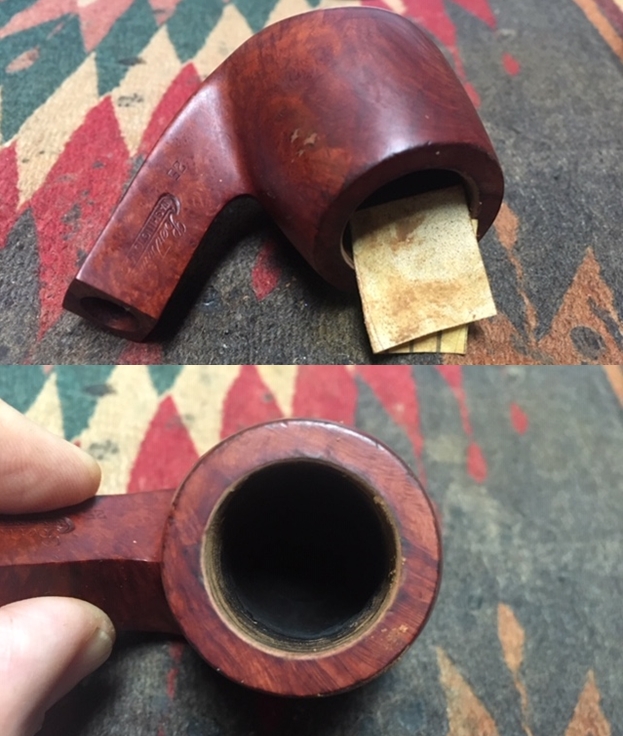
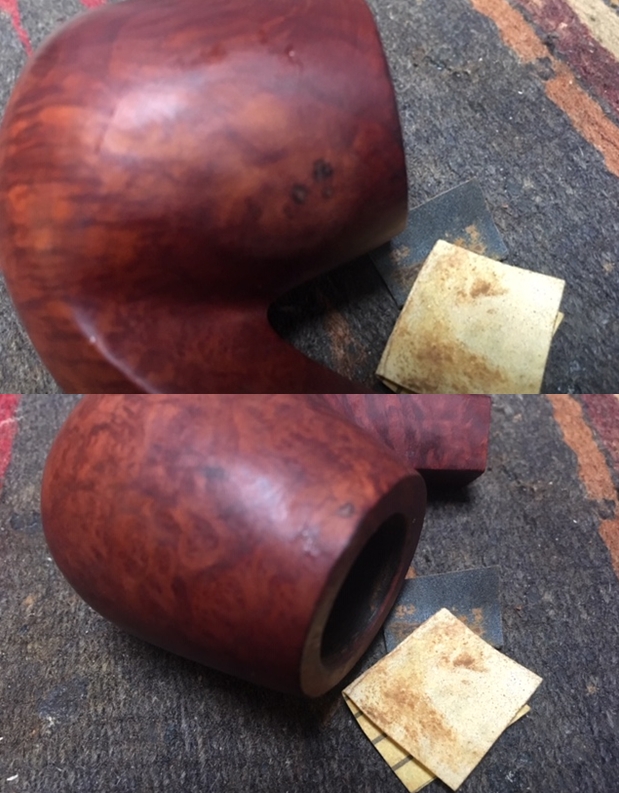
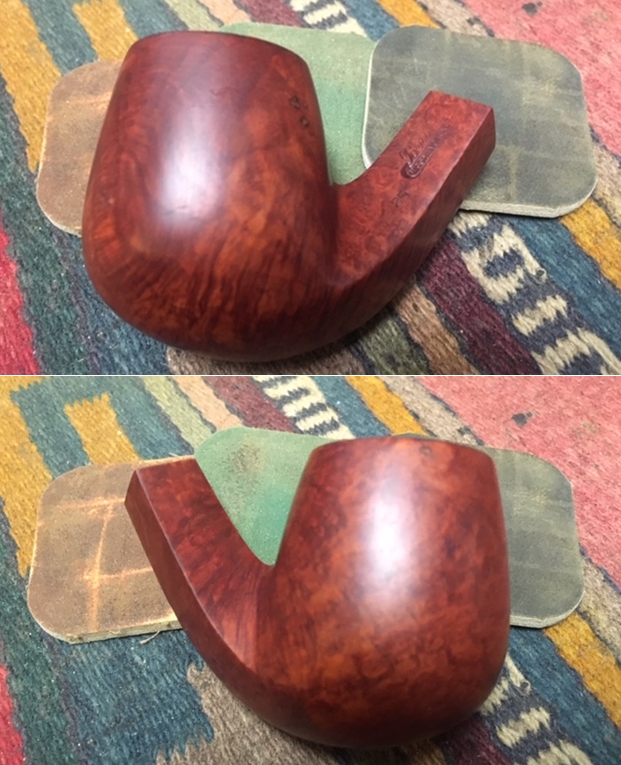
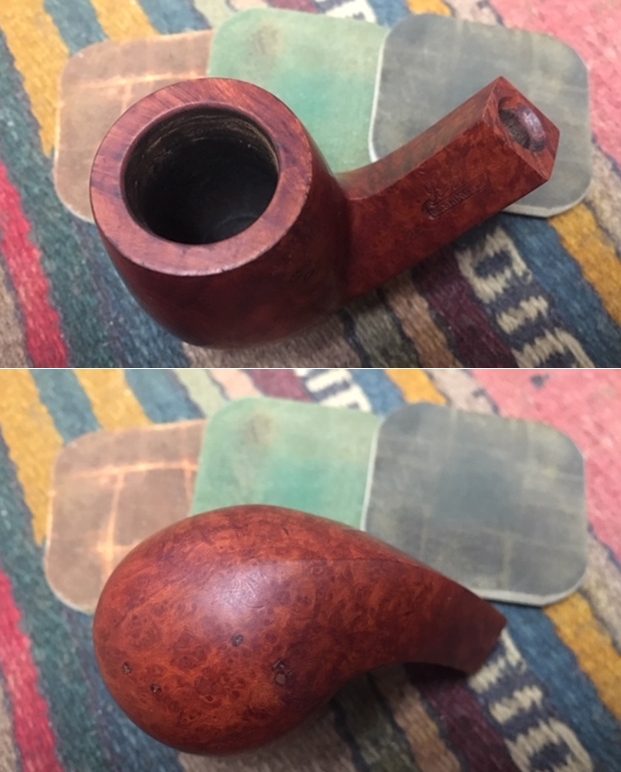
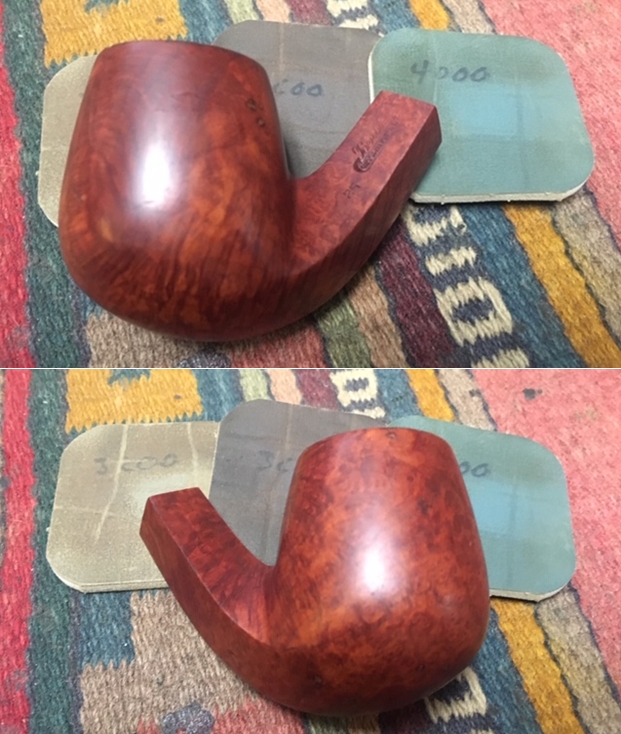
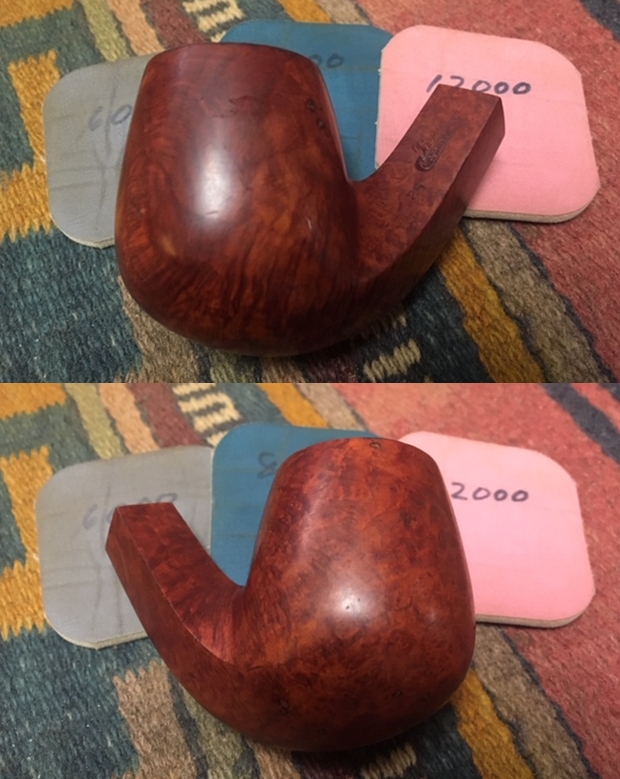
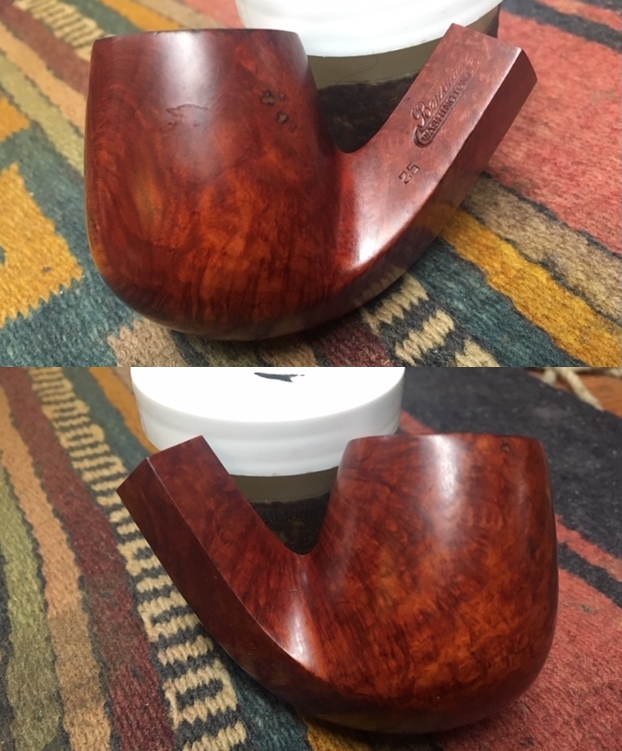
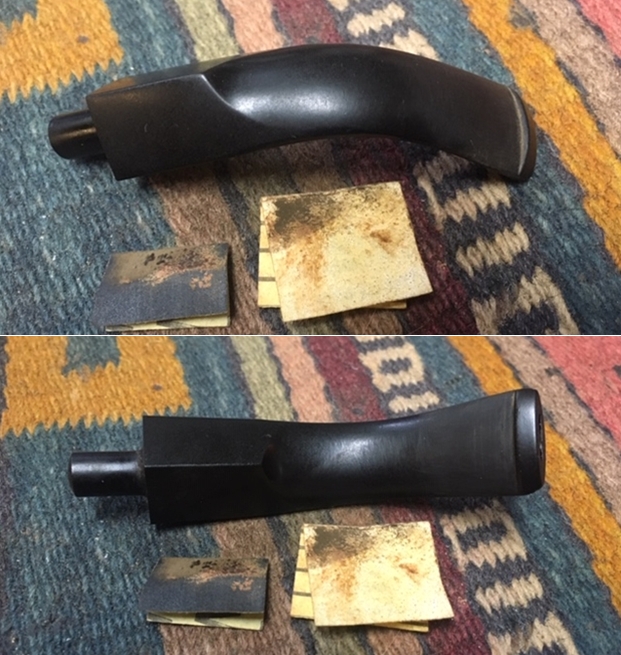
Once again rather than repeat myself with the repetition please refer to the previous blog posts on the collection of Bertrams and other brands that Jeff and I purchased. I can’t adequately describe how overwhelmed I am when I look at the 200+ pipes that need to be restored but there is only one way to move ahead – 1 pipe at a time. I am glad Jeff is helping with the clean up on the lot as that would be more than I could handle by myself in moving through this many pipes. From his cleaned pipes I chose a Diamond Shank Bent Billiard Bertram 25 with mixed grain to be the next pipe that I would work on. It was a1/2 bent Billiard with a saddle stem. The bowl had cake in the chamber that was no problem. The rim top had some darkening and lava overflow on the back side. The inner and outer edge of the bowl appeared to be in good condition but we would know more once the bowl had been reamed and cleaned. The exterior of the briar looked lifeless and was dusty with the grime of years of storage. I am still trying to figure out Bertrams numbering system as some of the higher number pipes seems to have more fills than the 25s. The stem had some oxidation and tooth marks near the button on both sides. Jeff took some photos of the pipe before he began his cleanup work on it. Jeff took a close-up photo of the bowl and rim to capture the condition of the pipe when it arrived. The rim top had a thick coat of lava and the bowl had a thick cake.Jeff took pictures of he bowl sides and the heel to show the great looking grain around the sides of the bowl. It really is quite stunning and very dirty! Jeff took a photo to capture the stamping on the top and left side of the shank. It shows the stamping on the topside which read Bertram over Washington, D.C. The stamping on this pipe is clear and readable. It also shows the number stamp 25 which shows the quality of the pipe.The next two photos show the stem surface. They show the oxidation and the chatter on both sides near the button. The tooth marks are visible on the underside next to the button. There is also some wear on the underside button edge.If you have read the previous Bertram blogs I have posted about the pipes that I have cleaned up so far you can skip the next bit. But if you have not, then I include the link to Bertram history and information. I would recommend that if you don’t know much about them do some research on them. I include a link to the write up on Pipedia (http://pipedia.org/wiki/Bertram). Bertram pipes were based out of Washington DC. They were popular among famous politicians and celebrities of the time. They made many products for them from FDR’s cigarette holders to Joseph Stalin’s favorite pipe. They were considered some of the best America had to offer till they finally closed their doors in the 70s. They graded their pipes by 10s, the higher the grade the better. Above 60s are uncommon and 80-90s are quite rare. I’ve never heard of or seen a 100 grade. I have several blogs that I have written on rebornpipes that give some history and background to Bertram pipes. (https://rebornpipes.com/2015/06/16/an-easy-restoration-of-a-bertram-grade-60-217-poker/).

I have included the following link to give a bit of historical information on the pipe company. It is a well written article that gives a glimpse of the heart of the company. http://www.streetsofwashington.com/2012/01/bertrams-pipe-shop-on-14th-street.html#

From this information I have learned that the shape and grade Bertram I have in front of me now was made before the closure of the shop in the 1970s. This Bertram Diamond Shank Bent Billiard with a darker finish is different from the other Bertram shapes I have worked. With a grade 25 stamp it is a lower range pipe.

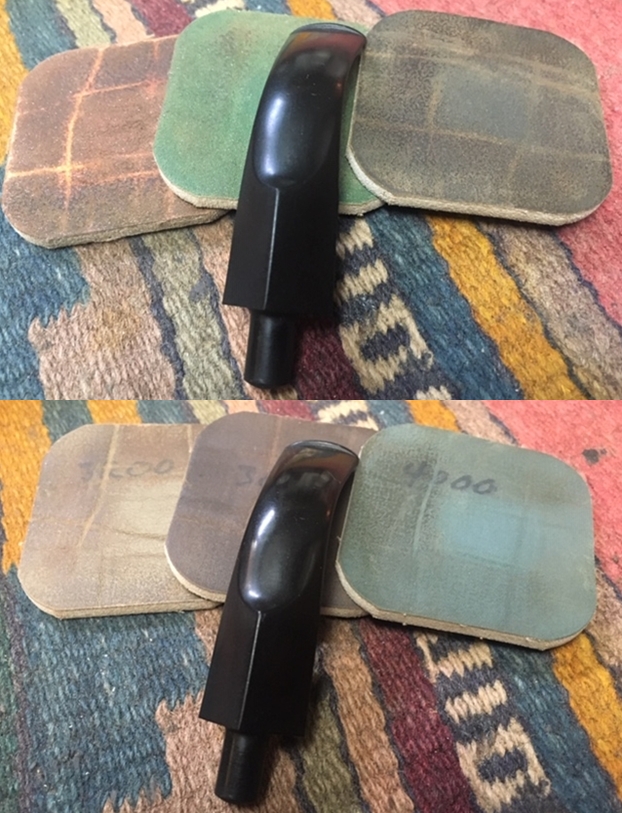
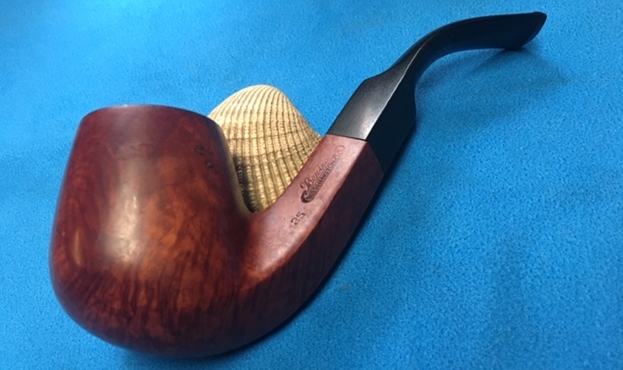
By now if you have been a reader for long you have Jeff’s cleaning regimen pretty well memorized. If you know it you can skip right to the pictures. If not I will include them once more. Jeff reamed the bowl with a PipNet pipe reamer and followed up with a Savinelli Fitsall pipe knife to remove the cake. He scrubbed out the mortise and the airway in the shank and the stem with alcohol, cotton swabs and pipe cleaners. He scrubbed the exterior of the bowl, rim, shank and stem with a tooth brush and Murphy’s Oil Soap to remove the oils and tars on the rim and the grime on the finish of the bowl. He rinsed it under running water. He dried it off with a soft cloth. He was able to remove lava build up on the rim top and you could see the great condition of the bowl top and edges of the rim. There was still some darkening to the rim top toward the back of the bowl. He soaked the stem in Before & After Deoxidizer to remove the oxidation. I took photos of the pipe before I started my work on it. I took a close up photo of the rim top to show the condition of the bowl and rim after Jeff had cleaned up the grime and lava but the rim top had some light damage, some pits and darkening on the inner edge of the rim. The stem photos show that the oxidation is gone. The light tooth chatter is hard to see but I should be able to sand it out quite easily. Every one of the pipes that I have worked on from this Bertram Collection has had tooth marks on the underside of the stem and some on the topside as well. The tooth marks on the underside will take a little more work to remove.I also took a photo of the stamping on the left side of the shank showing how the stamping was laid out.I used a folded piece of 220 grit sandpaper to cleanup the light damage to the inner edge of the rim. I would address the darkening when I polished it with micromesh sanding pads.I used a black Sharpie pen to put a black spot in each of the fills on the bowl sides. Once I had done that I filled in the dents with clear super glue. Once the repairs had cured I sanded the repaired spots with 220 grit sandpaper to blend them into the surface of the briar. I polished the bowl and rim top with micromesh sanding pads – dry sanding it with 1500-12000 grit pads. I wiped the bowl down with a damp cloth after each pad to remove the sanding debris. After the final sanding pad I hand buffed it with a cotton cloth to raise a shine. I know I have mentioned it before but I really like the balm that Mark Hoover created. It really does wonders on a dry piece of briar. I worked some Before & After Restoration Balm into finish of the briar with my fingertips to clean, enliven and protect it. I let the balm sit for a little while and then buffed with a cotton cloth to raise the shine. The Restoration Balm really makes the grain stands out beautifully. I set the bowl aside to work on the stem. I used a folded piece of 240 grit sandpaper to blend the tooth marks and chatter into the surface of the stem. Once the surface was smooth I sanded out the scratch marks and started the polishing of the stem with a folded piece of 400 grit sandpaper. I wiped the stem down with Obsidian Oil. I polished the stem with micromesh sanding pads – wetsanding it with 1500-12000 grit pads. I wiped the stem down with Obsidian Oil after each pad. I polished it with Before & After Pipe Polish – both Fine and Extra Fine and gave it a final coat and set it aside to dry. I am having fun doing these pipes from the Bertram Collection. Each one presents different challenges but all are well laid out classic shapes. This is no exception. I put the stem and bowl back together and buffed the pipe with Blue Diamond on the buffing wheel. I polished the briar and the minute scratches still in the vulcanite of the stem until there was a rich shine. This Bertram is a classic Bent Billiard shape with a diamond shank and saddle stem. The stain really highlights some amazing grain on a proportionally well carved pipe. Once I buffed the pipe the briar came alive and the mixture of grain popped with polishing. The black vulcanite stem had a rich glow. The finished pipe is a beautiful grained Billiard. Like the other Bertrams I have worked on this one fits well in the hand and sits right in the mouth. Have a look at it with the photos below. The dimensions are Length: 5 inches, Height: 2 inches, Outside diameter of the bowl: 1 3/8 inches, Chamber diameter: ¾ of an inch. This one will soon be on the rebornpipes store. If you are interested let me know. Thanks for walking through the restoration with me as it was a pleasure to work on.
A Zulu Shaped Bertram 30 from the Bertram Collection


Blog by Steve Laug

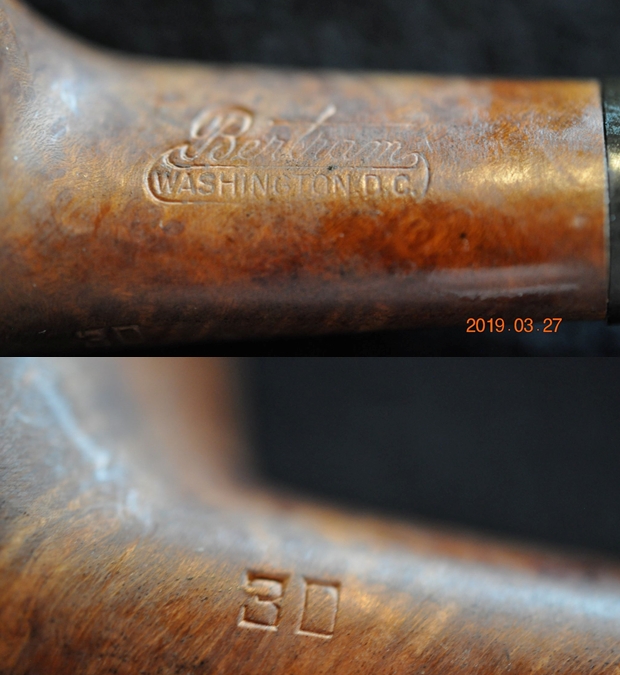
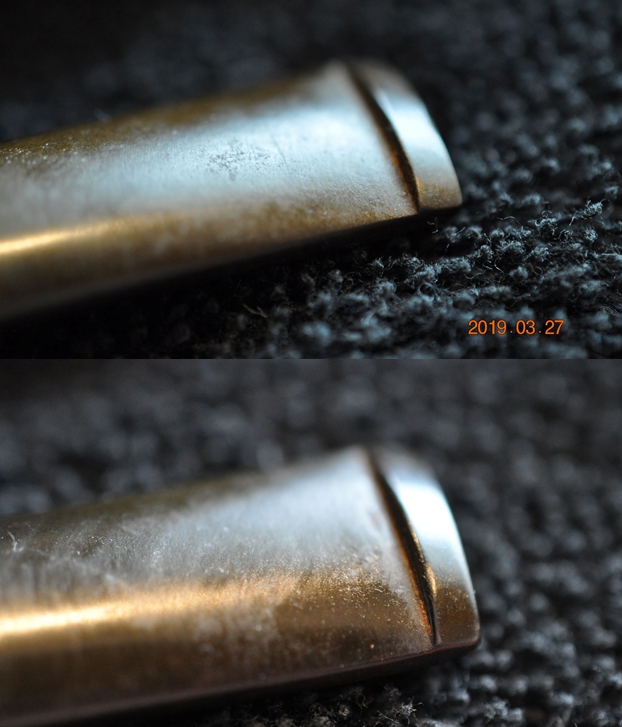
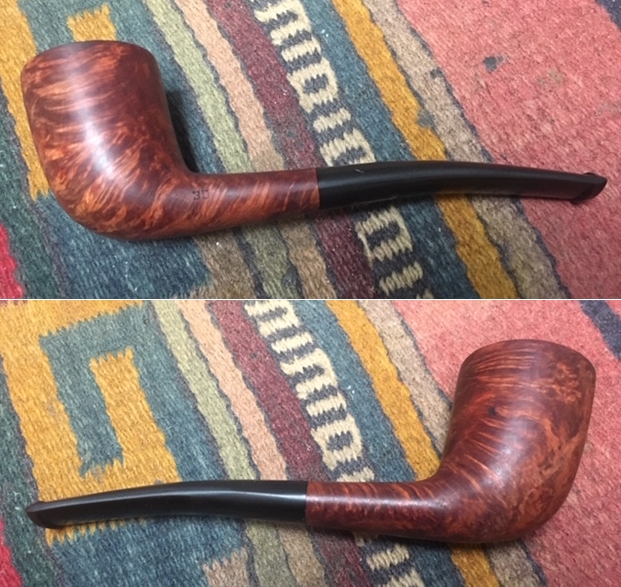
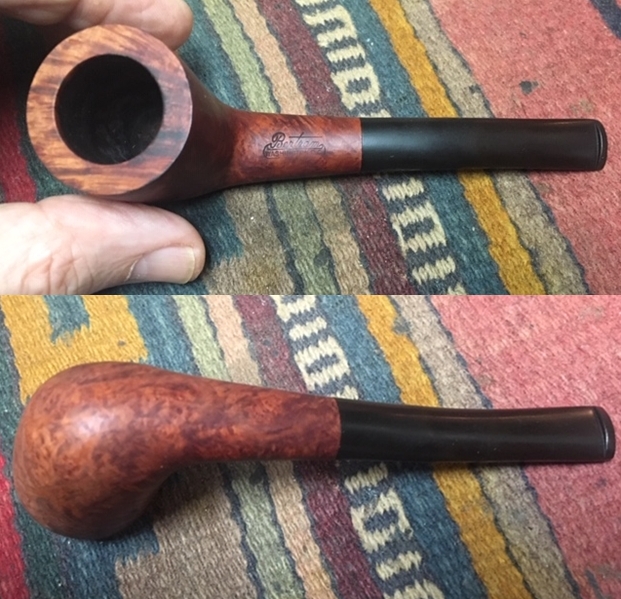
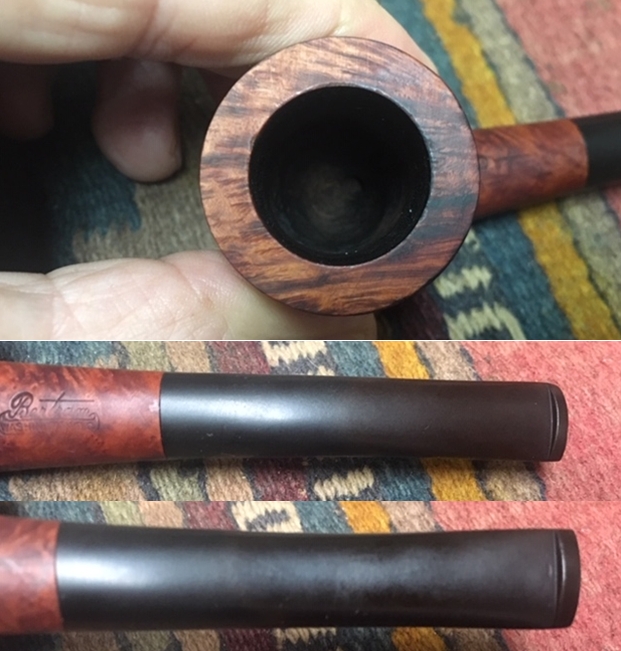
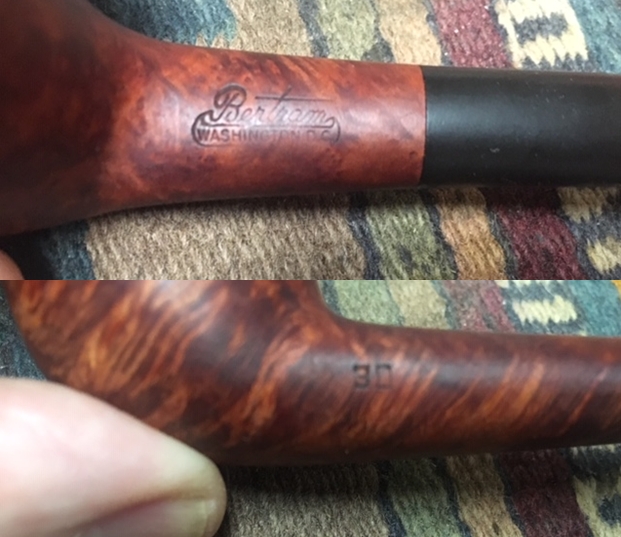
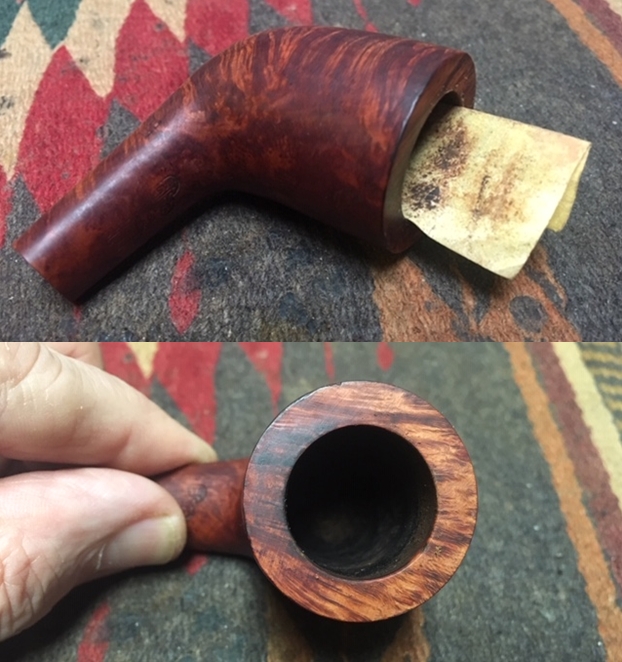
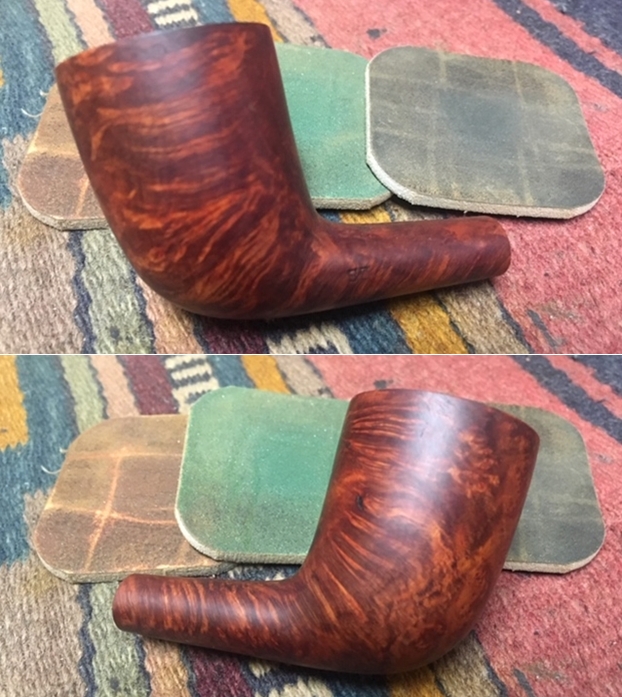
Once again rather than repeat myself and give readers grief with the repetition please refer to the previous blog posts on the collection of Bertrams and a smattering of other brands that Jeff and I purchased. I can’t adequately describe the sense of being overwhelmed that I have when I look at the 200+ pipes that need to be restored but there is only one way to move ahead – 1 pipe at a time. I am glad Jeff is helping with the clean up on the lot as that would be more than I could handle by myself in moving through this many pipes. From his cleaned pipes I chose an interesting Zulu with cross grain on the sides of the bowl and some birdseye around the front and back to be the next pipe that I would work on. It was a1/8 bent Zulu with a tapered stem. The bowl had cake in the chamber that was no problem. The rim top had some darkening and lava overflow on the back side. The inner and outer edge of the bowl appeared to be in good condition but we would know more once the bowl had been reamed and cleaned. The exterior of the briar looked lifeless and was dusty with the grime of years of storage. I am still trying to figure out Bertrams numbering system as some of the higher number pipes seems to have more fills than the 30s. This is one of those pipes that look really good. The stem had some oxidation and tooth marks near the button on both sides. Jeff took some photos of the pipe before he began his cleanup work on it. I have included them below and they tell the story and give a glimpse of the pipe before clean up. Jeff took close-up photos of the bowl and rim to capture the condition of the pipe when it arrived. The rim top had a thick coat of lava and the bowl had a thick cake.Jeff took pictures of he bowl sides and the heel to show the great looking grain around the sides of the bowl. It really is quite stunning and very dirty!Jeff took 2 photos to capture the stamping on the top and left side of the shank. The first photo shows stamping on the topside which read Bertram over Washington, D.C. The stamping on this pipe is clear and readable. The second photo shows the grade number stamping on the left side toward the shank/bowl junction. It read number 30 which shows the quality of the pipe. The next two photos show the stem surface. They show the oxidation and the chatter on both sides near the button. The tooth marks are visible on the underside next to the button. There is also some wear on the underside button edge. If you have read the previous Bertram blogs I have posted about the pipes that I have cleaned up so far you can skip the next bit. But if you have not, then I include the link to Bertram history and information. I would recommend that if you don’t know much about them do some research on them. I include a link to the write up on Pipedia (http://pipedia.org/wiki/Bertram). Bertram pipes were based out of Washington DC. They were popular among famous politicians and celebrities of the time. They made many products for them from FDR’s cigarette holders to Joseph Stalin’s favorite pipe. They were considered some of the best America had to offer till they finally closed their doors in the 70s. They graded their pipes by 10s, the higher the grade the better. Above 60s are uncommon and 80-90s are quite rare. I’ve never heard of or seen a 100 grade. I have several blogs that I have written on rebornpipes that give some history and background to Bertram pipes. (https://rebornpipes.com/2015/06/16/an-easy-restoration-of-a-bertram-grade-60-217-poker/).

I have included the following link to give a bit of historical information on the pipe company. It is a well written article that gives a glimpse of the heart of the company. http://www.streetsofwashington.com/2012/01/bertrams-pipe-shop-on-14th-street.html#

From this information I have learned that the shape and grade Bertram I have in front of me now was made before the closure of the shop in the 1970s. This Bertram Zulu with a darker finish is one of the more usual shapes in terms of the Bertram pipes I have worked on. With a grade 30 stamp it is a lower mid-range pipe.

By now if you have been a reader for long you have Jeff’s cleaning regimen pretty well memorized. If you know it you can skip right to the pictures. If not I will include them once more. Jeff reamed the bowl with a PipNet pipe reamer and followed up with a Savinelli Fitsall pipe knife to remove the cake. He scrubbed out the mortise and the airway in the shank and the stem with alcohol, cotton swabs and pipe cleaners. He scrubbed the exterior of the bowl, rim, shank and stem with a tooth brush and Murphy’s Oil Soap to remove the oils and tars on the rim and the grime on the finish of the bowl. He rinsed it under running water. He dried it off with a soft cloth. He was able to remove lava build up on the rim top and you could see the great condition of the bowl top and edges of the rim. There was still some darkening to the rim top toward the back of the bowl. He soaked the stem in Before & After Deoxidizer to remove the oxidation. I took photos of the pipe before I started my work on it. I took a close up photo of the rim top to show the condition of the bowl and rim after Jeff had cleaned up the grime and lava but the rim top had some light damage, some pits and darkening on the backside of the inner edge of the rim. The stem photos show that the oxidation is gone. The light tooth chatter is hard to see but I should be able to sand it out quite easily. Every one of the pipes that I have worked on from this Bertram Collection has had tooth marks on the underside of the stem and some on the topside as well. The tooth marks on the underside will take a little more work to remove.I also took a photo of the stamping on the left side of the shank showing how the stamping was laid out. I used a folded piece of 220 grit sandpaper to cleanup the light damage to the inner edge of the rim. I would address the darkening when I polished it with micromesh sanding pads.I polished the bowl and rim top with micromesh sanding pads – dry sanding it with 1500-12000 grit pads. I wiped the bowl down with a damp cloth after each pad to remove the sanding debris. After the final sanding pad I hand buffed it with a cotton cloth to raise a shine. I know I have mentioned it before but I really like the balm that Mark Hoover created. It really does wonders on a dry piece of briar. I worked some Before & After Restoration Balm into finish of the briar with my fingertips to clean, enliven and protect it. I let the balm sit for a little while and then buffed with a cotton cloth to raise the shine. The Restoration Balm really makes the grain stands out beautifully. I set the bowl aside to work on the stem. I used a folded piece of 240 grit sandpaper to blend the tooth marks and chatter into the surface of the stem. Once the surface was smooth I sanded out the scratch marks and started the polishing of the stem with a folded piece of 400 grit sandpaper. I wiped the stem down with Obsidian Oil. I polished the stem with micromesh sanding pads – wetsanding it with 1500-12000 grit pads. I wiped the stem down with Obsidian Oil after each pad. I polished it with Before & After Pipe Polish – both Fine and Extra Fine and gave it a final coat and set it aside to dry. I am having fun doing these pipes from the Bertram Collection. Each one presents different challenges but all are well laid out classic shapes. This is no exception. I put the stem and bowl back together and buffed the pipe with Blue Diamond on the buffing wheel. I polished the briar and the minute scratches still in the vulcanite of the stem until there was a rich shine. This Bertram is a classic Zulu or Yachtsman shape with a darker finish that really highlights some amazing grain on a proportionally well carved pipe. Once I buffed the pipe the briar came alive and the mixture of grain – cross grain and birdseye – popped with polishing. The black vulcanite stem had a rich glow. The finished pipe is a beautiful grained Zulu. Like the other Bertrams I have worked on this one fits well in the hand and sits right in the mouth. Have a look at it with the photos below. The dimensions are Length: 5 1/2 inches, Height: 1 7/8 inches, Outside diameter of the bowl: 1 3/8 inches, Chamber diameter: ¾ of an inch. This one will soon be on the rebornpipes store. If you are interested let me know. Thanks for walking through the restoration with me as it was a pleasure to work on.