Comoys 337C Restoration


By Al Jones

The 337C is a classic Prince shape from the pre-Cadogan era for Comoys.   This 1975 shape chart, courtesy of Pipepedia shows the 337.  However, I’ve never seen a 337 without the C designation

This one has stamping that is consistent with those made from the late 1940’s to the merger point in 1981.   The pipes condition made for a relatively simple restoration with only some bowl top build-up and an oxidized stem.

Below is the pipe as it was received.

I reamed the modest cake, and soaked the bowl with sea salt and alcohol.  While the bowl was soaking, I put a dab of grease on the C stem logo, and soaked it in a mild solution of Oxyclean.  Following the soak, the shank was cleaned and stem inserted.

I used a piece of worn scotchbrite to clean the bowl top.  The briar was lightly buffed with White Diamond and several coats of Carnuba wax.  I used a lighter flame to lift the slight dents in the stem near the button.  The oxidation was removed with 800, 1,500 and 2,000 grit wet sandpaper, followed by 8,000 and 12,000 micromesh sheets.  The stem was then buffed with White Diamond rouge and Meguiars plastic polish.

Below is the finished pipe.


Cleaning up a Lightly Smoked Algerian Briar Tinder Box Pot shaped pipe


Blog by Steve Laug

On a recent trip that Irene and I took with Jeff and his wife to the Oregon Coast we managed to do some pipe hunting. We found a few interesting pipes. I was in the mood today to work on a couple of them as a break from the restorations I am doing for others. The first of these is a pipe marked Tinderbox on the left side of the shank and Algerian Briar on the right side of the shank. It is a pot shaped piece with some great grain around the bowl – lots of birdseye. The bowl was not even broken in. At first glance we thought it was unsmoked but in looking at it at home I think it may have been smoked at least once as there is some darkening around the top 1/3 of the bowl. The rest of the bowl is pristine. The natural finish is dirty from sitting around but otherwise quite nice. The stem has some tooth chatter and oxidation but is otherwise quite clean. I took this one home as it did not need a lot of work to bring it back to life. I took photos of the pipe before starting my cleanup work. I took close up photos of the rim top and bowl to show how clean it was. There is some nice cross grain on the rim top. I also took photos of the stem to show their condition. You can see the oxidation and tooth chatter on it but otherwise it is a pretty straight forward cleanup.I took photos of the stamping on the sides of the shank. You can see them below and they read as noted above. I also noticed that the stem was stamped on the underside and read France.I have seen the France stamp on vulcanite before and I believe it is not the provenance of the pipe as a whole but of the rubber stem. In this case I am pretty sure that the pipe was made for Tinder Box by an English pipe maker as the shape matches the Pot shapes of several of the English makers. I looked up Tinder Box on Pipedia to see if I could get a lead. I have included the link to that article (https://pipedia.org/wiki/The_Tinder_Box). I quote in full:

The Tinder Box was the chain of tobacco stores started by Edward Kolpin, Sr., who carved Ed’s Hand Made pipes. The store, eventually sold to a Canadian conglomerate, eventually reached 200 retail outlets by 2007, and in the 40 years it operated on a large scale a great number of pipes were made for The Tinder Box by well respected makers. A few include the Tinder Box Unique, made by Charatan, Christmas Pipes by Ascorti, and the Tinder Box Noble and Exotica, made by Shalom Pipe Factory, Mauro Armellini did make the Verona and Napoli lines.

With that information and really not being much clearer on the maker of the pipe I turned to work on the pipe itself. I sanded out the darkened area of the bowl with a piece of 220 grit sandpaper wrapped around a dowel. I took off much of the darkening as it was only on the surface of the briar. I ran a pipe cleaner and a cotton swab and alcohol through the shank and it came out spotless. The pipe was very clean.I polished the bowl and rim top with micromesh sanding pads – wet sanding with 1500-12000 grit sanding pads. I wiped down the bowl after each sanding pad to remove the sanding debris. The natural finish on the bowl began to have a rich shine. I was finished polishing the bowl so it was time to rub the briar down with Before & After Restoration Balm. I worked it into the surface of the briar with my fingertips and let it sit for about 10 minutes. I buffed it off with a cotton cloth. You can see how well the product works to clean and enliven the briar and as a bonus it protects it as well. I set the bowl aside and turned my attention to the stem. While I was with Jeff in Oregon I picked up some of the Soft Scrub that he has found very useful in removing oxidation and calcification. I rubbed down the stem with it on a cotton pad. You can see the results on the pads in the photo below.I sanded out the tooth chatter and the remaining oxidation with 220 grit sandpaper and started the polishing with 400 grit wet dry sandpaper.  I rubbed down the stem with Denicare Mouthpiece Polish and a cotton pad to remove the remnants of oxidation and to blend in the sanding. The stem shows promise at this point in the process.   I polished the stem with micromesh sanding pads – wet sanding it with 1500-12000 grit pads. I wiped the stem down after each sanding pad with a cotton pad to remove the sanding debris. I finished polishing the stem with Before & After Pipe Stem Polish – both fine and extra fine. I finished by wiping it down with Briarville’s No Oxy Oil and buffing it to a shine. Once again I am my favourite part of the restoration when all the pieces are put back together. I put the pipe back together and buffed it with Blue Diamond on the buffing wheel. I gave the bowl and the stem multiple coats of carnauba wax. I hand buffed the pipe with a clean buffing pad to raise the shine. It is fun to see what the polished bowl and stem look like in comparison to what it looked like before I started. This Tinder Box Algerian Briar Pot is nice looking and feels great in my hand. The pipe is another light weight that could be clenched and smoked while doing other things as it is very well balanced. Have a look at it with the photos below. The dimensions are Length: 5 ¾ inches, Height: 1 ¾ inches, Outside diameter of the bowl: 1 ½ inches, Chamber diameter: ¾ of an inch. This is the first of the restorations of the pipes we picked up along the Oregon Coast. It will be going on the rebornpipes store shortly. If you are interested in adding this older Algerian Briar pipe to your collection let me know. Lots more to do in this lot! Thanks to each of you who are reading this blog.

Replacing a Broken Tenon and Restoring a Kriswill Bernadotte Dublin


Blog by Steve Laug

This is another one of the pipes that came to me from a fellow in Kitchener, Ontario that needed some cleaning and in this case a tenon replacement. He had been referred to me by my local pipe and cigar shop. While I am not currently adding more pipes to my queue of repairs I have made a commitment to the shop to work on pipes for their customers. Generally they have one or two pipes that need a bit of work. This fellow sent me the following email:

I just came across my smoking pipes that I’ve had in storage for about 40 years. I’m wondering what you’d charge to have them refurbished. There are 17 in total (11 are Brighams and 6 are various).

It turns out he said he had 17 pipes. That was certainly more than I expected but I communicated that there was a large queue ahead of him and I would have to fit them in as I could. He was fine with whatever time it took. He sent me the following photos of his collection that he wanted restored. The first photo shows his eleven Brigham pipes – all very interesting shapes. The second photo shows the six various pipes in the collection – A Republic Era Peterson’s System 1312 (Canadian Import), A Bjarne Hand Carved Freehand, a Comoy’s Everyman London smooth billiard, a GBD Popular Dublin 12, an English made Kaywoodie Rustica 72B, a Kriswill Bernadotte 60 with a broken tenon. When the box arrived there were two additional pipes included for a total of 19 – a Ropp 803 Deluxe Cherrywood Poker and a Comoy’s Sandblast Everyman Canadian 296. It was a lot of pipes! I have been randomly choosing the next pipe to work on and chose the Kriswill that needed a tenon replacement and general over haul. I have drawn a red box around it in the photo below.Unlike the other pipes that I unwrapped this one needed much more work than the Brighams that I had worked on so far. It was a Kriswill Bernadotte Oval Shank Dublin. It was stamped on the top of the shank Kriswill over Bernadotte over Hand Made Denmark. On the underside of the shank next the shank/stem junction it bears the shape number 60. It had great grain that the shape not only followed but captured. The rim top had a lava overflow from the thick cake in the bowl and some darkening and lava on the beveled inner edge of the rim. It was a dirty pipe but appeared to be in okay condition under the grime. There was some shiny substance in the stamping of the portion that read Hand Made Denmark. As I examined it I saw a small hairline crack in the shank area just below the stamping and into that portion noted above. It appeared to have been glued. I would need to clean that up and re-glue it. The tapered stem was oxidized and had tooth marks and chatter near the button on both sides. There was a classic Kriswill snowflake logo on the top of the stem. The tenon was snapped off cleanly in the shank and was stuck there. I took close up photos of the bowl and rim top to show the condition of the bowl and rim as well as the thick cake and lava overflowing onto the rim top. I also took close up photos of the stem to show its condition as mentioned above.   I took a photo of the stamping on the top and underside of the shank to show what I was speaking about above. It is very clear and readable. You can see the shiny substance in the Hand Made Denmark portion of the stamp. I have also drawn an oval around the hairline crack in the shank in the photos below. The repair seems to have left glue in the stamping as the crack is not that long. I also have included a photo of the shape number stamp on the underside of the shank. There was also a hairline crack in the underside of the shank to the right of the shape number.I remembered that Pipephil had a great summary of the brand so I turned to that site and reviewed the history (http://www.pipephil.eu/logos/en/logo-k3.html). It was much as I expected but there was a part of the history there that I had not noted before. I have included a screen capture of the section on the site regarding Kriswill pipes.I quote the new information (at least for me) regarding the Bernadotte line. Kriswill is a brand of Kriswork Briar Trading, in Kolding (Denmark) established about 1955. Some of Kriswill pipes were designed by Sigvard Bernadotte, Swedish prince and brother to the late Queen Ingrid of Denmark. He collaborated with his Danish partner Acton Bjørn.

There was a small line at the bottom of the section that said Portrait of Sigvard Bernadotte. I clicked on it and was taken to the second screen capture I have included.From the site and the information on Sigvard Bernadotte I learned that the pipe I had in hand was designed for Kriswill by Sigvard Bernadotte, Swedish prince and brother to the late Queen Ingrid of Denmark. That was new information to me. I have worked on a lot of Kriswill pipes before but never made that connection. But now I knew… a pipe designed by royalty! I would never have guessed that prior to reading this.

Armed with that information I was ready to start on the Bernadotte pipe. I decided to start my work by addressing the broken tenon. I put the bowl in the freezer for about 10 minutes and then pulled the broken tenon from the shank with drywall screw. It was an easy pull. I then cleaned up the glue on the stamping with acetone on a cotton pad. I opened the hairline crack on both sides of the shank and put clear superglue in the crack. I pressed it together and clamped it until it cured. With the crack on both sides I am going to recommend to the pipeman that we put an elegant thin band on the shank. I set the bowl aside to let the repairs cure while I waited to hear from the pipeman regarding possible banding of the pipe. I turned my attention to replacing the tenon. I used the Dremel and sanding drum to flatten the face of the stem and remove the broken bits of vulcanite from the broken tenon.I started drilling out the airway with a bit slightly larger than the existing airway in the stem. I complication was that the airway was not centered in either the broken tenon or the stem at this point. I used a sharp pen knife to funnel the airway and straighten it out before I drilled. I was able to center the airway. I worked my way through three different drill bits to get the airway open enough to receive the new tenon. The next photo shows the threaded tenon before I went to work on it with the Dremel. My issue with this replacement was that the stem tapered quickly and did not allow much room. I used the Dremel and sanding drum to remove the hip on the new tenon and reduce the diameter of the portion going into the stem. I glued it into the stem with thick super glue. In the photo it looks like it is tapered a bit. I cleaned that up with a file so that the flow was smooth and the fit was snug in the airway.Once I made the flow of the tenon straight and smooth I slid it into the repaired shank to have a look. Some fine tuning to do for sure but I like the look of the new fit.I set the stem aside to let the tenon cure. I turned back to the bowl. I reamed it with a PipNet pipe reamer. The bowl was conical so I started with the small reaming head to take care of the bowl and worked my way up to the third head. I cleaned up the transitions with a Savinelli Fitsall Pipe Knife and trimmed the cake back so I could examine the walls. I sanded the walls of the bowl with 220 grit sandpaper on a piece of dowel. I scraped off the lava on the inner beveled rim with the Savinelli Fitsall knife. I worked on the inner beveled edge with a folded piece of 220 grit sandpaper to smooth it out and clean off the darkening.I scrubbed the bowl with a tooth brush and some of Mark Hoover’s new Briar Cleaning product. He sent me some to experiment with so this was the first test. I tried the Extra Strength version. It worked fairly well. The verdict is still out for me whether it is better than Murphy’s Oil Soap. I rinsed it off with warm water and dried the bowl off with a cotton cloth. I cleaned out the mortise area and airway to the bowl and the stem with pipe cleaners, cotton swabs and alcohol.I wet sanded the rim top and the bowl sides with micromesh sanding pads – 1500-12000 grit sanding pads. I wiped the bowl surface down with a damp cloth after each sanding pad to remove the sanding dust. Once I finished the bowl looked good.   I rubbed the bowl and shank down with Before & After Restoration Balm. I worked it into the surface of the briar with my fingertips to clean, enliven and protect it. I let the balm sit for a little while and then buffed it with a cotton cloth to raise the shine. It really makes the grain stand out on this pipe. I set the bowl aside and turned my attention to the stem. When I was in the US visiting Jeff and his wife I picked up some Soft Scrub. Jeff swears by this stuff as the first tool to use to remove a lot of the oxidation on the stem. I rubbed it on with a cotton pad and sure enough it removed the oxidation and the calcification build up. It looked a lot better.I cleaned out the marks with alcohol and a cotton swab. I filled them in with clear super glue and set the stem aside to cure.   While the repairs to the stem surface were curing I made a call to Neil in Eastern Canada to talk with him about banding the shank on this beautiful little pipe. I have some small brass bands that I can reduce to 1/8 of an inch in height that will allow me to band the pipe and still keep the stamping free and readable. He gave the go ahead so I worked on the band. I found a band that was the right diameter in my collection of bands. I tapped it with a small hammer to make it oval and put it on the shank. I tapped around the shank to smooth out the fit. I tapped the end of the shank to smooth out the small dents. I took it off and used the topping board to reduce the depth of the band to just under 1/8 of an inch. I topped the dented top of the band as well.Once I had it smoothed out and the shape correct for the shank I spread some all-purpose glue on the shank and pressed the band in place on the shank. The band looks great to me and should do the job in binding the cracked shank together.I took photos of the newly banded shank to give and idea of the new look to the pipe. What do you think? I set the bowl aside and returned to the stem. I smoothed out the repairs and sanded out the remaining oxidation with 220 grit sandpaper and started the polishing with 400 grit wet dry sandpaper.  I rubbed down the stem with Denicare Mouthpiece Polish and a cotton pad to remove the remnants of oxidation and to blend in the sanding. The stem is starting to show promise at this point in the process.  I polished the stem with micromesh sanding pads – wet sanding it with 1500-12000 grit pads. I wiped the stem down after each sanding pad with a cotton pad to remove the sanding debris. I finished polishing the stem with Before & After Pipe Stem Polish – both fine and extra fine. I finished by wiping it down with Briarville’s No Oxy Oil and buffing it to a shine. I always look forward to this part of the restoration when all the pieces are put back together. I put the pipe back together and buffed it with Blue Diamond on the buffing wheel. I gave the bowl and the stem multiple coats of carnauba wax. I hand buffed the pipe with a clean buffing pad to raise the shine. It is fun to see what the polished bowl looks like with the new brass band on the shank end. The combination of grain and the thin band add some elegance to the pipe when combined with the polished black vulcanite stem. This royalty designed Kriswill Bernadotte 60 Dublin is nice looking and feels great in my hand. The pipe is another light weight that could be clenched and smoked while doing other things as it is very well balanced. Have a look at it with the photos below. The dimensions are Length: 5 ¾ inches, Height: 1 ½ inches, Outside diameter of the bowl: 2 inches, Chamber diameter: 7/8 of an inch. This is the fifth of the pipes sent to me from Eastern Canada for restoration. Once again I am looking forward to what the pipeman who sent it thinks of this restoration. Lots more to do in this lot! Thanks to each of you who are reading this blog. Remember we are not pipe owners; we are pipemen and women who hold our pipes in trust until they pass on into the trust of the next pipeman or woman.

A Complimentary Alfred Dunhill of London Snuff Sampler


Blog by Steve Laug

Irene and I were visiting with my brother and his wife on the Oregon Coast this past week and we had a great time together pipe hunting, trying out restaurants and going through the goodie bags he brought for me. He had cleaned up a good batch of nice pipes for me and brought them along to look at. There are some amazing pipes in the lot – but enough of that as you will see them in the days ahead. He also brought along some other interesting things that he had picked up in some of the estates that we had purchased. One of them was this Bamboo covered box. It had a hinged lid that was stamped “With the Compliments of Alfred Dunhill of London. It was narrow and a bit heavy. I opened the lid to have a look at what it contained and saw the six small jars with black lids and labels. There was also a small booklet in the inside of the cover that read Alfred Dunhill Special Snuff. Snuff is not something I have tried or even wanted to try out as the idea of inhaling powder up my nose is not of interest to me. But this setup was quite interesting and was the first Complimentary package of tobacciana that I had seen.I took the small jars out of the box and took several pictures of them. They had an ivory colored label with black images and lettering on them. There were six different snuffs in the box. These included Menthus, Menthus Plus, Aperitif, French Carotte, Carnation and Oriental. These different varieties were described in the booklet that came with the snuffs. I have included photos of the booklet below.The pamphlet had a cover with two figures on each side of an oval sign that read Alfred Dunhill Special Snuff and was written by Richard Dunhill. The backside read Dunhill with a crest that read By Appointment to Her Majesty the Queen (over) Suppliers of Smoking Requisites (over) Alfred Dunhill London.  Inside was an interesting article written by Richard Dunhill himself. On one side it gave a series of paragraphs including Snuff Making and Grinding, Why is Snuff Taken, How to Take Snuff, Happy Snuffing. The other side had a Description of the Snuffs included in the sampler and a brief History of Snuff. I have included the pages below for your reading pleasure. Richard Dunhill had a way with words as both his book and this pamphlet show. Each of the bottles of snuff was described clearly in the pamphlet. Those descriptions are interesting so I have included them here.

Menthus – a medicated snuff. Its medications include Menthol from Brazil, Formosa and Japan, Camphor distilled from laurel leaves from Formosa, Japan and the Far East, and Eucalyptus from Australia and the neighbouring islands.

Menthus Plus – a finer-ground derivative of Dunhill’s Menthus Snuff, somewhat stronger but a truly remarkable snuff, wonderful for clearing a stuffy head.

Aperitif – a refreshing, stimulating snuff, developed from an 18th Century recipe, it is a good example of the supreme quality of British snuff.

French Carotte – a traditional 18th Century French snuff containing a mixture and fine perfumes. This snuff is a true classic

Carnation – a delicate fine-ground snuff always popular, scented exquisitely with distilled essence of carnation. Truly a classic snuff.

Oriental – a delightful Oriental blend which includes essential oils of Bergamot, Lavender, Calamus, Sandlewood and Rose.

The descriptions almost have an aroma.


Breathing Life into a Patent Era Brigham Executive 632 Billiard


Blog by Steve Laug

Not too long ago I received an email from a fellow in Kitchener, Ontario regarding some pipes he needed cleaned up. He had been referred to me by my local pipe and cigar shop. While I am not currently adding more pipes to my queue of repairs I have made a commitment to the shop to work on pipes for their customers. Generally they have one or two pipes that need a bit of work. This fellow sent me the following email:

I just came across my smoking pipes that I’ve had in storage for about 40 years. I’m wondering what you’d charge to have them refurbished. There are 17 in total (11 are Brighams and 6 are various).

It turns out he said he had 17 pipes. That was certainly more than I expected but I communicated that there was a large queue ahead of him and I would have to fit them in as I could. He was fine with whatever time it took. He sent me the following photos of his collection that he wanted restored. The first photo shows his eleven Brigham pipes – all very interesting shapes. The second photo shows the six various pipes in the collection – A Republic Era Peterson’s System 1312 (Canadian Import), A Bjarne Hand Carved Freehand, a Comoy’s Everyman London smooth billiard, a GBD Popular Dublin 12, an English made Kaywoodie Rustica 72B, a Kriswill Bernadotte 60 with a broken tenon. When the box arrived there were two additional pipes included for a total of 19 – a Ropp 803 Deluxe Cherrywood Poker and a Comoy’s Sandblast Everyman Canadian 296. It was a lot of pipes! I have been randomly choosing the next pipe to work on and chose the Brigham that I have drawn a red box around in the first photo below. When I unwrapped it the pipe it was a Brigham Billiard. It was stamped on the heel 632 which is the shape number. That is followed by Can Pat. 372982 then Brigham in a script. It had a rusticated lower half of the bowl and shank with a smooth top half. The rim top had a lava overflow from the thick cake in the bowl and some darkening around the top and edges of the bowl. The inner edge of the bowl was out of round. It was a dirty pipe but appeared to be in okay condition under the grime. There was a shiny finish that was spotty around the smooth portions of the bowl. The 3 Vertical Dot saddle stem was oxidized and had tooth marks and chatter near the button on both sides. There was also some calcification for about an inch up the stem. I took close up photos of the bowl and rim top to show the condition of the bowl and rim as well as the thick cake and lava overflowing onto the rim top. I also took close up photos of the stem to show its condition as mentioned above.    I took a photo of the stamping on the underside of the shank to show what I was speaking about above. It is very clear and readable. It reads 632 followed by Can. Pat. stamp  372982 then Brigham in script.I removed the stem from the shank to reveal the aluminum tube/tenon that held the Rock Maple Distillator. The distillator was was missing in this pipe so I would need to replace it with a new one once I had cleaned it.

Before starting my clean up work on the pipe I turned to a chart that Charles Lemon of Dad’s Pipes sent to me on the patent era Brighams. There were made from 1938-1980. As the pipe I am working on is a Patent pipes, it’s more accurate to refer to its grade by name (the post 1980 grading scheme refers to Dots). Here is the  chart that Charles sent me. The pipe I am working on is thus a Brigham Executive with the brass pins arranged vertically. The pipe I have in hand has three brass pins with a larger center pin. It has a 6XX shape number.It is helpful having this chart and getting a quick picture of where the pipe fits in the Brigham line. Now it was time to work on the pipe.

I reamed the bowl with a PipNet pipe reamer using the second and third cutting head to take the cake back to bare briar so I could inspect the walls. I cleaned up the remnants with a Savinelli Fitsall Pipe Knife. I sanded the bowl walls with 220 grit sandpaper on a piece of dowel to smooth them out and further examine them. I was happy that the walls looked very good.  I used the Savinelli Fitsall knife to scrape off the heavy lava coat on the rim top. I cleaned out the mortise area and airway to the bowl and the interior of the metal tube and airway in the stem with pipe cleaners, cotton swabs and alcohol. The aluminum tube was really dirty since it had been smoked frequently without the distillator in place. It took a lot of work to clean out all of the grit and tars. I scrubbed the surface of the bowl with undiluted Murphy’s Oil Soap and a tooth brush to remove the grime and grit as well as the remnants of the shiny finish on the smooth portions of the bowl. I worked on the darkening on the rim top and the rough inner edge of the bowl with a folded piece of 220 grit sandpaper to remove the darkening and smooth out the inner edge of the bowl.I wet sanded the rim top and the smooth portions on the bowl sides with micromesh sanding pads – 1500-12000 grit sanding pads. I wiped the bowl surface down with a damp cloth after each sanding pad to remove the sanding dust. Once I finished the bowl looked good.    I rubbed the bowl and shank down with Before & After Restoration Balm. I worked it into the surface of the briar with my fingertips and a horsehair shoe brush to clean, enliven and protect it. I let the balm sit for a little while and then buffed with a cotton cloth to raise the shine. Mark Hoover’s Balm is a product that I have come to appreciate and one I use on every pipe I have been working on. It really makes the grain stand out on this pipe. I set the bowl aside and turned my attention to the stem. When I was in the US visiting Jeff and his wife I picked up some Soft Scrub. Jeff swears by this stuff as the first tool to use to remove a lot of the oxidation on the stem. I rubbed it on with a cotton pad and sure enough it removed the oxidation and the calcification build up. It looked a lot better.I painted the tooth marks on the stem with the flame of a Bic lighter to lift them as much as possible. It removed several on each side. There were three left on the top side and one on the underside that did not lift much.  I cleaned out the marks with alcohol and a cotton swab. I filled them in with clear super glue and set the stem aside to cure.    I smoothed out the repairs and sanded out the remaining oxidation with 220 grit sandpaper and started the polishing with 400 grit wet dry sandpaper.   I rubbed down the stem with Denicare Mouthpiece Polish and a cotton pad to remove the remnants of oxidation and to blend in the sanding. The stem is starting to show promise at this point in the process.   I polished the stem with micromesh sanding pads – wet sanding it with 1500-12000 grit pads. I wiped the stem down after each sanding pad with a cotton pad to remove the sanding debris.   Before I finished the last polishing touches on the stem I decided to fit it with a new Rock Maple Distillator.  I finished polishing the stem with Before & After Pipe Stem Polish – both fine and extra fine. I finished by wiping it down with Briarville’s No Oxy Oil and buffing it to a shine.  I always look forward to this part of the restoration when all the pieces are put back together. I put the pipe back together and buffed it with Blue Diamond on the buffing wheel. I gave the bowl and the stem multiple coats of carnauba wax. I hand buffed the pipe with a clean buffing pad to raise the shine. It is fun to see what the polished bowl looks like with the smooth portion and the rusticated portion contrasting well and added to that the polished black vulcanite stem with the shining brass pins. This Brigham Executive 632 Billiard is nice looking and feels great in my hand. The pipe is one that is light enough that it could be clenched and smoked while doing other things as it is very light weight and well balanced. Have a look at it with the photos below. The dimensions are Length: 5 ¼ inches, Height: 1 ¾ inches, Outside diameter of the bowl: 1 ½ inches, Chamber diameter: ¾ of an inch. This is the fourth of the pipes sent to me from Eastern Canada for restoration. Once again I am looking forward to what the pipeman who sent it thinks of this restoration. Lots more to do in this lot! Thanks to each of you who are reading this blog. Remember we are not pipe owners; we are pipemen and women who hold our pipes in trust until they pass on into the trust of the next pipeman or woman.

Breathing Fresh Life into a French Longchamp Leather Clad Billiard


Blog by Dal Stanton

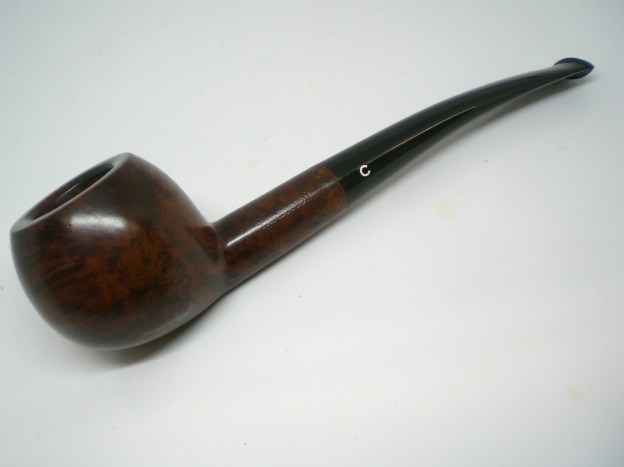
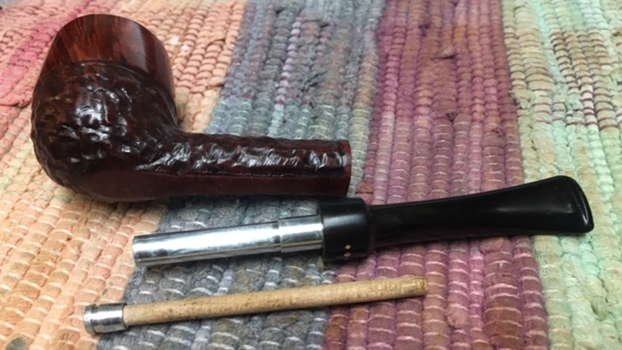
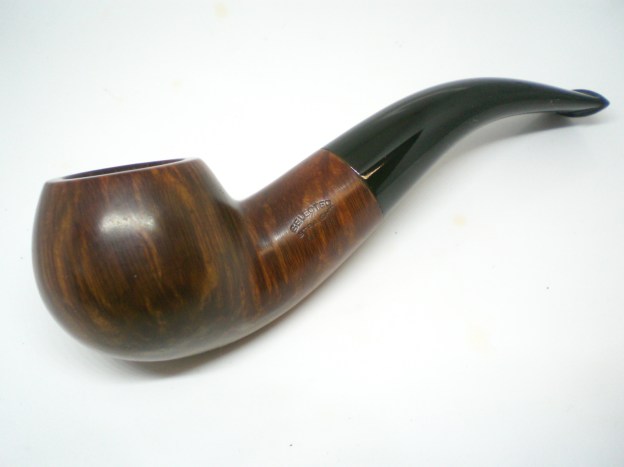
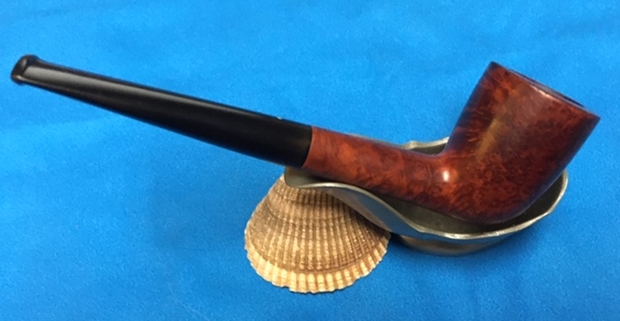
I saw this leather wrapped Longchamp on the eBay auction block from a seller in the USA state of Indiana.  Up to that point in time, a leather clad pipe was not part of my collection and the price was right when the final minutes ticked off the clock my bid weathered any challengers. The black leather drew my attention with the potential of cleaning the rim for a nice contrast with briar.  Here’s the Longchamp that got my attention. I brought the pipe back to Bulgaria and put it in the For “Pipe Dreamers” Only! online collection and this is where Jason saw the Longchamp.  Jason sent me an email and commissioned the Longchamp and expressed satisfaction in being able to help support the work we do here in Bulgaria with the Daughters of Bulgaria.  He also said that he heard about The Pipe Steward for the first time when I was interviewed by Brian Levine.  Last year, I had a great time being interviewed by Brian Levine of the Pipes Magazine Radio Show! I told the story of how I began restoring pipes as The Pipe Steward and how this intersects with the efforts here in Bulgaria working with the Daughters of Bulgaria.  Jason also commissioned a very nice Altinay Tear Drop Lattice Meerschaum which is next on the worktable.
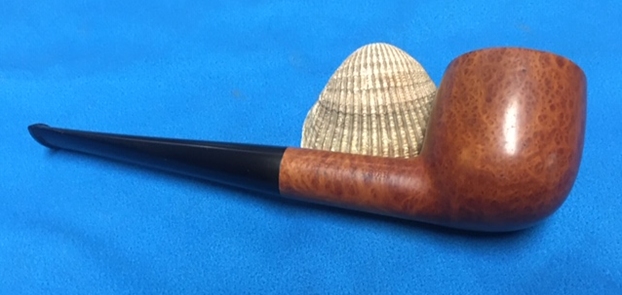
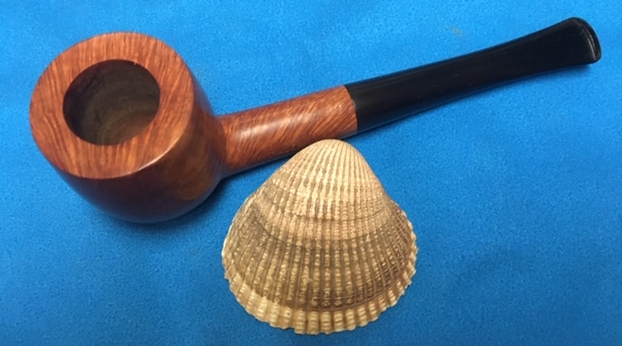
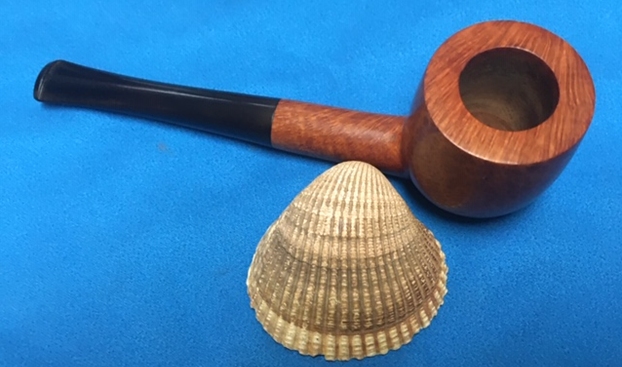
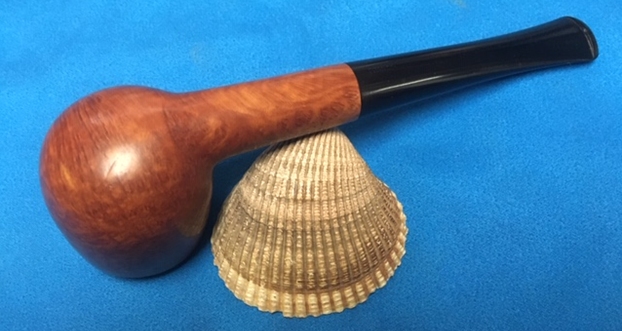
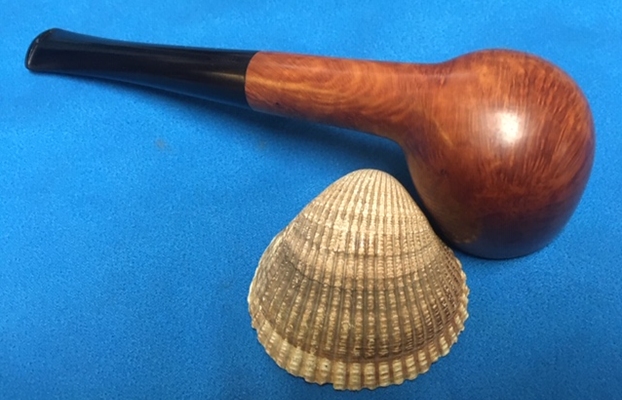
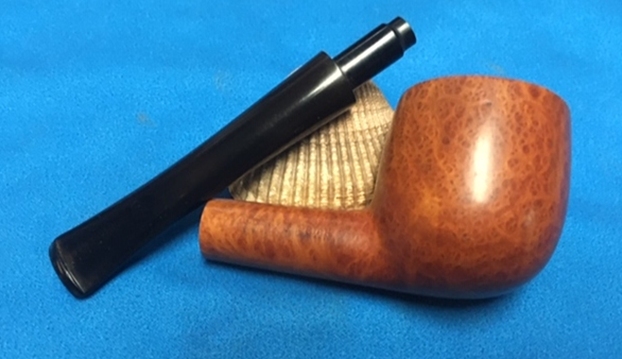
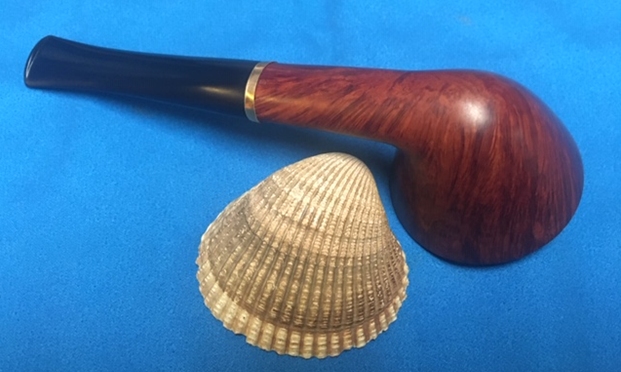
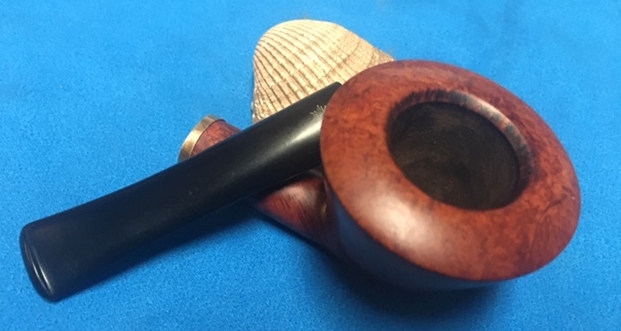
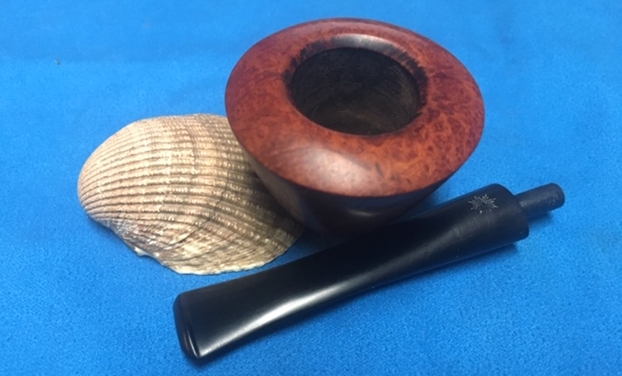
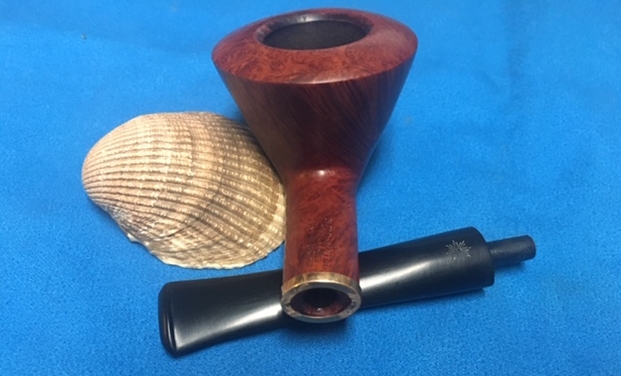
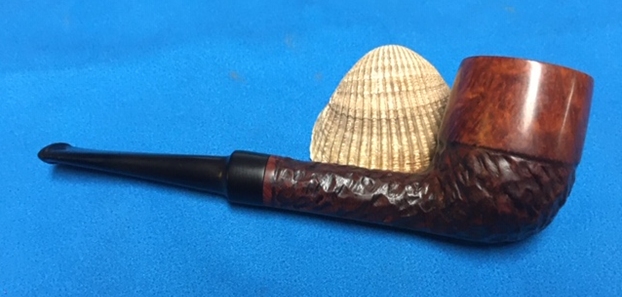
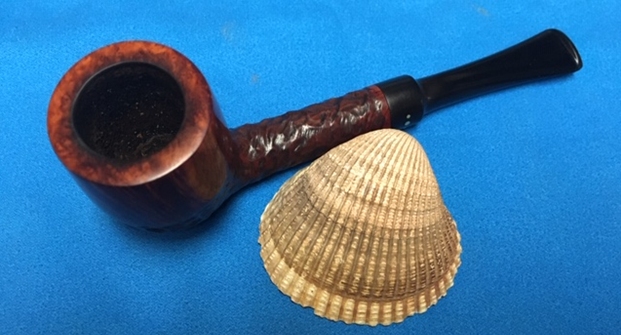
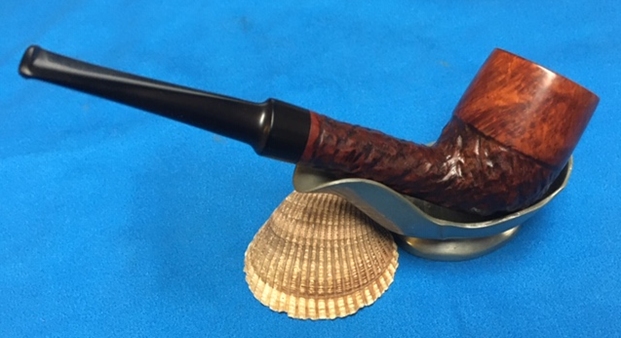
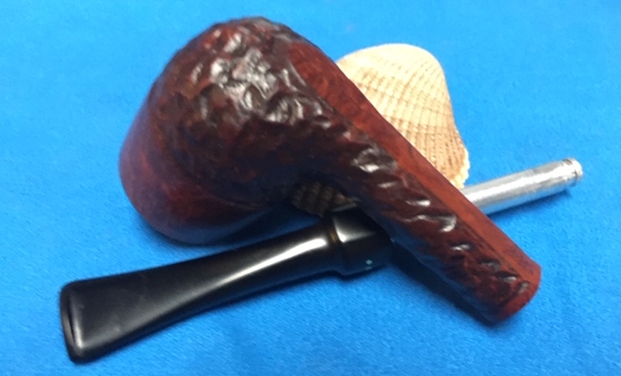
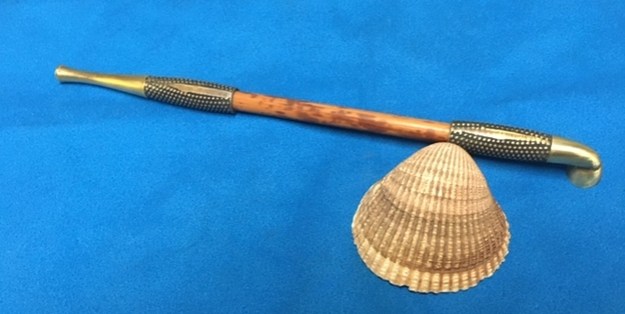
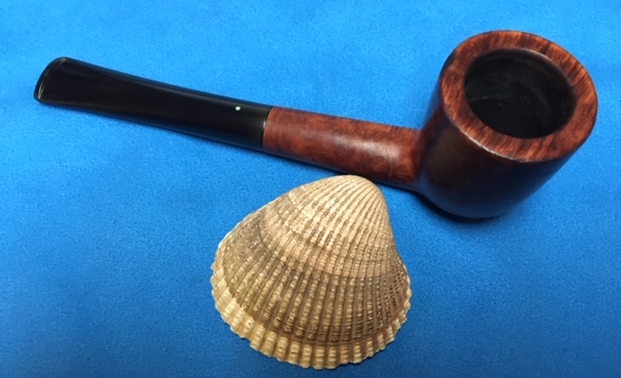
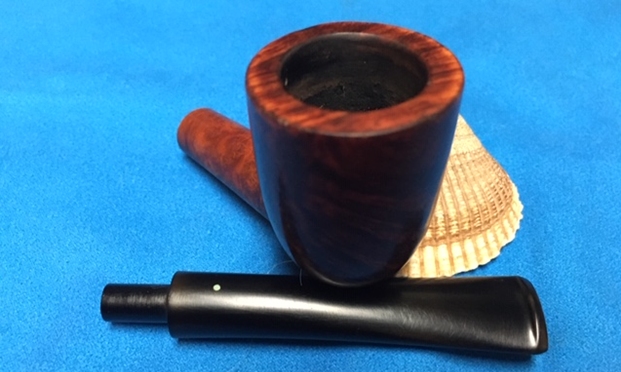
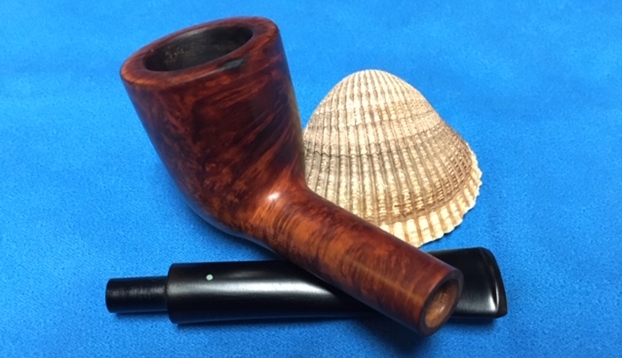
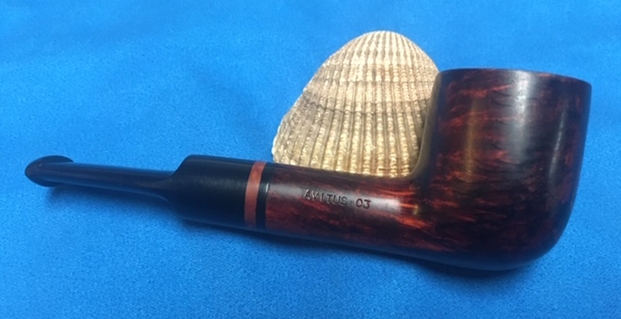
After getting the Longchamp to Bulgaria, I took more pictures to get a closer look. 
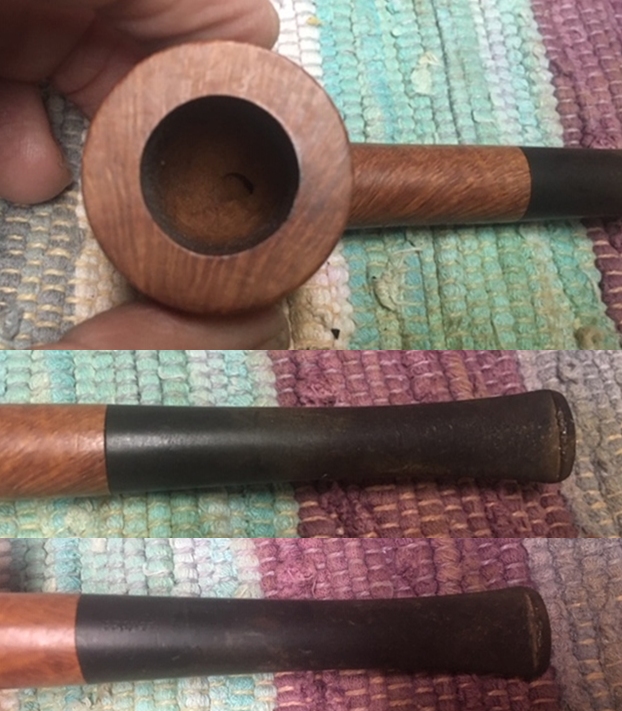
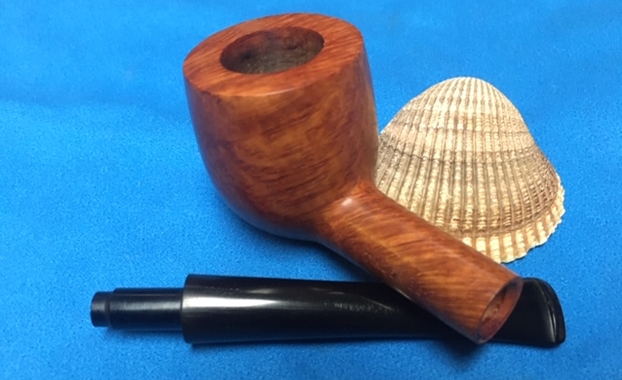
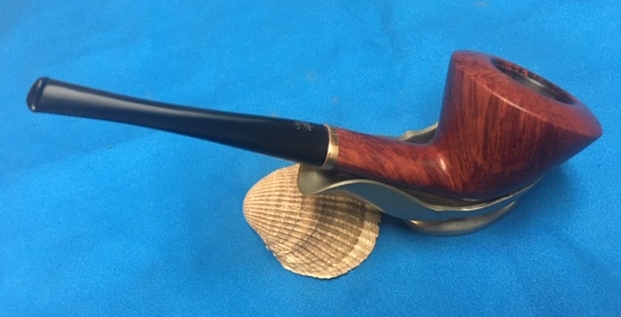
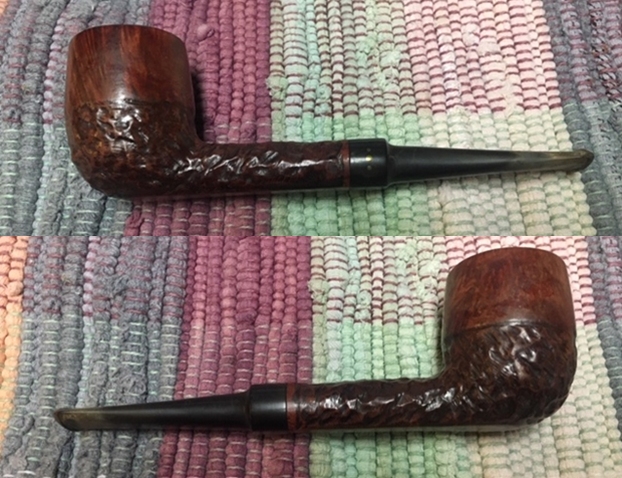
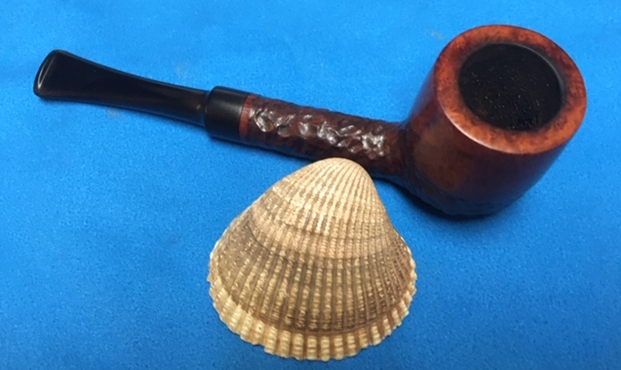
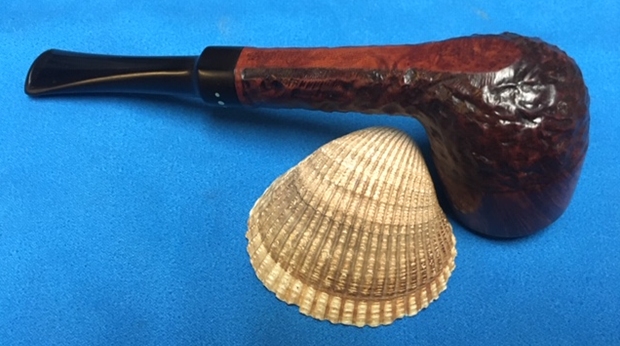
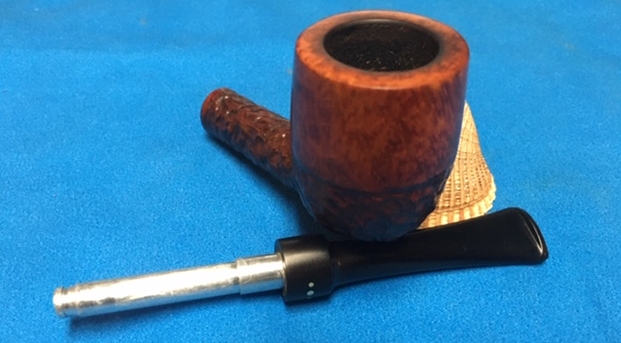
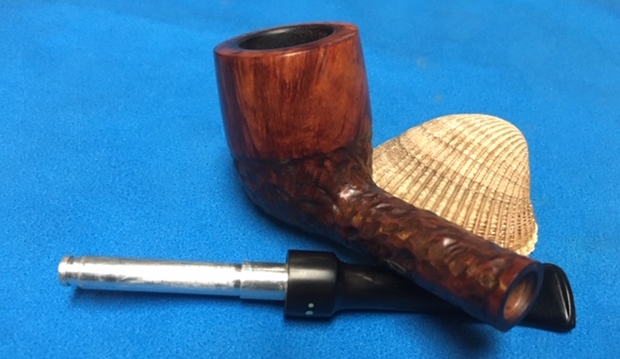
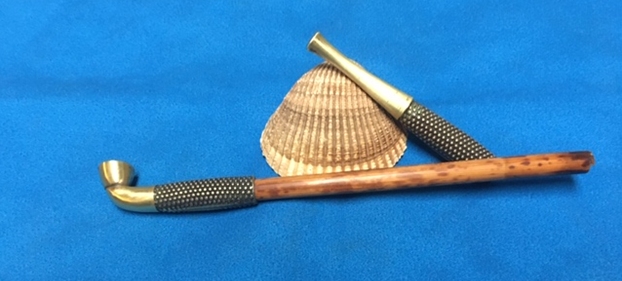
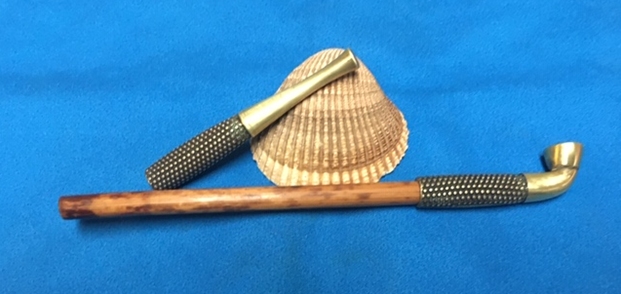
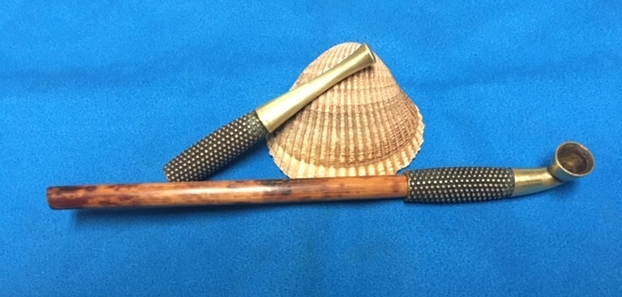
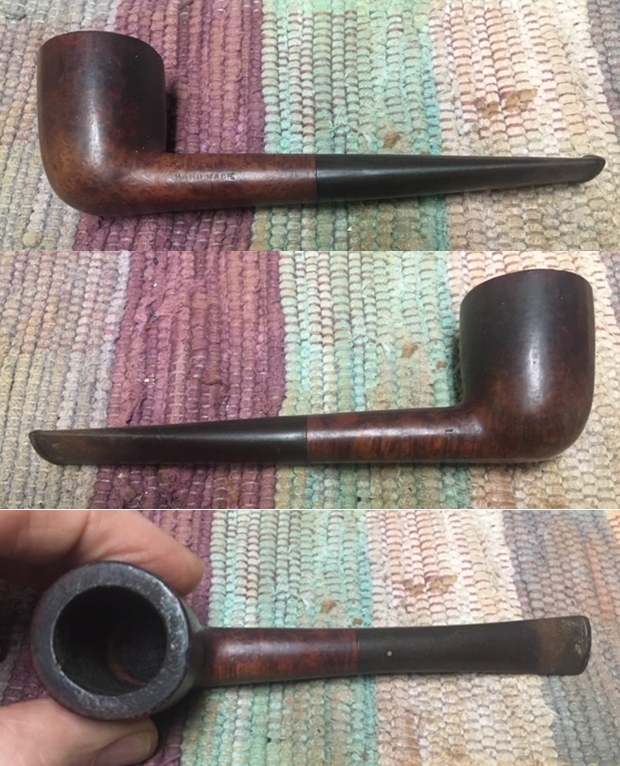
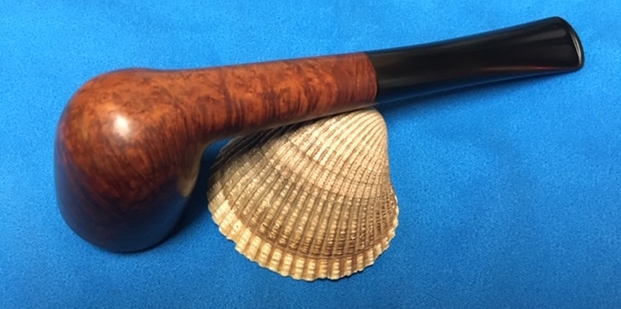
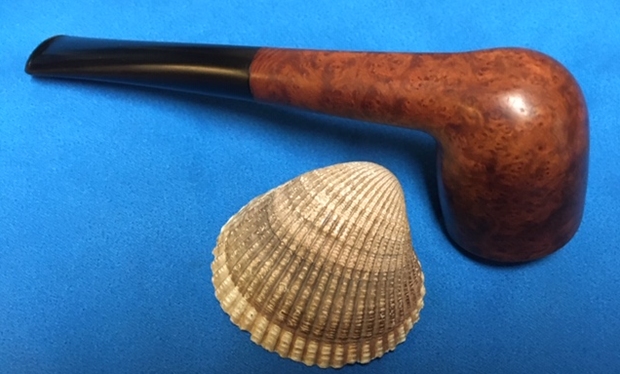
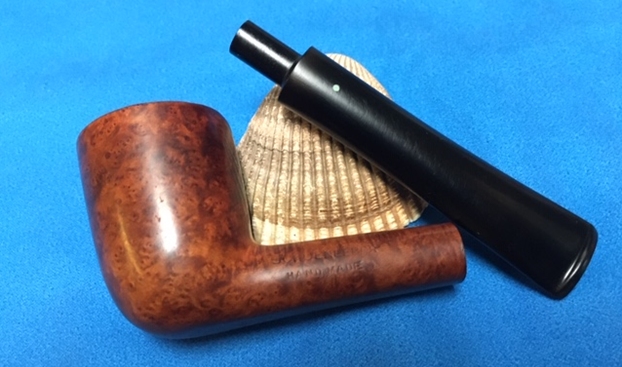
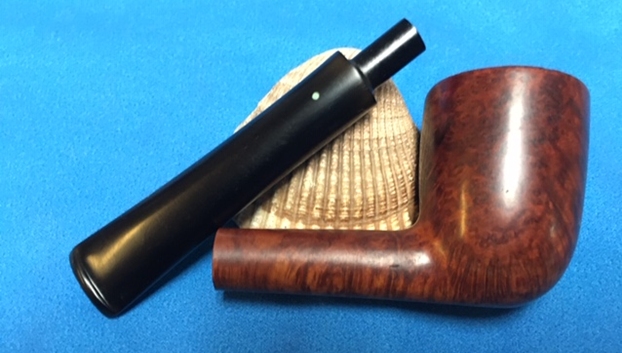
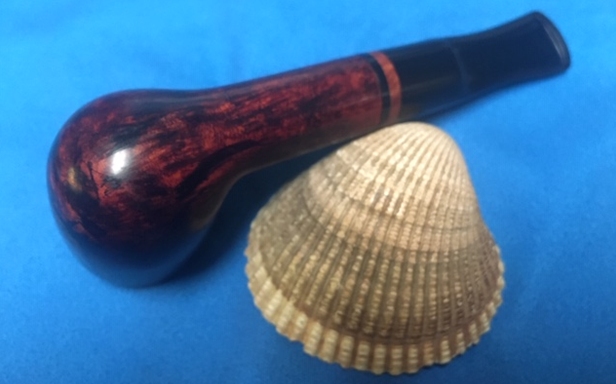
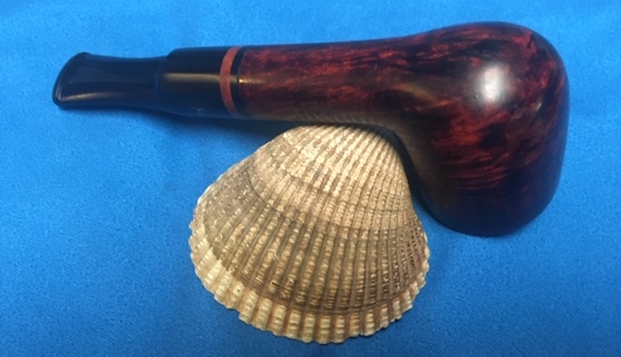
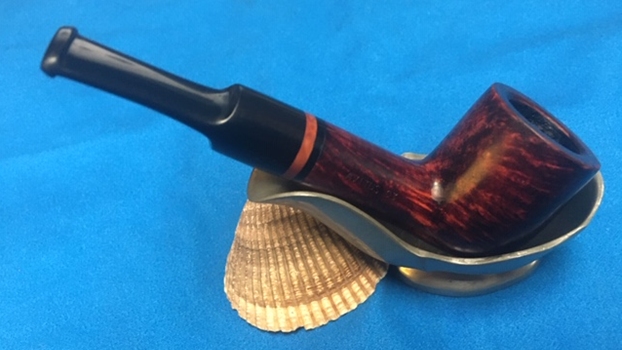
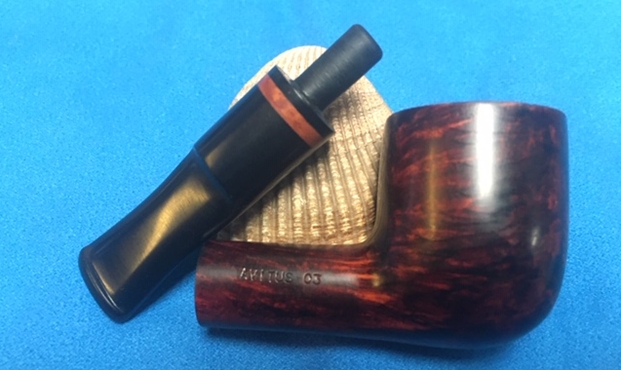
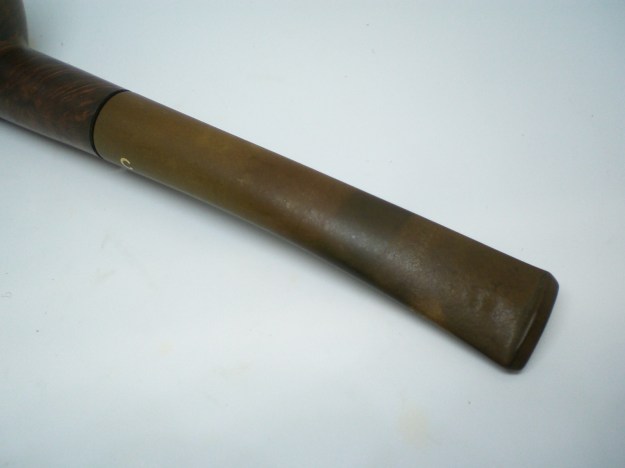
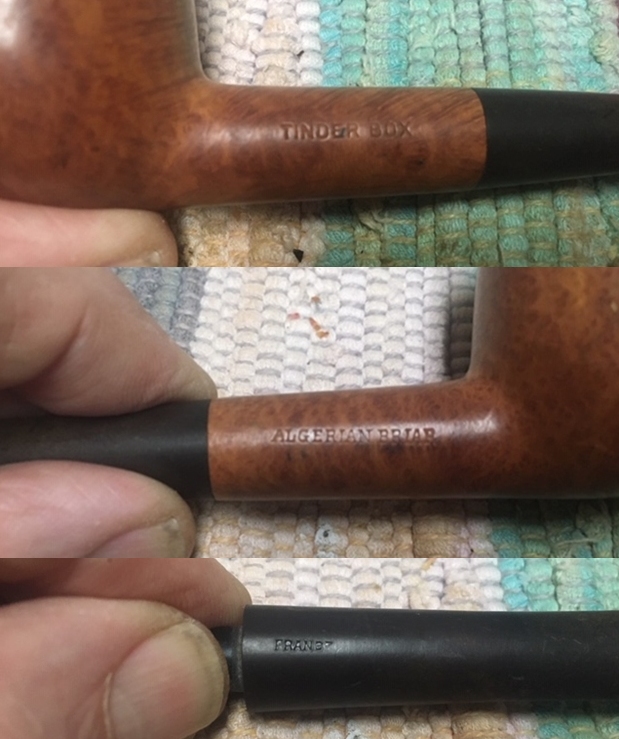
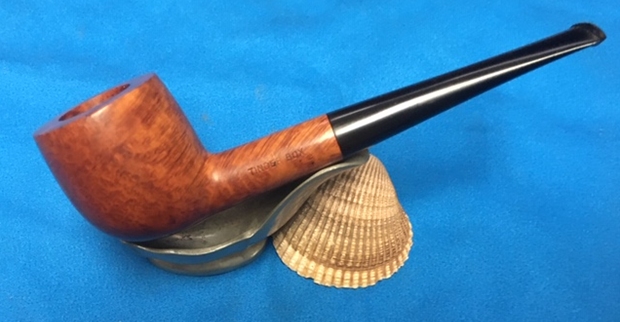
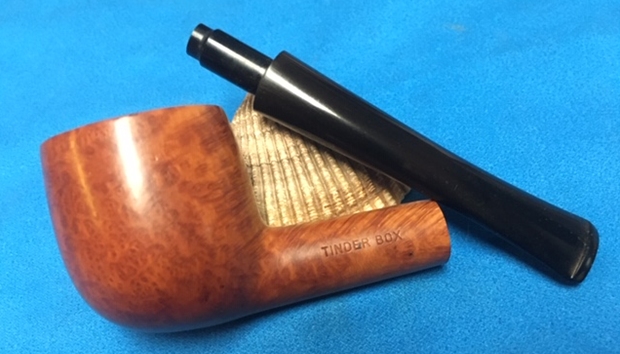
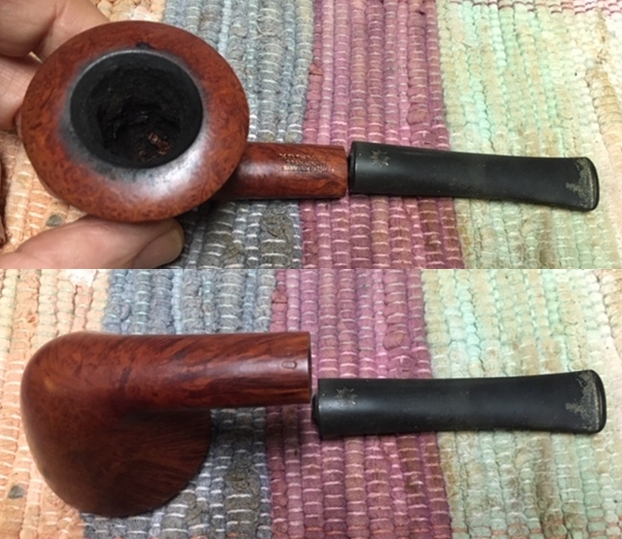
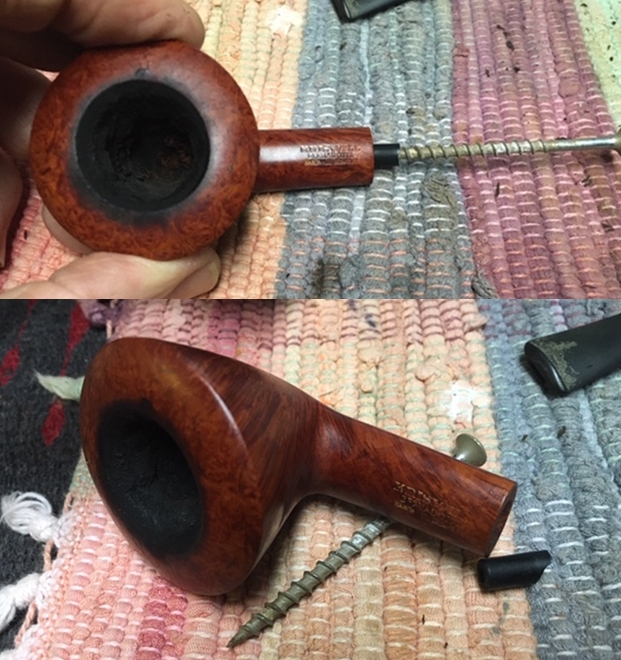
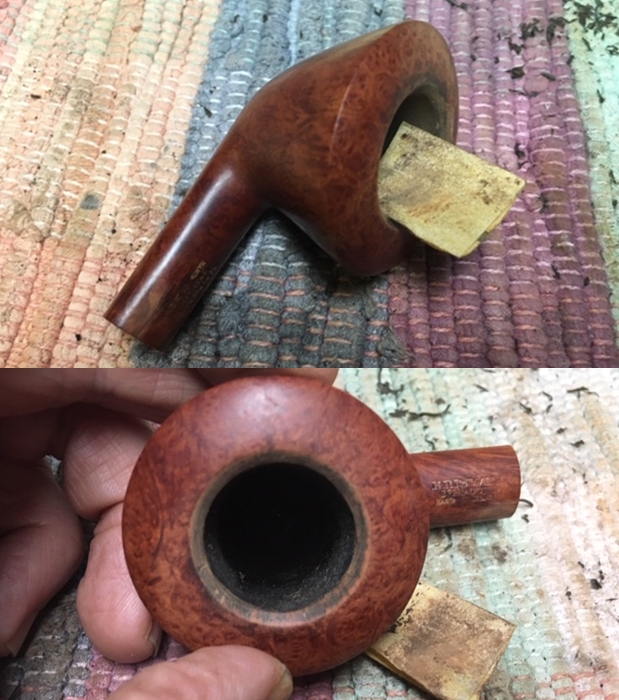
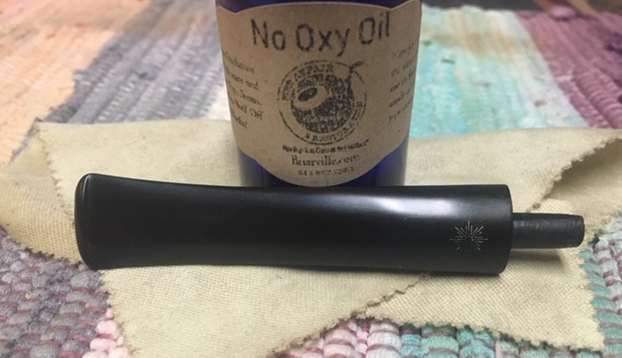
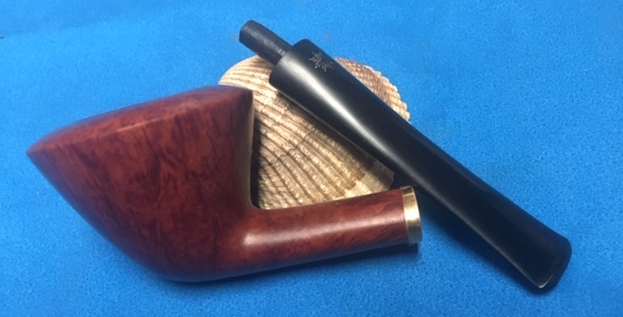
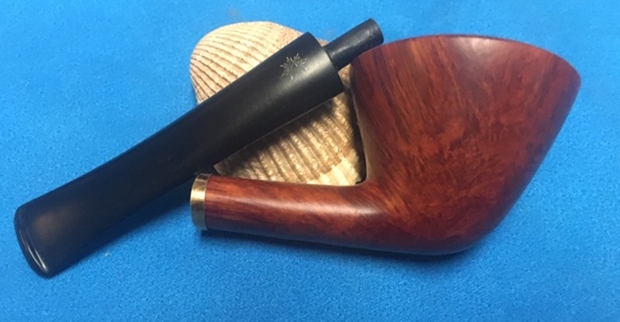
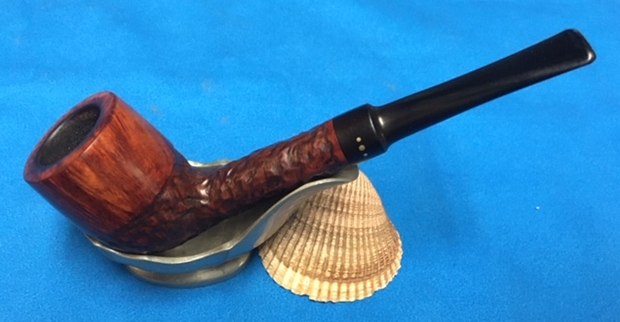
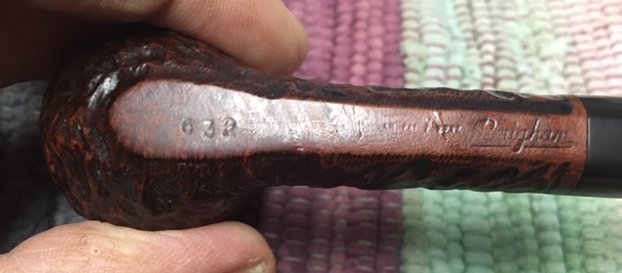
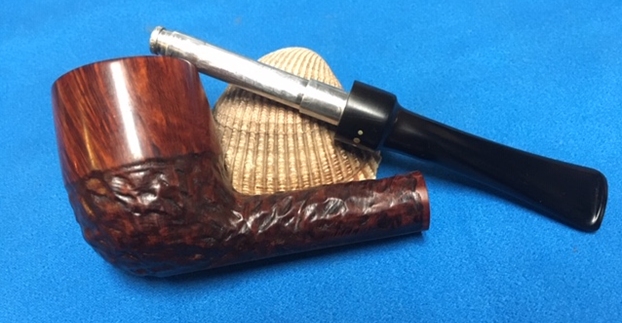
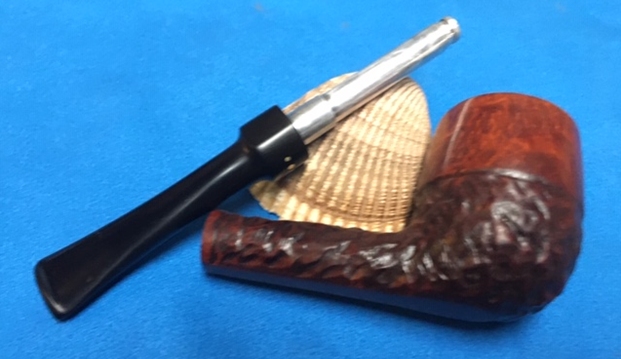
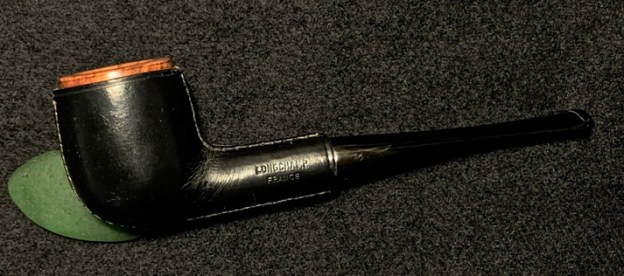
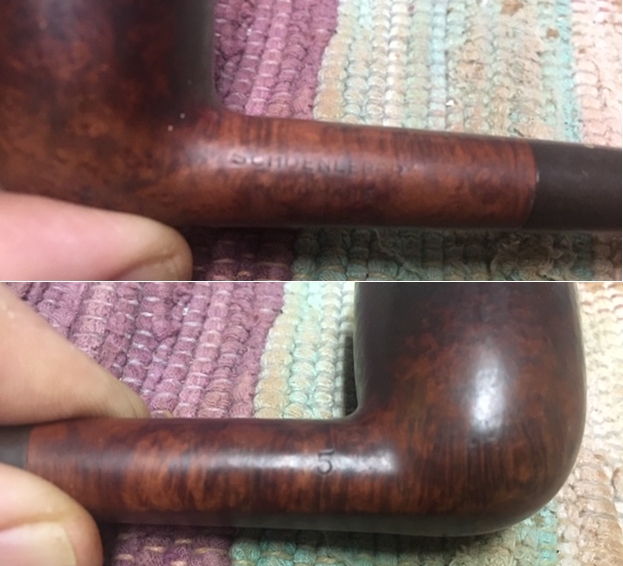
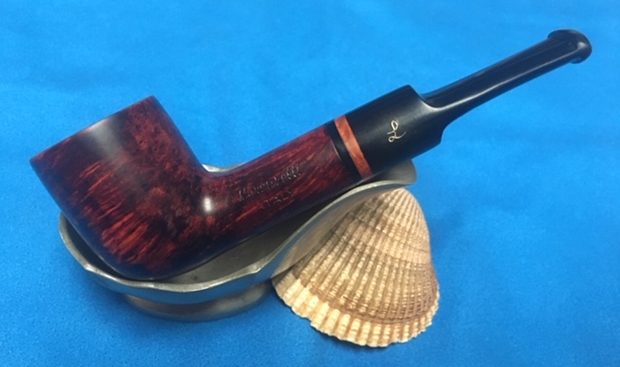
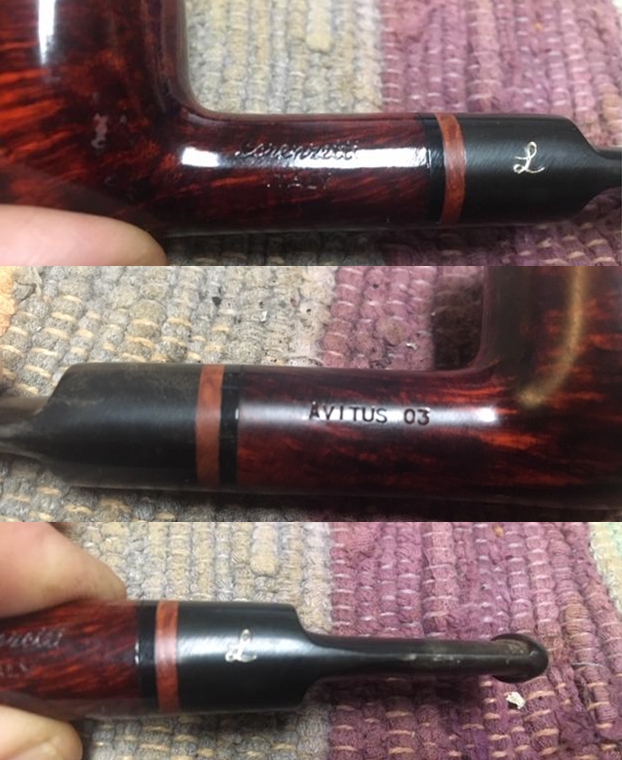
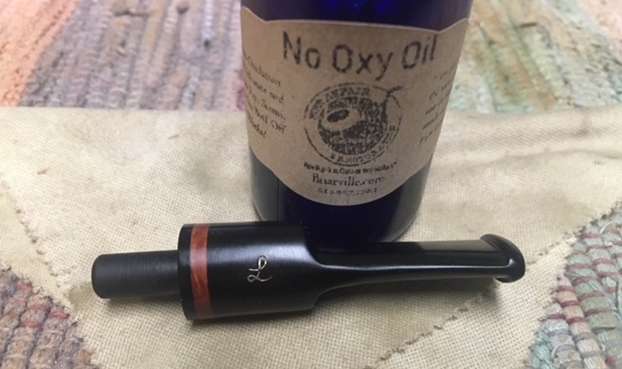
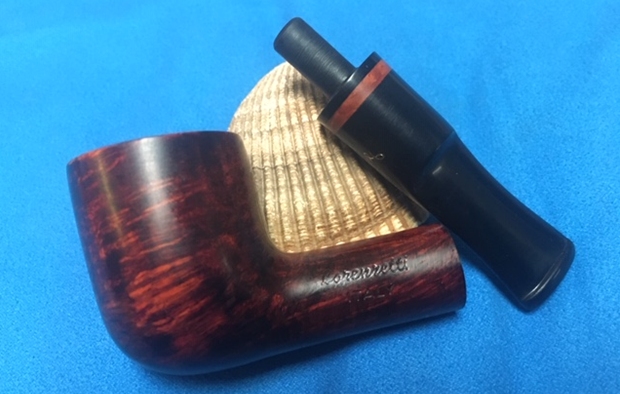
The nomenclature is stamped into the leather on the left flank of the shank. It reads, LONGCHAMP [over] FRANCE.  There is also a stamp of what looks like a horse in motion on the stem.The practice of wrapping briar bowls with leather started in France as a creative and economically savvy way to sell sub-par bowls that were part and parcel of France’s austerity measures during WWII.  Pipedia’s article uncovers this bit of pipe history in the article devoted to Longchamp:

In 1948 Jean Cassegrain inherited a small shop near the French Theater on the Boulevard Poissonnière in Paris, called “Au Sultan”. Articles for smokers and fountain pens were offered there. Now, the absolute bulk of the pipes Cassegrain found in the inventory was from war-time production and due to the sharp restrictions on pipe production the French government had enforced in 1940, these pipes were of very poor quality and showed large fills. Strictly speaking, they were not marketable now that the French pipe industry produced pipes of pre-war standards again. In this situation Cassegrain had the probably most enlightened moment in his life: he took some of these pipes to a leather worker who clad bowls and shanks in leather. Only the rims of the bowls and the shanks’ faces remained blank.

E voila – the pipes looked pretty good now and were eye-catching enough to become an instant success in sale. Above all among the thousands of Allied soldiers who populated Paris in those days. The thing worked well, and even unexperienced pipesters liked the covered pipes very much for they did not transmit the heat to the hand. Very soon Cassegrain had sold the old stock of pipes, and the leather-clad pipes became his only product. He began to place orders with renowned firms like Ropp or Butz-Choquin.

I love stories of innovation like the story of Jean Cassegrain and the creation of the Longchamp name which came from the name of a horse racing park near Paris.  Pipedia concludes the article with this comment:

After 1970 the interest in leather-clad pipes slowly diminished. The Longchamp pipes were offered for the last time in the 1978 catalog though previously placed orders were delivered until 1980.

The splendid success inspired many other renowned producers to offer their own lines RoppButz-ChoquinGubbelsGBD… Maybe Savinelli was the very last producing them for the label of the famous designer Etienne Aigner.

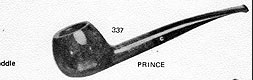
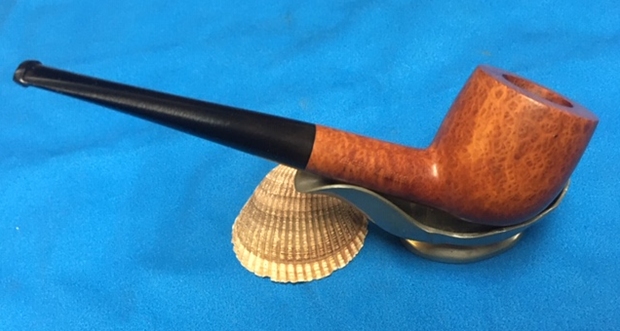
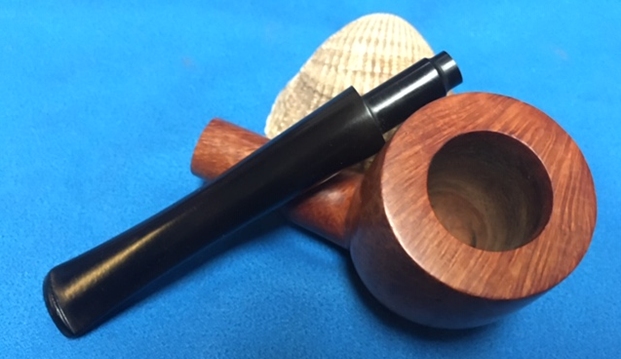
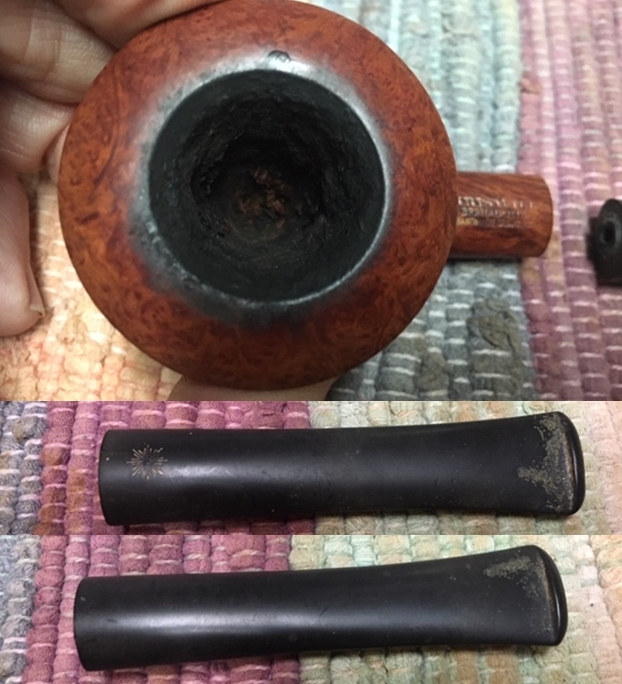
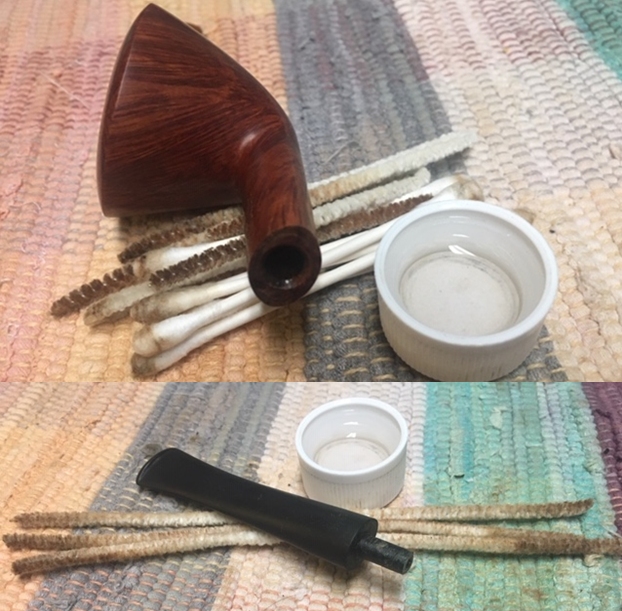
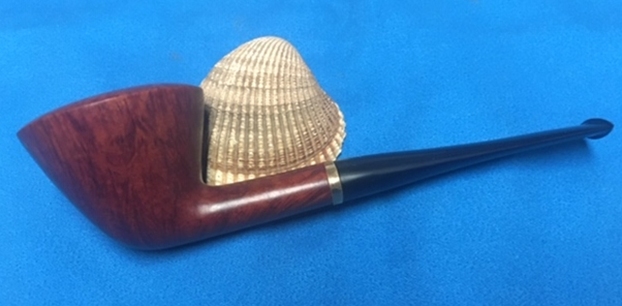
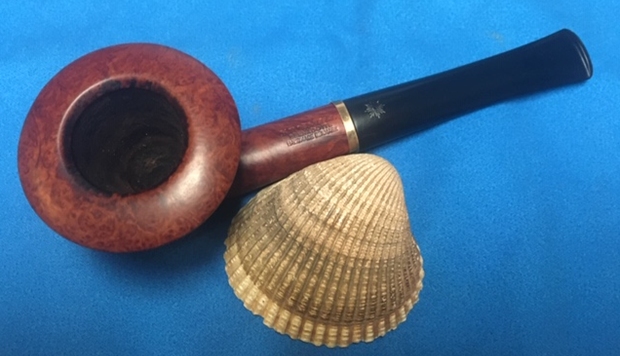
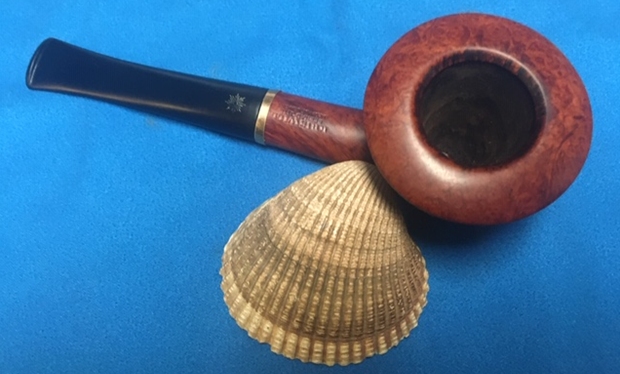
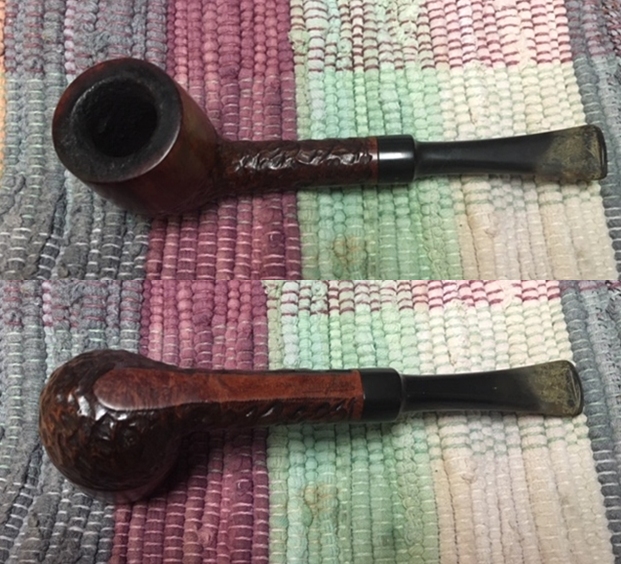
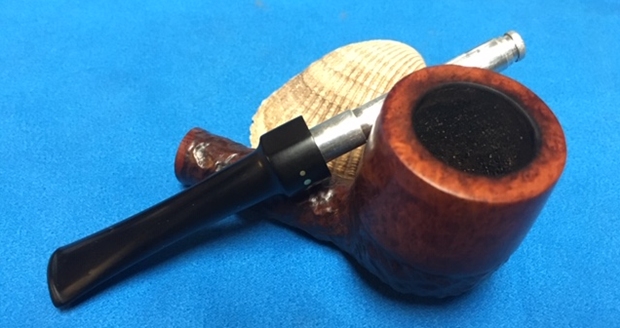
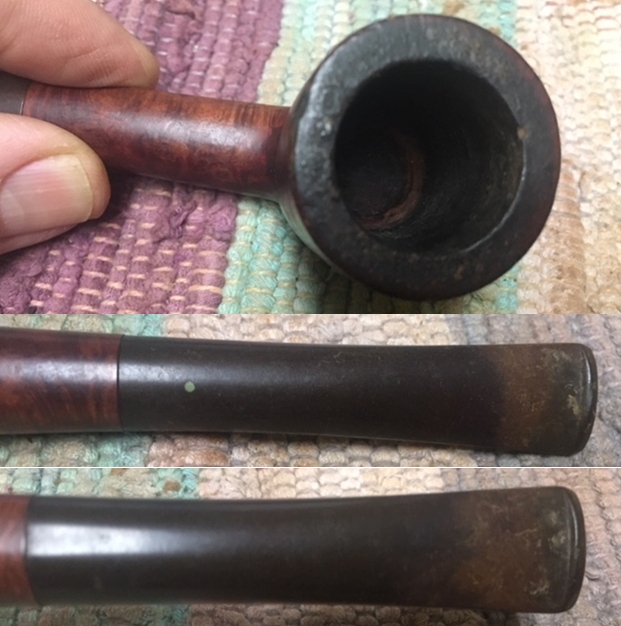
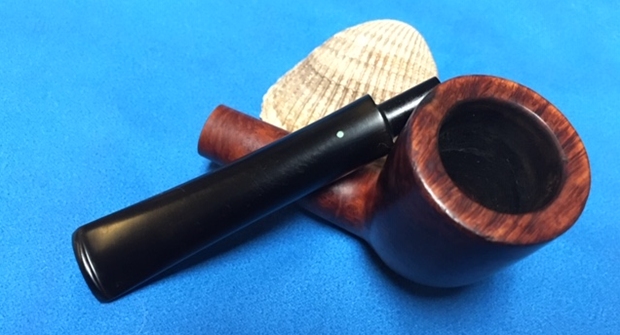
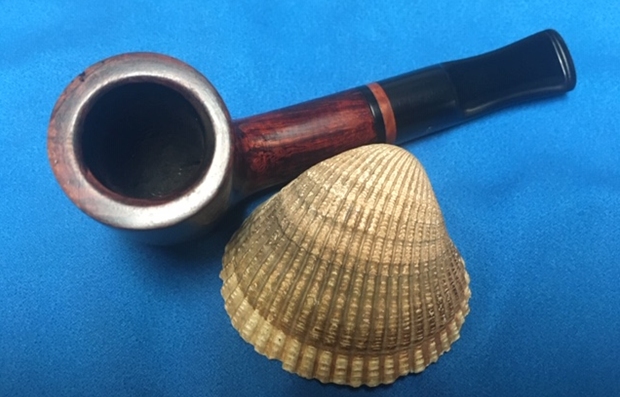
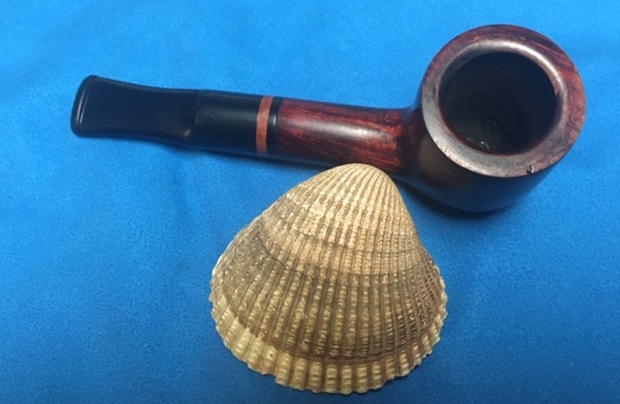
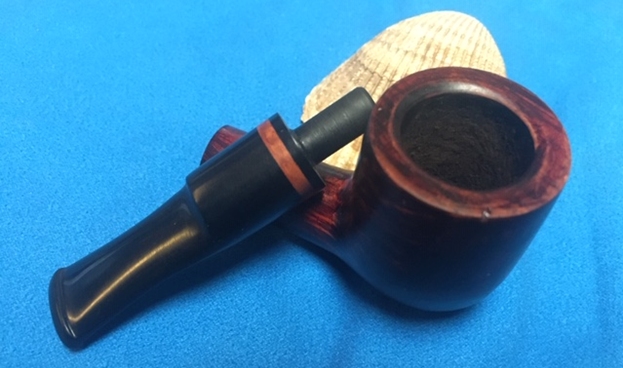
The dating of the pipe on my table would be no older than 1978.  The article also gave sense to the horse stamped on the stem.  I found more about this in the Longchamp panel provided on Pipephil.eu.  The panel shows the different versions of the very thin, ghosted horse stamping on the Longchamp matches the example on the lower right with the caption stating that this logo was on the more recent stems – so dating is for this pipe is most likely in the 70s.With this knowledge increasing my appreciation of the Longchamp story, I take a closer look at the Longchamp on my worktable.  The general condition of the leather appears to be very good.  I see no tears.  The chamber of the Billiard shape has some cake build up but not bad.  The rim is caked with lava flow, but it should clean up nicely revealing the briar beneath. The stem has oxidation and light tooth chatter, but nothing serious.  I begin the refreshing of this French Leather Clad Longchamp by addressing the oxidation in the stem.  I first clean the airway with pipe cleaners wetted with isopropyl 95%.
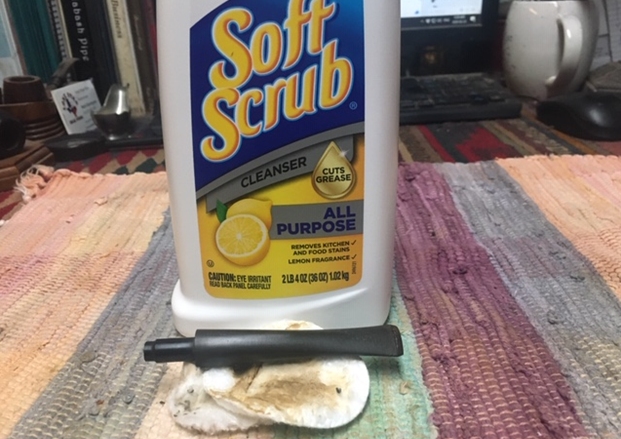
To break up the thick oxidation, 000 steel wool is applied to the stem. I’m careful to avoid the thin Longchamp stamping.  I have found that this helps give the oxidation removal a head start before putting the stem into the soak with Before & After Deoxidizer.
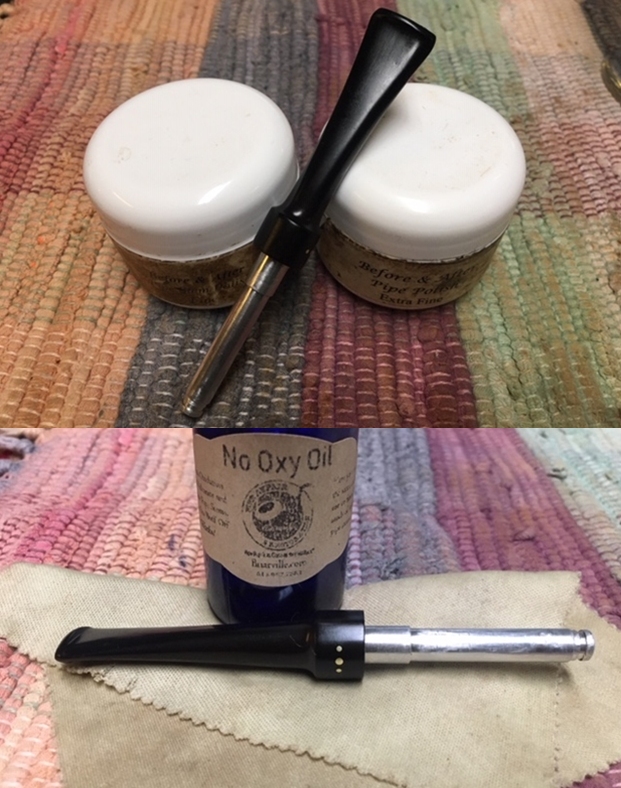
Next into the Before & After Deoxidizer with other stems of pipes in the queue.  I leave it in the soak for about 4 hours.When I fish the stem out of the Deoxidizer, I drain and squeegee the liquid off with my fingers.  I then put another pipe cleaner wetted with alcohol through the airway to clean it of the Deoxidizer.  Then using cotton pads wetted with alcohol, the raised oxidation is wiped off.I like to use paraffin oil to help begin the process of rejuvenating the vulcanite stem.  I wipe the oil on with a cotton pad and put the stem aside to absorb the oil.
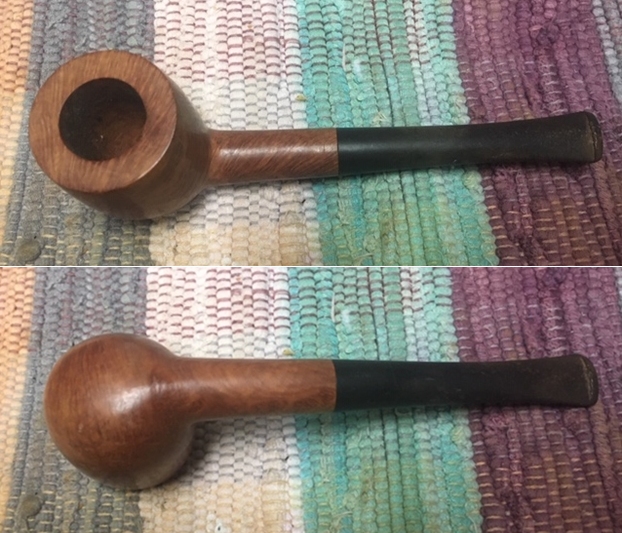
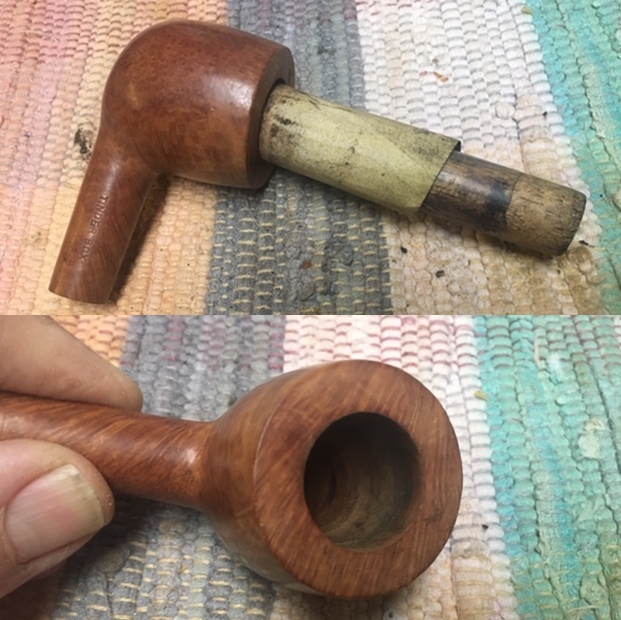
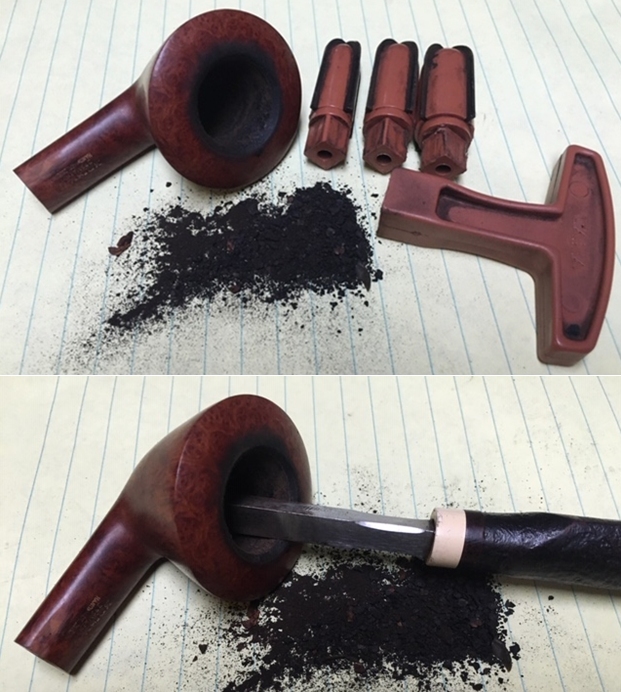
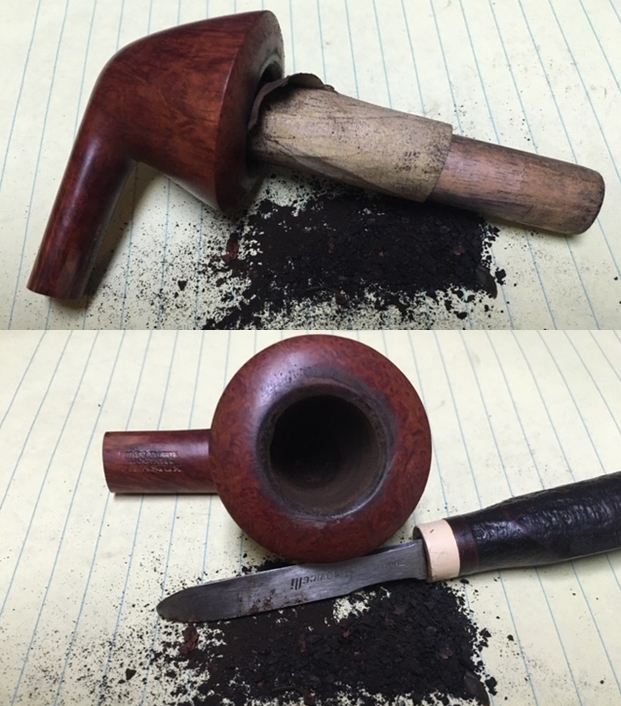
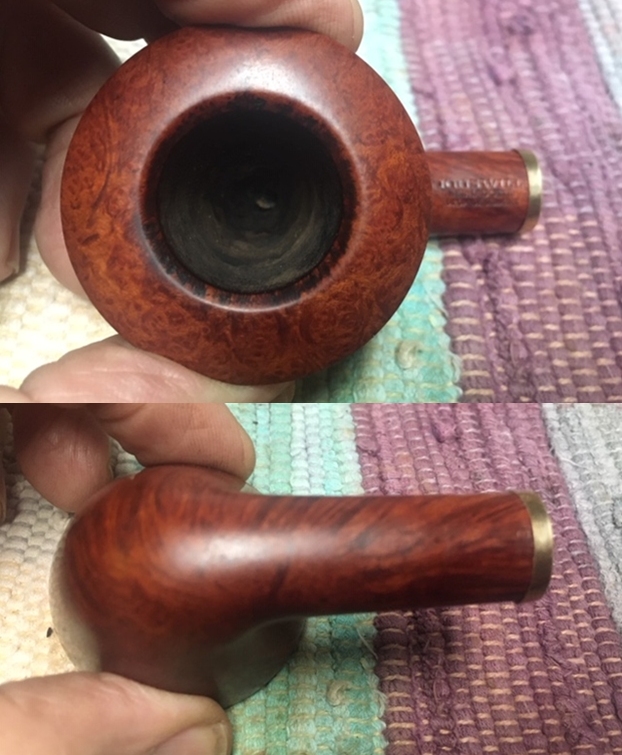
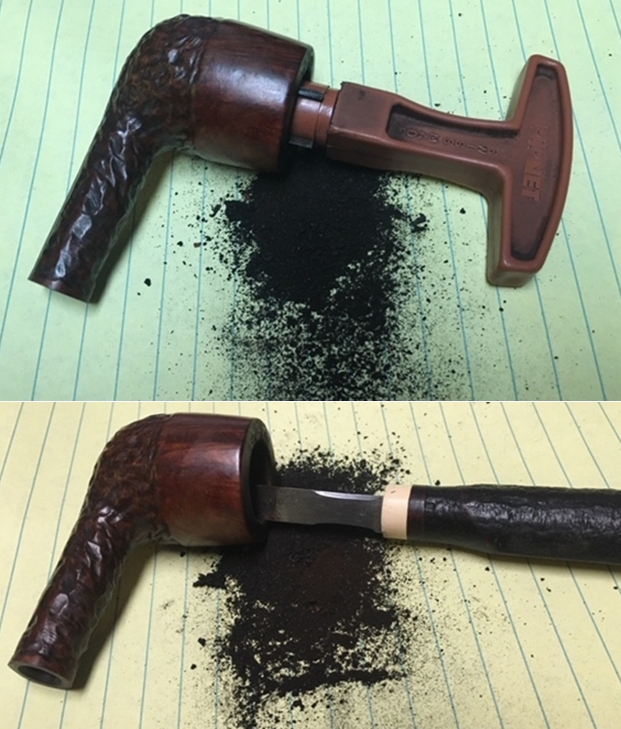
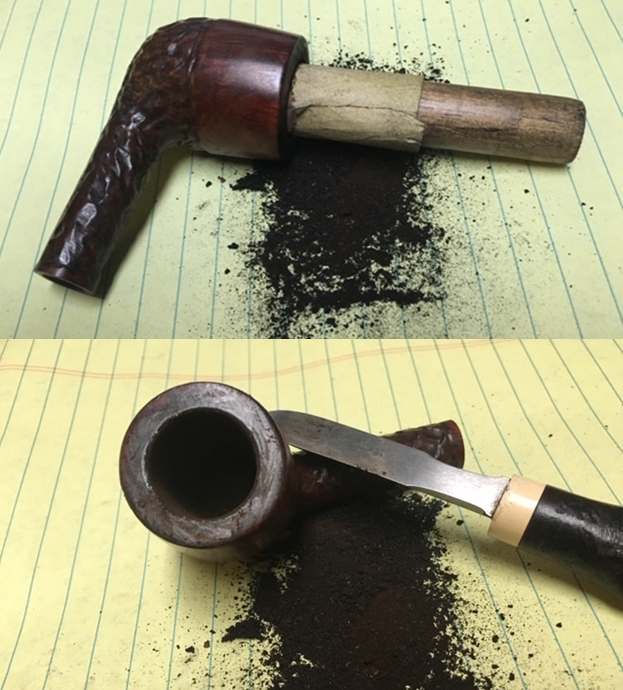
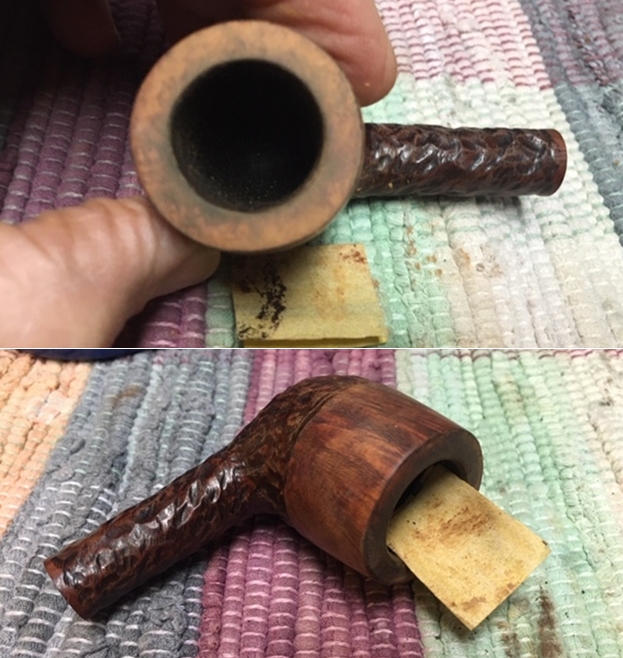
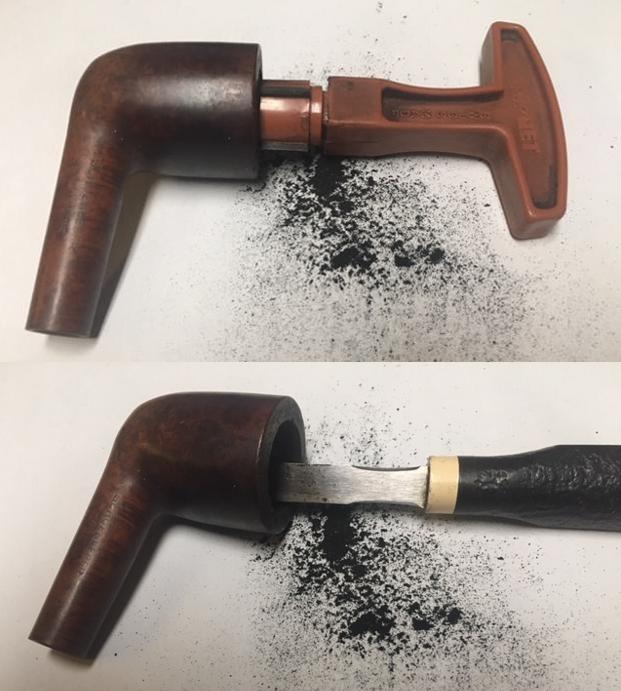
With the stem now on the sideline, I turn to the stummel to begin cleaning out the carbon cake.  After putting paper towel down for easier cleanup, I use the Pipnet Reaming Kit to do the job.  I take another picture of the chamber to mark the start and I use 2 of the 4 blade heads available.  After this, the Savinelli Fitsall tool further scrapes the chamber walls and I finish with sanding the chamber with 240 grade paper wrapped around a Sharpie Pen.  I then wipe the chamber with a cotton pad and after inspection, determine that there are no heating problems with the chamber briar. 
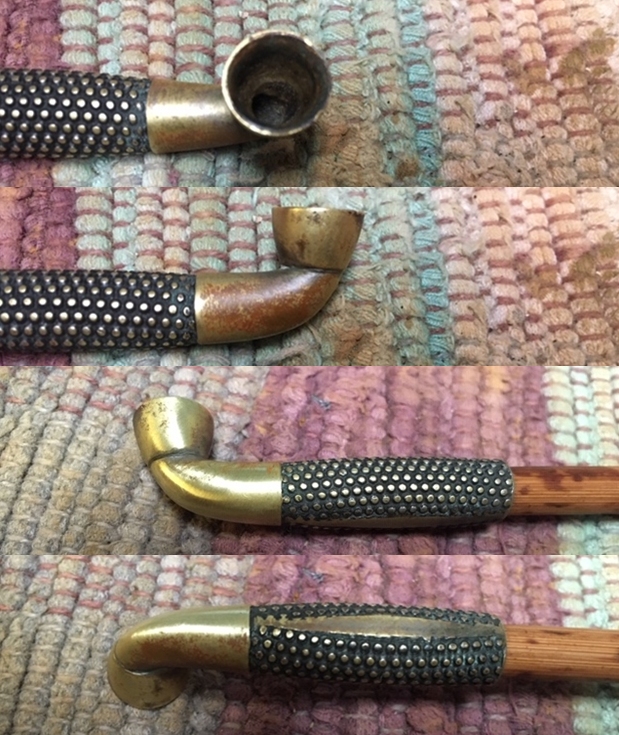
Next, cleaning the rim to remove the thick oil and tar crud that has collected will be a job.  I do not wish to immerse the leather with Murphy’s, though I don’t think it would be a problem.  
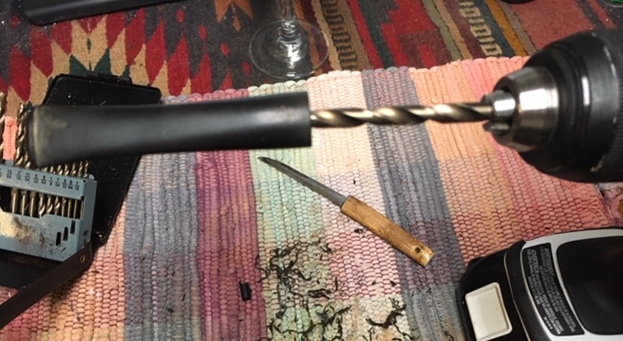
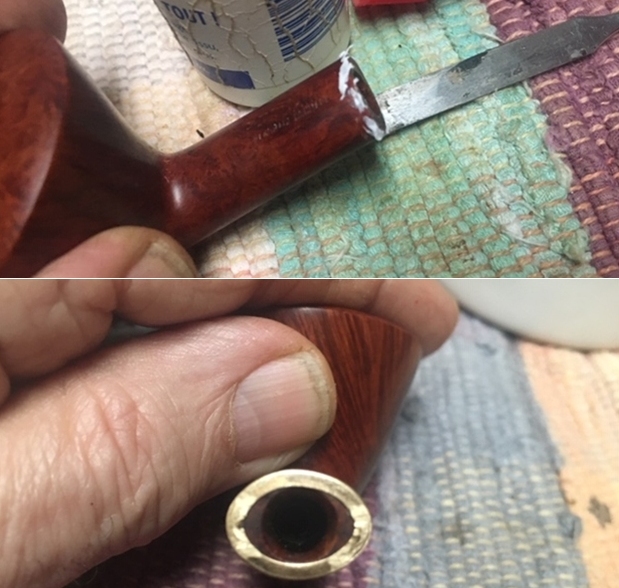
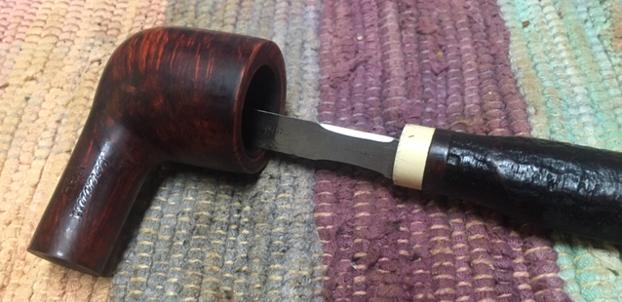
So, focusing to keep the cleaning only on the rim, I use Murphy’s Oil Soap undiluted and a cotton pad to begin softening the crusted rim. Using a Winchester pocketknife to scrape the rim, I carefully remove more of the crusting.  Finally, I use a bristled brass wire brush to work on the rim and then take the stummel to the sink and rinse the soap from the rim.
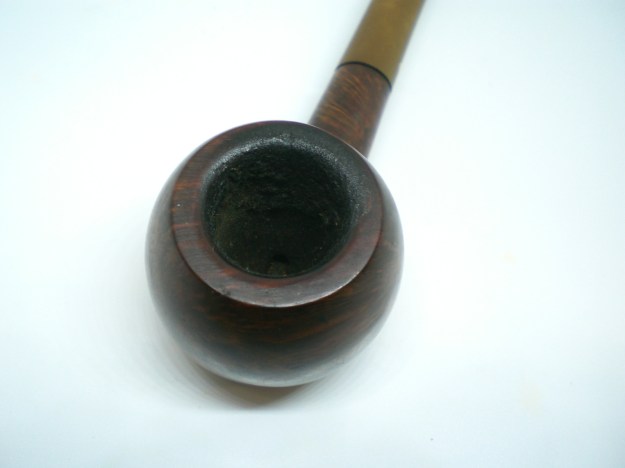
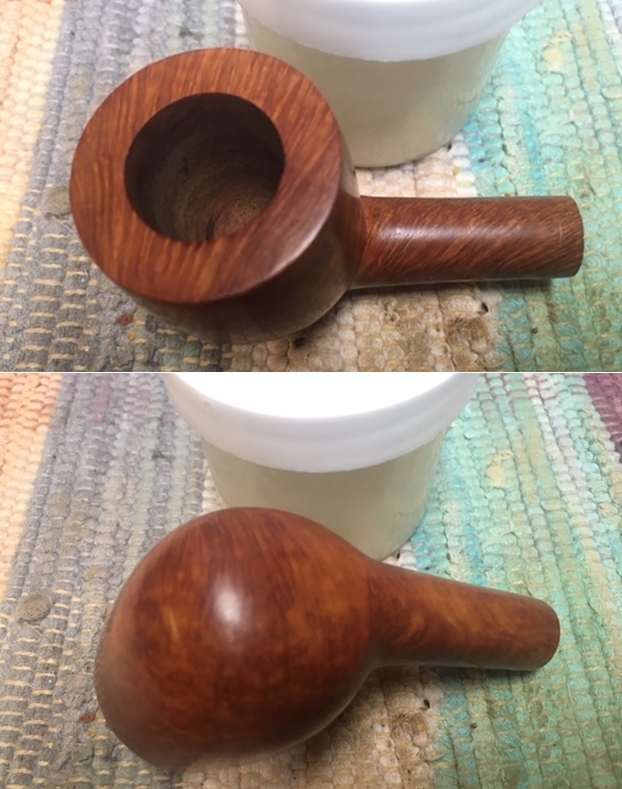
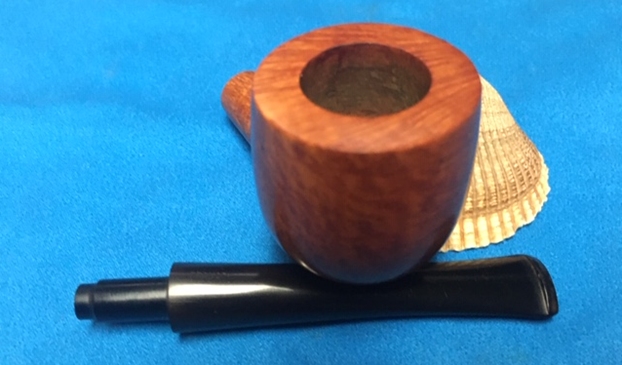
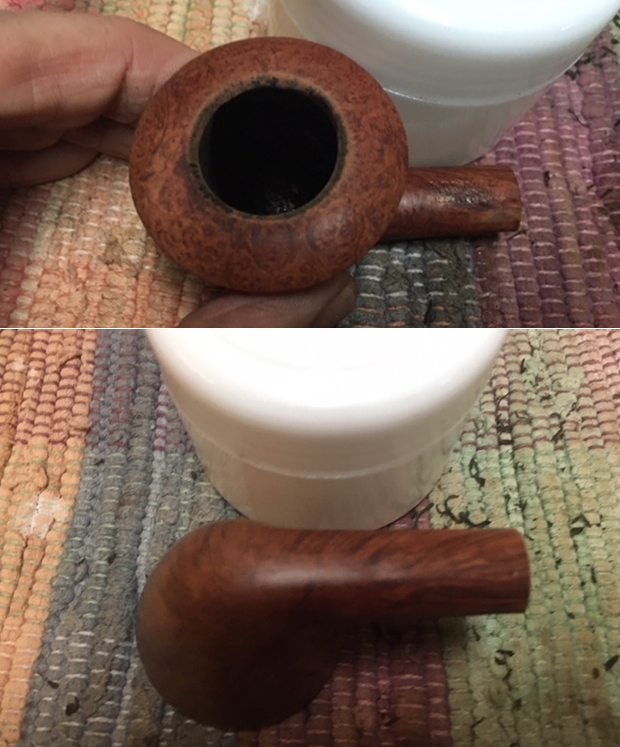
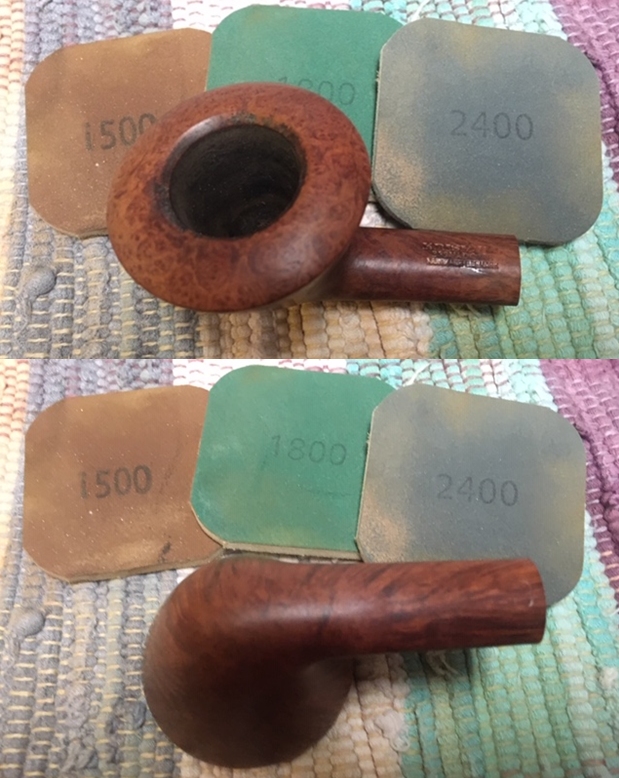
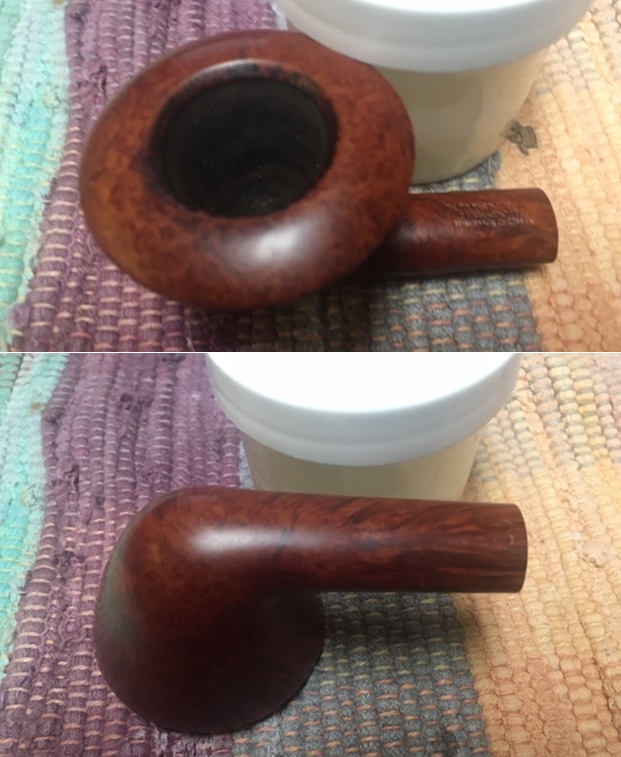
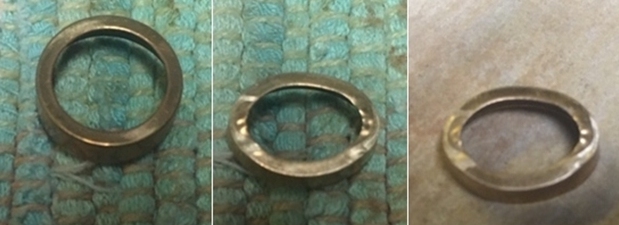
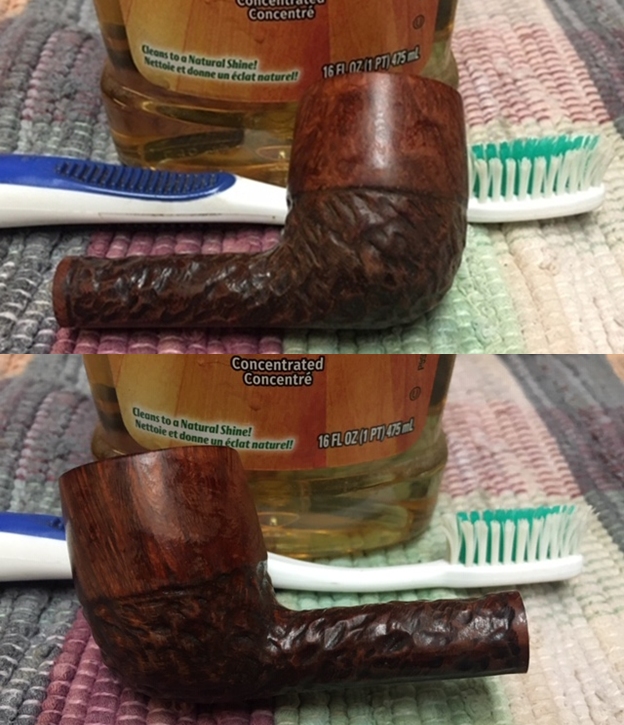
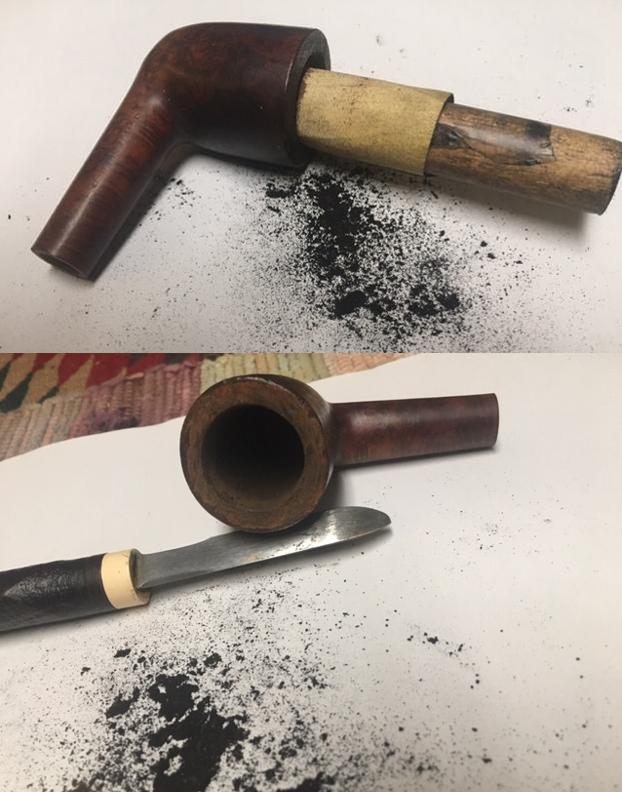
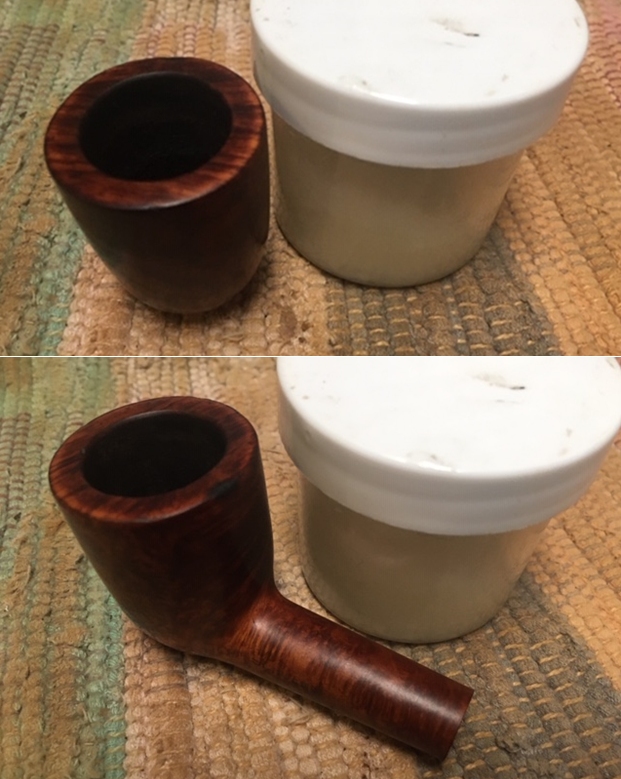
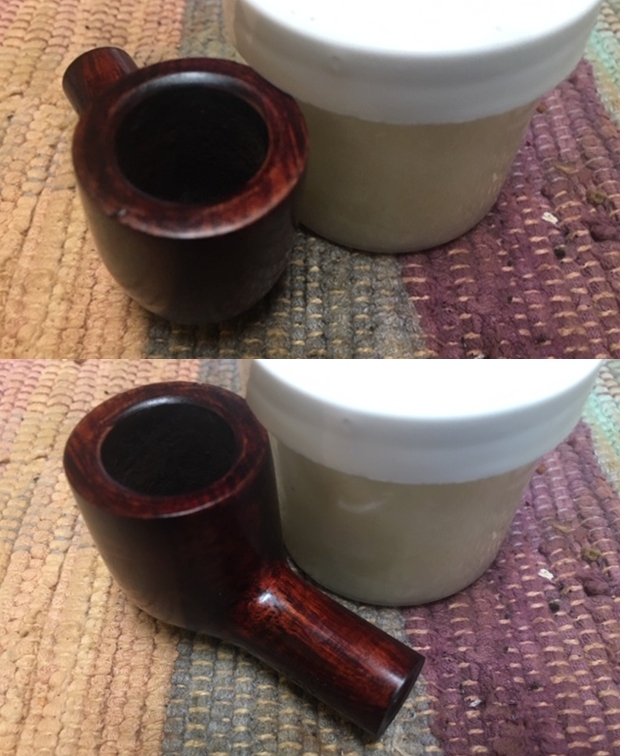
There’s a huge difference on the rim after the cleaning.  It appears that there originally was a bevel on the inside lip of the rim.
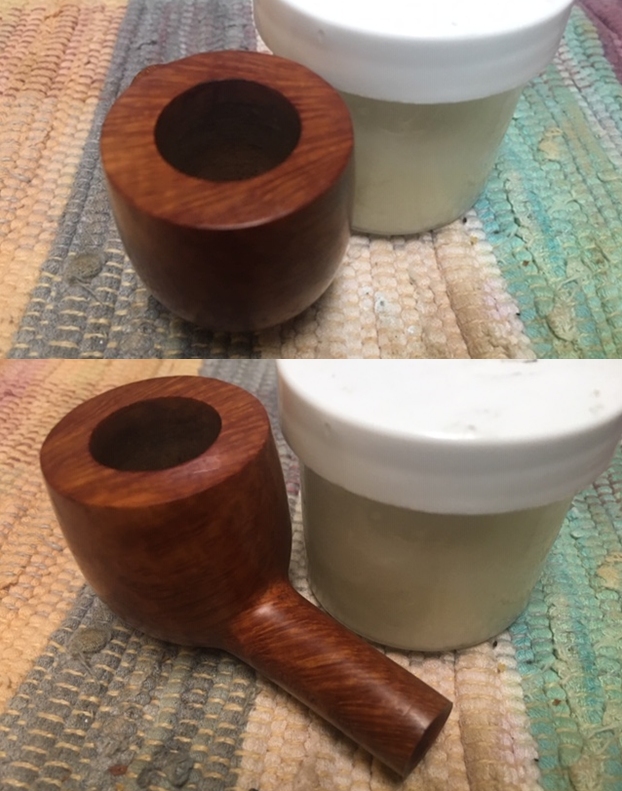
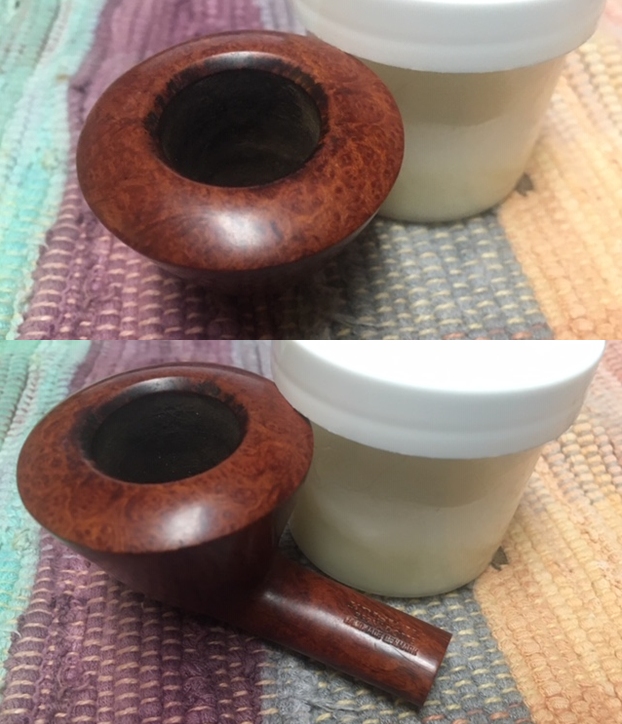
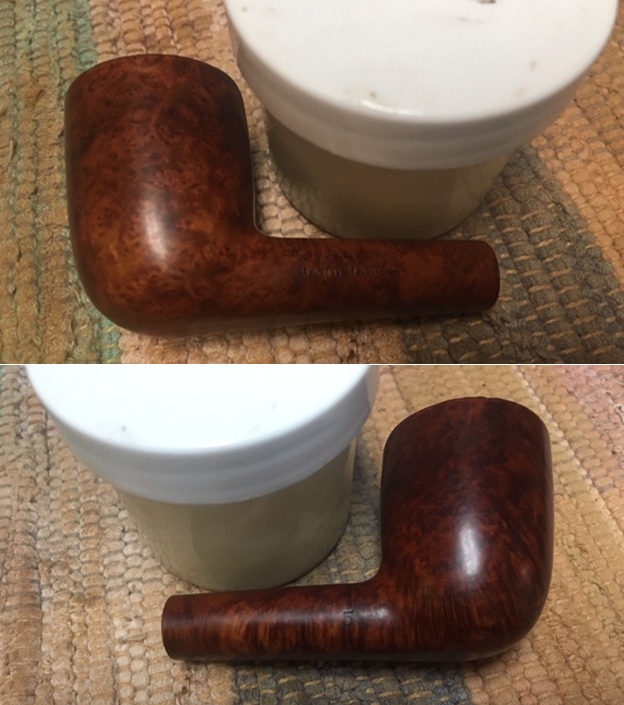
Next, to freshen the lines of the rim and to continue to clean the dark stains off the briar, I use the topping board with 240 grade paper.  I only rotate the stummel a few times. 
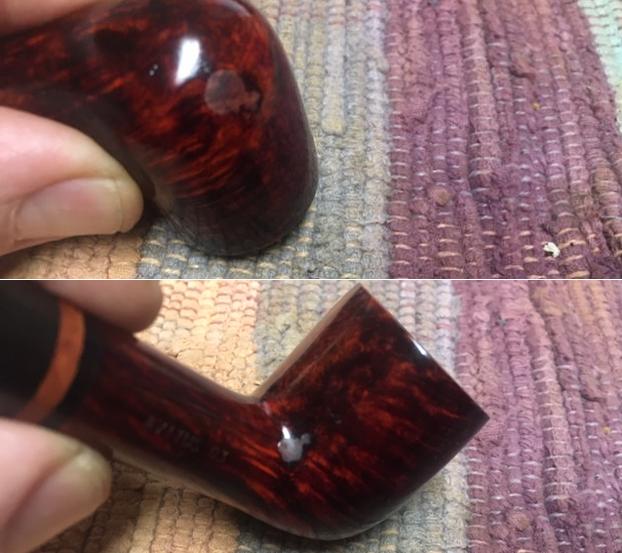
A small pit is revealed on the front-left rim after the first round of topping.  This will need to be filled.I rotate the inverted stummel several more time after transitioning from 240 grade paper to 600.To clean the internal rim lip as well as to refresh the internal bevel, I tightly wrap a piece 240 paper and shape the bevel.  Following this, I use 600 grade to smooth out the bevel.
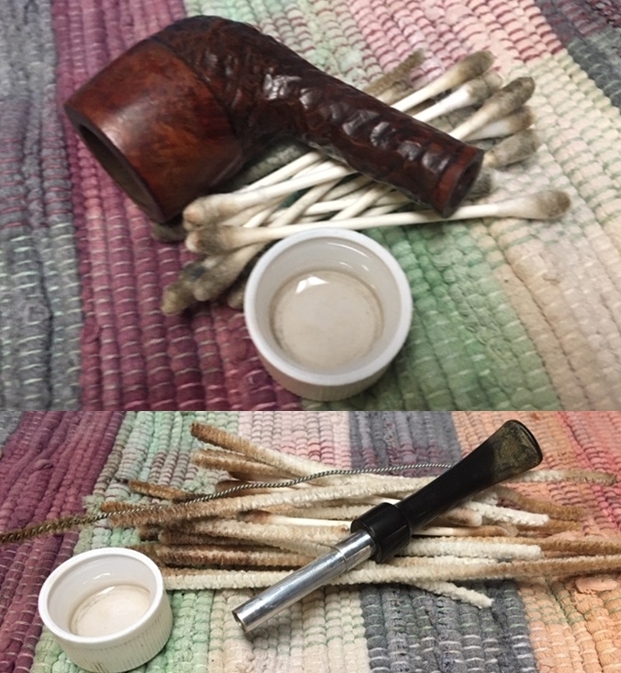
Next, using cotton buds and pipe cleaners dipped in isopropyl 95% the internal cleaning commences.  A small dental spoon is also used to scrape the internal mortise wall removing tars and oil build up.  After the cotton buds begin to emerge lighter, I call it clean at this stage.
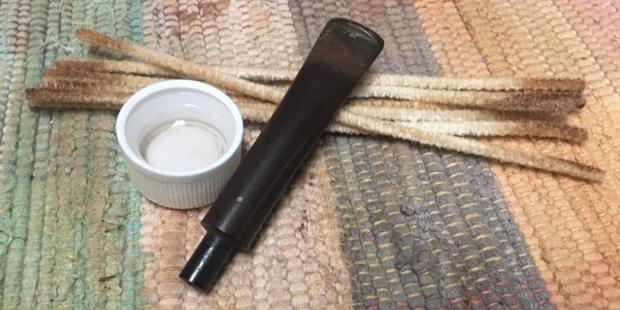
With the hour being late, I transition to utilizing a kosher salt and alcohol soak through the night to continue the internal cleaning.  It is my usual practice to do this to refresh the pipe for the new steward.  After creating a ‘wick’ by pulling and twisting a cotton ball, the wick is inserted into the mortise using a stiff wire to help guide it down through the mortise into the airway.  The wick helps to draw out the residual tar and oil from the briar.  I then fill the bowl with kosher salt which, unlike iodized salt, leaves no aftertaste.  After placing the stummel in the egg carton for stability, using a large eye dropper, the bowl is filled with isopropyl 95% until it surfaces over the salt.  After a time, the alcohol is drawn into the pipe and after topping off the alcohol, I turn off the lights! The next morning the salt and wick are soiled the brown showing the additional cleaning this process provided.  After cleaning the stummel of the expended kosher salt using a paper towel and blowing forcefully through the mortise, I follow with a few additional pipe cleaners and cotton buds to clean the remaining remnants of tar and oils.  All is good and I move on.
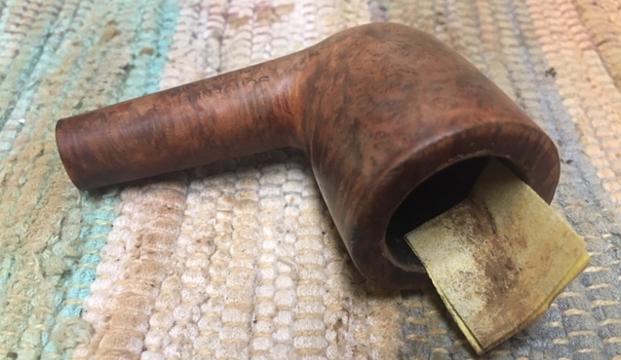
Next, addressing the hole on the rim, I first dig out and clean the pitted area using a sharp dental probe. 
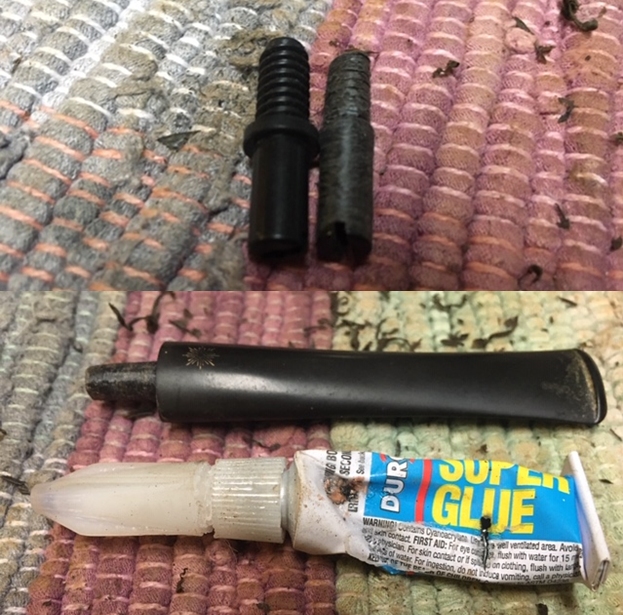
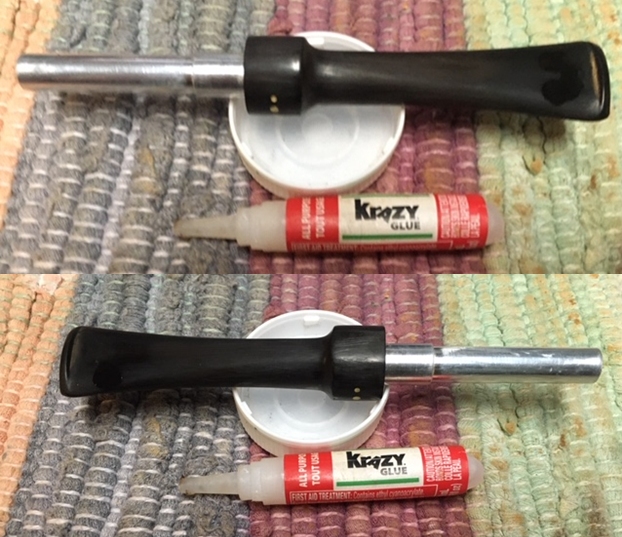
After wiping the area with alcohol to assure that it is clean, I then spot-drop the hole with regular clear CA glue.After the CA glue cures, a flat needle file is used to file the patch down. Following the filing, 240 and 600 sanding papers smooth the area further.
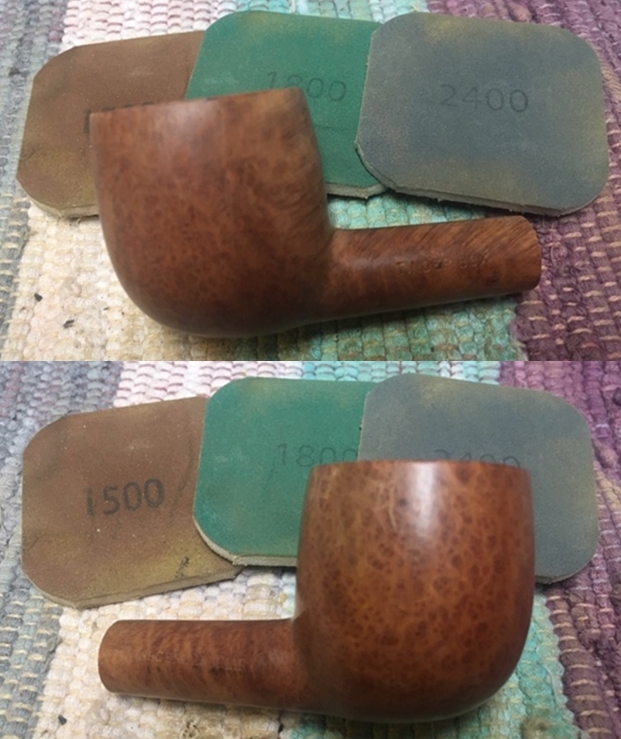
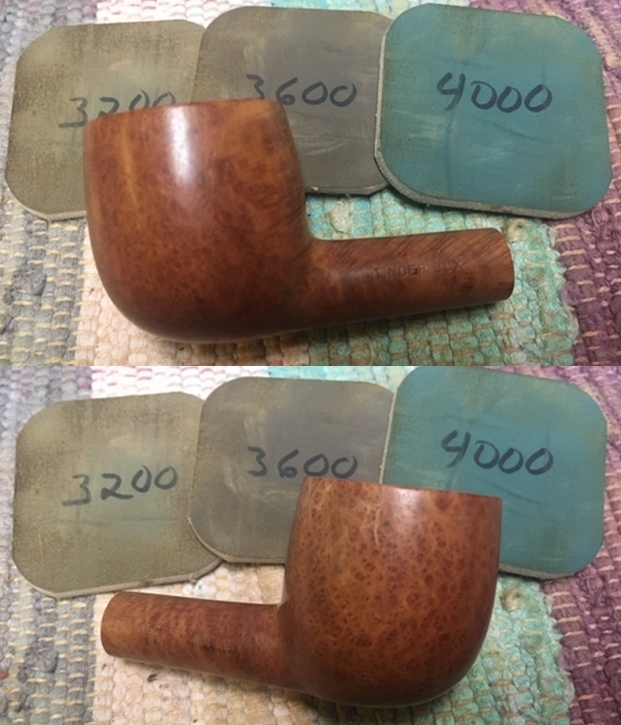
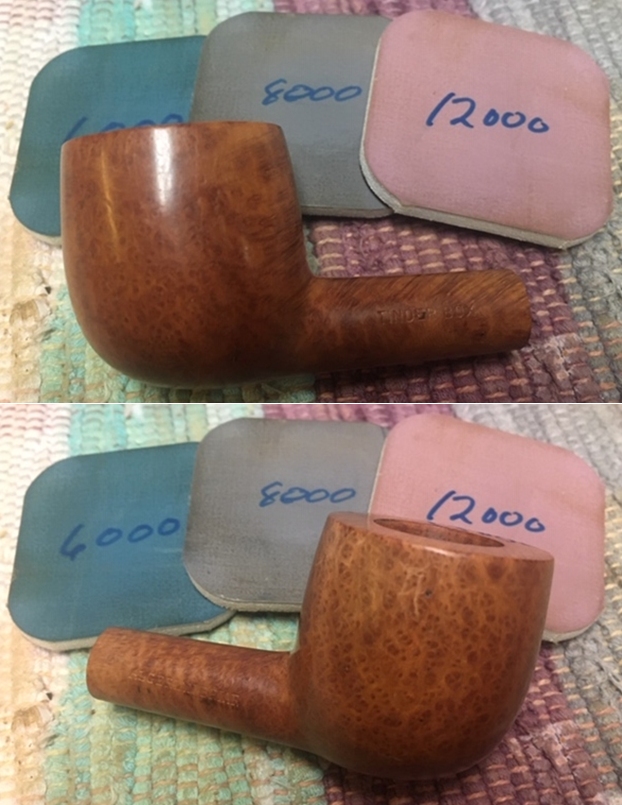
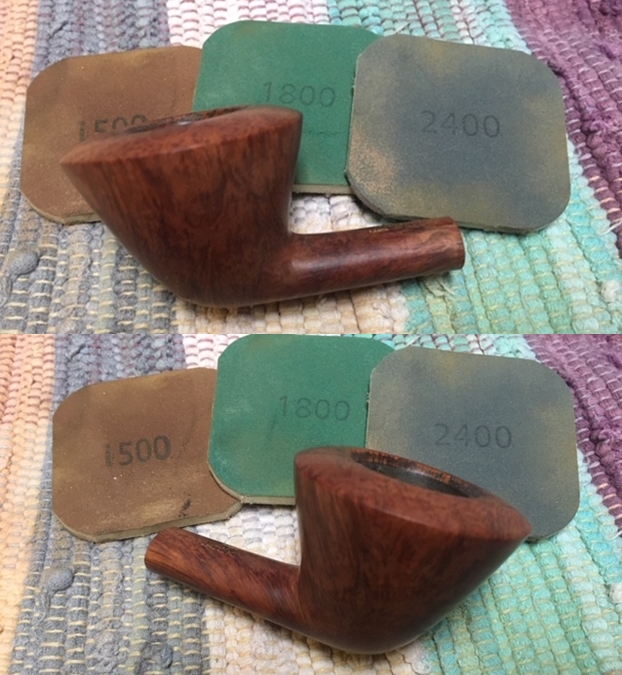
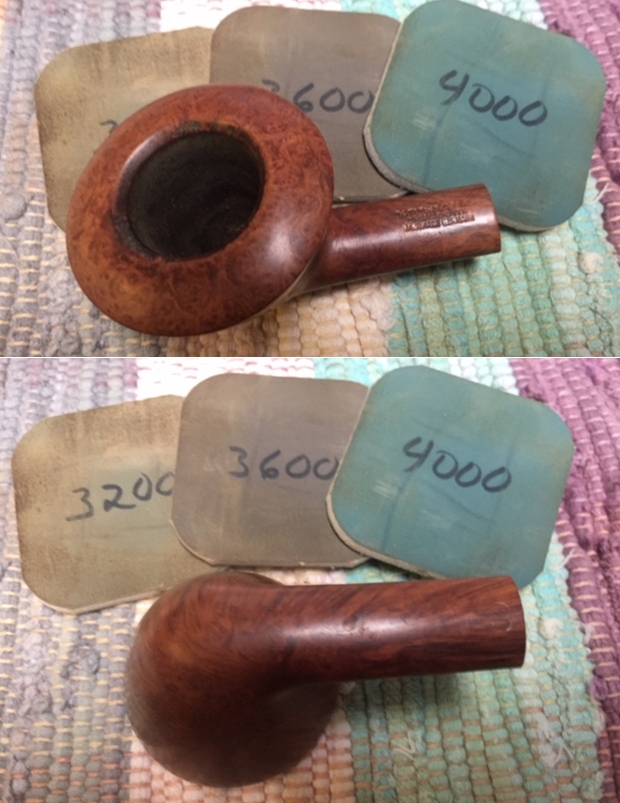
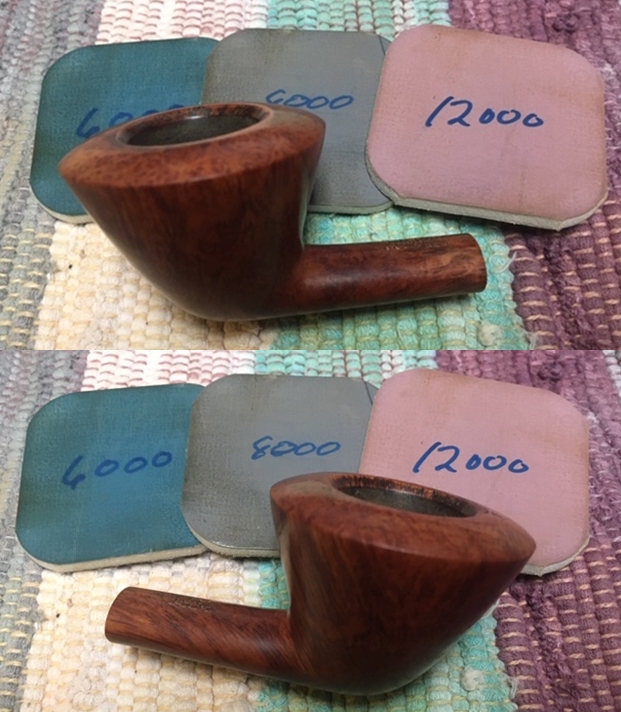
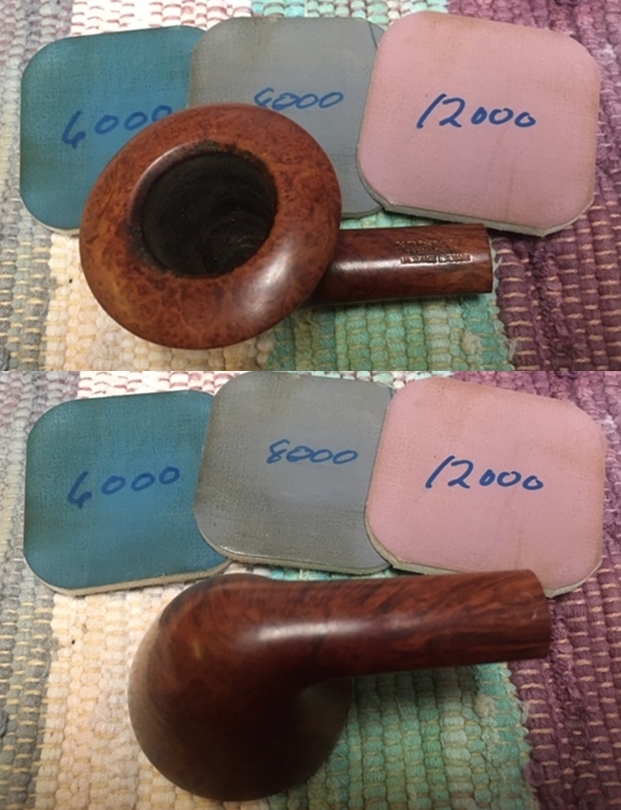
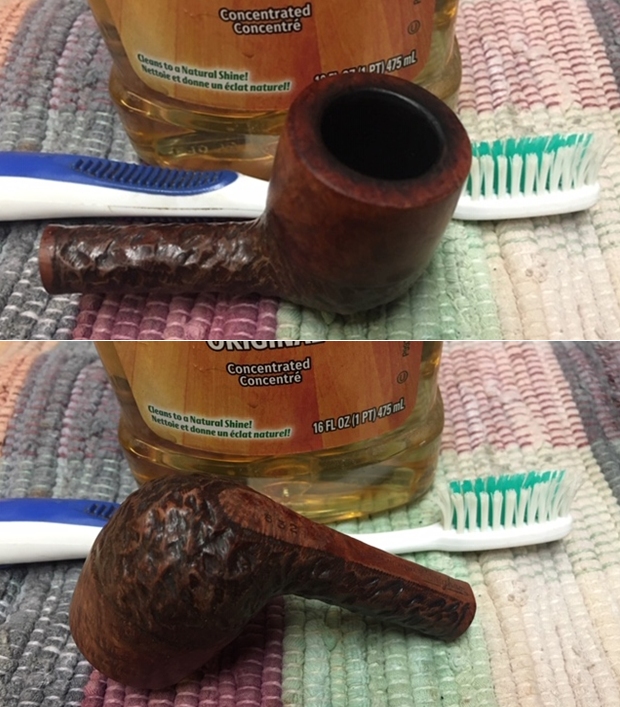
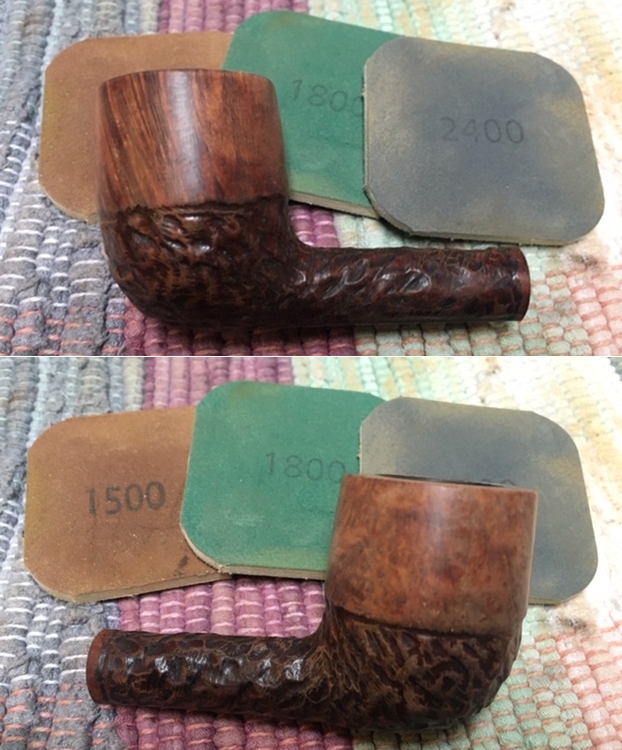
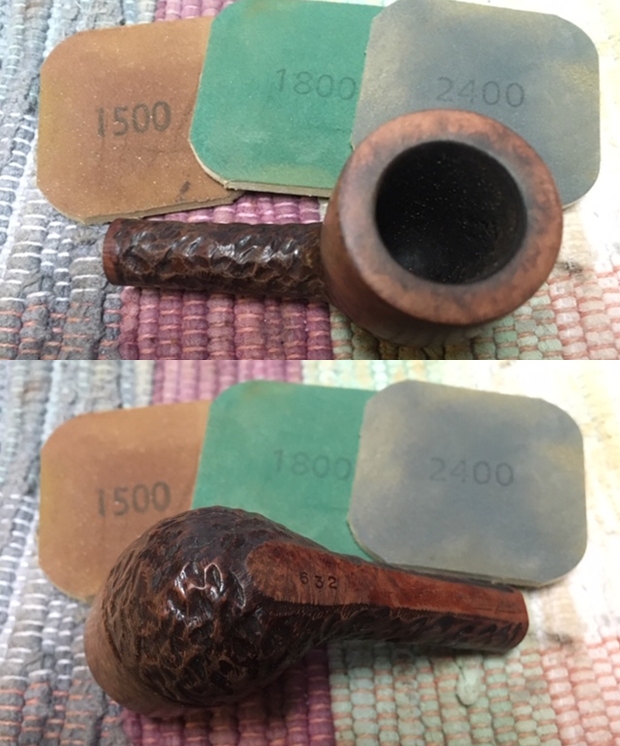
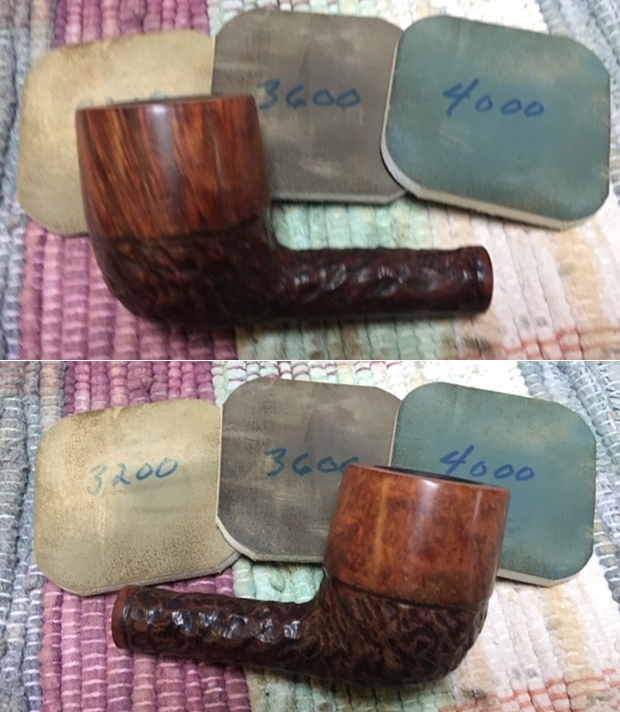
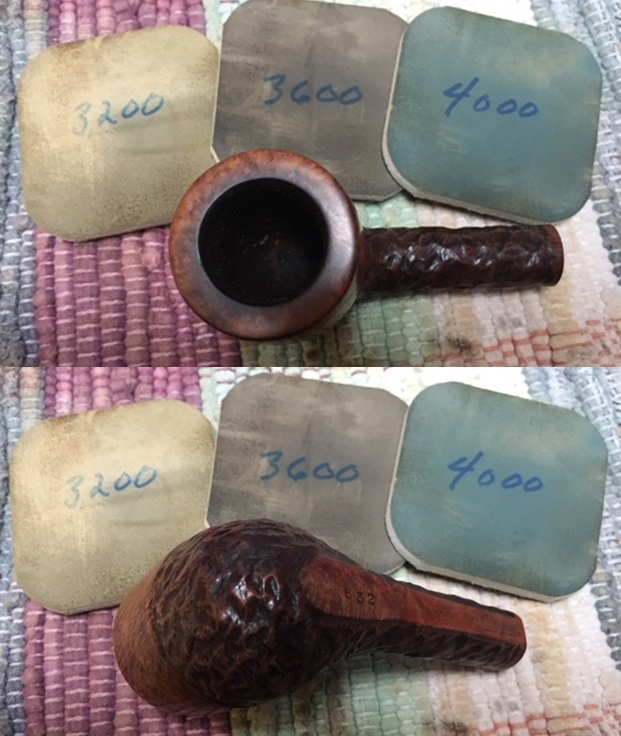
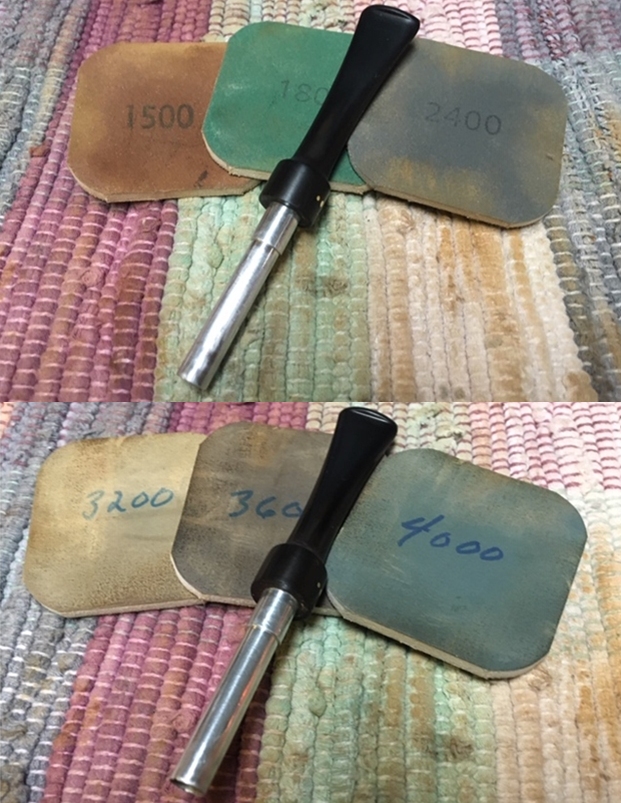
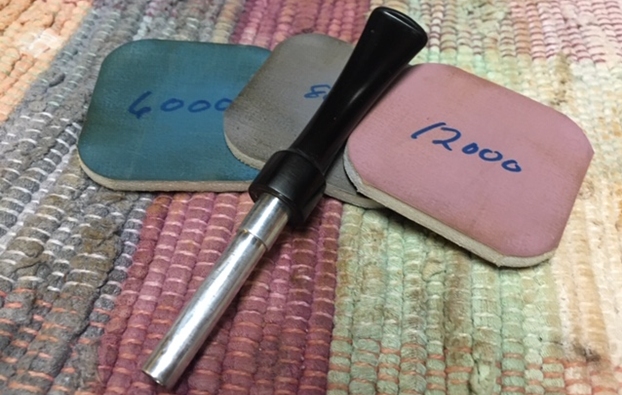
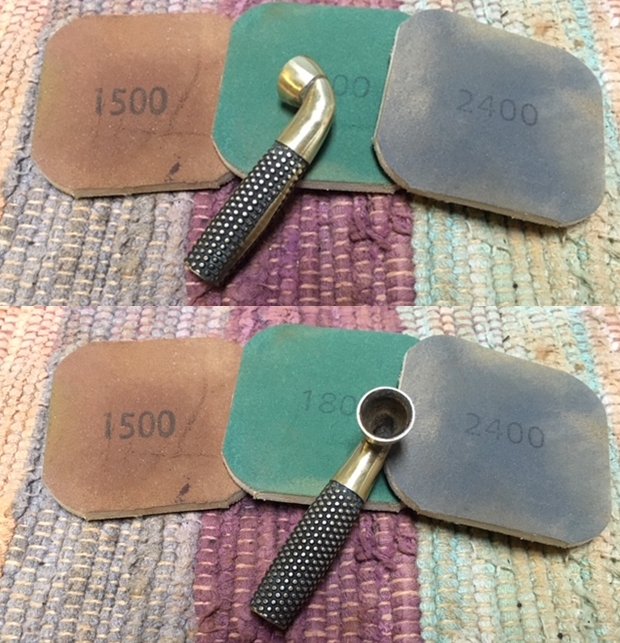
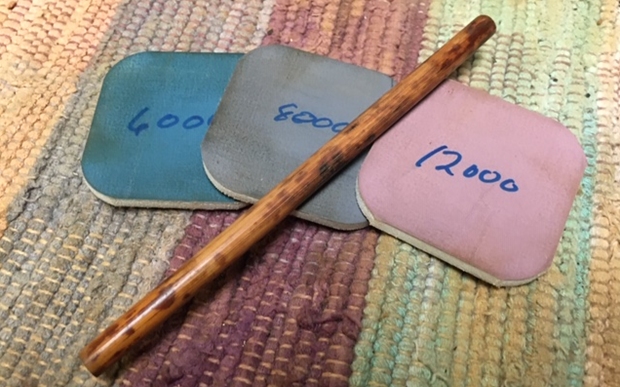
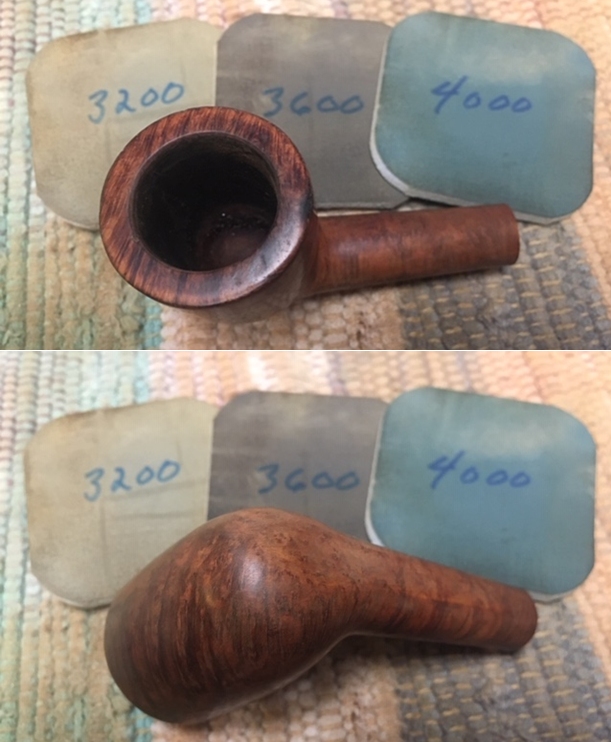
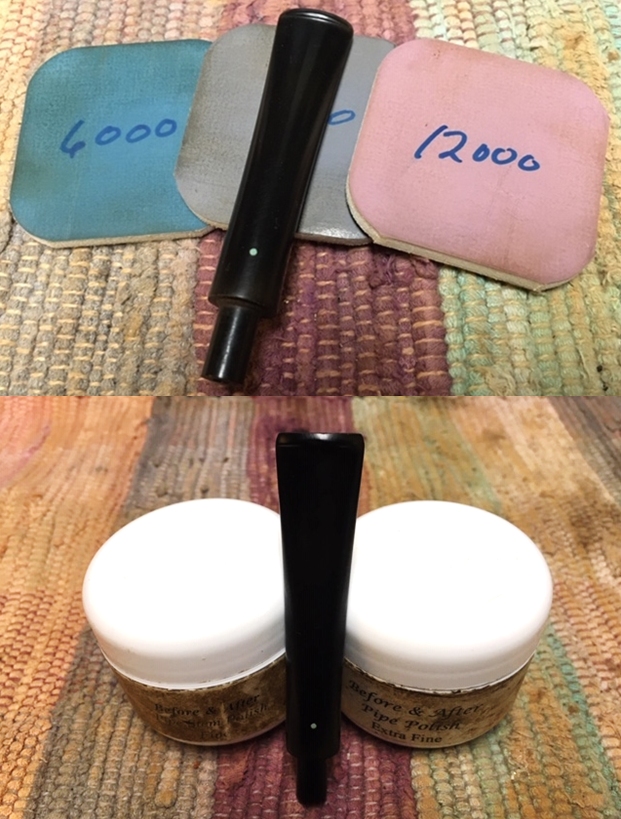
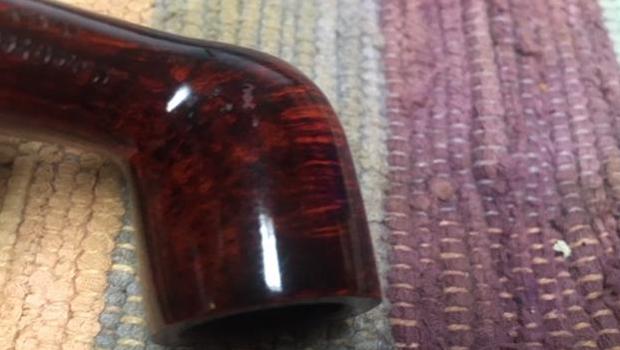
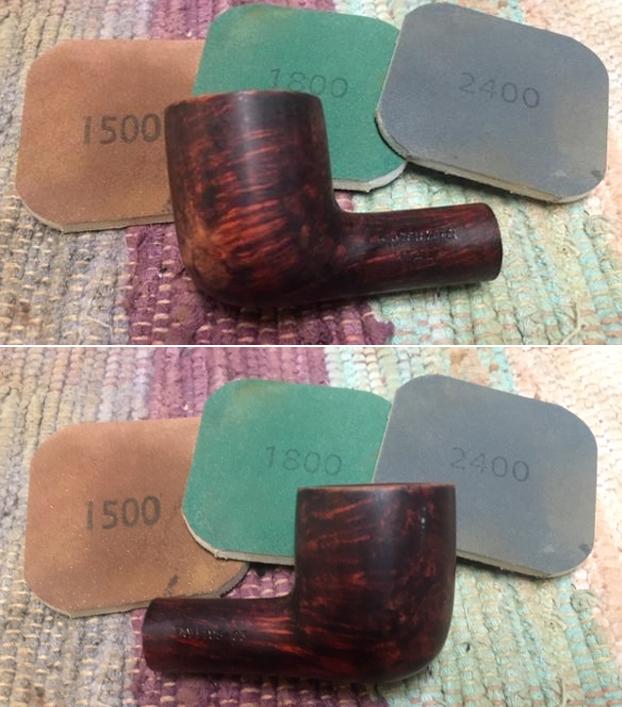
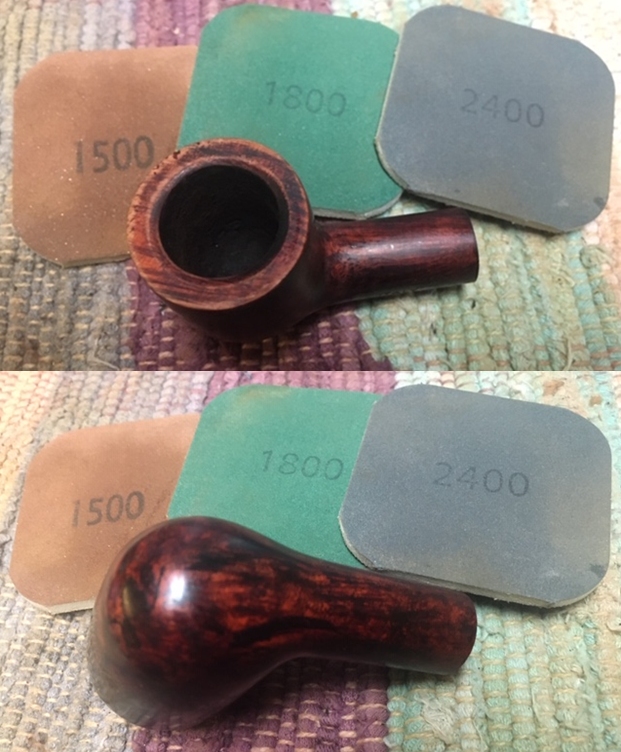
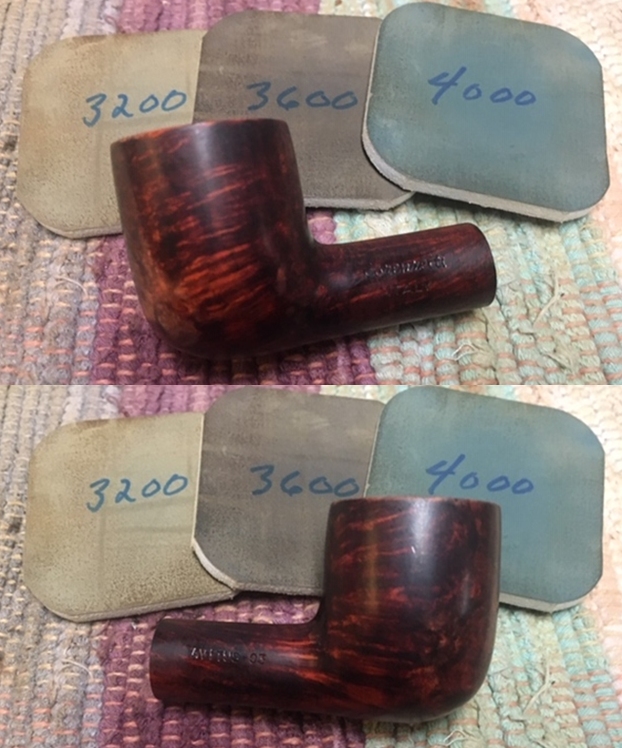
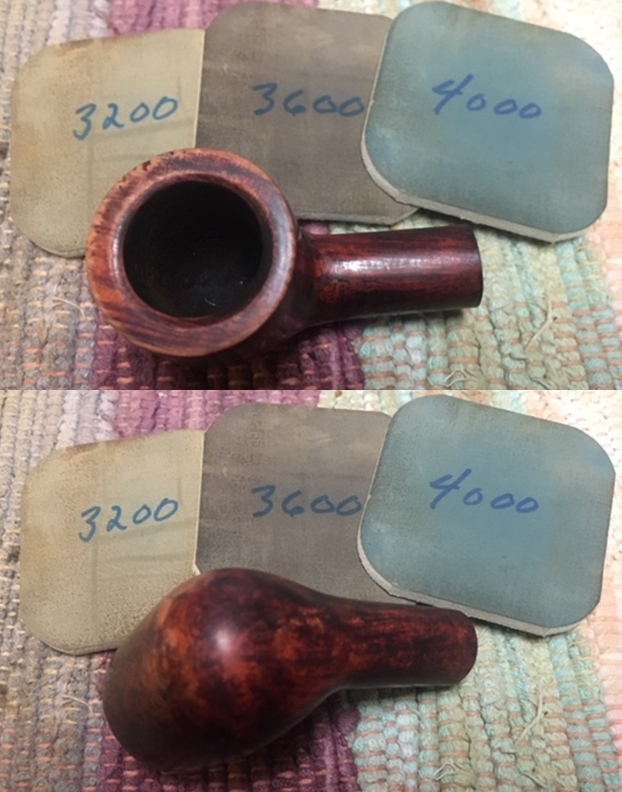
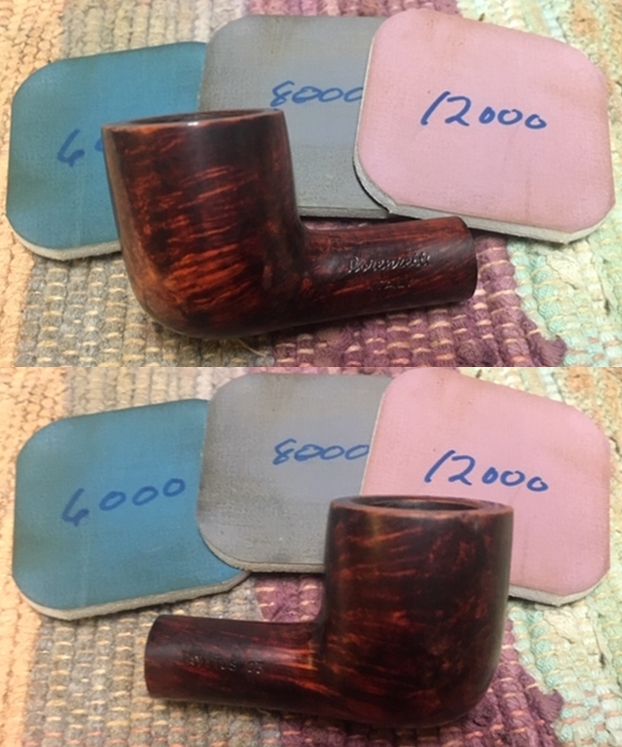
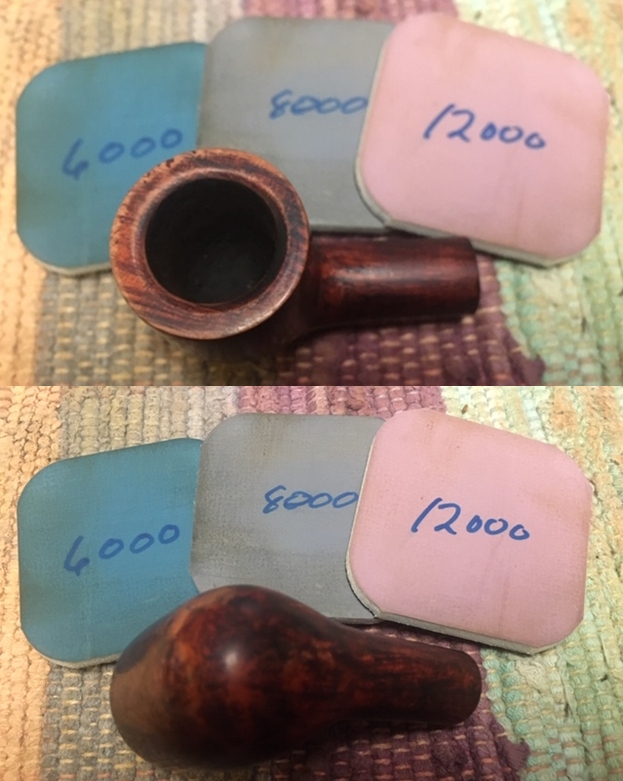
Transitioning then to applying the full regiment of micromesh pads, I wet sand with pads 1500 to 2400 and follow with dry sanding with pads 3200 to 4000 and 6000 to 12000.  The micromesh process brings out the grain nicely.  I love the briar/leather contrast created by the rim. 
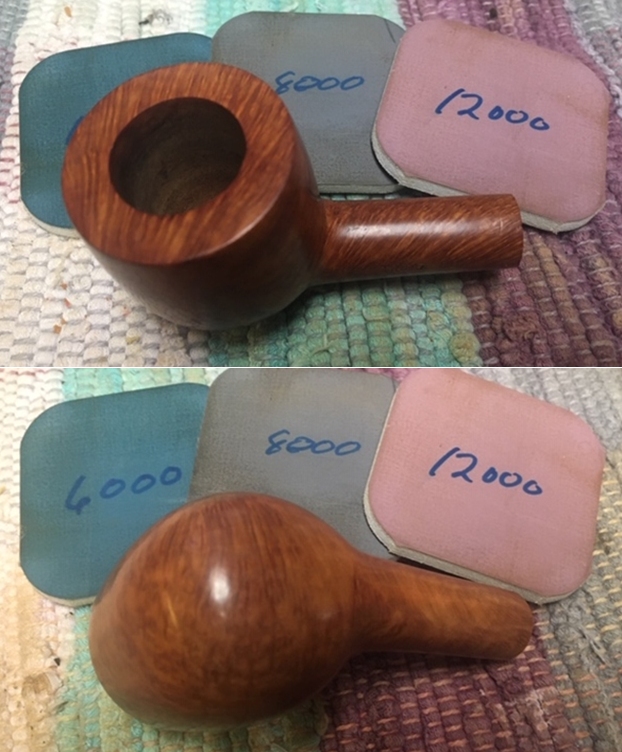
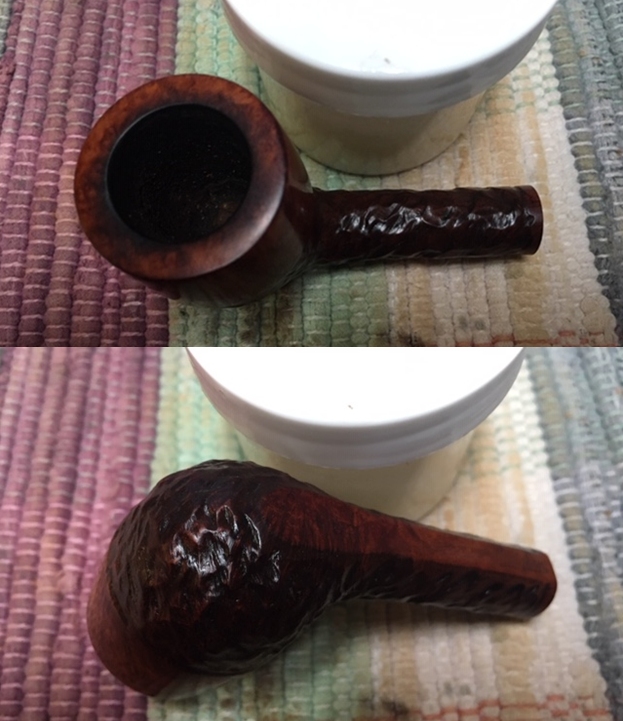
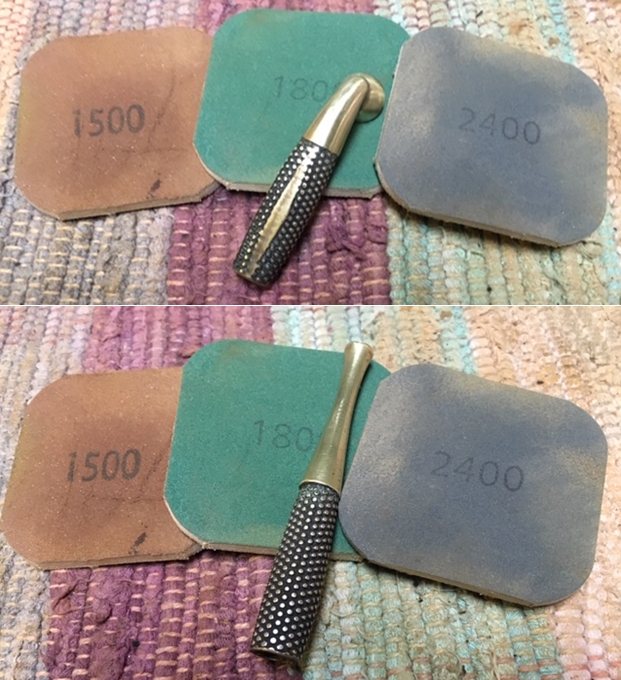
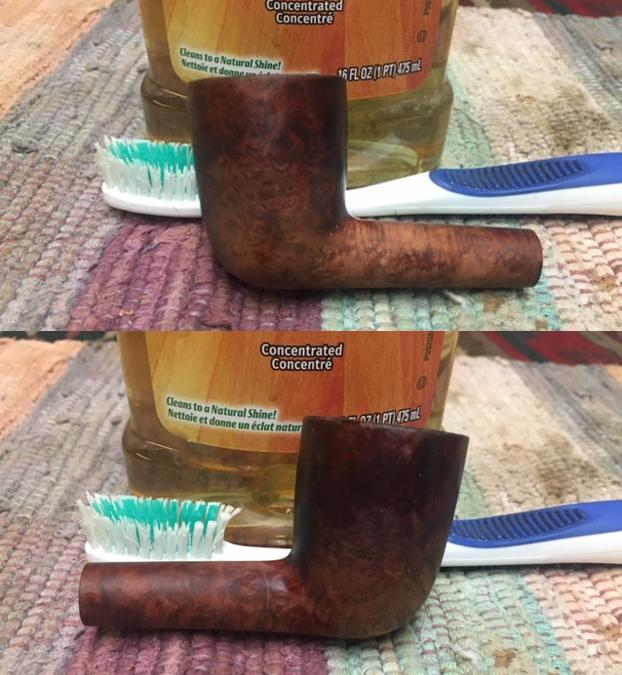
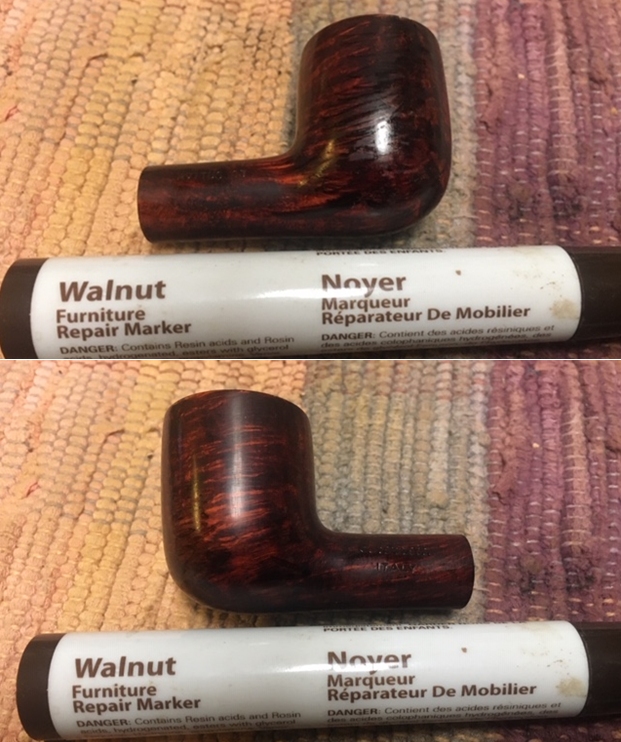
Applying Before & After Restoration continues to bring out the more subtle hues of the rim’s briar grain.  Applying first the Balm with my fingers and working it into the briar, I then set it aside for a few minutes for the Balm to be absorbed.  After about 20 minutes I wipe off the excess Balm and buff the rim with a microfiber cloth.
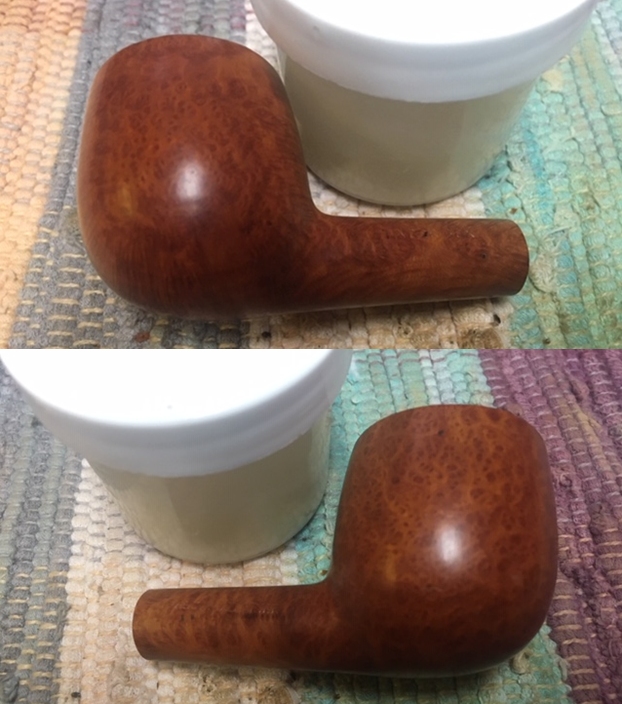
To treat the black leather, I use ‘Weiman Leather Wipes’ to clean and condition the leather.  This product works very well.  The leather is very attractive with a clean, healthy sheen. 
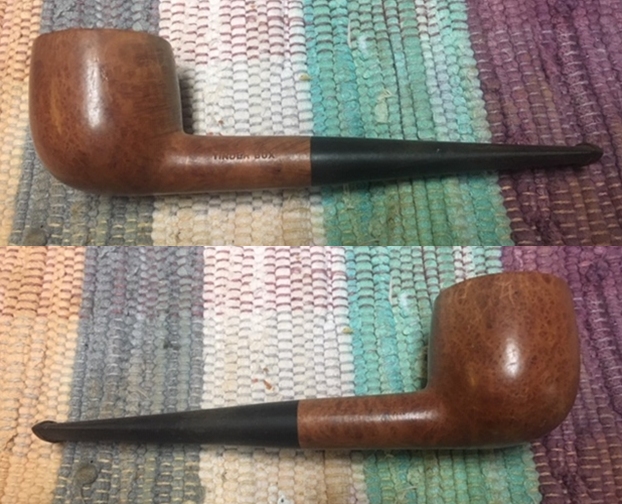
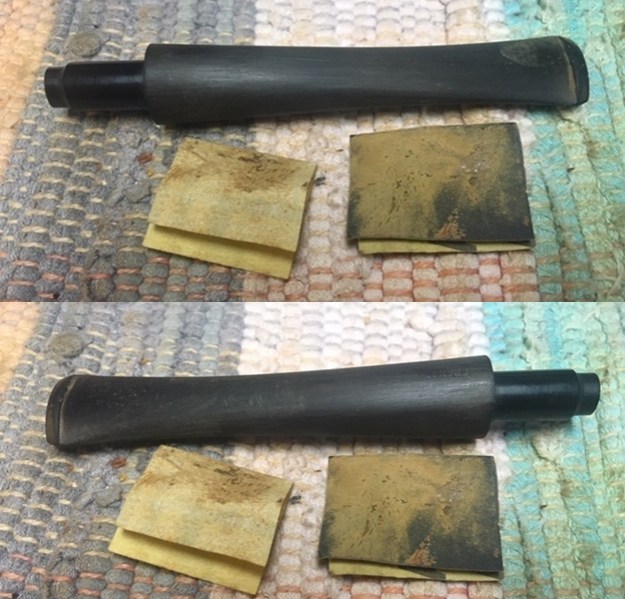
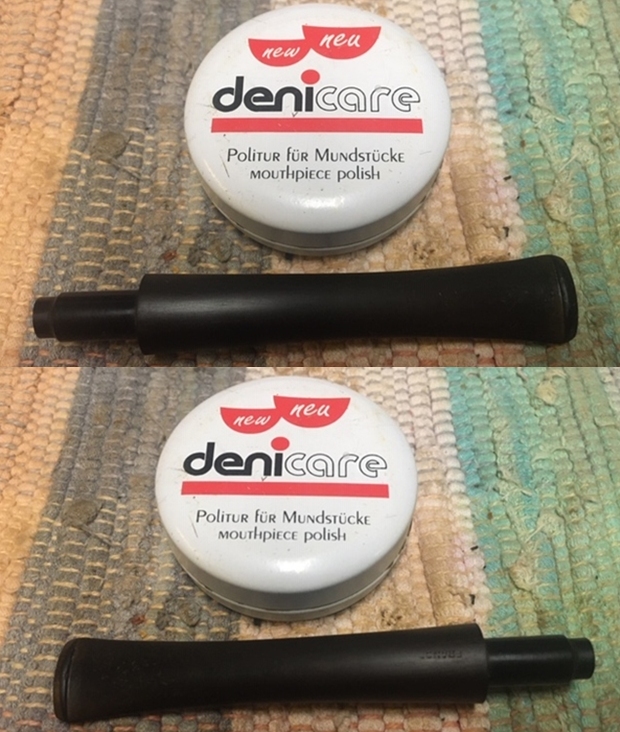
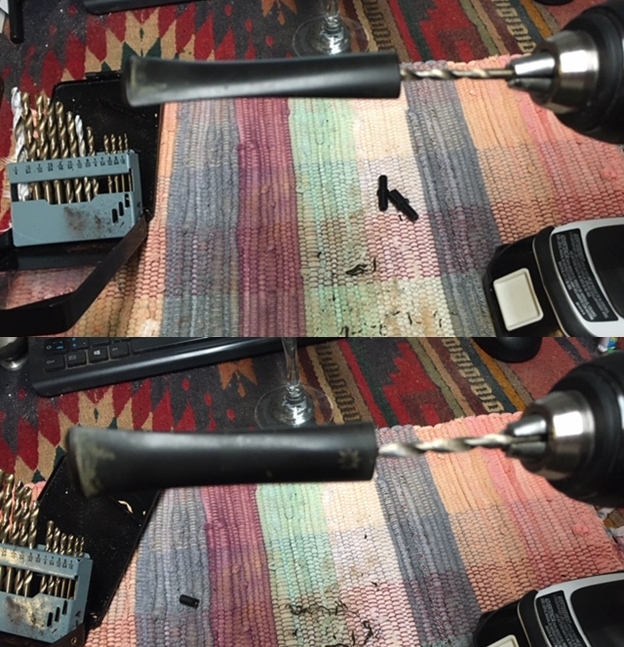
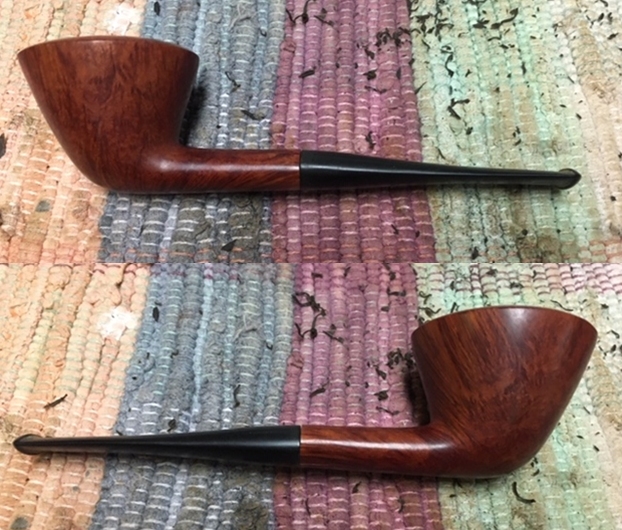
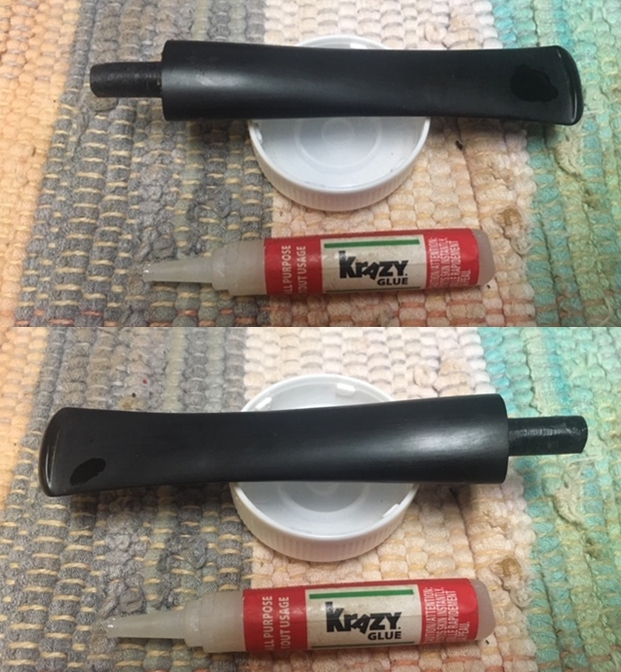
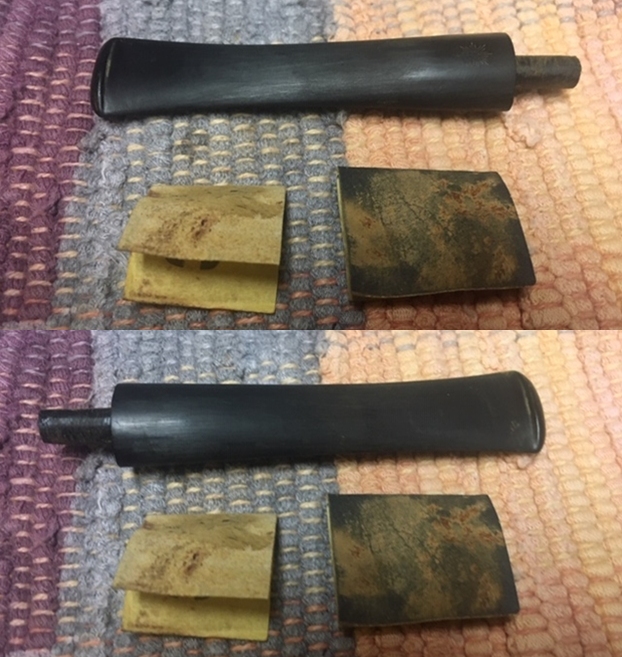
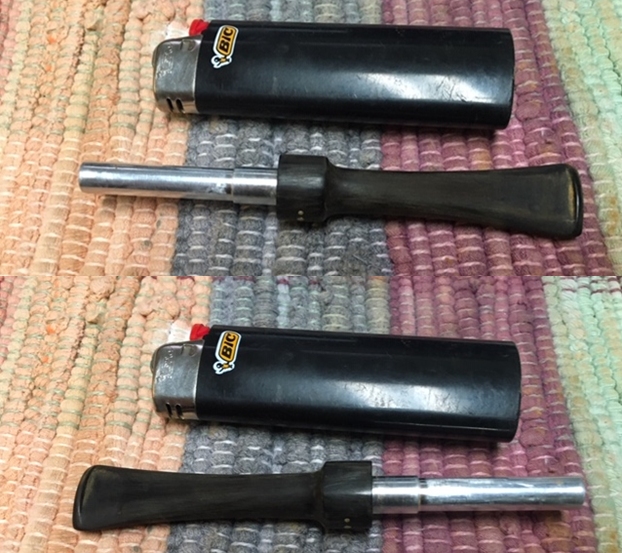
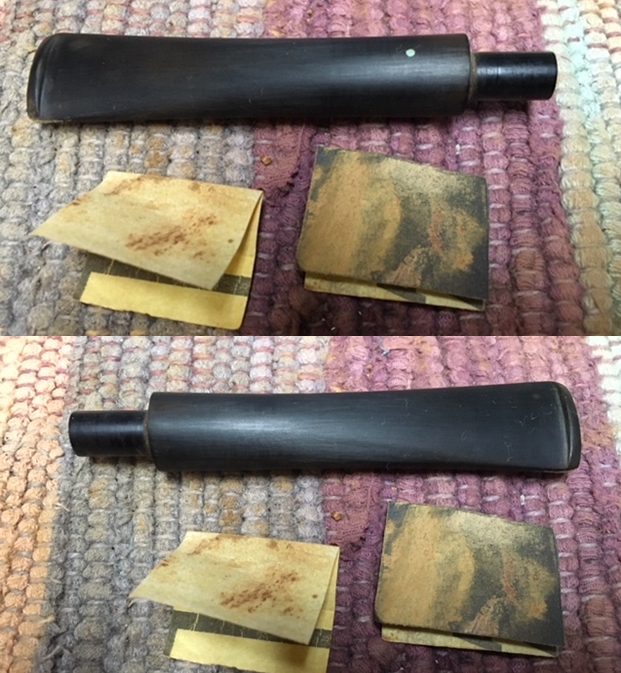
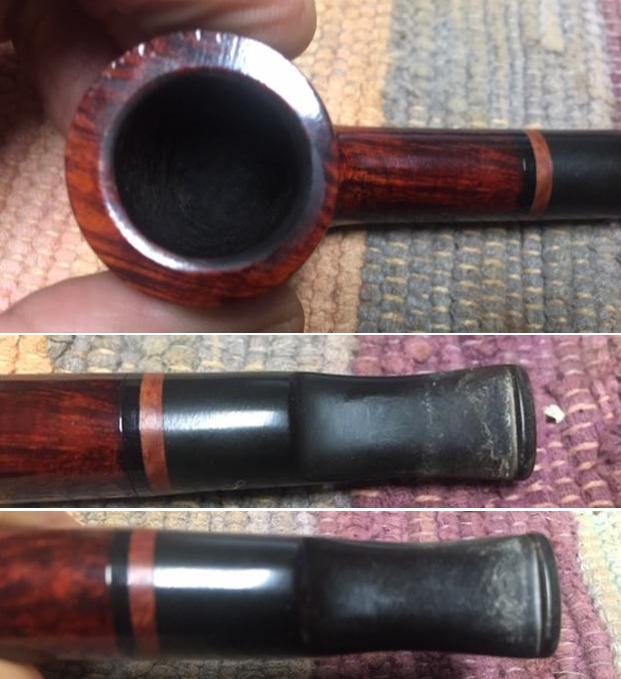
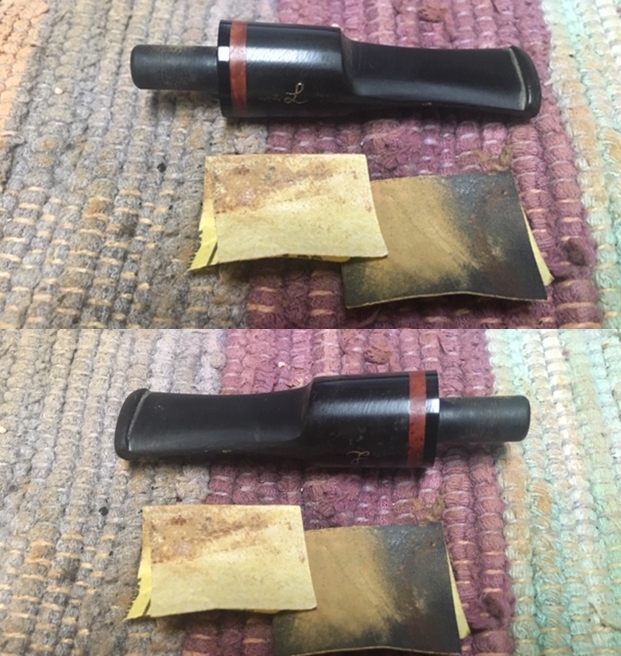
I put the stummel aside and transition to the stem, which is not in too bad of shape.  There are some tooth chatter and compressions on the upper bit which I first address with the heating method.  Using a Bic lighter, the bit is painted with the flame heating and expanding the vulcanite.  As the vulcanite is heated it expands to reclaim its original shaping – or closer.  The pictures show a before and after comparison.  The compressions are still visible but much reduced.I follow by sanding the upper and lower bit using 240 grade paper to erase the residual chatter and what remains of the compressions.
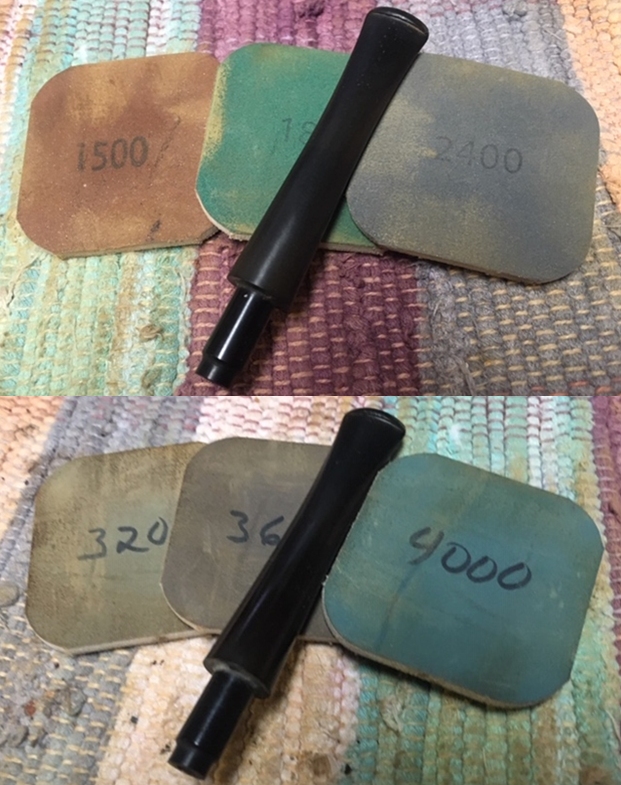
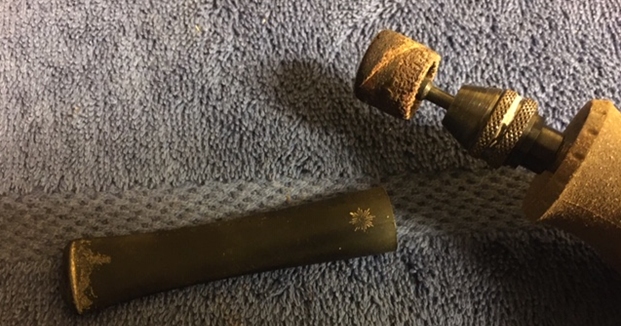
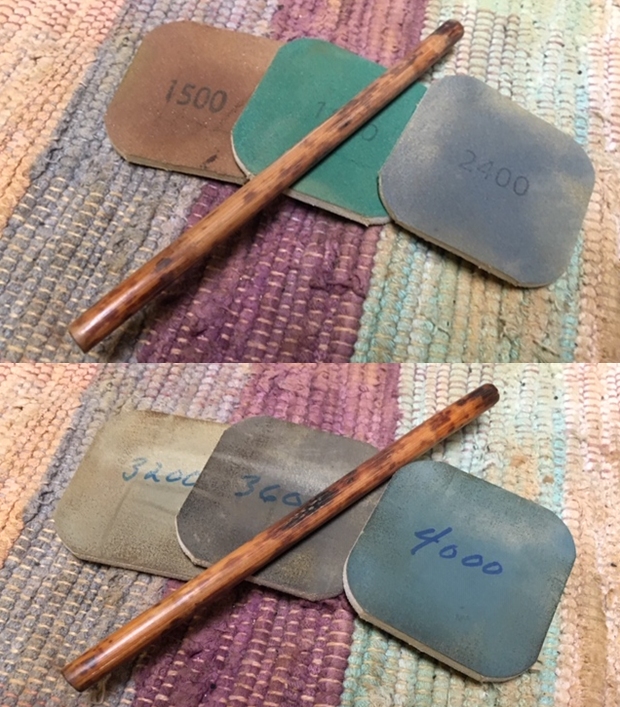
I then take the stem to the kitchen sink and wet sand the entire stem using 600 grade paper – careful not to sand the very thin running horse stamping on the stem.  Following the 600 grade paper, 000 grade steel wool is applied to smooth further.
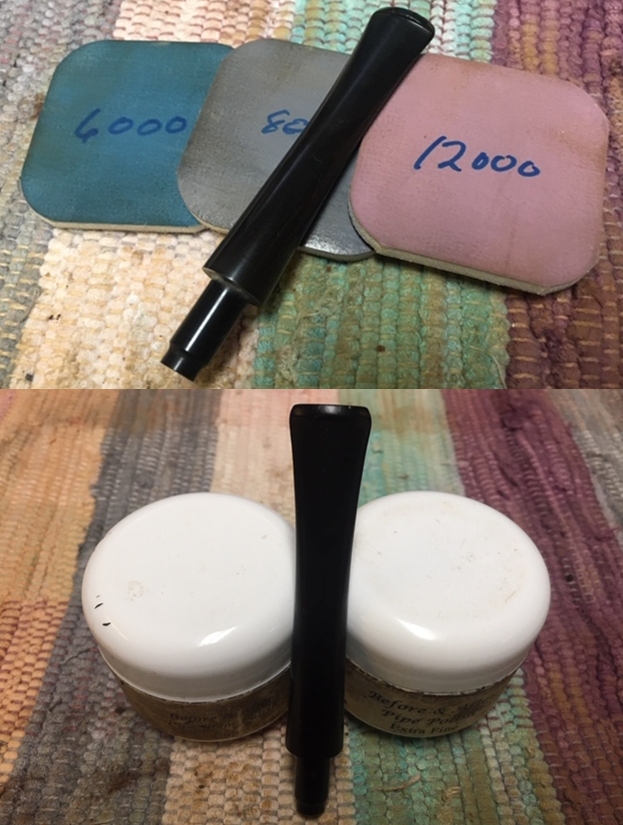
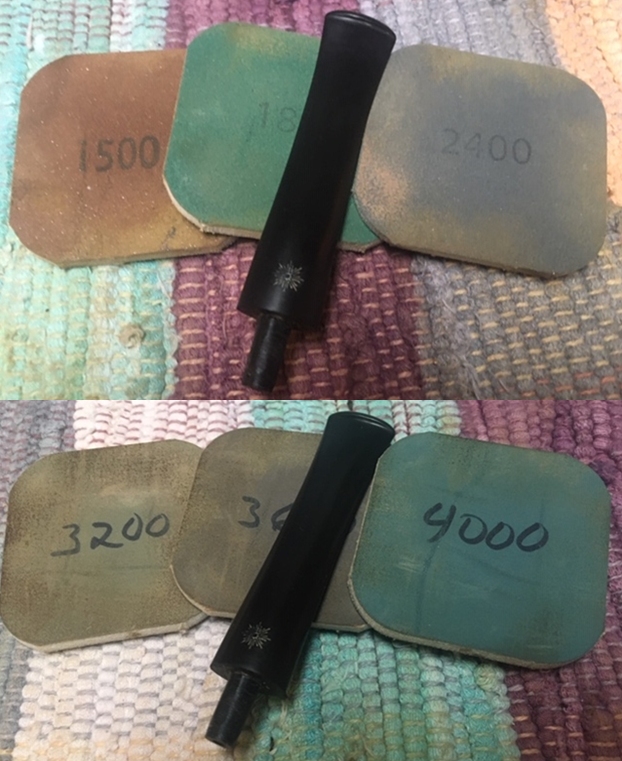
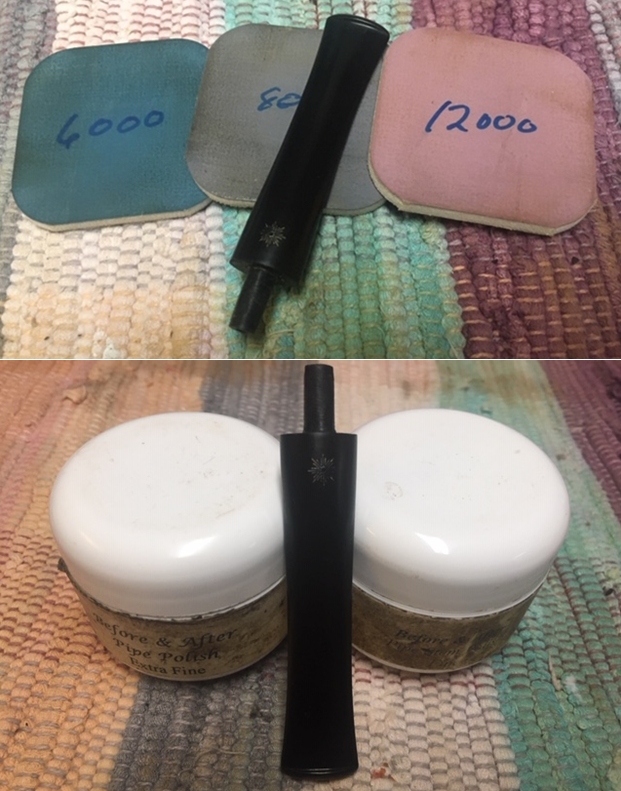
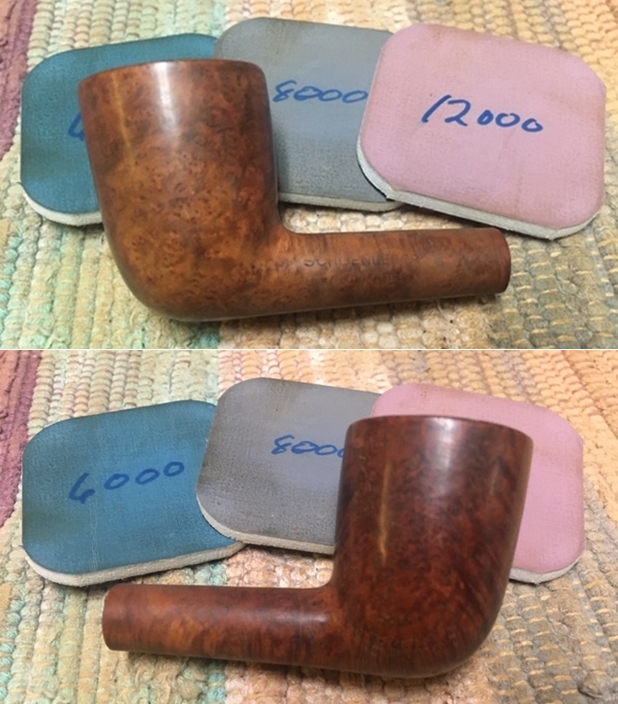
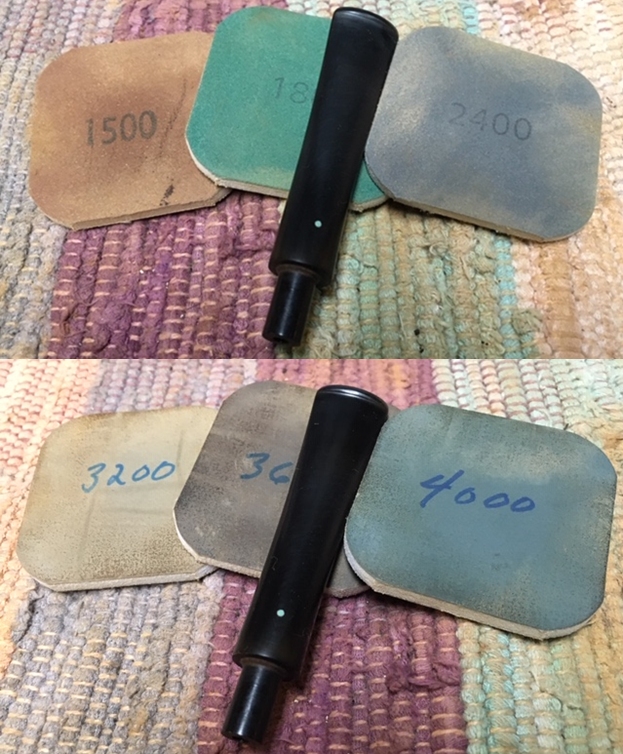
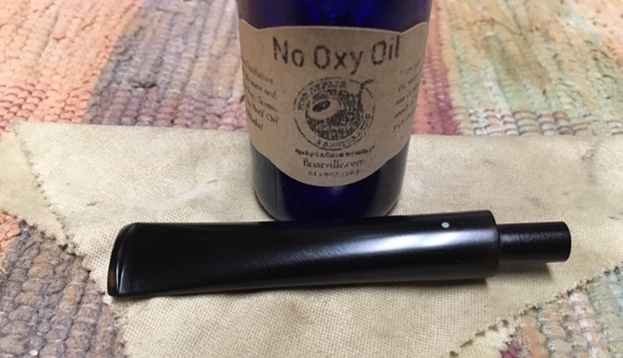
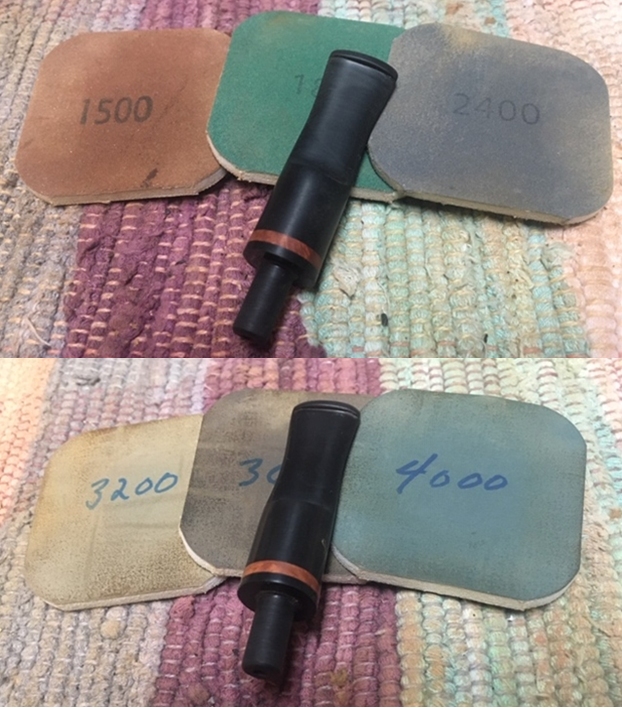
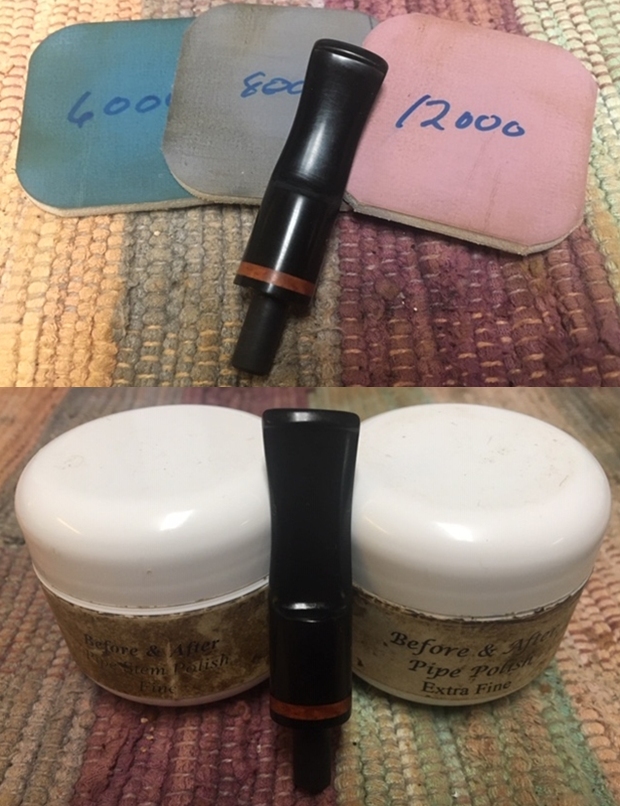
Next, I transition directly to applying micromesh pads to the stem by wet sanding with pads 1500 to 2400 then dry sanding with pads 3200 to 4000 and 6000 to 12000.  Between each set of 3 pads, Obsidian Oil is applied to rejuvenate the vulcanite as well as helping to prevent oxidation. 
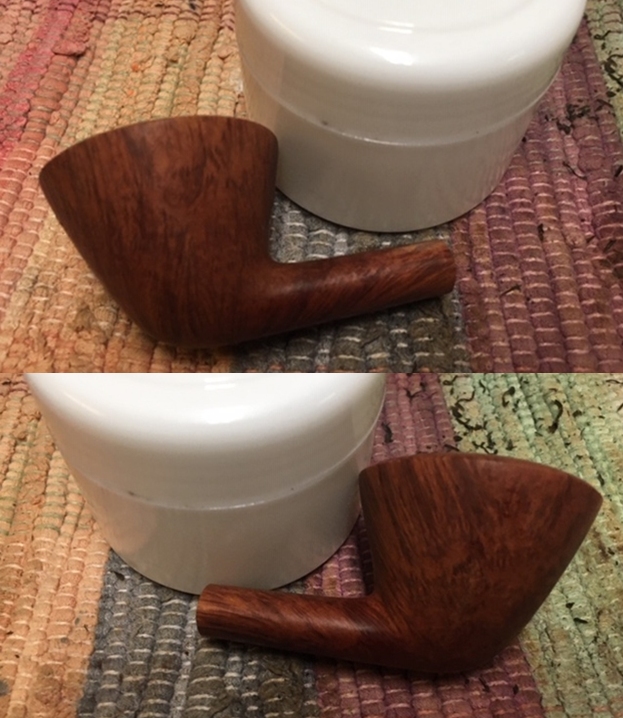
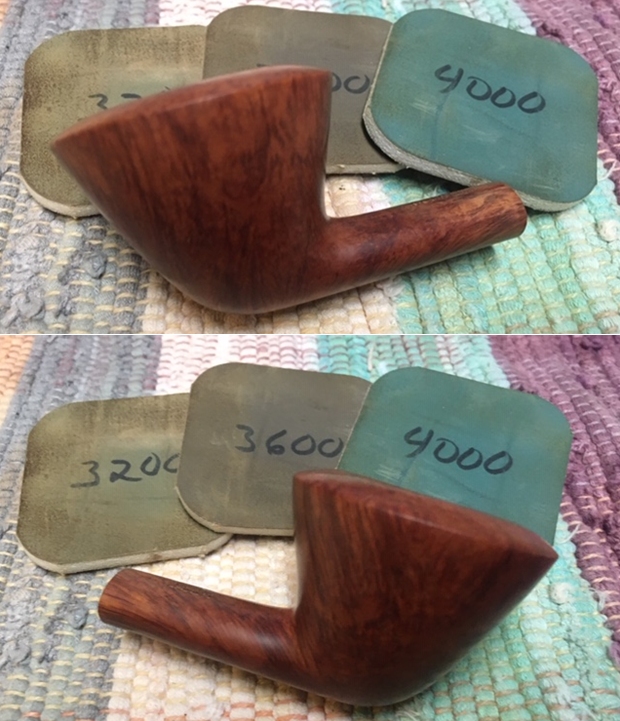
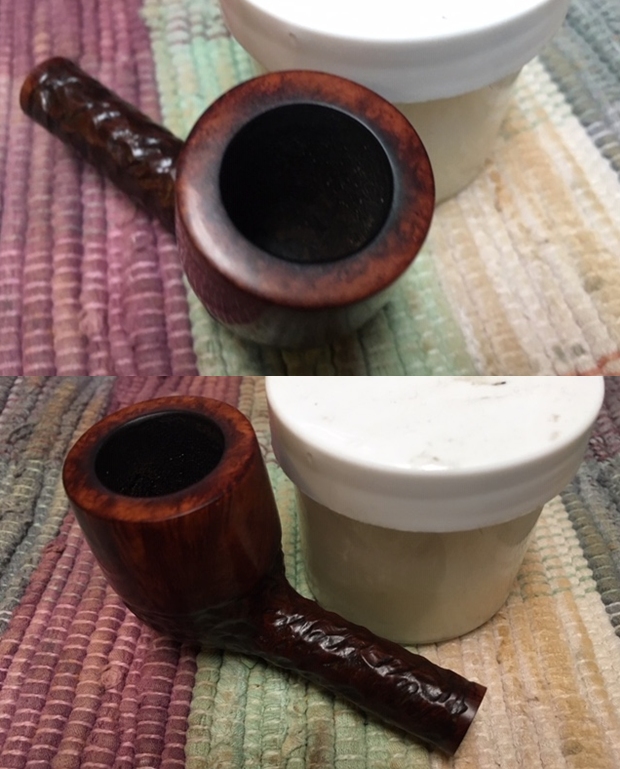
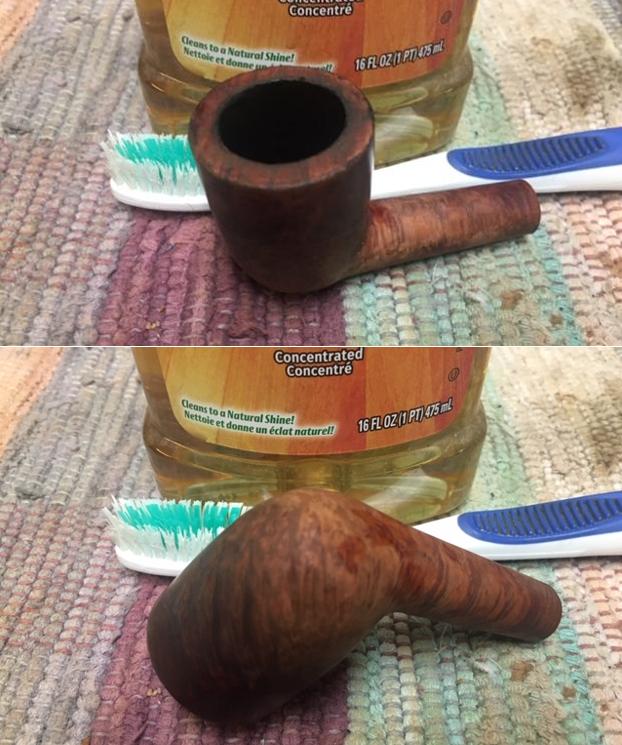
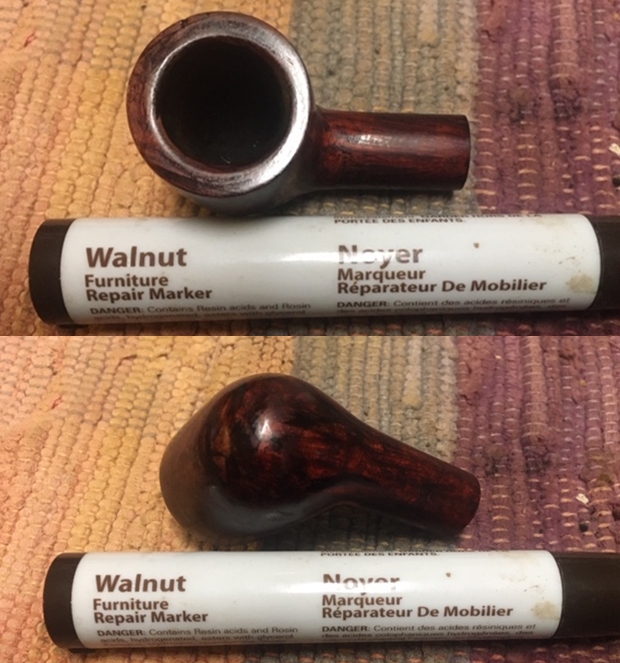
On the home stretch – after mounting a cotton cloth buffing wheel to the Dremel, with the speed set at about 40% full power, Blue Diamond compound, a fine abrasive, is applied to the stem and briar rim.  Following this, after another buffing wheel has been mounted at the same speed, carnauba wax is applied to the stem and briar rim.  The restoration is completed with a rigorous hand-buffing to raise the shine of both the stem and briar rim, but also the black leather wrap.
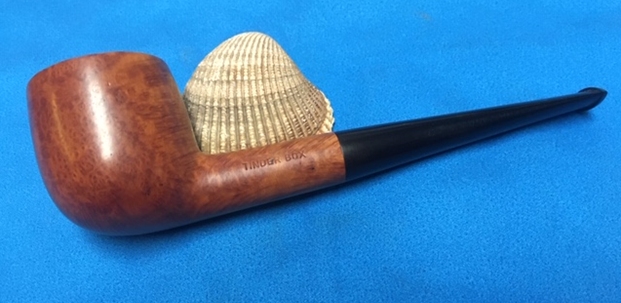
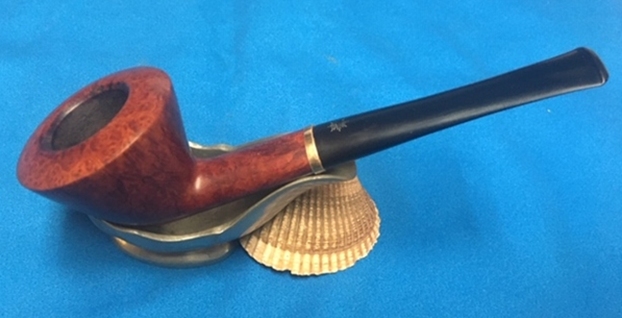
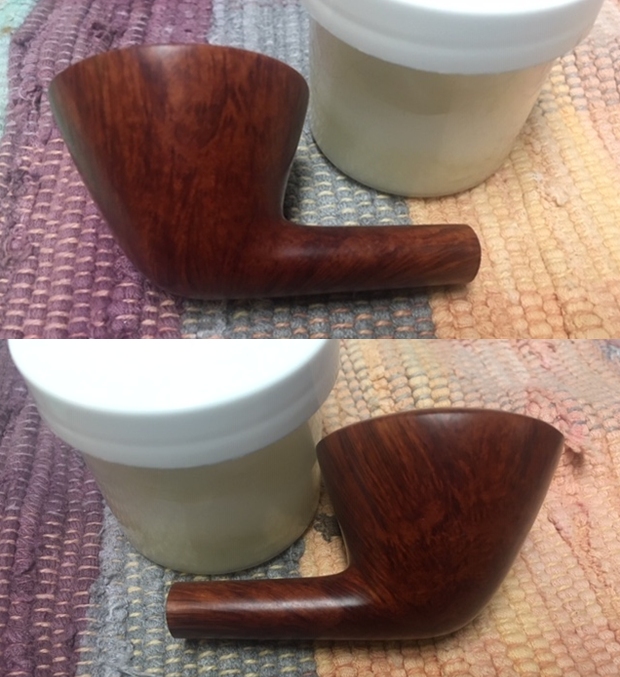
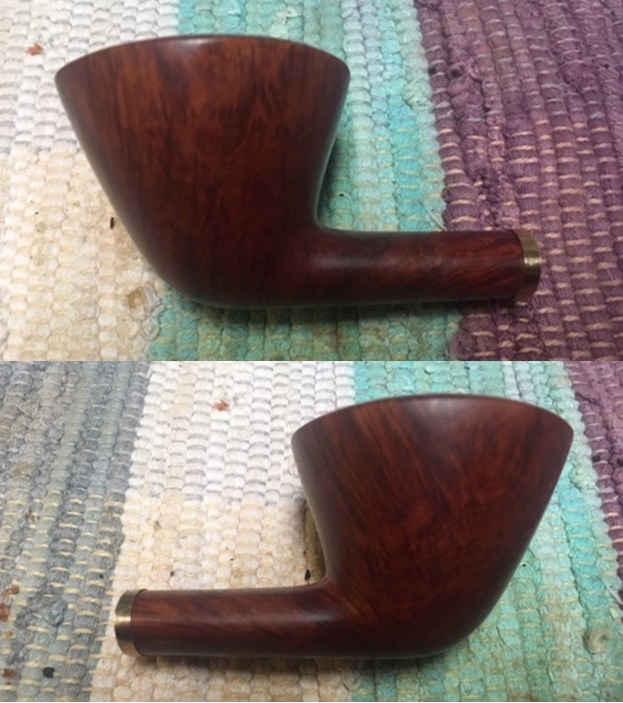
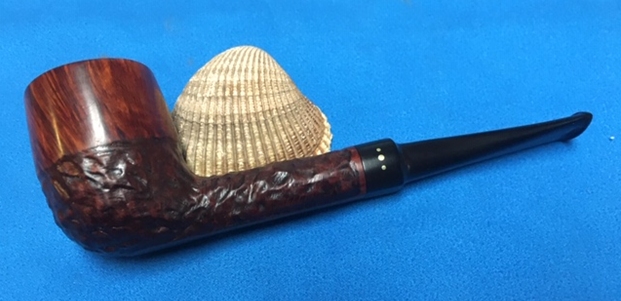
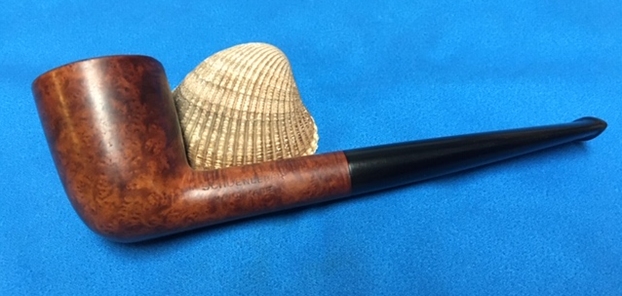
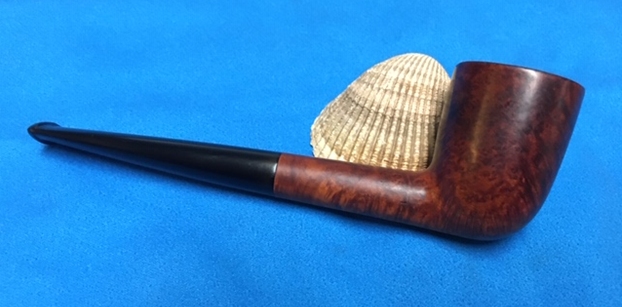
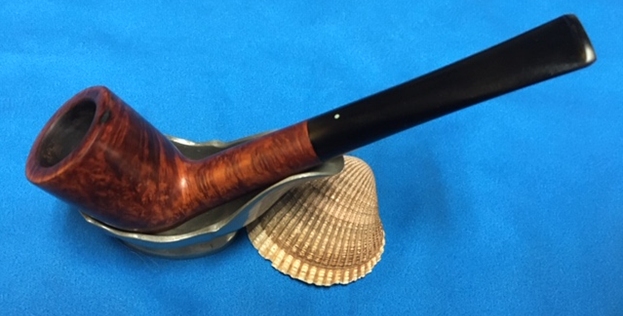
This Leather Clad French Longchamp is a nice pipe.  The leather gives that comfortable laid-back feel and the contrasting briar rim and white seams of stitching provide a great aesthetic presentation.  The classic Billiard workhorse shape has a great feel and balance in the hand – ready for a new steward!  Jason has the first opportunity to claim this French Longchamp from The Pipe Steward Store benefiting the Daughters of Bulgaria – women and girls who have been trafficked and sexually exploited.  Thanks for joining me!


Cleaning up a Japanese Kiseru Pipe


Blog by Steve Laug

Every once in a while Jeff picks up a unique piece. This is one of those it is a Japanese Kiseru. The bowl and stem are brass and the shank is a piece of reed that is fairly long but could easily have been a replacement for a shorter piece. It is similar in size to the Kiseru that I have here but the reed insert doubles the length of mine. I wrote a blog on my own Kiseru and experience smoking it. Here is the link to that blog:  https://rebornpipes.com/2012/11/09/kiseru-pipes-a-unique-experience-but-if-you-blink-you-will-miss-it/. I am also including a more recent blog on a long Japanese pipe that I cleaned up and wrote about. Here is the link to that blog if you are interested in having a look https://rebornpipes.com/2019/02/03/i-am-not-sure-what-to-call-this-a-japanese-churchwarden/.

I have included a photo of a trio of Kiseru pipes and the tobacco that is smoked in them to give you an idea of the finely cut Virginia that is used in the pipe.When Jeff received the pipe it was dirty and tarnished looking. The brass bowl and mouth piece were coated with what looked like orange rust. The stippled area on the shank and mouth piece was dirty and the grooves were filled in with grime. The reed shank was dirty and had burn marks on the side where it was laid in an ash tray. The bowl actually had white cobwebs in it from sitting for a long time. Jeff took photos to show the condition of the pipe before he worked on it.He took some close up photos of the bowl to show the dried ash and cobwebs in it when it arrived. He took some photos of the stippled mouthpiece end and the flattened underside there and on the bowl end. You can also see the orange rustlike look of the stem and bowl.Jeff took the pipe apart so you can see the parts that make it up. You can see the wear on the reed and the burn marks mid read. There is definitely some potential in this one!Jeff cleaned the pipe in his usual thorough way – scrubbing the exterior with Murphy’s Oil Soap and Soft Scrub to remove the grime and build up as well as the oxidation. He cleaned out the inside of the pipe with pipe cleaners, cotton swab and alcohol. You can see the brass is looking much better. When it arrived here in Canada it looked pretty good. I took photos of it before I started my part of the work.I took the pipe apart as well to show the ends of the reed shank. While the burn marks were still present the overall appearance of the reed was much better. The brass actually looked “brassy” and the stippling looked three dimensional! Nicely done!I took some close up photos of the bowl to show the condition now that it was clean. I have included photos from all angles. You can see the rust on the right side of the bowl.I polished the brass mouth piece and bowl with 1500-2400 grit micromesh sanding pads. That was enough to remove the rust and give the brass a shine. Once I had finished the shank tube I would buff it and give it some wax. I polished the reed tube with 1500-12000 girt micromesh sanding pads to raise a shine in the reed and to see if I could minimize the burn marks on the mid reed portion. It actually worked very well and I am happy with the polished reed. Once the parts were finished I buffed each part on the buffing wheel and then buffed the entirety. I first used Blue Diamond with a light touch on the stippled portion. I gave the entirety several coats of carnauba wax, using a light touch on the stippled portions and keeping the wax on the high spots in those areas. I buffed the pipe with a clean buffing pad and hand buffed it with a micro fibre cloth to deepen the shine. The finished pipe is shown in the photos below. The dimensions are Length: 8 inches, Height of the bowl: 5/8 of an inch, Diameter of the bowl: ¾ of an inch, Diameter of the chamber: 3/8 of an inch. This is an interesting piece of pipe history and if you are interested in adding it to your collection let me know. I will be putting it on the rebornpipes store shortly. Thanks for taking the time to read this blog!

Selected Straight Grain Author (256) Restoration


By Al Jones

It’s  been several years since I’ve had the opportunity to restore a Selected Straight Grain pipe.  Selected Straight Grain pipes were 2nd line offerings from Comoy’s and represent a good value for a pipe that might have a few flaws or fills.

Pipepedia describes the line as:

Selected Straight Grain. These were in effect a “Specimen Straight Grain” second that exhibited some small flaw or sand pit. They were listed in the 1965 catalogue at $15 or $17.50 in Extraordinaire size.

This one had a little bit of competition on Ebay, despite somewhat poor photos.  It appeared to be in good condition with no visible issues.  On arrival, the condition was as expected, but I was somewhat disappointed to not find the shape 256 stamp (indeed, no shape stamp) and the Country of Manufacture stamp was also a bit odd.  When I pulled the stem, I was pleased to see the Comoy’s metal reinforcing ring in the shank and in the tenon.

The pipe has some slight build-up on the bowl top,  mild cake and a lightly oxidized stem.  The button only had mild abrasions.  Below is the pipe as it was received.

I used a worn piece of Scotchbrite to remove the black build-up on the bowl top, then 8,000 grit micromesh. The cake was removed with my Pipenet reamer set and a piece of 320 grit sandpaper to finish the interior of the bowl, which was in great shape.  The pipe was soaked with alcohol and sea salt.

Following the soak, the stem was mounted.  I removed the oxidation with 800, 1500 and 2000 grit wet sandpaper, followed by 8,000 and 12,000 micromesh sheets.  The stem was buffed with White Diamond rouge and Meguiars Plastic Polish.

I lightly buffed the bowl with White Diamond and several coats of Carnuba wax. Below is the finished pipe.

Rebirthing another Schoenleber Hand Made – A #5 Dublin


Blog by Steve Laug

The next pipe in the queue is another pipe from the batch of pipes I am cleaning up for Alex – this one is another Schoenleber Hand Made – a straight shank Dublin with some beautiful grain around what appears to be an oil cured bowl and shank. The entire pipe has some beautiful mixed birdseye, cross and swirled grain around the bowl and shank. But it is under a thick coat of oils, grime and dirt. The carver did a great job utilizing the block of briar to maximize the grain. The pipe is stamped on the left side of the shank. It reads Schoenleber over Hand Made. On the right side of the shank it is stamped with a number 5 which is either a shape number or size designation. The tapered stem is vulcanite and has a single small blue dot on the top side. I think that this will be another nice looking piece much like many of the pipes Alex is picking up. The bowl is thickly caked with a thick overflow of lava on the rim top. There appears to be some damage on the inner edge but it is hard to know for sure. The exterior of the briar was dirty with grime and dust. The stem is actually quite free of tooth marks but there is tooth chatter on both sides. It is heavily oxidized and has some calcification. The photos below tell the story and give a glimpse of the pipe before clean up.I took a photo of the bowl and rim to capture the condition of the pipe before I started my cleanup work. There was  a thick cake in the bowl and a thick overflow of lava on the rim top. It was hard to know the condition of the edges of the bowl because of the lava though there appeared to be some damage to the inner edge.  The stem was in decent condition. There was also some tooth chatter, oxidation and calcification on the stem surfaces.I also took a photo of right side of the shank to show the stamping. The stamping is readable in the photo below and is as noted above – Schoenleber Hand Made. On the opposite side it reads 5 at the shank/bowl junction on the right side.When I worked on a Schoenleber pipe for Alex in the past I had done the research on the brand. I knew that the pipe had been made for a shop in New Jersey but went back and reread the previous blog I had written on the brand. I have included the information from Pipedia that I included before. I quote the article in full (https://pipedia.org/wiki/Schoenleber).

Louis Schoenleber lived in North Arlington N.J. and was an Austrian immigrant and skilled artisan in pipe making. His hand carved pipes were available in his shop, ‘Schoenleber’s Newark Pipe Shop’, at 26 Branford Pl., Newark NJ, thought to open in the 1920’s. Schoenleber’s carried a full line of tobaccos as well as related pipe smoking accessories. It’s thought the shop operated until the late 1960’s, and Louis Schoenleber died in 1976. It’s also fairly certain they may have sold to other brands such as Jelling, also in Newark and are very similar in design and finish.

There was also an advertising card on the site that I have included below. It speaks to my assumptions about the curing process and the finishing process on the pipe. It also connects the pipe to Schoenleber’s Newark Pipe Shop in Newark, N.J. It also has a comment on the fact that pipes were made to order.I started the restoration by working on reaming the thick cake from the bowl. I used a PipNet pipe reamer with the third cutting head to take the cake out of the bowl. It was crumbly and uneven so that was necessary. I followed up by scraping out the remaining cake with a Savinelli Fitsall Pipe Knife and finally sanded the bowl walls with 220 grit sand paper wrapped around a piece of dowel. I used the sharp edge of the Fitsall knife to scrape away the thick lava coat from the rim top. With the bowl reamed and the rim top scraped clean it was time to scrub the grime and oils off the outside of the bowl. I used undiluted Murphy’s Oil Soap and a tooth brush to scrub the briar. I rinsed off the grime that the soap removes with warm running water. I dried it off with a cotton cloth and took photos of the pipe at this point. With the externals clean it was time to clean out the internals. I scraped the inside of the mortise walls with a pen knife to remove the thick tarry buildup. I scrubbed the mortise and airway in the shank and stem with pipe cleaners, cotton swabs and alcohol until they were clean. I cleaned up the damages to the inner edge of the rim with a folded piece of 220 grit sandpaper. When I finished the rim was once again clean and round.I turned to polishing the bowl and rim with micromesh sanding pads – wet sanding with 1500-12000 grit pads. I wiped the bowl down with a damp cloth after each pad to remove the sanding debris. I worked some Before & After Restoration Balm into the surface of the briar with my fingertips to clean, enliven and protect it. I let the balm sit for a little while and then buffed with a cotton cloth to raise the shine. I set the bowl aside and turned my attention to the stem. I sanded it with 220 grit sandpaper to remove the oxidation and tooth chatter on both sides of the stem. I started the polishing of the surface with 400 grit wet dry sandpaper. I polished the stem with micromesh sanding pads – wet sanding it with 1500-12000 grit pads. I wiped the stem down with a damp cloth after each pad. I further polished it with Before & After Pipe Polish – both Fine and Extra Fine. I wiped it down with a coat of Briarville’s No Oxy Oil and set it aside to dry. With both parts of the pipe finished, I polished the bowl and the stem with Blue Diamond polish on the buffing wheel. I gave the bowl and the stem multiple coats of carnauba wax. I buffed the pipe with a clean buffing pad to raise the shine. I hand buffed it with a microfiber cloth to deepen the shine. The pipe polished up pretty nicely. The rich oil cured finish and the grain came alive with the buffing. The finish on the briar works well with the polished black vulcanite stem. The finished pipe is a well-proportioned, nicely grained Dublin. Have a look at it with the photos below. The dimensions are Length: 5 1/2 inches, Height: 1 7/8 inches, Outside diameter of the bowl: 1 1/4 inches, Chamber diameter: 3/4 of an inch. This Schoenleber Hand Made Dublin will be going back to Alex soon to join his growing collection of American made pipes. Thanks for walking through the restoration with me on another of Alex’s pipes.


Renewing one of Alex’s first pipes – a Lorenzetti Lovat


Blog by Steve Laug

Alex has been an ongoing source of restoration projects for me for a few years now. I actually have a box of Alex’s pipes that he drops by periodically and adds new ones to. It has been fun to see him pick up the restoration hobby himself lately. He leaves the harder ones to me to work on – whether harder in terms of issues or harder in terms of cleaning. I have quite a few of his to work on so I spread them among the others that I am working on. This next pipe is an interesting Lorenzetti Lovat that was one of his first pipes. It has some issues with the finish that will need to be addressed. The pipe is stamped Lorenzetti over Italy on the left side of the shank and Avitus 03 on the right side. It has been in the box for quite a while now so I took it to the work table. The finish is a combination of reddish browns and dark brown in streaks on the bowl sides. It almost appears that it was to make it look like grain. There were some spots around the heel and sides of the bowl where it looked like the shellac coat was peeling off the bowl. The rim top had an inward bevel that had some darkening to the inner edge on the back of the bowl. There were some nicks around the outer edge toward the front. The stem was lightly oxidized with calcification around the button. It has the cursive Lorenzetti “L” on the left of the saddle stem. There were tooth marks and chatter on both sides of the stem ahead of the button. I took some photos of the pipe as I received it.  I took a close up photo of the rim top. It shows some darkening on the back of the inward beveled top. The outer edges were nicked and damaged on the right side. The photos of the stem show tooth marks and chatter on both sides ahead of the button. The stem is also quite oxidized.I took photos of the stamping on both sides of the shank. You can see that it reads as noted above. I also took a photo of the stamping on the side of the saddle stem.I took photos of the bubbled finish around the sides of the bowl. It looked to me that the bubbled portions were over putty fills in the briar. Time would tell! I don’t believe I have worked on this brand before so I turned to Pipephil to get a quick overview of the brand (http://pipephil.eu/logos/en/logo-l6.html). I have included a screen capture of the information on that site for quick reference. I learned that the brand was created in 1934 by Otello Lorenzetti. As of (2009) the company was managed by Alessandro Lorenzetti.I then turned to Pipedia and found a great historical survey of the founder Otello Lorenzetti. It is a great read regarding the history of the brand and its development from small beginnings with Otello selling pipes from his bicycle around his community to a brand that is available around the world today. (https://pipedia.org/wiki/Lorenzetti).

This is a thick shank classic looking Lovat with a briar insert in the vulcanite stem. The staining     would have originally hidden the fills very well.  The stain gives the appearance of cross grain around the bowl when in reality the pipe is a mix of grains. I wiped the bowl down with a cotton pad and alcohol to remove the shiny, spotty top coat of the finish. The combination of brown stains on the finish makes it interesting. Now it was time to work on Alex’s pipe. I started the work by reaming the bowl and cleaning out the shank. The pipe was amazingly clean so it did not take too much to clean it.I polished the bowl and rim top with micromesh sanding pads – wet sanding with 1500-12000 grit pads and wiped the bowl down after each pad with a damp cloth. The polishing gave the bowl a rich shine. After polishing the rim it was slightly lighter than the other smooth portions of the bowl. I used a Maple Stain Pen to match the colour of the rest of the bowl and blend the new finished rim into the surrounding pipe. I rubbed it down with Before and After Restoration Balm. It is a product developed by Mark Hoover to clean, enliven and protect briar. I worked it into the briar with my fingertips. I let it sit for about 10 minutes and buffed it off with a cotton cloth. You can see the results in the photos below. I set the bowl aside and turned to address the light tooth marks, chatter and gouges on the stem surface. I sanded both the top and underside of the stem with 220 grit sandpaper to remove the damages to the vulcanite. Fortunately they were not too deep so they came out fairly quickly. I also did a quick sanding to remove the oxidation on the stem.I polished the stem with micromesh sanding pads – wet sanding it with 1500-12000 grit pads and wiping it down after each pad with a damp cotton pad to remove the dust. I polished it with Before and After Pipe Polish – both fine and extra fine. I finished by wiping the stem down with some No Oxy Oil that  received from Briarville Pipe Repair to try out and get a sense of its value to me and others. Once I finished I put the stem back on the shank and buffed the pipe with Blue Diamond polish briar and vulcanite. I gave the stem a vigorous polish being careful around the white spot. I gave the bowl and the stem several coats of carnauba. I buffed the pipe with a clean buffing pad and hand buffed it with a microfiber cloth. The finished pipe is shown in the photos below. This Lorenzetti Lovat is a great piece of Alex’s personal pipe history and looks better than when I began the process. The dimensions of the pipe are Length: 4 ½ inches, Height: 1 ½ inches, Outer Bowl Diameter: 1 ¼ inches, Chamber Diameter: ¾ of an inch. The pipe will soon be heading back to Alex so he can continue to enjoy it. I have told him that if he ever wants to part with it I get the right of first refusal. Thanks for walking with me through the restoration.