Blog by Paresh
This petite small pipe had attracted my attention since the time I had received three huge boxfuls of pipe that once belonged to my Grandfather. But over the period of years, there were always other interesting and larger bowl sized pipes that piqued my interest and these kept moving up the ladder in line for restoration, relegating this beauty further down in the pile. Abha, my wife, knew that I had liked this pipe the first time I had seen it and she worked her magic in cleaning it up for me to work further. After she had done the initial cleaning up, this pipe languished at the bottom of the pile of around 50 plus pipes that she had cleaned up. And it was during the period of my stay at home on compulsory leave due to the countrywide lockdown to contain the spread of CORONA VIRUS (COVID-19), that this pipe came up for restoration.
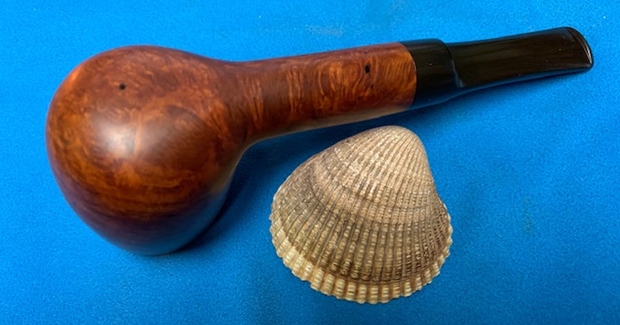
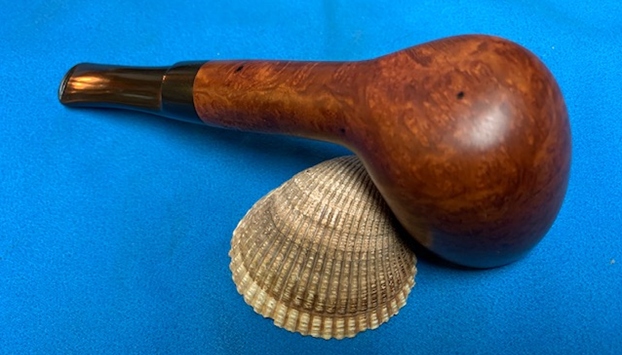
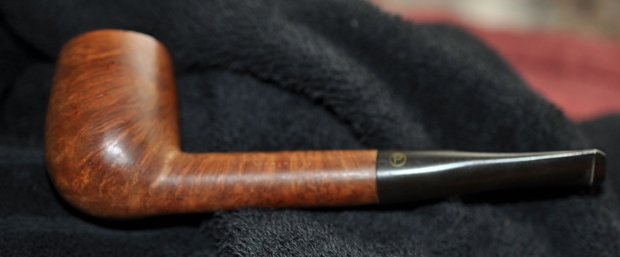
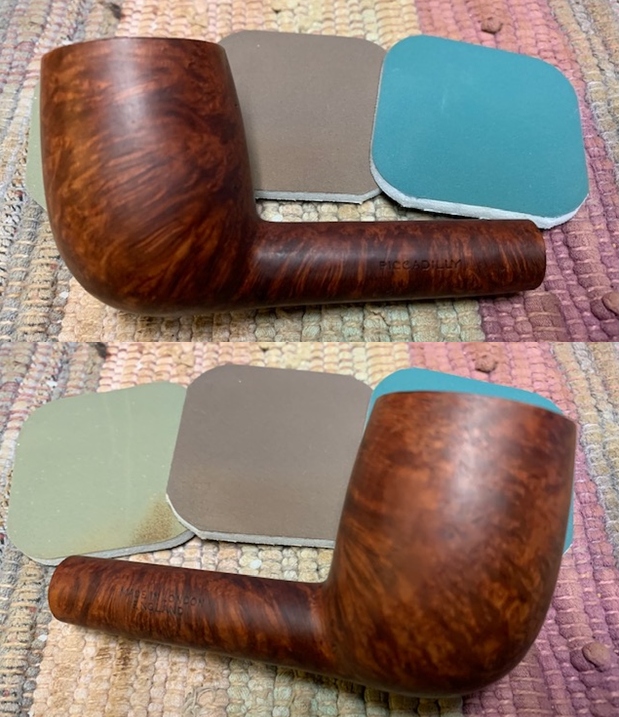
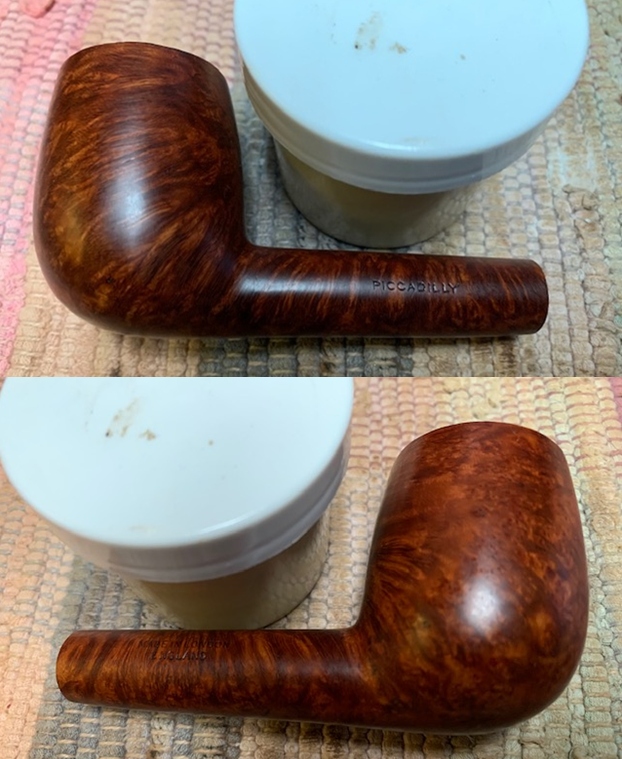
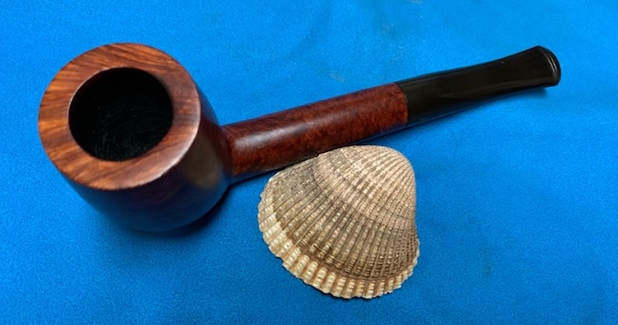
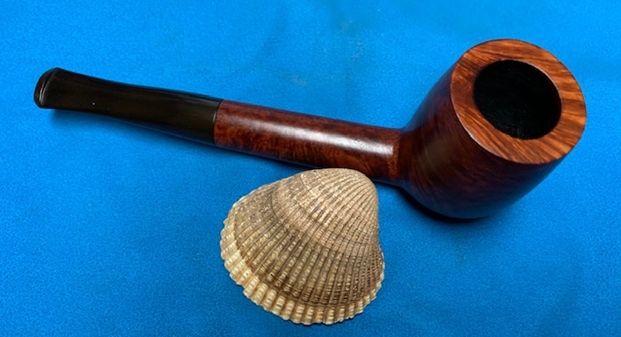
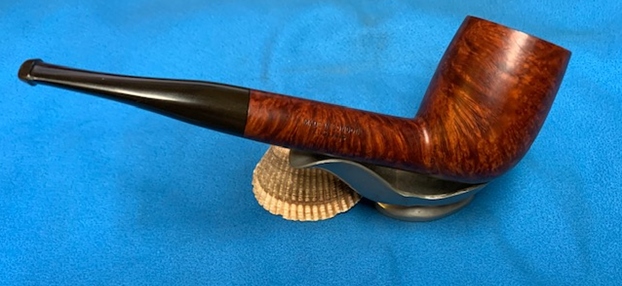
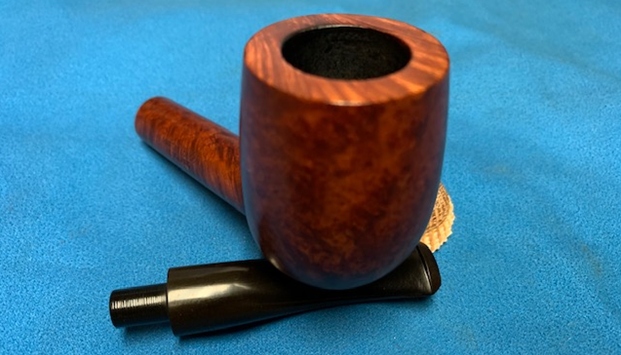
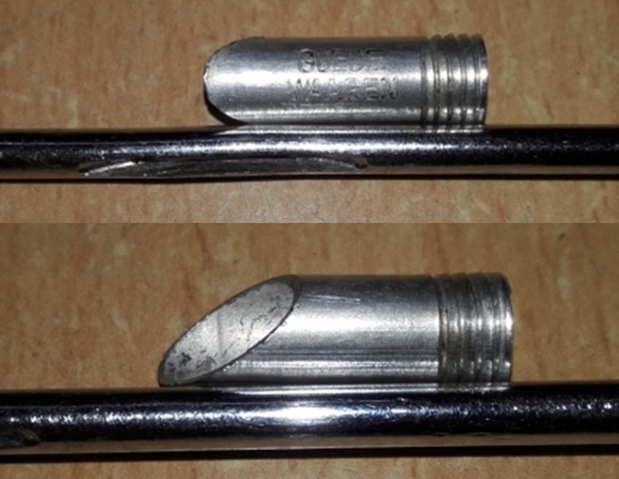
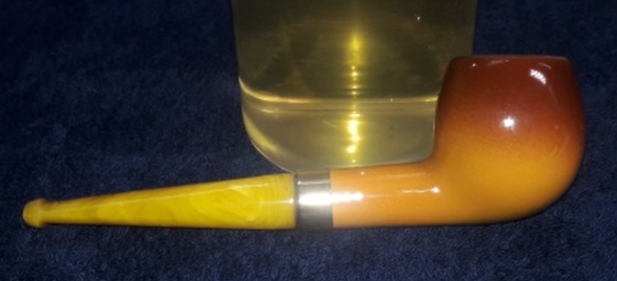
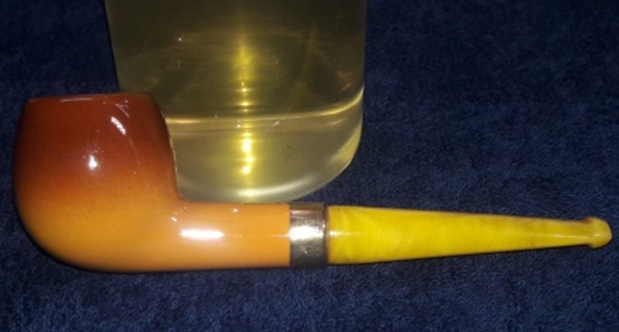
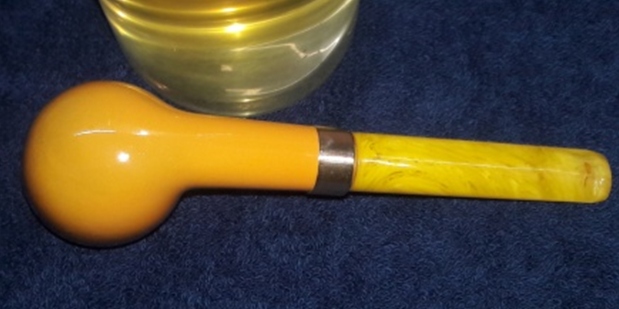
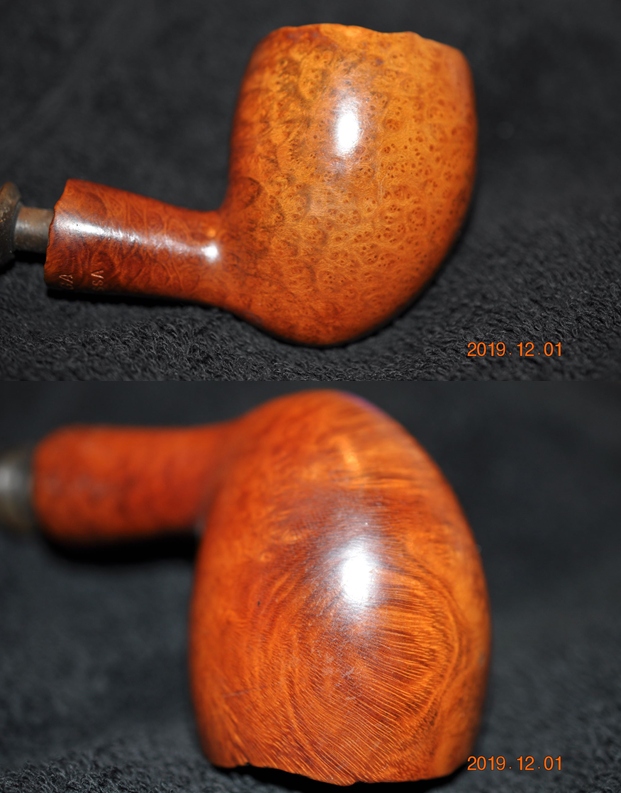
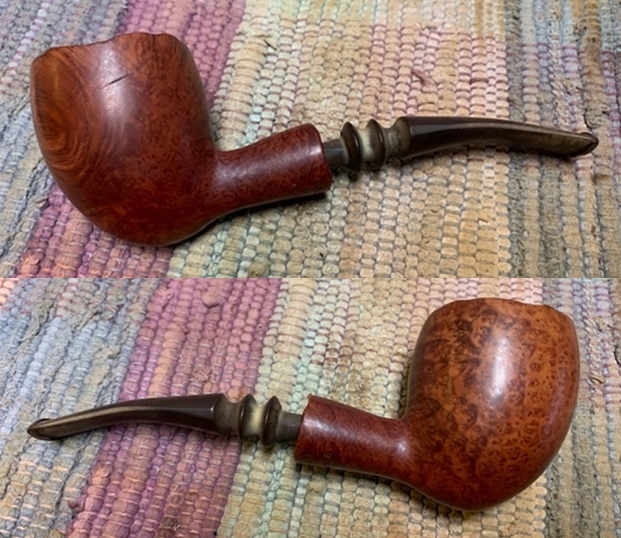
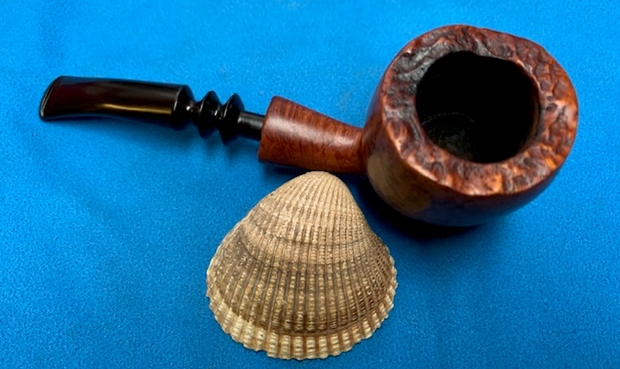
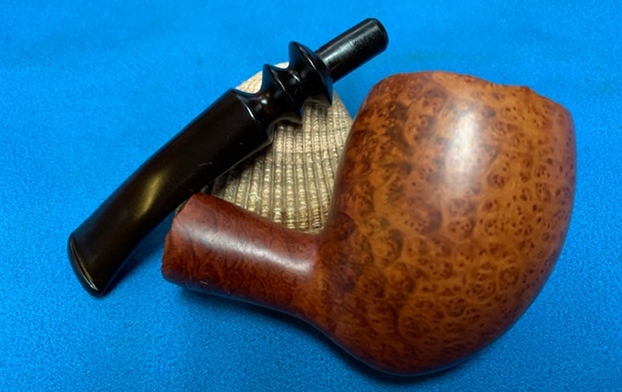
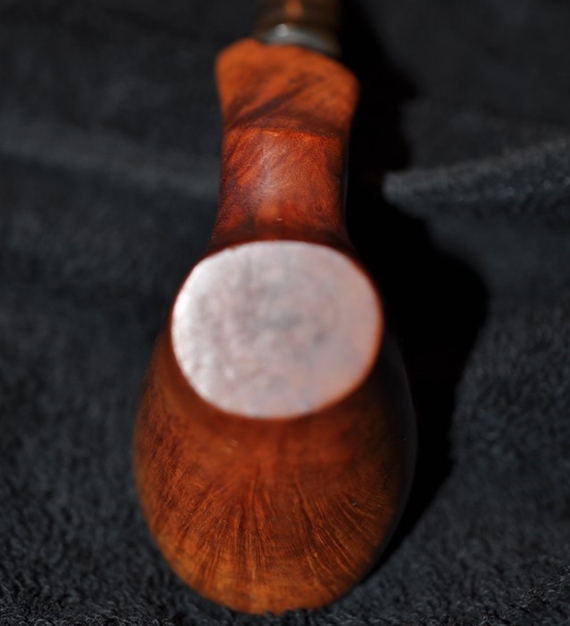
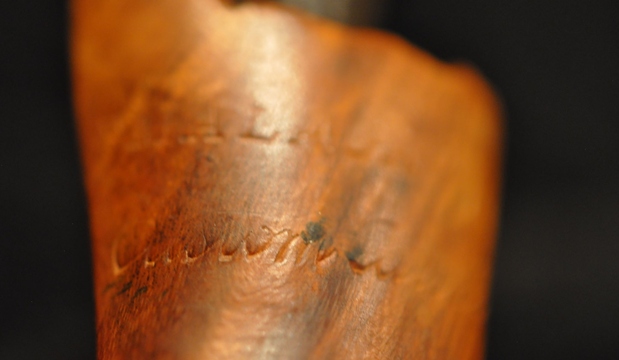
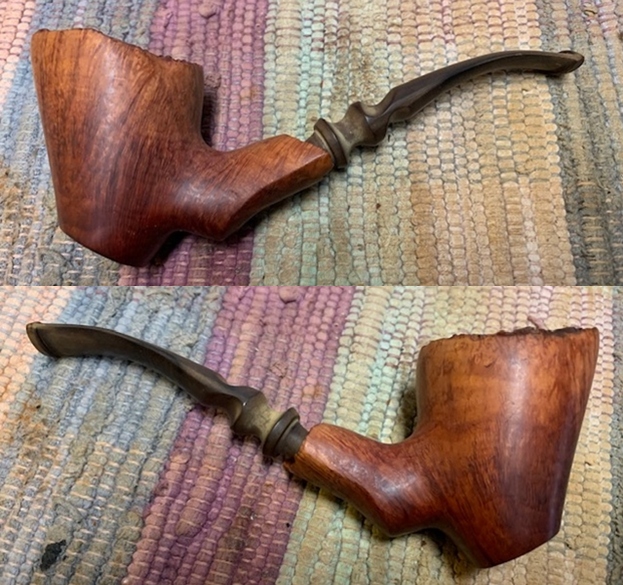
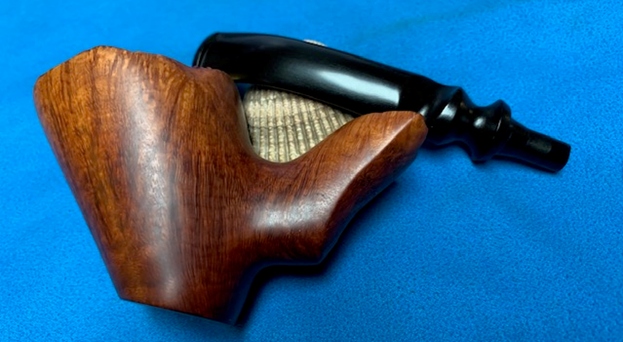
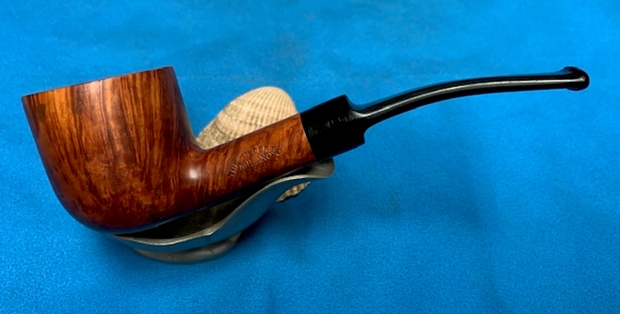
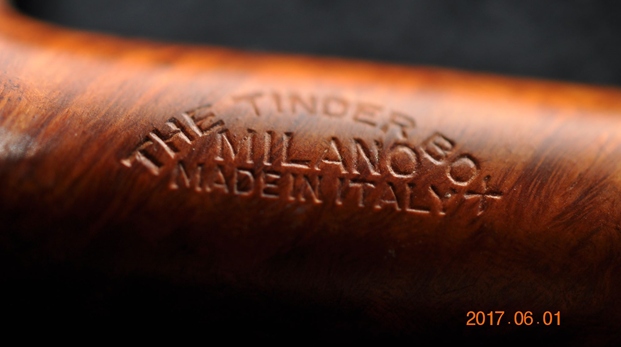
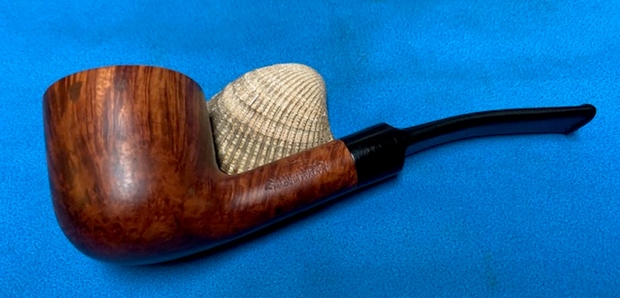
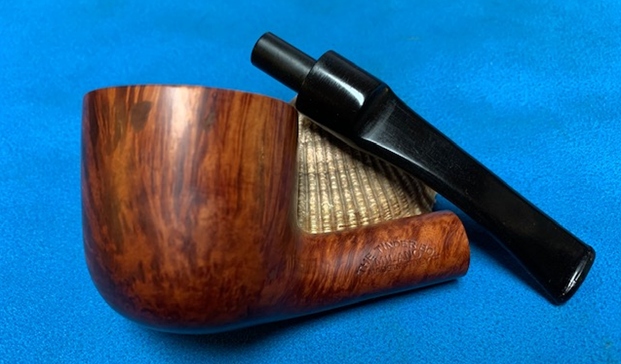
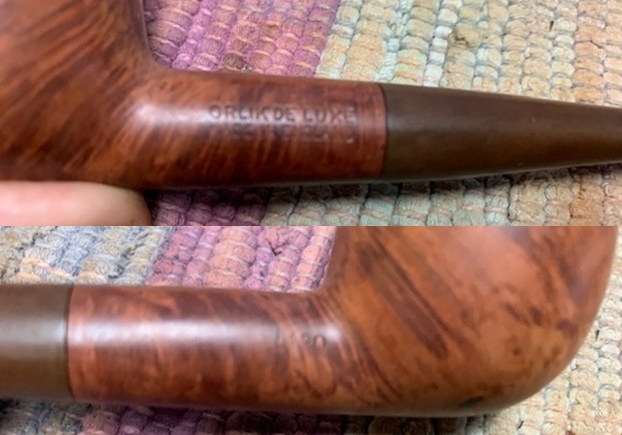
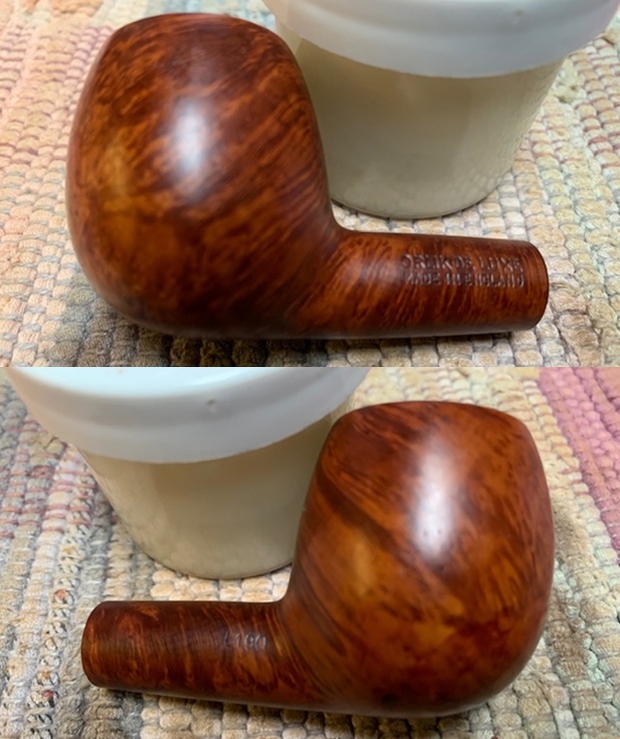
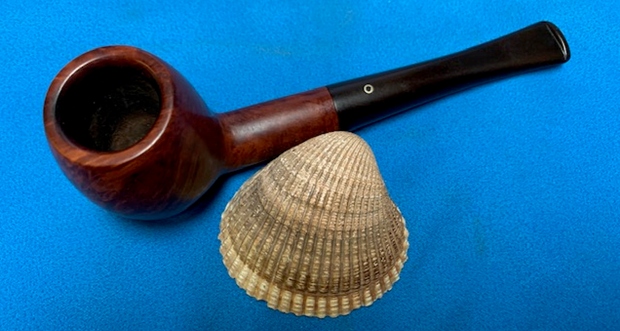
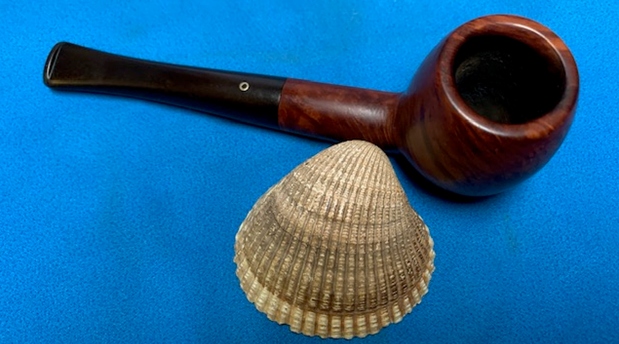
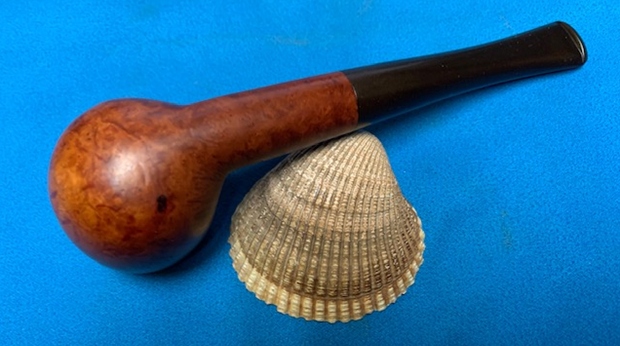
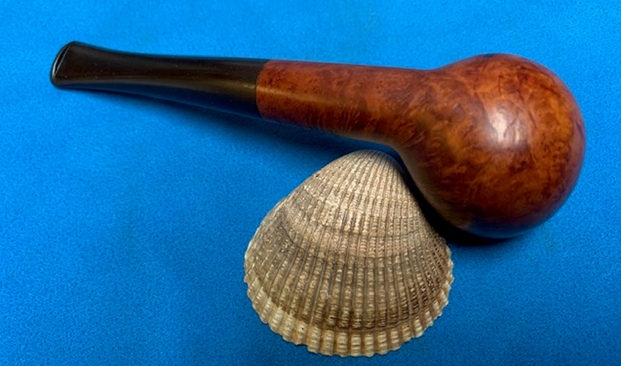
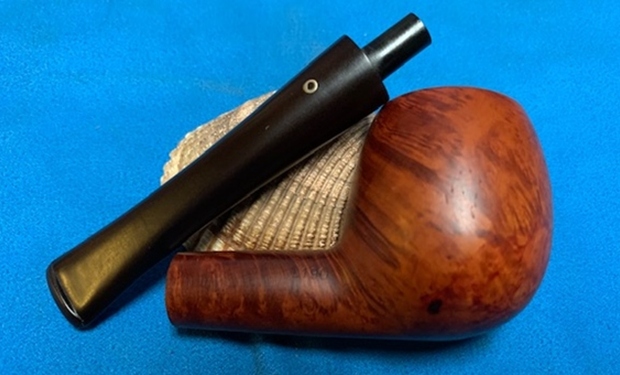
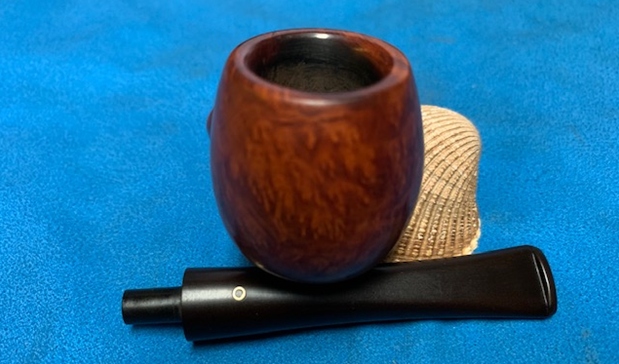
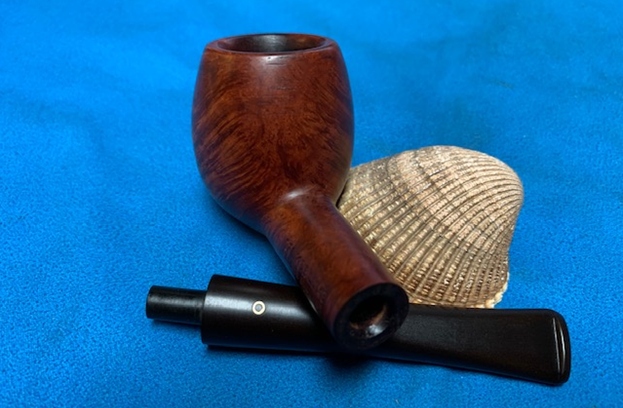
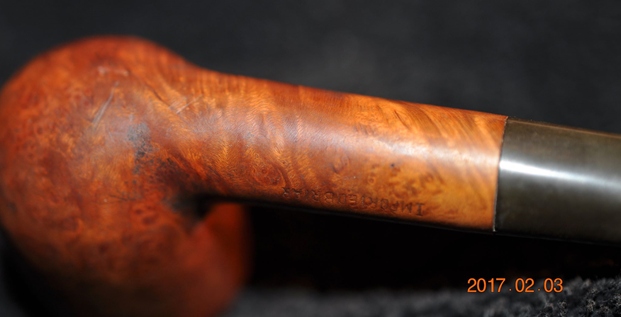
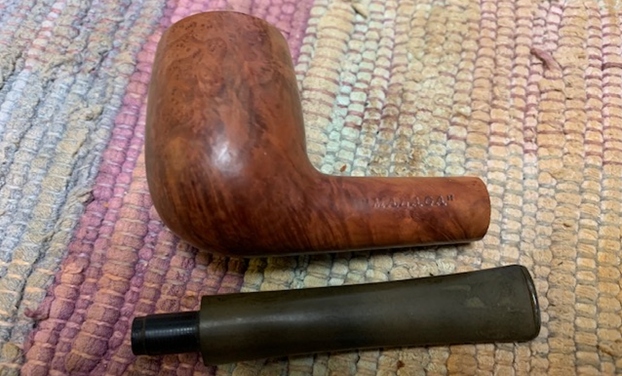
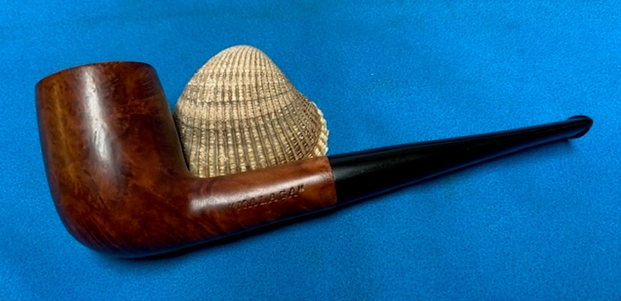
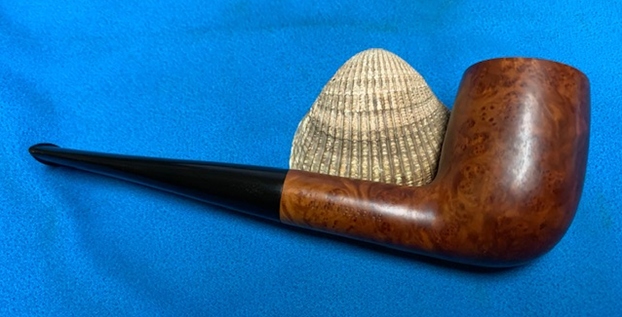
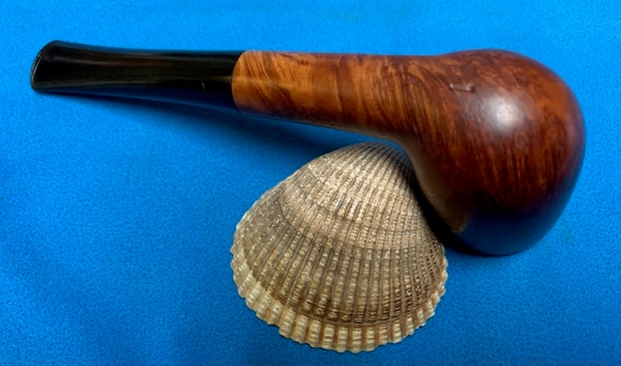
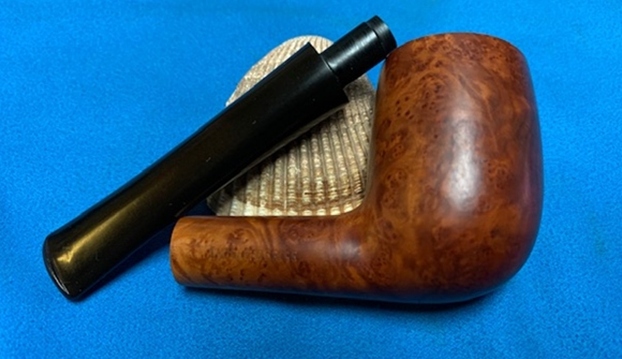
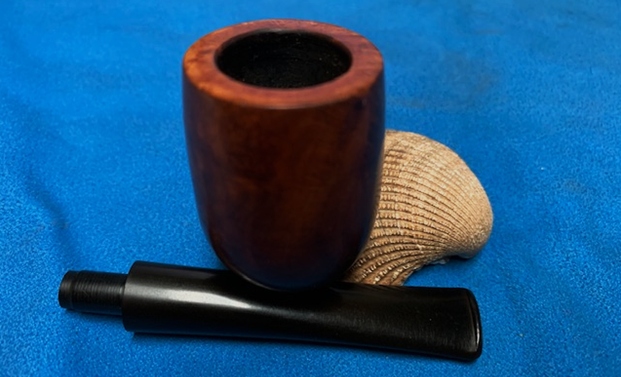
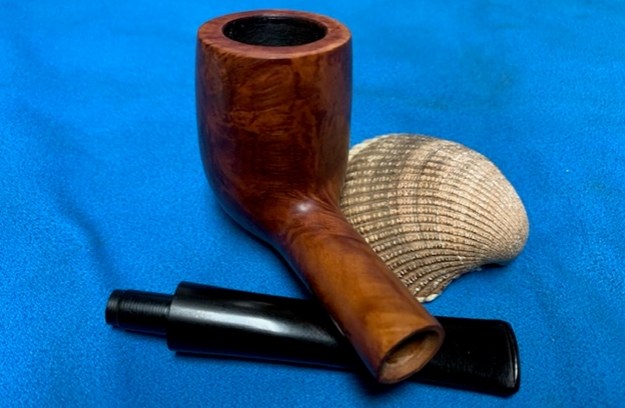
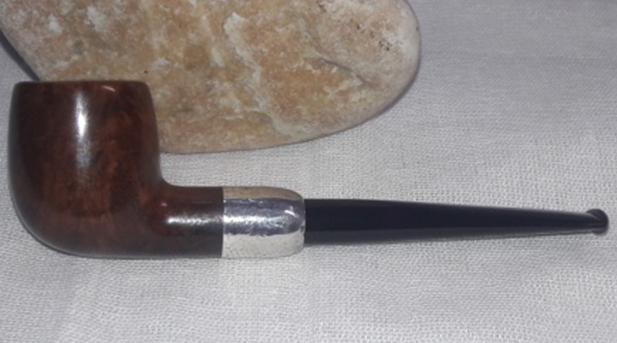
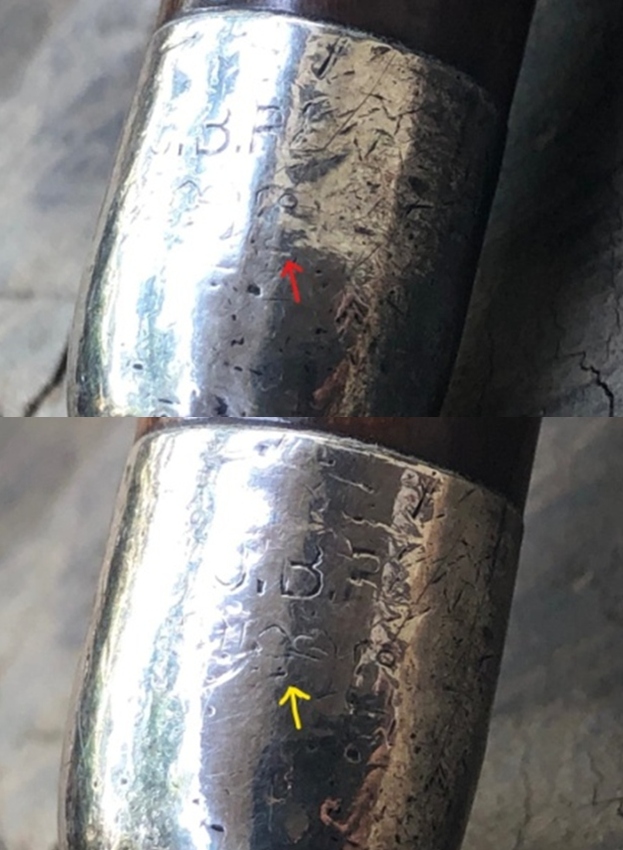
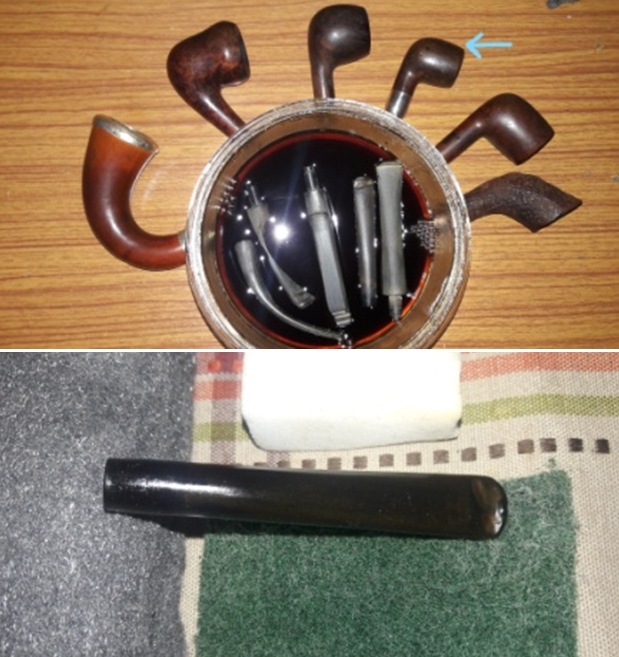
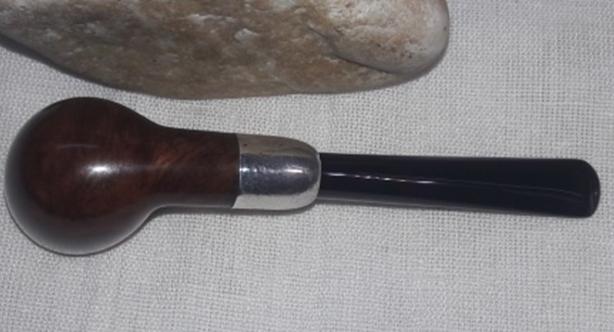
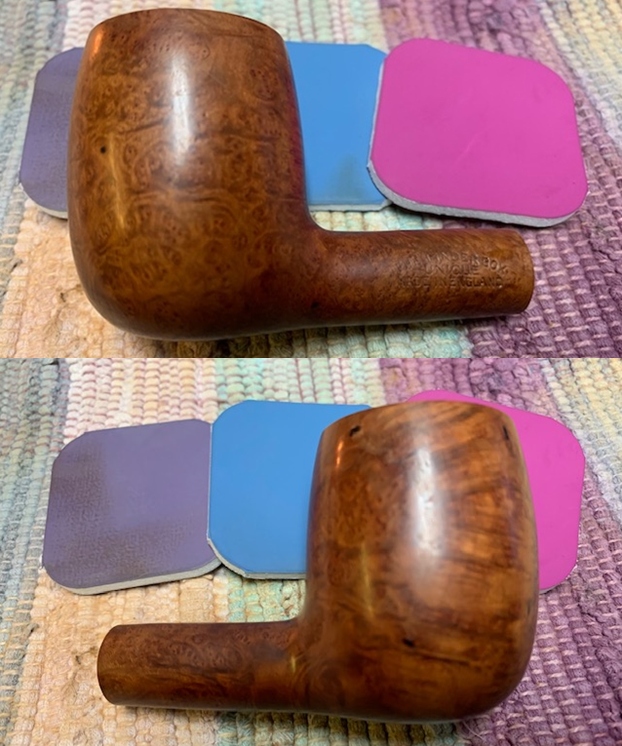
The pipe with its petite classic billiard shape and a military mount vulcanite stem has a delicate feel and look to it. It has beautiful dark coloration with some astonishing grain patterns that are seen over the stummel surface. The shank end is adorned with a sterling silver ferrule that adds a touch of classy bling to the appearance of the pipe. It is stamped on the left side of the shank in capital letters as “JBB” in an oval. The sterling silver ferrule is stamped as “J.B.B” without any frame in capital letters over three sterling silver hallmarks. From left to right the first cartouche stamping is completely buffed out (indicated in pastel pink arrow) with only a cross with upward projections on either sides of the horizontal arm that can be made out. This is followed by a cartouche with a LION PASSANT (indicated with yellow arrow) certifying silver quality and the last cartouche with date code letter “i” (indicated with red arrow). The vulcanite stem is without any logo. The stamping on this pipe are all worn out and can be faintly made out under 5X magnification. The lack of COM stamp may pose difficulties in identifying and researching of this brand. 
 JBB…again an unknown brand for me, a third one on the trot!! A visit to my favored site, rebornpipes, drew a blank and I decided to trace the brand through the Maker’s mark on the sterling silver ferrule. I have identified http://www.silvercollection.it as my favored site to date and identify mounter’s/ makers for all things that are silver hallmarked. Sure enough, I found what I was searching for. The pipe currently on my work table is from Joseph B Brown, a tobacconist from Hull, England registered with Chester Assay office.
http://www.silvercollection.it/DICTIONARYTOBACCONISTJ.html 
 With the maker’s mark identified and established to my satisfaction, I move ahead to date this pipe on the same site. I searched for Chester Assay office date chart and came across the date code letter that had the closest resemblance to the date code letter on the ferrule. The letter code identified it as being assayed in 1872!! Here is the link to the Chester dating chart and below is the image of the relevant section with the year marked in red box.
http://www.silvercollection.it/englishsilverhallmarksCHE.html
Since the date code letter on the ferrule is faded and worn out, I wanted to be sure of the correctness of the year of this ferrule being assayed. I searched pipedia.org for more information on this brand and have reproduced the relevant information below along with the link to the article (https://pipedia.org/wiki/J.B.B.).
J.B.B. is the initials found on pipes manufactured and distributed by Joseph B. Brown of Kingston upon Hull, England from the early 1870s until sometime in the 1920s. Hull is located in East Yorkshire. Brown billed his company as a “Hull Importer of Tobacconists Goods,” and apparently produced various lines of meerschaum and briar pipes as well as cheroot and cigar holders. His business was located on Brook Street.
Joseph Brown was born in Ashbourne, Derbyshire about 1844. His early years were spent as a traveller (i.e. salesman) in the jewelry trade. By 1871 he had moved to the Hull area in Yorkshire, and on February 17, 1875 he married there. His wife was named Alice Fourster (this spelling is almost certainly a transcription error), who was born in Newcastle, Northumberland about 1850.
By 1876 Joseph was associated with the pipe trade; in that year he received a patent for “mounts for tobacco pipes”. In subsequent censuses he is clearly identified as an importer of fancy goods. For many years the business was located at 41 Brook Street in Hull, while the family maintained a residence some 18 miles away in Withernsea.
Joseph and Alice had four children: Joseph (b. 1881), Walter H. (b. 1882), Rachel (b. 1884), and James (b. 1887). Of the boys, at least Joseph and James were involved in their father’s business. Joseph lived until at least 1911, and the business was in existence at least as late as 1922. The directory in the latter year fails to show Alice or two Josephs, lending some credence to an assumption that the eldest son had by that time taken over operations.
J.B.B. creations often have silver banding as part of their design. In the Hull region, all silver was assayed and hallmarked by the Chester Assay Office, a city located in Cheshire, England. A well established dating schema exists for this office, and makes it possible for the collector to accurately date the production of J.B.B. sterling outfitted tobacciana.
Now, this is where the confusion arises.
(a) Joseph Brown was associated with tobacco trade from early 1870s until sometime in 1920s. This fits in with the above appreciated dating of this pipe.
(b) By 1876 Joseph was associated with the pipe trade; in that year he received a patent for “mounts for tobacco pipes”. However, the pipe currently on my work table dates to 1872 as per the date code letter of Chester Assay office i.e. 4 years prior to receiving the patent.
Well, the J.B.B stamp on the shank surface and on the silver ferrule establishes beyond doubts the authenticity of this pipe. The faded and worn out hallmarks, including the date code letter, raises some doubts. It is also quite possible that there could be an anomaly in the collated information. Thus, unless proven otherwise, I would rather stick to my findings and date this pipe to 1872.
Initial Visual Inspection
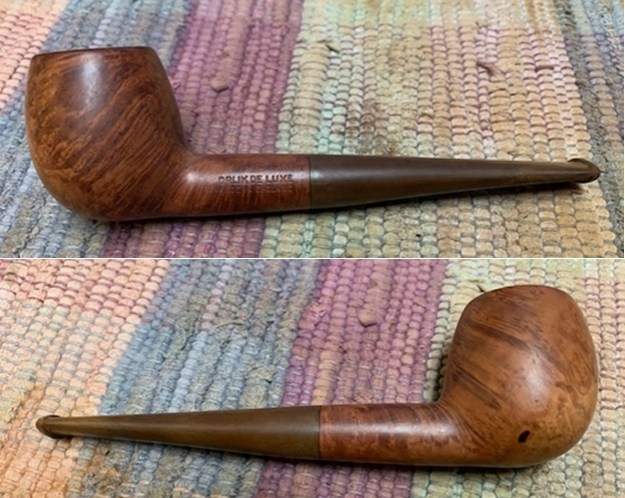
As I have mentioned above, this pipe was initially handled by Abha and she is not in a habit of taking many pictures as she works on each piece of briar. There are not many pictures to give the readers an idea about the condition of the pipe before she had worked her magic and presented me with a nice clean canvas to carry forward my repair and refurbishing tasks. I have included a description of the initial condition of the pipe as documented by her.
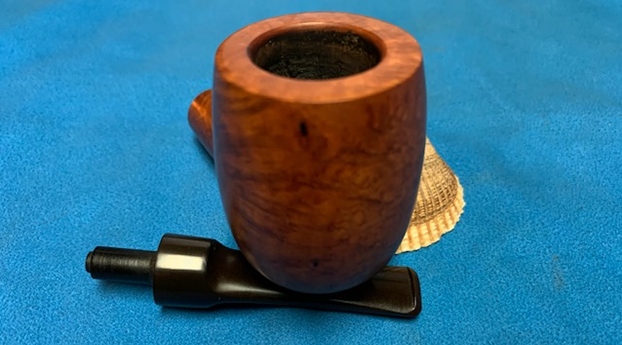
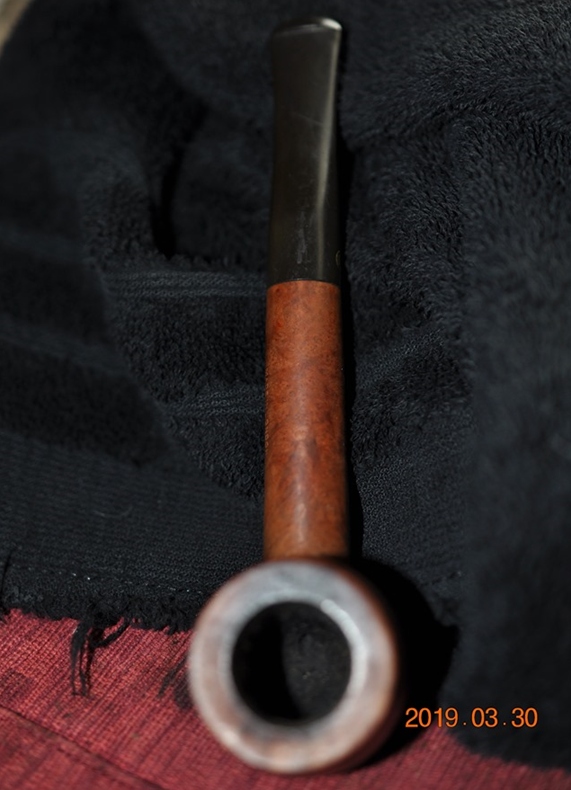
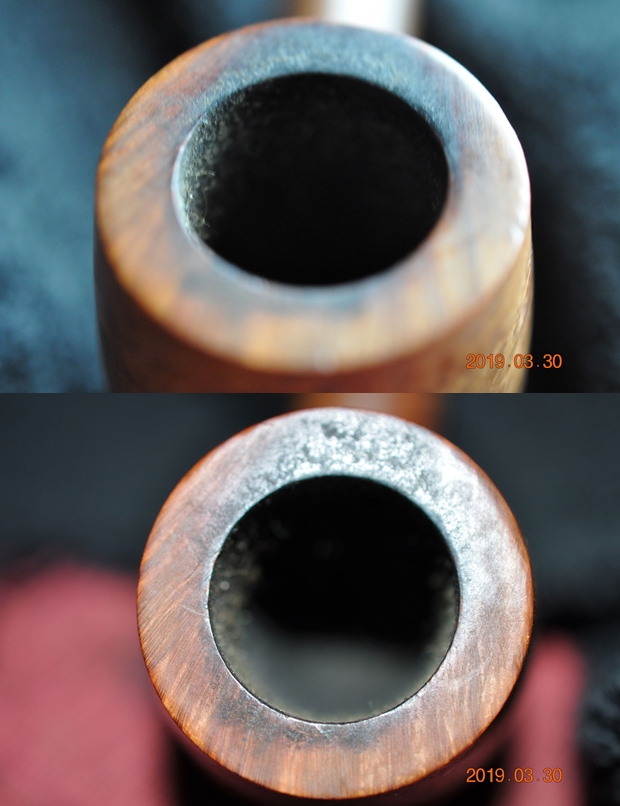
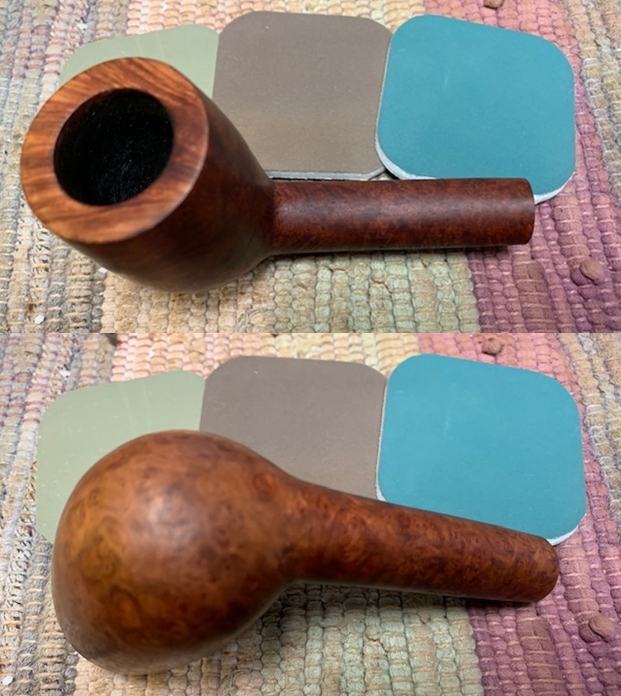
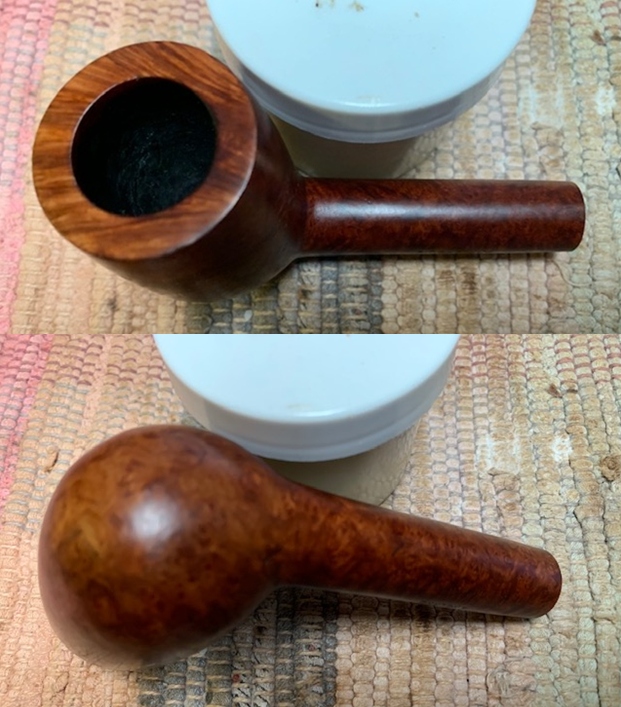
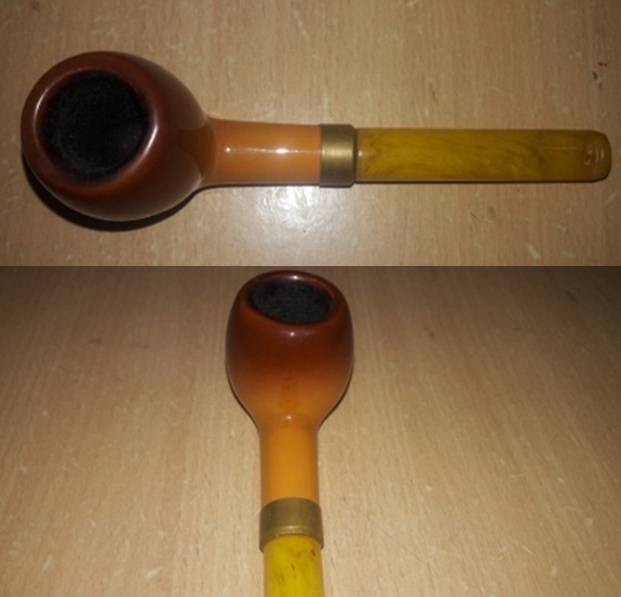
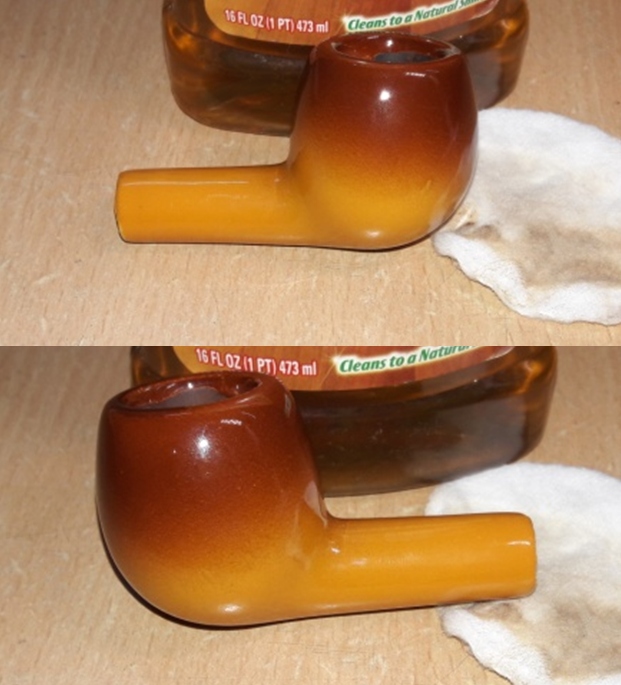
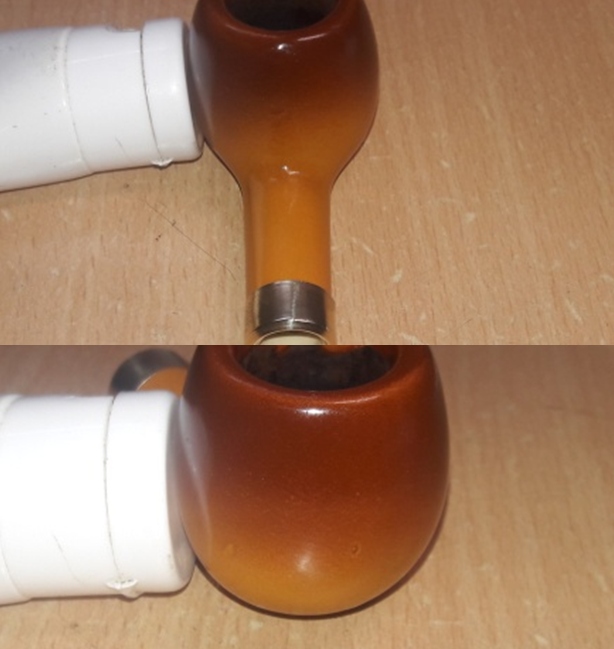
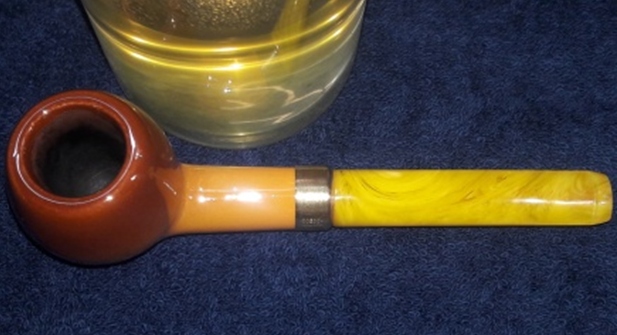
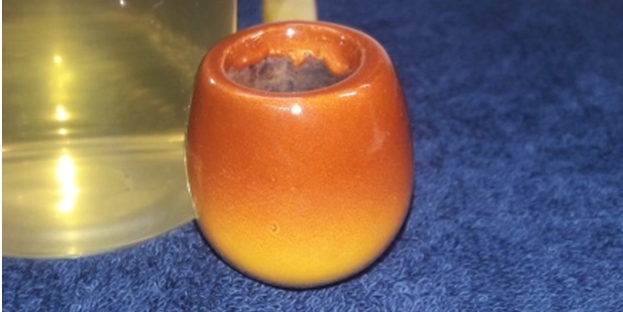
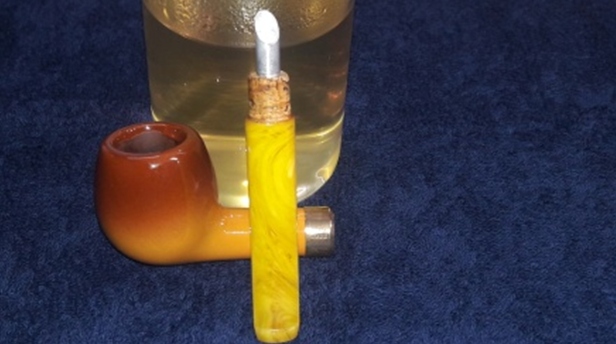
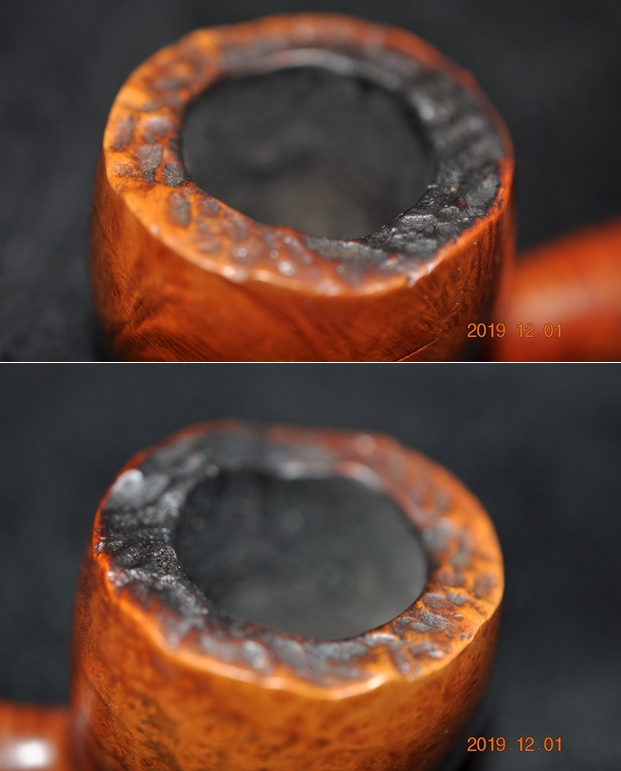
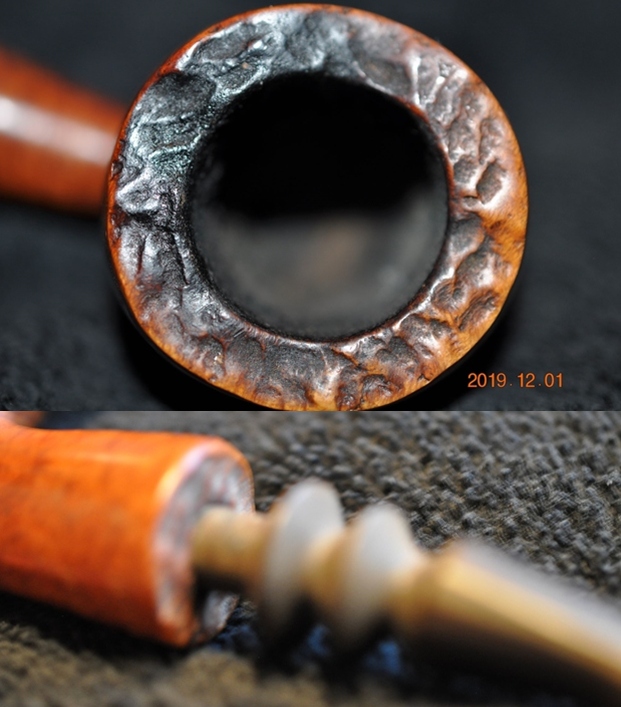
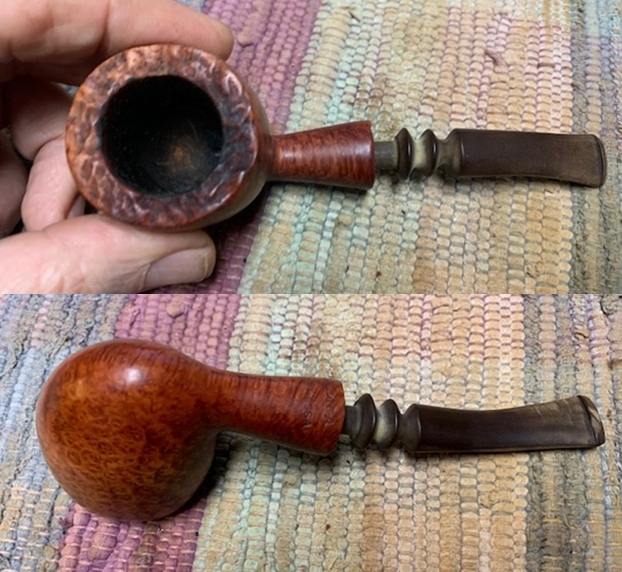
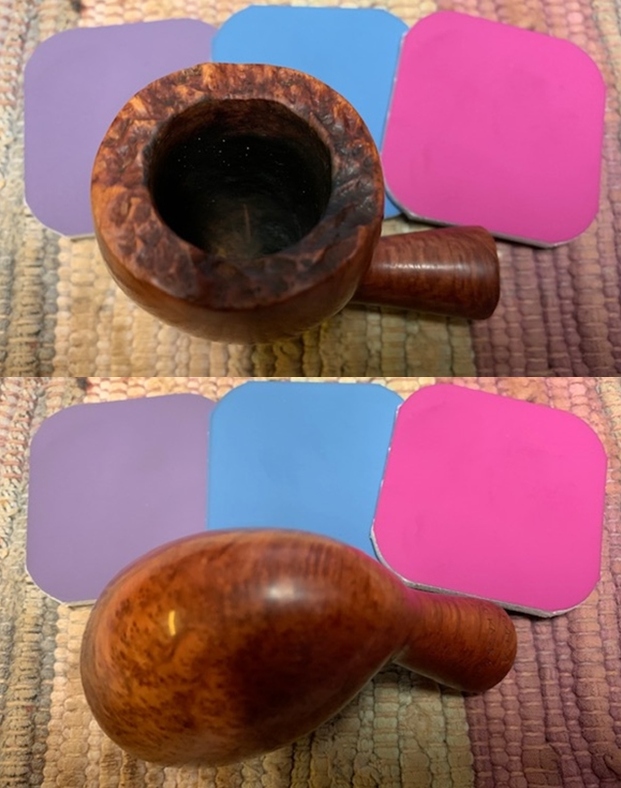
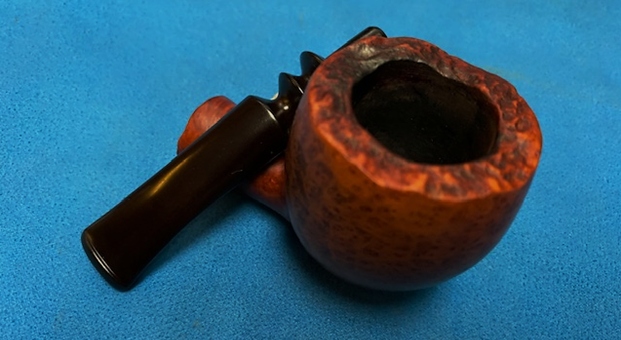
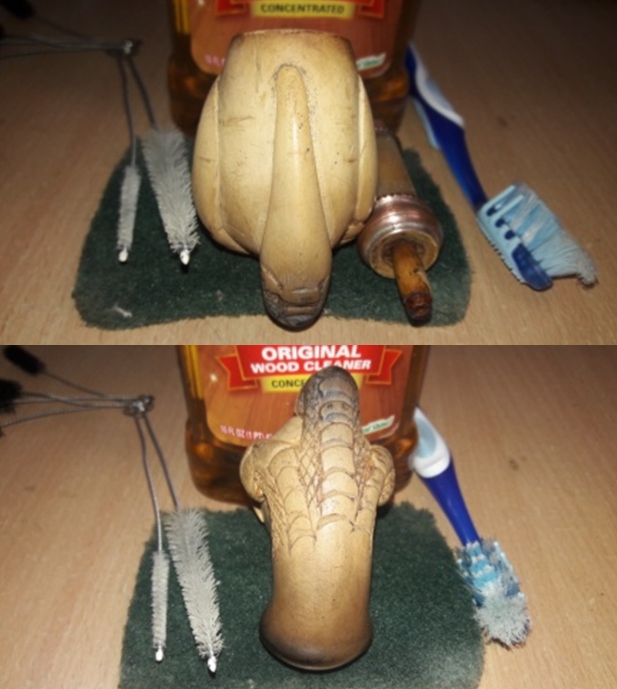
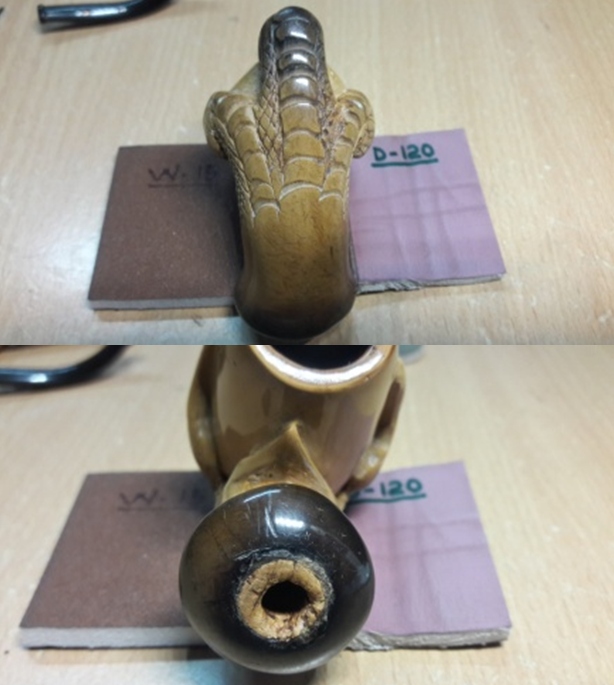
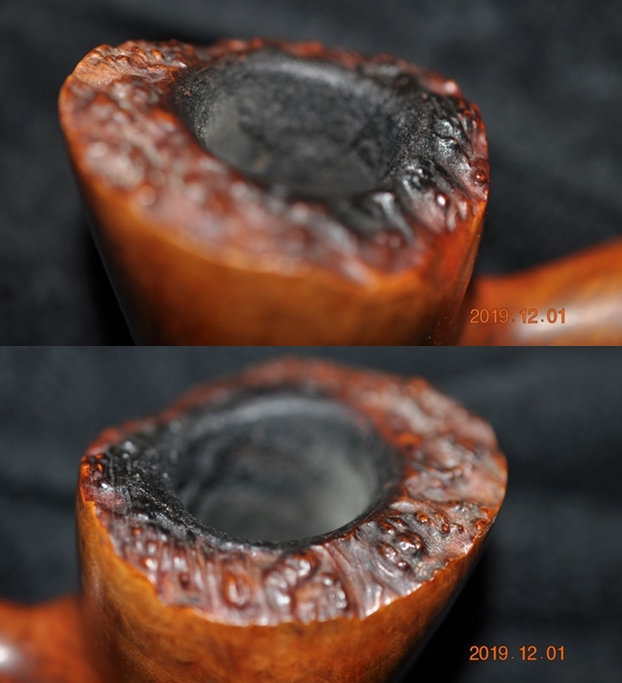
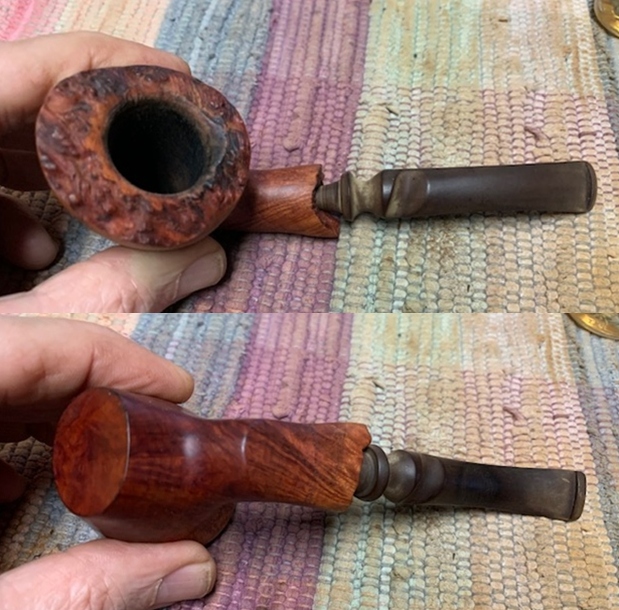
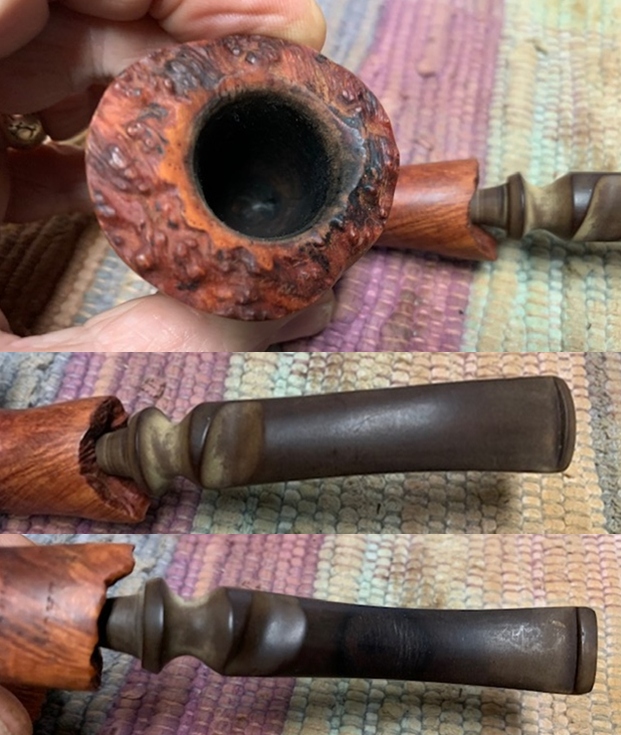
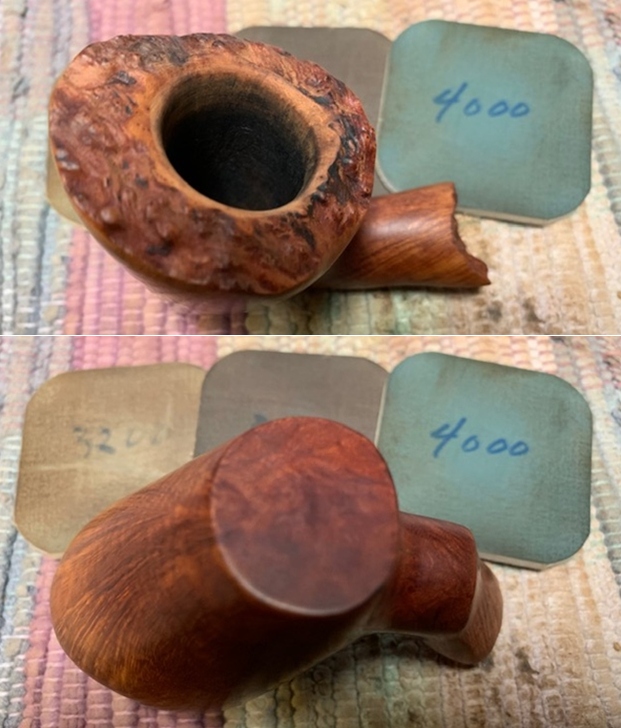
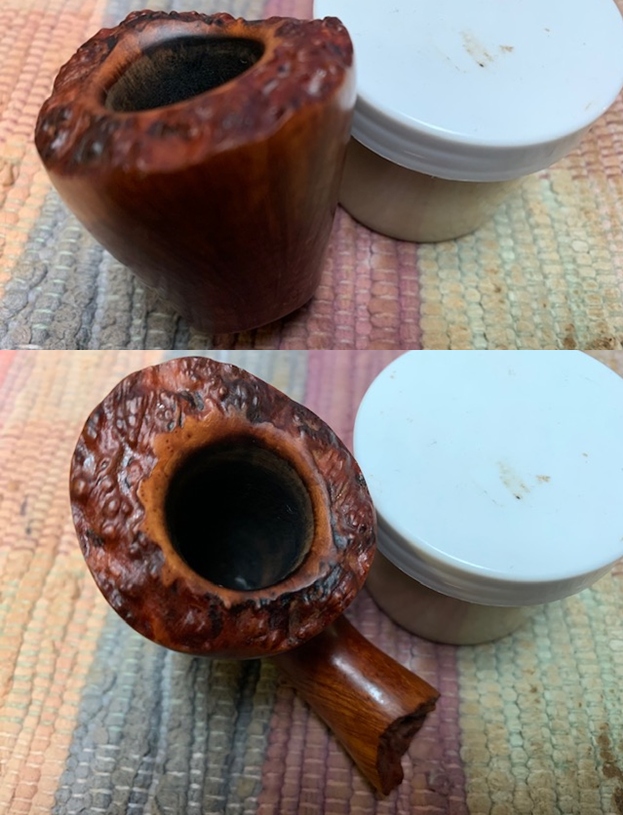
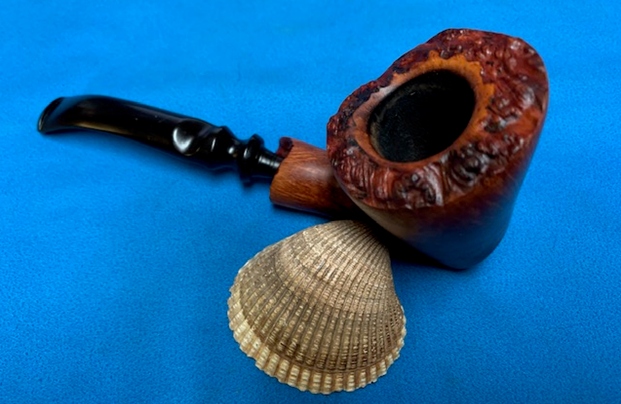
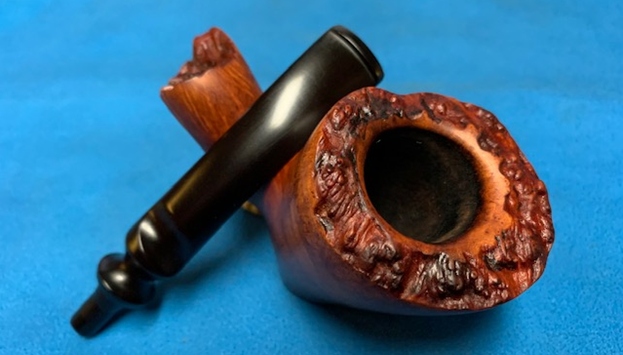
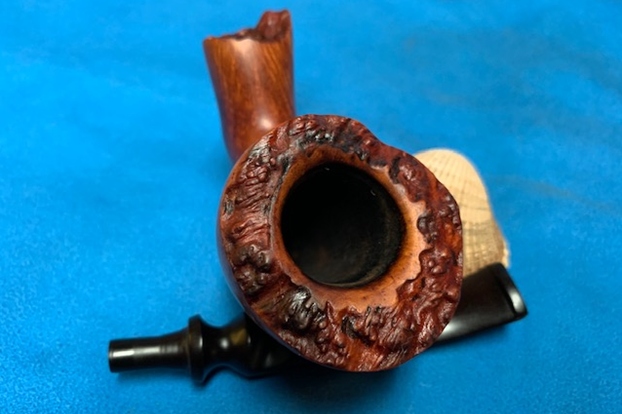
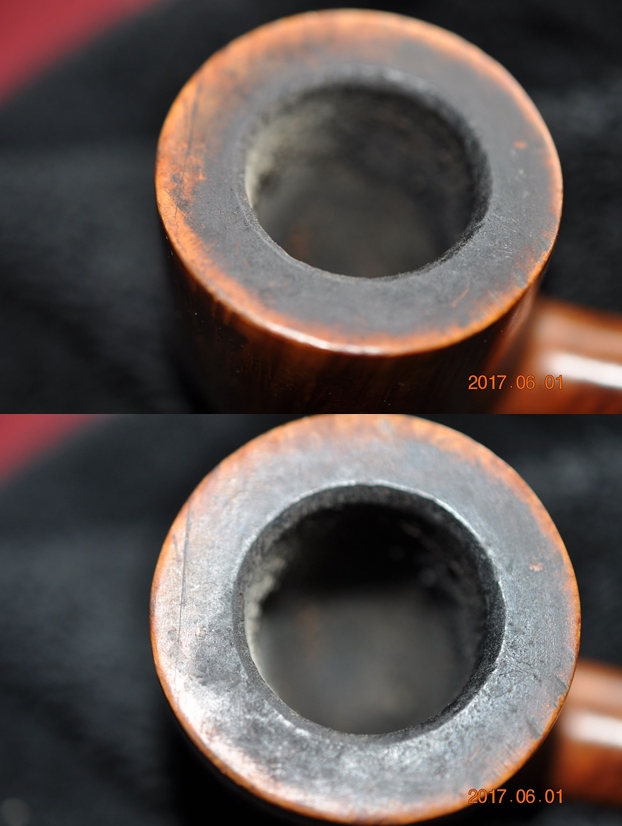
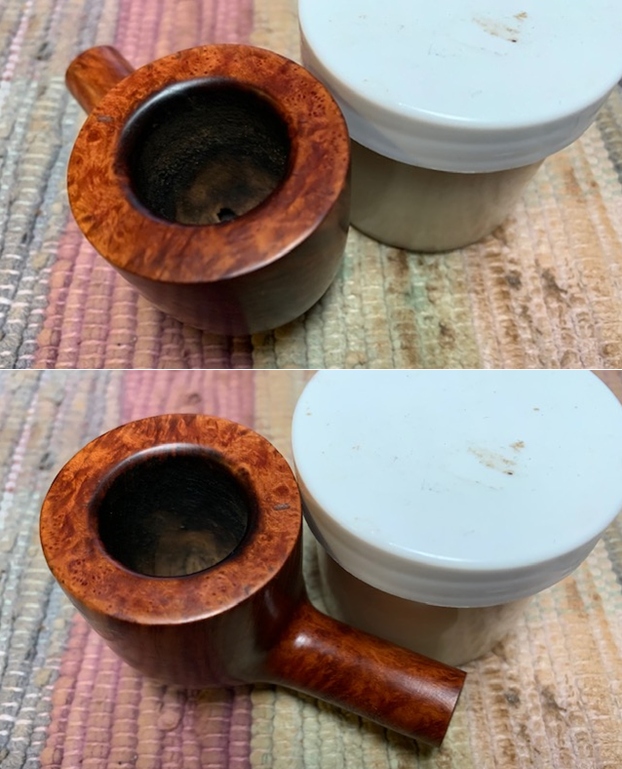
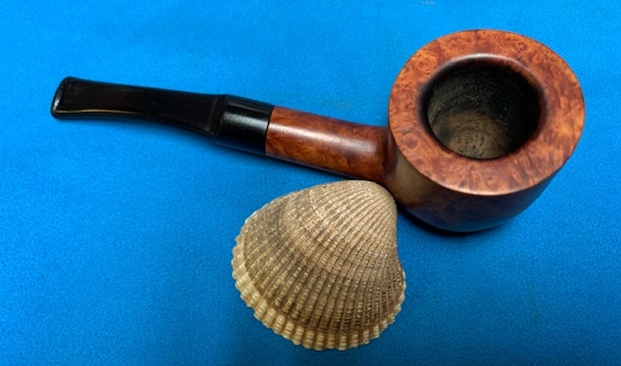
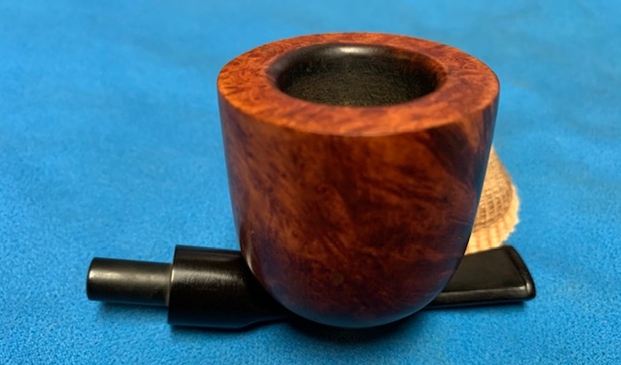
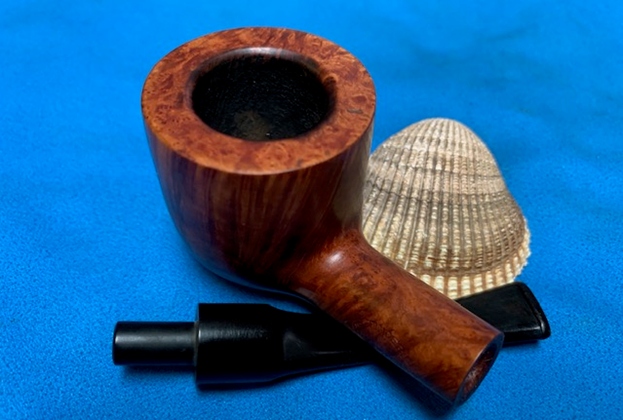
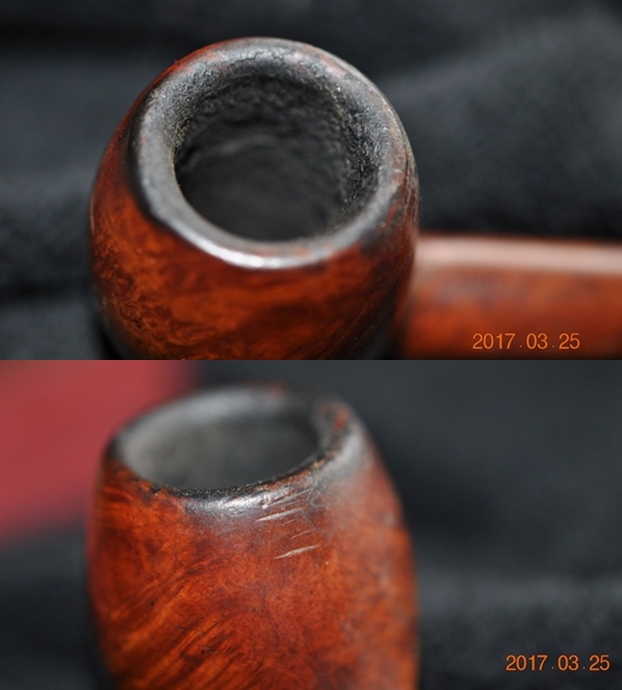
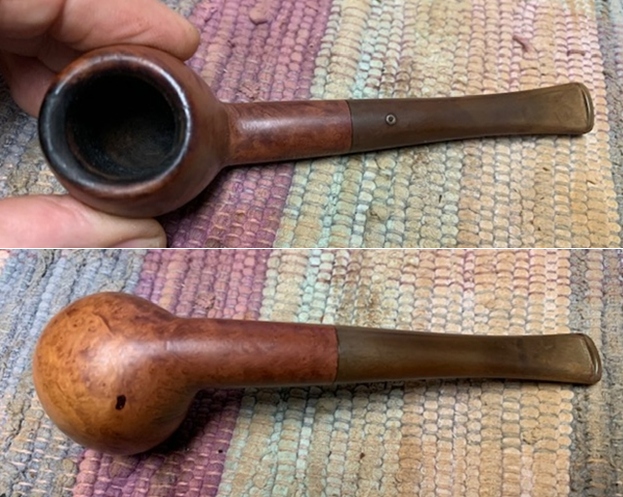
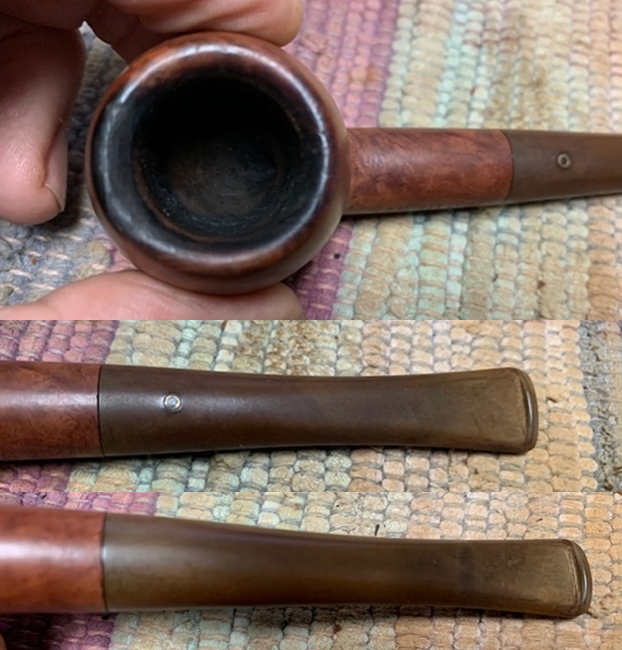
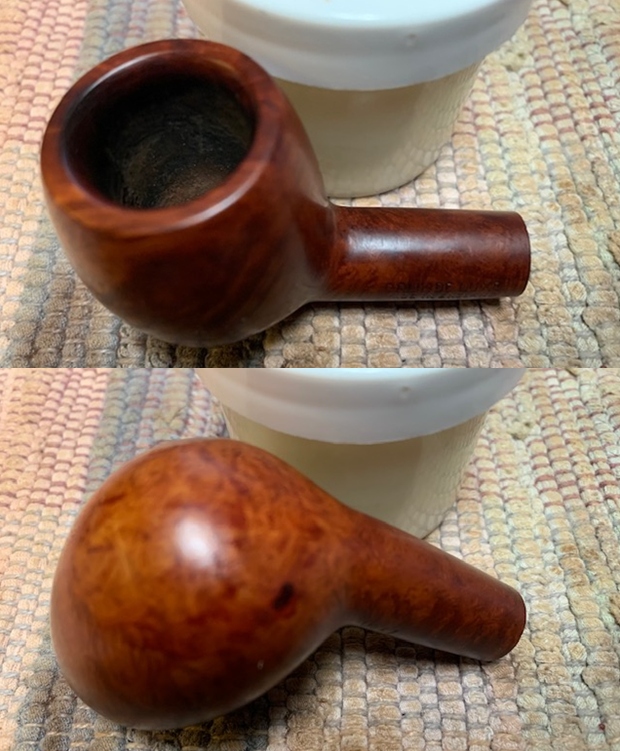
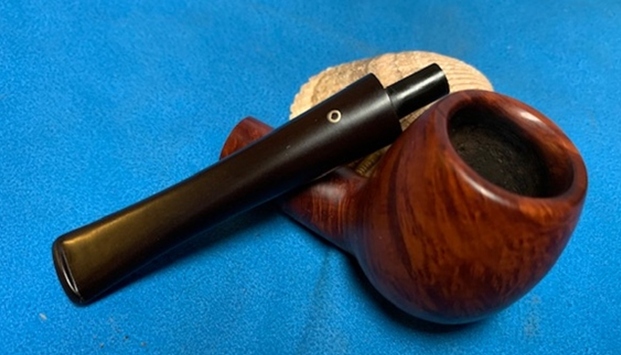
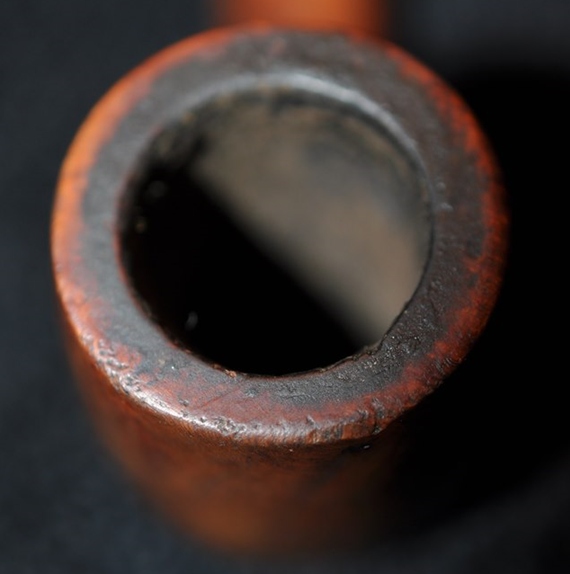
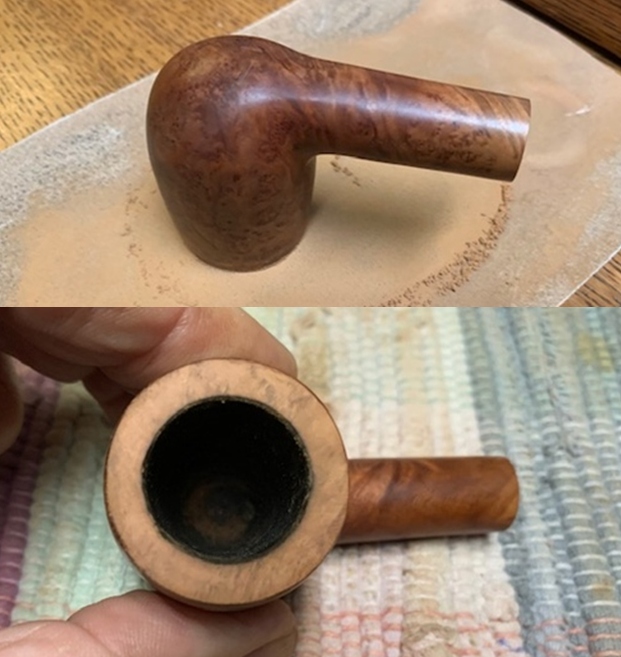
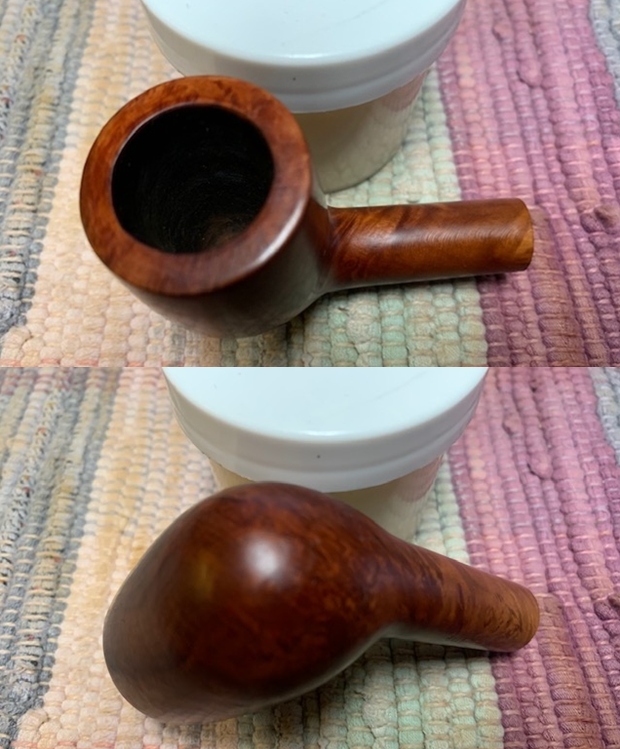
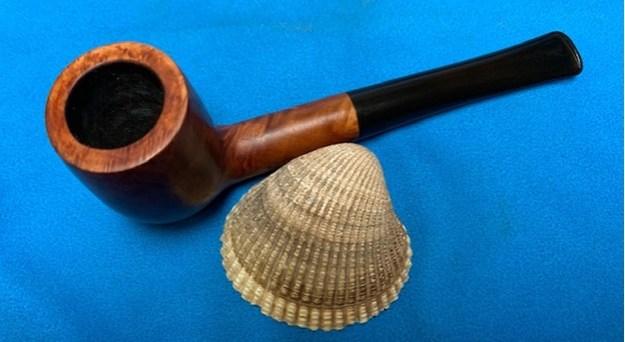
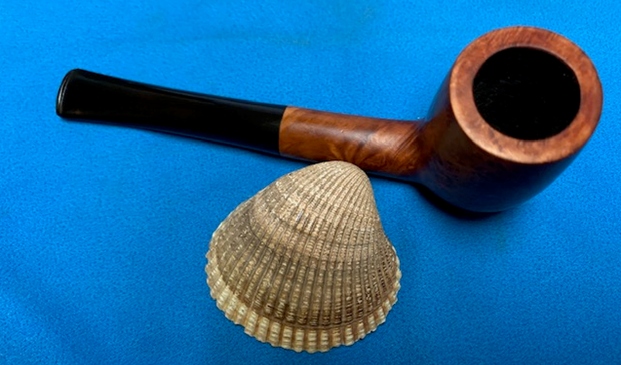
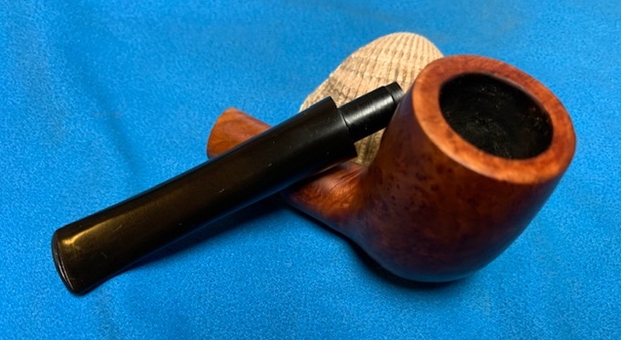
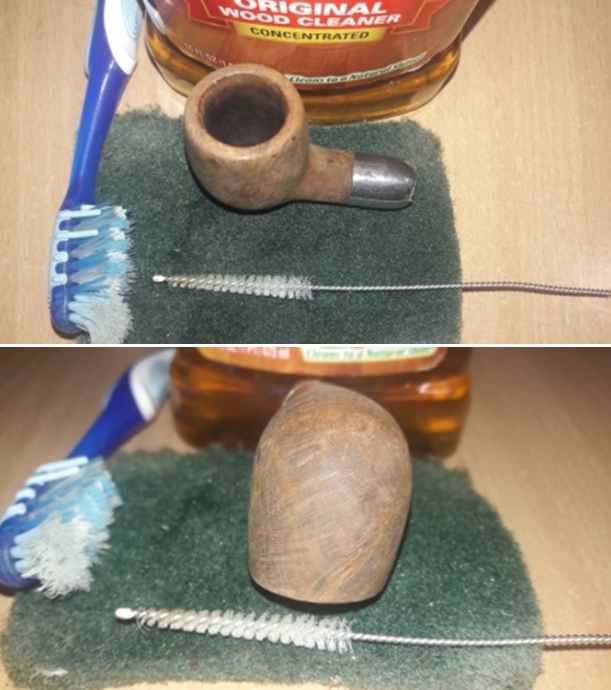
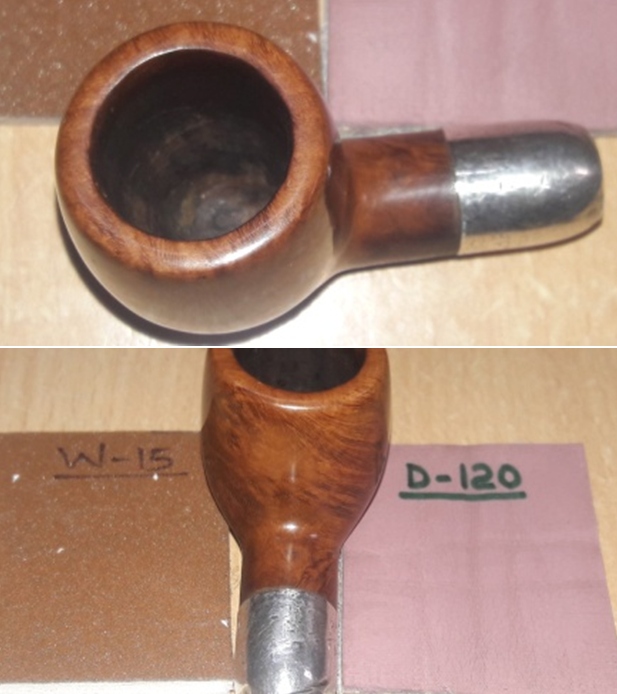
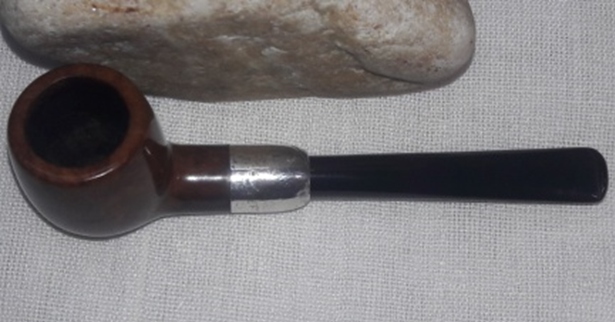
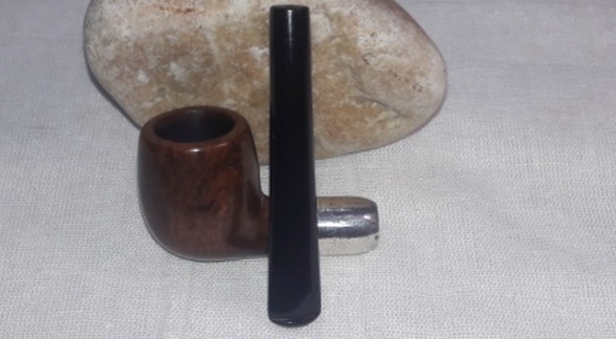
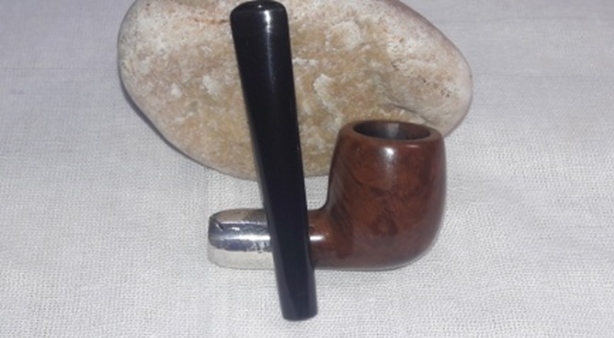
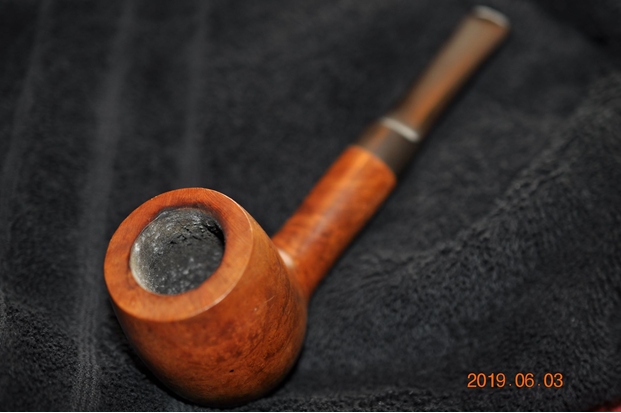
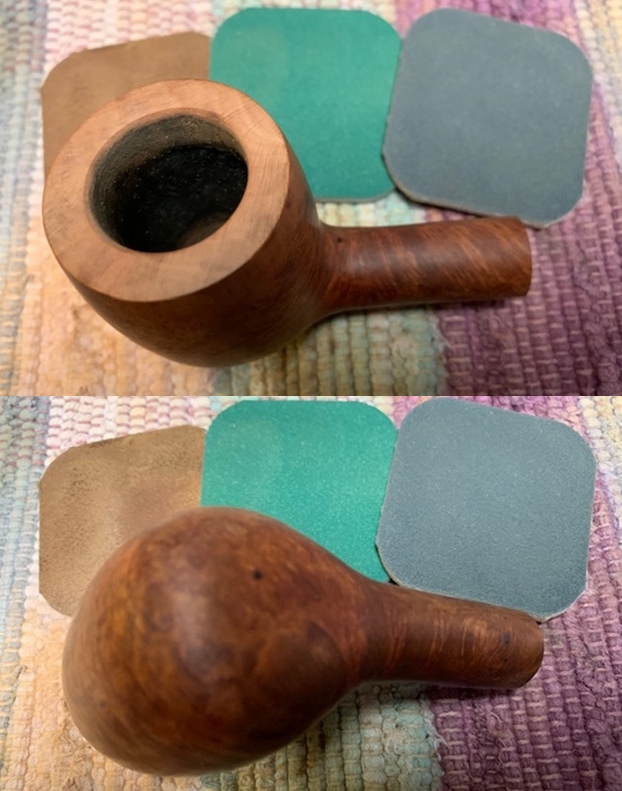
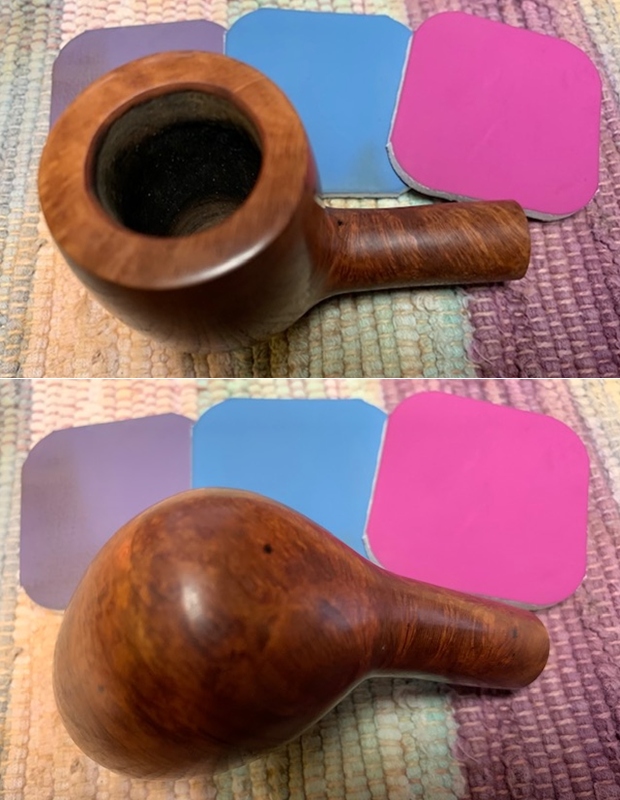
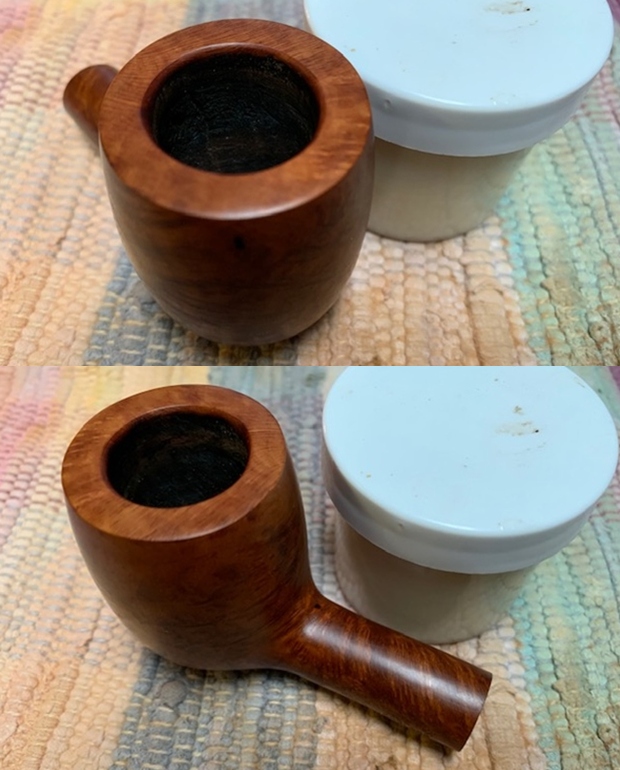
 This pipe has a rather small bowl in a classic Billiard shape and has a chamber depth of about 1.1 inches. The chamber had an even layer of hard cake which is not very thick. The condition of the inner walls of the chamber can be commented upon after the cake has been taken down to the bare briar. The rim top surface is relatively clean but is peppered with numerous minor dents/ dings and nicks. The rounded inner rim edge is sans any damage however, the outer edge shows numerous small dings notably to the front edge and in between 12 o’clock and 3 o’clock direction. The draught hole is clogged and restricts the free flow of air through it. The ghost smells in the chamber are very strong.
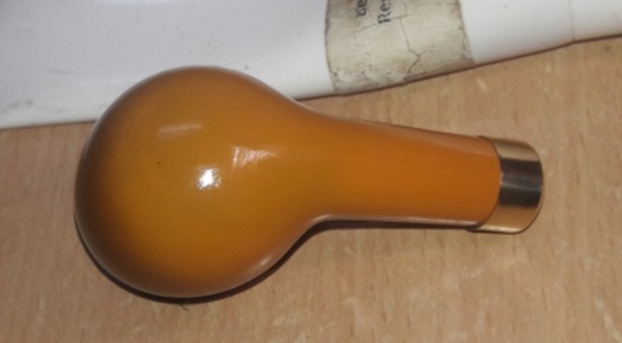
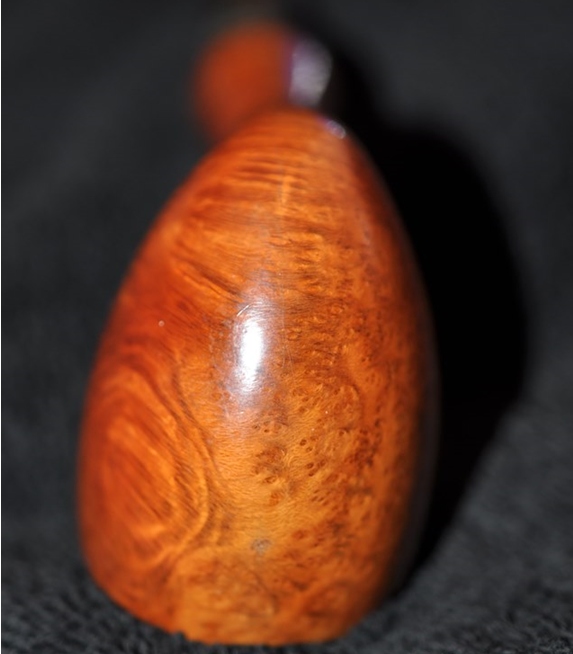
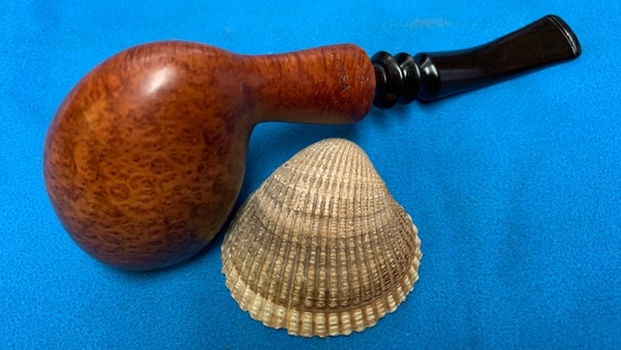
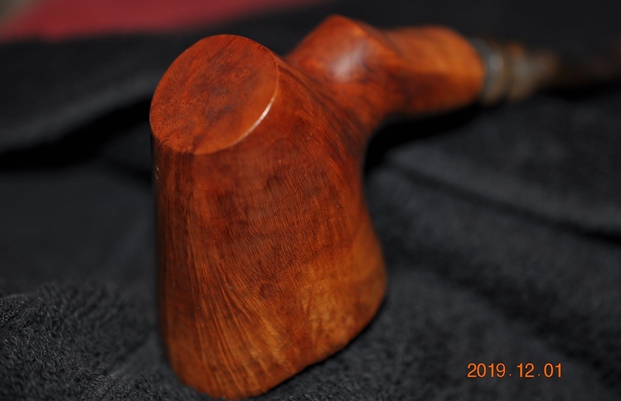
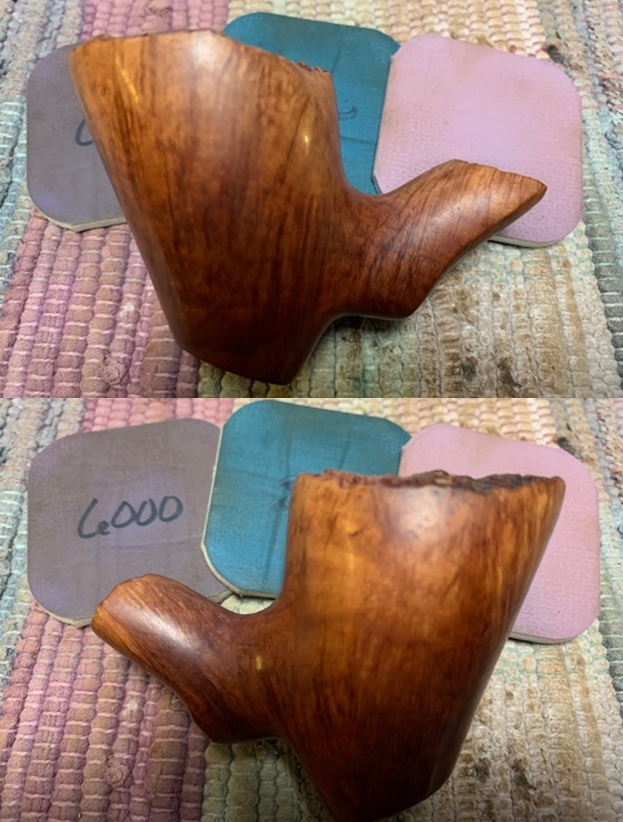
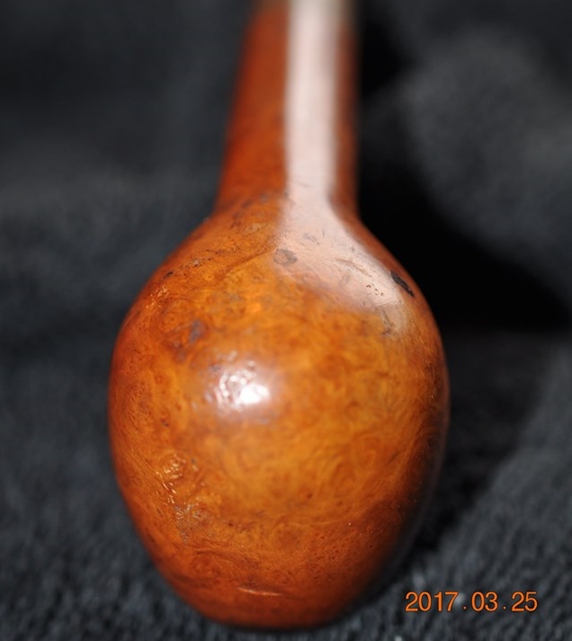
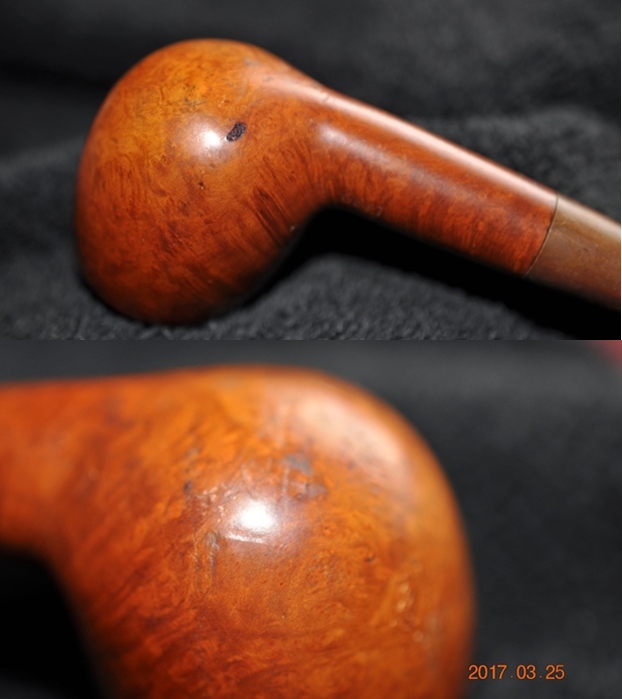
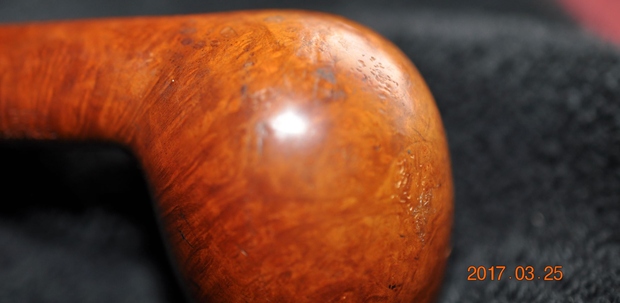
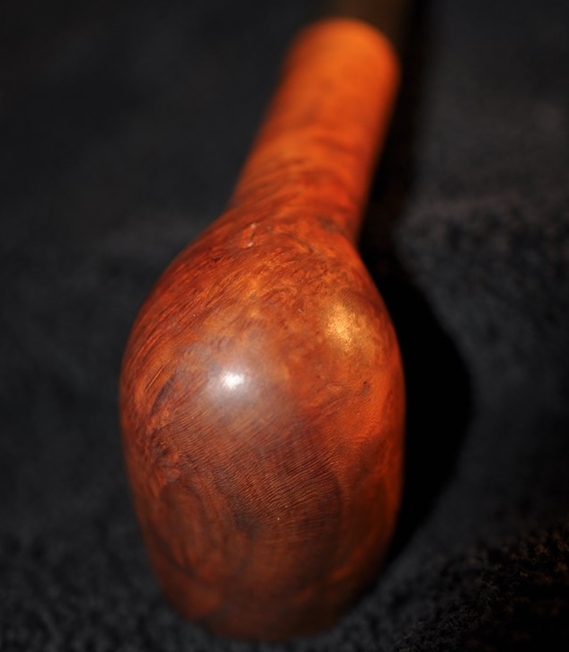
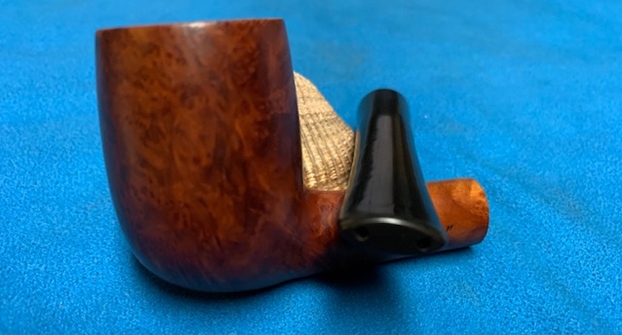
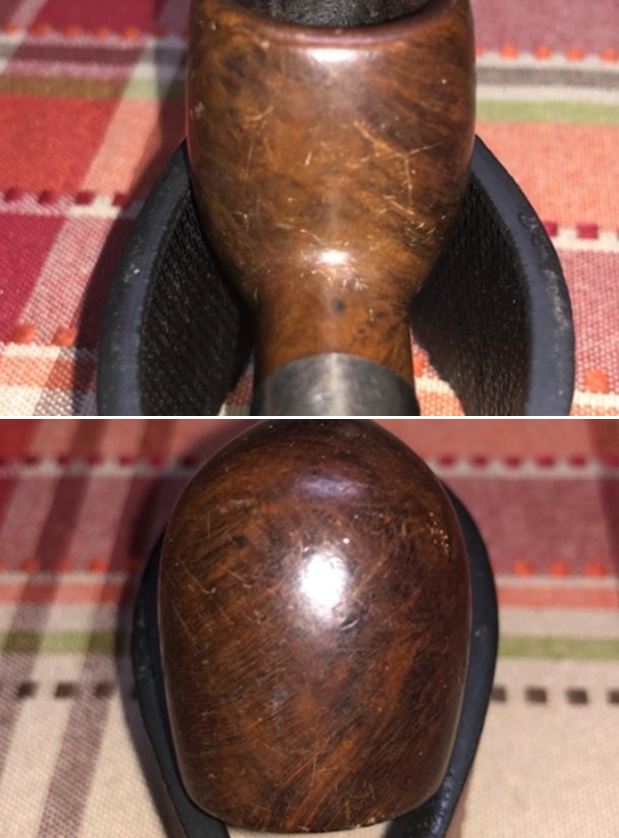
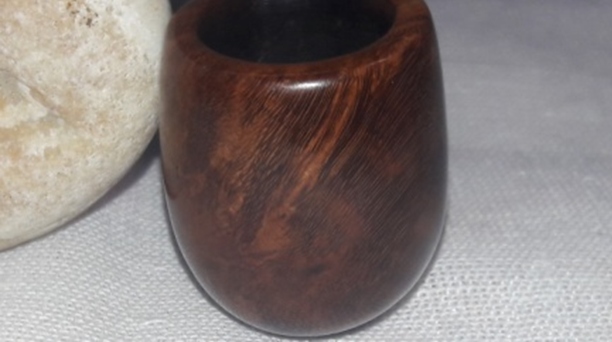
 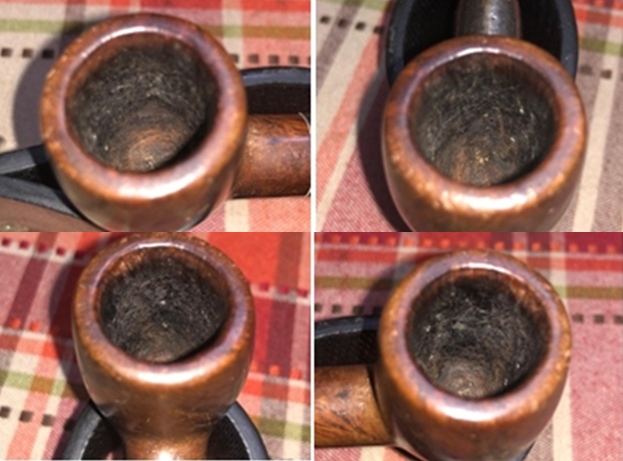 The smooth stummel surface has some very beautiful grain patterns and has taken on a lovely dark patina. The stummel shows signs of vintage in the form of many scratches, dents and dings that it has acquired over the last century and a half!! The briar has accumulated a lot of grime and dust imparting the stummel a lifeless and bone dry appearance.
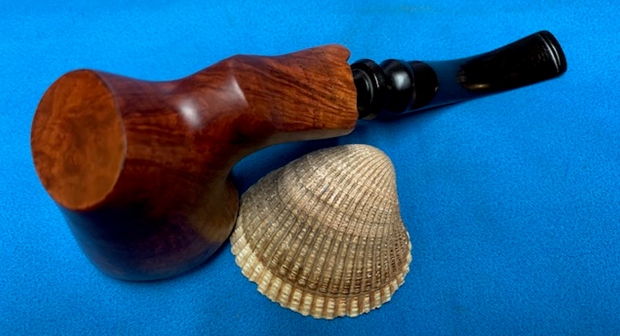
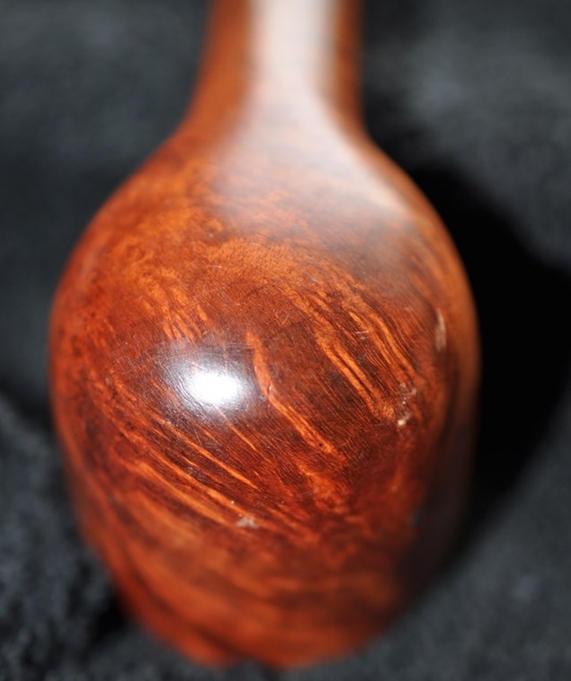
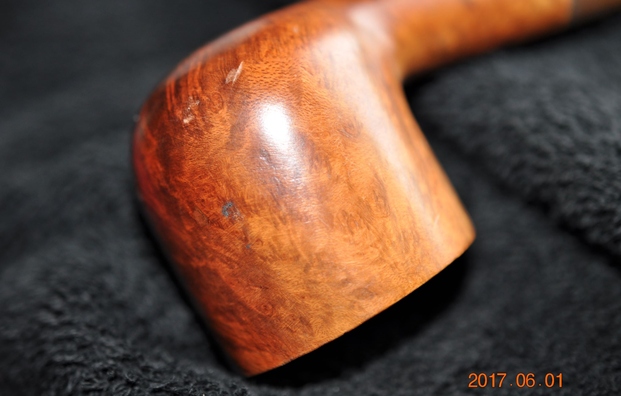
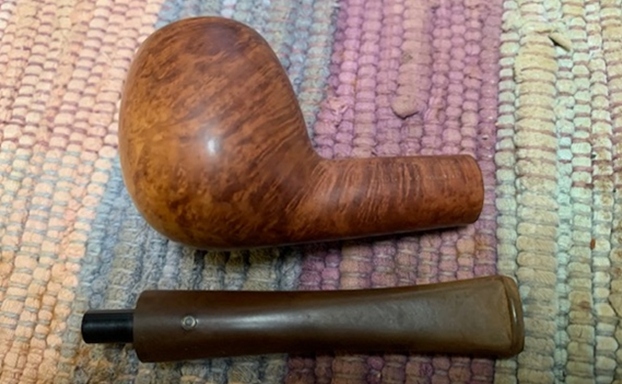
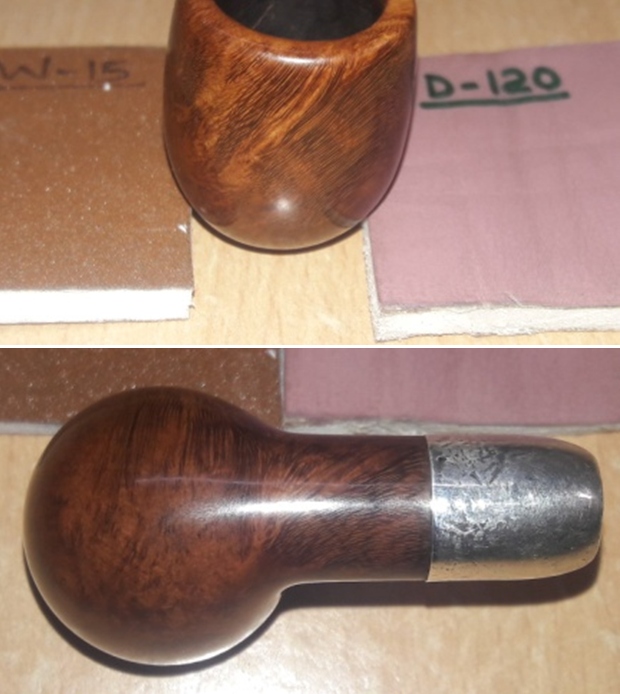
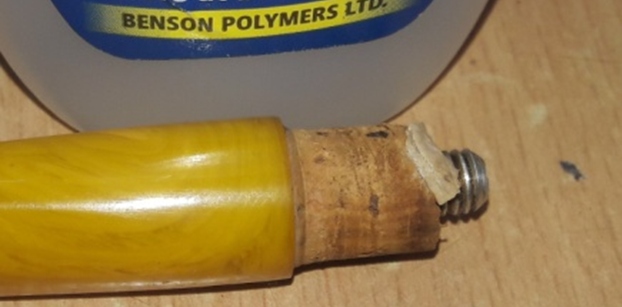
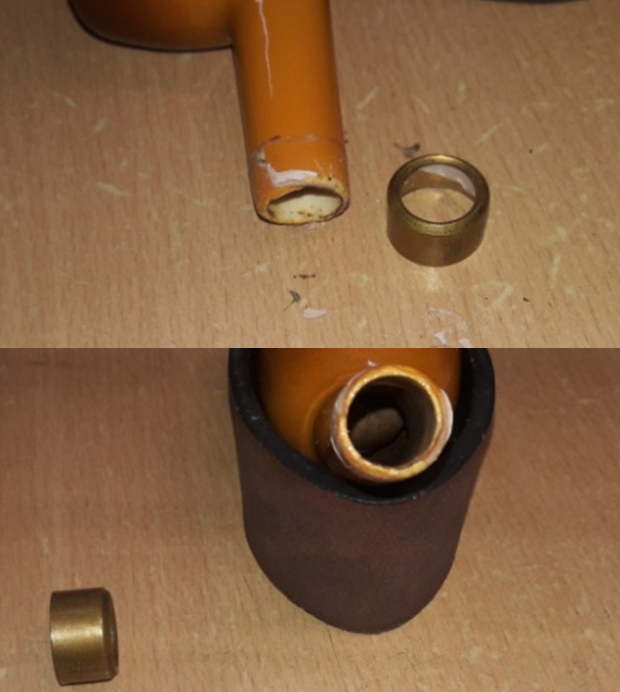
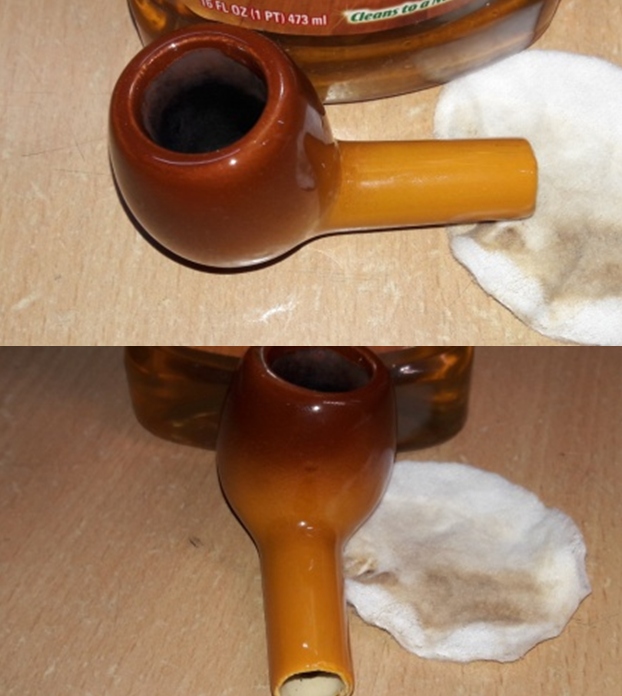
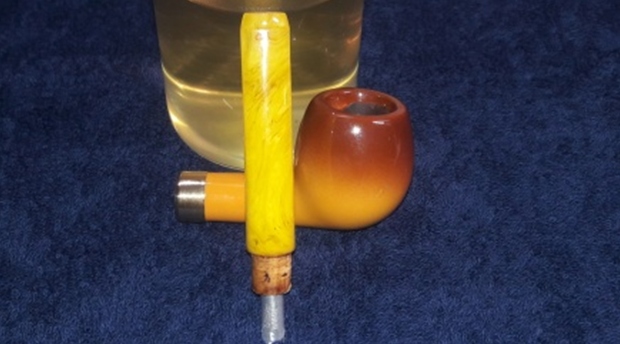
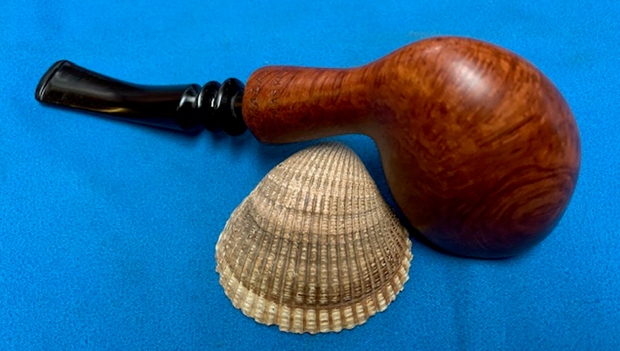
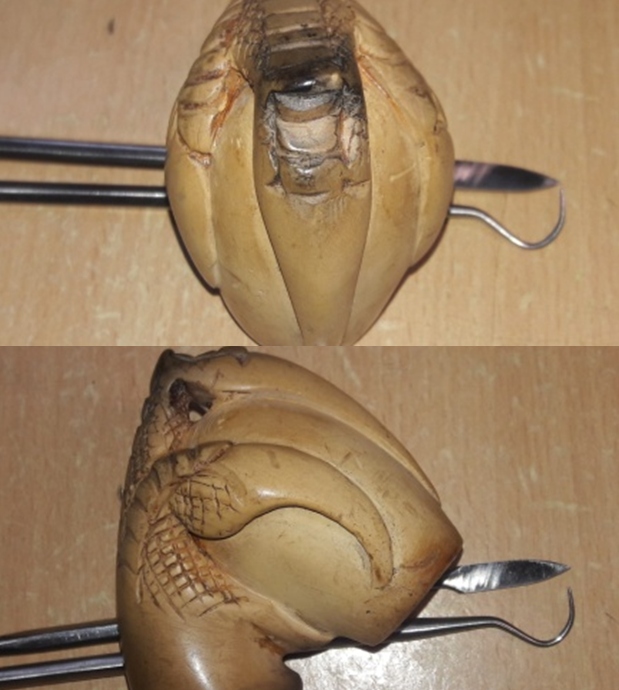
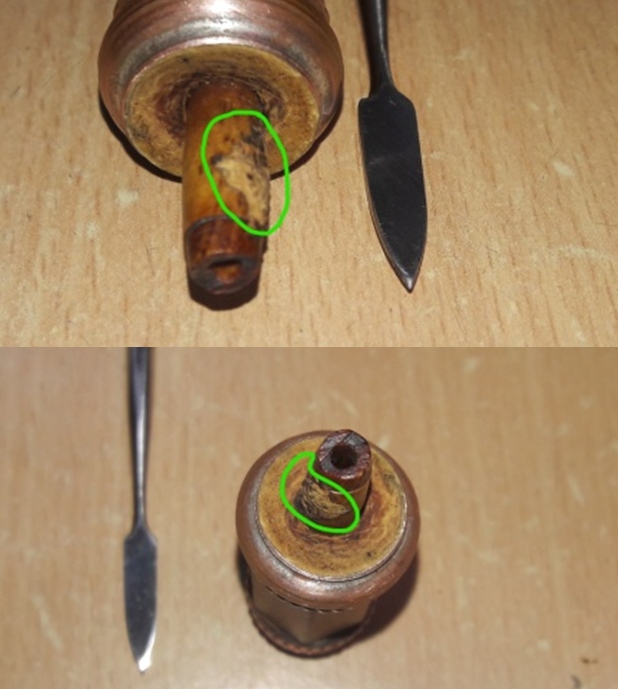
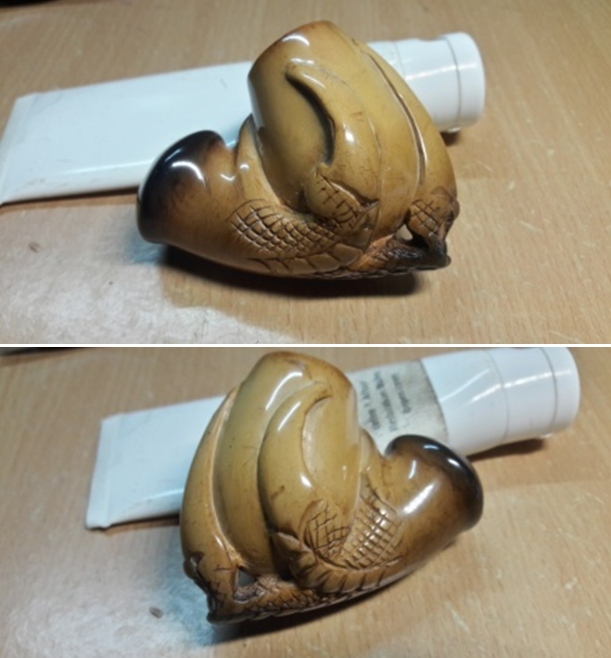
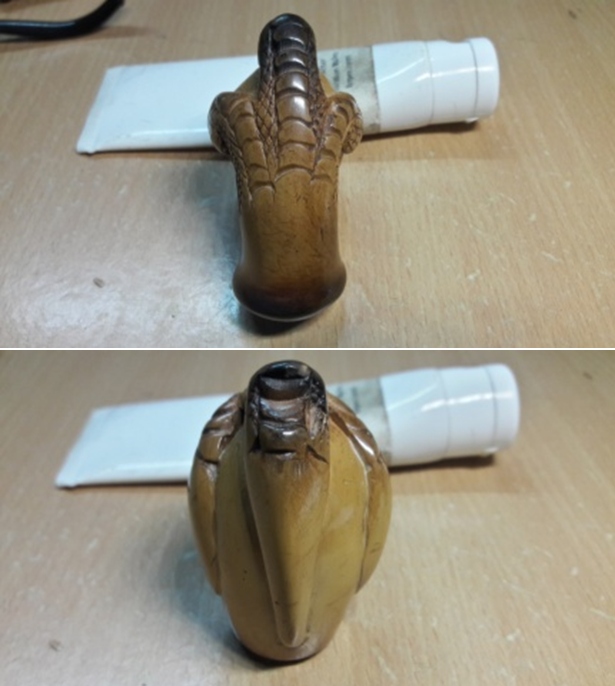
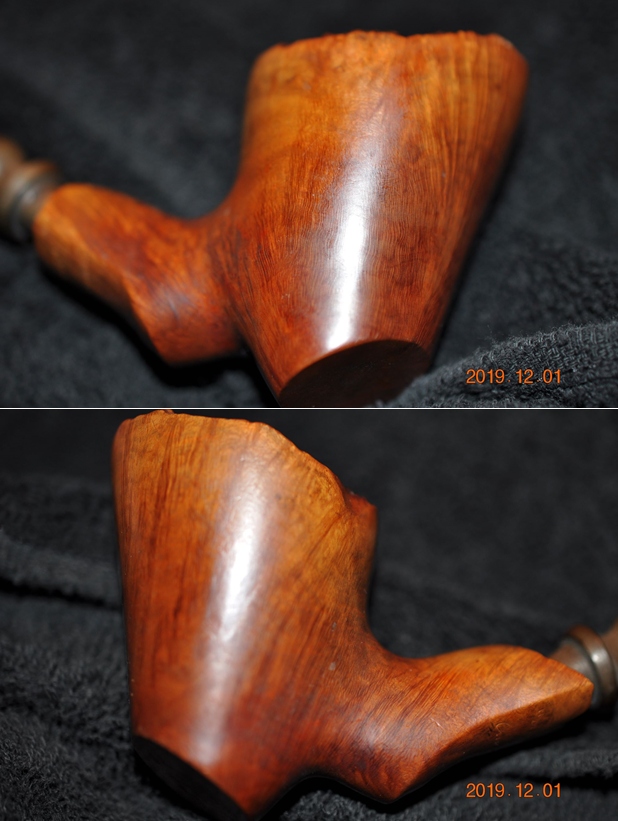
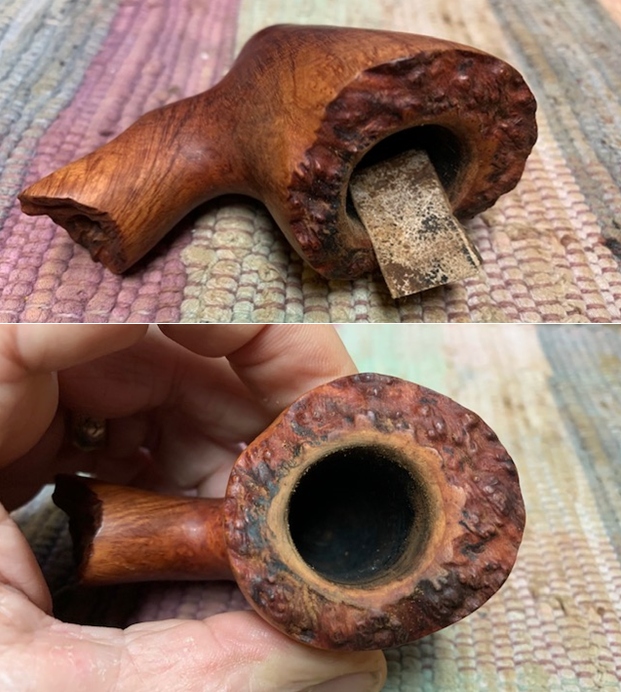
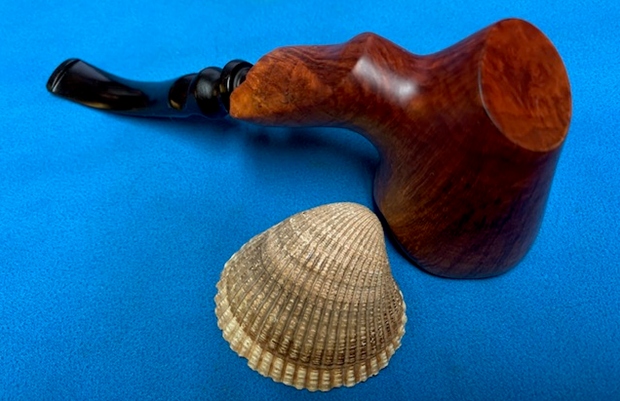
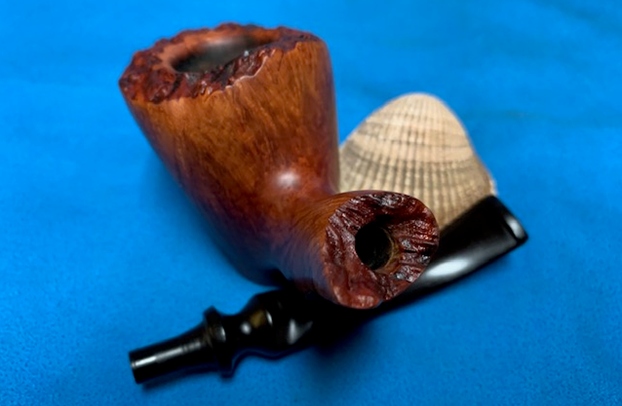
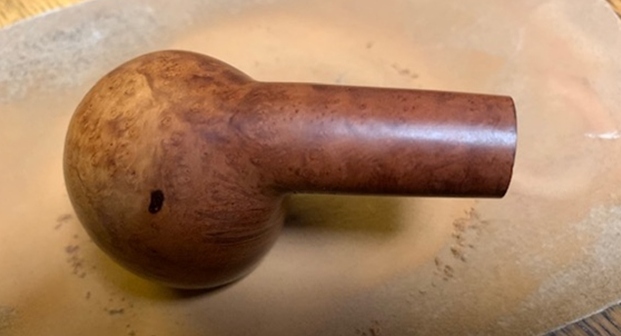
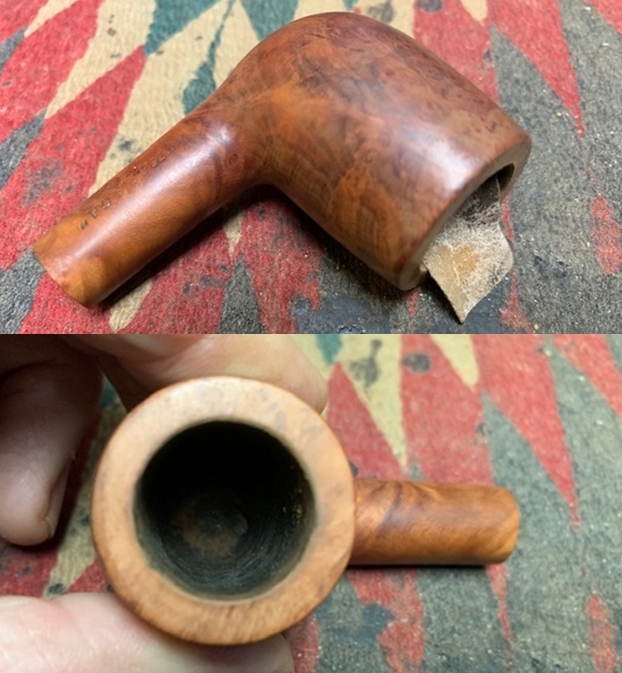
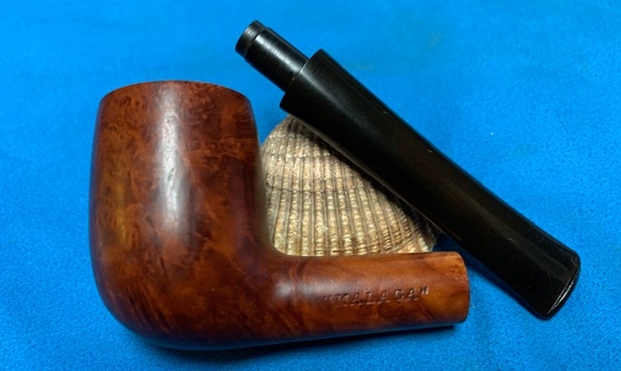
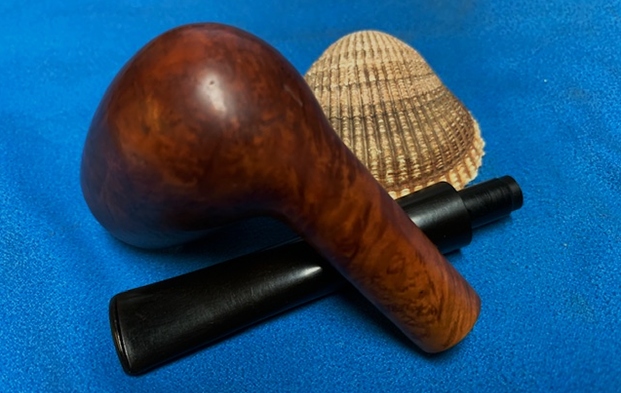
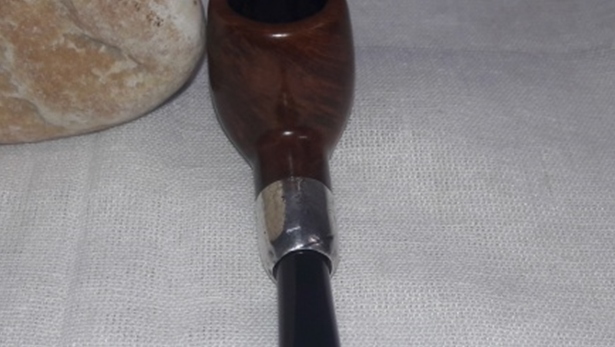
 The shank end is where the maximum damage is on this pipe. A chunk of briar is missing from two places at the shank end; one on the left hand side (enclosed in green) with a crack that extends towards the stummel and the other on the right side (enclosed in yellow). The mortise is completely clogged with a restricted draw. In case I am able to separate the silver ferrule from the shank end, I shall reconstruct the missing chunks from the shank end using briar dust and superglue while stabilizing the crack by drilling counter holes.
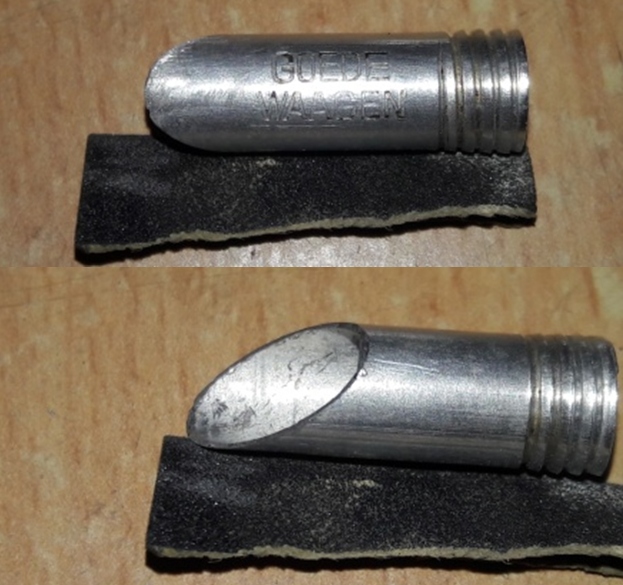
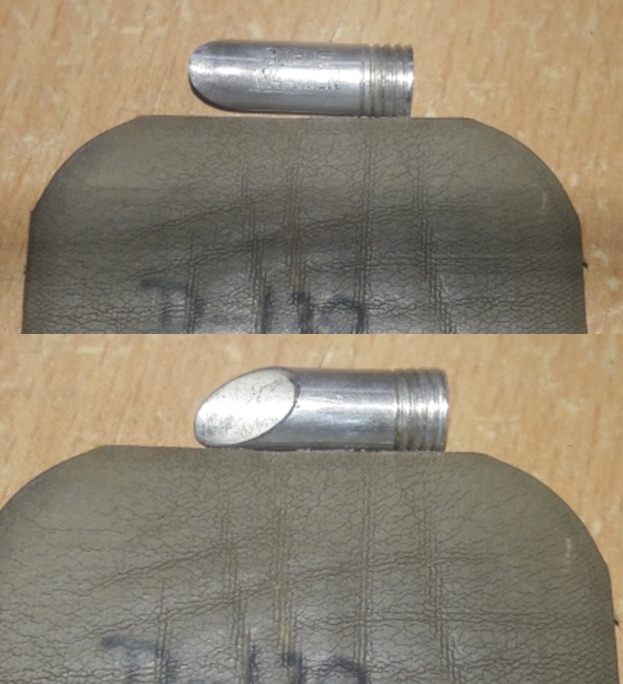
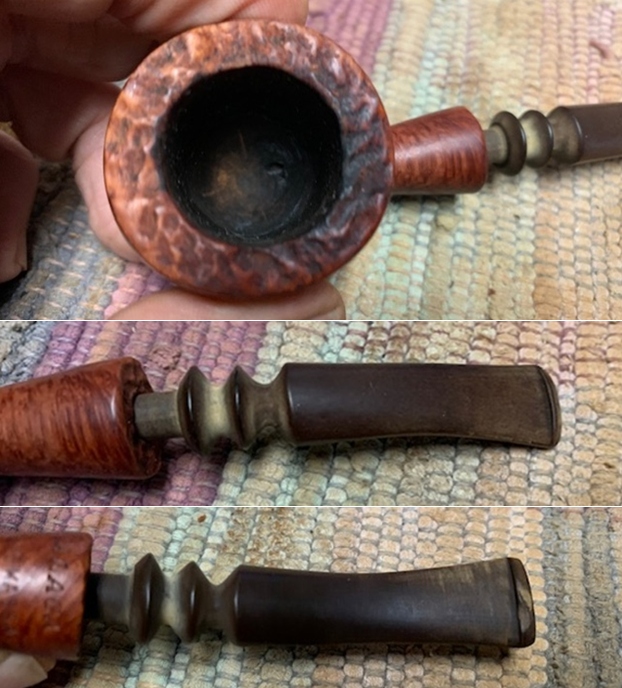
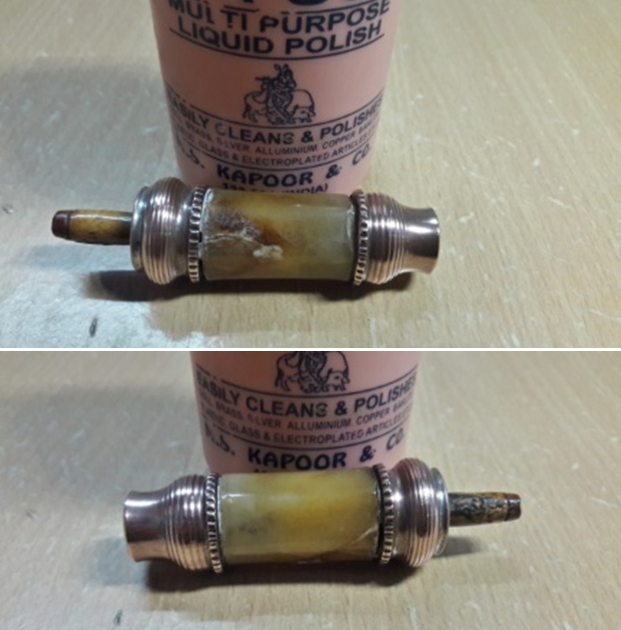
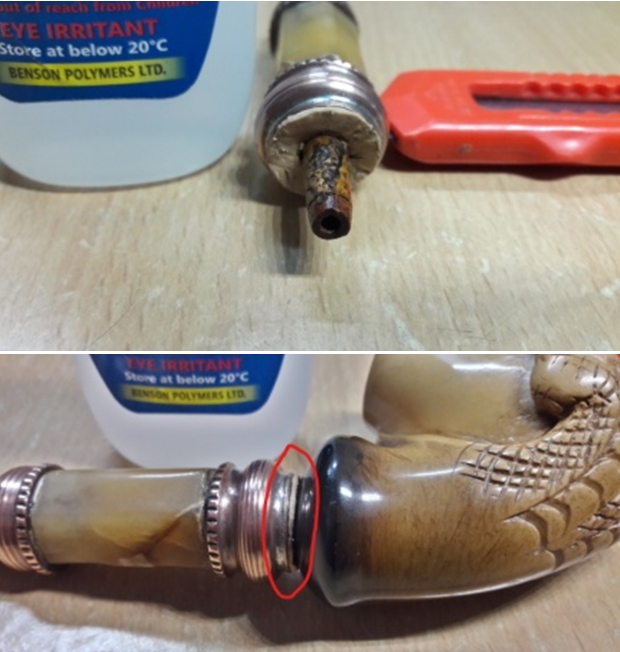
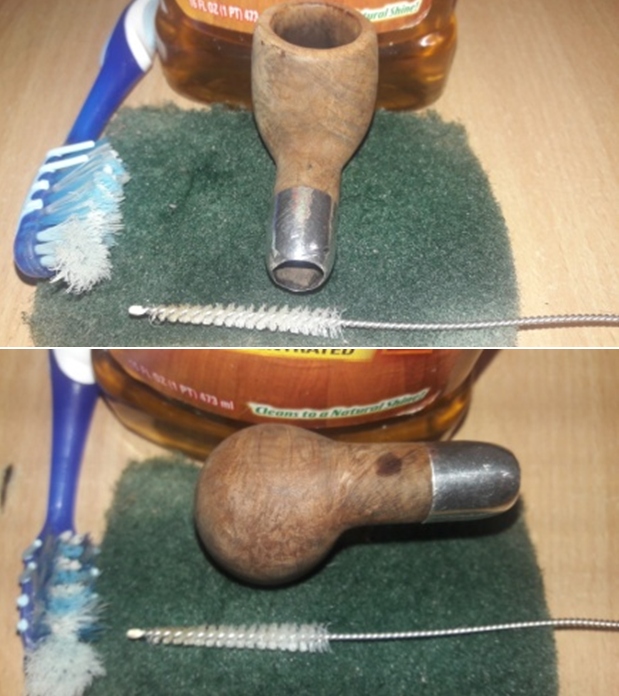
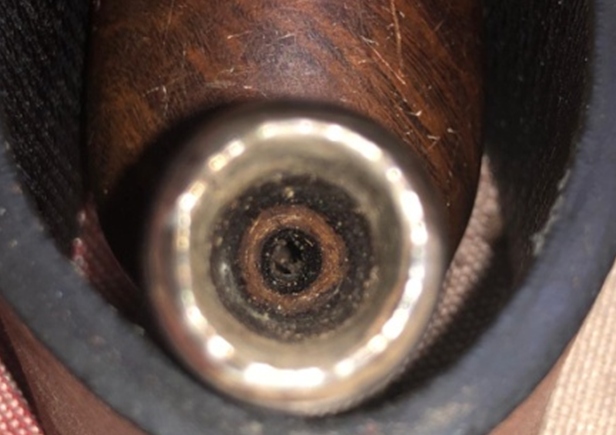 The sterling silver ferrule has numerous dents and dings that obscure the stampings that are already worn out and faded. The tenon end of the ferrule has some sharp edges and is severely dented. The ferrule is securely glued on to the shank end to stabilize the crack/ damage and hold it together. There is nothing much that I can do about the dents and dings to the ferrule other than clean it up and polish it to a nice shine. These dents and dings are and shall remain a part of the pipes journey thus far.
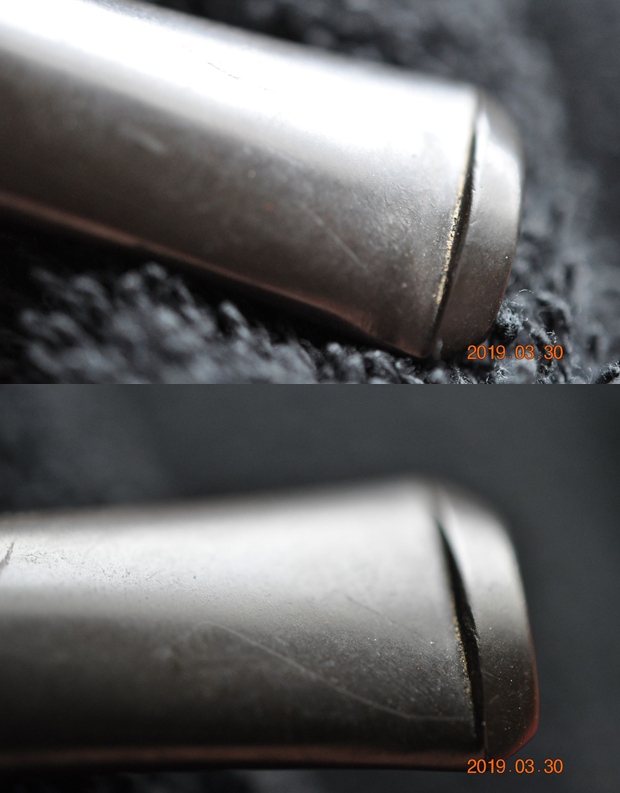
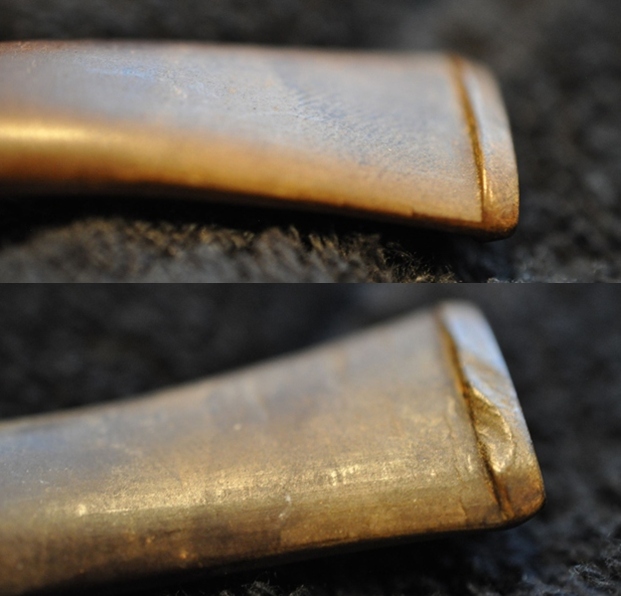
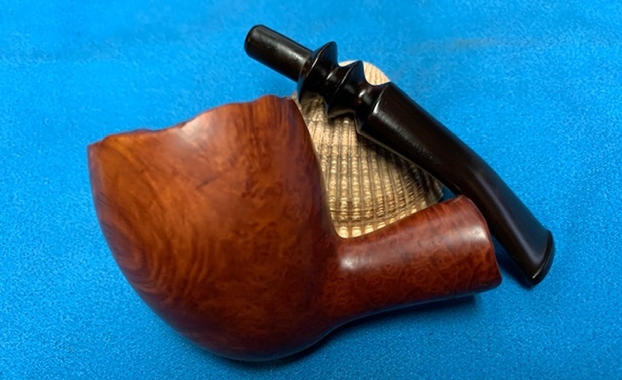
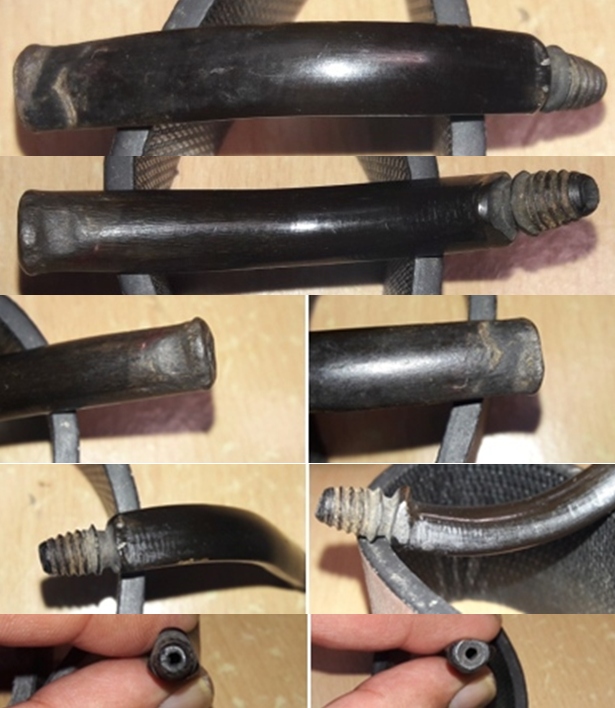
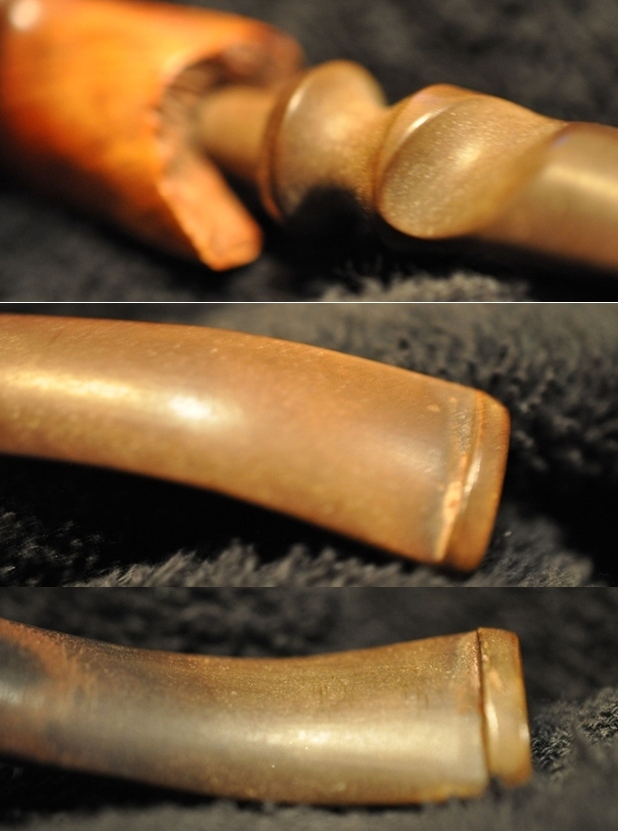
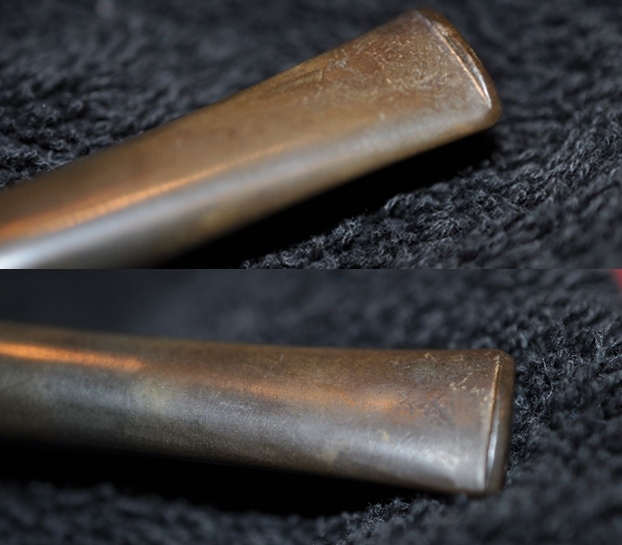
 The high quality vulcanite military mount stem was deeply oxidized. Some deep tooth chatter and tooth indentations are seen on both the upper and lower stem surfaces in the bite zone and at the bottom of the button edge. The tenon end had accumulated ash and oils/ tars that had dried out on the inside as well as on the outside. The orifice has scratch marks and dried gunk embedded in to it which will have to be addressed.
 The Process
The shank end damage/ crack were something that would essentially require materials and equipment that are available to me at my work place; therefore, I had no option but to relegate the stummel repairs and restoration to a later date. Abha and I decided that we should complete the stem repairs and polishing while I was home as that would reduce the time that I would otherwise spend in stem restoration.
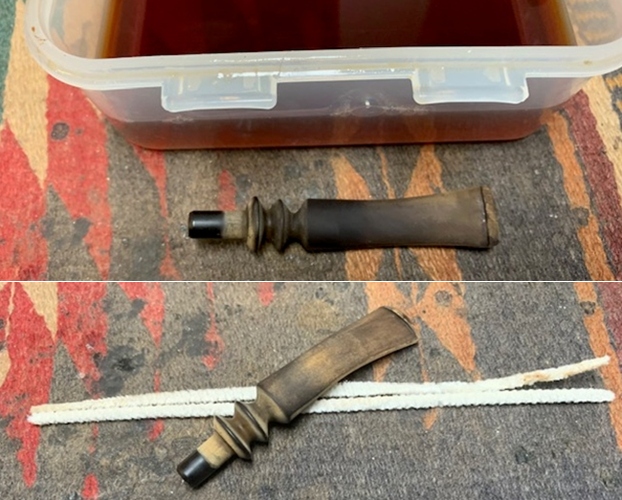
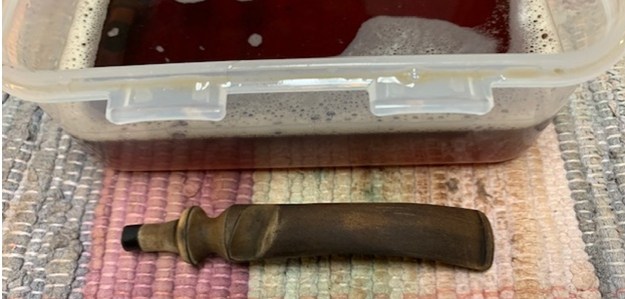
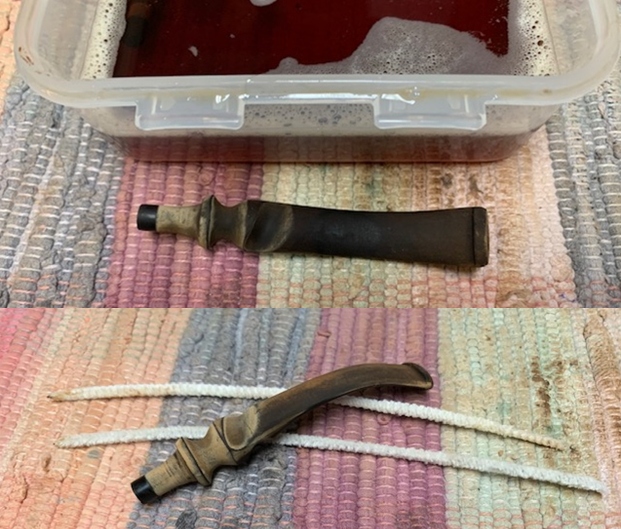
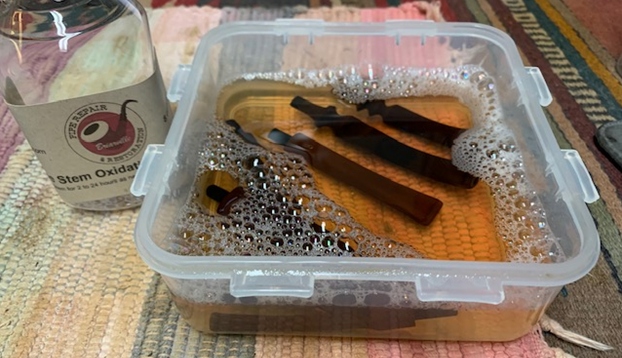
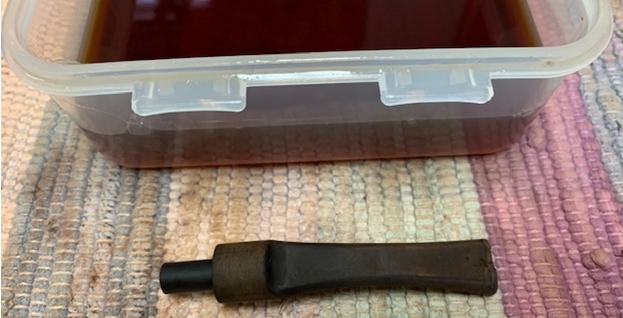
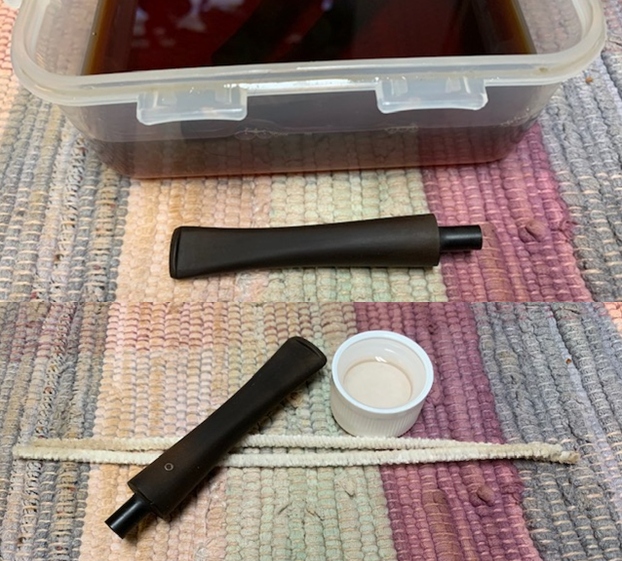
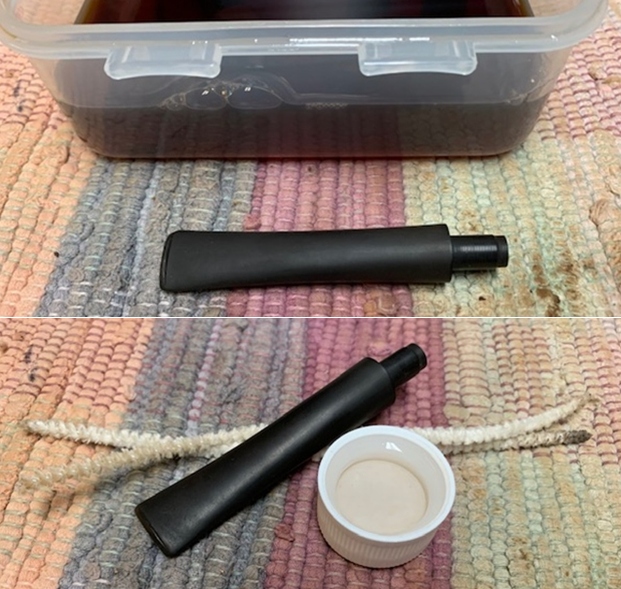
Abha cleaned out the internals of the stem air way and immersed it in “Before and After Deoxidizer” solution along with the stem of other pipes in line for restoration. Once the stem had soaked overnight, she cleaned the stem under running warm water and scrubbed the raised oxidation from the stem surface using Scotch Brite pad. She further removed the oxidation by scrubbing the stem with 0000 grade steel wool and applied a little olive oil to rehydrate the stem.
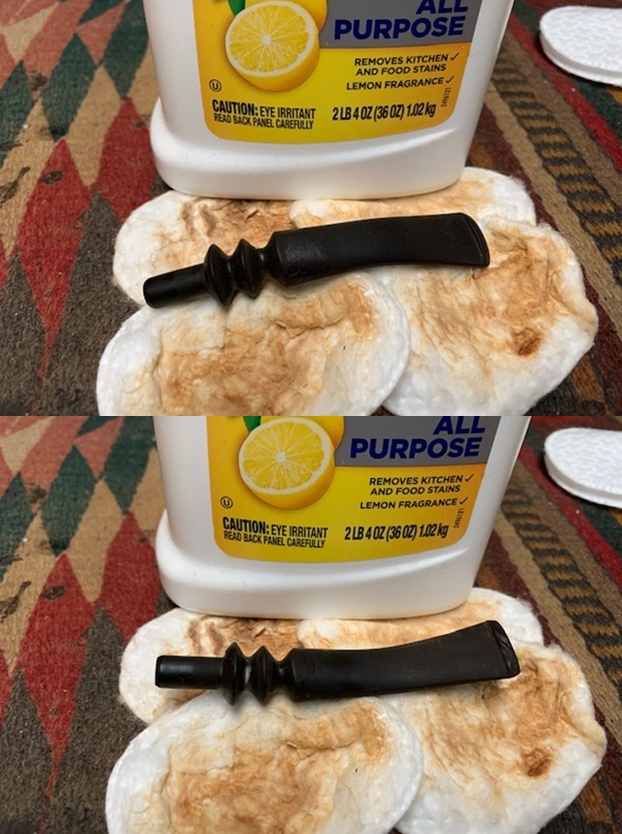
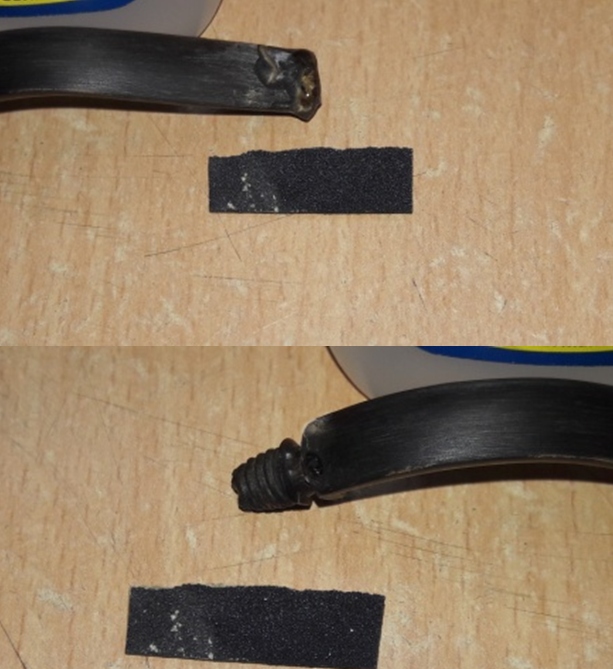
 Once the stem was internally and externally cleaned, I start with addressing the deep tooth indentations and chatter on either surface in the bite zone. Since rubber has a property to expand and regain its original shape when heated, I heat the bite zone with a candle flame to raise the bit marks and tooth chatter to the surface. I sand the stem surface with a folded piece of 220 grit sand paper. This helps to remove any raised residual oxidation and also smooths out the raised tooth indentations.
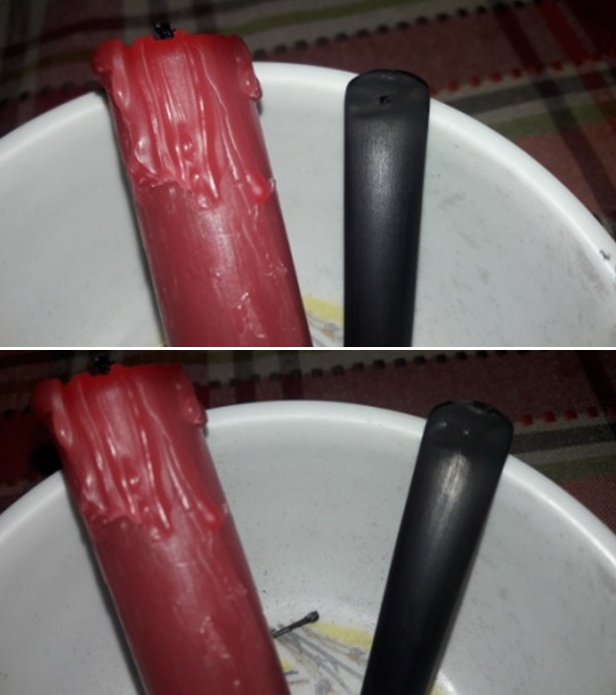
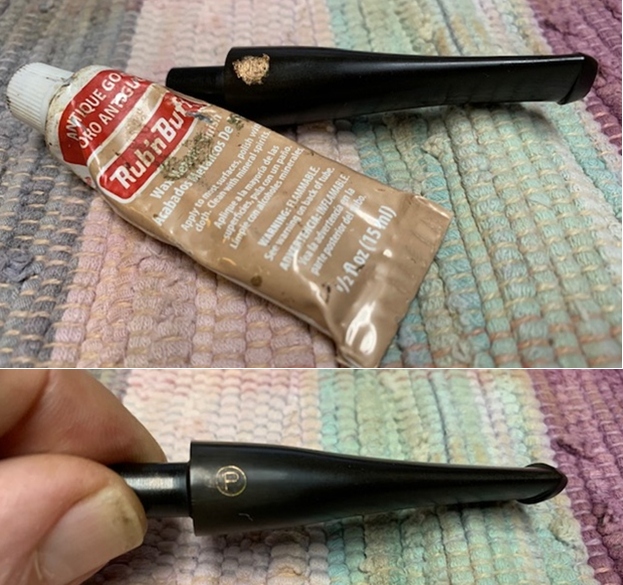
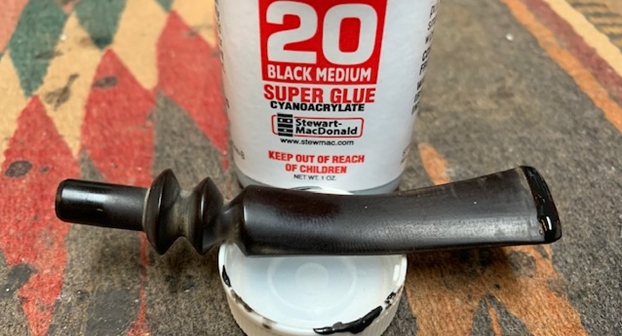
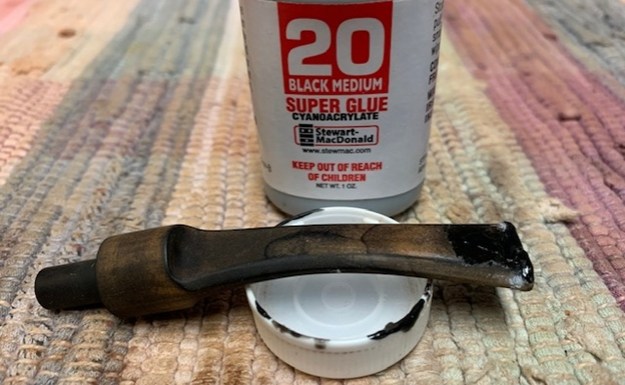
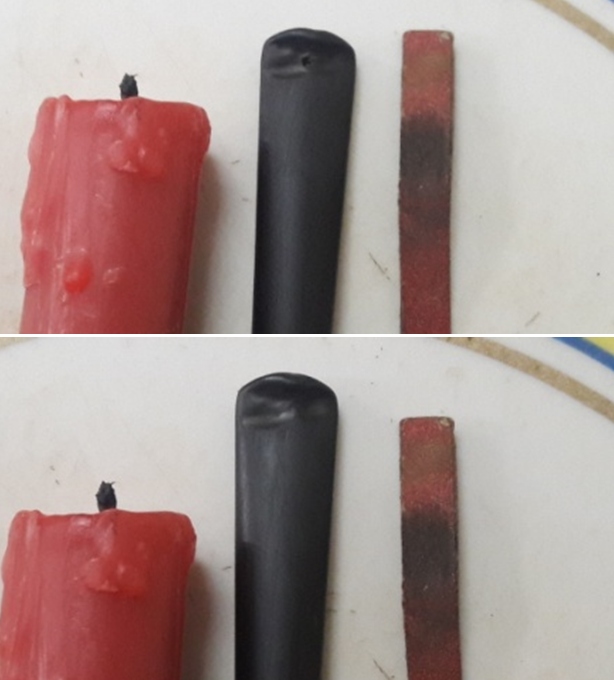 The deeper bite marks were filled with a mix of CA superglue and activated charcoal and set aside to cure.
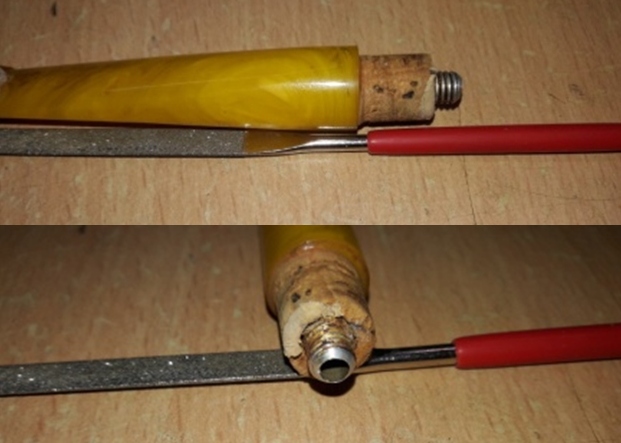
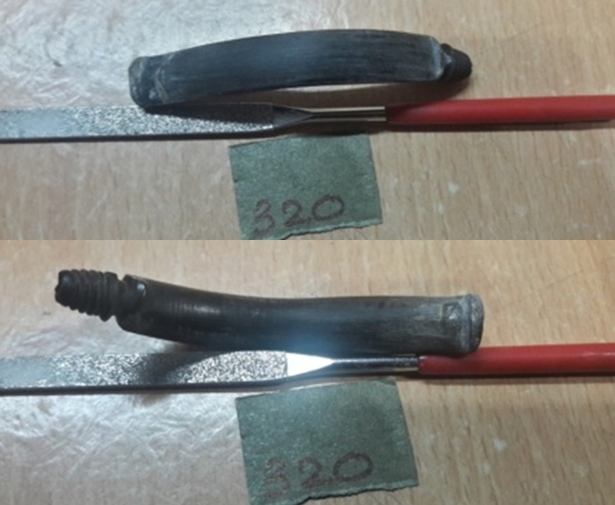
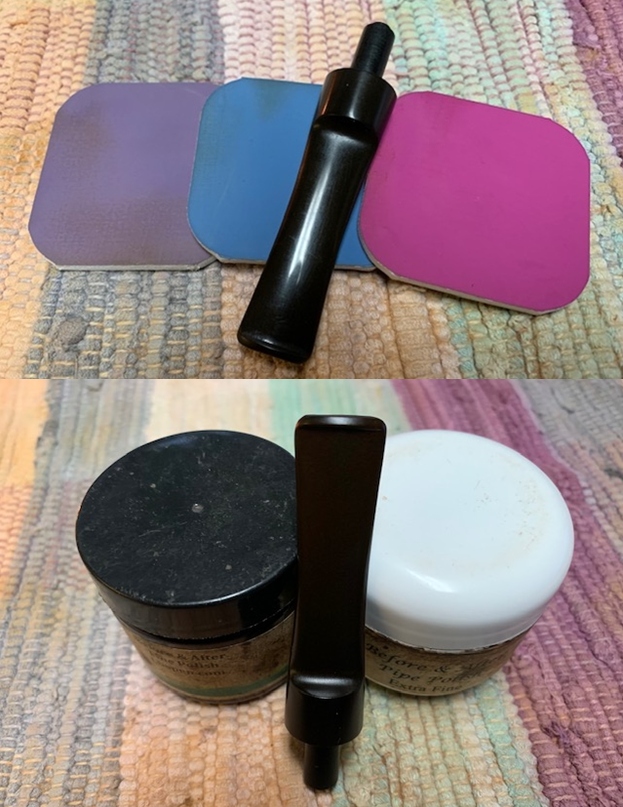
 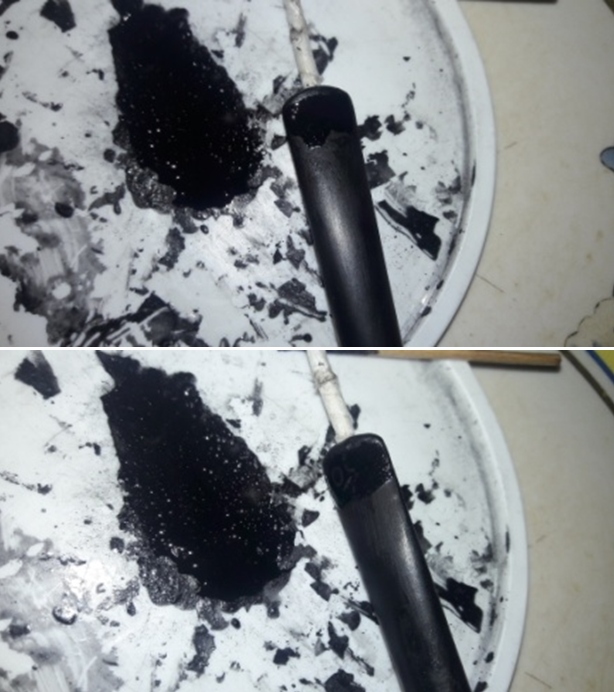 Once the fills had cured, using a flat head needle file, I reshaped the button and roughly matched the fills with the rest of the stem surface. I further fine tuned the match by sanding the filled area with a folded piece of 220 grit sand paper pinched between my thumb and forefinger. I followed it up by sanding the entire stem surface using 600 grit sand paper and finally with a piece of 0000 grade steel wool. This serves to remove the deep seated oxidation and also reduces the sanding marks of the more abrasive sand papers. I also sharpened the button edges while sanding. I wiped the stem with a cotton swab and alcohol to remove all the oxidation and sanding dust from the surface. I applied a little Extra Virgin Olive oil over the stem and set it aside to be absorbed by the vulcanite.
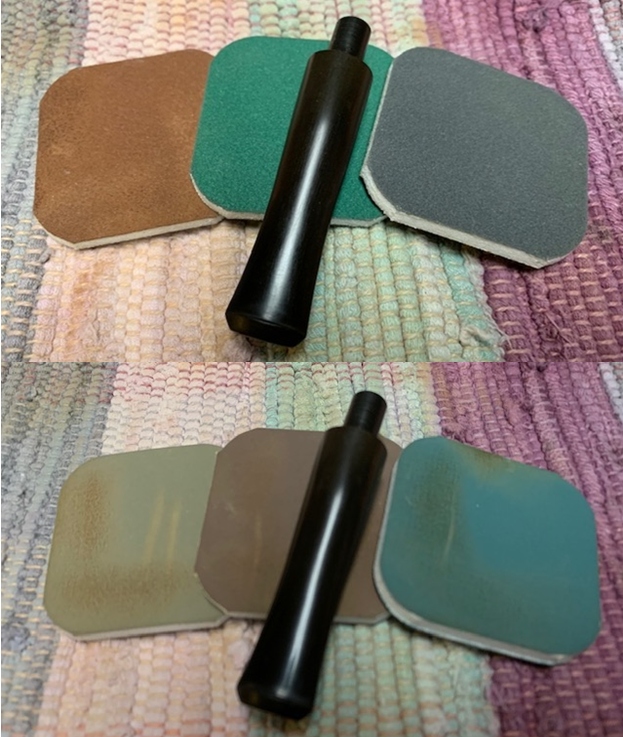
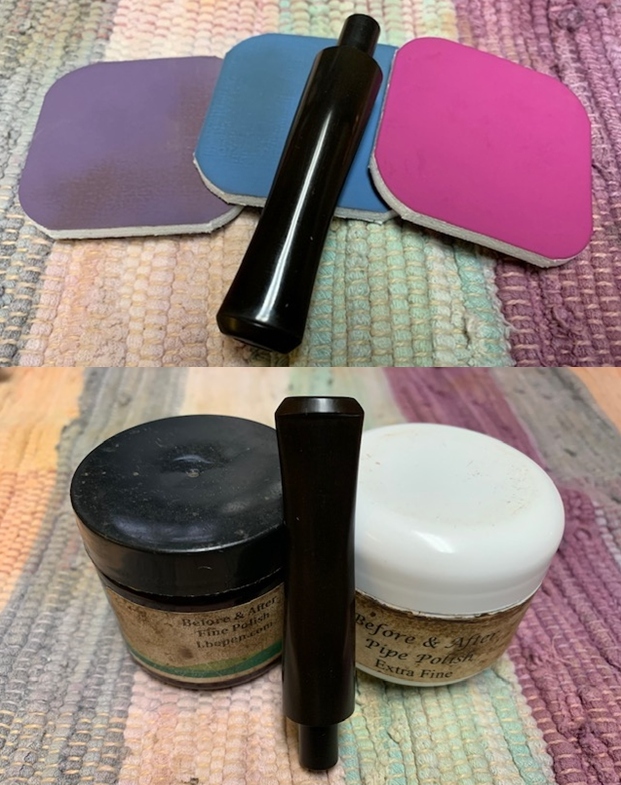
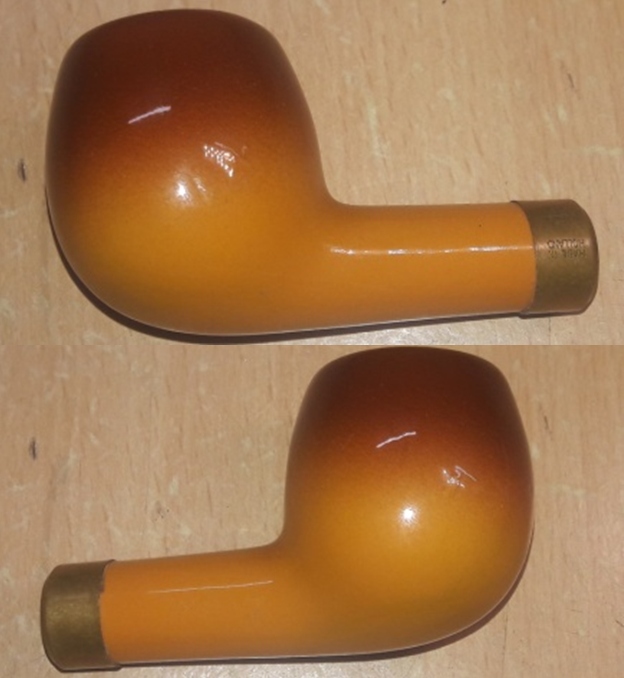
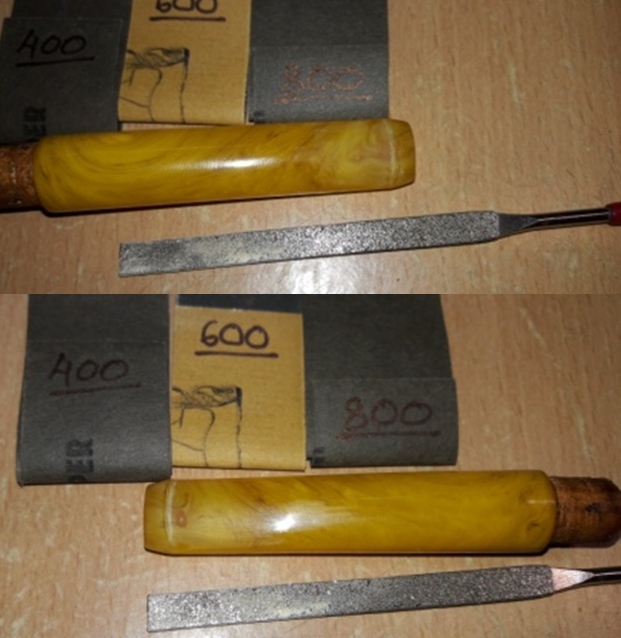
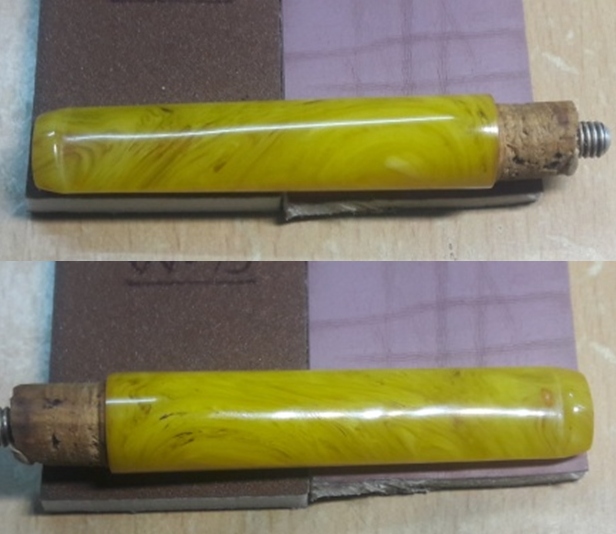
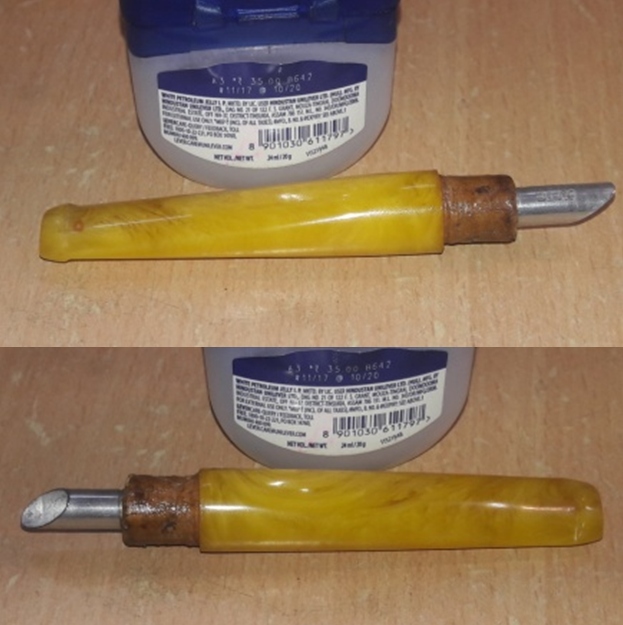
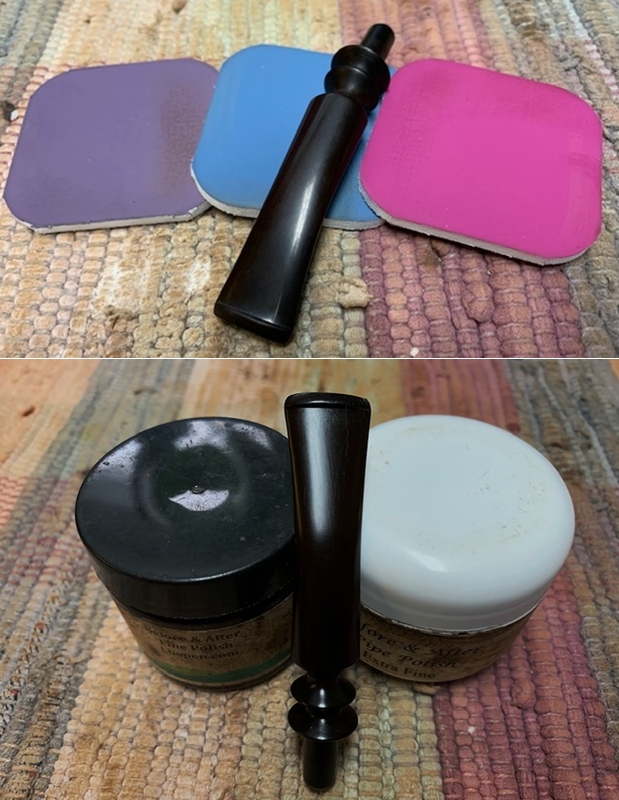
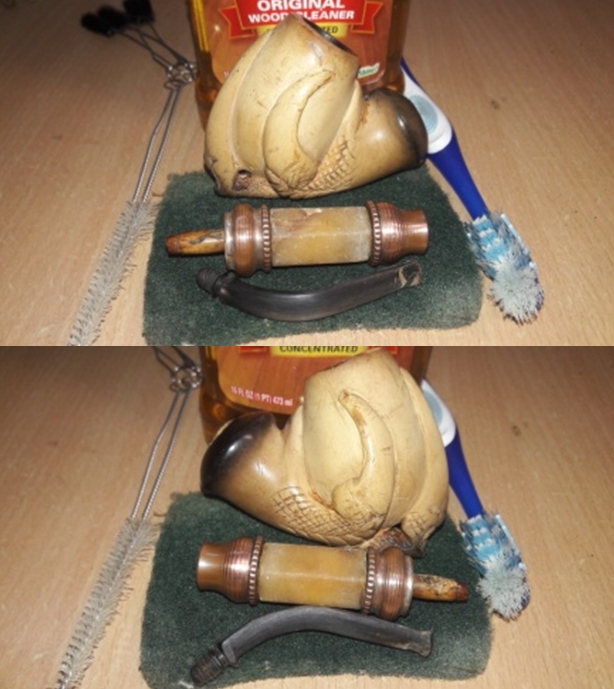
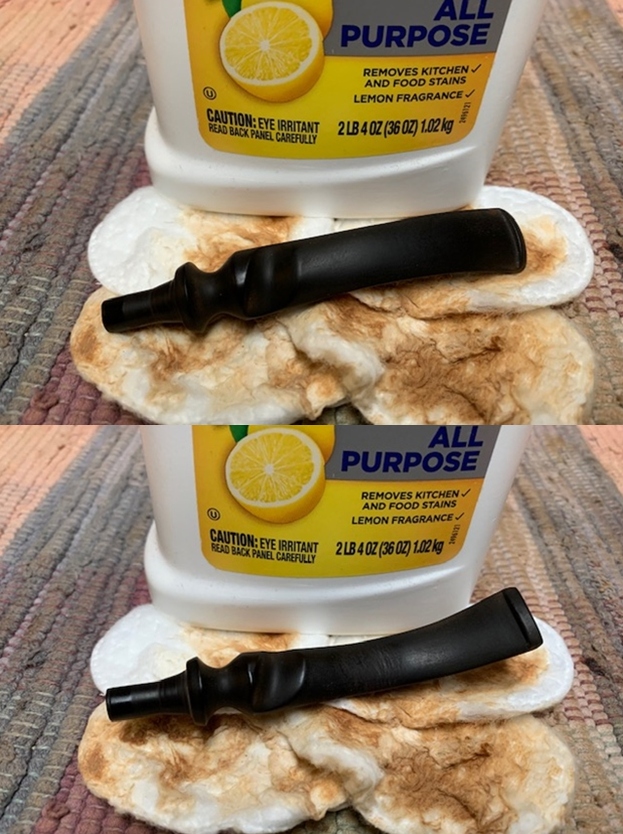
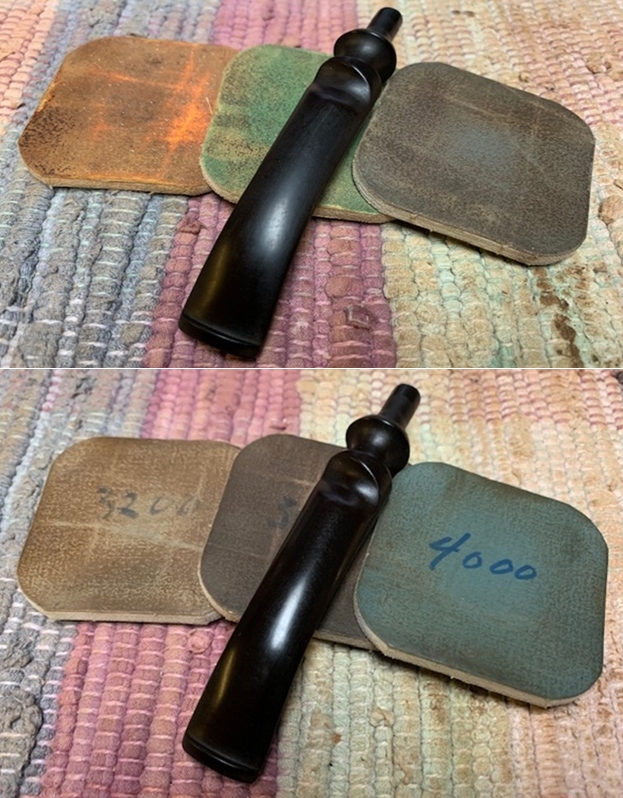
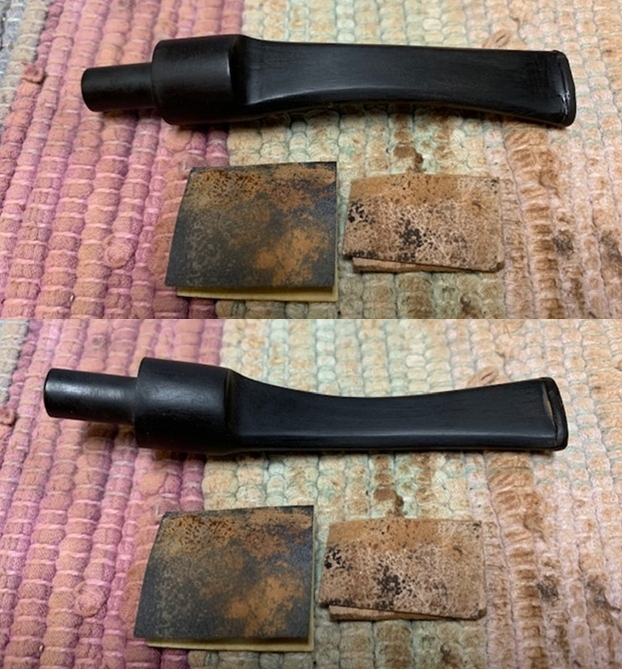
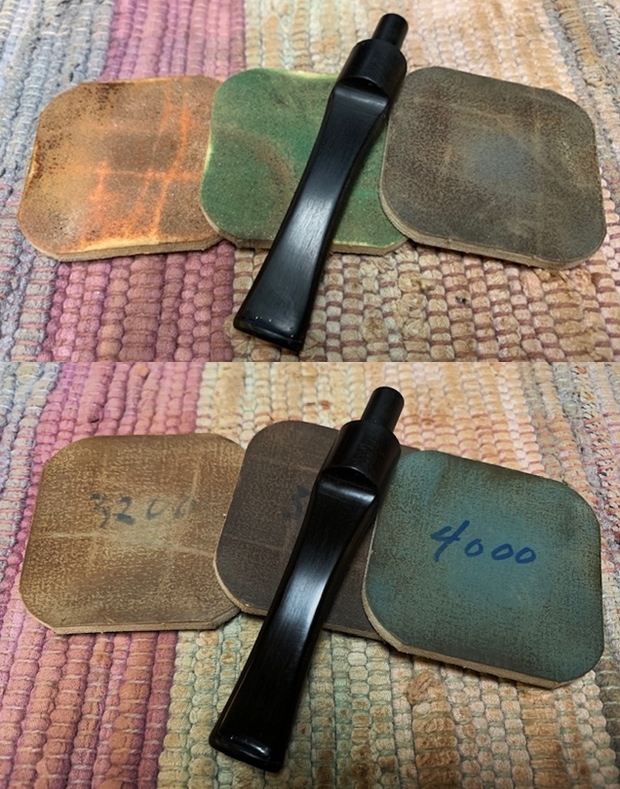
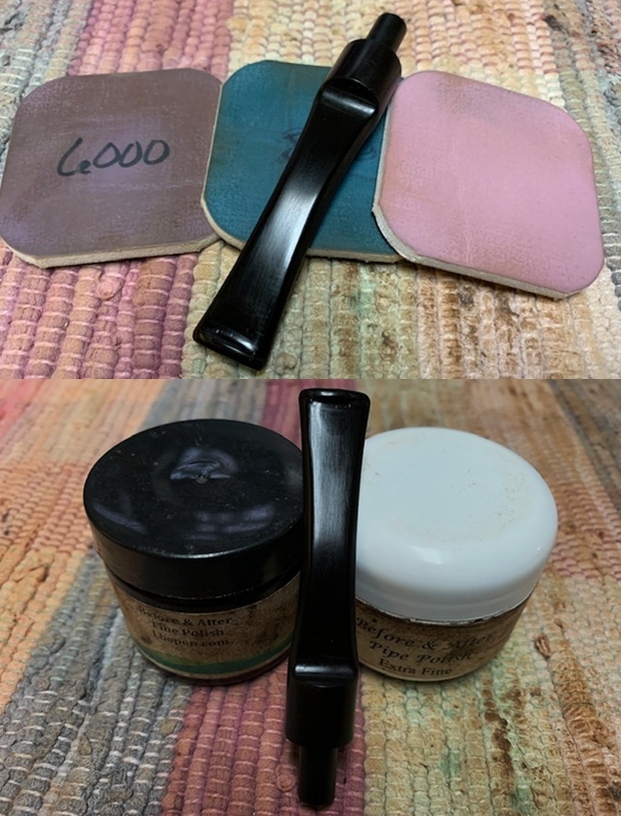
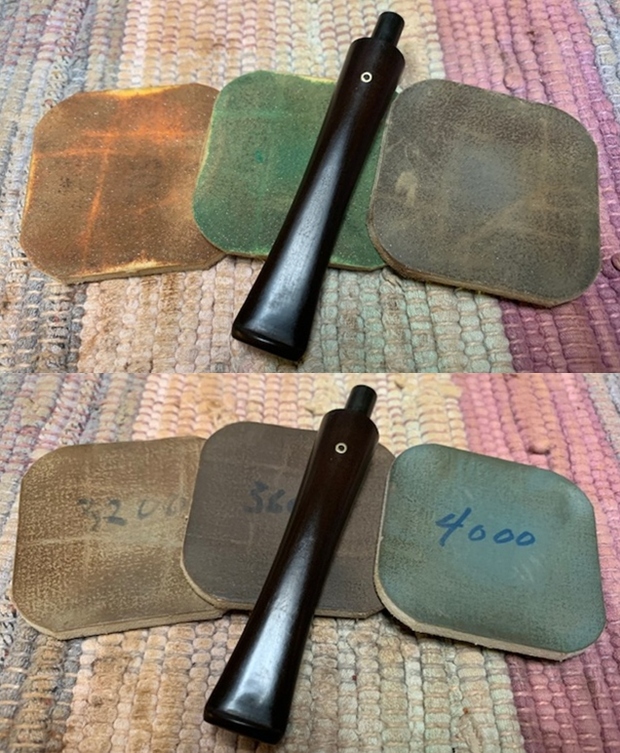
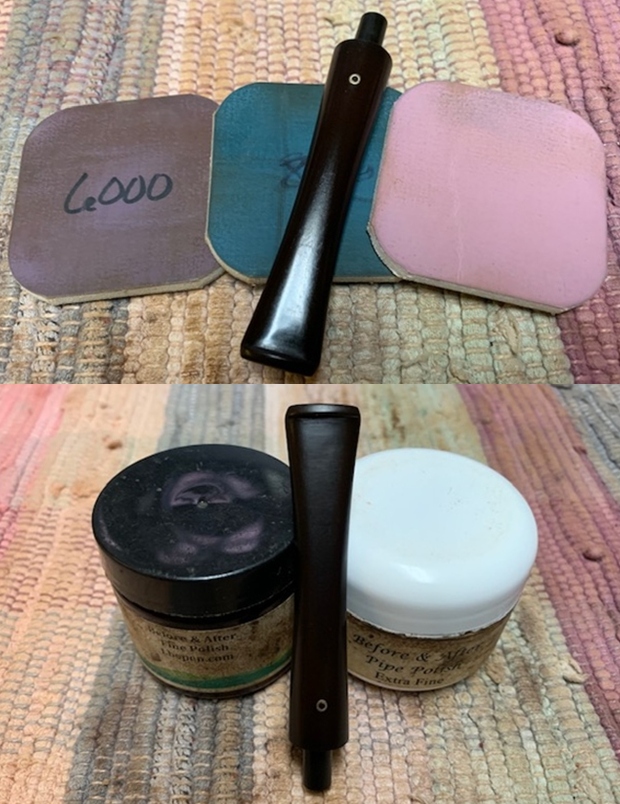
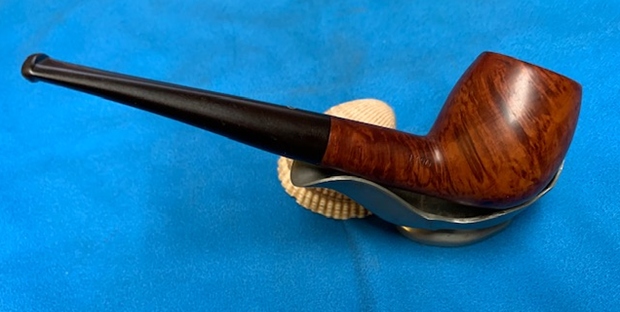
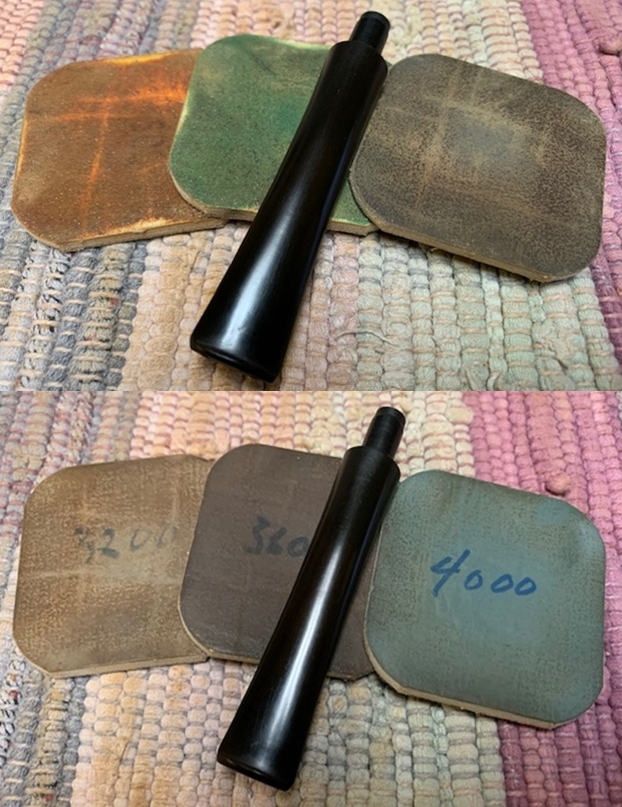
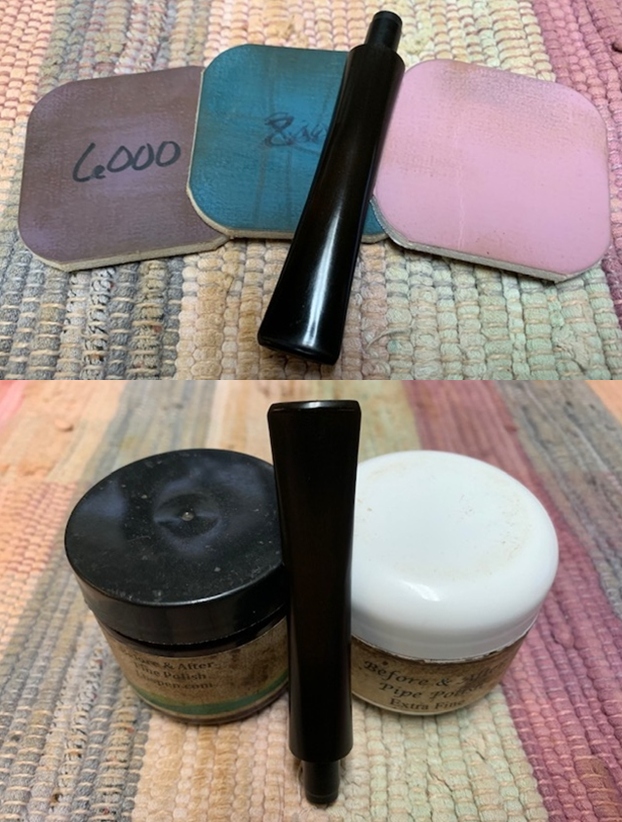
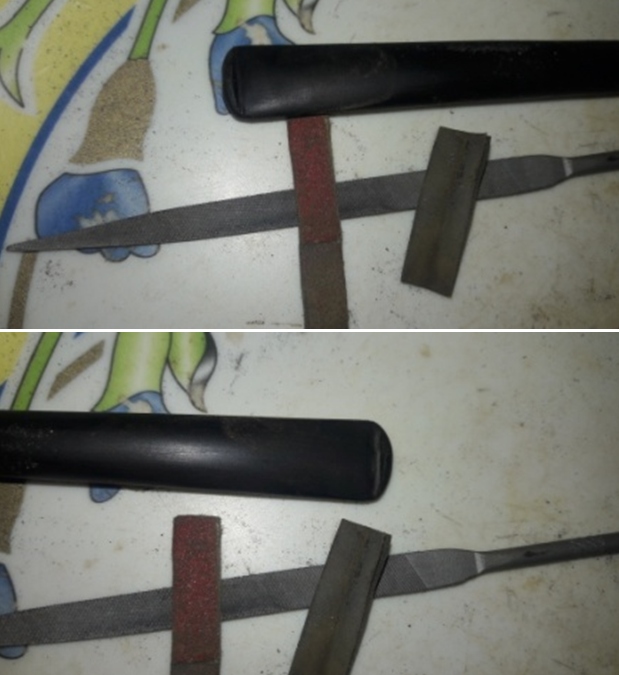 To bring a deep shine to the vulcanite stem, Abha polished it by wet sanding with 1500 to 2000 grit sandpapers followed by further wet sanding with 3200 to 12000 grit pads. She wiped the stem with a moist cloth after each pad and rubbed it down with Extra Virgin Olive oil to rejuvenate the vulcanite. The finished stem is shown below.
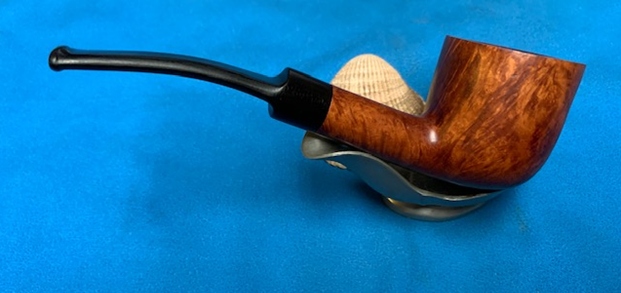
 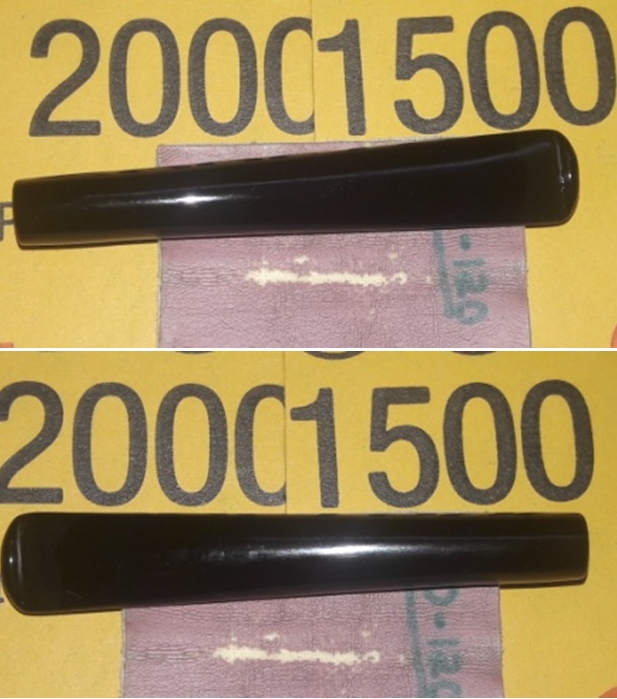 Further repair and refurbishing work would have to be put on hold till I rejoin my work place.
Part II
Finally back at my work place…… After enjoying a compulsorily extended leave of three months with family and having honed my culinary and domestic chores skill set, I was happy to rejoin my duty and get back to completing the pending pipe restorations.
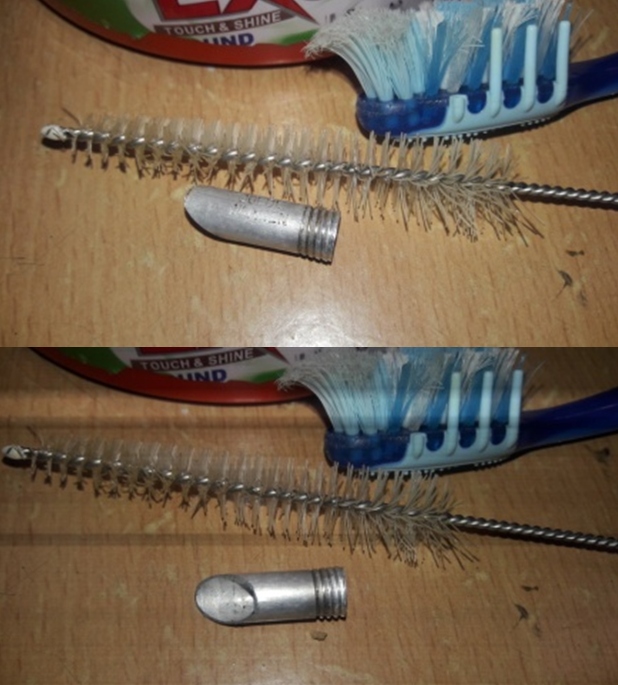
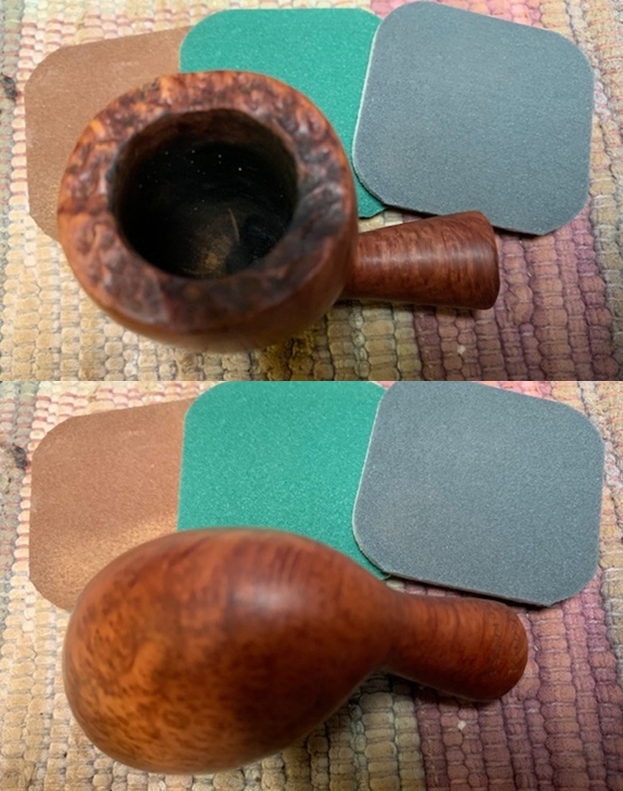
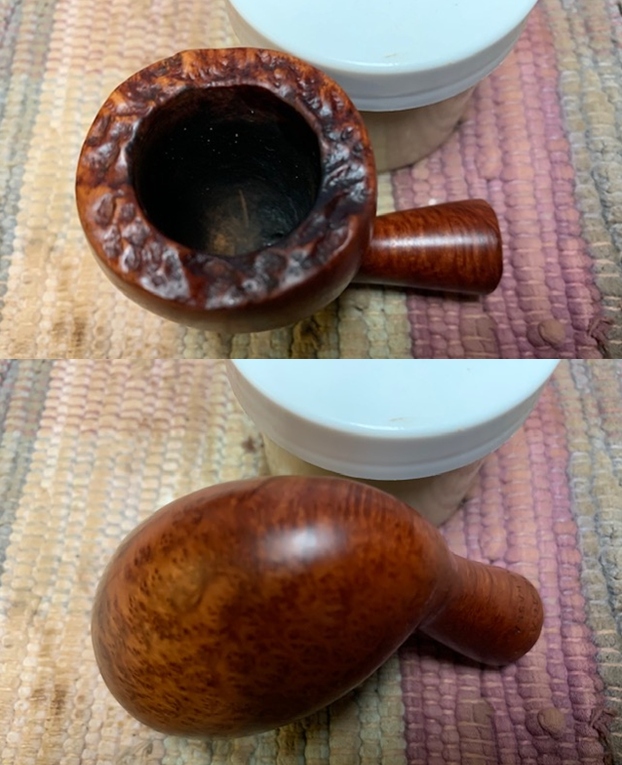
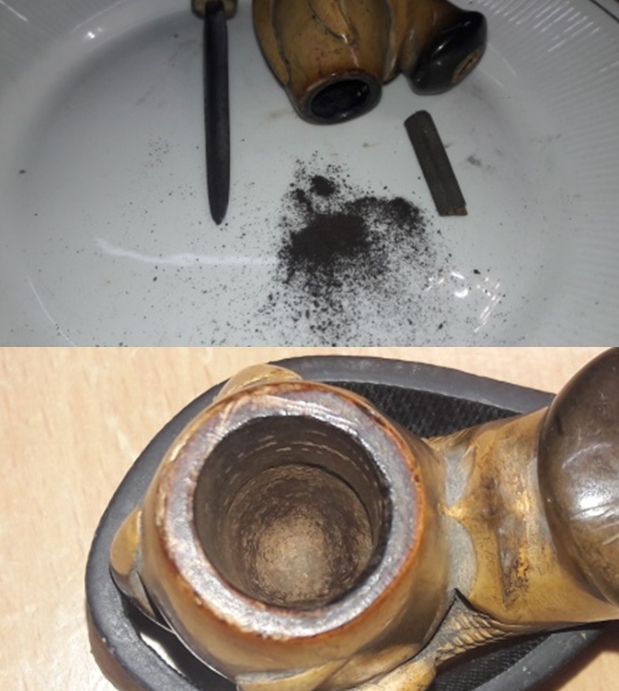
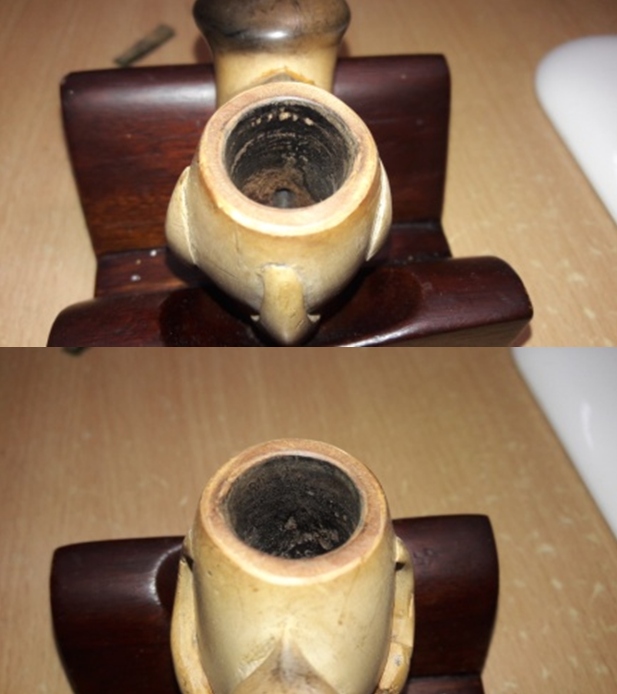
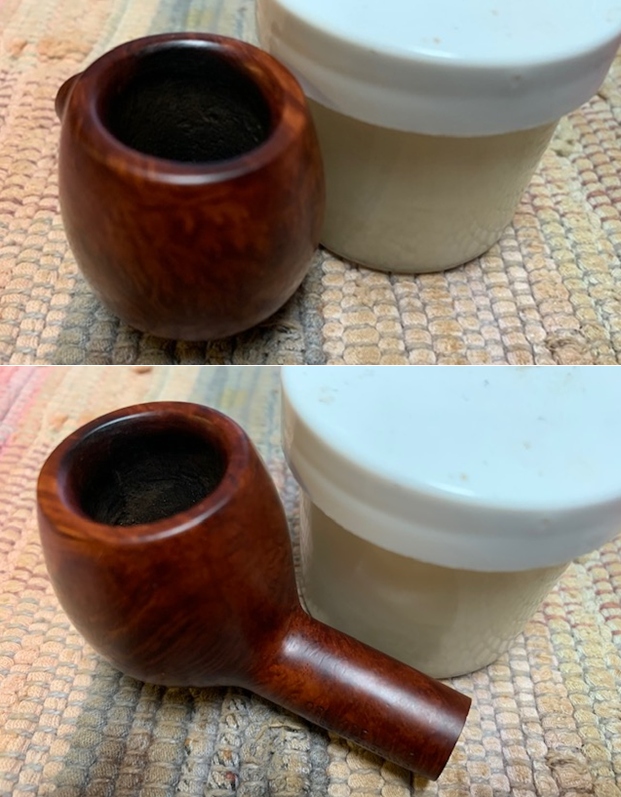
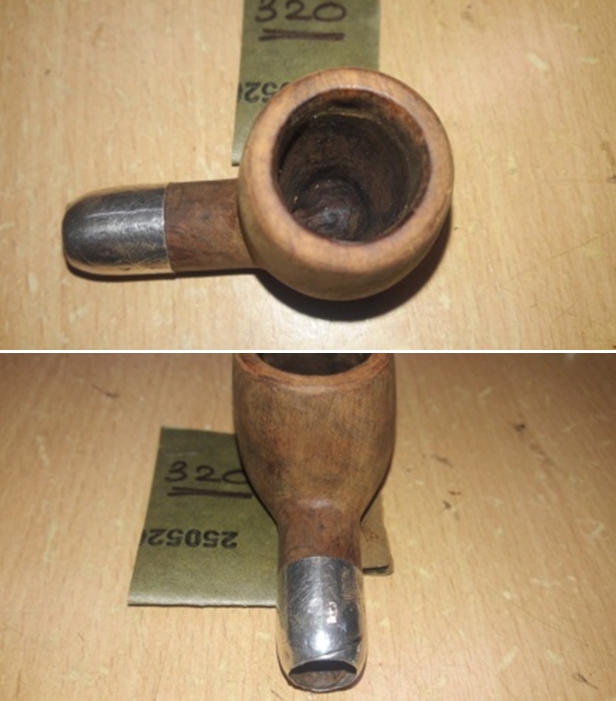
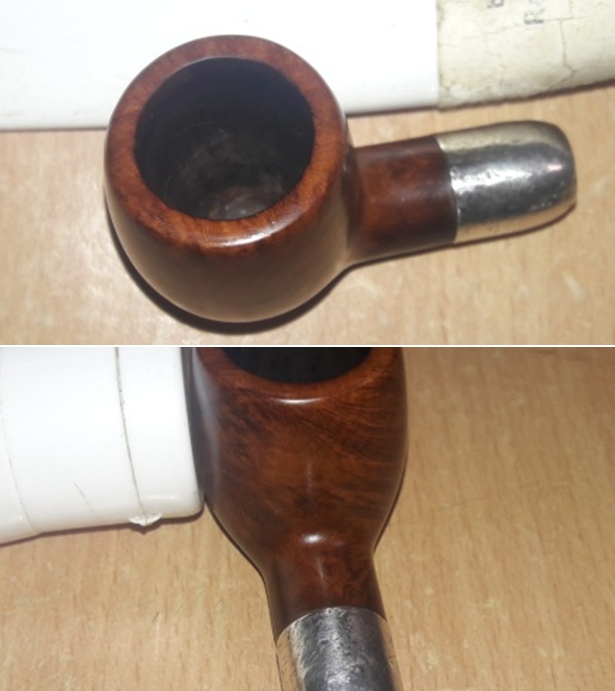
I started further restoration work on this pipe by reaming out complete cake with size 1 head of the PipNet pipe reamer and further smooth out the chamber walls with a folded piece of 220 grit sandpaper. The chamber walls are solid and in pristine condition.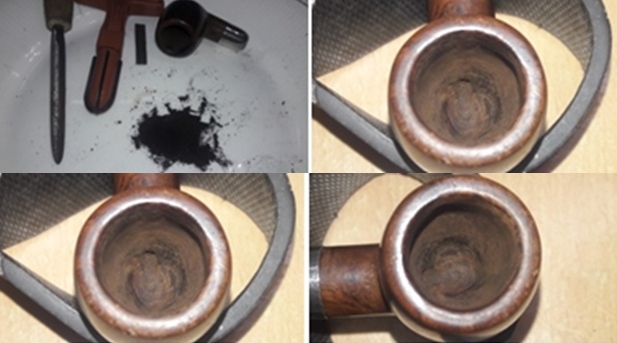 I further cleaned out the internals of the shank with pipe cleaners and alcohol and cotton buds. I scraped out the dried oils and tars from the shank walls with a dental tool. The ghosting is still strong and would need more invasive method to completely eliminate these smells.
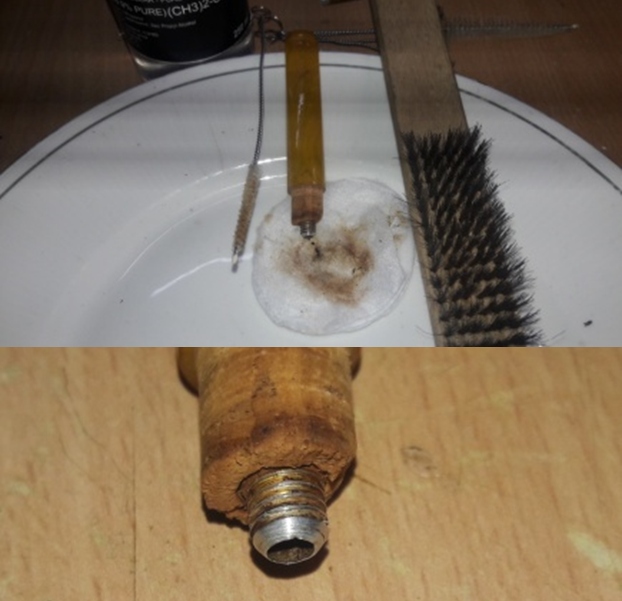
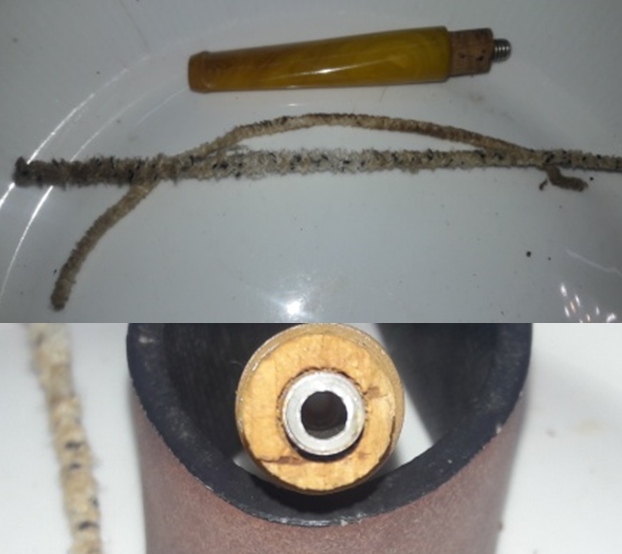
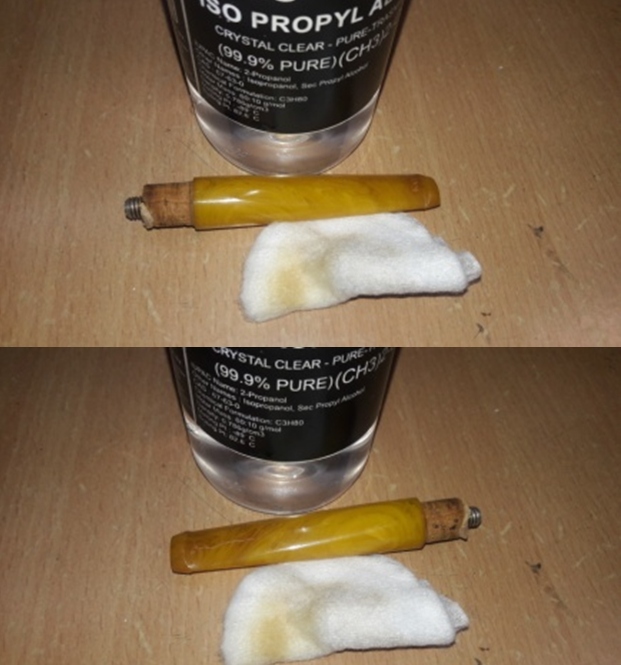
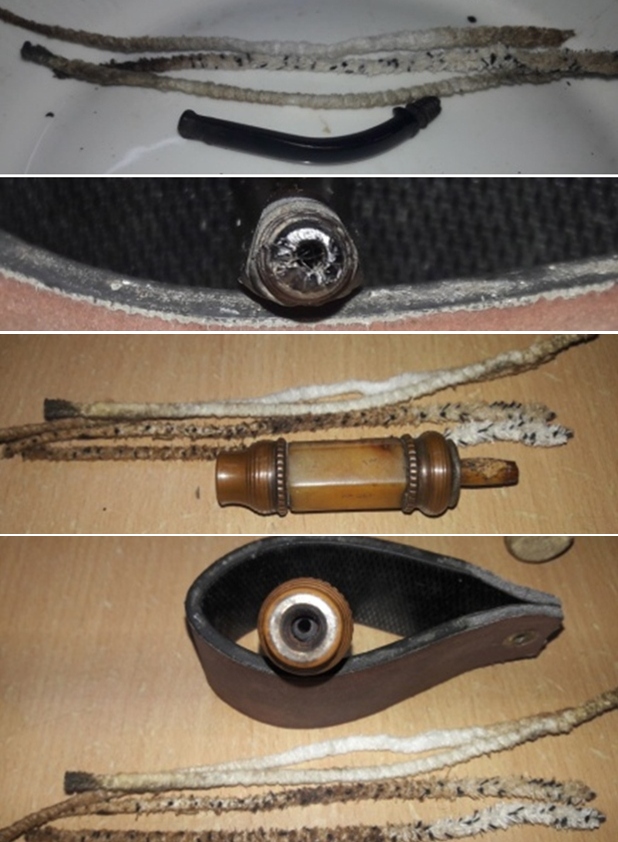
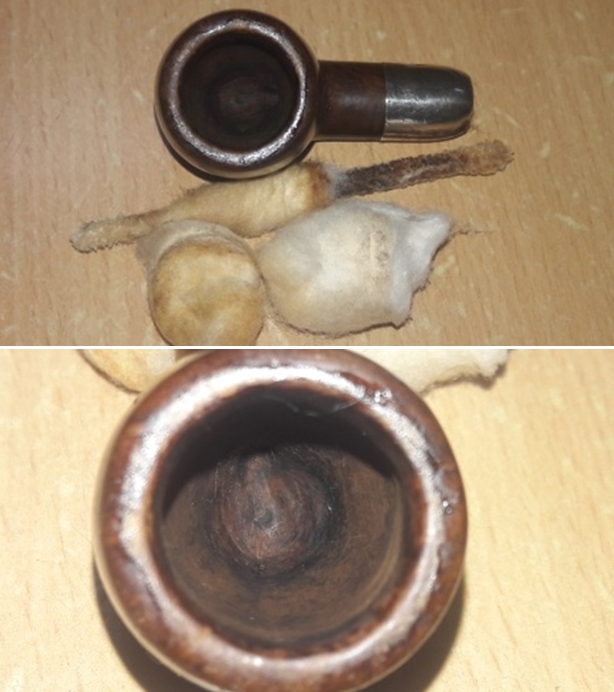
 To completely eliminate the ghost smells, I subjected the chamber to a cotton and alcohol soak. The alcohol draws out all the deep oils and tars from the chamber and mortise walls which is thereafter trapped by the cotton balls. The next day, the soak had done its intended task and the pipe now smells nice clean and fresh. Once the cotton balls were removed, I ran a couple of bristled pipe cleaners dipped in alcohol to remove the loosened oils and tars from the mortise.
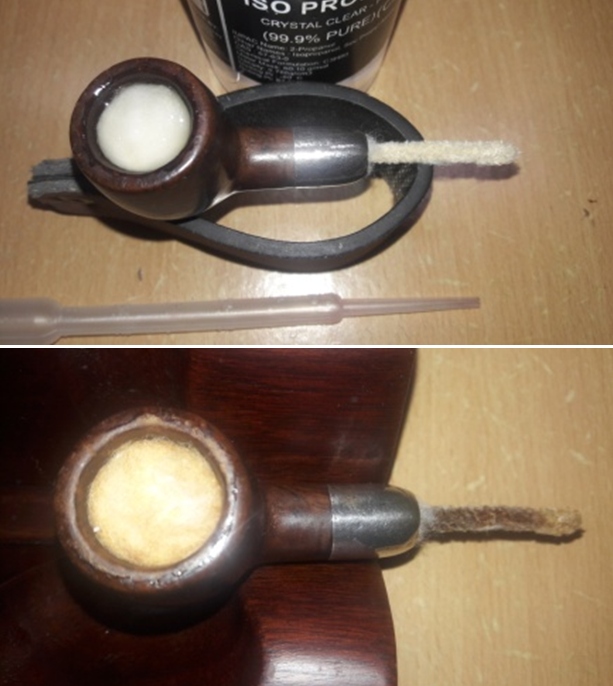
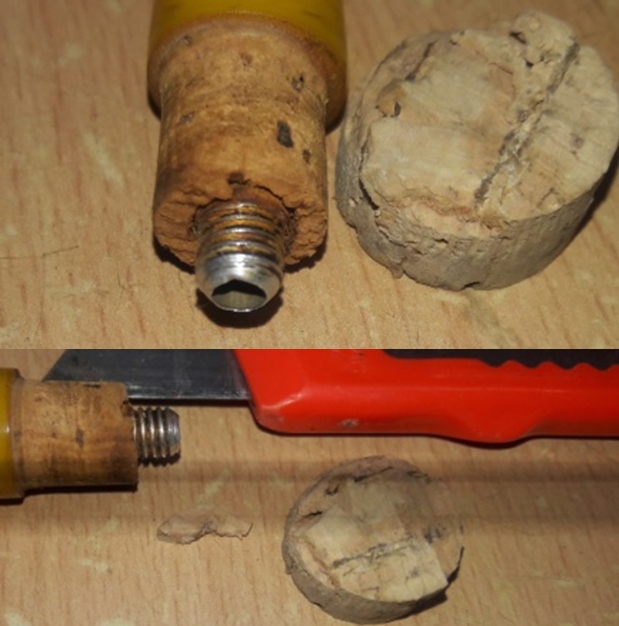
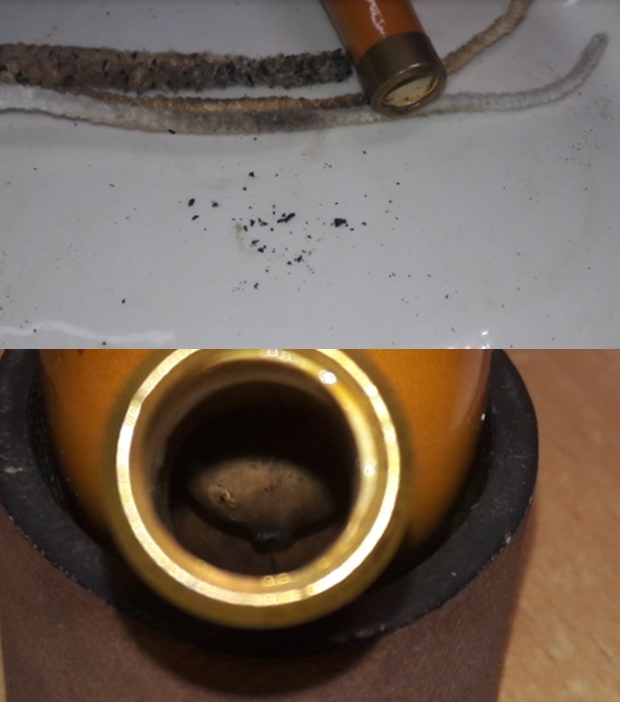
 Before proceeding with further repairs, I decided to separate the sterling silver ferrule from the shank end as it would give me free access to rebuild the chipped shank end and stabilize the crack. I first tried to heat the ferrule with my heat gun but to no avail. Next trick that I tried was to soak the shank end in pure acetone. Acetone eats away at the glue and loosens the ferrule. I stuffed a cotton ball wetted in acetone in to the shank end and set it aside for the acetone to loosen the glue. However, this too failed and the ferrule remained firmly stuck to the shank end. I conferred with Steve about this rebuild and he suggested that I should try and rebuild the shank end with clear superglue from the inside. That is exactly what I would do to repair the damage.
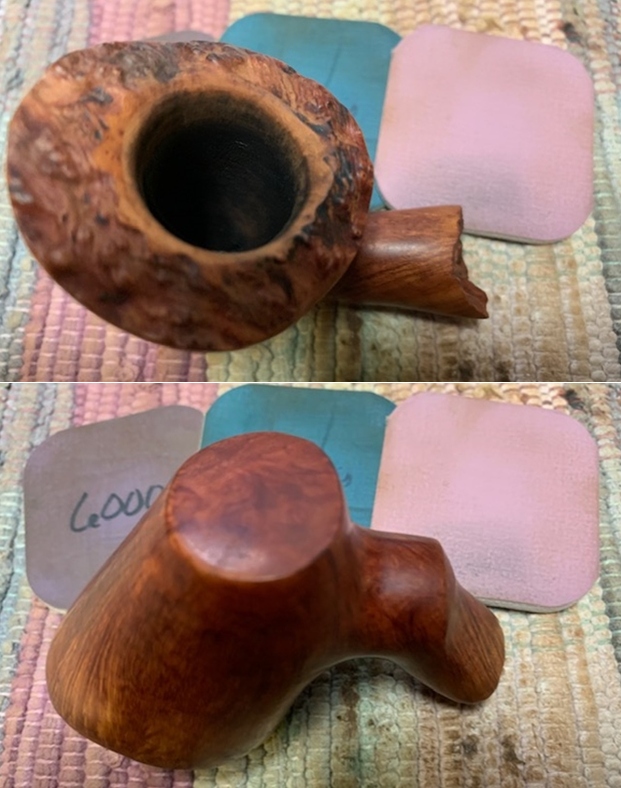
  Next, I thoroughly cleaned the rim top and the stummel surface using Murphy’s Oil soap and a hard bristled tooth brush. The stummel and the rim top have cleaned up nicely.
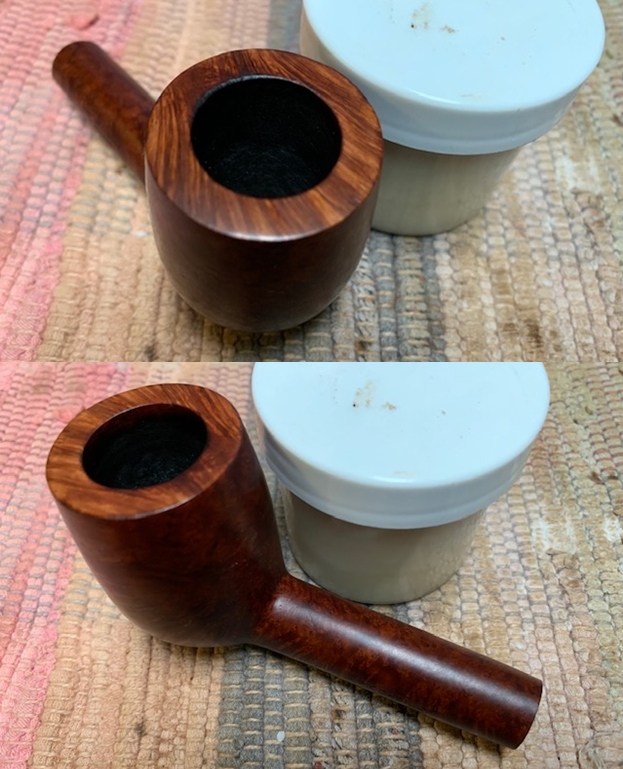
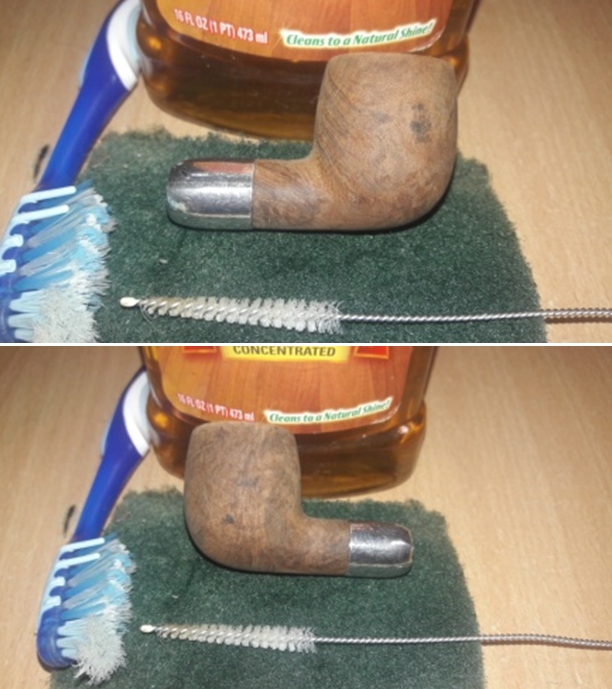
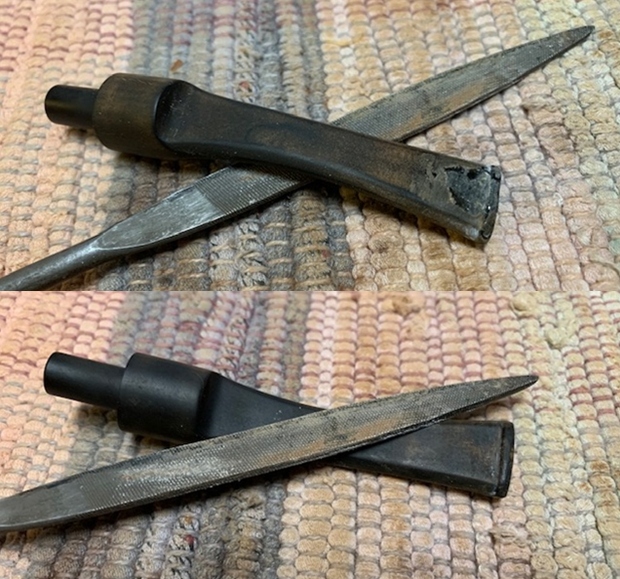
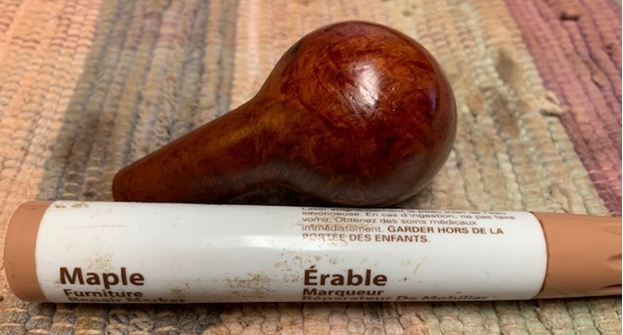
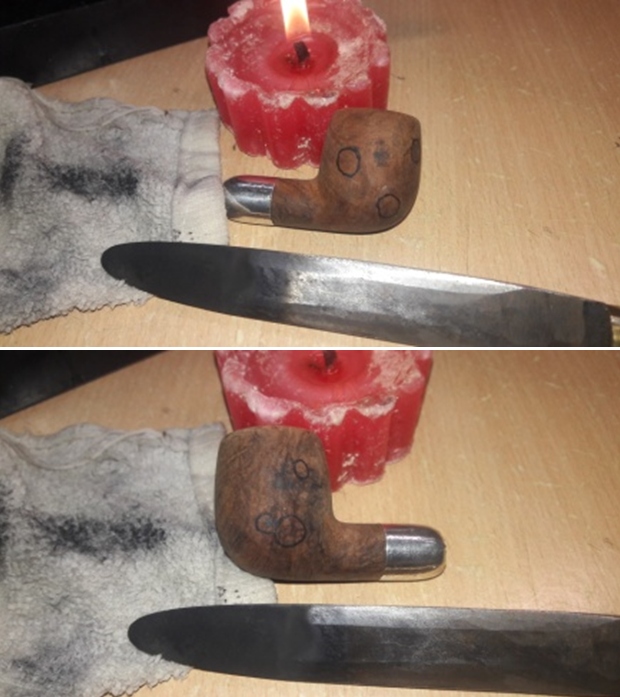
 I decided to address the dents and dings on the stummel surface and on the rim outer edge. Using a marker pen, I marked all the major areas with dents and dings as I had decided to leave the minor ones as they were. I heated my fabricated knife over the flame of a candle, placed a wet Turkish hand towel over the marked areas and steamed out the dents by placing the heated knife over the towel. Though some dents were still observed, these were greatly reduced when compared to before steaming.
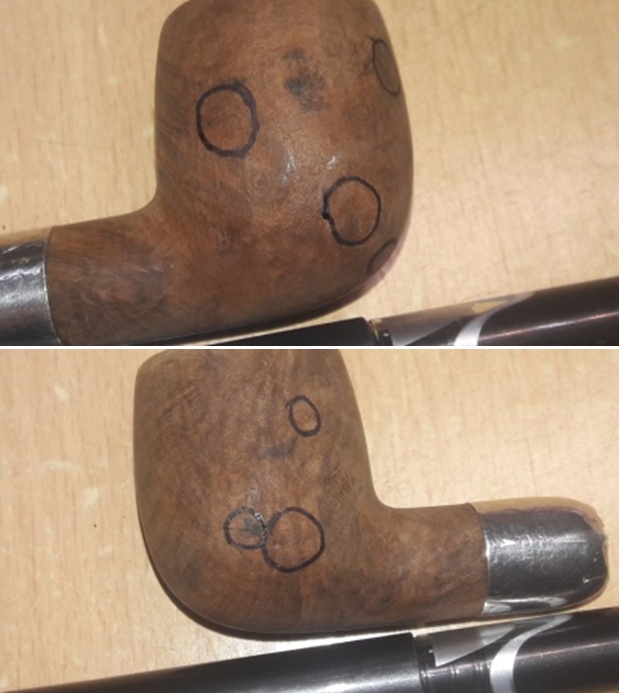
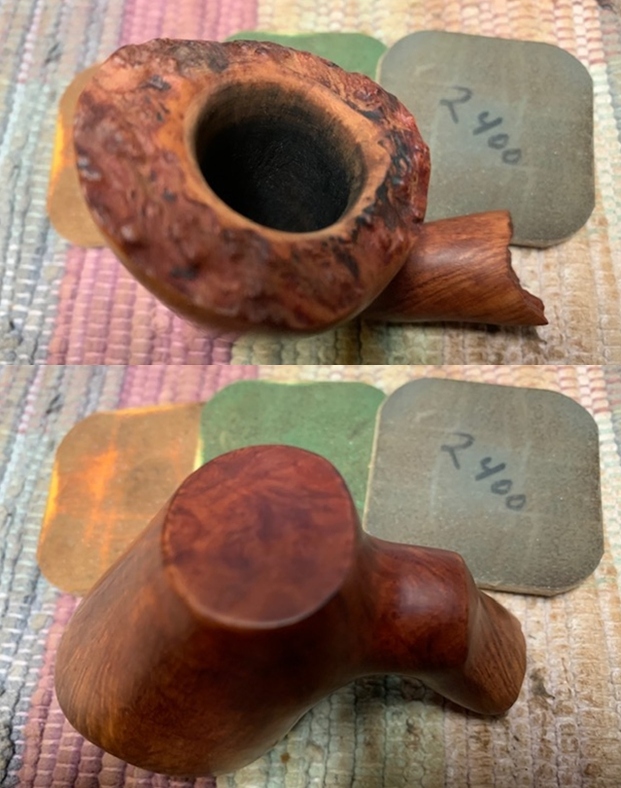
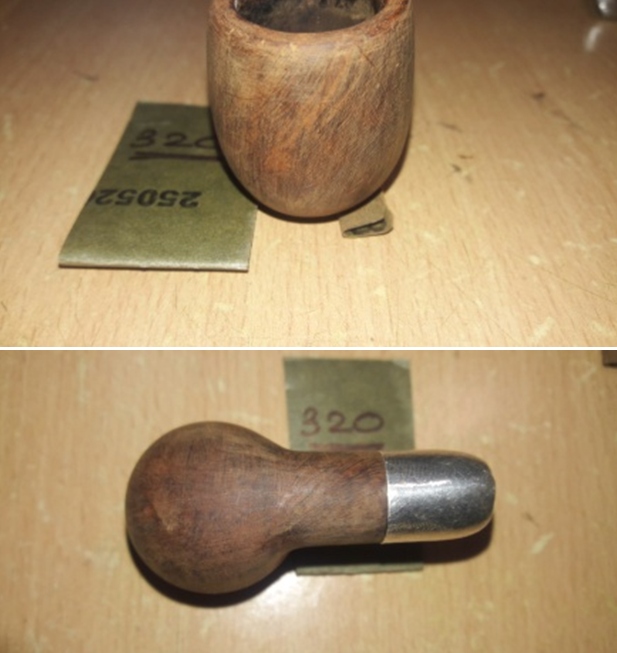
 To even out and match the raised dings over the stummel surface, I sand the entire stummel with a folded piece of 320 grit sand paper.
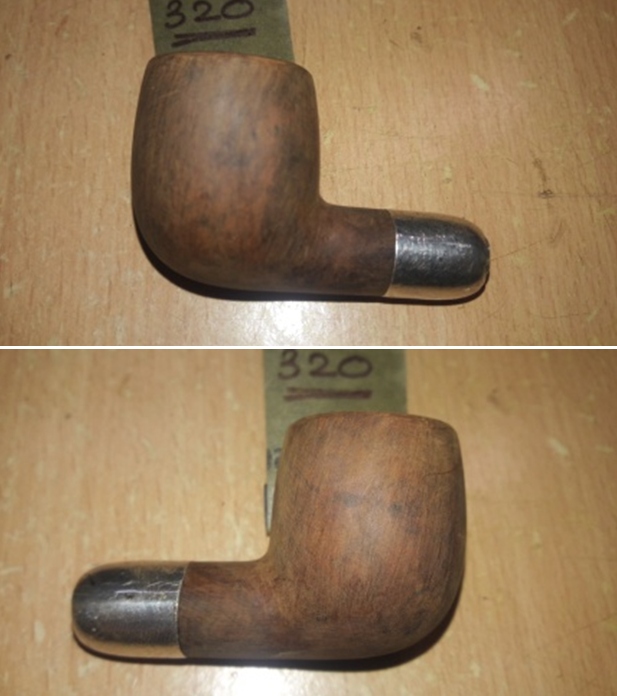
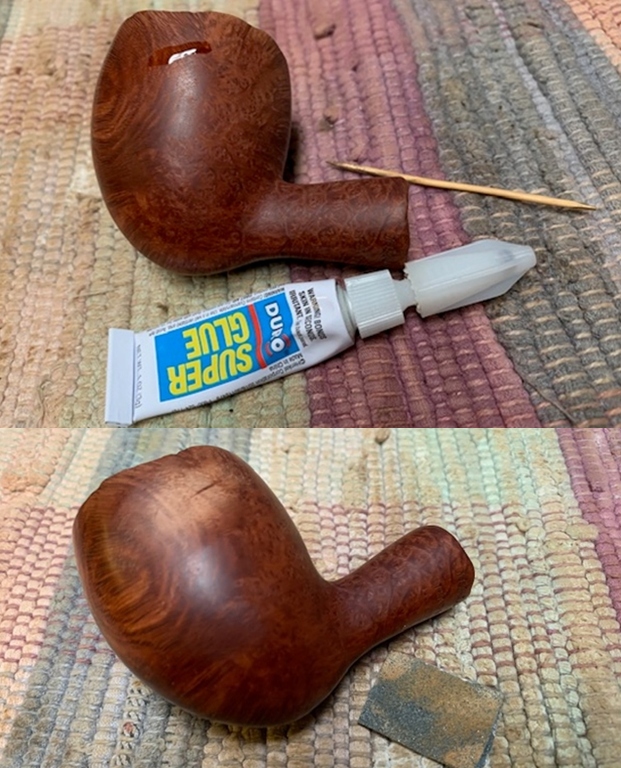
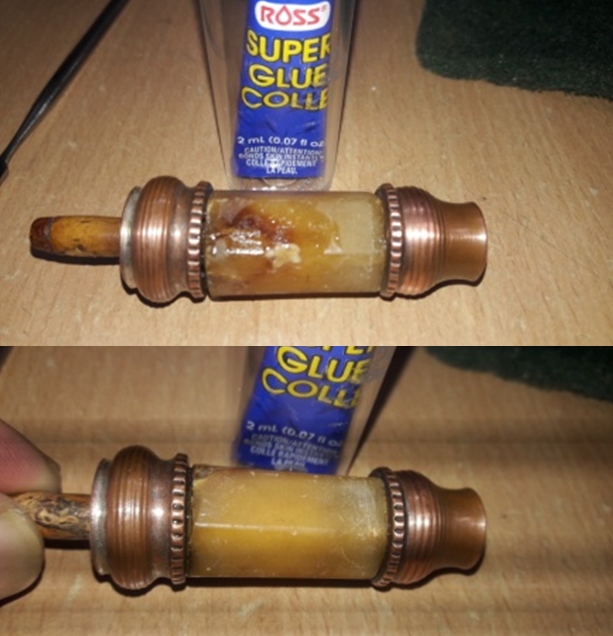
 Next I decided to address the damage to the shank end. As discussed with Steve, I filled the crack and chipped shank end on the left side with clear superglue. Once the glue had set, I applied another layer over it, repeating this process till I had a good coverage of superglue over the damaged area. I repeated this process over the right side after the superglue on the left side had set. Once the damaged surfaces were filled with superglue, I set the stummel aside for the fill to cure completely.
 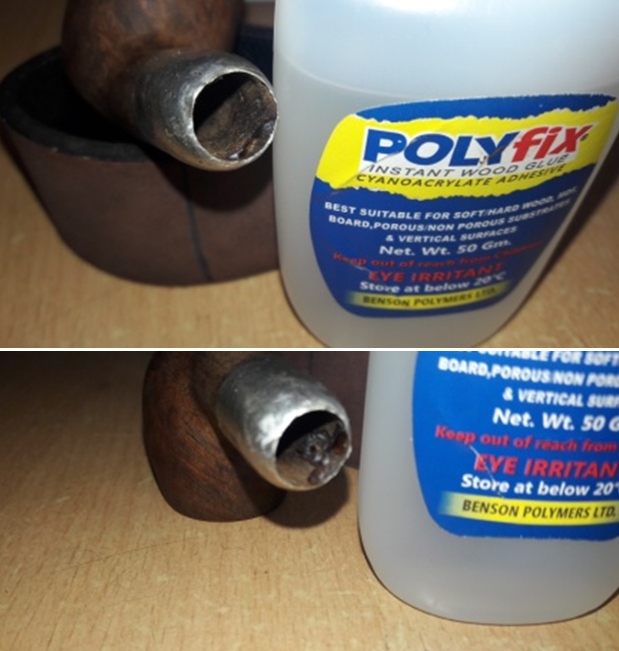 By the next afternoon when I got back to working on this pipe, the superglue fill had cured and hardened completely. With a semi circular needle file, I sand the fill to a smooth surface frequently checking for the seating of the stem in to the mortise. Once I had achieved a rough match, I worked the fills sanding it down with 320, 600, 800 and 1000 grit sand papers till I had a perfectly smooth shank wall and a snug seating of the stem in to the mortise.
 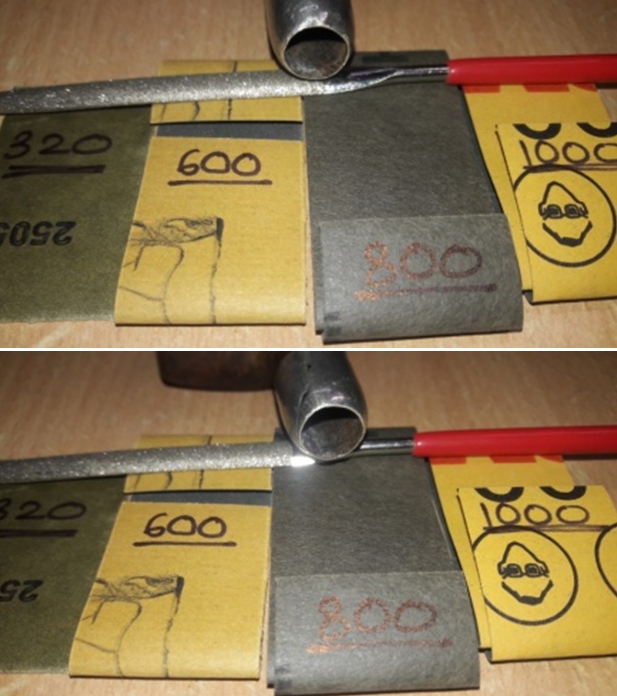 With the internal repairs to the shank end completed, I addressed the issue of sharp and uneven edges of the sterling silver ferrule. I lightly topped the sharp edges of the ferrule over a piece of 180 grit sand paper giving it only a few turns till I had a nice even edge surface. Using a round needle file, I filed at the rough and sharp edges till smooth. The silver ferrule edge is now even and smooth with no sharp edges and the seating of the stem in to the mortise is also snug and perfect.
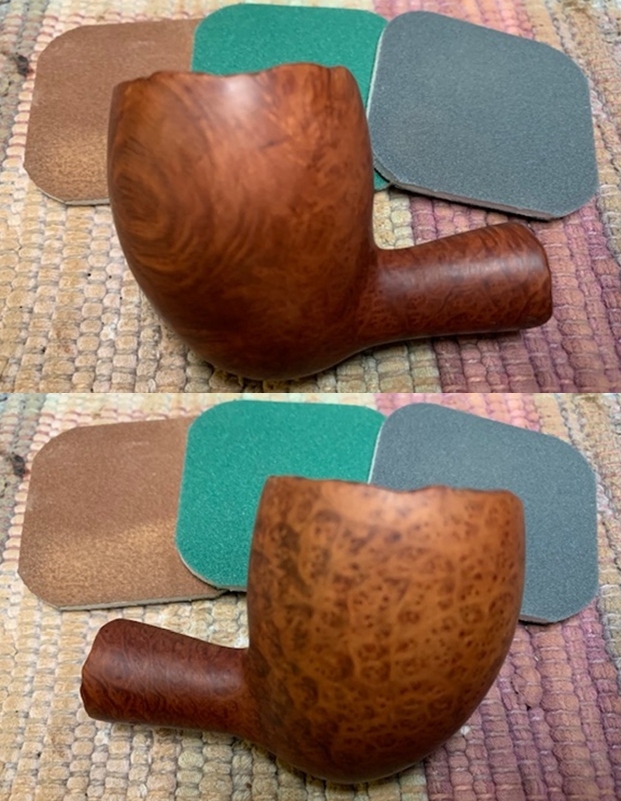
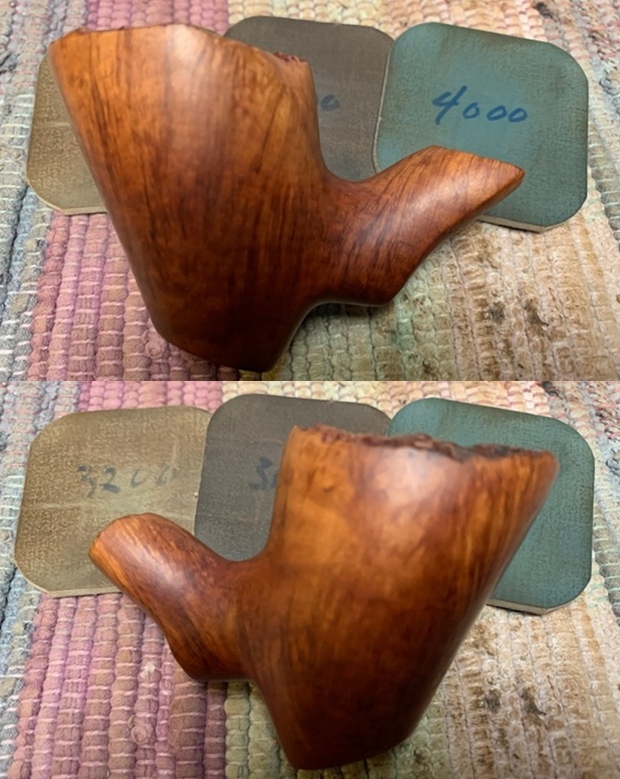
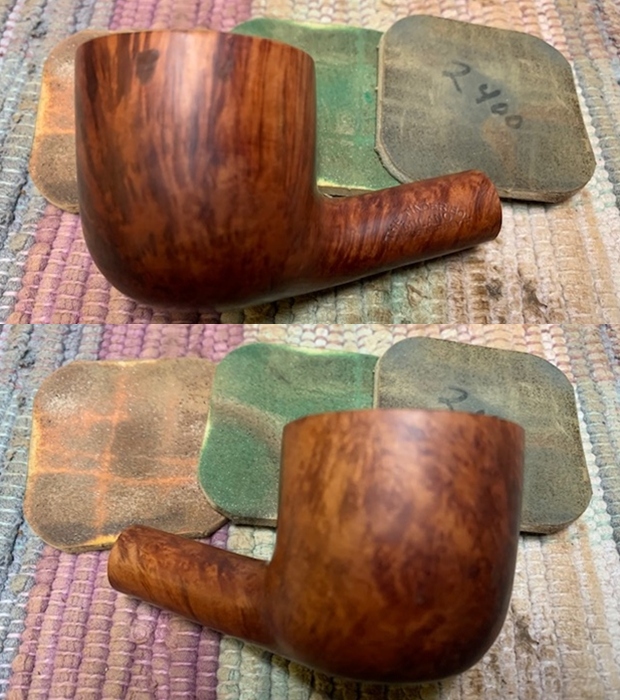
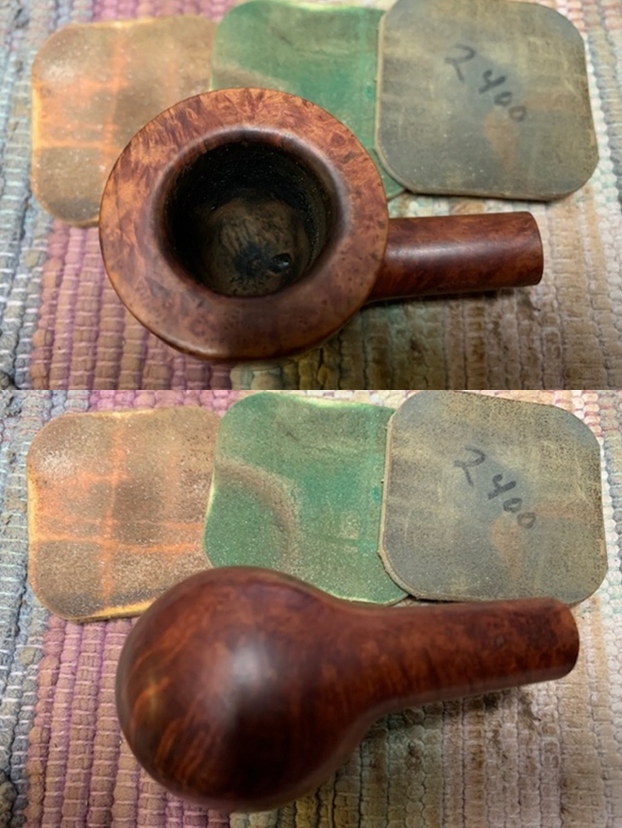
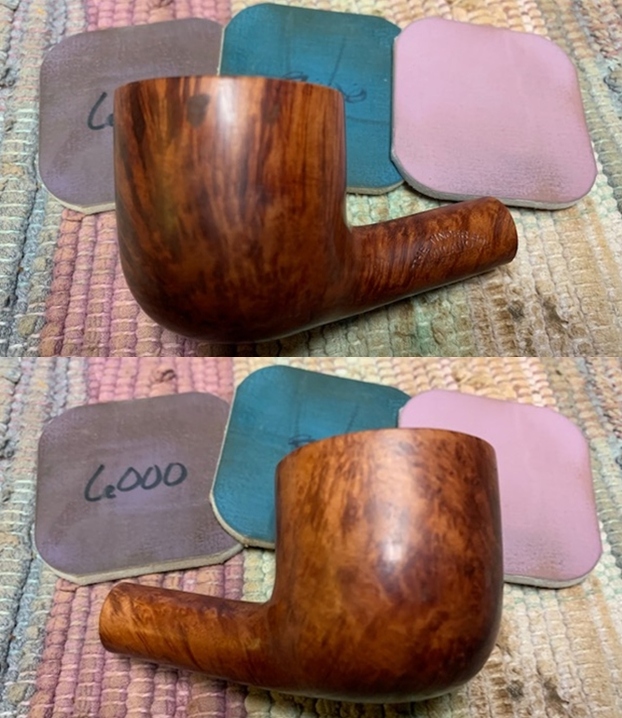
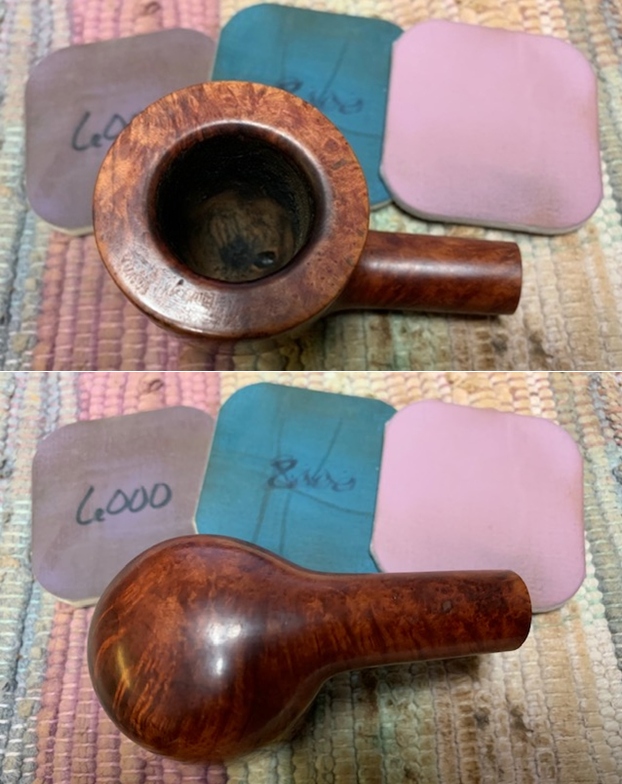
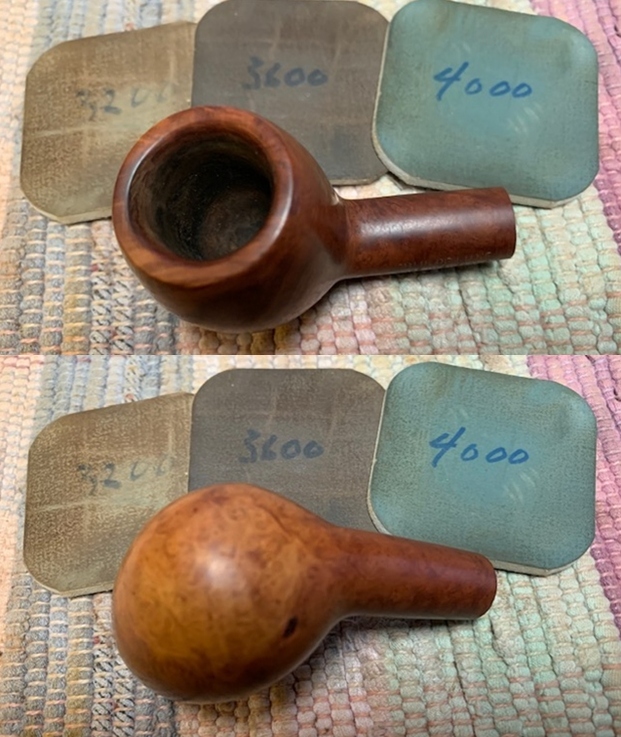
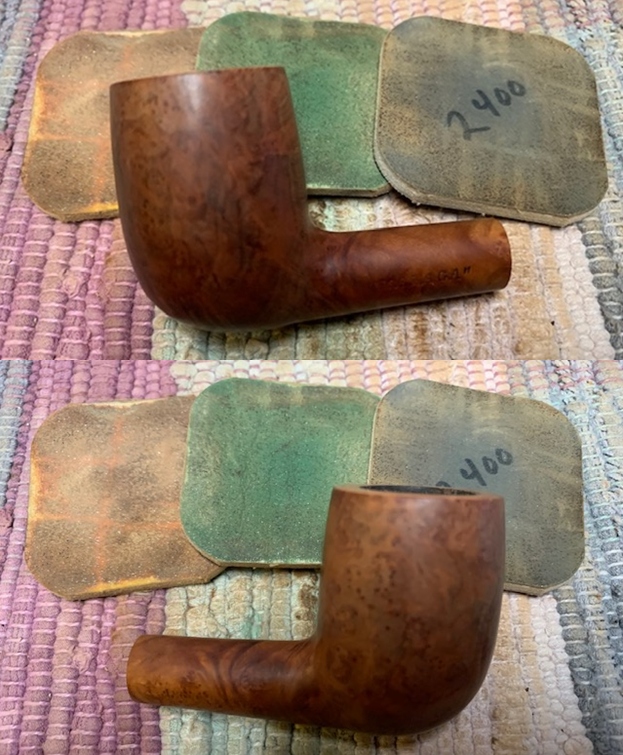
 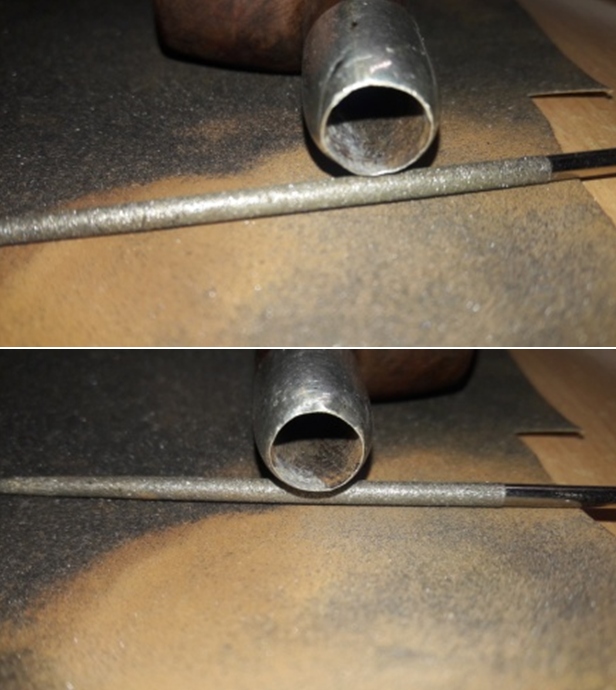 I had reached the stage where I had to decide if I wanted to completely eliminate all the dents and chips by further sanding with various grit sand papers and loose the patina which has developed on the surface or maintain the old sheen and make peace with a few minor dings. I decided on keeping the old sheen and went straight for the micromesh cycle. The old patina and the minor dents and dings would add to the vintage look of the pipe, which it was. I dry sand the entire stummel with 1500 to 12000 grit micromesh pads. I love all the pipes that I have restored or bought and are in my collection, but this piece has evoked the feeling of “DESIRE” in my heart, it’s such a beautiful pipe.
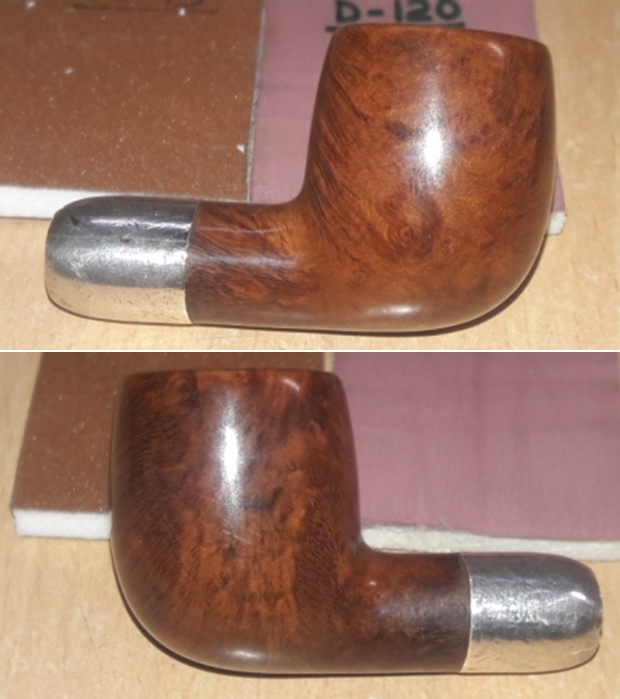
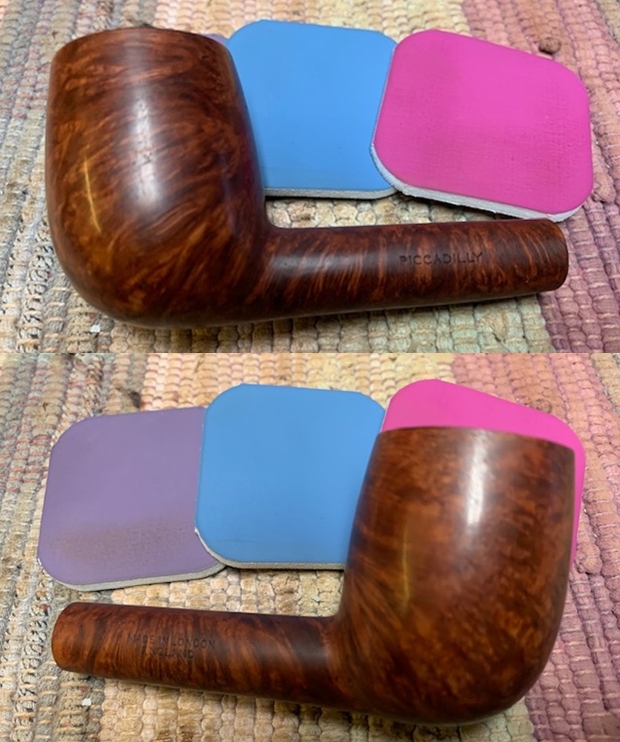
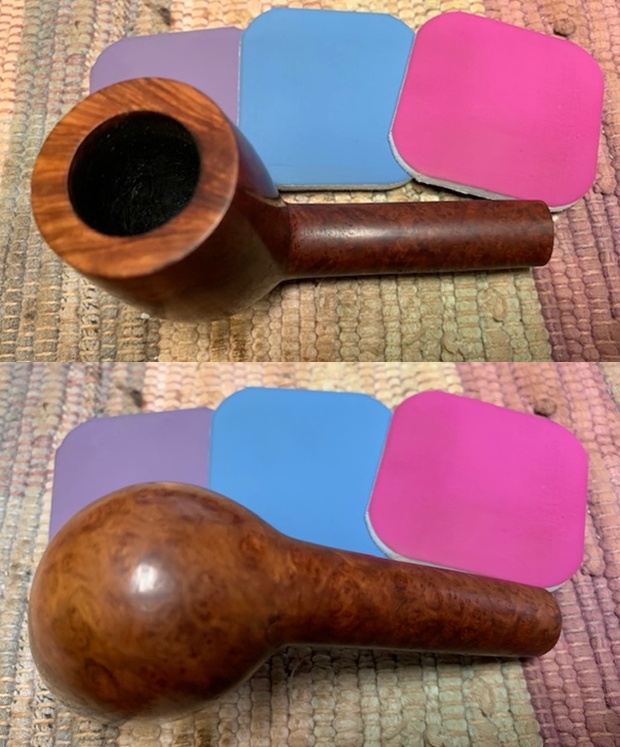
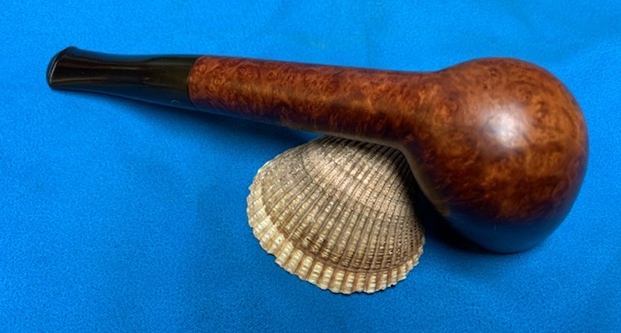
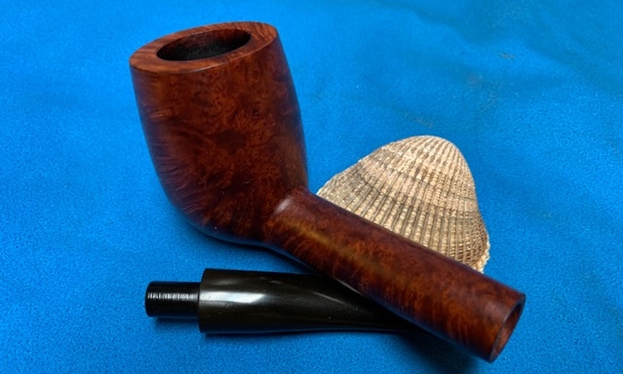
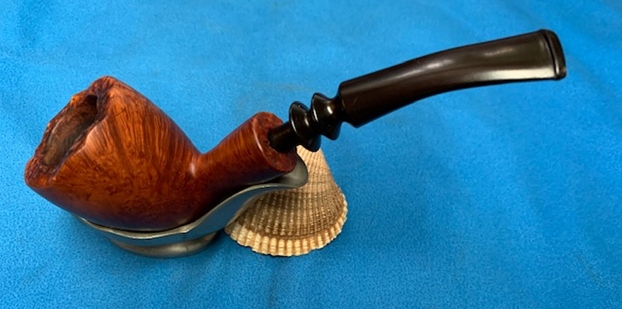
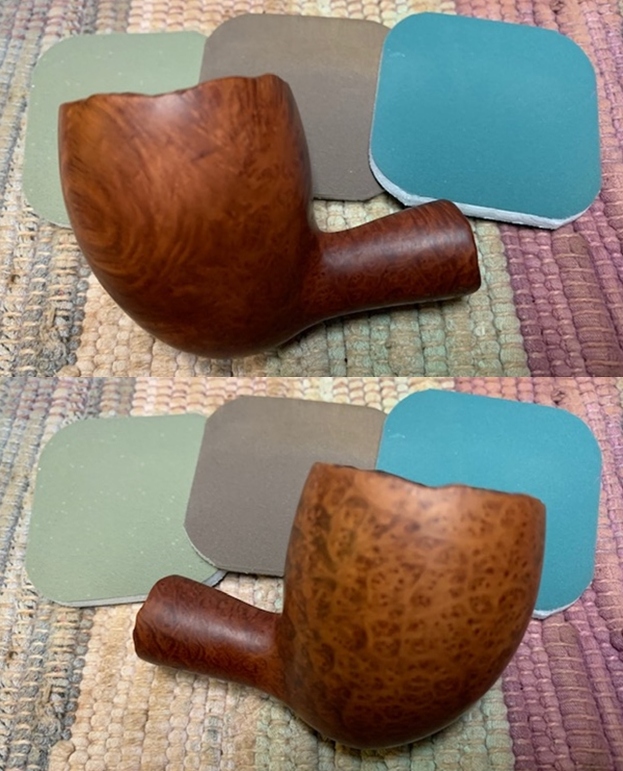
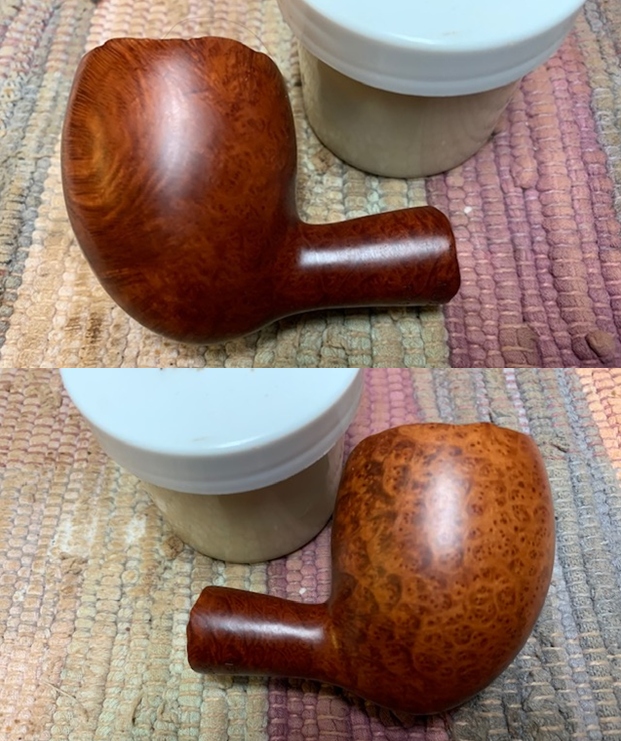
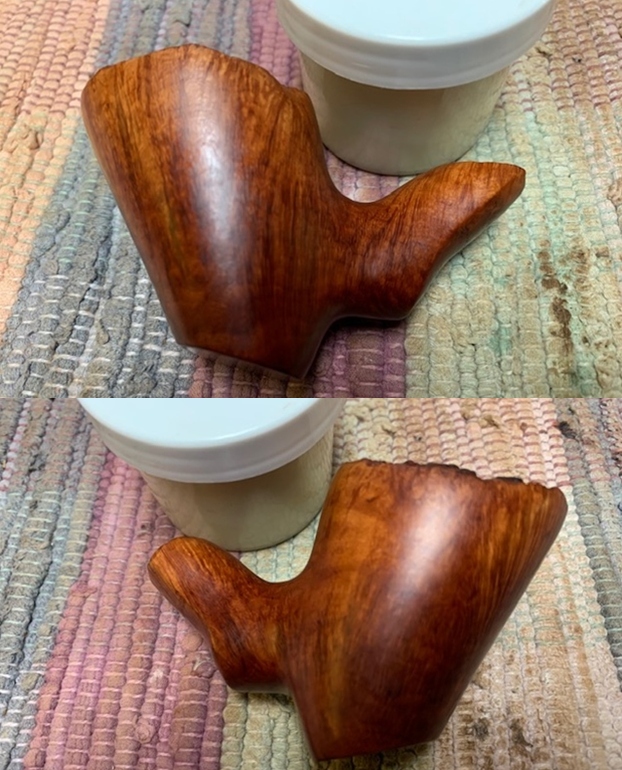
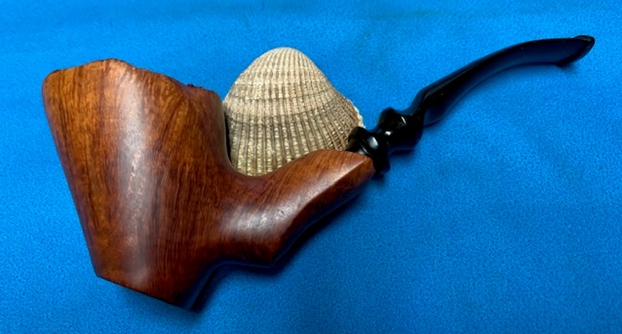
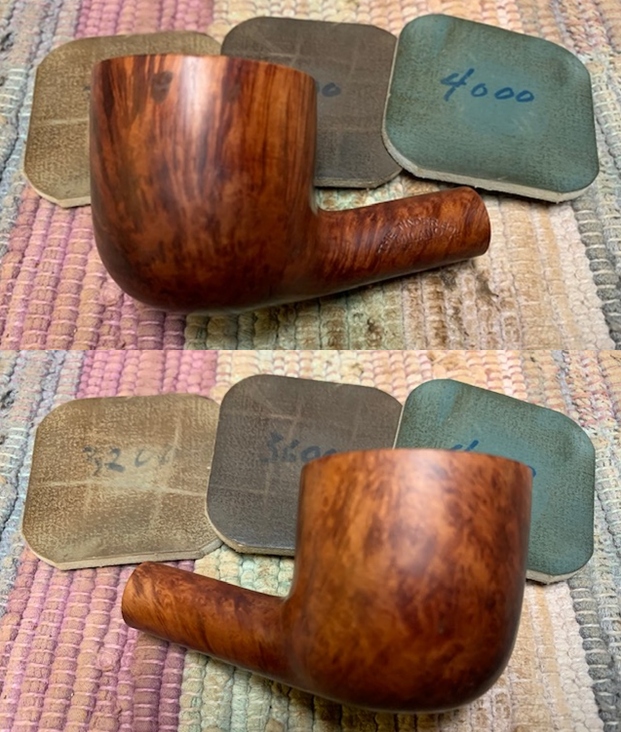
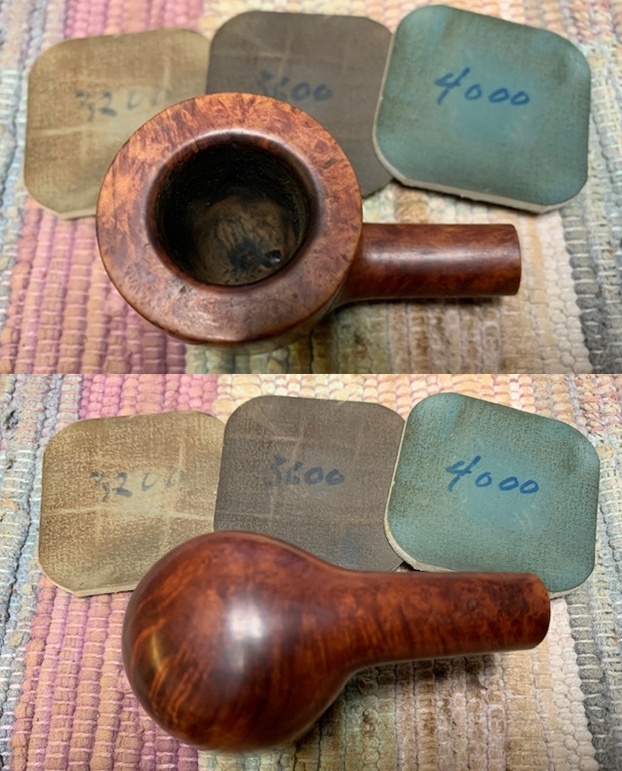
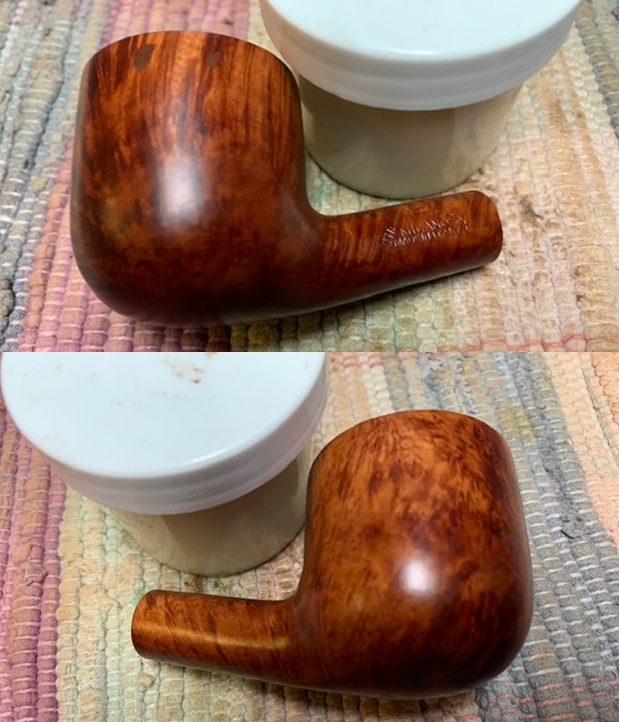
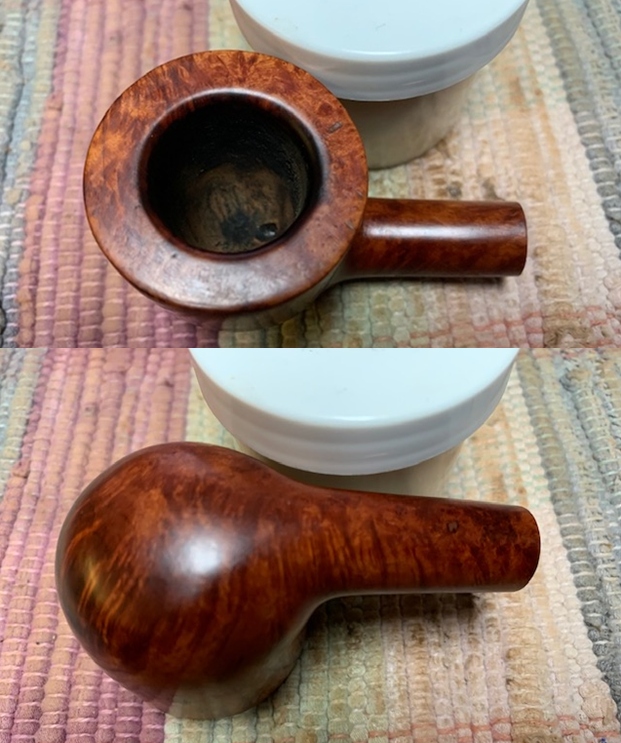
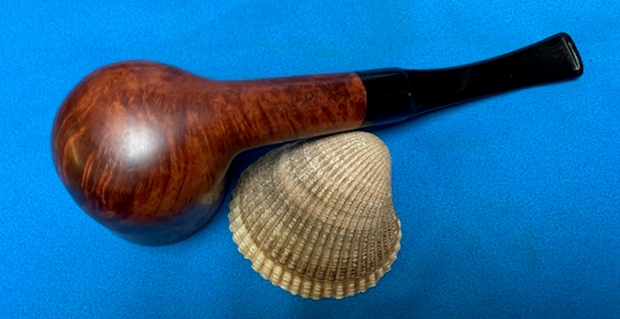
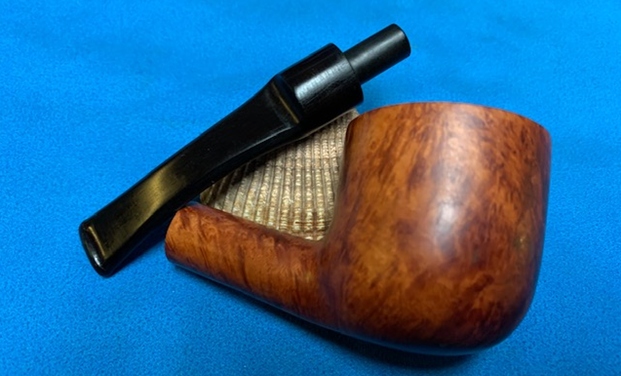
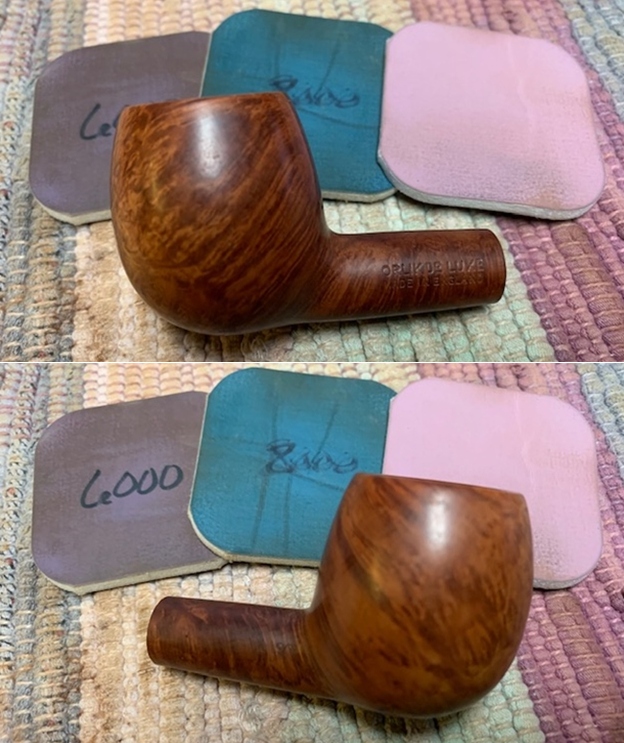
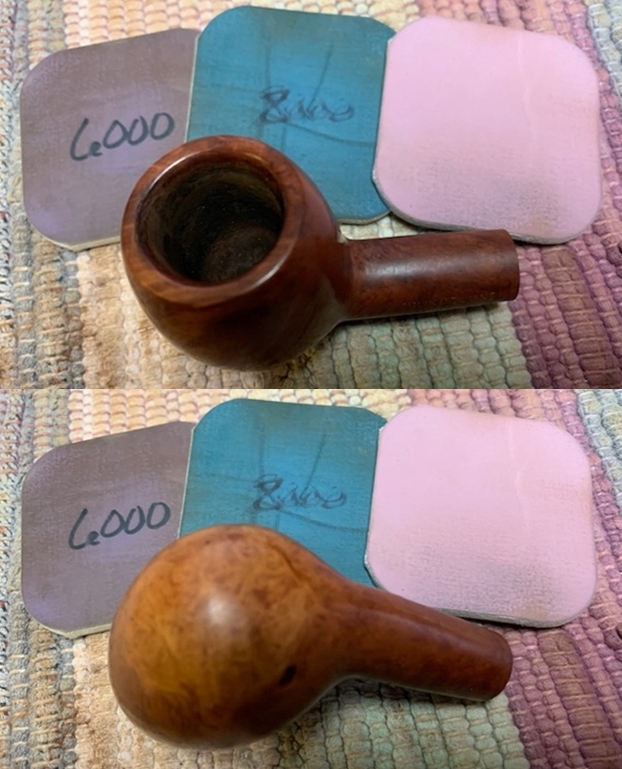
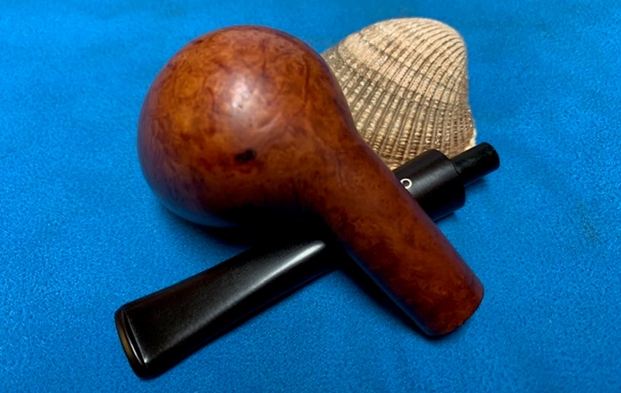
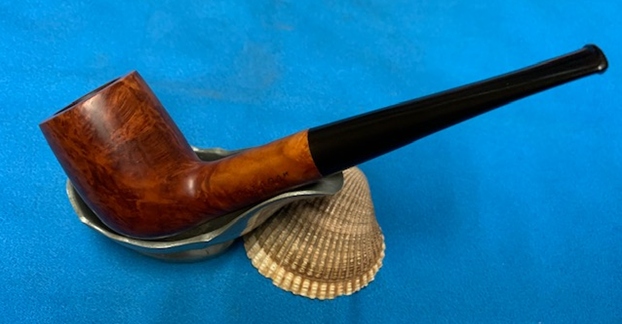
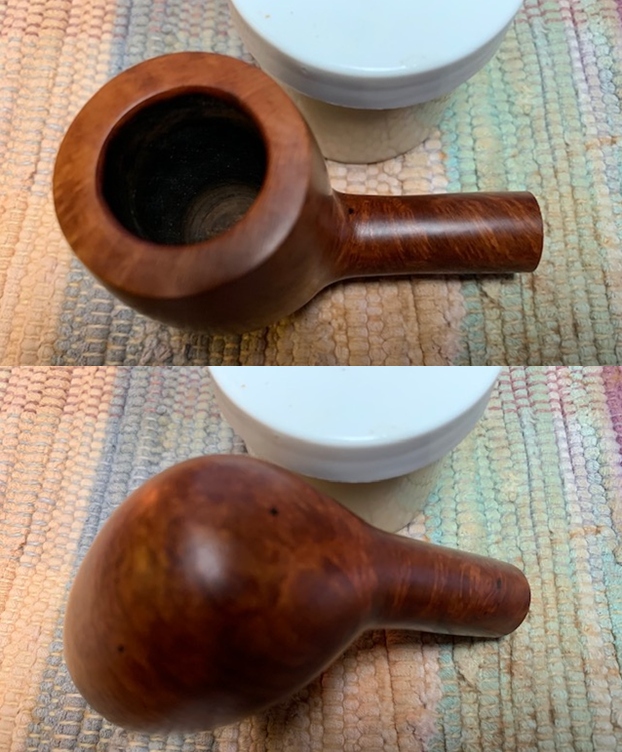
 Next, I rubbed a small quantity of “Before and After Restoration Balm” deep in to the briar with my finger tips and let it rest for few minutes. The balm almost immediately works its magic and the briar now has a nice vibrant appearance with the beautiful grain patterns displayed in their complete splendor. I further buffed it with a horse hair brush. The dark browns of the of the grain contrasts beautifully with the rest of the lighter brown stummel and makes for a visual treat. It really is a nice piece of briar.
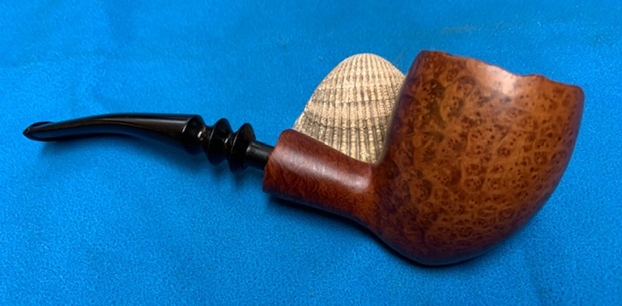
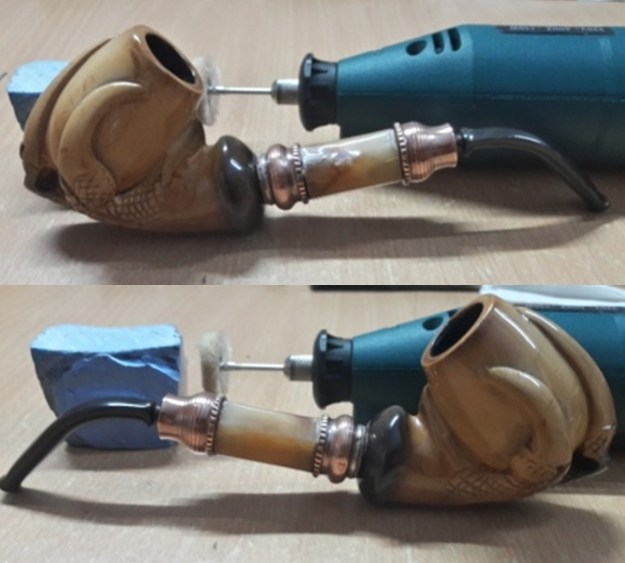
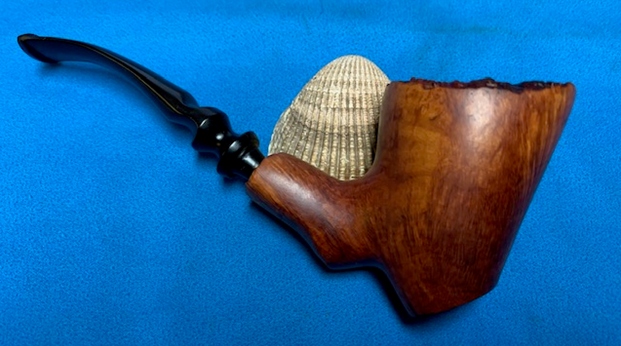
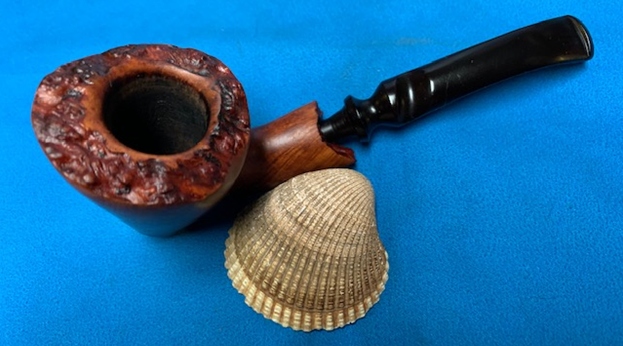
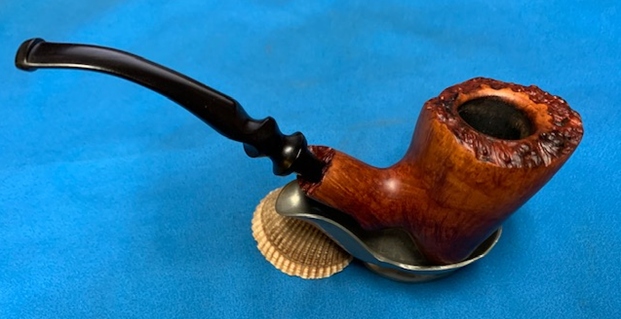
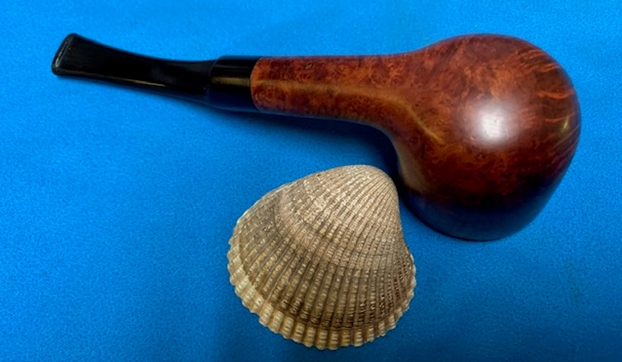
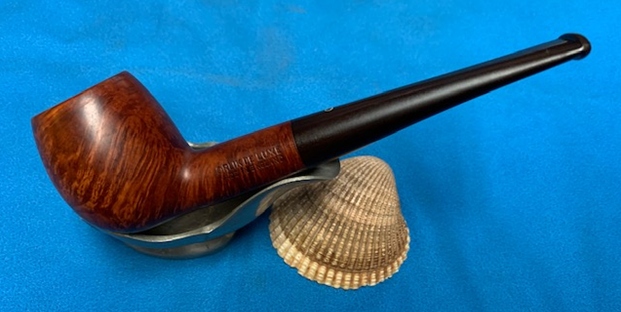
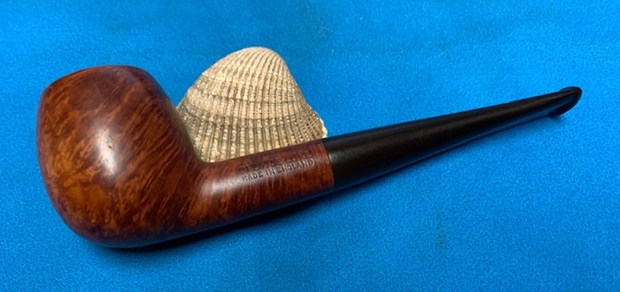
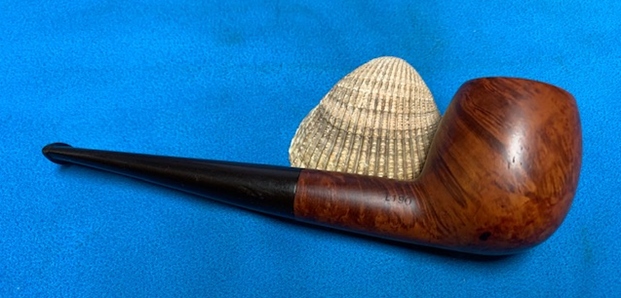
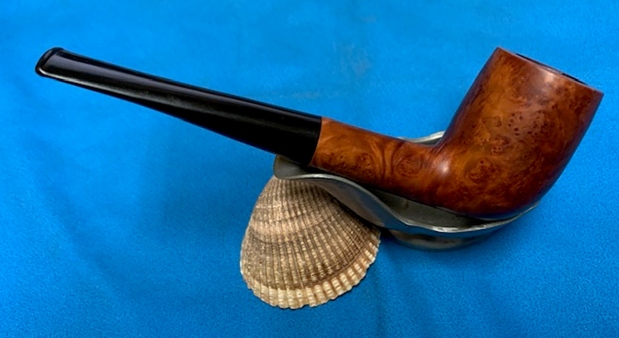
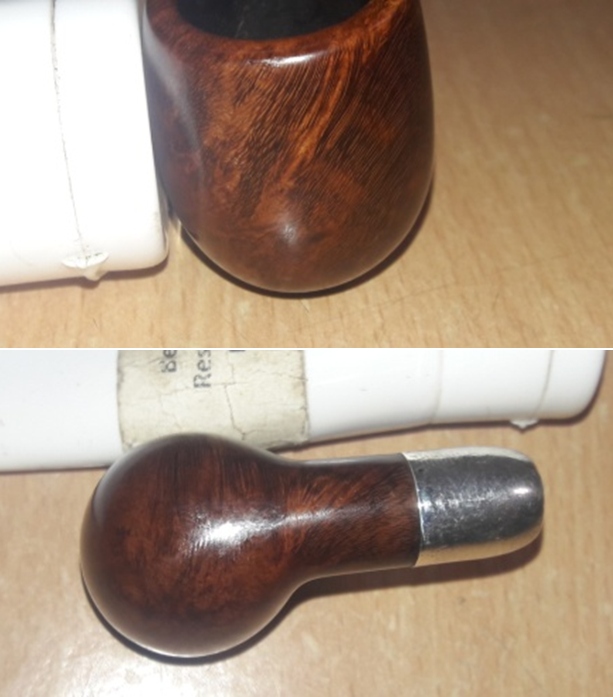 To put the finishing touches, I mount a cotton cloth buffing wheel on to my hand held rotary tool and polished the entire pipe with Blue Diamond compound. This compound helps to remove the minor scratch marks that remain from the sanding. Next, I mount another cotton buffing wheel that I have earmarked for carnauba wax and applied several coats of the wax. I finished the restoration by giving the entire pipe a rigorous hand buffing using a microfiber cloth to raise the shine further. Lastly, I polish the sterling silver ferrule with a jeweler’s cloth to a nice and radiant shine. The grain patterns on this finished pipe looks amazingly beautiful and coupled with the vintage, shape and the contrast that the sterling silver ferrule imparts, makes it quite a desirable pipe. This pipe shall be joining my small collection of English pipes to be admired and be happy that I have restored it, to the extent possible, to its former beauty and functionality.
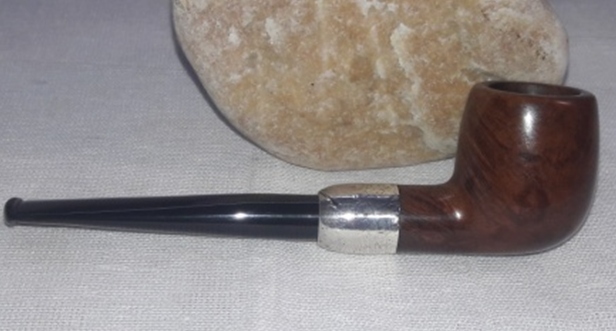

 I wish to thank each one for sparing their valuable time to read through this write up and each one is in my prayers. Stay home…stay safe!!


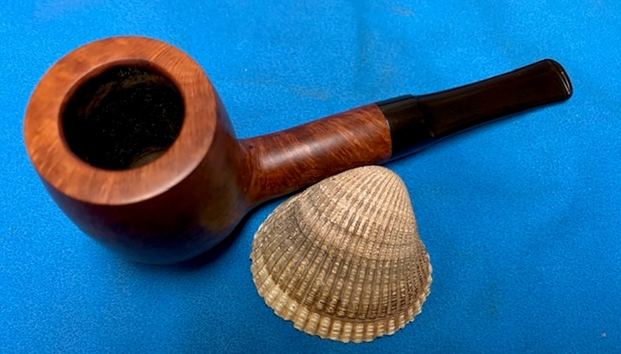
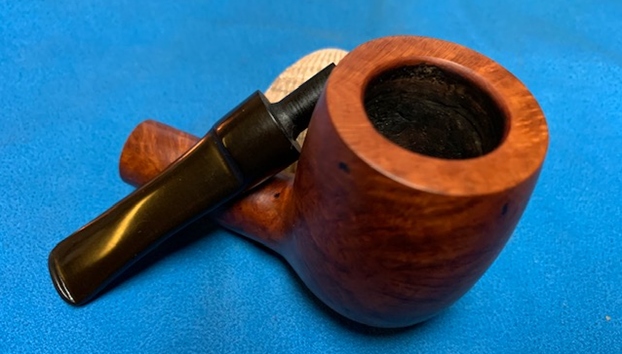
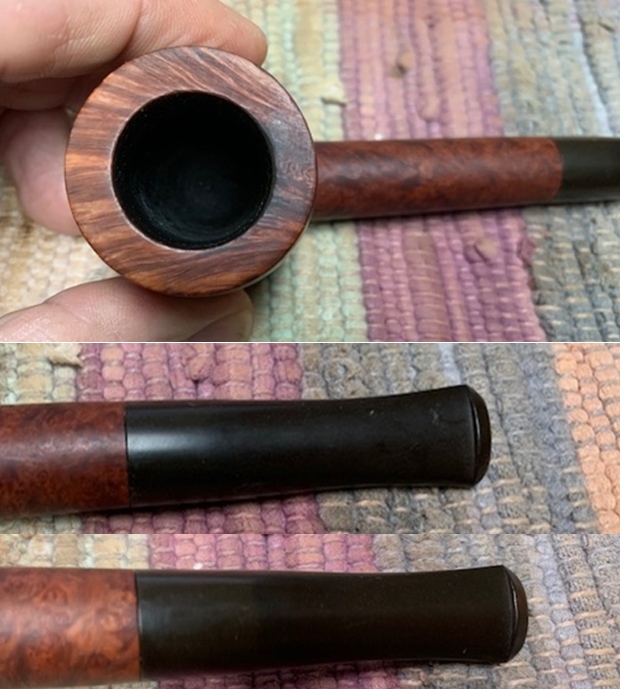
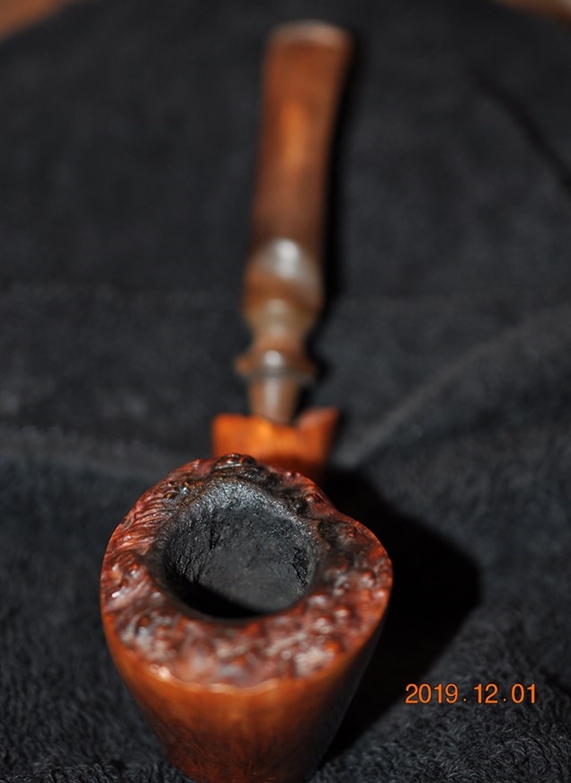
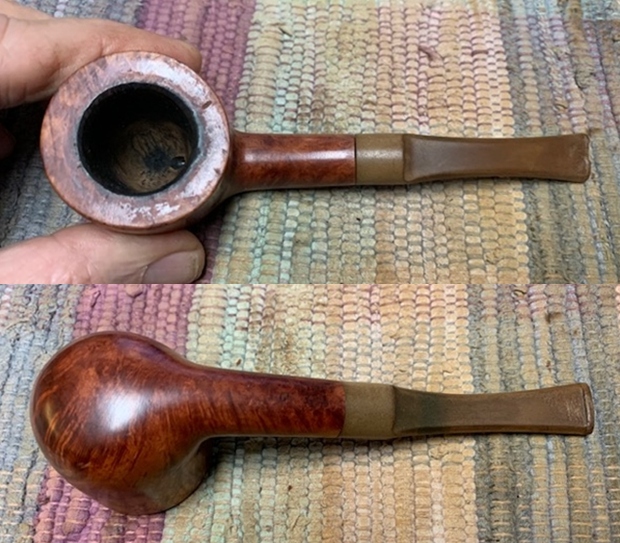
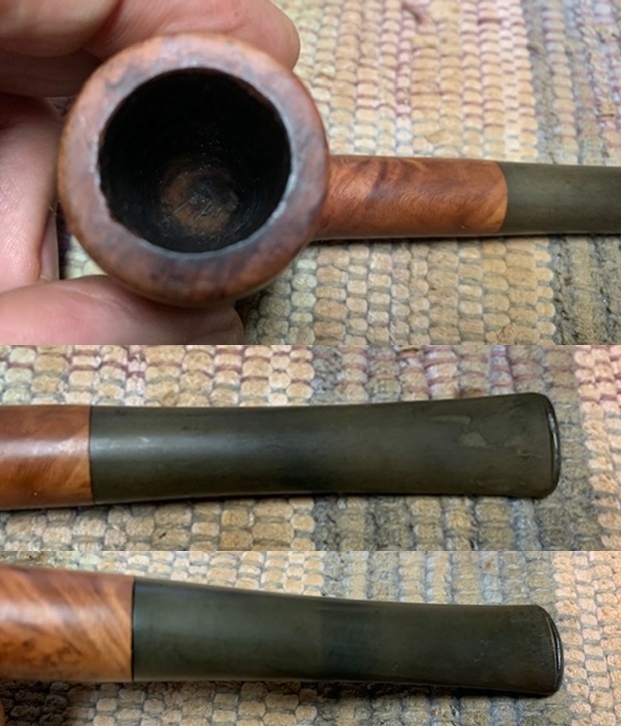
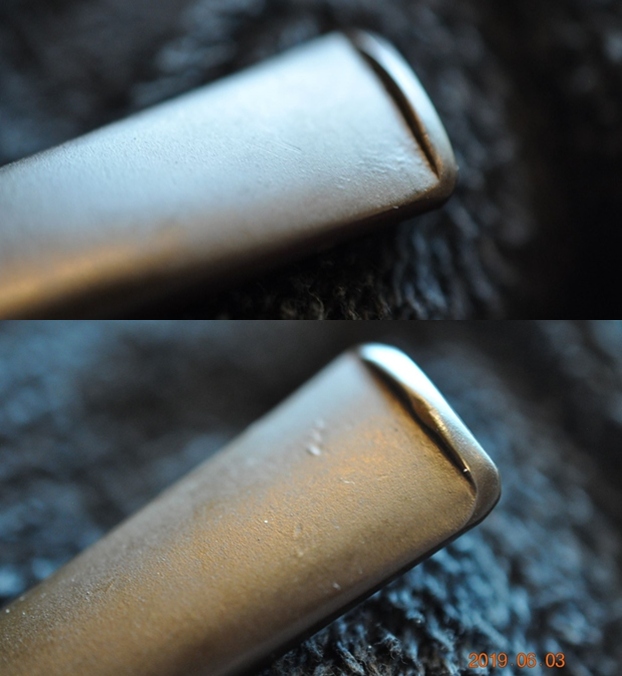
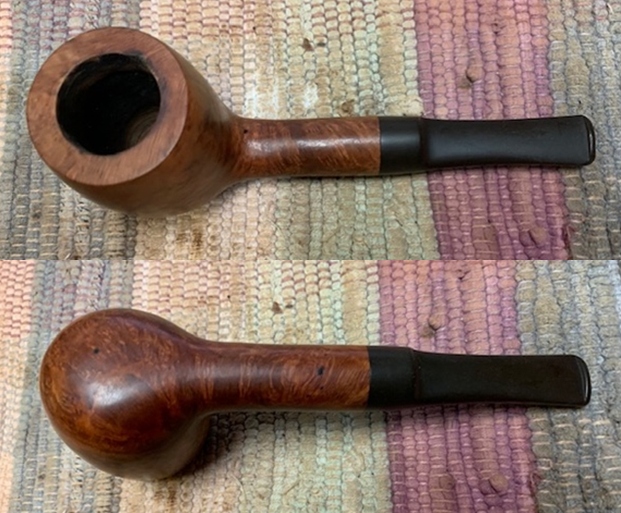
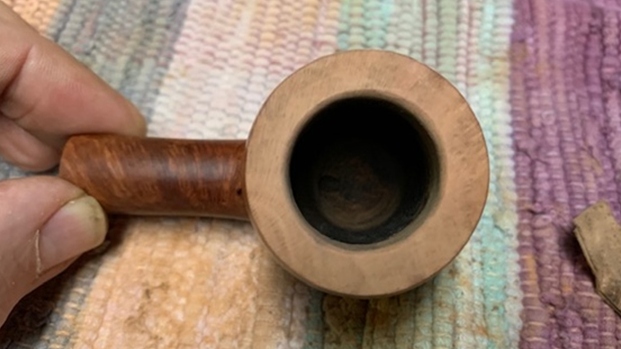
 He took photos of the rim top and bowl to give a clear picture of the thickness of the cake and the light overflow of lava on the rim top. He also took photos of the top and underside of the stem to show the oxidation and light chatter and tooth marks on the surface.
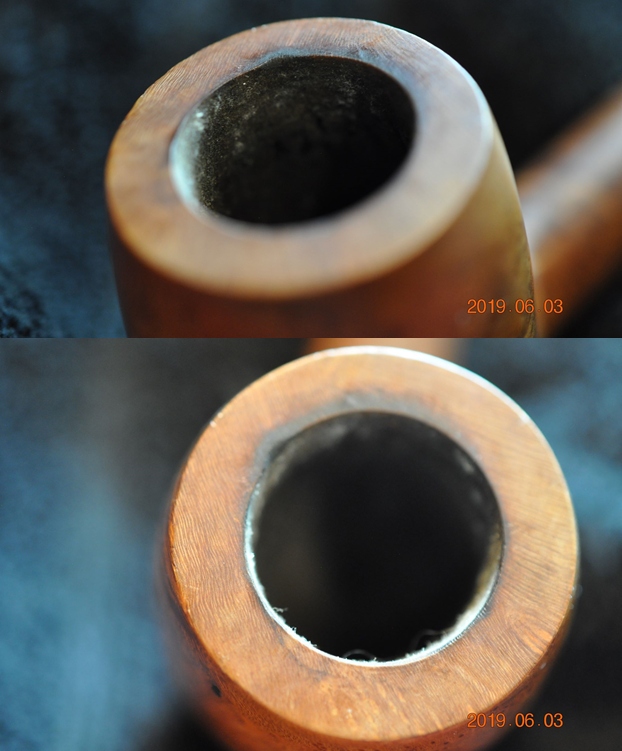
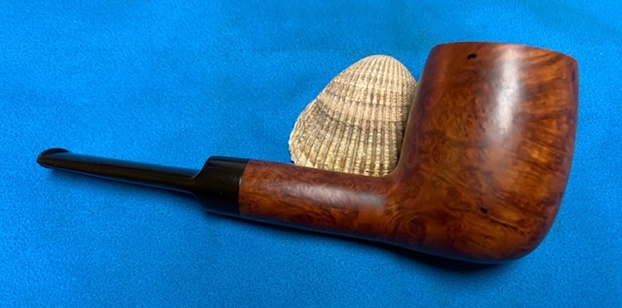
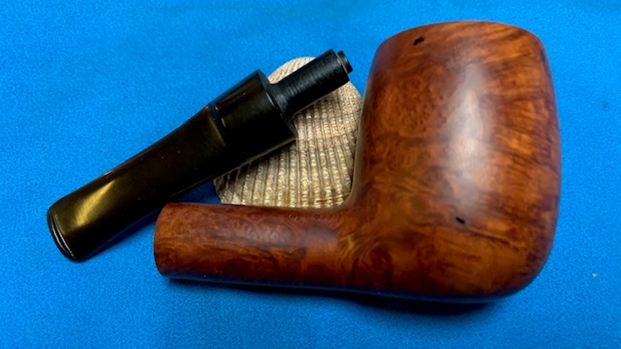
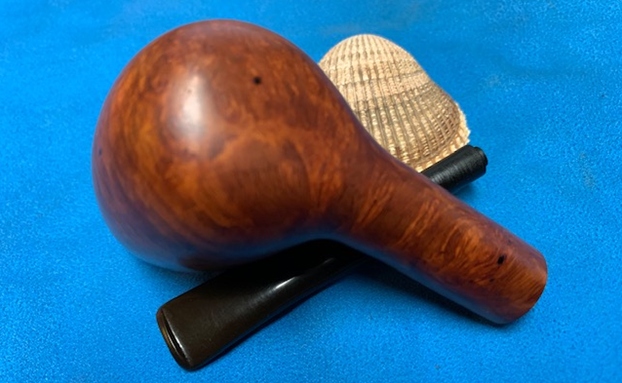
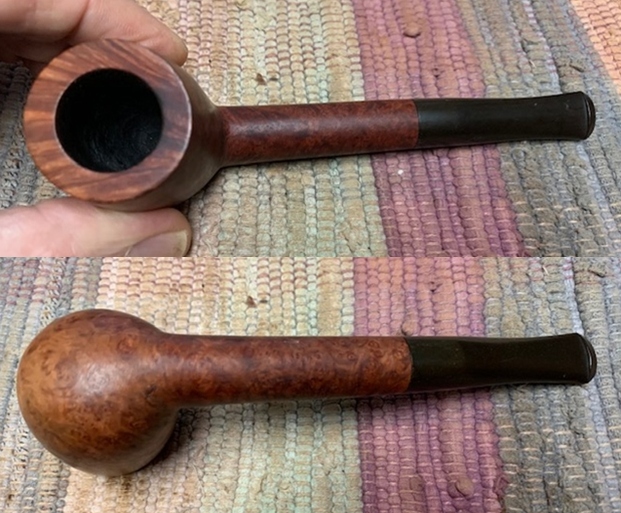
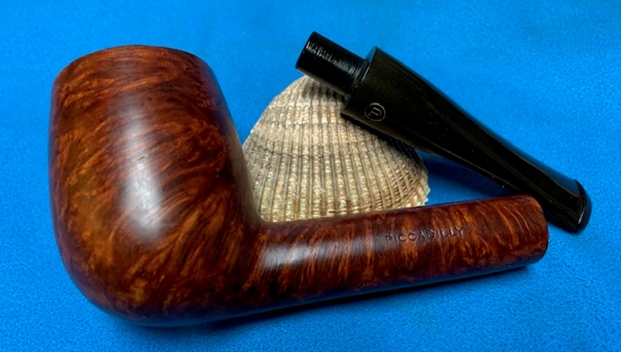
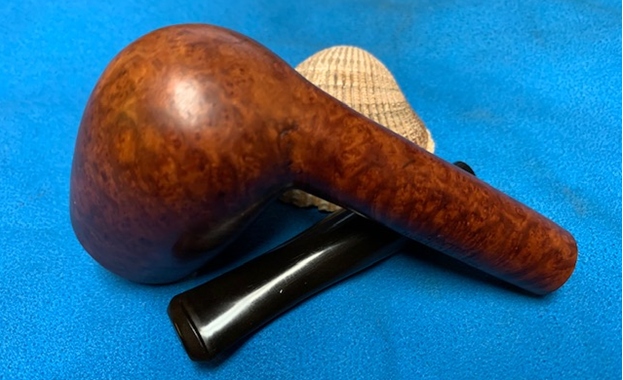
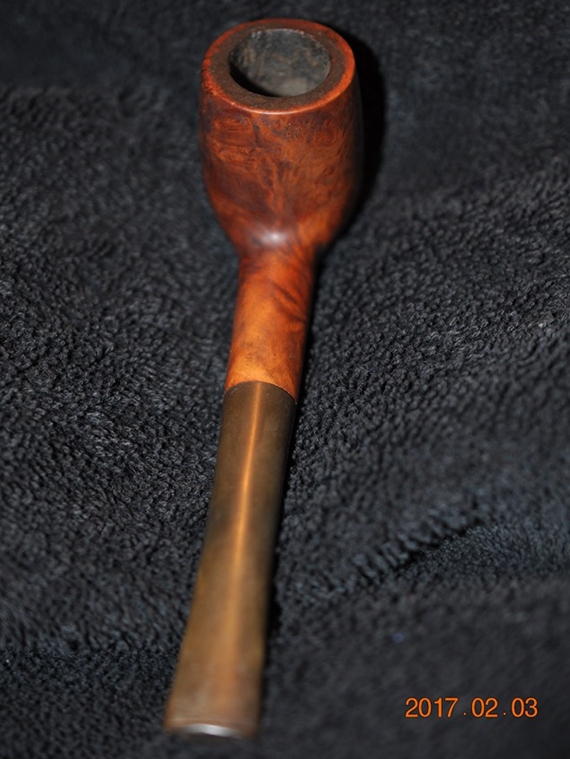
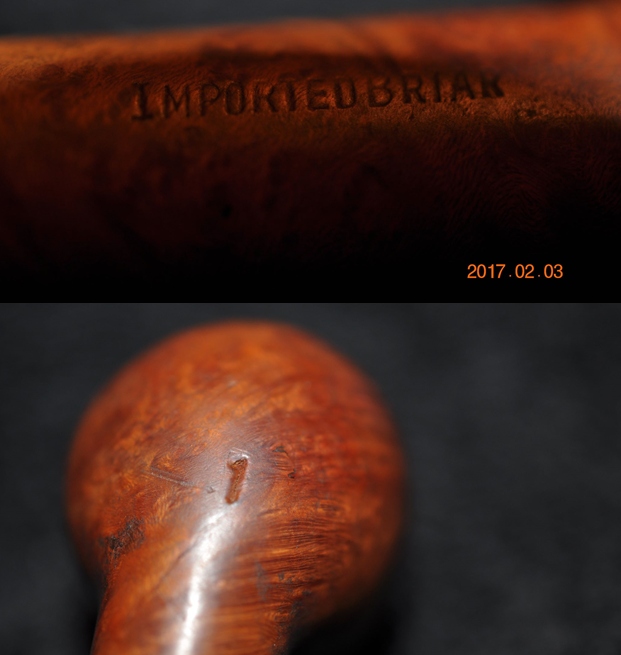
 Jeff took photos of the sides and heel of the bowl to give a picture of what the briar around the pipe looked like. There is some interesting grain under the grime.
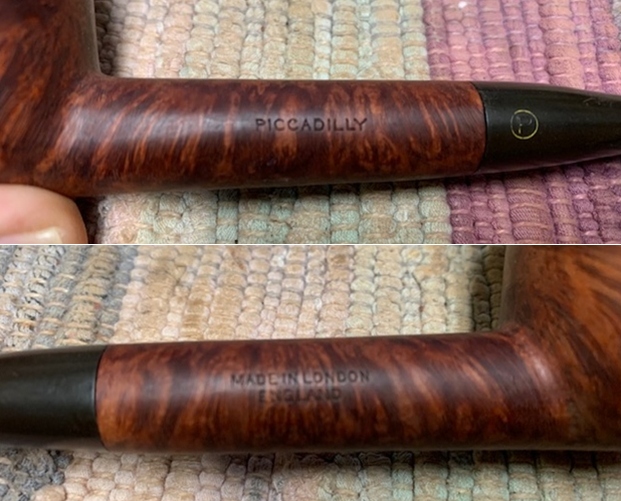
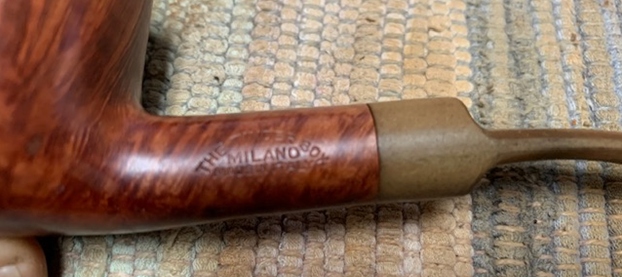
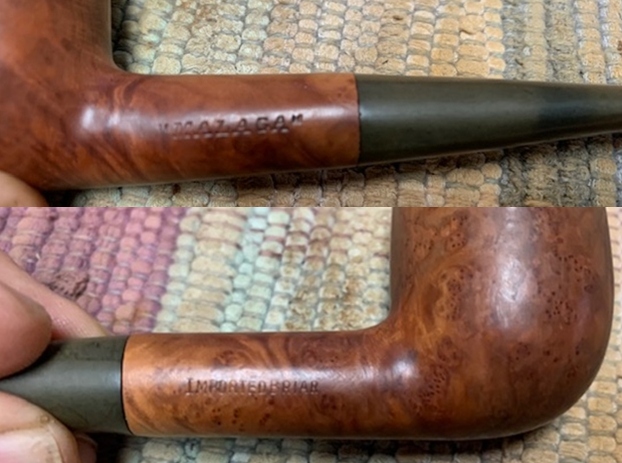
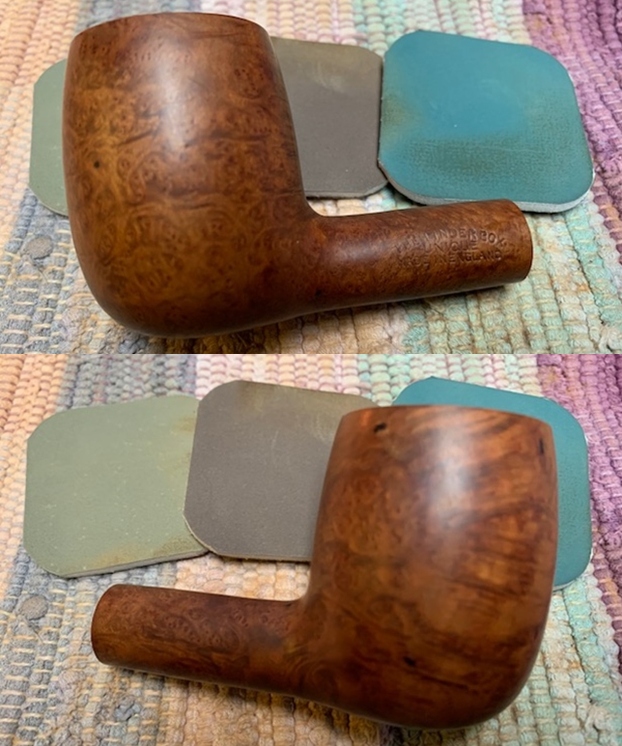
 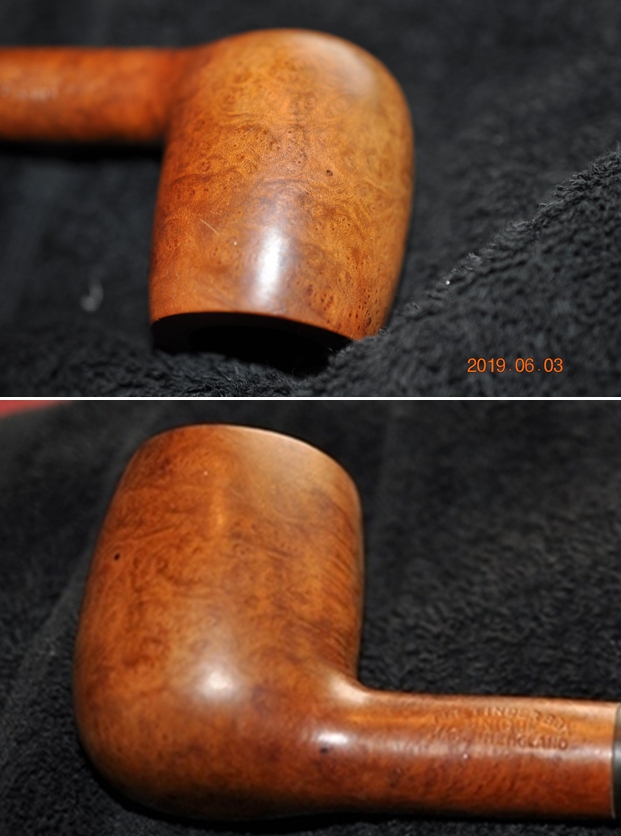 He took a photo of the stamping on the left side of the shank. It read as noted above.
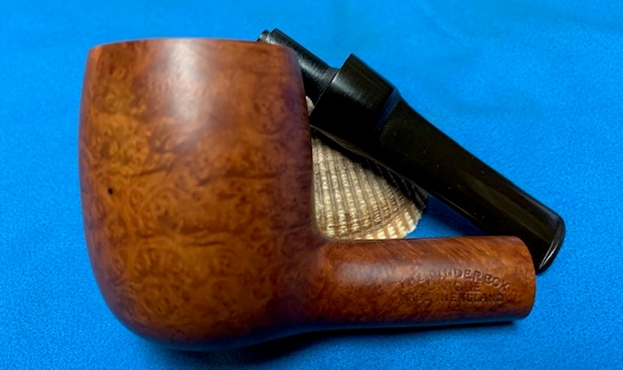
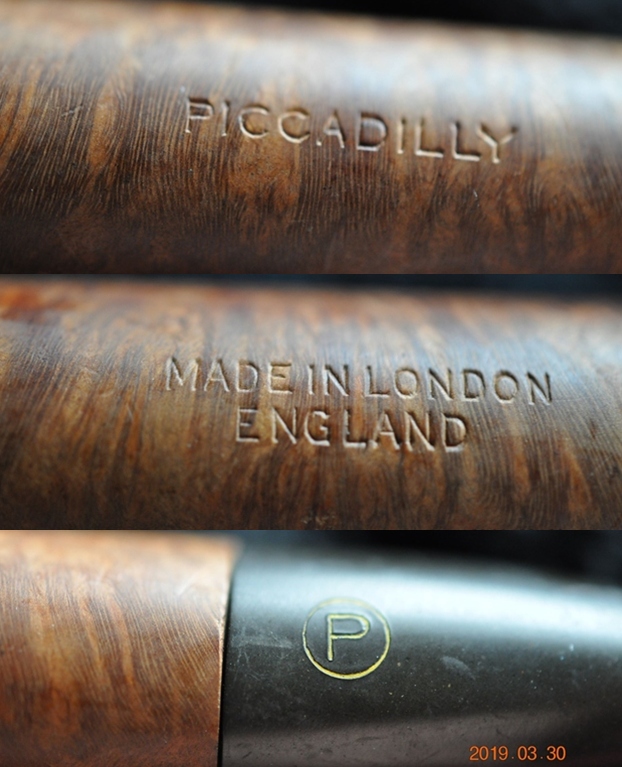
 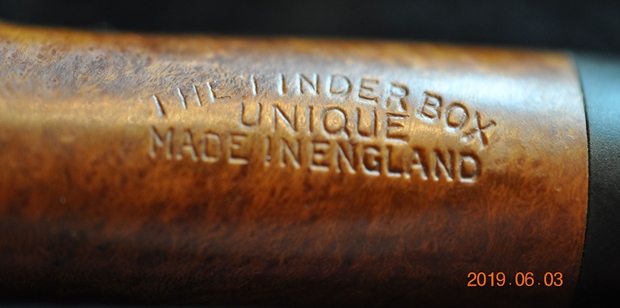 To learn about the brand I turned to Pipephil’s website ( http://www.pipephil.eu/logos/en/logo-t6.html). I did a screen capture of the information on the site and it appears that The Tinder Box had pipes made in Italy and England. The one I am working on is a Unique and it is not listed. To me it looks like a Charatan made pipe. This is going to take some more work.
 I turned to Pipedia (https://pipedia.org/wiki/The_Tinder_Box) for more information. I quote in full the brief article below:
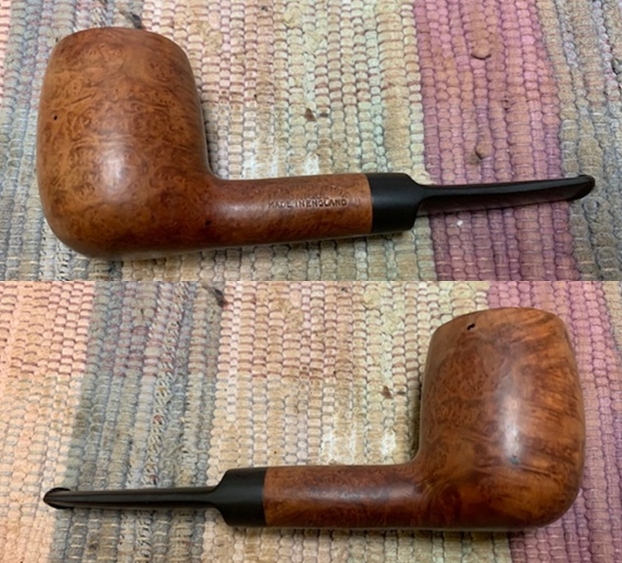
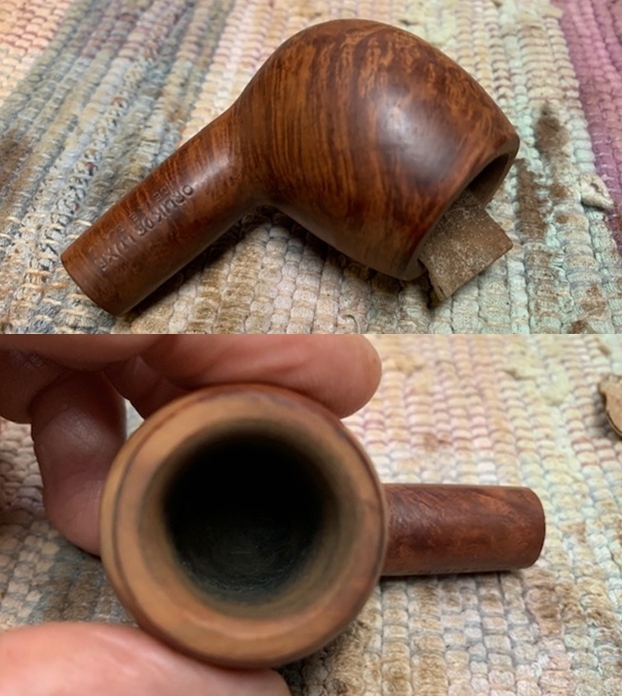
 The rim top cleaned up really well. The lava coat was removed and there was some darkening and burn damage left behind on the back side of the rim top. Other than that the edges were in good condition. The stem surface looked very good with some light tooth chatter and marks on both sides ahead of the button.
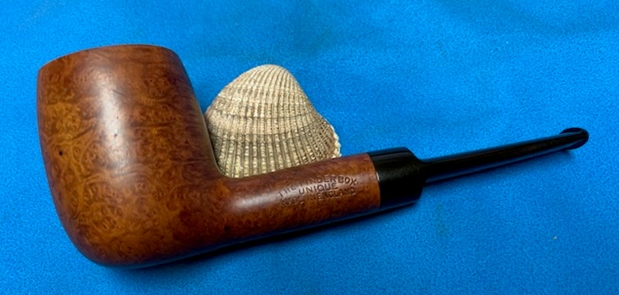
 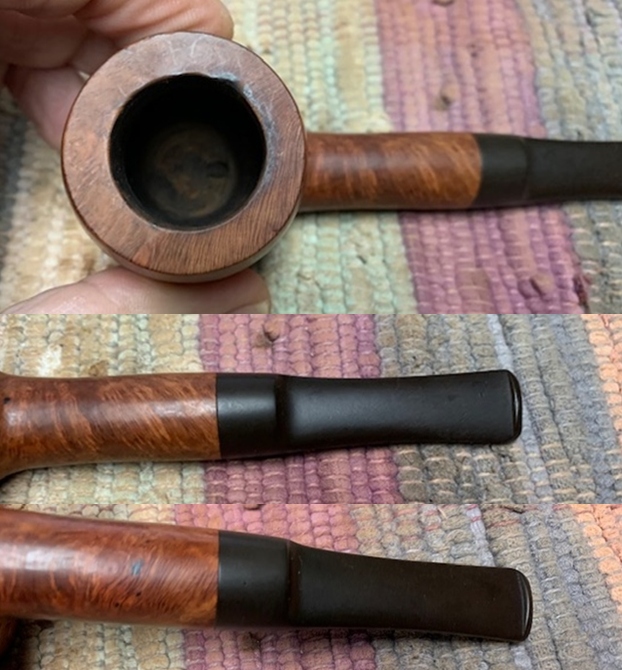 I took photos of the stamping on the left side of the shank. The stamping was clear and readable.
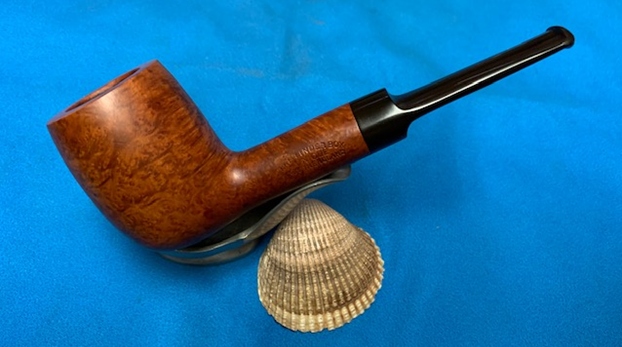
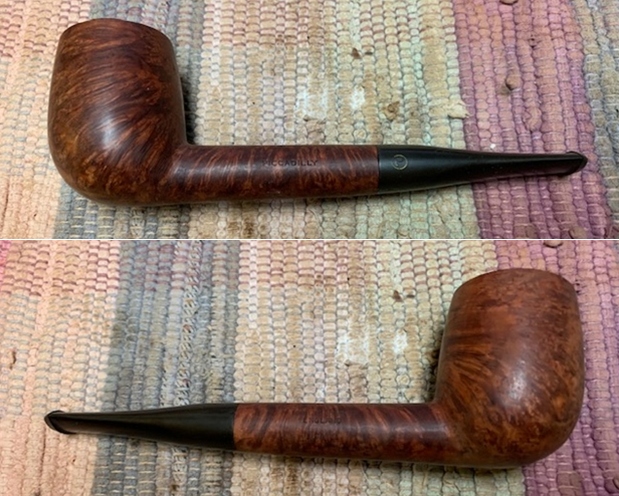
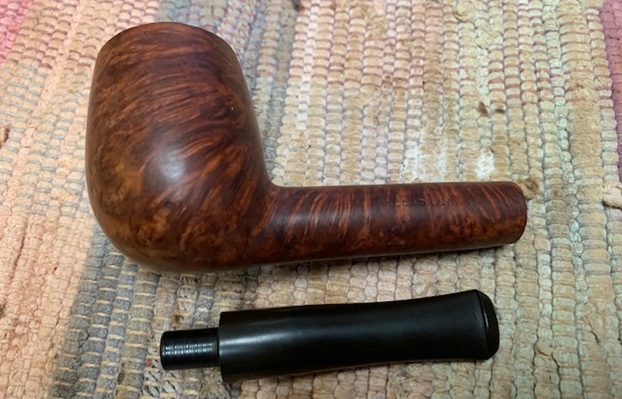
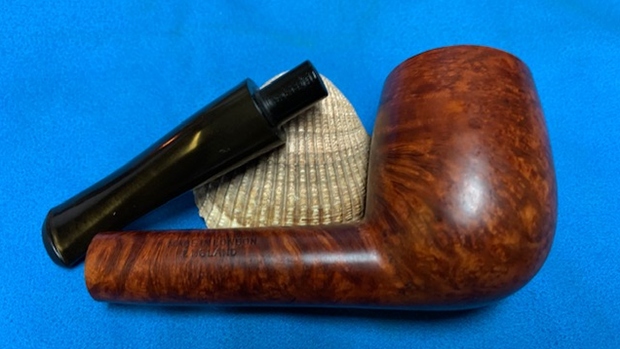
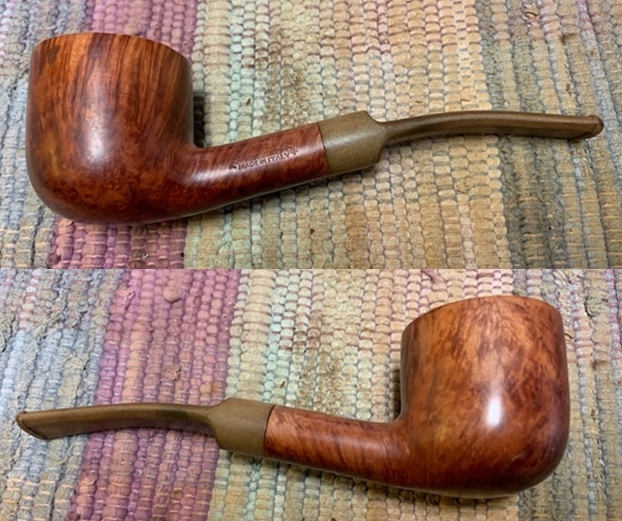
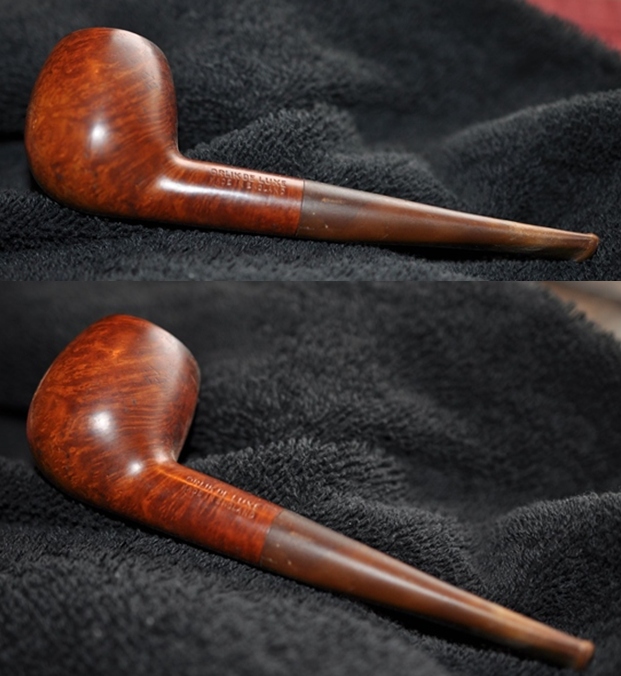
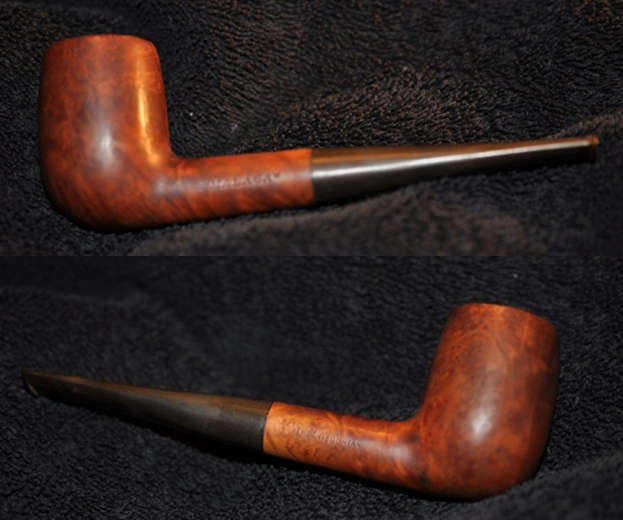
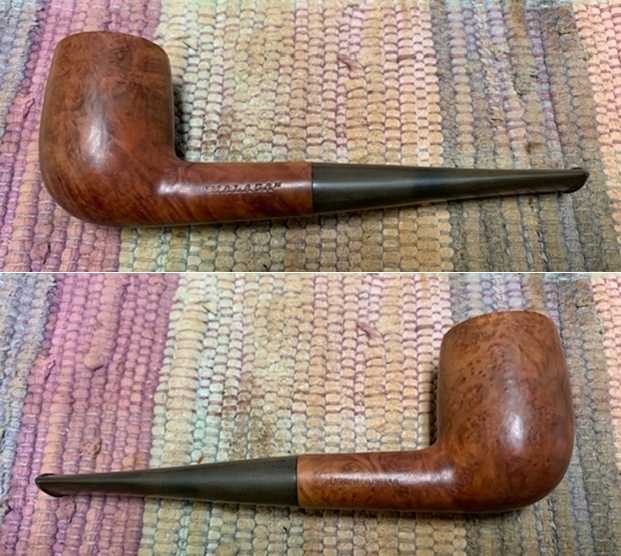
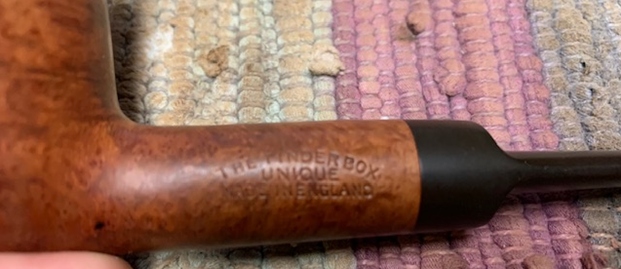 I removed the stem and took a photo of the pipe to give a sense of the well shaped saddle stem billiard.
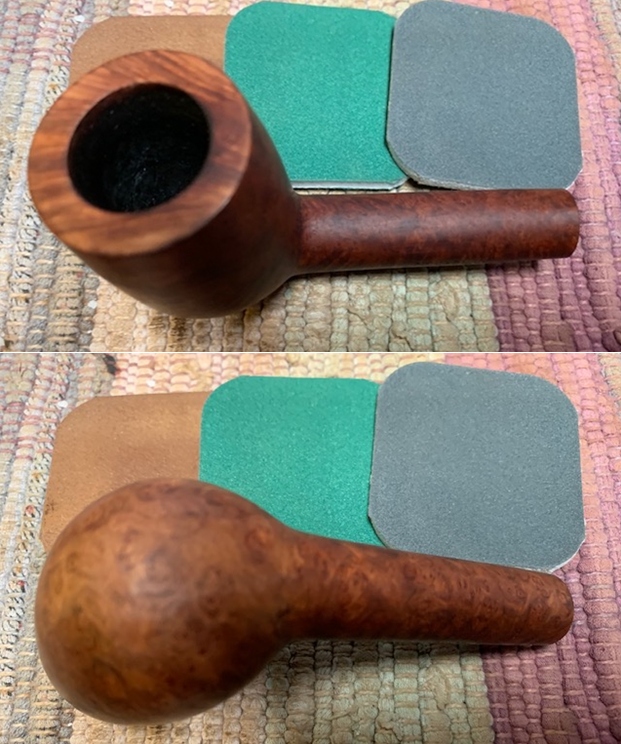
 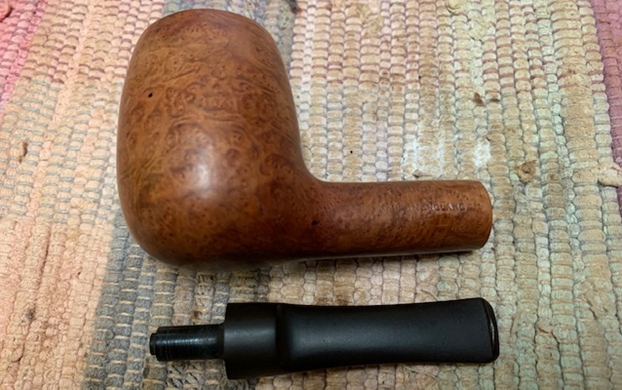 To remove the damage on the rim top and the inner edge of the rim I began by topping the bowl on a topping board with 220 grit sandpaper. I used a folded piece of sandpaper to give the inner edge of the bowl a slight bevel to remove the damaged area.
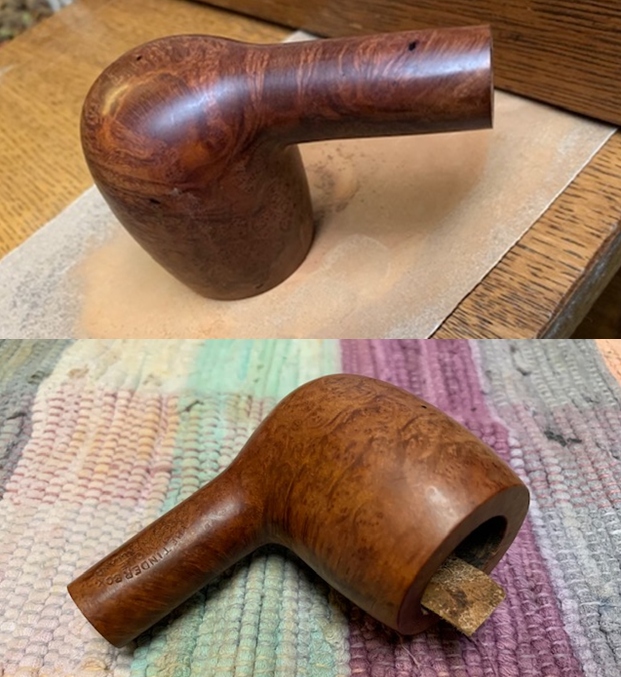
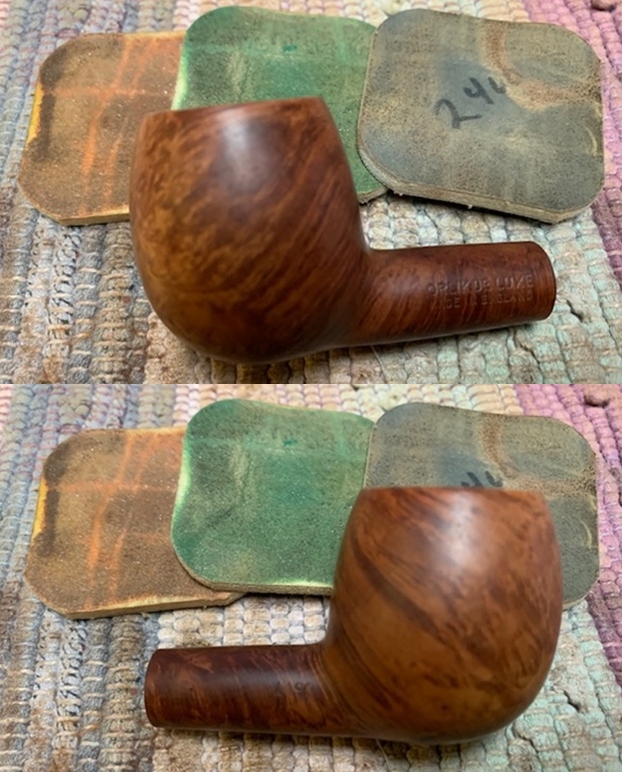
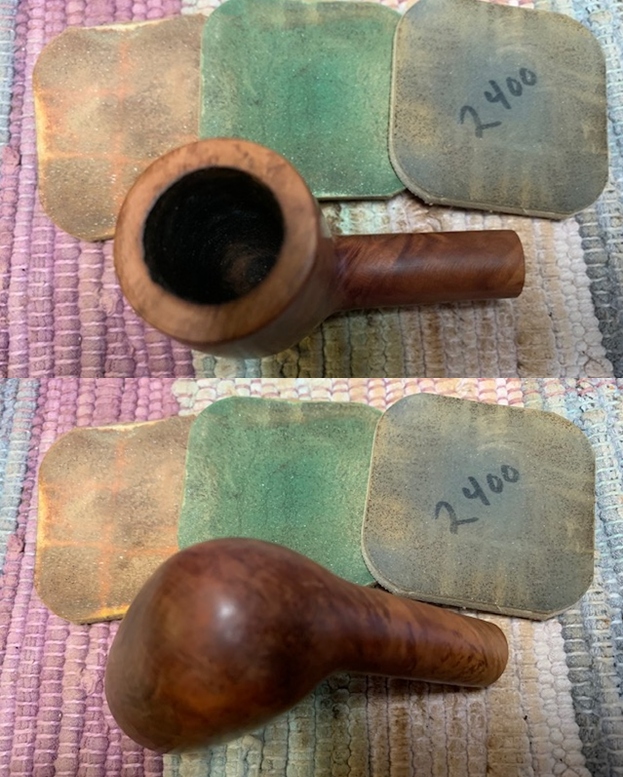
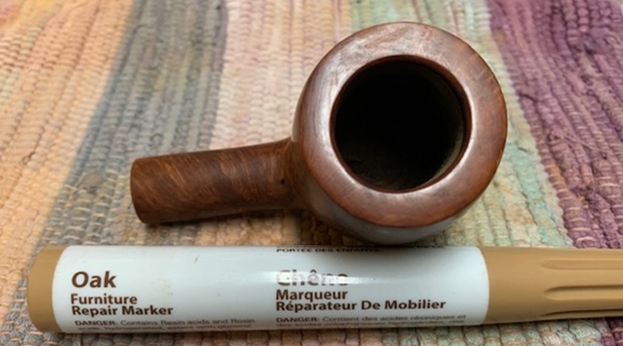
 I polished the bowl and the rim top, sides and shank with micromesh sanding pads – wet sanding with 1500-12000 grit pads and wiping it down after each pad with a damp cloth. I carefully avoided the stamping on the top and underside of the shank so as not to damage the already faint stamping. I paused after the 2400 grit sanding pad and used an Oak Stain Pen to touch up the rim top to match the rest of the bowl. I finished sanding with the rest of the pads -3200-12000 grit pads.
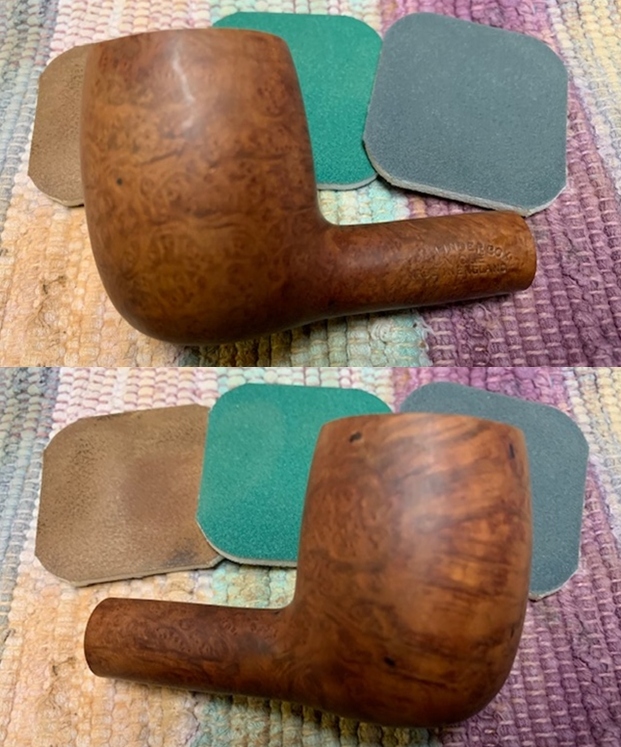
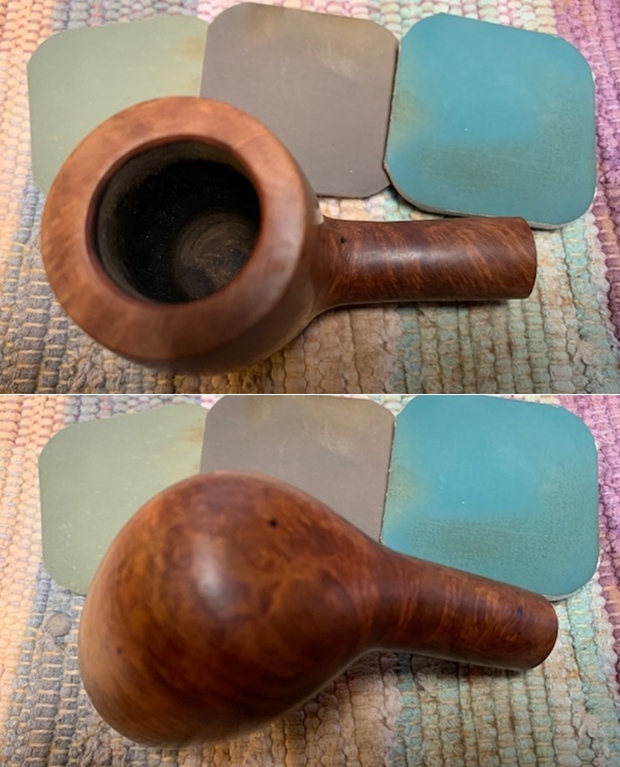
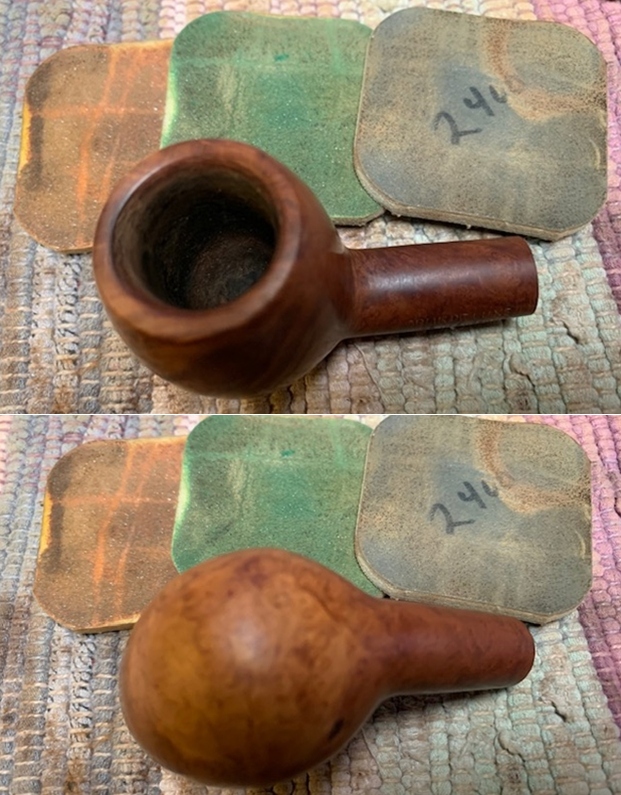
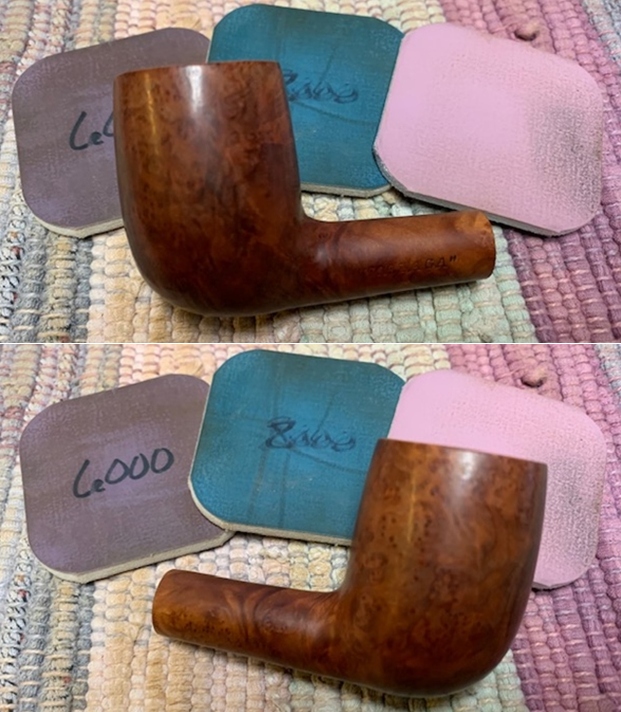
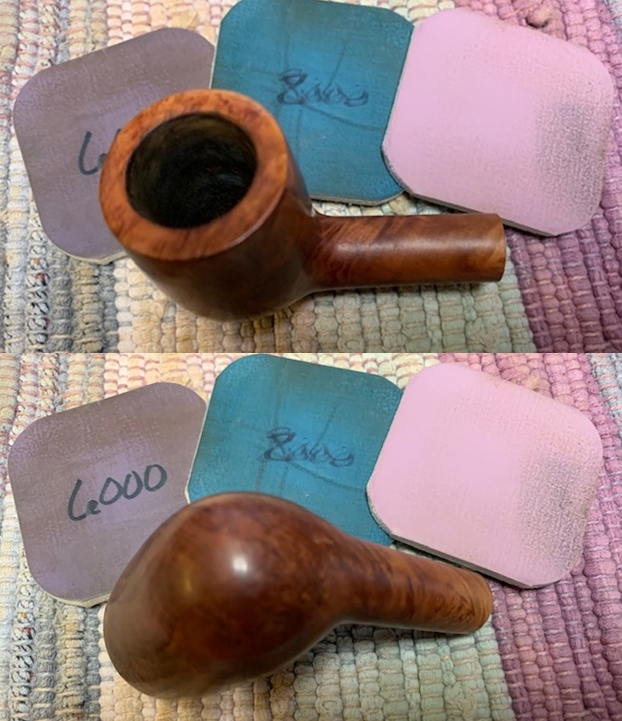
 I rubbed the bowl and shank down with Before & After Restoration Balm. I worked it into the surface of the bowl sides and shank with my fingertips to clean, enliven and protect the briar. I let the balm sit for a little while and then buffed with a cotton cloth to raise the shine.
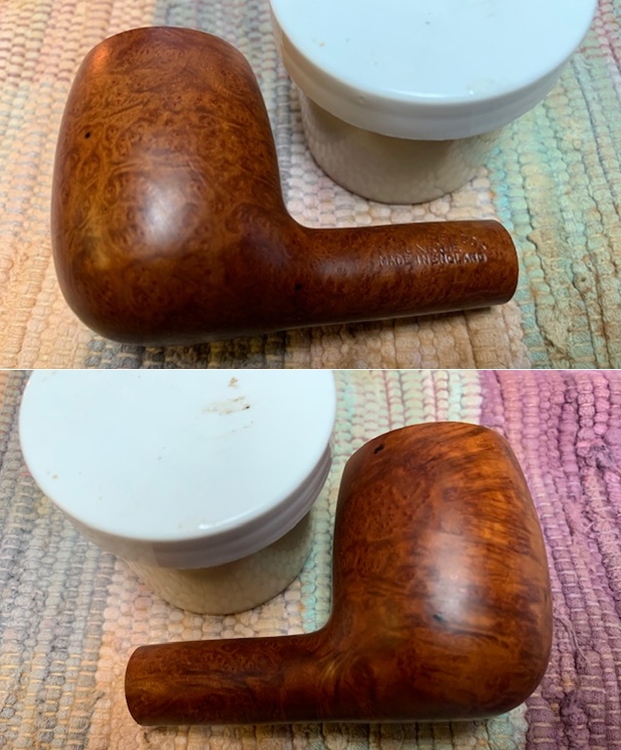
 I set the bowl aside and turned my attention to the stem. It was in very good condition so I did not have to do any repairs or preliminary sanding. I began by working with micromesh sanding pads – 1500-12000 grit pads. I wiped the stem down with Obsidian Oil after each sanding pad. I used Before & After Pipe Polish – both Fine and Extra Fine to further polish the stem.
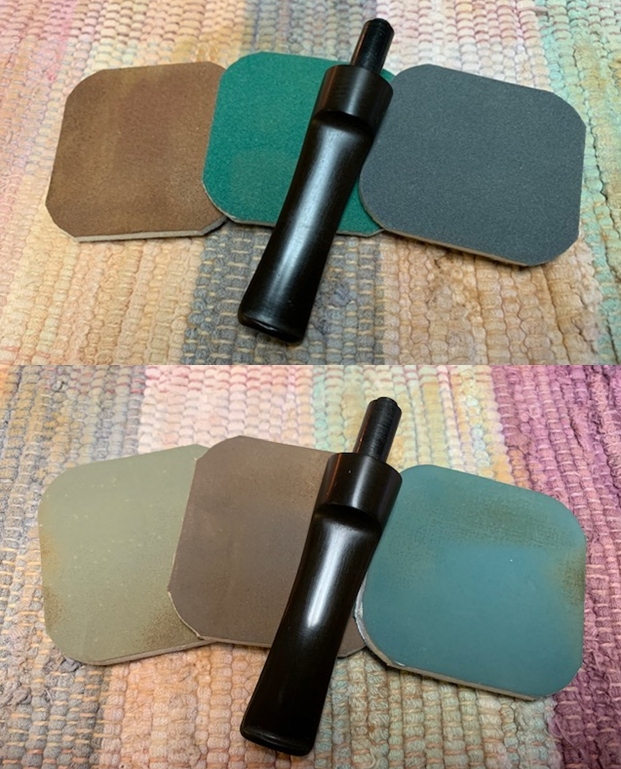
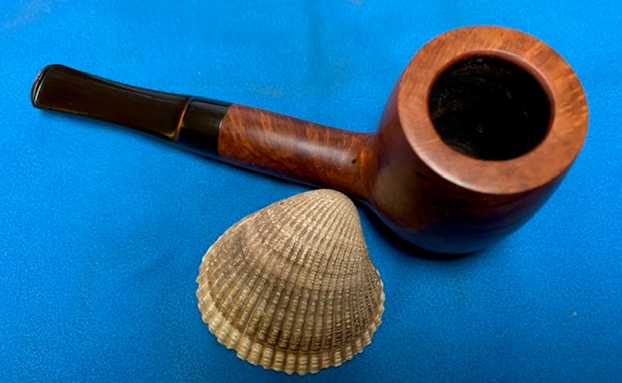
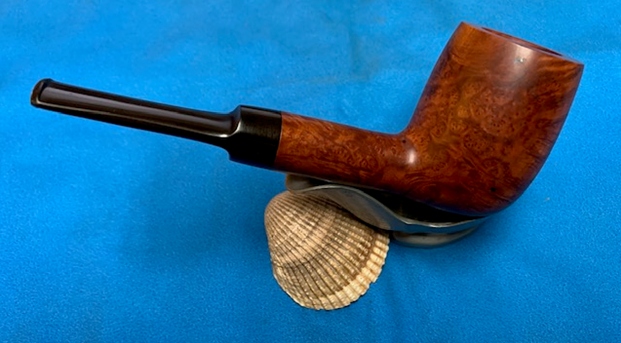
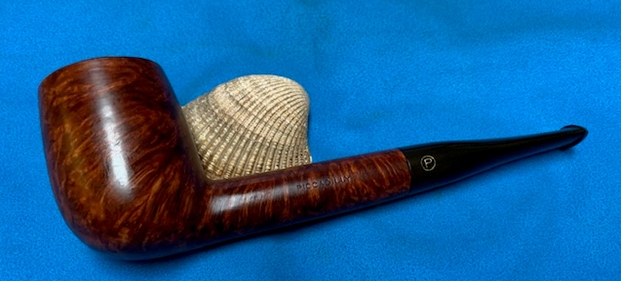
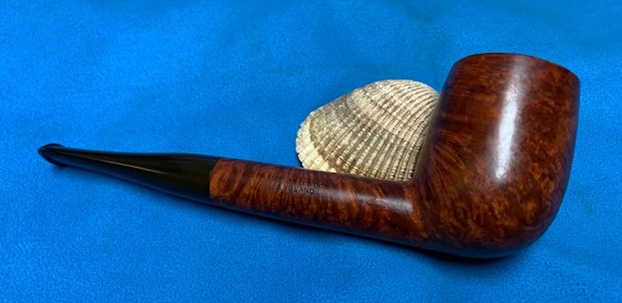
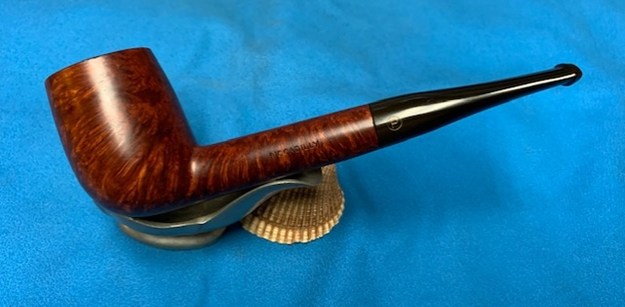
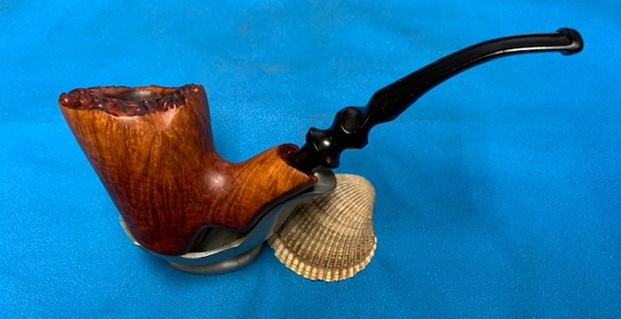
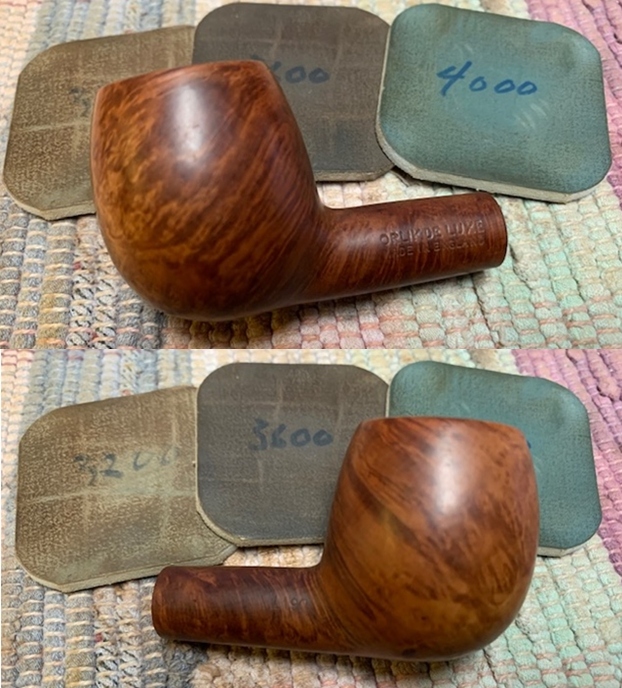
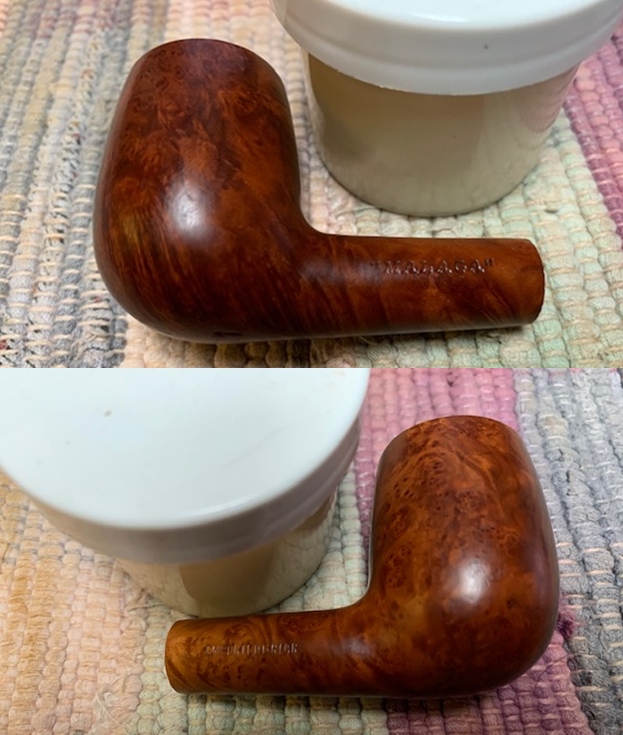
 This well made, classic Chartan Made The Tinder Box Unique Saddle Stem Billiard is a great looking pipe now that it has been restored. The rich brown finish that was used came alive with the polishing and waxing. The small sandpit/fills are virtually invisible. I put the stem back on the bowl and carefully buffed the pipe with Blue Diamond on the buffing wheel using a light touch on the briar. I gave the bowl and the stem multiple coats of carnauba wax on the buffing wheel and followed that by buffing the entire pipe with a clean buffing pad. I hand buffed the pipe with a microfiber cloth to deepen the shine. The finished Unique Billiard is a beauty with combination of great grain and rich stain. It fits nicely in the hand and looks very good. Give the finished pipe a look in the photos below. The dimensions of the pipe are Length: 5 ½ inches, Height: 2 inches, Outside diameter of the bowl: 1 ½ inches, Chamber diameter: 7/8 of an inch. If you are interested in adding this pipe to your collection send me a message or an email. Thanks for reading this blog and my reflections on the pipe while I worked on it. There are many more to come!