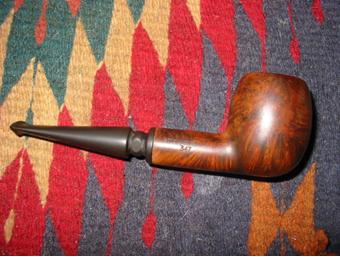
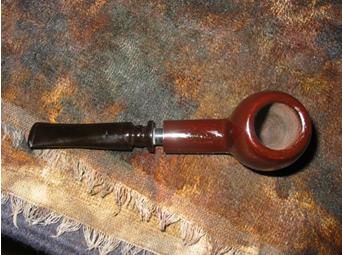
Category Archives: Pipe Refurbishing Essays

Essays and pictorial essays on the art of refurbishing

Polishing Stems (PART 1) Piet Binsbergen


I have had some questions about polishing stems.

I must warn that I will not be held responsible for any damage you may cause to pipes following this method. The process is relatively fail safe but certain circumstances that may be beyond my control, I simply cannot be held accountable for. I do suggest that you do a couple of trial runs using old or broken stems before you attempt this process with your beloved birth year Dunhill.

I will share with you my process. Please bear in mind that there are many ways to skin this cat, this is my way of doing things but this does not mean that I reject any other processes that other pipe repairman use.

I use two approaches. Firstly it is important when doing up a pipe to try and save the stems at all costs. So process 1 involves cleaning and polishing stems that have tarnished.

Secondly, especially when it comes to hotrods, I use pre-moulded stems. I am able to hand cut stems from rod stock but I find the process way to involved and time consuming for what I am doing. Call me a cheat but I find this works really well for me. My preferred medium is vulcanite and ebonite but I do not turn down Lucite stems if they come my way. Lucite is problematic in the sense that it has little give and little room for error. On the up side of it Lucite does not tarnish.

Part 1

Saving Original stems

As most of you know vulcanite is compressed rubber, the same stuff your car tyres are made of to a point. This rubber is just compressed way more. I have found different qualities of the stuff over the years and have notice some being more superior to others.

I do not have much to add here due to the fact that Steve Laug is doing some ground breaking work with regards to original stem repair. He manages to remove teeth marks and patch holes in bits. I have studied his technique but will need to pick his brain a little more before I perfect this process. For me, as soon as a stem has a hole in the bit, I replace it with a pre-moulded stem. (This process of his is archived on this blog.) I love tapered stems. There seems to be more ‘meat’ to work with and more ‘meat’ means there is room to open up the draft holes, file out teeth marks and restore the stem as good as new. Saddle stems prove to be a bit of a challenge due to the fact that there is not much room to move.

Most stems look like this, and believe me these are good ones!
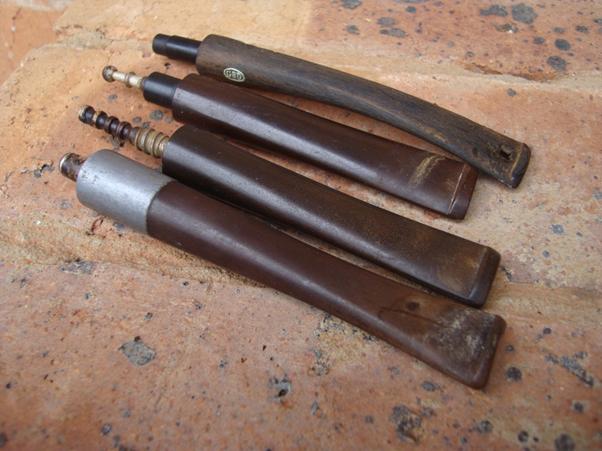
Stems1

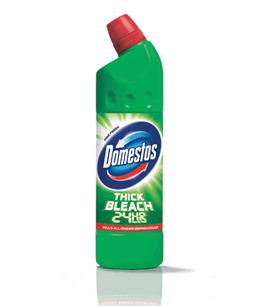
What I usually do is drop them into a bleach bath. Household bleach does the trick for me. Here in RSA I use a product called ‘Domestos ‘.
Stems2

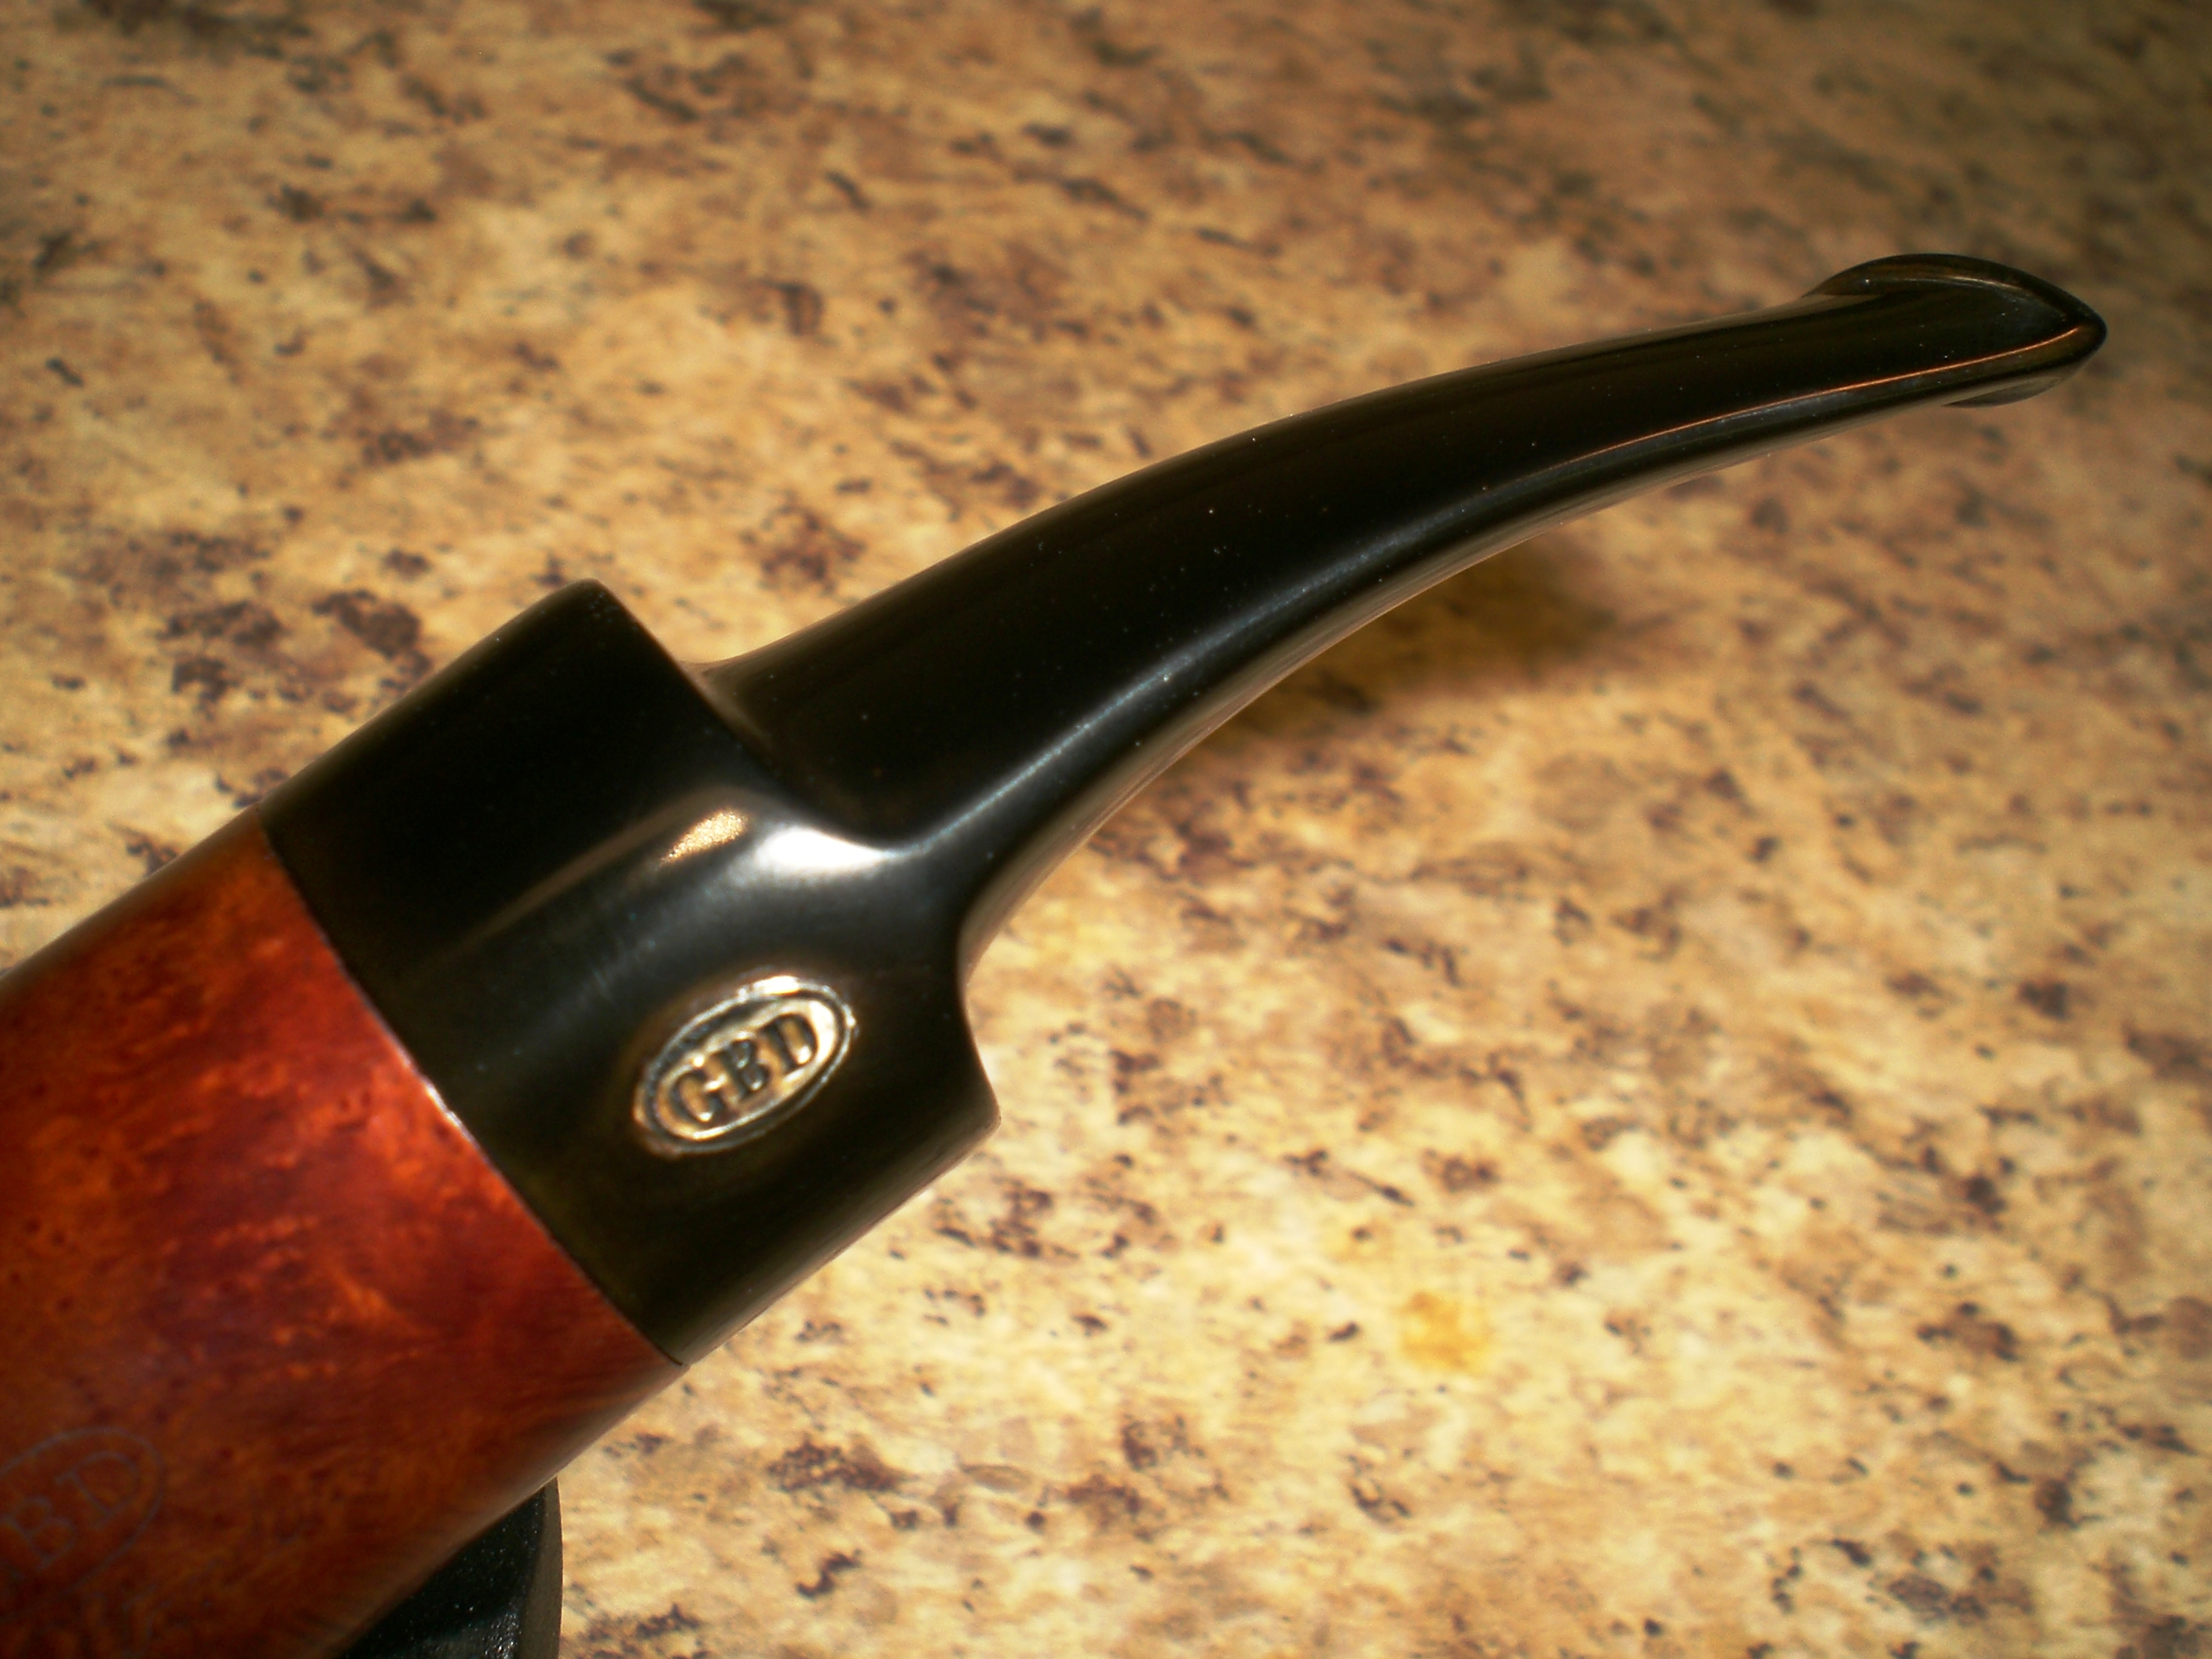
WARNING: Be sure to coat the tenon and nomenclature (If any, like say the GBD rondelle) with Vaseline (Petroleum Jelly).
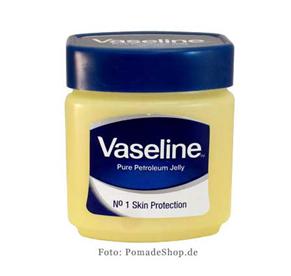
Stems3

This protects the stem material from coming into contact with the bleach. If you do not do this you will end up needing to resize the tenon as the bleach may eat away at it. As soon as the needed parts are coated, I drop the stem into the bleach. It will bubble a little and you will immediately notice the liquid turning brown. Depending on the extent of tarnish and the quality of the vulcanite will depend how long I leave the stem in the bleach.  A good average for me is 20 min.

Below is a picture of the stem in the bleach for a minute or so. It looks scary I know, but it works.
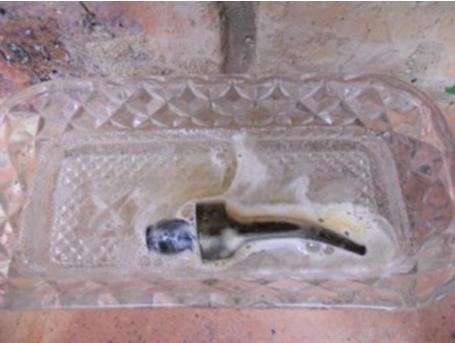
Stems4

Remove the stem from the bleach and rinse in warm water. Wipe off the Vaseline from the tenon. This process has an added bonus as it tends to eat the muck out of the draft hole in the process.

PROBLEM: But fear not. If you draw on the stem you will taste 2 things. Firstly, you are going to get a strong taste of bleach, secondly, you may taste the left overs from the ghosting of the previous owners blend. If it were aro’s you will really taste it. This is easy to get rid of.

The next step involves scrubbing out the daft hole. I use bristle brushes and bristle pipe cleaners. If I choose to open the stem to my preferred 4mm, I do it at this stage.

Interesting Observation: I have had clients complain that a pipe ghosts flavours of tobacco even when the bowl has been well refinished. Did you know that vulcanite is porous and will hold the ghost in the same way the bowl does. If you do not believe me remove a stem from an old pipe and draw on it, you will taste the ghost! The bleach bath cures this problem to a point. Further manual scrubbing aids the removal of the ghost.

The picture below shows how much dirt and grime is loosened and scrubbed out of the draft hole during this process.
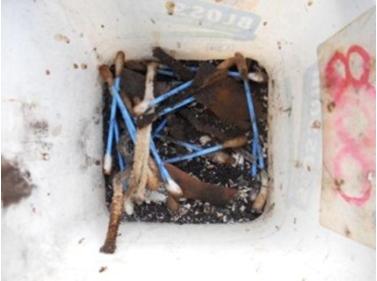
Stems5

In order to remove all ghosting of tobacco, bleach and in order to sanitize the stem, I soak the stem in alcohol for an hour. I use Isopropyl alcohol (96%). Now this stuff is poisonous in a big way if ingested but research has proven that as soon as it has evaporated it is harmless. This is the same stuff used by hospitals to clean and sanitize operating theatres and equipment so go figure. After an hour remove the stem from the alcohol bath and rinse with clean water.

Here is a picture of the colour of the alcohol once the stem has come out a soaking for an hour.
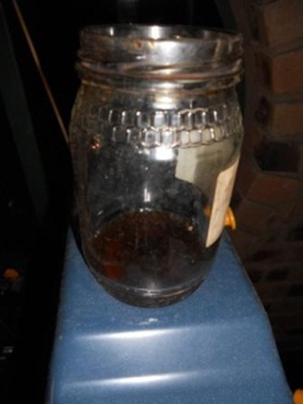
Stems6

Notice the stem may turn white, light green or matte black depending on the type of vulcanite used by the manufacturer. I have noticed that most Peterson stems for example turn white. If you draw on the stem at this stage will taste nothing. I will be as good as new.

Sanding and polishing: You may notice the following, the stem may be smooth with colouration or it may look matt black and be rough textured. Start sanding. I use 400 and work my way up to 800 grit sand paper. This is a time consuming process, do not take any short cuts here. The last thing you want is a stem with a high polish that is full of surface scratches.

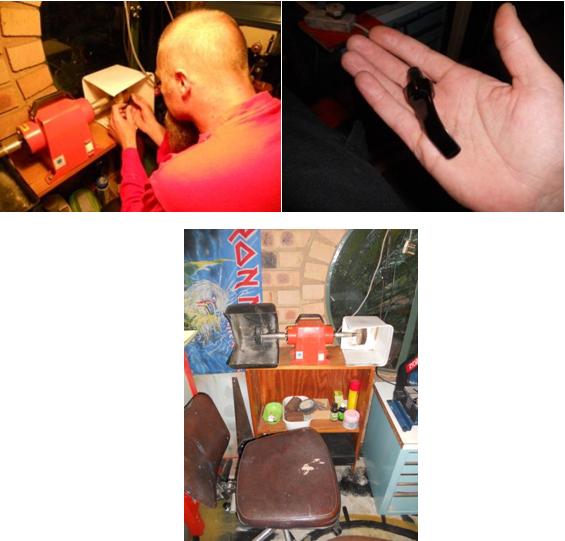
By the time I reach 800 grit I move to the buffer. I use Tripoli (Brown wax) which is equivalent to 800 grit sand paper and move onto White Diamond which is the same as 1200 grit. If you do not own a buffer, you can still get the same finish but the process will just take longer as you will hand sand up to 1200 grit and beyond.

The pictures below show the buffing process. Note that the picture of the stem on the right is not the finished product but shows what the stem looks like after buffing.
Stems7

By this stage the stem should shine and you should be able to see your reflection in the material. If not revert back to sanding, you have taken short cuts!

Depending on the type of material, as vulcanite differs in hardness, I continue hand sanding with 1500, 1800, and finally 2000 grit. Here you may notice the stem may start to dull a bit. The final polishing stages involves Brillo, or what we call Silvo here in RSA.  Silvo is a jewellery polish. Polishing is now done by hand using a soft duster cloth.
Stems8

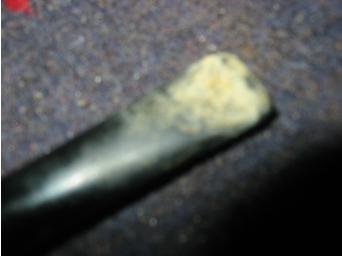
Finally, and you may laugh, but, I use tooth paste as the final step. This is a trick I learnt from a flute maker who high polish silver. Think about it, it really is quite logical. Toothpaste is a fine, very fine, rubbing compound. This process is also done by hand using a soft duster cloth.
Stems9

A final word of advice: Vulcanite is light and air sensitive. The more light the faster the tarnishing process will start. To avoid further tarnishing I run the stem including the bowl over a slow spinning buffer using carnauba wax. This forms a protective layer on the vulcanite keeping the oxidation process at bay. When done smoking your pipe, wipe the bit clean with a soft cloth. Saliva (Ph levels) mixed with the smoke is what makes pipes so yukky around the bit area. My stems are always clean and oxidation free. Besides standard cleaning after smoking I run the stem over the buffer to seal them up again from time to time.

Here are a couple of pictures to wet your stem polishing appetite. These are a herd of refurbished GBD that belong to “Muddler”. Stems can look better than new if you take the time and put in the effort.
Stems10

A Peterson Kildare.

Before and after
Stems11

Stems12

Good Luck and enjoy!
Hot Rods – next round please, Basket briar massacre. (October 2012) Part 2 – Piet Binsbergen


Ok, so here is the silly bit.

These 2 pipes I did not photograph before I started. Once again apologies!
Die Braaivleis pyp (Afrikaans for the BBQ pipe)

This is my opinion. I guess that basket briars are not that bad. What makes them unattractive is that they are drilled skew and full of putty. Now skew drilling sucks and these pipes are laid to rest. When I do find pipes that look like the drilling is solid enough I often find the bowls to be full of putty fills hence they become basket briars. So why do they do it then? Well, time is money and to fill a pipe and sand it, covering it with a dark stain seems to be fast and cost effective.

I have found that if one spends time and uses the right tools, with some practise you can rusticate the bowl and the fills become part of the character of the pipe. So why do the pipe manufacturers not do it then? The answer again is a simple one! Time versus money. A solid rustication job may take me some hours. Now hours I have, low end pipe manufacturers do not!

In time I will put together a photo essay of my rustication process.

With this pipe, the bowl was semi rusticated. I added a silver shank ring and fitted a green Lucite shank ring for contrast. The stem was replaced.
Piet1
The Bushveld Poker

Before you all have a stroke, this is NOT a CASTELLO but a Purex basket briar.

This was fun as I could get the stummel into the lathe chuck and work it back into true. The drilling was good but the tobacco chamber was off set to the outside of the bowl (Welcome to the wonderful world of basket briars). I was able to turn the bowl down just a bit to bring it back into true. I also added some rings. As the bowl was full of fills lower down on the stummel I used the same rustication process as above. I added a silver shank ring for contrast. The stem is a screw in type fit with one of those nasty stingers fixed to the tenon of the stem. Here I removed the stinger and saved the stem. This is one of the few pipes that had a stem which was saveable so I went through the motions of bleaching soaking and polishing. All the pipes have draft holes open to 4mm.
Piet2

Hot Rods – next round please, Basket briar massacre. (October 2012) – Piet Binsbergen


Hi guys, you know some times I am really dumb. I am so excited to get going that I fail to take some before pictures. I have come to realise that posting the end product only does not do the process or the hobby any justice. I have done 2 more pipes for which I do not have any before pictures, my apologies.

Well I got a batch of basket briars sent to me by my good friend and tobacconist Alan from Sturks in Cape Town. These pipes are really low enders with nothing much going for them. I like this, here I can go mad and be myself as there is nothing to lose and much to gain. I am under the impression that these putty filled beauties may hold some magic, and after all, they do seem to look like some old briars. Most of them are just nameless, others are Medico ‘Frank’ pipes and the odd one marked Purex, (Sounds like a contraceptive, juck, LOL)

I have been on the quiet side for a bit as my PhD title defence was looming and I needed to get that done and dusted. When I needed a solid break from my studies I took time out to do up some pipes. Hope you like them.

The DAMASCUS PIPE (LA Mort)

This is a Medico Frank, Maple I suspect or maybe some of you can help me out here? Either way I wondered what it would look like in its blasted form. It came out fantastic. The blast is fine and delicate so I decided to stain the pipe black and laid off heavy carnauba waxing. I added a Hippo bone shank ring for contrast and replaced the stem.

Before:
rod1

After:
rod2

rod3

The S.A.Y. 15 Plumbing Pipe

Well my father-in-law is a plumber by trade. I spent some time with him last weekend. He lives far away so I do not get much time to spend with him. I decided that if I was going to do crazy things to old pipes they might as well tell a story. This is another Medico ‘Frank’ with a cracked shank. The pipe is briar with plenty of ‘meat’ for me to go mad with. The crack in the shank caused the stem (screw fit) not to align. I cut off the shank, and had some fun.

The shank extension is stained cherry wood, the shank ring is a S.A.Y. 15 Copper plumbing pipe coupling. I rusticated the pipe and fitted a shorter ‘Lovat’ style saddle stem. The cool part is I managed to get a matt finish on top of the stem and polished the sides. The black ring next to the copper ring was burnt with a fine soldering iron.

Before:
rod4

After:
rod5

The Jockey

This is a no name briar. It is in a nasty state but under all that dirt and grime I found some really good wood. Here I did a full refurb as I always do and sanded the bowl starting at 150 grit and working it up to 2000. If you are after a good finish on smooth pipes you have to be prepared to put in the hours. My rule of thumb is that the pipe should shine before you add the final buffing and polishing wax. Carnauba wax will never hide your short cuts.

Stain is applied at the 600 grit sanding stage and a fresh layer of stain is added as the grit number climbs. In this way I get a deep stain, rich in colour. Steve has recently published his staining and sanding method in detail. It is published here on the blog and in the latest issue of the NASPC Pipe Collector. It is well worth checking out.

3 Shank extensions (rings) were added, Red ivory wood, Aluminium and African olive wood.  The stem was replaced.

Before:
rod6

After:
rod7

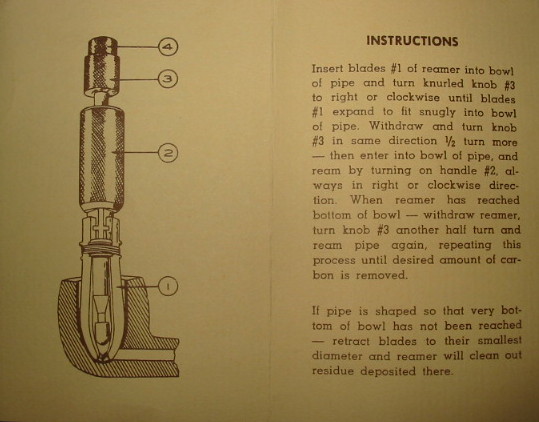
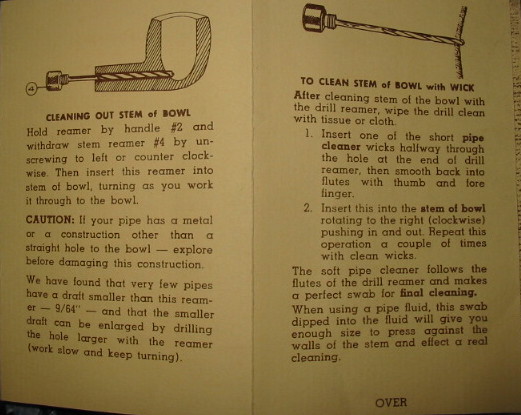
Kleen Reem Pipe Reamer Instruction Booklet


Blog by Steve Laug

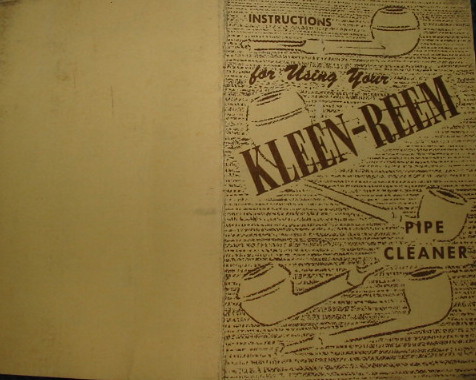
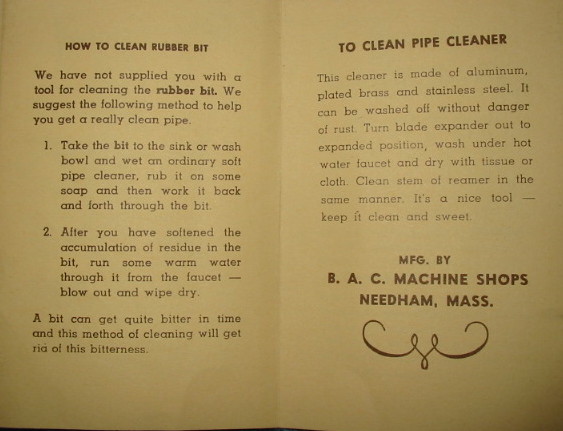
I had this instruction booklet for the Kleen Reem pipe reamer in my files and thought I would post it here. It is the best explanation in words and pictures that I have seen for the use of the reamer – regardless of whether it is marketed as a Kleen Reem Reamer or a Senior Reamer. The diagrams are applicable to both.
IMG_2872

IMG_2873

IMG_2874

IMG_2875

Stem Repair Just for the Practice


Blog by Steve Laug

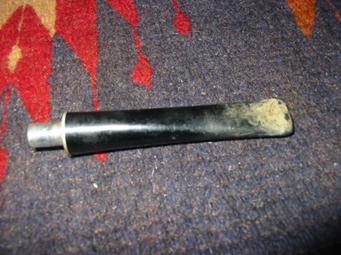
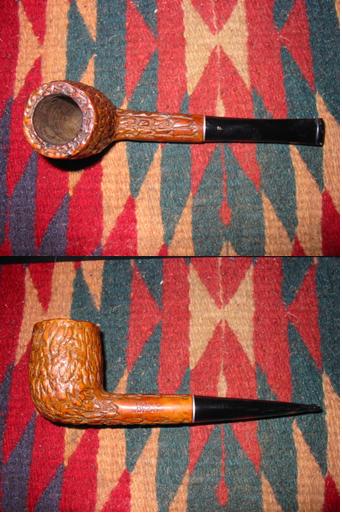
Sometimes I just repair a stem because it is there and I can get the practice working with it. Such was the case with the pipe below. It is a very low end pipe with a nylon stem and a metal tenon that holds a paper filter. The bowl of the pipe was rusticated and definitely not a favourite shape or style of mine. This one would not be a pipe I kept or would be tempted to add to the collection. It was solely a pipe that would provide me an opportunity to work on the tooth dents, the bite through holes on the top and the bottom of the stem near the button as pictured in the two photos below. A decision had to be made whether to fill the hole with super glue or to cut of the bitten through end of the stem and reshape a new button. The dents and holes were very big and the stem was truly a mess.
I used heat from a heat gun and boiling water to raise the tooth dents in the stem and then sanded it to provide a smooth surface in front of the button. I wanted to minimize the amount of the stem that I would have to cut off should I choose that method.
stem1

stem2

I used heat from a heat gun and boiling water to raise the tooth dents in the stem and then sanded it to provide a smooth surface in front of the button. I wanted to minimize the amount of the stem that I would have to cut off should I choose that method.
stem3

stem4

Once I had leveled the stem out, I again studied the bite through areas. It was clear to me that I was going to cut off the stem and reshape the button. I used a Dremel to cut back the button and the damaged area of the stem. The next three photos show the result of the cut back. I did not have to remove nearly as much as I originally thought I would as the heat had raise many of the tooth marks in the stem. I sanded the stem to smooth out the flow and slope of the stem and remove the remaining tooth damage. Even though the photos are a bit out of focus you can see the work that was done on the stems. If I had doubted that the stem was made of nylon it became very clear as I sanded it. The grey hue of the material can be seen in the photos below.
stem5

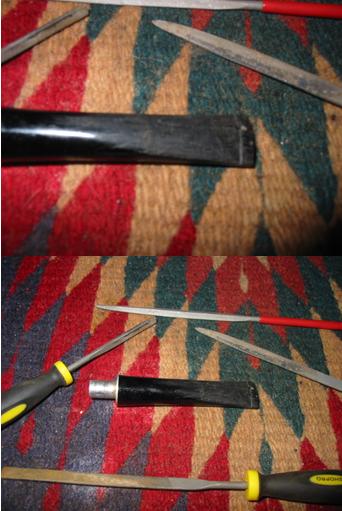
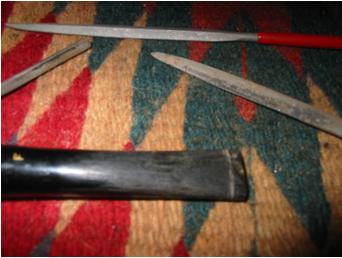
Once the stem surface was smooth and the remaining dents were minimized it was time to take out the needle files and begin to cut the new button on the stem. I used a square bladed needle file to do the initial cuts in the button. I am always concerned to make a clean straight edge on the button so I find that a square blade with no taper or tip makes that task simple. I then clean it up with a flat bladed file and smooth out the transition between the button and the slope of the stem. The other files in the pictures below are used to shape the button and to define its final form. The three photos below show the files and the progress in cutting the new button. You can also see that the small dents that remained are disappearing in the shaping of the button. Care must be taken not to cut the edge too deeply and recreate the hole in the stem again. In this case I had enough meat on the stem to allow me to cut a well defined button.
stem6
stem7

Once I had the button cut and defined I put the stem on the pipe to continue the process of refining the line of the stem and smoothing out the transition to the button. I wanted to taper the button toward the lip rather than leave it flat so you can see that in the profile picture below. The stem is just about finished by the time these photos were taken and only needed the final sanding to bring the stem to completion.
stem8

The stem was then sanded with 400 and 600 grit wet dry sandpaper to remove the deep scratches and then followed that with micromesh sanding pads from 1500-12000 grit. The finished stem is picture below both in profile and from a top view. The new button is comfortable and the slot is open and passes a pipe cleaner easily.

The pipe provided a great opportunity to work on a stem restoration and the recreation of a button and it has since found a new home in the rack of a happy pipe smoker who needed some pipes for working outside and in the yard. This is a perfect yard pipe and should continue to deliver a great smoke to him as long as he chooses to keep it.
stem9

Refurbishing a GBD Penthouse with a Chairleg Stem


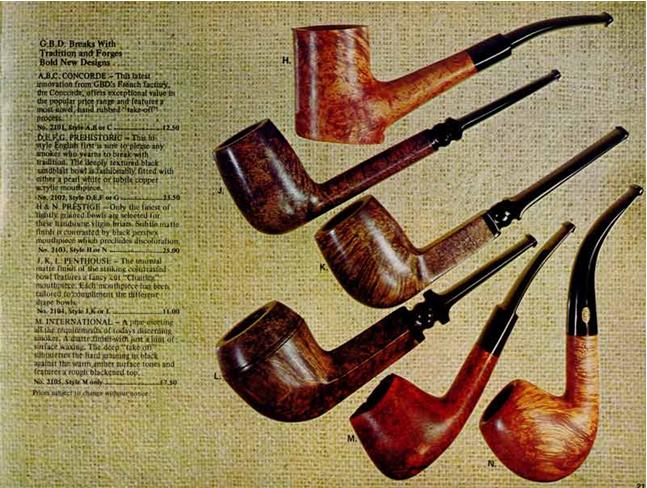
While scanning EBay for interesting old pipes to work on I came across a pipe for sale with the stamping Penthouse. There was little other information on the advert regarding the pipe but it looked interesting to me. The chairleg type stem made me think of the series of pipes that Al (upshalfan) has restored so I put a bid in for the pipe. I contacted Al and he sent me the following picture from a Tinderbox catalogue showing that indeed the pipe was a GBD line. (NOTE: The GBD catalog page came courtesy of Jerry Hannah. Jerry created the GBD Shapes/Model page that I frequently use for reference. I’m not sure if he reads this blog, but if so, thanks!) The headline on the page says that GBD breaks with tradition and forges bold new designs. Pipes marked J, K, and L in the picture below are all Penthouse pipes. I have no idea where they took the name but let imaginations rest, the pipes are stunning and the stems are uniquely beautiful.
Pent1

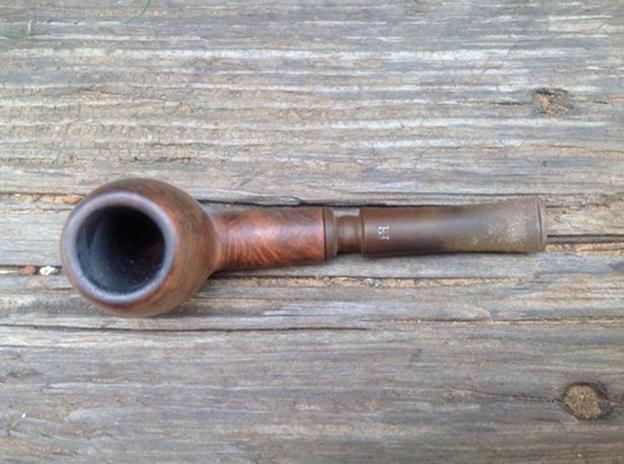
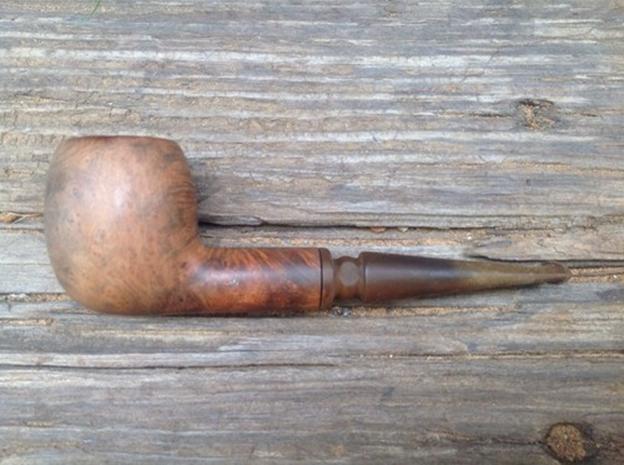
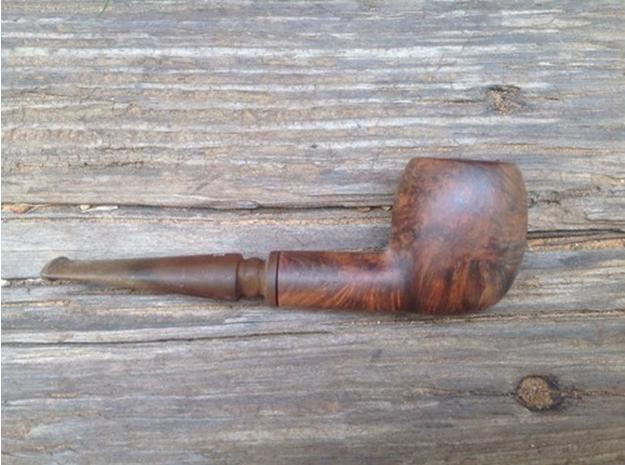
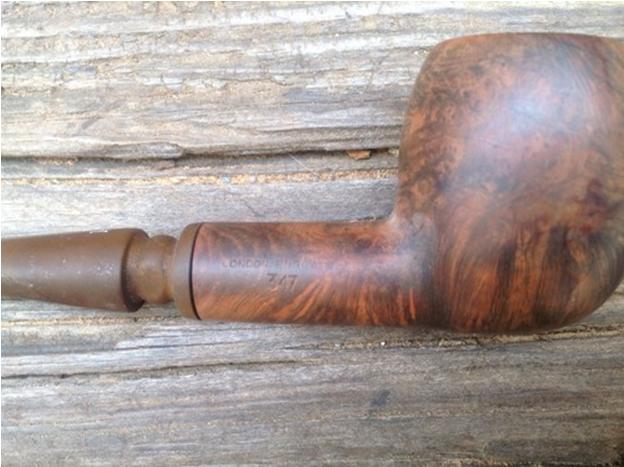
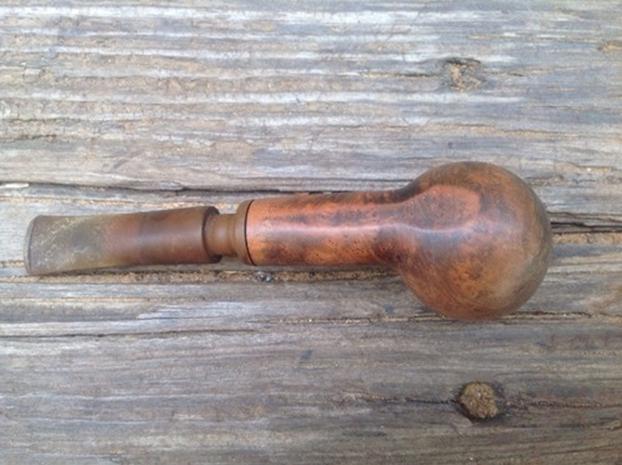
The Penthouse pipe that I bid on and subsequently won is an apple shape. The first six photos below are the seller’s pictures. It was these pictures that tempted me to place my initial bid on this pipe. As it turned out I was the sole bidder. The stem was badly oxidized and had some tooth chatter at the button. The stamping showed up but was not as deep as it appears in the photos. The rim appears to be darkened but not charred in the photos and the finish appeared to be dirty but not dented or scratched deeply. It was stamped on the left side- Penthouse in script over Made in England in block letters. On the right side it was stamped London England over 347. Now the wait began.
pent2

pent3

pent4

pent5

pent6

Pent7

When the pipe arrived it was much as the pictures had shown. I am never sure what to expect when I bid on these old pipes as I have been utterly surprised both ways – they have shown up in much worse shape than the photos showed or in much better shape. The next four photos show it as it appeared when I removed it from the box.
pent8

Pent9

Pent10

Pent11

The finish was actually quite dirty. Many of the dark areas of the finish were actually grime and grit and not the understain on the pipe. I wiped the pipe down with acetone to remove the grime. I also used a battery terminal brush to clean out the remaining cake remnants in the bowl. Then I dropped the bowl in the alcohol bath and the stem in a bath of Oxyclean. The bowl sat for about an hour in the alcohol bath and the stem sat in the bath overnight. When I removed them I cleaned out the shank and the inside of the stem until the pipe cleaners and cotton swabs came out clean. I wiped the entirety with a soft cotton pad and acetone to remove any remaining grime and the next series of four photos show the state of the pipe at this point in the process. The alcohol bath and acetone had successfully removed the remaining finish and the grime on the surface of the pipe. The Oxyclean had done a great job on the oxidation. You will notice the shiny areas on the top of the stem – I had run my fingernail across the surface to show how the oxidation had softened. It was ready for the next step in the process of cleaning the stem.
Pent12

Pent13

Pent14

Pent15

The next two photos show the stem after I had scrubbed it with a Magic Eraser. The stem was wet and shiny and you can see the oxidation on the Magic Eraser under the stem. I continued to scrub the stem with the Magic Eraser until it came out clean.
Pent16

Pent17

The oxidation was greatly decreased at this point but there was more work to be done on the stem. The hard points on the stem were obviously around the chairleg section. The grooves were difficult to get to with the Magic Eraser. I decided to use some Meguiar’s Scractch X 2.0 which is a scratch and blemish remover for auto paint finishes. I used soft cotton pads (makeup removal pads) with a spot of the Scratch X 2.0 on them to scrub the grooves and the area around the button as well. The next series of three photos show the stem after the scrubbing with X 2.0. The oxidation is further removed but still evident.
Pent18

Pent19

Pent20

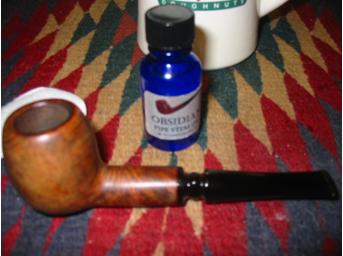
At this point I continued to scrub with the X 2.0 until the stem was once again black. I buffed the stems with White Diamond on my buffer once that was finished. The next two photos (please forgive the blurry focus) show the stem after the application of Obsidian Oil to the clean stem. I left the Obsidian Oil on the stem until it was absorbed and then coated the stem with an initial coating of carnauba wax to protect it while I went to work on the bowl.
Pent21

Pent22

I coated the bowl with an oxblood aniline stain. The next two photos show the coated bowl before I flamed the stain to set it in the grain. The stem appears to be brown again but I had coated it with wax and left it to dry while I worked on the bowl.
Pent23

Pent24

I buffed off the stain with a soft flannel cloth that is pictured below. I wanted to highlight the variety of grain in the pipe so that is why I chose the stain I did. It also shows that the black understain that appeared in the original photos still remained and makes the grain very visible in the pictures below.
Pent25

Pent26

Pent27

Once the stain was dry I put the pipe back together and took it to my buffer. I buffed the stem and bowl with White Diamond until is shone. Then I moved on to a soft flannel buff with carnauba wax and a final polishing buff with a clean soft flannel buff. The finished pipe is pictured below. All that remains is to fire it up and enjoy a bowl in the “new” Penthouse pipe. The stamping on the stem is still present and not harmed by the work but it is light and will not hold any whitening product.
Pent28

Pent29

Pent30

Pent31

Arghh, I Drilled to Far – A Lesson Learned Only Once


I had this interesting old timer in my box of pipes to repair. It is stamped Marxman Jumbo on the underside of the shank. The tenon was broken and stuck in the shank. I pulled the broken tenon with a screw and used it for sizing the new tenon for the pipe. The bowl finish was mottled and dirty so I dropped it in the alcohol bath while I worked on the new tenon.

I decide to use a Delrin tenon that I had here so it meant that I needed to drill out the stem in order to fit the new tenon. This was the first tenon I ever replaced so I proceeded slowly and with caution. I used a drill bit slightly larger than the airway in the stem. I wanted to move up slowly to the size of the tenon without chipping the vulcanite. So far so good. The hole began to open in diameter. In the photo above you can see the diameter of the airway in the stem after the first three drill bits. I had one more to go and the stem would be ready for the new tenon.

I decide to use a Delrin tenon that I had here so it meant that I needed to drill out the stem in order to fit the new tenon. This was the first tenon I ever replaced so I proceeded slowly and with caution. I used a drill bit slightly larger than the airway in the stem. I wanted to move up slowly to the size of the tenon without chipping the vulcanite. So far so good. The hole began to open in diameter. In the photo above you can see the diameter of the airway in the stem after the first three drill bits. I had one more to go and the stem would be ready for the new tenon.

No one had told me about a trick I have since learned to ensure that I do not drill too deeply. The idea is to measure the depth you want the bit to go and to mark the bit with tape so that you do not go beyond that. I had not learned that so I proceeded to drill with the last bit. I was feeling pretty good about the work at this point. It was going well and was centred. I was pleased and thinking this would be a breeze. But I was soon to be disappointed as I felt the drill break through at the place where saddle tapers off into the flat of the stem. I was sick when I felt this happen. I had drilled too deeply and the result was a hole on the top of the stem that all but ruined the repair. So much for my easy fix. In the photo below you can see the white spot on the stem at the spot where the saddle tapers. It was a large hole and I was frustrated. I put the pipe away for awhile and figured I had ruined a perfectly good stem.

Finally one day I decided to see if I could repair the hole. I set the new tenon with epoxy and once it was dry I went to work on the new “air hole” I had drilled in the stem! I filled it with epoxy and vulcanite dust to work a patch. The white spot in the photo above is the resultant patch. It is actually a grey spot. The vulcanite dust and epoxy dried to a mottled grey finish. The hole was repaired but whenever I smoke the pipe I am reminded that in the future I will measure twice and drill once! That grey spot speaks loudly to me. The good news is that the pipe smokes very well.

The finish was shot and the colour of the stain was mottled and uneven. So I when I removed it from the alcohol bath I restained it with a medium brown aniline stain and buffed it gently with White Diamond and then a flannel buff and a light coat of carnauba wax.

Since that day I have replaced many more tenons. I have not repeated the same mistake twice. The point is to learn from the errors not to keep repeating them.  I wanted to pass on what I learned and show the mistake I made to hopefully keep you from repeating my errors. Thanks for looking.

GBD 9438 New Standard Restoration


As you no doubt have learned, the pre-Cadogan era GBD 9438 is one of my favorite shapes. I have this model in several finishes (Tapestry, Fantasy, Seventy-Six Collossus) but was lacking a smooth finish. This one, found on Ebay, went unnoticed until the last few minutes of the auction. It is only a New Standard grade, but looked in good shape with no bite marks, etc. on the stem. I thought from the pictures that it would only require a simple clean up.

Here is the pipe as it was delivered.

The bowl had a very thin cake, which I reamed slightly revealing a very nicely maintained bowl and bowl top. There was a little stain lightening on one side, but I think with use, it should blend in. The stain is an interesting reddish-brown color, GBD called a “tobacco brown” finish in their 1976 catalog. The bowl was polished with tripoli, white diamond and finally several coats of carnuba wax.

The stem was soaked in oxyclean, with a dab of grease on the brass rondell. I sanded it with 1000, 1500 and then 2000 grades wet sandpaper. Then, the last two grades of micromesh were used (8000, 12000). The stem was then polished on the buffer with tripoli, white diamond and final top coat of plastic polish. There were no bite marks to lift or sand out, so it was a relatively simple clean-up.

Here is the finished pipe.

Al Jones

What About Needle Files


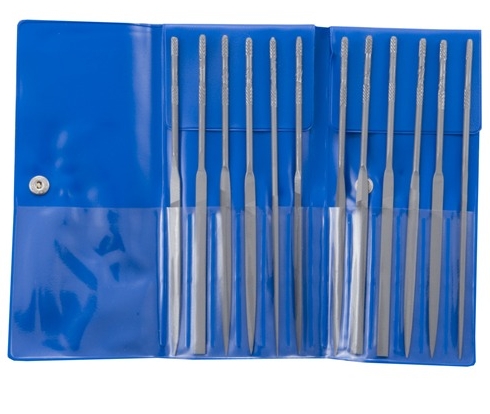
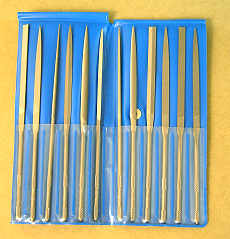
A needle file is a tool that I have referred to often in this blog and one that I use almost every time I work on a stem or shank in the refurbishing process. I have three sets of files that each has 12 files in various shapes. The reason for the three sets is the size of the files in each set. The picture below shows one of the sets that I have.

Image

Needle files are commonly used in crafts or design work to finish small pieces of material. My daughter uses them in her jewelry design work to open the tiny holes in beads to make them easier to thread. They are also used in model building, guitar making, fine instrument repairs and a world of other work. They are an indispensable tool to do the fine and detailed work needed in tight spaces. Most common files are made from a hard steel bar with a series of narrow or pointed ridges or teeth that face upward. The needle file is no different and is made up of a series of teeth laid out on a piece of metal, usually with a handle on the end. It is a very small tool that is usually sold in sets of five or more files. Two of my sets have handles – one with a hard plastic handle and one with the end dipped in rubberized material. The third and smallest set is exactly like the one pictured above.

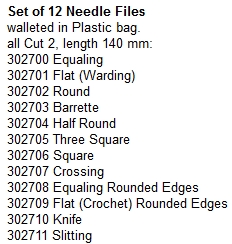
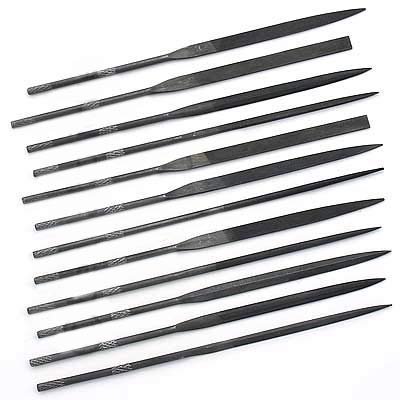
You will find if you do a Google search for needle files that there are many different types and descriptions and it can be a bit daunting to figure out the difference. The easiest explanation on the difference in the files that are available on the market is based on the cut of the teeth and the size and shape of the file, as each file is designed to be used for a different purpose. The teeth in the file are specifically designed to create different finishes on an object. Diamond needle files, hand files, checkering files, crossing files and half round ring files are a few of the common types of needle files that exist today. The chart below shows some of the shapes that are commonly found in a set of files.

Image

I have found that a needle file is excellent for shaping, designing and smoothing the button area on a stem, opening the airway in the slot and also opening the airway in the tenon. The different shapes of the files allow me to cut the vulcanite or Lucite in the shapes that I am aiming for. I personally like an oval slot so I use three different shapes – a round, an oval and a wedge to shape the slot. The round file and the oval file also work well on the tenon. I use a rectangular flat one to cut the edge of the button and to shape and reshape that area of the stem. The file is pushed it back and forth over the piece to create friction between the teeth of the file and the object. The teeth of the needle file pushing against the object will work to shave off pieces of the material until the desired effect is produced. A needle file is typically used to carve out the intricate details, smooth out a surface or provide a specific finish on a piece.

Image

When you look at the file sets you will see that needle files each have a slightly different shape to allow for different uses and handling. In the sets I have there are certainly some shapes that I have never used extensively. At one time or another I have tried them all to see what they can do but have settled into the common 5 or 6 that are close at hand. Each of these files is specifically used for detailing work on the surface of a project. Some of the needle files have a sharp pointed tip, which can be used for opening airways or even puncturing blocked stems or airways. I clean the files with isopropyl alcohol and a soft tooth brush to remove the vulcanite dust from the teeth and to keep the files sharp and useable. Remember, a needle file is not a tool that I would use to file large amount of vulcanite on the stem or to remove excess material, but rather to fine tune shapes and airways on the stem.

Image

Pick up a set and give them a try. You can read various articles on the blog on opening a stem or and airway, shaping a button or opening a slot on the stem. Each gives detailed pictures and comments on the use of the files.

What is a Pipe Retort and How it is used


Blog by Steve Laug

I have had a retort kit for many years now. I picked it up on eBay from a fellow who makes them and all profits from his sales go to the Sanctuary for Unwanted and Neglected Animal rescue S.U.N.A. All proceeds help pay veterinarian bills. The retort is owned and manufactured by them for a fund raising tool. I have used it in spurts over the years. When I first got it I used it all the time. I like the way it worked and cleaned up the dirtiest pipe and boiled out the tars and oils in the bottom of the bowl. In recent years I have just forgotten to take it out in the process of cleaning and refurbishing. It is nothing about the kit that makes me forget it is simply that I have used a variety of other methods to clean out the oils and tars. These include an alcohol bath and the bowl stuffed with either rock salt or cotton bolls and filled with alcohol. Both methods have worked well for me so I just seem to move on without doing the retort.

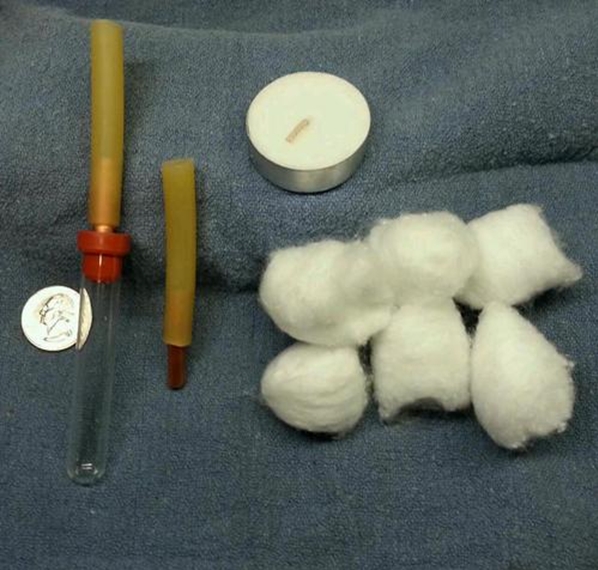
Retort kits are readily available on eBay and include all the things needed for a working retort. The picture below, taken from an eBay sale shows a version of the retort. The one from S.U.N.A. that I have is much more refined and elegant. But the constituent parts of the retort are virtually the same nonetheless. The retort includes a Pyrex test tube to hold the alcohol that is heated with either a candle or an alcohol lamp until it boils up through the surgical tubing through the stem and into the bowl of the pipe. Cotton bolls are used to plug the opening in the bowl and keep the hot alcohol in the pipe bowl.

Image

I found this drawing of a retort on the Seattle Pipe Club website and include it here to show the constituent parts of the retort. Where it uses an eye dropper, the S.U.N.A. version uses a nicely formed piece of brass tubing inserted into the stopper on the test tube.

Image

The designer of the S.U.N.A. retort says that the Pipe Cleaning Retort is the result of many years of experimentation by a 40 yr. pipe smoker and collector. He describes the purpose of the system as “the removal of gunk from the pores of the briar, specifically the heel, to sweeten and sterilize. Swabbing with pipe cleaners will not do the job, especially the musty estate pipe and also is great for changing blends without crossover taste. There is also the danger of harmful molds present in old pipes that will be removed by the hot alcohol method.”

How to use the retort

I begin the process by filling the retort test tube with isopropyl alcohol about ½ to 2/3 full. Others have used ever-clear but I have found that the 99% isopropyl alcohol works well for me. It is not only reasonably priced but less volatile than other products. It is also readily available at drug stores. The less water in the alcohol results in a lower boiling point. Put the stopper with the tube (whether copper tubing or eye dropper) into the mouth of the test tube. Attach the surgical tubing over the pipe’s stem. I usually stretch it up to about ½ inch on the stem. The connection of the tubing on the stem should be tight as you do not want the alcohol to seep around the joint when it is hot. (A 1/4″ slit or a v cut in the surgical tubing will make it easier to fit onto pipe bits.) Use cotton bolls to stuff in the opening of the bowl to prevent the hot alcohol from damaging the bowl’s finish.

Hold the retort over the heat source, candle or alcohol lamp and slowly move it back and forth over the flame. Hold the pipe by the bowl so that it is level and be careful of the tube as it gets hot. I generally hold onto the stem and the rubber stopper as I move the pipe back and forth. As the alcohol boils up into the pipe, periodically remove the retort from the flame. The instructions require that the unit be supported to allow back and forth flow for best cleaning, not just dangling over high heat source that causes over boil and uncontrolled gushing. As the retort cools, the alcohol will be sucked out of the pipe and into the retort. By repeated heating and cooling the retort, you can flush the pipe with boiling alcohol several times. Once the alcohol turns black with tar, replace it with some fresh alcohol. After about a dozen flushes, remove the retort and clean the pipe with bristle cleaners or a nylon brush. Let the pipe dry out at least six hours before smoking.

NOTE: Some may have a concern about fire or even explosion from heating the alcohol over an open flame. The maker of the retort system says that “our testing to deliberately cause separation due to restricted airway resulted in the connector pulling out of the glass tube due to the increased pressure, a press fit instead of fixed will prevent any explosion. Any remote possibility of a resultant fire using isopropyl alcohol in the amount required to operate the retort can easily be snuffed out by a small towel. The volatility of the alcohol is very low and it requires a low amount of heat to reach the point needed to make the retort function properly”. It is recommended that you use eye protection while working with the retort.

Image

The retort kit that I purchased included a generous supply of name brand tapered fluffy pipe cleaners, a natural rubber surgical tubing or connector bulb to attach various size stems, a thick walled Pyrex test tube (high speed centrifuge quality) and cotton balls for putting into the bowl. It also came with complete instructions. My kit did not come with a heat source though it appears that they now include a small votive candle.