Category Archives: Pipe Refurbishing Essays

Essays and pictorial essays on the art of refurbishing

Replacing a tenon and restoring a Radice Silk Cut Billiard


Blog by Steve Laug

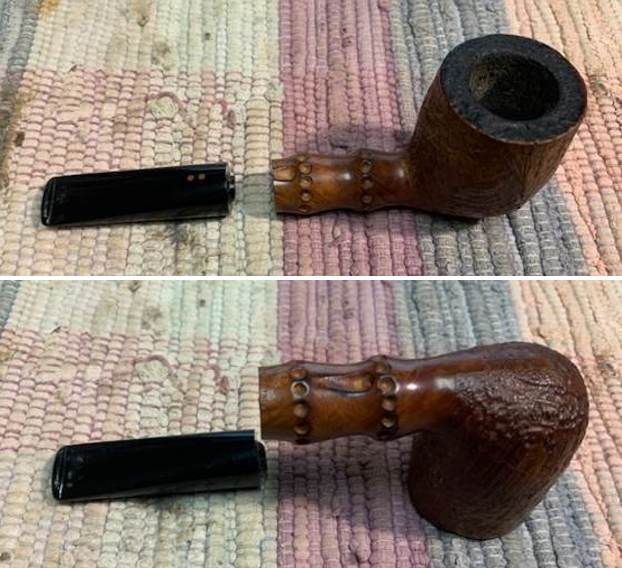
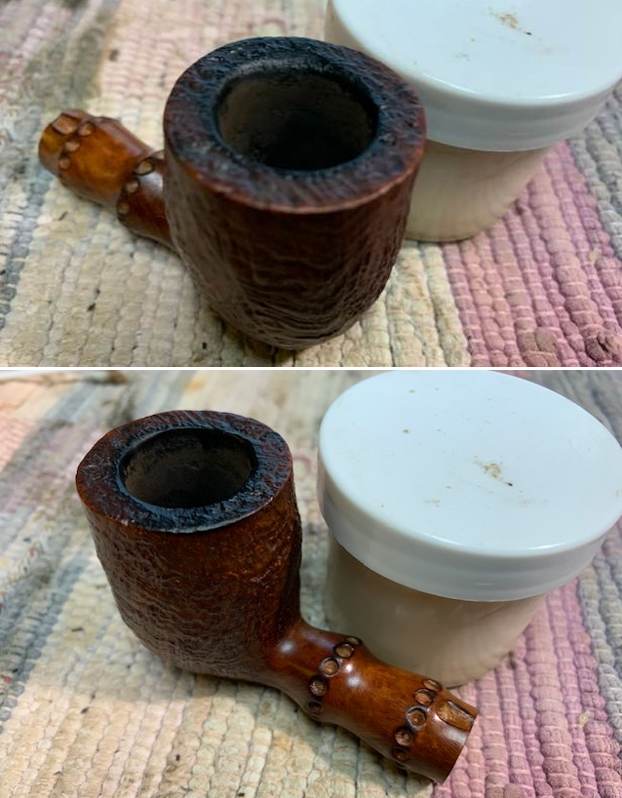
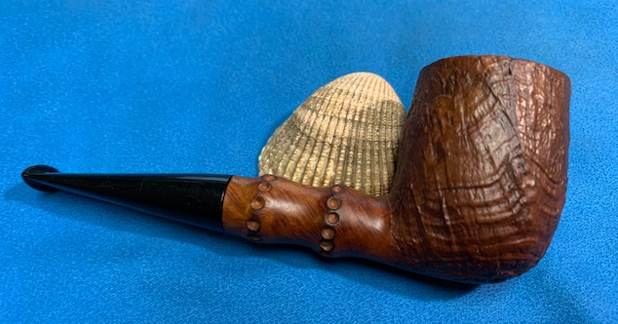
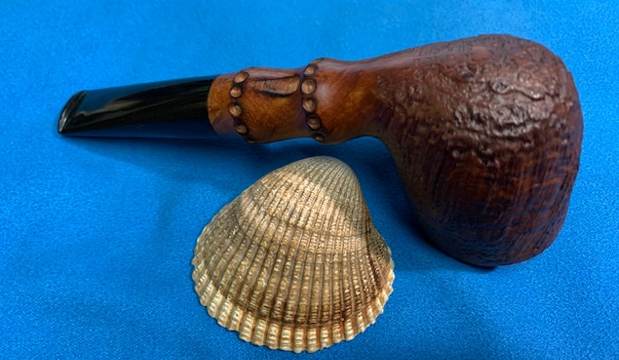
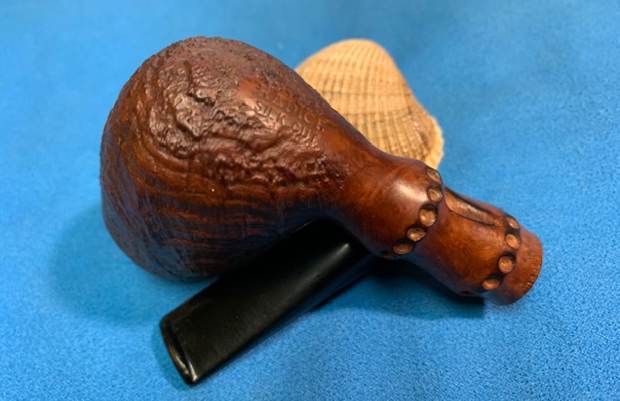
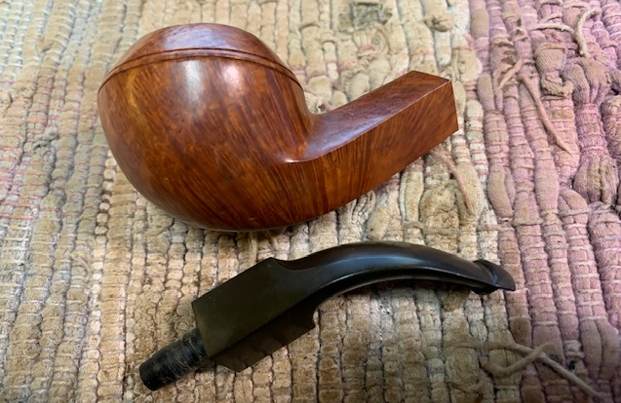
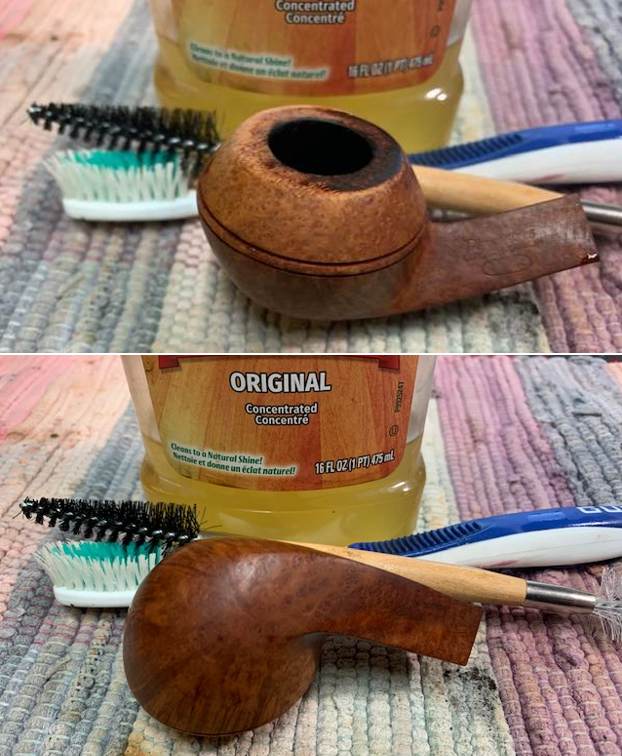
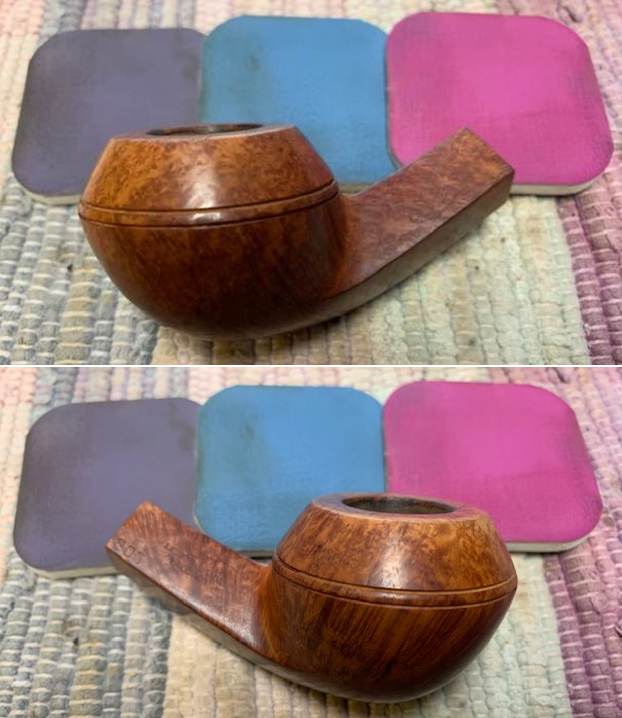
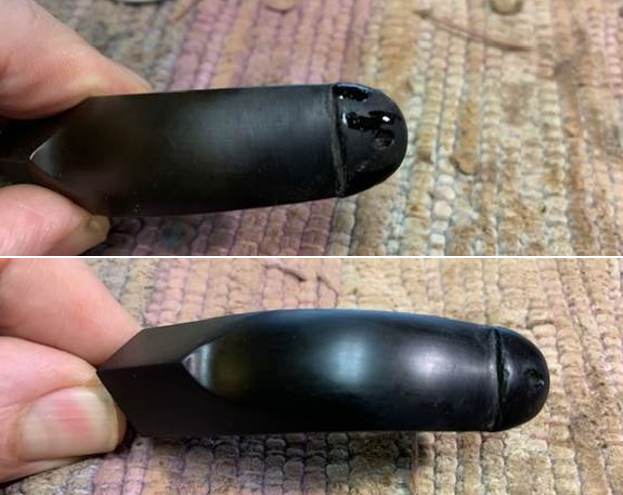
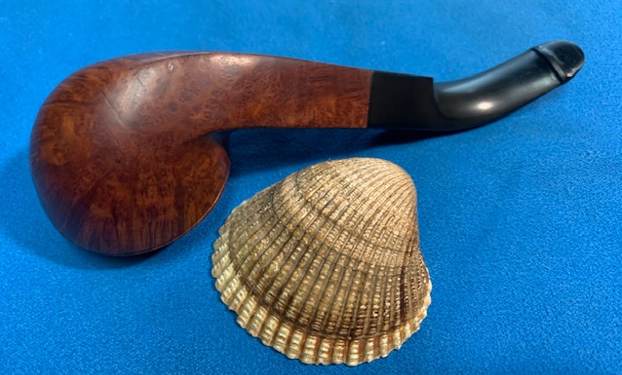
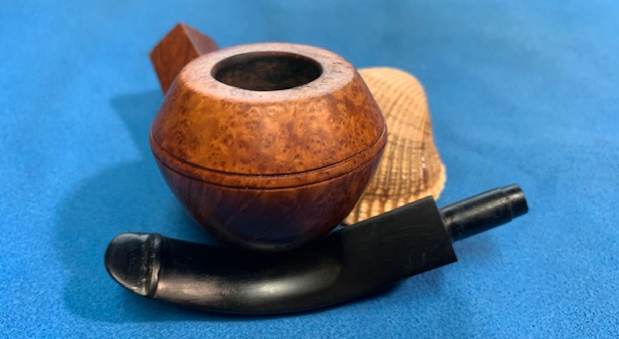
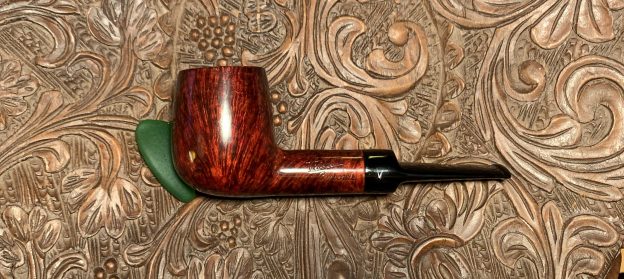
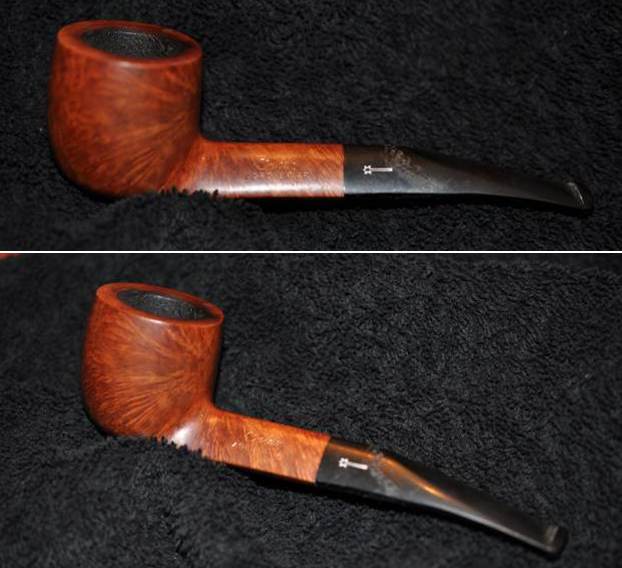
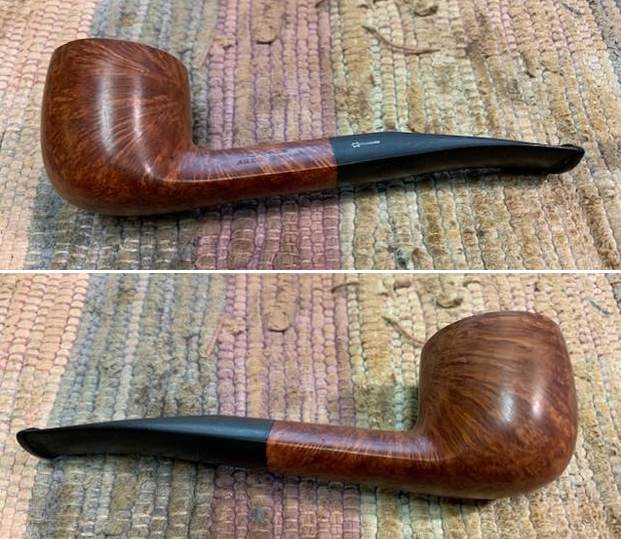
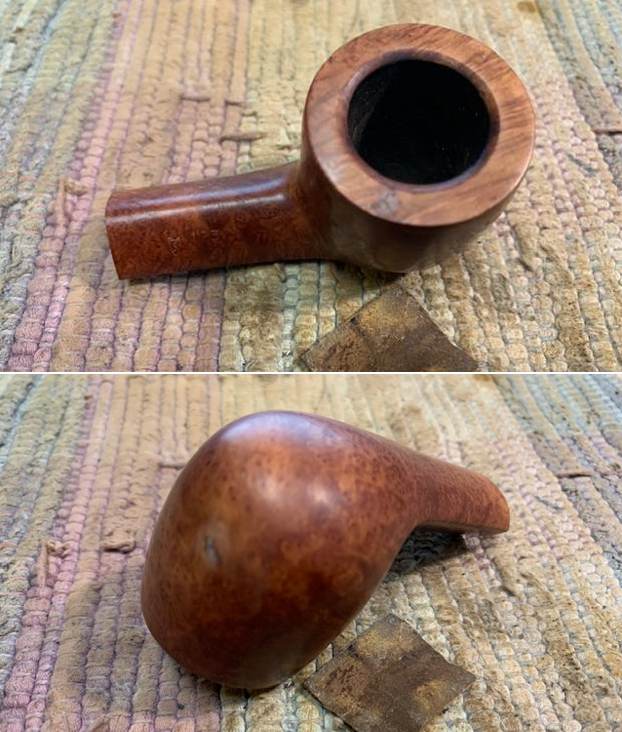
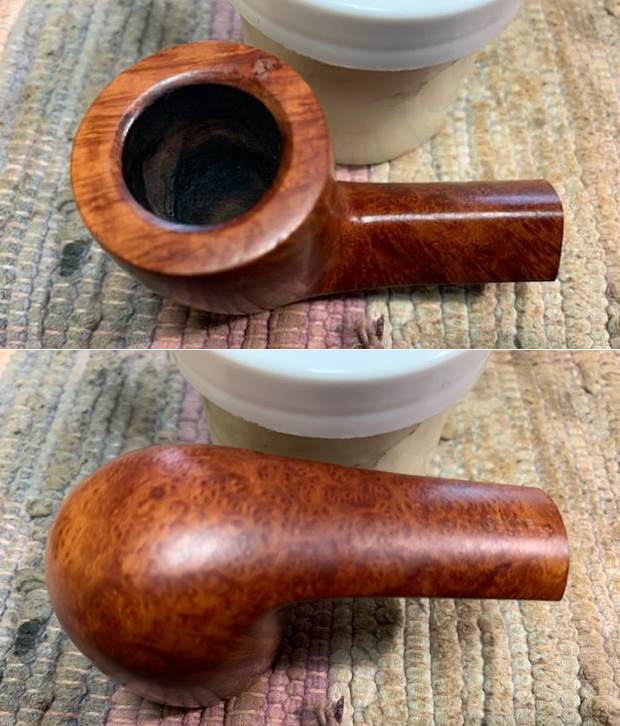
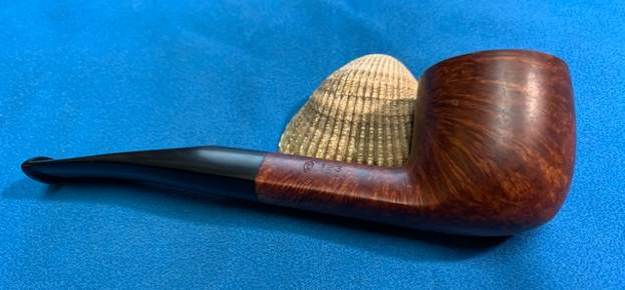
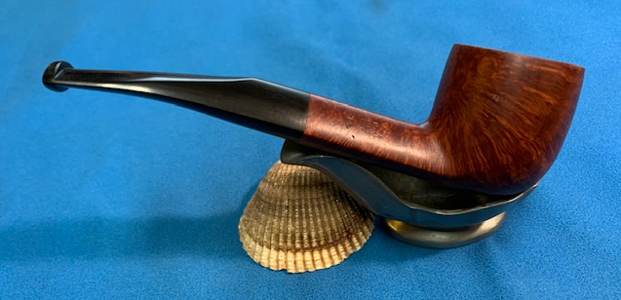
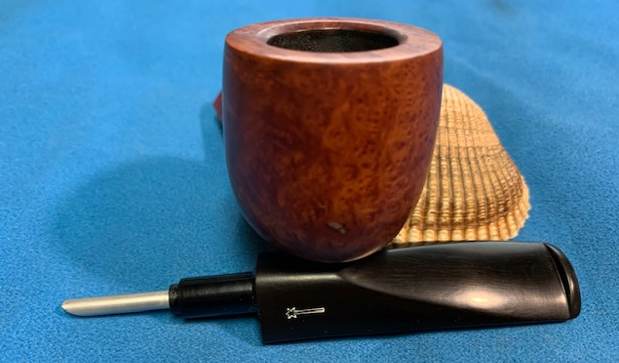
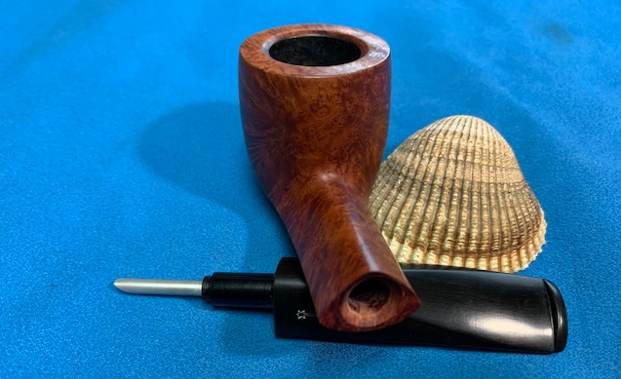
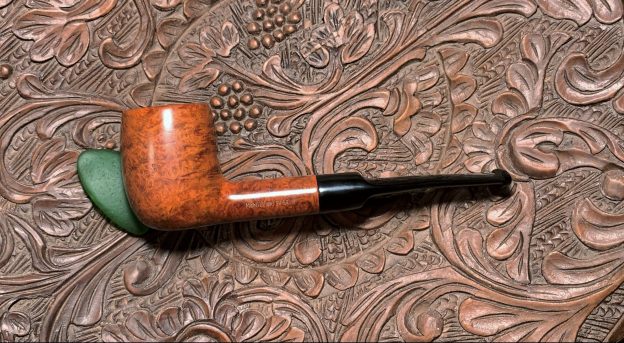
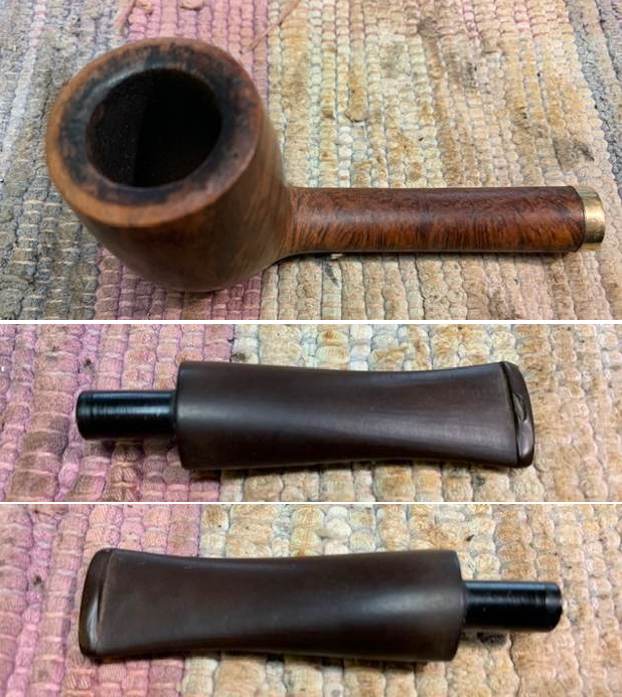
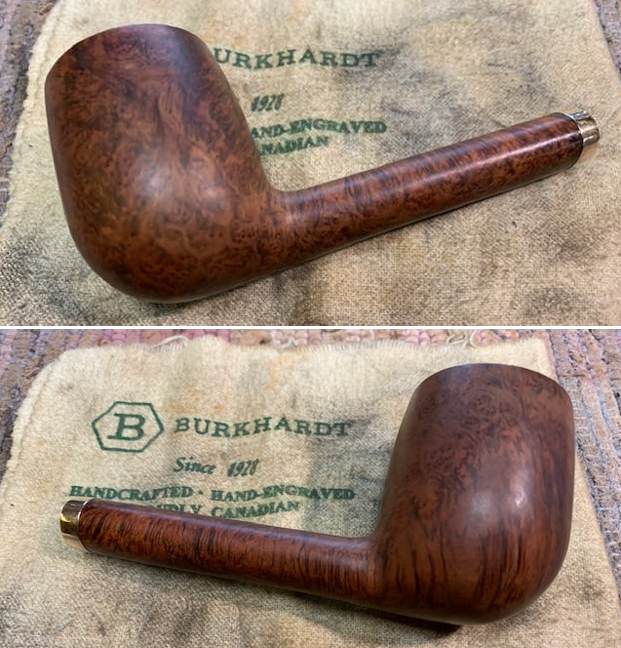
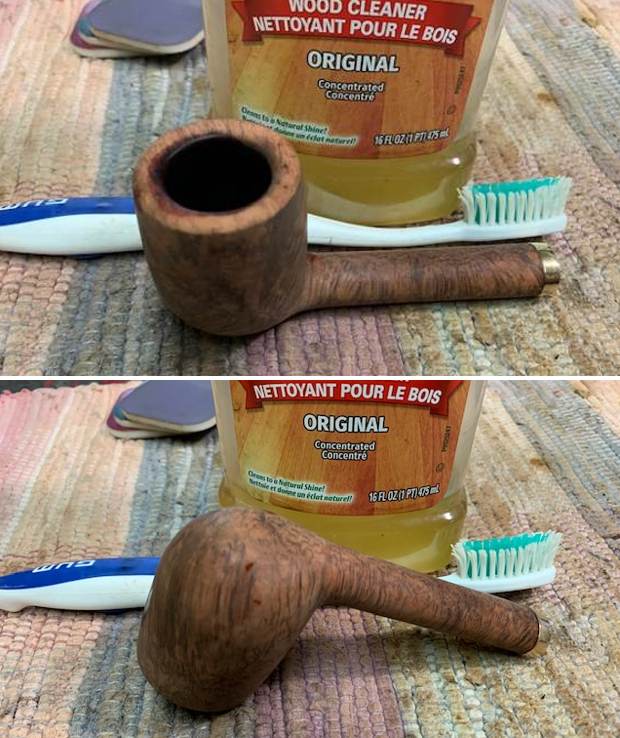
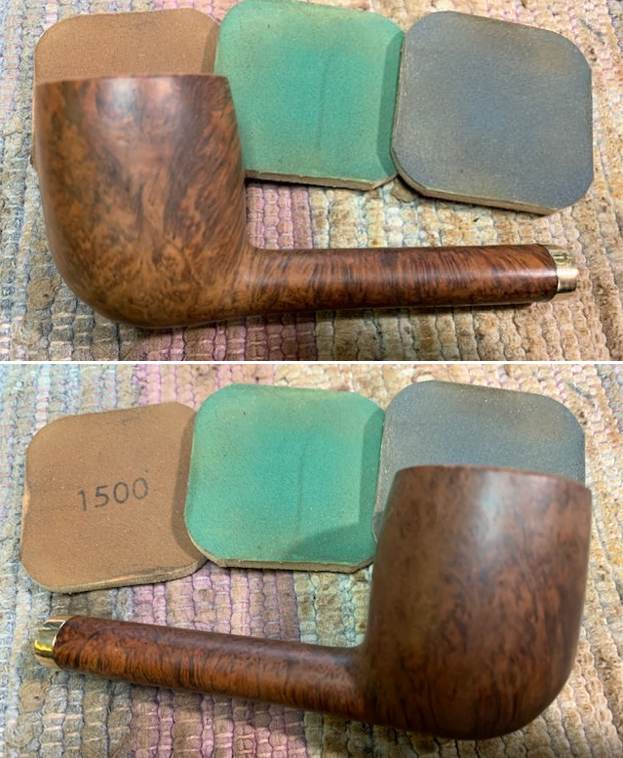
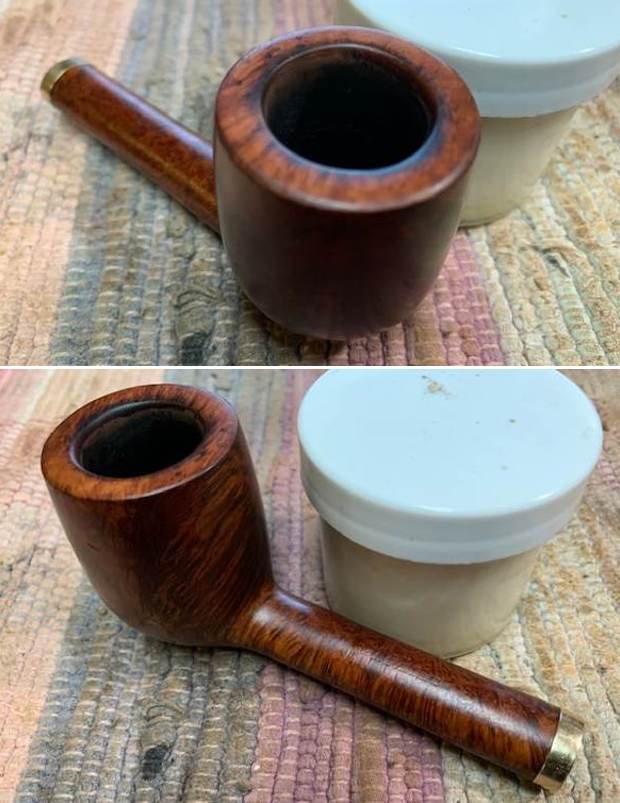
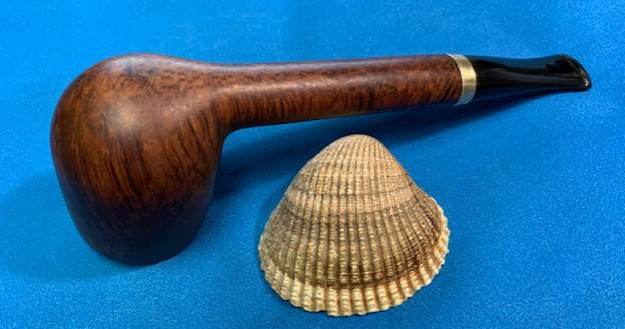
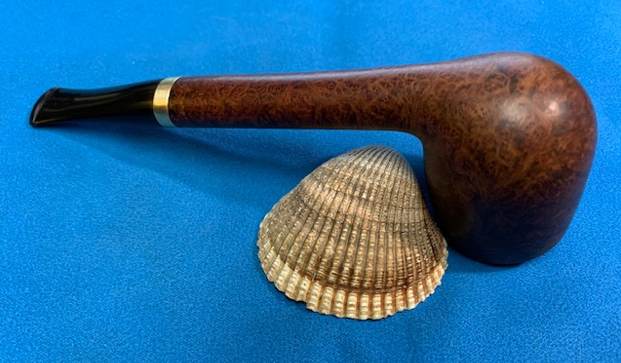
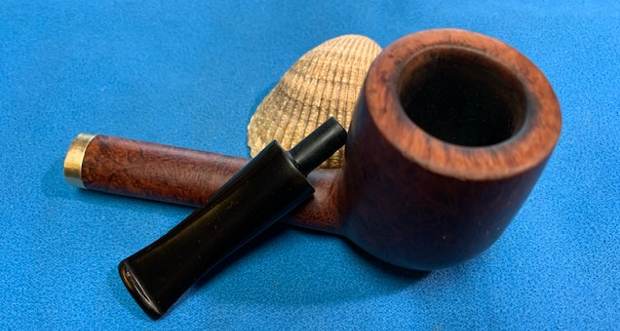
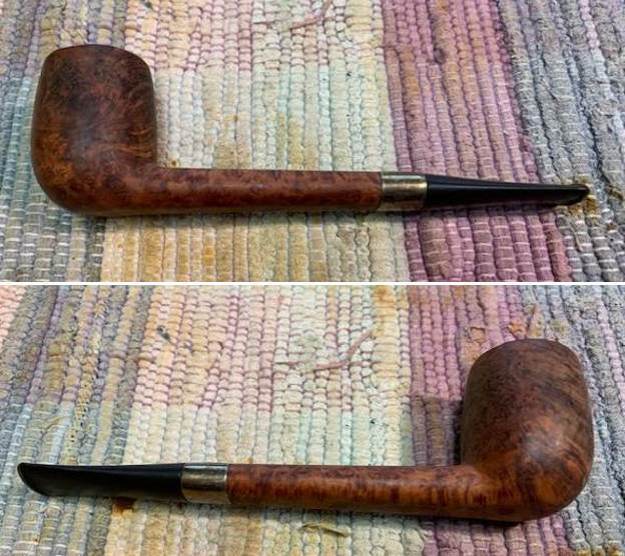
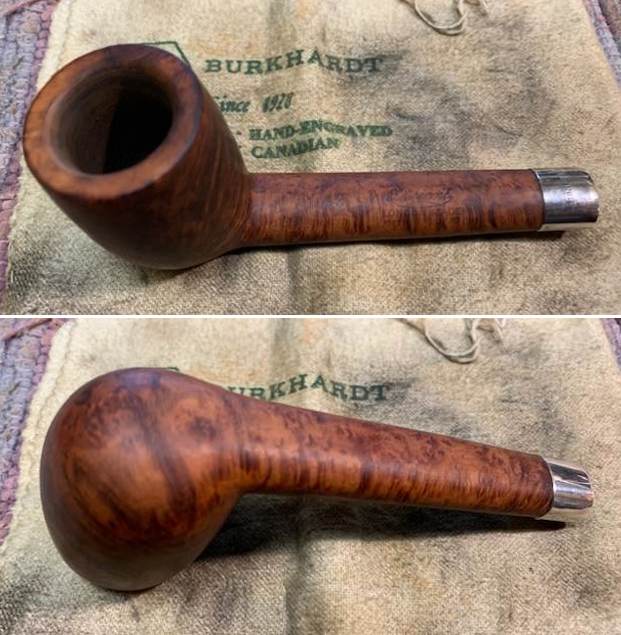
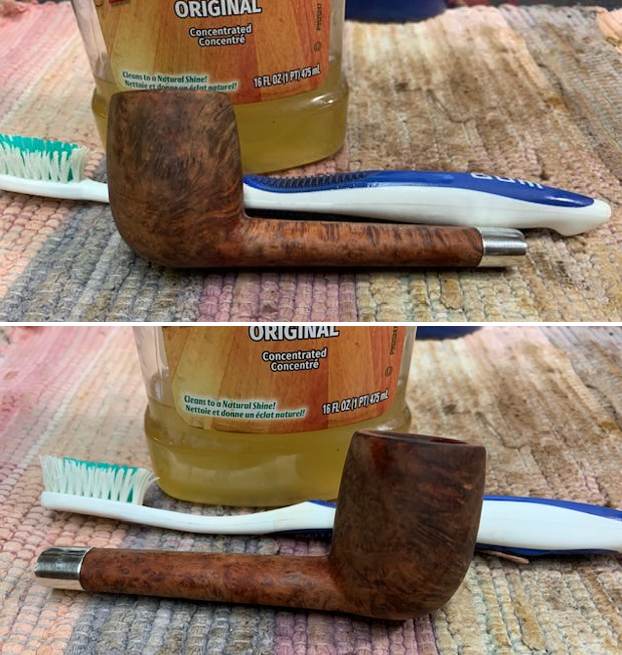
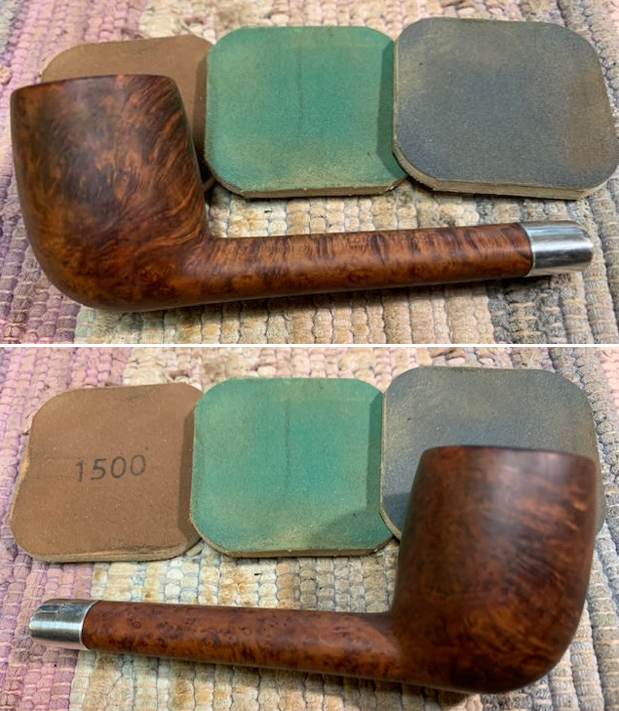
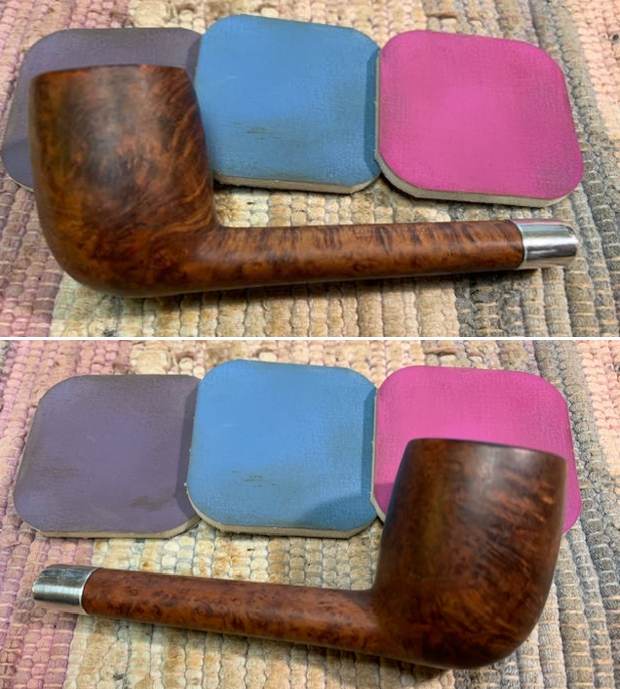
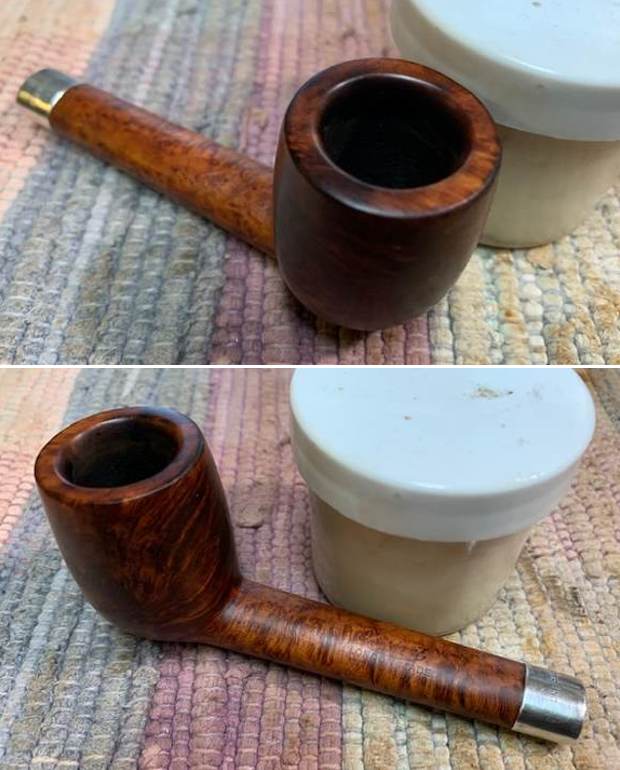
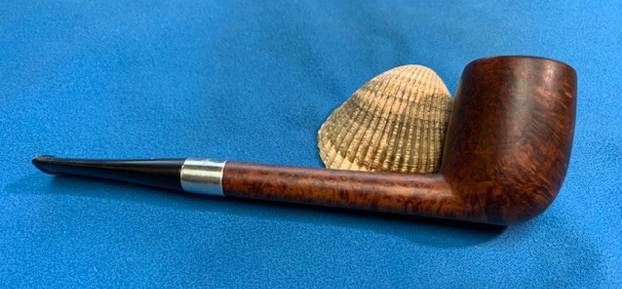
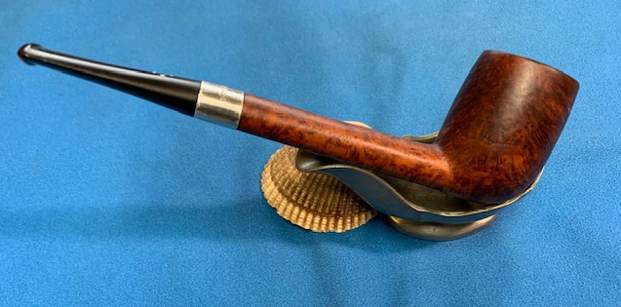
The next pipe on the table is a Radice Sandblast Billiard with a faux Bamboo shank. The briar has been carved to look like a piece of Bamboo but is actually briar. The pipe is stamped on the heel and reads Radice [over] Silk Cut and on the underside of the shank end it reads Hand [over] Made in Italy. It really is a beautiful pipe and the combination of “Bamboo” and the sandblast works really well the tapered acrylic stem. The fellow who sent it to me is a previous customer and in his box were two pipes with a snapped tenon – the Radice and a House of Robertson. This one was quite dirty with a thick cake in the bowl and overflowing onto the rim top. There was some burn damage on the inner edge of the rim at the back of the bowl and the pipe was dull and dusty. The tenon had snapped off cleanly at the shank end with no damage to the briar. The stem had tooth marks on both the top and underside ahead of the button and was also dirty. I took some photos of the pipe before I started my work on it. 
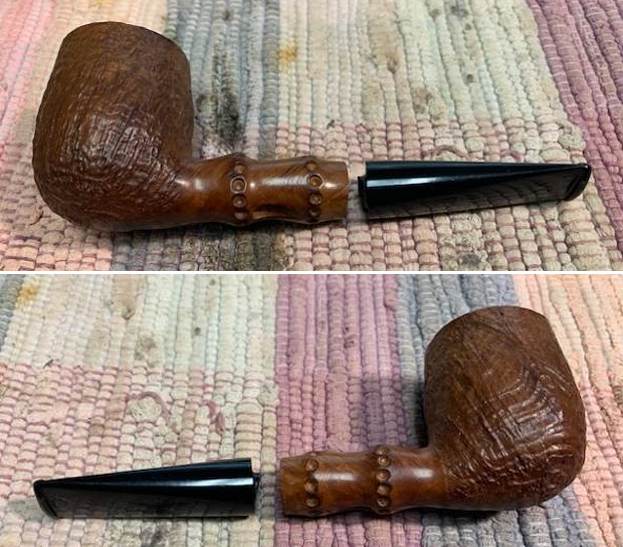
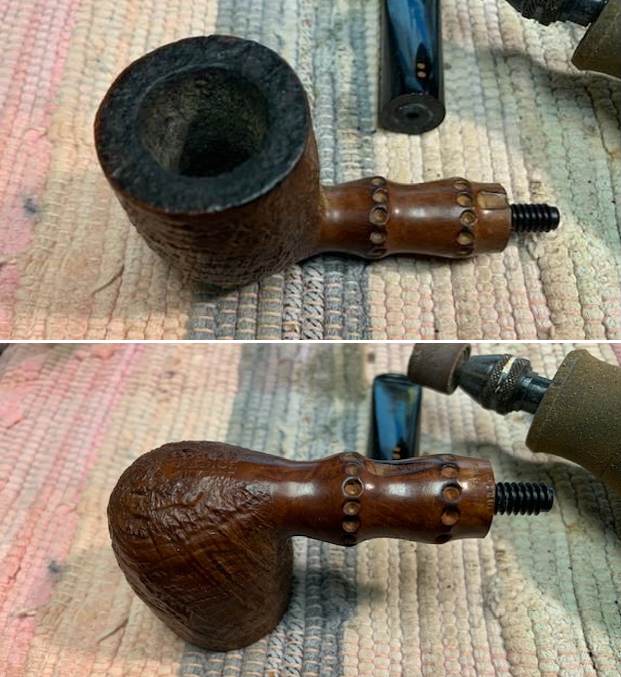
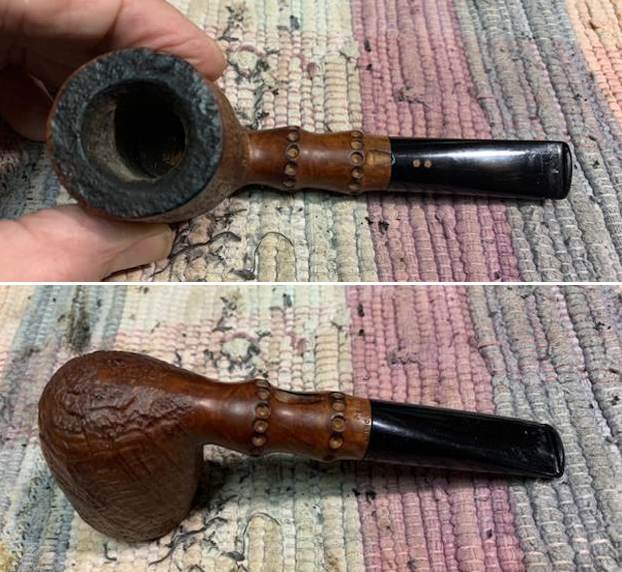
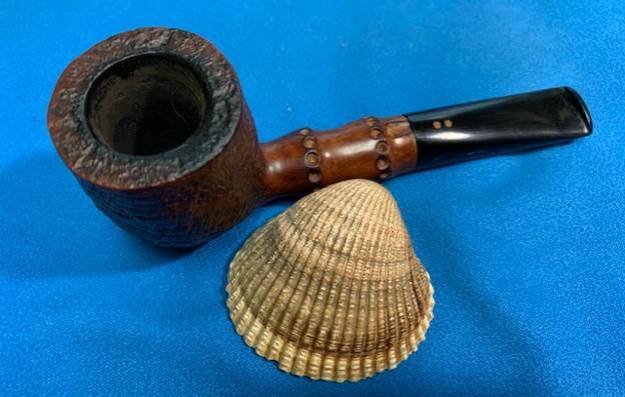
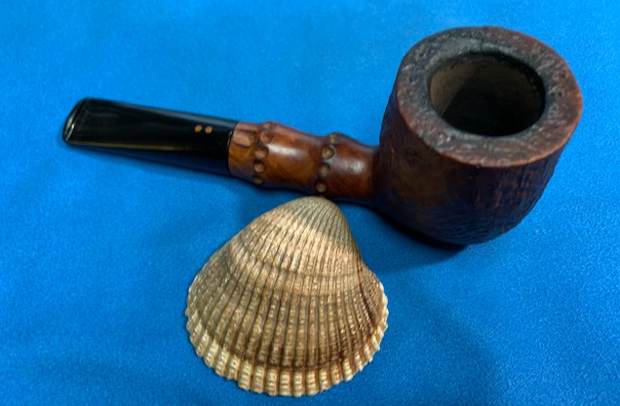
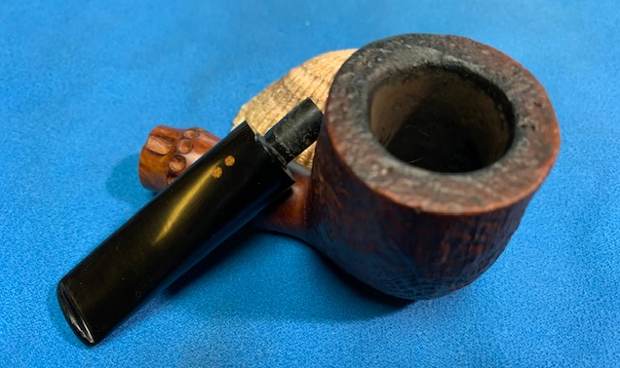
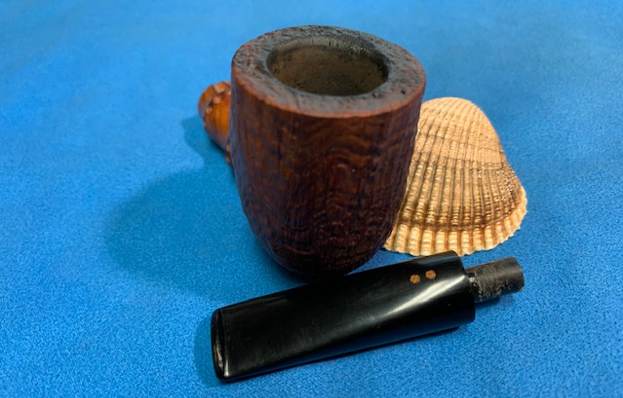
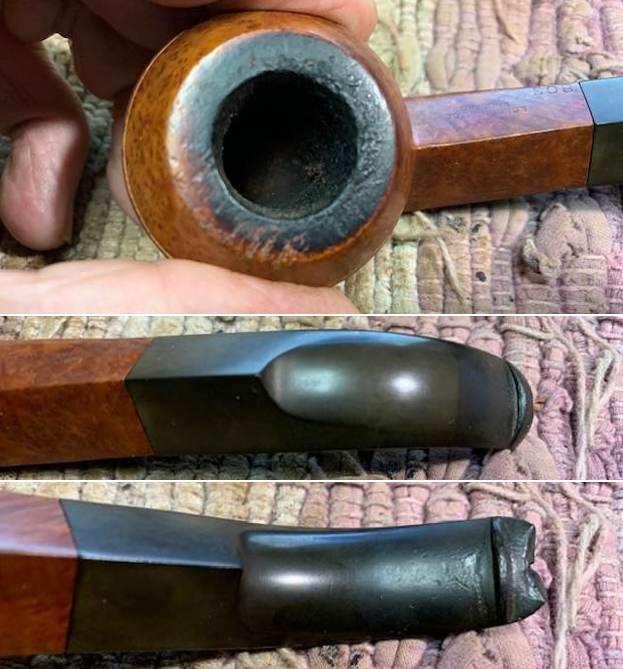
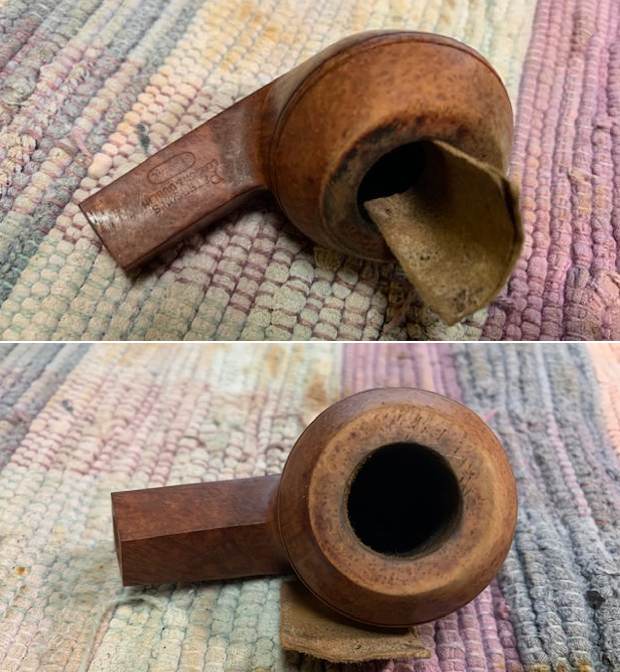
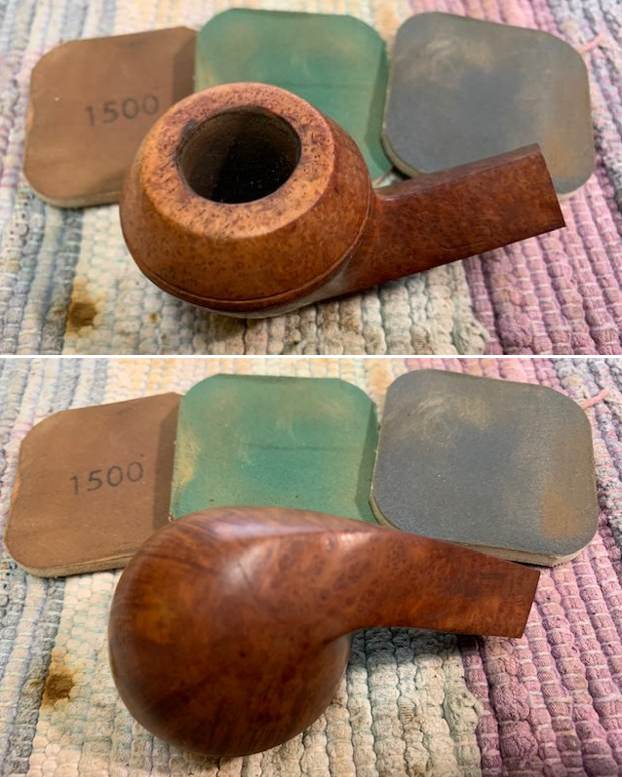
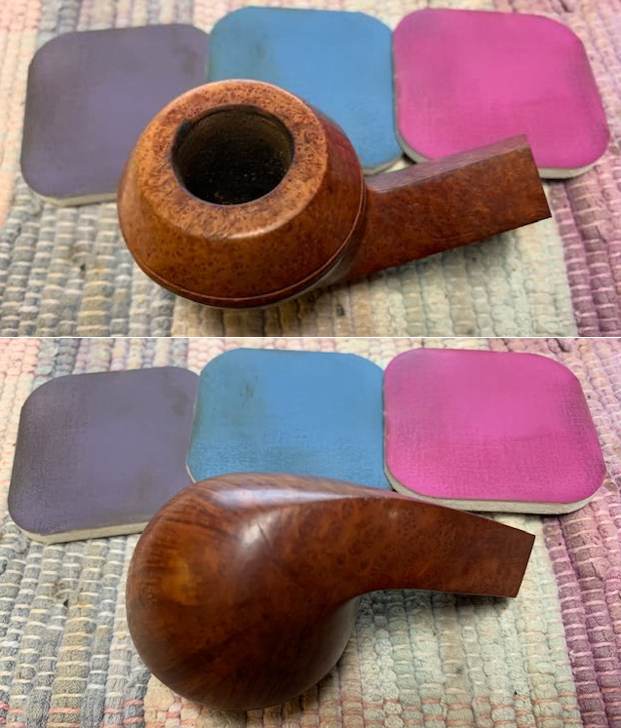
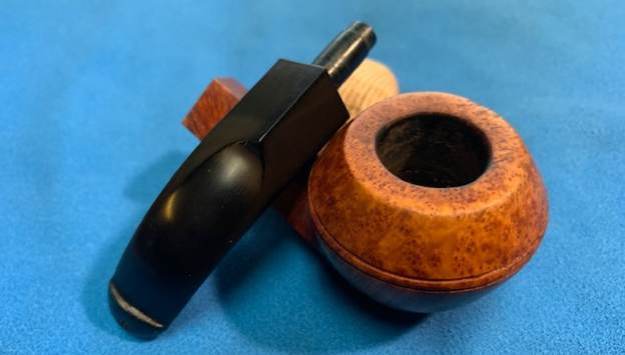
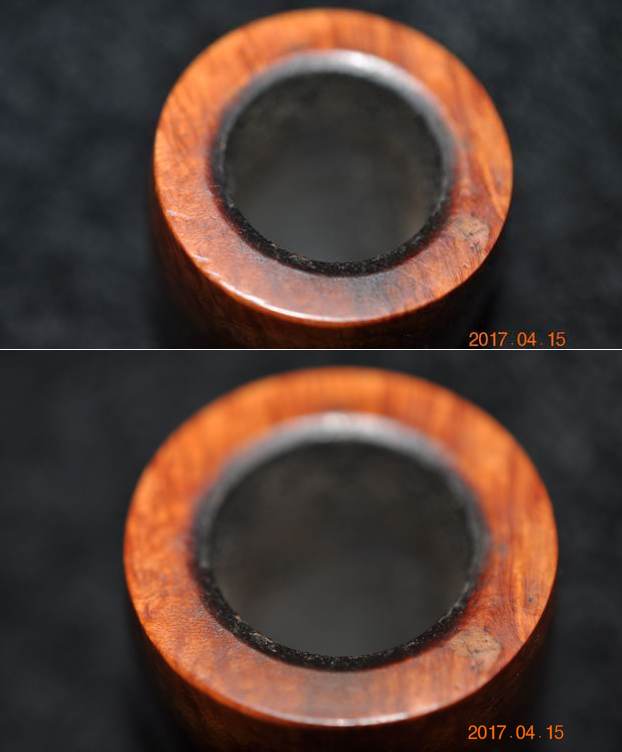
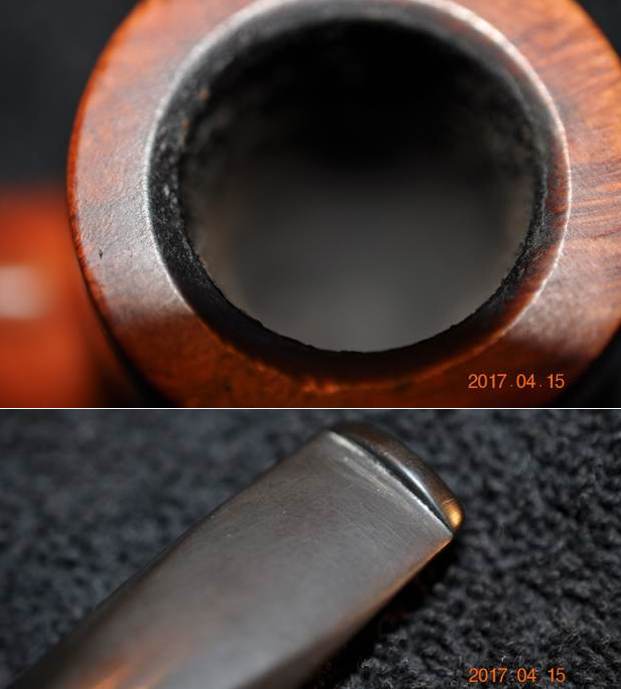
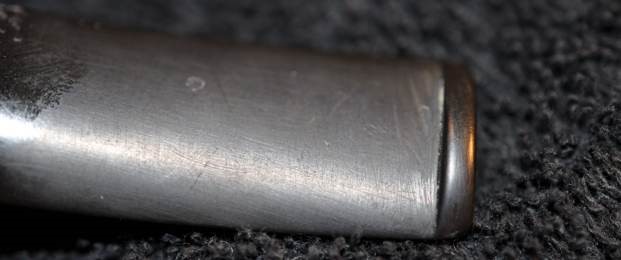
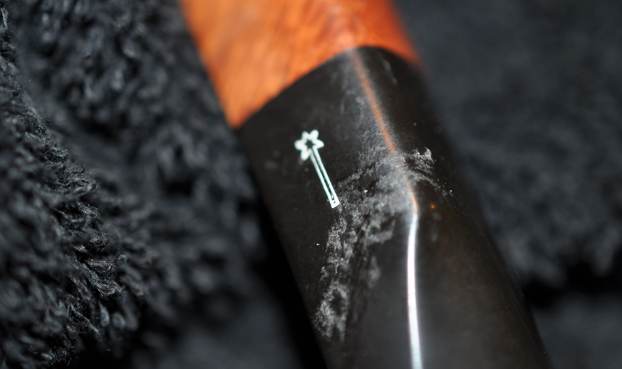
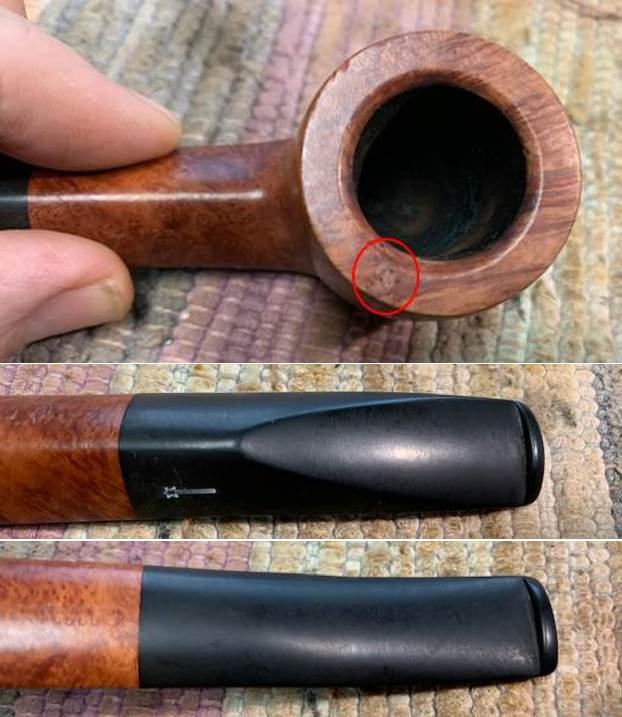
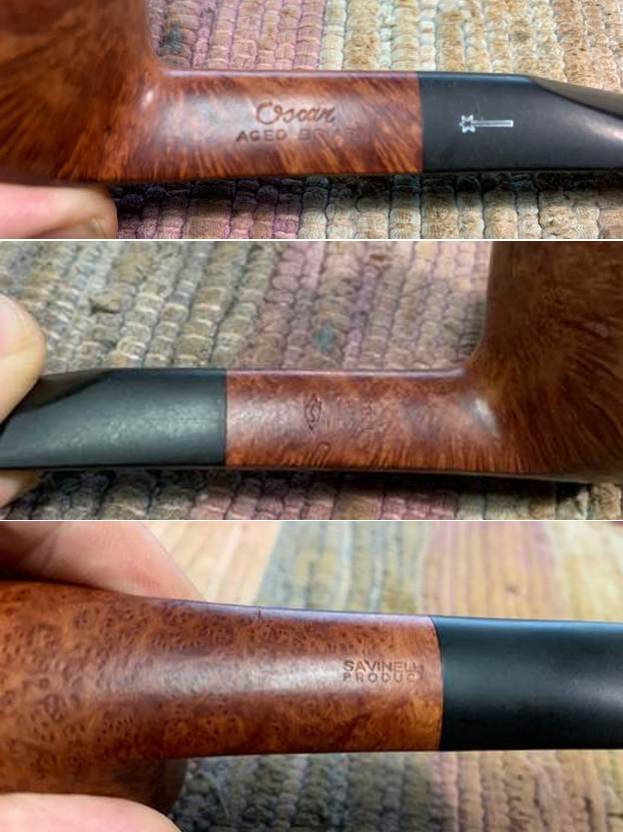
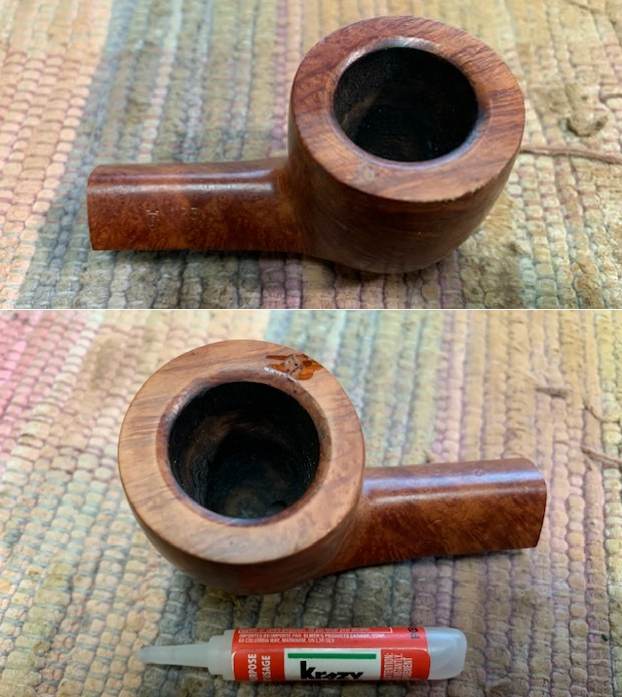
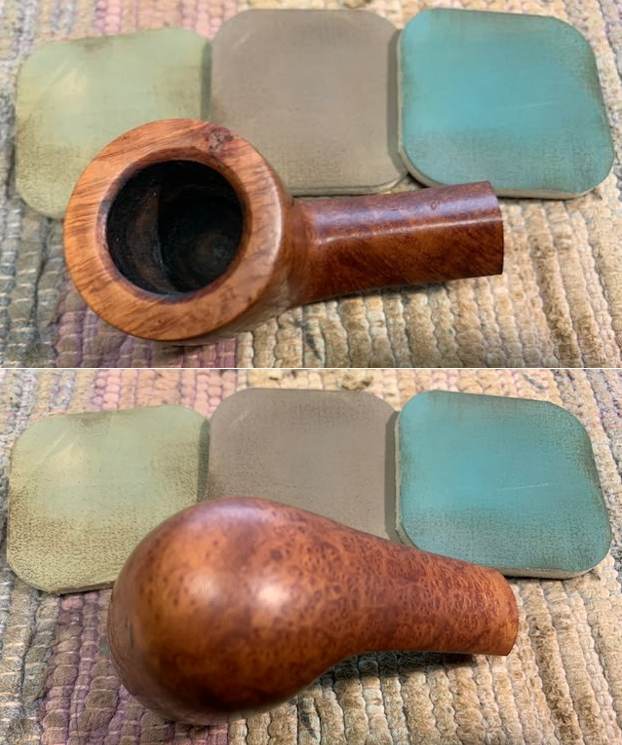
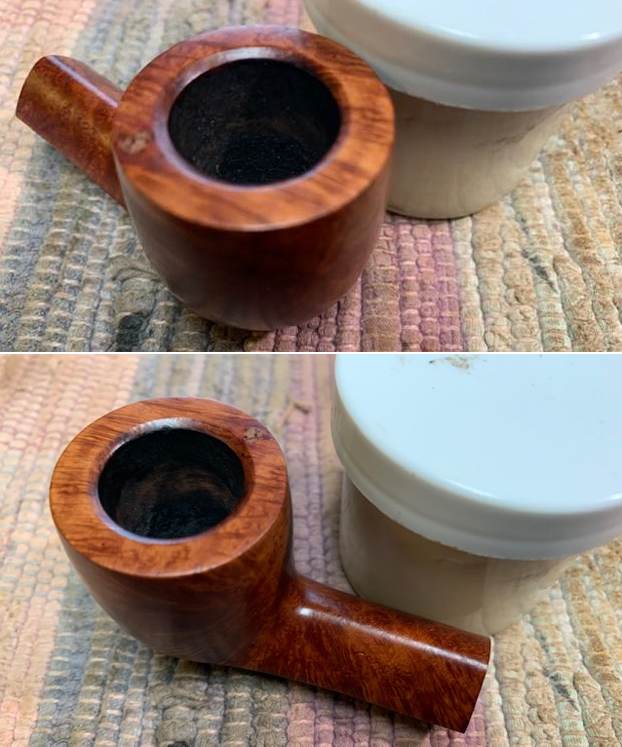
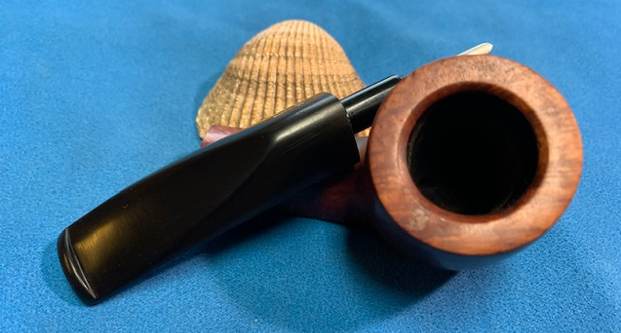
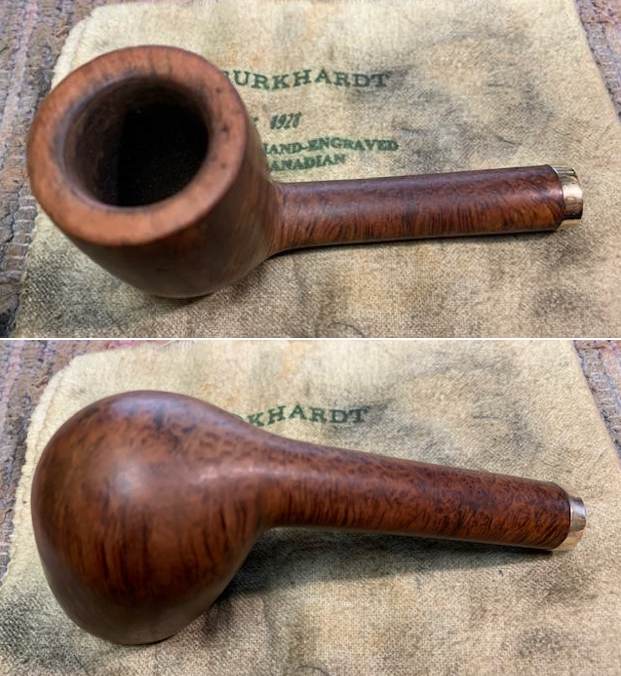
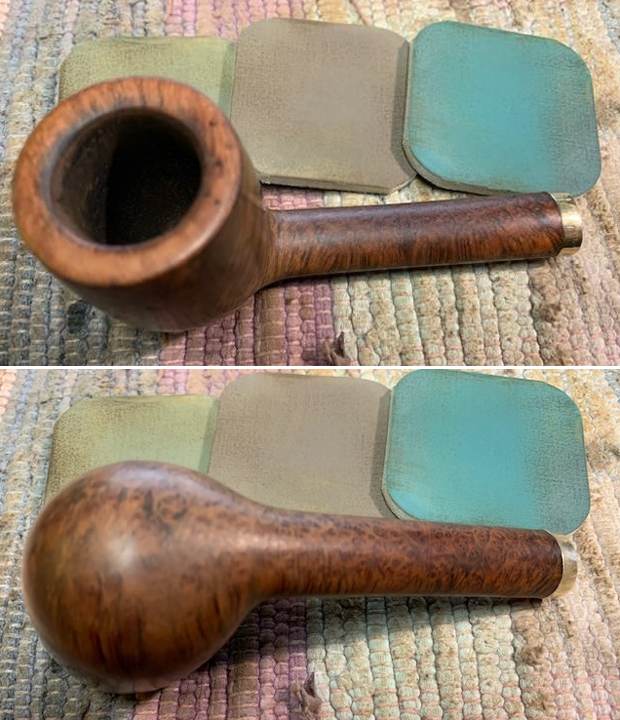
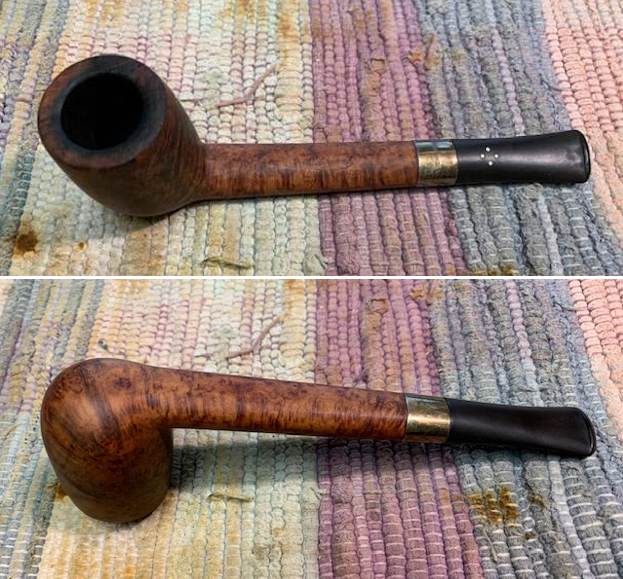
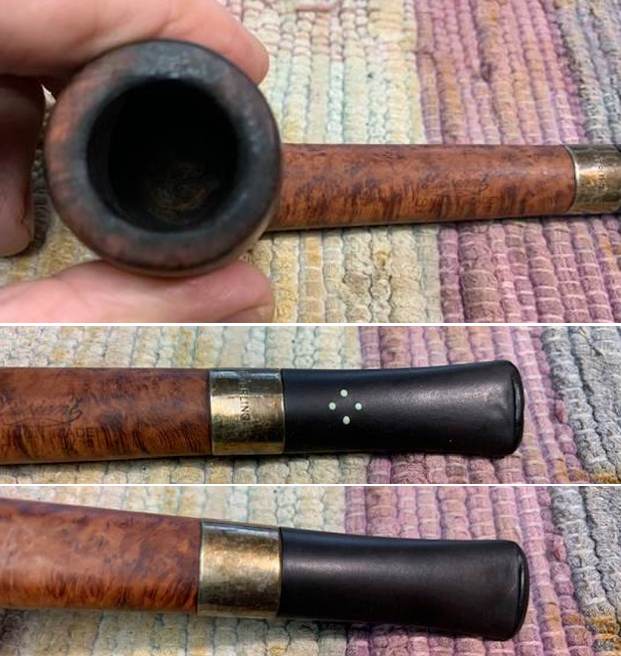
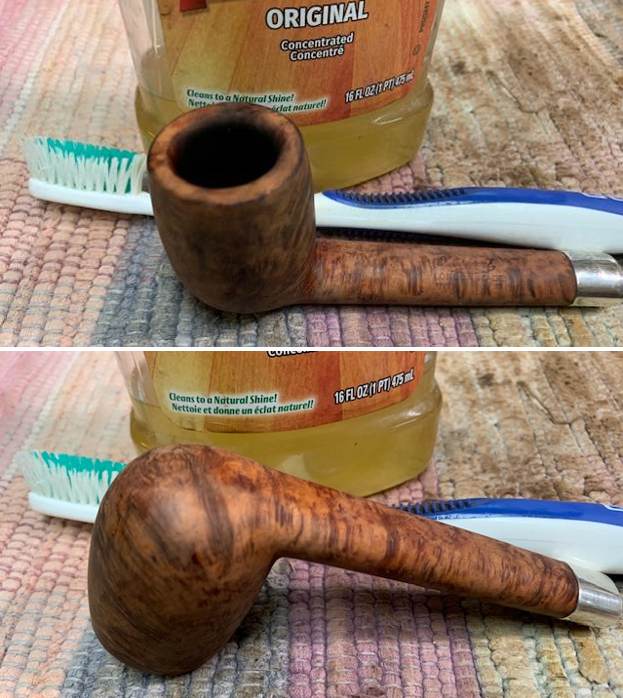
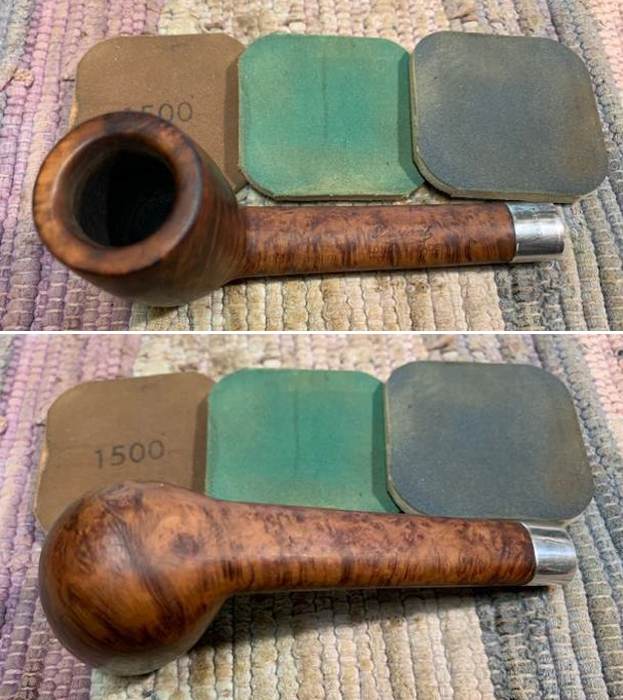
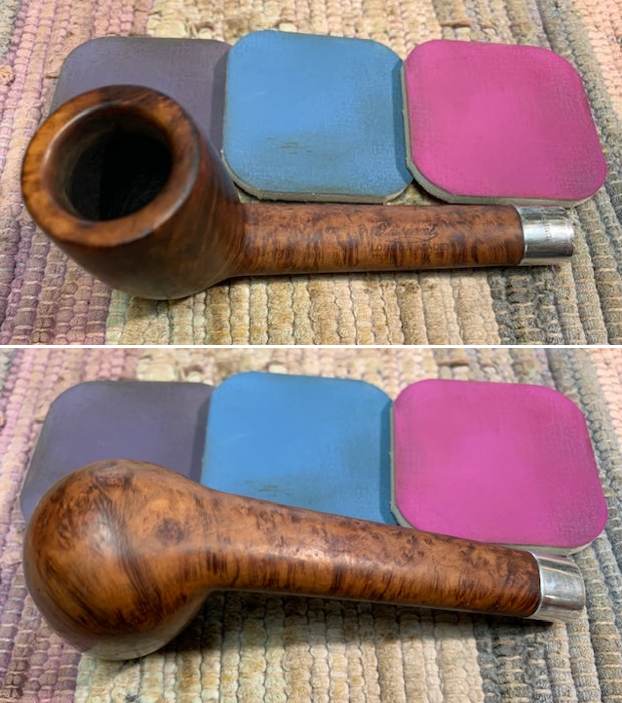
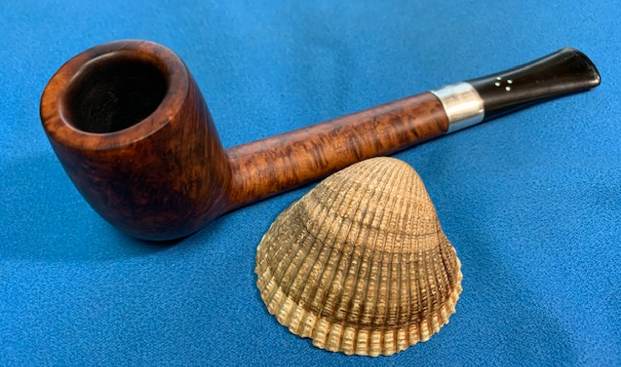
I took a close up photo of the rim top to show the condition of the bowl and inner edge. You can see the damage on the back inner edge of the rim. It will become more evident once the bowl has been reamed and cleaned. The photos of the stem show the tooth marks and chatter on both sides near the button.
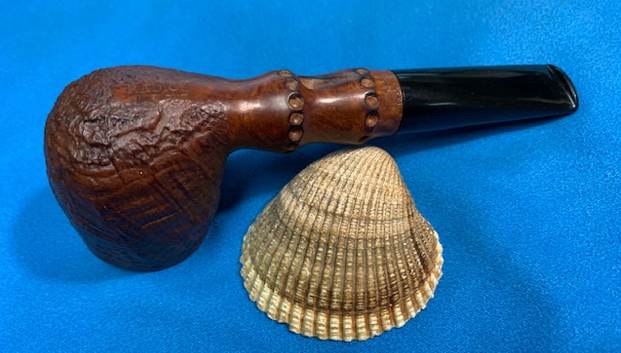
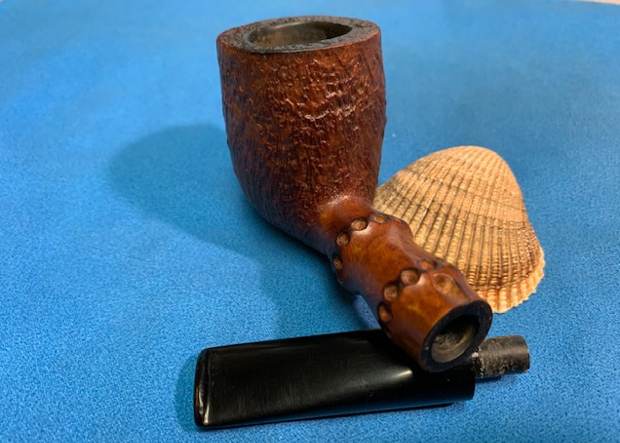
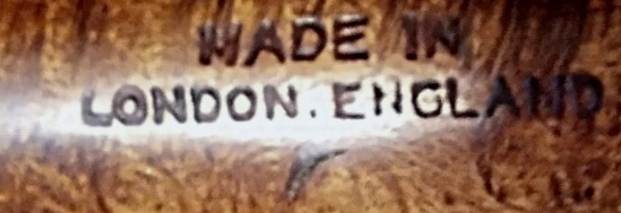
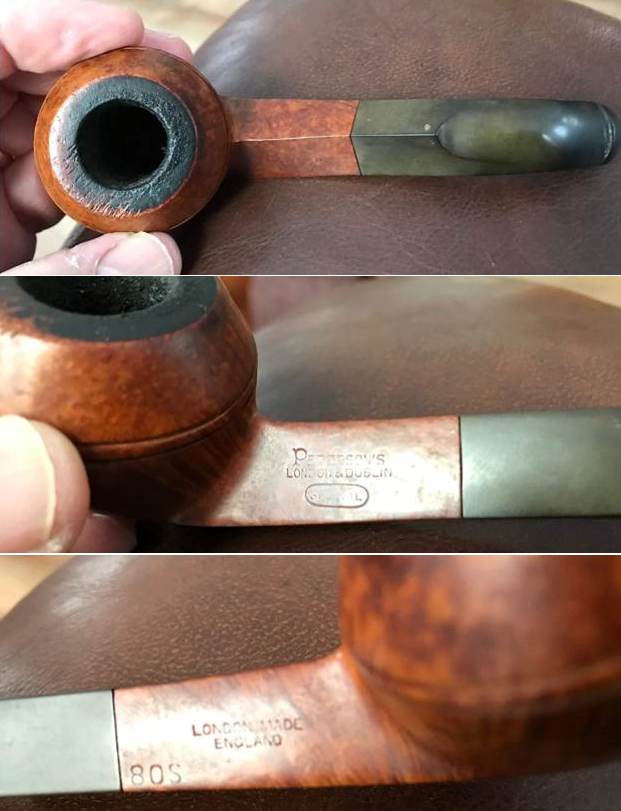
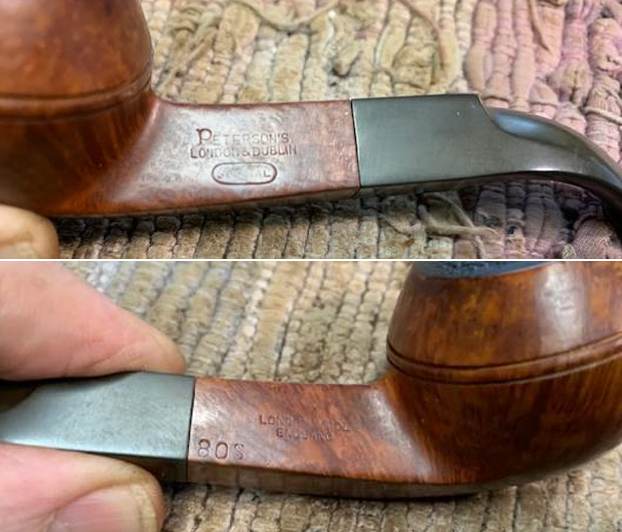
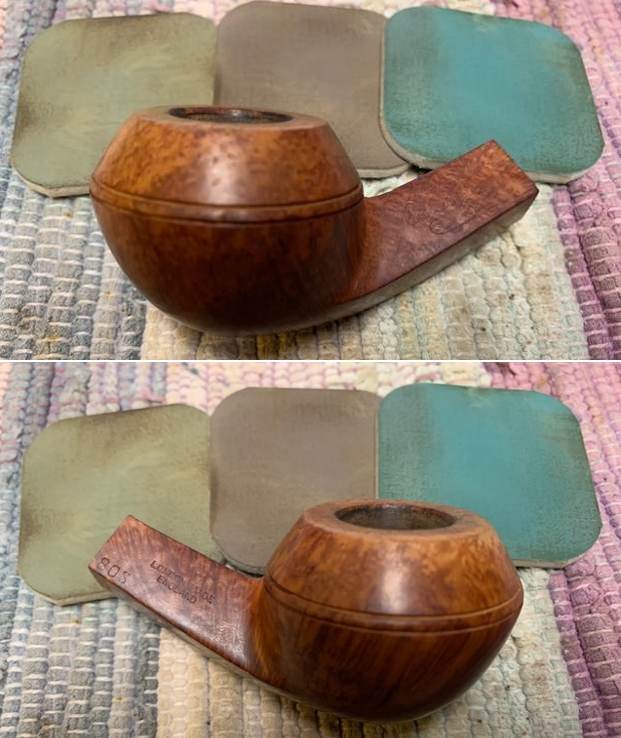
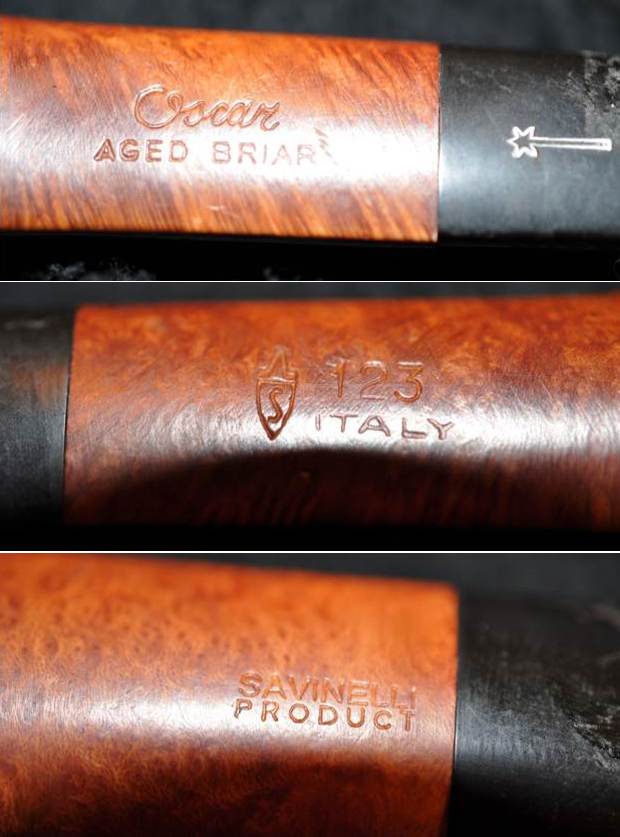
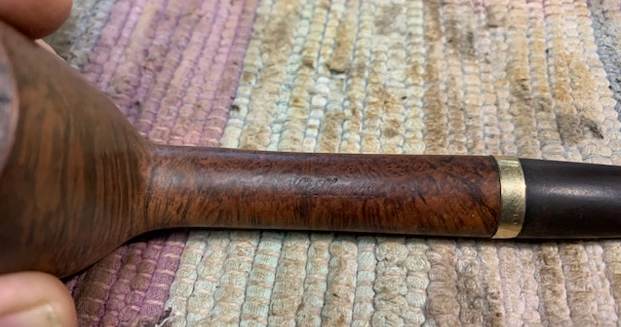
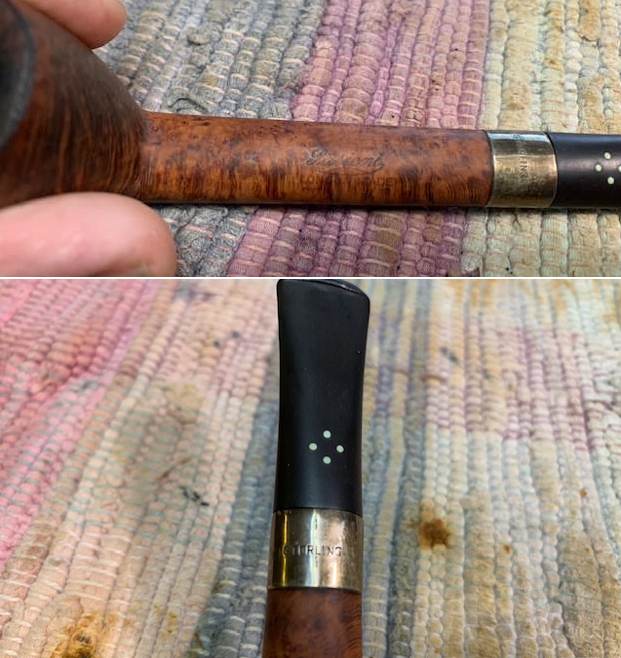
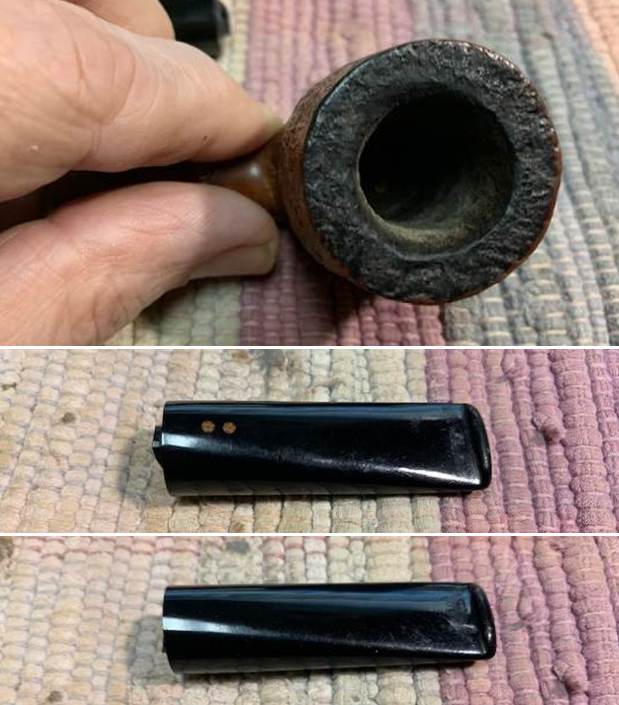
I took photos of the stamping on the heel of the bowl and the shank end to capture how it looked.
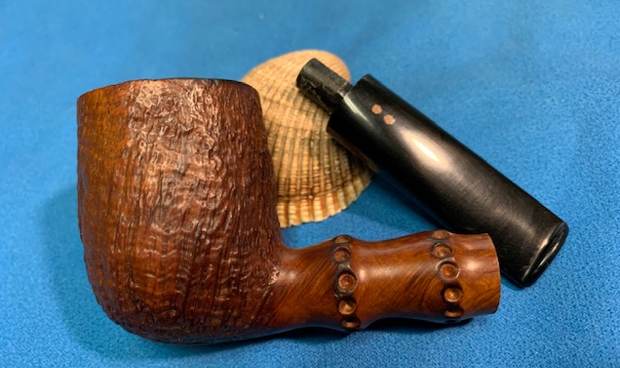
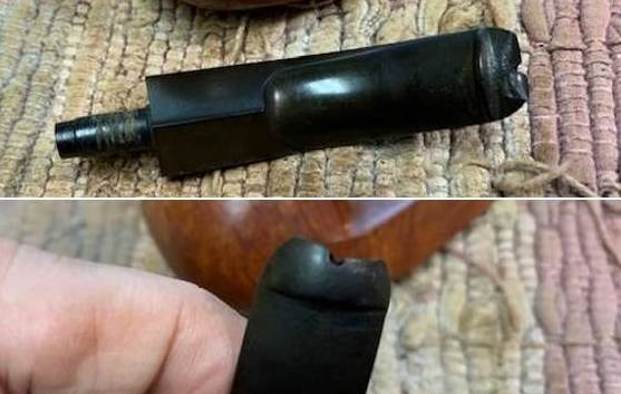
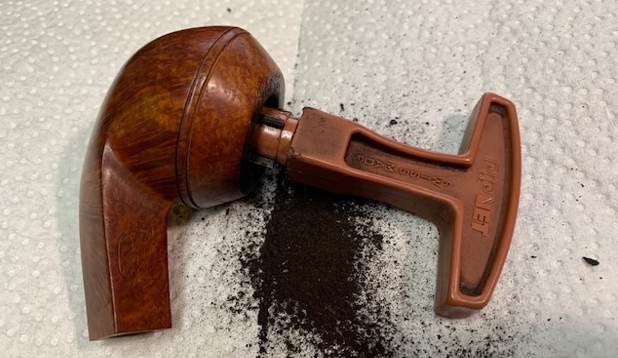
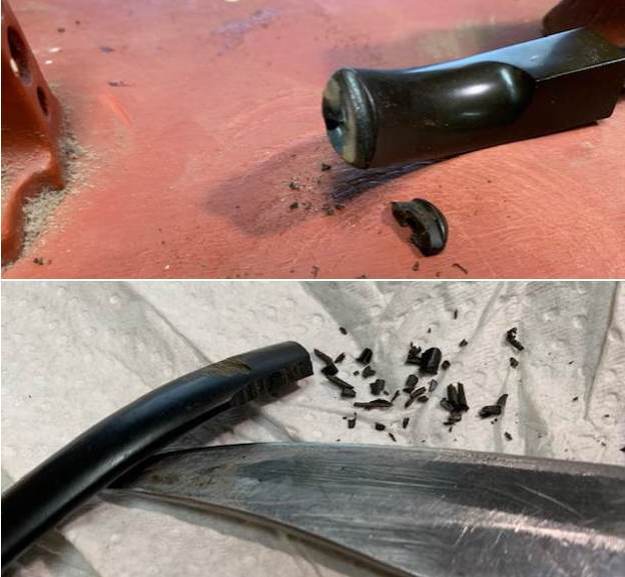
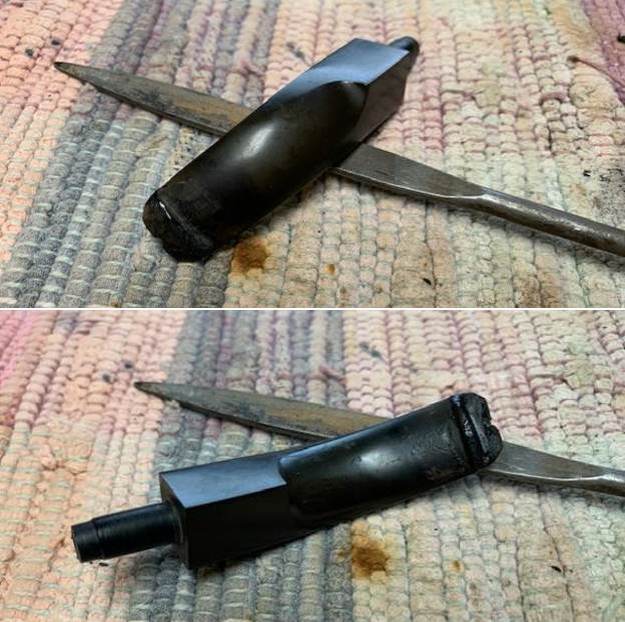
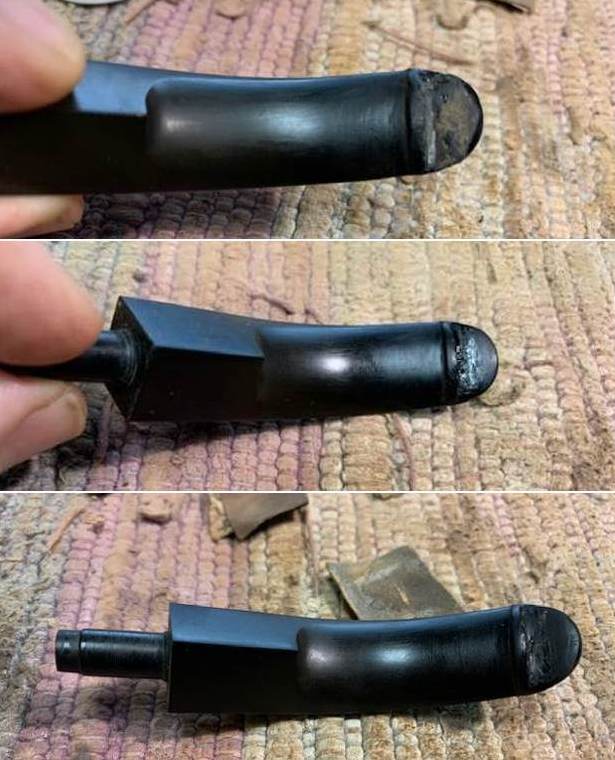
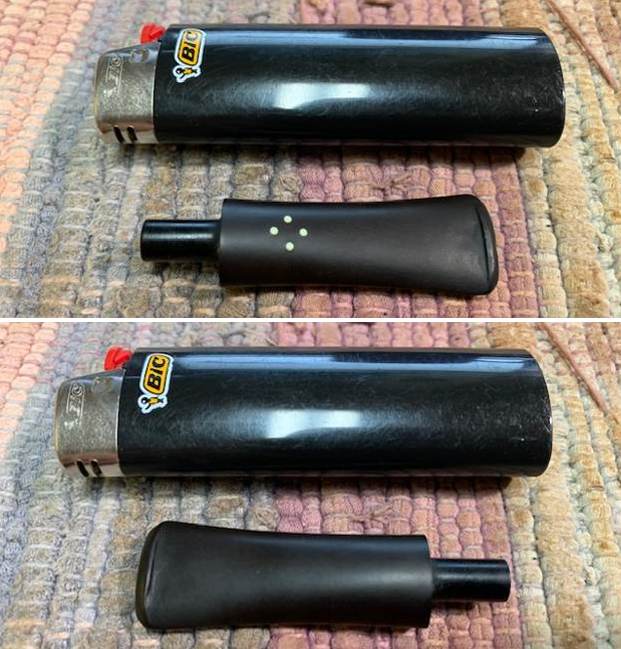
I began my work on this pipe by pulling the broken tenon from the shank. I generally use a dry wall screw and twist it into the airway of the broken tenon and wiggle it free. This one came out quite easily. I went through my replacement tenons and found one that would work on this stem.
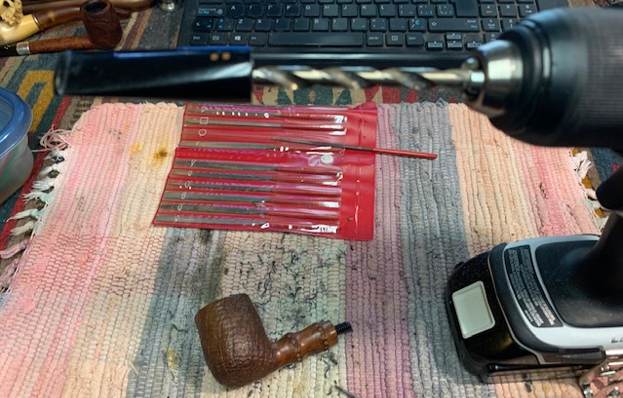
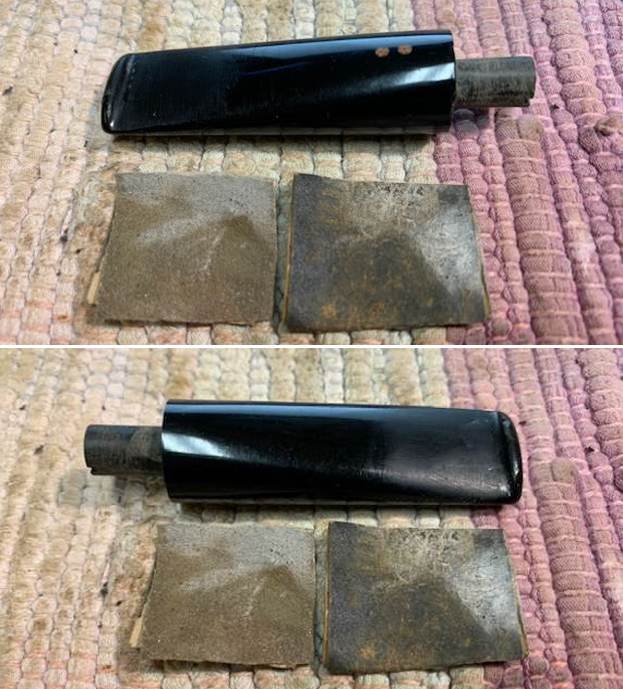
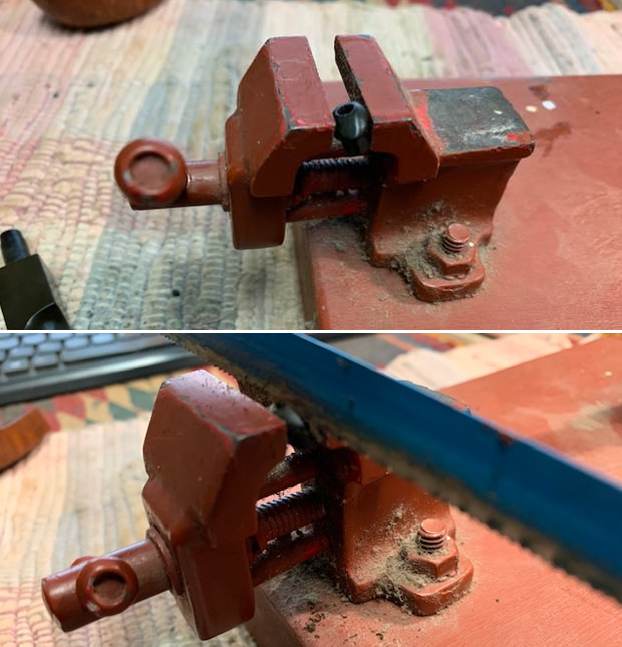
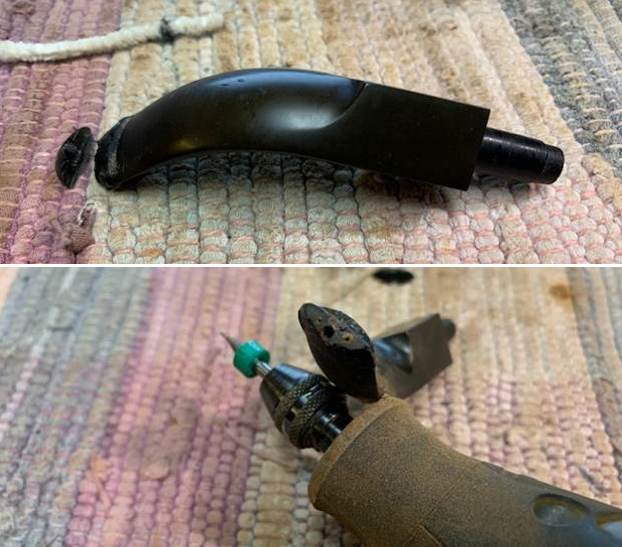
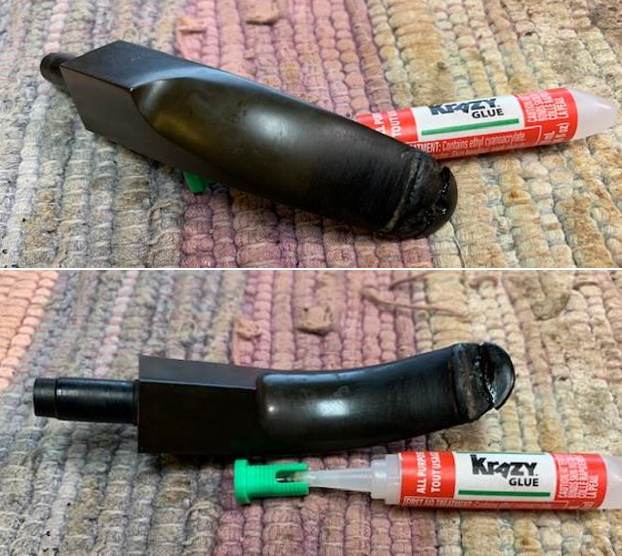
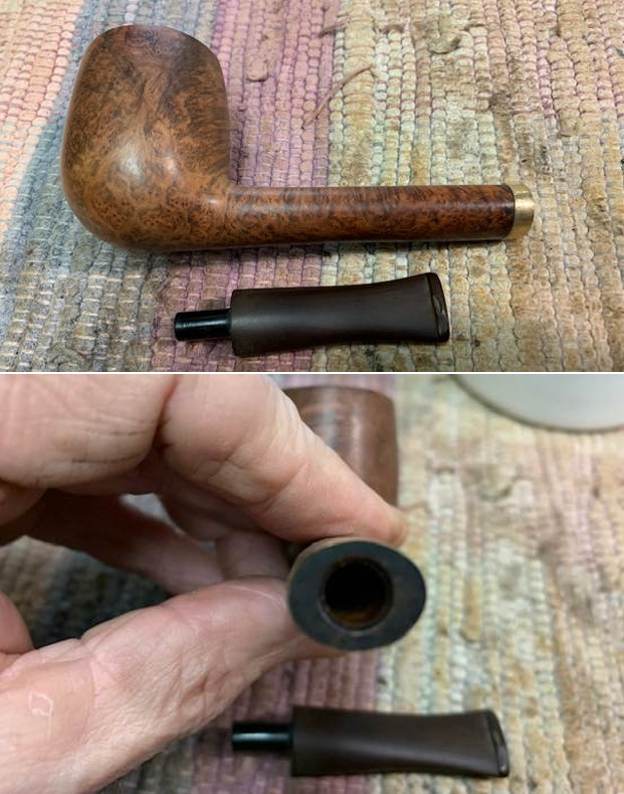
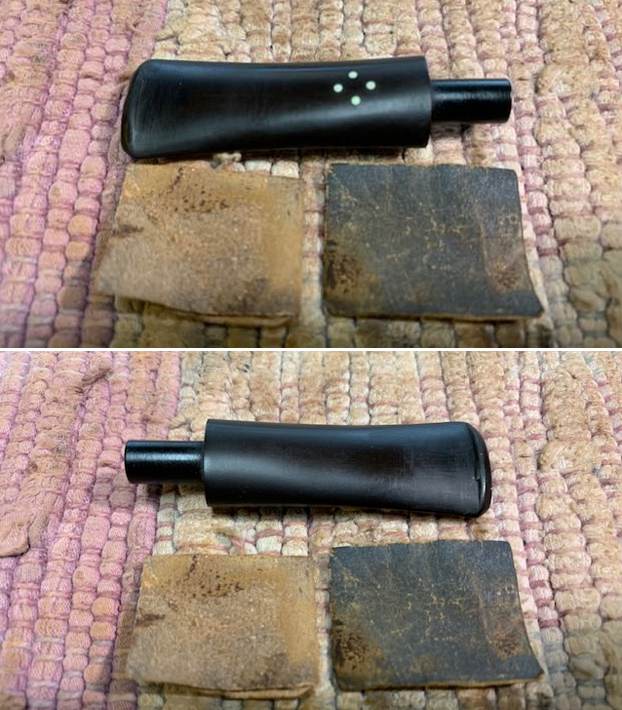
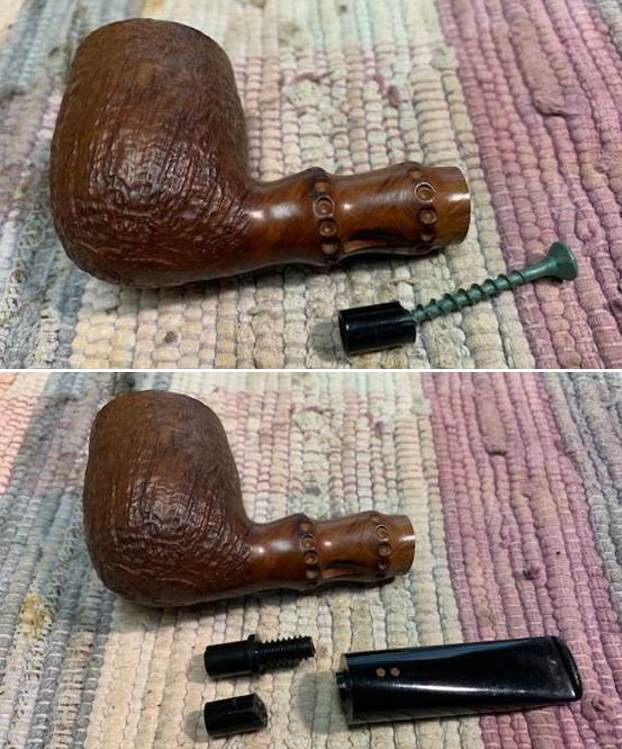
I sanded the broken end of the tenon remaining on the stem with a sanding drum on my Dremel. I also sanded the diameter of the new tenon at the same time to get a good fit in the shank. I took photos of the tenon in the shank at this point to show the fit. 
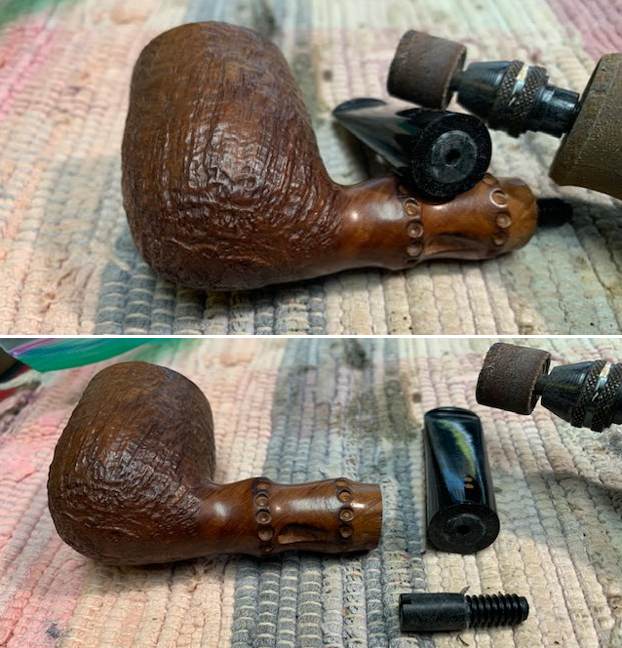
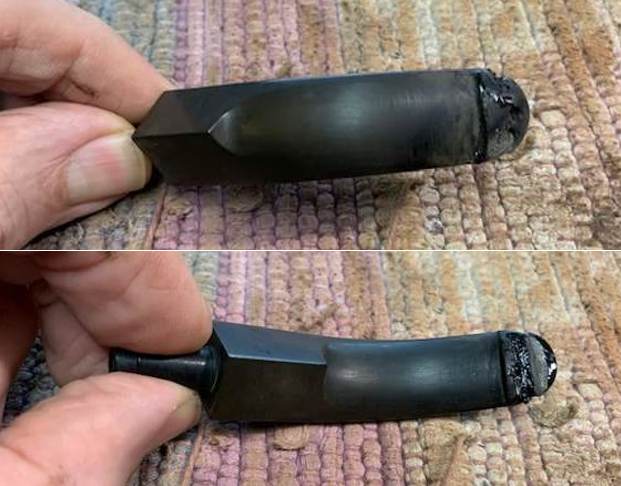
I drilled out the airway on the stem with successively larger drill bits to accommodate the threaded end of the tenon. The last bit was ¼ inch which is perfect for the tenon. 
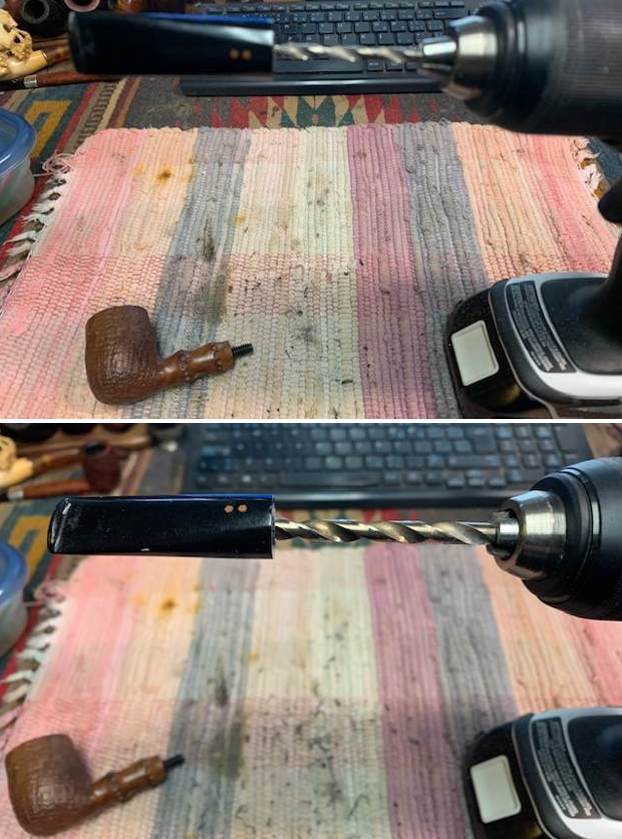
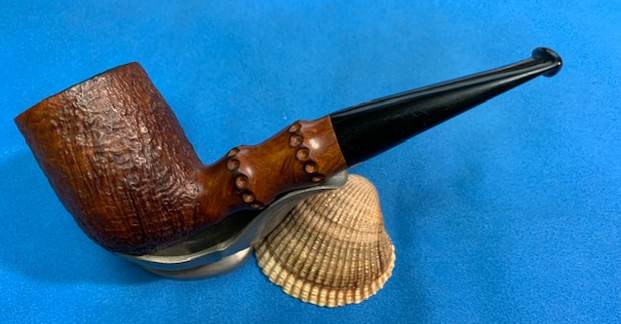
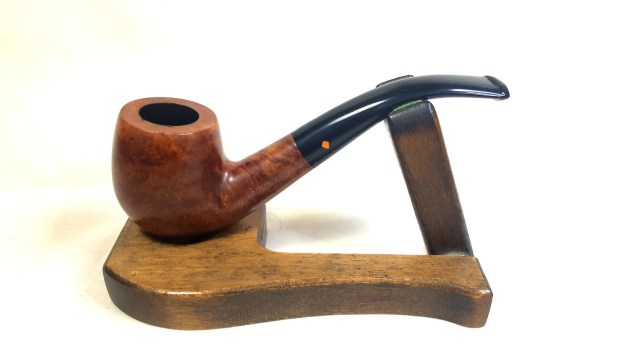
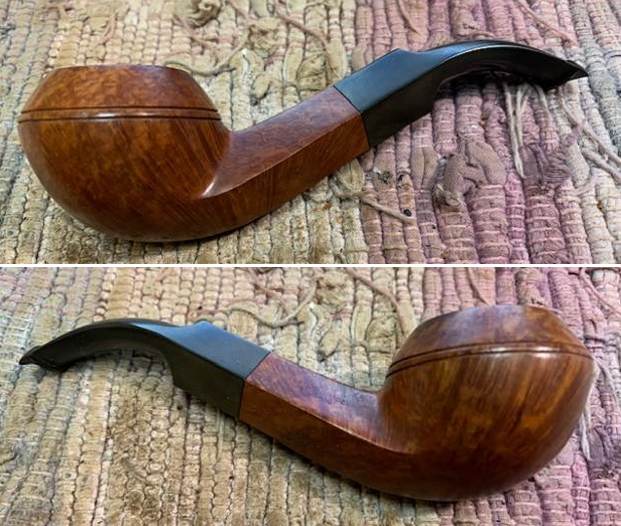
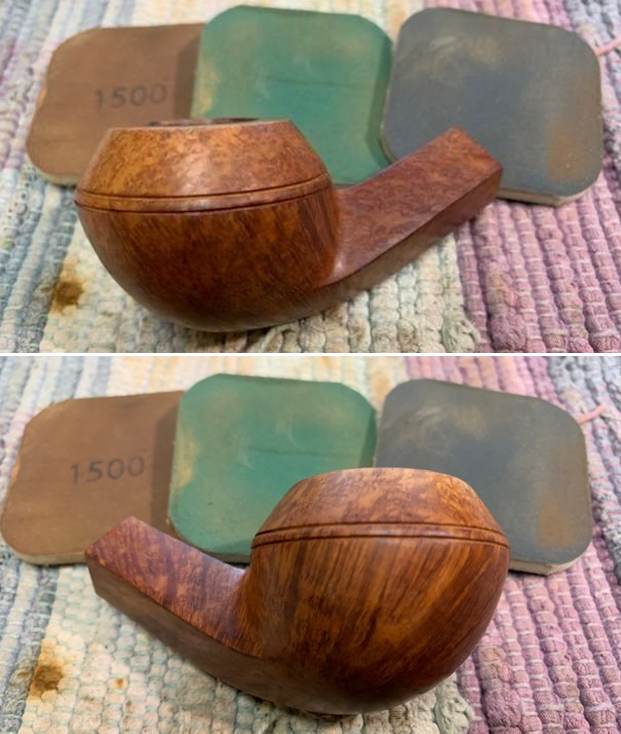
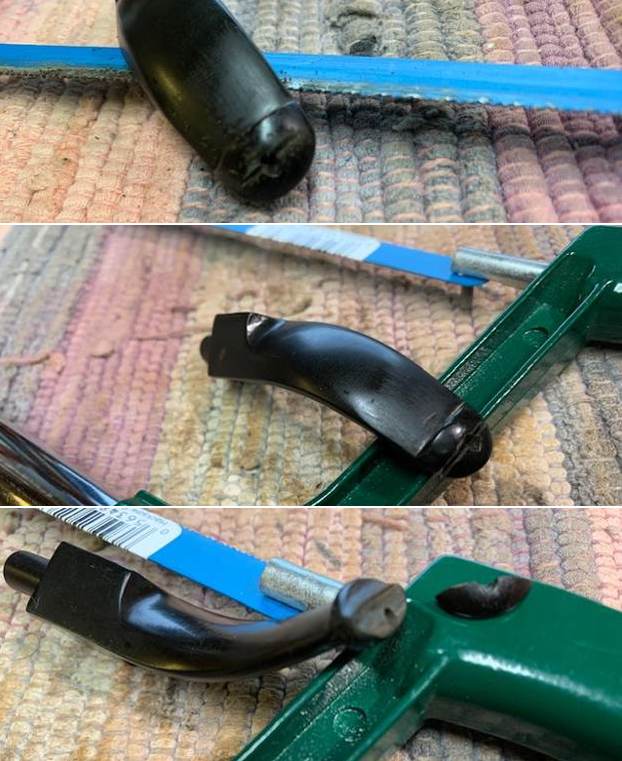
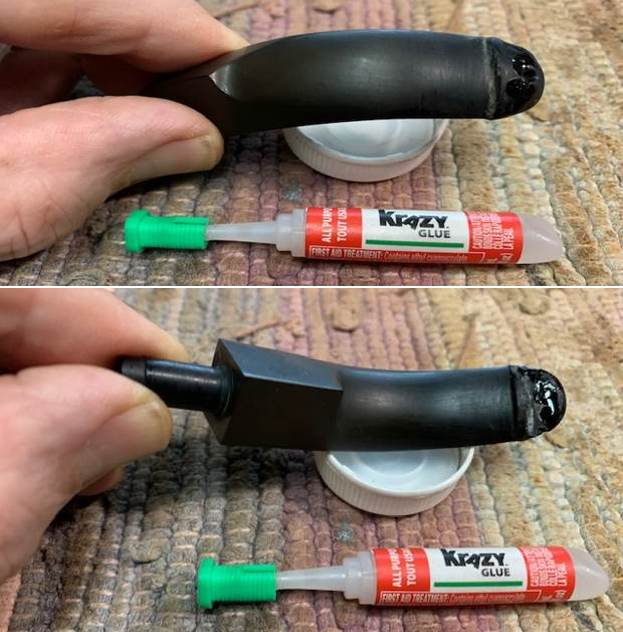
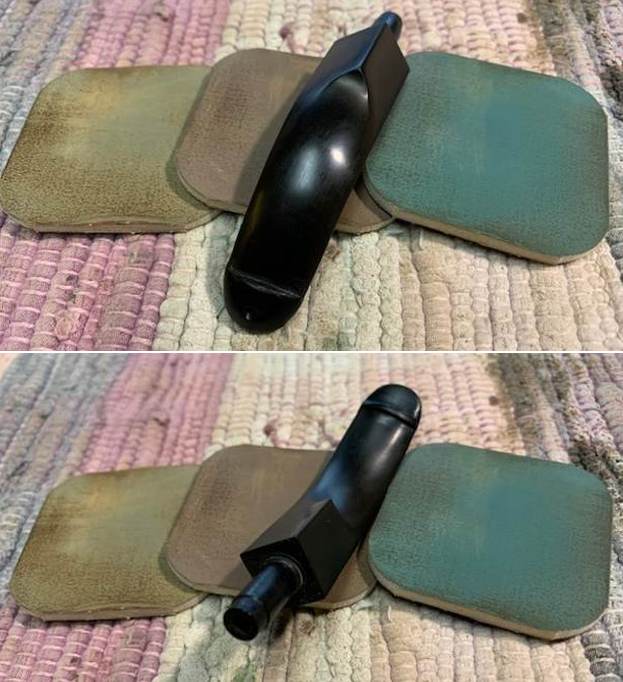
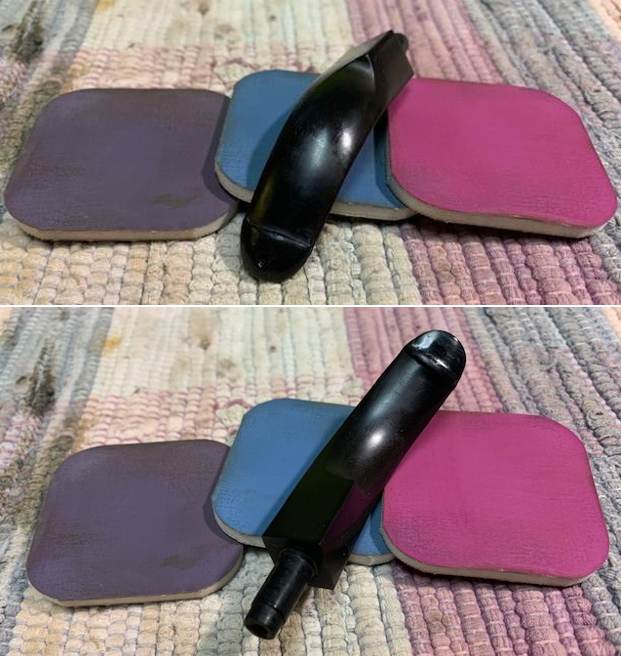
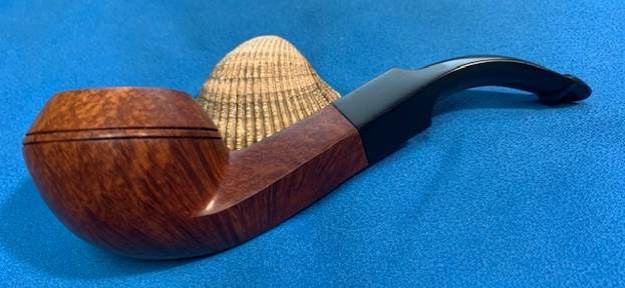
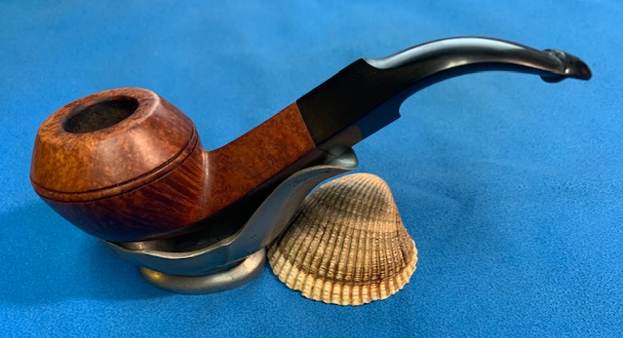
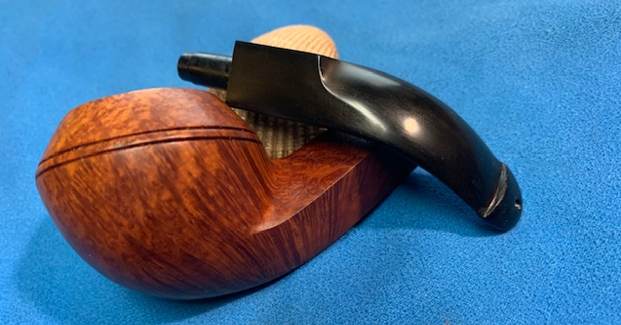
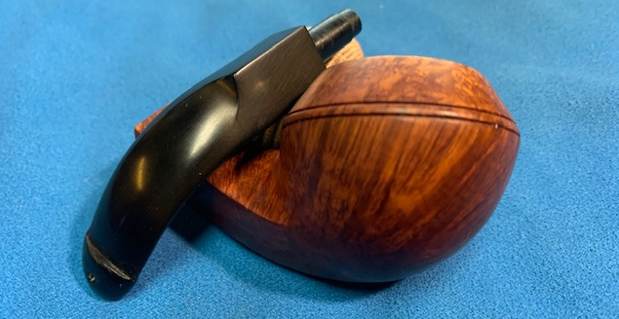
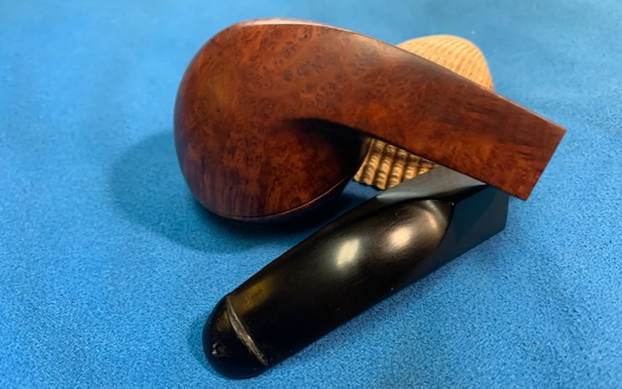
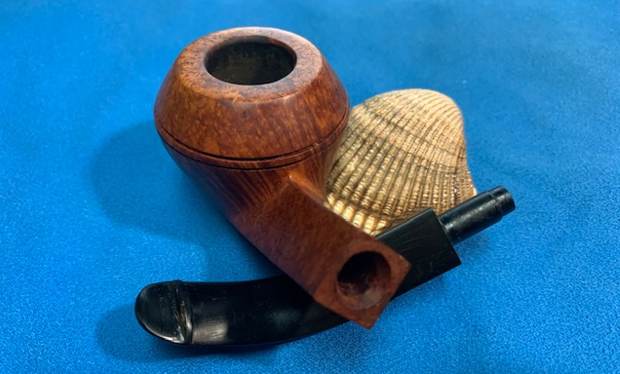
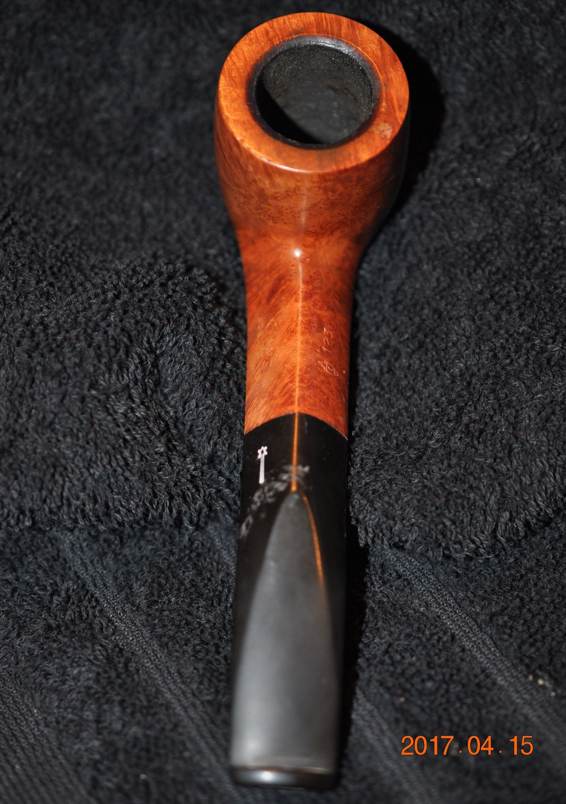
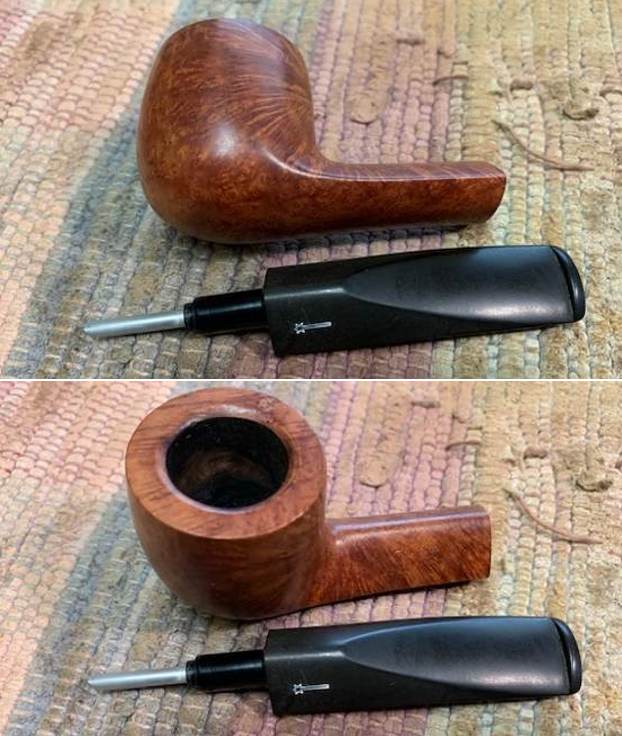
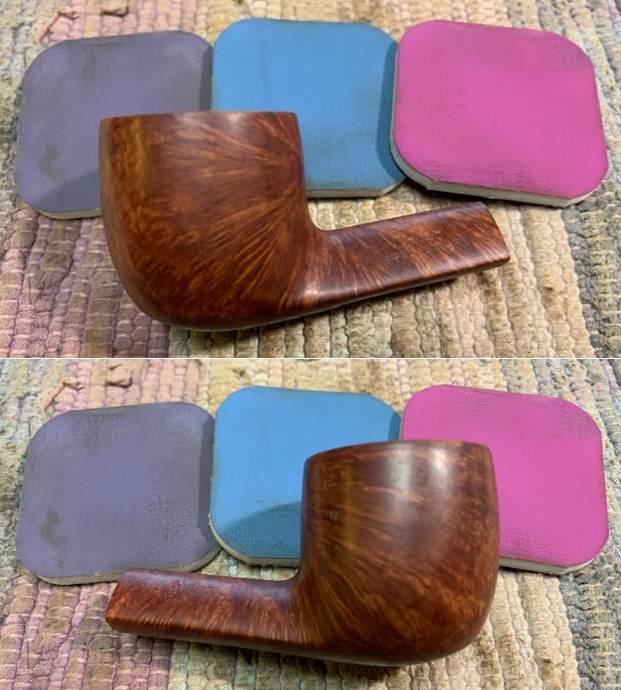
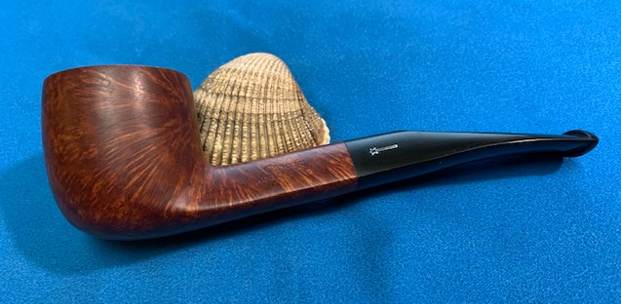
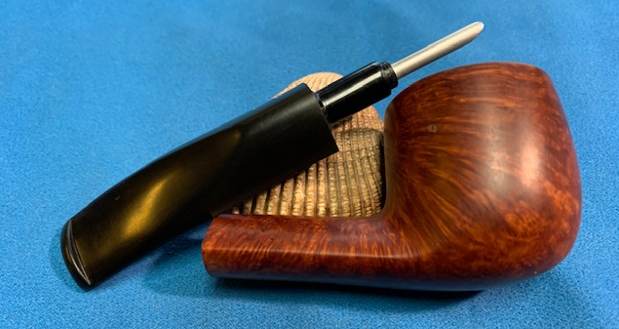
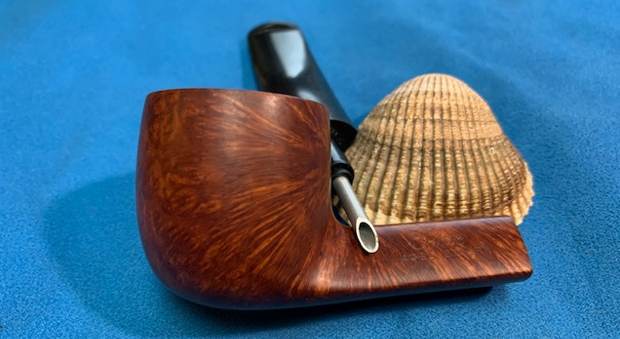
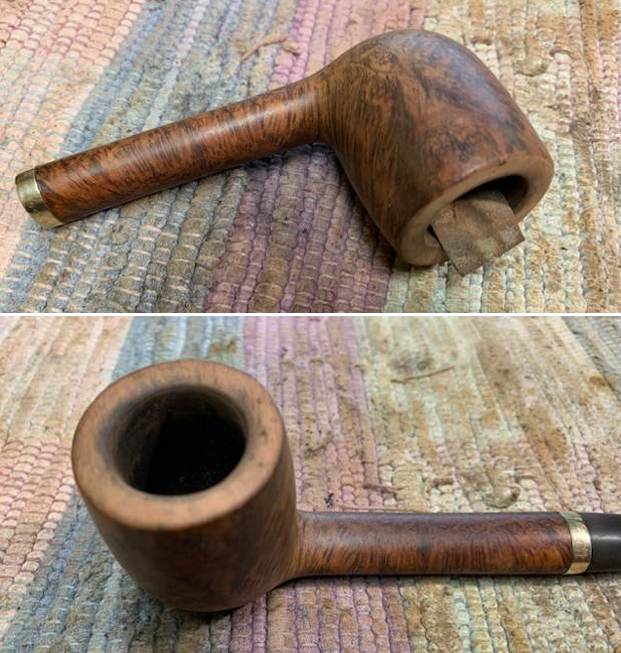
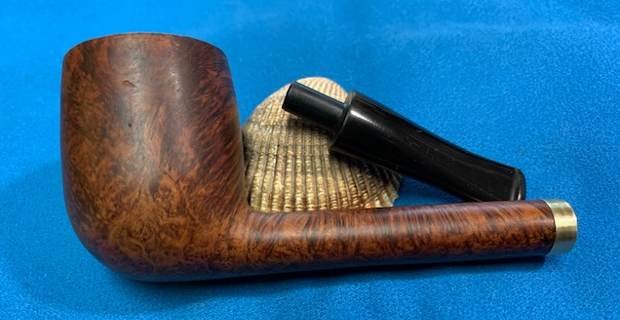
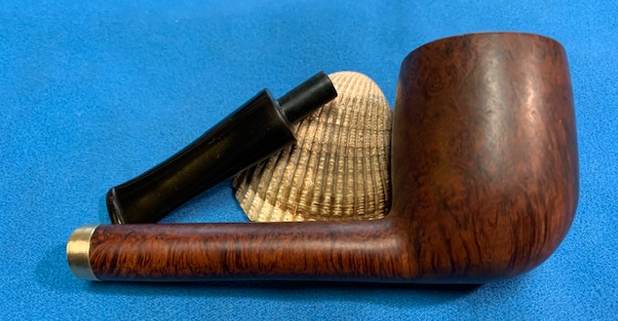
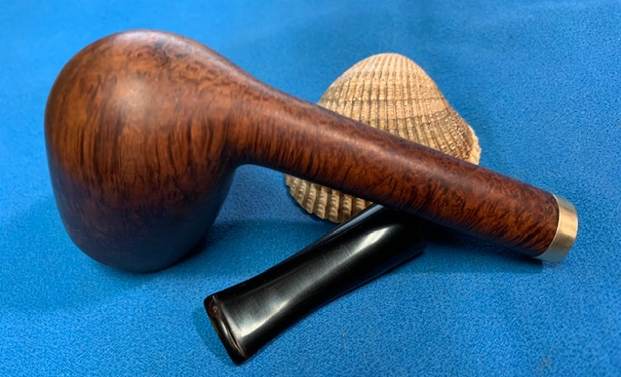
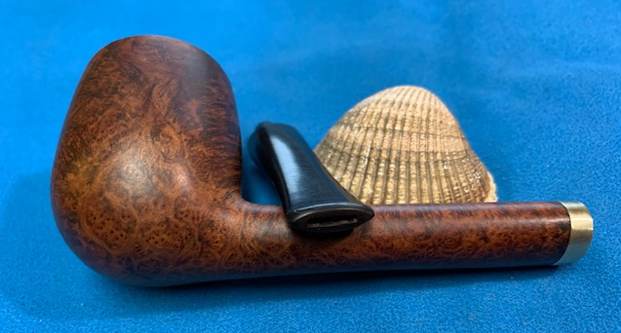
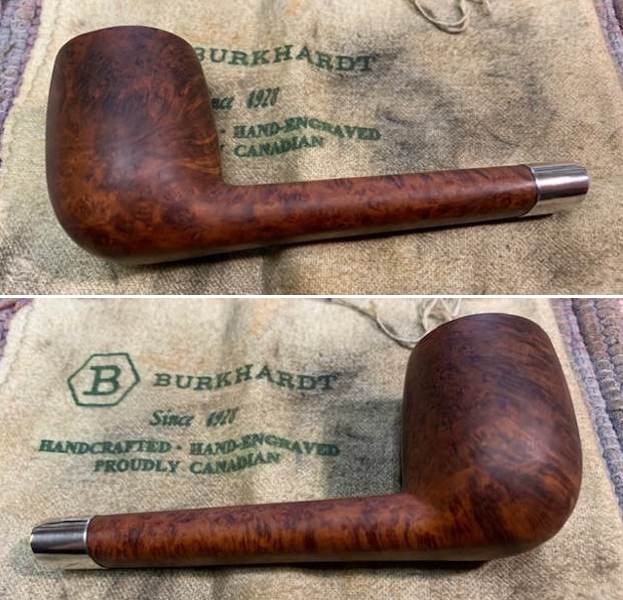
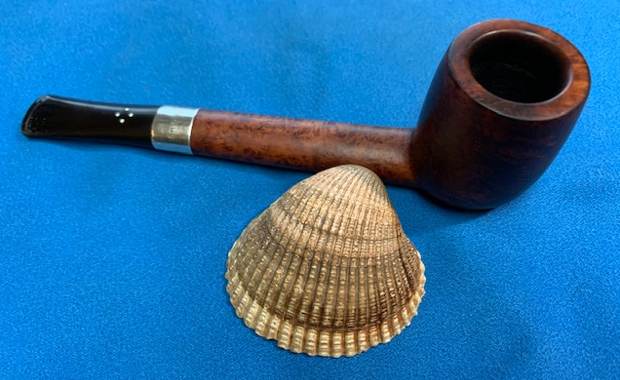
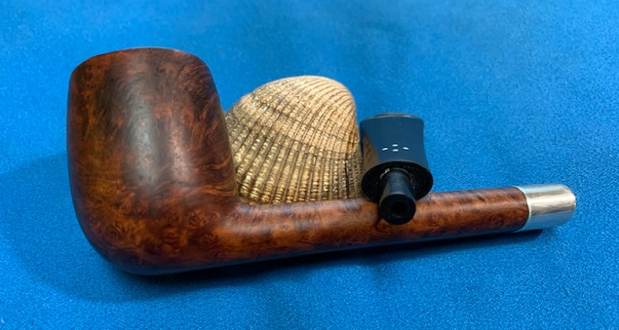
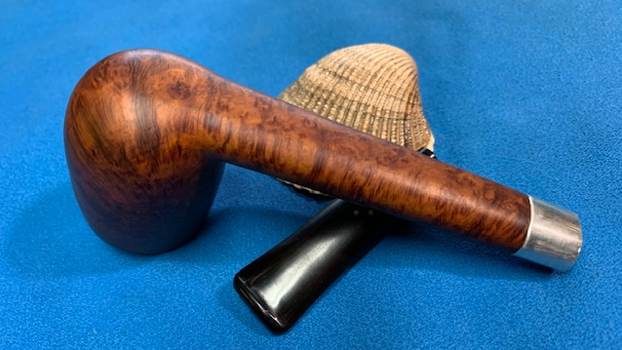
I slipped the stem over the tenon and took photos of the pipe at this point. It looks very good. 
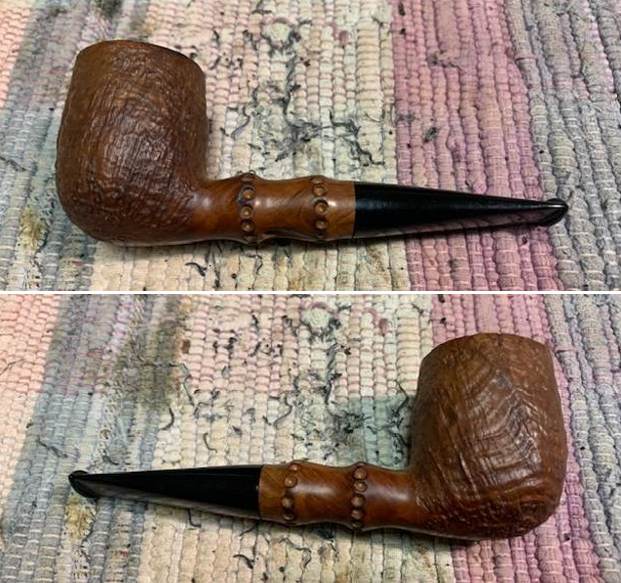
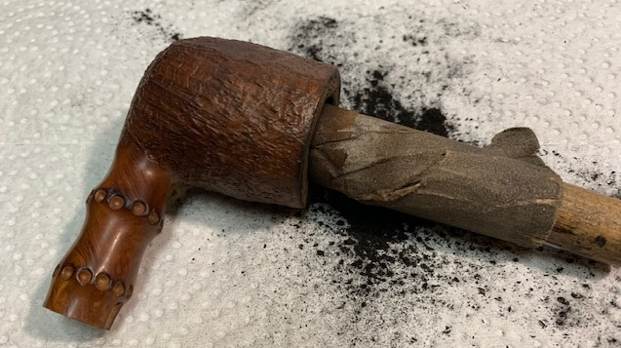
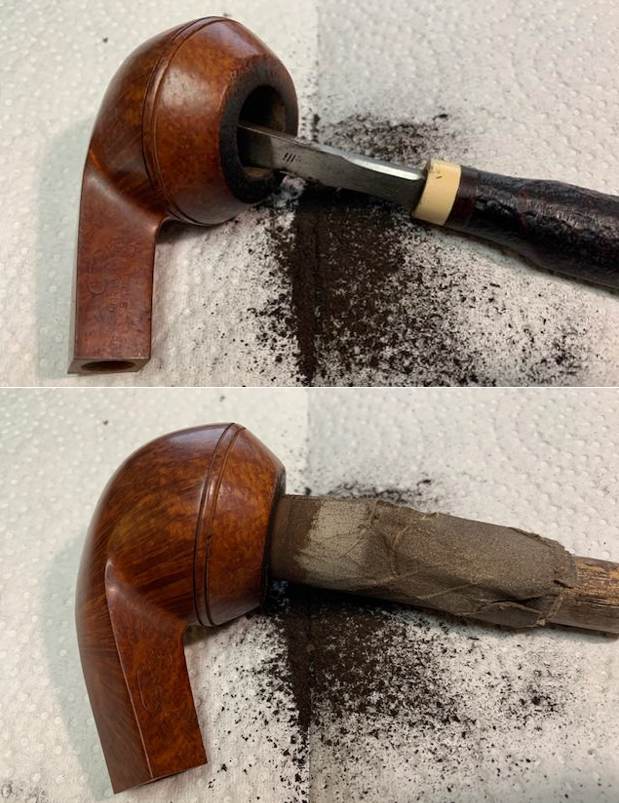
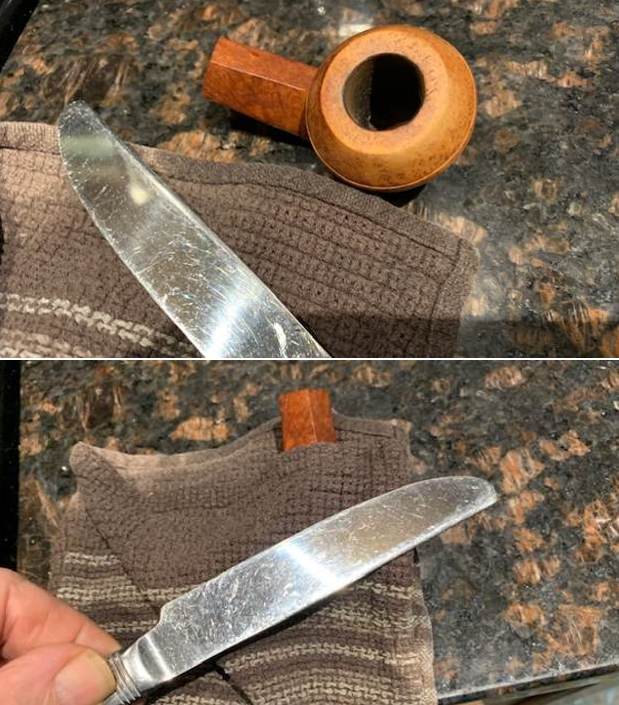
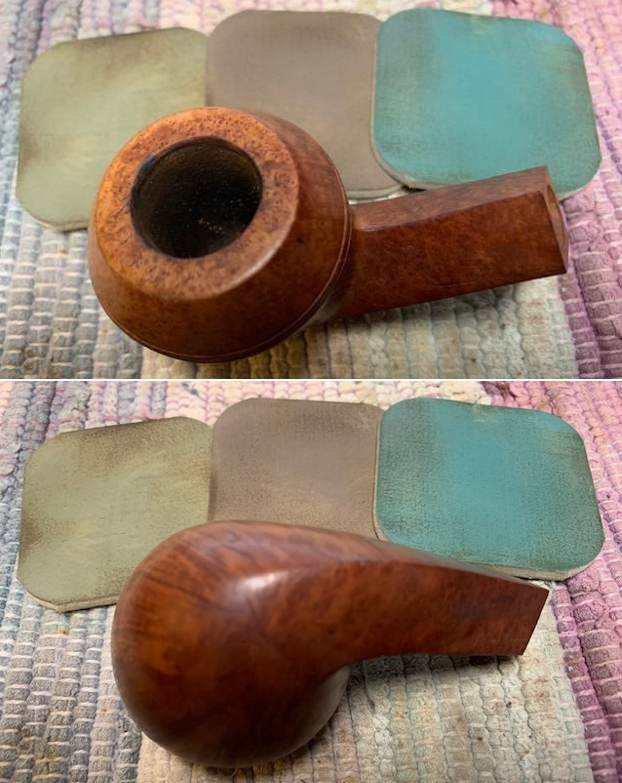
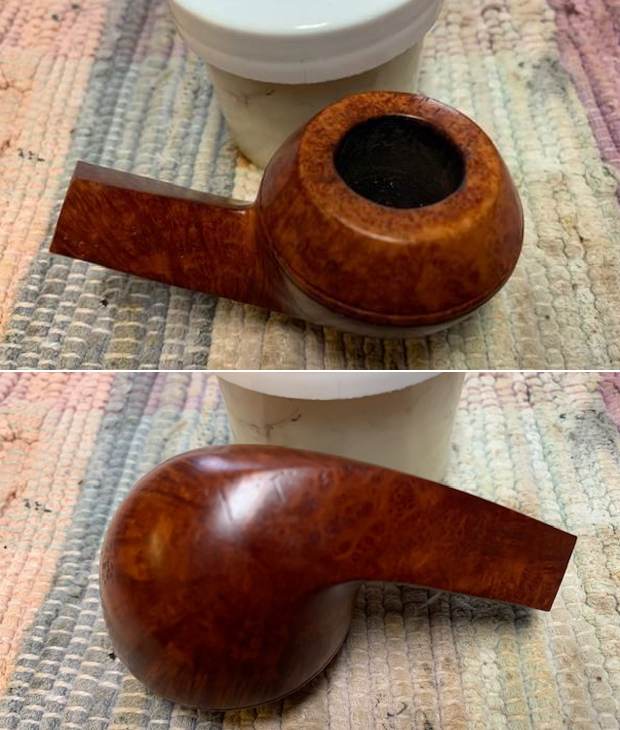
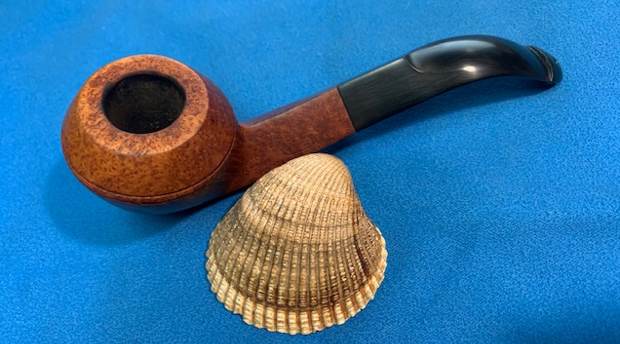
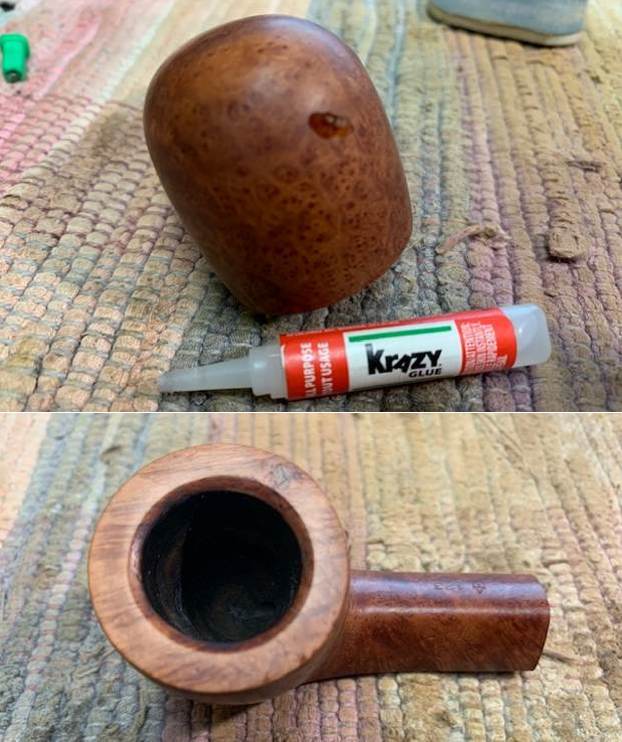
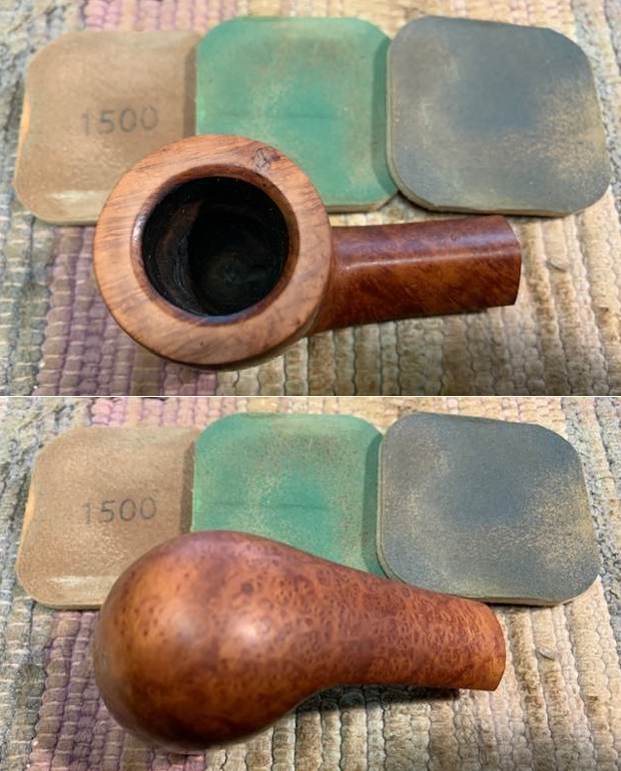
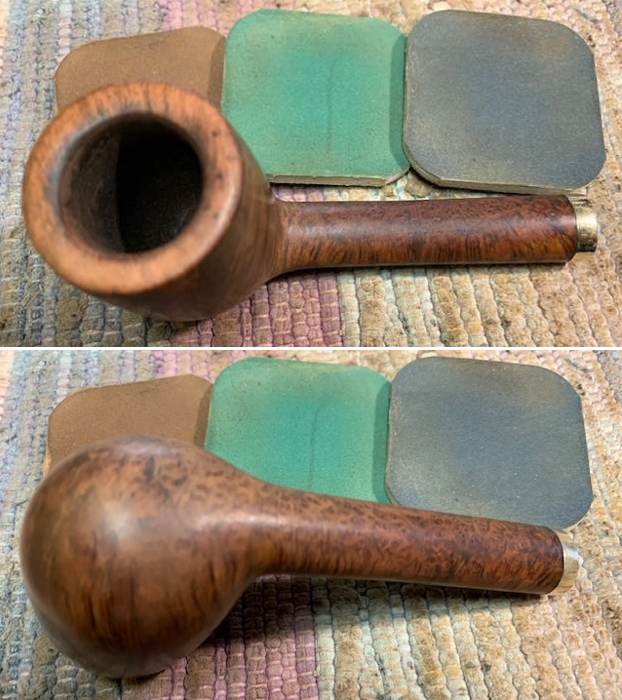
With that done I turned my attention to the bowl. I reamed it with a PipNet reamer and took the cake back to briar. I cleaned up the remnants with a Savinelli Fitsall pipe knife. I sanded the bowl walls with a piece of dowel wrapped with 220 grit sandpaper. 
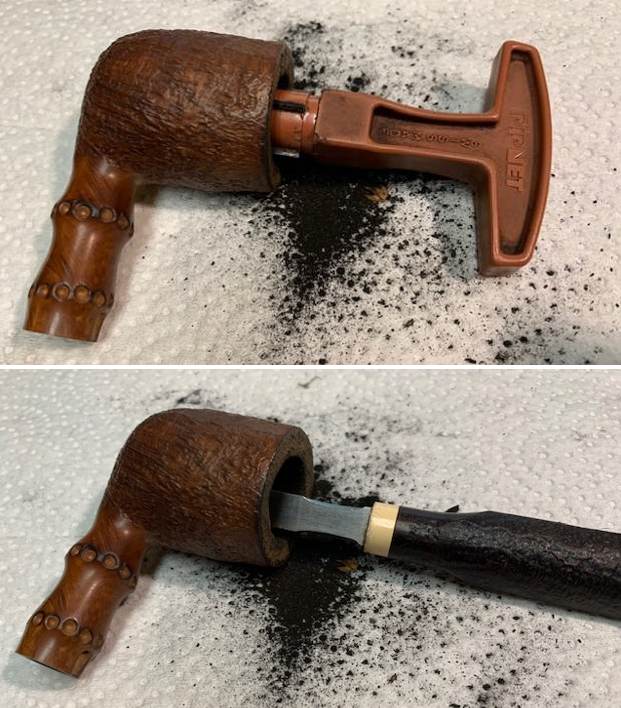
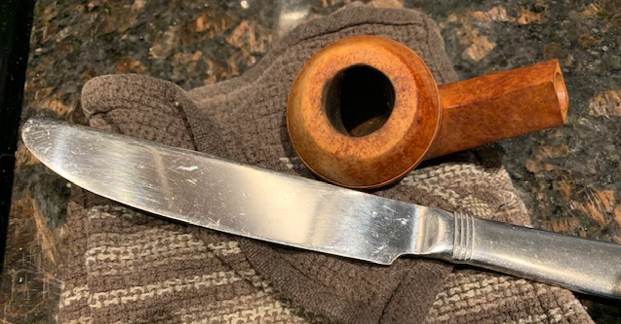
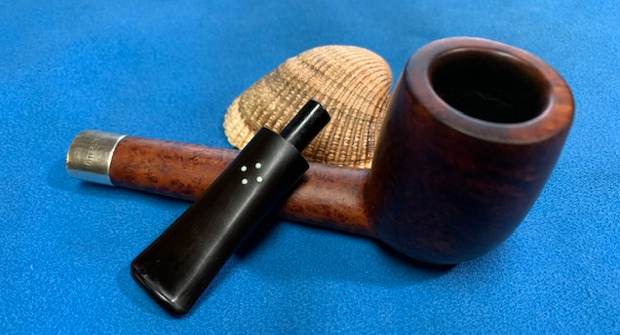
I cleaned up the rim top with a brass bristle wire brush to remove the lava in the sandblast and a bit of the burn damage on the back inner edge of the bowl.
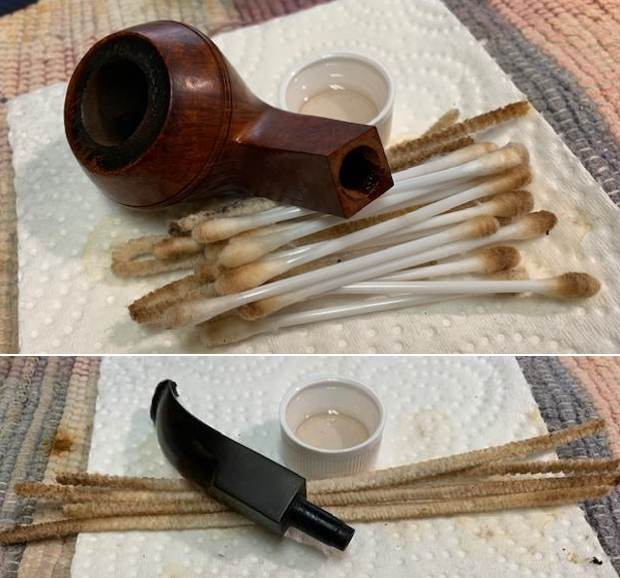
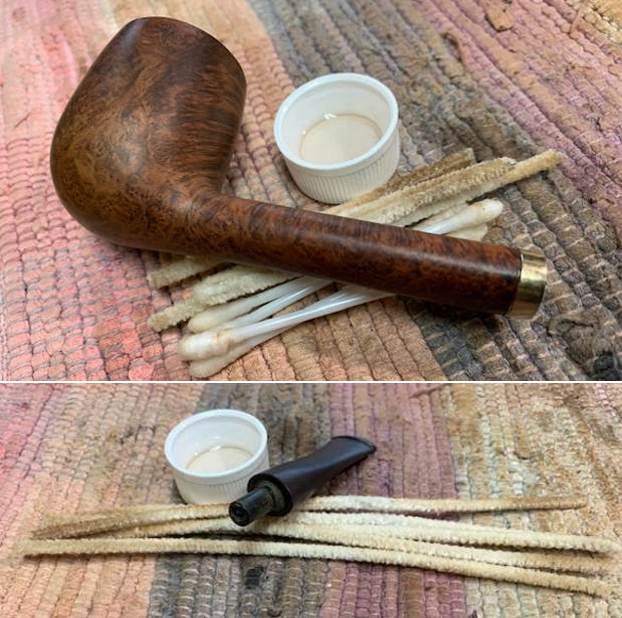
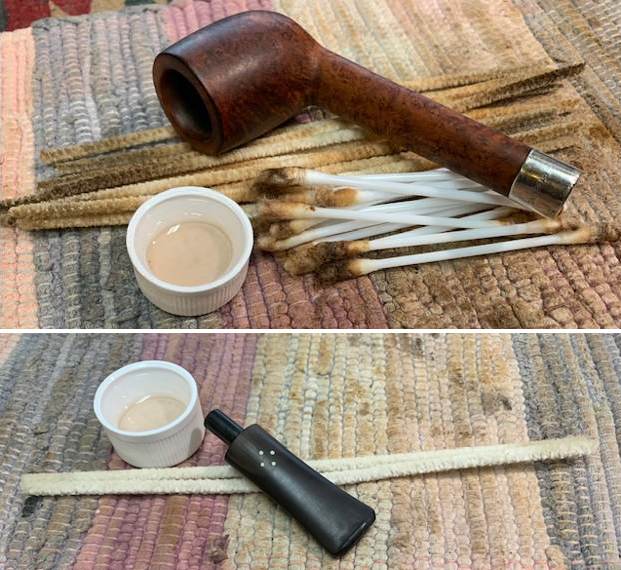
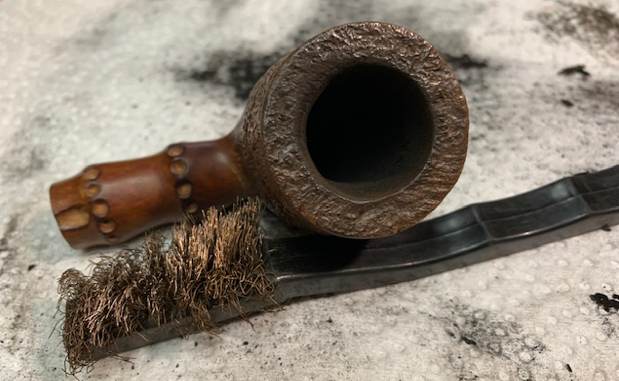
I cleaned out the internals on the stem and shank with pipe cleaners, cotton swabs and alcohol until they were clean.
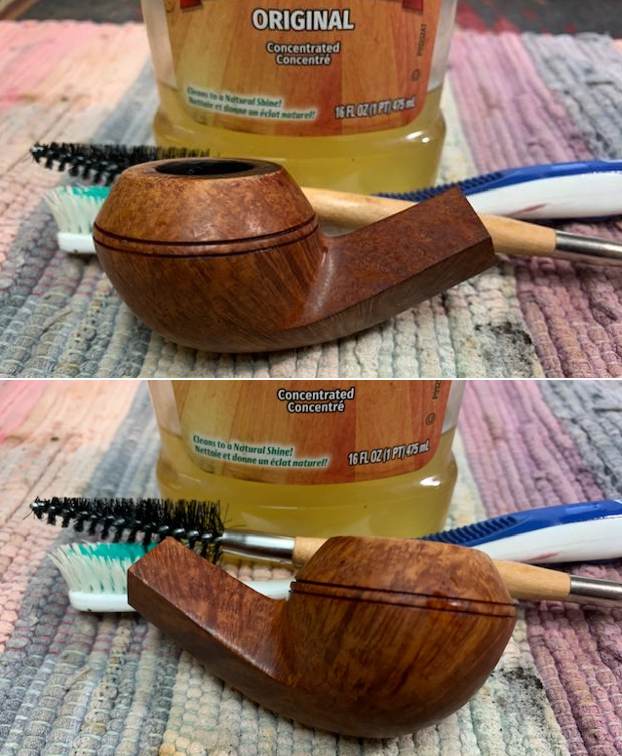
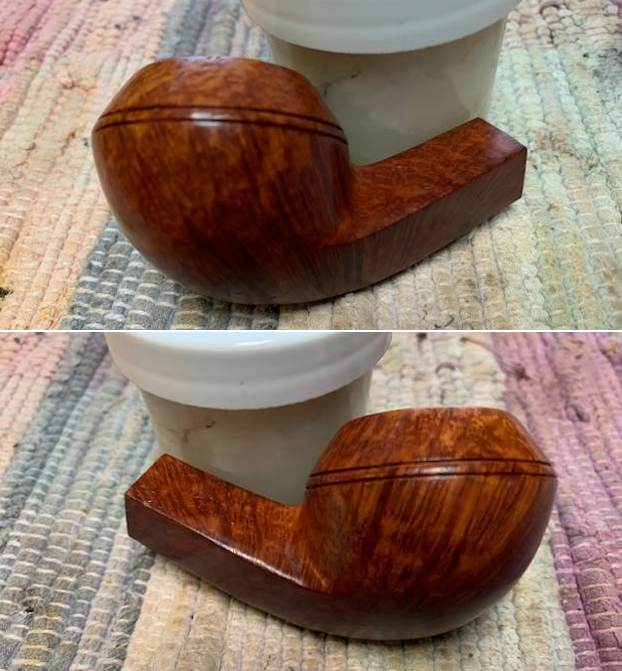
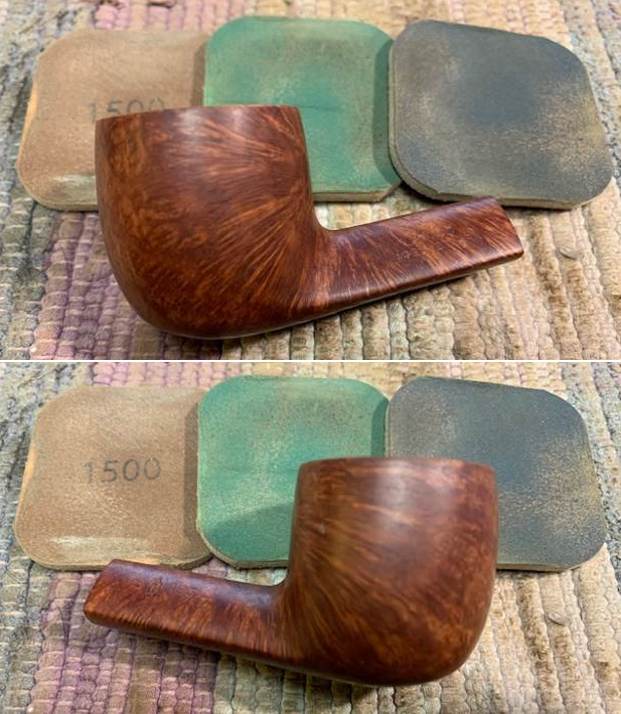
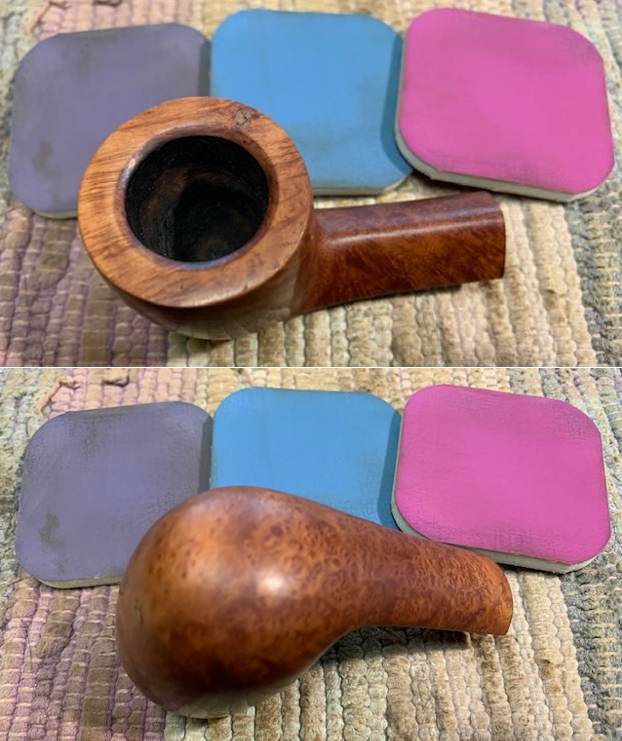
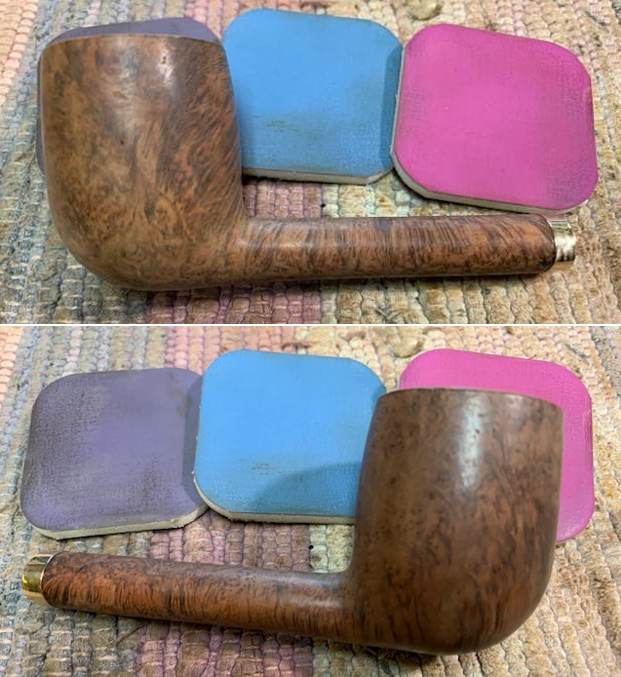
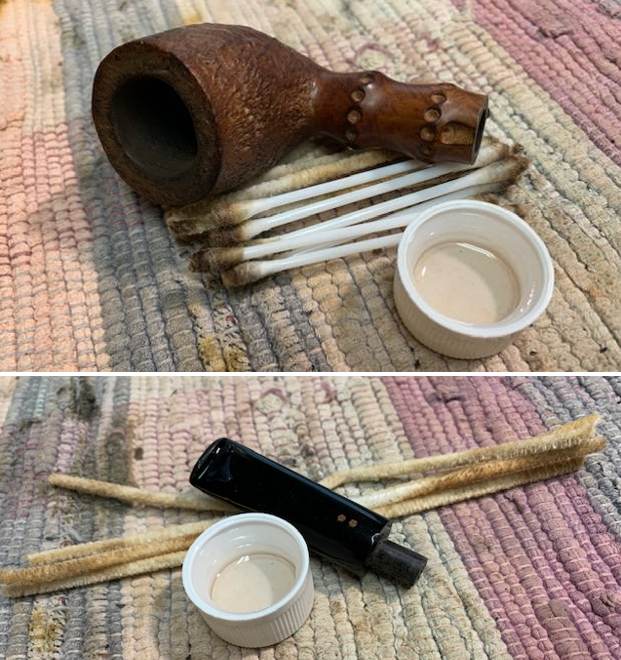
I rubbed down the bowl with Before & After Restoration Balm to clean, enliven and protect the briar. I worked it into the blast with a horsehair shoe brush. I let it sit and do its magic for 10 minutes and then buffed it off with a soft cloth. 
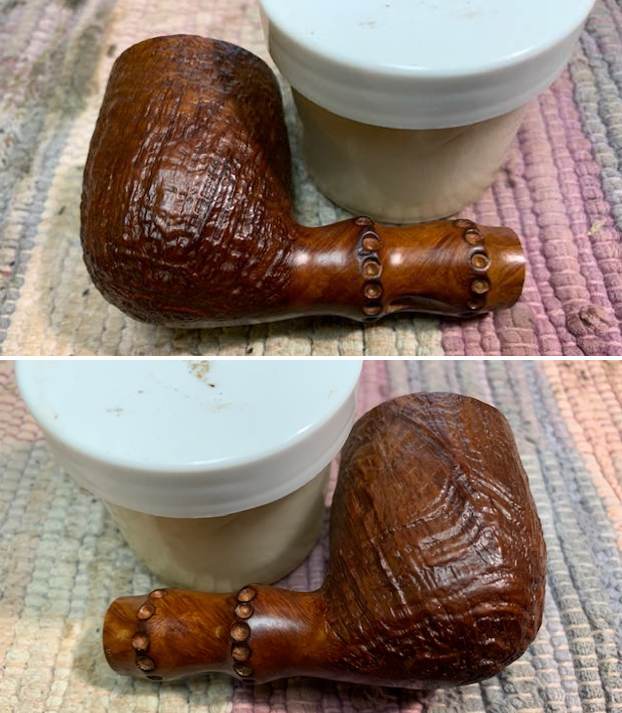
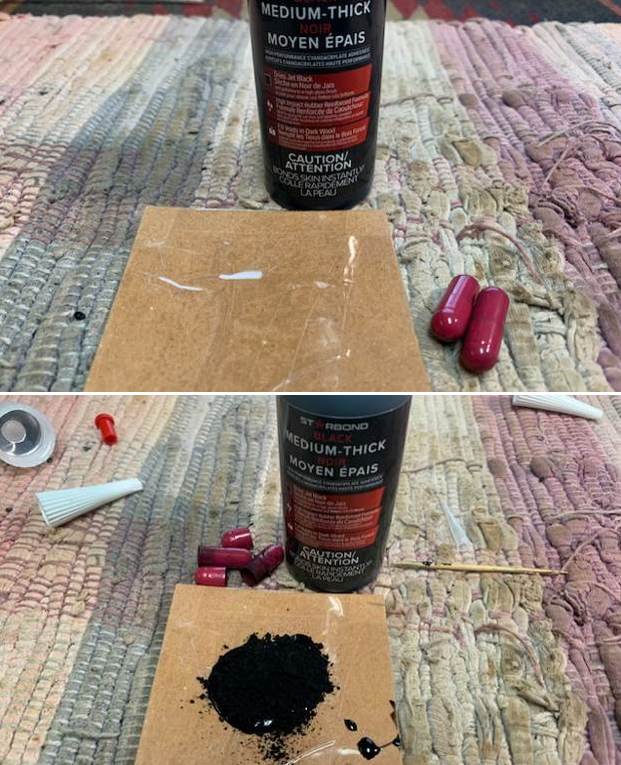
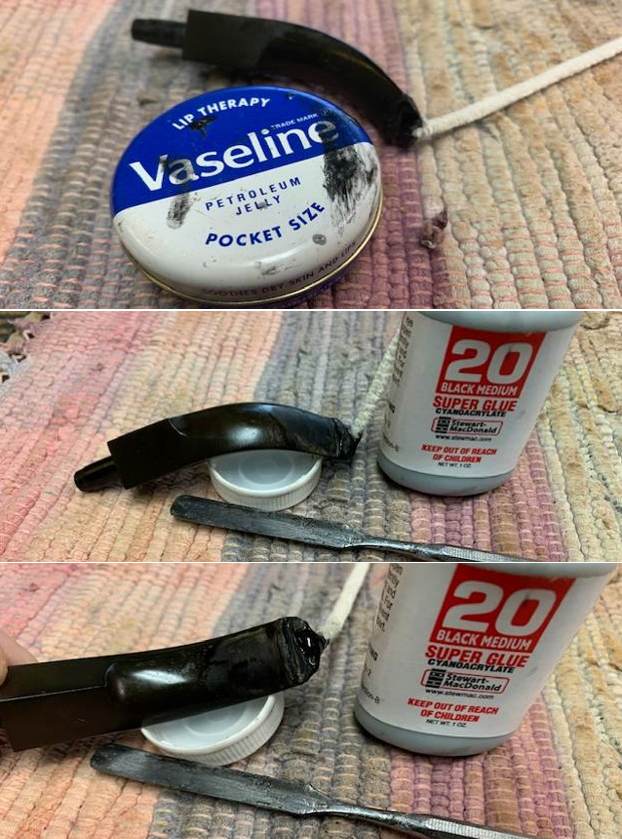
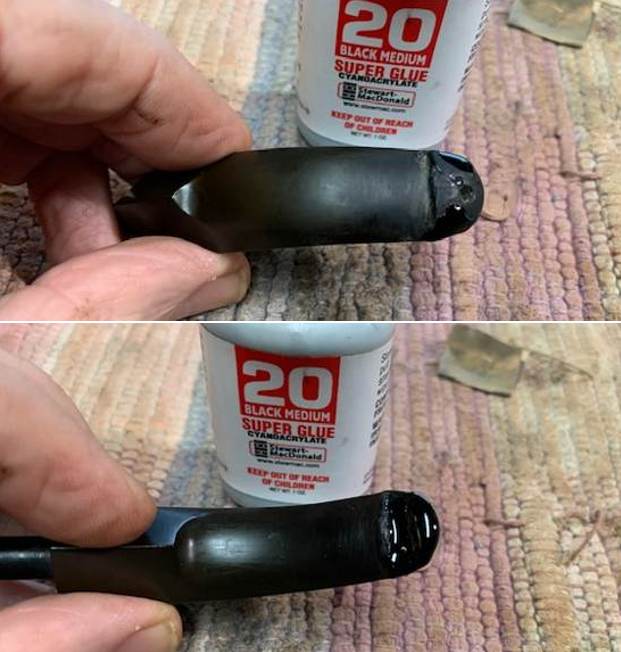
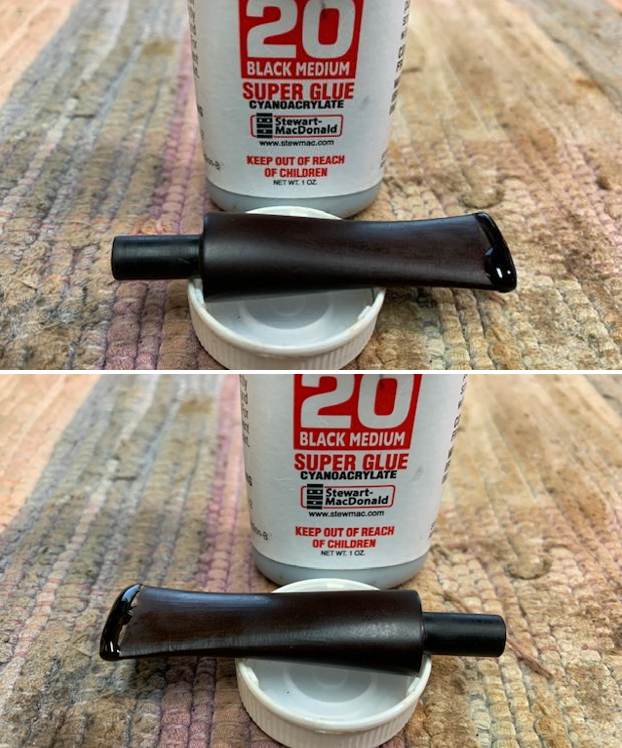
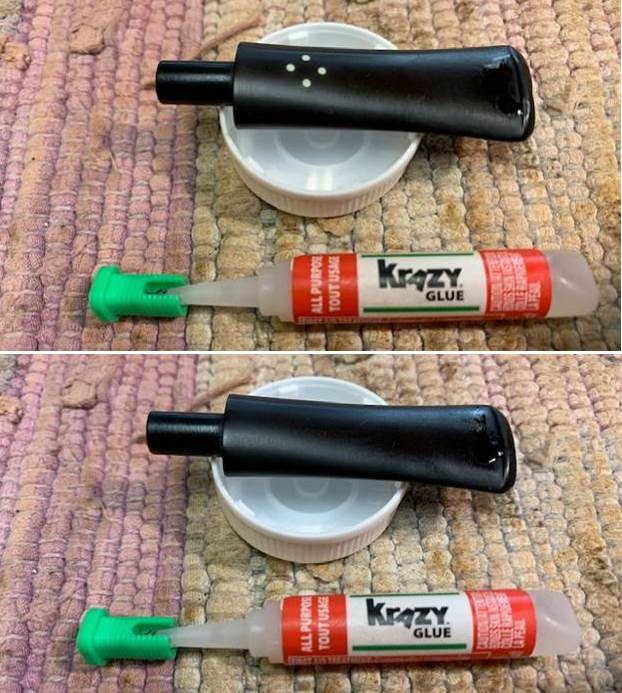
I set the bowl aside and turned my attention to the acrylic stem. I glued the tenon in the stem with Black Super Glue. While it cured I worked on the tooth marks in the stem.
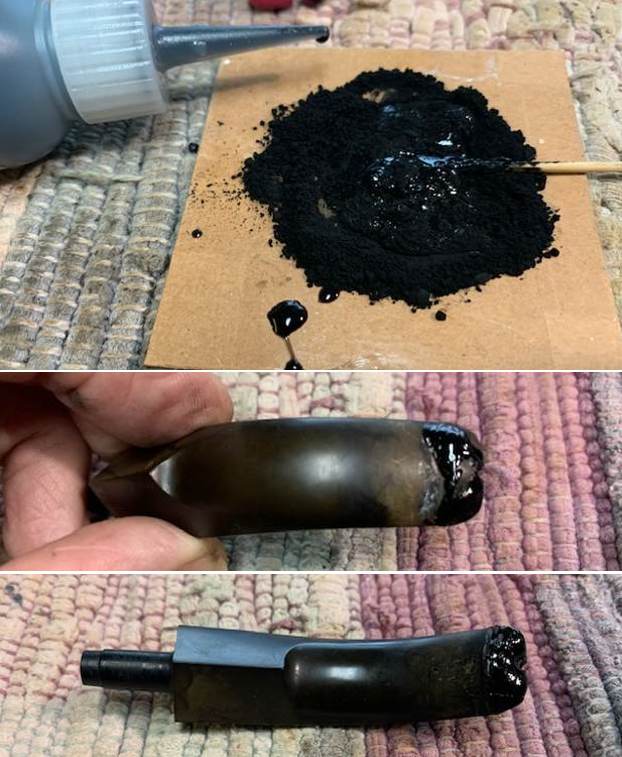
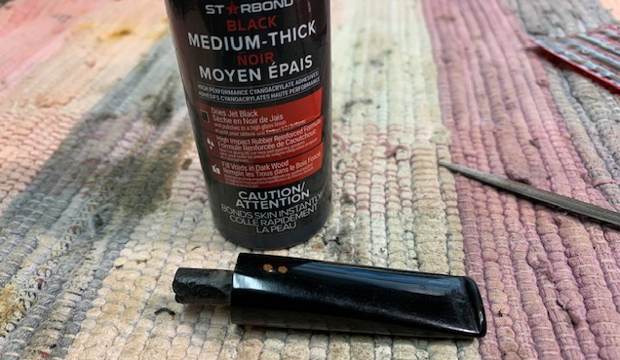
I cleaned up the tooth marks with alcohol and a cotton swab. I filled them in with black super glue and set it aside to cure.
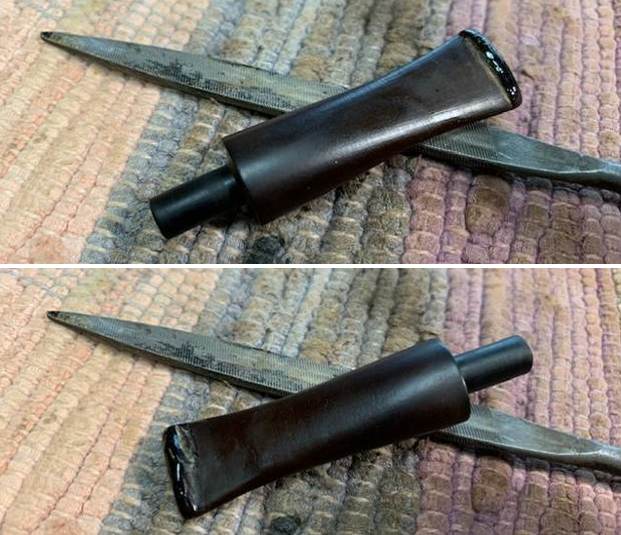
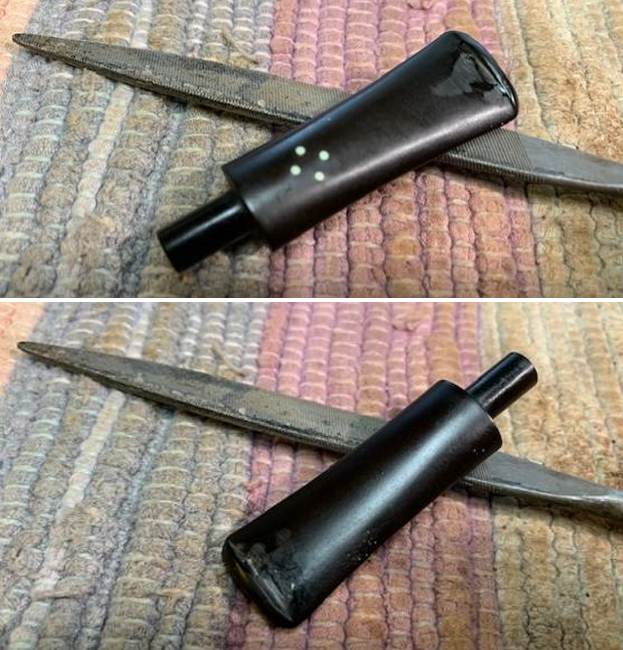
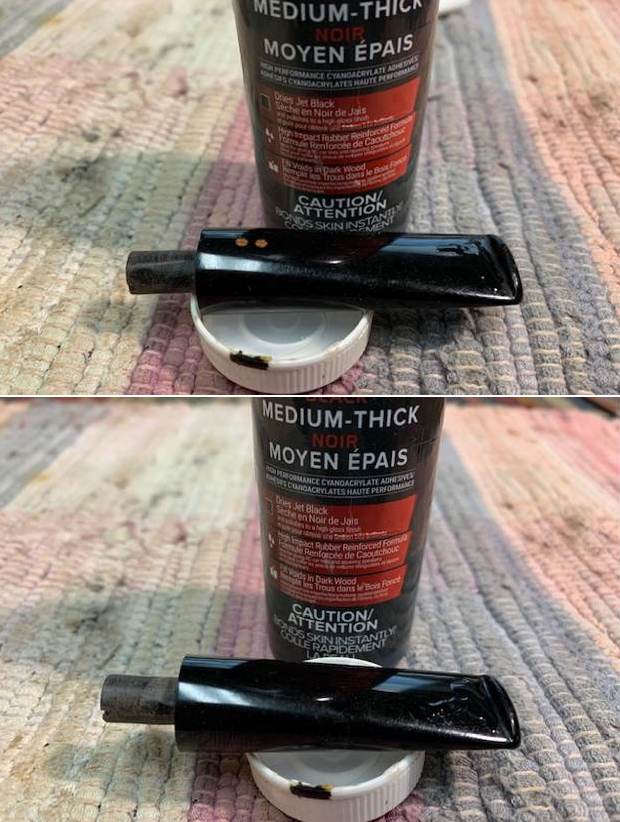
Once it had cured I flattened out the repairs with a small flat file. I sanded them with 220 grit sandpaper to further flatten them out and blend them into the surrounding area. I started polishing the stem with 400 grit wet dry sandpaper. 
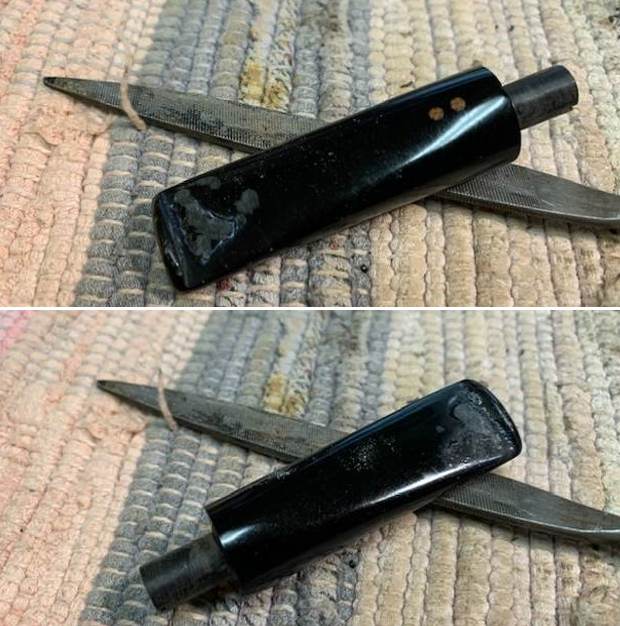
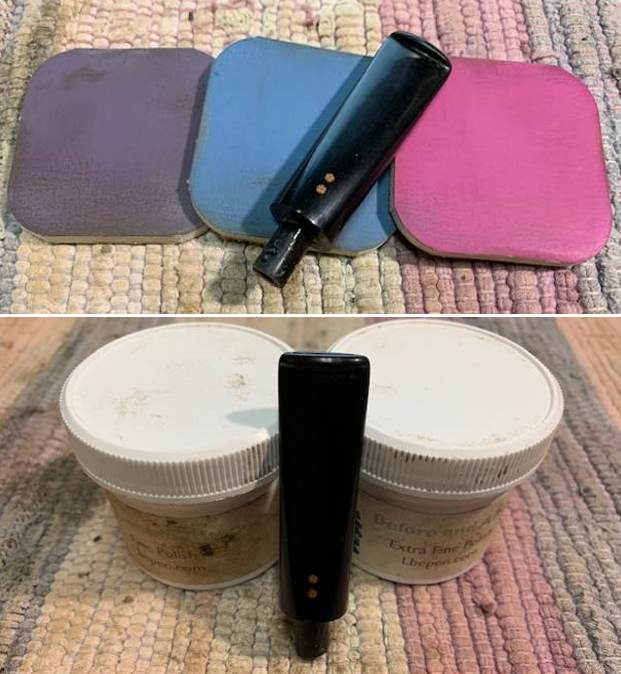
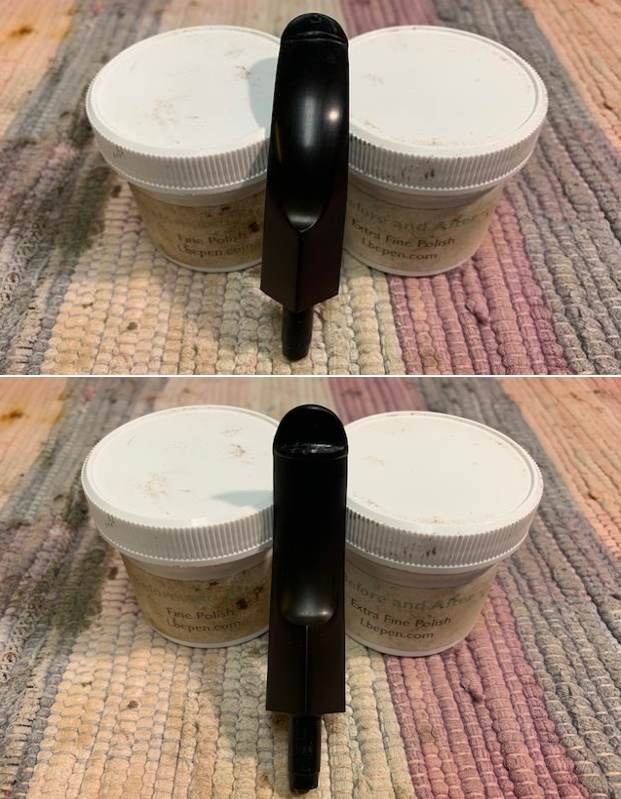
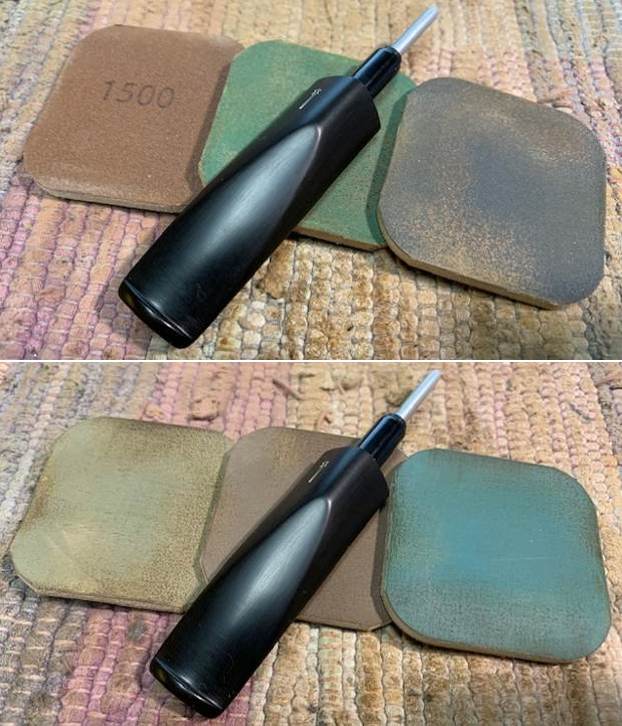
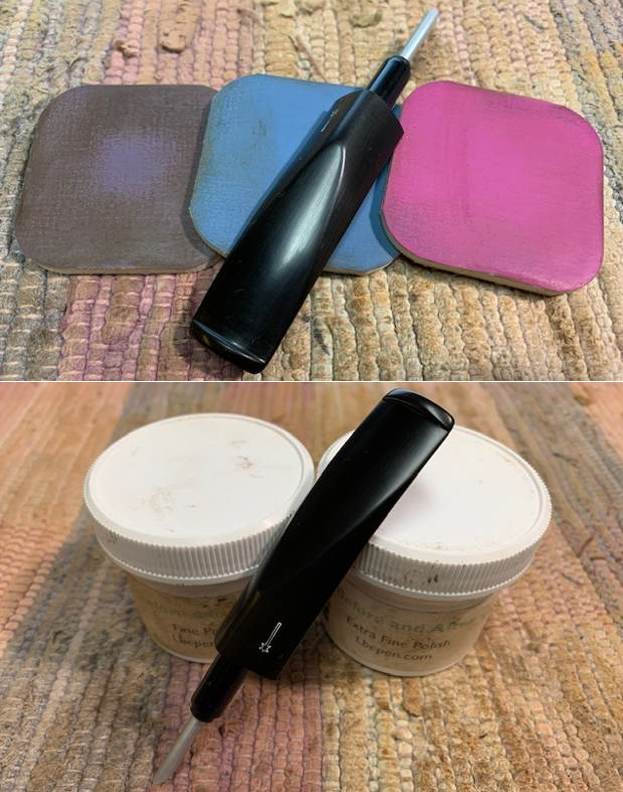
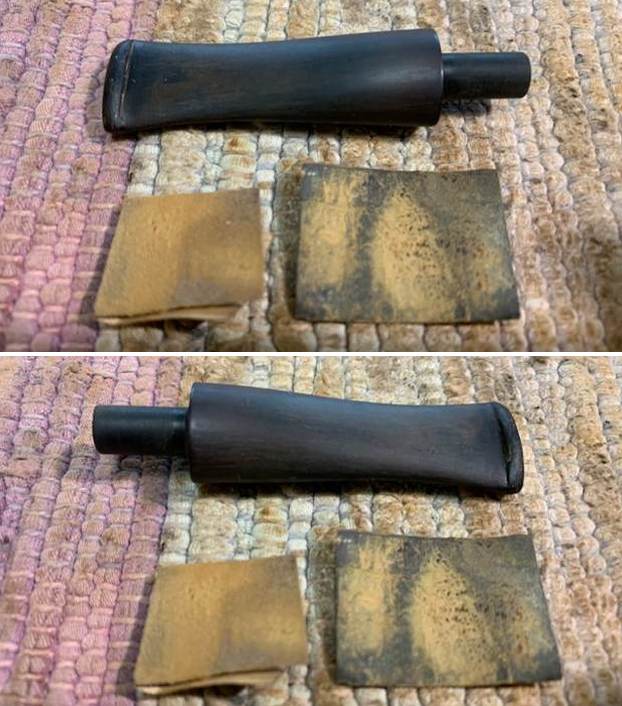
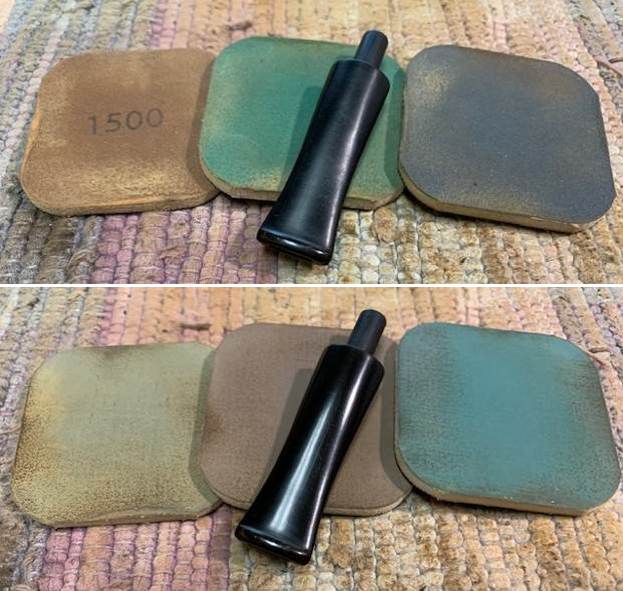
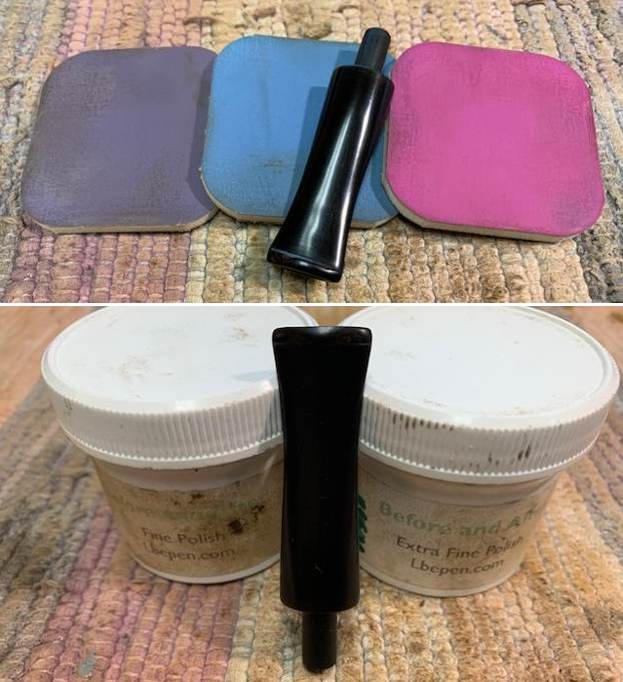
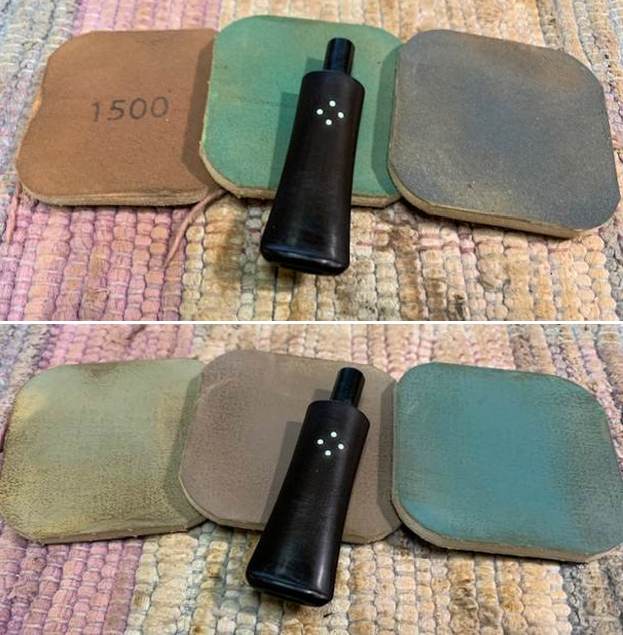
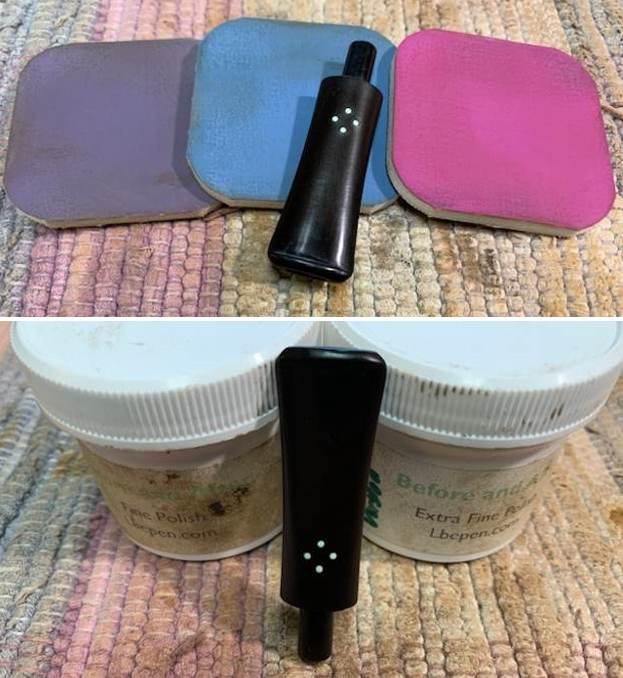
I polished the acrylic stem with micromesh sanding pads – dry sanding with 1500-12000 grit pads. I wiped the stem down after each pad with a damp cloth. I finished the polishing with Before & After Stem Polishes – both Fine and Extra Fine. I wiped the stem down with a cloth impregnated with Obsidian Oil to protect and give the deep shine to the stem. 
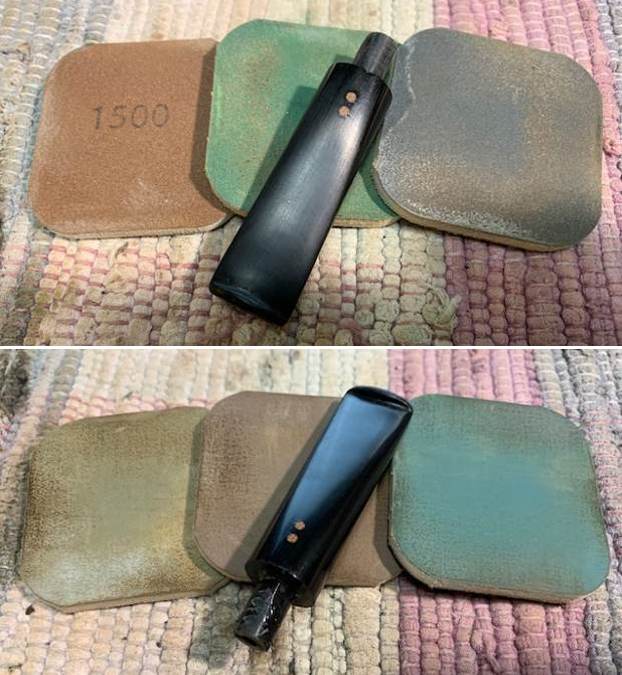
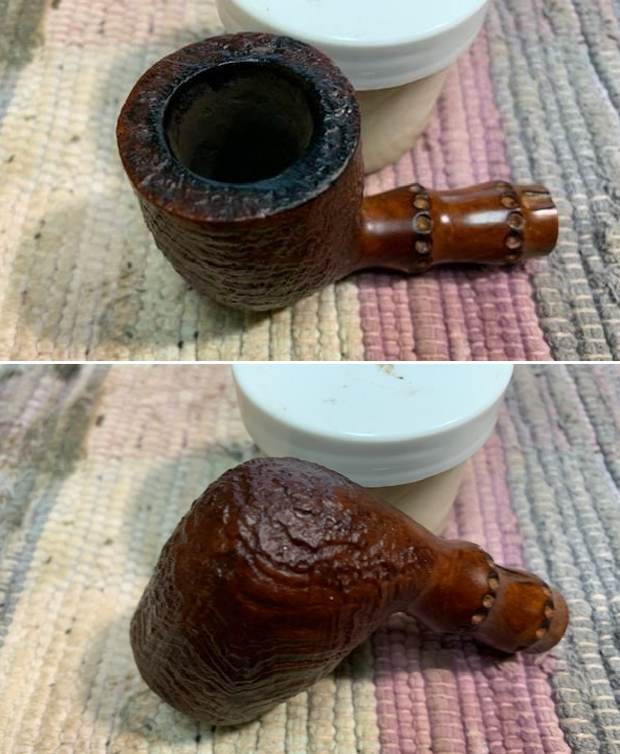
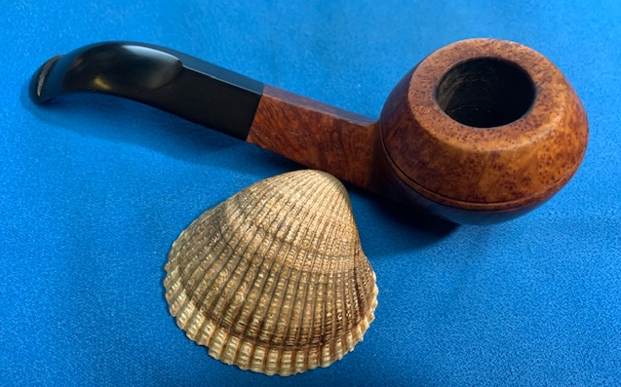
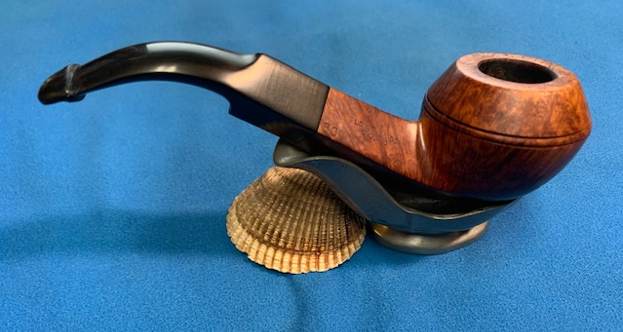
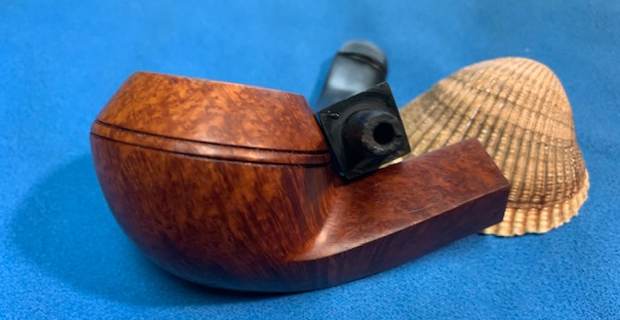
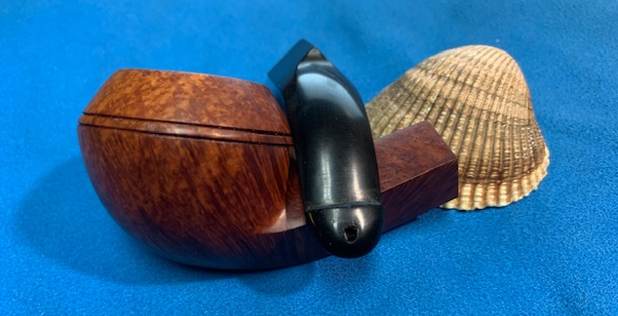
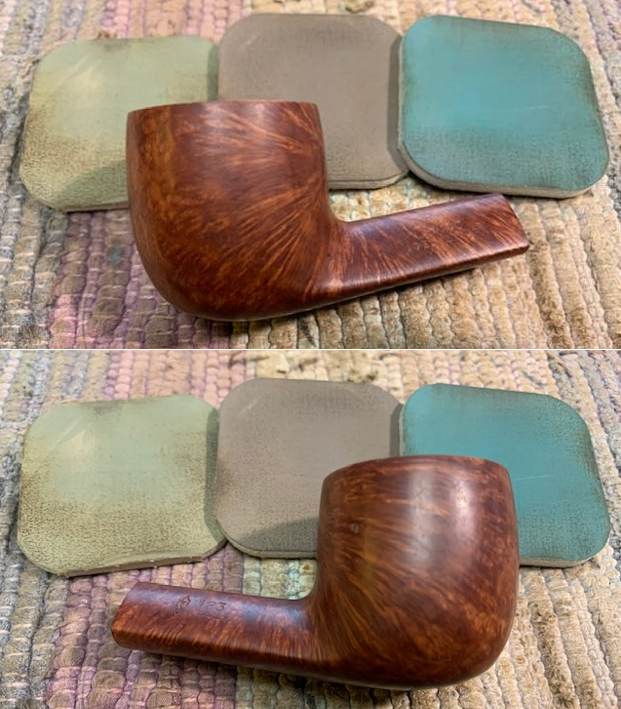
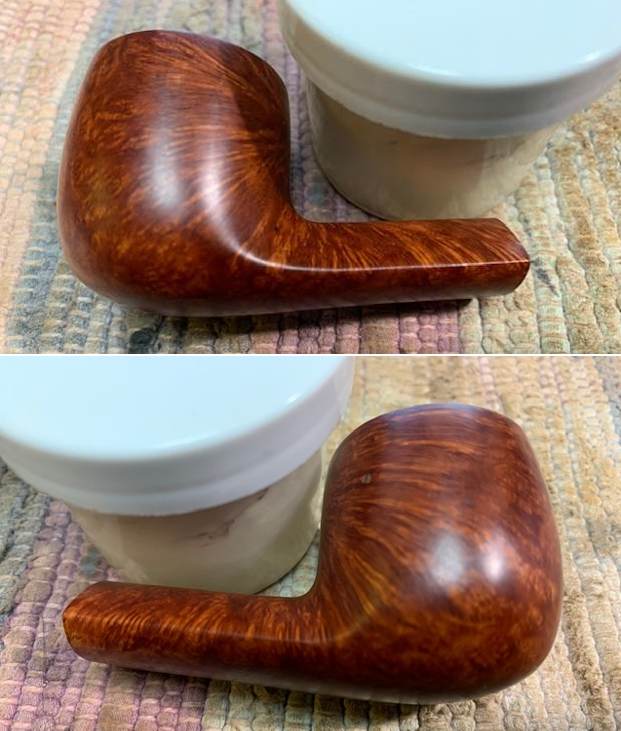
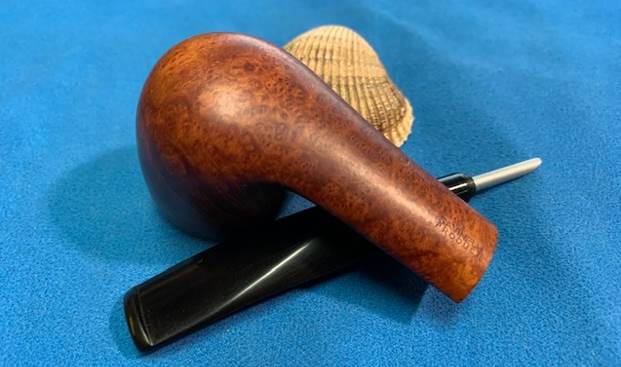
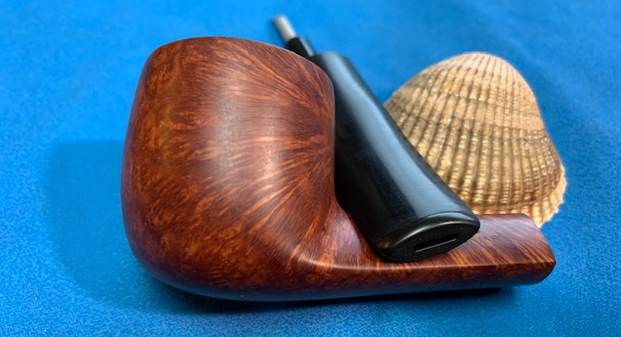
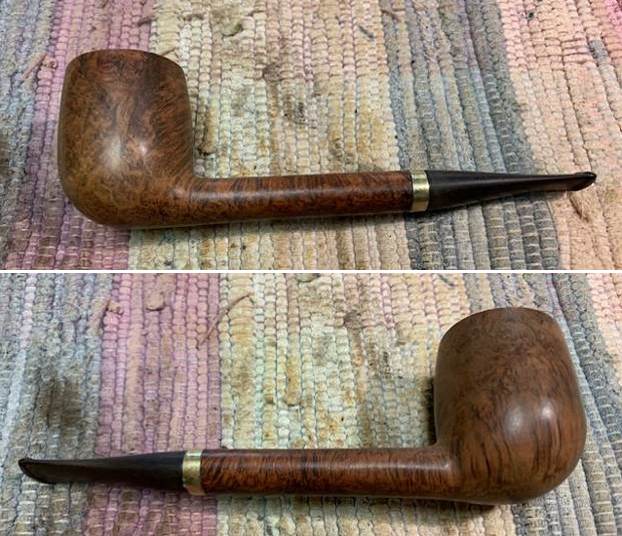
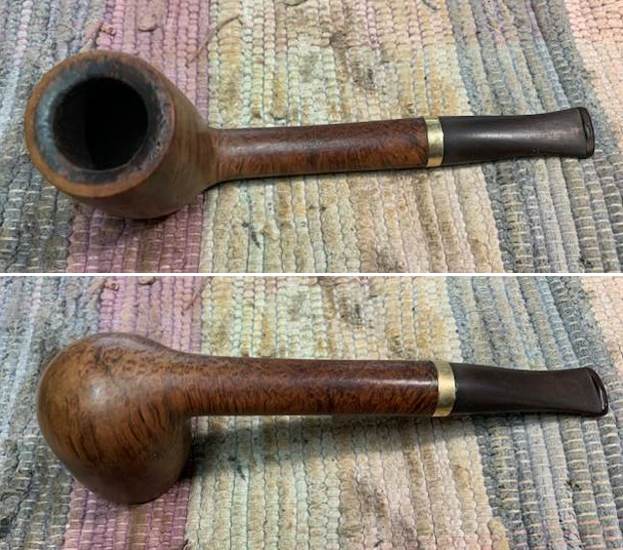
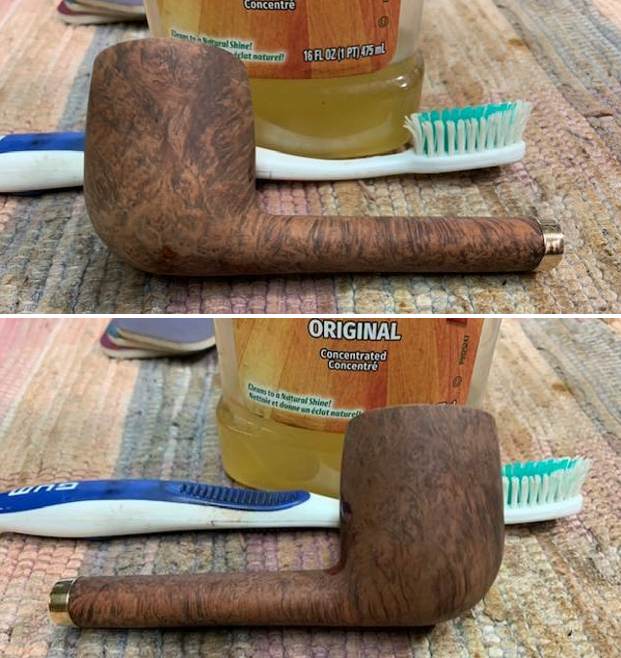
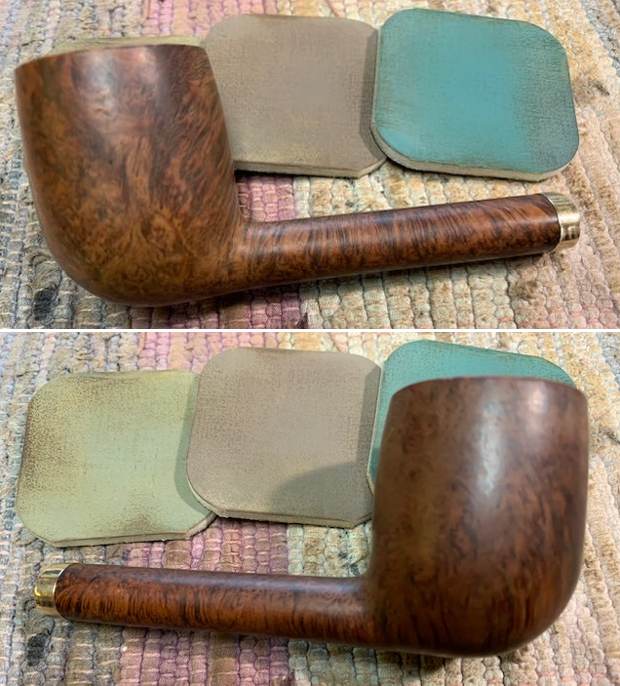
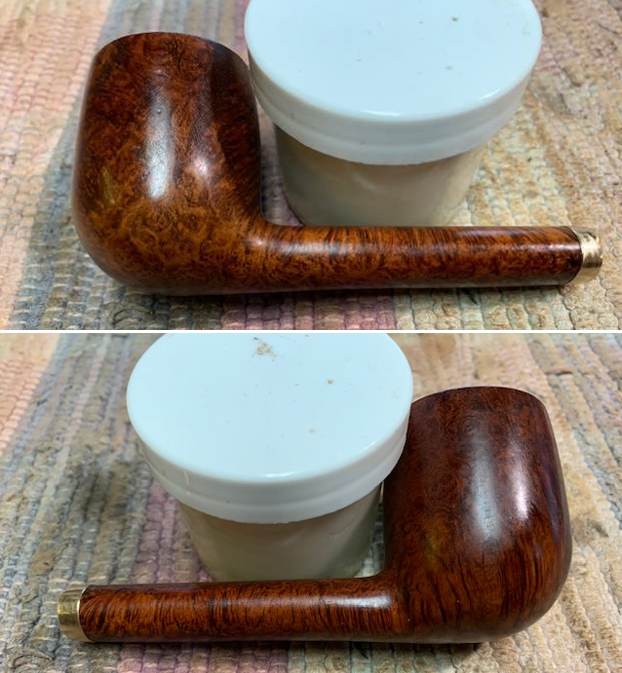
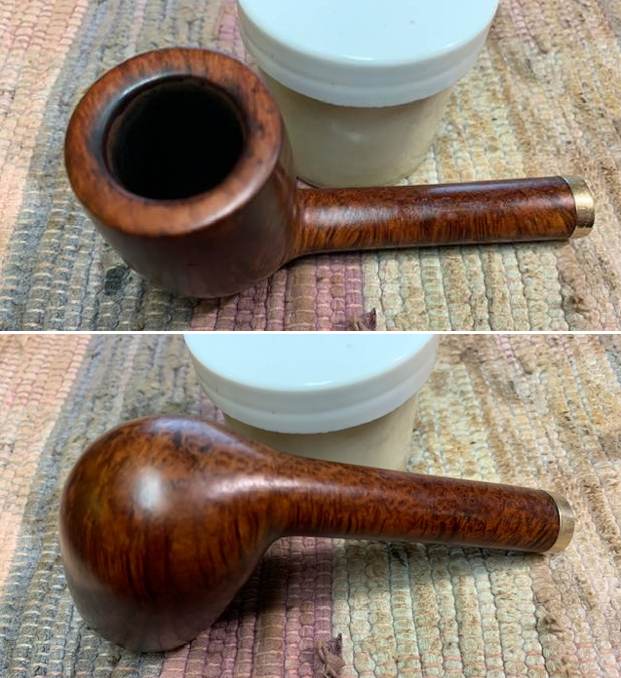
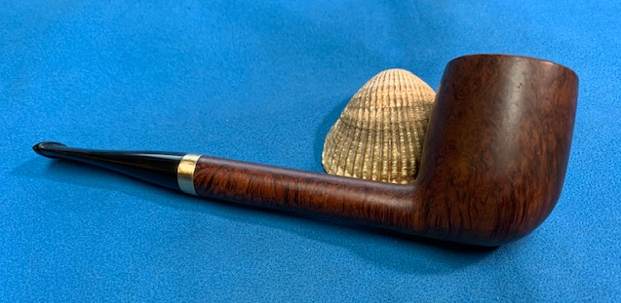
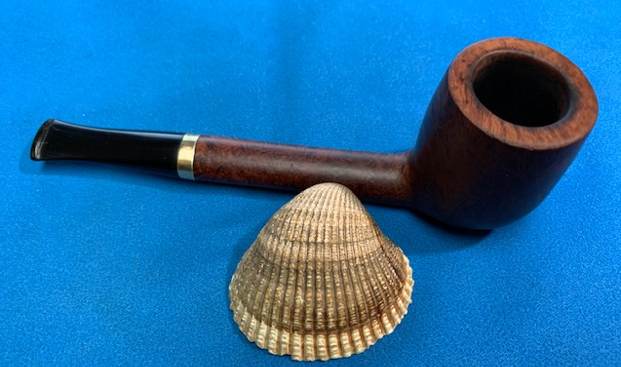
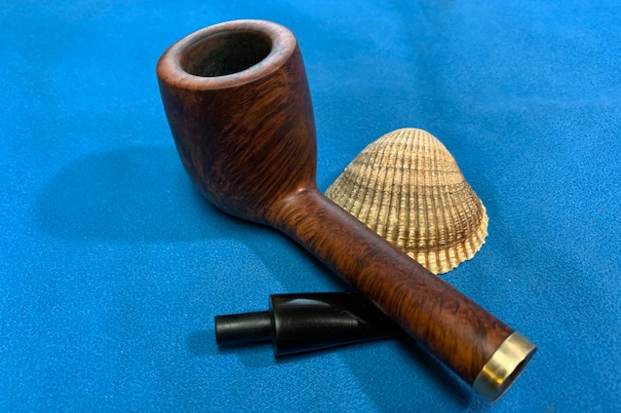
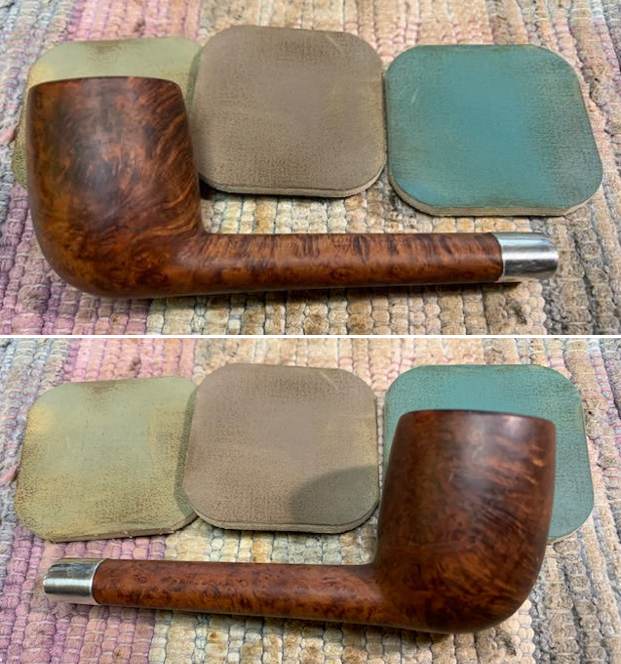
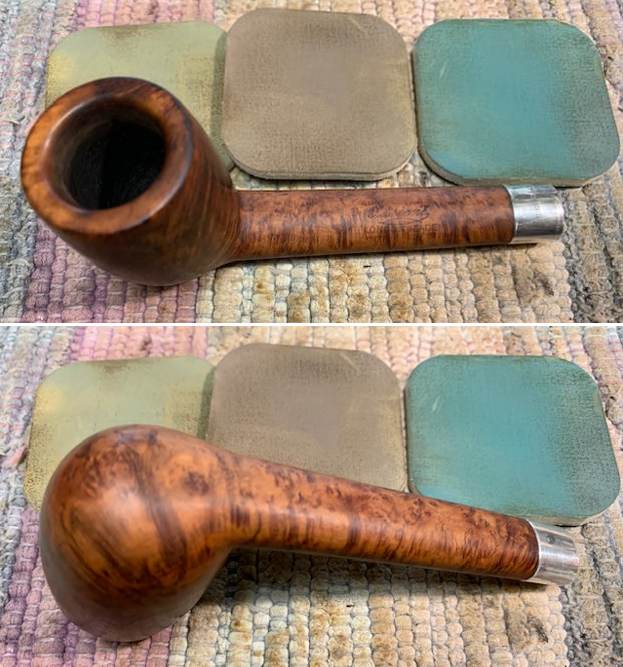
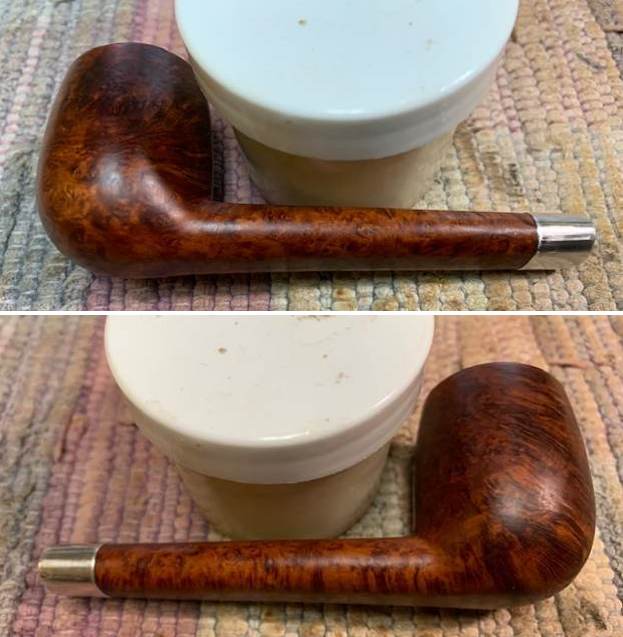
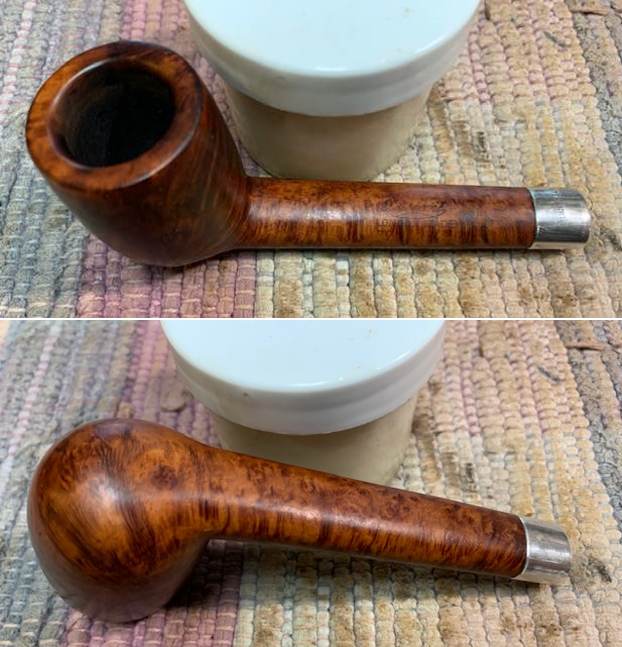
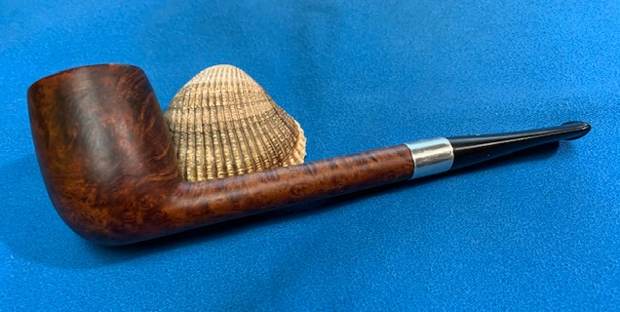
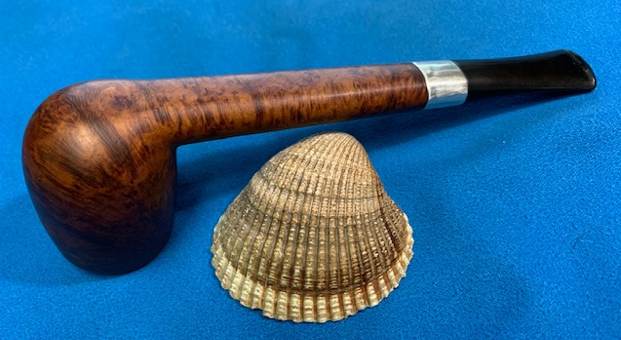
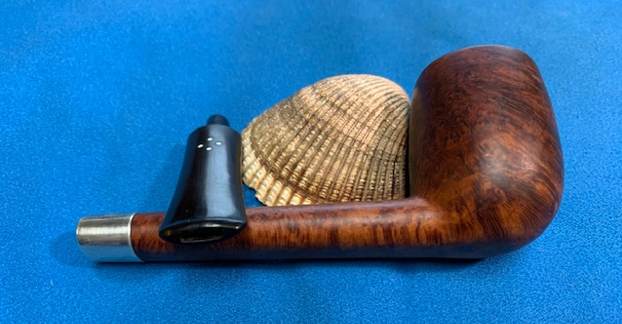
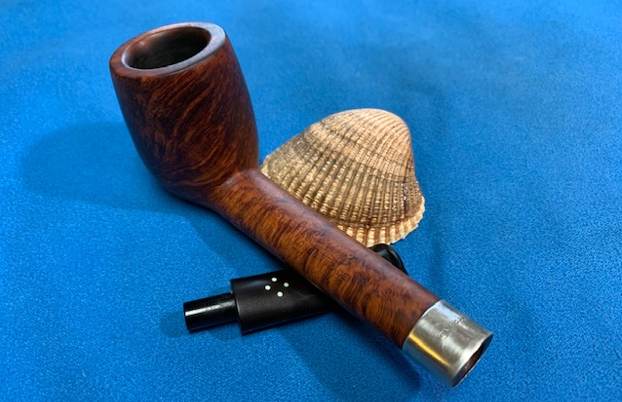
I was happy to be finished with this beautiful Radice Silk Cut Billiard. The stem fit well and looked good with the rich finish of the sandblast bowl and faux bamboo shank. I buffed the pipe with Blue Diamond on the buffing wheel and gave the bowl and shank multiple coats of Conservator’s Wax. I buffed it with a clean buffing wheel to raise the shine. I hand buffed it with a microfiber cloth to deepen the shine. The Radice is a great looking pipe that ticks all of my boxes. The dimensions of the pipe are Length: 5 inches, Height: 2 inches, Outer Diameter of the bowl: 1 ½ inches, Diameter of the chamber: 7/8 of and inch. The weight of the pipe is 48 grams/1.69 ounces. I will be packing it up to send back to my friend in Idaho once I finish the second pipe he sent. Thanks for reading the blog.

Tenon and Stem Repair for an Interesting LL Bean Bent Billiard


Reading this restoration I was reminded of a few of the LL Bean pipes I have worked on. Nice job on the new tenon and removing the strange metal tubes! Well done.

Charles Lemon's avatar

This is the second heirloom pipe send to me for work, along with the Medico Square Pot about which I wrote last time. This time I’m working on an LL Bean Bent Billiard fitted with an interesting Smokemaster filter system first produced by Briarcraft in the USA in the early 210th Century, and again later by Grabow between the mid 1960s and 1990s. We’ll take a closer look at the system later, but for now let’s focus on the pipe itself.

As this first series of pics illustrates, the pipe arrived in two pieces, with the remains of the stem tenon lodged inside the pipe’s shank. The rim of the bowl was hidden under a crust of carbon “lava”, but not enough to disguise a fair amount of dents and dings around the outer rim edge. As the rest of the stummel was in good shape, these dents are most…

View original post 1,700 more words

The English Calabash That Wanted to Be a Charatan


Blog by Robert M. Boughton

https://www.facebook.com/roadrunnerpipes

Not even once in a blue moon does a pipe with an uncommon feature – but having no nomenclature other than the county where it was made – find its way into my hands.  The two most recent examples show MADE IN over LONDON ENGLAND on the right shank and did not meet their makers’ exacting standards.  The previous was a Ben Wade celebrating the poker shape with capacious panache, but other than replacing the stem with a smaller, lighter, inappropriate one, there was no way to counter the off-center of gravity and force the poker sitter to sit.  This time it’s a Charatan that looks more akin to a beanpot to me but was called a calabash by the maker.  Had not Steve seen my “beanpot” for what it is, I might have concluded that both pipes began their lives as Ben Wades.  Although Charatan pipes do not include MADE IN, I concluded that the two words were added when the pipe was rejected, maybe to differentiate the rejected from the approved.  Here are two models of Charatan’s Make calabashes from Worthpoint.Based on the seller’s detailed description of the smooth finish calabash, at the first link below, I believe Charatan made these pipes while Dunhill owned the brand (1978-1988). The grain of my pipe is not very good and required a few fills, but I don’t see why it could not have been modified to a sandblasted or relief finish as shown above. Here is mine as I received it. Sanding with 220- and 320-grit paper cleaned it up pretty well. Using 400-, 600- and 1000-grit paper, I was able to give it a first glow. After retorting the pipe, I turned my attention to the stem, which, other than being dirty, looked much better than most. I’ve started giving stems a bath in generic viscous stain remover. So far, I haven’t tried it on a specimen with oxidation, and I doubt it will do more than remove the grime that often goes with estate pipe stems. But I will report back on that.An hour later, I took the stem out of the goop, rinsed it and ran a pipe cleaner through.  Micro meshing it made two small teeth marks stand out.What I should have done was flick my Bic on the annoying little marks, but that didn’t come to me until after I reached the point of no return with another method that’s great on real divots.  Anyway, mixing Super Glue and vulcanite shavings from an old stem that’s perfect for the task was good practice.This method for removing bite marks makes a mess. Cleaning it up took a couple of days of sanding and buffing before the final shots after one more progression of 60-1000-grit sandpaper and all nine micro mesh pads – but the practice and results were worth it.Time to stain.At this point, I would have had only the final wheel buff left.  In fact, that’s what I did.  But the pic I took of the nomenclature revealed a hairline crack just below LONDON, ENGLAND.To mitigate the potential for the crack to spread, I used a touch of Super Glue and let it sit overnight. At least the foul spot was not all the way through the shank. A 120/180 sanding pad followed by a full micro meshing took off the excess dried glue.  I re-stained the effected area with Moccasin Brown and buffed the char off with 8000-12000 micro mesh. I decided to make the rim lighter with 8000-12000 micro mesh, also.Quick wheel buffing of the stem and stummel with Red Tripoli and carnauba on the buffer wheel completed the Charatan’s Make Calabash reject. The best part of this restoration is how close I came with my sweet reject to the stain of a third Charatan’s Make Perfection Calabash I found online.And I didn’t even know it until I copied and pasted the pic from Pipehub.com.  I look forward to finding a loving home for my poor disadvantaged friend here.

SOURCES
https://www.worthpoint.com/worthopedia/charatans-make-london-england-special-495600609
https://www.worthpoint.com/worthopedia/lane-era-charatans-make-relief-grain-412563595
http://www.pipephil.eu/logos/en/logo-charatan.html
http://www.pipephil.eu/logos/en/logo-benwade.html

Breathing New Life into the FIRST of a Cased Set of  Two English Made Peterson’s Bulldogs – 80S Bent Bulldog London Made


Blog by Steve Laug

The next pipe is the third of four Peterson’s and the first of a case set of Bulldogs that came to me from a friend of mine for me to work on. The pair (pipes 3 and 4) came in a nice leather cast that was travel/time worn on the top and underside and damaged on the edges. My friend sent me some photos of the case and the pipes that I am including here. It was not a large case but a common style carrying case for pipes of this era. I am hoping to do some work and narrow down the dates on the pair of pipes.The inside of the case was lined with soft golden suede. The case was fitted for the pipes that it contained – a straight and a bent bulldog with similar finishes. The lid of the case had a logo on it that was a gold and burgundy oval that read PETERSON’S over Dublin & London. It was dirty but not in bad condition. The finish on both pipes was dirty and tired looking but the grain peeked through the grime and oils on the finish. I decided to work on the top pipe first – the Bent Bulldog 80S. The rim top was had hash marks on the left side and had a thick lava build up. The inner edges of the rim looked like there was both burn damage and reaming damage. The outer edge looked good. The stamping on the shank sides was clear and readable. It is stamped on the left side and reads Peterson’s [over] London & Dublin [over] an oval with the word SPECIAL stamped inside. On the right side of the shank it is stamped London Made [over] England. There is no “P” logo on the stem. The stem is lightly oxidized and there is a large chip out of end of the P-lip that will need to be repaired if possible. I have included the pictures that my friend sent me before I took on the pipes. The first shows the rim top with the issues described above. The second and third photos show the stamping as noted above.It took nearly a month for the pipes to arrive in Canada for me to work on. I took photos of them to have an idea of what I was dealing with. You can see from the photos what I saw. The finish is was dirty but the pipe had some amazing grain on the shank and bowl sides. Rim top showed cuts or marks on left side and a thick lava build up. The inner edge of the bowl had some lava and it looked like a bit of damage from burn or reaming. The outer edge of the bowl was in surprising good shape. There was tobacco debris in the bowl and a thick cake. The original style stem is present and is oxidized and has the damage on the end of the button as noted above. You will see that damage clearly in the photos below. I took some photos of the rim top, bowl and stem to capture the condition of the pipe. You can see the cake in the bowl. There is a lava coat and some darkening. There was damage all around the inner edge of the bowl. You can see the hash marks/scratches on the rim top. The P-lip stem appears to be in good condition at first glance other than light oxidation. However a close look at the button will reveal the damage on the stem.I took some photos of the chipped stem to give a clearer sense of the damage to that area. Combined with the photos above you can see the extent of the damage. It was going to be slow, tedious work to rebuild that.I took photos of the stamping on the shank sides. They were clear and readable as noted above.I removed the stem from the bowl and took a photo of it to show its appearance. The saddle portion of the stem is slightly deeper than the newer 80S bulldogs that I have worked on. It is a nicely proportioned stem.Before I started the restoration process on the pipe I wanted to see if I could pin down a time period for the London Made England Special.

I turned to the section on that stamping in the book, The Peterson Pipe by Mark Irwin & Gary Malmberg. I quote from the section on the COM stamp on page 296-297 below:

Peterson maintained a factory in England for about a quarter of a century, from the late 1930s to ’62. Corporate transcripts and London business periodicals suggest that the London operation on White Lion Street was about to get underway in ’37. Only a handful of London hallmarked Petersons are documented, stamped with the date marks 1936 and 1939, and these have no COM stamp. Their output would be limited by the onset of the Battle of Britain in July 1940, but it seems reasonable to suppose pipes were made at the London factory during WWII, inasmuch as the K&P Staff Register lists twelve employees earning wages there in January ’44. London hallmarked Petersons have been identified with dates of 1949-54. Most London-made Petersons in a collector’s inventory were made in these postwar years, from 1949 until the closing of the factory in ’62… the presence of one variation of another on a pipe is not by itself a reliable indicator of its age.

That information narrowed the date of manufacture to the time period between 1949-1962. That is not a long period of time to be sure but now it was time to account for the stamping SPECIAL in an oval. What did that mean? Is there more specifics that can be learned with that stamp?

I turned to page 313 of the above Peterson Pipe book and read the following on the SPECIAL Stamp.

SPECIAL Stamp – used on special order or small batch custom pipes, it will often appear under other stamps, such as PETERSON’S SYSTEM, DE LUXE or DUBLIN & LONDON. Used frequently on pipes cut by master carver Paddy Larrigan.

So it appears that this set of Bulldogs were made in London in a limited time period and perhaps were made by Paddy Larrigan himself. Was he perhaps visiting the London factory in those post war years? I guess we will never know for sure but it kind of a nice thought regarding the pipes.

Armed with this information I started working on the pipe. I reamed the bowl with a PipNet pipe reamer to remove the cake from the bowl. I cleaned up the remaining cake with a Savinelli Fitsall Pipe Knife. I sanded the bowl with 220 grit sandpaper wrapped around a piece of dowel to smooth out the inside of the bowl. The walls looked very good with no checking or heat damage. I cleaned out the shank with pipe cleaners, cotton swabs and 99% alcohol to remove the oils from the walls. It was filthy and when I was finished it smelled clean and fresh. I cleaned out the inside of the stem with alcohol and pipe cleaners.I scrubbed the bowl with undiluted Murphy’s Oil Soap to clean off the thick oils and grime ground into the surface of the briar. I used a shank brush to clean out the mortise The bowl looked and smelled much better and the grain really began to stand out clearly. I worked over the top and the inner edge of the bowl with 220 grit sandpaper to smooth out the burned edge and the damaged rim top. It definitely came out looking much better. I try to steam out the dents a bit more to reduce them more. The trick on these old pipes is not to go overboard on the repairs but to leave a bit of the story behind as it changes the shape and feel of the pipe. I steamed out the dents/hatch marks on the top of the bowl using a hot butter knife and a wet cloth. I heated the knife on my gas stove and then pressed it against the wet cloth. The steam generated caused the dents to lift. I repeated the process until I was unable to lift them any more. While it is not perfect it is certainly better. I polished the briar (carefully avoiding the areas where the pipe is stamped on the shank sides) with micromesh sanding pads. I dry sanded it with 1500-12000 grit sanding pads. I wiped it down after each pad with a damp cloth to remove the sanding debris. I worked some Before & After Restoration Balm into the surface of the smooth briar with my finger tips. The product is amazing and works to clean, enliven and protect the briar. I let it sit on the briar for 10 or more minutes and then buff it off with a soft cloth. It really makes the grain sing. I set the bowl aside and turned my attention to the stem. This repair would be a series of new experimental processes that would require many in process adjustments. I am including the total process below. I decided to try something a little different in rebuilding the button end of the P-lip. I cut a chunk of vulcanite off a stem to start with and sawed it into smaller, flatter pieces. I shaved more vulcanite off of a donor stem to add to the mix. The process would take several steps. I flattened out the underside of the button with a file to provide a ledge to build on. I would do that portion first before rebuilding the rounded end of the stem. I greased a pipe cleaner with Vaseline and inserted it pointing upward to be able to rebuild the underside of the button. I coated the underside of the area with black CA glue and then some shavings of vulcanite. When that had cured to touch I mixed a batch of activated charcoal powder and black CA glue to make a putty. I set the stem aside to let the mix of vulcanite/charcoal powder and black CA glue harden. Once it had hardened I used a small file to flatten out the repair and recut the button edge. I started the initial shaping of the flattened underside. The next step will be to reshape the rounded end of the button making sure that the airway opens on the top side of the button as it was originally. I greased a pipe cleaner and inserted it in the airway and bent it upward to be able to rebuild the area around the opening. It is tricky to rebuild the button as the airway is on top of the button rather than in the end. I built up the area around the end of the button with Black rubberized CA glue. I wanted to flatten it as much as possible so that I could connect a piece of another P-lip stem.Once the repaired area had hardened I used a topping board to flatten out the end. I cut off the end of another P-lip with a hacksaw. I cut through the middle of the exit of the airway on the top of the stem as that would match what is left of the damaged stem end.I drilled two small holes in the end of the cut off button and the stem. The holes would allow the CA glue to go deep in the holes and add to bind the cut off tip to the end of the stem.I coated the ends of the piece and the stem with clear super glue and worked it into the drilled holes. I pressed the pieces together while aligning the airway in the stem and in the piece of button. I set it aside to let the repair cure. I filled in the joint spots with black super glue and again let it cure. It would take several layers of black super glue to build it up and make it even. I let it cure between each layer of the repair and flattened it with sandpaper and a file between the layers. I did the small touch ups on the air bubbles and edges with clear super glue and set it aside to cure. The stem was starting to look much better.I reshaped the  stem end carefully so as not to damage the stem further. I used a folded piece of 220 grit sandpaper to smooth out the joint of the repair. I filled in the spots in the repair that came up in the shaping process with clear super glue. I let them cure and smoothed out the repair with 220 grit sandpaper. Once I was done with the shaping the button looked very good. I polished the vulcanite stem with 1500-12000 micromesh sanding pads. I wiped down the stem with Obsidian Oil after each sanding pad. I have an oil impregnated piece of cloth that I use after each pad. I polished it further with Before & After Stem Polish both Fine and Extra Fine polishes. I gave it a further coat of Obsidian Oil and set it aside to dry. I put the pipe back together – the bowl with its rebuilt stem. This smooth finished Peterson’s London & Dublin SPECIAL 80S Bent Bulldog is a real beauty with great grain around the bowl. The P-lip style black vulcanite stem with the rebuilt P-lip button works very well with the medium brown briar. This English made Bent Bulldog is a very collectible part of Peterson’s history. The grain on the bowl is quite beautiful and came alive with the buffing. I used Blue Diamond on the buffing wheel on the bowl and very carefully on the rebuilt stem. I gave both multiple coats of carnauba wax on the wheel then carefully buffed the pipe with a clean buffing pad to raise the shine. I hand buffed it with a microfibre cloth to deepen the shine. The English made Peterson’s SPECIAL 80S Bent Bulldog feels great in the hand. It is lightweight and beautiful. The dimensions of the pipe are Length: 5 ½ inches, Height: 1 ½ inches, Outer diameter of the bowl: 1 ¼ inches, Chamber diameter: ¾ of an inch. The weight of the pipe is 1.73 ounces/49 grams. This the last of the four pipes I have to work on from my friend’s collection and then I will send them all back to him. Thanks for walking through the restoration with me. Cheers.

A Challenging Refinish of a Vuillard Concorde 3S of St. Claude Chubby Billiard


Nice work on that one. I have not used the putty for fills. It is hard to see in the photos but I am assuming the coverage holds the colour but is flat. Is that right. Thanks Dal for posting this.

Dal Stanton's avatarThe Pipe Steward

I acquired this French made Vuillard Concorde Chubby Billiard in January 2017 from a seller in Giussago, Italy.  It was part of an interesting lot of 4 pipes which caught my attention.  The other 3 pipes were a Denicotea De Luxe Regatta, a Chacom Radford’s Seventy-Six, and a Machiavelli Cambio.  The final bid was sufficient, and the pipes came to Sofia, Bulgaria, where my wife and I were living.  The pipes were added to the For “Pipe Dreamers” ONLY! collection benefiting the Daughters of Bulgaria. Here is the Lot of 4 from Italy:
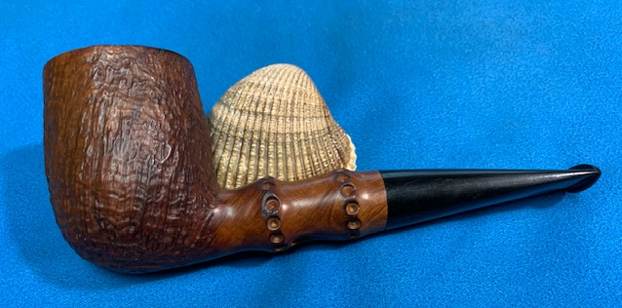
This is the 4th pipe in pipe man Mike’s trove of commissions.  The Vuillard Concorde that got Mike’s attention I’m calling a Chubby.  Looking at it in the picture above, the 3rd pipe down, the size of the bowl in relation to the other pipes and the shorter saddle stem stature, gives the Vuillard…

View original post 4,355 more words

What A Beautiful Triangular Shank Oscar Aged Briar 123 Pot


Blog by Steve Laug

This older Savinelli Made pipe has been in my restoration queue since we picked it up from an antique store on 04/08/17 in Stevensville, Montana, USA. It is a beautifully grained pot shaped pipe with a triangular shank. It was stamped on the left side and read Oscar [over] Aged Briar. On the right side it was stamped with a Savinelli Shield S and next to that is the shape number 123 [over] Italy. On the underside of the shank it is stamped Savinelli [over] Products. The grain was quite nice peeking through the ground in grime on the briar. The bowl had a thick cake and there was some lava on the beveled inner rim of the top. The rim top was quite clean but there was a large putty fill on the right side toward the back of the bowl. The vulcanite stem was dirty and had some sticky substance from a gum label near the shooting star logo on the left side of the taper stem. There was some light tooth chatter near the button and some light oxidation. Jeff took photo of the pipe before he started his clean up work on it. I have included them below. He took some photos of the rim top to show the condition. You can see the light lava coat on the back side of the bowl top and on the beveled inner edge of the bowl. You can also see the putty fill on the rim top on the lower right side of the photos below. He also took photos of both sides of the stem to show the condition of both. He also took photos of the heel of the bowl and underside of the shank to show the birdseye grain that is clustered on the bowl. It is quite a stunning pipe. You can also see the small fill on the lower front of the bowl.Jeff took photos of the stamping around the shank sides. It is clear and readable as noted above. You can also see the shooting star Oscar logo on the left side of the stem. I turned to Pipephil’s site to learn about the Oscar (http://pipephil.eu/logos/en/logo-savinelli3.html). I did a screen capture of the section and also included the note from the side bar on the site. I quote from the side bar: Pipes from the Oscar line are not free from fillings. See also (same star logo): Savinelli Antique Shell, Savinelli Garda, Savinelli Sila.

From Pipephil I knew that the line had notable fills. The pipe I was working on had fills on the top and the front of the bowl.

I turned to Pipedia to the link on the shape chart for Savinelli pipes looking to find the 123 shape number (https://pipedia.org/images/4/41/Sav_Shape_Chart_2017.jpg). I have included the shape chart below. I have drawn a red box around the 123 Shape. The article on Pipedia is a great history of the brand and the Oscar is listed in the various lines.Jeff had reamed the pipe with a PipNet Pipe Reamer and cleaned up the remnants with a Savinelli Fitsall Pipe Knife. He scrubbed the bowl with undiluted Murphy’s Oil Soap with a tooth brush. He rinsed it under running warm water to remove the soap and grime. He cleaned out the inside of the shank and the airway in the stem with alcohol, cotton swabs and pipe cleaners. He soaked the stem in Before & After Deoxidizer and rinsed it off with warm water. I took photos of the pipe once I got around to working on it. The rim top looked very good. There were some nicks in the outer left backside of the rim. The beveled rim top was in excellent condition. There was a large putty fill on the rear right top side of the rim that I have circled in the photo below. The stem surface had some light chatter on both sides near the button. I took photos of the stamping on the shank sides. The stamping is clear and readable as can be seen from the photos. You can also see the shooting star on the left side of the stem. I removed the stem and took a photo to give a sense of the grain and a look of the whole. The photos also show the aluminum inner tube in the end of the tenon. It is anchored and made to stay in place in the stem.I started my work on the pipe by cleaning up the fill on the rim top. I was able to even out the fill with a spot of super glue. I filled in the fill on the front of the bowl with clear super glue at the same time. Once it cured I sanded it with a folded piece of 220 grit sandpaper to blend it in. I polished the bowl and the rim top, sides and shank with micromesh sanding pads – dry sanding with 1500-12000 grit pads and wiping it down after each pad with a damp cloth. I rubbed the bowl and shank down with Before & After Restoration Balm. I worked it into the surface of the bowl sides and shank with my fingertips to clean, enliven and protect the briar. I let the balm sit for 15 minutes and then buffed with a cotton cloth to raise the shine.   I set the bowl aside and turned to work on the stem. Since it was in good condition I did not have to sand out tooth marks. I polished the vulcanite stem with micromesh sanding pads – 1500-12000 grit pads. I wiped it down with a damp cloth after each sanding pad. I used Before & After Pipe Polish – both Fine and Extra Fine to further polish the stem. I gave it a final coat of Obsidian Oil and let it dry. This Savinelli Product Oscar Aged Briar 123 Triangle Shank Pot with a vulcanite taper stem is a great looking pipe now that it has been restored. I put the stem back on the bowl and carefully buffed the pipe with Blue Diamond on the buffing wheel using a light touch on the briar. I gave the bowl and the stem multiple coats of carnauba wax on the buffing wheel and followed that by buffing the entire pipe with a clean buffing pad. I hand buffed the pipe with a microfiber cloth to deepen the shine. The finished Oscar Aged Briar 123 Pot is another one that is comfortable in the hand and feels great. Give the finished pipe a look in the photos below. The dimensions of the pipe are Length: 5 ½ inches, Height: 1 ½ inches, Outside diameter of the bowl: 1 ½ inches, Chamber diameter: 7/8 of an inch. The weight of this pipe is 40 grams/1.41 ounces. If you are interested in adding this pipe to your collection I will be adding it to the rebornpipes store in the American Pipemakers section. Send me a message or an email. Thanks for reading this blog and my reflections on the pipe while I worked on it. There are many more to come!

A Stem Replacement and Fresh Start for a McMillan Sports Made in England 60S Billiard


Here is a well done restem and restore by Dal. Give it a read.

Dal Stanton's avatarThe Pipe Steward

In January of 2018 I saw this fist-filling saddle stem Billiard on the online auction block from a seller in Hillsdale, Indiana.  The obscured grain had great potential, but the stem needed a good bit of help.  I put out a bid and brought this stout Billiard home to Bulgaria where we lived at the time.  It found its way to the ‘For “Pipe Dreamers” ONLY!’ collection for pipe men and women to commission benefitting the Daughters of Bulgaria, an effort that my wife and I founded in Bulgaria that continues today helping women and girls who have been trafficked and sexually exploited.Pipe man Mike from Tennessee heard the whisper of this pipe and the McMillian Sports joined other pipes he commissioned.  I appreciate Mike’s love of pipes and the fellowship that pipes create with likeminded folks.  I also appreciate Mike’s other hobby of threading and creating flies…

View original post 2,873 more words

New Life for a Nat Sherman 14K Gold Banded Canadian


Blog by Steve Laug

The next pipe on the work table is another one that came to me from either a trade I made (pipes for labour) or a find on one of my pipe hunts. I honestly don’t remember where it came from. It has been around for a while waiting to be worked on. It is an older long shank Canadian with a gold coloured band on the shank. It is quite dirty but has some great grain on the bowl and the shank. The stamping on this Canadian is faint but and readable. It is stamped on the topside mid-shank and reads Nat Sherman. There is no shape number on the shank that I can see. The gold band is stamped 1/20, 14K, Diamond T, G.F. The pipe had a lot of grime ground into the smooth finish on the bowl. The bowl had been heavily caked but had been reamed somewhere in its journey. The rim top and inner edges had darkening, burn damage and some nicks in the surface all the way around though heavier on the back side. The vulcanite stem was dirty and had light tooth chatter and marks on the top and underside ahead of the button. There were no identifying logos or markings on the taper stem. The pipe had promise but it was very dirty. I took photos of the pipe before I started my cleanup work.   I took photos of the rim top and bowl to give a clear picture of the bowl and the damage on the rim top and edges. The 14K Gold Band is tarnished and scratched. I also took photos of the top and underside of the stem to show the light chatter and tooth marks. I took photos of the stamping on the top side of the shank. It reads as noted above and is faint but readable. The gold band is stamped on the top as noted above.I removed the stem from the shank and took a photo of the pipe. I also took a photo of the shank end to show that there was no crack under the band. It appears that it was solely for adornment. I wanted to see if I could narrow down a time frame for this Nat Sherman pipe so I turned first to Pipephil’s site to get a good overview and see if there were photos of a similar looking stamping on a pipe there. There was no information on the brand on the site.

From there I turned to Pipedia to read more information about the time periods and the stamping on this particular pipe (https://pipedia.org/wiki/American_Pipe_Brands_%26_Makers_N_-_Q). There was only a note on the search page. It read as follows: Brand made for well known New York City Tobacconist of the same name.

I turned to Wikipedia to see what I could learn about the brand as it was one of the few articles on the history (https://en.wikipedia.org/wiki/Nat_Sherman).

Nat Sherman is the brand name for a line of handmade cigars and “luxury cigarettes”. The company, which began as a retail tobacconist, continued to operate a flagship retail shop, known as the “Nat Sherman Townhouse”, located on 42nd Street, off Fifth Avenue, in New York City from 1930 to 2020, when it closed its doors. Corporate offices are now located at the foot of the George Washington Bridge in Fort Lee, New Jersey…

…During the 1960s, the Sherman shop expanded its wares to include pipes. Over 1,000 pipes were offered for sale in a 40-foot (12 m) long case hung along the wall of the store.[1] The company also began to sell pipe tobacco under the “Nat Sherman” brand name.[1] At the time of its expansion, the company’s pipe department was perhaps the largest in New York City and the United States. Quoted from an interview with Joel Sherman noted below.            (Sherman, Joel. “An Interview with Joel Sherman of Nat Sherman”, PipesMagazine.com, November 25, 2009. Retrieved February 12, 2011)

Now it was time to work on the pipe. I cleaned up the reaming of the bowl with a Savinelli Fitsall Pipe Knife. It did not take too much work to clean it up internally. I then turned my attention to the rim top and edges. I lightly topped the bowl on a topping board and 220 grit sandpaper to remove the damage on the top of the rim. I also worked over the inside edge of the bowl with a folded piece of sandpaper to give it a gentle bevel.  I polished the 14K Gold shank band with a jeweler’s cloth to remove the tarnish and oxidation. It also works to slow down the tarnish process. I took some photos of the band after the polishing. I cleaned out the mortise and airway in the shank with pipe cleaners, cotton swabs and alcohol. It took quite a few of them to clean out the chamber. I cleaned the stem with pipe cleaners, cotton swabs and alcohol as well. Once finished the pipe smelled far better.      I scrubbed the exterior of the bowl and rim top with a tooth brush and undiluted Murphy’s Oil Soap to remove the debris from the finish. I rinsed the bowl with warm water to remove the grime and soap and dried it off with a soft towel.    I polished the briar with micromesh sanding pads – dry sanding with 1500-12000 grit pads and wiping it down with a damp cloth after each pad.   I rubbed the bowl and shank down with Before & After Restoration Balm. I worked it into the surface of the bowl sides and shank with my fingertips to clean, enliven and protect the briar. I let the balm sit for a little while and then buffed with a cotton cloth to raise the shine. I really like what I was seeing! I set the bowl aside and turned my attention to the stem. I noted that there was a metal tube in the tenon that added strength. I started working on it by dealing with the tooth marks on the stem and button. I “painted” the stem with the flame of a lighter and lifted the bite marks on the surface of the stem (forgot to take photos). I filled in the deep marks on both sides of the stem with black super glue and set it aside to cure.   I used a small flat file to flatten out the repairs and to recut the edge of the button. I sanded the repairs further with 220 grit sandpaper and started the polishing with 400 grit wet dry sandpaper.  There was some residual oxidation at the shank end of the stem and some deep spots just ahead of the button. I scrubbed it with SoftScrub All Purpose cleanser to scrub off the oxidation on the stem. I was able to remove the remnant of oxidation.I polished the vulcanite stem with micromesh sanding pads – 1500-12000 grit pads. I wiped it down with an Obsidian Oil impregnated cloth after each sanding pad. I used Before & After Pipe Polish – both Fine and Extra Fine to further polish the stem. I gave it a final coat of Obsidian Oil.   This beautiful Nat Sherman 14K Gold Banded Canadian with a vulcanite taper stem is a great looking pipe now that it has been restored. The rich brown stain on the bowl allows the grain to really show. It came alive with the polishing and waxing. The 14K Gold band is a great transition between the briar and the vulcanite. I gave the bowl and the stem multiple coats of carnauba wax on the buffing wheel and followed that by buffing the entire pipe with a clean buffing pad. I hand buffed the pipe with a microfiber cloth to deepen the shine. The finished Nat Sherman Canadian is a beauty and fits nicely in the hand and looks very good. Give the finished pipe a look in the photos below. The dimensions of the pipe are Length: 6 inches, Height: 1 ¾ inches, Outside diameter of the bowl: 1 ¼ inches, Chamber diameter: 7/8 of an inch. The weight of the pipe is 43 grams/1.52 oz. This one will go in the US Pipe makers section of the rebornpipes store. If you are interested in adding it to your collection let me know. Thanks for reading this blog and my reflections on the pipe while I worked on it. There are many more to come!

Rebirth of an Inherited Medico VFQ Foursquare Pot


Great job and you are right about family treasures. The back story is the most important part!! Well done

Charles Lemon's avatar

Often when we think of family heirloom pipes what comes to mind is Grandpa’s collection of Patent-Era Dunhills or a complete set of Peterson Sherlock Holmes pipes, but the truth is that the vast majority of pipes sold during the Golden Age of pipe smoking (roughly the 1950s through to the 1970s) were relatively inexpensive, factory-produced pipes. Two such inherited briar smoking companions arrived at the shop recently – today’s Medico VFQ Foursquare Pot, and an LL Bean Bent Billiard I will cover in another post. Both pipes had belonged to the current steward’s father.

The VFQ line was a mid-grade pipe in the Medico catalog, made by the SM Frank Co, originally from imported briar and later from Brylon, a blend of briar dust and synthetic resin developed by SM Frank in 1966. The example on the bench today is made from briar, which helps date its production to…

View original post 1,021 more words

Breathing New Life into Sasieni London Made Patent No. 150221/20 Canadian


Blog by Steve Laug

The next pipe on the work table came to me from either a trade I made (pipes for labour) or a find on one of my pipe hunts. I honestly don’t remember where it came from. It has been around for a while waiting to be worked on. It is an older long shank Canadian with a Sterling Silver band on the shank. It is quite dirty but has some great grain on the shank and stem. The stamping on this Canadian is faint but and readable. It is stamped on the topside of the shank next to the bowl and reads Made in England in an oval. That is followed by Sasieni [over] London Made [over] Pat. No. 150221/20. There is no shape number on the shank that I can see. The pipe had a lot of grime ground into the smooth finish on the bowl. The bowl had been heavily caked but had been reamed somewhere in its journey. The rim top and inner edge had darkening and some burn damage all the way around though heavier on the right and back side. The vulcanite stem was dirty and had light tooth chatter and marks on the top and underside ahead of the button. There were four pale blue dots on the top side of the taper stem that is common on a Sasieni. The pipe had promise but it was very dirty. I took photos of the pipe before I started my cleanup work.   I took photos of the rim top and bowl to give a clear picture of the bowl and the damage on the rim top and edges. The Sterling Silver band is tarnished and black. I also took photos of the top and underside of the stem to show the light chatter and tooth marks. I took photos of the stamping on the top side of the shank. It reads as noted above and is faint but readable. The silver band is stamped Sterling Silver on the top and there are four light blue dots on the top of the taper stem.   I wanted to see if I could narrow down a time frame for this Sasieni London Made Patent pipe so I turned first to Pipephil’s site to get a good overview and see if there were photos of a similar looking stamping on a pipe there (http://www.pipephil.eu/logos/en/logo-sasieni.html). I quote the summary of the history of the brand from the top of the page:

One may distinguish three major periods in the Sasieni brand history:

  • The so called pre-transition period during which the family totally owned the business.
  • The transition period from 1979 to 1986. The corporate has been bought by Ian Chase and a group of South African investors.
  • The post-transition period from 1986 up to the present. At first the corporate has been bought by James B. Russell and after him by Cadogan Investments Ltd (A. Oppenheimer & Co. Ltd).

With that information I scrolled through the photos of shapes and stamping on the pipes shown. The one that bore the same stamping as the Canadian I am working on was a billiard shown below. I did a screen capture to show the stamping look and design. The shape number on the Canadian is obviously buffed off on the pipe I have. From that information I knew that the pipe I had was a Pre-Transition Period pipe made between 1919-1924. This is demonstrated by the style of the Sasieni Stamp (with a flourish) and the rest of the stamping including the  Pat. No.

From there I turned to Pipedia to read more information about the time periods and the stamping on this particular pipe (https://pipedia.org/wiki/Sasieni). I quote a pertinent section below.

To begin with, there are three main elements to dating the Sasieni pipe, the patent number, the style of the name “Sasieni” as it appears on the shank, and the Dots themselves. Naturally, there are exceptions to these rules (this hobby would be boring without them), but for the most part these guidelines apply better than 95% of the time. All Sasieni One, Four, and Eight Dot pipes made before W.W.II and destined for the U. S. market carried a patent number on the shank which usually started with the numbers “15″, with 150221/20 and 1513428 being representative of the group. Also, the name “Sasieni” was stamped on the shank in a very florid manner, with the tail of the last “i” sweeping underneath the name forming a shape which has been compared to a fish by more than one collector. This script was discontinued by Alfred almost immediately after he took over the company, so this alone tells you your pipe is pre W.W.II. Underneath in block lettering are the words “London Made”, with the patent number making the third line.

The dots will help you narrow this down further. As we mentioned, the short lived U. S. market One Dot was introduced around 1920, and was replaced by the early to mid 1920’s by the Four Dot. The 1920’s Four Dot is distinguishable by the florid Sasieni script, a patent number, and four blue dots, which are quite small compared to the pipes of post war years. Furthermore, by 1935 Sasieni began stamping pipes, based on the shape, with their own names, which were usually, but not always, English towns. For example, apples were stamped “Hurlingham”, bulldogs were “Grosvenor” or “Danzey”, and panels were “Lincoln”. One rare and interesting variation of this was the large bent, dubbed “Viscount Lascelles”. Even in this soft Sasieni market, these pipes regularly sell for $150 in their rare appearances in mailers.

Once Alfred took over the company in 1946, these elements changed in fairly rapid succession. The first thing to be changed was the nomenclature itself. In place of the elaborate “Sasieni” stamp of pre war pipes, a simpler, though still script style, “Sasieni” was used. This can be seen on patent pipes which have the small, old style dots.

This further gave me a time period and date for this pipe. It was definitely pre-WWII and probably made between 1919-1924. So it was an older pipe that was in decent condition for a pipe that age.

Now it was time to work on the pipe. I cleaned up the reaming of the bowl with a Savinelli Fitsall Pipe Knife. It did not take too much work to clean it up internally. On a pipe of this age once again I exercised restraint in how far I went to clean up the top. I do not want to change look or feel of a pipe that is at least 100 years old. I then turned my attention to the rim top and edges. I lightly topped the bowl on a topping board and 220 grit sandpaper to remove the damage on the top of the rim. I also worked over the inside edge of the bowl with a folded piece of sandpaper to give it a gentle bevel.      I polished the Sterling Silver shank band with a jeweler’s cloth to remove the tarnish and oxidation. It also works to slow down the tarnish process. I took some photos of the band and bowl after the polishing. I scrubbed the exterior of the bowl and rim top with a tooth brush and undiluted Murphy’s Oil Soap to remove the debris from the finish. I rinsed the bowl with warm water to remove the grime and soap and dried it off with a soft towel.    I cleaned out the mortise and airway in the shank with pipe cleaners, cotton swabs and alcohol. It took quite a few of them to clean out the chamber. I cleaned the stem with pipe cleaners, cotton swabs and alcohol as well. Once finished the pipe smelled far better.      I polished the briar with micromesh sanding pads – dry sanding with 1500-12000 grit pads and wiping it down with a damp cloth after each pad.     I rubbed the bowl and shank down with Before & After Restoration Balm. I worked it into the surface of the bowl sides and shank with my fingertips to clean, enliven and protect the briar. I let the balm sit for a little while and then buffed with a cotton cloth to raise the shine. I really like what I was seeing!   I set the bowl aside to let the wall repairs cure overnight. I turned my attention to the stem. I “painted” the stem surface with the flame of a lighter to lift the tooth marks. It worked quite well but there were some left behind. I filled in the remaining marks with clear CA glue and set it aside to cure.   I used a small flat file to flatten out the repairs and to recut the edge of the button. I sanded the repairs further with 220 grit sandpaper and started the polishing with 400 grit wet dry sandpaper. I polished the vulcanite stem with micromesh sanding pads – 1500-12000 grit pads. I wiped it down with an Obsidian Oil impregnated cloth after each sanding pad. I used Before & After Pipe Polish – both Fine and Extra Fine to further polish the stem. I gave it a final coat of Obsidian Oil. This beautiful Sasieni London Made Pat. No. 150221-20 Canadian with a vulcanite taper stem is a great looking pipe now that it has been restored. The rich brown stain on the bowl allows the grain to really show. It came alive with the polishing and waxing. The silver band is a great transition between the briar and the vulcanite. I gave the bowl and the stem multiple coats of carnauba wax on the buffing wheel and followed that by buffing the entire pipe with a clean buffing pad. I hand buffed the pipe with a microfiber cloth to deepen the shine. The finished Sasieni London Made Canadian is a beauty and fits nicely in the hand and looks very good. Give the finished pipe a look in the photos below. The dimensions of the pipe are Length: 5 ¾ inches, Height: 1 ¾ inches, Outside diameter of the bowl: 1 ¼ inches, Chamber diameter: ¾ of an inch. The weight of the pipe is 32 grams/1.13 oz. I am still figuring out what to do with this one. It may stay here but if I decide to let it go watch for it on the store. Thanks for reading this blog and my reflections on the pipe while I worked on it. There are many more to come!