Category Archives: Examples of Refurbished Pipes

In this section of the blog you will find before and after pictures of pipes that I have reworked. In each of them I give a summary of the work done to them. There are tips on working with different materials in these posts as well. For instance I have posted two horn stem pipes that I did work on the horn stems to removed tooth damage.

A Quick Refurb – Yello Bole Dublin


I picked up this older KBB Yello Bole Dublin on eBay. It was stamped KBB in a cloverleaf, then Yello Bole over cured with real honey and then Imported Briar. I am working on the assumption that it was made shortly after WW2 with the imported briar stamp to differentiate it from the old Yello Boles made during the War from Manzanita or Mountain Laurel. http://pipedia.org/index.php?title=Yello-Bole

It was in far better shape than the pictures on the auction showed. It was dirty from dust on the outside. The bowl was dusty and cob webbed on the inside but it had been only smoked part way down the bowl. The old Yello Bole Honey Cured coating was still visible in the bottom half of the bowl. I removed the stinger apparatus, cleaned the stem inside and out (small tooth dent on the underside of the stem). Reamed the upper half of the bowl just gently to remove the bits of tobacco and beginning cake on the top half of the bowl and swabbed it out with a pipe cleaner dipped in alcohol. I scrubbed the outside of the bowl with Murphy’s Oil Soap, dried it off and gave it a light coating of stain add a bit of depth to the pipe. Here is the finished product.ImageImageImage

Peterson Rustication pictorial – Kirk Fitzgerald


When Kirk Fitzgerald posted this step by step tutorial on Smokers Forums I thought it would be great to have it on the blog. I asked Kirk if I could post it on the blog and he granted his permission. So without further introduction here is his rustication process. Kirk is the founder of the Pipe Smokers Cubby Web Forum http://www.pipesmokerscubby.com/cubby.php

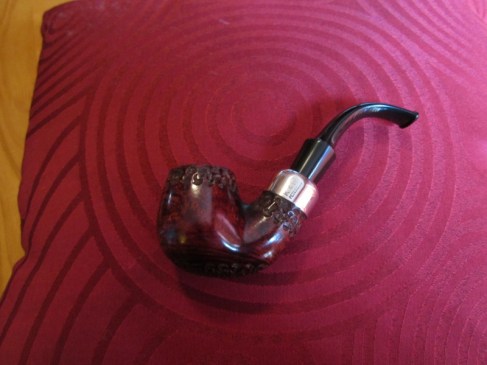
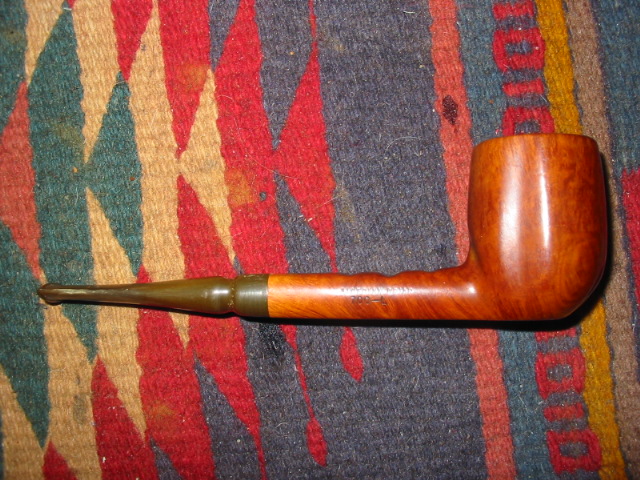
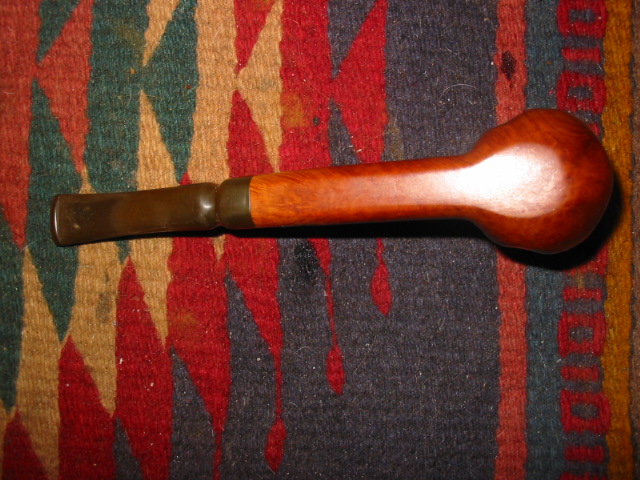
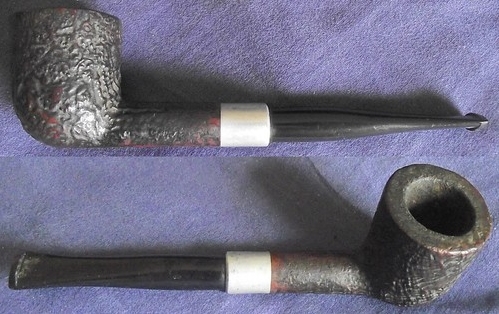
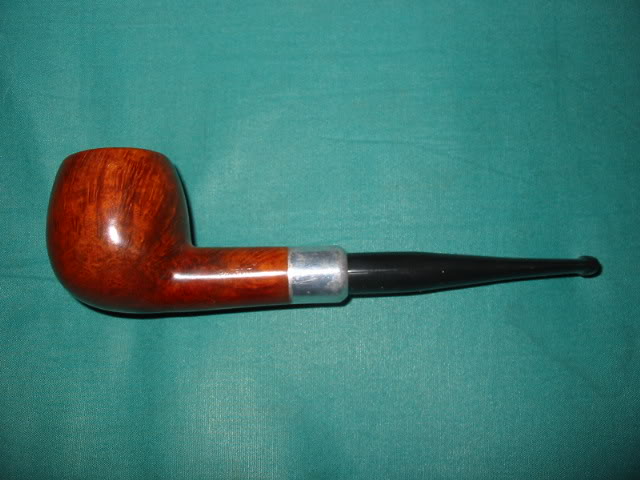
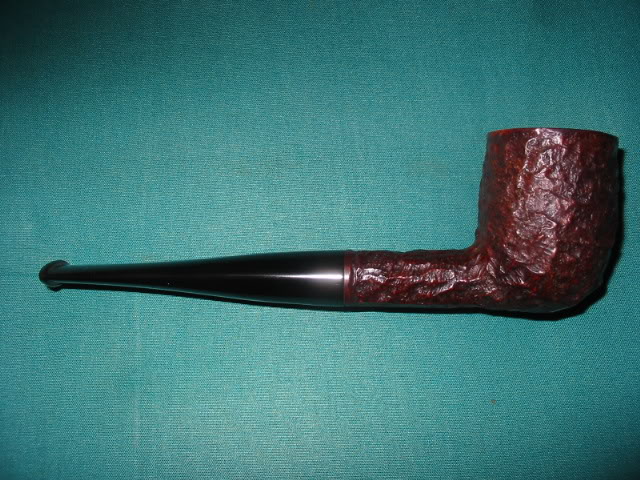
I was asked if I would do a step-by-step rundown on my own rustication process, so I have rusticated my own Peterson bent bowl for this purpose.

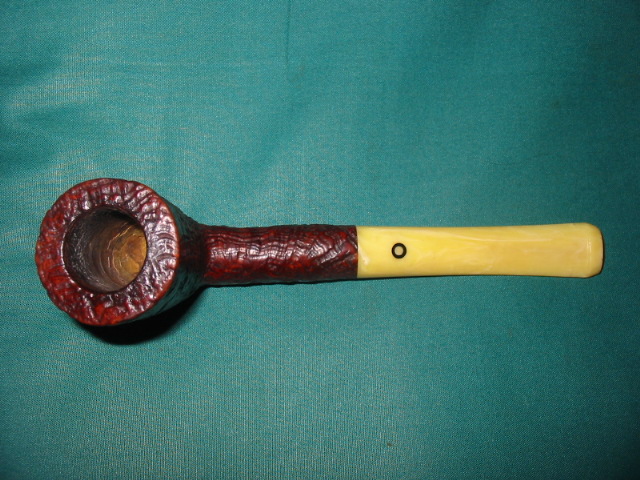
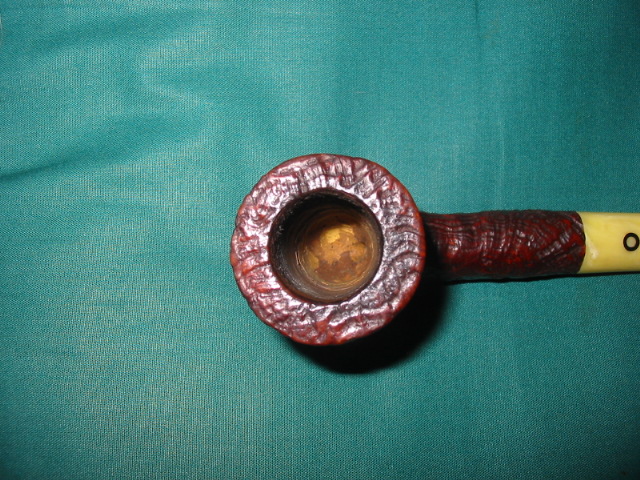
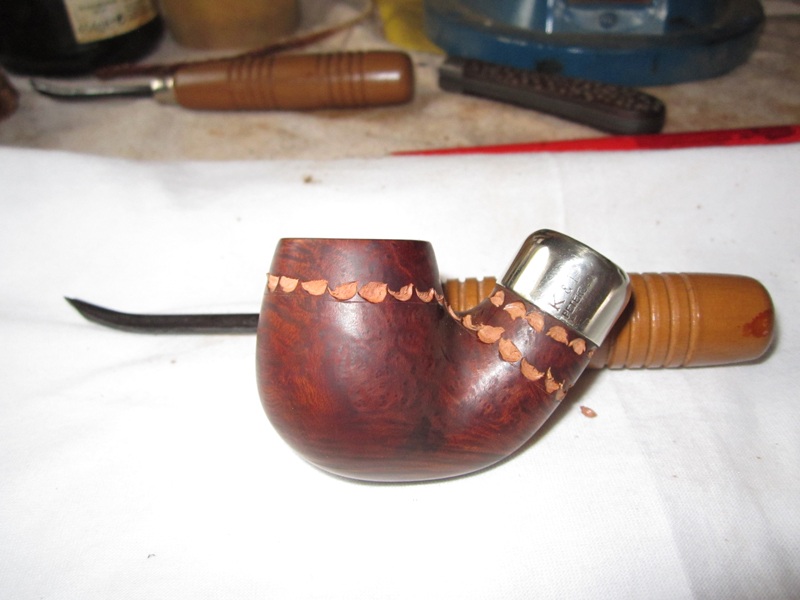
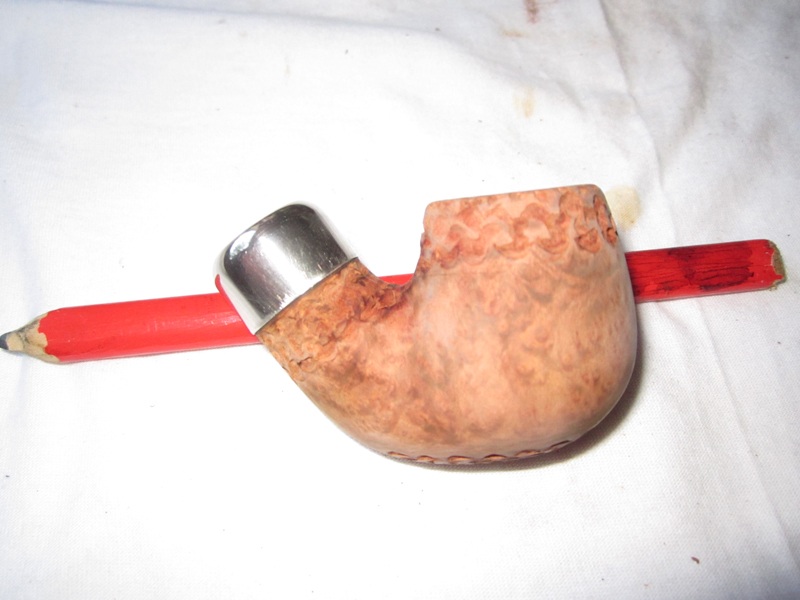
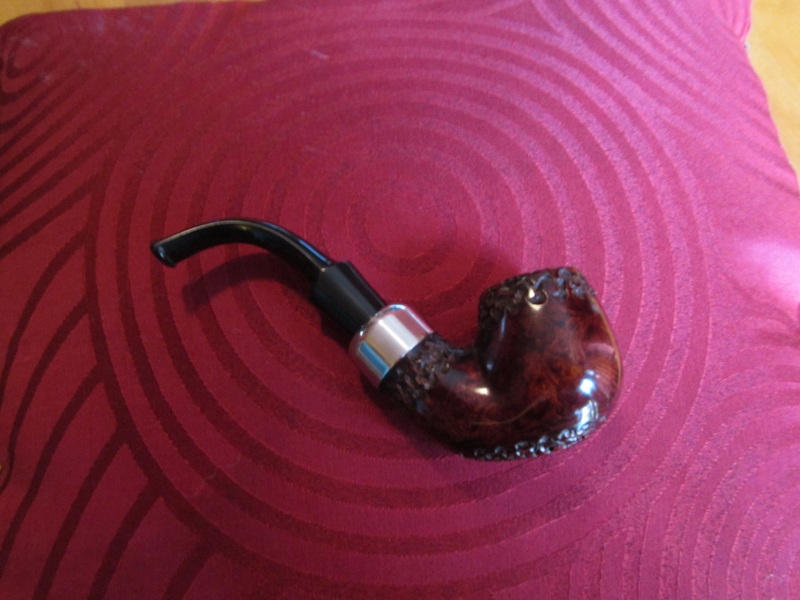
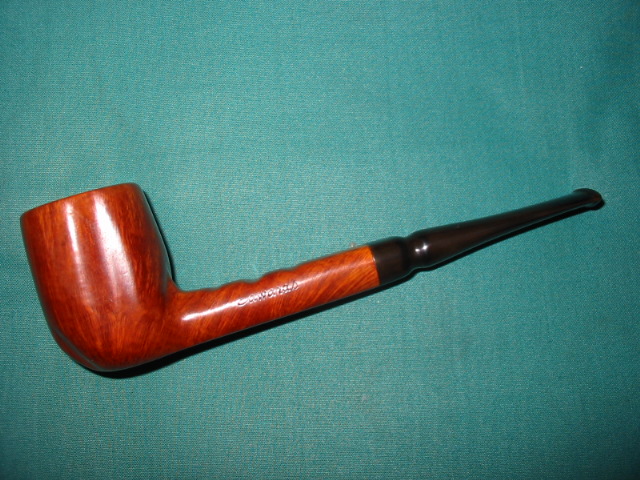
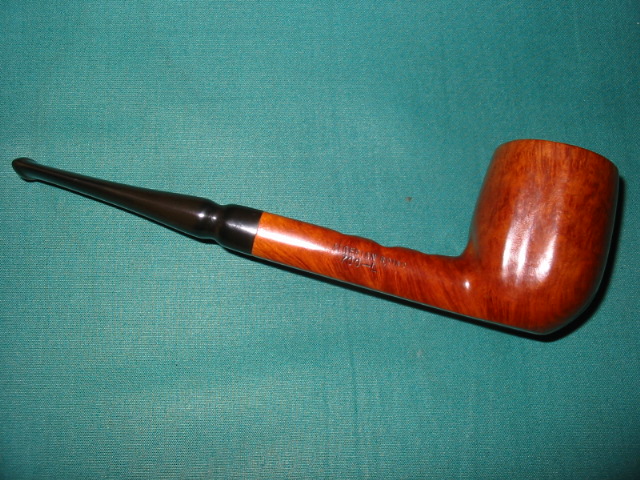
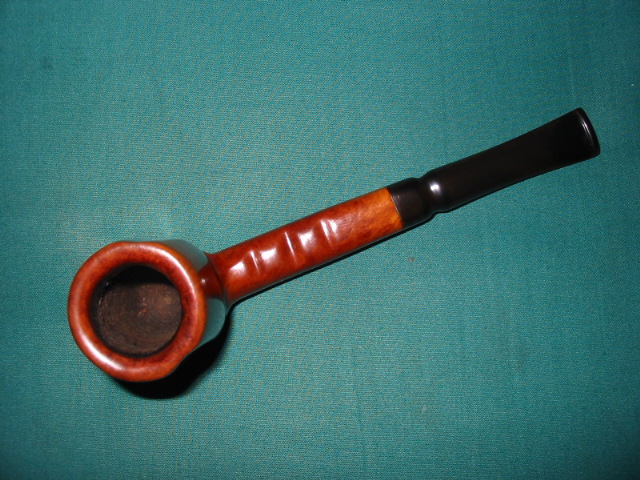
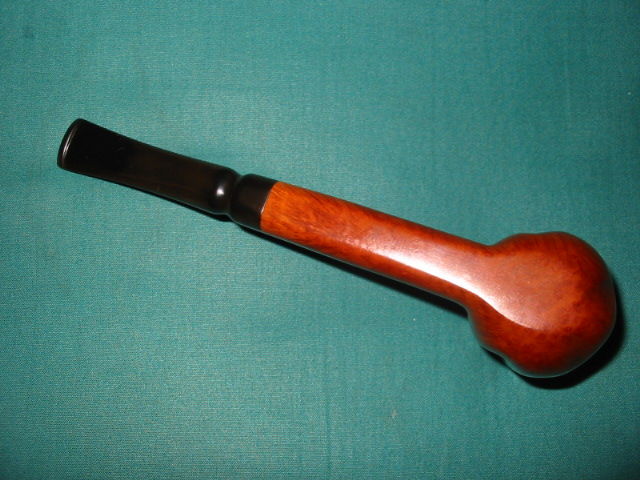
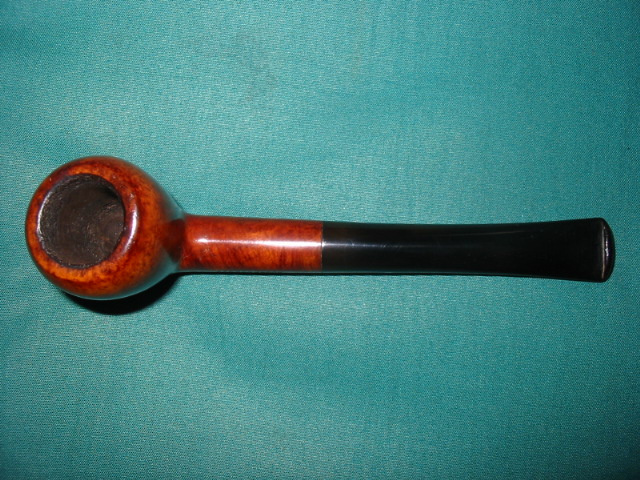
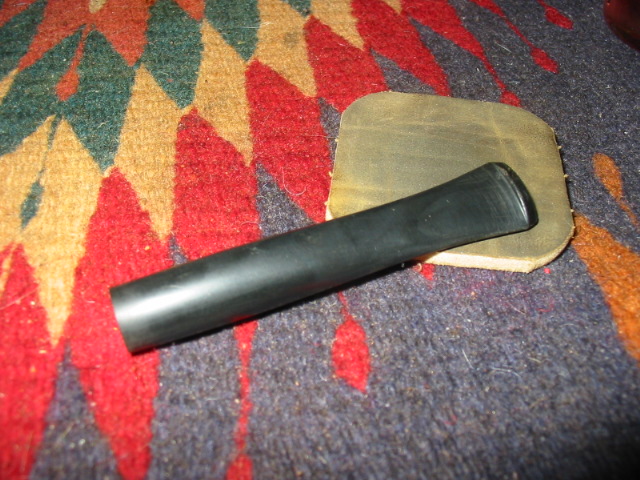
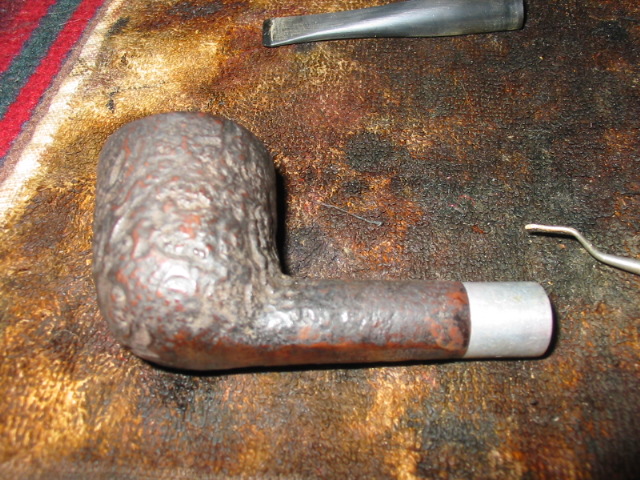
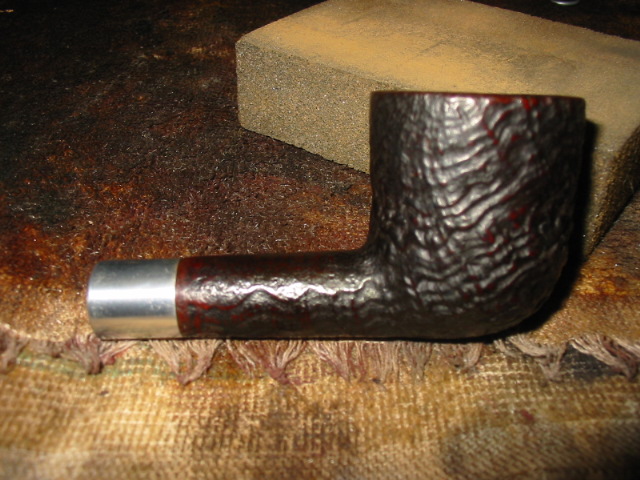
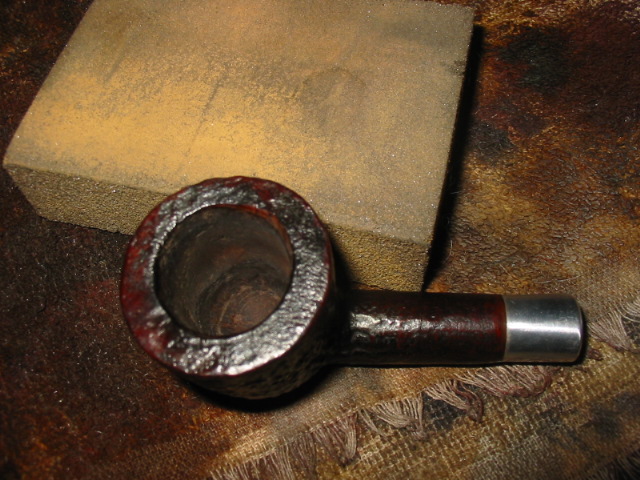
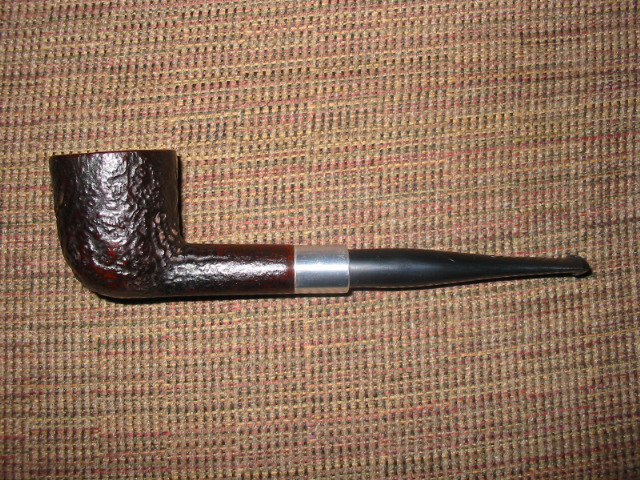
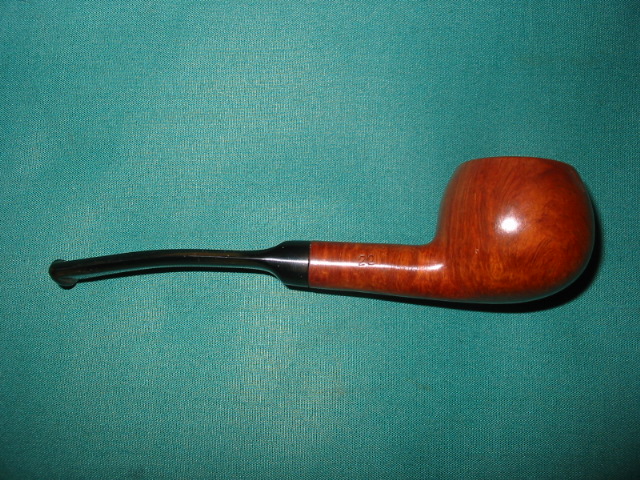
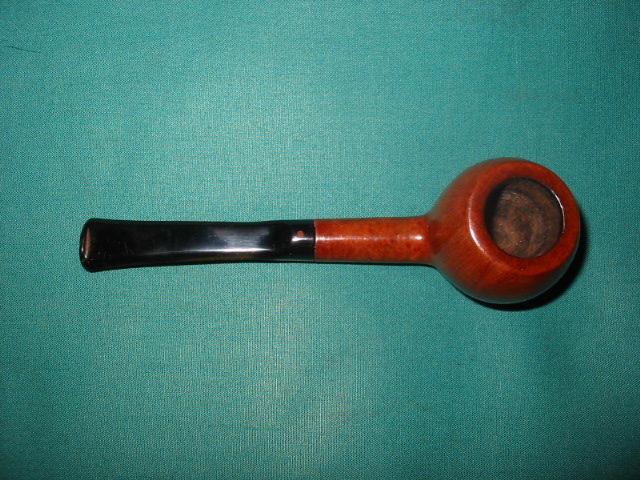
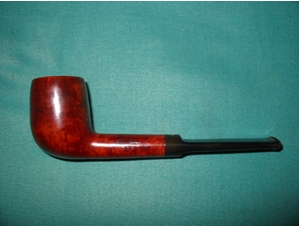
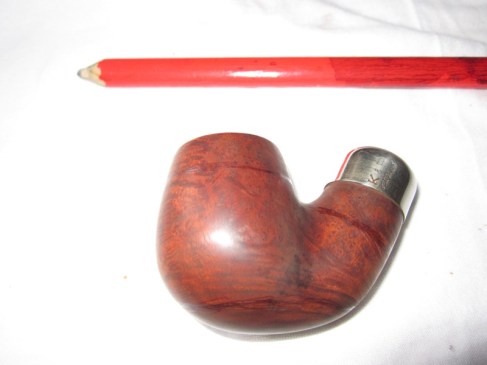
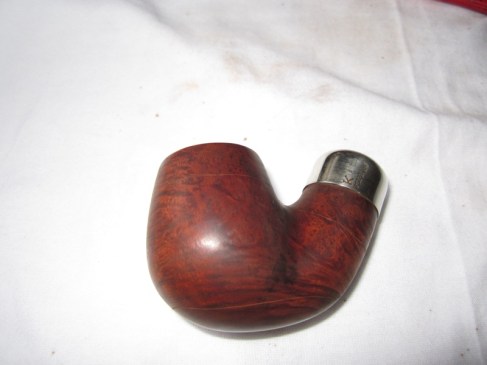
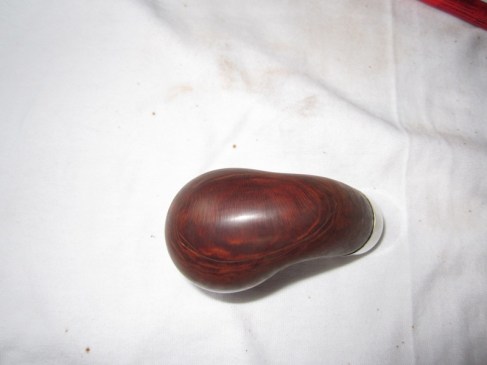
So before we get going, let’s see what the process will do to the bowl of the pipe

Image

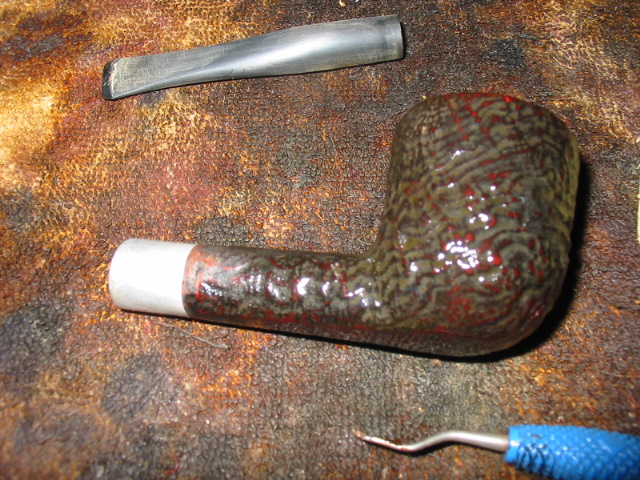
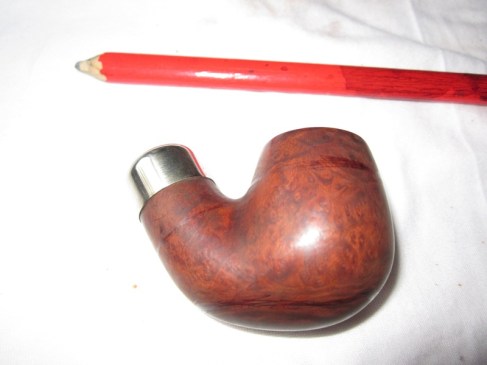
The pipe’s bowl, the two chisels I use, my crappy pencil and the knife I use to perma-line the boundaries for the areas to be rusticated

Image

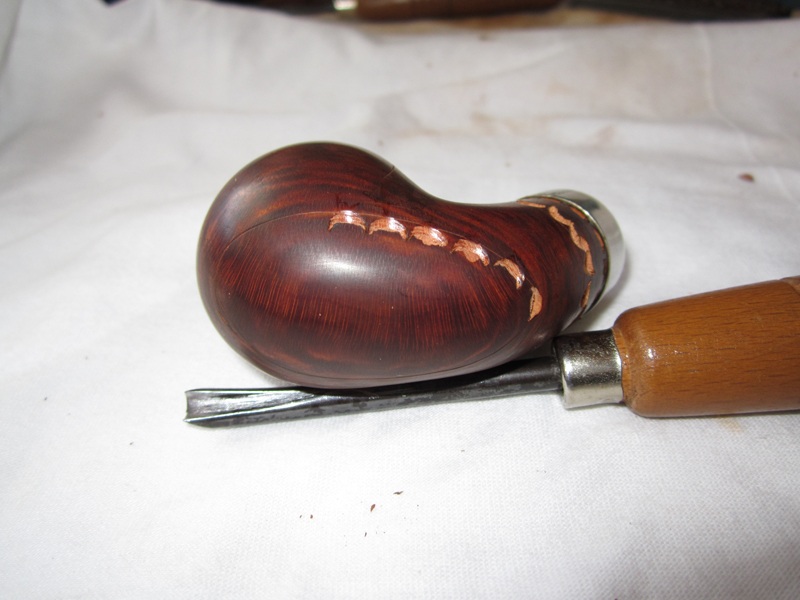
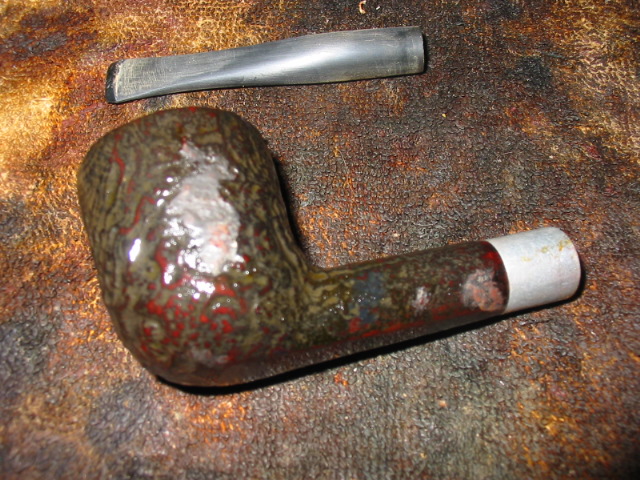
Here we mark the rustication boundaries in pencil

ImageImageImage

Here we perma-mark the boundaries using a sharp knife to scratch out the linesImageImageImage

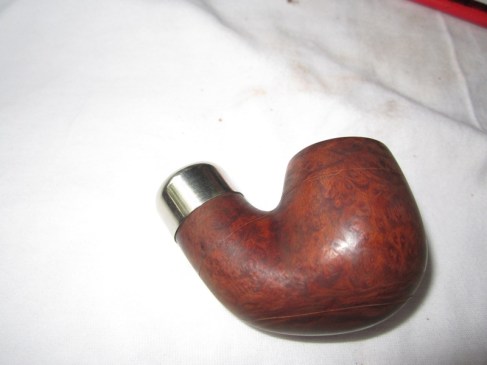
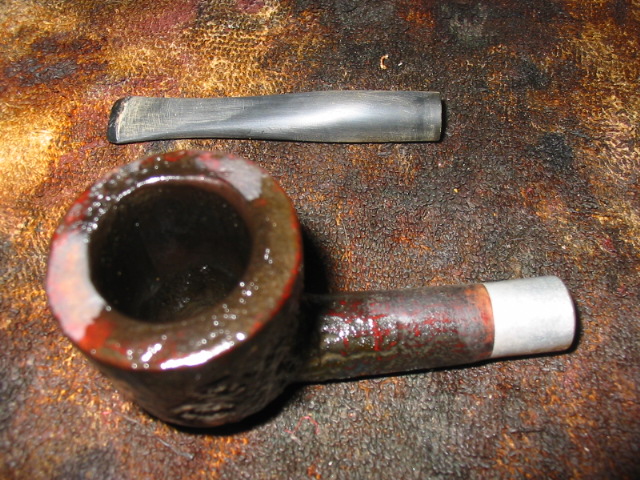
Notched out the shank boundary linesImage

Here’s me notching the bowl rim boundariesImage

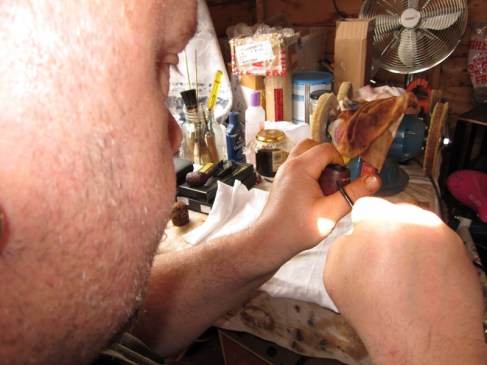
Notched the bowl rim boundaryImage

Here I have started notching the bowl topImage

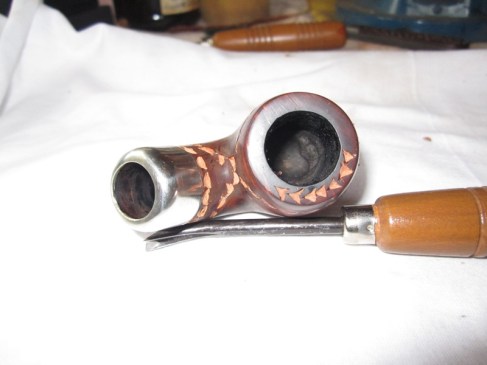
Here’s the bowl top notchedImage

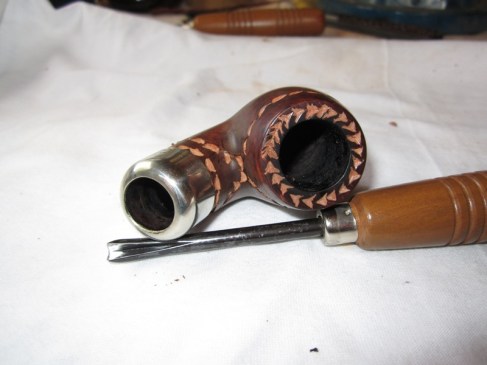
Start of the base boundary notchesImage

The base boundary notches are now doneImage

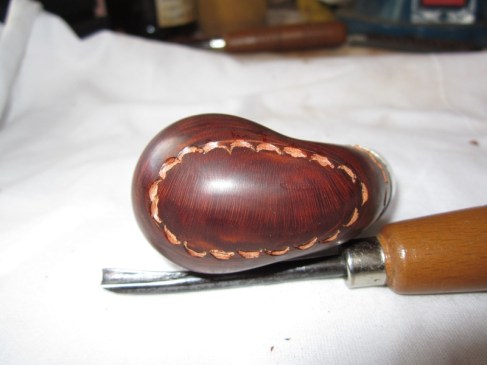
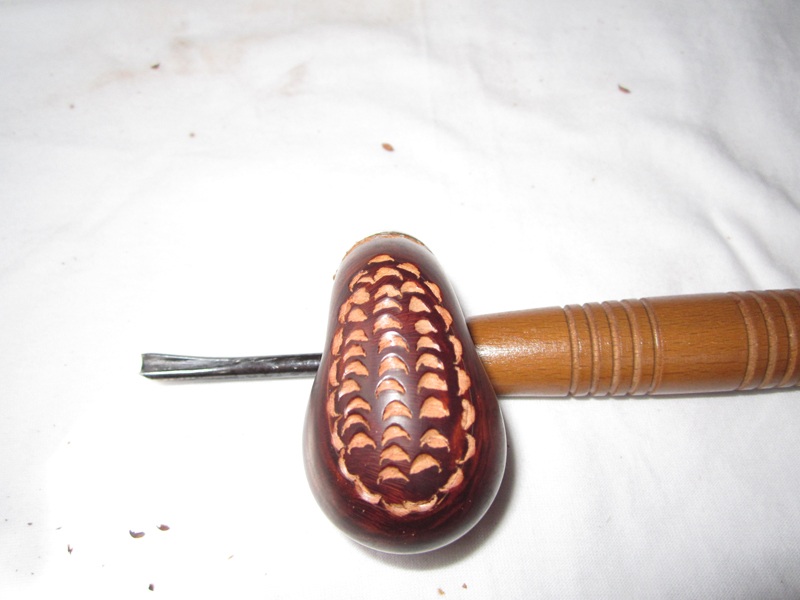
This is where we are so far, getting thereImage

Start to notch the bowl rim edgeImage

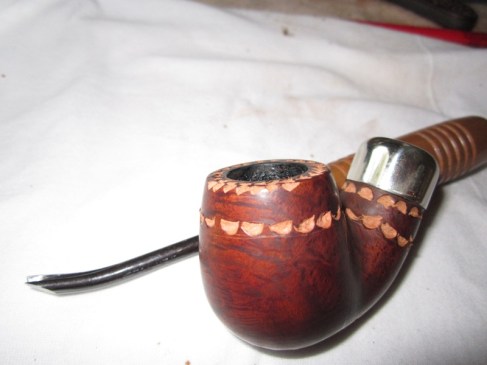
Finished notching the bowl rim edgeImage

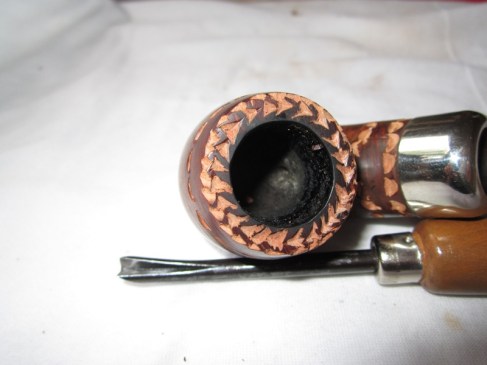
Here I have now notched the bowl top rimImage

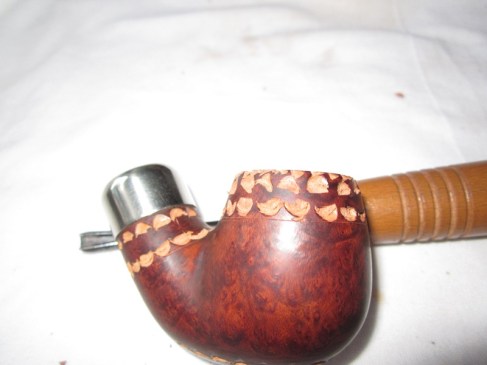
Notching the bulk of the base interiorImage

Here I have notched out the bulk of the bowl top rim interiorImageImage

Here I have notched the remainder of the base interiorImage

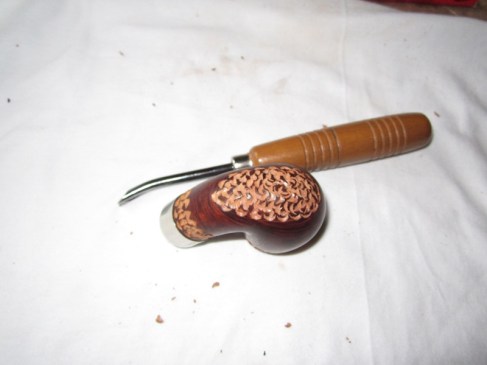
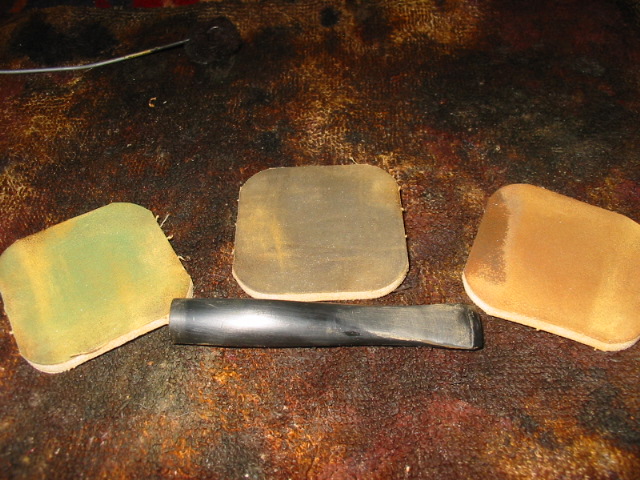
Here I am starting to remove the remaining surface finish with 180 wet and dryImage

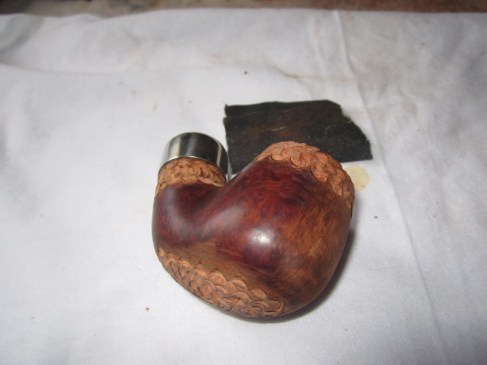
Here the remaining finish is now removed; note I have made sure it looks distressedImage

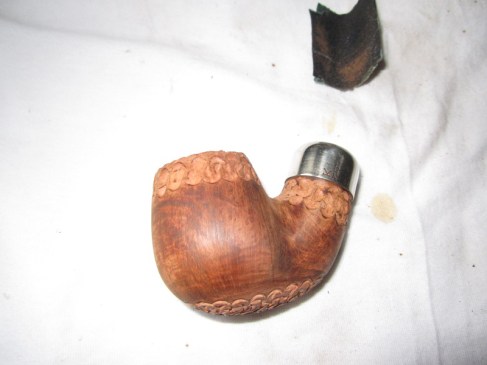
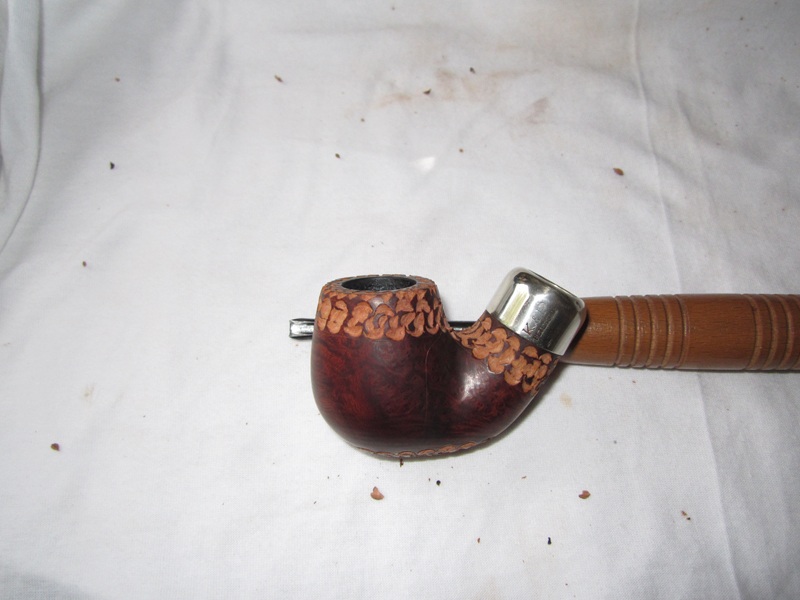
Here I have now sanded the bowl smooth using 400, 600, 1200 grit wet and dry sand paper, note the effect is looking distressedImage

Here I have applied a dark brown stain, note it is a full and generous applicationImage

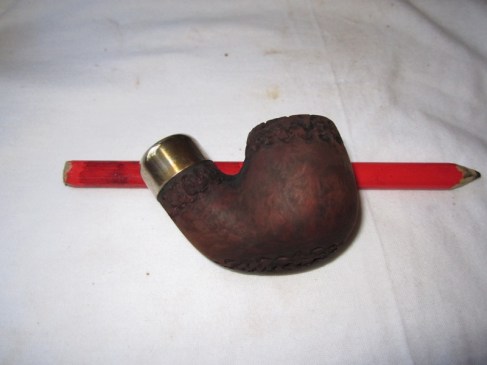
Here I have applied a dark red stain, again note the fullness of the coatingImage

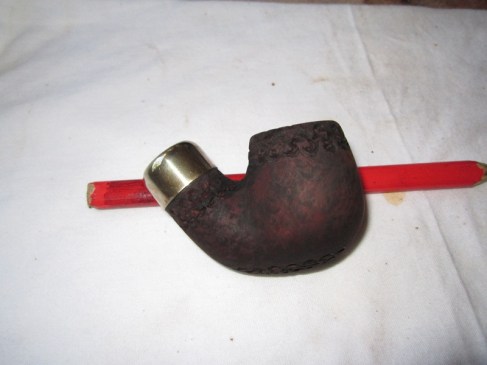
Now I have applied the final stain, a mid-brown, coverage is not so important with this one, a quick cover would do but I have opted for a full and generous application.Image

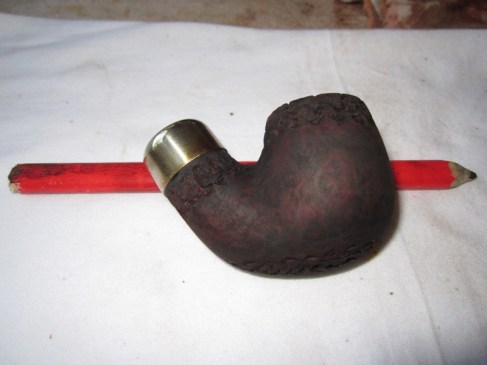
Now I have given the bowl an alcohol rub-down using a clean cloth and Isopropyl alcohol, note I have almost wiped the stains away, but only ‘almost’Image

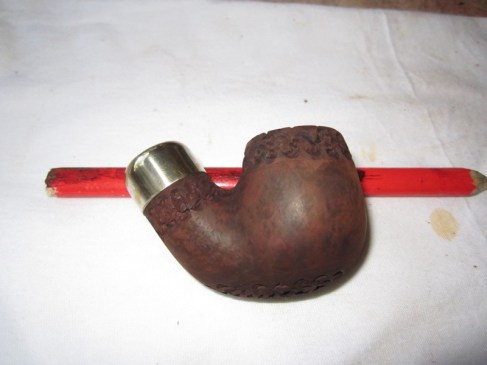
I have now applied 2 very generous applications of Tripoli using the buffer wheels, this stage is vital to the finish of the bowlImage

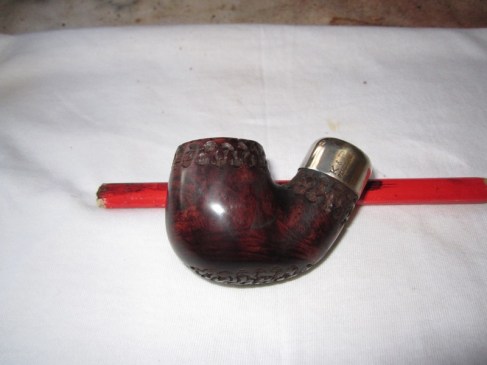
This is after I have brutalised the bowl on the buffer wheels to remove some staining to distress the bowl furtherImage

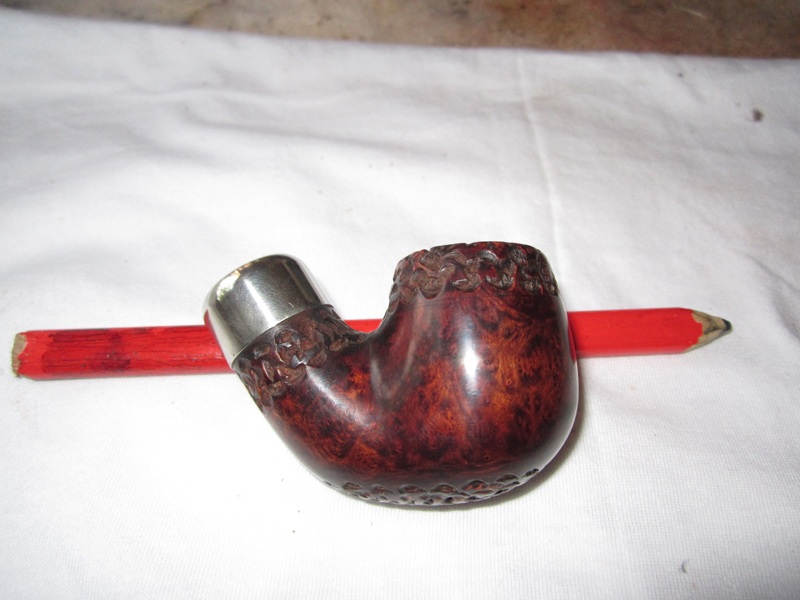
Here I have used White Diamond on the buffer wheels to remove the Tripoli much and shine the surface a little before the waxImage

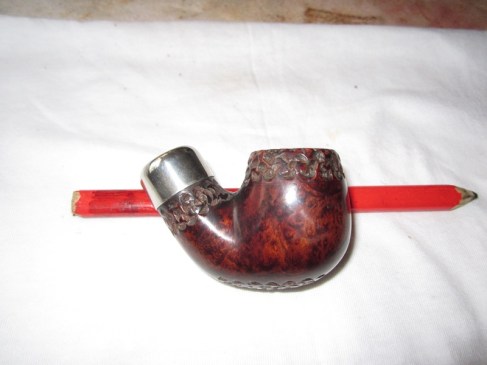
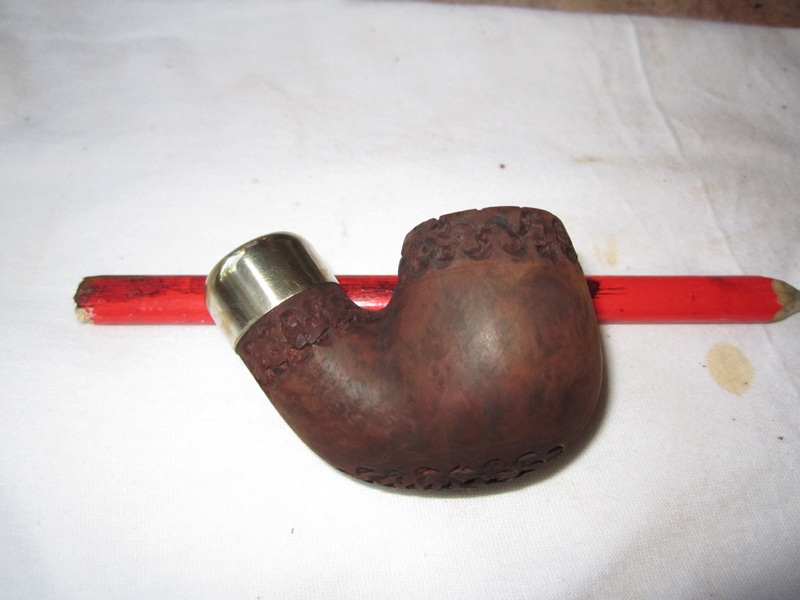
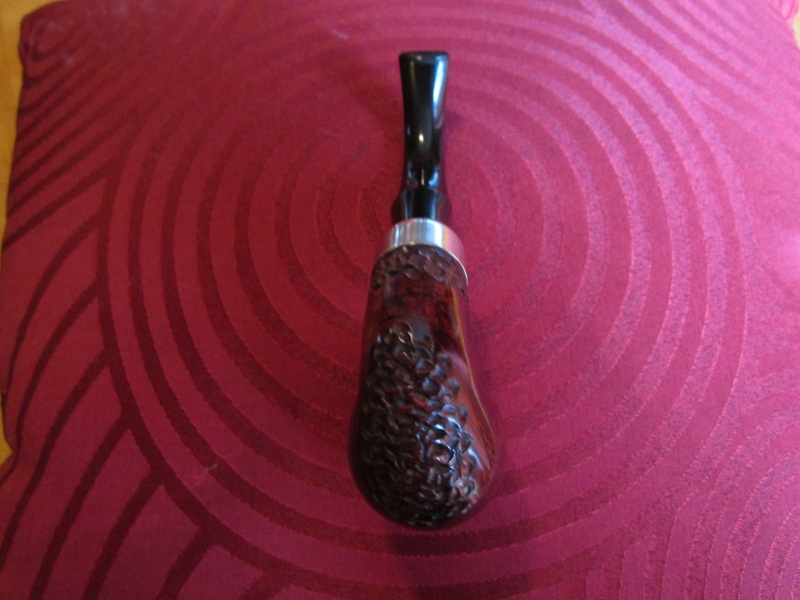
Here I have applied the first coat of wax and carnaubaImage

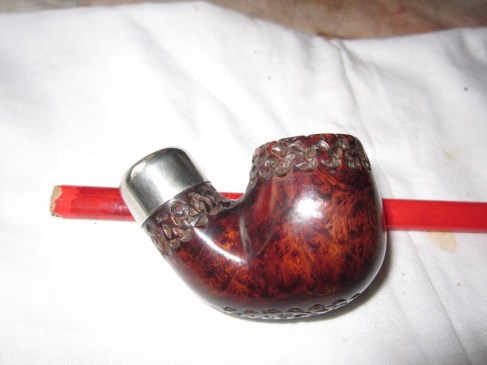
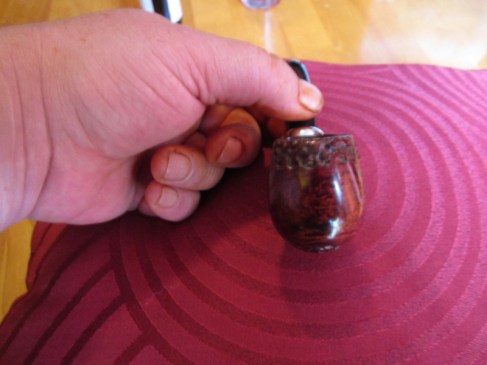
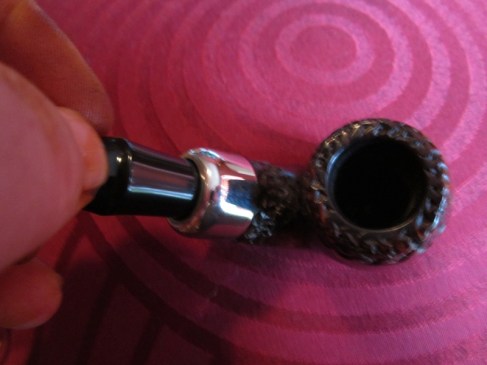
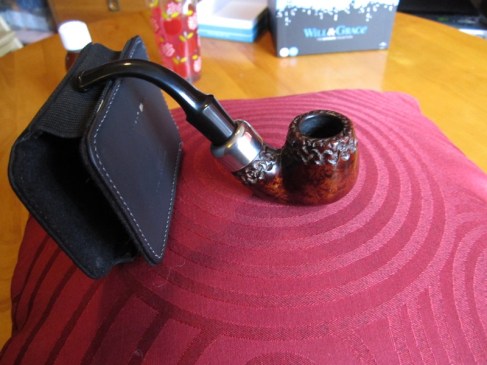
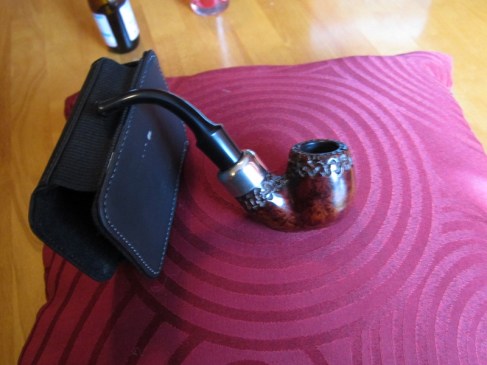
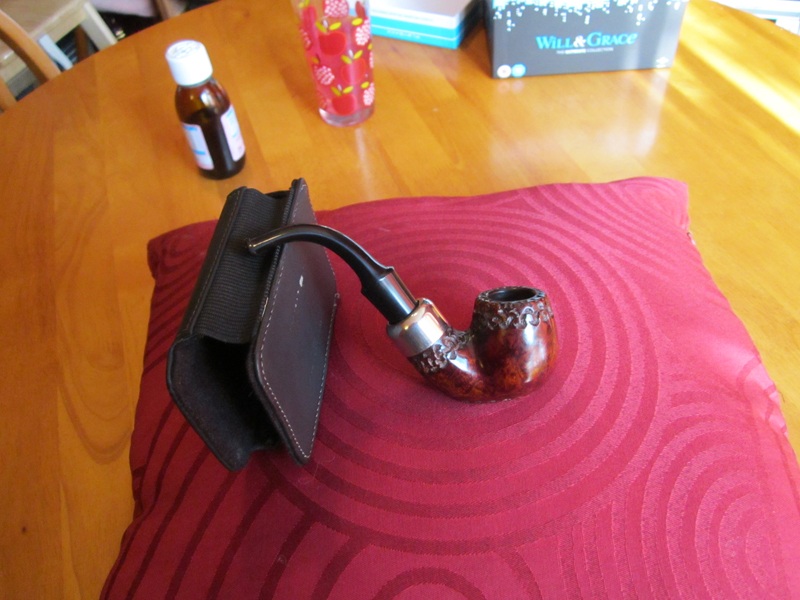
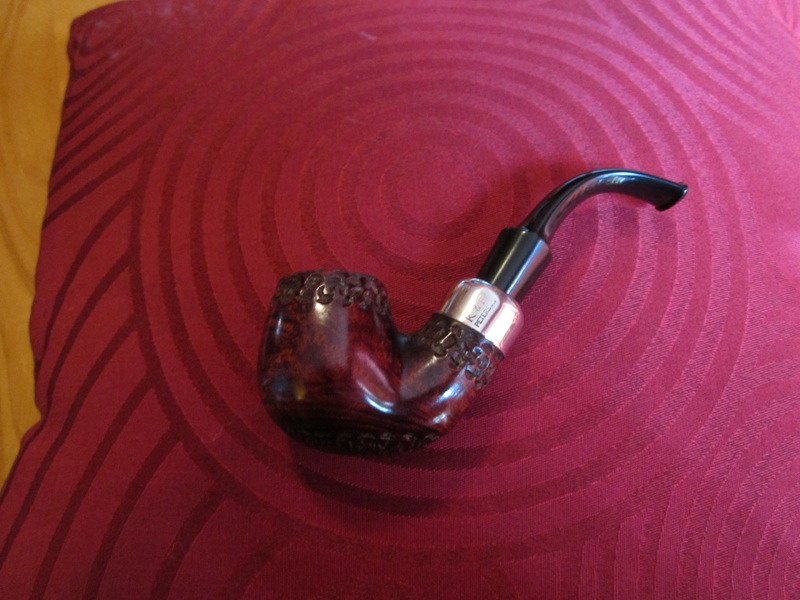
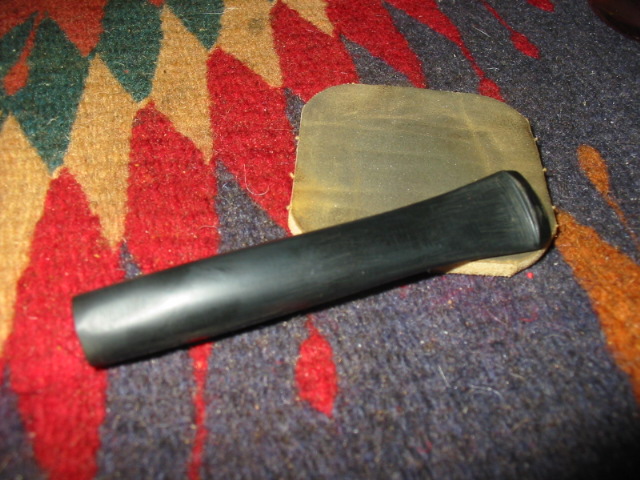
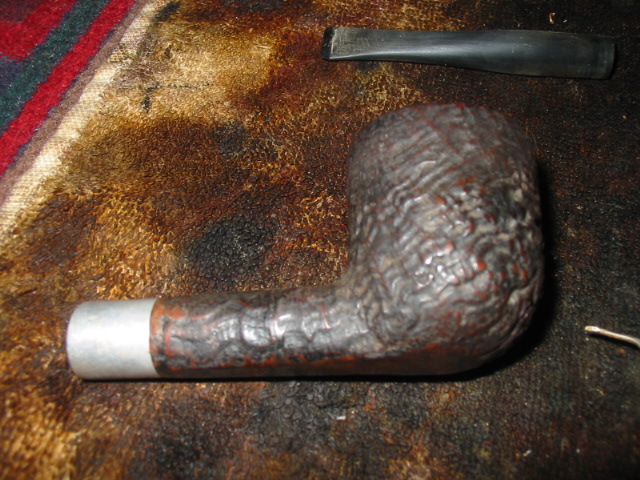
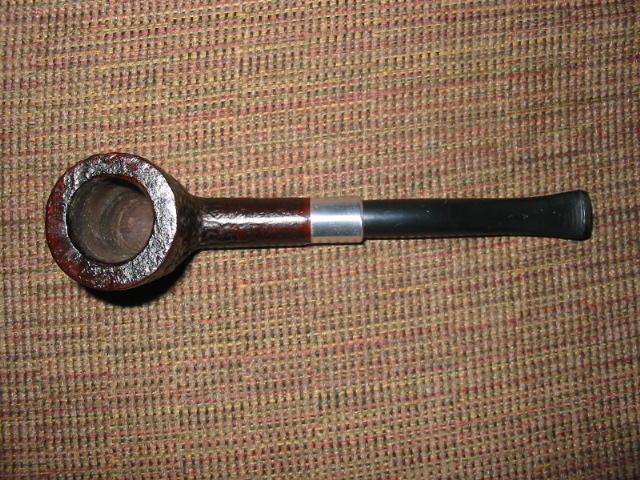
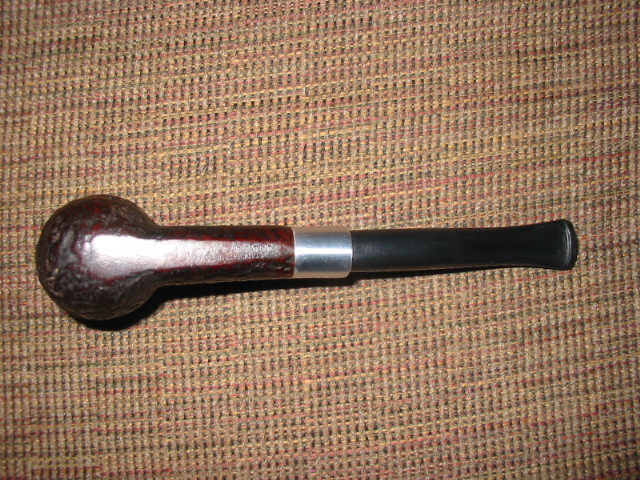
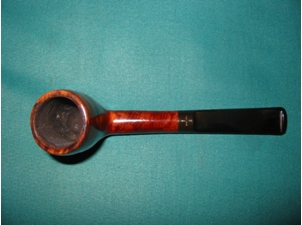
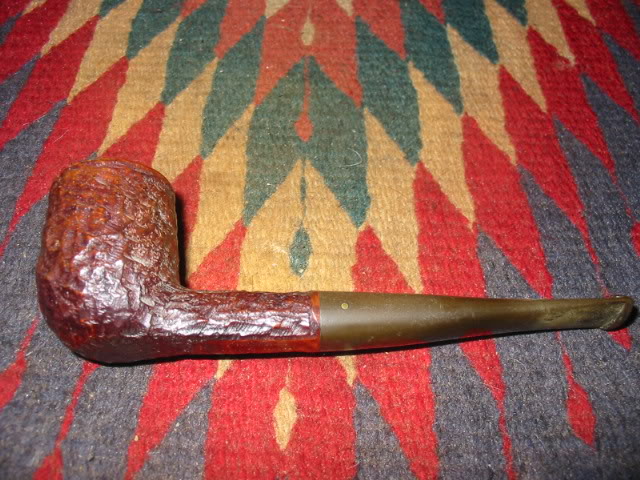
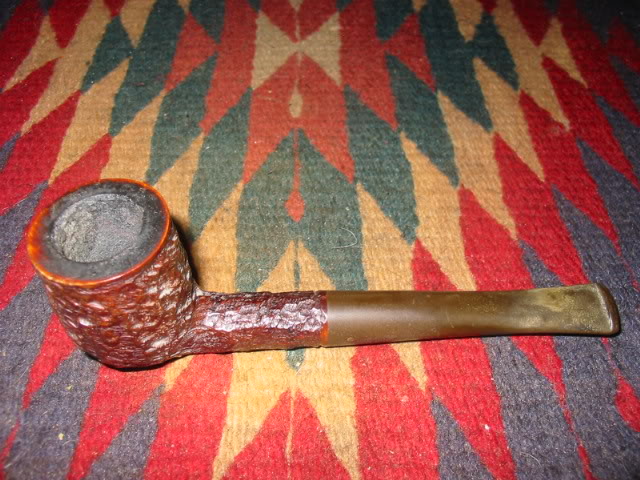
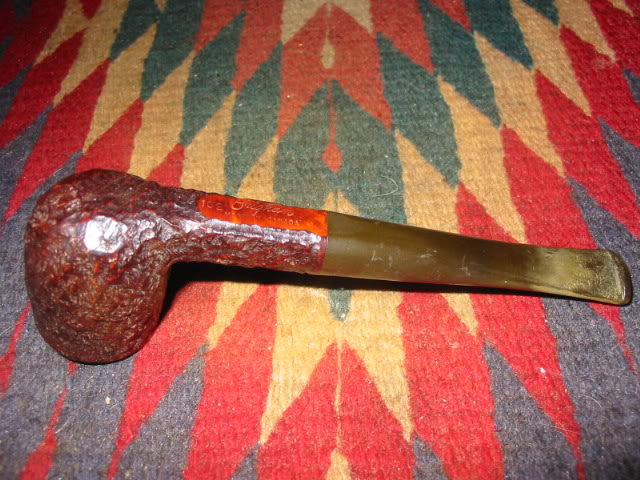
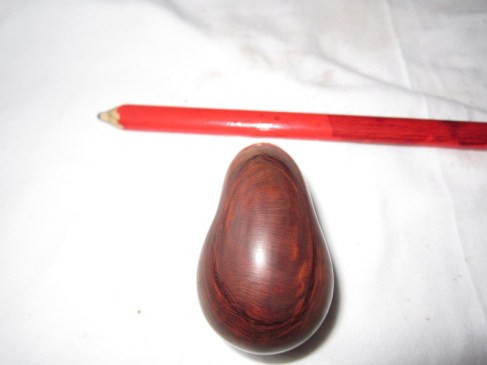
All done now, here is the final bowl re-attached to its polished stem.ImageImageImageImageImageImageImage

Restoring a unique Peterson 10


I picked up this old Peterson shape number 10 at a flea market for about $12. This one needed cleaning inside and out as well as reaming. The finish was quite good. I just used a soft bristle tooth brush to get into the crevices. The shank had a crack in it so I banded it with a silver band. The bowl was caked and very narrow. I used a battery terminal brush and an old adjustable reamer to get inside of it. The stem on it was obviously not the original but a smaller diameter replacement stem that did not fit well. The shank had been sanded smooth but was not tapered to meet the misfit stem but it was perfect for setting the band. Before doing that I used some super glue to squeeze the crack in the shank together. I held it until it was dry. I then heated the band with my heat gun and pressure fit it on the shank. I flattened the bottom edge of the band to match the flat bottom where the stamping is. I fit and shaped a new stem. Once it was fit I bent it to a comfortable fit for the mouth. Then I sanded and polished it with my usual regimen of micromesh pads from 1500-6000 grit.

Edwards Contour or Criterion Restoration


I found this old Edwards pipe while I was visiting a small community in Washington in the US. My wife and I were away for our 36th wedding anniversary and always love visiting second hand shops and antique malls. We must have visited a dozen or more shops on that trip. This older Edwards pipe was in the last shop we visited. It was an interesting shape and intrigued my eye. I made an offer for it and it soon became mine.

Once I got home I decided to refurbish it as one of the first I dealt with. I am not sure of the name of the particular Edwards line this one came from but on one of the online forums someone thought that it belonged to either the Contour or Criterion line. He had pointed out that the lines were carved in France but the only sign of that was that the word France was usually stamped on the underside of the stem. However, on this one there was no stamping on the stem – no France or other name, just smooth brown oxidation. The stem also had tooth marks on the top near the button and a very prominent dent on the underside of the stem near the button. The finish on the pipe was dirty but in great shape. There were no dents or scratches and the pipe seemed to have been well cared for. Edwards did not stain their pipes as is evidenced by the natural finish on this one. The rim was probably the most potentially problematic area on the pipe. It was tarred, caked and possibly charred on the bevel inward.

ImageImageImageImage

I reamed the bowl and cleaned the inside of the bowl and the shank. I wiped down the entire pipe with undiluted Murphy’s Oil soap on a cotton pad and removed the grime and old waxes. I scrubbed the bevelled rim with the oil soap as well to remove the tars and the surface carbons. I used some 1500 and 1800 grit micromesh to remove the rest of the tars and bring it back to a smooth surface. I was pleased to see that there was not any charring or burn to the surface of the rim and once cleaned it looked pristine. The pipe has not been stained but had a natural finish so I buffed and polished the rim and the rest of the surface of the pipe to get the shine back. While I was at the buffer I also buffed the stem with Tripoli to break up the oxidation and then took it back to my work table. At the table I used nail polishing sticks (these are fingernail polishing stick and come with micromesh sandpaper on a foam stick) to sand out the bite marks on the top and underside of the stem. I worked with the 1500-6000 grit micromesh pads to polish the stem and remove the remaining oxidation. A folded pad worked well to sand in the grooves of the stem to give even that area a clean glow. I coated it with Obsidian Oil and once it was dry I buffed the entirety with several coats of carnauba wax.

ImageImageImageImage

A WDC Milano Hesson Guard Reworked


I just worked over this old timer – A WDC Milano Hesson Guard. In order to know more about the pipe I was working on I searched for information regarding the patent number stamped on the pipe and went to the US Patent site where I found documentation. The patent was filed for it in 1932. It is an early example of the pipe. It is in the acorn shape. It has the patent number stamped on it as well as the other WDC labels. The triangle on the stem is silver or steel inlay. For me this is a part of the mystery of unpacking the history and life of the brand and mark. I always like to know as much of the back story as I can find on any of the pipes I refurbish. Patent numbers stamped on the pipe provide a means of ferretting out information on the design and the particular part of the pipe that is patented. I have included the patent site information on the pipe for your reading pleasure. At least to me this part is fascinating information.

ImageImageImage

The pipe was caked with a crumbly thick cake that pretty much filled the bowl when I picked it up. I reamed it out to field dress the pipe. I generally do this with most of the pipes I bring home for renewal. It keeps the mess of the carbon from the cake outside and away from my work desk. In the photos below you can see that the finish was pretty dirty with a lot of hand oils and grease ground into the bowl surface. The rim was caked and tarred and it looked like it was damaged. The finish was worn and the stain faded in many places on the bowl sides. The stem was oxidized and had some bubbles in the surface along the button – the bubbles are visible near the button in the second photo below.

ImageImage

I scrubbed the exterior of the pipe with Murphy’s Oil soap, undiluted. I wipe it on with a cotton cloth and immediately wipe it off. Others have said that it removes the stain if left to long and it does indeed do that. But I have found it unsurpassed in quickly removing grime and grease if rubbed on and rubbed off quickly. I worked on the rim as well with a soft bristle tooth brush and the oil soap to remove the buildup. Once that was done I put it in the alcohol bath and removed the finish that was on it. It seemed to have had some built up waxes and also some kind of varnish coat over the stain. It came off with a bit of elbow grease after soaking. I decided to not stain this pipe as the briar looked great as it was. I just sanded it with the micromesh pads to polish it and remove the surface scratches. Then I took it to the buffer to give it a buff with White Diamond.

I worked on the stem while the bowl soaked in the bath. I soaked it in the Oxyclean mixture for a while to soften the oxidation. I dried it and buffed it with Tripoli to remove the surface oxidation. I sanded it with 240 grit sandpaper to get the deeper oxidation. I also had to lift a few tooth marks from the underside of the stem near the button. I used the heat gun to do that. The bubble on the top of the stem also was heated to try to smooth it out. It was evidently not a blister but a bump from teeth. It went back in place with the heat. I sanded the remaining signs of bite with 240 grit sandpaper and then 400 and 600 grit wet dry and water. I finished it with the normal regimen of 1500-6000 grit micromesh pads to polish. I put it back on the bowl and then gave the entirety a buff with White Diamond to polish it and finished the restoration with several coats of carnauba wax.

ImageImageImage

Restemmed Red Point Capped Bent


I picked up this Red Point Old Briar Capped Pipe bowl on Ebay awhile ago. It did not have a stem but seemed to have promising grain. When it came in the mail I cleaned it up a bit and then worked on a stem for it. I decided to use a faux p-lip stem that has the airhole on the end of the stem rather than on the top. I fit the tenon to the shank – that was a bit of a trick as the shank is like a Pete shank in that it narrows/tapers as it descends toward the bowl. I finished fitting and polishing the stem.

Here are some pictures of the bowl when it came. From the second photo you can see that it was barely smoked. It was very clean and needed a few pipe cleaners run through it. The exterior needed to be wiped down with a little oil soap to clean away the grime – I always rub it on undiluted (no water) and quickly wipe it off. I do not leave it to sit. I also polished the silver work on the shank and the cap.

ImageImage

I heated the stem with my heat gun and bent it slightly and took the next three pictures. I have learned that pictures give the true story in terms of bend and overall look of the pipe in a way that is clearer than the naked eye. From the photos I decided that the bend need to be a bit more dramatic and match the curve of the bottom of the bowl and shank. I reheated it and used the rounded edge of my work table to get a proper bend in it.

ImageImageImage

Here is the final product – a proper bend with a curve that matches the bottom of the bowl and shank. The look is like an elongated S. Once it was finished I cooled the stem for a bit and then loaded it with Blue Mountain and smoked the inaugural bowl. Since then I have smoked it several times. It delivers a great smoke.

Image

Keyser Hygienic Patent Pipe


Blog by Steve Laug

Over the past year I have been picking up these Keyser Hygienic pipes on EBay. This one makes the third one I have picked up at a reasonable price. They are made in England and sold exclusively in South Africa. The word is that they were designed to be virtually indestructible for farmer pipe smokers in SA. All versions of the pipe have the same stem – one size fits all. They seem to be made of nylon and rubber or some combination. They are tough and take tooth wear very well. Two of the three I picked up are older and both had the original stems on them. They had tooth chatter and minor dents. Steaming would not raise the dents at all. I had to deal with them with sandpaper and micromesh sanding pads.

The photo below came from the web and pictures a cutaway picture of the pipe and the unique condensing chamber that makes up the patented portion of the pipe. The shank has an aluminum condensing chamber with a tube in the centre that lines up with the tube inside the stem. It is pointing downward so air swirls around in the chamber formed by the military bit stem and the shank. Moisture is trapped and the smoke is cool and dry without loss of flavour.

Image

The pipe I am working on this time is a pot shaped sand blasted pipe. The aluminum was oxidized and dull the blast was dirty and the crevices filled with dirt and grime. The stem was in pretty clean shape other than the tooth chatter near the button. The rim of the bowl was tarred and caked. The cake was uneven and tapering in the bowl – almost as if the bowl was only half filled and smoked that way the majority of the time. The upper portion of the bowl had a very thin layer of cake and the lower portion a thick uneven cake. The condenser in both the stem and the shank were filled with a dark brown tar and the airway was constricted in the shank and clogged in the stem. The photo below shows the condition of the bowl and the stem and highlight where the work would be needed to clean up the exterior of this pipe.

Image

I reamed the bowl back to bare briar and scrubbed the blast surface with a brass tire brush to clean out the crevices. I also used a soft bristle tooth brush to finish cleaning the surface off. Once that was done I put the bowl in the alcohol bath to soak while I worked on the stem. The next two photos below show the stem after I used 240 grit sandpaper to remove the tooth marks and slight dents. I then used micromesh pads from 1500-6000 grit to polish the stem and work out the scratches. I have learned the hard way that you cannot buff these stems on the buffer as a little bit of surface heat from the buffing pads melts and distorts the surface. So these stems are totally buffed and polished by hand.

ImageImage

The next two photos show the stem after it has been sanded up to the 3200 grit micromesh pad. The stem is beginning to get a shine and the scratches are disappearing with the sanding. From this point I went on the sand the stem through the remaining micromesh grits and when finished I gave it a coating of Obsidian Oil to penetrate the surface and give it a deep polish. Once that dried I buffed it by hand with some carnauba wax in paste form that I purchased from Walker Briar Works.ImageImage

From the next series of photos you can see that I interrupted my work on the stem to remove the bowl from the alcohol bath. I did that because I was curious to see how it was cleaning up. You will notice in these photos the brownish grey sludge in the grooves of the blast. I used the tooth brush once again to scrub the surface with Isopropyl from the alcohol bath. Once the grime was removed I washed the bowl down with clean Isopropyl and dried it off.

ImageImageImage

The next series of photos show the dried bowl. The grime is gone and the finish is now down to the stain. Even some of the top coat of stain has been removed and you can see the briar. I laid the bowl aside and finished up the stem as I described it above.

ImageImageImage

The aluminum condensing chamber on the shank and the chamber in the stem needed much work. I used cotton swabs that I flattened to clean the area inside the shank around the airway extension and the same in the stem. Once that was clean I polished the oxidized aluminum with the micromesh pads to burnish the aluminum and get the shine back.

Image

I then restained the bowl with a dark brown stain, knowing that when I buffed it the reddish brown undercoat would shine through on the high spots and the dark would fill the crevices and give the pipe a contrast stain. The next series of three photos show the staining and the way the various grains took the stain. The right side of the bowl has a great ring blast that is fairly deep and craggy. The left side is more of a blast on birdseye. It is an interesting looking blast. The bowl rim came out clean as well and shows an interesting contrast in the light of the flash.

ImageImageImage

The final series of four photos show the finished pipe. The entirety has been given a coat of wax. I used Halcyon II on the blast to polish it without leaving the white residue in the grain of the blast when it dried. I buffed it by hand. The stem received another hand applied coat of carnauba wax and a buff by hand. The pipe pictured is clean and ready to smoke.

ImageImageImageImage

I have included pictures below of the other two Keyser pipes that I picked up and refurbished. The top one is an apple with really nice grain. I have been smoking this one and enjoying the dry and cool smoke that it gives. The second is a smaller prince shape that is no longer available. It had some burns on the rim that are still visible but it too smokes very well. One day will rework the rim a bit and minimize the burn marks. Till then I will smoke these Keyser’s and keep an eye for more of them.

ImageImageImageImage

Refurb on a Dr. Plumb Tween Size Prince


Blog by Steve Laug

Off the workbench today is a nice little Dr. Plumb Tween Size Prince (that is what the stamping on this one says). It was pretty rough looking as can be seen from the before shots. I had reamed it before I remembered to take the photos, so the bowl is very clean in the photo below.

Image

The bowl, in fact, was very dirty with tars and crumbling cake as well as a thick white “gunk”, for lack of a better word, in the bowl and all the way through the shank. I have no idea what it was other than the fact that it had a plastic feel to it. It was stringy and literally all over the inside of the bowl and shank. I had never seen anything like this in the years I have been refurbishing pipes. It came out with the reaming of the bowl and out of the shank with alcohol soaked pipe cleaners and a shank brush. It took some time to clear it out. Many pipe cleaners later it was clean. The state of the bowl when I got it told me that obviously this little guy (5 inches long, group one sized bowl) was a great smoker.

I stuffed the bowl with cotton bolls and filled it with alcohol using an ear syringe.

Image

I removed the stem and put a cork in the shank so that the alcohol would go all the way into the shank. I wanted to make sure that all of the remnants of white stuff and tars were removed from the bowl before I went further in cleaning it. I left it overnight and the next morning removed the cotton bolls and plug and cleaned out the bowl and stem with pipe cleaners. The bowl smelled fresh and almost new once that final cleaning was done and the alcohol evaporated. The bowl was then dropped in an alcohol bath for a soak. While it was soaking I went to work on the stem.

The stem took quite a bit of work to restore as it was badly oxidized. I had soaked it in Oxyclean while I worked on the bowl so now when I took it out the oxidation had softened. I buffed it with Tripoli, sanded with 240 grit sandpaper, buffed again with Tripoli, sanded with 400 and 600 grit wet dry sandpaper until I was able to get the grit off and then polished with micromesh pads from1500-6000 grit. Each level of micromesh gives the stem a deeper polish and shine to the stem. In buffing a stem by itself, I always avoid the saddle area or the area next to where it joins the shank as it is very easy to over buff this area and make rounded shoulders on the stem and ruin the stem/shank junction. Once that was finished I laid it aside with a coat of Obsidian Oil and turned again to the bowl.

I removed the bowl from the alcohol bath and dried it off. The bath removed the remnant of finish and all of the oils and grime on the bowl. I used the 3200 and 4000 grit micromesh pads to sand down the bowl, being careful to not damage the stamping. Once it was smooth, I wiped it down with a soft cloth dampened with Isopropyl alcohol to remove the sanding dust and then stained the pipe with a light cherry coloured aniline stain. (I mixed the stain by adding Isopropyl to the oxblood stain until it was basically a light cherry coloured wash.) I flamed it and then put the stem on and buffed both the bowl and stem with White Diamond and finished it with several coats of carnauba wax. Here is the pipe ready to smoke!

ImageImageImage

A Barlings Make Saddle Billiard


Blog by Steve Laug

I enjoy working on Barlings pipes. They are generally carved from great pieces of briar and clean up nicely. They are light weight pipes with one of the most comfortable bits ever made IMHO. I had picked up this little Barlings Make 1364 Billiard. I have no idea on this one’s age as I have not bothered to look it up yet. It is stamped Barlings in an arch over Make inside the arch and then 1364 below that. The other side is stamped with an L. It has the Barlings thin bit saddle stem bearing the Barlings cross on the top and nothing on the underside.
Barling1Barling2

This one came with an over reamed bowl leaving the bowl walls thin and the bowl out of round. The left side was considerably thicker than the other sides. We are not talking a huge difference but visually it was off. The thin sides are probably a 1/8 inch thick and the left side was about a 1/4 inch thick. I carefully rounded the bowl with a knife to bring the 1/4 inch side into sync with the remainder of the bowl. The result is a much more balanced look to the bowl. Then I sanded the bowl carefully so as not to affect the finish on the top of the bowl and then buffed and polished the whole pipe. I am happy with the results and with some careful smoking this one should be able to build a good cake and last a long time.

Image

In terms of the stem I wanted to preserve the Barling cross stamped on the top and the profile. It was not in too bad shape as can be seen from the photos though it was oxidized. The oxidation I worked on by soaking it in Oxyclean to soften it. I find that though it does not remove the oxidation it makes it easier to deal with. I then carefully sanded the stem with micromesh pads. I worked with the 1500 grit pad to sand around the cross and not lose it. I also worked over the surface of the entire stem with the 1500 grit. Then I worked through the rest of the pads from 1500 to 6000 to give the pipe stem a polish. The only thing left to do was to give the pipe a good buff with White Diamond and carnauba wax to finish it up.

ImageImage

Renewed Brigham One Dot


Blog by Steve Laug

This old Brigham One Dot was on the shelf at a Movie Studio Clearance Store – they sell old set items and materials from movies and television shows. Over the years I have found quite a few nice old pipes there for sale at a low price. I paid $12 for this one. From the photos below you can see its condition clearly. The stem was very oxidized and worse at the button end. I think that it probably had a rubber bit protector on it and it was cut off or fell of when they put it up for sale. The rustication was still crisp and sharp. The stain had faded from the top to about mid bowl and would need to be restained. The rim was tarred but not dented or damaged. The inside of the bowl was caked with an uneven cake that smelled of sweet aromatics.

ImageImageImage

I reamed the bowl and cleaned the shank and inside of the stem with pipe cleaners and cotton swabs and alcohol. I scrubbed down the exterior of the bowl and rim with Murphy’s Oil Soap to remove the grime and the tars on the rim. I have used oil soap for a long time now on the surface of pipes and found that it works best undiluted. I rub it on and rub it off. On the rim I use a soft bristle tooth brush to scrub the tars off. On this pipe since I was restaining it anyway I did not care about losing a bit of the stain or finish in the process. I finished cleaning the rim with an 1800 grit micromesh pad. I then restained it to match the colour of the smooth patch on the underside. I gave it a quick light buff with White Diamond to polish the stain.

I had put the stem in a bath of Oxyclean and hot water and let it soak while I was working on the bowl. I removed it and wiped it down and resoaked it. After the second soak I sanded it with 400 and 600 grit wet dry sandpaper and then 1500-6000 grit micromesh pads to polish it. The Brighams have an aluminum shank that holds the hard rock maple filter tube. The filter tube was shot so I used a new one. The aluminum was tarry so it needed cleaning and a polish with 0000 steel wool. (The Brigham system is pictured in the graphic below.)

Image

When the aluminum was clean and polished I put the pipe back together took it to the buffer and gave the stem a buff with Tripoli to take off the remnant of oxidization. Then I used some White Diamond on it to give it a clean polish. I finished buffing the whole pipe lightly with carnauba wax. The finished pipe is pictured below.

ImageImageImage