Guest Blog by Robert M. Boughton
Member, International Society of Codgers
Member, North American Society of Pipe Collectors
http://www.naspc.org
http://www.roadrunnerpipes.com
http://about.me/boughtonrobert
Photos © the Author
CRITIC: n. A person who boasts himself hard to please because nobody tries to please him. ― From “The Devil’s Dictionary” (compiled 1881-1906), by Ambrose Bierce (1842-1913), U.S. printer’s devil, Union soldier [private-first lieutenant], Civil War hero, Federal Treasury agent and other low-pay money transport jobs, newspaper-magazine columnist, short story writer, fabulist, satirist, heavy drinker, brawler, daredevil
OPENING REMARKS
In a word, Ambrose Bierce was a gun-toting card, in the sense of a character, one-of-a-kind, clever or audacious; or, as one might say nowadays, a sociopath. I suspect Bierce would have approved of the latter term, and he is one cultural/historical figure I would like to meet if I could somehow arrange an interview – although, given his mercurial proclivities, I doubt I would want the rendezvous to occur in the region of the Hereafter where he might very well find himself. Besides, Bierce almost certainly would consider me too daring (“one of the most conspicuous qualities of a man in security,” meaning safety) for his tastes, wherever he is now.
Neither Bierce’s definition of critic, nor the long-standing common misconception that to criticize necessarily implies a negative bent, applies to this humble attempt to categorize my own personal favorites from among some of the pipe brands I have tried and collected. Call this a critique, then, to clarify my well-intended endeavor to review, based on my experiences, limited lists of brands in general and individual pipes.
I will be the first to admit the present list is somewhat meager, in particular considering my impossible dream of someday acquiring every pipe suggested to me by a wildly out of control case of Pipe Acquisition Disorder. In fact, I am already certain I will, maybe sooner than later, look back on this patently subjective exercise with the shiver of self-censure usually reserved for old drafts of literary attempts.
Then again, I’ve never been one to retreat from a challenge, even when I’m the one to throw down the gauntlet. Therefore, do not be surprised to find your own choices way out of order, so to speak, if not missing altogether. There are countless brands and styles I want to try, many of which are difficult to find outside of the high three-digit or even into the four and five figure price range. To those in that rarefied category of collecting, I can only say, more power to you, and may you enjoy your prizes for many years to come. I will provide more on a few of these hopeful future acquisitions later.
Which brings me to my next point: the origins of some of the pipes I have appreciated most, and indeed have come to cherish more as time passes, have proved to be untraceable, despite my concerted and ongoing efforts. A few – dare I say it? – can only be categorized as no-names. In other words (as I often find myself counseling clear newcomers to the thrilling world of pipe enjoyment, online at my own restored pipe sales business or even at my local tobacconist when opportunity knocks), the price tag is irrelevant.
STANDARDS OF REVIEW
My simple standards of review, by necessity, will rely on the following qualities.
• Is the pipe well-engineered? This refers not only to the alignment of the bit’s smoke channel, through the shank’s mortise and draught hole and ending flush with the bottom of the chamber; it includes construction elements such as materials used, bowl thickness, design and various factors effecting the ability to enjoy a good, thorough smoke without overheating, and the attendant tobacco performance issues of that problem.
• Does the pipe reflect my own sense of identity? Only a few times since I first smoked a pipe in 1989, when I was a non-traditional undergrad at New Mexico State University, have I been told by a fellow local club member that a particular pipe “looks good on me.” Now, there’s an interesting misnomer! I try not to end up wearing a pipe, though I have dropped more than a few with red-hot ashes in my lap and even scorched a shirt or two when a loose bit ran amok. One of these appreciated comments, as I recall, concerned a BBB Special Make 1982 Christmas Pipe, and another referred to a Peterson’s Sherlock Holmes Baskerville. Based on those two, I have to assume that a sturdier bent briar pipe looks good on me. But the fact is that most of the pipes I go back to over and over are straight, but I have to say the above complimented members of my growing collection are among my favorites, which vary in shape and from briar to meerschaum and other materials.
• Is the pipe comfortable in my mouth and hand?
I think that about covers that, although in no vital order.
FAVORITES BY BRAND – IN A SORT OF ORDER
Again, I feel a need to qualify this list as being based on the sheer numbers and relatively consistent qualities of the products made by these crafters. There are, to be sure, exceptions. Each brand is followed by its country or countries of origin and/or various manufacturing, and the year or approximation of establishment.
1. SAVINELLI (IT, 1876): Call it luck or what you may, but as Will Rogers suggested, I have never met a pipe created by this legendary maker that I didn’t like. That is to say, every Savinelli I ever smoked performed with excellence in engineering and taste.
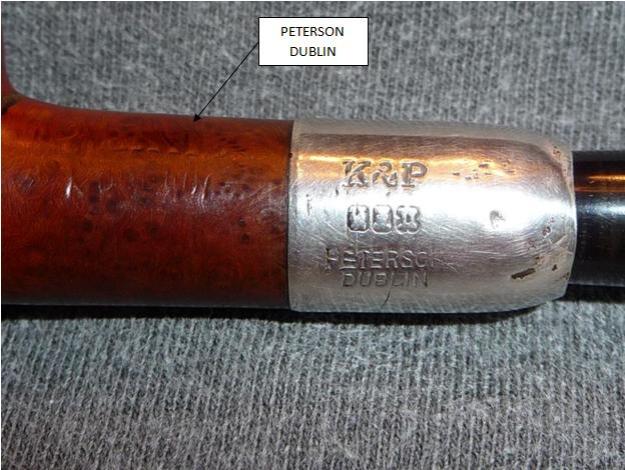
2. PETERSON (IE, 1865): First Kapp Brothers, then Kapp & Peterson and finally its present incarnation, Peterson pipes by any name are almost tied with the second largest part of my collection, the other being meerschaums that I can’t include as a brand but would if there were any way I could rationalize doing so. I am quite fortunate to have chosen my Petersons well over the years from estate pipes restored by my good friend and mentor, Chuck Richards, as well as some used collector’s editions I bought from other restorer friends. Of course, there are also those I bought on eBay and cleaned up myself, and some choice new models pre-checked for perfect engineering by Chuck. The results have almost always been top-notch, despite the fact that each year when the time rolls around to examine all 120 or so pipes supplied to our tobacconist by its Peterson supplier for the annual Christmas sale, Chuck returns a surprising number. Some of these, he says, are defects in drilling; others are from the wear and tear of salesmen’s car trunks. Either way, the lesson I’ve learned is to check out pipes carefully whenever possible before paying.
3. KAUFMAN BROTHERS & BONDY (US, 1851): Creator of the Kaywoodie line in 1919 and Yello-Bole in 1932, KB&B has been an innovator of premier pipes for almost 165 years.
4. KAYWOODIE (US, 1919): From a 1930s Super Grain Lovat to some beautiful meerschaums, Kaywoodie has never disappointed me.
5. BUTZ-CHOQUIN (FR, 1858): While aware of fluctuations in quality throughout the history of BC, I have found none that isn’t an excellent example of everything a pipe should be, including a huge gourd calabash church with cork lining in the chamber and an exquisite meerschaum bowl insert. I concede that one is high-maintenance as far as cleaning is concerned.
6. BEN WADE (UK, 1800s, DK, c. 1989): What can I say? I just love Ben Wades, again choosing with care. My absolute favorites of these are a Town & Country Bent Dublin with a Barling Cross gold band accidentally placed on it in the factory, and a gorgeous Preben Holm Danish freehand made on the sly for Ben Wade.
7. STANWELL (DK, 1942): Whenever I look at these or find one in my rotation – the bamboo shank cherry wood, the Kyringe No. 1 beech wood Bulldog Commemorative or the Billiard #88 with tortoise shell ferrule, for example – I can’t imagine the collection I’ve cobbled together so far without them.
8. COMOY and CHAPUIS-COMOY (UK, 1825 and 1925, respectively): Say what you will about some of these pipes, I have yet to experience problems, not even with the splendid orange pebbled London made Panel I have often regretted gifting to a friend.
9. DUNHILL (UK, c. 1902-1907): Undoubtedly one of the greatest if at times inconsistent brands
10. GBD (UK, 1850): Named for three gentlemen who designed the original (Ganneval, Bondier and Donninger), GBD was begun by Chapuis-Comoy. This is a very popular brand, and from my dabbling with it I understand.
11. KARL ERIK (DK, 1965-1966): In my opinion, this is one of the most under-rated lines of mostly free-hands. Maybe now that he passed on, they will come to be admired more.
12. ROPP (FR, 1890): I happen to be an unabashed fan of the natural cherry wood line of Ropps (the thicker the bowl, the better – all of which smoke cool and are versatile with tobaccos. I also adore my old Eug. Ropp Signature that was one of my best restorations.
13. FALCON (metal – US, 1936, UK): I doubt I will meet much resistance with this brand, other perhaps than its placement on my list! Since Kenley Bugg invented this metal system pipe in the U.S. in 1936, it has sold tens of millions worldwide, not counting the spin-offs.
14. BEST BRITISH BRIAR (UK, 1847): Anything with three initials – BBB, LHS, KB&B – seem to fly off of my virtual sales shelves, and I can appreciate the reasons.
15. L&H STERN (US, 1911): Founded in NYC, this venerable pipe maker moved to a permanent Brooklyn factory in 1925 until it dissolved in 1960, and is still regarded as one of the best. I have to agree.
16. JOBEY (US, FR, DK, UK): This name may not be a smoker’s household word, but I’ve had good luck with them…and they sell well, too.
17. EHRLICH (US), 1868: Another lesser-known brand, Ehrlich makes great pipes with consistent quality. The company closed in its centennial year, 1968.
18. PARKER (UK, 1926): Dunhill seconds, these pipes may actually be more consistent than their famed creator.
19. RIMKUS PIPES (US, c. 2007): I know Victor Rimkus from my local pipe club in Albuquerque, New Mexico and have purchased four pipes from him (three of them early works and the fourth a commissioned double-chamber). Victor, being a perfectionist who constantly hones his innate talent crafting blocks of briar into works of art enhanced by his long experience as an engineer, discredits his earlier efforts at pipe making, but I can attest that even they are among the finest pipes I have ever smoked. He fashions everything, the wood and bits, by hand, employing tasteful additions including turquoise, bamboo and varied ferrule materials. The grain of his natural pipes is exquisite, and his finish work makes the final products stunning. Shapes include traditional, unique and variations on the two. One of Victor’s engineering standards allows for the ability to insert a cleaner with ease all of the way through the assembled pipe, from the hole in the lip of the bit and always ending up flush with the bottom of the chamber. The only reason I add Rimkus Pipes to the end of my favorites list is that they remain relatively unknown to the pipe world as a whole, although he is well-known at all of the major pipe shows and to discerning collectors of American pipes. But the fact remains they are among the very best. http://rimkuspipes.com/index.html. By the way, Victor’s son, Nathan, following his own path, also makes exquisite pipes. I’m still hoping he will craft a double-bowl pipe for me and presently have first right of refusal when he decides to take me up on the commission offer! http://www.nwrpipes.com/index.html.
20. Don Warren Pipes (US, ?): Another Albuquerque master and friend from our club, Don’s original website notes that his pipes – briar, cherry, morta, hickory, maple, pecan, oak and walnut – are designed in the Danish freehand tradition, but really, many of them transcend that description. Unfortunately, I only own one of Don’s works (which he calls a Fine Figured Maple Gilpin), and look forward to buying many more of his unique and finely-engineered works. Other Don Warren products include bowls for Kirsten metal pipes. For basic information, see his old site at http://dwpipes.com/index.html. He now sells at https://www.etsy.com/shop/DonWarrenPipes, http://stores.ebay.com/dwpipes/_i.html?_dmd=1&_sid=122905250&_sop=10 and http://donwarrenpipes.com/html/pipes_4_sale.html.
Oh, I can hear the uproar, grumbling and outright scoffing starting now. Look at all the missing giants! And what kind of order is this, in the name of all that’s holy! I can only ask by way of defense that the reader give me time. I’ll get there, and hopefully make updates as I progress! Also, after the top four, I found it very difficult to assign a number to most of these brands. Don’t get me wrong. I love and enjoy each and every one of the pipes I own, including my five Dunhills, four of which are especially prized if only for the sentimental value associated with the genuine old codger who gifted them to me. But mine do tend to smoke a bit hot.
SIDEBAR
Larry – as I will refer to my Dunhill benefactor due to his desire to keep professional details of his life separate from personal web information such as this – at age 91 chose, with great sadness but the better part of valor, to give up the pipe instead of the ghost just after his cardiologist threw a conniption fit when he found out my good friend had taken up his pipes again despite a genuine predisposition for heart disease. Larry (see https://rebornpipes.com/2014/09/16/ponderings-on-an-almost-lost-generation-of-pipe-smokers-with-a-restoration-thrown-in-robert-m-boughton/) experienced his first taste of the briar social elixir, as in “the quintessence or soul of a thing” [OED], when he was 18 and FDR was president. That’s a boggling idea for most of us to wrap our minds around, even those who know what FDR stands for.
I called Larry on Friday to see how he is doing, and he was as spry and full of good humor as ever. I told him I was getting constant questions about him and that everyone missed his warm personality and wonderful humor. He quipped, “You miss me for my wisdom!” and offered to drop by that night’s pipe meeting, as an emeritus (my word). Larry’s 92nd birthday was the next Monday, November 30, and I greatly admire his eventful, fascinating life so far. Sadly, we were the only two people there other than Candace, who was on duty, but we had a very pleasant chat with much humor. When Larry promised to return a week later, I knew I could count on him, and again look forward to the event.
I received the four lovely Dunhills, wrapped tightly in a plain brown paper bag, waiting for me at the tobacconist almost a year ago when I arrived for the regular weekly meeting and learned that Larry would no longer be able to attend. I procrastinated a serious attempt to date them until this writing, but never forgot the clear facial indications of shocked awe on those in my pipe club who know pipes far better than I, as they examined them when I passed the quartet around the large group. More telling was the general agreement that I should consider selling them! My eyes actually watered up at the mere notion of such a betrayal, not to mention the unending sense of guilt and loss I would experience. That is the despicable sort of habit I fell into before I began to recover from alcoholism coming up on 28 years ago.
At any rate, taking advantage of my private audience with Larry this Friday past, I asked if he had any idea how old they were. He told me three were from the 1970s, and one from the ’30s.
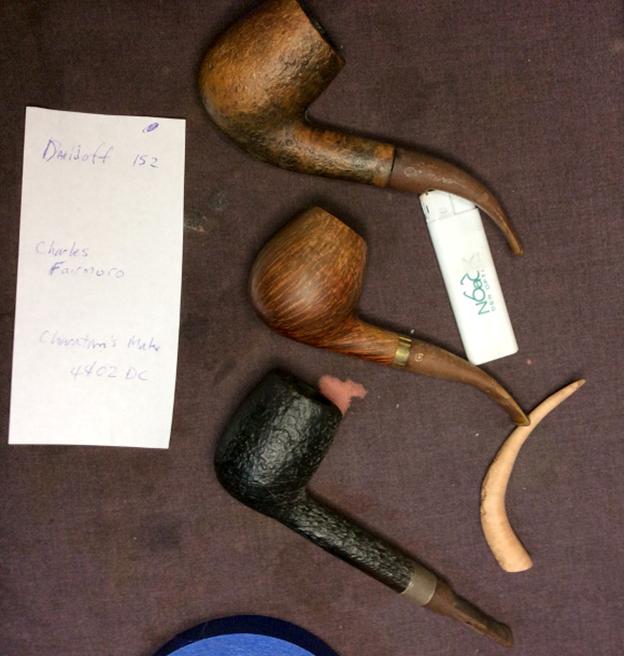
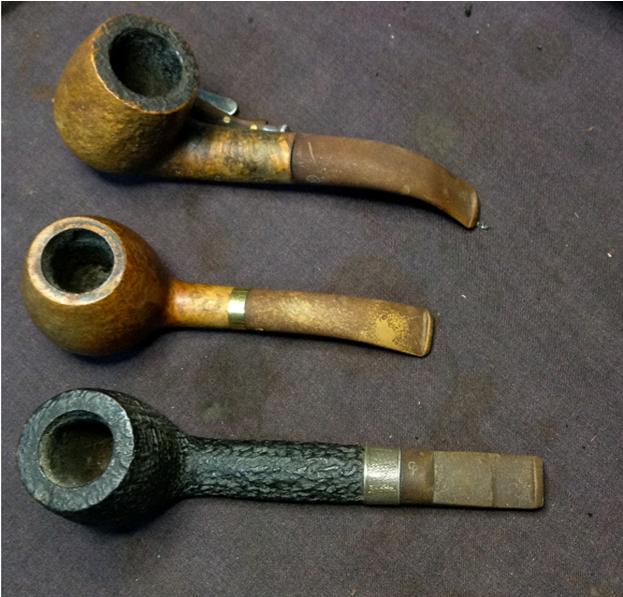
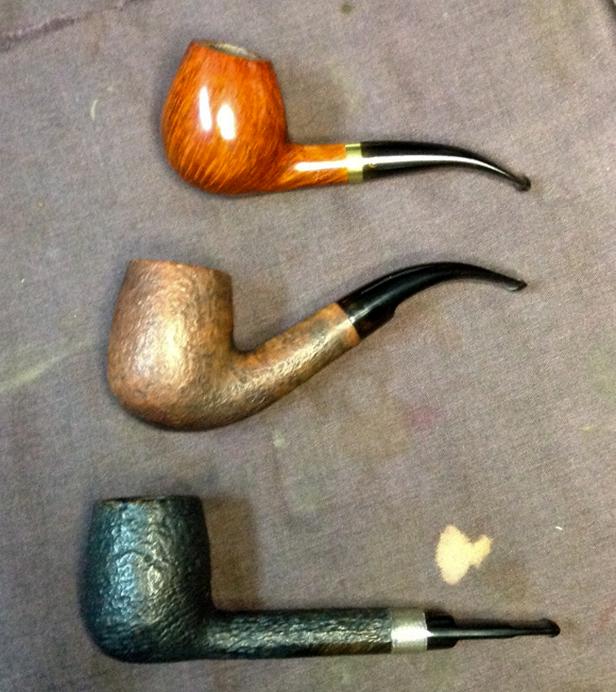
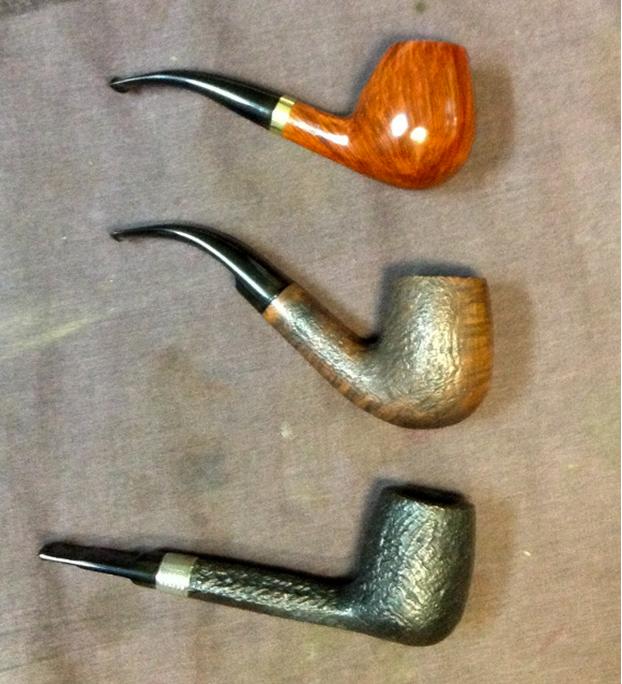
As was true with this blog, when I write I tend to make mental notes to return to parts that need additions. And so when I inserted the photos below with the models’ basic descriptions, I determined to date them no matter what it took. At last finding a reliable way to accomplish the task on my own, I used the two-digit year code usually found just to the right of the D in ENGLAND, or after the Patent Number. http://www.pipephil.eu/logos/en/dunhill/cledat-en1.html.
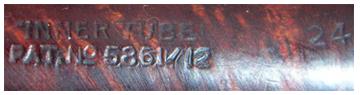
A Dunhill Inner Tube, 1912, Courtesy of Pipephil.eu
As it turned out, I tentatively guessed the pipe made in the 1930s but was flabbergasted by my full findings. I just emailed Larry my discovery.
Root Briar #433 – 1916
Shell Briar #114 – 1917
Bruyere #4103 – 1925
Shell Briar Canadian #34 – 1934
As I already clarified, I value these Dunhills above almost all of my other pipes, and with more virtuous motivations than their extreme age and potential resale value. I would never consider parting with them because of how they came to me. Still, as they are my only experiences with the Dunhill brand and all seem to smoke on a notably hot side, I have to be practical and as unbiased as possible in my judgment – which perception a little voice in my ear whispers is most liable to change with more exercise of my P.A.D. Still, #9 isn’t shoddy!
INDIVIDUAL FAVORITES
For those who enjoyed my favorite brands list, the subjectivity of this part should come as a real treat. (That’s semi-facetious!) However, on the plus side is that a far greater number of pipes, brands, shapes and materials will be represented, and by the very nature of that variety, the potential for redeeming the very possible negative perception of my judgment will be decided. And so, for better or worse, here they are.
1. Cavicchi 4C Silver Band Freehand (IT)
2. Castello Old Antiquari KKKK (IT)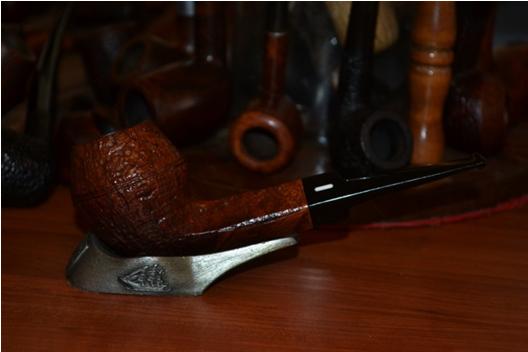
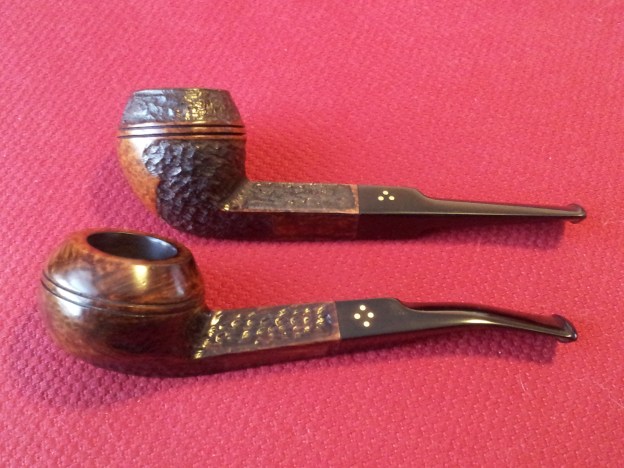
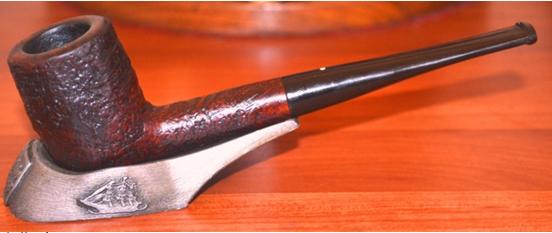
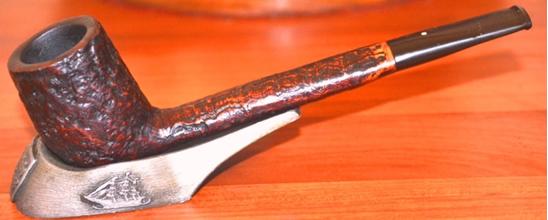
3. Sasieni Four-Dot Rustic (IT)
4. Savinelli Autograph Grade 4 Rusticated Bottom (Restore) (IT)
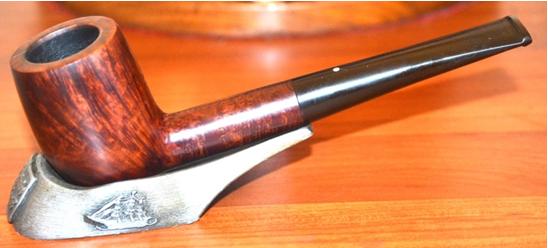
5. Savinelli deluxe Milano Panel #515KS (Restore) (IT)
6. CANO A. OZGENER (CAO) Silver Band Lattice Meerschaum (US)
7. Barling Special Make 1982 Christmas Pipe (UK)
8. Butz-Choquin Meer Insert Gourd Calabash Church (FR)
9. BC Regence Extra Curved Billiard (FR)
10. Ben Wade Town & Country Dublin with Gold Barling Cross Band (UK)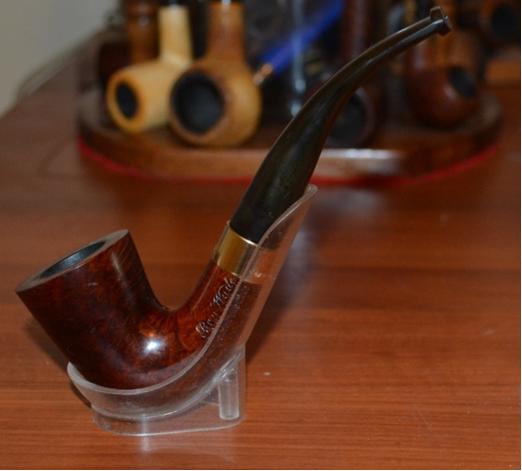
11. BW Preben Holm Danish Freehand (DK)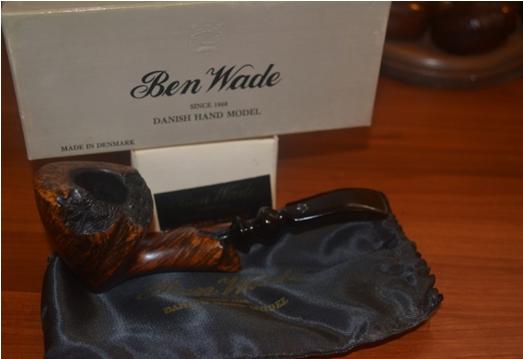
12. Comoy’s Satin Matte (Restore) (UK)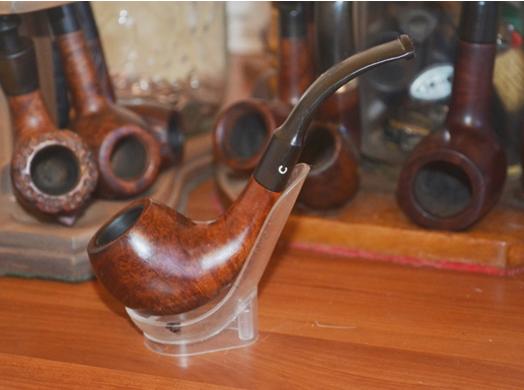
13. GBD Super Q Bent #9456 (UK)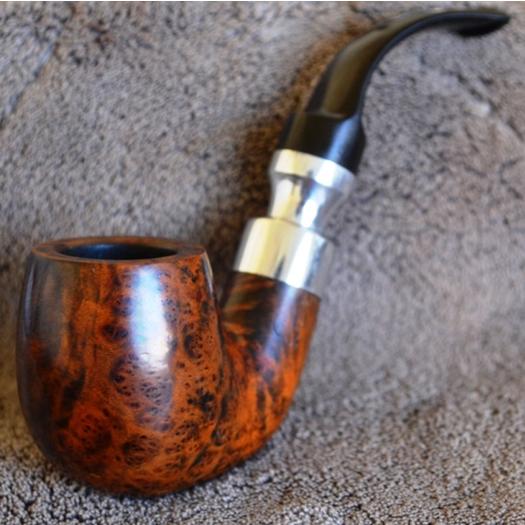
14. Kaywoodie Vintage Small Meer Billiard (Restore) (US)
15. Rusticated Red/Brown Meerschaum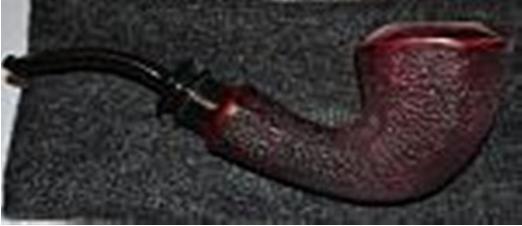
16. The Doodler (Restore) (US)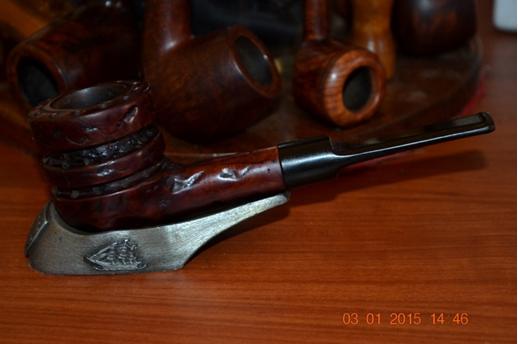
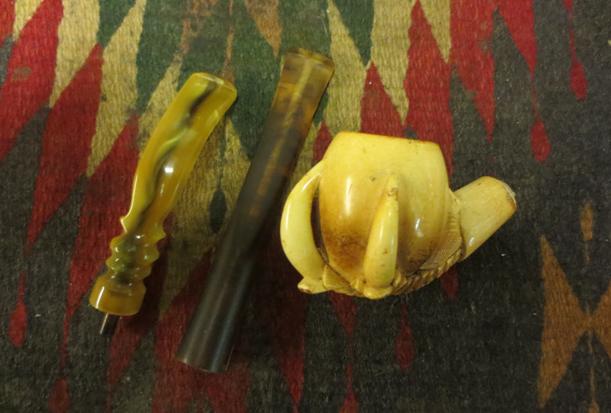
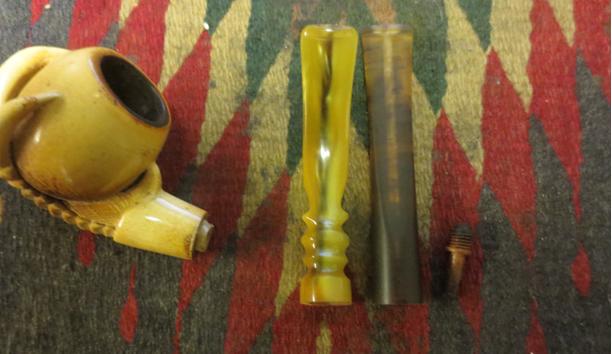
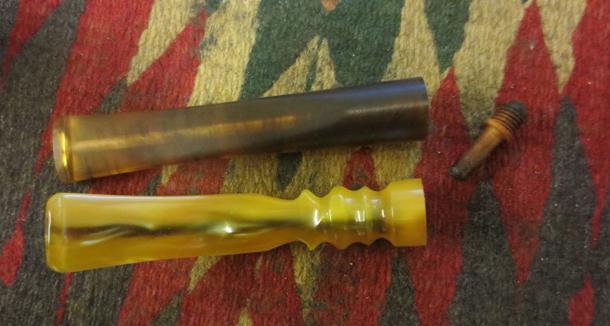
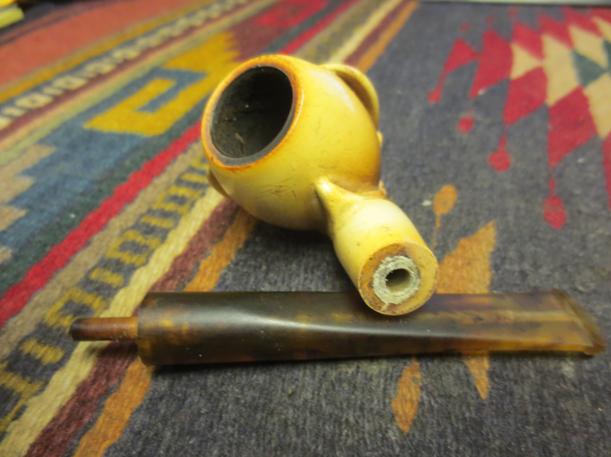
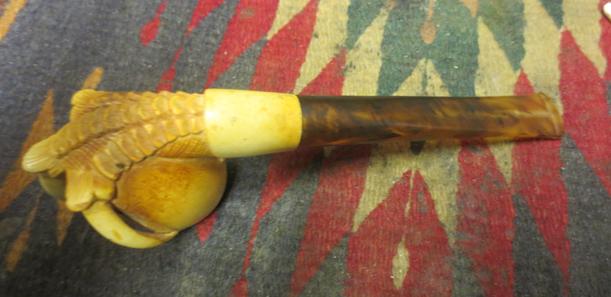
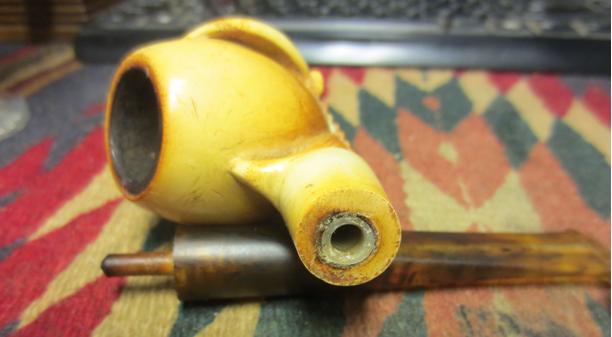
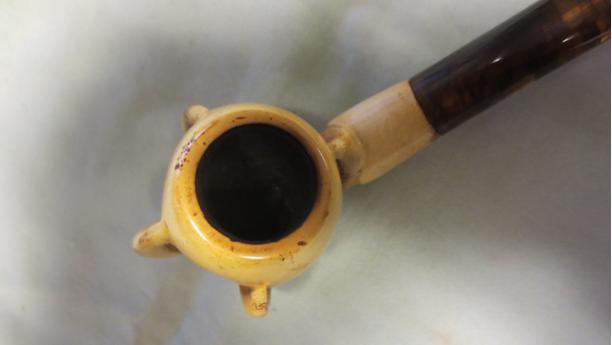
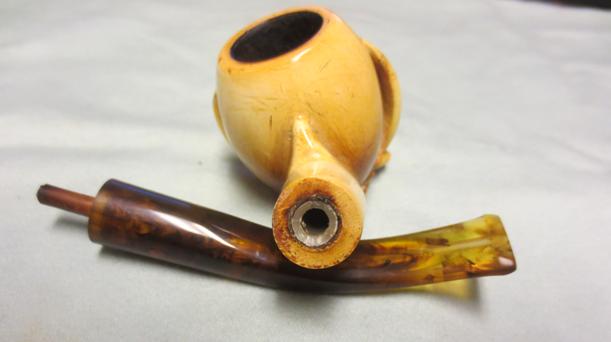
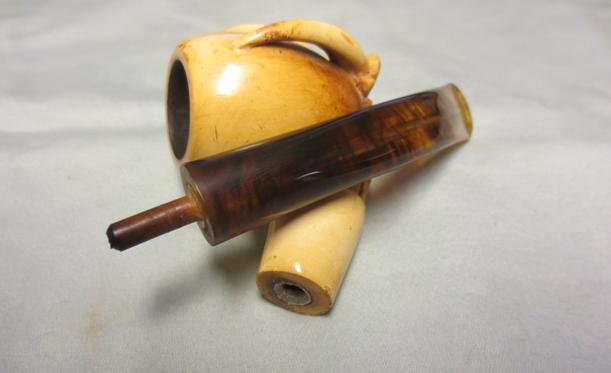
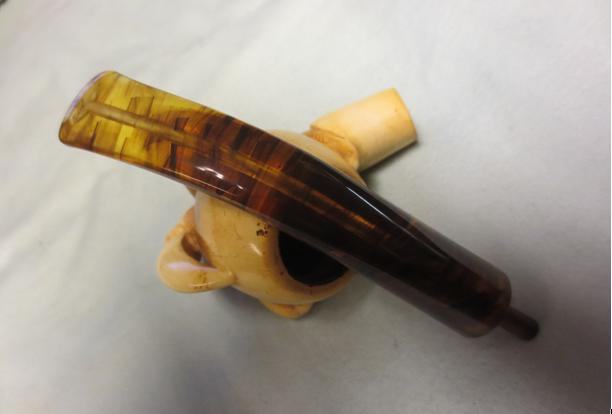
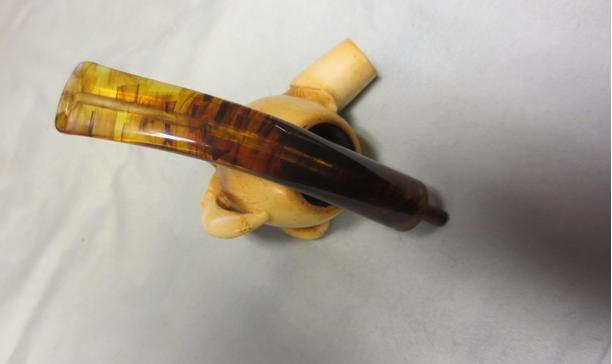
17. No-Name Italian German Folk Wine Pipe (Restore) (IT)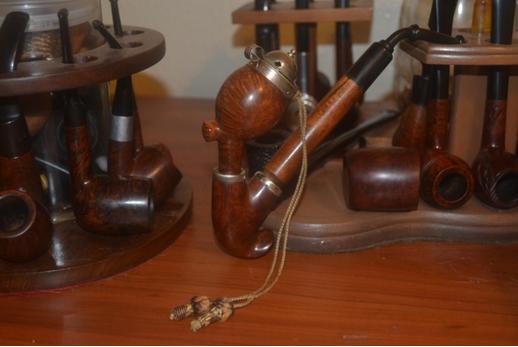
18. La Grande Bruyere Vintage Mini (CZ)
My first restore before:
After: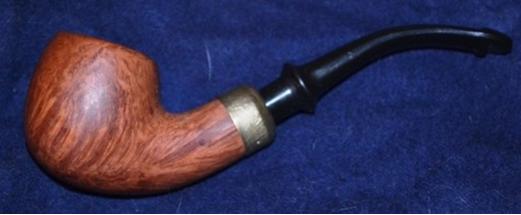
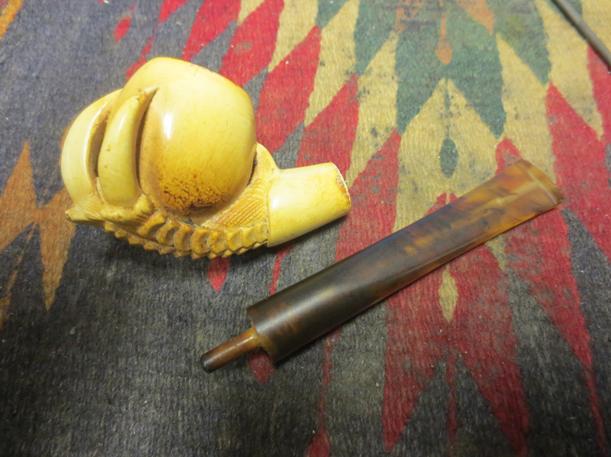
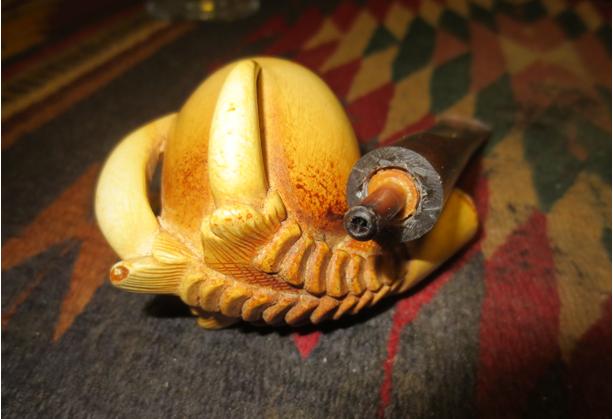
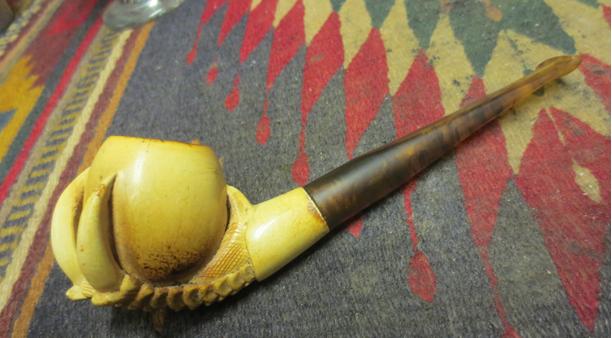
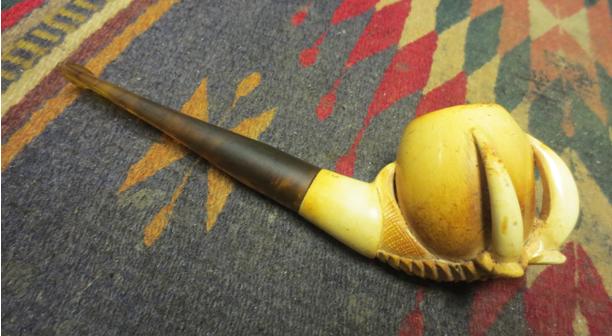
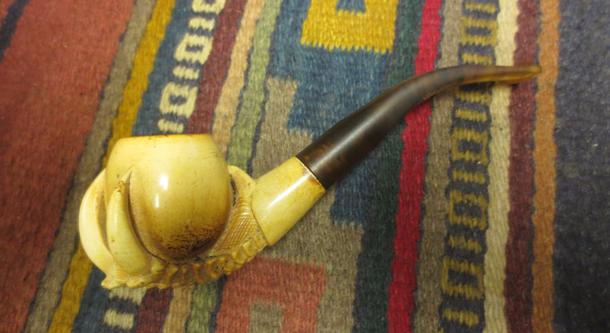
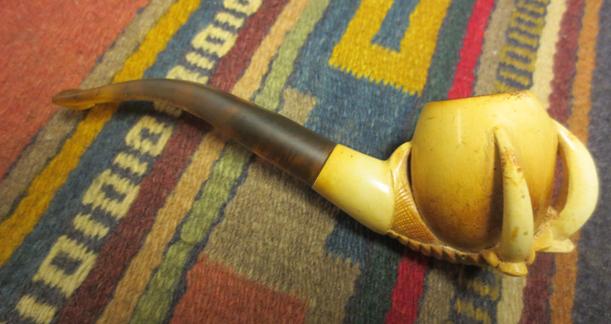
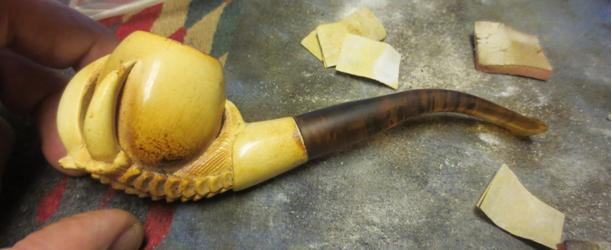
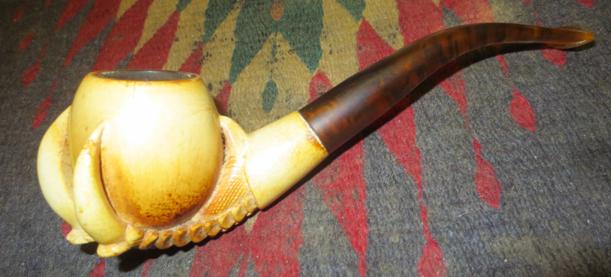
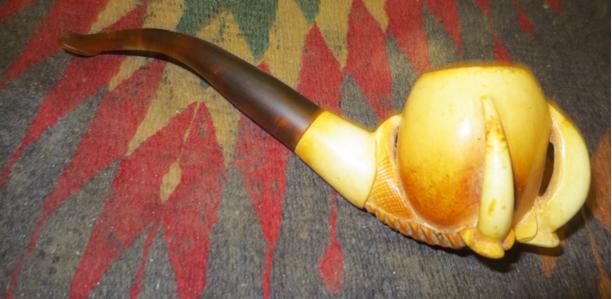
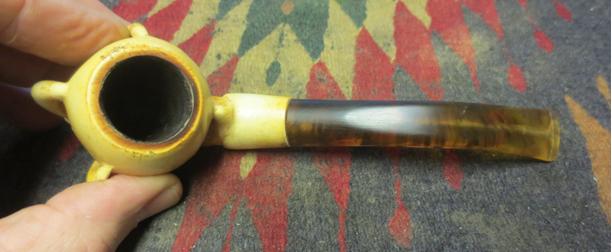
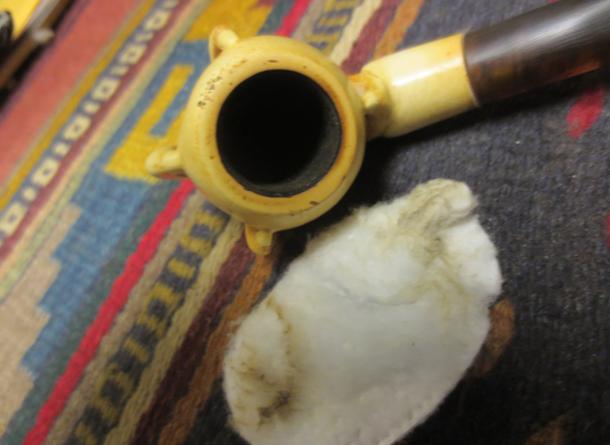
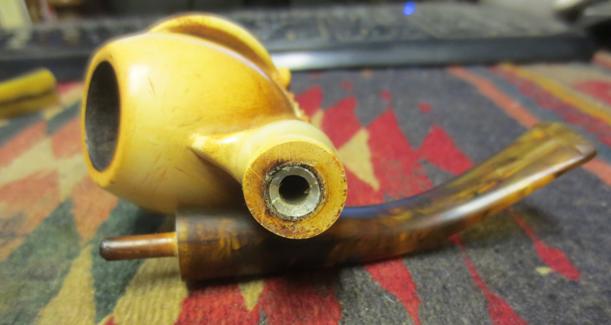
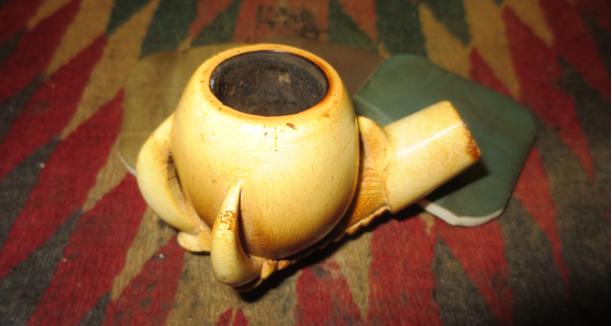
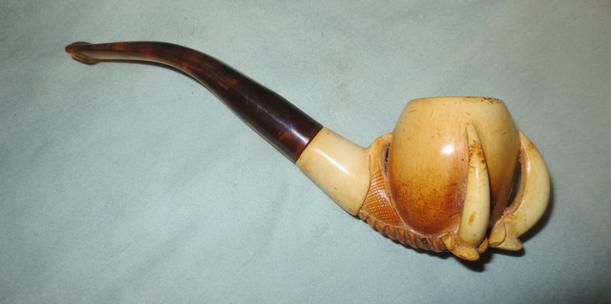
19. No-Name “The Beak” (Restore) (IT)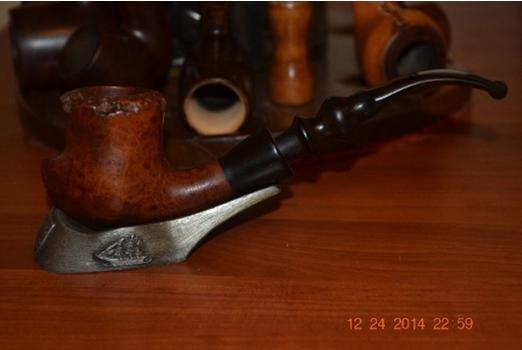
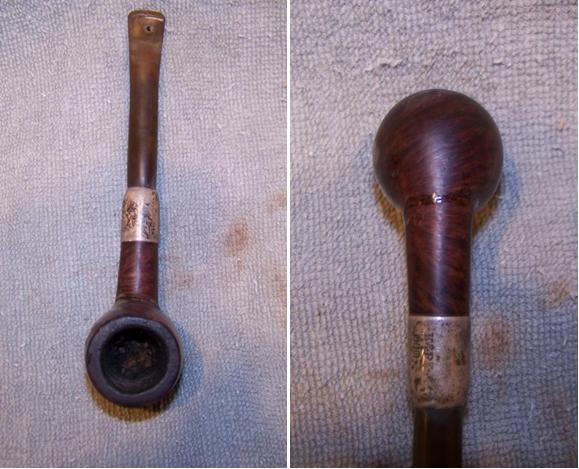
20. Peterson Sherlock Holmes Baskerville (Restore) (IE)
21. Stanwell Kyringe Beech Wood Bulldog #1 Commemorative (DK)
22. V. Rimkus Double Chamber (US)
23. Sjoborg Danish Panel (Restore) (DK)
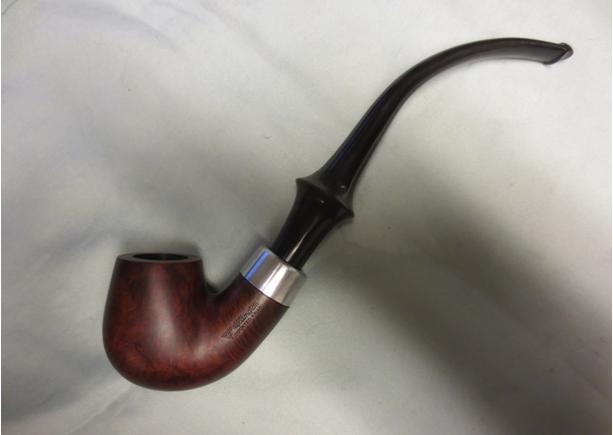
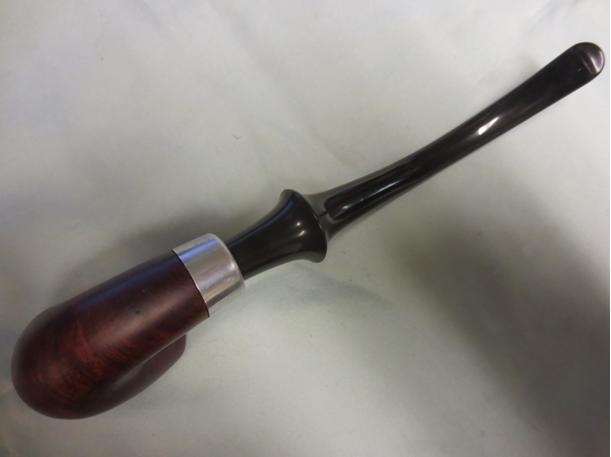
24. WDC Wellington Custom Deluxe Pot (Restore) (US)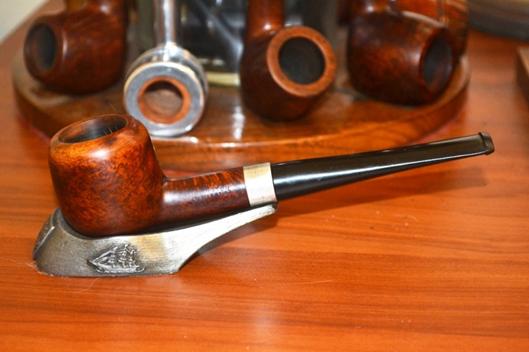
25. Lepeltier Glazed Ceramic (US)
26. Jobey Rustic Apple (Restore) (US)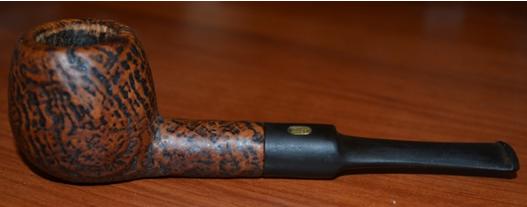
27. Johs Semi-Rustic Danish Billiard (DK)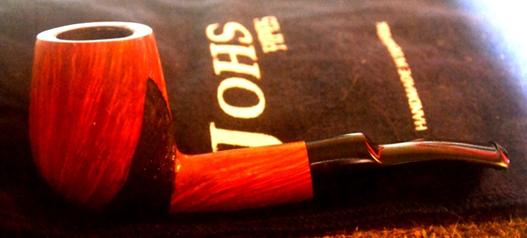
28. Dr. Grabow WWII Era Birch Dublin (US)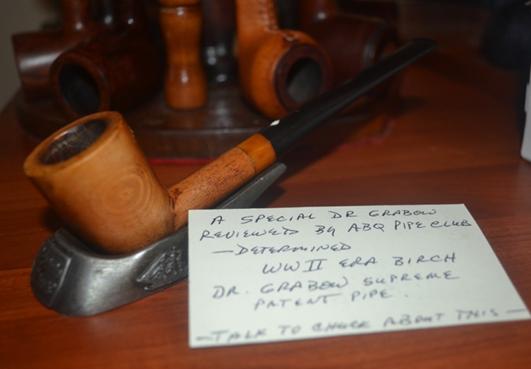
29. Kaywoodie Super Grain 1930s Lovat (Restore) (US)
30. Ser Jacopo Maxima Delecta Fatta a Mano (IT)
31. Stefano FX Bean Pot (IT)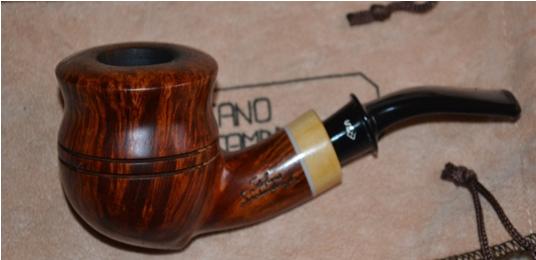
32. Royal Goedwagen Ceramic Billiard (Restore) (NE)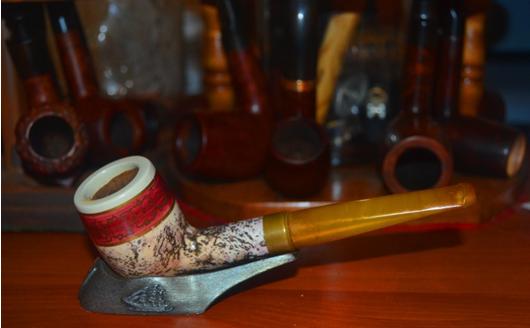
33. Don Warren Fine Figured Maple Gilpin (US)
34. Playboy African Meer (Restore) (UK?)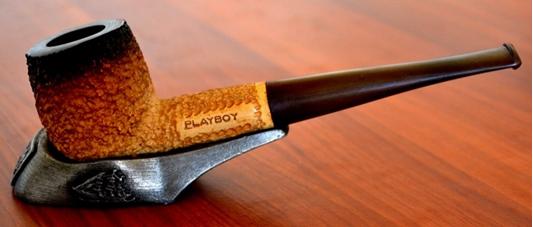
35. Falcon, c. 1930s-1940s (US)
WHEN I’M RICHER
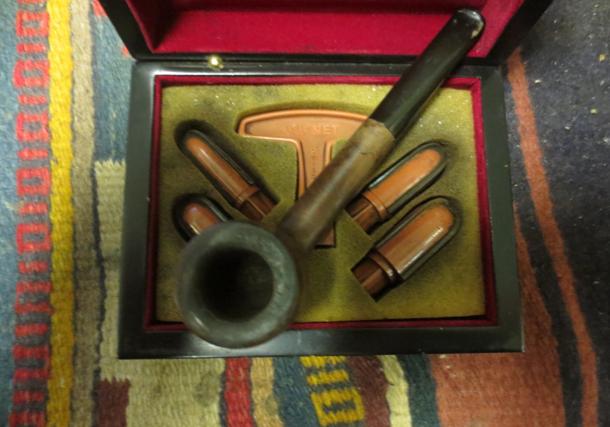
These are a few of the more expensive pipes on my wish-list. The two Russian pipes shown had no price, but the styles and quality usually have four-digit tags.
1. Buddha Bamboo Shank Pipe – Doctor’s Pipes (RU)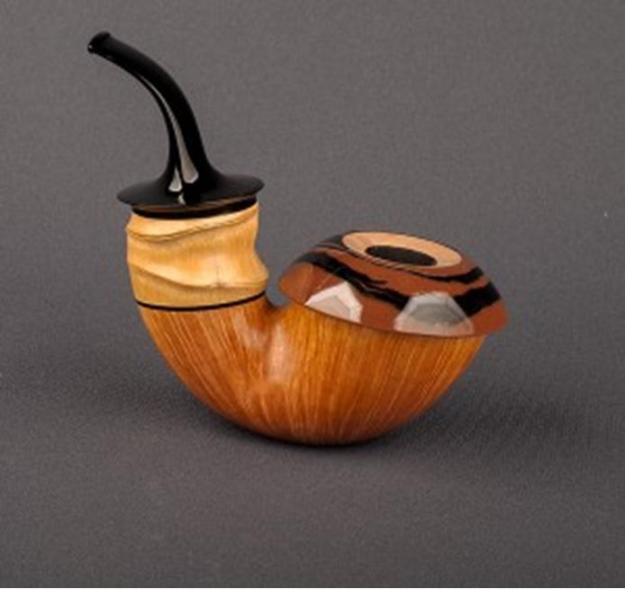
2. Evgeniy Looshin Pipe (RU)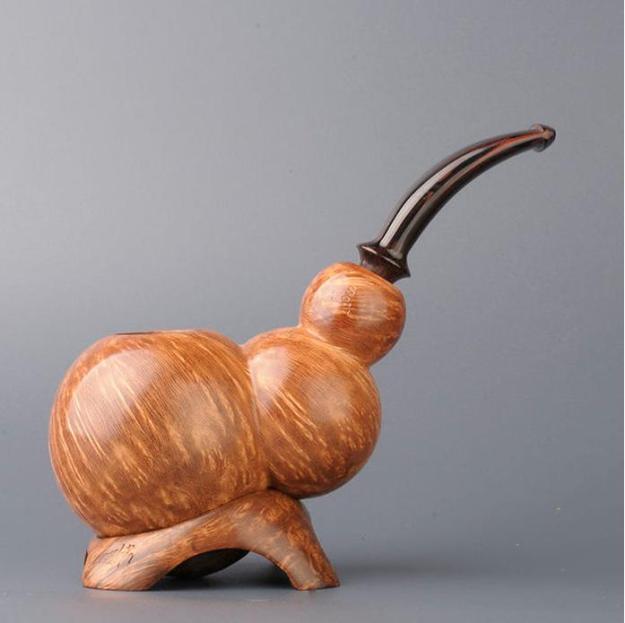
3. Dunhill Christmas Pipe 2015 Kit — $2,150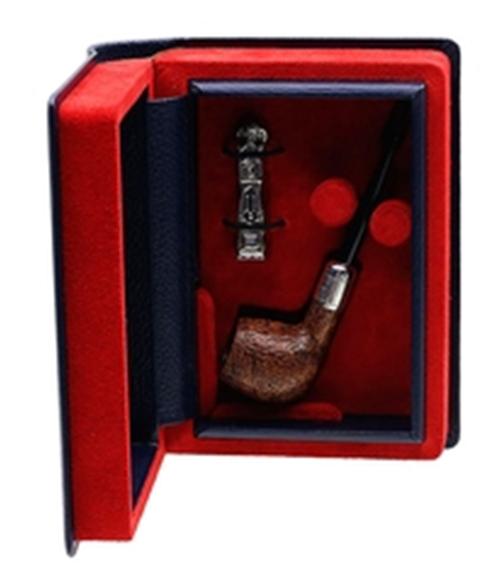
CLOSING REMARKS
I could go on and on with photos of my favorite individual pipes, but I think I demonstrated that my tastes are at least eclectic if not fully satisfied. With hope, they never will be.
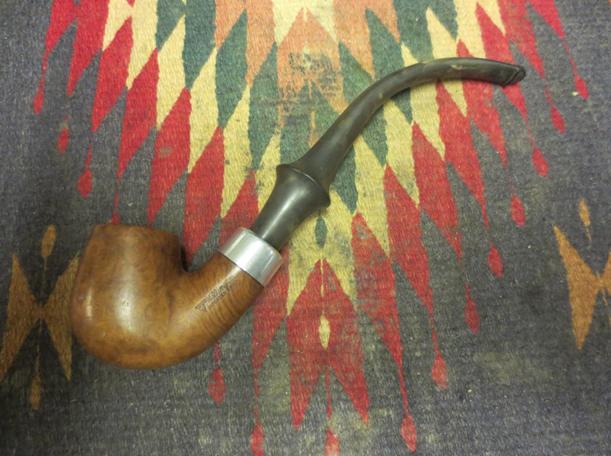
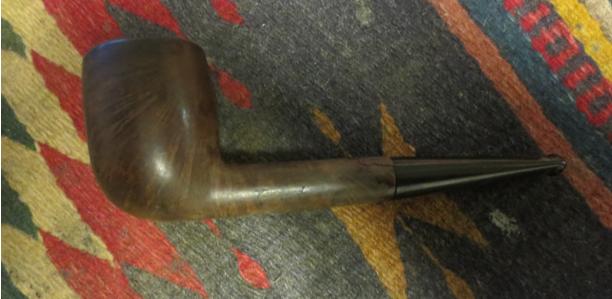
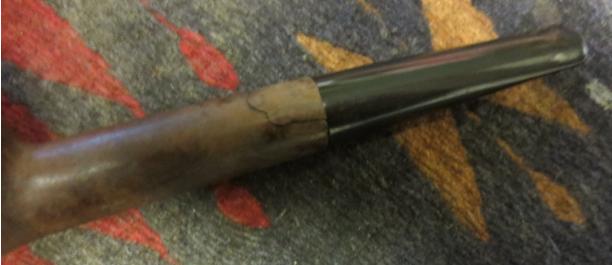
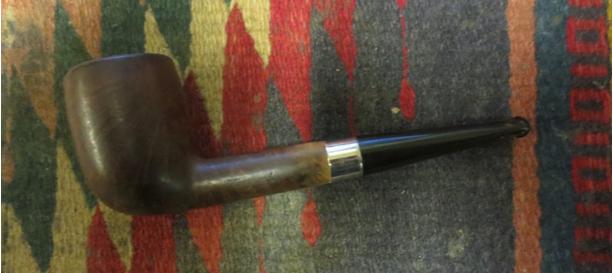
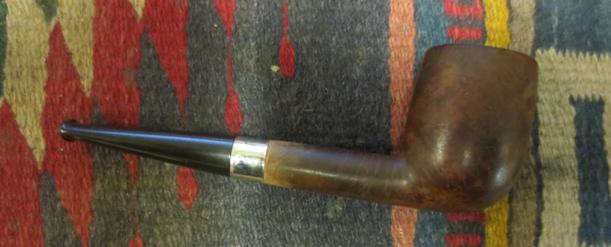
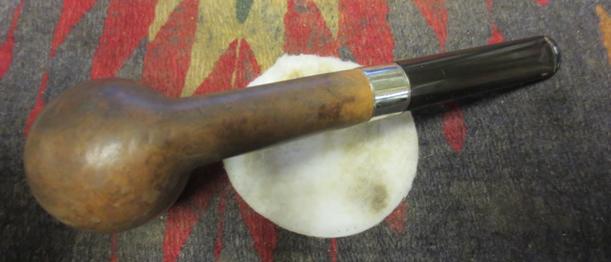
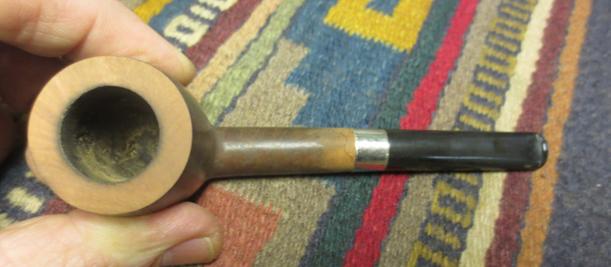
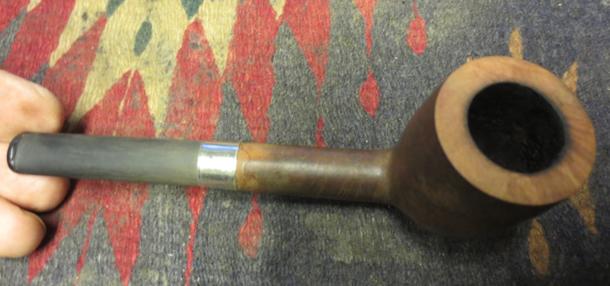
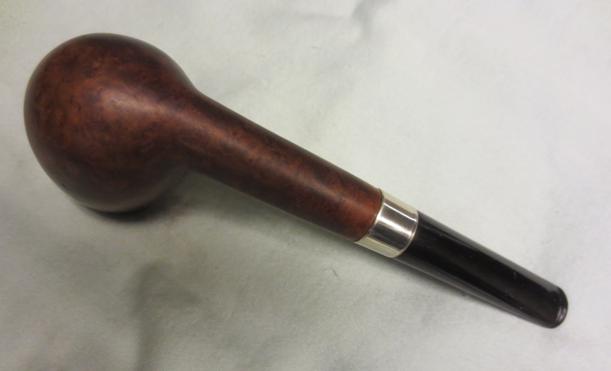
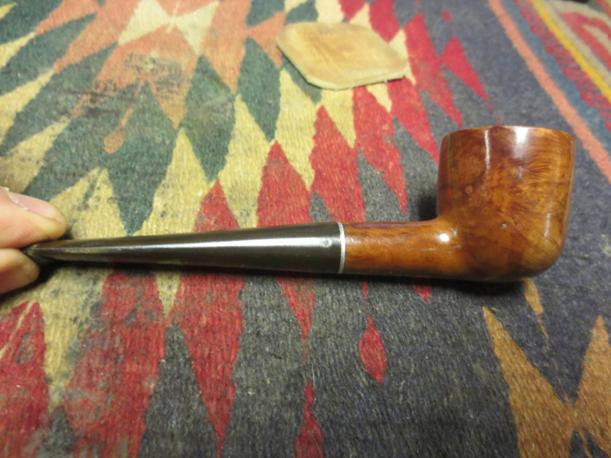
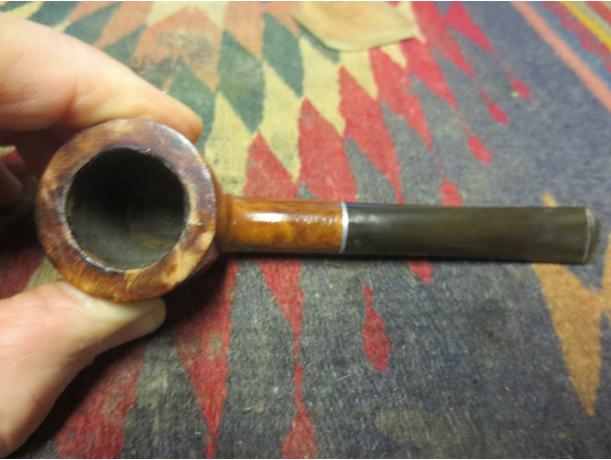
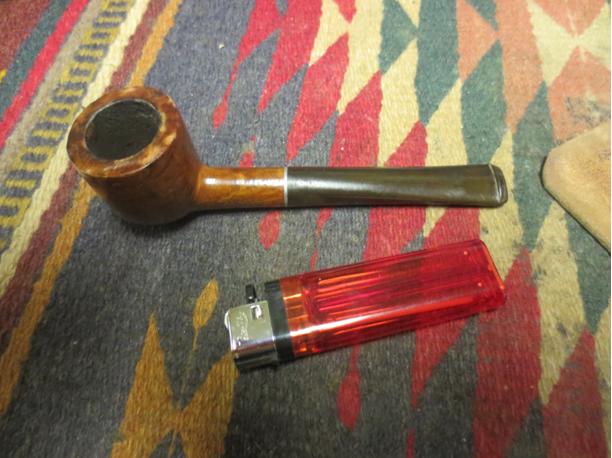
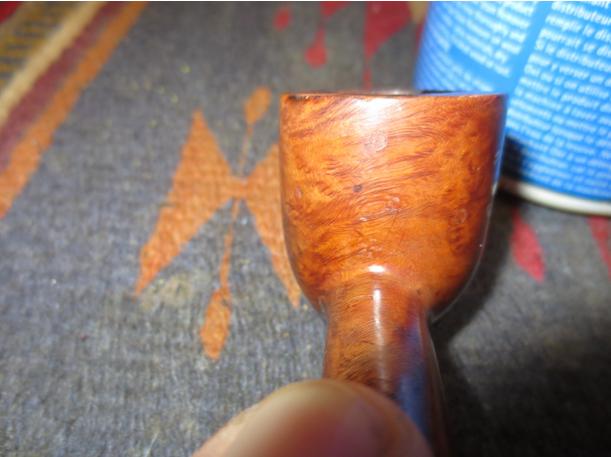
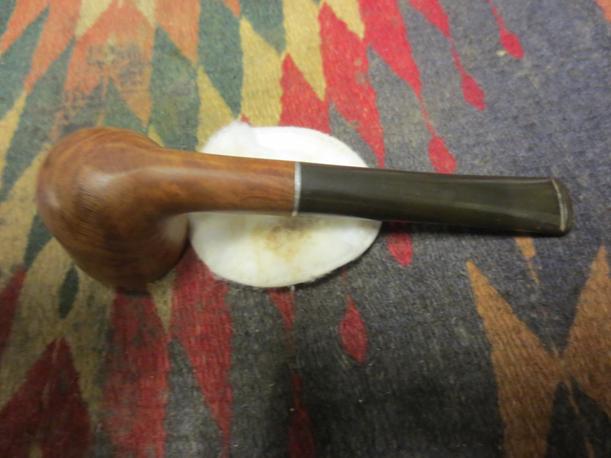
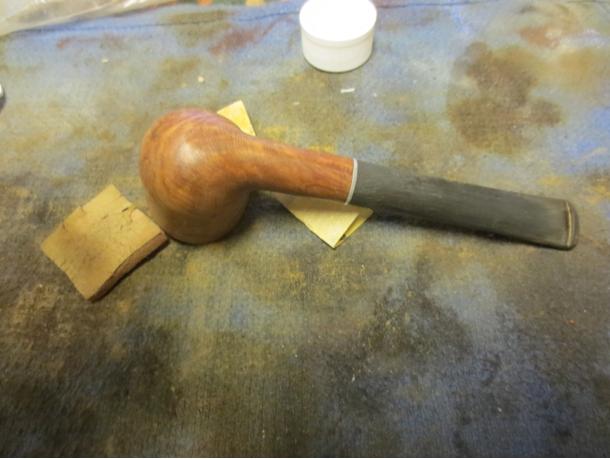
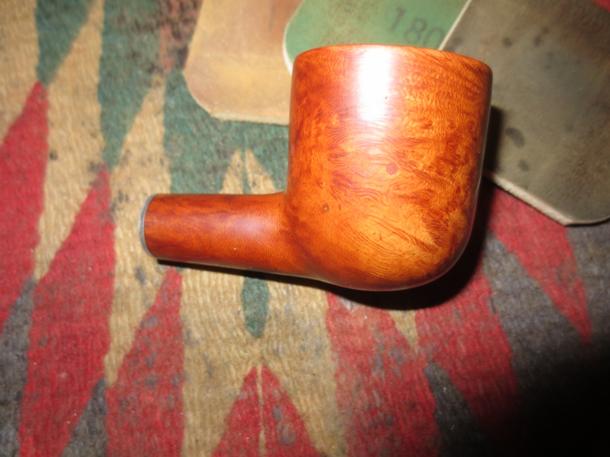
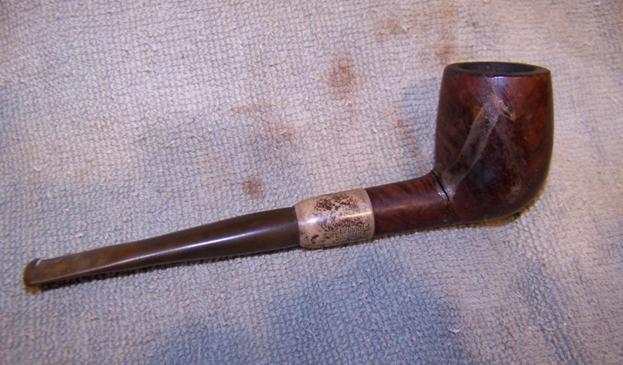
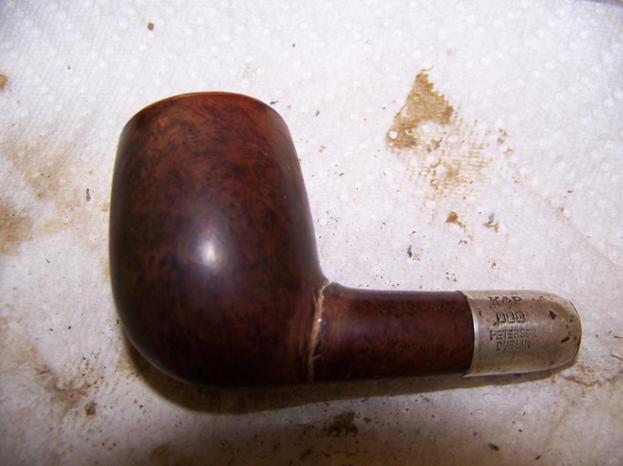
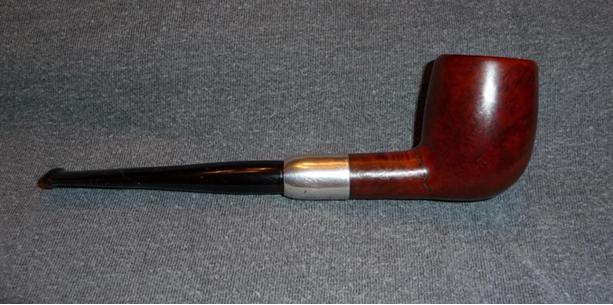
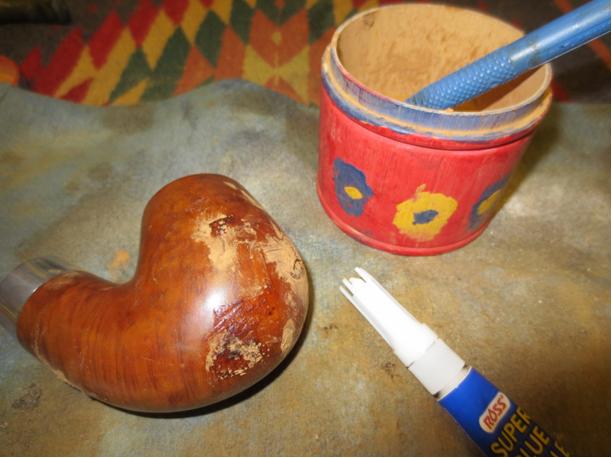
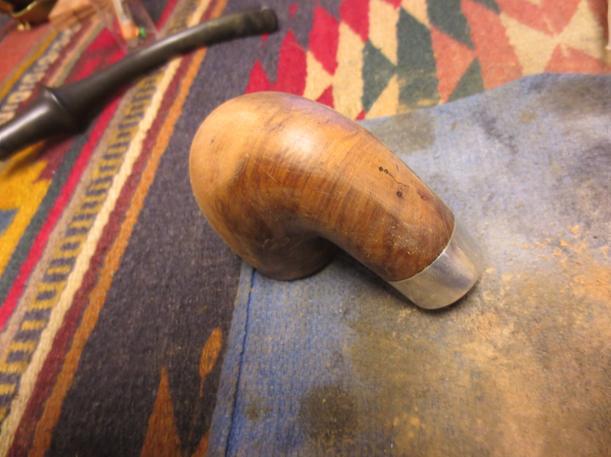
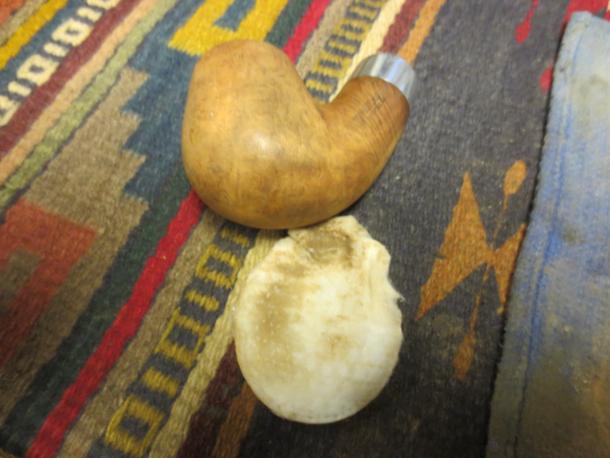
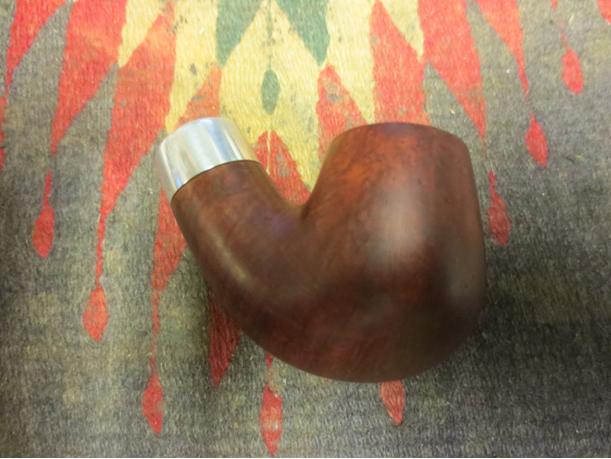
 The briar had some attractive grain in it but there were some issues as well. It had a lot of fills on the front left, front right and bowl front. There was some damage to the surface of the rim that looked as if the pipe had been dropped on concrete. The outer edge of the rim on the front had some damage and was rounded over and the inner back edge of the rim had burn damage that made that portion out of round. Fortunately it was not a deep burn and would be relatively easy to address. There was also a ¾ inch crack on the underside of the shank that had one ¼ inch branch going toward the left side of the shank.
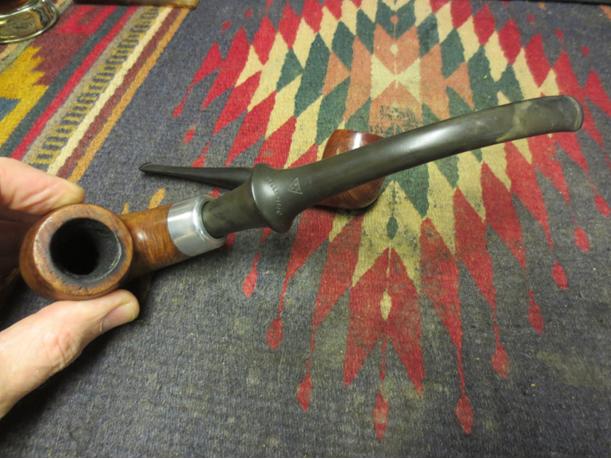
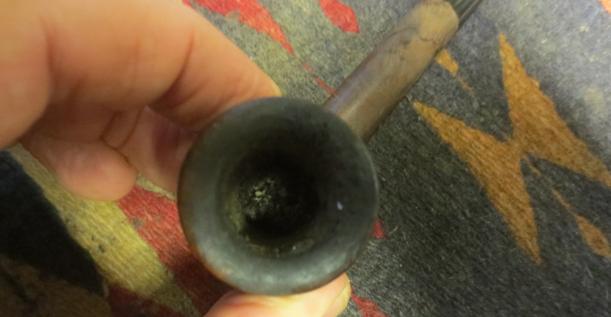
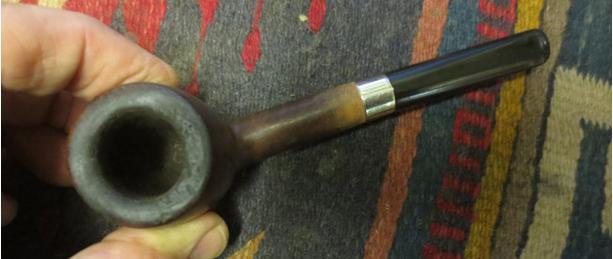
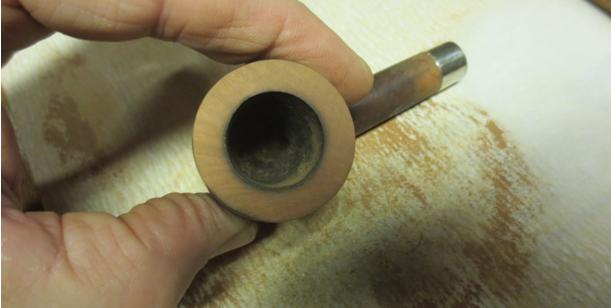
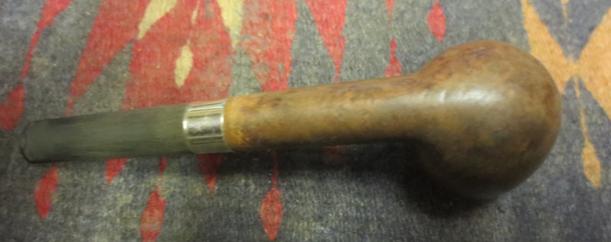
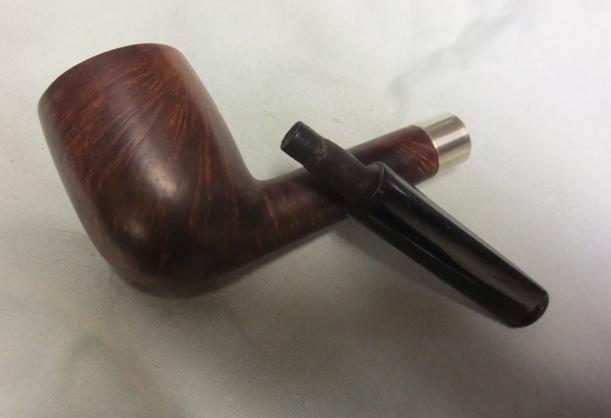
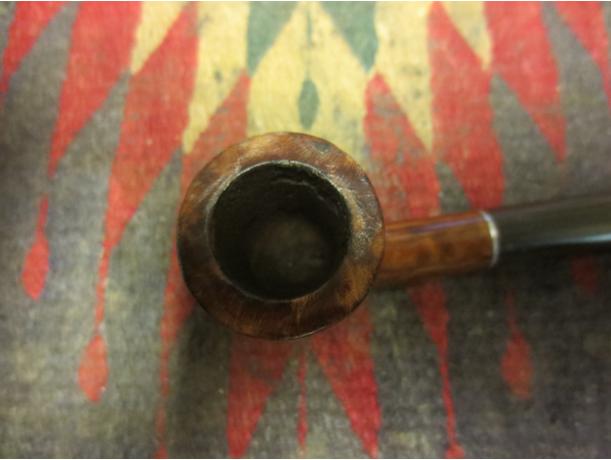
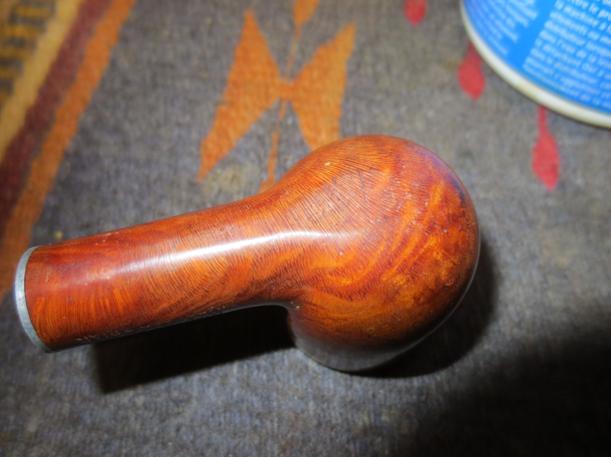
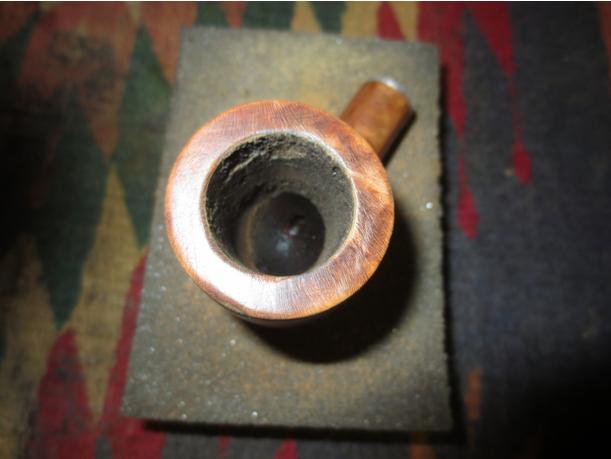
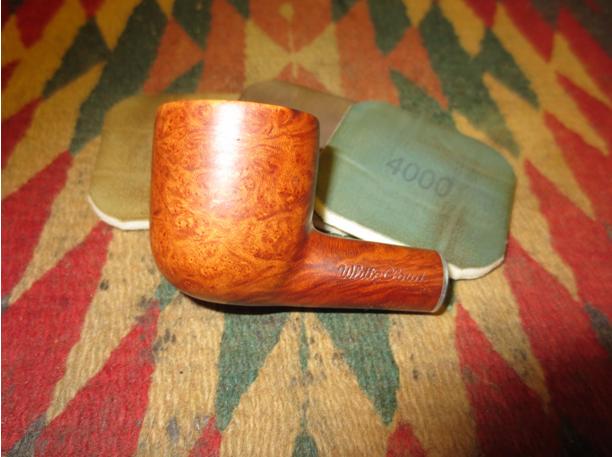
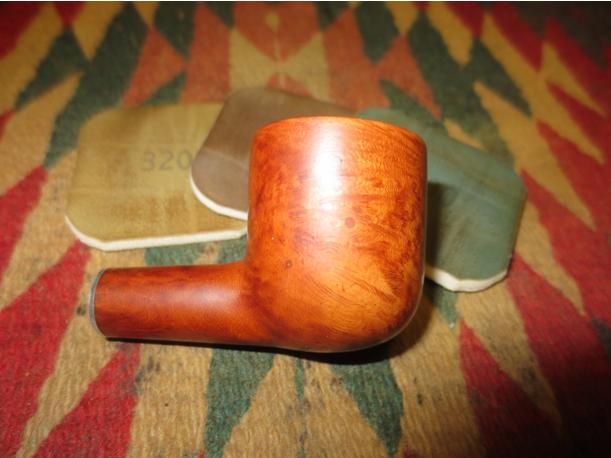
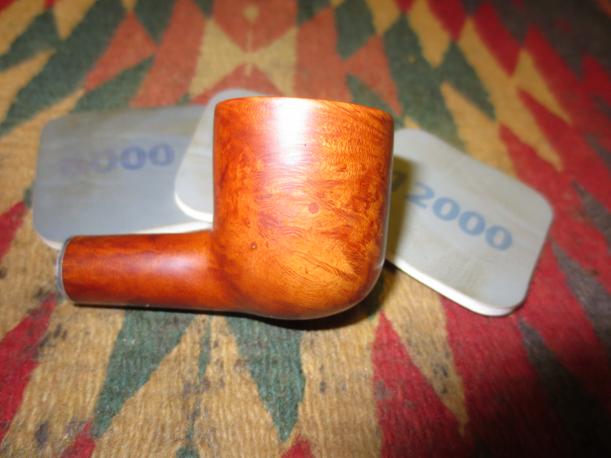
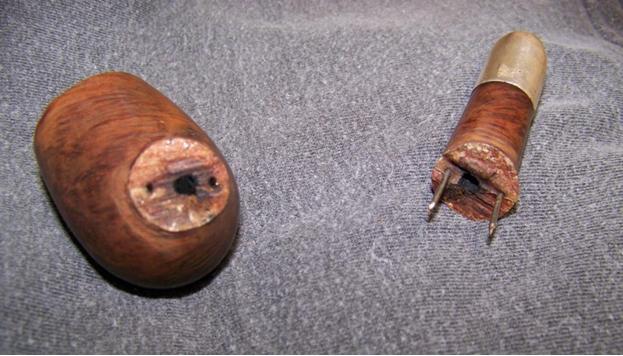
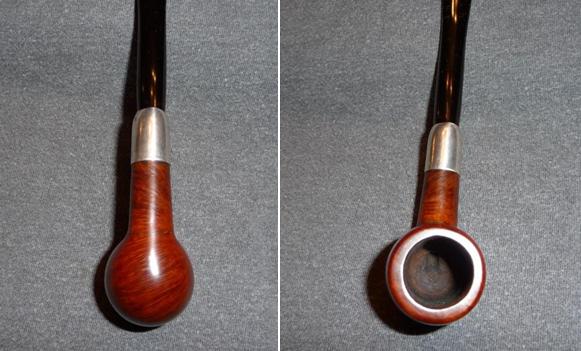
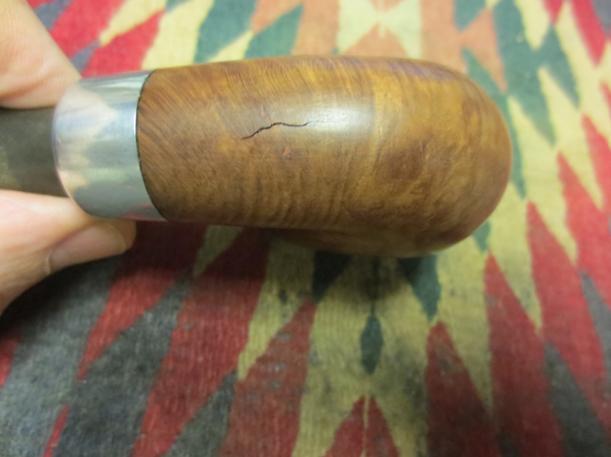
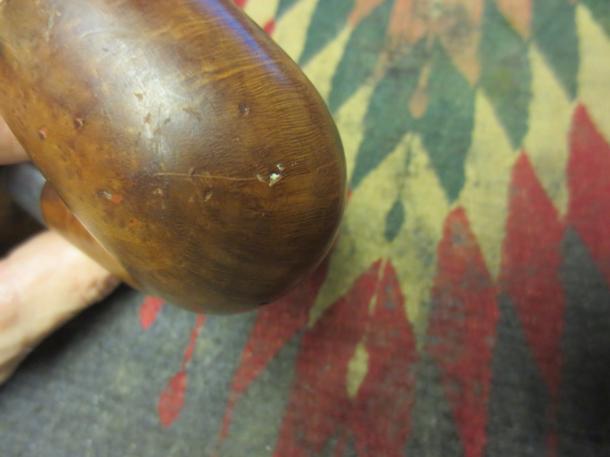
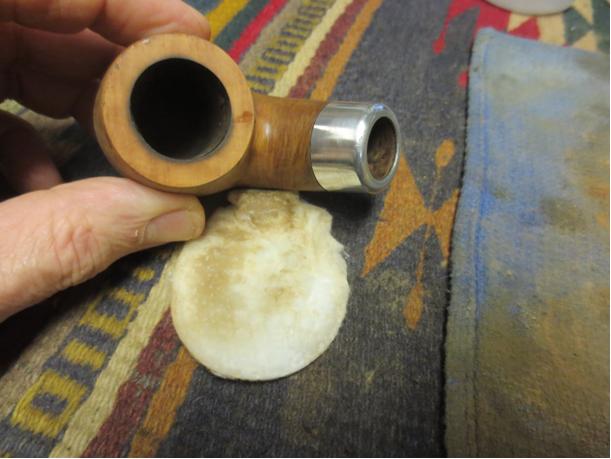
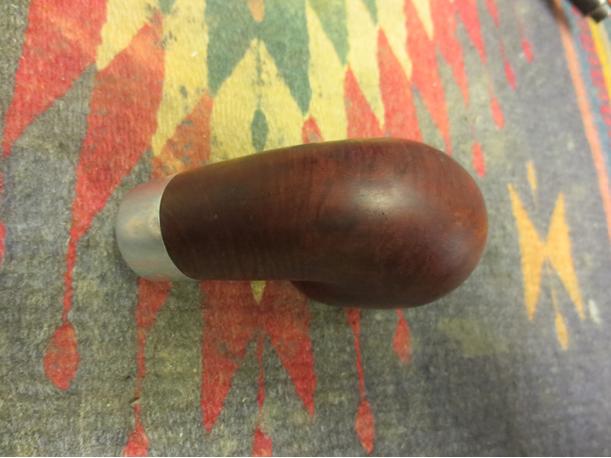
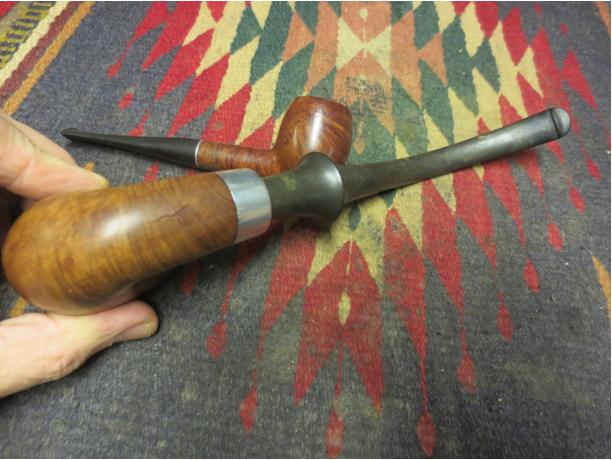 I took a series of close up photos to show the damaged areas of the pipe. The first shows the damage to the rim surface and edges. The second shows the crack in the shank. The third photo shows the missing fills and divots in the bowl sides.
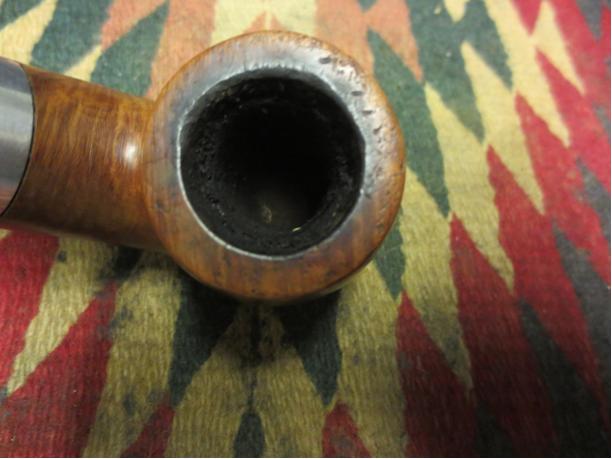
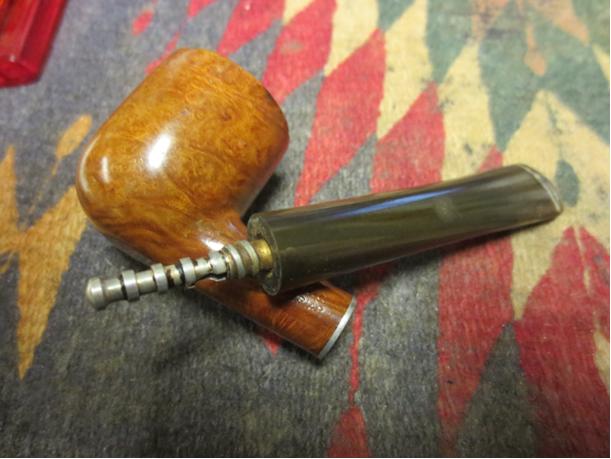
 I decided to address the crack in the bottom of the shank first. I used a micro drill bit on my Dremel to drill some small holes at the end of the crack and the branches of the crack to stop the damage from spreading further. The bit is very tiny as can be seen from the holes that are left behind after drilling. I drill two holes on each end because after the first hole I examined it with a lens and could see that extended slightly beyond my first hole. I picked out the damaged putty fills with a dental pick and wiped the bowl down so that I could repair the crack and the fills. I used a clear super glue and fine briar dust to replace the fills and to fill in the drill holes on the shank bottom. In each case I over filled the holes so that as the glue and dust were sanded I would not need to repeat the process due to shrinkage.
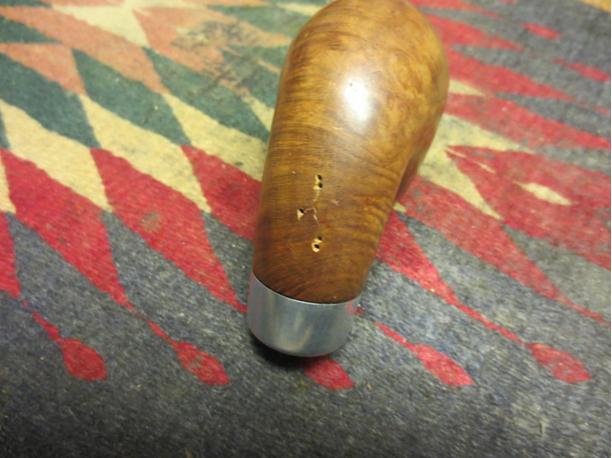

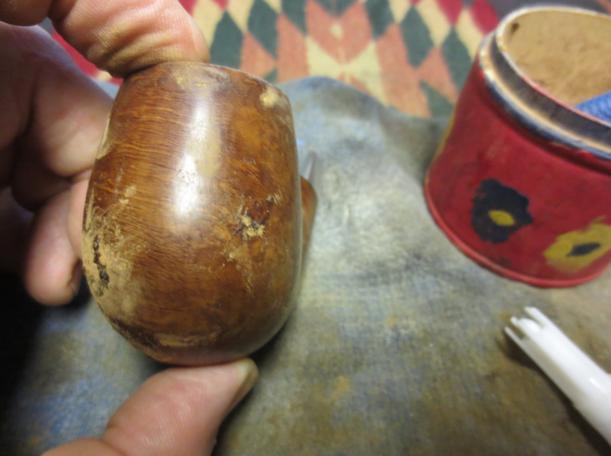 My intention was to restain the entire bowl so I sanded the bowl and the repairs with 220 grit sandpaper to smooth out the repairs. I followed that by sanding the bowl and repairs with a medium and a fine grit sanding sponge.
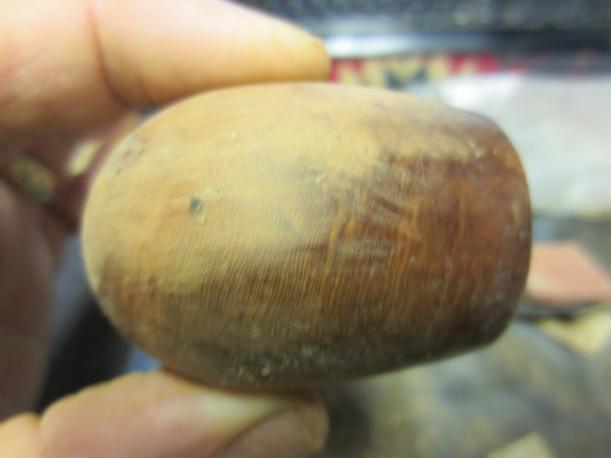

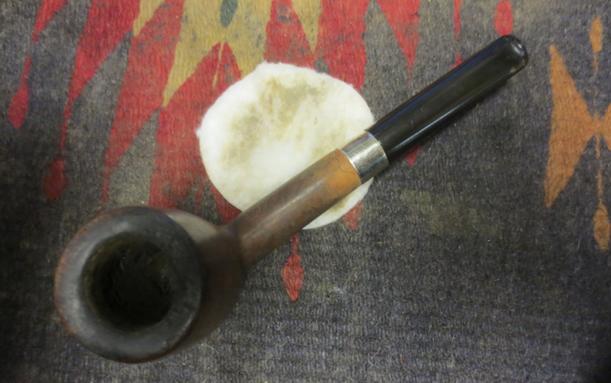
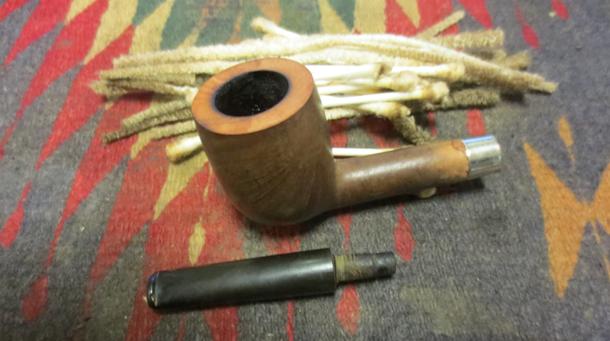
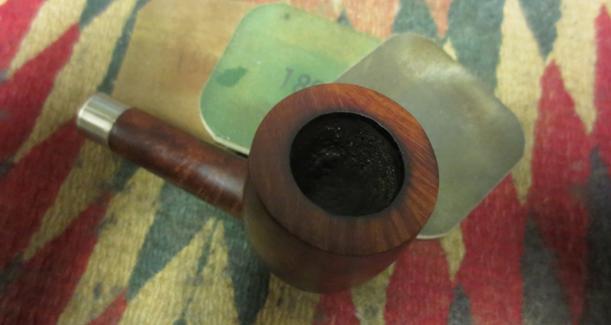
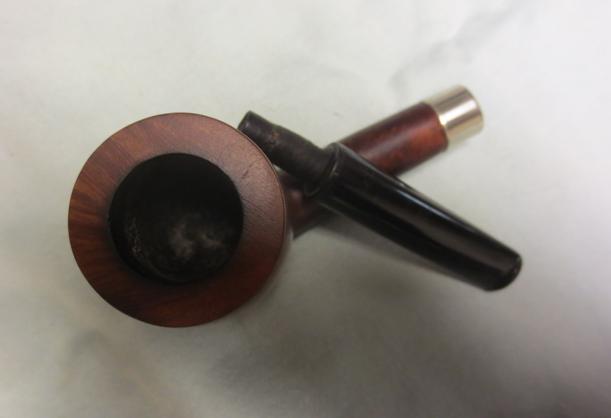
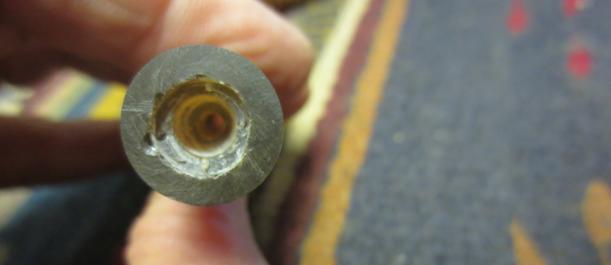
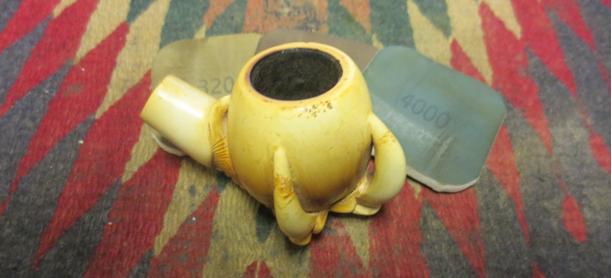
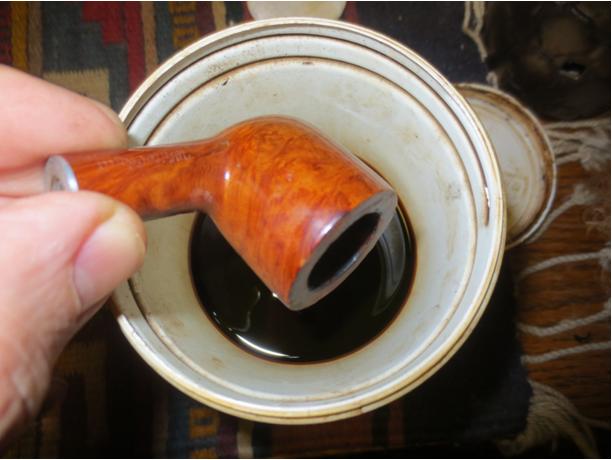
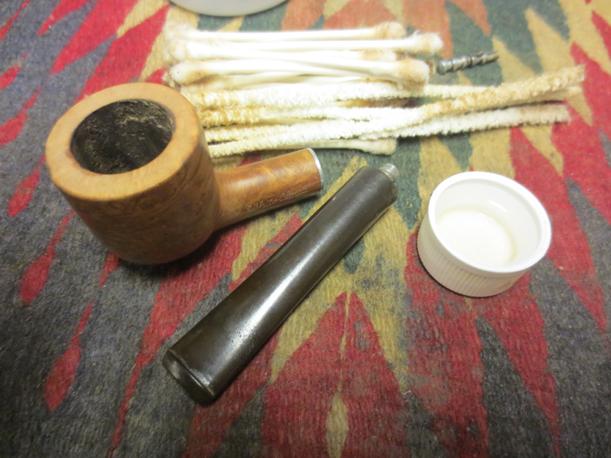
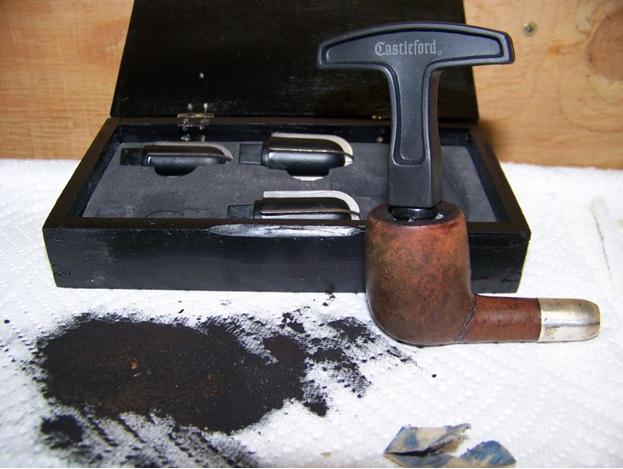
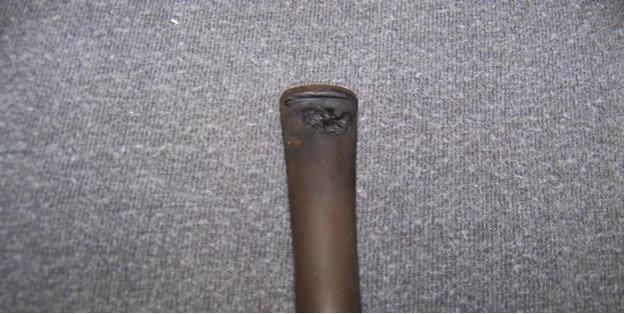
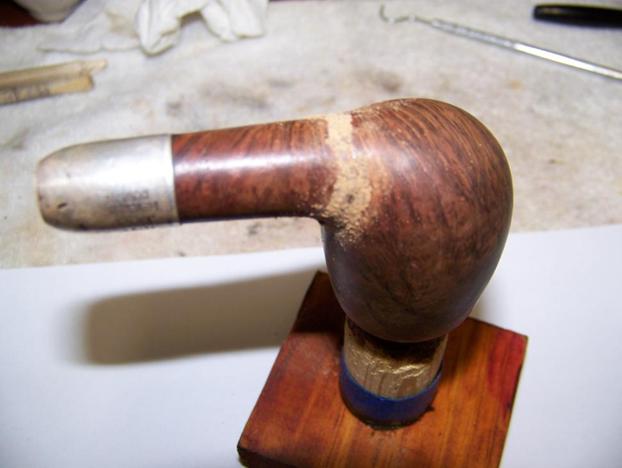
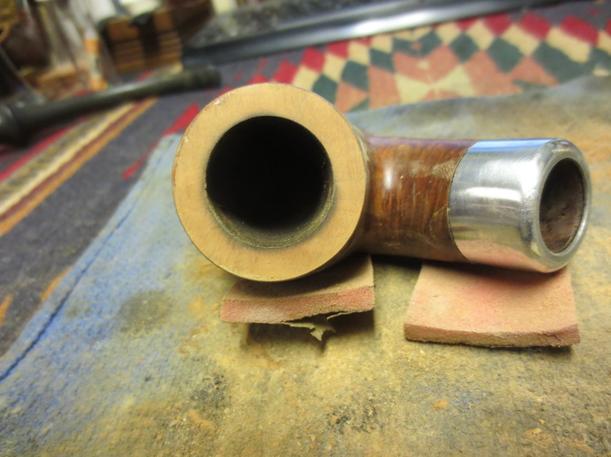
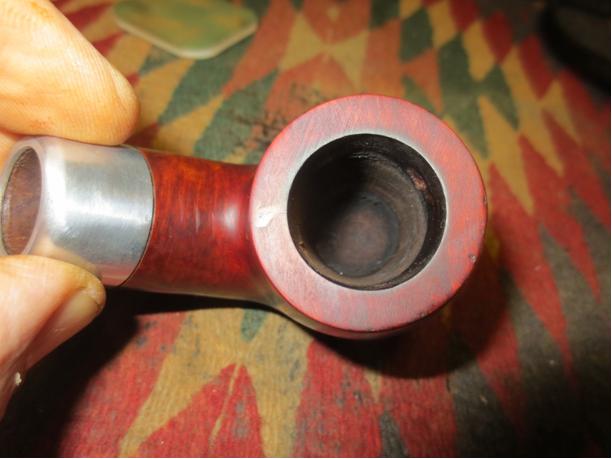
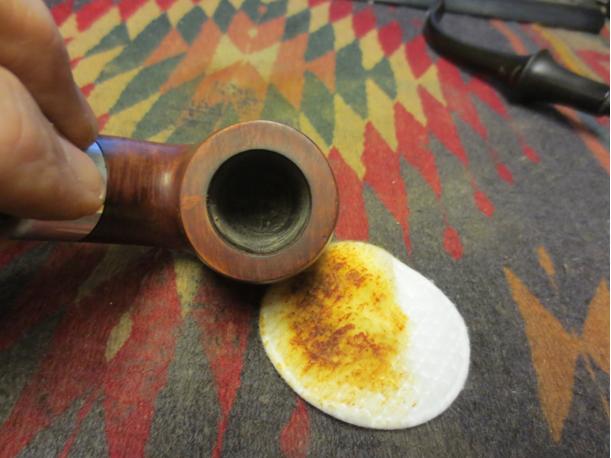
 I reamed the bowl with a PipNet reamer starting with the head that would fit and working up a head that took the cake back to bare briar. In looking at the back side of the bowl I could see a small hairline crack and I wanted to know if it went all the way through.
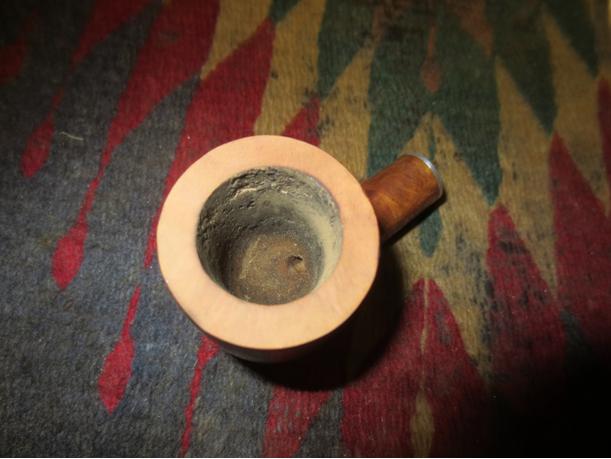
 I topped the bowl with the topping board and took off all of the damage to the inside and outside rim as well as the rim surface. I sanded it with the medium and fine grit sanding sponge as well to smooth out the scratches.
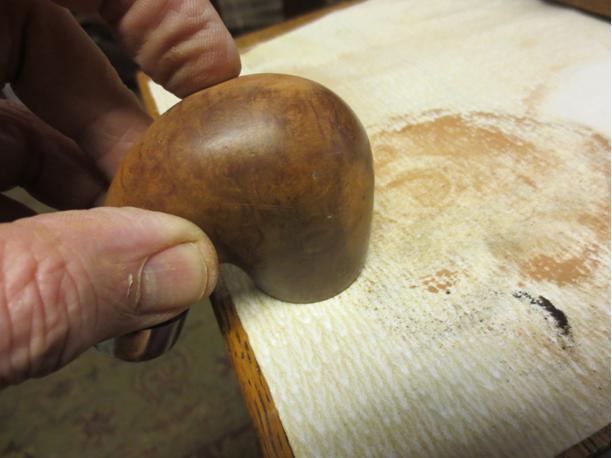
 After sanding and topping the bowl I could see that indeed there was a hairline crack that went across the rim at 5 o’clock and went down the back side of the bowl about ¾ of an inch. It was small and did not separate. It looked like it went all the way through to the inside of the bowl but upon examination appeared to only extend about 1/16th of an inch into the bowl. I topped it a little bit more to take care of the internal crack. I drilled the back side of the bowl at the bottom of the crack to stop it from going further down the bowl.
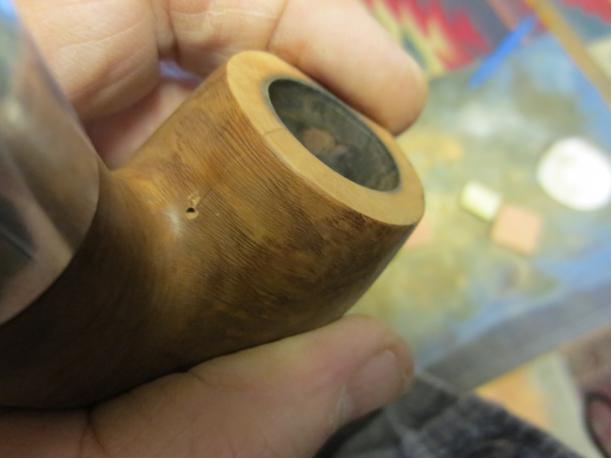 I wiped down the bowl side and then picked out the crack with a dental pick. I filled it with super glue and briar dust and sanded it down with 220 grit sandpaper and the medium and fine grit sanding sponges until it blended into the surface of the bowl. I picked out the rim crack as well and filled it with the same mix. I sanded it with the topping board once again and then with the medium and fine grit sanding sponge.
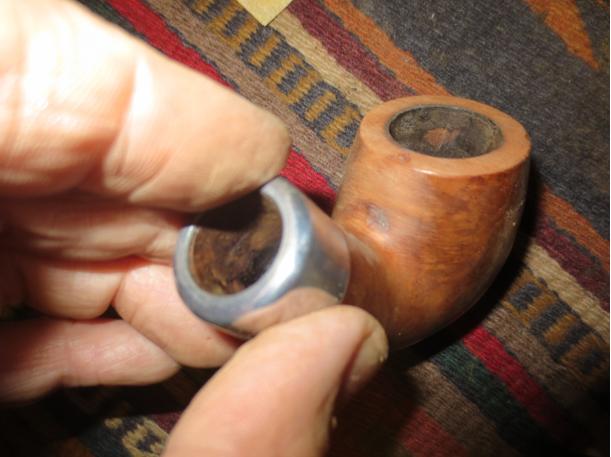
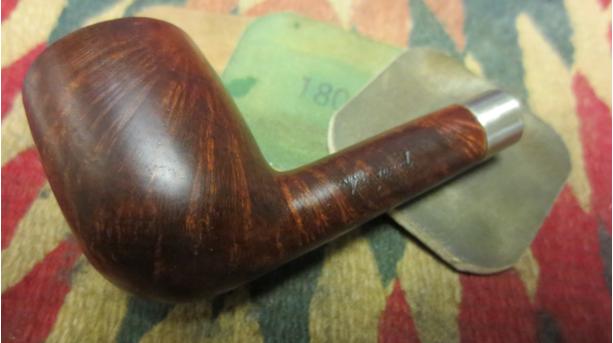
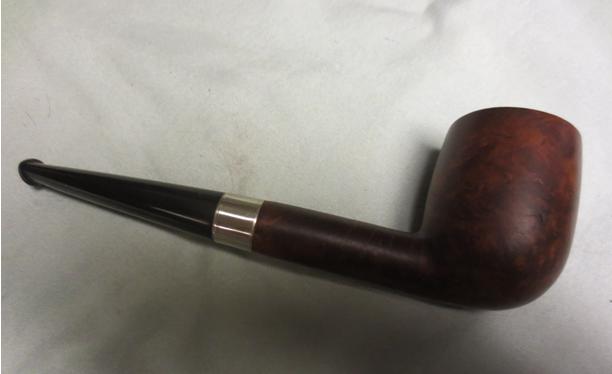
 I scrubbed the bowl with acetone on cotton pads to remove the remaining finish on the briar and to clean up the dust from all of the sanding of the fills. There was some beautiful grain that was showing through. The patches and fills actually looked much better.
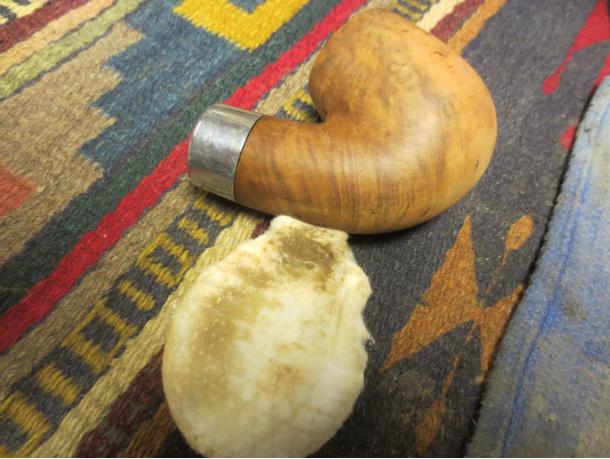
 I cleaned out the shank, bowl and airway in the shank and stem with alcohol, cotton swabs and pipe cleaners.
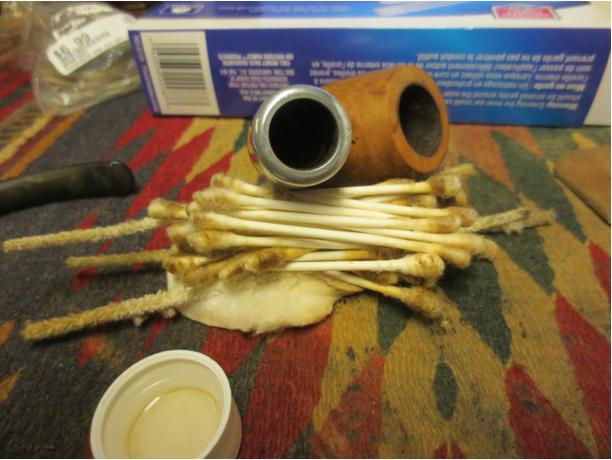
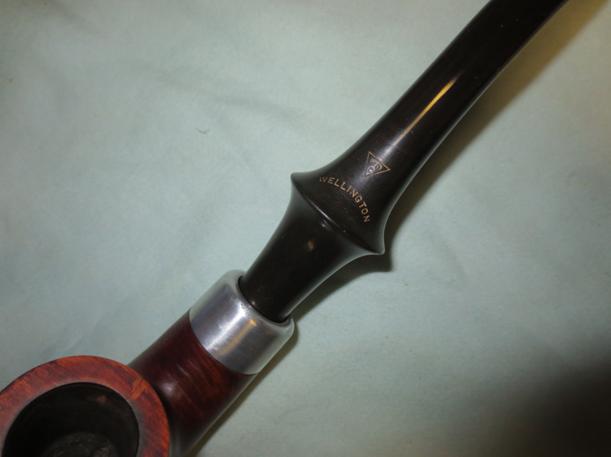
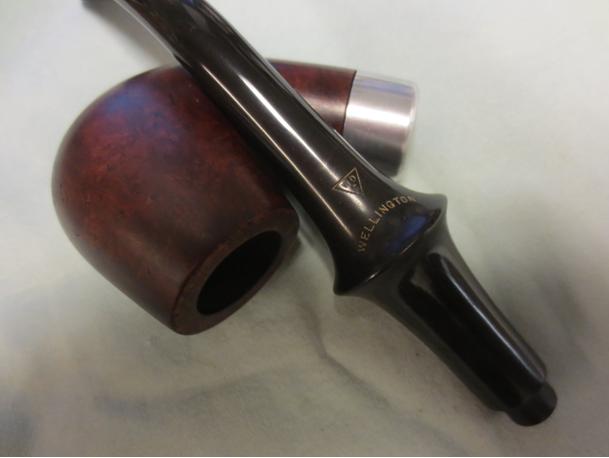
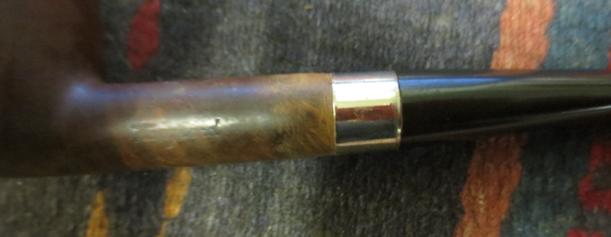
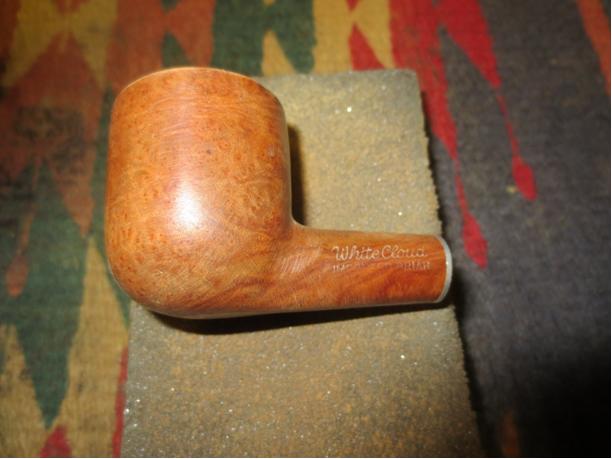
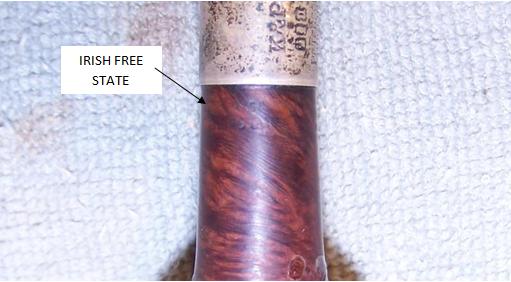
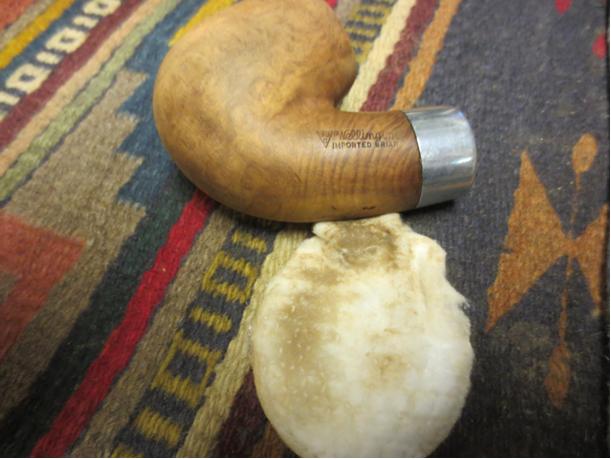
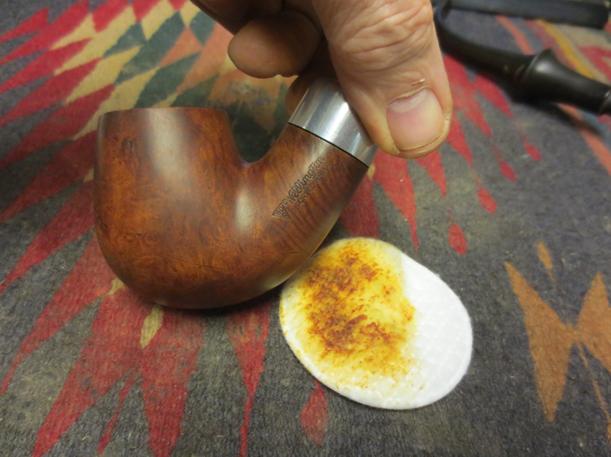
 I sanded the stem with 220 grit sandpaper and a medium and fine grit sanding sponge being careful not to damage the stamping. I went over that area with a 1500 grit micromesh pad. I then use an antique gold oil based product called Rub and Buff to fill in the stamping. The next photo shows the finished rework of the gold in the stem stamp.
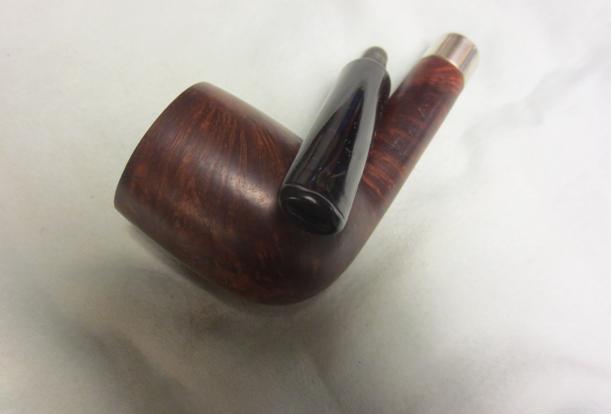
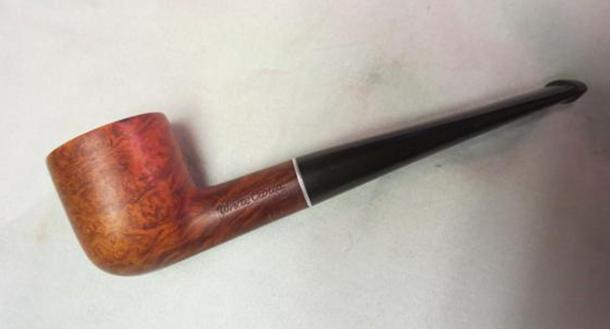
 I put the stem in place on the bowl to get an idea of the improvement that the repairs, fills and stem work had done. I wanted to see what the pipe would look like as I finished.
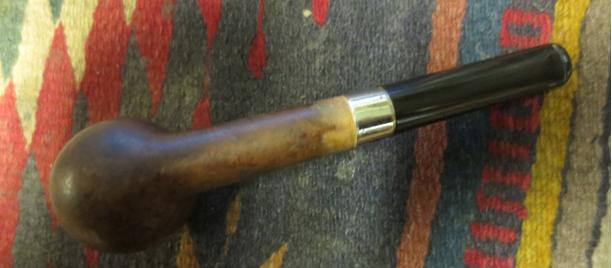
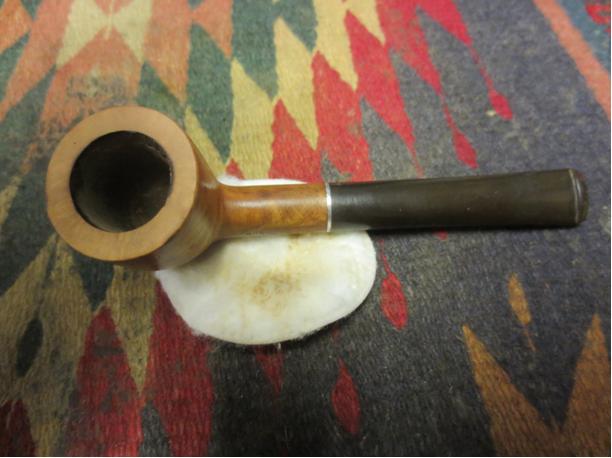
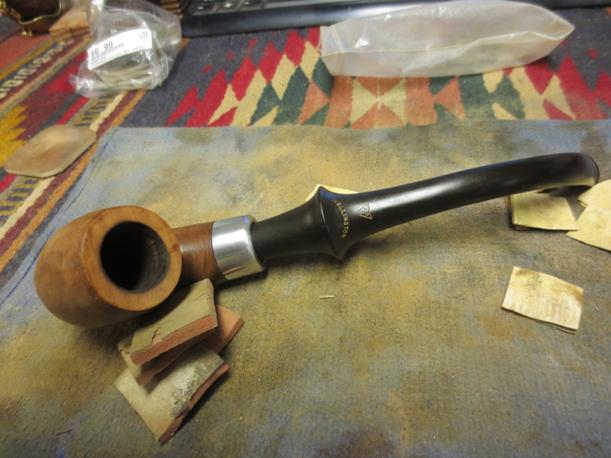

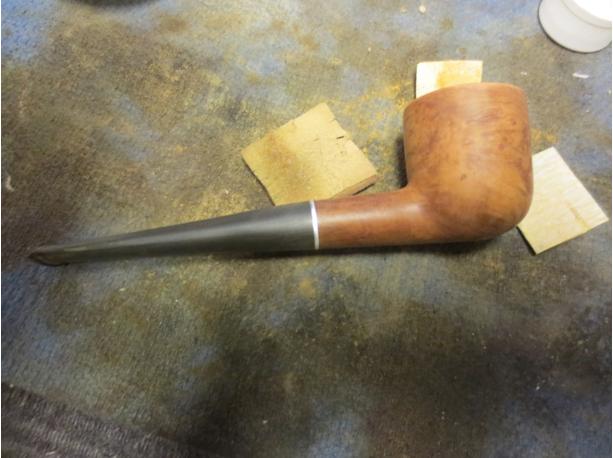
 I wiped the bowl down with a final wash of isopropyl alcohol and then heated it so that I could give it a stain coat. I stained it with a dark brown aniline stain thinned by 50% with isopropyl alcohol. I applied it and flamed it. I reapplied the stain and flamed it again and then set it aside to dry.
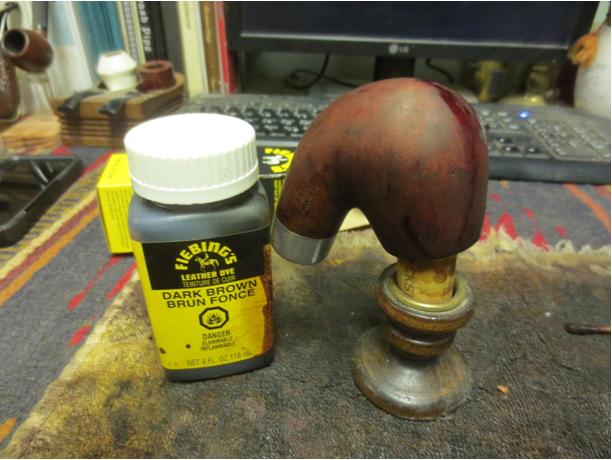
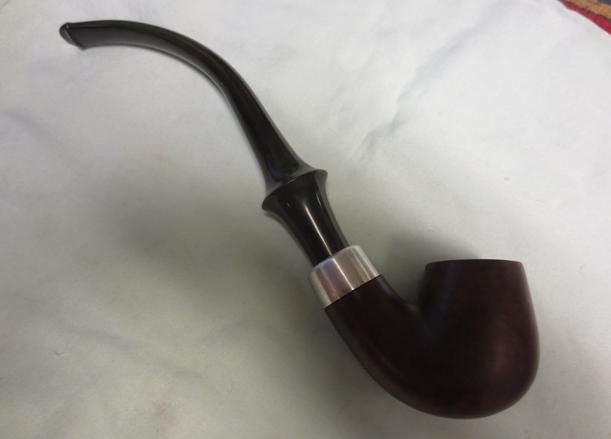
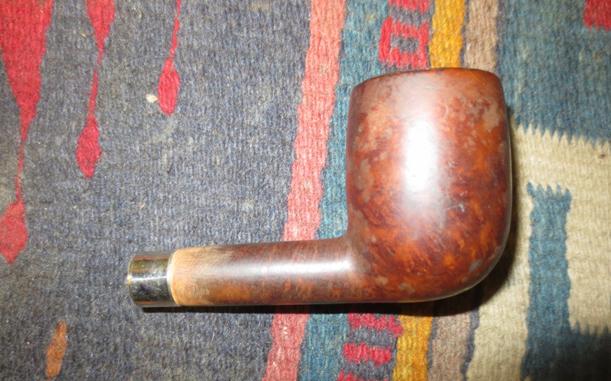
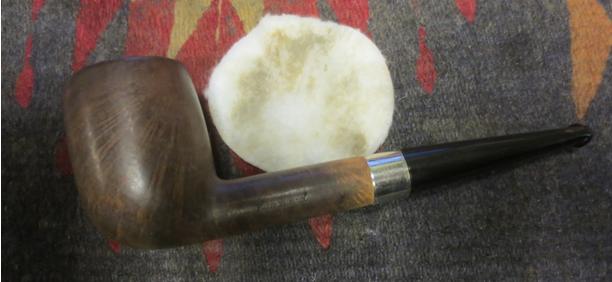
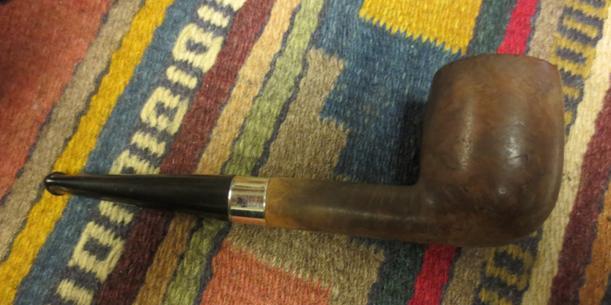
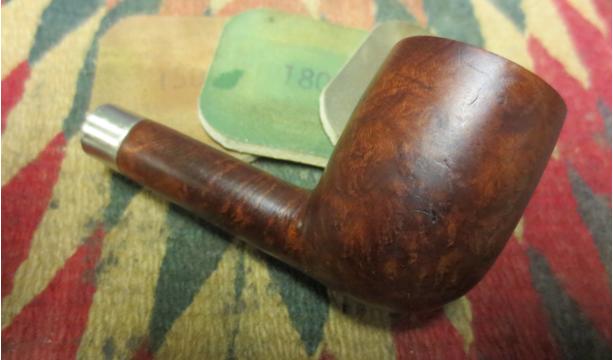
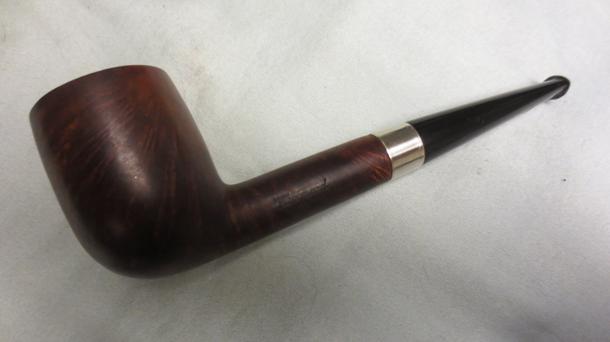
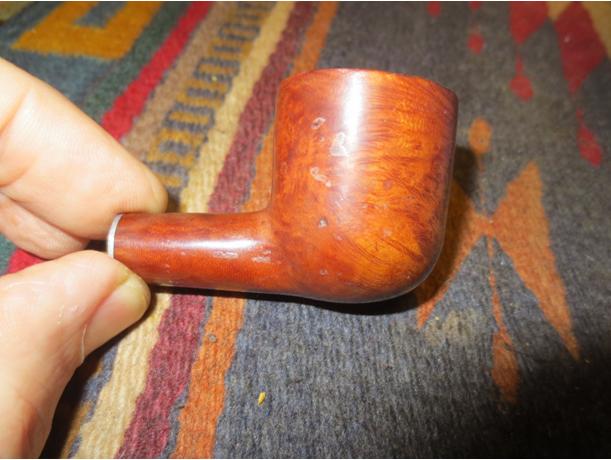
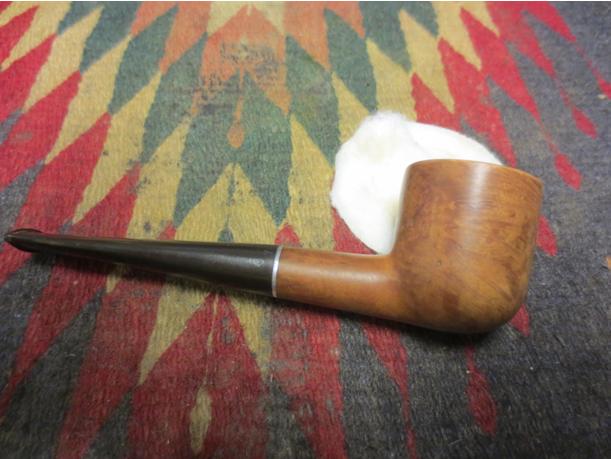
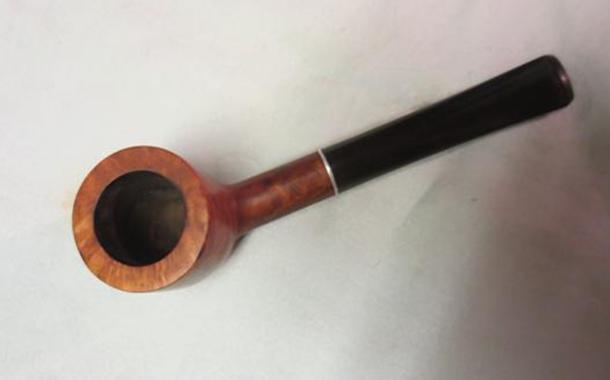
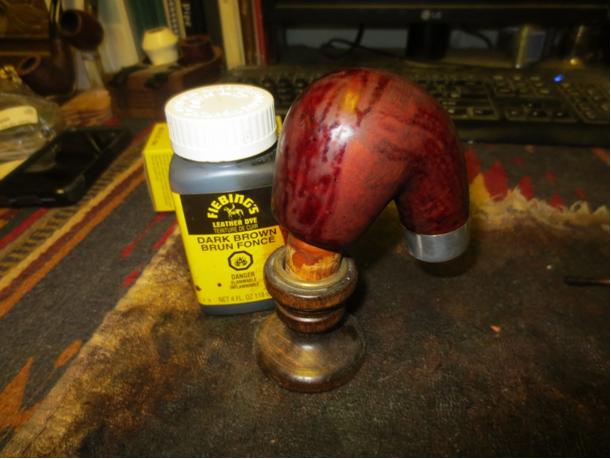 When it had dried I gave it a light buff with a microfibre cloth to see what the colour looked like. It was still a bit dark to my liking but the coverage was good. The repairs and fills while visible looked far better than when I started.
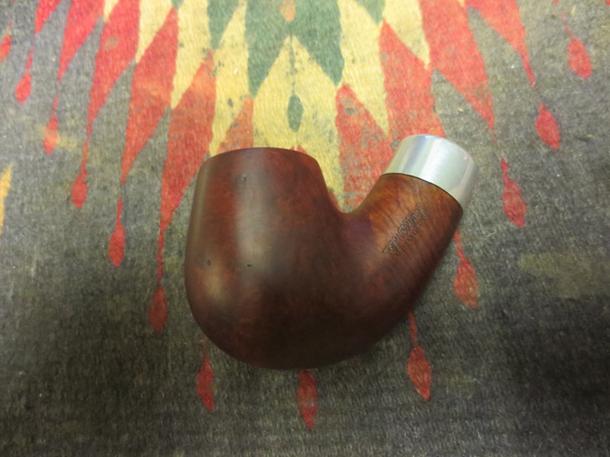
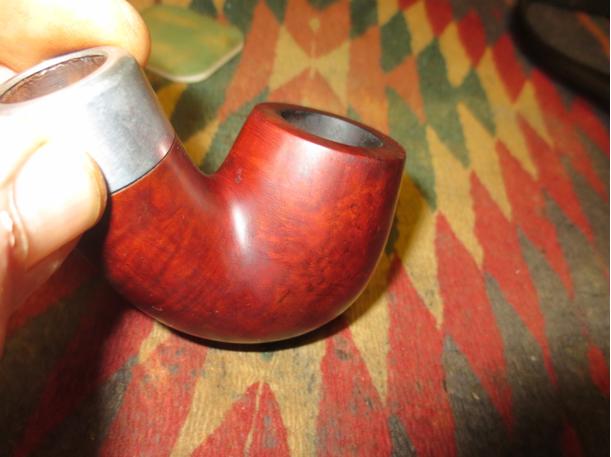
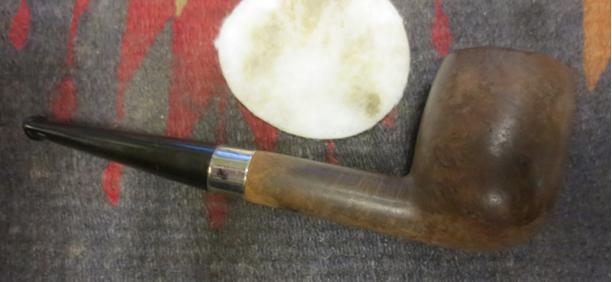
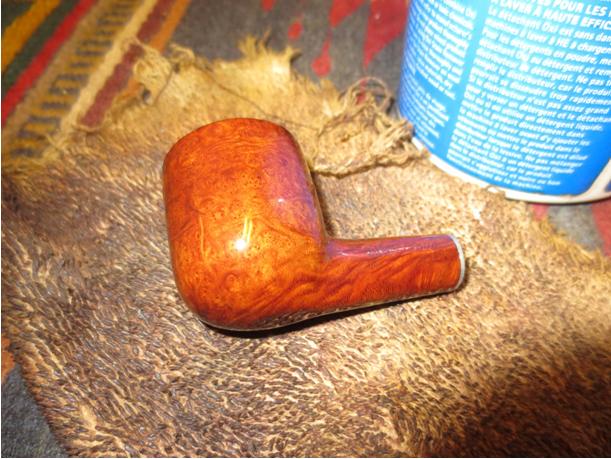
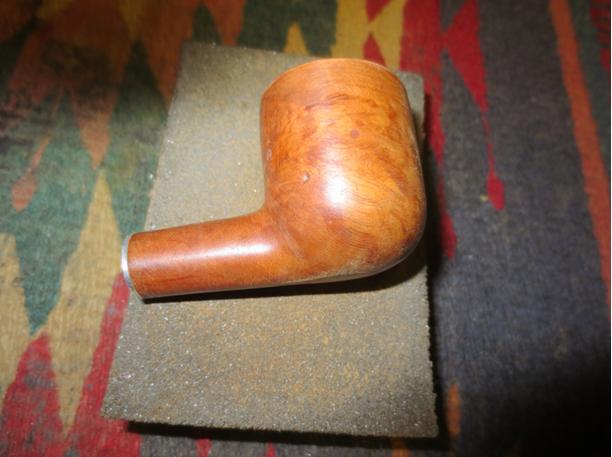
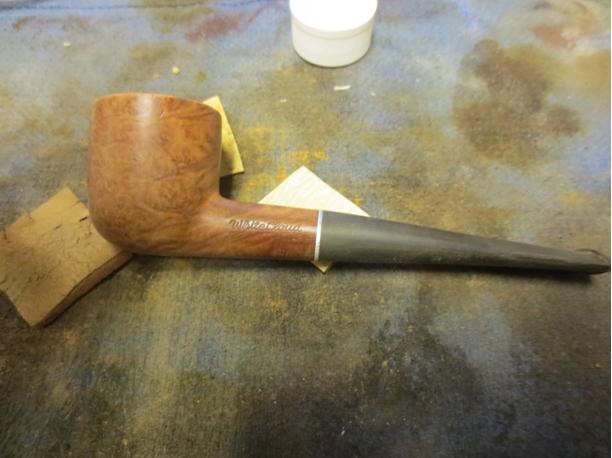
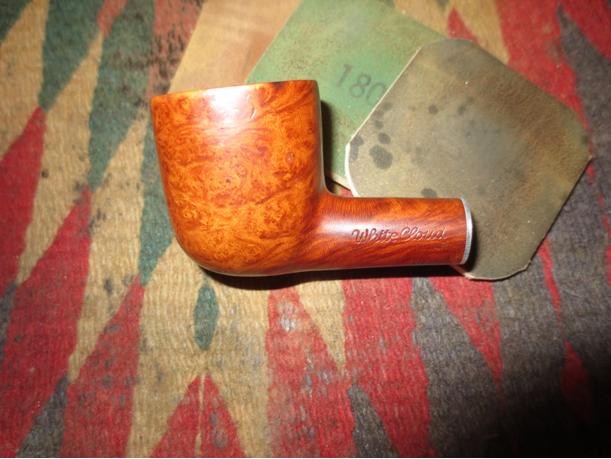
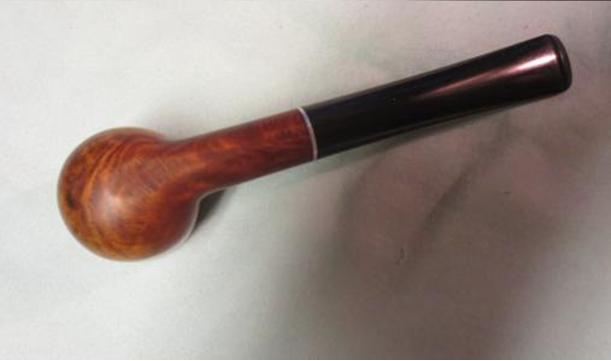
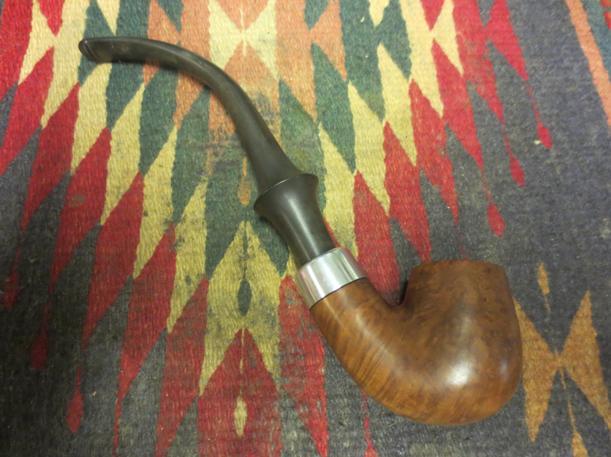
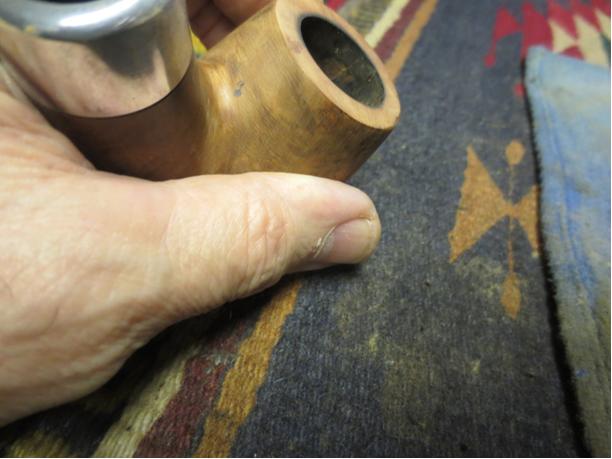
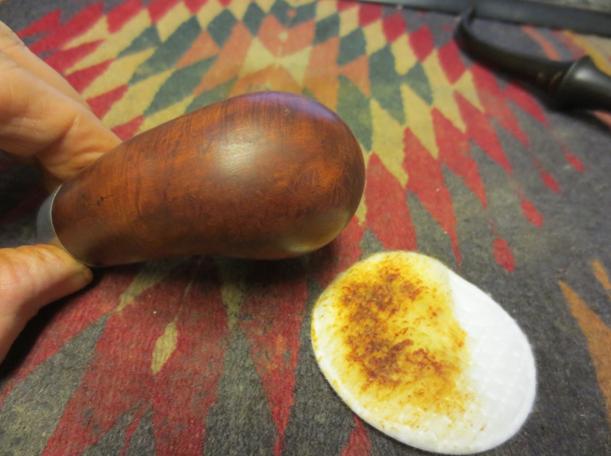
 I wiped the bowl down with alcohol on a cotton pad to make it a bit more transparent and make the grain shine through. It did not take much to coax the grain to the surface and highlight the beauty of the pipe.
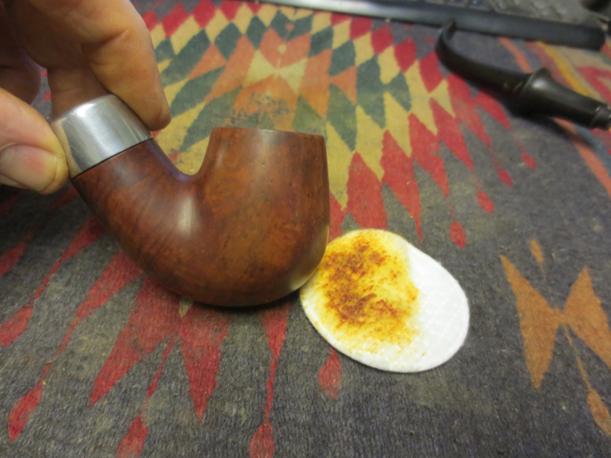
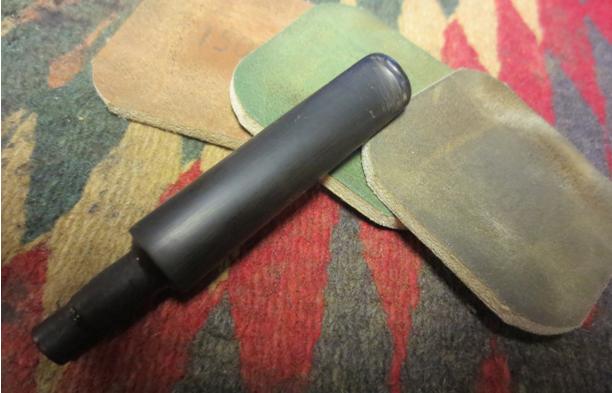
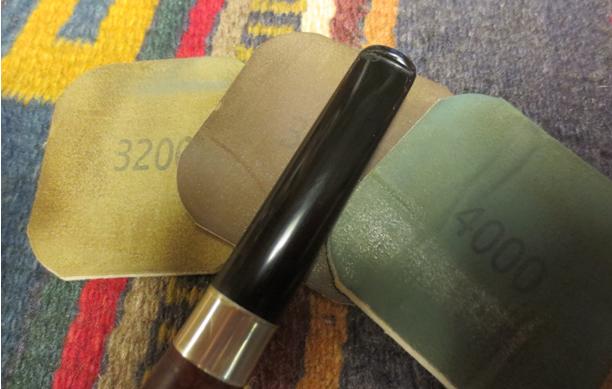
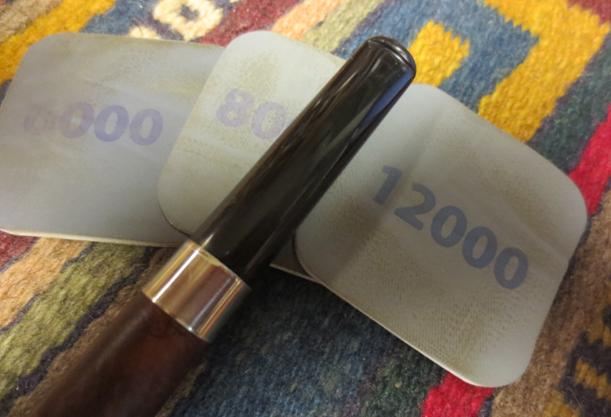
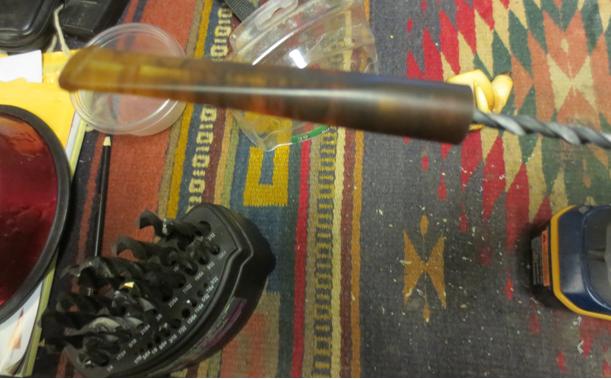
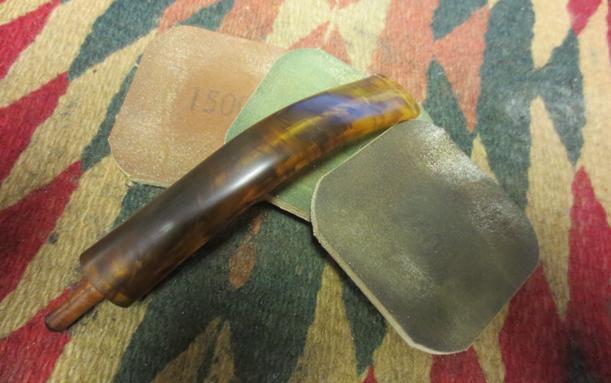
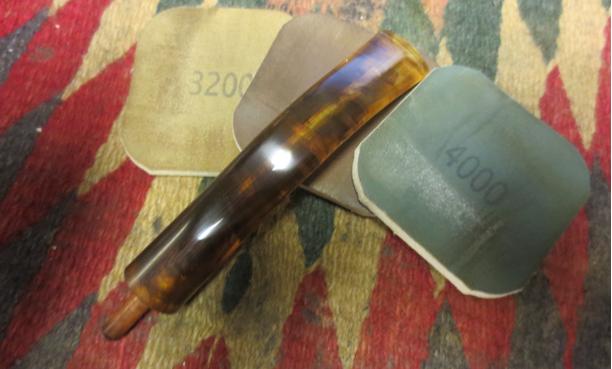
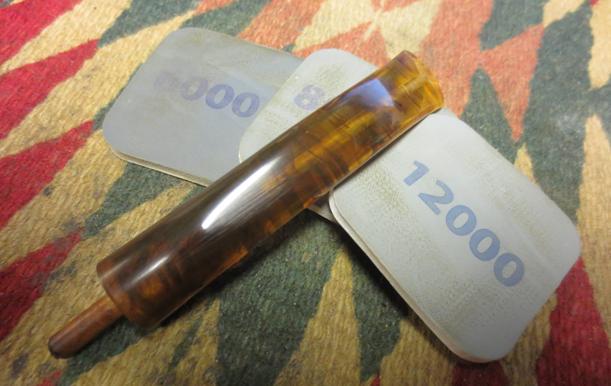
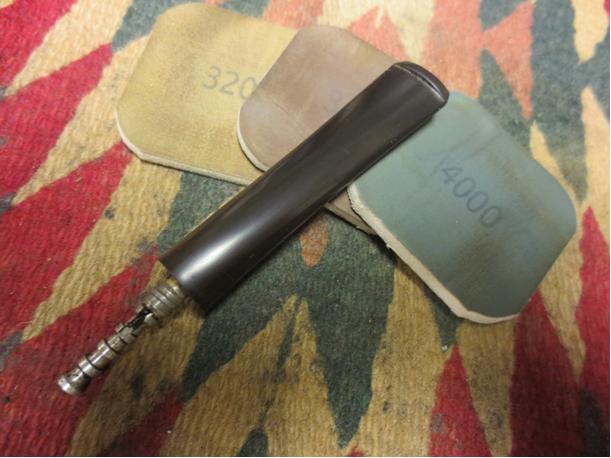
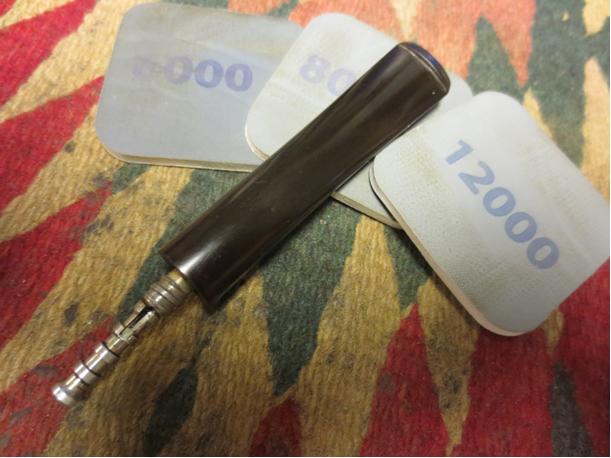
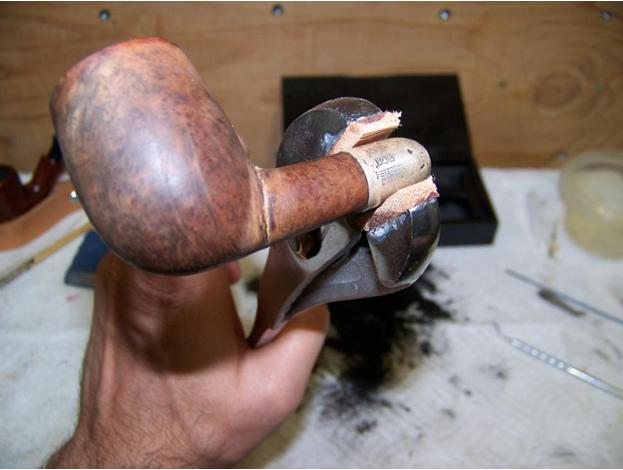
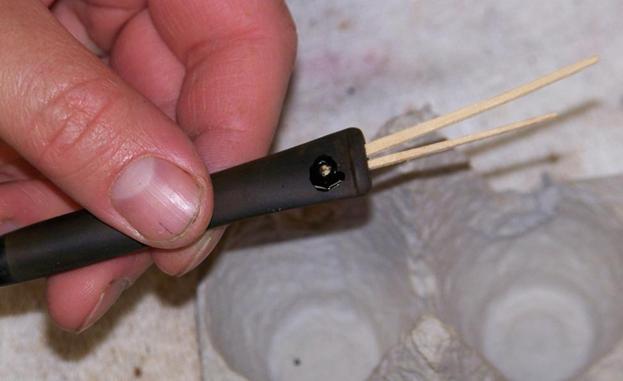
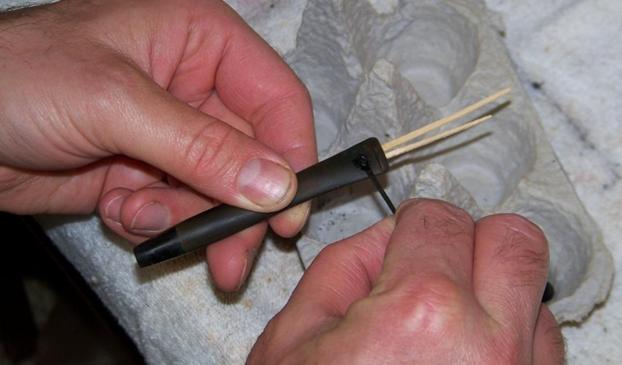
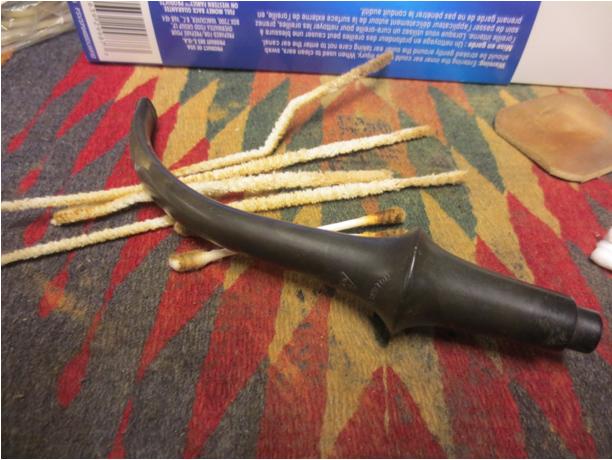
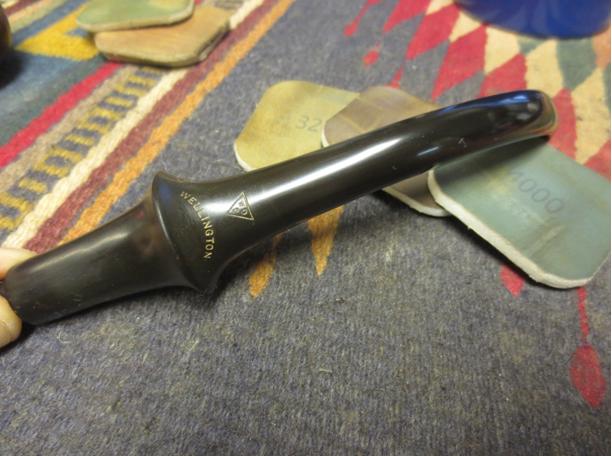
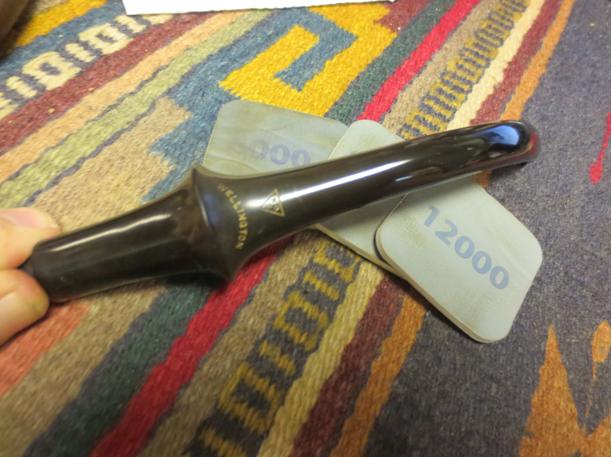
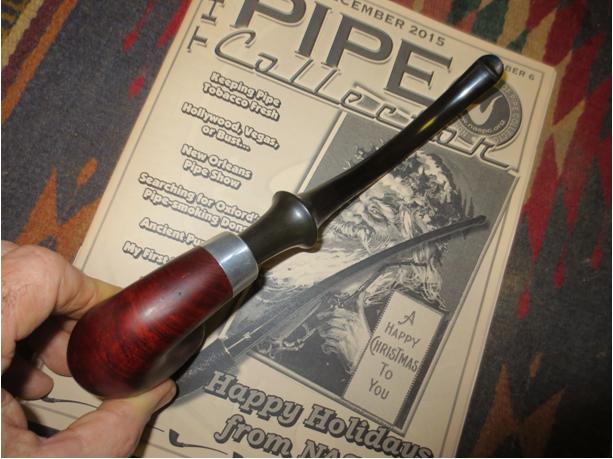
 I worked on the long stem. To clean it thoroughly I had to wrap pipe cleaners together to extend the length of the stem. I wet sanded it with 1500-2400 grit micromesh sanding pads to clean up the oxidation and scratches in the stem. I rubbed it down with Obsidian Oil afterwards and then dry sanded with 3200-4000 grit micromesh pads. I gave it another coat of oil and then finished sanding it with 6000-12000 grit pads. I gave it a final coat of the wax and set aside to dry.
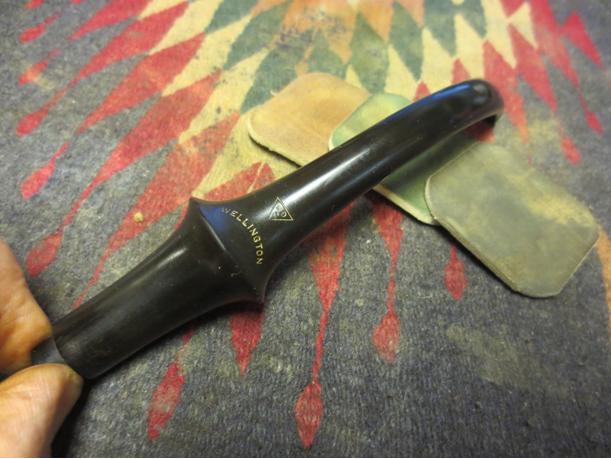
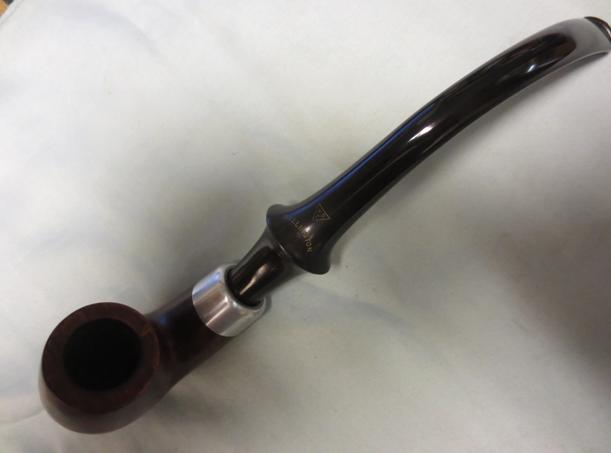
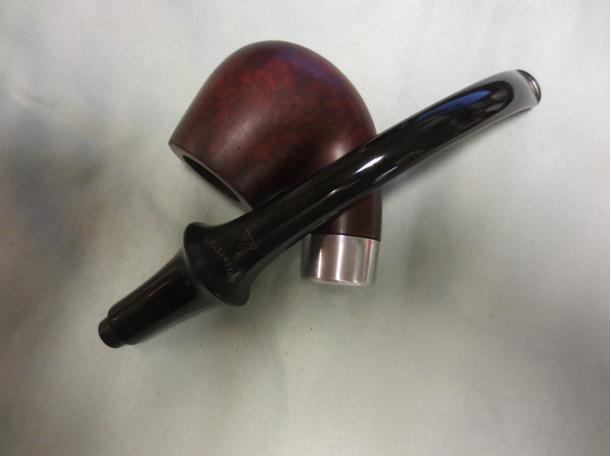
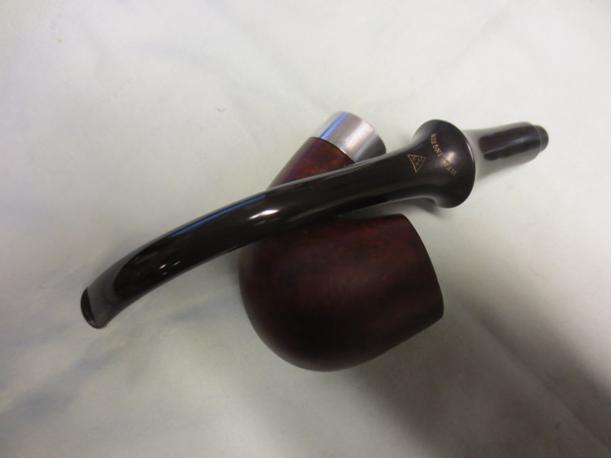
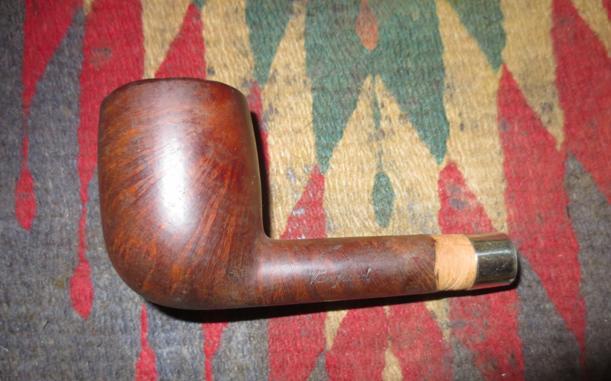
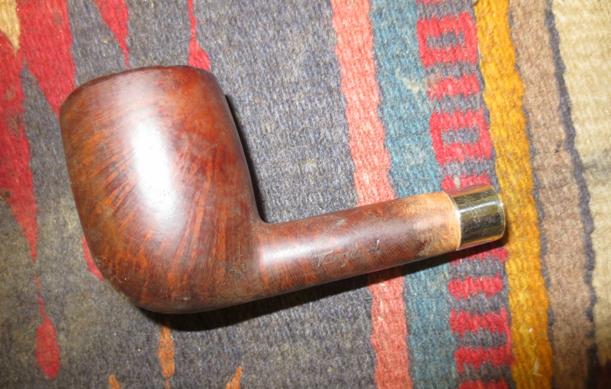
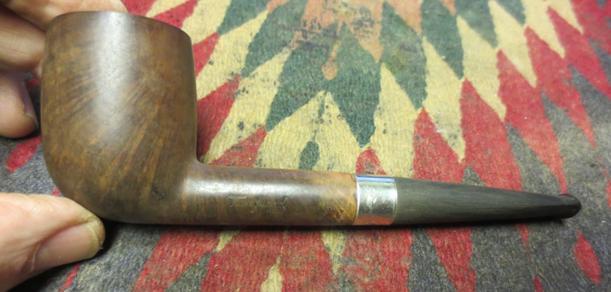
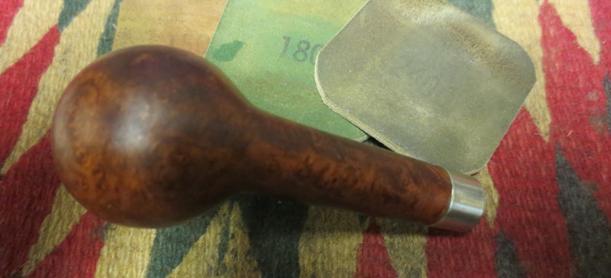
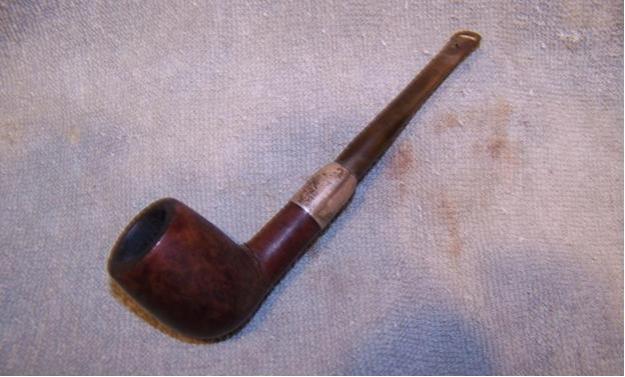
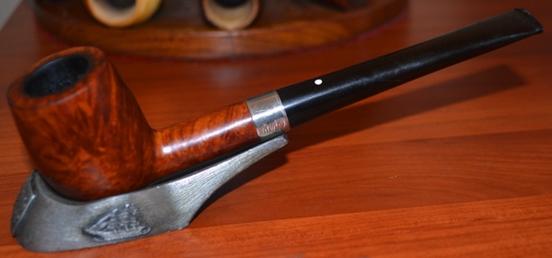
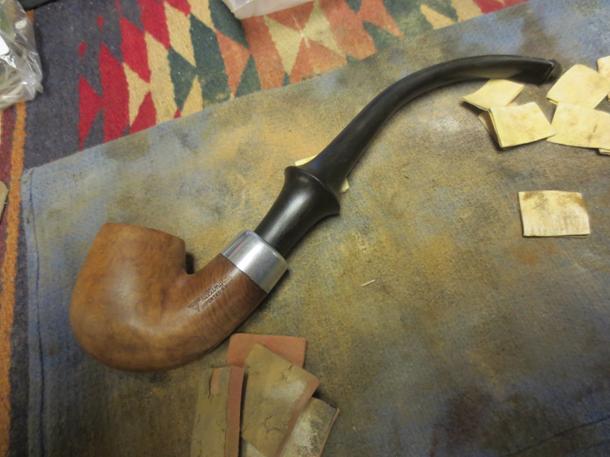
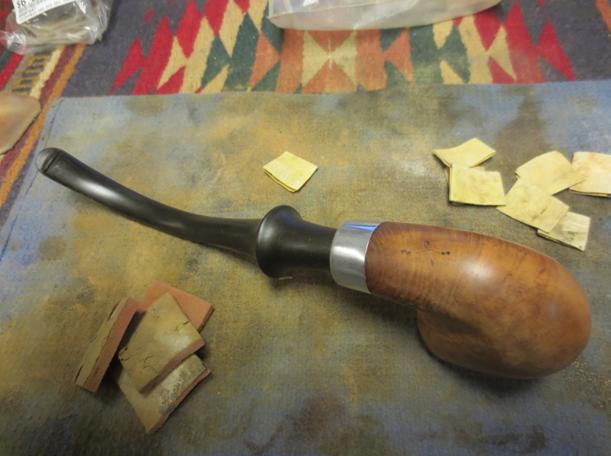
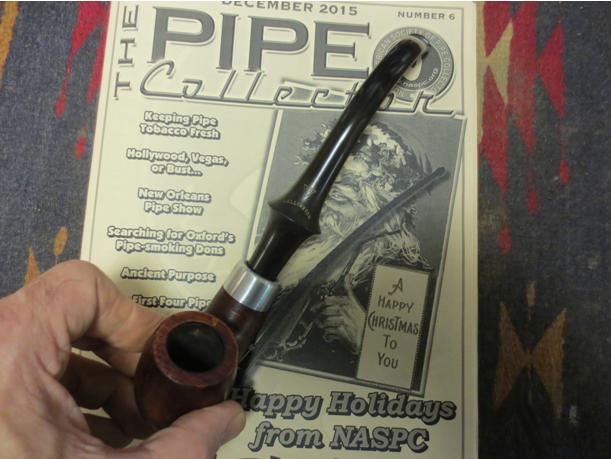
 At this point I laid the pipe on top of the current issue of the Pipe Collector and took a series of photos to show it before I buffed it.
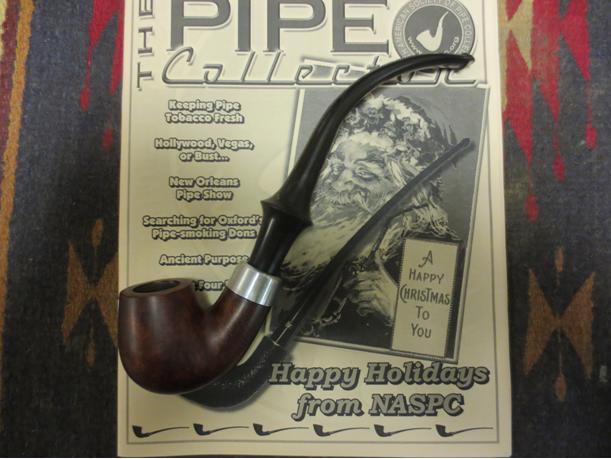
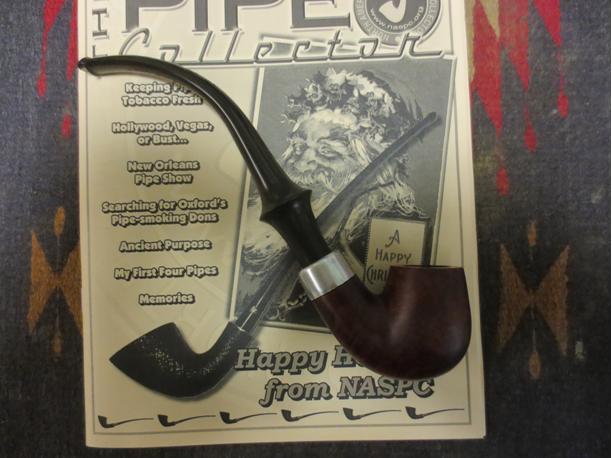
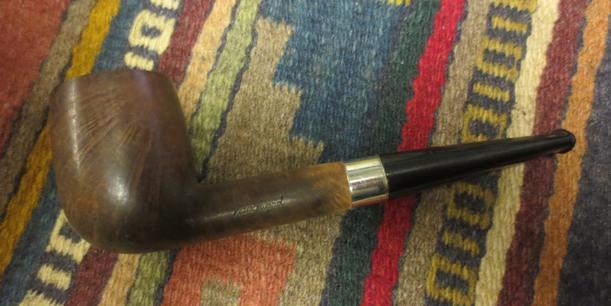
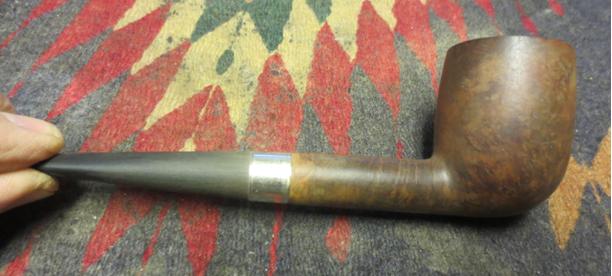
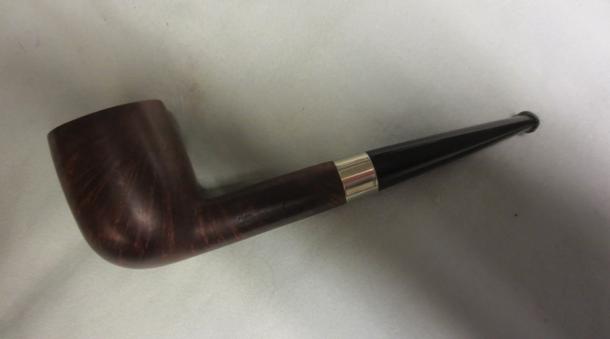
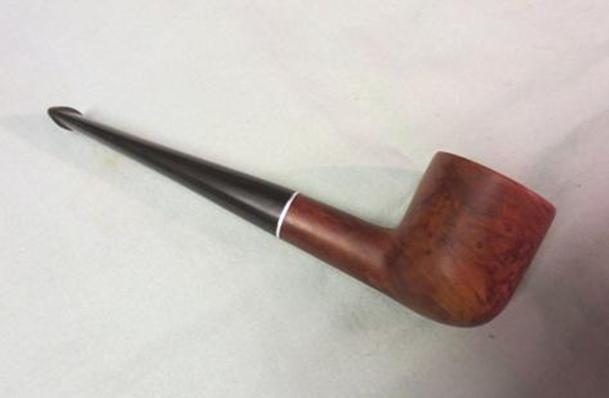
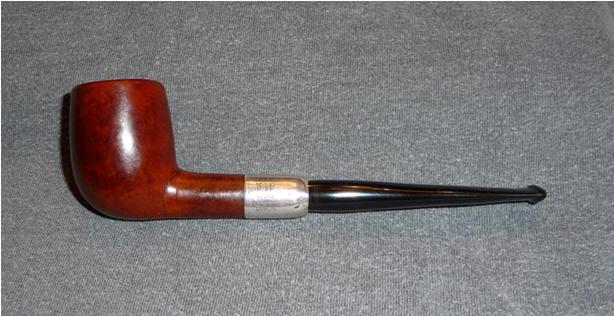
 I polished the nickel ferrule with a silver polishing cloth and gave it and the bowl several coats of carnauba wax. A light touch is imperative on the nickel as it will darken the buffing pad and then transfer to the bowl. I hand buffed the bowl and ferrule with a microfibre cloth. I buffed the stem with Blue Diamond polish on the wheel and then gave it several coats of carnauba as well. I buffed the stem with a clean flannel buff and then with the cloth as well. The finished pipe is shown below. It is repaired and serviceable for many years to come. Thanks for looking. Thanks for the challenge Warren.