
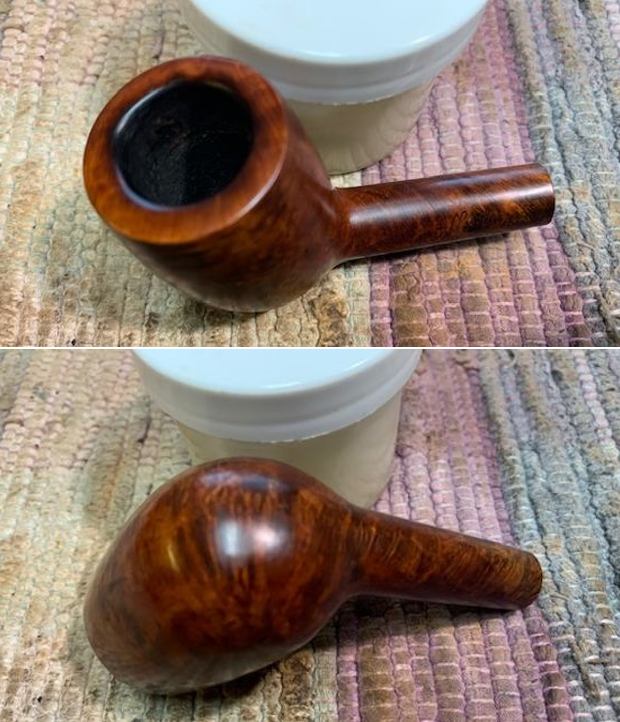
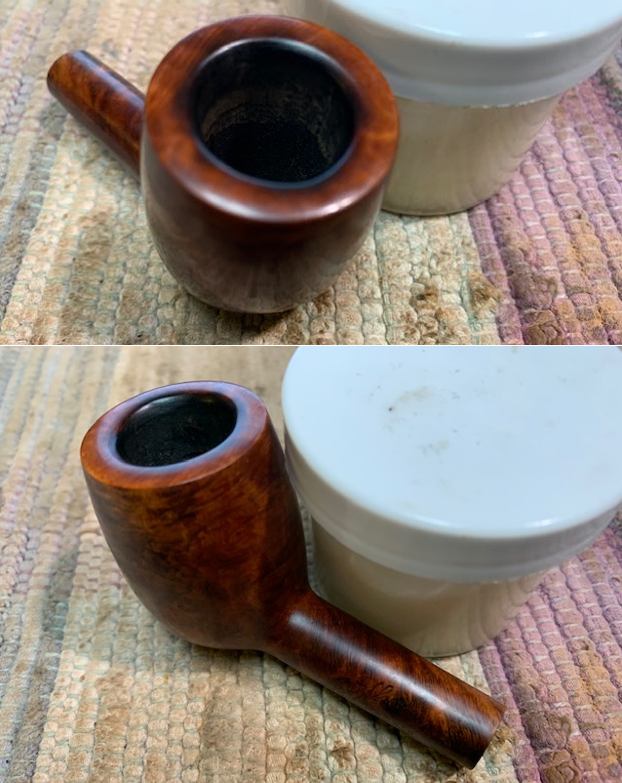
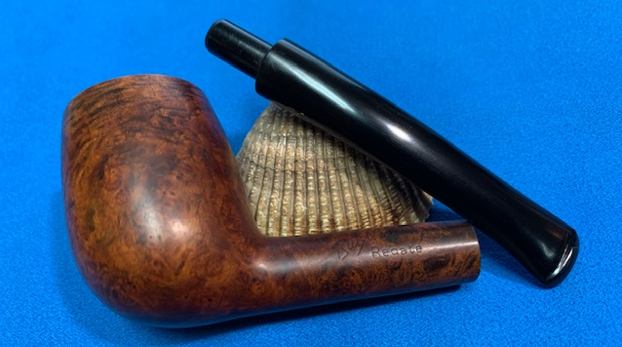
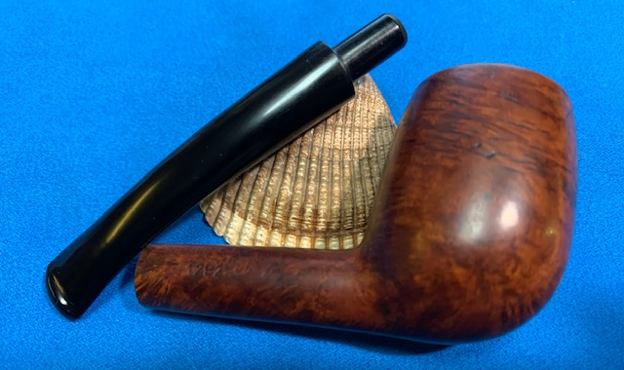
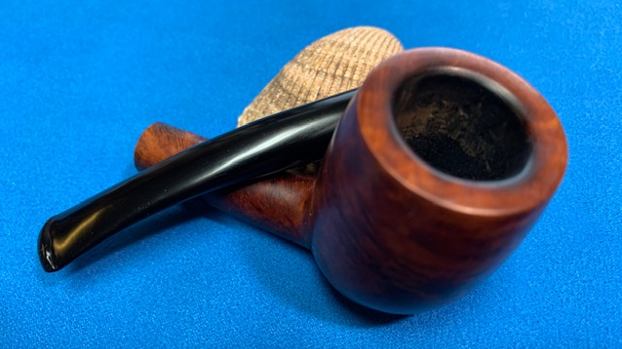
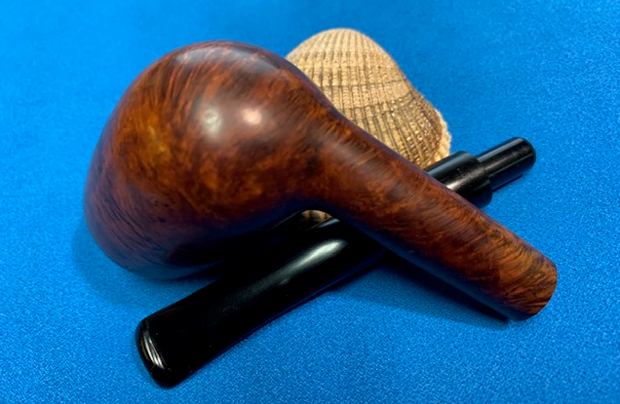
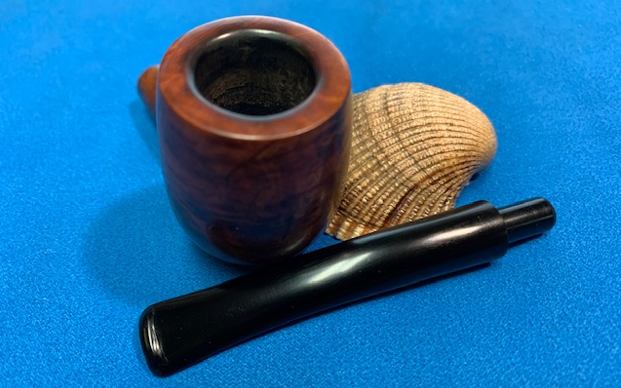
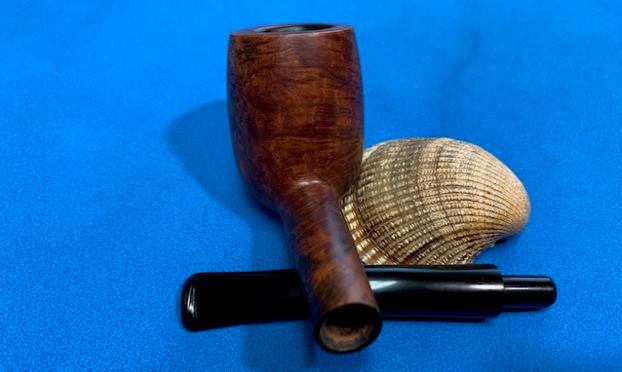
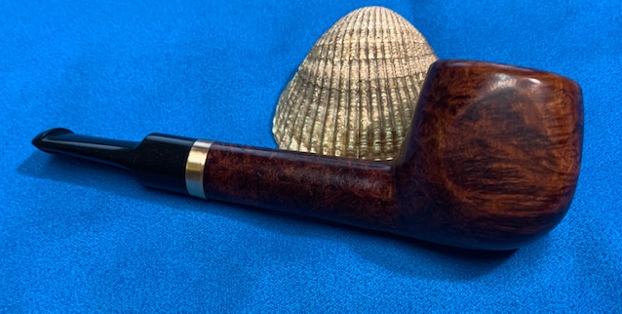
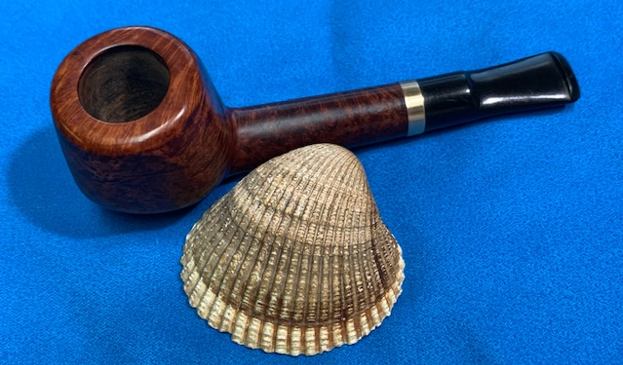
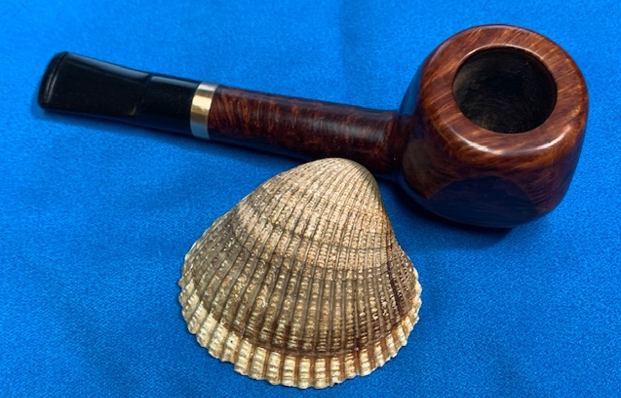
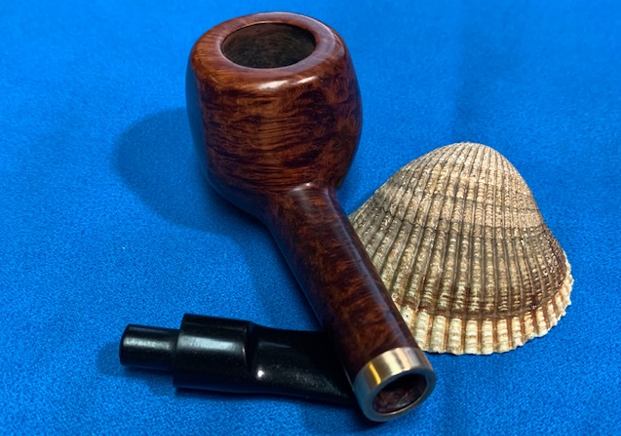
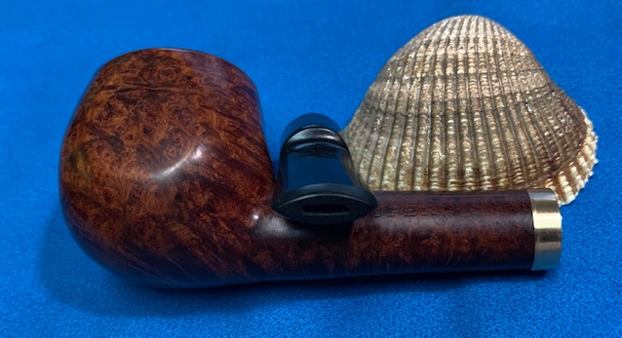
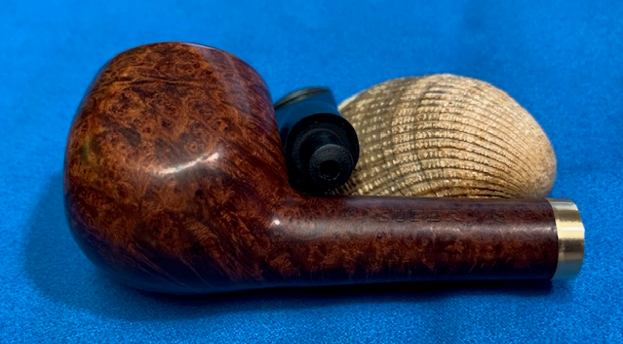
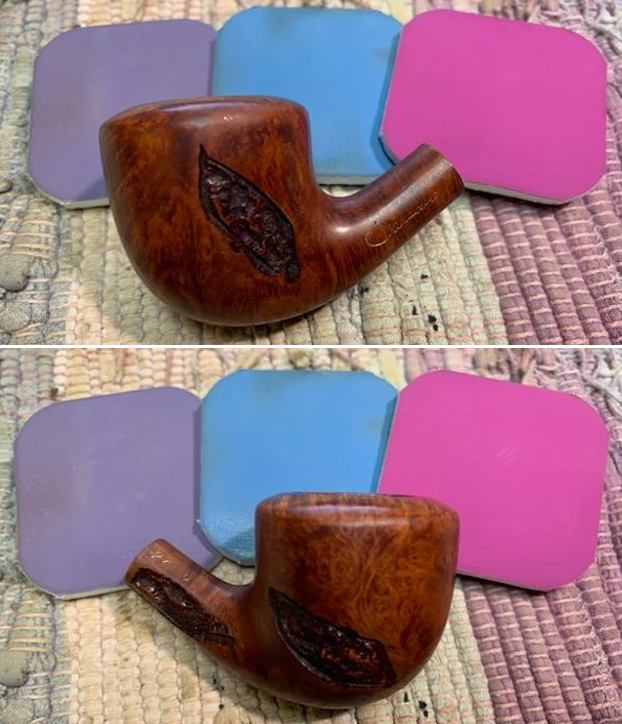
The last restoration of this lot is this wee little pipe made by Peterson of Dublin from their Specialty line called Belgique. Steve Laug wrote a …
Refreshing a Peterson Belgique Pipe
The last restoration of this lot is this wee little pipe made by Peterson of Dublin from their Specialty line called Belgique. Steve Laug wrote a …
Refreshing a Peterson Belgique Pipe
Blog by Steve Laug
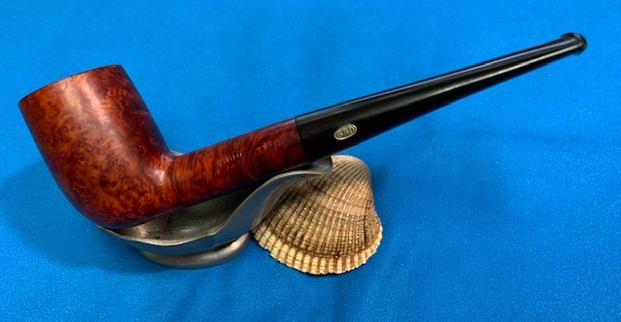
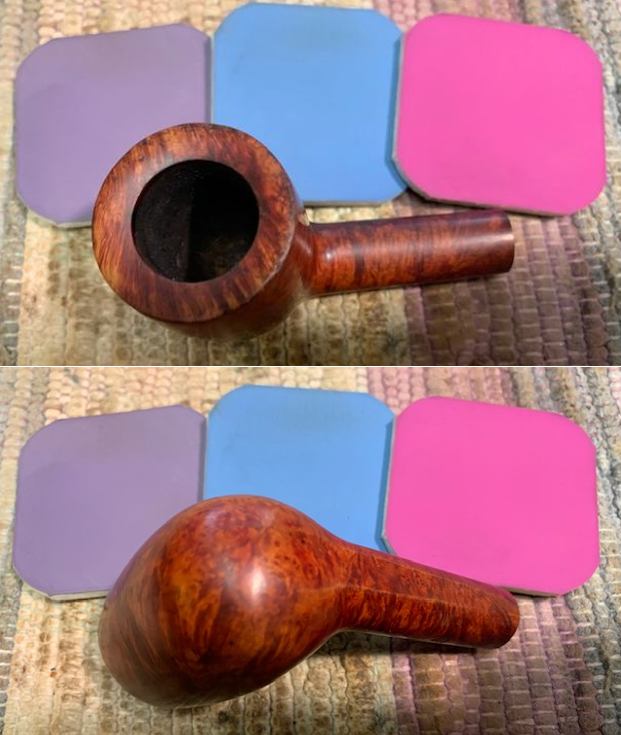
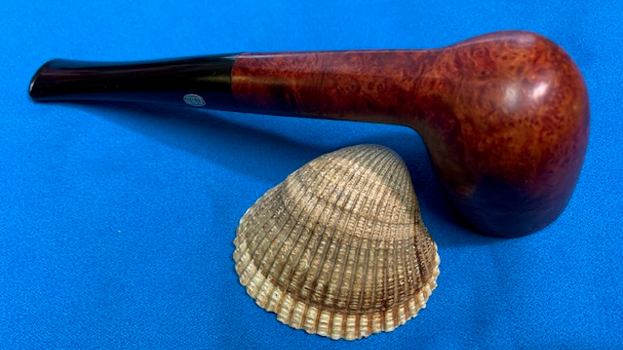
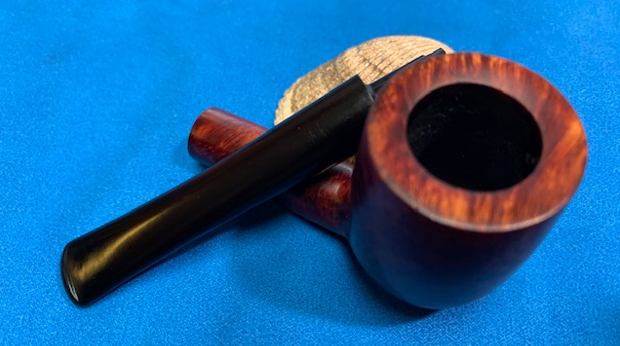
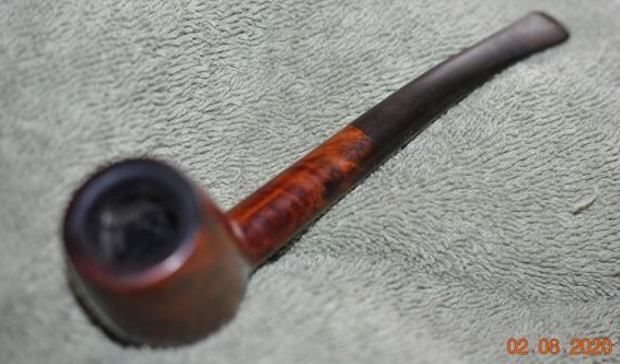
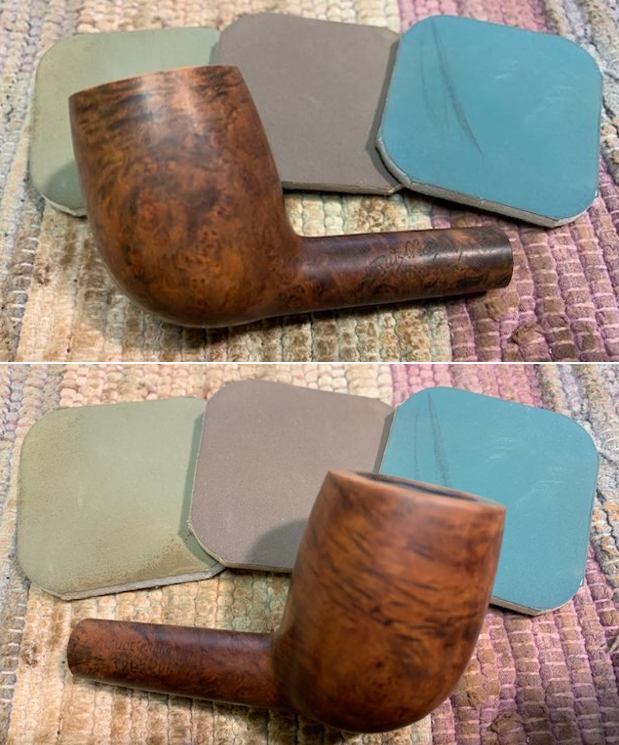
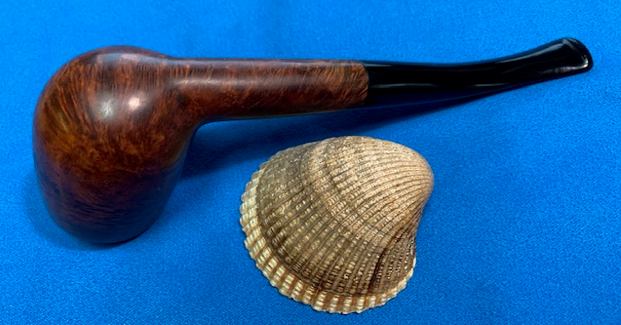
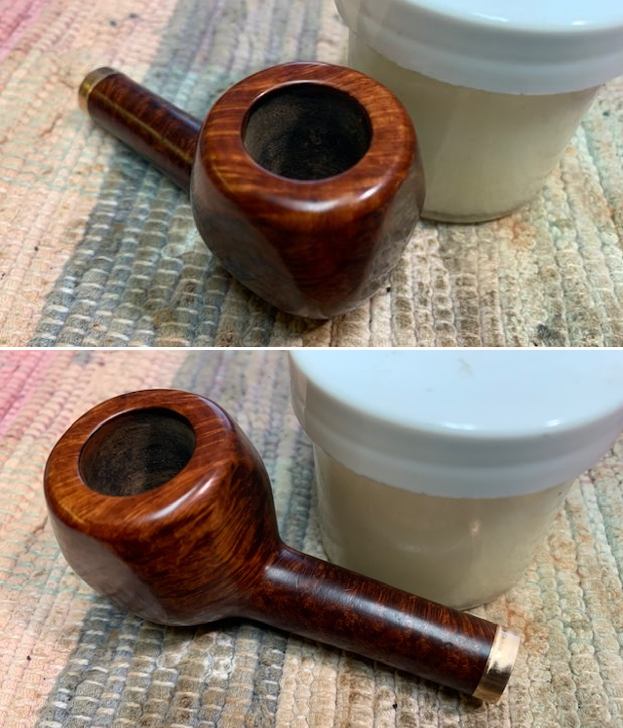
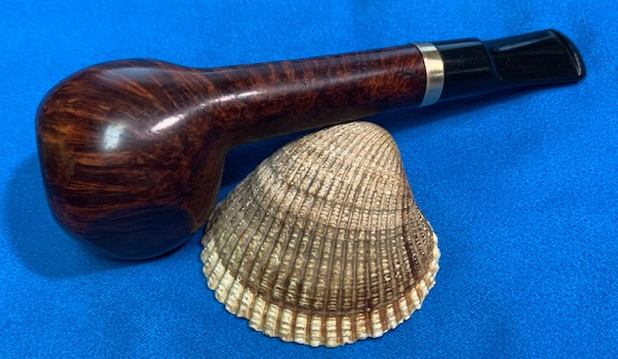
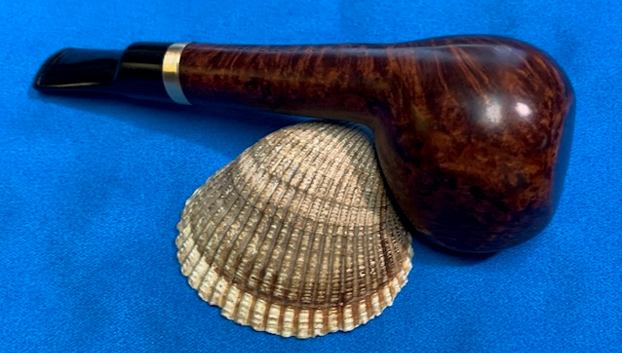
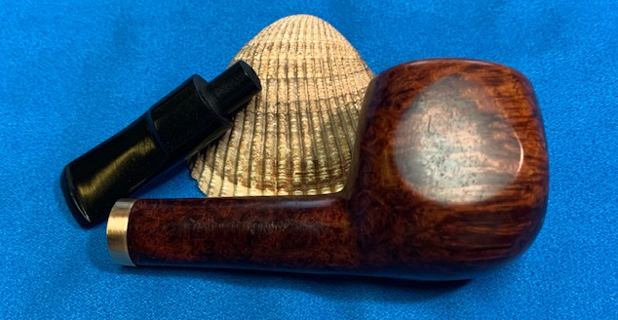
The next pipe on the table is one that came to us from an online auction in 2019 from Vanceburg, Kentucky, USA. The shape is very nice, with the rich red finish that highlights the grain around the bowl and shank. It is a great shape with a taper vulcanite stem with a GBD roundel on the left side. The finish was dirty with grime ground into the finish around the bowl sides. There was a thick cake in the bowl and lava overflow on the beveled top of the rim – heavy around the entire rim top. The edges – inner and outer both appeared to be okay under the lava coat. The pipe is stamped on the left side of the shank and reads GBD in an oval [over] New Standard. On the right side it reads London England [over] the shape number 124. The stem was lightly oxidized and there were tooth marks and chatter on both sides near the button. The taper stem also has a brass GBD roundel on the left side that was oxidized and dirty. Jeff took some photos of the pipe before he started the clean up work. 
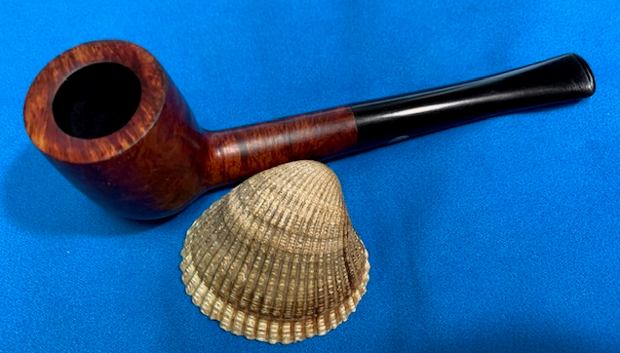
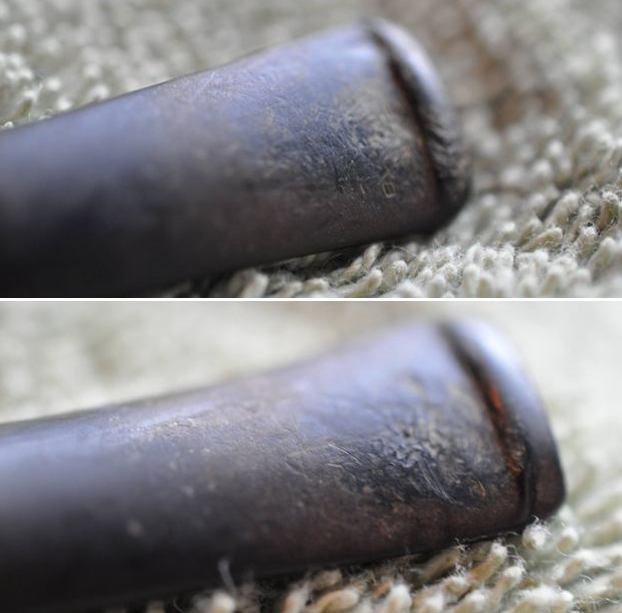
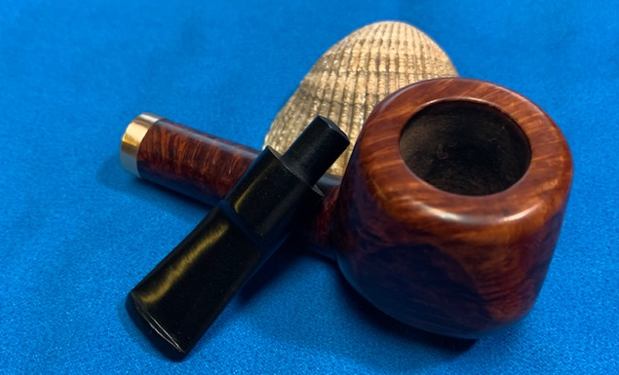
 He took photos of the rim top and bowl to give a clear picture of the thickness of the cake and well as the nicks, lava and darkening on the rim top. The inner edges showed some burn damage on the inner bevel of the bowl. The outer edges of the bowl appeared to be in great condition. He also took photos of the top and underside of the stem to show the oxidation, calcification and the chatter and tooth marks.
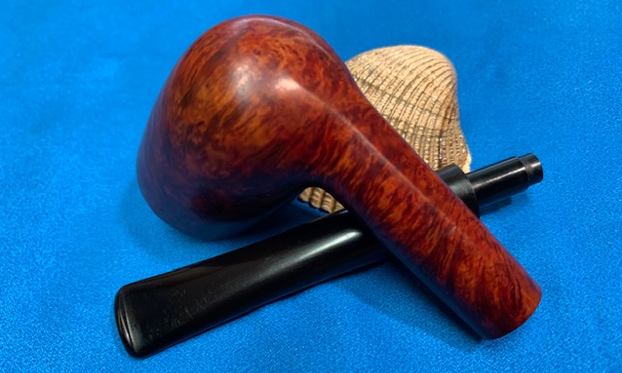
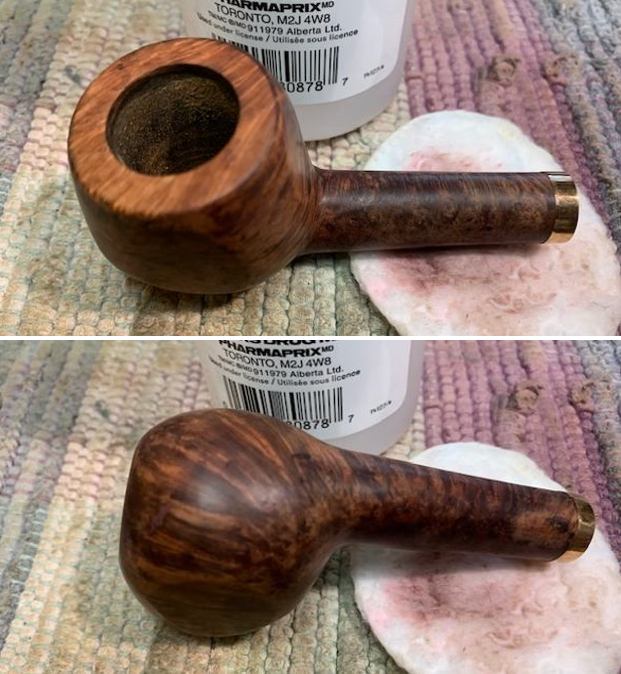
 Jeff took a photo the sides and heel of the bowl to give a picture of the beautiful grain around the bowl and shank. There were also shiny spots of varnish around the bowl and shank sides.
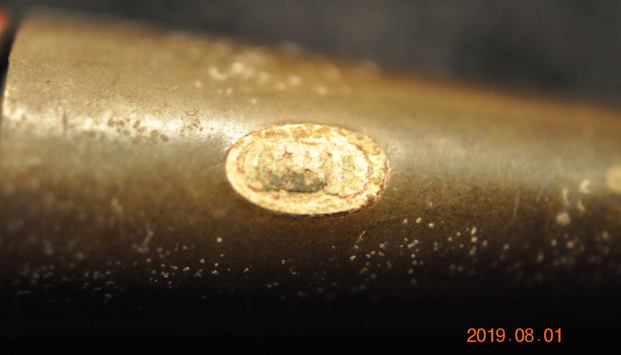
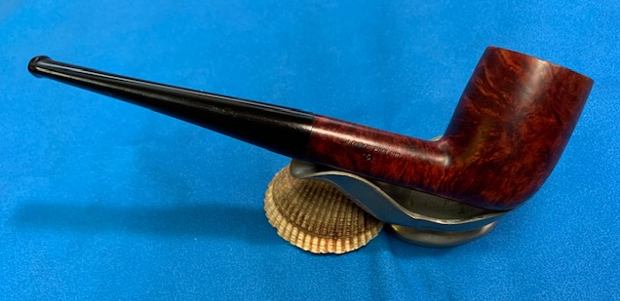
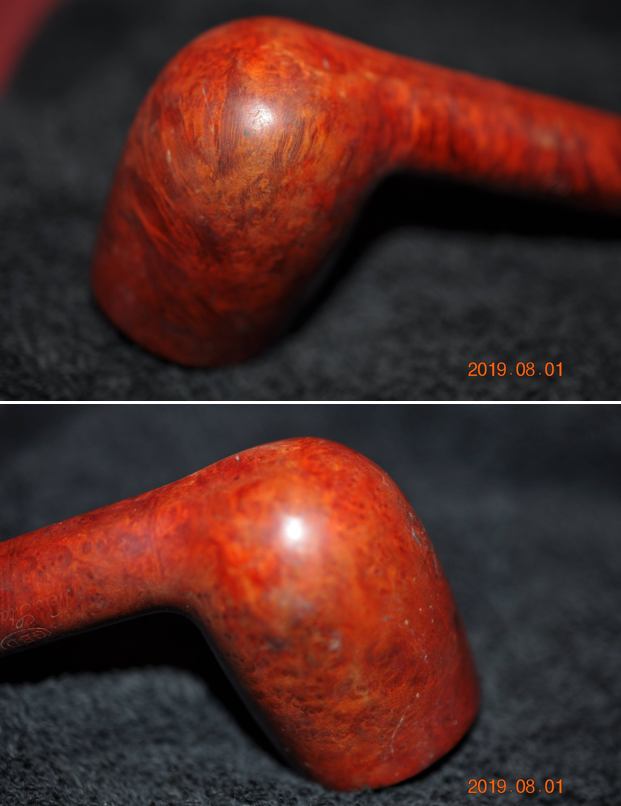 The stamping on the sides of the shank is clear and readable and read as noted above. There is also GBD Brass roundel on the left side of the stem.
 I turned to Pipephil’s site and looked for information on the GBD New Standard I was working on (http://pipephil.eu/logos/en/logo-gbd.html). As always there was a good, brief description of the history of the brand.
Brand created in 1850 in Paris by Ganneval, Bondier and Donninger. Marechal & Ruchon Cie first, then C.J. Verguet Frères (closed in 1970) owned GBD from 1903 to 1970 and manufactured these pipes in the St Claude (Fr) plant.
Sometime in the 1970s Cadogan company (Oppenheimer group) took over GBD. Prior to this time, the pipes were stamped “London England” in a straight line, even if they were sometimes crafted in France.
I turned to Pipedia (https://pipedia.org/wiki/GBD) to see what I could find on the GBD Brand and the New Standard Line. There was a few tidbits scattered in the body of the material.
The New Standard was introduced in order to give the popular Standard of the 20s a higher rank in value…
… The following list comprises the better grades in descending order: Pedigree, Pedigree I, Pedigree II, Straight Grain, Prodigy, Bronze Velvet, Virgin, Varichrome, Prestige, Jubilee, New Era, Prehistoric, International, Universe, Speciale Standard, Ebony, Tapestry, New Standard, Granitan, Sauvage, Sierra, Penthouse, Legacy, Concorde.
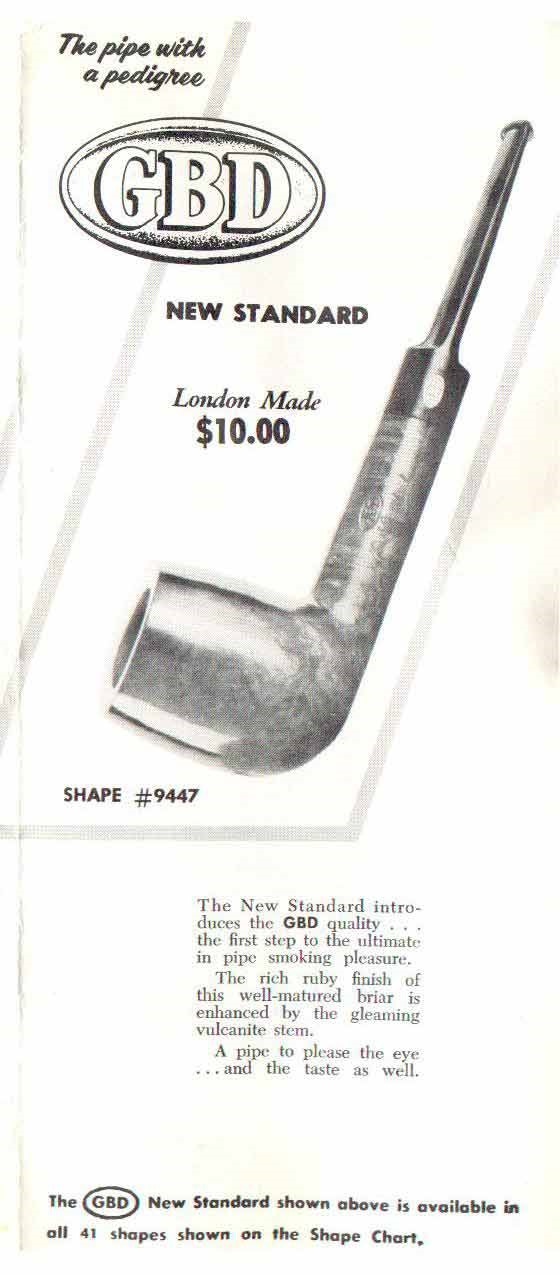
I also found two advertising fliers on the brand – one with the variety of shapes for the New Standard London Made and the other with a saddle billiard and a longer description of the pipe.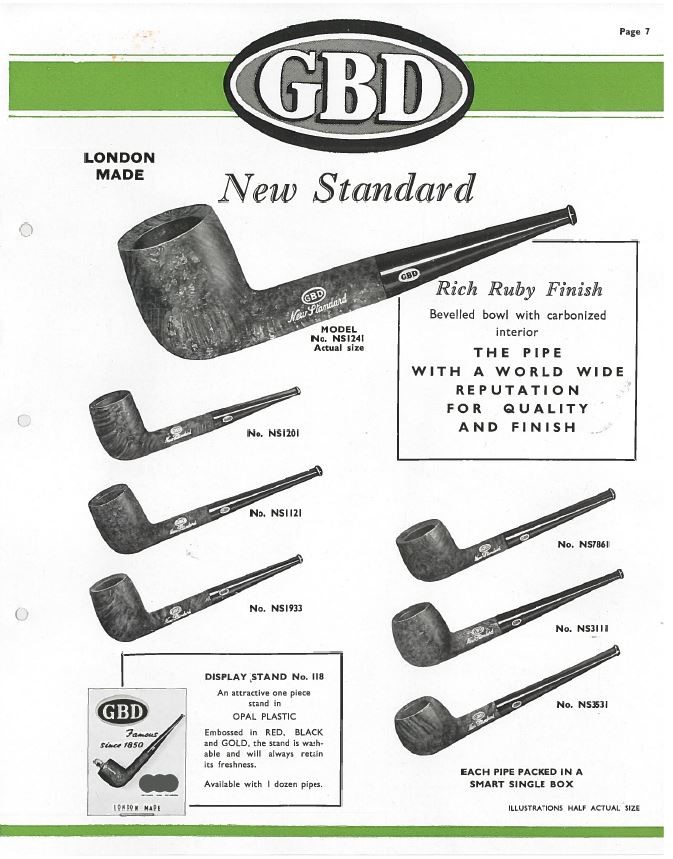
 I also found a shape chart that had the 124 pictured and described as a Medium Billiard with a taper mouthpiece.
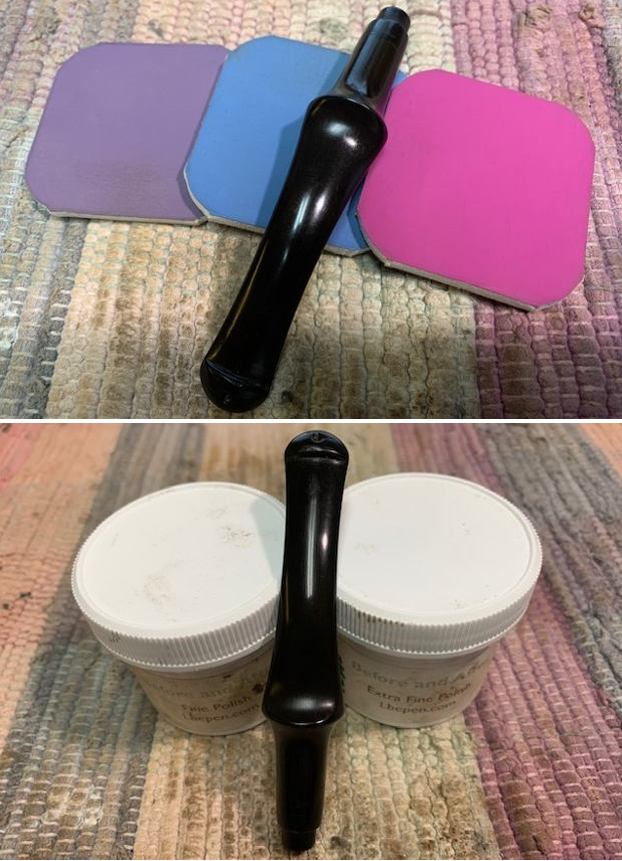
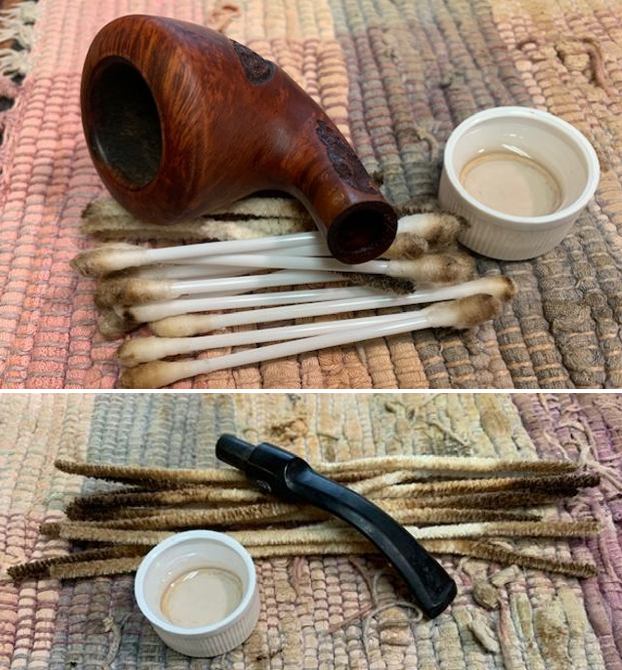
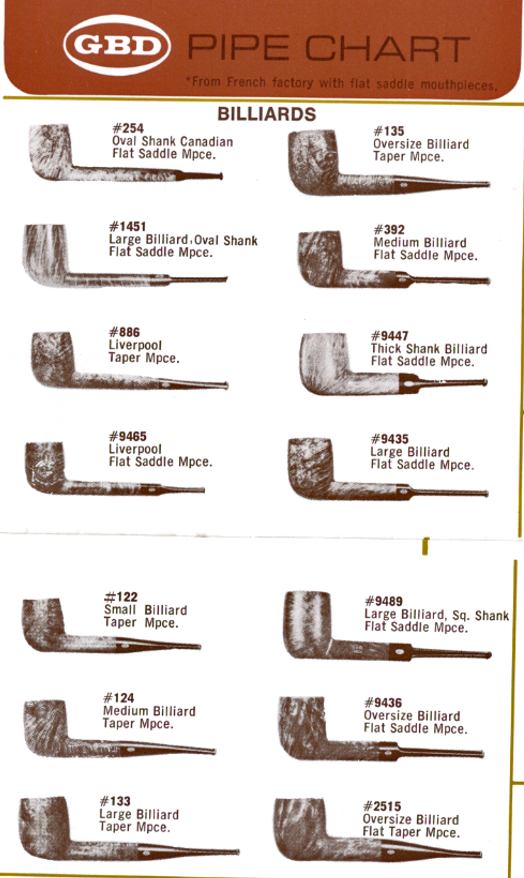 Now it was time to work on the pipe. Jeff had cleaned up the pipe following his usual procedures. He reamed the pipe with a PipNet pipe reamer and cleaned up the remnants with a Savinelli Fitsall Pipe Knife. He cleaned out the inside of the shank and the airway in the stem with 99% isopropyl alcohol, cotton swabs and pipe cleaners. He scrubbed the exterior of the bowl with undiluted Murphy’s Oil Soap and a tooth brush. He rinsed it under running warm water to remove the soap and grime. He soaked the stem in Before & After Deoxidizer and rinsed it off with warm water. I took photos of the pipe once I received it.
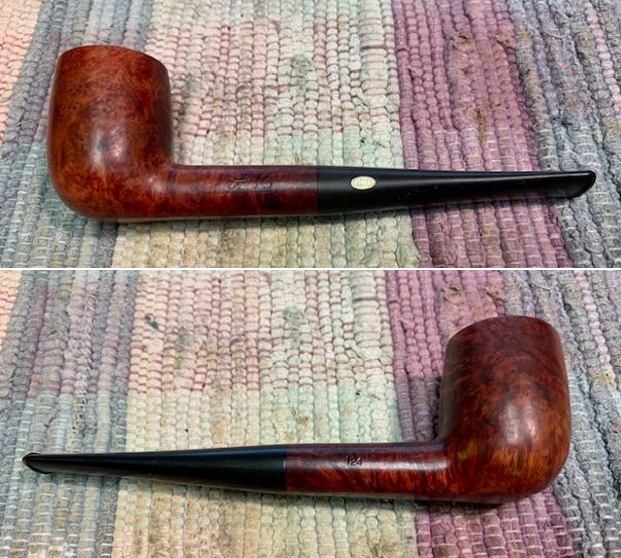
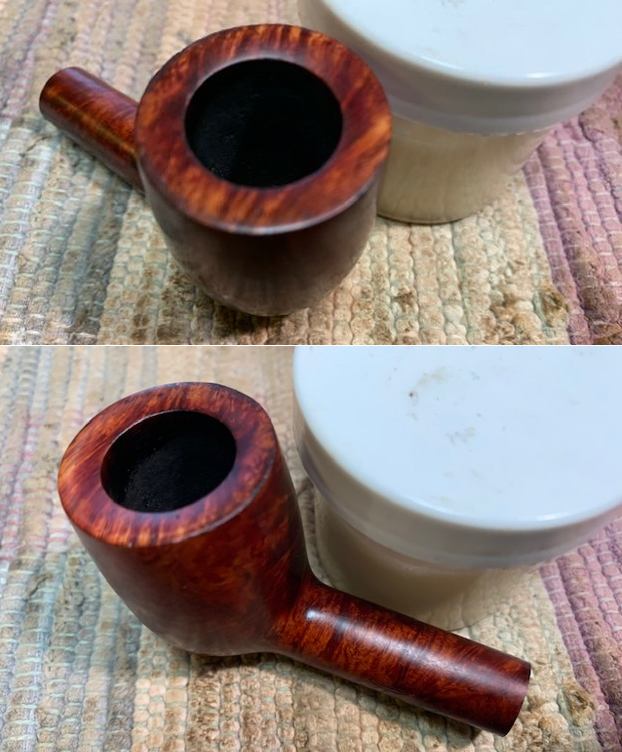
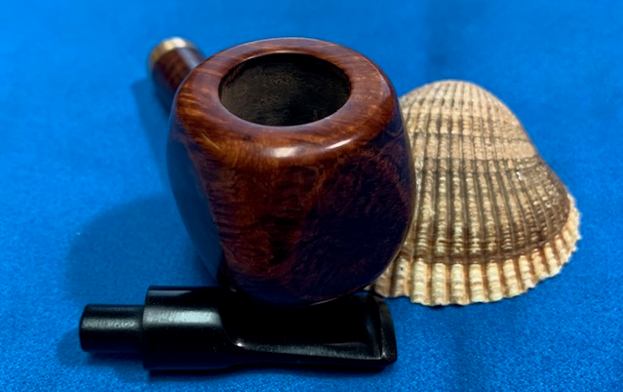
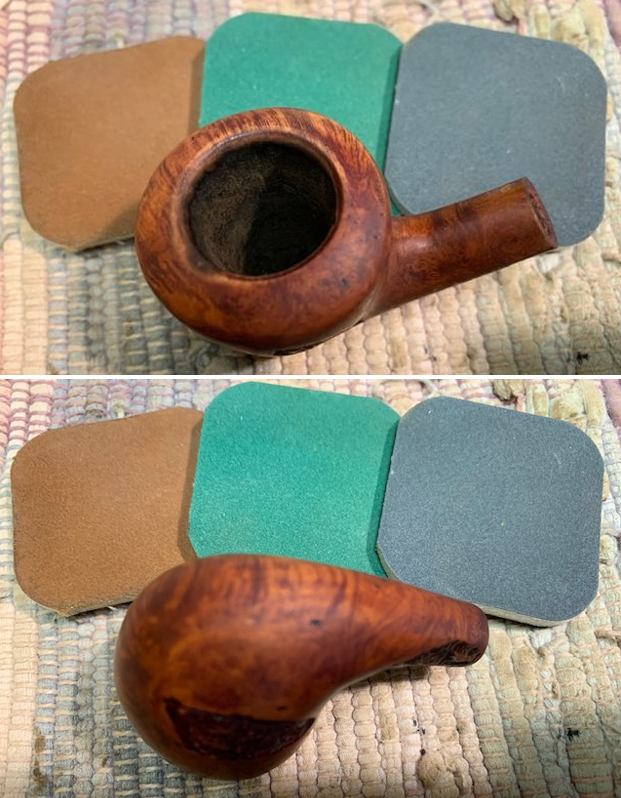
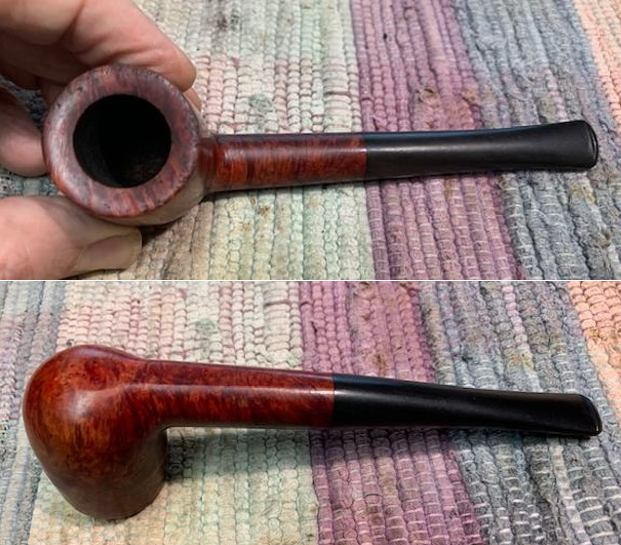 The rim top cleaned up really well. But the cleaning revealed some nicks and dings on the inwardly beveled rim top but the edges looked quite good. The stem surface looked good and the light tooth marks and chatter would be easy to address.
 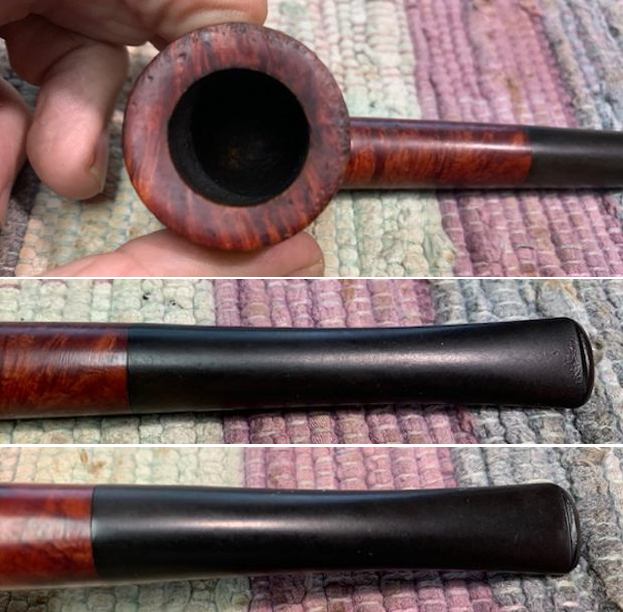 The stamping on the sides of the shank is readable and reads as noted above.
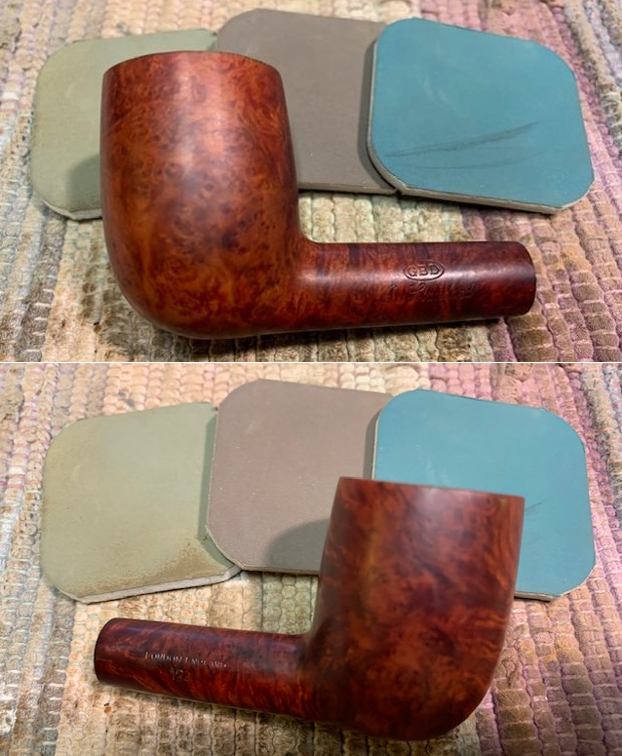
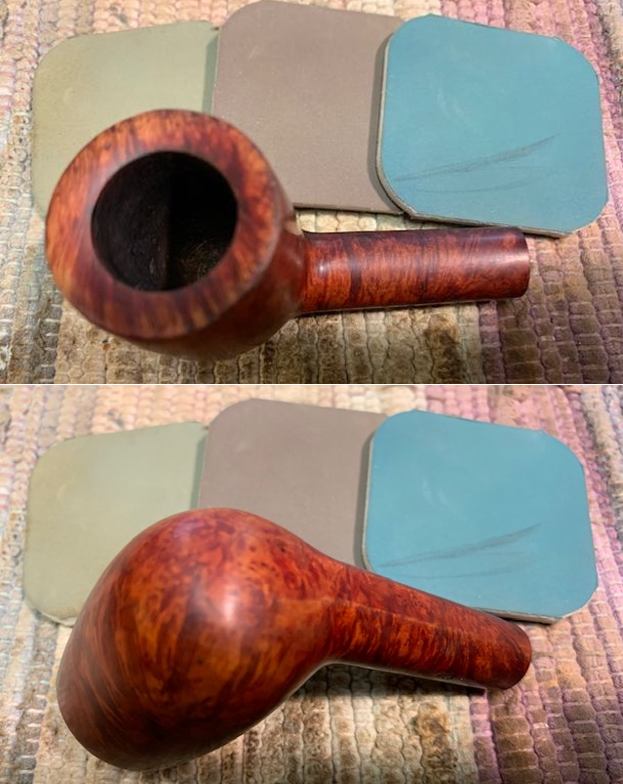
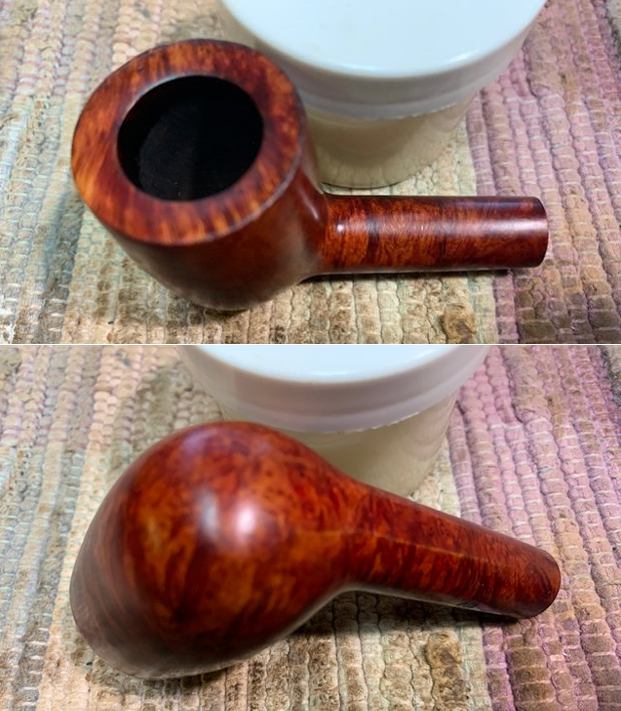
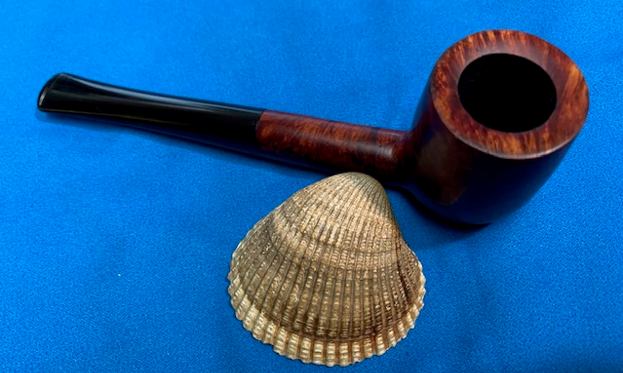
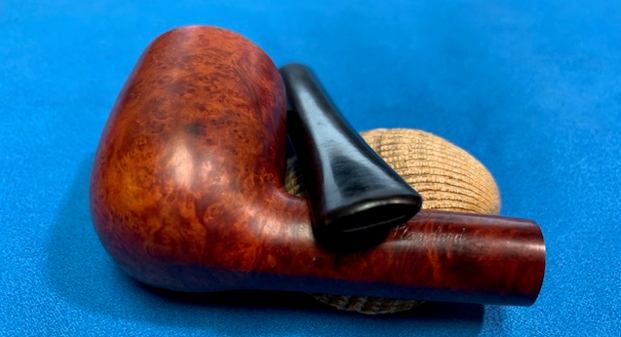
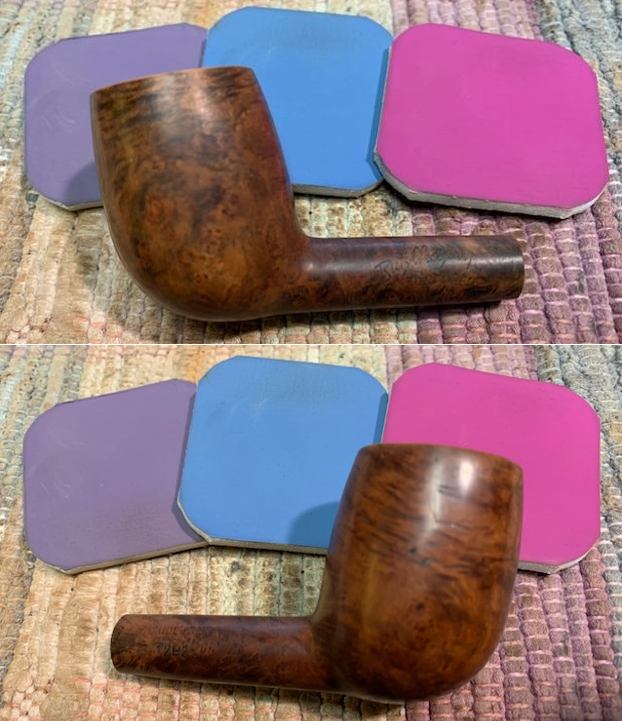
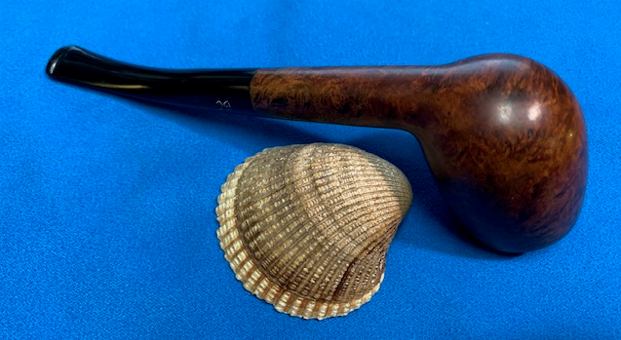
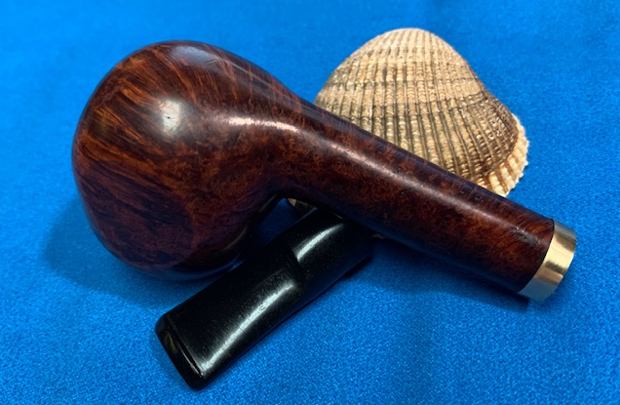
 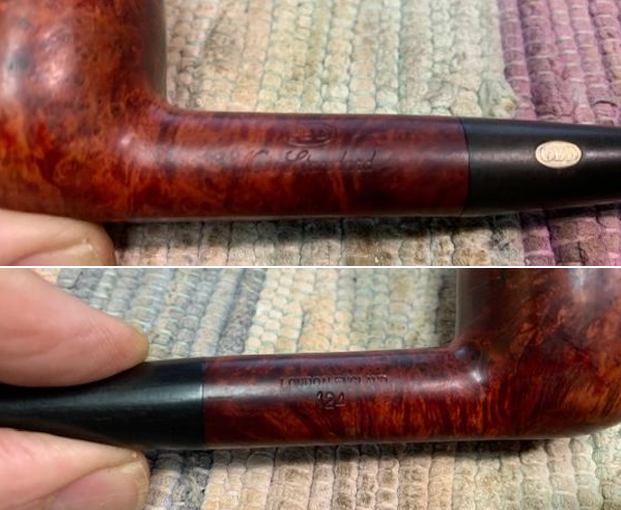 I removed the stem and took a photo of the pipe to give a sense of the shape and the grain on the bowl and shank. It was a great looking shape and would be a beautiful pipe when I was finished.
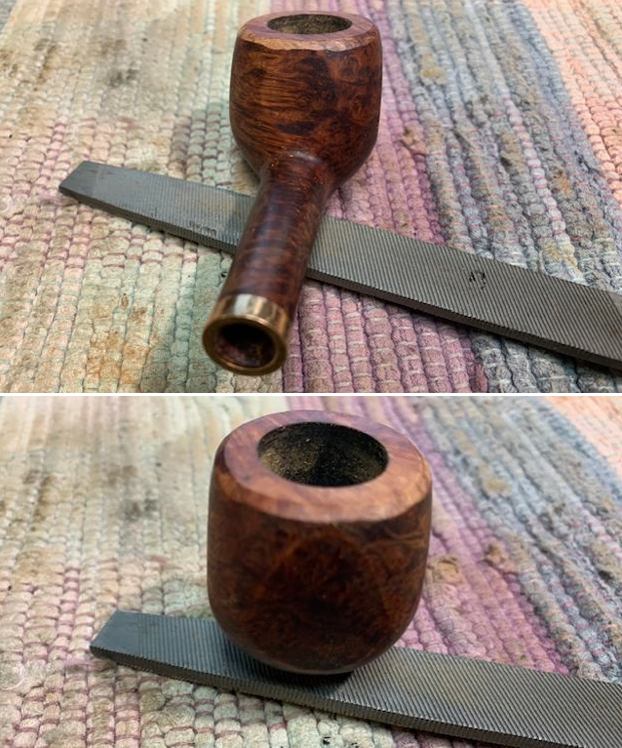
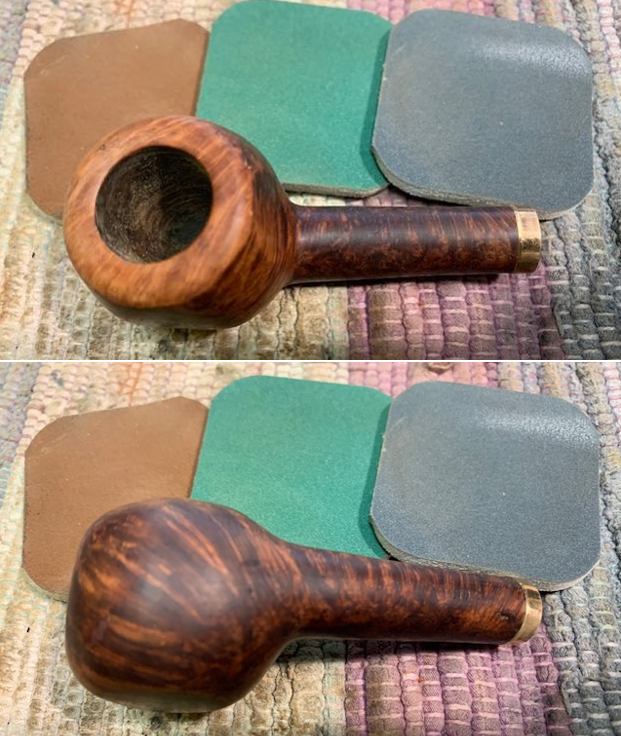
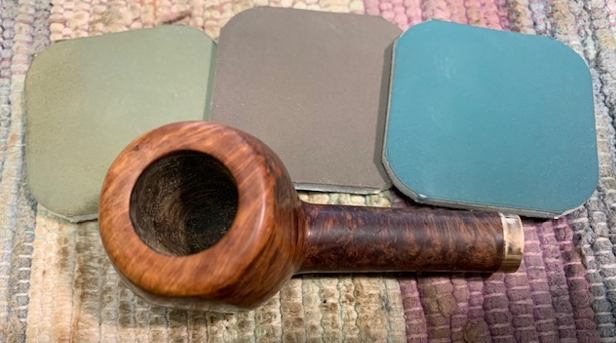
 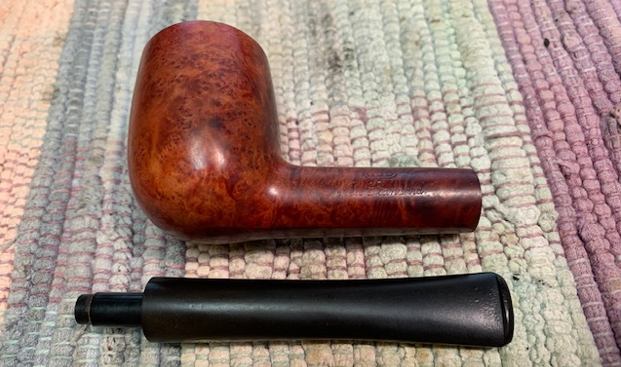 I worked on the rim top marks and polished the bowl and rim with micromesh sanding pads – 1500-12000 grit pads. I wiped it down with a damp cloth after each sanding pad. It was beginning to look good to my eyes.
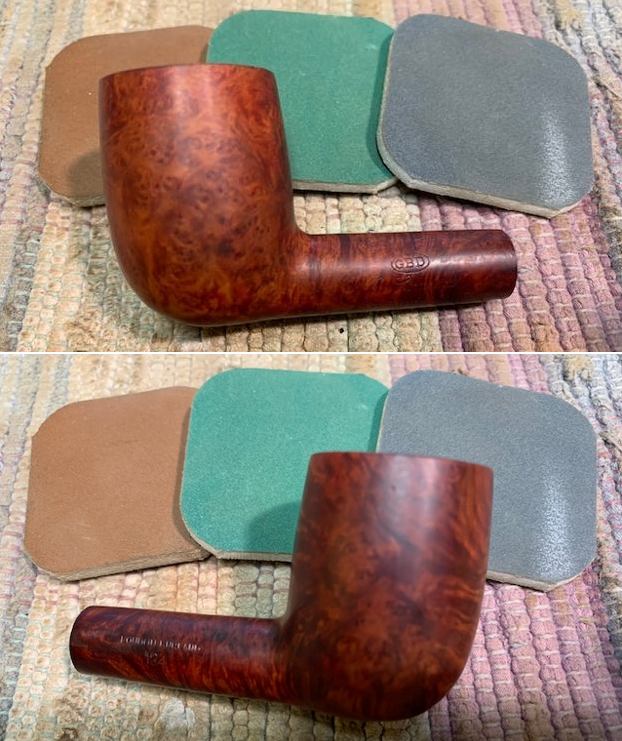


 I rubbed the bowl and shank down with Before & After Restoration Balm. I worked it into the surface of the bowl sides and shank with my fingertips to clean, enliven and protect the briar. I let the balm sit for ten minutes then buffed the bowl with a cotton cloth to raise the shine.
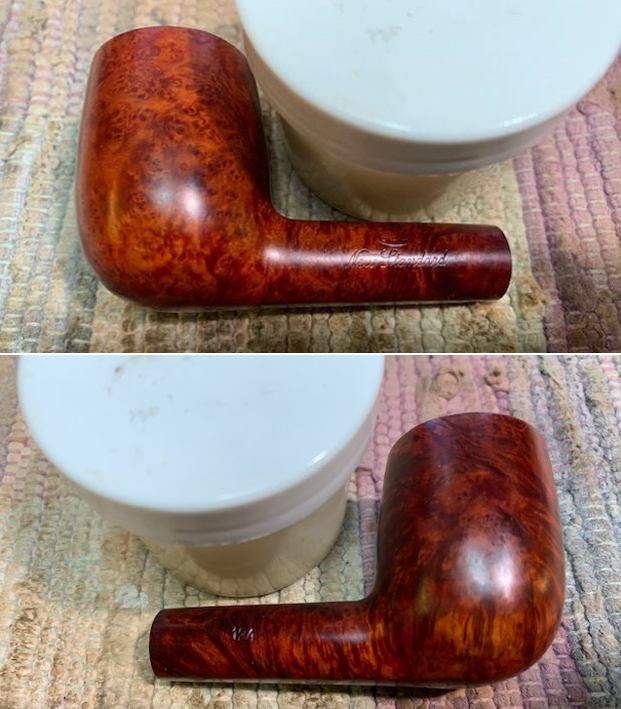
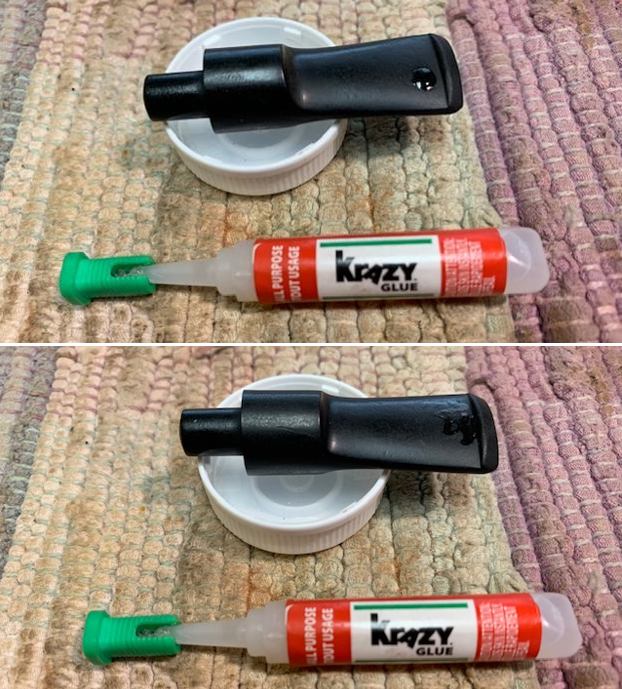
 I set the bowl aside and turned my attention to the stem. I “painted” both sides of the stem with the flame of a lighter to lift the tooth marks (forgot to take photos). It did a great job and left only one deep mark on the topside and on the underside ahead of the button. I filled them in with clear CA glue and once it cured I sanded the stem with 220 grit sandpaper to smooth out the repairs. I started polishing it with 400 grit sandpaper.
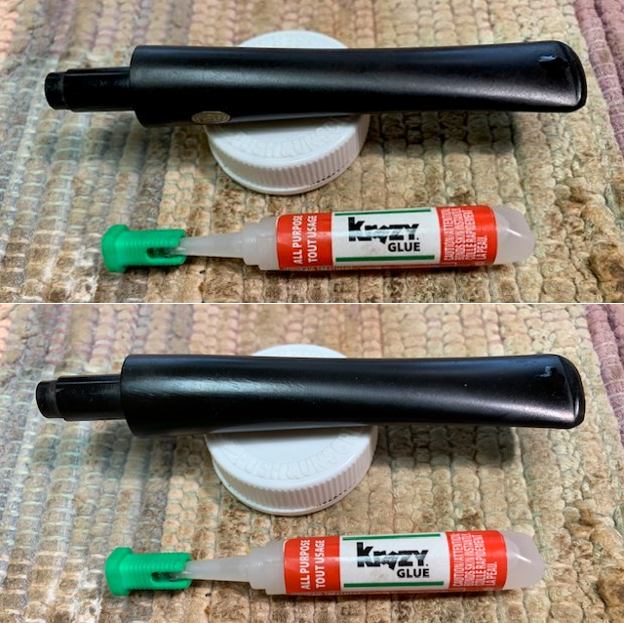
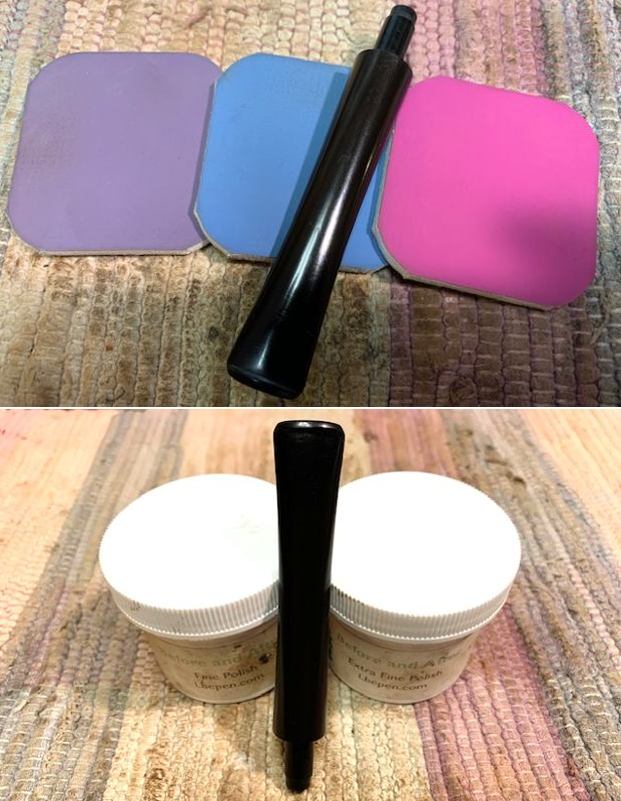
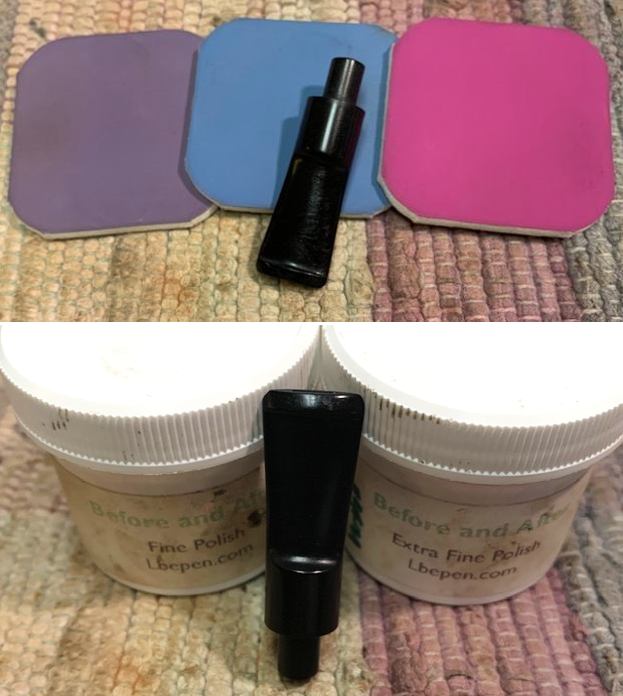
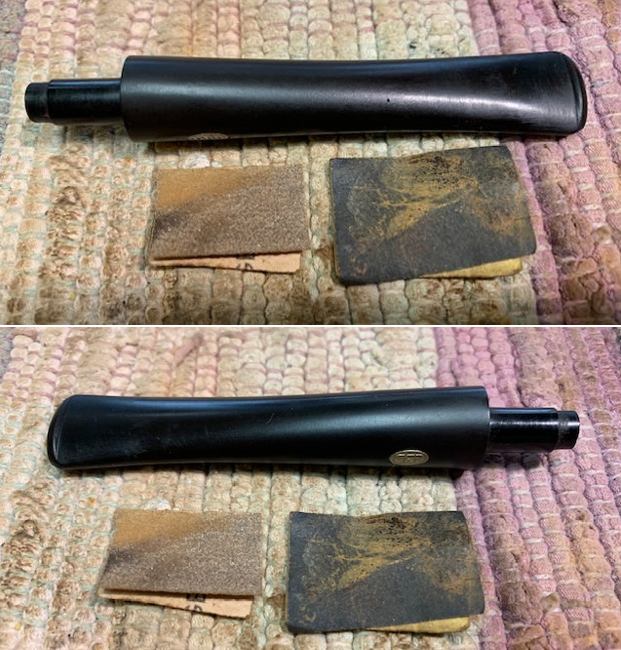 I polished the stem with micromesh sanding pads – 1500-12000 grit pads. I wiped it down with Obsidian Oil after each sanding pad. I used Before & After Pipe Polish – both Fine and Extra Fine to further polish the stem.
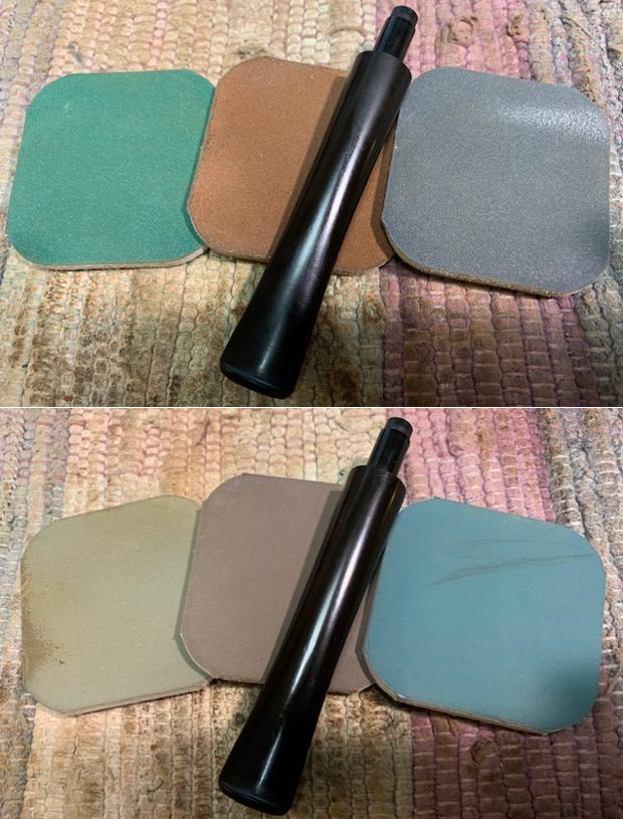
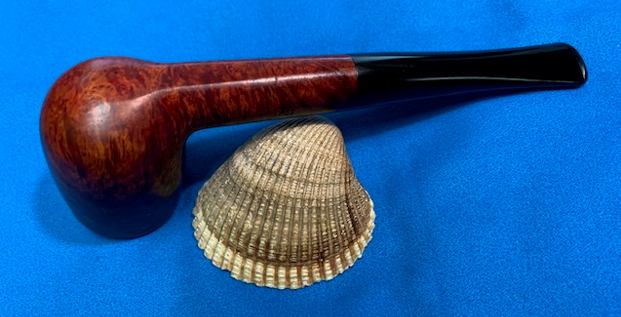
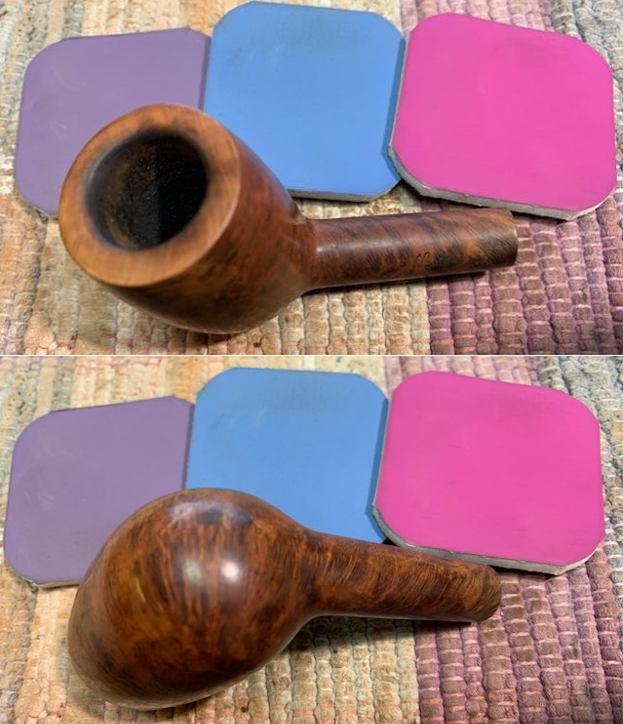
 This GBD New Standard 124 Billiard is a great looking pipe now that it has been restored. The ruby coloured wash/stain around the bowl is quite beautiful and highlights grain very well. The ruby coloured finish works well with the polished vulcanite taper stem. I put the stem back on the bowl and carefully buffed the pipe with Blue Diamond on the buffing wheel using a light touch on the briar. I gave the bowl and the stem multiple coats of carnauba wax on the buffing wheel and followed that by buffing the entire pipe with a clean buffing pad. I hand buffed the pipe with a microfiber cloth to deepen the shine. The finished GBD New Standard Billiard sits nicely in the hand and feels great. Give the finished pipe a look in the photos below. The dimensions of the pipe are Length: 6 inches, Height: 1 ¾ inches, Outside diameter of the bowl: 1 ¼ inches, Chamber diameter: ¾ inch. The weight of the pipe is 39 grams/1.41 ounces. I will be putting it on the British Pipemakers section of the rebornpipes store shortly. If you are interested in adding this pipe to your collection send me a message or an email. Thanks for reading this blog and my reflections on the pipe while I worked on it. There are many more to come!
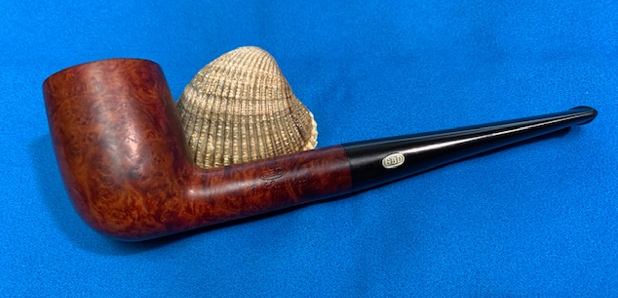


Blog by Steve Laug
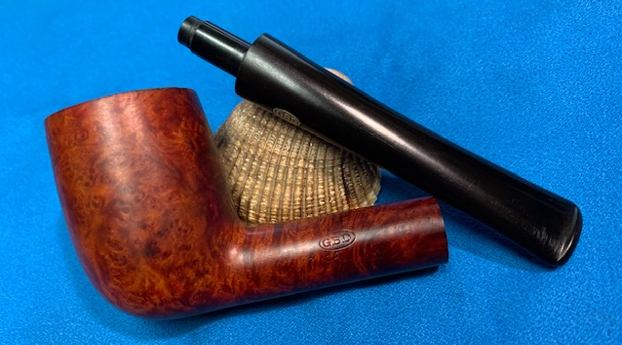
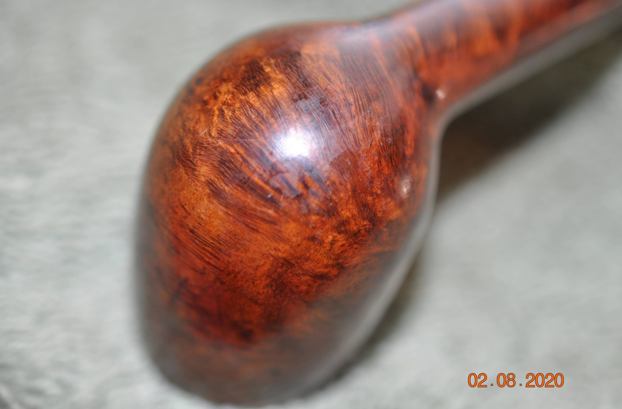
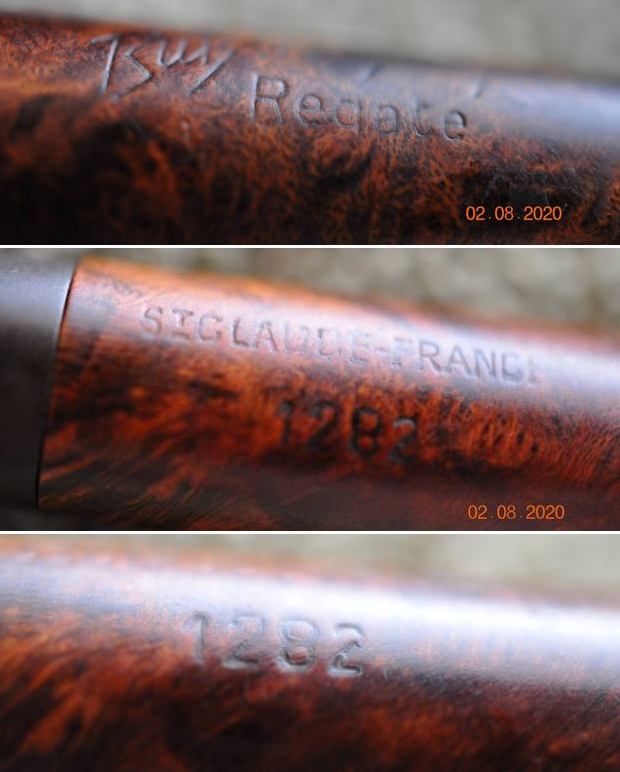
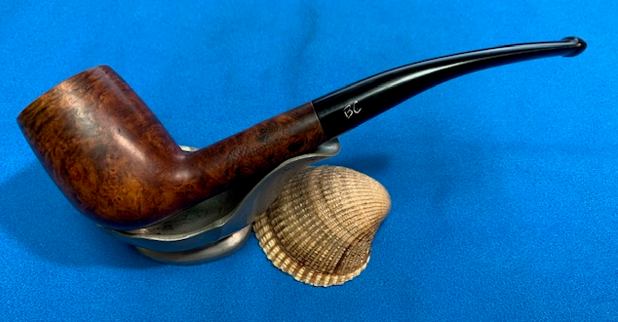
The next pipe on the table is one that came to us from Australia. It went to Jeff first then was shipped to me. It is a well traveled pipe that was purchased in 2020 from the estate of a fellow pipeman in Australia, shipped to the US and then to Canada. The shape is very nice, with the forward canted bowl and the quarter bent stem. It is a great shape with a taper vulcanite stem. The finish was dirty with grime ground into the finish around the bowl sides. There was a thick cake in the bowl and lava overflow on the top of the rim – heavier on the backside of the rim top but nonetheless on the entire rim top. There was some burn damage on the right front inner beveled edge of the bowl. The pipe is stamped on the left side of the shank and reads Butz-Choquin at an angle [over] Regate. On the right side it reads St. Claude – France [over] the shape number 1282. The stem was lightly oxidized and there were tooth marks and chatter on both sides near the button. The taper stem also has a BC stamped on the left side. Jeff took some photos of the pipe before he started the clean up work.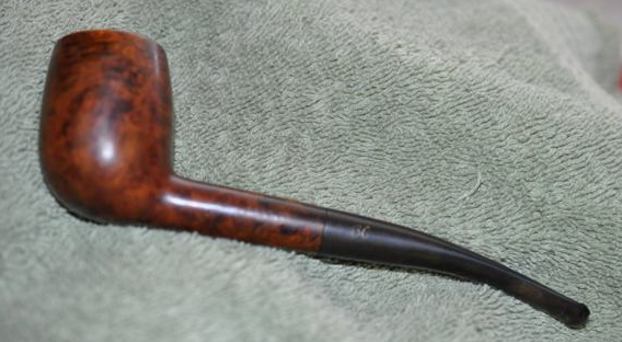
 He took photos of the rim top and bowl to give a clear picture of the thickness of the cake and well as the nicks, lava and darkening on the rim top. The inner edges showed some burn damage on the inner bevel of the bowl. The outer edges of the bowl appeared to be in great condition. He also took photos of the top and underside of the stem to show the light oxidation and the chatter and tooth marks.
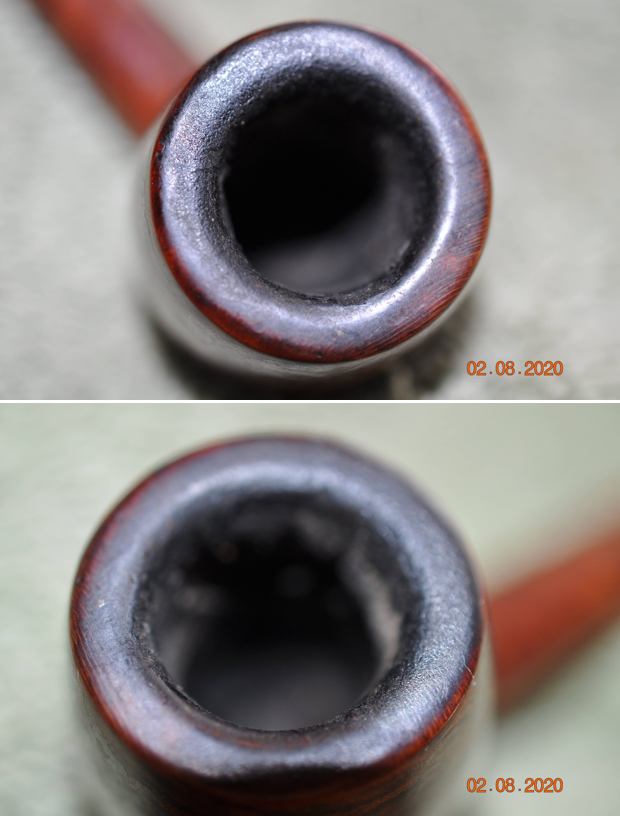

 Jeff took a photo the sides and heel of the bowl to give a picture of the beautiful grain around the bowl and shank. There were also shiny spots of varnish around the bowl and shank sides.
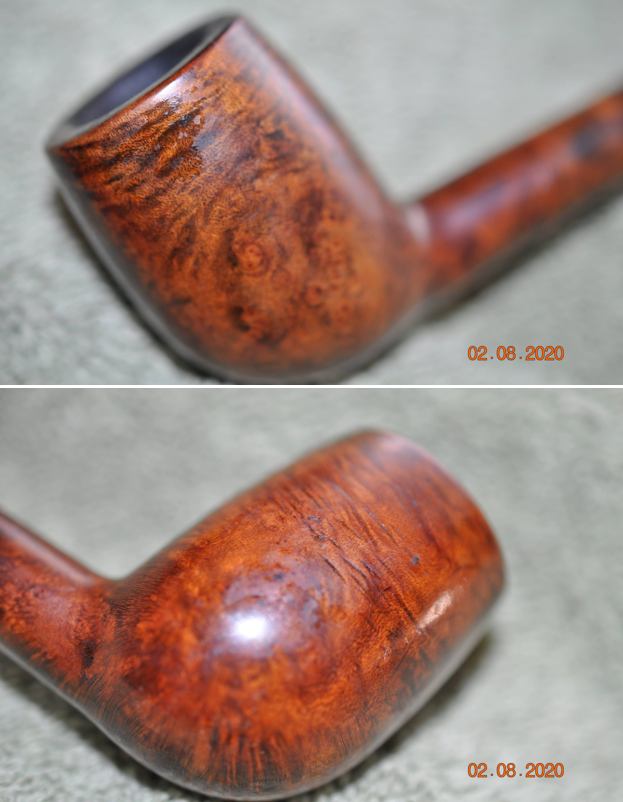
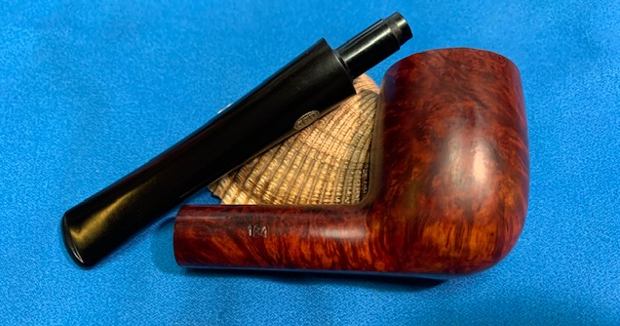
 The stamping on the sides of the shank is clear and readable and read as noted above. There is also BC stamp on the left side of the stem.
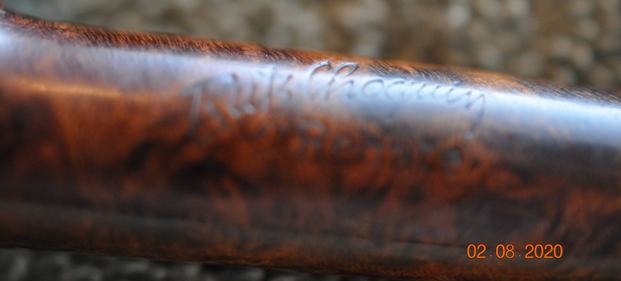
 I turned to Pipephil’s site and looked for information on the Butz – Choquin Regate I was working on (http://pipephil.eu/logos/en/logo-butzchoquin.html). As always there was a good, brief description of the history of the brand.
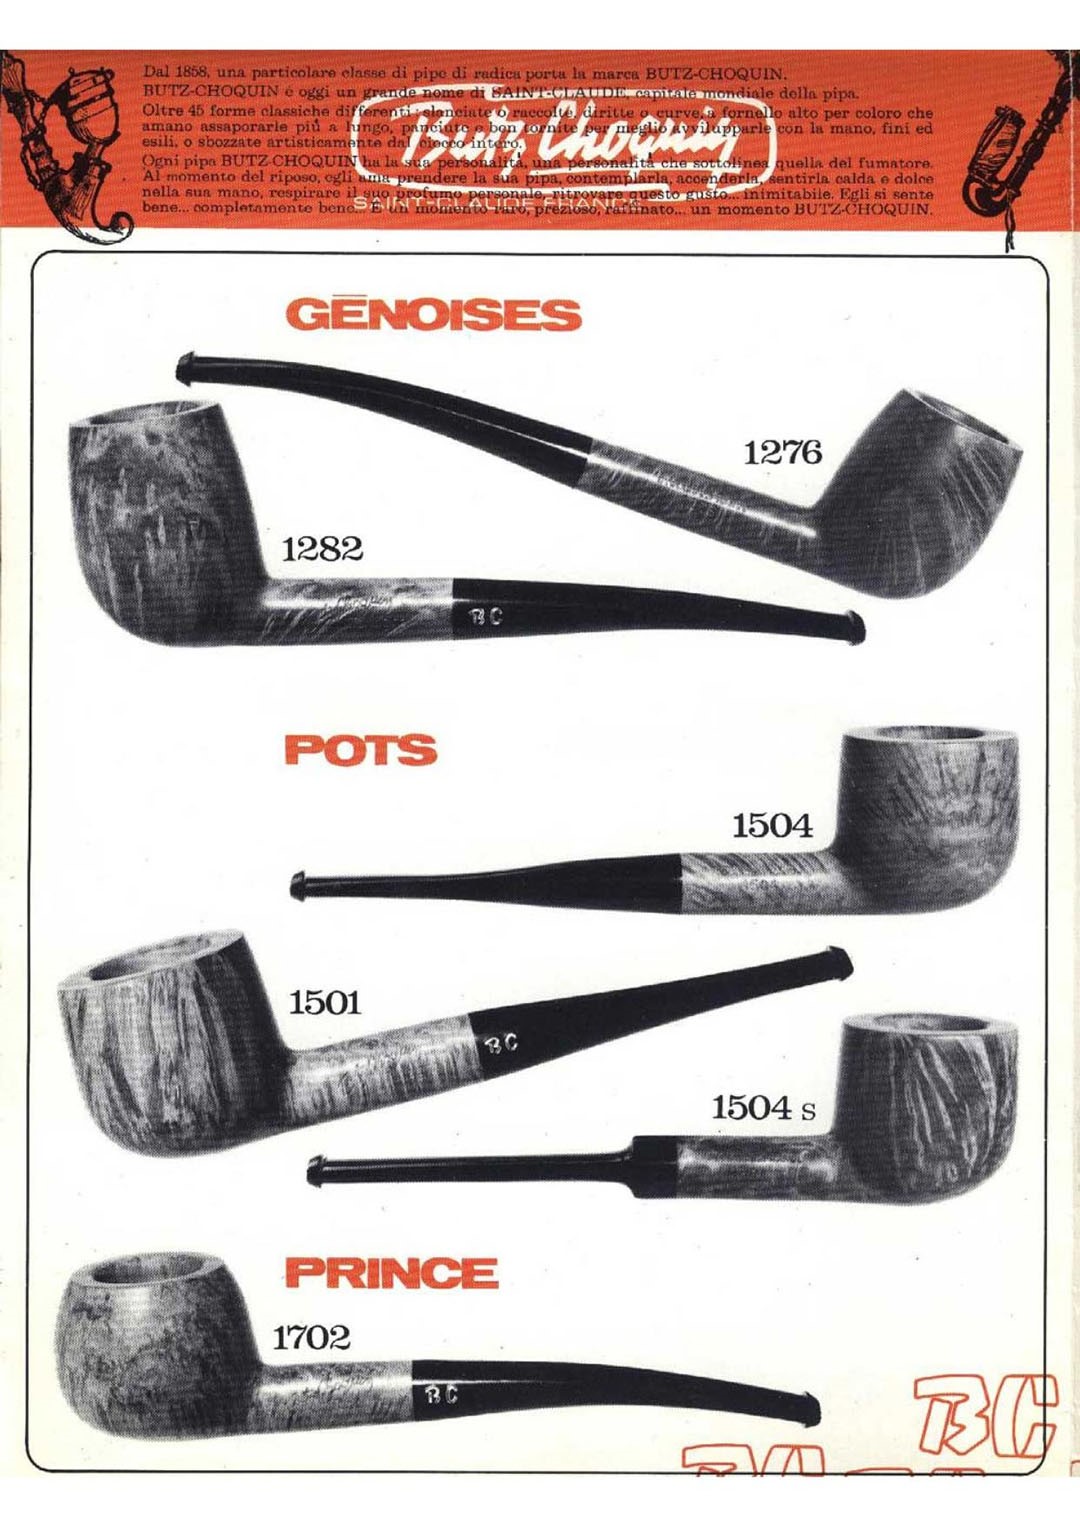
I turned to Pipedia (https://pipedia.org/wiki/Butz-Choquin) to see what I could find on the brand that the Regate line there. I found a catalogue page from Doug Valitchka on the Regate that listed the pipe line and a description (https://pipedia.org/wiki/File:BC10.jpg). I have captured that image below. The description under the Regate heading reads –
Regate (and the description below is in both French and English)
Les veines classique qui rallie les suffrages de la plupart des fumeurs
A great classic which meets with the approval of the majority of smokers.
I have also included another picture from Doug Valitchka that shows the shape of the pipe that I am working on (https://pipedia.org/wiki/File:BC06.jpg). It is the second shape that is shown on the page – Shape 1282. The shape is called a Genoises.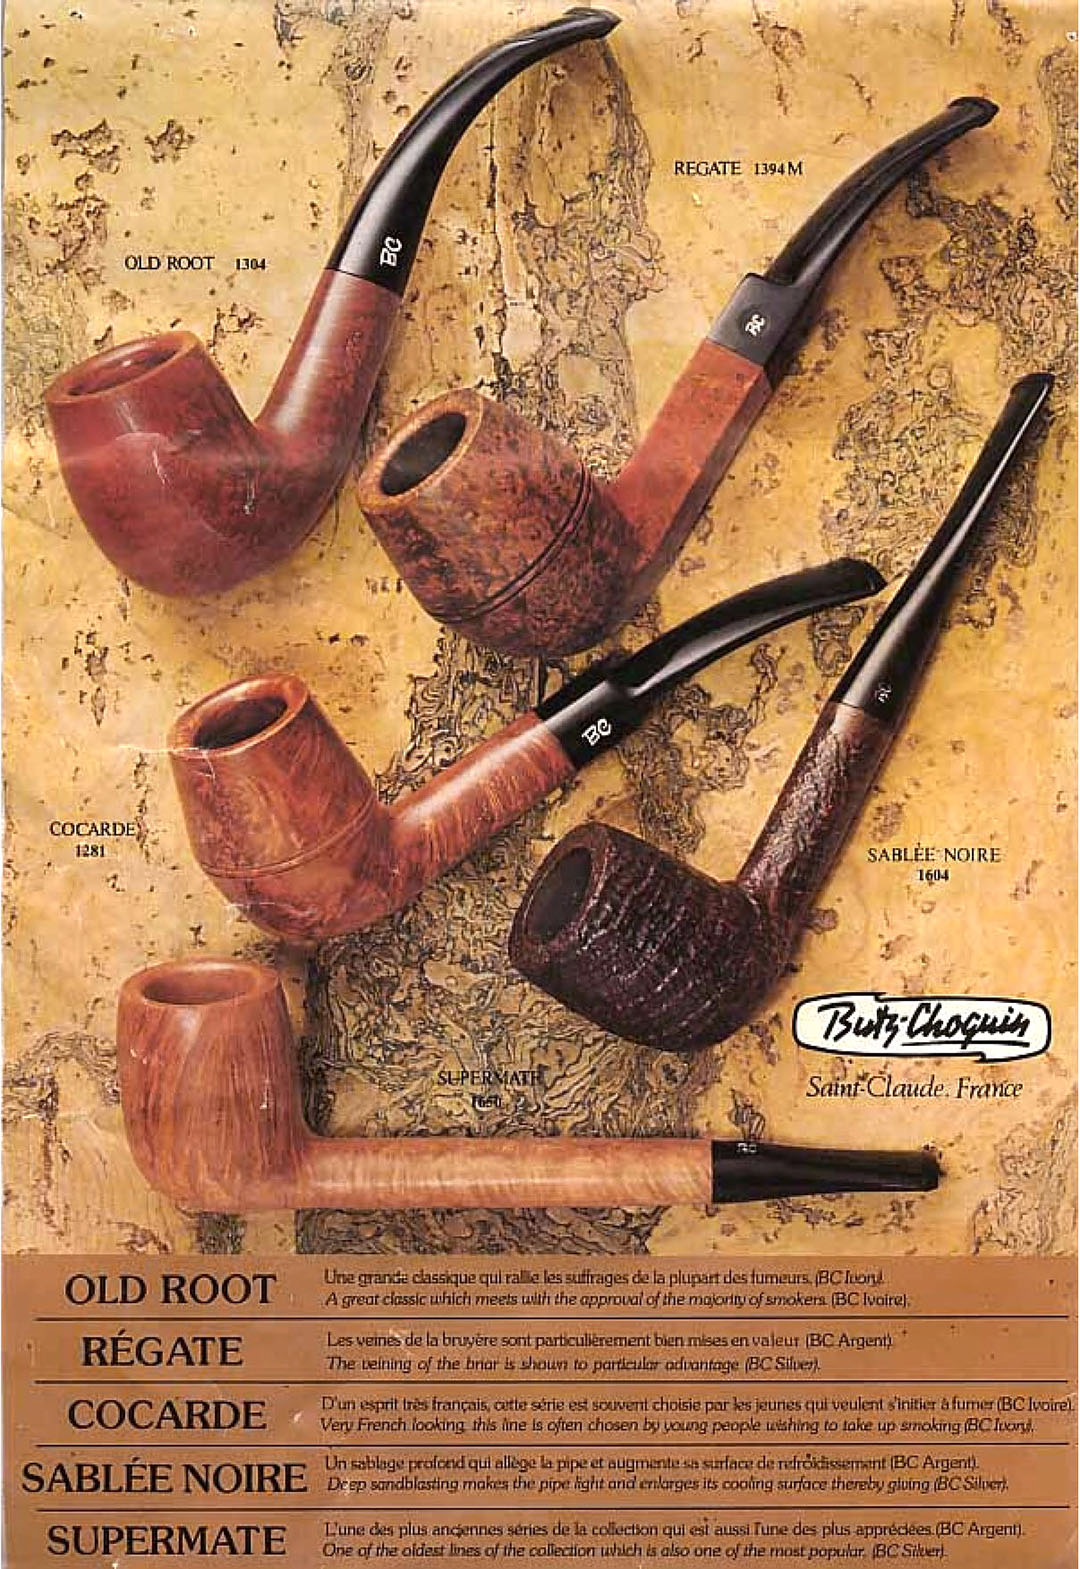
 Now it was time to work on the pipe. Jeff had cleaned up the pipe following his usual procedures. He reamed the pipe with a PipNet pipe reamer and cleaned up the remnants with a Savinelli Fitsall Pipe Knife. He cleaned out the inside of the shank and the airway in the stem with 99% isopropyl alcohol, cotton swabs and pipe cleaners. He scrubbed the exterior of the bowl with undiluted Murphy’s Oil Soap and a tooth brush. He rinsed it under running warm water to remove the soap and grime. He soaked the stem in Before & After Deoxidizer and rinsed it off with warm water. I took photos of the pipe once I received it.
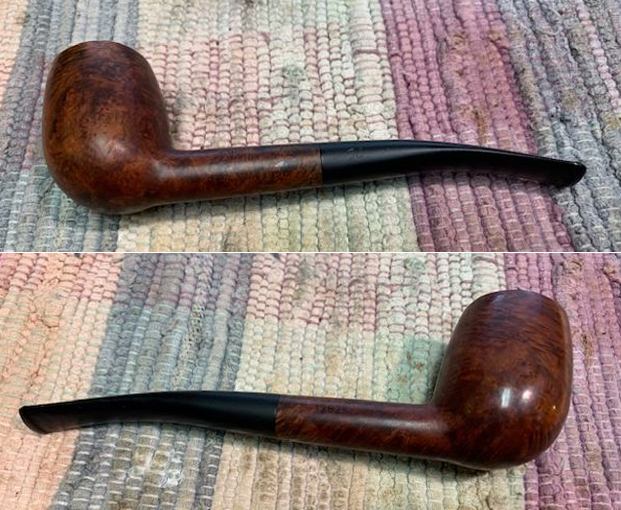
 The rim top cleaned up really well. But the cleaning revealed some serious burn damage on the rim top and front inner edge toward the right side. The stem surface looked good and the light tooth marks and chatter would be easy to address.
 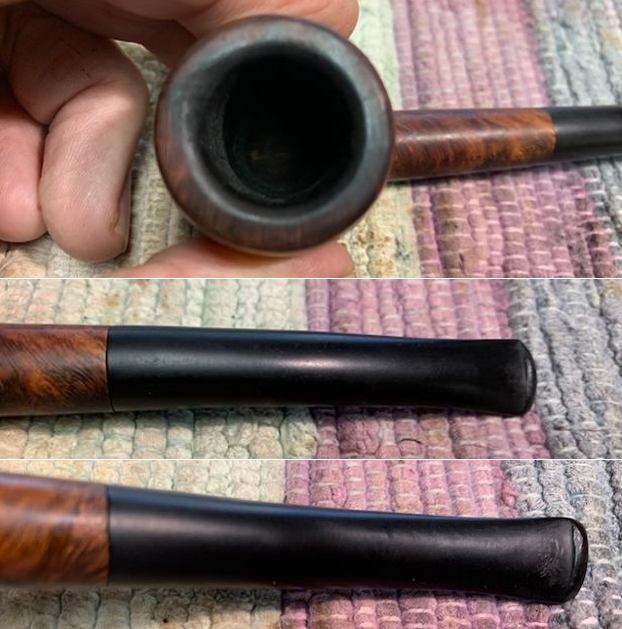 The stamping on the sides of the shank is readable and reads as noted above.
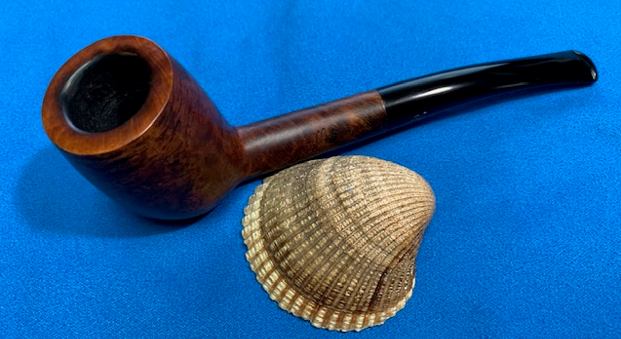
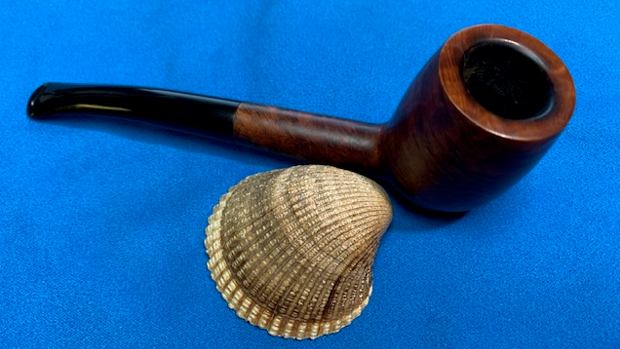
 I removed the stem and took a photo of the pipe to give a sense of the shape and the grain on the bowl and shank. It was a great looking shape and would be a beautiful pipe when I was finished.
 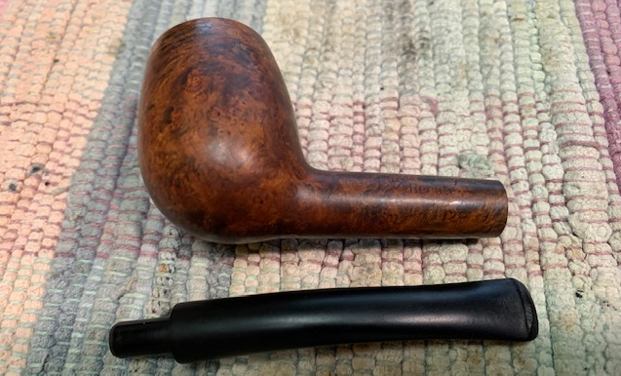 I decided to start my work on the pipe by wiping the bowl down with acetone on a cotton pad to remove the heavy stain around parts of the bowl sides. I wanted really be able to see the grain on the bowl.
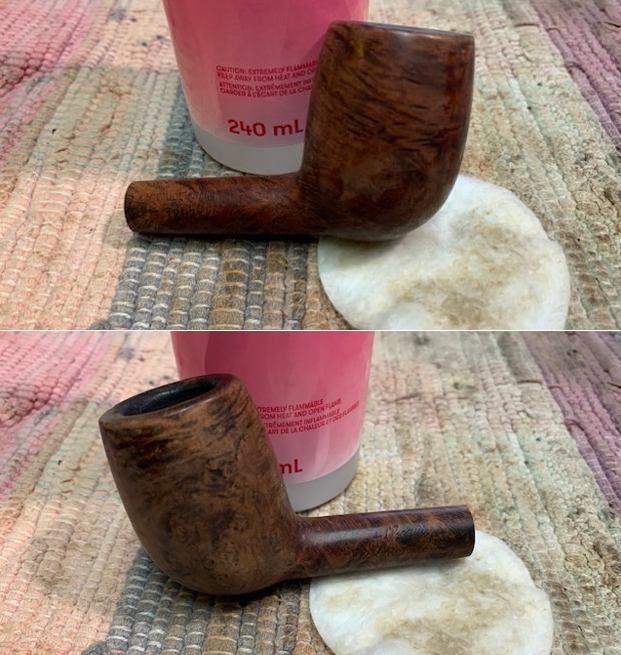
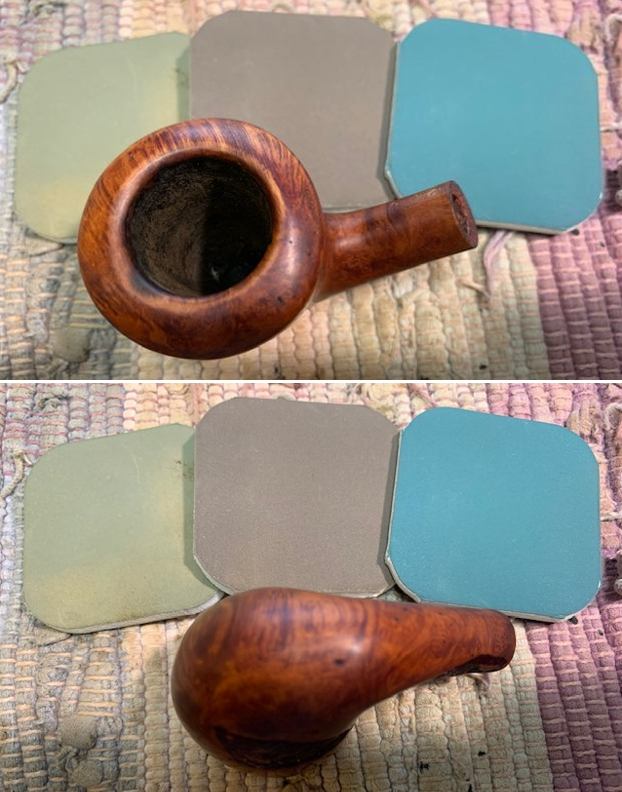
 I dealt with the damage to the rim top by topping it on a topping board with 220 grit sandpaper. I cleaned up the beveled inner edge of the rim with 220 grit sandpaper to remove as much of the burn damage as possible.
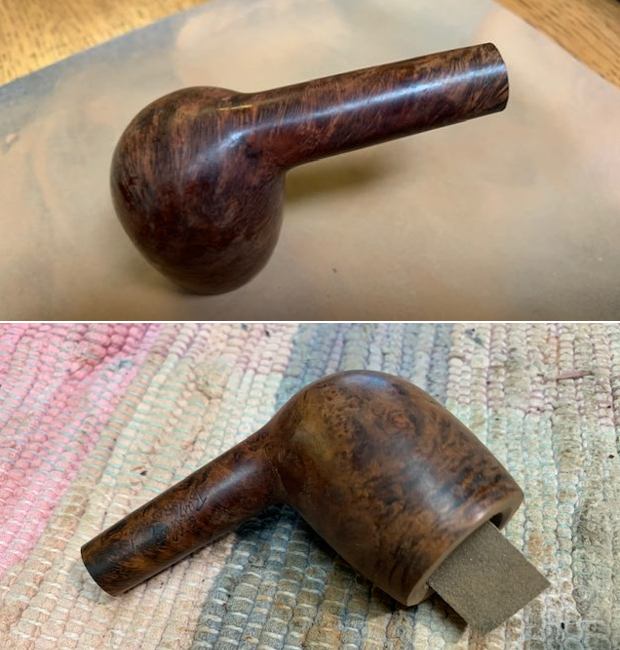
 I polished the bowl with micromesh sanding pads – 1500-12000 grit pads. I wiped it down with a damp cloth after each sanding pad. It was beginning to look good to my eyes.


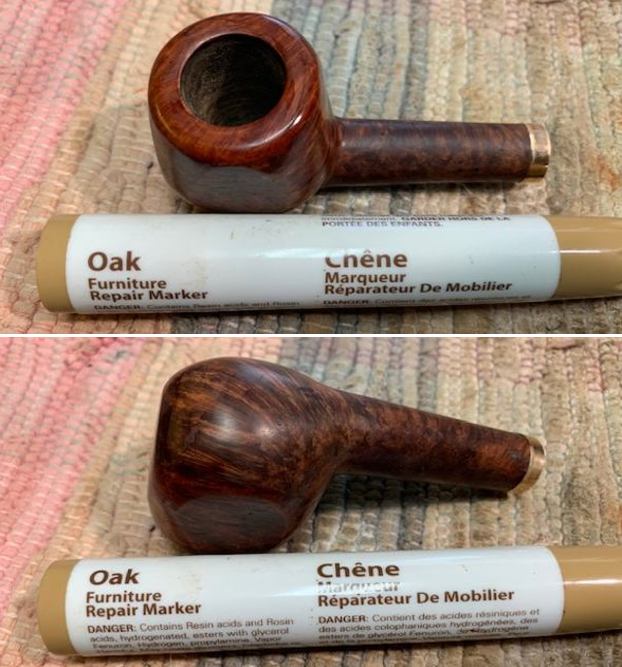
 I stained the inner edge and rim top with an Oak Stain Pen to match the rest of the surrounding bowl. It helps to blend in the burned area some more. The rim top and edges definitely look better than when I started.
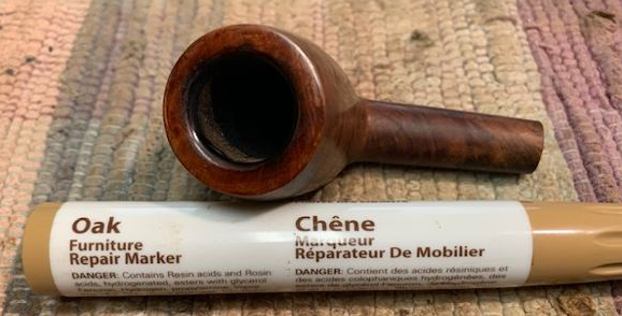 I rubbed the bowl and shank down with Before & After Restoration Balm. I worked it into the surface of the bowl sides and shank with my fingertips to clean, enliven and protect the briar. I let the balm sit for ten minutes then buffed the bowl with a cotton cloth to raise the shine.
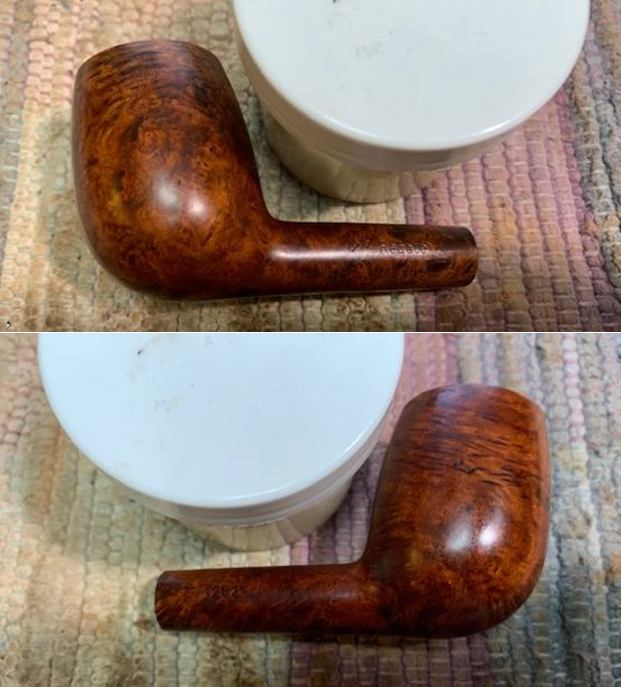
 I set the bowl aside and turned my attention to the stem. I “painted” both sides of the stem with the flame of a lighter to lift the tooth marks. It did a great job and left only one deep mark on the underside and some lighter tooth marks on the topside along the button. I filled them in with clear CA glue and once it cured I used a small file to sharpen the edge of the button and smooth out the repair. I sanded the stem with 220 grit sandpaper to smooth out the repairs. I started polishing it with 400 grit sandpaper.
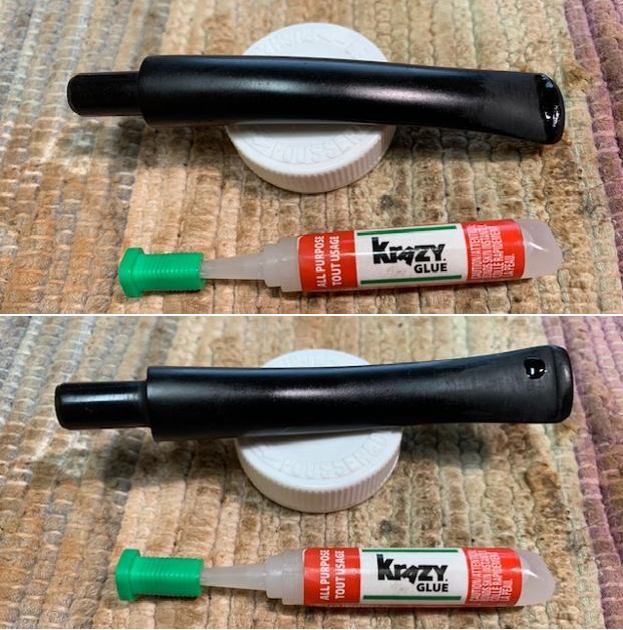
 I used some white acrylic fingernail polish to touch up the BC stamp on the left side of the stem. I painted it on with the brush and once it dried scraped it off and sanded it with a 1500 grit micromesh sanding pad.
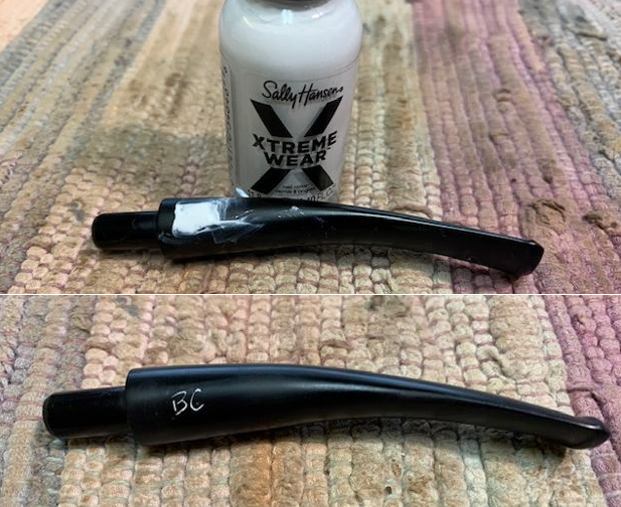 I polished the stem with micromesh sanding pads – 1500-12000 grit pads. I wiped it down with Obsidian Oil after each sanding pad. I used Before & After Pipe Polish – both Fine and Extra Fine to further polish the stem.
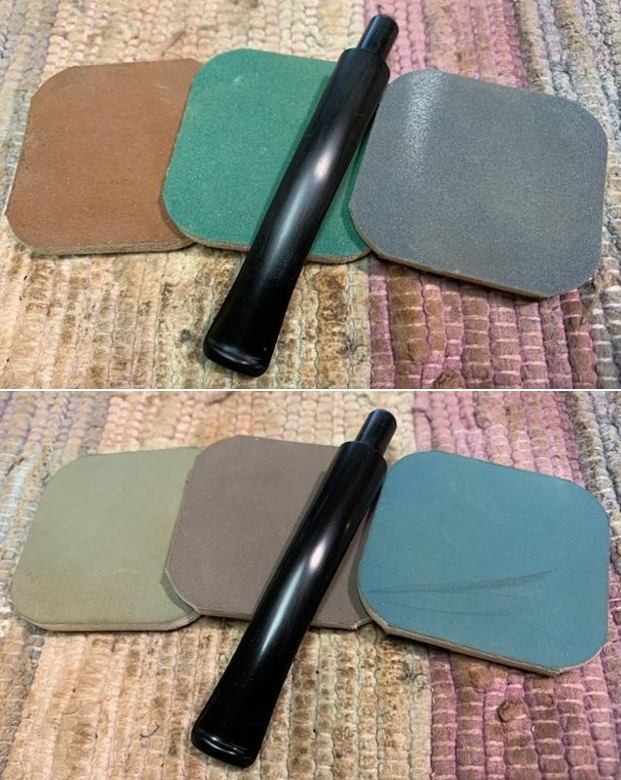
 This Butz-Choquin Regate 1282 Zulu is a great looking pipe now that it has been restored. The combination of various brown stains around the bowl is quite beautiful and highlights grain very well. The finish works well with the polished curved vulcanite taper stem. I put the stem back on the bowl and carefully buffed the pipe with Blue Diamond on the buffing wheel using a light touch on the briar. I gave the bowl and the stem multiple coats of carnauba wax on the buffing wheel and followed that by buffing the entire pipe with a clean buffing pad. I hand buffed the pipe with a microfiber cloth to deepen the shine. The finished Butz-Choquin Regate Zulu sits nicely in the hand and feels great. Give the finished pipe a look in the photos below. The dimensions of the pipe are Length: 6 inches, Height: 1 ¾ inches, Outside diameter of the bowl: 1 ¼ inches, Chamber diameter: ¾ inch. The weight of the pipe is 35 grams/1.23 ounces. I will be putting it on the French Pipemakers section of the rebornpipes store shortly. If you are interested in adding this pipe to your collection send me a message or an email. Thanks for reading this blog and my reflections on the pipe while I worked on it. There are many more to come!
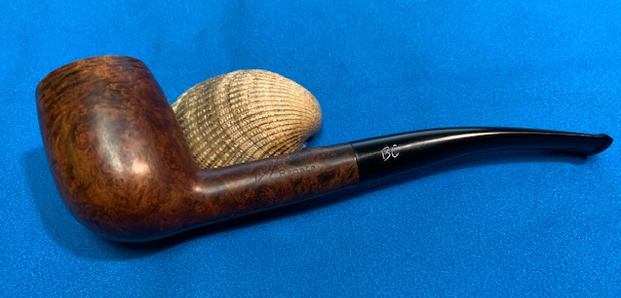
Blog by Steve Laug
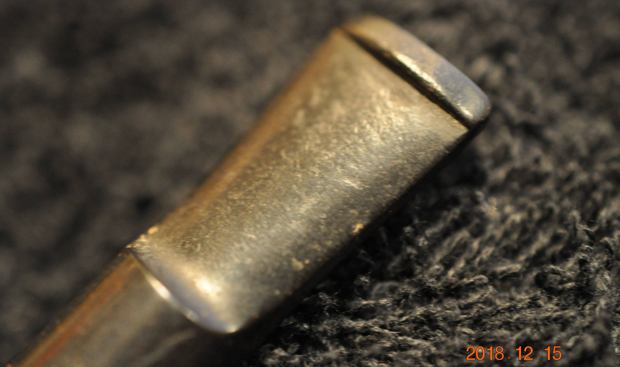
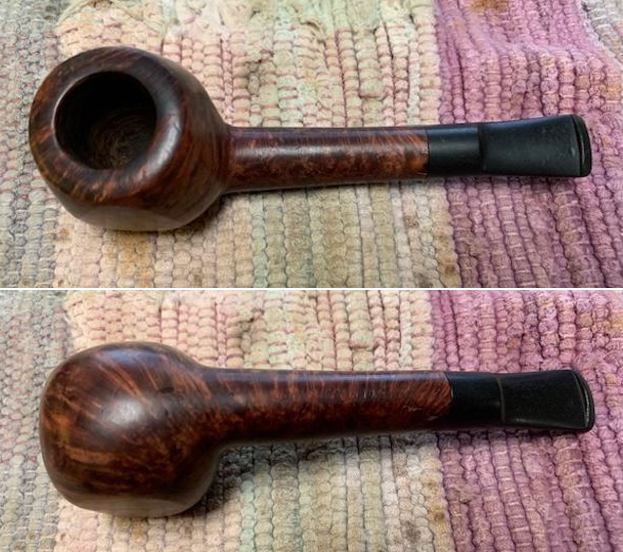
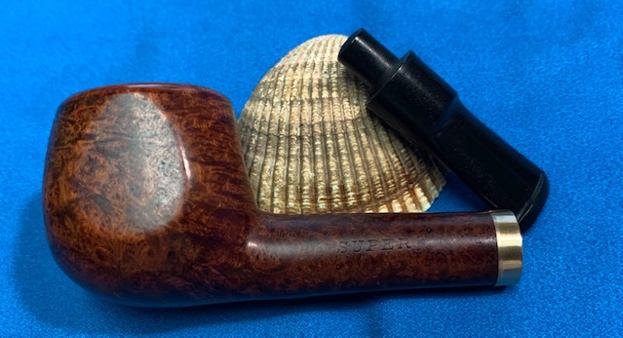
The next pipe on the table is one that we picked up back in 2018 and have no clear record of where and when we picked it up. The shape is what attracted us to the pipe. It is a unique shape with the panels on the bowl and the short Lovat style shank with a saddle stem. The finish was dirty with grime ground into the finish around the bowl sides. There were also some cracks in right side mid shank and on the lower part as well. The cracks were in the middle of some fills on that side of the bowl. There was a thick cake in the bowl and lava overflow on the top of the rim. There was also tobacco debris in the bowl. The stem was lightly oxidized and there were tooth marks and chatter on both sides near the button. The pipe is stamped on the left side of the shank and reads SUPER. On the right side it reads IMPORTED BRIAR. On the underside it is stamped John Surrey Ltd. The stamping is all clear and readable. 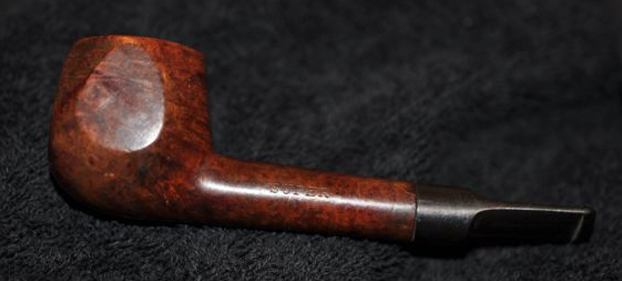
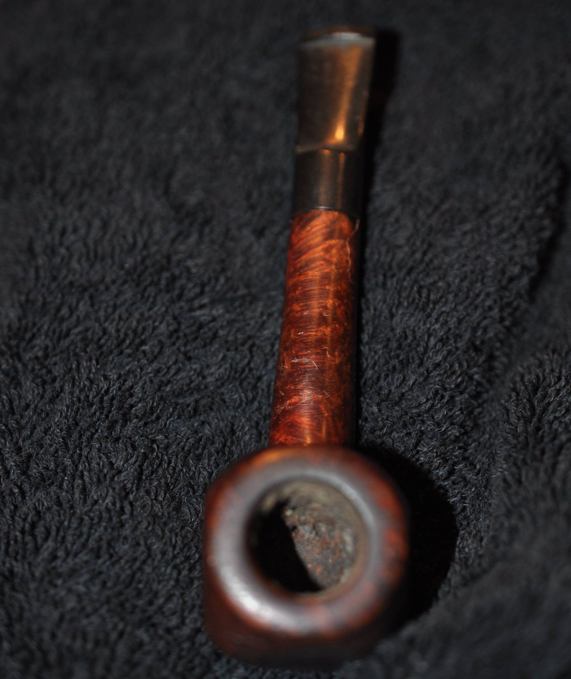 He took photos of the rim top and bowl to give a clear picture of the thickness of the cake and well as the nicks, lava and darkening on the rim top. The inner and outer edges of the bowl were in great condition. He also took photos of the top and underside of the stem to show the light oxidation and the chatter and tooth marks.
 Jeff took a photo the sides and heel of the bowl to give a picture of the beautiful grain around the bowl and shank.
  He also took a photo of the fills and damage to the right and underside of the shank – there were fills that had fallen out and there was a crack that needed attention.
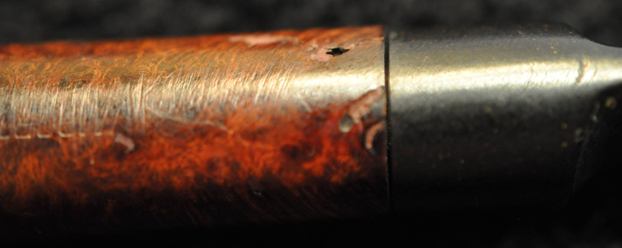 The stamping on the sides of the shank is clear and readable and read as noted above. Jeff did not take a photo of the John Surrey Ltd. stamp on the underside of the shank.
 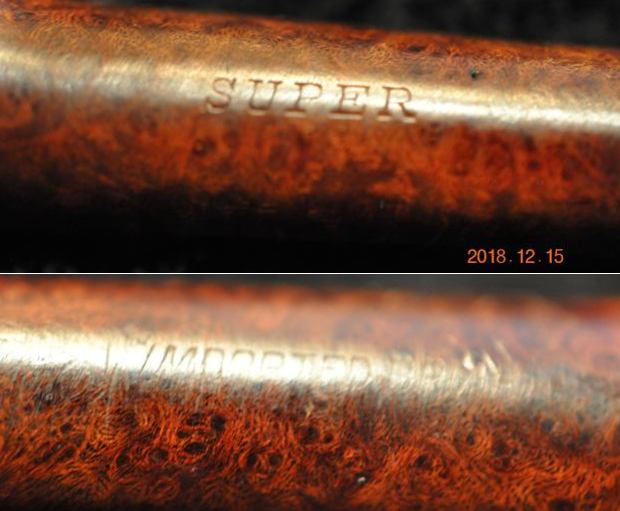 I turned to Pipephil’s site and looked for information on the John Surrey Ltd pipe company (http://pipephil.eu/logos/en/logo-j3.html). I found that the company, John Surrey, Ltd. was originally located at 509 Fifth Avenue New York City, New York in the USA. I also did a screen capture of the section on the brand. Interestingly the Super line is not included in the list but all of the other pipes in the section are stamped with the same style stamping as the one I am working on. The closest one is the John Surrey Ltd. Imported Briar Super Deluxe. It is possible that the Deluxe stamp is worn off on this one but it is not clear.
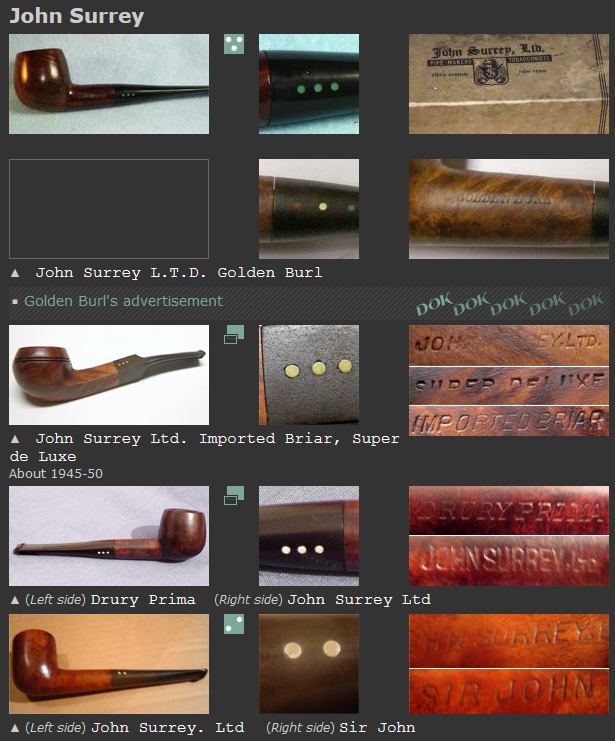 I turned to Pipedia in the US pipe makers section to see if I could find some more information on the brand (https://pipedia.org/wiki/John_Surrey_Ltd.). I found a short summary which I include below regarding the brand.
John Surrey Ltd. made John Surrey pipes. They were based at 509 Fifth Ave, New York. And in 1948 the company put a pipe on the market which sold very successfully: the Slugger Baseball Pipe (shank and stem like a baseball bat, and bowl similar to a baseball).
That was the extent of the information so it was not time to work on the pipe. Jeff had cleaned up the pipe following his usual procedures. He reamed the pipe with a PipNet pipe reamer and cleaned up the remnants with a Savinelli Fitsall Pipe Knife. He cleaned out the inside of the shank and the airway in the stem with 99% isopropyl alcohol, cotton swabs and pipe cleaners. He scrubbed the exterior of the bowl with undiluted Murphy’s Oil Soap and a tooth brush. He rinsed it under running warm water to remove the soap and grime. He soaked the stem in Before & After Deoxidizer and rinsed it off with warm water. I took photos of the pipe once I received it. 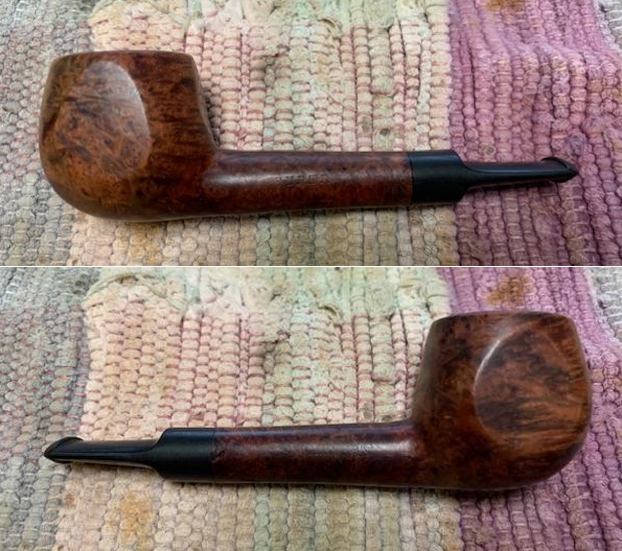
 The crowned rim top cleaned up really well. The rim top had a lot of nicks and deep gouges in it but the inner and outer edge of the bowl appeared to be in good condition. The stem surface looked very good and the tooth marks chatter on the stem on both sides near the button could probably be sanded out.
  The stamping on the sides of the shank is readable and reads as noted above.
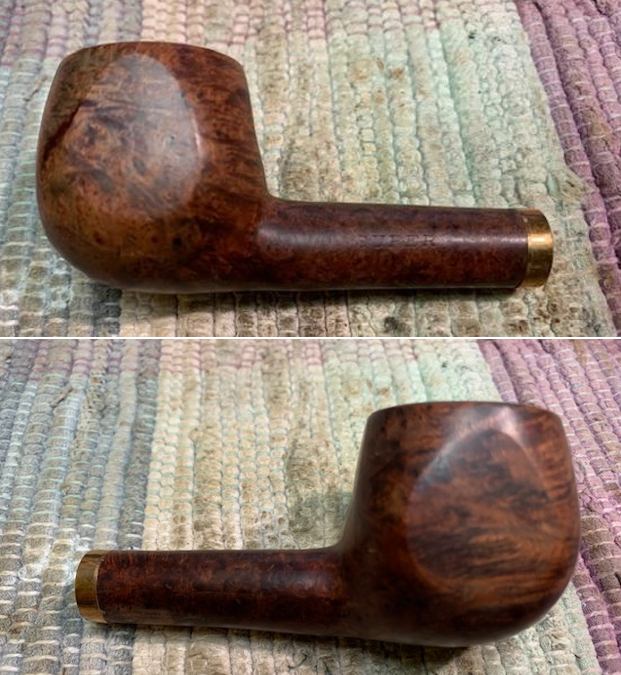
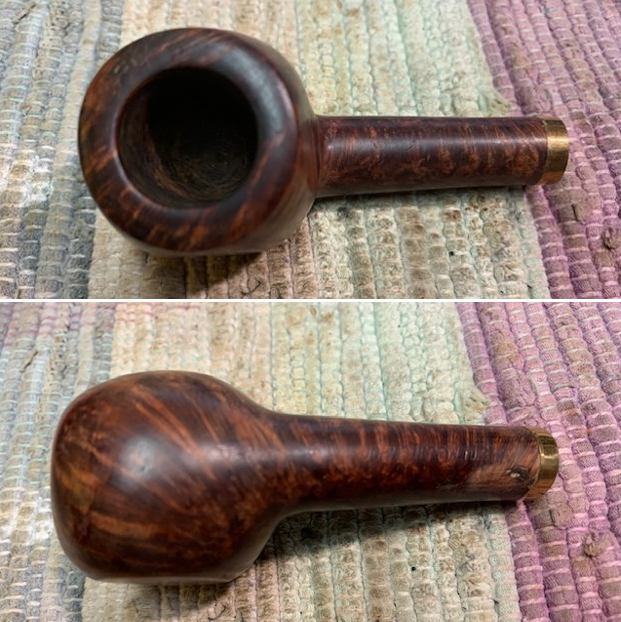
 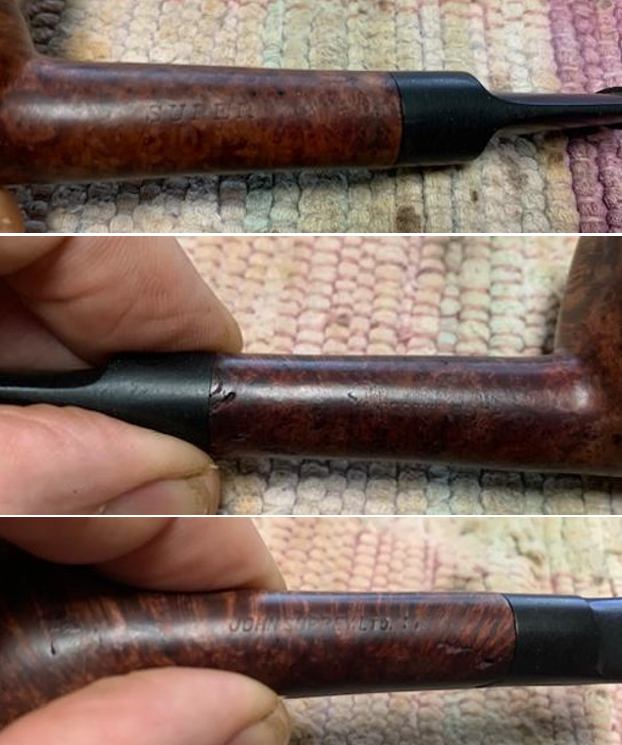 I removed the stem and took two photos of the pipe to give a sense of the shape and the grain on the bowl and shank. It was a unique shape and would be a beautiful pipe when I was finished.
 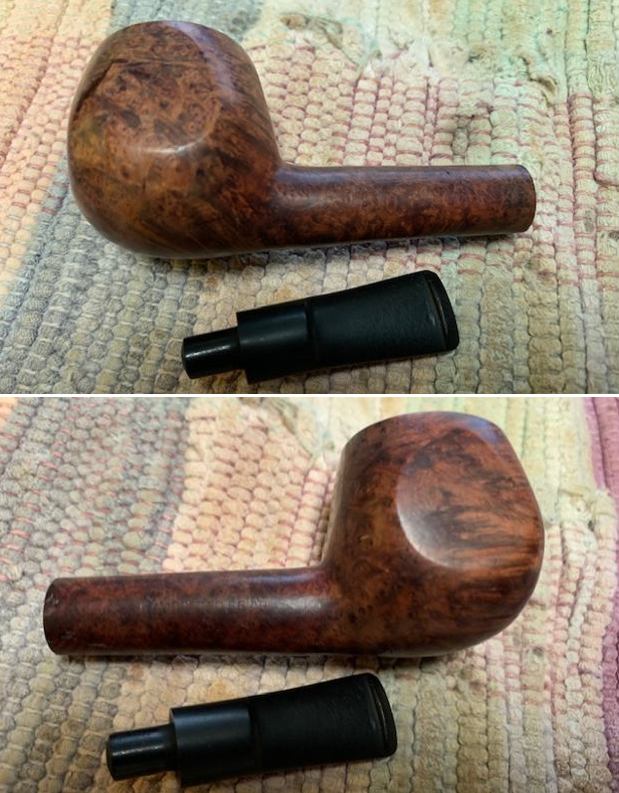 I took a series of photos of the cracks on the shank and flaws where the putty fills had fallen out.
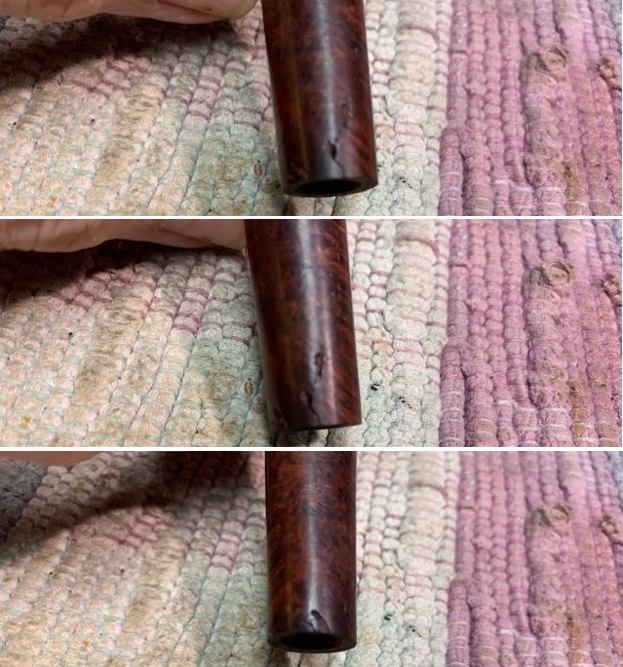 I decided to start my work on the pipe by dealing with the damage on the shank end. I filled in the crack and the damaged fills with briar dust and clear CA glue. I found a thin brass band in my band collection that was a perfect fit on the shank so once the repair had cured and I sanded it down I fitted a band. I put a thin bead of glue around the shank end and pressed the band in place. It bound the repaired areas together and it gave the shank a touch of bling. I took some photos of the banded shank to give a picture of what I was seeing!
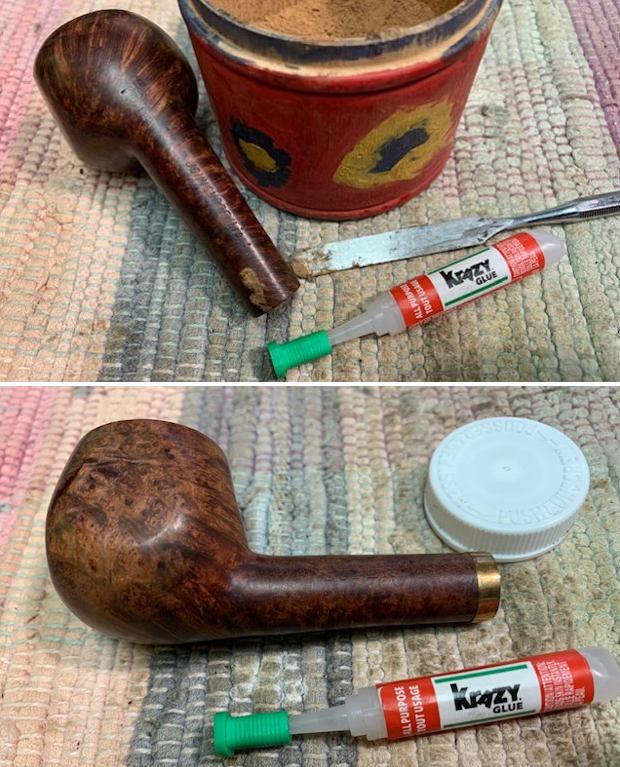
 I dealt with the damage to the rim top by topping it on a topping board with 220 grit sandpaper. Like so many other things in this process I also would need to redo the crowned rim top once I was finished.
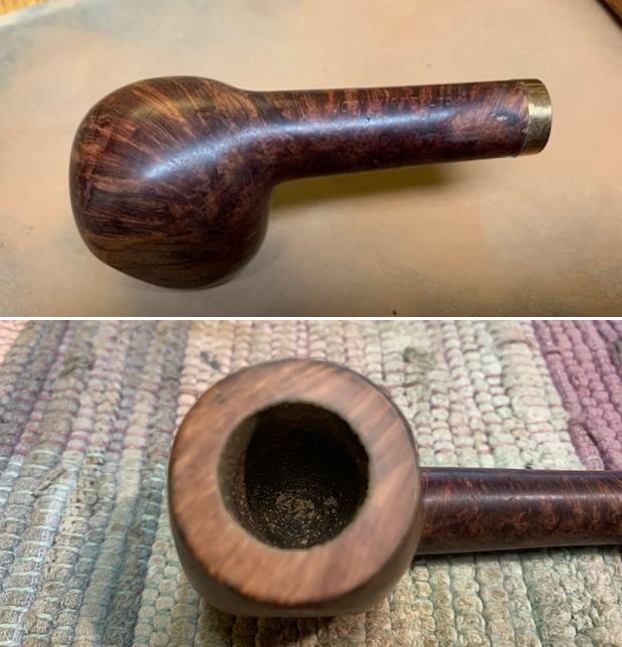 I wiped the bowl down with acetone on a cotton pad to remove the heavy stain around parts of the bowl sides. I wanted really be able to see the grain on the bowl. I also used this in preparation for reworking the bowl crown.
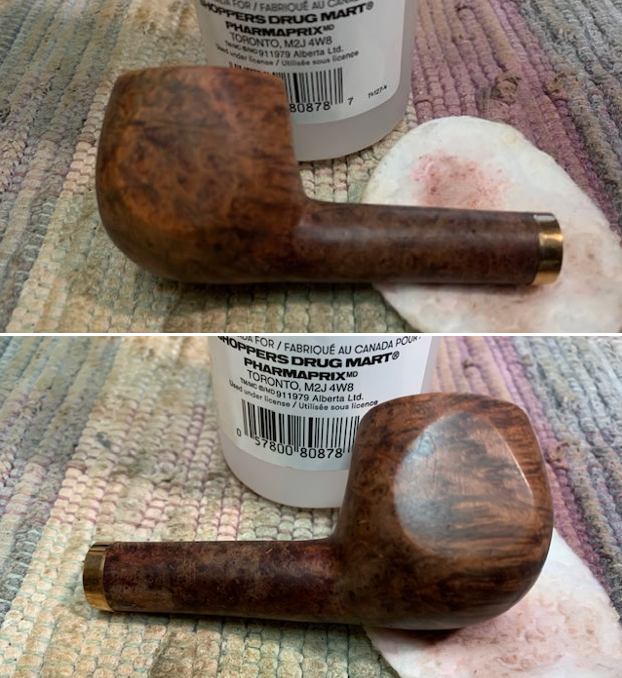
 I used a flat file to take down the outer edge and bevel it to bring the crowned rim back to the top of the bowl.
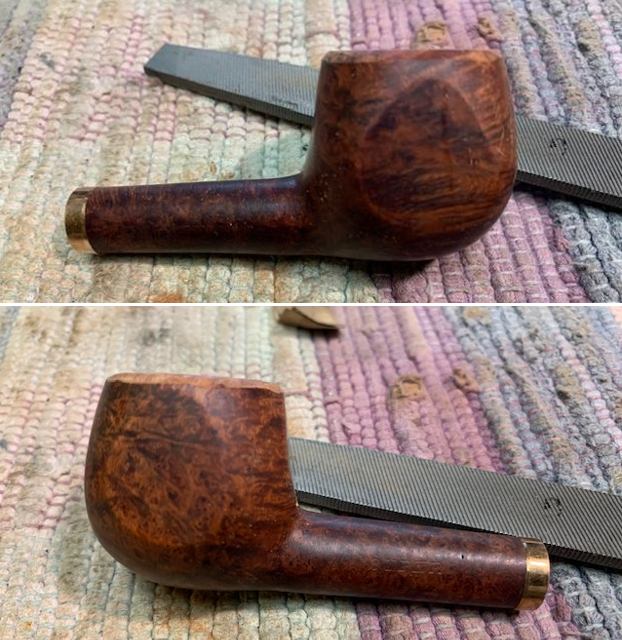
 I sanded the outer filed edge and the inner edge to give a slight inward bevel with 220 grit sandpaper to smooth out the file marks and fine tune the shape of the rim.
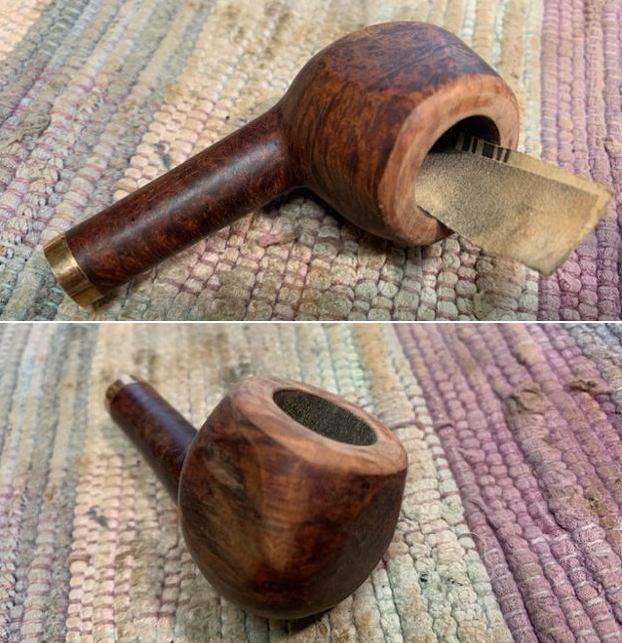
 I polished the newly shaped rim top and edges along with the rest of the bowl with micromesh sanding pads – 1500-12000 grit pads. I wiped it down with a damp cloth after each sanding pad. It was beginning to look good to my eyes.

 I forgot to take a photo of the underside at this point. I paused the polishing to stain the rim top and edges of the bowl with an Oak Stain Pen. I wanted to see if I could blend it into the bowl sides. I also touched up the light spots on the bowl sides at the same time. Once I finished that I buffed the bowl with Blue Diamond on the buffing wheel and returned to finish the polishing with 6000-12000 grit micromesh pads.
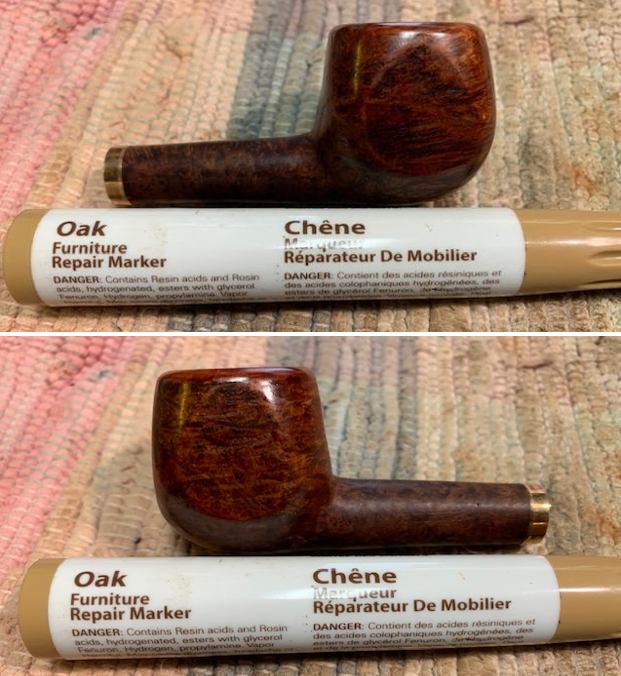

 I rubbed the bowl and shank down with Before & After Restoration Balm. I worked it into the surface of the bowl sides and shank with my fingertips to clean, enliven and protect the briar. I let the balm sit for ten minutes then buffed the bowl with a cotton cloth to raise the shine.
 I set the bowl aside and turned my attention to the stem. I “painted” both sides of the stem with the flame of a lighter to lift the tooth marks. It did a great job and left only one deep mark on the underside and some lighter tooth marks on the topside along the button. I filled them in with clear CA glue and once it cured I sanded the stem with 220 grit sandpaper to smooth out the repairs. I started polishing it with 400 grit sandpaper.
 I polished the stem with micromesh sanding pads – 1500-12000 grit pads. I wiped it down with Obsidian Oil after each sanding pad. I used Before & After Pipe Polish – both Fine and Extra Fine to further polish the stem.
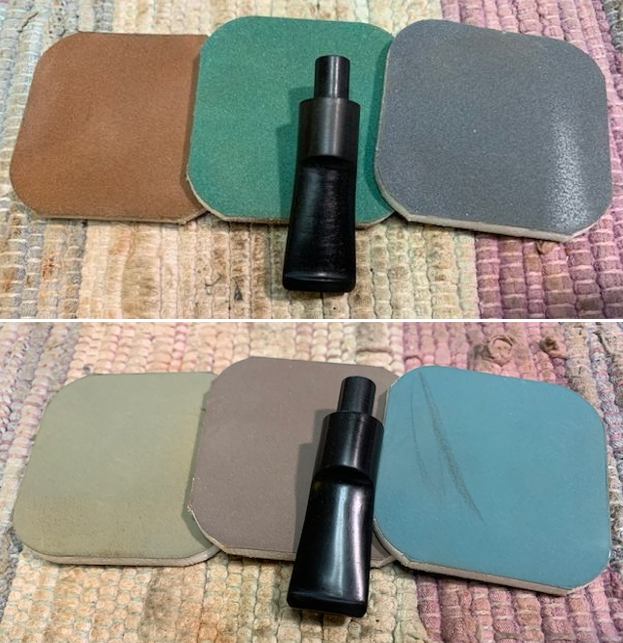
 This John Surrey Ltd. Super Imported Briar Panel Lovat is a great looking pipe now that it has been restored. The combination of various brown stains around the bowl is quite beautiful and highlights grain very well. The finish works well with the thin brass band on the shank end and the polished vulcanite saddle stem. I put the stem back on the bowl and carefully buffed the pipe with Blue Diamond on the buffing wheel using a light touch on the briar. I gave the bowl and the stem multiple coats of carnauba wax on the buffing wheel and followed that by buffing the entire pipe with a clean buffing pad. I hand buffed the pipe with a microfiber cloth to deepen the shine. The finished John Surrey Ltd. Super Panel Lovat sits nicely in the hand and feels great. Give the finished pipe a look in the photos below. The dimensions of the pipe are Length: 4 ¾ inches, Height: 1 ½ inches, Outside diameter of the bowl: 1 ¼ inches, Chamber diameter: ¾ inch. The weight of the pipe is 38 grams/1.34 ounces. I will be putting it on the American (US) Pipemakers section of the rebornpipes store shortly. If you are interested in adding this pipe to your collection send me a message or an email. Thanks for reading this blog and my reflections on the pipe while I worked on it. There are many more to come!
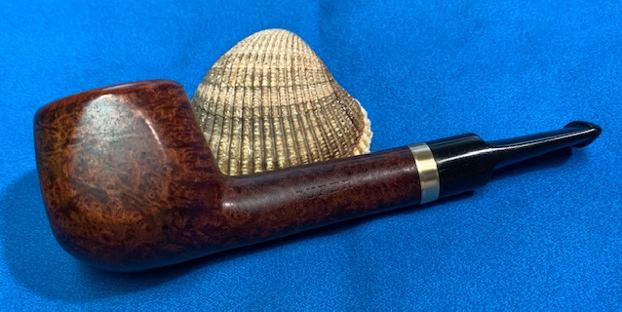


Blog by Steve Laug
A while back I received a small box of pipes from a fellow pipeman who wanted to donate them to support the non-profit organization I work for – the SA Foundation (www.safoundation.com). The organization has been providing long term recovery, housing and job training for women who have escaped sexual exploitation and trafficking. For over thirty years the work has gone on and thousands of young women and their children have been empowered to start over with skills and options. The work is currently in 7 countries and 12 cities around the world. If you are interested give the website a look.
Now back to the pipes. There were eight total pipes in the lot that he sent me. The first one I restored was a large Irish Second 05 Calabash that is heading off to Michigan. The second pipe was a Peterson’s Kapet pipe in a shape 124 (https://rebornpipes.com/2021/08/16/restoring-a-republic-era-petersons-kapet-124/). The third pipe was a very Danish looking Made in London, England Sandblast Acorn. (https://rebornpipes.com/2021/08/17/restoring-a-very-danish-looking-made-in-london-england-acorn/). The fourth pipe was a Bromma Bent Billiard with a screw on bowl (https://rebornpipes.com/2021/08/18/restoring-what-looks-like-a-swedish-bromma-pipe/). The fifth pipe is a Canadian Made Paradis Pipe (https://rebornpipes.com/2021/08/19/restoring-canadian-made-paradis-rustic-246-bent-dublin/). The sixth pipe was an unsmoked small carved figural meerschaum that is for sale on the rebornpipes store (https://rebornpipes.com/rebornpipes-store/meerschaum-pipes-smooth-figurals/). The seventh pipe was a Medico Ventilator Bent Billiard (https://rebornpipes.com/2021/08/20/restoring-a-sandblast-medico-ventilator-bent-billiard/). All of the pipes were in clean condition and had been lightly reamed.
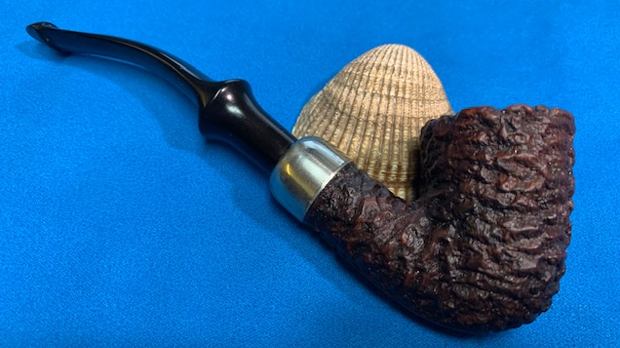
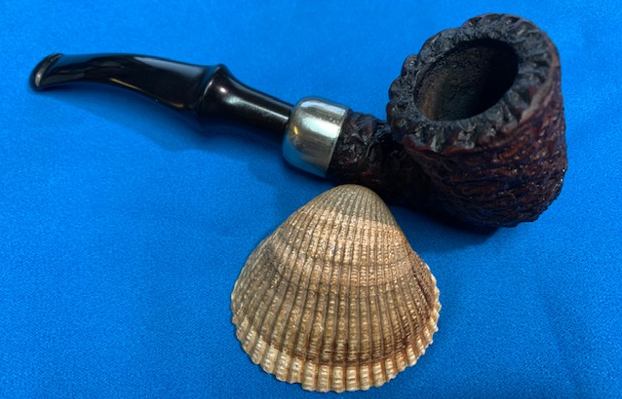
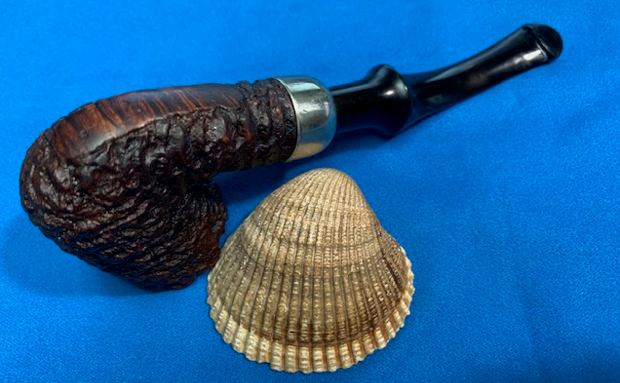
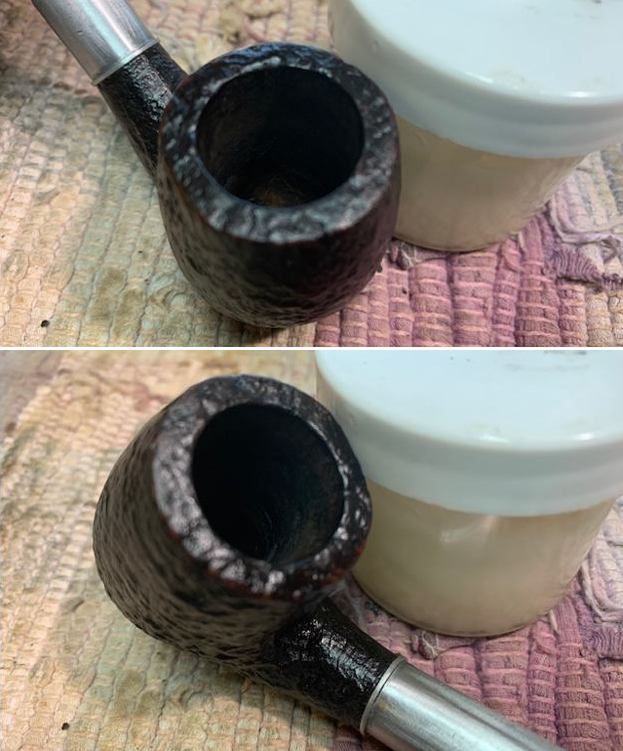
The next pipe, the eighth and final one is a bent Peterson’s System Standard 305 Rusticated Bent Dublin. The pipe was clean on the inside but dusty on the sandblast finish. The classic Peterson rustication was very well done and quite rugged. The rim top and edges looked very good. The pipe was stamped on the shank and read Peterson’s [over] System [over] Standard. That is followed by the stamping Made in the Republic of Ireland in three lines. Finally at the end of the smooth panel is the shape number 305. The nickel ferrule was stamped on the left side and read K&P [over] Petersons. The vulcanite P-lip stem had a small hole in the topside ahead of the button that looks like a bite through. There is a lot of tooth chatter and marks on both sides ahead of the button. There was no P stamp on the side or top of the stem. I took some photos of the pipe before I started my clean up work on it.
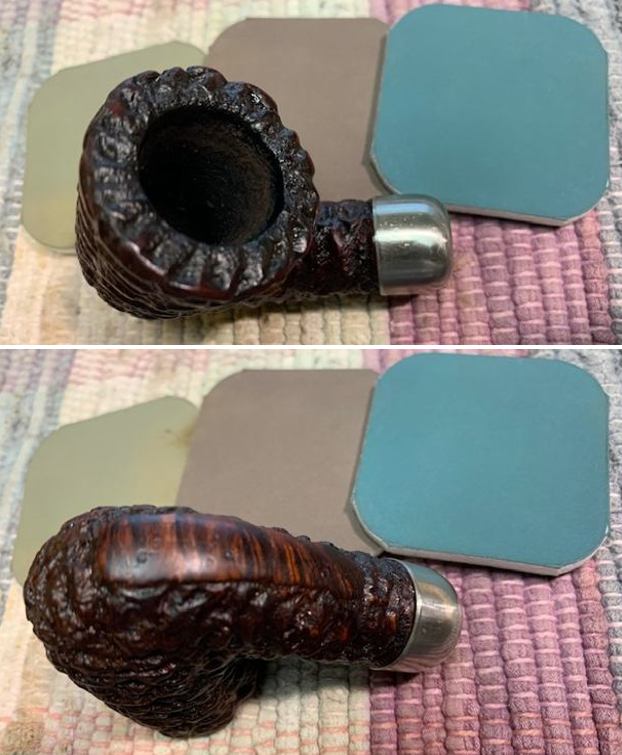
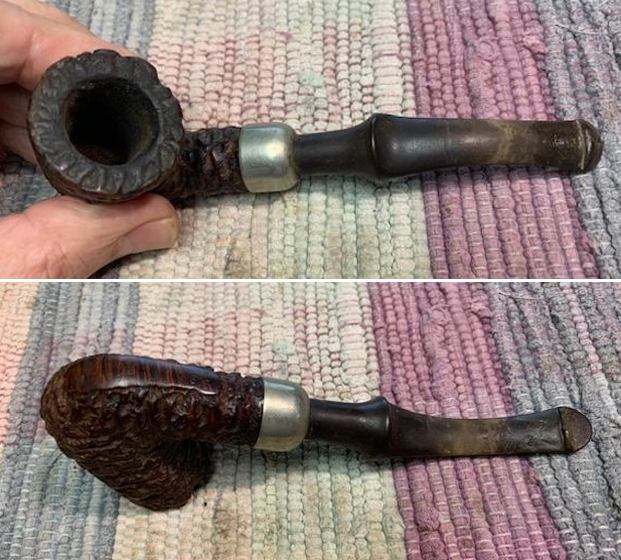 I took photos of the bowl and rim top as well as the stem to show the condition of the pipe. The rim top was dusty and had some lava build up in the rustication. There was a thin cake in the bowl as well. The finish on the bowl had paint flecks and dust in the crevices of the rustication. The stem was oxidized, calcified and had a lot of tooth chatter and some deep tooth marks on both the top and bottom. There was a small bite through on the topside ahead of the button. This was obviously a great smoking pipe and someone’s favourite!
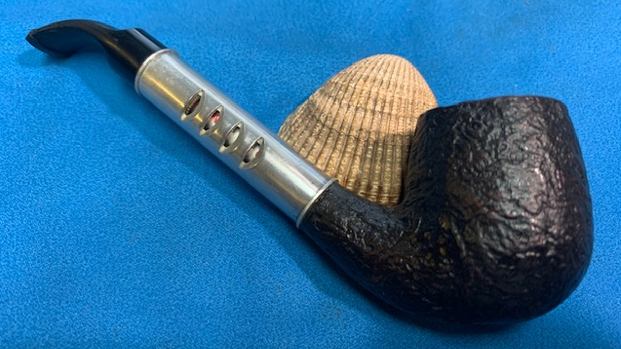
 I took a photo of the stamping on the underside of the heel of the bowl. It was clear and readable as noted above.
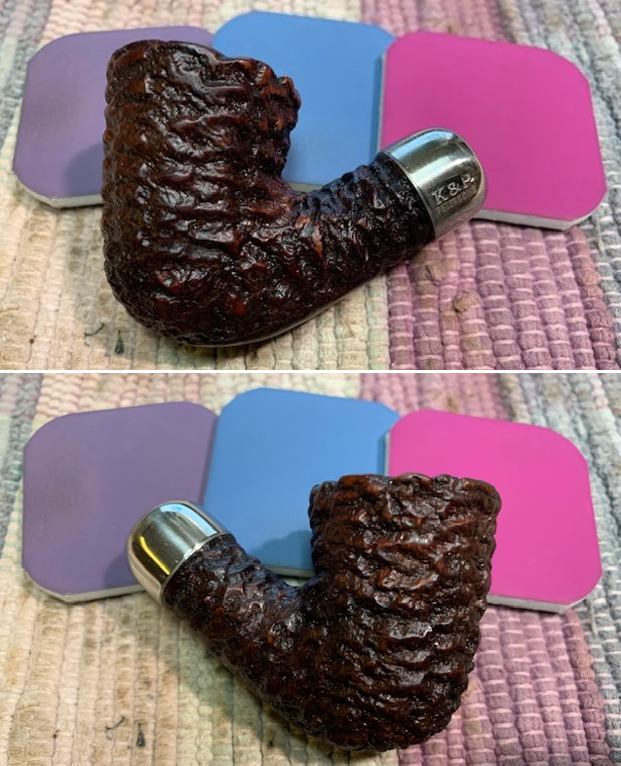
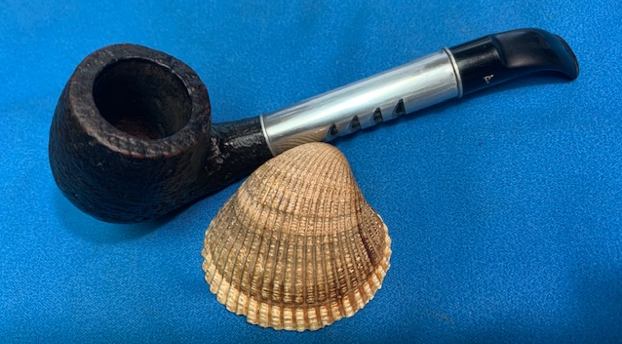
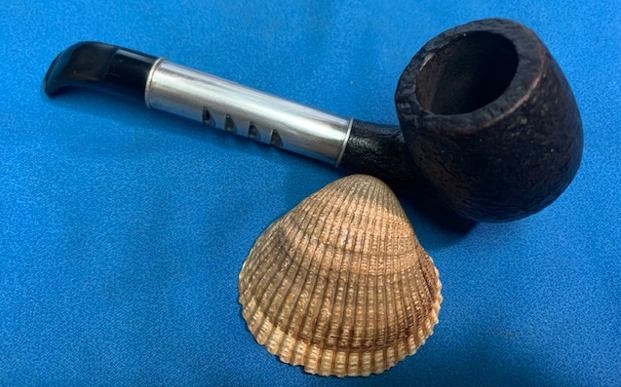
 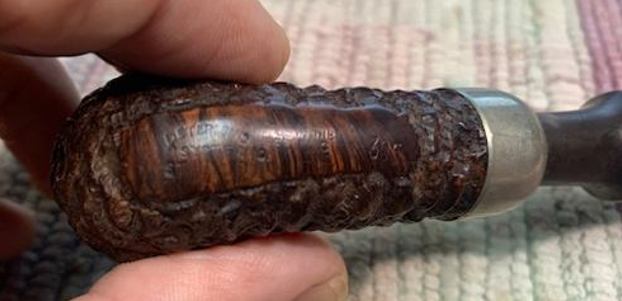 I removed the stem from the shank and took a photo of the pipe. The great rustication and charm of the pipe are visible even with the grime and dust.
  Now it was time to work on the pipe. I started my work on the pipe by cleaning up the reaming. I removed the remaining cake with a Savinelli Fitsall Pipe Knife and took it back to bare briar so that I could examine the bowl for heat damage. It looked good.
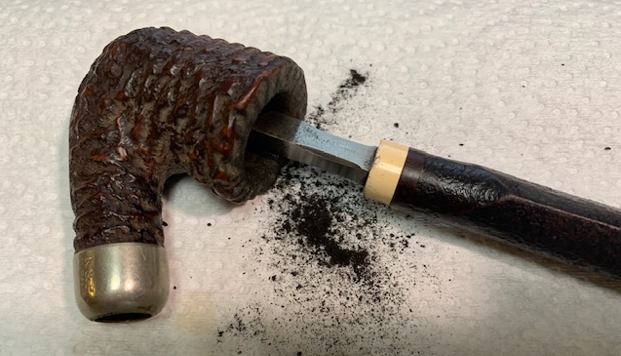 I cleaned the mortise, sump and shank along with the airway in both the shank and the stem with 99% isopropyl alcohol, pipe cleaners and cotton swabs until the interior of the pipe was very clean.
 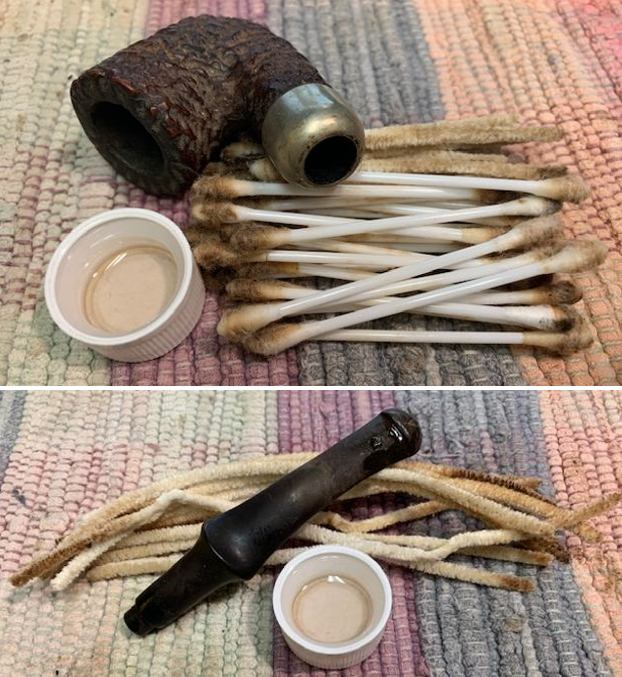 I dropped the stem in a bath of Briarville’s Stem Deoxidizer to soak while I worked on the bowl.
 I scrubbed the exterior of the pipe with undiluted Murphy’s Oil Soap. I scrubbed the rustication and paid serious attention to the lava on the rim top. I used a tooth brush and the soap and rinsed it off with running water. I dried it off with a cotton towel. There were still some small flecks of white paint on the bowl sides.
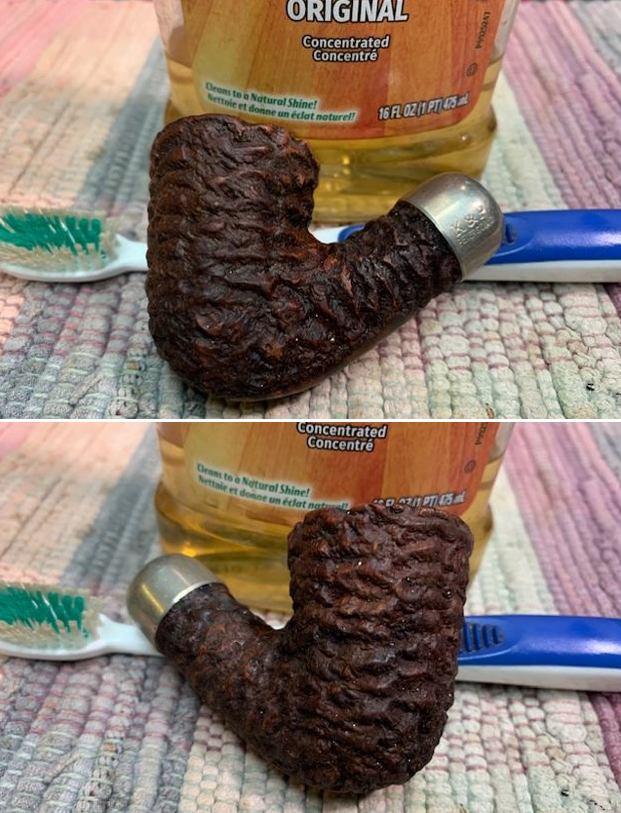
 I used a brass bristle brush to work on the white paint flecks in the rustication and to clean up the remaining debris on the rim top. It works well and leaves the surface clean.
 With the surface clean I was ready for the next step in the process. I rubbed the bowl and shank down with Before & After Restoration Balm. I worked it into the surface of the bowl sides and shank with my fingertips and a horsehair shoe brush to clean, enliven and protect the briar. I let the balm sit for ten minutes then buffed the bowl with a cotton cloth to raise the shine.
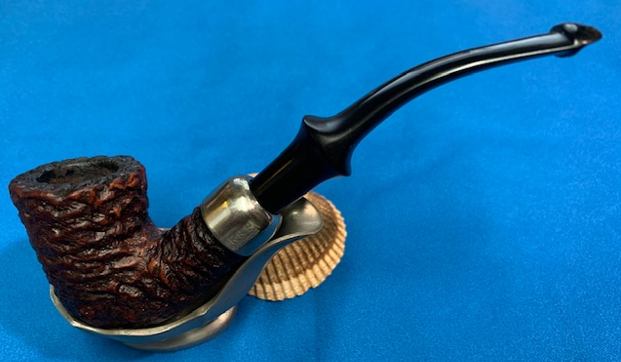
 I polished the nickel ferrule with micromesh sanding pads – using 3200-12000 grit pads and wiping it down after each pads with a damp cotton pad. The nickel took on a rich shine and looked really good with the rusticated bowl.
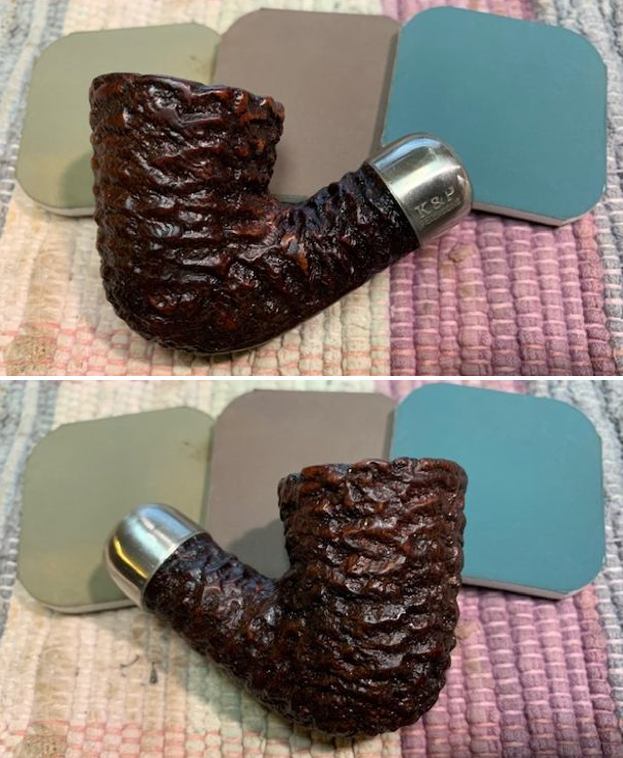
 I set the bowl aside and turned my attention to the stem. I removed it from the Briarville Pipe Stem Deoxidizer and cleaned it off with a paper towel. It looked much better.
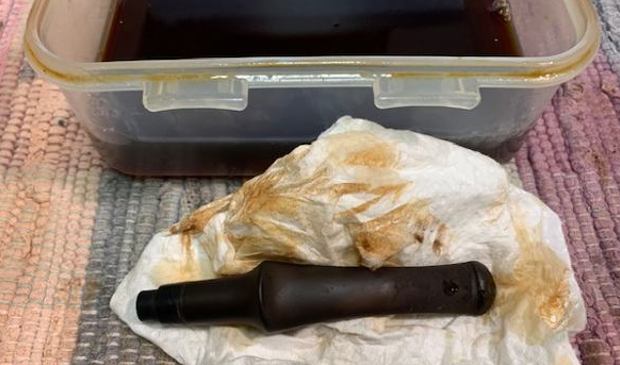 I scrubbed the stem surface with Soft Scrub to make sure I had removed as much of the remaining oxidation as I could before moving on to the repair that needed to be done on the bite through on the top of the stem.
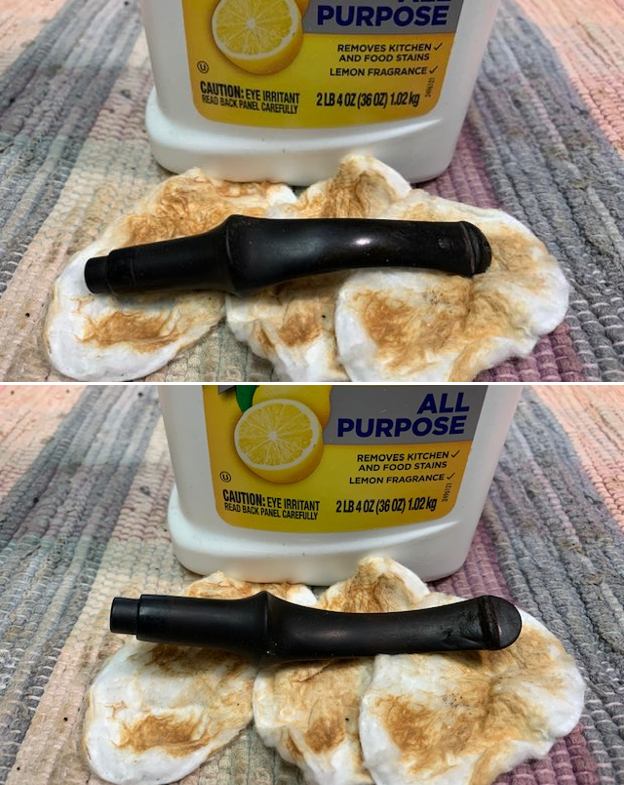 Once clean, I “painted” the tooth marks and chatter on the stem surface with the flame of a lighter to try and raise the dents. It worked relatively well and lifted the majority of them so that they were either gone or smaller.
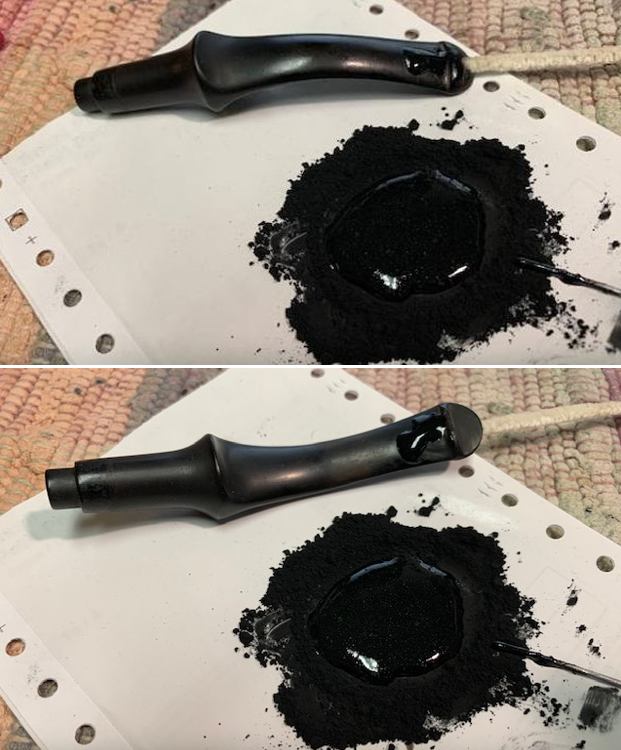
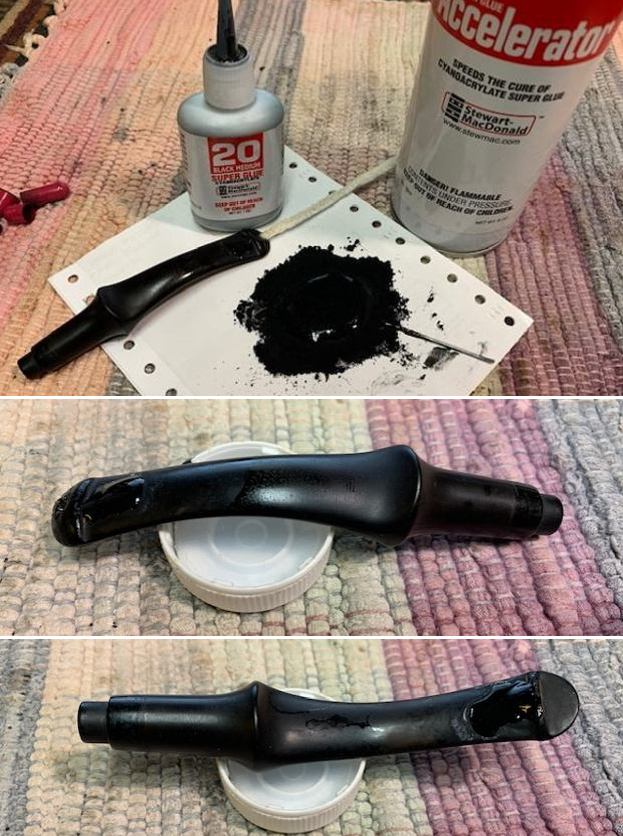
  With that finished I greased a pipe cleaner with Vaseline and inserted it in the stem until it was below the bite through. I mixed a paste of black super glue and charcoal powder to make the repair. I pressed the paste into the hole on the stem top. I filled the remaining tooth chatter and marks in with the mixture and set it aside to cure. I sprayed it with an accelerator then removed the pipe cleaner. I did not want it to dry and stick in the airway.
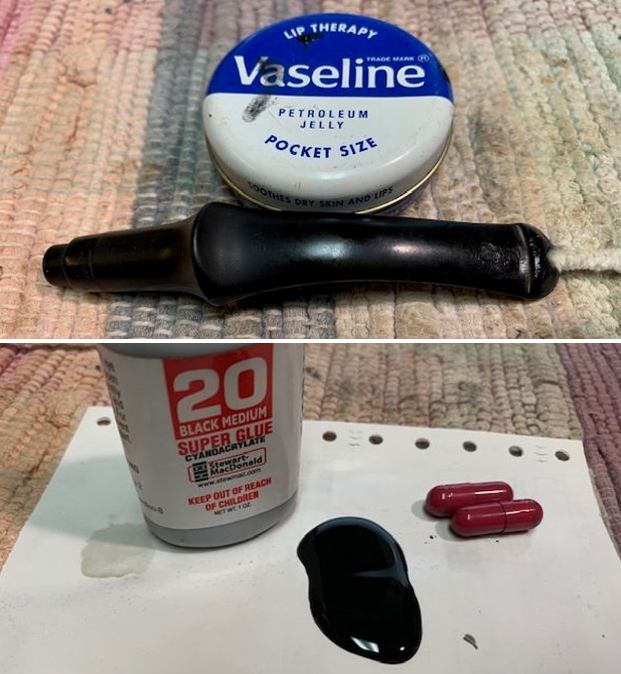
 Once the repairs cured I used a small file to flatten out the repairs and reshape the P-lip style button edges. I used 220 grit sandpaper to smooth out the repairs on both sides of the stem. I started to polish it with 400 grit wet dry sandpaper. The stem is looking much better.
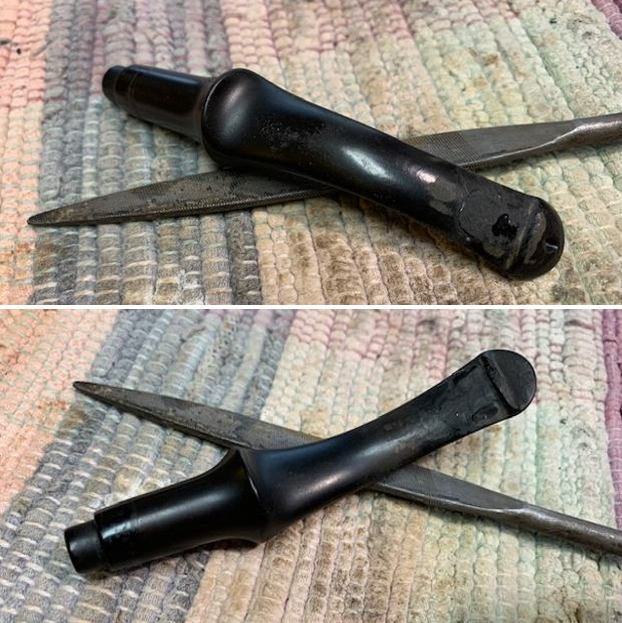
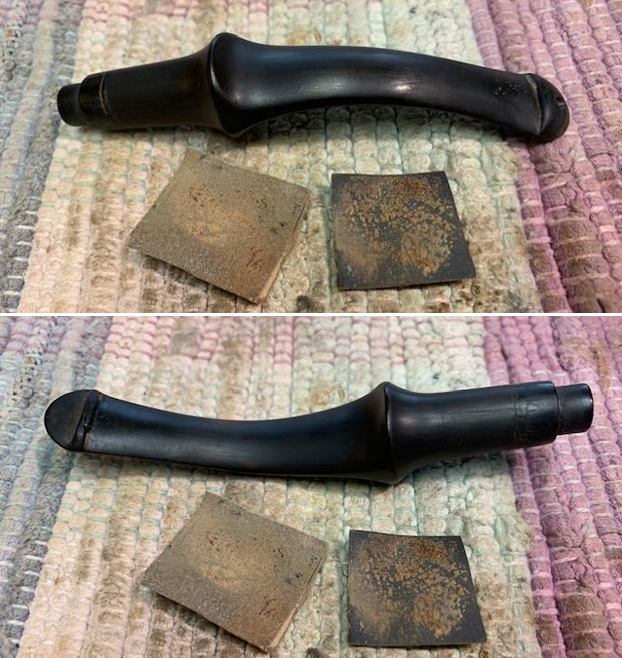 I polished the stem with micromesh sanding pads – 1500-12000 grit pads. I wiped it down with Obsidian Oil after each sanding pad. I used Before & After Pipe Polish – both Fine and Extra Fine to further polish the stem. I gave it a final rubdown with Obsidian Oil and set it aside to cure.
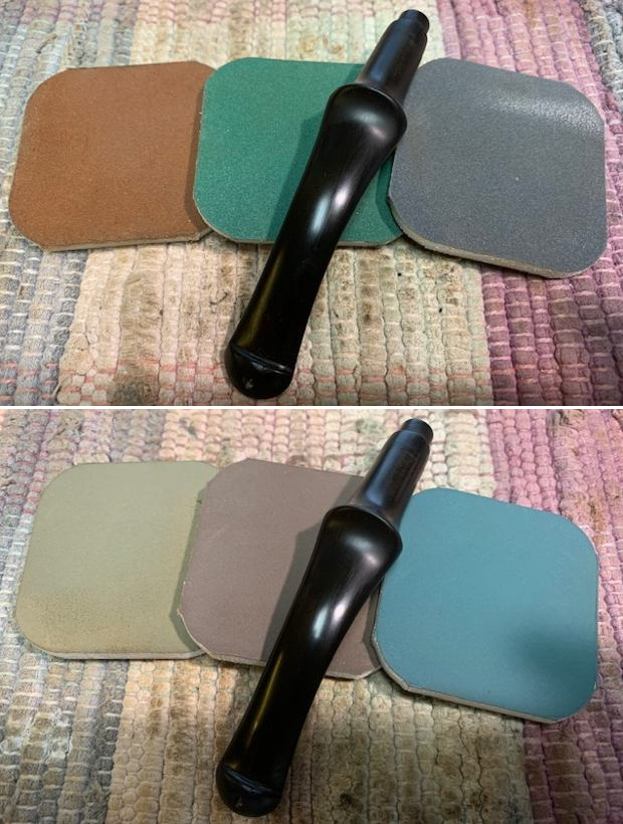
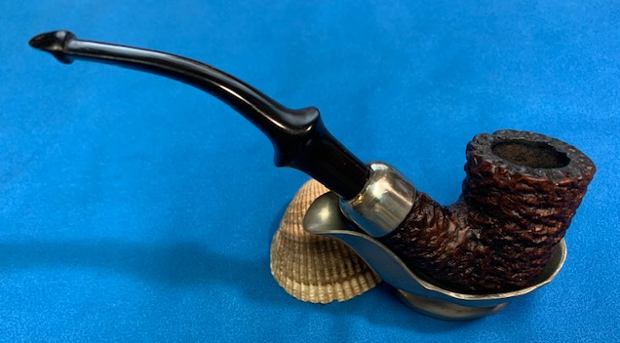
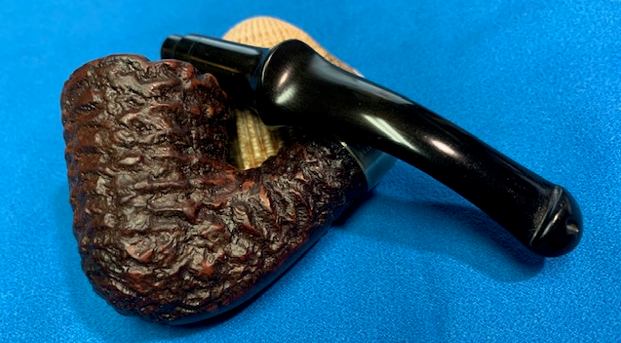
 I put the parts back together. This Republic Era Peterson’s System Standard Rusticated 305 Bent Dublin is a great looking pipe with a great rustication on the bowl. The rich, dark brown stained sandblast bowl and shank look surprisingly nice. The combination works well with the polished nickel ferrule and the polished black, vulcanite P-lip stem. I carefully buffed the pipe with Blue Diamond on the buffing wheel using a light touch on the briar. I gave the bowl multiple coats of Conservator’s Wax and the stem multiple coats of carnauba wax on the buffing wheel and followed that by buffing the entire pipe with a clean buffing pad. I hand buffed the pipe with a microfiber cloth to deepen the shine. The finished Peterson’s System Standard 305 is light and sits nicely in the hand and feels great. Give the finished pipe a look in the photos below. The dimensions of the pipe are Length: 5 ¾ inches, Height: 2 inches, Outside diameter of the bowl: 1 ¼ inches, Chamber diameter: ¾ of an inch. The weight of the pipe is 37 grams /1.31 ounces. I will be putting it on the rebornpipes store shortly in the Irish Pipemakers Section. If you are interested in adding this pipe to your collection send me a message or an email. Thanks for reading this blog and my reflections on the pipe while I worked on it. There are many more to come!
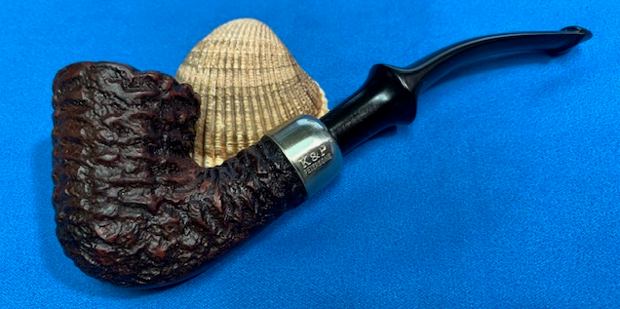


This is a true rebirth of this beautiful Meerschaum. Well done Charles.
Over the years, I have developed a generally good sense of the age of a pipe based on its size, shape and finish, among other details. This Peterson Sherlock Holmes meerschaum, however, surprised me.
When it arrived on the work table, the pipe was looking far from its best. The stem was heavily oxidized with mineral accretions and a few tooth dents at the P-lip button, the rim was completely obscured behind a thick crust of carbon “lava”, and the bottom of the bowl carried a large black splotch of unknown origin – a concentration of colouration in the meer? A slipshod bowl repair?


The shank band was marked on the left flank with “Peterson’s” over an image of Sherlock Holmes over “Stirling Silver”, and “Peterson’s” over a trio of hallmarks – Hibernia for the City of Dublin, Ireland, a .925 stamp indicating the purity of the silver, and a…
View original post 1,343 more words

Blog by Steve Laug
A while back I received a small box of pipes from a fellow pipeman who wanted to donate them to support the non-profit organization I work for – the SA Foundation (www.safoundation.com). The organization has been providing long term recovery, housing and job training for women who have escaped sexual exploitation and trafficking. For over thirty years the work has gone on and thousands of young women and their children have been empowered to start over with skills and options. The work is currently in 7 countries and 12 cities around the world. If you are interested give the website a look.
Now back to the pipes. There were eight total pipes in the lot that he sent me. The first one I restored was a large Irish Second 05 Calabash that is heading off to Michigan. The second pipe was a Peterson’s Kapet pipe in a shape 124 (https://rebornpipes.com/2021/08/16/restoring-a-republic-era-petersons-kapet-124/). The third pipe was a very Danish looking Made in London, England Sandblast Acorn. (https://rebornpipes.com/2021/08/17/restoring-a-very-danish-looking-made-in-london-england-acorn/). The fourth pipe was a Bromma Bent Billiard with a screw on bowl (https://rebornpipes.com/2021/08/18/restoring-what-looks-like-a-swedish-bromma-pipe/). The fifth pipe is a Canadian Made Paradis Pipe (https://rebornpipes.com/2021/08/19/restoring-canadian-made-paradis-rustic-246-bent-dublin/). The sixth pipe was an unsmoked small carved figural meerschaum that is for sale on the rebornpipes store (https://rebornpipes.com/rebornpipes-store/meerschaum-pipes-smooth-figurals/). All of the pipes were in clean condition and had been lightly reamed.
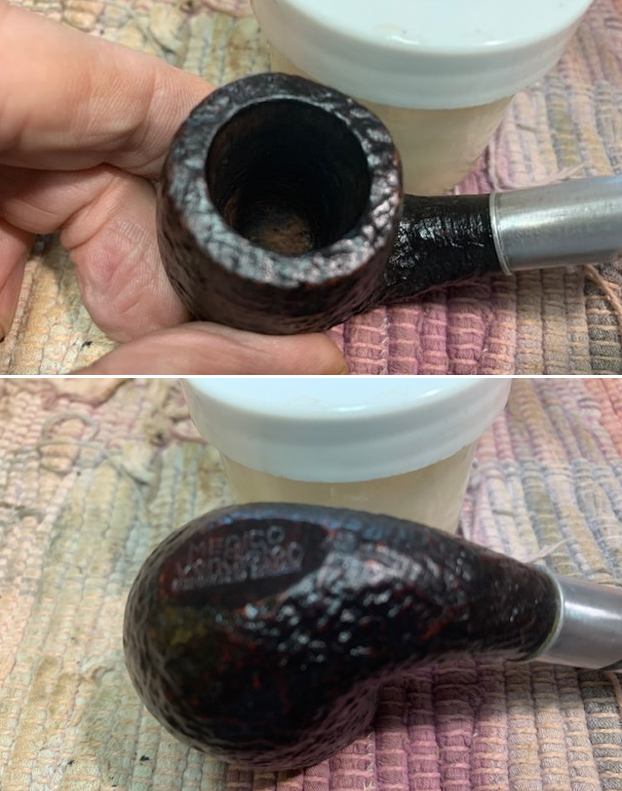
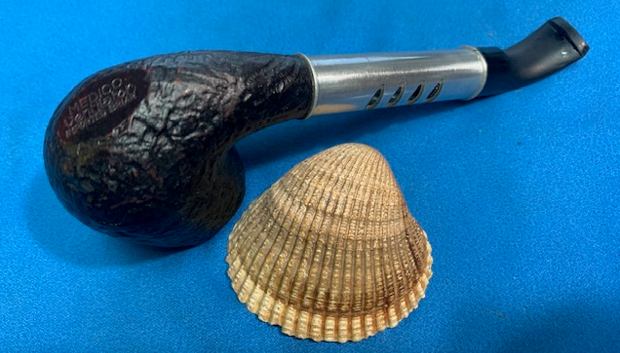
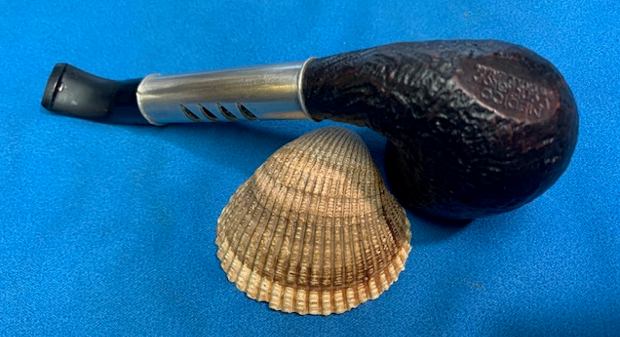
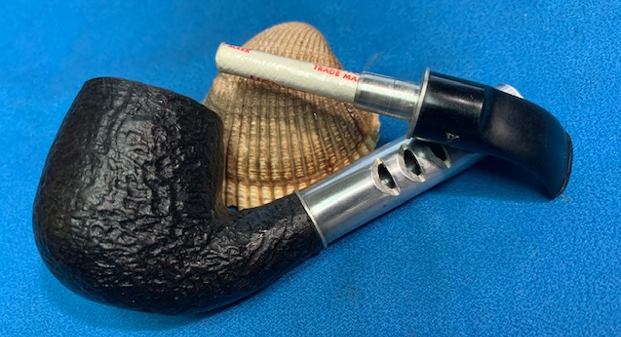
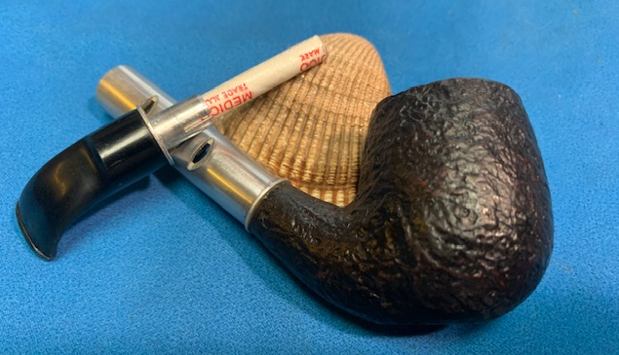
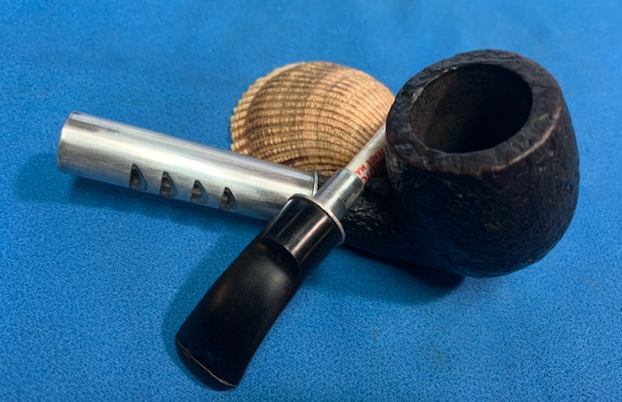
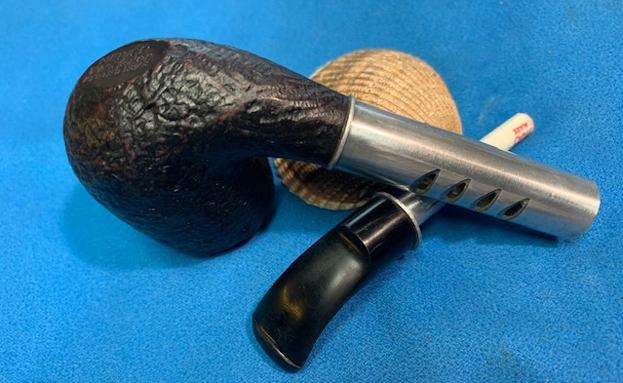
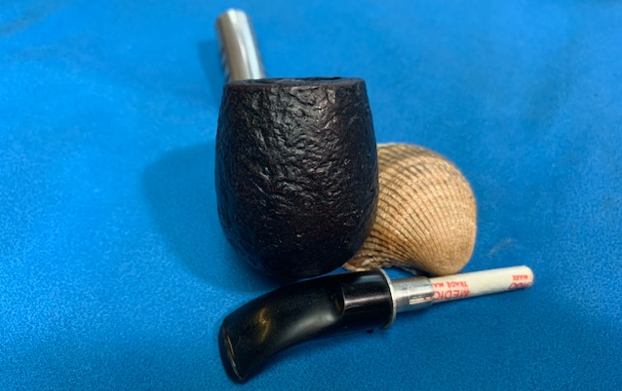
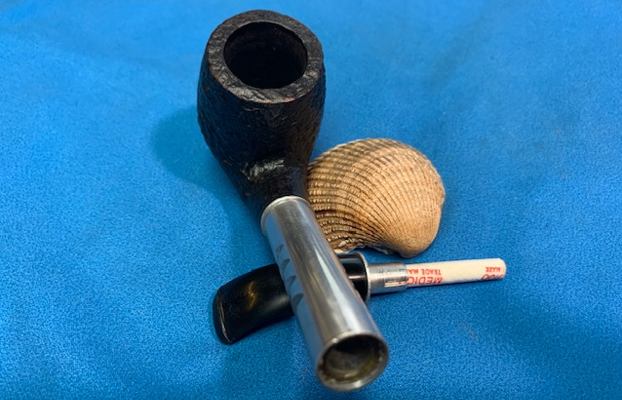
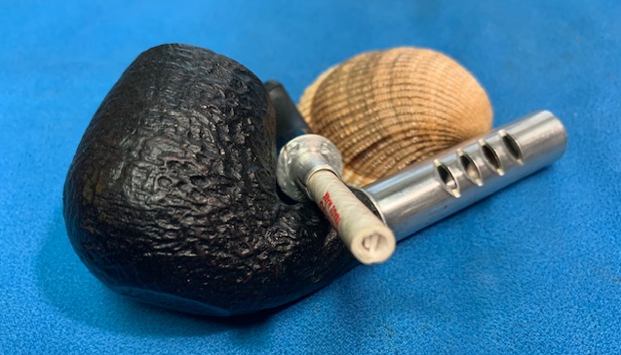
The next pipe, the seventh one is a bent Medico Ventilator with an aluminum slotted, ventilated shank. The pipe was clean on the inside but dusty on the sandblast finish. The sandblast was very well done and quite rugged. The rim top and edges looked very good. I think that this pipe was not smoked very much. The pipe was stamped on the flat heel of the bowl and read Medico [over] Ventilator [over] Imported Briar. The aluminum shank was dull looking but otherwise in great condition. The short bent saddle stem had a lot of tooth chatter and marks on both sides ahead of the button. There was a V logo stamped on the left side of the stem. The aluminum tenon was made to hold the classic Medico paper filter. I took some photos of the pipe before I started my clean up work on it.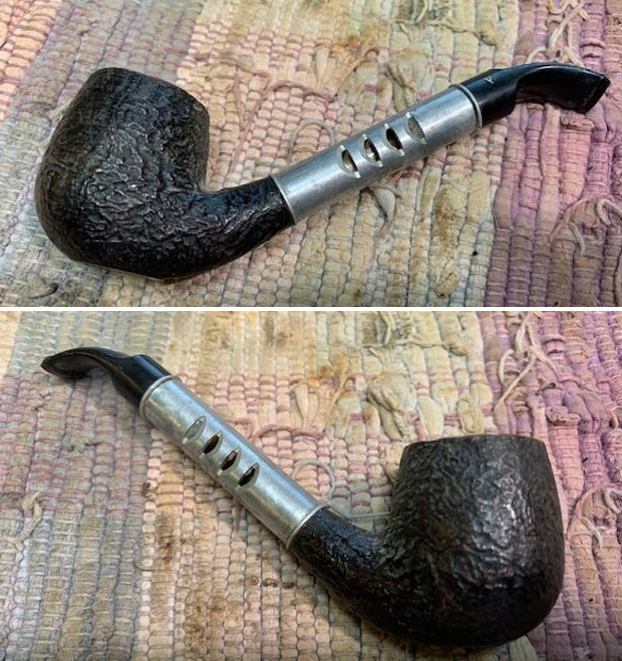
 I took photos of the bowl and rim top as well as the stem to show the condition of the pipe. The rim top was dusty and worn looking but it was otherwise clean. The bowl was slightly misshapen like I have seen before on these Ventilator pipe. It is not quite round with the thicker edges on the front of the bowl and narrower on the sides and rear of the bowl. The stem had a lot of tooth chatter and some deep tooth marks on both the top and bottom.
 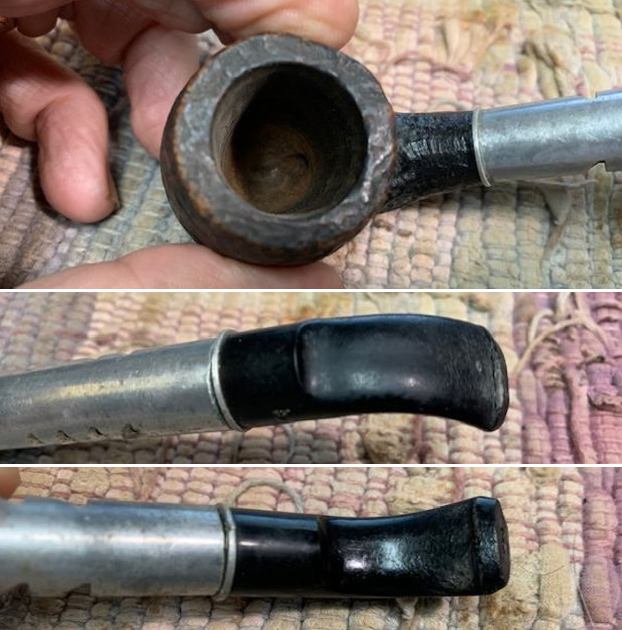 I took a photo of the stamping on the underside of the heel of the bowl. It was clear and readable as noted above.
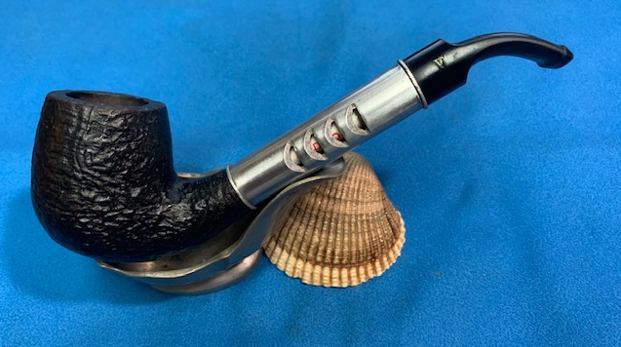
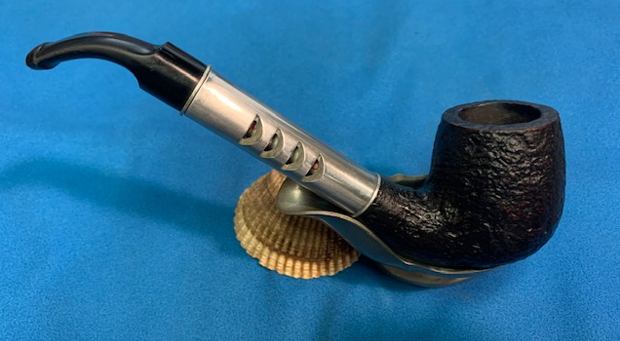
  I removed the stem from the shank and took a photo of the pipe. The great sandblast and the unique design of the Ventilator is visible in the photo.
 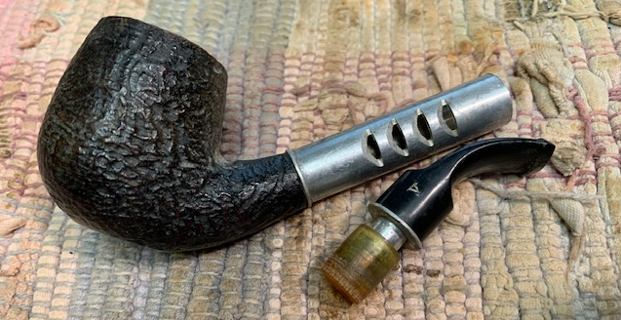 I turned to Pipephil’s site for a quick summary (http://pipephil.eu/logos/en/logo-medico.html). I have included a screen capture of the information on the site.
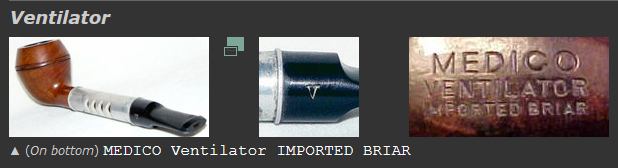 I also quote the information from the side bar of the entry on pipephil:
This model cannot be smoked without the use of the rolled paper filters.Others metal pipes logos & markings in these pages: Alco, Bryson, Duncan, Falcon, Kaywoodie (Filter Pipe , Filter plus, Filtronic), Ornsby
I turned to Pipedia for more info (https://pipedia.org/wiki/Medico). There was a brief writeup on the history of the brand and the paper filtration system but nothing specific on the Ventilator pipes.
Now it was time to work on the pipe. I started my work on the pipe by scrubbing the bowl and shank exterior with undiluted Murphy’s Oil Soap. I scrubbed the sandblast and the aluminum with a tooth brush and the soap and rinsed it off with running water. I dried it off with a cotton towel.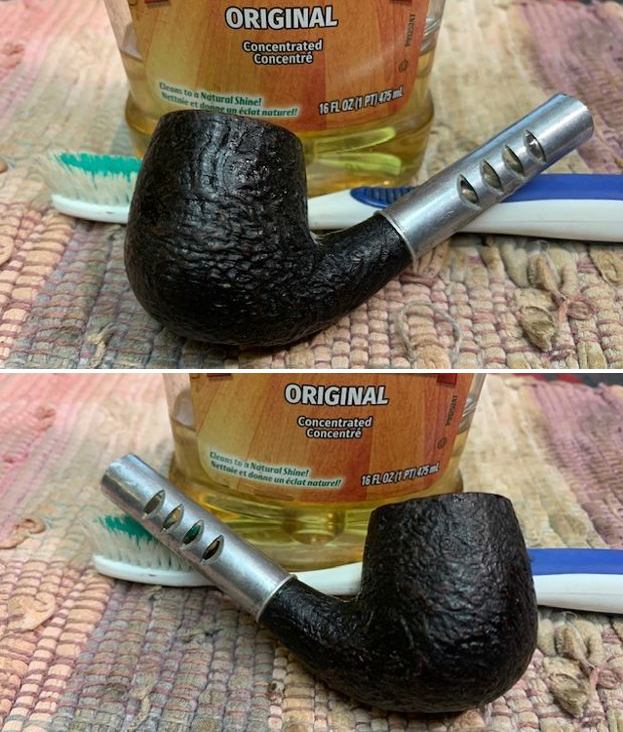
 I touched up the stain on the rim top with a Walnut Stain Pen. It matched the rest of the bowl colour perfectly.
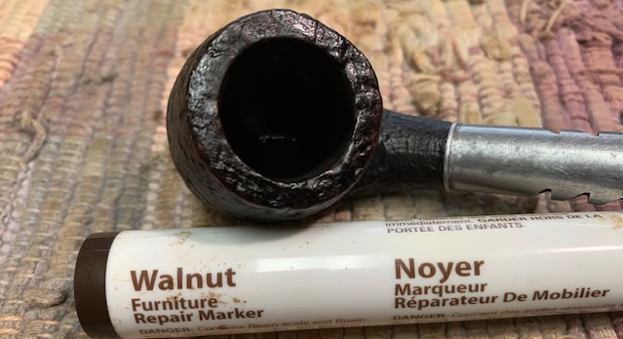 I cleaned the mortise/and aluminum shank along with the airway in both the shank and the stem with 99% isopropyl alcohol, pipe cleaners and cotton swabs until the interior of the pipe was very clean.
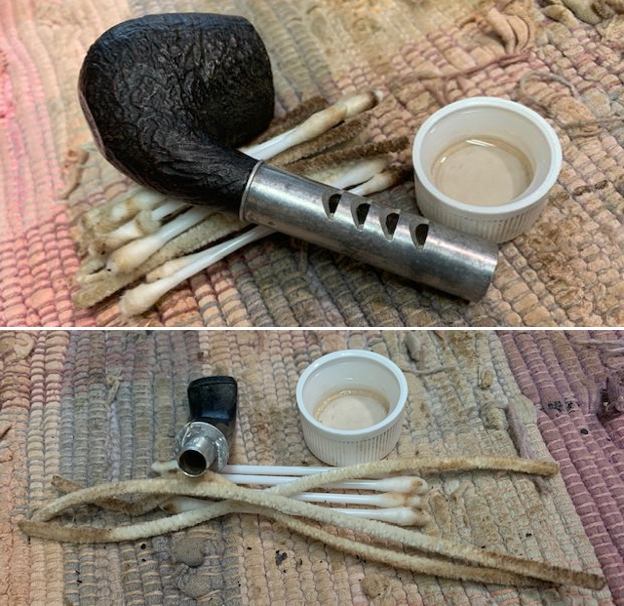 I rubbed the bowl and the briar portion of shank down with Before & After Restoration Balm. I worked it into the surface of the bowl sides and shank with my fingertips to clean, enliven and protect the briar. I let the balm sit for ten minutes then buffed the bowl with a cotton cloth to raise the shine.
 I polished the aluminum ventilated shank with micromesh sanding pads – dry sanding it with 1500-12000 grit pads. I wiped it down with a clean paper towel after each sanding pad. The aluminum took on a rich shine with the polishing.
 I set the bowl aside and turned my attention to the stem. There was a plastic/hard clear rubber insert that fit in the aluminum ventilated shank to hold the stem tightly in place. When I removed the stem the insert came out as well and was stuck on the aluminum tenon of the stem. I carefully used a pair of vise grips to hold the rubber insert and slowly turned the stem until I was able to remove it. Once the aluminum shank was cleaned I would glue it in place in the shank so that it would stay in place there.
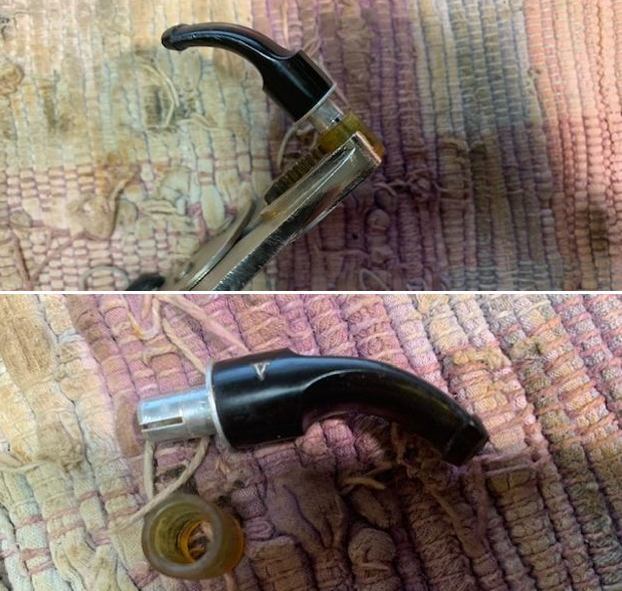 I coated the outside of the hard rubber/acrylic ring with white all-purpose glue and pushed it into place in the aluminum ventilator shank. I removed the stem and set the bowl and shank aside for the glue to cure.
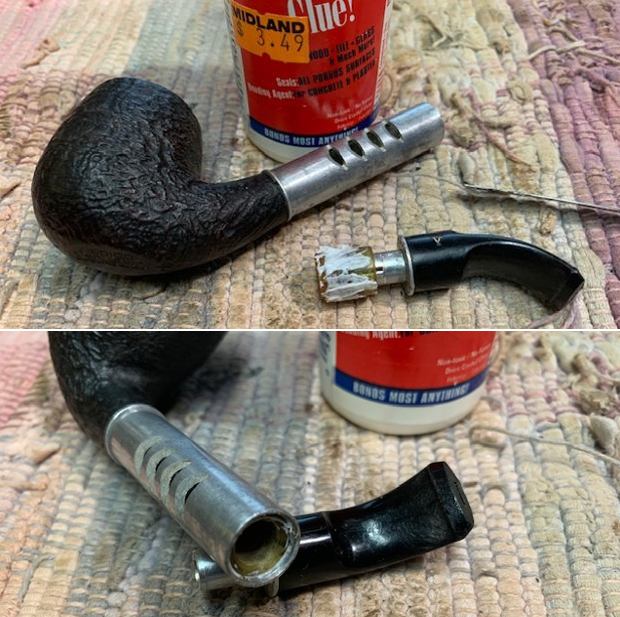 I “painted” the tooth marks and chatter on the stem surface with the flame of a lighter to try and raise the dents. The stem is a typical Medico stem which seems to be a mix of vulcanite and plastic or nylon so the flame did very little. I filled the tooth chatter and marks in with clear CA glue and set it aside to cure. Once it cured I used a small file to flatten out the repairs and reshape the button edge. I used 220 grit sandpaper to smooth out the repairs on both sides of the stem. I started to polish it with 400 grit wet dry sandpaper. The stem is looking much better.

 I polished the stem with micromesh sanding pads – 1500-12000 grit pads. I wiped it down with Obsidian Oil after each sanding pad. I used Before & After Pipe Polish – both Fine and Extra Fine to further polish the stem. I gave it a final rubdown with Obsidian Oil and set it aside to cure.
 I fitted the stem and shank with a Medico paper filter. It fit in the tenon and in the aluminum shank. All air flow from the bowl came through the filter and the cool air came in through the aluminum ventilator shank. The theory is it provided a cool smoke – mind you soggy but cool!
 I put the parts back together. This Medico Ventilator Imported Briar Bent Billiard is a great looking pipe with a great sandblast on the bowl. The rich, dark brown stained sandblast bowl and the ventilated polished aluminum shank look surprisingly nice. The combination works well with the polished saddle stem. I carefully buffed the pipe with Blue Diamond on the buffing wheel using a light touch on the briar. I gave the bowl and the stem multiple coats of carnauba wax on the buffing wheel and followed that by buffing the entire pipe with a clean buffing pad. I hand buffed the pipe with a microfiber cloth to deepen the shine. The finished Medico Ventilator Bent Billiard is light and sits nicely in the hand and feels great. Give the finished pipe a look in the photos below. The dimensions of the pipe are Length: 5 ½ inches, Height: 1 ¾ inches, Outside diameter of the bowl: 1 ¼ inches, Chamber diameter: ¾ of an inch. The weight of the pipe is 44 grams/1.52 ounces. I will be putting it on the rebornpipes store shortly in the American (US) Pipemakers Section. If you are interested in adding this pipe to your collection send me a message or an email. Thanks for reading this blog and my reflections on the pipe while I worked on it. There are many more to come!
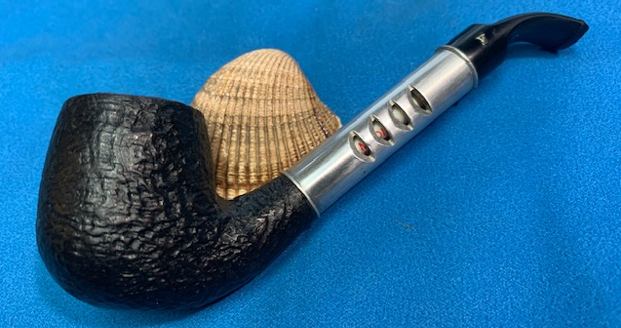


Blog by Steve Laug
A while back I received a small box of pipes from a fellow pipeman who wanted to donate them to support the non-profit organization I work for – the SA Foundation (www.safoundation.com). The organization has been providing long term recovery, housing and job training for women who have escaped sexual exploitation and trafficking. For over thirty years the work has gone on and thousands of young women and their children have been empowered to start over with skills and options. The work is currently in 7 countries and 12 cities around the world. If you are interested give the website a look.
Now back to the pipes. There were eight total pipes in the lot that he sent me. The first one I restored was a large Irish Second 05 Calabash that is heading off to Michigan. The second pipe was a Peterson’s Kapet pipe in a shape 124 (https://rebornpipes.com/2021/08/16/restoring-a-republic-era-petersons-kapet-124/). The third pipe was a very Danish looking Made in London, England Sandblast Acorn. (https://rebornpipes.com/2021/08/17/restoring-a-very-danish-looking-made-in-london-england-acorn/). The fourth pipe was a Bromma Bent Billiard with a screw on bowl (https://rebornpipes.com/2021/08/18/restoring-what-looks-like-a-swedish-bromma-pipe/). All of the pipes were in clean condition and had been lightly reamed. The next pipe, the fifth one is a Canadian Made Paradis Pipe. The pipe had a thin cake in the bowl and a light overflow of lava on the rim top. There was darkening around the inner edge of the rim. The finish was coated with a shiny coat of urethane (seems to be something I am dealing with lately!). It was peeling on the top of the rim and inner edge. It would all need to go. The pipe was stamped on the left side and read Paradis in script [over] Rustic. The right side of the shank was stamped with the shape number 246.The pipe rusticated patterns on the right and left side of the bowl and shank. The bent saddle stem had a lot of tooth chatter and marks on both sides ahead of the button. There was stylized P on the left side of the stem.
I took some photos of the pipe before I started my clean up work on it. It is another interesting pipe that has a great back story to the Canadian Province of Quebec. But… more of that after I introduce you to the pipe.
 I took photos of the bowl and rim top as well as the stem to show the condition of the pipe. The rim top had some darkening and lava on the inner edge of the bowl The urethane coat was peeling back from the inner edge onto the rim top. The stem had a lot of tooth chatter and some deep tooth marks on both the top and bottom.
 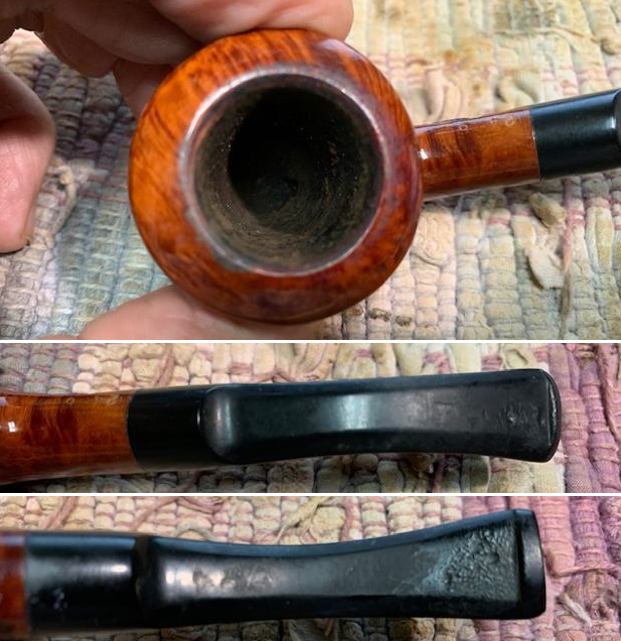 I took a photo of the stamping on the left side of the shank. It was clear and readable as noted above. The P stamp on the left side of the saddle stem is clear.
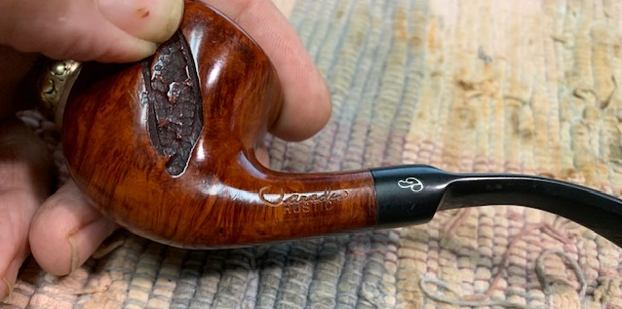 I removed the stem from the shank and took a photo of the pipe. Underneath the thick urethane coat there was some great grain and the pipe was a good shape and design.
  I have worked on quite a few Paradis pipes over the years and have done a lot of work on the background of the brand and have written about that I previous blogs. I have included the link for ease of reference (https://rebornpipes.com/2020/10/21/breathing-life-into-a-canadian-made-paradis-porte-st-louis-bent-billiard/). I quote from that blog below.
I turned first to Pipephil’s site for a quick summary (http://www.pipephil.eu/logos/en/logo-p1.html). I have included a screen capture of the information on the site. The Paradis brand was made by the Paradis brothers in Quebec but I did not remember much more than that so I turned to Pipedia for more info (https://pipedia.org/wiki/Paradis_Pipes) and learned the following:
Paradis Pipes is the Canadian brand of the brothers Gilles and Fernand Paradis. In 1922 the Paradis family moved to the USA, when Lucien Paradis (1906-1979) was 16 years old. It was at this age that he started as an apprentice at his uncle’s pipe factory, Joseph B. Desjardins, maker of (JD) pipes, in Fall River, MA. Joseph Desjardins was issued two patents during this period, one for a new machine for making pipe stems and another for a new design of pipe reamer. The company employed 60 workers at one stage.
In 1930, due to the Great Depressions, Lucien lost his job and returned to Quebec to work in the agricultural machine industry. In his spare time, he made pipes, selling them door to door. Three years later the rest of the family joined him and Lucien founded a pipe factory with two of his brothers. The company eventually employed 18 workers and in the 60s produced over 50 thousand pipes a year, under brands like JBL, Dr. Thomas, Fernand Gignac, S.C. Pipes, New London Golfer, and Jo Thomassin.
Paradis was founded in 1978, at the Salon of Quebec Artisans’ and is available in tobacconists all over the country today. The brand produces 8000 pipes a year (400 “handmade”), with Greek briar.
Now it was time to work on the pipe. I started my work on the pipe by addressing the lava coat and darkening on the rim top. I cleaned the inner edge of the bowl with a folded piece of 220 grit sandpaper. I wanted to remove the darkening and minor damage to the top and edge of the bowl.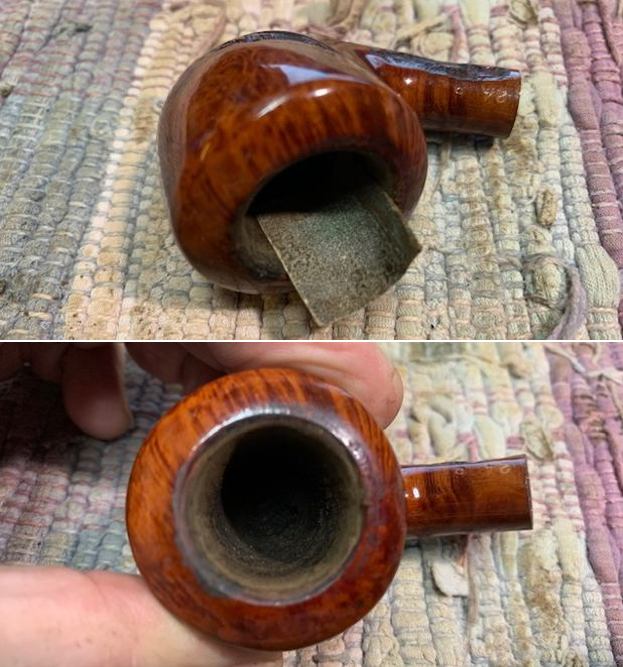 I stripped off the urethane coat with a 1500 grit micromesh sanding pad and some acetone on a cotton pad. I broke the shine coat and then rub it down with acetone on a cotton pad. I repeated the process until I had removed the shiny coat.
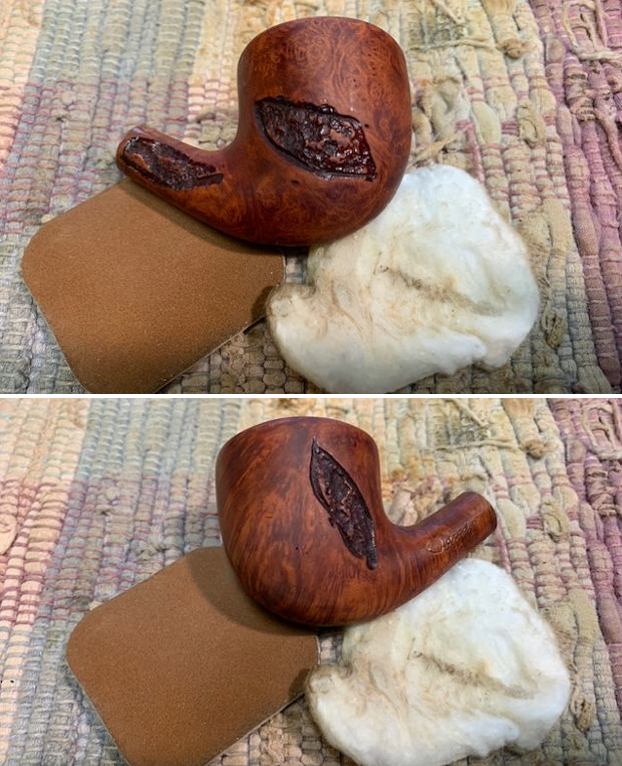
 I cleaned up the reaming of the bowl with a Savinelli Fitsall Pipe Knife. I took out the remnant of cake that had been left so I could examine the walls. I was glad to see there were no fissures in the briar walls.
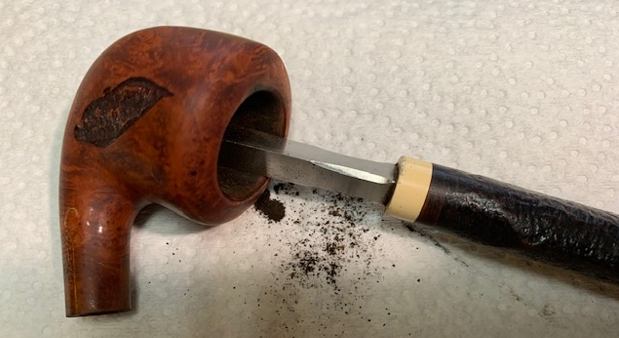 I scraped out the shank with a pen knife to remove the tar build up that was on the walls. I followed that up by cleaning the mortise and the airway in both the shank and the stem with 99% isopropyl alcohol, pipe cleaners and cotton swabs until the interior of the pipe was very clean.
 I polished the briar bowl with micromesh sanding pads – dry sanding it with 1500-12000 grit sanding pads. I wiped it down after each sanding pad with a damp cloth to remove the sanding debris.
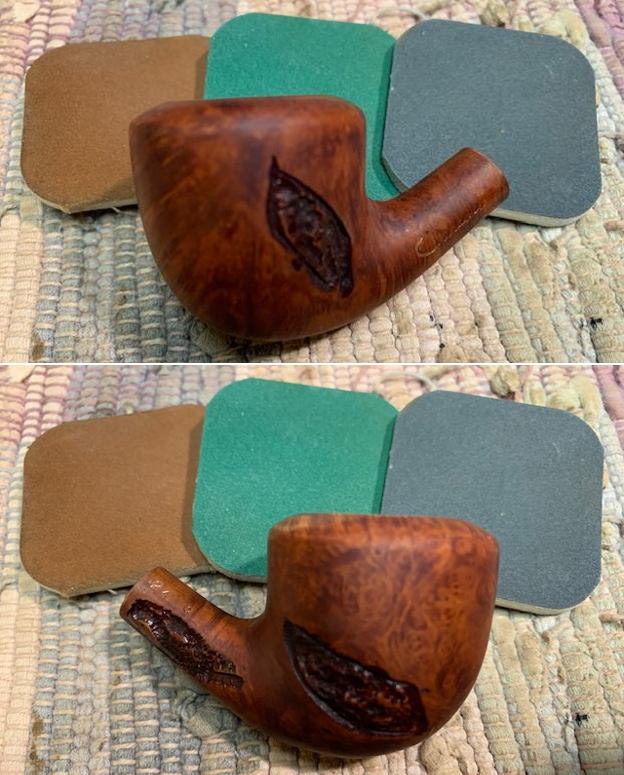

 I rubbed the bowl and shank down with Before & After Restoration Balm. I worked it into the surface of the bowl sides and shank with my fingertips to clean, enliven and protect the briar. I let the balm sit for ten minutes then buffed the bowl with a cotton cloth to raise the shine.
 I set the bowl aside and turned my attention to the stem. I “painted” the tooth marks and chatter on the stem surface with the flame of a lighter to try and raise the dents. It worked very well and the majority of them came up. The few that remained I filled them in with clear CA glue and set it aside to cure. Once it cured I used 220 grit sandpaper to sand out the tooth chatter and marks on both sides of the stem. I used a small file to flatten out the repairs and reshape the button edge. I started to polish it with 400 grit wet dry sandpaper. The stem is looking much better.
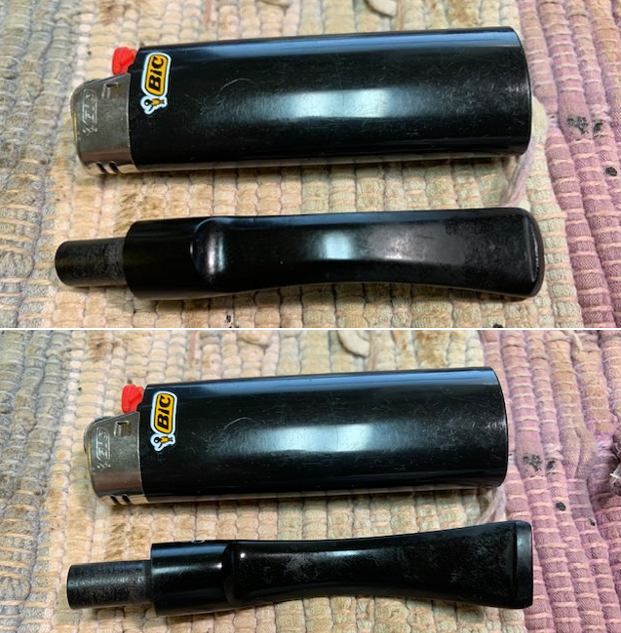
 I polished the stem with micromesh sanding pads – 1500-12000 grit pads. I wiped it down with Obsidian Oil after each sanding pad. I used Before & After Pipe Polish – both Fine and Extra Fine to further polish the stem. I gave it a final rubdown with Obsidian Oil and set it aside to cure.
 This Canadian Made Paradis Rustic 246 Bent Dublin is a great looking pipe with great grain once the urethane coat was removed and the briar polished. The rich, brown stained smooth bowl with carved patches around the bowl and shank that were stained with a darker brown is quite beautiful. The finish works well with the polished vulcanite saddle stem. I put the stem back on the bowl and carefully buffed the pipe with Blue Diamond on the buffing wheel using a light touch on the briar. I gave the bowl and the stem multiple coats of carnauba wax on the buffing wheel and followed that by buffing the entire pipe with a clean buffing pad. I hand buffed the pipe with a microfiber cloth to deepen the shine. The finished Paradis Rustic 264 Bent Dublin is light and sits nicely in the hand and feels great. Give the finished pipe a look in the photos below. The dimensions of the pipe are Length: 5 ¼ inches, Height: 1 ¾ inches, Outside diameter of the bowl: 1 ½ inches, Chamber diameter: 7/8 of an inch. The weight of the pipe is 34 grams/1.20 ounces. I will be putting it on the rebornpipes store shortly in the Canadian Pipemakers Section. If you are interested in adding this pipe to your collection send me a message or an email. Thanks for reading this blog and my reflections on the pipe while I worked on it. There are many more to come!
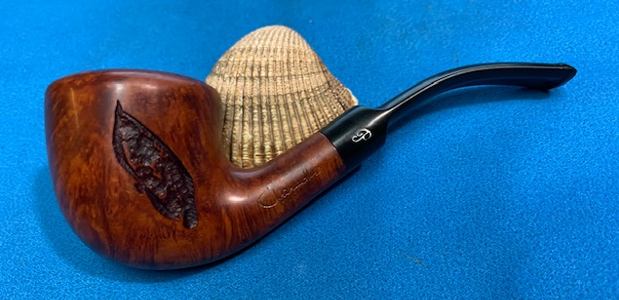
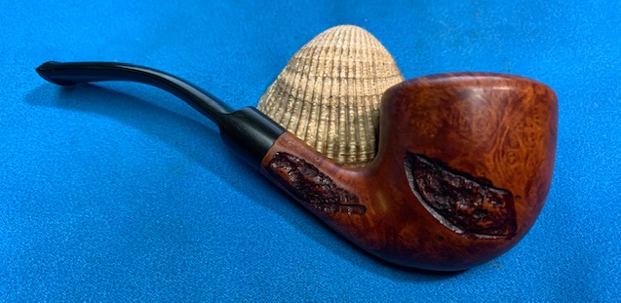
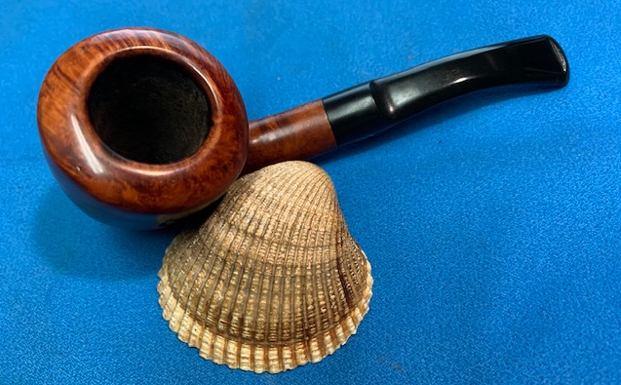

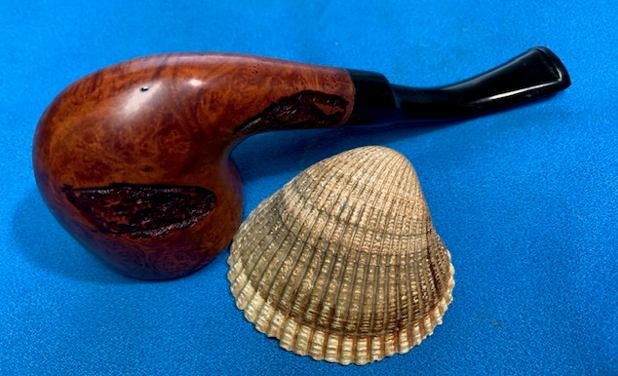

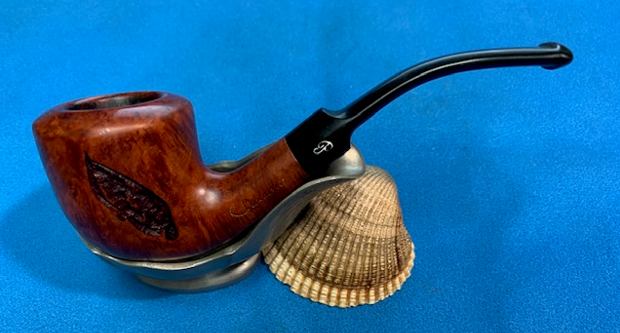

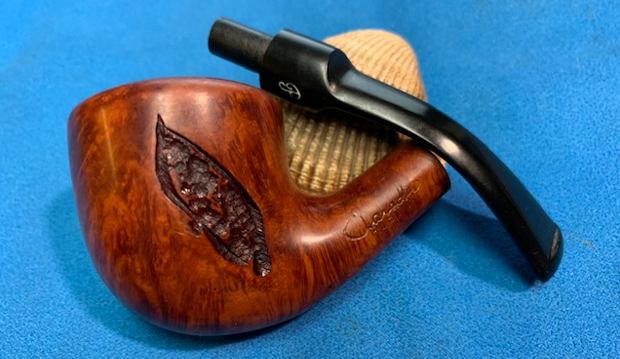
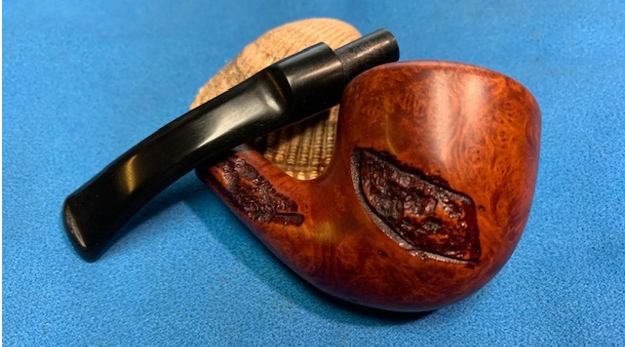
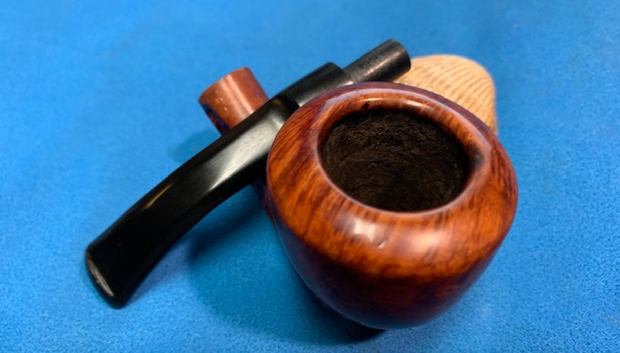
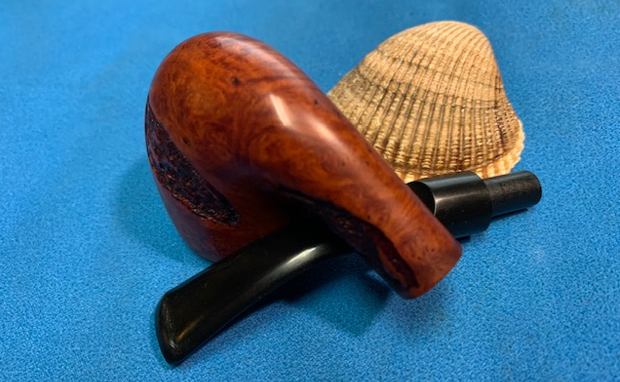


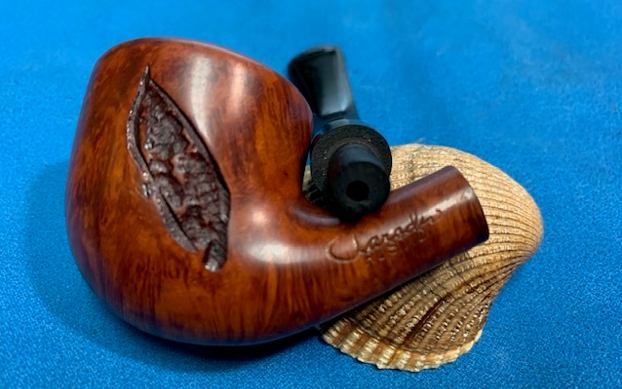
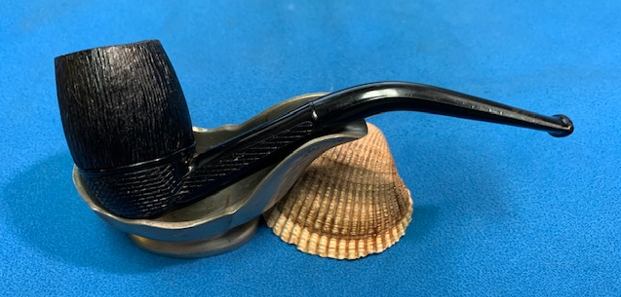
Blog by Steve Laug
A while back I received a small box of pipes from a fellow pipeman who wanted to donate them to support the non-profit organization I work for – the SA Foundation (www.safoundation.com). The organization has been providing long term recovery, housing and job training for women who have escaped sexual exploitation and trafficking. For over thirty years the work has gone on and thousands of young women and their children have been empowered to start over with skills and options. The work is currently in 7 countries and 12 cities around the world. If you are interested give the website a look.
Now back to the pipes. The first one I restored was a large Irish Second 05 Calabash that is heading off to Michigan. The second pipe from the lot was unique looking Peterson’s Kapet pipe in a shape 124 (https://rebornpipes.com/2021/08/16/restoring-a-republic-era-petersons-kapet-124/). The third pipe was a very Danish looking Made in London, England Sandblast Acorn. (https://rebornpipes.com/2021/08/17/restoring-a-very-danish-looking-made-in-london-england-acorn/) All of the pipes were in clean condition and had been lightly reamed. The next pipe is a nylon pipe built a lot like a Falcon. The base is nylon and the bowl is briar and threaded. The stem is also nylon/plastic. When I first saw it I thought about a previous pipe that I had worked on that was called a Bromma Dollar. Everything about it was just like the Bromma. The etched pattern on the shank and base is identical to the Bromma. The only stamping on the pipe is on the bottom of the briar bowl. It is stamped PAT. S. 3.The pipe has a thin pencil shank that is in excellent condition. The bent taper stem had a lot of tooth chatter and marks on both sides ahead of the button. There were no logo stamps on the stem.
I took some photos of the pipe before I started my clean up work on it. It is another unique and interesting looking pipe. The shape and materials of the pipe reminds me of the Bromma as mentioned above. I will go into more detail on that in the section before I start the restoration.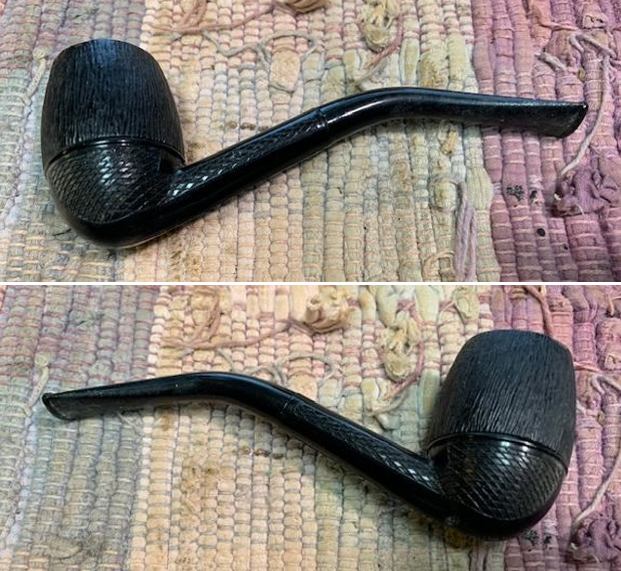
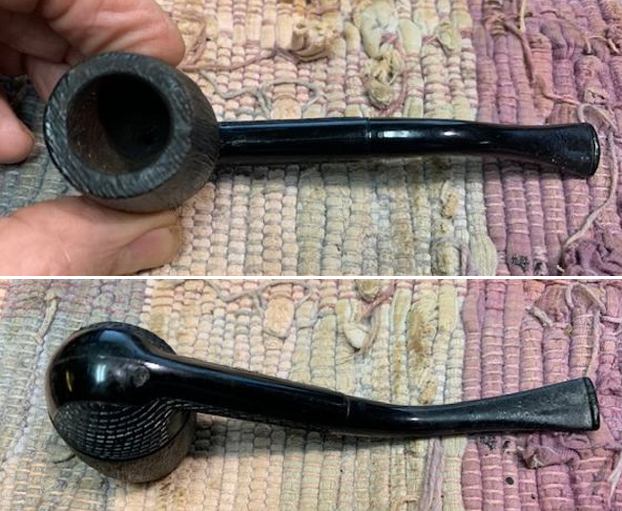 I took photos of the bowl and rim top as well as the stem to show the condition of the pipe. The rim top had some darkening and debris in the. The stem had a lot of tooth chatter and some deep tooth marks on both the top and bottom. The stem had a built in stinger which was a finned tube that extended into the shank.
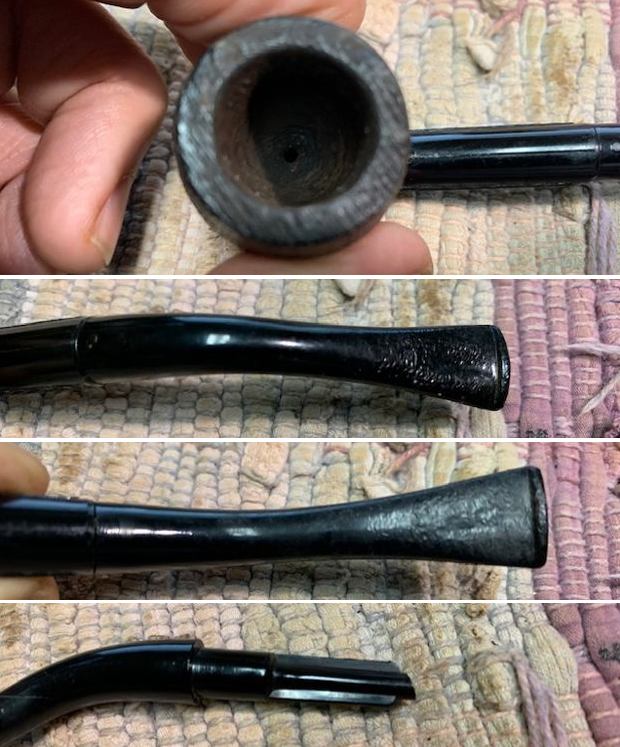 I took a photo of the stamping on the underside of the threaded bowl. It was clear and readable as noted above. The Pat. S. is below my finger and the 3 is just above my thumb in the photo below.
  I removed the stem from the shank and took a photo of the pipe. I removed all the parts and took a series of photos to show all of the parts. It is an interesting pipe for sure.
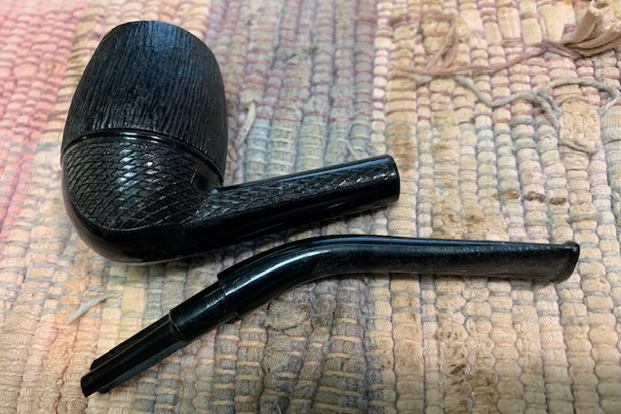
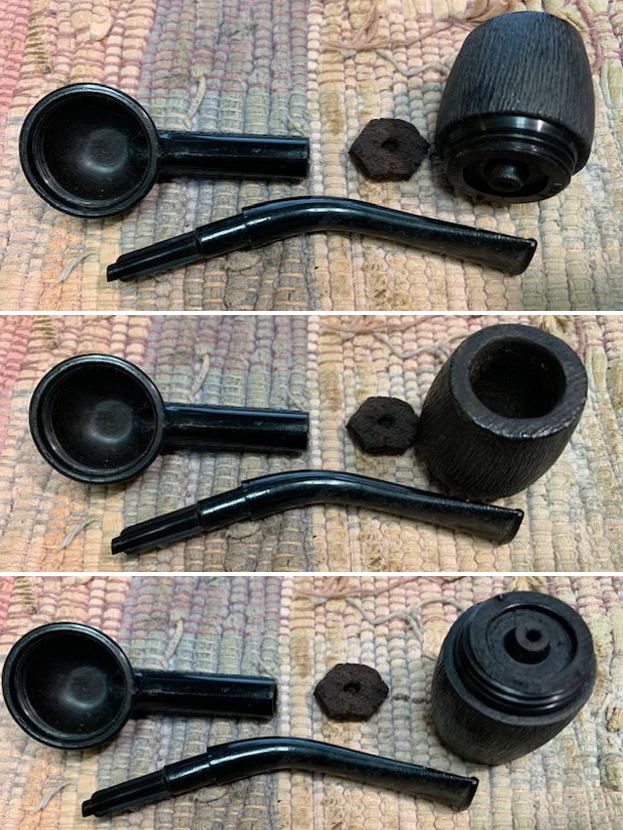
 I turned to Pipedia and found nothing listed for the brand that I was thinking about. I then turned to Pipephil and was glad to find that Bromma was listed with a picture for comparison sake (http://pipephil.eu/logos/en/logo-b8.html). While the pipe I was working on is not stamped like this one the material is the same. I did a screen capture of the pertinent section of the article and have included it below along with the information from the sidebar.
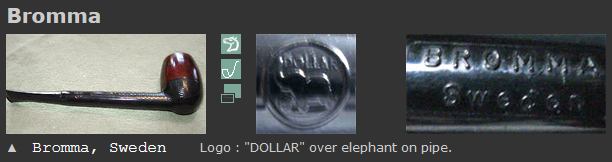 A brand of the Scandinaviska Pipfabriken. Probably from same workshop: Harlekin, Dollar
I also remembered working on a Bromma pipe many years ago and doing a blog on it for rebornpipes. I have included the link for the blog below and some photos of the pipe to show the parallels to the one I am working on now. Here is the link to the blog (https://rebornpipes.com/2012/11/24/cleaning-up-a-swedish-bromma-dollar-system-pipe-2/).  The parts of the pipe are identical to the one I am working on now. The etched pattern on the base, the patent stamp on the underside of the bowl, the stinger apparatus the way the bowl is threaded are all the same.
  I described the unique structure of the bottom of the bowl in the blog which is precisely the same as the bowl on the table now. All leads me to conclude that I am working on another Bromma Swedish system pipe. I quote:
…I also used a bristle tooth brush and alcohol to scrub the bottom of the bowl from the threads down to the nipple-like structure on the bottom…There is an inset portion of the bowl bottom that is like a moat around an island that has the mountain-like nipple in the centre. This took quite a few cotton swabs to clean the grime out of the channel. Once it was clean there is a patent stamp on it. It reads Pat. S. I am guessing it is a Swedish Patent mark. The portion of the bowl that is threaded seems like it is made of the same kind of material as the base of the pipe. The mountain in the middle is briar. It is an interesting and unique design.  From that I concluded that the threaded platform of the bowl was nylon or Bakelite like the base and shank and that the briar bowl was seated permanently on that nylon threaded platform. The current pipe bowl and platform are identical to the one shown above. It is a unique and patented system that removes the easily damaged briar threads on other system pipes like this and replaces them with a more solid and durable plastic/Bakelite platform that screws into the base. Now it was time to work on the pipe.
I cleaned the blast on the rim top with a brass bristle brush to loosen the debris in the grooves. It mad a difference and the blast was identifiable once more. I cleaned up the reaming of the bowl with a Savinelli Fitsall Pipe Knife. I took out the remnant of cake that had been left so I could examine the walls. I was glad to see there were no fissures in the briar walls.
  I cleaned the hexagonal filter pad with alcohol. I let it sit in the alcohol and it leeched out the oils and tars in the material. From examining it I think it is made of cork.
 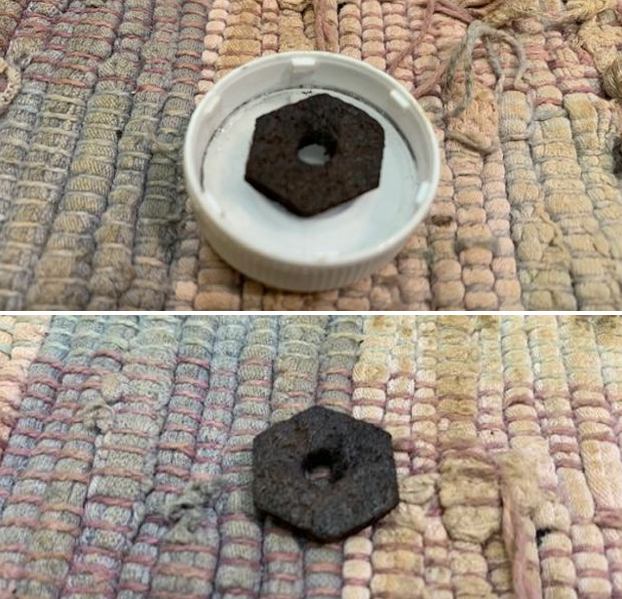 I cleaned the base of the pipe, shank and removable bowl with cotton swabs and alcohol. I cleaned the airway in both the stem and shank with alcohol, pipe cleaners and cotton swabs until the interior of the pipe was very clean.
 I rubbed the bowl and shank down with Before & After Restoration Balm. I worked it into the surface of the bowl sides and shank with my fingertips to clean, enliven and protect the briar. I let the balm sit for ten minutes then buffed the bowl with a cotton cloth to raise the shine.
 I rubbed down the base which seemed to be made of a lightweight nylon or plastic material, possibly Bakelite with Before & After Restoration Balm and let it sit for 10 minutes. I buffed the base off with a cotton cloth and then inserted the cork washer.
 I fit the cleaned cork filter on the top of the nipple on the base of the bowl and then screwed the bowl onto the base.
 I screws the bowl back onto the base and took photos of the pipe at this point in the process. It is actually a nice looking pipe and incredibly light weight.
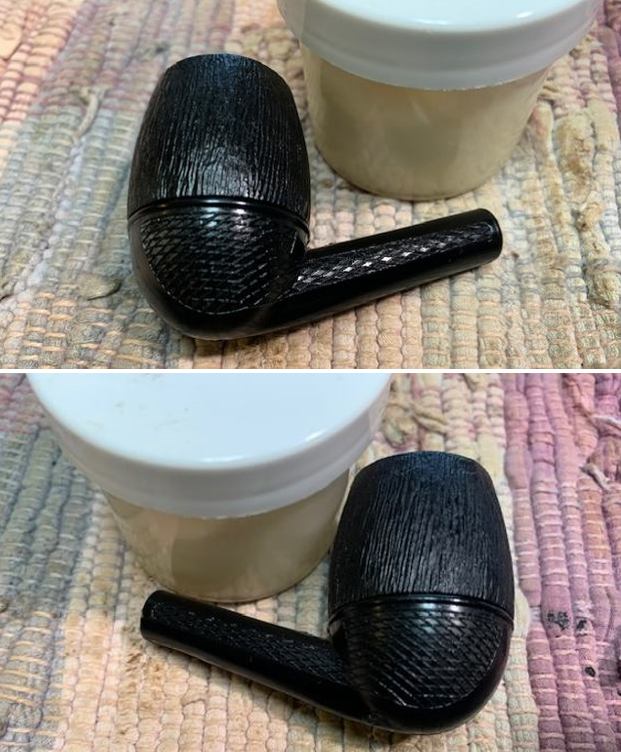
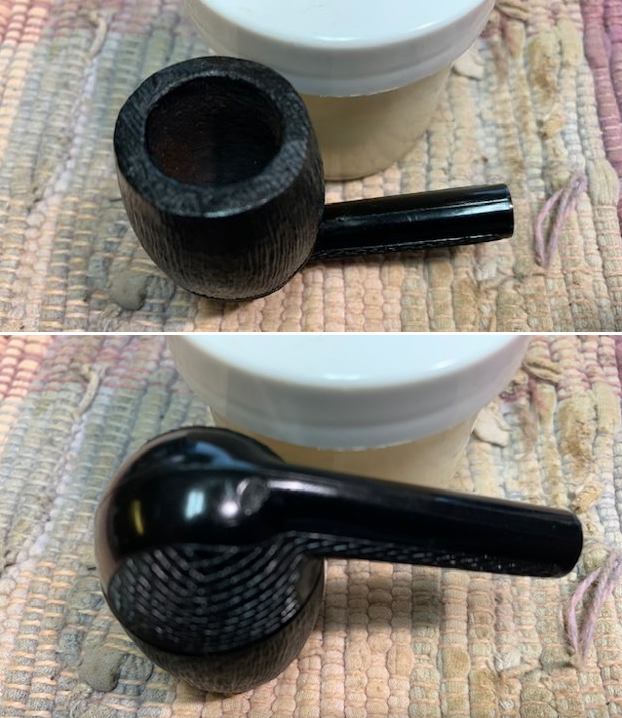
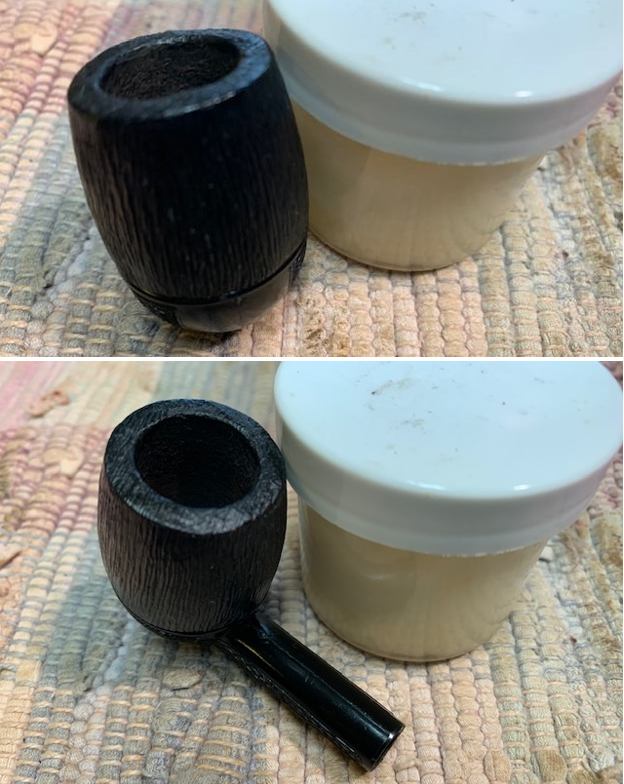 I heated the stem with the flame of a lighter to try and raise the dents. It did not work at all. I filled them in with clear CA glue and set it aside to cure. Once it cured I used 220 grit sandpaper to sand out the tooth chatter and marks on both sides of the stem. I started to polish it with 400 grit wet dry sandpaper. The stem is looking much better.
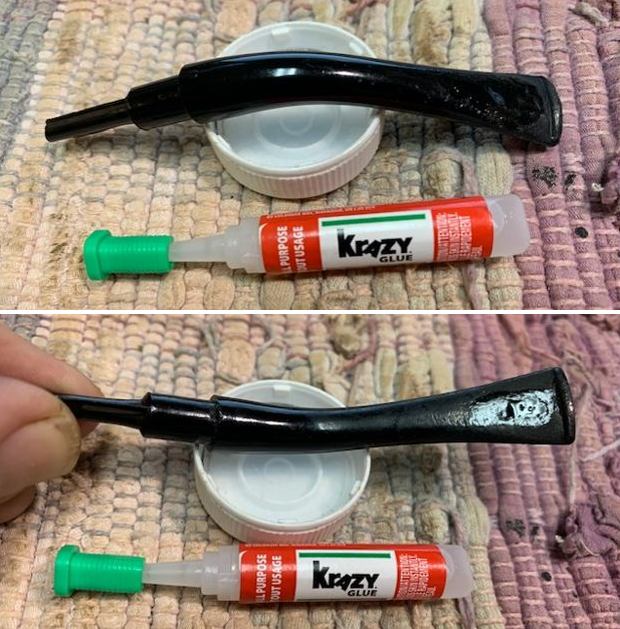
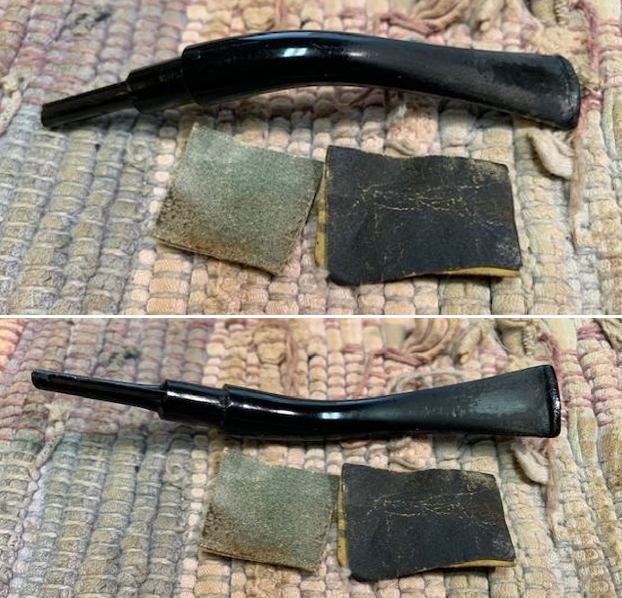 I polished the stem with micromesh sanding pads – 1500-12000 grit pads. I wiped it down with Obsidian Oil after each sanding pad. I used Before & After Pipe Polish – both Fine and Extra Fine to further polish the stem. The stem material is very odd and hard to polish. The spots where the repairs were done are visible because they are more shiny with the polishing. I am not sure where to take this at this point so it will probably go as it is now.
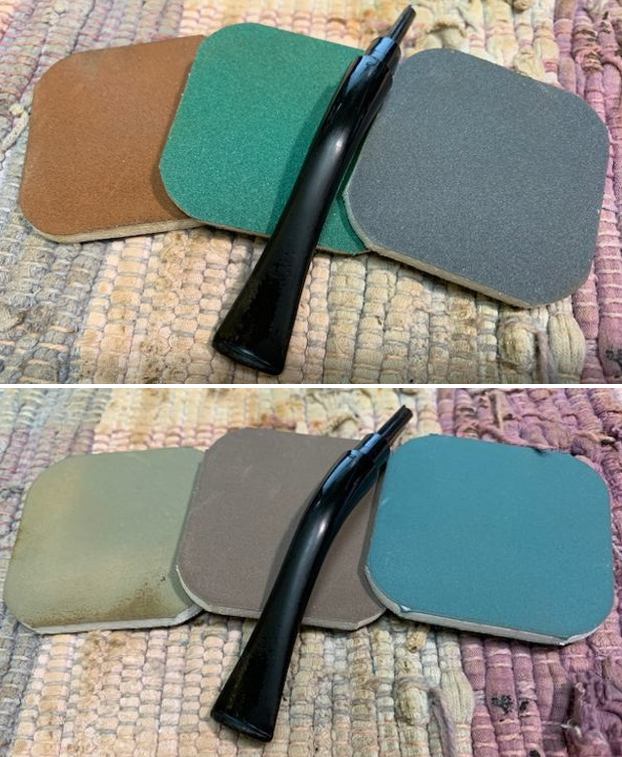
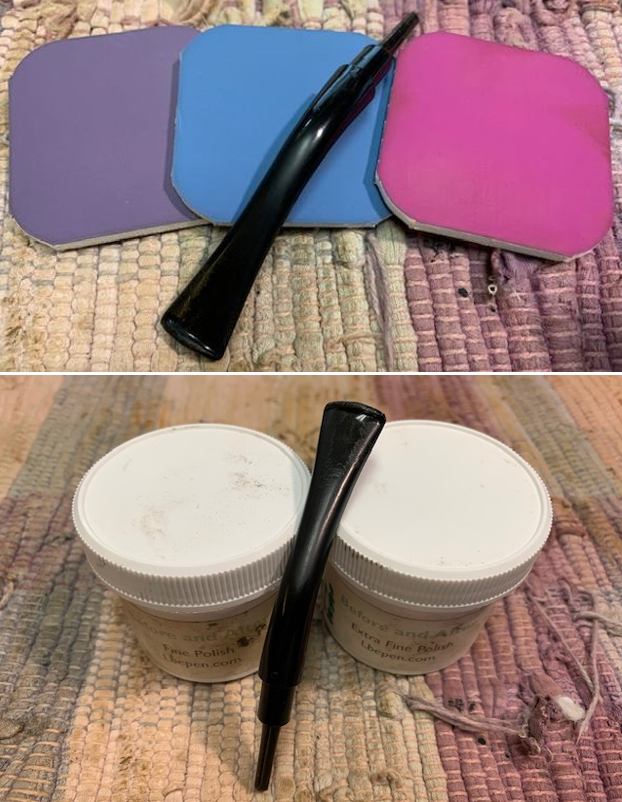 This Swedish Made Bromma Bent Billiard System Pipe with a pencil shank is a great looking pipe whatever you call the shape. The rich, black stained rusticated finish around the briar bowl is quite beautiful. The finish works well with the polished nylon/Bakelite base and the thin nylon taper stem. I put the stem back on the bowl and carefully buffed the pipe with Blue Diamond on the buffing wheel using a light touch on the briar. I gave the bowl multiple coats of Conservator’s Wax and the stem multiple coats of carnauba wax on the buffing wheel and followed that by buffing the entire pipe with a clean buffing pad. I hand buffed the pipe with a microfiber cloth to deepen the shine. No matter how I polished the stem the strange nylon mix material is a beast to fully polish. The repairs show clearly but the stem is solid. The finished Bromma Bent Billiard is very light and sits nicely in the hand and feels great. Give the finished pipe a look in the photos below. The dimensions of the pipe are Length: 5 inches, Height: 1 ¾ inches, Outside diameter of the bowl: 1 inches, Chamber diameter: ¾ inch. The weight of the pipe is 26 grams/.92 ounces. I will be putting it on the rebornpipes store shortly in the Pipes From Various Makers – Czech, Belgian, German, Israeli, Spanish Pipemakers along with Metal Pipes Section. If you are interested in adding this pipe to your collection send me a message or an email. Thanks for reading this blog and my reflections on the pipe while I worked on it. There are many more to come!
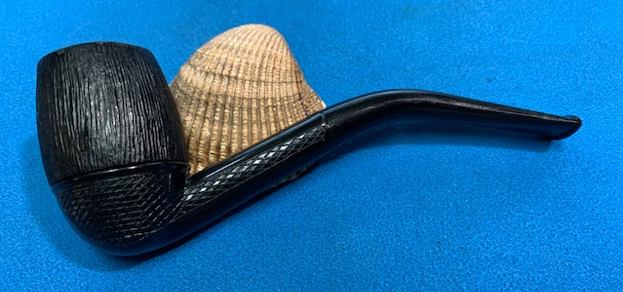
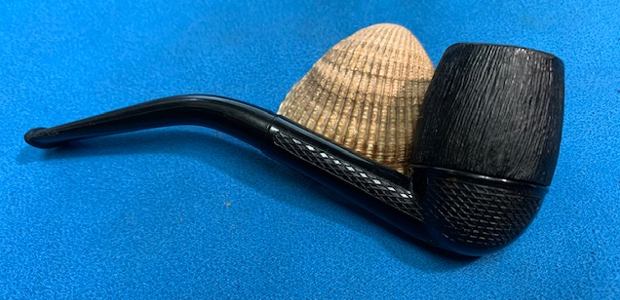


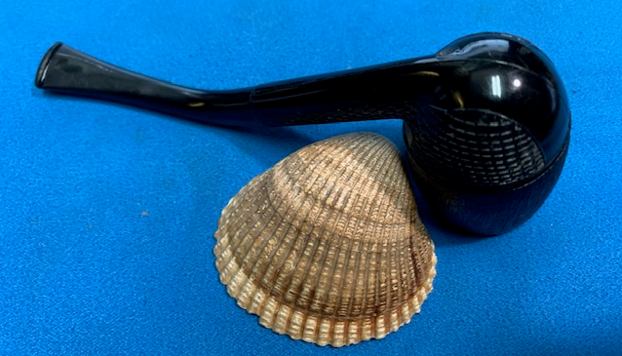


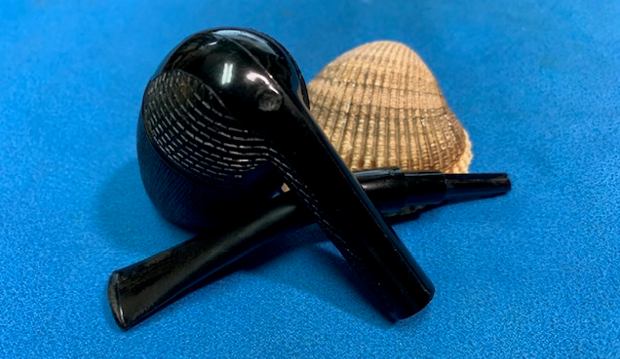
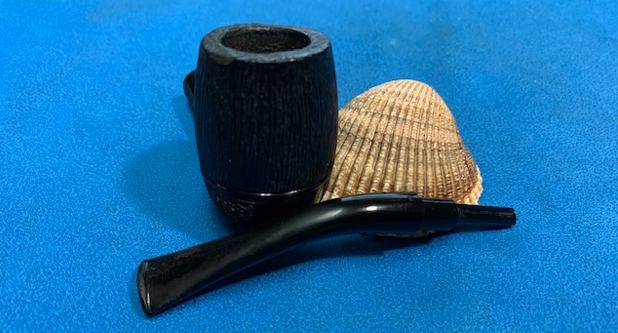
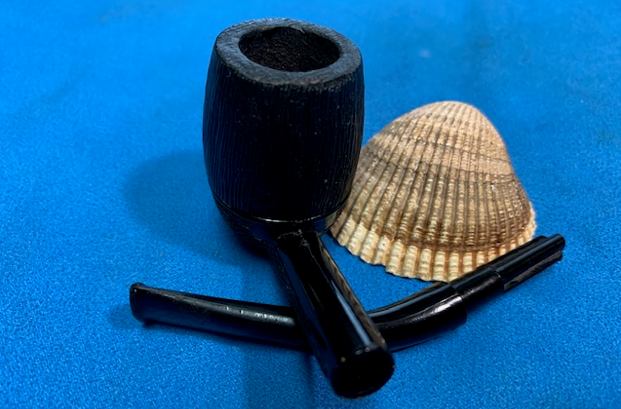
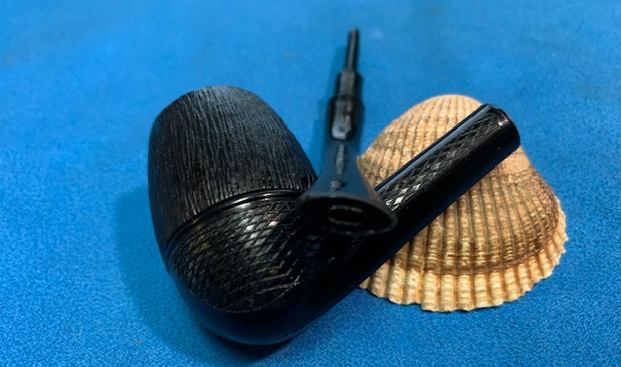


Blog by Steve Laug
A while back I received a small box of pipes from a fellow pipeman who wanted to donate them to support the non-profit organization I work for – the SA Foundation (www.safoundation.com). The organization has been providing long term recovery, housing and job training for women who have escaped sexual exploitation and trafficking. For over thirty years the work has gone on and thousands of young women and their children have been empowered to start over with skills and options. The work is currently in 7 countries and 12 cities around the world. If you are interested give the website a look.
Now back to the pipes. The first one I restored was a large Irish Second 05 Calabash that will be going to the fellow I repaired the cracked Irish Second for. This will give him another option to smoke should that one give him further issues. The second pipe from the lot was unique looking Peterson’s Kapet pipe in a shape 124 (https://rebornpipes.com/2021/08/16/restoring-a-republic-era-petersons-kapet-124/). All of the pipes were in clean condition and had been lightly reamed. The next one on the table is a very Danish looking Acorn. When I first saw it I thought maybe one of the Stanwell sandblasts. I was wrong the only stamping on it on a smooth panel on the underside of the shank. It is stamped Made in London [over] England. The sandblast was in good condition. There was some darkening on the rim top and inner edge of the bowl. There was a light cake in the bowl. The pipe has a thin pencil shank that is in excellent condition. The thin saddle stem was lightly oxidized and had tooth chatter on both sides ahead of the button. There were no logo stamps on the stem.
I took some photos of the pipe before I started my clean up work on it. It is another unique and interesting looking pipe. The acorn shaped bowl and pencil shank look very good together. The Made in London England stamp is vague enough and used by enough English pipemaking companies that I cannot give a definite maker for the pipe. My guess is that it is probably a Charatan pipe but I cannot prove or disprove that.
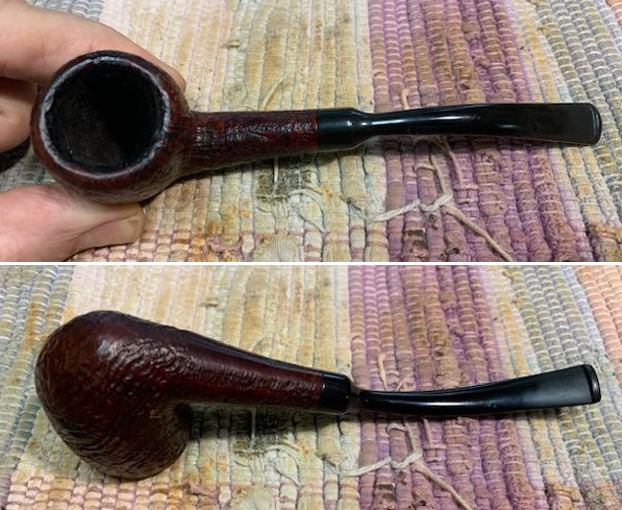 I took photos of the bowl and rim top as well as the stem to show the condition of the pipe. The rim top had some darkening and wear on the top and the inner edge of the bowl. The stem itself were in good condition other than a few light tooth marks and some chatter.
 I took a photo of the stamping on the underside of the shank. It was clear and readable as noted above. The “MADE IN LONDON” portion of the stamp is in the sandblasted portion.
 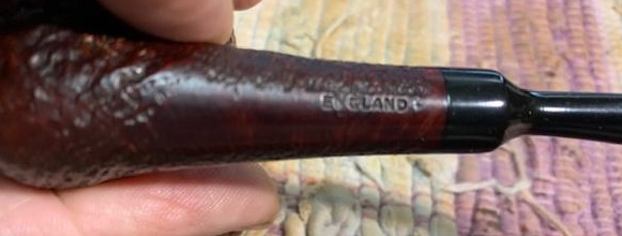 I removed the stem from the shank and took photos of the look of the pipe. The long pencil stem and shank are really well done and quite stunning. The grain around the bowl is very nice.
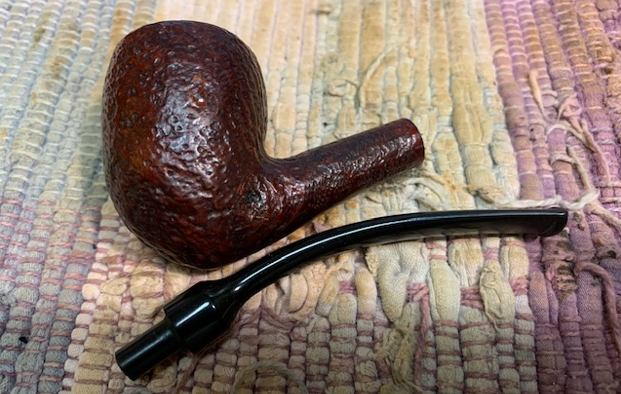 My guess on it being a Charatan made pipe is just that. The Made in London England stamp is the only clue and somewhere in the back of my memory the shape also twigs that thought. With no more to go on it was now time to work on the pipe.
I cleaned the blast on the rim top with a brass bristle brush to loosen the debris in the grooves. It mad a difference and the blast was identifiable once more.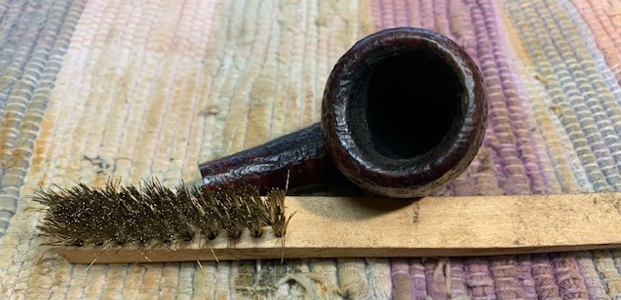 I cleaned up the reaming of the bowl with a Savinelli Fitsall Pipe Knife. I took out the remnant of cake that had been left so I could examine the walls. I was glad to see there were no fissures in the briar walls.
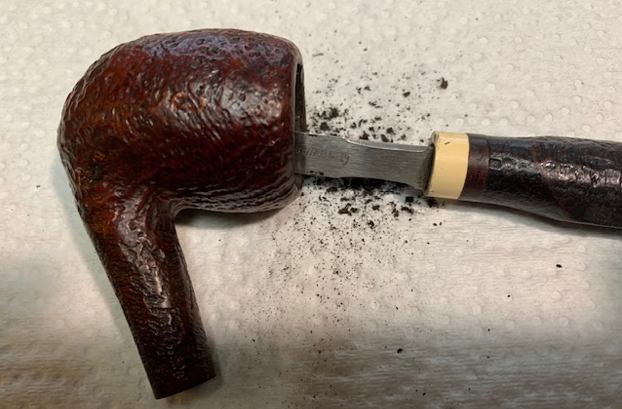 I moved on to deal with the inner edge of the bowl. I used a folded piece of 220 grit sand paper to remove the darkening and light damage on the inner edge of the bowl. Once finished it looked better.
  I scraped the build up of tars off the walls of the shank with a sharp pen knife. It removed a lot “gunk” (a technical term!). I cleaned the bowl, the shank and the airway in both the stem and shank with alcohol, pipe cleaners and cotton swabs until the interior of the pipe was very clean.
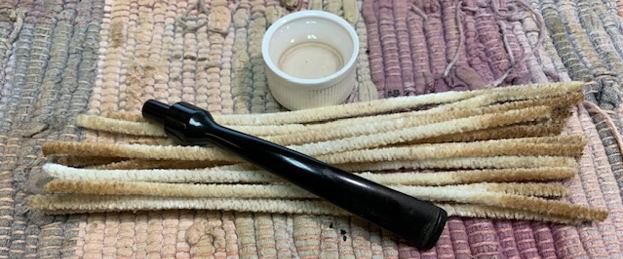 I rubbed the bowl and shank down with Before & After Restoration Balm. I worked it into the surface of the bowl sides and shank with my fingertips to clean, enliven and protect the briar. I let the balm sit for ten minutes then buffed the bowl with a cotton cloth to raise the shine.
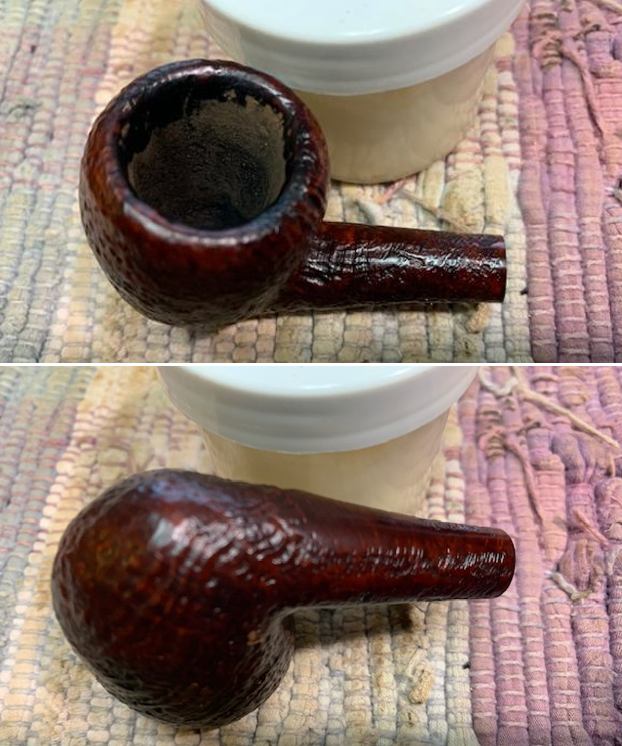
 I used 220 grit sandpaper to sand out the tooth chatter and marks on both sides of the stem. I started to polish it with 400 grit wet dry sandpaper. The stem is looking much better.
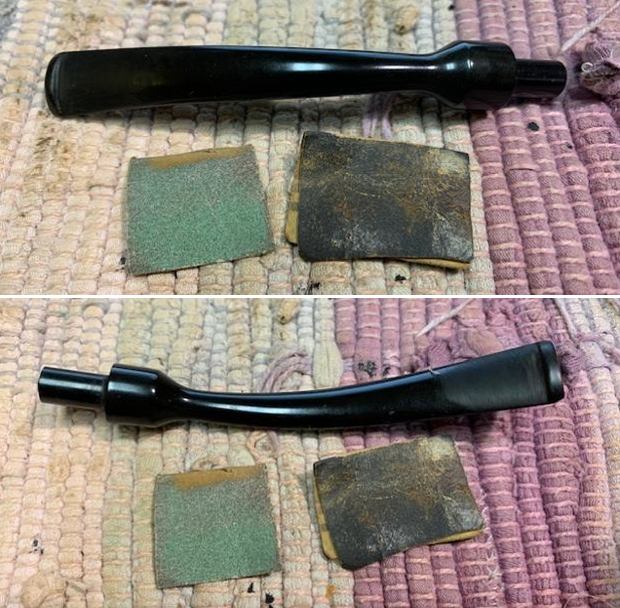 I polished the stem with micromesh sanding pads – 1500-12000 grit pads. I wiped it down with Obsidian Oil after each sanding pad. I used Before & After Pipe Polish – both Fine and Extra Fine to further polish the stem.
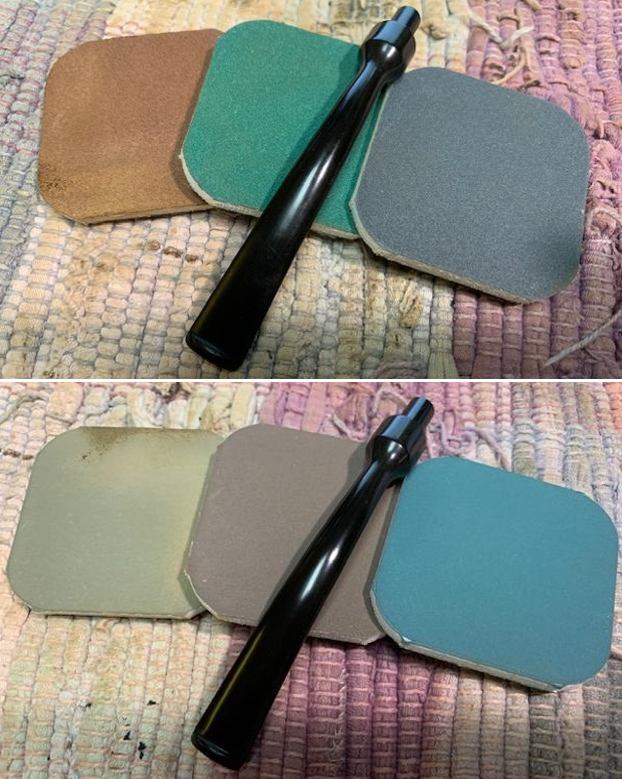
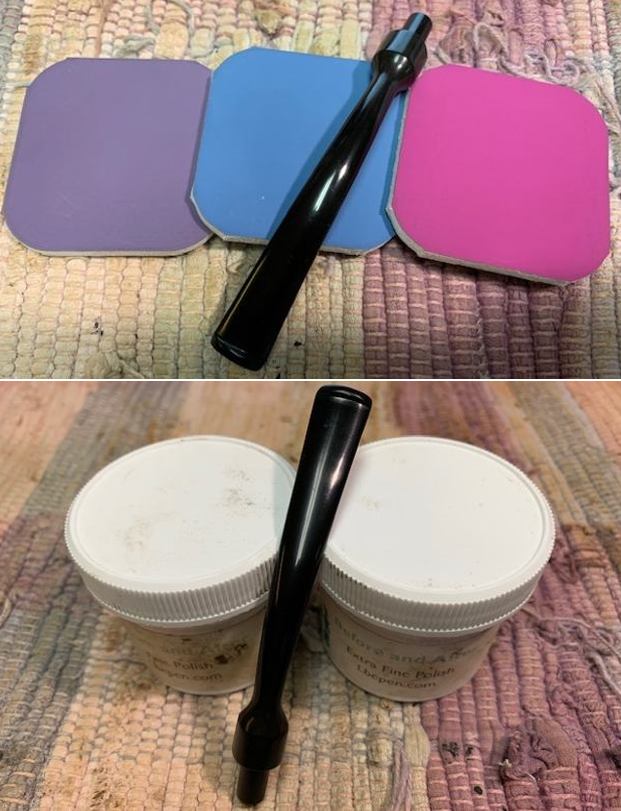 This Made In London England Sandblast Acorn with a pencil shank is a great looking pipe whatever you call the shape. The rich, reddish brown stained finish around the bowl is quite beautiful and gives depth to the blast. The finish works well with the polished, thin vulcanite saddle stem. I put the stem back on the bowl and carefully buffed the pipe with Blue Diamond on the buffing wheel using a light touch on the briar. I gave the bowl multiple coats of Conservator’s Wax and the stem multiple coats of carnauba wax on the buffing wheel and followed that by buffing the entire pipe with a clean buffing pad. I hand buffed the pipe with a microfiber cloth to deepen the shine. The finished Made in London England Acorn is very light and sits nicely in the hand and feels great. Give the finished pipe a look in the photos below. The dimensions of the pipe are Length: 6 inches, Height: 2 inches, Outside diameter of the bowl: 1 ¼ inches, Chamber diameter: ¾ inch. The weight of the pipe is 32 grams/1.13 ounces. I will be putting it on the rebornpipes store shortly in the British Pipe Makers Section. If you are interested in adding this pipe to your collection send me a message or an email. Thanks for reading this blog and my reflections on the pipe while I worked on it. There are many more to come!
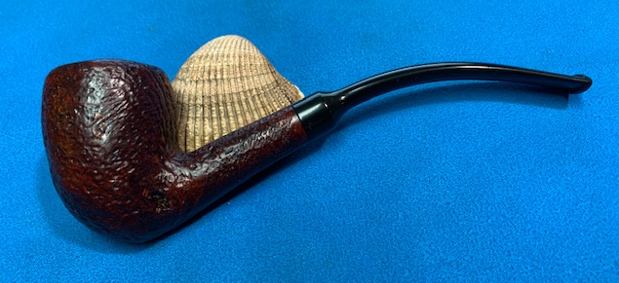

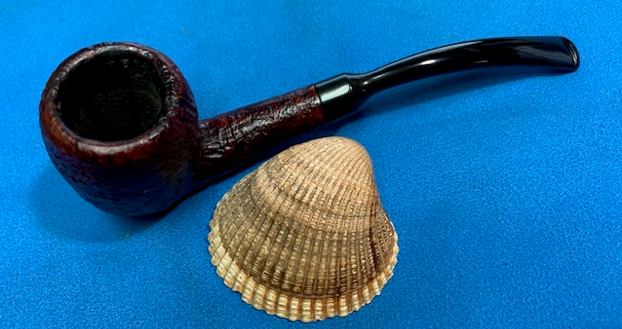
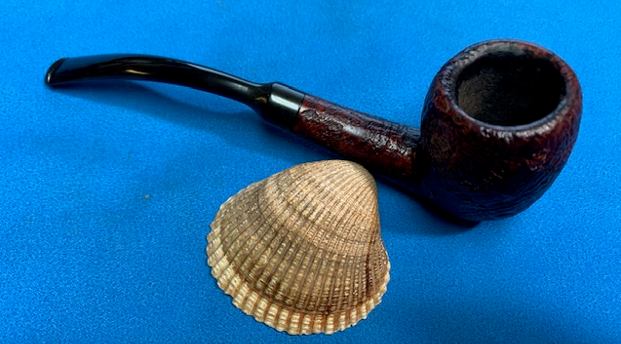
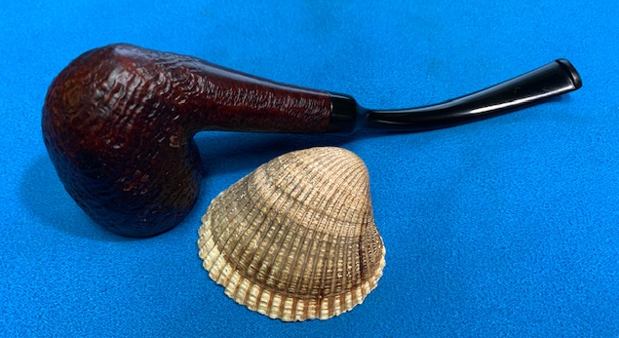
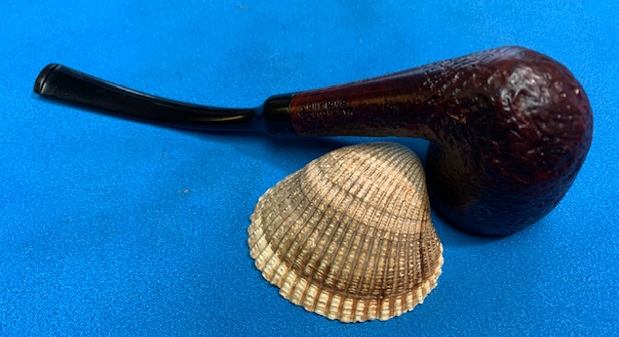
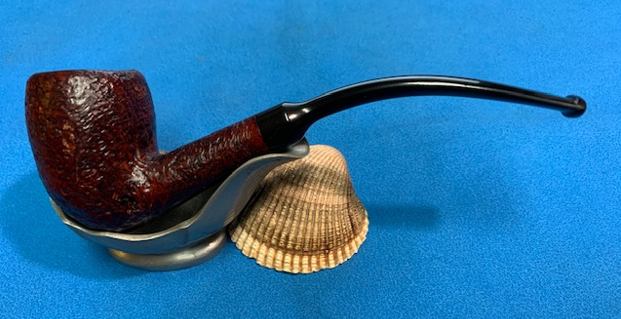
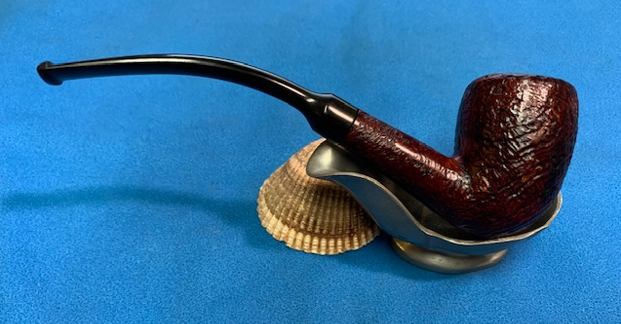
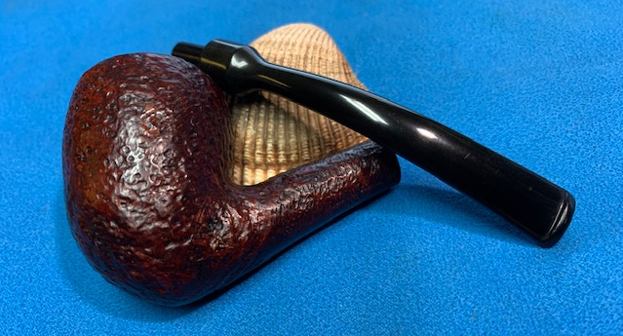
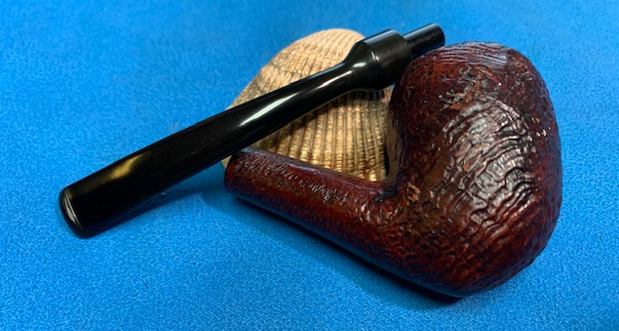


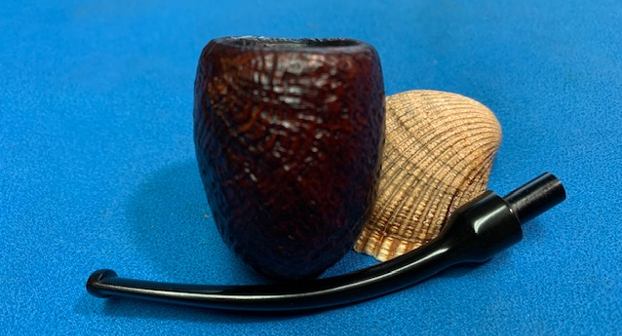
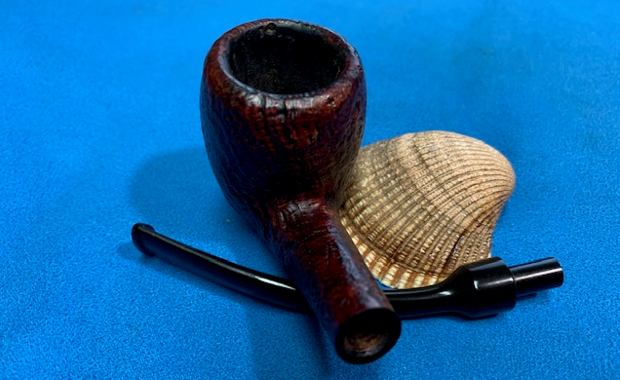
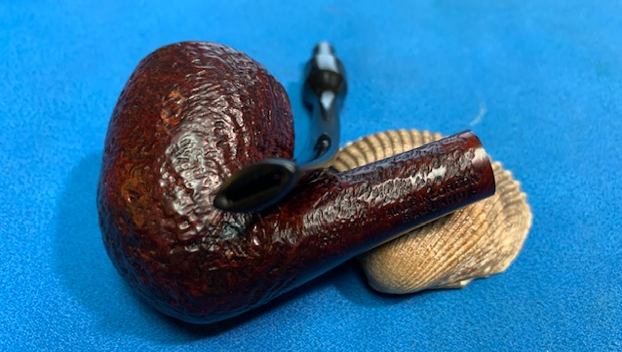
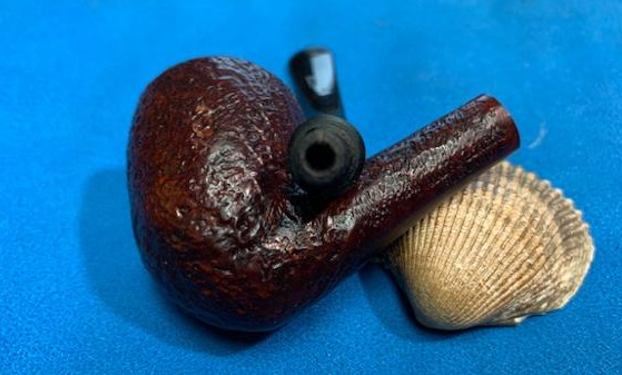
