Blog by Dal Stanton
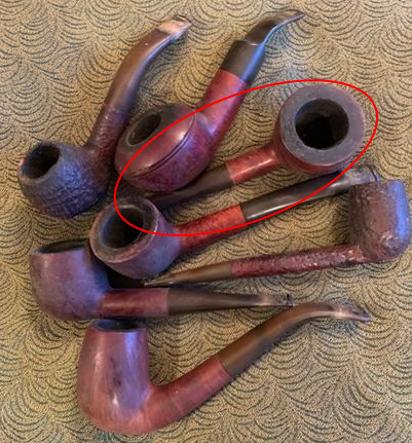
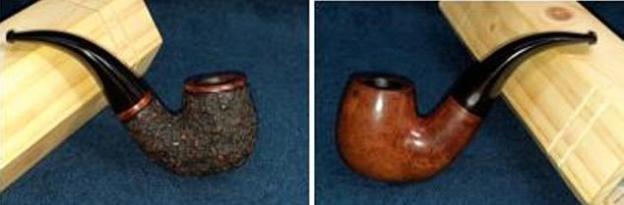
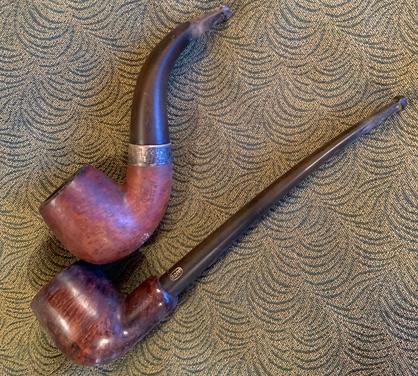
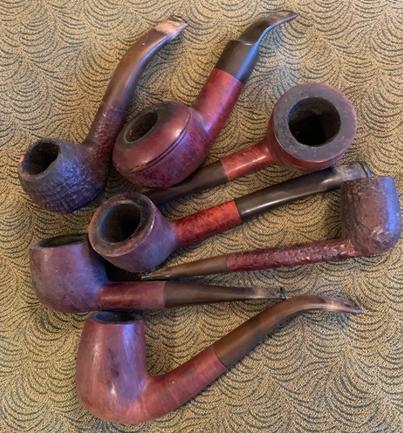
 My friend and fellow pipe man restorer, Dave Shane (see: The Pipery.com) donated the pipe now on the worktable, the Dr. Grabow Sculptura, along with 12 other pipes. Dave and I worked together several years ago in Ukraine. Our paths met again in January of 2018 when I was in the US from Bulgaria and went to his home in the Atlanta area to catch up. After much talk, some adult beverages and of course, sharing a few bowls together, Dave gifted me these pipes to benefit the Daughters of Bulgaria. Some have already found their way to new stewards and the Dr. Grabow (in the picture on the far right) caught the attention of another friend and fellow pipe man, Todd.
Todd has already commissioned several pipes from The Pipe Steward and is an active contributor on several Facebook groups dedicated to pipe men and women and their pipes and tobaccos. I became aware that Todd was an attorney specializing in international issues and  especially China when he commissioned his first pipes in September of 2018 while I was still living in Bulgaria. I had written to him asking for more patience to ‘bump him’ a bit in the queue so I could restore a special pipe commissioned by Chrystal, who was visiting us in Sofia from China. Chrystal had chosen a pipe to take back to China as a special gift for her grandfather (see: A Special Gift for Her Grandfather in the People’s Republic of China – A Sculpted Rose Billiard of Italy). It was a special visit and write up where I was able to include great pictures of Chrystal with her grandfather and his new pipe that she had sent upon her return to the People’s Republic of China.
When Todd found out why he was being ‘bumped’ I then found out about his work and special focus and devotion to China as a country and culture. Over time I have appreciated getting to know Todd more and we have made commitments to have bowls together when our paths ever get close enough! I have restored some nice, collectable pipes for Todd and when he wrote me about commissioning the Dr. Grabow, along with a few other ‘low-end’ pipes, as he described them, I was intrigued. Through our communications about commissioning the Dr. Grabow, I discovered that Todd and I share a similar view on the cost of a pipe not necessarily an accurate indicator of a better smoking experience. Todd wrote:
I recently acquired a couple of Dr. Grabow and Kaywoodie and other older, “low-end” pipes in good condition from eBay and found the old briar to be very tasty. As you may know, I try to reject the snobbery inherent in every aspect of so much of life; I enjoy a $10 Wrangler shirt from Walmart as much as a $100 shirt from Brooks Brothers, if not more; it fits and looks great, and that’s my major concern; the lower price is also a big help. Snobbery is present in this hobby also. Pipe making at $750.00 a pop is certainly good work if you can find it. However, in my humble experience, there seems to be negligible equivalency between price and briar quality of smoking, unless of course, Covid19 has deadened my faculty of taste. Enough of my useless pontificating. Please take a look at those six pipes and let me know your ideas. And please remember that your fine work is well appreciated by me and, I believe, many others in our hobby.
My response to Todd’s comments expressed my agreement:
Todd, I’m in total alignment with you about named pipes vs. basket pipes not being an indicator of how well a pipe smokes. And I think you would agree, that so many ‘low end’ pipes are only ‘low end’ because they were on more of a conveyor line when they were manufactured. Many of my restorations show that TLC with a no name throw away can produce an absolute treasure.
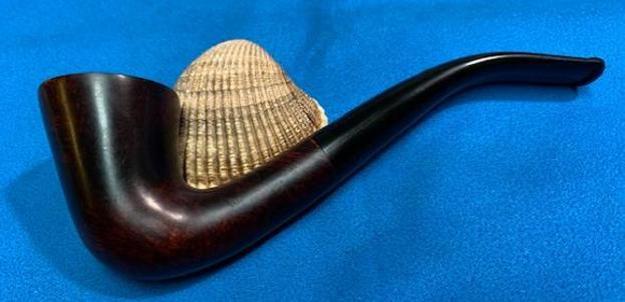
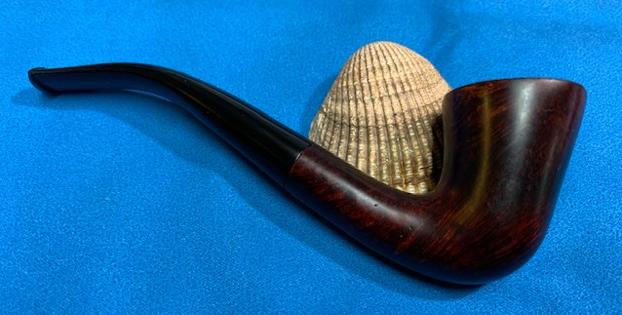
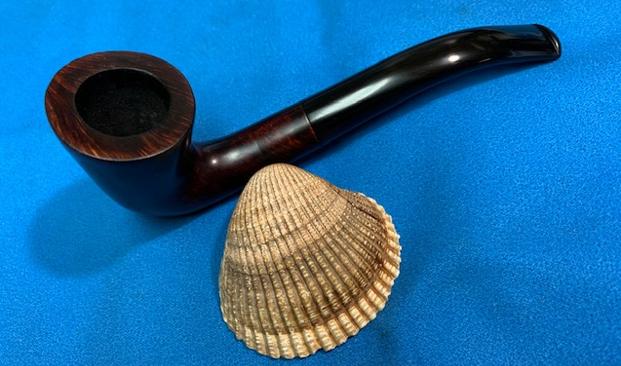
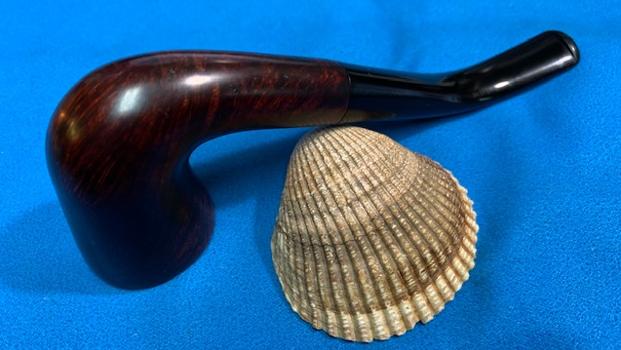
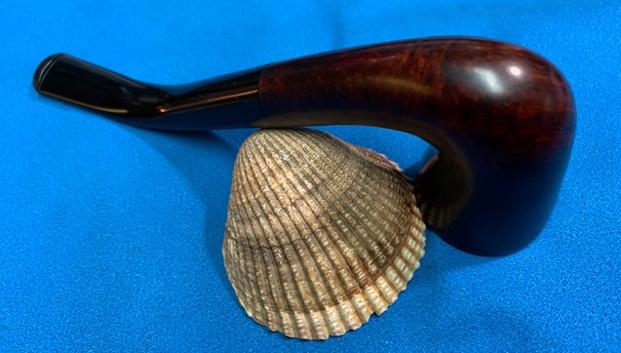
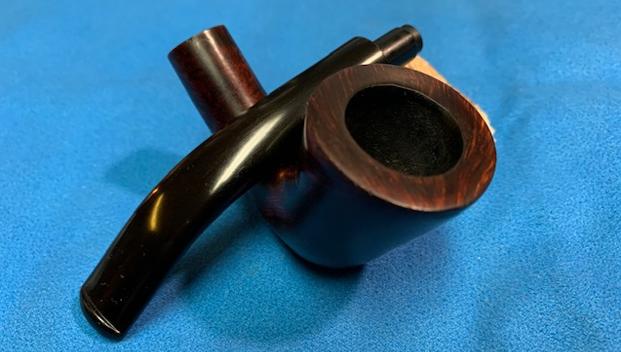
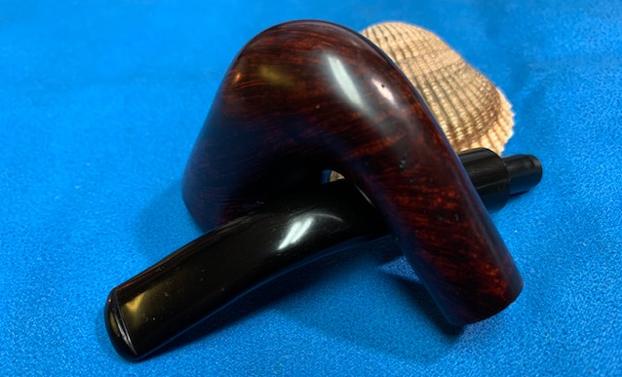
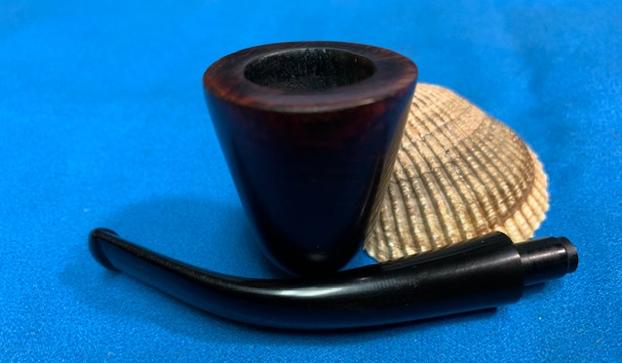
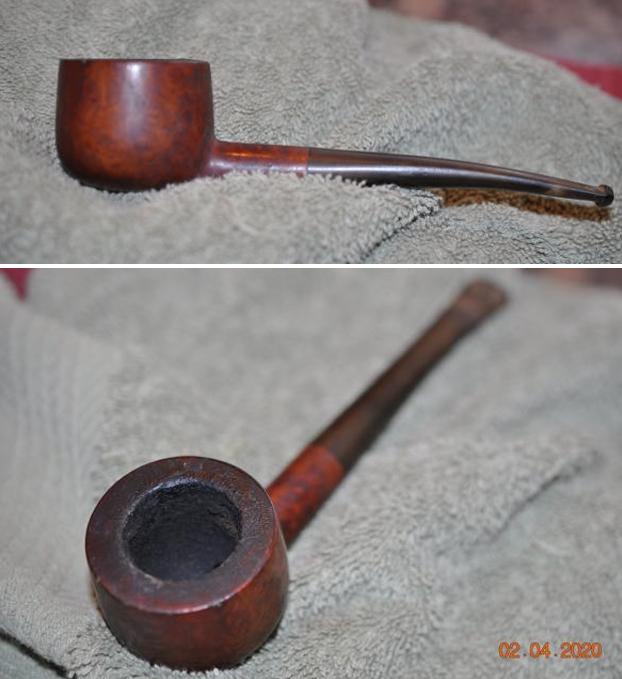
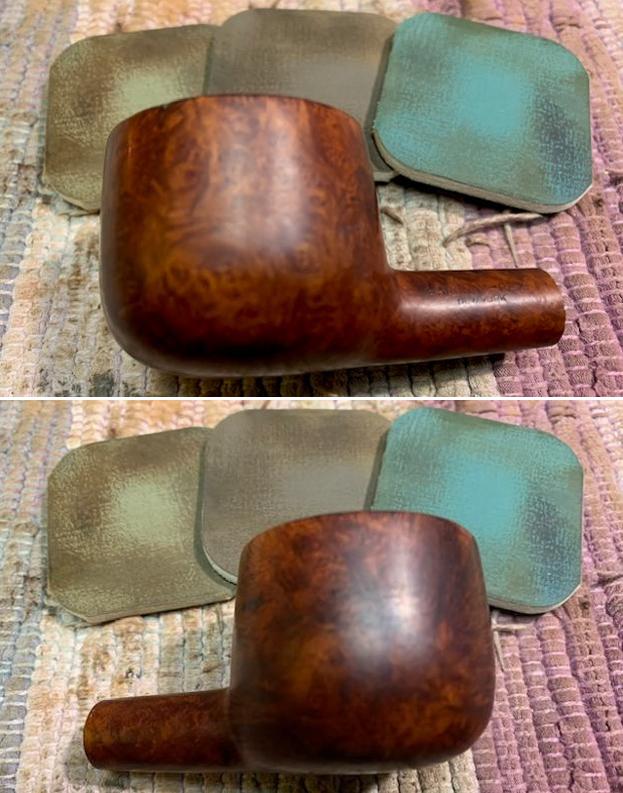
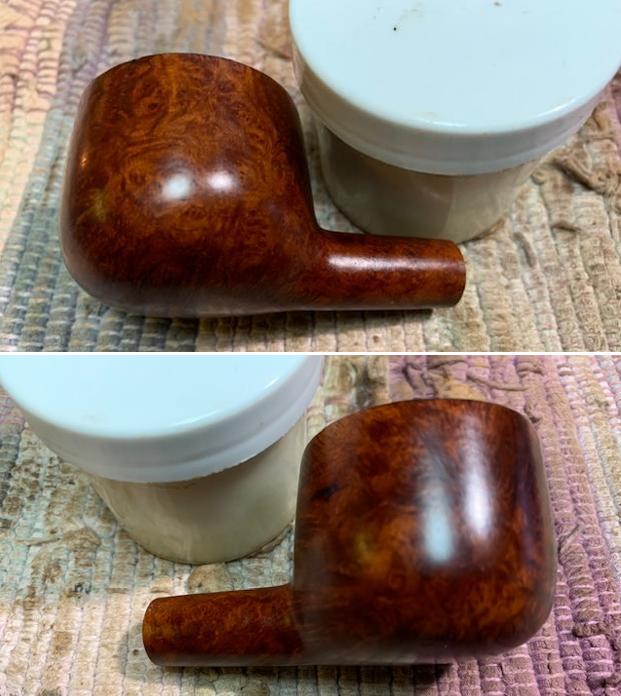
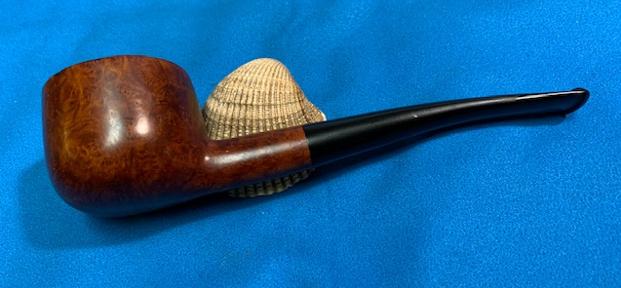
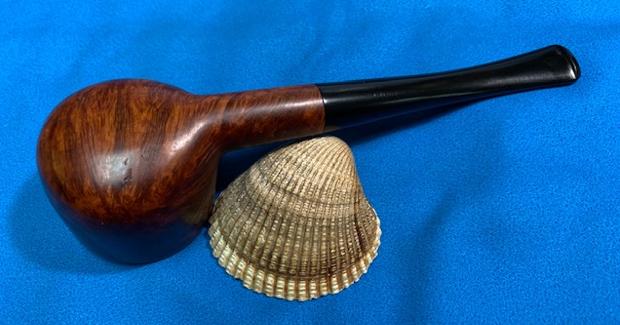
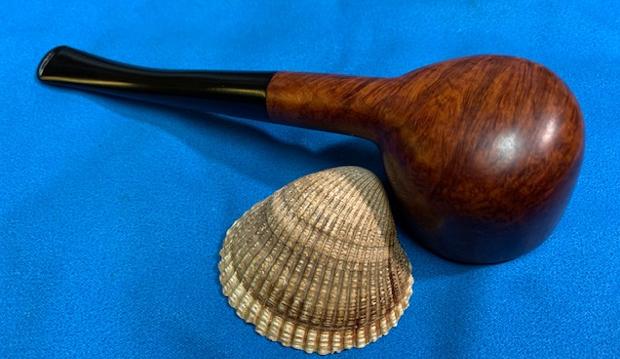
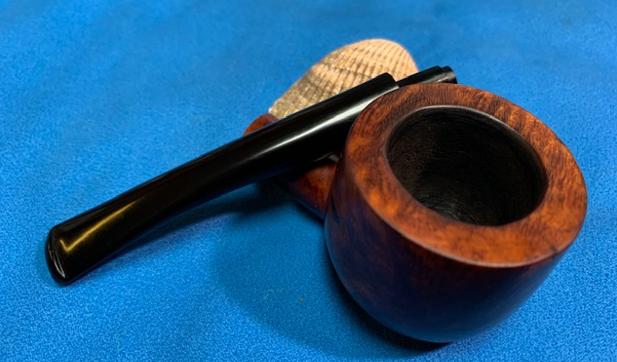
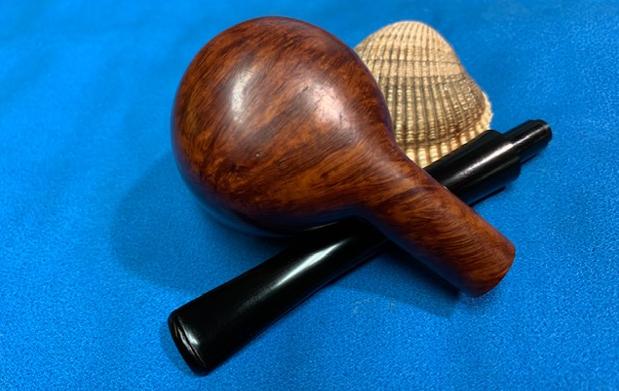
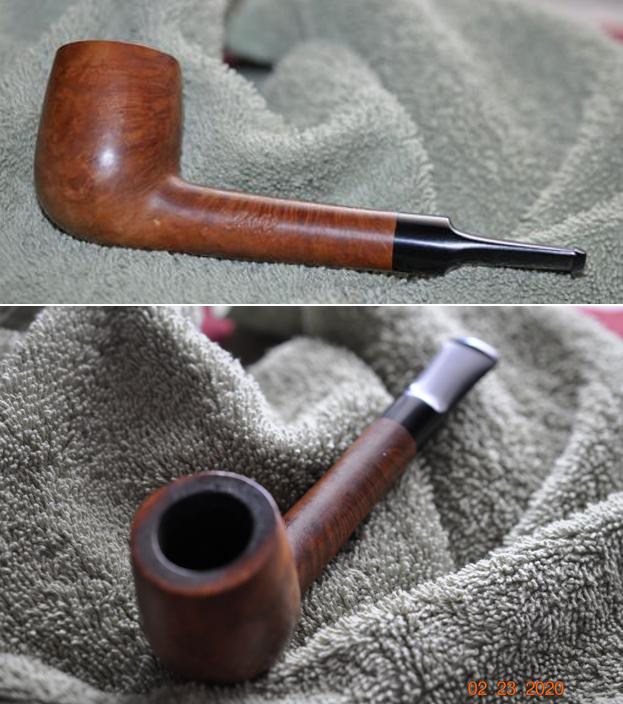
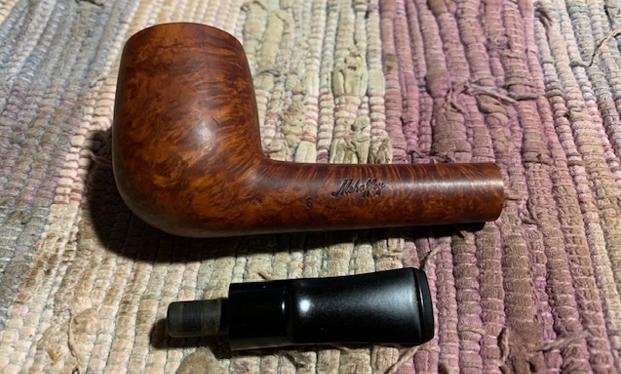
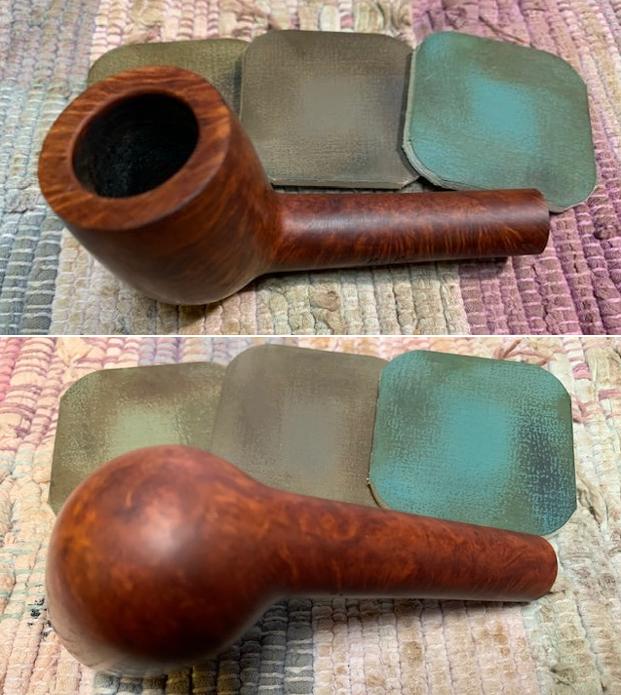
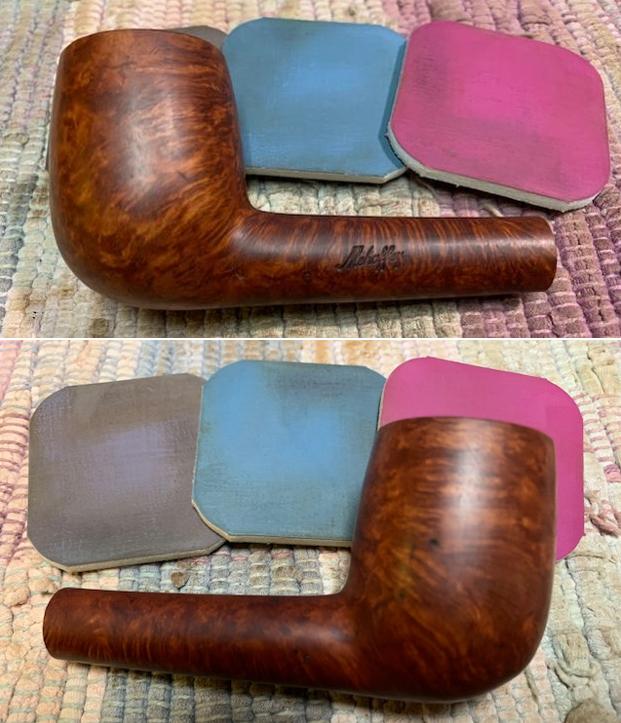
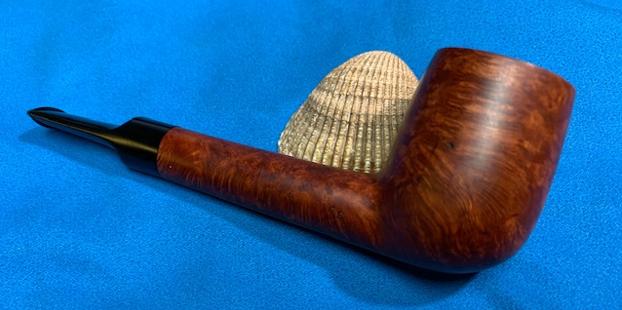
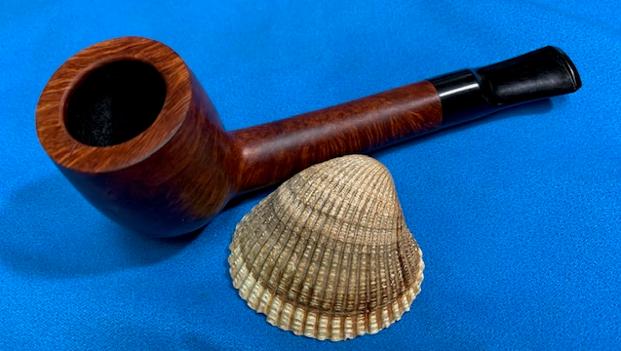
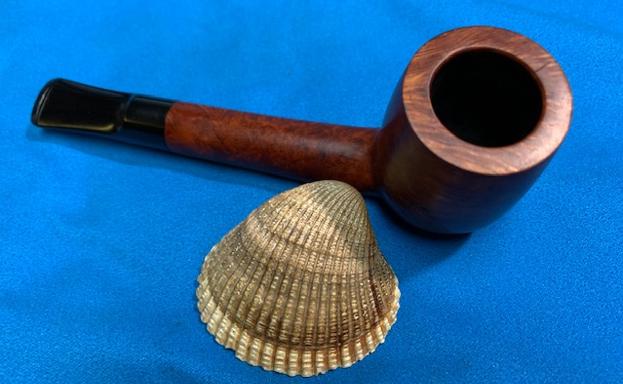
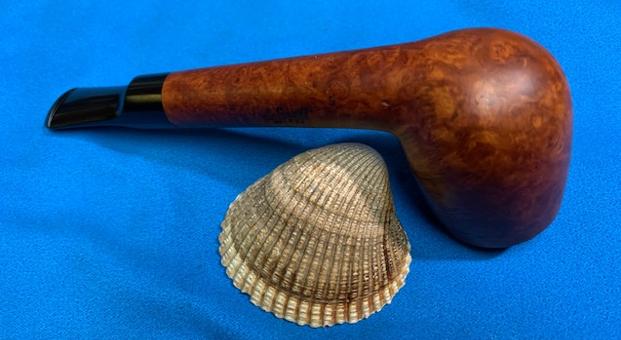
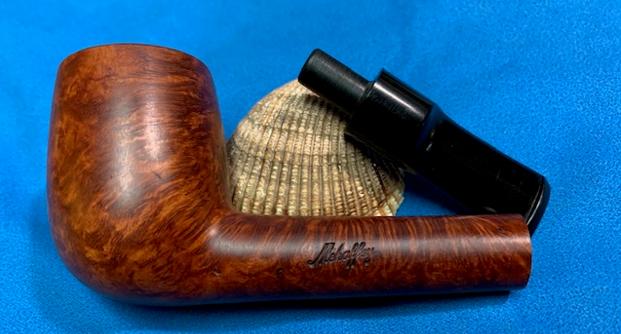
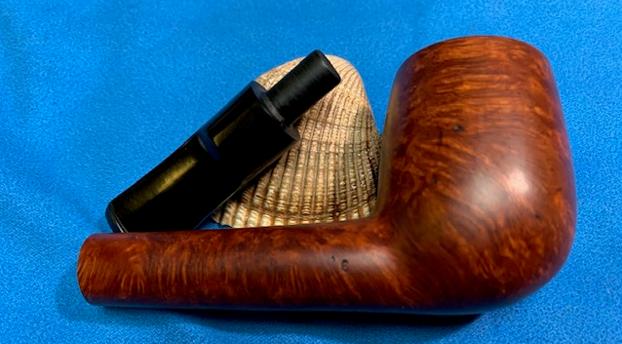
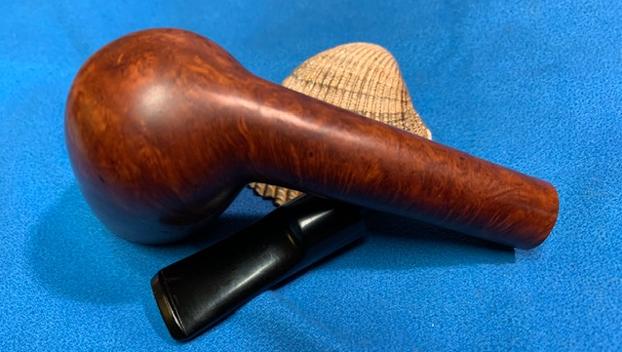
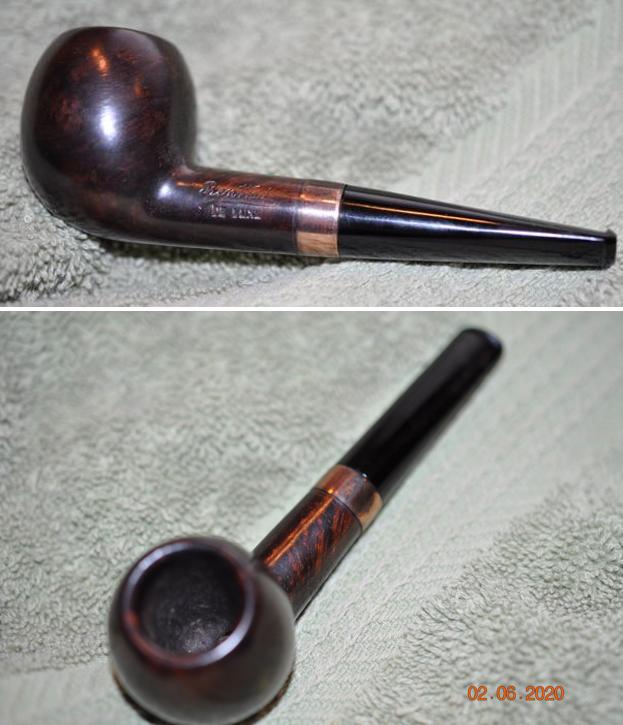
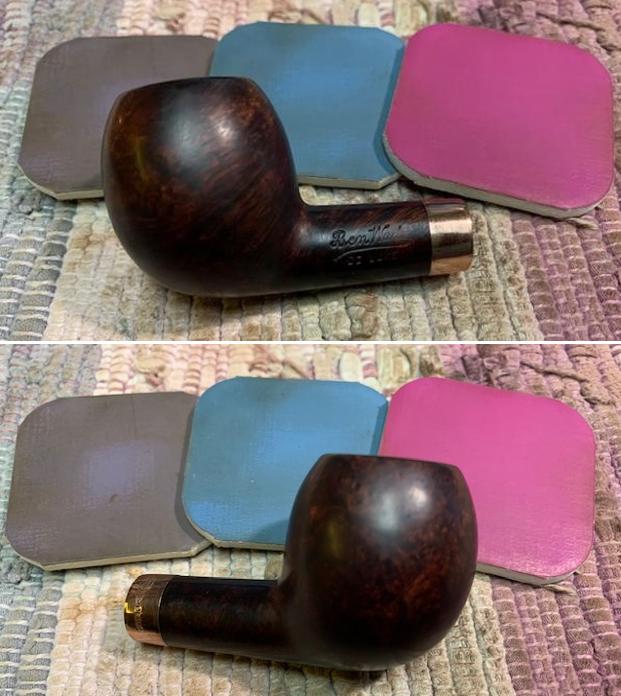
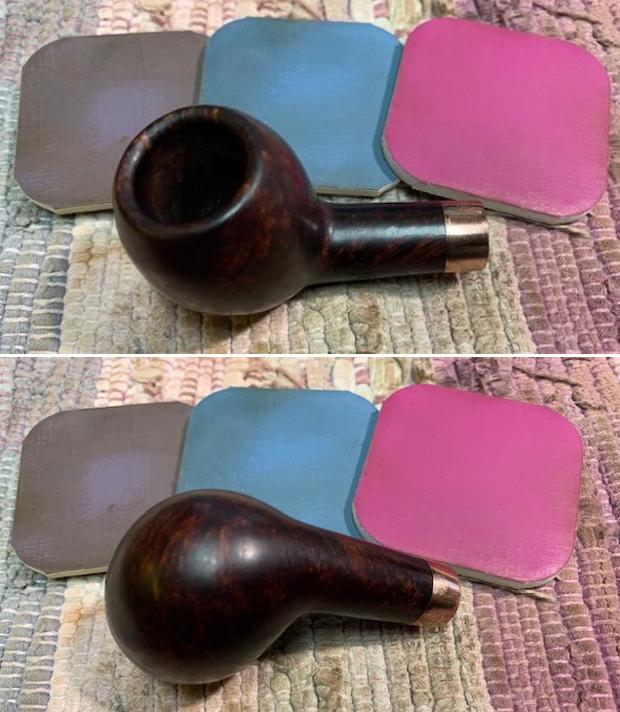
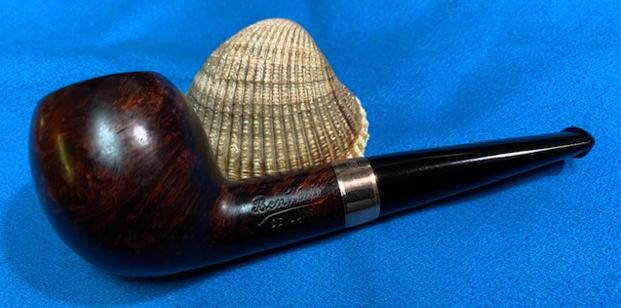
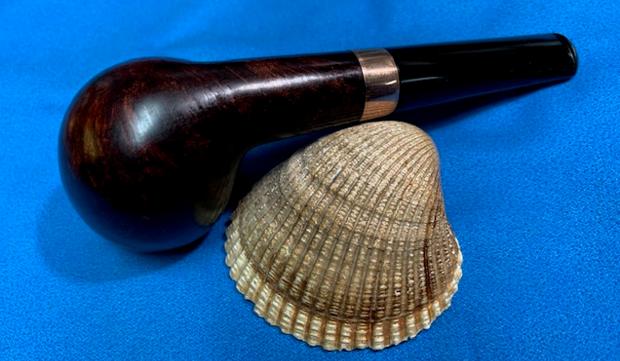
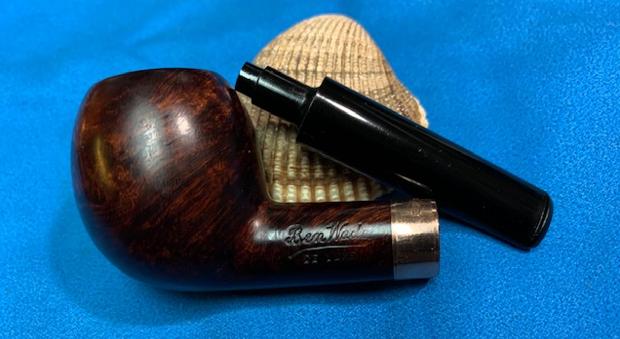
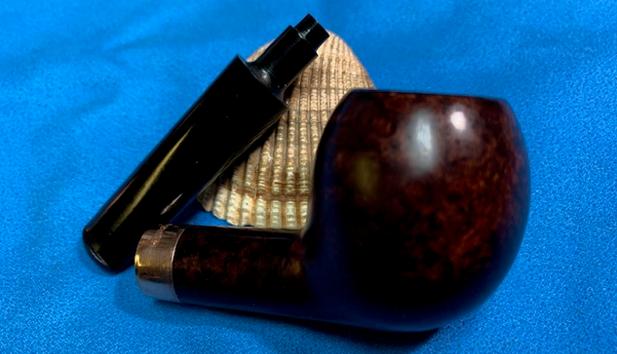
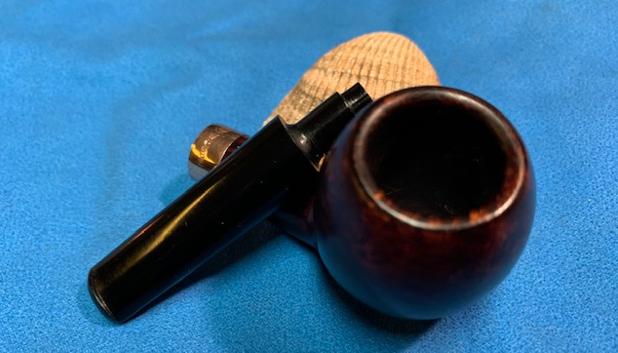
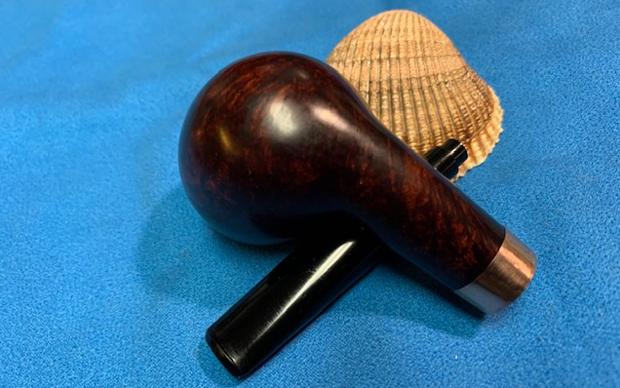
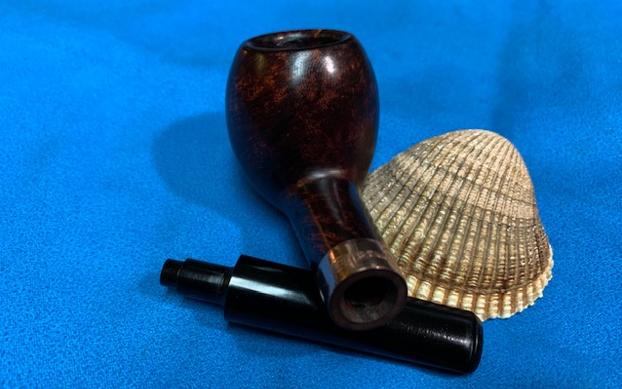
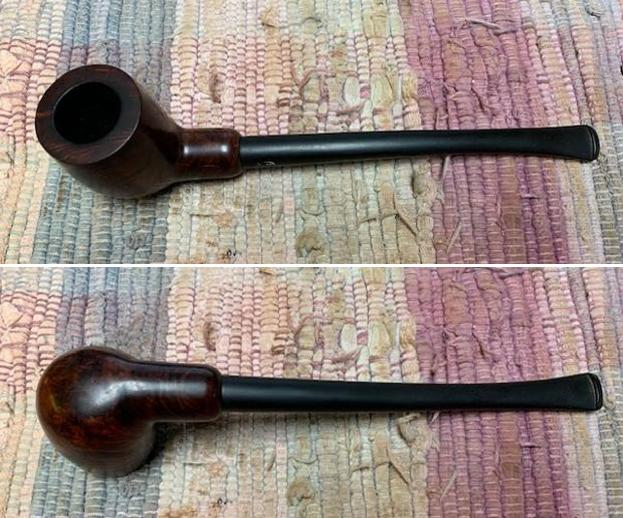
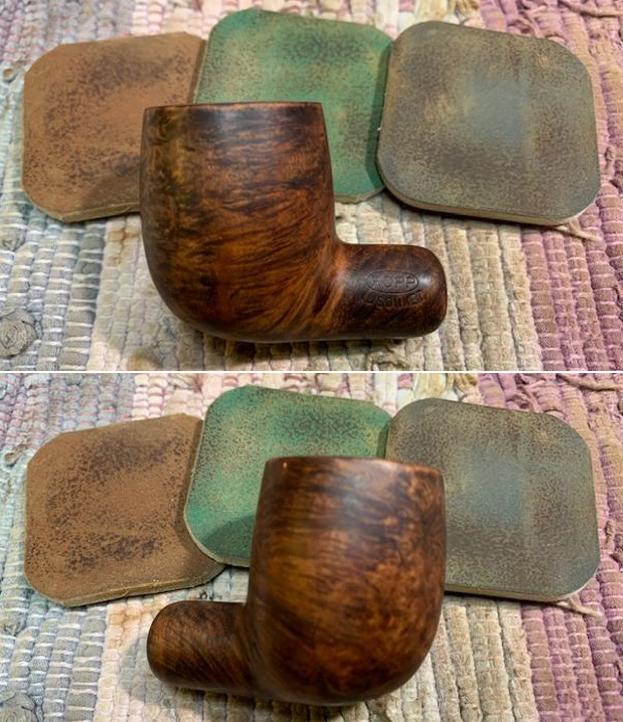
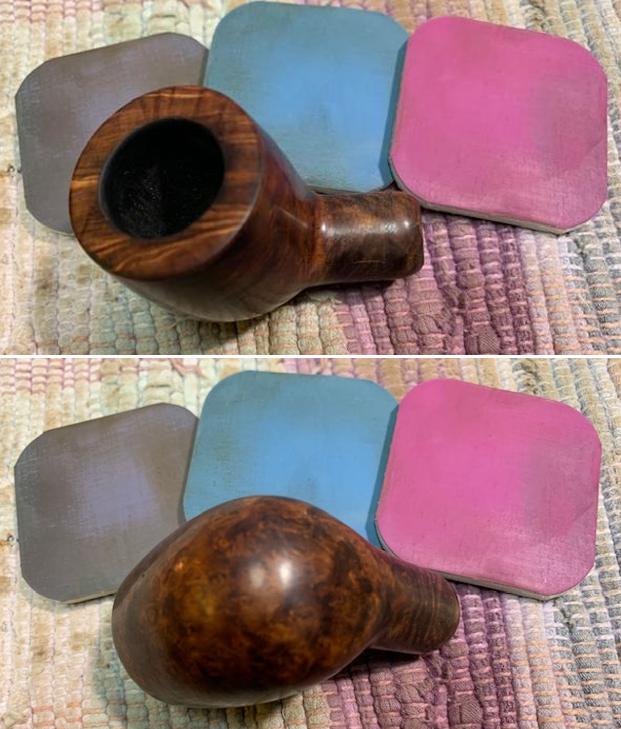
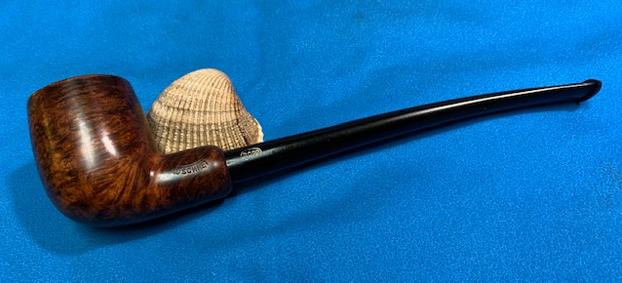
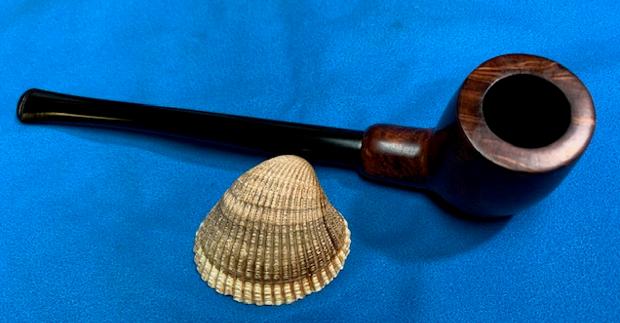
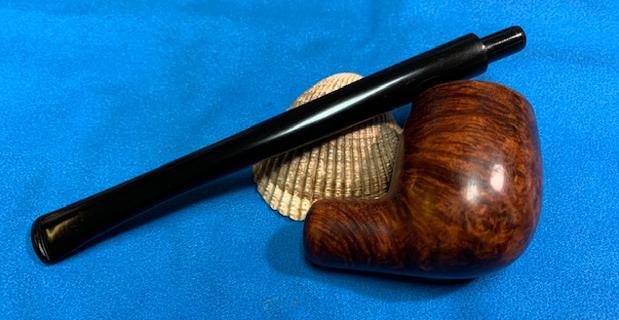
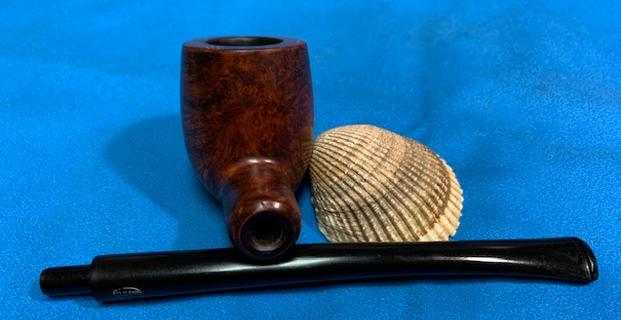
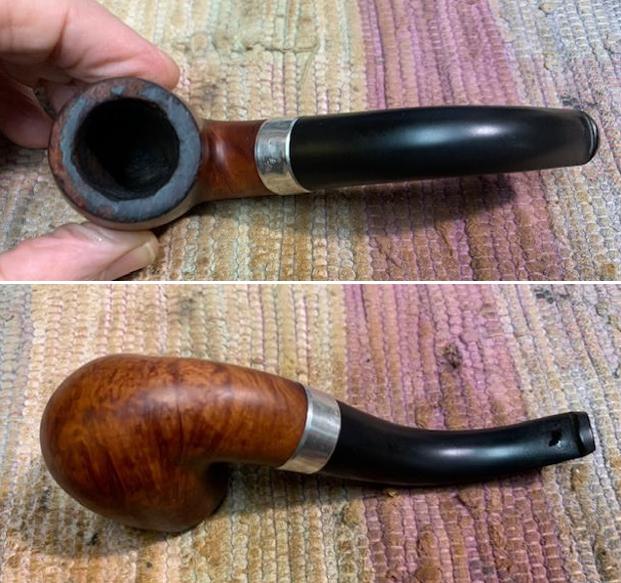
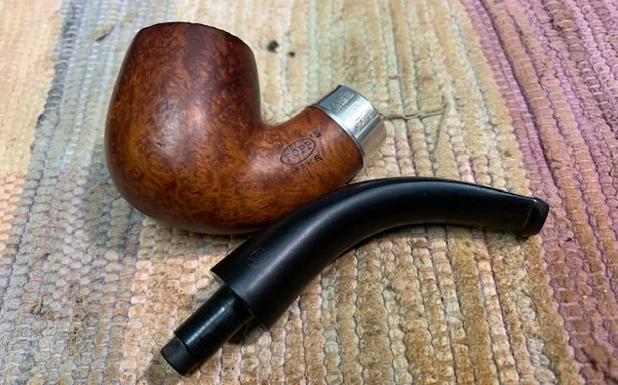
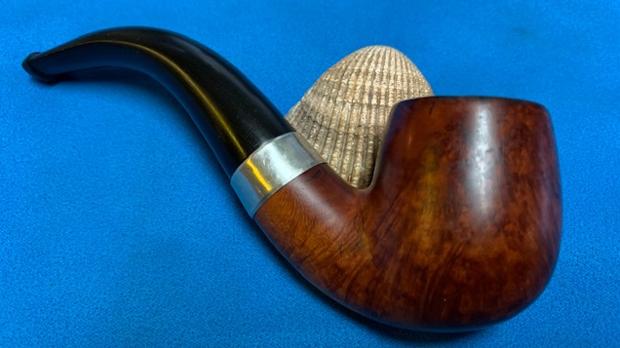
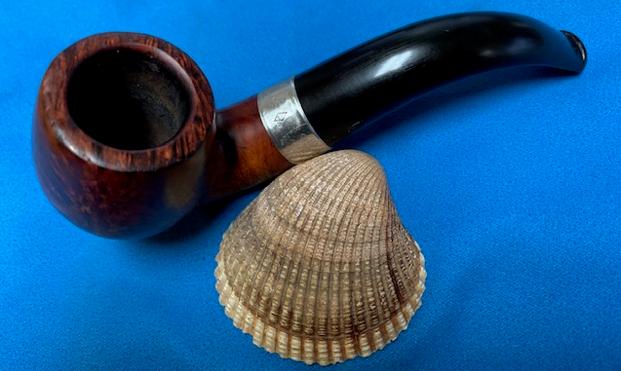
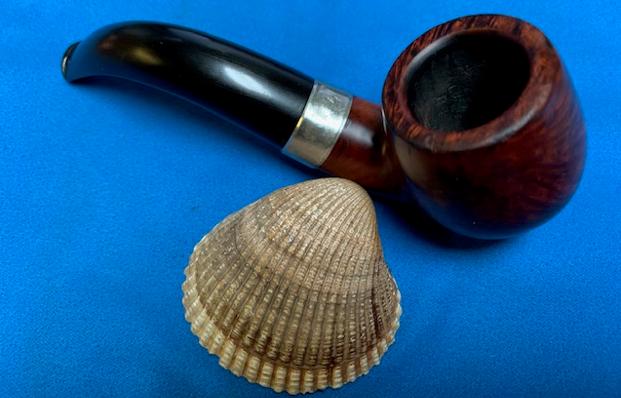
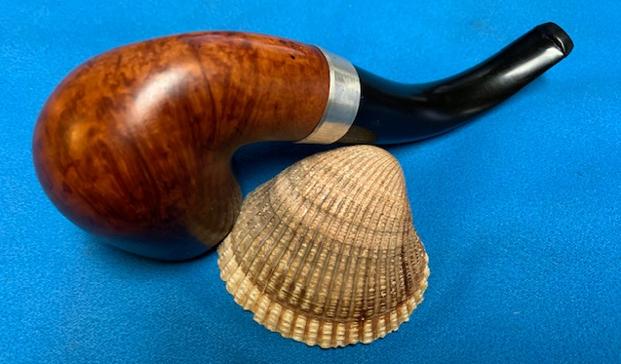
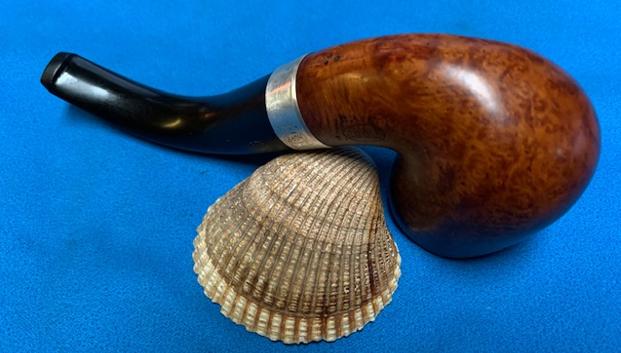
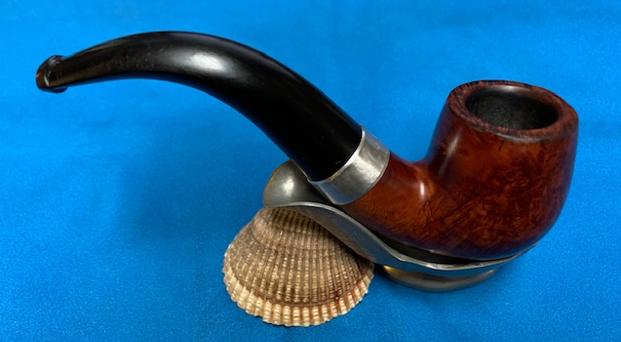
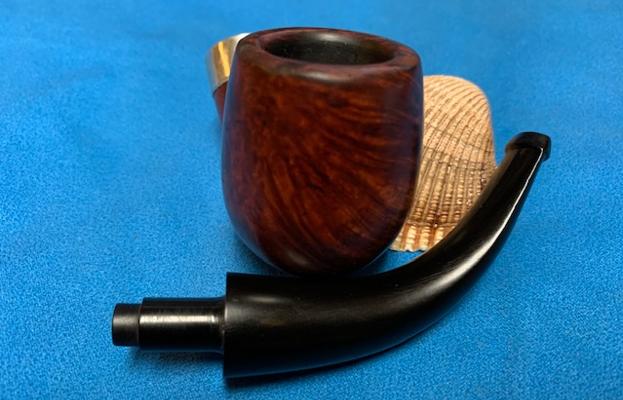
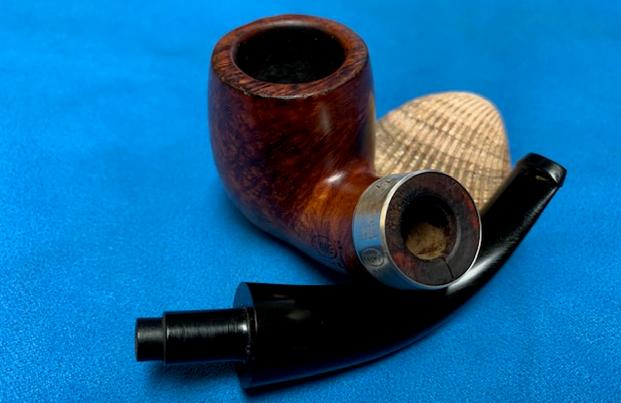
I know that there are many Dr. Grabow enthusiasts out there and to call a pipe a low-end pipe does not mean a ‘cheap’ pipe! Sometimes of course, this IS the case, but my experience has shown that with a little help, pipes that do not cost an arm and leg can look like a million and smoke just as well as the more expensive pipes out there. This is the first Dr. Grabow that I’ve worked on that is not upgrading an Omega – Dr. Grabow’s version of a system pipe. Here are some pictures of the Dr. Grabow Sculptura Blasted Bulldog which whispered Todd’s name in the For “Pipe Dreamers” Only! collection which he commissioned: 


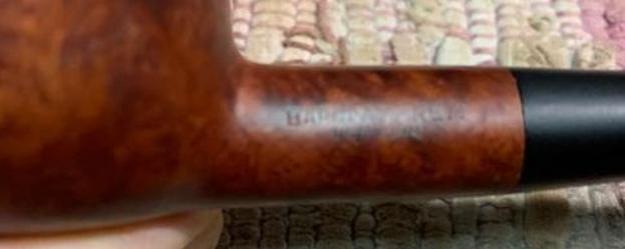
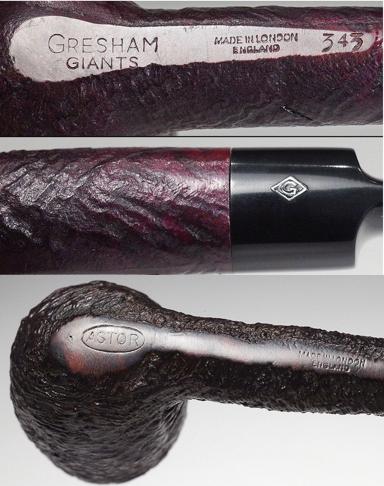
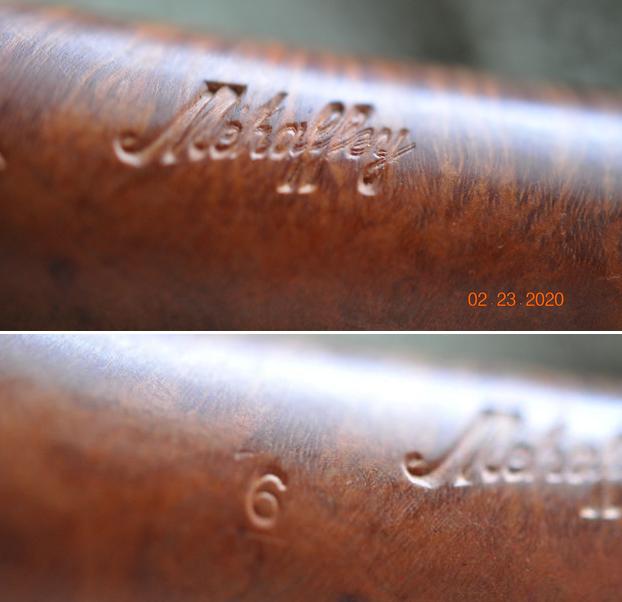
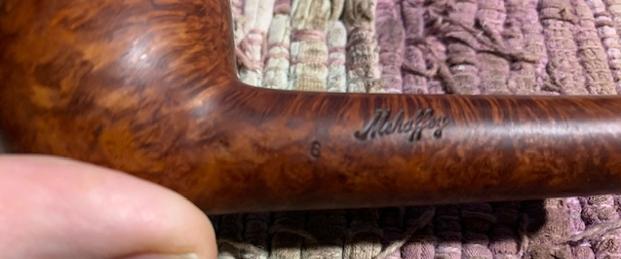
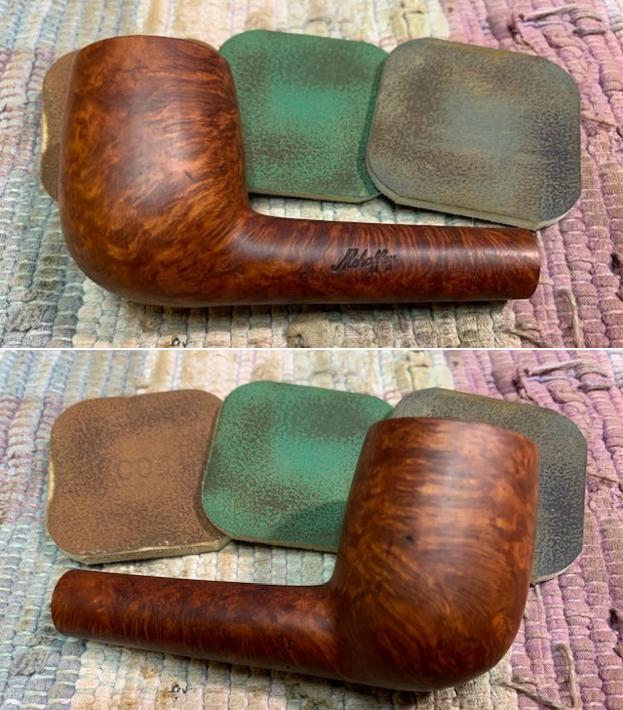
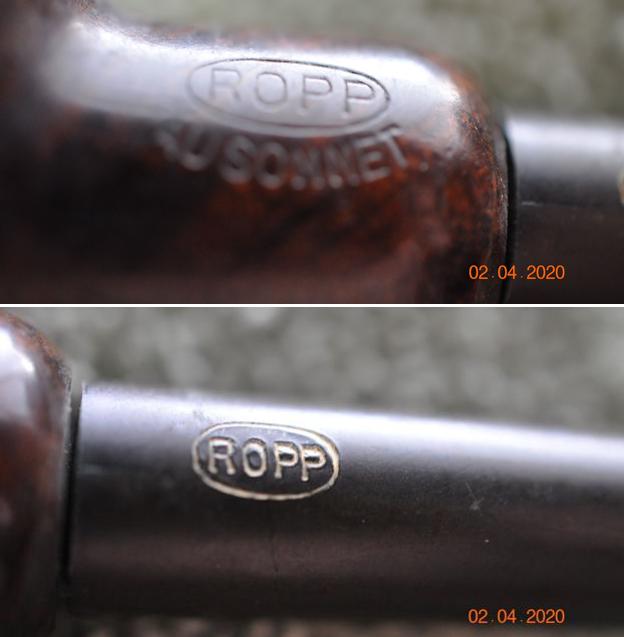
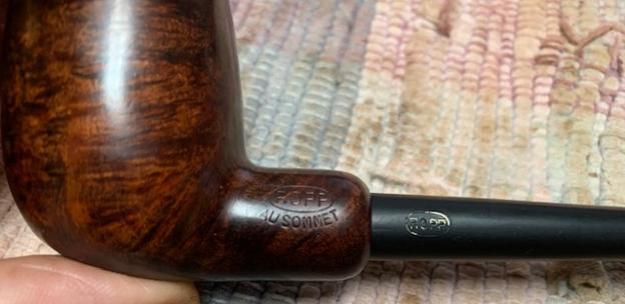
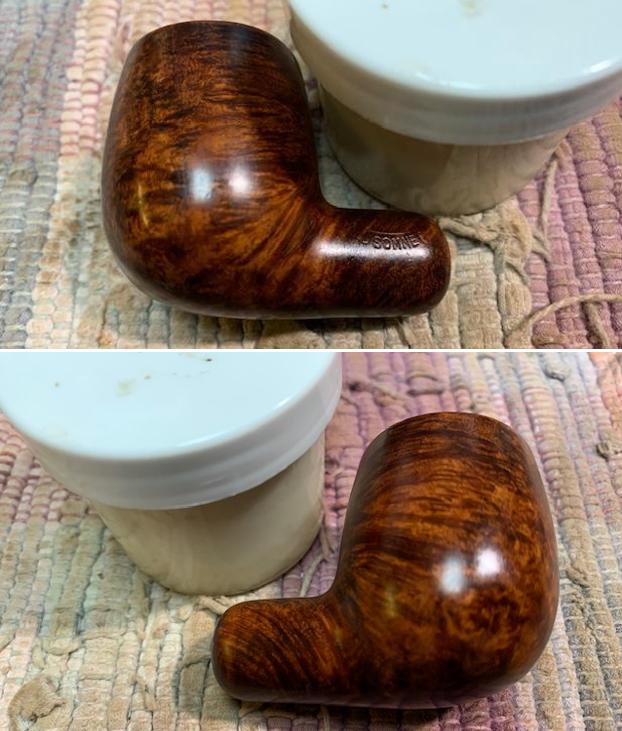
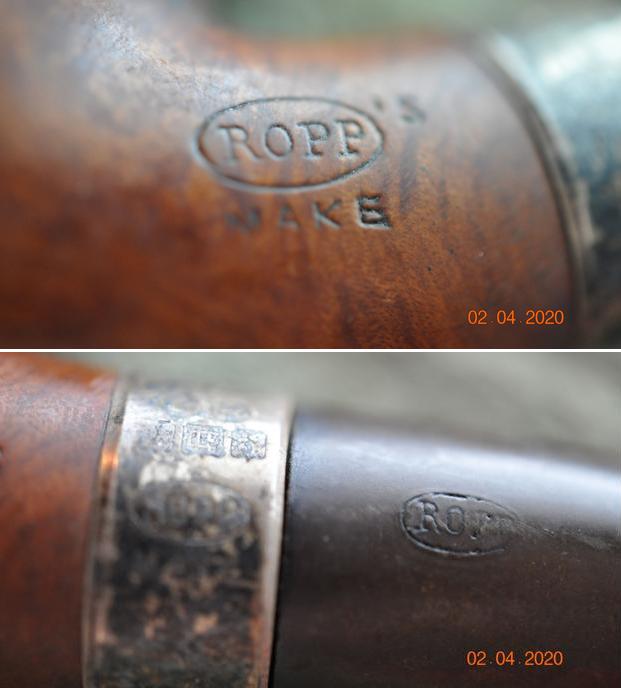
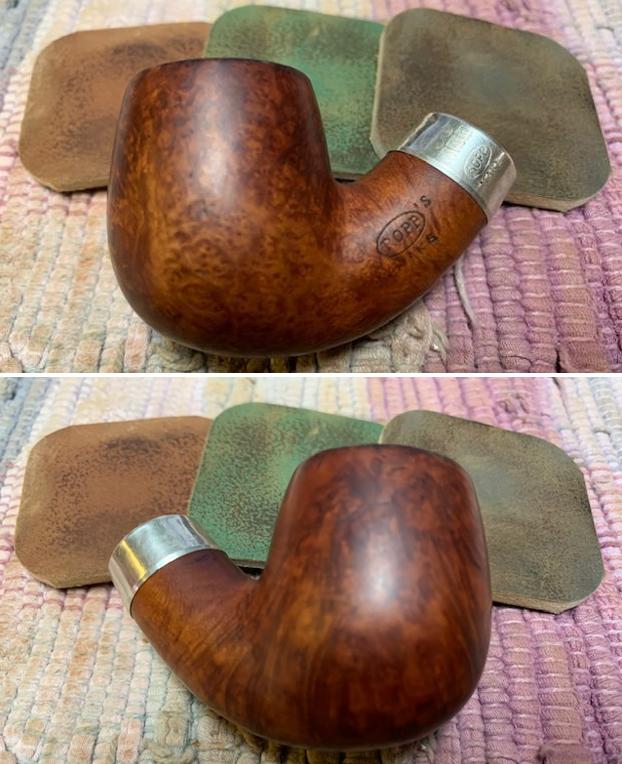
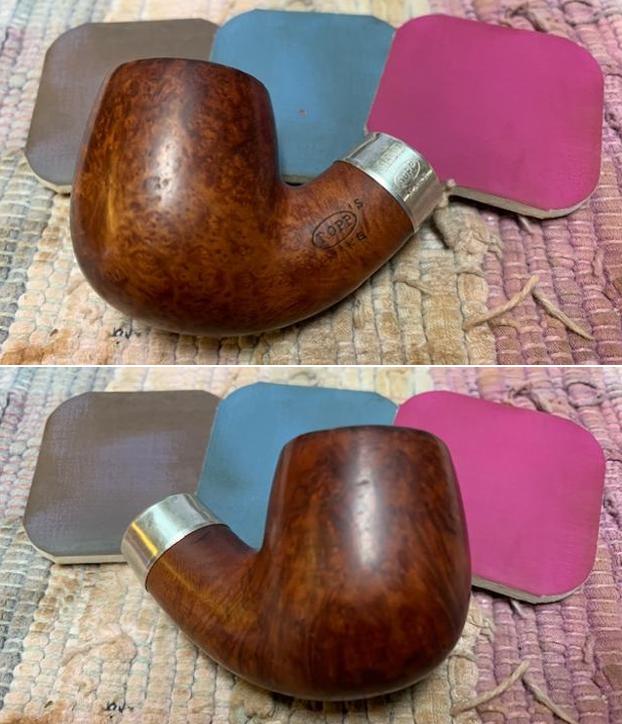
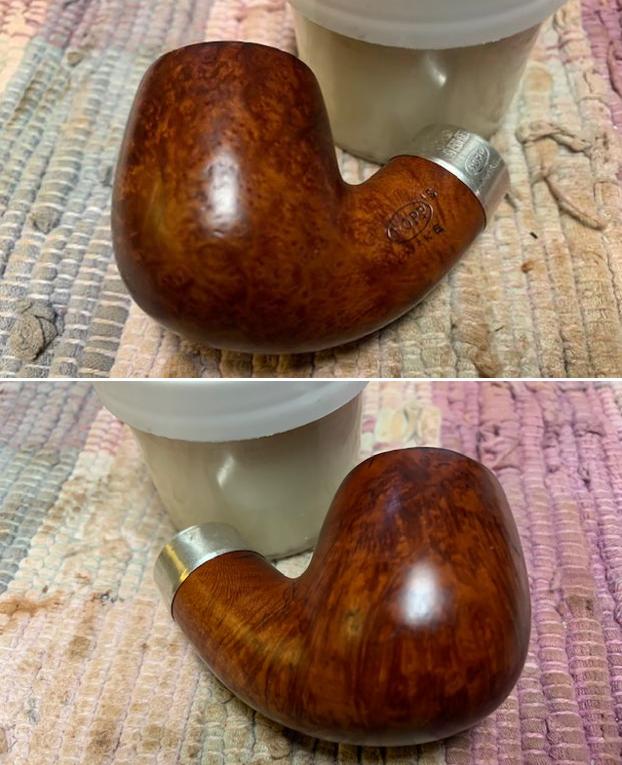
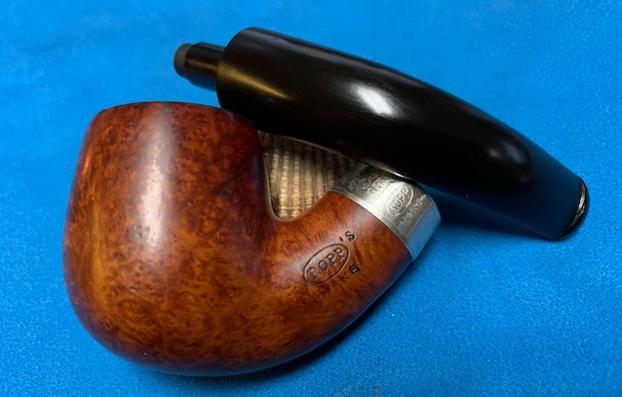
 The nomenclature is found in a smooth briar panel on the lower right panel of the Bulldog’s characteristic diamond shank. Stamped there is, SCULPTURA [over] DR. GRABOW. I could find no other markings.
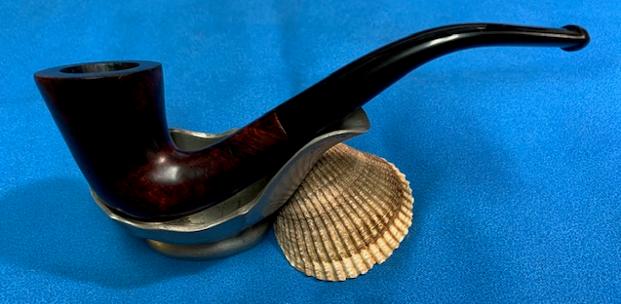
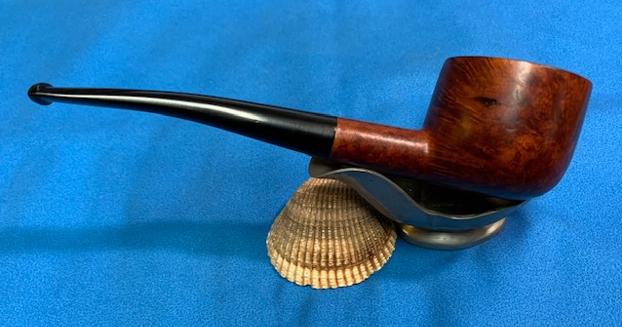
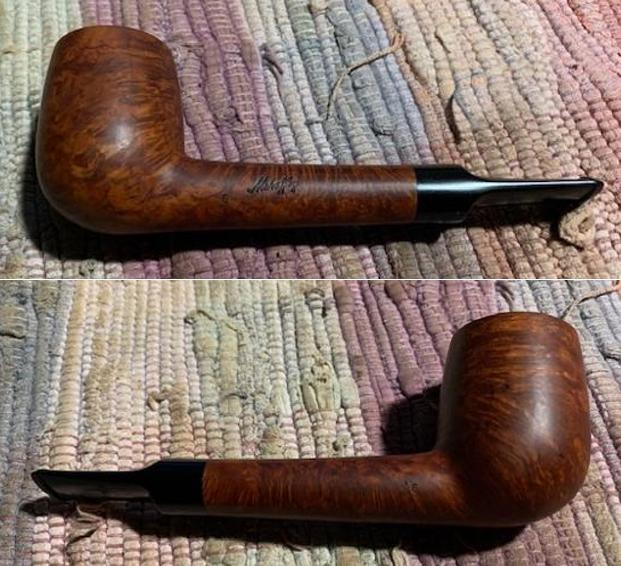
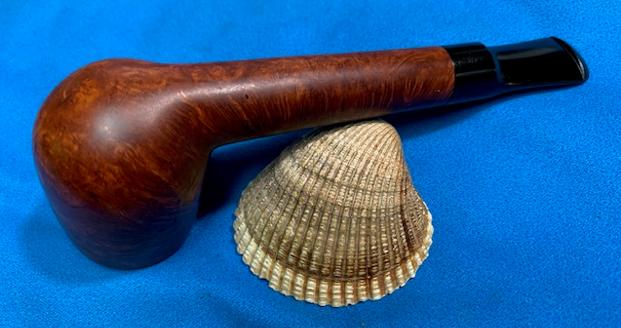
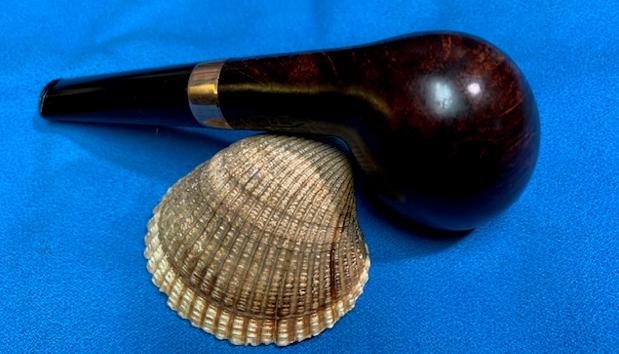
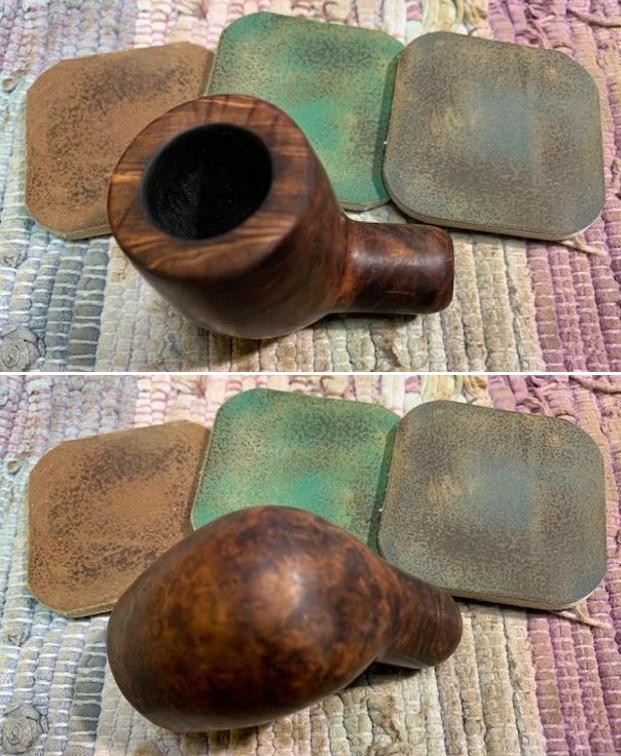
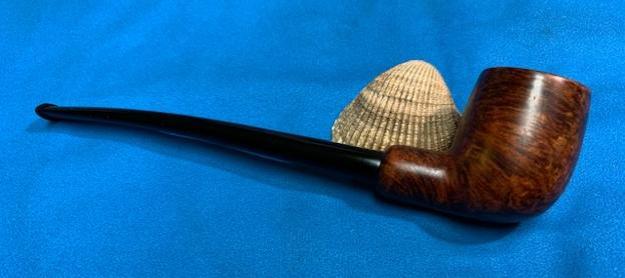
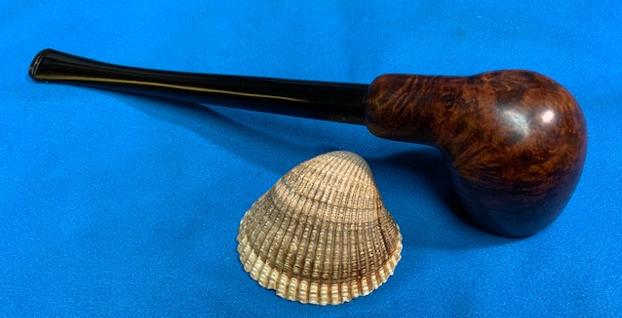
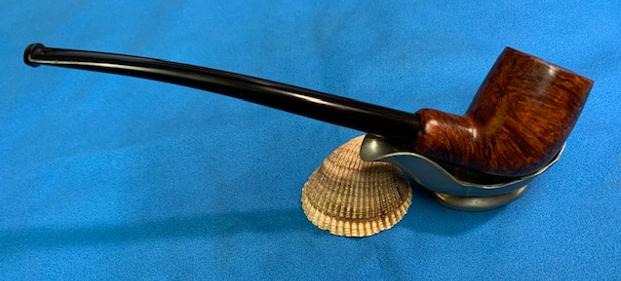
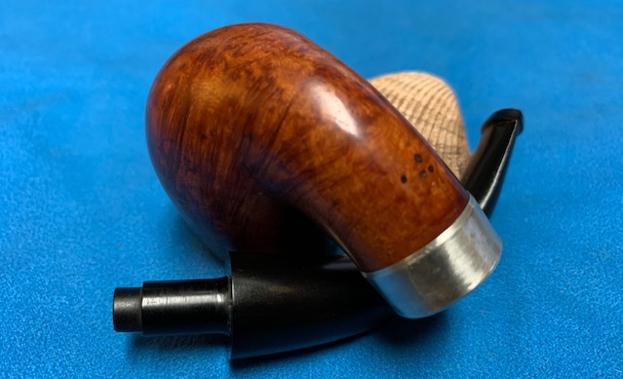
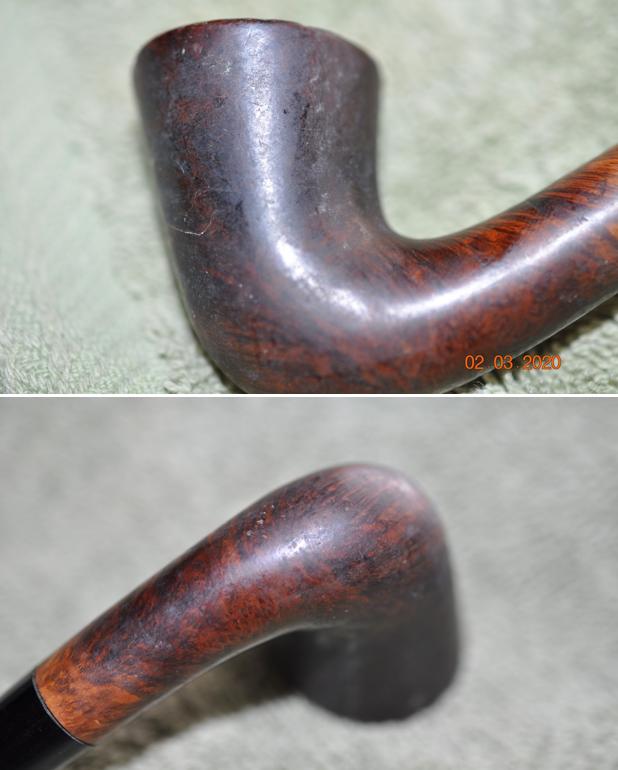
 The classic Bulldog is a fun shape and always seems to rustle up images of a bulldog smoking a pipe – but not necessarily a Bulldog shape! The blasted Sculptura looks like Grabow’s attempt at a value pipe and it’s not half bad. The diamond shank nickel cap/extender is interesting
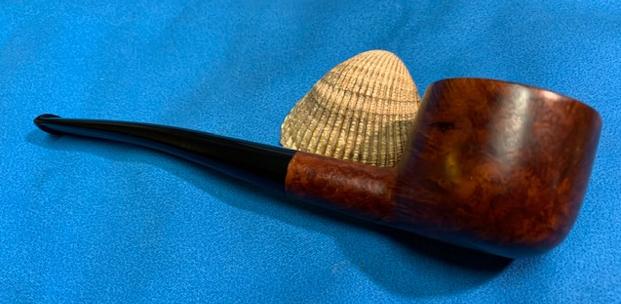
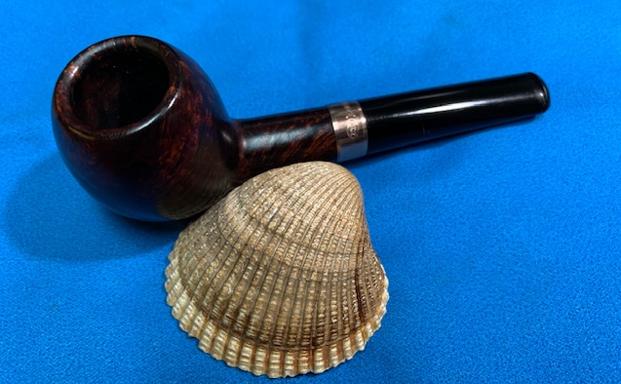
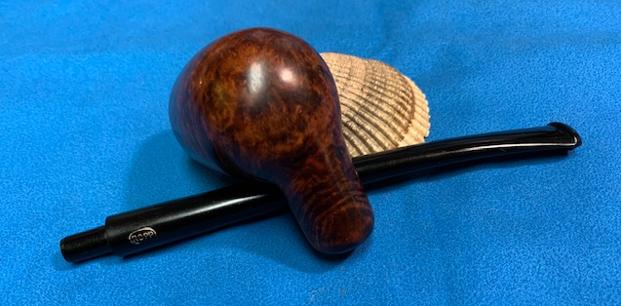
  giving this Bulldog more of an ‘elegant’ reach than the normal short, stubby reach of the classic Bulldog. The blasted finish is not bad too and has somewhat of a ‘Dunhill’ hue going for it with the deeper reddish tones nuancing the dark finish.
Pipedia’s short comment about the Sculptura line of Dr. Grabow in the History Timeline article states that the line was introduced in 1967 and registered by HL&T in 1972 (See Henry Leonard & Thomas Inc. for more information about company acquisitions when Linkman sold to HL&T in 1955 and operations were moved from Chicago to Greensboro, NC). More specific information is uncovered in the Pipedia Dr. Grabow article focusing on the myriad of Grabow models, series and lines through the years:
SCULPTURA (c1967-69?) — Newest of the RJR special offer pipes. These were sandblasted in a “big” blast. The operator stood with his hands in heavy rubber gloves and blasted away grain. He could only do about 50 pieces an hour. Prior to this, most “sandblasted” pipes were tumbled in a contraption like a cement mixer using walnut shells as the media. Dr. Grabow really never got into that but waited until they could do it “right” using glass shot.
The Sculptura line was without shape numbers and was a Grabow line which was exclusively sand blasted pipes of various shapes. We know from this article that Sculpturas were produced ‘properly’ using the processes pioneered by London’s Dunhill. The Sculptura was considered a ‘newer’ line of pipes because they were introduced after the acquisition that moved the Grabow production from Chicago to North Carolina. The history of the Dr. Grabow pipe name can be explored further at Pipedia’s main Dr. Grabow article (See: LINK) which is a good read describing the history. I would be remiss if I didn’t refresh the memory of how the Dr. Grabow name started for a line of pipes and continues to be a much-loved pipe by many which can be evidenced in a quick look at The Dr. Grabow’s Collector’s Forum. I repeat in its entirety a Pipedia article written by the grandson of the ‘original’ Dr. Grabow, entitled, The Legend of Dr. Grabow (Written October, 2005, by Paul W. Grabow, and courtesy of DrGrabow-pipe-info.com [now defunct]):
 Dr. Grabow Pipes are named after Dr. Paul E. Grabow (my deceased Grandfather), a general-practitioner physician formerly with an office on the northeast corner of Fullerton and Halsted in Chicago. His youngest son was Mr. Milford P. Grabow (my Uncle) who passed away January, 2005 in Chicago. Dr. Grabow’s other son (my Father, deceased in 1979) was Dr. William S. Grabow, a dentist who practiced in Chicago and Evanston, IL.
Milford Grabow recently recounted details of the Dr. Grabow Pipe legend in a letter to me as follows:
“To start from the beginning, the old homestead was on 2348 Seminary Ave. (Chicago) before the De Paul University bought and tore down the whole area to expand the campus. Three doors north on 2400 Seminary Ave. (corner of Fullerton) was Brown’s Drug Store, one of the old fashion community Drug stores that was popular of that area and was owned by Brown the Druggist. It had the usual ice cream counter and wire chairs and tables to serve sodas and sundaes. My Father became fast friends with his fishing buddy the Druggist. Most every weeknight after dinner while Mom did the dishes, Pop would visit Mr. Brown in the back room of the store and they would have weighty discussions about world events, fishing, politics, sports, etc. while smoking their pipes. One block west on Fullerton on the corner of Racine was the large pipe factory owned by Mr. Linkman. Mr. Linkman, when he wasn’t too busy, would join the other two in their bull sessions and the three became fast friends.
It was during one of their nightly sessions that Mr. Linkman mentioned that he was coming out with a new pipe containing some innovated improvements and was looking for a name for it. He thought if it contained a Doctor’s name it would probably sell well so he asked my Father if he would mind if he could use the Dr. Grabow name as he liked the sound of it. My Father liked the idea and was flattered to have a pipe named after him. So Mr. Linkman used the Dr. Grabow name without any formal agreement but just a “friendly understanding.”
As a child in the 1940’s and 1950’s, I remember how Grandpa loved to smoke his Dr. Grabow pipes. The pipes were generously provided to him at no cost by Mr. Linkman, apparently part of the friendly understanding. Dr. Paul E. Grabow died of natural causes in 1965 at the ripe age of 97. He had a very rich and full life and I believe pipe smoking was good to him. Through the years I’ve enjoyed watching the growth of the Dr. Grabow Pipes and sharing Grandpa’s legend with the curious.
Anyone personally familiar with additional details of this legend is requested to forward input to the undersigned.
Paul W. Grabow
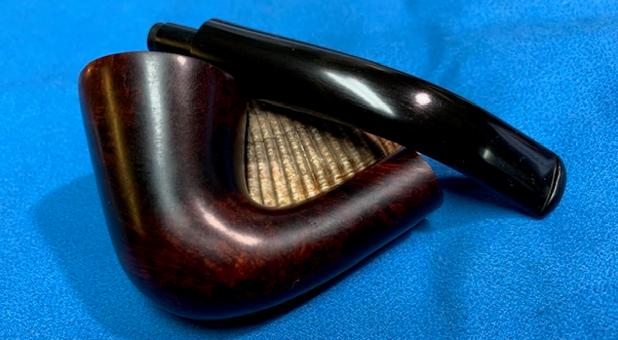
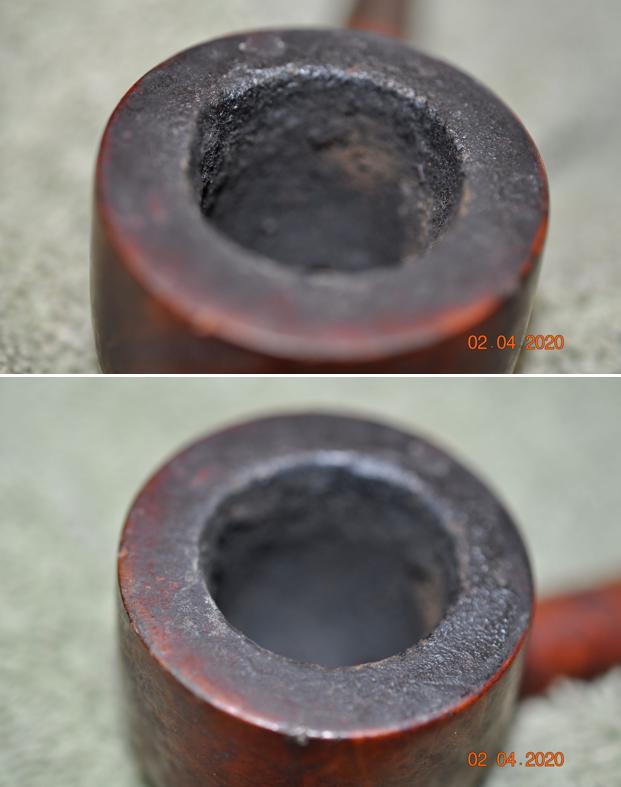
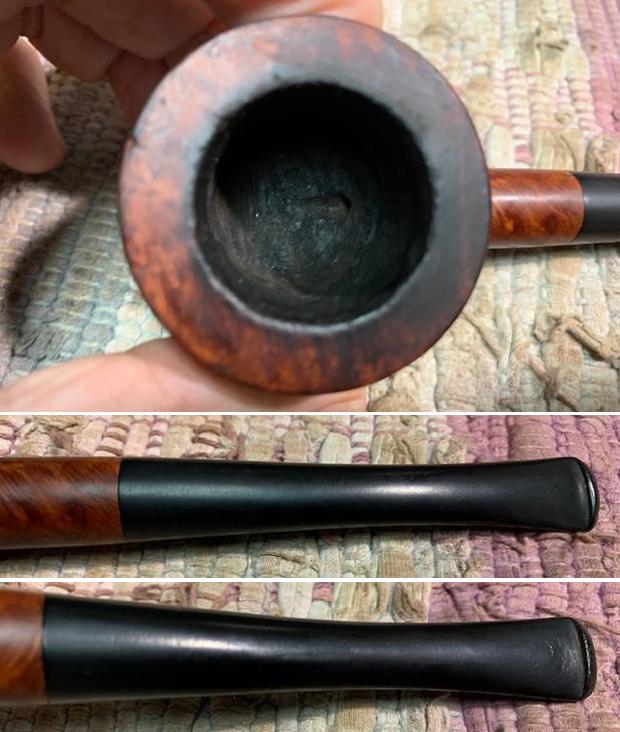
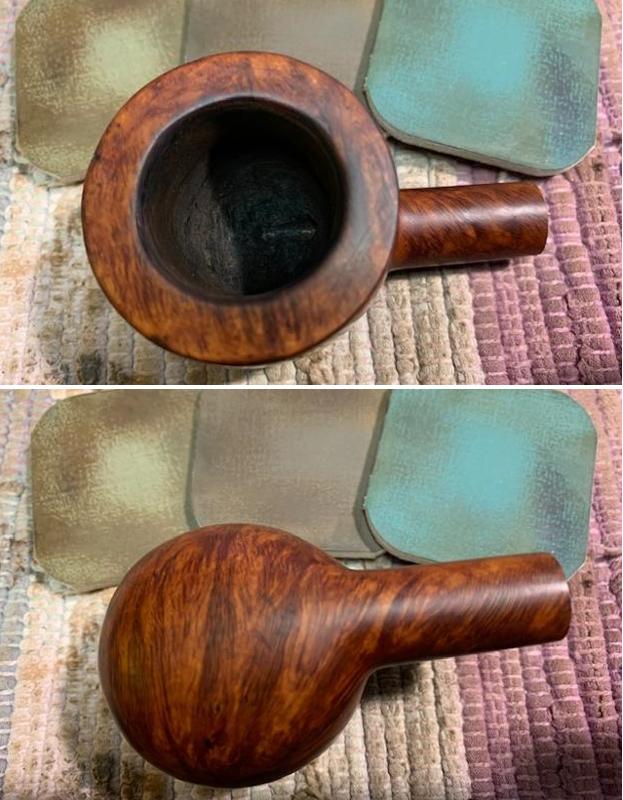
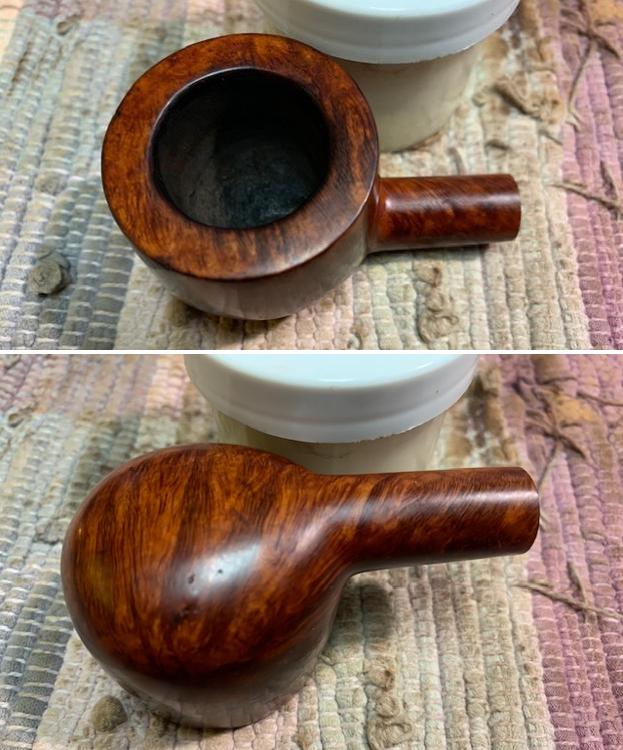
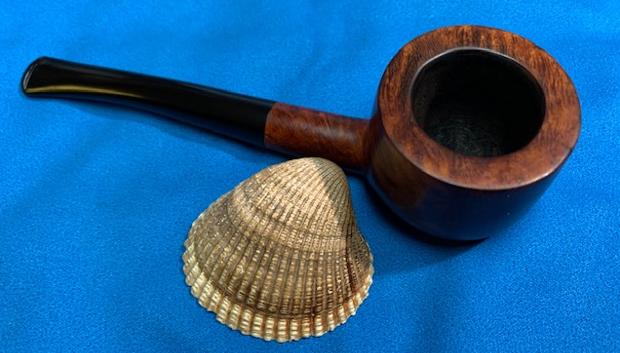
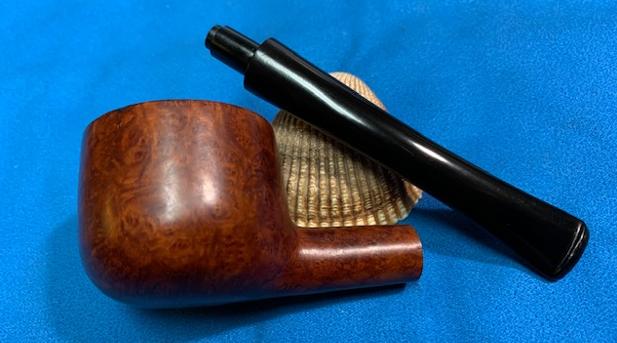
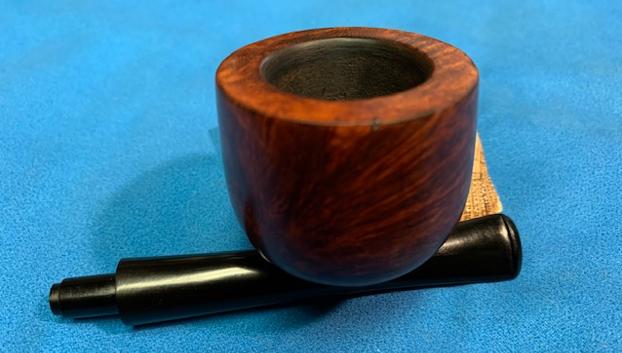
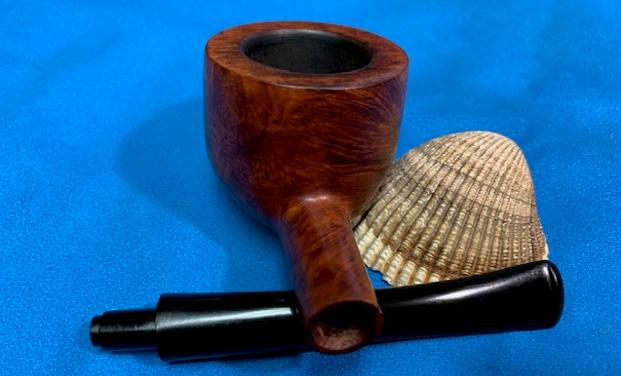
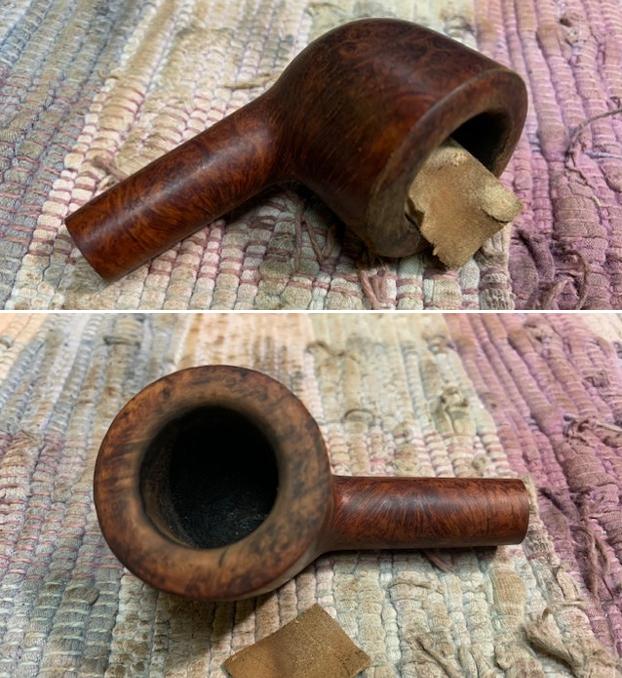
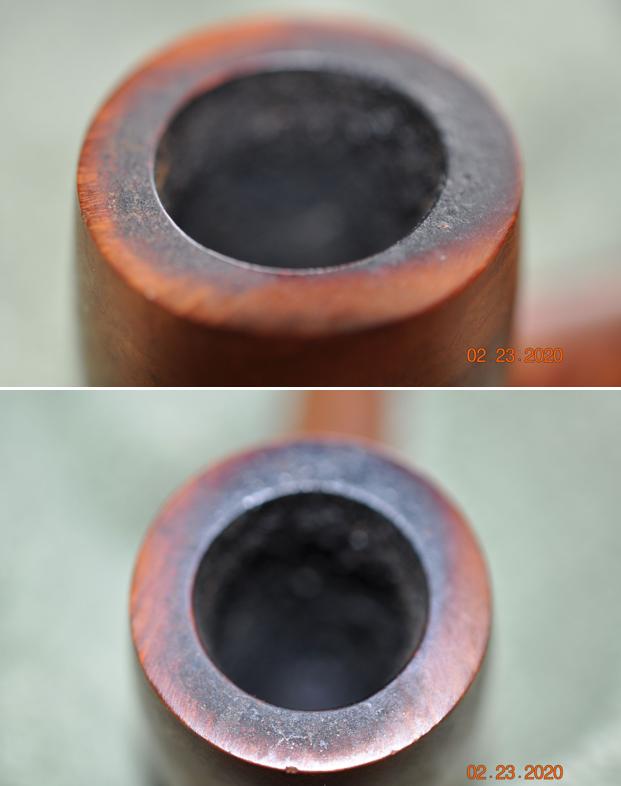
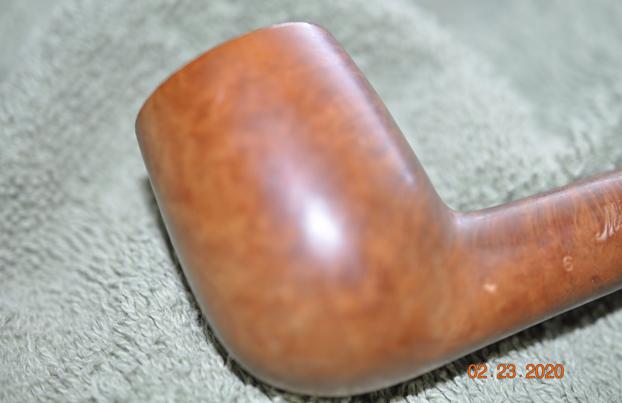
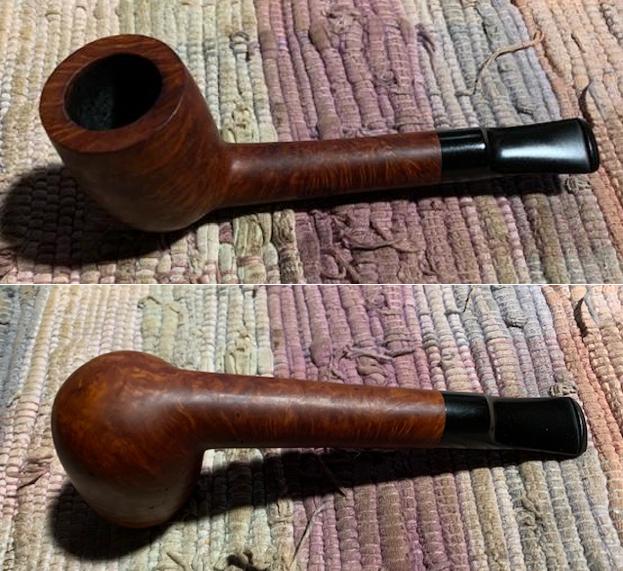
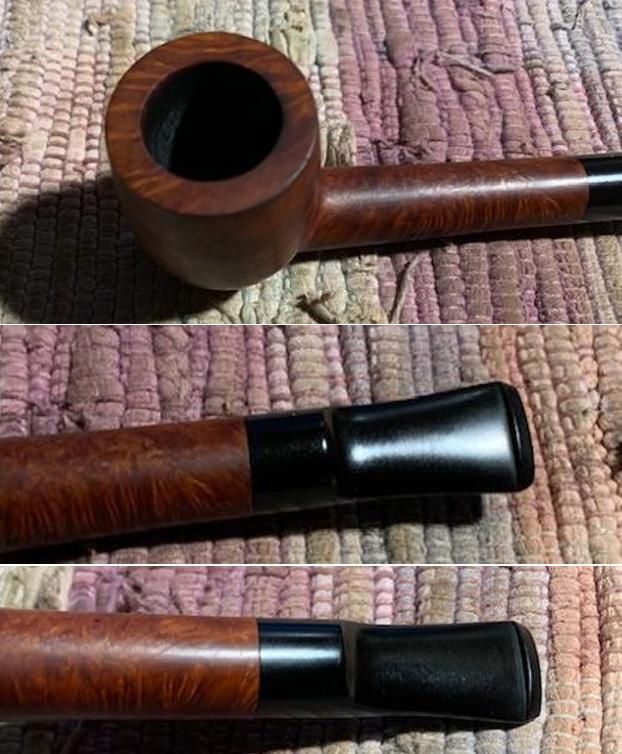
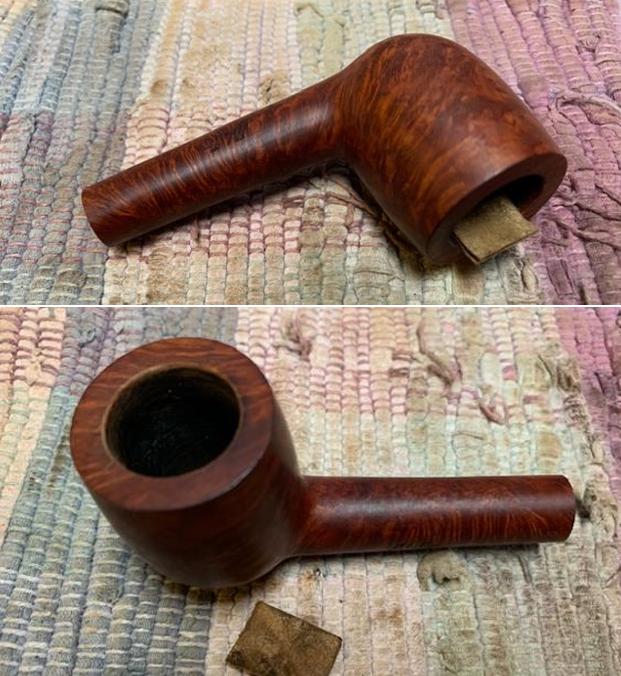
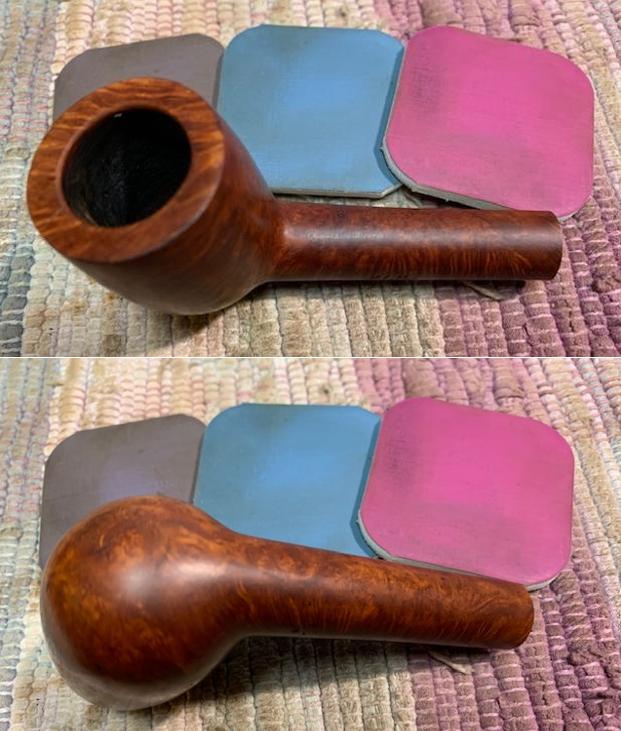
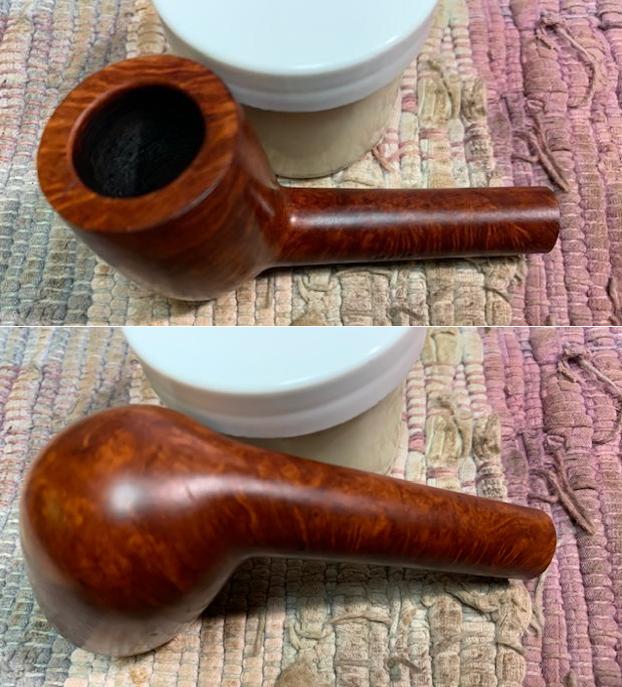
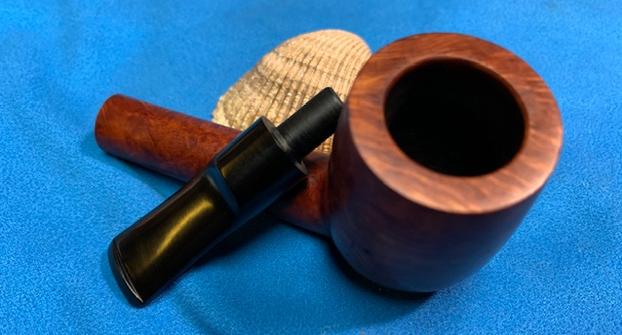
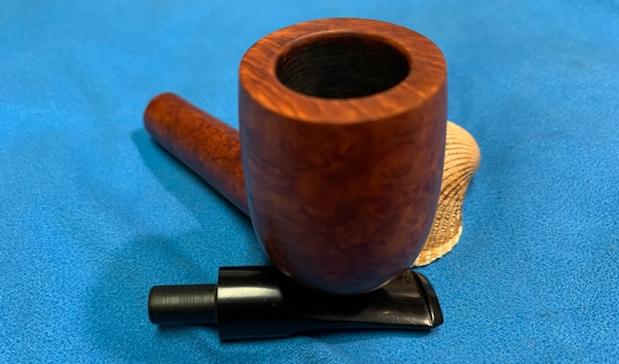
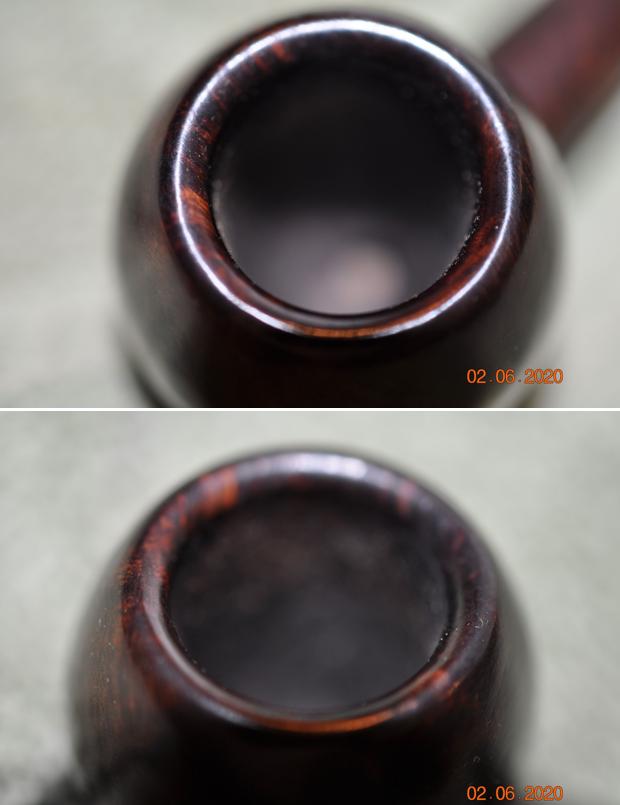
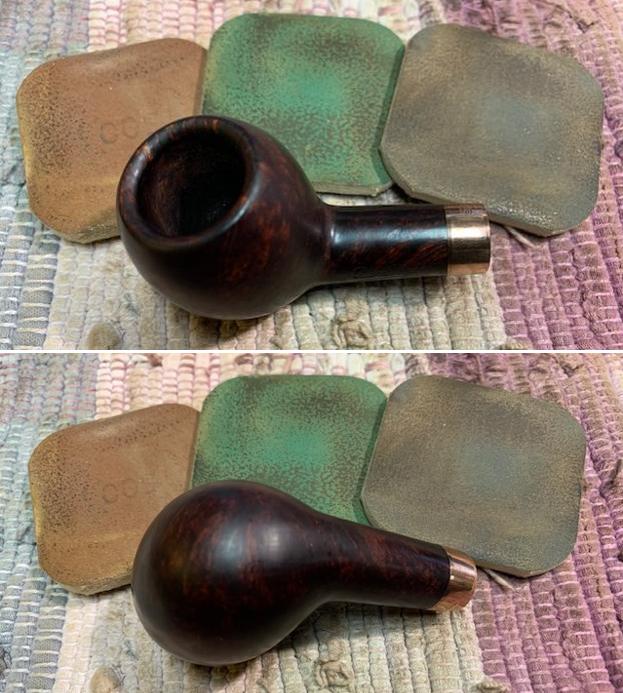
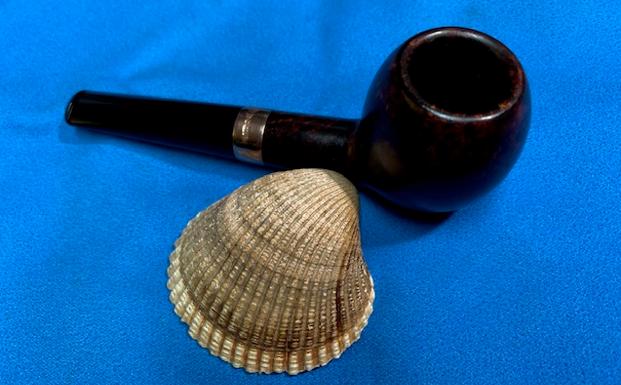
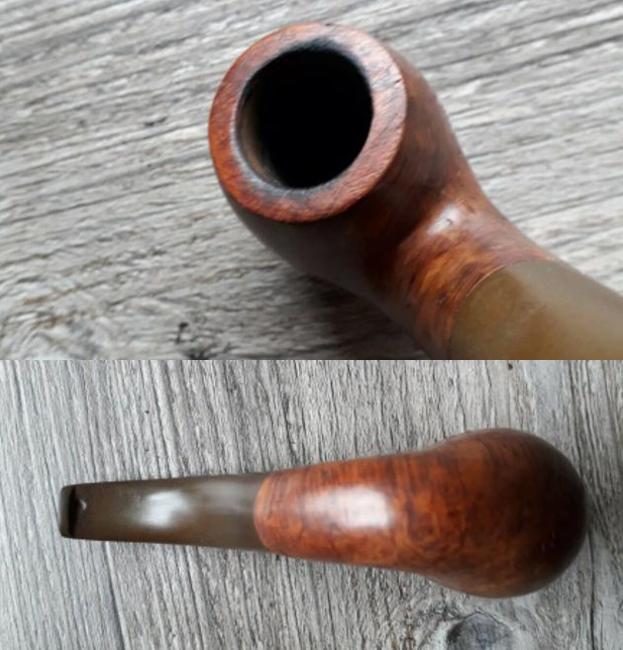
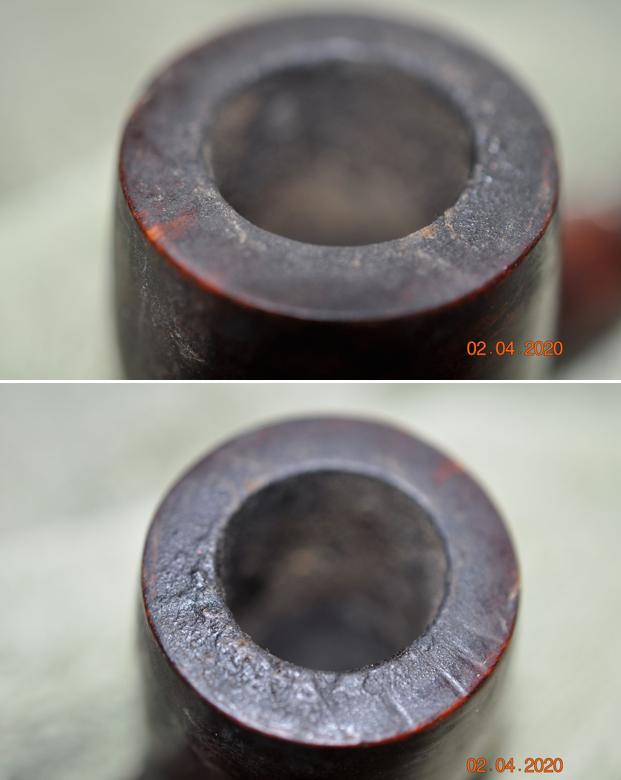
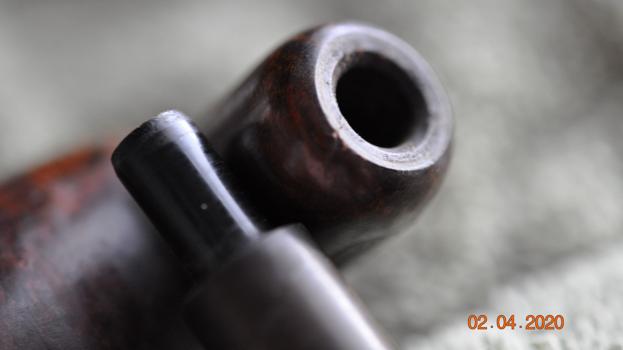
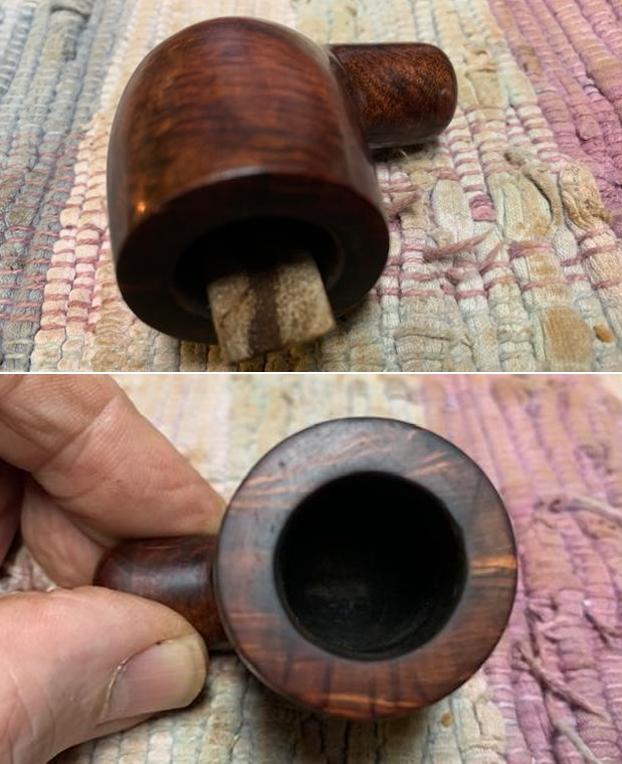
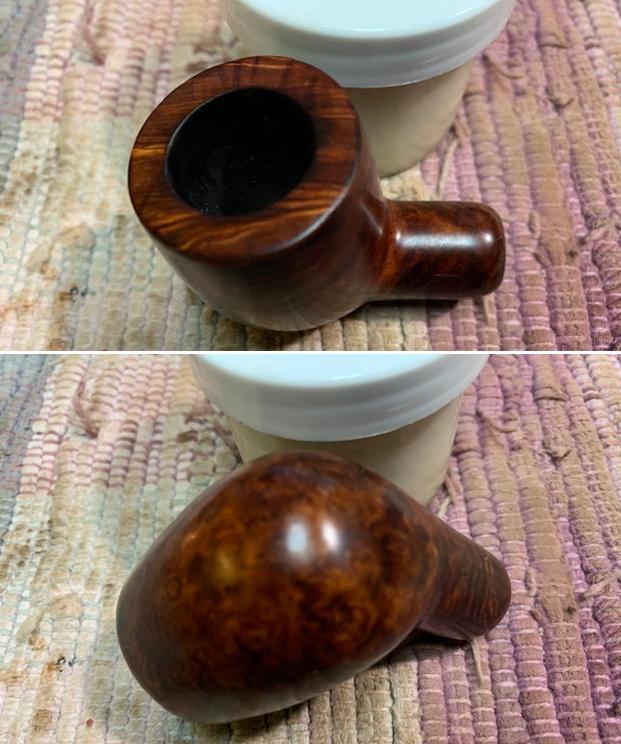
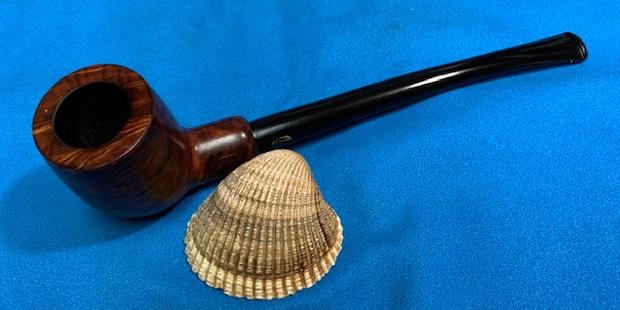
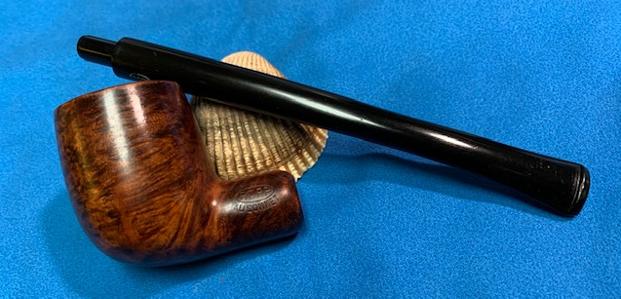
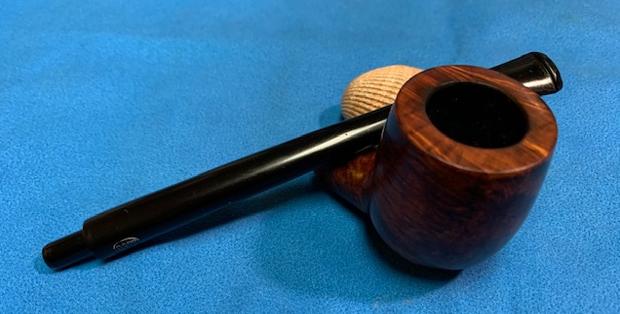
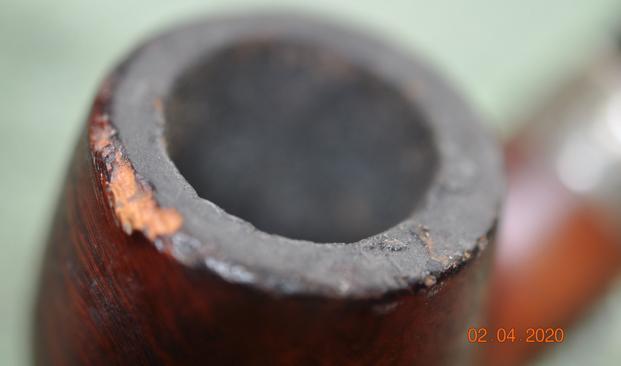
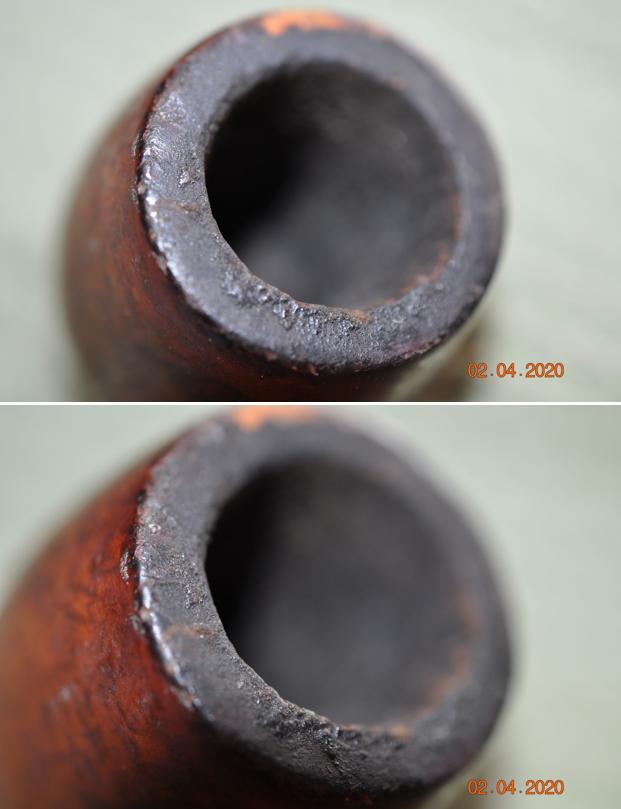
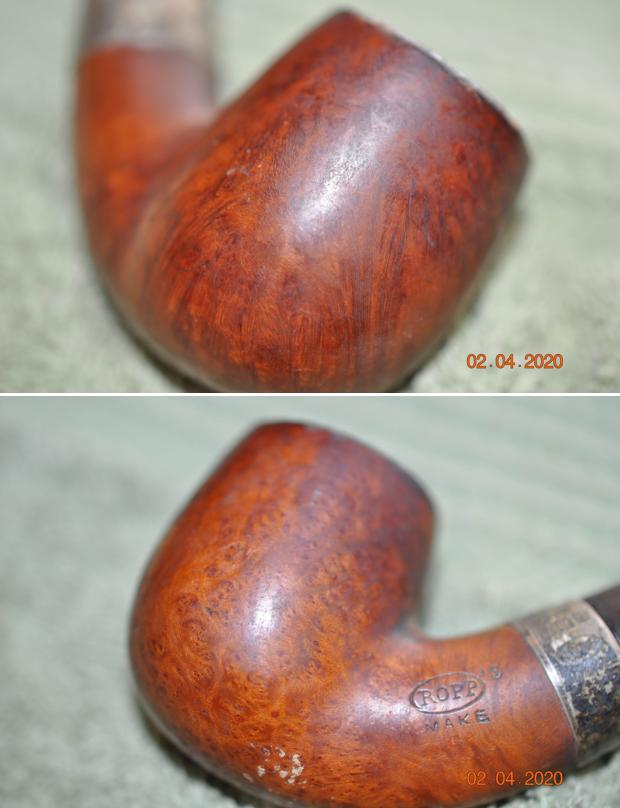
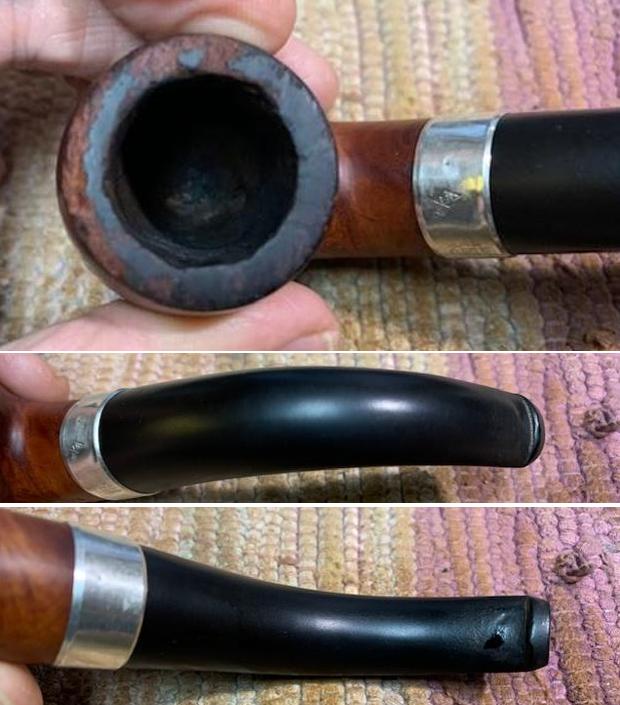
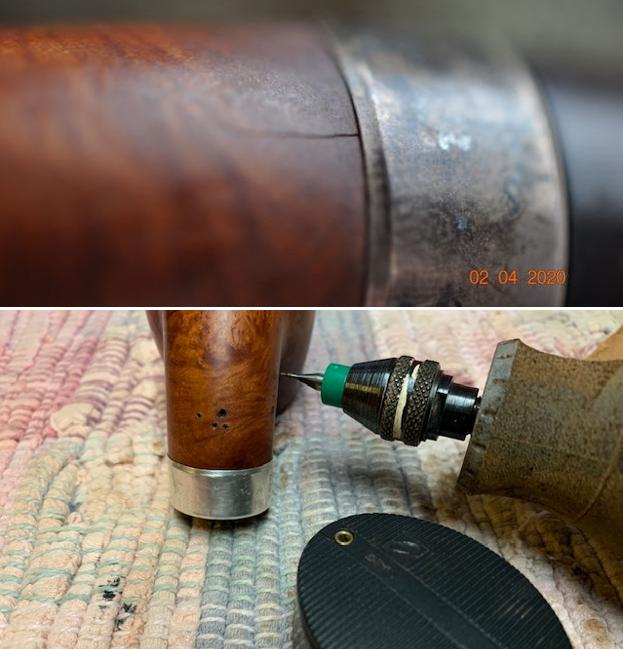
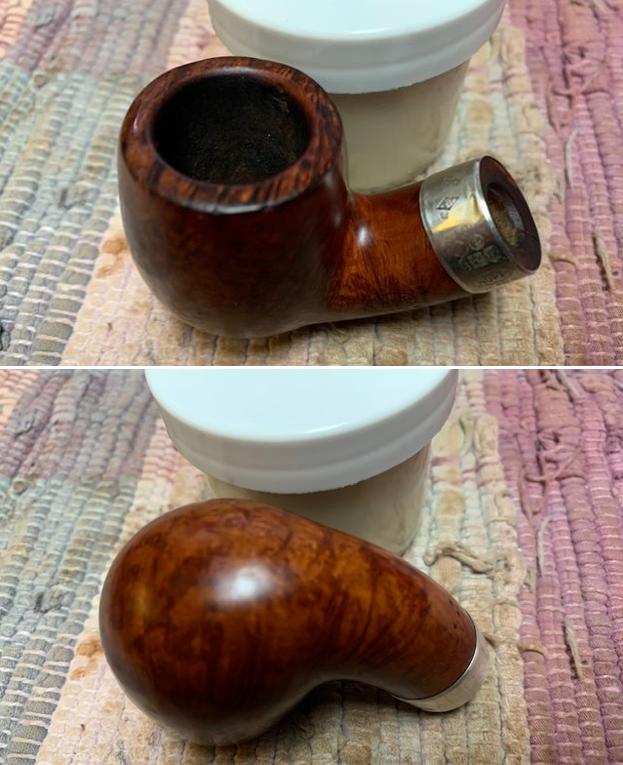
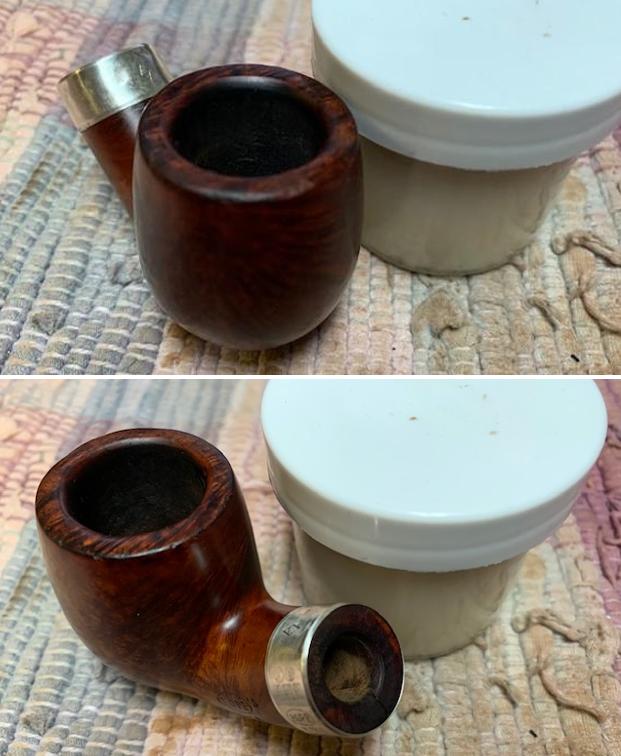
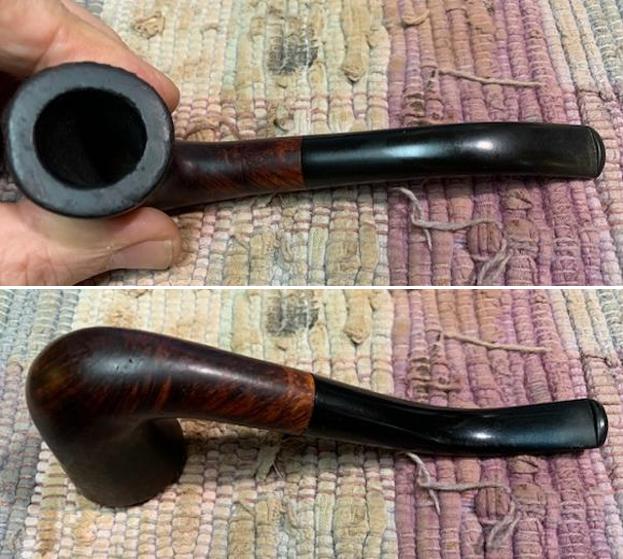
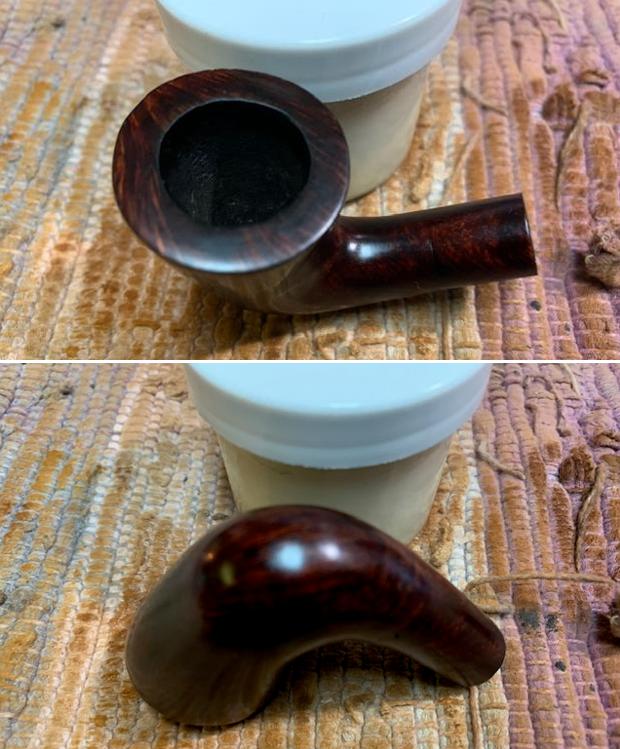
With a renewed appreciation for the Dr. Grabow name, I look more closely at the Blasted Sculptura Bulldog on the worktable which shows no major issues and which is why I’m calling it a ‘refresh’. The chamber has little cake build up and the rim has grime. What I see that is interesting is that the draft hole at the floor of the chamber looks to be a larger opening than usual.
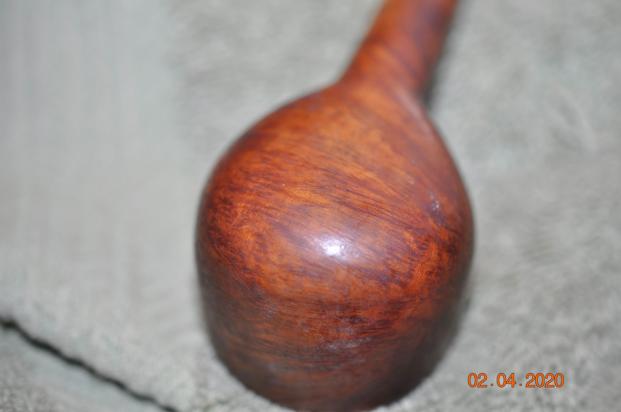
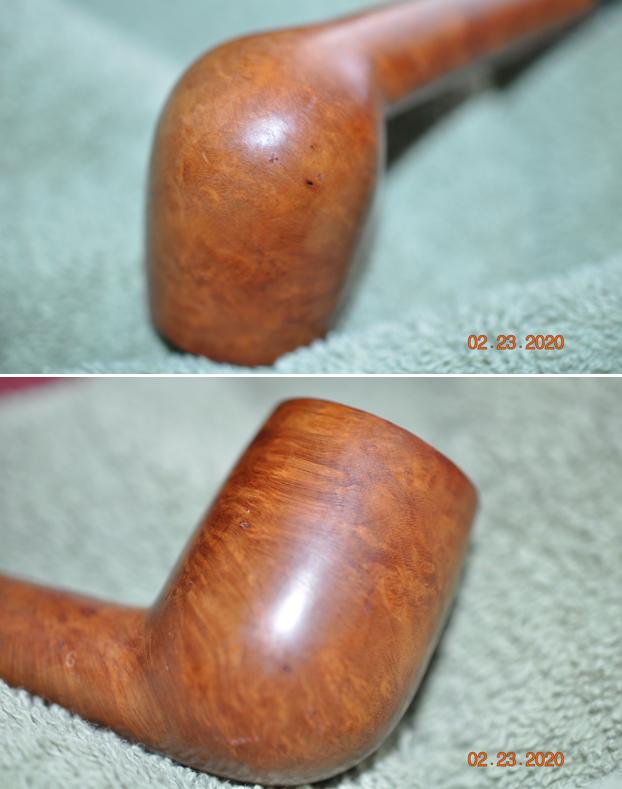
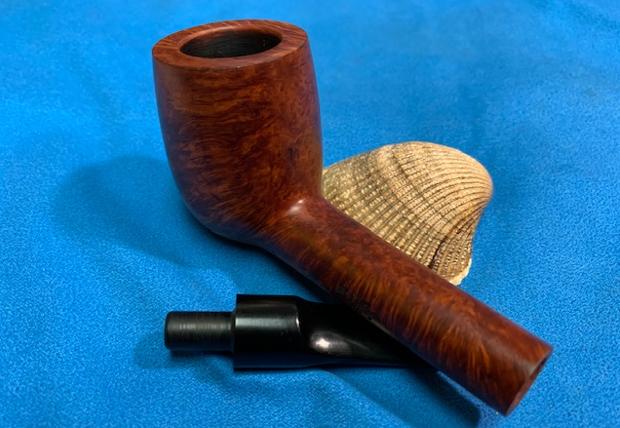
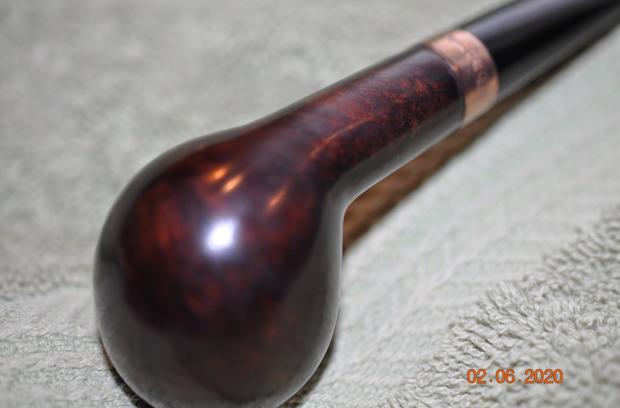
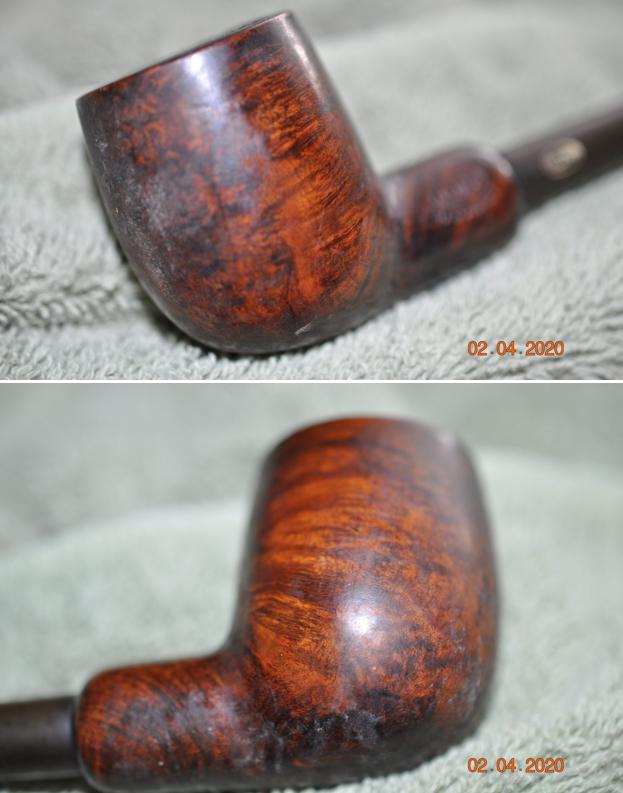
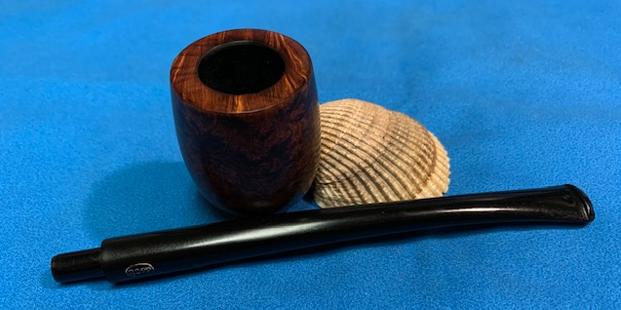
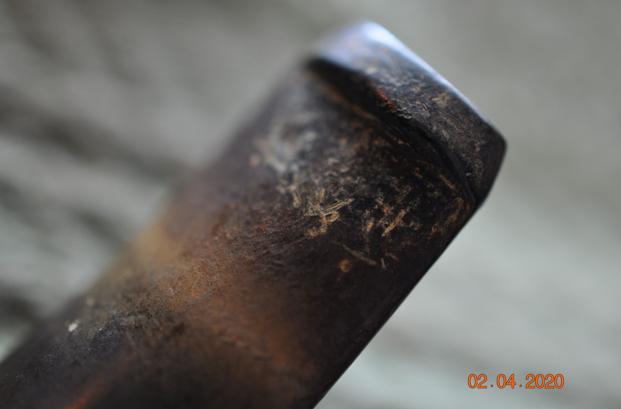
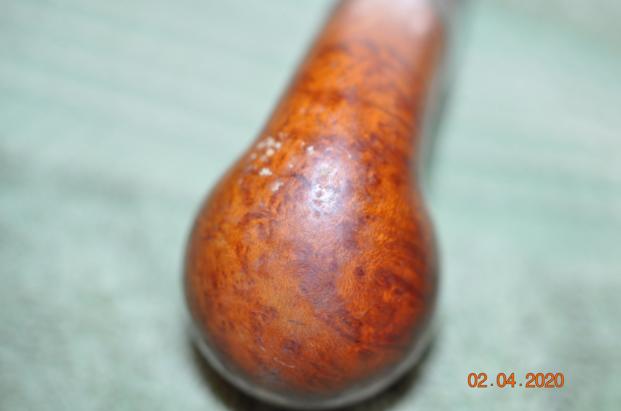
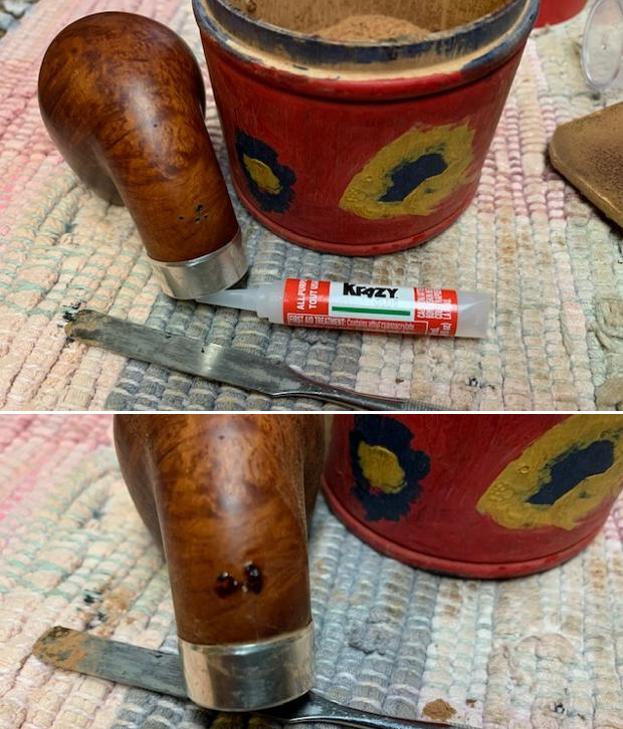
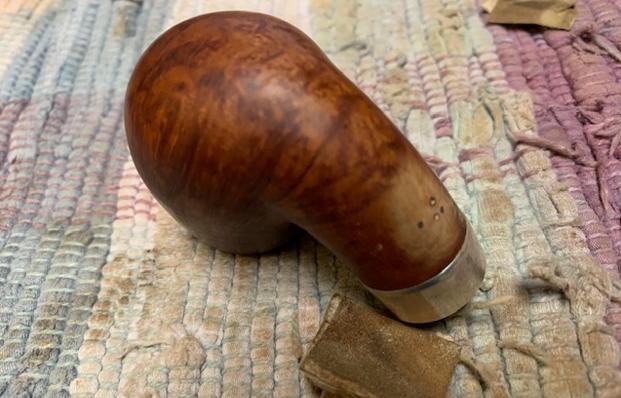
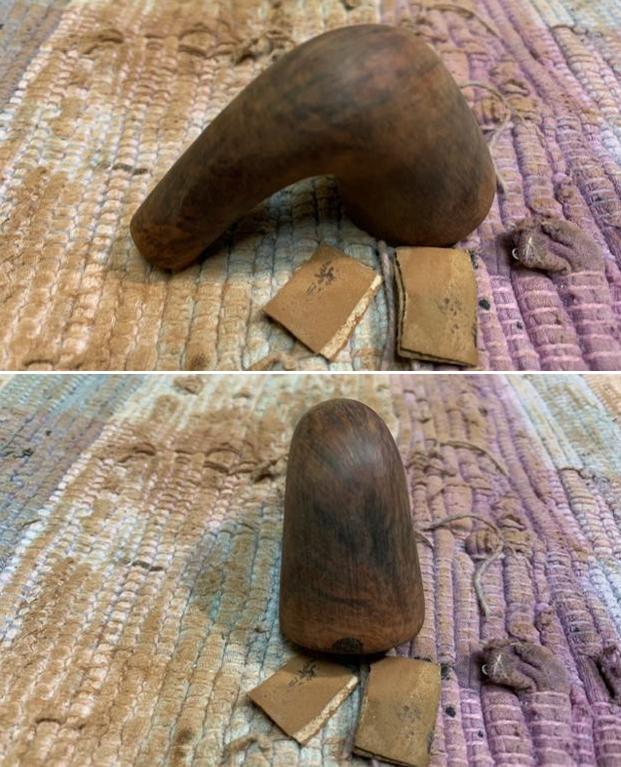
 The blasted surface has had its share of nicks, cuts and dents. Raw briar is visible here and there over the blasted surface.
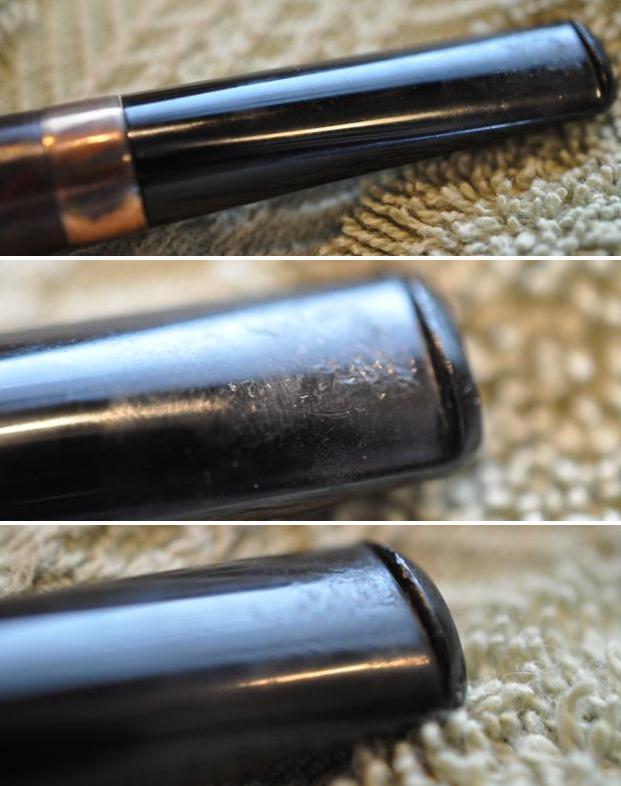
 The nickel shank cap has a high gloss – like it was plated. The surface is pitted, and small scratching is visible. This should shine up nicely.
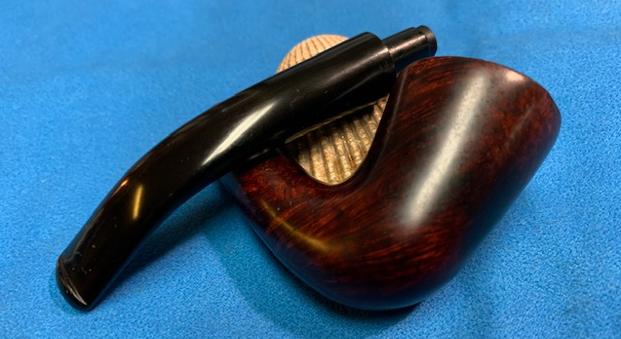
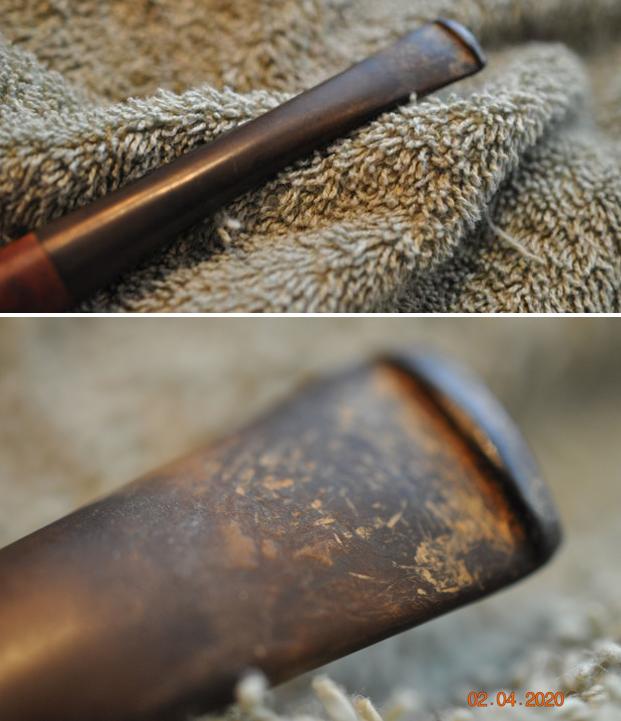
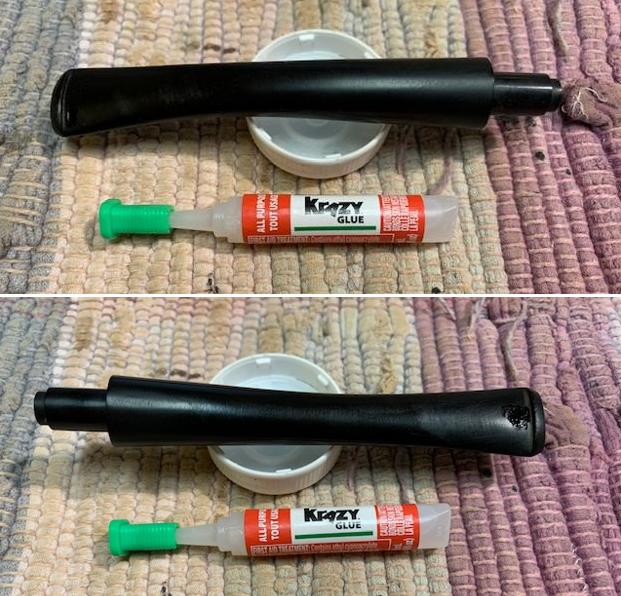
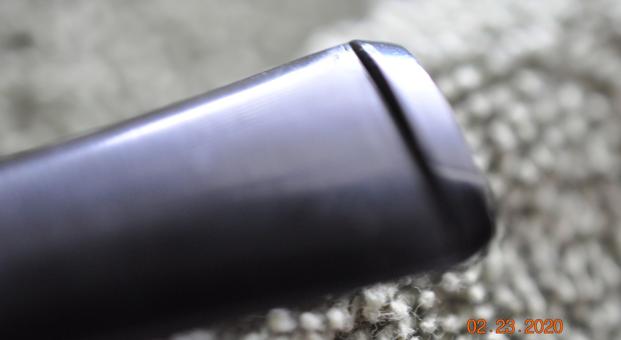
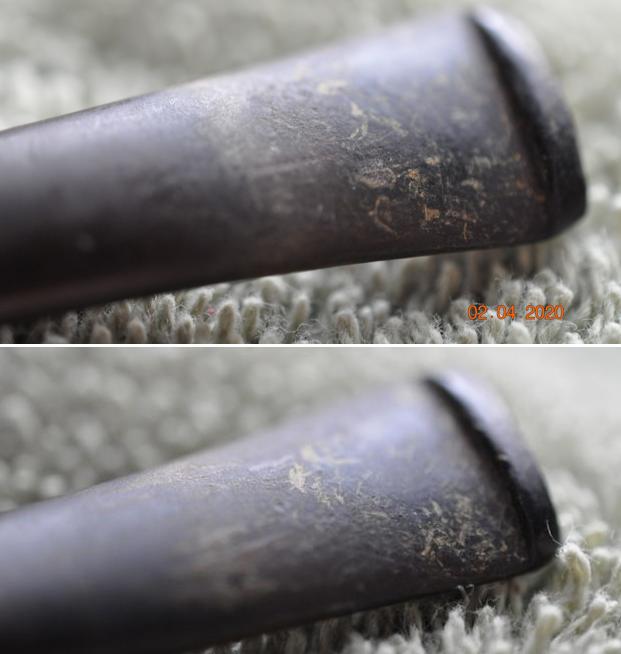
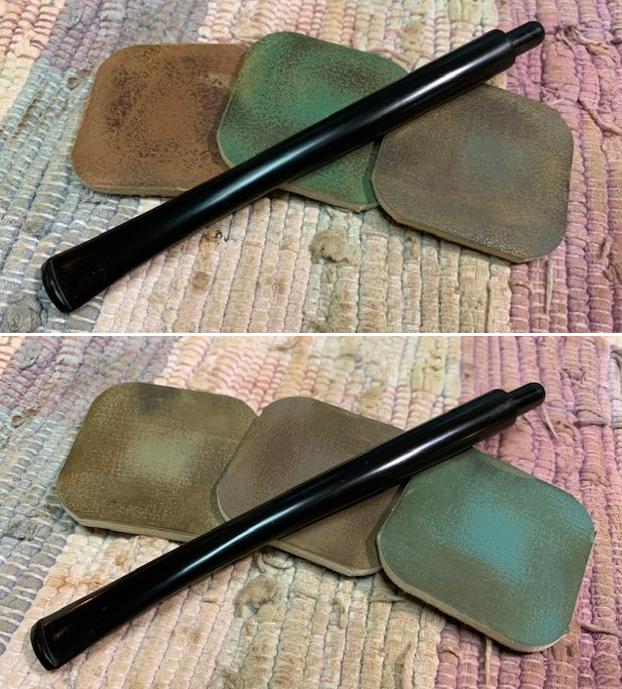
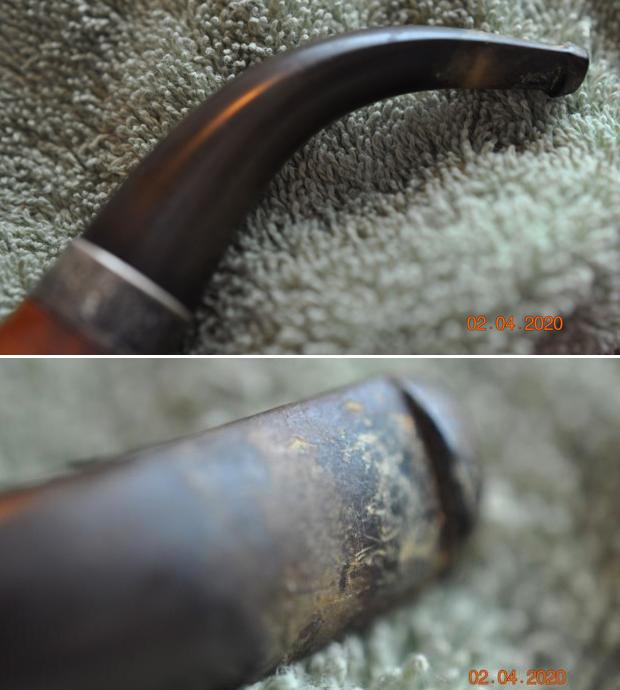
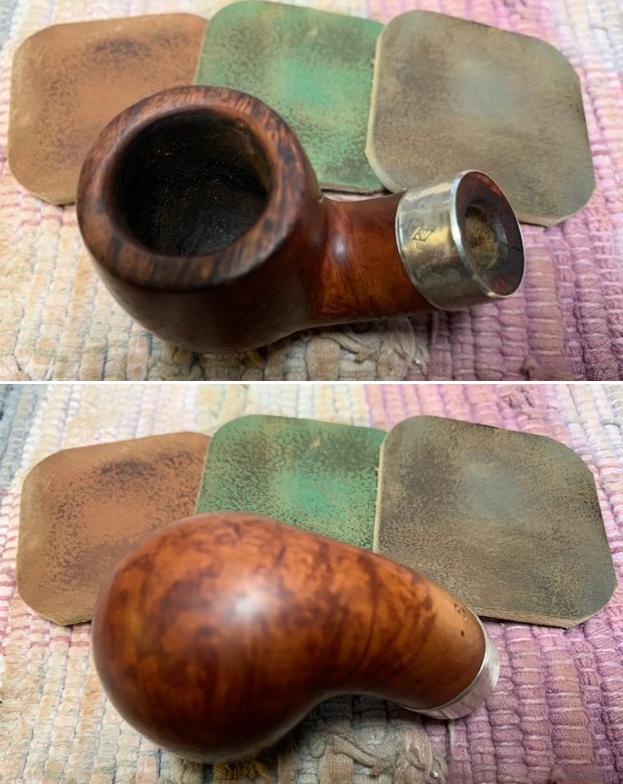
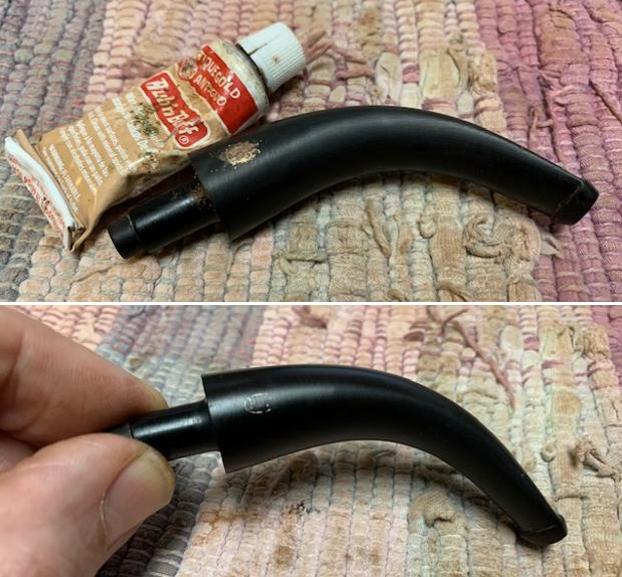
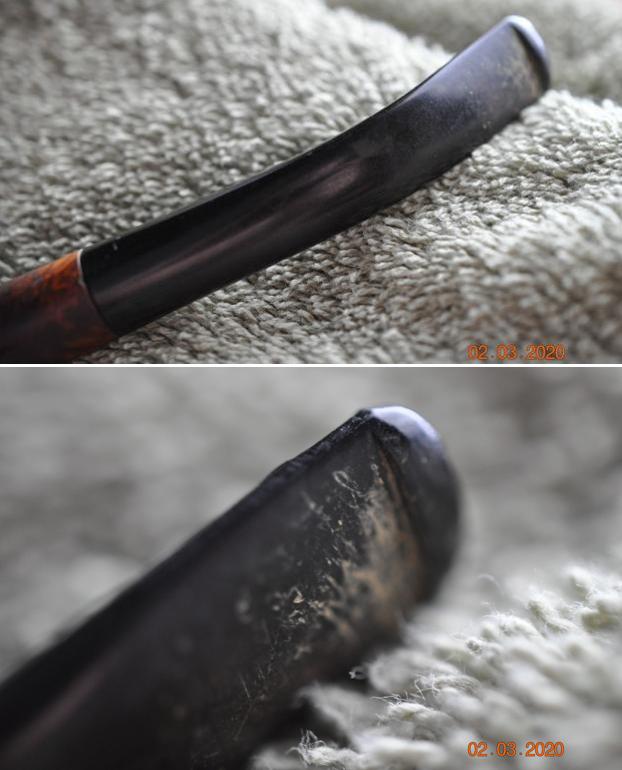
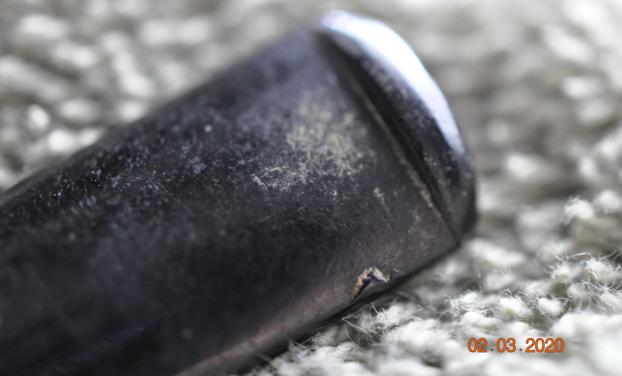
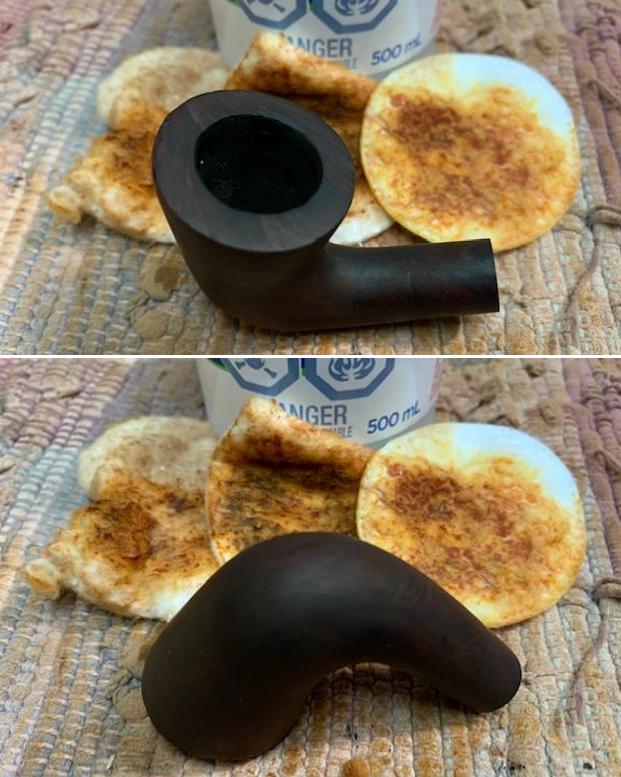
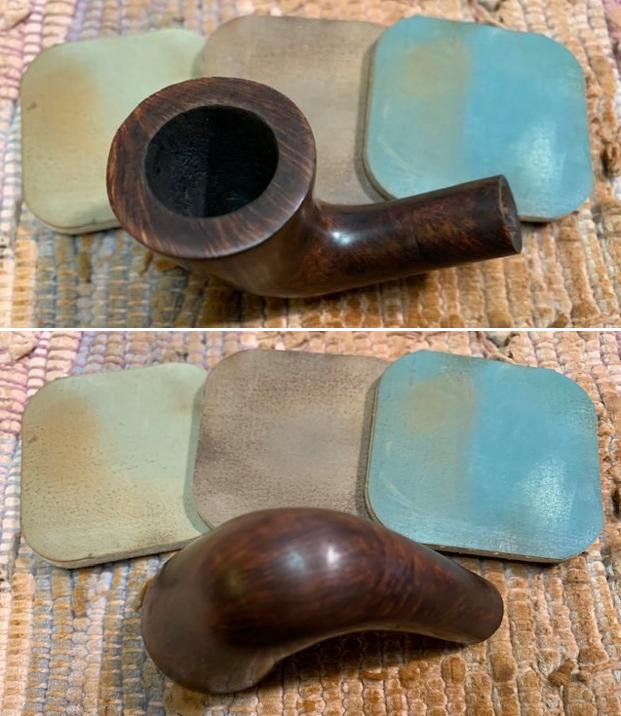
 The stem has significant and what I would call, deep oxidation. The vulcanite surface is rough, and the bit has a few compressions that need addressing. To see more clearly the oxidation, I’ve lightened the following pictures to reveal the dreaded, greenish murk of the oxidation. Oxidation happens to rubber mostly when overly exposed to UV lighting – sunlight. There is no way to totally protect a stem except to keep it in a UV free environment. Saliva also encourages oxidation.
 As I begin the refreshing of this Dr. Grabow, I will start with the oxidation in the stem. I’m using this write up to test a new product that I heard about on one of the Facebook groups where I post my work and converse with fellow pipe men. In the process of restoring pipes, the issue of oxidation in vulcanite stems is always an issue and is one of the most time-consuming parts of the process of restoration. Finding and using products that can naturally or chemically remove the oxidation is the holy grail that is sought. When oxidation is removed like this, it reduces sanding, time spent and can guard the stem logos stamped into the stems. The product that I’m trying for the first time comes from www.Briarville.com and is called, ‘Pipe Stem Oxidation Remover’. The product that I have been using is Mark Hoover’s, ‘Before & After Deoxidizer’ (www.Lbpen.com) which has in my experience had mixed reviews. What I have found with Mark’s product is that it does great with stems having minor oxidation. However, stems with what I call ‘deep’ oxidation, seem always to need additional sanding and prep work to remove the oxidation even with use of the product. In fairness to Mark’s Before & After Deoxidizer, in talking with pipe man, Chris from the Netherlands, who was part of the FB discussion about deoxidizer products, he shared with me that he just acquired an ‘extra strength’ version of the Before & After product that Chris said worked much better in his experience than the ‘normal’ strength. I’ll need to reach out to Mark to find out about this!
When I decided to order the Briarville Deoxidizer product, I had already started working on the Dr. Grabow stem using Before & After Deoxidizer. I followed the same process steps as I normally do by starting with cleaning the airway. Knowing that the oxidation is deep, I employ 0000 grade steel wool with Soft Scrub to begin the process of breaking down the oxidation. I do this to give a ‘head start’ on the oxidation removal before putting it through the Before & After Deoxidizer paces.
 After thoroughly rinsing the stem, the Grabow stem is added to the Before & After Deoxidizer along with two other pipes’ stems which have already been claimed by other stewards.
 After allowing the stems to soak through the night, the Dr. Grabow stem is drained of the Deoxidizer fluid. I squeegee with my fingers and using pipe cleaners and alcohol clear the liquid from the airway.
 I discover that the nickel stinger thankfully, can be removed from the nickel tenon. The vulcanite is wiped down with cotton pads wetted with alcohol to remove raised oxidation.
  Following this, to start conditioning the stem, paraffin oil is applied to the vulcanite stem.
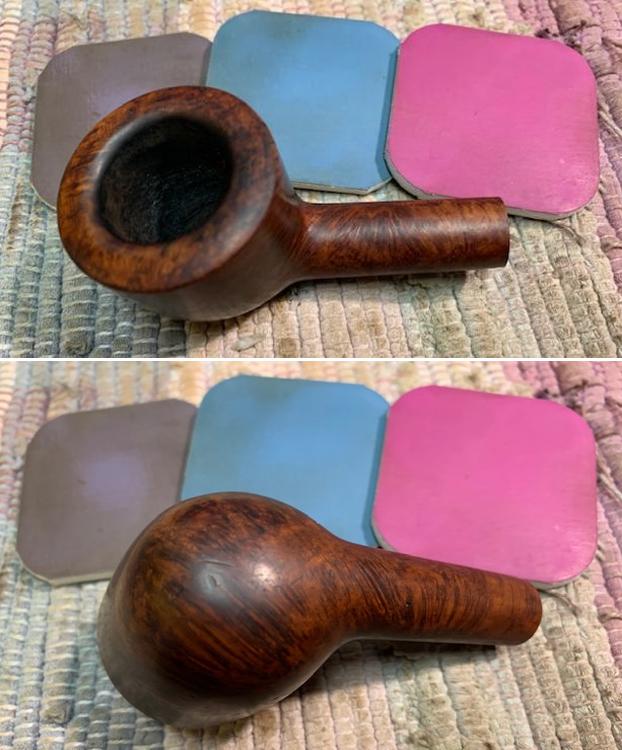
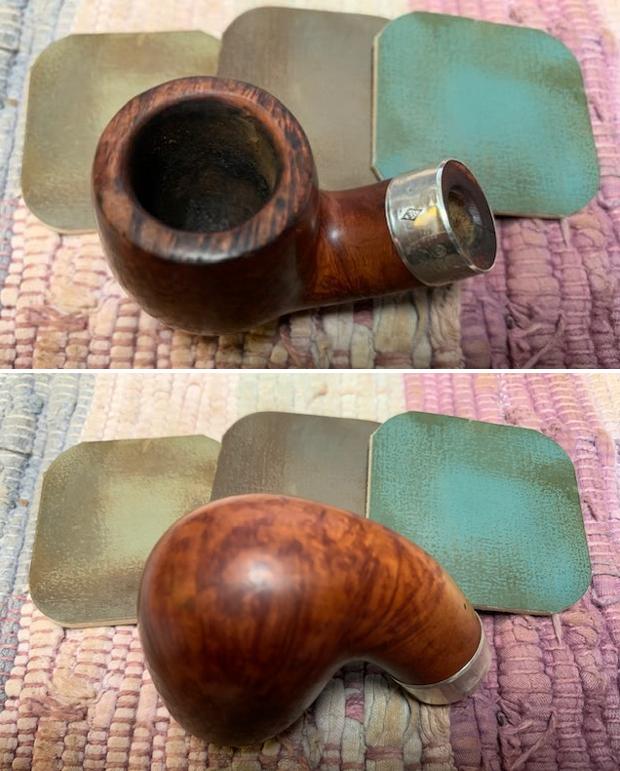
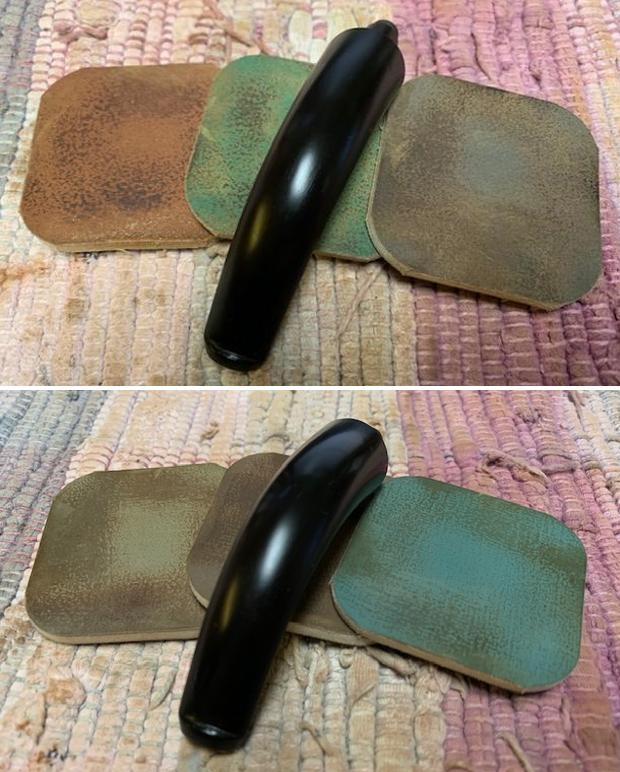
  The results: After the entire process using steel wool and Soft Scrub, soaking 24 hours in the Before & After Deoxidizer, the lightened pictures detect what I can see with the naked eye – the oxidation has been mitigated some, but continues to be visible predominantly around the saddle stem. block and in the bit area. Ugh!
  The Briarville Pipe Stem Oxidation Remover arrived from Briarville in Florida and the only directions were on the front label stating, “Soak Stem for 2 to 24 hours as needed for oxidation removal.” When I opened the bottle for the first time, on impulse I decided to smell the contents to see if I could discover through olfactory investigation clues to the secret mixture which was billed to add to my pipe restoration happiness. Mark Hoover’s Before & After secrets are only described as being fully organic – made with natural ingredients. As I sniffed Briarville’s Deoxidizer, the first thing that struck me was that it smelled like the side-chair mouth rinse my dentist provides to remove the debris of his work. It was interesting too, that pipe man, Chris, in the Netherlands said later when texting with him, that his first impression of the product when he gave it a whiff, was that it reminded him of Listerine! Two similar responses to the question of the secret ingredients of Briarville’s mixture. Chris said he would test this hypothesis of mouthwash by soaking stems in Listerine to see if the results were similar. He said he would let me know how it turned out.
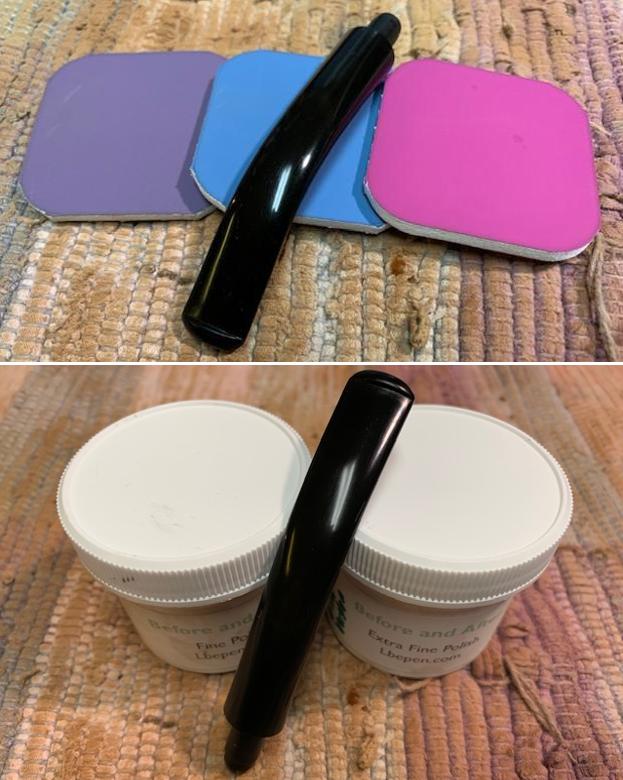
 I decide to put the Dr. Grabow through the paces again using the Briarville Oxidation Remover even though it had been through the Before & After process. The bottle is shaped nicely so that most stems will fit in the bottle and be covered with the solution. The Dr. Grabow goes into the solution and I decide to give it the maximum exposure from the outset – 24 hours.
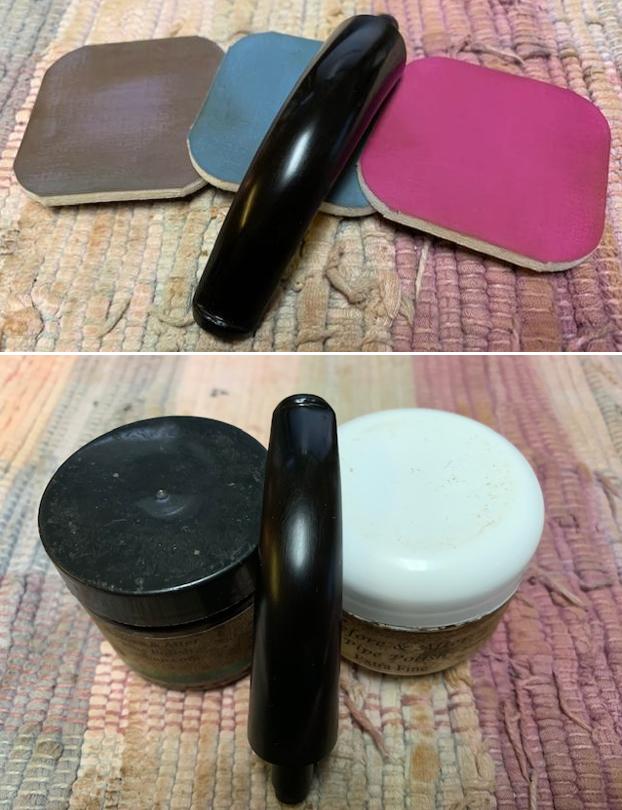
  As I do with Before & After, I add two additional stems of pipes that are in the queue after cleaning their airways alone, to join the 24-hour experiment. I decided not to ‘prep’ the stems by scrubbing with steel wool and Soft Scrub. I considered one of the two stems as having deep oxidation. The pristine yellow color of the fluid changed gradually during the oxidation removal process.
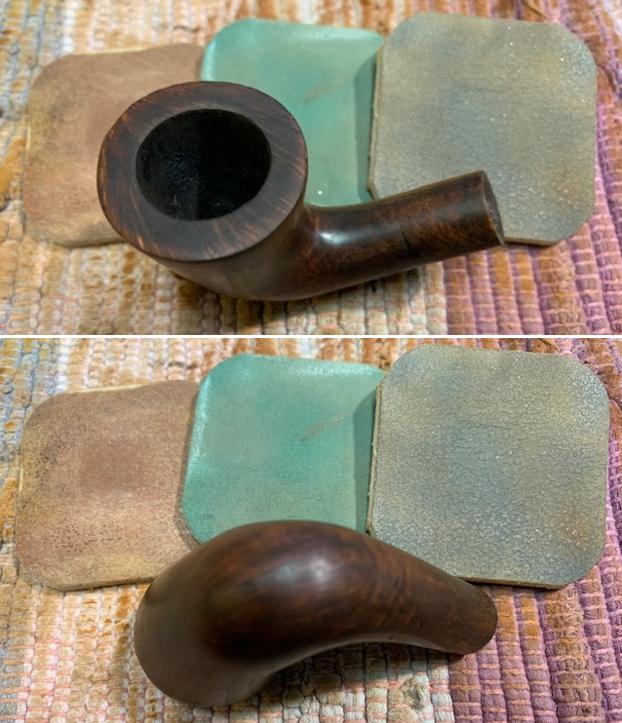
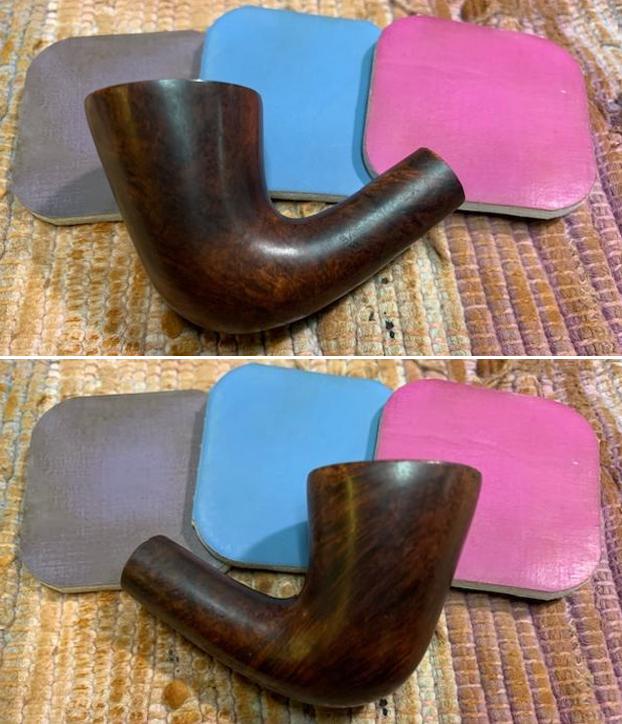
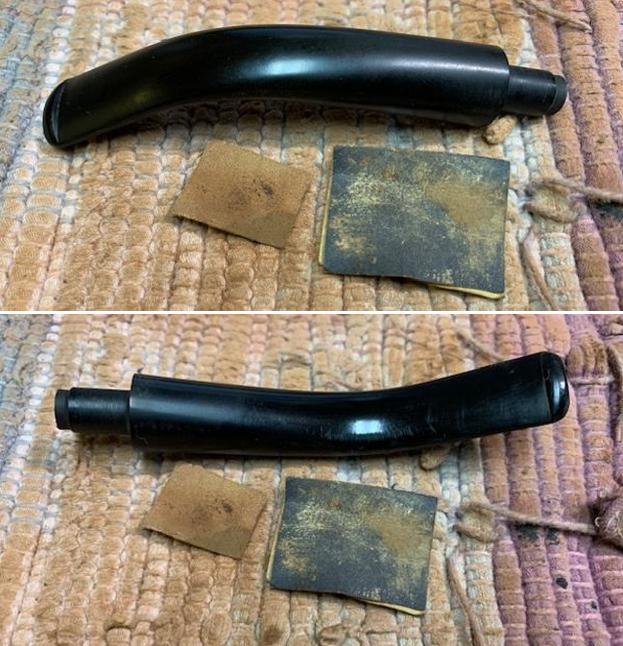
 After 24 hours, the stems were removed from the Briarville Oxidation Remover including the Dr. Grabow stem. First, using a dry cotton pad, the stem is wiped to remove raised oxidation from the stem. A distinctive brown color is left on the pad. Following the initial wipe with a dry pad, the stem is additionally wiped with a cotton pad wetted with alcohol to clean thoroughly.
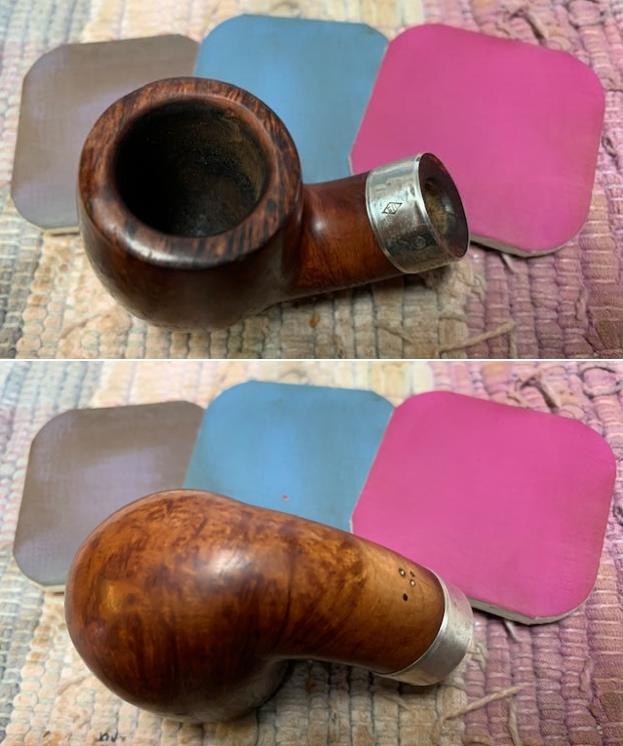
  Afterwards, as I did with the Before & After evaluation, I lighten the photo to show what I also am not now seeing with my eye – residual oxidation. I’m not seeing the oxidation compared with the second ‘before’ picture – where the oxidation was still presenting after the Before & After Deoxidation process.
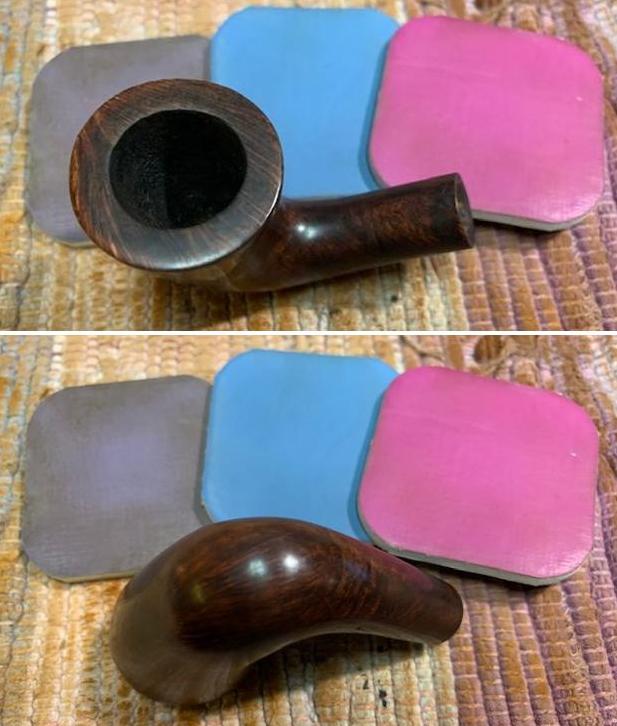
  As usual, I then treat the stem with paraffin oil to further condition the vulcanite and put the stem aside.
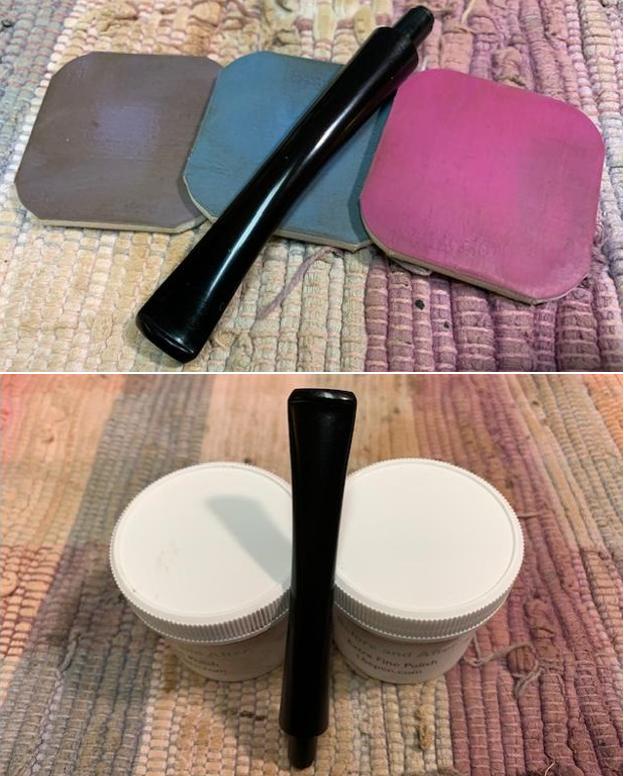
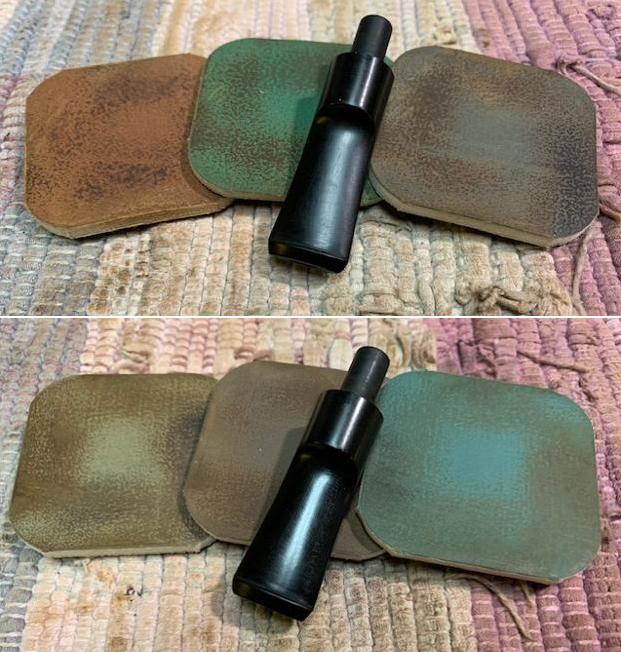
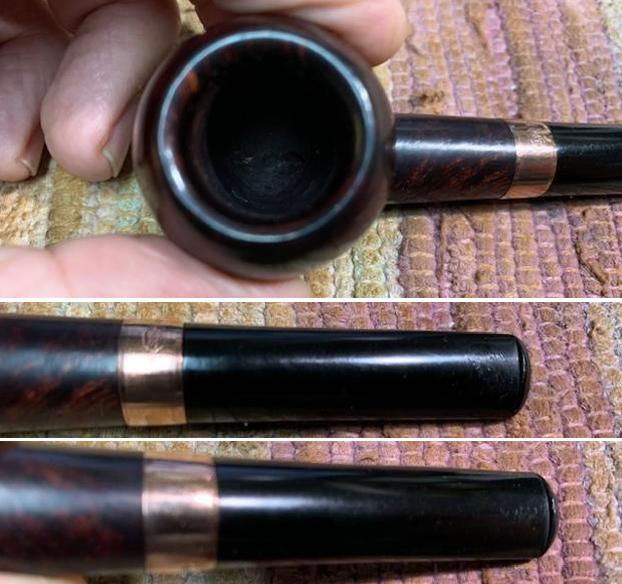
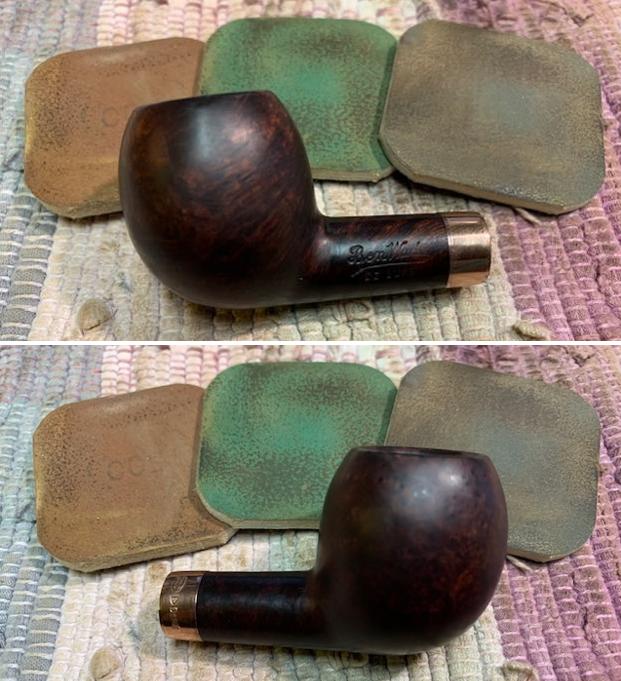
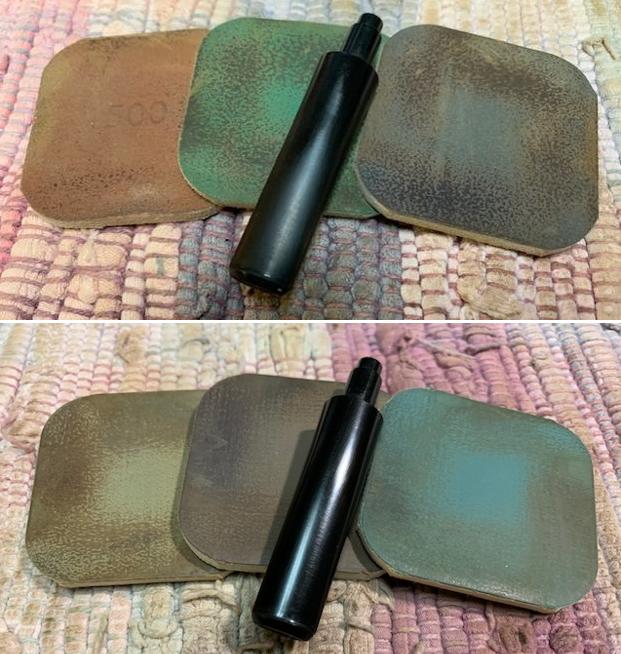
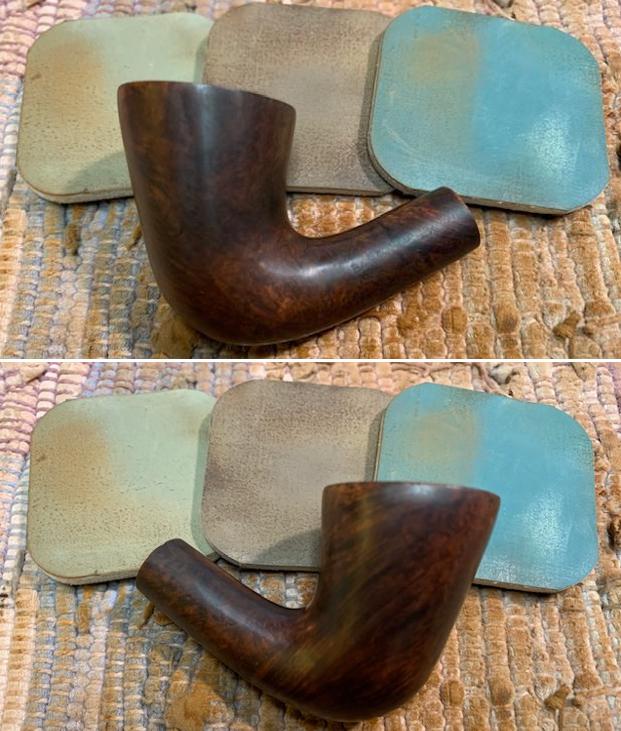
 I know this testing is not scientific and it could be reasoned that the more positive result with the Grabow stem with the Briarville product could have been made possible because it first had been through the Before & After process. This is true and this method of testing is experiential and open to subjective results. However, the other stems had similar results even though they received no prep or did they first go through the Before & After process. The set of three pictures of each stem includes in this order: 1) Enhanced picture before treatment, 2) After treatment showing the cotton pad results, and 3) After applying paraffin oil with enhanced picture to show latent oxidation. First, the St. Regis DeLuxe stem.
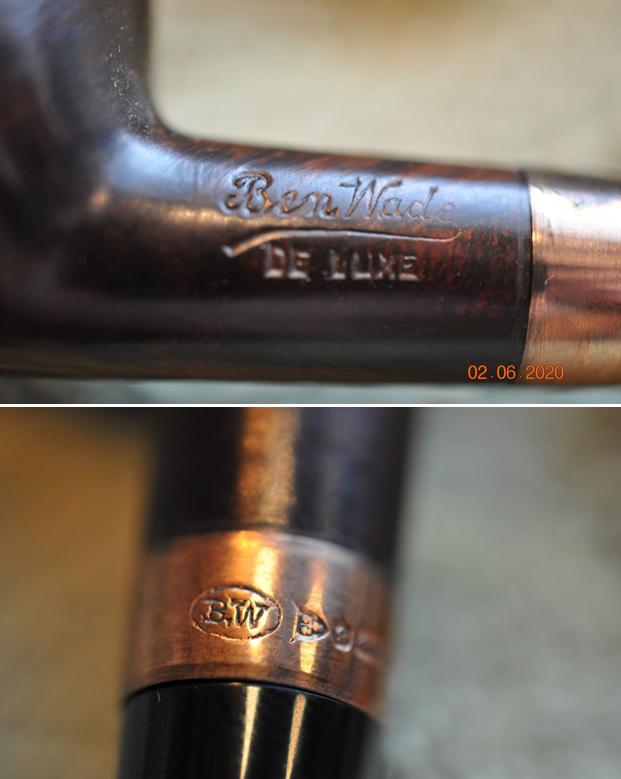
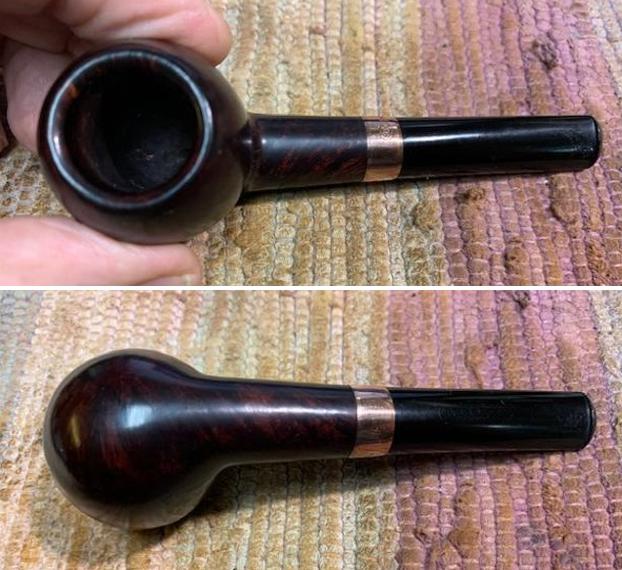
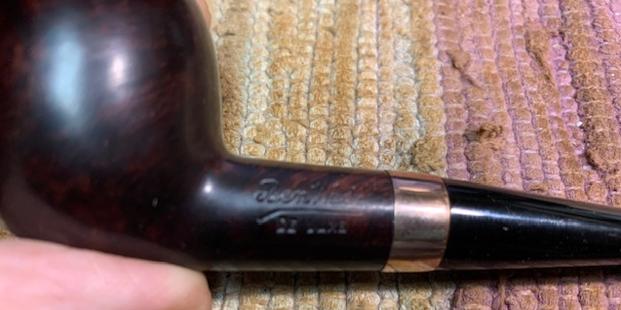
 Next, the stem of the Bennington Supreme:
 Based upon these results, I have found no reason not to continue testing and using Briarville.com’s Pipe Stem Oxidation Remover and see how it goes in the long run. Generally, I’m seeing positive results where oxidation seems significantly reduced. Again, this was not a scientific test but my desire to see how different products work! The cost of the 8 oz. bottle was $26.98, which included mailing to Colorado.
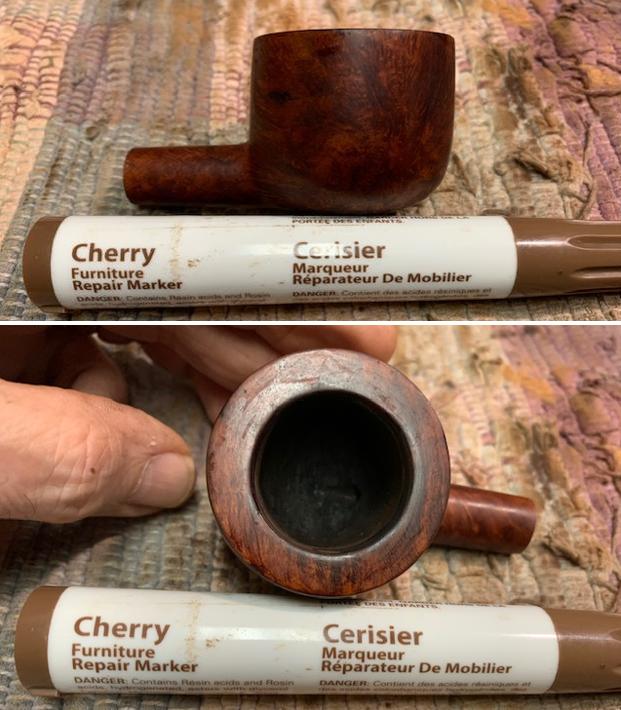
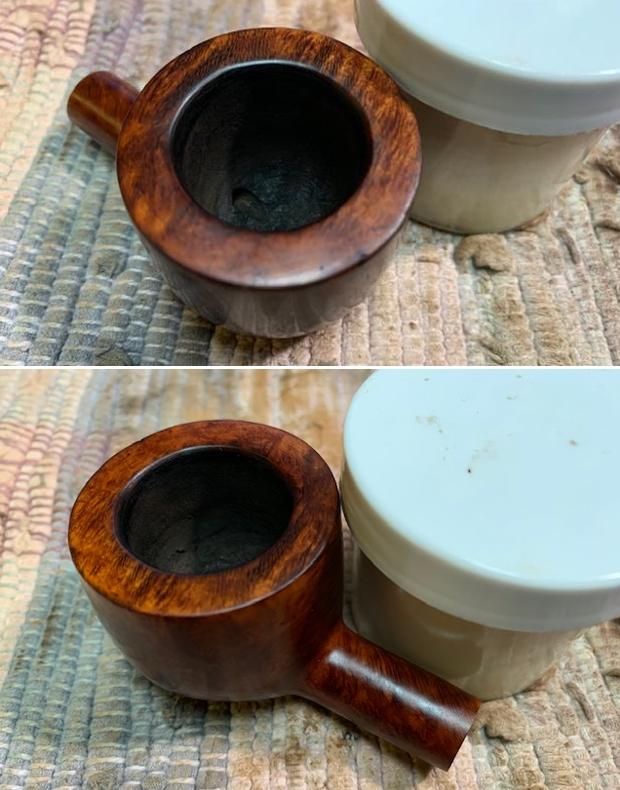
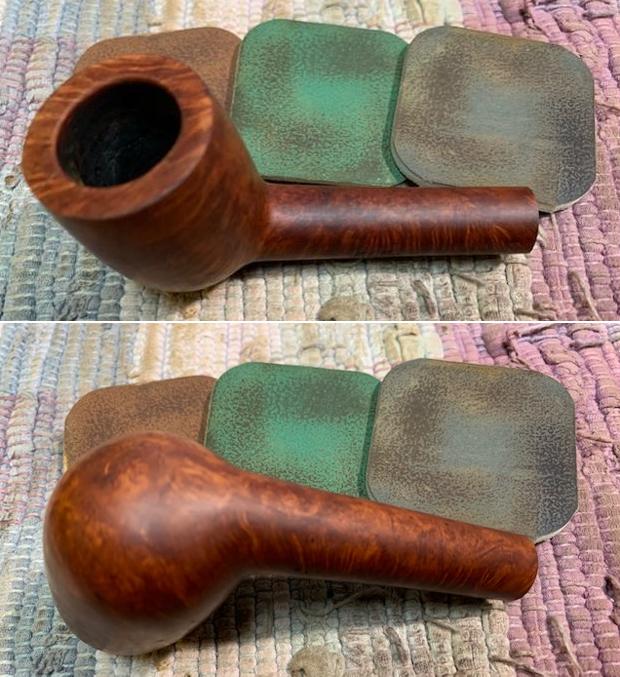
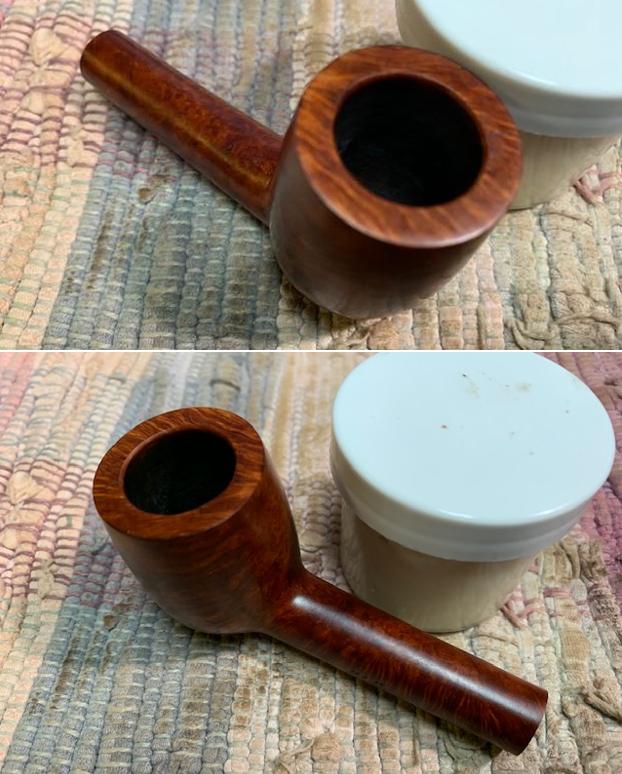
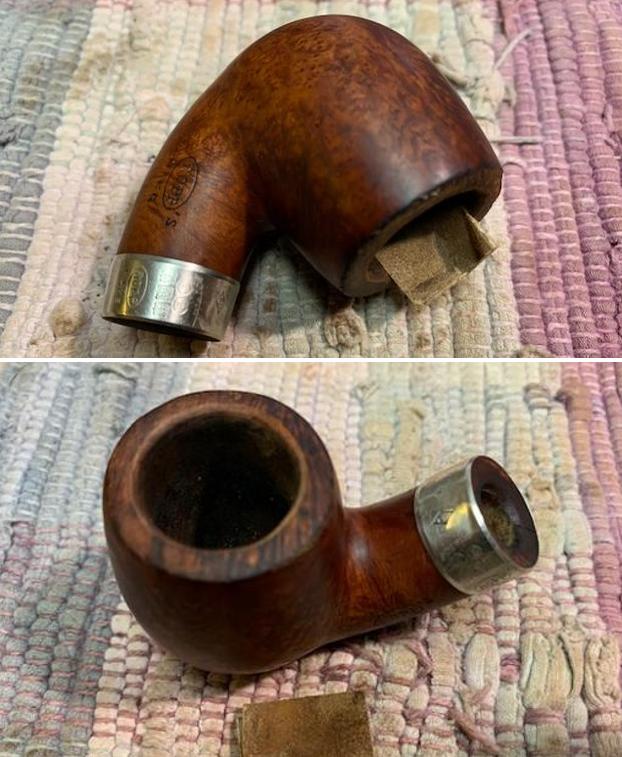
Turning now to the stummel, the chamber has a light cake – it appears as though it had recently been reamed but I start again with a clean slate. The chamber is reamed with the Pipnet Reaming Kit using 2 smaller of the 4 blades available. This is followed by scraping the walls of the chamber with the Savinelli Fitsall Tool. Finally, the chamber is sanded with 240 grade paper wrapped around a Sharpie Pen. After wiping the bowl, the inspection shows a healthy chamber with no heating problems.
 Transitioning to the external blasted surface, the stummel is scrubbed with a cotton pad and undiluted Murphy’s Oil Soap. A bristled toothbrush is also used to scrub the surface, the dual dome grooves, and the rim.
 The stummel then goes to the sink with warm to hottish water and the internal mortise is scrubbed with shank brushes using liquid anti-oil dishwashing soap. After the stummel is scrubbed and thoroughly rinsed, it goes back to the worktable to continue the cleaning process.
 The internals are fine cleaned next using cotton buds and pipe cleaners wetted with isopropyl 99%. A small dental spoon is also helpful in scraping and excavating old oil and tar buildup on the mortise wall. After some effort, the buds emerge lighter and I stop the cleaning for now. I plan later to give the stummel a kosher salt and alcohol soak to continue to freshen the internals for a new steward.
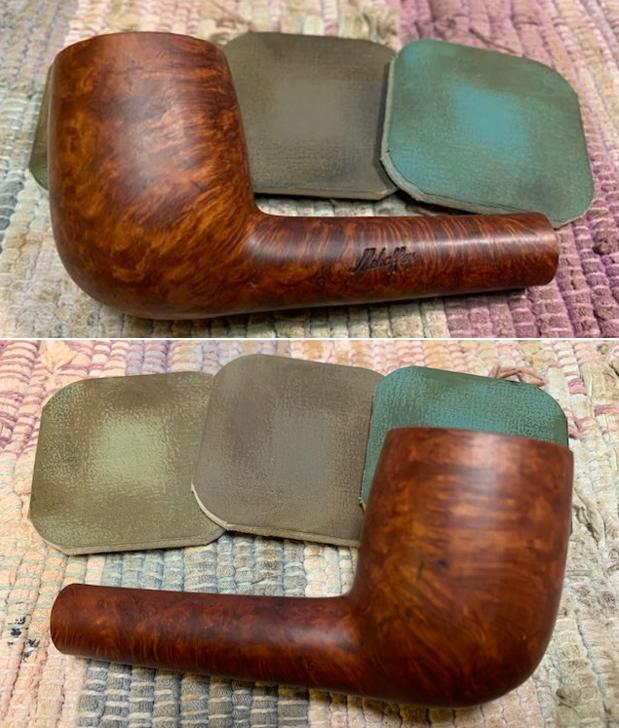
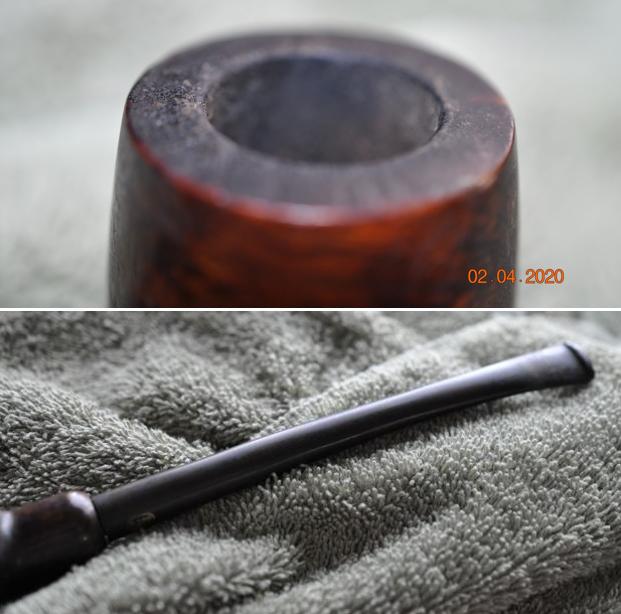
 With the surface cleaning completed, an inspection shows what I saw earlier. The finish is old and worn. There are lightened spots showing bare briar. The rim cleaned up nicely.
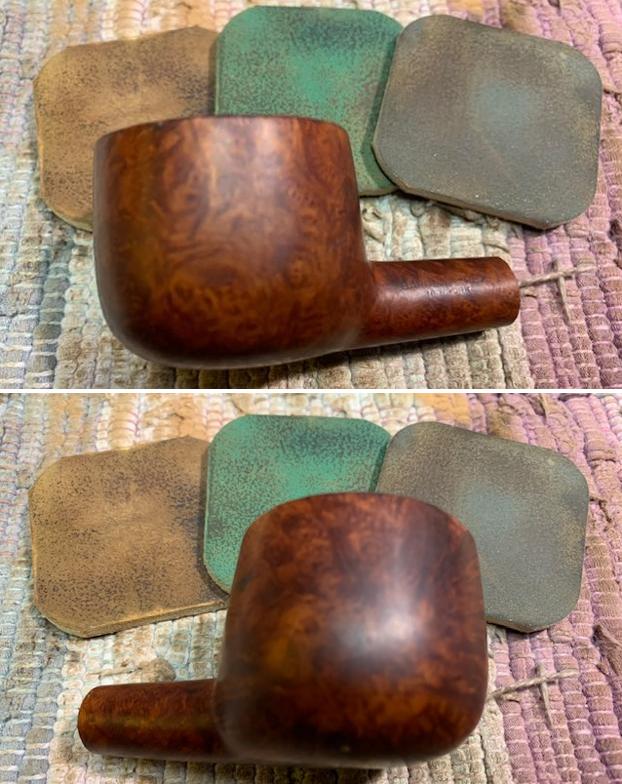
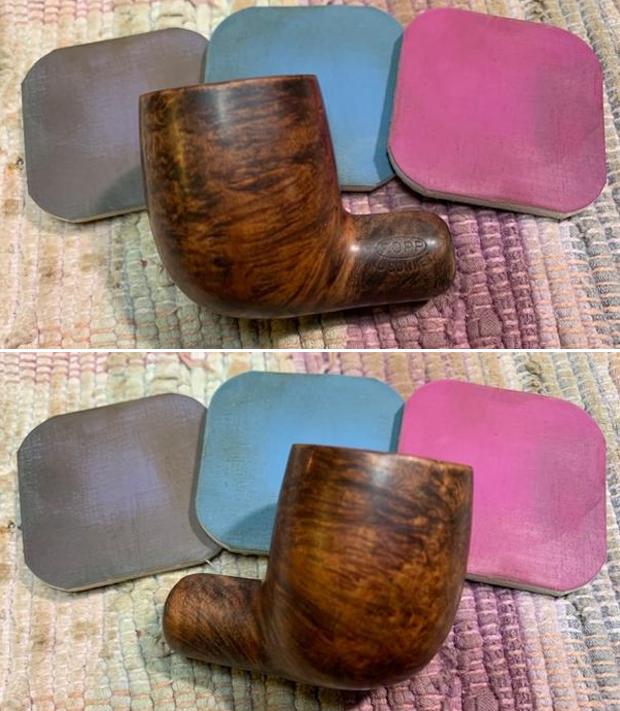
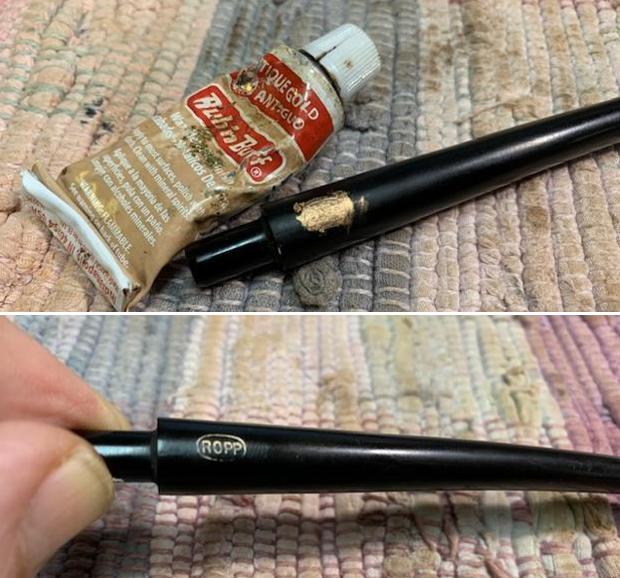
 It doesn’t take much consideration to give the nicely blasted Grabow Bulldog a fresh finish. To clean the surface further, a cotton pad wetted with alcohol wipes the surface and reveals what I mentioned earlier. The dark finish has a reddish tone which is reminiscent of the Dunhill branded color that my good friend and pipe man in India, Paresh, has almost perfected in his restorations of Dunhill pipes and shared in his blogs on rebornpipes. This Dr. Grabow will get a dark undercoat of dark brown with just a touch of black dye added. I add the black to deepen the hue a bit. Over this primary undercoat, a red dye will be washed.
  With the components needed assembled on the worktable, after wrapping the nickel shank cap with painter’s tape, I begin by heating the stummel with the hot air gun. The warming of the briar expands it and helps it to be more receptive to the dyes.
  Fiebing’s Dark Brown Leather Dye is used and with it is mixed only a drop of Fiebing’s Black. With a cork in the chamber to act as a handle and stand, the dye mixture is applied with a folded pipe cleaner. After application of the dye over a small patch of the briar surface, the aniline dye is flamed with a lit candle. The alcohol combusts in the dye burning off leaving behind in the grain the dye pigment. After thoroughly applying the dye and flaming it, the stummel is set aside to allow the newly dyed stummel to rest letting the dye settle.
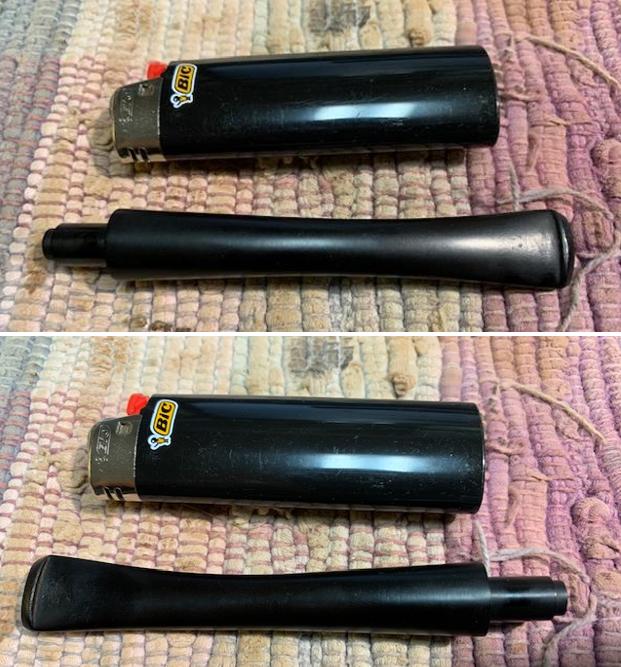
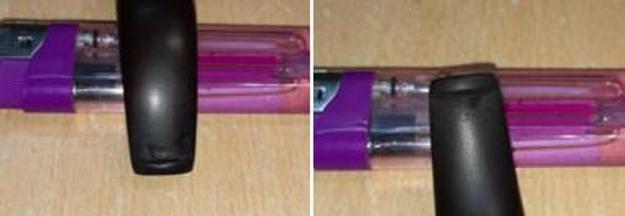
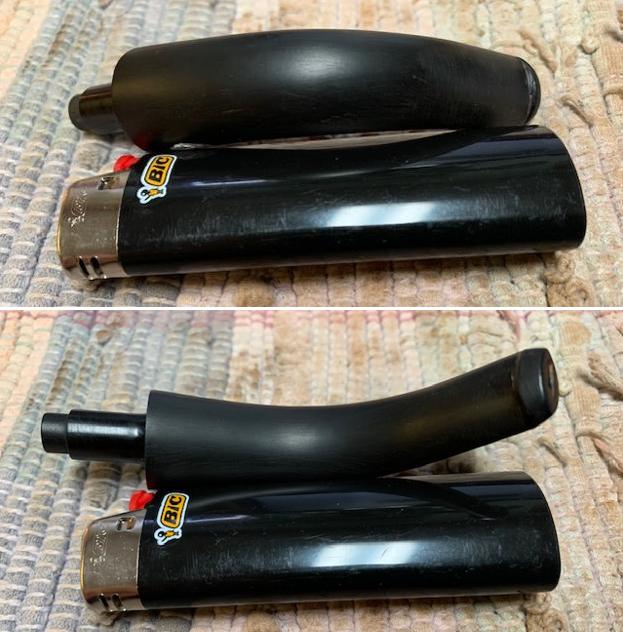
 Next, the stem needs some attention. The bit has some roughness and tooth chatter. The upper button lip has a significant compression which I’m hopeful of minimizing. To minimize or remove the biting damage to the bit the heating method is used. Using a Bic lighter, the bit is painted with the flame back and forth. As the flame heats the vulcanite, physics takes over and the rubber expands recapturing its former shape – at least partially. I take before pictures and the after-heating process. The large compression on the upper button is still there but I’m hopeful that sanding alone will take care of it.
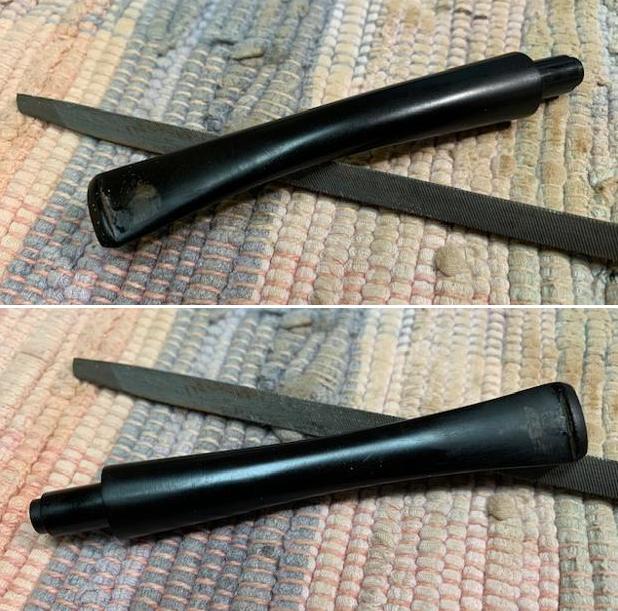
 Next, a flat needle file is used to refresh the button lips to improve the bite hang.
  The filing is followed by sanding with 240 grade sanding paper focusing first on smoothing the compressions in the bit and button and then expanded to include the entire stem. A plastic disk is used on the tenon side of the stem to prevent shouldering – keeping the edges crisp forming of the shank union.
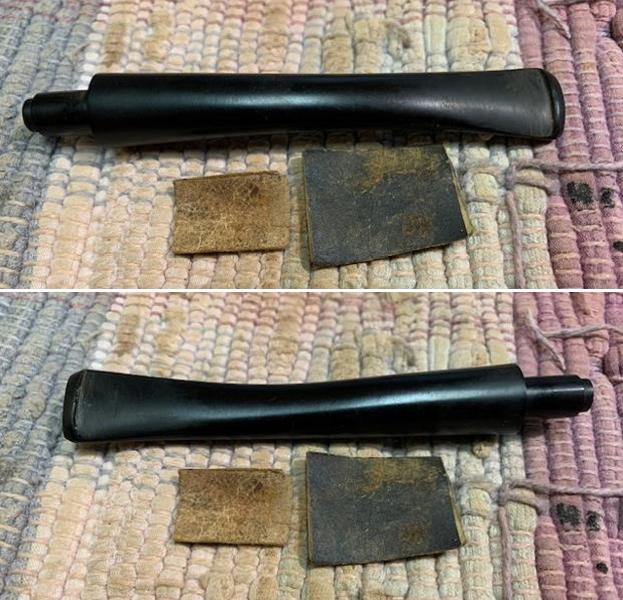
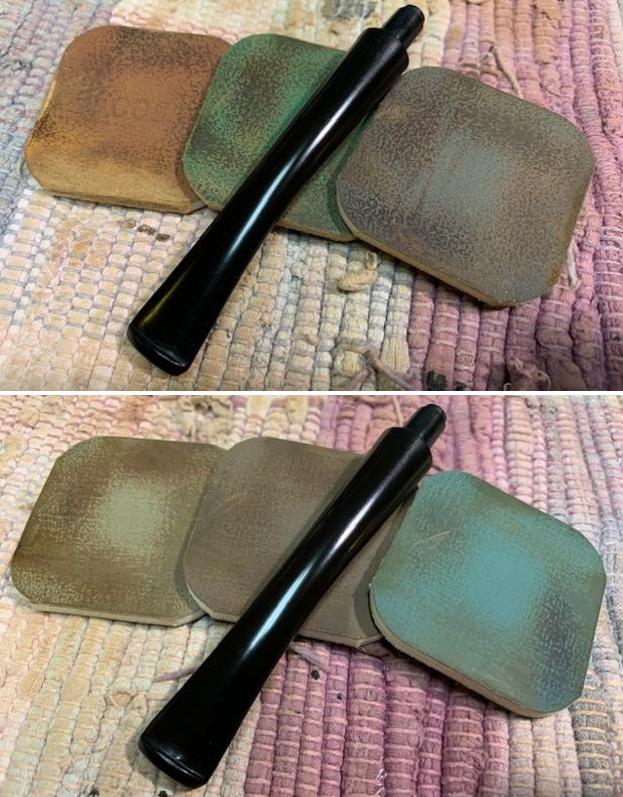
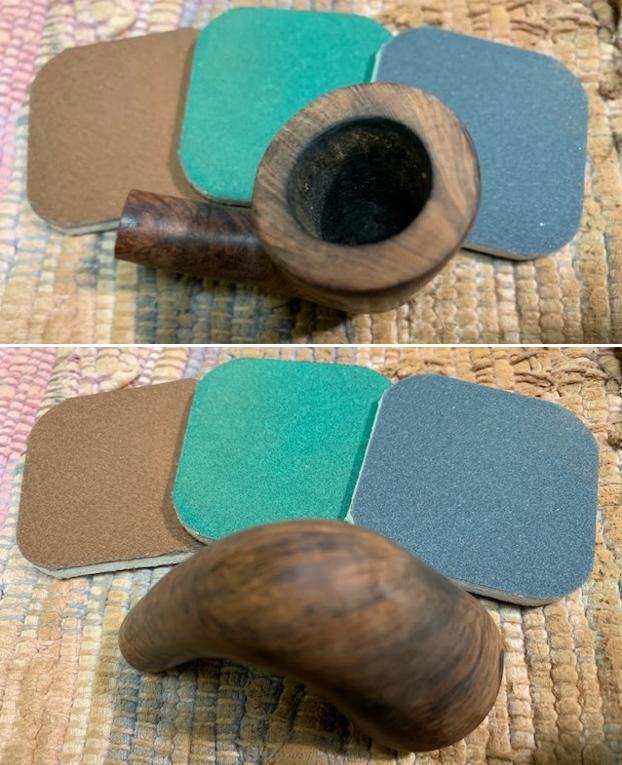
 Next, moving to less abrasive sanding, wet sanding with 600 grade paper is followed by applying 0000 grade steel wool.
 Following the steel wool, the full regimen of micromesh pads is used starting with wet sanding with pads 1500 to 2400. This is followed by dry sanding with pads 3200 to 4000 and 6000 to 12000. Between each set of 3 pads, Obsidian Oil is applied to condition the vulcanite and to guard against oxidation. I love the pop of freshly micromeshed stems!
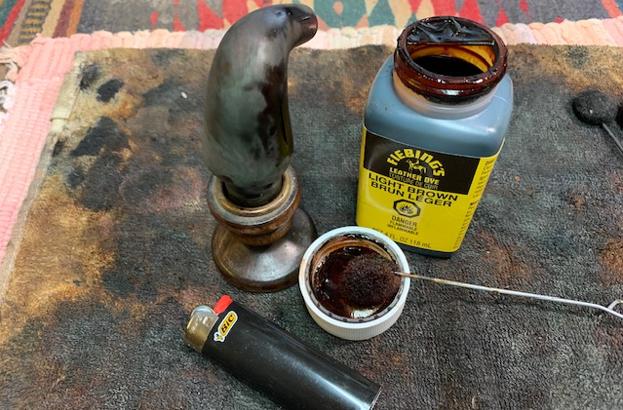
 Putting the stem to the side, the stummel has rested several hours after applying the dye undercoat. Next, after a felt buffing wheel is mounted to the rotary tool set at about 30% full power, the flamed crust is removed from the Grabow blasted surface.
  Following this, a cotton pad wetted with alcohol is used to wipe the newly dyed stummel surface. This helps to blend the dye and to remove overt, excess dye.
 As before, in preparation of applying the red dye overcoat, the stummel is warmed using the hot air gun.
 I use a red dye concentrate called TransTint which can be mixed with either water or alcohol to form the base. I mix a small amount of alcohol with the red concentrate. With the stummel warmed, a pipe cleaner is used to ‘wash’ the red dye over the dark undercoat. When the blasted surface is thoroughly covered with the overcoat of red, the stummel is put aside to rest again for several hours allowing the dye to settle.
 After a few hours, the dye has dried enough to handle the stummel. Before turning the lights out for the night, I continue the internal stummel cleaning with a kosher salt and alcohol soak. Being careful not to disturb the resting dye, a cotton ball is stretched and twisted to form a ‘wick’ which is guided down the mortise to the draft hole with the help of a stiff wire. The cotton wick helps to draw the oils and tars from the internal briar walls.
  After the wick is in the mortise, the bowl is filled with the kosher salt and set in an egg crate to maintain stability. Kosher salt does not leave an aftertaste like iodized salt. The bowl is then filled with isopropyl 99% until it surfaces over the salt.
  After about 15 minutes, after the initial alcohol has been absorbed, additional alcohol is used to top it off. The lights are turned off allowing the soak to do its thing through the night and the dye to continue to settle in.
 The next morning reveals soiling in the salt and the cotton wick indicating that the process has worked. After removing the expended salt and wiping the bowl with a paper towel I blow through the mortise to assure that the salt crystals are removed.
 To make sure the internals are clean and to remove any remaining debris, a few cotton buds wetted with isopropyl 99% confirm the internals are clean and refreshed. I move on.
 The red overcoat wash of red dye rested through the night. To continue the refinishing process, a cotton cloth buffing wheel is mounted on the rotary tool and set to about 40% full power. Using Blue Diamond compound, the buffing is applied to the blasted briar. I’m waiting to attach the stem and to apply Blue Diamond to it because this phase of Blue Diamond is for the purpose of removing excess dye. While applying the Blue Diamond, I am also careful not to overrun onto the nickel shank cap. Polishing the metal is reserved for another buffing wheel dedicated to this purpose. Polishing metals with Blue Diamond compound produce a black residue that can stain the briar if one is not careful. This is the reason for dedicated buffing wheels for different materials.
 After the initial application of Blue Diamond compound, the surface is wiped with a cotton pad wetted with alcohol. The purpose of this is to reduce excess dye and to help prevent dye leeching on the hands when the pipe is put into service. After the wipe down, the stummel is again buffed with Blue Diamond compound.
 One final measure to minimize the possibility of the dye leeching onto the hands of the new steward when the pipe is put into service. To emulate the heating of the pipe during its initial times put into service, the stummel is warmed with the hot air gun.
 While the stummel is hot, an old cotton cloth is used rigorously to hand buff the stummel picking up the final vestiges of excess dye – hopefully!
  Next, another cleaner cotton buffing wheel is mounted onto the rotary tool and Blue Diamond compound is applied to the waiting stem. The nickel stinger is also reunited to the threaded tenon after being cleaned and polished with 0000 grade steel wool.
  With both the stummel and stem buffed with Blue Diamond, next is buffing the nickel shank cap and stinger/tenon. Another cotton cloth buffing wheel dedicated to metals is mounted on the rotary tool. The speed remains at about 40% full power and the nickel is shined up using the mildly abrasive compound.
 After completing all the applications of Blue Diamond, a felt cloth is used to wipe/buff the entire pipe including the nickel fitments. This is done to make sure compound dust is removed before application of the wax to the stem and stummel.
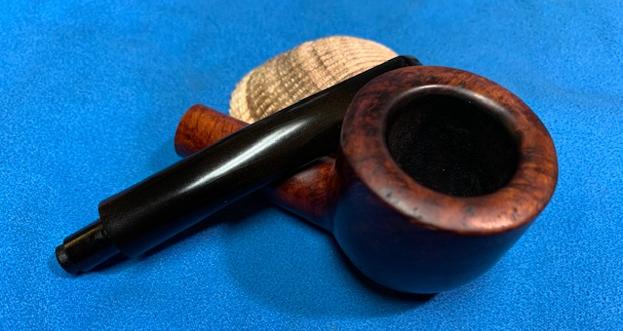
 The last step is to mount another cotton cloth wheel to the rotary tool maintaining the same speed. Carnauba wax is applied to the stem and stummel avoiding the nickel shank cap. When the wax has been applied, a microfiber cloth is used to give the pipe a rigorous hand buffing to raise the shine and to disperse excess wax.
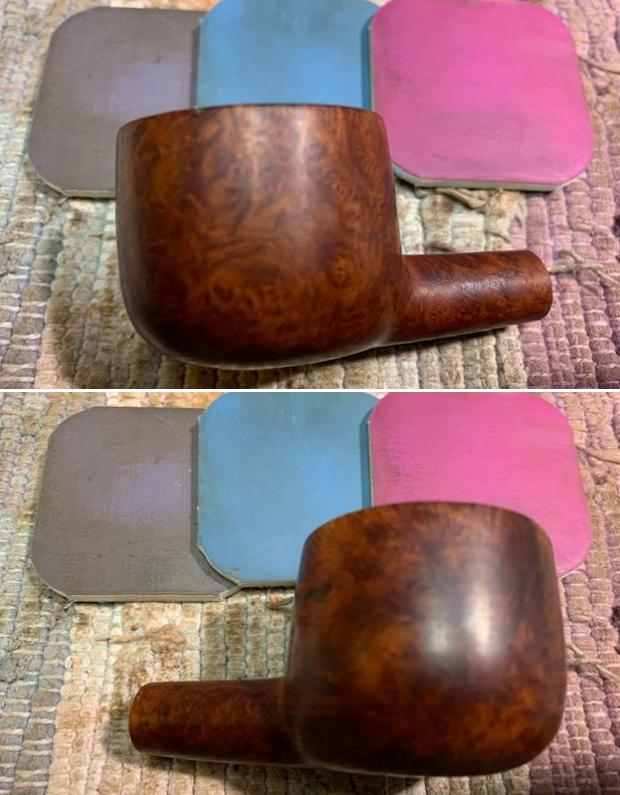
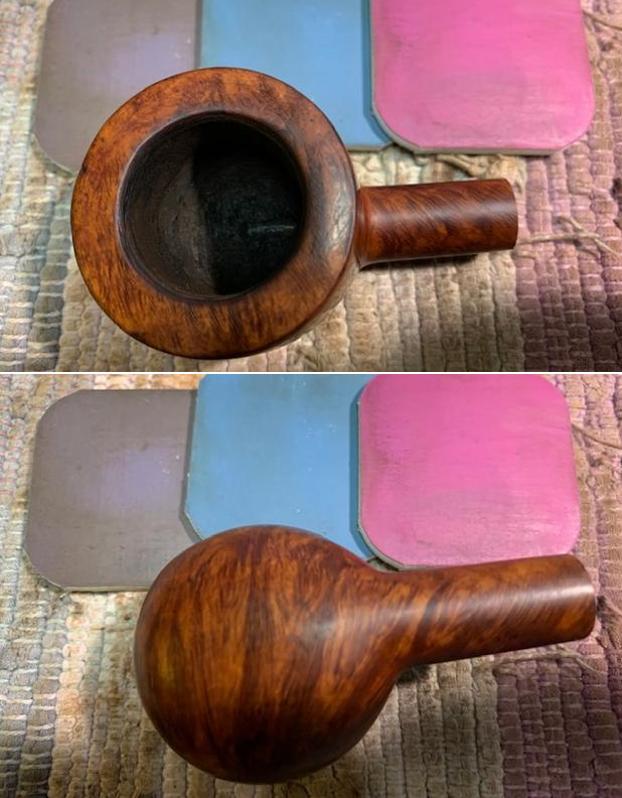
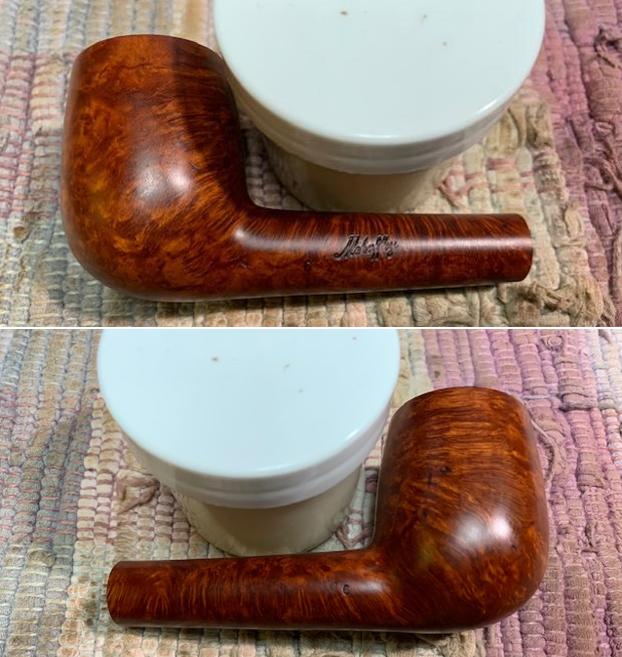
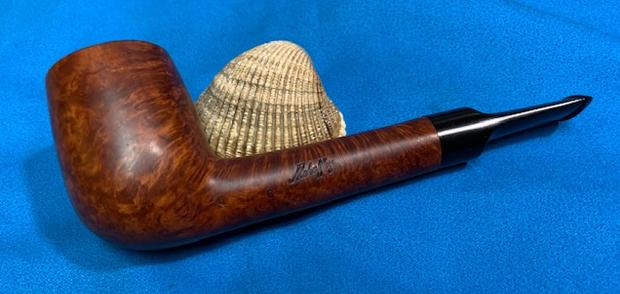
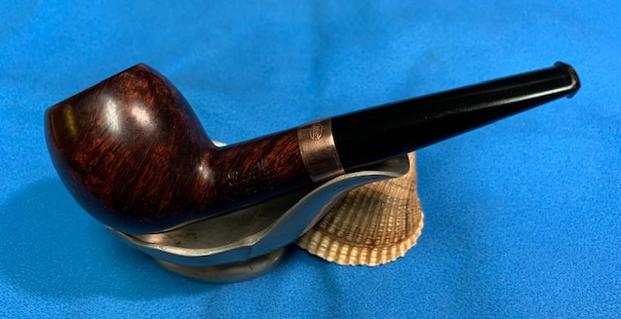
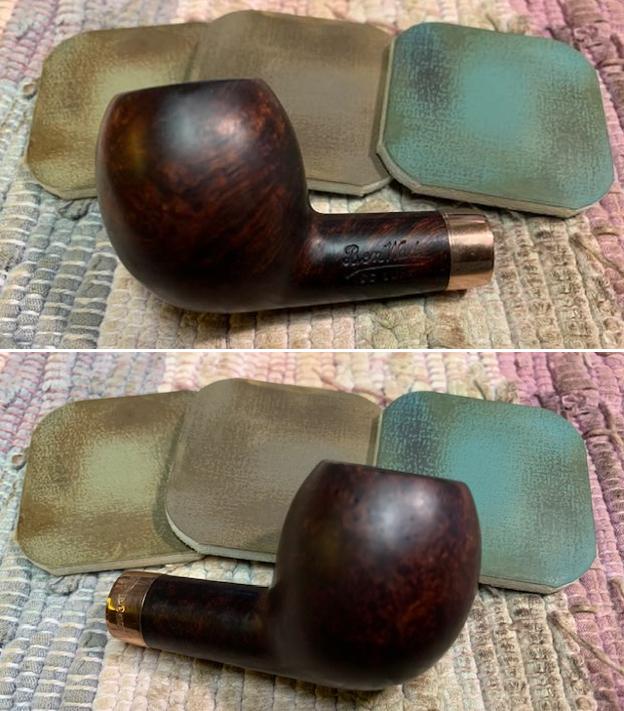
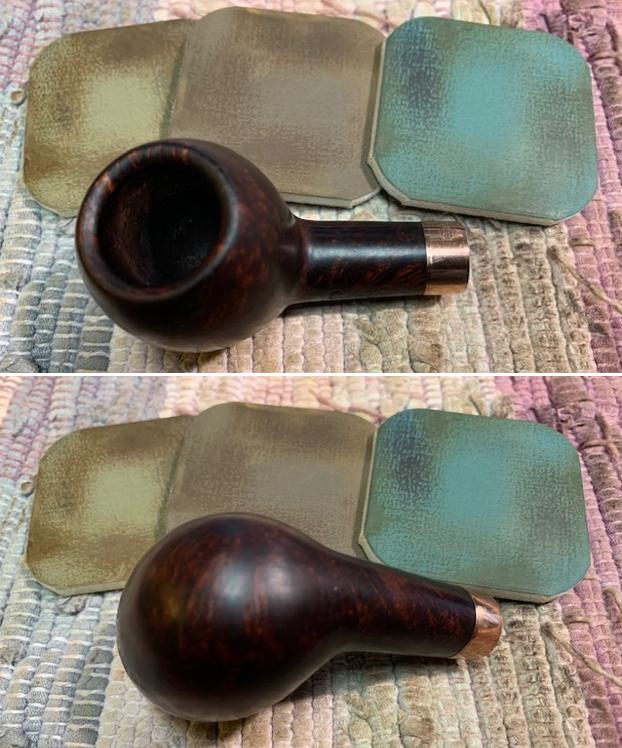
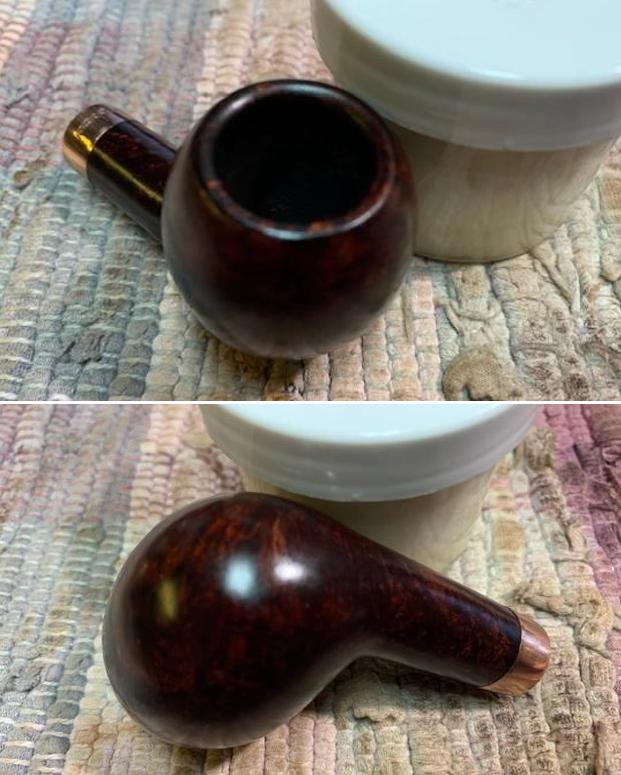
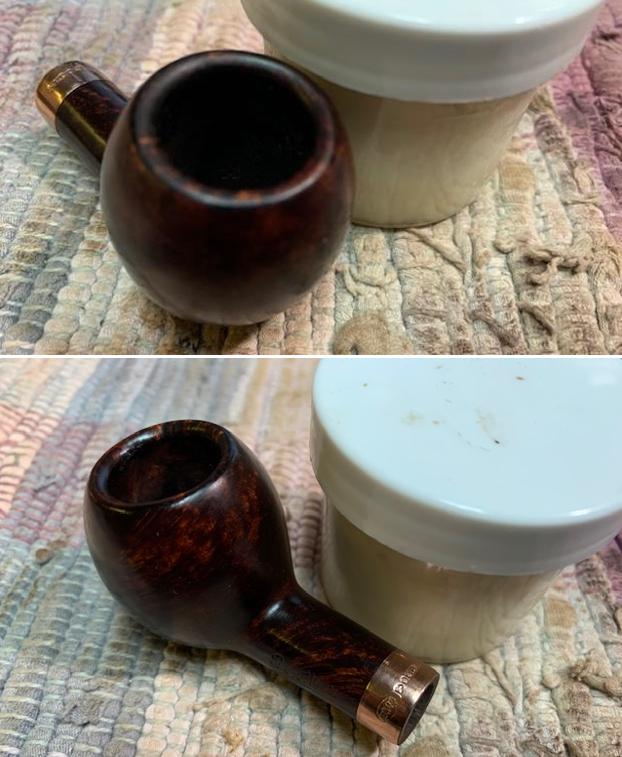
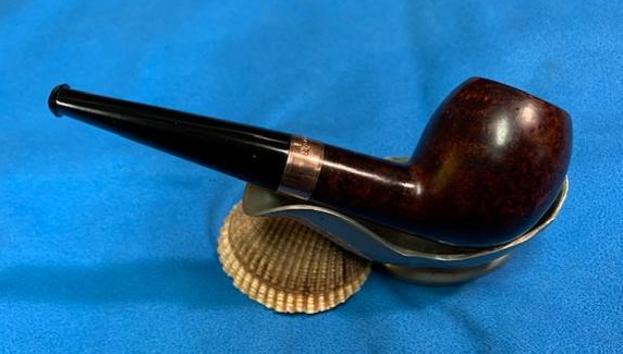
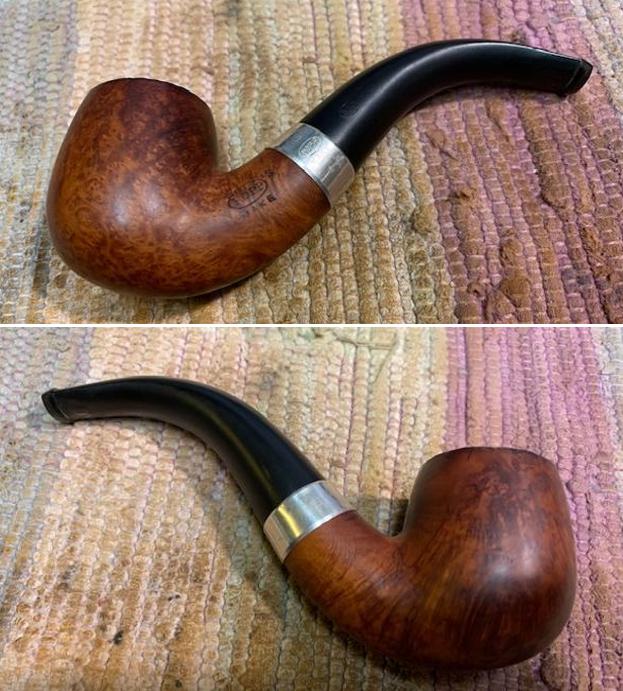
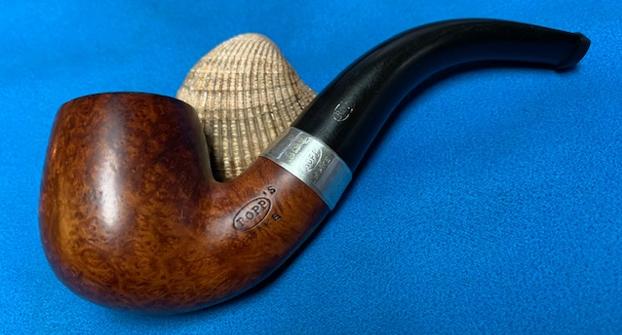
 The classic Bulldog shape looks great. The Dr. Grabow Sculptura dates to the 1960s and this one looks brand new. The extended nickel shank cap gives the Bulldog a bit of class and the renewed blasted surface is pleasing to the eye and touch. Todd commissioned this classic Dr. Grabow and will have the first opportunity to claim him in The Pipe Steward Store benefiting the Daughters of Bulgaria. Thanks for joining me!


 It seems like just a few weeks ago I was contacted by an older gentleman about purchasing his pipe collection. He sent me the photos and I was amazed at what I saw. He had Dunhill pipes, BBB pipes, Orlik pipes, Barclay Rex Pipes, a couple of Meerschaums and a whole lot of other pipes. All I could say as I looked at the pipes was what a collection it was. We negotiated a deal and I think we both walked away quite happy with the exchange.
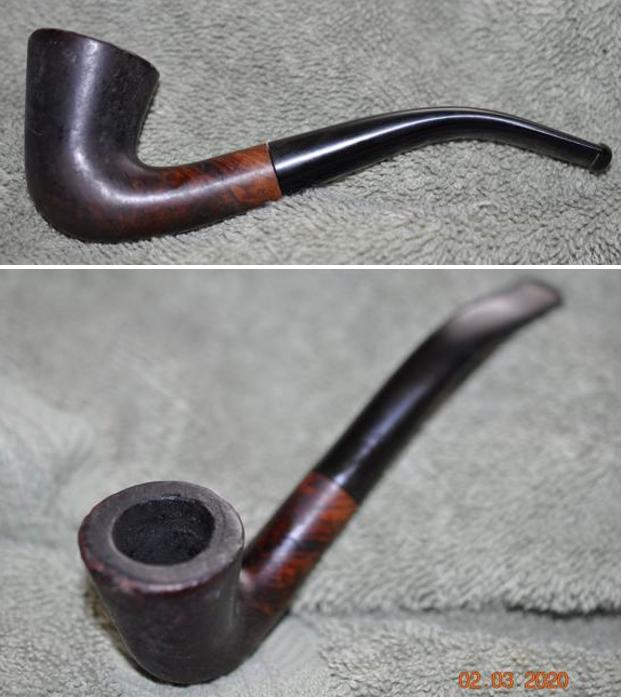 Jeff took photos of the bowl, rim top to show the thickness of the cake in the bowl and the thick lava on the rim top. There is significant damage to the outer edge of the rim that is visible in the photos. He took photos of the top and underside of the vulcanite stem showing the oxidation, calcification, tooth marks, chatter and wear on the stem and button. There is also damage to the edges of the stem.
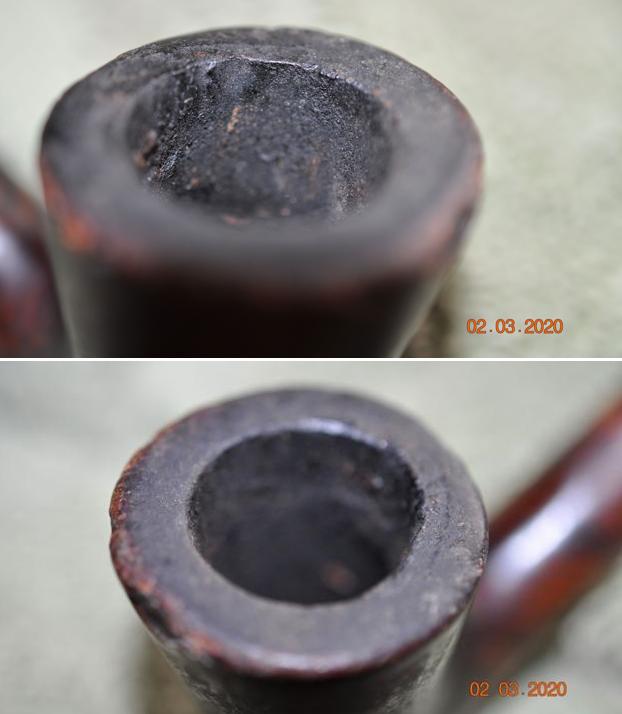
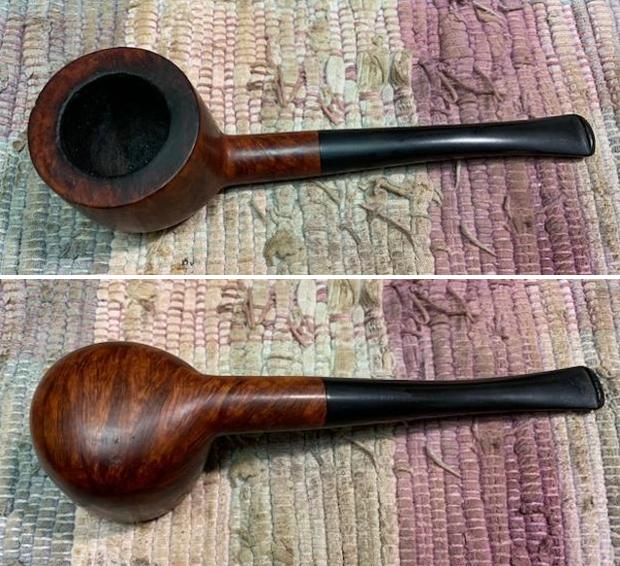
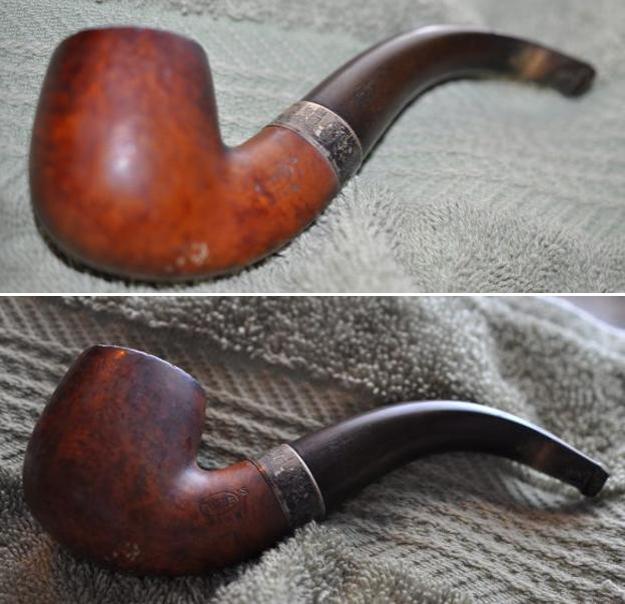
 Jeff took photos of the sides and heel of the bowl to show the condition of the briar. You can see the beautiful shape and the grain on the bowl even through the dirt and debris of many years. The chips around the outer edge are also very visible.
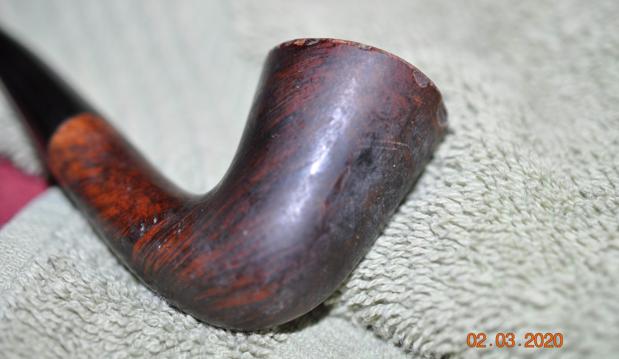
 He took a pictures of the damage to the outer edges of the rim. It really is a mess. The work will have to include topping and rebuilding the edge.
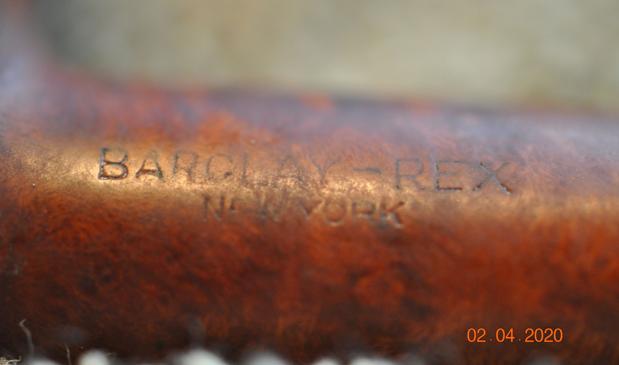
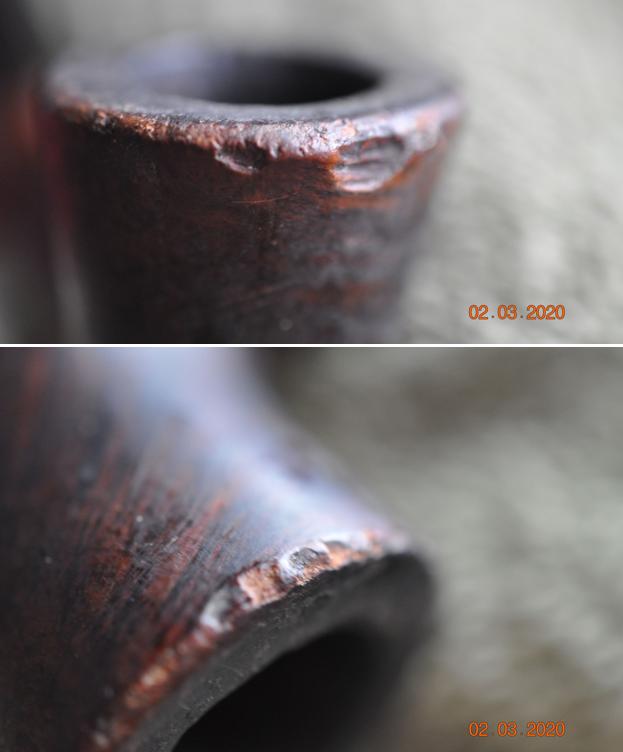 Jeff took a photo of the stamping on the left side of the shank. You can see that it is faint but readable as noted above.
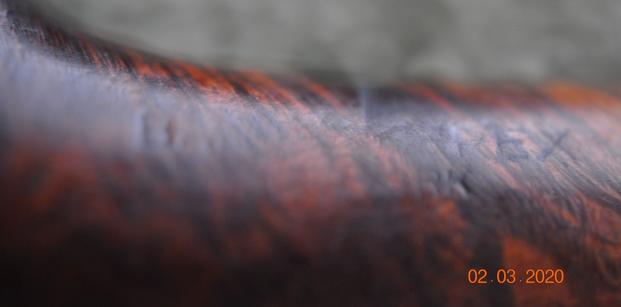 I turned to Pipephil’s site to see what I could learn about the Barclay-Rex brand and particularly the sandblast one I was working on (http://pipephil.eu/logos/en/logo-b1.html). I have included a screen capture of the information that is shown there.
  I quote from the sidebar on the site below as it gives a good summary of information.
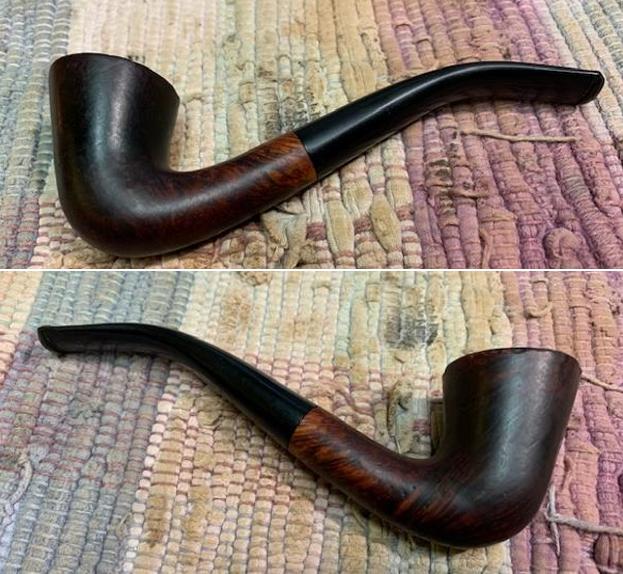
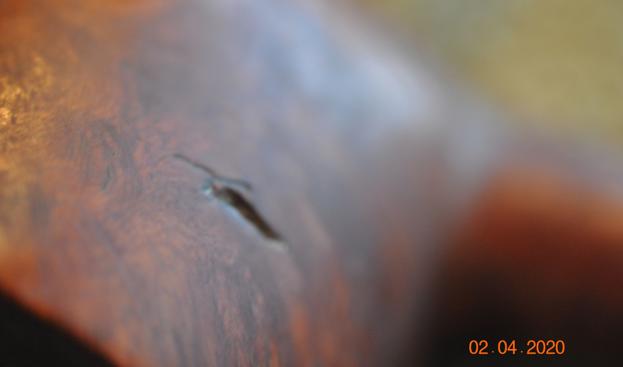
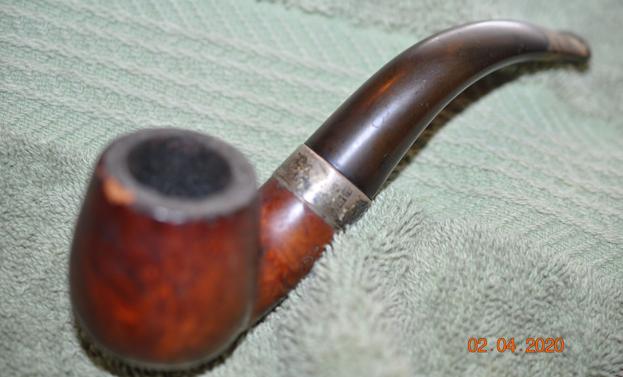
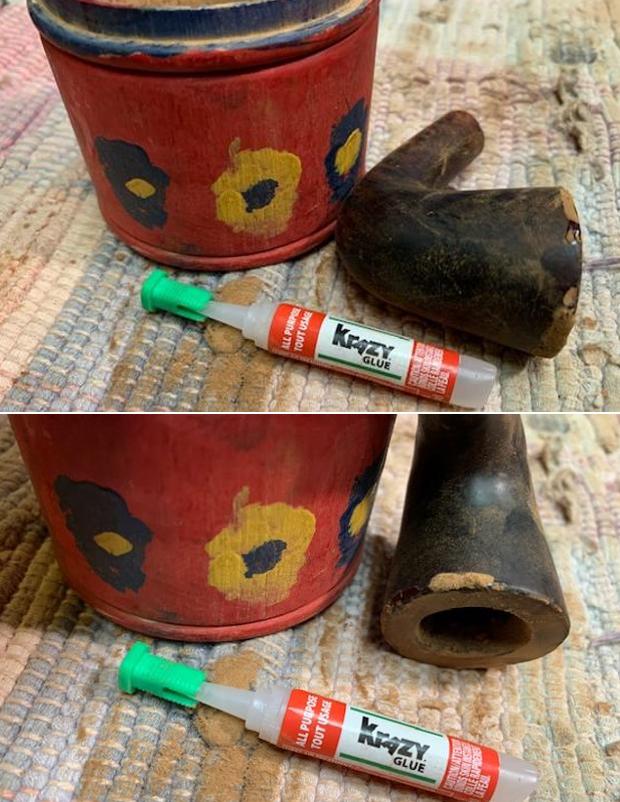
 I took some close up photos of the rim top and the stem surface. The inner edge of the rim had some nicks and burn damage on the bevel. The outer edge had a nicks and chips missing all the way around the bowl. There was some darkening on the rim top that would need to be cleaned up. I took close up photos of the stem to show the condition of the surface and button.
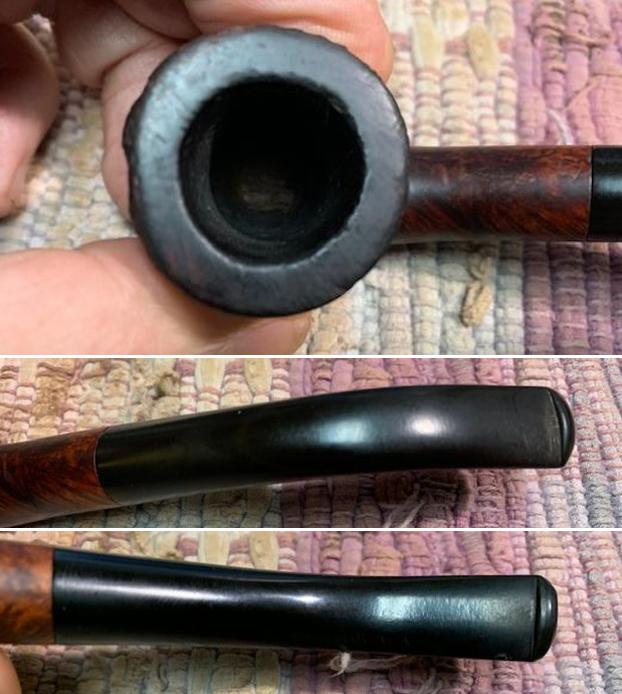 I took a picture of the stamping on the left side of the shank and it was faint but readable as noted above.
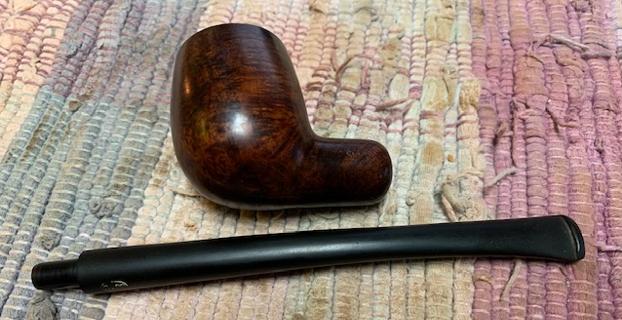
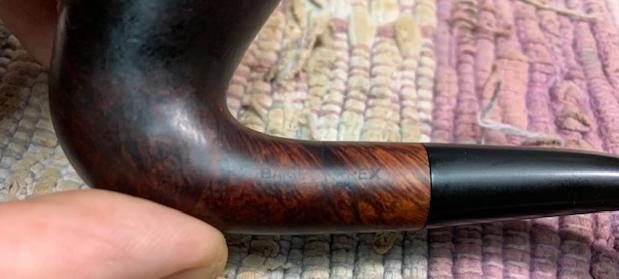 I removed the stem from the shank and took a photo of the parts of the pipe.
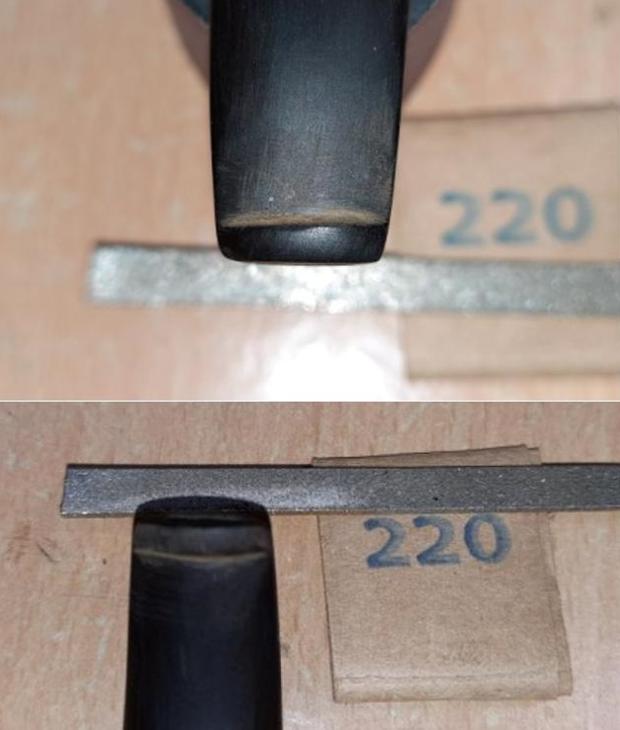
 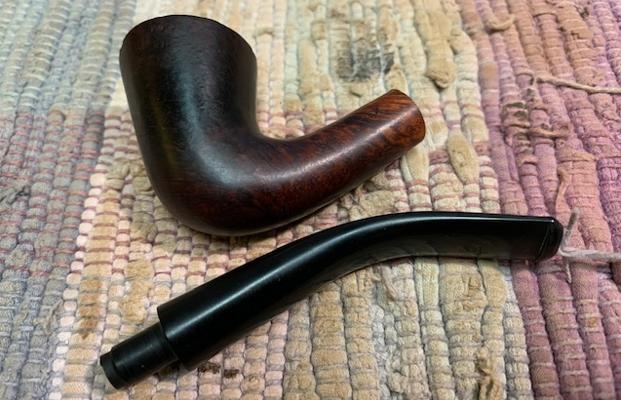 I started my work on the pipe by addressing the damage to the rim top and edges of the bowl. It was a mess so it was going to take the majority of work on this pipe to get it back to some semblance of round once more. I topped it on a topping board with 220 grit sandpaper to smooth out the top and give me a sense of the outer edge around the bowl.
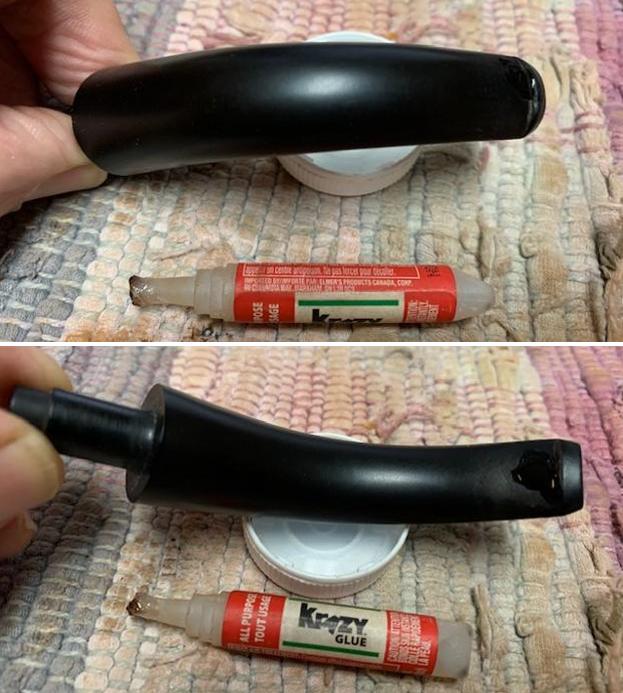
 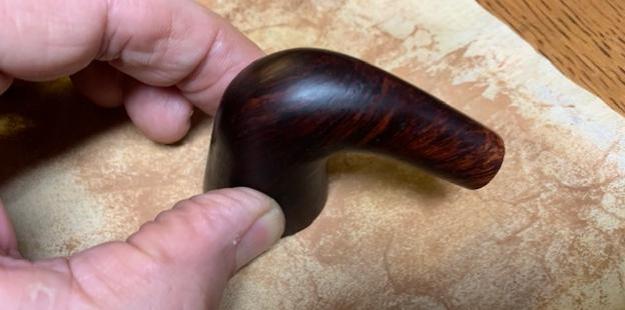 Once I had it smooth I could clearly see the damage around the top and outer edge of the bowl. I repaired the deep chips around the edge and rim with clear CA glue and briar dust. I layered on the dust and glue to rebuild the edges.
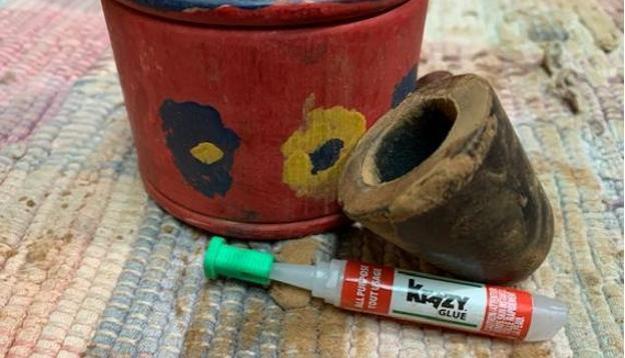
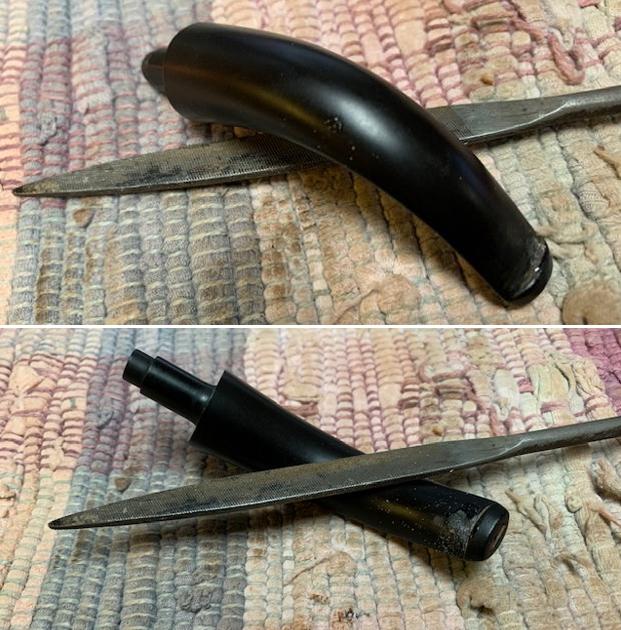
 I flattened out the repairs with a small flat file. I worked to being them down to the surface of the surrounding briar. From there I would need to sand but it was looking better.
 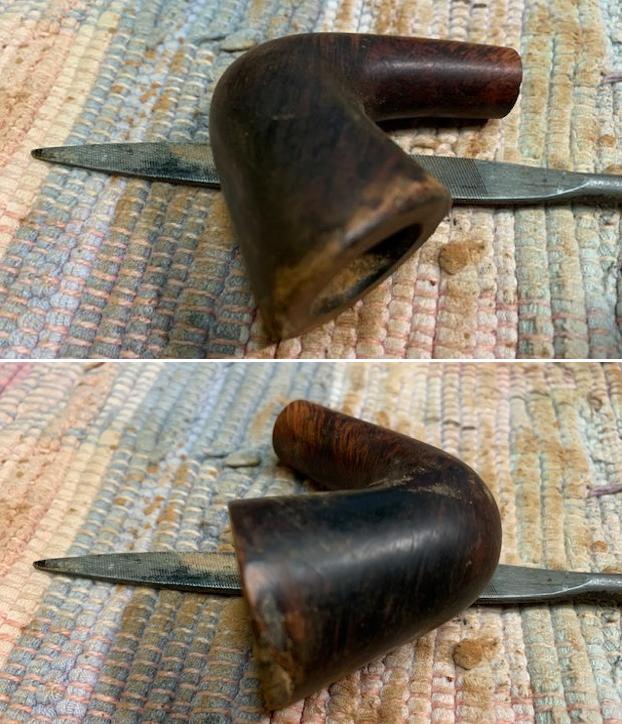 I sanded the bowl down with folded 220 grit sandpaper to smooth out the transition and remove the darkening opaque stain around the bowl sides and shank. I wiped it down with alcohol to remove the finish and the sanding dust.
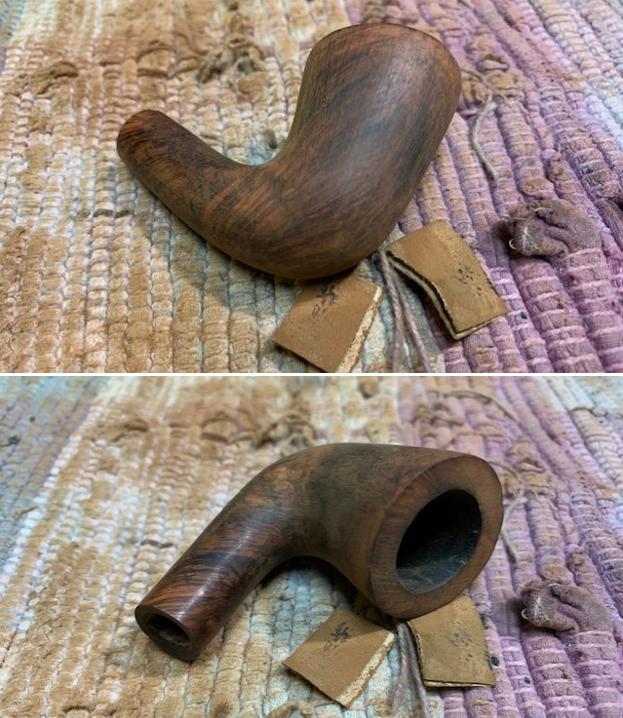
 I polished the briar with micromesh sanding pads – dry sanding with 1500-1800 grit pads to prepare for staining the bowl. It started to bring out the grain. I would do more polishing with micromesh after the staining of the bowl.
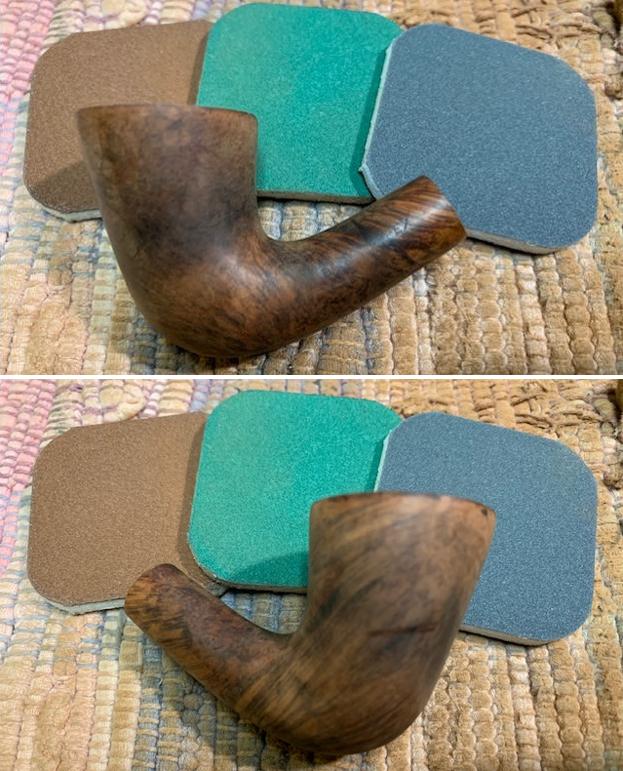
 I stained the bowl with a light brown aniline stain. I applied it to the bowl with the dauber and then flamed it to set it in the grain. I repeated the process until I was happy with the coverage of the colour on the briar.
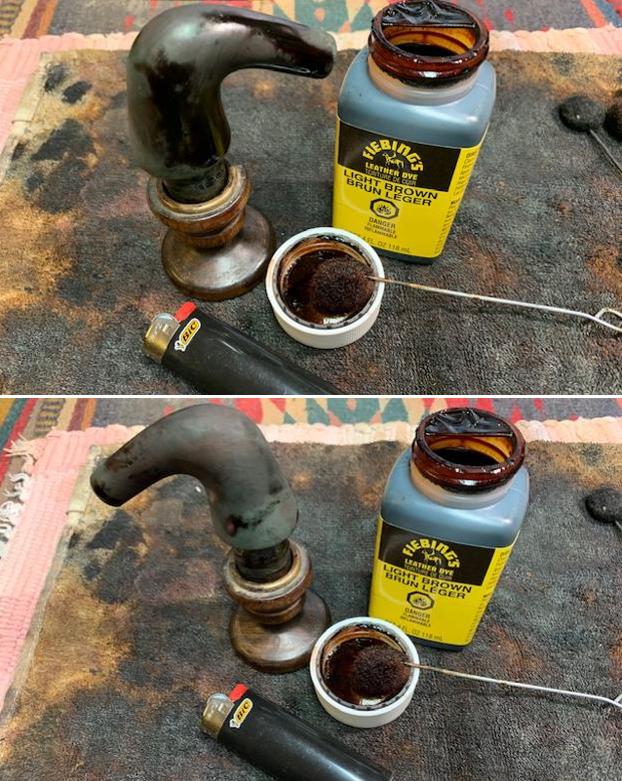
 I wiped down the bowl with alcohol and cotton pads to remove the excess stain and make it more transparent.
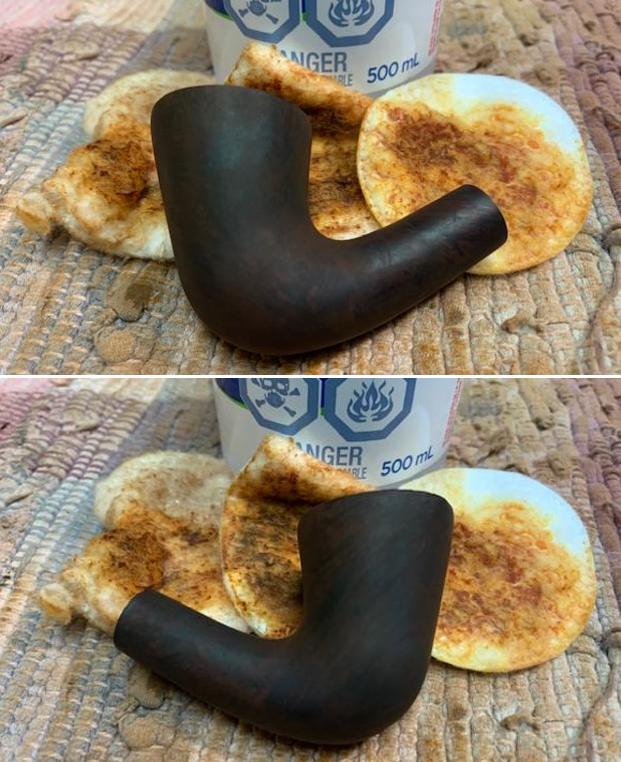
 I polished the stained briar with micromesh sanding pads. I used 1500-12000 grit sanding pads and wiped the bowl down with a damp cloth between each pad. The grain began to stand out with the polishing.
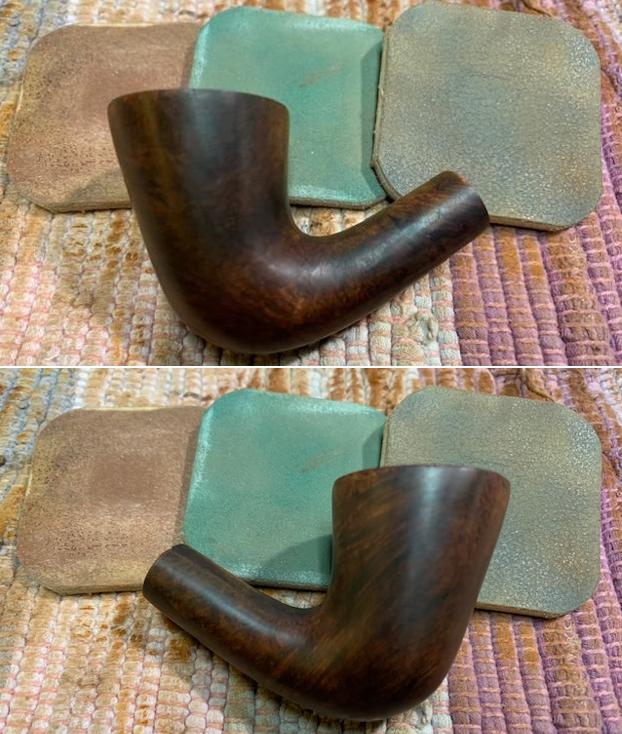
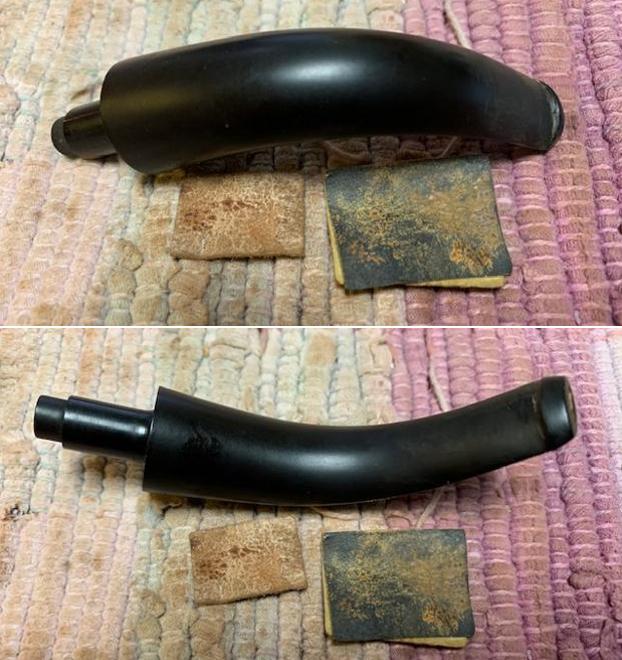
 I worked some Before & After Restoration Balm into the surface of the bowl and shank with my fingertips to clean, enliven and protect the briar. I let the balm sit for 15 minutes and then buffed with a cotton cloth to raise the shine. The photos show the bowl at this point in the restoration process.
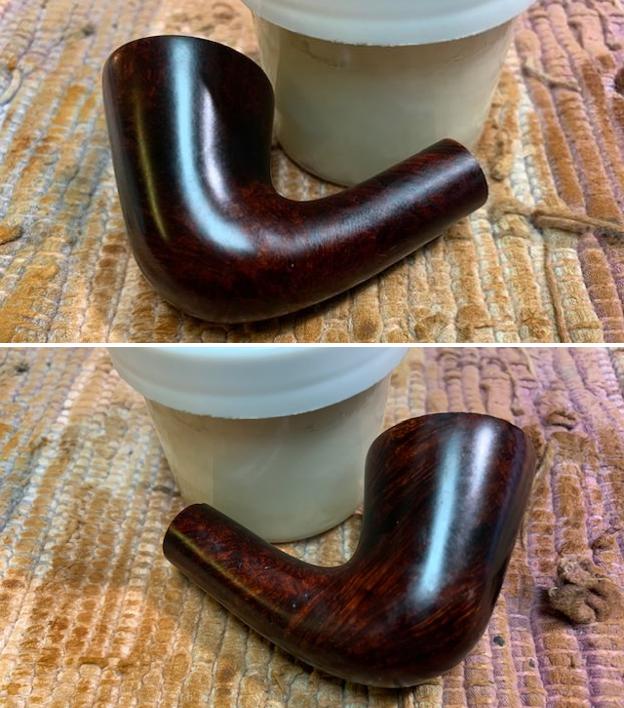
 I set the bowl aside and turned my attention to the stem. I “painted” it with the flame of a Bic lighter to lift the tooth dents in the surface of the vulcanite. I was able to lift the majority of them. I sanded those that remained smooth with a folded piece of 220 grit sandpaper to blend them in the rest of the stem surface. I started polishing the stem with 400 grit wet dry sandpaper.
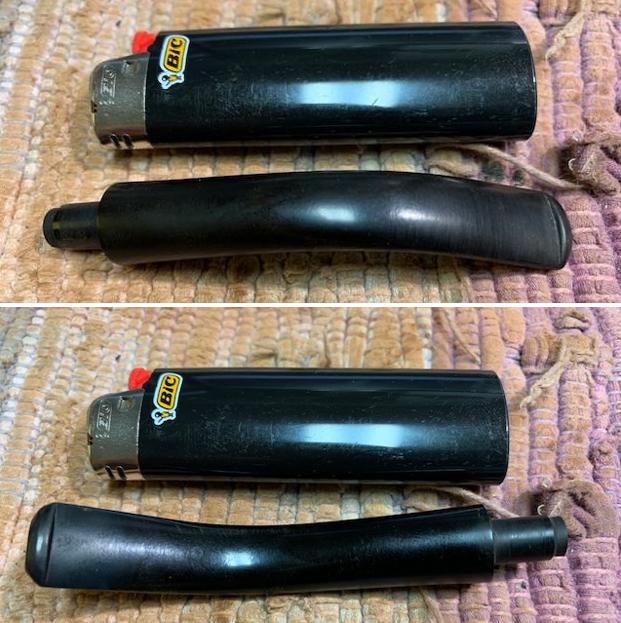
 I polished the stem with micromesh sanding pads – dry sanding with 1500-12000 grit sanding pads. I wiped it down after each sanding pad with Obsidian Oil. I polished it with Before & After Pipe Stem Polish – both Fine and Extra Fine. I gave it a final coat of Obsidian Oil.
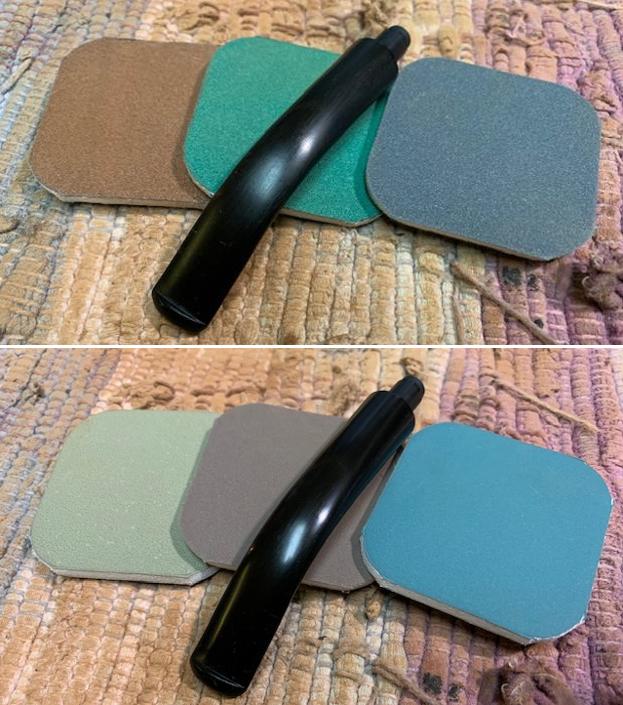
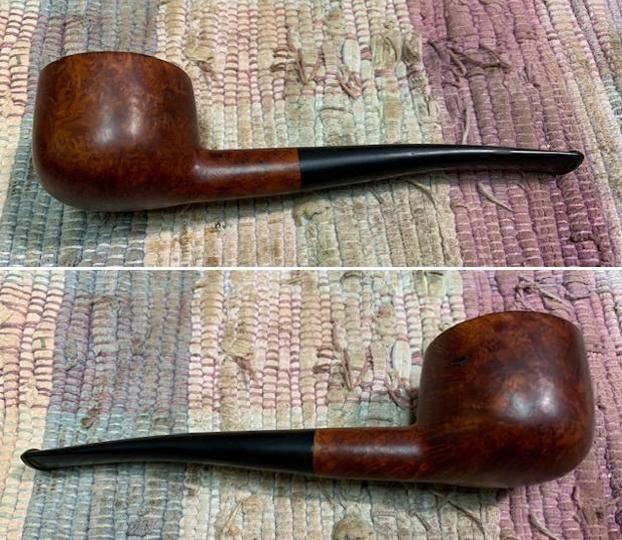
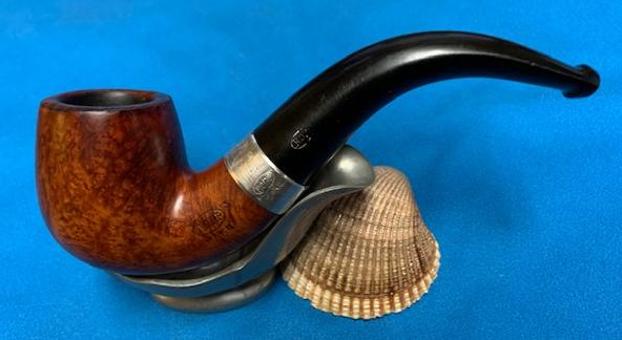
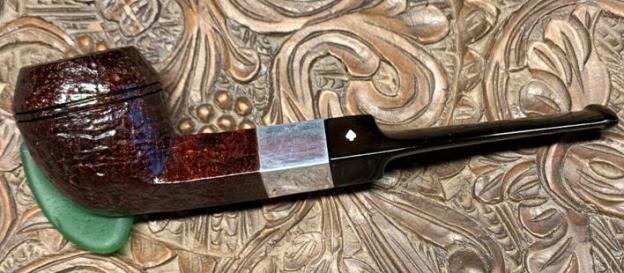
 With the bowl and the stem finished I put the beautiful Barclay-Rex New York Petite Bent Dublin back together and buffed it on the wheel using Blue Diamond to give it a shine. I gave the bowl and the stem multiple coats of carnauba wax on the wheel. I buffed it with a clean buffing pad to raise the shine. I hand buffed it with a microfiber cloth to deepen the shine. It really is a great looking pipe. The dimensions of the pipe are – Length: 5 ¾ inches, Height: 1 ¾ inches, Outside diameter of the bowl: 1 ¼ inches, Chamber diameter: ¾ inch. The weight of this large pipe is .99 ounces /28 grams. This Barclay-Rex Petite Bent Dublin is another great find in this collection. It is much more beautiful in person than these photos can capture. I will be putting it on the rebornpipes store soon. If you would like to add it to your collection let me know. This is another pipe that has the possibility of transporting the pipe man or woman back to a slower paced time in history where you can enjoy a respite. Thanks for walking through the restoration with me.