Blog by Paresh Deshpande
I had recently worked on a long Albatross wing bone stemmed Corn Cob which was both rustic and delicate from an estate lot of 40 pipes that I had acquired about six months ago. This was the second pipe from the lot that I had refurbished, the first being a huge Real Cherry wood pipe. Here is the link to both the write ups which will provide background information as to how I came to acquire this lot and the condition of the pipes that I had received;
https://rebornpipes.com/2020/03/08/refurbishing-a-real-cherry-foreign-pipe-from-estate-lot-of-40/
https://rebornpipes.com/2020/05/10/refurbishing-a-vintage-corn-cob-pipe-with-an-albatross-wing-bone/
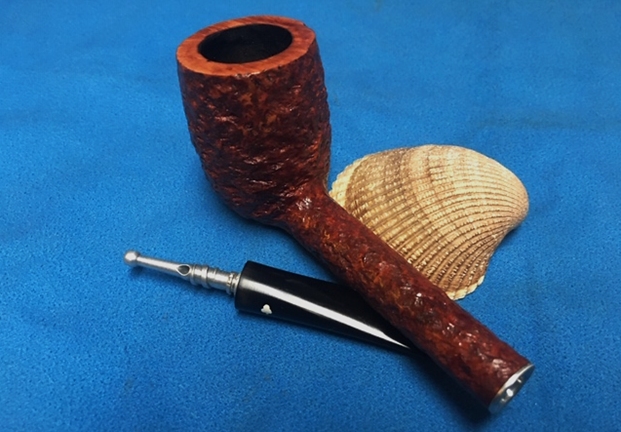
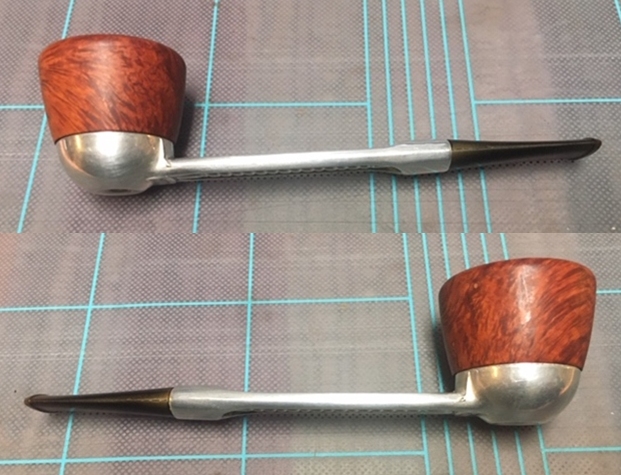
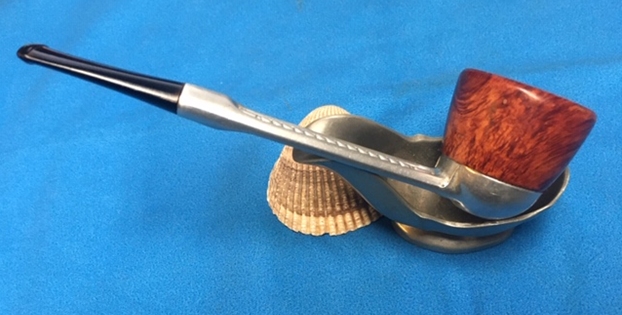
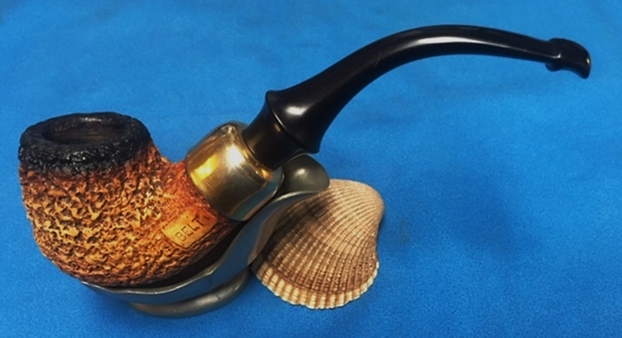
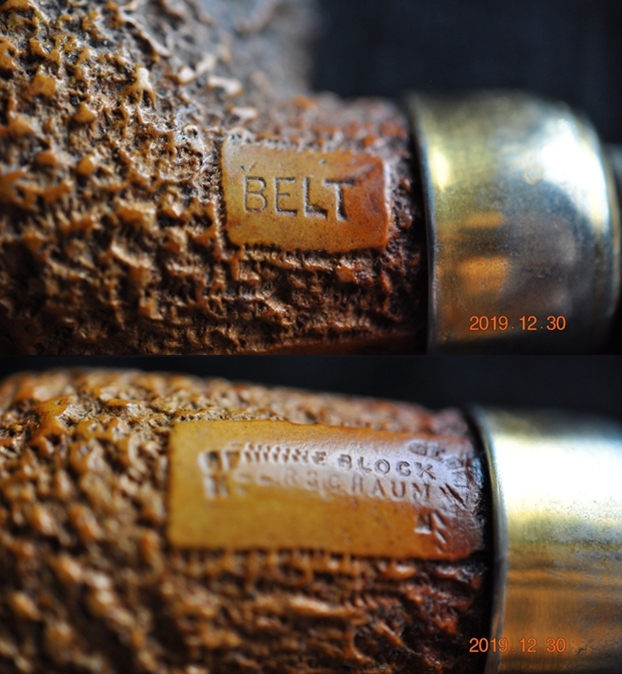
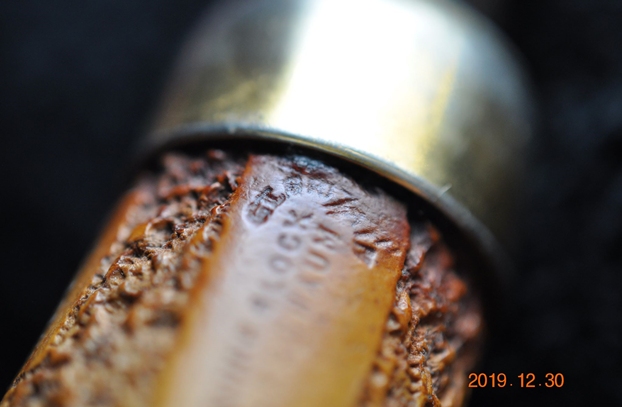
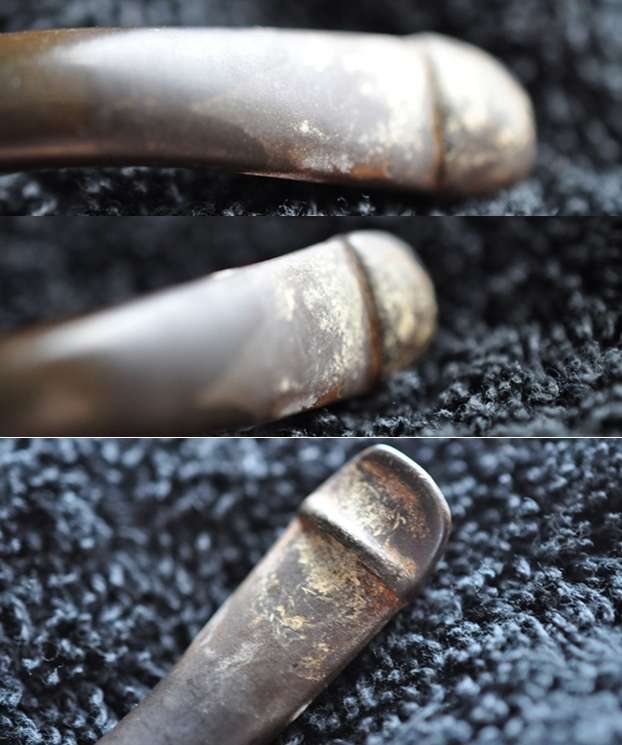
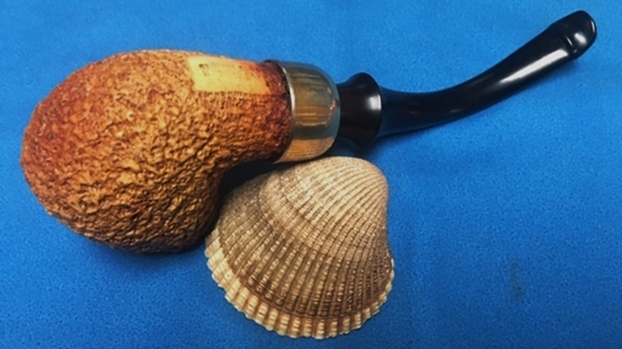
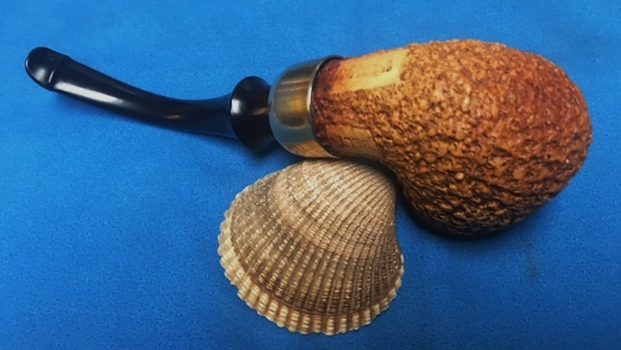
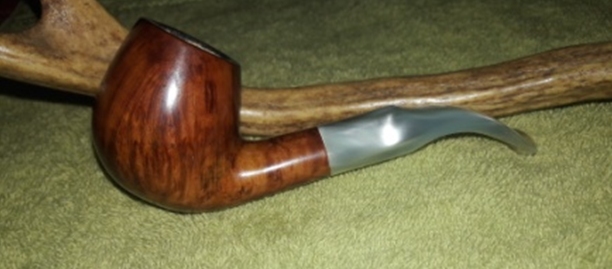
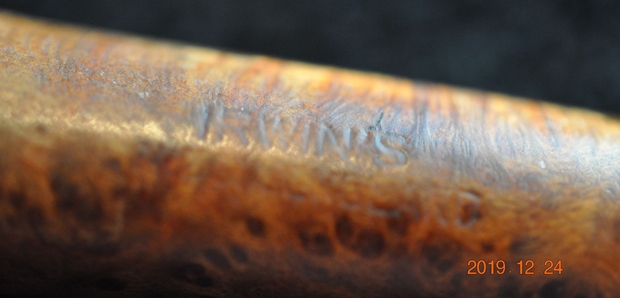
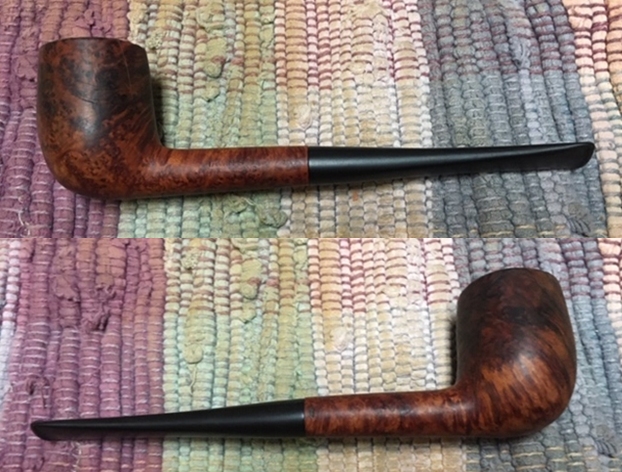
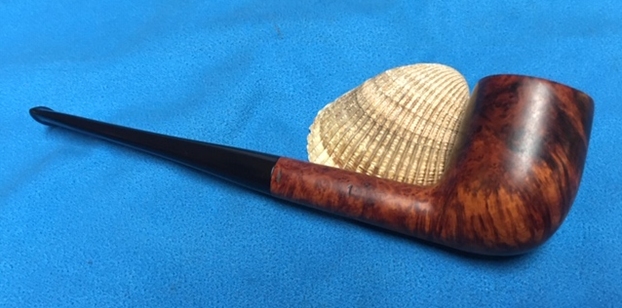
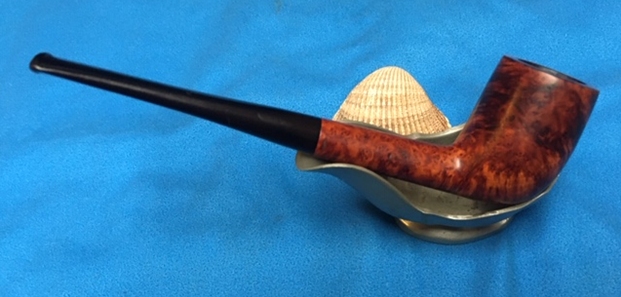
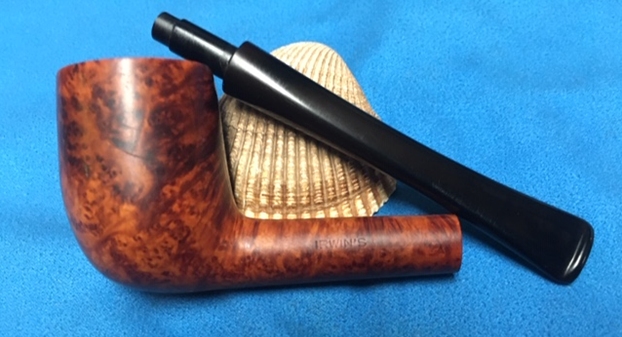
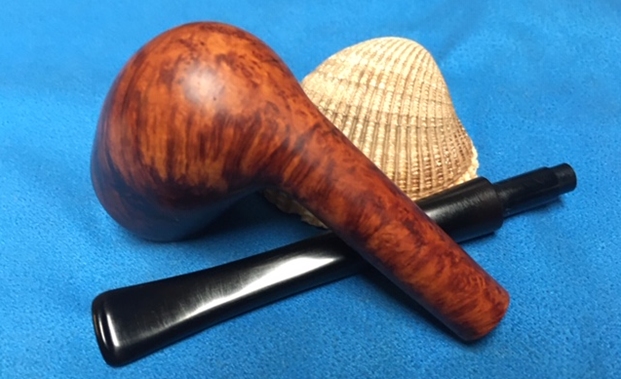
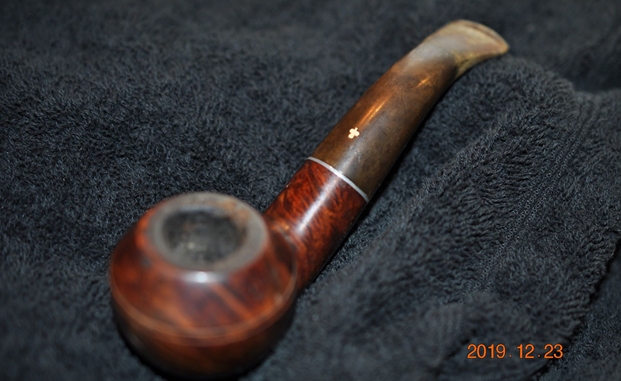
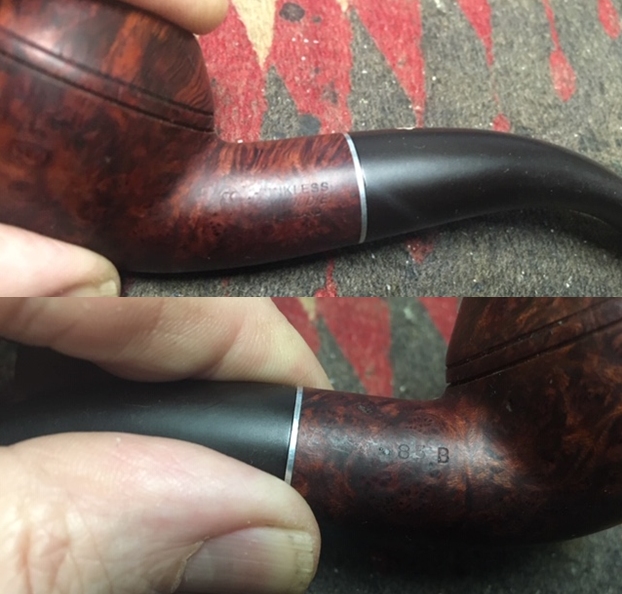
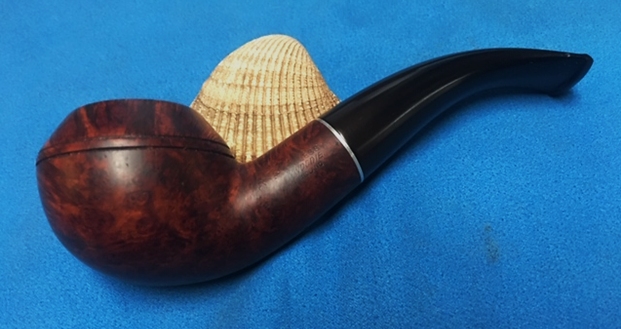
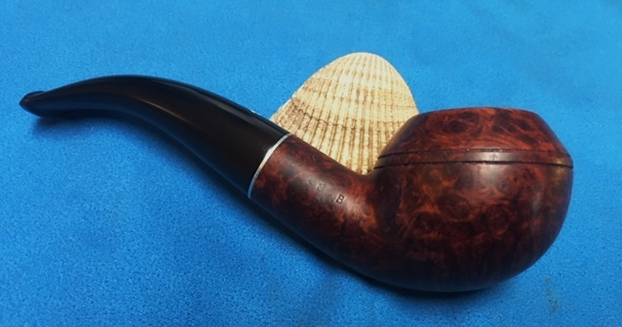
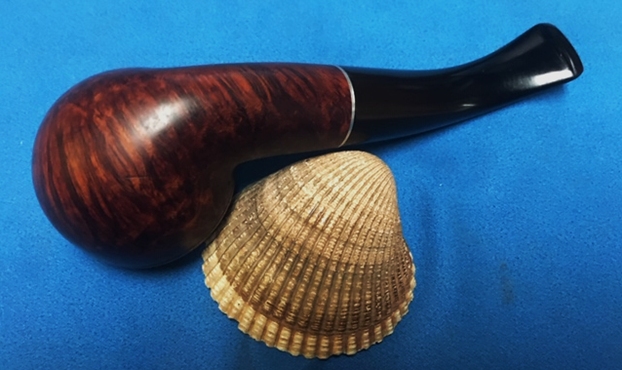
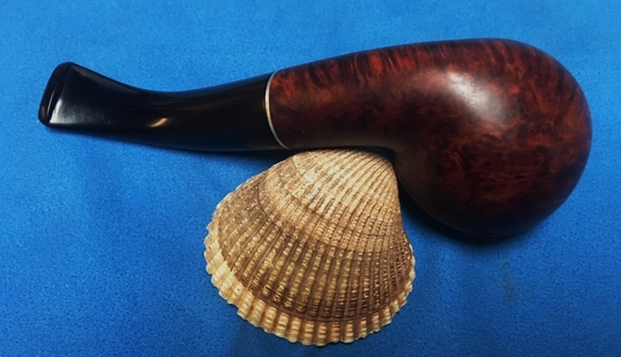
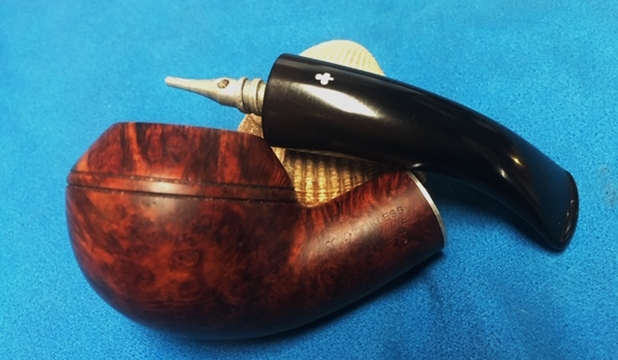
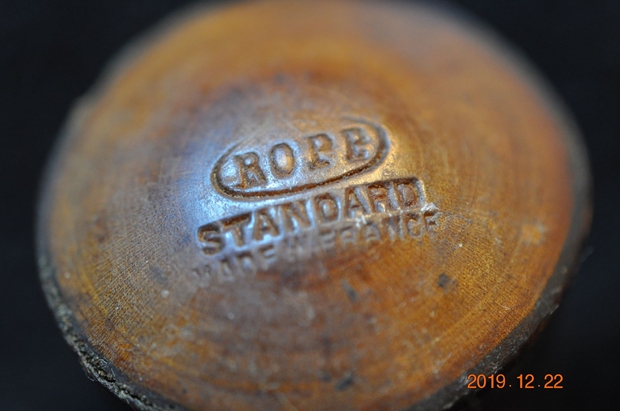
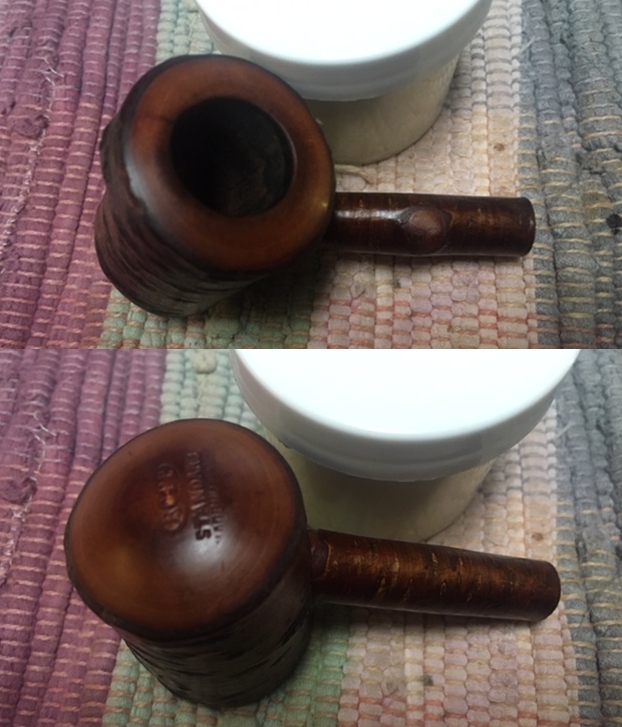
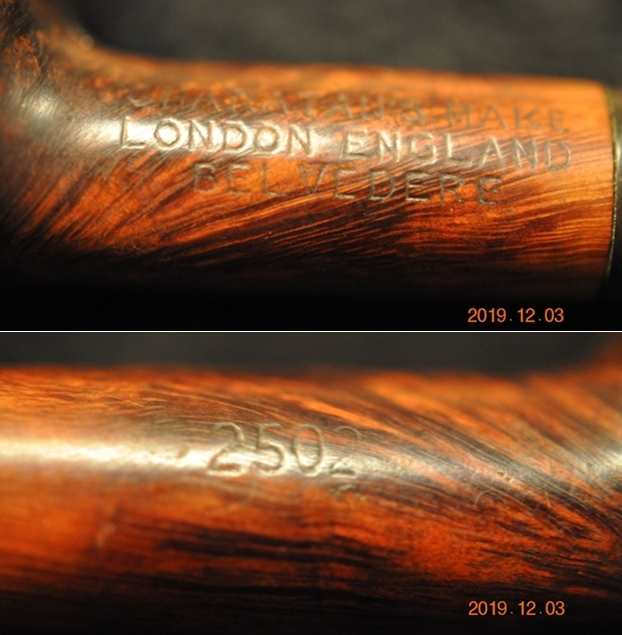
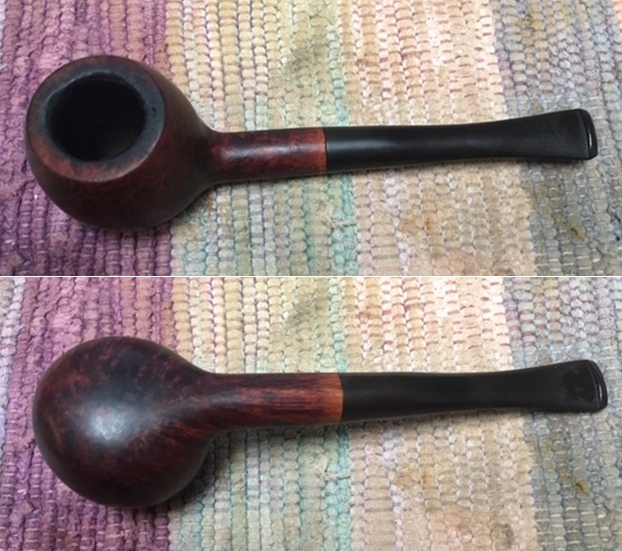
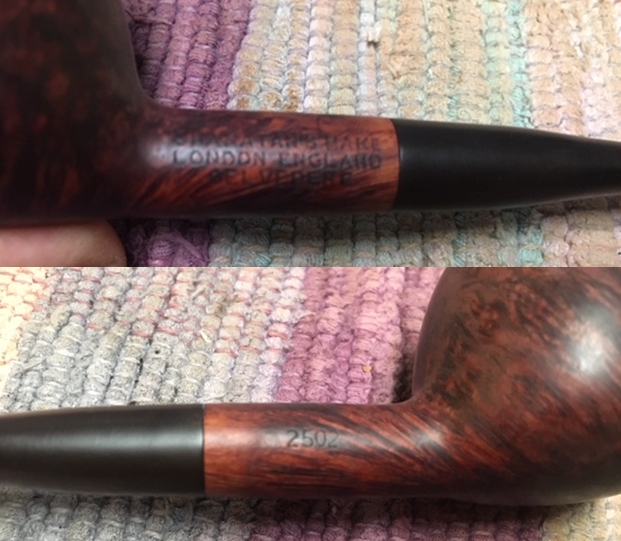
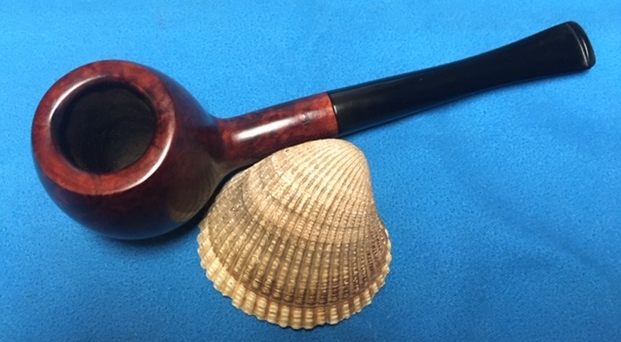
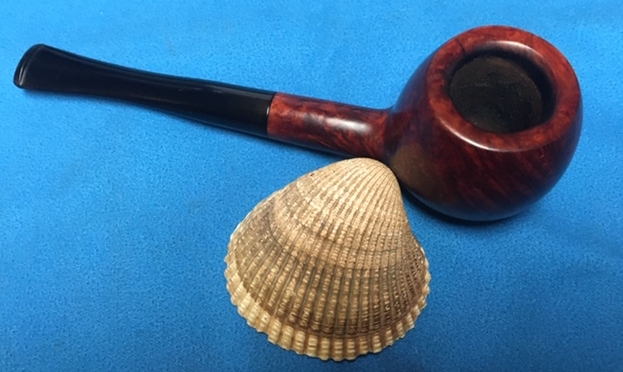
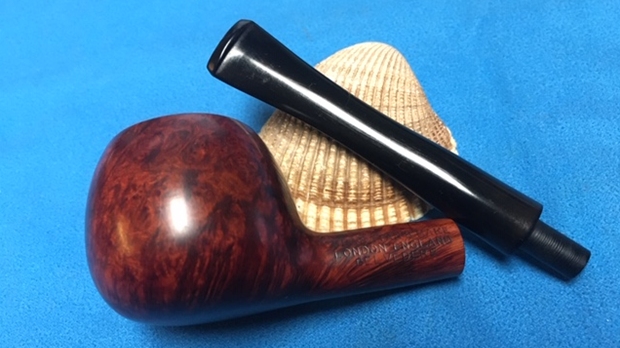
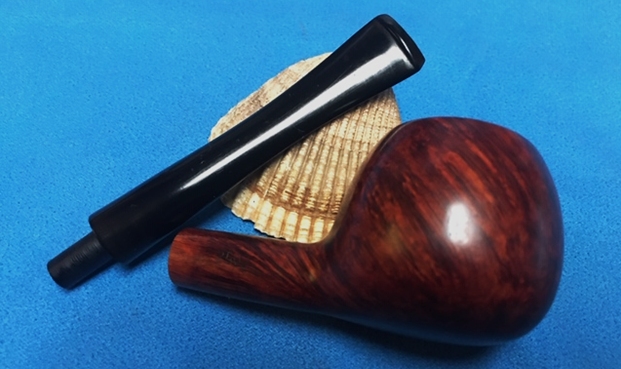
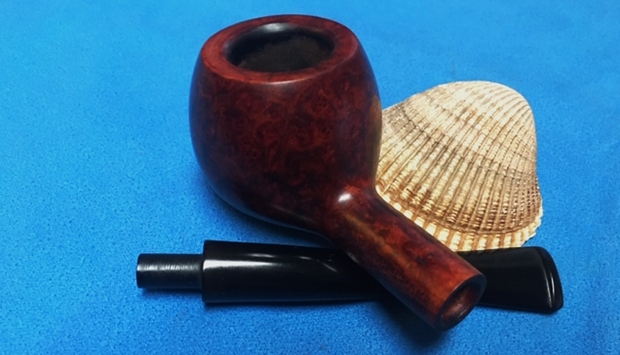
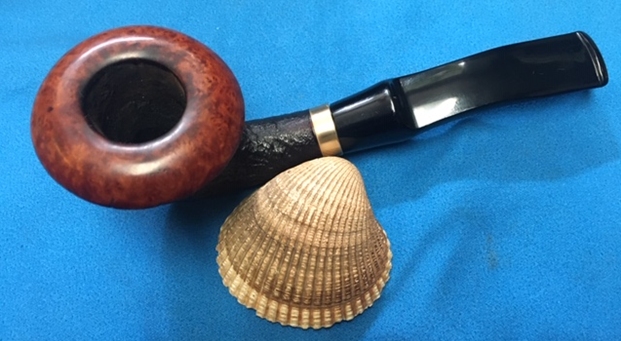
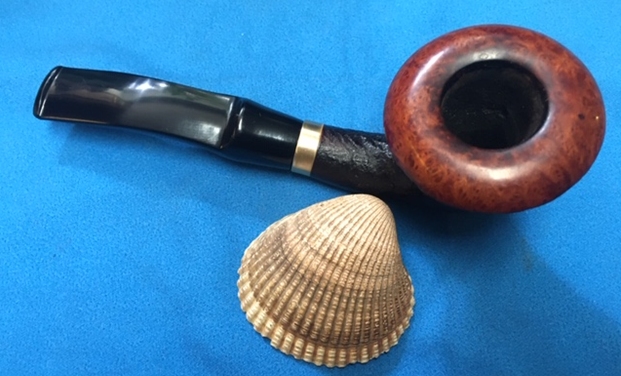
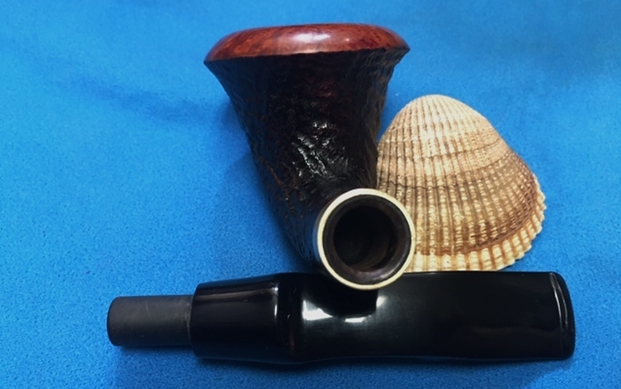
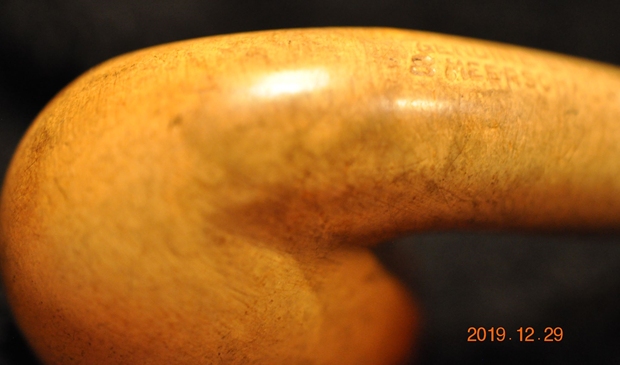
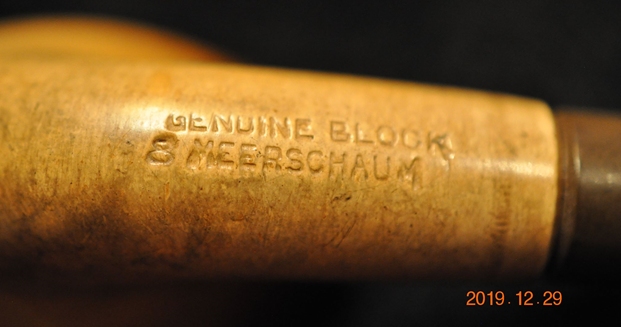
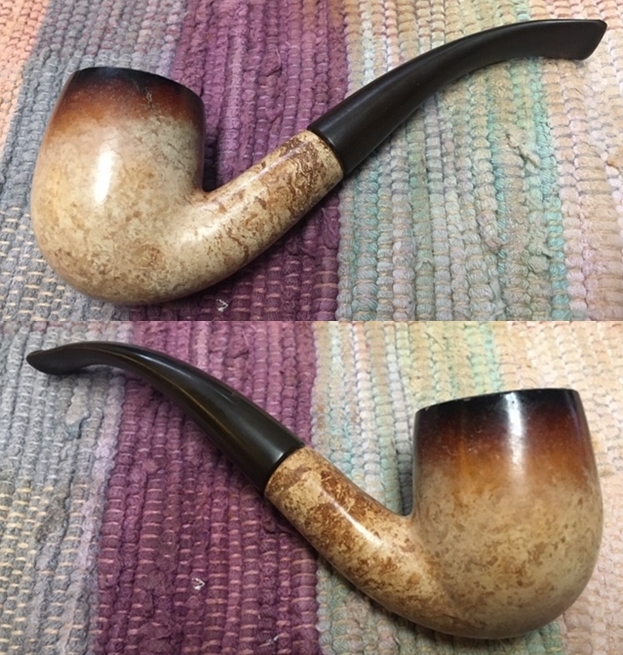
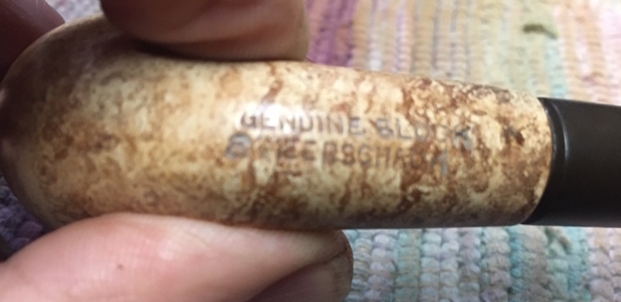
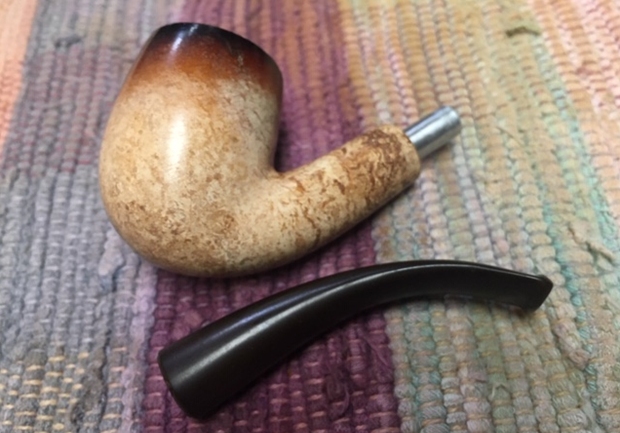
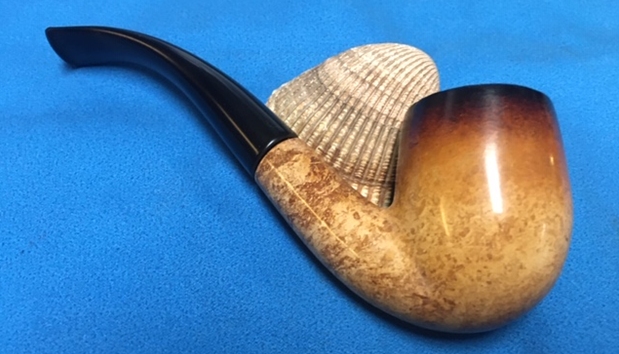
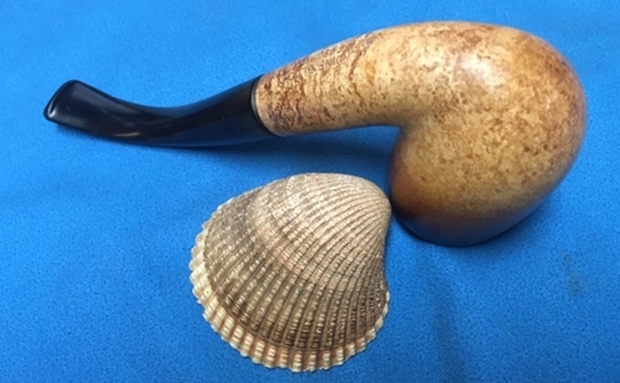
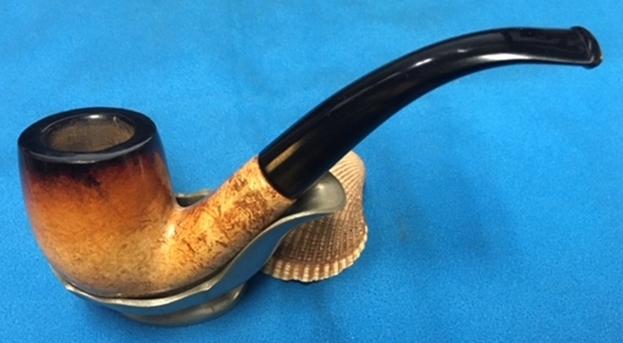
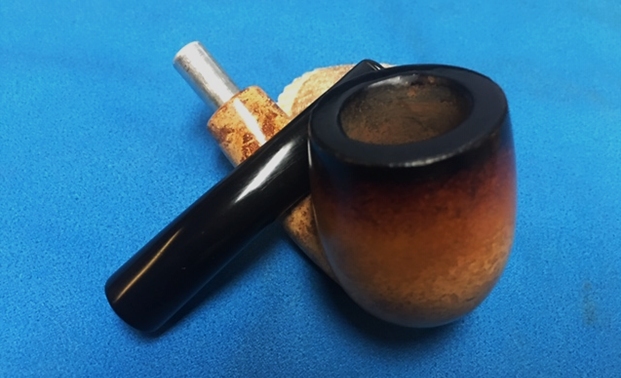
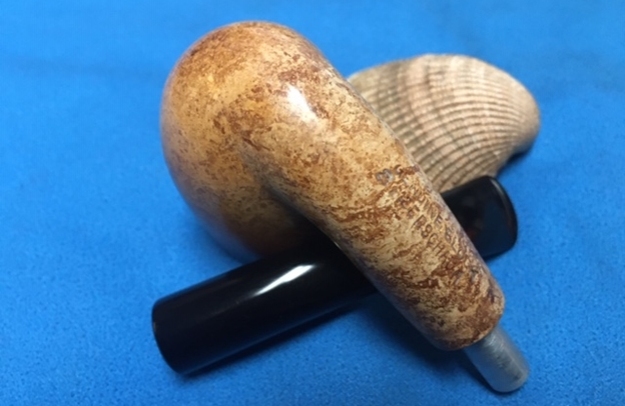
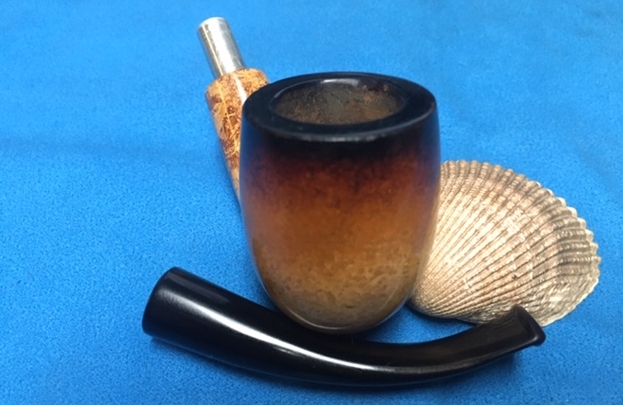
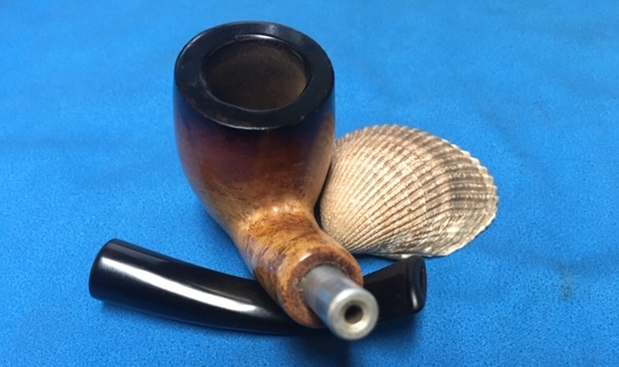
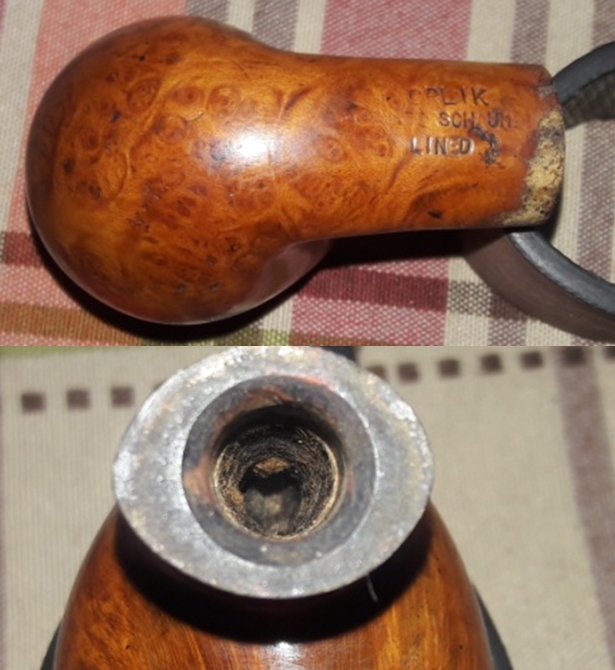
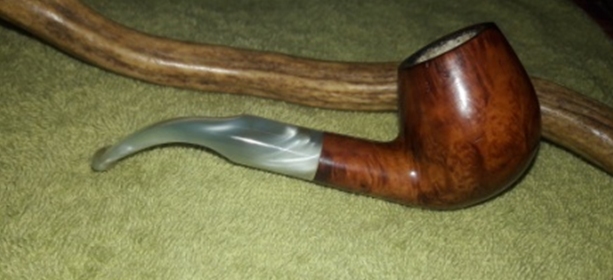
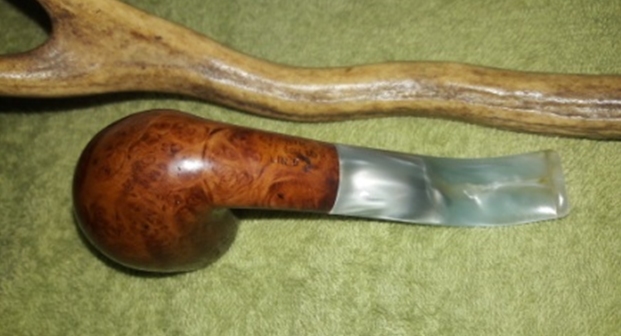
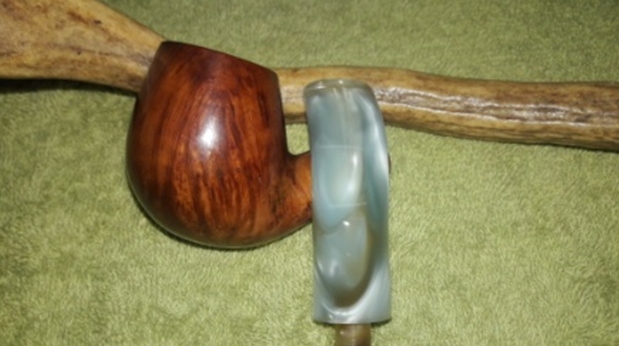
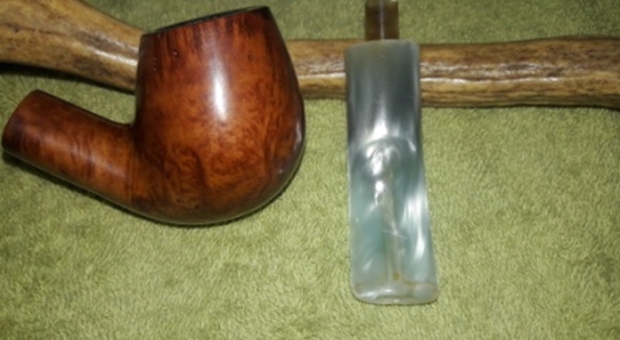
The third pipe from this lot and currently on my work table is beautiful Bent Brandy with a pearly variegated stem with swirls of light browns and grays. The first two pipes that I had worked on are marked with yellow and green arrows while the third pipe that is currently on my work table is shown in the second picture marked in indigo colored arrow.  The pipe feels heavy and solid in hand. It is stamped on the bottom surface towards the shank end as “ORLIK” over “MEERSCHAUM” over “LINED”. There is no shape code or COM stamp on the stummel. The acrylic stem too is devoid of any stamping.
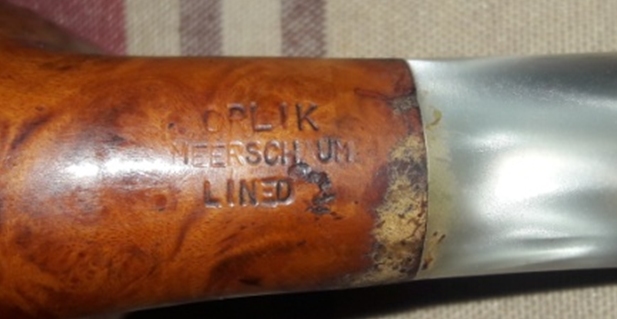 I referred to pipedia.org for information on the firm ORLIK, my interest being piqued since I remember having seen a few Orlik pipes in my inherited pipe collection (unfortunately, I have never gotten around to work on any of them as yet!!). From what I have learned, the company was started in 1899 by Louis Orlik in London, Bond Street to produce HIGH QUALITY pipes for a RELATIVELY LOW PRICE. In 1980 the company was acquired by Cadogan. Like many of London’s other pipe manufacturers they moved to a new built factory in Southend-on-Sea. As all current brands in the Cadogan group, Orlik was being produced in those factories. In the same article, at the end is an onsite link to Dating Orlik Pipes by Michael Lankton, which makes for an interesting read. I reproduce the relevant portion which points to the pipe currently on my table;
- Virgin(Series Letter:Without letters)
- Old Bond Street(Series Letter:A)
- Old Bond Street Sandblast(Series Letter:AX)
- Supreme(Series Letter:T)
- Supreme Sandblast(Series Letter:TX)
- Meerschaum Lined(Series Letter:M)
- Corona(Series Letter:C)
- Old Root(Series Letter:R)
Here is the pipedia link to the article on Orlik pipes;
https://pipedia.org/wiki/Orlik
Since the pipe currently on my table is sans the series letter M and also the stem is neither Hand cut nor molded vulcanite but variegated acrylic stem, I assume that it is a Post Cadogan era pipe that is Post 1980s.
Initial Visual Inspection
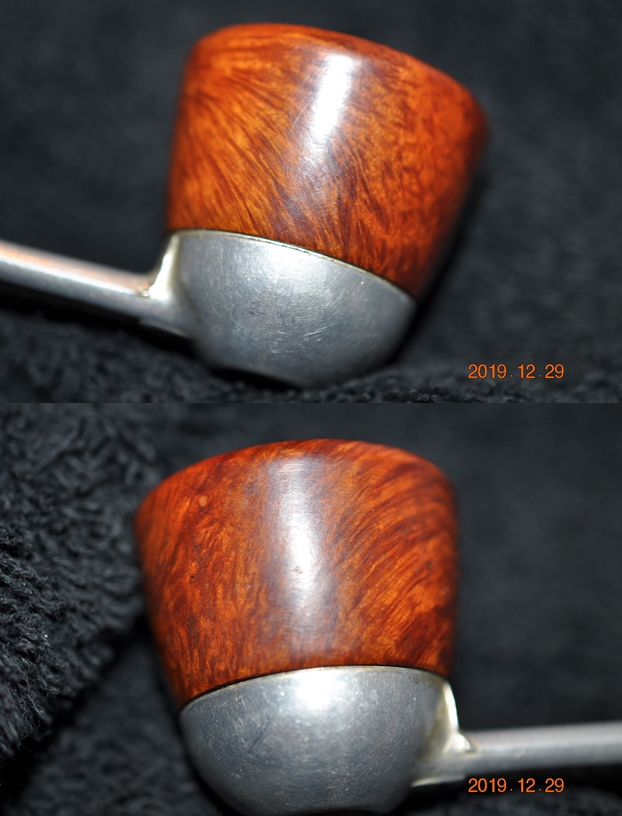
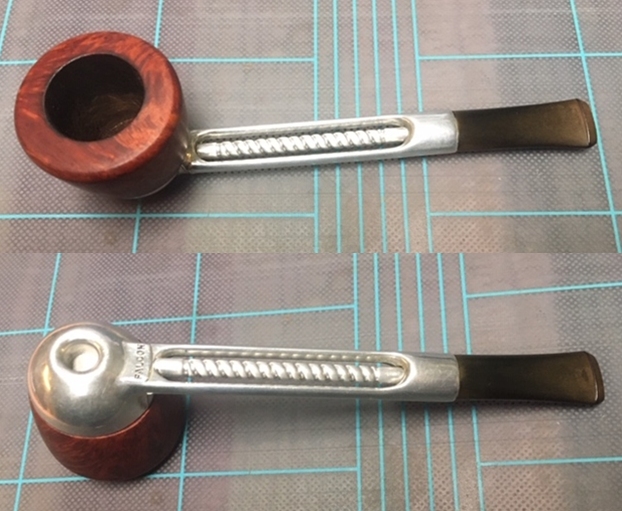
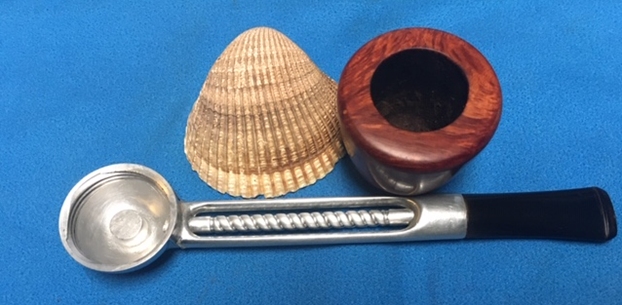
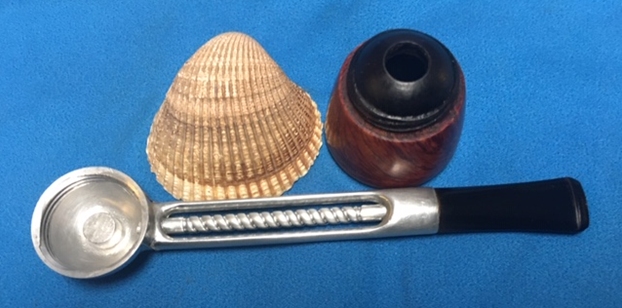
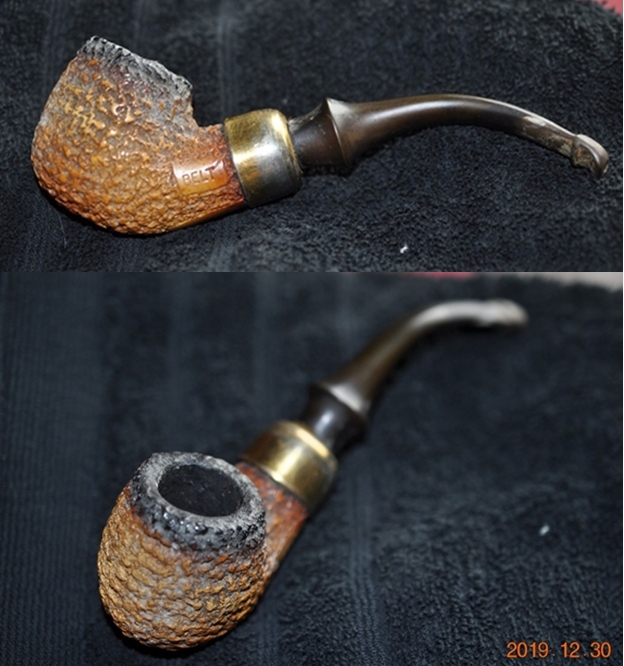
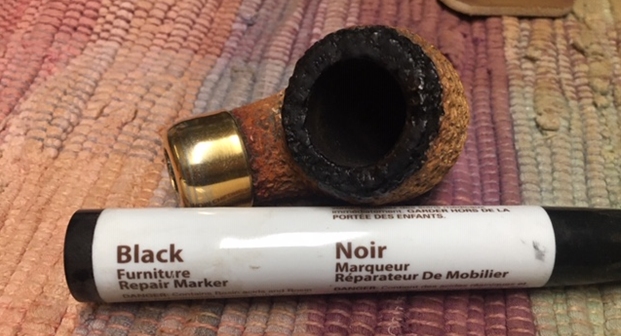
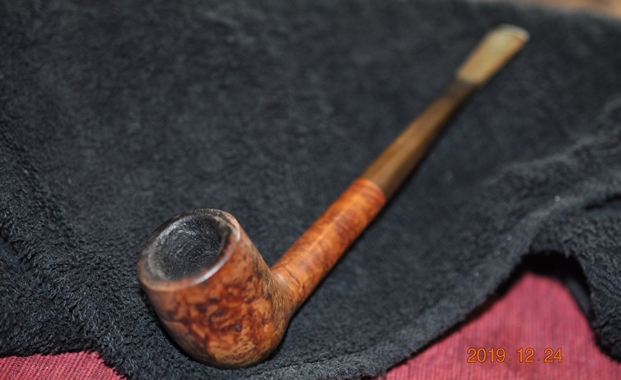
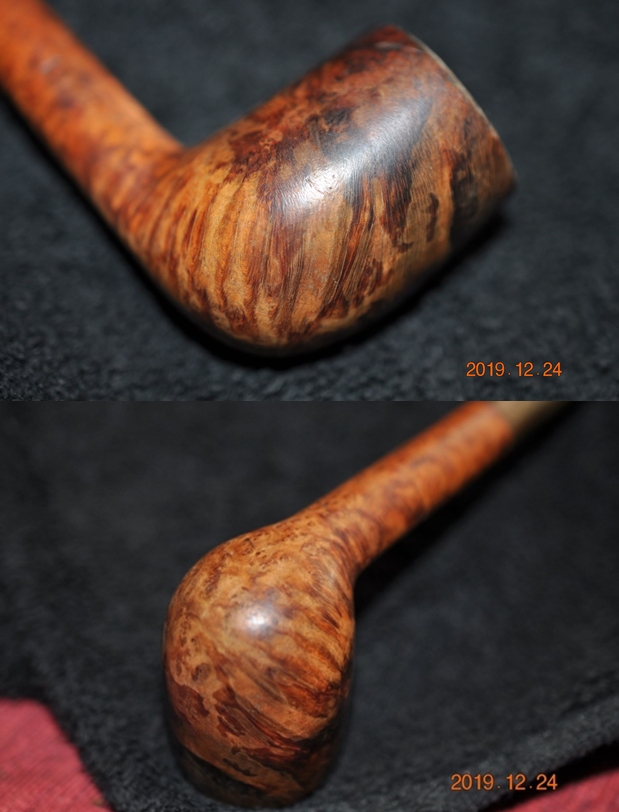
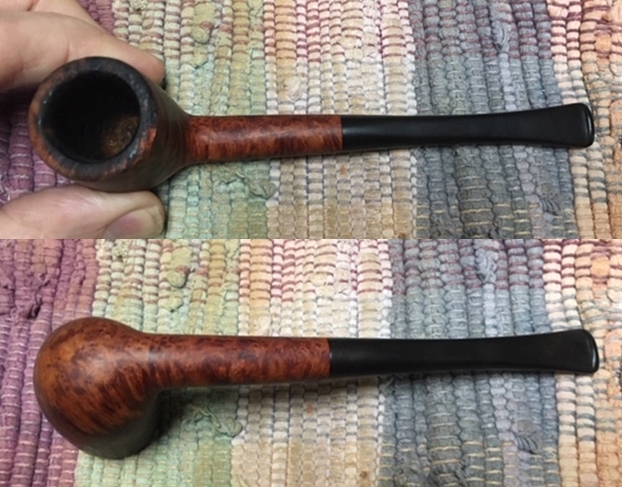
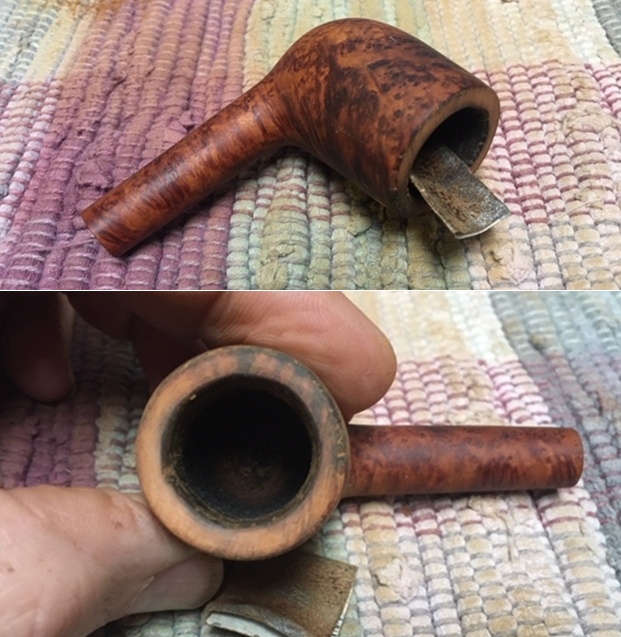
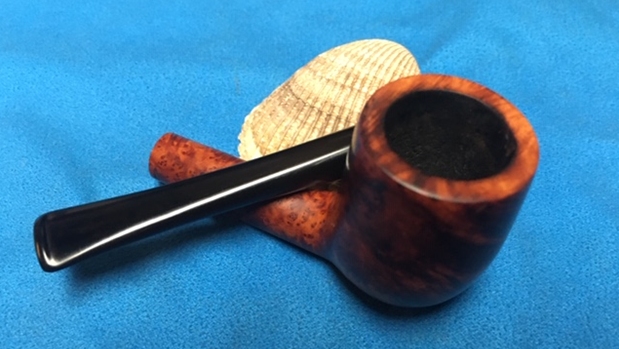
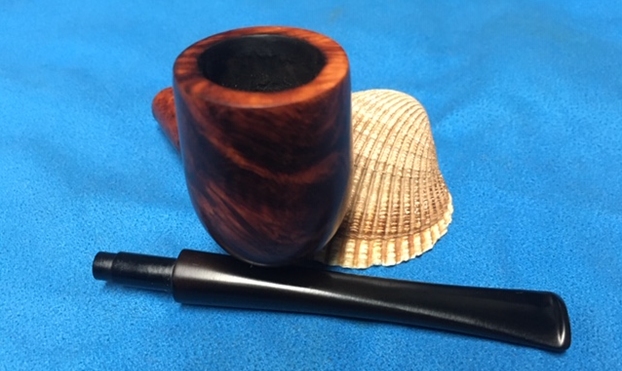
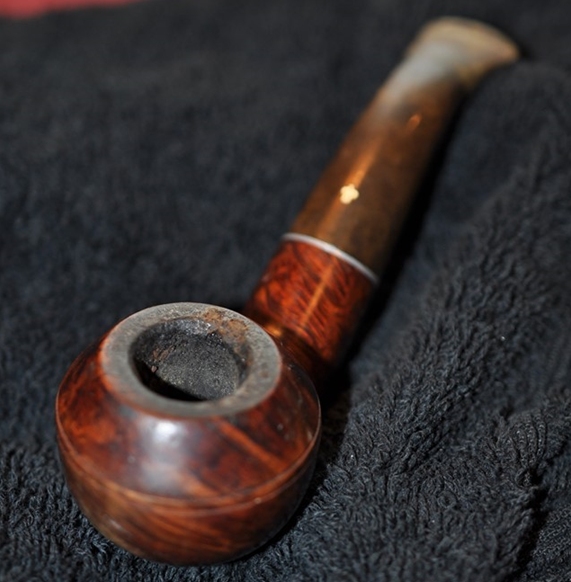
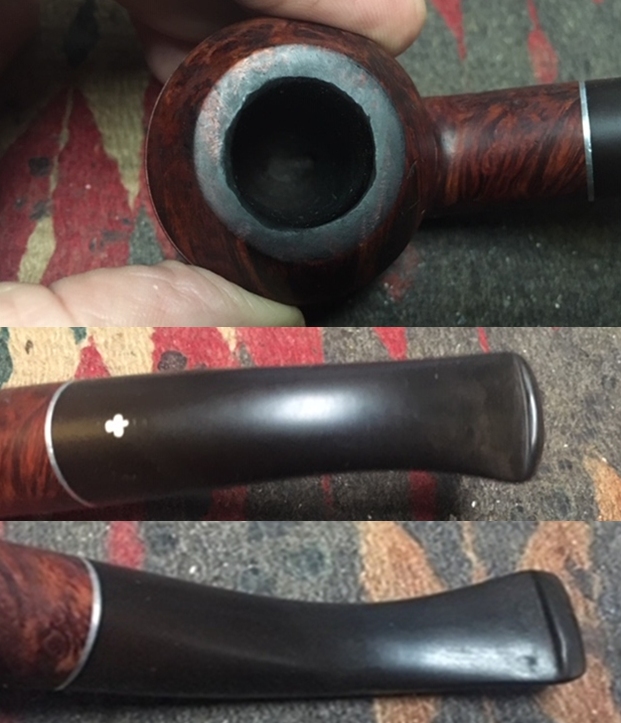
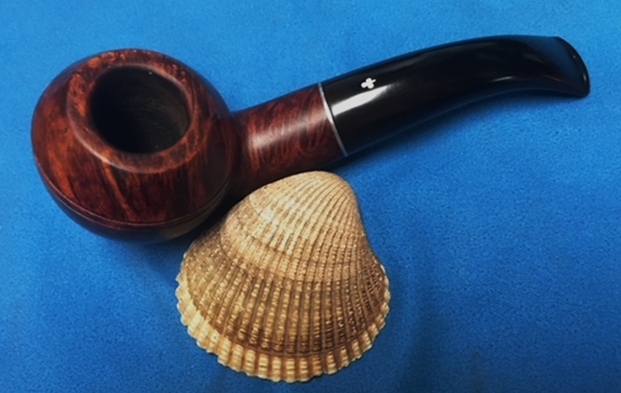
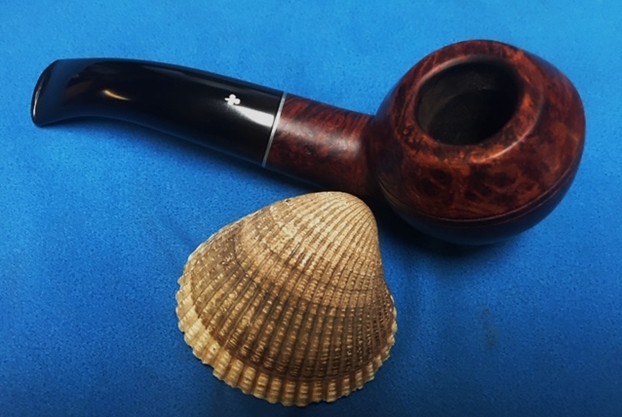
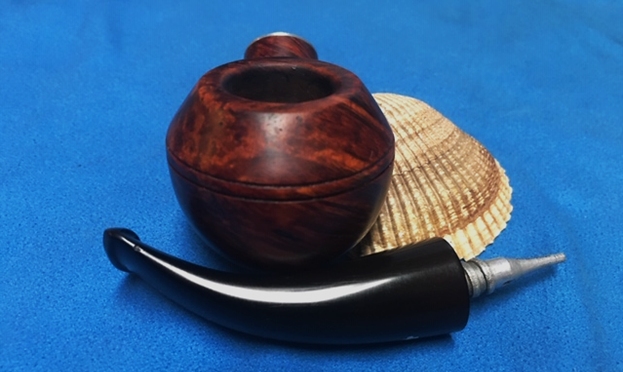
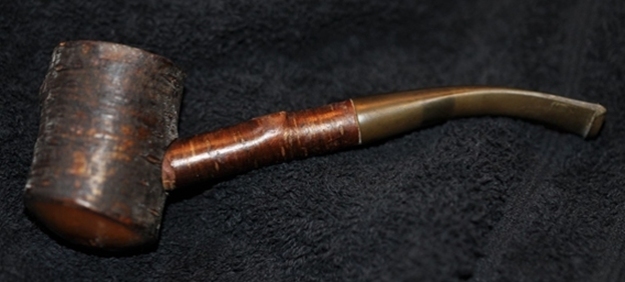
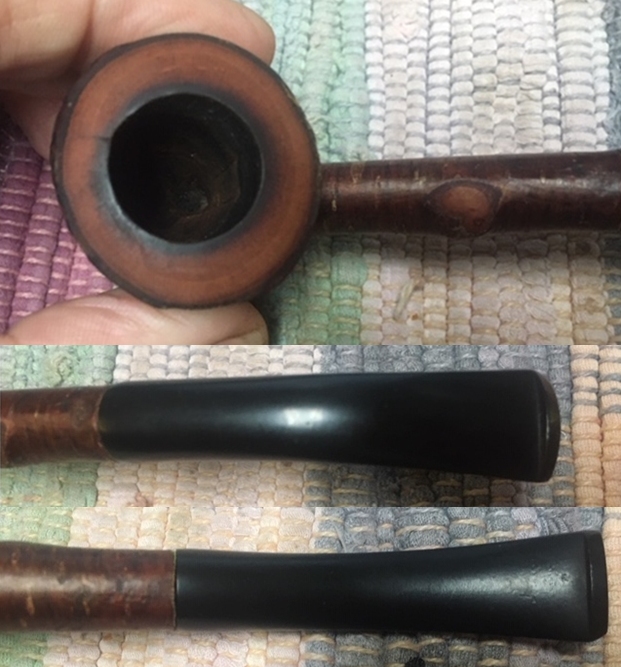
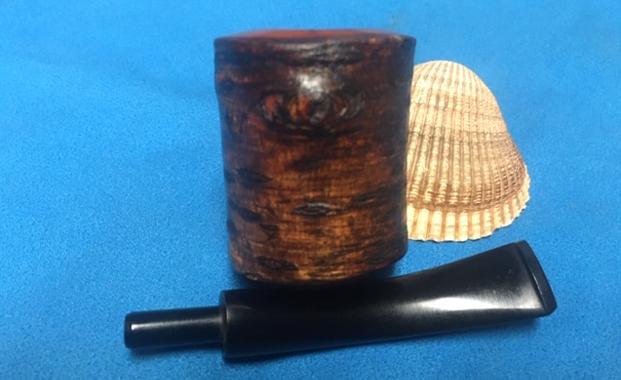
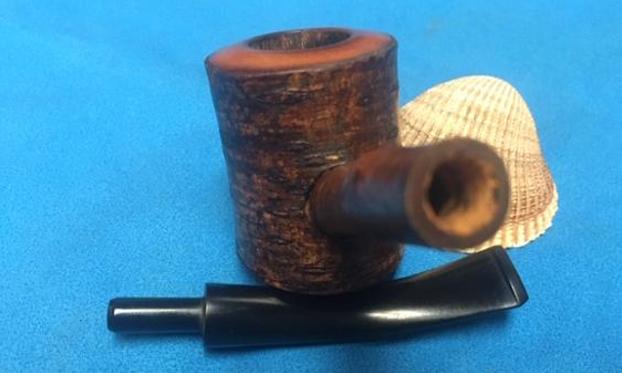
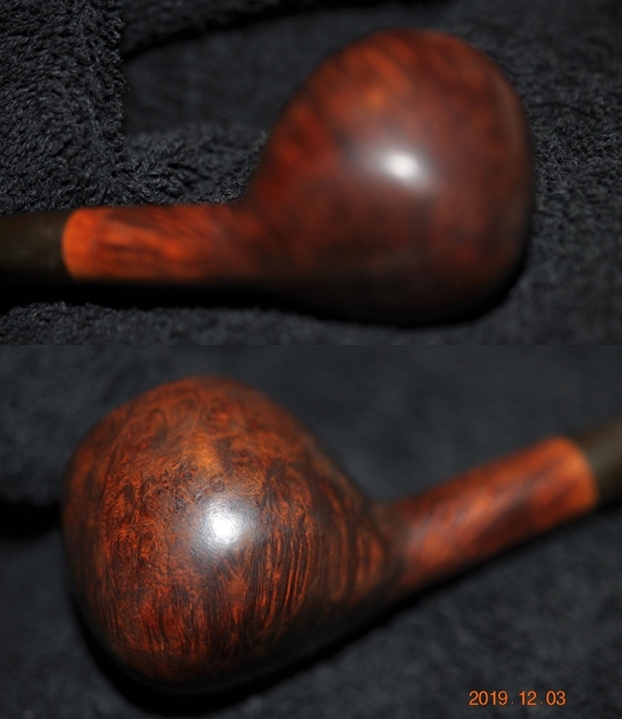
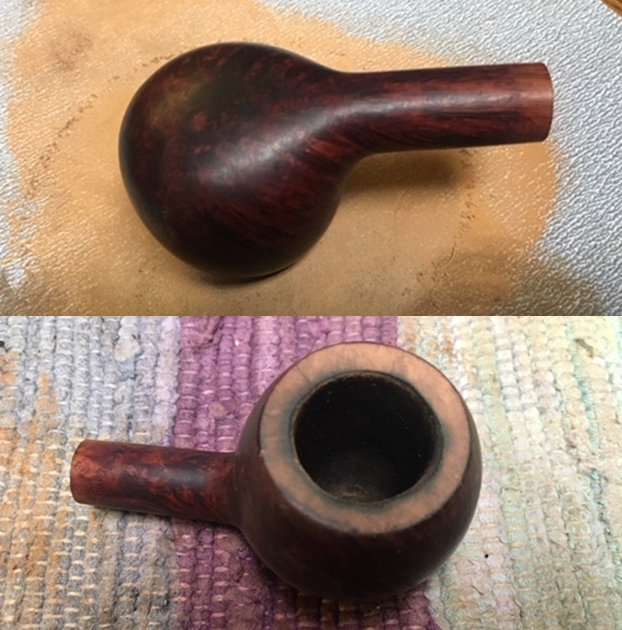
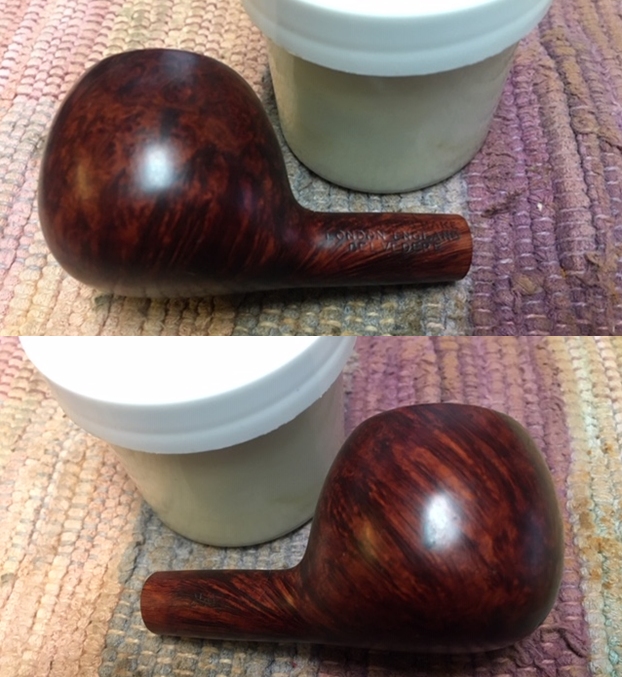
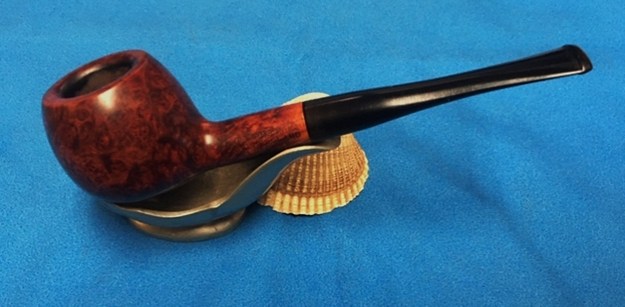
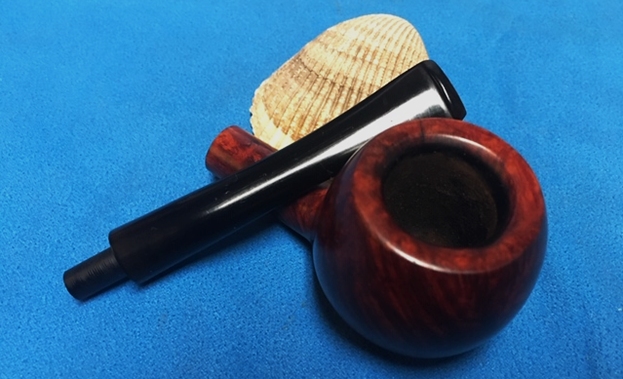
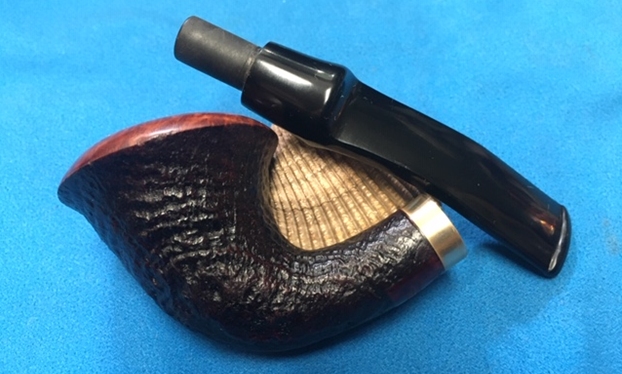
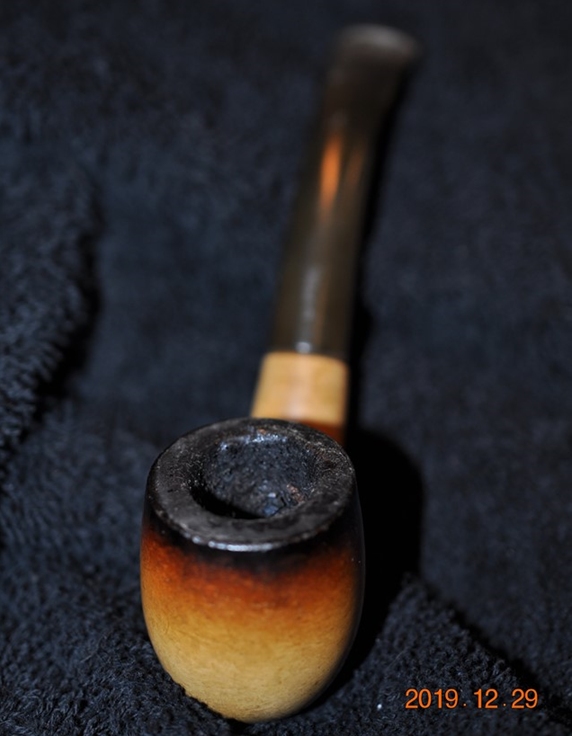
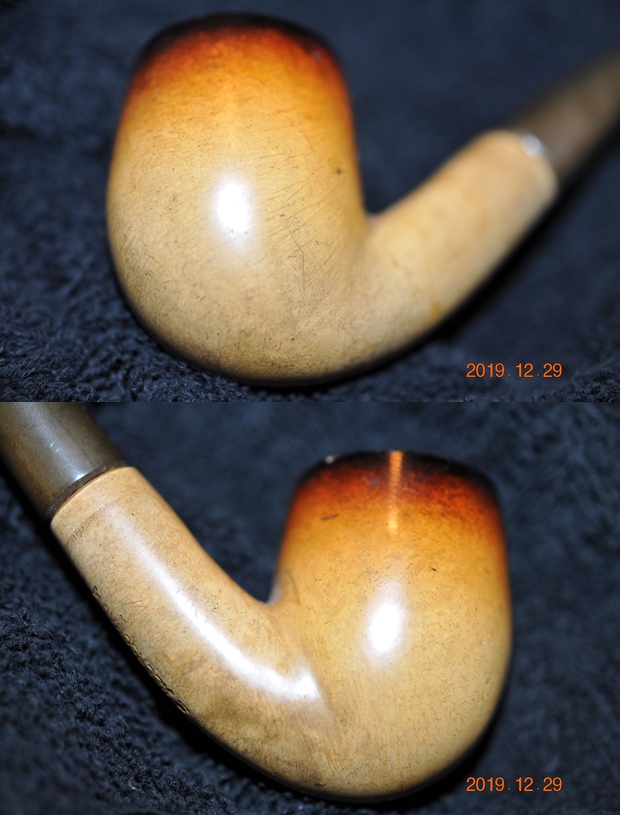
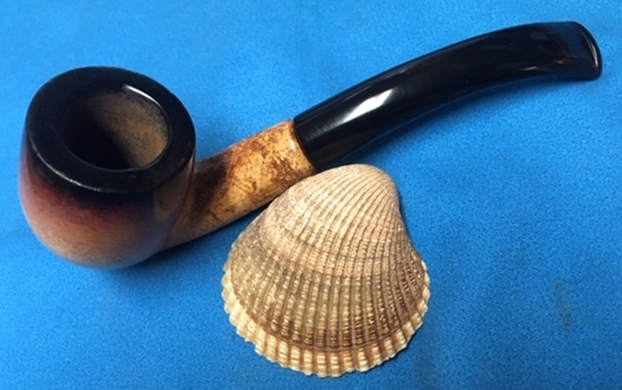
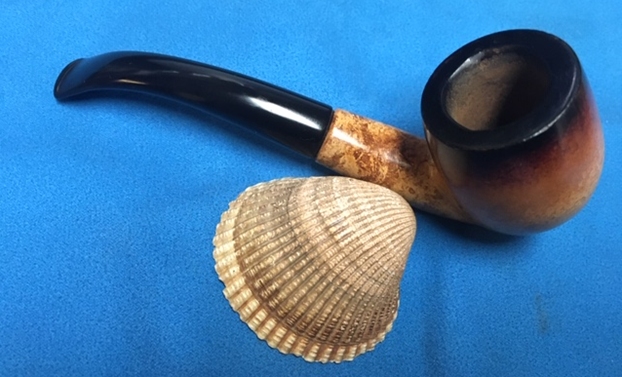
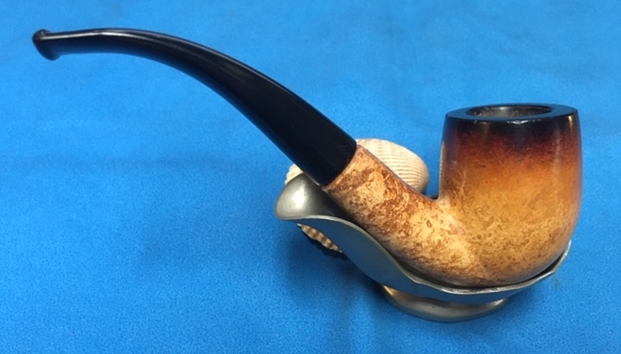
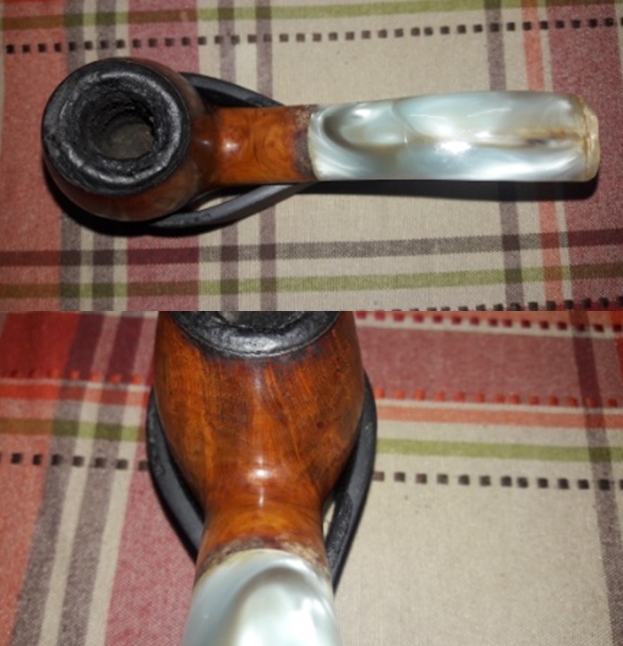
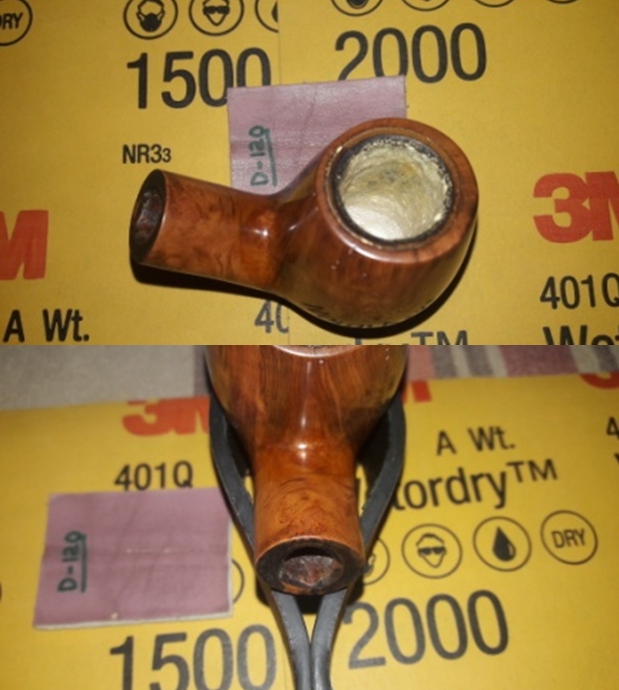
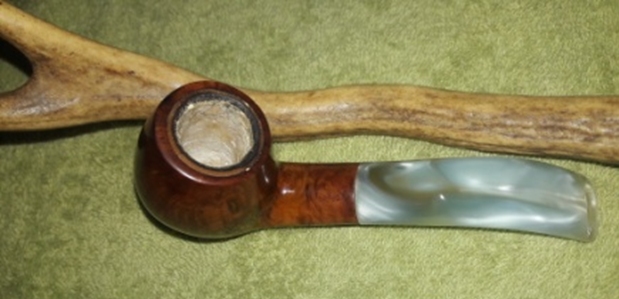
The pipe, as it appears, is shown in the pictures below. There is thick layer of cake in the chamber with equally heavy overflow of lava over the rim top surface. The stummel is dirty with a number of dents/ dings and minute fills that are visible. The stem is filthy with heavy tooth chatter and deep bite marks in the bite zone and button edges on either surface. All in all, this was a very well loved pipe that has the classic signs of poor care and rough use.
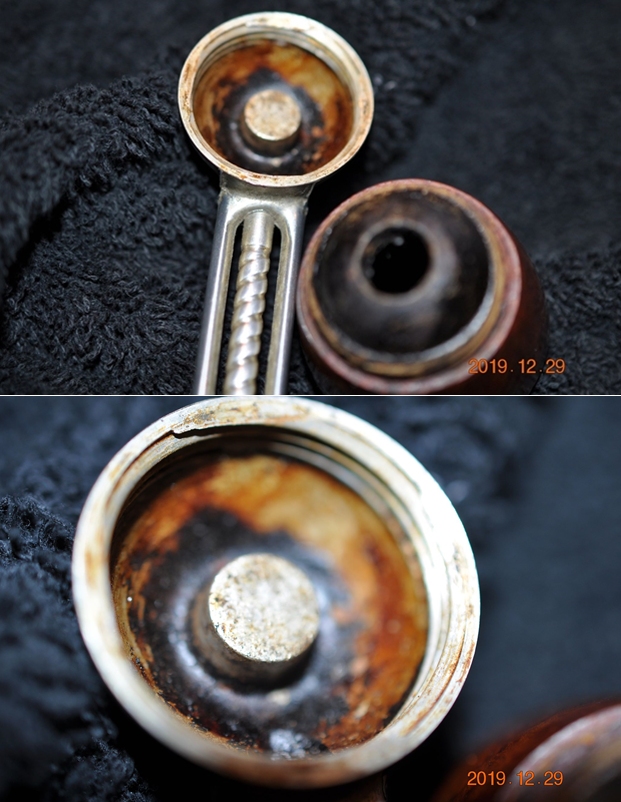
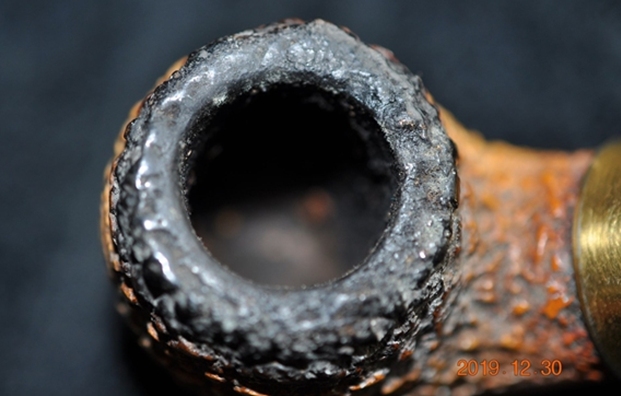
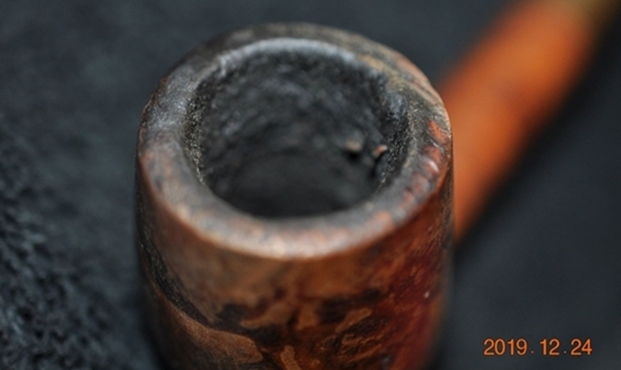
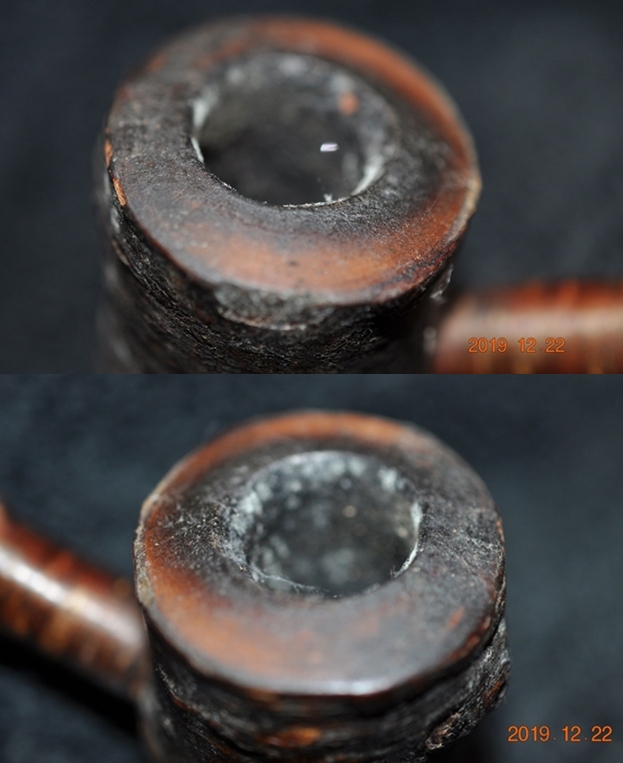
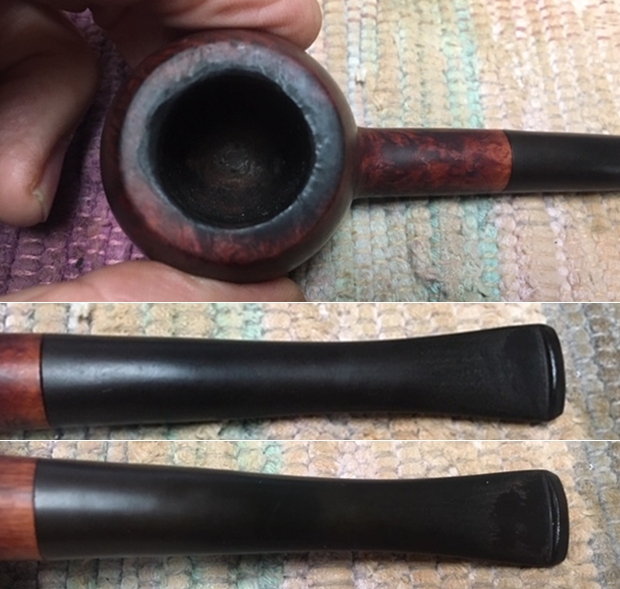
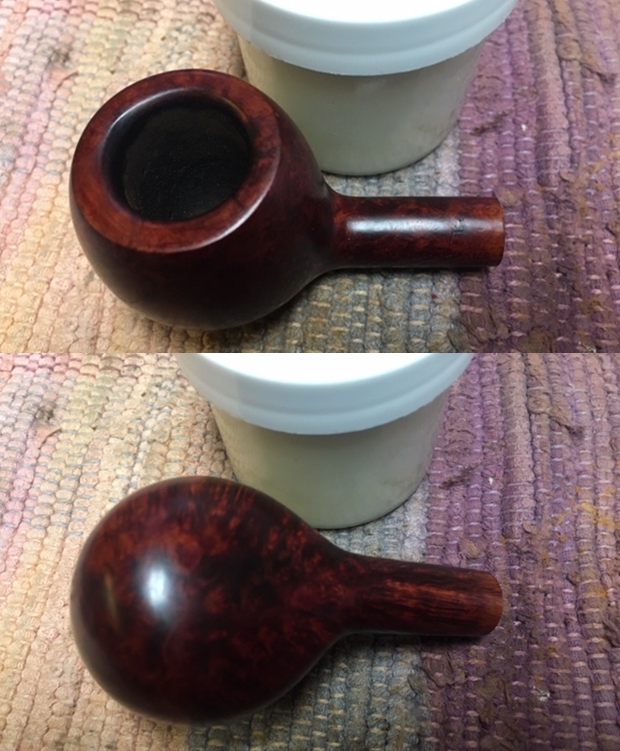
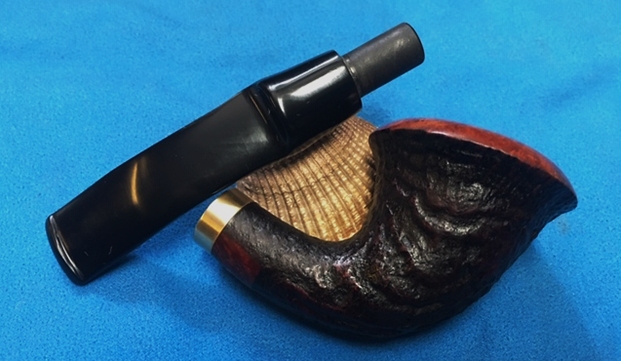
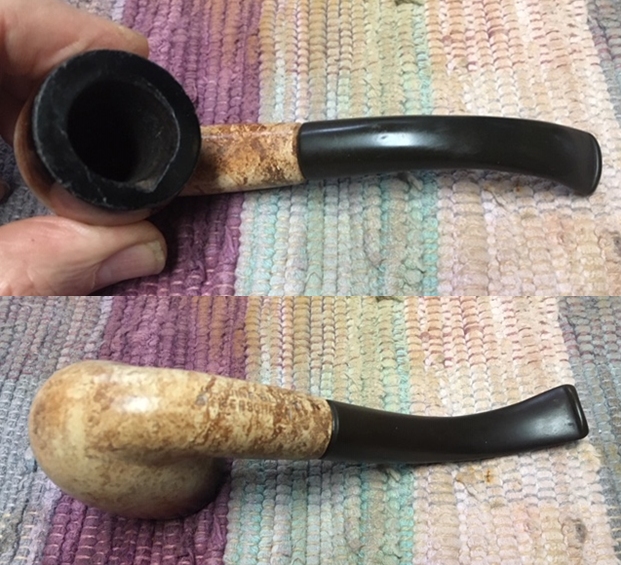
 The chamber has a thick even layer of hard cake. There are copious amounts of old oils, tars and grime that have overflown the rim top surface and further down the stummel surface. The thick cake and heavy lava overflow over the rim top masks the condition of the chamber walls and the rim surface. The condition of these surfaces will be determined only once the cake and lava overflow has been cleaned up. The rim top surface is highly uneven as evinced by the uneven accumulation of lava overflow, again, this is just speculation as what surprises are hidden beneath will be revealed only once the overflow has been removed. There are signs of charring along the outer rim edge and one prominent charred portion is at 1 o’clock direction to the front of the bowl. The smells from the chamber are very strong (very strong is actually an understatement) and all pervading. This issue of old smells will have to be addressed. I shall top the rim to make it perfectly even and also address the charred outer rim edges. It has been my experience that such thick layer of cake invariably hides some kind of wall damage, either heat fissures or beginnings of a burnout. Being meerschaum lined, I just don’t want a broken/ cracked meerschaum surface.
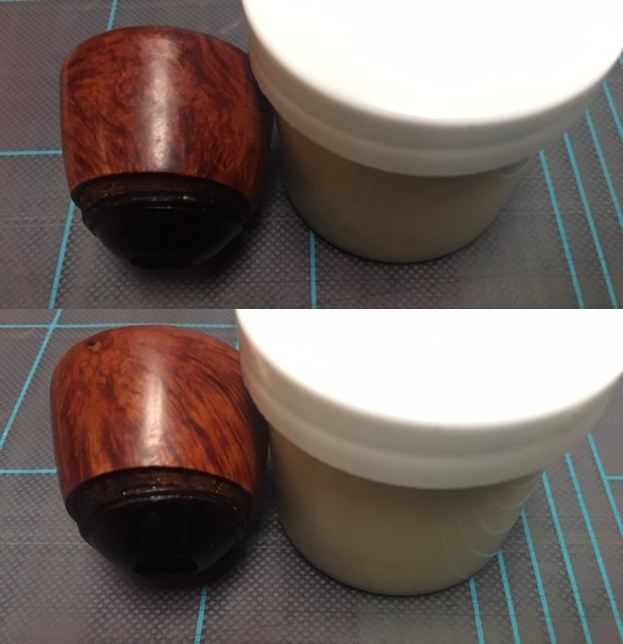
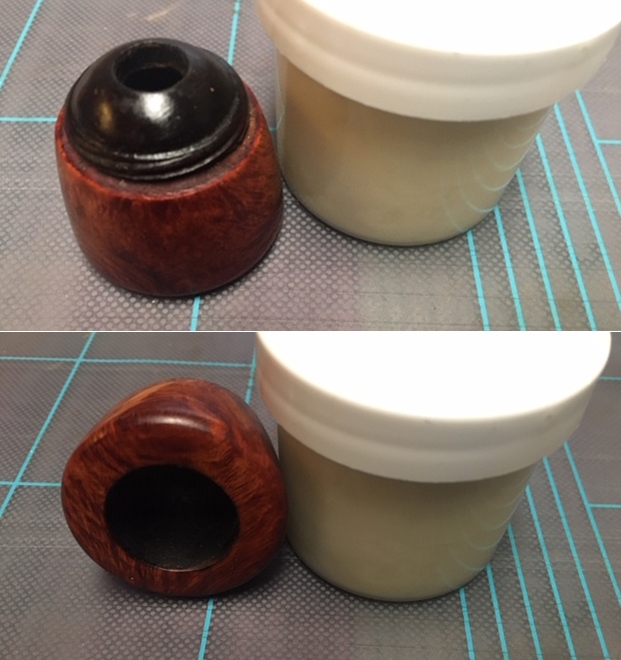
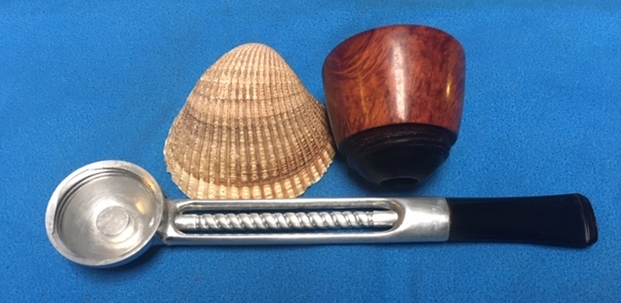
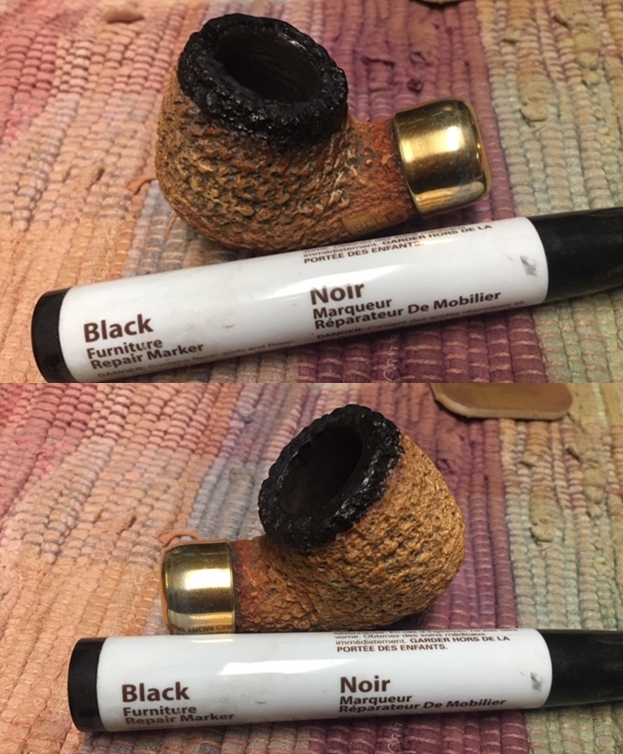
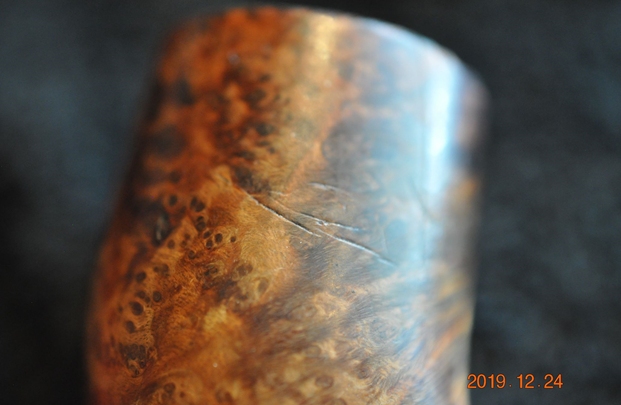
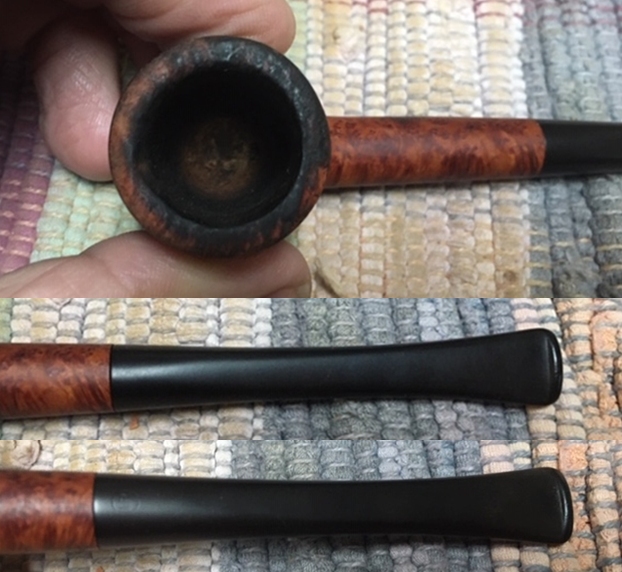
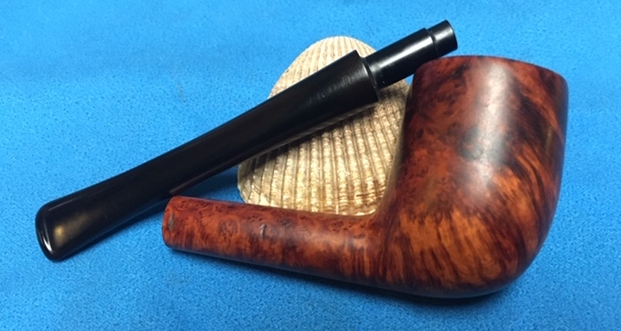
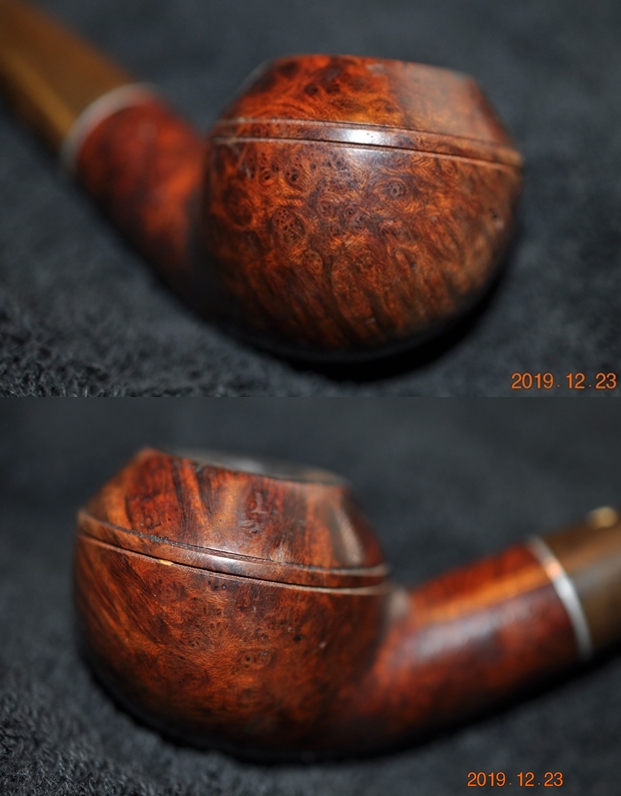
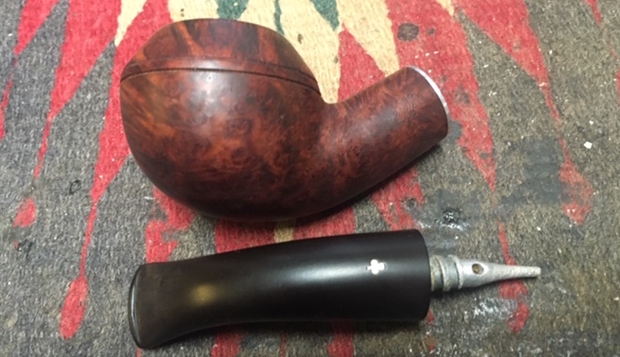
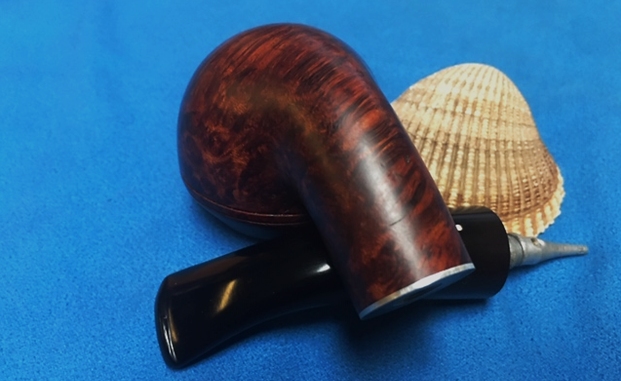
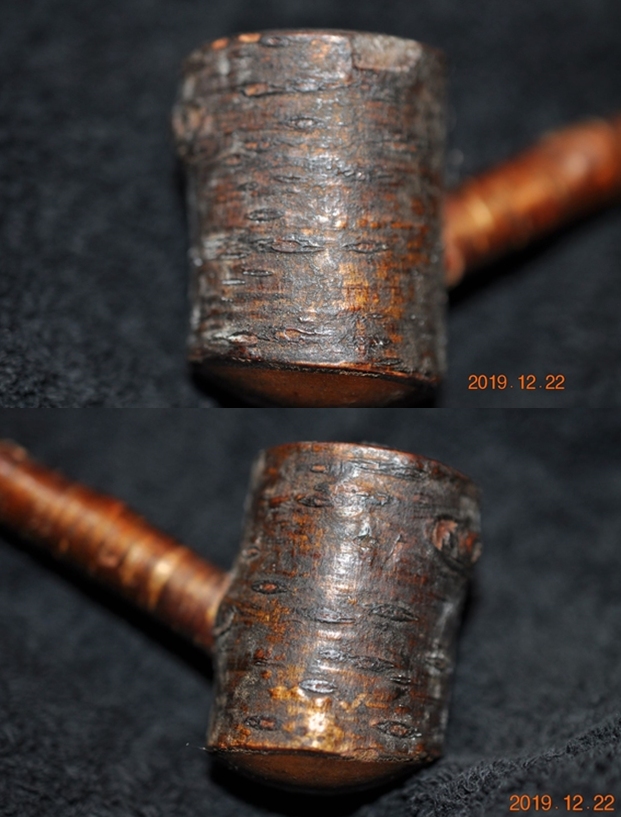
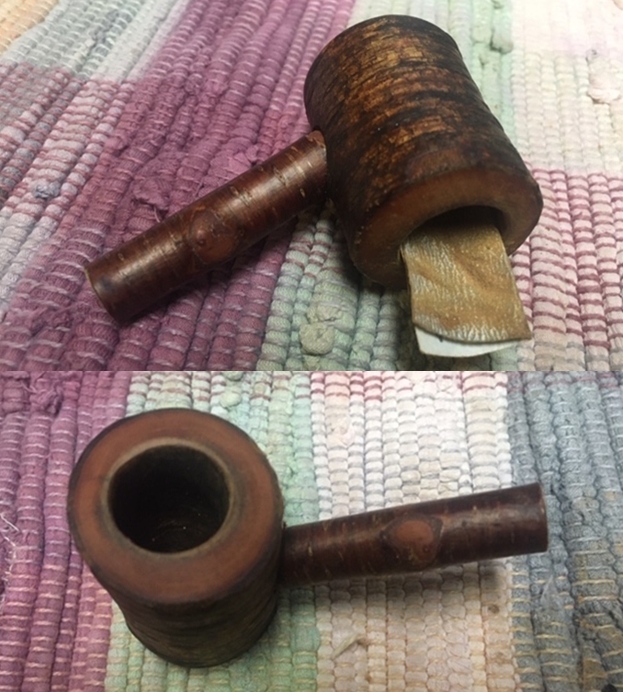
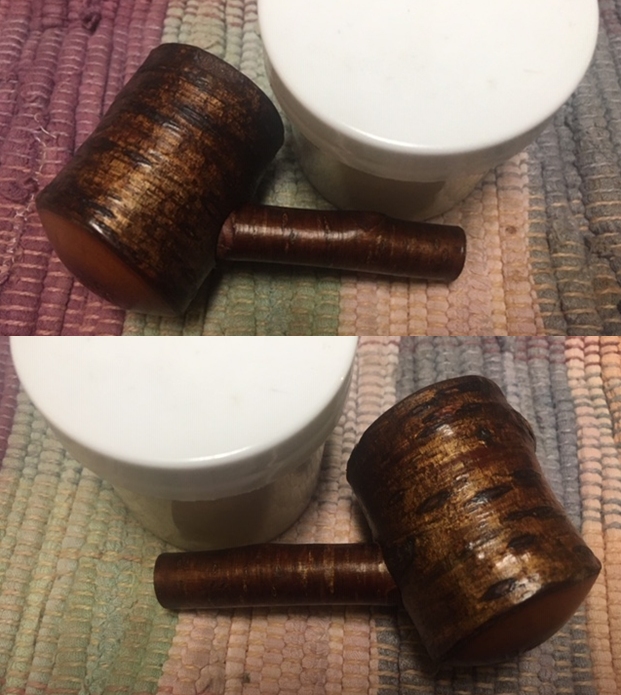
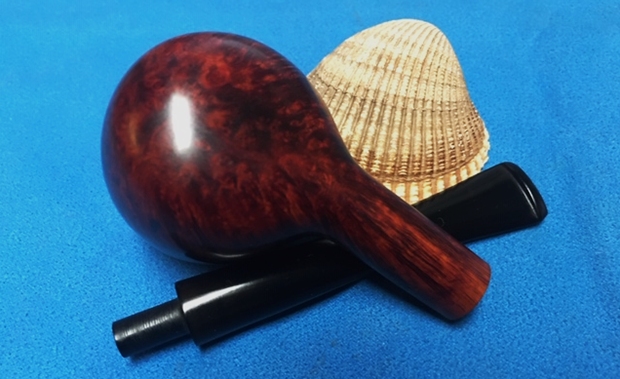
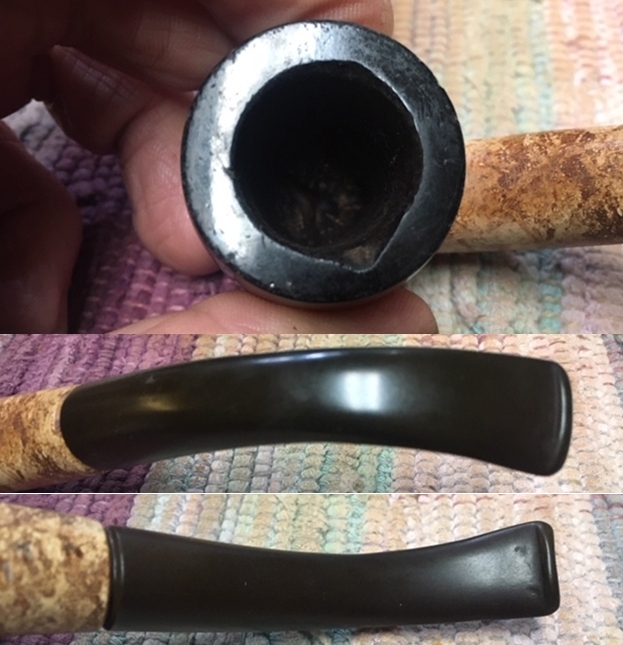
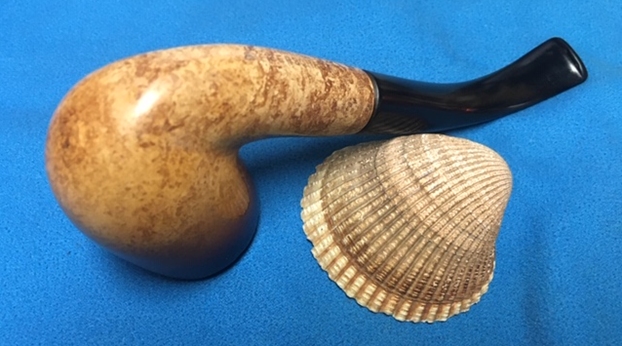
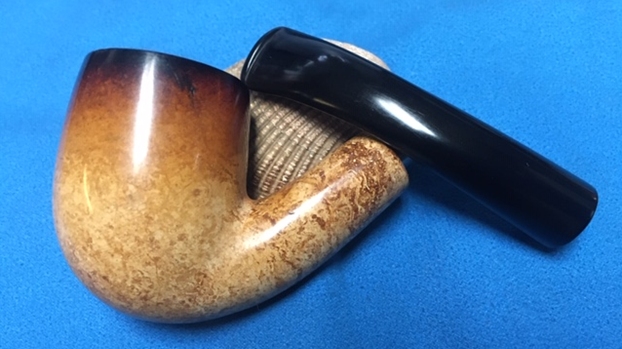
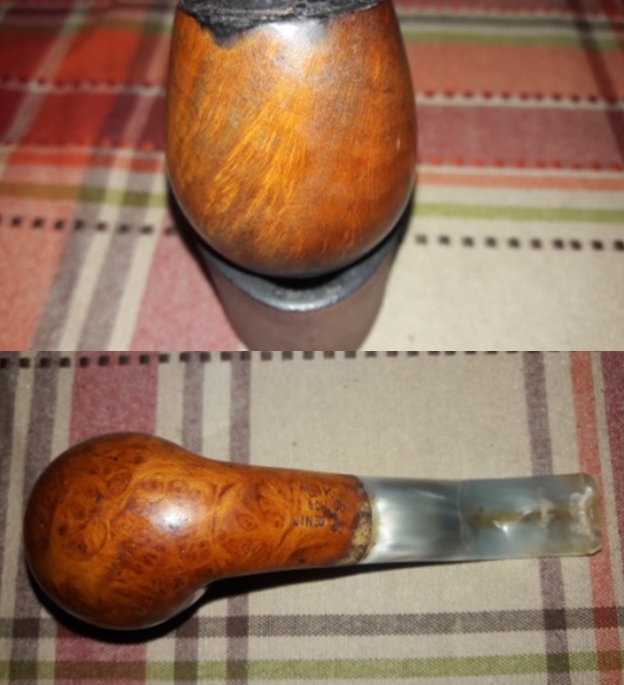
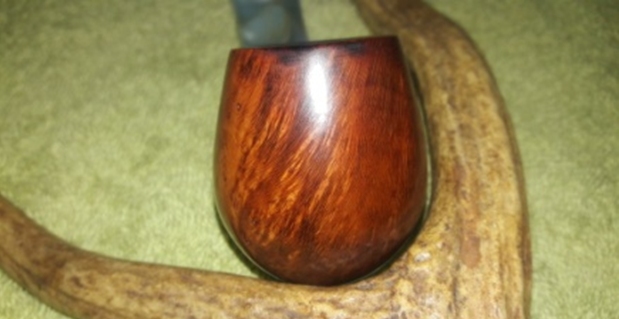
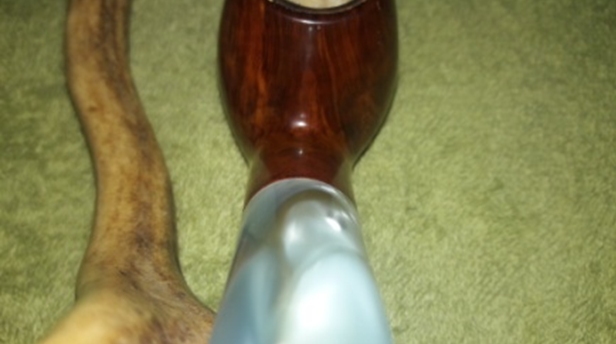
 The golden walnut stained stummel with dark brown stained grains makes for an alluring visual display. The surface is fraught with numerous minor dents, dings and is covered in dust, dirt and grime of the overflowed lava. A charred spot is seen to the front of the bowl in 1 o’clock direction (encircled in red). The shank end has patches all around, akin to water marks and my guess, looking at the condition of the chamber and stummel, is that the oils and tars from the mortise had leaked from the tenon- mortise junction and dried over the surface. The heavily clogged mortise is an indication of the oils and tars having nowhere to go but escape from the stem shank junction. I intend to sand the stummel surface to remove as much of the dents and dings as is possible while making the stummel surface smooth. I need to be careful while sanding the shank end to remove the patches so as not to shoulder the shank end. Major dents and fills that are revealed, if any, will be filled with clear superglue as briar dust and glue would leave ugly dark spots.
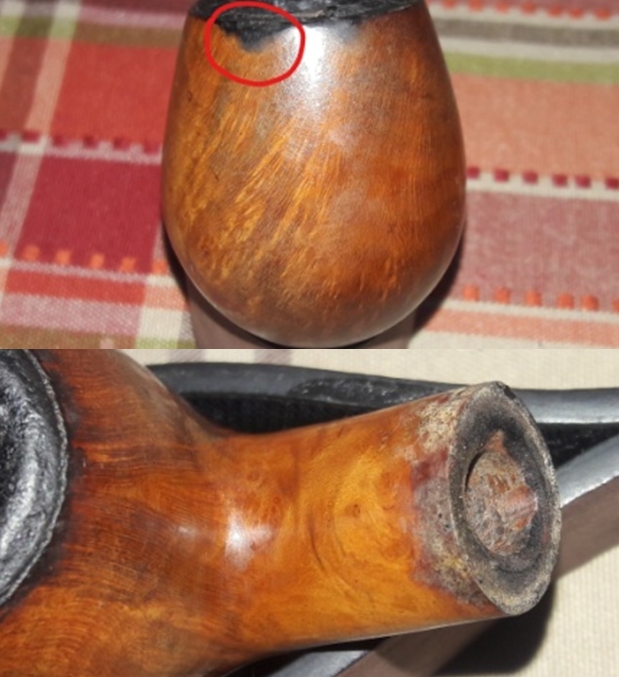
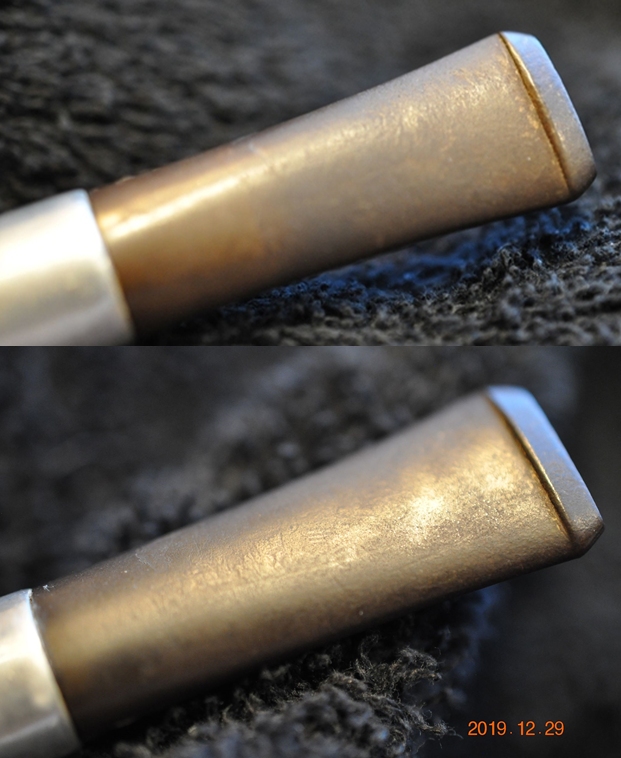
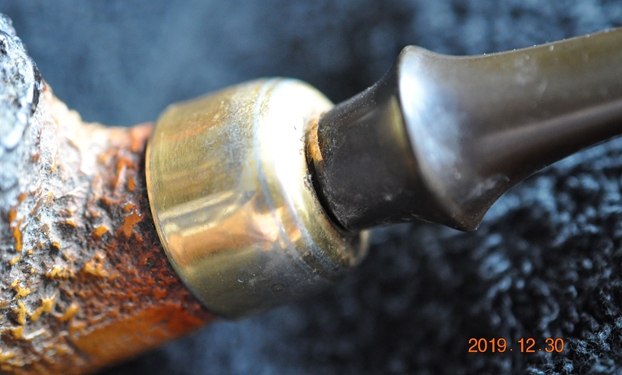
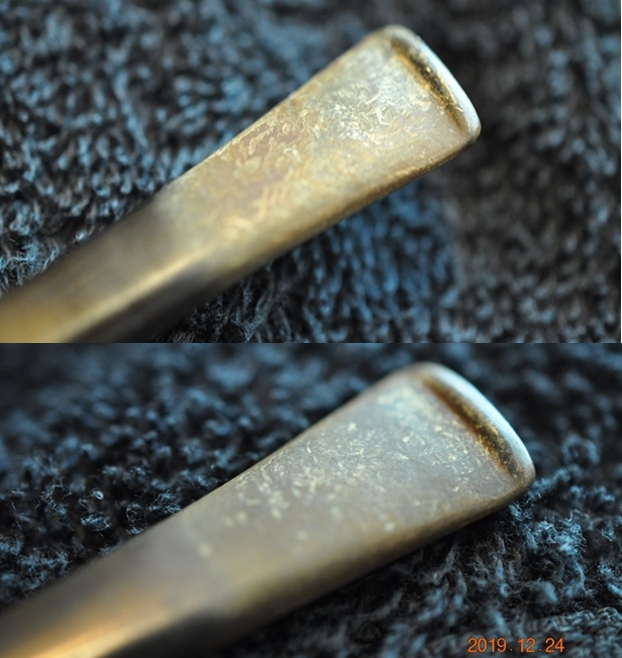
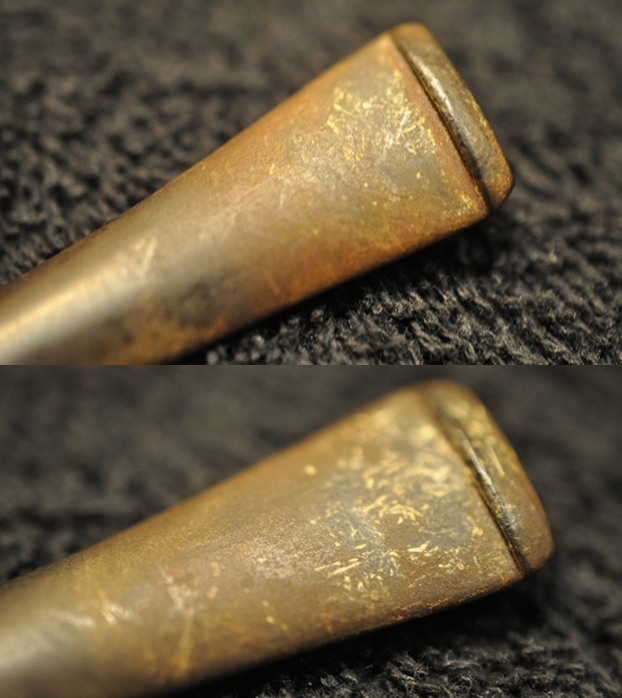
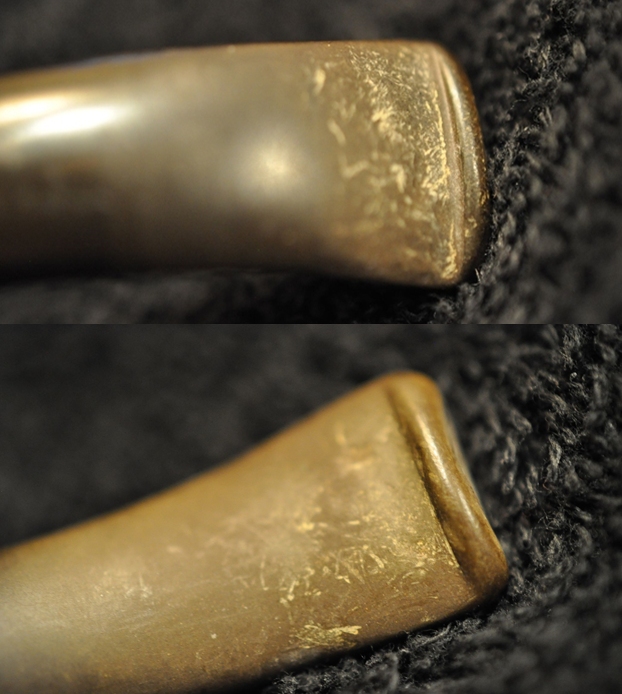
 The pearly variegated stem with swirls of light browns and grays is filthy to say the least. The stem surface is covered in grime and dirt with heavy tooth indentations over the button edges on either surface. The bite zone is peppered with deep tooth chatter. The tenon end, horizontal slot and the air way is covered and clogged with gunk. Air way over the surface appears darkened and flow through the stem is laborious and heavy. The stem surface and internal first needs to be cleaned. The tooth chatter will be sanded out with 220 grit sandpaper and if need be, will be filled with glue. The button edges on either surface needs re-building using clear CA superglue.
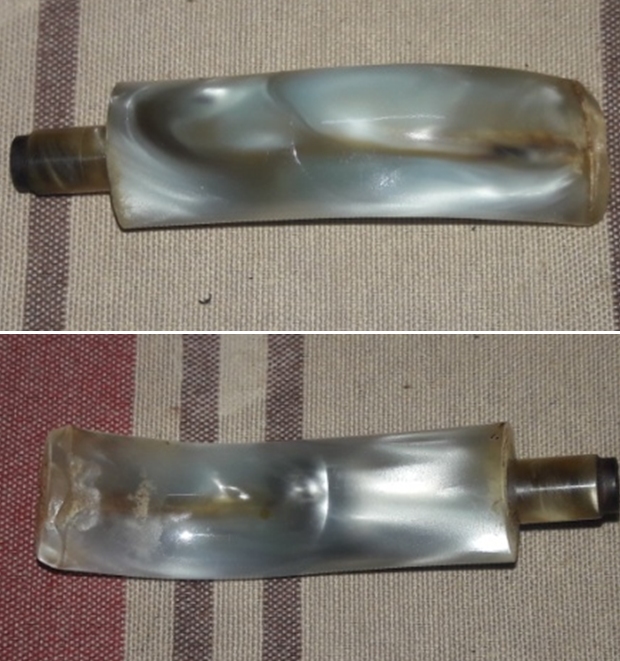

 The Process
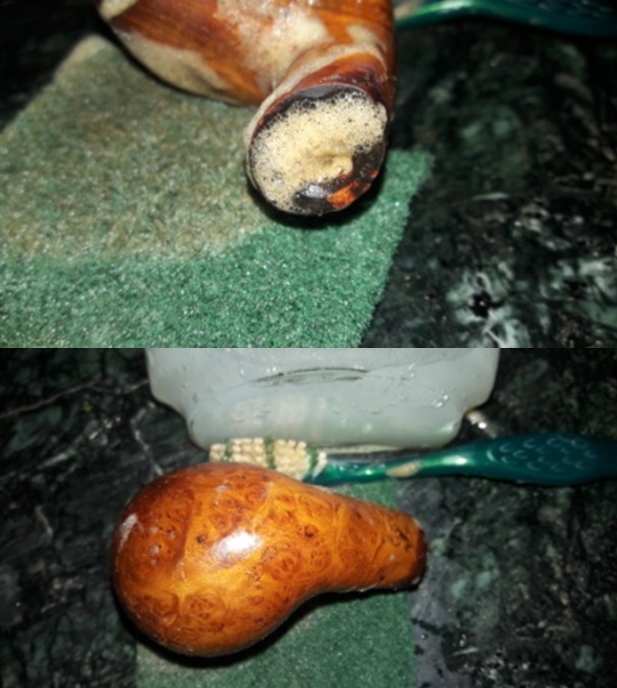
I began the process of refurbishing this pipe first by working on the stem. I cleaned the external surface of the stem with a Scotch Brite gauze and liquid dish washing soap. Once the external surfaces were clean, I cleaned the stem internals with a small shank brush and liquid dish soap. I have realized that using small shank brush and liquid soap reduces consumption of pipe cleaners by about 75%. This is considerable savings considering that I pay thrice the cost of pipe cleaners on cost of shipping!! Next, I ran a couple of dry pipe cleaners through the stem to clean and dry it out. I avoid using isopropyl alcohol in cleaning stem air way just to guard it against crazing (call it my paranoia to use alcohol on an acrylic or Perspex stem!!). The tenon end, slot and the air way is now clean.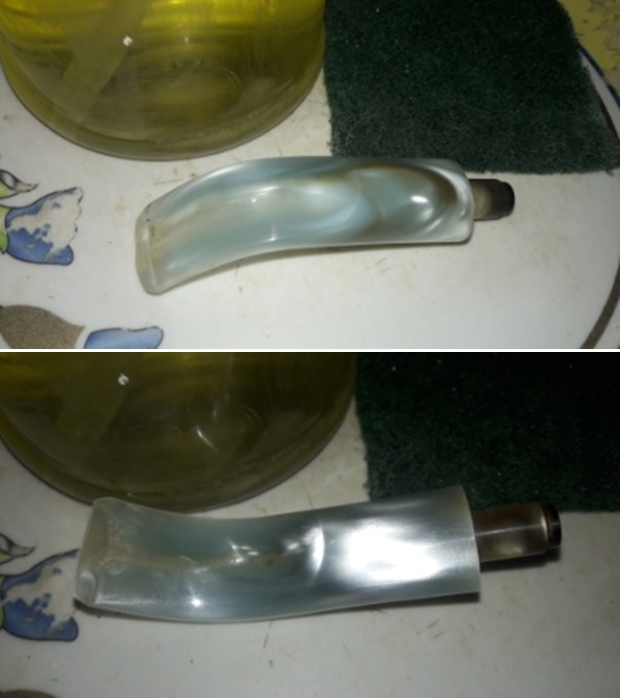
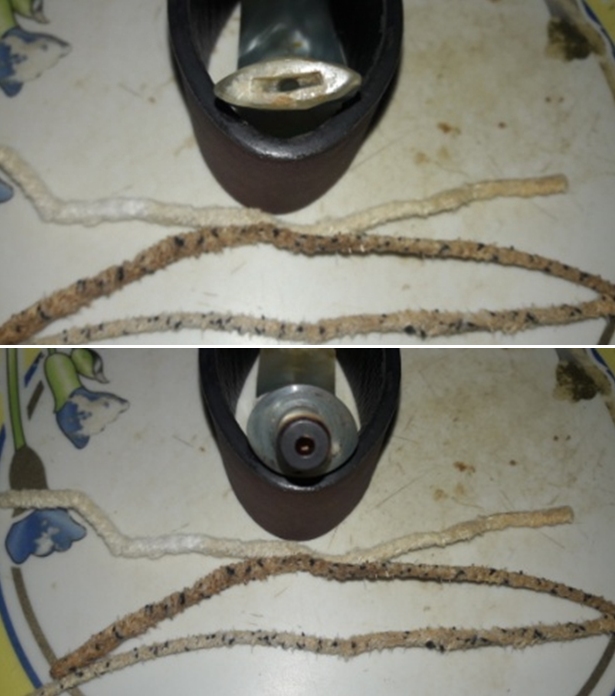 I sand the bite zone with a folded piece of 220 grit sand paper to address the tooth chatter. Though the tooth chatter has been addressed to a great extent, the button edges are yet to be addressed. I wiped the stem with a moist cloth to remove the sanding dust. Thereafter, I applied clear CA superglue over the button edges and filled the deep tooth indentations and the minor tooth chatter in the bite zone. I set the stem aside for the fill to cure.
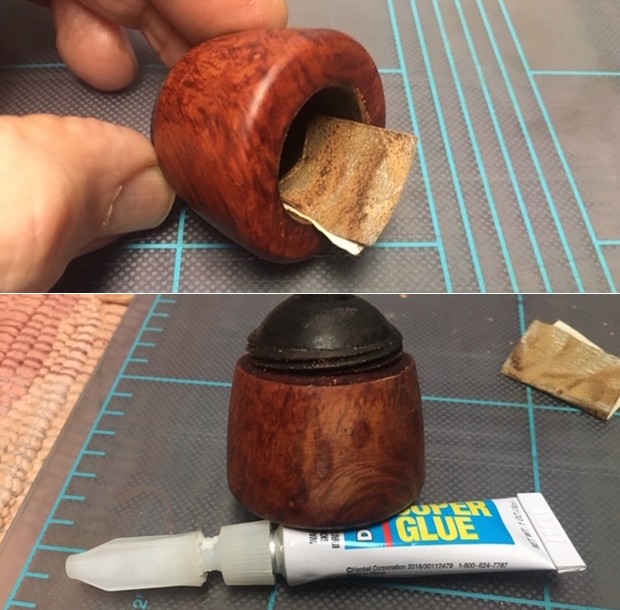
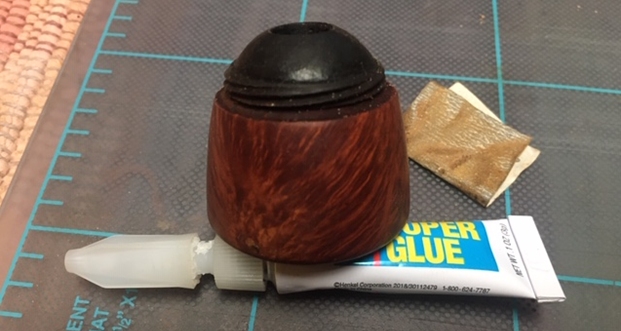
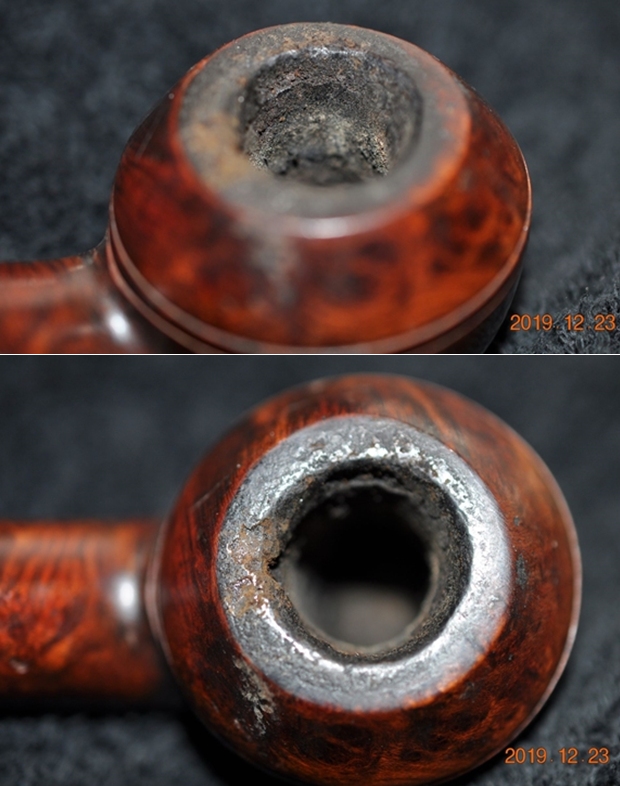
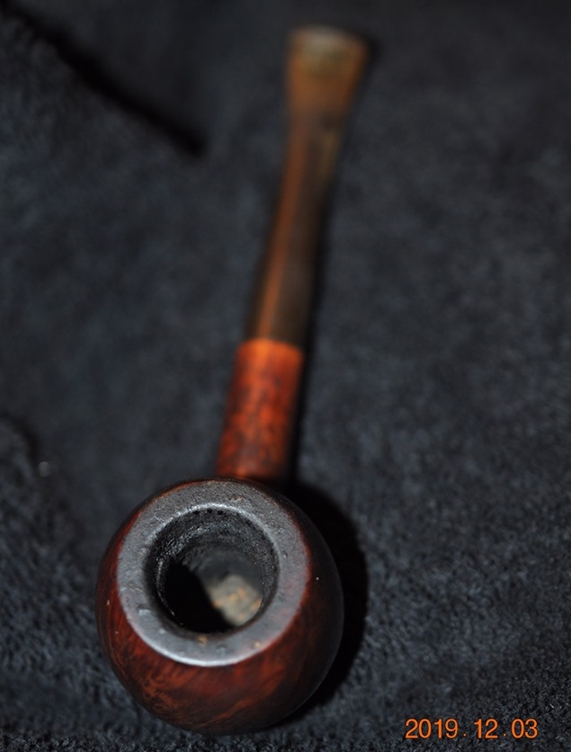
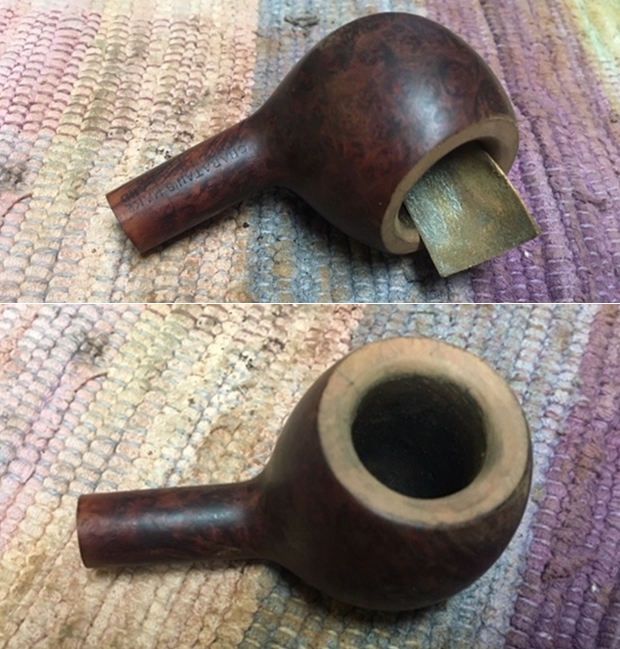
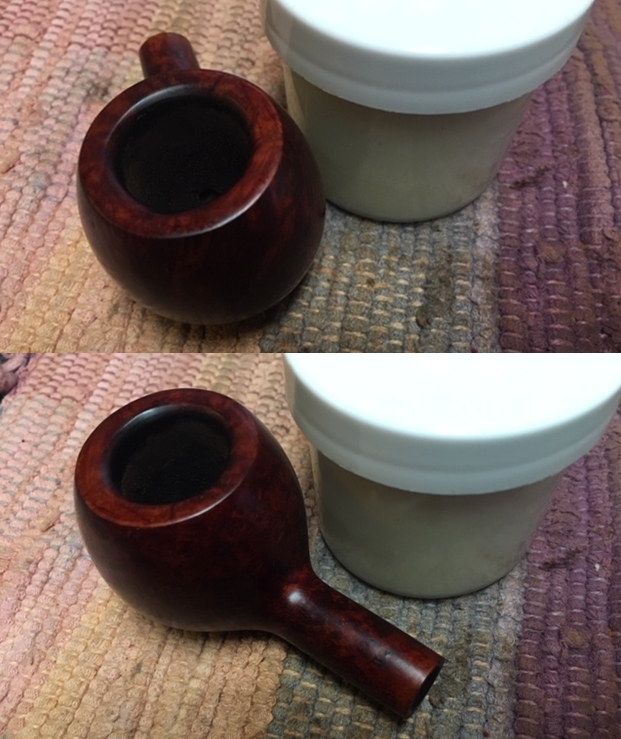
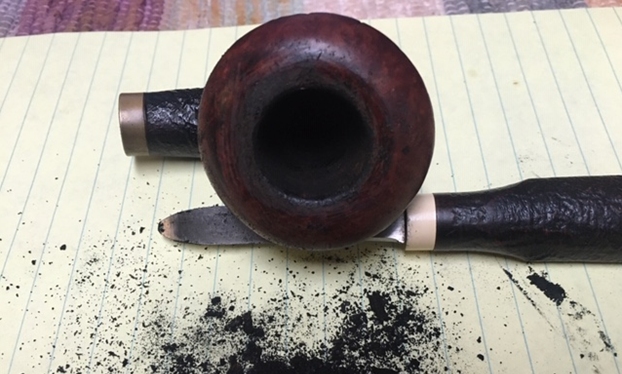
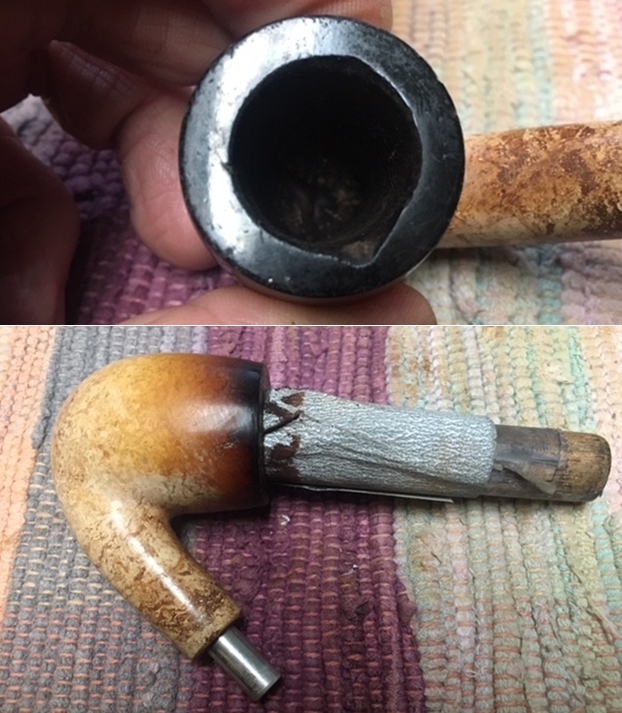
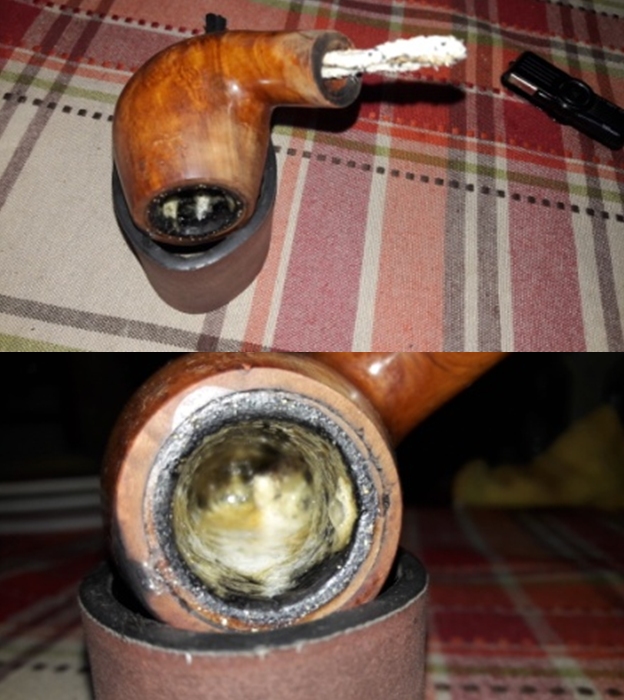
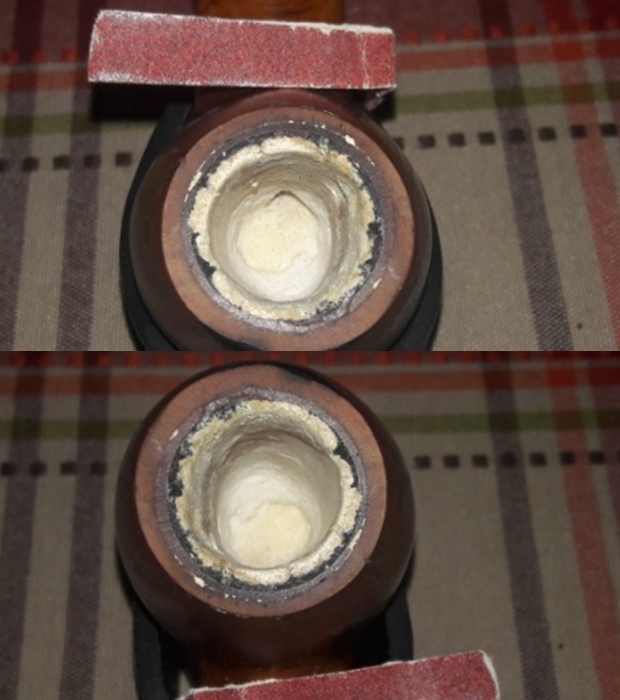
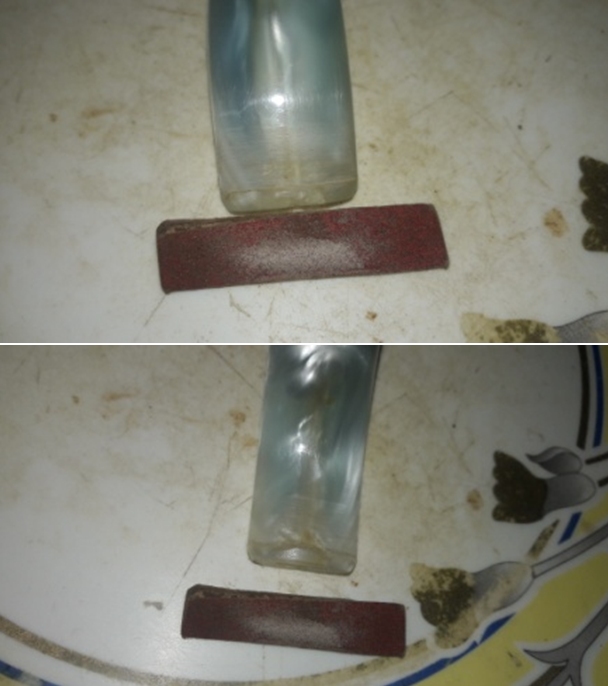 I reamed the chamber with a Castleford reamer tool, using the smallest (size one) head of the tool. Reaming a meerschaum lined bowl is fraught with challenges, most notably being exerting of excess pressure with the reamer heads on the thin meerschaum wall lining causing the lining to break in chunks. I was very gentle and careful while using the reamer head. Thereafter I moved on to using my fabricated knife to further take the cake down to the meerschaum lining. Truth be told, the use of the knife was restricted only to scraping the surface in an attempt to dislodge the cake. With a 150 grit sand paper, the walls of the chamber were rid of all the remnants of the cake and it was at this stage that the first large chunk of meerschaum lining came loose. Subsequently a few smaller bits loosened out and came apart from the meerschaum lining. The area of damaged meerschaum lining can be seen in the enclosed red area. It seemed that the thick layer of cake was holding the meerschaum lining together. The rim top is not even and the lava overflow has hardened considerably over the surface to form a mound all along the rim top surface.
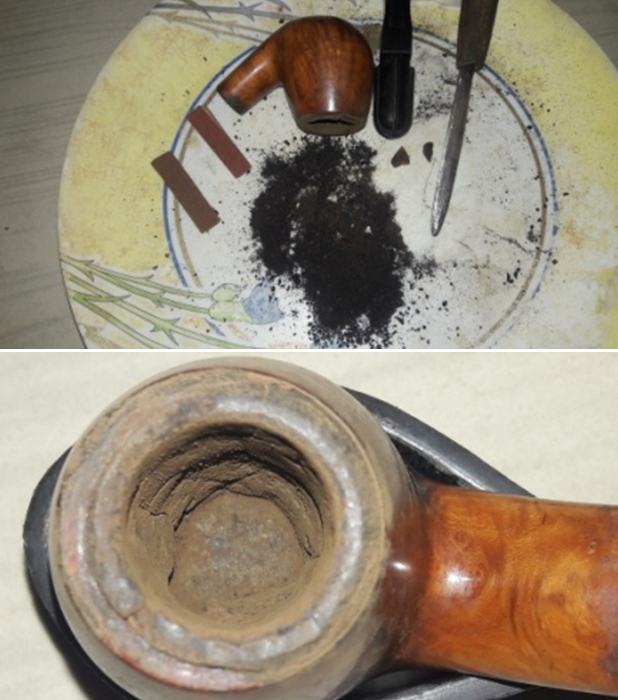
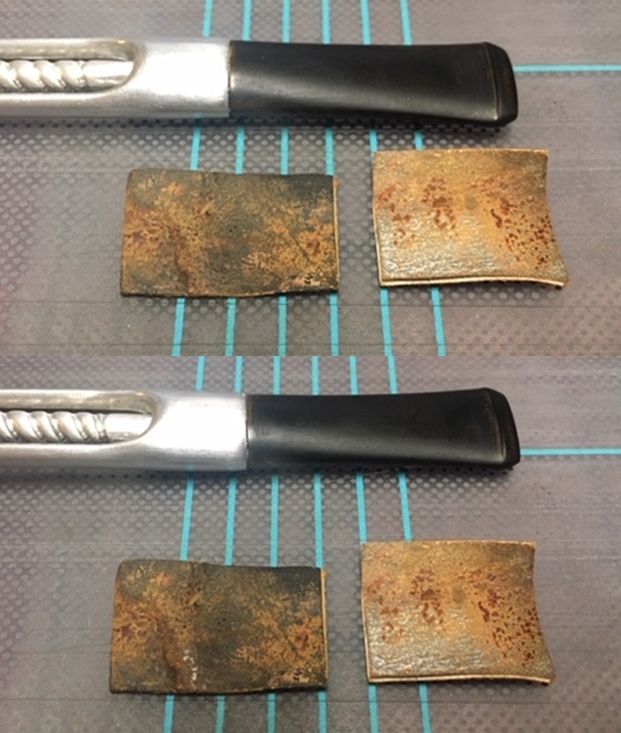
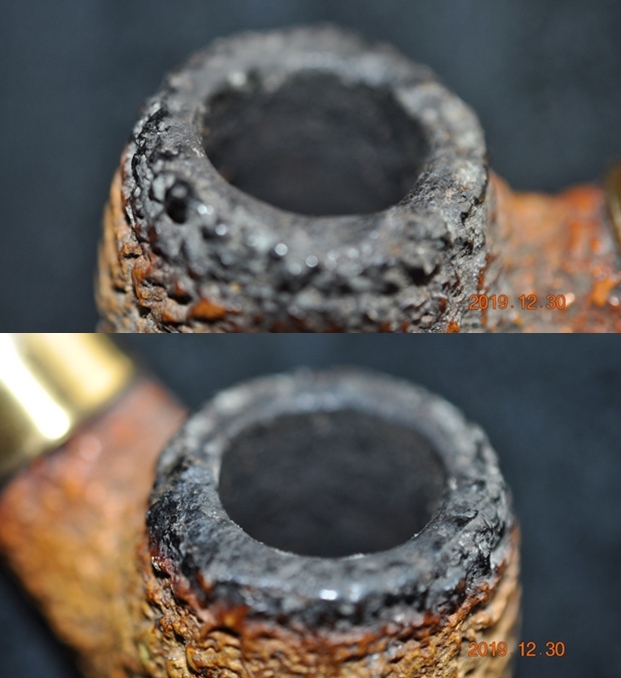
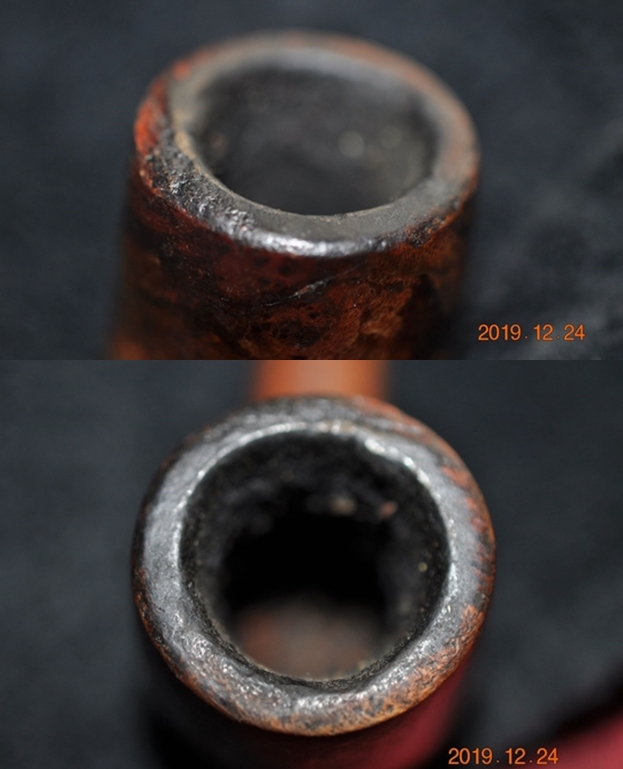
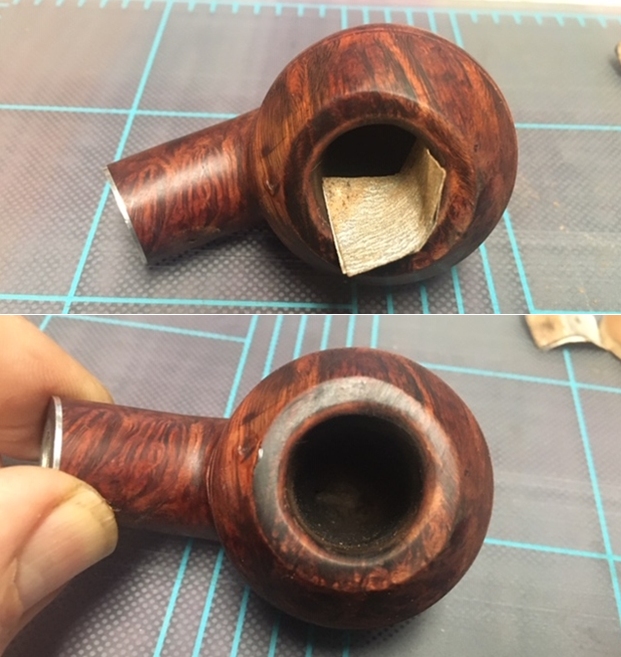
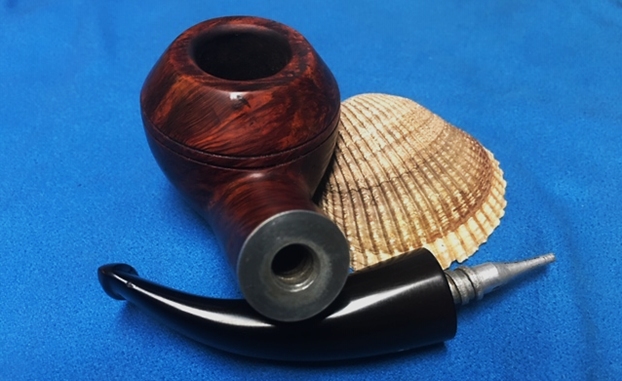
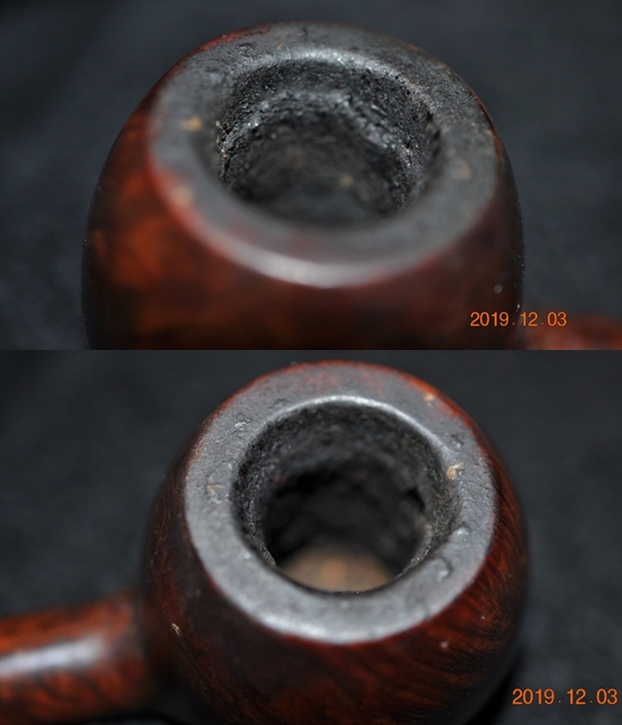
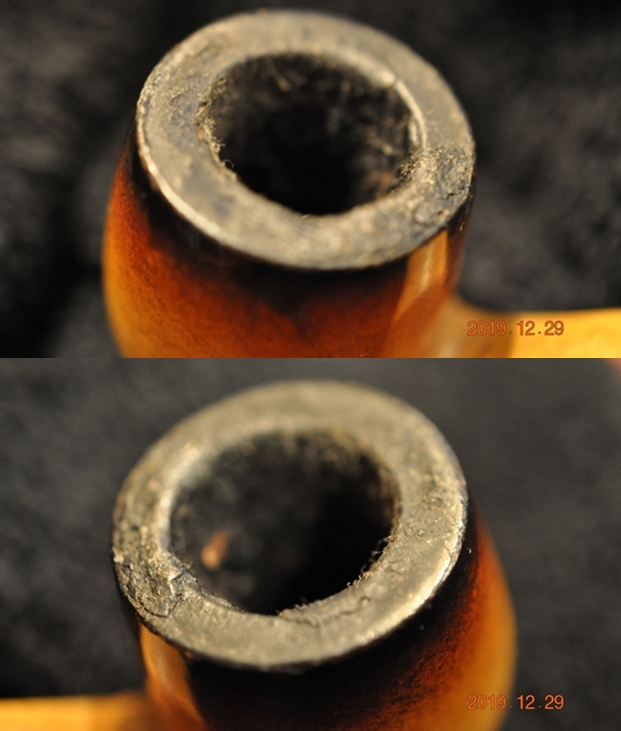
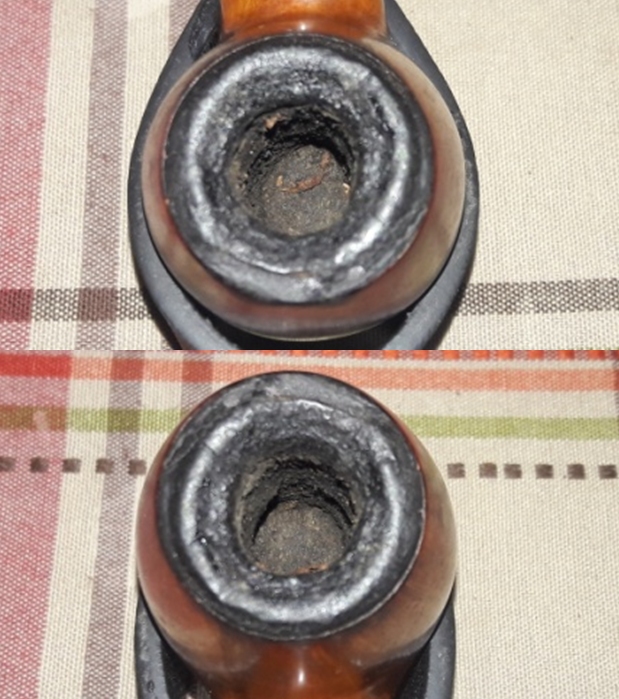
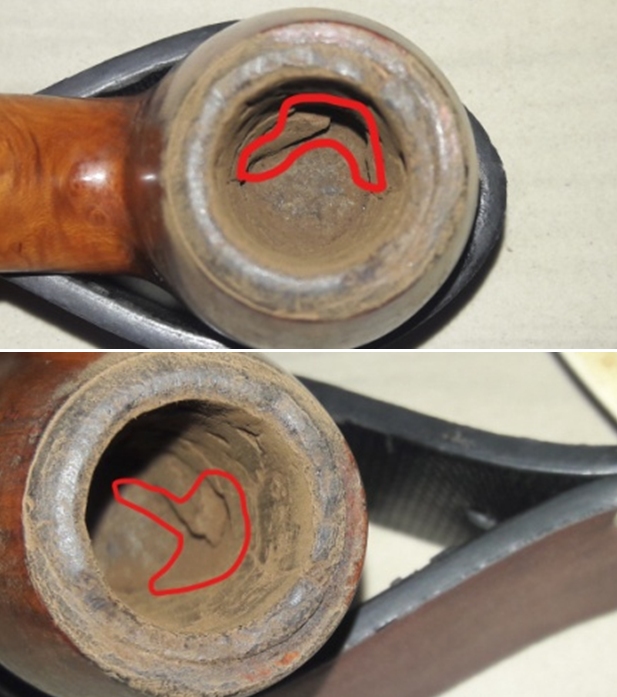 To get a better understanding of the condition of the meerschaum lining, I wiped the walls of the chamber with isopropyl alcohol on a cotton swab. Now the extent of repairs required is amply evident. The entire lower meerschaum lining on the left half of the chamber has broken down in a jagged manner and the same is marked with yellow arrows. The fourth picture gives out a very clear idea of the break in the lining and the thickness of the lining that needs to be repaired. Also the hardened lava overflow over the rim top is clearly discernible. This issue needs to be addressed first.
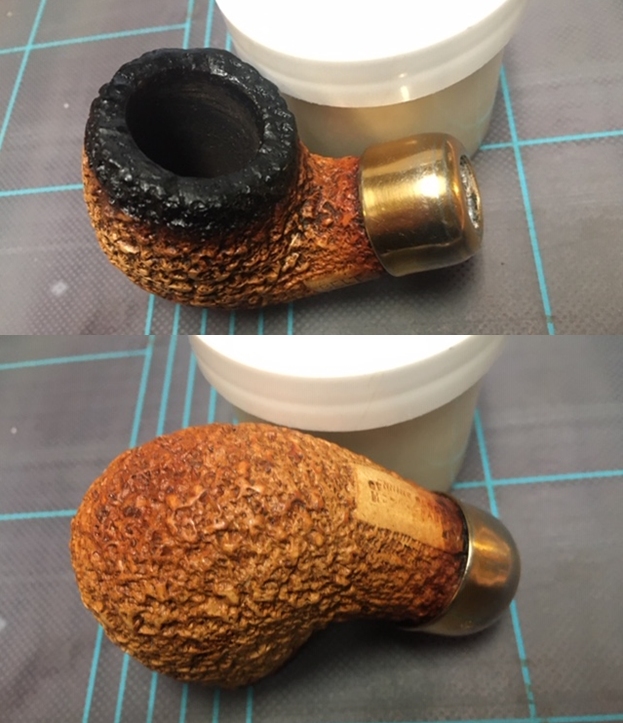
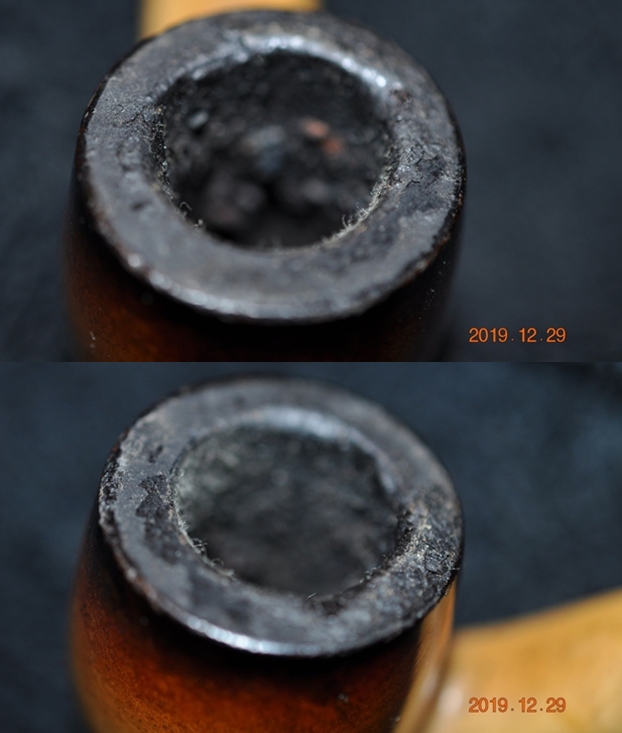
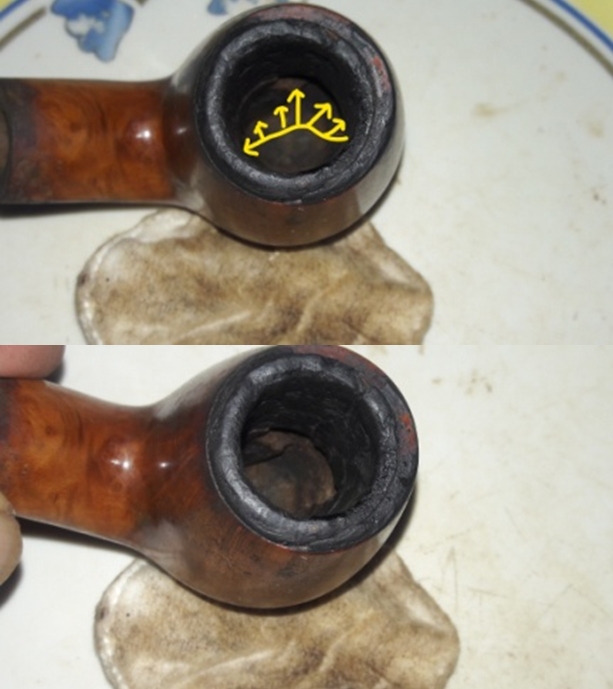 With my fabricated sharp edged knife, I gently scrapped and dislodged the complete mound of overflowed lava from all around the rim top surface. After the lava overflow has been removed, the damage to the rim top is now clearly visible. The meerschaum lining is uneven and has been completely blackened due to absorbing all the oils and tars from such heavy usage.
 I topped the rim on a piece of 220 grit sand paper, frequently (every couple of turns) checking for the progress being made and was careful with topping as I had no desire to break the meerschaum lining from the rim top area. Though the rim top, after topping was smooth and even, the distinct white meerschaum lining edge is still a dirty dark color and is, in fact, darker than the rest of the briar surface. A closer look inside the chamber revealed a highly uneven and heavily gouged looking chamber walls. The ghost smells are still very strong and not even reduced with all the cleaning and removal of the cake. Since the meerschaum lining along the chamber walls are broken and gouged out, salt and alcohol treatment to get rid of the smell is NOT RECOMMENDED. I need to figure a way out. This is how the rim top and the chamber walls appear at this stage.
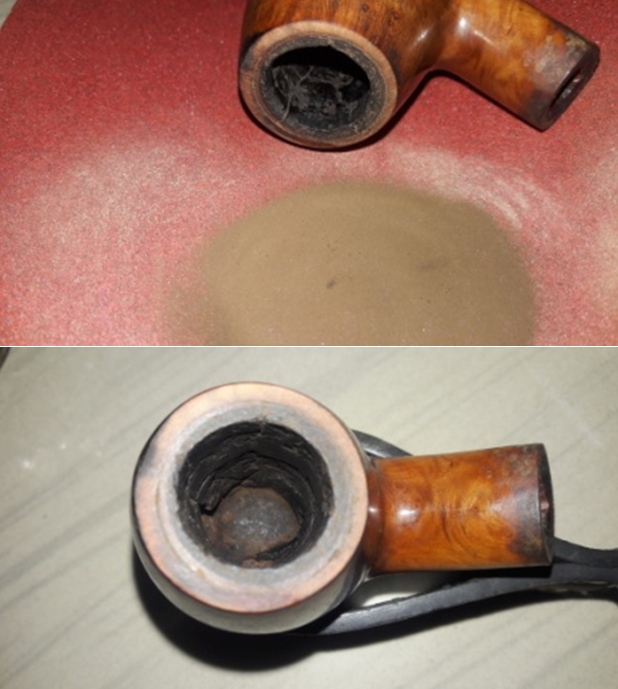
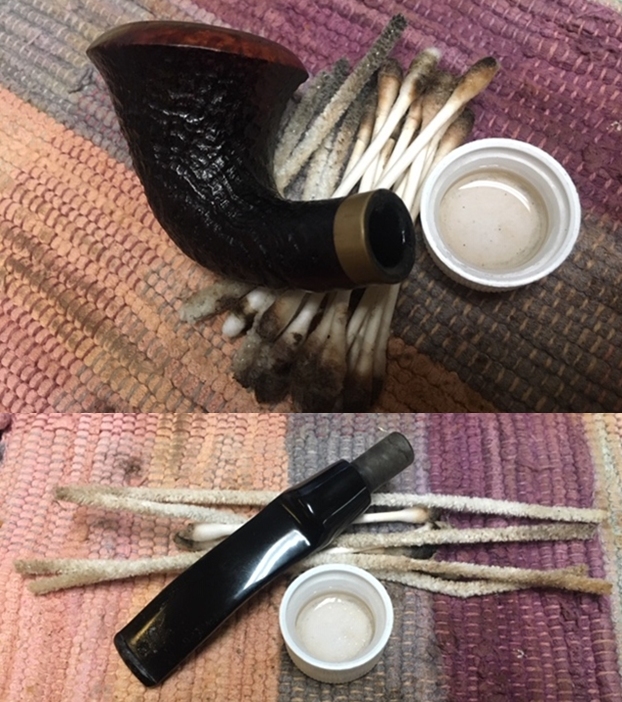
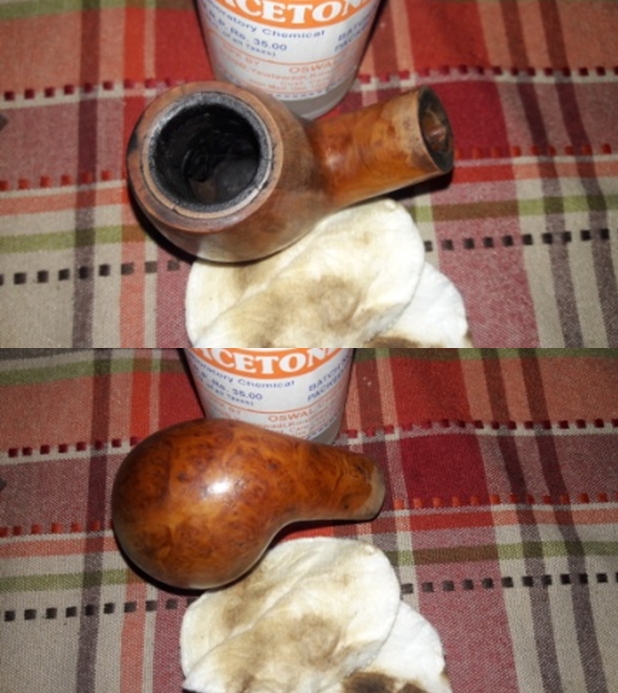
 I was so caught up with the condition of the chamber, I completely forgot to clean the mortise and shank air way. Maybe with this cleaning the ghost smells may greatly reduce and or miraculously disappear altogether. I cleaned the mortise and the airway using regular/ bristled pipe cleaners and q-tips dipped in 99.9% pure isopropyl alcohol. I also scraped out the entire gunk from the shank with my fabricated knife. While I was cleaning the air way, two more chunks of the meerschaum linings came loose from around the draught hole. As expected, the mortise was filthy and clogged with oils, tars and gunk and the number of pipe cleaners and q-tips that were used to get the mortise and shank cleaned up is an indication enough.
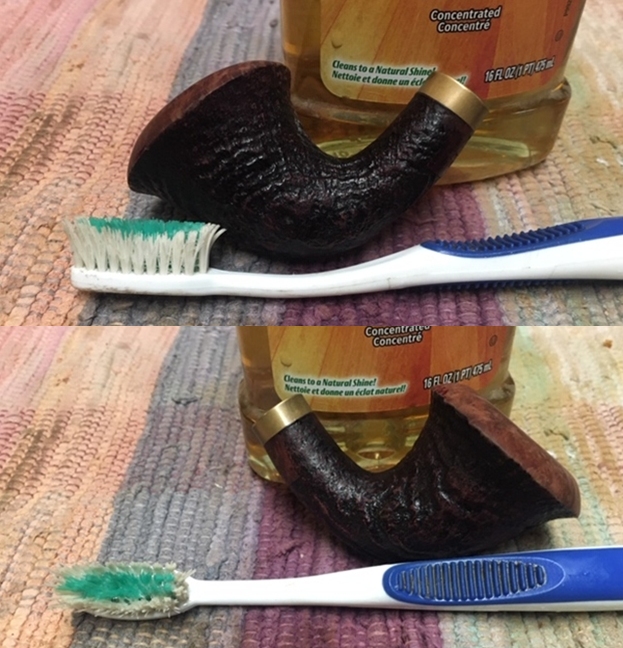
 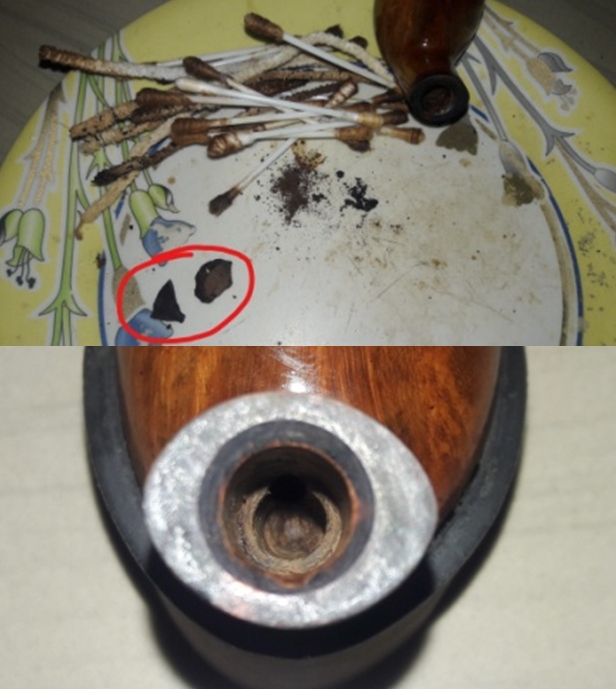 I applied “Briar Cleaner”, a product that has been developed by my friend Mark Hoover, to the external surface of the bowl. It works similar to Murphy’s oil soap and needs to be applied to the stummel surface and set aside for 5- 10 minutes. The product pulls out all the dirt and grime to the surface making further cleaning easy. I am quite happy with this product. I used a hard bristled tooth brush to scrub the stummel with the gel like product, wiped it clean with a moist cloth and dried it using paper towels and soft cotton cloth. I deliberately cleaned the rim and the shank end by inverting the stummel and rotating it on a piece of Scotch Brite. I set the stummel aside to dry out naturally.
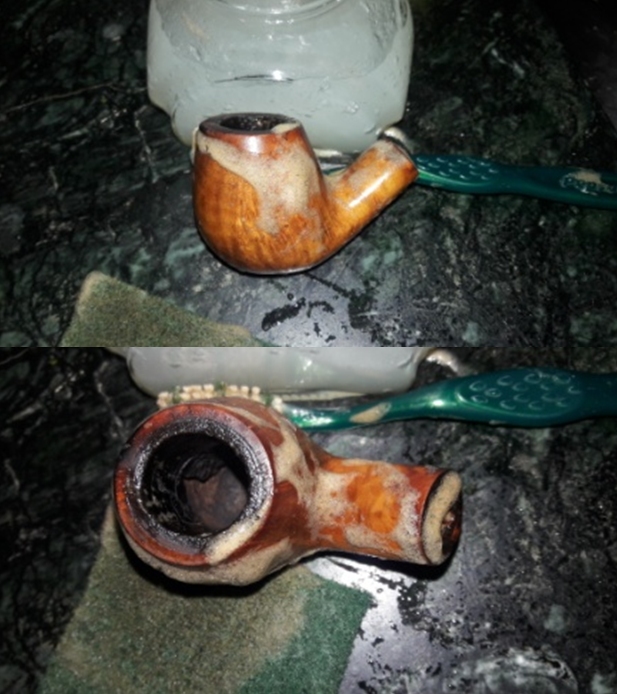
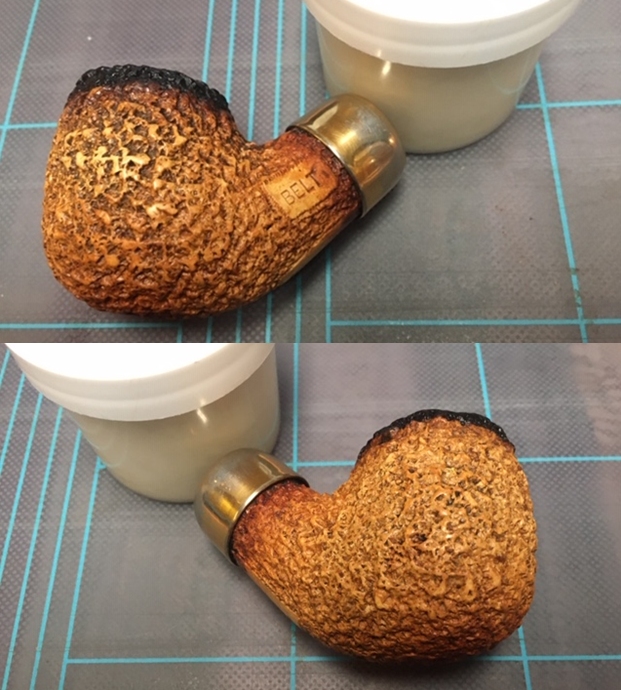
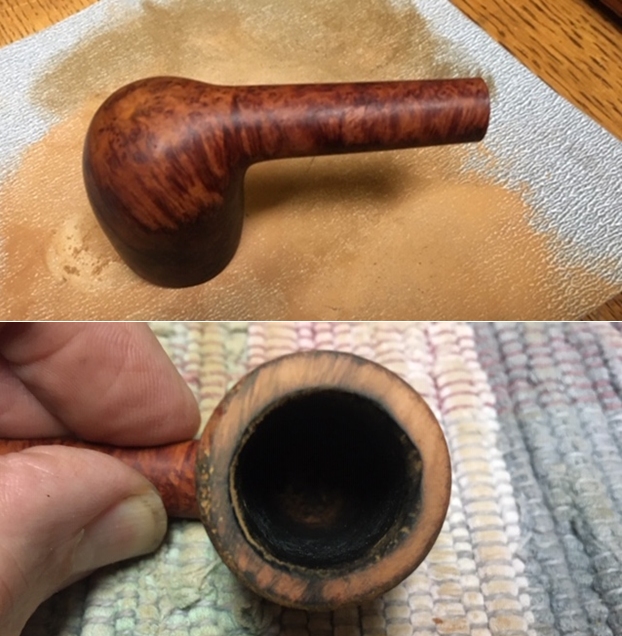
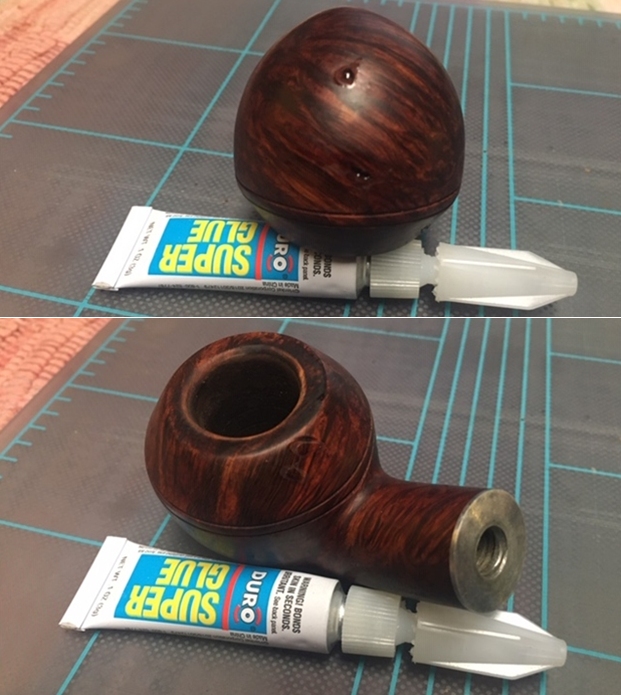
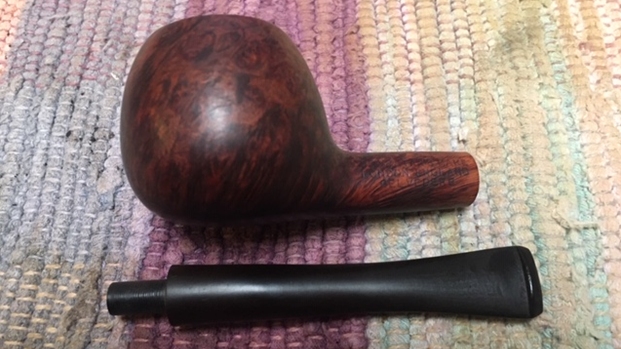
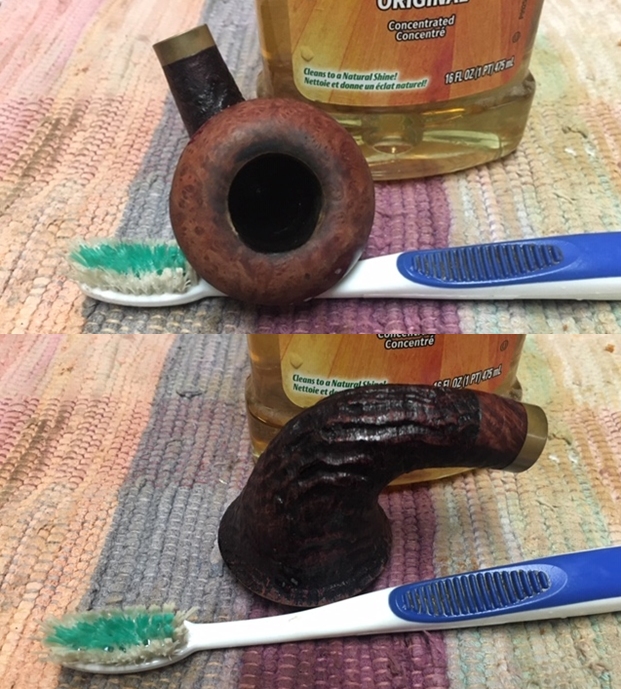
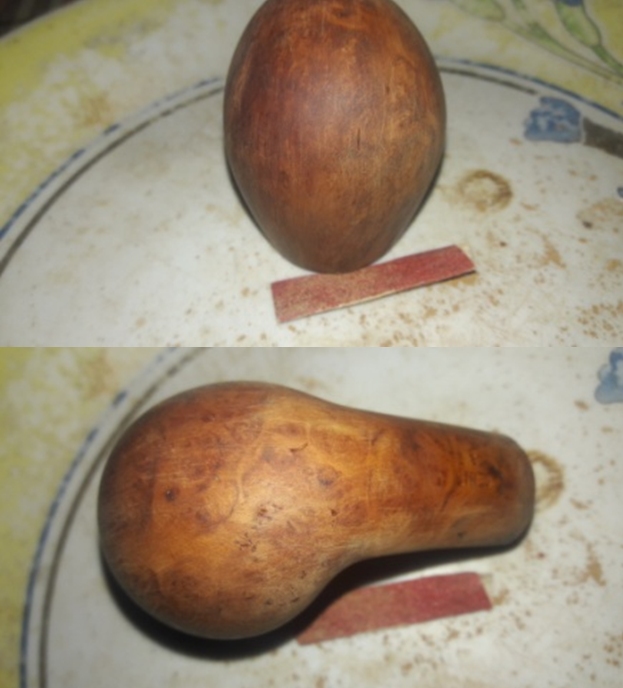
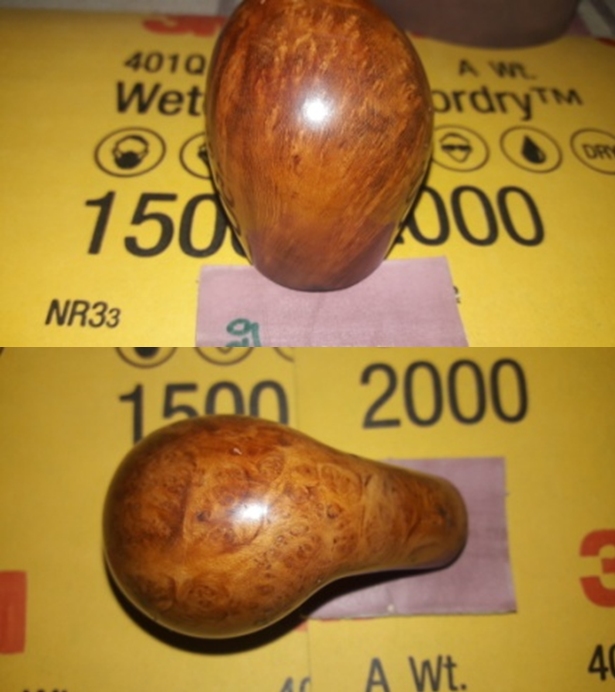
 With the external cleaning, the stummel looks clean with the beautiful Bird’s eye grains at the foot now clearly visible. This scrubbing and cleaning also removed the thin layer of lacquer in patches on the stummel (layer of lacquer had missed my notice before). A few minor dot-like fills were also now visible. I first need to remove the entire lacquer coat from the stummel to further revel any other imperfections in the briar surface of the stummel.
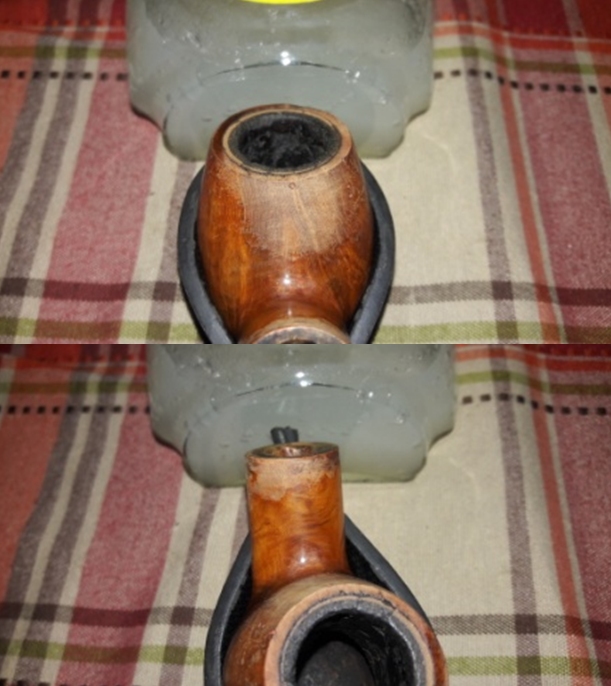 To remove the coat of lacquer from the stummel, I wiped the entire surface with pure Acetone on a cotton swab. I was relieved that the lacquer coat did not hide any more flaws in the briar than what was noted after the external cleaning. I must admit that the tiny spots of fills are something which needs no refilling and should be further reduced once the stummel has been sanded and polished.
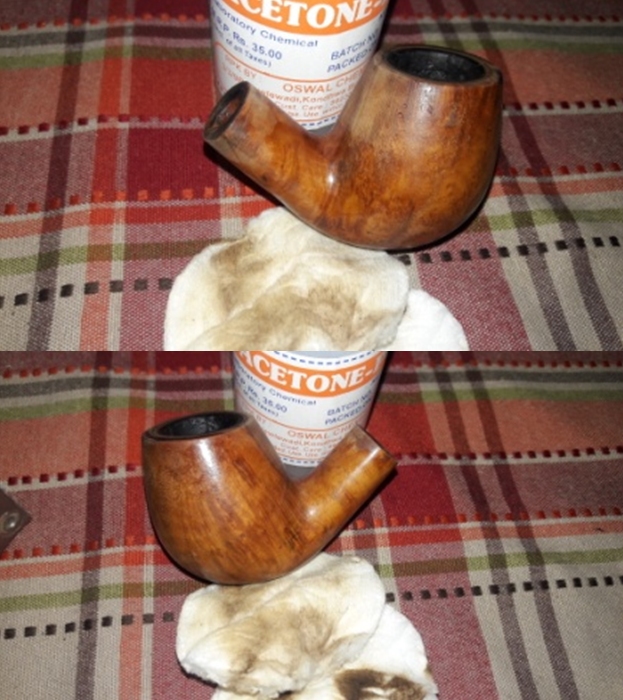
 With the external cleaning of the stummel surface complete, I turned my attention to the most challenging part of this restoration, the repairs to the meerschaum lining along the walls of the chamber! I have never attempted this repair though I had earlier read about the process of repairing meerschaum lining on rebornpipes.com using egg whites and finely powdered chalk. However, attempting it for the first time is always a challenging prospect.
I had been gifted a Meerschaum lined gargantuan Kilimanjaro Made in Tanganyika bent billiard by my good friend Dal Stanton, aka The Pipe Steward that had several complications, the most significant being repairing meerschaum lining. Dal has the gift of penning down thoughts and actions in to words on paper and his essays are very detailed and descriptive. I went through his write up, understood the process, followed the useful links in his blog and formulated my own strategy to execute the repairs on the meerschaum lining on the pipe in front of me. Here is the link to the write up that Dal has posted on rebornpipes.com.
https://rebornpipes.com/2019/07/12/a-meer-lining-and-crack-repair-to-rescue-a-doomed-gargantuan-kilimanjaro-made-in-tanganyika-bent-billiard/
In his write up, Dal had referenced another article on rebornpipes.com which he had followed in his restoration of the Kilimanjaro pipe. I read through the article which was indeed a very useful step by step guide to build up the repairs to the meer lining using the mixture. Here is the link to the write up.
https://baccypipes.wordpress.com/2017/06/10/old-time-meer-lining-repair-method-on-a-1930s-kaywoodie-shellcraft-5651/
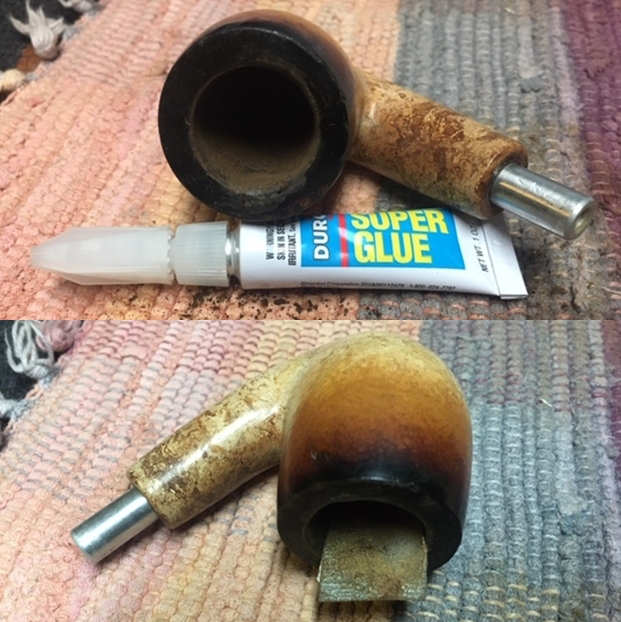
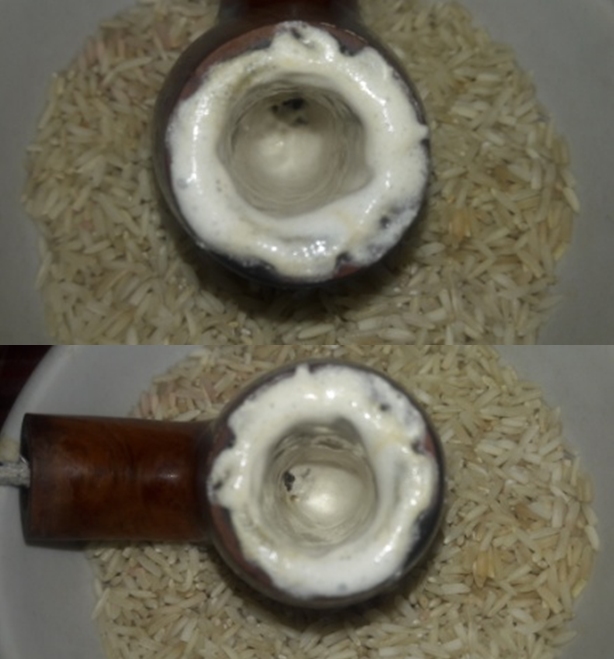
With my ideas crystallized as regards tackling this repairs, I first made a chalk powder using a mortar and pestle. I strained this powder through a very fine mesh sieve and obtained sufficient quantities of very fine chalk powder. I separated egg white from one egg. Next, I made a thin mix of egg white and chalk powder and with a flat bamboo frond; inserted a folded pipe cleaner to keep the draught hole open and applied a layer all along the walls of the chamber and over the meerschaum lining. No sooner had I applied the mixture, it ran down the sides and accumulated at the heel of the stummel forming a dark dirty yellow puddle. Apparently the mix was too thin. I cleaned this puddle using absorbent kitchen napkins. The unexpected benefit of this failed first layer was that the old oils and tars were pulled out from the walls of the chamber by this mixture. I wiped the chamber with a cotton swab and isopropyl alcohol. Once the chamber walls had dried out, I made a slightly more thick mix of the old timers mix and applied a layer. I kept the stummel left side down as I wanted the mix to fill and harden over the damaged meer lining over the left side. I kept the stummel aside to dry out naturally. 
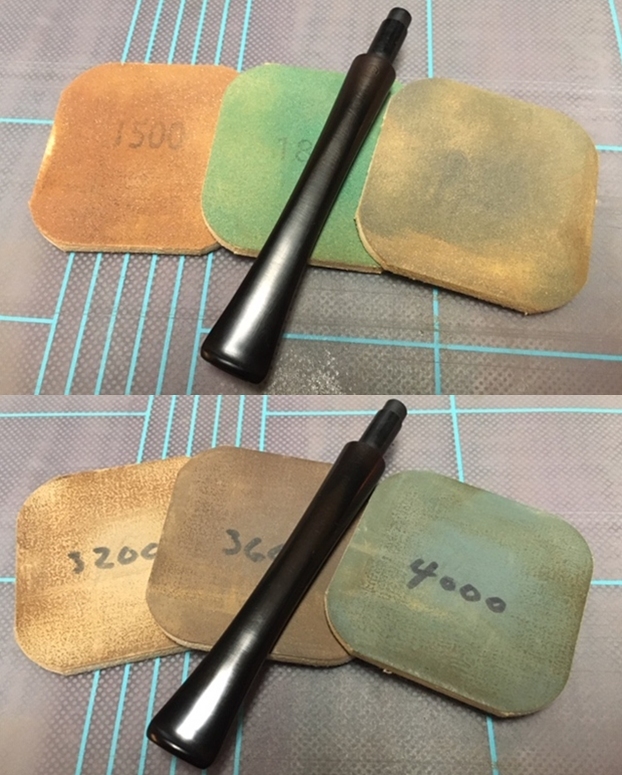
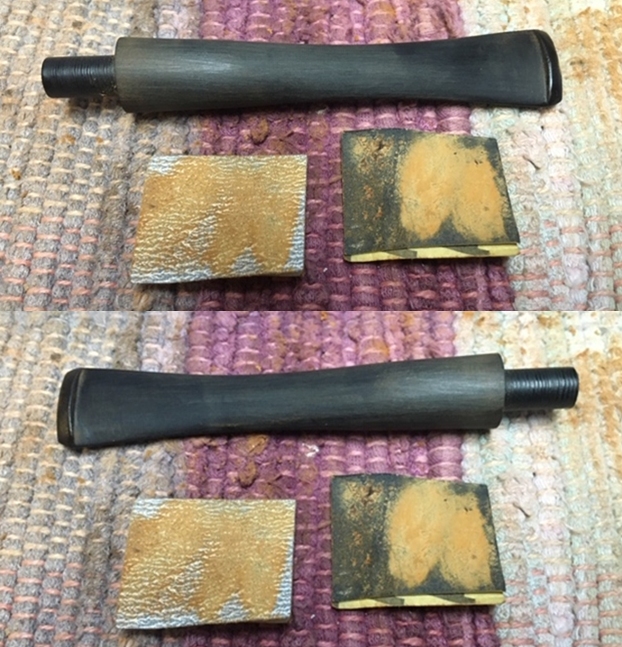
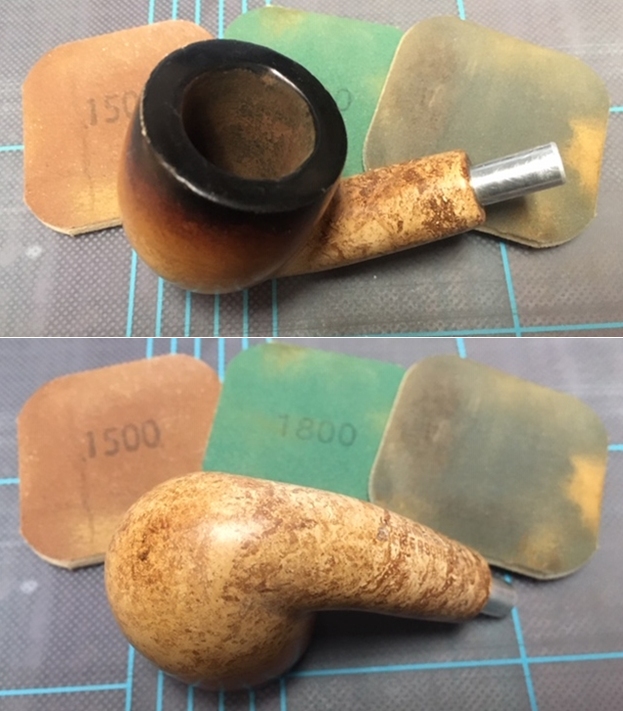
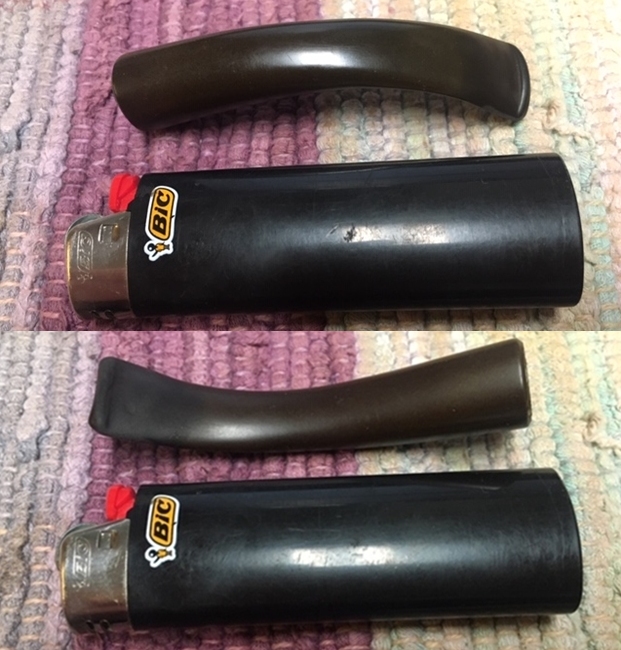
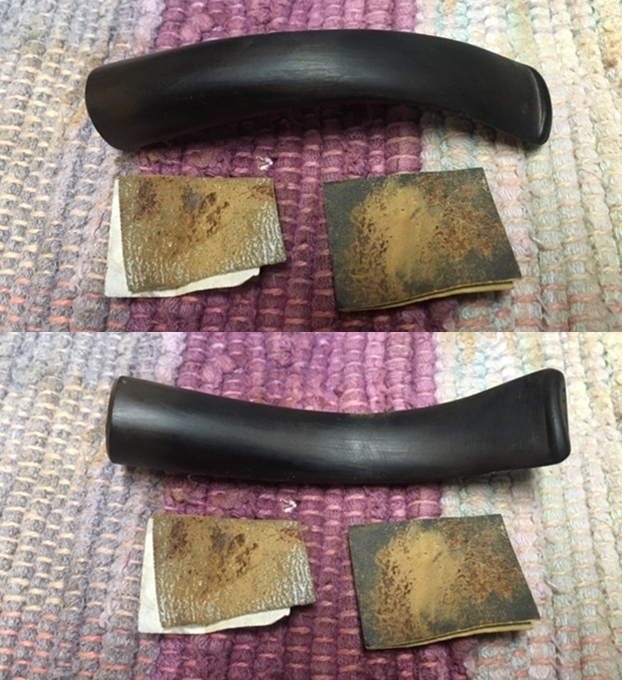
 While the meerschaum repairs were set aside to cure, I worked the stem. The stem fills had cured nicely. Using a flat head needle file, I sand the fills to achieve a rough match with the rest of the stem surface and also reshaped the buttons on both the surfaces. I further fine tuned the match with a folded piece of 220 grit sand paper.
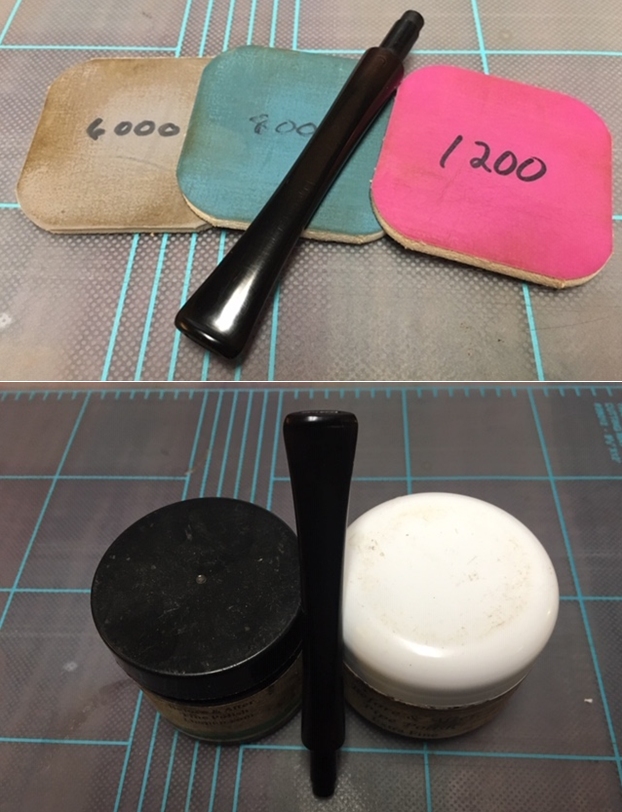
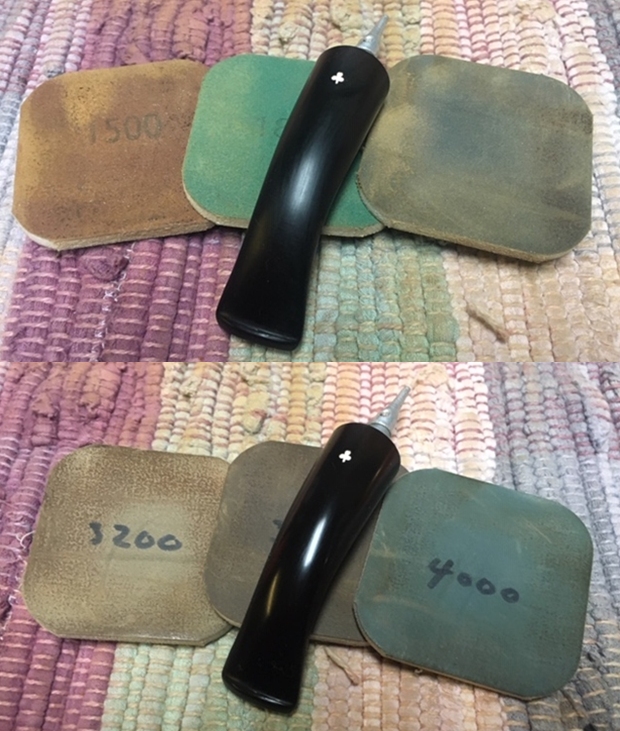
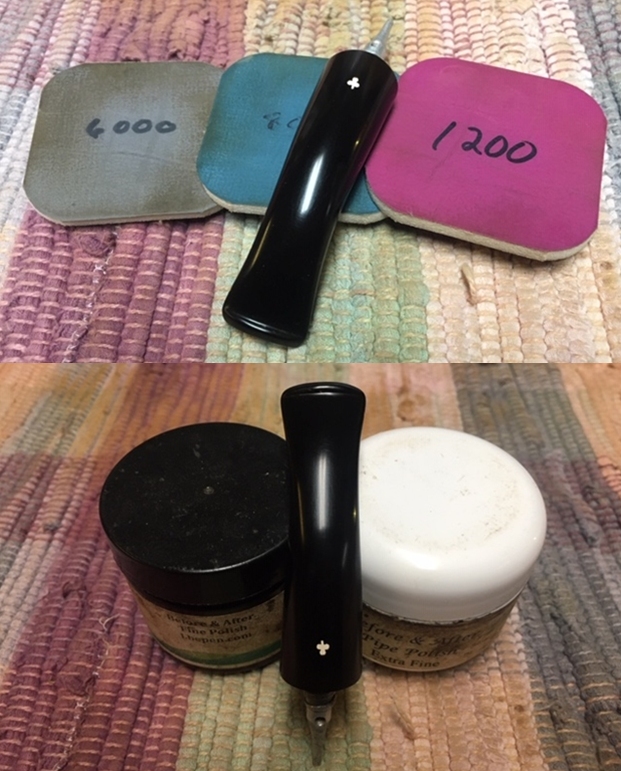
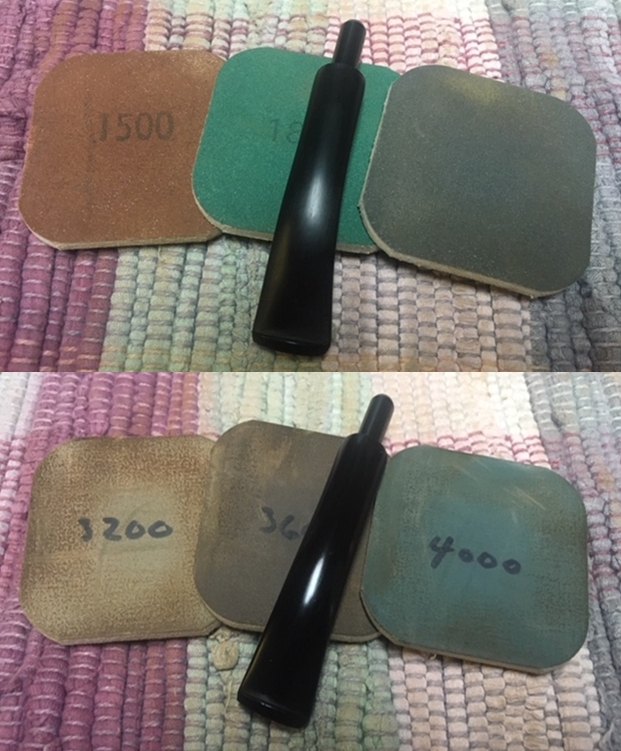
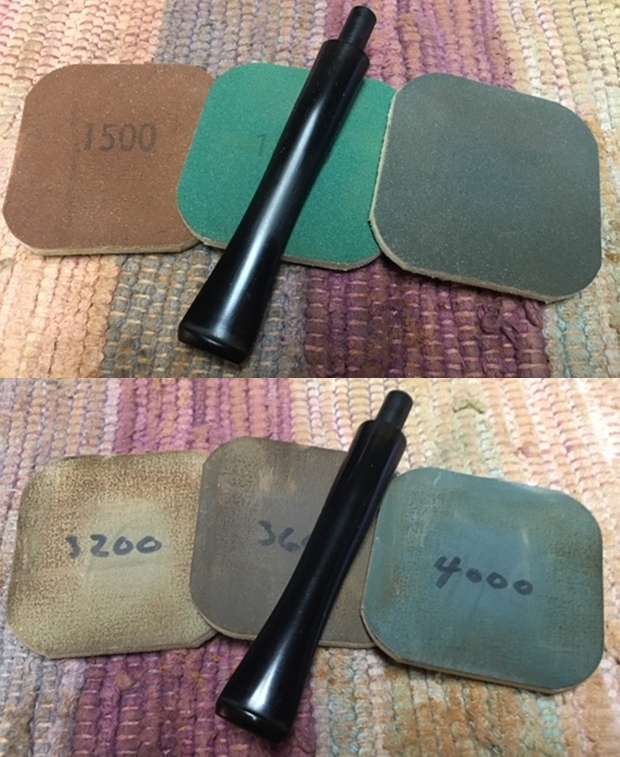
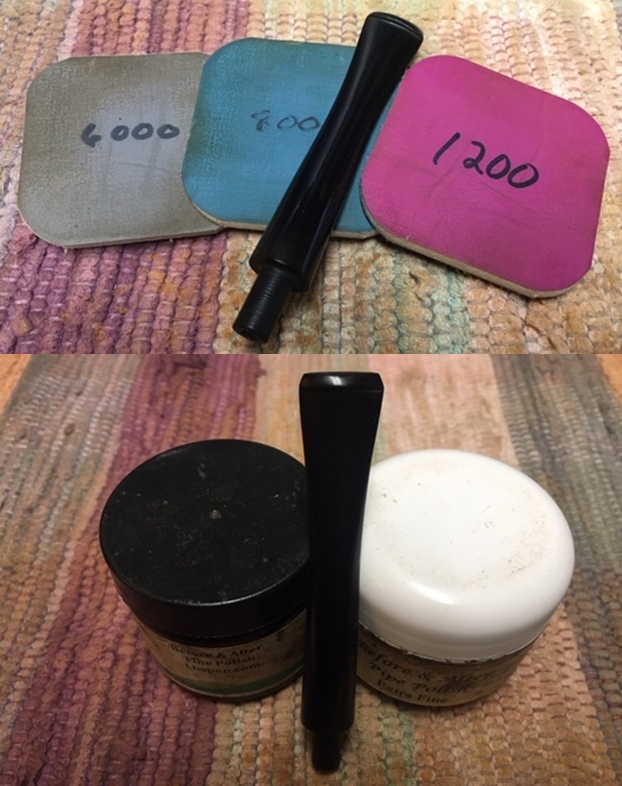
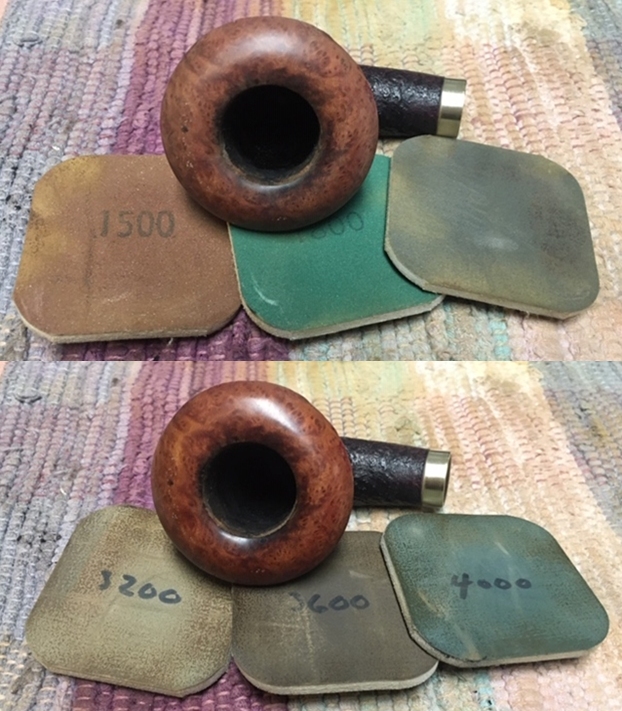
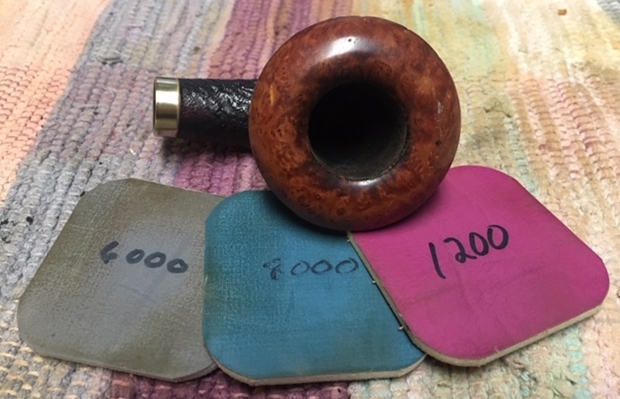
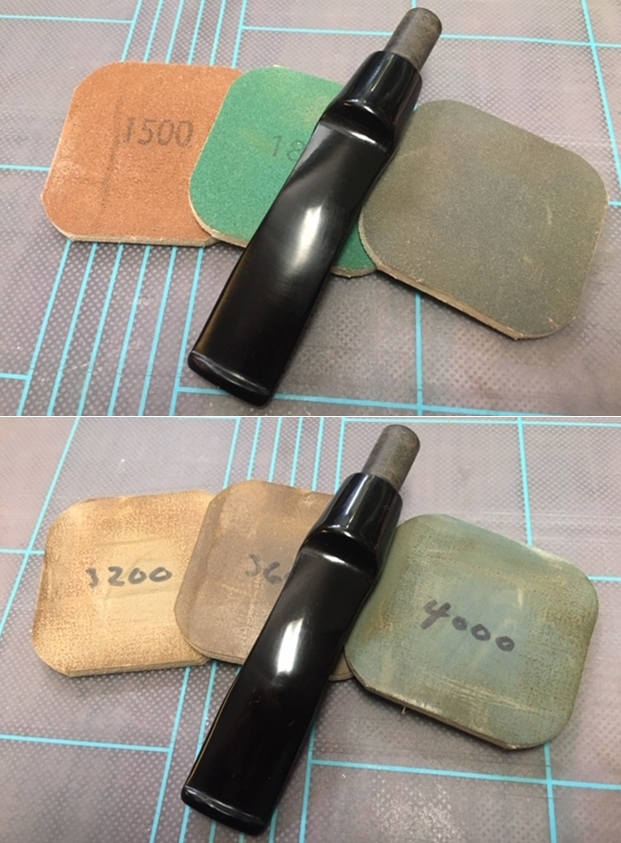
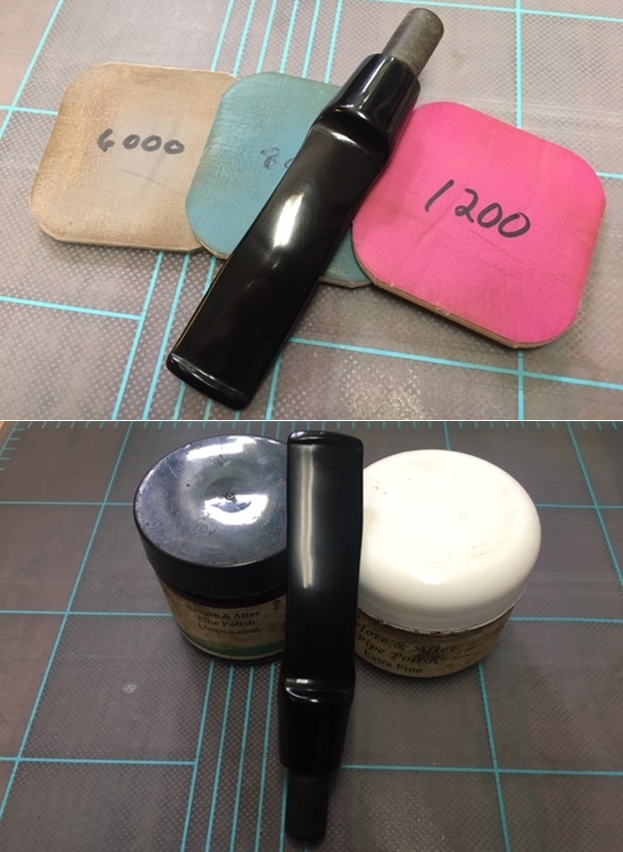
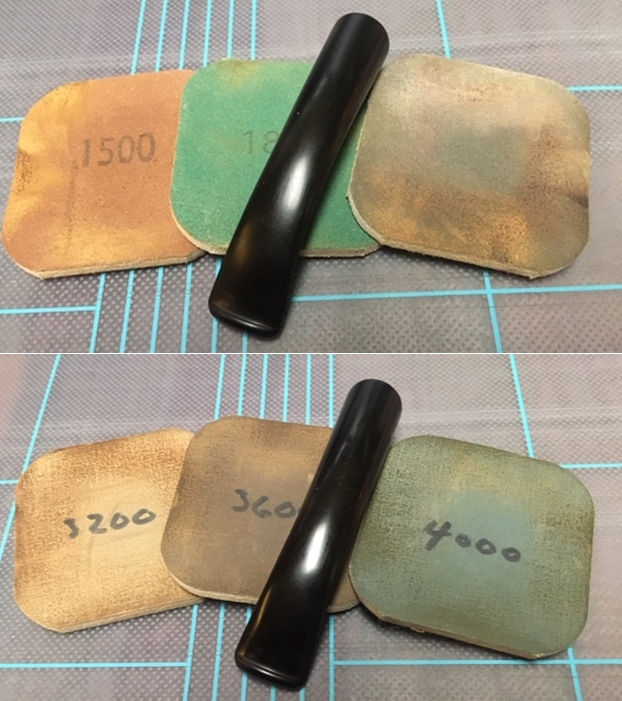
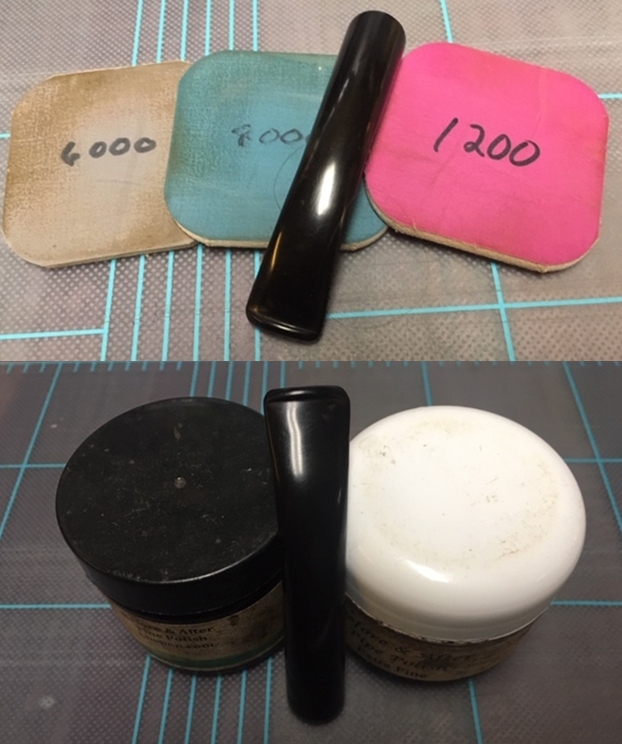
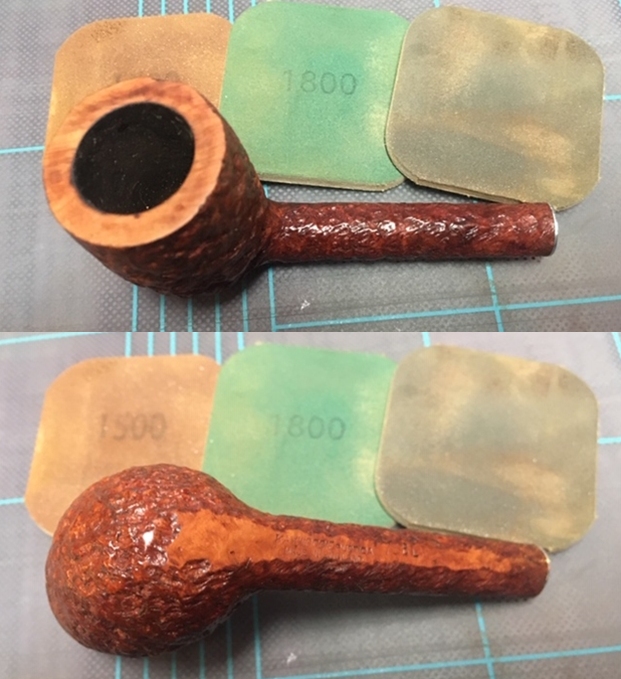
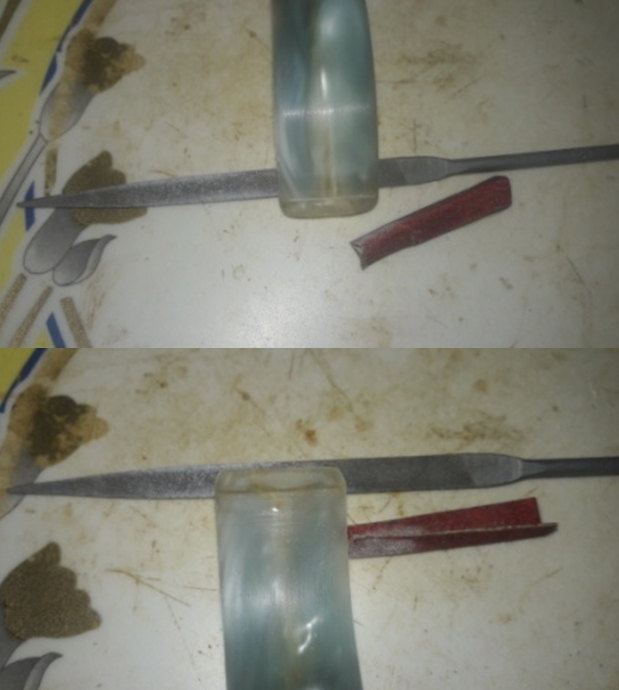 Staying with the stem restoration, I polished the stem surface with micromesh pads, wet sanding with 1500 to 12000 pads. I wiped the surface with a soft cloth at the end of the micromesh cycle. The rim top surface looks nice with a deep shine. I applied a little Extra Virgin Olive oil to the stem, though it does not help much, and set it aside. Though I am not a big fan of acrylic stems, I am happy with the way the stem appears at this stage.
 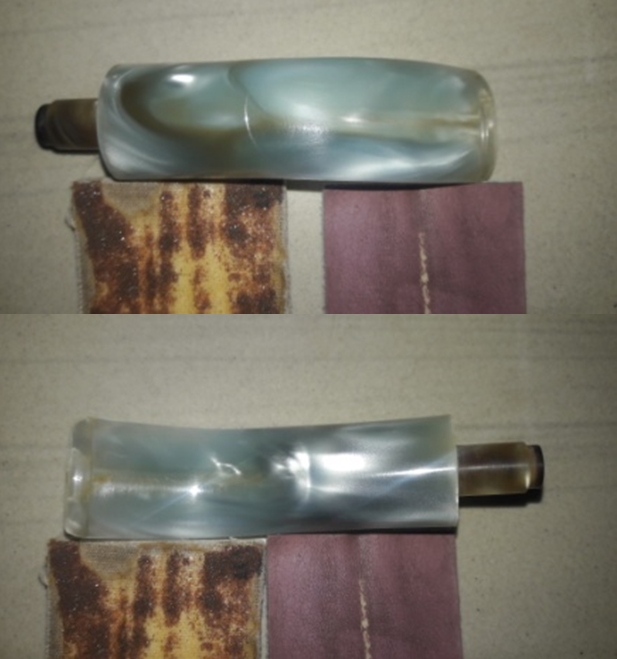 The layer of egg white and chalk powder mix had hardened considerably after an overnight curing time. I made a slightly thicker mix and applied another layer and set it aside to cure. I continued to apply a gradually thicker layer of the mix till I was satisfied that the broken meer lining was completely covered. I set the stummel aside for the mix to harden. The mix appears to be too thick, but the same can be sanded down subsequently to the desired thickness.
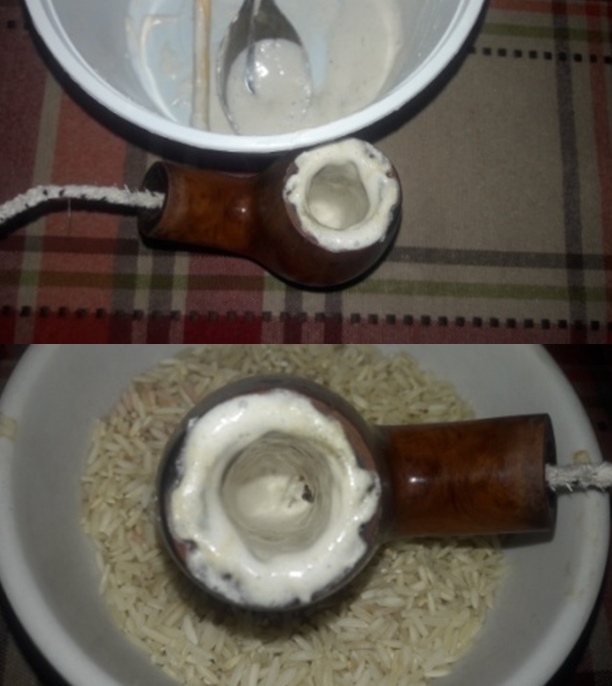
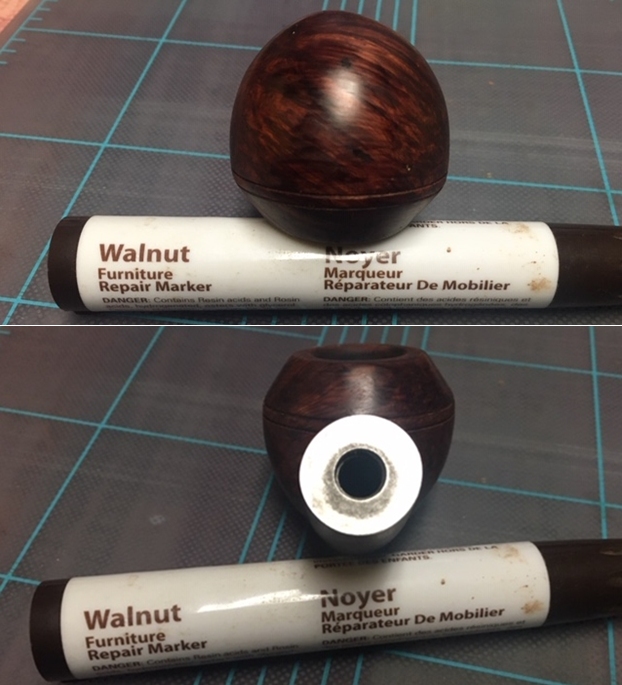
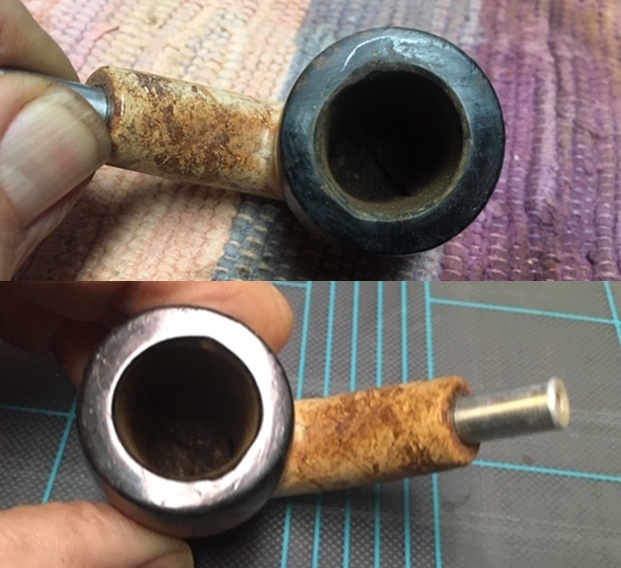
 Once the mix had completely cured, I topped the rim top to even out the excess of the mix from the rim. I expected to find a perfect white ring of the mixture within the briar rim surface. However, that was not to be!! Though not perfect ring, it’s a lot better than before. One maxim that I follow during restoration is “LESS IS MORE” and thus, I did not further repeat the process of adding a layer of the mix and topping it again once the mix had cured. It’s not perfect but it is definitely functional.
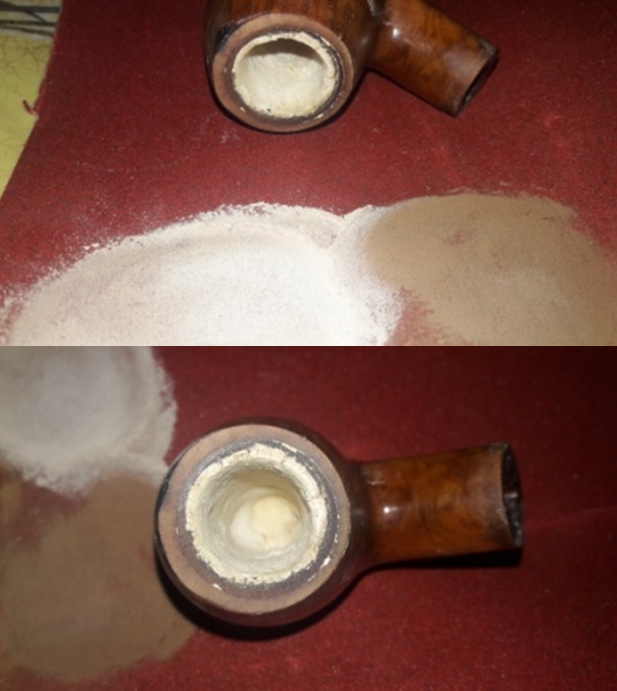
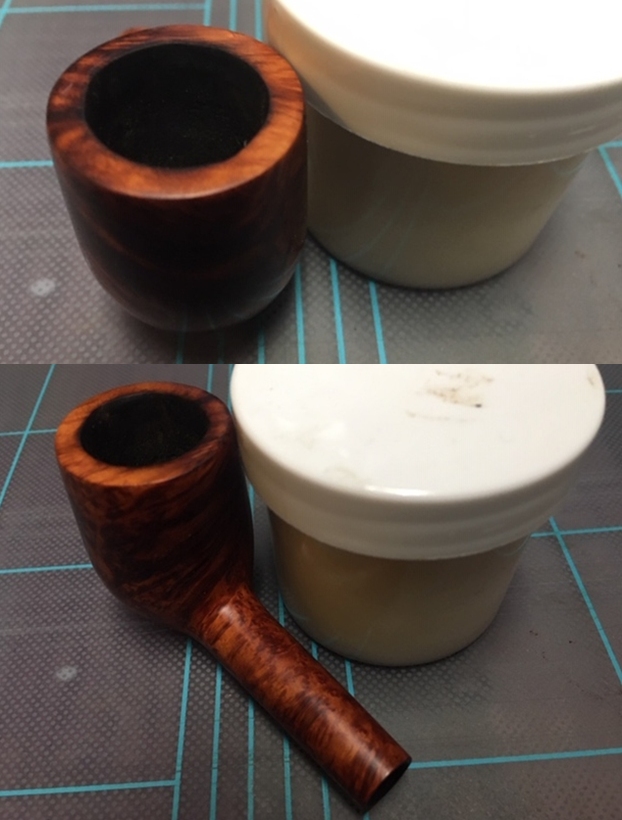
 I followed the topping by sanding the walls with a folded piece of 180 grit sand paper. If observed closely, the left side lining is thicker than the rest of the chamber giving the chamber an out of round appearance. I need to sand the left side layer more to achieve the desired symmetry.
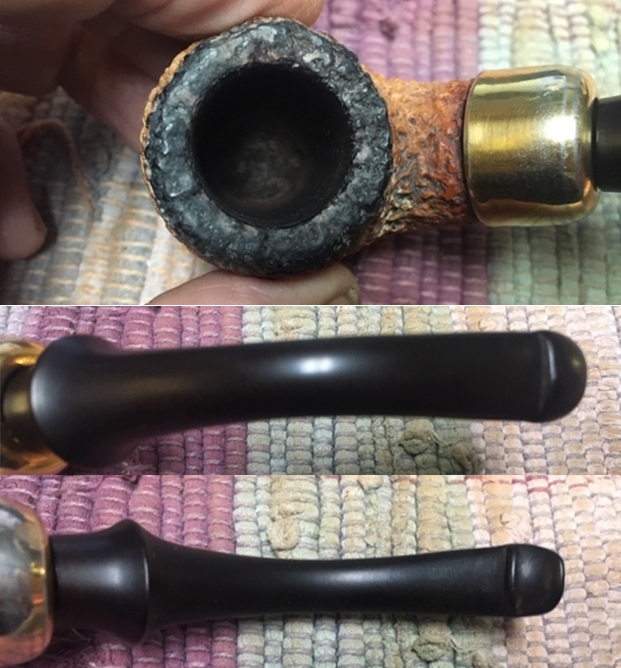
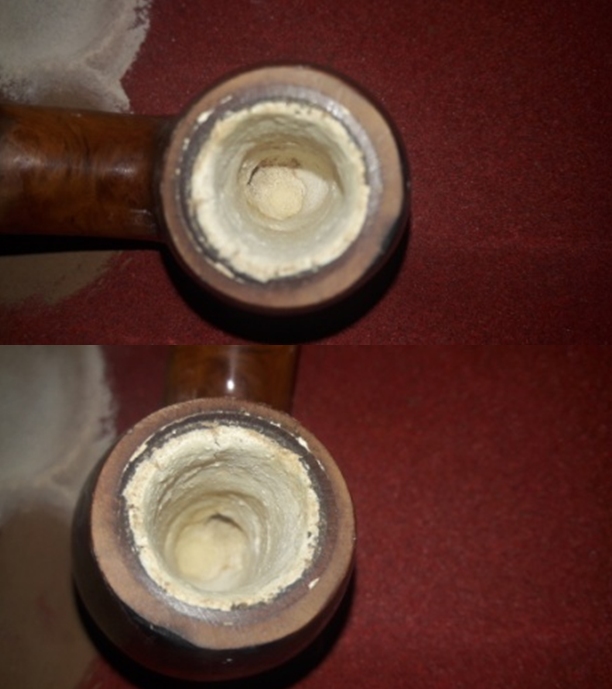
 I further sand the chamber walls with a 220 grit sand paper to even out the thickness of the left side wall and also reduce the thickness from the bottom half of the chamber. Again the uneven appearance of the white mixture was an eye sore but I resisted the temptation of rebuilding it all over again. But that’s for now…..never know maybe a couple of months down the line, as I look at it again, maybe I would attempt the rebuild! However, for now the chamber is nice round and the repairs appear solid and the pipe is definitely ready for a smoke. The ghost smells are also completely eliminated and the chamber is now odorless. I am quite happy with the progress till now.
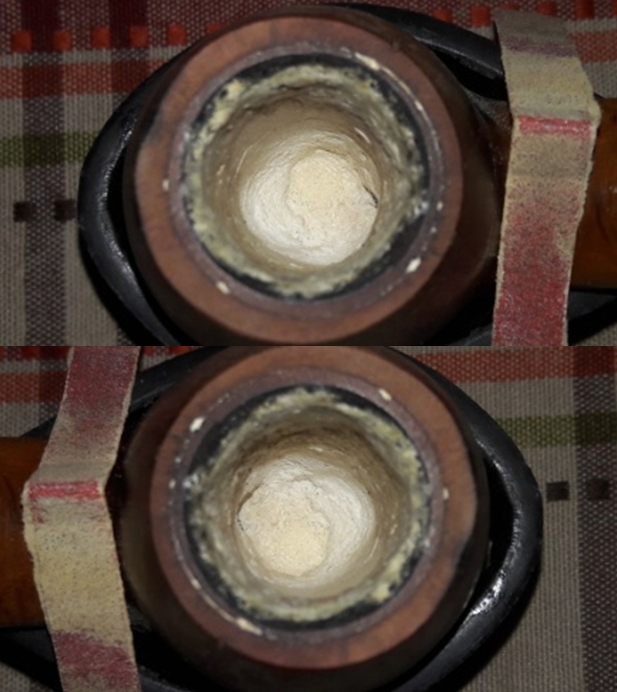
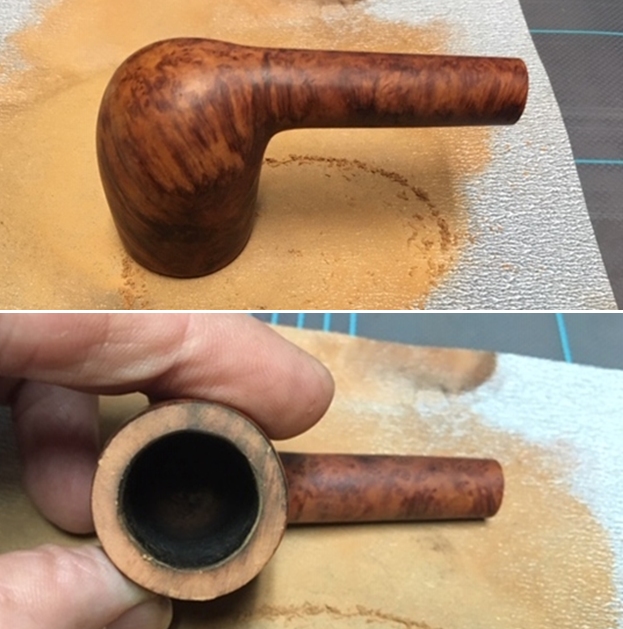
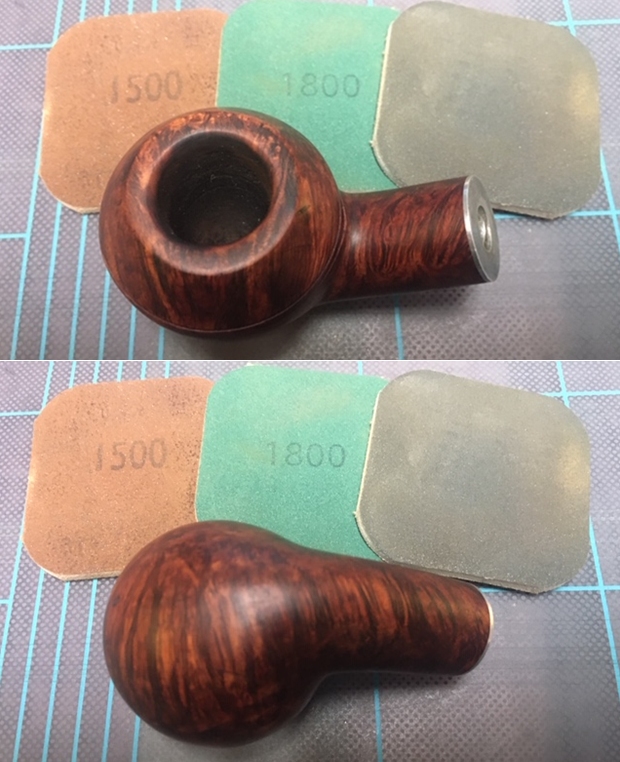
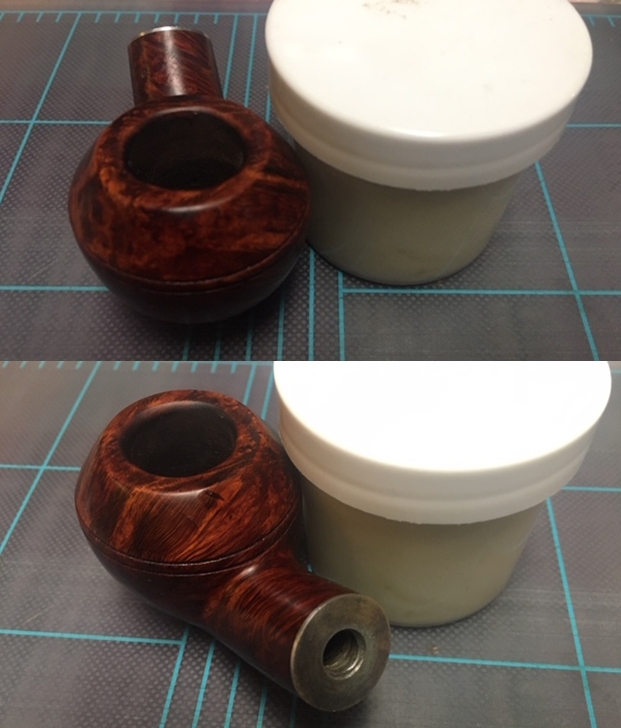
 With the meerschaum lining repairs sorted out for now, I turned my attention to the external surface of the stummel. I sand the entire stummel with a piece of 220 grit sand paper. This served four purposes; firstly the coating of lacquer was completely rid off, secondly, the minor dents and dings and fills were evened out to a great extent and thirdly the water marks at the shank end were completely eliminated. The fourth issue that was addressed was the charred spot on the rim outer edge in 1 o’clock direction. The stummel is now ready for a nice polish.
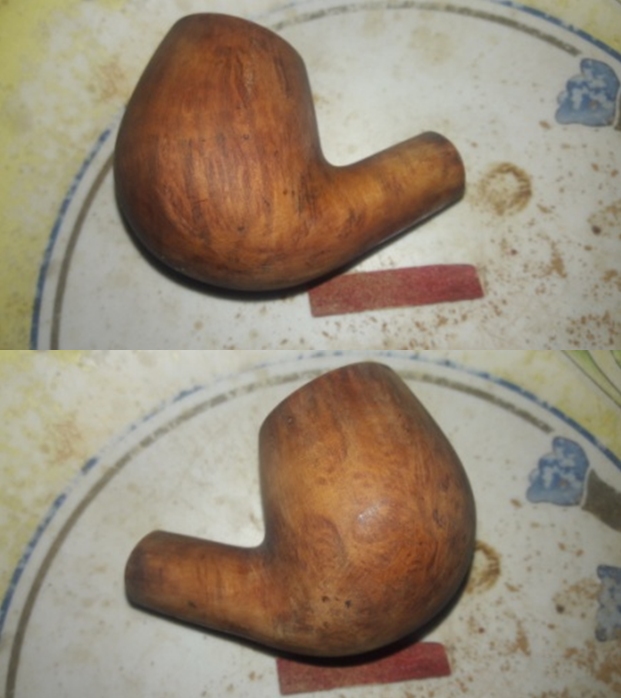
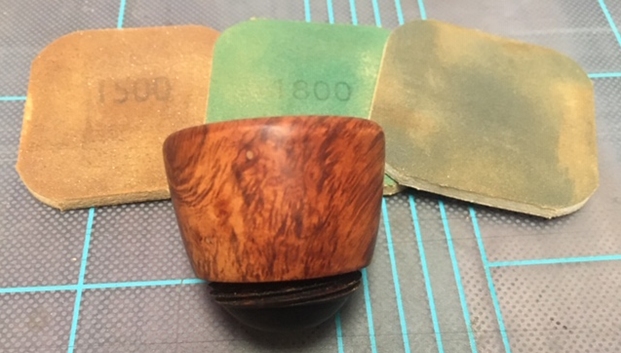
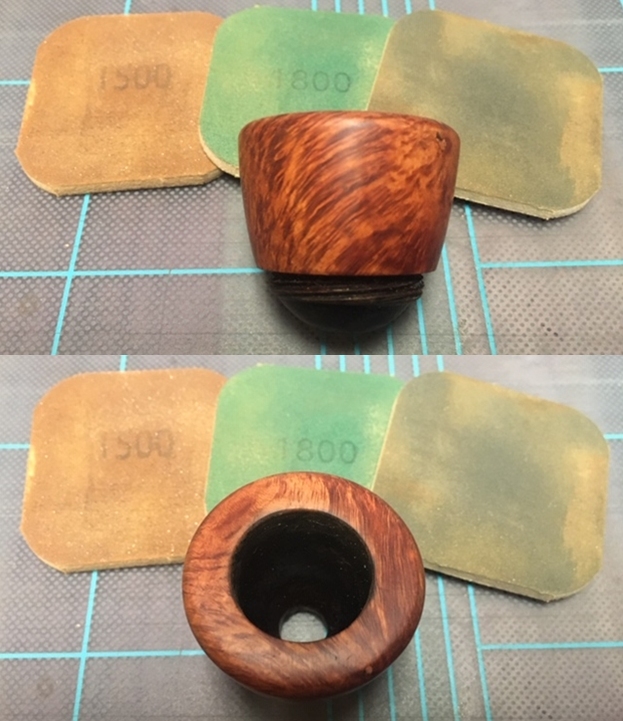
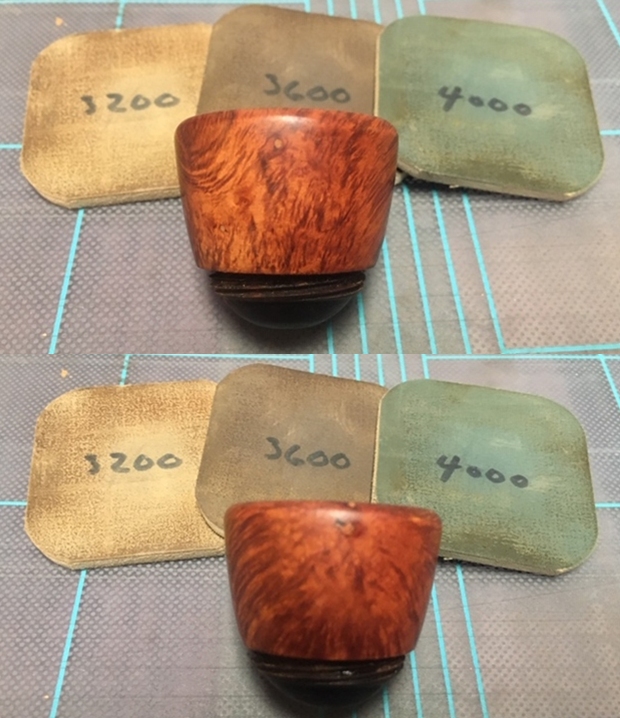
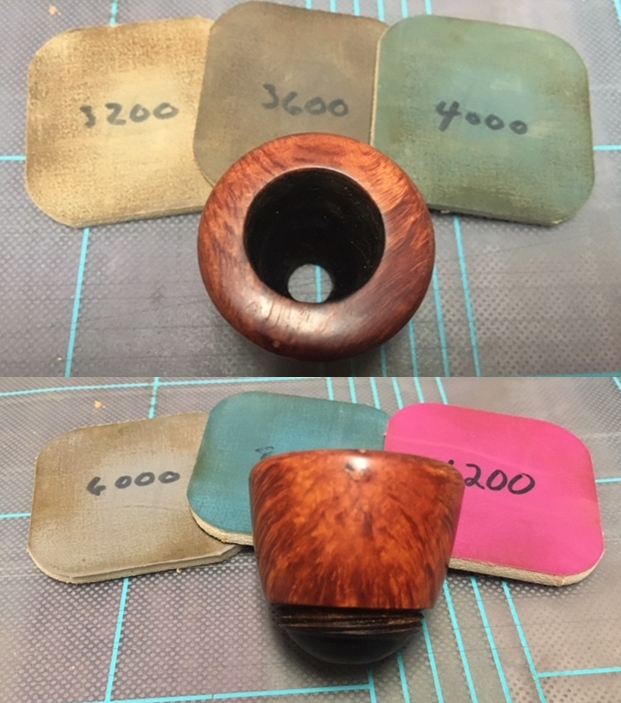
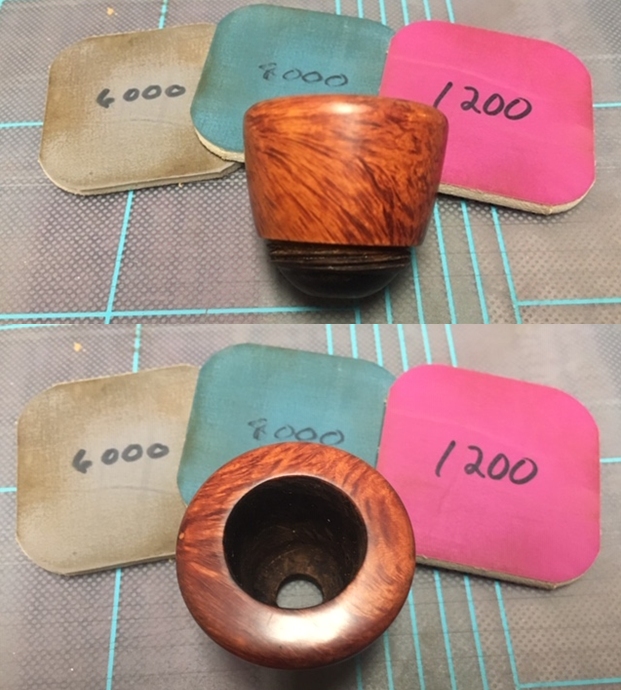
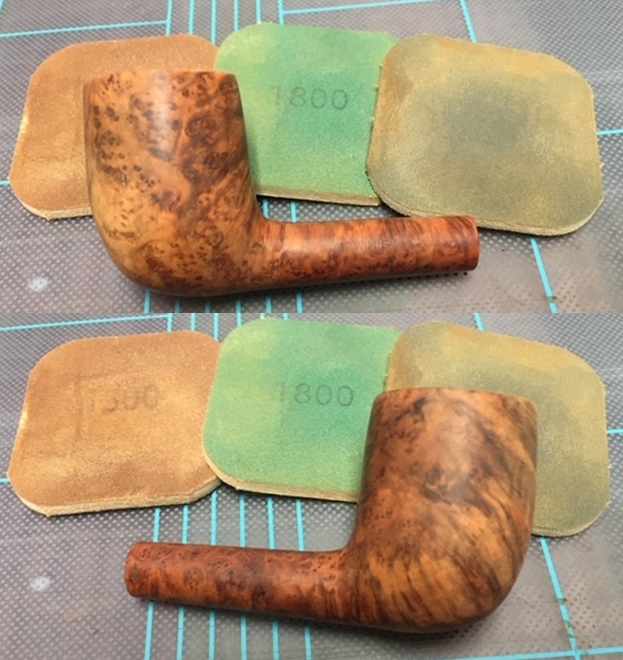
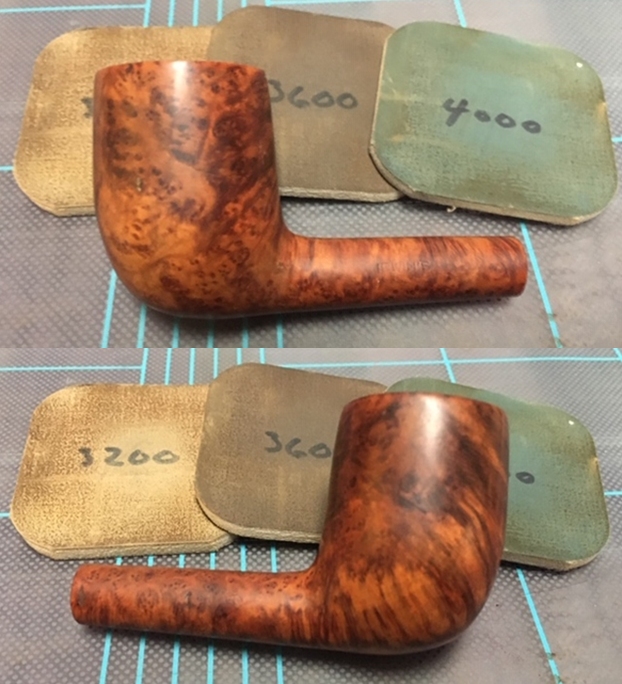
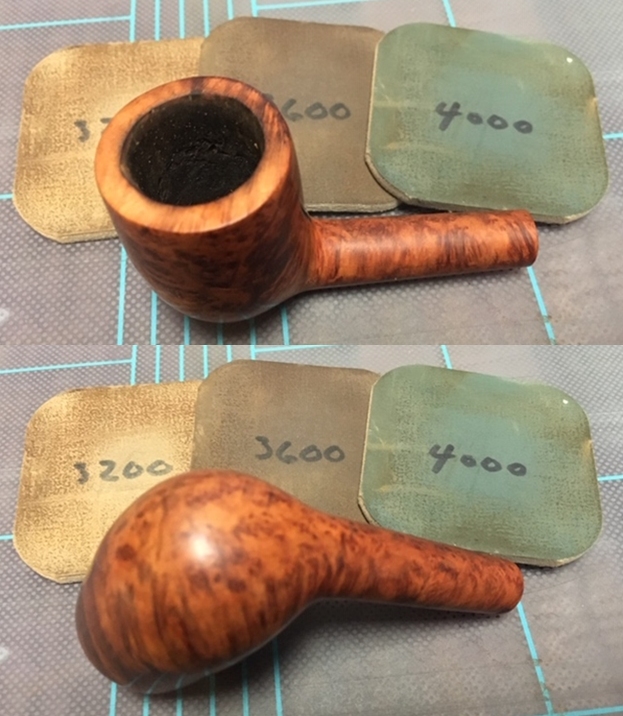
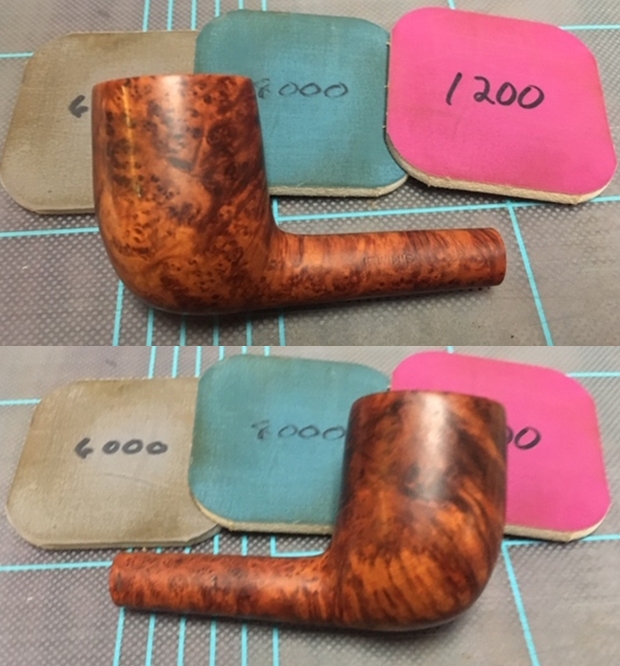
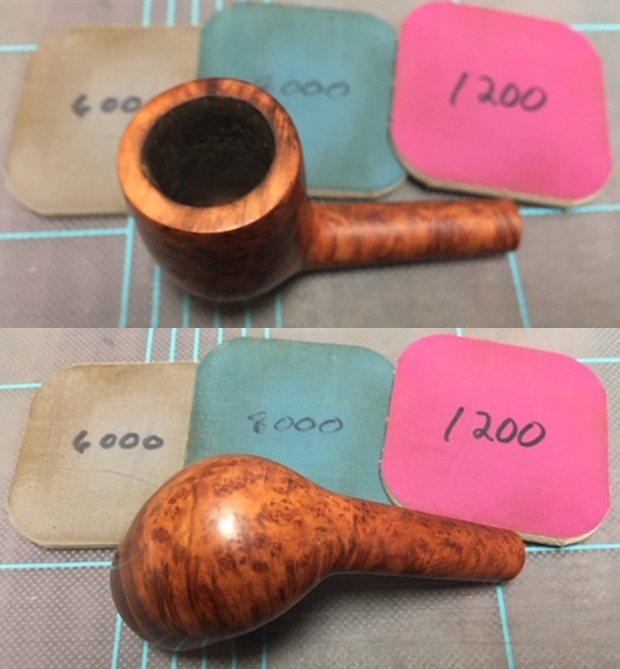
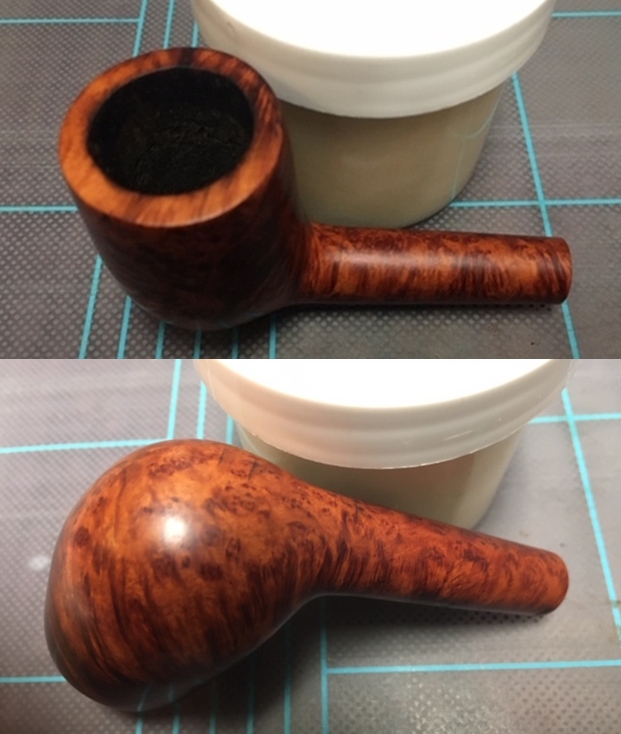
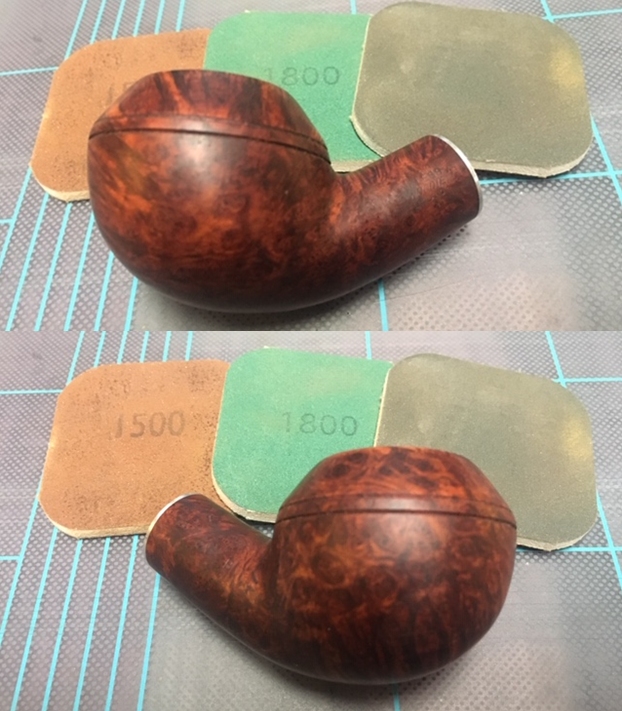
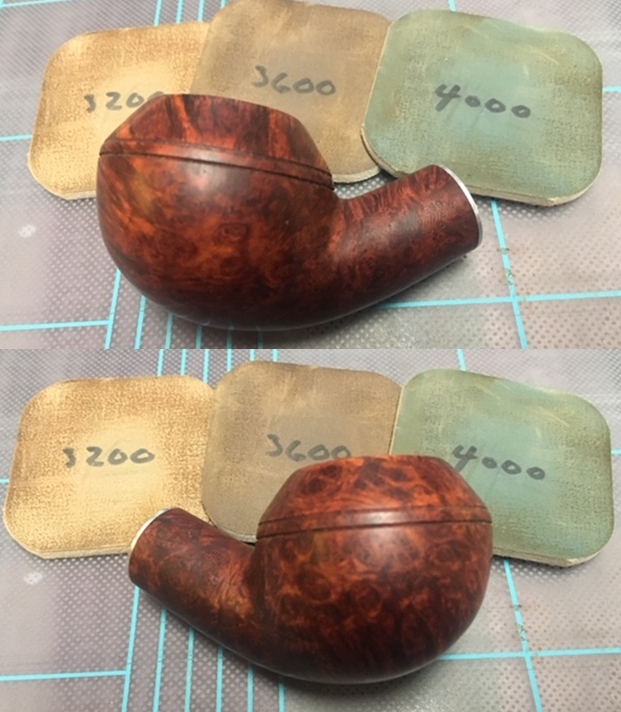
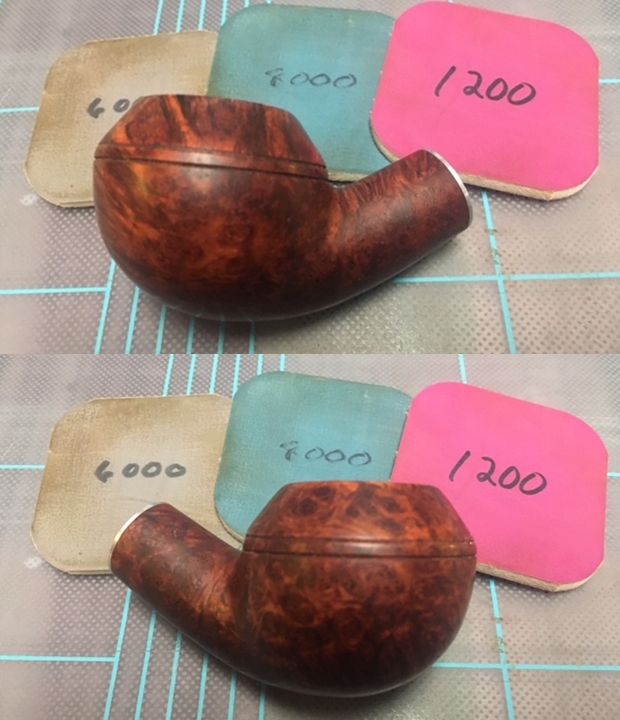
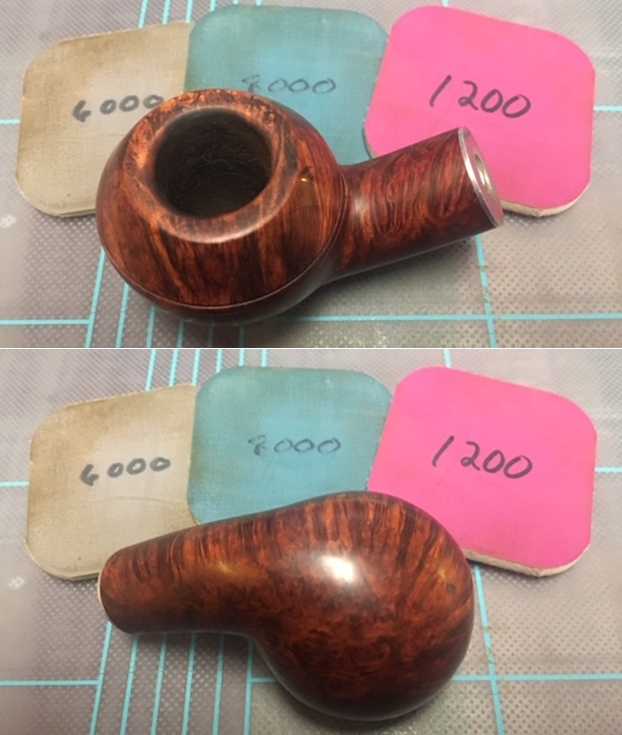
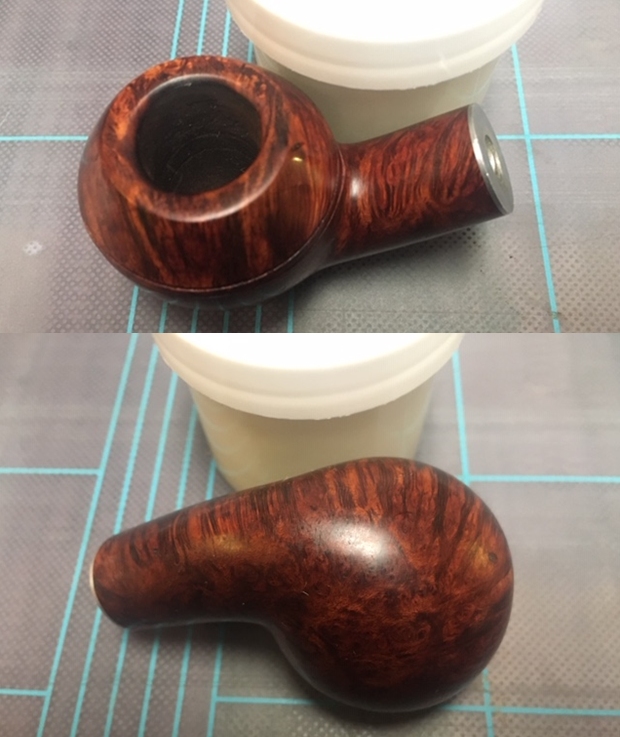
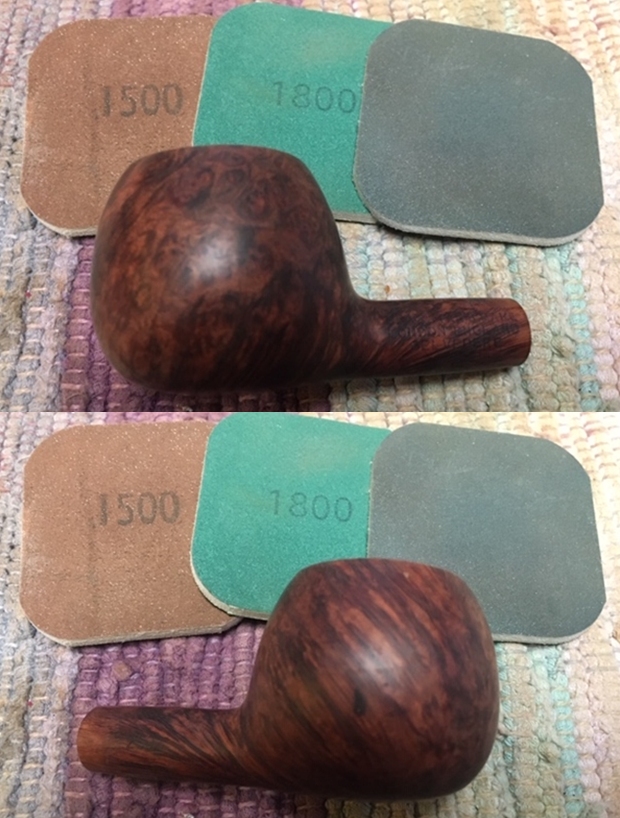
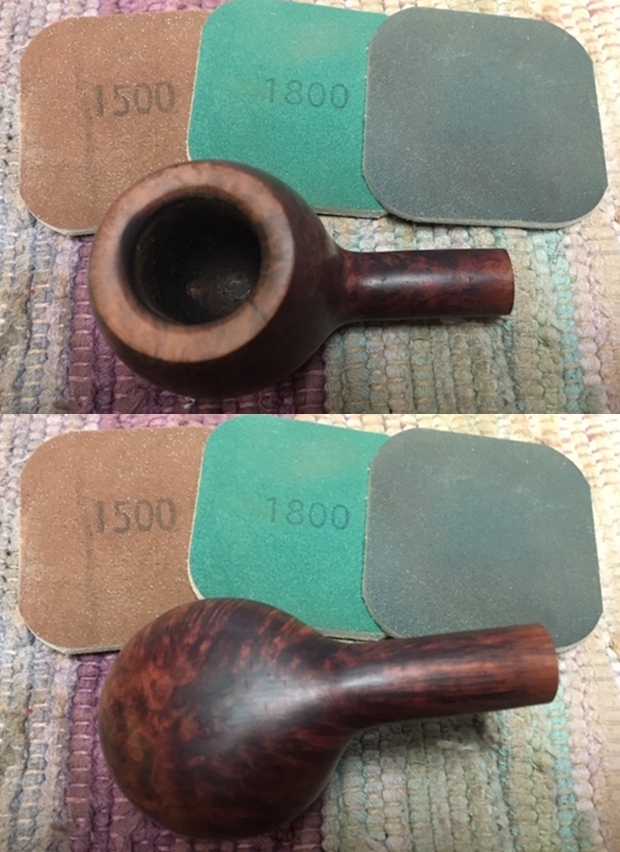
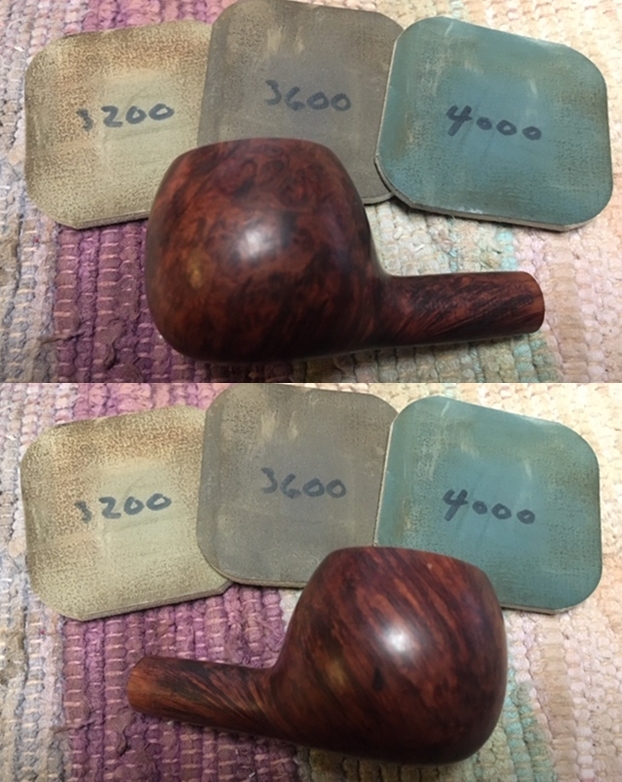
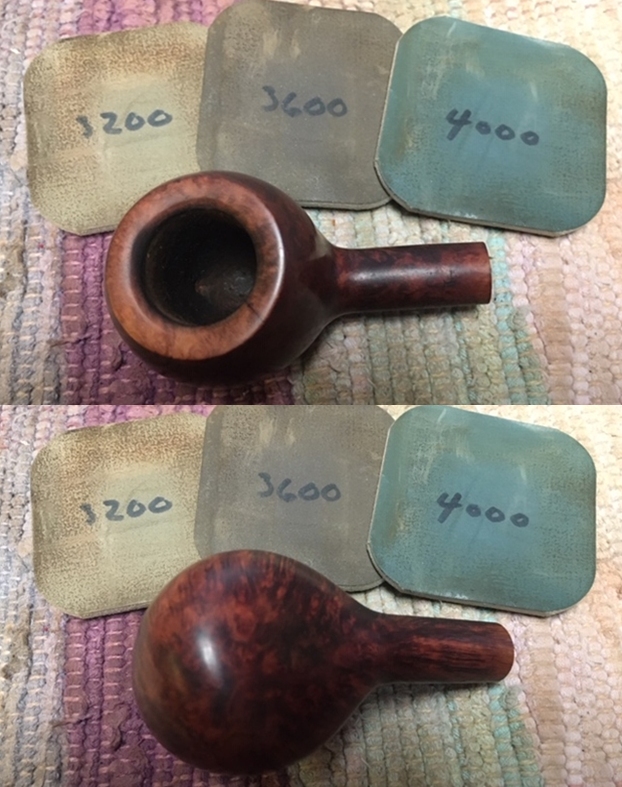
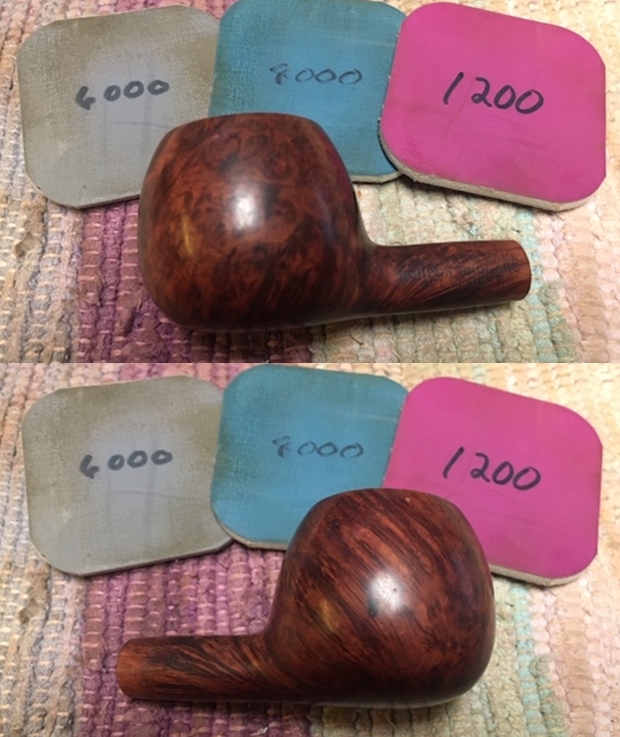
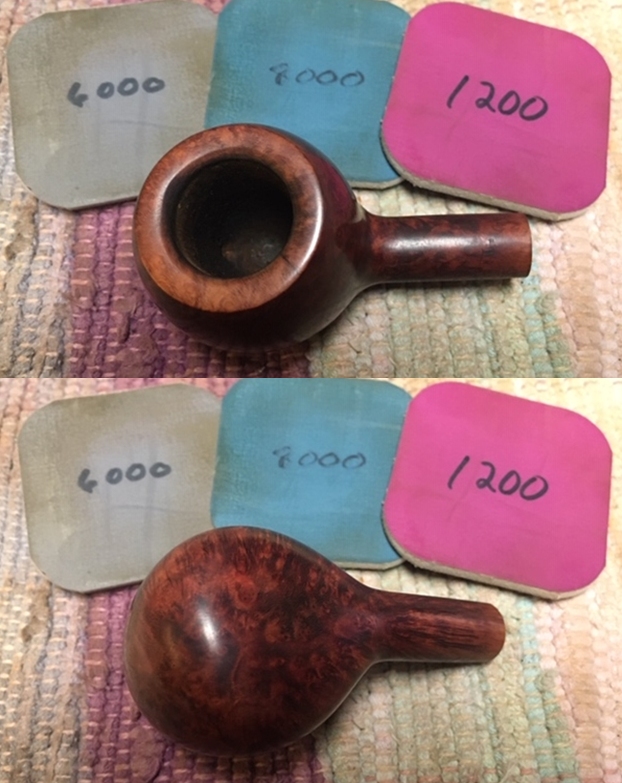
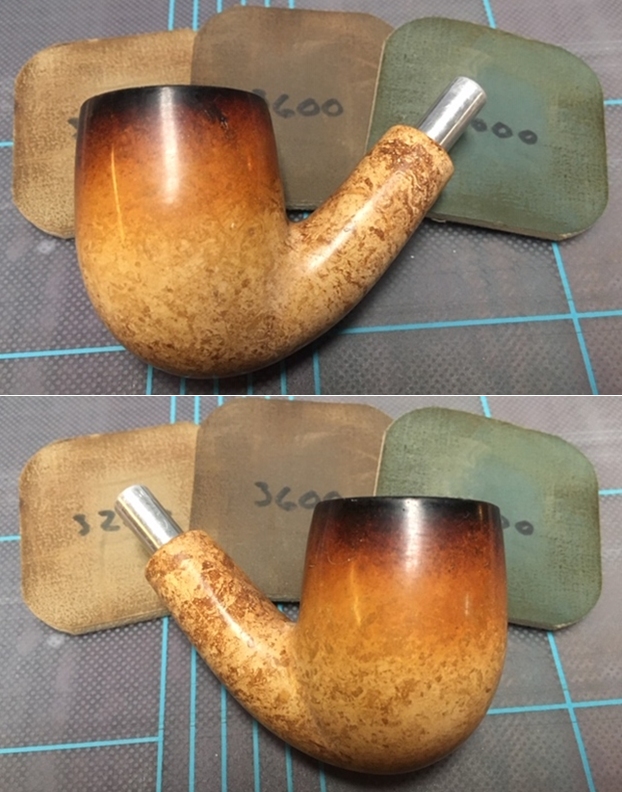
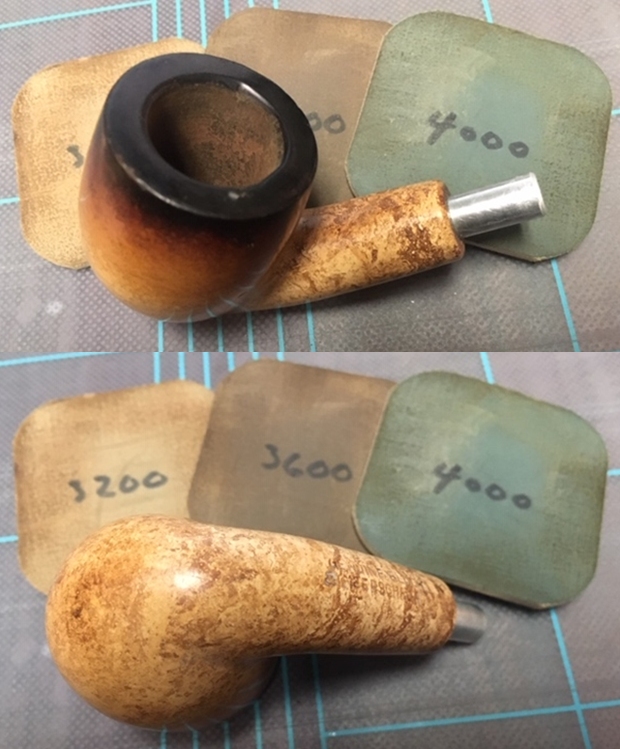
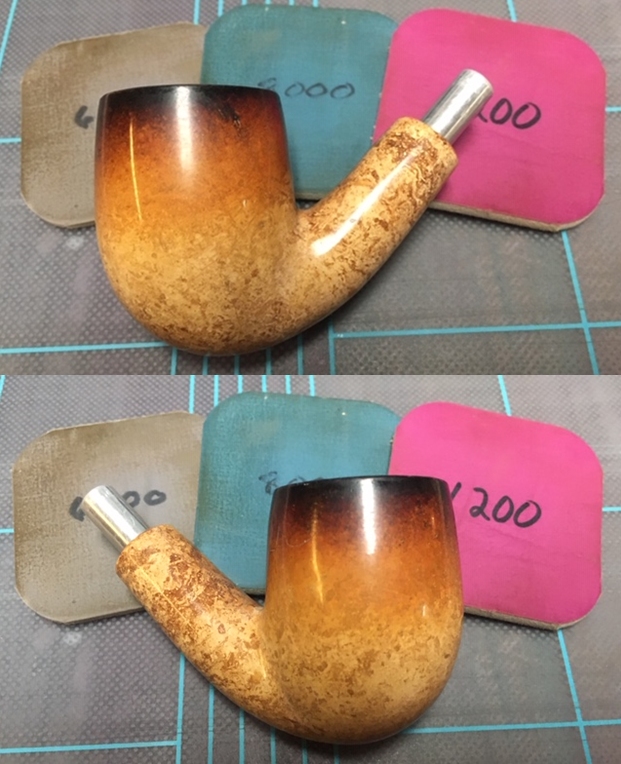
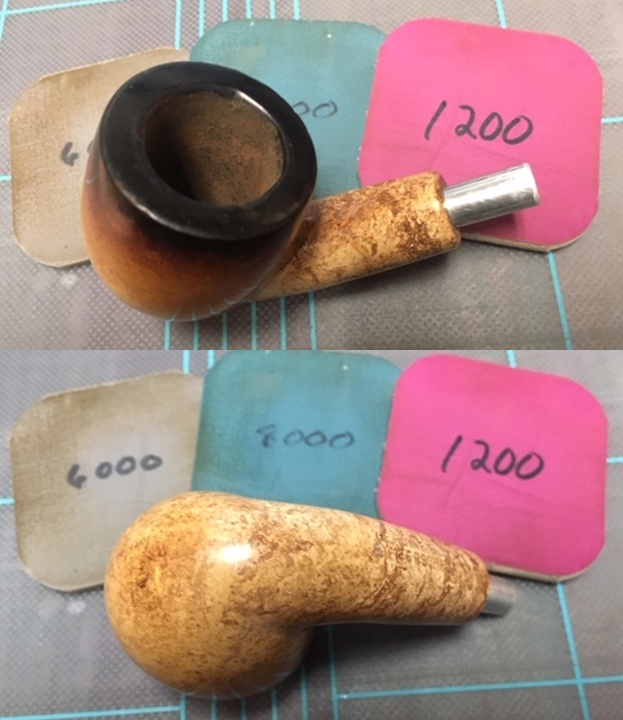
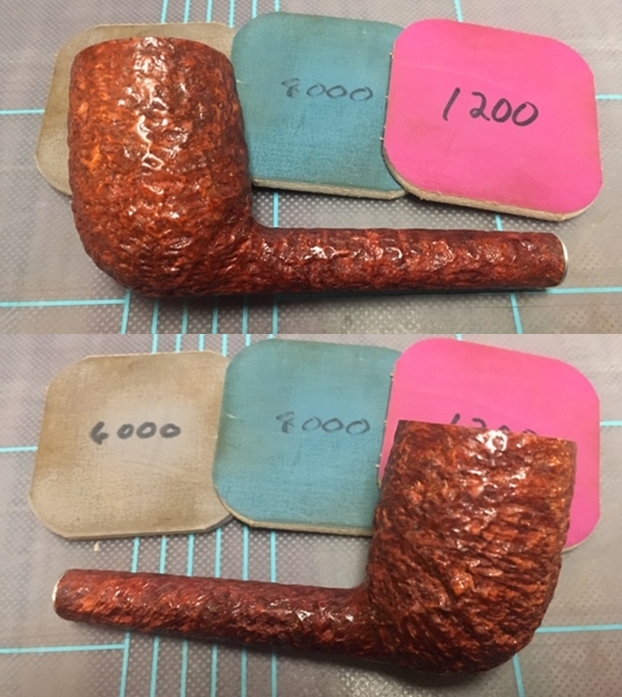
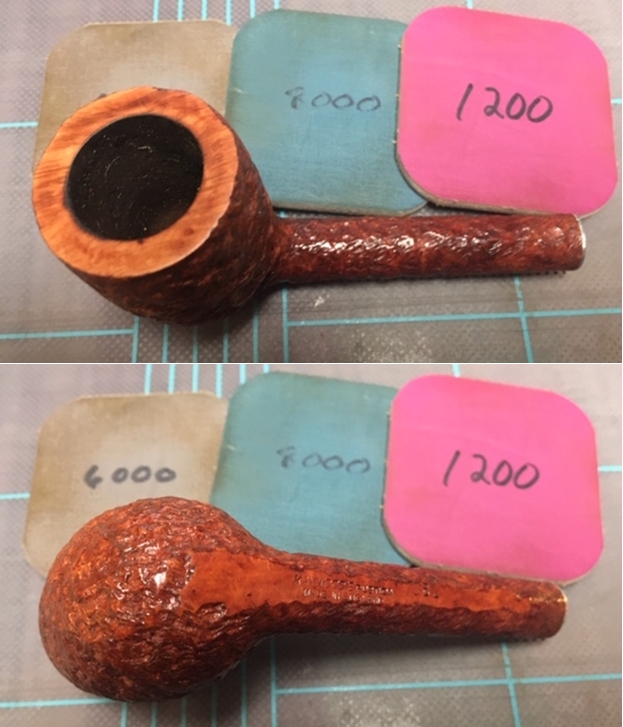
 Now it was time to polish and impart a nice shine to the stummel. I wet sand the stummel with a 1500 and 2000 grit sand paper followed by wet sanding with 2400 to 12000 grit micromesh pads. Even though the tiny fills are clearly seen in the following pictures, in person, they merely appear as tiny dots and not easily discernible. I really liked that the mixed grains on the sides and Bird’s eye grain on the foot are now visibly resplendent in all their glory.
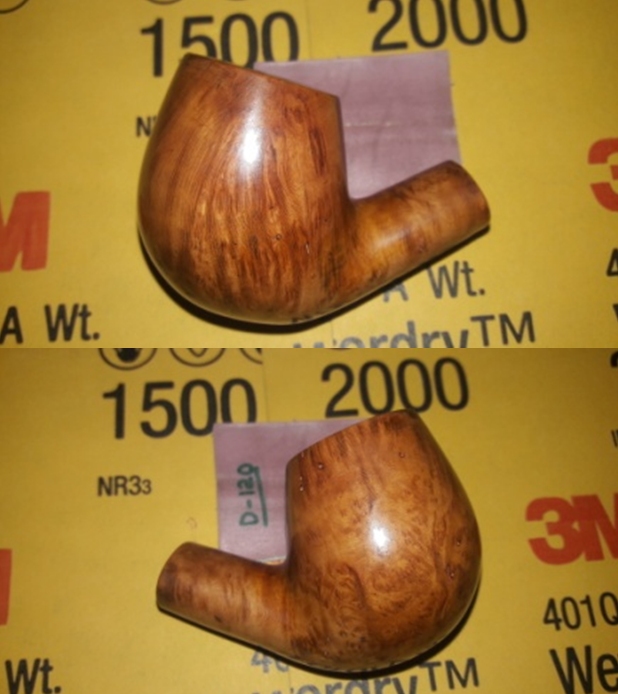
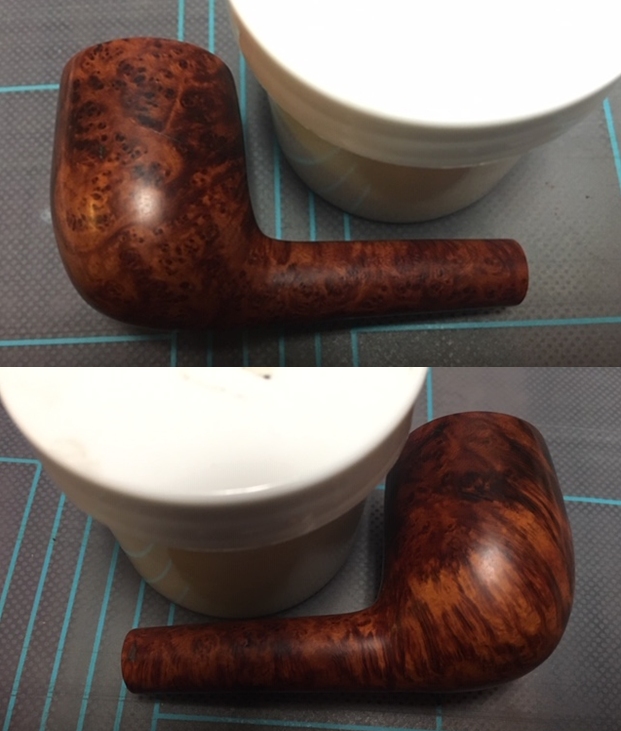
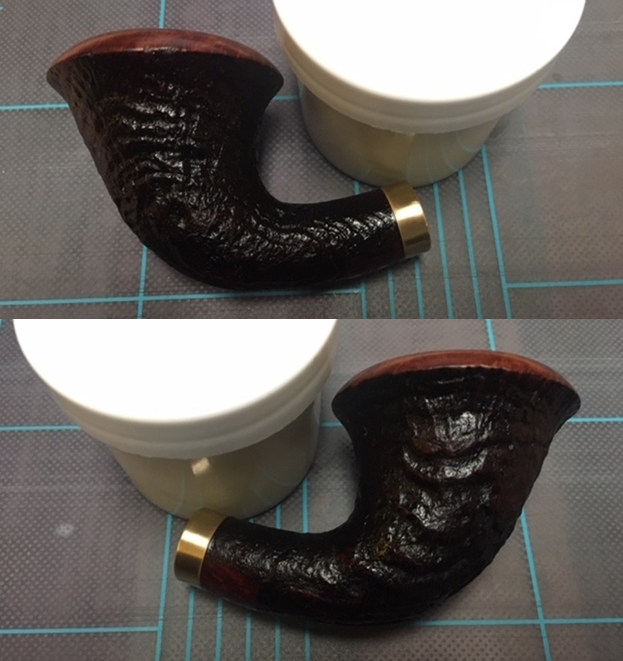
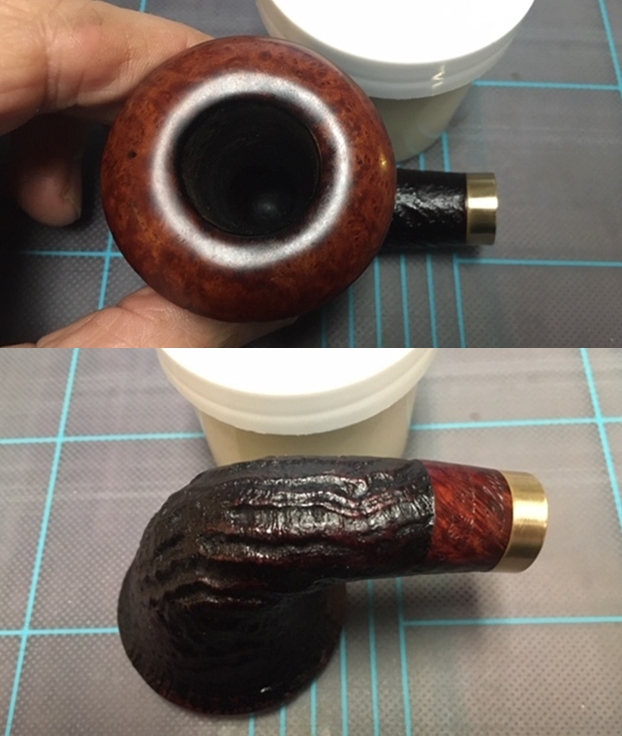
 I rubbed a small quantity of “Before and After Restoration Balm” in to the stummel to enliven and protect it. I rubbed this balm deep in to the briar of the stummel and smooth rim top with my fingers and let it rest for a few minutes. The balm almost immediately works its magic and the stummel now has a nice vibrant appearance. I further buff it with a horse hair shoe brush.
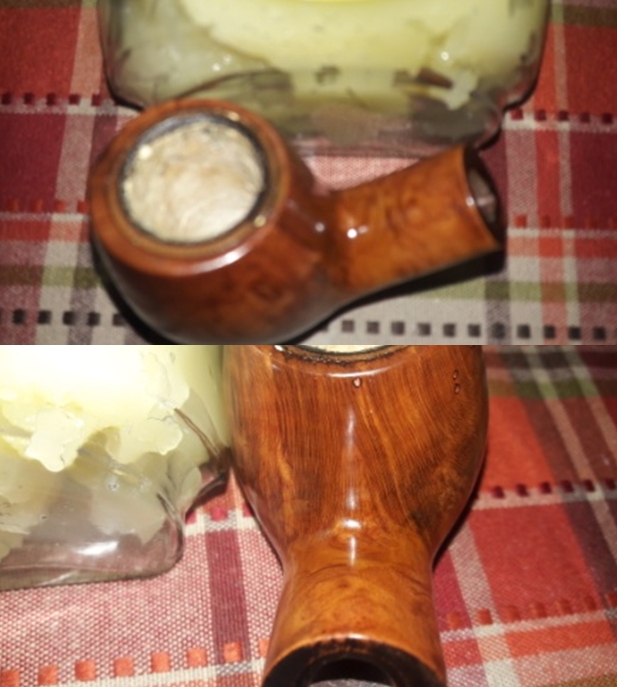
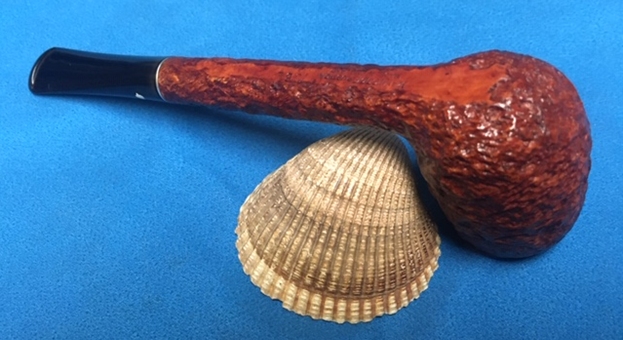
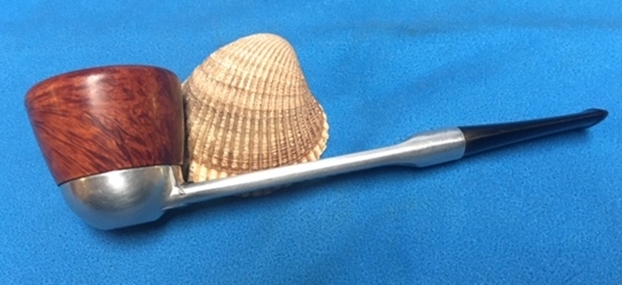
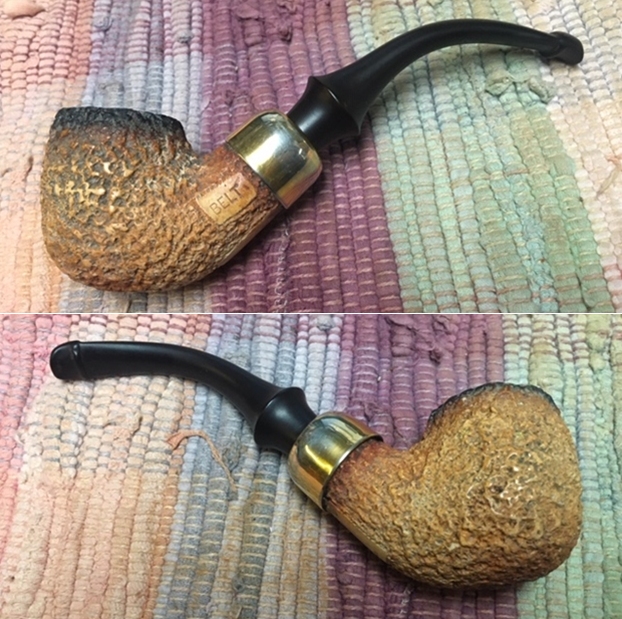
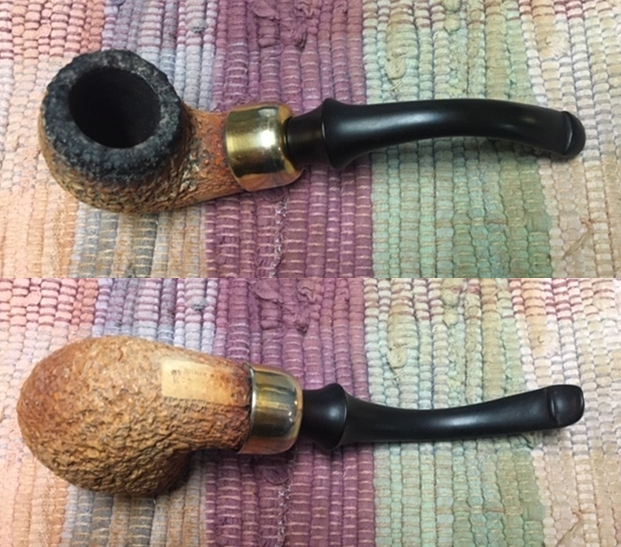
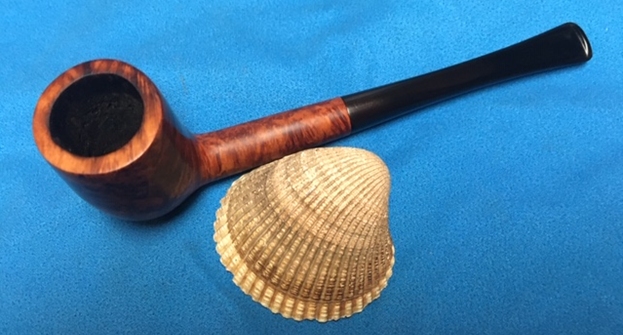
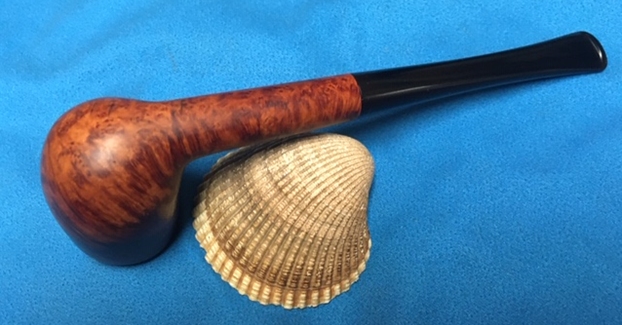
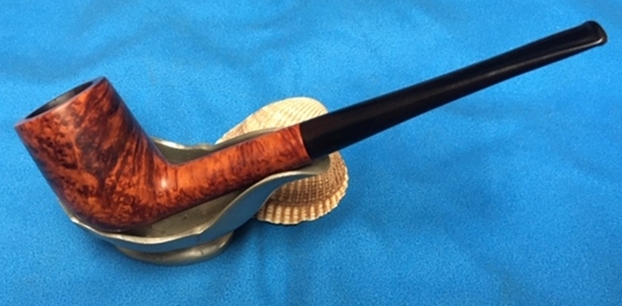
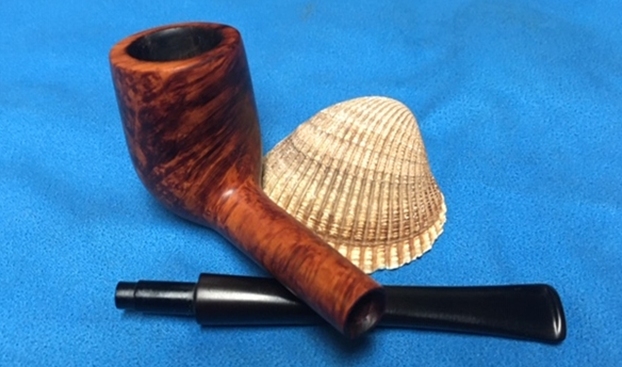
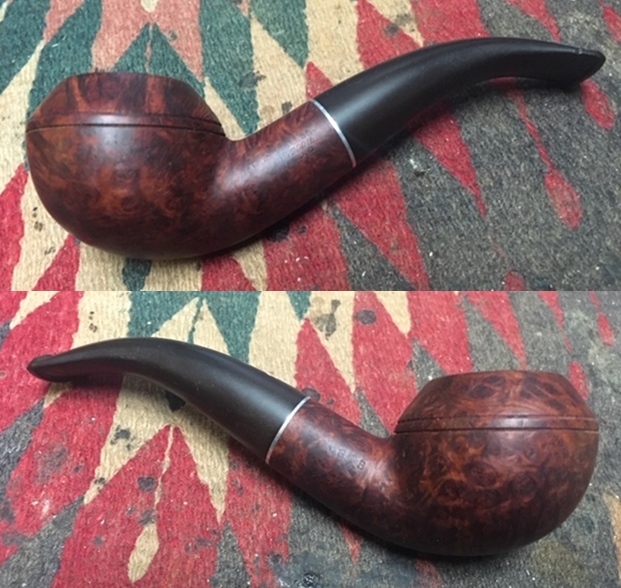
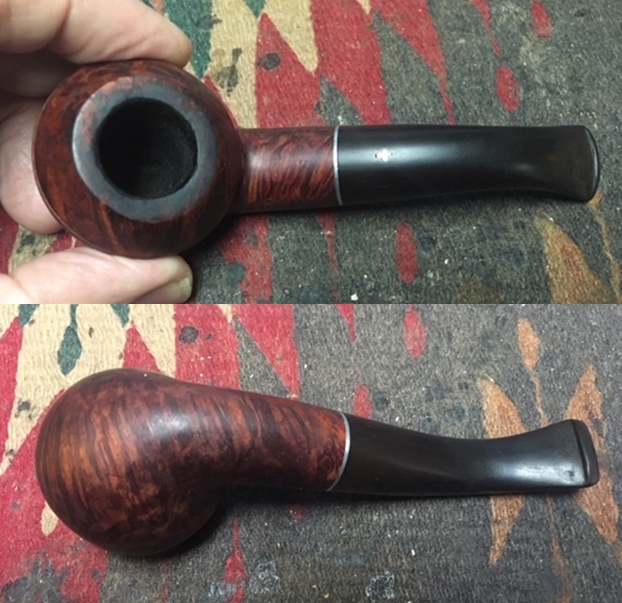
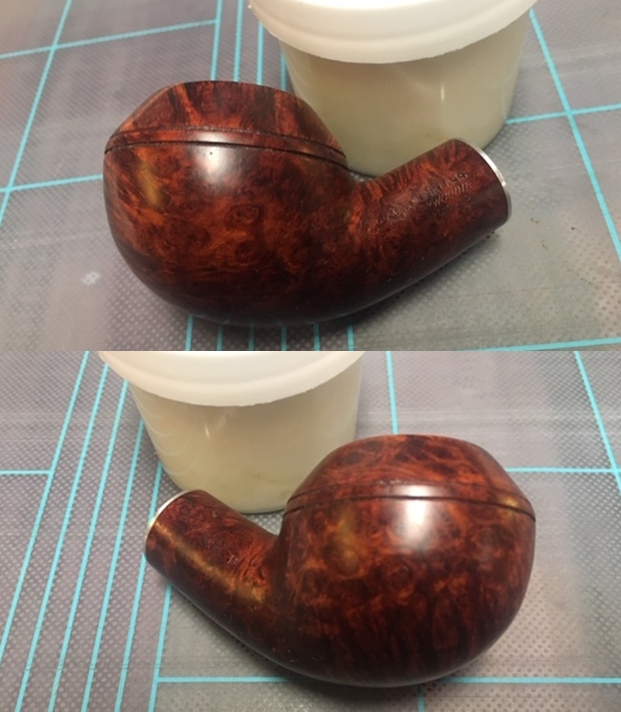
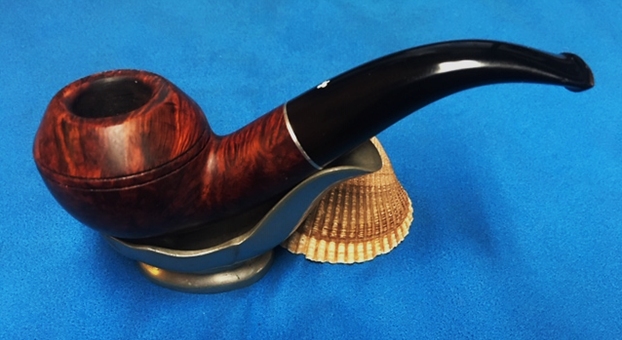
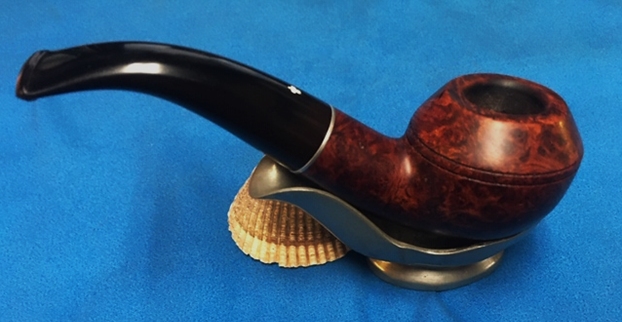
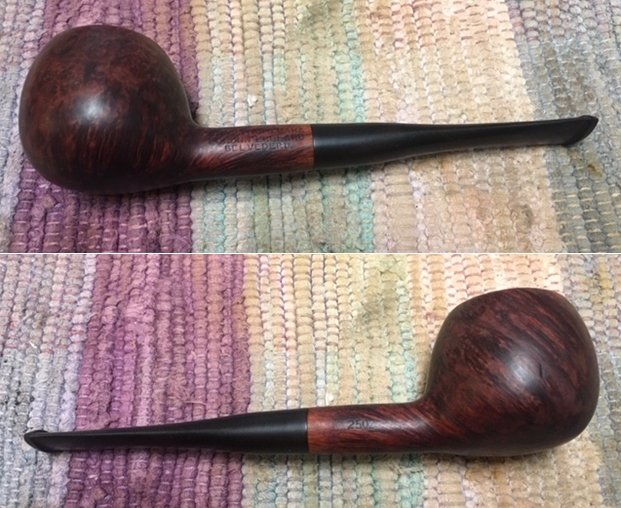
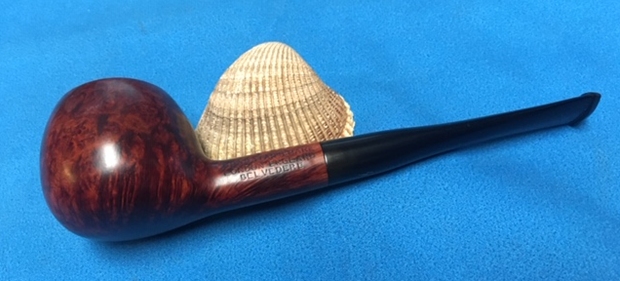
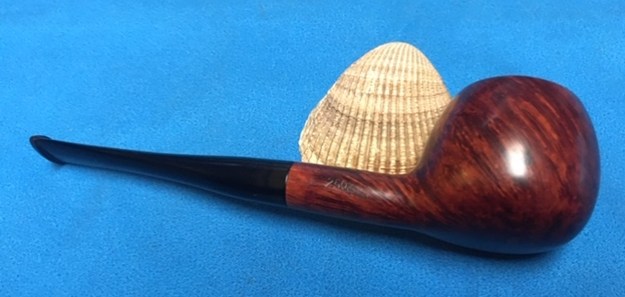
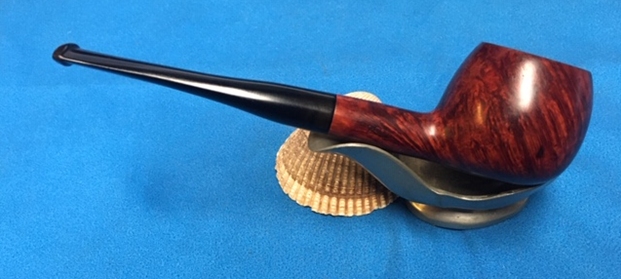
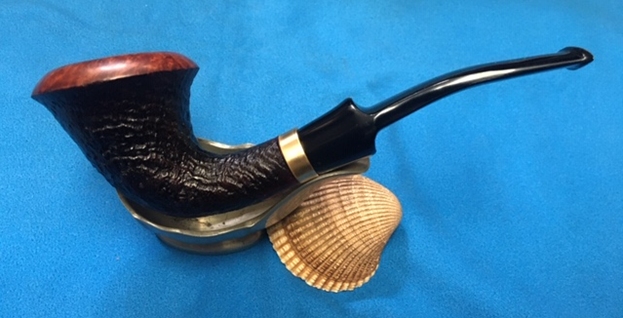
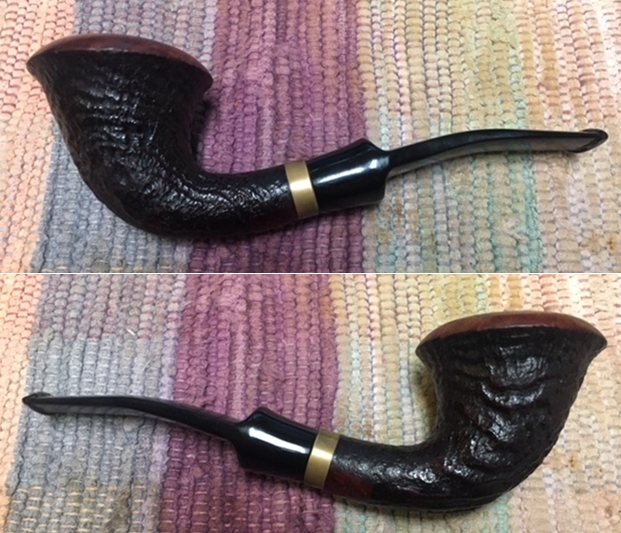
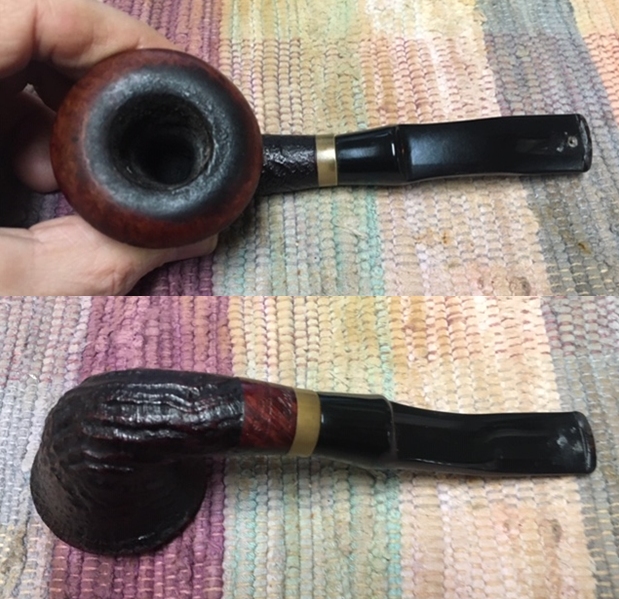
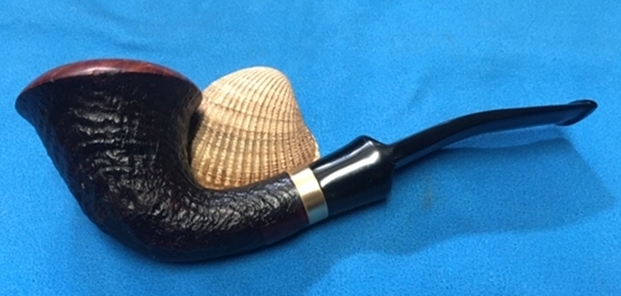
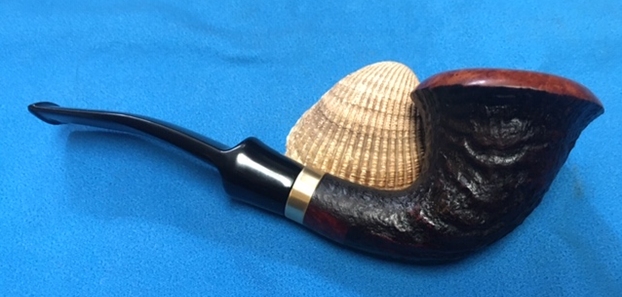
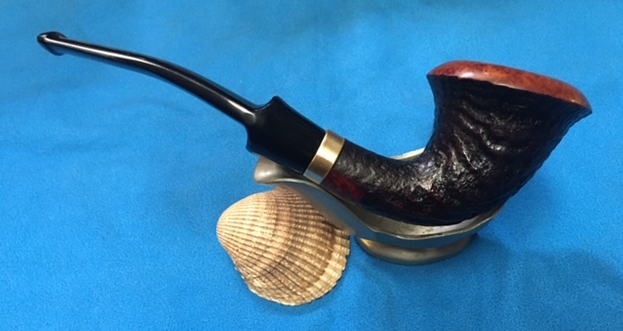
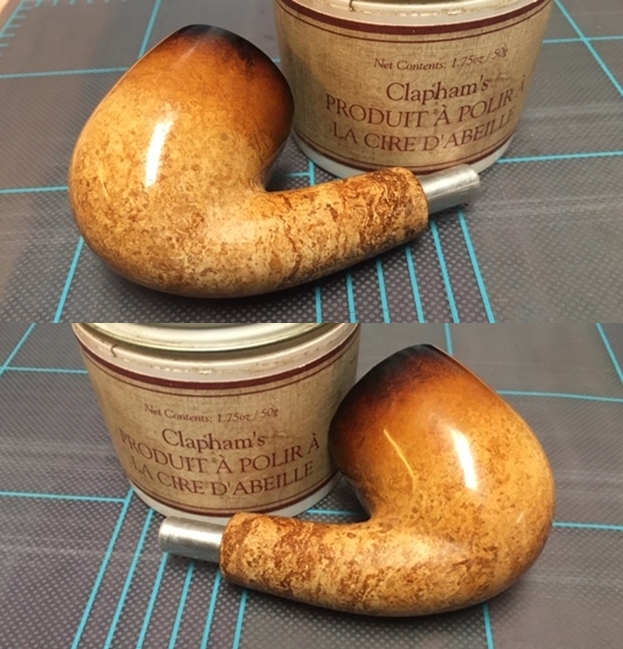
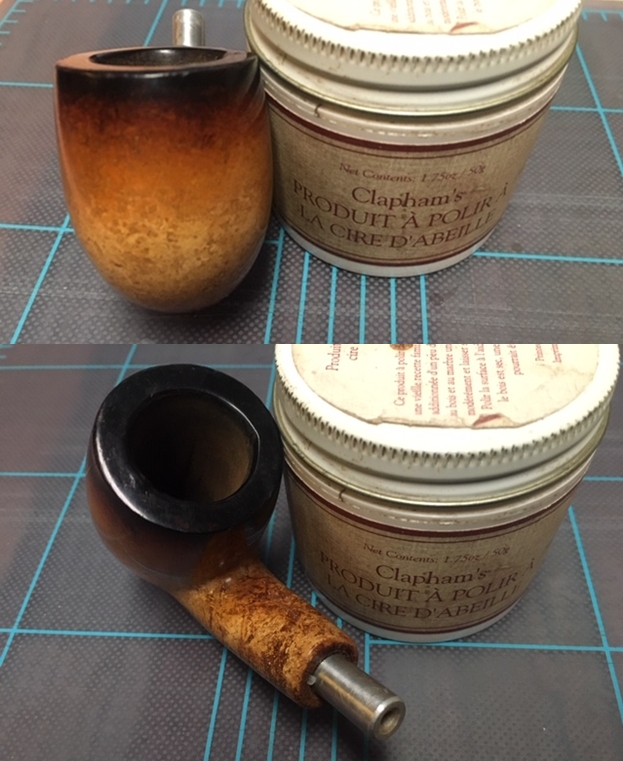
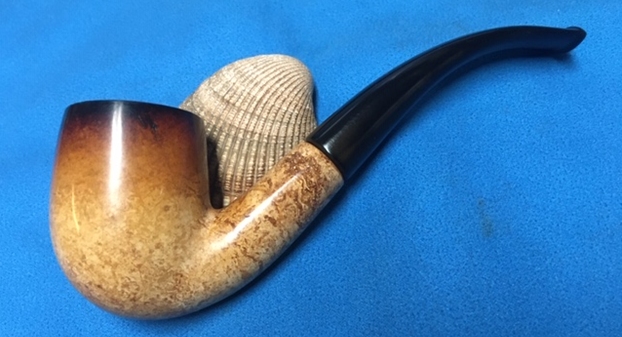
 To apply the finishing touches, I mount a cotton cloth buffing wheel on to my hand held rotary tool and apply a coat of Blue Diamond to the stummel and the stem to polish out the minor scratches. With a cotton buffing wheel that I use for carnauba wax, I apply a coat of carnauba wax to the stummel and stem and continued to work on it till the complete coat of wax had been polished out. I mount a clean cotton cloth buffing wheel and gave the entire pipe a once over buff. I finished the restoration by giving the entire pipe a rigorous hand buffing using a microfiber cloth to deepen the shine further. The finished pipe is shown below. The pearly variegated stem with swirls of light browns and grays contrasts beautifully with the dark brown hues of the stummel and is very appealing to the eye. The repairs and transformation of this pipe to its present functionality and beauty was indeed worth the efforts that were put in.
 P.S. This pipe, when it came to my work table, presented a daunting task to restore. It was surely greatly loved by someone in the past as was evident from the thick cake, overflowing lava over the rim top and the stem damage, but I say in the same breath that it was also the most abused pipe. The broken meerschaum lining added to my agony while presenting me with an opportunity to put in to practice what I had read and learned about meerschaum repairs on Reborn Pipes.
A big THANK YOU to my good friend, Dal Stanton aka The Pipe Steward for the detailed and graphic description of the technique to repair Meerschaum and also to my Guru, Steve, for creating and regularly updating rebornpipes.com, a one stop site for everything that one wants to know and learn about pipe restoration!!
Appreciate all the efforts of readers who have had the patience to read this write up thus far!
Praying for the safety and well being of all the readers and their loved ones in these troubled times…
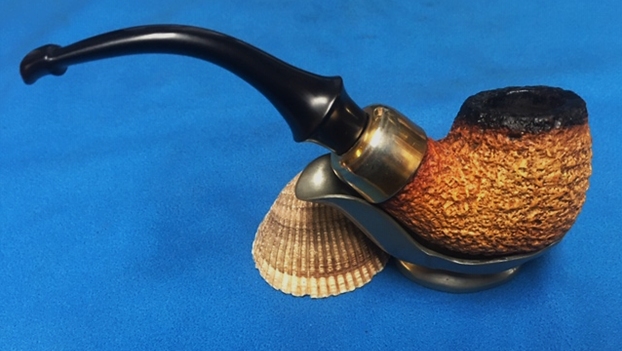
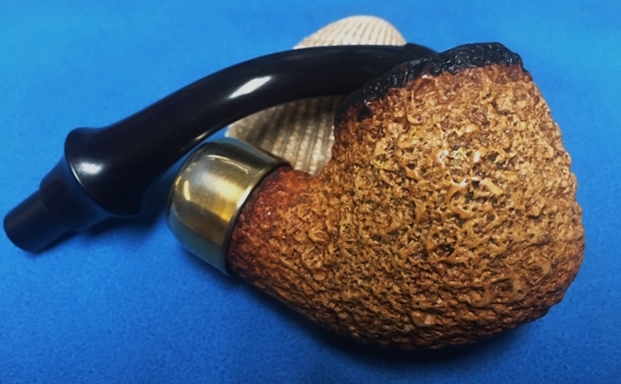
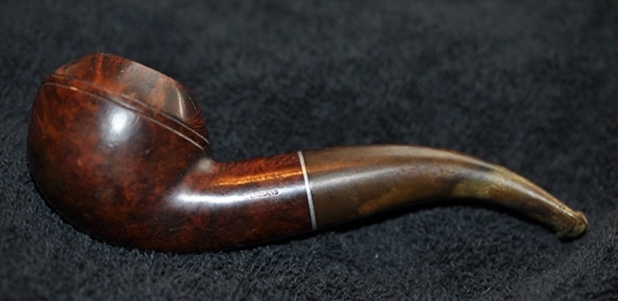
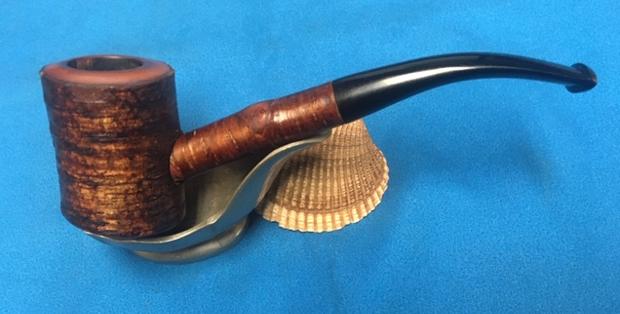
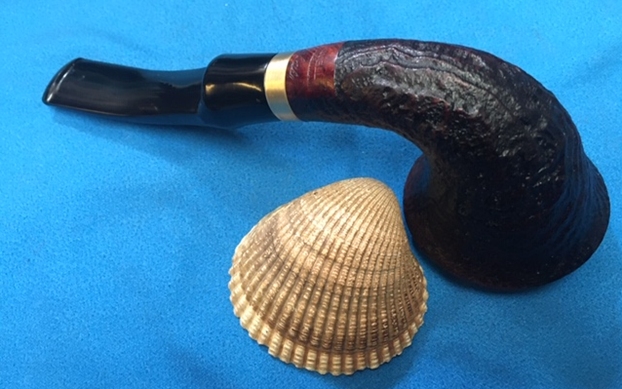
 The next pipe I have chosen from Bob Kerr’s Estate is a Kaywoodie Rustica Medium English Billiard. (Bob’s photo is to the left). If you have not “met” the man and would like to read a bit of the history of the pipeman, his daughter has written a great tribute that is worth a read. Because I have included it in most of the restorations of the estate to date I thought that I would leave it out this time. Check out some of the recent Dunhill restoration blogs (https://rebornpipes.com/2020/01/01/restoring-the-last-of-bob-kerrs-dunhills-a-1962-dunhill-bruyere-656-f-t-bent-billiard/).
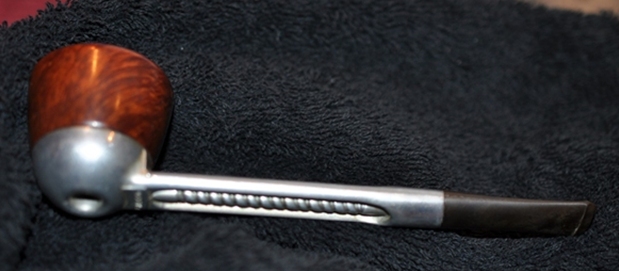
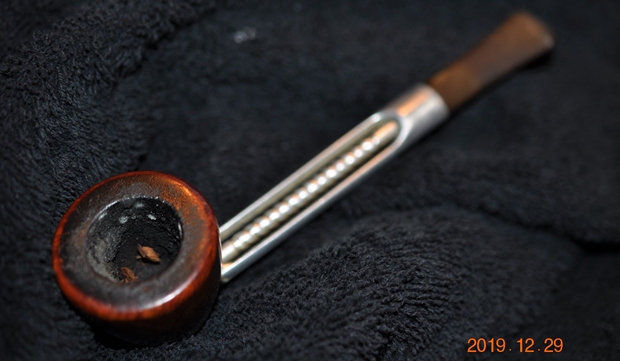
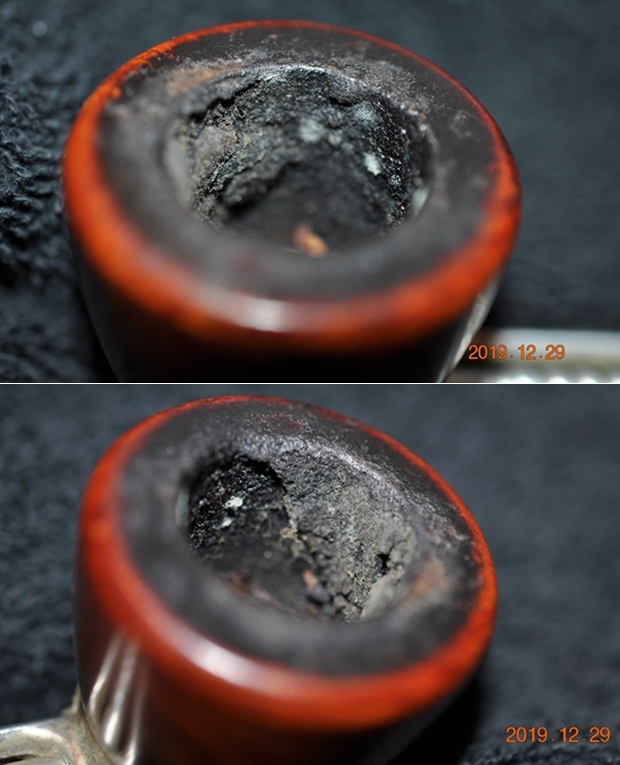
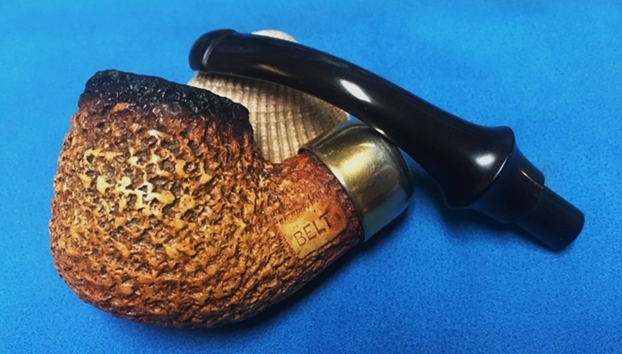
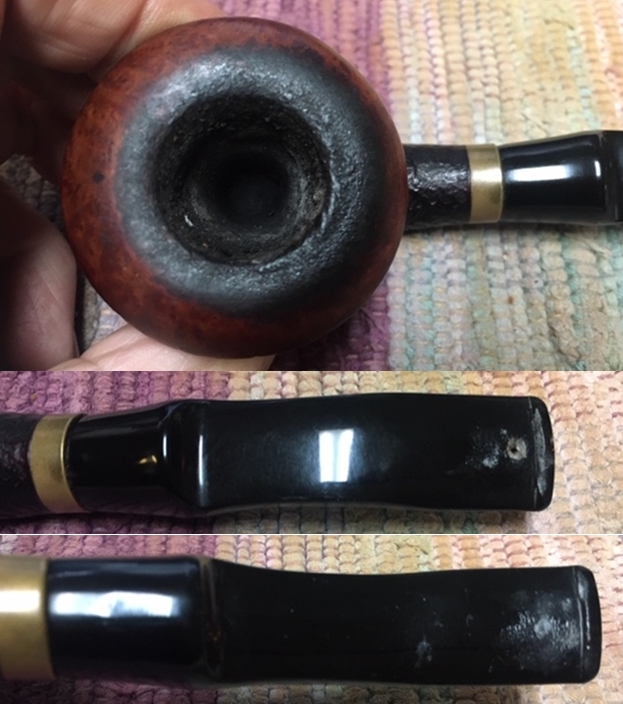
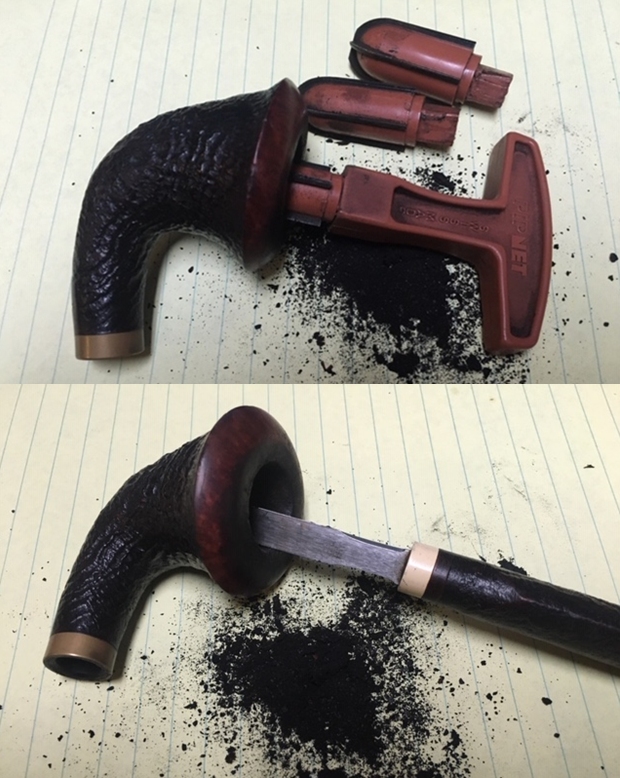
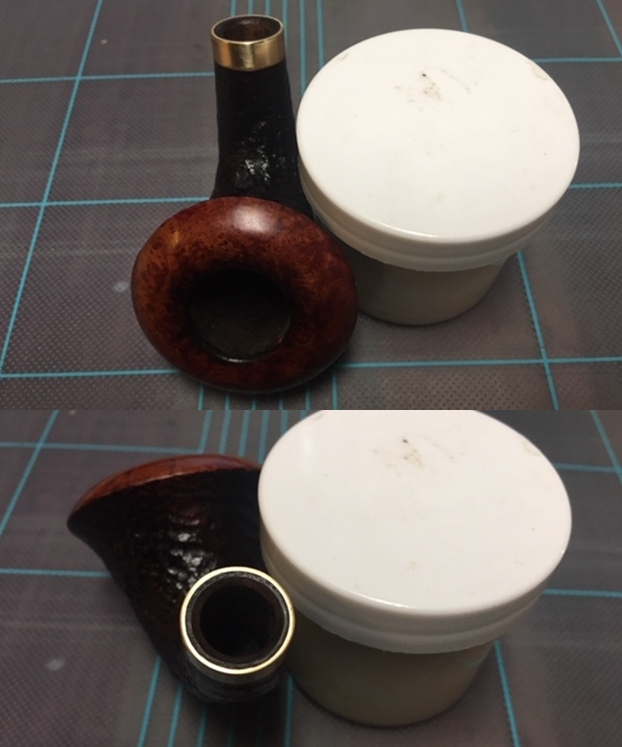
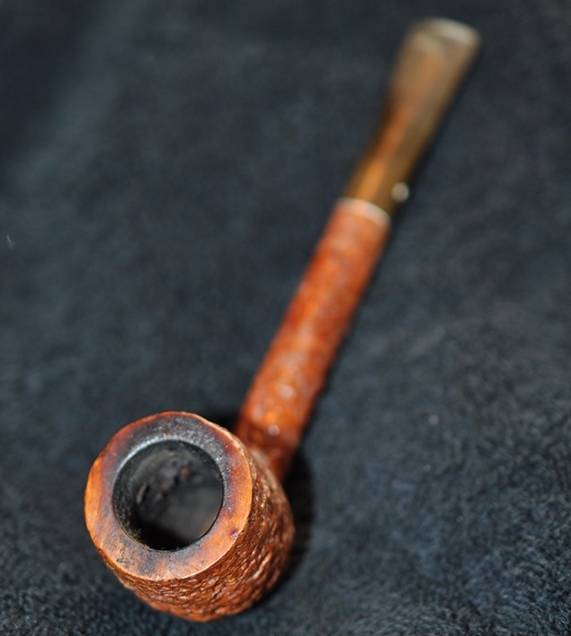 The exterior of the pipe was very dirty – grime and grit ground in from years of use and sitting. The rim top was covered with a coat of thick lava that overflowed the bowl. There was also some darkening on the rim top and inner edge of the bowl. The bowl itself had a thick cake with flecks of tobacco stuck in the cake on the sides.
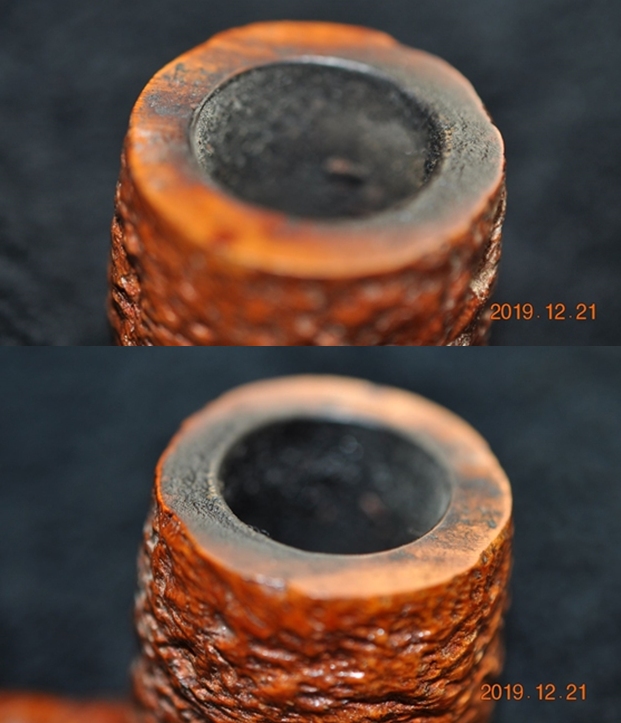
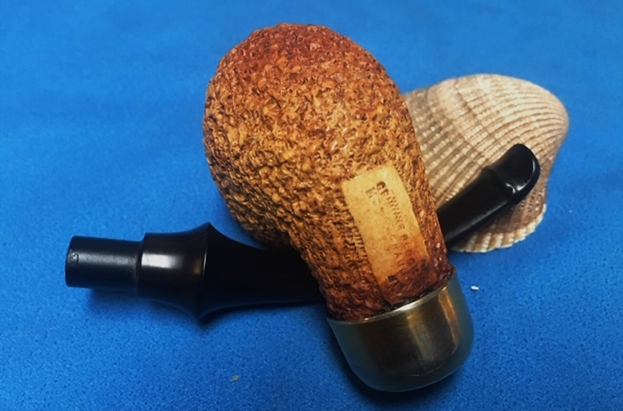
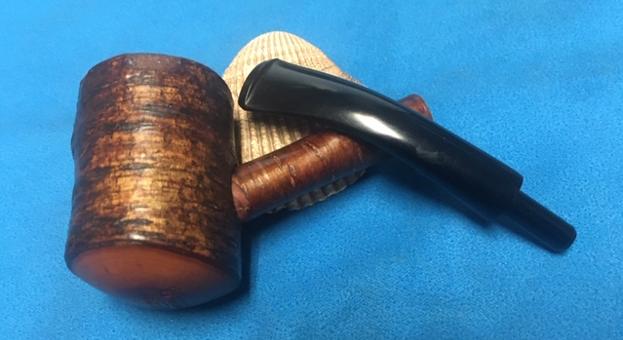
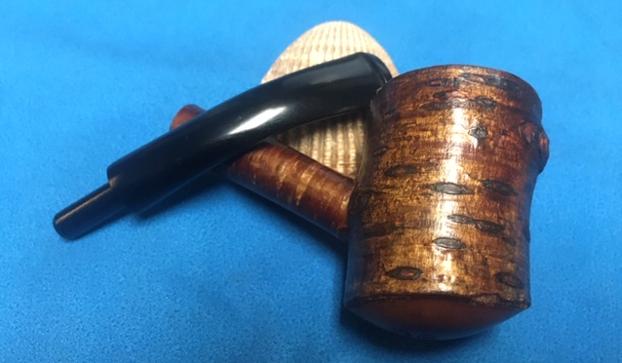
 Jeff took photos of the sides and the heel of the bowl to give a better feel for the condition of the bark around the bowl.
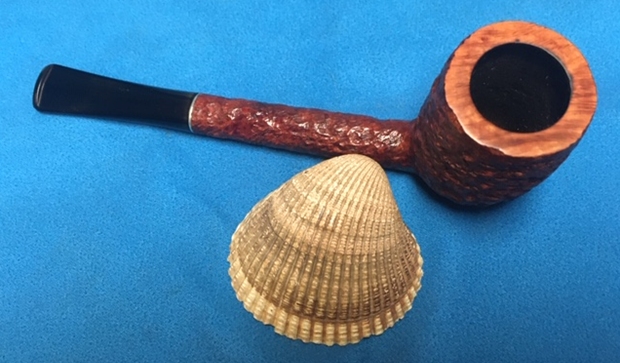
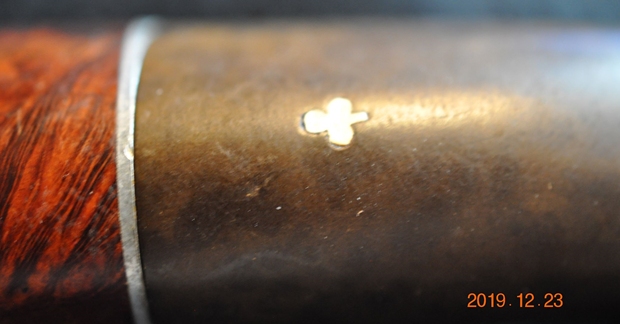
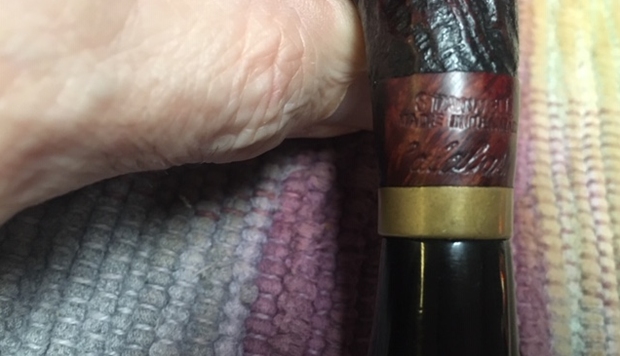
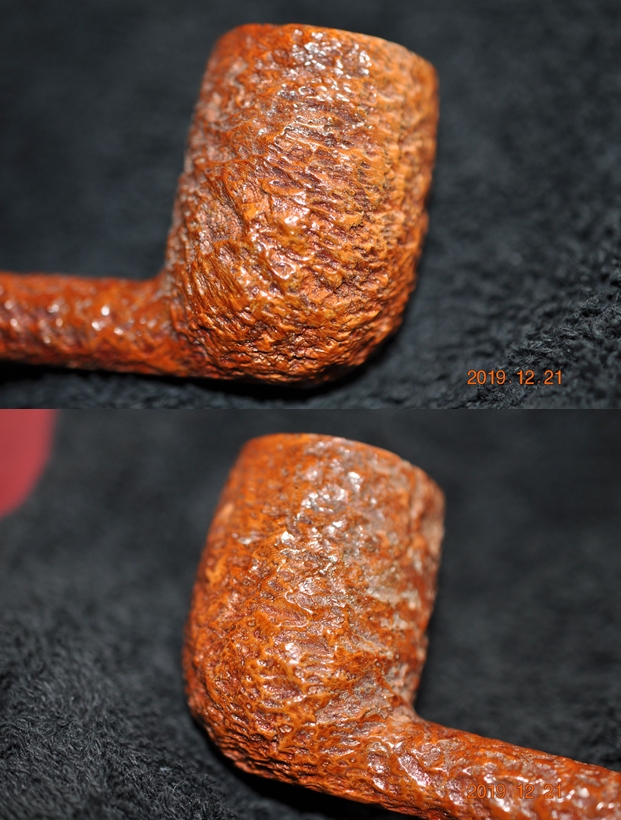 The next photo show the stamping on the underside of the shank and it is very readable. It reads as noted above. The second photo shows the inlaid cloverleaf logo on the top of the stem.
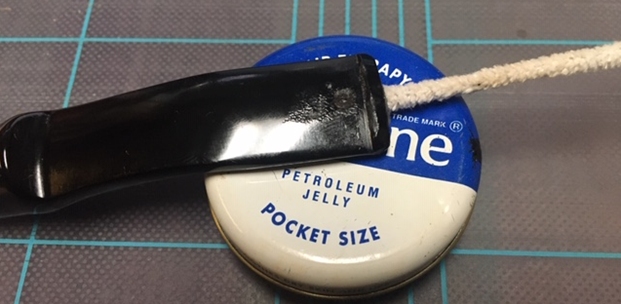
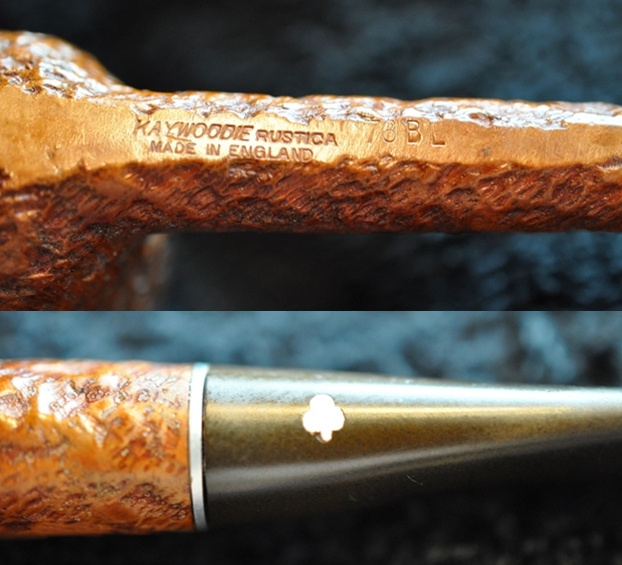 The stem was dirty and oxidized with light tooth chatter and marks on the top and underside of the stem at the button. This one at least did not have the chew marks that were a norm on Bob’s pipes.
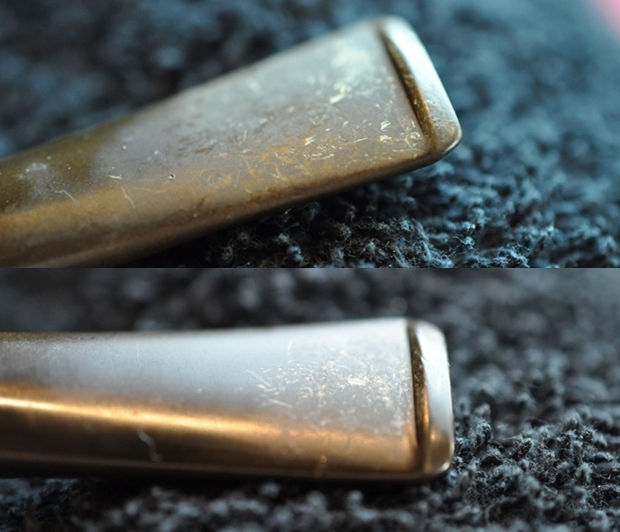 Before doing cleanup work on the pipe I decided to do some research on the pipe. I looked first on the Pipephil website and found some information on the white club inlay on the left side of the tapered stem. I did a screen capture of the pertinent information on the logo itself (http://www.pipephil.eu/logos/en/logo-kaywoodie.html). From there I learned that the logo was used until the 1980s. After the early 50s the logo was on the side of the stem.
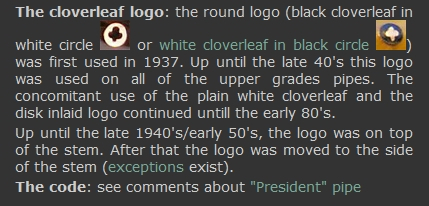 I turned to Pipedia (https://pipedia.org/wiki/Kaywoodie) and read the section on the rough outline on the history of the brand that links the brand with the English section of the company. I quote:
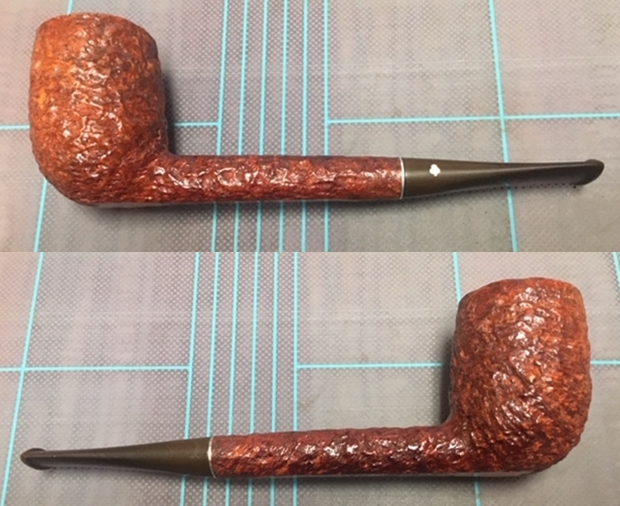
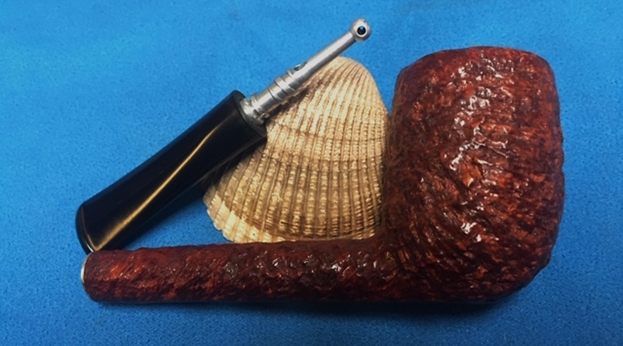
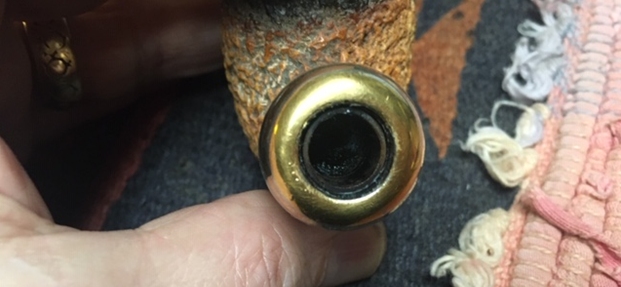
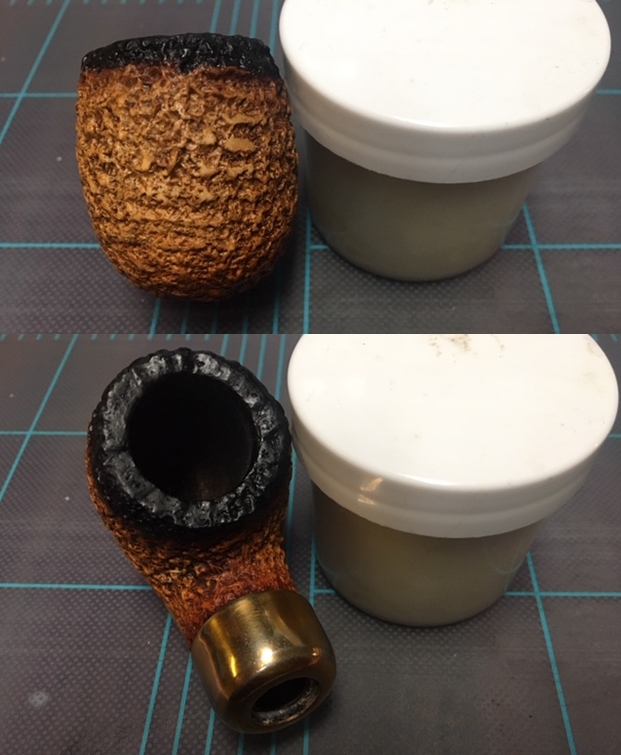
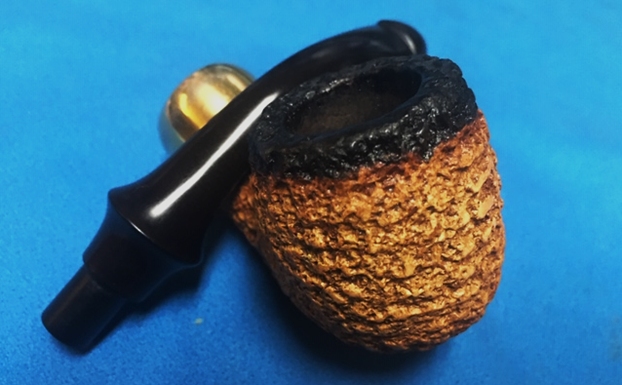
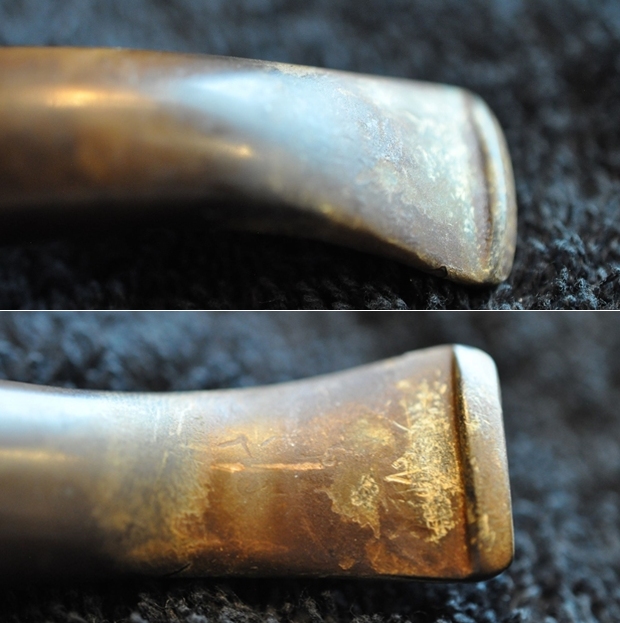
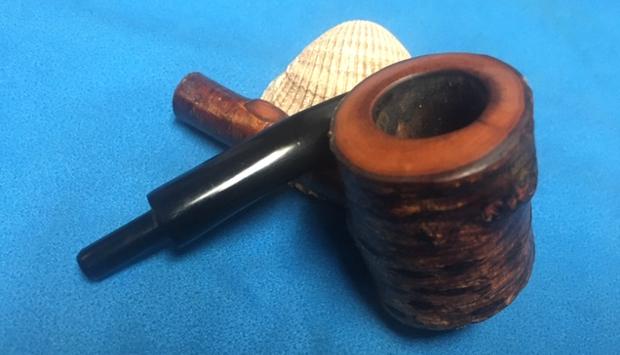
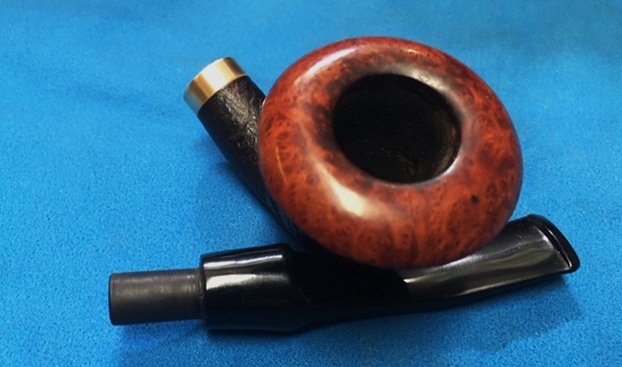
 I took some close up photos of the rim top and also of the stem surface. I wanted to show what cleaned bowl and rim top looked like. The rim top shows some damage on the inner edge of the bowl. I also took close up photos of the stem to show the light tooth marks and the remaining oxidation on the stem surface.
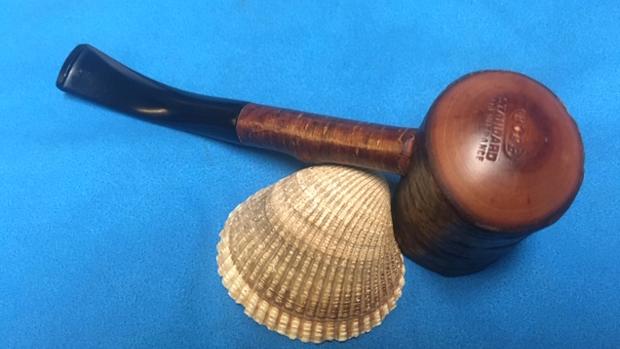
 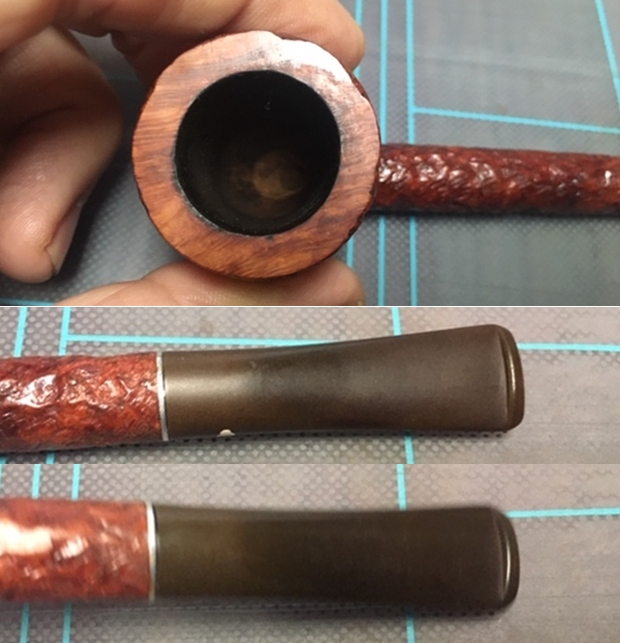 I took photos of the stamping on the underside of the shank and it is clear and readable. It is stamped as noted above.
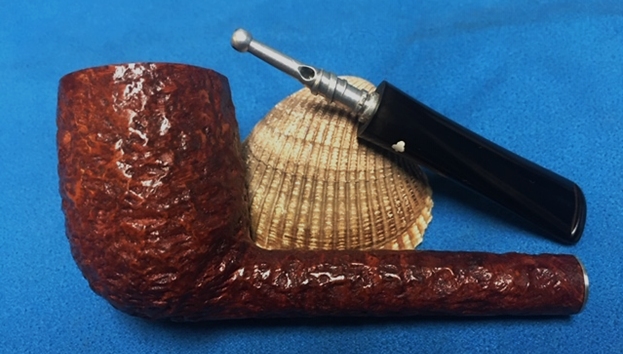
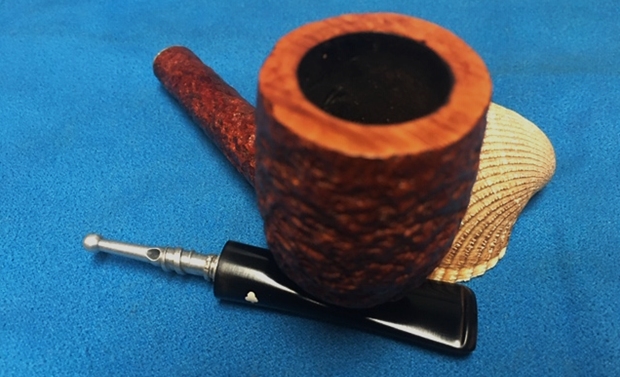
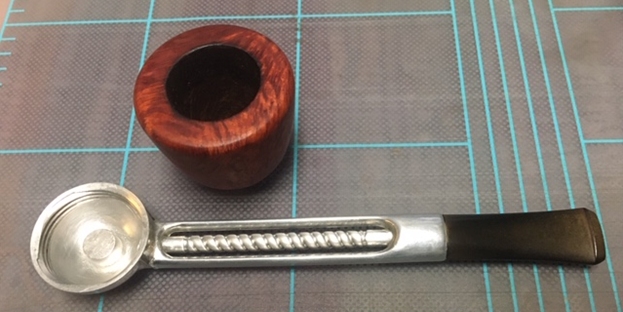
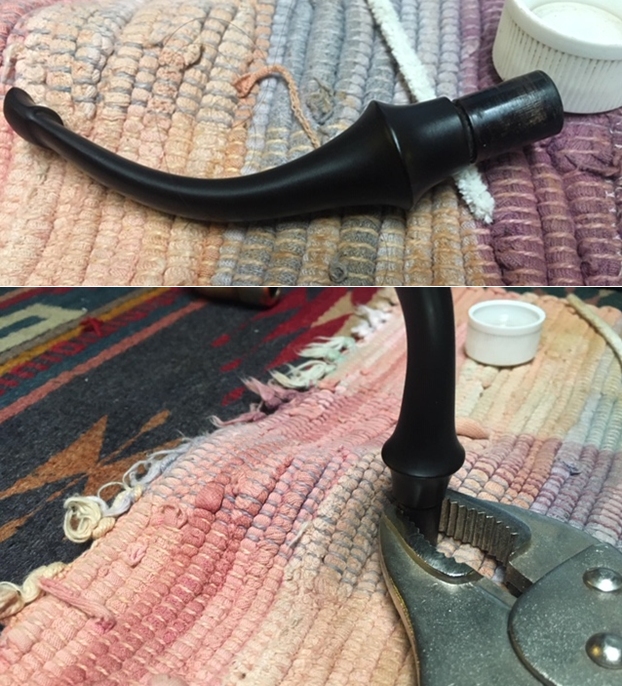
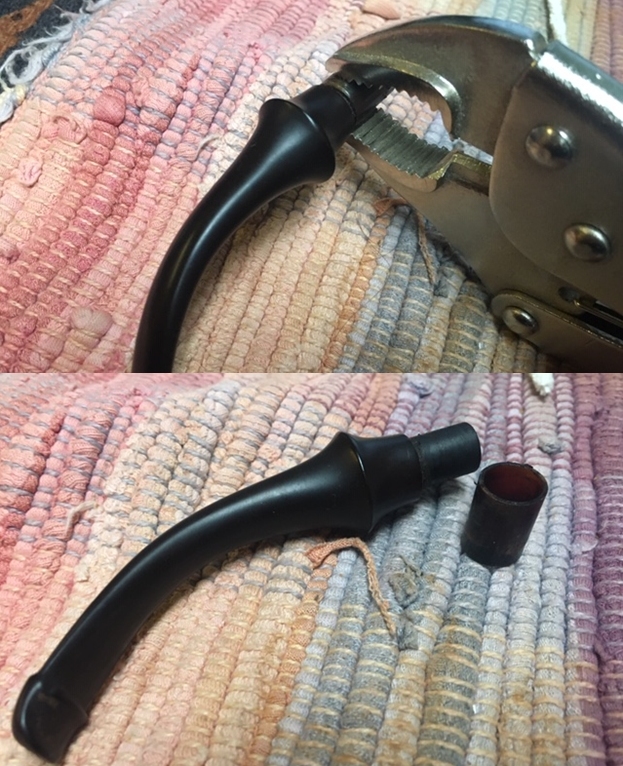
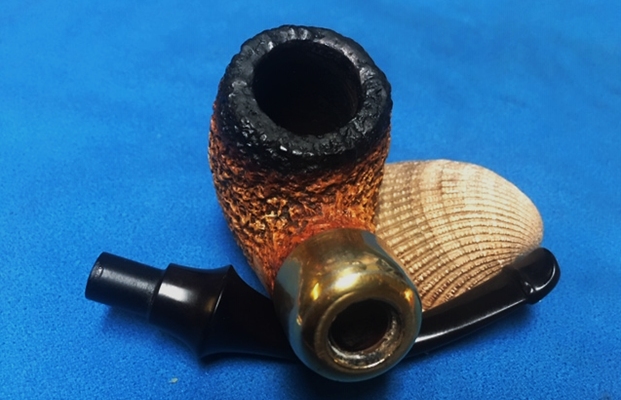
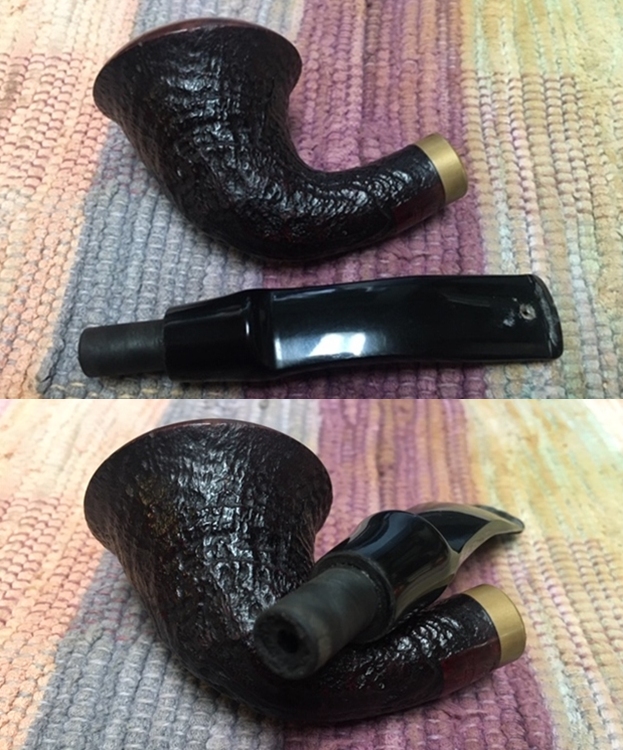
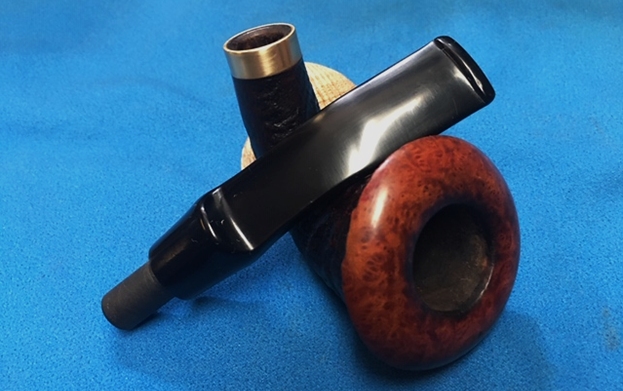
 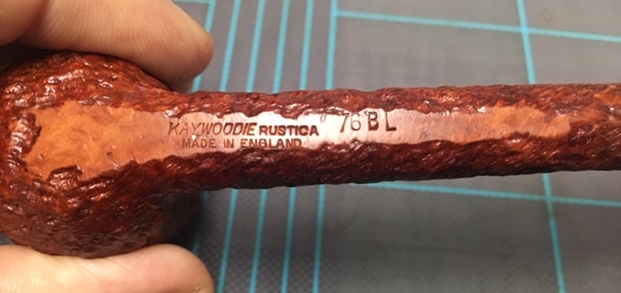 I unscrewed the stem for the shank and took a photo of the bowl and stem to give a picture of what it looked like. You can see the stinger apparatus is intact and you can see the oxidation on the stem surface.
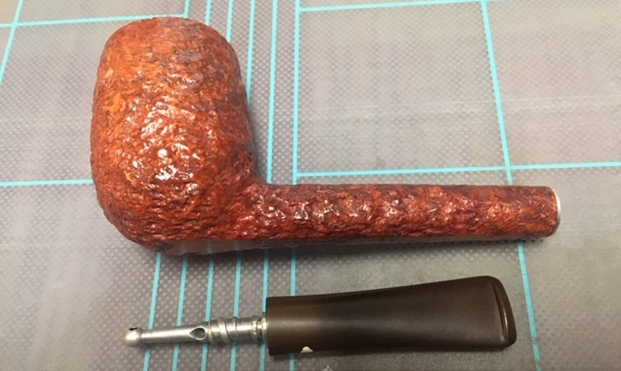 Now, on to my part of the restoration of this KBB English Made Medium Billiard. I decided to start by polishing the top of the bowl with micromesh sanding pads – wet sanding with 1500-12000 grit pads and wiping the briar down with a damp cloth after each sanding pad.
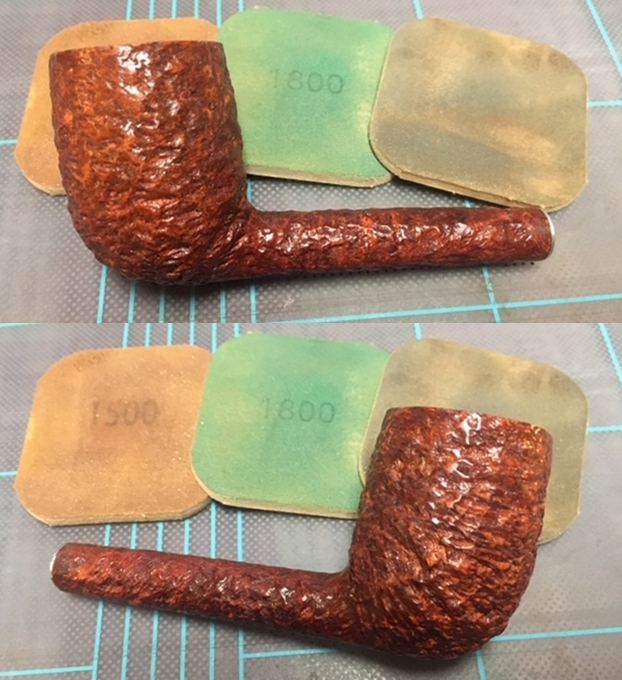


 I rubbed the bowl down with Before & After Restoration Balm. I worked it into the surface of the briar on the bowl sides and shank with my fingertips and a horse hair shoe brush to clean, enliven and protect it. I let the balm sit for a little while and then buffed with a cotton cloth and shoe brush to raise the shine.
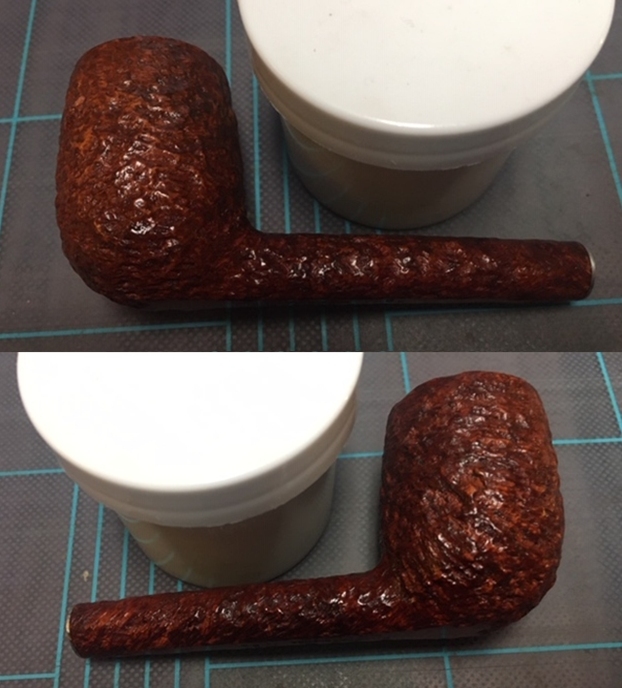

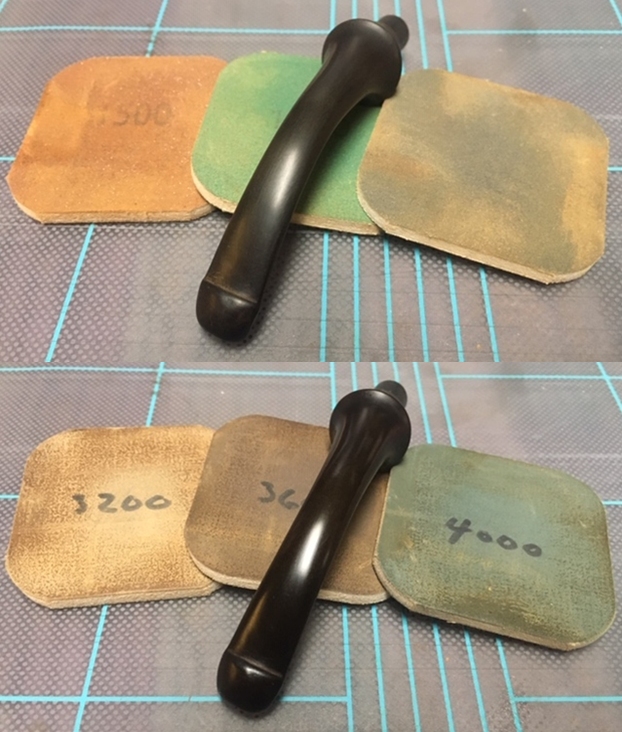
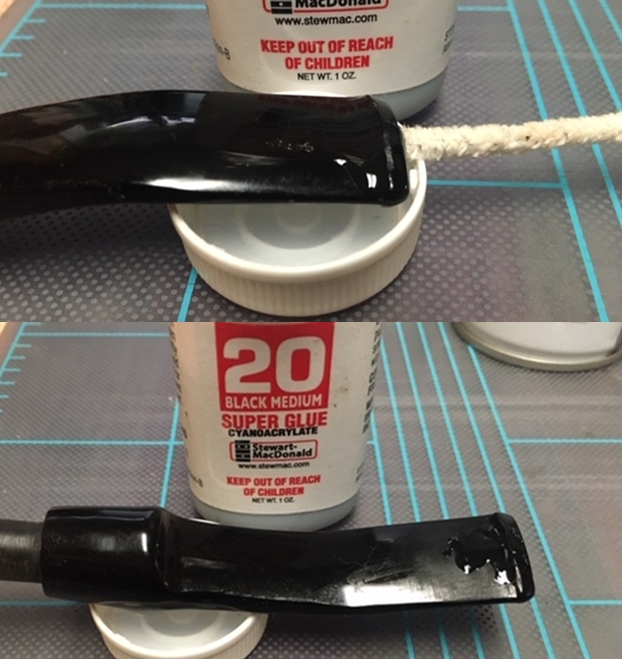
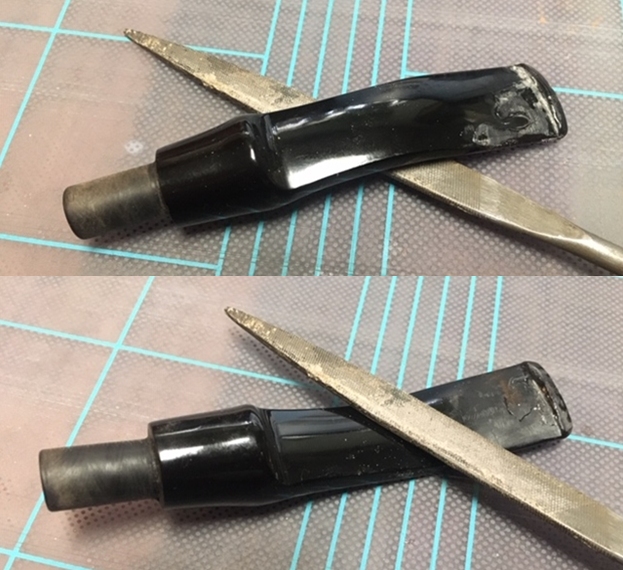
 I set the bowl aside and turned my attention to the stem. I sanded out the tooth dents in the top and underside of the stem at the button. I started polishing the stem with 400 grit wet dry sandpaper.
 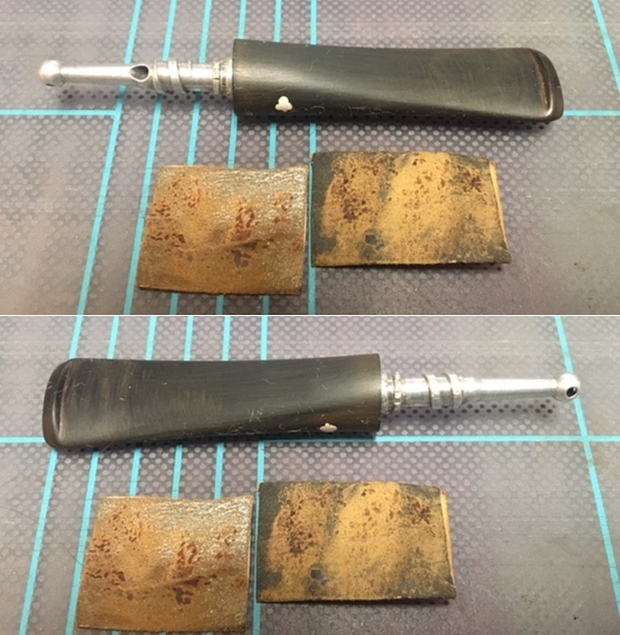 I polished the vulcanite with micromesh sanding pads – 1500-12000 grit pads. I wiped it down with a damp cloth after each sanding pad. I used Before & After Pipe Polish – both Fine and Extra Fine to further polish the stem.
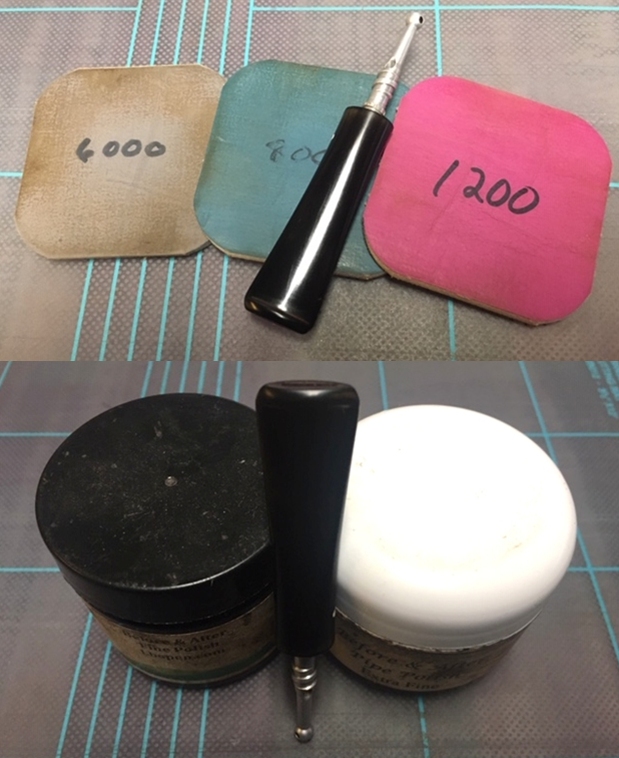
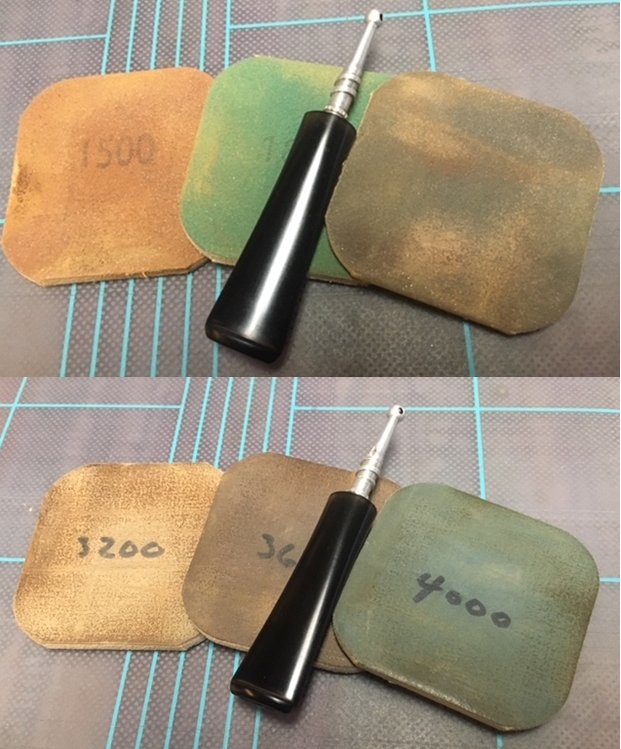
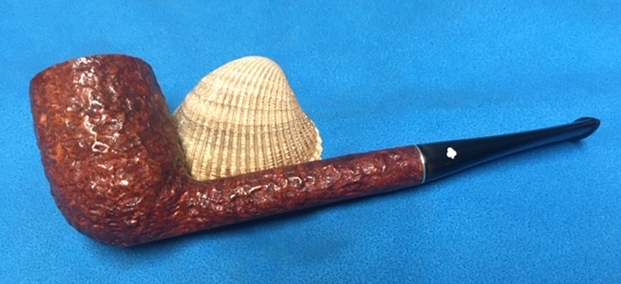
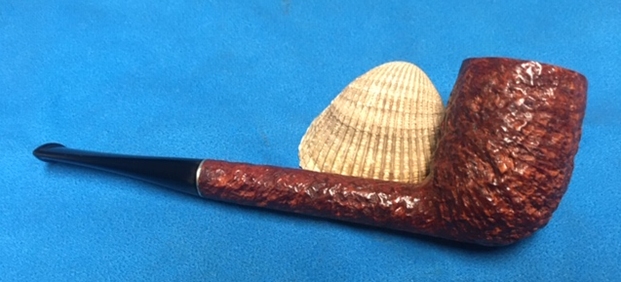
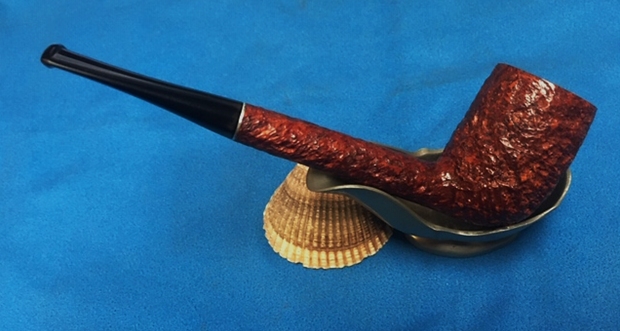
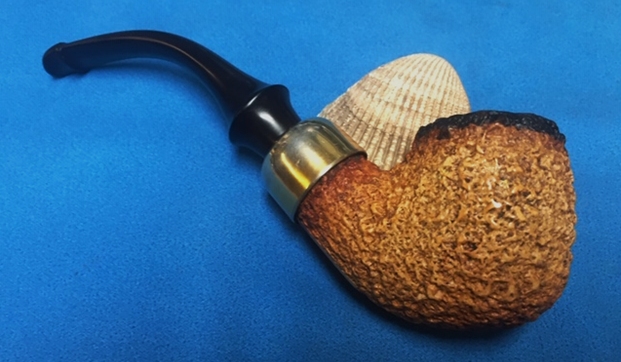
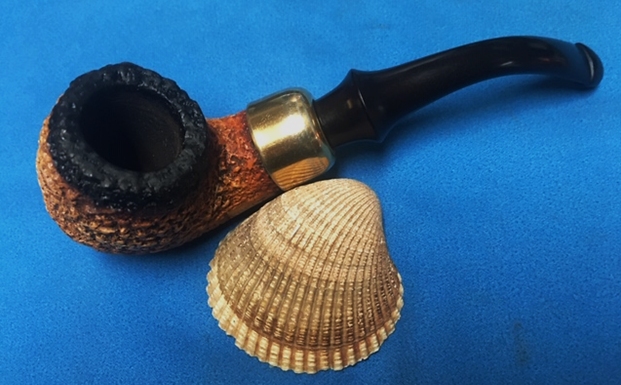
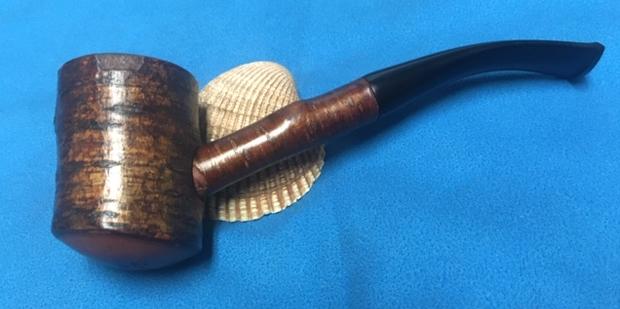
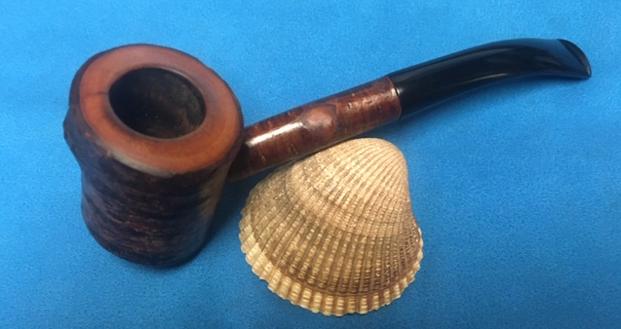
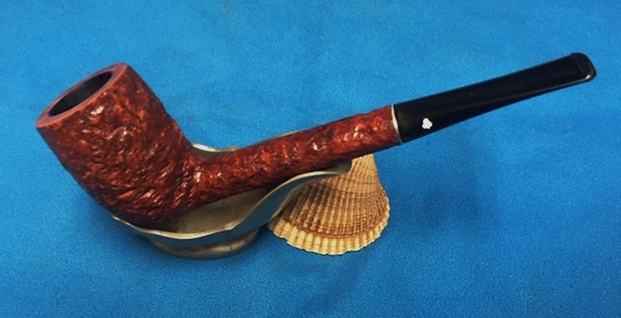
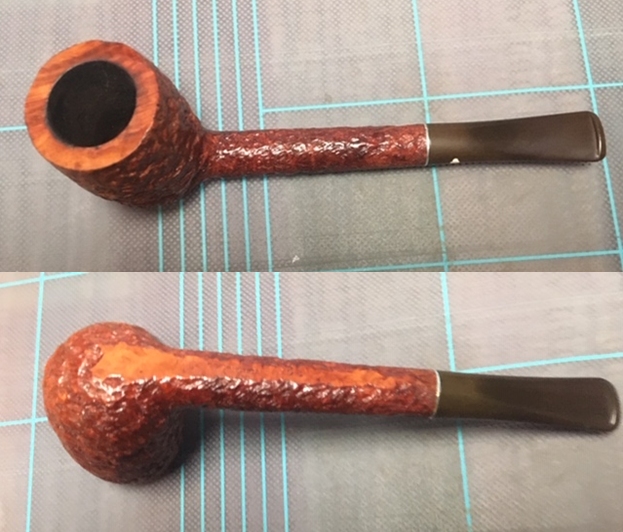
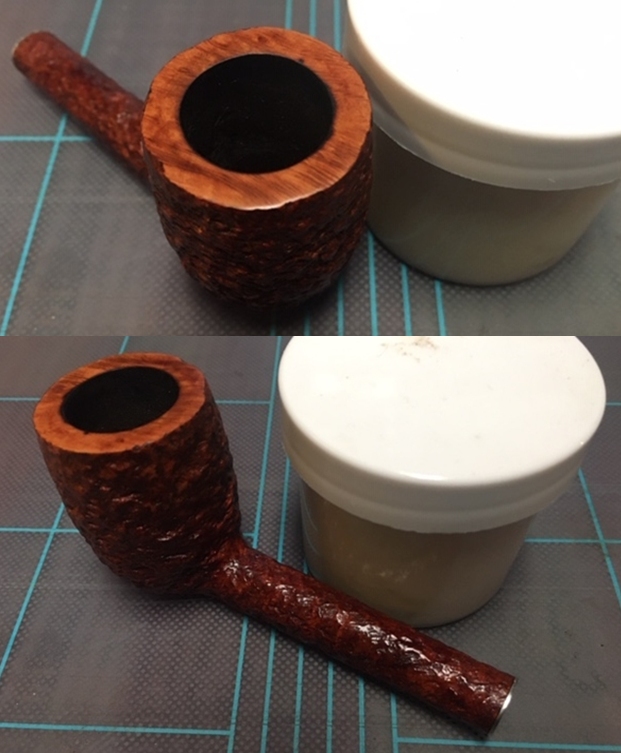
 This Kaywoodie Rustica 76BL Medium English Billiard, an English made pipe from Bob Kerr’s estate turned out to be a great looking pipe. The rusticated medium brown finish on the pipe is in excellent condition and works well with the polished vulcanite taper stem. I put the stem back on the bowl and carefully buffed the pipe with Blue Diamond on the buffing wheel using a light touch on the briar. I gave the bowl and stem multiple coats of carnauba wax on the buffing wheel and followed that by buffing the entire pipe with a clean buffing pad. I hand buffed the pipe with a microfiber cloth to deepen the shine. The finished Kaywoodie Rustica Medium Billiard fits nicely in the hand and feels great. Give the finished pipe a look in the photos below. The dimensions of the pipe are Length: 5 ¾ inches, Height: 1 ¾ inches, Outside diameter of the bowl: 1 ¼ inches, Chamber diameter: ¾ of an inch. If you are interested in carrying on Bob’s legacy with this pipe send me a message or an email. I have more to work on of various brands. Perhaps one of those will catch your attention. Thanks for reading this blog and my reflections on the pipe while I worked on it. This is an interesting estate to bring back to life.