Blog by Steve Laug
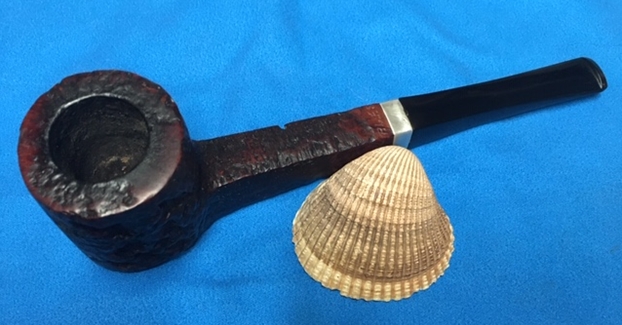
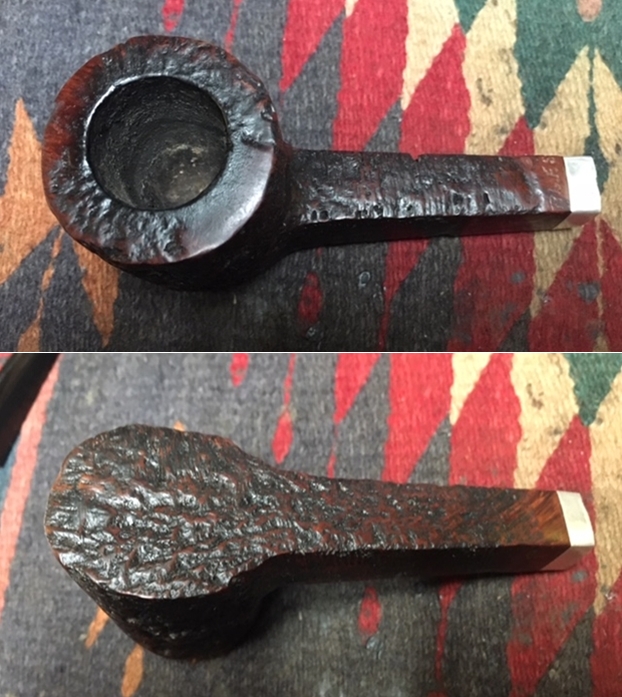
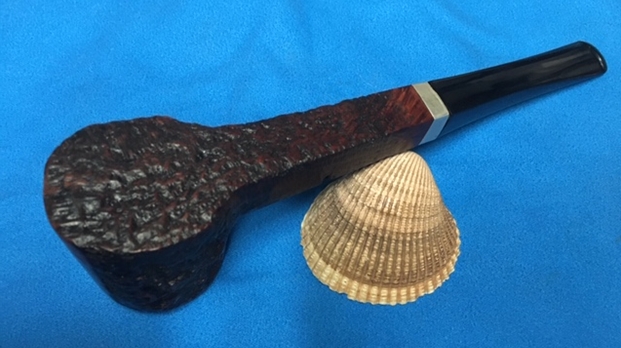
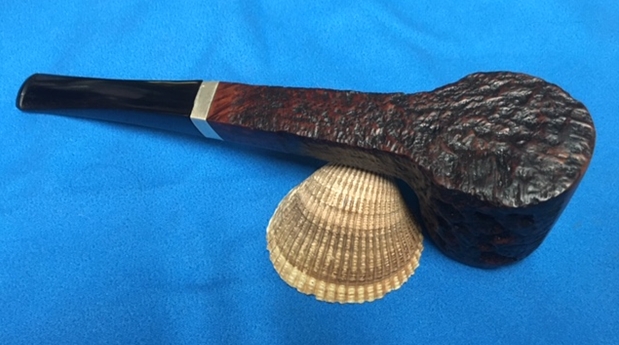
Back in February of 2018 (almost a year ago now) I posted my restoration of an interesting House of Robertson Pipe that was made by a carver in a pipe shop in Boise, Idaho. It was not only an interesting pipe but also one that had some history that was interesting to me as I was raised in Idaho for the better part of my childhood and adolescence. It was a huge piece of wood and had both smooth and rusticated portions on the shank and bowl. It was a flat bottom sitter with a square shank. The dimensions of the pipe are: Length: 7 3/8 inches, Height: 2 inches, Outside Diameter: 1 5/8 inches, Diameter of the chamber: 7/8 inches. I sent it back to a fellow in Idaho who collected House of Robertson pipes and who used to frequent the Boise shop. He was excited to add it to his collection. (https://rebornpipes.com/2018/02/28/restoring-a-rusticated-house-of-robertson-war-club/). Here is what it looked like when I sent it to him.
 About the same time I picked up the Calich, I received an email from the collector in Idaho asking for help. This is what he wrote to me:
Steve, I purchased the rusticated House of Robertson War Club pipe earlier this year. I have thoroughly enjoyed it. The bad news is i was polishing it and dropped it. The stem broke at the tenon and is still lodged in the briar. Hopefully you can repair or replace it. If so, please let me know and then how to proceed with mailing and payment. Thanks…
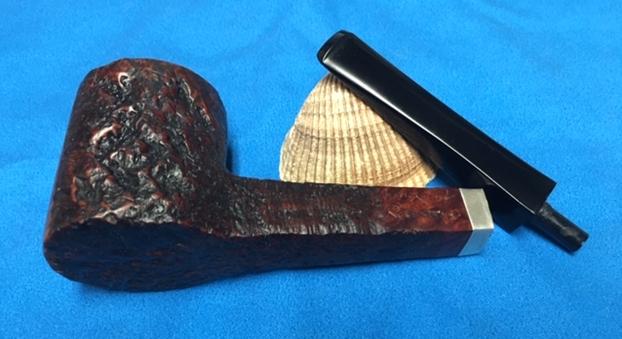
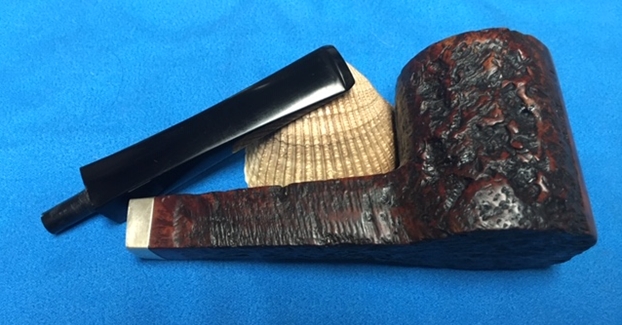
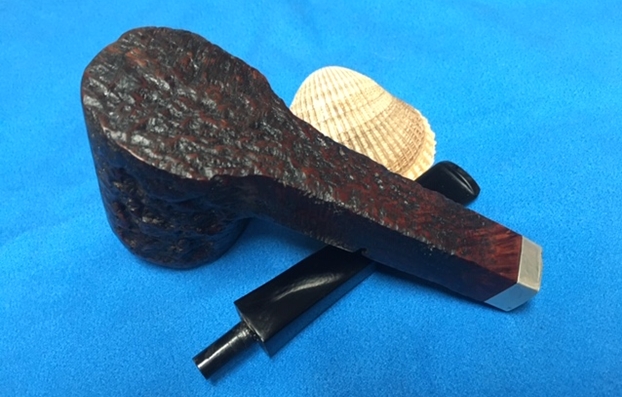
I wrote him back pretty quickly and he put it in the mail. It arrived here yesterday and was waiting for me when I got home from work. I opened the envelope that it had been mailed in and took out the two plastic Ziploc bags and the bubble wrap that was around the bowl and stem. I took them out of the mailer and unwrapped the protective layers and took them out of the Ziploc bag. This is what I saw. The stem had snapped off almost perfectly against the stem end. There was a small ledge but really nothing stuck out from the original tenon.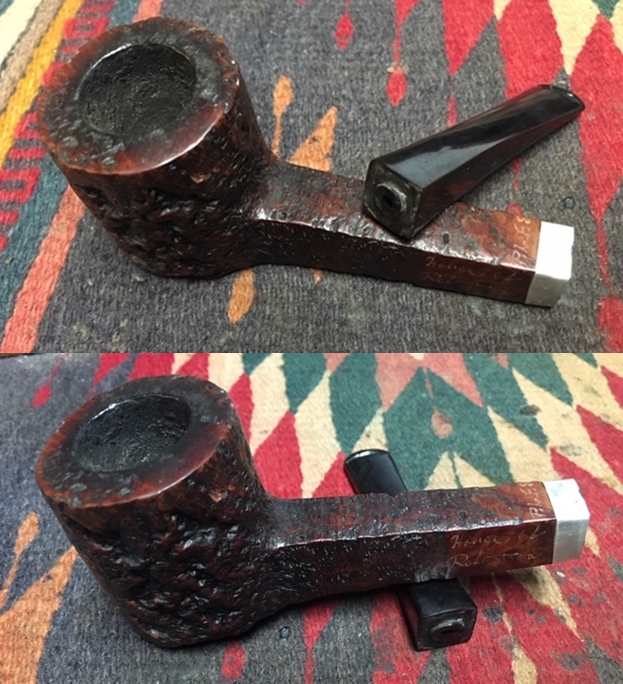 I took an end view photo to show the snapped off tenon in the shank of the pipe. You can see in that photo that it is also a clean break.
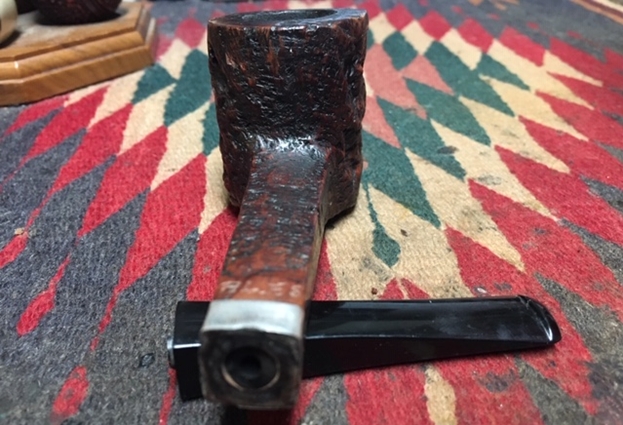 This morning I was “chatting” with Charles Lemon on the Tobacco Pipe Restorers Group on Facebook about Jobey Links and how easy they were to work with when replacing a tenon. I went through my container of tenons and I did not have one that would work in this shank without a lot of work. I took out my box of Jobey Link replacement tenons and one of them was absolutely the perfect size for this shank. I would need to use it backwards and do some modifications but it was exactly what I wanted for this repair. I used a topping board to flatten out the remnants of the broken tenon on the stem. I used a knife to bevel the airway to make drilling it easier. I took the following photo to show the parts of the repair.
 I tried my usual method for removing a broken tenon from the shank – a drywall screw turned into the airway in the shank until it was tight and then wiggling the broken tenon out of the shank. It failed to produce any results. It was almost like the tenon was glued/bonded to the walls of the shank. I used a cotton swab to dribble alcohol down the shank around the broken tenon. I left the shank and tenon sitting while I went to work for the day. When I came home I tried the screw again and still absolutely no movement on the tenon… it was stuck.
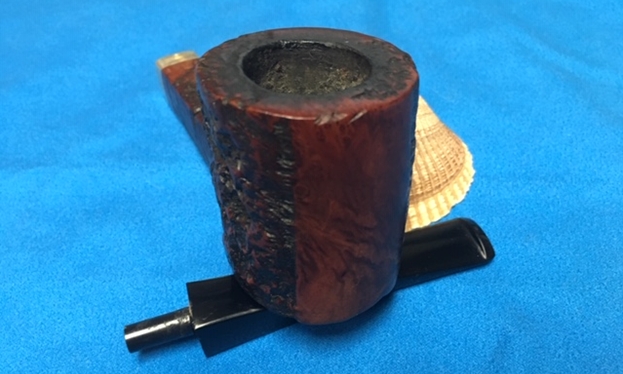
I resorted to the next best method – drilling the tenon out of the shank with my cordless drill. I started with a bit a little larger than the airway and turned it into the airway with the drill and then reversed the drill to see if I could pull it out. Nope. It still did not move. I tried a larger drill bit and repeated the process still no movement at all. I tried a third bit – a little bit smaller than the diameter of the original tenon. I drilled it in and backed it out – no luck. I then decided to just drill out the tenon all together. It did not take too much to drill it with the ¼ inch drill bit and then take out the pieces of the old tenon. The fourth photo below shows the clean airway in the shank. The tenon is gone.
 Now with that half of the job done I set the bowl aside and picked up the stem. I used a drill bit slightly smaller than the threaded portion of the Jobey Link. I drilled out the airway in the stem with increasingly larger drill bit until it was the perfect size for the Link. I still needed to tap the newly drilled airway so that I could turn the tenon into the stem.
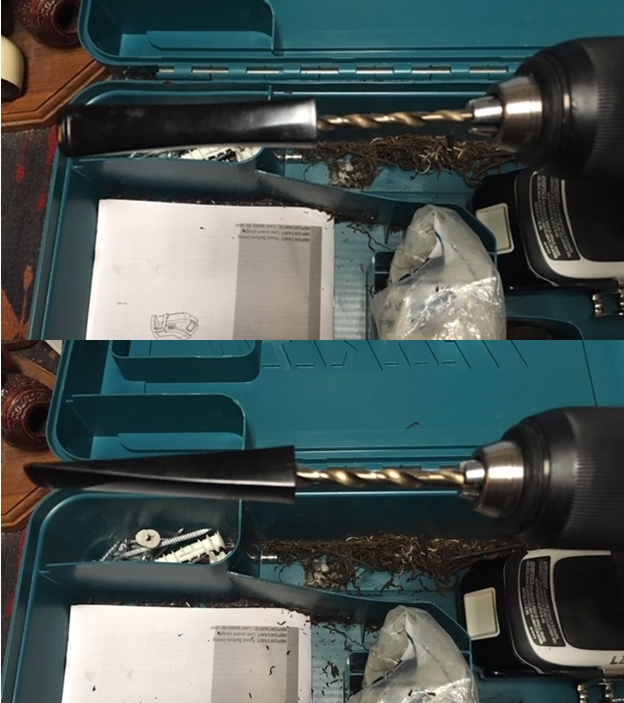
 I used a tap set that I have and tapped threads into the newly drilled airway in the stem. It did not take long to tap thread into the vulcanite. I tapped the airway until it was deep enough for to take the threaded tenon.
 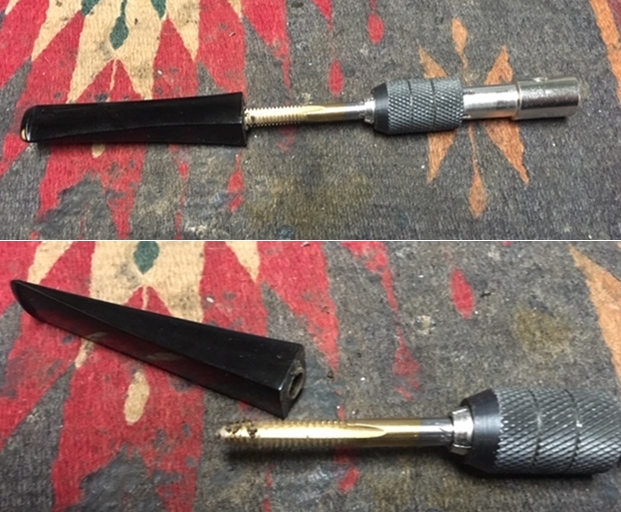 I shortened the threaded end of the tenon to deal with the taper of the stem. I used a Dremel and sanding drum and then smoothed it out on the 220 grit sandpaper topping board. I used the Dremel and sanding drum to remove the hip on the Jobey Link. I flattened it out to match the smooth part of the tenon that would go into the shank. The added length of the tenon fit perfect in the depth of the mortise on the pipe. I turned the tenon into the airway with a pair of pliers.
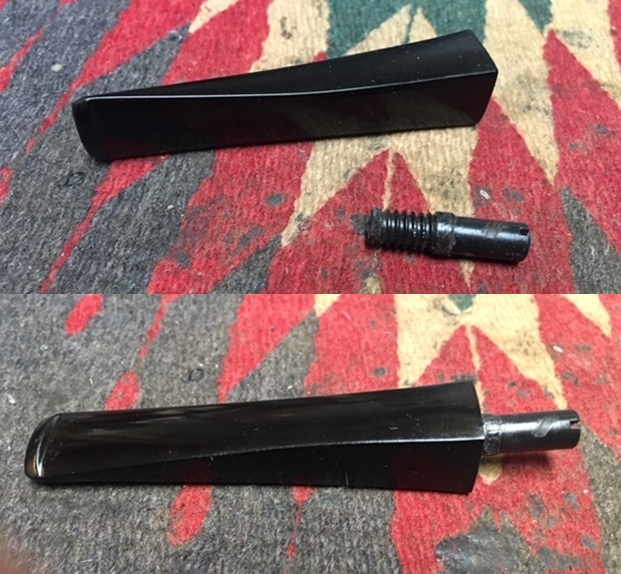 I sanded out the scratch marks from the Dremel removal of the hip on the tenon with 220 grit sandpaper and polished it with 1500-2400 grit micromesh and took a photo of the stem with the new tenon and the tools I used to work on it.
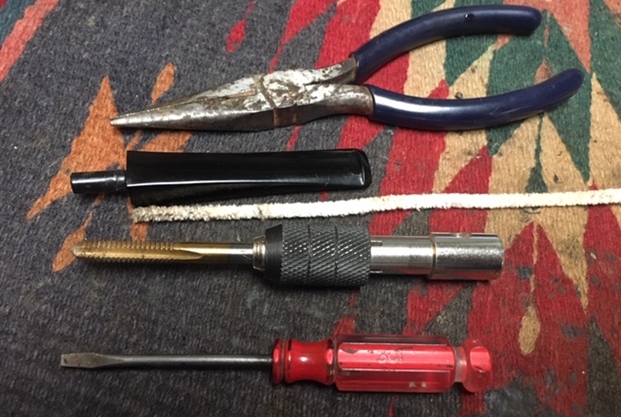 When I looked over the stem I could see a few tooth marks on the surface on both the top and underside near the button. I figured that since I was working on it anyway I would remove those areas. I sanded the stem with 220 grit sandpaper to remove the damage and polished the sanding marks with 400 grit wet dry sandpaper.
 I polished the vulcanite stem with micromesh sanding pads – wet sanding with 1500-2400 grit pads and dry sanding with 3200-12000 grit pads. I wiped the stem down after each pad with Obsidian Oil. When I finished the last pad I gave it a final coat of Obsidian Oil and set it aside to dry.
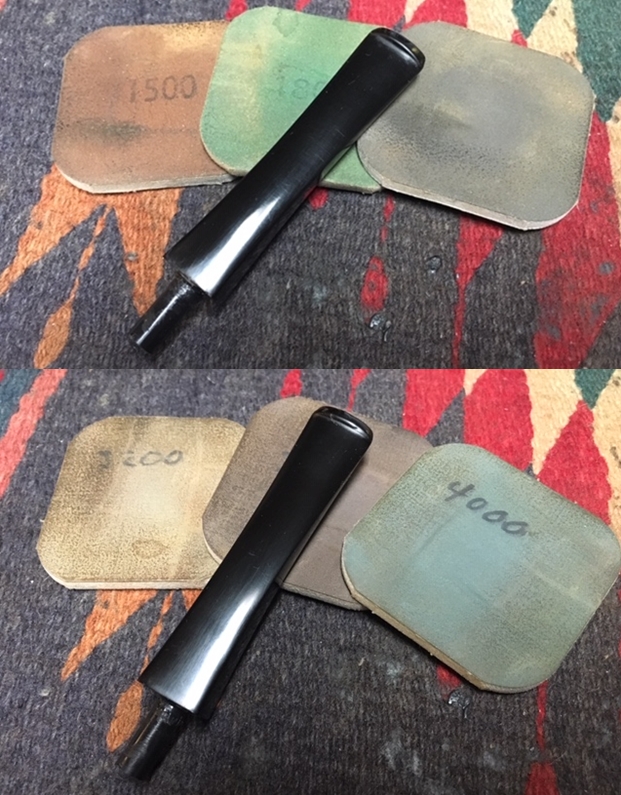
 I set the stem aside and turned my attention to the bowl. I examined it and found that there were a few small nicks and chips around the rim top and outer edge of the bowl. I touched these up with a walnut stain pen to blend them into the rest of the finish on the bowl. I rubbed the bowl down with Before & After Restoration Balm to enliven the wood and protect the newly finished portions of the briar. I took these photos after to show the bowl and the repairs are unnoticeable.
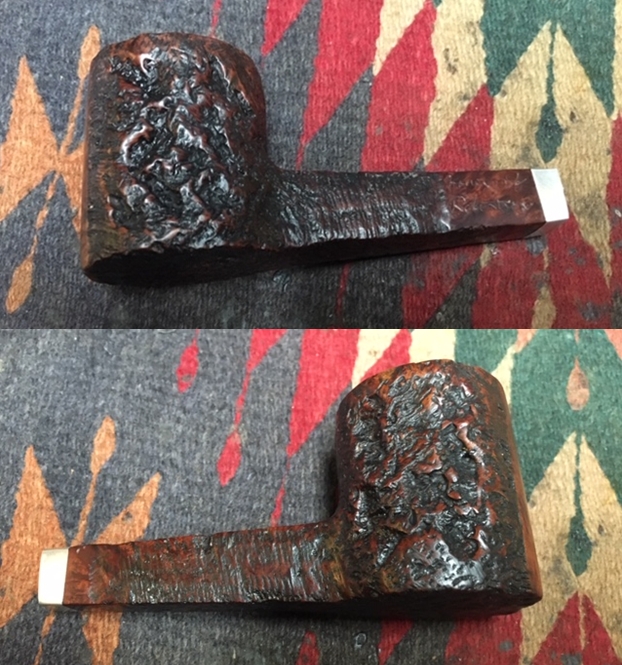
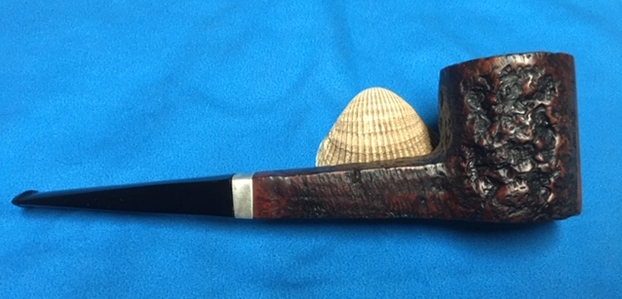
 I put the stem back on the shank and buffed the pipe with a clean buffing pad to bring a shine back to the bowl and stem. I gave it several coats of Conservator’s Wax and continue the buff. I hand buffed it with a microfibre cloth to deepen the shine. The finished pipe is shown in the photos below. Tomorrow I will box it up and send it back to Idaho. Can’t wait to see what he thinks when he has it in his hands. Thanks for reading this. Cheers.
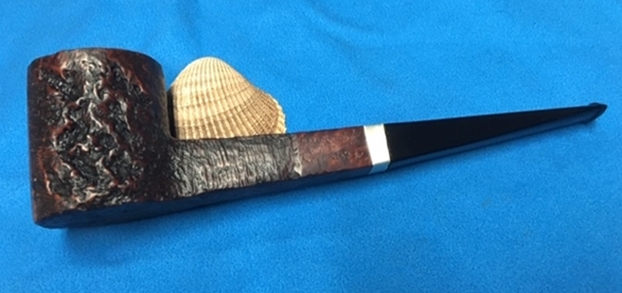


What a timely post, Steve. Funny that we were discussing the Jobey link system just the other day! I’m working on setting up some tooling so I can drill stems for tenons (among other things) with greater accuracy. My “freehanding” with a power drill is starting to slip, I think. 🙂
LikeLike
Keep me posted on your tooling design.
LikeLike
Will do!
LikeLike
A clinic in replacing a tenon. This one is going in the file for the straight-forward process that hopefully I can try in the future. One question that I have had – I do not have a tap tool, and my assumption that it is ‘standard’ system of measurement. I’m not sure, but I know I can buy a tap & Die set here in Bulgaria, but it will probably be metric. I would need to use a standard sized set for a Jobey replacement, yes? Thanks!
LikeLike
Thanks Dal. My tap set is standard and the jobey links are standard as well.
LikeLiked by 1 person