Daily Archives: July 8, 2015

WDC Wellington Bent System – Restoring a Mainstay Pipe of the Celebrated Maker


Guest Blog by Robert M. Boughton
Member, North American Society of Pipe Collectors
http://www.naspc.org
http://www.roadrunnerpipes.com
http://about.me/boughtonrobert
Photos © the Author

Bruno Antony: Each fellow does the other fellow’s murder. Then there is nothing to connect them. The one who had the motive isn’t there. Each fellow murders a total stranger. Like you do my murder and I do yours…For example, your wife, my father. Criss-cross.
― from “Strangers on a Train” (1951), directed by Alfred Hitchcock, screenplay by Raymond Chandler and Czenzi Ormonde, starring Farley Granger and Robert Walker [Bruno]

INTRODUCTION
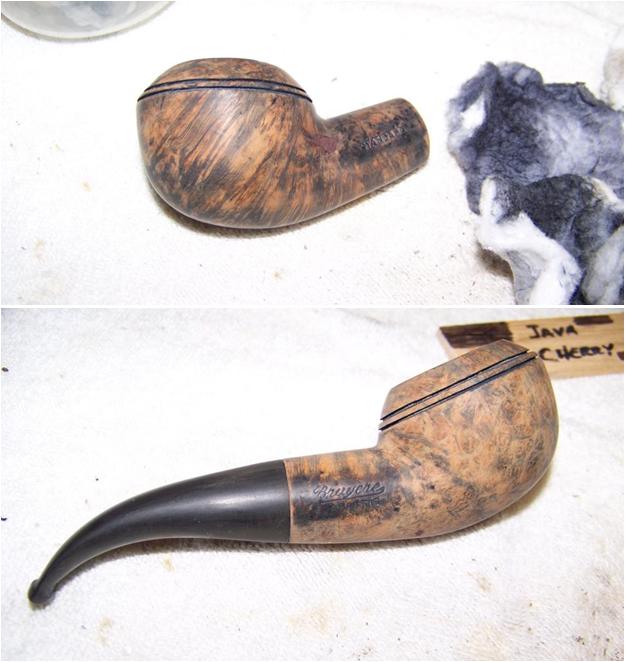
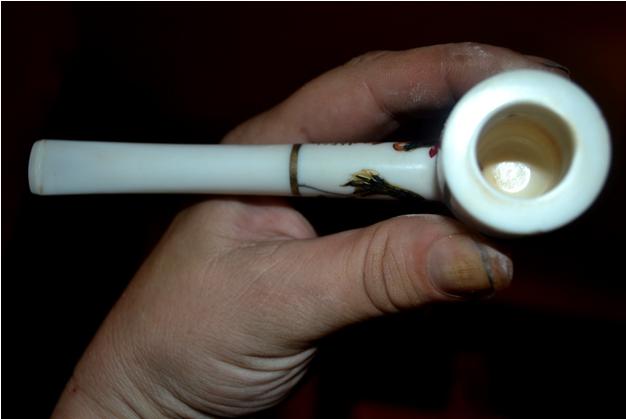
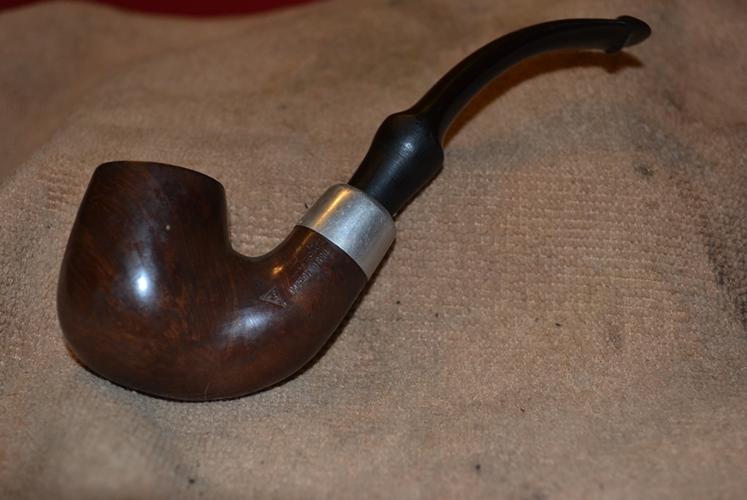
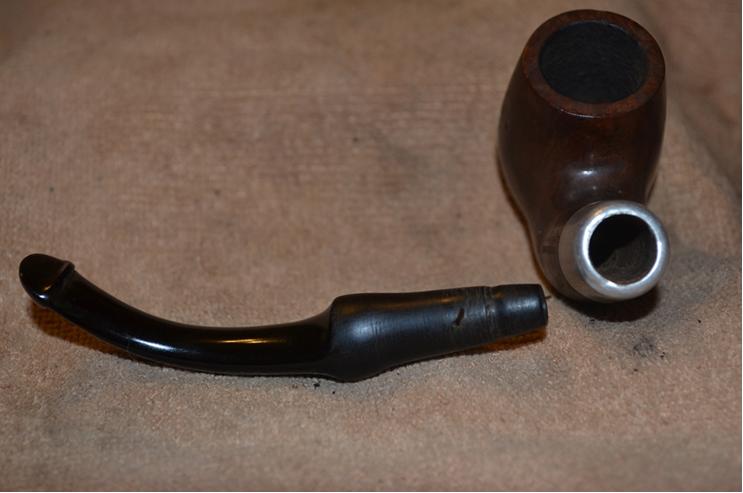
The movie was one of Hitchcock’s greatest and a favorite of mine. How could it not be, with the legendary detective novelist Raymond Chandler as the top word-man? But this is not a blog about swapping murders. It does concern the swapping of a bit, however, or to be more accurate, the removal of one from a basic Peterson’s System Standard in my collection of pipes awaiting more extreme repair, and which won’t be missed before it can be mended, to use for the William Demuth Co. Wellington System Billiard.

But first, let’s play Find the Pipe in the Lot.Robert1 No doubt you have spotted it without trouble, or will soon deduce the answer from following photos.

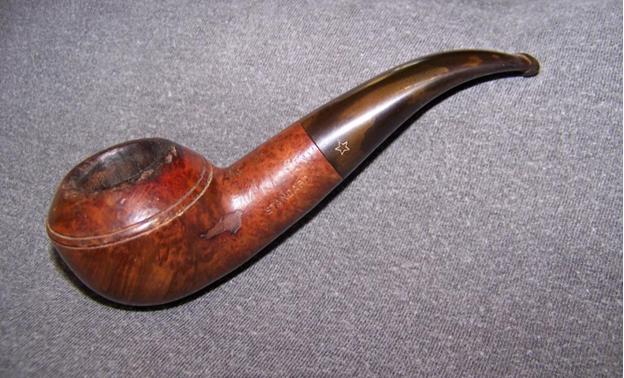
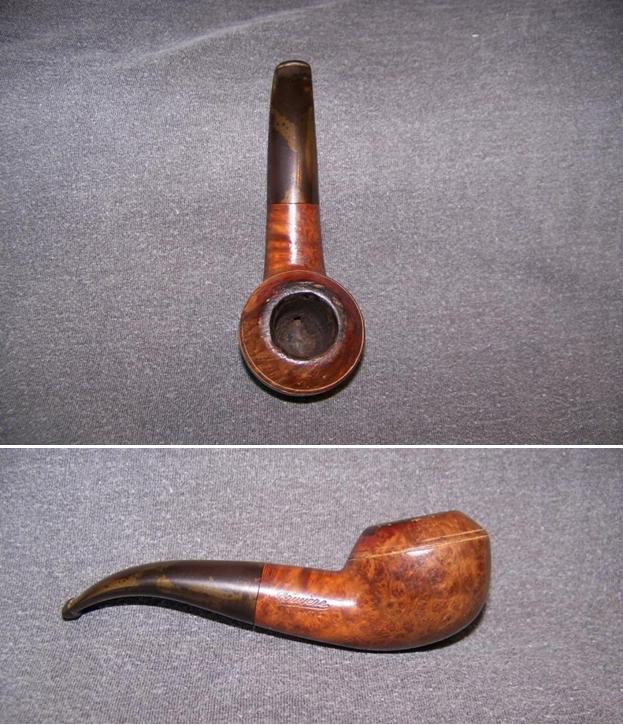
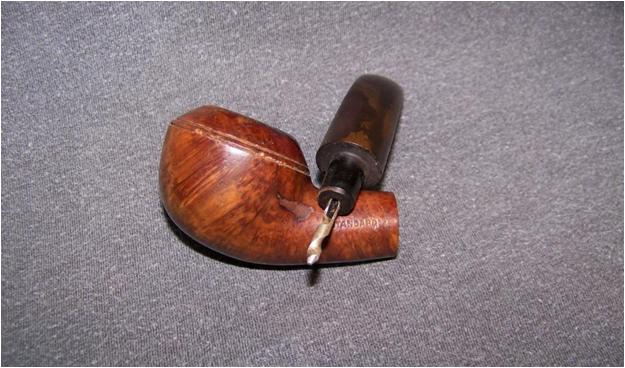
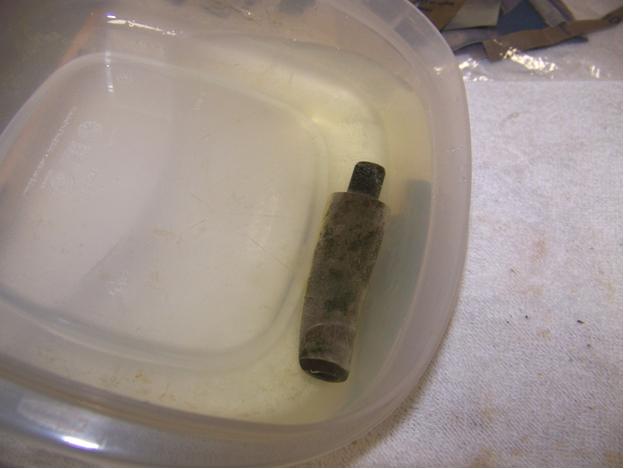
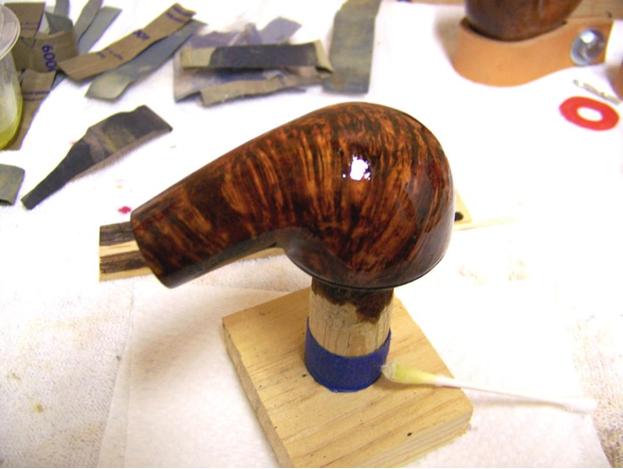
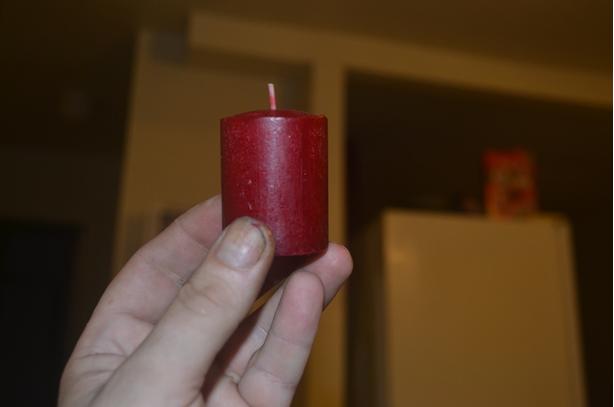
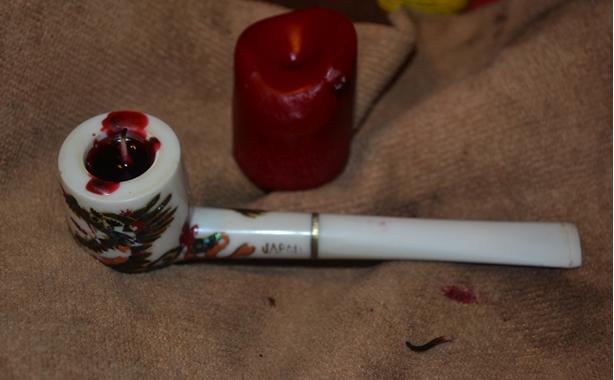
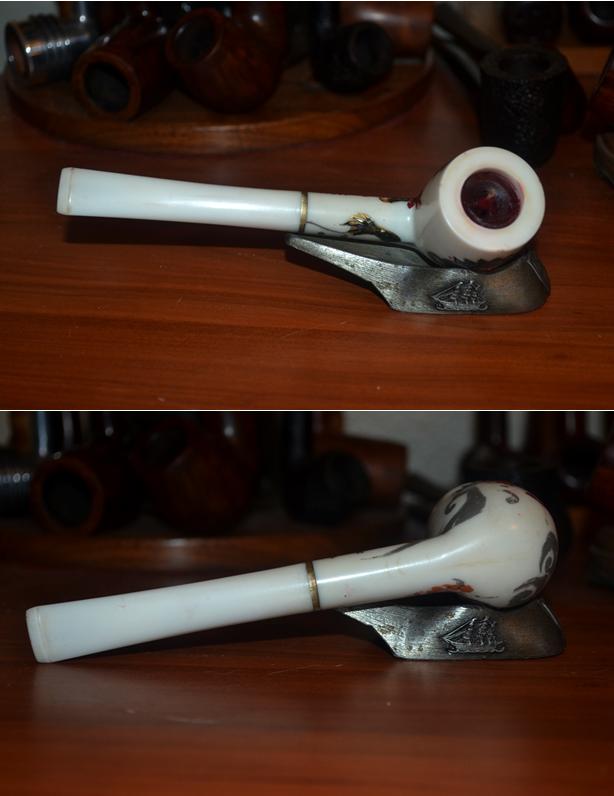
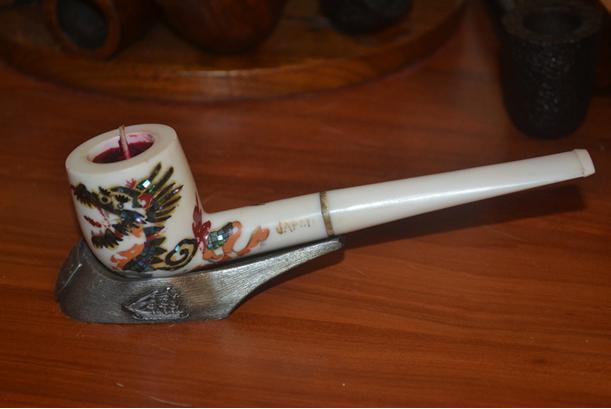
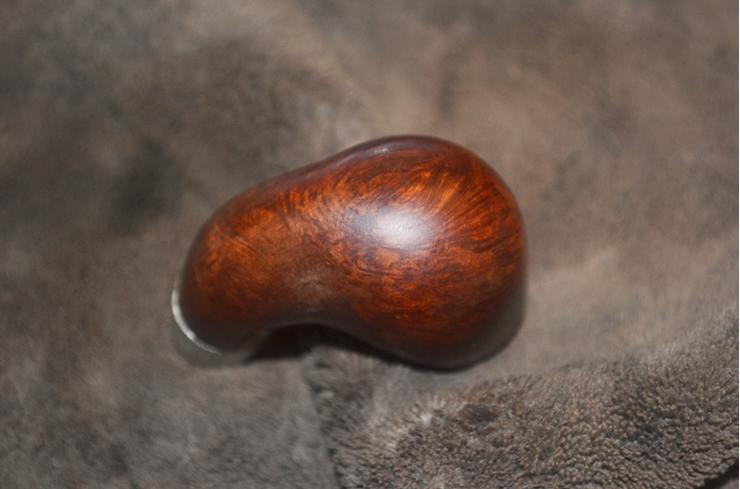
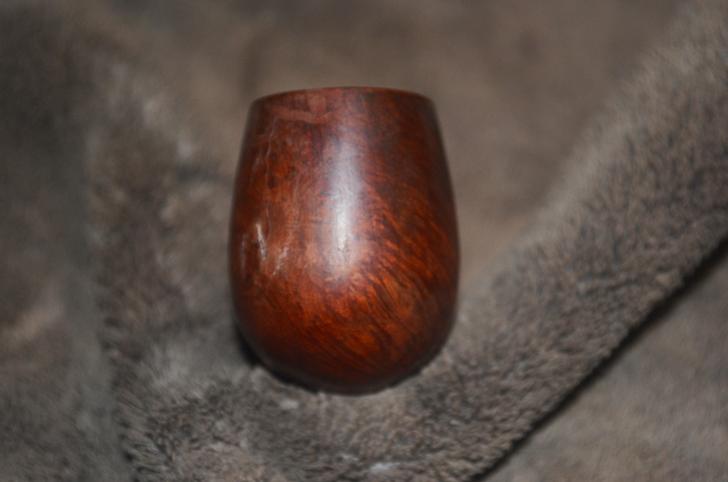
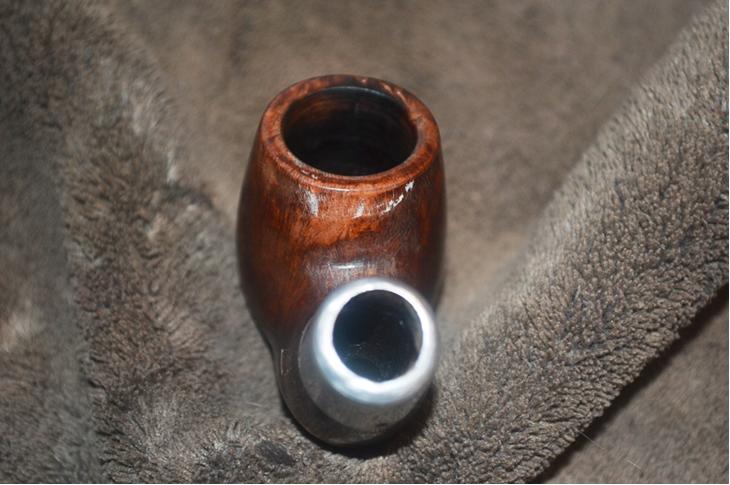
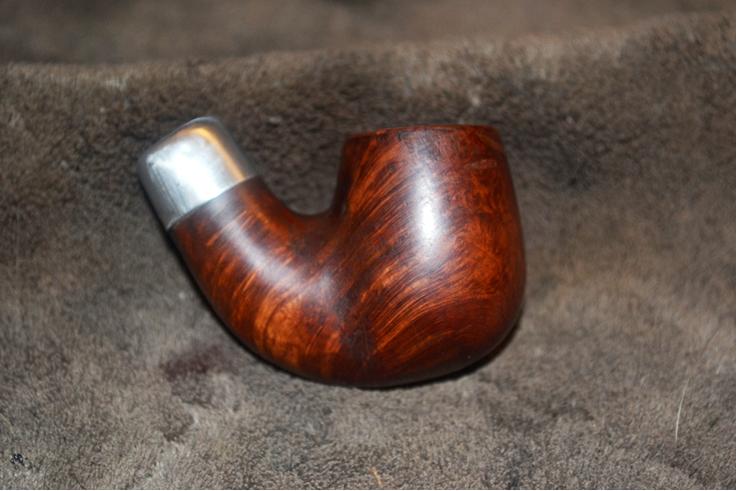
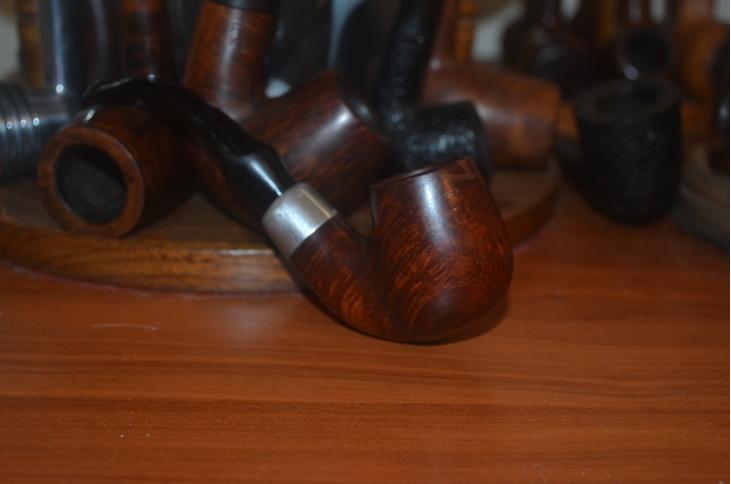
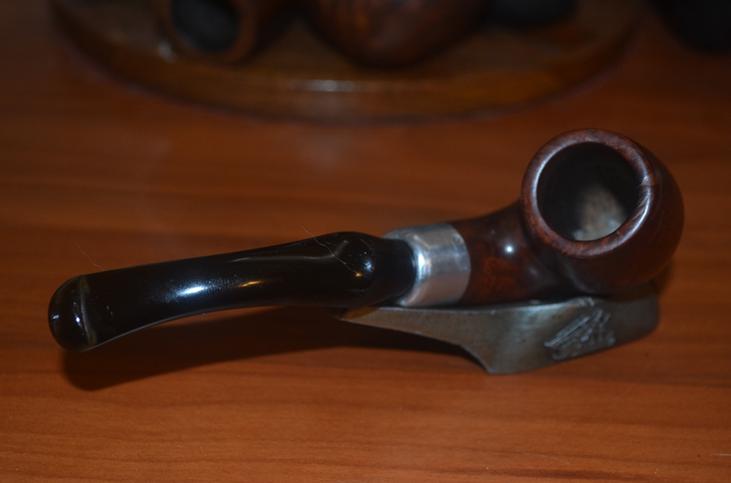
Now for the criss-cross: watch as the bit, at first loose but in place in the shank of the Peterson’s Standard System to the right in photo one, without warning falling to the trademark green sleeve along with the battered band in photo two. Look long enough, and I guarantee you’ll see the moment of selfless sacrifice for the blighted, bit-less predicament of the once proud, near-twin WDC close by. And then, in photo three – the miraculous transplant to the WDC after the donated organ has embraced its new host body, at least tentatively.Robert2

Robert3 
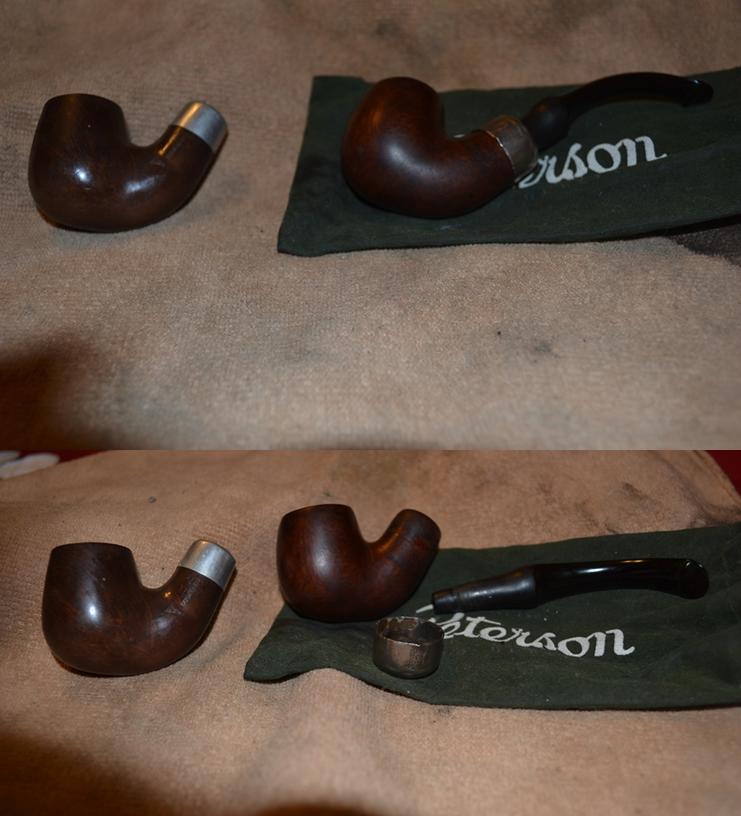
A few words concerning the William Demuth Co. are in order, for those not familiar with its illustrious history. Demuth (1835-1911) entered the U.S. as an emigrant from Germany with no money when he was 16 and worked a number of odd jobs. His break came when he attained the position of clerk for a tobacco products trade company. Demuth founded his own company in Brooklyn, New York in 1862, two years into the Civil War, when he was only 27.

Success was rapid, leading to friendships with such prominent figures as James A. Garfield. [Garfield was inaugurated as the twentieth U.S. president in 1881 after winning by the narrowest popular vote margin in history, a mere 9,464 ballots, but with an extra 59 Electoral College votes. He served only four months before he was gunned down by a single shot aimed by Charles Julius Guiteau, an American lawyer denied an ambassadorship to France(evidently for good cause, as shooting the president on July 2, four months into his term, was not very diplomatic). Although Garfield lingered for about two and a half months, the assassin’s bullet caused the blood poisoning to which he succumbed. Guiteau was hanged several days short of a year after the ultimate assassination.]

At the Presidential Inauguration, Demuth presented Garfield with two meerschaum pipes, one in Garfield’s image and the other in the new First Lady’s. The friendship of the two men led to Demuth’s commissioning of a partial presidential line of pipes. But the linchpin WDC pipe was the Wellington, which lasted beyond the company’s own lifetime. Having become a subsidiary of S.M. Frank & Co. in 1937, WDC continued until the final day of 1972. The Wellington, however, was still offered in Frank’s catalog until 1976 and even had a brief reprise in the mid-1980s by way of consumer-direct sales.

Here are two other Wellington’s, the first courtesy of pipephil.eu and the second from pipedia.org.Robert4 RESTORATION Robert5

Robert6

Robert7

Robert8 
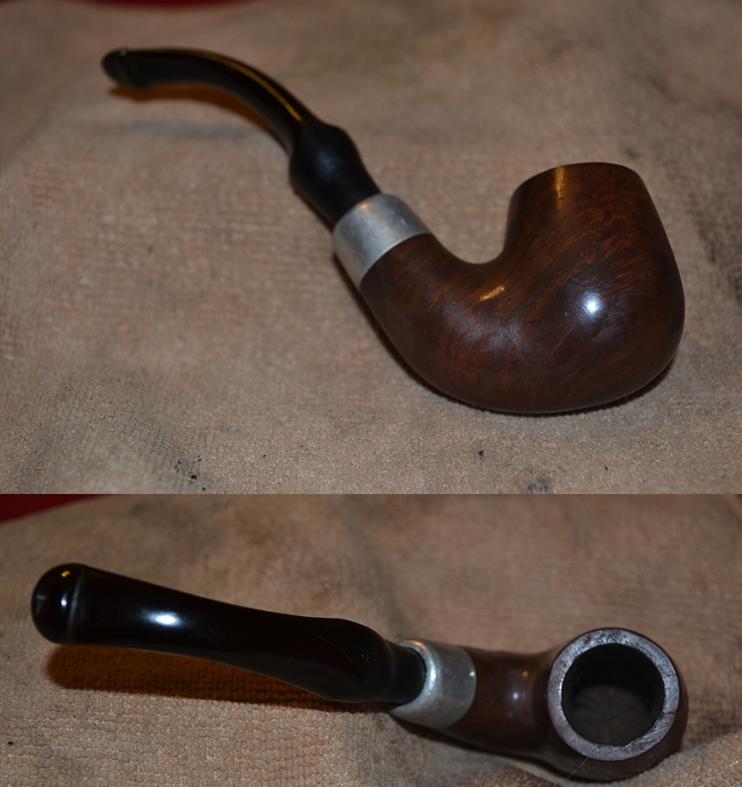
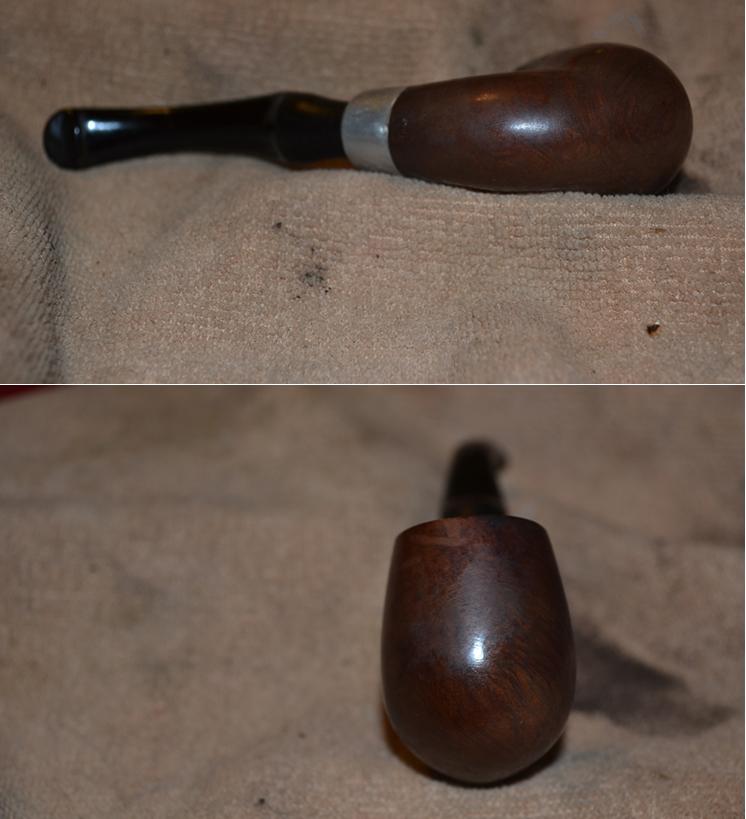
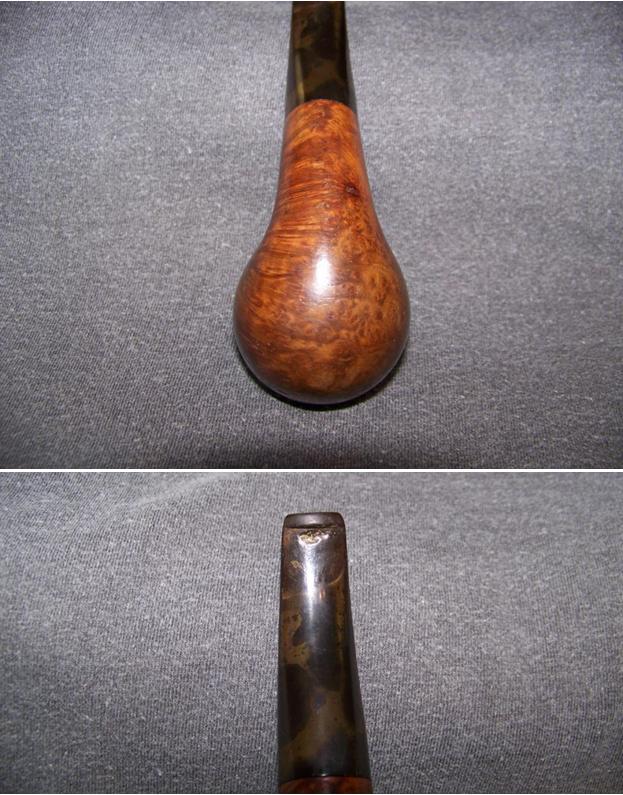
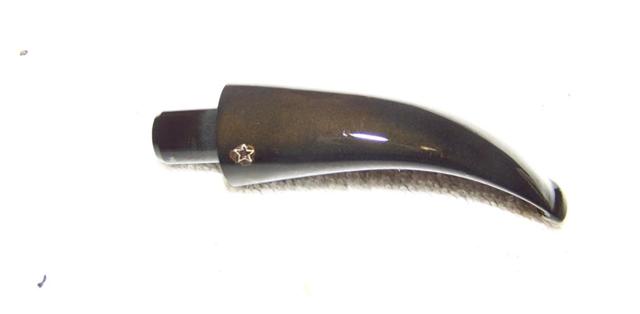
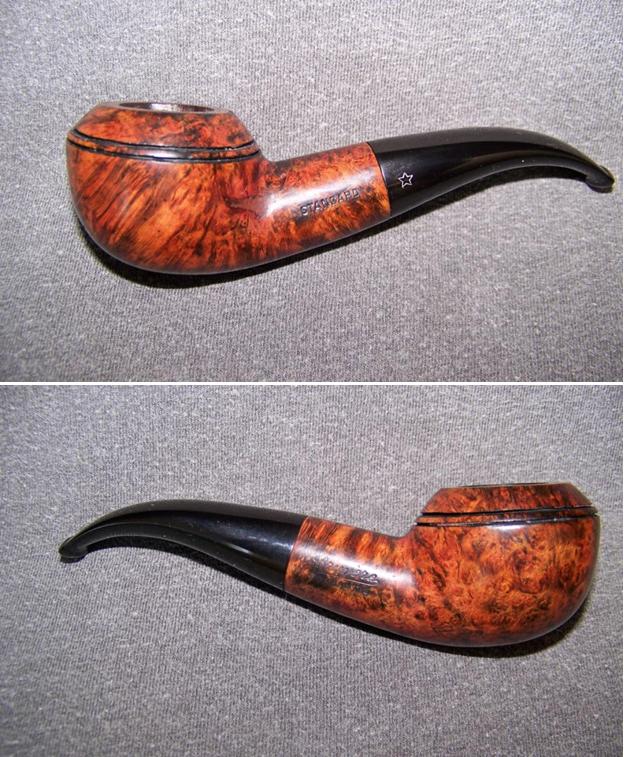
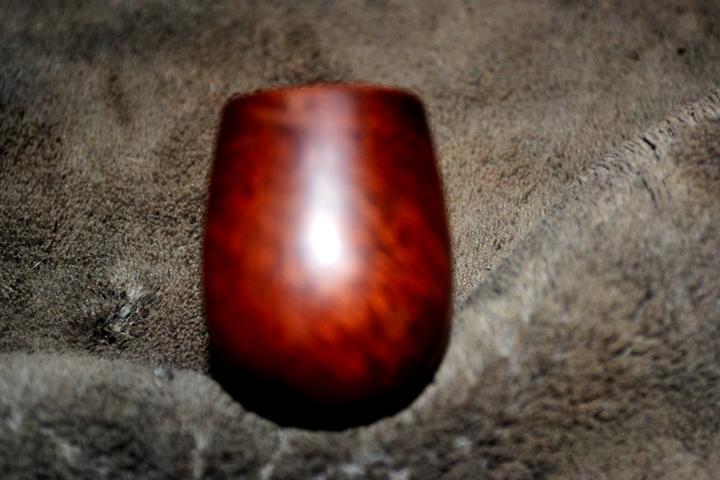
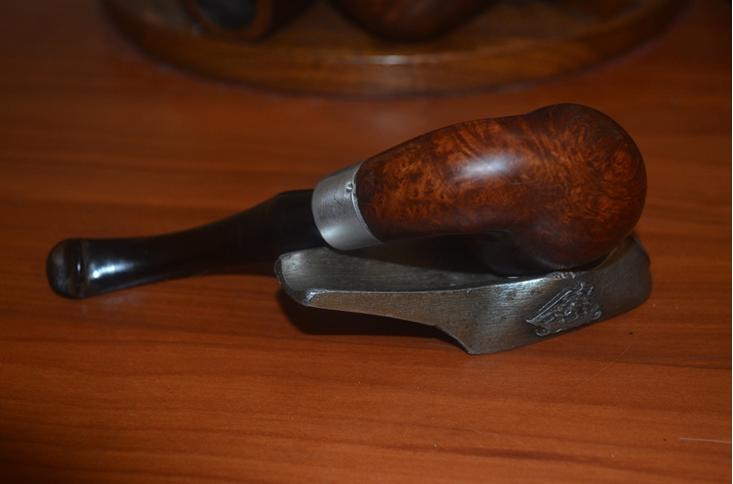
In a sentence, this restoration was more about the stem than anything else. I had decided to go with a perfect replacement from a Peterson’s Standard System pipe in my personal collection. Then, when I donned my Dollar Store 3.75X glasses for a “final” close inspection, I cringed at the sight of the faint black outline of the Peterson’s P, shown below, now filled in with a white china marker.Robert9 Note the correct shape of this bit from lip to tenon. My next brainstorm was to sand off the P, and in fact set out to do so when I came to my senses. What can I say? Sometimes I have the stupidest ideas. And so I opted to let the buck stop here and repair the bit I took off of the Peterson’s System Standard shown in the criss-cross photos of the Introduction. That System Standard needs serious work, also; not only a new, genuine bit but a replacement matching band. I will tackle that one when I have the new bit and band and am up to speed on the process of banding.

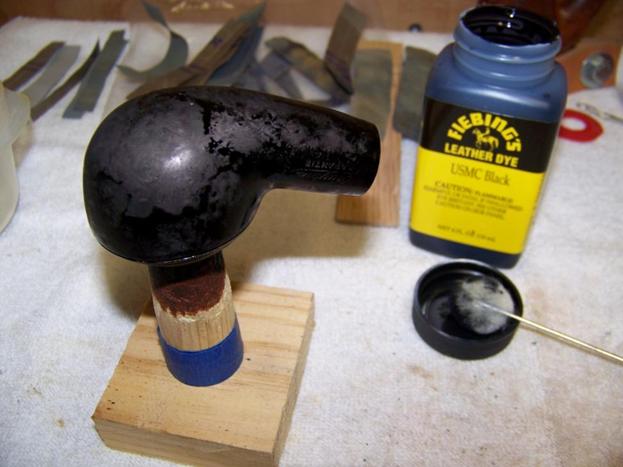
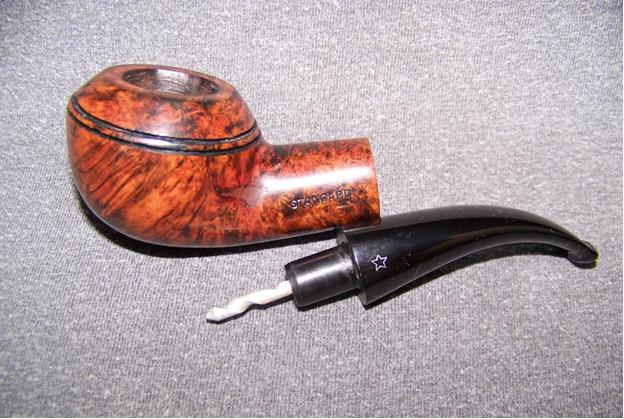
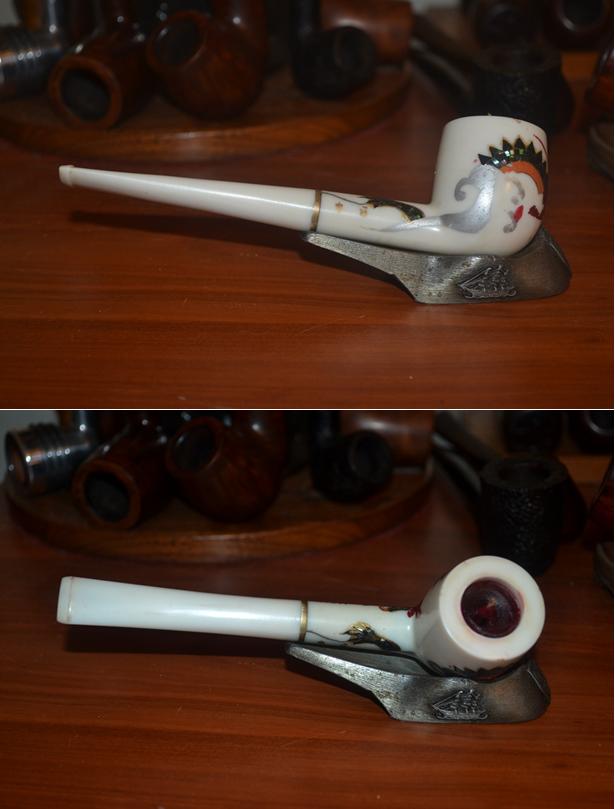
With a happy glow of contentment in the pit of my belly, I replaced the above bit, with the P filled in at last, on its rightful pipe in the stand-up, two sided bookshelf with doors where I store most of my collection, and opted to proceed with this restoration by doing the long, tedious work of applying layers of black Super Glue to build up the thinner, bottom section of the bit that lacks a tenon. As a result, while the rest of the Wellington has been finished for about ten days, the old bit, mangled by some wannabe pipe fixer, took days of patient layering, sanding and micro-meshing each phase, then polishing on the buffers, and was only completed moments ago.

I started the bit on its way, which I knew would take some days, by filing it to a uniform tapering roundness and sanding with 150- and 320-grit paper before micro-meshing from 1500-4000.Robert10

Robert11 
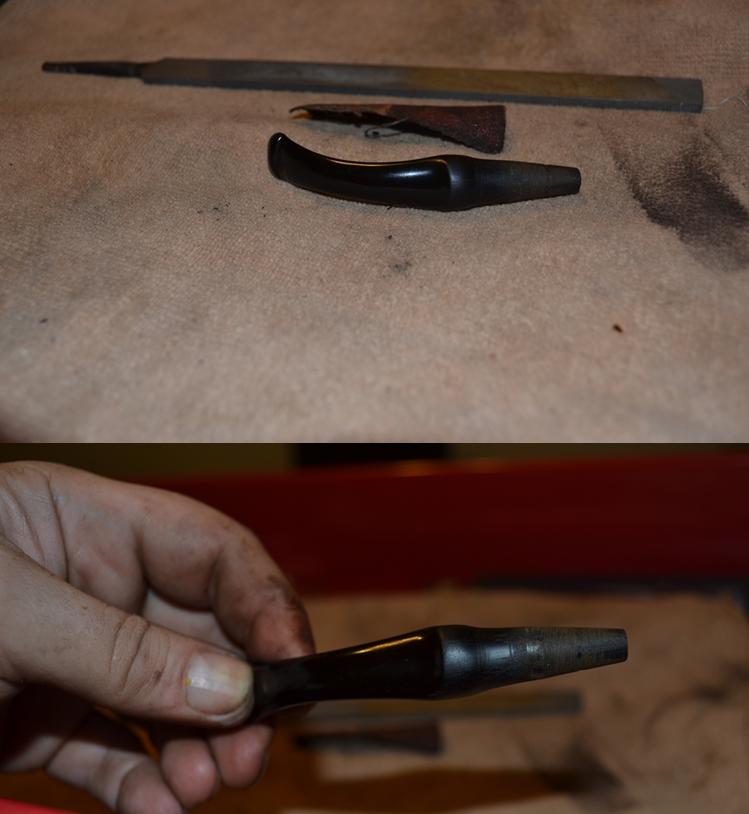
After that I gave the entire surface of the bit below the bulge the first of four thick coats of black Super Glue. Aware of the risk, I then stripped the old finish with as short as possible of an Everclear soak.Robert12

Robert13

Robert14

Robert15

Robert16

Robert17 
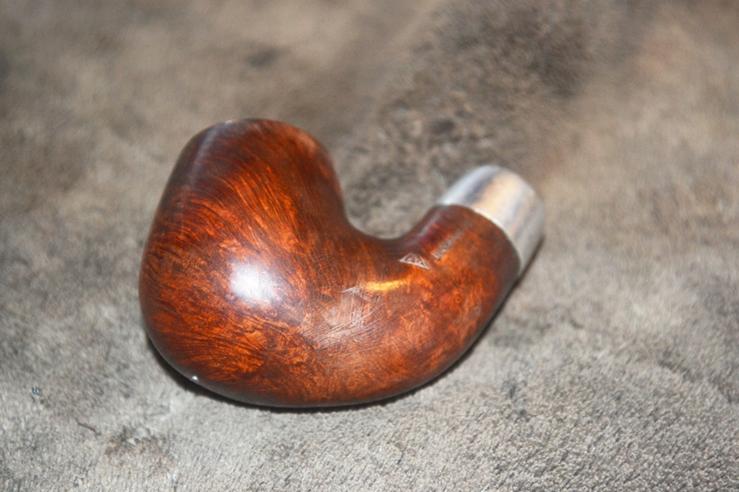
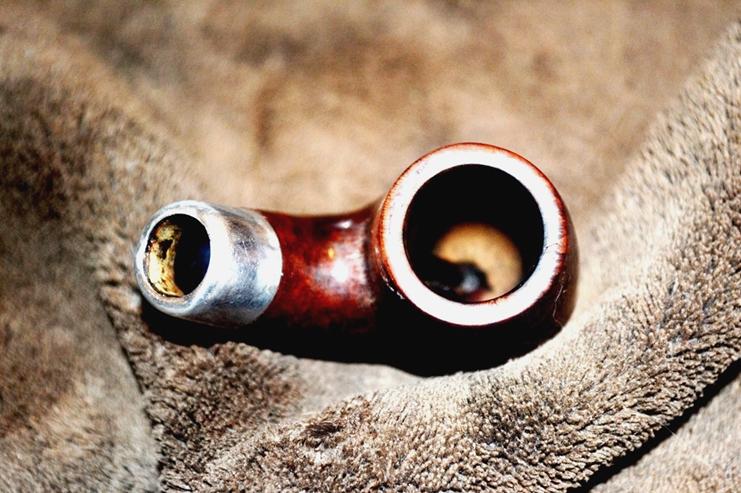
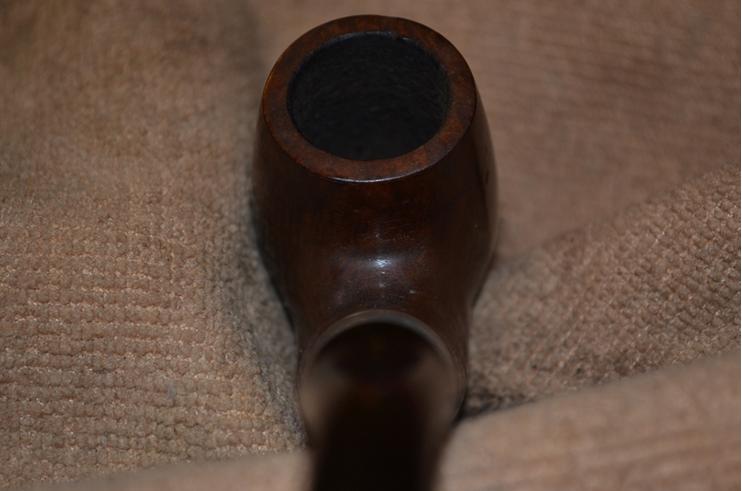
Leaving the bowl and shank for about 10 minutes in the alcohol and time enough to dry, I reamed and sanded the chamber to the smoothness of a chamois cloth and retorted the pipe using the bit from my own Peterson’s System Standard. Starting with super fine 0000 steel wool, then micromesh every step from 1500-4000, the wood and steel band had a nice natural sheen.Robert18

Robert19

Robert20

Robert21

Robert22

Robert23 Without stain, using the natural rich color of the briar, I prepared the bowl and shank for the coming test to see if the bit worked out, the likelihood of which I had doubts, by buffing it with white Tripoli, White Diamond and two coats of carnauba, using the plain cloth buffer between each, of course.

The following days seemed to drag with each successive layer of black Super Glue and the long drying time followed by sanding with 200-grit paper and micro-meshing up the scale each time. But in the end, the result was worth the time and effort, considerable and somewhat unnerving as they were.
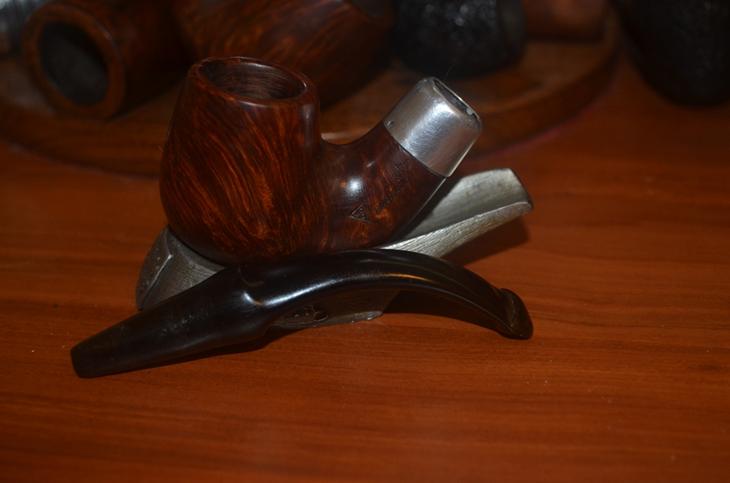
Robert24

Robert25

Robert26

Robert27

Robert28

Robert29

Robert30

Robert31 CONCLUSION
Again, this battle was far more about trying to recover an available bit, so that it would fit and lock in the shank, rather than any problems I faced with the bowl and shank. As the bit was when I received the Pete System Standard with which it came, well, the bit was the tip of the iceberg with that future project. In fact, my friend and mentor, Chuck, recommended that I send it to someone he knows in Denver – not so much because the task was beyond my skills but that it was what he would do if he needed a new Peterson’s bent system pipe stem with the right measurements as well as a replacement band of the appropriate type. I was fortunate with the WDC in that it called for a bit designed after the Pete System variety.

Of course I would have preferred to place a perfect, like-new bit in this great WDC Wellington, but the personal reward came in finding out that I could take what I had and make it work.

I think I’ll do the same with the estate Peterson’s Standard System that gave its bit for this pipe, after I’ve received the new parts in the mail.

Restoring a No-Name Bent Rhodesian


Blog by Aaron Henson

Still being relatively new to the pipe collecting/restoration hobby I have been a bit selective when it comes to the pipe I purchase. I typically look for shapes that have visual or tactile appeal and pay little attention to the name on the stem. And in that line of thought, ever since seeing the GBD 4292 for the first time I have wanted a pipe of this shape. So when I came across this no-name bent Rhodesian on eBay, I quickly placed a bid.Aaron1 It’s not that there were no markings on this pipe. The left side was stamped with STANDARD on the shank and a white 5-point star on the stem. The right side of the shank was stamped with Bruyère in script over Garantie.

A week later the package arrived in the mail and happily, the pipe was just as described and there were no surprise chips or cracks that the seller forgot to mention in the advertisement.Aaron2

Aaron3

Aaron4

Aaron5 Stummel Inspection
The grain was very nice with some birds eye on the right side and a kind of flame grain on the left. There was some minor denting on the heel but the only real wood flaw was a large fill on the left side The color of the fill did not blend well with the grain and it detracted from look of the pipe. Around the rim there was some chipping and charring; damage not uncommon in a used pipe. The only other major issue that I found was the that the twin groves around the bowl were not very deep and had been worn completely away on the right side.

Stem Inspection
The stem was in very good shape. There were some tooth marks on the bottom side of the stem with moderate oxidation overall. The singer was removable and had a modest build up of tar. The biggest issue with the stem was the loose fit to the stummel – which didn’t become apparent until after the shank was cleaned.

During the inspection I decided to change the stain and finish of the pipe in order to highlight the grain and camouflage the large patch. So I began by setting the stummel to soak in 95% isopropyl alcohol to remove finish and loosen the tars and cake. I set the stem to soak in the same solution in a different container for the same reasons.Aaron6 After an overnight soak, I began cleaning the stem with pipe cleaners, running them through until they came out clean. To address the oxidation, I placed a small dab of petroleum jelly over the star and set the stem to soak in a solution of 50/50 chlorine bleach and water. After 20 minutes – when the bubbles had subsided – I rolled the stem over in the solution and let it go another 20 minutes. Then I removed from the bath, rinsed with fresh water and set the stem aside to dry.Aaron7 I didn’t get back to the work bench right away, so after a 36 hour soak, I removed the stummel from its alcohol bath and wiped it dry. I then reamed the bowl with 40 grit sand paper wrapped around a ½” diameter dowel (although this method works well, I did finally order a Castelford pipe reamer from Amazon). Once the cake was removed and the chamber cleaned, I went to work on the shank. Pipe cleaners and cotton swabs removed the remaining gunk inside the shank.

The chips and charring around the rim could only be cleaned up by topping the bowl. I use a sheet of 220 grit sandpaper laid on a flat surface and worked the stummel around in the circular motion. Even pressure and constant checking ensured that the rim was flat and level. I didn’t get the deepest chips because I was concerned that anymore material off the top would change the look of the pipe. Looking back now, I could have filled these chips with a briar dust patch. Maybe I will go back and do that this fall.

I sanded the remainder of the bowl with 320 – particularly around the large filled area and decided that the fill was in good shape and not worth removing. The fill proved to be of a darker color and that went along with my finishing plans.

The parallel grooves around the bowl were next on the list. On the right side they had worn away until they were barely visible. I went to my local hardware store and searched through the saw blades until I found what I was after: a thin fine toothed mini-hacksaw blade that just fit the width of the existing grooves. I trimmed the end of the blade with shears so I would have more clearance around the shank. Using the existing groves as a guide, I carefully worked my way around the bowl deepening and redefining the grooves. As usual, I found that not rushing yielded the bet results.Aaron8

Aaron9 Returning to the stem, I tried applying heat to raise the tooth mark but that did not answer. So I roughened the tooth marks with 320 grit paper and fill of the divot with black superglue in multiple thin layers, letting the glue dry completely (12 hours) between layers. Once the final layer of superglue was dry, I feathered out the patch with 320 grit paper. Then I began the sanding/polishing process by wet sanding with 400 – 4000 grit paper stopping every few grits to dry the stem and apply a light coat of mineral oil. I didn’t touch the star on the stem until I got to the 2000 grit paper not wanting to damage the logo. Once I finished polishing the stem with 6000 – 12000 grit paper I oiled the stem and set it aside.

I wanted to provide some contract to the grain of the pipe and to make the grooves really stand out. The original grooves did not have a contrasting color. I began with a coat of Black Fiebing’s leather dye. In retrospect, I should have thinned it down some.Aaron10 After the stain dried, I had a difficult time removing it. Acetone wipes and eventually light sanding removed most of the dye but left enough to highlighting the grain.Aaron11 I wanted a little more color so I applied a 3:1 diluted coat of Fiebing’s Ox Blood dye. This had the result of giving the pipe a pink hue that had me more than a little concerned. Happily, it all came together with multiple thin coats of olive oil. I left the oil on the stummel until it soaked in and then applied the second and third coats. The third coat did not soak in, so I wiped in clean and set it aside to rest for a couple of days.Aaron12 Before taking the pipe to the buffing wheel and thought I would address the loose stem. I tried bee’s wax, which has worked in the past, but the stem remained too loose. After a little research I heated the tenon over the heat gun and then inserted a nail set into the air hole and let the tenon cool. This technique only enlarges the end of the tenon rather than the full length of the tenon, which is a better repair. I went through the heating/cooling process several times until I got a snug but not tight fit. Another thing to be aware of when heating the tenon is that the softened tenon may ‘sag’ a little. If this happens, then you may be left with a little gap between the stem and shank.

From here, I assembled the pipe and took it to the buffing wheel. I use an inexpensive Sears buffing system that fits into the chuck of my drill press. I found on previous projects that gearing down the drill speed to 1200 rpms was important to maintain control and not overheat the pipe. I finished with three coats of carnauba wax and buffed to a shine.Aaron13

Aaron14

Aaron15

The Perfect Birthday Present for a Mother Who Never Smoked and Has Everything


Guest Blog by Robert M. Boughton
Member, North American Society of Pipe Collectors
http://www.naspc.org
http://www.roadrunnerpipes.com
http://about.me/boughtonrobert
Photos © the Author

Mr. McGuire: I just want to say one word to you. Just one word.
Benjamin: Yes, sir.
Mr. McGuire: Are you listening?
Benjamin: Yes, I am.
Mr. McGuire: Plastics.
Benjamin: Exactly how do you mean?
― From “The Graduate” (1967), directed by Mike Nichols; with Anne Bancroft, Dustin Hoffman, Katharine Ross, many others…and Walter Brooke as Mr. McGuire

INTRODUCTION
My mother’s birthday was last Saturday, June 27. I won’t go into the kind of details most women prefer to avoid, even though my mother is by no means most women. She would be the first person to tell you her age, and that is as it should be. But I will tell you about the Japanese hand-painted and otherwise adorned white billiard I bought as part of a pipe lot, thinking it was ceramic, even when it arrived, because of its heft and the thickness of the bowl. I will describe and illustrate this pipe and the work I did to restore it because of my decision to make something unusual and special of the otherwise novelty or gift store item as a late present to my mother for a landmark birthday (I’ll go that far and not a word more).

I only learned of the true composition of the Japanese beauty after I stopped by my Post Office Box to pick it up, along with the regular briars that came with the lot, on the way to my pipe club’s monthly meeting on the third Thursday of a forgotten month last year. And it really is a pretty thing, with its hand painting and what looks to be intricate application of green, red, purple, blue, black and other colored stones of whatever types arranged in the shape of a dragon.

As I recall, I arrived at the meeting a little late and showed it first, as my supposed jewel of the lot, to my mentor, Chuck. He took it in his rough but surprisingly kindly hands and turned it every which way, frowning.

“What the hell have you got here?” I believe were his exact first words. Anyone who knows Chuck understands how he likes to beat around the bush.

“Ummm, a ceramic pipe from Japan?” I tried, feeling my gut sink, rightfully as it turned out.

“I don’t think so,” he said and headed across the room to a table where two professional pipe-makers, Victor Rimkus and Don Warren, sat talking.

I like to think the idea that discretion is the better part of valor stayed me from joining them. Instead I watched and listened from my seat at a safe distance. At least they all seemed genuine in their curiosity and perplexity about the material used to fashion this odd Japanese billiard. At last, Victor whipped out his trusty cellphone to use the flashlight app, but not as I expected. Here is a poor shot I later took replicating his action.Rob1 I gave it a moment’s thought as I vaguely heard them chortling, and the truth hit me like the bright Christmas ornament Victor had made of my beautiful new pipe: it was plastic!

Chuck walked back to me with one of his big grins and the pipe outstretched in a hand, and as I took it, he asked, “Do you know what you have here?”

“Yes, I figured it out,” I replied, snatching it from him with a bit of motherly protection.

“That’s how you learn,” he said, managing not to laugh outright.

And so I had a marvelous Japanese plastic pipe that I knew right off I could never imagine offering it for sale, even if there might be someone somewhere on the planet who would want to buy it. Yes, I did smoke a bowl in it later that night, for the experience if nothing else, and it wasn’t all that bad; maybe a tad toxic, but not bad at all.

RESTORATION
Rob2

Rob3

Rob4

Rob5 Doesn’t it look like the dragon broke its hind quarters with the bit fully closed at an exact half-turn off? I set the dratted thing away with my broken pipes, all of the others of which had one thing in common, even the cheapest Medicos – they were real pipes, not plastic and Made in Japan, if the fatally flawed tobacco pipe was not in fact made in one of the Koreas.

At any rate, the week before my mother’s birthday, I found myself in line at my Post Office with a card I found there (the USPS is hilarious when it comes to greeting cards), and the idea to send my dear mother the pretty plastic pipe that might have come all the way from Japan first occurred to me. I dismissed the notion out-of-hand as some sort of mental attack of ghastly tackiness.

But as the week passed, somewhere in the echoes of my mind as Glen Campbell sings “Wichita Lineman,” I continued to cogitate on how I might somehow make the perhaps proudest pipe poseur into a worthwhile gift my mother might just love. After all, she has become quite interested in the myriad types of pipes and ways they can go wrong following my blogs on this site, despite the fact that she has never smoked anything – at least not to speak of.

Well, first I had to align the bit, which several of the above photos reveal is half off its screw, in more ways than one. Besides, this was a new lesson I received from Chuck regarding a genuine example of fine pipe-making, a 1930s L&H Stern Park Lane De Luxe Billiard that was about an eighth of a turn off. And so I gathered together my pump pliers, a small cloth and a Bic, and set myself to the task of heating the tenon until it was black. Then I draped the cloth over the tiny screw sticking out of the shank and clamped my pliers over the cloth until the jaws settled and closed shut. With all of my might, I turned the tenon as far as it would go, which turned out to be about halfway, and repeated the process. The stem was in perfect alignment.Rob6 By the way, not only is the direction to turn the tenon counterintuitive, as Chuck warned me obliquely, but the entire concept of heating metal (which thereby expands it) takes some pondering to get a handle on. But if nothing else, my mind does thrive on theories that seem to defy logic. Consider this: the turning of the tenon, in the direction it is off-set, is made possible by the very expansion of the metal stretching that which surrounds it. The trick is not heating it to the point of cracking the outer substance.

I considered skipping the next step for reasons that will become apparent, but the thought was abhorrent to me, and so I cleaned some stains, light and dark brown, from the chamber using a small cotton cloth square with a little Everclear. There was still a light brown area around the bottom of the chamber.Rob7 While I was at it, I used the super fine steel wool #0000 on the bit and turned it from a creamy color to bright white. I finished the bit with 4000 micromesh.Rob8 I happened to have a dark red votive candle that was perfect for my plan.Rob9 Peeling away the paper label from the bottom of it, I removed the wick and its aluminum base and inserted it in the direct center of the chamber.Rob10 By now I’m sure it’s clear where I’m headed with this. If not, there is something wrong with the reader’s sense of foreshadowing. At any rate, I bent the top of the wick to a side and melted the rim of the candle into the chamber until it was almost full. I set it aside to harden again and clipped the excess wick.Rob11 The waxed that dripped onto the pipe’s rim came off easily, and since no buffing on a wheel was necessary or even possible, I was finished.Rob12

Rob13

Rob14

Rob15 CONCLUSION
For the most part, I have no problem with special kinds of plastic being used to make tobacco pipes. I have even said that no real pipe collection is complete without at least one of The Pipe versions, made of pyrolytic graphite/phenolic resin, a high heat and pressure plastic the components of which were created more often for use in liquid rocket fuels. This liberal attitude toward pipe material, in a rarefied and more than a little opinionated sub-culture of human society in general, does not go over well with many pipe enjoyers. But The Pipe models, started in 1963 by the Super-Temp Corporation contracting with Venturi Inc. for marketing, lasted until 1975. They were supposed to be fun, and, after a brief time of distribution of only the pure black “dress pipe” variety, were offered in multiple colors such as yellow and red and were often mixed in wild combinations representative of the good old Hippie Generation that inspired them. The Pipes made no pretense of being anything but a fancy kind of plastic that may have been used in the construction of the Japanese billiard, which was likely bought by or for a collector who discarded it after learning of its material. Here are two The Pipes I own, one of which I will restore for sale on my site and the other that I will keep.Rob16 I guess all I have left to say at this point is: Happy Birthday, Mom! I hope you enjoy your new, very special Japanese plastic tobacco pipe candle for many years. And remember, you can burn it as often as you like, and I’ll always refill it for you.