Blog by Steve Laug
Before I post this review I wanted to let you know that it has been in the works for many months now. Somehow I misplaced this little pipe and only found it this morning. I loaded a bowl and smoked it as I wrote the review. It is a great little pipe. I only wish I had kept it in the rack when it arrived. But, it is kind of like getting a new pipe when you find one that you have misplaced. Without further ado, here is the completed review.
 I want to introduce this pipe review with a little bit of information that is taken from the book From Pipes, Artisans and Trademarks, by José Manuel Lopes. Lopes states that Lannes Johnson was an artisan pipe maker from Texarkana. He was a graduate in Medical Technology, and that was his profession for around thirty years. He began making pipes in 1997, having first bought a kit from Mark Tinsky, and later learned the art from Trever Talbert.
Lannes preferred making traditionally shaped pipes, working with Greek brair and with stems in vulcanite and lucite. He stamped them originally with his name, Lannes Johnson and later used LJ in a heart (“pipes from the heart”), adding the grade, date, origin and handmade. His earlier grading was as follows, in ascending order: L (Legion), T (Tribune), C (Centurion), G (Governor), and E (Emperor), to which he adds the numbers (1 to 5, according to the beauty of the wood and the design of the piece). Later his grading changed as follows, in ascending order as well: one to five hearts. Symbol: LJ (in gold, silver, or white) in a heart.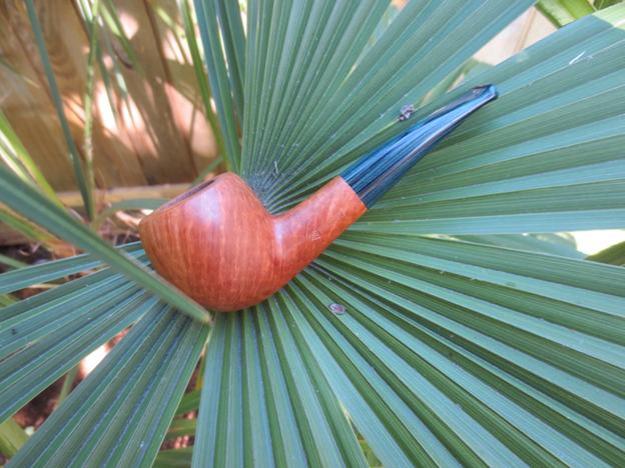 When I purchased the pipe I copied the following information off of Frenchy’s website and from Lannes’ own website. I am certainly glad that I did as it is no longer available. I will let Frenchy himself give you some information on Lannes Johnson.
“LJ Heart pipes are high quality, handmade pipes crafted from 30 year old Grecian and select Corsican Plateaux Briars. The stems are made from the best Vulcanite available (and rarely, Lucite), most feature Delrin tenons. None of the pipes have any fills, so there are no surprises. These pipes will give you a cool, dry smoke from the start without break-in. I really love the green Cumberland stems LJ’s been usin’…”
The following gives you a glimpse of the philosophy he had about making pipes and the way he went about it as he told it on his site.
“… All LJ Pipes are guaranteed for the life of the pipemaker. Pipes will be repaired, or replaced, at the discretion of the pipemaker. Naturally, this guarantee does not apply to pipes abused by the owner… I want you to be happy with your LJ pipes. A tremendous amount of effort has been put forth to insure that you have one of the finest smoking pipes available in every LJ Pipe. If for any reason you are not completely satisfied with the LJ Pipe just simply return the pipe in the condition in which you receive it and your funds will be promptly and cheerfully refunded. No questions asked!”
“Many LJ Pipes are made from 30-year-old Grecian Plateaux Briar. This briar is no longer available at any price, anywhere. I have a large quantity of this briar, enough to easily last me the rest of my life, it is really exceptional and I am so lucky to be able to craft pipes from this quality briar. I have received many compliments concerning the grain, smoke induced taste, and lightness of the briar. The briar is perfect now for pipemaking due to only containing approximately four percent moisture. Recently I have started using some Algerian Plateaux, Corsican, and Select Corsican Plateaux briars in addition to the 30 years old Grecian Plateaux for pipe crafting. Every effort will be made to identify the origin of the briar in the pipe description.”
“No LJ Heart pipes will ever contain fills-ever! No way Jose! I call these shop pipes and they are usually smoked by myself, gifted to smokers, or destroyed. Briar is a naturally occurring product and is subject to contain sand pits, variations in color, and just minor irregularities in general. I will make no efforts to conceal or hide very minor imperfections during the construction of LJ Pipes. Naturally, every effort will be made while shaping the pipes to produce a pipe free of any briar blems. If there are any issues in any LJ Pipe I do guarantee they will be made known to any prospective buyers if I am aware of them. Sometimes, even the pipemaker is unaware of their presence in briar until the pipe is in the hands of the buyer and after the pipe is smoked.”
“All pipes will be stamped with a custom stamp to identify the pipe as a LJ Handmade. The custom stamp will be a heart with the initials LJ inside the heart. Pipes may be stamped with additional makers marks such as grading, date, origin, and handmade. I seem to have preference for traditional shaped pipes. I smoke them, I like them the best, and naturally this influences the pipes that I make. I like pipes that I can smoke every day and treat as normal pipes. I like straight pipes and slight bent pipes the best so these are the types of pipes that I am enthusiastic to make and this shows in my crafting…”
“…LJ Handmade pipes are available in several finishes. All LJ Handmade smooth finished are hand sanded to a satin smooth finish, stained, and liberally coated with Carnauba Wax. I use traditional Aniline stains on my pipes in different colors and combinations. Additionally, many times I use LJ Custom Stain that I developed and have used for many years. It is an alcohol based stain but is not an Aniline stain. The stain is light in color and very durable. I like this stain very much and use it often.”
“I like rusticated finished pipes. Rusticated pipes are probably my favorite finish. I use rustication to enhance the aesthetics of pipes that have little to offer in the way of grain. I think that pipes partially smooth/rusticated are very attractive and will sometime make striking aesthetic enhancements to a pipe. Robert Vacher, longtime friend and fellow pipemaker, made my rustication tool and gifted it to me. Thus, all pipes that I rusticate will be labeled as having Vacher Rustication. I love it and it is the only rustication that I have ever used.”
“LJ Handmade Pipes are constructed by hand. Lathes are used in the drilling of stummels for air holes and tobacco chambers. Tobacco chambers are available in three popular sizes, 3/4″ Custom Taper, 13/16″ Custom Taper and 7/8″ Custom Taper. 13/16″ is my favorite size to smoke so look for many pipes drilled in this size. You will find the custom design of the tobacco chambers in LJ Handmade Pipes will enhance the airflow of the pipe while insuring combustion and smooth burning of tobacco in the chamber. Tenons will be made from Delrin, ported, and used whenever possible in all LJ Handmade Pipes. I love Delrin because of its durability, self-lubricating properties, and it just about eliminates any tenon problems found in pipes. Not all pipe designs, or various stem shapes, allow the use of Delrin but every effort will be made to use Delrin whenever possible.”
“Pipes will be graded in a series of 1 thru 5 and the pipes will be correspondingly stamped with a custom 3/32″ LJ Custom Heart Stamp. One heart being the lowest grade and 5 hearts being the highest grade pipe. Any grading is highly subjective but it does relate the pipemakers overall opinion of the briar graining etc., construction, and general feeling about the pipe.”
“I have found that it usually takes about 6 smokes to get a pipe to break-in. I realize this is a highly debatable issue but this reflects my feelings. When you get your new pipe the briar in the pipe is very dry and needs to be hydrated slightly before use. Many methods have been used to do just this. Before the first smoke just wipe the interior of the tobacco bowl with some tap water, saliva on finger, etc. to put just a small amount of moisture in the bowl. This will help hydrate the briar. The hydration of the briar is necessary before the first smoke only. Subsequent applications of moisture to the tobacco chamber are not necessary but will not damage the pipe either. I recommend that you not get the pipe really warm, or hot, for the first six smokes. You need to season the briar a bit. If you are an aggressive puffer just put the pipe down an allow it to cool before relighting. Fill the bowl full of tobacco during the break-in period. The pipe will smoke better and much cooler and give a more pleasant break-in smoke. After the first six smokes, smoke the pipe as you normally would. With just a little care on your part this pipe will provide you with several lifetimes of quality smoking.”
“Thanks for your faith and patronage of LJ Handmade Pipes. They are the best pipes that I am capable of making. I really feel they are “Pipes From The Heart”, my heart to you.”
I had learned about Lannes Johnson on Frenchy’s website and had followed his pipe making there for quite a few years. Later I chatted with him on Smoker’s Forums an online pipe forum and shared stories and even enjoyed some tobacco he sent me. Then one day I decided to have him make me a pipe so I commissioned a straight apple pipe from him around the fall of 2008. I have had it since then and continue to enjoy it. I had put it in a cupboard and just found it recently. It is once again in my current rotation.
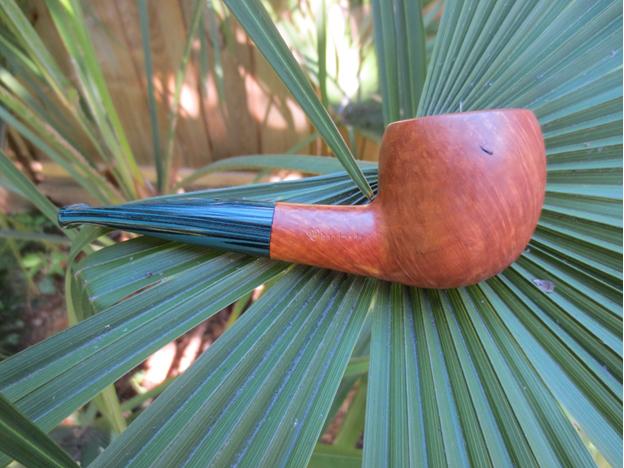
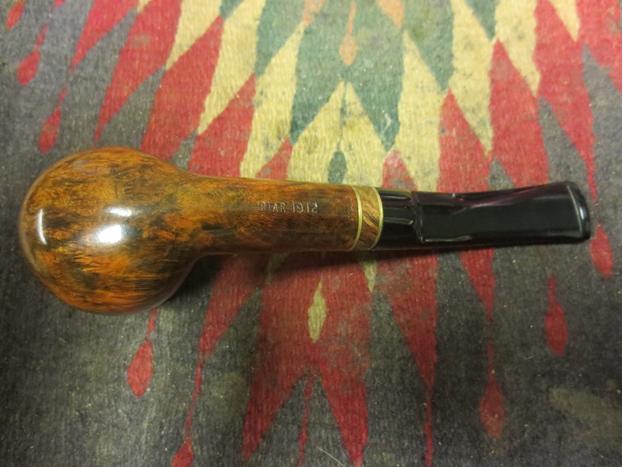
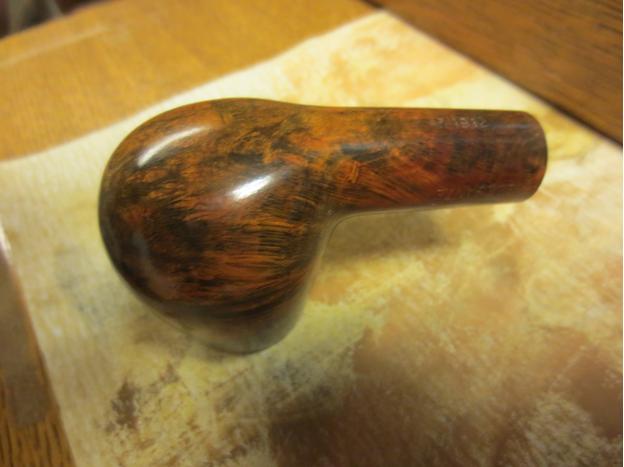
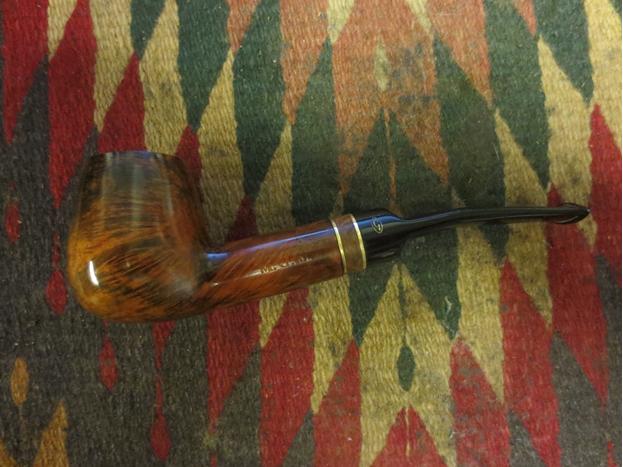
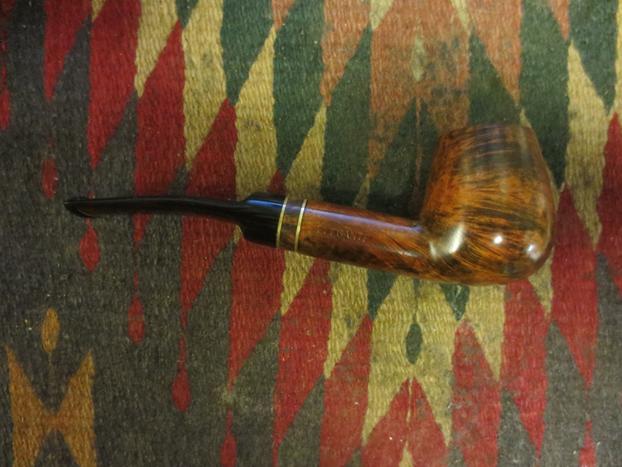
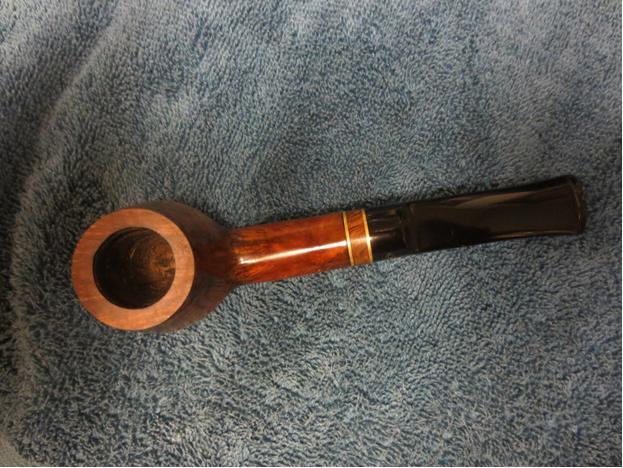
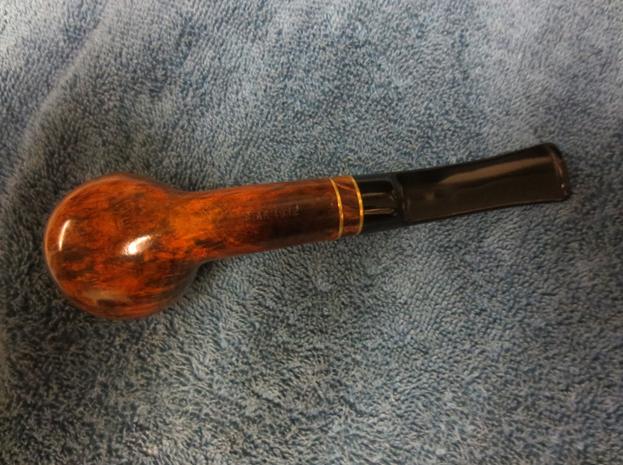
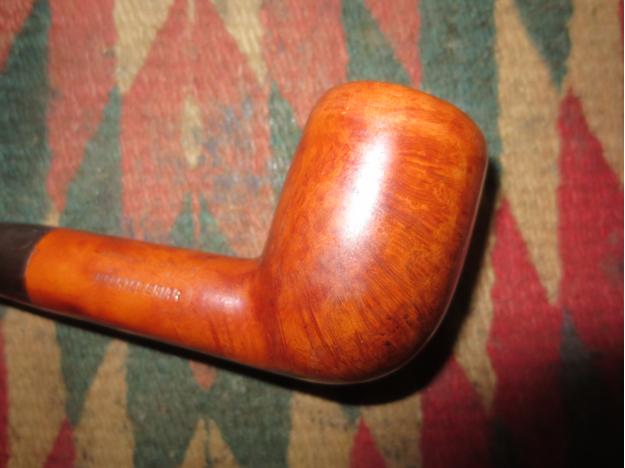
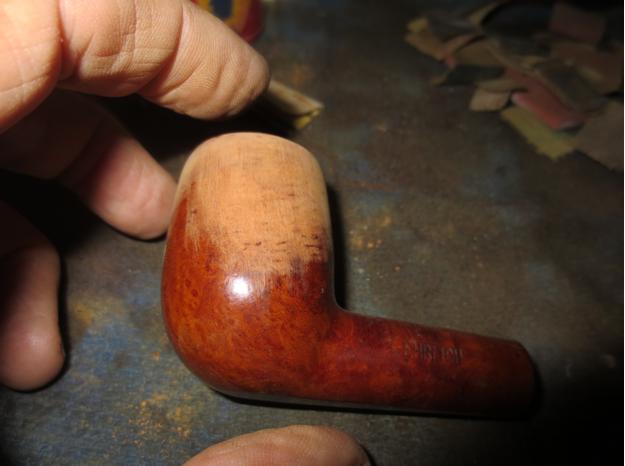
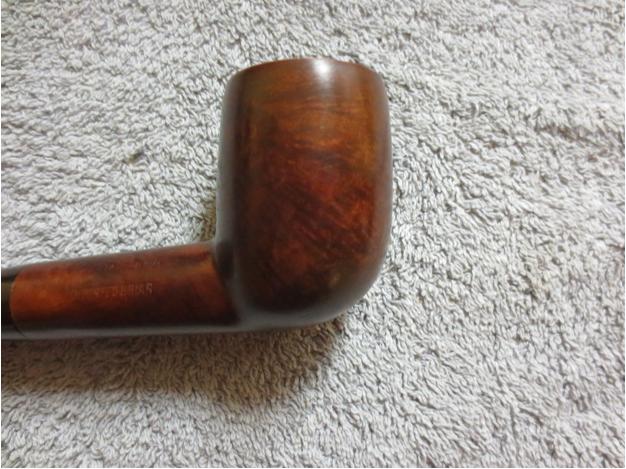
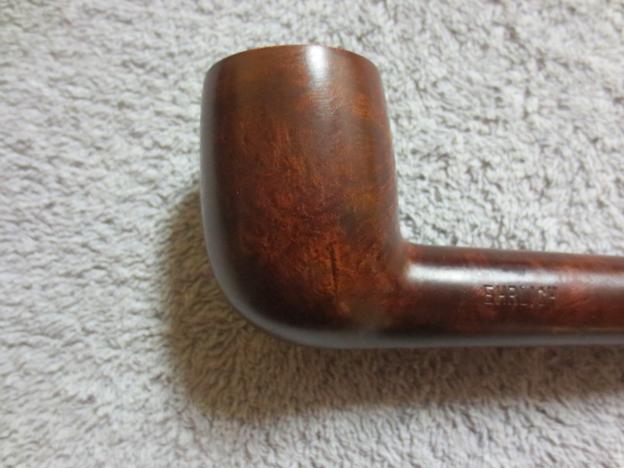
It is a beautiful little straight apple sporting a hand cut green Cumberland stem. It is stamped with his signature LJ in a Heart and Handmade next to it. On the underside of the shank it is stamped with two hearts which is how he graded the pipes that he made. It was cut from well cured Greek briar that had been in LJ’s shop for a while getting acclimated. The briar has two small flaws in it – the first is on the bottom of the bowl toward the front and the second is on the right side near the top of the bowl. Lannes never filled the flaws but left them as they gave character to the briar. The weight of the pipe is 1.60 ounces or 45.4 grams so it is light in the hand and the mouth. But the measurements are as follows. The tobacco chamber is drilled ¾ inches by 1-7/16 inches deep. The pipe itself is 1 1/2 inches wide and 1 3/4 inches tall. The overall length of the pipe 4 ¾ inches. I took it out today and took some outside photos of the pipe against a palm tree in my backyard. The green of the palm really highlights the green Cumberland stem. Lannes did an amazing job fitting the shape of the pipe to the grain of the briar. The grain runs diagonal across the sides of the bowl coming from the front and ending toward the back of the bowl. The bottom of the bowl has birdseye on the rim as does the rim and the top and bottom of the shank. LJ hand sanded the briar to a satin smooth finish, stained, and liberally coated with carnauba wax. He used an LJ Custom Stain that he spoke of above. It is an alcohol based stain but is not an Aniline stain. The stain is light in color and very durable. The bowl is round and an apple shape and the shank is at a slight angle giving the stem a canted look. The combination of the natural finish and the green Cumberland stem give the pipe a very clean look.
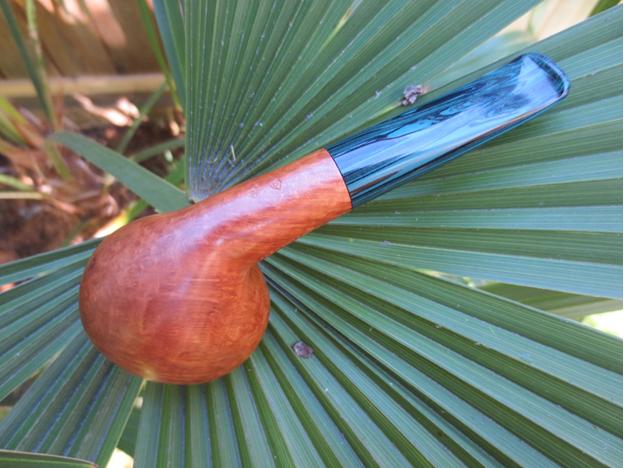
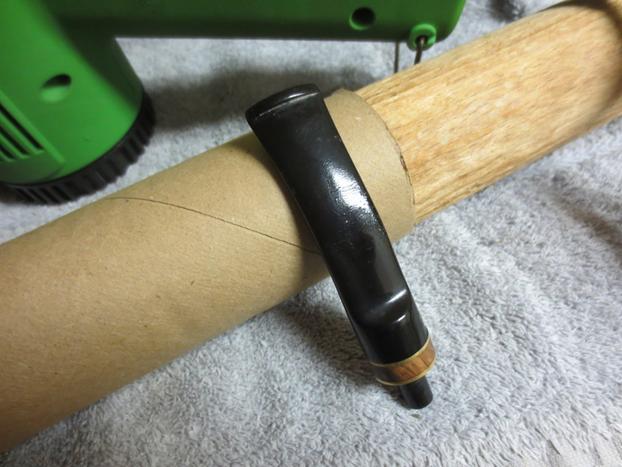
 The stem is a hand cut green Cumberland taper that angles back to a thin button where it flares to the same width as the shank junction. It gives the pipe a stubby look like a nose warmer even though the pipe is five inches long. The Cumberland is a good grade of material and has not oxidized in the years I have had it. The tenon is Delrin and is inserted into the stem material. It is perfectly centered in the circle of the stem face. The airway in the end is chamfered inward to form a dished end that is well-polished.
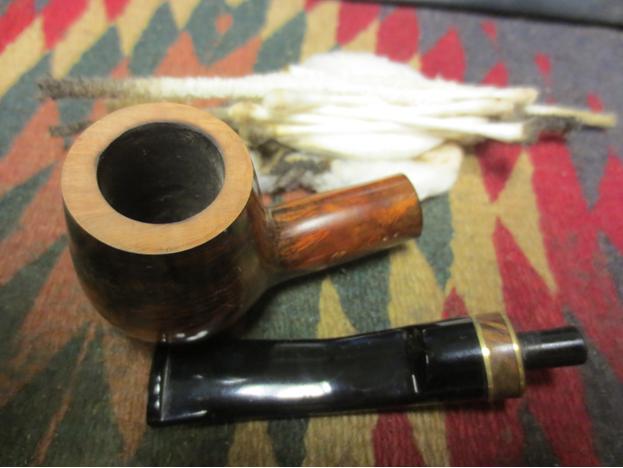
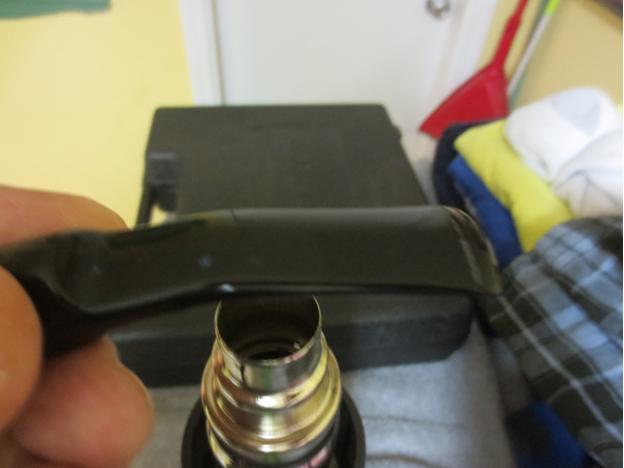
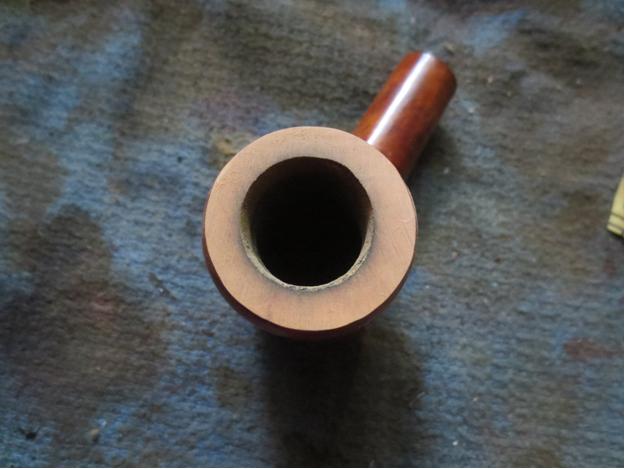
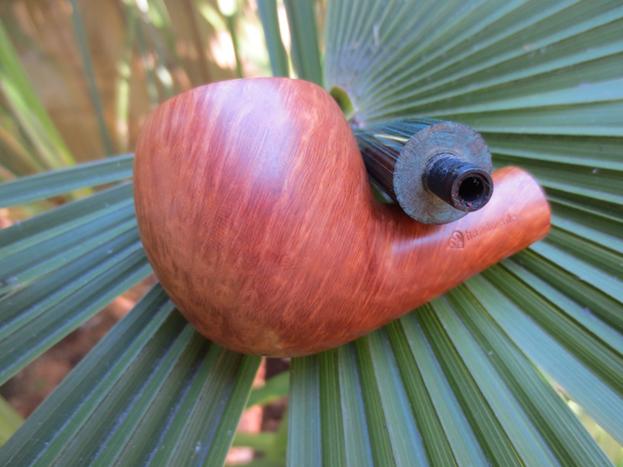 The button is on the small size and does not have a well-defined lip or edge. The shape does work for me but one day I may have to give it a little more definition. Looking at the button from the end it is a fat oval that curves at the edges flattens out on the top and bottom surfaces. The end is also flattened and the slot is shallow and Y shaped into the airway. LJ made the slot oval shaped, but different from the oval of the button. Where it was flattened and rounded, the slot is more curved and shaped like an eye. The airway is like a pupil in the middle of the eye. It is a comfortable and well executed pipe. A pipe cleaner passes easily through the pipe with no obstruction.
 Lannes is as good as his word in crafting the airflow dynamics in his pipes. The draught is clean and easy with no whistling or tightness. The draw makes smoking it a pleasure. The bowl chamber is drilled to 3/4 of an inch diameter with a rounded bowl bottom. Lannes left the tobacco chamber uncoated but sanded smooth. I smoked it several times when I got it but because I misplaced it the cake has not really begun to form. The draught hole is centered perfectly above the bottom of the bowl and seems to have a slight funnel leading into the shank and stem. The fit of the stem to the shank is excellent – smooth and snug with no light showing at the joint. The tenon fits well in the mortise and is almost against the bottom. The airway is in the center of the mortise and aligns perfectly with the airway in the tenon. The edges of the tenon have been polished and rounded and the airhole countersunk so that it meets the airway in the mortise. Looking at the airways with a flashlight it is clear to see that they are smooth and polished with no rough edges. The interior of the pipe is smooth and polished from the button to the bottom of the bowl.
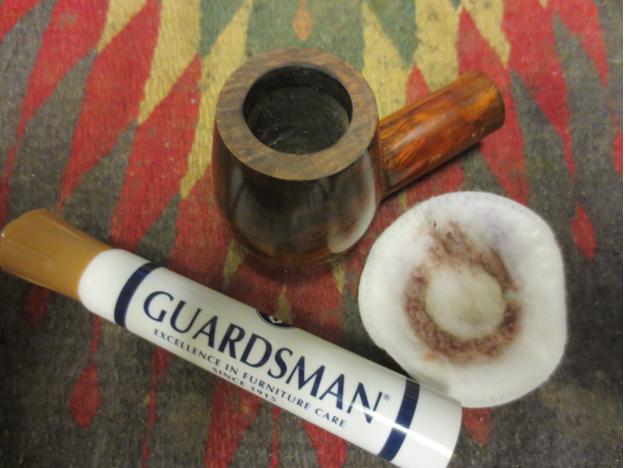
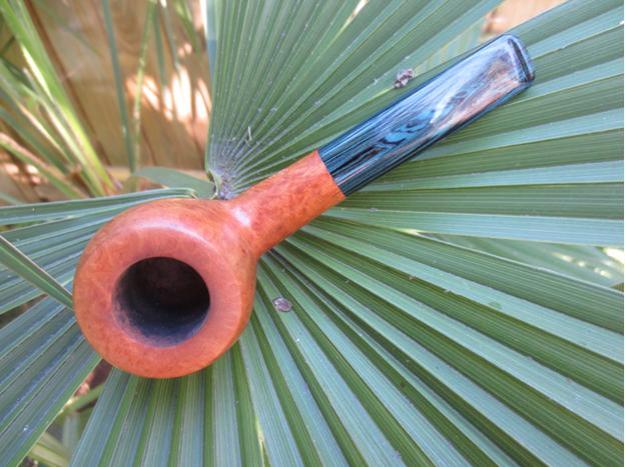 When the pipe arrived I loaded it with some aged McClellands 5100. I wanted to make it a dedicated Virginia pipe because of the shape and size of the bowl. Those first smokes were very good and confirmed my decision about keeping it a dedicated Virginia pipe. It smoked cool and dry and delivered good flavor with the Virginias that I choose to smoke in it. After finding it again today I have loaded it once more with some aged McClelland Dark Navy Flake (2035) and am not disappointed with the great smoke it delivered. I intend to enjoy it throughout the weekend ahead and move it into rotation in my rack.
 I am glad I found this pipe once more and reacquainted myself with it. I was quite pleased with the craftsmanship of Lannes work when it arrived and after seven years of not seeing the pipe I am still pleased with it. Lannes Johnson provided me with a beautiful little smoking pipe. It is light weight and comfortable in the hand. I am not sure if Lannes is still living. I have looked for him on the web and have come up empty handed. I want to let him know that I have and will continue to enjoy the pipe that he made for me. While he may no longer be making any more pipes there are many of his showing up on the web as estate pipe. I would definitely recommend that you give them a try. I don’t think that you will be disappointed.
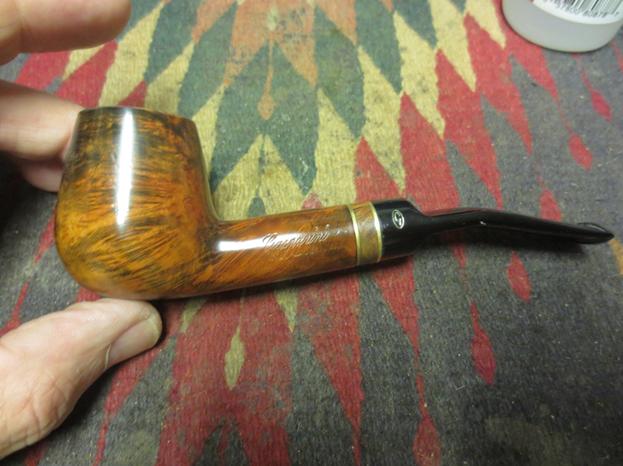
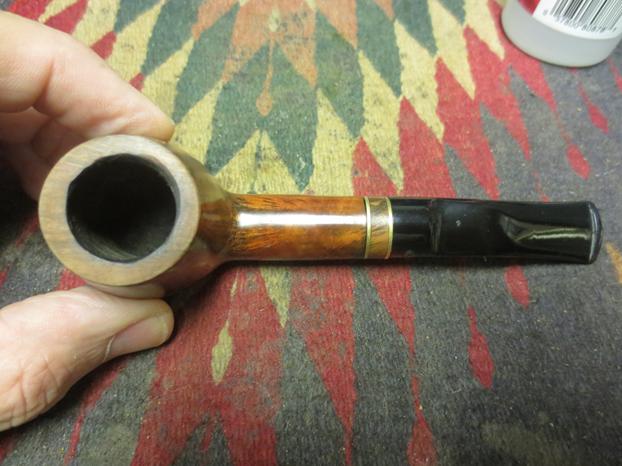
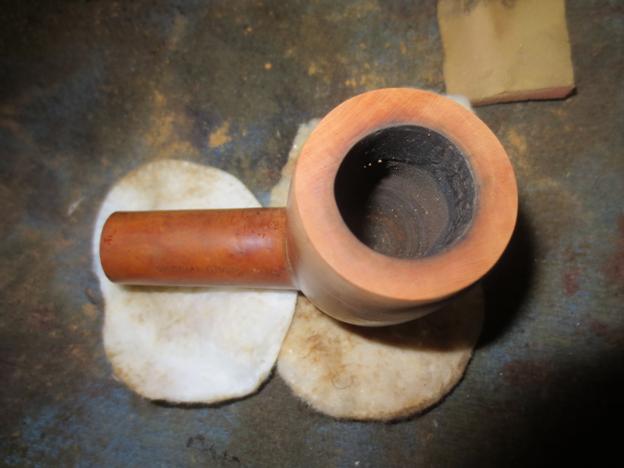
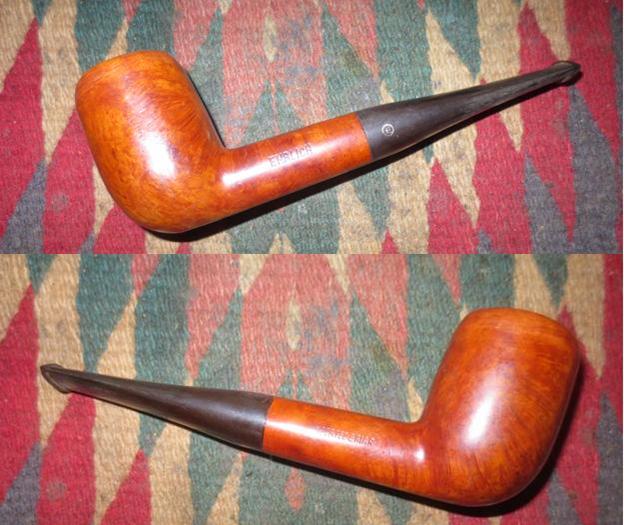 The top of the rim was very rough. The inner edge was no longer round. The flat top was cut and damaged with the carving knife that had been used on the outer edge of the rim to round it out. The underside of the shank was in good shape but the bowl sides and bottom had some dings and dents in it from knocking it about.
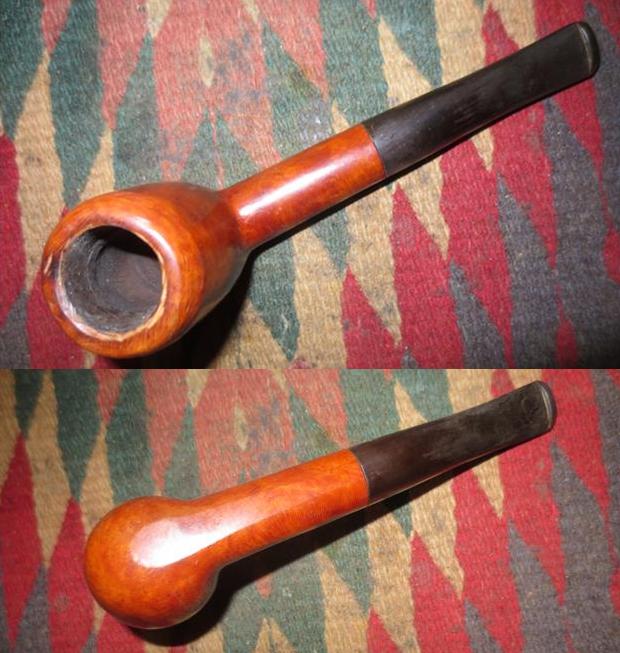 I took a series of close up photos of the rim and the sides of the bowl to show the knife damage that had been done. You can see from the first photo how the inner edge had been beveled with a knife and was quite uneven. The top of the rim was scratched and had deep grooves from where the knife had slipped. The second and third photo shows the sides of the bowl and how the outer edge of the rim had been rounded haphazardly with a knife. The front and back side also was rounded and hacked. It was very poorly done and left the pipe a mess. The finish was worn and had been covered with a coat of varnish that was bubbling.
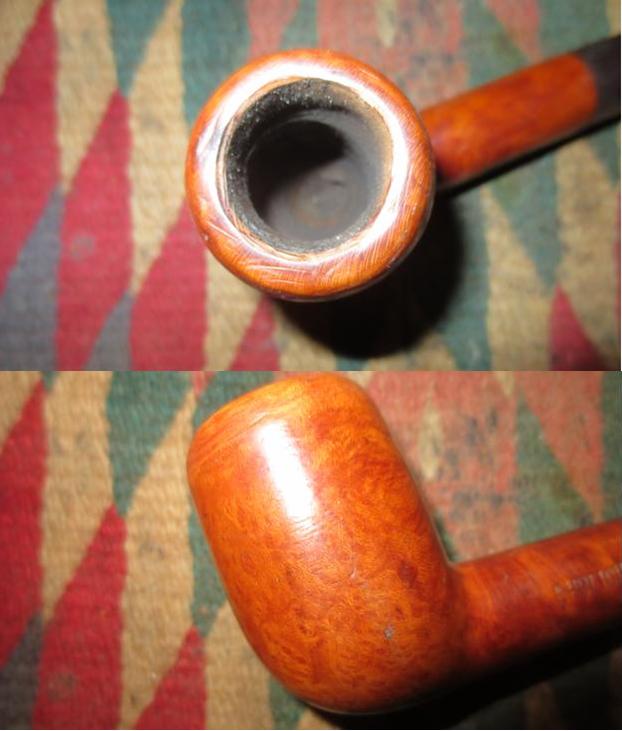
 I decided to top the bowl first. It would need to be topped quite a bit to take out the rounded and cut sides of the bowl. The damage was significant and I would need to bring the top down at least a ¼ inch to repair it. I used the topping board and 220 grit sandpaper to remove the damaged wood. It took probably 30 minutes of continuous sanding to bring it down. I had to press the rim against the sandpaper to keep the rim flat and horizontal.
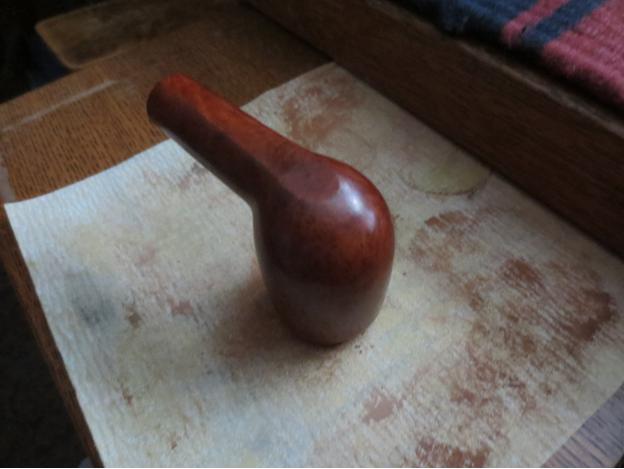
 Once the top was flat and most of the damaged outer edge removed I used a folded piece of 220 grit sandpaper to smooth out the taper from the bowl side up to the outer edge of the rim. It took a bit of time to smooth out the transition and remove all of the nicks and dents in the briar.
 I wiped down the bowl with acetone on cotton pads to remove the finish and sanded the bowl sides until the transition to the rim was smooth.
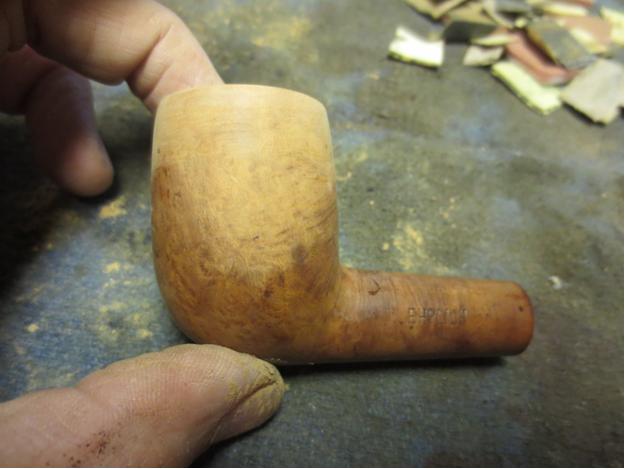

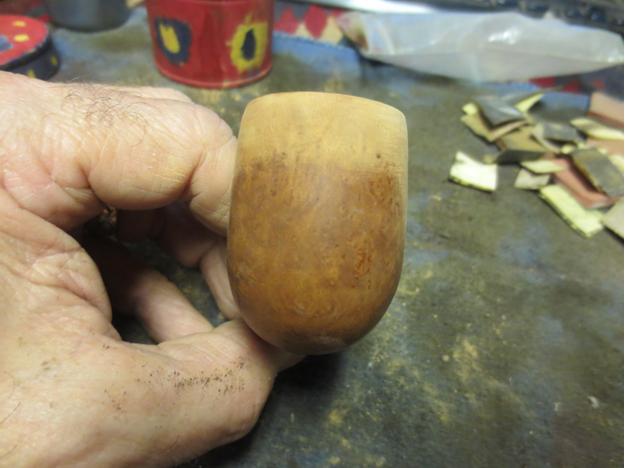
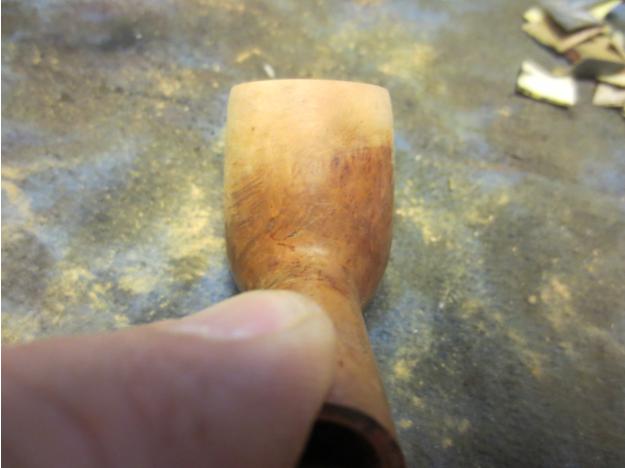
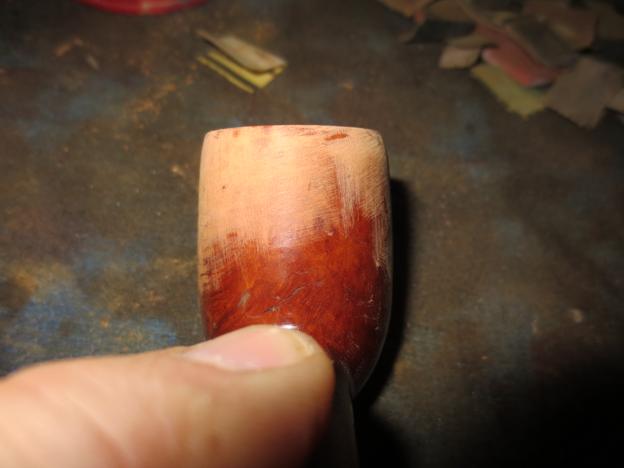
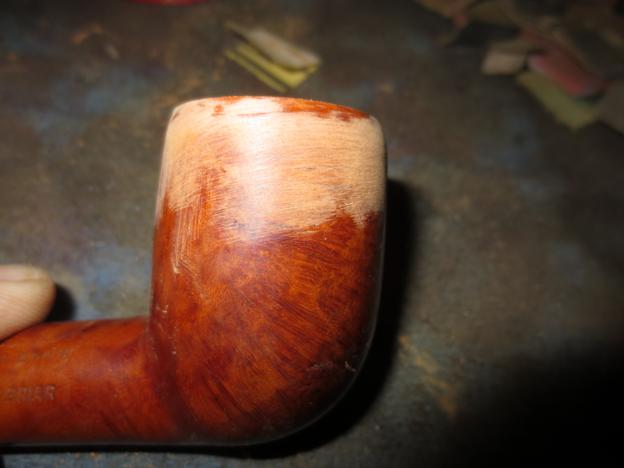
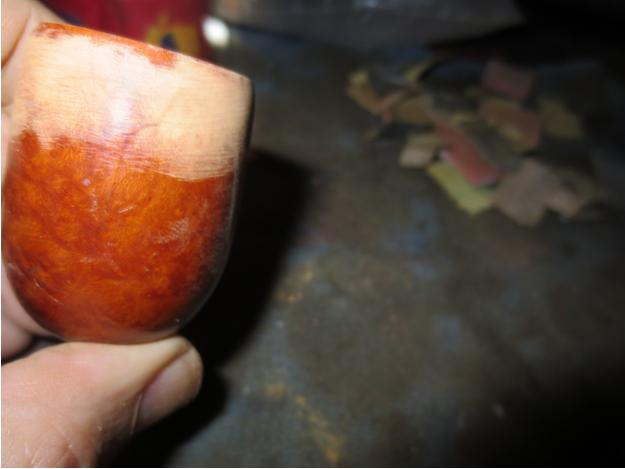
 When the transition was smooth and the sides of the bowl flowed evenly to the top I wiped the bowl down with isopropyl alcohol to clean off the remaining finish and the sanding dust. I sanded the bowl with a medium and a fine grit sanding sponge and then took the following four photos to show the new look of the bowl.

 I sanded the bowl and rim with 1500-2400 grit micromesh sanding pads and then prepped it to be stained. I put a cork in the bowl so that I could stand it in the candle holder that I used for drying my stained bowls. I stained the bowl with a 50-50 mixture of alcohol and dark brown aniline stain. I flamed it, repeated the stain and the flame and set it aside to dry.
 Once it dried enough to pick up I wiped it down with acetone on cotton pads to thin the dark coat and make the grain stand out better.
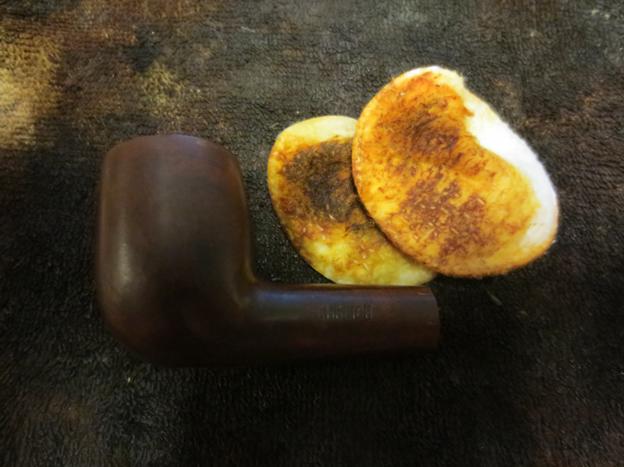


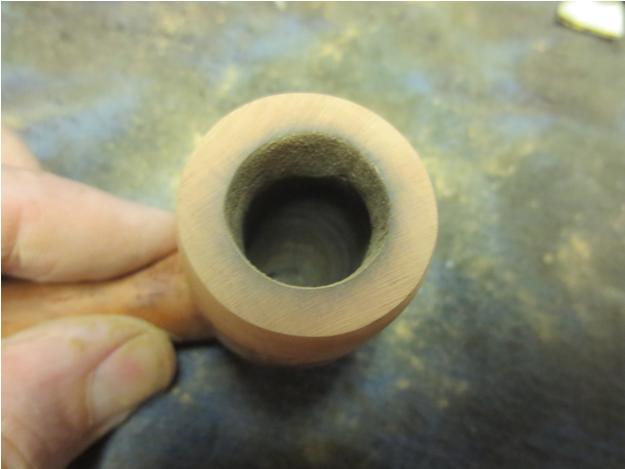
 I cleaned out the shank and stem with alcohol, cotton swabs and pipe cleaners. I lightly reamed the bowl with a pen knife to remove the debris from the sides of the bowl.
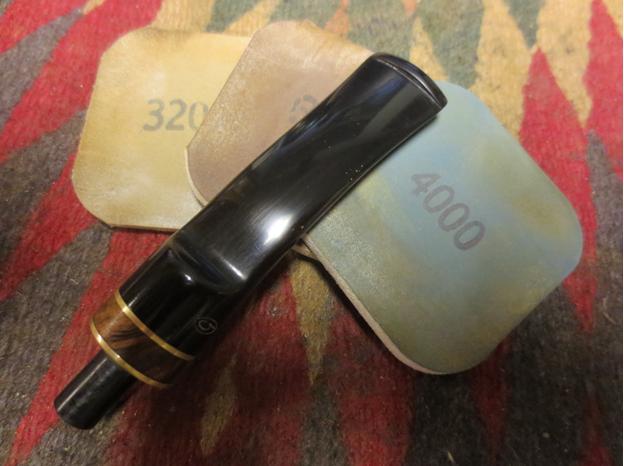
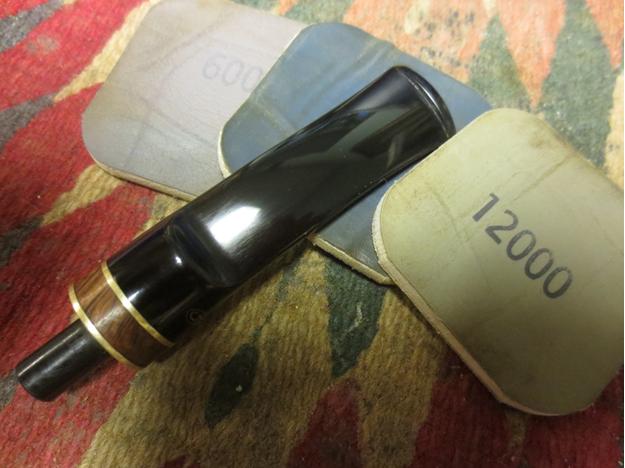
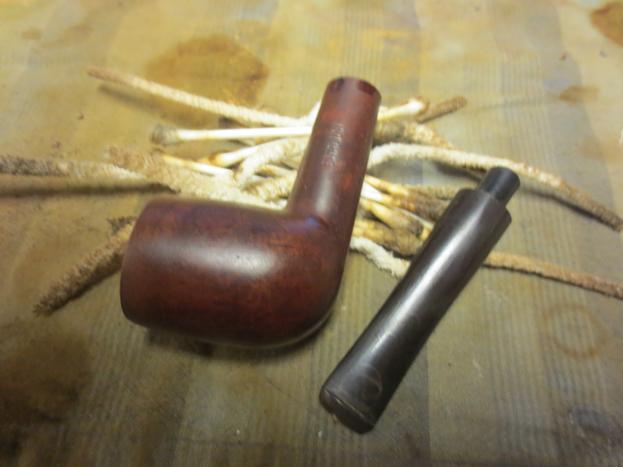 I sanded the stem with medium and fine grit sanding sponges. I followed that by sanding it with micromesh sanding pads – wet sanding with 1500-2400 grit pads and then rubbing it down with Obsidian Oil.
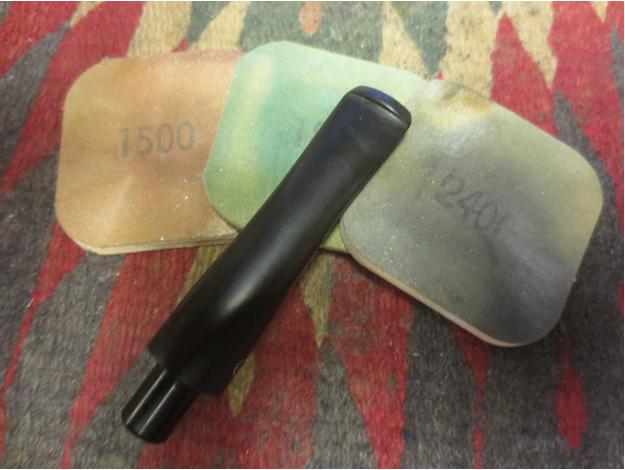 After the wet sanding I decided to open up the slot to make it easier to clean out the stem and shank with a pipe cleaner. I used a flat oval needle file to start the work and finished it with a thicker oval file. Once I had it opened I used a folded piece of sandpaper to smooth out the opening.
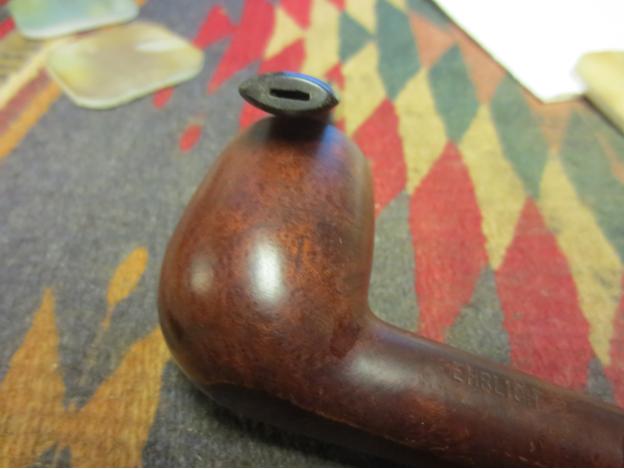
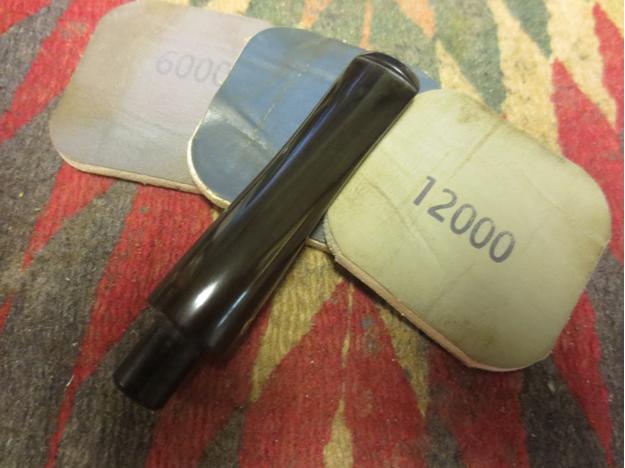
 I dry sanded the stem and the end of the button with 3200-4000 and rubbed it down with oil a second time. I finished with the micromesh pads by sanding with the 6000-12000 grit pads, rubbed it down with Obsidian Oil. Once it dried I buffed it with Blue Diamond on the buffer.
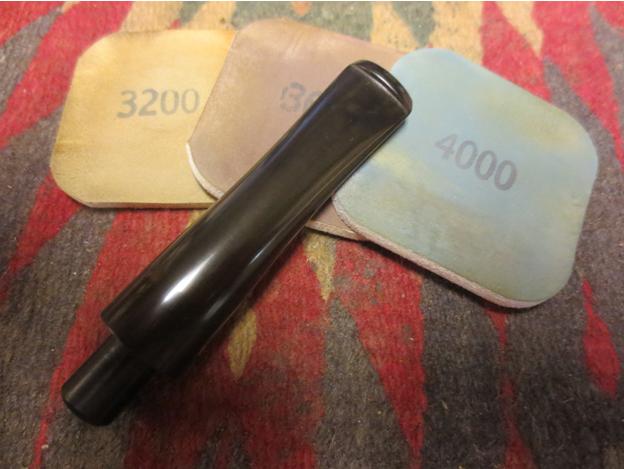
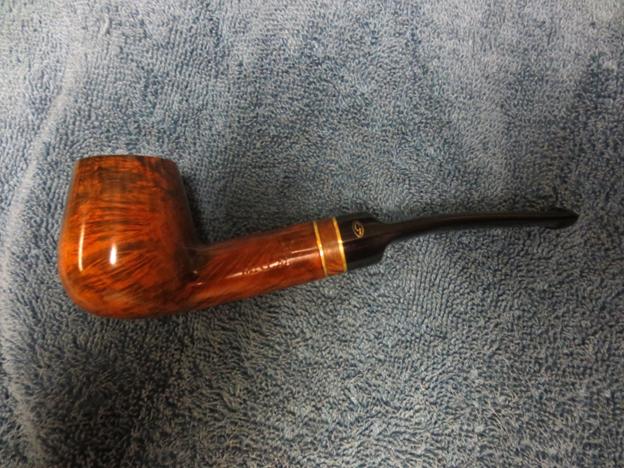
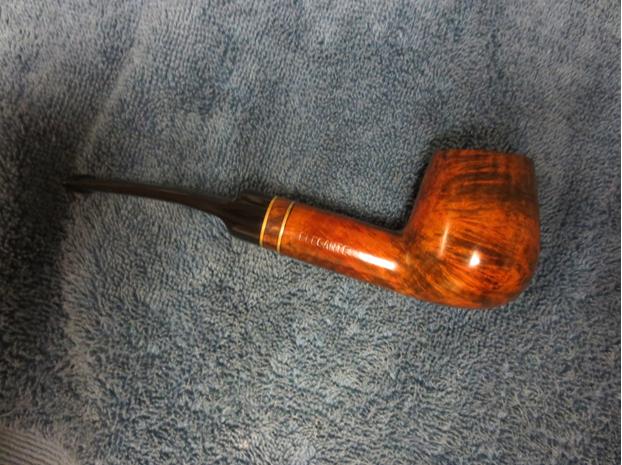
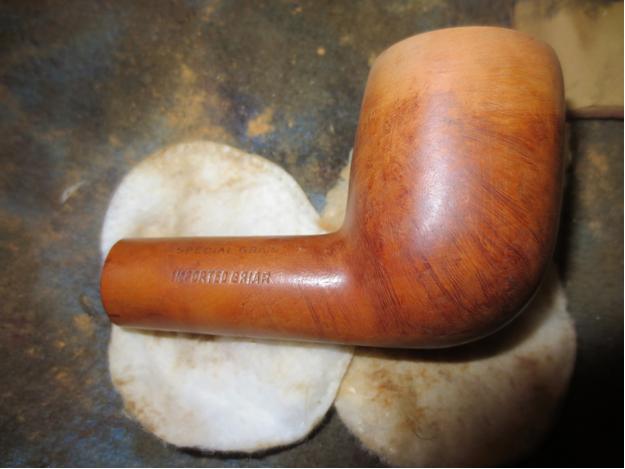
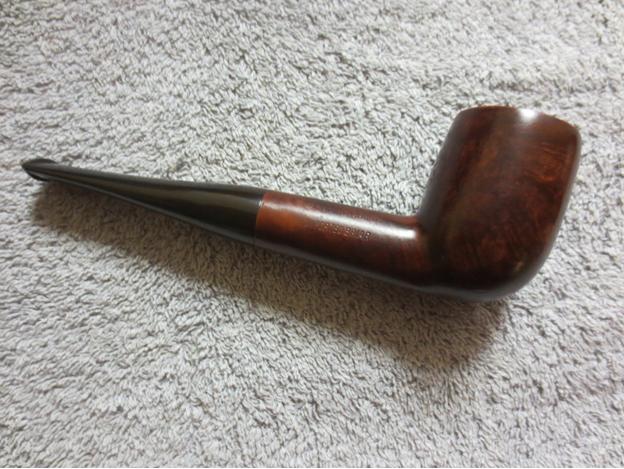
 The reborn Ehrlich Billard is shown in the photos below. I was able to clean up the mess of the bowl and rim and open the stem for a better draw. The bumbled job on the rim and bowl had disappeared and a sharp billiard took its place. The slightly darker colour of the stain adds richness to the billiard that I really like. It is now ready to be sold into the hands of its next owner.

 The next three photos give a clear picture of the rim top and sides of the bowl to show the grain.
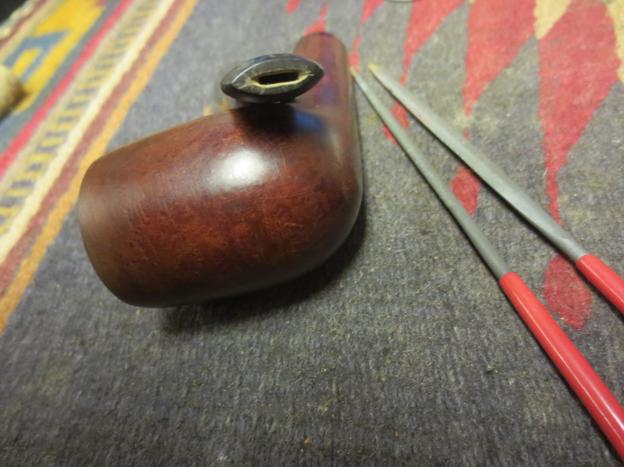
 The last two photos show the tenon and slot on the stem.
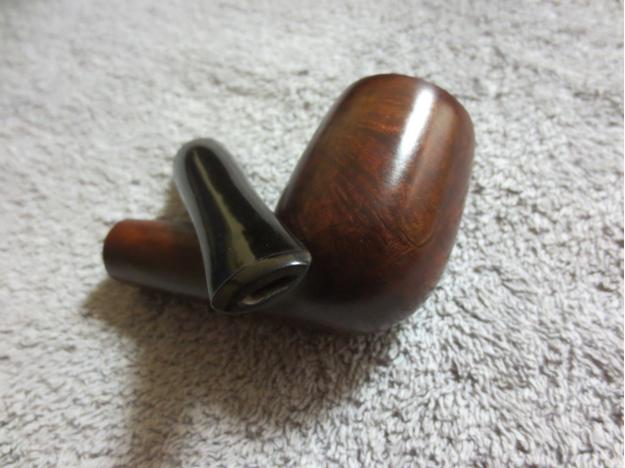
 This Ehrlich billiard is a chubby shank larger sized pipe, probably the same size as a Group 4 in Dunhill terms. The grain is quite nice and the thinned dark brown stain allows the grain to show through to its advantage. It should make someone a great addition. If you are interested in this pipe email me with an offer at slaug@uniserve.com and we can discuss it. The entirety of the sale price will go to the Nepal project. I will pay the postage so that does not get taken off the proceeds. If you are interested in reading about the SA Foundation you can look at their website at http://www.safoundation.com.